A. Postfix - Mechanical Engineering, IITB
46
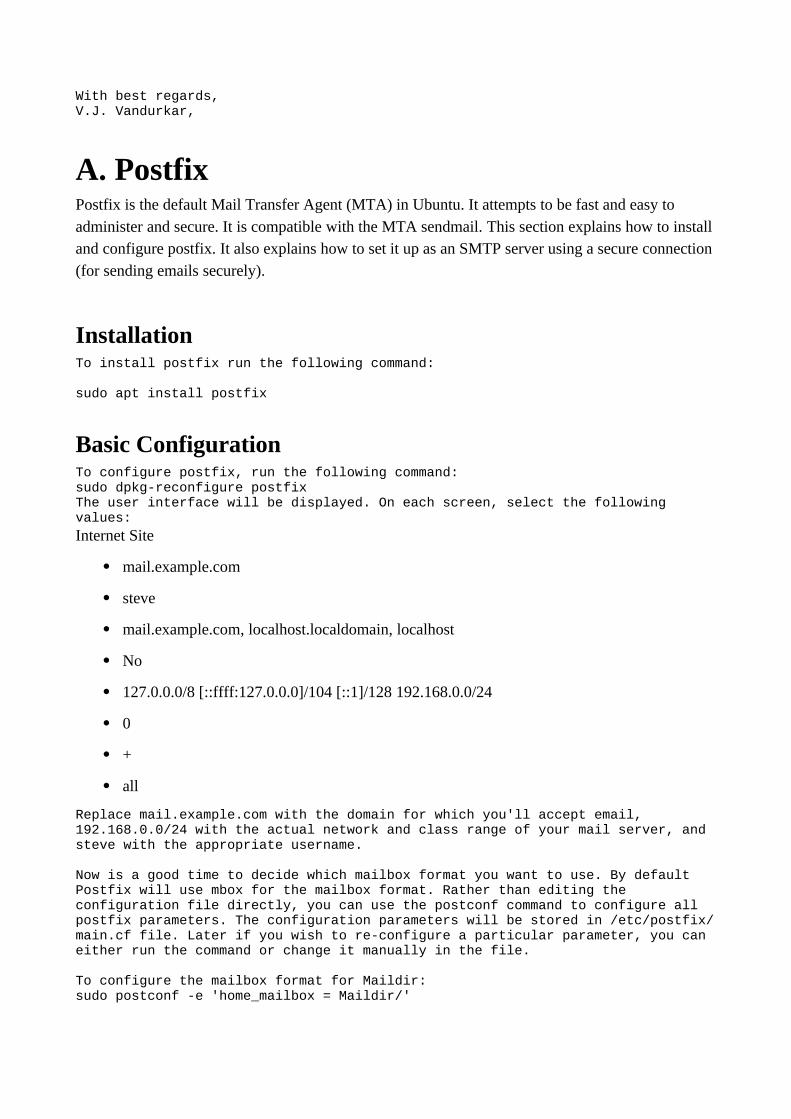
With best regards, V.J. Vandurkar, A. Postfix Postfix is the default Mail Transfer Agent (MTA) in Ubuntu. It attempts to be fast and easy to administer and secure. It is compatible with the MTA sendmail. This section explains how to install and configure postfix. It also explains how to set it up as an SMTP server using a secure connection (for sending emails securely). Installation To install postfix run the following command: sudo apt install postfix Basic Configuration To configure postfix, run the following command: sudo dpkg-reconfigure postfix The user interface will be displayed. On each screen, select the following values: Internet Site mail.example.com steve mail.example.com, localhost.localdomain, localhost No 127.0.0.0/8 [::ffff:127.0.0.0]/104 [::1]/128 192.168.0.0/24 0 + all Replace mail.example.com with the domain for which you'll accept email, 192.168.0.0/24 with the actual network and class range of your mail server, and steve with the appropriate username. Now is a good time to decide which mailbox format you want to use. By default Postfix will use mbox for the mailbox format. Rather than editing the configuration file directly, you can use the postconf command to configure all postfix parameters. The configuration parameters will be stored in /etc/postfix/ main.cf file. Later if you wish to re-configure a particular parameter, you can either run the command or change it manually in the file. To configure the mailbox format for Maildir: sudo postconf -e 'home_mailbox = Maildir/'
-
Upload
khangminh22 -
Category
Documents
-
view
0 -
download
0
Transcript of A. Postfix - Mechanical Engineering, IITB
With best regards,V.J. Vandurkar,
A. PostfixPostfix is the default Mail Transfer Agent (MTA) in Ubuntu. It attempts to be fast and easy to administer and secure. It is compatible with the MTA sendmail. This section explains how to install and configure postfix. It also explains how to set it up as an SMTP server using a secure connection (for sending emails securely).
InstallationTo install postfix run the following command:
sudo apt install postfix
Basic ConfigurationTo configure postfix, run the following command: sudo dpkg-reconfigure postfixThe user interface will be displayed. On each screen, select the following values:
Internet Site
mail.example.com
steve
mail.example.com, localhost.localdomain, localhost
No
127.0.0.0/8 [::ffff:127.0.0.0]/104 [::1]/128 192.168.0.0/24
0
+
all
Replace mail.example.com with the domain for which you'll accept email, 192.168.0.0/24 with the actual network and class range of your mail server, and steve with the appropriate username.
Now is a good time to decide which mailbox format you want to use. By default Postfix will use mbox for the mailbox format. Rather than editing the configuration file directly, you can use the postconf command to configure all postfix parameters. The configuration parameters will be stored in /etc/postfix/main.cf file. Later if you wish to re-configure a particular parameter, you can either run the command or change it manually in the file.
To configure the mailbox format for Maildir:sudo postconf -e 'home_mailbox = Maildir/'
This will place new mail in /home/username/Maildir so you will need to configureyour Mail Delivery Agent (MDA) to use the same path.
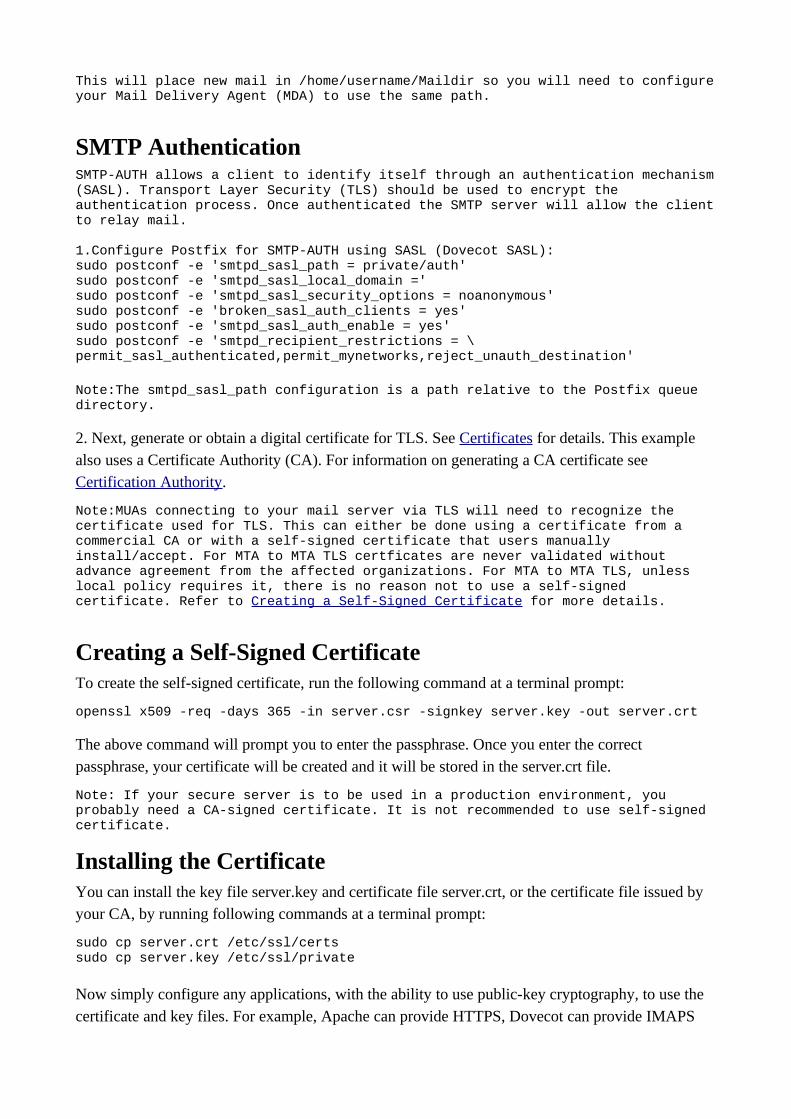
SMTP AuthenticationSMTP-AUTH allows a client to identify itself through an authentication mechanism(SASL). Transport Layer Security (TLS) should be used to encrypt the authentication process. Once authenticated the SMTP server will allow the clientto relay mail.
1.Configure Postfix for SMTP-AUTH using SASL (Dovecot SASL): sudo postconf -e 'smtpd_sasl_path = private/auth'sudo postconf -e 'smtpd_sasl_local_domain ='sudo postconf -e 'smtpd_sasl_security_options = noanonymous'sudo postconf -e 'broken_sasl_auth_clients = yes'sudo postconf -e 'smtpd_sasl_auth_enable = yes'sudo postconf -e 'smtpd_recipient_restrictions = \permit_sasl_authenticated,permit_mynetworks,reject_unauth_destination'
Note:The smtpd_sasl_path configuration is a path relative to the Postfix queue directory.
2. Next, generate or obtain a digital certificate for TLS. See Certificates for details. This example also uses a Certificate Authority (CA). For information on generating a CA certificate see Certification Authority.
Note:MUAs connecting to your mail server via TLS will need to recognize the certificate used for TLS. This can either be done using a certificate from a commercial CA or with a self-signed certificate that users manually install/accept. For MTA to MTA TLS certficates are never validated without advance agreement from the affected organizations. For MTA to MTA TLS, unless local policy requires it, there is no reason not to use a self-signed certificate. Refer to Creating a Self-Signed Certificate for more details.
Creating a Self-Signed CertificateTo create the self-signed certificate, run the following command at a terminal prompt:
openssl x509 -req -days 365 -in server.csr -signkey server.key -out server.crt
The above command will prompt you to enter the passphrase. Once you enter the correct passphrase, your certificate will be created and it will be stored in the server.crt file.
Note: If your secure server is to be used in a production environment, you probably need a CA-signed certificate. It is not recommended to use self-signed certificate.
Installing the CertificateYou can install the key file server.key and certificate file server.crt, or the certificate file issued by your CA, by running following commands at a terminal prompt:
sudo cp server.crt /etc/ssl/certssudo cp server.key /etc/ssl/private
Now simply configure any applications, with the ability to use public-key cryptography, to use the certificate and key files. For example, Apache can provide HTTPS, Dovecot can provide IMAPS
and POP3S, etc.
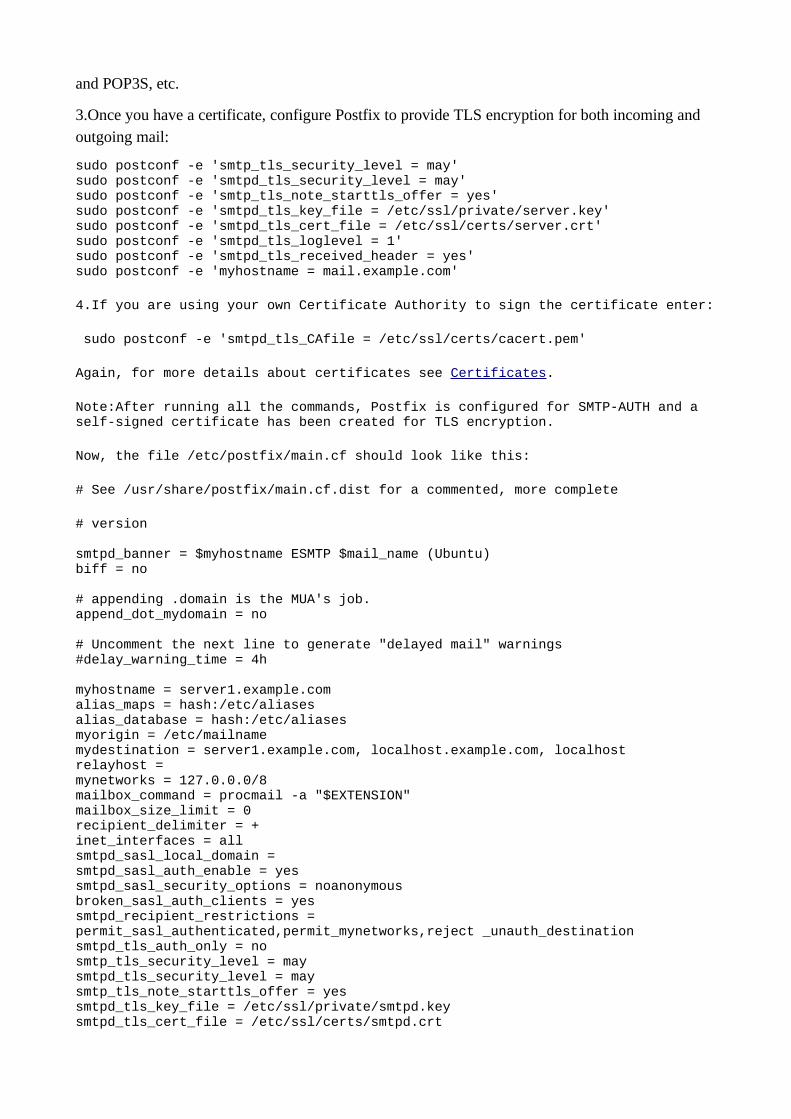
3.Once you have a certificate, configure Postfix to provide TLS encryption for both incoming and outgoing mail:
sudo postconf -e 'smtp_tls_security_level = may'sudo postconf -e 'smtpd_tls_security_level = may'sudo postconf -e 'smtp_tls_note_starttls_offer = yes'sudo postconf -e 'smtpd_tls_key_file = /etc/ssl/private/server.key'sudo postconf -e 'smtpd_tls_cert_file = /etc/ssl/certs/server.crt'sudo postconf -e 'smtpd_tls_loglevel = 1'sudo postconf -e 'smtpd_tls_received_header = yes'sudo postconf -e 'myhostname = mail.example.com'
4.If you are using your own Certificate Authority to sign the certificate enter:
sudo postconf -e 'smtpd_tls_CAfile = /etc/ssl/certs/cacert.pem'
Again, for more details about certificates see Certificates.
Note:After running all the commands, Postfix is configured for SMTP-AUTH and a self-signed certificate has been created for TLS encryption.
Now, the file /etc/postfix/main.cf should look like this:
# See /usr/share/postfix/main.cf.dist for a commented, more complete
# version
smtpd_banner = $myhostname ESMTP $mail_name (Ubuntu)biff = no
# appending .domain is the MUA's job.append_dot_mydomain = no
# Uncomment the next line to generate "delayed mail" warnings#delay_warning_time = 4h
myhostname = server1.example.comalias_maps = hash:/etc/aliasesalias_database = hash:/etc/aliasesmyorigin = /etc/mailnamemydestination = server1.example.com, localhost.example.com, localhostrelayhost =mynetworks = 127.0.0.0/8mailbox_command = procmail -a "$EXTENSION"mailbox_size_limit = 0recipient_delimiter = +inet_interfaces = allsmtpd_sasl_local_domain =smtpd_sasl_auth_enable = yessmtpd_sasl_security_options = noanonymousbroken_sasl_auth_clients = yessmtpd_recipient_restrictions =permit_sasl_authenticated,permit_mynetworks,reject _unauth_destinationsmtpd_tls_auth_only = nosmtp_tls_security_level = maysmtpd_tls_security_level = maysmtp_tls_note_starttls_offer = yessmtpd_tls_key_file = /etc/ssl/private/smtpd.keysmtpd_tls_cert_file = /etc/ssl/certs/smtpd.crt
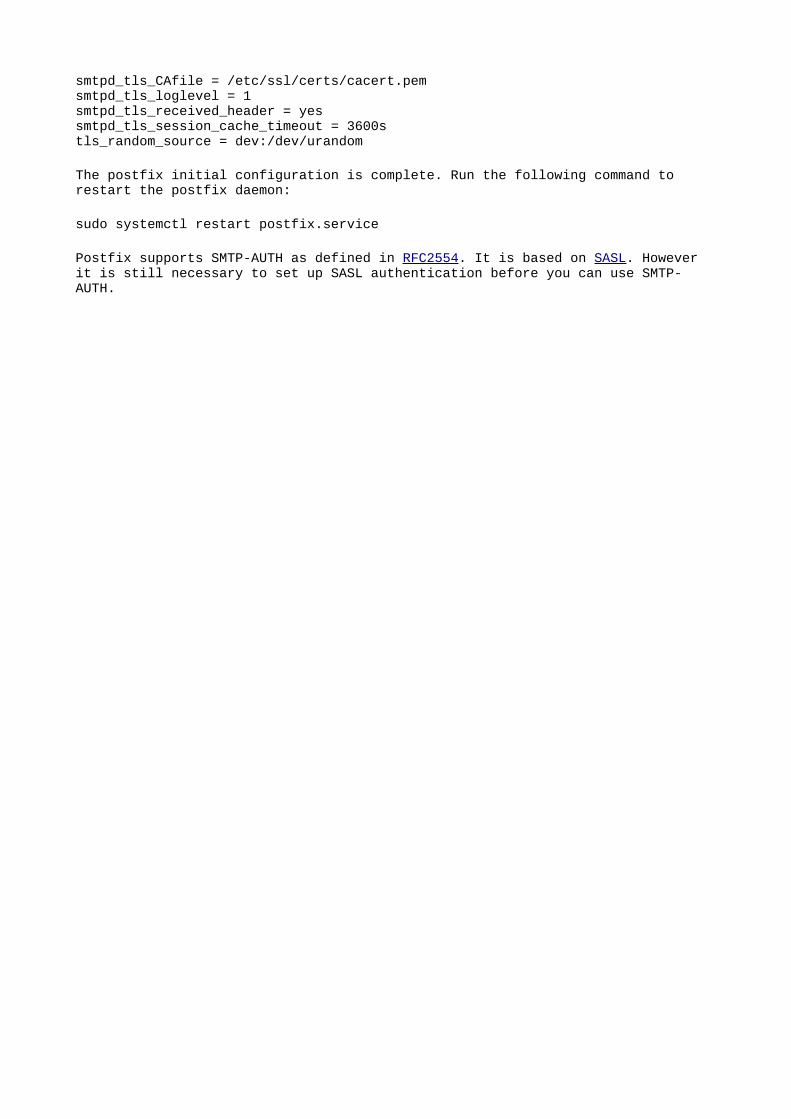
smtpd_tls_CAfile = /etc/ssl/certs/cacert.pemsmtpd_tls_loglevel = 1smtpd_tls_received_header = yessmtpd_tls_session_cache_timeout = 3600stls_random_source = dev:/dev/urandom
The postfix initial configuration is complete. Run the following command to restart the postfix daemon:
sudo systemctl restart postfix.service
Postfix supports SMTP-AUTH as defined in RFC2554. It is based on SASL. However it is still necessary to set up SASL authentication before you can use SMTP-AUTH.
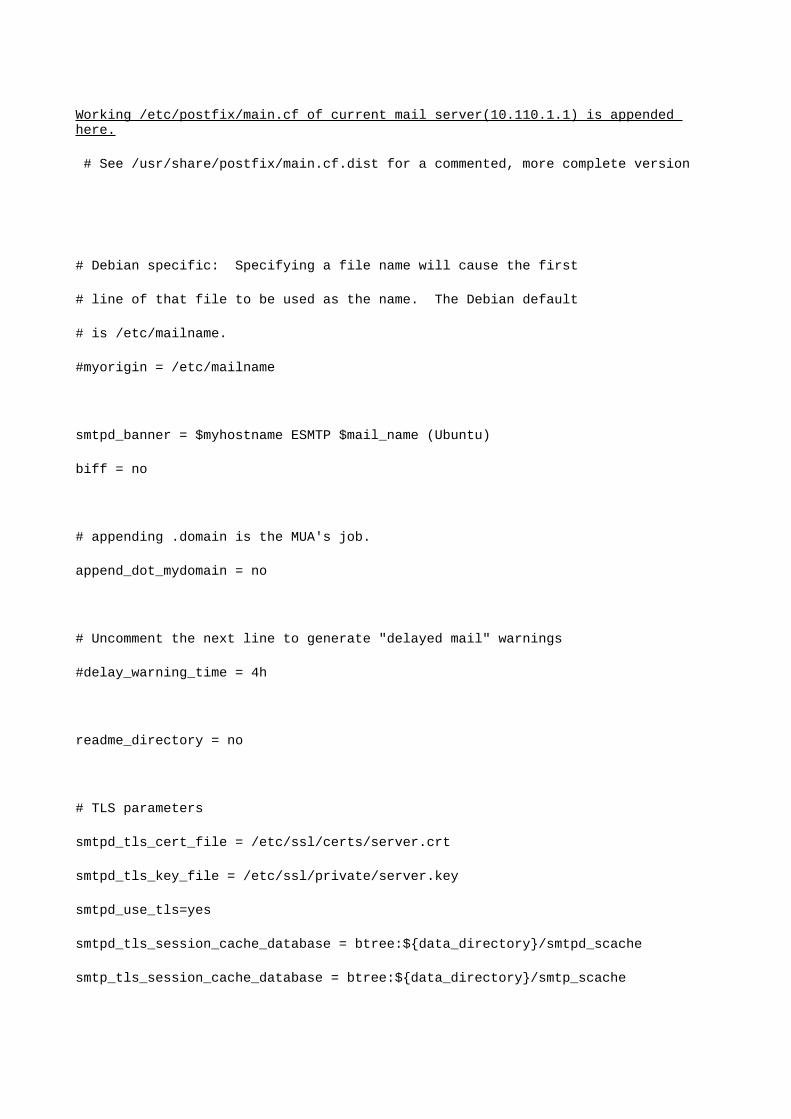
Working /etc/postfix/main.cf of current mail server(10.110.1.1) is appended here.
# See /usr/share/postfix/main.cf.dist for a commented, more complete version
# Debian specific: Specifying a file name will cause the first
# line of that file to be used as the name. The Debian default
# is /etc/mailname.
#myorigin = /etc/mailname
smtpd_banner = $myhostname ESMTP $mail_name (Ubuntu)
biff = no
# appending .domain is the MUA's job.
append_dot_mydomain = no
# Uncomment the next line to generate "delayed mail" warnings
#delay_warning_time = 4h
readme_directory = no
# TLS parameters
smtpd_tls_cert_file = /etc/ssl/certs/server.crt
smtpd_tls_key_file = /etc/ssl/private/server.key
smtpd_use_tls=yes
smtpd_tls_session_cache_database = btree:${data_directory}/smtpd_scache
smtp_tls_session_cache_database = btree:${data_directory}/smtp_scache
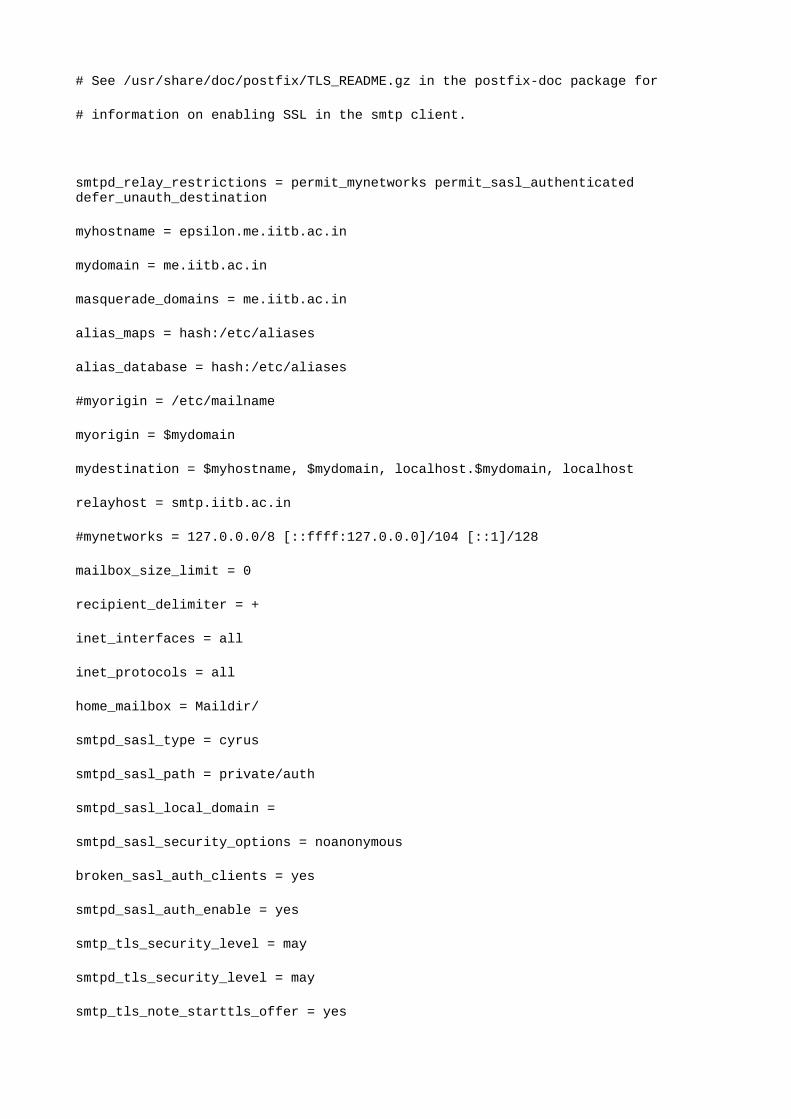
# See /usr/share/doc/postfix/TLS_README.gz in the postfix-doc package for
# information on enabling SSL in the smtp client.
smtpd_relay_restrictions = permit_mynetworks permit_sasl_authenticated defer_unauth_destination
myhostname = epsilon.me.iitb.ac.in
mydomain = me.iitb.ac.in
masquerade_domains = me.iitb.ac.in
alias_maps = hash:/etc/aliases
alias_database = hash:/etc/aliases
#myorigin = /etc/mailname
myorigin = $mydomain
mydestination = $myhostname, $mydomain, localhost.$mydomain, localhost
relayhost = smtp.iitb.ac.in
#mynetworks = 127.0.0.0/8 [::ffff:127.0.0.0]/104 [::1]/128
mailbox_size_limit = 0
recipient_delimiter = +
inet_interfaces = all
inet_protocols = all
home_mailbox = Maildir/
smtpd_sasl_type = cyrus
smtpd_sasl_path = private/auth
smtpd_sasl_local_domain =
smtpd_sasl_security_options = noanonymous
broken_sasl_auth_clients = yes
smtpd_sasl_auth_enable = yes
smtp_tls_security_level = may
smtpd_tls_security_level = may
smtp_tls_note_starttls_offer = yes
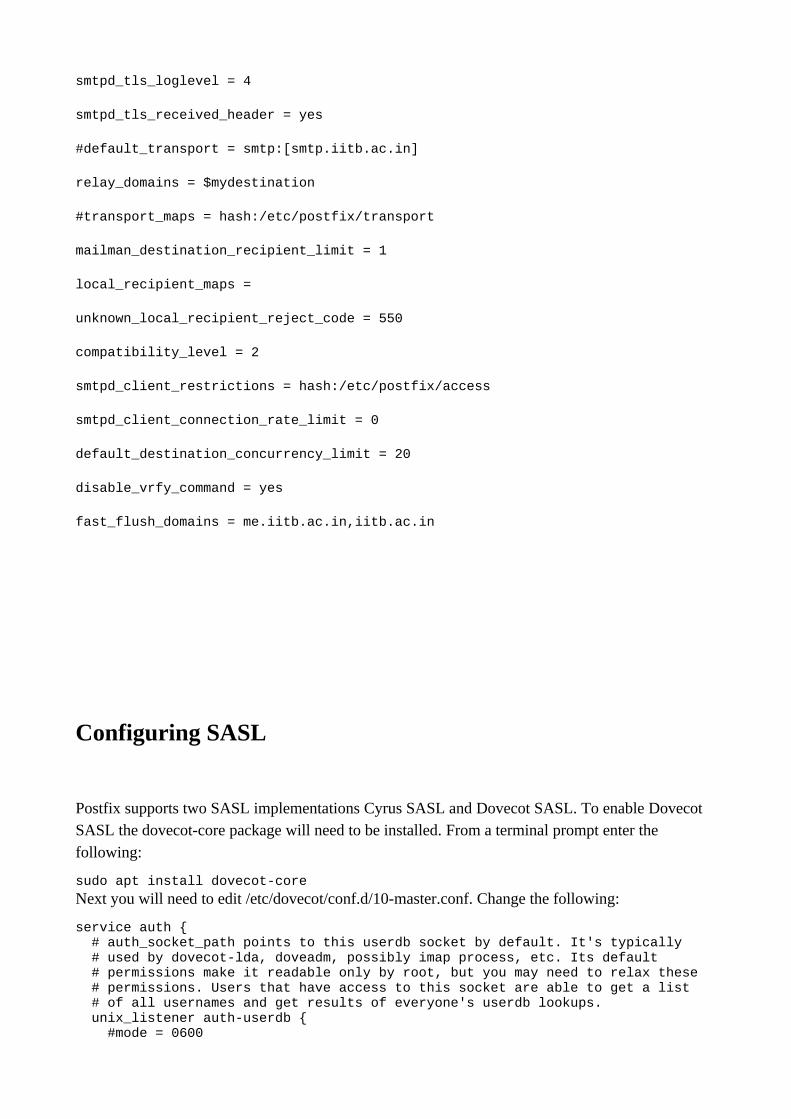
smtpd_tls_loglevel = 4
smtpd_tls_received_header = yes
#default_transport = smtp:[smtp.iitb.ac.in]
relay_domains = $mydestination
#transport_maps = hash:/etc/postfix/transport
mailman_destination_recipient_limit = 1
local_recipient_maps =
unknown_local_recipient_reject_code = 550
compatibility_level = 2
smtpd_client_restrictions = hash:/etc/postfix/access
smtpd_client_connection_rate_limit = 0
default_destination_concurrency_limit = 20
disable_vrfy_command = yes
fast_flush_domains = me.iitb.ac.in,iitb.ac.in
Configuring SASL
Postfix supports two SASL implementations Cyrus SASL and Dovecot SASL. To enable Dovecot SASL the dovecot-core package will need to be installed. From a terminal prompt enter the following:
sudo apt install dovecot-core
Next you will need to edit /etc/dovecot/conf.d/10-master.conf. Change the following:
service auth { # auth_socket_path points to this userdb socket by default. It's typically # used by dovecot-lda, doveadm, possibly imap process, etc. Its default # permissions make it readable only by root, but you may need to relax these # permissions. Users that have access to this socket are able to get a list # of all usernames and get results of everyone's userdb lookups. unix_listener auth-userdb { #mode = 0600
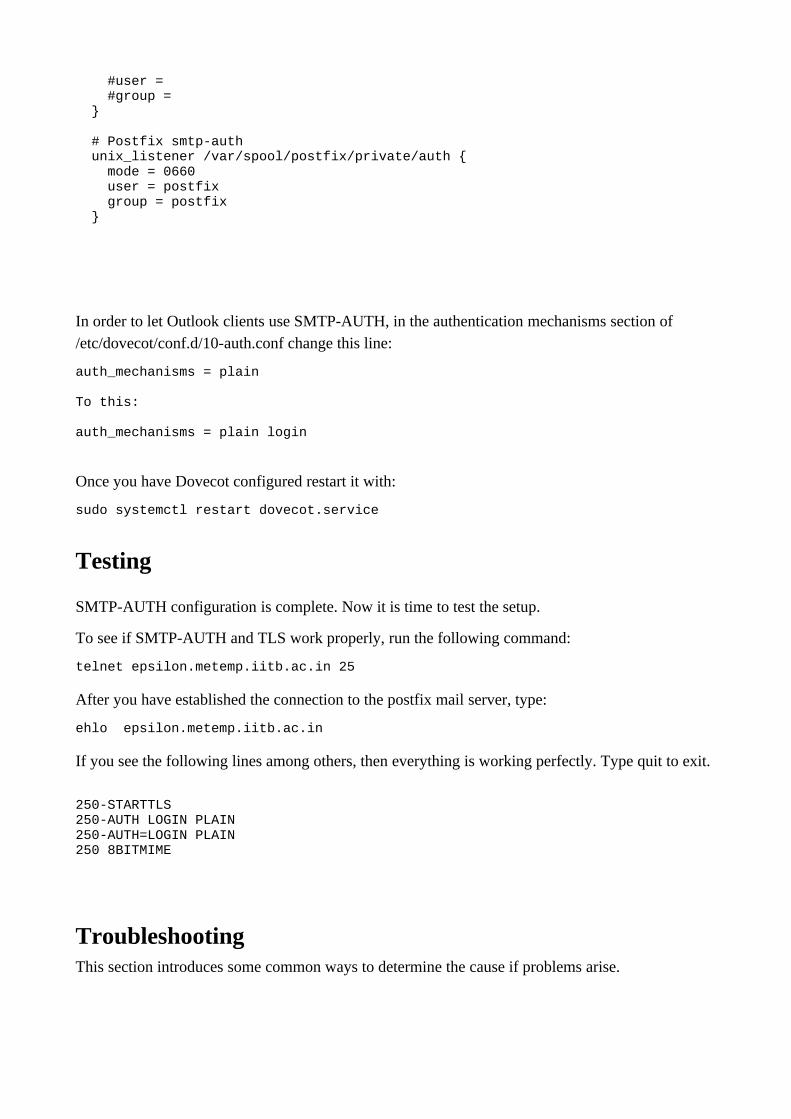
#user = #group = }
# Postfix smtp-auth unix_listener /var/spool/postfix/private/auth { mode = 0660 user = postfix group = postfix }
In order to let Outlook clients use SMTP-AUTH, in the authentication mechanisms section of /etc/dovecot/conf.d/10-auth.conf change this line:
auth_mechanisms = plain
To this:
auth_mechanisms = plain login
Once you have Dovecot configured restart it with:
sudo systemctl restart dovecot.service
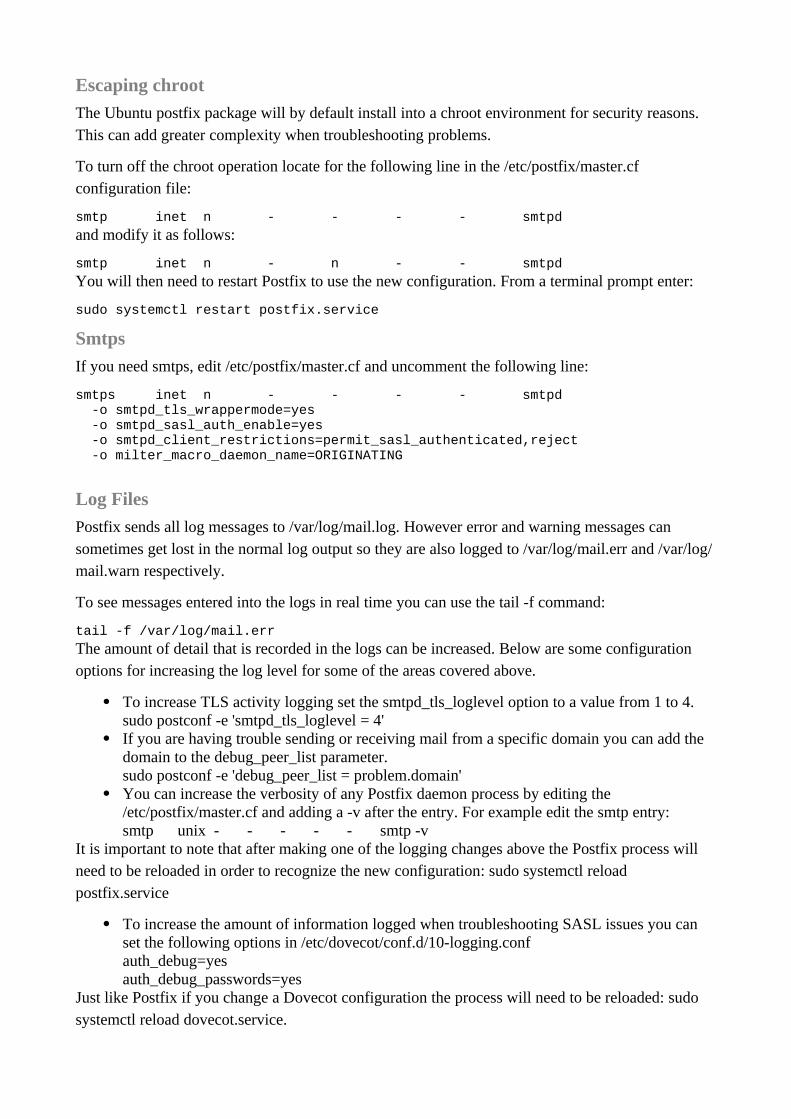
Testing
SMTP-AUTH configuration is complete. Now it is time to test the setup.
To see if SMTP-AUTH and TLS work properly, run the following command:
telnet epsilon.metemp.iitb.ac.in 25
After you have established the connection to the postfix mail server, type:
ehlo epsilon.metemp.iitb.ac.in
If you see the following lines among others, then everything is working perfectly. Type quit to exit.
250-STARTTLS250-AUTH LOGIN PLAIN250-AUTH=LOGIN PLAIN250 8BITMIME
TroubleshootingThis section introduces some common ways to determine the cause if problems arise.
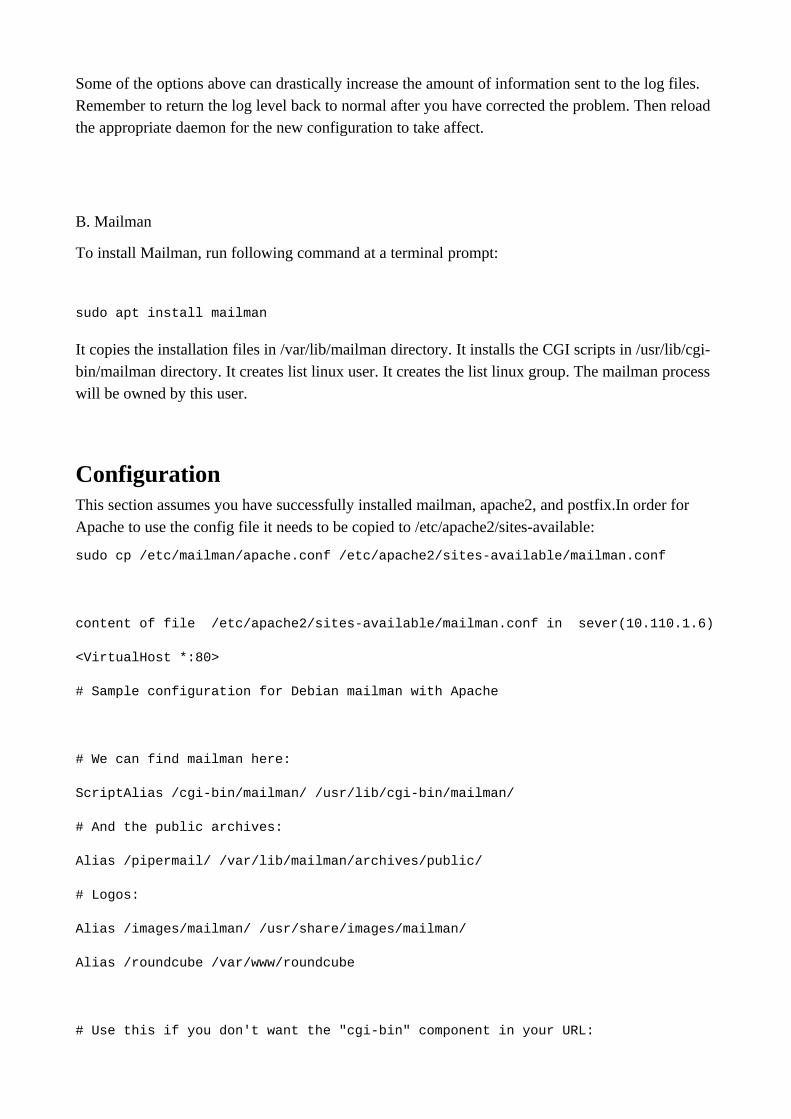
Escaping chroot
The Ubuntu postfix package will by default install into a chroot environment for security reasons. This can add greater complexity when troubleshooting problems.
To turn off the chroot operation locate for the following line in the /etc/postfix/master.cf configuration file:
smtp inet n - - - - smtpd
and modify it as follows:
smtp inet n - n - - smtpd
You will then need to restart Postfix to use the new configuration. From a terminal prompt enter:
sudo systemctl restart postfix.service
Smtps
If you need smtps, edit /etc/postfix/master.cf and uncomment the following line:
smtps inet n - - - - smtpd -o smtpd_tls_wrappermode=yes -o smtpd_sasl_auth_enable=yes -o smtpd_client_restrictions=permit_sasl_authenticated,reject -o milter_macro_daemon_name=ORIGINATING
Log Files
Postfix sends all log messages to /var/log/mail.log. However error and warning messages can sometimes get lost in the normal log output so they are also logged to /var/log/mail.err and /var/log/mail.warn respectively.
To see messages entered into the logs in real time you can use the tail -f command:
tail -f /var/log/mail.err
The amount of detail that is recorded in the logs can be increased. Below are some configuration options for increasing the log level for some of the areas covered above.
To increase TLS activity logging set the smtpd_tls_loglevel option to a value from 1 to 4. sudo postconf -e 'smtpd_tls_loglevel = 4'
If you are having trouble sending or receiving mail from a specific domain you can add the domain to the debug_peer_list parameter. sudo postconf -e 'debug_peer_list = problem.domain'
You can increase the verbosity of any Postfix daemon process by editing the /etc/postfix/master.cf and adding a -v after the entry. For example edit the smtp entry: smtp unix - - - - - smtp -v
It is important to note that after making one of the logging changes above the Postfix process will need to be reloaded in order to recognize the new configuration: sudo systemctl reload postfix.service
To increase the amount of information logged when troubleshooting SASL issues you can set the following options in /etc/dovecot/conf.d/10-logging.conf auth_debug=yesauth_debug_passwords=yes
Just like Postfix if you change a Dovecot configuration the process will need to be reloaded: sudo systemctl reload dovecot.service.
Some of the options above can drastically increase the amount of information sent to the log files. Remember to return the log level back to normal after you have corrected the problem. Then reload the appropriate daemon for the new configuration to take affect.
B. Mailman
To install Mailman, run following command at a terminal prompt:
sudo apt install mailman
It copies the installation files in /var/lib/mailman directory. It installs the CGI scripts in /usr/lib/cgi-bin/mailman directory. It creates list linux user. It creates the list linux group. The mailman process will be owned by this user.
ConfigurationThis section assumes you have successfully installed mailman, apache2, and postfix.In order for Apache to use the config file it needs to be copied to /etc/apache2/sites-available:
sudo cp /etc/mailman/apache.conf /etc/apache2/sites-available/mailman.conf
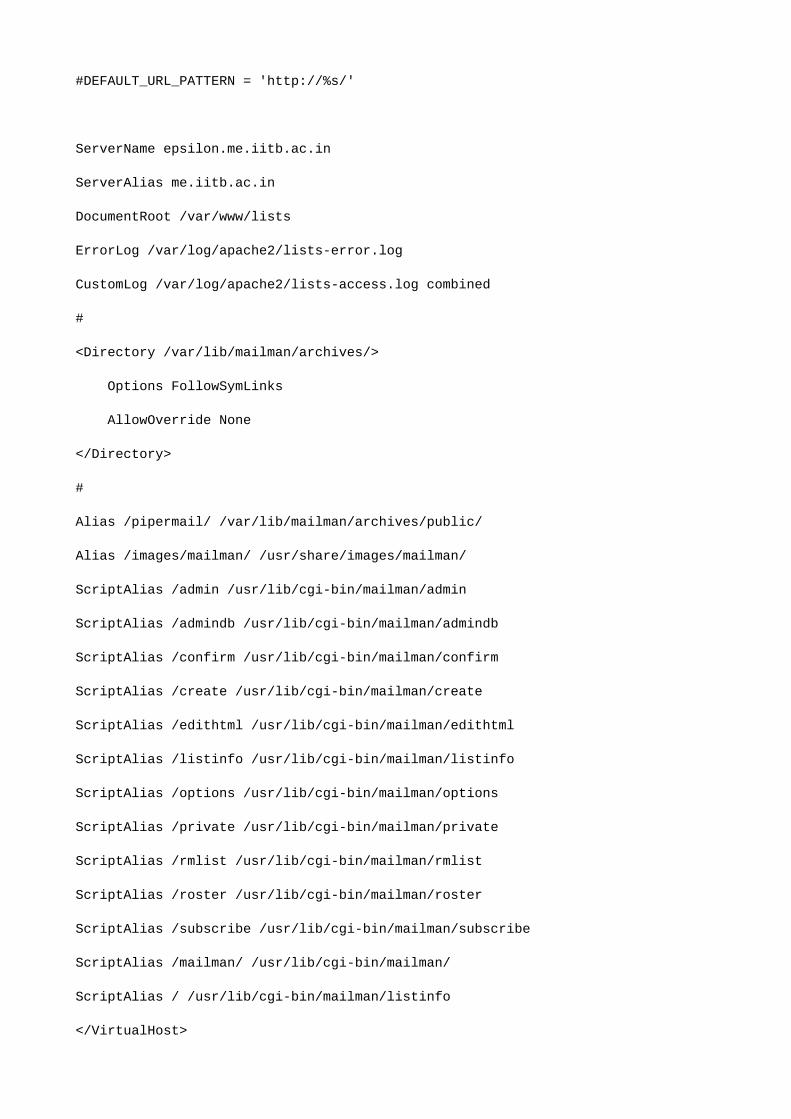
content of file /etc/apache2/sites-available/mailman.conf in sever(10.110.1.6)
<VirtualHost *:80>
# Sample configuration for Debian mailman with Apache
# We can find mailman here:
ScriptAlias /cgi-bin/mailman/ /usr/lib/cgi-bin/mailman/
# And the public archives:
Alias /pipermail/ /var/lib/mailman/archives/public/
# Logos:
Alias /images/mailman/ /usr/share/images/mailman/
Alias /roundcube /var/www/roundcube
# Use this if you don't want the "cgi-bin" component in your URL:
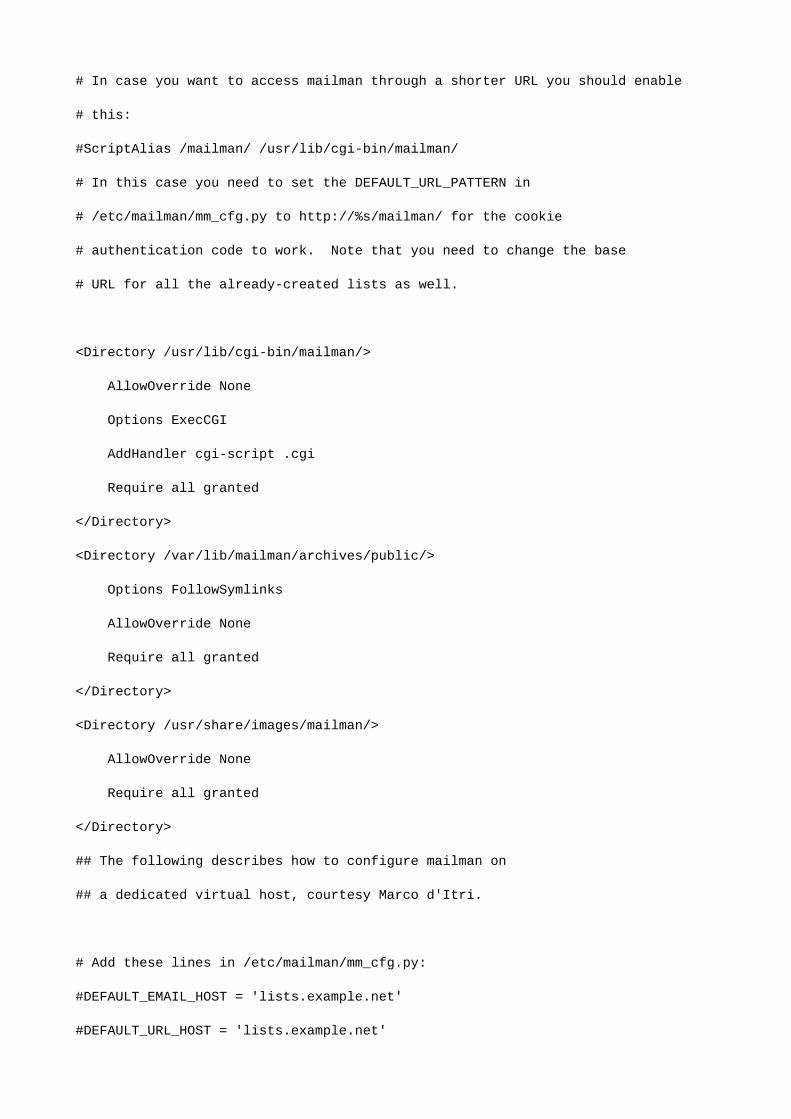
# In case you want to access mailman through a shorter URL you should enable
# this:
#ScriptAlias /mailman/ /usr/lib/cgi-bin/mailman/
# In this case you need to set the DEFAULT_URL_PATTERN in
# /etc/mailman/mm_cfg.py to http://%s/mailman/ for the cookie
# authentication code to work. Note that you need to change the base
# URL for all the already-created lists as well.
<Directory /usr/lib/cgi-bin/mailman/>
AllowOverride None
Options ExecCGI
AddHandler cgi-script .cgi
Require all granted
</Directory>
<Directory /var/lib/mailman/archives/public/>
Options FollowSymlinks
AllowOverride None
Require all granted
</Directory>
<Directory /usr/share/images/mailman/>
AllowOverride None
Require all granted
</Directory>
## The following describes how to configure mailman on
## a dedicated virtual host, courtesy Marco d'Itri.
# Add these lines in /etc/mailman/mm_cfg.py:
#DEFAULT_EMAIL_HOST = 'lists.example.net'
#DEFAULT_URL_HOST = 'lists.example.net'
#DEFAULT_URL_PATTERN = 'http://%s/'
ServerName epsilon.me.iitb.ac.in
ServerAlias me.iitb.ac.in
DocumentRoot /var/www/lists
ErrorLog /var/log/apache2/lists-error.log
CustomLog /var/log/apache2/lists-access.log combined
#
<Directory /var/lib/mailman/archives/>
Options FollowSymLinks
AllowOverride None
</Directory>
#
Alias /pipermail/ /var/lib/mailman/archives/public/
Alias /images/mailman/ /usr/share/images/mailman/
ScriptAlias /admin /usr/lib/cgi-bin/mailman/admin
ScriptAlias /admindb /usr/lib/cgi-bin/mailman/admindb
ScriptAlias /confirm /usr/lib/cgi-bin/mailman/confirm
ScriptAlias /create /usr/lib/cgi-bin/mailman/create
ScriptAlias /edithtml /usr/lib/cgi-bin/mailman/edithtml
ScriptAlias /listinfo /usr/lib/cgi-bin/mailman/listinfo
ScriptAlias /options /usr/lib/cgi-bin/mailman/options
ScriptAlias /private /usr/lib/cgi-bin/mailman/private
ScriptAlias /rmlist /usr/lib/cgi-bin/mailman/rmlist
ScriptAlias /roster /usr/lib/cgi-bin/mailman/roster
ScriptAlias /subscribe /usr/lib/cgi-bin/mailman/subscribe
ScriptAlias /mailman/ /usr/lib/cgi-bin/mailman/
ScriptAlias / /usr/lib/cgi-bin/mailman/listinfo
</VirtualHost>
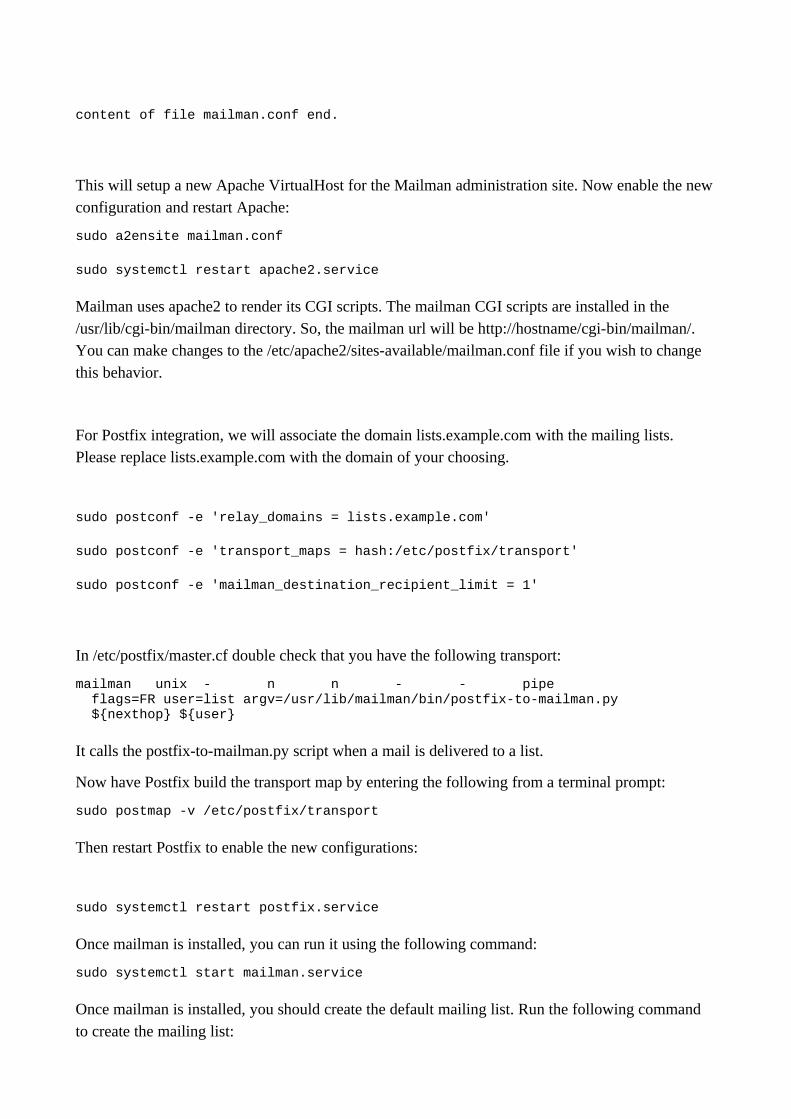
content of file mailman.conf end.
This will setup a new Apache VirtualHost for the Mailman administration site. Now enable the newconfiguration and restart Apache:
sudo a2ensite mailman.conf
sudo systemctl restart apache2.service
Mailman uses apache2 to render its CGI scripts. The mailman CGI scripts are installed in the /usr/lib/cgi-bin/mailman directory. So, the mailman url will be http://hostname/cgi-bin/mailman/. You can make changes to the /etc/apache2/sites-available/mailman.conf file if you wish to change this behavior.
For Postfix integration, we will associate the domain lists.example.com with the mailing lists. Please replace lists.example.com with the domain of your choosing.
sudo postconf -e 'relay_domains = lists.example.com'
sudo postconf -e 'transport_maps = hash:/etc/postfix/transport'
sudo postconf -e 'mailman_destination_recipient_limit = 1'
In /etc/postfix/master.cf double check that you have the following transport:
mailman unix - n n - - pipe flags=FR user=list argv=/usr/lib/mailman/bin/postfix-to-mailman.py ${nexthop} ${user}
It calls the postfix-to-mailman.py script when a mail is delivered to a list.
Now have Postfix build the transport map by entering the following from a terminal prompt:
sudo postmap -v /etc/postfix/transport
Then restart Postfix to enable the new configurations:
sudo systemctl restart postfix.service
Once mailman is installed, you can run it using the following command:
sudo systemctl start mailman.service
Once mailman is installed, you should create the default mailing list. Run the following command to create the mailing list:
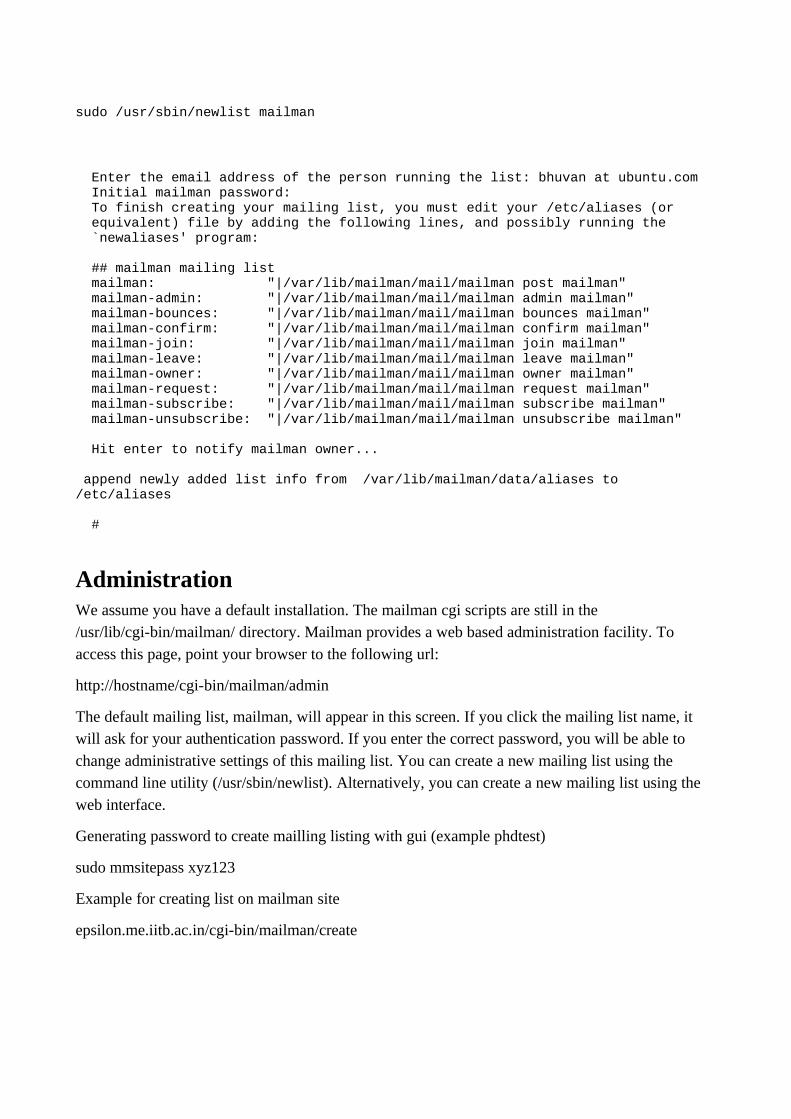
sudo /usr/sbin/newlist mailman
Enter the email address of the person running the list: bhuvan at ubuntu.com Initial mailman password: To finish creating your mailing list, you must edit your /etc/aliases (or equivalent) file by adding the following lines, and possibly running the `newaliases' program:
## mailman mailing list mailman: "|/var/lib/mailman/mail/mailman post mailman" mailman-admin: "|/var/lib/mailman/mail/mailman admin mailman" mailman-bounces: "|/var/lib/mailman/mail/mailman bounces mailman" mailman-confirm: "|/var/lib/mailman/mail/mailman confirm mailman" mailman-join: "|/var/lib/mailman/mail/mailman join mailman" mailman-leave: "|/var/lib/mailman/mail/mailman leave mailman" mailman-owner: "|/var/lib/mailman/mail/mailman owner mailman" mailman-request: "|/var/lib/mailman/mail/mailman request mailman" mailman-subscribe: "|/var/lib/mailman/mail/mailman subscribe mailman" mailman-unsubscribe: "|/var/lib/mailman/mail/mailman unsubscribe mailman"
Hit enter to notify mailman owner...
append newly added list info from /var/lib/mailman/data/aliases to /etc/aliases
#
AdministrationWe assume you have a default installation. The mailman cgi scripts are still in the /usr/lib/cgi-bin/mailman/ directory. Mailman provides a web based administration facility. To access this page, point your browser to the following url:
http://hostname/cgi-bin/mailman/admin
The default mailing list, mailman, will appear in this screen. If you click the mailing list name, it will ask for your authentication password. If you enter the correct password, you will be able to change administrative settings of this mailing list. You can create a new mailing list using the command line utility (/usr/sbin/newlist). Alternatively, you can create a new mailing list using the web interface.
Generating password to create mailling listing with gui (example phdtest)
sudo mmsitepass xyz123
Example for creating list on mailman site
epsilon.me.iitb.ac.in/cgi-bin/mailman/create
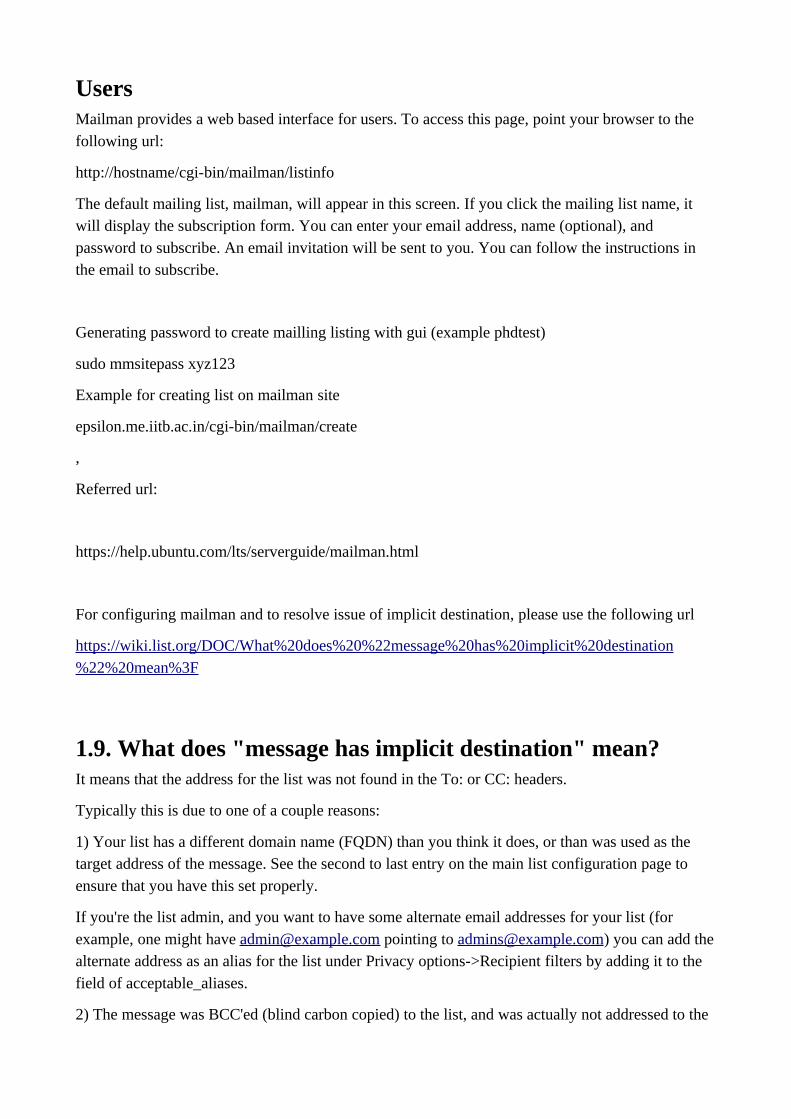
UsersMailman provides a web based interface for users. To access this page, point your browser to the following url:
http://hostname/cgi-bin/mailman/listinfo
The default mailing list, mailman, will appear in this screen. If you click the mailing list name, it will display the subscription form. You can enter your email address, name (optional), and password to subscribe. An email invitation will be sent to you. You can follow the instructions in the email to subscribe.
Generating password to create mailling listing with gui (example phdtest)
sudo mmsitepass xyz123
Example for creating list on mailman site
epsilon.me.iitb.ac.in/cgi-bin/mailman/create
,
Referred url:
https://help.ubuntu.com/lts/serverguide/mailman.html
For configuring mailman and to resolve issue of implicit destination, please use the following url
https://wiki.list.org/DOC/What%20does%20%22message%20has%20implicit%20destination%22%20mean%3F
1.9. What does "message has implicit destination" mean?It means that the address for the list was not found in the To: or CC: headers.
Typically this is due to one of a couple reasons:
1) Your list has a different domain name (FQDN) than you think it does, or than was used as the target address of the message. See the second to last entry on the main list configuration page to ensure that you have this set properly.
If you're the list admin, and you want to have some alternate email addresses for your list (for example, one might have [email protected] pointing to [email protected]) you can add thealternate address as an alias for the list under Privacy options->Recipient filters by adding it to the field of acceptable_aliases.
2) The message was BCC'ed (blind carbon copied) to the list, and was actually not addressed to the
list directly (not that you can see).
If you're running an umbrella list, you may want this message to be accepted by the sub-list. To do that, in the sub-list's admin screen, go to Privacy Options / Recipient Filters / Alias Names, and enter the name of the umbrella list as a valid alias.
The reason this happens is that mail being distributed by a mail list retains the name of the mail list in the To: header and the name of the original sender in the From: header. So, when the mail gets to the sub-list, it is still marked as being To the umbrella list. By entering the name of the umbrella listas a valid alias, you tell your sub-list that it's OK to accept mail which was originally sent to the umbrella list.
Alternatively, if you want to accept all BCCs to the list and get rid of this message entirely, go to Privacy Options / Recipient Filters and set the require_explicit_destination option to be "No". This should be the first option on the page, and by default, Mailman will set this option to be "Yes".
Converted from the Mailman FAQ Wizard
This is one of many Frequently Asked Questions.
Contents
How To Install Your Own Webmail Client with Roundcube on Ubuntu 16.04Introduction
Nowadays, many people use browser-based email clients like Gmail to access their email. However,if you want to stop seeing ads when you check your email, or if you’ve moved from a public email service to your own domain, you can run your own webmail client (also known as a mail user agentor MUA).
Roundcube is a modern and customizable IMAP-based webmail client written in PHP. It has a largeset of features for viewing, organizing, and composing emails, as well as support for contacts and calendar management. With its plugin repository, you can add functionality comparable to the most popular browser-based clients.
To understand where Roundcube fits in your email infrastructure, let’s walk through the components that comprise email behind the scenes:
A mail user agent (MUA) is the interface a user interacts with to view and send email. A mail transfer agent (MTA) transfers email from the sender to the recipient. Simple Mail Transfer Protocol (SMTP) is the protocol MUAs use to send mail to MTAs. A mail delivery agent (MDA) receives emails from MTAs and stores them. Internet Message Access Protocol (IMAP) is a protocol that MDAs use to deliver mail to
MUAs.
When you send an email, your MUA transfers it to your email server’s MTA using SMTP. After several hops, your recipient’s MTA will receive the email and transfer it to their MDA using IMAP.Then your recipient can view the email using their MUA of choice.
Note: In other words, Roundcube is an MUA, not an MTA. This means that if you use it, you still need to have a service that manages your email. You can use your own mail server, but if you don’t want to run your own mail server, Roundcube works equally well with public email services like Gmail or hosted email from an ISP.
In this tutorial, you will set up Roundcube backed by Gmail.
PrerequisitesTo follow this tutorial, you will need:
One Ubuntu 16.04 server set up by following this Ubuntu 16.04 initial server setup tutorial, including a sudo non-root user and a firewall.
The LAMP stack installed by following this LAMP on Ubuntu 16.04 tutorial. An IMAP-based email server. For simplicity, this article will use Gmail, but any IMAP-
based email server will work. Make sure you know the IMAP and SMTP settings for your email server.
Step 1 — Installing DependenciesThe first step in setting up Roundcube is installing its dependencies and configuring PHP. Once Roundcube is installed, we can use its helpful dependency check page to verify that everything is set up properly.
These are the Roundcube dependencies that aren’t included out of the box:
Several PHP libraries (which are the php-* packages below, including support for XML
and multi-byte strings) Support tools (zip and unzip to handle compressed files)
Git for version control The PHP plugin management system (composer)
Update your package index and install all of these dependencies at once.
sudo apt-get updatesudo apt-get install php-xml php-mbstring php-intl php-zip php-pear zip unzip git composer
Next, some of the PHP libraries need to be enabled in the server’s php.ini file, which is located
at /etc/php/7.0/apache2/php.ini. Open this file with nano or your favorite text editor.
sudo nano /etc/php/7.0/apache2/php.ini
Many of the changes necessary are just enabling options that have been commented out. In
php.ini files, commented lines start with a ; semicolon (instead of the more common # hash
symbol). To uncomment a line, delete this leading semicolon; to comment a line, add a leading
semicolon.
Search for the section that contains many commented lines beginning with extension=.
Uncomment the lines for the php_mbstring.dll and php_xmlrpc.dll extensions.
/etc/php/7.0/apache2/php.ini. . .;extension=php_interbase.dll;extension=php_ldap.dllextension=php_mbstring.dll;extension=php_exif.dll ; Must be after mbstring as it depends on it;extension=php_mysqli.dll. . .;extension=php_sqlite3.dll;extension=php_tidy.dllextension=php_xmlrpc.dll;extension=php_xsl.dll . . .
Then add extension=dom.so to the bottom of the extension block.
/etc/php/7.0/apache2/php.ini
. . .extension=php_xmlrpc.dll;extension=php_xsl.dllextension=dom.so
. . .
There are a few other modifications we need to make in this file.
First, search for the date.timezone setting. Uncomment the line and add your timezone in
quotation marks. To see how to format your timezone in the php.ini file, you can reference
PHP’s timezone page. For example, if you live in Eastern Standard Time, your file could look like this:
/etc/php/7.0/apache2/php.ini
. . .[Date]; Defines the default timezone used by the date functions; http://php.net/date.timezonedate.timezone = "America/New_York". . .
Next, search for the upload_max_filesize setting. This setting mainly affects uploading
attachments. By default, it’s set to 2MB. You can set it to any amount you want, but most email servers limit the total attachment size to 10MB. We’ll set it to 12MB here in the event that multiple users are adding attachments at the same time.
/etc/php/7.0/apache2/php.ini
. . .; Maximum allowed size for uploaded files.; http://php.net/upload-max-filesizeupload_max_filesize = 12M. . .
Next, search for post_max_size. Whereas the upload_max_filesize setting applied only
to attachments, this setting applies to the size of the whole email (including attachments). To prevent deadlocks, we’ll set this one to a slightly higher value.
/etc/php/7.0/apache2/php.ini
. . .; Maximum size of POST data that PHP will accept.; Its value may be 0 to disable the limit. It is ignored if POST data reading; is disabled through enable_post_data_reading.; http://php.net/post-max-sizepost_max_size = 18M. . .
Finally, search for mbstring.func_overload, uncomment it, and verify its value is set to 0.
This enables support for multi-byte string functions.
/etc/php/7.0/apache2/php.ini
. . .mbstring.func_overload = 0. . .
Save and close the file.
Your server is now set up with a LAMP stack, Roundcube’s dependencies, and the necessary PHP configuration. The next step is downloading the Roundcube software, installing it, and configuring it.
Step 2 — Downloading RoundcubeAs with many projects in the Linux world, there are two ways to install Roundcube: from a packageor from source. There is a PPA for Roundcube, but because the project is under active development,the PPA is often out of date. (At time of writing, the PPA is on version 1.2.3 but the project itself is at 1.3). To make sure we’re getting the most recent version, we’ll install from source.
Navigate to the Roundcube download page. Look under the Stable version section and locate the Complete package. Right click the Download button and select Copy Link Address.
Use this address with wget to download the Roundcube tarball on the server.
wget https://github.com/roundcube/roundcubemail/releases/download/1.3.0/roundcubemail-1.3.0-complete.tar.gz
Decompress the Roundcube archive.
tar -xvzf roundcubemail-1.3.0-complete.tar.gz
Arguments for tar can be a bit intimidating, so here’s what each flag does:
The x flag stands for extract.
The v flag stands for verbose, which tells tar to print the path and name of every file
extracted. The z flag tells tar to not only remove the tar wrapper but to decompress the archive using
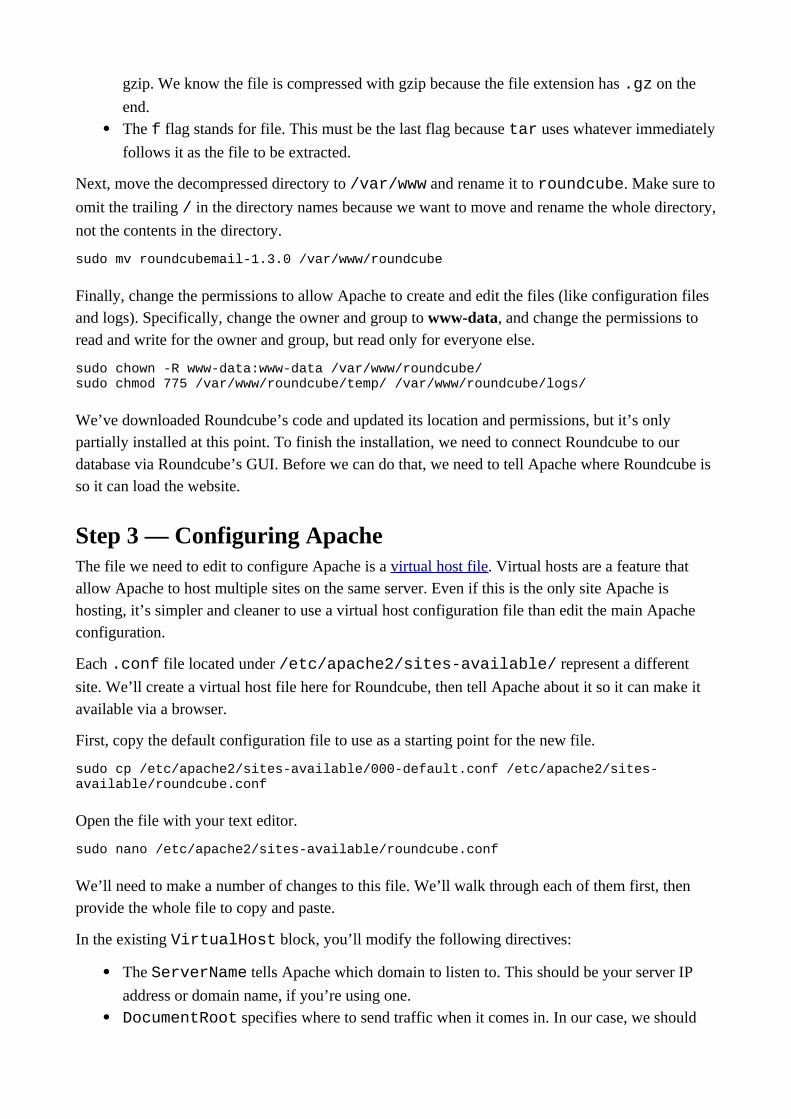
gzip. We know the file is compressed with gzip because the file extension has .gz on the
end. The f flag stands for file. This must be the last flag because tar uses whatever immediately
follows it as the file to be extracted.
Next, move the decompressed directory to /var/www and rename it to roundcube. Make sure to
omit the trailing / in the directory names because we want to move and rename the whole directory,
not the contents in the directory.
sudo mv roundcubemail-1.3.0 /var/www/roundcube
Finally, change the permissions to allow Apache to create and edit the files (like configuration files and logs). Specifically, change the owner and group to www-data, and change the permissions to read and write for the owner and group, but read only for everyone else.
sudo chown -R www-data:www-data /var/www/roundcube/sudo chmod 775 /var/www/roundcube/temp/ /var/www/roundcube/logs/
We’ve downloaded Roundcube’s code and updated its location and permissions, but it’s only partially installed at this point. To finish the installation, we need to connect Roundcube to our database via Roundcube’s GUI. Before we can do that, we need to tell Apache where Roundcube is so it can load the website.
Step 3 — Configuring ApacheThe file we need to edit to configure Apache is a virtual host file. Virtual hosts are a feature that allow Apache to host multiple sites on the same server. Even if this is the only site Apache is hosting, it’s simpler and cleaner to use a virtual host configuration file than edit the main Apache configuration.
Each .conf file located under /etc/apache2/sites-available/ represent a different
site. We’ll create a virtual host file here for Roundcube, then tell Apache about it so it can make it available via a browser.
First, copy the default configuration file to use as a starting point for the new file.
sudo cp /etc/apache2/sites-available/000-default.conf /etc/apache2/sites-available/roundcube.conf
Open the file with your text editor.
sudo nano /etc/apache2/sites-available/roundcube.conf
We’ll need to make a number of changes to this file. We’ll walk through each of them first, then provide the whole file to copy and paste.
In the existing VirtualHost block, you’ll modify the following directives:
The ServerName tells Apache which domain to listen to. This should be your server IP
address or domain name, if you’re using one. DocumentRoot specifies where to send traffic when it comes in. In our case, we should
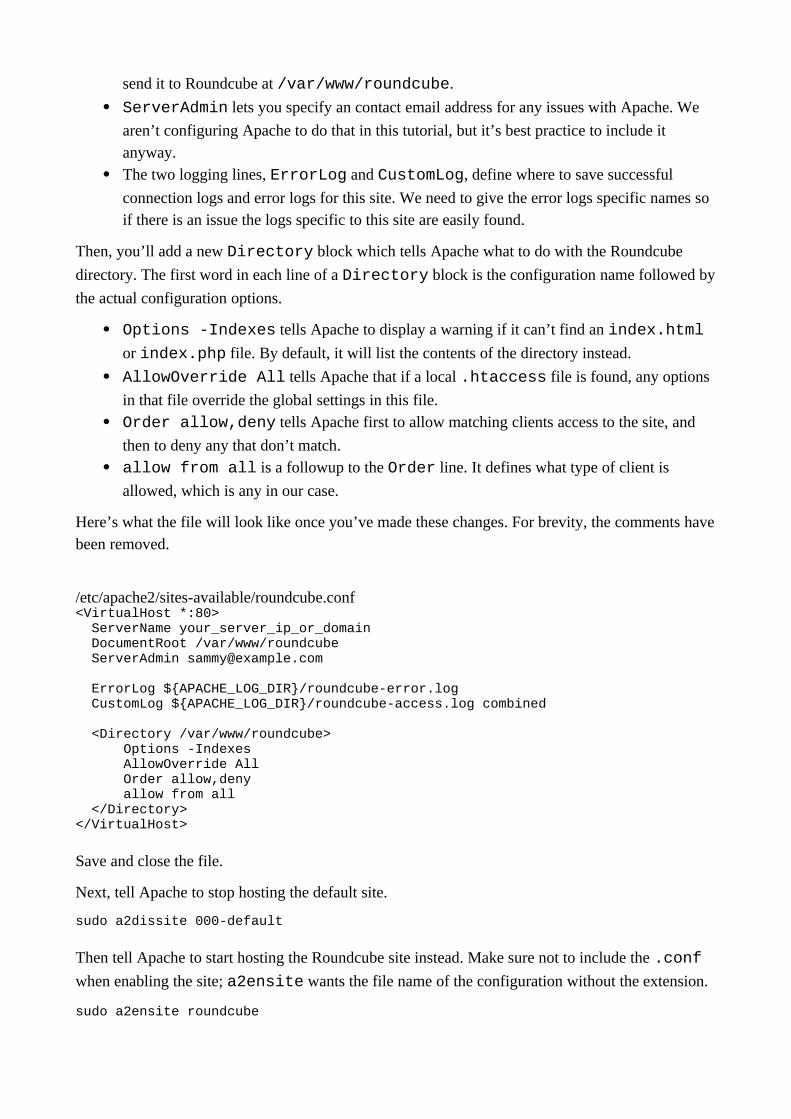
send it to Roundcube at /var/www/roundcube.
ServerAdmin lets you specify an contact email address for any issues with Apache. We
aren’t configuring Apache to do that in this tutorial, but it’s best practice to include it anyway.
The two logging lines, ErrorLog and CustomLog, define where to save successful
connection logs and error logs for this site. We need to give the error logs specific names so if there is an issue the logs specific to this site are easily found.
Then, you’ll add a new Directory block which tells Apache what to do with the Roundcube
directory. The first word in each line of a Directory block is the configuration name followed by
the actual configuration options.
Options -Indexes tells Apache to display a warning if it can’t find an index.html
or index.php file. By default, it will list the contents of the directory instead.
AllowOverride All tells Apache that if a local .htaccess file is found, any options
in that file override the global settings in this file. Order allow,deny tells Apache first to allow matching clients access to the site, and
then to deny any that don’t match. allow from all is a followup to the Order line. It defines what type of client is
allowed, which is any in our case.
Here’s what the file will look like once you’ve made these changes. For brevity, the comments havebeen removed.
/etc/apache2/sites-available/roundcube.conf<VirtualHost *:80> ServerName your_server_ip_or_domain DocumentRoot /var/www/roundcube ServerAdmin [email protected]
ErrorLog ${APACHE_LOG_DIR}/roundcube-error.log CustomLog ${APACHE_LOG_DIR}/roundcube-access.log combined
<Directory /var/www/roundcube> Options -Indexes AllowOverride All Order allow,deny allow from all </Directory></VirtualHost>
Save and close the file.
Next, tell Apache to stop hosting the default site.
sudo a2dissite 000-default
Then tell Apache to start hosting the Roundcube site instead. Make sure not to include the .conf
when enabling the site; a2ensite wants the file name of the configuration without the extension.
sudo a2ensite roundcube
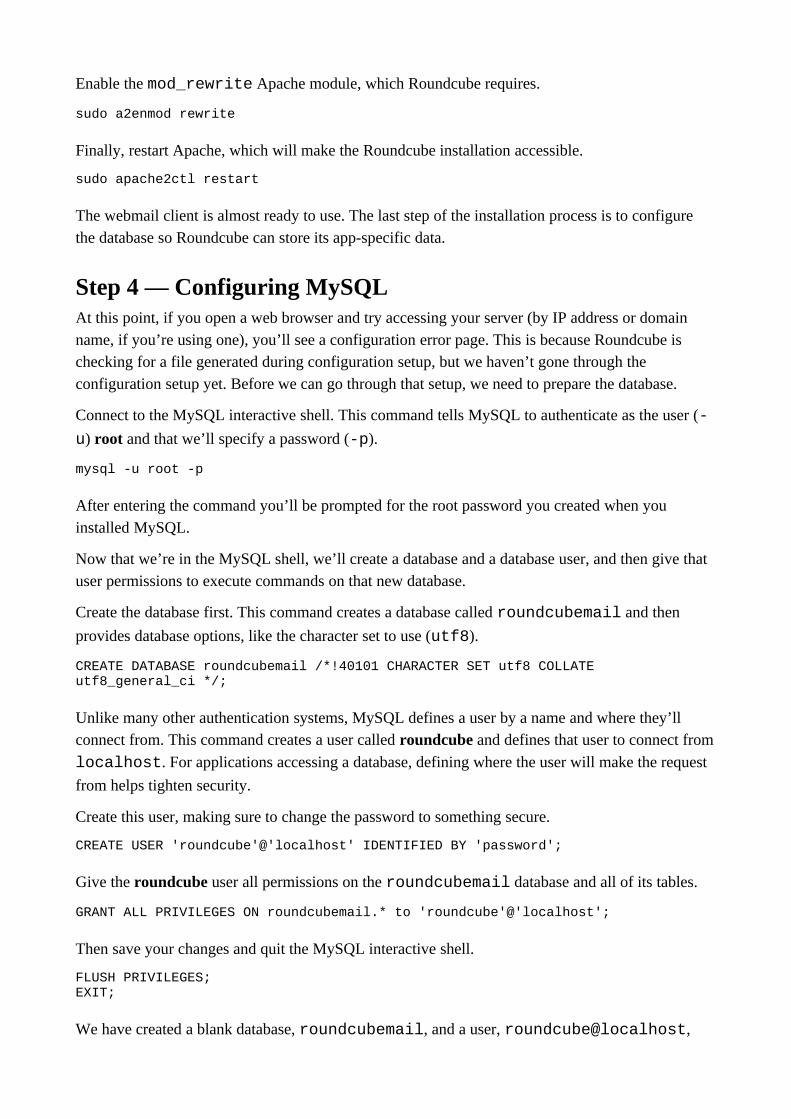
Enable the mod_rewrite Apache module, which Roundcube requires.
sudo a2enmod rewrite
Finally, restart Apache, which will make the Roundcube installation accessible.
sudo apache2ctl restart
The webmail client is almost ready to use. The last step of the installation process is to configure the database so Roundcube can store its app-specific data.
Step 4 — Configuring MySQLAt this point, if you open a web browser and try accessing your server (by IP address or domain name, if you’re using one), you’ll see a configuration error page. This is because Roundcube is checking for a file generated during configuration setup, but we haven’t gone through the configuration setup yet. Before we can go through that setup, we need to prepare the database.
Connect to the MySQL interactive shell. This command tells MySQL to authenticate as the user (-
u) root and that we’ll specify a password (-p).
mysql -u root -p
After entering the command you’ll be prompted for the root password you created when you installed MySQL.
Now that we’re in the MySQL shell, we’ll create a database and a database user, and then give that user permissions to execute commands on that new database.
Create the database first. This command creates a database called roundcubemail and then
provides database options, like the character set to use (utf8).
CREATE DATABASE roundcubemail /*!40101 CHARACTER SET utf8 COLLATE utf8_general_ci */;
Unlike many other authentication systems, MySQL defines a user by a name and where they’ll connect from. This command creates a user called roundcube and defines that user to connect from
localhost. For applications accessing a database, defining where the user will make the request
from helps tighten security.
Create this user, making sure to change the password to something secure.
CREATE USER 'roundcube'@'localhost' IDENTIFIED BY 'password';
Give the roundcube user all permissions on the roundcubemail database and all of its tables.
GRANT ALL PRIVILEGES ON roundcubemail.* to 'roundcube'@'localhost';
Then save your changes and quit the MySQL interactive shell.
FLUSH PRIVILEGES;EXIT;
We have created a blank database, roundcubemail, and a user, roundcube@localhost,
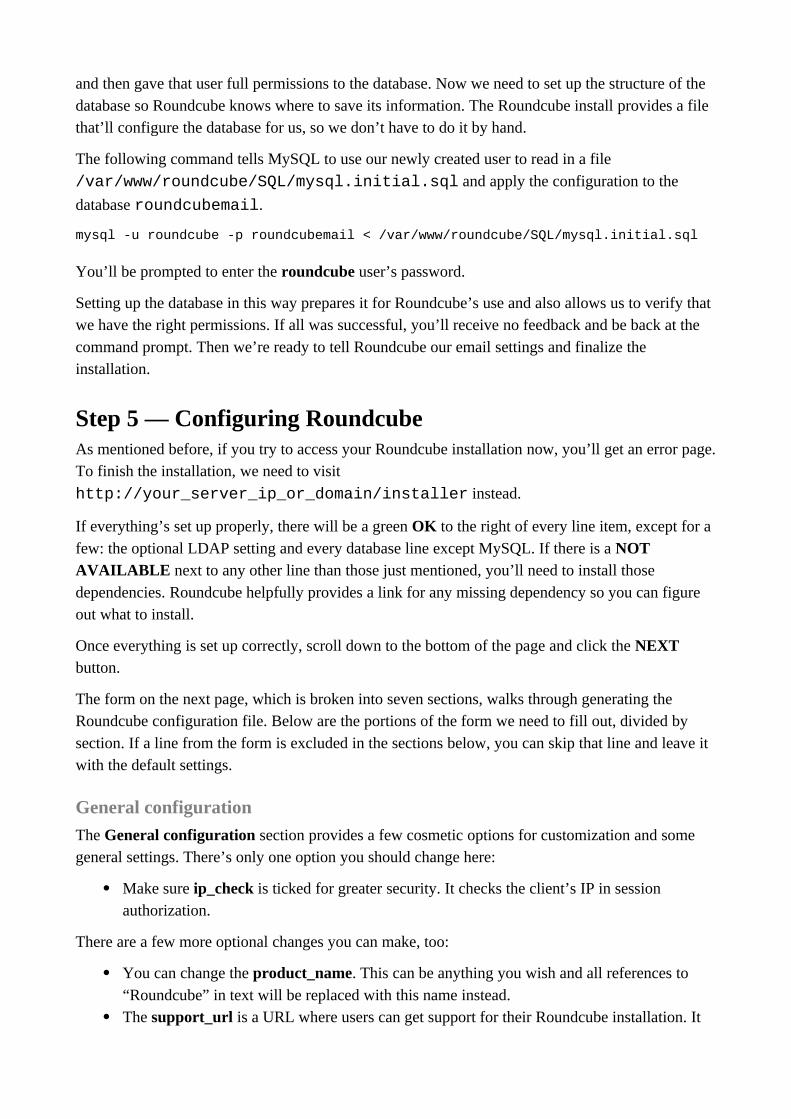
and then gave that user full permissions to the database. Now we need to set up the structure of the database so Roundcube knows where to save its information. The Roundcube install provides a file that’ll configure the database for us, so we don’t have to do it by hand.
The following command tells MySQL to use our newly created user to read in a file
/var/www/roundcube/SQL/mysql.initial.sql and apply the configuration to the
database roundcubemail.
mysql -u roundcube -p roundcubemail < /var/www/roundcube/SQL/mysql.initial.sql
You’ll be prompted to enter the roundcube user’s password.
Setting up the database in this way prepares it for Roundcube’s use and also allows us to verify that we have the right permissions. If all was successful, you’ll receive no feedback and be back at the command prompt. Then we’re ready to tell Roundcube our email settings and finalize the installation.
Step 5 — Configuring RoundcubeAs mentioned before, if you try to access your Roundcube installation now, you’ll get an error page.To finish the installation, we need to visit
http://your_server_ip_or_domain/installer instead.
If everything’s set up properly, there will be a green OK to the right of every line item, except for a few: the optional LDAP setting and every database line except MySQL. If there is a NOT AVAILABLE next to any other line than those just mentioned, you’ll need to install those dependencies. Roundcube helpfully provides a link for any missing dependency so you can figure out what to install.
Once everything is set up correctly, scroll down to the bottom of the page and click the NEXT button.
The form on the next page, which is broken into seven sections, walks through generating the Roundcube configuration file. Below are the portions of the form we need to fill out, divided by section. If a line from the form is excluded in the sections below, you can skip that line and leave it with the default settings.
General configuration
The General configuration section provides a few cosmetic options for customization and some general settings. There’s only one option you should change here:
Make sure ip_check is ticked for greater security. It checks the client’s IP in session authorization.
There are a few more optional changes you can make, too:
You can change the product_name. This can be anything you wish and all references to “Roundcube” in text will be replaced with this name instead.
The support_url is a URL where users can get support for their Roundcube installation. It
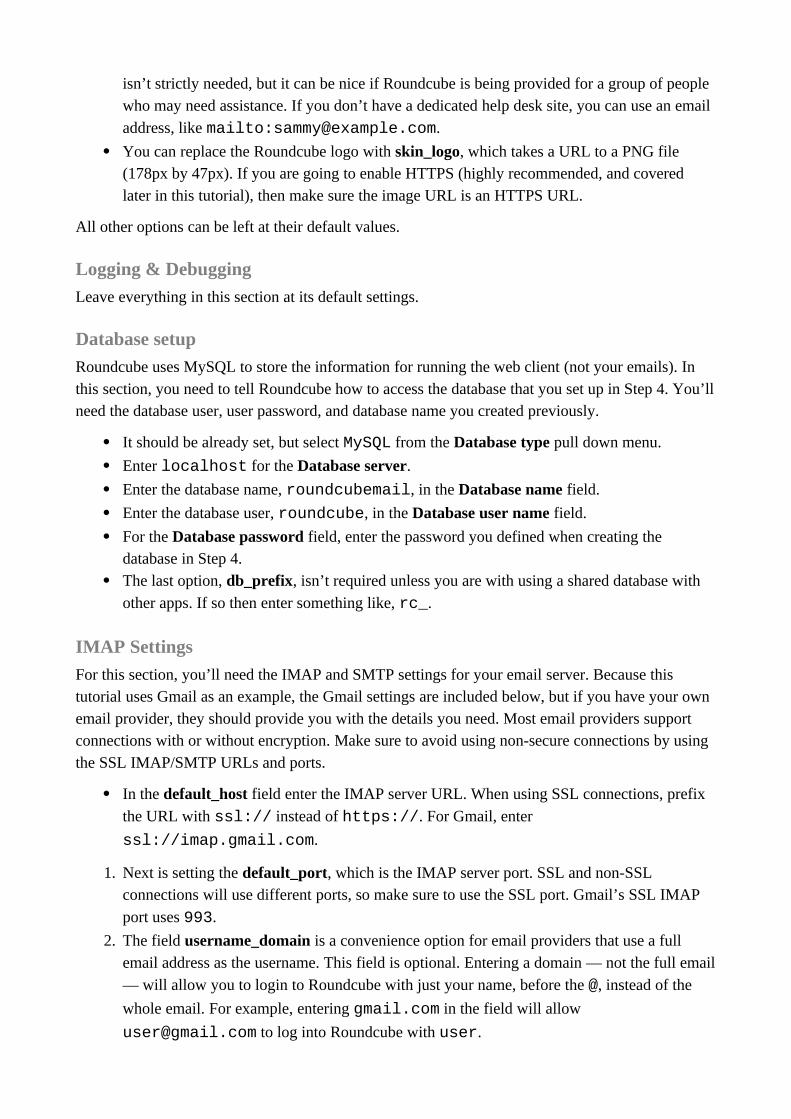
isn’t strictly needed, but it can be nice if Roundcube is being provided for a group of people who may need assistance. If you don’t have a dedicated help desk site, you can use an email
address, like mailto:[email protected].
You can replace the Roundcube logo with skin_logo, which takes a URL to a PNG file (178px by 47px). If you are going to enable HTTPS (highly recommended, and covered later in this tutorial), then make sure the image URL is an HTTPS URL.
All other options can be left at their default values.
Logging & Debugging
Leave everything in this section at its default settings.
Database setup
Roundcube uses MySQL to store the information for running the web client (not your emails). In this section, you need to tell Roundcube how to access the database that you set up in Step 4. You’llneed the database user, user password, and database name you created previously.
It should be already set, but select MySQL from the Database type pull down menu.
Enter localhost for the Database server.
Enter the database name, roundcubemail, in the Database name field.
Enter the database user, roundcube, in the Database user name field.
For the Database password field, enter the password you defined when creating the database in Step 4.
The last option, db_prefix, isn’t required unless you are with using a shared database with
other apps. If so then enter something like, rc_.
IMAP Settings
For this section, you’ll need the IMAP and SMTP settings for your email server. Because this tutorial uses Gmail as an example, the Gmail settings are included below, but if you have your own email provider, they should provide you with the details you need. Most email providers support connections with or without encryption. Make sure to avoid using non-secure connections by using the SSL IMAP/SMTP URLs and ports.
In the default_host field enter the IMAP server URL. When using SSL connections, prefix
the URL with ssl:// instead of https://. For Gmail, enter
ssl://imap.gmail.com.
1. Next is setting the default_port, which is the IMAP server port. SSL and non-SSL connections will use different ports, so make sure to use the SSL port. Gmail’s SSL IMAP
port uses 993.
2. The field username_domain is a convenience option for email providers that use a full email address as the username. This field is optional. Entering a domain — not the full email
— will allow you to login to Roundcube with just your name, before the @, instead of the
whole email. For example, entering gmail.com in the field will allow
[email protected] to log into Roundcube with user.
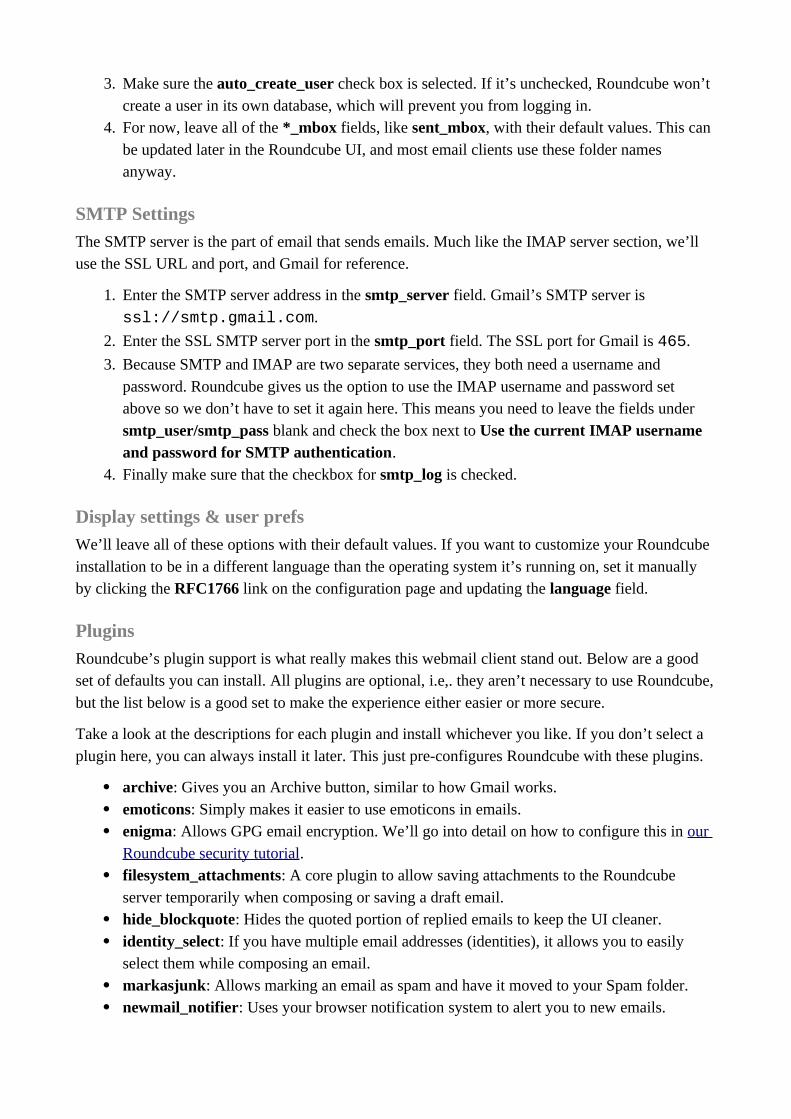
3. Make sure the auto_create_user check box is selected. If it’s unchecked, Roundcube won’t create a user in its own database, which will prevent you from logging in.
4. For now, leave all of the *_mbox fields, like sent_mbox, with their default values. This can be updated later in the Roundcube UI, and most email clients use these folder names anyway.
SMTP Settings
The SMTP server is the part of email that sends emails. Much like the IMAP server section, we’ll use the SSL URL and port, and Gmail for reference.
1. Enter the SMTP server address in the smtp_server field. Gmail’s SMTP server is
ssl://smtp.gmail.com.
2. Enter the SSL SMTP server port in the smtp_port field. The SSL port for Gmail is 465.
3. Because SMTP and IMAP are two separate services, they both need a username and password. Roundcube gives us the option to use the IMAP username and password set above so we don’t have to set it again here. This means you need to leave the fields under smtp_user/smtp_pass blank and check the box next to Use the current IMAP username and password for SMTP authentication.
4. Finally make sure that the checkbox for smtp_log is checked.
Display settings & user prefs
We’ll leave all of these options with their default values. If you want to customize your Roundcube installation to be in a different language than the operating system it’s running on, set it manually by clicking the RFC1766 link on the configuration page and updating the language field.
Plugins
Roundcube’s plugin support is what really makes this webmail client stand out. Below are a good set of defaults you can install. All plugins are optional, i.e,. they aren’t necessary to use Roundcube,but the list below is a good set to make the experience either easier or more secure.
Take a look at the descriptions for each plugin and install whichever you like. If you don’t select a plugin here, you can always install it later. This just pre-configures Roundcube with these plugins.
archive: Gives you an Archive button, similar to how Gmail works. emoticons: Simply makes it easier to use emoticons in emails. enigma: Allows GPG email encryption. We’ll go into detail on how to configure this in our
Roundcube security tutorial. filesystem_attachments: A core plugin to allow saving attachments to the Roundcube
server temporarily when composing or saving a draft email. hide_blockquote: Hides the quoted portion of replied emails to keep the UI cleaner. identity_select: If you have multiple email addresses (identities), it allows you to easily
select them while composing an email. markasjunk: Allows marking an email as spam and have it moved to your Spam folder. newmail_notifier: Uses your browser notification system to alert you to new emails.

At last, that’s all of the configuration. Press the UPDATE CONFIG button at the bottom of the page to save your settings. Let’s test that everything works next.
Step 6 — Testing the Roundcube ConfigurationAfter you update the configuration, the page will refresh and you’ll see a yellow info box at the top
of the page which says The config file was saved successfully into RCMAIL_CONFIG_DIR
directory of your Roundcube installation.
From here, click on the CONTINUE button to test your configuration. Like the dependency check page, if there are no errors, you’ll see a green OK marker on every line. If not, go back and double check what you entered.
To test the rest of the configuration, put in your IMAP and SMTP username and password in the Test SMTP config and Test IMAP config sections, then click Send test email and Check login, respectively. If a test is successful, the page will reload and you’ll see the green ‘OK’ under the section you tested.
Note: If you are using Gmail and you have 2-step authentication enabled, you’ll need to generate anapp-specific password because Roundcube doesn’t know how to prompt for your 2-step auth token.
Once you’ve checked both SMTP and IMAP connections and both are green, then it’s time to jump back into your SSH session and remove the installer directory. This will prevent someone else to generate a new config and override the correct settings.
sudo rm -rf /var/www/roundcube/installer/
Now you can visit your Roundcube instance using your server’s IP or your domain name, log in, and check your email.
ConclusionWith Roundcube, you can have the feature set and appearance of a native desktop client with the flexibility of a webmail client. You have a fully functional installation now, but there are some additional steps you should take to make sure you’re fully secure (like adding HTTPS support and using GPG encryption for your email). You can do this by following How to Secure Roundcube on Ubuntu 16.04.
In addition, you can install new themes to enhance the look of your client and plugins to add new functionality. Unlike plugins, there isn’t a central site to find themes, but you can find Roundcube Skins or Roundcube forums as places to find some.
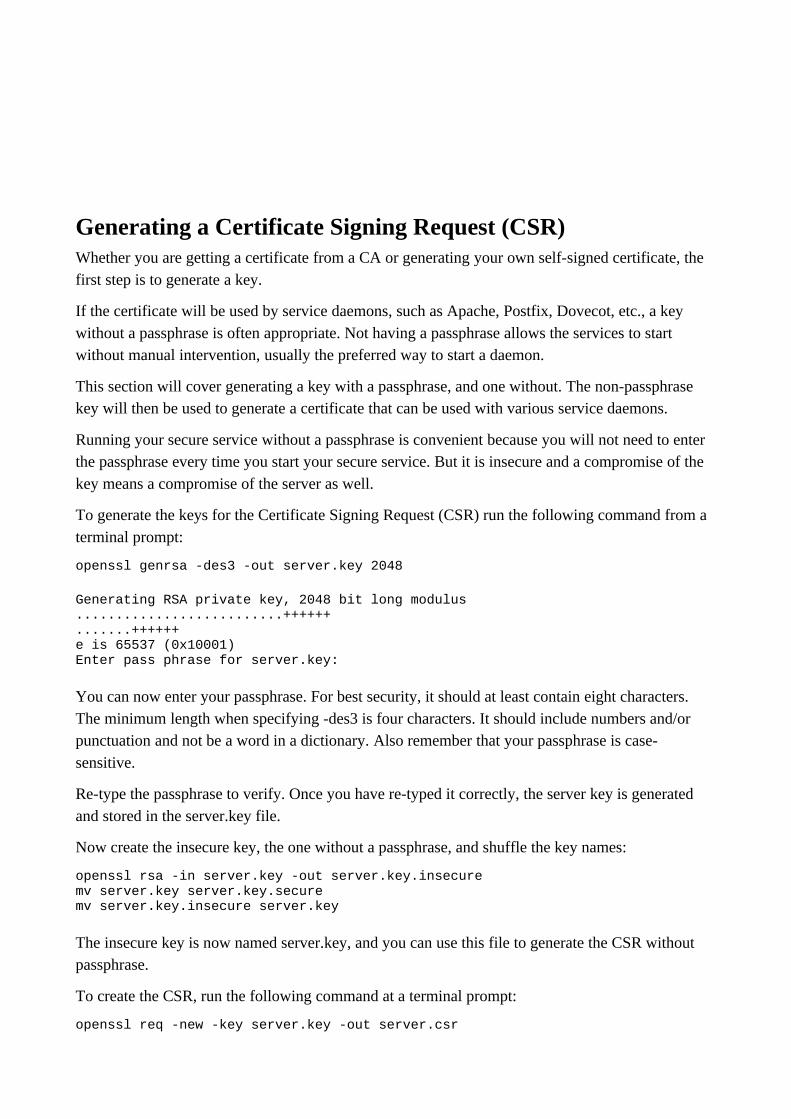
Generating a Certificate Signing Request (CSR)Whether you are getting a certificate from a CA or generating your own self-signed certificate, the first step is to generate a key.
If the certificate will be used by service daemons, such as Apache, Postfix, Dovecot, etc., a key without a passphrase is often appropriate. Not having a passphrase allows the services to start without manual intervention, usually the preferred way to start a daemon.
This section will cover generating a key with a passphrase, and one without. The non-passphrase key will then be used to generate a certificate that can be used with various service daemons.
Running your secure service without a passphrase is convenient because you will not need to enter the passphrase every time you start your secure service. But it is insecure and a compromise of the key means a compromise of the server as well.
To generate the keys for the Certificate Signing Request (CSR) run the following command from a terminal prompt:
openssl genrsa -des3 -out server.key 2048
Generating RSA private key, 2048 bit long modulus..........................++++++.......++++++e is 65537 (0x10001)Enter pass phrase for server.key:
You can now enter your passphrase. For best security, it should at least contain eight characters. The minimum length when specifying -des3 is four characters. It should include numbers and/or punctuation and not be a word in a dictionary. Also remember that your passphrase is case-sensitive.
Re-type the passphrase to verify. Once you have re-typed it correctly, the server key is generated and stored in the server.key file.
Now create the insecure key, the one without a passphrase, and shuffle the key names:
openssl rsa -in server.key -out server.key.insecuremv server.key server.key.securemv server.key.insecure server.key
The insecure key is now named server.key, and you can use this file to generate the CSR without passphrase.
To create the CSR, run the following command at a terminal prompt:
openssl req -new -key server.key -out server.csr
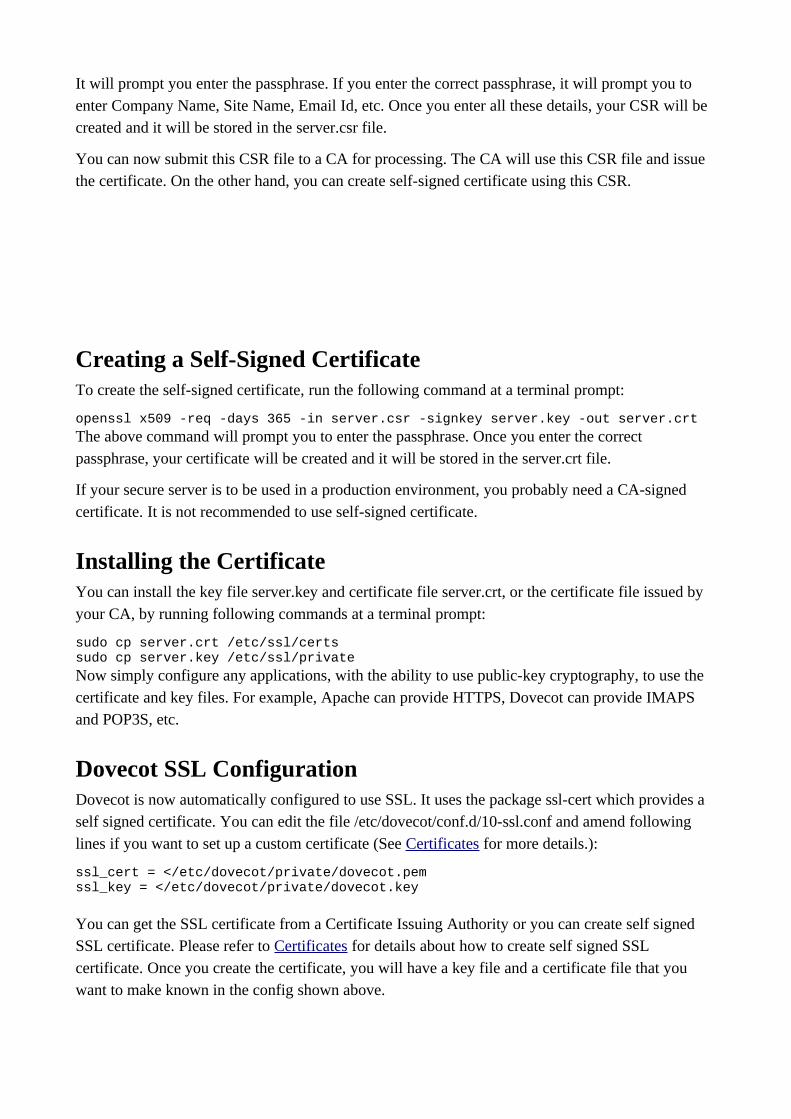
It will prompt you enter the passphrase. If you enter the correct passphrase, it will prompt you to enter Company Name, Site Name, Email Id, etc. Once you enter all these details, your CSR will be created and it will be stored in the server.csr file.
You can now submit this CSR file to a CA for processing. The CA will use this CSR file and issue the certificate. On the other hand, you can create self-signed certificate using this CSR.
Creating a Self-Signed CertificateTo create the self-signed certificate, run the following command at a terminal prompt:
openssl x509 -req -days 365 -in server.csr -signkey server.key -out server.crt
The above command will prompt you to enter the passphrase. Once you enter the correct passphrase, your certificate will be created and it will be stored in the server.crt file.
If your secure server is to be used in a production environment, you probably need a CA-signed certificate. It is not recommended to use self-signed certificate.
Installing the CertificateYou can install the key file server.key and certificate file server.crt, or the certificate file issued by your CA, by running following commands at a terminal prompt:
sudo cp server.crt /etc/ssl/certssudo cp server.key /etc/ssl/private
Now simply configure any applications, with the ability to use public-key cryptography, to use the certificate and key files. For example, Apache can provide HTTPS, Dovecot can provide IMAPS and POP3S, etc.
Dovecot SSL ConfigurationDovecot is now automatically configured to use SSL. It uses the package ssl-cert which provides a self signed certificate. You can edit the file /etc/dovecot/conf.d/10-ssl.conf and amend following lines if you want to set up a custom certificate (See Certificates for more details.):
ssl_cert = </etc/dovecot/private/dovecot.pemssl_key = </etc/dovecot/private/dovecot.key
You can get the SSL certificate from a Certificate Issuing Authority or you can create self signed SSL certificate. Please refer to Certificates for details about how to create self signed SSL certificate. Once you create the certificate, you will have a key file and a certificate file that you want to make known in the config shown above.
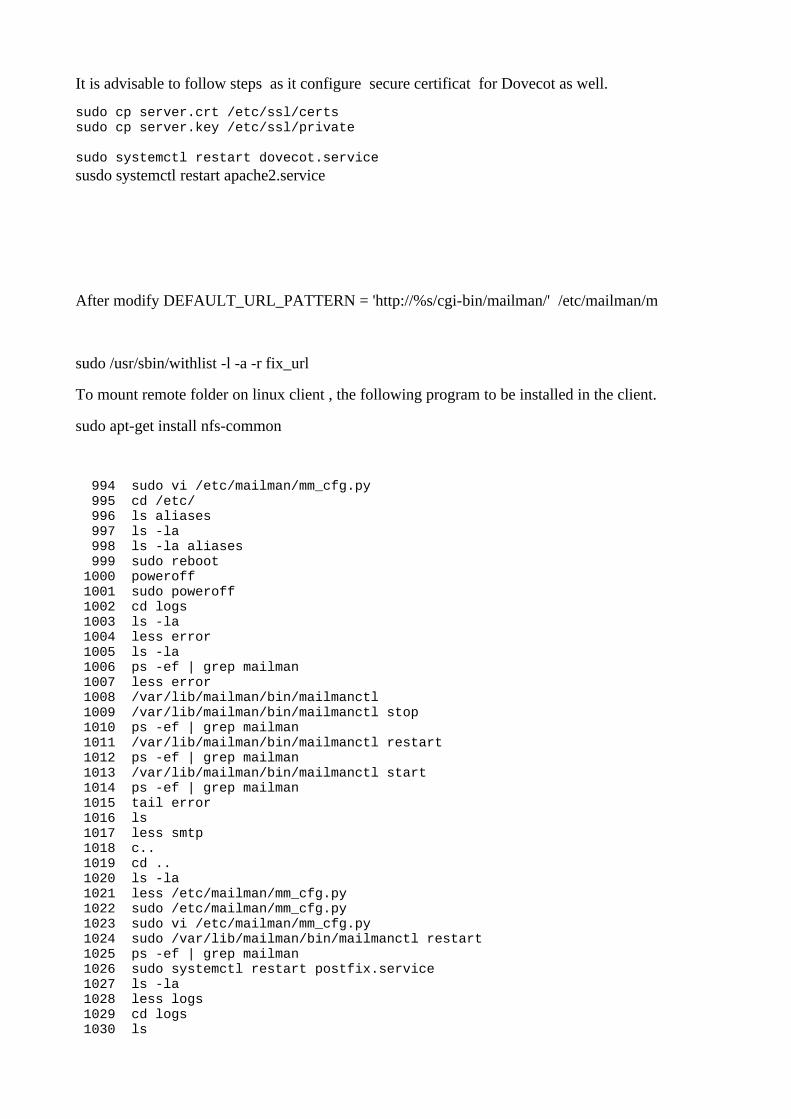
It is advisable to follow steps as it configure secure certificat for Dovecot as well.
sudo cp server.crt /etc/ssl/certssudo cp server.key /etc/ssl/private
sudo systemctl restart dovecot.service
susdo systemctl restart apache2.service
After modify DEFAULT_URL_PATTERN = 'http://%s/cgi-bin/mailman/' /etc/mailman/m
sudo /usr/sbin/withlist -l -a -r fix_url
To mount remote folder on linux client , the following program to be installed in the client.
sudo apt-get install nfs-common
994 sudo vi /etc/mailman/mm_cfg.py 995 cd /etc/ 996 ls aliases 997 ls -la 998 ls -la aliases 999 sudo reboot 1000 poweroff 1001 sudo poweroff 1002 cd logs 1003 ls -la 1004 less error 1005 ls -la 1006 ps -ef | grep mailman 1007 less error 1008 /var/lib/mailman/bin/mailmanctl 1009 /var/lib/mailman/bin/mailmanctl stop 1010 ps -ef | grep mailman 1011 /var/lib/mailman/bin/mailmanctl restart 1012 ps -ef | grep mailman 1013 /var/lib/mailman/bin/mailmanctl start 1014 ps -ef | grep mailman 1015 tail error 1016 ls 1017 less smtp 1018 c.. 1019 cd .. 1020 ls -la 1021 less /etc/mailman/mm_cfg.py 1022 sudo /etc/mailman/mm_cfg.py 1023 sudo vi /etc/mailman/mm_cfg.py 1024 sudo /var/lib/mailman/bin/mailmanctl restart 1025 ps -ef | grep mailman 1026 sudo systemctl restart postfix.service 1027 ls -la 1028 less logs 1029 cd logs 1030 ls

1031 tail error 1032 mailmail --version 1033 cd /etc/mailman/ 1034 sudo vi mm_cfg.py 1035 sudo vi /etc/postfix/master.cf 1036 sudo vi /etc/postfix/transport 1037 sudo postmap -v /etc/postfix/transport 1038 sudo systemctl restart postfix.service 1039 sudo systemctl restart mailman.service 1040 sudo /usr/sbin/newlist mailman 1041 less /etc/aliases 1042 newaliases 1043 tail /var/log/apache2/lists-error.log 1044 cd /var/log/apache2/ 1045 ls 1046 tail -f *.log 1047 sudo a2enmod cgi 1048 sudo service apache restart 1049 sudo service apache2 restart 1050 less /etc/postfix/transport 1051 sudo vi /etc/mailman/mm_cfg.py 1052 sudo vi /etc/postfix/main.cf 1053 sudo vi /etc/apache2/sites-available/mailman.conf 1054 sudo systemctl restart postfix.service 1055 sudo systemctl start mailman.service 1056 sudo /usr/sbin/newlist staff 1057 sudo vi /etc/aliases 1058 newaliases 1059 ls /var/lib/mailman/ 1060 ls -la 1061 pwd 1062 cd /var/lib/ 1063 ls 1064 cd mailman/ 1065 ls 1066 cd logs 1067 sudo cd logs 1068 cd logs 1069 sudo cd logs 1070 sudo hostname epsilon 1071 sudo cd logs 1072 cd logs 1073 sudo -s 1074 cd /etc/ 1075 ls -la 1076 less aliases 1077 less /var/log/mail.err 1078 less /var/log/mail.log 1079 less /var/log/mail.log.4.gz 1080 egrep 'april' /var/log/mail.log.4.gz 1081 history | grep 'egrep' 1082 egrep 'april' /var/log/mail.log.3.gz 1083 egrep 'April' /var/log/mail.log.3.gz 1084 egrep 'April' /var/log/mail.log 1085 cd /var/log/apache2/ 1086 ls -la 1087 less error.log 1088 less error.log.4.gz 1089 less error.log.5.gz 1090 less error.log.1 1091 less error.log.3.gz 1092 less error.log.4.gz 1093 less other_vhosts_access.log 1094 less error.log.8.gz
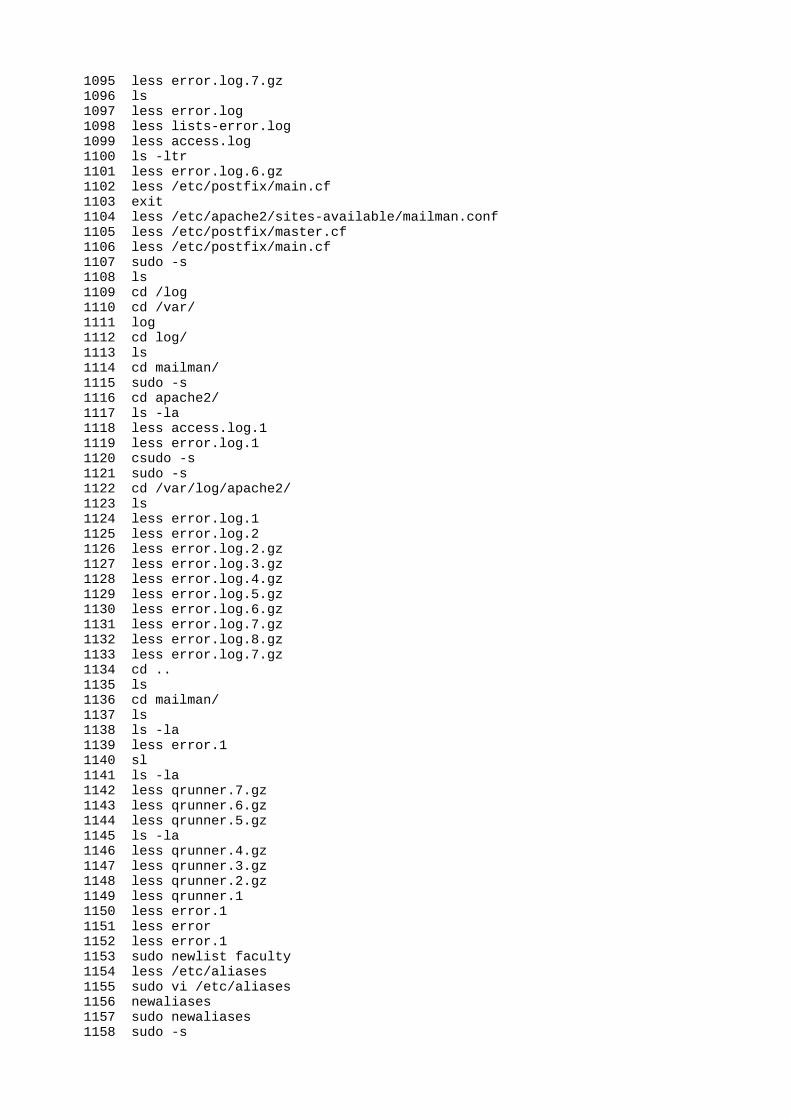
1095 less error.log.7.gz 1096 ls 1097 less error.log 1098 less lists-error.log 1099 less access.log 1100 ls -ltr 1101 less error.log.6.gz 1102 less /etc/postfix/main.cf 1103 exit 1104 less /etc/apache2/sites-available/mailman.conf 1105 less /etc/postfix/master.cf 1106 less /etc/postfix/main.cf 1107 sudo -s 1108 ls 1109 cd /log 1110 cd /var/ 1111 log 1112 cd log/ 1113 ls 1114 cd mailman/ 1115 sudo -s 1116 cd apache2/ 1117 ls -la 1118 less access.log.1 1119 less error.log.1 1120 csudo -s 1121 sudo -s 1122 cd /var/log/apache2/ 1123 ls 1124 less error.log.1 1125 less error.log.2 1126 less error.log.2.gz 1127 less error.log.3.gz 1128 less error.log.4.gz 1129 less error.log.5.gz 1130 less error.log.6.gz 1131 less error.log.7.gz 1132 less error.log.8.gz 1133 less error.log.7.gz 1134 cd .. 1135 ls 1136 cd mailman/ 1137 ls 1138 ls -la 1139 less error.1 1140 sl 1141 ls -la 1142 less qrunner.7.gz 1143 less qrunner.6.gz 1144 less qrunner.5.gz 1145 ls -la 1146 less qrunner.4.gz 1147 less qrunner.3.gz 1148 less qrunner.2.gz 1149 less qrunner.1 1150 less error.1 1151 less error 1152 less error.1 1153 sudo newlist faculty 1154 less /etc/aliases 1155 sudo vi /etc/aliases 1156 newaliases 1157 sudo newaliases 1158 sudo -s
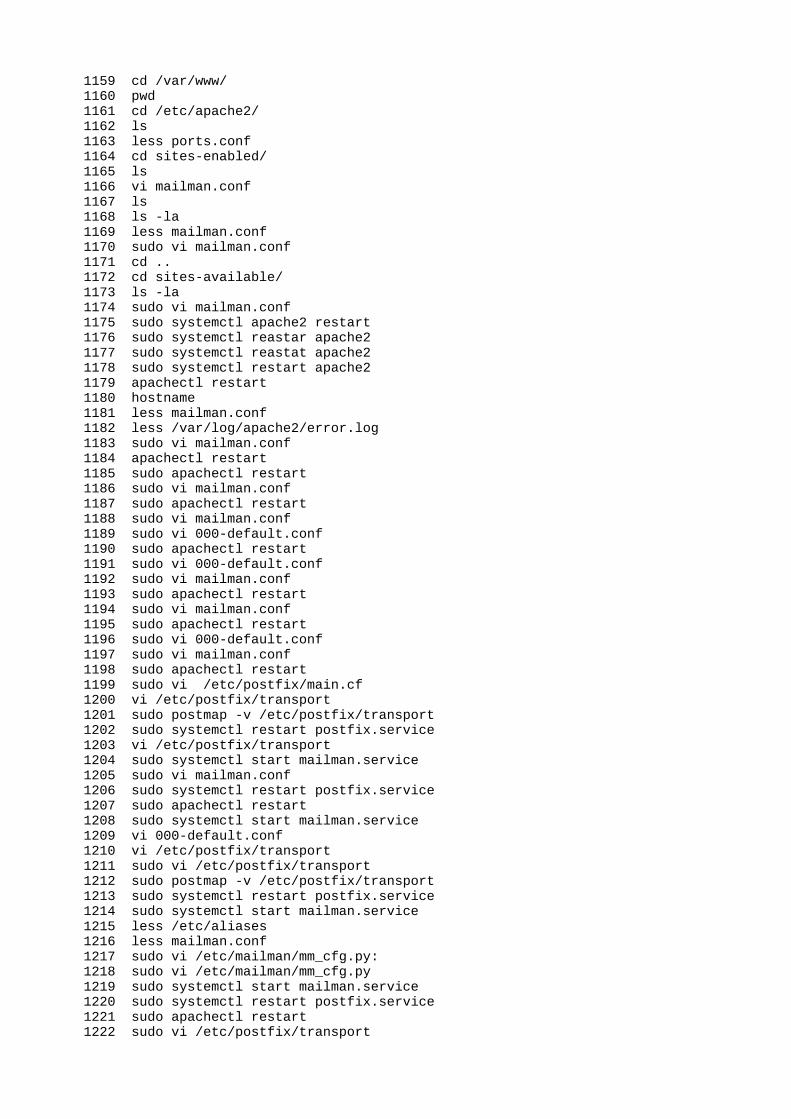
1159 cd /var/www/ 1160 pwd 1161 cd /etc/apache2/ 1162 ls 1163 less ports.conf 1164 cd sites-enabled/ 1165 ls 1166 vi mailman.conf 1167 ls 1168 ls -la 1169 less mailman.conf 1170 sudo vi mailman.conf 1171 cd .. 1172 cd sites-available/ 1173 ls -la 1174 sudo vi mailman.conf 1175 sudo systemctl apache2 restart 1176 sudo systemctl reastar apache2 1177 sudo systemctl reastat apache2 1178 sudo systemctl restart apache2 1179 apachectl restart 1180 hostname 1181 less mailman.conf 1182 less /var/log/apache2/error.log 1183 sudo vi mailman.conf 1184 apachectl restart 1185 sudo apachectl restart 1186 sudo vi mailman.conf 1187 sudo apachectl restart 1188 sudo vi mailman.conf 1189 sudo vi 000-default.conf 1190 sudo apachectl restart 1191 sudo vi 000-default.conf 1192 sudo vi mailman.conf 1193 sudo apachectl restart 1194 sudo vi mailman.conf 1195 sudo apachectl restart 1196 sudo vi 000-default.conf 1197 sudo vi mailman.conf 1198 sudo apachectl restart 1199 sudo vi /etc/postfix/main.cf 1200 vi /etc/postfix/transport 1201 sudo postmap -v /etc/postfix/transport 1202 sudo systemctl restart postfix.service 1203 vi /etc/postfix/transport 1204 sudo systemctl start mailman.service 1205 sudo vi mailman.conf 1206 sudo systemctl restart postfix.service 1207 sudo apachectl restart 1208 sudo systemctl start mailman.service 1209 vi 000-default.conf 1210 vi /etc/postfix/transport 1211 sudo vi /etc/postfix/transport 1212 sudo postmap -v /etc/postfix/transport 1213 sudo systemctl restart postfix.service 1214 sudo systemctl start mailman.service 1215 less /etc/aliases 1216 less mailman.conf 1217 sudo vi /etc/mailman/mm_cfg.py: 1218 sudo vi /etc/mailman/mm_cfg.py 1219 sudo systemctl start mailman.service 1220 sudo systemctl restart postfix.service 1221 sudo apachectl restart 1222 sudo vi /etc/postfix/transport

1223 sudo postmap -v /etc/postfix/transport 1224 sudo apachectl restart 1225 sudo systemctl restart postfix.service 1226 sudo systemctl start mailman.service 1227 /usr/lib/mailman/bin/rmlist staff 1228 less /etc/aliases 1229 newlist staff 1230 newaliases 1231 less /etc/postfix/transport 1232 vi /etc/postfix/main.cf 1233 vi /etc/postfix/transport 1234 sudo systemctl restart postfix.service 1235 sudo systemctl start mailman. 1236 sudo systemctl start mailman.service 1237 rmlist staff 1238 sudo newlist staff 1239 reboot 1240 cd /etc/ 1241 ls aliases 1242 ls -la 1243 ls 1244 ls -la aliases 1245 ls -la aliases.db 1246 cd postfix/ 1247 cd .. 1248 cd mailman/ 1249 ls 1250 ls -la 1251 less apache.conf 1252 sudo vi mm_cfg.py 1253 sudo /usr/lib/mailman/Mailman/Defaults.py 1254 sudo vi /usr/lib/mailman/Mailman/Defaults.py 1255 sudo vi mm_cfg.py 1256 sudo systemctl start mailman.service 1257 hostname 1258 sudo hostname epsilon 1259 sudo systemctl start mailman.service 1260 sudo systemctl restart postfix.service 1261 sudo apachectl restart 1262 sudo rmlist staff 1263 sudo newlist staff 1264 newaliases 1265 sudo newaliases 1266 sudo vi mm_cfg.py 1267 cd /etc/mailman/ 1268 exit 1269 postconf -d myhostname 1270 postconf -d mydomain 1271 sudo vi /etc/postfix/main.cf 1272 less /etc/hosts 1273 sudo vi /etc/postfix/main.cf 1274 less /etc/postfix/transport 1275 sudo vi /etc/mailman/mm_cfg.py 1276 sudo systemctl start mailman.service 1277 sudo apachectl restart 1278 sudo systemctl restart postfix.service 1279 sudo rmlist staff 1280 sudo newlist staff 1281 sudo newlist project-staff 1282 sudo newlist students 1283 sudo poweroff 1284 sudo systemctl start mailman.service 1285 ls 1286 sudo vi /etc/mailman/mm_cfg.py
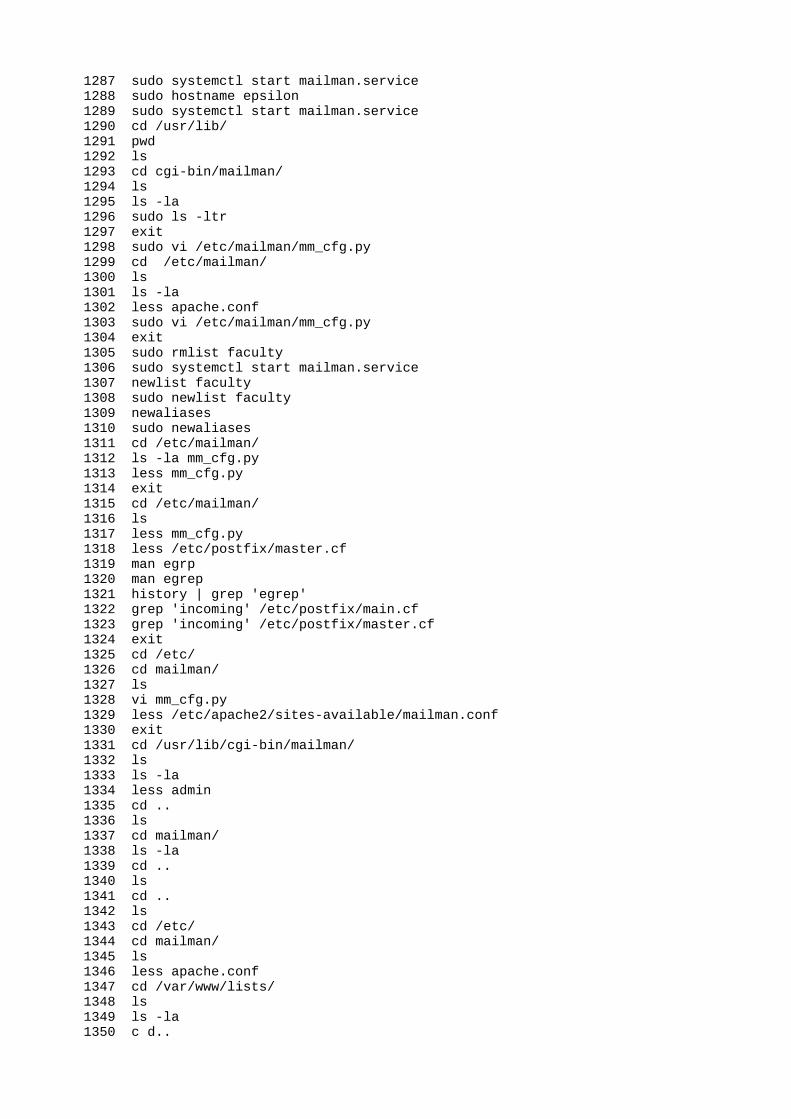
1287 sudo systemctl start mailman.service 1288 sudo hostname epsilon 1289 sudo systemctl start mailman.service 1290 cd /usr/lib/ 1291 pwd 1292 ls 1293 cd cgi-bin/mailman/ 1294 ls 1295 ls -la 1296 sudo ls -ltr 1297 exit 1298 sudo vi /etc/mailman/mm_cfg.py 1299 cd /etc/mailman/ 1300 ls 1301 ls -la 1302 less apache.conf 1303 sudo vi /etc/mailman/mm_cfg.py 1304 exit 1305 sudo rmlist faculty 1306 sudo systemctl start mailman.service 1307 newlist faculty 1308 sudo newlist faculty 1309 newaliases 1310 sudo newaliases 1311 cd /etc/mailman/ 1312 ls -la mm_cfg.py 1313 less mm_cfg.py 1314 exit 1315 cd /etc/mailman/ 1316 ls 1317 less mm_cfg.py 1318 less /etc/postfix/master.cf 1319 man egrp 1320 man egrep 1321 history | grep 'egrep' 1322 grep 'incoming' /etc/postfix/main.cf 1323 grep 'incoming' /etc/postfix/master.cf 1324 exit 1325 cd /etc/ 1326 cd mailman/ 1327 ls 1328 vi mm_cfg.py 1329 less /etc/apache2/sites-available/mailman.conf 1330 exit 1331 cd /usr/lib/cgi-bin/mailman/ 1332 ls 1333 ls -la 1334 less admin 1335 cd .. 1336 ls 1337 cd mailman/ 1338 ls -la 1339 cd .. 1340 ls 1341 cd .. 1342 ls 1343 cd /etc/ 1344 cd mailman/ 1345 ls 1346 less apache.conf 1347 cd /var/www/lists/ 1348 ls 1349 ls -la 1350 c d..
1351 cd .. 1352 ls 1353 cd html/ 1354 ls 1355 cd /etc/mailman/ 1356 ls 1357 cd .. 1358 ls 1359 cd mailman/ 1360 ls 1361 cd .. 1362 ls -la 1363 less apache.conf 1364 ls -la 1365 cd mailman/ 1366 ls 1367 cd en/ 1368 ls -la 1369 ls 1370 cd mailman/ 1371 exit 1372 pwd 1373 finger 1374 cd /usr/lib/mailman/ 1375 ls 1376 ls -la 1377 cd Mailman/ 1378 ls 1379 cd .. 1380 ls -la 1381 cd Mailman/ 1382 ls -la 1383 Cd Archiver/ 1384 cd Archiver/ 1385 ls 1386 cd .. 1387 pwd 1388 cd .. 1389 ls -la 1390 cd .. 1391 pwd 1392 cd mailman/ 1393 ls 1394 cd .. 1395 cd cgi-bin/ 1396 pwd 1397 ls 1398 cd mailman/ 1399 ls 1400 cd .. 1401 ls 1402 cd .. 1403 ls 1404 cd mailman/ 1405 ls 1406 exit 1407 df -h 1408 dk -h 1409 du -h 1410 dk -h 1411 du -h 1412 df -h 1413 backup_website_2019 1414 mkdir backup_working_website
1415 cd backup_working_website/ 1416 ls 1417 mkdir Jun2019 1418 cd Jun2019/ 1419 pwd 1420 ls -la 1421 du -h 1422 du -h mefac.tar.gz 1423 du -h iitmechanical.tar.gz 1424 exit 1425 cd /home/ 1426 ls 1427 cd / 1428 ls 1429 cd /home 1430 ls 1431 cd / 1432 cd home/ 1433 ls 1434 cd .. 1435 ls 1436 pwd 1437 ls 1438 cd home/ 1439 ls 1440 cd old-epsilon/ 1441 ls 1442 pwd 1443 cd backup_working_website/ 1444 pwd 1445 ls 1446 cd Jun2019/ 1447 pwd 1448 ls -la 1449 exit 1450 cd /home/old-epsilon/backup_working_website/Jun2019/ 1451 ls -la 1452 ls 1453 ls -la 1454 ls 1455 cd .. 1456 ls 1457 cd 2019 1458 lls 1459 ls -la 1460 rm -rf Jun2019/ 1461 cd jul2019/ 1462 pwd 1463 ls 1464 ls -la 1465 exit 1466 man shutdown 1467 shutdown --poweroff 1468 sudo shutdown --poweroff 1469 sudo shutdown -p t : 0 sec 1470 sudo shutdown -pt : 0 sec 1471 man shutdown 1472 systemctl restart postfix.service 1473 systemctl enable postfix.service 1474 sudo systemctl enable postfix.service 1475 telnet localhost smtp 1476 cd ~old-epsilon 1477 ls 1478 cd Maildir/

1479 ls 1480 telnet local pop3 1481 exit 1482 df -h 1483 df -hp 1484 cat /etc/postfix/main.cf| grep smtpd_tls_cert_file 1485 cd /etc/dovecot/conf.d 1486 ls 1487 less 10-master.conf 1488 vi 10-master.conf 1489 telnet localhost 25 1490 exit 1491 apt -list installed 1492 apt -l installed 1493 dpkg -l 1494 dpkg -get-selections | grep -v deinstall 1495 dpkg -l | grep "sasl" 1496 dpkg -l | grep "mail-stack-delivery" 1497 telnet old-epsilon.me.iitb.ac.in 25 1498 telnet old-epsilon.metmp.iitb.ac.in 25 1499 telnet old-epsilon.metemp.iitb.ac.in 25 1500 hostname 1501 less /etc/hosts 1502 nslookup 1503 hostname epsilon 1504 sudo hostname epsilon 1505 hostname 1506 telnet epsilon.metemp.iitb.ac.in 25 1507 dpkg -l | grep "dovecot-core" 1508 vi /etc/dovecot/dovecot 1509 vi /etc/dovecot/dovecot.conf 1510 sudo apt install dovecot-imapd dovecot-pop3d 1511 vi /etc/dovecot/dovecot.conf 1512 sudo vi /etc/dovecot/dovecot.conf 1513 sudo vi /etc/dovecot/conf.d/10-ssl.conf 1514 sudo vi /etc/dovecot/conf.d/10-mail.conf 1515 exit 1516 cd /etc/dovecot/ 1517 pwd 1518 cpwd 1519 pwd 1520 cp dovecot.conf dovecot.conf.org 1521 cd /etc/dovecot/ 1522 cd conf.d/ 1523 ls 1524 cp 10-mail.conf 10-mail.conf.org 1525 cp 10-auth.conf 10-auth.conf.org 1526 cp 10-ssl.conf 10-ssl.conf.org 1527 cp 10-master.conf 10-master.conf.org 1528 ls 10-cd .. 1529 cd .. 1530 ls 1531 cp dovecot-sql.conf.ext dovecot-sql.conf.ext.org 1532 nano /etc/dovecot/dovecot.conf 1533 vi /etc/dovecot/dovecot.conf 1534 cd conf.d/ 1535 vi 10-mail.conf 1536 cd .. 1537 exit 1538 sudo vi /etc/dovecot/conf.d/10-mail.conf 1539 cd /etc/dovecot/conf.d/ 1540 ls 1541 sudo -s 1542 exit
1543 vi /etc/dovecot/dovecot.conf 1544 cat /etc/postfix/main.cf | grep "Maildir" 1545 vi /etc/dovecot/dovecot.conf 1546 sudo systemctl restart postfix.service 1547 sudo systemctl restart dovecot.service 1548 telnet localhost pop3 1549 sudo fwu status 1550 sudo ufw status 1551 lees /etc/dovecot/conf.d/10-mail.conf 1552 less /etc/dovecot/conf.d/10-mail.conf 1553 vi /etc/dovecot/conf.d/10-mail.conf 1554 sudo ufw start 1555 sudo ufw status 1556 ufw enable 1557 sudo nano /etc/default/ufw 1558 sudo vi /etc/default/ufw 1559 sudo ufw status verbose 1560 sudo ufw default deny incoming 1561 sudo ufw default allow outgoing 1562 sudo ufw allow ssh 1563 sudo ufw enable 1564 sudo ufw status verbose 1565 sudo ufw allow http 1566 sudo ufw allow https 1567 sudo ufw allow 143 1568 sudo ufw allow 993 1569 sudo ufw allow 110 1570 sudo ufw allow 995 1571 exit 1572 nslloup 1573 nslookup 1574 sudo -s 1575 exit 1576 cd Maildir/ 1577 ls -la 1578 cd new/ 1579 ls 1580 ls -la 1581 hostname 1582 exit 1583 telnet localhost pop3 1584 telnet localhost imap 1585 telnet localhost imaps 1586 telnet localhost 995 1587 netstat -tlpn 1588 mailq 1589 echo "mail body" | mail -s "test" root 1590 mailq 1591 cd ~old-epsilon 1592 ls 1593 cd Maildir/new/ 1594 ls 1595 ls -la 1596 cd .. 1597 ls 1598 ls -la 1599 less sent 1600 tailf /var/log/mail.log 1601 echo "mail body" | mail -s "test" old-epsilon 1602 mailq 1603 ls -la 1604 ls -la new/ 1605 tailf /var/log/mail.log 1606 finger
1607 finger test 1608 echo "mail body" | mail -s "helo" test 1609 cd ~test 1610 ls -la 1611 cd Maildir/ 1612 sudo cd Maildir/ 1613 ls 1614 cd Maildir/ 1615 sudo -s 1616 tailf /var/log/mail.log 1617 finger 1618 echo "mail body" | mail -s "helo" [email protected] 1619 tailf /var/log/mail.log 1620 echo "mail body" | mail -s "helo" [email protected] 1621 tailf /var/log/mail.log 1622 cd ~old-epsilon 1623 ls 1624 cd Maildir/ 1625 ls -la 1626 cd new/ 1627 ls 1628 less 1565263720.V801Id00315M626904.epsilon 1629 less /etc/dovecot/dovecot.conf 1630 sudo vi /etc/dovecot/dovecot.conf 1631 vi /etc/dovecot/conf.d/10-auth.conf 1632 sudo vi /etc/dovecot/conf.d/10-auth.conf 1633 sudo vi /etc/dovecot/conf.d/10-mail.conf 1634 sudo vi /etc/dovecot/conf.d/10-master.conf 1635 systemctl restart dovecot.service 1636 systemctl status dovecot.service 1637 netstat -tlpn 1638 finger test 1639 passwd test 1640 sudo passwd test 1641 mail from: root 1642 ehlo localhost 1643 ehlo localhost25 1644 ehlo localhost 25 1645 nc localhost 25 1646 sudo ls /home/test/Maildir/new 1647 sudo ls -ltr /home/test/Maildir/new 1648 sudo cat /home/test/Maildir/new/1554983966.V801Id002e8M795419.epsilo1554983966.V801Id002e8M795419.epsilo 1649 sudo cat /home/test/Maildir/new/1554984633.V801Id002f6M430763.epsilon 1650 sudo cat /home/test/Maildir/new/1565263565.V801Id0023bM169547.epsilon 1651 ns localhost 143 1652 nc localhost 143 1653 exit 1654 sudo -s 1655 shutdown -ht : 0 sec 1656 shutdown -ht : 0 1657 sudo shutdown -h t : 0 sec 1658 sudo shutdown -ht : 0 sec 1659 sudo shutdown --poweroff 1660 sudo shutdown --poweroff t : 0 1661 sudo shutdown --poweroff t : 0 sec 1662 sudo shutdown --poweroff 1663 man shutdown 1664 exit 1665 less /etc/postfix/main.cf 1666 cat /etc/postfix/main.cf | grep "smtp_tls" 1667 cat /etc/postfix/main.cf | grep "smtp*_tls" 1668 cat /etc/postfix/main.cf | grep "smtp*"
1669 vi /etc/postfix/main.cf 1670 telnet smtp.iitb.ac.in 1671 hostname 1672 sudo hostname epsilon 1673 hostname 1674 telnet epsilon.metemp.iitb.ac.in 1675 telnet epsilon.metemp.iitb.ac.in 25 1676 tail -f /var/log/mail.err 1677 tail -f /var/log/mail.log 1678 history 1679 finger test 1680 less /etc/passwd 1681 passwd complab 1682 sudo passwd complab 1683 history | grep "nmail" 1684 history | grep "nc: 1685 ; 1686 ; 1687 history | grep "nc" 1688 nmail 1689 history |more 1690 s-nail 1691 exit 1692 less /var/log/mail.err 1693 less /var/log/mail.log 1694 cat /var/log/mail.log | grep 1695 cat /var/log/mail.log | grep "complab" 1696 finger 1697 finger complab 1698 cat /var/log/mail.log 1699 cat /var/log/mail.log | grep "complab" 1700 cat /etc/postfix/master.cf | grep dovecot 1701 cat /etc/postfix/main.cf | grep "dovecot" 1702 cat /etc/postfix/main.cf | grep 'dovecot' 1703 cat /etc/postfix/main.cf | grep ' private/auth' 1704 cat /etc/postfix/main.cf | grep 'smtpd_sasl_local_domain =' 1705 cat /etc/postfix/main.cf | grep 'smtpd_sasl_security_options = noanonymous' 1706 cat /etc/postfix/main.cf | grep 'broken_sasl_auth_clients = yes' 1707 cat /etc/postfix/main.cf | grep 'smtpd_sasl_auth_enable = yes' 1708 cat /etc/postfix/main.cf | grep 'smtpd_recipient_restrictions = \ 1709 ' 1710 1711 cat /etc/postfix/main.cf | grep 'smtpd_recipient_restrictions = \ 1712 permit_sasl_authenticated,permit_mynetworks,reject_unauth_destination' 1713 'smtpd_recipient_restrictions = \ 1714 permit_sasl_authenticated,permit_mynetworks,reject_unauth_destination' 1715 cat /etc/postfix/main.cf | grep 'smtpd_recipient_restrictions = \ 1716 permit_sasl_authenticated,permit_mynetworks,reject_unauth_destination' 1717 cat /etc/postfix/main.cf | grep 'smpt*' 1718 cat /etc/postfix/main.cf | grep 'smptd*' 1719 cat /etc/postfix/main.cf | grep 'smpt*_*' 1720 cat /etc/postfix/main.cf | grep 'smtpd_*' 1721 vi /etc/postfix/main.cf 1722 vi /etc/postfix/master.cf 1723 vi /etc/postfix/main.cf 1724 sudo vi /etc/postfix/main.cf 1725 sudo systemctl restart postfix.service 1726 s-snail 1727 n-snail 1728 snail 1729 s-nail 1730 less /var/log/mail.log 1731 s-nail
1732 exit 1733 s-nail 1734 less /var/log/mail.log 1735 cat /var/log/mail.log | grep "complab" 1736 s-mail 1737 sudo vi /etc/postfix/main.cf 1738 exit 1739 s-nail 1740 exit 1741 wd 1742 pwd 1743 vi /etc/postfix/main.cf.09042019 1744 sudo vi /etc/postfix/main.cf 1745 sudo vi /etc/postfix/master.cf 1746 sudo vi /etc/postfix/main.cf 1747 service ufw status 1748 sudo ufw status 1749 history | grep "port" 1750 sudo ufw allow 22 1751 sudo ufw allow 25 1752 sudo ufw status 1753 s-nail 1754 sudo systemctl restart postfix.service 1755 s-nail 1756 date 1757 less /var/log/mail.log 1758 date 1759 less /var/log/mail.log 1760 cat /var/log/mail.log | grep "Aug 27 2019" 1761 cat /var/log/mail.log | grep "Aug 27, 2019" 1762 cat /var/log/mail.log | grep "test" 1763 vi /etc/postfix/main.cf 1764 sudo ufw disable 1765 s-nail 1766 sudo systemctl restart postfix.service 1767 s-nail 1768 cat /var/log/mail.log | grep "Aug 27, 2019" 1769 cat /var/log/mail.log | grep "test" 1770 sudo vi /etc/postfix/main.cf 1771 sudo systemctl restart postfix.service 1772 s-nail 1773 pwd 1774 s-nail 1775 vi /var/log/mail.log 1776 exit 1777 s-nail 1778 sudo vi /etc/postfix/main.cf 1779 s-nail 1780 sudo ufw status 1781 sudo ufw enable 1782 s-nail 1783 sudo systemctl restart postfix.service 1784 s-nail 1785 sudo ufw disable 1786 s-nail 1787 sudo systemctl restart postfix.service 1788 s-nail 1789 sudo systemctl restart postfix.service 1790 s-nail 1791 tail -100 /var/log/mail.log 1792 tail -100 /var/log/mail.logq 1793 tail -100 /var/log/mail.log 1794 s-nail 1795 tail -100 /var/log/mail.log

1796 s-nail 1797 sudo ufw enable 1798 sudo systemctl restart postfix.service 1799 s-nail 1800 netstat -tlpn 1801 netstat -tlpn 1802 tailf /var/log/mail.log 1803 cd /etc/ 1804 ls 1805 hostname 1806 less /etc/issue 1807 which php 1808 locate php 1809 sudo systemctl start mailman.service 1810 ps -ef | grep "mailman" 1811 top 1812 history | grep "rm" 1813 tail /var/log/mail.log 1814 s-nail 1815 less /etc/mailman/mm_cfg.py 1816 sudo vi /etc/postfix/main.cf 1817 sudo systemctl restart postfix.service 1818 sudo systemctl restart mailman.service 1819 less /etc/mailman/mm_cfg.py exit 1820 exit 1821 s-nail 1822 tail /var/log/mail.log 1823 vi /etc/postfix/main.cf 1824 vi /etc/mailman/mm_cfg.py 1825 sudo vi /etc/mailman/mm_cfg.py 1826 sudo systemctl restart postfix.service 1827 sudo systemctl restart mailman.service 1828 s-nail 1829 date 1830 less /etc/issue 1831 exit 1832 which php 1833 locate php 1834 dpkg | grep "php" 1835 dpkg -list | grep "php" 1836 dpkg -l | grep "php" 1837 man dpkg 1838 less /etc/apt/apt.conf 1839 vi /etc/apt/apt.conf 1840 sudo vi /etc/apt/apt.conf 1841 nskooup 1842 nslookup 1843 sudo vi /etc/apt/apt.conf 1844 sudo apt-get update 1845 less /etc/apache2/sites-available/ 1846 cd /etc/apache2/sites-available/ 1847 ls 1848 ls -la 1849 less 000-default.conf 1850 less mailman.conf 1851 ls -la ../../apache2/sites-enabled/ 1852 less 000-default.conf 1853 ps -ef | grep mysql 1854 history | grep "ufw" 1855 sudo ufw status verbose 1856 telnet localhost 993 1857 locate php 1858 sudo apt-get install php-xml php-mbstring php-intl php-zip php-pear zip unzip git composer
1859 df -k 1860 df -h 1861 cd .. 1862 ls 1863 cd .. 1864 cd php/ 1865 ls 1866 cd 7.0/ 1867 ls 1868 cd cli/ 1869 ls 1870 /etc/php/7.0/apache2/php.ini 1871 less /etc/apache2/mods-enabled/dir.conf 1872 sudo systemctl apache2 1873 sudo systemctl status apache2 1874 sudo apt-get install php libapache2-mod-php php-mcrypt php-mysql 1875 sudo nano /etc/php/7.0/apache2/php.ini 1876 sudo vi /etc/php/7.0/apache2/php.ini 1877 wget https://github.com/roundcube/roundcubemail/releases/download/1.3.0/roundcubemail-1.3.0-complete.tar.gz 1878 cd /tmp 1879 scp [email protected]:/home/vandurkarv/Downloads/roundcubemail-1.3.10-complete.tar.gz . 1880 sudo mv roundcubemail-1.3.10 /var/www/roundcube 1881 ls /var/www/roundcube/ 1882 ls -la 1883 cat /etc/passwd| grep www-data 1884 sudo chown -R www-data:www-data /var/www/roundcube/ 1885 sudo chmod 775 /var/www/roundcube/temp/ /var/www/roundcube/logs/ 1886 exit 1887 cd /etc/apache2/sites-available/ 1888 ls 1889 sudo cp 000-default.conf roundcube.conf 1890 sudo vi roundcube.conf 1891 sudo a2ensite roundcube 1892 ls -la /etc/apache2/sites-enabled/ 1893 sudo a2enmod rewrite 1894 sudo apache2ctl restart 1895 ls 1896 mailmail 1897 less mailman.conf 1898 less roundcube.conf 1899 ls -la roundcube.conf 1900 ls -la mailman.conf 1901 ls /var/www/lists/ 1902 less mailman.conf 1903 mysql -u root -p 1904 sudo apt-get install mysql 1905 sudo apt-get update 1906 sudo apt-get install mysql-server 1907 mysql_secure_installation 1908 systemctl status mysql.service 1909 mysql -u root -p 1910 mysql -u roundcube -p roundcubemail < /var/www/roundcube/SQL/mysql.initial.sql 1911 sudo vi mailman.conf 1912 sudo apache2ctl restart 1913 locate .htaccess 1914 locate php.ini/.htaccess 1915 cd /var/www/roundcube/ 1916 ls 1917 mv /tmp/mech_logo.png . 1918 sudo mv /tmp/mech_logo.png . 1919 pwd
1920 s-nail 1921 tail /var/log/mail.log 1922 s-nail 1923 ls 1924 cd installer/ 1925 ls 1926 less config.php 1927 vi config.php 1928 cd .. 1929 ls 1930 cd config/ 1931 ls 1932 vi config.inc.php 1933 s-nail 1934 ls 1935 localhost 1936 localhosts 1937 localhost 1938 hostname 1939 exit 1940 useradd chirag 1941 sudo useradd chirag 1942 finger chirag 1943 history | grep "maildir" 1944 history | more 1945 history | grep -i "mail" 1946 history | grep -i "maild" 1947 history | grep -i "useradd" 1948 sudo history | grep -i "useradd" 1949 history | grep -i "useradd" 1950 history | grep -i "adduser" 1951 history |more 1952 finger chirag 1953 cd ~chirag 1954 cd~ chirag 1955 cd /home 1956 del chirag 1957 userdel chirag 1958 useradd -D 1959 useradd -h /home/chirag -s " /bin/bash" chirag -m 1960 useradd -d /home/chirag -s " /bin/bash" chirag -m 1961 useradd -d /home/chirag -s "/bin/bash" chirag -m 1962 finger chirag 1963 ls 1964 mkdir chirag 1965 sudo mkdir chirag 1966 ls -la 1967 chown -R chirag: chirag /home/chirag 1968 sudo chown -R chirag: chirag /home/chirag 1969 cd ~chirag 1970 cd .. 1971 mkdir -p /home/chirag/Maildir/{cur,new,temp} 1972 sudo mkdir -p /home/chirag/Maildir/{cur,new,temp} 1973 cd~ chirag 1974 cd ~chirag 1975 ls -la 1976 cd Maildir/ 1977 ls 1978 ls -la 1979 sudo passwd chirag 1980 exit 1981 sudo usermod -aG sudo chirag 1982 tail /var/log/mail.log 1983 exit

1984 cd /home 1985 ls -la 1986 cd chirag/ 1987 sudo chown -R chirag: chirag /home/chirag 1988 cd .. 1989 sudo chown -R chirag: chirag /home/chirag 1990 exit 1991 finger chirag 1992 exit 1993 history > /tmp/postfix-mailman-install
https://www.digitalocean.com/community/tutorials/how-to-install-your-own-webmail-client-with-roundcube-on-ubuntu-16-04
Installing QuotaThis guide starts by installing the quota program using the following command:
apt-get install quota
The mount options of the file system need to be edited before user specific quotas can be used. The
mount file fstab needs to be opened for editing using the following command:
sudo nano /etc/fstab
The quotas are enabled by adding a usrquota and/or grpquota to the mounting options of the
main hard disk. When using ursquota, the quotas are only enabled on specific users. The grpquota option allows for quotas on user groups.
Both options can be independently added depending on the desired result. The fstab file should
be edited as follows for enabling user quotas (for group quotas add grpquota).
LABEL=DOROOT / ext4 errors=remount-ro,usrquota 0 1
Save the file and enable the new mount options by remounting the file system as follows:
mount -o remount /
74First install the module:
sudo apt-get install sshfs
Load it to kernel:
sudo modprobe fuse
Setting permissions (Ubuntu versions < 16.04):
sudo adduser $USER fusesudo chown root:fuse /dev/fusesudo chmod +x /dev/fusermount
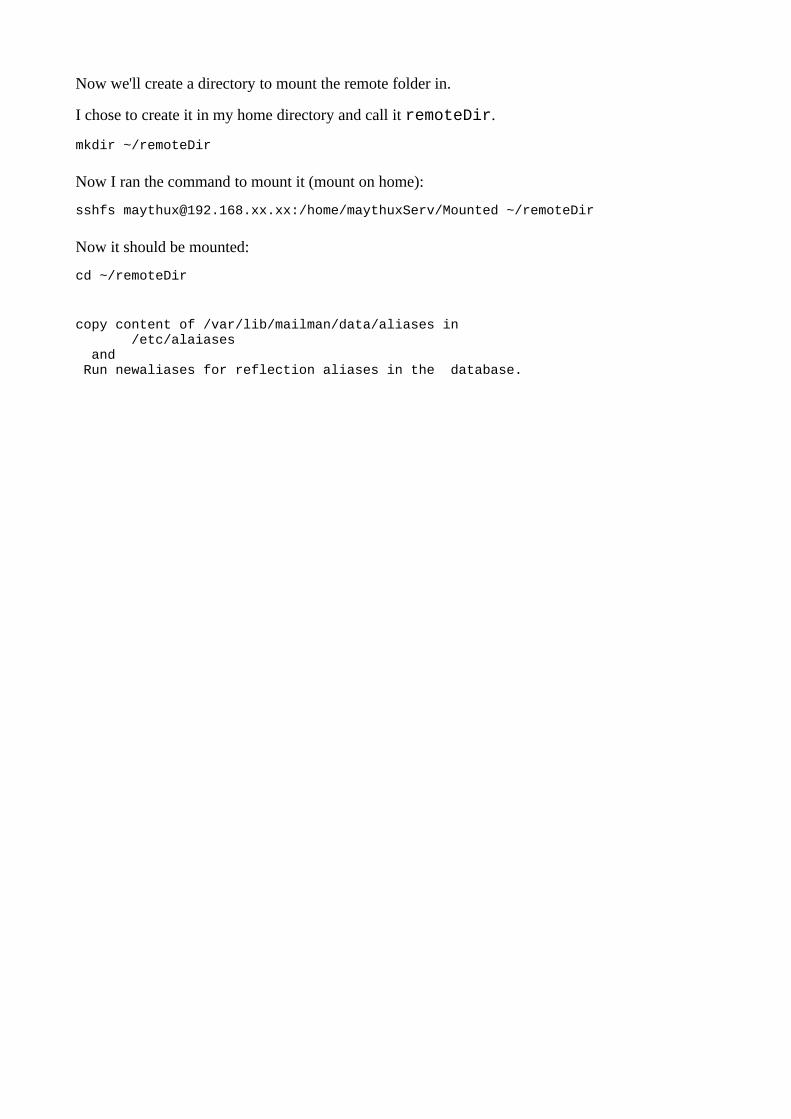
Now we'll create a directory to mount the remote folder in.
I chose to create it in my home directory and call it remoteDir.
mkdir ~/remoteDir
Now I ran the command to mount it (mount on home):
sshfs [email protected]:/home/maythuxServ/Mounted ~/remoteDir
Now it should be mounted:
cd ~/remoteDir
copy content of /var/lib/mailman/data/aliases in /etc/alaiases and Run newaliases for reflection aliases in the database.