A Beginner's Guide To Computer Programming - PureBasic
352
Purebasic A Beginner’s Guide To Computer Programming Updated for Purebasic v4 Gary Willoughby
-
Upload
khangminh22 -
Category
Documents
-
view
3 -
download
0
Transcript of A Beginner's Guide To Computer Programming - PureBasic

PurebasicA Beginner’s Guide To Computer Programming
Updated for
Purebasic v4
Gary Willoughby


Purebasic
Gary Willoughby
A Beginners Guide To Computer Programming

PureBasic - A Beginner’s Guide To Computer Programmingby Gary Willoughby
Copyright © 2006 Gary WilloughbyThis book and all included source materials such as diagrams, photos and PureBasic source code isdistributed under the Creative Commons Attribution Non-Commercial Share Alike License. Moredetails can be found here: http://creativecommons.org/about/licenses/
PureBasic is a registered trademark of Fantaisie Software. PureBasic and all provided tools andcomponents contained within the PureBasic package are Copyright © 2006 Fantaisie Software.
Fantaisie Software10, rue de Lausanne67640 FegersheimFrancewww.purebasic.com
Published 2006, by Aardvark Global Publishing.
EditorGary Willoughby
Print HistoryJuly 2006 - First Edition
DisclaimerWhile every precaution has been taken in the preparation of this book and the programs containedwithin it, the author and publisher assumes no responsibility whatsoever for errors, omissions, or fordamages resulting from the use of the information or programs contained herein. The author orpublisher shall not be liable if incidental or consequential damages occur in connection with, or arisingfrom, the furnishings, performance, or use of the programs, associated instructions, and/or claims ofproductivity gains. All information contained herein is considered accurate at time of publication butbecause PureBasic is a language in a constant state of refinement and development, some informationover time may be rendered out-of-date. For up to date news and information regarding PureBasicplease refer to www.purebasic.com.
TrademarksTrademarked names appear throughout this book. Rather than list the names and entities that ownthe trademarks or insert a trademark symbol with each mention of the trademarked name, thepublisher states that it is using the names for editorial purposes only and to the benefit of thetrademark owner, with no intention of infringing on that trademark.

DedicationDedicated to my girlfriend, Sara Jane Gostick and her dog ‘Stella’ for putting up with many lonelynights while I wrote this book and for the encouragement (and chicken dinners) she always gives
me.
AcknowledgmentsThanks to Fred and the Purebasic team for the Purebasic language, keep up the good work, it rocks!
Thanks to Paul Dixon for clarifying some of the details regarding binary encoding of floating pointnumbers.
Thanks to Timo Harter for helping to choose what Purebasic data types would best substitute theWin32 API types, and for demonstrating how to retrieve different strings from memory via the
different Win32 API String pointer types.
“With great power there must also come great responsibility!”--Ben Parker (Spiderman’s Uncle)
Code examples contained in this book can be downloaded freely fromwww.pb-beginners.co.uk
ISBN 1-4276-0428-2 19/7/2006


v
Table of Contents
Preface . . . . . . . . . . . . . . . . . . . . . . . . . . . . . . . . . . . . . . . . . . . . . . . . . . . . . . . . . . . . . . . . .ix
I. The Core Language . . . . . . . . . . . . . . . . . . . . . . . . . . . . . . . . . . . . . . . . . . . . . . . . . . . . .1
1. Getting Started . . . . . . . . . . . . . . . . . . . . . . . . . . . . . . . . . . . . . . . . . . . . . . . . . . . . . . . .3The History Of PureBasic . . . . . . . . . . . . . . . . . . . . . . . . . . . . . . . . . . . . . . . . . . . . . . . . . . . . . . . . . .3The Development Philosophy Of PureBasic . . . . . . . . . . . . . . . . . . . . . . . . . . . . . . . . . . . . . . . . . . .5A First Look At The IDE . . . . . . . . . . . . . . . . . . . . . . . . . . . . . . . . . . . . . . . . . . . . . . . . . . . . . . . . . . .6How To Run PureBasic Programs . . . . . . . . . . . . . . . . . . . . . . . . . . . . . . . . . . . . . . . . . . . . . . . . . . .7The Debugger . . . . . . . . . . . . . . . . . . . . . . . . . . . . . . . . . . . . . . . . . . . . . . . . . . . . . . . . . . . . . . . . . . .8A Note On Program Structure . . . . . . . . . . . . . . . . . . . . . . . . . . . . . . . . . . . . . . . . . . . . . . . . . . . . . .8Introducing The PureBasic Help File . . . . . . . . . . . . . . . . . . . . . . . . . . . . . . . . . . . . . . . . . . . . . . . .9
2. Data Types . . . . . . . . . . . . . . . . . . . . . . . . . . . . . . . . . . . . . . . . . . . . . . . . . . . . . . . . . . .10 Built-In Data Types . . . . . . . . . . . . . . . . . . . . . . . . . . . . . . . . . . . . . . . . . . . . . . . . . . . . . . . . . . . . . .10Numbers . . . . . . . . . . . . . . . . . . . . . . . . . . . . . . . . . . . . . . . . . . . . . . . . . . . . . . . . . . . . . . . . . . . . . .10Strings . . . . . . . . . . . . . . . . . . . . . . . . . . . . . . . . . . . . . . . . . . . . . . . . . . . . . . . . . . . . . . . . . . . . . . . .12Variables And Constants . . . . . . . . . . . . . . . . . . . . . . . . . . . . . . . . . . . . . . . . . . . . . . . . . . . . . . . . . .12
3. Operators . . . . . . . . . . . . . . . . . . . . . . . . . . . . . . . . . . . . . . . . . . . . . . . . . . . . . . . . . . . .18 An Introduction To Operators . . . . . . . . . . . . . . . . . . . . . . . . . . . . . . . . . . . . . . . . . . . . . . . . . . . . .18Operator Precedence . . . . . . . . . . . . . . . . . . . . . . . . . . . . . . . . . . . . . . . . . . . . . . . . . . . . . . . . . . . .33Expression Notes . . . . . . . . . . . . . . . . . . . . . . . . . . . . . . . . . . . . . . . . . . . . . . . . . . . . . . . . . . . . . . .34
4. Conditional Statements And Loops . . . . . . . . . . . . . . . . . . . . . . . . . . . . . . . . . . . . . .37Boolean Logic . . . . . . . . . . . . . . . . . . . . . . . . . . . . . . . . . . . . . . . . . . . . . . . . . . . . . . . . . . . . . . . . . .37The ‘If’ Statement . . . . . . . . . . . . . . . . . . . . . . . . . . . . . . . . . . . . . . . . . . . . . . . . . . . . . . . . . . . . . . .38The ‘Select’ Statement . . . . . . . . . . . . . . . . . . . . . . . . . . . . . . . . . . . . . . . . . . . . . . . . . . . . . . . . . . . .41Loops . . . . . . . . . . . . . . . . . . . . . . . . . . . . . . . . . . . . . . . . . . . . . . . . . . . . . . . . . . . . . . . . . . . . . . . . .43
5. Other Data Structures . . . . . . . . . . . . . . . . . . . . . . . . . . . . . . . . . . . . . . . . . . . . . . . . .49 Structures . . . . . . . . . . . . . . . . . . . . . . . . . . . . . . . . . . . . . . . . . . . . . . . . . . . . . . . . . . . . . . . . . . . . .49Arrays . . . . . . . . . . . . . . . . . . . . . . . . . . . . . . . . . . . . . . . . . . . . . . . . . . . . . . . . . . . . . . . . . . . . . . . .52Linked Lists . . . . . . . . . . . . . . . . . . . . . . . . . . . . . . . . . . . . . . . . . . . . . . . . . . . . . . . . . . . . . . . . . . . .62Sorting Arrays And Linked Lists . . . . . . . . . . . . . . . . . . . . . . . . . . . . . . . . . . . . . . . . . . . . . . . . . . .67
6. Procedures And Subroutines . . . . . . . . . . . . . . . . . . . . . . . . . . . . . . . . . . . . . . . . . . .71Why Use Procedures Or Subroutines? . . . . . . . . . . . . . . . . . . . . . . . . . . . . . . . . . . . . . . . . . . . . . . .71Subroutines . . . . . . . . . . . . . . . . . . . . . . . . . . . . . . . . . . . . . . . . . . . . . . . . . . . . . . . . . . . . . . . . . . . .71Procedure Basics . . . . . . . . . . . . . . . . . . . . . . . . . . . . . . . . . . . . . . . . . . . . . . . . . . . . . . . . . . . . . . . .74Program Scope . . . . . . . . . . . . . . . . . . . . . . . . . . . . . . . . . . . . . . . . . . . . . . . . . . . . . . . . . . . . . . . . .76The ‘Global’ Keyword . . . . . . . . . . . . . . . . . . . . . . . . . . . . . . . . . . . . . . . . . . . . . . . . . . . . . . . . . . . .78The ‘Protected’ Keyword . . . . . . . . . . . . . . . . . . . . . . . . . . . . . . . . . . . . . . . . . . . . . . . . . . . . . . . . . .79The ‘Shared’ Keyword . . . . . . . . . . . . . . . . . . . . . . . . . . . . . . . . . . . . . . . . . . . . . . . . . . . . . . . . . . .80

Table of Contentsvi
The ‘Static’ Keyword . . . . . . . . . . . . . . . . . . . . . . . . . . . . . . . . . . . . . . . . . . . . . . . . . . . . . . . . . . . . .82Passing Variables To Procedures . . . . . . . . . . . . . . . . . . . . . . . . . . . . . . . . . . . . . . . . . . . . . . . . . . .83Passing Arrays To Procedures . . . . . . . . . . . . . . . . . . . . . . . . . . . . . . . . . . . . . . . . . . . . . . . . . . . . .86Passing Linked Lists To Procedures . . . . . . . . . . . . . . . . . . . . . . . . . . . . . . . . . . . . . . . . . . . . . . . .88Returning A Value From Procedures . . . . . . . . . . . . . . . . . . . . . . . . . . . . . . . . . . . . . . . . . . . . . . . .91
7. Using Built-In Commands . . . . . . . . . . . . . . . . . . . . . . . . . . . . . . . . . . . . . . . . . . . . . .93Using The PureBasic Helpfile . . . . . . . . . . . . . . . . . . . . . . . . . . . . . . . . . . . . . . . . . . . . . . . . . . . . .93PB Numbers And OS Identifiers . . . . . . . . . . . . . . . . . . . . . . . . . . . . . . . . . . . . . . . . . . . . . . . . . . .95Examples Of Common Commands . . . . . . . . . . . . . . . . . . . . . . . . . . . . . . . . . . . . . . . . . . . . . . . . .98Handling Files . . . . . . . . . . . . . . . . . . . . . . . . . . . . . . . . . . . . . . . . . . . . . . . . . . . . . . . . . . . . . . . . .104Read The Helpfile . . . . . . . . . . . . . . . . . . . . . . . . . . . . . . . . . . . . . . . . . . . . . . . . . . . . . . . . . . . . . .110
8. Good Programming Style . . . . . . . . . . . . . . . . . . . . . . . . . . . . . . . . . . . . . . . . . . . . . .111Why Bother Formatting Code . . . . . . . . . . . . . . . . . . . . . . . . . . . . . . . . . . . . . . . . . . . . . . . . . . . . .111The Value Of Comments . . . . . . . . . . . . . . . . . . . . . . . . . . . . . . . . . . . . . . . . . . . . . . . . . . . . . . . . .112My Coding Format . . . . . . . . . . . . . . . . . . . . . . . . . . . . . . . . . . . . . . . . . . . . . . . . . . . . . . . . . . . . . .113Golden Rules For Writing Easily Readable Code . . . . . . . . . . . . . . . . . . . . . . . . . . . . . . . . . . . . . .116How To Minimize And Handle Errors . . . . . . . . . . . . . . . . . . . . . . . . . . . . . . . . . . . . . . . . . . . . . .117
II Graphical User Interfaces . . . . . . . . . . . . . . . . . . . . . . . . . . . . . . . . . . . . . . . . . . . . .129
9. Creating User Interfaces . . . . . . . . . . . . . . . . . . . . . . . . . . . . . . . . . . . . . . . . . . . . . .131Console Programs . . . . . . . . . . . . . . . . . . . . . . . . . . . . . . . . . . . . . . . . . . . . . . . . . . . . . . . . . . . . . .131Creating Native User Interfaces . . . . . . . . . . . . . . . . . . . . . . . . . . . . . . . . . . . . . . . . . . . . . . . . . . .137Understanding Events . . . . . . . . . . . . . . . . . . . . . . . . . . . . . . . . . . . . . . . . . . . . . . . . . . . . . . . . . .139Adding Gadgets . . . . . . . . . . . . . . . . . . . . . . . . . . . . . . . . . . . . . . . . . . . . . . . . . . . . . . . . . . . . . . . .140Adding A Menu . . . . . . . . . . . . . . . . . . . . . . . . . . . . . . . . . . . . . . . . . . . . . . . . . . . . . . . . . . . . . . . .148Menu Keyboard Shortcuts . . . . . . . . . . . . . . . . . . . . . . . . . . . . . . . . . . . . . . . . . . . . . . . . . . . . . . .153Including Graphics In Your Program . . . . . . . . . . . . . . . . . . . . . . . . . . . . . . . . . . . . . . . . . . . . . . .156A First Look At The New Visual Designer . . . . . . . . . . . . . . . . . . . . . . . . . . . . . . . . . . . . . . . . . . .162
III Graphics And Sound . . . . . . . . . . . . . . . . . . . . . . . . . . . . . . . . . . . . . . . . . . . . . . . . . .165
10. 2D Graphics . . . . . . . . . . . . . . . . . . . . . . . . . . . . . . . . . . . . . . . . . . . . . . . . . . . . . . . . .1672D Drawing Commands . . . . . . . . . . . . . . . . . . . . . . . . . . . . . . . . . . . . . . . . . . . . . . . . . . . . . . . . .167Saving Images . . . . . . . . . . . . . . . . . . . . . . . . . . . . . . . . . . . . . . . . . . . . . . . . . . . . . . . . . . . . . . . . .179Introducing Screens . . . . . . . . . . . . . . . . . . . . . . . . . . . . . . . . . . . . . . . . . . . . . . . . . . . . . . . . . . . .181Sprites . . . . . . . . . . . . . . . . . . . . . . . . . . . . . . . . . . . . . . . . . . . . . . . . . . . . . . . . . . . . . . . . . . . . . . .192
11. 3D Graphics . . . . . . . . . . . . . . . . . . . . . . . . . . . . . . . . . . . . . . . . . . . . . . . . . . . . . . . .203An Overview Of The OGRE Engine . . . . . . . . . . . . . . . . . . . . . . . . . . . . . . . . . . . . . . . . . . . . . . . .203A Gentle Beginning . . . . . . . . . . . . . . . . . . . . . . . . . . . . . . . . . . . . . . . . . . . . . . . . . . . . . . . . . . . .206A Simple First Person Camera . . . . . . . . . . . . . . . . . . . . . . . . . . . . . . . . . . . . . . . . . . . . . . . . . . . .215A Little More Advanced . . . . . . . . . . . . . . . . . . . . . . . . . . . . . . . . . . . . . . . . . . . . . . . . . . . . . . . . .221What’s Next? . . . . . . . . . . . . . . . . . . . . . . . . . . . . . . . . . . . . . . . . . . . . . . . . . . . . . . . . . . . . . . . . . .226
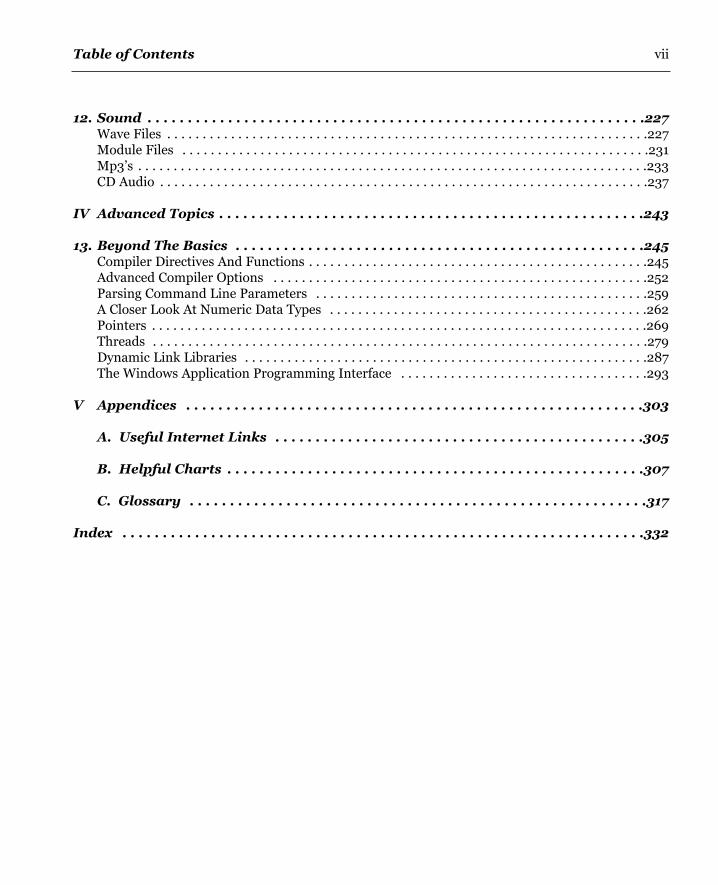
Table of Contents vii
12. Sound . . . . . . . . . . . . . . . . . . . . . . . . . . . . . . . . . . . . . . . . . . . . . . . . . . . . . . . . . . . . . .227Wave Files . . . . . . . . . . . . . . . . . . . . . . . . . . . . . . . . . . . . . . . . . . . . . . . . . . . . . . . . . . . . . . . . . . . .227Module Files . . . . . . . . . . . . . . . . . . . . . . . . . . . . . . . . . . . . . . . . . . . . . . . . . . . . . . . . . . . . . . . . . .231Mp3’s . . . . . . . . . . . . . . . . . . . . . . . . . . . . . . . . . . . . . . . . . . . . . . . . . . . . . . . . . . . . . . . . . . . . . . . .233CD Audio . . . . . . . . . . . . . . . . . . . . . . . . . . . . . . . . . . . . . . . . . . . . . . . . . . . . . . . . . . . . . . . . . . . . .237
IV Advanced Topics . . . . . . . . . . . . . . . . . . . . . . . . . . . . . . . . . . . . . . . . . . . . . . . . . . . . .243
13. Beyond The Basics . . . . . . . . . . . . . . . . . . . . . . . . . . . . . . . . . . . . . . . . . . . . . . . . . . .245Compiler Directives And Functions . . . . . . . . . . . . . . . . . . . . . . . . . . . . . . . . . . . . . . . . . . . . . . . .245Advanced Compiler Options . . . . . . . . . . . . . . . . . . . . . . . . . . . . . . . . . . . . . . . . . . . . . . . . . . . . .252Parsing Command Line Parameters . . . . . . . . . . . . . . . . . . . . . . . . . . . . . . . . . . . . . . . . . . . . . . .259A Closer Look At Numeric Data Types . . . . . . . . . . . . . . . . . . . . . . . . . . . . . . . . . . . . . . . . . . . . .262Pointers . . . . . . . . . . . . . . . . . . . . . . . . . . . . . . . . . . . . . . . . . . . . . . . . . . . . . . . . . . . . . . . . . . . . . .269Threads . . . . . . . . . . . . . . . . . . . . . . . . . . . . . . . . . . . . . . . . . . . . . . . . . . . . . . . . . . . . . . . . . . . . . .279Dynamic Link Libraries . . . . . . . . . . . . . . . . . . . . . . . . . . . . . . . . . . . . . . . . . . . . . . . . . . . . . . . . .287The Windows Application Programming Interface . . . . . . . . . . . . . . . . . . . . . . . . . . . . . . . . . . .293
V Appendices . . . . . . . . . . . . . . . . . . . . . . . . . . . . . . . . . . . . . . . . . . . . . . . . . . . . . . . . .303
A. Useful Internet Links . . . . . . . . . . . . . . . . . . . . . . . . . . . . . . . . . . . . . . . . . . . . . .305
B. Helpful Charts . . . . . . . . . . . . . . . . . . . . . . . . . . . . . . . . . . . . . . . . . . . . . . . . . . . .307
C. Glossary . . . . . . . . . . . . . . . . . . . . . . . . . . . . . . . . . . . . . . . . . . . . . . . . . . . . . . . . .317
Index . . . . . . . . . . . . . . . . . . . . . . . . . . . . . . . . . . . . . . . . . . . . . . . . . . . . . . . . . . . . . . . . .332


Preface
About this Book
This book provides a quick introduction to the PureBasic programming language. PureBasic’spopularity has increased significantly in the past few years, being used for many purposes such asrapid software prototyping, creation of commercial applications and games, Internet CGI applications,while some people just use it for small utilities. This book has been written, with the complete novicein mind. We all need to start somewhere and I believe PureBasic is a fantastic first leap into theprogramming world. With PureBasic becoming more and more widely used, many people are startingout and finding they need the occasional push in the right direction or need an explanation of a certainfeature or oddity. This book is to guide novices through their first steps and to give the seasonedprogrammer a quick overview of the language.
This Book’s Scope
Although this book covers the essentials of the PureBasic language, I’ve kept this book’s scope quitenarrow to make sure it’s not information overload for new users. Sometimes this text will refer toconcepts and syntax in a simplistic way to be used as a stepping stone to more advanced texts or as acomplement to the existing PureBasic helpfile.
For example I won’t talk much about how easy it is to use DirectX or OpenGL directly in PureBasic,otherwise this book would be triple in size and although topics such as pointers, threads and theWin32 API is talked about later in this book, don’t expect too many fancy examples as I’ve only givenan overview to such advanced topics.
PureBasic raises the bar to not only what a Basic language should be but also what all languages shouldbe. Clean, uncluttered syntax, small compiled executable files and a fantastically active community ofprogrammers. Hopefully this book will give you a clear understanding of the core features of PureBasicand the design goals and philosophies behind its creation and hopefully make you want to learn more.
ix
Prefacex
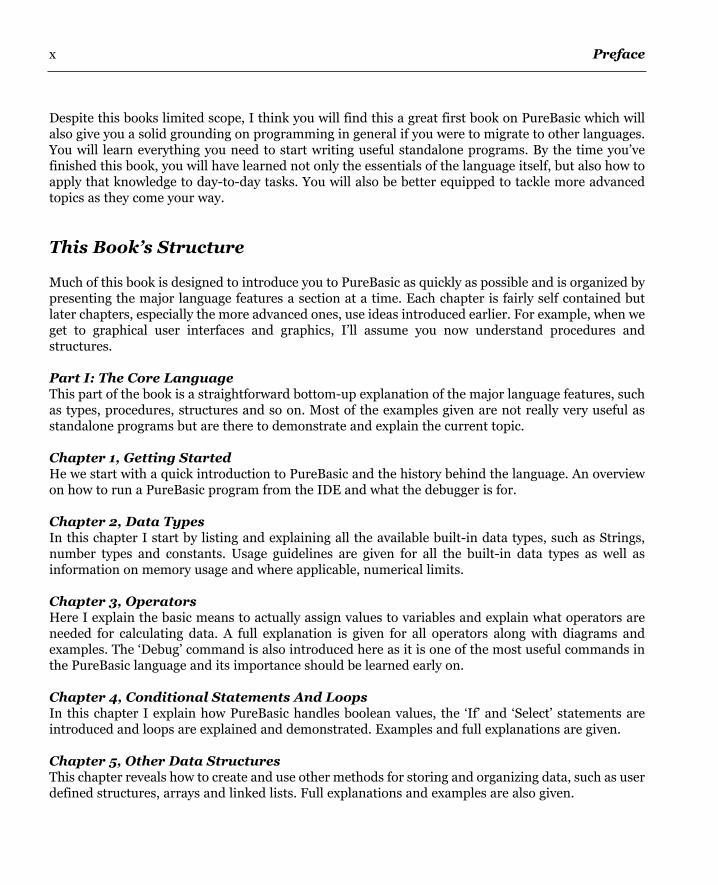
Despite this books limited scope, I think you will find this a great first book on PureBasic which willalso give you a solid grounding on programming in general if you were to migrate to other languages.You will learn everything you need to start writing useful standalone programs. By the time you’vefinished this book, you will have learned not only the essentials of the language itself, but also how toapply that knowledge to day-to-day tasks. You will also be better equipped to tackle more advancedtopics as they come your way.
This Book’s Structure
Much of this book is designed to introduce you to PureBasic as quickly as possible and is organized bypresenting the major language features a section at a time. Each chapter is fairly self contained butlater chapters, especially the more advanced ones, use ideas introduced earlier. For example, when weget to graphical user interfaces and graphics, I’ll assume you now understand procedures andstructures.
Part I: The Core LanguageThis part of the book is a straightforward bottom-up explanation of the major language features, suchas types, procedures, structures and so on. Most of the examples given are not really very useful asstandalone programs but are there to demonstrate and explain the current topic.
Chapter 1, Getting StartedHe we start with a quick introduction to PureBasic and the history behind the language. An overviewon how to run a PureBasic program from the IDE and what the debugger is for.
Chapter 2, Data TypesIn this chapter I start by listing and explaining all the available built-in data types, such as Strings,number types and constants. Usage guidelines are given for all the built-in data types as well asinformation on memory usage and where applicable, numerical limits.
Chapter 3, OperatorsHere I explain the basic means to actually assign values to variables and explain what operators areneeded for calculating data. A full explanation is given for all operators along with diagrams andexamples. The ‘Debug’ command is also introduced here as it is one of the most useful commands inthe PureBasic language and its importance should be learned early on.
Chapter 4, Conditional Statements And LoopsIn this chapter I explain how PureBasic handles boolean values, the ‘If’ and ‘Select’ statements areintroduced and loops are explained and demonstrated. Examples and full explanations are given.
Chapter 5, Other Data StructuresThis chapter reveals how to create and use other methods for storing and organizing data, such as userdefined structures, arrays and linked lists. Full explanations and examples are also given.
Preface xi
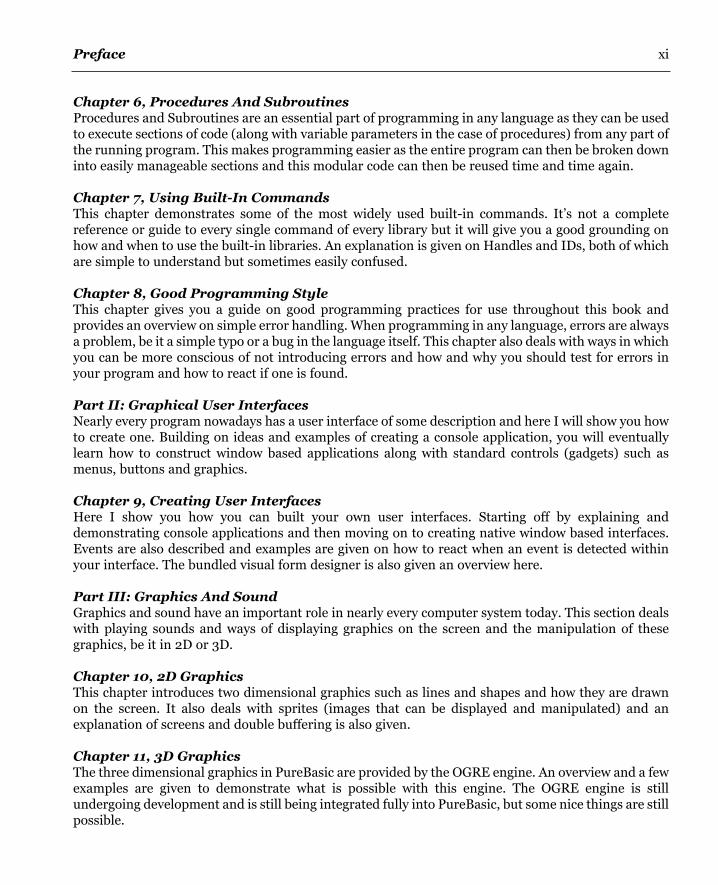
Chapter 6, Procedures And SubroutinesProcedures and Subroutines are an essential part of programming in any language as they can be usedto execute sections of code (along with variable parameters in the case of procedures) from any part ofthe running program. This makes programming easier as the entire program can then be broken downinto easily manageable sections and this modular code can then be reused time and time again.
Chapter 7, Using Built-In CommandsThis chapter demonstrates some of the most widely used built-in commands. It’s not a completereference or guide to every single command of every library but it will give you a good grounding onhow and when to use the built-in libraries. An explanation is given on Handles and IDs, both of whichare simple to understand but sometimes easily confused.
Chapter 8, Good Programming StyleThis chapter gives you a guide on good programming practices for use throughout this book andprovides an overview on simple error handling. When programming in any language, errors are alwaysa problem, be it a simple typo or a bug in the language itself. This chapter also deals with ways in whichyou can be more conscious of not introducing errors and how and why you should test for errors inyour program and how to react if one is found.
Part II: Graphical User InterfacesNearly every program nowadays has a user interface of some description and here I will show you howto create one. Building on ideas and examples of creating a console application, you will eventuallylearn how to construct window based applications along with standard controls (gadgets) such asmenus, buttons and graphics.
Chapter 9, Creating User InterfacesHere I show you how you can built your own user interfaces. Starting off by explaining anddemonstrating console applications and then moving on to creating native window based interfaces.Events are also described and examples are given on how to react when an event is detected withinyour interface. The bundled visual form designer is also given an overview here.
Part III: Graphics And SoundGraphics and sound have an important role in nearly every computer system today. This section dealswith playing sounds and ways of displaying graphics on the screen and the manipulation of thesegraphics, be it in 2D or 3D.
Chapter 10, 2D GraphicsThis chapter introduces two dimensional graphics such as lines and shapes and how they are drawnon the screen. It also deals with sprites (images that can be displayed and manipulated) and anexplanation of screens and double buffering is also given.
Chapter 11, 3D GraphicsThe three dimensional graphics in PureBasic are provided by the OGRE engine. An overview and a fewexamples are given to demonstrate what is possible with this engine. The OGRE engine is stillundergoing development and is still being integrated fully into PureBasic, but some nice things are stillpossible.

Prefacexii
Chapter 12, SoundThis chapter covers how to use sound within PureBasic and covers how to load and play familiar soundformats.
Part IV: Advanced TopicsThe last section deals with things which a novice would find very advanced. The topics contained hereare not necessary to understand to write fully functioning useful programs but they can achieve somethings that ordinary methods cannot. This section is to wet your appetite for knowledge to improveyour understanding of PureBasic and programming in general.
Chapter 13, Beyond The BasicsHere the topics covered are advanced memory management using pointers. Compiler directives areexplained and a how-to guide is written for DLL creation. There is also a section on the WindowsApplication Programming Interface.
Part V: AppendicesThis is the final section of this book and it ends with appendices that direct the reader to useful pageson the Internet, provides helpful charts and includes a comprehensive glossary of words and terms.
Prerequisites
I hope that you know how to use a computer, there won’t be much talk on how to use a mouse or whatan icon is, but this book assumes you are a complete novice to computer programming, not only withPureBasic, but in general.
All you will need to start programming today is a little bit of time and a copy of PureBasic, availablefrom www.purebasic.com

IThe Core
LanguageIn this section, we will study the PureBasic language itself. I call this part ‘The Core Language’, becauseour focus will be on the essentials of PureBasic programming: its built-in types, statements andexpressions. By the time you finish reading this section and studying the examples, you’ll be ready towrite programs yourself.
The word ‘Core’ in the title is used on purpose, because this section is not an exhaustive document onevery minute detail of PureBasic. While I may skip certain things along the way, the basics you learnhere will stand you in very good stead for when the unknown pops up. There is also a mention of thehistory and development philosophy of PureBasic for those who are interested.

1Getting Started
This first chapter starts with a brief history of PureBasic and then takes a quick look at how to runPureBasic programs. Its main goal is to get you set up to compile and run PureBasic programs on yourown computer, so you can work along with the examples and tutorials given in this book. Along theway we’ll study different ways you can compile from within PureBasic - just enough to get you started.
We’ll also take a look at the included IDE that comes with the standard installation of PureBasic. Itlooks a little daunting for new users but after an overview and a little tutorial, things will look less scary
The History Of PureBasic
PureBasic started life in 1995 as a command-set expansion for BlitzBasic after PureBasic’s author,Frédéric Laboureur hit many limitations with BlitzBasic while programming an application called‘TheBoss’, a powerful application launcher for the Commodore Amiga. The expansion named ‘NCS’(NewCommandSet) was entirely coded using 68000 assembly, as all new commands had to be codedin assembly at this time of Blitz’s development. Fred’s progress was quite slow to begin with as gooddocumentation was hard to find for assembly programming and of course online forums didn’t thenexist for BlitzBasic plug-in programming.
Development of ‘NCS’ continued for about a year after which Fred received very positive commentsregarding his work, through which he became very familiar with assembly programming anddebugging. He was also astonished with the incredible things that could be achieved with an old 68000processor if everything was programmed correctly.
Around this time, IBM PowerPC based processor cards for the Amiga started to appear and were a verypowerful alternative to the Motorola 68000 processor. They were very fast and sold at a relativelycheap cost, even compared to the high-end 68060 processors. With the arrival of these new chips,people wanted a native version of Blitz to support them, as it was an extremely popular language atthis time, but everyone knew that all development had been put on hold for the Amiga platform infavor of the Intel x86 based PCs. An opportunity had presented itself for the creation of a new language
3

Getting Started4
which would be the logical replacement and enhancement of BlitzBasic, which also would have fullsupport for the 680x0 and PowerPC processors.
Enter PureBasic!The early design and the first version of PureBasic started in 1998. The main differences betweenPureBasic and ‘normal’ compilers then was the inclusion of a ‘virtual processor’ (which actually usedthe 680x0 assembly mnemonics) right from the start to allow different kinds of assembly output (orany language) possible without changing the compiler core. After the initial design was finished andprogramming began, things started to move very fast. Fred fully dedicated all his time to program thecompiler and learned a great deal including the C language to be able eventually to produce a fullyportable compiler.
The first version of PureBasic was initially released for the Amiga and (even if it was badly bugged) hadan integrated and fully cross platform editor, an integrated debugger and a huge internal command-set, you guessed it, taken directly from the former ‘NCS’ Blitz package.
While refining and bug testing, Fred also studied other programming languages to give him a firmgrounding in other areas and to give him the best foundation to make better, more informed decisionsabout the internal design and how PureBasic should grow and expand in the future.
During the fourth year of Fred’s computer science diploma, the Amiga was starting to be considered adead platform and many of Fred’s fellow students asked why wasn’t he working on a Windows basedversion. Fred of course defended himself saying that it would be a piece of cake to port PureBasic to anew system, but he had to prove it!
A Larger ArenaFred started to learn Microsoft DirectX and Win32 API programming (see Chapter 13), completely inassembly, an enormous task! During which he found the Intel x86 a nightmare to understand andprogram coming from a Motorola 680x0 background, because the chip is very different in design.Even the internal storage method of numbers in memory was reversed! After three months indevelopment and after the founding of his new company, Fantaisie Software, a new website was
A Brief Overview of The Assembly Language
Assembly language or simply Assembly, is a human-readable notation for the machine language that aspecific computer architecture uses. Machine language, a pattern of bits encoding machine operations, ismade readable by replacing the raw values with symbols called mnemonics.
Programming in machine code, by supplying the computer with the numbers of the operations it mustperform can be quite a burden, because for every operation the corresponding number must be looked up orremembered. Therefore a set of mnemonics was devised. Each number was represented by an alphabeticcode. For example, instead of entering the number corresponding to addition to add two numbers togetheryou can enter ‘add’. Assembly is compiled using an Assembler.

Getting Started 5
created and PureBasic for Windows was finally released. Usage and testing of PureBasic increased andmany supportive and enthusiastic mails were received by Fred further enhancing his dedication todevelop the best language possible.
After many years of careful development, a team was formed around Fred to help him with thedevelopment and testing of new releases. This team is composed of experienced programmers, webdesigners and documentation writers, all who share the same vision for the language.
After the massive success of the Windows release the next logical step was to support more operatingsystems. So Linux and Mac OS were soon to be supported and native versions of PureBasic werereleased to an ever increasingly impressed public. All versions supporting the native applicationprogramming interfaces (APIs) of these particular operating systems, all using the native graphicaluser interfaces to give them the correct look and feel of the system.
Development was halted for the Commodore Amiga version in 2002 after it became clear to manyusers that the Amiga itself was losing support to PCs and was eventually becoming accepted (to peopleother than hardcore enthusiasts) to be a dead platform. The Windows, Linux and Mac OS versions arestill being tirelessly developed and supported today!
Version 4 is the latest incarnation of PureBasic which has nearly all been rewritten from scratch. Thisis to ease future enhancements and further cross platform development. PureBasic v4 also broughthuge language improvements, nearly all of which are covered in this book.
The Development Philosophy Of PureBasic
The development philosophy of PureBasic is slightly different from that of other languages in manyrespects. Here is a list of some of PureBasic’s development goals and policies.
After the initial purchase of a PureBasic license, all future updates are free of charge for life.All Programs compiled using PureBasic can be sold commercially free of any further cost or royalties.All programs should compile at the minimum file size they can be and contain no bloated code.All compiled programs should not rely on any runtimes and be completely ‘stand-alone’ executables.
The above list is a big selling point in itself and contrary to many development philosophies of rivalcompanies. Can you imagine Microsoft giving you free version upgrades of VB.NET for life? Meneither.
PureBasic’s development philosophy is one of creating a programming environment that is both funand functional to use. It’s all about giving the users the power to create the programs they need in thesimplest way possible. With all past version upgrades there has been included bug fixes, newcommands plus brand new IDEs and a Visual Designer, the last two of which are covered in later areasof this book. So not only are bug fixes a feature of future upgrades, there are also additions to thelanguage command-set along with the addition of useful tools and updates to the actual developmentenvironment itself.

Getting Started6
A First Look At The IDE
PureBasic’s Integrated Development Environment consists of a source code editor, a visual formdesigner and a compiler. The visual form designer will be given an overview later in Chapter 9 (A FirstLook At The New Visual Designer), so only the source code editor and compiler will be mentionedhere. In the PureBasic community the source code editor is usually referred to as the ‘IDE’, while thevisual form designer is usually given the dubious name of the ‘VD’. This is mainly due to save typinglong names in the forums while asking questions or participating in a discussion, so I’ll use thatconvention here.
The IDE (Fig. 1) is written entirely in PureBasic and is the main tool used to write PureBasic programs,so let’s take a tour around the main interface of the editor. At the top is the menu bar giving access tothe menu commands, below that is a customizable toolbar which can be configured to hold manydifferent icons each triggering a pre-defined menu command. Underneath the toolbar on the left is themain editor pane, here all PureBasic code is entered. On the right of the editor pane is another usercustomized pane which can contain a procedure viewer, a variable viewer, a file explorer, etc... Also bydefault the error log will be shown as a pane attached to the bottom of the editor pane, this can beturned off and on via a menu command (Menu:Debugger->Error Log->Show Error Log). Below thepanes there is the status bar which shows information on what row and column is being edited anddisplays the quick help.
This editor is a ‘front-end’ to the actual PureBasic compiler. Once code has been entered into the editor
Fig. 1
CustomizablePane
Menu
Quick Help
Toolbar
Error Log
EditorPane
The IDE as it appears on Microsoft Windows.

Getting Started 7
pane and the ‘Compile/Run’ toolbar button has been pressed (Shortcut Key: F5) the code is thenpassed to the compiler for the creation of an executable. Any plain text editor could be used to writesource code for PureBasic but I recommend using the official editor as it has been written from theground up to only support the PureBasic compiler. Not only that but other editors require someconfiguration to correctly pass the file to the PureBasic compiler which some users find a little toocomplicated to begin with.
How To Run PureBasic Programs
Right, let’s get started to learn how to run programs. Before they are compiled, PureBasic programsare just plain text files (usually containing the suffix ‘*.pb’) that contain the actual PureBasic code. Allthat needs to be done to compile these text files into an executable program is to pass them to thecompiler for processing. There are many ways of doing this such as:
In the IDE:Press the ‘F5’ keyboard shortcut for ‘Compile/Run’.Press the ‘Compile/Run’ toolbar button.Select the menu command: ‘Compiler->Compile/Run’.Select the menu command: ‘Compiler->Create Executable...’.
Using the command line:Enter the command: ‘PBCompiler filename’ where ‘filename’ is the name of the text file.
After reading the above list it seems that there is many different ways of achieving the same result, butsome of these are slightly different and should be explained more clearly.
The first three IDE methods mentioned above, achieve the same result and any one of these three canbe used while actually writing and testing the current program (it doesn’t matter which one). Thepurpose of these three commands is in the name, ‘Compile/Run’.
When selected the text file is immediately compiled into a temporary executable file called‘purebasic0.exe’ within the ‘/PureBasic/Compilers’ folder and that executable file is then run. This ishandy when you need to see immediately how your program runs, without specifying a proper namefor the compiled executable. If this temporary program file is still running while another program iscompiled and run, then a new temporary file will be created called ‘purebasic1.exe’, and so on. If,however the first program has ended while using the ‘Compile/Run’ method, then the compiler re-uses
The IDE Quick Help
As you are entering built-in library commands into the editor pane, the status bar at the bottom of the editorwill show you the completed command along with an example of what parameters (if any) are expected. Thiscan be a very handy reference when you are speed coding (maybe after too much coffee) and searching thehelpfile is too much hassle. Built-in Library commands are explained further in Chapter 7.

Getting Started8
old numbers on the temporary files and keeps on using ‘purebasic0.exe’ as the temporary name. Thismakes sure that there aren’t huge numbers of temporary executable files within the‘/PureBasic/Compilers’ folder.
The last IDE method, using the ‘Compiler->Create Executable...’ menu command is for when alldevelopment is finished on the current program and you are ready to compile and deploy yourexecutable file. Once this menu command has been selected a dialog box appears asking you to specifya name and location for your final executable program file.
The Windows Command Prompt method is for more advanced users and enables you to manually typein commands to pass the text file to the PureBasic compiler as a parameter. Other parameters can bepassed along with the filename to further customize the compilation. These other parameters will bediscussed later in Chapter 13 (Advanced Compiler Options).
That is all there is to compile and run your first program. After the commands are entered into theeditor pane just hit ‘F5’ and you’re away!
The Debugger
The PureBasic debugger is a tool which controls the execution of the program you’re working on. Itcontrols and keeps track of all variables and procedure parameters, etc. as the program is running. Itis a second pair of eyes on your code to highlight errors and to avoid potential program crashes suchas zero division, illegal array offset access and data overflow errors. It can also be used as a brake tohalt the program at any given time to see what actual variable values are. The program execution canbe stopped and forwarded step by step to locate any faults or strange behavior. This can be very usefulespecially if a program falls into an endless loop or you are unsure of what value a particular variableholds at any given time.
The Debugger can be toggled on and off at any time by pressing the ‘Enable Debugger’ toolbar buttonor by selecting the menu command (Menu:Debugger->Enable Debugger). Careful when developing aprogram with the debugger off, you could crash your computer if a problem isn’t recognized and isallowed to execute.
A Note On Program Structure
The structure of a PureBasic program is quite easy to understand. The compiler processes the text filefrom the top to the bottom. It’s that easy. Commands written at the top of the file are processed beforethe ones written below, just as if you were reading the file yourself. If the debugger spots a problemthe compilation is stopped and an error is raised. Take this pseudo-code as an example:
1 PRINT "THIS LINE IS EXECUTED FIRST"2 PRINT "THIS LINE IS EXECUTED SECOND"3 PRINT "THIS LINE IS EXECUTED THIRD"

Getting Started 9
The output of this pseudo-code example would be three lines of text displayed in the order that theywere written (1-3). This is exactly how the compiler processes the text file. This is important tounderstand and remember, because you will run into errors if, for example, you try to gain access to afile that hasn’t been opened yet. This all seems pretty straightforward but you may run into this atsometime, especially when you start to use procedures (these will be explained fully in Chapter 6).There is more to a program’s structure than this little snippet but this will become apparent as yourjourney continues and I expand more on using statements and procedures.
Introducing The PureBasic Helpfile
With every PureBasic installation, a complete helpfile is installed alongside. This helpfile is a fantasticreference for the entire PureBasic language but can be a little daunting for new users to refer tobecause sometimes things are not explained fully. If they were, then it would be a very sizabledocument and not very printer friendly. As it stands though, it is an invaluable resource for looking upkeywords, checking syntax and it integrates nicely with the IDE. In fact, every time I personally createa program using the PureBasic IDE, I like to keep the helpfile open at all times to quickly flick betweenthe two. This simple habit could save hours of valuable time.
IDE IntegrationAt anytime when you are using the IDE to create your program, you can press the ‘F1’ key on yourkeyboard to trigger the launching of the PureBasic helpfile. Also, if you happen to have your cursorwithin the IDE upon a PureBasic keyword while pressing ‘F1’, then the helpfile is brought to the frontand that keyword will be highlighted within the helpfile, giving you an explanation of that command.This integration between the IDE and helpfile is invaluable once you start to gain speed whileprogramming.
Let’s try a small example to show this in action, type this (exactly) into the IDE:
OpenConsole()Print("Press enter to exit")Input()End
After running this little program it opens a console window, then prints a line of text to it informingthe user in order to exit he or she must press ‘enter’, during which we wait for input. After the enterkey is pressed then we then end the program nicely.
If you place the flashing IDE cursor upon any keywords that are used in this program, then press ‘F1’,the helpfile is brought to the front and flipped to the page that describes that command. For example,place your flashing cursor anywhere within the ‘OpenConsole()’ keyword and hit ‘F1’. You will now seethe ‘OpenConsole()’ help page appear like magic!
If you want to learn more about using the built-in PureBasic helpfile, refer to Chapter 7 (Using ThePureBasic Helpfile).
2Data Types
Now that the introductions are over let’s begin this chapter with more substance, namely Data Types.As you may know, in computer programs you manipulate and process data. Data types are thedescriptions of the containers of this data. In this chapter I will show you all the available built-in datatypes and explain fully how and when to use them.
To enable you to get up and running as soon as possible, I have included many of examples andeverything is explained using plain speech.
Built-In Data Types
Data types (or sometimes just called ‘types’) can be thought of as a way of giving stored data adescription. The basic idea of typing data is to give some useful meaning to what is ultimately justbinary digits. Be it text or numbers, describing this data using types makes it easier to understand,manipulate or retrieve. Data is held within the computers RAM until needed by the program. Theamount of RAM needed to hold each data type depends on what type of data type is being used.
Numbers
The first data types to be introduced are the numbers types. Numbers can be used to store anythingfrom a date, a length or even the result from a lengthy calculation. Anything you use numbers for inthe real world, you can also use PureBasic’s numeric types to store that data.
Numbers come in two flavors in PureBasic, Integers and Floating Point Numbers. Integers arenumbers which don’t have a decimal point and can either be positive or negative. Here are a fewexamples of integers:
16543 -1951434 100 -1066 0
10

Data Types 11
Floating Point Numbers (or ‘Floats’) on the other hand are numbers which do contain a decimal pointand can also be either positive or negative. Here are a few examples of floating point numbers:
52.887 -11.0005 1668468.1 -0.000004 0.0
PureBasic provides seven numeric data types for you to use in your programming, each one uses adifferent amount of RAM and all have different numerical limits. The numerical types are describedhere in Fig.2.
Numerical LimitsIn Fig.2 you can see that many types have a numerical limit, this is directly linked to the amount ofRAM that particular type is allocated. The amount of RAM allocated and the names of the numericaltypes are more or less the same as the C language. Note in C you will find there are many more typesthan listed here but PureBasic is about keeping things simple, not bending your head with hundredsof advanced types. For beginners, all you need to remember is the numerical limits of each type andunderstand that this can’t be exceeded. To explain why the memory allocated to each type affects thenumerical limit, I’ll need to explain how the numbers are stored in RAM using Binary, this you can findin Chapter 13 (A Closer Look At Numeric Data Types).
If a numeric data type is exceeded numerically then that numeric value will wrap around the lowernumeric level. For example, if you assigned the value of ‘129’ to a Byte variable, then that value hasexceeded the numerical limit for a Byte and will be wrapped to ‘-127’.
PureBasic’s Numeric Types
Byte
Char (Ascii)
Char (Unicode)
Word
Long
Quad
Float
Double
.b
.c
.c
.w
.l
.q
.f
.d
1 byte (8 bits)
1 byte (8 bits)
2 bytes (16 bits)
2 bytes (16 bits)
4 bytes (32 bits)
8 bytes (64 bits)
4 bytes (32 bits)
8 bytes (64 bits)
-128 to 127
0 to 255
0 to 65535
-32768 to 32767
-2147483648 to 2147483647
-9223372036854775808 to 9223372036854775807
Unlimited*
Unlimited*
Type Suffix Memory Usage (RAM) Numerical Limit
Fig. 2* This will be explained fully in Chapter 13 (A Closer Look At Numeric Data Types).
Data Types12
Strings
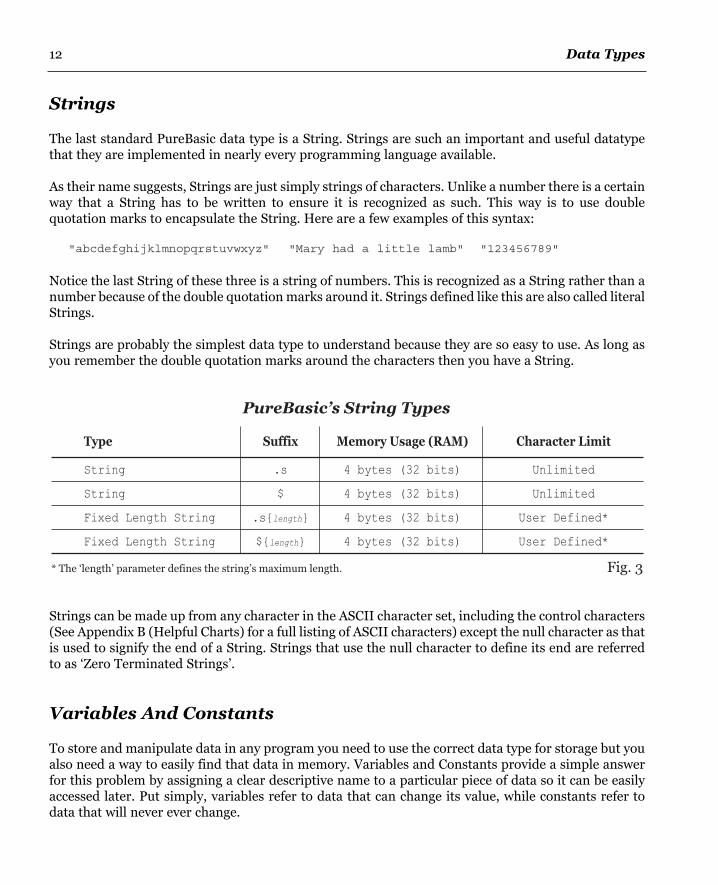
The last standard PureBasic data type is a String. Strings are such an important and useful datatypethat they are implemented in nearly every programming language available.
As their name suggests, Strings are just simply strings of characters. Unlike a number there is a certainway that a String has to be written to ensure it is recognized as such. This way is to use doublequotation marks to encapsulate the String. Here are a few examples of this syntax:
"abcdefghijklmnopqrstuvwxyz" "Mary had a little lamb" "123456789"
Notice the last String of these three is a string of numbers. This is recognized as a String rather than anumber because of the double quotation marks around it. Strings defined like this are also called literalStrings.
Strings are probably the simplest data type to understand because they are so easy to use. As long asyou remember the double quotation marks around the characters then you have a String.
Strings can be made up from any character in the ASCII character set, including the control characters(See Appendix B (Helpful Charts) for a full listing of ASCII characters) except the null character as thatis used to signify the end of a String. Strings that use the null character to define its end are referredto as ‘Zero Terminated Strings’.
Variables And Constants
To store and manipulate data in any program you need to use the correct data type for storage but youalso need a way to easily find that data in memory. Variables and Constants provide a simple answerfor this problem by assigning a clear descriptive name to a particular piece of data so it can be easilyaccessed later. Put simply, variables refer to data that can change its value, while constants refer todata that will never ever change.
PureBasic’s String Types
.s
$
.s{length}
${length}
4 bytes (32 bits)
4 bytes (32 bits)
4 bytes (32 bits)
4 bytes (32 bits)
Unlimited
Unlimited
User Defined*
User Defined*
Fig. 3
String
String
Fixed Length String
Fixed Length String
Suffix Memory Usage (RAM) Character LimitType
* The ‘length’ parameter defines the string’s maximum length.

Data Types 13
VariablesTypically, the name of a variable is bound to a particular area and amount of RAM (defined by its datatype), and any operations on a variable will manipulate that associated area of memory. Variablenames can be named anything you want, but many people like to keep them as descriptive as possibleto convey what the actual value is that the variable holds. Variables are the building blocks of anycomputer program as they hold data that can be manipulated, referred to and ultimately displayed.Variables are essential for the organization and storage of your data.
Okay, let’s get playing with PureBasic. Open the PureBasic IDE and let’s create a variable of our own.When you want to create a variable the syntax is very simple. You enter a variable name followed by atype suffix to define what type of variable it is to be, followed by an operation you wish to perform onit. This operation is primarily a value definition.
In the following statement, we assign the value of ‘1’ to the name ‘NumberOfLinesOfCode’, using theequals operator (=) and using a Byte as its data type.
NumberOfLinesOfCode.b = 1
Look at this statement a little more closely. You will see that the variable name has no spaces, this isvery important. No variable ever has spaces! If you need to separate the words in a variable to make itmore easy to read you can use underscores like this:
Number_Of_Lines_Of_Code.b = 1
You can use any name you want for a variable but there are few rules. Variable names must not startwith a number and must not contain any operators (see Fig.15 for a complete list of operators). Alsono special characters are allowed such as accented characters (ß, ä, ö, ü). The ‘.b’ added to the end ofthe variable name is a suffix to tell the compiler that this variable is to be a Byte and as such will usethe associated amount of memory and impose the associated numerical limit. Fig.2. shows all thesuffixes you need to use for the number types, while Fig.3. shows the suffixes necessary for the Stringtypes. If a type suffix is not used like this:
NumberOfLinesOfCode = 1
The variable is declared as a Long as this is the default type of PureBasic. This is important tounderstand because if you forget the suffix on a variable you will create a Long type variable andpossible bugs could occur. PureBasic does provide a way to change the default type by using the‘Define’ keyword like this:
Define.bNumberOfLinesOfCode = 1TodaysDate = 11
The ‘Define’ keyword is given a suffix of its own and every variable after that is declared as that newlydesignated type. The above two variables for instance are both declared as Bytes because of the ‘.b’suffix on the end of the ‘Define’ keyword. If this keyword is not used in a PureBasic program then thedefault type remains as a Long.

Data Types14
If you want to declare a few variables for later use but don’t want to give them a value just yet, youcould also use this style syntax:
Define.w Day, Month, Year
This code switches the default type to a Word and declares three variables, ‘Day’, ‘Month’ and ‘Year’ asWords but because these variables have no value assigned to them, they are given the value of zero (0).Here is an example showing the creation of all variable types using PureBasic code:
ByteVariable.b = 123CharVariable.c = 222WordVariable.w = 4567LongVariable.l = 891011QuadVariable.q = 9223372036854775807FloatVariable.f = 3.1415927DoubleVariable.d = 12.53456776674545StringVariableOne.s = "Test String One"StringVariableTwo$ = "Test String Two"StringVariableThree.s{6} = "abcdef"StringVariableFour${3} = "abc"
You will notice the last four variables are Strings but are all defined by slightly different suffixes. Thefirst two are unlimited length Strings while the last two are defined as fixed length Strings. Each oneof these types can be defined by using two suffixes. These two different suffixes are ‘.s’ and ‘$’. Both ofwhich are identical in every way, it’s just that the ‘$’ suffix is an old style, kept to appease Basic puristswho like using the old style String suffix. Both can be used in the same program but the two suffixesare not interchangeable. For example, these two variables are different:
StringVariable.s = "Test String One"StringVariable$ = "Test String Two"
Even though they have the same name, the different suffixes mean they are different variables alltogether. Don’t believe me? Well this can be tested by using the ‘Debug’ keyword.
StringVariable.s = "Test String One"StringVariable$ = "Test String Two"Debug StringVariable.sDebug StringVariable$
In this example the ‘Debug’ keyword is used to echo the values of the two variables to the DebugOutput window. Type this example into the IDE and hit the ‘Compile/Run’ button (F5). You will seetwo lines appear in the Debug Output window showing the values of the two variables that we used‘Debug’ with. This keyword is probably the most used keyword in the whole of the PureBasic languageas it is used to test values and echo other useful text to the Debug Output window during programdevelopment. When a final executable is made all the ‘Debug’ commands are removed from the finalprogram, leaving a small executable size.
Data Types 15
One more thing to note about variables is that they are not case sensitive. Meaning that anycapitalization is ignored, which is standard Basic language behavior. Look at this example:
TestVariable.s = "Test String One"testvariable = "Test String Two"TeStVaRiAbLe = "Test String Three"Debug tEsTvArIaBlE
Here it looks as if I am assigning values to three different variables but in truth I am re-assigning avalue to the same variable, it’s just that each time I do it, I’m using different a capitalization for thevariable name. As you can see, letter case means nothing to a variable as this example outputs the text‘Test String Three’. This example also demonstrates another feature of PureBasic’s variables, in thatonce a variable has been declared using a given data type, that data type remains assigned to thatvariable throughout the programs life. For example, once a variable has been declared as a String thenfrom then on you can never store an integer or floating point number in that variable. Let me show youa bad example:
StringVariable.s = "Test String One"StringVariable = 100
This example will never compile and if you try to, you will get a polite message from the IDE tellingyou that you cannot write a numeric value into a String variable. This following example will work:
StringVariable.s = "Test String One"StringVariable = "One Hundred"
Because the variable ‘StringVariable’ was originally declared as a String, only Strings can be given asvalues to that variable from then on. When we change its value to ‘One Hundred’ it works fine becausewe change a String for a String. So let’s recap on the main variable rules.
1). Variables must not contain spaces.2). Variable names must not start with a number but can contain them.3). Variable names must not contain any operators (See Fig.15).4). Variable names must not contain any special or accented characters (ß, ä, ö, ü).5). By default if no suffix is given to a variable then its data type is a Long.6). Once a variable has been declared, its data type can never be changed during runtime.7). Once a variable is declared you can use it freely without a suffix, the compiler remembers its type.
The ‘Debug’ Command
The ‘Debug’ command is very useful to quickly print useful text into the Debug Output window. Any data typecan be used with this command, making it invaluable for quickly printing helpful numbers, memoryaddresses, returned Strings and/or values of calculations.
Any ‘Debug’ commands used within your code are ignored and will not be compiled when you disable thedebugger or compile your final executable using (Menu:Compiler->Create Executable...).

Data Types16
ConstantsConstants are similar to variables in that they provide an easy way to reference data and can be calledwhatever you want, but that’s where the similarity ends. Constants are used when you want to give aparticular piece of data a name while knowing that value will never change. Look at this example:
#DAYS_IN_THE_YEAR = "365"
We know that the number of days in a standard year will never change so we can use a constant toexpress this. If we tried to change its value like a variable we get an error. The IDE will complain,telling you that a constant with that name has already been declared and halt compilation.
The good thing about constants is that they use no memory, because they are never compiled as such,they are replaced in your code by their initial values before compilation. Look at this example:
#DAYS_IN_THE_YEAR = "365"Debug "There are " + #DAYS_IN_THE_YEAR + " days in the year."
Before this example is compiled into your program, it really looks like this to the compiler:
Debug "There are 365 days in the year."
because the constant is replaced by the value it was assigned, in this case ‘365’, and then compiled.
All constants follow exactly the same naming rules as variables except for the suffixes, constants don’tuse them regardless of what type of data you assign to a constant, because there is no memoryallocation needed. All constants are declared using a prefix rather than a suffix. The prefix is a hashcharacter (#).
Enumerating ConstantsIf you need a block of constants all of which are assigned numeric values enumerated one after theother, then you can use the ‘Enumeration’ keyword.
Enumeration#ZERO#ONE#TWO#THREE
EndEnumeration
Debug #ZERODebug #ONEDebug #TWODebug #THREE
You will see in the Debug Output window, each constant has a greater value than the one preceding it,starting at ‘0’. If you want to start the enumeration at a number other than ‘0’, you can use an optionalnumeric parameter with the ‘Enumeration’ keyword, like this:

Data Types 17
Enumeration 10#TEN#ELEVEN#TWELVE
EndEnumeration
Debug #TENDebug #ELEVENDebug #TWELVE
Now you can see the constant ‘#TEN’ has the value of ‘10’ and the rest are incremented from then on.You can even use the ‘Step’ keyword after the numeric parameter to change the increment value withinan enumeration block. Look at this example:
Enumeration 10 Step 5#TEN#FIFTEEN#TWENTY
EndEnumeration
Debug #TENDebug #FIFTEENDebug #TWENTY
Now the constants are incremented by ‘5’, starting at ‘10’.
If you assign a value at any time to a constant within an enumeration block, this sets a new value to beenumerated from. Just like this:
Enumeration 5#FIVE#ONE_HUNDRED = 100#ONE_HUNDRED_AND_ONE#ONE_HUNDRED_AND_TWO
EndEnumeration
Debug #FIVEDebug #ONE_HUNDREDDebug #ONE_HUNDRED_AND_ONEDebug #ONE_HUNDRED_AND_TWO
Here you can see demonstrated, after the line: ‘#ONE_HUNDRED = 100’, all the constants are thenenumerated from ‘100’.
Enumerated constants are used mostly in graphical user interface programing (See Chapter 9) whereeach window or gadget needs its own ID, enumerated constants are a great way to provide these IDsand enumerated blocks take all the hassle out of assigning incremented values to a lot of constants.

3Operators
Operators are used to assign values to variables and to manipulate the data that those variablescontain. In this chapter I’ll introduce you to all operators that PureBasic supports and for each one I’llgive you a brief example describing its function and use. There are also many diagrams showing howthe more advanced operators manipulate data at a binary level. Operator precedence (or operatorpriority if you prefer) is also explained and notes on PureBasic’s expression evaluation are brought toyour attention.
An Introduction To Operators
Operators are a set of functions that can perform arithmetic operations on numerical data, booleanoperations on truth values and perform String operations for manipulating strings of text. Someoperators are known as Overloaded Operators, meaning that they can be used on more than one typeof data and can perform different functions. For example, the equals operator (=) can be used to assigna value to a variable as well as being used as an equality operator to test that two variables or valuesare equal.
= (Equals)This is probably the easiest operator to explain even though it can be used in two ways. First, it can beused to assign a value to a variable like this:
LongVariable.l = 1
Secondly, it can be used to make an equality comparison between two expressions, variables or values,like this:
LongVariable.l = 1If LongVariable = 1Debug "Yes, LongVariable does equal 1"
EndIf
This is the first time you have seen the ‘If’ keyword but don’t worry. This keyword enables a way inyour programs to execute code based on if a certain condition is met. In this case, if ‘LongVariable’
18
Operators 19
equals ‘1’ then echo some text to the Debug Output window.
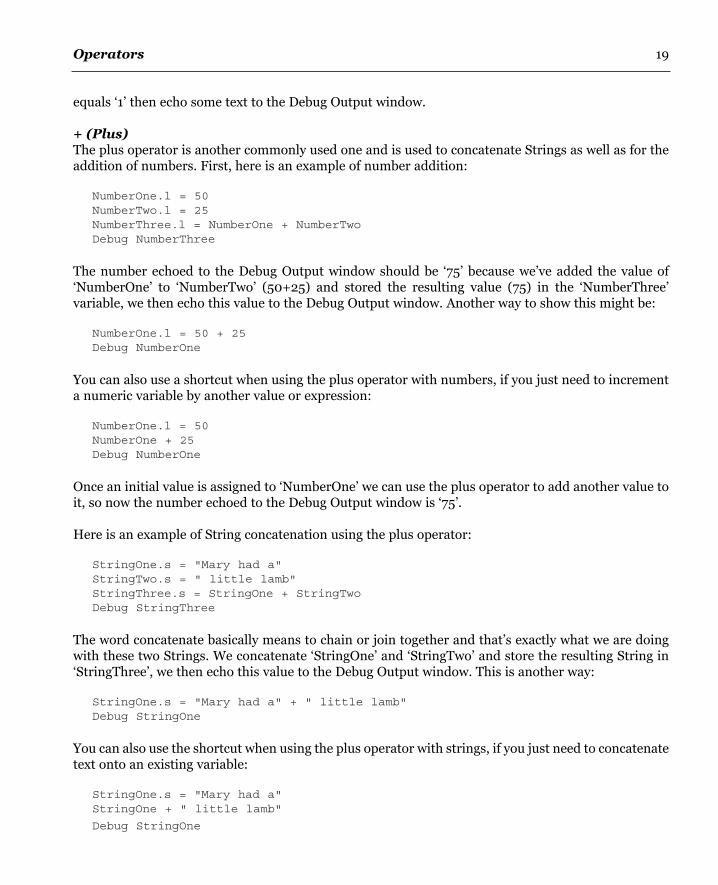
+ (Plus)The plus operator is another commonly used one and is used to concatenate Strings as well as for theaddition of numbers. First, here is an example of number addition:
NumberOne.l = 50NumberTwo.l = 25NumberThree.l = NumberOne + NumberTwoDebug NumberThree
The number echoed to the Debug Output window should be ‘75’ because we’ve added the value of‘NumberOne’ to ‘NumberTwo’ (50+25) and stored the resulting value (75) in the ‘NumberThree’variable, we then echo this value to the Debug Output window. Another way to show this might be:
NumberOne.l = 50 + 25Debug NumberOne
You can also use a shortcut when using the plus operator with numbers, if you just need to incrementa numeric variable by another value or expression:
NumberOne.l = 50NumberOne + 25Debug NumberOne
Once an initial value is assigned to ‘NumberOne’ we can use the plus operator to add another value toit, so now the number echoed to the Debug Output window is ‘75’.
Here is an example of String concatenation using the plus operator:
StringOne.s = "Mary had a"StringTwo.s = " little lamb"StringThree.s = StringOne + StringTwoDebug StringThree
The word concatenate basically means to chain or join together and that’s exactly what we are doingwith these two Strings. We concatenate ‘StringOne’ and ‘StringTwo’ and store the resulting String in‘StringThree’, we then echo this value to the Debug Output window. This is another way:
StringOne.s = "Mary had a" + " little lamb"Debug StringOne
You can also use the shortcut when using the plus operator with strings, if you just need to concatenatetext onto an existing variable:
StringOne.s = "Mary had a"StringOne + " little lamb"
Debug StringOne

Operators20
This works kind of like the numeric shortcut but instead of adding the value numerically, the secondString is joined to the existing String variable.
- (Minus)The minus operator works the exact reverse of the addition operator, in that it subtracts rather thanadds. Unlike the addition operator, the minus operator cannot work with Strings. Here is an exampleof the minus operator in action:
NumberOne.l = 50NumberTwo.l = 25NumberThree.l = NumberOne - NumberTwoDebug NumberThree
The text echoed to the Debug Window should be ‘25’ which is ‘NumberTwo’ subtracted from‘NumberOne’. Again a shortcut can be used if you need to decrement a variable by a specific amount:
NumberOne.l = 50NumberOne - 10Debug NumberOne
Here ‘NumberOne’ is assigned the value of ‘50’ then ‘NumberOne’ is decremented by ‘10’ using theminus operator. The new value of ‘NumberOne’ (40) is then echoed to the Debug Output window.
* (Multiplication)The multiplication operator is used to multiply two values together and like the minus operator cannotwork with Strings. To demonstrate how this operator is used, here is an example:
NumberOne.l = 5NumberTwo.l = 25NumberThree.l = NumberOne * NumberTwoDebug NumberThree
The debug output should be ‘125’ because in this example we’ve multiplied ‘NumberOne’ by‘NumberTwo’ (5*25=125). Again a shortcut can be used to multiply a variable by a specified number.
NumberOne.l = 50NumberOne * 3Debug NumberOne
Here ‘NumberOne’ is assigned the value of ‘50’ then ‘NumberOne’ is multiplied by ‘3’ using themultiplication operator. The new value of ‘NumberOne’ (150) is then echoed to the Debug Outputwindow.
/ (Division)The division operator is another mathematical operator that works only with numbers and not Strings.You’ve probably guessed how to use it from reading the other examples but here is an example showingits use anyway:

Operators 21
NumberOne.l = 100NumberTwo.l = 2NumberThree.l = NumberOne / NumberTwoDebug NumberThree
Here ‘NumberOne’ is assigned the value of ‘100’ and ‘NumberTwo’ is assigned the value of ‘2’. We thendivide ‘NumberOne’ (100) by ‘NumberTwo’ (2) and store the result (50) in ‘NumberThree’. We thenecho the value of ‘NumberThree’ to the Debug Output window. As before a shortcut can be used todivide a variable by a specified number:
NumberOne.l = 50NumberOne / 5Debug NumberOne
Here ‘NumberOne’ is assigned the value ‘50’ then we use the division operator to divide this value by‘5’. Then we echo the result stored in ‘NumberOne’ (10) to the Debug Output window.
& (Bitwise AND)The bitwise operators are a group of operators that manipulate numbers at a binary level. If you are alittle unfamiliar with binary and how PureBasic stores numbers using binary you can refer to Chapter13 (A Closer Look At Numeric Data Types) where a full explanation is given. Bitwise operators cannotbe used with Floats or Strings.
The bitwise ‘&’ operator tests two values to see if they are both true on a bit by bit basis, if two bits arecompared and are both true (1) then the operator returns true (1) otherwise it returns false (0). Thisapplies to all bits within the two numbers that are to be compared. Here is a diagram to try to explaina little better.
In Fig.4 you can see the two numbers to be evaluated using the ‘&’ operator are ‘77’ and ‘117’. After thecalculation is complete, an end result of ‘69’ is achieved. To explain how this value is achieved you need
&
Fig. 4
Binary Value of 77
8 bit number(1 byte)
10110010
10101110Binary Value of 117
10100010Result value of 69
Tru
e
False
Tru
e
False
False
False
Tru
e
False
The ‘&’ (Bitwise AND) Operator

Operators22
to look at each column of bits from the top down. If you look at the right most column (which is thecolumn associated with the value of ‘1’ in binary) both bits of the two numbers in this column are setat ‘1’ so the value returned by the ‘&’ operator is ‘1’ (which in PureBasic is true). If we move one columnalong to the left we can see that both bits of the two numbers are both ‘0’, so the ‘&’ operator returns‘0’ (false). Remember that when using the ‘&’ operator both bits have to be ‘1’ before the operator willreturn ‘1’ otherwise it will return ‘0’.
This operator is applied to all the columns of bits starting from the right to the left and when finishedthe resulting number is returned. In this case the value returned by this calculation is ‘69’. Here is anexample to translate Fig.4 into code:
NumberOne.b = 77NumberTwo.b = 117NumberThree.b = NumberOne & NumberTwoDebug NumberThree
In this small example two variables are assigned numbers that are to be evaluated using the ‘&’operator and the variable ‘NumberThree’ contains the result of this calculation. The value of‘NumberThree’ is then echoed to the Debug Output window, which in this case should be ‘69’. Just likethe other operators the bitwise ‘&’ operator has a shortcut if you just need to ‘&’ a number to a singlevariable:
NumberOne.b = 77NumberOne & 117Debug NumberOne
Here ‘NumberOne’ is assigned the value ‘77’ and then in the next line we ‘&’ the value ‘117’ to‘NumberOne’. This value is then echoed to the Debug Output window.
Fig.5 shows the comparison made between two bits and the result given by the ‘&’ operator.
| (Bitwise OR)The bitwise ‘|’ operator tests two values to see if one or more is true on a bit by bit basis, if two bits arecompared and either one or both are true (1) then the operator returns true (1) otherwise it returns
‘&’ (Bitwise AND) Bit Comparison
Left Hand Side
0
0
1
1
Right Hand Side
0
1
0
1
Result
0
0
0
1
Fig. 5

Operators 23
false (0). This applies to all bits within the two numbers that are to be compared.
In Fig.6 you can see the two numbers to be evaluated using the ‘|’ operator are ‘54 and ‘102’. After thecalculation is complete, an end result of ‘118’ is achieved. To explain how this value is achieved youneed to look at each column of bits from the top down. If you look at the right most column (which isthe column associated with the value of ‘1’ in binary) both bits of the two numbers in this column areset at ‘0’ so the value returned by the ‘|’ operator is ‘0’ (false). If we move one column along to the leftwe can see that both bits of the two numbers are both ‘1’, so the ‘|’ operator returns ‘1’ (true). If we lookat the fifth column from the right you will see that the first number has a bit which is set at ‘1’ and thesecond number has a bit which is set at ‘0’. In this case the ‘|’ operator still returns ‘1’ (true) becauseas long as one or the other bit is true then the operator will return true. The ‘|’ operator will alwaysreturn true, unless both bits are ‘0’.
This operator is applied to all the columns of bits in Fig.6 starting from the right to the left and whenfinished the resulting number is returned. In this case the value returned by this calculation is ‘118’.Here is an example to translate Fig.6 into code:
NumberOne.b = 54NumberTwo.b = 102NumberThree.b = NumberOne & NumberTwoDebug NumberThree
In this small example two variables are assigned numbers that are to be evaluated using the ‘|’ operatorand the variable ‘NumberThree’ contains the result of this calculation. The value of ‘NumberThree’ isthen echoed to the Debug Output window, which in this case should be ‘118’. Just like the otheroperators the bitwise ‘|’ operator can be used as a shortcut if you just need to ‘|’ a number to a singlevariable:
NumberOne.b = 54NumberOne | 102Debug NumberOne
|
Fig. 6
Binary Value of 54
8 bit number(1 byte)
01101100
01100110Binary Value of 102
01101110Result value of 118
False
Tru
e
Tru
e
False
Tru
e
Tru
e
Tru
e
False
The ‘|’ (Bitwise OR) Operator

Operators24
Here ‘NumberOne’ is assigned the value ‘54’ and then in the next line we ‘|’ the value ‘102’ to‘NumberOne’. This value is then echoed to the Debug Output window.
Fig.7 shows the comparison made between two bits and the result given by the ‘|’ operator.
! (Bitwise XOR)The bitwise ‘!’ operator tests two values to see if one of them is true on a bit by bit basis, if the two bitsare compared and either one is true (1) then the operator returns true (1) otherwise it returns false (0).This applies to all bits within the two numbers that are to be compared. Here is a diagram to try toexplain a little better:
In Fig.8 you can see the two numbers to be evaluated using the ‘!’ operator are ‘38 and ‘74’. After thecalculation is complete, an end result of ‘108’ is achieved. To explain how this value is achieved youneed to look at each column of bits from the top down again. If you look at the right most column(which is the column associated with the value of ‘1’ in binary) both bits of the two numbers in thiscolumn are set at ‘0’ so the value returned by the ‘!’ operator is ‘0’ (false). If we move one column alongto the left we can see that both bits of the two numbers are both ‘1’, so the ‘!’ operator still returns ‘0’
‘|’ (Bitwise OR) Bit Comparison
Left Hand Side
0
0
1
1
Right Hand Side
0
1
0
1
Result
0
1
1
1
Fig. 7
!
Fig. 8
Binary Value of 38
8 bit number(1 byte)
01100100
01010010Binary Value of 74
00110110Result value of 108
False
False
Tru
e
Tru
e
False
Tru
e
Tru
e
False
The ‘!’ (Bitwise XOR) Operator

Operators 25
(false). This is because when two bits are compared the ‘!’ operator will only return ‘1’ (true) if only onebit is set to ‘1’. If both bits are set to ‘1’ or ‘0’ then the ‘!’ operator will return ‘0’ (false).
This operator is applied to all the columns of bits in Fig.8 starting from the right to the left and whenfinished the resulting number is returned. In this case the value returned by this calculation is ‘108’.Here is an example to translate Fig.8 into code:
NumberOne.b = 38NumberTwo.b = 74NumberThree.b = NumberOne ! NumberTwoDebug NumberThree
In this small example two variables are assigned numbers that are to be evaluated using the ‘!’ operatorand the variable ‘NumberThree’ contains the result of this calculation. The value of ‘NumberThree’ isthen echoed to the Debug Output window, which in this case should be ‘108’.
Just like the other operators the bitwise ‘!’ operator has a shortcut if you just need to ‘!’ a number to asingle variable:
NumberOne.b = 38NumberOne ! 74Debug NumberOne
Here ‘NumberOne’ is assigned the value ‘38’ and then in the next line we ‘!’ the value ‘74’ to‘NumberOne’. This value is then echoed to the Debug Output window.
Fig.9 shows the comparison made between two bits and the result given by the ‘!’ operator:
~ (Bitwise NOT)The bitwise ‘~’ operator is an easier operator to explain in that it simply returns a number who’s bitshave been inverted using an input number or expression as a source.
The bitwise ‘~’ operator is known as an Unary operator meaning that it uses one value or expressionto return a value. This can be demonstrated with this piece of code:
‘!’ (Bitwise XOR) Bit Comparison
Left Hand Side
0
0
1
1
Right Hand Side
0
1
0
1
Result
0
1
1
0
Fig. 9

Operators26
NumberOne.b = 43NumberTwo.b = ~NumberOneDebug NumberTwo
Here the variable ‘NumberOne’ is assigned the value of ‘43’ then we create a variable ‘NumberTwo’ andassign it the value of ‘NumberOne’ which is inverted at a binary level using the ‘~’ operator. This value(which should be ‘-44’) is then echoed to the Debug Output window.
In Fig.10 you can see the ‘~’ operator simply inverts the bits of the source number then returns thatnew value. To understand better how numbers are represented in binary within PureBasic, especiallynegative (signed) numbers, see chapter 13 (A Closer Look At Numeric Data Types).
<< (Bit shift left)The bit shift operators are similar to the bitwise operators in that they manipulate numbers at a binarylevel. As their name suggests they shift all bits to the left or right depending on which operator is used.Here is some code demonstrating the use of the ‘<<’ operator:
NumberOne.b = 50NumberTwo.b = NumberOne << 1Debug NumberTwo
In this example we assign ‘NumberOne’ the value of ‘50’. Then we create a variable called‘NumberTwo’ and assign it the value of ‘NumberOne’ which has been bit shifted to the left by oneplace. This resulting value (which should be ‘100’) is then echoed to the Debug Output window. Youcan understand the function of this operator more clearly looking at Fig.11.
As you can see the resulting value simply has its binary digits (bits) shifted to the left from theiroriginal position, in this case by one place. When shifting bits to the left like this, zeros are created andshifted in to fill the gap on the right, while the bits on the left will be shifted ‘off the end’ of the number(in this case a Byte) and will be lost forever.
~
Fig. 10
Binary Value of 43
8 bit number(1 byte)
11010100
00101011Result value of -44
Inverted
Inverted
Inverted
Inverted
Inverted
Inverted
Inverted
Inverted
The ‘~’ (Bitwise NOT) Operator

Operators 27
>> (Bit shift right)The ‘>>’ operator is exactly the same as the ‘<<’ operator but works in the opposite direction. Here issome code demonstrating the use of the ‘>>’ operator:
NumberOne.b = 50NumberTwo.b = NumberOne >> 1Debug NumberTwo
In this example we assign ‘NumberOne’ the value of ‘50’. Then we create a variable called‘NumberTwo’ and assign it the value of ‘NumberOne’ which has been bit shifted to the right by oneplace. This resulting value (which should be ‘25’) is then echoed to the Debug Output window. You canunderstand the function of this operator more clearly in this diagram:
As you can see the resulting value simply has its binary digits (bits) shifted to the right from theiroriginal position, in this case by one place. When shifting bits to the right like this it is important tounderstand what bits are used to fill the gap that is created on the left hand side of the binary number.If the number is a positive number, the left most bit (sometimes called the most significant bit) is setto zero. In this case the gap will be filled with bits set to zero. If the source number is a negative(signed) number then the left most bit will be one. In this case the gap will be filled with bits set to one.The bits on the right will be shifted ‘off the end’ of the number (in this case a Byte) and will be lostforever.
Fig. 11
Binary Value of 50
8 bit number(1 byte)
01001100
00100110Result value of 100 Bits shifted 1 place to the left
The ‘<<’ (Bit Shift Left) Operator
Fig. 12
Binary Value of 50
8 bit number(1 byte)
01001100
10011000Result value of 25 Bits shifted 1 place to the right
The ‘>>’ (Bit Shift Right) Operator

Operators28
< (Less than)The ‘<’ operator is used in comparisons of two variables or expressions. If the value on the left handside of this operator is less than the value on the right hand side then this operator will return true (1)otherwise it will return false (0). Here is a code snippet demonstrating its usage:
NumberOne.l = 1NumberTwo.l = 2
If NumberOne < NumberTwoDebug "1: NumberOne is less than NumberTwo"
ElseDebug "2: NumberTwo is less than NumberOne"
EndIf
Here in the ‘If’ statement we test to see if ‘NumberOne’ is less than ‘NumberTwo’, which of course itis, so the first debug statement is executed. If we change the value of ‘NumberOne’ to ‘3’, like this:
NumberOne.l = 3NumberTwo.l = 2
If NumberOne < NumberTwoDebug "1: NumberOne is less than NumberTwo"
ElseDebug "2: NumberTwo is less than NumberOne"
EndIf
We now see in the Debug Output window that the second debug statement has been executed becausenow ‘NumberOne’ is no longer less than ‘NumberTwo’.
> (More than)The ‘>’ operator is used in comparisons of two variables or expressions. If the value on the left handside of this operator is more than the value on the right hand side then this operator will return true(1) otherwise it will return false (0). Here is a code snippet demonstrating its usage:
NumberOne.l = 2NumberTwo.l = 1
If NumberOne > NumberTwoDebug "1: NumberOne is more than NumberTwo"
ElseDebug "2: NumberTwo is more than NumberOne"
EndIf
Here in the ‘If’ statement we test to see if ‘NumberOne’ is more than ‘NumberTwo’, which of course itis, so the first debug statement is executed. If we change the value of ‘NumberOne’ to ‘0’, like this:
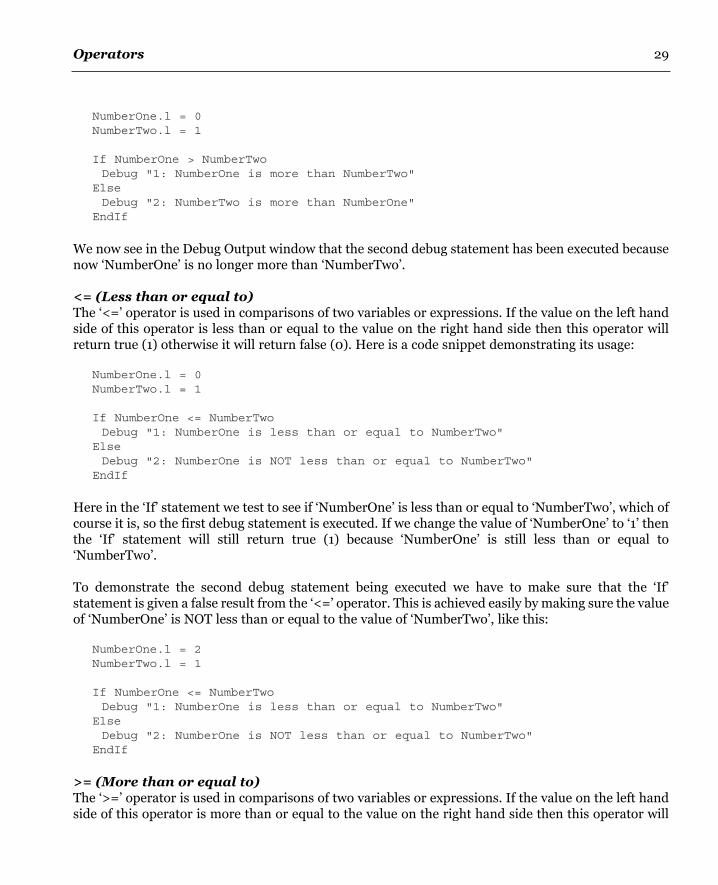
Operators 29
NumberOne.l = 0NumberTwo.l = 1
If NumberOne > NumberTwoDebug "1: NumberOne is more than NumberTwo"
ElseDebug "2: NumberTwo is more than NumberOne"
EndIf
We now see in the Debug Output window that the second debug statement has been executed becausenow ‘NumberOne’ is no longer more than ‘NumberTwo’.
<= (Less than or equal to)The ‘<=’ operator is used in comparisons of two variables or expressions. If the value on the left handside of this operator is less than or equal to the value on the right hand side then this operator willreturn true (1) otherwise it will return false (0). Here is a code snippet demonstrating its usage:
NumberOne.l = 0NumberTwo.l = 1
If NumberOne <= NumberTwoDebug "1: NumberOne is less than or equal to NumberTwo"
ElseDebug "2: NumberOne is NOT less than or equal to NumberTwo"
EndIf
Here in the ‘If’ statement we test to see if ‘NumberOne’ is less than or equal to ‘NumberTwo’, which ofcourse it is, so the first debug statement is executed. If we change the value of ‘NumberOne’ to ‘1’ thenthe ‘If’ statement will still return true (1) because ‘NumberOne’ is still less than or equal to‘NumberTwo’.
To demonstrate the second debug statement being executed we have to make sure that the ‘If’statement is given a false result from the ‘<=’ operator. This is achieved easily by making sure the valueof ‘NumberOne’ is NOT less than or equal to the value of ‘NumberTwo’, like this:
NumberOne.l = 2NumberTwo.l = 1
If NumberOne <= NumberTwoDebug "1: NumberOne is less than or equal to NumberTwo"
ElseDebug "2: NumberOne is NOT less than or equal to NumberTwo"
EndIf
>= (More than or equal to)The ‘>=’ operator is used in comparisons of two variables or expressions. If the value on the left handside of this operator is more than or equal to the value on the right hand side then this operator will

Operators30
return true (1) otherwise it will return false (0). Here is a code snippet demonstrating its usage:
NumberOne.l = 2NumberTwo.l = 1
If NumberOne >= NumberTwoDebug "1: NumberOne is more than or equal to NumberTwo"
ElseDebug "2: NumberOne is NOT more than or equal to NumberTwo"
EndIf
Here in the ‘If’ statement we test to see if ‘NumberOne’ is more than or equal to ‘NumberTwo’, whichof course it is, so the first debug statement is executed. If we change the value of ‘NumberOne’ to ‘1’then the ‘If’ statement will still return true (1) because ‘NumberOne’ is still more than or equal to‘NumberTwo’.
To demonstrate the second debug statement being executed we have to make sure that the ‘If’statement is given a false result from the ‘>=’ operator. This is achieved easily by making sure the valueof ‘NumberOne’ is NOT more than or equal to the value of ‘NumberTwo’, like this:
NumberOne.l = 0NumberTwo.l = 1
If NumberOne >= NumberTwoDebug "1: NumberOne is more than or equal to NumberTwo"
ElseDebug "2: NumberOne is NOT more than or equal to NumberTwo"
EndIf
<> (Not equal to)The ‘<>’ operator is used in comparisons of two variables or expressions which works in the exactopposite way of the comparison (not assignment) function of the ‘=’ operator. If the value on the lefthand side of this operator is not equal to the value on the right hand side then this operator will returntrue (1) otherwise it will return false (0). Here is a code snippet demonstrating its usage:
NumberOne.l = 0NumberTwo.l = 1
If NumberOne <> NumberTwoDebug "1: NumberOne does not equal NumberTwo"
ElseDebug "2: NumberOne does equal NumberTwo"
EndIf
Here in the ‘If’ statement we test to see if ‘NumberOne’ is not equal to ‘NumberTwo’, which of courseit isn’t, so the first debug statement is executed. If we change the value of ‘NumberOne’ to ‘1’, like this:
NumberOne.l = 1NumberTwo.l = 1

Operators 31
If NumberOne <> NumberTwoDebug "1: NumberOne does not equal NumberTwo"
ElseDebug "2: NumberOne does equal NumberTwo"
EndIf
We now see in the Debug Output window that the second debug statement has been executed because‘NumberOne’ is now equal to ‘NumberTwo’ and the ‘<>’ operator returns false.
And (Logical AND)The logical operators are used to combine the logical true or false results of the comparison operatorsto provide a more robust solution to comparing values of multiple expressions.
The ‘And’ operator is used for checking two expressions to make sure both evaluate as true. Look atthis piece of code:
StringOne.s = "The quick brown fox"NumberOne.l = 105
If StringOne = "The quick brown fox" And NumberOne = 105Debug "1: Both expressions evaluate to true (1)"
ElseDebug "2: One or both of the expressions evaluate as false (0)"
EndIf
We can see here that the ‘If’ statement is testing to make sure that the String variable, ‘StringOne’equals ‘The quick brown fox’ and that the Long variable ‘NumberOne’ equals ‘105’. Because both do sothe ‘And’ operator returns true and the first debug statement is executed. If either of the twoexpressions on the right and left hand side of the ‘And’ operator return a false result, the ‘And’ operatoritself returns a false result. This operator is optimized in such a way that if the first of the expressionsreturn a false result then the ‘And’ operator immediately returns false and doesn’t bother to evaluatethe next expression. This is handy when you want to write code that runs very quickly.
Not (Logical NOT)The ‘Not’ operator is used to perform a logical negation on an expression or a boolean value. In otherwords anything that evaluates to true on the right hand side of this operator is returned as false andvice versa. See this example:
One.l = 1Two.l = 2
If Not One = 5Debug "1: One = 5 is evaluated as true (1)"
ElseDebug "2: One = 5 is evaluated as false (0)"
EndIf

Operators32
If Not Two = 2Debug "1: Two = 2 is evaluated as true (1)"
ElseDebug "2: Two = 2 is evaluated as false (0)"
EndIf
We can see here that the first ‘If’ statement is testing to make sure that the Long variable, ‘One’ equals‘5’ which it doesn’t and the expression returns false. Because we have the ‘Not’ operator in front of ‘One= 5’ this inverts the false return value to a true value. Opposite values are shown in the second ‘If’statement. The expression here returns true but because of the ‘Not’ operator it inverts it to a falsevalue.
Or (Logical OR)The ‘Or’ operator is used for checking two expressions to make sure one or the other evaluate as true.Look at this piece of code:
StringOne.s = "The quick brown fox"NumberOne.l = 105
If StringOne = "The quick brown fox" Or NumberOne = 100Debug "1: One or more expressions evaluate to true (1)"
ElseDebug "2: Both of the expressions evaluate as false (0)"
EndIf
Here we can see that the ‘If’ statement is testing to make sure that the String variable, ‘StringOne’equals ‘The quick brown fox’ or that the Long variable ‘NumberOne’ equals ‘100’. You will notice thatthe second expression in the ‘If’ statement actually returns false because ‘NumberOne’ does not equal‘100’.
Because one of the expressions returns a true result, the ‘Or’ operator returns true and the first debugstatement is executed. The ‘Or’ operator will only return a false result if both expressions on the rightand left hand side return a false result themselves. This operator is also optimized in such a way thatif the first expression returns a true result then the ‘Or’ operator immediately returns true and doesn’tbother to evaluate the next expression. This is handy when you want to write code that runs veryquickly.
XOr (Logical XOR)The ‘XOr’ operator is used for checking two expressions to make sure only one evaluates as true. Lookat this piece of code:
StringOne.s = "The quick brown fox"NumberOne.l = 105If StringOne = "The quick brown fox" XOr NumberOne = 105Debug "1: Only one expression is true (1)"
ElseDebug "2: The expressions are either both true (1) or both false (0)"
EndIf

Operators 33
The ‘If’ statement is testing both expressions using the ‘XOr’ operator to make sure only oneexpression is evaluating as true. If both are evaluating as true or false then the ‘If’ statement itself willreturn false and execute the second debug statement, which is the case here. If this example waschanged to make sure only one expression returned a true value, then the ‘If’ would return true andexecute the first debug statement.
% (Modulo)The ‘%’ operator divides the number on the left hand side by the number on the right hand side andthen returns the remainder of this division. Here is an example:
NumberOne.l = 20 % 8Debug NumberOne
Here we divide the number ‘20’ by ‘8’ using the ‘%’ operator. In which there are two ‘8’s in ‘20’, thisleaves ‘4’ as a remainder. This remaining number is assigned to the variable ‘NumberOne’. We thenecho this value to the Debug Output window.
( ) (Brackets)Brackets are not really an operator in themselves because they never return any result. They are usedto determine the execution order of nested expressions. The general rule of thumb is that theexpression within brackets is evaluated first. In the case of nested brackets the inner-most set isevaluated first, then the next set and so on until the final set is reached. Here is an example:
NumberOne.l = 2 * 5 + 3Debug NumberOne
Here the value of ‘NumberOne’ is ‘13’ because the order of evaluation is, ‘2 * 5’ then ‘+ 3’, if we addbrackets like this:
NumberOne.l = 2 * (5 + 3)Debug NumberOne
Then the order of evaluation is changed to ‘5 + 3’ then ‘* 2’ which returns the value of ‘16’ which in turnin assigned to ‘NumberOne’ and echoed to the Debug Output window.
Operator Precedence
Operator precedence is a term that means the order in which operators are evaluated during compiletime. If you look at Fig.13 you can see the order in which operators are evaluated based on theirindividual priority.
This priority is shown in the left hand column, the lowest number (1) means these operators areevaluated first while the higher the number means that these operators will be evaluated later.
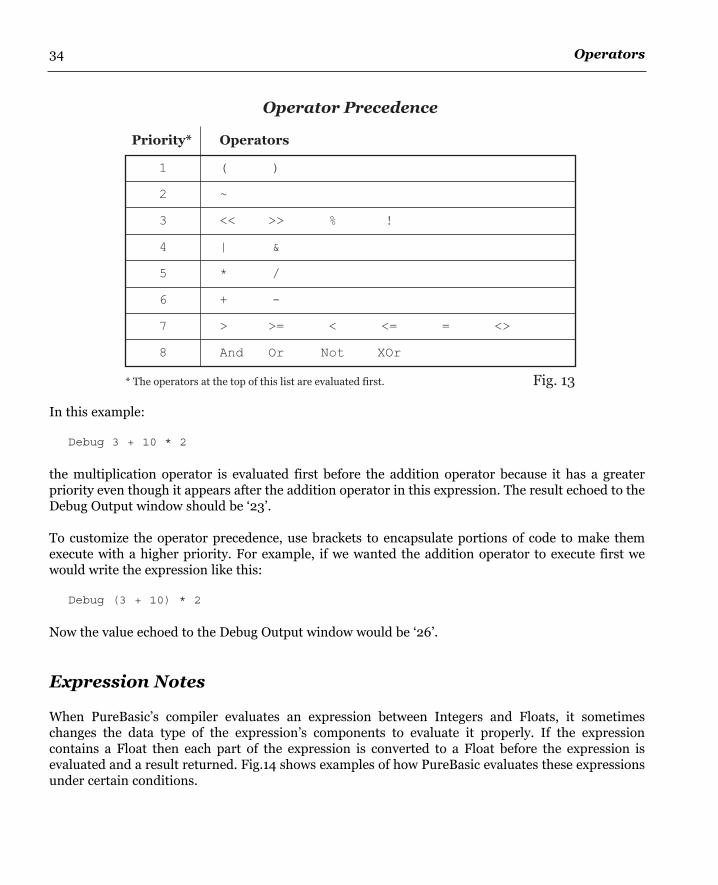
Operators34
In this example:
Debug 3 + 10 * 2
the multiplication operator is evaluated first before the addition operator because it has a greaterpriority even though it appears after the addition operator in this expression. The result echoed to theDebug Output window should be ‘23’.
To customize the operator precedence, use brackets to encapsulate portions of code to make themexecute with a higher priority. For example, if we wanted the addition operator to execute first wewould write the expression like this:
Debug (3 + 10) * 2
Now the value echoed to the Debug Output window would be ‘26’.
Expression Notes
When PureBasic’s compiler evaluates an expression between Integers and Floats, it sometimeschanges the data type of the expression’s components to evaluate it properly. If the expressioncontains a Float then each part of the expression is converted to a Float before the expression isevaluated and a result returned. Fig.14 shows examples of how PureBasic evaluates these expressionsunder certain conditions.
1
2
3
4
5
6
7
8
( )
~
<< >> % !
| &
* /
+ -
> >= < <= = <>
And Or Not XOr
Fig. 13
OperatorsPriority*
Operator Precedence
* The operators at the top of this list are evaluated first.

Operators 35
If you find that strange results are being returned from operators or expressions or that the numberreturned is not of the expected type, it’s a good idea to re-check the expression to make sure thecompiler is not following these rules.
a.l = b.l + c.l
a.l = b.l + c.f
a.f = b.l + c.l
a.l = b.f + c.f
Fig. 14
Evaluation RuleExpression Example
Expression Evaluation Rules
‘b’ and ‘c’ both remain as a Long before and during evalua-tion, a Long is then returned and assigned to ‘a’.
Because this expression contains a Float, ‘b’ is converted to Float before the evaluation. ‘b’ is then added to ‘c’ and the resulting Float is then converted to a Long and assigned to ‘a’.
‘b’ and ‘c’ both remain as a Long before and during evalua-tion. The resulting Long returned by the addition operator is then converted to a Float and assigned to ‘a’.
‘b’ and ‘c’ both remain as a Float before and during evalua-tion. The resulting Float returned by the addition operator is then converted to a Long and assigned to ‘a’.

Operators36
=
+
-
*
/
&
|
!
~
<
>
<=
>=
<>
And
Or
Not
XOr
<<
>>
%
( )
Fig. 15
DescriptionOperator
Operator Quick Reference
Equals. This can be used in two ways. The first is to assign the value of the expression on the RHS to the variable on the LHS. The second way is when the result of the operator is used in an expression to test whether the values of the expression on the LHS and the RHS are the same (if they are the same the equals operator will return true, otherwise it will return false).
Plus. Gives a result of the value of the expression on the RHS added to the value of the expression on the LHS. If the result of this operator is not used and there is a variable on the LHS, then the value of the expression on the RHS will be added directly to the variable on the LHS.
Minus. Subtracts the value of the expression on the RHS from the value of the expression on the LHS. When there is no expression on the LHS this operator gives the negative value of the value of the expression on the RHS. If the result of this operator is not used and there is a variable on the LHS, then the value of the expression on the RHS will be subtracted directly from the variable on the LHS. (This operator cannot be used with strings).
Multiplication. Multiplies the value of the expression on the LHS by the value of the expression on the RHS. If the result of this operator is not used and there is a variable on the LHS, then the value of the variable is directly multiplied by the value of the expression on the RHS. (This operator cannot be used with strings).
Division. Divides the value of the expression on the LHS by the value of the expression on the RHS. If the result of this operator is not used and there is a variable on the LHS, then the value of the variable is directly divided by the value of the expression on the RHS. (This operator cannot be used with strings).
Bitwise AND. You should be familiar with binary numbers when using this operator. The result of this operator will be the value of the expression on the LHS AND’ed with the value of the expression on the RHS, bit for bit. Additionally, if the result of the operator is not used and there is a variable on the LHS, then the result will be stored directly in that variable. (This operator cannot be used with strings).
Bitwise OR. You should be familiar with binary numbers when using this operator. The result of this operator will be the value of the expression on the LHS OR’ed with the value of the expression on the RHS, bit for bit. Additionally, if the result of the operator is not used and there is a variable on the LHS, then the result will be stored directly in that variable. (This operator cannot be used with strings).
Bitwise XOR. You should be familiar with binary numbers when using this operator. The result of this operator will be the value of the expression on the LHS XOR’ed with the value of the expression on the RHS, bit for bit. Additionally, if the result of the operator is not used and there is a variable on the LHS, then the result will be stored directly in that variable. (This operator cannot be used with strings).
Bitwise NOT. You should be familiar with binary numbers when using this operator. The result of this operator will be the NOT’ed value of the expression on the RHS. i.e. the result will have it’s bits inverted compared to the value of the expression. (This operator cannot be used with strings).
Less than. This is used to compare the values of the expressions on the LHS and RHS. If the value of the expression on the LHS is less than the value of the expression on the RHS this operator will give a result of true, otherwise the result is false.
More than. This is used to compare the values of the expressions on the LHS and RHS. If the value of the expression on the LHS is more than the value of the expression on the RHS this operator will give a result of true, otherwise the result is false.
Less than or equal to. This is used to compare the values of the expressions on the LHS and RHS. If the value of the expression on the LHS is less than or equal to the value of the expression on the RHS this operator will give a result of true, otherwise the result is false.
More than or equal to. This is used to compare the values of the expressions on the LHS and RHS. If the value of the expression on the LHS is more than or equal to the value of the expression on the RHS this operator will give a result of true, otherwise the result is false.
Not equal to. This is used to compare the values of the expressions on the LHS and RHS. If the value of the expression on the LHS is equal to the value of the expression on the RHS this operator will give a result of false, otherwise the result is true.
Logical AND. This is used to compare the values of the expressions on the LHS and RHS. If the value of the expressions on the LHS and the RHS are both true then the result is true, otherwise the result is false.
Logical OR. This is used to compare the values of the expressions on the LHS and RHS. If the value of the expression on the LHS or the RHS is true then the result is true, otherwise the result is false.
Logical NOT. This is used to perform logical negation of a boolean value. In other words if an expression returns a true value, using the Not operator can invert this value to a false. Conversely if the expression on the RHS of this operator returns false then Not will return true.
Logical XOR. This is used to compare the values of the expressions on the LHS and RHS. If only one of the expressions on the LHS or the RHS is evaluated as true then the result is true. If both expressions are either true or both false then the XOr operator returns false.
Arithmetic shift left. Shifts each bit in the value of the expression on the LHS left by the number of places given by the value of the expression on the RHS. Additionally, when the result of this operator is not used and the LHS contains a variable, that variable will have its value shifted by the amount on the RHS. It probably helps if you understand binary numbers when you use this operator, although you can use it as if each position you shift by is multiplying by an extra factor of 2.
Arithmetic shift right. Shifts each bit in the value of the expression on the LHS right by the number of places given by the value of the expression on the RHS. Additionally, when the result of this operator is not used and the LHS contains a variable, that variable will have its value shifted by the amount on the RHS. It probably helps if you understand binary numbers when you use this operator, although you can use it as if each position you shift by is dividing by an extra factor of 2.
Modulo. Returns the remainder of the LHS divided by RHS using integer division.
Brackets. You can use sets of brackets to force part of an expression to be evaluated first, or in a certain order. Expressions in brackets are evaluated first before any other part of the current expression. In nested brackets the inner-most set are evaluated first and then each evaluated outwards.
RHS = Right hand side LHS = Left hand side

4Conditional Statements
And LoopsIn this chapter I’ll introduce conditional statements and loops. These are major parts of any programand help define the program flow. I start by explaining what boolean values are and how PureBasichandles them. I then move on to conditional statements such as ‘If’ and ‘Select’ which are used to tellthe program how to proceed when a particular condition is met. I then finish the chapter withexplanations and examples of the different loops that are available for use in PureBasic. As always fullexplanations are given along with many examples.
Boolean Logic
First let’s dig out the history books. George Boole was a mathematician and philosopher who inventeda form of algebra now called Boolean algebra. The logic behind this form of algebra has been namedBoolean Logic in honor of George Boole. This form has grown to be the basis of all modern computerarithmetic. What is astonishing is that George Boole invented this form roughly seventy years beforethe creation of the first computer that used it!
In a nutshell, the entire system revolves around two values, True and False. These two values (orstates) are tested using logic operations to determine a result. It really is as simple as that. The threemost basic logic operations were (and still are) AND, OR and NOT. It was these three operators thatformed the basis of Boole’s algebra form, and were the only operations necessary to performcomparisons or basic mathematics. (You can see these logical operators implemented in PureBasicand read how to use them in Chapter 3).
PureBasic does not have a boolean data type (as you can see from Fig.2 and Fig.3), unlike somelanguages such as C++. So in PureBasic to express a true or false value we use numbers. ‘1’ equalingTrue and ‘0’ equaling False, keep this in mind when testing for a true or false result. If you are usingthese numeric values to represent true and false, then it would be a good idea to use PureBasic’s built-in constants instead, to make your program code easier to read and understand later on.
37
Conditional Statements And Loops38
Here are the two constants:
#True#False
‘#True’ has the value of ‘1’ and ‘#False’ has the value of ‘0’.
Nearly all commands in PureBasic return a value. Sometimes this is the value of a mathematicalfunction or it may be the status of a window you have just created. These values are returned to betested if needed and sometimes they are required to make sure certain actions take place. Look at thispiece of pseudo-code:
if window creation equals Truethen draw graphics and buttons on the window
elsetell the user there has been a problemend the program
This is not real compilable code but you get the idea. Here I’m testing to make sure my window hasbeen created. Once I have tested that it has been created then I can draw my stuff on it. If, however, ithas not been created, then I end the program after informing the user something went wrong. If I don’ttest the window creation, I might run the risk of a bad program crash if I try to draw buttons andgraphics on something that doesn’t exist.
This is a first glimpse of the value of having true and false tests. This also leads us nicely into the nextsection which explains the ‘If’ keyword in more detail.
The ‘If’ Statement
An ‘If’ keyword is used to construct statements which effect the flow of the program. It affects whichpath to choose when a certain condition arises or is met. Sometimes when programs are running, youmay get unusual input or errors and is nice to be able to direct the flow of the program to handle suchthings, if and when they occur.
Constructing ‘If’ StatementsAn ‘If’ statement is used to test for a true value, if it receives this true value, then it immediatelyexecutes the piece of code after the first line of the ‘If’ statement. If it doesn’t receive this true value,then it will execute another separate piece of code immediately after the ‘Else’ keyword further alongin the statement. Let’s take a look at an example.
a.l = 5If a = 5Debug "A true value was found"
ElseDebug "No true value was found"
EndIf

Conditional Statements And Loops 39
Here the ‘If’ operator is testing that the variable ‘a’ equals ‘5’. It does, and returns a true value, so thefirst line after the ‘If’ keyword is executed. If this comparison returned false then the code after the‘Else’ keyword would of been executed. To finished the ‘If’ statement off, you must use the ‘EndIf’keyword, as this defines the end of the ‘If’ statement.
The first thing to take notice of when learning about ‘If’ statements is the expression that directlyfollows the ‘If’ keyword. This expression is being tested to see if it evaluates as true. This expressioncould be a simple variable or a very long expression. The ‘Else’ keyword is also completely optional andis only used here to present a complete example. We could omit it completely and re-type the aboveexample as this:
a.l = 5
If a = 5Debug "A true value was found"
EndIf
The only drawback with this smaller example is that it doesn’t provide any feedback when a false resultis encountered. There is no rule to say that you must use the ‘Else’ keyword within an ‘If’ statement butsometimes it’s nice to provide a way of handling a false result for the sake of completeness.
Let’s look at a simple ‘If’ statement to test to see if a variable has a value.
Beads.l = 5
If BeadsDebug "The variable has a value"
ElseDebug "The variable does not have a value"
EndIf
Here, after the ‘If’ keyword I have used just one variable as the expression to test. This variable is testedto see if it returns a value, which in this case it does. The value is not ‘0’, so it is considered true (Seethe info box ‘Everything Is True?’) and the relevant piece of code is executed. Try changing the valueof ‘Beads’ to ‘0’ and run again to see a false result.
Everything Is True?
As you have read earlier on, and generally in PureBasic, ‘1’=True and ‘0’=False. While this is correct, ‘If’statements are a special case regarding what they recognized as true. In ‘If’ statements everything equals trueunless the value returned is ‘0’ (zero) and then it equals false (unless you are making specific comparisons).This is handy when using an ‘If’ statement to test if a variable, command or expression returns any valueother than ‘0’.

Conditional Statements And Loops40
Let’s take a look at a more complicated example of an expression inside an ‘If’ statement. Re-readChapter 3 if you need to understand fully all the operators used in this expression.
Value1.l = 10Value2.l = 5Value3.l = 1
If Value1 >= 10 And (Value2 / 5) = Value3Debug "The expression evaluates as true"
ElseDebug "The expression evaluates as false"
EndIf
This ‘If’ statement is testing to see if ‘Value1’ is greater than or equal to ‘10’ and that ‘Value2’ dividedby ‘5’ is equal to ‘Value3’. As you can see the expressions that can be tested can be quite complicatedand be very specific about what values you are testing for.
The ‘ElseIf’ KeywordAnother keyword that can be used within an ‘If’ statement is the ‘ElseIf’ keyword. The ‘ElseIf’ keyword,as its name suggests, is a combination of ‘Else’ and ‘If’. Like ‘Else’, it extends an ‘If’ statement toexecute a different piece of code if the original ‘If’ expression evaluates as false. However, unlike the‘Else’ keyword, it will execute an alternative piece of code only if the ‘ElseIf’ conditional expressionevaluates as true. Confused? Here’s an example:
NumberOfBeads.l = 10
If NumberOfBeads < 5Debug "The variable has a value below '5'"
ElseIf NumberOfBeads > 5Debug "The variable has a value above '5'"
ElseDebug "The variable has a value of '5'"
EndIf
Here we test the value of the ‘NumberOfBeads’ variable. The first ‘If’ tests to see if this value is lessthan ‘5’. Because this returns false the program then moves onto the ‘ElseIf’ part. Here the ‘ElseIf’ linereturns true because ‘NumberOfBeads’ is greater than ‘5’.
The ‘ElseIf’ statement is a great way to extend an ‘If’ to check for multiple values and there is anunlimited number of ‘ElseIf’ checks you can make within an ‘If’ statement. The only drawback is thatwhen a large number of these statements are used, things can get a little complicated while decidingthe order with which they are typed in. When a great deal of checks are needed sometimes a ‘Select’statement is preferred.
Statement SkippingAt anytime during the execution of an ‘If’ statement, if any part of the statement returns true then therest of the ‘If’ statement is skipped and not executed. Because of this behavior some care is neededwhen designing an ‘If’ statement.

Conditional Statements And Loops 41
The last example showed this skipping in action, the ‘Else’ part is completely skipped because the‘ElseIf’ part returns true.
The ‘Select’ Statement
‘Select’ statements are a direct complement to ‘If’s. In that they provide a way of combining severaltests of the same variable or expression into a single block of statements. While ‘If’s are very powerfulin what they do, sometimes it’s better to use a ‘Select’ when things are starting to get complicated anda great deal of conditions are needed to be tested for. Let me show you an example of the correct syntaxand explain its use.
Days.l = 2
Select DaysCase 0Debug "0 Days"
Case 1Debug "1 Day"
Case 2Debug "2 Days"
DefaultDebug "Over 2 Days"
EndSelect
The ‘Select’ statement starts with the ‘Select’ keyword, which basically selects an expression or variableto be tested, in this case it is the variable ‘Days’. The ‘Case’ keywords that follow are branches thatcould potentially be executed should the value of ‘Days’ be equal to the variable or expression followingthat particular ‘Case’ statement. In our example here, if the variable ‘Days’ has the value ‘0’ then thecode immediately following ‘Case 0’ is executed, if the variable ‘Days’ has the value ‘1’ then the codeimmediately following ‘Case 1’ is executed and so on.
You will notice that in the last place where there would normally be a ‘Case’ statement, there is anotherkeyword named ‘Default’. This is the piece of code that executes if all other ‘Case’s return false, kind oflike the ‘Else’ within an ‘If’ statement.
Checking For Multiple Values‘Select’ statements can check for lots of different values and can be neatly presented to produce clearconcise code. To facilitate this nice and clean approach of testing lots of values, a ‘Select’ statement canuse a few shortcuts when defining the ‘Case’ statements within. Here is an example:
Weight.l = 12
Select WeightCase 0Debug "No Weight"
Case 1, 2, 3Debug "Light"
Conditional Statements And Loops42
Case 4 To 15Debug "Medium"
Case 16 To 30Debug "Heavy"
DefaultDebug "Massive"
EndSelect
Here you can see shortcuts that can be used to specify a range of cases. Using the ‘To’ keyword tospecify a range or specify several numbers in one ‘Case’ statement using commas. When specifyingranges using the ‘To’ keyword, the second number must always be larger than the first. In this exampleI’ve used numbers but these can be replaced by expressions or variables for more precise handling ofthe potential values that the selected variable or expression might have.
Here’s another fun example using a ‘Select’ statement within a console program:
If OpenConsole()PrintN("1. Official PureBasic Home")PrintN("2. Official PureBasic Forums")PrintN("3. PureArea.net")PrintN("")PrintN("Enter a number from 1 To 3 and press Return: ")Destination.s = Input()Select DestinationCase "1"RunProgram("http://www.purebasic.com")
Case "2"RunProgram("http://forums.purebasic.com")
Case "3"RunProgram("http://www.purearea.net")
EndSelectEndIfEnd
In this example I’ve used a few new commands that you will not be familiar with but I think this simpleprogram neatly demonstrates one use of the ‘Select’ statement. These new commands will be explaineda little later but I think you can gather what’s going on by their descriptive names.
The main thing to notice about this example is that the ‘Select’ statement is testing the ‘Destination’variable. This variable is assigned a String value which is returned from the ‘Input()’ command afterthe Return key is pushed. The ‘Case’ statements are then also defined using Strings to match correctlythe variable’s value. Any PureBasic type or any type resulting from an expression can be tested usinga ‘Select’ or ‘Case’ statement.
As a side note, you can also see in this last example that I’ve used an ‘If’ statement to test that‘OpenConsole()’ returns true and correctly opens a console window.

Conditional Statements And Loops 43
Loops
To be able continuously to receive and process data you need loops. All programs that use graphicaluser interfaces employ loops to manage the drawing of the interface and to continuously monitor forinput from the user. For example, the PureBasic IDE uses many loops within its code, to monitor forkeypresses and mouse clicks, to update displays, etc. Loops are also a great way of processing largeamounts of data within arrays or linked lists by iterating through them, one element at a time.
‘For’ LoopsThe first loop I will talk about is probably the most well known and maybe the most used loop of all,it is the ‘For’ loop. These loops, sometimes called ‘For/Next’ loops, are a great way of looping throughdata when you need an incrementing variable available to be used as a counter or as an index for anindividual element of a looping array. Here’s an example to get things started.
For x.l = 1 To 10Debug x
Next x
In this example we construct a loop using the ‘For’ keyword. A user defined Long variable must beentered immediately following this keyword, which in this example I’ve called ‘x’. The value assignedto ‘x’ is the start value of our loop, here I’ve assigned it the value of ‘1’. After this variable assignmentthe ‘To’ keyword is used to define a range, so I’ve entered ‘10’ as the upper limit that ‘x’ should reachduring our loop. This completes the beginning of the loop, all we need to do now is specify the endpoint of the loop. We do this using the line ‘Next x’. This last line tells the compiler that after everysingle step of the loop, move on to the next value of ‘x’ specified in the range in the first line, then startthe loop again.
The code between these two lines is repeated in a loop depending on how many steps there arebetween the start and end value in the range specified. Once the value of ‘x’ reaches the upper limitspecified after the ‘To’ keyword, the loop exits and normal program flow is resumed.
You will notice if you run the above example, the Debug Output window shows the different values that‘x’ has during the loop. You will see that the loop is repeated ten times as each time the ‘x’ variable isincremented according to the specified range.
Here’s another example of using a loop to easily traverse an array.
Dim Names.s(3)
Names(0) = "Gary"Names(1) = "Sara"Names(2) = "Stella"Names(3) = "MiniMunch"
For x.l = 0 To 3Debug Names(x)
Next x
Conditional Statements And Loops44
Because all array values are accessed using indices, and these indices always start from zero, ‘For’loops are fantastic for performing operations on all the elements within an array using just a smallamount of code. As you can see from the last example, it just takes three lines of code to echo all of thearray’s element values to the Debug Output window, no matter what size the array. A bigger array justneeds a bigger range in the first line of the ‘For’ loop definition.
‘For’ loops can also be constructed using expressions too:
StartVar.l = 5StopVar.l = 10
For x = StartVar - 4 To StopVar / 2Debug x
Next x
and, of course, loops can be nested if you need to process multi-dimensional arrays:
Dim Numbers.l(2, 2)
Numbers(0, 0) = 1Numbers(0, 1) = 2Numbers(0, 2) = 3Numbers(1, 0) = 4Numbers(1, 1) = 5Numbers(1, 2) = 6Numbers(2, 0) = 7Numbers(2, 1) = 8Numbers(2, 2) = 9
For x = 0 To 2For y = 0 To 2Debug Numbers(x, y)
Next yNext x
As long as the counter variables are different names, you can nest as many ‘For’ loops as you wish. Theunique configurability of ‘For’ loops make them powerful to use and extremely useful for looping codea user defined amount of times.
Until now you’ve seen how ‘For’ loops increment the counter variable by ‘1’ on every iteration of theloop but the incremental step can be configured manually using the optional ‘Step’ keyword. Here isanother example:
For x.l = 0 To 10 Step 2Debug x
Next x
You’ll notice the ‘Step’ keyword appears on the first line of the ‘For’ loop. This keyword can only beused in a ‘For’ loop and this is the only place in the loop that it can be used. Immediately after the ‘Step’

Conditional Statements And Loops 45
keyword you specify the amount that the counter variable should be incremented by on each iterationof the loop. In this case I’ve used the number ‘2’, this increments the variable ‘x’ by ‘2’ on everyiteration. If you run this example and look at the Debug Output window you will see the values echoedare all multiples of ‘2’.
‘ForEach’ LoopsThis type of loop is different from all the others in that it only works with linked lists. The syntax isvery similar to the ‘For’ loop except it doesn’t need a counter variable setting up. Here is a simpleexample.
NewList Shopping.s()
AddElement(Shopping())Shopping() = "Bunch of bananas"
AddElement(Shopping())Shopping() = "Tea bags"
AddElement(Shopping())Shopping() = "Cheese"
ForEach Shopping()Debug Shopping()
Next
In this example after the linked list is defined and a few elements added, I use a ‘ForEach’ loop to echothe list’s contents to the Debug Output window. As you can see the syntax is very clear and very simple.The loop starts with the ‘ForEach’ keyword followed by the linked list name. Then the end of the loopis defined by using the ‘Next’ keyword. The code that sits between these two lines is the code that’srepeated for the length of the linked list. Once the end of the linked list is reached the loop will exit. A‘ForEach’ loops works on all type of linked list, even structured linked lists. I will talk more aboutlinked lists a little later on in Chapter 5.
‘While’ LoopsThis particular loop uses an expression to determine wether it should start and how long it shouldcontinue. If this expression returns true then the loop will start. After each individual iteration throughthe loop, the expression is tested again for a true value, if this expression still returns true, the loopcontinues. If this expression returns false at any time, the loop ends. Look at this example:
Monkeys.l = 0
While Monkeys < 10Debug MonkeysMonkeys + 1
Wend
This loop is very simple to construct. It starts with the ‘While’ keyword, then an expression is used tocontrol the loop, in this case I’ve used ‘Monkeys < 10’. The loop is then completed using the ‘Wend’
Conditional Statements And Loops46
keyword. The initial expression checks to see if the variable ‘Monkeys’ is below ‘10’, if it is the loop willenter and start. The code within this loop is then repeated until ‘Monkeys < 10’ returns false. If youlook at the output in the Debug Output window you will see that when ‘Monkeys’ equals ‘10’ theexpression returns false (because it is no longer less than ‘10’) and the loop ends.
One thing to keep in mind when using ‘While’ loops is that if the initial expression returns false thenthe loop will never be entered and started. This can be demonstrated in this example:
Monkeys.l = 20
While Monkeys < 10Debug "This code is never executed"
Wend
‘Repeat’ LoopsThese types of loops are pretty much the opposite of ‘While’ loops. ‘Repeat’ loops begin with the‘Repeat’ keyword and end in one of two ways. The first way is using the ‘Until’ keyword preceding anexpression and the second way is using the ‘Forever’ keyword. I’ll fully explain both ways, starting withthe ‘Until’ keyword.
Look at this example:
Bananas.l = 0
RepeatDebug BananasBananas + 1
Until Bananas > 10
Opposite to ‘While’ loops, the controlling expression is at the end of the loop and this is evaluated tosee if it returns false. If it does, the loop continues, if it returns true, the loop ends. As you can see fromthe above example, when ‘Bananas’ value is greater than ‘10’ the loop ends.
Another point to take notice of is that unlike ‘While’ loops, a ‘Repeat’ loop always enters and runs atleast once before the expression on the end is evaluated. This is demonstrated here:
Bananas.l = 20
RepeatDebug Bananas
Until Bananas > 10
You can see that even thought ‘Bananas’ is greater than ‘10’ the loop is started and run once beforeevaluating the expression at the end of the loop. Once this expression is evaluated, ‘Bananas’ is greaterthan ‘10’ so the expression returns true and the loop ends.
‘Repeat’ loops also have an alternative side to them, they can be used with another keyword in orderto make fully continuous loops. To construct a continuous loop just use the ‘Forever’ keyword instead
Conditional Statements And Loops 47
of the ‘Until’ keyword and an expression, like this:
Counter.l = 0
RepeatDebug CounterCounter + 1
ForEver
This is handy if you want to keep a loop going forever or you are not sure what condition is to be metin order to exit it, or you may have multiple conditions that all need to be met in order jump out of theloop. Use the ‘Kill Program’ menu command (Menu:Debugger->Kill Program) to exit this example.
Controlling Loops Using ‘Break’ and ‘Continue’At any time all these different types of loop can be controlled by two common keywords. These twokeywords are ‘Break’ and ‘Continue’. I’ll explain ‘Break’ first.
If the ‘Break’ keyword is used anywhere within any type of loop then that loop is immediately exitedas soon as this keyword is encountered. In the case of nested loops, there is an optional parameter thatcan be added to the end of the ‘Break’ keyword which specifies how many loops to exit out of. Let’shave a look at an example of the ‘Break’ keyword:
For x = 1 To 10If x = 5Break
EndIfDebug x
Next x
Here in this ‘For’ loop I’ve prematurely broken out of the loop using the ‘Break’ keyword when ‘x’equals ‘5’. You will notice the loop exits even before ‘5’ is echoed to the Debug Output window. Here isan example of breaking out of nested loops using the optional level parameter of the ‘Break’ keyword:
Manually Stopping Never Ending Loops
Sometimes when you are using loops in your program you may run into the problem of unintendedcontinuous loops. This can cause problems in your programs because these loops can stop everything elsefrom working until they exit. One of the main headaches of unintended continuous loops is that programscontaining them are notoriously difficult to quit.
The PureBasic IDE makes this easy for you. If you need to stop the running program manually then just hitthe ‘Kill Program’ button on the IDE toolbar, it’s the one that looks like a skull or use the menu command(Menu:Debugger->Kill Program). This not only ends the loop but also quits the whole program straightaway.

Conditional Statements And Loops48
For x.l = 1 To 10Counter = 0RepeatIf x = 5Break 2
EndIfCounter + 1
Until Counter > 1Debug x
Next
Here, once ‘x’ equals ‘5’ then both loops are exited by using the command ‘Break 2’.
Next up is the ‘Continue’ keyword. This enables you at anytime to jump out of the current iteration andcontinue to the next one inside the current loop. This is more simple than it sounds:
For x.l = 1 To 10If x = 5Continue
EndIfDebug x
Next
Here you can see that when ‘x’ equals ‘5’ (on the fifth iteration) the ‘Continue’ keyword is used. Thisjumps out of the loop and continues from the top at the beginning of the sixth iteration where ‘x’ nowequals ‘6’. Because of this jump and continuation of the loop, you will notice in the Debug Outputwindow that ‘5’ was never echoed because on that iteration it jumped out of the loop before the ‘Debugx’ line was executed.
Loops can be used for a variety of things in computer programming, mainly to reduce tedious code andto iterate quickly through vast amounts of data. Hopefully, you should now have an insight to how theycan be used.

5Other DataStructures
In this chapter I’ll explain how to create and use other methods for storing and organizing data, suchas user defined structures, arrays and linked lists. Data structures such as these are essential forprograming applications and games as they allow for easier and faster access to multiple values ofrelated and non-related data. As always, full explanations and multiple examples are given.
Structures
Earlier in Chapter 2, I introduced to you the built-in types, Byte, Character, Word, Long, Quad, Float,Double and String. Using the ‘Structure’ keyword you are able to define your own structured type andthen assign that type to a variable. Creating your own structured variable is handy if you need to grouplots of common variable names under one structure name. Confused? Then let’s look at an example ofa structure that contains several fields:
Structure PERSONALDETAILSFirstName.sLastName.sHome.s
EndStructure
Me.PERSONALDETAILS
Me\FirstName = "Gary"Me\LastName = "Willoughby"Me\Home = "A House"
Debug "First Name: " + Me\FirstNameDebug "Last Name: " + Me\LastNameDebug "Home: " + Me\Home
Here the structure ‘PERSONALDETAILS’ is created using the ‘Structure’ keyword. After that the
49
Other Data Structures50
components of the structure are then defined in exactly the same way as defining normal variables.The ‘EndStructure’ keyword is used to define the end of the new structure. After the structure isdeclared it is immediately ready for use. We assign this structured type in exactly the same way as weassign any type to a variable, like this:
Me.PERSONALDETAILS
Here the variable name is ‘Me’ and its type is ‘PERSONALDETAILS’. To assign values to the individualvariables (sometimes called fields) within the new ‘Me’ structured variable, we use the ‘\’ character. Ifyou look at the larger example, the ‘\’ character is also used to retrieve data from the individual fieldstoo, like this:
Father.PERSONALDETAILSFather\FirstName = "Peter"Debug Father\FirstName
Here in this little example, we create a new structured variable called ‘Father’ with a user definedstructured type of ‘PERSONALDETAILS’. We assign the value of ‘Peter’ to the ‘FirstName’ field within‘Father’. We then echo this value to the Debug Output window.
It might not of hit you yet but structures are incredibly useful things. In applications they can help todefine anything from personal records to window coordinates, in games they can be used to helpdefine bullets, spaceships along with all associated values.
Memory ConsiderationsThe size in memory of a structured variable depends on the field variables used within the initialstructure definition. In the ‘PERSONALDETAILS’ structure there are defined three field variables ofthe String type, each having a size of 4 Bytes (see Fig.3 earlier in Chapter 2 for sizes of String types).So the newly declared variable ‘Me’ takes up 12 Bytes (3 x 4 Bytes) in memory. We can test this byechoing the output returned by the ‘SizeOf()’ command.
Structure PERSONALDETAILSFirstName.sLastName.sHome.s
EndStructureDebug SizeOf(PERSONALDETAILS)
Here ‘SizeOf()’ returns the value of ‘12’ which is how many Bytes this structure uses in memory.
The ‘SizeOf()’ Command
This command returns the size of any structure or defined variable in Bytes. It does not work with arrays,linked lists or interfaces. This command is invaluable for Windows programming as some Win32 APIfunctions need the size of a particular structure or variable as a parameter. Read more about the WindowsApplication Programming Interface (Win32 API) later in Chapter 13.

Other Data Structures 51
Inheriting Fields From Another StructureStructures can also inherit fields from another structure by using the optional ‘Extends’ keyword.
Structure PERSONALDETAILSFirstName.sLastName.sHome.s
EndStructure
Structure FULLDETAILS Extends PERSONALDETAILSAddress.sCountry.sZipCode.s
EndStructure
User.FULLDETAILS
User\FirstName = "John"User\LastName = "Smith"User\Home = "A House"User\Address = "A Street"User\Country = "UK"User\ZipCode = "12345"
Debug "Users First Name: " + User\FirstNameDebug "Users Last Name: " + User\LastNameDebug "Users Home: " + User\HomeDebug "Users Address: " + User\AddressDebug "Users Country: " + User\CountryDebug "Users Zip Code: " + User\ZipCode
In this example the ‘FULLDETAILS’ structure is extending the ‘PERSONALDETAILS’ structureduring its creation, inheriting all the fields from the ‘PERSONALDETAILS’ structure. These fields thenappear first in our new structure. We assign this newly created structured type to the variable ‘User’,then proceed to assign values to all its fields. These are then tested by echoing their values to the DebugOutput window.
Structure UnionsStructure unions are a way of conserving memory by forcing groups of variables within a structure toshare the same memory address. This is maybe a little too advance to introduce this to you now butI’ve included it here for completeness. You may want to read Chapter 13 (Pointers) to understandbetter how unions work. Here is a simple example:
Structure UNIONSTRUCTUREStructureUnionOne.lTwo.lThree.l
EndStructureUnionEndStructure

Other Data Structures52
Debug SizeOf(UNIONSTRUCTURE)
UnionVariable.UNIONSTRUCTURE
UnionVariable\One = 123Debug UnionVariable\One
UnionVariable\Three = 456Debug UnionVariable\One
When we declared the ‘UNIONSTRUCTURE’ we have used the ‘StructureUnion’ and‘EndStructureUnion’ keywords to encapsulate the variables we want to use the same memory area.When we run this small program, the first debug statement echoes ‘4’ (Bytes) to the Debug Outputwindow. This is because there are three variables inside this structure, that all share the same place inmemory so only the size of one Long variable is returned.
Further on in the program we assign the ‘UnionVariable’ the type of ‘UNIONSTRUCTURE’ and assignthe value of ‘123’ to ‘UnionVariable\One’, then it’s echoed. We then assign a completely new value of‘456’ to ‘UnionVariable\Three’ but because this field shares the same place in memory as the otherfields, we can access this value using any other field name, in this case we again echo the value of‘UnionVariable\One’ to the Debug Output window and it predictably displays the shared value of‘UnionVariable\Three’.
Structures can also contain what are known as Static Arrays but I’ll need to explain Arrays before wecan apply that knowledge to structures. Arrays and Static Arrays are explained fully in the next section.
Arrays
In PureBasic, An Array can hold a user defined amount of variables of the same data type. Individualvariables within the array are accessed by an index using a consecutive range of integers (wholenumbers). Arrays can also be defined to contain structured variables instead of the standard PureBasicvariable types. This section will teach you all you need to know about arrays in PureBasic.
The ‘Dim’ KeywordArrays in PureBasic are created by using the ‘Dim’ keyword, like this example:
Dim LongArray.l(2)
Let me explain this line of code a little more clearly, first we use the ‘Dim’ keyword to tell the compilerwe are about to define an array. Then we give this new array a name, In this case, I’ve imaginativelycalled it ‘LongArray’. After the name, we then assign the array type in a similar way as variable typesvia a type suffix. Here I’ve used the ‘.l’ suffix to define that this is an array whose type is Long. Afterthe type is defined then we have to define how many indices this array is to hold. We use brackets todefine the last index number. In the above example we’ve used a ‘2’ to define the last index, so thisactually gives our new array three indices, this is because array indices always start at zero. Once thisarray has been created, each index contains a Long variable.

Other Data Structures 53
This simple array is sometimes referred to as a One Dimensional array because it requires only oneindex to assign and return all values within it. In this more complete example we define an array andassign values to its indices:
Dim LongArray.l(2)
LongArray(0) = 10LongArray(1) = 25LongArray(2) = 30
Debug LongArray(0) + LongArray(1)Debug LongArray(1) * LongArray(2)Debug LongArray(2) - LongArray(0)
After the values are assigned, we then echoed some tests to the Debug Output window using the valuesstored in the array indices. For example, the first return value to be echoed is from ‘10 + 25’, which arethe values stored in indices ‘0’ and ‘1’. The results of ‘25 * 30’ and ‘30 - 10’ are then echoed too. Arrayindices can also be expressed using variables or expressions.
LastIndex.l = 2FirstIndex.l = 0Dim StringArray.s(LastIndex)
StringArray(FirstIndex) = "One is one and all alone"StringArray(FirstIndex + 1) = "Two, two, the lily-white boys"StringArray(FirstIndex + 2) = "Three, three, the rivals"
Debug StringArray(FirstIndex)Debug StringArray(FirstIndex + 1)Debug StringArray(FirstIndex + 2)
Here we’ve defined an array with three indices each containing a String variable (note the ‘.s’ suffixattached to the array name while using the ‘Dim’ command). We used the variable ‘LastIndex’ to assignthe last index of the new array. Then we used the variable ‘FirstIndex’ to assign a String to the firstindex of the array and in later assignments we use an expression using the addition operator. Thissame technique (using an expression as an index) is used to return results from the different arrayindices to the Debug Output window. See Fig.16 for a graphical representation of the above array.
0
1
2
One is one and all alone
Two, two, the lily-white boys
Three, three, the rivals
Fig. 16
ValueIndex
One Dimension String Array

Other Data Structures54
Because arrays are neatly ordered into indices, this makes it possible to iterate through them usingloops very quickly. Just to wet your appetite, here is an example of an array with a thousand indiceshaving each index assigned a value using a ‘For’ loop and then each index’s value is echoed to theDebug Output window using a second ‘For’ loop.
Dim TestArray.l(999)
For x = 0 To 999TestArray(x) = x
Next x
For x = 0 To 999Debug TestArray(x)
Next x
Run it and take a look at the Debug Output window. As you can see, with arrays it’s very fast to set andget even a thousand values.
Multi-dimensional ArraysThe best way of describing multi-dimensional arrays are in terms of tables holding columns and rows.To create multi-dimensional arrays simply specify the number of columns and rows you want the arrayto have. In the following example, we will create an array called ‘Animals’ which contains three indices,each of which contain a further three indices.
Dim Animals.s(2, 2)Animals(0, 0) = "Sheep"Animals(0, 1) = "4 Legs"Animals(0, 2) = "Baaa"
Animals(1, 0) = "Cat"Animals(1, 1) = "4 Legs"Animals(1, 2) = "Meow"
Animals(2, 0) = "Parrot"Animals(2, 1) = "2 Legs"Animals(2, 2) = "Screech"
Debug Animals(0, 0) + " has " + Animals(0, 1) + " And says " + Animals(0, 2)Debug Animals(1, 0) + " has " + Animals(1, 1) + " And says " + Animals(1, 2)Debug Animals(2, 0) + " has " + Animals(2, 1) + " And says " + Animals(2, 2)
After defining the array, we then assign values to its indices. Because the ‘Animals’ array has twoindices from which data is assigned and retrieved it is known as a Two Dimensional array. Twodimensional arrays can easily be understood by representing them in a two dimensional tableconsisting of rows and columns. Fig.17 shows the ‘Animals’ array in a similar way that Fig.16 shows aone dimensional array. It shows the rows and columns that can be accessed using two indices requiredby a two dimensional array.

Other Data Structures 55
Using Fig.17 as a reference we can see now how easily it is to assign and retrieve values of the variousindices. For example, if I want to echo the value of row index ‘1’ and column index ‘2’ to the DebugOutput window, we type:
Debug Animals(1, 2)
This should echo the text ‘Meow’. If you wanted to replace an entire row then we can do so like this:
Animals(0, 0) = "Tripod"Animals(0, 1) = "3 Legs"Animals(0, 2) = "Oo-la"
This replaces the Strings ‘Sheep’, ‘4 Legs’ and ‘Baaa’ with ‘Tripod’, ‘3 Legs’ and ‘Oo-la’ inside row index‘0’ within the ‘Animals’ array. Fig.17 now looks like Fig.18, notice the modified first row.
Another way to explain Multi-dimensional arrays are that they are arrays within arrays. Just think thatin each array index is contained another array and you get the idea of multi-dimensional arrays. Thenumber of arrays that are contained within each index of the first dimension is dependent on how thearray was first defined.
0
1
2
Sheep
Cat
Parrot
4 Legs
4 Legs
2 Legs
Baaa
Meow
Screech
Fig. 17
0 1 2Index
Two Dimension String Array
0
1
2
Tripod
Cat
Parrot
3 Legs
4 Legs
2 Legs
Oo-la
Meow
Screech
Fig. 18
0 1 2Index
Two Dimension String Array (modified)

Other Data Structures56
In this following example, I show how to define one, two, three, four and five dimensional arrays:
Dim Animals.s(5)Dim Animals.s(5, 4)Dim Animals.s(2, 5, 3)Dim Animals.s(1, 5, 4, 5)Dim Animals.s(2, 3, 6, 2, 3)
After two dimensions, things start to get a little hard on your head, but if you keep in mind, the arraywithin an array explanation, you should be able to work things out. Even though the maximumnumber of dimensions that can be assigned to an array is two hundred and fifty five (255), using arraysover two or three dimensions is unusual in everyday programming practices.
Structured Type ArraysUntil now we have seen how to define different arrays using only the standard PureBasic types but wecan also ‘Dim’ an array using a structure. Let’s look at a simple example using a one dimensional array:
Structure FISHKind.sWeight.sColor.s
EndStructure
Dim FishInTank.FISH(2)
FishInTank(0)\Kind = "Clown Fish"FishInTank(0)\Weight = "4 oz."FishInTank(0)\Color = "Red, White and Black"
FishInTank(1)\Kind = "Box Fish"FishInTank(1)\Weight = "1 oz."FishInTank(1)\Color = "Yellow"
FishInTank(2)\Kind = "Sea Horse"FishInTank(2)\Weight = "2 oz."FishInTank(2)\Color = "Green"
Debug FishInTank(0)\Kind+" "+FishInTank(0)\Weight+" "+FishInTank(0)\ColorDebug FishInTank(1)\Kind+" "+FishInTank(1)\Weight+" "+FishInTank(1)\ColorDebug FishInTank(2)\Kind+" "+FishInTank(2)\Weight+" "+FishInTank(2)\Color
Here after we define the ‘FISH’ structure we define the array using the ‘Dim’ keyword and use ‘FISH’as the array’s type in exactly the same way as we used the ‘.s’ (String) as the ‘Animals’ array type. I’vealso used ‘2’ as the last index for this array. To assign values to the fields of each of the array’s indicesit’s incredibly simple. We just amalgamate the syntax of assignment to arrays and structures like this:
FishInTank(0)\Kind = "Clown Fish"

Other Data Structures 57
Let’s break this down into easily understandable chunks. First is the name of the array, in this case itis ‘FishInTank’. Then comes the current index contained within brackets in this case, index ‘0’. Nextwe use the ‘\’ character to access the field called ‘Kind’ within the ‘FISH’ structure which has beenassigned to the ‘FishInTank’ array. We then use the ‘=’ operator to assign a String value to that field.Simple! To retrieve the value we have just assigned, we just use exactly the same syntax but withoutthe assignment part, like this:
Debug FishInTank(0)\Kind
If we need to assign or retrieve a value from another index we do it like an array:
Debug FishInTank(0)\KindDebug FishInTank(1)\KindDebug FishInTank(2)\Kind
This would list the ‘Kind’ fields of all the indices of the ‘FishInTank’ array. To assign or retrieve any ofthe other fields we just use their names:
Debug FishInTank(1)\KindDebug FishInTank(1)\WeightDebug FishInTank(1)\Color
Here we echo all the different fields to the Debug Output window of index ‘1’. To make things moreunderstandable refer to Fig.19 for a graphical representation of the ‘FishInTank’ array.
As with the standard type arrays you can also specify multi-dimensional arrays using a structure as thearray type. This gives you access to the unique fields of a structure within every index available insidemulti-dimensional arrays. To define a multi-dimensional structured type array we do it in exactly thesame way as one dimension structured type array but we just add more dimensions.
0
1
2
Kind: Clown Fish
Kind: Box Fish
Kind: Sea Horse
Weight: 4 oz.
Weight: 1 oz.
Weight: 2 oz.
Colour: Red, White and Black
Colour: Yellow
Colour: Green
Fig. 19
‘FISH’ StructureIndex
One Dimension Structured Type Array

Other Data Structures58
Here is an example of how to define a two dimensional structured type array:
Structure FISHKind.sWeight.sColor.s
EndStructure
Dim FishInTank.FISH(2, 2)...
I’ll not type anymore code out regarding this two dimensional array because it will be far too long.Instead refer to Fig.20 for a fictional two dimensional structured type array.
To retrieve a value from this kind of array we need to supply two indices and a field name such as this:
Debug FishInTank(1, 1)\Kind
which would echo the text ‘Angel Fish’ to the Debug Output window. If we wanted to change this orother values we use the same method to access this area in the array:
FishInTank(1, 1)\Kind = “Devil Fish”FishInTank(1, 1)\Weight = “6 oz.”FishInTank(1, 1)\Color = “Dark Red”
This would change all fields of the ‘FISH’ structure located in the middle area in the array located atindices ‘1, 1’. This is shown in Fig.21.
As you can see these types of arrays are extremely handy if a little complex (especially when you startgoing beyond three dimensions), but to know how they work will give you an advantage later on inyour programming.
0
1
2
Fig. 20
Index
Two Dimension Structured Type Array
Kind: Clown FishWeight: 4 oz.Colour: Red, White and Black
Kind: Box FishWeight: 1 oz.Colour: Yellow
Kind: Sea HorseWeight: 2 oz.Colour: Green
Kind: Parrot FishWeight: 5 oz.Colour: Red
Kind: Angel FishWeight: 4 oz.Colour: Orange
Kind: ShrimpWeight: 1 oz.Colour: Pink
Kind: Gold FishWeight: 2 oz.Colour: Orange
Kind: Lion FishWeight: 8 oz.Colour: Black and White
Kind: SharkWeight: 1 lb.Colour: Grey
0 1 2

Other Data Structures 59
You will probably only use one dimensional structured type arrays in your programs for now but toknow how multi-dimensional structured type arrays work will give you a good understanding of moreadvanced code.
Redefining Arrays Once CreatedStandard arrays in PureBasic are not completely static, meaning they can be redefined in two differentways. The first way is to use the ‘Dim’ command again which redefines the array but in the processdestroys all previous data assigned to it. The second way is to use the ‘ReDim’ command whichredefines the array but keeps previous data intact. Here are examples showing both these behaviors.First let’s look at redefining an array with the ‘Dim’ command:
Dim Dogs.s(2)
Dogs(0) = "Jack Russell"Dogs(1) = "Alaskan Husky"Dogs(2) = "Border Collie"
Debug Dogs(0)Debug Dogs(1)Debug Dogs(2)
Dim Dogs.s(2)
Debug Dogs(0)Debug Dogs(1)Debug Dogs(2)
Here after the initial array creation and assignment of data I’ve used the ‘Dim’ command again toredefine the array with the same amount of indices as before. After the second definition, you willnotice that the ‘Debug’ commands return nothing from the newly defined array. This is because alldata has been destroyed during the redefinition. This data destruction can have a good use though. Forexample, if I needed to free up the memory used by an array, I could just redefine it with zero (0) asthe maximum index which would free all memory associated with it. When redefining arrays like thisyou must always redefine them using the same type or an error will be raised.
0
1
2
Fig. 21
Index
Two Dimension Structured Type Array (Modified)
Kind: Devil FishWeight: 6 oz.Colour: Dark Red
Kind: Clown FishWeight: 4 oz.Colour: Red, White and Black
Kind: Box FishWeight: 1 oz.Colour: Yellow
Kind: Sea HorseWeight: 2 oz.Colour: Green
Kind: Parrot FishWeight: 5 oz.Colour: Red
Kind: ShrimpWeight: 1 oz.Colour: Pink
Kind: Gold FishWeight: 2 oz.Colour: Orange
Kind: Lion FishWeight: 8 oz.Colour: Black and White
Kind: SharkWeight: 1 lb.Colour: Grey
0 1 2

Other Data Structures60
Here is an example of how to keep the data intact while redefining an array using the ‘ReDim’command:
Dim Dogs.s(2)
Dogs(0) = "Jack Russell"Dogs(1) = "Alaskan Husky"Dogs(2) = "Border Collie"
For x.l = 0 To 2Debug Dogs(x)
Next x
Debug ""
ReDim Dogs.s(4)
Dogs(3) = "Yorkshire Terrier"Dogs(4) = "Greyhound"
For x.l = 0 To 4Debug Dogs(x)
Next x
Here I’ve used the ‘ReDim’ command to redefine the array but this time as well as redefining it, I’vegiven it two extra indices. The extra two indices (‘3’ and ‘4’) are assigned data and then the whole arrayhas its data echoed to the Debug Output window. Notice that the data from the initial creation is notlost. You must be aware though, if I used the ‘ReDim’ command to redefine an array with fewer indicesthan it previously had then of course the data within the discarded indices are lost. Also if you areredefining a multi-dimensional array using the ‘ReDim’ command then only the last dimension can beresized. This is standard behavior for a Basic command such as this.
Rules For Using ArraysEven though arrays are very flexible they have a few rules to take into account when using them. Theserules should be observed when using arrays in your programs.
1). If an array is re-defined using the ‘Dim’ command, its previous data is lost.2). If an array is re-defined using the ‘ReDim’ command, its previous data is kept.3). Arrays can only be made up of one type of variable (a structured or a standard variable type).4). Arrays can be Global, Protected, Static and Shared. See Chapter 6 (Program Scope).5). The size of an array is only limited by the current machine’s installed RAM.6). Multi-dimensional arrays can have 255 dimensions.7). Arrays can be dynamically defined, using a variable or an expression to define dimension size.8). When defining dimension size, you define the last index number (all indices start at ‘0’).9). Dimensions can be of different sizes in multi-dimensional arrays.

Other Data Structures 61
Static Arrays Within Structures
Static arrays within structures are a little bit different from the normal arrays that have beenpreviously described. Static arrays in their very nature are static and therefore cannot be modifiedonce they have been defined. These types of arrays also only exist within structures.
Static arrays also have a different set of rules to take into account when using them:
1). Once a static array is defined its internal structure cannot be modified.2). Static arrays (like structures) cannot be redefined.3). They can only be made up of one type of variable (a structured or a standard variable type).4). The size of an array is only limited by the current machine’s installed RAM.5). Static arrays can only have one dimension.6). They can be dynamically defined, using a variable or an expression to define dimension size.7). When defining dimension size, you define the amount of indices it is to contain, not the last index.8). Static arrays can only be accessed through the structure variable within which they are defined.
So now that I’ve given you the main rules, let me give you an example of how they are used:
Structure FAMILYFather.sMother.sChildren.s[2]Surname.s
EndStructure
Family.FAMILY
Family\Father = "Peter"Family\Mother = "Sarah"Family\Children[0] = "John"Family\Children[1] = "Jane"Family\Surname = "Smith"
Debug "Family Members:"Debug Family\Father + " " + Family\SurnameDebug Family\Mother + " " + Family\SurnameDebug Family\Children[0] + " " + Family\SurnameDebug Family\Children[1] + " " + Family\Surname
Here in this example, the ‘FAMILY’ structure has a field called ‘Children’ which is a static String array.When we defined this array, we used the number ‘2’. This defines this static array will hold two indices.This behavior is completely different to standard arrays, with which you define the last index oncreation. In our new static array we now have two indices, ‘0’ and ‘1’, further on in the example I assignvalues to all the fields in the ‘Family’ structured variable, including the two indices in the ‘Children’static array. You will notice that static arrays have a slightly different syntax for assigning andretrieving data, they use square brackets instead of the usual curved ones.
Other Data Structures62
Assigning data to a static String array (using square brackets):
Family\Children[0] = "John"
Assigning data to a standard Long array (using curved brackets):
LongArray(0) = 10
You will also notice that you do not need to use a keyword such as ‘Dim’ when you define a static array.You just add square brackets to the end of a field within a structure. Within the square brackets youdefine how many indices you wish to give to this newly created static array. In the ‘FAMILY’ structureabove, we use the String type to create a static array but you can use any PureBasic built-in type or evenuse another structure!
Let’s look at another simple example:
Structure EMPLOYEESEmployeeName.sEmployeeClockNumber.lEmployeeAddress.sEmployeeContactNumbers.l[2]
EndStructure
Dim Company.EMPLOYEES(9)
Company(0)\EmployeeName = "Bruce Dickinson"Company(0)\EmployeeClockNumber = 666Company(0)\EmployeeAddress = "22 Acacia Avenue"Company(0)\EmployeeContactNumbers[0] = 0776032666Company(0)\EmployeeContactNumbers[1] = 0205467746
Company(1)\EmployeeName = "Adrian Smith"Company(1)\EmployeeClockNumber = 1158...
Here I create a user defined structure called ‘EMPLOYEES’ to describe a small company employeerecord and then create a standard array to contain ten of these records (remember that in a standardarray you define the last index and these indices start at ‘0’). Inside the ‘EMPLOYEES’ structure I’veused a Long static array to store two contact phone numbers. I’ve then started to define the individualemployee records starting with ‘Company(0)\...’ and then onto ‘Company(1)\...’, etc. I don’t actuallycomplete this example due to not wanting to waffle on, but you can see where I’m going with it andhow everything works.
Linked Lists
Linked Lists are similar to arrays in that they are able to refer to lots of data using one name. They arehowever different to arrays in that they don’t use an index to assign and retrieve data.

Other Data Structures 63
These lists are like a book where you can flip through the data from start to finish or just turn to a pagewithin and read the data from there. Linked lists are also totally dynamic, meaning that they can growor shrink depending on how much data you need them to hold. When increasing the size of a linkedlist you won’t harm or change any of the other data held within it and you can safely add elements tothe list in any position necessary.
Linked lists are a great way of storing and organizing data of an unknown length and can be sorted inseveral ways. There is also a built-in ‘Linked List’ library which provides functions to perform elementadditions, deletions and element swapping. Inside the built-in ‘Sort’ library there are also twofunctions that are used purely for sorting linked lists, I shall mention these later. A general overviewand an introduction to PureBasic’s built-in commands is given later in Chapter 7.
The ‘NewList’ KeywordLinked Lists in PureBasic are created by using the ‘NewList’ keyword as in this example:
NewList Fruit.s()
Defining a linked list is very similar to defining an array using the ‘Dim’ command. First we use the‘NewList’ keyword to tell the compiler we are about to define a linked list. Next, we define a name forthe new list, in this case we’ve called it ‘Fruit’. After a name has been given we then define its type,which again in this case is the String type. Brackets are then used to finish the list definition. You willnotice in this small example that there are no indices defined within the brackets. This is becauselinked lists don’t need them, they are dynamic and will grow as you add elements. Let’s look at how weadd elements to our new list, here is a more complete example:
NewList Fruit.s()
AddElement(Fruit())Fruit() = "Banana"
AddElement(Fruit())Fruit() = "Apple"
Because linked lists don’t have any indices it may at first seem a little strange using them because youmight not know where in the list you are. In the above example, I’ve added two new elements to the‘Fruit()’ list. To do this I used the ‘AddElement()’ function of the built-in Linked List library. When youadd a new element using this function, not only does it automatically define a new element but it alsomakes the linked list name point to that newly created, empty element. So we just use its name toassign a piece of data to the list, notice we still use the brackets:
Fruit() = "Banana"
When we add another element using the ‘AddElement()’ function then exactly the same process takesplace. First the new element is created, then the linked list name again points to the newly createdempty element. So then we add data to the new element in exactly the same way:
Fruit() = "Apple"
Other Data Structures64
You would think that this is wrong because we are assigning the text ‘Apple’ to the same name as weassigned the text ‘Banana’. Because we added a new element, the linked list name ‘Fruit()’ will point tothe new element within the list. We can also check how many elements are in our list at any time usingthe built-in ‘CountList()’ function, like this:
Debug CountList(Fruit())
If we executed the above code then the number of elements contained within the ‘Fruit()’ list will beechoed to the Debug Output window. In this case it would be ‘2’.
Let’s add a few more elements to this list and then echo all of the element values to the Debug Outputwindow. Here is a full example again:
NewList Fruit.s()
AddElement(Fruit())Fruit() = "Banana"
AddElement(Fruit())Fruit() = "Apple"
AddElement(Fruit())Fruit() = "Pear"
AddElement(Fruit())Fruit() = "Orange"
ForEach Fruit()Debug Fruit()
Next
In this larger example, we create a new linked list called ‘Fruits()’ and within it we create four elementsand assign them individual values. We then loop through this list using a ‘ForEach’ loop and echo allof the element’s values to the Debug Output window. The ‘ForEach’ keyword is used to define a loopwhich is only used for linked lists.
A Note About Using The Word ‘Point’
In this introduction and explanation of Linked Lists I’ve used the word ‘point’ a lot. When I’m using it hereit must not be confused with the computer science term ‘point’ or ‘pointers’. The computer science termmeans to point to a particular area in memory or in the case of a ‘pointer’, a variable that holds a memoryaddress. When I use it here, especially when I say the Linked List name points to the current element, I useit in a descriptive sense and not literally pointing to the area in memory that this element uses. For a furtherexplanation of pointers (in the computer science sense) refer to Chapter 13 (Pointers).

Other Data Structures 65
Fig.22 gives a brief overview of the linked list commands available in the built-in ‘Linked List’ library.This diagram is not a complete reference but is included here as a brief guide to see which commandto use when the need arises. The more advanced commands can be found in the PureBasic helpfile.
Structured Linked ListsNow that I have explained standard linked lists, let’s move onto structured linked lists. These are verysimilar to structured type arrays in that they are defined with a structure instead of a built-in variabletype. You can then effectively have a dynamically resizing linked list masquerading as a structured typearray that grows and shrinks depending on what information you have to store. Let’s take a look at aprevious example but this time re-code it to use a structured linked list.
Structure FISHKind.sWeight.sColor.s
EndStructure
NewList FishInTank.FISH()
AddElement(List())
ClearList(List())
CountList(List())
DeleteElement(List())
FirstElement(List())
InsertElement(List())
LastElement(List())
ListIndex(List())
NextElement(List())
PreviousElement(List())
ResetList(List())
SelectElement(List(), Position)
Fig. 22
DescriptionFunction
The Built-in Linked List Library
Adds an element to the linked list.
Clears the list of all elements.
Counts the elements inside a list.
Deletes the current element within the list
Go to the first element in the list.
Insert another element in the list before the current element, or at the start of the list if the list is empty.
Go to the last element in the list.
Return the current element’s position within the list. (Element positions start at ‘0’).
Go to the next element within the list.
Go to the previous element within the list.
Reset the list’s position to ‘0’ and make the first element the current element.
Make the current element the one specified by the ‘Position’ parameter.

Other Data Structures66
AddElement(FishInTank())FishInTank()\Kind = "Clown Fish"FishInTank()\Weight = "4 oz."FishInTank()\Color = "Red, White and Black"
AddElement(FishInTank())FishInTank()\Kind = "Box Fish"FishInTank()\Weight = "1 oz."FishInTank()\Color = "Yellow"
AddElement(FishInTank())FishInTank()\Kind = "Sea Horse"FishInTank()\Weight = "2 oz."FishInTank()\Color = "Green"
ForEach FishInTank()Debug FishInTank()\Kind+" "+FishInTank()\Weight+" "+FishInTank()\Color
Next
You can see from this example that after you create a list it is then very similar to a structured typearray to assign and retrieve data. The main difference here though is that array style indices are notused. Remember that when you use the ‘AddElement(FishInTank())’ command you create a newelement using the structure from the initial definition. This command then moves the current positionof the list to this newly created element. It is then safe to assign data to the new structured elementlike this:
FishInTank()\Kind = "Clown Fish"FishInTank()\Weight = "4 oz."FishInTank()\Color = "Red, White and Black"
Because the name ‘FishInTank()’ now points to your new element there is no need to use an index. Toaccess the fields inside this structured element you again use the ‘\’ character. At the end of theexample another ‘ForEach’ loop is used to quickly and efficiently echo the data to the Debug Outputwindow.
Pros And Cons Of Linked Lists?Linked lists are great for storing data when you don’t know how much of it there is. For example, inthe past I’ve written a program to track household expenses, and used a structured linked list to holdthe details of these expenses. Using a linked list rather than an array made it easier to add, delete andsort the data.
While writing this program I thought that I must make this program flexible to handle new expenseswhen they occur and to be able to delete old ones, just in-case I buy a new car and/or pay off a loan,etc. This is handled very nicely by linked lists. When I need to add an entry I use the ‘AddElement()’function and when I need to delete an entry I use the ‘DeleteElement()’ function. After the adding anddeleting is done within the list, I then transfer all this data into a nice Graphical User Interface (GUI)for the user to see and interact with. I will give talk more extensively about GUIs in Chapter 9.

Other Data Structures 67
Linked lists are more flexible than arrays in that they can grow and shrink in size more easily butarrays will always use less RAM to store the same amount of data than linked lists. This is becausearrays are continuous areas of memory which only use the standard amount of RAM per type for eachindex. Linked lists are different in the way that each element uses roughly three times the amount ofRAM for its particular type. This is because linked lists are not in the same continuous piece of memoryand need to store information on where to find the other elements within RAM. This is something tokeep in mind when dealing with huge amounts of data as your memory requirements could be tripleif you use linked lists.
Sorting Arrays And Linked Lists
Arrays and linked lists are great for storing all sorts of data and these data structures can easily betraversed to quickly retrieve that data. Sometimes though you may need to reorganize the datacontained within an array or linked list, so it is sorted alphabetically or numerically. Here are a fewexamples of how to use the commands of the ‘Sort’ library (Helpfile:Reference Manual->GeneralLibraries->Sort) to sort arrays and linked lists.
Sorting A Standard ArraySorting a standard array is extremely simple. First of all you need an array pre-filled with values thenuse the ‘SortArray()’ command to sort it. Here is the syntax example:
SortArray(Array(), Options [, Start, End])
The first parameter is the array to be sorted, notice the curved brackets after the array name, these arerequired to correctly pass an array as a parameter. The second parameter is an option, to specify howyou would like the array to be sorted. Here are the options for the second parameter:
‘0’ : Sort the array in ascending order being case sensitive.‘1’ : Sort the array in descending order being case sensitive.‘2’ : Sort the array in ascending order without being case sensitive (‘A’ is the same as ‘a’).‘3’ : Sort the array in descending order without being case sensitive (‘A’ is the same as ‘a’).
The square brackets around the last two parameters indicate that these are optional and don’t need tobe specified when using this command. These last two parameters are used to specify an array positionrange to perform the sort within.
Using the above information, we can sort a full array in ascending order and being case sensitive, usingthe command like this:
Dim Fruit.s(3)
Fruit(0) = "Banana"Fruit(1) = "Apple"Fruit(2) = "Pear"Fruit(3) = "Orange"SortArray(Fruit(), 0)
Other Data Structures68
For x.l = 0 To 3Debug Fruit(x)
Next x
Sorting A Structured ArrayThis is slightly more complicated as it uses a slightly more complicated sort command;‘SortStructuredArray()’. Here is the syntax example:
SortStructuredArray(Array(), Options, Offset, Type [, Start, End])
The first parameter is the array name complete with brackets. The second is the sort options, these areexactly the same as the ‘SortArray()’ command. The third parameter is an offset (a position within theoriginating structure) of the field you would like to sort by. This is retrieved using the ‘OffsetOf()’command. The ‘OffsetOf()’ command returns the number of Bytes that a particular variable field isoffset, from the beginning of a structure. The forth parameter defines what type of variable is found atthe previously passed offset. You can use built-in constants for the forth parameter to describe whattype of variable you are sorting by, these are:
‘#PB_Sort_Byte’ : The field in the structure to sort by, is a Byte (.b)‘#PB_Sort_Character’ : The field in the structure to sort by, is a Character (.c) ‘#PB_Sort_Word’ : The field in the structure to sort by, is a Word (.w)‘#PB_Sort_Long’ : The field in the structure to sort by, is a Long (.l)‘#PB_Sort_Quad’ : The field in the structure to sort by, is a Quad (.q)‘#PB_Sort_Float’ : The field in the structure to sort by, is a Float (.f)‘#PB_Sort_Double’ : The field in the structure to sort by, is a Double (.d)‘#PB_Sort_String’ : The field in the structure to sort by, is a String (.s or $)
The last two parameters in this command are optional and don’t need to be specified when using thiscommand. These are used to specify an array position range to perform the sort within. Using theabove information, we can sort a full structured array in ascending order and sorting by the ‘Range’field, like this:
Structure WEAPONName.sRange.l
EndStructure
Dim Weapons.WEAPON(2)
Weapons(0)\Name = "Phased Plasma Rifle"Weapons(0)\Range = 40
Weapons(1)\Name = "SVD-Dragunov Sniper Rifle"Weapons(1)\Range = 3800
Weapons(2)\Name = "HK-MP5 Sub-Machine Gun"Weapons(2)\Range = 300

Other Data Structures 69
SortStructuredArray(Weapons(), 0, OffsetOf(WEAPON\Range), #PB_Sort_Long)
For x.l = 0 To 2Debug Weapons(x)\Name + " : " + Str(Weapons(x)\Range)
Next x
In this example, I’ve chosen the ‘Range’ field to sort the structured array by, so in the sort commandI’ve defined this using the offset ‘OffsetOf(WEAPON\Range)’ and telling the sort command it is a Longtype variable field by using the ‘#PB_Sort_Long’ constant.
Sorting A Standard Linked ListSorting a standard linked list is extremely simple. First of all you need a linked list pre-filled withvalues then use the ‘SortList()’ command to sort it. Here is the syntax example:
SortList(ListName(), Options [, Start, End])
The first parameter is the linked list to be sorted, notice the curved brackets after the list’s name, theseare required to correctly pass the linked list as a parameter. The second is the sort options, these areexactly the same as the ‘SortArray()’ command. The last two parameters are used to specify a linkedlist position range to perform the sort within.
Using the above information, we can sort a full linked list in ascending order and being case sensitive,using the sort command like this:
NewList Fruit.s()
AddElement(Fruit())Fruit() = "Banana"
AddElement(Fruit())Fruit() = "Apple"
AddElement(Fruit())Fruit() = "Orange"
SortList(Fruit(), 0)
ForEach Fruit()Debug Fruit()
Next
Sorting A Structured Linked ListSorting a structured linked list is slightly more complicated as it uses a slightly more complicated sortcommand; ‘SortStructuredList()’. Here is this command’s syntax example:
SortStructuredList(List(), Options, Offset, Type [, Start, End])
The first parameter is the linked list name complete with brackets. The second is the sort options,

Other Data Structures70
which are exactly the same as the ‘SortArray()’ command. The third parameter is an offset (a positionwithin the originating structure) of the field you would like to sort by. This is retrieved using the‘OffsetOf()’ command. The forth parameter defines what type of variable is found at the previouslypassed offset. You can use built-in constants for the forth parameter to describe what type of variableyou are sorting by, these are exactly the same as the ‘SortStructuredArray()’ command. The last twoparameters are used to specify a linked list position range to perform the sort within.
Using the above information, we can sort a full structured linked list in ascending order and being casesensitive, using the sort command like this:
Structure GIRLName.sWeight.s
EndStructure
NewList Girls.GIRL()
AddElement(Girls())Girls()\Name = "Mia"Girls()\Weight = "8.5 Stone"
AddElement(Girls())Girls()\Name = "Big Rosie"Girls()\Weight = "19 stone"
AddElement(Girls())Girls()\Name = "Sara"Girls()\Weight = "10 Stone"
SortStructuredList(Girls(), 0, OffsetOf(GIRL\Name), #PB_Sort_String)
ForEach Girls()Debug Girls()\Name + " : " + Girls()\Weight
Next
In this example, I’ve chosen the ‘Name’ field to sort this structured linked list by, so in the sortcommand I’ve defined this using the offset ‘OffsetOf(GIRL\Name)’ and telling the commands it’s aString by using the ‘#PB_Sort_String’ constant.
Sorting Made EasyAll the previous sorting examples can be used in the same way to sort all numeric fields as well asStrings, it’s just a case of choosing the right sorting option when using the different sort commands.Sorting arrays and linked lists, wether created using a structure or not is just a case of using the rightoptions and offsets. Try some examples yourself to practice sorting using these commands.
6Procedures And
SubroutinesIn this chapter I’ll talk about Procedures and Subroutines. Procedures are an essential part of anyprogramming language and provide a way of neatly structuring code and enabling code re-use.PureBasic is considered a structured programming language and procedures provide the means tocreate the structure of a program. I will also mention subroutines in this chapter but these are not amajor feature in many programming languages. Because they play a part in PureBasic they arementioned here for the sake of completeness.
Why Use Procedures Or Subroutines?
In theory, I guess you never need to use procedures or subroutines. You could just write a very bigpiece of code, but this would get very confusing, very quickly and I think you would repeat yourselfmany times within this jumbled code. Procedures and subroutines provide ways of calling separatepieces of code at any time during your main code. These separate pieces of code can be written to doanything. For example, you could call a procedure to play a sound or update a display or even call onethat contains a fully functional program.
Using procedures and subroutines are good ways of keeping your code neat and tidy and providing itwith a clear structure. Well structured code is always better for reading later on, especially if you revisityour code for tweaking, or you are working in a team and many people are likely to work on the samefile.
Subroutines
Subroutines are not used very often in PureBasic and some consider them poor coding style butsometimes they can be useful if you want to quickly call some code. Subroutines provide a way ofjumping to another piece of code further down in your source code and then returning to the point ofthe jump after executing it. In order to jump to a separate piece of code using this method you need tospecify a point to jump to. This jump destination in your code is specified using a subroutine label.
71
Procedures and Subroutines72
To specify a subroutine label in your code you can use any name you like but you must adhere to thesame naming guidelines as set out for variables, except that instead of using a suffix to define a label,you use a colon, like this:
Label:
This subroutine label can be jumped to at any point in your code by using this command:
Gosub Label
Notice in the ‘Gosub’ command that we don’t use a colon when we specify what subroutine label tojump to. After the destination label, you enter normal PureBasic code that you wish this subroutine toexecute. After this code you must then specify that you want to jump back to the main code by usingthis command:
Return
Here is a brief example demonstrating the use of a subroutine:
a.l = 10
Debug aGosub CalculationDebug aEnd
Calculation:a = a * 5 + 5
Return
In this example, we give the variable ‘a’ the value of ‘10’ and echo it to the Debug Output window. Wethen use the ‘Gosub’ keyword to jump to the ‘Calculation’ label. You can tell it’s a label by the colonafter its name and you will probably notice that the IDE colors labels differently too. After we havejumped to this label a small calculation is performed on the ‘a’ variable and we return to the main codeusing the ‘Return’ keyword. When returning to the main code, we return to the next line just after theoriginal ‘Gosub’ command. In this case we return to the ‘Debug a’ line, which echoes the value of ‘a’ tothe Debug Output window again. This value has now changed according to the calculation performedin the subroutine.
A Note Regarding The Position Of Subroutines In Your CodeOne important thing I need to point out here is that if you include subroutines to be used in yourprogram, they must always be after an ‘End’ keyword. The ‘End’ keyword not only immediatelyterminates a program when it’s executed but also defines the end point of a program duringcompilation. All subroutines must appear after this point or your program could function incorrectly.

Procedures and Subroutines 73
Jumping From A SubroutineThis is generally considered very bad coding practice but as I’m talking about subroutines, I may aswell follow the style of the rest of this book and describe them in their entirety, as well as mentioningthe correct syntax to be able to do it.
Because all subroutines must contain a ‘Return’ keyword to jump back into your main code, asubroutine must be prematurely returned in order to leave it correctly if you need to jump out at anytime. This is achieved by using the ‘FakeReturn’ and ‘Goto’ keywords. Here’s an example:
a.l = 10
Debug aGosub CalculationDebug aEnd
RunAgain:a.l = 20Debug aGosub CalculationDebug aEnd
Calculation:If a = 10FakeReturnGoto RunAgain
Elsea = a * 5 + 5
EndIfReturn
As you can see from this small example, things have started to get complicated and the code jumpsaround all over the place, as I said before this is bad coding style and makes very ugly code.
This example is pretty straightforward if you follow it carefully. You can see the in the ‘Calculation’subroutine, that when we need to jump out using the ‘Goto’ command we have to use ‘FakeReturn’before it. We jump to another label (subroutine) called ‘RunAgain’ which references another almostself-contained program complete with another ‘End’ keyword, which really is not ideal.
I hope these examples give you an overview of subroutines and how to jump around programs, but Ido hope you don’t abuse these practices and don’t adopt them as a regular way of coding. I feel you canstructure code a lot better using procedures.
Procedures and Subroutines74
Procedure Basics
The term ‘Structured Programming’ is a term that clearly defines PureBasic and the ethos behind itscreation. PureBasic can be described as a ‘Procedural’ and ‘Structured’ programming language. Thearchitecture behind structured programming is provided by Procedures. They are quite literally thestructure in structured programming.
Procedures (sometimes called ‘Functions’ in other languages) are the most important piece offunctionality that PureBasic provides. In their most basic form they are just a holder for a piece of codethat can be called (run) at any time in your program, very similar to subroutines. They can be calledas many times as you like just like subroutines and they can hold any PureBasic code you like. Unlikesubroutines however, procedures can be given multiple starting parameters and they can even returnone value of any built-in type.
Let’s start with a simple procedure example.
Procedure NurseryRhyme()Debug "Mary had a little lamb, its fleece was white as snow."Debug "And everywhere that Mary went, that lamb was sure to go."
EndProcedure
NurseryRhyme()
In order to use a procedure in your code you have to define it first. Here I’ve defined a procedure called‘NurseryRhyme’ using the ‘Procedure’ keyword. Code is then entered after this line which theprocedure is to contain. The end of the procedure is then defined using the ‘EndProcedure’ keyword.We can call this piece of code contained within this procedure at any time by just using its name, likethis:
NurseryRhyme()
Before we move on, I need to point out a few things in this example that need further explanation.First, you may of noticed that there are a mysterious set of brackets after the procedure name. Theseare used to hold any parameters that need to be passed to the procedure. Even if you are not passingany parameters, like in this example, you still need to include the brackets. Also, when you call theprocedure, you always need to include the brackets as part of the procedure call, parameters or noparameters. I will explain passing of parameters to a procedure later on in this chapter.
One more thing to point out is that the procedure name, e.g. ‘NurseryRhyme()’ must not contain anyspaces and should adhere to the same naming guidelines as set out for variables.
If you run the above example, you should see in the Debug Output window the nursery rhyme as codedin the ‘NurseryRhyme()’ procedure. If you want to repeat this procedure code at any time in this smallexample, just call it over and over again using its name.

Procedures and Subroutines 75
Procedure NurseryRhyme()Debug "Mary had a little lamb, its fleece was white as snow."Debug "And everywhere that Mary went, that lamb was sure to go."
EndProcedure
For x.l = 1 To 5NurseryRhyme()
Next x
Procedures can be called from anywhere in programs, as in the above example, where I’ve called the‘NurseryRhyme()’ procedure from a loop. Procedures can also be called from other procedures too.
Procedure NurseryRhyme2()Debug "And everywhere that Mary went, that lamb was sure to go."
EndProcedure
Procedure NurseryRhyme1()Debug "Mary had a little lamb, its fleece was white as snow."NurseryRhyme2()
EndProcedure
NurseryRhyme1()
Here, you can see that ‘NurseryRhyme1()’ contains a call to ‘NurseryRhyme2()’.
A Note Regarding The Position Of Procedures In Your CodeThe above example neatly demonstrates why the position of procedures in your code matters. You willnotice that I’ve coded ‘NurseryRhyme2()’ first, above ‘NurseryRhyme1()’. This was intentional and wasnecessary because of the fact that you must always define a procedure before calling it. Because‘NurseryRhyme1()’ calls ‘NurseryRhyme2()’, the latter had to be defined first. The PureBasic compileris known as a ‘One Pass’ compiler, which reads the source code from the top to the bottom. It will raisean error if it encounters a procedure call and no procedure has yet been defined. This simple examplealso demonstrates why procedures are defined at the top of most source codes.
As with most things in life though there is an exception to this rule. You can use the ‘Declare’ keywordto alter the position of procedure definitions in your code. The ‘Declare’ keyword doesn’t define aprocedure, it merely lets the compiler know what procedures it will be asked to call. This allows anyprocedures to be defined later on in the source code. Here’s an example:
Declare NurseryRhyme1()Declare NurseryRhyme2()
NurseryRhyme1()
Procedure NurseryRhyme1()Debug "Mary had a little lamb, its fleece was white as snow."NurseryRhyme2()
EndProcedure
Procedures and Subroutines76
Procedure NurseryRhyme2()Debug "And everywhere that Mary went, that lamb was sure to go."
EndProcedure
When using the ‘Declare’ keyword, you just define the first line of the procedure, identically as youwould when using the ‘Procedure’ keyword. You are then free to call this procedure at any time afterthis declaration. Because this is purely a declaration and not a definition, you must also define theprocedure as normal somewhere else in your code. The procedure can be defined anywhere now, evenat the end of your source code, instead of the top.
If you look at the above example, you can see I’ve used two declarations using the ‘Declare’ keyword.After that I’m then free to call the ‘NurseryRhyme1()’ procedure. The actual procedure definitions areat the end of the code.
Program Scope
When using procedures it is also very important to understand the different scopes that a program cancontain. This term refers to what scope any given variable, array or linked list is available to be usedin. Let me start explaining this using a simple example using a variable.
a.l = 10
Procedure DisplayValue()Debug a
EndProcedure
DisplayValue()
Here I’ve defined a Long type variable called ‘a’ and assigned to it the numeric value of ‘10’. I’ve alsodefined a procedure called ‘DisplayValue()’ and in this procedure I’ve written one line of code to echothe value of ‘a’. The last line of this example calls the procedure. Now, if you run this example youwould expect that the value of ‘a’ (which is ‘10’) to be echoed to the Debug Output window but this isnot the case. You will notice that the value of ‘0’ is echoed instead. This is due to program scope.
Let me break down this example even more and explain exactly what is happening. The first thing toremember when using variables in PureBasic is that they are by default Local in scope. This means thatin the above example when the first variable definition is made ‘a.l = 10’ this variable is local to thescope in which it is defined, in this case, local to the main source code. Unless this variable is madeGlobal then no procedure will be able to see it or use it.
In the ‘DisplayValue()’ procedure we echo the value of ‘a’, but this variable ‘a’ is not the same as theone outside the procedure. They have the same name but are not the same variable. The one inside theprocedure is local to the procedure so neither variable is accessible to one another.

Procedures and Subroutines 77
This can get very confusing especially if both local variables share the same name as in this littleexample, but I think I’ve neatly demonstrated local scope well.
As I said before, if the original variable was made to be a global variable, then all procedures can seeit and use it, let me demonstrate how this is done.
Global a.l = 10
Procedure DisplayValue()Debug a
EndProcedure
DisplayValue()
Here you will notice the only change I’ve made is that I’ve used the ‘Global’ keyword before the variabledefinition. This now defines the ‘a’ variable as global and all procedures can now see and use thisvariable. In the Debug Output window you will now see the correct value of ‘10’ echoed.
Conversely, if we define variables within a procedure they too are considered local to that procedure.Take a look at this:
Procedure DisplayValue()a.l = 10
EndProcedure
DisplayValue()
Debug a
As expected the last line ‘Debug a’ echoes the value ‘0’ to the Debug Output window. If we want to seeand use the ‘a’ variable outside the defining procedure, we need to make it global. Like this:
Procedure DisplayValue()Global a.l = 10
EndProcedure
DisplayValue()
Debug a
Reading through these last few examples you may be thinking why not make all variables global? Thismight make sense to some people but when programs reach a larger scale, things can get muddled andconfusing if all variables are global. You may also find that you’ll start to run out of useful variablenames. Using different scopes within your program also enables you to use temporary variable nameswithin procedures for calculations or loops, safe in the knowledge that they won’t effect any variablesoutside. Some programmers strive to use as little global variables as possible as this makes debugginga program much less effort. Suspect values and variables can be narrowed down more quickly to aparticular scope if less global variables are used.

Procedures and Subroutines78
When using arrays and linked lists with procedures, they too can have different scopes within yourprogram exactly like variables. Up until PureBasic v4, all arrays and linked lists were global by defaultensuring they all could always be manipulated by procedures. With the arrival of PureBasic v4, arraysand linked lists can be local, global, protected and static in exactly the same way as variables. Theyeven use the same scope keywords.
In the next section I’ve listed all of the scope keywords and given a full explanation for each one alongwith plenty of examples to demonstrate their usage for variables, arrays and linked lists.
The ‘Global’ Keyword
Global VariablesI’ve already given an example of the ‘Global’ keyword while explaining program scope but here it isagain to make this list complete.
Global a.l = 10
Procedure DisplayValue()Debug a
EndProcedure
DisplayValue()
The ‘Global’ keyword is used before a variable definition to make that variable’s scope global. Once avariable has been defined as global then that variable can be seen and modified within all proceduresthat your source code may contain. The syntax is very simple as you can see from the above example.
Global Arrays
Global Dim Numbers.l(1)
Procedure ChangeValues()Numbers(0) = 3Numbers(1) = 4
EndProcedure
ChangeValues()
Debug Numbers(0)Debug Numbers(1)
In this example, similar to global variables, I’ve used the ‘Global’ keyword in front of the arraydefinition so I’m able to access it within the procedure. Without the ‘Global’ keyword in front of thearray, the procedure would not be able to see or use it.

Procedures and Subroutines 79
Global Linked Lists
Global Newlist Numbers.l()
AddElement(Numbers())Numbers() = 1
Procedure ChangeValue()SelectElement(Numbers(), 1)Numbers() = 100
EndProcedure
ChangeValue()
SelectElement(Numbers(), 1)Debug Numbers()
In this example, similar to arrays I’ve used the ‘Global’ keyword in front of the linked list definition soI’m able to access it within the procedure. Without the ‘Global’ keyword in front of the linked list, theprocedure would not be able to see or use it.
The ‘Protected’ Keyword
Protected VariablesThe ‘Protected’ keyword forces a variable to be local in a procedure even if the same variable has beendeclared as global in the main source code. This is very useful for defining temporary variable namesinside procedures or just to make sure procedure variables never interfere with any global variables inthe main code.
Global a.l = 10
Procedure ChangeValue()Protected a.l = 20
EndProcedure
ChangeValue()
Debug a
You can see that even though the protected variable inside the procedure has the same name as theglobal variable, they are considered separate variables in two different scopes. If you run the aboveexample the result echoed to the Debug Output window will be ‘10’ because even though we call the‘ChangeValue()’ procedure the protected variable doesn’t alter the global one. This keyword isessential for writing generic procedures that you intend to use in variety of different source codes soas not to interfere with anything in the main code.

Procedures and Subroutines80
Protected Arrays
Global Dim Numbers.l(1)
Procedure ChangeValues()Protected Dim Numbers.l(1)Numbers(0) = 3Numbers(1) = 4
EndProcedure
ChangeValues()
Debug Numbers(0)Debug Numbers(1)
In this example we use the ‘Protected’ keyword in exactly the same way as the protected variableexample. If you run this above example, the results echoed to the Debug Output window will be ‘0’because even though we call the ‘ChangeValues()’ procedure, the protected array doesn’t alter theglobal one at all. This keyword is great for protecting arrays within procedures so they never interferewith the main code even if they have the same name as global arrays.
Protected Linked Lists
Global Newlist Numbers.l()AddElement(Numbers())Numbers() = 1
Procedure ChangeValue()Protected Newlist Numbers.l()AddElement(Numbers())Numbers() = 100
EndProcedure
ChangeValue()SelectElement(Numbers(), 1)Debug Numbers()
Again, If you run the above example, the result echoed to the Debug Output window will be ‘1’ becauseeven though we call the ‘ChangeValue()’ procedure, the protected linked list doesn’t alter the globalone. This keyword is great for protecting linked lists within procedures so they never interfere with themain code even if they have the same name as global linked lists.
The ‘Shared’ Keyword
Shared VariablesSometimes in your code you may need to access a variable from inside a procedure that hasn’t beendefined as global. This is when the ‘Shared’ keyword is used. Here’s an example:
Procedures and Subroutines 81
a.l = 10
Procedure ChangeValue()Shared aa = 50
EndProcedure
ChangeValue()Debug a
Here, even though ‘a’ is originally not defined as global, you can still access it from within a procedureby using the ‘Shared’ keyword. When the above example is run, the ‘ChangeValue()’ procedure changesthe value of ‘a’ even thought it isn’t a global variable.
Shared Arrays
Dim Numbers.l(1)
Procedure ChangeValues()Shared Numbers()Numbers(0) = 3Numbers(1) = 4
EndProcedure
ChangeValues()
Debug Numbers(0)Debug Numbers(1)
In this example, even though the ‘Numbers()’ array is not defined as global, I can still access it frominside the ‘ChangeValues()’ procedure by using the ‘Shared’ keyword. When specifying what array youwant to share, you just need to specify the array name along with brackets on the end, like this:‘Numbers()’, there’s no need for the type suffix, indices or dimensions to be specified.
Shared Linked Lists
Newlist Numbers.l()
Procedure ChangeValue()Shared Numbers()AddElement(Numbers())Numbers() = 100
EndProcedure
ChangeValue()
SelectElement(Numbers(), 1)Debug Numbers()

Procedures and Subroutines82
In this example even though the ‘Numbers()’ linked list is not defined as global, I can still access itfrom the ‘ChangeValue()’ procedure using the ‘Shared’ keyword, very similar to the shared arrayexample. When specifying what linked list to share, you just need to specify the linked list name withbrackets on the end, like this ‘Numbers()’, there’s no need for the type suffix to be specified.
The ‘Static’ Keyword
Static VariablesEvery time a procedure exits, all variable values defined within it are lost. If you would like a procedureto remember a variable’s value after each call, then you need to use the ‘Static’ keyword. See thisexample:
Procedure ChangeValue()Static a.la + 1Debug a
EndProcedure
For x.l = 1 To 5ChangeValue()
Next x
Here in the ‘ChangeValue()’ procedure I’ve set the ‘a’ variable to be static by using the ‘Static’ keyword.After this I increase the value of ‘a’ by ‘1’ and then echo that value to the Debug Output window. I thencall this procedure five times using a standard ‘For’ loop. If you look at the echoed values they are alldifferent and incremented by ‘1’. This is because the value of ‘a’ is remembered between procedurecalls.
Static ArraysYou can also keep array values intact between procedure calls by using the ‘Static’ keyword.
Procedure ChangeValue()Static Dim Numbers.l(1)Numbers(0) + 1Numbers(1) + 1Debug Numbers(0)Debug Numbers(1)
EndProcedure
For x.l = 1 To 5ChangeValue()
Next x
In the above example, I’ve used the ‘Static’ keyword to preserve the array’s values between procedurecalls in exactly the same as static variables. If you look at the echoed values they are all different andincremented by ‘1’. This is because the static array’s values have all been preserved between the calls.

Procedures and Subroutines 83
Static Linked Lists
Procedure ChangeValue()Static NewList Numbers.l()If CountList(Numbers()) = 0AddElement(Numbers())
EndIfSelectElement(Numbers(), 1)Numbers() + 1Debug Numbers()
EndProcedure
For x.l = 1 To 5ChangeValue()
Next x
In this example I use the ‘Static’ keyword to preserve a linked list’s values between procedure calls inexactly the same as static arrays. If you look at the echoed values they are all different and incrementedby ‘1’.
Because this linked list is static and I only wanted to add one element for the purpose of this example,I’ve used an ‘If’ statement in the procedure to test the amount of elements within the list. If the list hasno elements then I add one, otherwise I just change the value of the existing element within the staticlinked list. If I didn’t do things like this, I would keep adding elements with each procedure call whichis not what I wanted.
Passing Variables To Procedures
As I mentioned before, one of the most useful abilities procedures possess is that they can accept initialstarting parameters. These parameters can be variables of any built-in type, arrays or even linked lists.Parameters are used as a way of passing values from the main program into any procedure forprocessing. Procedures can then be defined and used over and over again throughout the programwith different starting values. This is how you define a procedure to accept parameters:
Procedure AddTogether(a.l, b.l)Debug a + b
EndProcedure
AddTogether(10, 5)AddTogether(7, 7)AddTogether(50, 50)
All parameters that are to be passed to a procedure should be inside the brackets and if multipleparameters are needed then they should be separated by commas. When parameters are included inthe definition like this, they all must have their type defined too. Here, I’ve defined two parameters, ‘a’and ‘b’, both of which are Long type variables.

Procedures and Subroutines84
Once a procedure is defined like this, you have to remember to include the values you wish to pass asparameters when calling it, like this:
AddTogether(10, 5)
After this particular call, the value ‘10’ is passed into the ‘a’ variable and the value ‘5’ is passed into the‘b’ variable. The procedure then adds these variables together and displays the result in the DebugOutput window. This applies to all of the other calls too, the first parameter value in the call is passedinto ‘a’ and the second into ‘b’.
Here’s another example using Strings:
Procedure JoinString(a.s, b.s)Debug a + b
EndProcedure
JoinString("Mary had a little lamb, ", "its fleece was white as snow.")JoinString("And everywhere that Mary went, ", "that lamb was sure to go.")JoinString("..", "..")
Here we’re using the secondary role of the ‘+’ operator, using it for String concatenation instead ofaddition. I’ve basically modified the ‘AddTogether(a.l, b.l)’ procedure and replaced the Long typeparameters with String types and renamed it to ‘JoinString(a.s, b.s)’. I can now call this procedurefrom anywhere in my program passing Strings to match the defined parameters.
Another point to remember regarding procedures is that their parameters don’t have to be all of thesame type, you can mix and match as much as you like.
Procedure LotsOfTypes(a.b, b.w, c.l, d.f, e.s)Debug "Byte: " + Str(a)Debug "Word: " + Str(b)Debug "Long: " + Str(c)Debug "Float: " + StrF(d)Debug "String: " + e
EndProcedure
LotsOfTypes(104, 21674, 97987897, 3.141590, "Mary had a little lamb")
Here I’ve used a few different variable types as parameters in my ‘LotsOfTypes()’ procedure todemonstrate that parameters don’t all have to be of the same type. The values that are passed in theprocedure call are assigned to the defined procedure parameters ‘a’, ‘b’, ‘c’, ‘d’ and ‘e’ respectively. Youwill also notice that all values passed must match their respective parameter types or else a syntaxerror will occur.
You’ve also probably noticed I’ve used two built-in functions that you may not be familiar with. Thesetwo functions, ‘Str()’ and ‘StrF()’ will be explained in more detail in Chapter 7 (Examples Of CommonCommands), but to explain simply, they convert numeric types into Strings.
Procedures and Subroutines 85
Even from these simple examples the power of procedures should start to become apparent. Not onlyare they a great timesaver in respect of typing code but they allow programmers to extend thefunctionality of PureBasic and then have freedom to use this functionality in any source code fromthen on. This allows for great code reusability, especially if you’ve written some really helpful genericprocedures.
Optional Variable ParametersA new feature in PureBasic v4 was the inclusion of optional procedure parameters. These are very easyto explain and demonstrate and are extremely useful.
Basically you can set an initial value for any parameter in case it isn’t used on the procedure call. Here’san example:
Procedure DisplayParameters(a.l, b.l, c.l = 3)Debug aDebug bDebug c
EndProcedure
DisplayParameters(1, 2)
If you look at the procedure definition in the above example you will see that the last parameter hasbeen defined differently to the others and has been given the initial value of ‘3’. If the last parameteris not specified within a procedure call then it will have this default value. When I call the procedurein the above example using ‘DisplayParameters(1, 2)’, missing out the last parameter, then you can seethis default value recognized and used in the echoed output within the Debug Output window.
Any number of parameters can be optional and defined in this way. You must understand however thatall optional parameters must always appear to the right of standard non-optional parameters. This isbecause all values passed during a procedure call are assigned left to right to parameters and optionalones can’t be skipped.
Strictly Passing Values To Procedures
When calling a procedure you must make sure that any defined parameters are called using the correct typesor you will raise a syntax error when compiling. For example, if a procedure is defined as this:
AddTogether(a.l, b.l)
then only Long variables must be passed as parameters. If String type variables are defined as parametersthen you must call the procedure using Strings as values for these parameters. Procedures using arrays andlinked lists as parameters must also be called correctly and all parameters must be in the correct order andusing the correct type. I know this seems obvious but I think it’s worth pointing out.

Procedures and Subroutines86
Passing Arrays To Procedures.
As an accompaniment to variables, you can also pass arrays and linked lists to procedures asparameters. Their usage is simplicity itself and very easy to demonstrate.
To pass an array as a parameter you must first define an array using the standard ‘Dim’ keyword. Hereis a simple one dimensional String array defined with four indices (remember that the indices start at‘0’) I’ve called it ‘Countries’:
Dim Countries.s(3)
Countries(0) = "England"Countries(1) = "Northern Ireland"Countries(2) = "Scotland"Countries(3) = "Wales"
Once this array has been defined, let’s then define a procedure to pass it to:
Procedure EchoArray(MyArray.s(1))For x.l = 0 To 3Debug MyArray(x)
Next xEndProcedure
To define a procedure to accept an array as a parameter you must do so in a very strict way. Forstarters, you define an array parameter within the same procedure brackets as any other standardparameter. The actual array parameter itself is composed of three parts.
First a name is used to act as the array name within the procedure. Then a suffix of the expected arraytype is added to this name and brackets are added to the end. These brackets usually contain a numberwhich expresses an array index. But here, this number should be the number of dimensions containedwithin the array that is to be passed. In the above example I’ve used a one dimensional array, so thefull array parameter looks like this:
MyArray.s(1)
Showing an array parameter name, the array type suffix and then between the brackets, the numberof dimensions defined in the expected array.
You will notice that I’ve used ‘MyArray’ as the array parameter name, this is not essential and you cancall your parameters whatever you like. You must however, always adhere to the same namingguidelines as set out for variables, i.e. no spaces, no keyword names, etc.
Inside this procedure you are now able to use the ‘MyArray()’ as any other normal array, getting andsetting values to and from it using standard indices. In the above example, I’ve used a simple ‘For’ loopto iterate through this array and echo its values to the Debug Output window. You can however, be ascreative as you like, in finding ways to process arrays.

Procedures and Subroutines 87
Once the procedure has been correctly defined you can call it, passing the ‘Countries’ array like this:
EchoArray(Countries())
Notice when we pass our ‘Countries()’ array we only use its name with brackets on the end, almost likea procedure call itself. No types, indices or dimensions are necessary when actually passing an arrayin a procedure call.
If you run this example, you should see the four countries of the United Kingdom echoed to the DebugOutput window.
Passing Multi-dimensional arraysYou can also pass multi-dimensional arrays as parameters as demonstrated in this example:
Dim Countries.s(3, 1)
Countries(0,0) = "England"Countries(0,1) = "57,000,000"
Countries(1, 0) = "Northern Ireland"Countries(1,1) = "2,000,000"
Countries(2, 0) = "Scotland"Countries(2,1) = "5,200,000"
Countries(3, 0) = "Wales"Countries(3,1) = "3,100,000"
Procedure EchoArray(MyArray.s(2))For x.l = 0 To 3Debug MyArray(x,0) + " - " + "Population: " + MyArray(x,1)
Next xEndProcedure
EchoArray(Countries())
Even though this is a two dimensional array we still use the same rules as before when defining aprocedure to handle this array as a parameter. You will notice that in this array parameter definitionwe use ‘2’ within the brackets to specify that the expected array will be a two dimensional array, likethis:
MyArray.s(2)
Even thought this parameter is defined for a two dimensional array we still call the procedure, passingthe array as before, with no types, indices or dimensions:
EchoArray(Countries())

Procedures and Subroutines88
Passing Structured type arraysStructured type arrays can also be passed to a procedure very easily. You do it exactly as illustrated onthe previous page, you just need change the array parameter type to match the structure used in thearray definition. Look at this example:
Structure COUNTRYName.sPopulation.s
EndStructure
Dim Countries.COUNTRY(3)
Countries(0)\Name = "England"Countries(0)\Population = "57,000,000"
Countries(1)\Name = "Northern Ireland"Countries(1)\Population = "2,000,000"
Countries(2)\Name = "Scotland"Countries(2)\Population = "5,200,000"
Countries(3)\Name = "Wales"Countries(3)\Population = "3,100,000"
Procedure EchoArray(MyArray.COUNTRY(1))For x.l = 0 To 3Debug MyArray(x)\Name + " - " + "Population: " + MyArray(x)\Population
Next xEndProcedure
EchoArray(Countries())
Here I’ve used a structured array, defined using the ‘COUNTRY’ structure. In order for this type ofarray to be passed to a procedure, you have to make sure you define the array parameter to use thesame structure that was used when defining the expected array, in this case it was the ‘COUNTRY’structure. You can see this parameter for yourself in the above procedure definition:
MyArray.COUNTRY(1)
This shows the parameter name, the structured array type suffix and then the dimensions in thepassed array. If all of this is coded correctly as above, then a one dimensional, ‘COUNTRY’ structuredarray will pass into this procedure just fine.
Passing Linked Lists To Procedures
Sometimes while programming using PureBasic you may want to pass a linked list to a procedure. Thisis very similar to passing an array. First, take a look at this example:
Procedures and Subroutines 89
NewList Numbers.l()
AddElement(Numbers())Numbers() = 25
AddElement(Numbers())Numbers() = 50
AddElement(Numbers())Numbers() = 75
Procedure EchoList(MyList.l())ForEach MyList()Debug MyList()
NextEndProcedure
EchoList(Numbers())
Here, I’ve created a standard linked list called ‘Numbers’ which will contain Long type elements. Afteradding three elements to this list, I’ve defined the ‘EchoList()’ procedure that this linked list will bepassed into. The linked list parameter is coded very similarly to an array parameter, in that it startswith the parameter name, followed by the list type suffix and finally a set of brackets. Linked lists don’tuse indices like arrays, so you don’t need to type a number inside the brackets. Once this is all done,you can then call the procedure, passing the linked list just like an array, without any type, etc. Likethis:
EchoList(Numbers())
Of course inside the ‘EchoList()’ procedure the ‘MyList()’ linked list now contains all of theinformation that the passed linked list had and can be used in exactly the same as any other standardlinked list. You can see inside the ‘EchoList()’ procedure, I’ve used a standard ‘ForEach’ loop to quicklyiterate through the linked list and echo its values to the Debug Output window.
Passing Structured linked listsStructured linked lists can also be passed easily as procedure parameters. Again, similar to passingstructured arrays into procedures, you must remember to define the structure in the procedureparameter to be the same as the structure used to define the linked list that is expected to be passed.
Structure FLAGSCountry.sFlag.s
EndStructure
NewList Info.FLAGS()
AddElement(Info())Info()\Country = "Great Britain"

Procedures and Subroutines90
Info()\Flag = "Union Jack"
AddElement(Info())Info()\Country = "USA"Info()\Flag = "Stars And Stripes"
AddElement(Info())Info()\Country = "France"Info()\Flag = "Tricolore"
Procedure EchoList(MyList.FLAGS())ForEach MyList()Debug MyList()\Country + "'s flag is the " + MyList()\Flag
NextEndProcedure
EchoList(Info())
Notice from the above example, the linked list parameter looks like this:
MyList.FLAGS()
I’ve made sure that the linked list parameter now includes the ‘FLAGS’ type in order for the structuredlinked list to be passed correctly.
Arrays And Linked Lists Are Passed By Reference
Unlike variables, arrays and linked lists are passed by reference. This means that values aren’t actually passedfrom arrays and linked lists into the procedures and ‘copied’ into the parameters. Instead an internal memorypointer is passed to the procedure and this is used to manipulate the array or linked list.
This is all done internally so you wouldn’t really notice anything different from using variables. The onlything you need to consider is that when you pass an array or linked list into a procedure, the parameter nameused will not be a separate local array or linked list. Whatever name you give to the array or linked listparameter inside the procedure, you are still manipulating the original passed array or linked list.
For example, if you pass an array called ‘Dogs()’ into a procedure as a parameter, this parameter could havea different name and be called ‘Cats()’ for instance. Then inside the procedure you could assign the ‘Cats()’array different values. When the procedure exits you will notice that the ‘Dogs()’ array has been modified inthe same way as the ‘Cats()’ array. This is because the ‘Cats()’ parameter will be just a reference to the originalpassed ‘Dogs()’ array.
This is only true for arrays and linked lists, variables on the other hand are passed by value, meaning that anactual value is copied into the variable parameter. So, if you alter a variable parameter in a procedure, it willnot alter the original variable that was passed to it.

Procedures and Subroutines 91
Returning A Value From Procedures
Another great feature of procedures is that they can return a value. This value can be of any ofPureBasic’s built-in types. Returning a value from a procedure is a great way to be able to calculate ormanipulate data within a procedure and then return something useful. This could be a calculationresult, an error code or even a descriptive String of what the procedure has just done or achieved. SeeFig.2 and Fig.3 for a list of types that can be returned by procedures.
The syntax for returning a value from a procedure is simplicity itself. First you need to define what typeis to be returned from the procedure, this is done by slightly extending the procedure definition. Lookat this example:
Procedure.l AddTogether(a.l, b.l)ProcedureReturn a + b
EndProcedure
Debug AddTogether(7, 5)
The above procedure definition has been given a new type suffix on the end of the ‘Procedure’ keyword.This is where you define the type to be returned by this procedure. The above definition has been giventhe ‘.l’ suffix, meaning that this procedure will return a Long type value. To actually make theprocedure return a value we need to use the ‘ProcedureReturn’ keyword. The value or expressionfollowing this keyword is the one that is returned. In this case the resulting value evaluated from ‘a +b’ is returned.
You can also see demonstrated, that when we call the above procedure using ‘AddTogether(7, 5)’, avalue is returned directly from this call, and itself can be used in an expression or statement. In thiscase I’ve used it as an expression for a ‘Debug’ statement. The value ‘12’ is returned from the procedurecall and directly echoed to the Debug Output window using the ‘Debug’ keyword.
If we want a procedure to return a String we just switch the return type to ‘.s’. As shown here:
Procedure.s JoinString(a.s, b.s)ProcedureReturn a + b
EndProcedure
Debug JoinString("Red ", "Lorry")Debug JoinString("Yellow ", "Lorry")
Notice the return type is specified in the ‘Procedure.s’ keyword. This now specifies that this procedurewill return a String. In this new example, I pass two Strings into the procedure, which are thenconcatenated and returned from the line ‘ProcedureReturn a + b’. I call this procedure three timesusing it with the ‘Debug’ keyword again to echo the returned values to the Debug Output window andto demonstrate the returned values.
Procedures that return values can be used anywhere where expressions are. For example, they couldbe used in another procedure call, like this:

Procedures and Subroutines92
Procedure.l AddTogether(a.l, b.l)ProcedureReturn a + b
EndProcedure
Debug AddTogether(AddTogether(2, 3), AddTogether(4, 1))
Here I’ve used the ‘AddTogether(a.l, b.l)’ procedure to return values added together from two separatecalls to the same procedure. First the ‘AddTogether(2, 3)’ is called and this returns ‘5’ then‘AddTogether(4, 1)’ is called and this returns ‘5’ too. Both of these procedure calls are being used asparameters within another procedure call. This final call adds together both of the returned values andreturns that value to be echoed to the Debug Output window.
Parameters Do Not Affect Return TypesOne thing to remember when using procedure return types is that they don’t have to be the same asdefined parameter types. For example:
Procedure.s DisplayValue(a.l, b.s)ProcedureReturn Str(a) + b
EndProcedure
x = 5While x >= 0Debug DisplayValue(x, " green bottles hanging on the wall.")x - 1
Wend
Even though I’ve used a Long type and a String type parameter in the ‘DisplayValue(a.l, b.s)’procedure, it can still return a String as defined by the type suffix on the ‘Procedure.s’ keyword. Returntypes and parameter types can mixed as much as you like.
Return types are very strict though, just as much as variable types. If you have defined a procedure toreturn a String and you wish to return a Long type value from it, you must convert that value into thecorrect return type (String) before returning it, otherwise you will get a syntax error. You can see thisin action in the above example. I’ve used the built-in ‘Str()’ command to convert ‘a’ to a String beforeconcatenating and returning it correctly.
Limitations Of Returning ResultsWhile using procedures to return results there are however two limitations. First, procedures can onlyreturn one result per call. Meaning that you cannot return two or more values in one procedure call.Second, you cannot return arrays, linked lists or any user defined type from procedures. You can onlyreturn built-in PureBasic types. It is however, possible to get around these limitations, by returning apointer. See Chapter 13 (Pointers) for an explanation of this technique.

7Using Built-in
CommandsProgramming languages are nothing without built-in libraries of useful commands, so PureBasic hasavailable over eight hundred built-in commands to be used within your programs. These range fromString manipulation, to mathematics, to file handling and even graphics commands. They coveralmost any programming task imaginable and if nothing exists that meets your needs you also havethe option of creating your own procedures.
In this chapter I will introduce and explain the most commonly used built-in commands thatPureBasic has to offer. While this list is not complete by any means, this introduction should serve toexplain fully some of the most common commands you will come across in general programming.
This chapter starts with a description on how to read the command syntax in the PureBasic helpfileand then moves on to the actual command descriptions and explanations. I finish this chapter with asection on how to handle files, such as loading, writing to and reading from, and then saving, all usingthe PureBasic built-in commands.
Using The PureBasic Helpfile
Here we will take a proper look at the PureBasic helpfile and I explain how the pages are organized,how to read them and more importantly, how to use the built-in commands that are described there.
When you view a command page in the PureBasic helpfile you are confronted with a standard layout,this goes similar to:
SyntaxDescriptionAn ExampleSupported Operating Systems
The latter three sections of each helpfile page are mostly self explanatory so let’s concentrate for a
93

Using Built-in Commands94
minute on the syntax section. The syntax portion at the top of each helpfile page is an example of howthe command is actually typed into the IDE and what parameters are expected to be passed to it. Forexample, let’s look at the ‘SaveImage()’ command in the helpfile. This is how to navigate to the correctpage: (Helpfile:Reference Manual->General Libraries->Image->SaveImage). On this page at the verytop, under the syntax heading, this syntax example appears:
SaveImage(#Image, FileName$ [, ImagePlugin [, Flags]])
The first thing on this line is the actual command name, in this case ‘SaveImage’, after that is a pair ofbrackets and if this certain command can accept parameters they will be shown within these brackets.In the ‘SaveImage()’ syntax example it is shown that this command can accept four parameters and soall four are within the brackets. You will also notice that the last two parameters are shown withinsquare brackets too. This is to signify that these last two parameters are optional and don’t have to beused when you need to call the ‘SaveImage()’ command. If we keep this in mind, the ‘SaveImage()’command can be properly used like these three examples:
SaveImage(1, "Image.bmp")SaveImage(1, "Image.jpg", #PB_ImagePlugin_JPEG)SaveImage(1, "Image.jpg", #PB_ImagePlugin_JPEG, 10)
The first example will save an image called ‘Image.bmp’ in the default 24bit Bitmap format. Thesecond example will save the image as JPEG format and use the standard compression value. The thirdexample will save the image as JPEG format and use the maximum compression value of ten (‘10’).Simple!
The first thing you may realize while using built-in commands is that they look and act exactly likenormal procedure calls. All built-in commands are simply calling pre-written procedures that aredefined as part of the PureBasic package. The trick to using them correctly is that when you call a built-in command, you must pass it the correct parameters as defined in that command’s syntax example,otherwise a syntax error will be triggered by the compiler.
The structure of the above syntax example is emulated throughout the entire helpfile, so if youunderstand how to read this one, you will understand how to read all syntax examples for all the otherbuilt-in commands.
What Are Those Square Brackets Within The Syntax Examples?
The square brackets shown in syntax examples are never used when using these commands. They are onlyincluded in the examples to show what parameters (if any) are optional, when using these commands. Squarebrackets are only ever used in actual code when you are using Static Arrays. For more information aboutstatic arrays see Chapter 5 (Arrays).
Using Built-in Commands 95
PB Numbers And OS Identifiers
When using built-in commands it is important to understand the role of PureBasic’s object numberingsystem and that of operating system identifiers, as these are used directly when controlling whathappens in your program. Both are nothing more than numbers but both are used to identify objectswithin programs. For example, to identify parts of a graphical user interface or different images youhave to identify them by a number. Knowing how and when to use them is essential, not only toPureBasic but programming in general.
The PureBasic helpfile is invaluable for the information it contains but it can get a little confusingwhen first trying to understand PureBasic’s object numbering system and operating systemidentifiers. This is because sometimes the helpfile refers to both being identifiers. Let me explainexactly what they are so you can understand the helpfile better.
PB Numbers ExplainedPureBasic works on a number system to identify each object that you create in your program. APureBasic object, among others, can be a window, a gadget or even an image. These numbers, we’ll callthem PB numbers, are then used by your program to refer to these objects later when you want toperform some action on them.
Many PureBasic commands need either one or two PB numbers passed to them as parameters tofunction correctly. These are shown in the PureBasic helpfile within the syntax example of any givencommand. If a command needs a PB number, these are usually shown as a constant, beginning with ahash (#) and ending with the name of the library that the command resides in, e.g. ‘#Image’ is usedfor an image number, ‘#Window’ is used for a window number, etc.
Here is an example of a built-in command from the ‘Image’ library that makes use of a PB number:(Helpfile:Reference Manual->General Libraries->Image->CreateImage).
CreateImage(#Image, Width, Height)
As you can see this command expects a PB number to be passed to it as the first parameter, shown by‘#Image’. Although this is shown as a constant in the syntax example, it doesn’t necessarily mean thata constant must be passed to the command, it just means that constants are usually used. In fact, anyinteger can be used as a PB number for an object, as long as it is unique amongst others if many of thesame objects are used. This number refers to this newly created object from then on throughout yourprogram.
The Same Kind Of Objects Can’t Share PB NumbersPureBasic numbers provide a great way to refer to anything that PureBasic creates on an individualbasis. Because of this you can’t have two of the same object sharing the same PB number. If you createan image with a number of ‘1’ then later in your program you create another image with the numberof ‘1’, PureBasic automatically destroys the first and frees the memory it was using before creating thesecond. This makes sure no two objects from the same library share the same PB number. This featureis also very handy if you want to replace objects at any time.

Using Built-in Commands96
PureBasic numbers can be shared across libraries though. For example, you can create a window using‘1’ as its PB number and then create a button gadget on it using ‘1’ as its PB number too. These twonumbers don’t conflict with one another because they refer to objects from two different libraries.
When using different commands to create objects, things can get confusing when trying to keep trackof all the numbers that must be used. To avoid this problem, many PureBasic programmers (includingme) use constants for these PB numbers. These constants are usually defined in an enumeration blockto keep the numbers sequential. Here’s an example:
Enumeration#IMAGE_DOG#IMAGE_CAT#IMAGE_BIRD
EndEnumerationCreateImage(#IMAGE_DOG, 100, 100)CreateImage(#IMAGE_CAT, 250, 300)CreateImage(#IMAGE_BIRD, 450, 115)
After the constants have been defined, I can use these to create the above images (or any other object)and not worry about their values conflicting. Throughout the program I can also use these constantsto refer to the images by name. For example, now I can refer to the first image by using the‘#IMAGE_DOG’ constant. This method of using constants for PureBasic’s numbers guarantees clearlyorganized and readable code.
Dynamic PB NumbersAs an alternative to using enumeration blocks to handle PB numbers for newly created objects, you canuse a special constant for them all. This constant is:
#PB_Any
This constant can be used wherever a PB number is expected in an object creation command. Thevalue of this constant is the next PB number that is available for use. So for example, the first time itis used its value may be ‘1’, then the second time it is used its value may be ‘2’. This behavior is greatfor building dynamic programs, where you may or may not know how many objects you will becreating.
The only thing to keep in mind while using ‘#PB_Any’ as a PB number, is that in order for you to referto this object later, you have to know what value ‘#PB_Any’ had during the object’s creation. This ismade simple by PureBasic, because you use this special constant as a parameter within a command,that command returns the PB number of this newly created object. Here is an example of using adynamic PB number in the ‘CreateImage’ command:
ImageDog.l = CreateImage(#PB_Any, 100, 100)
Here the ‘CreateImage()’ command now returns the PB number of the newly created image becausewe have used the ‘#PB_Any’ constant as the PB number parameter. This works in exactly the same wayfor all object creation commands.

Using Built-in Commands 97
PB numbers are unique to PureBasic and enable a quick and easy way of referring to different objectswithin your program. To view them in real working examples, see Chapter 9.
Operating System IndentifiersSome objects you create using PureBasic’s built-in commands are also assigned numbers from theoperating system. These numbers are how the actual operating system keeps track of such things aswindows, fonts and images, etc. The PureBasic helpfile calls these, OS Identifiers or just IDs. Whileprogramming in PureBasic you will notice that some commands return OS identifiers while othersmay need them as parameters.
Here are a few commands that return an OS identifier of the object defined by the PB numberparameter:
WindowOSId.l = WindowID(#Window)GadgetOSId.l = GadgetID(#Gadget)ImageOSId.l = ImageID(#Image)
I’ve listed three here but there are a few more. Command names that end with ‘...ID()’ usually returnOS Identifiers. As mentioned before, here is an example of a command that uses an OS Identifier as aparameter:
CreateGadgetList(WindowOSId)
This command is used to create a gadget list within a window and uses an operating system identifierto define where the list is created. An OS identifier is used in this command instead of a PB numberfor maximum compatibility, just in case the window has been created by the operating system’s nativeAPI. If you wanted to use this command to create a gadget list on a window created by usingPureBasic’s number system, then we could do something like this:
CreateGadgetList(WindowID(#Window))
Notice we are using the ‘WindowID()’ command as a parameter which returns the OS identifier of aPB numbered window.
Every operating system has a native application programming interface or API for short. This is abuilt-in command-set for all programming languages to use, to control the operating system and drawan interface for it. OS identifiers are used to keep track of, and access all objects that the operatingsystem contains. All OS identifiers are unique for every program and they exist for all objects, even forthose not written in PureBasic. For an operating system to track thousands of items, the numbers usedcan be quite large, so don’t be surprised to see OS identifiers that are over eight digits in length.
OS identifiers do not have to be used to create full working PureBasic programs but it’s good forbeginners to understand what they are even though they probably won’t use them. OS identifiers playa major part when using the API of any operating system, especially the Windows API, which I covera little more in Chapter 13.

Using Built-in Commands98
Examples Of Common Commands
In this section I’m going to demonstrate some of the most commonly used commands in PureBasic.These commands are usually found in most PureBasic programs and because of this, learning theirsyntax and purpose is very advantageous. All these commands exist in different libraries and are notnecessarily related, they are just very useful for general programming tasks. Here they are presentedbelow in alphabetical order, complete with their helpfile location and examples on usage.
Asc()
(Helpfile:Reference Manual->General Libraries->String->Asc)
Syntax Example:
ASCIIValue.l = Asc(Character.s)
This command returns the associated character’s ASCII value retrieved from a standard ASCII chart.In the standard ASCII character set, numbers from ‘0’ to ‘255’ are used to represent characters andcomputer control codes. The parameter passed to this command is a String that’s one character long,with which this command retrieves its associated ASCII value.
Text.s = "This is a test"
For x.l = 1 To Len(Text)Debug Mid(Text, x, 1) + " : " + Str(Asc(Mid(Text, x, 1)))
Next x
The above example uses a ‘For’ loop and the built-in ‘Mid()’ command to break up the text containedin the ‘Text’ variable into separate letters. While the loop is running each letter is passed to the ‘Asc()’command and their associated ASCII value is retrieved. These values along with the associated lettersare echoed to the Debug Output window. I’ve used some new commands in this example, but don’tpanic, these are explained a little later in this section. See Appendix B (Helpful Charts) for a full ASCIIchart, showing all characters and associated numbers from ‘0’ to ‘255’.
Chr()
(Helpfile:Reference Manual->General Libraries->String->Chr)
Syntax Example:
Character.s = Chr(ASCIIValue.l)
This command returns a one character String, retrieved from a standard ASCII chart. The returnedstring is the associated ASCII character of the value passed as a parameter. In the standard ASCIIcharacter set, numbers from ‘33’ to ‘126’ are actual printable characters that you can find on a standardEnglish keyboard.
Using Built-in Commands 99
The parameter passed to this command: ‘ASCIIValue.l’, is the number with which you retrieve theassociated character.
Text.s = Chr(84) + Chr(104) + Chr(105) + Chr(115) + Chr(32)Text.s + Chr(105) + Chr(115) + Chr(32) Text.s + Chr(97) + Chr(32)Text.s + Chr(116) + Chr(101) + Chr(115) + Chr(116)Debug Text
The above example constructs the String ‘This is a test’ by concatenating the results from multiple‘Chr()’ commands. For example, the first command ‘Chr(84)’ returns the ‘T’ character, the rest arethen concatenated to the ‘Text’ variable. See Appendix B (Helpful Charts) for a full ASCII chart,showing all characters and associated numbers from ‘0’ to ‘255’.
Delay()
(Helpfile:Reference Manual->General Libraries->Misc->Delay)
Syntax Example:
Delay(Milliseconds)
This command pauses all program activity for the amount of time specified in the ‘Milliseconds’parameter. The time is measured in milliseconds (which is a thousandth of a second).
Debug "Start..."Delay(5000)Debug "This is executed 5 seconds later"
When the above example is run, the second ‘Debug’ statement is executed five seconds after the firstone because I’ve used the value of ‘5000’ milliseconds (5 seconds) in the ‘Delay()’ command.
ElapsedMilliseconds()
(Helpfile:Reference Manual->General Libraries->Misc->ElapsedMilliseconds)
Syntax Example:
Result.l = ElapsedMilliseconds()
This command returns the number of milliseconds that have elapsed since your computer was turnedon.
Debug "Start..."StartTime.l = ElapsedMilliseconds()Delay(5000)Debug "Delayed for "+Str(ElapsedMilliseconds() - StartTime)+" milliseconds."

Using Built-in Commands100
This command is great for performing any kind of timing operation in your program. For example, ifyou want to measure any elapsed number of milliseconds, you first record the start time in a Longvariable using this command. Then when you want this timer to stop, you record the time again using‘ElapsedMilliseconds()’. To get the result, subtract the end time from the start time and this leaves youwith the number of milliseconds that have elapsed between each command. This is all demonstratedin the above example. When you use this command for the first time you may be shocked at the largenumbers returned by it. You have to remember that it’s recording the milliseconds elapsed fromsystem switch on. Don’t panic at the big numbers, just remember that it is providing a good point intime as a reference and you can use the above method to calculate elapsed time from any point.
FindString()
(Helpfile:Reference Manual->General Libraries->String->FindString)
Syntax Example:
Position.l = FindString(String.s, StringToFind.s, StartPosition.l)
This command tries to find the ‘StringToFind’ parameter within the ‘String’ parameter, starting fromthe position indicated by the ‘StartPosition’ parameter. If it finds this String it immediately returns theposition of the first occurrence. These positions referred to are character counts from the beginning ofthe ‘String.s’ parameter, starting at ‘1’.
String.s = "I like to go fishing and catch lots of fish"StringToFind.s = "fish"
FirstOccurrence.l = FindString(String, StringToFind, 1)SecondOccurrence.l = FindString(String, StringToFind, FirstOccurrence + 1)Debug "Index of the first occurrence: " + Str(FirstOccurrence)Debug "Index of the second occurrence: " + Str(SecondOccurrence)
This example shows how to find a String within another String. The first ‘FindString()’ command triesto find the String ‘fish’ starting from a position of ‘1’, which it does successfully and assigns the position‘14’ to the ‘FirstOccurrence’ variable. The second ‘FindString()’ command tries to find the same Stringbut from a position of ‘FirstOccurrence + 1’ to make sure we avoid the first occurrence being foundagain. This returns the position as being ‘40’ which is assigned to the ‘SecondOccurrence’ variable.Both are then echoed to the Debug Output window.
Len()
(Helpfile:Reference Manual->General Libraries->String->Len)
Syntax Example:
Length.l = Len(String.s)
This command returns the length in characters of the ‘String’ parameter.

Using Built-in Commands 101
Alphabet.s = "abcdefghijklmnopqrstuvwxyz"LengthOfString.l = Len(Alphabet)
Debug LengthOfString
This example is very simple because the ‘Len()’ command is very simple itself. The alphabet is assignedto a String variable called ‘Alphabet’. This variable is then passed to the ‘Len()’ command whichreturns ‘26’ (this is how many characters the ‘Alphabet’ variable contains). This value is assigned to the‘LengthOfString’ variable which is then echoed to the Debug Output window.
MessageRequester()
(Helpfile:Reference Manual->General Libraries->Requester->MessageRequester)
Syntax Example:
Result.l = MessageRequester(Title.s, Text.s [, Flags])
;Possible Flags:#PB_MessageRequester_Ok#PB_MessageRequester_YesNo#PB_MessageRequester_YesNoCancel
;Possible Return Values:#PB_MessageRequester_Yes#PB_MessageRequester_No#PB_MessageRequester_Cancel
This command is used to create a small window that can display any information in your program. Itcan be used within any type of program, not just programs with a graphical user interface. The firstparameter in this command is the String displayed in the titlebar of the window. The second parameteris the actual message string displayed in the window itself. The third and last parameter are availablefor optional flags. By using different flags for the last parameter, you can alter the style of the requesterwindow to include different buttons. Your program is halted until one of these buttons has beenpressed. To find out which one, you can test the return value, like this:
Title.s = "Information"Message.s = "This is the default style message requester"MessageRequester(Title, Message, #PB_MessageRequester_Ok)
Message.s = "In this style you can choose 'Yes' or 'No'."Result.l = MessageRequester(Title, Message, #PB_MessageRequester_YesNo)
If Result = #PB_MessageRequester_YesDebug "You pressed 'Yes'"
ElseDebug "You pressed 'No'"
EndIf

Using Built-in Commands102
Message.s = "In this style you can choose 'Yes' or 'No' or 'Cancel'."Result.l = MessageRequester(Title, Message, #PB_MessageRequester_YesNoCancel)
Select ResultCase #PB_MessageRequester_YesDebug "You pressed 'Yes'"
Case #PB_MessageRequester_NoDebug "You pressed 'No'"
Case #PB_MessageRequester_CancelDebug "You pressed 'Cancel'"
EndSelect
This example shows all the different ways that the ‘MessageRequester’ command can be used. It alsoshows you how to use the return value constants to determine which button was pressed. Usingconstants like this takes all the worry out of remembering numeric values. You don’t need to knowwhat values are assigned to these constants internally, we are just interested if they are equal (or not)to the return value of the command.
Mid()
(Helpfile:Reference Manual->General Libraries->String->Mid)
Syntax Example:
Result.s = Mid(String.s, StartPosition.l, Length.l)
This command returns a cropped String which is extracted from another. The starting String is passedas the ‘String’ parameter. The extracted String can then be taken from any position within the startingString, defined by the ‘StartPosition’ parameter. The length of the new String to be extracted is definedin the ‘Length’ parameter. Here’s an example:
StartingString.s = "Hickory Dickory Dock"ExtractedString.s = Mid(StartingString, 17, 4)Debug ExtractedString
Here I extract the String ‘Dock’ by specifying the start position as ‘17’, then I extract ‘4’ characters. Likethe ‘FindString()’ command, the position within the starting string is measured in characters.
Random()
(Helpfile:Reference Manual->General Libraries->Misc->Random)
Syntax Example:
Result.l = Random(Maximum.l)
This command is simple to demonstrate because all it does is return a random integer between (andincluding) ‘0’ and the value defined in the ‘Maximum’ parameter.

Using Built-in Commands 103
Debug Random(100)
In the above example, the ‘Random()’ command will return a random value between ‘0’ and ‘100’.
Str(), StrF(), StrQ(), StrD()
(Helpfile:Reference Manual->General Libraries->String->Str)
Syntax Examples:
Result.s = Str(Value.b)Result.s = Str(Value.w)Result.s = Str(Value.l)Result.s = StrF(Value.f [, DecimalPlaces.l])Result.s = StrQ(Value.q)Result.s = StrD(Value.d [, DecimalPlaces.l])
These four commands are essentially the same. Their main use is to turn numeric values into Strings.There are four different commands here to handle four different types of numeric values, ‘Str()’ tohandle Byte, Word and Long types, ‘StrF()’ to handle Floats, ‘StrQ()’ to handle Quads and ‘StrD()’ tohandle Doubles. You must use the right type of ‘Str()’ function to convert any particular numeric valueto a String. In the case of ‘StrF()’ and ‘StrD()’ you will notice that there is also an optional parametercalled ‘DecimalPlaces’. If this parameter is used, it defines how many decimal places the value shouldbe cropped to before converting it to a String.
Debug "Long converted to a String: " + Str(2147483647)Debug "Float converted to a String: " +StrF(12.05643564333454646, 7)Debug "Quad converted to a String: " +StrQ(9223372036854775807)Debug "Double converted to a String: " +StrD(12.05643564333454646, 14)
The above example shows how to convert four different kinds of numeric values into Strings. In eachcase I’ve concatenated a literal String to the converted one to form complete sentences, I then echothese to the Debug Output window. One important thing to take note of is that if you omit the‘DecimalPlaces’ parameter in the Float or Double type commands, then they will both default to sixdecimal places and you may lose a lot of precision.
Val(), ValF(), ValQ(), ValD()
(Helpfile:Reference Manual->General Libraries->String->Val)
Syntax Examples:
Result.l = Val(String.s)Result.f = ValF(String.s)Result.q = ValQ(String.s)Result.d = ValD(String.s)
Using Built-in Commands104
These four commands are essentially the same as one another and the complete opposite of the ‘Str()’commands. The difference is that these commands take a String as a parameter and return a numericvalue depending on which flavor of ‘Val()’ is used. For example, ‘Val()’ returns a Long, ‘ValF()’ returnsa Float, ‘ValQ()’ returns a Quad and ‘ValD()’ returns a Double. Here’s a simple example:
LongTypeVar.l = Val("2147483647")FloatTypeVar.f = ValF("12.05643564333454646")QuadTypeVar.q = ValQ("9223372036854775807")DoubleTypeVar.d = ValD("12.05643564333454646")
Debug LongTypeVarDebug FloatTypeVarDebug QuadTypeVarDebug DoubleTypeVar
In this example I’ve used all four different types of the ‘Val()’ command to convert four Strings intotheir respective numeric types. You must note however, if you are converting numbers from withinStrings that are numerically larger than the resulting type can hold, then some clipping will occur. Forexample, if you look at the ‘ValF("12.05643564333454646")’ line in the example above, this number isfar too large or precise for a normal Float type to hold, so when it’s converted by the ‘ValF()’ commandit’s clipped to fit the destination type.
Handling Files
Using files is a natural way for any program to store and retrieve data. PureBasic provides full supportto read and write files, and can read from, and write to, any number of files at the same time. All thefile manipulation commands are stored in the same File library, located here in the PureBasic helpfile:
(Helpfile:Reference Manual->General Libraries->File)
Not all the file commands will explained fully within this section, but I will give you a good groundingon reading and writing files so that the remainder of the commands will become easy to understand,when you use them.
Writing To A FileLet’s get started with an example on how to write some data to a file, here we’ll write a few Strings toa simple text file.
#FILE_RHYME = 1
Dim Rhyme.s(3)
Rhyme(0) = "Baa baa black sheep, have you any wool?"Rhyme(1) = "Yes sir, yes sir, three bags full!"Rhyme(2) = "One for the master, one for the dame,"Rhyme(3) = "And one for the little boy who lives down the lane."

Using Built-in Commands 105
If CreateFile(#FILE_RHYME, "Baa baa.txt")For x.l = 0 To 3WriteStringN(#FILE_RHYME, Rhyme(x))
Next xCloseFile(#FILE_RHYME)
EndIf
To begin with I’ve used the constant ‘#FILE_RHYME’ to be used as the PB number for our new fileobject and I’ve defined a String array to hold my nursery rhyme. After the Strings have been added tothe ‘Rhyme()’ array, we then move on to writing our file. If I wanted to open and write to an existingfile, I could use the ‘OpenFile()’ command, but in the above example, I want to create and write to anew file, so I use the ‘CreateFile()’ command instead.
The ‘CreateFile()’ command takes two parameters, the first is the PB number that this new file objectwill be associated with, and the second is the actual file name that this file will be named once created.I’ve also used the ‘CreateFile()’ command within an ‘If’ statement to test that the command returnstrue. If it does, then the file has been created successfully and I can carry on with my program. It’salways a good idea to test file creation, as things could go very wrong if you try to write to an invalidfile.
To actually write a String to the file, I’ve used the ‘WriteStringN()’ command. This takes twoparameters, the first is the PB number associated with the file object I want to write to, the second isthe actual String I wish to write. I’m using a loop to iterate through the array to write all its contentsto the file, thus writing the whole nursery rhyme. The ‘WriteStringN()’ command used in this exampleis an extended version of the ‘WriteString()’ command. In fact the only difference is the ‘N’ before thebrackets. This ‘N’ denotes that a 'new line' character is written after the String during the command’sexecution. Because I want a new line to start after every String I write to this file, I use the‘WriteStringN()’ command, otherwise it would all be on the same line.
Once I have written all Strings to the file and the loop exits, I close the file using the ‘CloseFile()’command. This only takes one parameter which is the PB number of the file object you wish to close.
Different Ways Of Creating Or Opening Files
When using PureBasic’s file commands to read or write to files, you must choose the right commanddepending on how you wish to use that file. The below list describes commands that enable any read or writeto be catered for.
‘ReadFile()’ will open the defined file for reading and prevents any writing to it.‘OpenFile()’ will open the defined file for reading or writing and will create it if it doesn't exist.‘CreateFile()’ creates an empty file for writing to. If the file already exists, it replaces it with a blank one.
Each one works in exactly the same way and all share the same two parameters. The first parameter is the PBnumber to be associated to the file object and the second parameter is the actual file name on disk.
Using Built-in Commands106
This file containing the nursery rhyme should now be somewhere on your hard drive. If you create afile using a relative file name such as ‘Baa baa.txt’, then the newly created file will be in the samedirectory as your source code file. If you need a file to be created somewhere more specific you mustspecify an absolute path which should include the drive name, any directories and the file name,something similar this:
...If CreateFile(#FILE_RHYME, "C:\My Directory\Baa baa.txt")...
When using this method though, you must always make sure that all directories specified in the pathdo exist before you write the file, else the file creation will fail.
How Do I Write Other Built-in Type Values?Writing the other built-in types to a file is just as easy as writing Strings. Now that you understand howthe ‘WriteString()’ command works the others are simple to grasp. Here are syntax examples forwriting the other built-in types:
WriteByte(#File, Value.b)WriteChar(#File, Value.c)WriteWord(#File, Value.w)WriteLong(#File, Value.l)WriteQuad(#File, Value.q)WriteFloat(#File, Value.f)WriteDouble(#File, Value.d)
These can be used to write any built-in type value to a file and all commands can be used as many timesas you like. These values, along with Strings can be mixed and matched in a single file over and overagain if needed. To make things even more simple, these commands are all used in the same manneras the ‘WriteString()’ command, the first parameter is the file object to write to and the second is theactual value to write.
The ‘CloseFile()’ Command Is Very Important
When you have finished reading and especially writing to files you must close the file correctly using the‘CloseFile()’ command. This command not only closes the selected file but frees it up again to be opened byanother program if needed. Another important role that the ‘CloseFile()’ command plays is that it completelywrites to the file any data that has been left in the file buffer. PureBasic uses a buffer system to increaseperformance of file access, so if you are open a file in another editor and some data you expected to be thereis missing you must check that you’ve closed the file properly using ‘CloseFile()’. This command ensures anydata remaining in the file buffer is written to disk.
The file buffers are completely transparent to the regular user, so you won’t have to worry about them toomuch, you just need to close each file when you have finished with it to avoid any errors.

Using Built-in Commands 107
Reading From A FileReading from files is just as simple as writing to them. PureBasic makes it extremely simple withpowerful file reading commands. If you look at the next example, I read Strings from a file called‘Report.txt’, and place them into a linked list called ‘FileContents’. The contents of this linked list arethen echoed to the Debug Output window, purely to show the String data within. You don’t have toecho this data though, you can go on to manipulate the Strings in any way you see fit during yourprogram.
#FILE_REPORT = 1
NewList FileContents.s()
If ReadFile(#FILE_REPORT, "Report.txt")While Eof(#FILE_REPORT) = #FalseAddElement(FileContents())FileContents() = ReadString(#FILE_REPORT)
WendCloseFile(#FILE_REPORT)
EndIf
ForEach FileContents()Debug FileContents()
Next
At the beginning of the code I’ve used a constant which is to be used as the PB number of the openedfile. Then I create a linked list called ‘FileContents’ to hold the Strings we’re going to read. You don’thave to use a linked list to hold these Strings, I find it just makes things a little more organized if donelike this. I’ve used a linked list here because they are easy to use and can grow with new items, unlikearrays who’s size is pre-defined.
I open the file using the ‘ReadFile()’ command, this opens it with read-only permission and preventsany writing to the file while it is open. Like the ‘CreateFile()’ command, the first parameter is a PBnumber that this newly opened file will be associated with, while the second is the name of the file tobe read. As before, I’ve use this command within an ‘If’ statement to make sure the command returnstrue. If it does then I can be sure this file has been opened correctly and I’m able to access it properly.
Once the file is open, I need to read the information inside it. I’ve used a ‘While’ loop here, so I don’thave to type out repeated commands to read the Strings within. The loop is constructed using the‘Eof()’ command, ‘Eof’ stands for ‘End of file’ and this command will return true if you have reachedthe end of an opened file. In the loop I check to see if this is returning false on each iteration, if it is Iknow I’m not at the end the file and I can continue reading from it. The ‘Eof()’ command takes oneparameter, which is the PB number of the file you want to test.
While the file is open, I use the ‘ReadString()’ command to read one String at a time from it. The Stringreturned by this command starts at the beginning of the current line and ends when a new line isencountered, this also moves the file access pointer forward one line. Each time I read a String fromthe file, I create a new element within the ‘FileContents’ linked list and assign the String to it. Icontinue to do this until the ‘Eof()’ command returns true causing the loop to exit.

Using Built-in Commands108
Once the loop is broken, I then correctly close the open file with the ‘CloseFile()’ command. Closingthe file is important and should be done as soon as you’ve finished with it. A simple ‘ForEach’ loop isthen used to echo the read data to the Debug Output window.
How Do I Read Other Built-in Type Values?While the last example dealt with Strings, you can also read other types values just as easy. PureBasicprovides specific commands for each of the built-in types to read them correctly.
ReadByte(#File)ReadChar(#File)ReadWord(#File)ReadLong(#File)ReadQuad(#File)ReadFloat(#File)ReadDouble(#File)
To keep things simple all these commands share the same parameter with the ‘ReadString()’command. This parameter is the PB number of the open file object to read from. The only differencebetween these commands and ‘ReadString()’ is that these will only read a single value from the filewhich will contain that type’s associated number of Bytes. Unlike ‘ReadString()’ they won’t keepreading until another line is encountered. For example, if I wanted to read a Long type value from afile, I would use ‘ReadLong()’ which would read ‘4’ Bytes and return the value contained within theseBytes as a Long. This would also move the file access pointer forward ‘4’ Bytes within the file, ready forthe next read command.
Locating The File Access Pointer?At any time while reading or writing to a file you can retrieve the location of the file access pointer byusing the ‘Loc()’ command. ‘Loc()’ stands for ‘Location’. The return value is measured in Bytes.
(Helpfile:Reference Manual->General Libraries->File->Loc)
Syntax Example:
Position.q = Loc(#File)
The File Access Pointer
Within each opened file there exists an invisible file access pointer. This imaginary position is where you willread from or write to in an open file. When using the ‘ReadFile()’, ‘OpenFile()’ or ‘CreateFile()’ commandsthe access pointer starts at the beginning of the file ready for the next operation. Once you start reading orwriting, the file access pointer starts moving. If you are writing to the file then the access pointer will progressthrough it, moving to just after the value last written, ready for the next. If you are reading from a file thenthe access pointer will move after each read operation to the end of the last value read until the end of the fileis encountered, and the ‘Eof()’ command returns true.

Using Built-in Commands 109
This command will return the position of the file access pointer (in Bytes) within the file objectspecified in the PB number parameter. The position is returned as a Quad value to support large files.
Moving The File Access Pointer?The file access pointer can be moved at any time by using the ‘FileSeek()’ command.
(Helpfile:Reference Manual->General Libraries->File->FileSeek)
Syntax Example:
FileSeek(#File, NewPosition.q)
This command takes two parameters, the first is the PB number of the file object to be modified andthe second is the new position (in Bytes) of the file access pointer. This allows you to read from anyposition, within in any file at any time. The ‘NewPosition’ parameter type is a Quad for large filesupport.
Finding Out The Current File Size?To find out the size of the currently used file, you use the ‘Lof()’ command. ‘Lof()’ stands for ‘Lengthof file’.
(Helpfile:Reference Manual->General Libraries->File->Lof)
Syntax Example:
Length.q = Lof(#File)
This command will return the size of the file object specified in the PB number parameter in Bytes. Thelength is returned as a Quad type, to support large files.
Loc, Lof And FileSeek ExampleIn this next snippet I’m going to demonstrate the use of ‘Loc()’, ‘Lof()’ and ‘FileSeek()’ to provide youwith a relevant example of these commands. In the code below I’m reading a MP3 music file todiscover if it has an ID3(v1) tag embedded inside it. These tags usually contain information such as theartist name, song name and genre, etc.
After reading the specifications of MP3 ID3 tags on the Internet, I discovered that the tag informationis always added to the end of a regular MP3 file and this tag is always ‘128’ Bytes long. The specificationmentions that the first ‘3’ Bytes of this tag are the characters ‘TAG’, so this is what I will check for.
Here’s the code:
#FILE_MP3 = 1
MP3File.s = "Test.mp3"
Using Built-in Commands110
If ReadFile(#FILE_MP3, MP3File)FileSeek(#FILE_MP3, Lof(#FILE_MP3) - 128)For x.l = 1 To 3Text.s + Chr(ReadByte(#FILE_MP3))
Next xCloseFile(#FILE_MP3)If Text = "TAG"Debug "'" + MP3File + "' has an ID3v1 tag embedded within it."
ElseDebug "'" + MP3File + "' does not have an ID3v1 tag embedded within it."
EndIfEndIf
After opening the file using ‘ReadFile()’, I move the file access pointer to the correct place by findingout the length of the file, then back tracking ‘128’ Bytes. Like this:
FileSeek(#FILE_MP3, Lof(#FILE_MP3) - 128)
After this command has finished the file access pointer is now in the correct place. So I use a loop toperform a ‘ReadByte()’ operation three times and I pass each Byte to the ‘Chr()’ command to return acharacter. These characters are then concatenated to form a String variable called ‘Text’. Once the loophas ended and the is file closed I check the value of ‘Text’. If the String contained within ‘Text’ is equalto ‘TAG’ then an ID3(v1) tag is present in the MP3 file.
Read The Helpfile
This has been the warcry of many good programmers for years, especially on Internet forums. To trulyunderstand something you have to study it, and to study something properly you have to readeverything about it. There really is no getting around the fact that people who read more about asubject are usually better at understanding it. This is especially true with programming languages.
The best piece of advice I can give to you to start learning PureBasic is to read the PureBasic helpfilefrom front to back and read every page about every command. This sounds extremely boring butbelieve me it will substantially increase your understanding of PureBasic and give you an excellentinsight to just what is possible using this great language.
Sometimes the only thing that distinguishes a good programmer from a truly great one is the amountof reading and study of relevant information that has taken place.
Hopefully this chapter will give you enough insight to be able read the helpfile and understand how touse most built-in commands purely from their helpfile syntax examples.

8Good
ProgrammingStyle
Until now I’ve concentrated on explaining core essentials of PureBasic programming. Its built-intypes, statements and expressions, etc. I think it’s now time that I mention something about the styleof how a program should be written.
In this chapter, I’m going to talk about something that all programmers should recognize and use andthat’s good programming style. Learning to program can be great fun but that fun can soon erode awaywhen you are confronted with (and trying to understand) poorly written code, especially if you are theauthor. Writing neatly formatted code not only makes it look more professional, but it actually helpsyou to read and understand it better.
In the following paragraphs I’m going to describe ways in which you can format your code formaximum readability. This is not necessarily the right or wrong way to do so, just the way I usuallywork. Hopefully after reading further you will settle into your own style and stick to it.
Later in this chapter, I go on to show you tips and tricks to help you avoid errors in your code and giveyou examples on how to handle them when they do happen. I’ve also included some guidance on howto use the PureBasic debugger to track down where problems may be occurring in your code.
Why Bother Formatting Code Neatly?
This question is sometimes asked by beginners and should be addressed. One answer would be, if Iwere to write this book without headings, subheadings, paragraphs or capitalization and flow the textinto one big block, would it be as easy to read as it is now?
Formatting code neatly has absolutely nothing to do with program compilation and it doesn’t alter thefunction or execution of the compiled program either, it’s purely done to make code easily readable.So why bother? Well I can guarantee that in the future you will work on source code that you will
111
Good Programming Style112
revisit time and time again. Sometimes because you might not finish what you are doing in one day oryou might revise an old program to include new functionality. Each time, you will have to re-read yourcode and understand what it does. If you have ugly, unorganized code then I guarantee you will havedifficulty in reading it and carrying on with your project.
If a bug appears in your program and the program code is not very well organized you will also have aharder time trying to track down where the error is in your code. A program that is perfectly clear tounderstand today may not be clear tomorrow. If it takes you a while to figure it out, how long would ittake someone else to figure it out?
Working in teams is another good reason for writing well formatted code. If you are working on aproject within a team and amending other people’s code, as well as writing new stuff, it is essential thatthe whole team uses the same formatting standard. This is so all team members can quickly and easilyunderstand any programmer’s code and carry on with the project effectively.
The Value Of Comments
The very first thing to talk about when mentioning good programming style is the use of Comments.Until now, comments have not been used in any examples. I thought, I would wait until this chapterfor a chance to describe them properly as I regard comments as one of the most important aspects ofwriting good code.
To put simply, comments are just lines of text included within your program that are used to describeor document what you are doing with your code. They are never compiled into the final executable orhave any other bearing on the program. You can use as many as you like as they will never interferewith program performance.
Comments are a way to provide a more detailed explanation of what you are writing as well as providean overview on how different parts of your program are meant to work and how they interact with therest of the code. Here’s a brief example:
;The procedure Pi() is called to return the value of Pi.;This calculation is only accurate to six decimal places.
Procedure.f Pi()ProcedureReturn 4 * (4 * ATan(1/5) - ATan(1/239))
EndProcedure
CircleDiameter.l = 150
Debug "A circle which has a diameter of " + Str(CircleDiameter) + "mm"Debug "has a circumference of " + StrF(CircleDiameter * Pi()) + "mm."
Here I’ve used comments within this example to describe the function of the ‘Pi()’ procedure and moreimportantly explain its limitation of only being accurate to six decimal places.

Good Programming Style 113
Creation of comments is simple because all comments start with a semi-colon (‘;’) and that’s it:
;This is a comment
Comments can appear absolutely anywhere within your source code even on the same line as anothercommand, like this:
Procedure.l AddTogether(a.l, b.l) ;Add two numbers and return the resultProcedureReturn a + b
EndProcedure
You have to remember is the semi-colon at the beginning, this defines where the comment starts. Thecomment will then be as long as the current line and when a new line is encountered the commentends. If you want a comment to continue onto a new line then you have to start that new line withanother semi colon.
To properly comment code, make every comment significant and fight the temptation of just repeatingyour code with the comment. Comments shouldn’t be too lengthy but long enough to explain what youneed to. The general rule of thumb while writing comments is to imagine that you are clarifying themore complicated parts of your code to another person. In six month’s time when you revisit yourcode, you will be glad comments are there to help you understand your work.
Comments can be used for:
1). Adding license or copyright information.2). Explaining why a particular approach has been used.3). Adding notices of where code could be improved.4). Clarifying the functions of complicated procedures.5). Clarifying procedure internals by drawing graphs or formulae using ASCII art.
My Coding Format
The general layout of my code and the way I structure certain bits and bobs is based on the standardcode format of several programming languages. This entire book has been written in this style, whichI personally feel is an easy to read and learn format. Here, I’m going to explain why, and show you howI write code, to give you a head start in writing neat and readable programs. Hopefully you will findthis style helpful and continue to use it.
Variables, Arrays, Linked Lists And ProceduresI usually name these with clear, accurate, pronounceable and descriptive names based on‘CamelHump’ notation. This notation is easy to understand, you capitalize the first letter of the nameand then capitalize any other words that follow. The capital letters act as a separator for these wordsas no spaces can be used. This capitalization format makes these words look as if they have humpsrunning along them, hence the name ‘CamelHump’ notation. This how is how I prefer to format allvariables, arrays and linked lists as I find this makes them easier to read.

Good Programming Style114
Example:
NumberOfDays.l = 365Dim MonthsOfTheYear.s(11)NewList Days.s()
ConstantsI format constants using the standard C and Windows API style, which is all uppercase. If I need todistinguish separate words within them, I use underscores.
Example:
#SPEED_OF_LIGHT = 299792458 ; Meters per second
StructuresI use the same standard for structures as I do for constants, I use all uppercase names. This again isthe standard format of C and the Windows API. Also, like constants, if I need to distinguish separatewords then I use underscores. Notice, the following structure name is all uppercase.
Example:
Structure USER_SERVICEServiceType.sServiceCode.l
EndStructure
IndentationIndents provide a way to structure code and make it easy to see the beginning and end of procedures,loops and conditional statements. Indents are very often used to give purely visual aids to readingcode. Here are examples of good indentation:
; Returns a String containing a floating point number that’s been rounded up.; 'Number' = Number to round up and return as a String.; 'DecimalPlaces' = Number of decimal places to round up to.
Procedure.s StrFRound(Number.f, DecimalPlaces.l)Protected R.fProtected T.fIf DecimalPlaces < 0DecimalPlaces = 0
EndIfR.f = 0.5 * Pow(10, -1 * DecimalPlaces)T.f = Pow(10, DecimalPlaces)ProcedureReturn StrF(Int((Number + R) * T) / T, DecimalPlaces)
EndProcedure
Debug StrFRound(3.1415927, 4)

Good Programming Style 115
In this example, you can see, I’ve indented the code using tabs. This clearly defines code between thebeginning and ending keywords of a code block such as a procedure or an ‘If’ statement. I also indentcode this way for loops, procedures, ‘If’ and ‘Select’ statements and ‘Enumeration’ blocks. Indentationis especially helpful in nested statements, like this:
For x = 0 To 2For y = 0 To 2z.l = 0While z =< 10Debug x * y + zz + 1
WendNext y
Next x
Here, you can see the start and end keywords of each loop statement clearly and see all the codecontained within. Only one tab to the right is used per code block so the code contained within aparticular block isn’t too far away from the beginning and end keywords, which could also make codeharder to read.
If you look at the line: ‘For y = 0 To 2’ you can easily track down in the code and find the line: ‘Next y’.This is the beginning and end of an ‘If’ statement. By looking at this we know that all code indented tothe right, is inside this block. This will become more useful the larger your programs get.
Multiple Commands On The Same LineI sometimes write multiple commands on the same line to make some source code smaller. This iseasily done using the colon (‘:’) character. The colon character when used, tells the compiler that a newline has started and treats the next command as if it appears on its own separate line. Look at this:
Dim Birds.s(3)Birds(0)="Sparrow" : Birds(1)="Wren" : Birds(2)="Cuckoo" : Birds(3)="Owl"
Some programmers frown on this kind of formatting as it can impede readability. I feel sometimes itcan help, while it’s not over used.
Breaking Source Code UpWhen I’m writing a program and it’s starting to get big, I tend to break it up into many separate sourcecode files. These files are standard PureBasic files but have either the ‘*.pb’ or ‘*.pbi’ extension. ‘*.pb’files are standard PureBasic code files while ‘*.pbi’ files are PureBasic Include files. These two types offile are exactly the same and both are associated with the IDE for opening correctly. The ‘*.pbi’extension however is purely cosmetic to be able to identify quickly included files from the mainprogram file when grouped together in a folder.
In these separate files I hold different parts of the main program and then include them all into themain source code file by using the ‘IncludeFile’ or ‘XIncludeFile’ keyword.
Good Programming Style116
For example, if I am defining a lot of procedures I might create a separate source file called‘Procedures.pbi’ where all my procedures will be defined. Then at the top of my main source code fileI will include the procedures code like this:
IncludeFile "Procedures.pbi"
This has the effect of taking all lines of code from the "Procedures.pbi" file and pasting them into mymain source code starting from this line. Wherever the ‘IncludeFile’ command appears, this is wherethe code from the included file will be added into your main code. This is done before compilation soall the compiler sees is one big file to compile.
If you add an ‘IncludeFile’ line many times within your main code using the same file name, you willget duplicate pieces of code inserted into your main code file. If, however you want to avoid this youmust use the ‘XIncludeFile’ keyword. This is used in the same way as above:
XIncludeFile "Procedures.pbi"
The ‘XIncludeFile’ line will include the code from the ‘Procedures.pbi’ file, only if this line has not beenused before. I seldom use the ‘IncludeFile’ command as you only usually need one of each include fileincluding in any given program. I prefer to use ‘XIncludeFile’ for everything, as it cuts down on errorsoccurring.
Correctly Ending A ProgramTo end a program properly you should always use the ‘End’ keyword. This closes everything correctlywithin your program and frees any memory used by it. An optional exit code can also be used with the‘End’ keyword if needed. The syntax for use is simple, just use this keyword where you would like yourprogram to end. Multiple ‘End’ statements can also appear in any one program if you need topotentially end your program in more than one place in your code.
Without exit code:
End ; Immediately ends the program and frees all memory used by it.
With exit code:
End 1 ; Immediately ends the program, frees all memory and returns 1.
Golden Rules For Writing Easily Readable Code
Here is a list of golden rules I follow while writing a program. I stick to these rules even when writingvery small programs. If you follow this list you too will write good, clean, understandable code. Usinga standard way of working gives your code clear and concise structure to anyone reading it and willmake your code look and feel more professional.

Good Programming Style 117
1). Give all variables, procedures, arrays, etc. clear, accurate, pronounceable, descriptive names.2). Group logically connected variables or data into arrays or structures.3). Procedures should perform one function and perform it well.4). Use indentation to show code structure.5). Use parentheses (brackets) in expressions to avoid any evaluation confusion.6). Use blank lines to separate different procedures and other blocks of code.7). Try not to use the ‘Goto’ or ‘Gosub’ keyword.8). Use comments to help people (or you) understand your code more clearly.9). Try not to document bad code with comments, re-write the code properly.10). When working in a team, agree a formatting style before starting, then stick to it.
How To Minimize And Handle Errors
In this chapter I’m going to talk about methods that will help you catch errors in your code. Even themost experienced and dedicated programmer can make mistakes or forget to handle common ones ormaybe even overlook them altogether. Here I reveal good working practices along with some valuabletips and tricks, enabling you to be more vigilant in your programming, minimizing the chance of anyproblems occurring.
Use An Error Handler ProcedureIf your using PureBasic for large projects you might find that you’ll be making many tests to confirma true value. This is because a great deal of commands return a value. This value is nearly always aninteger and always above ‘0’ if things have gone right. Some programmers use ‘If’ statements to testcommands for a true value before proceeding, because if you remember from Chapter 4, everythingabove ‘0’ is considered a true value in PureBasic.
While some people use ‘If’ statements to check things have gone right before proceeding, I find thisapproach is only useful for small programs as it can lead to a lot of confusing nested ‘If’ statementswhen used for larger ones. What I tend to do is use a procedure as an error handler instead of an ‘If’statement. This not only makes your source code much more easy to read but you can pass userdefined messages to this procedure to inform users of where exactly in your program things have gonewrong and with what command. To see both sides, here is an example of using an ‘If’ statement to testa command:
#TEXTFILE = 1
If ReadFile(#TEXTFILE, "TextFile.txt")Debug ReadString(#TEXTFILE)CloseFile(#TEXTFILE)
ElseMessageRequester("Error", "Could not open the file: 'TextFile.txt'.")
EndIf
Here I test to make sure I can read the file ‘TextFile.txt’ if I can then I read a String from it. While thismethod is fine for small programs, I prefer this way for bigger projects:

Good Programming Style118
#TEXTFILE = 1
Procedure HandleError(Result.l, Text.s)If Result = 0MessageRequester("Error", Text, #PB_MessageRequester_Ok)End
EndIfEndProcedure
HandleError(ReadFile(#TEXTFILE,"TextFile.txt"),"Couldn’t open: 'TextFile.txt'.")Debug ReadString(#TEXTFILE)CloseFile(#TEXTFILE)
Here I’ve used a procedure called ‘HandleError()’ to take care of testing return values of anycommands passed to it. The first parameter called ‘Result’, is where the return value from a commandis passed. If a command is passed like this to a procedure, that command will always be executedbefore the procedure is called. This is to make sure any return values are passed correctly. The secondparameter ‘Text.s’, is the String you wish to be displayed if the passed command returns ‘0’. Let’s breakthis down a little more.
When I pass this command to the ‘HandleError()’ procedure:
ReadFile(#TEXTFILE, "TextFile.txt")
If the file ‘TextFile.txt’ does not exist on your hard drive or something else goes wrong, the ‘ReadFile()’command will return ‘0’. This value of ‘0’ is then passed to the first parameter of the error handlingprocedure. Inside the procedure this parameter is tested to see if its value is equal to ‘0’, if it is thenthe error message passed in the second parameter will be displayed using a message requester and theprogram will end. This is handy to give clear and concise error messages for every command that raisesan error.
If the command passed to the error handling procedure returns a value above ‘0’, then this commandis considered to have been successful and the error handling procedure takes no action.
The procedure demonstrated in the above example may look like overkill for such a small example butthis kind of thing is not what it would mainly be used for. Using an error handling procedure reallybecomes useful in larger programs, where many commands need to be tested one after another. Oncethe procedure is defined you can use it to test as many commands as you like and each can be testedon one line, unlike an ‘If’ statement. Look at this example of testing multiple commands:
HandleError(InitEngine3D(), "InitEngine3D() failed to initialized!")HandleError(InitSprite(), "InitSprite() failed to initialized!")HandleError(InitKeyboard(), "InitKeyboard() failed to initialized!")HandleError(OpenScreen(1024, 768, 32, "Game"), "A screen could not be opened!")
Can you image using ‘If’ statements to test all these commands? It would be a nested ‘If’ nightmare,and this isn’t even a full program yet! Using error handling procedures makes your code look neater,cleaner and more readable.
Good Programming Style 119
Working like this, you will find mistakes are easier to spot and unexpected problems are more simpleto handle. The only problem with this approach is that ‘HandleError’ appears at the start of every line,which some people find intrusive.
Use The ‘EnableExplicit’ CommandThis command is a godsend for some people and a hindrance to others and that’s why it is completelyoptional to use. This command enables explicit variable definition within the whole of your program.So what does this mean? Well, in Chapter 2, I explained that if you didn’t specify a type suffix for avariable, then that variable’s type will default to the current default type, which is normally a Long. Ifthe ‘Define’ keyword has been used to define another default type then any un-typed variables will usethat instead. The ‘EnableExplicit’ command stops this behavior and requires after use that all newvariables have their scope and type strictly defined. Let me show you how this command could proveuseful.
Say for example, I have a procedure which needs to be passed a variable of some crucial value and thenthe result of this procedure needs to be used, I could write it like this:
WeeklyAmount.l = 1024
Procedure CalculateYearlyAmount(Value.l)YearlyAmount.l = Value * 52ProcedureReturn YearlyAmount
EndProcedure
Debug CalculateYearlyAmount(WeaklyAmount)
Now, this looks okay and if you quickly scan through this example you don’t see any problems. If yourun it however, the ‘CalculateYearlyAmount()’ procedure returns ‘0’. This is obviously not right as weare supposed to be passing it the ‘WeeklyAmount’ variable which has a value of ‘1024’. If you lookclosely at the procedure call you can see that I actually pass a variable called ‘WeaklyAmount’. Noticethat this variable is spelt incorrectly and so it’s treated as a new variable. When passing variables likethis, if they haven’t been defined before then PureBasic creates a new variable automatically andpasses that. Variables that haven’t had their type or value defined during creation are always assignedthe default type, and given a null value. This new variable named ‘WeaklyAmount’ in the aboveexample, therefore has a value of ‘0’.
Automatically defining variables that have been typed like this is considered by some programmers tobe careless and very error prone. This default behavior can be turned off and the compiler told to bemore strict about variable definition by using the ‘EnableExplicit’ command. If we used this commandin the above example we would get a few messages informing us that some variables need to be morestrictly defined. This means that all variables used after the ‘EnableExplicit’ command must be definedusing any one of the variable definition keywords. These are ‘Define’, ‘Global’, ‘Protected’, ‘Static’ and‘Shared’, as explained in Chapters 2 and 6.
If we go through the above example, strictly defining all variables and then re-launching the program,the compiler would bring our attention to the last line and would show a message informing us thatthe variable ‘WeaklyAmount’ needs to be defined more strictly too. This would be a bit strange as it
Good Programming Style120
should already be done earlier in the program. On further investigation it would then be noticed thatthis variable is spelt wrong and needs correcting. Here’s what the above example would look like usingthe ‘EnableExplicit’ command and all variables defined in a more explicit way.
EnableExplicit
Define WeeklyAmount.l = 1024
Procedure CalculateYearlyAmount(Value.l)Protected YearlyAmount.l = Value * 52ProcedureReturn YearlyAmount
EndProcedure
Debug CalculateYearlyAmount(WeeklyAmount)
Hopefully using this command should prevent many more variable based spelling mistakes becauseevery time a spelling mistake is encountered the compiler will treat it as a separate variable name andyou will be asked to clarify this variable’s scope and definition. Giving you chance to correct thevariable, thus restoring any values that may be lost through these errors.
At anytime if you want to revert to default PureBasic behavior, you can switch off the ‘EnableExplicit’command’s influence by using the ‘DisableExplicit’ command.
Introducing The PureBasic DebuggerPureBasic provides a full featured debugger that helps find errors and bugs within your code. Thisdebugger is invaluable as it gives you the ability to control program flow and take a look at the values
Defining Variables Using The ‘Define’ Command
The ‘Define’ command can be used in two ways. First it sets the default type for un-typed variables, as shownin Chapter 2. In this way the ‘Define’ keyword is used with a type suffix which defines the new default type,like this:
Define.sMyString = "Hello"
Secondly, the ‘Define’ command can be used to define variables after an ‘EnableExplicit’ command has beenused. If the ‘EnableExplicit’ command has been used, all variables from then on in your program have to bestrictly defined. In this case, the ‘Define’ command may be used like this:
EnableExplicitDefine MyVar.b = 10
Notice that when used in this way you don’t have to use the type suffix on the end of the ‘Define’ keywordbecause we define the variable type using the variable’s own type suffix instead.

Good Programming Style 121
of variables, arrays and linked lists at any time during the running of your program. It also providesadvanced functions for assembly programmers to examine and modify CPU registers or view valuesstored in associated memory addresses. It’s also possible to view the CPU usage of your program usingthe built-in CPU monitor.
If you run your program and the debugger encounters an error, the program will halt and the linewhere the error occurred will be marked in the IDE (using red) and the error will be displayed in theIDE Error Log and IDE status bar. When an error is caught like this, you can use the program controlfunctions or end the running program. To end the running program use the ‘Kill Program’ menu item(Menu:Debugger->Kill Program) or its associated toolbar button. If the debugger is disabled, no errorswill be caught and could lead to a program crash.
While writing a program in the IDE, the debugger is enabled by default. This you can see at a glanceby looking at the debugger toggle button located in the IDE’s toolbar, see Fig.23. If this button is shownas pressed down then the debugger is enabled, if it is shown as being up, the debugger is disabled. Thisbutton is also a shortcut to the ‘Use Debugger’ menu item, (Menu:Debugger->Use Debugger) which isalso a toggle. The debugger can also be enabled in the compiler options for your program too,(Menu:Compiler->Compiler Options...->Compiler Options->Enable Debugger). All these differentways of toggling the status of the debugger are linked. If one is used, the others mirror its status.
The Windows PureBasic package comes with three different kinds of debugger to be used. These canall be used to debug your program but some don’t have the same functionality. The first is the built-indebugger which is the most feature rich among the different ones and is used by default because it’sintegrated directly into the IDE. The PureBasic IDE running on some operating systems doesn’tsupport this built-in version so a stand-alone debugger is also supplied with the installation. Thisstand-alone version has almost the same feature set as the built-in debugger but because it’s separatefrom the IDE, some of the efficiency of direct access from the IDE is lost. The third debugger runs ina console only. This version’s primary use is for non-graphical environments such as text based Linuxoperating systems or remotely developed applications working with clients using the SSH protocol.The available debuggers can be selected as default in the IDE preferences, (Menu:File->Preferences->Debugger).
Even though the debugger is a great tool to use to track down problems, all this debuggingfunctionality however comes at a price. You will find that programs running while the debugger isenabled will be a great deal slower than running them with it disabled. This shouldn’t pose anyproblems though, because the vast majority of final executables are compiled without the debugger formaximum speed and compactness. This must be kept in mind if you are developing speed criticalprograms or need to time certain bits of code, etc.
If you need to use the debugger to debug your code but in some sections you could do with it beingdisabled, you can use the built-in debugger commands, ‘DisableDebugger’ and ‘EnableDebugger’.These are pretty self explanatory to use, the ‘DisableDebugger’ command disabled the debugger fromthen on in your code and the ‘EnableDebugger’ command re-enables it. If you disable the debugger youwill also notice that this disables any ‘Debug’ commands. This is because ‘Debug’ commands are alsopart of the debugger and they are not compiled if the debugger is disabled.
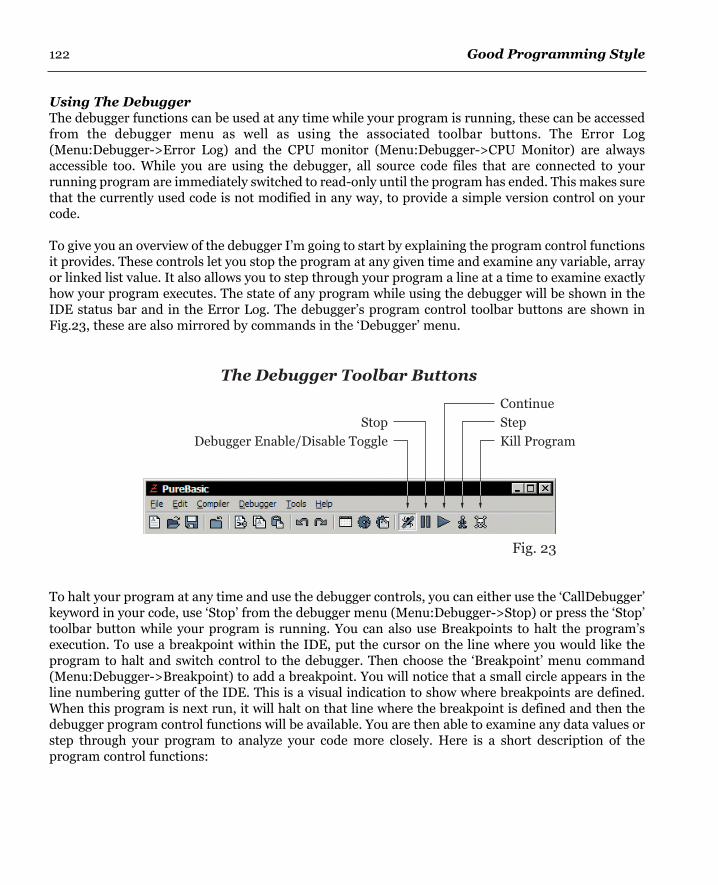
Good Programming Style122
Using The DebuggerThe debugger functions can be used at any time while your program is running, these can be accessedfrom the debugger menu as well as using the associated toolbar buttons. The Error Log(Menu:Debugger->Error Log) and the CPU monitor (Menu:Debugger->CPU Monitor) are alwaysaccessible too. While you are using the debugger, all source code files that are connected to yourrunning program are immediately switched to read-only until the program has ended. This makes surethat the currently used code is not modified in any way, to provide a simple version control on yourcode.
To give you an overview of the debugger I’m going to start by explaining the program control functionsit provides. These controls let you stop the program at any given time and examine any variable, arrayor linked list value. It also allows you to step through your program a line at a time to examine exactlyhow your program executes. The state of any program while using the debugger will be shown in theIDE status bar and in the Error Log. The debugger’s program control toolbar buttons are shown inFig.23, these are also mirrored by commands in the ‘Debugger’ menu.
To halt your program at any time and use the debugger controls, you can either use the ‘CallDebugger’keyword in your code, use ‘Stop’ from the debugger menu (Menu:Debugger->Stop) or press the ‘Stop’toolbar button while your program is running. You can also use Breakpoints to halt the program’sexecution. To use a breakpoint within the IDE, put the cursor on the line where you would like theprogram to halt and switch control to the debugger. Then choose the ‘Breakpoint’ menu command(Menu:Debugger->Breakpoint) to add a breakpoint. You will notice that a small circle appears in theline numbering gutter of the IDE. This is a visual indication to show where breakpoints are defined.When this program is next run, it will halt on that line where the breakpoint is defined and then thedebugger program control functions will be available. You are then able to examine any data values orstep through your program to analyze your code more closely. Here is a short description of theprogram control functions:
Fig. 23
Kill Program
Step
Continue
Debugger Enable/Disable Toggle
Stop
The Debugger Toolbar Buttons
Good Programming Style 123
‘Stop’This halts the program and displays the current line.
‘Continue’This continues the program execution until another halt command is met.
‘Step’This executes one line of source code and then stops the execution again.
‘Kill Program’This forces the program to end, and closes all associated debugger windows.
Here is a brief example of halting program execution using the ‘CallDebugger’ command:
CallDebuggerFor x.l = 1 To 10Debug x
Next xEnd
Once the above program has been halted using the ‘CallDebugger’ command. You can step through it,a line at a time using the ‘Step’ toolbar button. Click it ten times and you will see the value of ‘x’ echoedto the Debug Output window, incremented by one each time this button is pressed. While a programis halted in this way you can view any variable, array or linked list value by opening the Variable Viewer(Menu:Debugger->Variable Viewer). This small overview should be enough for you to learn the basicsof the debugger. For more advanced information of what it is capable of, see the PureBasic Helpfile.
The ‘OnError’ LibraryThe built-in ‘OnError’ library enables you to perform error checking in your final executable when thedebugger is not available. Normally you would use the debugger during development to help catcherrors, but when you compile your final executable for distribution, you disable the debugger in orderto compile the smallest and fastest executable possible. The speed gain for disabling the debugger isabout six times than with it enabled. Using the ‘OnError’ library it is easy to implement advanced errorchecking and handling into a final executable and still have the full speed of PureBasic available.
There are many very advanced commands that can be used from this library but these are beyond thescope of this book, so I’ll just focus on the more commonly used and easily understood ones. First, I’llshow you how to effectively catch and describe an error without using the debugger. Take a look at thefollowing example:
;Set the error handlerOnErrorGoto(?ErrorHandler)
;Trigger a classic 'divide by zero' error.Null.l = 0TestVariable.l = 100 / Null
Good Programming Style124
;Handle any system error that occursErrorHandler:Text.s = "Error count:" + #TAB$ + #TAB$ + Str(GetErrorCounter()) + #CRLF$Text.s + "Error ID number:" + #TAB$ + #TAB$ + Str(GetErrorNumber()) + #CRLF$Text.s + "Error description:" + #TAB$ + #TAB$ + GetErrorDescription() + #CRLF$Text.s + "Error occurred on line:" + #TAB$ + Str(GetErrorLineNR()) + #CRLF$Text.s + "Error occurred in module:" + #TAB$ + GetErrorModuleName() + #CRLF$MessageRequester("ERROR", Text)End
Here, I use the ‘OnErrorGoto()’ command to specify where to jump to if an error is encountered. Theparameter of this command is a label destination of where to jump. If you look closely at the label thatI have passed as a parameter, you will notice I have appended a question mark to the beginning of thelabel name. This is because the ‘OnErrorGoto()’ command actually needs a pointer of the label passinginstead of just a label. Using a question mark like this returns the label’s memory address. A pointeris a variable which contains a memory address of where something is stored, see Chapter 13 (Pointers)for a more complete explanation. Like the ‘Goto’ and ‘Gosub’ command we also omit the colon on theend of the label when we pass the label name to this command.
After the label has been specified using the ‘OnErrorGoto()’ command, then other ‘OnError’ librarycommands help us to understand what went wrong and where. In the above example I’ve used thesecommands:
‘GetErrorCounter()’This command returns the number of errors that have occurred in your program since it was started.
‘GetErrorNumber()’This command returns the unique error number of the last error that occurred.
‘GetErrorDescription()’This command returns a String fully describing the error that has occurred.
‘GetErrorLineNR()’This command returns the line number of where the error has occurred in your source code, either inthe main source file or in any included files. For this command to work properly you must switch onthe ‘Enable OnError Lines Support’ compiler option before compiling your program.
‘GetErrorModuleName()’This command returns a String telling you in which source code file the error occurred in. This is veryuseful if you are using a lot of included source code files. For this command to work properly you mustswitch on the ‘Enable OnError Lines Support’ compiler option before compiling your program.
The last two commands listed here require that you switch on the ‘Enable OnError Lines Support’compiler option before compiling your program. This is located in the compiler options within theIDE, (Menu:Compiler->Compiler Options...->Compiler Options->Enable OnError Lines Support).

Good Programming Style 125
To actually demonstrate the ‘OnError’ commands catching and handling an error, I’ve created areproducible error in the code. This error is a simple ‘divide by zero’ error and is coded like this:
;Trigger a classic 'divide by zero' error.Null.l = 0TestVariable.l = 100 / Null
If the debugger is enabled then it would catch this easily but if we disabled it this error is missed. Wecan use the ‘OnError’ library to catch this error without the need for the debugger. To run the exampleand see it working properly, you need to first disable the debugger and enable the ‘Enable OnErrorLines Support’ compiler option. Now when you compile the program, it should now catch the ‘divideby zero’ error and give you some detailed feedback, all without the help of the debugger. Fig.24 showsthis example in action and shows the information collected by the other ‘OnError’ commands.
In the last example, I used the ‘OnErrorGoto()’ command to specify a label to jump to if an erroroccurs. This command, however does not let you return from that label and continue with theprogram, even if you use the ‘Return’ keyword. This is where the ‘OnErrorGosub()’ command comesin handy. Using this command you can specify a label or a procedure as the error handler and thiscommand does let you return from these with the appropriate keyword. Here’s an example of using aprocedure:
;Handle any system error that occursProcedure ErrorHandler()Text.s = "Error count:" + #TAB$ + Str(GetErrorCounter()) + #CRLF$Text.s + "Error ID number:" + #TAB$ + Str(GetErrorNumber()) + #CRLF$Text.s + "Error description:" + #TAB$ + GetErrorDescription() + #CRLF$Text.s + "Occurred on line:" + #TAB$ + Str(GetErrorLineNR()) + #CRLF$Text.s + "Occurred in module:" + #TAB$ + GetErrorModuleName() + #CRLF$+#CRLF$Text.s + "Would you like to continue execution of the program?"ReturnValue.l = MessageRequester("ERROR", Text, #PB_MessageRequester_YesNo)If ReturnValue = #PB_MessageRequester_NoEnd
EndIfEndProcedure
;Set the error handler
Fig. 24

Good Programming Style126
OnErrorGosub(@ErrorHandler())
;Trigger a classic 'divide by zero' error.Null.l = 0TestVariable.l = 100 / Null
;If the program reaches here then the program was resumedMessageRequester("STATUS", "The program was allowed to continue running.")End
Here I demonstrate how to resume the program execution after an error, something which you can’tdo using the ‘OnErrorGoto()’ command. There is however one problem with this approach and that isif you choose to continue with the program execution, the error that occurred, may make this programunstable and crash. That’s why, if you give your program the ability to resume after an error,depending on how serious the error was, you should inform the user what has happened andencourage them to restart the program. Resuming program execution should ideally be used if youthink your user may lose work after a program crash. Resuming gives them a chance to save what theywas doing in your program (if it has this functionality) before they restart it.
Say for example, you have written a text editor and Bob is using it to write a letter. If after an hour ofwriting an unexplained error occurs and the program throws up an error message, Bob doesn’t wantto have wasted that last hour and lose his letter due to an error. In this case, Bob can be informed ofwhat has happened and be given the choice to resume the program execution to save his letter to a filebefore restarting the program. An email address could even be displayed in the error message for Bobto contact and explain what went wrong in order for the program writer to correct it.
Raising And Catching User Defined ErrorsSo far I’ve shown you a way of catching and documenting system errors that can occur in your programand this way will catch almost any serious system error you may encounter. Sometimes however youmay want to raise your own error for the sake of customization. If this is the case you can use the‘SetErrorNumber()’ command to create and fire an error of your own.
‘OnErrorGoto’ And ‘OnErrorGosub’
These two commands are very similar in that they let you specify a place to jump to if an error occurs so youcan handle and describe the error. The main difference between these two commands is wether or not theerror handler lets you return back to the normal program flow.
The ‘OnErrorGoto()’ command lets you specify a label that you can jump to when an error occurs but youcan’t return from it. Meaning that once an error is handled the program must quit immediately.
The ‘OnErrorGosub()’ command lets you specify a label or a procedure to use as an error handler, giving youthe ability to return from these with the appropriate keyword. This means you have the option of resumingnormal program execution after an error has been handled.

Good Programming Style 127
The ‘SetErrorNumber()’ command needs one parameter in order to work properly and this parameteris a Long type number that identifies this error. I usually use constants to define custom error numbersthen I can refer to these by name, like this:
#ERROR_READFILE = 1#ERROR_WRITEFILE = 2#FILE_TEXT = 1
;Set the error handlerOnErrorGoto(?ErrorHandler)
If ReadFile(#FILE_TEXT, "Report.txt") = #False;If the file read fails then fire an errorSetErrorNumber(#ERROR_READFILE)
EndIfEnd
;Handle any custom error that occursErrorHandler:Text.s = "Error count:" + #TAB$ + #TAB$ + Str(GetErrorCounter()) + #CRLF$Text.s + "Error ID number:" + #TAB$ + #TAB$ + Str(GetErrorNumber()) + #CRLF$Select GetErrorNumber()Case #ERROR_READFILEDescription.s = "The file could not be read."
Case #ERROR_WRITEFILEDescription.s = "The file could not be written."
EndSelectText.s + "Error description:" + #TAB$ + #TAB$ + Description + #CRLF$Text.s + "Error occurred on line:" + #TAB$ + Str(GetErrorLineNR()) + #CRLF$Text.s + "Error occurred in module:" + #TAB$ + GetErrorModuleName() + #CRLF$MessageRequester("ERROR", Text)End
In the above example if the file ‘Report.txt’ cannot be read using the ‘ReadFile()’ command, I raise acustom error using the ‘SetErrorNumber()’ command. This error is identified by the constant‘#ERROR_READFILE’ which has a value of ‘1’. Once an error has been triggered in this way the errorhandler label or procedure is called. In the error handler you can check to see what error number hasbeen raised by using the ‘GetErrorNumber()’ command. Depending on what the result is of thiscommand you can then tailor the error description to your hearts content. Here I’m testing the‘GetErrorNumber()’ command with a ‘Select’ statement and using different description Stringsdepending on its value. The pop-up error message then displays this description.
As you can see from these examples, using the ‘OnError’ library gives you advanced error checking butusing a very simple syntax.


IIGraphical
User InterfacesIn this next section I’m going to talk about Graphical User Interfaces and how they are created inPureBasic. Nearly all modern operating systems have a built-in graphical user interface available,allowing the user to interact fluidly with programs that choose to use it. The operating system exposesthe user interface to programs through an Application Programming Interface (or API) through whicha program can tell the operating system how draw its user interface. This sounds extremelycomplicated but is simply and elegantly handled within PureBasic using the ‘Window’, ‘Menu’ and‘Gadget’ libraries.
PureBasic creates these graphical interfaces for your programs using the native applicationprogramming interface of the system they've been compiled for. In other words, when you code aninterface for a program and compile it on a particular system, that program will have the correct lookand feel of the operating system it has been compiled for. This is essential for all professionalapplication development.
This section begins with explaining and demonstrating programs that use a console as their userinterface, which is arguably the simplest user interface of all. Later, I move on to explain how to createprograms with native user interfaces and how to add menus and graphics. In the last section I give youand overview of the PureBasic Visual Form Designer. Using this tool you can design an interfacevisually as if you were painting it upon a program.
After reading this section you should have a firm grasp on how to create graphical user interfaces foryour programs and understand how to handle interaction from the user.

9Creating User
InterfacesIn this chapter I’ll explain how to create graphical user interfaces for your programs. PureBasic makesthis task very easy by distilling complex application programming interfaces into simple, easy to learncommands. I explain fully how to code the graphical interface, complete with menus and sometimeswith graphics. I also cover how to handle events from your program’s interface, such as, when the userpresses a button or selects a menu item. Hopefully after reading this chapter you will be well equippedto create user interfaces for any program you decide to develop.
Console Programs
To begin with, we shouldn’t run before we can walk, so first I’ll introduce to you what is known as aConsole Program. Console programs, as the name suggests, are programs that use a console as theiruser interface. A console is a text based interface that can accept typed input and display output usingtext characters. On some operating systems the console can display simple graphics by substitutingsome of the ASCII character set for graphical symbols instead of characters.
Console interfaces are usually used in programs where a fully blown user interface is not needed. Thesetypes of programs are usually command line tools that are run from other consoles or things like CGIprograms that run in the background on web servers, etc. Basically, a console is used to display basicoutput information from the program and to accept basic text input from the user. Commands thatcreate and work with a console interface are grouped inside the ‘Console’ library (Helpfile:ReferenceManual->General Libraries->Console). This library offers PureBasic programmers various commandsto print text, accept user input, clear the console and even change its colors. Here is an example of howto create a console program in PureBasic:
If OpenConsole()Print("This is a test console program, press return to exit...")Input()CloseConsole()
EndIfEnd
131
Creating User Interfaces132
In this example I’ve used the ‘OpenConsole()’ and ‘CloseConsole()’ commands to open and close theactual console window, these are self explanatory. The second command I’ve used is the ‘Print()’command which accepts one String parameter that is printed to the console interface. This commandis almost identical to the other console library command ‘PrintN()’. The ‘PrintN()’ will also print a lineof text but it will append an end-of-line character on the end to move to a new line after the text hasbeen printed. This is very similar behavior to the file writing commands ‘WriteString()’ and‘WriteStringN()’ as mentioned in Chapter 7 (Handling Files).
The last command used in the above example is ‘Input()’. This command halts the program’s executionuntil the Return key is pressed on the keyboard. This command then returns any characters (as aString) that were entered into the console before the Return key was finally pressed. Because in myexample, I’m not dealing with any return value from this command, it’s used here purely to keep theconsole open so people can read the text I’ve printed to it. If this command was omitted, then theconsole would almost immediately close as soon as it had opened. Using ‘Input()’ like this, can providea simple way to keep the console open while we read what is printed there, as long as we inform theuser that to continue the program execution he or she must press Return.
Reading User InputSometimes in your console programs you may want to read user input, this could be a simple numberor a String of text. Although it is pretty straightforward to gather any user input you must alwaysremember that the ‘Input()’ command only returns Strings. This next piece of code shows this, whileintroducing some new console commands:
If OpenConsole()
EnableGraphicalConsole(#True)
Repeat
ConsoleColor(10, 0)PrintN("TIMES TABLES GENERATOR")PrintN("")ConsoleColor(7, 0)PrintN("Please enter a number, then press Return...")PrintN("")
Number.q = ValQ(Input())If Number = 0ClearConsole()Continue
ElseBreak
EndIf
ForEverPrintN("")

Creating User Interfaces 133
For x.l = 1 To 10PrintN(Str(x) + " x " + StrQ(Number) + " = " + StrQ(x * Number))
Next xPrintN("")
Print("Press Return to exit...")Input()CloseConsole()
EndIfEnd
This example looks rather complicated but it’s not really if you read it a line at a time. The first newcommand I’ve used here is the ‘EnableGraphicalConsole()’ command. This enables or disables thegraphical capabilities of the console program by passing either the ‘#True’ or ‘#False’ constants as aparameter. Because we later use ‘ClearConsole()’ which only works with a graphical console, we set‘EnableGraphicalConsole()’ to true.
I’ve also changed the console text color in some places by using the ‘ConsoleColor()’ command. Thefirst parameter is the text color and the second is the text background color. The parameters arenumbers that range from ‘0’ to ‘15’ which represent different color presets, see the helpfile to see whatcolor is associated with each number (Helpfile:Reference Manual->General Libraries->Console->ConsoleColor).
Differences Between Graphical And Non Graphical Console Modes
Using the ‘EnableGraphicalConsole()’ command you can switch between text mode and graphical mode ofthe current console. Here are the differences for each mode:
Text Mode (Default):ASCII control characters work correctly (ASCII range ‘0’ to ‘31’).Output redirection using Pipes works correctly (Essential for CGI programs).Long Strings of printed text wrap onto a new line if they reach the end of the console window.You can read and write data to the console that is not necessarily text based.
Graphical Mode (Changed using ‘EnableGraphicalConsole(#True)’):Text characters outside the ACSII range ‘33’ to ‘126’ are displayed as small simple graphics.Long Strings of printed text are truncated if they reach the end of the console window.‘ClearConsole()’ clears the entire console of any output.‘ConsoleLocate()’ Moves the cursor to be able to print text in any position in the console window.
This list contains some advanced topics you might not be familiar with right now but I have included this listhere to be used a future reference when you are more comfortable with these things.

Creating User Interfaces134
Also in this example I’ve used a loop to handle verifying user input, this is used as a way of almost re-running the program if the user entered an incorrect value. I want a number to be entered so I use the‘ValQ()’ command to change the String returned from the ‘Input()’ command into a Quad. Thisreturned value is then tested, if it is equal to ‘0’ then the user must have typed a non-numeric Stringor the number ‘0’. If this is the case I clear the console of all output by using the ‘ClearConsole()’command and force the loop to continue from the beginning, totally redrawing the original text andrequesting user input again. If the user input is a number above ‘0’ then I ‘Break’ from the loop andcontinue with the rest of the program which draws the times table for that number.
Reading User Input In RealtimeThe last example showcased the ‘Input()’ command which is fine if you need to enter a String or suchbut its only limitation is that you have to press the Return key in order for the input to be passed tothe program. What if you wanted to get user input in realtime to detect immediately when a key waspressed in order to trigger an action? Well, this can be achieved by using the ‘Inkey()’ and ‘RawKey()’commands. Look at this next piece of code for an example on the usage of both:
Procedure DisplayTitle()ConsoleColor(10, 0)PrintN("KEY CODE FINDER")PrintN("")ConsoleColor(7, 0)
EndProcedure
Procedure DisplayEscapeText()PrintN("")ConsoleColor(8, 0)PrintN("Press another key or press Escape to exit")ConsoleColor(7, 0)
EndProcedure
If OpenConsole()
EnableGraphicalConsole(#True)DisplayTitle()PrintN("Press a key...")RepeatKeyPressed.s = Inkey()RawKeyCode.l = RawKey()
If KeyPressed <> ""
ClearConsole()DisplayTitle()PrintN("Key Pressed: " + KeyPressed)PrintN("Key Code: " + Str(RawKeyCode))DisplayEscapeText()
ElseIf RawKeyCode

Creating User Interfaces 135
ClearConsole()DisplayTitle()PrintN("Key Pressed: " + "Non-ASCII")PrintN("Key Code: " + Str(RawKeyCode))DisplayEscapeText()
Else
Delay(1)
EndIf
Until KeyPressed = #ESC$CloseConsole()
EndIfEnd
This example is similar to the one before in that we are opening a console and switching it to graphicalmode then printing some text to it. The main difference is the ‘Repeat’ loop is continuously calling twocommands to determine which key, if any, has been pressed. These two commands are ‘Inkey()’ and‘RawKey()’.
The first command, ‘Inkey()’ returns a one character String of the key held down when this commandwas called. So if I held down the ‘D’ key on the keyboard while this command is called, then ‘Inkey()’would return the String ‘d’. Although this command is simple to understand you must remember thatthe keys on a standard keyboard are usually printed in uppercase, while the ‘Inkey()’ command returnsthem as lowercase unless the Shift key is held down at the same time. If a non-ASCII key is held downwhile this command is called then ‘Inkey()’ will return an empty String until an ASCII key is helddown.
The second command for gathering information on what key has been pressed is a companion to the‘Inkey()’ command, its name is ‘RawKey()’. This command, as the name suggests, returns a numericraw key code of the key being held down while this command is called. In the above example, you cansee how to use both commands to extract information about which key is being held down during theloop. This is a great way to read user input in realtime and react accordingly when a particular key isbeing pressed.
Delaying Things A LittleYou may notice that in the above example I’ve also used a ‘Delay()’ command to tell the program todelay itself for ‘1’ millisecond. While this looks a little strange and unnecessary, the ‘Delay()’ commandis there for a reason. Because you will be using a multitasking operating system to run your programs,it’s good programming practice not to monopolize CPU time if you can help it. Using the ‘Delay()’command gives other programs a chance to use the CPU while your program is delayed. Even a delayof ‘1’ millisecond allows the operating system to free up the CPU long enough to let other programshave a chance to run. This command is especially useful when using loops to perform the same actionover and over again. If a ‘Delay()’ command is not used within such a loop then your program will takeup all the CPU’s resources until it has quit, leaving no processing power available for other programsto run. This can sometimes make these other programs appear to ‘freeze’ and not respond as normal.
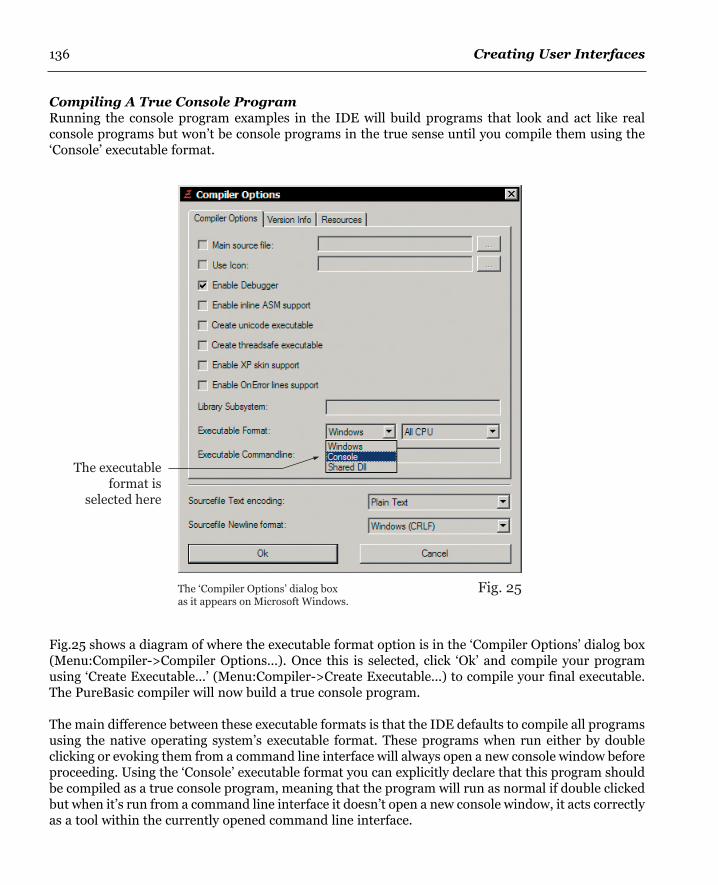
Creating User Interfaces136
Compiling A True Console ProgramRunning the console program examples in the IDE will build programs that look and act like realconsole programs but won’t be console programs in the true sense until you compile them using the‘Console’ executable format.
Fig.25 shows a diagram of where the executable format option is in the ‘Compiler Options’ dialog box(Menu:Compiler->Compiler Options...). Once this is selected, click ‘Ok’ and compile your programusing ‘Create Executable...’ (Menu:Compiler->Create Executable...) to compile your final executable.The PureBasic compiler will now build a true console program.
The main difference between these executable formats is that the IDE defaults to compile all programsusing the native operating system’s executable format. These programs when run either by doubleclicking or evoking them from a command line interface will always open a new console window beforeproceeding. Using the ‘Console’ executable format you can explicitly declare that this program shouldbe compiled as a true console program, meaning that the program will run as normal if double clickedbut when it’s run from a command line interface it doesn’t open a new console window, it acts correctlyas a tool within the currently opened command line interface.
Fig. 25The ‘Compiler Options’ dialog boxas it appears on Microsoft Windows.
The executableformat is
selected here
Creating User Interfaces 137
And that’s all there is to programming interfaces in console programs really. They are not supposed tobe used for complicated interfaces (although in the past, games have been written using the graphicalconsole mode). These interfaces are really used nowadays for displaying simple output from commandline tools.
Creating Native User Interfaces
In this next section I’m going to show you how to create user interfaces that have the same native lookand feel as all the programs currently running on your operating system. These are called ‘Native’interfaces because PureBasic uses the underlying operating system’s API to draw the interfacecomponents. For an example of such an interface, look at the PureBasic IDE, this has been completelywritten from scratch using PureBasic which in turn uses the operating system’s API.
All this talk of the operating system’s API may dishearten you, making you think that this all soundsvery complicated, but don’t panic. The good news is that you don’t have to know anything about ‘whatgoes on under the hood’ because PureBasic handles this automatically and hides any complicatedissues from you. Just using PureBasic’s built-in libraries you can build powerful applications that rivalany other programming language. On average PureBasic programs prove to be faster and compile to asmaller executable size than many industrial strength languages. This has been proved many timesthrough small competitions created by members of PureBasic’s official online forums.
So, let’s get going and create our first native user interface with PureBasic.
Hello WorldAs is customary in the programming world, the first example of any programming language’s interfacecommands is usually a ‘Hello World’ program. This consists of a simple window that says hello to theuser and provide a way of closing the program. Start a new file in the IDE and type this in:
#WINDOW_MAIN = 1
#FLAGS = #PB_Window_SystemMenu | #PB_Window_ScreenCenteredIf OpenWindow(#WINDOW_MAIN, 0, 0, 300, 200, "Hello World", #FLAGS)RepeatEvent.l = WaitWindowEvent()
Until Event = #PB_Event_CloseWindowEndIfEnd
If you run this piece of code you will see a window similar to Fig.26 overleaf. To close this window clickthe close button in the top right hand corner. Even though this example only consists of a blankwindow and a close button in the title bar, this is the start of all native user interfaces in PureBasic.
In the above example, I use the ‘OpenWindow()’ command to actually open the window and definewhat features it should have. If you open the helpfile and refer to the ‘OpenWindow()’ command(Helpfile:Reference Manual->General Libraries->Window->OpenWindow) then look at the syntaxexample, you can see I’ve used the ‘#PB_Window_SystemMenu’ and ‘#PB_Window_ScreenCentered’

Creating User Interfaces138
window flags to define that this window should have a functioning system menu, complete with closebutton and be centered on the screen when it’s opened. When using multiple flags like this, you jointhem together using the bitwise ‘OR’ operator as shown in the code above. This operator combines thevalue of any flags used at the binary level (for a more complete explanation see Chapter 3).
After the ‘OpenWindow()’ command is used I’ve then used a ‘Repeat’ loop to act as the Main Loop toprocess any events that this window may encounter.
The Main LoopThe main loop in a program is what keeps the program ‘alive’. It allows the program to continuallykeep running while redrawing the interface (if it’s moved around the desktop) and handle any eventsthat the interface may generate. Thankfully PureBasic handles all redrawing of the interfaceautomatically so we only need to use a main loop to keep the program running and to process otherevents.
In my little ‘Hello World’ program I’ve used a ‘Repeat’ loop as my main loop, this gives me the abilityto keep the loop going forever until a particular condition is met, in this case, until I have encounteredan event of ‘#PB_Event_CloseWindow’ type, which is the event triggered when you click the closebutton. Once this event is received, the loop then exits thus ending the program.
Fig. 26
Close Button
(Microsoft Windows example)
Why Are The Window Position Parameters Set At ‘0’?
When opening a window using the ‘OpenWindow()’ command the second and third parameters of thiscommand determine the coordinates where this window will be drawn on screen. However, if you use the‘#PB_Window_ScreenCentered’ or ‘#PB_Window_WindowCentered’ flags in the same command call theposition parameters are ignored. This is because PureBasic is over-riding these position parameters to centerthe window on the screen or over another window. If this is the case you can safely use ‘0’ for both theposition parameters or use the ‘#PB_Ignore’ constant to explicitly show in your source code that these twoparameters are been ignored because of the flags passed.
Creating User Interfaces 139
Understanding Events
Every program you write using any programming language will use roughly the same way of handlingevents. This involves detecting an event during the main loop then directing the program to runanother piece of code depending on what the event was. So what kinds of events are there? Well, anevent can be triggered by many actions within your programs, an event might be triggered by clickingon a gadget, pressing a button on the keyboard, selecting an item from a menu or just by moving orclosing the program. The trick is knowing what event has happened so you can deal with it properly.To do this we use the ‘WaitWindowEvent()’ and ‘WindowEvent()’ commands.
These two commands are almost identical because they both return an event identifier in the form ofa Long type number when an event occurs. The difference between these two is that the‘WaitWindowEvent()’ command halts your program until an event is detected, then returns the eventidentifier and lets the program continue normally until it’s called again. (This is great for use ingraphical user interfaces as it allows the program to use as little of the CPU as possible, only utilizingit when an event actually occurs.) The ‘WindowEvent()’ command however, does not halt the programat all, it just tests to see if there are any events to return. If there is, this command will return itsidentifier. This command is very seldom used in user interfaces as it can make them very CPU ‘hungry’,hogging the processing power of the computer on which they run. The ‘WindowEvent()’ command isoften used when you need to keep the main loop running at all cost, for example, if you are displayinga dynamic graphic in your program that needs to be continually redrawn, etc. If this is the case andyou must use the ‘WindowEvent()’ command, good programming style dictates that you try to use the‘Delay(1)’ trick with it (as explained in the console program section) to make sure your program is CPUfriendly. If no events are detected use ‘Delay(1)’ to let other programs get a chance to use the CPU.
In the ‘Hello World’ program I’ve used a ‘WaitWindowEvent()’ command during the ‘Repeat’ loop tohalt the program until an event is triggered. Once an event is triggered the ‘WaitWindowEvent()’command returns its identifier which is stored in a Long type variable called ‘Event’. The loop is thencoded to exit if ‘Event’ equals the value of ‘#PB_Event_CloseWindow’, which is a built-in constant thatcontains the identifier of a ‘close window’ event from the interface. If these two are equal then a ‘closewindow’ event must of occurred so the loop exits and the program is ended.
Events Happen All The TimeEven though no other events are handled in this small example, it doesn’t mean that they aren’toccurring. If we take the same ‘Hello World’ program and add another line containing a ‘Debug’command it will now display identifiers of events in the Debug Output window during runtime.
What Is A Gadget?
In PureBasic a gadget is a graphical user interface object that provides some sort of interactivity for yourprogram. Microsoft Windows calls these ‘Controls’ and some Linux distributions calls these ‘Widgets’.Gadgets are buttons, tick boxes, sliders, input fields, tabs, frames, progress bars, etc. All the differentinteractive components that make up an interface, PureBasic calls gadgets.

Creating User Interfaces140
Run the following piece of code, then move and click in and around the window. You will see manyevents occurring.
#WINDOW_MAIN = 1
#FLAGS = #PB_Window_SystemMenu | #PB_Window_ScreenCenteredIf OpenWindow(#WINDOW_MAIN, 0, 0, 300, 200, "Hello World", #FLAGS)RepeatEvent.l = WaitWindowEvent()Debug Event
Until Event = #PB_Event_CloseWindowEndIfEnd
This is the ‘WaitWindowEvent()’ command returning identifiers for all triggered events, even if theyare not handled by your program. This is completely normal and won’t noticeably slow your programdown in the slightest.
Adding Gadgets
So far we’ve seen a simple window created which displayed ‘Hello World’ in the title bar, although thisis a nice introduction to user interfaces it really doesn’t show any form of interaction with the userother than being able to close the window. In this next section I’ll show you how you can add gadgetsto your program’s window to increase functionality and interactivity.
In this next piece of code I’ve added two buttons and demonstrated how to detect events from them.
Enumeration#WIN_MAIN#BUTTON_INTERACT#BUTTON_CLOSE
EndEnumeration
Global Quit.b = #False#FLAGS = #PB_Window_SystemMenu | #PB_Window_ScreenCentered
If OpenWindow(#WIN_MAIN, 0, 0, 300, 200, "Interaction", #FLAGS)If CreateGadgetList(WindowID(#WIN_MAIN))
ButtonGadget(#BUTTON_INTERACT, 10, 170, 100, 20, "Click me")ButtonGadget(#BUTTON_CLOSE, 190, 170, 100, 20, "Close window")Repeat
Event.l = WaitWindowEvent()Select EventCase #PB_Event_GadgetSelect EventGadget()
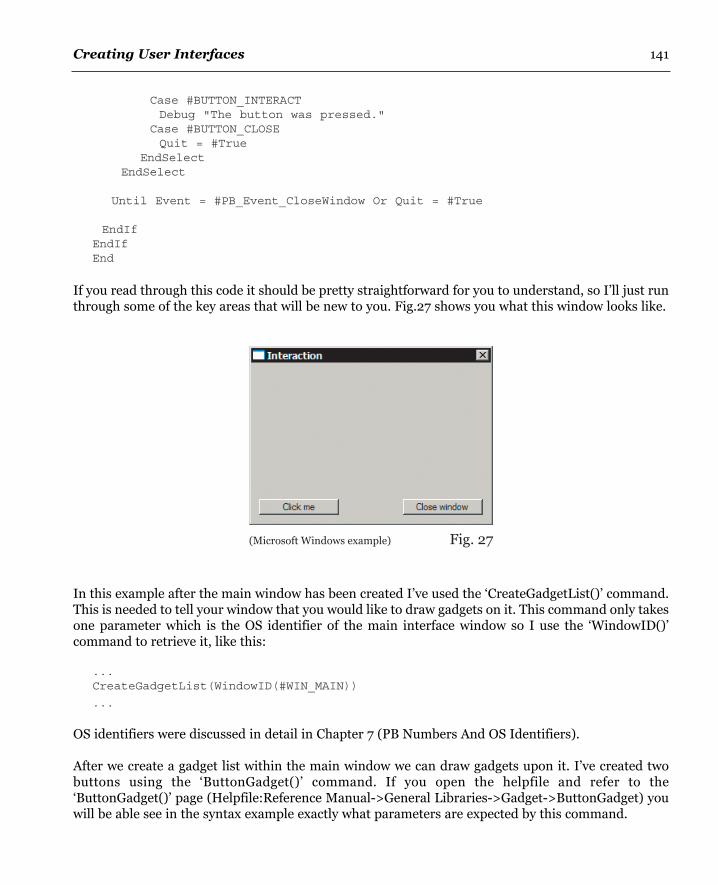
Creating User Interfaces 141
Case #BUTTON_INTERACTDebug "The button was pressed."
Case #BUTTON_CLOSEQuit = #True
EndSelectEndSelect
Until Event = #PB_Event_CloseWindow Or Quit = #True
EndIfEndIfEnd
If you read through this code it should be pretty straightforward for you to understand, so I’ll just runthrough some of the key areas that will be new to you. Fig.27 shows you what this window looks like.
In this example after the main window has been created I’ve used the ‘CreateGadgetList()’ command.This is needed to tell your window that you would like to draw gadgets on it. This command only takesone parameter which is the OS identifier of the main interface window so I use the ‘WindowID()’command to retrieve it, like this:
...CreateGadgetList(WindowID(#WIN_MAIN))
...
OS identifiers were discussed in detail in Chapter 7 (PB Numbers And OS Identifiers).
After we create a gadget list within the main window we can draw gadgets upon it. I’ve created twobuttons using the ‘ButtonGadget()’ command. If you open the helpfile and refer to the‘ButtonGadget()’ page (Helpfile:Reference Manual->General Libraries->Gadget->ButtonGadget) youwill be able see in the syntax example exactly what parameters are expected by this command.
Fig. 27(Microsoft Windows example)

Creating User Interfaces142
Using the position parameters in the ‘ButtonGadget()’ command, I’ve placed the buttons along thebottom edge of the window.
To highlight another key area, if you look at the main loop, after an event identifier has been returnedfrom the ‘WaitWindowEvent()’ command and assigned to the ‘Event’ variable, I’ve used a ‘Select’statement to test its value, like this:
...Select EventCase #PB_Event_Gadget...
EndSelect
...
You will notice that the first ‘Case’ statement tests for a value of ‘#PB_Event_Gadget’. This is a specialglobal event value, used to test an identifier to determine if it’s from a gadget, in other words, if ‘Event’is equal to ‘#PB_Event_Gadget’ then ‘Event’ must hold an event identifier from a gadget.
Once we know that an event comes from a gadget we then have to distinguish what gadget it is from.We do this using the ‘EventGadget()’ command which returns the PB number of the originatinggadget. So in this example I test the return value of ‘EventGadget()’ by using another ‘Select’.
...Select EventGadget()Case #BUTTON_INTERACTDebug "The button was pressed."
Case #BUTTON_CLOSEQuit = #True
EndSelect
...
Here, I have two ‘Case’ statements, one testing for ‘#BUTTON_INTERACT’ and one testing for‘#BUTTON_CLOSE’. If the return value from ‘EventGadget()’ equals ‘#BUTTON_INTERACT’ thenthe ‘Click me’ button has been pressed. This we know because this gadget’s PB number has beenreturned from ‘EventGadget()’. Then I type some code that I want executing when this button ispressed on the next line after the ‘Case’ statement.
The same theory applies to the next ‘Case’ statement too. If the return value equals‘#BUTTON_CLOSE’ then the ‘Close window’ button has been pressed. If so, I assign a true value to the‘Quit’ variable which makes the main loop exit and eventually ends the program.
This is why using a constant ‘Enumeration’ block is so incredibly helpful. After defining numericconstants for all gadgets at the start of the source code, I can then refer to each of them by a constantname instead of a number, which makes the source code infinitely more clear and readable.

Creating User Interfaces 143
Accepting Text InputLet’s expand the last example a bit more and add a String gadget so we can enter some text that theprogram can use. String gadgets are very handy as they provide a simple way of allowing your programto accept strings of text. This next example is to show you how you can retrieve the value of the Stringgadget, i.e. retrieve the text, and use it in your program. Let’s create one that is the full width of thewindow. Fig.28 overleaf, shows what this compiled program should look like, here’s the code:
Enumeration#WIN_MAIN#TEXT_INPUT#STRING_INPUT#BUTTON_INTERACT#BUTTON_CLOSE
EndEnumeration
Global Quit.b = #False#FLAGS = #PB_Window_SystemMenu | #PB_Window_ScreenCentered
If OpenWindow(#WIN_MAIN, 0, 0, 300, 200, "Interaction", #FLAGS)If CreateGadgetList(WindowID(#WIN_MAIN))
TextGadget(#TEXT_INPUT, 10, 10, 280, 20, "Enter text here:")StringGadget(#STRING_INPUT, 10, 30, 280, 20, "")ButtonGadget(#BUTTON_INTERACT, 10, 170, 120, 20, "Echo text")ButtonGadget(#BUTTON_CLOSE, 190, 170, 100, 20, "Close window")SetActiveGadget(#STRING_INPUT)Repeat
Event.l = WaitWindowEvent()Select EventCase #PB_Event_GadgetSelect EventGadget()Case #BUTTON_INTERACTDebug GetGadgetText(#STRING_INPUT)
Case #BUTTON_CLOSEQuit = #True
EndSelectEndSelect
Until Event = #PB_Event_CloseWindow Or Quit = #True
EndIfEndIf End
In this updated version I’ve added a couple more constants to the ‘Enumeration’ block so I can add afew more gadgets easily. The first new gadget I’ve added is a text gadget which literally displays a non-editable text string on the window, I use one to display the String: ‘Enter text here:’. The second newgadget I’ve used is a String gadget which creates an input field upon the window which allows you toenter your own text.

Creating User Interfaces144
If you open the PureBasic helpfile on the ‘StringGadget()’ page (Helpfile:Reference Manual->GeneralLibraries->Gadget->StringGadget) you can see the parameters that this gadget can accept. I’ve usedthe position and size parameters to align a String gadget to the top of the window, just below the textgadget. For the ‘Content$’ parameter I’ve passed a blank String, which is expressed through two setsof double quotation marks with nothing between. This is still a String but a String that has no content.I’ve done this because the ‘Content$’ parameter sets an initial text value for the String gadget and Iwant the String gadget to start off with none entered.
Once this program is running you will notice that the text cursor is immediately flashing in the Stringgadget. This is not the default behavior, normally you would have to click on the gadget to give it focusfor the cursor to appear there. In my program I have set that gadget to be the active one on startup byusing the ‘SetActiveGadget()’ command. This command takes one PB number as a parameter of thegadget you want to give focus to, making it the currently active gadget. I’ve done this in this littleexample to help the user and to save him or her a mouse click.
To test the interactivity of this program, enter some text in the String gadget once the program isrunning and then press the ‘Echo text’ button. You will now see that text echoed to the Debug Outputwindow. This is because I’ve changed the ‘#BUTTON_INTERACT’ ‘Case’ statement to alter whathappens once the ‘Echo text’ button is pressed. This line of code has been altered to now read ‘DebugGetGadgetText(#STRING_INPUT)’.
The ‘GetGadgetText()’ command takes one parameter which is the PB number of the gadget you wantto retrieve text from, here I use it to retrieve text from the String gadget. This command can be usedwith many gadgets in PureBasic but with a String gadget it simply returns the text as a String which Ithen immediately echo using a ‘Debug’ command.
Displaying TextLet’s expand this program even further and instead of echoing the text from the String gadget to theDebug Output window, let’s add a gadget to display the text actually inside our program. In this nextexample I’ve added a list view gadget to display the input text in a list of non-editable Strings.
Fig. 28(Microsoft Windows example)

Creating User Interfaces 145
A list view gadget is a great way to display lists of Strings because each String has its own line withinthe gadget.
PureBasic offers a lot of commands to work with list view gadgets, ranging from adding and removingto counting and sorting of items contained within this type of gadget. In the following small exampleI’ve only used the ‘AddGadgetItem()’ command to add new Strings to mine. Fig.29 overleaf, shows thenew program running, here is the code:
Enumeration#WIN_MAIN#TEXT_INPUT#STRING_INPUT#LIST_INPUT#BUTTON_INTERACT#BUTTON_CLOSE
EndEnumeration
Global Quit.b = #False#FLAGS = #PB_Window_SystemMenu | #PB_Window_ScreenCentered
If OpenWindow(#WIN_MAIN, 0, 0, 300, 200, "Interaction", #FLAGS)If CreateGadgetList(WindowID(#WIN_MAIN))
TextGadget(#TEXT_INPUT, 10, 10, 280, 20, "Enter text here:")StringGadget(#STRING_INPUT, 10, 30, 280, 20, "")ListViewGadget(#LIST_INPUT, 10, 60, 280, 100)ButtonGadget(#BUTTON_INTERACT, 10, 170, 120, 20, "Enter text")ButtonGadget(#BUTTON_CLOSE, 190, 170, 100, 20, "Close window")SetActiveGadget(#STRING_INPUT)Repeat
Event.l = WaitWindowEvent()Select EventCase #PB_Event_GadgetSelect EventGadget()Case #BUTTON_INTERACTAddGadgetItem(#LIST_INPUT, -1, GetGadgetText(#STRING_INPUT))SetGadgetText(#STRING_INPUT, "")SetActiveGadget(#STRING_INPUT)
Case #BUTTON_CLOSEQuit = #True
EndSelectEndSelect
Until Event = #PB_Event_CloseWindow Or Quit = #True
EndIfEndIfEnd

Creating User Interfaces146
This example is very similar to the last one, in fact the only real difference is the inclusion of the listview gadget. Reading the PureBasic helpfile on the ‘ListViewGadget()’ page (Helpfile:ReferenceManual->General Libraries->Gadget->ListViewGadget) will give you a good overview of this gadgetand what you can achieve using it. Reading the syntax example contained here also lets you knowexactly what parameters this gadget accepts. I’ve used the position and size parameters to put the listview gadget in the middle of the main window, above the buttons but under the String gadget.
Once this program is running, enter some text into the String gadget and press the ‘Enter text’ button.This will take the text from the String gadget and add it to the list view gadget. Once this is done theprogram clears the String gadget to be ready for more input.
This is all achieved because once again, I have changed the ‘#BUTTON_INTERACT’ ‘Case’ statementto alter what happens once the renamed ‘Enter text’ button is pressed. Here are the three new lines Ihave added to the ‘#BUTTON_INTERACT’ ‘Case’ statement:
...Case #BUTTON_INTERACTAddGadgetItem(#LIST_INPUT, -1, GetGadgetText(#STRING_INPUT))SetGadgetText(#STRING_INPUT, "")SetActiveGadget(#STRING_INPUT)
...
The first line after the ‘Case’ statement adds an item to the list view gadget. If you open the page in thehelpfile on ‘AddGadgetItem()’ (Helpfile:Reference Manual->General Libraries->Gadget->AddGadgetItem) you will see the parameters that this command accepts. The first parameter is the PBnumber of the gadget you would like to add an item to, in our case it is ‘#LIST_INPUT’ which is aconstant that holds our gadget’s number. The second parameter is what position in the list (of existingor non existing values) you would like this new entry to be added, remembering that indices start at‘0’. In the above example, I want this text to be added to the end of the list regardless of what that indexthat may be, so I specify this parameter as ‘-1’. This tells the command not to bother with inserting itat a particular index, just add it to the end of the current list no matter how big it may be.
Fig. 29(Microsoft Windows example)

Creating User Interfaces 147
The third parameter is the actual String you want to add to the gadget. I’ve used the ‘GetGadgetText()’command here to return the current value of the String gadget; ‘#STRING_INPUT’ and to pass it as aparameter. ‘AddGadgetItem()’ takes more parameters than I’ve used here but the others are optionaland therefore not necessary so I haven’t used them.
The second line of code after the ‘Case’ statement uses the ‘SetGadgetText()’ command to set the Stringgadget’s value to nothing by using a blank String. This is because, once text has been entered into thelist view gadget, I want to clear the String gadget ready for a new String to be entered.
The last line uses the ‘SetActiveGadget()’ command again to give the ‘#STRING_INPUT’ String gadgetfocus so the text cursor appears there ready for more input saving a mouse click or two from the user.
What Have We Learned So Far?Hopefully the last few examples have been a good introduction to native graphical user interfaces andprovide a good starting point for further learning. In this book I can’t give you examples of everyinterface you are likely wanting to build, all I can do is give you the basic building blocks of an interfaceand let you build upon them.
The beginnings of every native interface in PureBasic is the same. First you must open a window usingthe ‘OpenWindow()’ command. Secondly, if you want to place gadgets upon this window you mustcreate a gadget list using the ‘CreateGadgetList()’ command and Third, you must have a main loop tokeep the program running and handle any events that may occur. All events that do occur are returnedfrom a ‘WaitWindowEvent()’ or ‘WindowEvent()’ command within the main loop.
Read The Gadget Section In The HelpfileIf you have understood what has been written so far you are on your way to fully grasping how to buildnative interfaces in PureBasic. Once you have understood the basics, the rest is learning about whatgadgets are available and learning how to use them. This can be achieved by reading through thePureBasic helpfile in the ‘Gadget’ section (Helpfile:Reference Manual->General Libraries->Gadget). Irecommend reading this section from front to back to understand what is available for you to use andto understand what commands work with each gadget.
Take for example, the ‘SetGadgetText()’ command, this can be used with many different gadgets. If youlook at the ‘SetGadgetText()’ page in the helpfile (Helpfile:Reference Manual->General Libraries->Gadget->SetGadgetText) it lists all the gadgets that this command works with along with any specialinstructions for use with a particular gadget.
To cover all gadgets and the commands that work with them would take far too long here and probablybe another book in itself. So I think it’s perhaps a better idea to familiarize yourself with the ‘Gadget’section in the helpfile.
Meanwhile, if you need a quick reference of what gadgets are available for use with PureBasic, thenhave a look at Appendix B (Helpful Charts) for a full list of all gadgets and a brief description of eachone.
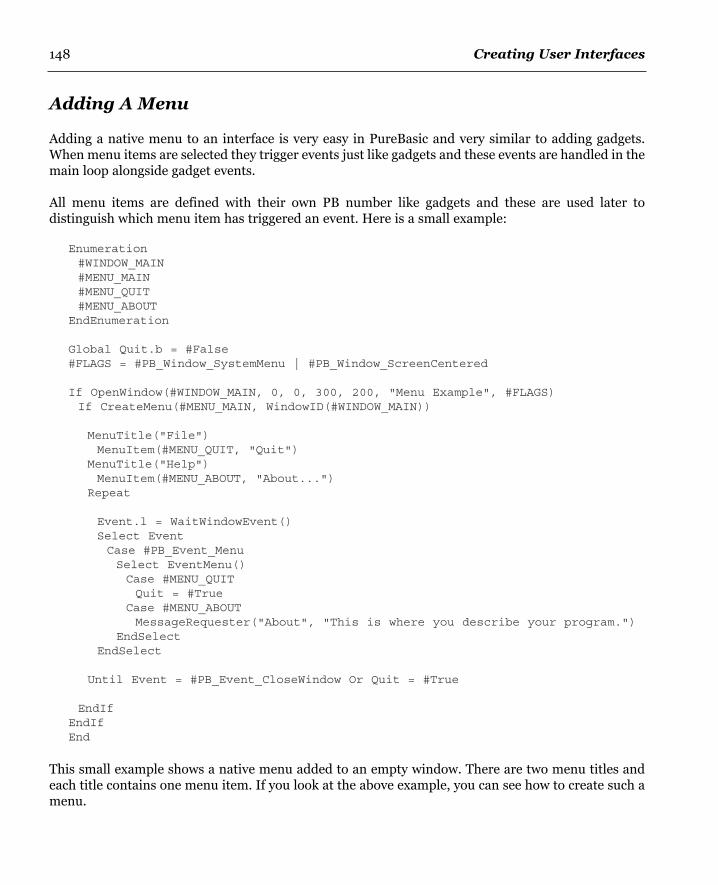
Creating User Interfaces148
Adding A Menu
Adding a native menu to an interface is very easy in PureBasic and very similar to adding gadgets.When menu items are selected they trigger events just like gadgets and these events are handled in themain loop alongside gadget events.
All menu items are defined with their own PB number like gadgets and these are used later todistinguish which menu item has triggered an event. Here is a small example:
Enumeration#WINDOW_MAIN#MENU_MAIN#MENU_QUIT#MENU_ABOUT
EndEnumeration
Global Quit.b = #False#FLAGS = #PB_Window_SystemMenu | #PB_Window_ScreenCentered
If OpenWindow(#WINDOW_MAIN, 0, 0, 300, 200, "Menu Example", #FLAGS)If CreateMenu(#MENU_MAIN, WindowID(#WINDOW_MAIN))
MenuTitle("File")MenuItem(#MENU_QUIT, "Quit")
MenuTitle("Help")MenuItem(#MENU_ABOUT, "About...")
Repeat
Event.l = WaitWindowEvent()Select EventCase #PB_Event_MenuSelect EventMenu()Case #MENU_QUITQuit = #True
Case #MENU_ABOUTMessageRequester("About", "This is where you describe your program.")
EndSelectEndSelect
Until Event = #PB_Event_CloseWindow Or Quit = #True
EndIfEndIfEnd
This small example shows a native menu added to an empty window. There are two menu titles andeach title contains one menu item. If you look at the above example, you can see how to create such amenu.
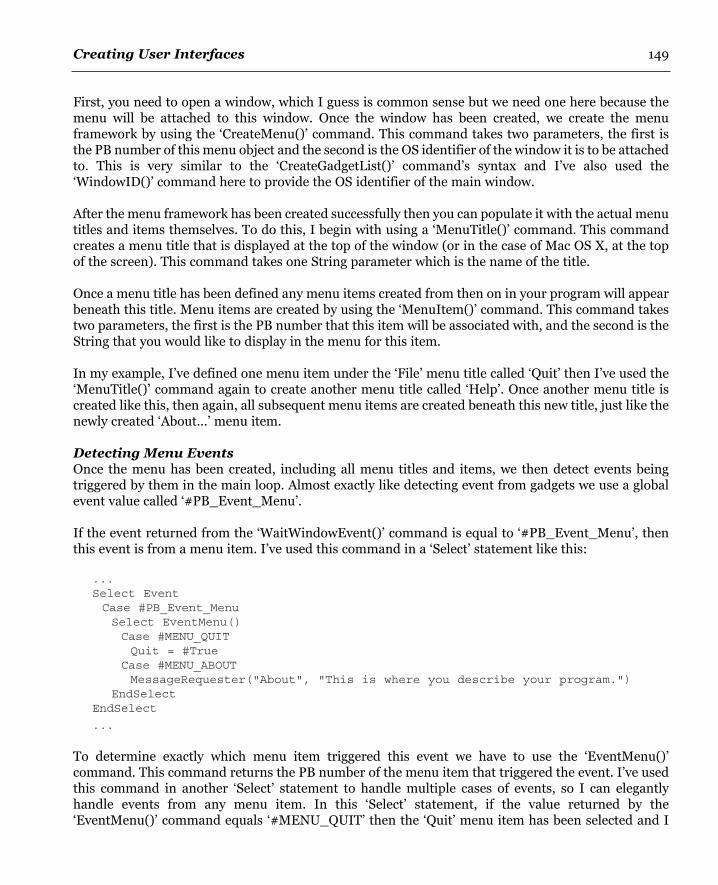
Creating User Interfaces 149
First, you need to open a window, which I guess is common sense but we need one here because themenu will be attached to this window. Once the window has been created, we create the menuframework by using the ‘CreateMenu()’ command. This command takes two parameters, the first isthe PB number of this menu object and the second is the OS identifier of the window it is to be attachedto. This is very similar to the ‘CreateGadgetList()’ command’s syntax and I’ve also used the‘WindowID()’ command here to provide the OS identifier of the main window.
After the menu framework has been created successfully then you can populate it with the actual menutitles and items themselves. To do this, I begin with using a ‘MenuTitle()’ command. This commandcreates a menu title that is displayed at the top of the window (or in the case of Mac OS X, at the topof the screen). This command takes one String parameter which is the name of the title.
Once a menu title has been defined any menu items created from then on in your program will appearbeneath this title. Menu items are created by using the ‘MenuItem()’ command. This command takestwo parameters, the first is the PB number that this item will be associated with, and the second is theString that you would like to display in the menu for this item.
In my example, I’ve defined one menu item under the ‘File’ menu title called ‘Quit’ then I’ve used the‘MenuTitle()’ command again to create another menu title called ‘Help’. Once another menu title iscreated like this, then again, all subsequent menu items are created beneath this new title, just like thenewly created ‘About...’ menu item.
Detecting Menu EventsOnce the menu has been created, including all menu titles and items, we then detect events beingtriggered by them in the main loop. Almost exactly like detecting event from gadgets we use a globalevent value called ‘#PB_Event_Menu’.
If the event returned from the ‘WaitWindowEvent()’ command is equal to ‘#PB_Event_Menu’, thenthis event is from a menu item. I’ve used this command in a ‘Select’ statement like this:
...Select EventCase #PB_Event_MenuSelect EventMenu()Case #MENU_QUITQuit = #True
Case #MENU_ABOUTMessageRequester("About", "This is where you describe your program.")
EndSelectEndSelect
...
To determine exactly which menu item triggered this event we have to use the ‘EventMenu()’command. This command returns the PB number of the menu item that triggered the event. I’ve usedthis command in another ‘Select’ statement to handle multiple cases of events, so I can elegantlyhandle events from any menu item. In this ‘Select’ statement, if the value returned by the‘EventMenu()’ command equals ‘#MENU_QUIT’ then the ‘Quit’ menu item has been selected and I
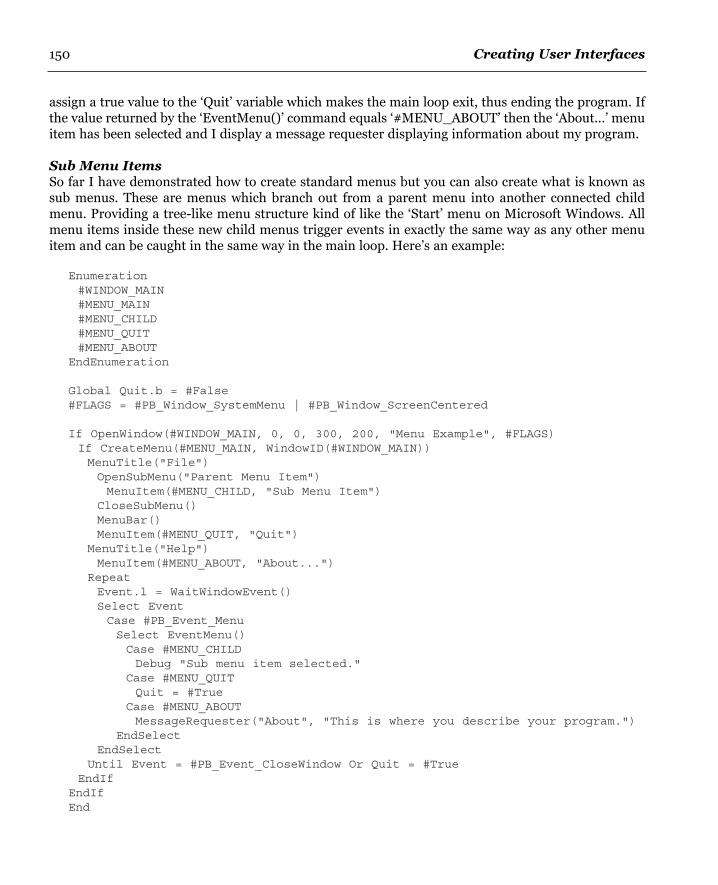
Creating User Interfaces150
assign a true value to the ‘Quit’ variable which makes the main loop exit, thus ending the program. Ifthe value returned by the ‘EventMenu()’ command equals ‘#MENU_ABOUT’ then the ‘About...’ menuitem has been selected and I display a message requester displaying information about my program.
Sub Menu ItemsSo far I have demonstrated how to create standard menus but you can also create what is known assub menus. These are menus which branch out from a parent menu into another connected childmenu. Providing a tree-like menu structure kind of like the ‘Start’ menu on Microsoft Windows. Allmenu items inside these new child menus trigger events in exactly the same way as any other menuitem and can be caught in the same way in the main loop. Here’s an example:
Enumeration#WINDOW_MAIN#MENU_MAIN#MENU_CHILD#MENU_QUIT#MENU_ABOUT
EndEnumeration
Global Quit.b = #False#FLAGS = #PB_Window_SystemMenu | #PB_Window_ScreenCentered
If OpenWindow(#WINDOW_MAIN, 0, 0, 300, 200, "Menu Example", #FLAGS)If CreateMenu(#MENU_MAIN, WindowID(#WINDOW_MAIN))MenuTitle("File")OpenSubMenu("Parent Menu Item")MenuItem(#MENU_CHILD, "Sub Menu Item")
CloseSubMenu()MenuBar()MenuItem(#MENU_QUIT, "Quit")
MenuTitle("Help")MenuItem(#MENU_ABOUT, "About...")
RepeatEvent.l = WaitWindowEvent()Select EventCase #PB_Event_MenuSelect EventMenu()Case #MENU_CHILDDebug "Sub menu item selected."
Case #MENU_QUITQuit = #True
Case #MENU_ABOUTMessageRequester("About", "This is where you describe your program.")
EndSelectEndSelect
Until Event = #PB_Event_CloseWindow Or Quit = #TrueEndIf
EndIfEnd

Creating User Interfaces 151
A sub menu is created by using the ‘OpenSubMenu()’ command after a ‘MenuTitle()’ command. Thisis so the sub menu is related to a menu title just like any other menu item. The ‘OpenSubMenu()’command takes one parameter which is the String that is displayed in the menu in front of the submenu arrow. Once a ‘OpenSubMenu()’ command is used then all subsequently used ‘MenuItem()’commands will place new menu items within the sub menu. To close this sub menu to be able to addmore items to the main menu, you have to call the ‘CloseSubMenu()’ command. This switches menuitem creation back to the parent menu.
New menu items that are added to sub menus trigger events that can be caught in the main loop in thesame way as any other menu item. If you look at the ‘EventMenu()’ ‘Select’ statement, you can see I’veadded a new value to be handled; ‘#MENU_CHILD’. If the return value from ‘EventMenu()’ equals thevalue of ‘#MENU_CHILD’ then the child menu item must of been selected, so I echo some text to theDebug Output window to show this.
Separating Menu ItemsIf you take a closer look at the above example I’ve added another new command too. This commanddraws a nice graphical separator bar in the menu which is useful to separate certain menu items. Thisnew command is the ‘MenuBar()’ command. It takes no parameters and is used wherever you wouldlike to place a separator in the current menu. Usually one is placed to separate the ‘Quit’ menu itemfrom the rest of the menu items in the ‘File’ menu, so that’s what I have done in this example.
Combining Gadgets And Menus In The Same ProgramIncluding menus and gadgets in the same program is easy. First, you open a window and create amenu. Then you create a gadget list and draw your gadgets, it’s that simple. Here’s a code example:
Enumeration#WINDOW_MAIN#MENU_MAIN#MENU_QUIT#MENU_ABOUT#TEXT_INPUT#STRING_INPUT#LIST_INPUT#BUTTON_INTERACT#BUTTON_CLOSE
EndEnumeration
Global Quit.b = #False#FLAGS = #PB_Window_SystemMenu | #PB_Window_ScreenCentered
If OpenWindow(#WINDOW_MAIN, 0, 0, 300, 222, "Interaction", #FLAGS)If CreateMenu(#MENU_MAIN, WindowID(#WINDOW_MAIN))MenuTitle("File")MenuItem(#MENU_QUIT, "Quit")
MenuTitle("Help")MenuItem(#MENU_ABOUT, "About...")
If CreateGadgetList(WindowID(#WINDOW_MAIN))TextGadget(#TEXT_INPUT, 10, 10, 280, 20, "Enter text here:")StringGadget(#STRING_INPUT, 10, 30, 280, 20, "")

Creating User Interfaces152
ListViewGadget(#LIST_INPUT, 10, 60, 280, 100)ButtonGadget(#BUTTON_INTERACT, 10, 170, 120, 20, "Enter text")ButtonGadget(#BUTTON_CLOSE, 190, 170, 100, 20, "Close window")SetActiveGadget(#STRING_INPUT)RepeatEvent.l = WaitWindowEvent()Select EventCase #PB_Event_MenuSelect EventMenu()Case #MENU_QUITQuit = #True
Case #MENU_ABOUTMessageRequester("About", "This is your program description.")
EndSelectCase #PB_Event_GadgetSelect EventGadget()Case #BUTTON_INTERACTAddGadgetItem(#LIST_INPUT, -1, GetGadgetText(#STRING_INPUT))SetGadgetText(#STRING_INPUT, "")SetActiveGadget(#STRING_INPUT)
Case #BUTTON_CLOSEQuit = #True
EndSelectEndSelect
Until Event = #PB_Event_CloseWindow Or Quit = #TrueEndIf
EndIfEndIfEnd
To handle events from either menu items or gadgets you can use the different global event constants.In the above example, I’ve used both in the same ‘Select’ statement which tests the ‘Event’ variable, likethis:
...Select EventCase #PB_Event_MenuSelect EventMenu()...;Menu events are handled here...
EndSelect...
Case #PB_Event_GadgetSelect EventGadget()...;Gadget events are handled here...
EndSelectEndSelect...

Creating User Interfaces 153
If an event is triggered from a menu item then it is handled in the ‘#PB_Event_Menu’ ‘Case’ statementand the exact menu item can be determined by using the ‘EventMenu()’ command. If an event istriggered from a gadget then it is handled in the ‘#PB_Event_Gadget’ ‘Case’ statement and the exactgadget can be determined by using the ‘EventGadget()’ command. This allows you to handle all menuand gadget events from one nested ‘Select’ statement, as shown in the snippet on the previous page.
Menu Keyboard Shortcuts
Most pieces of software nowadays have some form of keyboard shortcuts available for selecting menuitems. These shortcuts are just key combinations that you can press on the keyboard to trigger menuitems so you don’t physically have to select them from the menu. PureBasic can insert these into youprogram with ease.
To demonstrate this we need to create a window with a menu. In this menu we define our menu itemsbut this time we’ll define them with Accelerators. An accelerator is a computer term for the String on
Why Can’t I Put Icons In Menus?
You will probably notice in Fig.30 that there are icons in the PureBasic IDE’s menus but there are no nativecommands included in PureBasic for putting icons in menus. PureBasic is a cross-platform programminglanguage and PureBasic code, once written, should compile for any supported platform. Therefore, allsupported commands must achieve the same desired effect on each platform. Icons in menus were regardedas being too difficult to support in a cross-platform way so they were omitted, from the final PureBasiccommand set. The icons included in the PureBasic IDE were coded using each platform's native API (Suchas the WinAPI in the case of Microsoft Windows). To learn more about what a native API is and learn moreabout the WinAPI, see Chapter 13.
Fig. 30
Accelerators

Creating User Interfaces154
the end of a menu item describing what shortcut you need to press in order to trigger it, Fig.30 showsthe accelerators defined in the PureBasic IDE’s file menu. Looking at this you can see that if you wantto create a new document in the PureBasic IDE you can press ‘Ctrl+N’ which is the ‘Control’ key andthe ‘N’ key at the same time on the keyboard, etc.
You will also notice in Fig.30, that the accelerators are aligned to the right hand side of the menu. Thisis to make sure they are clearly marked and to keep the menu itself uncluttered.
In this next piece of code I’m going to extend the previous menu example and add accelerators andkeyboard shortcuts, run it and try them for yourself.
Enumeration#WIN_MAIN#MENU_MAIN#M_QUIT#M_ABOUT
EndEnumeration
Global Quit.b = #False#FLAGS = #PB_Window_SystemMenu | #PB_Window_ScreenCentered
If OpenWindow(#WIN_MAIN, 0, 0, 300, 200, "Menu Example", #FLAGS)If CreateMenu(#MENU_MAIN, WindowID(#WIN_MAIN))
MenuTitle("File")MenuItem(#M_QUIT, "Quit" + #TAB$ + "Ctrl+Q")
MenuTitle("Help")MenuItem(#M_ABOUT, "About..." + #TAB$ + "Ctrl+A")
AddKeyboardShortcut(#WIN_MAIN,#PB_Shortcut_Control|#PB_Shortcut_Q,#M_QUIT)AddKeyboardShortcut(#WIN_MAIN,#PB_Shortcut_Control|#PB_Shortcut_A,#M_ABOUT)
Repeat
Event.l = WaitWindowEvent()Select EventCase #PB_Event_MenuSelect EventMenu()Case #M_QUITQuit = #True
Case #M_ABOUTMessageRequester("About", "This is where you describe your program.")
EndSelectEndSelect
Until Event = #PB_Event_CloseWindow Or Quit = #True
EndIfEndIfEnd

Creating User Interfaces 155
If you run the example, you will see that besides the menu items there are now accelerators. These aredefined by using a tab character within the menu item String, like this:
...MenuItem(#M_QUIT, "Quit" + #TAB$ + "Ctrl+Q")...
This command still takes two parameters, but the second String parameter is being made up of threeparts. The first part is the menu item String, which in this case is ‘Quit’. Then we concatenate a tabcharacter to the end using the built-in ‘#TAB$’ String constant. This constant has the ASCII value of‘9’ in String form. Then we concatenate a further String which is the menu accelerator; ‘Ctrl+Q’.
A tab is used here instead of a space so that the accelerators are always aligned to the right of the menuregardless of the lengths of the menu item Strings.
Once the accelerators have been entered alongside the menu items then that’s the visual part done, theaccelerators are after all just for the user to refer to visually. To add the shortcut functionality of theaccelerators we must use the ‘AddKeyboardShortcut()’ command. I’ve used these commands in mycode like this:
...AddKeyboardShortcut(#WIN_MAIN,#PB_Shortcut_Control|#PB_Shortcut_Q,#M_QUIT)AddKeyboardShortcut(#WIN_MAIN,#PB_Shortcut_Control|#PB_Shortcut_A,#M_ABOUT)
...
This command takes three parameters, the first is the PB number of the window that this shortcut isassociated with, in this case it’s ‘#WIN_MAIN’. The second parameter is a value that represents theactual keyboard shortcut. This value is made up of built-in constants that represent different keycombinations on the keyboard. On the first line in the above snippet, I’ve combined the constants‘#PB_Shortcut_Control’ and ‘#PB_Shortcut_Q’ to specify that I want the shortcut to be ‘Control+Q’on the keyboard. These constants are combined in the usual way by using the bitwise ‘Or’ operator (‘|’).All shortcut constants available for use to create all other key combinations are listed in the PureBasichelpfile on the ‘AddKeyboardShortcut()’ page (Helpfile:Reference Manual->General Libraries->Window->AddKeyboardShortcut). The third parameter is the menu item’s PB number that you wishto associate this shortcut to. On the first line in the above snippet, I’ve used ‘#M_QUIT’ which is thesame PB number I used to create the ‘Quit’ menu item earlier on. This means that once this shortcutis pressed on the keyboard it will trigger an event with the same value as if the ‘Quit’ menu item wasselected.
On the next line of the snippet I’ve repeated this command but with different parameters to provide akeyboard shortcut for the ‘About’ menu item.
These events triggered from keyboard shortcuts are handled in exactly the same way as if they weretriggered from selecting a menu item and there is absolutely no difference in the main loop as you cansee from the shortcut example.

Creating User Interfaces156
Keyboard Shortcuts Without A MenuUsing the same keyboard shortcut commands you can create keyboard shortcuts without having amenu to base them on. All you have to do, is use the ‘AddKeyboardShortcut()’ command to create ashortcut associated to your window and instead of mirroring a menu item’s PB number in the thirdparameter, just use a unique value. You then test for this value as a menu event in the main loop eventhough there is no menu. Here’s an example:
#WIN_MAIN = 1#SC_EVENT = 2
#FLAGS = #PB_Window_SystemMenu | #PB_Window_ScreenCentered
If OpenWindow(#WIN_MAIN, 0, 0, 300, 200, "Hello World", #FLAGS)AddKeyboardShortcut(#WIN_MAIN,#PB_Shortcut_Control|#PB_Shortcut_Z, #SC_EVENT)RepeatEvent.l = WaitWindowEvent()Select EventCase #PB_Event_MenuSelect EventMenu()Case #SC_EVENTDebug "The shortcut was pressed"
EndSelectEndSelect
Until Event = #PB_Event_CloseWindowEndIfEnd
While the above example is running, press ‘Control+Z’ on your keyboard and you should see the text‘The shortcut was pressed’ echoed to the Debug Output window. This example works because the‘AddKeyboardShortcut()’ command triggers a menu event that is handled correctly in the main loopeven though there is no physical menu attached to the window. This is a handy trick to know if youever want to add keyboard shortcuts to your programs even though you don’t want a menu.
Including Graphics In Your Program
Sometimes in your programs you might like to include certain images and PureBasic makes this veryeasy. In this next section I’ll show you how to add images to your interfaces in one of two ways. First,you can load them from an external source, for example, the image may be in the same directory asyour program. Second you can embed the image directly into your program so you only have oneexecutable file. Both ways achieve the same thing but it depends how you want to handle the image fileitself. Both these methods require an image gadget to be placed on your window to display the image.This is placed upon your window in the same way as any other gadget and conforms to the same rules.
Loading Images Into Your ProgramThis method of loading images for use in your interface is reliant on external images. Unlikeembedding images, this method requires you to distribute any images used along with your executablefile. Here is an example:

Creating User Interfaces 157
Enumeration#WIN_MAIN#IMAGE_FILE#IMAGE_DISPLAY#BUTTON_CLOSE
EndEnumeration
Global Quit.b = #False#FLAGS = #PB_Window_SystemMenu | #PB_Window_ScreenCentered
If OpenWindow(#WIN_MAIN, 0, 0, 300, 200, "Image Example", #FLAGS)If CreateGadgetList(WindowID(#WIN_MAIN))If LoadImage(#IMAGE_FILE, "image.bmp")
ImageGadget(#IMAGE_DISPLAY, 10, 10, 280, 150, ImageID(#IMAGE_FILE))ButtonGadget(#BUTTON_CLOSE, 100, 170, 100, 20, "Close window")Repeat
Event.l = WaitWindowEvent()Select EventCase #PB_Event_GadgetSelect EventGadget()Case #BUTTON_CLOSEQuit = #True
EndSelectEndSelect
Until Event = #PB_Event_CloseWindow Or Quit = #True
EndIfEndIf
EndIfEnd
For this example to work properly, you will need a ‘280’ by ‘150’ pixel image and save it in Bitmapformat inside the same directory as the source code or final compiled executable. Once this is in placethe program (once run) will look something like Fig.31 overleaf.
In this example, I’ve used the ‘LoadImage()’ command to load the image from a place on the hard driveinto memory ready for displaying in the program, like this:
...LoadImage(#IMAGE_FILE, "image.bmp")
...
If you look at the ‘LoadImage()’ command in the PureBasic helpfile (Helpfile:Reference Manual->General Libraries->Image->LoadImage) you can see this command takes three parameters, the firstis the PB number that will be associated with this loaded image and the second is the place on the harddrive where this image will be loaded from. If no file path information is included in the secondparameter the file location is assumed to be relative to the program itself. I’ve not used the third
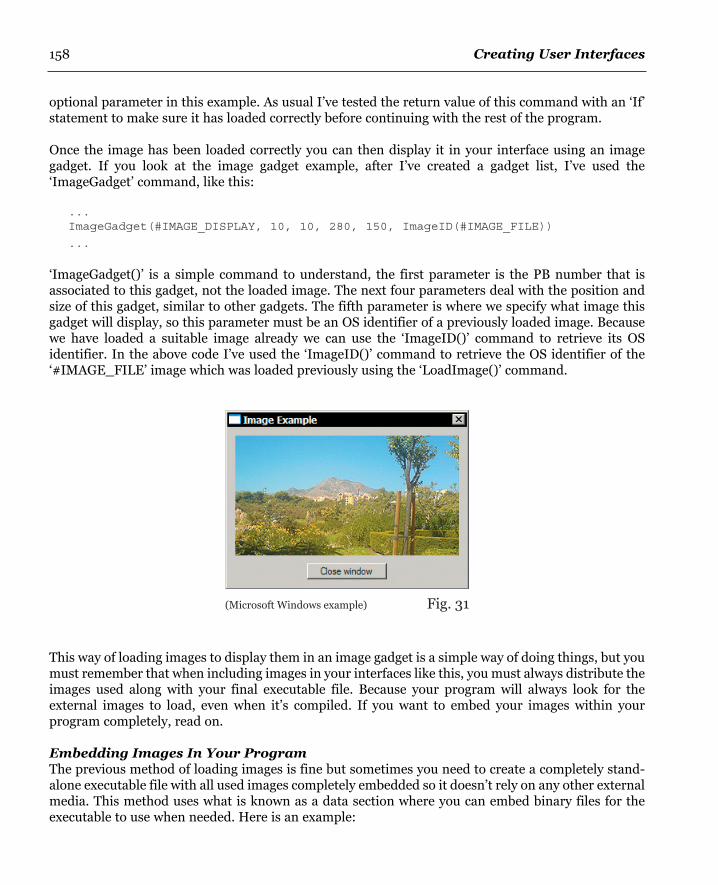
Creating User Interfaces158
optional parameter in this example. As usual I’ve tested the return value of this command with an ‘If’statement to make sure it has loaded correctly before continuing with the rest of the program.
Once the image has been loaded correctly you can then display it in your interface using an imagegadget. If you look at the image gadget example, after I’ve created a gadget list, I’ve used the‘ImageGadget’ command, like this:
...ImageGadget(#IMAGE_DISPLAY, 10, 10, 280, 150, ImageID(#IMAGE_FILE))
...
‘ImageGadget()’ is a simple command to understand, the first parameter is the PB number that isassociated to this gadget, not the loaded image. The next four parameters deal with the position andsize of this gadget, similar to other gadgets. The fifth parameter is where we specify what image thisgadget will display, so this parameter must be an OS identifier of a previously loaded image. Becausewe have loaded a suitable image already we can use the ‘ImageID()’ command to retrieve its OSidentifier. In the above code I’ve used the ‘ImageID()’ command to retrieve the OS identifier of the‘#IMAGE_FILE’ image which was loaded previously using the ‘LoadImage()’ command.
This way of loading images to display them in an image gadget is a simple way of doing things, but youmust remember that when including images in your interfaces like this, you must always distribute theimages used along with your final executable file. Because your program will always look for theexternal images to load, even when it’s compiled. If you want to embed your images within yourprogram completely, read on.
Embedding Images In Your ProgramThe previous method of loading images is fine but sometimes you need to create a completely stand-alone executable file with all used images completely embedded so it doesn’t rely on any other externalmedia. This method uses what is known as a data section where you can embed binary files for theexecutable to use when needed. Here is an example:
Fig. 31(Microsoft Windows example)

Creating User Interfaces 159
Enumeration#WIN_MAIN#IMAGE_MEMORY#IMAGE_DISPLAY#BUTTON_CLOSE
EndEnumeration
Global Quit.b = #False
#FLAGS = #PB_Window_SystemMenu | #PB_Window_ScreenCentered
If OpenWindow(#WIN_MAIN, 0, 0, 300, 200, "Image Example", #FLAGS)If CreateGadgetList(WindowID(#WIN_MAIN))If CatchImage(#IMAGE_MEMORY, ?Image)ImageGadget(#IMAGE_DISPLAY, 10, 10, 280, 150, ImageID(#IMAGE_MEMORY))ButtonGadget(#BUTTON_CLOSE, 100, 170, 100, 20, "Close window")RepeatEvent.l = WaitWindowEvent()Select EventCase #PB_Event_GadgetSelect EventGadget()Case #BUTTON_CLOSEQuit = #True
EndSelectEndSelect
Until Event = #PB_Event_CloseWindow Or Quit = #TrueEndIf
EndIfEndIfEnd
DataSectionImage:IncludeBinary "image.bmp"
EndDataSection
This example is very similar to the previous one, except this one is embedding the image into a datasection when compiled. Once this program is run, the image is read from the data section instead ofbeing read from the hard drive. If you look at the example you can see the data section at the bottomof the source code, it looks like this:
...DataSectionImage:IncludeBinary "image.bmp"
EndDataSection
The commands ‘DataSection’ and ‘EndDataSection’ are the start and finish of the section. You are thenable to embed binary files within it using the ‘IncludeBinary’ command. This command doesn’t use anybrackets, it just uses a String after it to define a file to embed.
Creating User Interfaces160
In this case I’ve embedded the file called ‘image.bmp’. You will also notice that I’ve used a label beforethe ‘IncludeBinary’ command, very similar to a subroutine definition. This label enables your programto find the start of this image in memory once loaded with this program. Once an image has beenembedded like this then we can easily use it in our main code.
In the main code, we no longer use the ‘LoadImage()’ command to load the image into memory. Onceit’s placed within a data section, it’s already loaded once the program is running. So we use the‘CatchImage()’ command to retrieve the image from the data section, like this:
...CatchImage(#IMAGE_MEMORY, ?Image)
...
If you look at the ‘CatchImage()’ command in the PureBasic helpfile (Helpfile:Reference Manual->General Libraries->Image->CatchImage) you can see this command takes three parameters, the firstis the PB number that will be associated with this image. The second parameter is the memory addresswhere this image resides. If you remember, I’ve used a label in the data section to show this so I needto get the memory address of this label. I do this using a question mark in front of the label when I useit as a parameter. This question mark is a special one character function that returns the memoryaddress of any label. This is explained in more detail later in Chapter 13 (Pointers). I’ve not used thethird parameter in this example because it is optional.
Displaying an image loaded with the ‘CatchImage()’ command is exactly the same as using the‘LoadImage()’ command. Again, we use an image gadget and populate its parameters in the same wayas before:
...ImageGadget(#IMAGE_DISPLAY, 10, 10, 280, 150, ImageID(#IMAGE_MEMORY))
...
Once you run this example it should look like Fig.31 again. This is because it is the same program, butnow it no longer needs the external ‘image.bmp’ file.
What Image Formats Can Be Used?In the last few examples I’ve loaded and embedded images which are in Bitmap (*.bmp) format butyou are not limited to this one single format.
As standard, PureBasic can load and display Bitmap (*.bmp) and Icon (*.ico) format files butsometimes these can be restrictive. If you need to use other formats you can use optional decodercommands to give further functionality to PureBasic’s image loading commands. These other decodersare extremely simple to use, you just use the decoder command at the start of your source code andfrom then on in your program all the image loading commands have full support of the image formatdecoder used. You can find more information on the decoders in the PureBasic helpfile(Helpfile:Reference Manual->General Libraries->ImagePlugin).

Creating User Interfaces 161
Here are the other decoder commands:
‘UseJPEGImageDecoder()’This decoder adds support for the Jpeg image (*.jpg/*.jpeg) file format.
‘UsePNGImageDecoder()’This decoder adds support for the Png image (*.png) file format.
‘UseTIFFImageDecoder()’This decoder adds support for the TIFF image (*.tif/*.tiff) file format.
‘UseTGAImageDecoder()’This decoder adds support for the Targa image (*.tga) file format.
As stated before, using these decoder commands is simplicity itself. Let’s take the last imageembedding example and add Jpeg support to it so we can embed a Jpeg file instead of a Bitmap file:
UseJPEGImageDecoder()
Enumeration#WIN_MAIN#IMAGE_MEMORY#IMAGE_DISPLAY#BUTTON_CLOSE
EndEnumeration
Global Quit.b = #False#FLAGS = #PB_Window_SystemMenu | #PB_Window_ScreenCentered
If OpenWindow(#WIN_MAIN, 0, 0, 300, 200, "Image Example", #FLAGS)If CreateGadgetList(WindowID(#WIN_MAIN))If CatchImage(#IMAGE_MEMORY, ?Image)
ImageGadget(#IMAGE_DISPLAY, 10, 10, 280, 150, ImageID(#IMAGE_MEMORY))ButtonGadget(#BUTTON_CLOSE, 100, 170, 100, 20, "Close window")Repeat
Event.l = WaitWindowEvent()Select EventCase #PB_Event_GadgetSelect EventGadget()Case #BUTTON_CLOSEQuit = #True
EndSelectEndSelect
Until Event = #PB_Event_CloseWindow Or Quit = #True

Creating User Interfaces162
EndIfEndIf
EndIfEnd
DataSectionImage:IncludeBinary "image.jpg"
EndDataSection
In this example the only difference I’ve made to the source code to make it able to support Jpeg filesis I’ve added the ‘UseJPEGImageDecoder()’ command as the first line in the code and then changedthe image in the data section to a Jpeg format one. This program now embeds a Jpeg image instead ofa Bitmap.
All other decoders are used in the same way, just add the decoder command at the top of your sourcecode to add support for these further file formats.
A First Look At The New Visual Designer
Included with PureBasic is a powerful Visual Designer to enable you to build interfaces visually anddynamically. This means in plain speak, that you can literally draw your gadgets upon a window tocreate your interface and all the underlying PureBasic code is generated for you automatically and inrealtime.
Using a tool like this can save you considerable time when designing interfaces, adjusting the look andfeel of an interface while seeing immediate results. You should also be able to load the code back inagain at a later date if you need to add something or provide further functionality in your program.There is currently one limitation regarding loading existing sources, code not written by the visualdesigner might not be loaded correctly if you open it for re-editing. This is because the visual designergenerates code in a certain way and if a hand written file deviates from this format the designer mighthave a hard time reading it in. The visual designer, like other tools provided, is written entirely fromthe ground up using PureBasic and is colorfully referred to as the ‘VD’ by the PureBasic community.
Why Haven’t You Mentioned This Earlier?I thought it was very important for you to learn how things work in PureBasic regarding gadgets,menus and events, to give you a more solid grounding of the code generated by the VD. So I thought Iwould mention it last within this chapter.
The Main WindowWhen you start the visual designer up it will look something like Fig.32. The main window is a multipledocument interface containing all the tools you will need to design your interface. The visual designerconsists of a menu at the top and a toolbar beneath. To the left of the screen there is a long tool panelcontaining the Gadget Tool Box and the Properties panel. In the center will be the current interfacebeing designed and below that, the automatically generated code.

Creating User Interfaces 163
Using The Visual DesignerIf you look at Fig.32 you will see the interface that is in progress indicated by an arrow to the right.This window is easy to spot because it is covered in tiny dots. These dots are a ‘snap grid’ that allowplaced gadgets to snap to a set grid to make aligning them much quicker and easier. These dots do notappear on the finished program.
Once the interface’s window has been resized to the desired dimensions you can then start placinggadgets on it. To do this, pick a tool from the Gadget Tool Box and draw on the interface using thattool. You will now be drawing a dynamically resizing gadget of the selected tool type directly on thewindow. Once you have drawn the gadget, you will see that it is surrounded by big blue dots. These are
Fig. 32
InterfaceInProgress
Toolbar
GadgetToolBox
PropertiesAndFlagsPanel Auto
GeneratedCode

Creating User Interfaces164
handles allowing you to resize and move the gadget after it has been drawn. While you are addinggadgets to your interface you will notice that the PureBasic code is automatically generated in the CodeViewer near the bottom of the screen.
Once all gadgets are placed and you have finished designing your user interface you can save yourproject by clicking the disk button in the Toolbar. This allows you to save the automatically generatedcode to a standard PureBasic file so you can open, edit and compile it as normal in the PureBasic IDE.
Pro’s and Con’s Of The Visual DesignerWhile the visual designer is a great tool to quickly and easily throw together user interfaces the formatof the code generated cannot be changed. Therefore, you have to accept the way the program has beencoded and if tweaks are needed by hand in the IDE then you have to conform to this format. This isnot really a problem if you are experienced with PureBasic but for the novice user, the exported codecan be quite complicated and advanced.
The real plus point about using the visual designer is speed. You can throw together a useful userinterface in seconds and see how it looks and then just as easily move and resize the gadgets until youget it just right. This cannot be overstated. The amount of time you could save designing a userinterface using the VD is staggering, simply because you are negating the need to compile the programto see how it looks.
Some people like visual designers and some don’t, it’s as simple as that. Some say that it’s best tohandle all the code yourself so you truly know what’s going on ‘under the hood’ while others argue thatin today’s competitive world you need a fast solution to designing interfaces. The argument will rageon I’m sure but it’s up to you what you feel like using. The tools are there it’s up to you if you want touse them.
Learning More About The Visual DesignerThe PureBasic Visual Designer comes complete with an extensive helpfile which covers all theworkings of the VD in a similar style to the IDE helpfile. To view it press ‘F1’ within the visual designerand the helpfile will load. I recommend reading through this helpfile fully at least once.
The new version of the visual designer which is (shown in Fig.32) being currently developed, can beread about, and downloaded from the PureBasic visual designer website. There is an Internet linkgiven for this in Appendix A (Useful Internet Links).

IIIGraphics
And SoundPrograms that use graphics and sound are a prerequisite now in this world of computer games andinteractive applications. When programming such cool stuff you need a computer language that willprovide you with the necessary tools to realize your ideas. PureBasic offers simple, powerful and fullyfeatured commands that can create professional quality games, demo’s, screensavers and otherinteractive programs. In this section I will show you the basics of using graphics and sound within yourPureBasic programs.
First I’ll explain the 2D drawing commands that allow you to draw simple shapes, lines and text andthen demonstrate how to save these images. Then I’ll move on to show you how to open full sizegraphical screens to be able to draw graphics onto. Also I will introduce you to sprites and how to usethem to create nice graphical effects.
After that, we’ll move onto 3D graphics where I will introduce you to PureBasic’s adopted 3D engineand show you the basics of using 3D graphics in PureBasic. This engine is called OGRE and is a thirdparty professional quality engine capable of producing stunning graphics and effects.
The last chapter in this section deals with sound. The topics covered, are how to load and play sounds,with an emphasis on wav’s, tracker modules, mp3’s and CD audio.
The chapters contained in this section are not complete guides on how to achieve every graphical effector how to write games, I’ll leave that to other texts. These chapters are here to introduce you to thelibraries of commands that make these things possible and to provide a starting point so you canexperiment and have some fun. Hopefully this section will give you a taste of what is possiblegraphically using PureBasic and inspire you to create a cool demo or game.


102D Graphics
In this chapter, I am going to explain how to draw 2D graphics using PureBasic. The term ‘2D graphics’encompasses quite a large subject and many drawing operations fall beneath this descriptive umbrella.When I refer to 2D graphics in this book, I mean simple, two dimensional graphics that can be drawnonto graphical user interfaces, screens, images in RAM or even to a printer. These graphical types canalso contain different complexities, from a single pixel right up to a full color image. All 2D graphicsare two dimensional as you would guess from their name, unlike 3D graphics, which display 3Dmodels that have a third ‘depth’ dimension.
Using 2D graphics, it’s possible to achieve some very impressive visuals and as a result, many games,screensavers and demo’s have been created using PureBasic. Hopefully you will be able to copy, learnfrom and adapt the examples in this chapter to create cool graphics in your own programs.
2D Drawing Commands
PureBasic contains commands that allow you to draw primitive shapes and colors in your programs.These simple 2D drawing commands are all contained in the ‘2D Drawing’ library (Helpfile:ReferenceManual->General Libraries->2DDrawing). These commands are useful for drawing simple shapes andtext in different colors and there is even a couple of commands to draw using a previously created orloaded image.
What Can I Draw Onto?The built-in 2D drawing commands can be used to draw onto various outputs such as, a graphical userinterface window, a PureBasic screen, a sprite, a newly created image in memory, a 3D model textureor straight to a printer. These six methods pretty much cover anything you might need to draw onto,and each one is as easy to use as any other. Using these different output methods is a trivial matter inPureBasic because you only need to specify once where you would like the drawing output to go, andthen use the drawing commands to draw to it. To simplify things even further, all the output methodsshare the same drawing command syntax.
167

2D Graphics168
Drawing On A WindowIn this first example, I’ll show you how to draw 2D graphics directly onto a window. You probably willnever do this in a real world application but it’s a simple exercise for you to understand and learn thesyntax from. Look at this piece of code:
#WINDOW_MAIN = 1
#FLAGS = #PB_Window_SystemMenu | #PB_Window_ScreenCenteredIf OpenWindow(#WINDOW_MAIN, 0, 0, 200, 240, "Window Drawing", #FLAGS)
If StartDrawing(WindowOutput(#WINDOW_MAIN))Box(15, 15, 75, 75, RGB(255, 0, 0))Circle(140, 125, 45, RGB(35, 158, 70));The next 2D drawing commands draw a triangleLineXY(62, 140, 112, 220, RGB(0, 0, 255))LineXY(112, 220, 12, 220, RGB(0, 0, 255))LineXY(12, 220, 62, 140, RGB(0, 0, 255))FillArea(62, 180, RGB(0, 0, 255), RGB(0, 0, 255))
StopDrawing()EndIf
RepeatEvent.l = WaitWindowEvent()
Until Event = #PB_Event_CloseWindowEndIfEnd
If you run the above example, you will see a window similar to Fig.33 opened, and a red square, a greencircle and a blue triangle drawn upon it. These shapes are drawn directly onto the window itself andno gadgets have been used. For you to fully understand the code above, I need to further explain thedrawing command syntax.
Fig. 33(Microsoft Windowsexample)
2D Graphics 169
First, you will see I’ve used a new command called ‘StartDrawing()’. This command tells PureBasicthat I wish to start drawing using the 2D graphics commands and specifies what the drawingcommands should draw on. If you look at the ‘StartDrawing()’ command’s helpfile page(Helpfile:Reference Manual->General Libraries->2DDrawing->StartDrawing) you will see that thiscommand can take six other commands as its parameter to specify the drawing output method. Theseare:
‘WindowOutput()’Use this to draw onto PureBasic user interface windows. This output method requires a PB number asa parameter to specify what window to draw onto.
‘ScreenOutput()’Use this to draw directly onto a PureBasic screen.
‘SpriteOutput()’Use this to draw onto a PureBasic sprite. This output method requires a PB number as a parameter tospecify what sprite to draw onto.
‘ImageOutput()’Use this to draw onto a loaded or newly created image in memory. This output method requires a PBnumber as a parameter to specify what image to draw onto.
‘PrinterOutput()’Use this to draw directly to a printer.
‘TextureOutput()’Use this to draw onto a 3D model’s texture. This output method requires a PB number as a parameterto specify what texture to draw onto.
In my example I’ve specified that I want to start drawing onto a window, like this:
...StartDrawing(WindowOutput(#WINDOW_MAIN))
...
Once I have set up the drawing output like this, I am free to use any of the 2D drawing commands todraw to it. In other words, everything drawn by the 2D drawing commands will now be drawn onto thewindow as specified in the parameter of the ‘WindowOutput’ command. Once you have used a‘StartDrawing()’ command you must always use a ‘StopDrawing()’ command to finish off the drawingoperations. This tells the PureBasic compiler, I now wish to stop using 2D drawing commands and Iwant to continue as normal with the rest of my program. This is essential because it may cause bugsin your program if you do not tell the compiler that you have stopped drawing.
Inside the drawing block, I’ve used four 2D drawing commands to actually draw the shapes onto thewindow. These are ‘Box()’, ‘Circle()’, ‘LineXY()’ and ‘FillArea()’. All these 2D drawing commands areexplained in detail through links on the ‘2D Drawing’ helpfile page (Helpfile:Reference Manual-

2D Graphics170
>General Libraries->2DDrawing). Nearly all the 2D commands share similar parameters. There isusually parameters for ‘x’ and ‘y’ position and sometimes different size parameters and then usuallythe last parameter is the color that you would like this shape to be. If we take the ‘Box()’ command forexample, the first two parameters are the position of the box on the output. The third and fourthparameters are the width and height of the box and the fifth parameter is its color.
Working With ColorsThe colors in PureBasic are specified using a single 24 bit color value. This value is a large number thatrepresents different combinations of red, green, and blue. To get a 24 bit value of a color we need touse the ‘RGB()’ command. This command takes three parameters which specify the values of red,green and blue individually. Each one of these parameters has a value range of ‘0’ to ‘255’. Using these,it’s possible for the ‘RGB()’ command to return over 16.7 million colors as individual 24 bit values.Here’s how I used it in the window drawing example shown in Fig.33:
...Box(15, 15, 75, 75, RGB(255, 0, 0))
...
Here, I’ve used the ‘RGB()’ command inline as a parameter of the ‘Box()’ command. If you look closely,you can see that I have specified a maximum value for the red parameter and the lowest value of ‘0’ forthe green and blue parameters. This means that the ‘RGB()’ command will return a 24 bit value thatdescribes a full red which is not mixed with any green or blue. The same is true for the triangle:
...LineXY(62, 140, 112, 220, RGB(0, 0, 255))LineXY(112, 220, 12, 220, RGB(0, 0, 255))LineXY(12, 220, 62, 140, RGB(0, 0, 255))FillArea(62, 180, RGB(0, 0, 255), RGB(0, 0, 255))...
These four lines make up the blue triangle drawn on the window in Fig.33. The first three are‘LineXY()’ commands that draw the three sides to the triangle. The last command is a ‘FillArea()’command that picks a point in the center of the triangle and fills it with the same color as the sides.You can see the color is the same throughout all these four drawing commands. The first and secondparameters of the ‘RGB()’ command representing red and green are at ‘0’ while the third parameterrepresenting blue is at ‘255’. This means that the ‘RGB()’ command here will return a 24 bit value thatdescribes a full blue which is not mixed with any red or green. The green circle in Fig.33 is a little bitdifferent because I use all three colors to achieve the desired color, like this:
...Circle(140, 125, 45, RGB(35, 158, 70))
...
Here I’ve used a mix of red, green and blue values to give a nice grass green instead of a full brightgreen. Using colors like this, makes things simple in PureBasic and very easy to understand forbeginners. Using the ‘RGB()’ command you can return almost any color that the human eye candistinguish.

2D Graphics 171
While the ‘RGB()’ command can take red, green and blue values and return a combined 24 bit value,there may be a time when you want to extract the red, green and blue component values from a single24 bit color value. If this is the case, you can do so using the ‘Red()’, ‘Green()’ and ‘Blue()’ commands.Look at this example:
ColorValue.l = RGB(35, 158, 70)
Debug "The 24 bit color value is made up of: "Debug "Red: " + Str(Red(ColorValue))Debug "Green: " + Str(Green(ColorValue))Debug "Blue: " + Str(Blue(ColorValue))
Each one of the ‘Red()’, ‘Green()’ and ‘Blue()’ commands takes one 24 bit color value as a parameterthen returns the corresponding color component value. On the first line in the above example, Icompose the 24 bit color value using (amongst the others) a red parameter value of ‘35’. If I wanted toretrieve the red component value from this 24 bit color value at a later stage, I could pass this value tothe ‘Red()’ command which returns the red component value used to compose it, in this case ‘35’. Theother color commands work in exactly the same way.
Why Drawing On Windows Is Not PreferredDrawing on windows although possible is not necessarily the right way of displaying graphics drawnwith the 2D drawing commands. This is mostly because of the way different operating systems handlethe refreshing of the window display. For example, on Microsoft Windows, if you draw graphicsdirectly onto a window and then move another window across it, the graphics will be wiped off theoriginal window. This is because of the internal event handling that takes place within MicrosoftWindows. It determines wether or not to redraw window contents automatically and sometimes makesthe decision not to. You can force the redraw of graphics after a window has passed in front of anotherbut this is advanced stuff and requires the use of API knowledge of the particular operating system youare dealing with. A more elegant way of displaying drawn graphics, would be to create a new image inmemory, draw stuff on it, then display this image using an image gadget on your window. Using animage gadget makes sure that the window automatically takes care of any refreshing that may beneeded to keep the image visible.
Drawing Onto An ImageWorking with new images in PureBasic is easy, as there is a whole library written purely for creatingand manipulating these images. In this next example, I’m going to try to emulate the last program butwith a difference. I’m going to create a new image using the ‘CreateImage()’ command, draw thecolored shapes onto it then display the finished result in an image gadget. This should then avoid anywindow refresh issues and behave how we think it should. You can read more about the imagecommands contained in PureBasic by looking at the ‘Image’ library page in the helpfile(Helpfile:Reference Manual->General Libraries->Image). Here’s our example:
Enumeration#WINDOW_MAIN#IMAGE_GADGET#IMAGE_MAIN
EndEnumeration

2D Graphics172
If CreateImage(#IMAGE_MAIN, 180, 220)If StartDrawing(ImageOutput(#IMAGE_MAIN))
;Because a new image has a Black background, draw a white one instead:Box(0, 0, 180, 220, RGB(255, 255, 255));Now, continue drawing the shapes:Box(5, 5, 75, 75, RGB(255, 0, 0))Circle(130, 115, 45, RGB(35, 158, 70))LineXY(52, 130, 102, 210, RGB(0, 0, 255))LineXY(102, 210, 2, 210, RGB(0, 0, 255))LineXY(2, 210, 52, 130, RGB(0, 0, 255))FillArea(52, 170, RGB(0, 0, 255), RGB(0, 0, 255))
StopDrawing()EndIf
EndIf
#FLAGS = #PB_Window_SystemMenu | #PB_Window_ScreenCentered
If OpenWindow(#WINDOW_MAIN, 0, 0, 200, 240, "Drawing On A New Image", #FLAGS)If CreateGadgetList(WindowID(#WINDOW_MAIN))ImageGadget(#IMAGE_GADGET, 10, 10, 180, 220, ImageID(#IMAGE_MAIN))RepeatEvent.l = WaitWindowEvent()
Until Event = #PB_Event_CloseWindowEndIf
EndIfEnd
The main bulk of this code should be self explanatory because the only difference in this code from thelast example is that we are now creating a new image using the ‘CreateImage()’ command and drawingon it instead of a window. The ‘CreateImage()’ command takes four parameters, the first is the PBnumber associated with this new image. The second and third are the width and height (in pixels) ofthe new image and the fourth parameter is the new image’s bit depth, which is optional. If the fourthparameter is not used, like in my example, then it uses the same bit depth as your desktop.
After a new image has been created, I tell the program that I want to draw on it by using this line:
...StartDrawing(ImageOutput(#IMAGE_MAIN))
...
Here, using the ‘StartDrawing()’ command with the ‘ImageOutput()’ method I’ve specified that alldrawing commands should now draw on this image who’s PB number is ‘#IMAGE_MAIN’.
This way of specifying an image to draw onto is not limited to a newly created image. You can just asfreely load an image into your program and draw on that too. As long as an image has a PB numberassociated to it, then you can set the drawing output to draw on it.

2D Graphics 173
Once the image has been created and the drawing output set, I am then free to draw on the image.Because all newly created images in PureBasic start with a black background, the first drawingoperation I must make is to color the background with white. I do this using the ‘Box()’ commandwhich draws a white box as big as the new image itself, covering all the black. After this, I draw thesquare, circle and triangle shapes as before. When I have finished all necessary drawing operations, Icall the ever important ‘StopDrawing()’ command.
To display this image correctly and avoid the previous refresh problems of drawing directly onto awindow, I use an image gadget. This lets the operating system take care of refreshing the gadget’sdisplay if other windows pass over it, etc.
Changing The Drawing ModeIn this next example, I’ll show you how to change the drawing mode of certain commands includingtext. Using the ‘DrawingMode()’ command you can switch to outline mode for shape commands, drawtext with a transparent background or even mix (XOr) the output from a drawing command with thebackground. Here’s the drawing mode example:
Enumeration#WINDOW_MAIN#IMAGE_GADGET#IMAGE_MAIN#FONT_MAIN
EndEnumeration
Global ImageWidth = 401Global ImageHeight = 201Global XPos.l, YPos.l, Width.l, Height.l, Red.l, Green.l, Blue.lGlobal Text.s = "PureBasic - 2D Drawing Example"
What Is The Bit Depth Of An Image?
Each pixel on a computer display or in a digital image is described by binary numbers, as you would expecton a computer. The greater, the number of bits (or binary digits) used to describe a single pixel allows thatpixel to express a broader range of colors. The number of bits describing a single pixel in any given digitalimage or a computer display is called its bit depth. Common bit depths are 1 bit, 8 bit, 16 bit, 24 bit, and 32bit.
1 bit images can only describe black and white (2 color) images since the one single bit that describes eachpixel can either have a value of ‘1’ or ‘0’.
32 bit pixels on the other hand are capable of displaying more colors than the human eye can see, so thisformat is regularly used in images for digital film, digital photos, realistic computer games, etc. Moderncomputers nowadays tend to only use 32 bits per pixel.
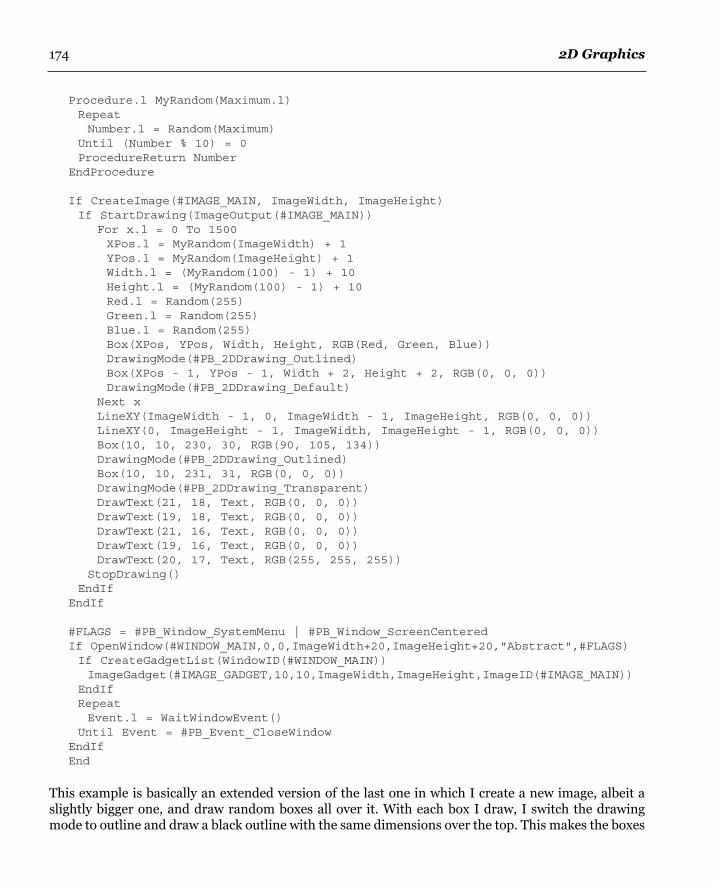
2D Graphics174
Procedure.l MyRandom(Maximum.l)RepeatNumber.l = Random(Maximum)
Until (Number % 10) = 0ProcedureReturn Number
EndProcedure
If CreateImage(#IMAGE_MAIN, ImageWidth, ImageHeight)If StartDrawing(ImageOutput(#IMAGE_MAIN))
For x.l = 0 To 1500XPos.l = MyRandom(ImageWidth) + 1YPos.l = MyRandom(ImageHeight) + 1Width.l = (MyRandom(100) - 1) + 10Height.l = (MyRandom(100) - 1) + 10Red.l = Random(255)Green.l = Random(255)Blue.l = Random(255)Box(XPos, YPos, Width, Height, RGB(Red, Green, Blue))DrawingMode(#PB_2DDrawing_Outlined)Box(XPos - 1, YPos - 1, Width + 2, Height + 2, RGB(0, 0, 0))DrawingMode(#PB_2DDrawing_Default)
Next xLineXY(ImageWidth - 1, 0, ImageWidth - 1, ImageHeight, RGB(0, 0, 0))LineXY(0, ImageHeight - 1, ImageWidth, ImageHeight - 1, RGB(0, 0, 0))Box(10, 10, 230, 30, RGB(90, 105, 134))DrawingMode(#PB_2DDrawing_Outlined)Box(10, 10, 231, 31, RGB(0, 0, 0))DrawingMode(#PB_2DDrawing_Transparent)DrawText(21, 18, Text, RGB(0, 0, 0))DrawText(19, 18, Text, RGB(0, 0, 0))DrawText(21, 16, Text, RGB(0, 0, 0))DrawText(19, 16, Text, RGB(0, 0, 0))DrawText(20, 17, Text, RGB(255, 255, 255))
StopDrawing()EndIf
EndIf
#FLAGS = #PB_Window_SystemMenu | #PB_Window_ScreenCenteredIf OpenWindow(#WINDOW_MAIN,0,0,ImageWidth+20,ImageHeight+20,"Abstract",#FLAGS)If CreateGadgetList(WindowID(#WINDOW_MAIN))ImageGadget(#IMAGE_GADGET,10,10,ImageWidth,ImageHeight,ImageID(#IMAGE_MAIN))
EndIfRepeatEvent.l = WaitWindowEvent()
Until Event = #PB_Event_CloseWindowEndIfEnd
This example is basically an extended version of the last one in which I create a new image, albeit aslightly bigger one, and draw random boxes all over it. With each box I draw, I switch the drawingmode to outline and draw a black outline with the same dimensions over the top. This makes the boxes
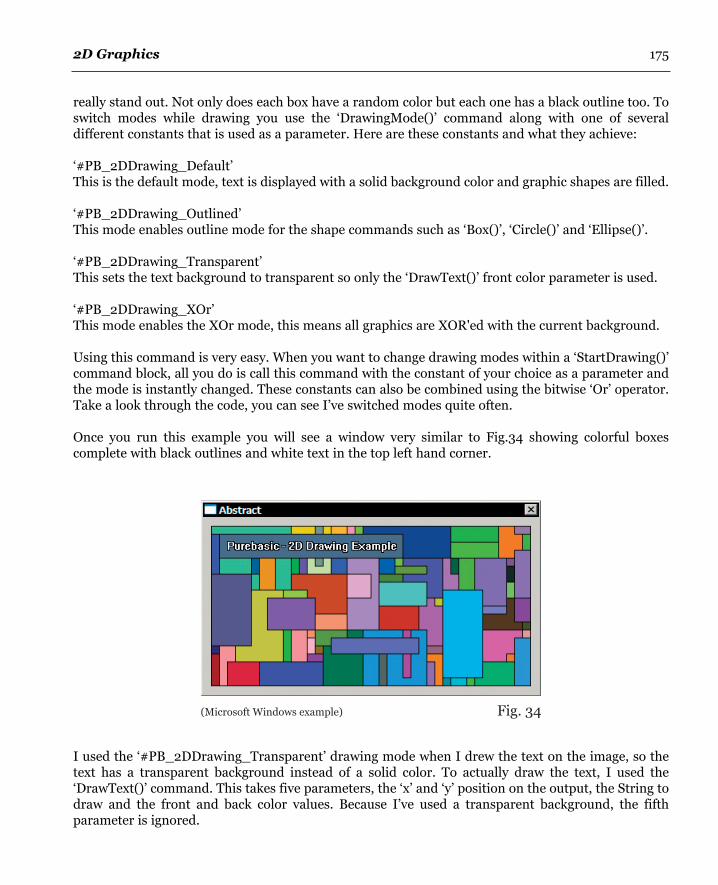
2D Graphics 175
really stand out. Not only does each box have a random color but each one has a black outline too. Toswitch modes while drawing you use the ‘DrawingMode()’ command along with one of severaldifferent constants that is used as a parameter. Here are these constants and what they achieve:
‘#PB_2DDrawing_Default’This is the default mode, text is displayed with a solid background color and graphic shapes are filled.
‘#PB_2DDrawing_Outlined’This mode enables outline mode for the shape commands such as ‘Box()’, ‘Circle()’ and ‘Ellipse()’.
‘#PB_2DDrawing_Transparent’This sets the text background to transparent so only the ‘DrawText()’ front color parameter is used.
‘#PB_2DDrawing_XOr’This mode enables the XOr mode, this means all graphics are XOR'ed with the current background.
Using this command is very easy. When you want to change drawing modes within a ‘StartDrawing()’command block, all you do is call this command with the constant of your choice as a parameter andthe mode is instantly changed. These constants can also be combined using the bitwise ‘Or’ operator.Take a look through the code, you can see I’ve switched modes quite often.
Once you run this example you will see a window very similar to Fig.34 showing colorful boxescomplete with black outlines and white text in the top left hand corner.
I used the ‘#PB_2DDrawing_Transparent’ drawing mode when I drew the text on the image, so thetext has a transparent background instead of a solid color. To actually draw the text, I used the‘DrawText()’ command. This takes five parameters, the ‘x’ and ‘y’ position on the output, the String todraw and the front and back color values. Because I’ve used a transparent background, the fifthparameter is ignored.
Fig. 34(Microsoft Windows example)
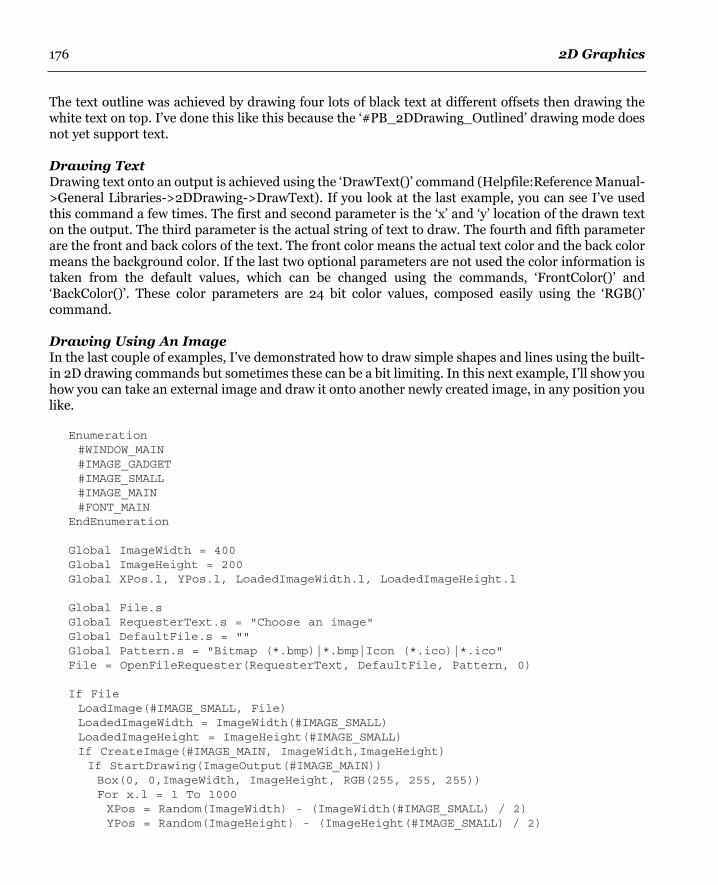
2D Graphics176
The text outline was achieved by drawing four lots of black text at different offsets then drawing thewhite text on top. I’ve done this like this because the ‘#PB_2DDrawing_Outlined’ drawing mode doesnot yet support text.
Drawing TextDrawing text onto an output is achieved using the ‘DrawText()’ command (Helpfile:Reference Manual->General Libraries->2DDrawing->DrawText). If you look at the last example, you can see I’ve usedthis command a few times. The first and second parameter is the ‘x’ and ‘y’ location of the drawn texton the output. The third parameter is the actual string of text to draw. The fourth and fifth parameterare the front and back colors of the text. The front color means the actual text color and the back colormeans the background color. If the last two optional parameters are not used the color information istaken from the default values, which can be changed using the commands, ‘FrontColor()’ and‘BackColor()’. These color parameters are 24 bit color values, composed easily using the ‘RGB()’command.
Drawing Using An ImageIn the last couple of examples, I’ve demonstrated how to draw simple shapes and lines using the built-in 2D drawing commands but sometimes these can be a bit limiting. In this next example, I’ll show youhow you can take an external image and draw it onto another newly created image, in any position youlike.
Enumeration#WINDOW_MAIN#IMAGE_GADGET#IMAGE_SMALL#IMAGE_MAIN#FONT_MAIN
EndEnumeration
Global ImageWidth = 400Global ImageHeight = 200Global XPos.l, YPos.l, LoadedImageWidth.l, LoadedImageHeight.l
Global File.sGlobal RequesterText.s = "Choose an image"Global DefaultFile.s = ""Global Pattern.s = "Bitmap (*.bmp)|*.bmp|Icon (*.ico)|*.ico"File = OpenFileRequester(RequesterText, DefaultFile, Pattern, 0)
If FileLoadImage(#IMAGE_SMALL, File)LoadedImageWidth = ImageWidth(#IMAGE_SMALL)LoadedImageHeight = ImageHeight(#IMAGE_SMALL)If CreateImage(#IMAGE_MAIN, ImageWidth,ImageHeight)If StartDrawing(ImageOutput(#IMAGE_MAIN))Box(0, 0,ImageWidth, ImageHeight, RGB(255, 255, 255))For x.l = 1 To 1000XPos = Random(ImageWidth) - (ImageWidth(#IMAGE_SMALL) / 2)YPos = Random(ImageHeight) - (ImageHeight(#IMAGE_SMALL) / 2)

2D Graphics 177
DrawImage(ImageID(#IMAGE_SMALL), XPos, YPos)Next xDrawingMode(#PB_2DDrawing_Outlined)Box(0, 0, ImageWidth, ImageHeight, RGB(0, 0, 0))StopDrawing()
EndIfEndIf#TEXT = "Drawing Using Images"#FLAGS = #PB_Window_SystemMenu | #PB_Window_ScreenCenteredIf OpenWindow(#WINDOW_MAIN,0,0,ImageWidth+20,ImageHeight+20,#TEXT,#FLAGS)If CreateGadgetList(WindowID(#WINDOW_MAIN))ImageGadget(#IMAGE_GADGET,10,10,ImageWidth,ImageHeight,ImageID(#IMAGE_MAIN))
EndIfRepeatEvent.l = WaitWindowEvent()
Until Event = #PB_Event_CloseWindowEndIfEnd
EndIf
In the above code, I allow the user to open an image, either in Bitmap or Icon format using the‘OpenFileRequester()’ command. Once this requester correctly returns an image file name, I load thatfile using the ‘LoadImage()’ command, very similar to the image gadget example in Chapter 9. Oncethis file is loaded, I can create a new image to draw onto, and use the ‘DrawImage()’ command to drawthe loaded image many times. The resulting image is displayed on a window using an image gadget. Ifyou look at Fig.35 you can see what it looks like after I have loaded a sphere shaped icon which is thenrandomly drawn all over the new image and then displayed.
Fig. 35(Microsoft Windows example)
Original Loaded Image
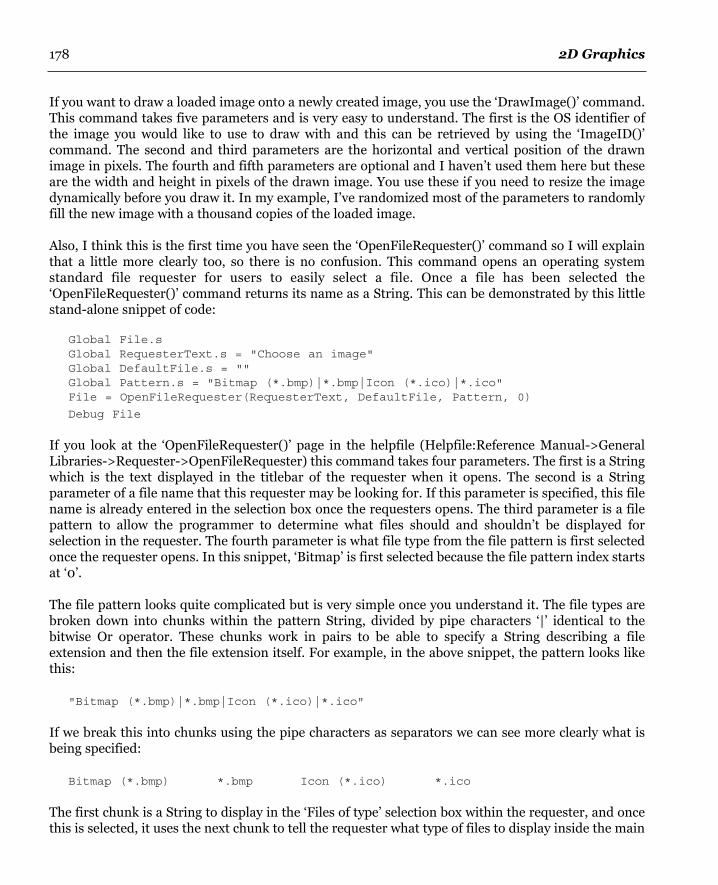
2D Graphics178
If you want to draw a loaded image onto a newly created image, you use the ‘DrawImage()’ command.This command takes five parameters and is very easy to understand. The first is the OS identifier ofthe image you would like to use to draw with and this can be retrieved by using the ‘ImageID()’command. The second and third parameters are the horizontal and vertical position of the drawnimage in pixels. The fourth and fifth parameters are optional and I haven’t used them here but theseare the width and height in pixels of the drawn image. You use these if you need to resize the imagedynamically before you draw it. In my example, I’ve randomized most of the parameters to randomlyfill the new image with a thousand copies of the loaded image.
Also, I think this is the first time you have seen the ‘OpenFileRequester()’ command so I will explainthat a little more clearly too, so there is no confusion. This command opens an operating systemstandard file requester for users to easily select a file. Once a file has been selected the‘OpenFileRequester()’ command returns its name as a String. This can be demonstrated by this littlestand-alone snippet of code:
Global File.sGlobal RequesterText.s = "Choose an image"Global DefaultFile.s = ""Global Pattern.s = "Bitmap (*.bmp)|*.bmp|Icon (*.ico)|*.ico"File = OpenFileRequester(RequesterText, DefaultFile, Pattern, 0)
Debug File
If you look at the ‘OpenFileRequester()’ page in the helpfile (Helpfile:Reference Manual->GeneralLibraries->Requester->OpenFileRequester) this command takes four parameters. The first is a Stringwhich is the text displayed in the titlebar of the requester when it opens. The second is a Stringparameter of a file name that this requester may be looking for. If this parameter is specified, this filename is already entered in the selection box once the requesters opens. The third parameter is a filepattern to allow the programmer to determine what files should and shouldn’t be displayed forselection in the requester. The fourth parameter is what file type from the file pattern is first selectedonce the requester opens. In this snippet, ‘Bitmap’ is first selected because the file pattern index startsat ‘0’.
The file pattern looks quite complicated but is very simple once you understand it. The file types arebroken down into chunks within the pattern String, divided by pipe characters ‘|’ identical to thebitwise Or operator. These chunks work in pairs to be able to specify a String describing a fileextension and then the file extension itself. For example, in the above snippet, the pattern looks likethis:
"Bitmap (*.bmp)|*.bmp|Icon (*.ico)|*.ico"
If we break this into chunks using the pipe characters as separators we can see more clearly what isbeing specified:
Bitmap (*.bmp) *.bmp Icon (*.ico) *.ico
The first chunk is a String to display in the ‘Files of type’ selection box within the requester, and oncethis is selected, it uses the next chunk to tell the requester what type of files to display inside the main
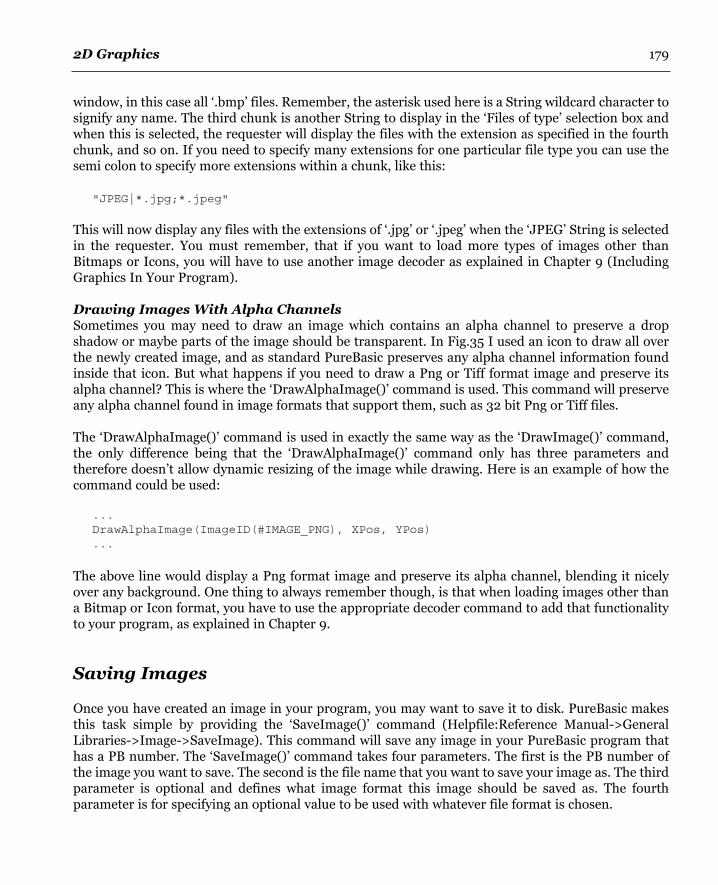
2D Graphics 179
window, in this case all ‘.bmp’ files. Remember, the asterisk used here is a String wildcard character tosignify any name. The third chunk is another String to display in the ‘Files of type’ selection box andwhen this is selected, the requester will display the files with the extension as specified in the fourthchunk, and so on. If you need to specify many extensions for one particular file type you can use thesemi colon to specify more extensions within a chunk, like this:
"JPEG|*.jpg;*.jpeg"
This will now display any files with the extensions of ‘.jpg’ or ‘.jpeg’ when the ‘JPEG’ String is selectedin the requester. You must remember, that if you want to load more types of images other thanBitmaps or Icons, you will have to use another image decoder as explained in Chapter 9 (IncludingGraphics In Your Program).
Drawing Images With Alpha ChannelsSometimes you may need to draw an image which contains an alpha channel to preserve a dropshadow or maybe parts of the image should be transparent. In Fig.35 I used an icon to draw all overthe newly created image, and as standard PureBasic preserves any alpha channel information foundinside that icon. But what happens if you need to draw a Png or Tiff format image and preserve itsalpha channel? This is where the ‘DrawAlphaImage()’ command is used. This command will preserveany alpha channel found in image formats that support them, such as 32 bit Png or Tiff files.
The ‘DrawAlphaImage()’ command is used in exactly the same way as the ‘DrawImage()’ command,the only difference being that the ‘DrawAlphaImage()’ command only has three parameters andtherefore doesn’t allow dynamic resizing of the image while drawing. Here is an example of how thecommand could be used:
...DrawAlphaImage(ImageID(#IMAGE_PNG), XPos, YPos)...
The above line would display a Png format image and preserve its alpha channel, blending it nicelyover any background. One thing to always remember though, is that when loading images other thana Bitmap or Icon format, you have to use the appropriate decoder command to add that functionalityto your program, as explained in Chapter 9.
Saving Images
Once you have created an image in your program, you may want to save it to disk. PureBasic makesthis task simple by providing the ‘SaveImage()’ command (Helpfile:Reference Manual->GeneralLibraries->Image->SaveImage). This command will save any image in your PureBasic program thathas a PB number. The ‘SaveImage()’ command takes four parameters. The first is the PB number ofthe image you want to save. The second is the file name that you want to save your image as. The thirdparameter is optional and defines what image format this image should be saved as. The fourthparameter is for specifying an optional value to be used with whatever file format is chosen.

2D Graphics180
If we wanted to save the image created from the last example, we could add this line of code onto theend of the example code. Once the program finishes it would save our image:
...SaveImage(#IMAGE_MAIN, "Image.bmp")...
By default, PureBasic will save a Bitmap format image file when you use this command without the lasttwo optional parameters. So the filename will need to have the correct extension (*.bmp) when saved.
Saving Images In Other FormatsYou can save images in other graphical formats by specifying this as a third parameter. This can be oneof these three built-in constants:
‘#PB_ImagePlugin_BMP’Save the image in Bitmap format. This is the default setting and doesn’t really need specifying.
‘#PB_ImagePlugin_JPEG’Save the image in Jpeg format. (To work properly, the ‘UseJPEGImageEncoder()’ command must becalled before this command is used).
‘#PB_ImagePlugin_PNG’ Save the image in Png format. (To work properly, the ‘UsePNGImageEncoder()’ command must becalled before this command is used).
When saving an image using either ‘#PB_ImagePlugin_JPEG’ or ‘#PB_ImagePlugin_PNG’ you mustput the appropriate encoder command at the top of your source code before using the ‘SaveImage()’command to make sure it knows how to encode that given format. The encoders only need to be calledonce to add the required functionality throughout your program. Here are they are:
‘ UseJPEGImageEncoder()’This encoder adds support for the Jpeg image (*.jpg/*.jpeg) file format.
‘ UsePNGImageEncoder()’This encoder adds support for the Png image (*.png) file format.
When using the ‘ UseJPEGImageEncoder()’ to add Jpeg support, you can optionally use the fourthparameter of the ‘SaveImage()’ command to specify the compression value of the saved image. This isthe only image type that currently supports this fourth parameter.
Here are a few examples of using the ‘SaveImage()’ command:
SaveImage(#IMAGE_MAIN, "Image.bmp")
This first example will save an image called ‘Image.bmp’ in the default 24bit Bitmap format. Noticethat no encoder is needed because PureBasic supports Bitmap format images as standard.
2D Graphics 181
UseJPEGImageEncoder()...
SaveImage(#IMAGE_MAIN, "Image.jpg", #PB_ImagePlugin_JPEG)
The second example will save an image called ‘Image.jpg’ in JPEG format using a default compressionvalue of ‘7’ because we haven’t specified one ourselves.
UseJPEGImageEncoder()...
SaveImage(#IMAGE_MAIN, "Image.jpg", #PB_ImagePlugin_JPEG, 10)
This third example will save an image called ‘Image.jpg’ in JPEG format and use the maximumcompression value of ‘10’ as specified in the fourth parameter.
UsePNGImageEncoder()...
SaveImage(#IMAGE_MAIN, "Image.png", #PB_ImagePlugin_PNG)
This fourth example will save an image called ‘Image.png’ in PNG format.
Introducing Screens
If you ever wanted to create your own game or write your own screensaver using PureBasic then youwill always start by opening a ‘Screen’. This screen is a purely graphical environment, created for theone intention of displaying graphics such as output from 2D drawing, loaded images, loaded spritesand loaded 3D models and worlds.
Screens are normally opened fully occupying the entire width and height of your screen, but if you feelthe need, you can also open one upon a window that has already been created. This is referred to as aWindowed Screen. Only one type of screen can be opened at any one time, either one full-screen or onewindowed screen.
What Is A Sprite?
Sprites were originally special hardware accelerated images that were used to create composited 2D graphicsfor computer games. As processing power of computers increased through the years, the special hardwarethat was used to move and draw these images quickly was no longer needed. However, even today, the namestill remains in use to describe 2D images that are drawn on screen to create games and the like.
Today a sprite can be described as a small graphic (usually containing a transparent background) that can bepositioned and drawn independently on a screen to simulate animation or to provide static graphics.

2D Graphics182
The reason why screens are preferred to display graphics (instead of simply drawing onto windows) tocreate games and the like, is that screens are fast, ...very fast! On every platform that PureBasic isavailable for, its screens are optimized to provide the greatest performance possible no matter whatthe underlying operating system.
Opening Your First ScreenTo create and open a screen in PureBasic you need to follow a basic code template. Screen and spritehandling are very closely connected so you always have to initialize the sprite engine before opening ascreen. This makes sure that everything is correctly initialized internally and the screen will be readyfor drawing operations. Once the sprite engine has been initialized and the screen is actually open, youthen need a main loop to keep the program running, just like a graphical user interface program.
The code below shows a skeleton screen program with all crucial bits of code present to initialize thesprite engine, open a screen, create a main loop and initialize the keyboard commands to provide a wayof closing the program.
Global Quit.b = #False
;Simple error checking procedureProcedure HandleError(Result.l, Text.s)If Result = 0MessageRequester("Error", Text, #PB_MessageRequester_Ok)End
EndIfEndProcedure
HandleError(InitSprite(), "InitSprite() command failed.")HandleError(InitKeyboard(), "InitKeyboard() command failed.")HandleError(OpenScreen(1024, 768, 32, "Fullscreen"), "Could not open screen.")
RepeatClearScreen(RGB(0, 0, 0))
;Drawing operations go here
FlipBuffers(2)ExamineKeyboard()If KeyboardReleased(#PB_Key_Escape)Quit = #True
EndIfUntil Quit = #TrueEnd
If you first take a look at the sprite and screen section in the PureBasic helpfile (Helpfile:ReferenceManual->2D Games Libraries->Sprite & Screen) you’ll find more information regarding all the newcommand used in this example.
This example doesn’t really do anything other than open a blank screen and if you are looking at thatnow you can exit the program by pressing ‘Esc’ on your keyboard. This example is what all games and
2D Graphics 183
the like are born from so let me run through the important bits and explain what’s happening alongthe way.
To start with I’ve created a simple error checking procedure as explained in Chapter 8 (How ToMinimize And Handle Errors) and used this to make sure that the ‘InitSprite()’, ‘InitKeyboard()’ and‘OpenScreen()’ commands do not return ‘0’. If any of them do, then that particular command isconsidered to have failed, so I immediately exit the program. If a failure occurs like this for whateverreason, it is always best to close the program and inform the user of the problem. Otherwise, if yourprogram was to continue, major crashes are likely to occur.
The commands needed to initialize the sprite engine and keyboard are just simple command calls,these are ‘InitSprite()’ and ‘InitKeyboard()’, remember that we need to initialize the sprite enginebefore we open a screen. The ‘OpenScreen()’ command takes four parameters, these are the width,height and bit depth of the screen plus its text caption. This caption is what will be displayed in thetaskbar if you were to minimize the screen from view.
The width, height and bit depth parameters are very important to get right as these define what sizeand bit depth your screen will be. Whatever computer is going to run this program and open thisscreen must be capable of supporting whatever size and bit depth is used. The width and height valuesare collectively known as the resolution and this must be supported wholly by the graphics card andmonitor connected to the target computer or else an error will be raised and the ‘OpenScreen()’command will not succeed. The values I have used in this example are those that most computers areable to support and shouldn’t present any problems. This is worth keeping in mind when writing aprogram that relies on a screen.
Fig.36 shows common screen resolutions and bit depths that should work on almost every moderncomputer. Just like computer games, the higher, the screen resolution, the more crisp the display looksbut because there are more pixels to draw, the program may slow down. The higher, the bit depth, themore colors are able to be displayed and more lifelike graphics are able to be represented.
Using The Keyboard?
In these examples I’ve used a few keyboard commands to initialize the keyboard and detect keypresses, etc.These can all be found in the ‘Keyboard’ library helpfile page (Helpfile:Reference Manual->GeneralLibraries->Keyboard). This is a very small and easy to use library of commands, so you should be able to pickthem up pretty easily.
The ‘InitKeyboard()’ command initializes the keyboard and should be called before any other keyboardcommand. The ‘ExamineKeyboard()’ command examines the current state of the keyboard to see if any keysare being held down, etc. The ‘KeyboardReleased()’ and ‘KeyboardPushed()’ commands return true if a givenkey is either released or pushed respectively. These keys can be assigned using built-in constants, of whichthere is a full list on the helpfile page of each command.

2D Graphics184
Of course, instead of hard coding values like these into a program, it’s always best to test the ability ofthe target computer to use these values. You can list the different resolutions and bit depths that anycomputer can display, by using this code:
InitSprite()If ExamineScreenModes()While NextScreenMode()Width.l = ScreenModeWidth()Height.l = ScreenModeHeight()BitDepth.l = ScreenModeDepth()Debug Str(Width)+" x "+Str(Height)+" x "+Str(BitDepth)
WendEndIf
Again in this snippet, we initialize the sprite engine before we use the ‘ExamineScreenModes()’command, this initializes everything correctly to allow us to use these screen based commands. I thenuse a ‘While’ loop to iterate through each supported screen mode and use the ‘ScreenModeWidth()’,‘ScreenModeHeight()’ and ‘ScreenModeDepth()’ commands, to construct a String describing eachmode. This is then echoed to the Debug Output window for us to examine. This is a simple exampleand one that you should be able to understand yourself by reading the associated command helpfilepages (Helpfile:Reference Manual->2D Games Libraries->Sprite & Screen).
Double Buffered RenderingWhen using a screen to display graphics you always need a main loop to keep the program running,draw graphics and test for user input, etc. and this too must follow a template when using a screen.Here is the main loop taken from the skeleton screen program on the previous page:
...RepeatClearScreen(0);Drawing operations go hereFlipBuffers(2)ExamineKeyboard()If KeyboardReleased(#PB_Key_Escape)Quit = #True
EndIfUntil Quit = #True
...
Common Screen Resolutions
Width
640
800
1024
Height
480
600
768
Bit Depths
8, 16 & 32
8, 16 & 32
8, 16 & 32
Fig. 36

2D Graphics 185
At first glace you can see it’s very similar to a normal main loop of any other program but there are afew differences. There are two commands in there that are crucial to make a screen draw graphicscorrectly, these are ‘ClearScreen()’ and ‘FlipBuffers()’. Before I can go into more detail about these twocommands I must explain a graphical technique called double buffering.
Double buffering is a graphical technique used by PureBasic screens to avoid corrupted graphics anda flickering display. Because computer monitors constantly redraw the monitor screen usually sixty toseventy (sometimes more) times a second, it’s hard to make changes to the screen, such as moving anddrawing new graphics without the display showing changes before you’ve actually completed them.This results in torn, corrupted graphics and other strange visual artifacts. If you wanted to avoid thisproblem by clearing the screen every time before redrawing the whole screen again, it would cure thecorrupted graphic problem but it would make the screen flicker.
Using double buffering, PureBasic solves these problems. Once a screen is opened it automatically getsassigned two video buffers in memory, exactly the same size as the opened screen. When you drawgraphics onto the screen using PureBasic’s graphics commands you are actually drawing onto the backbuffer while the front buffer is being displayed on the screen. When the monitor has finisheddisplaying the front buffer and the drawing operations are complete on the back buffer, both areflipped over (swapped). Now the front becomes the back and the back becomes the front, which is thendisplayed. When the program draws its graphics again it draws on the newly flipped back buffer. Thisnew back buffer will probably contain old graphics because they have already been displayed, so it isstandard procedure to clear the back buffer completely using a single color (usually black) beforestarting to draw on it again. Fig.37 shows this technique in action showing three cycles of the buffers.
In this diagram you can see at program start (indicated by step 1), that the front buffer (‘Buffer A’) hasno graphics drawn on it, so nothing is displayed on screen. When we draw stuff using the PureBasicdrawing commands, we draw onto the backbuffer, indicated by ‘Buffer B’. Once all drawing has takenplace, we can call the ‘FlipBuffers()’ command and the buffers are flipped. This is shown in step 2.Now, ‘Buffer B’ is displayed on the screen and we continue drawing onto ‘Buffer A’ which is now the
1 2 3The screen is opened and
drawing starts on the back buffer.(Buffer A is displayed on screen)
The buffers are flipped over.The new back buffer is cleared
and redrawn with updated graphics.(Buffer B is displayed on screen)
The buffers are flipped over againThe new back buffer is cleared
and redrawn with updated graphics.(Buffer A is displayed on screen)
Double Buffered Rendering
Buffer B Buffer A Buffer B
Buffer A
Fig. 37
FlipBuffers() FlipBuffers()Buffer B Buffer A

2D Graphics186
new back buffer. Again, once all drawing operation are done, we can flip the buffers again using‘FlipBuffers()’ and we arrive at step 3, where ‘Buffer A’ is now drawn to the screen and ‘Buffer B’ is onceagain the back buffer.
When the buffers are flipped using the ‘FlipBuffer()’ command, the buffer that arrives at the back willstill have old graphics drawn on it. If we want to create the illusion of movement to animate graphics,we will have to clear these and redraw them in a new position before we flip the buffers again. To clearold graphics we use the ‘ClearScreen()’ command. ‘ClearScreen()’ takes one parameter which is a 24bit color value of the color you want to clear the screen with. This can be retrieved easily using the‘RGB()’ command.
The ‘FlipBuffers()’ command (Helpfile:Reference Manual->2D Games Libraries->Sprite & Screen->FlipBuffers) also has an optional parameter and can take these values:
‘0’ : Disable monitor vertical synchronization ‘1’ : Enable monitor vertical synchronization (default value)‘2’ : Enable monitor vertical synchronization, using CPU saving mode (full screen mode only).
If ‘0’ is used as a parameter then the ‘FlipBuffers()’ flips the buffer as fast as it can to achieve thehighest frame rate of the drawn graphics. The only downside to this is that the monitor refresh ratemight not be fast enough to draw the new graphics in realtime so some visual tearing may occur as themonitor tries to keep up with the flipped buffers.
If ‘1’ is used as a parameter the ‘FlipBuffers()’ command flips the buffers in perfect synchronizationwith the monitors refresh rate ensuring that all graphics are drawn correctly and smoothly to themonitor. The only downside of this is that the frame rate can never exceed beyond the refresh rate ofthe monitor. This is the default mode if no parameter is used.
Using ‘2’ as a parameter will have the same effect as using ‘1’, but will switch to CPU saving mode toensure it does not run the CPU at a hundred percent so other program don’t have a chance to run.
Drawing To A ScreenHere is an example of double buffered rendering and animation created by drawing updated graphicsbetween each ‘FlipBuffers()’ command: (exit this program by pressing ‘Esc’ on your keyboard)
#IMAGE_MAIN = 1;Set the width, height and bit depth of the screen;Abbreviated variables are used here due to page width constraints :(Global ScrW.l = 1024Global ScrH.l = 768Global ScrD.l = 32Global Quit.b = #FalseXOrigin.f = (ScrW / 2) - 64 : YOrigin.f = (ScrH / 2) - 64
;Simple error checking procedureProcedure HandleError(Result.l, Text.s)If Result = 0MessageRequester("Error", Text, #PB_MessageRequester_Ok)
2D Graphics 187
EndEndIf
EndProcedure
;Initialize environmentHandleError(InitSprite(), "InitSprite() command failed.")HandleError(InitKeyboard(), "InitKeyboard() command failed.")HandleError(OpenScreen(ScrW, ScrH, ScrD, "Blobs"), "Could not open screen.")SetFrameRate(60)
;Create an imageIf CreateImage(#IMAGE_MAIN, 128, 128)If StartDrawing(ImageOutput(#IMAGE_MAIN))
For x.l = 255 To 0 Step -1Circle(64, 64, x / 4, RGB(0, 0, 255 - x))
Next xStopDrawing()
EndIfEndIf
;Convert Degrees to RadiansProcedure.f DegToRad(Angle.f)ProcedureReturn Angle.f * #PI / 180
EndProcedure
;Main loopRepeatClearScreen(RGB(0, 0, 0))Angle.f + 2.0Radius.f = ((ScrH / 2) - 100) * Sin(DegToRad(Angle))
StartDrawing(ScreenOutput())For x.l = 0 To 359 Step 45XPos.f = XOrigin + (Radius * Cos(DegToRad(Angle + x)))YPos.f = YOrigin + (Radius * Sin(DegToRad(Angle + x)))DrawImage(ImageID(#IMAGE_MAIN), XPos, YPos)
Next xStopDrawing()
FlipBuffers()ExamineKeyboard()If KeyboardReleased(#PB_Key_Escape)Quit = #True
EndIfUntil Quit = #TrueEnd
In this example, I’ve created a new image using the ‘CreateImage()’ command and then later drawnthis image to the screen using a ‘StartDrawing()’ block. Even though this code looks a littlecomplicated, especially when calculating the ‘x’ and ‘y’ values of the drawn image, this example ispurely to demonstrate the flipping of the buffers.

2D Graphics188
You can see in the main loop, that the first thing I do is clear the screen using the ‘ClearScreen()’command. This is to allow me to start on a clear buffer, so no old graphics are left over from anyprevious drawing operations. After that I use some math to calculate new coordinates for my blobimages and use a loop to draw them. After these have been drawn, they are on the back buffer so I haveto use the ‘FlipBuffers()’ command to display them on the screen. And so it goes on, clearing, drawingand flipping, and between each flip, I change the position of the graphics.
You might of noticed another new command that I’ve used in this example and that is‘SetFrameRate()’ (Helpfile:Reference Manual->2D Games Libraries->Sprite & Screen->SetFrameRate). This command has one parameter that sets the number of times that ‘FlipBuffers()’can be executed per second. This is to provide a standard frame rate on other computers that mightrun this code. This should limit this example to display updated graphics sixty times a second.
This is how all animation is produced on computers, very similar to cartoons or films. Nothing actuallymoves on screen, it’s really a slideshow of different images (buffers) in which graphics are in slightlydifferent positions. Because it all happens very fast (sixty plus times a second) the images appear tomove.
A Simple StarfieldThis is one of the effects that any demo or game programmer will know how to draw. A starfield suchas this has been used in hundreds of demo’s and games to give the effect of traveling through space. Itis an effect that draws and animates hundreds of pixels on the screen using different shades of colorto give the illusion of depth and movement. There are various way of programming this effect, here ismy example:
#APP_NAME = "Stars v1.0"#NUMBER_OF_STARS = 10000;Set the width, height and bit depth of the screen;Abbreviated variables are used here due to page width constraints :(Global ScrW.l = 1024Global ScrH.l = 768Global ScrD.l = 32Global Quit.b = #False
Structure STARxPos.fyPos.fxStep.fColor.l
EndStructureGlobal Dim Stars.STAR(#NUMBER_OF_STARS)
;Simple error checking procedureProcedure HandleError(Result.l, Text.s)If Result = 0MessageRequester("Error", Text, #PB_MessageRequester_Ok)End
EndIfEndProcedure
2D Graphics 189
;init starsProcedure InitializeStars()For x = 0 To #NUMBER_OF_STARSStars(x)\xPos = Random(ScrW - 1)Stars(x)\yPos = Random(ScrH - 1)If x < #NUMBER_OF_STARS / 3Stars(x)\xStep = (Random(10) / 100) + 0.2Stars(x)\Color = RGB(40, 40, 40)
ElseIf x >= #NUMBER_OF_STARS / 3 And x < (#NUMBER_OF_STARS / 3) * 2Stars(x)\xStep = (Random(10) / 100) + 0.6Stars(x)\Color = RGB(100, 100, 100)
ElseStars(x)\xStep = (Random(10) / 100) + 1.2Stars(x)\Color = RGB(255, 255, 255)
EndIfNext x
EndProcedure
;move stars on the 'x' axisProcedure MoveStarsX()For x = 0 To #NUMBER_OF_STARSStars(x)\xPos - Stars(x)\xStepIf Stars(x)\xPos < 0Stars(x)\xPos = ScrW - 1Stars(x)\yPos = Random(ScrH - 1)
EndIfNext x
EndProcedure
;Initialize environmentHandleError(InitSprite(), "InitSprite() command failed.")HandleError(InitKeyboard(), "InitKeyboard() command failed.")HandleError(OpenScreen(ScrW, ScrH, ScrD, #APP_NAME), "Could not open screen.")SetFrameRate(60)InitializeStars()
RepeatClearScreen(RGB(0, 0, 0))StartDrawing(ScreenOutput())For x = 0 To #NUMBER_OF_STARSPlot(Stars(x)\xPos, Stars(x)\yPos, Stars(x)\Color)
Next xDrawingMode(#PB_2DDrawing_Transparent)DrawText(20, 20, #APP_NAME, #White)DrawText(20, 40, Str(#NUMBER_OF_STARS)+" Animated stars", #White)DrawText(20, 60, "Screen Resolution: "+Str(ScrW)+" x "+Str(ScrH), #White)DrawText(20, 80, "Screen Bit depth: "+Str(ScrD)+"bit", #White)
StopDrawing()FlipBuffers()MoveStarsX()

2D Graphics190
ExamineKeyboard()If KeyboardReleased(#PB_Key_Escape)Quit = 1
EndIf
Until Quit = 1End
This example uses the 2D drawing command, ‘Plot()’ to draw a single pixel at a time(Helpfile:Reference Manual->General Libraries->2DDrawing->Plot). This command uses threeparameters, of which the third is optional. These parameters define the ‘x’ and ‘y’ position and color ofthe pixel to be drawn. If the last parameter is not used then this command uses the default foregroundcolor, which is set using the ‘FrontColor()’ command.
In the above example, I’ve used a structure to keep all the information about a single pixel together,then created an array of variables using this structure. Each of the elements in the array describes theposition, color and step value of all of the individual pixels. I then loop through the array, drawing eachpixel on the screen using the pixel information (position, color, etc.) contained inside each structuredarray element. Once the drawing is complete, I then flip the buffers and update the pixel positions inthe array using the associated step values. Once this is done, I clear the screen and redraw again, ...andso it goes on. Doing things this way makes the code look cleaner, it’s much more easier to read andallows you to update it easily at a later stage.
Opening A Screen On A WindowSometimes you might like to open a screen on a window, especially if you want to make a windowedgame or demo, etc. You can do this using the ‘OpenWindowedScreen()’ command. To open a screenupon a window, you need to first create a window and then handle the events from that window in themain loop, as well as the drawing. Here is an example of using a windowed screen:
#WINDOW_MAIN = 1#IMAGE_MAIN = 1
;Set the width, height and bit depth of the screen;Abbreviated variables are used here due to page width constraints :(Global ScrW.l = 800Global ScrH.l = 600Global ScrD.l = 32Global Quit.b = #FalseGlobal XOrigin.f = (ScrW / 2) - 64Global YOrigin.f = (ScrH / 2) - 64
;Simple error checking procedureProcedure HandleError(Result.l, Text.s)If Result = 0MessageRequester("Error", Text, #PB_MessageRequester_Ok)End
EndIfEndProcedure

2D Graphics 191
;Convert Degrees to RadiansProcedure.f DegToRad(Angle.f)ProcedureReturn Angle.f * #PI / 180
EndProcedure
;Initialize environmentHandleError(InitSprite(), "InitSprite() command failed.")HandleError(InitKeyboard(), "InitKeyboard() command failed.")
#FLAGS = #PB_Window_SystemMenu | #PB_Window_ScreenCenteredIf OpenWindow(#WINDOW_MAIN, 0, 0, ScrW, ScrH, "Windowed Screen", #FLAGS)If OpenWindowedScreen(WindowID(#WINDOW_MAIN), 0, 0, ScrW, ScrH, 0, 0, 0)SetFrameRate(60)
;Create an imageIf CreateImage(#IMAGE_MAIN, 128, 128)If StartDrawing(ImageOutput(#IMAGE_MAIN))
For x.l = 255 To 0 Step -1Circle(64, 64, x / 4, RGB(255 - x, 0, 0))
Next xStopDrawing()
EndIfEndIf
;Main loopRepeatEvent.l = WindowEvent()ClearScreen(RGB(0, 0, 0))
Angle.f + 2.0Radius.f = ((ScrH / 2) - 100) * Sin(DegToRad(Angle))
StartDrawing(ScreenOutput())For x.l = 0 To 359 Step 45XPos.f = XOrigin + (Radius * Cos(DegToRad(Angle + x)))YPos.f = YOrigin + (Radius * Sin(DegToRad(Angle + x)))DrawImage(ImageID(#IMAGE_MAIN), XPos, YPos)
Next xStopDrawing()
FlipBuffers()ExamineKeyboard()If KeyboardReleased(#PB_Key_Escape)Quit = #True
EndIf
Until Event = #PB_Event_CloseWindow Or Quit = #TrueEndIf
EndIfEnd

2D Graphics192
This example should be pretty straightforward, because most of this code you have seen before. Themain difference being the ‘OpenWindowedScreen()’ command which takes eight parameters! The firstparameter is the OS identifier of the window it is to be opened on. The second and third parametersare the ‘x’ and ‘y’ position of the new screen on the window. The fourth and fifth parameters are thewidth and height of the new screen. The sixth parameter is the auto-size or auto-stretch flag. If thisparameter is set to ‘0’ then no automatic resizing takes place but if it is set to ‘1’ then the screen withautomatically resize itself to the maximum size that the window will allow, disregarding parametersfour and five. This means that even if you resize the parent window, the screen will automaticallychange its size to always fill the full parent window area. The seventh and eight parameters aremargins that you can specify for when auto-stretch is enabled. These will pull the auto-sizing screenback a little from the right hand side or from the bottom respectively, to leave room for a status bar orother gadgets on the window.
It is also very important when using a screen on a window, that you always handle the events properlyusing the ‘WindowEvent()’ command. If you remember from Chapter 9, this command doesn’t wait foran event to occur before returning, instead it always tries to detect and return any events that needhandling. Using this command instead of ‘WaitWindowEvent()’ is a must because you don’t want tohalt the drawing and flipping of buffers for any length of time.
Sprites
Sprites in PureBasic are images that can be drawn in any position on a screen. Unlike images however,sprites have their own command set, are optimized for speed and can be drawn in several special waysto achieve many special effects. All normal sprite commands appear in the ‘Sprite & Screen’ section inthe helpfile (Helpfile:Reference Manual->2D Games Libraries->Sprite & Screen) but there are alsosome other sprite commands located in the ‘Sprite3D’ section too (Helpfile:Reference Manual->2DGames Libraries->Sprite3D). To familiarize yourself fully with what is capable using the spritecommands, I would recommend reading both of these two sections.
The Difference Between Sprites And Sprite3D’sIn PureBasic there are two different types of sprite. The first is what you would consider a normalsprite, which is created from a user drawn or loaded image and which is displayed and manipulatedusing the standard sprite library.
The second type is almost the same, except PureBasic uses a very small 3D engine to display thesprites. Also, the commands used for drawing and manipulating this type, allow the programmer toachieve graphical effects not possible with normal sprites. These effects include, realtime zooming, 3Dtransformation and sprite blending. The 3D engine that performs the transformation and displayingof the 3D sprites is not the OGRE engine as mentioned in the next chapter, but a small, self-contained3D engine specifically created to handle this type of sprite.
Using Normal SpritesTo create a sprite for use within your program, you can either load one with the ‘LoadSprite()’command (Helpfile:Reference Manual->2D Games Libraries->Sprite & Screen->LoadSprite) or createa new one using the ‘CreateSprite()’ command (Helpfile:Reference Manual->2D Games Libraries-
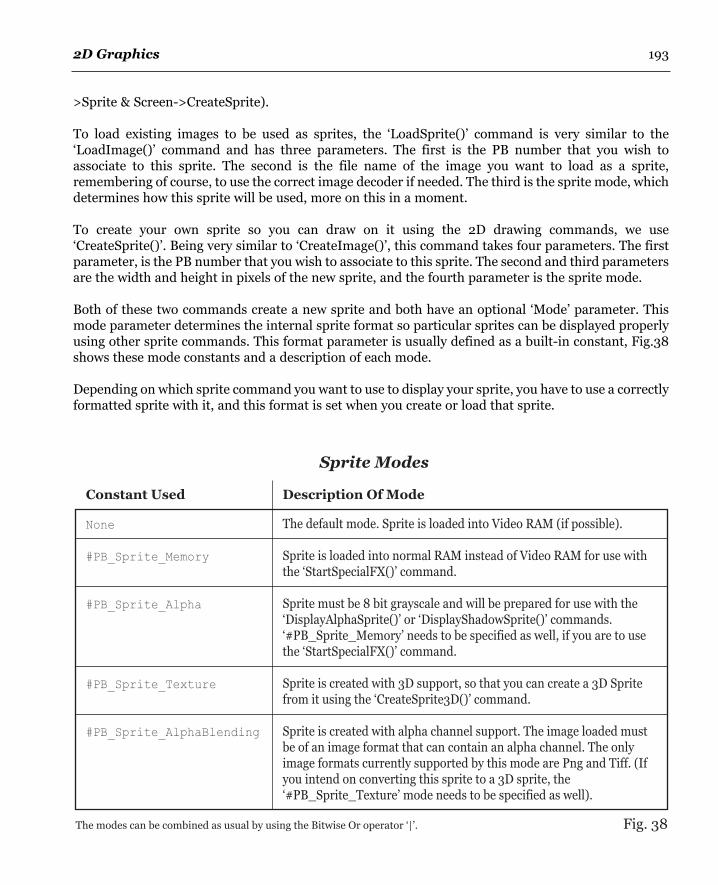
2D Graphics 193
>Sprite & Screen->CreateSprite).
To load existing images to be used as sprites, the ‘LoadSprite()’ command is very similar to the‘LoadImage()’ command and has three parameters. The first is the PB number that you wish toassociate to this sprite. The second is the file name of the image you want to load as a sprite,remembering of course, to use the correct image decoder if needed. The third is the sprite mode, whichdetermines how this sprite will be used, more on this in a moment.
To create your own sprite so you can draw on it using the 2D drawing commands, we use‘CreateSprite()’. Being very similar to ‘CreateImage()’, this command takes four parameters. The firstparameter, is the PB number that you wish to associate to this sprite. The second and third parametersare the width and height in pixels of the new sprite, and the fourth parameter is the sprite mode.
Both of these two commands create a new sprite and both have an optional ‘Mode’ parameter. Thismode parameter determines the internal sprite format so particular sprites can be displayed properlyusing other sprite commands. This format parameter is usually defined as a built-in constant, Fig.38shows these mode constants and a description of each mode.
Depending on which sprite command you want to use to display your sprite, you have to use a correctlyformatted sprite with it, and this format is set when you create or load that sprite.
None
#PB_Sprite_Memory
#PB_Sprite_Alpha
#PB_Sprite_Texture
#PB_Sprite_AlphaBlending
Fig. 38
Description Of ModeConstant Used
Sprite Modes
The default mode. Sprite is loaded into Video RAM (if possible).
Sprite is loaded into normal RAM instead of Video RAM for use with the ‘StartSpecialFX()’ command.
Sprite must be 8 bit grayscale and will be prepared for use with the‘DisplayAlphaSprite()’ or ‘DisplayShadowSprite()’ commands.‘#PB_Sprite_Memory’ needs to be specified as well, if you are to use the ‘StartSpecialFX()’ command.
Sprite is created with 3D support, so that you can create a 3D Sprite from it using the ‘CreateSprite3D()’ command.
Sprite is created with alpha channel support. The image loaded must be of an image format that can contain an alpha channel. The only image formats currently supported by this mode are Png and Tiff. (If you intend on converting this sprite to a 3D sprite, the ‘#PB_Sprite_Texture’ mode needs to be specified as well).
The modes can be combined as usual by using the Bitwise Or operator ‘|’.

2D Graphics194
Here are examples of how to specify the mode properly for each sprite display command. Whereapplicable, I’ve given an example of how to create and load a sprite with the correct mode settings, soit will display properly when using the command before it.
‘DisplaySprite()’ & ‘DisplayTransparentSprite()’
;Default formatCreateSprite(#PB_NUMBER, Width.l, Height.l)
LoadSprite(#PB_NUMBER, "Image.bmp")
‘DisplaySprite3D()’
;Without an alpha channelCreateSprite(#PB_NUMBER, Width.l, Height.l, #PB_Sprite_Texture )LoadSprite(#PB_NUMBER, "Image.bmp", #PB_Sprite_Texture )
;With an alpha channel;NOTE: You can’t create sprites with an alpha channel in PureBasic yet.
LoadSprite(#PB_NUMBER,"Image.bmp",#PB_Sprite_Texture|#PB_Sprite_AlphaBlending)
‘DisplayTranslucentSprite()’
;Load in normal RAM for processing by the 'StartSpecialFX()' commandCreateSprite(#PB_NUMBER, Width.l, Height.l, #PB_Sprite_Memory)
LoadSprite(#PB_NUMBER, "Image.bmp", #PB_Sprite_Memory)
‘DisplayAlphaSprite()’, ‘DisplayShadowSprite()’ & ‘DisplaySolidSprite()’
;Load in normal RAM for processing by the 'StartSpecialFX()' command;and specify as an alpha type spriteCreateSprite(#PB_NUMBER, Width.l, Height.l, #PB_Sprite_Memory|#PB_Sprite_Alpha)
LoadSprite(#PB_NUMBER, "Image.bmp", #PB_Sprite_Memory | #PB_Sprite_Alpha)
These examples should give you a good idea of how to load and create your own sprites for everydisplay command.
You Can Draw On Sprites TooOnce you have created or loaded a sprite, you may want to draw on it. Similar to drawing on an image,you can do this by using the standard ‘StartDrawing()’ command and setting the output to‘SpriteOutput()’. This allows you to use the 2D drawing commands to draw onto the sprite’s surface.You can even draw a sprite onto another sprite. To do this you must switch the sprite drawing outputfrom the back buffer to your target sprite. For this, you need use the ‘UseBuffer()’ command. Thiscommand takes one parameter which is the PB number of the sprite you want to direct all sprite outputto. Once switched, all further sprite displaying commands draw sprites onto the target sprite. Whenyou have finished, you can return the sprite display output back to the back buffer by using the‘UseBuffer()’ command again, but this time with a parameter of ‘#PB_Default’.

2D Graphics 195
‘SpecialFX’ Sprite CommandsIn the mode examples I mentioned ‘SpecialFX’ sprites. These are still normal sprites but work a lotfaster if they have the ‘StartSpecialFX()’ commands enclosing them. All sprites that use the specialeffects like this are capable of producing good looking graphics but because everything is renderedinside the computer’s main RAM these sprites aren’t as quick as sprites3D’s. Here is a brief snippetshowing the usage of these commands:
...StartSpecialFX()DisplayAlphaSprite(#SPRITE_NUMBER, 64, 64)DisplayRGBFilter(100, 100, 100, 100, 0, 255, 0)DisplayTranslucentSprite(#SPRITE_NUMBER, 128, 128, 128);etc...
StopSpecialFX()...
As you can see, the ‘StartSpecialFX()’ command starts the block and ‘StopSpecialFX()’ ends it. Allspecial effects commands must go inside these two commands. This is done to increase the renderingspeed of these special effects, otherwise without the ‘StartSpecialFX()’ block the display performancewould be very poor.
If using these commands, it is very important to understand that these must be used before any othergraphics commands. This is because of the way PureBasic handles the internals of the special effectsdrawing. Otherwise, if you use other graphics commands before a special effect block, they will be overwritten on the backbuffer once the ‘StartSpecialFX()’ block starts. If you are using a ‘ClearScreen()’command to clear the buffer before you draw, you should include this in the ‘StartSpecialFX()’ blocktoo. Another important point to make clear is that there should only ever be one ‘StartSpecialFX()’block in any main loop, as this increases performance even further.
The commands that use a ‘StartSpecialFX()’ block are:
‘DisplayAlphaSprite()’‘DisplaySolidSprite()’‘DisplayShadowSprite()’‘DisplayRGBFilter()’‘DisplayTranslucentSprite()’
You can read about these commands in more detail in the helpfile, in the ‘Sprite & Screen’ library(Helpfile:Reference Manual->2D Games Libraries->Sprite & Screen).
Displaying Normal SpritesNormal sprites are the foundations of making a 2D game in PureBasic. This type of sprite has beenused over and over again, time after time, to produce cool visuals in many top games. Here is a simpleexample of creating a new sprite and rendering it all over the screen using the standard‘DisplayTransparentSprite()’ command:

2D Graphics196
#SPRITE_MAIN = 1#NUMBER_OF_BALLS = 500
;Set the width, height and bit depth of the screen;Abbreviated variables are used here due to page width constraints :(Global ScrW.l = 1024Global ScrH.l = 768Global ScrD.l = 32Global Quit.b = #False
Structure BALLx.fy.fXOrigin.lYOrigin.lRadius.lAngle.fSpeed.f
EndStructureGlobal Dim Balls.BALL(#NUMBER_OF_BALLS)
;Simple error checking procedureProcedure HandleError(Result.l, Text.s)If Result = 0MessageRequester("Error", Text, #PB_MessageRequester_Ok)End
EndIfEndProcedure
;Convert Degrees to RadiansProcedure.f DegToRad(Angle.f)ProcedureReturn Angle.f * #PI / 180
EndProcedure
;Initialize all ball dataProcedure InitialiseBalls()For x.l = 0 To #NUMBER_OF_BALLSBalls(x)\XOrigin = Random(ScrW) - 32Balls(x)\YOrigin = Random(ScrH) - 32Balls(x)\Radius = Random(190) + 10Balls(x)\Angle = Random(360)Balls(x)\Speed = Random(2) + 1
Next xEndProcedure
;Initialize environmentHandleError(InitSprite(), "InitSprite() command failed.")HandleError(InitKeyboard(), "InitKeyboard() command failed.")HandleError(OpenScreen(ScrW, ScrH, ScrD, "Blobs"), "Could not open screen.")SetFrameRate(60)

2D Graphics 197
;Create an imageGlobal Offset.f = 32If CreateSprite(#SPRITE_MAIN, 64, 64)If StartDrawing(SpriteOutput(#SPRITE_MAIN))
Box(0, 0, 64, 64, RGB(255, 255, 255))For x.l = 220 To 1 Step -1Offset + 0.025Circle(Offset, 64 - Offset, x / 8, RGB(0, 255 - x, 0))
Next xStopDrawing()
EndIfEndIfTransparentSpriteColor(#SPRITE_MAIN, RGB(255, 255, 255))InitialiseBalls()
;Main loopRepeatClearScreen(RGB(56, 76, 104))For x.l = 0 To #NUMBER_OF_BALLSBalls(x)\x=Balls(x)\XOrigin+(Balls(x)\Radius*Cos(DegToRad(Balls(x)\Angle)))Balls(x)\y=Balls(x)\YOrigin+(Balls(x)\Radius*Sin(DegToRad(Balls(x)\Angle)))Balls(x)\Angle + Balls(x)\SpeedDisplayTransparentSprite(#SPRITE_MAIN, Balls(x)\x, Balls(x)\y)
Next xFlipBuffers()
ExamineKeyboard()If KeyboardReleased(#PB_Key_Escape)Quit = #True
EndIf
Until Quit = #TrueEnd
The ‘DisplayTransparentSprite()’ command allows you to display a sprite on screen very similar to‘DisplaySprite()’, but when displaying a sprite using ‘DisplayTransparentSprite()’, it selects a singlecolor within the image and it treats as transparent. This allows the sprite to not always appear square.
In this example, I’ve created a new sprite and then immediately fill it with white using a ‘Box()’command. Once this is done, I then draw a shaded green sphere on it using the ‘Circle()’ commandwithin a loop. This leaves me with a green sphere on a white background. After the drawing commandshave finished, I set all the white pixels in the new sprite to be flagged as transparent, using the‘TransparentSpriteColor()’ command. This command takes two parameters, the first is the PB numberof the sprite to change and the second is the color that you would like to be flagged as transparent.Once the color has been picked, the next usage of ‘DisplayTransparentSprite()’ displays a sprite, minusthe transparent color. Once this example is run, you should see a screen full of green spheres withoutany white at showing at all. This is a great way to display sprites with a transparency.
2D Graphics198
You will also notice in this example that the command to display a normal sprite doesn’t have to beinside any special enclosing commands such as a ‘StartSpecialFX()’ or ‘StartDrawing()’, etc. You canuse the normal sprite displaying commands by themselves. As long as the sprite engine is initializedand a screen has been opened, you can use the standard sprite commands to display a sprite. Thestandard sprite displaying commands are:
‘DisplaySprite()’‘DisplayTransparentSprite()’
Using Sprites3D’sPureBasic calls it’s 3D sprites by the slightly mangled name of ‘sprite3D’. Each sprite3D is a 2D surfacemade up of two polygons. These polygons are drawn using a small 3D engine and can be transformedin 3D but each sprite3D is ultimately drawn in 2D on the screen. Confused? Good, let’s continue.
A sprite3D in PureBasic is really a normal sprite that has had 3D support given to it and as such, thisdifferent type needs a small 3D engine to display them. To use any sprite3D’s in your program youmust initialize the sprite3D engine before using any other sprite3D related commands. This is done byusing the ‘InitSprite3D()’ command. This command is however a child command of ‘InitSprite()’,which must also be called before it.
Every sprite3D starts life as a normal sprite, either loaded or created but with the‘#PB_Sprite_Texture’ mode defined. This normal version isn’t displayed at any time, instead, thisnormal sprite is turned into a 3D version by using the ‘CreateSprite3D()’ command. This commandtakes two parameters, the first is the PB number that you would like to associate to the new sprite3D.The second is the sprite first created or loaded that you want to turn into a sprite3D.
This is how this conversion procedure appears in PureBasic code:
LoadSprite(#NORMAL_SPRITE, "Image.bmp", #PB_Sprite_Texture)CreateSprite3D(#SPRITE_3D, #NORMAL_SPRITE)
Once the sprite3D has been created like this, we can then display this on the screen by using the‘DisplaySprite3D()’ command. To explain things a little more clearly, here’s an example of displayingand manipulating sprites3D’s:
UsePNGImageDecoder()
Enumeration#SPRITE_2D#SPRITE_3D
EndEnumeration
#NUMBER_OF_FLOWERS = 150
;Set the width, height and bit depth of the screen;Abbreviated variables are used here due to page width constraints :(Global ScrW.l = 1024Global ScrH.l = 768

2D Graphics 199
Global ScrD.l = 32;Other global variablesGlobal Quit.b = #FalseGlobal XOrigin.l = ScrW / 2Global YOrigin.l = ScrH / 2
Structure FLOWERXPos.fYPos.fWidth.fHeight.fAngle.fRadius.fRadiusStep.f
EndStructureGlobal Dim Flowers.FLOWER(#NUMBER_OF_FLOWERS)
;Simple error checking procedureProcedure HandleError(Result.l, Text.s)If Result = 0MessageRequester("Error", Text, #PB_MessageRequester_Ok)End
EndIfEndProcedure
;Convert Degrees to RadiansProcedure.f DegToRad(Angle.f)ProcedureReturn Angle.f * #PI / 180
EndProcedure
;Initialize all flowersProcedure InitialiseAllFlowers()For x.l = 0 To #NUMBER_OF_FLOWERSFlowers(x)\Width = 0Flowers(x)\Height = 0Flowers(x)\Angle = Random(360)Flowers(x)\Radius = 1.0Flowers(x)\RadiusStep = (Random(30) / 10) + 1.0
Next xEndProcedure
;Reset a flowerProcedure ResetFlower(Index.l)Flowers(Index)\Width = 0Flowers(Index)\Height = 0Flowers(Index)\Angle = Random(360)Flowers(Index)\Radius = 1.0Flowers(Index)\RadiusStep = (Random(30) / 10) + 1.0ProcedureReturn
EndProcedure

2D Graphics200
;Initialize environmentHandleError(InitSprite(), "InitSprite() command failed.")HandleError(InitSprite3D(), "InitSprite3D() command failed.")HandleError(InitKeyboard(), "InitKeyboard() command failed.")HandleError(OpenScreen(ScrW, ScrH, ScrD, "Flowers"), "Could not open screen.")SetFrameRate(60)Sprite3DQuality(1)
;Load spriteLoadSprite(#SPRITE_2D,"Flower.png",#PB_Sprite_Texture|#PB_Sprite_AlphaBlending)CreateSprite3D(#SPRITE_3D, #SPRITE_2D)
InitialiseAllFlowers()
;Main loopRepeat
ClearScreen(RGB(200, 100, 100))
HandleError(Start3D(), "Start3D() command failed.")For x.l = 0 To #NUMBER_OF_FLOWERSFlowers(x)\Width + 1.5Flowers(x)\Height + 1.5Flowers(x)\Angle + 1.0If Flowers(x)\Width > 512.0 Or Flowers(x)\Height > 512.0Flowers(x)\Width = 512.0Flowers(x)\Height = 512.0
EndIfIf Flowers(x)\Radius > ScrWResetFlower(x)
EndIfFlowers(x)\Radius + Flowers(x)\RadiusStepFlowers(x)\XPos=XOrigin+(Flowers(x)\Radius*Cos(DegToRad(Flowers(x)\Angle)))Flowers(x)\YPos=YOrigin+(Flowers(x)\Radius*Sin(DegToRad(Flowers(x)\Angle)))Flowers(x)\XPos - Flowers(x)\Radius / 3.5Flowers(x)\YPos - Flowers(x)\Radius / 3.5ZoomSprite3D(#SPRITE_3D, Flowers(x)\Width, Flowers(x)\Height)RotateSprite3D(#SPRITE_3D, Flowers(x)\Angle, 0)DisplaySprite3D(#SPRITE_3D, Flowers(x)\XPos, Flowers(x)\YPos)
Next xStop3D()
FlipBuffers()
ExamineKeyboard()If KeyboardReleased(#PB_Key_Escape)Quit = #True
EndIf
Until Quit = #TrueEnd

2D Graphics 201
To allow me to use sprite3D’s in my example, I’ve initialized the normal sprite engine and then I’veinitialized the sprite3D engine, using the ‘InitSprite3D()’ command. This is essential to use anysprite3D related commands. After this, I’ve then used the ‘LoadSprite()’ command to load a Pngformat image. This image which is called ‘Flower.png’, uses an alpha channel to create a transparentbackground. Loading a Png format image with an alpha channel like this requires you to define thesprite mode correctly in the ‘LoadSprite()’ command. If you look at the example code, I’ve specified themode as ‘#PB_Sprite_Texture|#PB_Sprite_AlphaBlending’. This tells the compiler I wish to use thissprite as a sprite3D and it contains an alpha channel. After this has been loaded and defined correctlyI can then create a sprite3D from it using the ‘CreatSprite3D()’ command and it’s alpha channel ispreserved.
Once the sprites have been created, it’s time to draw the sprites onto the screen. This is achieved usingthe ‘DisplaySprite3D()’ command inside a ‘Start3D()’ block. This looks something like this:
...Start3D()DisplaySprite3D(#SPRITE_3D, x, y, Alpha)
Stop3D()
...
If you look at the flower example, the ‘Start3D()’ block is being checked using a small error checkingprocedure to make sure it starts properly. If it does, we can continue and draw the sprites. If it doesn’tstart correctly, we must not draw any sprite3D’s or there may be serious program crash. A ‘Stop3D()’command is used to end the sprite3D block. Inside this block you must not use any commands fromthe normal sprite library, this block is for sprite3D commands only.
To actually display a sprite3D you use the ‘DisplaySprite3D()’ command, which takes four parameters.The first is the PB number of the sprite3D you wish to display. The second and third are the ‘x’ and ‘y’positions of the sprite on the buffer. The fourth optional parameter is the alpha value of the sprite. Thisalpha value defines how transparent the whole sprite is rendered on the display. This is an integerwhich ranges from ‘0’, which is completely transparent, to ‘255’, which is completely opaque.
In the flower example I’ve also used the ‘ZoomSprite3D()’ and ‘RotateSprite3D()’ commands to resizeand rotate the sprite3D’s. These commands are very easy to understand and can be read about in moredetail in the PureBasic helpfile within the ‘Sprite3D’ section (Helpfile:Reference Manual->2D GamesLibraries->Sprite3D).
Sprite3D QualityWhile using sprite3D’s in your program, it is possible to toggle the rendering quality of the sprites. Thisis done with the ‘Sprite3DQuality()’ command. This command takes one parameter which is therendering mode of all sprite3D’s in your program. The parameter is a numeric value which is equal toa particular mode.
Here are the definitions:
2D Graphics202
0 : No filtering (faster, but very pixelated when zooming and rotating)1 : Bilinear filtering (slower, but blends the pixels to look better when zooming and rotating)
In my example I’ve used ‘Sprite3DQuality(1)’ which enables bilinear filtering and gives the sprites anice smooth look when I’m resizing and rotating them. If this command is not used however, thedefault quality setting for that program is ‘0’, which doesn’t enable any filtering, leaving sprites3D’slooking pixelated when manipulated.
113D Graphics
In this chapter I’m going to talk about 3D graphics and how PureBasic uses the OGRE engine to drawthese to the screen. 3D graphics uses imaginary 3D models to create believable worlds that give theimpression of width, height and depth, and the computer monitor is usually considered a windowthrough which you can view these 3D worlds. This of course is a little inaccurate, while even I like tothink that I’m viewing a 3D world through my monitor (especially when playing 3D games) I know fora fact that it’s sophisticated math routines drawing these imaginary 3D models on my computer’smonitor to give me the impression of three dimensions. Luckily, PureBasic takes care of all themathematics that are needed to draw 3D graphics on screen by using the OGRE 3D engine. This allowsyou to call simple, high level commands that perform complicated 3D graphical effects. This makesprogramming 3D graphics in PureBasic quick, fun and very easy.
This chapter, unfortunately, will not be an exhaustive text on programming 3D graphics usingPureBasic as this would be a whole book in itself, but this chapter is really a primer to using thecommands and a few solutions to common problems that beginners may face.
An Overview Of The OGRE Engine
To make it possible to draw three dimensional graphics on screen, as I said before, you have to usecomplicated math routines to calculate the model shapes, model textures, positions and lighting, etc.and this can be very time-consuming and very hard on the brain. Thankfully for users of PureBasic,the OGRE 3D engine is used to take care of all this tedious stuff so you can concentrate on coding yourprogram. OGRE (Open source GRaphics Engine) is an open source realtime 3D rendering enginecreated and developed by Torus Knot Software Limited. This engine is provided freely on the Internetand available for anybody to use, free of charge, for any purpose.
After looking at the source code of the OGRE engine, the lead developer of PureBasic, FrédéricLaboureur, decided that it was of such fantastic quality he incorporated it into PureBasic’s commandset. The engine itself is included with PureBasic as a dynamic linked library (DLL) and PureBasic’sbuilt-in 3D library is a wrapper to it. The only drawback with this, is that the OGRE engine has an
203

3D Graphics204
application programming interface (API) that contains many hundreds of commands and PureBasicdoesn’t support all of them. This is due to some incompatibilities with the language that OGRE wasprogrammed in and the time it takes the PureBasic team to implement and test new commands. Morecommands may be added in future, as the PureBasic team has expressed an interest in increasing theOGRE command set available to PureBasic users, so I guess only time will tell. You can view thecurrent OGRE command set in the helpfile under the ‘3D Games Libraries’ section (Helpfile:ReferenceManual->3D Games Libraries).
The OGRE Mesh FormatTo use OGRE to manipulate and display 3D models in your program, you will need these models to bein a particular format. This is the OGRE ‘Mesh’ format and these model files will have the file extensionof ‘*.mesh’.
If you look on the OGRE website, in the downloads section, you will find many third party tools andplugins that provide extra functionality to leading 3D modeling packages. These tools enable thesepackages to save and export loaded and newly created models into the correct mesh format. In fact, itis probably a good idea to look here first before deciding which 3D modeling package to use for yourmesh creation.
OGRE Texture FormatsEvery model that is displayed using a 3D engine needs a texture. These textures are nothing more thanimages which are wrapped around models to provide a skin on which to draw detail. In fact somepeople do indeed refer to textures as ‘skins’. Sometimes models have more than one texture to providea greater array of textures or to provide a more detailed finish.
When using textures to provide skins for your 3D models, you must use the correct image format,otherwise the textures will not appear once your program is compiled. This is important to rememberbecause most 3D modeling packages have the ability to load and use multiple types of image formatsthat aren’t supported by OGRE. The OGRE engine used by PureBasic uses Png, Tga or Jpg files. If youuse these image formats as textures for your models, you know everything will work as expected.
Creating Your Own OGRE Meshes
To create your own meshes you will need to use what is known as a 3D modeling program. This type ofprogram will allow you create a model using a three dimensional display. This allows you to see a realtimeupdated preview of your model from any angle during the creation process. This type of program alsoprovides tools to allow you to add image textures, to give your model a graphical skin for when it’s renderedin the 3D engine. More advanced 3D modeling programs allow you precisely to align image textures to amodel by un-wrapping the model into a 2D form. This two dimensional unwrapped form can then beexported as an image to provide a template from which you can draw your texture. When this texture isapplied back onto the original 3D model, it will match the 3d shape perfectly. Any 3D modeling program canbe used to create your 3D models as long as the finished model can be exported and saved as a ‘*.mesh’ file,OGRE’s native file format.

3D Graphics 205
OGRE’s 3D Coordinate SystemWhen drawing and manipulating objects in 3D space you need a good coordinate system to track anobject’s position in that space. OGRE uses a standard right handed ‘x, y, z’ coordinate system, but forthose of you who don’t know what that is, let me explain. In a coordinate system like this, the threedimensions are assigned a different letter and this is where the ‘x, y, z’ comes from. Knowing whichletter is assigned to what dimension is essential to use this system. Fig.39 shows the dimensions andwhat letter is assigned to them. This diagram also shows how three dimensional space can easily bedivided and referred to using three values. If you imagine that an entire 3D scene is inside this invisiblebox, then any point within that scene can be described by a set of three ‘x, y, z’ values.
The coordinates themselves are pretty simple to understand, each dimension can be referred to usinga positive or negative number and the OGRE engine enumerates these in a particular way. The box onthe left in Fig.39 shows this using ‘+’ and ‘-’ characters. If you imagine the bottom left corner of yourcomputer monitor as existing at 3D coordinates; ‘0, 0, 0’. The ‘x’ coordinate number will increasenumerically the further to the right of your monitor you travel and the ‘y’ coordinate will increasenumerically the further up the monitor screen you go. The ‘z’ coordinate is a little bit different, in thatit increases in value the further away from the screen, towards you, that you travel. This is againdemonstrated in the right hand box if you look at the numbers along the sides.
Some people like to use the coordinates ‘0, 0, 0’ as the center of any given 3D space, and thencoordinates that refer to other objects within that world can either be positive or negative dependingon which way from the center, the point that you need to describe is. Hopefully this simple diagramshould give you an understanding how ‘x, y, z’ coordinates are handled.
OGRE API IdentifiersWhile using PureBasic and OGRE to produce 3D visuals, you are effectively using the OGRE API(application programming interface) to handle things behind the scenes. PureBasic doesn’t expose anyof this raw OGRE API to you, but instead wraps the API commands into much more friendly basiccommands. On occasion however, you will still need to refer to some OGRE objects by their OGRE
0123456789
10
0 1 2 3 4 5 6 7 8 9 1010
98
76
54
32
10
Coordinates Of OGRE’s 3D Space
Fig. 39
Z
Y
X
Each point in 3D space canbe expressed by three ‘x, y, z’values. Here the point expressedas ‘5, 5, 5’ is shown graphicallyusing three imaginaryintersecting lines.
‘X’ = Width‘Y’ = Height‘Z’ = Depth
+
+
-
-

3D Graphics206
identifier. These identifiers are just Long type values and are very similar to OS identifiers which arealso needed by an API (Win32 API). To get the OGRE identifiers of various objects you can use thesePureBasic commands:
‘MaterialID(#MATERIAL)’Returns the OGRE identifier of the material specified (as a PB number) in the parameter.
‘MeshID(#MESH)’Returns the OGRE identifier of the mesh specified (as a PB number) in the parameter.
‘TextureID(#TEXTURE)’Returns the OGRE identifier of the texture specified (as a PB number) in the parameter.
A Gentle Beginning
In the following example I’m going to show you how to initialize the 3D environment, load a 3D mesh,apply a texture to it and display it onscreen. To make things a little bit more exciting, I’ve made themodel spin around and I’ve included a light, so the model doesn’t look too flat when being displayed.
Enumeration#MESH#TEX#MAT#ENTITY_INVADER#LIGHT#CAMERA_ONE
EndEnumeration
;Set the width, height and bit depth of the screen;Abbreviated variables are used here due to page width constraints :(Global ScrW.l = 1024Global ScrH.l = 768Global ScrD.l = 32;Other global variablesGlobal Quit.b = #False
;Simple error checking procedureProcedure HandleError(Result.l, Text.s)If Result = 0MessageRequester("Error", Text, #PB_MessageRequester_Ok)End
EndIfEndProcedure
;Initialize environmentHandleError(InitEngine3D(), "InitEngine3D() command failed.")HandleError(InitSprite(), "InitSprite() command failed.")HandleError(OpenScreen(ScrW, ScrH, ScrD, ""), "Could not open screen.")

3D Graphics 207
HandleError(InitKeyboard(), "InitKeyboard() command failed.")SetFrameRate(60)
Add3DArchive("Data\", #PB_3DArchive_FileSystem)
HandleError(LoadMesh(#MESH, "Invader.mesh"), "Can't load mesh")HandleError(LoadTexture(#TEX, "Invader.png"), "Can't load texture")HandleError(CreateMaterial(#MAT, TextureID(#TEX)), "Can't create Material")CreateEntity(#ENTITY_INVADER, MeshID(#MESH), MaterialID(#MAT))
CreateLight(#LIGHT, RGB(255,255,255), 0, 5, 0)
CreateCamera(#CAMERA_ONE, 0, 0, 100, 100)CameraLocate(#CAMERA_ONE, 0, 1, 2.5)RotateCamera(#CAMERA_ONE, -15, 0, 0)
;Main loopRepeat
y.l + 2RotateEntity(#ENTITY_INVADER, 0, y, 0)
RenderWorld()FlipBuffers()
ExamineKeyboard()If KeyboardReleased(#PB_Key_Escape)Quit = #True
EndIf
Until Quit = #TrueEnd
This example should be quite useful to you as it shows all the necessary steps you must perform todisplay a 3D model on the screen. As always, the code should be pretty easy to follow but I’ll go throughthe main points just so you don’t miss anything.
Once the constants, variables and procedures have been declared, you will see I’ve used the‘InitEngine3D()’ command to initialize the 3D environment. This command call is necessary to loadthe that contains the 3D engine from the compilers directory. This DLL file contains the OGRE enginein a pre-compiled form, which like this, can be used easily in your programs.
Once the 3D environment has been initialized then a screen can be created in the normal manner. Firstinitializing the sprite engine and then opening a screen. This has to be done in this order or a compilererror will occur and the IDE will start complaining. If this happens you may have to kill the programand rearrange the initializations into the correct order before running again.
3D Graphics208
Create A 3D Archive To Contain MediaAfter all the initializations are done we can start using the 3D commands and the very first thing wemust do is specify a ‘3D Archive’. This is a path in which OGRE looks for external files when loadingmedia such as models, textures, maps, etc. You must have at least one 3D archive specified in your 3Dprogram or else the compiler will raise an error. To specify such an archive you must use the‘Add3DArchive()’ command (Helpfile:Reference Manual->3D Games Libraries->Engine3D->Add3DArchive). This command takes two parameters, the first is a String specifying a file path andthe second is a built-in constant that tells the compiler what sort of path it is. The built-in constantsare:
‘#PB_3DArchive_FileSystem’This tells the compiler that the path specified is a normal folder.
‘#PB_3DArchive_Zip’This tells the compiler that the path specified is a compressed ZIP file.
In my Invader example I’ve created a 3D archive using a relative path, this tells OGRE to look insidethe same directory as my program and look inside the folder called ‘Data\’. Once specified like this, allrequired media must be in this folder. This, then allows the use of simple commands like:
...LoadMesh(#MESH, "Invader.mesh")
...
Including OGRE With Your 3D Program
When you create a 3D program using PureBasic and want to share it with other people, be it commerciallyor as a freeware program, you must remember to distribute the OGRE 3D engine with it.
PureBasic uses OGRE as a compiled DLL to provide all the 3D functions in a compact and portable way.When you compile your program, the OGRE commands are not embedded into your program like regularbuilt-in PureBasic commands. Instead, all OGRE commands are called from a DLL dynamically. This meansthat the DLL file must always accompany your executable file in order for it to run correctly.
This is done automatically while developing, because when you hit ‘F5’ from within the IDE to compile andrun your program, a temporary executable file in created in the ‘\Compilers’ directory, which is exactly wherethe OGRE engine is installed. This ensures that testing the 3D commands is always as easy as possible.However, once you compile to an executable file elsewhere, the engine needs to be copied along with it.
The two files that you must distribute with your 3D program for it to initialize and work properly, are:
‘Engine3D.dll’‘stlport_vc646.dll’
Both of these files are found in the ‘\Compilers’ directory, within your PureBasic folder. These files must beloose (not in another folder) and must be in the same folder as your program’s executable file.

3D Graphics 209
When a command like this is encountered in our program that needs to load external media, OGREwill look inside all specified 3D archives for this file, in this case OGRE will look in the ‘Data\’ folderfor the ‘Invader.mesh’ file.
If you want to order your media into a more strict filing system and include further subdirectories inthe ‘Data\’ folder, than you can do by all means. You will then have to load this media from their newlocations like this:
...LoadMesh(#MESH, "Meshes\Invader.mesh")LoadTexture(#TEX, "Textures\Invader.png")
...
Again this will search the original 3D archive (‘Data\’) for these folders (‘Meshes\’ and ‘Textures\’) andload the media from inside them. If this syntax looks a little clumsy, then instead of defining the foldernames in the loading commands you could just as easily add further 3D archives for OGRE to look inwhen requesting media, like this:
...Add3DArchive("Data\", #PB_3DArchive_FileSystem)Add3DArchive("Data\Meshes\", #PB_3DArchive_FileSystem)Add3DArchive("Data\Textures\", #PB_3DArchive_FileSystem)...
Now we can use simpler loading commands like this:
...LoadMesh(#MESH, "Invader.mesh")LoadTexture(#TEX, "Invader.png")
...
OGRE will now search the folders, ‘Data\’, ‘Data\Meshes\’ and ‘Data\Textures\’ for these files.
You can also use ZIP files for 3D archives if you want. This can help a lot when distributing a program,because all of your media is enclosed within a single compressed file. If you wish to do this, you mustspecify that this 3D archive is a ZIP file when you create it. This is achieved using the‘#PB_3DArchive_Zip’ built-in constant as the type parameter in the ‘Add3DArchive()’ command. Ifyou have subdirectories within your ZIP file, you can access these in loading commands by using thestandard format:
...Add3DArchive("Data.zip", #PB_3DArchive_Zip)LoadMesh(#MESH, "Meshes\Invader.mesh")LoadTexture(#TEX, "Textures\Invader.png")
...

3D Graphics210
Creating A 3D EntityWhen you have created a 3D archive you are ready to create an object that’s able to use your media.This object is going to be displayed on screen and can be manipulated in three dimensions usingvarious built-in commands. OGRE calls these 3D objects, ‘Entities’.
An entity is an object which is a building block of any game or demo, they are the 3D models displayedon screen that use a mesh as a structure and a texture as a skin. Entities can be anything that ismodeled in 3D, they can be game maps or the characters that populate them.
Knowing how to properly create these entities is essential to display any 3D model on the screen.Fig.40 shows the process of correctly creating a 3D entity and in what order the steps must be done. Ihave followed this flow diagram precisely in the previous Invader example. Here is what it looks likein code:
...HandleError(LoadMesh(#MESH, "Invader.mesh"), "Can't load mesh")HandleError(LoadTexture(#TEX, "Invader.png"), "Can't load texture")HandleError(CreateMaterial(#MAT, TextureID(#TEX)), "Can't create Material")CreateEntity(#ENTITY_INVADER, MeshID(#MESH), MaterialID(#MAT))
...
The commands used to complete this process are simple. The first one is the ‘LoadMesh()’ command(Helpfile:Reference Manual->3D Games Libraries->Mesh->LoadMesh) which takes two parameters.
Process Of Creating A 3D Entity
Load Texture
Create Materialfrom Texture
Create Entity from Mesh and Material
Fig. 40
Load Mesh
Entity is Automatically displayedwhen using ‘RenderWorld()’
1. 2.
3.
4.
5.

3D Graphics 211
The first is the PB number that will be associated to this mesh and the second is the actual mesh fileto load from the 3D archive. The next command is ‘LoadTexture()’ (Helpfile:Reference Manual->3DGames Libraries->Texture->LoadTexture) which also takes two parameters. The first is the PBnumber associated to the newly loaded texture and the second is the name of the image to be used asthis texture. When using images for textures, one thing to note is the image size in pixels. Oldercomputer graphics cards can only support textures that are square and have an image size which is apower of ‘2’. For maximum compatibility with older cards, I suggest you use these sizes too. Fig.41shows the standard texture image sizes you can use to create materials safely.
The next command doesn’t load anything, it merely creates a material. This material is a special OGREformat texture that can have many different properties. Because we are creating one from a texture thisis the simplest form of material. I will talk about the more advanced materials a little later.
To create a material you use the ‘CreateMaterial()’ command (Helpfile:Reference Manual->3D GamesLibraries->Material->CreateMaterial) which takes two parameters. The first is the PB number thatthis material will be associated with, and the second is the OGRE identifier of a texture. This identifiercan be returned by using the ‘TextureID()’ command, which uses a PB number of a texture as aparameter.
Once we have the necessary ‘ingredients’ we can then create our entity. This is done using the‘CreateEntity()’ command (Helpfile:Reference Manual->3D Games Libraries->Entity->CreateEntity),like this:
...CreateEntity(#ENTITY_INVADER, MeshID(#MESH), MaterialID(#MAT))
...
As you can see from this line this command takes three parameters. The first is the PB number thatthis entity will be associated with. The second is the OS identifier of the mesh we want to make thisentity out of, and the third is the OGRE identifier of the material that we want to cover the mesh with.
Standard Texture Image Sizes
Width In Pixels
32
64
128
256
512
1024
Height In Pixels
32
64
128
256
512
1024
Image Bit Depth
8, 16 & 32
8, 16 & 32
8, 16 & 32
8, 16 & 32
8, 16 & 32
8, 16 & 32
Fig. 41All standard texture sizes are powers of ‘2’.

3D Graphics212
These last two OGRE identifiers can be returned by using the ‘MeshID()’ and ‘MaterialID()’ commandrespectively. These two commands take a PB number as a parameter and return an OGRE identifier.
Once a 3D entity has been created it then is queued, ready to be drawn onto the screen at thecoordinates ‘0, 0, 0’ in three dimensional space. Until then we’ll carry on with our breakdown of theInvader example.
Lighting The WayAfter the entity has been created, I’ve created a light to illuminate the scene better. This light providesa bright illumination source, that can be any color, to make this entity stand out better. When youcreate a 3D environment it already contains a default amount of ambient light but this light is notactually emitted from any one point, but instead as the name suggests it’s ambient. This can make theentity look flat because it can’t calculate which sides should shine and which sides should have shadow.When you add a light to a scene, you allow the entity to change it’s facial lighting to simulate shine andshade depending on where the light is located in relation to the mesh used. To create a light I’ve usedthe ‘CreateLight()’ command. (Helpfile:Reference Manual->3D Games Libraries->Light->CreateLight)
...CreateLight(#LIGHT, RGB(255,255,255), 0, 5, 0)
...
This command takes five parameters, the first of which is the PB number that will be associated to thislight. The second is the color of light that should be emitted which should be entered as a 24 bit colorvalue (the ‘RGB()’ command can be used for this). The third, forth and fifth parameters are optionaland specify the position of the light in 3D space using the ‘x, y, z’ coordinate system. If theseparameters are not used, then the light is created at a position of ‘0, 0, 0’, which is the center of the 3Dspace. In the Invader example I’ve used the position of ‘0, 5, 0’, which elevates the light off the floor by‘5’ units. See Fig.39 for a graphical representation of 3D space using the ‘x, y, z’ coordinate system.
The Camera Is RollingNow that the 3D elements are in place, we need to create a viewport through which to look at our 3Dscene. OGRE calls these viewports, Cameras, but really we need to distinguish between the two toavoid confusion. A viewport is a 2D viewport that exists on the currently opened screen and displayswhat the 3D camera is looking at. Once a camera viewport is created it automatically creates a 3Dcamera positioned at coordinates ‘0, 0, 0’ and the newly created viewport displays what the 3D camerais looking at. The 3D camera can be positioned and rotated at will but the viewport is always locked inthe same position on-screen.
To create a camera viewport and automatically create a 3D camera in the current 3D world, you usethe ‘CreateCamera()’ command. (Helpfile:Reference Manual->3D Games Libraries->Camera->CreateCamera) This command takes five parameters and as usual the first is the PB number that willbe associated to this camera object. The second and third parameters are the ‘x’ and ‘y’ positions of thetop left hand corner of the viewport on the 2D screen. The forth and fifth parameters are the width andheight of the viewport through which the 3D scene is viewed. When using this command it is veryimportant to understand the values it uses because they are very different to most PureBasic
3D Graphics 213
commands. The parameter values that the ‘CreateCamera()’ command uses are not in pixels, but inpercentages of the currently opened screen. In the Invader example I create a camera like this:
...CreateCamera(#CAMERA_ONE, 0, 0, 100, 100)
...
To understand this fully, let’s break down this command call on an individual parameter basis. Thefirst parameter is the PB number which is easy enough to understand so we’ll skip quickly past thisone. The second parameter has been defined as a ‘0’. This means that this will be calculated as zeropercent of the screen width (‘1024’) which is ‘0’. The third parameter is defined as ‘0’ too. This is alsoa percentage but a percentage of the screen height (‘768’) so this also equates to ‘0’. The forthparameter has been defined as ‘100’. This equates to one hundred percent of the screen width, whichin this case is ‘1024’. The fifth parameter is also defined as ‘100’, and this will equate to one hundredpercent of the screen height, which is ‘768’. This gives us overall screen coordinates for this cameraviewport as being ‘x=0, y=0, width=1024, height=768’, this completely covers the screen to give us afull screen camera viewport into the 3D world.
Percentages are used for this command instead of pixels, so that camera viewport positions arecompletely independent of the screen size. This is an easy way to support camera positions acrossdifferent screen resolutions. For example, if I create a camera viewport half of the screen width andheight, this viewport will always be half of the screen width and height regardless of what screenresolution used.
Multiple Camera ViewportsUsing percentages is also a good way of supporting multiple camera viewports. Imagine if you need tocode a game in split or quad screen, you will need a good way to calculate the viewport size for eachgiven screen resolution (if it’s user selectable). This is all done for you in PureBasic using percentagesby always ensuring that each camera viewport always takes up the same screen space regardless of thescreen resolution used. Also, when creating multiple cameras, the creation order is very important. Allviewports created later in your code will always appear over the top of viewports created earlier. Forexample, look at this code:
...CreateCamera(#CAMERA_ONE, 0, 0, 100, 100)CreateCamera(#CAMERA_ONE, 75, 0, 25, 25)
...
Here, I create one camera viewport taking up the full screen and another camera viewport over the topof it, in the top right hand corner. This smaller viewport would be positioned three quarters of thewidth of the screen across and it’s width and height would be a quarter of the current screen. If thesmaller viewport was created first then it would be hidden by the bigger camera viewport.
Each multiple camera created can also be independently moved and rotated in the 3D world to giveusers more views of your world on-screen. For example, you might use a second camera as a rear viewmirror in a 3D first person driving game. This camera viewport could be positioned at the top of the2D screen and have it’s 3D camera pointing towards the rear of the car.
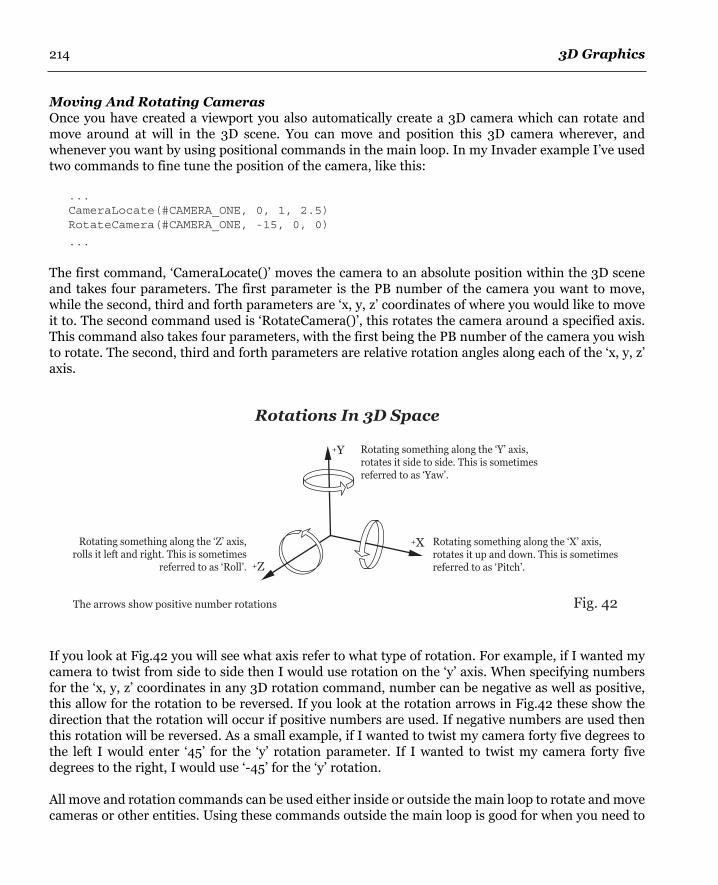
3D Graphics214
Moving And Rotating CamerasOnce you have created a viewport you also automatically create a 3D camera which can rotate andmove around at will in the 3D scene. You can move and position this 3D camera wherever, andwhenever you want by using positional commands in the main loop. In my Invader example I’ve usedtwo commands to fine tune the position of the camera, like this:
...CameraLocate(#CAMERA_ONE, 0, 1, 2.5)RotateCamera(#CAMERA_ONE, -15, 0, 0)
...
The first command, ‘CameraLocate()’ moves the camera to an absolute position within the 3D sceneand takes four parameters. The first parameter is the PB number of the camera you want to move,while the second, third and forth parameters are ‘x, y, z’ coordinates of where you would like to moveit to. The second command used is ‘RotateCamera()’, this rotates the camera around a specified axis.This command also takes four parameters, with the first being the PB number of the camera you wishto rotate. The second, third and forth parameters are relative rotation angles along each of the ‘x, y, z’axis.
If you look at Fig.42 you will see what axis refer to what type of rotation. For example, if I wanted mycamera to twist from side to side then I would use rotation on the ‘y’ axis. When specifying numbersfor the ‘x, y, z’ coordinates in any 3D rotation command, number can be negative as well as positive,this allow for the rotation to be reversed. If you look at the rotation arrows in Fig.42 these show thedirection that the rotation will occur if positive numbers are used. If negative numbers are used thenthis rotation will be reversed. As a small example, if I wanted to twist my camera forty five degrees tothe left I would enter ‘45’ for the ‘y’ rotation parameter. If I wanted to twist my camera forty fivedegrees to the right, I would use ‘-45’ for the ‘y’ rotation.
All move and rotation commands can be used either inside or outside the main loop to rotate and movecameras or other entities. Using these commands outside the main loop is good for when you need to
Rotations In 3D Space
Fig. 42The arrows show positive number rotations
Rotating something along the ‘Z’ axis,rolls it left and right. This is sometimes
referred to as ‘Roll’.
Rotating something along the ‘Y’ axis,rotates it side to side. This is sometimesreferred to as ‘Yaw’.
Rotating something along the ‘X’ axis,rotates it up and down. This is sometimesreferred to as ‘Pitch’.
+Y
+X
+Z

3D Graphics 215
set up the position of static objects. Using these commands inside your main loop provides a way ofmoving and rotating your entities in realtime, often reacting to user input.
All commands in PureBasic that use 3D rotations will use the same ‘x, y, z’ system. If you look insidethe main loop of the Invader example, I have used the ‘RotateEntity()’ command (Helpfile:ReferenceManual->3D Games Libraries->Entity->RotateEntity) to rotate the invader entity during runtime.Again, this command uses the same set of rotation axis as described in Fig.42. When using anycommand that uses 3D rotation, Fig.42 can provide a reference for what rotation might be needed.
You can learn more about the commands available to use with OGRE cameras in the PureBasichelpfile. (Helpfile:Reference Manual->3D Games Libraries->Camera)
Rendering The 3D World To The ScreenWhen using the 3D commands to create a 3D world, unlike the 2D commands, your meshes, lights andparticles, etc. aren’t drawn to the screen immediately. Instead they exist in memory, ready to becaptured and drawn. Once everything is in place in your 3D scene, you must use the ‘RenderWorld()’command (Helpfile:Reference Manual->3D Games Libraries->Engine3D->RenderWorld) to tell allcurrently existing 3D cameras to each take a snapshot of what they are pointing at. These snapshotsare then drawn onto the backbuffer, scaled and positioned to the size and position of the relatedcamera’s viewport. Then, once the ‘FlipBuffers()’ command is called, the backbuffer is flipped to thefront and the 3D scene is drawn to the computer screen. You can see this in action in the Invaderexample. If you do not use the ‘RenderWorld()’ command, no 3D graphics will be drawn onto the backbuffer. Hopefully this is the Invader example fully explained now, so you should be able to load anddisplay models of your own using this example as a reference.
A Simple First Person Camera
After running the Invader example you are probably eager to write your own 3D program or even havea go at writing a game. The first thing I thought of when seeing the 3D capabilities of PureBasic is, Iwonder if I could make a first person shooter game? I came up with this next piece of code as anexample of how to code a first person camera within a 3D world. Granted, it’s not a full game, far fromit, but it can be used as a learning example for beginners. This code will show you how to create aterrain and move the camera around using the cursor keys and mouse:
Enumeration#TEXTURE_GLOBAL#TEXTURE_DETAIL#MATERIAL_TERRAIN#CAMERA_ONE
EndEnumeration
#MOVEMENT_SPEED = 1
;Set the width, height and bit depth of the screen;Abbreviated variables are used here due to page width constraints :(Global ScrW.l = 1024

3D Graphics216
Global ScrH.l = 768Global ScrD.l = 32
;Other global variablesGlobal Quit.b = #FalseGlobal MouseXRotation.f,MouseYRotation.f,KeyX.f,KeyZ.f,DesiredCameraHeight.fGlobal CurrentCamXPos.f = 545Global CurrentCamZPos.f = 280
;Simple error checking procedureProcedure HandleError(Result.l, Text.s)If Result = 0MessageRequester("Error", Text, #PB_MessageRequester_Ok)End
EndIfEndProcedure
;Initialize environmentHandleError(InitEngine3D(), "InitEngine3D() command failed.")HandleError(InitSprite(), "InitSprite() command failed.")HandleError(OpenScreen(ScrW, ScrH, ScrD, ""), "Could not open screen.")HandleError(InitMouse(), "InitMouse() command failed.")HandleError(InitKeyboard(), "InitKeyboard() command failed.")SetFrameRate(60)
;Set 3D ArchiveAdd3DArchive("Data\", #PB_3DArchive_FileSystem)
;Create TerrainHandleError(LoadTexture(#TEXTURE_GLOBAL, "Global.png"), "Can't load texture")HandleError(LoadTexture(#TEXTURE_DETAIL, "Detail.png"), "Can't load texture")CreateMaterial(#MATERIAL_TERRAIN, TextureID(#TEXTURE_GLOBAL))AddMaterialLayer(#MATERIAL_TERRAIN,TextureID(#TEXTURE_DETAIL),#PB_Material_Add)CreateTerrain("Terrain.png", MaterialID(#MATERIAL_TERRAIN), 1, 2, 1)
;Create Viewport and 3D CameraCreateCamera(#CAMERA_ONE, 0, 0, 100, 100)DesiredCameraHeight.f = TerrainHeight(CurrentCamXPos, CurrentCamZPos) + 10CameraLocate(#CAMERA_ONE,CurrentCamXPos,DesiredCameraHeight,CurrentCamZPos)
;Main loopRepeat
;Update MouseIf ExamineMouse()MouseYRotation = -MouseDeltaX() / 10MouseXRotation = MouseDeltaY() / 10
EndIfRotateCamera(#CAMERA_ONE, MouseXRotation, MouseYRotation, 0);Update Key Presses and position the Camera accordinglyIf ExamineKeyboard()

3D Graphics 217
If KeyboardPushed(#PB_Key_Left) : KeyX = -#MOVEMENT_SPEED : EndIfIf KeyboardPushed(#PB_Key_Right) : KeyX = #MOVEMENT_SPEED : EndIfIf KeyboardPushed(#PB_Key_Up) : KeyZ = -#MOVEMENT_SPEED : EndIfIf KeyboardPushed(#PB_Key_Down) : KeyZ = #MOVEMENT_SPEED : EndIfMoveCamera(#CAMERA_ONE, KeyX, 0, KeyZ)KeyX = 0KeyZ = 0CurrentCamXPos.f = CameraX(#CAMERA_ONE)CurrentCamZPos.f = CameraZ(#CAMERA_ONE)DesiredCameraHeight.f = TerrainHeight(CurrentCamXPos, CurrentCamZPos) + 10CameraLocate(#CAMERA_ONE,CurrentCamXPos,DesiredCameraHeight,CurrentCamZPos)
EndIf
RenderWorld()FlipBuffers()
If KeyboardReleased(#PB_Key_Escape)Quit = #True
EndIf
Until Quit = #TrueEnd
This example is similar to the Invader example in that it sets up the 3D environment in the same way,so you should be familiar with this now. The main difference here in this example is that I’ve createda terrain to provide a floor on which to walk about on.
TerrainsTo create a terrain you have to create a multi-layered material first, to be used as the terrain’s surface.To create a multi-layered material you need to create a normal material then apply another materiallayer to it. If you look at the FPS example you will see the following lines in the code:
...HandleError(LoadTexture(#TEXTURE_GLOBAL, "Global.png"), "Can't load texture")HandleError(LoadTexture(#TEXTURE_DETAIL, "Detail.png"), "Can't load texture")
...
These two commands load in two Png format images as standard textures using the ‘LoadTexture()’command. The first image, ‘Global.png’, is going to be the main material which is applied as a hugeblanket that covers the new terrain’s surface. The second image, ‘Detail.png’, is a secondary texturethat is blended with the first and is tiled across the terrain to provide more detail across it. To actuallycreate the multi-layered material I’ve used these two commands:
...CreateMaterial(#MATERIAL_TERRAIN, TextureID(#TEXTURE_GLOBAL))AddMaterialLayer(#MATERIAL_TERRAIN,TextureID(#TEXTURE_DETAIL),#PB_Material_Add)...
The first line creates a standard, one layer material as explained in the Invader example. The second

3D Graphics218
command loads another texture to add as a second layer to the previously created material. The‘AddMaterialLayer()’ command (Helpfile:Reference Manual->3D Games Libraries->Material->AddMaterialLayer) takes three parameters. The first is the PB number of the material that you wishto add a layer to. The second is the OGRE identifier of the texture you wish to add as another layer.The third parameter is the blending mode of the new texture with the existing material. This blendingmode can be defined as one of four built-in constants:
‘#PB_Material_Add’Blends the new material layer with the existing one using an ‘Add’ operation.
‘#PB_Material_Replace’Blends the new material layer with the existing one using a ‘Replace’ operation.
‘#PB_Material_AlphaBlend’Blends the new material layer with the existing one using an ‘Add’ operation. This mode will also useany alpha channel information found in the texture. Only Png and Tga image format textures aresupported.
‘#PB_Material_Modulate’Blends the new material layer with the existing one using a ‘Modulate’ operation.
Once you have created a multi-layered material then you are ready to create a terrain using the‘CreateTerrain()’ command (Helpfile:Reference Manual->3D Games Libraries->Terrain->CreateTerrain). In the FPS example, I’ve created one like this:
...CreateTerrain("Terrain.png", MaterialID(#MATERIAL_TERRAIN), 1, 2, 1)
...
The ‘CreateTerrain()’ command takes six parameters. The first parameter is the name of an image thatwill be used as a height map for the terrain. The second is an OGRE identifier of a multi-layeredmaterial to be used as the terrain surface. The third, forth and fifth are optional and can be used toscale the terrain on the ‘x’, ‘y’ or ‘z’ axis. These values are multiplication values, meaning that if a valueof ‘1’ is used then the terrain will remain the same size on that axis. If a value of ‘2’ is used then thataxis will be doubled, etc. The sixth and final parameter is an optional terrain quality value whichranges from ‘1’ to ‘20’. The lower, the value passed, the higher, the terrain render quality and higherthe CPU usage to draw it. Higher values have the opposite effect.
Terrain Height Map DetailsWhen using a height map image to create a terrain there are a few rules you must follow when creatingthe height map image. First this image must be square, as OGRE in PureBasic can only create squareterrains (although you can scale them during creation). Secondly, the image must be saved in an 8 bitgrayscale format to provide ‘256’ levels of gray. Pure black will be treated as a height of ‘0’ while fullwhite will be treated as a height of ‘255’. Thirdly this image must be of a certain size because it will alsodefine the number of triangles (polygons) used in the terrain’s mesh. The size of a height map imageshould be that of a normal texture size but plus one pixel on each dimension. This is to ensure that the

3D Graphics 219
terrain height is calculated correctly from the image. Fig.43 shows recommended sizes of height mapimages and how many triangles (polygons) will be used to generate that terrain’s mesh.
Looking at Fig.43 you can see how the triangle count goes up when a higher resolution height mapimage is used. A higher resolution height map can improve the rendering accuracy of the terrain to theheight map but at the cost of slowing performance. Large height map resolutions, such as ‘1025 x 1025’are not normally used because of the high polygon count of the newly created terrain.
Terrains And Automatic ‘Level Of Detail’All terrains created in PureBasic using OGRE have automatic and dynamic levels of detail. This meansthat when a terrain is not shown through a camera or some terrain features hide others (such as hills)the hidden portions of the terrain are not drawn. Also when the camera has traveled a certain distancefrom a terrain feature, that feature will automatically lower its complexity, lowering the polygon counton screen to ease drawing a larger scene. This is easily demonstrated in the FPS example by focusingon any particular hill and moving backwards away from it and watching its structure. You will see thehill lower its complexity when being far away from the camera.
First Person PerspectiveOnce the terrain is created and the FPS example is running, I’ve used different commands to gatherinformation from the mouse and keyboard and then positioned the camera accordingly. The mousecommands are:
‘MouseDeltaX()’(Helpfile:Reference Manual->2D Games Libraries->Mouse-> MouseDeltaX)This command returns the number of pixels the mouse has moved on the ‘X’ screen axis (left to right)since the last iteration of the main loop.
‘MouseDeltaY()’(Helpfile:Reference Manual->2D Games Libraries->Mouse-> MouseDeltaY)This command returns the number of pixels the mouse has moved on the ‘Y’ screen axis (up and down)since the last iteration of the main loop.
Terrain Height Map Image Sizes
Width
65
129
257
513
1025
Height
65
129
257
513
1025
Terrain Polygons
8192
32768
131072
524288
2097152
Fig. 43All height map texture sizes are powers of ‘2’ + ‘1’.
3D Graphics220
These two returned values are then placed in the ‘x’ and ‘y’ parameters of the ‘RotateCamera()’command to rotate the 3D camera by whatever value the mouse moves. Here is the actual code:
...If ExamineMouse()MouseYRotation = -MouseDeltaX() / 10MouseXRotation = MouseDeltaY() / 10
EndIfRotateCamera(#CAMERA_ONE, MouseXRotation, MouseYRotation, 0)...
This creates our mouse controlled camera. Notice the minus sign in front of the ‘MouseDeltaX()’command. This is there to invert the value returned by this command, because if you remember fromearlier, you need positive values to turn left and negative values to turn right. The ‘MouseDeltaX()’command returns these inverted due to it returning 2D screen coordinates instead of rotation angles.
To move the camera around in the 3D world and to make it appear as if we are traveling over theterrain, I have used code like this:
...If ExamineKeyboard()
If KeyboardPushed(#PB_Key_Left) : KeyX = -#MOVEMENT_SPEED : EndIfIf KeyboardPushed(#PB_Key_Right) : KeyX = #MOVEMENT_SPEED : EndIfIf KeyboardPushed(#PB_Key_Up) : KeyZ = -#MOVEMENT_SPEED : EndIfIf KeyboardPushed(#PB_Key_Down) : KeyZ = #MOVEMENT_SPEED : EndIfMoveCamera(#CAMERA_ONE, KeyX, 0, KeyZ)KeyX = 0KeyZ = 0CurrentCamXPos.f = CameraX(#CAMERA_ONE)CurrentCamZPos.f = CameraZ(#CAMERA_ONE)DesiredCameraHeight.f = TerrainHeight(CurrentCamXPos, CurrentCamZPos) + 10CameraLocate(#CAMERA_ONE,CurrentCamXPos,DesiredCameraHeight,CurrentCamZPos)
EndIf
...
Here, I use the ‘KeyboardPushed()’ command to test wether or not a key is being held down. If it is Iassign a value to the relevant variables, then use these as parameters in the ‘MoveCamera()’ command.This will move the camera throughout the 3D world but doesn’t take into consideration the height ofthe terrain.
To move the camera up and down so it is always a set distance away from the terrain, I use the‘CameraLocate()’ command. Because this command uses absolute values, I need to retrieve the current‘x’ and ‘z’ coordinates of the camera so I can set these again when altering the ‘y’ value. To get thecurrent camera coordinates I use the ‘CameraX()’ and ‘CameraZ()’ commands (Helpfile:ReferenceManual->3D Games Libraries->Camera). These two command have only one parameter which is thePB number of a camera to get the values from. Once I have these values I need to find out what theterrain height is at these coordinates. To retrieve this I use the ‘TerrainHeight()’ command(Helpfile:Reference Manual->3D Games Libraries->Terrain->TerrainHeight). This command takes

3D Graphics 221
two parameters. These are the ‘x’ and ‘z’ coordinates of the point of the terrain we wish to know theheight of. Once I have this value, I add ‘10’ to raise the camera off the ground slightly and now I havemy three 3D coordinates needed for the ‘CameraLocate()’ command. During every main loop iterationa new ‘y’ coordinate is calculated to adjust the camera height when moving over the terrain.
A Little More Advanced
In this next section, I’ll talk about slightly more advanced features of OGRE and PureBasic. Thesefeatures include particles and a material scripts. Particles are used in 3D engines for a variety ofdifferent things, mainly to produce visuals for random effects such as snow, rain, fire and smoke. I’veused them in the following example to simulate fire. Material scripts are a way to encapsulate allmaterial properties into one material script file, to make your PureBasic source code a lot cleaner andeasier to read. Material scripts allow you to load a mesh containing a reference to a material and if thatmaterial appears in a script file, then the mesh uses that material negating the need to do anythingfurther in your source code. This allows for ease of use and further customizability, because certainadvanced material properties are only available by using scripts. In the following example, I’ve used amaterial script to specify that the loaded mesh uses sphere texture mapping, something that isotherwise unavailable. Here is the code:
Enumeration#MESH#TEXTURE#MATERIAL#ENTITY#CAMERA_ONE#LIGHT_ONE#LIGHT_TWO#PARTICLE_ONE
EndEnumeration
;Set the width, height and bit depth of the screen;Abbreviated variables are used here due to page width constraints :(Global ScrW.l = 1024Global ScrH.l = 768Global ScrD.l = 32;Other global variablesGlobal Quit.b = #False
;Simple error checking procedureProcedure HandleError(Result.l, Text.s)If Result = 0MessageRequester("Error", Text, #PB_MessageRequester_Ok)End
EndIfEndProcedure
;Convert Degrees to RadiansProcedure.f DegToRad(Angle.f)

3D Graphics222
ProcedureReturn Angle.f * #PI / 180EndProcedure
;Initialize environmentHandleError(InitEngine3D(), "InitEngine3D() command failed.")HandleError(InitSprite(), "InitSprite() command failed.")HandleError(OpenScreen(ScrW, ScrH, ScrD, ""), "Could not open screen.")HandleError(InitKeyboard(), "InitKeyboard() command failed.")SetFrameRate(60)
Add3DArchive("Data\", #PB_3DArchive_FileSystem)Parse3DScripts()CreateEntity(#ENTITY, LoadMesh(#MESH, "Statue.mesh"), #PB_Material_None)
LoadTexture(#TEXTURE, "Flame.png")CreateMaterial(#MATERIAL, TextureID(#TEXTURE))DisableMaterialLighting(#MATERIAL, 1)MaterialBlendingMode(#MATERIAL, #PB_Material_Add)
CreateParticleEmitter(#PARTICLE_ONE, 2, 2, 0,#PB_Particle_Point,12.9, 69, 15.7)ParticleSize(#PARTICLE_ONE, 5, 5)ParticleMaterial(#PARTICLE_ONE, MaterialID(#MATERIAL))ParticleEmissionRate(#PARTICLE_ONE, 50)ParticleTimeToLive(#PARTICLE_ONE, 0.25, 0.25)ParticleColorRange(#PARTICLE_ONE, RGB(255, 0, 0), RGB(255, 200, 0))ParticleVelocity(#PARTICLE_ONE, 1, 10)
CreateLight(#LIGHT_ONE, RGB(255,255,255))CreateLight(#LIGHT_TWO, RGB(255, 200, 0), 12.9, 72, 15.7)CreateCamera(#CAMERA_ONE, 0, 0, 100, 100)
;Main loopRepeat
Angle.f + 0.5PosX.f = 75 * Sin(DegToRad(Angle))PosY.f = (50 * Sin(DegToRad(Angle / 2))) + 65PosZ.f = 75 * Cos(DegToRad(Angle))LightLocate(#LIGHT_ONE, PosX, PosY + 100, PosZ)LightColor(#LIGHT_TWO, RGB(255, Random(200), 0))CameraLocate(#CAMERA_ONE, PosX, PosY, PosZ)CameraLookAt(#CAMERA_ONE, 0, 60, 0)RenderWorld()FlipBuffers()
ExamineKeyboard()If KeyboardReleased(#PB_Key_Escape)Quit = #True
EndIfUntil Quit = #TrueEnd
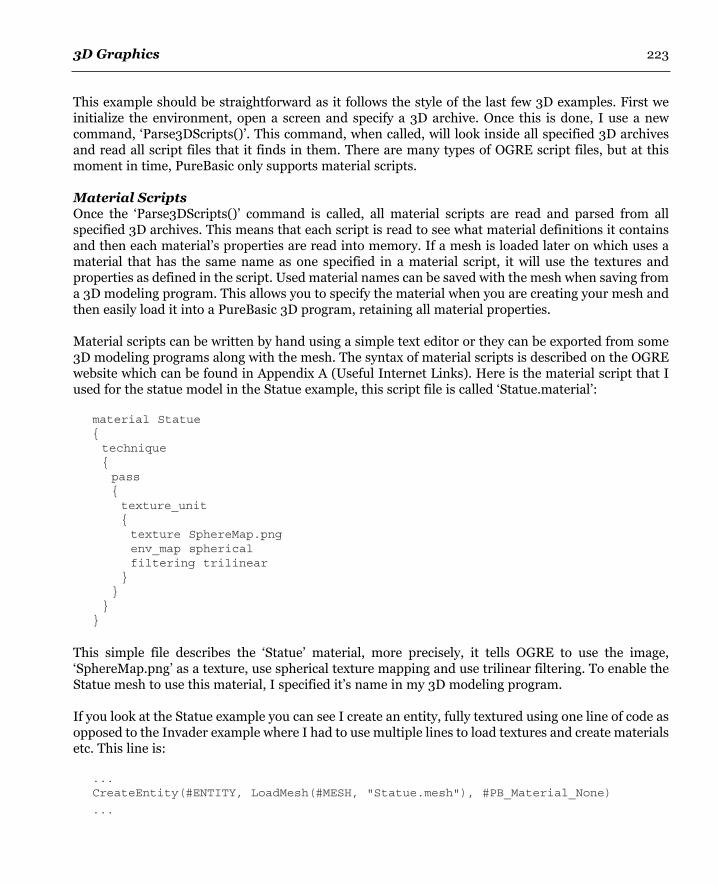
3D Graphics 223
This example should be straightforward as it follows the style of the last few 3D examples. First weinitialize the environment, open a screen and specify a 3D archive. Once this is done, I use a newcommand, ‘Parse3DScripts()’. This command, when called, will look inside all specified 3D archivesand read all script files that it finds in them. There are many types of OGRE script files, but at thismoment in time, PureBasic only supports material scripts.
Material ScriptsOnce the ‘Parse3DScripts()’ command is called, all material scripts are read and parsed from allspecified 3D archives. This means that each script is read to see what material definitions it containsand then each material’s properties are read into memory. If a mesh is loaded later on which uses amaterial that has the same name as one specified in a material script, it will use the textures andproperties as defined in the script. Used material names can be saved with the mesh when saving froma 3D modeling program. This allows you to specify the material when you are creating your mesh andthen easily load it into a PureBasic 3D program, retaining all material properties.
Material scripts can be written by hand using a simple text editor or they can be exported from some3D modeling programs along with the mesh. The syntax of material scripts is described on the OGREwebsite which can be found in Appendix A (Useful Internet Links). Here is the material script that Iused for the statue model in the Statue example, this script file is called ‘Statue.material’:
material Statue{technique{pass{texture_unit{texture SphereMap.pngenv_map sphericalfiltering trilinear
}}
}}
This simple file describes the ‘Statue’ material, more precisely, it tells OGRE to use the image,‘SphereMap.png’ as a texture, use spherical texture mapping and use trilinear filtering. To enable theStatue mesh to use this material, I specified it’s name in my 3D modeling program.
If you look at the Statue example you can see I create an entity, fully textured using one line of code asopposed to the Invader example where I had to use multiple lines to load textures and create materialsetc. This line is:
...CreateEntity(#ENTITY, LoadMesh(#MESH, "Statue.mesh"), #PB_Material_None)
...

3D Graphics224
This loads the ‘Statue.mesh’ file and uses the material defined in the material script. Because we areusing a material script to define the material, when using the ‘CreateEntity()’ command, the materialID parameter must be ‘#PB_Material_None’. This built-in constant ensures that this entity is notassigned a material, other than the one defined in the script.
Particle EffectsCreating particles can be quite a complicated affair, especially when so many effects can be producedby using them. Currently, PureBasic supports eighteen commands to customize particles in nearlyevery way imaginable.
Particles, like meshs need a material assigned to them to display properly and I’ve created one in theStatue example using the ‘Flame.png’ image as a texture. This image will be used for every singleparticle that leaves the emitter. A particle emitter is a coordinate in 3D space that will be the point thatall particles are emitted from. I’ve defined this in my example like this:
...CreateParticleEmitter(#PARTICLE_ONE, 2, 2, 0,#PB_Particle_Point,12.9, 69, 15.7)
...
The ‘CreateParticleEmitter’ command (Helpfile:Reference Manual->3D Games Libraries->Particle->CreateParticleEmitter) takes eight parameters. The first, as usual is the PB number that will beassociated to this particle emitter. The second, third and forth parameters are how far from the centerpoint the particles are emitted along the ‘x’, ‘y’ and ‘z’ axis. The fifth is the particle mode. This caneither be ‘#PB_Particle_Point’ or ‘#PB_Particle_Box’. Emitter points are usually used for fire andsmoke, etc. when the particles emanate from a particular point, while emitter boxes are usually usedfor area effects such as rain or snow. The last three parameters are coordinates in the 3D world thatdefine where this emitter will be placed. These last three are also optional and if not used the emitterwill be placed at ‘0, 0, 0’. You can later move the emitter by using the ‘ParticleEmitterLocate()’command.
Particle Scripts?
Like material scripts, particle scripts are a way of encapsulating complicated properties under a simple name.Then, when you next create a particle emitter you can specify the particle property name and all theproperties defined under that name are applied to the emitter. This makes testing and creating particleeffects quicker and easier.
At the moment, PureBasic does not support particle scripts but the OGRE engine does. When asked, thePureBasic team said that particle script support will be added to PureBasic in the near future. So maybe whenyou are reading this, PureBasic already has this support. For more information refer to the OGRE websiteand the online PureBasic forums, both addresses can be found in Appendix A (Useful Internet Links).
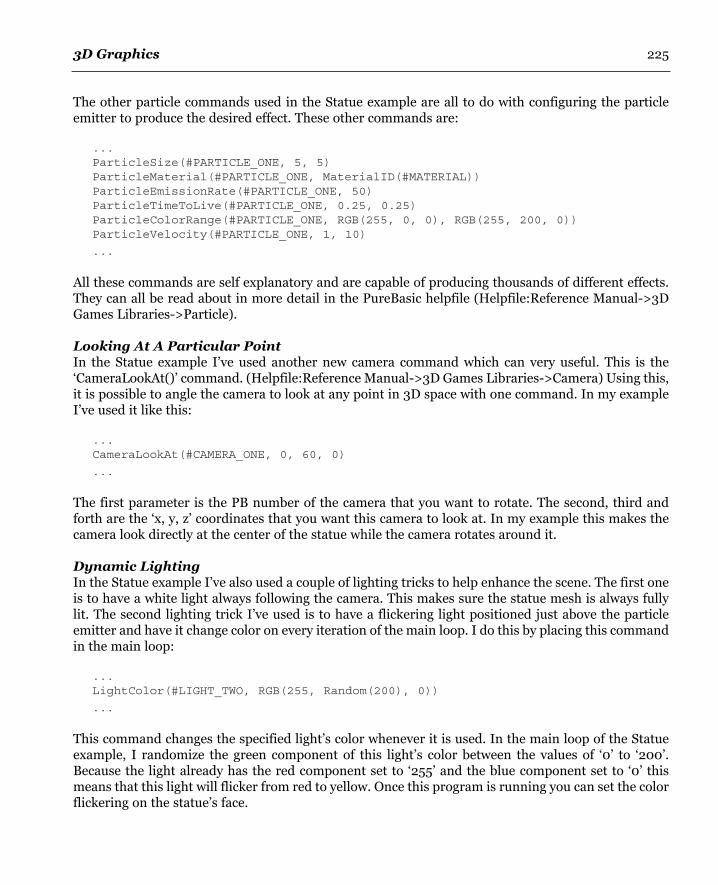
3D Graphics 225
The other particle commands used in the Statue example are all to do with configuring the particleemitter to produce the desired effect. These other commands are:
...ParticleSize(#PARTICLE_ONE, 5, 5)ParticleMaterial(#PARTICLE_ONE, MaterialID(#MATERIAL))ParticleEmissionRate(#PARTICLE_ONE, 50)ParticleTimeToLive(#PARTICLE_ONE, 0.25, 0.25)ParticleColorRange(#PARTICLE_ONE, RGB(255, 0, 0), RGB(255, 200, 0))ParticleVelocity(#PARTICLE_ONE, 1, 10)
...
All these commands are self explanatory and are capable of producing thousands of different effects.They can all be read about in more detail in the PureBasic helpfile (Helpfile:Reference Manual->3DGames Libraries->Particle).
Looking At A Particular PointIn the Statue example I’ve used another new camera command which can very useful. This is the‘CameraLookAt()’ command. (Helpfile:Reference Manual->3D Games Libraries->Camera) Using this,it is possible to angle the camera to look at any point in 3D space with one command. In my exampleI’ve used it like this:
...CameraLookAt(#CAMERA_ONE, 0, 60, 0)
...
The first parameter is the PB number of the camera that you want to rotate. The second, third andforth are the ‘x, y, z’ coordinates that you want this camera to look at. In my example this makes thecamera look directly at the center of the statue while the camera rotates around it.
Dynamic LightingIn the Statue example I’ve also used a couple of lighting tricks to help enhance the scene. The first oneis to have a white light always following the camera. This makes sure the statue mesh is always fullylit. The second lighting trick I’ve used is to have a flickering light positioned just above the particleemitter and have it change color on every iteration of the main loop. I do this by placing this commandin the main loop:
...LightColor(#LIGHT_TWO, RGB(255, Random(200), 0))
...
This command changes the specified light’s color whenever it is used. In the main loop of the Statueexample, I randomize the green component of this light’s color between the values of ‘0’ to ‘200’.Because the light already has the red component set to ‘255’ and the blue component set to ‘0’ thismeans that this light will flicker from red to yellow. Once this program is running you can set the colorflickering on the statue’s face.

3D Graphics226
Using a few tricks like material scripts to build more complex materials and using particles to createcool effects will help lift your game or demo above the rest in terms of quality and style. I’ve only givenyou a brief demonstration of what is possible with these commands the rest is up to you. To learn moreabout these commands try coding your own 3D programs and experiment with a few settings,especially with the particle commands.
What’s Next?
Hopefully this has been a helpful, albeit brief chapter on programming 3D graphics using PureBasic.I hope that you have been inspired to learn more about what PureBasic can achieve using the OGREengine. I would recommend reading through the entire ‘3D Games Libraries’ section in the PureBasichelpfile to understand fully what PureBasic has to offer. This chapter has not covered every commandthat is contained there because of space and time constraints, but hopefully I’ve given you a goodprimer on how to start, the rest now is up to you.
Learning how to program 3D graphics can be quite tricky as sometimes it relies on complicated mathroutines and 3D modeling skills. The mathematics used in the examples in this chapter is quiteelementary and is something which I think every college student will probably know. Saying thatthough, the one piece of advice I would give to all beginners of 3D programming is to learn your maths.There will be times when programming 3D graphics that you will be stopped dead in your tracksbecause your math ability has fallen behind your programming ability, so it’s best to be prepared.
Take a look on the Internet, as there are hundreds of 3D math tutorials you can work through and amyriad of books you can read that cover this very topic in detail.

12Sound
At some point while programming, you may need sounds to be played by a program. It might be anaudible chime that lets the user know that a task has finished or it might be a sound effect in a game.However you use sound, you will need to know how to load and playback particular sound files. Thischapter explains how to load various different sound files and gives examples on how to play thosesound files from within a program.
Wave Files
Wave files are one of the most common sound formats on personal computers, due to their creationby a join effort between Microsoft and IBM. Wave files, which usually have the file extension of ‘*.wav’,are the native sound format used by all PCs. Although this format has no native compression for thesound data, it’s still used for every day purposes.
The following example loads a wave file called ‘Intro.wav’ and plays it:
#SOUND_FILE = 1If InitSound()
LoadSound(#SOUND_FILE, "Intro.wav")PlaySound(#SOUND_FILE)
StartTime.l = ElapsedMilliseconds()RepeatDelay(1)
Until ElapsedMilliseconds() > StartTime + 8000End
EndIf
This example would probably not be used in a real program but it shows you the correct steps neededto play a wave file. First, we have to initialize the sound environment using the ‘InitSound()’ command.
227

Sounds228
This correctly initializes all the hardware and software needed to play your file. If this returns true, weknow that it has initialized properly and we can continue. There’s no point continuing with sound ifthe sound initialization fails, the computer probably doesn’t have a sound card installed.
Once the initialization is done and checked we load the sound file using the ‘LoadSound()’ command(Helpfile:Reference Manual->2D Games Libraries->Sound->LoadSound). This loads the sound intomemory ready for us to play it. The ‘LoadSound()’ command takes two parameters, the first is the PBnumber that you wish to be associated to this sound file and the second is a String containing thefilename of the sound you wish to load.
Once the wave file has been loaded you can play it at any time in your program by using the‘PlaySound()’ command (Helpfile:Reference Manual->2D Games Libraries->Sound->PlaySound).This command takes one parameter, which is the PB number of the sound file you wish to play.
If you take a closer look at the wave file example you will see I’ve used quite an elaborate loop on theend of the program. This is to stop this example program exiting too soon. When this program exits,all sound currently being played by it will stop and be unloaded from memory. I don’t want this tohappen straight away, so I’ve coded this loop to give the program eight seconds to play the file and thenexit. You will probably never see this on a real program because it will probably have a main loop tokeep the program ‘alive’ while the sound is playing.
Embedding Wave FilesSometimes in your programs you may not want to load external wave files, but have the files actuallycontained within your program so the whole thing can be distributed as one file. This can be done byembedding your wave file inside a ‘DataSection’, similar to embedding an image, as explained inChapter 9 (Including Graphics In Your Program). There is one difference however, instead of using the‘CatchImage()’ command to load the file from the ‘DataSection’ we use the ‘CatchSound()’ commandinstead, here is an example:
#SOUND_FILE = 1If InitSound()
CatchSound(#SOUND_FILE, ?SoundFile)PlaySound(#SOUND_FILE)
StartTime.l = ElapsedMilliseconds()RepeatDelay(1)
Until ElapsedMilliseconds() > StartTime + 8000End
EndIf
DataSectionSoundFile:IncludeBinary "Intro.wav"
EndDataSection
The sound file is embedded in the ‘DataSection’ by using the ‘IncludeBinary’ command in exactly the
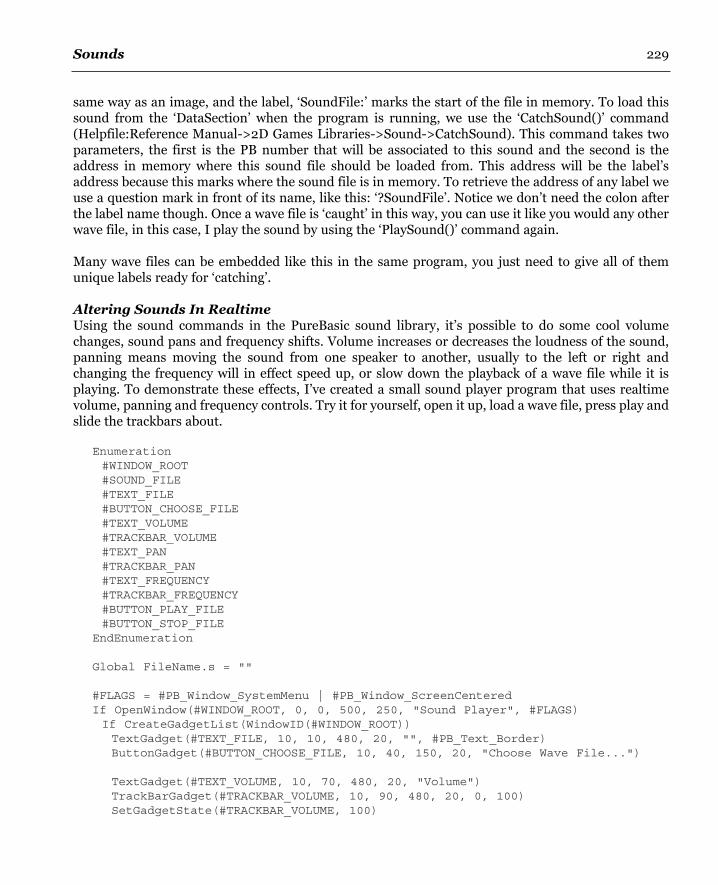
Sounds 229
same way as an image, and the label, ‘SoundFile:’ marks the start of the file in memory. To load thissound from the ‘DataSection’ when the program is running, we use the ‘CatchSound()’ command(Helpfile:Reference Manual->2D Games Libraries->Sound->CatchSound). This command takes twoparameters, the first is the PB number that will be associated to this sound and the second is theaddress in memory where this sound file should be loaded from. This address will be the label’saddress because this marks where the sound file is in memory. To retrieve the address of any label weuse a question mark in front of its name, like this: ‘?SoundFile’. Notice we don’t need the colon afterthe label name though. Once a wave file is ‘caught’ in this way, you can use it like you would any otherwave file, in this case, I play the sound by using the ‘PlaySound()’ command again.
Many wave files can be embedded like this in the same program, you just need to give all of themunique labels ready for ‘catching’.
Altering Sounds In RealtimeUsing the sound commands in the PureBasic sound library, it’s possible to do some cool volumechanges, sound pans and frequency shifts. Volume increases or decreases the loudness of the sound,panning means moving the sound from one speaker to another, usually to the left or right andchanging the frequency will in effect speed up, or slow down the playback of a wave file while it isplaying. To demonstrate these effects, I’ve created a small sound player program that uses realtimevolume, panning and frequency controls. Try it for yourself, open it up, load a wave file, press play andslide the trackbars about.
Enumeration#WINDOW_ROOT#SOUND_FILE#TEXT_FILE#BUTTON_CHOOSE_FILE#TEXT_VOLUME#TRACKBAR_VOLUME#TEXT_PAN#TRACKBAR_PAN#TEXT_FREQUENCY#TRACKBAR_FREQUENCY#BUTTON_PLAY_FILE#BUTTON_STOP_FILE
EndEnumeration
Global FileName.s = ""
#FLAGS = #PB_Window_SystemMenu | #PB_Window_ScreenCenteredIf OpenWindow(#WINDOW_ROOT, 0, 0, 500, 250, "Sound Player", #FLAGS)If CreateGadgetList(WindowID(#WINDOW_ROOT))TextGadget(#TEXT_FILE, 10, 10, 480, 20, "", #PB_Text_Border)ButtonGadget(#BUTTON_CHOOSE_FILE, 10, 40, 150, 20, "Choose Wave File...")
TextGadget(#TEXT_VOLUME, 10, 70, 480, 20, "Volume")TrackBarGadget(#TRACKBAR_VOLUME, 10, 90, 480, 20, 0, 100)SetGadgetState(#TRACKBAR_VOLUME, 100)

Sounds230
TextGadget(#TEXT_PAN, 10, 120, 480, 20, "Pan")TrackBarGadget(#TRACKBAR_PAN, 10, 140, 480, 20, 0, 200)SetGadgetState(#TRACKBAR_PAN, 100)
TextGadget(#TEXT_FREQUENCY, 10, 170, 480, 20, "Frequency")TrackBarGadget(#TRACKBAR_FREQUENCY, 10, 190, 480, 20, 100, 10000)SetGadgetState(#TRACKBAR_FREQUENCY, 4400)
ButtonGadget(#BUTTON_PLAY_FILE, 10, 220, 100, 20, "Play File")ButtonGadget(#BUTTON_STOP_FILE, 130, 220, 100, 20, "Stop Sound")
If InitSound()RepeatEvent.l = WaitWindowEvent()Select EventCase #PB_Event_Gadget
Select EventGadget()Case #BUTTON_CHOOSE_FILEFileName=OpenFileRequester("Choose","","Wave File (*.wav)|*.wav",0)If filename <> ""SetGadgetText(#TEXT_FILE, GetFilePart(FileName))LoadSound(#SOUND_FILE, filename)
EndIf
Case #TRACKBAR_VOLUMEIf filename <> ""SoundVolume(#SOUND_FILE, GetGadgetState(#TRACKBAR_VOLUME))
EndIf
Case #TRACKBAR_PANIf filename <> ""SoundPan(#SOUND_FILE, GetGadgetState(#TRACKBAR_PAN) - 100)
EndIf
Case #TRACKBAR_FREQUENCYIf filename <> ""SoundFrequency(#SOUND_FILE,GetGadgetState(#TRACKBAR_FREQUENCY) * 10)
EndIf
Case #BUTTON_PLAY_FILEIf filename <> ""PlaySound(#SOUND_FILE)
EndIf
Case #BUTTON_STOP_FILEIf filename <> ""StopSound(#SOUND_FILE)
EndIfEndSelect

Sounds 231
EndSelectUntil Event = #PB_Event_CloseWindow
EndIfEndIf
EndIfEnd
This example introduces three new sound commands:
‘SoundVolume()’This command is used to control the ‘loudness’ of the loaded sound. It doesn’t change the originalsound file in any way, it merely changes the volume of the sound when it’s played back. To use thiscommand you must pass it two parameters, the first is the PB number of the sound you wish to changeand the second is the volume level you wish to change it to. The volume level is a number between ‘0’and ‘100’. With ‘0’ being silent and ‘100’ being the loudest setting.
‘SoundPan()’This command pans the sound to and from the left and right channel. To use this command you needto pass two parameters. The first is the PB number of the sound you wish to pan and the secondparameter is the pan value. This pan value is a number which ranges from ‘-100’ to ‘100’. If you use avalue of ‘-100’, then the sound is fully panned to the left. If you use a value of ‘100’, then the sound isfully panned to the right.
‘SoundFrequency()’This command changes the frequency of the sound to be played. The frequency of a sound file ismeasured in Hertz and is explained as the number of times a particular waveform is read per second.For example, all music stored on a compact disc is sampled at a rate of 44.1kHz (kilohertz). This meansthat the waveform containing the sound information on a CD is read forty four thousand, one hundredtimes a second. This makes sure that there is necessary resolution within the waveform to encode eventhe slightest variation of sound. If a sound is encoded at 44.1kHz and you use this command to changeits frequency to 22,050Hz, then once this sound is played back, it will play back at half the speed of theoriginal. To use this command in PureBasic to change the frequency of a loaded sound, you pass it twoparameters. The first is the PB number of the sound you want to alter and the second is a number thatexpresses the new frequency in Hertz. This second parameter must be between ‘1000’ to ‘100000’.
To learn more about the commands that manipulate wave files, see the sound library in the PureBasichelpfile (Helpfile:Reference Manual->2D Games Libraries->Sound).
Module Files
These types of files use formats that represents music using digital patterns. Internally, they storeseveral patterned pages of music data in a form similar to that of a spreadsheet. These patterns containnote numbers, instrument numbers, and controller messages which tell the program reading the filewhen to play notes, using what samples and for how long. Module files also hold a list which definesthe order in which to play the patterns. The number of notes that can be played simultaneously

Sounds232
depends on how many tracks there are per pattern. Early programs which were available allowed usersto create their own modules using four tracks. The biggest advantage of modules over standard soundfiles is that modules include their own audio samples and should sound the same from one player toanother.
Module files are often called tracker modules, and the art of composing modules is known as tracking,simply because the first ever program that allowed users to create modules was called ‘Soundtracker’.This program, although originally poorly received, was eventually released into the public domain andwas cloned many times, sporting better features and different names such as ‘Noisetracker’ or‘Protracker’, these became extremely popular especially with Commodore Amiga game and democreators. Programs that can create module files are today collectively known as trackers.
Module files can have many different file extensions because they come in many different formats,these extensions usually reveal the file’s creator program. Module file types which are supported byPureBasic are:
FastTracker (‘*.xm’)Scream Tracker (‘*.s3m’)Protracker (‘*.mod’)Impulse Tracker (‘*.it’)
These different types of modules are treated in the same way when loading and playing in yourPureBasic program. Here is an example showing how to load and play any of the above types ofmodule:
#MODULE_FILE = 1
If InitSound()If InitModule()
LoadModule(#MODULE_FILE, "Eighth.mod")PlayModule(#MODULE_FILE)
StartTime.l = ElapsedMilliseconds()RepeatDelay(1)
Until ElapsedMilliseconds() > StartTime + 15000
StopModule(#MODULE_FILE)
EndEndIf
EndIf
First, we need to initialize the sound environment just like the wave file example by using the‘InitSound()’ command. Next, we need to initialize the module playing capabilities of PureBasic byusing the ‘InitModule()’ command. Both of these commands should be tested to ensure that both areinitialized correctly.

Sounds 233
Once the environment is set up we can load a module by using the ‘LoadModule()’ command(Helpfile:Reference Manual->2D Games Libraries->Module->LoadModule). This command takes twoparameters, the first is the PB number that you wish to be associated with this module and the secondis the filename of the module to be loaded.
Once it’s loaded we can play this module at any time using the ‘PlayModule()’ command(Helpfile:Reference Manual->2D Games Libraries->Module->PlayModule). Just like the‘PlaySound()’ command, this one takes one parameter, which is the PB number of the module youwant to play. To stop the module from playing you can use the ‘StopModule()’ command.
The Downsides Of Using ModulesThere are two big downsides of using modules in your PureBasic programs. The first is that there is noeasy way to embed and load from memory any modules that need to be played. This means that youhave to distribute all the used module files along with your executable. There are however, ways ofstoring the module in your executable, and then writing it to disk before loading and playing it, but thisis a little bit cumbersome. The second downside is that you have to distribute the ‘Midas11.dll’ filealong with your program. This dynamic linked library is loaded by the command; ‘InitModule()’ andwill error if it doesn’t find it. You may think that this isn’t too bad but the license connected to usingthis ‘Midas’ library forbids the use of it for any commercial purposes. This license also prevents the‘Midas11.dll’ file being included within the PureBasic package, so you have to download it for yourselffrom the ‘Housemarque Audio System’ website, which can be found in Appendix A (Useful InternetLinks).
To learn about other commands that can be used to manipulate module files, see the module libraryin the PureBasic helpfile (Helpfile:Reference Manual->2D Games Libraries->Module).
Mp3’s
MP3 files are quickly becoming the most popular sound file format of all time, largely due to the factthat the MP3 file format is the de-facto standard for nearly all downloadable music on the Internet.MP3 is an anacronym that stands for ‘MPEG-1 Audio Layer 3’ which is quite a mouthful, so you willprobably understand why it was shortened.
MP3 files are handled a little bit differently in PureBasic and in order to play them we must use thecommands from the ‘Movie’ library (Helpfile:Reference Manual->General Libraries->Movie). It mayseem a little odd using the movie commands to play mp3 files but the movie commands are capable ofmuch more than just playing movies. The ‘Movie’ library provides a convenient way to load and playnearly all media that has a codec installed on the host computer. Not only can you play movie formatsusing these commands, but you can also play audio file formats.
Here is a list of the more popular file formats that the ‘Movie’ library is able to play as long as therequired plugins and/or codecs are installed first. You may even be able to play more formats thanwhat is shown on this list:

Sounds234
Movie Files:Audio Video Interleave (‘*.avi’)MPEG Video (‘*.mpg’)
Audio Files:Midi Files (‘*.mid’)MP3 Files (‘*.mp3’)Ogg Vorbis (‘*.ogg’)Wave Files (‘*.wav’)
The ‘Movie’ library may seem like a ‘one stop shop’ for all your media playing needs and some peoplehave even asked for it to be renamed to the ‘Media’ library, but the one thing to remember is that ifsomething loads and plays on your computer, it might not load and play on another person’scomputer. This is because there might be different plugins and/or codecs installed, (or not) on othermachines. However, saying this, the list above seems to be pretty standard on most machines, butdon’t quote me on that.
In this next example I’ve used the movie commands to create a simple MP3 player and provide simplevolume and pan controls. It may not rival WinAmp but it gives you an idea of how easy media playersare to create in PureBasic.
Enumeration#WINDOW_ROOT#SOUND_FILE#TEXT_FILE#BUTTON_CHOOSE_FILE#TEXT_VOLUME#TRACKBAR_VOLUME#TEXT_PAN#TRACKBAR_PAN#BUTTON_PLAY_FILE#BUTTON_PAUSE_FILE#BUTTON_STOP_FILE
EndEnumeration
Global FileName.s = ""Global FilePaused.b = #False
#FLAGS = #PB_Window_SystemMenu | #PB_Window_ScreenCenteredIf OpenWindow(#WINDOW_ROOT, 0, 0, 500, 215, "MP3 Player", #FLAGS)If CreateGadgetList(WindowID(#WINDOW_ROOT))TextGadget(#TEXT_FILE, 10, 10, 480, 20, "", #PB_Text_Border)ButtonGadget(#BUTTON_CHOOSE_FILE, 10, 40, 150, 20, "Choose MP3 File...")TextGadget(#TEXT_VOLUME, 10, 70, 480, 20, "Volume")TrackBarGadget(#TRACKBAR_VOLUME, 10, 90, 480, 20, 0, 100)SetGadgetState(#TRACKBAR_VOLUME, 100)TextGadget(#TEXT_PAN, 10, 120, 480, 20, "Pan")TrackBarGadget(#TRACKBAR_PAN, 10, 140, 480, 20, 0, 200)SetGadgetState(#TRACKBAR_PAN, 100)

Sounds 235
ButtonGadget(#BUTTON_PLAY_FILE, 10, 180, 100, 20, "Play")ButtonGadget(#BUTTON_PAUSE_FILE, 130, 180, 100, 20, "Pause")ButtonGadget(#BUTTON_STOP_FILE, 250, 180, 100, 20, "Stop")
If InitMovie()RepeatEvent.l = WaitWindowEvent()Select EventCase #PB_Event_Gadget
Select EventGadget()Case #BUTTON_CHOOSE_FILEFileName=OpenFileRequester("Choose","","MP3 File (*.mp3)|*.mp3",0)If filename <> ""SetGadgetText(#TEXT_FILE, GetFilePart(FileName))LoadMovie(#SOUND_FILE, filename)
EndIf
Case #TRACKBAR_VOLUME, #TRACKBAR_PANIf filename <> ""Volume.l = GetGadgetState(#TRACKBAR_VOLUME)Balance.l = GetGadgetState(#TRACKBAR_PAN) - 100MovieAudio(#SOUND_FILE, Volume, Balance)
EndIf
Case #BUTTON_PLAY_FILEIf filename <> ""PlayMovie(#SOUND_FILE, #Null)FilePaused = #FalseSetGadgetText(#BUTTON_PAUSE_FILE, "Pause")
EndIf
Case #BUTTON_PAUSE_FILEIf filename <> ""If FilePaused = #FalsePauseMovie(#SOUND_FILE)FilePaused = #TrueSetGadgetText(#BUTTON_PAUSE_FILE, "Resume")
ElseResumeMovie(#SOUND_FILE)FilePaused = #FalseSetGadgetText(#BUTTON_PAUSE_FILE, "Pause")
EndIfEndIf
Case #BUTTON_STOP_FILEIf filename <> ""StopMovie(#SOUND_FILE)FilePaused = #FalseSetGadgetText(#BUTTON_PAUSE_FILE, "Pause")
EndIf

Sounds236
EndSelect
EndSelectUntil Event = #PB_Event_CloseWindow
EndIfEndIf
EndIfEnd
Looking at this small example, you can see that to use the movie commands, you must initialize theenvironment properly just like wave files and modules. To initialize the movie commands you use the‘InitMovie()’ command. After this has been called you are free to use the other ‘Movie’ librarycommands. As with other initialization commands it must be tested and if it fails, you won’t be able tocontinue using the movie commands.
To load a movie (or in this case a MP3 file) we use the ‘LoadMovie()’ command (Helpfile:ReferenceManual->General Libraries->Movie->LoadMovie). This command takes two parameters. The first oneis the PB number that you want associated to the media about to be loaded and the second parameteris a String containing the filename of the actual media to load.
Once the media has been loaded we can play it back using the ‘PlayMovie()’ command(Helpfile:Reference Manual->General Libraries->Movie->PlayMovie). This command takes twoparameters to be able to support movies as well as audio media. The first parameter is the PB numberof the media you want to play, while the second parameter is an OS identifier of a window. This OSidentifier is required if you are playing back a movie because this window is where the movie displaywill be rendered. If you are playing back a file that only consists of audio data (such as a MP3) thenyou can use the built-in constant ‘#Null’ as an OS identifier, this doesn’t then associate any window tothe playback of the file:
...PlayMovie(#SOUND_FILE, #Null)
...
Also in the example I’ve used the ‘PauseMovie()’ and ‘ResumeMovie()’ commands, these are simple touse, they both take one parameter which is the PB number of the media you want to pause or resume.
To enable you to stop the playback of your files, I’ve also used the ‘StopMovie()’ command in thisexample. Again, this is a simple one to use, as you only need to pass it one parameter. This is the PBnumber of the media you wish to stop playing.
Even though this is a skeleton of a media player and it only supports MP3’s, it would be a trivial taskto convert this code to make your own media player capable of handling all of the formats listed above.Why don’t you try?
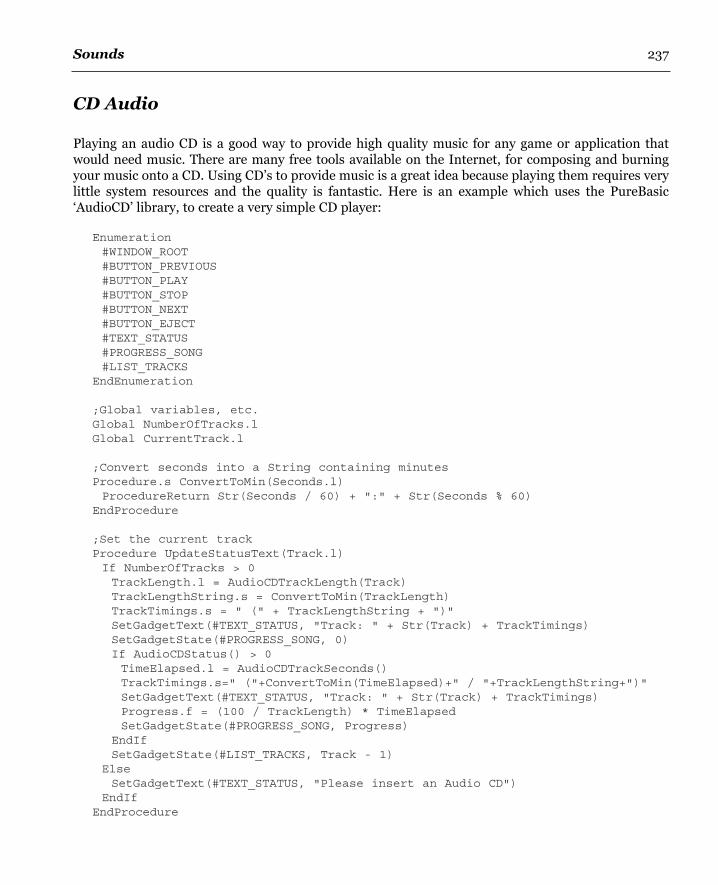
Sounds 237
CD Audio
Playing an audio CD is a good way to provide high quality music for any game or application thatwould need music. There are many free tools available on the Internet, for composing and burningyour music onto a CD. Using CD’s to provide music is a great idea because playing them requires verylittle system resources and the quality is fantastic. Here is an example which uses the PureBasic‘AudioCD’ library, to create a very simple CD player:
Enumeration#WINDOW_ROOT#BUTTON_PREVIOUS#BUTTON_PLAY#BUTTON_STOP#BUTTON_NEXT#BUTTON_EJECT#TEXT_STATUS#PROGRESS_SONG#LIST_TRACKS
EndEnumeration
;Global variables, etc.Global NumberOfTracks.lGlobal CurrentTrack.l
;Convert seconds into a String containing minutesProcedure.s ConvertToMin(Seconds.l)ProcedureReturn Str(Seconds / 60) + ":" + Str(Seconds % 60)
EndProcedure
;Set the current trackProcedure UpdateStatusText(Track.l)If NumberOfTracks > 0TrackLength.l = AudioCDTrackLength(Track)TrackLengthString.s = ConvertToMin(TrackLength)TrackTimings.s = " (" + TrackLengthString + ")"SetGadgetText(#TEXT_STATUS, "Track: " + Str(Track) + TrackTimings)SetGadgetState(#PROGRESS_SONG, 0)If AudioCDStatus() > 0TimeElapsed.l = AudioCDTrackSeconds()TrackTimings.s=" ("+ConvertToMin(TimeElapsed)+" / "+TrackLengthString+")"SetGadgetText(#TEXT_STATUS, "Track: " + Str(Track) + TrackTimings)Progress.f = (100 / TrackLength) * TimeElapsedSetGadgetState(#PROGRESS_SONG, Progress)
EndIfSetGadgetState(#LIST_TRACKS, Track - 1)
ElseSetGadgetText(#TEXT_STATUS, "Please insert an Audio CD")
EndIfEndProcedure
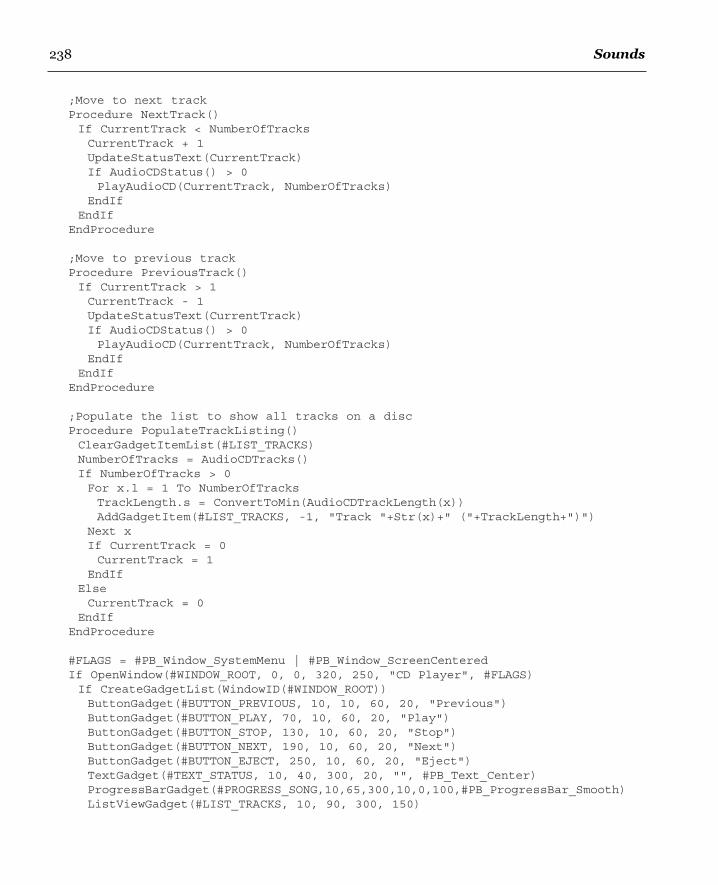
Sounds238
;Move to next trackProcedure NextTrack()If CurrentTrack < NumberOfTracksCurrentTrack + 1UpdateStatusText(CurrentTrack)If AudioCDStatus() > 0PlayAudioCD(CurrentTrack, NumberOfTracks)
EndIfEndIf
EndProcedure
;Move to previous trackProcedure PreviousTrack()If CurrentTrack > 1CurrentTrack - 1UpdateStatusText(CurrentTrack)If AudioCDStatus() > 0PlayAudioCD(CurrentTrack, NumberOfTracks)
EndIfEndIf
EndProcedure
;Populate the list to show all tracks on a discProcedure PopulateTrackListing()ClearGadgetItemList(#LIST_TRACKS)NumberOfTracks = AudioCDTracks()If NumberOfTracks > 0For x.l = 1 To NumberOfTracksTrackLength.s = ConvertToMin(AudioCDTrackLength(x))AddGadgetItem(#LIST_TRACKS, -1, "Track "+Str(x)+" ("+TrackLength+")")
Next xIf CurrentTrack = 0CurrentTrack = 1
EndIfElseCurrentTrack = 0
EndIfEndProcedure
#FLAGS = #PB_Window_SystemMenu | #PB_Window_ScreenCenteredIf OpenWindow(#WINDOW_ROOT, 0, 0, 320, 250, "CD Player", #FLAGS)If CreateGadgetList(WindowID(#WINDOW_ROOT))ButtonGadget(#BUTTON_PREVIOUS, 10, 10, 60, 20, "Previous")ButtonGadget(#BUTTON_PLAY, 70, 10, 60, 20, "Play")ButtonGadget(#BUTTON_STOP, 130, 10, 60, 20, "Stop")ButtonGadget(#BUTTON_NEXT, 190, 10, 60, 20, "Next")ButtonGadget(#BUTTON_EJECT, 250, 10, 60, 20, "Eject")TextGadget(#TEXT_STATUS, 10, 40, 300, 20, "", #PB_Text_Center)ProgressBarGadget(#PROGRESS_SONG,10,65,300,10,0,100,#PB_ProgressBar_Smooth)ListViewGadget(#LIST_TRACKS, 10, 90, 300, 150)

Sounds 239
If InitAudioCD()PopulateTrackListing()
StartTime.l = ElapsedMilliseconds()
RepeatEvent.l = WindowEvent()Select EventCase #PB_Event_GadgetSelect EventGadget()Case #BUTTON_PREVIOUSPreviousTrack()
Case #BUTTON_PLAYIf NumberOfTracks > 0PlayAudioCD(CurrentTrack, NumberOfTracks)
EndIfCase #BUTTON_STOPStopAudioCD()
Case #BUTTON_NEXTNextTrack()
Case #BUTTON_EJECTEjectAudioCD(#True)PopulateTrackListing()
Case #LIST_TRACKSIf EventType() = #PB_EventType_LeftDoubleClickCurrentTrack = GetGadgetState(#LIST_TRACKS) + 1UpdateStatusText(CurrentTrack)PlayAudioCD(CurrentTrack, NumberOfTracks)
EndIfEndSelect
EndSelect
CurrentTime.l = ElapsedMilliseconds()If CurrentTime > StartTime + 1000PopulateTrackListing()UpdateStatusText(CurrentTrack)StartTime.l = ElapsedMilliseconds()
EndIfDelay(1)
Until Event = #PB_Event_CloseWindowStopAudioCD()
EndIfEndIf
EndIfEnd
This example is an extremely simple CD player which provides the bare minimum of functionality tocontrol and play CD’s. All the ‘AudioCD’ library commands that have been used can be read about inmore detail in the PureBasic helpfile (Helpfile:Reference Manual->General Libraries->AudioCD).

Sounds240
To use the ‘AudioCD’ commands you first have to initialize the resources needed to be able to playCD’s. To do this we use the ‘InitAudioCD()’ command. This command must be tested to determine ifit was successful or not. As a byproduct, the return value of this command is the number of CD drivesconnected to the computer and of which are available for use to play music. If the return value is ‘0’then the computer either doesn’t have a CD drive installed or another problem has been encounteredwhich prevents the CD drive from playing music. As long as the return value is above ‘0’ then all shouldbe well.
Once the CD audio has been initialized, you are then free to use all of the other commands available inthe ‘AudioCD’ library.
Here is a list of the ones I’ve used in my CD player example:
‘PlayAudioCD()’This command is used to play a track on the current CD which is inserted into your drive. Thiscommand takes two parameters. The first is the track to start playing from and the second is the trackto stop playing once the end has been reached. So for example, If I called the command like this:
PlayAudioCD(1, 3)
Track ‘1’ would start playing, then continue afterwards to the next track. The play back would then stopafter track ‘3’ had finished.
‘StopAudioCD()’This command can be used at any time to stop the playback of any track currently playing on the CD.
‘EjectAudioCD()’This command will either open or close the tray on the CD drive depending on what parameter ispassed to it. This command only takes one parameter and if that parameter is ‘1’ the drive tray will beopened, effectively stopping playback and ejecting the CD. If the parameter is ‘0’ the drive tray isclosed, effectively loading any CD that is placed in it.
‘AudioCDStatus()’This command doesn’t have any parameters but returns a result that gives us a realtime status of theCD in the drive. If you call this command and it returns ‘-1’ then the drive is not ready, meaning thatthe drive either contains no CD or that the drive tray is currently open. If this command returns thevalue ‘0’ then a CD has been detected correctly and is in the drive but the CD is not playing. If thiscommand returns a value which is above ‘0’ then the CD drive is playing a CD track. The number whichwas actually returned, is the track number which is being played back.
‘AudioCDTracks()’This command doesn’t take any parameters and when called, returns the number of tracks on a loadedCD that are available to be played back.

Sounds 241
‘AudioCDTrackLength()’This command requires one parameter and that is a track number from a loaded CD. With thisinformation, this command will return that track’s length in seconds.
‘AudioCDTrackSeconds()’This command doesn’t take any parameters. When called, it will return the amount of time elapsed inseconds that the current track has been playing for.
If you look closer at my CD player example, I’ve also used the command; ‘WindowEvent()’ instead of‘WaitWindowEvent()’. This means that the main loop will always be running regardless of if an eventis detected or not. I needed this particular program to do this because I use a timed procedure call inthe main loop to update the status text in the CD player’s graphical user interface. If I didn’t use thiscommand, the status text would only be updated if an event was detected, which could be sometime.
‘WindowEvent()’ and ‘WaitWindowEvent()’ are covered in more detail in Chapter 9 (UnderstandingEvents).


IVAdvanced
Topics
In this section, I explain things that are a little more advanced than what the rest of this book dealswith. This section is for those who have further questions on a particular facet of PureBasic or want tolearn a little more about what goes on ‘under the hood’.
You don’t need to know any of what is contained in this section to write good, solid and feature-richprograms, but I have included it here for those who want to delve a little deeper.


13Beyond
The Basics
This chapter contains a mish-mash of topics because I felt all these subjects needed to be explained buteach one really didn’t warrant a full chapter. These things are not essential to know if you want to writePureBasic programs but are for programmers who want to increase their knowledge of the moreadvanced features of the PureBasic language.
Topics covered in this chapter include; Compiler Directives and how to control the compiler usingcode, Advanced Compiler Options to get more from the PureBasic compiler, How to pass CommandLine Arguments to you program for writing command line tools, How PureBasic stores numeric datatypes, What Pointers are and how to use them, What Threads are and how to use them, WhatDynamically Linked Libraries are and how to create them and How to use the Window ApplicationProgramming Interface natively in PureBasic.
Compiler Directives And Functions
Compiler directives are commands that control the PureBasic compiler during compile time. As such,these directives allow you to have total control over what parts of your source code are compiled andallow you to retrieve information from the compiler. Compiler directives only have an effect duringcompile time, where they are parsed and acted on. They cannot be utilized while your program isactually running.
Compiler functions are different from directives as these are commands which enable you to gatherinformation about something that has already been compiled (usually a data type). Unlike directives,compiler functions can be utilized while the program is running.
Earlier on in this book you have already seen examples of compiler directives and compiler functionsbut you might not have noticed, for example, I demonstrated the ‘EnableExplicit’ command in Chapter8 (How To Minimize And Handle Errors). This compiler directive switches the compiler to explicit
245

Beyond The Basics246
mode and makes sure all variables are explicitly declared, making sure the scope and type of each newvariable is defined. You have also seen the ‘SizeOf()’ and ‘OffsetOf()’ commands in Chapter 5. Thesecompiler functions gather information from compiled structures and interfaces, such as the size inBytes of a particular structure in memory or the offset of where a particular field is within a structureor interface.
There are a few more directives and functions to add to this list, but before I can continue to explainthese any further, I’ll need to explain the built-in reserved compiler constants that they nearly all use.
Reserved Compiler ConstantsThese built-in reserved constants are just like any other constant, but what is different is that theirvalues largely depend on the current state of the compiler. All these constants can be tested at compiletime to make decisions on how to proceed with the compilation and some constants even provideinformation about the compiling process itself. Here is a full list of the reserved compiler constantsand what information you may get from them.
‘#PB_Compiler_OS’This is a special constant that is assigned a value depending on what platform the compiler is runningon. It also has some associated constants to help you determine what it’s value may mean. Forexample, if the ‘#PB_Compiler_OS’ constant has a value equal to any one of either‘#PB_OS_Windows’, ‘#PB_OS_Linux’, ‘#PB_OS_AmigaOS’ or ‘#PB_OS_MacOS’ then the compileris running on that particular platform.
‘#PB_Compiler_Date’This constant’s value contains a date in numeric form, which is the date of when your program wascompiled. This value is encoded in the PureBasic date format to integrate nicely with the commandsin the ‘Date’ library (Helpfile:Reference Manual->General Libraries->Date).
‘#PB_Compiler_File’This constant’s value is a String that contains the full path and name of the file (*.pb) being compiled.
‘#PB_Compiler_Line’This constant’s value is the line number of the current file which is being compiled.
‘#PB_Compiler_Version’This constant’s value contains a floating point number which is the version of the compiler being usedto compile the program.
‘#PB_Compiler_Home’This constant’s value is a String containing the full path of PureBasic’s installation folder on yourcomputer.
‘#PB_Compiler_Debugger’This constant can have one of two values. If its value is equal to ‘#True’ then the debugger was enabledbefore the program was compiled. If its value is equal to ‘#False’ then the debugger was disabled beforecompilation.
Beyond The Basics 247
‘#PB_Compiler_Thread’This constant can have one of two values. If its value is equal to ‘#True’ then the compiler was switchedto thread-safe mode before compilation. If its value is equal to ‘#False’ then the thread-safe compilermode wasn’t used.
‘#PB_Compiler_Unicode’This constant can have one of two values. If its value is equal to ‘#True’ then the compiler was switchedto unicode mode before compilation. If its value is equal to ‘#False’ then the unicode compiler modewasn’t used.
All these reserved compiler constants can be used as normal in statements and expressions, in fact youcan use them anywhere where you would use a normal constant. However, most of these compilerconstants are only really useful when they are used with the following directives.
The ‘CompilerIf’ DirectiveIf you understand how to use ‘If’ statements in PureBasic you will understand how to use ‘CompilerIf’s.A ‘CompilerIf’ is a statement that acts exactly like any other ‘If’ statement but which is never actuallycompiled. It’s basically a compiler version of an ‘If’ statement.
Unlike a normal ‘If’, a ‘CompilerIf’ decides which piece of code to compile based on the result of aconstant expression (no variables allowed). In contrast, a normal ‘If’ decides which piece of (alreadycompiled) code to run based on a variable expression.
Let me show you an example of one of the most common uses of a ‘CompilerIf’:
CompilerIf #PB_Compiler_OS = #PB_OS_WindowsMessageRequester("Info", "This compiler is running on Microsoft Windows")
CompilerElseMessageRequester("Info", "This compiler is NOT running on Microsoft Windows")
CompilerEndIf
Here the ‘CompilerIf’ tests this constant expression; ‘#PB_Compiler_OS = #PB_OS_Windows’. If thisexpression equals true then we know that this piece of code is being compiled on a computer runningMicrosoft Windows. If it equals false then it isn’t, it’s as simple as that. This seems prettystraightforward but what’s clever about using ‘CompilerIf’s is that whichever branch the ‘CompilerIf’statement takes, it will only compile that piece of code. With that in mind, if we compiled this exampleon a Microsoft Windows computer, then the line:
MessageRequester("Info", "This compiler is NOT running on Microsoft Windows")
Will never get compiled and therefore never be included in the program’s executable file.
A ‘CompilerIf’ statement consists of three commands, all of which are demonstrated in the aboveexample. The ‘CompilerElse’ component, which is similar to a standard ‘Else’, is entirely optional butthe whole statement must end with ‘CompilerEndIf’.
Beyond The Basics248
Some programmers use ‘CompilerIf’s to limit the functionality of a program especially if it’s compiledas a trial version. For example, if I write a useful program and want to give my users a demo to trybefore they buy, and I’m afraid that some might attempt to crack it to remove any limitations. I couldcode my program like this:
#DEMO = #True
CompilerIf #DEMO
;Demo codeMessageRequester("Info", "This is a demo, You must buy the full version.")
CompilerElse
;Full version codeProcedure.d MyPI()ProcedureReturn ACos(-1)
EndProcedure
Test.s = "This is the full version." + #LF$ + #LF$Test.s + "The value of Pi is: " + StrD(MyPI(), 16)MessageRequester("Info", Test)
CompilerEndIf
Just simply changing the value of the constant ‘#DEMO’ will now force the compiler to compiledifferent versions of the source code. This is useful as it can prevent cracking of your demo programsbecause they simply will not contain the code contained inside the full version. Try changing the valueof the ‘#DEMO’ constant to ‘#False’ to compile the full version of this program.
The ‘CompilerSelect’ DirectiveThe ‘CompilerSelect’ statement is a compiler version of the popular ‘Select’ statement. This means thatmultiple sections of source code can be compiled depending on the different values of a selectedconstant. Similar to a ‘CompilerIf’, ‘CompilerSelect’s can only test constant values, this is againbecause the test is done at compile time instead of runtime. Here’s another operating system test doneusing a ‘CompilerSelect’:
CompilerSelect #PB_Compiler_OS
CompilerCase #PB_OS_Windows;Windows specific codeMessageRequester("Info", "This is being compiled on Microsoft Windows.")
CompilerCase #PB_OS_Linux;Linux specific codeMessageRequester("Info", "This is being compiled on Linux.")

Beyond The Basics 249
CompilerCase #PB_OS_MacOS;MacOS specific codeMessageRequester("Info", "This is being compiled on MacOS X")
CompilerCase #PB_OS_AmigaOS;AmigaOS specific codeMessageRequester("Info", "This is being compiled on Amiga OS.")
CompilerEndSelect
Using something like this, it’s possible to customize your program to exhibit different behavior basedon what operating system it’s compiled for. Your program might also use commands from a particularoperating systems API, and because commands like that are not cross-platform, you might use a‘CompilerSelect’ to use other operating system’s APIs to produce the same result on all platforms.
PureBasic provides support for several keywords to give a ‘CompilerSelect’ the same functionality as anormal ‘Select’ statement. These keywords are, ‘CompilerSelect’, ‘CompilerCase’, ‘CompilerDefault’and ‘CompilerEndSelect’. You have seen three of these commands in the ‘CompilerSelect’ exampleabove. The forth one, ‘CompilerDefault’ is used as a fallback case keyword to handle a default state justincase the ‘CompilerCase’ commands don’t return true, like this:
CompilerSelect #PB_Compiler_OS
CompilerCase #PB_OS_AmigaOS;AmigaOS specific codeMessageRequester("Error", "This source code does not support Amiga OS.")
CompilerDefault;This code will compile on all other operating systems.MessageRequester("Info", "This is code will compile fine on this OS.")
CompilerEndSelect
In this example I’ve thrown up an error if someone tries to compile this code on AmigaOS but for allother operating systems (handled by the ‘CompilerDefault’ keyword) it runs fine.
Although my examples for the ‘CompilerIf’ and ‘CompilerSelect’ mainly use the ‘#PB_Compiler_OS’constants, you must remember that any constants, compiler reserved or not, can be tested by them.This is so you can customize the compiling process using PureBasic code as much as you see fit.
The ‘CompilerError’ DirectiveThis directive can be used by itself or within other compiler directives, such as ‘CompilerIf’ or‘CompilerSelect’ to raise a compiler error, complete with helpful text. This is handy when you want tostop the compilation process and give the user a graceful compiler error message. Here is the above‘CompilerSelect’ example translated to use a real compiler error message:

Beyond The Basics250
CompilerSelect #PB_Compiler_OS
CompilerCase #PB_OS_MacOSCompilerError "This source code does not support MacOS."
CompilerDefaultMessageRequester("Info", "This is code will compile fine on this OS.")
CompilerEndSelect
Looking at this example, you can see that the ‘CompilerError’ directive does not use brackets toenclose any parameters like a normal command. Instead we simply use the ‘CompilerError’ directivewith a literal String following it. This String will be the error text that is displayed when the compilererror is thrown. When the compiler encounters an ‘CompilerError’ directive, the compilation isstopped and the error text is presented.
The ‘Subsystem()’ Compiler FunctionTo explain this compiler function I must first explain subsystems in general, and how they relate toPureBasic. Subsystems are an easy concept to grasp, basically, if you are not happy with thefunctionality of any of PureBasic ‘s built-in commands you can override them with your own versions,these new versions are contained within a subsystem.
If you take a look inside the PureBasic installation folder, you will see a folder called ‘PureLibraries’,this folder contains library files which contain PureBasic’s built-in commands. These library files arethe ones that are replaced when a subsystem is used. When I say replaced, I don’t mean actuallydeleted or copied over. A subsystem library merely takes priority over standard libraries.
To create a subsystem you must first rewrite and compile a PureBasic library (there is moreinformation regarding this in the PureBasic ‘Library SDK’ folder). This new library must contain allcommands of the original library and all these commands must be named in exactly the same way asthe originals. You must then make sure that the name of the newly compiled library matches the nameof the library you want it to replace.
Once you have done this, it should be an almost identical copy of the original library, apart from thefunctionality of the commands it contains (you can write these to have any functionality you wish). Toinstall this library as a subsystem, so you can use it during compilation, you need to create a new folderwithin the ‘SubSystems’ folder in your PureBasic installation directory. The name you give this newfolder will be the name of your new subsystem. Inside this new subsystem folder you now must havea folder called ‘PureLibraries’, and this is where you put your replacement libraries. So the directorystructure of these folders will looking something like this:
‘..\PureBasic\SubSystems\YourSubSystem\PureLibraries\YourNewLibrary’
To make PureBasic use your new subsystem, you must add a subsystem flag to the compiler so it usesthe libraries from your subsystem and not those from the standard ‘PureLibraries’ folder. To do thisopen the ‘Compiler Options’ window (Menu:Compiler->Compiler Options...) and type the subsystemfolder name (the one that you created in the ‘SubSystems’ folder) into the ‘Library Subsystem:’ field,

Beyond The Basics 251
then click ‘OK’. When your program is next compiled, the compiler will scan the ‘SubSystems’ and‘PureLibraries’ folders looking for libraries, if it finds that these two folders contain identically namedlibraries, the compiler will always choose the specified subsystem over the standard one, thereforereplacing the original.
There is already an example of a subsystem in the ‘SubSystems’ directory. If you look in there, you willfind a folder called ‘OpenGL’, inside which is a ‘PureLibraries’ folder, and inside that, there arereplacement libraries for ‘Screen’, ‘Sprite’ and ‘Sprite3D’. These are the libraries this subsystem willreplace if this subsystem is used. Once activated via a compiler flag, this subsystem will use OpenGLfor 2D graphics instead of DirectX.
Now, as mentioned earlier I will explain the ‘Subsystem()’ compiler function.
During compilation, the ‘Subsystem()’ compiler function lets you know if a particular subsystem hasbeen activated using a compiler flag. The syntax is easy enough to understand, For example, if I hadenabled the ‘OpenGL’ subsystem the following debug message would be displayed:
If Subsystem("OpenGL")Debug "The OpenGL subsystem is being used."
EndIf
The ‘Subsystem()’ compiler function takes one parameter, this is a literal String of the subsystem youwant to test for, (variables cannot be used here). If this subsystem has been activated and is being usedto compile this program, then the ‘Subsystem()’ compiler function will return true.
The ‘Defined()’ Compiler FunctionSometimes when coding software you need to test wether a particular data object has been defined.This is achieved by using the ‘Defined()’ compiler function. This function takes two parameters, thefirst is a data object to test for, and the second is the data type of that object. If this particular objecthas been defined, then the ‘Defined()’ compiler function will return true. The value of the object beingtested doesn’t matter, only that it has been defined. The data objects that can be tested are constants,variables, arrays, linked lists, structures and interfaces.
When using the ‘Defined()’ compiler function, the first parameter must only be the name of the dataobject to test and must not contain any of the usual prefixes or suffixes that are usually used for thatobject. For example, constant names must not contain the ‘#’ character and array and linked list namesmust not contain brackets. For the second parameter, where you pass the type of the object you aretesting, you can use built-in constants, here is the full list of what is available:
‘#PB_Constant’‘#PB_Variable’‘#PB_Array’‘#PB_LinkedList’‘#PB_Structure’‘#PB_Interface’

Beyond The Basics252
I’ve made this command sound like it’s quite complicated to use, so I better dismiss that with a simpleexample of how easy it really is. This example tests if the variable; ‘Name.s’ has been defined, if not, itdefines it:
Global Name.s = "Name 1"
If Not Defined(Name, #PB_Variable);This will only define this variable if it hasn't been defined beforeGlobal Name.s = "Name 2"
EndIf
Debug Name
You can test this piece of code by commenting out the first line. If you do this, the variable definitionnow takes place inside the ‘If’ statement and the String variable’s value will now be ‘Name 2’. Code likethis is invaluable for large projects, where you may be including a lot of source code files into a mainone and you need to test if something important has been defined before. If not, then define it.
Advanced Compiler Options
When using PureBasic you may need to change modes on the compiler for a particular program or youmay need to have the compiler output specific information. To be able to do this, PureBasic offersseveral compiler options for you to use. You can enable or disable most of these options visually in theIDE from within the ‘Compiler Options’ window (Menu:Compiler->Compiler Options...). To gainaccess to all supported compiler options, you have to call the compiler using a shell command and passthe options as parameters.
So what is a command line interface anyway? Well, it’s a small program that usually comes with youroperating system (sometimes called a Shell Interface), that allows you to navigate your computer’shard drive or start programs and control computer functions by typing in recognized text commands.It does not have any other user interface other than text input. There are numerous command lineinterface programs available, and these seem to be some of the most popular:
‘CLI’ on AmigaOS‘Command Prompt’ on Microsoft Window XP‘BASH’ on Linux‘Terminal’ on MacOS X
For these command line interfaces to work correctly with PureBasic, you may need to add the fulldirectory path to the compiler to your ‘PATH’ environment variable. This is so the command lineinterface always knows where the compiler is located. Using an environment variable like this willnegate the need to type in the full path of the compiler when using it in a shell command. Using acommand line interface, in my opinion, is not very user friendly, but it’s the only way to use some ofthe more advanced features of the PureBasic compiler. Saying that though, sometimes having acompiler that you can use on the command line is useful, especially if you want to use your own codeeditor, then you can set it up as an external tool.

Beyond The Basics 253
Using The Compiler On The Command LineUsing the compiler on the command line is simple enough, you just have to make sure you pass theoptional parameters correctly. The actual compiler command itself must always start with the name ofthe PureBasic compiler followed by any parameters that are required. The only mandatory parameteris a file to pass to the compiler for processing.
Using the command line compiler in its simplest form to produce an executable file from a PureBasicfile, doesn’t need any optional parameters to be passed to it, but it does need the name of a ‘*.pb’ file.Open a command line interface window, type this in it and hit return:
PBCompiler MyProgram.pb
If your ‘PATH’ environment variable is configured correctly, this command will start the PureBasiccompiler and pass the ‘MyProgram.pb’ file to it. The compiler will create a temporary executable filein the same directory as the compiler and launch that program, in the same way as if you had hit the‘Compile/Run’ button in the IDE. This is probably the simplest way of compiling a program using thecommand line.
If you want to compile a program to an executable file which has a user defined name, and want thatfile to appear in the same directory as the source code file, then you can use this shell command:
PBCompiler MyProgram.pb /exe "MyProgram.exe"
This would compile the ‘MyProgram.pb’ file and create an executable file from it. This compiledexecutable file will be called ‘MyProgram.exe’ and will be placed in the same directory as the specified‘*.pb’ file. Notice in this command we are using a new compiler option; ‘/exe’. This tells the compilerthat we want a properly named executable file. The String after this compiler option is what that fileshould be called. All command line compiler options start with a forward slash ‘/’ like this. These twoexamples are fairly easy to understand, but these actual commands are seldom used in practice. Peopleprefer instead to use the PureBasic IDE to perform simple compilations. These two are useful to knowthough, especially if you want to set up another code editor.
When using compiler options on the command line, it’s also important to understand that manyoptions can be used at the same time. For example, if I wanted to compile a ‘*.pb’ file to an executableand assign an icon to it, I would use a shell command like this:
PBCompiler MyProgram.pb /exe "MyProgram.exe" /icon ".\icons\MyIcon.ico"
The compiler recognizes that the String after the ‘/exe’ option is what the executable file should becalled and the String after the ‘/icon’ option is the icon file that should be applied to this executable.All command line compiler options must always be separated by spaces.
PureBasic Command Line Compiler OptionsWhat follows now is a complete list of all PureBasic’s command line compiler options, including anexplanation of each one and a small example of its usage. Remember, most of these options can beenabled visually in the IDE, using a checkbox or a drop-down menu in the ‘Compiler Options’ window.

Beyond The Basics254
This enables you to control the compiler’s behavior more easily. All these command line options arealso completely case insensitive, so you can enter them in upper or lowercase, it’s entirely up to you.
/?This is a command line only option which displays a helpful page detailing all available PureBasiccommand line compiler options. The help page is printed to the shell interface window. This compileroption also overrides any others used in the same shell command.
PBCompiler /?
/CommentedThis is another command line only option which creates a commented Assembly file in the‘PureBasic\Compilers’ folder called ‘PureBasic.asm’ along with any executable file output. This file isthe raw output of the PureBasic compiler and contains the raw compiler generated assembly sourcecode of the ‘*.pb’ file. This file can be re-compiled into an executable file, using the ‘/reasm’ compileroption, even if modifications are made to it.
PBCompiler MyProgram.pb /commented
/ConsoleThis compiler option enables you to compile a true console application. Here’s a simple example:
PBCompiler MyProgram.pb /exe "MyProgram.exe" /console
For more information regarding console applications, please refer to Chapter 9 (Console Programs).
/Constant (Name=Value)This is another command line only option which enables you to define a constant dynamically on thecommand line. This can be useful if, for example, you code a program that changes its functionalitydepending on the value of that constant. For example: ‘DEMO=1’ or ‘DEMO=0’.
PBCompiler MyProgram.pb /exe "MyProgram.exe" /constant MY_STRING="Hello World"
As you can see from this example, when defining a constant on the command line you must not usethe ‘#’ character to prefix the constant name and there must be no space around the equals sign (‘=’).Also, if you are defining a String constant, I would advise enclosing it within double quotation marksas in my example. This is not one hundred percent necessary because the compiler tries toautomatically convert it into a String if they are missing, but it may get confused and error if that Stringcontains spaces. For safety sake, use double quotes for Strings.
/DebuggerIf this compiler option is used by itself, the standalone (GUI) debugger is enabled to debug theresulting temporary executable file. If this option is used with the ‘/exe’ option, the console debuggeris embedded into the resulting executable file. The console debugger will then display a consolewindow along with the launched executable file to allow command line based debugging of thatprogram. Here’s these two examples:

Beyond The Basics 255
PBCompiler MyProgram.pb /debugger
PBCompiler MyProgram.pb /exe "MyProgram.exe" /debugger
/DLLThis compiler option allows you to create a DLL (dynamically linked library) file from your PureBasicsource code. If this option is used during compilation, the resulting DLL file is created within the‘PureBasic\Compilers’ folder called ‘PureBasic.dll’. This file can then be renamed as you see fit. As abyproduct of creating a DLL like this, a static library file called ‘PureBasic.lib’ and an export file called‘PureBasic.exp’ is also created in the same folder.
PBCompiler MyProgram.pb /dll
PureBasic source code files that are used to create DLL’s are usually composed of procedures only.Some of these procedure are specially named to give you extra functionality within your compiledlibrary. Read further on in this chapter for more information on DLL’s.
/DynamicCpuThis command line option is almost equivalent to specifying all the options; ‘/mmx’, ‘/3dnow’, ‘/sse’and ‘/sse2’ in one go. If your program’s source code contains ASM routines that support all theseprocessor extensions and you use the ‘/dynamiccpu’ compiler option then the resulting executable filewill contain all of the processor specific code. What’s happens when this executable is run, is it looksat the processor type of the system it’s being run on and chooses between the compiled routines toselect the one that matches that particular processor’s architecture. Meaning that it dynamically usesdifferent code contained within it for different processors. This could make the executable file largerthan usual because it may contain many versions of the same routine, but it can make the program runfaster because those different routines can contain specific processor optimized code.
PBCompiler MyProgram.pb /exe "MyProgram.exe" /dynamiccpu
/Exe "FileName"This compiler option is pretty straightforward, the String after the ‘/exe’ part is the name that theexecutable file will be compiled as. A String specifying the executable name must always follow the‘/exe’ part and must always be contained within double quotation marks, otherwise you may getunexpected results. Also when compiling a program like this, the generated executable file will beplaced in the same directory as the source code used to compile it.
PBCompiler MyProgram.pb /exe "MyProgram.exe"
/Icon "IconName"This compiler option lets you specify an icon on your hard drive that you would like your executableto use. The String after the ‘/icon’ part must be defined and must be enclosed in double quotationmarks, as this is the location on your hard drive of where the desired icon file is located. The Stringcontaining the location of the icon file can be a relative String if needed, as in this example:
PBCompiler MyProgram.pb /exe "MyProgram.exe" /icon ".\icons\MyIcon.ico"
Beyond The Basics256
/IgnoreResident "FileName"This is a command line only option which enables you to stop an installed resident file from loadingduring compilation. This is handy if you want to re-compile a resident file that is already installed inthe ‘PureBasic\Residents’ folder. If the installed resident file is not ignored and you are re-compilingthat file again, you may get ‘Already defined’ errors.
PBCompiler MyProg.pb /resident "MyResid.res" /ignoreresident "MyResid.res"
PBCompiler MyProgram.pb /exe "MyProgram.exe" /ignoreresident "MyResid.res"
The first line shows an example of compiling a resident file while ignoring the previously installedversion. The second line is an example of what you may need to do if you are re-defining constants orstructures in your program that are already present in an installed resident file.
/InlineAsmThis compiler option enables inline assembly programming within your ‘*.pb’ file. In other words ifyou have used any assembly language commands within your PureBasic source code, you shouldenable this feature so the assembly commands are passed correctly to the PureBasic compiler.
PBCompiler MyProgram.pb /exe "MyProgram.exe" /inlineasm
/LineNumberingThis compiler option adds support for internal line numbering of commands within your executablefile. This is useful for third party debugging tools or if you are using the built-in ‘OnError’ library.
PBCompiler MyProgram.pb /exe "MyProgram.exe" /linenumbering
Be aware that if you are using line numbering for your executable, it could slow down the speed withwhich it runs, because you are adding slightly more ‘overhead’ to the executable than usual.
/Linker "FileName"This is a command line only option which enables you to pass a file straight to the linker which cancontain linker commands.
PBCompiler MyProgram.pb /exe "MyProgram.exe" /linker "MyLinkerCommands.txt"
/MMX, /3DNow, /SSE And /SSE2These four compiler options create very processor specific executables depending on which option isused. Only one of these options can be used at a time, as they tailor the executable file to only includeroutines that specifically run on processors that support such extensions. If you have created manyroutines using ASM that support all processor extensions, only the ones which match the compileroption will be used in the final executable. For example, if you create an executable that uses the‘/mmx’ compiler option, only the MMX routines used in the source code will be used for the finalexecutable and that executable will only run on processor that support the MMX extensions.
PBCompiler MyProgram.pb /exe "MyProgram.exe" /mmxPBCompiler MyProgram.pb /exe "MyProgram.exe" /3dnowPBCompiler MyProgram.pb /exe "MyProgram.exe" /sse

Beyond The Basics 257
PBCompiler MyProgram.pb /exe "MyProgram.exe" /sse2
/QuietThis is a command line only option which suppresses all unnecessary text output from the commandline compiler. This is handy when you want to use the compiler as an external tool from another codeeditor, etc.
PBCompiler MyProgram.pb /exe "MyProgram.exe" /quiet
/ReAsmThis is a command line only option which enables you to re-assemble and compile a previouslyexported, commented ‘*.asm’ file. These commented ‘*.asm’ files are created using the ‘/commented’compiler option.
PBCompiler PureBasic.asm /reasm
When using this command, the ‘*.asm’ file to be re-assembled must be in the ‘PureBasic\Compilers’folder, otherwise a compiler error will occur.
/Resident "FileName"This is a command line only option which enables you to create a resident file from a standard ‘*.pb’file. Resident files are usually composed of constant and structure definitions only.
PBCompiler MyProgram.pb /resident "MyResident.res"
A String enclosed in double quotation marks must be defined after the ‘/resident’ part of this compileroption, as this defines the name of the new resident file. If this String is missing or not enclosed indouble quotes, then a compiler error will occur. Using this compiler option will create a resident fileinside the same directory as the source code file.
/Resource "FileName"This compiler option is for Microsoft Windows only as it appends a Windows resource file to thecompiled DLL or executable file. A String enclosed in double quotation marks must follow the‘/resource’ part of this compiler option which specifies the resource file to add. Only one resource filemay be added but this file can contain references to other resource files if needed. The resource filemust not be a compiled resource either, but be an ASCII file containing directives.
PBCompiler MyProgram.pb /exe "MyProgram.exe" /resource "MyResource.rc"
/StandbyThis command line option is used by the IDE to load the compiler into memory to wait for commandsto be passed to it. This is not a command that normal users would usually use because documentationis very scarce regarding how to interface with the compiler once it’s loaded into memory.

Beyond The Basics258
/Subsystem "SubsystemName"This compiler option enables you to specify a subsystem to use for the compilation of your program.I’ve given subsystems a full description a little earlier in this chapter, so I’ll not repeat myself here. Bydefault there are a few built-in subsystems which you can choose from when compiling your program,these are:
Windows:PBCompiler MyProgram.pb /exe "MyProgram.exe" /subsystem "NT4"
PBCompiler MyProgram.pb /exe "MyProgram.exe" /subsystem "OpenGL"
Linux:PBCompiler MyProgram.pb /exe "MyProgram.exe" /subsystem "GTK2"
MacOS X:PBCompiler MyProgram.pb /exe "MyProgram.exe" /subsystem "GTK"
PBCompiler MyProgram.pb /exe "MyProgram.exe" /subsystem "GTK2"
As you can see from these examples, after the ‘/subsystem’ part of this compiler option you mustspecify a subsystem name, enclosed within double quotation marks.
/ThreadThis compiler option will enable thread-safety for the compiled executable file. This option should beused if you are compiling a program that makes use of threads. One thing to remember when usingthis command is that the resulting executable file may run slightly slower than a non-threadsafe one.This is because of the extra ‘overhead’ needed to make the executable thread safe.
PBCompiler MyProgram.pb /exe "MyProgram.exe" /thread
More information about threads can be found later in this chapter.
/UnicodeThis compiler option will enable unicode support for your compiled executable. Unicode is a characterencoding scheme using 16 bits (2 Bytes) per character to allow all characters of all major worldlanguages, living and dead, to be encoded in a single character set. Using this compiler option meansthat all PureBasic commands used and the internal String management will be fully unicodecompatible.
PBCompiler MyProgram.pb /exe "MyProgram.exe" /unicode
/VersionThis is a command line only option, and its only function is to print the version of the PureBasiccompiler used in the command line interface window. This compiler option overrides any others usedin the same shell command.
PBCompiler /version

Beyond The Basics 259
/XPThis compiler option is for Microsoft Windows XP only. It adds Windows XP skin support to yourexecutables, to make them show themed gadgets and windows correctly when a theme is used for theWindows GUI.
PBCompiler MyProgram.pb /exe "MyProgram.exe" /xp
Parsing Command Line Parameters
Sometimes when developing programs using PureBasic you may want to create command line toolsthat accept certain parameters when being launched using a shell command. This is a similar way tohow the PureBasic compiler works. The program is started and parameters are passed to it, the valuesof these parameters determine what function the program performs. In this section I will show youhow to parse these types of parameters that are passed to your program.
Explaining Parameters?When passing parameters (sometimes called arguments) to command line programs, you need to keepin mind how they are passed and what actually constitutes a parameter. For example, if we take thiscompiler example from earlier on in this chapter:
PBCompiler MyProgram.pb /exe "MyProgram.exe"
This shell command instructs the operating system to launch the ‘PBCompiler’ program and pass threeparameters, (‘MyProgram.pb’, ‘/exe’ and ‘"MyProgram.exe"’). Even though we are only using onecompiler option after the ‘*.pb’ file name (which is the first parameter), that option consists of twofurther parameters.
When passing parameters to programs like this, the program makes a decision about how manyparameters are passed based on how many spaces it sees after the program name. If you need to havespaces within a single parameter, then you must enclose that parameter in double quotation marks.For example, all these shell commands would pass two parameters to the program called ‘MyProgram’:
MyProgram /a 105MyProgram /play /nowMyProgram /play "Me And My Shadow"MyProgram "Put It In The" "Back"
As you can see from these examples, parameters can be either numbers or Strings, but when they arepassed into your program they are all automatically converted into Strings. If you are enclosingparameters in double quotation marks when passing them (especially for parameters with spaces) youshould keep in mind that these quotation marks are stripped out before the String is actually passed,so you are only passing the String inside them, not the quotes.

Beyond The Basics260
Reading Passed Parameters From Inside Your ProgramWhen parameters are passed to your program from a shell command, they are stored internally for youto read in your program when you see fit. By calling the ‘ProgramParameter()’ command you canreturn one parameter at a time from this internal list. When all parameters have been returned by the‘ProgramParameter()’ command, it then returns an empty String. Here is an example programshowing how to list all parameters that are passed to a program:
NumberOfParameters.l = CountProgramParameters()Text.s = "List of parameters passed:" + #LF$ + #LF$
If NumberOfParameters > 0For x.l = 1 To NumberOfParametersText.s + ProgramParameter() + #LF$
Next xElseText.s + "None"
EndIf
MessageRequester("Info", Text)
The first line of this example uses the ‘CountProgramParameters()’ command, this returns the exactnumber of valid parameters that was passed to your program. After this command has been called, Ithen use a ‘For’ loop to call the ‘ProgramParameter()’ command over and over again to return allparameters. If I compile this piece of code to an executable file and called it ‘ListParameters.exe’, Icould then pass some parameters to it using a shell command, like this:
ListParameters /one /two /three
These parameters are just made up for this example so you can use any you like, I’ve used a forwardslash to prefix my parameters as this seems to be the norm for console programs I use. Once thiscommand has been entered and the program has been launched. The value stored in the‘NumberOfParameters’ variable would be ‘3’ and each time the program calls the‘ProgramParameter()’ command, each one of these parameters will be returned in sequence. The firsttime it’s used, the ‘ProgramParameter()’ command will return ‘/one’, the second time it’s used it willreturn ‘/two’ and the third time ‘/three’ is returned. If I called the ‘ProgramParameter()’ command aforth time, it would return an empty String.
Testing Command Line Parameters Using The IDE
When developing an application in the IDE that will accept command line parameters, you don’t really wantto be compiling to a final executable and calling that through a command line interface every time you wantto test it. Instead of this long process, the PureBasic IDE helps you out by providing a field where you canenter command line parameters that you want to pass to your program when you compile it. This field canbe found in the ‘Compiler Options’ window, which is accessible from the ‘Compiler’ menu. If you look threequarters of the way down you will see the field marked ‘Executable Commandline’. This is where you enterparameters that you would like passing to your program when you hit the ‘Compile/Run’ button. Try enteringsome parameters in there to test the examples in this section.
Beyond The Basics 261
Making Decisions Based On ParametersIf you are using command line parameters to control the functionality or output of your program, youwill need it to perform different actions depending on the values of those passed parameters.Sometimes you will need your program to do something completely different if a particular parameteris passed. Making decisions based on what parameters have been passed is not as hard as you maythink, you just use regular ‘If’ and ‘Select’ statements to test the values of the parameters.
This next example demonstrates this approach, testing to see if one or more of the parameters passedis either, ‘Mouse’, ‘Cat’ or ‘Dog’. Try passing one or two of these parameters to this program to see theoutput:
;Count parametersNumberOfParameters.l = CountProgramParameters()
;Add all command line parameters to a linked listGlobal NewList Parameters.s()If NumberOfParameters > 0For x.l = 1 To NumberOfParametersAddElement(Parameters())Parameters() = UCase(ProgramParameter())
Next xEndIf
;Check to see if a particular parameter was passedProcedure ParameterPassed(Parameter.s)ForEach Parameters()If Parameter = Parameters()ProcedureReturn #True
EndIfNext ProcedureReturn #False
EndProcedure
;Check to see if the parameter 'Mouse' was passedIf ParameterPassed("MOUSE")MessageRequester("Info", "'Mouse' was specified as a parameter.")
EndIf;Check to see if the parameter 'Cat' was passedIf ParameterPassed("CAT")MessageRequester("Info", "'Cat' was specified as a parameter.")
EndIf;Check to see if the parameter 'Dog' was passedIf ParameterPassed("DOG")MessageRequester("Info", "'Dog' was specified as a parameter.")
EndIf
If you look closely at this example I’m using the ‘UCase()’ command (Helpfile:Reference Manual->General Libraries->String->UCase) to convert all passed parameters to uppercase lettering. This soI can perform String comparisons on the parameters without worrying about its case. If you do this in

Beyond The Basics262
your programs, then you can just use uppercase String comparisons, as shown in the ‘If’ statements.This is good practice because it doesn’t matter how the user enters parameters (uppercase, lowercase,mixed case) they will always be converted to uppercase before the ‘If’ comparison.
Giving your programs command line support by utilizing parameters in this way may seem an oldfashioned way of doing things, and to be honest, it is. However, giving your users the potential to useyour application or tool from the command line will get more people using it and will give the programmore versatility. It’s definitely something to think about when creating a piece of software.
A Closer Look At Numeric Data Types
Numeric data types allow you to store numbers in several different formats and each type allows youto use slightly different amounts of memory to store those numbers. This doesn’t sound like such a bigdeal but the amount of memory a numeric type uses strictly defines its numerical limit. If you lookback in Chapter 2 at Fig.2, you will see a diagram detailing all PureBasic’s numerical type limits. Theselimits are imposed by the finite number of bits contained within the memory that these data typesallocate. For example, if you look at the Byte data type (.b) you will see that it uses one Byte of memory,which consists of eight binary digits or ‘bits’. These bits can only be manipulated in a finite amount ofways to express numbers. In fact, eight bits can only be ordered into two hundred and fifty six (256)unique patterns, with each bit being either ‘1’ or ‘0’. This means only two hundred and fifty six uniquenumbers are capable of being expressed by an eight bit binary number (Byte).
In this section I will explain to you, how numbers are stored in memory and how binary numbers areactually calculated. Hopefully this will give you a little more insight into the inner workings of not onlyPureBasic but of computers in general.
When dealing with numbers in computer languages there needs to be made a clear distinction betweenintegers and floating point numbers. Integers are numbers which can be positive or negative but donot contain a decimal point. Floating point numbers on the other hand can be positive or negative butalways contain a decimal point. This has been explained earlier in this book but I thought I wouldrefresh your memory here.
What Is Binary?Binary Notation, or base-two as it’s sometimes called, is a numerical system where the digits of abinary number can only have one of two values, ‘0’ or ‘1’. Similar to the Decimal system (which issometimes called base-ten) each position of a binary digit represents another quantity.
Let me explain this concept a little more clearly, here is an example of a decimal number:
542
In this example, the ‘2’ digit is in the position associated with the quantity one, the ‘4’ digit is in theposition associated with the quantity ten and the ‘5’ digit is in the position associated with the quantityhundred. Each associated quantity is ten times the quantity to its right. To find out what number thisrepresents you simply multiply the value of each digit by the quantity associated with that digit’s

Beyond The Basics 263
position and then add those results together i.e. (‘5’ x hundred) + (‘4’ x ten) + (‘2’ x one) = ‘542’ (fivehundred and forty two).
This is also how binary (base-two) numbers work when dealing with integers. The position of eachdigit in a binary number is also associated with a quantity, except that the quantity associated witheach position is twice that of the position to it’s right, this is base-two after all. While that might soundlike a mouthful, its surprisingly easy to understand using a diagram. Look at Fig.44.
To extract the value represented by this binary number, we follow the same procedure as in decimal(base-ten). We multiply the value of each digit by the quantity associated with its position then add theresults. For example, the value represented by ‘01001101’ as shown in Fig.44 is ‘77’. Since binarynotation only uses the digits 0 and 1, this ‘multiply-and-add’ process demonstrated earlier with base-ten numbers, reduces to just addition of the quantities associated with the positions occupied by abinary value of ‘1’. So, if you look at Fig.44 and add up the quantities of where a binary value of ‘1’appears, you get: ‘64 + 8 + 4 + 1 = 77’.
You can probably see now from Fig.44 that only a finite amount of numbers can be represented inbinary using only this number of bits. This is why certain types have certain limits, they simply run outof bits to use. Bigger types work in exactly the same way, they just have more bits to calculate.
Signed And Unsigned IntegersEarlier on in Fig.2, you can see many of PureBasic’s integer types range from negative to positivenumbers. These are known as Signed number types, because their values can potentially contain anegative sign. Unsigned types, on the other hand, refer to integer types which have a numerical limitthat ranges from zero to a larger positive number. The PureBasic Character type is an example of anunsigned integer type and which is also shown in Fig.2. Because there is only a finite number of bitsallocated by these data types, there are two methods needed to interpret these binary numbersdepending on wether they should be read as signed or unsigned.
If you take a look at Fig.45 every integer data type has two ways of being read. The Byte for example,can be both signed and unsigned, and both flavors can contain a value taken from a range of twohundred and fifty six (256) possible numbers, including zero...yes, zero is a number too!
Fig. 44
Binary Digits (bits)
8 bit number(1 byte)
10110010
1248163264128Associated Quantity
= 77
Unsigned Byte
Numerical range: ‘0’ to ‘255’

Beyond The Basics264
Reading Unsigned Integers Using BinaryAn unsigned number is easy to represent in binary as we have seen from Fig.44. You just keep turningthe bits to 1 and add together the associated values where a ‘1’ appears. For example, the maximumvalue of an unsigned Byte expressed using binary is ‘11111111’ (‘255’) where all the bits are set to ‘1’. Niceand simple.
Reading Signed Integers Using BinaryA signed integer follows slightly different rules to express using binary. PureBasic uses a system calledTwo’s Complement to express signed integers. In two's complement form, the left most bit of a signedbinary number (sometimes called the most significant bit) indicates if the actual sign (-) is present inthe integer. If the left most bit is ‘0’ the integer being expressed by the bits is a positive integer and canbe read by using the unsigned binary method explained earlier. If the left most bit is ‘1’ the integerbeing expressed is negative and must be read using two's complement form, as explained below.
Because the left most sign bit is reserved to indicate wether a sign is present or not you are only leftwith the remainder of bits to express the rest of the integer. Let’s take a Byte as an example again, ifwe left the sign bit as ‘0’ to express a positive number that only leaves us with seven remaining bits tomake a number out of, so we’ll turn all these to ‘1’, like this: ‘01111111’. This is now expressing themaximum positive integer that a signed Byte can hold, which in this case is ‘127’.
If we want to express a negative integer using binary we have to do it in a slightly different manner.Let’s first look at the unsigned binary representation of the number ‘9’, which is ‘00001001’. The leftmost bit is zero so we know for definite this is a positive integer. To convert this to two’s complementform and express it as a negative integer, we first need to invert the bits and then we add one (‘1’) tothe inverted binary number. So the number ‘-9’ looks like this: ‘11110111’. When I talk about invertingthe bits, what I mean is that if a bit is ‘0’ then change it to ‘1’, and if a bit is ‘1’ then change it to ‘0’ anddo this for all bits contained in the type. As you can see the left most bit is now ‘1’ indicating this binarynumber represents a negative (signed) integer. Inverting the bits and adding ‘1’ to a positive integer isthe two’s complement method of expressing that integer’s negative form.
Signed Byte
Unsigned Byte*
-128 to 127
0 to 255
Signed Word
Unsigned Word*
-32768 to 32767
0 to 65535
Signed Long
Unsigned Long*
-2147483648 to 2147483647
0 to 4294967295
Fig. 45* Not available in PureBasic v4 (maybe in future versions?)
Numerical RangeData Type

Beyond The Basics 265
To convert this negative integer back to its positive form, you follow exactly the same procedure. Afterinverting ‘-9’ (‘11110111’) the binary number now looks like this: ‘00001000’, we then add one (‘1’) tothis number and it becomes: ‘00001001’, which gives us a positive ‘9’ when read using the normalunsigned binary method. Fig.46 shows a signed Byte visually holding the value of ‘-9’.
Even though I’ve used the Byte type in these last few sections to describe how to read binary, thesemethods are universal for any numerical integer type no matter what its size. In all integer types theassociated quantities of each bit position grows by a power of ‘2’ as you move to the left within thebinary number. In signed binary numbers, the left most bit is always the sign bit.
Floating Point Numbers And BinaryA floating point number is a number which contains a decimal point and which can be either negativeor positive. Numbers like these are stored in a way that makes the point ‘float’ around the number, sothat it is possible to store very large or very small numbers. Using a storage method like this makes itpossible to have a huge range of numbers that can be stored but at the cost of numeric accuracy. Eventhough floating point numbers are extremely versatile, you have to account for the fact that someprecision may be lost if you are storing a lot of decimal places.
PureBasic currently supports two data types to handle floating point numbers, these are the normalFloat type and the Double type. The difference between these two types is the amount of bits they useto store the floating point number. A Float uses 32 bits (4 Bytes) and a Double uses 64 bits (8 Bytes),so obviously Doubles are a lot more accurate for holding large numbers. So why not use Doubles allthe time, instead of Floats? Well, speed for one. Floats can be a lot faster at reading from memoryespecially when using large Float arrays. This is because of the fact that you are only retrieving half thenumber of Bytes from memory than you would be with Doubles. Usually programs such as games tendto use Floats while programs that need more accuracy tend to use Doubles.
Storing Floating Point Numbers Using BinaryBecause of the special nature of floating point numbers, which need to store a decimal point along witha large number to the right, left or both sides of that point, a different method of storing numbers inbinary is used. This method is quite complicated and is described in the ‘IEEE 754’ standard for binary
Fig. 46
Binary Digits (bits)
8 bit number(1 byte)
11101111
1248163264Associated Quantity
Sign (-) Bit
= -9
Signed Byte
Numerical range: ‘-128’ to ‘127’

Beyond The Basics266
encoding of floating point numbers. I’ll see if I can describe it as simply as possible.
First, all floating point numbers are stored in three binary parts. These parts are the Sign, theExponent and the Significand. These three parts all fall inside the bit limit as defined by using eithera Float or a Double. See Fig.47.
Here, you can see how the type is divided internally to support each of the three sections. Now all weneed to understand is how a floating point number is encoded to fit into these sections. The sign bit isprobably the easiest of the sections to explain. If the number to be encoded is positive then the sign bitwill be ‘0’ and if the number is negative the sign bit will be ‘1’. Let’s start with an example number andI’ll demonstrate how it is encoded into a 32 bit Float. Let’s take the number: ‘10.625’.
Step One, Encode The Number To BinaryTo encode this number to fit within the binary sections of a Float we have to follow several steps. Thefirst, is we have to convert both sides of the decimal point into binary, like this:
‘10.625’ = ‘1010.101’
This might look a little odd because you will probably not have seen a decimal point (or radix point asit’s more accurately called here) within a binary number. This is only to visualize the number at thisstage so don’t be alarmed. Encoding a number into binary like this is a little different from what wasexplained before, because you are dealing with a whole number on one side of the radix point and afraction on the other side. The whole number part is the easy one to encode because it follows standardunsigned binary encoding as explained in Fig.44, i.e. decimal ‘10’ = binary ‘1010’. The fractional part
Fig. 47
32 Bit FloatSign Bit
Exponent(8 bits)
Significand(23 bits)
0 10000000 10010010000111111011011
22 Bit Index3031 023
0 100100 00000 1001001000011111101101110010010000111111011011011011
64 Bit Double (Precision Float)Sign Bit
Exponent(11 bits)
Significand(52 bits)
51 Bit Index6263 052

Beyond The Basics 267
on the other hand uses a similar method but in the binary representation of a fraction the associatedquantities are fractions themselves instead of whole numbers. Also, for these binary numbers, we don’tpad them with unnecessary zeros.
In standard unsigned binary, associated quantities start at ‘1’ and increase by a factor of ‘2’ the furtherleft you go along the binary number, while in fractional binary the associated quantities start at ‘0.5’and decrease by a factor of ‘2’ the more right you go along the binary number. Take a look at Fig.48.
Here, you can see the associated quantities of the fractional binary number starting at ‘0.5’ anddecreasing by a factor of ‘2’ in each place moving to the right, so they are calculated as, ‘0.5’, ‘0.25’,‘0.125’, etc. The more places you go to the right the more precision a fractional number can contain.Because our number has a fractional part of ‘.625’ it is easily represented by ‘0.5’ + ‘0.125’ so that’swhere the binary ‘1’s appear.
Knowing how a fractional number is represented in binary does not necessarily help you to encode itthough, especially when dealing with huge decimal fractions. Luckily though there is an easy way toencode these numbers using the ‘doubling’ trick.
First, we take our starting fraction ‘.625’ and double it and see if it is above or equal to ‘1.0’. If it is thenwe mark down a binary ‘1’. We then take the fractional part of the last sum and double and test it again.If at any stage the doubling does not produce a number which is equal to or above ‘1.0’ then we markdown a binary ‘0’. Here’s how this works in practice:
.625 * 2 = 1.25 - This is above or equal to ‘1.0’ so we mark a binary ‘1’.
.25 * 2 = 0.5 - This is not above or equal to ‘1.0’ so we mark a binary ‘0’.
.5 * 2 = 1.0 - This is above or equal to ‘1.0’ so we mark a binary ‘1’.
Fig. 48
Encoding A Fractional Decimal Into Binary
Original Number: 10.625
Binary Digits (bits)
Associated Quantity
0101
1248
(8+2) = 10
Binary Digits (bits)
Associated Quantity
101
0.1250.250.5
(0.5 + 0.125) = .625
The whole number can be encoded like this:
The fractional number can be encoded like this:
Radix Point
Radix Point

Beyond The Basics268
When no more fractional parts are available to test or you have run out of bits to fill you stopcalculating. If you now look at the resulting binary digits from these calculations reading from top tobottom you can see it’s ‘101’, exactly as expected for ‘.625’.
Now we know how to encode a fractional decimal number into binary, I can continue to explain howthese numbers are encoded in 32 bit Floats. So, step one was first to encode our number into a binaryform, like this:
‘10.625’ = ‘1010.101’
Step Two, Move The Radix Point And Calculate The ExponentIn this step we need to move the radix point, as this will not be encoded in the final binary number.Because the radix point defines where the decimal point is in the decimal version of this number wedo actually need to remember where it was, so we can put it back to its original position when it’sdecoded. To do this we shift the radix point along the binary number until there only remains a ‘1’ toit’s left. Any extra zeros on the left can be ignored but their positions must be counted if the radix pointmoves past them. Look at this example:
‘1010.101’ (original)‘1.010101’ (Radix point moved 3 places to the left)
When moving the radix point we need to note of how many places we move it. Here, I’ve moved it ‘3’places to the left to leave a leading ‘1’ to the left of it, so the number of places the radix point has movedwill be a positive number. If the original binary number was something like ‘0.0001101’ then I wouldhave to move the radix point to the right to leave a single leading ‘1’ to the left of it (disregarding thezeros) which would give me a negative radix point movement value of ‘-4’. (I’ll explain about this ‘1’always being to the left in a minute).
The number of places you need to move the radix point to leave only a leading ‘1’ to its left, is noted asthe Exponent. This exponent is then added to a preset number (depending on what size of floatingpoint type you are using), to make sure it is encoded as an unsigned number. For example, when usinga 32 bit Float the number you have to add ‘127’ this is called the Exponent Bias.
In our original example, we moved the radix point ‘3’ places to the left (which is a positive 3), so weadd ‘127’ to ‘3’ and get ‘130’. This number is then encoded to binary using the standard unsignedmethod as described in Fig.44, which would be ‘10000010’. This is then saved in the exponent sectionwithin the 32 bit Float as shown in Fig.47. Because we save the number of places the radix point hasmoved, this means that the bit count of the exponent section actually imposes a limit on how far wecan record the radix point moving. This limit is ‘127’ places to the left and ‘(-)126’ places to the right.Anything above ‘127’ and the number is considered to be ‘infinite’ and anything below ‘-126’ thenumber is considered to be a denormalized number of which is a special case where the exponent iskept at ‘-126’ and the leading ‘1.’ is changed to a leading ‘0.’.
Step Three, Calculate The SignificandThe significand is the part of the floating point number which contains the significant part of thenumber. In fact this is where the actual number is stored, the exponent merely tells you where the

Beyond The Basics 269
radix point should sit relative to the significand. After moving the radix point in step two, our binarynumber should now look like this: ‘1.010101’
To calculate the significand from this, we first completely disregard the ‘1’ at the beginning of thisbinary number. This ‘1’ never has to be encoded because it is always there, any number we want toencode using a floating point type will always have a ‘1’ there, so it’s completely safe to disregard aslong as we remember to put it back when we decode this binary number. Disregarding this numberallows us to gain one more bit within the significand to help us represent the original decimal number.Remember the more bits we have, the more precisely we can be to represent the original.
After disregarding the ‘1’ in front of the binary number the radix point is then meaningless too, so wecan get rid of that as well. So now the binary number looks like this: ‘010101’. This is our significand.If the significant is smaller than 23 bits as in this example we need to pad this number with zeros tomake it up to the 23 bit length it should be. These zeros must be on the right hand side, like this:‘01010100000000000000000’. This is now the full significand which is saved in the significandsection within the 32 bit Float as shown in Fig.47.
So in total the binary representation of the number ‘10.625’ would be:‘0 10000010 01010100000000000000000’
Limitations Of Floating Point NumbersEven though floating point numbers are very versatile, they are also inherently inaccurate because ofthe way the number is stored using binary. Do not be shocked to see a number being read from a Floatthat was different to what was originally assigned to it. Only about 7 decimal digits are representedcorrectly in single precision Floats, and about 16 in Doubles. Precision of decimal numbers can also belost when performing arithmetic with floating point numbers too, chipping away at the overallprecision again. This is always something to keep in mind when using Floats and Doubles.
Using Binary Numbers Directly In PureBasicBinary numbers can be assigned to variables directly by using the ‘%’ prefix. Using the percent sign likethis should not be confused with the modulo operator from Chapter 3 (An Introduction To Operators)even though they use the same symbol. PureBasic recognizes this as a binary assignment because thereisn’t an expression to the left of it and there is no space to the right of it. Here’s an example:
BinaryVariable.b = %01101101
Debug BinaryVariable
All PureBasic’s numerical types can be assigned using binary like this.
Pointers
I think its fair to say that pointers in computer programming scare a lot of people. I have no idea why,because pointers can give you immense power when dealing with certain programming problems.Maybe it’s the fear of the unknown that makes people avoid them? I don’t know, but what I do knowis that, when pointers are explained to people properly, they always wonder why they avoided them for
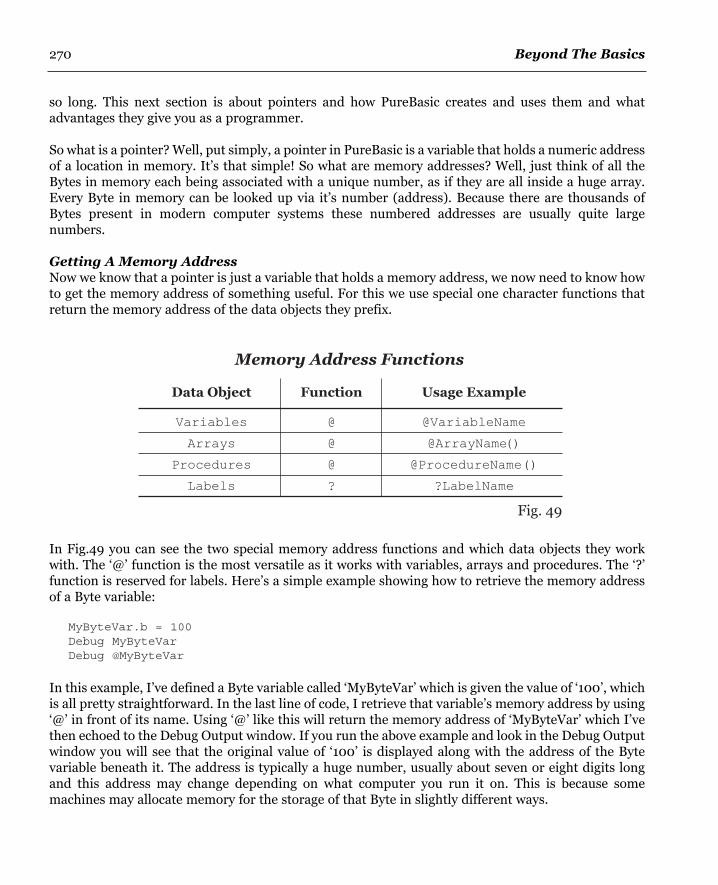
Beyond The Basics270
so long. This next section is about pointers and how PureBasic creates and uses them and whatadvantages they give you as a programmer.
So what is a pointer? Well, put simply, a pointer in PureBasic is a variable that holds a numeric addressof a location in memory. It’s that simple! So what are memory addresses? Well, just think of all theBytes in memory each being associated with a unique number, as if they are all inside a huge array.Every Byte in memory can be looked up via it’s number (address). Because there are thousands ofBytes present in modern computer systems these numbered addresses are usually quite largenumbers.
Getting A Memory AddressNow we know that a pointer is just a variable that holds a memory address, we now need to know howto get the memory address of something useful. For this we use special one character functions thatreturn the memory address of the data objects they prefix.
In Fig.49 you can see the two special memory address functions and which data objects they workwith. The ‘@’ function is the most versatile as it works with variables, arrays and procedures. The ‘?’function is reserved for labels. Here’s a simple example showing how to retrieve the memory addressof a Byte variable:
MyByteVar.b = 100Debug MyByteVarDebug @MyByteVar
In this example, I’ve defined a Byte variable called ‘MyByteVar’ which is given the value of ‘100’, whichis all pretty straightforward. In the last line of code, I retrieve that variable’s memory address by using‘@’ in front of its name. Using ‘@’ like this will return the memory address of ‘MyByteVar’ which I’vethen echoed to the Debug Output window. If you run the above example and look in the Debug Outputwindow you will see that the original value of ‘100’ is displayed along with the address of the Bytevariable beneath it. The address is typically a huge number, usually about seven or eight digits longand this address may change depending on what computer you run it on. This is because somemachines may allocate memory for the storage of that Byte in slightly different ways.
Memory Address Functions
Data Object
Variables
Arrays
Procedures
Labels
Function
@
@
@
?
Usage Example
@VariableName
@ArrayName()
@ProcedureName()
?LabelName
Fig. 49
Beyond The Basics 271
When I run the this example on my PC, I get this displayed in the Debug Output window:
1004298004
This tells me that the Byte variable which is used to store the value of ‘100’ is located at memoryaddress ‘4298004’.
Using these special memory address functions, it’s possible to get the memory address of all variabletypes, arrays, procedures and labels, which can be very useful. Here is an example which would bepretty useless in the real world, but demonstrates getting the addresses of all these different dataobjects and echoing these memory addresses to the Debug Output window:
MyByteVar.b = 1MyWordVar.w = 2MyLongVar.l = 3MyQuadVar.q = 4MyFloatVar.f = 5MyDoubleVar.d = 6MyStringVar.s = "Seven"Dim MyLongArray.l(8)
Procedure MyProcedure(Test.l)Debug "Testing my procedure."
EndProcedure
Debug "Byte variable address: " + Str(@MyByteVar)Debug "Word variable address: " + Str(@MyWordVar)Debug "Long variable address: " + Str(@MyLongVar)Debug "Quad variable address: " + Str(@MyQuadVar)Debug "Float variable address: " + Str(@MyFloatVar)Debug "Double variable address: " + Str(@MyDoubleVar)Debug "String variable address: " + Str(@MyStringVar)Debug "Array address: " + Str(@MyLongArray())Debug "Procedure address: " + Str(@MyProcedure())Debug "Label address: " + Str(?Label)
DataSectionLabel:Data.s "Testing"
EndDataSection
Notice when getting the address of arrays, procedures or labels you do not need to specify anydecoration such as type identifiers, array dimensions, or parameters, etc. And even though the arrayin the above example was defined like this:
...Dim MyLongArray.l(8)
...

Beyond The Basics272
To get its memory address you just need to use its name with brackets on the end, like this:
@MyLongArray()
Similarly, when getting the address of a procedure, you only need its name with brackets:
@MyProcedure()
No types or parameters are needed. The same is also true for labels. Even though they are definedusing a colon on the end of their name, the colon is completely omitted when using them with amemory address function, like this:
?Label
Getting the memory address of all these different data objects is easy because of the simple way thatthe memory address functions work. To begin with, and for clarity’s sake, I would recommend that allretrieved memory addresses are kept within variables, to keep code neat and readable, alwaysremembering to give them good meaningful names.
Creating And Naming PointersAs I said in the beginning, a pointer is a variable that holds a numeric address of a memory location,but what I didn’t say is that a pointer is a special kind of variable that follows a few rules. For a start,pointers in PureBasic are created by using an asterisk ‘*’ as the first character in its name. Like this:
*Pointer
Secondly, pointers are a numeric type that can change size depending on what computer architectureis compiling the program. For example, on a 32 bit system, a pointer will use 4 Bytes of memory tostore a number, while on a 64 bit system, a pointer will use 8 Bytes to store a number.
Also a pointer in PureBasic is not associated with any particular type. Meaning that if you define apointer using an asterisk along with any of the built-in numeric types, the built-in type is discarded tomake sure the pointer is the correct size for your particular computer architecture. So if you defined apointer like this, using a Byte type:
*Pointer.b = @Variable
The Byte type is discarded and the pointer will still use 4 Bytes on a 32 bit system and 8 Bytes on a 64bit system.
This asterisk used as part of the pointer name, is also a permanent character, meaning that once youhave defined your pointer then you have to keep it as part of its name when using it. For example, thesetwo are completely different and have no relationship towards each other:
MyVariable.l*MyVariable.l

Beyond The Basics 273
Even though the only difference between these variables is the asterisk, the first variable is a Long typevariable, while the second one is a pointer (defined by the asterisk). In other languages, an asteriskprefixes variables to return its value or memory address interchangeably, so it’s important tounderstand that PureBasic doesn’t have this extended functionality. They are treated as two entirelydifferent variables.
Using asterisks to create pointer variables is an effective way to differentiate them from other types inPureBasic, and giving you a good visual indication of what data they may hold. In the helpfile, all thesyntax examples that deal with memory also use this convention to help programmers know wherepointers are needed. Just take a look at some of the syntax examples of the memory commands(Helpfile:Reference Manual->General Libraries->Memory), there are asterisks everywhere.
Using this convention, the first example can be re-coded like this:
MyByteVar.b = 100*MemoryAddress = @MyByteVarDebug MyByteVar
Debug *MemoryAddress
Notice the asterisk prefixing the pointer name? Using this method it’s easy to spot which variables arepointers and which are not.
Accessing Memory In A Structured Way, Via A PointerIn this next example I’ll show you how you can use a pointer to act as a structured variable. Thispointer is the same size as any other but we can access the memory that it points to in a morestructured way.
Structure DETAILSAge.lHeight.l
EndStructure
My.DETAILSMy\Age = 32My\Height = 168
*Pointer.DETAILS = @My
Debug *Pointer\AgeDebug *Pointer\Height
Here, you can see I’ve defined a structure called ‘DETAILS’ which contains two Long fields.Immediately after that, I define a variable called ‘My’ using this structure and assign some data to theString fields within it. Now this is where the special function of the asterisk can be helpful whencreating a pointer. If we create a structured variable pointer using an asterisk, we are able to set itsvalue by assigning to it a memory address, like this:
*Pointer.DETAILS = @My
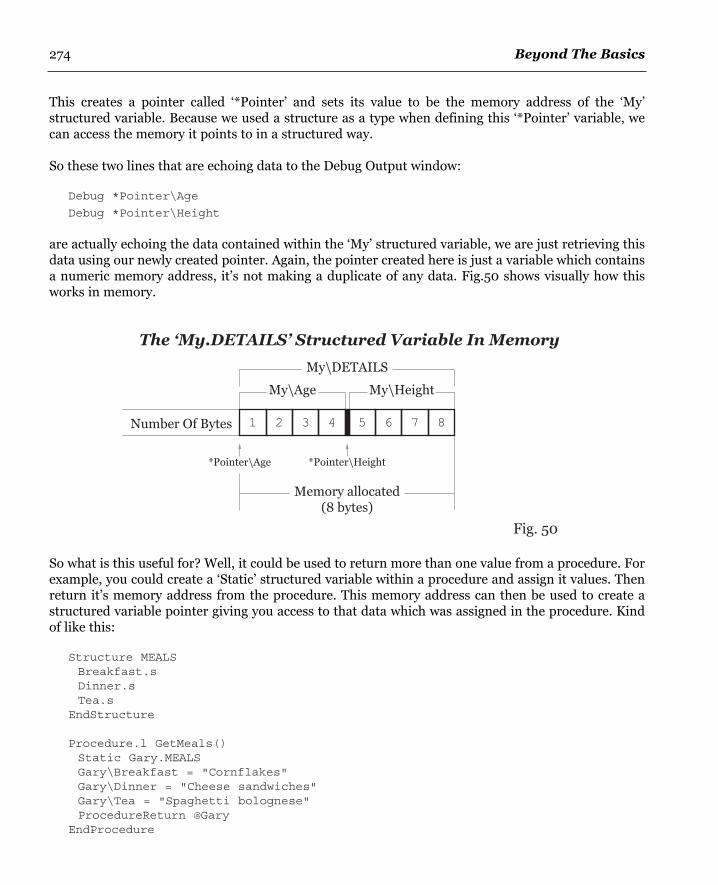
Beyond The Basics274
This creates a pointer called ‘*Pointer’ and sets its value to be the memory address of the ‘My’structured variable. Because we used a structure as a type when defining this ‘*Pointer’ variable, wecan access the memory it points to in a structured way.
So these two lines that are echoing data to the Debug Output window:
Debug *Pointer\Age
Debug *Pointer\Height
are actually echoing the data contained within the ‘My’ structured variable, we are just retrieving thisdata using our newly created pointer. Again, the pointer created here is just a variable which containsa numeric memory address, it’s not making a duplicate of any data. Fig.50 shows visually how thisworks in memory.
So what is this useful for? Well, it could be used to return more than one value from a procedure. Forexample, you could create a ‘Static’ structured variable within a procedure and assign it values. Thenreturn it’s memory address from the procedure. This memory address can then be used to create astructured variable pointer giving you access to that data which was assigned in the procedure. Kindof like this:
Structure MEALSBreakfast.sDinner.sTea.s
EndStructure
Procedure.l GetMeals()Static Gary.MEALSGary\Breakfast = "Cornflakes"Gary\Dinner = "Cheese sandwiches"Gary\Tea = "Spaghetti bolognese"ProcedureReturn @Gary
EndProcedure
My\Age
My\DETAILS
My\Height
Number Of Bytes
Memory allocated(8 bytes)
The ‘My.DETAILS’ Structured Variable In Memory
Fig. 50
1 2 3 4 5 6 7 8
*Pointer\Age *Pointer\Height

Beyond The Basics 275
*Gary.MEALS = GetMeals()
Debug *Gary\BreakfastDebug *Gary\DinnerDebug *Gary\Tea
We use the ‘Static’ keyword here to preserve the data in the ‘Gary’ structured variable when theprocedure returns, otherwise it will be destroyed. The memory address returned by this procedure isthen assigned to the structured variable pointer called ‘*Gary’ (notice the asterisk). We can then accessthat memory using the ‘MEALS’ structure. As you can see, very handy indeed.
For added flexibility memory addresses from any variable type can be assigned to a newly createdstructured variable pointer, even PureBasic’s built-in types can be used. Here’s a demonstration:
Structure SCREENCOORDSx.wy.w
EndStructure
Coordinates.l = %00000011000000000000010000000000*Screen.SCREENCOORDS = @Coordinates
Debug *Screen\xDebug *Screen\y
Here, I define a Long type 32 bit variable using binary and call it ‘Coordinates’. Then I assign itsmemory address to a newly created structured variable pointer called ‘*Screen’. Because the structureI used for the pointer contains two 16 bit Words, the 32 bit value pointed to won’t fit into just one ofthe fields but will overlap across both of them, split in the middle. This allows me to return two valuesfrom this one variable, giving you the two ‘x’ and ‘y’ values.
Passing A Structured Variable Into A Procedure Via A PointerAny structured variable can be passed into a procedure as a pointer to allow that procedure tomanipulate it. This is the only way in PureBasic that you can actually pass a structured variable into aprocedure. When passing structured variables like this, you are actually passing them ‘By Reference’,very similar to arrays and linked lists. What this means is that values aren’t actually ‘copied’ into anyparameters. Instead a pointer is passed to the procedure and this is used to manipulate the originalstructured variable. One of the main things you need to consider when using this method, is that whenyou pass a structured variable into a procedure, the parameter name of that procedure might not havethe same name as the structured variable you are passing, but whatever name you give to theparameter, you are still manipulating the original passed structured variable. Here’s an example:
Structure COORDINATESx.ly.l
EndStructurePoint.COORDINATES

Beyond The Basics276
Procedure IncreaseValues(*Var.COORDINATES)*Var\x + 10*Var\y + 10
EndProcedure
Point\x = 100Point\y = 100
IncreaseValues(@Point)Debug Point\xDebug Point\y
Here, I’ve defined a structure called ‘COORDINATES’ and created a structured variable from it called‘Point’. When all field values have been assigned to this variable, I then pass its memory address to the‘IncreaseValues()’ procedure.
In the definition of the ‘IncreaseValues()’ procedure, I’ve defined one parameter in the form of‘*Var.COORDINATES’. A parameter defined like this tells the procedure to expect a pointer from astructured variable which has been created from the ‘COORDINATES’ structure. The name ‘*Var’ canbe anything you like (as long as it’s prefixed by an asterisk), it’s merely used as a friendly way tomanipulate the passed pointer. So, when I do this in the above procedure:
...*Var\x + 10*Var\y + 10
...
What I am really doing is this:
Point\x + 10
Point\y + 10
because the procedure is manipulating the data stored at the passed memory address.
Using this method of passing structured variables to procedures can be very handy for situationswhere you want to pass lots of information nicely grouped together. For example, Address details,configuration details or any specifically grouped settings or values. Also using this method you canhave less parameters being passed to procedures, as you can pass them all in one structured variable.As an example of real world use, I wrote an email procedure a few years ago, to which I could pass astructured variable containing the mail account details along with the recipient, subject and message,etc... It just makes things a little more readable and manageable.
Reading And Writing Values Using PointersWhen you retrieve a memory address, you are able to use it in a variety of different ways. Arguably themost common way is reading values from that memory location or storing new data there. This iscalled peeking and poking. You use a ‘Peek’ command to retrieve data from a memory location and usea ‘Poke’ command to store new data there.
Beyond The Basics 277
In PureBasic there are eight ‘Peek’ commands and eight ‘Poke’ commands to accommodate fully all ofthe built-in data types. Each one of these commands are named in pretty much the same way, exceptthe last letter of the command name is the same as the type it works with. For example, if you want topeek a Byte from a particular memory address, you would use the command called ‘PeekB()’ which (asthe ‘B’ in its name suggests) would return a Byte from that location in memory. Similarly, if you wantedto poke a String into a particular memory address, then you would use ‘PokeS()’. All these sixteencommands can be read about in more detail in the ‘Memory’ section within the PureBasic helpfile(Helpfile:Reference Manual->General Libraries->Memory).
Peeking Values Held In Memory LocationsUsing a peek command is quite straightforward, you pass it a memory location (maybe being heldinside a pointer) and the peek command will return the data that resides there. To return a particulardata type you have to use the associated peek command. Here is an example of peeking a Byte from amemory location using the ‘PeekB()’ command:
Weight.b = 30*Weight = @WeightReadValue.b = PeekB(*Weight)Debug ReadValue
Here, I assign the value ‘30’ to a Byte variable named ‘Weight’. In the next line I assign its memoryaddress to a pointer called ‘*Weight’ (Notice the asterisk). The next line contains the ‘PeekB()’command which actually reads a Byte value from the passed pointer and returns it. You are not forcedto use pointers for the address parameter (although it is advisable for the sake of clarity), we could ofwritten this example like this:
Weight.b = 30ReadValue.b = PeekB(@Weight)
Debug ReadValue
Here, I use the Byte variable with the memory address function directly, completely doing away withthe pointer altogether. I guess it depends what you are most comfortable with. At the end of the day,all the ‘Peek’ commands need a memory location as a parameter, which ultimately can be supplied bya defined pointer or (more directly) by the return value of a memory address function.
Poking Values Into Memory LocationsPoking values into memory locations is just as easy as using a ‘Peek’ command. For poking however,you need to supply a new value along with the memory address of where to put it. Here’s an exampleof poking a new Long value into an existing Long variable’s memory location:
Weight.l = 1024*Weight = @WeightPokeL(*Weight, 333)Debug Weight
Here we start with the original value of ‘1024’ being assigned to the ‘Weight’ variable. Then I’ve createda pointer called ‘*Weight’ which contains the memory address of ‘Weight’. The ‘PokeL()’ command is
Beyond The Basics278
then used to poke the value of ‘333’ into the memory location specified in the first parameter. The newvalue of ‘Weight’ is then echoed to the Debug Output window.
A Word Of Warning When Poking New ValuesBe very careful about where you are poking new values. Using PureBasic’s memory commands can bequite dangerous of you don’t know what you are doing. For example, the ‘Poke’ commands have nointernal checking to tell you wether or not you can safely poke a value into a particular memoryaddress. You could pass a random number to any ‘Poke’ command as a memory address and it willquite happily poke a value into it. This is a double edged sword, because you sometimes need thispower to re-arrange values in memory but it can lead to problems. If you get it wrong, you could messup a memory location that some essential program might need to read. Leading to a program crash orsomething more damaging, like an operating system crash.
To safely poke values into memory you should poke into an existing variable or array’s memorylocation or poke into memory allocated using the ‘AllocateMemory()’ command (Helpfile:ReferenceManual->General Libraries->Memory->AllocateMemory). Ensuring that any values poked into thesememory areas do not exceed the allocated space. For example, it would be bad practice to poke a Longvalue into a Byte variable’s memory location, because you are poking 3 more Bytes of data than youshould be. This would actually work though, because there is no error checking, but you wouldoverwrite 3 Bytes of potentially essential data, corrupting whatever was there.
Using A Memory Address As A Start IndexWhen using contiguous blocks of memory to peek values from or to poke values into, it’s possible touse the starting Byte’s memory address as a starting index for the rest of the block. This is especiallyuseful when using pointers to arrays. Take a look at this example:
Dim Numbers.l(2)
Numbers(0) = 100Numbers(1) = 200Numbers(2) = 300
*ArrayPointer = @Numbers()
Debug PeekL(*ArrayPointer)Debug PeekL(*ArrayPointer + 4)Debug PeekL(*ArrayPointer + 8)
After creating an array of Long type variables called ‘Numbers’ I assign each of it’s indices a numericalvalue, ranging from ‘100’ to ‘300’. Once this is done I create a pointer called ‘*ArrayPointer’ whichholds the array’s memory address.
When you create any array like this, all its indices are created in a continuous block of memory, so alldata that the array holds is stored next to one another. The memory address returned by a memoryaddress function prefixing an array, is the address of the first index. In effect, the pointer called‘*ArrayPointer’ holds the memory address of the array index ‘Numbers(0)’.

Beyond The Basics 279
When we use a line of code like this:
...Debug PeekL(*ArrayPointer)
...
We are peeking the value from the first index’s memory location. You can see this is true by the firstvalue echoed to the Debug Output window. To peek other values from the array, we must use thispointer as a starting location and add to it the number of Bytes we wish to move through memory by.We know that Long types use four Bytes so we can increase the pointer by ‘4’ to retrieve the next Longvalue held inside the memory that’s allocated to this array. The following lines of code, from the aboveexample does just that, they peek values from further into the array’s memory by using the array’spointer as a starting location.
...Debug PeekL(*ArrayPointer + 4) ;This echoes the second Long value: ‘200’
Debug PeekL(*ArrayPointer + 8) ;This echoes the third Long value: ‘300’
I’ve shown this visually in Fig.51. If I was using an array of Bytes then of course I would have toincrease the array’s pointer by ‘1’ to peek the second Byte and by ‘2’ to peek the third, etc.. Similarly, ifI was using Word types, then the pointer would have to be increased by ‘2’ Bytes each time.
Threads
A thread is a single sequence of instructions executed as a separate task but still remaining part of theoriginating program. Any program can have several threads running concurrently, each performing adifferent task, such as waiting for events or performing a time-consuming job. Threads are an offshootof the main program, that can execute instructions independently of it. If the originating program isclosed, then the thread will automatically be stopped and destroyed too. So, what kind of programswould use threads? Well, any program can potentially use them, but mainly they are coded into
Index ‘0’ Index ‘1’ Index ‘2’
Number Of Bytes
Memory allocated for the ‘Numbers’ array(12 bytes)
The ‘Numbers’ Array In Memory
Fig. 51
1 2 3 4 5 6 7 8 9 10 11 12
*ArrayPointer *ArrayPointer + 4 *ArrayPointer + 8

Beyond The Basics280
programs that need to do more than one thing at once. For example, if you wrote a search tool tosearch for files on your hard drive, you would probably write the search code to be executed fromwithin a thread. This would then not interfere with the redrawing of the GUI or the event handling inthe main loop. The searching could be done independently, without impairing the responsiveness ofthe main interface. For another example, you may have a program that manipulates large files.Because these files take quite a while to manipulate in whatever way, you may want to deal with themin a thread, so that the main program can be doing other things. These are just two of the many waysthreads could defeat a particular programming problem.
Using ThreadsBefore I continue showing you how to use threads, let me show you a simple program that isn’tthreaded to base a comparison upon. This example calls a procedure twice, each time to insert valuesinto two different list view gadgets. Notice that when you press the ‘Start Test’ button, you can’t movethe window or see any text actually being entered into the gadgets until both procedure calls havefinished.
Enumeration#WINDOW_ROOT#LIST_ONE#LIST_TWO#BUTTON_TEST
EndEnumeration
Procedure InsertText(Gadget.l)For x.l = 1 To 25AddGadgetItem(Gadget, -1, Str(x))Delay(100)
Next xEndProcedure
#FLAGS = #PB_Window_SystemMenu | #PB_Window_ScreenCenteredIf OpenWindow(#WINDOW_ROOT, 0, 0, 290, 200, "Thread Test", #FLAGS)If CreateGadgetList(WindowID(#WINDOW_ROOT))ListViewGadget(#LIST_ONE, 10, 10, 130, 150)ListViewGadget(#LIST_TWO, 150, 10, 130, 150)ButtonGadget(#BUTTON_TEST, 95, 170, 100, 20, "Start Test")RepeatEventID.l = WaitWindowEvent()Select EventIDCase #PB_Event_GadgetSelect EventGadget()Case #BUTTON_TESTInsertText(#LIST_ONE)InsertText(#LIST_TWO)
EndSelectEndSelect
Until EventID = #PB_Event_CloseWindowEndIf
EndIfEnd

Beyond The Basics 281
You will also notice that when you run this example, the two procedure calls to ‘InsertText()’ in themain loop are run one after another. Meaning, the first procedure will have to finish before the secondone can begin, this is after all, how procedural programs work. In this case, that doesn’t really matterto us, because we can’t see any updates happening in the list view gadgets because of the ‘Delay()’command used in the ‘InsertText()’ procedure.
This delay is even delaying the program from processing internal messages to re-draw the userinterface or handle the movement of the window within the operating system. We just click the buttonand have to wait for the procedures to finish before we can interact with the program again. Nowimagine if this was an image processing program, and these two procedures take thirty minutes tofinish whatever they do. That’s a lot of time to wait until you can move that program’s window or seeany update in the user interface. We wouldn’t even be able to draw a progress bar!
If we want both of these procedure calls to run at the same time and be completely independent of themain user interface, we could create two threads to run at the same time as the main program. This ishow you could do it:
Enumeration#WINDOW_ROOT#LIST_ONE#LIST_TWO#BUTTON_TEST
EndEnumeration
Compiling Thread Safe Programs
PureBasic has a compiler setting to create thread safe executables, which is a must for trouble freeprogramming using threads. If you are using the compiler on the command line you can use the ‘/Thread’compiler option or you can switch on thread safe compilation in the IDE from the ‘Compiler Options’ dialogbox (Menu:Compiler->Compiler Options...->Compiler Options->Create Threadsafe Executable).
If this mode is not enabled and you are compiling and running your program, your finished executable mightnot be one hundred percent thread safe. This means, that because the threads contained in your program alluse shared resources from within your executable, those resources can sometimes get corrupted. This isespecially true regarding String usage. Without the thread safety compiler option being used, you may findthat Strings used in your program may get corrupted and may return unexpected results.
Using the thread safe compilation mode comes at a small price though. Because of the extra codeautomatically included in your executable file to handle thread safety, you may find that your program willrun slightly slower than one compiled without the thread safety mode. This is why the decision to use threadsmust be well thought out.
For all beginners using threads in PureBasic, I would recommend that the ‘Create Threadsafe Executable’compiler option is always enabled when compiling programs that use threads.

Beyond The Basics282
;Insert text into the specified list gadgetProcedure InsertText(Gadget.l)For x.l = 1 To 25AddGadgetItem(Gadget, -1, Str(x))Delay(100)
Next xEndProcedure
#FLAGS = #PB_Window_SystemMenu | #PB_Window_ScreenCenteredIf OpenWindow(#WINDOW_ROOT, 0, 0, 290, 200, "Thread Test", #FLAGS)If CreateGadgetList(WindowID(#WINDOW_ROOT))ListViewGadget(#LIST_ONE, 10, 10, 130, 150)ListViewGadget(#LIST_TWO, 150, 10, 130, 150)ButtonGadget(#BUTTON_TEST, 95, 170, 100, 20, "Start Test")RepeatEventID.l = WaitWindowEvent()Select EventIDCase #PB_Event_GadgetSelect EventGadget()Case #BUTTON_TESTThread1.l = CreateThread(@InsertText(), #LIST_ONE)Thread2.l = CreateThread(@InsertText(), #LIST_TWO)
EndSelectEndSelect
Until EventID = #PB_Event_CloseWindowEndIf
EndIfEnd
If you look closely, the only difference between these two examples is how the procedures have beencalled. Every newly created thread in PureBasic starts life as a standard procedure, defined as usual inthe source code and always defined with one parameter. To create a thread from it, you use the‘CreateThread()’ command (Helpfile:Reference Manual->General Libraries->Thread->CreateThread)which itself takes two parameters. The first is the memory address of the procedure you want to launchas a thread. The second is a mandatory parameter which can be of any type. You always have to passthis parameter to the procedure even if you use it or not, here I’ve used it to specify which gadget toinsert the text to.
When creating a thread like this, if the ‘CreateThread()’ command returns a value that is greater thanzero the thread has been successfully created and has been immediately launched. Also, this value (ifsuccessful) is a Long type thread identifier that can be used with other commands from the ‘Thread’library (Helpfile:Reference Manual->General Libraries->Thread).
So let’s recap on what rules we must follow to create a thread from a procedure.
1). The thread procedure must have one, and only one parameter.2). No value can be returned by the thread procedure. If it does return a value, it will be lost.
Beyond The Basics 283
When this threaded example is run, you will see values being inserted to both of the list view gadgetsin realtime. While these value are being inserted, you can also move the program’s window around thescreen and you will notice that it is now being redrawn and updated as normal. The two newly createdthreads have become independent parts of the same program, which run at the same time as it. If themain program should close at any time, these two threads will be terminated and closed too.
If you notice any garbled text being inserted into any of the gadgets, you must ensure that the ‘CreateThreadsafe Executable’ compiler option is enabled, as described in the ‘Compiling Thread SafePrograms’ box.
Waiting For Threads To FinishUsing threads can be a bit tricky sometimes, and can sometimes introduce new problems while solvingothers. If you use threads in your main program, they are always at the mercy of that program’s lifespan. Meaning, that when the main program finishes or is closed by a user, the associated threads areterminated too.
In PureBasic you can get around this problem by using the ‘WaitThread()’ command(Helpfile:Reference Manual->General Libraries->Thread->WaitThread). This command will makesure a thread has completed its task before continuing with the main program. Here’s an example:
Procedure DrawNumbers(Unused.l)For x.l = 1 To 20PrintN(Str(x))Delay(75)
Next xEndProcedure
If OpenConsole()ThreadID.l = CreateThread(@DrawNumbers(), 0)WaitThread(ThreadID)Print("Press Return to quit") : Input()CloseConsole()
EndIfEnd
After the thread creation line you can see I’ve used the ‘WaitThread()’ command. This takes oneparameter which is a thread identifier of a previously created thread. This command will halt normalprogram execution until the thread specified in the thread identifier has finished running, or in otherwords, until the procedure used to create the thread has completed its task. The ‘WaitThread()’command can take an optional second parameter if needed, which specifies a time-out value inmilliseconds. Once this time-out value has elapsed, the program execution is resumed regardless of thespecified thread’s state. I’ve not used this optional second parameter in my example because I want tomake sure the threaded procedure has finished before you are able to ‘End’ the program. If youcomment out the ‘WaitThread’ line of code, you will notice that you can press the Return key at anytime while the program is running and close it, effectively cutting short the thread’s task. With the‘WaitThread()’ command in place however, you have to wait for the thread to finish before thekeypress is acted on.
Beyond The Basics284
Using Shared Resources SafelyWhen using many threads in the same program, you have to code their actions very carefully,especially if your allowing these threads to use shared resources. Having many threads attempting toread and write to the same file or memory location at exactly the same time is always going to end incorrupted files and a lot of tears. To avoid this, PureBasic provides a simple mechanism for onlyallowing one thread at a time to gain access to any shared resource. This mechanism is in the form ofa Mutex.
A Mutex is a data object that can be used as a lock to stop threads using a resource if it’s being used byanother thread. Once used in your code to protect a shared resource, a mutex will prevent threads fromproceeding unless they have locked it. Once a thread has locked the mutex object, they are then free touse that protected resource. If another thread tries to lock the same mutex in the meantime, thatsecond thread will be effectively paused until the mutex is unlocked by the first one, thus stopping itfrom reading or writing to the shared resource. Here is an example where I use a mutex to controlprinting access to the console.
Global ConsoleAccess.l = CreateMutex()
Procedure DrawNumbers(ThreadNumber.l)LockMutex(ConsoleAccess)ConsoleLocate(ThreadNumber * 20, 0)ConsoleColor((ThreadNumber + 1) * 3, 0)Print("Thread " + Str(ThreadNumber) + " locked.")For x.l = 1 To 20ConsoleLocate(ThreadNumber * 20, x + 1)Print(Str(x))Delay(75)
Next xUnlockMutex(ConsoleAccess)
EndProcedure
If OpenConsole()EnableGraphicalConsole(#True)Thread0.l = CreateThread(@DrawNumbers(), 0)Thread1.l = CreateThread(@DrawNumbers(), 1)Thread2.l = CreateThread(@DrawNumbers(), 2)WaitThread(Thread0)WaitThread(Thread1)WaitThread(Thread2)ConsoleLocate(0, 23)Print("Press Return to quit") : Input()CloseConsole()
EndIfEnd
When this code is run, numbers will be printed to the console by each thread, but because I’ve used amutex in the ‘DrawNumbers()’ procedure only one thread at a time can lock the mutex and continueto print to the console.

Beyond The Basics 285
The first line of code creates a new mutex object, this is done with the ‘CreateMutex()’ command(Helpfile:Reference Manual->General Libraries->Thread->CreateMutex). This command doesn’trequire any parameters but when used will return a handle to a newly created mutex object. Thereturned handle is a 32 bit numeric value, so I’ve stored it in a Long type variable called‘ConsoleAccess’.
Once the mutex object is created, I then need to make my thread procedures obey its status if itbecomes locked or unlocked. To do this I need to add the lock and unlock commands to all threadprocedures that are going to use this shared resource. In my example I have only one threadprocedure, so I need to add this functionality there. If I were to add more thread procedures thatprinted to the console, I would have to code them to obey this mutex status too.
In order for a thread to be able to acquire a lock on a mutex object we use the ‘LockMutex()’ command(Helpfile:Reference Manual->General Libraries->Thread->LockMutex). This command takes oneparameter which is the mutex handle of the mutex object we want to lock. If the mutex is currentlyunlocked, the ‘LockMutex()’ command will lock it and continue as normal. If, however, the mutex hasalready been locked by another thread, the ‘LockMutex()’ command will pause the thread until it isable to lock it itself, which would be after the other thread has unlocked it.
You can see this in action in my mutex example, I lock the mutex before I print to the console and thenunlock it when I have finished, allowing other threads to lock it and continue printing. Unlocking themutex object is as simple as calling the ‘UnlockMutex()’ command (Helpfile:Reference Manual->General Libraries->Thread->UnlockMutex) while passing a mutex handle as a parameter of themutex object you want to unlock.
Continuing Your Thread If A Mutex Is LockedSometimes when your thread uses a shared resource protected by a mutex, it may be useful for it tonot halt entirely when it cant lock an already locked mutex object. You may need your thread tocontinue doing something else, or provide feedback on the mutex status itself. If this is the case youcan use the ‘TryLockMutex()’ command (Helpfile:Reference Manual->General Libraries->Thread->TryLockMutex). The ‘TryLockMutex()’ command does what it says on the tin, it tries to lock themutex specified in the first parameter. If it fails because another thread has already locked thespecified mutex, this command will return ‘0’ (zero). If, however, it is able to lock it, then thiscommand will return a non zero value (meaning a numeric value other than zero).
Here’s an example that shows three threads, all trying to lock the ‘Lock’ mutex object using the‘TryLockMutex()’ command. If any of them fail to do so then instead of just sitting idle and waitinguntil it’s unlocked, they display the amount of time they have been waiting in the relevant Stringgadget.
Enumeration#WINDOW_ROOT#TEXT_ONE#TEXT_TWO#TEXT_THREE#BUTTON_START
EndEnumeration

Beyond The Basics286
Global Lock.l = CreateMutex()
Procedure Update(Gadget.l)StartTime.l = ElapsedMilliseconds()RepeatIf TryLockMutex(Lock)For x.l = 1 To 20SetGadgetText(Gadget, Str(Gadget) + " has locked the mutex. " + Str(x))Delay(250)
Next xUnlockMutex(Lock)Break
ElseTime.s = "(" + Str((ElapsedMilliseconds() - StartTime) / 1000) + " Secs)"SetGadgetText(Gadget, Str(Gadget) + " is waiting for mutex. " + Time)Delay(1)
EndIfForEverSetGadgetText(Gadget, Str(Gadget) + " has finished.")
EndProcedure
#FLAGS = #PB_Window_SystemMenu | #PB_Window_ScreenCenteredIf OpenWindow(#WINDOW_ROOT, 0, 0, 290, 130, "'TryLockMutex()' Test", #FLAGS)If CreateGadgetList(WindowID(#WINDOW_ROOT))StringGadget(#TEXT_ONE, 10, 10, 270, 20, "")StringGadget(#TEXT_TWO, 10, 40, 270, 20, "")StringGadget(#TEXT_THREE, 10, 70, 270, 20, "")ButtonGadget(#BUTTON_START, 95, 100, 100, 20, "Start")RepeatEventID.l = WaitWindowEvent()Select EventIDCase #PB_Event_GadgetSelect EventGadget()Case #BUTTON_STARTThread1.l = CreateThread(@Update(), #TEXT_ONE)Thread2.l = CreateThread(@Update(), #TEXT_TWO)Thread2.l = CreateThread(@Update(), #TEXT_THREE)
EndSelectEndSelect
Until EventID = #PB_Event_CloseWindowEndIf
EndIfEnd
Here you can see inside the thread procedure I’ve used a ‘Repeat’ loop to keep the thread active evenif it can’t lock the mutex object. Once the mutex is locked, the thread counts to twenty, updating theString gadget as it goes. Once the count is finished the mutex is unlocked and the ‘Break’ keyword isused to exit the loop and ultimately end the thread. An ‘If’ statement is used to test the‘TryLockMutex()’ command to decide which course of action is required depending on the status of themutex.

Beyond The Basics 287
In SummaryThreads are another useful tool in a programmer’s toolbox and like any tool need to be used correctly.When compiling any program that uses threads I would recommend that you always use the thread-safe compiler option and try to use as few threads as possible.
Also I would recommend that you thoroughly read through the entire ‘Thread’ section in the PureBasichelpfile (Helpfile:Reference Manual->General Libraries->Thread), as it lists many more useful threadcommands than I have demonstrated in these pages. Before using threads you need to be completelyaware of their uses and limitations.
Dynamic Link Libraries
Dynamic link libraries, also known as dynamically linked libraries and usually abbreviated to just‘DLLs’, are Microsoft's implementation of a shared code library for the Microsoft Windows operatingsystem, and as such are only available for use on Microsoft operating systems. DLLs enableprogrammers to compile code into a shared library to enable many computer programs to use the codecontained within. Programs can dynamically connect to the DLL during runtime and use the library’scommands. When finished, the program can unload the library, freeing any memory associated withits use.
The DLL concept was one that was thought to decrease program filesize and memory requirements bystoring libraries on the hard disk, then loading and using when needed. The reality however, especiallyprevalent in Microsoft Windows operating systems, is that many different versions of the same DLLare needed by different programs for compatibility reasons, meaning that sometimes many copies ofthe same DLL (albeit different versions) are required. This particular problem has been given themoniker ‘DLL Hell’, to imply the problems it can create.
Operating system problems aside, DLLs can be very useful to break a program into a modularapproach. If you consider any code that you write to be useful for future programs, you can compile itinto a DLL and then it will be available to any program that wants to use it.
PureBasic makes using DLLs simple by providing a built-in library of commands (Helpfile:ReferenceManual->General Libraries->Library) to load and use DLLs, while the PureBasic compiler has anoption to compile your code to a DLL, making PureBasic the perfect choice for using and creatingDLLs.
Creating A DLLWhen creating your own DLLs there are a few things you must do as a matter of course, but don’tworry they are quite painless. The first thing to remember when writing code to be used as a DLL isthat nearly all your code must be written inside procedures. This is because, when a program loadsyour DLL, it runs the code contained within it by calling the compiled procedure names. Opening alibrary doesn’t automatically run the DLL like a program, instead, you have to call procedures from it.So what do I mean by nearly all code must be written like this? Well, variable and structure definitionsdon’t have to be written inside procedure definitions inside a DLL, but they are the only thing thatdon’t.
Beyond The Basics288
When writing code for DLLs there are four special reserved procedure names that are automaticallycalled by Windows once the DLL is loaded. These four procedures are defined like any other DLLprocedure but if they are named correctly, Windows will call each one when a particular conditionarises surrounding the DLL. I personally define these in all DLLs I write, even if I don’t use them. Thisis so, if ever I need to go back to development of that particular DLL, they are always there ready touse if needed. Here is a list of the four reserved procedure names and what conditions automaticallytrigger their execution:
‘AttachProcess(Instance.l)’This procedure is called once, when a program loads this DLL. This procedure is the only place in yourcode that you can define arrays and linked lists. I also use it to define variables and structures too,keeping everything in one place and not having anything outside procedures. The only limitation ofthis procedure is that DirectX initialization routines must not be written in here.
‘DetachProcess(Instance.l)’This is called when the program closes this DLL. All clean-up code should be in here, such as freeingany resources used by this DLL.
‘AttachThread(Instance.l)’This procedure is called each time a thread is created in the program that loads this DLL.
‘DetachThread(Instance.l)’This procedure is called each time a thread exits in the program that loads this DLL.
As you can see from this list, they are not very complicated to understand and use simple names. If youwant to use these automatically called procedures in your DLL, you just need to define the procedurenames as shown. The ‘Instance’ parameter that all of these procedures create, is an instance handle(sometimes called a module handle). This can be handy for more advanced programming. Thisparameter always needs to be defined if you are using these procedures, even if you don’t intend onusing the parameter in your code.
So now you know how a DLL should be coded (everything must be inside procedures) and you nowknow the names of the special reserved procedures, let me show you an example of a simple DLL.
ProcedureDLL AttachProcess(Instance.l)Global Message.s = "This is my DLL."
EndProcedure
ProcedureDLL ShowAlert()MessageRequester("Alert", Message)
EndProcedure
Here, I’ve not used all the special reserved procedures for the sake of brevity, the only one I’ve shownin this example is the ‘AttachProcess()’ procedure, within which I define a global String variable called‘Message’. The second procedure in this example is called ‘ShowAlert()’. This will be the procedure Icall when I open this DLL in another program. As you can see the message requester defined in the‘ShowAlert()’ procedure uses the String that’s defined in the ‘AttachProcess()’ procedure.

Beyond The Basics 289
You will also notice in this example that I’ve used a different keyword for defining these procedures,instead of ‘Procedure’ I’ve used ‘ProcedureDLL’. This is essential for defining the special reservedprocedures and for any procedure you want to be available for other programs to use. You can still usethe standard ‘Procedure’ keyword to define procedures, but these wont be accessible externally byother programs that load your DLL. These are mainly used for internal calculations, etc.
Once we have coded our DLL in the style above we need to test it. So first things first, let’s compile thisexample into a DLL. Because dynamic link libraries are a little bit different to standard programs, weneed to tell the compiler to compile a DLL instead of a regular program. If your using the commandline you can do this by using the ‘/DLL’ compiler option or if your using the IDE you can set it visuallyin the ‘Compiler Options’ dialog box (Menu:Compiler->Compiler Options...->Compiler Options->Executable Format->Shared DLL). Fig.52 shows where you need to select ‘Shared DLL’ within the‘Compiler Options’ dialog box. Once this has been set you can select ‘Create Executable...’ in the‘Compiler’ menu to actually produce the DLL. This allows you to specify a name and location for yourDLL.
Fig. 52The ‘Compiler Options’ dialog boxas it appears on Microsoft Windows.
To compile aDLL, select
‘Shared DLL’here.
Beyond The Basics290
Once you have compiled your DLL, you will notice that the compiler creates three files. Say forexample, we called our DLL, ‘Demo.dll’, you will end up with these three files:
‘Demo.dll’ ‘Demo.exp’ ‘Demo.lib’
The first one is of course the compiled DLL, the second is an export file and the third is a static libraryfile. PureBasic only needs the DLL file to use the commands within, but the other files can be useful topeople who use this DLL with other languages. If you are going to distribute your DLL file, I wouldrecommend distributing all these files together, but if you are only using your DLL for use withPureBasic, you only need the DLL file and the other two can be discarded.
Using A DLL In Your CodeUsing a DLL in a program is easy, you simply open the library and call the procedure you want to run.This is handled in PureBasic by using the commands from the ‘Library’ section (Helpfile:ReferenceManual->General Libraries->Library). Here is an example of how we would call the ‘ShowAlert()’procedure from the ‘Demo.dll’. Make sure you put the ‘Demo.dll’ in the same folder as the source codefile that contains this code:
#LIBRARY_DEMO = 0If OpenLibrary(#LIBRARY_DEMO, "Demo.dll")CallFunction(#LIBRARY_DEMO, "ShowAlert")CloseLibrary(#LIBRARY_DEMO)
EndIf
First, you open the library using the ‘OpenLibrary()’ command. This takes two parameters, the first isthe PB number you want to associate to this newly opened library and the second is the name of theDLL you want to open. To call a function from within the opened DLL you use the ‘CallFunction()’command, which takes two mandatory parameters. The first of which is the PB number of the librarythat you want to call a procedure from and the second is the name of the procedure you want to call.Notice that when you specify the name of the procedure to call, you don’t need to include the bracketson the end. After these two mandatory parameters, the ‘CallFunction()’ command can take up totwenty (20) optional parameters to pass values as parameters to the called DLL procedure. This isuseful if the DLL procedure you are calling needs parameters to be passed. The last command I’ve usedin this example is the ‘CloseLibrary()’ command, which closes the DLL associated with the PB numberpassed within its single parameter.
Creating and using DLLs can get a little more complicated than this, but the examples used here showthe outline of the whole process. All DLLs consist of procedures and to use them, you just need to openthe library and call them (using whatever method), it’s that simple.
When using a DLL like this you may be tempted to open the DLL, use a procedure and thenimmediately close the library. While this is fine for the odd one or two procedures to be called, you mayrun into performance issues if your program uses the DLL a lot. A better way to do things is that whenyour program initially starts up, open the DLL ready for use. Then in your program use the DLLprocedures when needed. Then, when your program shuts down, close the DLL library along with it.This ensures that the DLL is only opened once and closed only once, removing any performance issuesassociated with these file operations.
Beyond The Basics 291
Returning Values From DLL ProceduresWhen using procedures contained within DLLs, it may sometimes be necessary to return a value fromone of them. You can do this by using the ‘ProcedureReturn’ keyword as you would in any ordinaryprocedure. Here is a simple example of a DLL procedure coded to return a result.
ProcedureDLL.l MultiplyValues(x.l, y.l)ProcedureReturn x * y
EndProcedure
As you can see it’s pretty straightforward and apart from the ‘ProcedureDLL’ keyword, it looks like anyother normal procedure. Compile this piece of code into a DLL and then call it using this code:
#LIBRARY = 0If OpenLibrary(#LIBRARY, "Demo.dll")ReturnValue.l = CallFunction(#LIBRARY, "MultiplyValues", 22, 33)Debug ReturnValueCloseLibrary(#LIBRARY)
EndIf
Here, I’m using the ‘CallFunction()’ command again but this time I’m using two of the optionalparameters to pass values to the ‘MultiplyValues’ DLL procedure. The values I’m passing are ‘22’ and‘33’. When these two are passed to the ‘MultiplyValues’ DLL procedure, it uses them as parameters andprocesses them accordingly. In this case, it multiplies them together and returns the result. Thereturned value is then passed back to the ‘CallFunction()’ command which returns it into our program.I’ve used a Long type variable called ‘ReturnValue’ to hold the returned value from the DLL procedure,which I then echo to the Debug Output window.
While this way of returning values is fine for most built-in integer types (see Limitations WhenWorking With DLLs overleaf), for Strings it’s a little bit different. For a start, any Strings that you needto return from a DLL must be defined as global. This is to preserve the String after the DLL procedurehas returned. Also, when a String is supposed to be returned from a DLL procedure, a memory addressfor the String is actually returned instead, even if the return type was defined as a String in theprocedure definition.
Here’s an example to demonstrate this:
ProcedureDLL AttachProcess(Instance.l)Global MyString.s = "Lorem ipsum dolor sit amet."
EndProcedure
ProcedureDLL.s GetString()ProcedureReturn MyString
EndProcedure
In this example, I’ve defined the ‘GetString()’ procedure to return a String and made sure the‘MyString’ variable is global. Try compiling this to a DLL and call it using this code:
Beyond The Basics292
#LIBRARY = 0If OpenLibrary(#LIBRARY, "Demo.dll")*ReturnValue = CallFunction(#LIBRARY, "GetString")Debug PeekS(*ReturnValue)CloseLibrary(#LIBRARY)
EndIf
You’ll see that the ‘CallFunction()’ command returns a Long type number, so we have to use anumerical variable to hold it. So, I’ve created a pointer called ‘*ReturnValue’ to hold the returnedmemory address, from which, I read the String pointed to using the ‘PeekS()’ command.
Limitations When Working With DLLsThe only real limitations that exist when using DLLs is the passing and returning of values to and fromthe DLL. Bytes, Words and Longs are relatively painless to use and all DLL commands support thembut for the other types there can be a bit of a headache. You’ve already seen the peculiarity of Stringsreturned as a memory address instead of the actual String itself. While Floats seem to get completelymangled when being returned from the DLL. Quads and Doubles are completely unsupported usingthe standard ‘Library’ commands but can be handled by using PureBasic prototypes which are a littlebeyond the scope of this book.
To handle returning a Float from a DLL procedure your best bet is to return its memory addressinstead and then read the returned value using ‘PeekF()’. Here is a little example of how to successfullyreturn a Float from a DLL procedure. First, here is the example DLL:
ProcedureDLL AttachProcess(Instance.l)Global MyFloat.f = 3.1415927
EndProcedure
ProcedureDLL.l GetPi()ProcedureReturn @MyFloat
EndProcedure
Instead of returning the actual Float value, the DLL procedure ‘GetPi()’ is defined to return a Long.This allows me to return the Float’s memory address. Once this is compiled into a DLL I can call itusing this code:
#LIBRARY = 0If OpenLibrary(#LIBRARY, "Demo.dll")*ReturnValue = CallFunction(#LIBRARY, "GetPi")Debug PeekF(*ReturnValue)CloseLibrary(#LIBRARY)
EndIf
The memory address, once returned, gets assigned to the ‘*ReturnValue’ pointer, then I use the‘PeekF()’ command to read the Float value pointed to in memory. In fact this trick of returningmemory addresses can be used in a similar fashion to return memory address to Quads and Doubles,so in effect you can say PureBasic supports returning them.
Beyond The Basics 293
There is just no way at the minute of passing Quads or Doubles to DLL procedures as parameters usingthe ‘Library’ commands.
Using DLLs is quite simple once you’ve got your head around passing variables to the DLL and howyou return and use the returned values. They can make code re-usable by coding it into a neatlypackaged library. There are a few issues regarding some built-in types but these can be overcome byusing more advanced methods, usually by just returning a pointer to what data you need returned. Themore complicated approaches, such as prototypes are unfortunately a little too advanced to be goinginto at this stage, but you can always look them up in the PureBasic helpfile (Helpfile:ReferenceManual->Prototype) to familiarize yourself with them just incase. Just don’t be shocked if you can’tunderstand them in your first go. It’s also worth reading the whole ‘Library’ section(Helpfile:Reference Manual->General Libraries->Library) in the PureBasic helpfile to learn about allthe commands that can be used with DLLs. This should give you a good understanding of what’savailable when you decide to develop your first real DLL.
The Windows Application Programming Interface
You are probably wondering why I’m including a section on Windows programming in a bookdescribing a computer language which is cross-platform. Well, I’m including it here because theWindows version of PureBasic has a rather cool and useful ability to be able to use the WindowsApplication Programming Interface natively. Let me explain a little more fully.
The Windows Application Programming Interface (Usually shortened to just the Win32 API) is foundin all new versions of the Microsoft Windows operating system and is a common interface available forall computer programs to use. The Win32 API is basically a command library, contained within many
DLL Calling Conventions
When using PureBasic there are two calling conventions that may be used with DLLs. As standard PureBasicassumes that any given DLL uses the ‘stdcall’ calling convention and that any DLLs created using PureBasicvia the ‘ProcedureDLL’ keyword are also considered to be using the ‘stdcall’ calling convention. Thisconvention is used as standard in PureBasic because it is the standard calling convention of MicrosoftWindows.
If needed though, the ‘cdecl’ calling convention can be used by using the complementary ‘C’ functions fromthe PureBasic ‘Library’ group of commands. For example, instead of using the ‘ProcedureDLL’ keyword tocreate a ‘stdcall’ DLL procedure you can make that procedure use the ‘cdecl’ calling convention by using the‘ProcedureCDLL’ keyword instead. The same goes for calling procedures from DLLs. Instead of calling a‘stdcall’ procedure using the ‘CallFunction()’ command, you can call a ‘cdecl’ procedure using the‘CallCFunction()’ command.
There are more of these complementary ‘C’ functions available to be used in PureBasic, look at the helpfile inthe ‘Library’ section for a complete list.
Beyond The Basics294
different DLLs installed by default during a normal Windows installation. The API itself is part of theoperating system and available to be used by any computer program to carry out almost anything thatthe operating system is capable of, e.g. opening windows, manipulating Strings, drawing shapes, etc.
Using Win32 API CommandsTo use a Win32 API command, a user can simply load the DLL that contains the needed command andthen call it, passing any relevant parameters that are needed. This can be done easily in PureBasicusing the ‘Library’ commands but because PureBasic for Windows supports the Win32 API natively,you can use the API as easily as you would any other PureBasic command. For example, other morecumbersome programming languages would have to do things this way to display a simple messagerequester using the Win32 API:
#LIBRARY = 0If OpenLibrary(#LIBRARY, "User32.dll")MB_OK = 0Caption.s = "Test"TextString.s = "This is a Win32 API Test"CallFunction(#LIBRARY, "MessageBoxA", #Null, @TextString, @Caption, MB_OK)CloseLibrary(#LIBRARY)
EndIf
As you can see, you would have to open the DLL where the required command resides, Here, it’s acommand called ‘MessageBoxA’ located in ‘User32.dll’. Once this is open, you can call the necessarycommand passing any parameters needed. This is all well and good, but it’s a bit complicated and longwinded. In PureBasic you can use that same command like this:
MessageBox_(#Null, "This is a Win32 API Test", "Test", #MB_OK)
Notice the underscore (‘_’) after the command name? That denotes that this is an API command andcalls it from the necessary DLL automatically. I think you’ll agree, this way is a lot simpler and quickerto use. We are using the Win32 API command as if it were another native command in the standardPureBasic package.
The underscore can be used to automatically include any command from the Win32 API. For example,there is a command called ‘CharUpper’ in the Win32 API for converting Strings to uppercase, we canuse this command as if it’s a native PureBasic command by using an underscore after it’s name andbefore the brackets, like this:
TextString.s = "this is all lowercase text."CharUpper_(@TextString)Debug TextString
This command needs a memory address of a String as a parameter according to the Win32 APIdocumentation, so that’s what I’ve passed. When you run this example and look in the Debug Outputwindow, you will see the text String has now been converted to uppercase.
Beyond The Basics 295
Using the Win32 API like this alleviates all the hassle of opening the required DLLs yourself and allowsyou to use an API command whenever you need to in your code. In fact if your using the Windowsversion of PureBasic you can mix regular and API commands as much as you like in your source code.
Using Win32 API Constants And StructuresTo complement the ease of use of Win32 API commands in the Windows version of PureBasic, all theassociated constants and structures have also been predefined. This means that if you ever need aconstant or a structure to use with a Win32 API command, they have already been defined internallyready for immediate use.
You can see this in the PureBasic version of the ‘MessageBox’ command example on the other page,where I’ve used the constant ‘#MB_OK’ without defining it. This is because the Win32 API constant‘MB_OK’ has already been defined internally. To use any Win32 API constant in PureBasic, you justneed to add the hash symbol (‘#’) to the beginning of the Win32 API constant name and it should thenbe useable as if it was defined natively in your source code.
Win32 API Constant: ‘MB_OK’PureBasic’s version: ‘#MB_OK’ (This doesn’t need defining, because it already has been internally.)
The same goes for Win32 API structures, whenever you need to use one, you just use it. There is noneed to define it. Take a look at this example:
DesktopInfo.RECTDesktopHandle.l = GetDesktopWindow_()GetClientRect_(DesktopHandle, @DesktopInfo)
DesktopSize.s = "Your current desktop size is: "DesktopSize + Str(DesktopInfo\right) + " x "DesktopSize + Str(DesktopInfo\bottom)Debug DesktopSize
Here, I’m using the Win32 API structure called ‘RECT’ without defining it and then I go on to use theWin32 API commands, ‘GetDesktopWindow’ and ‘GetClientRect’ as if they were native commands(notice the underscores?). As you can see from the ‘RECT’ structure, all Win32 API structures havebeen defined using uppercase names. This is the standard form when programming using the Win32API and my naming preference for structures, as described in Chapter 8 (My Coding Format).
This naming convention matches exactly the way in which structures are defined in the Win32 APIreference manuals and to avoid confusion when it comes to use them.
For example, if the Win32 API documentation says that a particular command needs a variabledefined with the structure ‘RECT’, then you can just use ‘RECT’ in your PureBasic source code as astructure.
Take this example text from the Win32 API documentation, detailing the ‘BeginPaint’ API command:

Beyond The Basics296
The BeginPaint function prepares the specified window for painting and fills aPAINTSTRUCT structure with information about the painting.
HDC BeginPaint(HWND hwnd,// handle to windowPAINTSTRUCT lpPaint // pointer to structure for paint information);
Parameters
hwndIdentifies the window to be repainted.
lpPaintPointer to the PAINTSTRUCT structure that will receive painting information.
Return ValuesIf the function succeeds, the return value is the handle to a display devicecontext (HDC) for the specified window. If the function fails, the returnvalue is NULL, indicating that no display device context is available.
You can see that this command needs a pointer (or memory address) to a structured variable as thesecond parameter, and this structured variable must be created from the ‘PAINTSTRUCT’ structure.To create such a variable in PureBasic we can do this:
PaintVariable.PAINTSTRUCT
And that’s it. The ‘PAINTSTRUCT’ structure has already been defined internally, so we can just use itwithout a definition. A full usage example of this command might look like this inside your main code:
...PaintVariable.PAINTSTRUCTWindowHandle.l = WindowID(#MY_WINDOW)HDC.l = BeginPaint_(WindowHandle, @PaintVariable)...
Viewing Internally Defined Constants And StructuresSo now you know that a lot of handy data has been defined internally but you don’t necessarily knowwhat exactly has been defined. To clear up any confusion and let you see what exactly has been definedthe PureBasic IDE has a handy viewer for looking up all such data. This tool is called the ‘StructureViewer’ and can be found in the ‘Tools’ menu in the IDE (Menu:Tools->Structure Viewer). Fig.53shows the Structure Viewer as it appears on the Window operating system and notes many of thefeatures that make this such an useful tool.
Once the Structure Viewer is open, you are greeted with a list of all structures that have been definedinternally. This list can be searched and filtered alphabetically by using the appropriate controldetailed in the diagram. Although this list initially shows defined structures, this can be changed byselecting a different tab to display defined interfaces or constants. Although interfaces haven’t beendiscussed in this book, the constants list will be helpful to you as this shows all internally definedconstants and their values. All built-in PureBasic constants are shown here too.

Beyond The Basics 297
To view the actual definitions of internally defined structures you just double-click their names in thedata list. When you do this the ‘Insert Copy’ and ‘Insert’ buttons become active. The ‘Insert Copy’button inserts a copy of the structure definition into your PureBasic source, while the ‘Insert’ buttoninserts code to actually use and define the fields within the structure. Open a new PureBasic source fileand have a play to get used to how it works.
Documentation On The Win32 APIWhen using the Win32 API you are going to need a good reference documentation to understand whatcommands are available for use and to understand how to use them. The first port of call wouldprobably be Microsoft’s Developers Network on the Internet (www.msdn.com) but this can beconfusing for new users as the site is massive and contains information on every conceivable aspect ofWindows programming, so it can be a pain to navigate. I’ve found the best solution (for mepersonally), is to consult a smaller more focused reference and then search the MSDN if moreinformation is needed about a particular command or syntax.
Fig. 53The ‘Structure Viewer’ dialog boxas it appears on Microsoft Windows.
Defined Data List(Double Click OnAn Entry To See
Its Definition)
Close Button
Insert Button(Inserts PureBasicCode NecessaryTo Define Fields OfA Selected Structure)
Back Button(Used To Return
To The Main List)
Alphabetical Filter
Data Tabs(To View Other
Types Of DefinedData)
Search Field(Type A Name ToSearch For DataIn The Data List)
Insert Copy Button(Inserts A Copy OfThe Definition AsPureBasic Code)
Insert Name Button(Inserts PureBasic
Code Needed To UseThe Selected Data)

Beyond The Basics298
The smaller reference I use is the ‘Win32.hlp’ file, a Windows helpfile that contains a reference for theWin32 API commands. This helpfile is not part of the normal PureBasic package so you will have tohunt it down and install it yourself, to be helpful I’ve provided an Internet link in Appendix A (UsefulInternet Links). Once you have the ‘Win32.hlp’ file you should install it manually into the ‘Help’ folderwhich is inside your PureBasic folder. If a ‘Help’ folder doesn’t appear inside your PureBasic folderthen just create one and place the ‘Win32.hlp’ file(s) inside that newly created folder. Sometimes thehelpfile is accompanied with other files such as ‘Win32.cnt’ and ‘Win32.kwf’, if this is the case all mustbe installed together. Once this has been done, you can then take advantage of the integration betweenthis file and the IDE.
Once this file is correctly installed, you can select any Win32 API command within the IDE by placingyour cursor within it and then hitting ‘F1’. Now, instead of the usual PureBasic helpfile appearing, the‘Win32.hlp’ file is opened on the correct page for the highlighted Win32 API command. This behaviordoesn’t stop the standard PureBasic helpfile from functioning, it just opens a different helpfiledepending on what command is highlighted within the IDE.
Try it for yourself, type this code in from a previous example, place the flashing text cursor within the‘GetClientRect’ command and hit ‘F1’.
DesktopInfo.RECTDesktopHandle.l = GetDesktopWindow_()GetClientRect_(DesktopHandle, @DesktopInfo)
DesktopSize.s = "Your current desktop size is: "DesktopSize + Str(DesktopInfo\right) + " x "DesktopSize + Str(DesktopInfo\bottom)
Debug DesktopSize
You should now see the ‘Win32.hlp’ file opened and displaying the page on the ‘GetClientRect’command. Don’t forget, the ‘Win32.hlp’ file is a standard Windows helpfile and as such is easilynavigated and fully searchable, so it’s maybe worth a read at some point if you plan on doing a lot ofWin32 API programming.
Disadvantages Of Using The Win32 API In PureBasicOne of the biggest disadvantages of using the Win32 API in a PureBasic program is that you can onlyuse these commands on a Microsoft Windows operating system. This means that any program youwrite using these commands will only be able to be compiled using PureBasic for Windows.
Another big disadvantage is that the Win32 API was originally designed to be used by the C and C++programming languages and as such contains references to many advanced data types that simplydon’t exist in PureBasic. For the most part however, you can substitute a PureBasic type in place of aC/C++ type. Fig.54 shows a diagram of what PureBasic types can be used instead of the C/C++ typeslisted. For example, if you read in a Win32 API command description that a particular command needsa variable of type ‘DWORD32’, looking at Fig.54 you can see that you can use a PureBasic Long typeinstead.

Beyond The Basics 299
You will notice that some types listed in Fig.54 are marked with a ‘†’ symbol. This is to show that thesetypes do not exactly match their PureBasic counterparts. The reason for this mismatch is that all themarked Win32 API types are unsigned (except for ‘TBYTE’) while the substitute PureBasic types areall signed. Because of this, some types might suffer from numerical wrapping issues. The odd one outis the API type: ‘TBYTE’, which is signed while the PureBasic Character type which substitutes it, isunsigned. This ultimately shouldn’t raise massive problems in your program, because with a little bitof coding you can easily convert signed values to unsigned values and vice versa. Here are a fewprocedures that you could use to convert all these problem types:
;Returns the correct unsigned value from a UCHAR.Procedure.w UCHAR(UCHAR.b)ProcedureReturn UCHAR & $FF
EndProcedure
Fig. 54
PureBasic Substitute Types For Win32 API Types
DWORD_PTRINT_PTRLONG_PTRUINT_PTRULONG_PTR
*Pointer
BOOLCOLORREFDWORDDWORD32HACCELHANDLEHBITMAPHBRUSHHCONVHCONVLISTHCURSORHDCHDDEDATAHDESKHDROPHDWPHENHMETAFILEHFILEHFONTHGDIOBJHGLOBALHHOOKHICONHIMAGELISTHIMCHINSTANCEHKEY
HKLHLOCALHMENUHMETAFILEHMODULEHMONITORHPALETTEHPENHRGNHRSRCHSZHWINSTAHWNDINTINT32LANGIDLCIDLCTYPELONGLONG32LPARAMLPBOOLLPBYTELPCOLORREFLPCRITICAL_SECTIONLPCSTRLPCTSTR
LPCVOIDLPCWSTRLPDWORDLPHANDLELPINTLPLONGLPSTRLPTSTRLPVOIDLPWORDLPWSTRLRESULTPBOOLPBOOLEANPBYTEPCHARPCRITICAL_SECTIONPCSTRPCTSTRPCWCHPCWSTRPDWORDPFLOATPHANDLEPHKEYPINTPLCID
PLONGPLUIDPOINTER_32PSHORTPSTRPTBYTEPTCHARPTSTRPUCHARPUINTPULONGPUSHORTPVOIDPWCHARPWORDPWSTRSC_HANDLESC_LOCKSERVICE_STATUS_HANDLEUINT †UINT32 †ULONG †ULONG32 †WPARAM
Long
BOOLEANBYTECHARUCHAR †
ByteTBYTE †TCHAR
CharacterSHORTUSHORT †WCHARWORD
WordDWORD64INT64LONG64LONGLONGPOINTER_64
Quad
FLOAT
Float
DOUBLE
Double
Types marked with ‘†’ need to be read correctly after a command call. This is because thesetypes may be unsigned or signed opposite to the PureBasic type they are using.

Beyond The Basics300
;Returns the correct signed value from a TBYTE.CompilerIf #PB_Compiler_UnicodeProcedure.w TBYTE(TBYTE.c)
CompilerElseProcedure.b TBYTE(TBYTE.c)
CompilerEndIfProcedureReturn TBYTE
EndProcedure
;Returns the correct unsigned value from a USHORT.Procedure.l USHORT(USHORT.w)ProcedureReturn USHORT & $FFFF
EndProcedure
;Returns the correct unsigned value from a UINT.Procedure.q UINT(UINT.l)ProcedureReturn UINT & $FFFFFFFF
EndProcedure
;Returns the correct unsigned value from a UINT32.Procedure.q UINT32(UINT32.l)ProcedureReturn UINT32 & $FFFFFFFF
EndProcedure
;Returns the correct unsigned value from a ULONG.Procedure.q ULONG(ULONG.l)ProcedureReturn ULONG & $FFFFFFFF
EndProcedure
;Returns the correct unsigned value from a ULONG32.Procedure.q ULONG32(ULONG32.l)ProcedureReturn ULONG32 & $FFFFFFFF
EndProcedure
For example, if you used a PureBasic Byte (which is signed) to store a ‘UCHAR’ unsigned value, thenyou can only read that unsigned value correctly by using the ‘UCHAR()’ procedure like this:
MyUCHAR.b = 255 ; This represents '-1' signed and '255' unsigned.Debug MyUCHAR ; This echoes the signed value of '-1'.UnsignedValue.w = UCHAR(MyUCHAR)Debug UnsignedValue ; This echoes the unsigned value of '255'.
The only drawback in using these procedures is that the value they return, (although totally correct)uses twice the amount of memory of the type you passed as a parameter. Just look at the ‘UCHAR()’procedure in the last example. This accepts a Byte as a parameter of the ‘UCHAR’ you want to read,and then returns a Word containing the correct unsigned value. That’s double the size of the originalByte. This is done because nearly all PureBasic’s types are signed, so we have to use a big enough typeto correctly express an unsigned value, avoiding any wrapping issues.

Beyond The Basics 301
Assigning unsigned values to signed types on the other hand is easy. As shown in the last example, youcan assign an unsigned value to a signed type, but that value is always stored as a signed value. So, thisline of code:
MyUCHAR.b = 255Debug MyUCHAR
Would actually store ‘-1’ as its value. This is implemented in PureBasic to ease such Win32 APIconversion issues.
A Quick Note Regarding Win32 API String Pointer TypesWhen using Win32 API String pointer types, it’s useful to know how to read and write to memorycorrectly for each of the different types of String they point to. For example, a pointer of type ‘LPCSTR’would be used by the Win32 API to point to a one Byte per character ASCII String, while a pointer oftype ‘LPCWSTR’ would point to a two Bytes per character unicode String. Even though all Stringpointers use a PureBasic Long type to represent the actual pointer and hold a memory location, youhave to peek and poke each one from memory using a different mode of the ‘PeekS()’ and ‘PokeS()’commands to properly observe each String type’s character encoding.
Here are the Win32 API String pointer types, and more importantly, how to correctly read and writeeach type of String from the memory location they point to:
‘LPCSTR’One Byte per character (ASCII) String, even if the program is compiled in unicode mode.
PeekS(StringPointer.l, StringLength, #PB_Ascii)PokeS(StringPointer.l, Text.s, StringLength, #PB_Ascii)
‘LPCWSTR’ ‘PCWSTR’ ‘PWSTR’ ‘LPOLESTR’ Two Bytes per character (Unicode) String, even if the program isn’t compiled in unicode mode.
PeekS(StringPointer.l, StringLength, #PB_Unicode)
PokeS(StringPointer.l, Text.s, StringLength, #PB_Unicode)
‘LPCTSTR’ ‘LPTSTR’ ‘LPSTR’ ‘PCTSTR’ ‘PTSTR’Exactly the same as a standard PureBasic String, which is one Byte per character if the program is notcompiled in unicode mode and two Bytes per character if the program is compiled in unicode mode.
PeekS(StringPointer.l, StringLength)
PokeS(StringPointer.l, Text.s, StringLength)
A Doorway To A Larger WorldHopefully this brief introduction to the Win32 API will spur you on to read more about it and perhapsuse it in your Windows programming. Sometimes when using PureBasic and writing software forMicrosoft Windows, you may need the occasional API command to provide extra functionality that isnot currently available natively in PureBasic.


VAppendices
This next section contains the appendices to this book. This supplementary material contains a varietyof useful information including useful Internet links, a few pages of helpful charts and a completecomputer science glossary.
These final pages provide you with a quick reference to some of the more useful information that youwill want to look at time and time again.


AUseful
Internet Links
The following pages contain many useful web address from the Internet that you will want to take alook at when starting out with PureBasic. These websites contain lots of useful information, such ascode snippets, tool and utilities, where to get technical support and where to ask questions.
PureBasic Beginnershttp://www.pb-beginners.co.ukThe website associated to this book. Most of the code, images and sounds used in the examplescontained in this book can be downloaded from this website along with other useful tools and utilities,including the elusive ‘Win32.hlp’ help file.
Official PureBasic Websitehttp://www.purebasic.comThe official website of PureBasic. This is where you buy and download the full PureBasic package. Youcan also find the latest development news on PureBasic and access support via the website’s menu.
Official PureBasic Forumshttp://forums.purebasic.comHopefully this will be one of your first stops when using PureBasic. All you need to do is register withthe forum and you can ask as many questions as you like. This online forum is monitored closely bythe PureBasic team who regularly contribute to discussions and answer questions relating toPureBasic. The wealth of information regarding PureBasic stored on this site should not beunderestimated. Not only do you have access to the shared knowledge of hundreds of PureBasicprogrammers willing to help you, but every post is archived and fully searchable, meaning you literallyhave years worth of PureBasic knowledge at your fingertips detailing almost any programming taskyou may encounter.
305
Appendix A - Useful Internet Links306
PureAreahttp://www.purearea.netThis site contains lots of PureBasic related material including, thousands of PureBasic code examplescontained in the downloadable Code Archive, downloadable third party user libraries and links tohundreds of freeware and shareware utilities written in PureBasic. There is also an online PureBasicreference manual.
The PureBasic Visual Designerhttp://www.purebasic.beThis site contains news and updated builds of the new official PureBasic visual designer. Everything todo with the development of the visual designer is contained on this site.
PureProjecthttp://pureproject.reelmedia.orgMore PureBasic code snippets including games and applications and more downloadable third partyuser libraries. There’s also a Windows API section too.
PureVisionhttp://purevision.reelmedia.orgA third party commercial replacement for the standard PureBasic visual designer. This professionalvisual designer also has full support for GUI skinning.
Microsoft Windows API Documentationhttp://msdn.microsoft.com/libraryMicrosoft’s Windows API website detailing all the Windows Application Programming Interface. Usethe search box on the webpage to quickly find information.
API-Guidehttp://www.allapi.net/agnet/apiguide.shtmlA program called ‘API-Guide’ that allows you to explore the commands available in the Win32 API.Details of all commands and parameters are given with examples for nearly all commands. Note: Theexamples are coded for VisualBasic but can easily be converted to PureBasic.
The OGRE Enginehttp://www.ogre3d.org/The website of the OGRE 3D engine, this is the one that PureBasic uses to provide 3D graphics.
Housemarque Audio Systemhttp://www.s2.org/hmqaudio/This is the sound system that PureBasic uses to play modules. You will need to download the‘midas11.dll’ file to provide module playback capabilities in your programs. This file is part of theHousemarque ‘Standard distribution package’. For more information see Chapter 12 (Module Files).

BHelpful Charts
This appendix contains many useful charts, some of which have already appeared earlier on in thisbook. Some are reprinted here for your convenience to make finding them easier when needed.
307
1
2
3
4
5
6
7
8
( )
~
<< >> % !
| &
* /
+ -
> >= < <= = <>
And Or Not XOr
Fig. 13
OperatorsPriority*
Operator Precedence
* The operators at the top of this list are evaluated first.

Appendix B - Helpful Charts308
=
+
-
*
/
&
|
!
~
<
>
<=
>=
<>
And
Or
Not
XOr
<<
>>
%
( )
Fig. 15
DescriptionOperator
Operator Quick Reference
Equals. This can be used in two ways. The first is to assign the value of the expression on the RHS to the variable on the LHS. The second way is when the result of the operator is used in an expression to test whether the values of the expression on the LHS and the RHS are the same (if they are the same the equals operator will return true, otherwise it will return false).
Plus. Gives a result of the value of the expression on the RHS added to the value of the expression on the LHS. If the result of this operator is not used and there is a variable on the LHS, then the value of the expression on the RHS will be added directly to the variable on the LHS.
Minus. Subtracts the value of the expression on the RHS from the value of the expression on the LHS. When there is no expression on the LHS this operator gives the negative value of the value of the expression on the RHS. If the result of this operator is not used and there is a variable on the LHS, then the value of the expression on the RHS will be subtracted directly from the variable on the LHS. (This operator cannot be used with strings).
Multiplication. Multiplies the value of the expression on the LHS by the value of the expression on the RHS. If the result of this operator is not used and there is a variable on the LHS, then the value of the variable is directly multiplied by the value of the expression on the RHS. (This operator cannot be used with strings).
Division. Divides the value of the expression on the LHS by the value of the expression on the RHS. If the result of this operator is not used and there is a variable on the LHS, then the value of the variable is directly divided by the value of the expression on the RHS. (This operator cannot be used with strings).
Bitwise AND. You should be familiar with binary numbers when using this operator. The result of this operator will be the value of the expression on the LHS AND’ed with the value of the expression on the RHS, bit for bit. Additionally, if the result of the operator is not used and there is a variable on the LHS, then the result will be stored directly in that variable. (This operator cannot be used with strings).
Bitwise OR. You should be familiar with binary numbers when using this operator. The result of this operator will be the value of the expression on the LHS OR’ed with the value of the expression on the RHS, bit for bit. Additionally, if the result of the operator is not used and there is a variable on the LHS, then the result will be stored directly in that variable. (This operator cannot be used with strings).
Bitwise XOR. You should be familiar with binary numbers when using this operator. The result of this operator will be the value of the expression on the LHS XOR’ed with the value of the expression on the RHS, bit for bit. Additionally, if the result of the operator is not used and there is a variable on the LHS, then the result will be stored directly in that variable. (This operator cannot be used with strings).
Bitwise NOT. You should be familiar with binary numbers when using this operator. The result of this operator will be the NOT’ed value of the expression on the RHS. i.e. the result will have it’s bits inverted compared to the value of the expression. (This operator cannot be used with strings).
Less than. This is used to compare the values of the expressions on the LHS and RHS. If the value of the expression on the LHS is less than the value of the expression on the RHS this operator will give a result of true, otherwise the result is false.
More than. This is used to compare the values of the expressions on the LHS and RHS. If the value of the expression on the LHS is more than the value of the expression on the RHS this operator will give a result of true, otherwise the result is false.
Less than or equal to. This is used to compare the values of the expressions on the LHS and RHS. If the value of the expression on the LHS is less than or equal to the value of the expression on the RHS this operator will give a result of true, otherwise the result is false.
More than or equal to. This is used to compare the values of the expressions on the LHS and RHS. If the value of the expression on the LHS is more than or equal to the value of the expression on the RHS this operator will give a result of true, otherwise the result is false.
Not equal to. This is used to compare the values of the expressions on the LHS and RHS. If the value of the expression on the LHS is equal to the value of the expression on the RHS this operator will give a result of false, otherwise the result is true.
Logical AND. This is used to compare the values of the expressions on the LHS and RHS. If the value of the expressions on the LHS and the RHS are both true then the result is true, otherwise the result is false.
Logical OR. This is used to compare the values of the expressions on the LHS and RHS. If the value of the expression on the LHS or the RHS is true then the result is true, otherwise the result is false.
Logical NOT. This is used to perform logical negation of a boolean value. In other words if an expression returns a true value, using the Not operator can invert this value to a false. Conversely if the expression on the RHS of this operator returns false then Not will return true.
Logical XOR. This is used to compare the values of the expressions on the LHS and RHS. If only one of the expressions on the LHS or the RHS is evaluated as true then the result is true. If both expressions are either true or both false then the XOr operator returns false.
Arithmetic shift left. Shifts each bit in the value of the expression on the LHS left by the number of places given by the value of the expression on the RHS. Additionally, when the result of this operator is not used and the LHS contains a variable, that variable will have its value shifted by the amount on the RHS. It probably helps if you understand binary numbers when you use this operator, although you can use it as if each position you shift by is multiplying by an extra factor of 2.
Arithmetic shift right. Shifts each bit in the value of the expression on the LHS right by the number of places given by the value of the expression on the RHS. Additionally, when the result of this operator is not used and the LHS contains a variable, that variable will have its value shifted by the amount on the RHS. It probably helps if you understand binary numbers when you use this operator, although you can use it as if each position you shift by is dividing by an extra factor of 2.
Modulo. Returns the remainder of the LHS divided by RHS using integer division.
Brackets. You can use sets of brackets to force part of an expression to be evaluated first, or in a certain order. Expressions in brackets are evaluated first before any other part of the current expression. In nested brackets the inner-most set are evaluated first and then each evaluated outwards.
RHS = Right hand side LHS = Left hand side
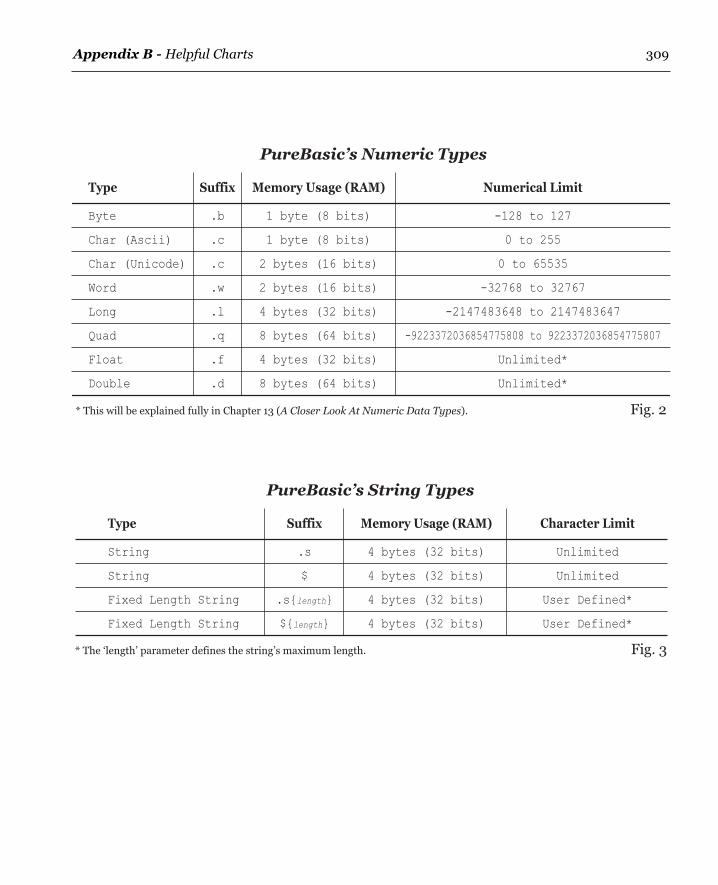
Appendix B - Helpful Charts 309
PureBasic’s Numeric Types
Byte
Char (Ascii)
Char (Unicode)
Word
Long
Quad
Float
Double
.b
.c
.c
.w
.l
.q
.f
.d
1 byte (8 bits)
1 byte (8 bits)
2 bytes (16 bits)
2 bytes (16 bits)
4 bytes (32 bits)
8 bytes (64 bits)
4 bytes (32 bits)
8 bytes (64 bits)
-128 to 127
0 to 255
0 to 65535
-32768 to 32767
-2147483648 to 2147483647
-9223372036854775808 to 9223372036854775807
Unlimited*
Unlimited*
Type Suffix Memory Usage (RAM) Numerical Limit
Fig. 2* This will be explained fully in Chapter 13 (A Closer Look At Numeric Data Types).
PureBasic’s String Types
.s
$
.s{length}
${length}
4 bytes (32 bits)
4 bytes (32 bits)
4 bytes (32 bits)
4 bytes (32 bits)
Unlimited
Unlimited
User Defined*
User Defined*
Fig. 3
String
String
Fixed Length String
Fixed Length String
Suffix Memory Usage (RAM) Character LimitType
* The ‘length’ parameter defines the string’s maximum length.

Appendix B - Helpful Charts310
Fig. 54
PureBasic Substitute Types For Win32 API Types
DWORD_PTRINT_PTRLONG_PTRUINT_PTRULONG_PTR
*Pointer
BOOLCOLORREFDWORDDWORD32HACCELHANDLEHBITMAPHBRUSHHCONVHCONVLISTHCURSORHDCHDDEDATAHDESKHDROPHDWPHENHMETAFILEHFILEHFONTHGDIOBJHGLOBALHHOOKHICONHIMAGELISTHIMCHINSTANCEHKEY
HKLHLOCALHMENUHMETAFILEHMODULEHMONITORHPALETTEHPENHRGNHRSRCHSZHWINSTAHWNDINTINT32LANGIDLCIDLCTYPELONGLONG32LPARAMLPBOOLLPBYTELPCOLORREFLPCRITICAL_SECTIONLPCSTRLPCTSTR
LPCVOIDLPCWSTRLPDWORDLPHANDLELPINTLPLONGLPSTRLPTSTRLPVOIDLPWORDLPWSTRLRESULTPBOOLPBOOLEANPBYTEPCHARPCRITICAL_SECTIONPCSTRPCTSTRPCWCHPCWSTRPDWORDPFLOATPHANDLEPHKEYPINTPLCID
PLONGPLUIDPOINTER_32PSHORTPSTRPTBYTEPTCHARPTSTRPUCHARPUINTPULONGPUSHORTPVOIDPWCHARPWORDPWSTRSC_HANDLESC_LOCKSERVICE_STATUS_HANDLEUINT †UINT32 †ULONG †ULONG32 †WPARAM
Long
BOOLEANBYTECHARUCHAR †
ByteTBYTE †TCHAR
CharacterSHORTUSHORT †WCHARWORD
WordDWORD64INT64LONG64LONGLONGPOINTER_64
Quad
FLOAT
Float
DOUBLE
Double
Types marked with ‘†’ need to be read correctly after a command call. This is because thesetypes may be unsigned or signed opposite to the PureBasic type they are using.

Appendix B - Helpful Charts 311
Built-in PureBasic Gadgets
Fig. 55
DescriptionGadget Name Sample Image
Button Gadget
Button Image Gadget
Text Gadget
Creates a clickable button with user definedtext.
Creates a clickable button with a user definedimage.
Creates an editable text label which can notaccept any typed text.
String Gadget Creates an editable text field which can accepttyped text.
Check Box Gadget Creates a box that can be checked on and offvia a small tick, alongside user defined text.
Option Gadget Creates radio buttons that can be toggled onand off, alongside user defined text.
Spin Gadget Creates a number gadget who’s value can beincreased and decreased by the arrow buttons.
IP Address Gadget Creates a four field gadget for displayingIP numbers.
Track Bar Gadget Creates a slidable bar to increment anddecrement values in realtime.
Progress Bar Gadget Creates a user controllable progress bar toshow progress of a user defined action.
Scroll Bar Gadget Creates a scroll bar that can be configured toscroll a partly seen object such as an image.
Hyperlink Gadget Creates a clickable, editable text label, similarto a webpage hyperlink.
Combo Box Gadget Creates a fully editable drop-down menu stylelist. Clicking the button on the right opens thelist fully for making another selection.
Date Gadget Creates a combo box that displays and returnsany user defined date. Clicking the button onthe right allows another date to be chosen.
(Sample images from Microsoft Windows)

Appendix B - Helpful Charts312
Built-in PureBasic Gadgets continued.
Fig. 55 continued.
DescriptionGadget Name Sample Image
Panel Gadget Creates a gadget with a user defined numberof panels. Each panel has a user defined labeland each one can hold a separate interface.
Frame 3D Gadget Creates a 3D frame along with a user definedlabel. This frame is purely for aestheticreasons only and provides a nice graphicalway of grouping associated interface items.
Web Gadget Creates a gadget that can display a webpage,either from the Internet or from a local sourcesuch as your hard drive.
Tree Gadget Creates a gadget that displays user definedstrings in a tree-like structure.
List View Gadget Creates a gadget that displays user definedstrings in a list.
List Icon Gadget Creates a gadget that contains rows andcolumns which can be populated by userdefined strings and icons.
(Sample images from Microsoft Windows)

Appendix B - Helpful Charts 313
Built-in PureBasic Gadgets continued.
Fig. 55 continued.
DescriptionGadget Name Sample Image
Image Gadget Creates a gadget, within which you can displayan image.
(Sample images from Microsoft Windows)
Editor Gadget Creates a gadget that can hold a huge amountof user defined text, ideal for using as a texteditor.
Container Gadget Creates a container gadget that can hold manyother gadgets within. These gadgets whencontained can be manipulated as a unit, i.e.moving and hiding.
Explorer List Gadget Creates a gadget that displays hard drive anddirectory information in rows and columnsvery similar to a List Icon Gadget.
Scroll Area Gadget Creates a scrollable area complete with scrollbars. This area can contain lots of othergadgets and have the ability to scroll themaround as necessary.
Explorer Tree Gadget Creates a gadget that displays hard drive anddirectory information in a tree-like structure.

Appendix B - Helpful Charts314
Built-in PureBasic Gadgets continued.
Fig. 55 continued.
DescriptionGadget Name Sample Image
Explorer ComboGadget
Creates a gadget that displays hard drive anddirectory information within a Combo Gadget.
Calendar Gadget Creates a gadget that displays a configurablecalendar. Any date can be displayed orretrieved from this gadget.
MDI Gadget Creates a Multiple Document Interface gadgetthat can contain multiple child windows. Eachchild window can contain it’s own interface.
Splitter Gadget Creates a splitter between two other gadgetswhich when moved will resize bothdynamically.
(Sample images from Microsoft Windows)

Appendix B - Helpful Charts 315
Character Ascii Hex Binary
NULL 0 00 00000000SOH 1 01 00000001STX 2 02 00000010ETX 3 03 00000011EOT 4 04 00000100ENQ 5 05 00000101ACK 6 06 00000110BEL 7 07 00000111BS 8 08 00001000TAB 9 09 00001001LF 10 0A 00001010VT 11 0B 00001011FF 12 0C 00001100CR 13 0D 00001101SO 14 0E 00001110SI 15 0F 00001111DLE 16 10 00010000DC1 17 11 00010001DC2 18 12 00010010DC3 19 13 00010011DC4 20 14 00010100NAK 21 15 00010101SYN 22 16 00010110ETB 23 17 00010111CAN 24 18 00011000EM 25 19 00011001SUB 26 1A 00011010ESC 27 1B 00011011FS 28 1C 00011100GS 29 1D 00011101RS 30 1E 00011110US 31 1F 00011111Space 32 20 00100000! 33 21 00100001" 34 22 00100010# 35 23 00100011$ 36 24 00100100% 37 25 00100101& 38 26 00100110' 39 27 00100111( 40 28 00101000) 41 29 00101001* 42 2A 00101010+ 43 2B 00101011, 44 2C 00101100- 45 2D 00101101. 46 2E 00101110/ 47 2F 001011110 48 30 001100001 49 31 001100012 50 32 001100103 51 33 001100114 52 34 001101005 53 35 001101016 54 36 001101107 55 37 001101118 56 38 001110009 57 39 00111001: 58 3A 00111010; 59 3B 00111011< 60 3C 00111100= 61 3D 00111101> 62 3E 00111110? 63 3F 00111111
Character Ascii Hex Binary
@ 64 40 01000000A 65 41 01000001B 66 42 01000010C 67 43 01000011D 68 44 01000100E 69 45 01000101F 70 46 01000110G 71 47 01000111H 72 48 01001000I 73 49 01001001J 74 4A 01001010K 75 4B 01001011L 76 4C 01001100M 77 4D 01001101N 78 4E 01001110O 79 4F 01001111P 80 50 01010000Q 81 51 01010001R 82 52 01010010S 83 53 01010011T 84 54 01010100U 85 55 01010101V 86 56 01010110W 87 57 01010111X 88 58 01011000Y 89 59 01011001Z 90 5A 01011010[ 91 5B 01011011\ 92 5C 01011100] 93 5D 01011101^ 94 5E 01011110_ 95 5F 01011111` 96 60 01100000a 97 61 01100001b 98 62 01100010c 99 63 01100011d 100 64 01100100e 101 65 01100101f 102 66 01100110g 103 67 01100111h 104 68 01101000i 105 69 01101001j 106 6A 01101010k 107 6B 01101011l 108 6C 01101100m 109 6D 01101101n 110 6E 01101110o 111 6F 01101111p 112 70 01110000q 113 71 01110001r 114 72 01110010s 115 73 01110011t 116 74 01110100u 117 75 01110101v 118 76 01110110w 119 77 01110111x 120 78 01111000y 121 79 01111001z 122 7A 01111010{ 123 7B 01111011| 124 7C 01111100} 125 7D 01111101~ 126 7E 01111110? 127 7F 01111111
Associated Character, Ascii, Hexadecimal and Binary Table
Fig. 56
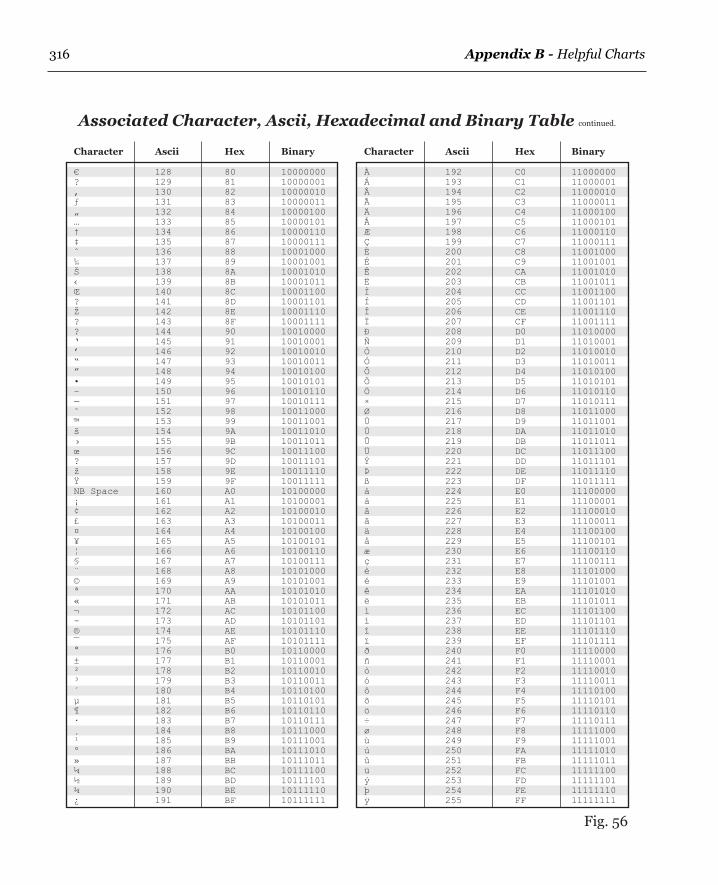
Appendix B - Helpful Charts316
Character Ascii Hex Binary
€ 128 80 10000000? 129 81 10000001‚ 130 82 10000010ƒ 131 83 10000011„ 132 84 10000100… 133 85 10000101† 134 86 10000110‡ 135 87 10000111ˆ 136 88 10001000‰ 137 89 10001001Š 138 8A 10001010‹ 139 8B 10001011Œ 140 8C 10001100? 141 8D 10001101Ž 142 8E 10001110? 143 8F 10001111? 144 90 10010000‘ 145 91 10010001’ 146 92 10010010“ 147 93 10010011” 148 94 10010100• 149 95 10010101– 150 96 10010110— 151 97 10010111˜ 152 98 10011000™ 153 99 10011001š 154 9A 10011010› 155 9B 10011011œ 156 9C 10011100? 157 9D 10011101ž 158 9E 10011110Ÿ 159 9F 10011111NB Space 160 A0 10100000¡ 161 A1 10100001¢ 162 A2 10100010£ 163 A3 10100011¤ 164 A4 10100100¥ 165 A5 10100101¦ 166 A6 10100110§ 167 A7 10100111¨ 168 A8 10101000© 169 A9 10101001ª 170 AA 10101010« 171 AB 10101011¬ 172 AC 10101100- 173 AD 10101101® 174 AE 10101110¯ 175 AF 10101111° 176 B0 10110000± 177 B1 10110001² 178 B2 10110010³ 179 B3 10110011´ 180 B4 10110100µ 181 B5 10110101¶ 182 B6 10110110· 183 B7 10110111¸ 184 B8 10111000¹ 185 B9 10111001º 186 BA 10111010» 187 BB 10111011¼ 188 BC 10111100½ 189 BD 10111101¾ 190 BE 10111110¿ 191 BF 10111111
Character Ascii Hex Binary
À 192 C0 11000000Á 193 C1 11000001Â 194 C2 11000010Ã 195 C3 11000011Ä 196 C4 11000100Å 197 C5 11000101Æ 198 C6 11000110Ç 199 C7 11000111È 200 C8 11001000É 201 C9 11001001Ê 202 CA 11001010Ë 203 CB 11001011Ì 204 CC 11001100Í 205 CD 11001101Î 206 CE 11001110Ï 207 CF 11001111Ð 208 D0 11010000Ñ 209 D1 11010001Ò 210 D2 11010010Ó 211 D3 11010011Ô 212 D4 11010100Õ 213 D5 11010101Ö 214 D6 11010110× 215 D7 11010111Ø 216 D8 11011000Ù 217 D9 11011001Ú 218 DA 11011010Û 219 DB 11011011Ü 220 DC 11011100Ý 221 DD 11011101Þ 222 DE 11011110ß 223 DF 11011111à 224 E0 11100000á 225 E1 11100001â 226 E2 11100010ã 227 E3 11100011ä 228 E4 11100100å 229 E5 11100101æ 230 E6 11100110ç 231 E7 11100111è 232 E8 11101000é 233 E9 11101001ê 234 EA 11101010ë 235 EB 11101011ì 236 EC 11101100í 237 ED 11101101î 238 EE 11101110ï 239 EF 11101111ð 240 F0 11110000ñ 241 F1 11110001ò 242 F2 11110010ó 243 F3 11110011ô 244 F4 11110100õ 245 F5 11110101ö 246 F6 11110110÷ 247 F7 11110111ø 248 F8 11111000ù 249 F9 11111001ú 250 FA 11111010û 251 FB 11111011ü 252 FC 11111100ý 253 FD 11111101þ 254 FE 11111110ÿ 255 FF 11111111
Associated Character, Ascii, Hexadecimal and Binary Table continued.
Fig. 56
CGlossary
This glossary is a list of words and terms that you might come into contact with while programming.In this appendix I’ve attempted to be as comprehensive and concise as possible in describing themeaning of these words and terms to make your life a little easier when you come across somethingyour not familiar with.
3D EngineA 3D engine is an environment explicitly programmed to provide a construct in which to realize 3Dgraphics. A 3D engine can be explained as a layer of abstraction to allow artists or developers quicklyput together 3D graphics using simplified methods rather than programming all the low level stuffthemselves. For example, a 3D engine might provide a 'LoadModel()' command to load a 3D modeland display it, making things easier for the user. 3D engines are sometimes provided with other helpfulfeatures such as collision detection and physics modeling.
AbsoluteCan relate to a value or a path. An absolute value is a value that stands on it's own and is not relativeto another. An absolute path is one that specifies a path in it's entirety. For example, all Internetaddresses are absolute paths, as shown in the address bar of an Internet browser. Absolute paths areused so there is no ambiguity as to where a particular file or folder exists.
ActiveXA Microsoft specification for reusable software components. ActiveX is based on COM which specifieshow components interact and interoperate. ActiveX controls can add further functionality to anapplication by incorporating further pre-made modules within its interface. Modules can beinterchanged but still appear as parts of the original software. On the Internet, ActiveX controls can beincluded in webpages and downloaded by an ActiveX-compliant browser. ActiveX controls can providefunctionality for webpages making them perform task like any other program launched from a server.ActiveX controls can have full system access! In most instances this access is entirely legitimate, buthistory has shown that this access has been exploited by malicious ActiveX applications.
317

Appendix C - Glossary318
AlgorithmAn explicit step by step procedure for producing a solution to a given problem.
Alpha ChannelIn an image, a portion of each pixel's data that is reserved for transparency information. Some 32-bitimage formats contain four channels, three eight bit channels for red, green, and blue and one eightbit alpha channel. The alpha channel is a mask. It specifies how much of the pixel's color should bemerged with another pixel when the two are overlaid, one on top of the other.
Anti-virus SoftwareSoftware that scans a computer's memory and disk drives for viruses. If it finds a virus, the applicationinforms the user and may clean, delete or quarantine any files, directories or disks affected by themalicious code.
API (Application Programming Interface)A set of functions that an application uses to request and carry out lower level services performed bya computer's operating system or third party program command library. Simply, an API is anyinterface that enables one program to use facilities provided by another. The Microsoft Win32 API isprobably the most famous of all the different API's.
AppletAny miniature application transported over the Internet, especially as an enhancement to a webpage.
ArrayA simple data structure for holding equally sized data elements, generally of the same data type.Individual elements are accessed via an index using a consecutive range of integers. Some arrays aremulti-dimensional, meaning they are indexed by a fixed number of integers. Generally speaking, oneand two dimensional arrays are the most common.
ASCII (American Standard Code For Information Interchange)A character encoding scheme that assigns numerical values to characters such as letters, numbers,punctuation, and other symbols. ASCII allows only 7 bits per character (for a total of 128 characters).The first 32 characters are unprintable control characters (line feed, form feed, etc.) used forcontrolling hardware devices. Extended ASCII adds an additional 128 characters that vary betweencomputers, programs and fonts. Computers use these extended characters for accented letters,graphical characters or other special symbols.
ASCII ArtDrawings created using the characters from a standard ASCII character set. Mono-spaced fonts areusually used to make sure each character uses the same space as any other within the drawing.
ASM (Assembly Language)A human readable notation for machine code that a specific computer architecture uses. This Machinecode is made readable by replacing the raw numeric values with symbols called mnemonics.
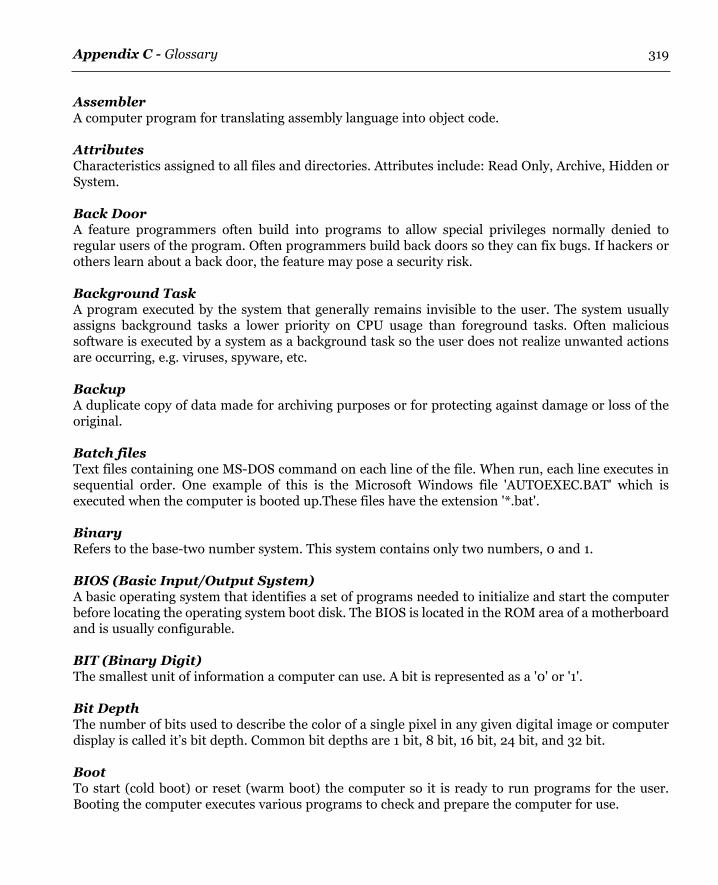
Appendix C - Glossary 319
AssemblerA computer program for translating assembly language into object code.
AttributesCharacteristics assigned to all files and directories. Attributes include: Read Only, Archive, Hidden orSystem.
Back DoorA feature programmers often build into programs to allow special privileges normally denied toregular users of the program. Often programmers build back doors so they can fix bugs. If hackers orothers learn about a back door, the feature may pose a security risk.
Background TaskA program executed by the system that generally remains invisible to the user. The system usuallyassigns background tasks a lower priority on CPU usage than foreground tasks. Often malicioussoftware is executed by a system as a background task so the user does not realize unwanted actionsare occurring, e.g. viruses, spyware, etc.
BackupA duplicate copy of data made for archiving purposes or for protecting against damage or loss of theoriginal.
Batch filesText files containing one MS-DOS command on each line of the file. When run, each line executes insequential order. One example of this is the Microsoft Windows file 'AUTOEXEC.BAT' which isexecuted when the computer is booted up.These files have the extension '*.bat'.
BinaryRefers to the base-two number system. This system contains only two numbers, 0 and 1.
BIOS (Basic Input/Output System)A basic operating system that identifies a set of programs needed to initialize and start the computerbefore locating the operating system boot disk. The BIOS is located in the ROM area of a motherboardand is usually configurable.
BIT (Binary Digit)The smallest unit of information a computer can use. A bit is represented as a '0' or '1'.
Bit DepthThe number of bits used to describe the color of a single pixel in any given digital image or computerdisplay is called it’s bit depth. Common bit depths are 1 bit, 8 bit, 16 bit, 24 bit, and 32 bit.
BootTo start (cold boot) or reset (warm boot) the computer so it is ready to run programs for the user.Booting the computer executes various programs to check and prepare the computer for use.

Appendix C - Glossary320
BugAn unintentional fault in a program that causes actions neither the user nor the program authorintended.
ByteA group of eight bits (binary digits). Also the name of an integer that can be expressed using these eightbits.
CacheA memory area where frequently accessed data can be temporarily stored for rapid access.
CGI (Common Gateway Interface)A standard for the exchange of information between a Web server and computer programs that areexternal to it. The external programs can be written in any programming language that is supportedby the operating system on which the Web server is running. CGI is not a programming language initself.
ChecksumAn identifying number calculated from file characteristics. The slightest change in a file changes itschecksum.
ChildA window (or object) that is based on or enclosed within another window (or object).
ClassAn OOP template that can be instantiated to create objects with common definitions, properties,methods, operations, and behavior.
ClientA computer system or piece of software that accesses a remote service provided by another computerusing some kind of network. A web browser is a client of a web server.
CodeA slang term for Source Code.
CodingA slang term for computer programming.
Compile TimeThe time when a compiler compiles code written in a programming language into an executable form.
CompilerA software development tool that translates high level language program source codes into machinecode instructions (object code) that a particular computer architecture can understand and execute.

Appendix C - Glossary 321
ConstantA named item that retains a constant value throughout the execution of a program. Constants can beused anywhere in your code in place of actual values. A constant can be a String or numeric value.
CookiesBlocks of text placed in a file on your computer's hard disk. Web sites use cookies to identify users whorevisit a site. Cookies might contain login names and passwords or user preferences. When a webpageis viewed that has previously written a cookie, the server can use the information stored in the cookieto customize the Web site for the user.
CPU (Central Processing Unit)The main processor responsible for the overall processing of a computer.
Data MemberIn OOP a data member is a variable defined and encapsulated within a class or object. Each instanceof an object retains a unique value for each data member in the class, as opposed to the class havingone variable that every instantiation shares. This is just another name for a Property.
Data TypeThe characteristics of a variable that describes whether it is numeric, alphabetic, or alphanumeric. Italso specifies the range of values that a variable can hold, and how that information is stored in thecomputer memory.
DirectXA set of low level application programming interfaces (API's) provided by Microsoft for creating highperformance multimedia applications. DirectX allows programs to interface with, and use built-inhigh speed 3D graphic routines on graphic cards for faster processing. The DirectX API also allowseasy access to computers hardware such as sound cards, joysticks and even network adapters.
DLL (Dynamic Linked Library)A file that contains compiled code that can be loaded and executed by programs dynamically. Becauseseveral different programs can reuse the same DLL instead of having that code in their own file, thisdramatically reduces required storage space for the executable.
DOS (Disk Operating System)Generally any computer operating system, though often used as shorthand for 'MS-DOS' the operatingsystem used by Microsoft before Windows was developed.
Double (Double Precision Floating Point Number)A floating point number that uses double the memory of a normal floating point number to moreaccurately calculate and store the information of the numbers beyond the decimal point. Doublestypically use eight Bytes in memory.
EncapsulationAn OOP scheme used for defining objects. Encapsulation hides detailed internal specifications of anobject and publishes only its external interfaces. Thus, users of an object only need to use these

Appendix C - Glossary322
interfaces. By encapsulation, the internal data and methods of an object can be changed or updatedwithout changing the way users use the object.
EncryptionThe scrambling of data so it becomes difficult to unscramble and interpret.
EXE (Executable) fileA file that can be executed, such as a computer program, usually by double-clicking its icon or ashortcut on the desktop, or by entering it's name in a command prompt. Executable files can also beexecuted from other programs, batch files or various script files. The vast majority of known virusesinfect executable files.
ExpressionA combination of values, Strings, operators, commands or procedures, interpreted according to therules of precedence, which computes and returns a value.
File ExtensionA tag of three or four letters, preceded by a period, which identifies a data file's format or theapplication used to create the file.
FirewallThese typically prevent computers on a network from communicating directly with external computersystems. The firewall software analyzes information passing between the two and stops it, if it does notconform it's pre-configured rules.
Floating Point Number (or a Real Number)A number which has a decimal portion, even if that decimal portion is zero. A floating point numberis also sometimes called a 'real number' which is often shortened to just 'real'. Floating point numberstypically use four Bytes in memory.
FunctionSame as a procedure.
HexadecimalA numbering system which uses a base of 16. The first ten digits are ‘0’ to ‘9’ and the next six are ‘A’ to‘F’. This enables very large numbers to be expressed using very few characters. ‘FF’ in hexadecimalequals ‘255’ in decimal. Webpages use hexadecimal numbers to express a 24 bit color value.
High Level Programming LanguageA programming language where each instruction corresponds to many machine code instructions.Commands in this language must be translated by a compiler or interpreter before they can beexecuted by a particular computer architecture. A high level programming language is also more userfriendly, more easily readable by humans, often cross-platform, and abstract from low level computerprocessor operations. PureBasic is a high level language.

Appendix C - Glossary 323
HTML (Hypertext Markup Language)The authoring software language used on the Internet's world wide web. HTML is used for creatingWorld Wide Webpages.
HTTP (Hypertext Transfer Protocol)The underlying protocol used by the world wide web. HTTP defines how messages are formatted andtransmitted, and what actions Web servers and browsers should take in response to variouscommands. For example, when you enter a URL in your browser, this actually sends a HTTP commandto the Web server directing it to fetch and transmit the requested webpage.
HyperlinkA link in a document that links to information within the same document or a different document.These links are usually represented by highlighted words or images. When a reader selects a hyperlink,the computer display switches to the linked document or portion of the document referenced by thehyperlink.
InheritanceThe process in OOP, in which objects inherit functionality and data from a deriving class.
IntegerA number without a decimal point. Integer values can be less than, equal to, or greater than zero.
InternetAn electronic network of computers that today includes nearly every university, government, andresearch facility in the world. Initially created in 1969 to provide a backbone of communication in theevent of nuclear war, the Internet has seen an explosion in public and commercial use since thedevelopment of easy to use software for accessing the information contained within it.
InterpreterA program that executes programs written in high level programming languages line by line directlyfrom the source code. This is in contrast to a compiler which does not execute its input (source code)but translates it into executable machine code (object code) which is for later linking and execution.
IP (Internet Protocol) AddressA number that identifies each sender or receiver of information that is sent across a TCP/IP network.The IP address takes the form of four numbers separated by dots, for example: 127.0.0.1
IRC (Internet Relay Chat)A form of instant communication over the Internet. It is mainly designed for group communication indiscussion forums called channels, but also allows one to one communication.
JavaScriptA scripting language that can run wherever there is a suitable script interpreter such as in webbrowsers.

Appendix C - Glossary324
LAN (Local Area Network)A local area network is a computer network covering a local area, like a home, an office or small groupof buildings such as a school.
Link TimeThe time during executable compilation when object code is linked with the final executable file.
Linked ListA data structure that mimics the behavior of what would be a dynamic array. Allowing elements to beinserted and deleted dynamically during runtime. Linked lists can be created using any of the availablelanguage's data types. However, unlike an array, each element also holds pointers to the previous andnext element in the list, not allowing the list to occupy a sequential area in RAM and thus performslower than an array while retrieving data.
LinkerA program that links compiled object code files and other data files to create an executable program.A linker can also have other functions, such as creation of libraries.
LinkingThe process of combining object code files into the final executable file.
LinuxA free open source operating system based on Unix. Linux was originally created by Linus Torvaldswith the assistance of developers from around the globe.
LocalhostThe computer system the user is working on, often assigned the IP address: 127.0.0.1
LongAn integer that uses four Bytes in memory.
Low Level Programming LanguageA programming language that provides little or no abstraction from a computer's microprocessor. Theword 'low' does not imply that the language is inferior to high level programming languages but refersto the reduced amount of abstraction between the language and the hardware it's controlling.Assembly is an example of a low level language.
Mac OS XThe latest version of the Mac OS, the operating system used for Apple Macintosh computers. Mac OSX, unlike it's predecessors, is based upon a Unix core with an updated user interface.
Malicious CodeA piece of code designed to damage a system or the data it contains, or to prevent the system frombeing used in its normal manner.

Appendix C - Glossary 325
MalwareA generic term used to describe malicious software such as: viruses, trojan horses, spyware, adware,etc.
MBR (Master Boot Record)The program located in the master boot sector. This program reads the partition table, determineswhat partition to boot and transfers control to the program stored in the first sector of that partition.There is only one master boot record on each physical hard disk.
MBS (Master Boot Sector)The first sector of a hard disk. This sector is located at sector '1', head '0', track '0'. The sector containsthe master boot record.
Member FunctionA function or procedure that is a component of an OOP class, that performs some computation, usuallyrelated to the data members of the class. This is another name for a Method.
MethodA function or procedure that is a component of an OOP class, that performs some computation, usuallyrelated to the properties of the class.
MS-DOS (Microsoft Disk Operating System)The operating system Microsoft developed for the IBM platform before Windows. Windows 3.x, 95and 98 rely heavily on MS-DOS and can execute most MS-DOS commands.
NewsgroupAn electronic forum where readers post articles and follow-up messages on a specified topic. AnInternet newsgroup allows people from around the globe to discuss common interests. Eachnewsgroup name indicates the newsgroup's subject.
NTFS (New Technology File System)A file system used to organize and keep track of files which is the standard file system of Windows NTand its descendants: Windows 2000, Windows XP and Windows Server 2003.
ObjectAn instance of an OOP class. This object inherits all the functionality and data programmed into theoriginating class.
Object CodeThe output of compilers and assemblers and the input and output of a linker are files containing objectcode. There are a variety of standardized and proprietary object file formats, meaning thatdevelopment tools from one vendor can rarely read the object code produced by those of another.
OCX (OLE Control Extension)An independent program module that can be accessed by other programs in a Windows environment.OCX controls have now been superseded by ActiveX controls. OCX controls end with a '*.ocx'
Appendix C - Glossary326
extension and even though superceded are still compatible with ActiveX, meaning some ActiveXcompatible programs can still use these modules.
OLE (Object Linking And Embedding)This has been renamed as, and superceded by ActiveX.
OOP (Object Oriented Programming)A style of programming that supports encapsulation, inheritance, and polymorphism. Someprogramming languages are inherently object oriented such as C++, java and Python, and as suchallow real or imaginary objects to be modeled effectively using programming language constructs.
Open Source SoftwareRefers to any program whose source code is made available for use or modification as users or otherdevelopers see fit. Open source software is usually developed as a public collaboration and made freelyavailable.
OpenGL (Open Graphics Library)A specification defining a language independent API for writing applications that render 2d and 3dgraphics. OpenGL is open source and cross platform, unlike DirectX which is it's closest rival.
Operating SystemThe operating system is the underlying software that enables you to interact with the computer. Theoperating system controls things such as computer storage, communications and task management.Examples of common operating systems include: Mac OS X, Linux and Windows XP.
ParentA primary or enclosing window (or object) that creates, and sometimes handles, its child windows (orobjects).
PolymorphismAn OOP term that means allowing a single definition to be used with different types of data. Forexample, a polymorphic procedure definition can replace several type specific ones, and a singlepolymorphic operator can act in expressions of various types.
POP (Post Office Protocol)An email protocol to allow email clients to retrieve e-mail from a remote server over a TCP/IPconnection. Nearly all subscribers to individual Internet service provider email accounts can accesstheir email using client software that uses POP3 (Post Office Protocol version 3).
Port(1) An interface through which data is sent and received. (2) To 'Port' can mean the act of re-coding aprogram's source code (sometimes using another language) to allow it to be compiled or run onanother computer platform.
ProcedureA named sequence of statements executed as a unit by calling it's name. Procedures can also accept

Appendix C - Glossary 327
parameters to allow user data to be passed into the sequence. Unlike subroutines, procedures canreturn a calculated value. Procedures can be 'called' several times allowing programs to access the coderepeatedly without the procedure's code having been written more than once.
ProcessA running instance of a program. A multitasking operating system switches between processes to givethe appearance of simultaneous execution, though in reality only one process at any given time can usethe CPU.
PropertyIn OOP a Property is a variable defined and encapsulated within a class or object. Each instance of anobject retains a unique value for each property in the class, as opposed to the class having one variablethat every instantiation shares.
ProtocolA formal description of message formats and the rules that two computers must follow in order toexchange those messages.
QuadAn integer that uses eight Bytes in memory.
Radix PointIn mathematics, the radix point refers to the symbol used in numerical representations to separate theintegral part of the number (to the left of the radix) from its fractional part (to the right of the radix).The radix point is usually a small dot, either placed on the baseline or halfway between the baselineand the top of the numerals. In base 10, the radix point is called the decimal point.
Refresh RateThe number of times a monitor's image is repainted per second to the screen. The refresh rate isexpressed in hertz (Hz) so a refresh rate of 75 means the image is refreshed 75 times a second. Therefresh rate for any particular monitor depends on specifications of said monitor and graphics cardused.
RegistryAn internal database that Microsoft Windows uses to store hardware and software configurationinformation, user preferences and setup information.
RelativeCan relate to a value or a path. A relative value is one that relates to or builds upon another. A relativepath is one which is in relation to another. Relative paths are usually used when specifying the locationof resources for a program in the source code, which are relative to the executable file. For example, ifan image is to be loaded by a program from an 'Images' folder, then the relative path is defined as'\Images' because this folder is in the same directory as the executable, and is therefore relative to theprogram.
Appendix C - Glossary328
ResetTo restart a computer without turning it off.
RGB (Red, Green And Blue)These are the primary colors of light, which computers use to display images on a computer screen.RGB colors are usually composed of Red, Green And Blue values ranging from '0' to '255'. These colorsare then mixed using an additive color model. For example, when all color values are at maximum(255) the color produced is white.
RuntimeThe time when a program is running, or executing.
SDL (Simple DirectMedia Layer)An open source, application programming interface (API) for creating high performance multimediaapplications. SDL is very simple, it acts as a thin, cross platform wrapper, providing support for 2Dpixel operations, sound, file access, event handling, timing, threading, and more. OpenGL is often usedwith SDL to provide fast 3D rendering. SDL is often thought of as a cross platform version of DirectX,although it lacks some if it's more advanced functionality.
ServerAny application or computer that serves another, for example, the computers that hold webpages arecalled servers since they serve web resources to client applications such as web browsers.
ServiceA program that can be automatically started as part of the operating system startup process and thatruns continuously as a background task.
SharewareSoftware distributed for evaluation without cost, but that requires payment to the author for full rightsof usage. If, after trying the software, you do not intend to use it, you simply delete it. Usingunregistered shareware beyond the evaluation period is considered software piracy.
SMTP (Simple Mail Transport Protocol)A simple email delivery format for transmitting email messages between servers which is the currentstandard for e-mail transmission across the Internet.
Software PirateAn individual who breaks the law regarding copyright of software. Laws are subject to the country inwhich the individual lives.
Source CodeThe code that a program consists of before being compiled, i.e. the original building instructions of aprogram that defines to a compiler what actions a program should perform once compiled to a binaryexecutable file.

Appendix C - Glossary 329
StatementA programming command that rarely returns any value and can contain other components such as aconstant or expression. One or more statements are needed to create a program.
Static LibraryA library whose code is included into an executable at link time and thus becomes static within theprogram. Once a program is compiled it no longer needs the library, as all code is now inside theexecutable file.
StringA consecutive series of letters, numbers, and other characters contained within (double or single)quotation marks.
SubroutineA labeled sequence of statements executed as a unit by jumping to the start of the sequence, usuallyusing a 'Goto' or 'GoSub' command. Once the sequence has executed then program flow returns to theorigin of the jump, usually using a 'Return' command. Unlike procedures, subroutines cannot returna calculated value. Subroutines can be jumped to several times allowing programs to access the coderepeatedly without the subroutine's code having been written more than once.
SyntaxThe rules by which words in a program's source code are combined to form commands that are validto an interpreter or compiler.
TCP/IPThis Internet protocol suite is a set of communication protocols that implement a protocol stack onwhich the Internet and most commercial networks run. It is called the TCP/IP protocol suite, after thetwo most important protocols in it: the Transmission Control Protocol (TCP) and the Internet Protocol(IP), which were also the first two defined.
Thread (Thread Of Execution)A thread is a single sequence of instructions executed as a separate task but still part of the originatingprocess. A process can have several threads running concurrently, each performing a different task,such as waiting for events or performing a time-consuming job that the program doesn't need tocomplete before moving on to do something else. When a thread has finished its job, the thread issuspended or destroyed. Multi-threaded programs can finish tasks quicker than non-threadedprograms if programmed right, because some processors support running two or more threadssimultaneously, such as the Intel Hyperthreading family of CPUs.
Trojan HorseA malicious program that pretends to be useful and non-harmful but when executed, purposefullydoes something the user does not expect and sometimes doesn't realize. Trojans are not viruses sincethey do not replicate, but Trojan horse programs can be just as destructive.
UNC (Universal Naming Convention)A standard for identifying servers, printers and other resources on a network, which originated from

Appendix C - Glossary330
the Unix community. A UNC path uses double forward-slashes or double back-slashes to precede thename of the computer. The path (disk and directories) within that computer are then separated withsingle forward-slashes or single back-slashes. Microsoft Windows generally uses back-slashes andUnix (Linux) uses forward-slashes.
UnicodeA character encoding scheme using 16 bits (2 Bytes) per character to allow all characters of all majorworld languages, living and dead, to be encoded in a single character set and like ASCII be assigned aunique number. Unicode character sets can contain over 65,000 characters.
UnixAn operating system co-created by researchers at AT&T. Unix is well known for its hardwareindependence and portable application interfaces. UNIX is designed to be used by many people at thesame time and has TCP/IP networking built-in. It, and it's derivatives (Linux) are the most commonoperating systems for servers on the Internet.
URL (Uniform Resource Locator)A HTTP address used by the world wide web to specify a certain place and file. This is the uniqueidentifier, or address, of a webpage on the Internet.
UsenetAn informal system of electronic bulletin boards or discussion groups commonly distributed over theInternet. Usenet predates the Internet, although today most Usenet material is distributed over theInternet.
VBS (Visual Basic Script)A programming language that can invoke any system function, including starting, using and shuttingdown other applications even without the users knowledge. VBS programs can be embedded in HTMLfiles and provide active content via the Internet. Visual Basic Script files have the extension '*.vbs'.
VirusA computer program file capable of attaching to disks or other files and replicating itself repeatedly,typically without user knowledge or permission. Some viruses attach to files so when the infected fileexecutes, the virus also executes. Other viruses sit in a computer's memory and infect files as thecomputer opens, modifies or creates the files. Some viruses display symptoms, and some virusesdamage files and computer systems, but neither symptoms nor damage is essential in the definition ofa virus, a non-damaging virus is still a virus.
VM (Virtual Machine)Software that mimics the performance of a hardware device. A virtual machine is a self-containedoperating environment that behaves as if it was a separate computer. For example, Java applets run ina Java virtual machine that has no access to the host operating system.
VSync (Vertical Synchronization)Vertical Synchronization is an option found in many games that allows the frame rate of the game tobe matched to the refresh rate of the monitor. Generally, enabling VSync provides the greatest

Appendix C - Glossary 331
stability, but turning it off can allow for much higher frame rates. The downside of the greater speedis the potential for visual artifacts like graphics tearing to develop.
W3C (Wide Web Consortium)The governing body for world wide web standards.
WAN (Wide Area Network)A group of computer networks connected together over long distances. The Internet is a WAN.
WordAn integer that uses two Bytes in memory.
World Wide WebA system for browsing Internet sites. It is named the web because it is made of many sites linkedtogether. Users can travel from one site to another by clicking on hyperlinks.
WormParasitic computer programs that replicate, but unlike viruses, do not infect other computer programfiles. Worms can create copies on the same computer, or can send copies to other computers via anetwork.
WrapperA programming interface between a program and a separate wrapped piece of code. This may be donefor compatibility reasons, for example, if the wrapped code is compiled as a DLL or uses differentcalling conventions. The implication is that the wrapped code can only be accessed via a wrapper.
WSH (Windows Scripting Host)A Microsoft integrated module that lets programmers automate operations throughout the Windowsdesktop.
XML (Extensible Markup Language)A standard for creating markup languages which describe the structure of data. It is not a fixed set ofelements like HTML but a language for describing languages. XML enables authors to define their owntags.
ZIP FileAn archive that contains compressed collections of other files. ZIP files are popular on the Internetbecause users can deliver multiple files in a single container which also save disk space and downloadtime.

Index
! . . . . . . . . . . . . . . . . . . . . . . . . . . . . . . . . . .24% . . . . . . . . . . . . . . . . . . . . . . . . . . . . . . . . . .33& . . . . . . . . . . . . . . . . . . . . . . . . . . . . . . . . . .21( ) . . . . . . . . . . . . . . . . . . . . . . . . . . . . . . . . .33* . . . . . . . . . . . . . . . . . . . . . . . . . . . . . . . . . .20+ . . . . . . . . . . . . . . . . . . . . . . . . . . . . . . . . . .19- . . . . . . . . . . . . . . . . . . . . . . . . . . . . . . . . . .20/ . . . . . . . . . . . . . . . . . . . . . . . . . . . . . . . . . .20< . . . . . . . . . . . . . . . . . . . . . . . . . . . . . . . . . .28<< . . . . . . . . . . . . . . . . . . . . . . . . . . . . . . . . .26<= . . . . . . . . . . . . . . . . . . . . . . . . . . . . . . . . .29<> . . . . . . . . . . . . . . . . . . . . . . . . . . . . . . . . .30= . . . . . . . . . . . . . . . . . . . . . . . . . . . . . . . . . .18> . . . . . . . . . . . . . . . . . . . . . . . . . . . . . . . . . .28>= . . . . . . . . . . . . . . . . . . . . . . . . . . . . . . . . .29>> . . . . . . . . . . . . . . . . . . . . . . . . . . . . . . . . .27| . . . . . . . . . . . . . . . . . . . . . . . . . . . . . . . . . .22~ . . . . . . . . . . . . . . . . . . . . . . . . . . . . . . . . . .252D Graphics . . . . . . . . . . . . . . . . . . . .167-2022D Output Methods . . . . . . . . . . . . . .167, 1693D Archive . . . . . . . . . . . . . . . . . . . . .208-2093D Coordinates . . . . . . . . . . . . . . . . . . . . .2053D Graphics . . . . . . . . . . . . . . . . . . . .203-226
AAdvanced Compiler Options . . . . . . .252-259Altering Sound In Realtime . . . . . . . .229-231And . . . . . . . . . . . . . . . . . . . . . . . . . . . . .31, 37
Array Rules . . . . . . . . . . . . . . . . . . . . . . . . .60Arrays . . . . . . . . . . . . . . . . . . . . . . . . . . .52, 67Arrays As Parameters . . . . . . . . . . . . . .86-88Asc() . . . . . . . . . . . . . . . . . . . . . . . . . . . . . . .98ASCII . . . . . . . . . . . . . . . . . . . . . . . . . . . . . .98Assembly Language . . . . . . . . . . . . . . . . . . . .4
BBASH . . . . . . . . . . . . . . . . . . . . . . . . . . . . .252Binary . . . . . . . . . . . . . . . . . . . . . . . . .262-269Bit Depth . . . . . . . . . . . . . . . . . . . . . .173, 184Bit Shift Left (<<) . . . . . . . . . . . . . . . . . . . .26Bit Shift Right (>>) . . . . . . . . . . . . . . . . . . .27Bitwise AND (&) . . . . . . . . . . . . . . . . . . . . .21Bitwise NOT (~) . . . . . . . . . . . . . . . . . . . . . .25Bitwise OR (|) . . . . . . . . . . . . . . . . . . . . . . .22Bitwise XOR (!) . . . . . . . . . . . . . . . . . . . . . .24BlitzBasic . . . . . . . . . . . . . . . . . . . . . . . . . . . .3Boolean Logic . . . . . . . . . . . . . . . . . . . . . . . .37Brackets . . . . . . . . . . . . . . . . . . . . . . . . . . . .33Break . . . . . . . . . . . . . . . . . . . . . . . . . . . . . .47Built-in Commands . . . . . . . . . . . . . . . . . . .93By Reference . . . . . . . . . . . . . . . . . . . .90, 275
CCamelHump Notation . . . . . . . . . . . . . . . .113Cameras . . . . . . . . . . . . . . . . . . .212-215, 225CD Audio . . . . . . . . . . . . . . . . . . . . . . .237-241
332

Index 333
Cdecl . . . . . . . . . . . . . . . . . . . . . . . . . . . . .293Changing Drawing Modes . . . . . . . . .173-175Chr() . . . . . . . . . . . . . . . . . . . . . . . . . . . . . . .98CLI . . . . . . . . . . . . . . . . . . . . . . . . . . . . . . .252CloseFile() . . . . . . . . . . . . . . . . . . . . . . . . .106Code Format . . . . . . . . . . . . . . . . . . . . . . . .113Command Line Compiler . . . . . . . . . . . . .253Command Line Parameters . . . . . . .259-262Command Prompt . . . . . . . . . . . . . . . . . . .252Comments . . . . . . . . . . . . . . . . . . . . . . . . . .112Common Commands . . . . . . . . . . . . . . . . .98Compiler Constants . . . . . . . . . . . . . .246-247Compiler Directives . . . . . . . . . . . . . .245-250Compiler Functions . . . . . .245-246, 250-252CompilerError . . . . . . . . . . . . . . . . . .249-250CompilerIf . . . . . . . . . . . . . . . . . . . . .247-248CompilerSelect . . . . . . . . . . . . . . . . . .248-249Console Program Differences . . . . . . . . . .133Console Programs . . . . . . . . . . . . . . . .131-136Constants . . . . . . . . . . . . . . . . . . . . . . . . . . .16Continue . . . . . . . . . . . . . . . . . . . . . . . . . . .48CreateFile() . . . . . . . . . . . . . . . . . . . . . . . .105
DData Types . . . . . . . . . . . . . . . . . .10, 262-269Data Types Number Wrapping . .11, 299-300Data Types Numerical Limits . . .11, 262-265Debugger . . . . . . . . . . . . . . . . . . . .8, 120-122Debugger Controls . . . . . . . . . . . . . . . . . . .123Debugger Toggle . . . . . . . . . . . . . . . . . .8, 122Declare . . . . . . . . . . . . . . . . . . . . . . . . . . . . .75Define . . . . . . . . . . . . . . . . . . . . . . . . . . . . .120Define Default Type . . . . . . . . . . . . . . .13, 120Defined() . . . . . . . . . . . . . . . . . . . . . . .251-252Delay() . . . . . . . . . . . . . . . . . . . . . . . . .99, 135Dim (Arrays) . . . . . . . . . . . . . . . . . . . . .52, 59DisableDebugger . . . . . . . . . . . . . . . . . . . .121Division (/) . . . . . . . . . . . . . . . . . . . . . . . . .20DLL . . . . . . . . . . . . . . . . . . . . . . . . . . .287-293DLL Calling Conventions . . . . . . . . . . . . .293Double Buffered Rendering . . . . . . . .184-192Double Precision Floats . . . . . . . . . . .265-266Drawing Commands . . . . . . . . . . . . . . . . .167Drawing On A Window . . . . . . . . . . .168, 171Drawing On An Image . . . . . . . . . . . . . . . .171Drawing Text . . . . . . . . . . . . . . . . . . . . . . .176
Drawing Using An Image . . . . . . . . . .176-178Dynamic Link Libraries . . . . . . . . . . .287-293
EElapsedMilliseconds() . . . . . . . . . . . . . . . . .99Else . . . . . . . . . . . . . . . . . . . . . . . . . . . . . . . .39ElseIf . . . . . . . . . . . . . . . . . . . . . . . . . . . . . .40Embedding Wave Files . . . . . . . . . . .228-229EnableDebugger . . . . . . . . . . . . . . . . . . . . .121EnableExplicit . . . . . . . . . . . . . . . . . . . . . .119Ending A Program . . . . . . . . . . . . . . . . . . .116Entities . . . . . . . . . . . . . . . . . . . . . . . .210-211Enumerating Constants . . . . . . . . . . . . . . . .16Eof() . . . . . . . . . . . . . . . . . . . . . . . . . . . . . .107Equals (=) . . . . . . . . . . . . . . . . . . . . . . . . . . .18Error Handling . . . . . . . . . . . . . . . . . . . . . .117Error Handling Procedure . . . . . . . . .117-118Events . . . . . . . . . . . . . . . . . . . . .139-140, 149Exponent (Floats) . . . . . . . . . . . . . . .266-268
FFalse . . . . . . . . . . . . . . . . . . . . . . . . . . . . . . .38File Access Pointer . . . . . . . . . . . . . . . . . .108File Buffer . . . . . . . . . . . . . . . . . . . . . . . . .106File Location . . . . . . . . . . . . . . . . . . . . . . .106File Requester . . . . . . . . . . . . . . . . . . . . . .178Files . . . . . . . . . . . . . . . . . . . . . . . . . . . . . .104FileSeek() . . . . . . . . . . . . . . . . . . . . . . . . . .109FindString() . . . . . . . . . . . . . . . . . . . . . . . .100First Person Camera . . . . . .215-217, 219-221Fixed Length Strings . . . . . . . . . . . . . . . . . .14Floating Point Numbers . . . .11, 262, 265-269For . . . . . . . . . . . . . . . . . . . . . . . . . . . . . . . .43ForEach . . . . . . . . . . . . . . . . . . . . . . . . .45, 64Freeing Arrays From Memory . . . . . . . . . .59
GGadgets . . . . . . . . . . . . . . . . .139-147, 151-152George Boole . . . . . . . . . . . . . . . . . . . . . . . .37Global . . . . . . . . . . . . . . . . . . . . . . . . . . .77-78Good Programming Rules . . . . . . . . . . . . .117Good Programming Style . . . . . . . . . .111-116Graphical User Interfaces . . . . . . . . . . . . .131
HHello World . . . . . . . . . . . . . . . . . . . . . . . .137

Index334
IIDE . . . . . . . . . . . . . . . . . . . . . . . . . . . . . . . . .6IDE Error Log . . . . . . . . . . . . . . . . . . . . . . . .6IDE Helpfile Integration . . . . . . . . . . . . . . . .9IDE Quick Help . . . . . . . . . . . . . . . . . . . . . . .7If Statement . . . . . . . . . . . . . . . . . . . . . . . . .38Images With Alpha Channels . . . . . . . . . .179Including Graphics . . . . . . . . . . . . . . .156-161Including Other Source Files . . . . . . .115-116Indentation . . . . . . . . . . . . . . . . . . . . . . . . .114Integers . . . . . . . . . . . . . . . . . . . . . . . .10, 262
JJumping From Subroutines . . . . . . . . . . . .72
LLabels . . . . . . . . . . . . . . . . . . . . . . . . . . . . . .72Len() . . . . . . . . . . . . . . . . . . . . . . . . . . . . . .100Less Than (<) . . . . . . . . . . . . . . . . . . . . . . .28Less Than Or Equal To (<=) . . . . . . . . . . . .29Level Of Detail . . . . . . . . . . . . . . . . . . . . . .219Lighting . . . . . . . . . . . . . . . . . . . . . . .212, 225Linked List Memory Usage . . . . . . . . . . . . .67Linked Lists . . . . . . . . . . . . . . . . . . . . . .62, 69Linked Lists As Parameters . . . . . . . . .88-89Loc() . . . . . . . . . . . . . . . . . . . . . . . . . .108-109Local . . . . . . . . . . . . . . . . . . . . . . . . . . . . . . .76Lof() . . . . . . . . . . . . . . . . . . . . . . . . . . . . . .109Logical AND (And) . . . . . . . . . . . . . . . . .31, 37Logical NOT (Not) . . . . . . . . . . . . . . . . .31, 37Logical OR (Or) . . . . . . . . . . . . . . . . . . .32, 37Logical XOR (XOr) . . . . . . . . . . . . . . . . . . .32Loops . . . . . . . . . . . . . . . . . . . . . . . . . . . . . .43
MMain Loop . . . . . . . . . . . . . . . . . . . . . . . . .138Memory Address . . . . . . . . . . . . . . . .270-272Menus . . . . . . . . . . . . . . . . . . . . . . . . .148-156MessageRequester() . . . . . . . . . . . . . . . . . .101Mid() . . . . . . . . . . . . . . . . . . . . . . . . . . . . .102Minus (-) . . . . . . . . . . . . . . . . . . . . . . . . . . .20Module Files . . . . . . . . . . . . . . . . . . . .231-233Modulo (%) . . . . . . . . . . . . . . . . . . . . . . . . .33More Than (>) . . . . . . . . . . . . . . . . . . . . . . .28More Than Or Equal To (>=) . . . . . . . . . . .29Most Significant Bit . . . . . . . . . . . . . . .27, 264
MP3 Files . . . . . . . . . . . . . . . . . . . . . .233-236Multi-Dimensional Arrays . . . . . . . . . .54, 57Multiple Commands On Same Line . . . . .115Multiplication (*) . . . . . . . . . . . . . . . . . . . .20Mutex . . . . . . . . . . . . . . . . . . . . . . . . .284-286
NNative Interfaces . . . . . . . . . . . . . . . . .137-164NewList . . . . . . . . . . . . . . . . . . . . . . . . . . . .63Not . . . . . . . . . . . . . . . . . . . . . . . . . . . . .31, 37Not Equal To (<>) . . . . . . . . . . . . . . . . . . . .30Numbers . . . . . . . . . . . . . . . . . . . . . . . . . . . .10
OOffsetOf() . . . . . . . . . . . . . . . . . . . . . . . . . . .68OGRE API Identifiers . . . . . . . . . . . .205-206OGRE Engine . . . . . . . . . . . . . . . . . .203-206OGRE Mesh Format . . . . . . . . . . . . . . . . .204OGRE Texture Format . . . . . . . . . . . . . . .204One Dimensional Arrays . . . . . . . . . . . . . . .53One Pass . . . . . . . . . . . . . . . . . . . . . . . . . . . .75OnErrorGosub() . . . . . . . . . . . . . . . . .125-126OnErrorGoto() . . . . . . . . . . . . . . . . . .123, 126OpenFile() . . . . . . . . . . . . . . . . . . . . . . . . .105Operator Precedence . . . . . . . . . . . . . . . . . .33Operators . . . . . . . . . . . . . . . . . . . . . . . .18, 36Optional Parameters In Procedures . . . . . .85Or . . . . . . . . . . . . . . . . . . . . . . . . . . . . . .32, 37OS Identifiers . . . . . . . . . . . . . . . . . . . . .95, 97
PParticles . . . . . . . . . . . . . . . . . . .221, 224-226Passed By Reference . . . . . . . . . . . . . .90, 275PB Numbers . . . . . . . . . . . . . . . . . . . . . .95-96PB Numbers (Dynamic) . . . . . . . . . . . . . . .96PB Numbers (Sharing) . . . . . . . . . . . . .95-96Peek . . . . . . . . . . . . . . . . . . . . . . . . . . . . . .277Plus (+) . . . . . . . . . . . . . . . . . . . . . . . . . . . . .19Pointers . . . . . . . . . . . . . . . . . . . . . . .269-279Pointers And Structures . . . . . . . . . . .273-276Poke . . . . . . . . . . . . . . . . . . . . . . . . . .277-278Procedure Limitations . . . . . . . . . . . . . . . . .92Procedure Positioning . . . . . . . . . . . . . . . . .75Procedures . . . . . . . . . . . . . . . . . . . . . . . . . .74Program Scope . . . . . . . . . . . . . . . . . . . . . . .76Protected . . . . . . . . . . . . . . . . . . . . . . . . . . .79

Index 335
PureBasic Helpfile . . . . . . . . . . . . . . . . . .9, 93PureBasic History . . . . . . . . . . . . . . . . . . . . .3PureBasic's Development Philosophy . . . . .5
RRadix Point . . . . . . . . . . . . . . . .266, 268-269Random() . . . . . . . . . . . . . . . . . . . . . . . . . .102ReadFile() . . . . . . . . . . . . . . . . . . . . . . . . . .105Reading From Files . . . . . . . . . . . . . .107-108Reading User Input . . . . . . . . . . . . . .132-135Redefining Arrays . . . . . . . . . . . . . . . . . . . .59ReDim (Arrays) . . . . . . . . . . . . . . . . . . . . . .60Rendering A 3D Scene . . . . . . . . . . . . . . . .215Repeat . . . . . . . . . . . . . . . . . . . . . . . . . . . . .46Returning Value From A Procedure . . . . . .91Running PureBasic Programs . . . . . . . . . . . .7
SSaving Images . . . . . . . . . . . . . . . . . . .179-181Screens . . . . . . . . . . . . . . . . . . . . . . . .181-188Select Default . . . . . . . . . . . . . . . . . . . . . . . .41Select Multiple Case . . . . . . . . . . . . . . . . . . .41Select Statement . . . . . . . . . . . . . . . . . . . . .41Shared . . . . . . . . . . . . . . . . . . . . . . . . . . . . .80Sign . . . . . . . . . . . . . . . . . . . . . . . . . . .264-266Signed Numbers . . . . . . . . . . . . . . . .263-265Significand . . . . . . . . . . . . . . . . . . . . .266, 269SizeOf() . . . . . . . . . . . . . . . . . . . . . . . . . . . .50Sorting Arrays . . . . . . . . . . . . . . . . . . . .67-68Sorting Linked Lists . . . . . . . . . . . . . . . .69-70Sound . . . . . . . . . . . . . . . . . . . . . . . . .227-241Sprites . . . . . . . . . . . . . . . . . . . . .181, 192-202Static . . . . . . . . . . . . . . . . . . . . . . . . . . . . . .82Static Array Rules . . . . . . . . . . . . . . . . . . . .61Static Arrays . . . . . . . . . . . . . . . . . . . . . . . . .61Stdcall . . . . . . . . . . . . . . . . . . . . . . . . . . . .293Str(), StrF(), StrQ(), StrD() . . . . . . . . . . . .103Strings . . . . . . . . . . . . . . . . . . . . . . . . . . . . .12Structure Inheritance . . . . . . . . . . . . . . . . . .51Structure Memory Usage . . . . . . . . . . . . . .50Structure Unions . . . . . . . . . . . . . . . . . . . . .51Structured Arrays . . . . . . . . . . . . . .56, 58, 68Structured Linked Lists . . . . . . . . . . . .65, 69Structures . . . . . . . . . . . . . . . . . . . . . . . . . .49Subroutine Positioning . . . . . . . . . . . . . . . .72Subroutines . . . . . . . . . . . . . . . . . . . . . . . . .71
Subsystems . . . . . . . . . . . . . . . . .250-251, 258
TTerminal . . . . . . . . . . . . . . . . . . . . . . . . . . .252Terrains . . . . . . . . . . . . . . . . . . . . . . . .217-221Text Input . . . . . . . . . . . . . . . . . . . . . . . . . .143Threads . . . . . . . . . . . . . . . . . . . . . . . .279-287True . . . . . . . . . . . . . . . . . . . . . . . . . . . . . . .38Two Dimensional Arrays . . . . . . . . . . . . . . .55Two’s Complement . . . . . . . . . . . . . .264-265
UUnary operator . . . . . . . . . . . . . . . . . . . . . .25Unsigned Numbers . . . . . . . . . . . . . .263-265User Defined Errors . . . . . . . . . . . . . . . . . .126Using The Debugger . . . . . . . . . . . . . . . . .122
VVal(), ValF(), ValQ(), ValD() . . . . . . . . . . .103Variables . . . . . . . . . . . . . . . . . . . . . . . . . . . .12Variables As Parameters . . . . . . . . . . . .83-84Variables Rules . . . . . . . . . . . . . . . . . . . . . . .15Vertical Synchronization . . . . . . . . . . . . . .186Visual Designer . . . . . . . . . . . . . . . . . .162-164
WWave Files . . . . . . . . . . . . . . . . . . . . . .227-231While . . . . . . . . . . . . . . . . . . . . . . . . . . . . . .45Win32 API . . . . . . . . . . . . . . . . . . . . .293-301Win32 API String Pointers . . . . . . . . . . . .301Working With Colors . . . . . . . . . . . . . . . . .170Writing To Files . . . . . . . . . . . . . . . . .104-106
XXOr . . . . . . . . . . . . . . . . . . . . . . . . . . . . . . . .32
ZZero Division . . . . . . . . . . . . . . . . . . . . .8, 125

About The Author
Gary Willoughby is a professional graphic artist,Internet web developer and software developer.Having first cut his teeth programming usinginterpreted languages such as PHP, Python andJavascript during the late nineties, Gary decided tospend his free time moving into applicationdevelopment using compiled languages.
After using C++ for a while and noticing themassive marathon of programming needed for even a simple piece of software, a search began for asimpler, more intuitive and elegant programming language to realize well designed software within ashorter time frame. All of these wishes were fulfilled by a little known French company called FantaisieSoftware. The programming language they developed and marketed was PureBasic.
Since the summer of 2002, Gary has been an active community member of the official onlinePureBasic forum (under the pseudonym of ‘Kale’) and has written several pieces of successfulcommercial software using PureBasic.
336


Updated for
Purebasic v4
Gary WilloughbyCopyright © 2006
RRP £21.99 - $39.99 - €31.99
Purebasic - A Beginner’s Guide To Computer Programming is an essential guide for newcomers to Purebasic or computer programming in general. If you are an experienced programmer looking for a quick reference on Purebasic or some-body wishing to learn how to program computers from scratch, this book is for you. Purebasic makes a great first language for anyone wishing to learn to program computers and this book is designed to guide them through their first steps. Written in a no-nonsense style, this book aims to simplify complicated topics making sure that everything is explained fully in a straightforward and helpful way.
Book highlights include:. A history of the Purebasic programming language. A complete reference for all core language features. A primer on how to use the Purebasic helpfile, IDE and visual designer. Guidelines on writing good code. Tutorials on creating graphical user interfaces. Examples of 2D & 3D graphics. A whole section devoted to simplifying advanced topics. Extensive Appendices containing Internet Links and helpful charts. A full computer science glossary to educate new programmers
7814279 604286
ISBN 1-4276-0428-2 02199
Download ContainedCode Examples from
www.pb-beginners.co.uk
PurebasicA Beginner’s Guide To Computer Programming