9th-standard - WordPress.com
110
-
Upload
khangminh22 -
Category
Documents
-
view
1 -
download
0
Transcript of 9th-standard - WordPress.com


GGOOVVEERRNNMMEENNTT OOFF KKAARRNNAATTAAKKAA
IIINNNFFFOOORRRMMMAAATTTIIIOOONNN AAANNNDDDCCCOOOMMMMMMUUUNNNIIICCCAAATTTIIIOOONNN TTTEEECCCHHHNNNOOOLLLOOOGGGYYY
(((IIICCCTTT)))
SSuuppppoorrtt MMaatteerriiaall
NNIINNEETTHH SSTTAANNDDAARRDD
LLEEVVEELL IIVV
99
KKaarrnnaattaakkaa RReessiiddeennttiiaall EEdduuccaattiioonnaall IInnssttiittuuttiioonnss SSoocciieettyyNNoo--88,, MM..SS..BB --11,, 66tthh aanndd 77tthh FFlloooorr,, CCuunnnniinngghhaamm RRooaadd,,
BBeennggaalluurruu –– 556600 005522

PREFACE
M.R. Hiremath K.A.S
Executive DirectorKREIS, Bengaluru-20
Computers have become a way of life in the present day world. Everyone need to be
educated about the implications of this technology. Now the Karnataka Residential
Educational Institutions Society (KREIS) has proposed a course/textbook in this regards. The
course outlined for this textbook is an attempt to design a generally friendly course that
would not only be contemporary but also leaves sufficient scope for expansion into unknown
realms of computer activity that may emerge in future.
The National Curriculum Framework 2005 recommends that theoretical component of
Higher Secondary stage should emphasise on problem-solving methods and that the
awareness of the historical development of key concepts be judiciously integrated into the
content of a subject. It also recommends that given the pervasive impact of information and
communication technology (ICT), a course related to this, should address this infrastructure
challenge seriously and explore viable and innovative alternatives with regard to hardware,
software and connectivity technologies appropriate for rural schools.
NCF 2005 speaks about the tremendous effectiveness of the information and
communication technology in shaping modern society which has created the need for an
educated public that can utilise such technology most effectively for the betterment of society
and humankind. This book is aligned with these broad guidelines of NCF.
The book has been conscientiously designed and is the result of the renewed efforts of
the textbook team comprising of computer teachers and subject experts. Some of the
members worked at the advisory level while others worked towards the actual developmental
activity. It is hoped that the students will appreciate the beauty and logic of information and
communication technology. It has truly been a team work.
A conceptual coherence is derived with the pedagogy, the use of easily
understandable language, simple mathematical formulations in a logical fashion. This book
has some features which, we earnestly hope will enhance its usefulness to the students. Each
chapter is provided with learning outcomes in the beginning and the worksheets at the end of
each chapter.

I thank Dr. Shalini Rajanish, I.A.S, Principal Secretary, Former Department of
Backward Classes and the then Vice Chairman, KREIS, Bengaluru, a National awardee on
Sakala and Panchayat Raj whose spontaneous and continuous support for initiating this work
with distinct guidelines and made it happen. We express our gratitude to Sri E.Venkataiah Retd
I.A.S, Former Principal Secretary, Department of Social Welfare and the east while Vice
Chairman of KREIS, Bengaluru who was the path maker for KREIS. Sri Gangaram Baderiya
I.A.S, Principal Secretary, Department of Social Welfare and Vice Chairman, KREIS,
Bengaluru. Sri Naveen Raj Singh, I.A.S, Principal Secretary, Department of Backward Classes
and Dr. S.C Sharma, Former Vice Chancellor, Tumkur University, Karnataka, Prof. Rajaram
Sharma, Joint Director, CIET, NCERT, New Delhi, Prof. A.N Ramachandra, Former Joint
Commissioner, Navodaya Vidyalaya Samiti, New Delhi and also to the Director, DSERT, for
supporting us with the task of preparing these textbooks. I thank our core team of computer
teachers who worked restlessly for formulation of these text books in the leadership of Sri.
A.T Chamaraja, Retd. Joint Director, Department of Public Education, Mr. Santosh Elemmi,
Mr. Sunil C.S and Mr. Keerthi Kumar H.M.
We welcome suggestions and comments from our valued users, especially students
and teachers. We wish our young readers a happy journey to the exciting realm of ICT-
Support Material.
(M.R. Hiremath K.A.S)

FOREWORD
A N RamachandraFormerly- Joint Commissioner Acad
Navodaya Vidyalaya Samiti,Min of HRD, Govt of India
It is well said by Sir Winston Churchill that “Men occasionally stumble over truth,but most of them pick themselves up and hurry off as if nothing ever happened”. Computershave entered into classrooms so naturally than expected. While a decade ago teaching theschool children about the use of computers was a challenge. Now children in even remoteareas also know that a lot of fun can be understood by the touch of mobile screen. The 21st
century digital children are at par with the pace of the Technology and its multipledimensions affecting all spheres of their life.
What is planned to teach the children through this support material is to engross thechildren towards understanding the computer and its functional competency. This effortsurely enhances the learning pattern and desired outcomes. Parting computer in the schoolcurriculum brings paradigm shift from teaching to learning and also:
a. Use of computer by teacher increases their efficiency and quality of teaching.b. Integration of ICT in curricular activities makes children learning a joyful eventc. Inter-disciplinary approach in learning brings higher order conceptsd. Computer aided learning gives impetus to Multiple Intelligence such as; Creative
thinking and problem solving skills.
Let me also caution that this support material does not contain material to learnspecific software. Further, learning computers is not designed as a substitute for learning coresubjects. However, by association with the computer and with the help of this set of supportmaterial students will be able to explore the possibilities of using computer as a tool inenhancing knowledge, understanding of subjects and skills and concepts dealt in coresubjects. I am happy to be associated with the team in developing this material to assist theteachers and children in Karnataka Residential Educational Institutions Society (KREIS).The team involved in this work has also taken into account the constraint like availability oftime of the children in the Residential school pattern. Hence, lot of activities could beplanned to be conducted after the class hours through a formal interaction with the computerteacher and the subject teachers, using the techniques explained in this support material. Withthis material it is expected to enhance collaborative activities and interdisciplinaryapproaches. The support material in this series has links from level to level. Over a period of5 years students are expected to integrate ICT tools in their core subjects at ease. Althoughteachers can use their own methods to evaluate themselves the efficacy of use of this materialfrom time to time , learning concepts explained in this set of support material is not expectedto be evaluated through a formal set of examinations. The fun of learning the skills isincorporated in various exercises and activities recommended.

Special features maintained in series of support material are:
Minimum skills required at the age group for operation have been attempted to beincorporated
Time share of 100-120 periods (80 hrs per year) is planned Exercises and materials are designed in such a way that children Learn through
independent operation and collaborative work Play-way/Conversation /interactive approaches are adopted Brand neutrality is maintained to avoid specific alignment to any particular brand
Kannada compliant inputs are exhaustively attempted
I wish that teachers will make use of this material more informally to have fullparticipation of the students in productive manner. I thank the Karnataka ResidentialEducational Institutions Society (KREIS) for reposing confidence in our entire team indeveloping the material. Thanks are also due to the team members who have investedvaluable time and expertise.
(A N Ramachandra)

I
ICT – Support Material Level IV
CHAIRMAN:
Prof. A.N Ramachandra, Former Joint Commissioner, Navodaya Vidyalaya Samiti, NewDelhi.
MEMBERS:
Sri. Sunil C.S MCA, M.Tech, M.Phil, KREIS, Bengaluru.
Sri. Venkatesh Doddapattar MCA,M.Phil, MDRS, Nalatwad, Muddebihal Taluk, Vijayapur.
Sri. Janardhan G N M.Tech, MDRS, Badavanahally, Madhugiri Taluk, Tumkur.
Sri. Karthik R K M.Sc(CS),M.Phil, KRCRS, Balki, Balki Taluk, Bidar.
Sri. Anand Kodekall MCA, KRCRS, Kodla, Sedam Taluk, Kalaburgi.
COORDINATORS:
Sri. A.T Chamaraja, Rtd. Joint Director, Department of Public Education and Consultant,
KREIS, Bengaluru.
Sri. Santosh Elemmi S.C M.Sc(CS), M.Phil, KREIS, Bengaluru.
Sri. Sunil C.S MCA, M.Tech, M.Phil, KREIS, Bengaluru.
Sri. Keerthi Kumar H M B.E, MDRS, Belur Town, Belur Taluk, Hassan.
TTEEXXTTBBOOOOKK CCOOMMMMIITTTTEEEE

Karnataka Residential Educational Institutions Society 9th Standard
II
HOW TO USE THIS BOOK
This book is prepared for teaching about the computer to children. The teachers’ role is
primarily that of a facilitator encouraging active learning. Specific guidelines can be found in the
Teachers’ Corner at the end of the book. The teachers’ should read all the books in a series before
starting any class and understand the flow of content to ensure that the contents are comfortably
transacted inside the classroom. Ensure that the conceptual understanding is mastered before
proceeding to the skills. Use the Group Activities and Projects to stimulate creativity and knowledge
sharing. The book can easily be covered in one year, with four classes (40 minutes) per week. See the
table below for an overview of the concepts, objectives covered in each lesson along with periods.
SlNo
Topic Name Concepts Objectives Periods
01Overview of
Level III
1. Classification of computer2. Block diagram of computer3. Computer memory4. Word Processor5. Spreadsheet
Recall and apply what was learnt in Level III.12
(4+8)
02More on word
processor
1. Tables, Picture ,clipart, and shapes2. Word art and textbox3. Header and footer4. Page Layout, Setup, Background
Work with tables. Insert pictures, clipart and word art. Set Pages, color, and border.
16(3+13)
03More on
spreadsheet
1. Filtering and sorting2. Charts3. Functions and formula
Perform filtering and sorting on records. Create charts for analysis of data. Use more functions and formulas.
16(3+13)
04Introduction to
Presentation
1. Introduction2. Creating a Presentation3. Formatting toolbar4. Saving the Presentation5. Insert Picture/Clip Art6. Insert Movie/Sounds7. Animations
Create a Presentation. Enter content into the presentation application. Use design options. Print the presentation.
22(4+18)
05Introduction to
Internet
1. Introduction2. History of Internet3. Browsing in internet4. Searching the information
Define Internet. Open websites using a browser. Use a search engine tool. Use keywords to search for information.
16(4+12)
06 Electronic Mail
1. About E-Mail2. Creation of E-Mail Account3. How to send E-Mail4. Attaching files to E-Mail
Define e-mail. Create an e-mail account. Send and receive e-mail. Send attachments with e-mail.
10(2+8)
07 Online Services1. E-Governance2. E-Commerce3. Social Networking
Define E-governance and E-Commerce. List the advantages and disadvantage of E-Commerce. Use social networking.
10(5+5)
08ComputerNetworks
1. Introduction2. Types of Network3. Network Topologies4. Network and Data Security5. Advantages of Networks
Define computer network. List types of network. Identify network components. List the advantages of the network.
16(14+2)
09 HTML
1. Introduction to HTML2. Document Structure3. Basic Tags, Formatting4. Images, Tables, Lists
Define HTML. Write the structure of HTML. Use the HTML tags. Design a basic HTML web page.
22(10+12)

Karnataka Residential Educational Institutions Society 9th Standard
III
CONTENTS
SL.NO NAME OF THE LESSON PAGE NO
01 Overview of Level III 01
02 More on Word Processor 13
03 More on Spreadsheet 26
04 Introduction to Presentation 34
05 Introduction to Internet 48
06 Electronic-Mail 56
07 Online Services 62
08 Computer Networks 72
09 HTML 83

Karnataka Residential Educational Institutions Society 9th Standard
IV
BUS
RING
STAR
MESH
HYBRID
LAN
WAN
MAN
Wireless
NetworkTopologies
Types ofNetwork 9th Standard
Level 4
Networking
Software
Usage Skills
Safety and Security
HardwareNetworkHardware
Cable
Hub
Switch
Router
Modem
Helpline
Word Processor
Spread Sheet
Presentation
HTML
Word Processor Inserting Tables, Charts, Word Art
Spread Sheet
Creating Charts Applying Formulae
Presentation
Creating Simple Presentation Inserting Images, Charts, Sounds Animations
E-Mail Creating an E-mail Account
Sending an E-mail Receiving an E-mail
Online Services
Applying an Online Application Searching & Browsing Using Social Networks
HTML Designing a Simple Web Pages
Using HTML tags
Network Security
Data Security
Internet Safety
Presentation
Websites
HTML

Chapter 1: Overview of Level III
Revise the topics learned in the previous class.
Classification of computer
Block diagram of computer
Computer memory
Word Processor
Spreadsheet
Learning Objectives:
After you have studied this lesson you will be able to:
Recall and apply what was learnt in Level III.
Inside

Chapter 1: Overview of Level III 9th Standard
Karnataka Residential Educational Institutions Society 2 | P a g e
Classification of Computer
Computers differ based on their data processing abilities. They are classified according
to purpose and data handling.
According to purpose, computers are either general purpose or specific
purpose. General purpose computers are designed to perform a range of tasks. They have
the ability to store numerous programs but lack in speed and efficiency. Specific purpose
computers are designed to handle a specific problem or to perform a specific task.
According to data handling, computers are classified into three types
1. Analog Computer:
Analog computers work upon continuous data.
Computations are carried out with the physical quantities, such as voltages,
length, current, temperature etc.
The device that measures such quantities is analog devices.
The main advantage of analog computers is that all calculations take place in
parallel and hence these are faster.
2. Digital Computer
The digital computer works upon discontinuous data.
They convert the data into digits (Binary Digit 0 and 1) and all operations
carried out on these digits at extremely fast rates.
Digital Computers are much faster than an analog computer and far more
accurate. Computers used for business and scientific applications are digital
computers.
Digital computer can be classified into four types:
Mini Computers: This type of computers is usually designed for real-time
dedicated applications or as high performance, multiple user applications.
Example: Digital Alpha, IBM RS/6000, IBM 8000 series, Sun Ultra and
PDP 11
Micro Computers: Also know as PC (Personal Computer), this is the most
prevalent form of computers. Sitting on a standard desktop(or laptop),
today PC’s are single/Multiprocessor systems which can perform simple
tasks such as word processing or spreadsheet calculations or demanding
Chapter 1: Overview of Level III 9th Standard
Karnataka Residential Educational Institutions Society 3 | P a g e
task such as graphic. Example: Desktops (PC, Macintosh), Laptops,
Notebooks, Tablets, Palmtops, Smart Phones, etc.
Mainframe: Applications which require high performance and/or generate
and process large numbers of truncations are generally hosted on the
mainframe. Most major banks rely heavily on mainframes. Example: CDC
6600, IBM ES000 series, IBM S/390 etc.
Supercomputers: Supercomputers are designed for ultra-high performance
tasks such as weather analysis, encryption cracking, and the creation of
animation. Supercomputers are large, expensive, massively parallel-
processing machines usually owned by government agencies or large
corporations. Example: IBM Roadrunner, IBM Blue Gene, PARAM
Padma, etc.
3. Hybrid Computer
Hybrid computers incorporate the measuring feature of an
analog computer and counting feature of a digital computer.
For computational purposes, these computers use analog components and for
storage, digital memories are used.
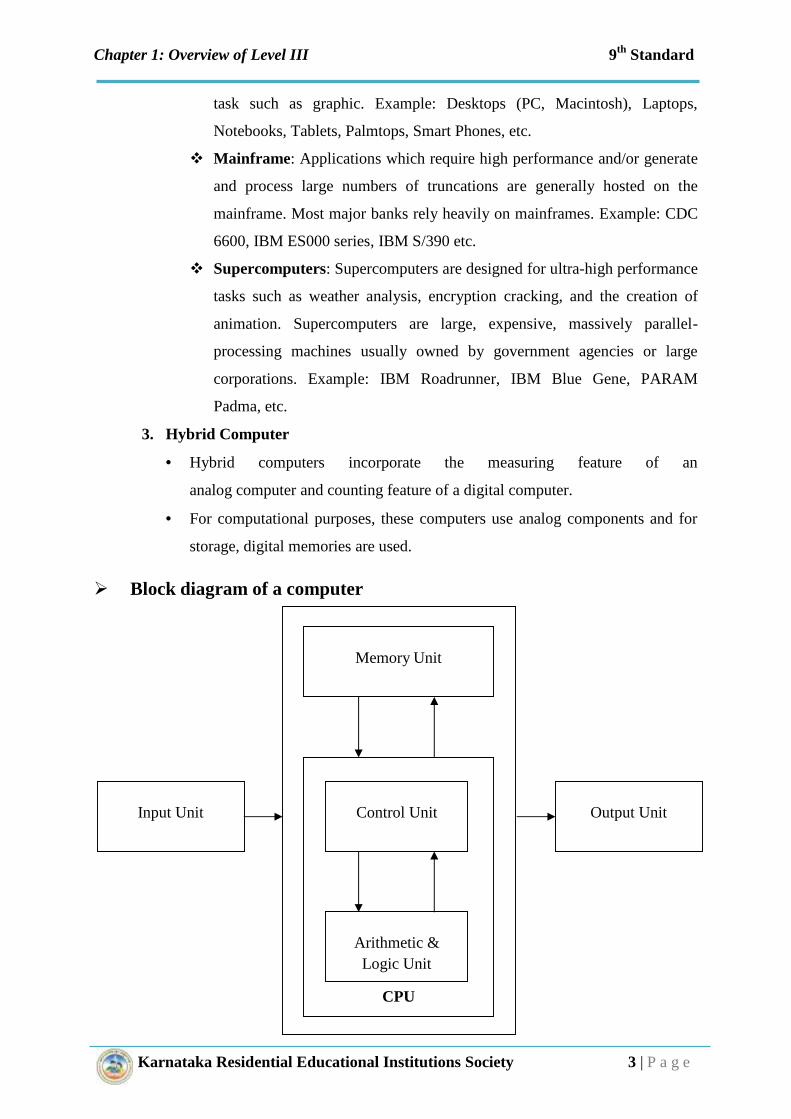
Block diagram of a computer
Fig: Block Diagram of Computer
Memory Unit
CPU
Control Unit
Arithmetic &Logic Unit
Input Unit Output Unit

Chapter 1: Overview of Level III 9th Standard
Karnataka Residential Educational Institutions Society 4 | P a g e
Input Unit
a) It accepts the instructions and data from the user.
b) Converts those instructions and data into computer understandable format.
c) Supplies the converted instructions and data to CPU for further processing.
Central Processing Unit (CPU)
It is the main part of a computer system like the heart of a human being. The function of
the CPU is to interpret the instructions in the program and execute them one by one. It
consists of two major units.
1. Control Unit: It controls and directs the transfer of program instructions and data
between various units. The main activity of the control unit is to maintain order and
direct the operations of the entire system.
2. Arithmetic and Logic Unit (ALU): Arithmetic and Logic Unit performs arithmetic
and logical operations and controls the speed of these operations.
Memory Unit
The data and the instructions required for processing has to be stored in the memory unit
before the actual processing starts. In a similar manner, the results generated from processing
has to be preserved before it is displayed. The memory units thus provide space to store input
data, intermediate results and the final output generated.
Output Unit
a) It receives the results from the CPU.
b) Converts those results into the human understandable format.
c) Supplies the converted result to the user.
Computer Memory
Memory is an essential component of any digital computer. It is storing device. It stores
programs and data, which is required by the CPU, and the results generated after processing.
There are two kinds of memory are commonly used in computers.
1. Primary Memory (Semi-Conductor Memory)
2. Secondary Memory ( Magnetic Memory)

Chapter 1: Overview of Level III 9th Standard
Karnataka Residential Educational Institutions Society 5 | P a g e
Word Processor
Word processing is an application program that allows you to create letters, reports,
newsletters, tables, form letters, brochures, and Web pages. Using this application program
you can add pictures, tables, and charts to your documents. You can also check spelling and
grammar. There are many flavors of Word Processing programs like Microsoft Word, Open
Office Writer, Libre Writer etc,
Starting with Word Processor
Step 1: Click the Start Button - then Start Menu appears
Step 2: Select All Programs
Step 3: Go to Microsoft Office
Step 4: Select Microsoft Office Word
Structure of Word Processor Window
Computer Memory
Primary Memory Secondary Memory
RAM ROM HDD CD/DVDD
Pen Drive

Chapter 1: Overview of Level III 9th Standard
Karnataka Residential Educational Institutions Society 6 | P a g e
Operations on Word Processor document
The Word Processor basic operations are
Creating a New Document
1. Click the Office button
2. Click the New option and then select Blank Document.
Saving New Document
1. Click the Save button on the title bar. (Or)
2. Click the Office button
3. Select the Save option
Open the Existing Document
1. Click the Office button
2. Select the Open option
3. Select the drive that contains the document. The list of folders and files are
displayed. Select the document name.
4. Click on Open button. Then selected document will be opened.
Closing/ Exit From Word
1. Click the Office button
2. Select the Close option
Exit from Word
1. Click the Office button
2. Select the Exit word option
Clipboard
The clipboard is a temporary holding area for information. It
contains:
Cut the selection from the document and put it on clipboard
Copy the selection and put it on clipboard
Paste the contents of the clipboard.
Format Painter: copy formatting from one place and apply to another.
Formatting Text
Formatting means changing the style and design of text and objects in the document in a
proper way and this can be achieved using the formatting toolbar.
Chapter 1: Overview of Level III 9th Standard
Karnataka Residential Educational Institutions Society 7 | P a g e
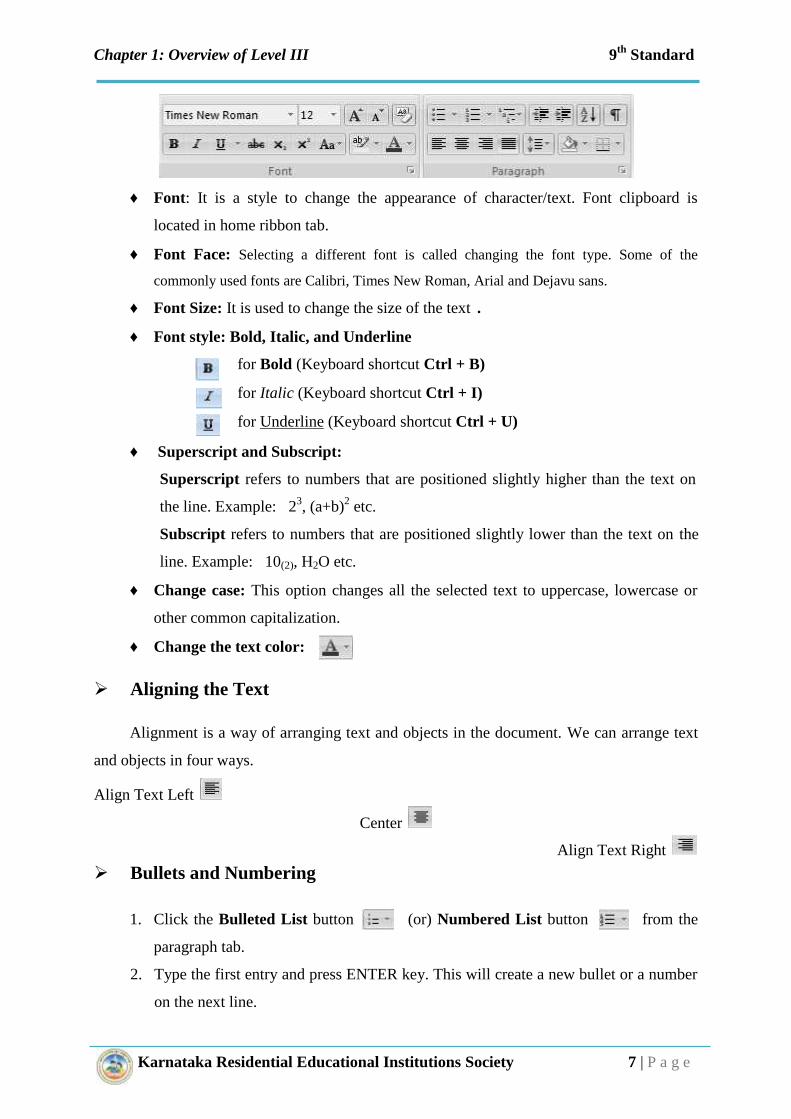
Font: It is a style to change the appearance of character/text. Font clipboard is
located in home ribbon tab.
Font Face: Selecting a different font is called changing the font type. Some of the
commonly used fonts are Calibri, Times New Roman, Arial and Dejavu sans.
Font Size: It is used to change the size of the text .
Font style: Bold, Italic, and Underline
for Bold (Keyboard shortcut Ctrl + B)
for Italic (Keyboard shortcut Ctrl + I)
for Underline (Keyboard shortcut Ctrl + U)
Superscript and Subscript:
Superscript refers to numbers that are positioned slightly higher than the text on
the line. Example: 23, (a+b)2 etc.
Subscript refers to numbers that are positioned slightly lower than the text on the
line. Example: 10(2), H2O etc.
Change case: This option changes all the selected text to uppercase, lowercase or
other common capitalization.
Change the text color:
Aligning the Text
Alignment is a way of arranging text and objects in the document. We can arrange text
and objects in four ways.
Align Text Left
Center
Align Text Right
Bullets and Numbering
1. Click the Bulleted List button (or) Numbered List button from the
paragraph tab.
2. Type the first entry and press ENTER key. This will create a new bullet or a number
on the next line.
Chapter 1: Overview of Level III 9th Standard
Karnataka Residential Educational Institutions Society 7 | P a g e
Font: It is a style to change the appearance of character/text. Font clipboard is
located in home ribbon tab.
Font Face: Selecting a different font is called changing the font type. Some of the
commonly used fonts are Calibri, Times New Roman, Arial and Dejavu sans.
Font Size: It is used to change the size of the text .
Font style: Bold, Italic, and Underline
for Bold (Keyboard shortcut Ctrl + B)
for Italic (Keyboard shortcut Ctrl + I)
for Underline (Keyboard shortcut Ctrl + U)
Superscript and Subscript:
Superscript refers to numbers that are positioned slightly higher than the text on
the line. Example: 23, (a+b)2 etc.
Subscript refers to numbers that are positioned slightly lower than the text on the
line. Example: 10(2), H2O etc.
Change case: This option changes all the selected text to uppercase, lowercase or
other common capitalization.
Change the text color:
Aligning the Text
Alignment is a way of arranging text and objects in the document. We can arrange text
and objects in four ways.
Align Text Left
Center
Align Text Right
Bullets and Numbering
1. Click the Bulleted List button (or) Numbered List button from the
paragraph tab.
2. Type the first entry and press ENTER key. This will create a new bullet or a number
on the next line.

Chapter 1: Overview of Level III 9th Standard
Karnataka Residential Educational Institutions Society 8 | P a g e
Find and Replace
Find: It is used to quickly search for every occurrence of a specific
word or phrase.
Replace: It is used to automatically replace a word or phrase with
another.
Spreadsheet
Spreadsheets are designed to record and analyze numbers and data. Spreadsheets are
very widely used for accounting and financial purposes. A spreadsheet is a grid of rows and
columns and is also called as a worksheet. There are many spreadsheet programs available
like Open Office Calc, Microsoft Excel, Libre Calc, etc.
Starting with Spreadsheet
1. Click the Start Button
2. Select All Programs
3. Go to Microsoft Office
4. Select Microsoft Office Excel
Structure of Spreadsheet Window

Chapter 1: Overview of Level III 9th Standard
Karnataka Residential Educational Institutions Society 9 | P a g e
Creating a Workbook
Spreadsheet creates documents as workbooks. Each workbook can contain many
spreadsheets. Each spreadsheet has a tab on the bottom marked Sheet1, Sheet2, etc. These
sheets can be added, deleted, rearranged, and the tabs renamed.
To create a new workbook, you can open a blank workbook. The steps involved in creating a
new document are
1. Click the Office Button
2. Click the New option and then select Blank Workbook.
Worksheet Modification
Insert a Worksheet
By default, Spreadsheet provides 3 worksheets Sheet1, Sheet2, and Sheet3.To insert
a new worksheet in front of an existing worksheet do the following steps
1. Select the worksheet, then on the Home tab Cells group.
2. Click Insert and select Insert Sheet.
Rename a Worksheet
To give a worksheet a more specific name, execute the
following steps.
1 Right-click on the sheet tab of any sheet you want to
rename.
2 Choose Rename. Then type a name and Press Enter.
Delete a Worksheet
To delete a worksheet, right click on a sheet tab and choose Delete.
Inserting Rows and Columns
When you insert a row, the new row will be positioned above the row containing the
active cell.
1. Select a cell in the row above which you want to insert a new row.2. On the Home ribbon, find the Cells group and click Insert followed by Insert Sheet
Rows.
Chapter 1: Overview of Level III 9th Standard
Karnataka Residential Educational Institutions Society 10 | P a g e
3. A new row will be inserted above the current row.
When you insert a column, the new column will be positioned to the left of the column
containing the active cell.
1. Select a cell in the column to the left of which you want to insert a new column.
2. On the Home ribbon, find the Cells group and click Insert followed by Insert Sheet
Columns.
3. A new column will be inserted to the left of the current column.
Deleting Rows and Columns
To delete a row, do as follows:
1. Select a cell in the row that you want to delete.
2. On the Home ribbon, find the Cells group and click Delete followed by Delete
Sheet Rows.
3. The row containing the active cell will be deleted. All the rows below it
will move up by one.
To delete a column, do as follows:
1. Select a cell in the column that you want to delete.
2. On the Home ribbon, find the Cells group and click Delete followed by Delete
Sheet Columns.
3. The column containing the active cell will be deleted. All the columns on its right
will move left by one.
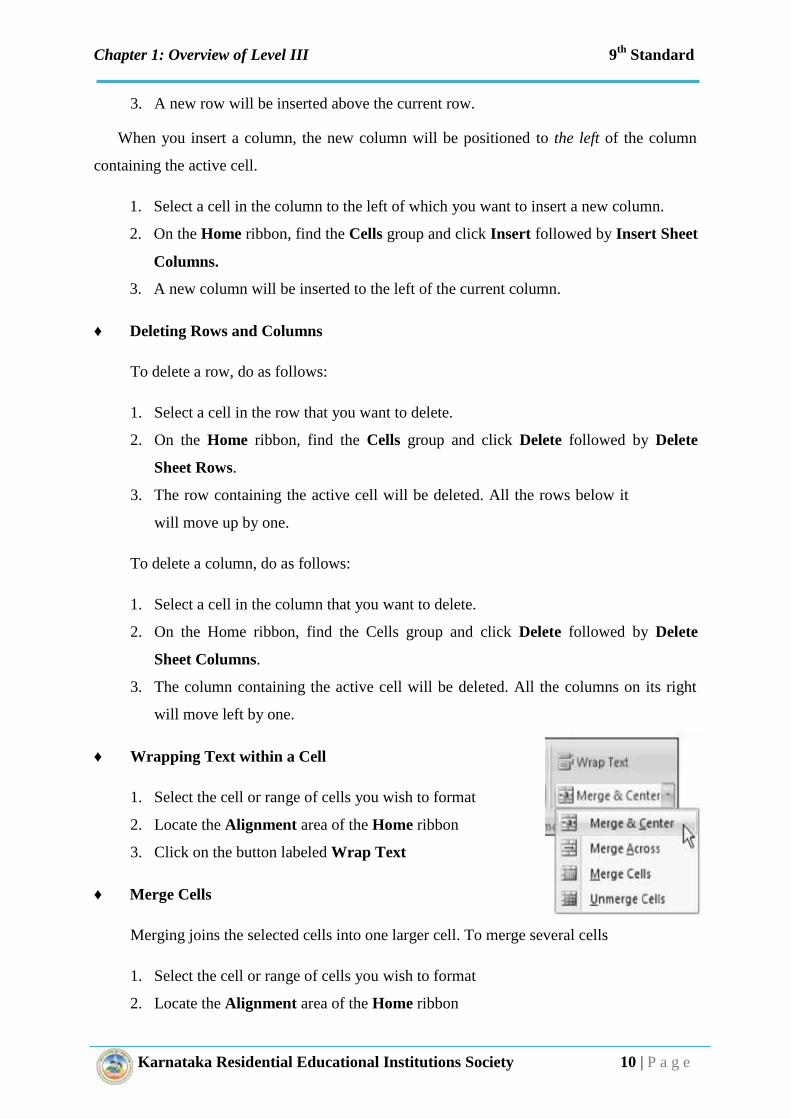
Wrapping Text within a Cell
1. Select the cell or range of cells you wish to format
2. Locate the Alignment area of the Home ribbon
3. Click on the button labeled Wrap Text
Merge Cells
Merging joins the selected cells into one larger cell. To merge several cells
1. Select the cell or range of cells you wish to format
2. Locate the Alignment area of the Home ribbon
Chapter 1: Overview of Level III 9th Standard
Karnataka Residential Educational Institutions Society 10 | P a g e
3. A new row will be inserted above the current row.
When you insert a column, the new column will be positioned to the left of the column
containing the active cell.
1. Select a cell in the column to the left of which you want to insert a new column.
2. On the Home ribbon, find the Cells group and click Insert followed by Insert Sheet
Columns.
3. A new column will be inserted to the left of the current column.
Deleting Rows and Columns
To delete a row, do as follows:
1. Select a cell in the row that you want to delete.
2. On the Home ribbon, find the Cells group and click Delete followed by Delete
Sheet Rows.
3. The row containing the active cell will be deleted. All the rows below it
will move up by one.
To delete a column, do as follows:
1. Select a cell in the column that you want to delete.
2. On the Home ribbon, find the Cells group and click Delete followed by Delete
Sheet Columns.
3. The column containing the active cell will be deleted. All the columns on its right
will move left by one.
Wrapping Text within a Cell
1. Select the cell or range of cells you wish to format
2. Locate the Alignment area of the Home ribbon
3. Click on the button labeled Wrap Text
Merge Cells
Merging joins the selected cells into one larger cell. To merge several cells
1. Select the cell or range of cells you wish to format
2. Locate the Alignment area of the Home ribbon
Chapter 1: Overview of Level III 9th Standard
Karnataka Residential Educational Institutions Society 11 | P a g e
3. Click on the down-facing arrow located next to the button labeled Merge & Centre
4. From the list that appears, select the formatting you wish to apply (example Merge
and Centre)
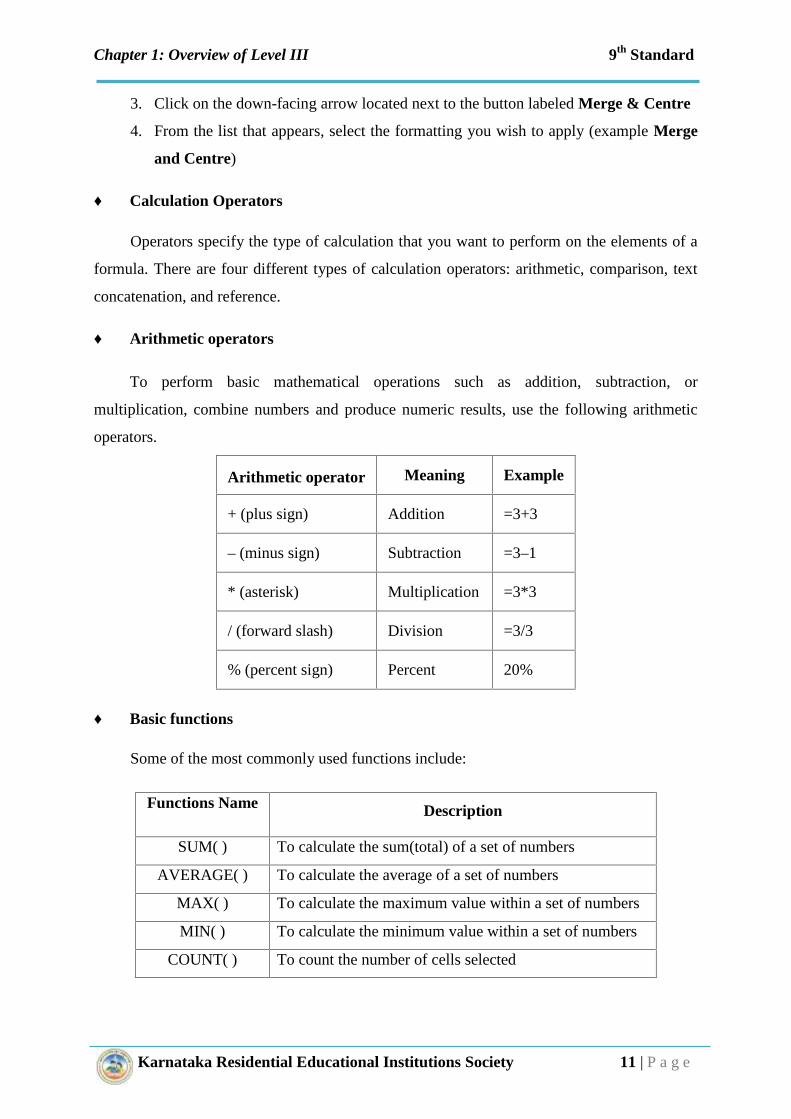
Calculation Operators
Operators specify the type of calculation that you want to perform on the elements of a
formula. There are four different types of calculation operators: arithmetic, comparison, text
concatenation, and reference.
Arithmetic operators
To perform basic mathematical operations such as addition, subtraction, or
multiplication, combine numbers and produce numeric results, use the following arithmetic
operators.
Arithmetic operator Meaning Example
+ (plus sign) Addition =3+3
– (minus sign) Subtraction =3–1
* (asterisk) Multiplication =3*3
/ (forward slash) Division =3/3
% (percent sign) Percent 20%
Basic functions
Some of the most commonly used functions include:
Functions Name Description
SUM( ) To calculate the sum(total) of a set of numbers
AVERAGE( ) To calculate the average of a set of numbers
MAX( ) To calculate the maximum value within a set of numbers
MIN( ) To calculate the minimum value within a set of numbers
COUNT( ) To count the number of cells selected

Chapter 1: Overview of Level III 9th Standard
Karnataka Residential Educational Institutions Society 12 | P a g e
SUM( ): The SUM function adds all the numbers that you specify as arguments.
Each argument can be a range.
The general form of Sum function is
Use this function to add the numbers in selected cells
1. Type ‘=’ sign.
2. Type SUM and open the left bracket ‘(‘.
3. Select the range of cells for which you want to add.
4. Close the right bracket ‘)’.
5. Press Enter key to get the result.
AVERAGE( ): This function gives you the average of series of numbers.
The general form of this function is
Type the formula as shown and press enter key. You will get the average of series of
numbers.
COUNT( ): This function counts the number of selected cells that contain data.
The general form of this function is
MAX( ): This function is used for finding the largest value from a given series of
numbers.
The general form of this function is
MIN( ): This function gives the smallest value from a set of values.
The general form of this function is
=SUM (Starting Cell: Ending Cell)
=AVERAGE (Starting Cell: Ending Cell)
=MAX (Starting Cell: Ending Cell)
=MIN (Starting Cell: Ending Cell)
=COUNT (Starting Cell: Ending Cell)
Chapter 2: More on Word Processor
Tables
Picture, Clipart, and Shapes
Word art and Textbox
Symbols
Header and Footer
Page Layout
Page Setup
Page Background
Learning Outcomes:
After you have studied this lesson you will be able to:
Work with Tables.
Insert Pictures, clipart, and Word art.
Set Pages, color, and border.
Inside

Chapter 2: More on Word Processor 9th Standard
Karnataka Residential Educational Institutions Society 14 | P a g e
Tables
A combination of rows and columns is called a table.
It is used to display data in rows and columnar format.
Tables make the data look simple and are used in the design of calendars, report
cards and school timetables.
Inserting table
There are two ways to add a table to the document.
Step 1:
1. Place the cursor in the document where you would
like to add a table.
2. Click on the Insert ribbon tab.
3. Select the Table button just on the Insert tab. A blank
table grid will appear.
4. Position the mouse pointer on the top left a square of
the table grid.
5. Click the left button, and hold it down while dragging the mouse down and to the
right.
6. Release the left mouse button, and the required table is included in the document.
Step 2:
1. Click where you want to insert a table.
2. On the Insert tab, in the Tables group, click
Table, and then click Insert Table.
3. Under Table size, enter the number of columns
and rows.
Adding text to table
1. After the table is created, the cursor will be blinking in the first cell. You can begin
typing here.
2. To move on to the next cell, press the [TAB] key on the keyboard.
3. To move on to the above or below cells, use direction keys (Arrow keys).

Chapter 2: More on Word Processor 9th Standard
Karnataka Residential Educational Institutions Society 15 | P a g e
Inserting rows and columns
In the Layout ribbon tab can perform following operation.
1. Place the cursor in the row or column on the table.
2. Click Layout ribbon tab and Select one of the Rows & Columns options.
3. The new row or column will be included in your table.
Deleting rows and columns
1. Place the cursor in the row or column that you want to get rid
of.
2. Click on the Layout ribbon tab.
3. Click on the Delete button, and a drop-down menu will appear.
4. Select an option to delete cells, columns, rows, or even the entire table.
Merge Cells
Merge Cells option is used to combine two or more cells into
one cell.
1. Select two or more cells to be merged.
2. Click on the Layout ribbon tab.
3. Click on the Merge Cells button.
Splitting Cell
Split Cells option is used to split the cell(s) into two or more rows or columns.
1. Select the cell to be divided.
2. Click on the Layout ribbon tab.
3. Click on the Split Cells button and enter the number
of rows and columns to split the cell into.

Chapter 2: More on Word Processor 9th Standard
Karnataka Residential Educational Institutions Society 16 | P a g e
Formatting Cells
For formatting; select the cells of a table that you want to
format.
To Change the Text Alignment in a Cell
1. Place the cursor in a cell or select multiple cells or select the whole table.
2. Select the appropriate text alignment from the Layout ribbon tab.
Auto Fit
To fit the cell automatically in a table
1. Select the table.
2. Click on the Layout ribbon tab.
3. Select AutoFit button and a drop-down menu will appear.
4. Select any option to entire table
Converting existing text to a table
Convert the existing text to a table format without drawing a table and entering the data
again.
1. Select the text to convert it to a table.
2. Select Table Convert to table option.
3. Choose the number of columns and number of rows to be divided
4. Choose OK
Example:
Organism Lifespan
Lion 20-25 yrs
Horse 25-30 yrs
Converting a table to ordinary text
You can convert an existing table to ordinary text without having to re-type the data.
1. Select the entire table
2. Select Convert to text option on Layout.
3. Choose OK.
Organism Lifespan
Lion 20-25 yrs
Horse 25-30 yrs

Chapter 2: More on Word Processor 9th Standard
Karnataka Residential Educational Institutions Society 17 | P a g e
Design the table
After you create a table, you can format the entire table by using Table Styles. By
resting your pointer over each of the preformatted table styles, you can preview what the table
will look like.
1. Click in the table that you want to format.
2. Under Table Tools, click the Design tab.
3. In the Table Styles group, rest the pointer over each table style. To see more styles,
click the More arrow .
4. Click the style to apply it to the table.
5. In the Table Style Options group, select or clear the check box; to apply or remove
the selected style.
Add or remove borders
You can add or remove borders to format a table the way that you want.
Add table borders
1. Under Table Tools, click the Layout tab.
2. In the Table group, click Select, and then click Select Table.
3. Under Table Tools, click the Design tab.
4. In the Table Styles group, click Borders
5. Click one of the predefined border sets. Or Click Borders and Shading, click the
Borders tab, and then choose the options that you want.
Remove table borders
1. Under Table Tools, click the Layout tab.
2. In the Table group, click Select, and then click Select Table.
3. Under Table Tools, click the Design tab.
4. In the Table Styles group, click Borders, and then click No Border.

Chapter 2: More on Word Processor 9th Standard
Karnataka Residential Educational Institutions Society 18 | P a g e
Picture and ClipArt
Pictures and clip art can be inserted or copied into
a document from many different sources, including
downloaded from a clip art or inserted from a file where
you save pictures.
Inserting Images
1. Click on the Insert ribbon tab.
2. In the Illustrations group, select the Picture button.
3. Locate the picture that you want to insert.
4. Double-click the picture that you want to insert or Click insert button
Inserting ClipArt
1. Click on the Insert ribbon tab.
2. Select the ClipArt button.
3. A ClipArt pane will open on the right side of
the document.
4. Type a descriptive term in the Search for
field. For example Sports.
5. Then click Go or press ENTER key.
6. The ClipArt Gallery will show you all the available graphics related to this theme.
7. Clicking on a picture you want.
Shapes
You can add a variety of shapes to your document, including
arrows, callouts, squares, stars, and flow chart symbols. For
inserting Shapes:
1. Select the Insert tab.
2. Click the Shape command.
3. Left-click a shape from the menu. Your cursor now
becomes cross-shaped.
4. Left-click your mouse and while holding it down, drag

Chapter 2: More on Word Processor 9th Standard
Karnataka Residential Educational Institutions Society 19 | P a g e
your mouse until the shape is the desired size.
5. Release the mouse button.
To change the shapes fill color
1. Select the shape. A new Format tab appears with Drawing
Tools.
2. Click the Shape Fill command to display a drop-down list.
3. Choose the color.
To change the shape outline:
1. Select the shape. A new Format tab appears with Drawing Tools.
2. Click the Shape Outline command to display a drop-down list.
3. Select a color from the list, choose No Outline, or choose one of the other options.
To change shadow effects:
1. Select the Format tab.
2. Left-click the Shadow Effects command.
3. Select any shadow options.
To change 3D effects:
1. Select the Format tab.
2. Left-click the 3-D Effects command.
3. Move your mouse over the menu options.
Know This!
The Shapes are used to draw many geometrical shapes,
arrows, flowcharts symbols, stars and banners on the
document.

Chapter 2: More on Word Processor 9th Standard
Karnataka Residential Educational Institutions Society 20 | P a g e
Word Art
The WordArt feature helps to create artistic text
that makes the document look attractive. It is very useful
in creating posters and greeting cards.
1. Click the WordArt button on the Insert ribbon.
2. A selection of WordArt design options will
appear.
3. Click on a Design option to select it.
4. The Edit WordArt Text dialog box allows you to change the font style and size.
5. Click OK to accept the settings.
Textbox
1. Click on the Insert ribbon tab.
2. Click on the Textbox button.
3. A selection of TextBox design options
will appear.
4. Click on a design option to select it.
5. Edit the text in TextBox and you can
position the TextBox anywhere in the
document.
Symbols
At some point or other, you will need to insert symbols or special characters in your
word document. Symbols and characters like foreign currency symbols, some mathematical
and scientific symbols don't appear on a computer keyboard.

Chapter 2: More on Word Processor 9th Standard
Karnataka Residential Educational Institutions Society 21 | P a g e
Symbols group contains two options. They are Equations and Symbols
Equation
You can type an equation in your document or insert an equation in the following ways:
1. On the Insert tab, in the Symbols group
2. Click the arrow next to Equations, and then select the Built-in Equations.
Insert a symbol
1. On the Insert tab, in the Symbols group, click Symbol.
2. Do one of the following:
Click the symbol that you want in the drop-down list.
If the symbol that you want to insert is not in the list, click
More Symbols.
Select the symbol and click Insert.
3. Click Close.
Header and footer
A header is a text that is added to the top margin of every page.
The footer is the text added to the bottom margin of every page.
The header or footer can include text or graphics. For example Page number, Date, a
company logo, the document title or file name or the author’s name.
Steps to Insert or edit the Header and Footer in the document.
1. On the Insert Ribbon, click the Header/Footer button.
2. The Header/Footer menu will drop down.
3. Select a layout by clicking on it.
4. The Header/Footer area will appear
above/below document.
5. A text placeholder in the Header/Footer area
will be seen. Click on it and then type the text
that you want to appear in the Header/Footer.

Chapter 2: More on Word Processor 9th Standard
Karnataka Residential Educational Institutions Society 22 | P a g e
To edit an existing header, just double-click anywhere in the header area, To remove the
header, Click the Header/Footer button and then select Remove Header/Footer from the
bottom of the drop-down menu.
Page number
1. On the Insert tab, in the Header & Footer group, click
Page Number.
2. Click Top of Page or Bottom of Page, depending on
where you want page numbers to appear in your
document.
3. Choose a page number design from the gallery of designs
Page Layout
You can use section breaks to change the layout or formatting of a page or pages in your
document. For example, you can lay out part of a single-column page as two columns. You
can also create a different watermark or page color and page border for a section of your
document.
The Page Layout Tab controls the look and feel of the document.
It helps to apply design to the document by using available themes and color
schemes.
It also helps in changing the document orientation, page size, margins,
indentation, line spacing and paragraph settings.
Page setup:
The page setup group consists of margins, orientation, size and columns options.
Page margin: Page margins are the blank space around the edges of the page.
In general, you can insert text and graphics in the printable area between the
margins.
Some text and objects can be inserted in the margins like header and footer.

Chapter 2: More on Word Processor 9th Standard
Karnataka Residential Educational Institutions Society 23 | P a g e
To Change or set page margins
1. Select Page Layout tab, in the Page Setup group, click Margins.
2. Select the Margins type that you want.
For common margin width, click Normal.
When you click the margin type that you want, your
entire document automatically changes to the margin
type that you have selected.
3. You can also specify your own margin settings. Click
Margins, click Custom Margins, and then in the Top,
Bottom, Left, and Right boxes, enter new values.
Page Orientation
You can choose either portrait (vertical) or landscape (horizontal) orientation for all or
part of your document.
1. Select the Page Layout ribbon tab
2. Select the Orientation
3. Choose the Portrait or Landscape
Page Size
You can change the Page Size of the document.
1. Select the Page Layout ribbon tab
2. Select the Size option
3. Choose the Paper size in the list or
4. Click More Paper size option.
Page Columns
Page columns option splits text into two or more columns. To set the Page Columns.
1. Select Page Layout tab, in the Page Setup group, click
Columns.
2. Click One, Two, Three, Left, Right etc.
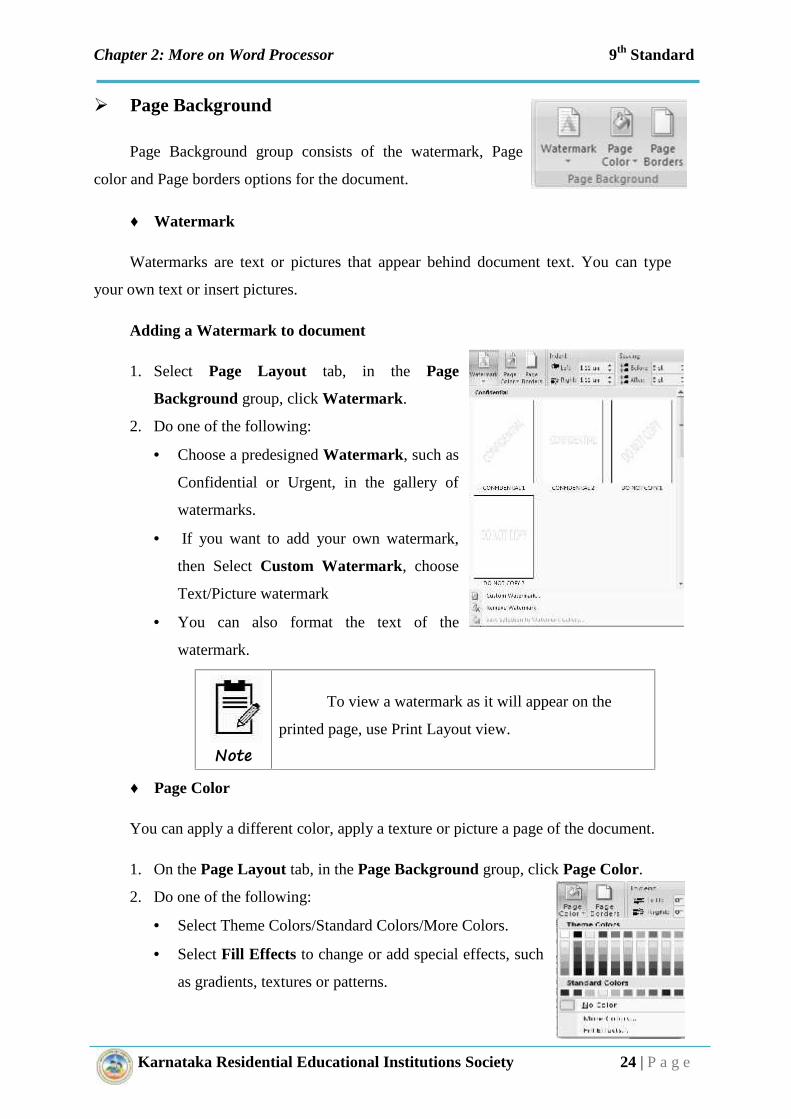
Chapter 2: More on Word Processor 9th Standard
Karnataka Residential Educational Institutions Society 24 | P a g e
Page Background
Page Background group consists of the watermark, Page
color and Page borders options for the document.
Watermark
Watermarks are text or pictures that appear behind document text. You can type
your own text or insert pictures.
Adding a Watermark to document
1. Select Page Layout tab, in the Page
Background group, click Watermark.
2. Do one of the following:
Choose a predesigned Watermark, such as
Confidential or Urgent, in the gallery of
watermarks.
If you want to add your own watermark,
then Select Custom Watermark, choose
Text/Picture watermark
You can also format the text of the
watermark.
Page Color
You can apply a different color, apply a texture or picture a page of the document.
1. On the Page Layout tab, in the Page Background group, click Page Color.
2. Do one of the following:
Select Theme Colors/Standard Colors/More Colors.
Select Fill Effects to change or add special effects, such
as gradients, textures or patterns.
Note
To view a watermark as it will appear on the
printed page, use Print Layout view.

Chapter 2: More on Word Processor 9th Standard
Karnataka Residential Educational Institutions Society 25 | P a g e
Page Borders
A page border can serve as a graphic enhancement for a variety of documents, such as
letters, flyers, notices, and signs.
Borders can be added to pages, text, tables and table cells, graphic objects, and
pictures.
Borders are applied to any or all sides of each page in a document, to pages in a
section, to the first page only, or to all pages except the first.
Border Style, Color, Width, Setting, and Options can be changed.
Shading
Using the Shading tab, you can select a background color
and/or pattern. The Apply To field lets you specify whether this
should be applied to the whole paragraph or to selected text. Click
OK to see the effect.

Chapter 3: More on Spreadsheet
Filtering and Sorting
Charts
Functions and Formula
Learning Objectives:
After you have studied this lesson you will be able to:
Perform filtering and sorting on records.
Create charts for analysis of data.
Use more functions and formulas.
Inside
Chapter 3: More on Spreadsheet
Filtering and Sorting
Charts
Functions and Formula
Learning Objectives:
After you have studied this lesson you will be able to:
Perform filtering and sorting on records.
Create charts for analysis of data.
Use more functions and formulas.
Inside
Chapter 3: More on Spreadsheet
Filtering and Sorting
Charts
Functions and Formula
Learning Objectives:
After you have studied this lesson you will be able to:
Perform filtering and sorting on records.
Create charts for analysis of data.
Use more functions and formulas.
Inside

Chapter 3: More on Spreadsheet 9th Standard
Karnataka Residential Educational Institutions Society 27 | P a g e
Filtering and Sorting
A filter is a list of conditions that each entry has to meet in order
to be displayed
Sorting rearranges the visible cells on the sheet. . Sorts are handy
when you are searching for a particular item, and become even more
powerful after you have filtered data.
In addition, sorting is often useful when you add new information. When a list is long, it
is usually easier to add new information at the bottom of the sheet, rather than inserting rows
in the proper places. After you have added the information, you can sort it to update the sheet.
Filtering
The filtering command is used to filter and view only the required data.
Steps to Filter:
1. Select the entire data.
2. Click on the On the Home ribbon, select Sort & Filter
3. Select the Filter option.
4. In the first row of your data table, a drop-down arrow
will appear on the right of each column heading.
5. When you click on a drop-down arrow, you will see a
list of all the values occurring in that column.
6. If you want to view records with a particular value only,click to uncheck the Select All option, and then checkone or more values that you want to view. Click the OKbutton.
7. All rows that do not contain the value(s) you checkedwill be hidden from view. A column that has beenfiltered will show a funnel icon next to the drop-downarrow on the heading.
8. Repeat the filtering process for as many columns as youneed. You can remove a column filter by checking itsSelect All option.
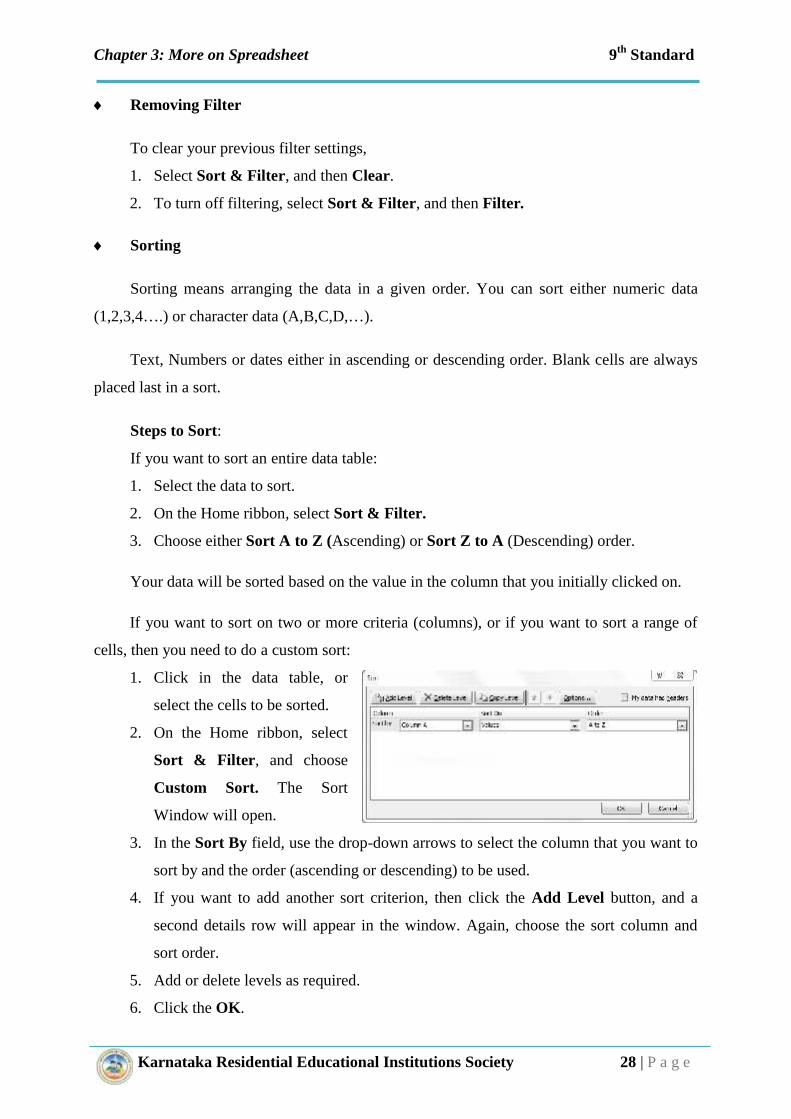
Chapter 3: More on Spreadsheet 9th Standard
Karnataka Residential Educational Institutions Society 28 | P a g e
Removing Filter
To clear your previous filter settings,
1. Select Sort & Filter, and then Clear.
2. To turn off filtering, select Sort & Filter, and then Filter.
Sorting
Sorting means arranging the data in a given order. You can sort either numeric data
(1,2,3,4….) or character data (A,B,C,D,…).
Text, Numbers or dates either in ascending or descending order. Blank cells are always
placed last in a sort.
Steps to Sort:
If you want to sort an entire data table:
1. Select the data to sort.
2. On the Home ribbon, select Sort & Filter.
3. Choose either Sort A to Z (Ascending) or Sort Z to A (Descending) order.
Your data will be sorted based on the value in the column that you initially clicked on.
If you want to sort on two or more criteria (columns), or if you want to sort a range of
cells, then you need to do a custom sort:
1. Click in the data table, or
select the cells to be sorted.
2. On the Home ribbon, select
Sort & Filter, and choose
Custom Sort. The Sort
Window will open.
3. In the Sort By field, use the drop-down arrows to select the column that you want to
sort by and the order (ascending or descending) to be used.
4. If you want to add another sort criterion, then click the Add Level button, and a
second details row will appear in the window. Again, choose the sort column and
sort order.
5. Add or delete levels as required.
6. Click the OK.

Chapter 3: More on Spreadsheet 9th Standard
Karnataka Residential Educational Institutions Society 29 | P a g e
0102030405060
6th 7th 8th 9th 10th
Strength
Charts
Charts and graphs can be powerful ways to convey information to the reader. Using a
spreadsheet, you can customize charts and graphs to a considerable extent. Many of these
options enable you to present your information in the best and clearest manner.
The graphical representation of data is called chart. Charts allow you to present
information contained in the worksheet in a graphic format. Excel offers many types of charts
including Column, Line, Pie, Bar, Area, Scatter and more.
Creating a Chart:
To create a chart
1. Select all the cells containing data including labels.
2. Click the Insert tab. Select any type of the Charts
group. A list of chart sub-types appears.
3. Click any Chart option.
The chart will be created depending upon your choice.
Functions and Formula
A Function is a pre-defined formula for performing a particular task. Spreadsheet
programs provide a wide range of built-in functions that can be included in formulas to avoid
detailed calculations.
Formulas are equations using numbers and variables to get a result. In a spreadsheet, the
variables are cell locations that hold the data needed for the equation to be completed. A
Chapter 3: More on Spreadsheet 9th Standard
Karnataka Residential Educational Institutions Society 29 | P a g e
10th
Strength
Strength
Strength
Charts
Charts and graphs can be powerful ways to convey information to the reader. Using a
spreadsheet, you can customize charts and graphs to a considerable extent. Many of these
options enable you to present your information in the best and clearest manner.
The graphical representation of data is called chart. Charts allow you to present
information contained in the worksheet in a graphic format. Excel offers many types of charts
including Column, Line, Pie, Bar, Area, Scatter and more.
Creating a Chart:
To create a chart
1. Select all the cells containing data including labels.
2. Click the Insert tab. Select any type of the Charts
group. A list of chart sub-types appears.
3. Click any Chart option.
The chart will be created depending upon your choice.
Functions and Formula
A Function is a pre-defined formula for performing a particular task. Spreadsheet
programs provide a wide range of built-in functions that can be included in formulas to avoid
detailed calculations.
Formulas are equations using numbers and variables to get a result. In a spreadsheet, the
variables are cell locations that hold the data needed for the equation to be completed. A
Chapter 3: More on Spreadsheet 9th Standard
Karnataka Residential Educational Institutions Society 29 | P a g e
Strength
6th
7th
8th
9th
10th
Charts
Charts and graphs can be powerful ways to convey information to the reader. Using a
spreadsheet, you can customize charts and graphs to a considerable extent. Many of these
options enable you to present your information in the best and clearest manner.
The graphical representation of data is called chart. Charts allow you to present
information contained in the worksheet in a graphic format. Excel offers many types of charts
including Column, Line, Pie, Bar, Area, Scatter and more.
Creating a Chart:
To create a chart
1. Select all the cells containing data including labels.
2. Click the Insert tab. Select any type of the Charts
group. A list of chart sub-types appears.
3. Click any Chart option.
The chart will be created depending upon your choice.
Functions and Formula
A Function is a pre-defined formula for performing a particular task. Spreadsheet
programs provide a wide range of built-in functions that can be included in formulas to avoid
detailed calculations.
Formulas are equations using numbers and variables to get a result. In a spreadsheet, the
variables are cell locations that hold the data needed for the equation to be completed. A

Chapter 3: More on Spreadsheet 9th Standard
Karnataka Residential Educational Institutions Society 30 | P a g e
function is a predefined calculation entered in a cell to help you analyze or manipulate data in
a spreadsheet. All you have to do is add the arguments, and the calculation is automatically
made for you.
Examples:
‘+’ this operator adds two numbers together for a result. SUM() on the other hand adds
groups of contiguous ranges of numbers together.
‘*’ this operator multiplies two numbers together as a result. PRODUCT() does the
same for multiplying that SUM() does for adding.
Each function has a number of arguments used in the calculations. These arguments
may or may not have their own name. Your task is to enter the arguments needed to run the
function.
Mathematical Functions
PRODUCT(): The product function is used to multiply all the numbers given as
arguments and returns the product.
Syntax
Arguments:
number1, number2, ... are numbers that you want to multiply. The number can be text
strings, numbers, or single-cell references
MOD(): The Mod function returns the remainder after a number is divided by the
divisor. The result has the same sign as divisor.
Syntax
Arguments:
number, is the number for which you want to find the remainder.
divisor, is the number by which you want to divide number.
ROUND(): The round function rounds a number to a specified number of digits.
Syntax
Arguments:
number, is the number you want to round.
count (optional) is the number of the places to which the value is to be rounded. If the
count parameter is negative, only the whole number portion is rounded
=PRODUCT(number1,number2,...)
= MOD(number, divisor)
= ROUND(number, count)

Chapter 3: More on Spreadsheet 9th Standard
Karnataka Residential Educational Institutions Society 31 | P a g e
SQRT(): It is used to find the square root of the given value.
Syntax
Arguments:
number, is the number for which you want the square root.
FACT(): It returns the factorial of a given number. The factorial of a number is equal to
1*2*3*...* number.
Syntax
Arguments:
number, is the nonnegative number for which you want the factorial. If the number is
not an integer, it is truncated.
Date and Time Functions
TODAY(): It returns the serial number of the current date.
Syntax
NOW(): It returns the serial number of the current date and time.
Syntax
String/Text Functions
UPPER(): It is used to converts the string to all upper case letters.
Syntax
Argument: Text is the text you want to be converted to uppercase.
LOWER(): It is used to converts the string to all lower case letters.
Syntax
Argument: Text is the text you want to convert to lowercase. LOWER does not change
characters in the text that are not letters.
Logical Functions
IF()
Syntax
= SQRT (number)
= FACT(number)
= TODAY()
= NOW( )
= UPPER(text)
= LOWER (text)
= IF( [logical_test], [if_value_is_true],[if_value_is_false])

Chapter 3: More on Spreadsheet 9th Standard
Karnataka Residential Educational Institutions Society 32 | P a g e
The IF function checks whether a logical_test is met
and returns one value if TRUE and another value if FALSE.
Select the cell and enter the following function. The Marks is
greater than 30 IF function returns pass otherwise NC (Not
Completed).
AND()
Syntax
The AND Function returns TRUE if all logical conditions are true and returns FALSE if
any of the conditions are false.
OR()
Syntax
The OR function returns TRUE if any of the logical conditions are TRUE and returns
FALSE if all conditions are false.
Note
The AND and OR function can check up to 255conditions.
Remember
Important Functions
Logical FunctionsAND Returns TRUE if all its arguments are TRUE
IF Specifies a logical test to perform
NOT Reverses the logic of its argument
OR Returns TRUE if any argument is TRUE
Date and Time FunctionsDATE Returns the serial number of a particular date
DATEDIF Calculates the difference between two dates.
DAY Converts a serial number to a day of the month
HOUR Converts a serial number to an hour
= AND(logical1,logical2,….)
= OR(logical1,logical2,….)

Chapter 3: More on Spreadsheet 9th Standard
Karnataka Residential Educational Institutions Society 33 | P a g e
MINUTE Converts a serial number to a minute
MONTH Converts a serial number to a month
NOW Returns the serial number of the current date and time
TIME Returns the serial number of a particular time
TODAY Returns the serial number of today's date
WEEKDAY Converts a serial number to a day of the week
YEAR Converts a serial number to a year
Mathematical FunctionsEVEN Rounds a number up to the nearest even integer
FACT Returns the factorial of a number
GCD Returns the greatest common divisor
INT Rounds a number down to the nearest integer
LCM Returns the least common multiple
MMULT Returns the matrix product of two arrays
MOD Returns the remainder from division
ODD Rounds a number up to the nearest odd integer
PI Returns the value of Pi
POWER Returns the result of a number raised to a power
PRODUCT Multiplies its arguments
QUOTIENT Returns the integer portion of a division
ROUND Rounds a number to a specified number of digits
SUM Adds its arguments
Text FunctionsCONCATENATE Joins several text items into one text item
EXACT Checks to see if two text values are identical
FIND Finds one text value within another (case-sensitive)
LEFT Returns the leftmost characters from a text value
LEN Returns the number of characters in a text string
LOWER Converts text to lowercase
REPLACE Replaces characters within text
RIGHT Returns the rightmost characters from a text value
TRIM Removes spaces from text
UPPER Converts text to uppercase

Chapter 4: Introduction to Presentation
Introduction
Creating a Presentation
Creating a New Slide
Text Box
Formatting toolbar
Saving the Presentation
View Presentation
Insert Picture/Clip Art
Insert Movie/Sounds
Animations
Printing the Presentation
Learning Outcomes:
After you have studied this lesson you will be able to:
Create a presentation.
Enter content into the presentation application.
Use design options.
Print the presentation.
Inside

Chapter 4: Introduction to Presentation 9th Standard
Karnataka Residential Educational Institutions Society 35 | P a g e
Introduction
A presentation program is a software used to perform computer-based presentations.
There are various situations in which a presentation is made, for example, a student can make
it for a class seminar, a teacher can use it for being more interesting and persons working in a
company can use it for routine meetings or talk with regular clients. A presentation is made up
of slides. Individual pages of a presentation are called Slides.
Some of the presentation programs available are OpenOffice.org Impress, Microsoft
PowerPoint, LibreOffice Impress, etc.
Steps to open Presentation
Click on Start Button on taskbar
Click on All Programs
Click on Microsoft Office then select Microsoft Office PowerPoint
This will open the PowerPoint window.
Creating a Presentation
Presentation involves the creation of a series of slides with text, images, charts, graph,
tables, audio and video displayed on them. You can create a new presentation using several
options. A dialog box that appears when you start presentation offers four options:

Chapter 4: Introduction to Presentation 9th Standard
Karnataka Residential Educational Institutions Society 36 | P a g e
1. Using the Auto Content Wizard
2. Using a Design Template
3. Using a Blank Presentation
4. Open an Existing Presentation
The Auto Content Wizard
The Auto Content Wizard provides templates and ideas for a variety of presentation
types. You will be walked through a series of questions about the presentation you are
making, including a category for the type of information being presented and the method of
delivery. The Wizard then applies a background and text as well as an outline of text you may
use as a guide. This is the preferred method for creating a presentation in the least of the
amount of time.
1. Click on the Office Button
and click New.
2. A new window will appear
with several categories of
templates to choose from.
Click on the Installed
templates style that you wish
to use and click the Create
button. This will allow us to easily a consistent background and style to our
presentation.
3. Slides will be added automatically to your slide presentation. Instructions will be
included on each slide explaining how to add content to your slideshow.
Design Template
The presentation provides many templates or predefined options with different
backgrounds and text formatting to begin your presentation.
Design templates contain color schemes, slide and title masters with custom formatting
to give a particular look to a presentation. When you apply a design template replaces the slide
master, title master, and color scheme of the original presentation. After you apply a design
template, each slide has the some look. Since you will be applying only the background using
the design template, you can the design of a presentation at any time.

Chapter 4: Introduction to Presentation 9th Standard
Karnataka Residential Educational Institutions Society 37 | P a g e
1. Click on the Office Button and click New.
2. A new window will appear
with several categories of
themes to choose from. Click
on the Installed Themes that
you wish to use and click the
Create button. This will allow
us to easily a consistent
background and style to our
presentation.
3. Slides will be added
automatically to your slide presentation.
Blank Presentation
Select this option to open a presentation to build the presentation with no preset graphics
or formatting. The user can use this option to develop a presentation using his imagination.
This method gives you the most freedom, but also requires the most amount of time to
complete.
1. Click on the Office Button
and click New.
2. A new window will appear in
that click on Blank and
Recent option.
3. Select the Blank Presentation
and then click on Create
button.
Open an existing presentation
Select this option to open a presentation that already exists. Select the folder where the
file is located in from the look in the drop-down menu and highlight the file on the list. Click
Open to open the presentation.

Chapter 4: Introduction to Presentation 9th Standard
Karnataka Residential Educational Institutions Society 38 | P a g e
Creating a new slide
Once you have opened a new presentation, the next step is to add and format the content.
The presentation provides a selection of pre-defined slide layouts based on different types of
content that you can use to quickly add content to the slides. For each of the 9 Slide Layouts
provided, Presentation combines the four types of placeholders in different combinations; each
placeholder will be replaced with the following type of content:
Placeholder: Replaced with:
Title A title
Subtitle A subtitle
Text A bulleted list
Content +Slide Layout Placeholders
Using a Slide Layout ensures that the text and other elements you enter into the
placeholders will have consistent spacing and be optimally arranged.
Inserting a New Slide
1. Click the New Slide button on the Home Ribbon Tab.
2. From the list of Slide Layouts, select the layout you want to apply to the new slide.
3. You may now begin adding content using the placeholders in the layout.
Changing the layout of an existing slide:
1. Select the slide you want to change.
2. Click the Layout button on the Home tab. A
menu appears with your options.
3. Click an option to select it. The slide will
change in the presentation.
Note
Placeholders are boxes with dotted borders that are part of allslide layouts. These boxes hold title and body text or objectssuch as Smart Art graphics, charts, tables, and pictures.

Chapter 4: Introduction to Presentation 9th Standard
Karnataka Residential Educational Institutions Society 39 | P a g e
Text Box
Text boxes are the basic slide elements necessary for creating a professional looking
presentation. Your template has provided you with these basic design elements for each slide,
but you will need to change them or add more of them to create your presentation.
Adding and editing text
1. Click on the text area of the slide.
2. Start typing.
3. When typing in a bulleted list area, press the Enter key on your keyboard to create
another bulleted line.
Inserting additional text boxes
1. On the Insert Ribbon tab, in the Text group click on Text Box.
2. The cursor will turn into what looks like an upside down. Click on the slide and drag
the mouse diagonally on the slide to create a new text box of whatever size and
shape you need and release the mouse button.
3. Click on the new text box to begin typing text into it.
Formatting Tool Bar
Format Text
You can change the appearance of text by changing its font, size, style, and color. You
can format text in the Outline tab or the Slide pane. To format text:
1. Select the text you want to format.
2. To change the font, select a new font from the Font drop-down list on the Home
Chapter 4: Introduction to Presentation 9th Standard
Karnataka Residential Educational Institutions Society 40 | P a g e
Ribbon Tab.
3. To change the size, select a new size from the Size drop-down list on the Home
Ribbon Tab.
4. To change the style, click the Bold, Italic, or Underline button on the Home Ribbon
Tab.
5. To change the color, select a new color from the Font Color button's drop-down
palette. (The Font Color button is on the Drawing toolbar).
Align Text
Alignment determines the position of the text within its text object box on a slide. Text
can be left-aligned, right-aligned, centered, or justified as follows:
1. Select the text you want to align.
2. Click on Home Ribbon Tab
3. Select the alignment option you want:
Align Left - Aligns text at the left edge of the text object box.
Center - Aligns text between the left and right edges of the text object box.
Align Right - Aligns text at the right edge of the text object box.
Justify - Begins text at the left edge and ends the text at the right edge of the text
object box.
Deleting a Slide
As you look at your presentation you may find that there is a slide you really don’t need.
The presentation allows you to delete any unnecessary slide.
1. Select the slide you want to delete.
2. Press the Delete button
OR
1. Right-click on the slide you want to delete from slide list.
2. Click on delete slide option
Saving the Presentation
If you are saving a document for the first time, you will need to use the Save As
command; however, if you have already saved a presentation, you can use the Save command.

Chapter 4: Introduction to Presentation 9th Standard
Karnataka Residential Educational Institutions Society 41 | P a g e
To use the Save As command:
1. Click the Office Button.
2. Select Save As. A menu will appear. Select the type of file you want to save the
presentation.
3. The Save As dialog box will appear. Select the location where you want to save the
document using the drop-down menu.
4. Enter a name for the document.
5. Click the Save button.
To use the Save command:
1. Click the Office Button.
2. Select Save from the menu.
View presentation
A view is simply a way of managing and representing your slide. Since in presentation
you are writing text, inserting objects and creating layouts for slides, you may want to look
closely at specific aspects of a presentation to see the effect. The presentation comes with
different views to help you to create your presentation better. It offers different types of views.
1. Normal View
2. Slide Sorter View
3. Slide Show View
Normal view
Normal view is the main editing view, where you write and design your presentation.
This view has four working areas:
1. Outline tab: This is a great place to start writing your content — to capture your ideas, plan
how you want to present them, and move slides and text around. The Outline tab shows your
slide text in outline form.
Know This!
Some of the presentation file extension are“.odp”, “.ppt”, “.sdd”

Chapter 4: Introduction to Presentation 9th Standard
Karnataka Residential Educational Institutions Society 42 | P a g e
2. Slides tab: This is a great
place to view the slides in your
presentation as thumbnail-sized
images while you edit. The
thumbnails make it easy for you
to navigate through your
presentation and to see the
effects of any design changes.
You can also easily rearrange,
add, or delete slides here.
3. Slide pane: In the upper-
right section of the window, the
Slide pane displays a large view of the current slide. With the current slide shown in this view,
you can add text and insert pictures, tables, Smart Art graphics, charts, drawing objects, text
boxes, movies, sounds, hyperlinks, and animations.
4. Notes pane: In the Notes pane below the Slide pane, you can type notes that apply to the
current slide. Later, you can print your notes and refer to them when you give your
presentation. You can also print notes to hand out to your audience or include the notes in a
presentation that you send to the audience or post on a Web page.
Slide sorter view
A small image of each slide is
displayed in Slide Sorter View. In
Slide Sorter view, you see the
thumbnail representations of the
slides comprising your slide show.
This is a great way to see the whole
presentation at once, in the order in
which they will appear in the slide
show. After you are finished
creating and editing your
presentation, you can come to Slide

Chapter 4: Introduction to Presentation 9th Standard
Karnataka Residential Educational Institutions Society 43 | P a g e
Sorter view to shuffle slides around, and copy, delete, or hide slides until you've got it right.
Slide Sorter view also allows you to set up special effects to the slides in the presentation.
As you look through your slides in Slide Sorter view and find a slide that you need to
further edit, just double-click on that slide and it will be displayed in the Normal view.
Rearranging Slides in Slide Sorter View
You can often make a presentation better by playing with the order in which the slides
appear. Sometimes, you may wish to entirely hide a slide that doesn't apply to your audience.
All of this happens in Slide Sorter view. To rearrange slides in Slide Sorter view:
1. Click on the Slide Sorter view button (or choose View/Slide Sorter).
2. Click on the slide you wish to move, copy, delete or hide to select it.
3. Now move, copy, delete, or hide the slide:
To move a slide, press and hold the mouse button, drag the slide to where you
want it to go, and release the mouse button.
To copy a slide, press and hold the [Ctrl] key and drag the slide to where you
want it to go.
To delete a slide, press [Delete] or [Backspace].
To hide a slide, right-click in the slide thumbnail and choose Hide Slide.
Slideshow view
Use the Slide Show view to see the slide show on your computer screen one slide at a
time, using the full screen, as you will when actually presenting the show. You can move the
subsequent slides by either clicking your mouse button, clicking the [Page Up] and [Page
Down] buttons, or by using the left and right arrow keys on your keyboard.
To view the Slide Show:
1. When you use the Slide Show view button, Presentation starts the show at the
currently selected slide. So, go to the first slide in your presentation.
2. Click the Slide Show view button.(Or Press F5)
3. To move to the next slide, click the mouse button or push the right arrow key. At the
end of the show, PowerPoint will display, "End of slide show, click to exit".
4. You can exit a slide show at any point by pressing the [Esc] key.

Chapter 4: Introduction to Presentation 9th Standard
Karnataka Residential Educational Institutions Society 44 | P a g e
Insert Picture/ Clip Art
Effective visuals emphasize the key content points in a presentation. It provides a
selection of professionally designed pictures, or clip art, that you can use in your
presentations. These clip art images include many different themes such as animals, people,
buildings, food, holidays, business, and more.
To Insert a Picture/Clip Art Image:
1. Move to the slide on which you want to place clip art.
2. Apply a Slide Layout that includes content or clip art placeholder.
3. Open the Select a Picture dialog box by:
Clicking on the Clip Art button on the content placeholder (OR)
Double-clicking on the clip art placeholder
4. In the Search box, type a word or phrase that describes the clip you want.
5. Click Search. It displays the search results in the Select Picture List.
6. Click on the clip art image you want and click OK.
To Resize a Clip Art Image
Once you have added a clip art object to your slide, you can resize it to make it fit better
into your presentation.
1. Click on the Clip Art object to select it.
2. Put the arrow on one of the resize handles at the corner of the picture until the cursor
changes to a double-headed arrow.
3. Press the mouse button and drag the handle toward or away from the center to make
the image larger or smaller.
Insert a Movie/ Sound
1. Select the slide where you want to insert the movie.
2. Select the Insert tab.
3. Click the drop-down arrow on the Movie/Sound button in the
Media Clips group.
4. Select Insert a Movie/Sound from File from the menu. The Insert Movie/Sound
dialog box will appear.

Chapter 4: Introduction to Presentation 9th Standard
Karnataka Residential Educational Institutions Society 45 | P a g e
Animations
Animations refer to the manner in which individual text or other objects appear as they
enter or exit a slide. Normally, all objects on a slide appear at the same time when you display
the slide. However, you can have different objects appear and exit at different times under
your control as the show proceeds.
Applying Transition
Transitions affect the way one slide goes to the next slide. Transitions add interest to
your slide show.
1. Select the slide you want to modify.
2. Select the Animations tab.
3. Locate the Transition to This Slide group. By default, No Transition is applied to
each slide.
4. Click the More drop-down arrow to display all available transition effects.
5. Click a slide transition effect to apply it to the selected slide.
If you want to apply the transition to all slides in presentation click Apply to All
Setting slide Transition Speed/Sound:
1. Apply a slide transition effect to a slide.
2. Click the Transition Speed/Sound drop-down menu in the Transition to This Slide
group on the Animations tab.
3. Select a menu option transition speed/sound to apply it to the selected slide.
Printing the Presentation
1. You may want to print copies of your slides for the people who view your
presentation or for yourself.
2. There are three print options available from the Office button menu: Print, Quick
Print, and Print Preview.

Chapter 4: Introduction to Presentation 9th Standard
Karnataka Residential Educational Institutions Society 46 | P a g e
OpenOffice.org Impress
Impress is OpenOffice.org presentations component. You can create slides that contain
many different elements, including text, bulleted and numbered lists, tables, charts, clip art,
and a wide range of graphic objects. Impress, in common with the other components of
OpenOffice.org, has access to the spelling checker and thesaurus and comes with pre-
packaged text styles, background styles, and a handy online help.
The main Impress window has three parts: the Slides pane, the Workspace, and the
Tasks pane. Additionally, several toolbars can be displayed or hidden during the creation of a
presentation.
Slides pane
The Slides pane contains thumbnail pictures of the slides in your presentation; in the
order, they will be shown. Clicking a slide in this pane selects it and places it in the
Workspace. While it is there, you can apply any changes desired to that particular slide.
Tasks pane
The Tasks pane has five sections: Master Pages, Layout, Table Design, Custom
Animation, and Slide Transition.

Chapter 4: Introduction to Presentation 9th Standard
Karnataka Residential Educational Institutions Society 47 | P a g e
Workspace
The Workspace has five tabs: Normal, Outline, Notes, Handout, and Slide Sorter. These
five tabs are called View Buttons. There are also many toolbars that can be used during slide
creation; they are revealed by selecting them with View > Toolbars.
Toolbars
The various Impress toolbars can be displayed or hidden by clicking View > Toolbars
and selecting from the menu. You can also select the icons that you wish to appear on each
toolbar.
Status Bar
The status bar, positioned at the bottom of the Impress window, contains information
that you may find useful when working on a presentation.
Remember
Keyboard Shortcut Keys
Ctrl + D Insert a Duplicate Slide
Ctrl + KOpen the Insert/Edit Hyperlink
dialog box
Save Ctrl + S
Print Ctrl + P
F5 Start Slide Show
Esc End the Slide Show

Chapter 5: Introduction to Internet
Introduction
History of Internet
Browsing the internet
Searching the information
Learning Objectives:
After you have studied this lesson you will be able to:
Define Internet.
Open websites using a browser.
Use a search engine tool.
Use keywords to search for information.
Follow safety rules while browsing and searching.
Inside

Chapter 5: Introduction to Internet 9th Standard
Karnataka Residential Educational Institutions Society 49 | P a g e
Introduction
The term internet is derived from two words Interconnection and Network. The
Internet is a combined collection of many interconnected computer networks around the
world. Each network consists of multiple numbers of computers connected through cables,
wireless or any other media. Using these computers people can share and exchange
information. A connection to the Internet is needed to access the Internet.
History of Internet
The foundation of internet laid in 1969 when the Department of Defense (DOD) of the
United States of America started a network called ARPANET (Advanced Research Projects
Agency Network). The basic aim behind ARPANET was to develop a network that could
continue to function efficiently even during a nuclear attack.
Later in 1980, the ARPANET project was assigned to National Science Foundation
(NSF) created a new network of computers based on ARPANET called NSFNET which
turned out to be more efficient and capable. Over time, it expanded to include sites for
business, universities, government and so on, and finally became a network consisting of
millions of computers now known as Internet
Know This!
A computer network is a set of computers connectedtogether for the purpose of sharing resources.
The most common resource shared today is a connectionto the Internet.
Other shared resources can include a printer or a fileserver. The Internet itself can be considered as acomputer network.

Chapter 5: Introduction to Internet 9th Standard
Karnataka Residential Educational Institutions Society 50 | P a g e
Browsing the internet
Browser: A web browser, or simply "browser," is an application used to access and
view websites. It enables the user to view web pages, navigates websites, and move
from one website to another. Popular Web browsers are Internet explorer, Mozilla
Firefox, Google Chrome, Netscape navigator, Opera etc.
WWW: The World Wide Web is also called as “WWW”, it allows computer users
to locate and access any information over the internet. The Web is a collection of
millions of pages of information. The information can include text, pictures,
animations, sound and video. We can usually find information about any topic on
the Internet.
Web site: The location where the information is available on the web is called a
website. A website is a collection of web pages. The Web pages are organized on a
website like the pages of a book. Each Website is owned and updated by an
individual, company or organization.

Chapter 5: Introduction to Internet 9th Standard
Karnataka Residential Educational Institutions Society 51 | P a g e
Web page: The documents available on WWW are known as web pages. A web
page is a file containing information in text, graphics, Audio and Video.
HTTP: The internal structure of the World Wide Web is built on a set of rules
called Hypertext transfer protocol (HTTP).
URL: A website is accessed by using the website address called the URL (Uniform
resource locator). HTTP uses internet addresses in a URL format.
URLs look like this: type://address/path/
Example: http://www.karnataka.gov.in or http://www.kreis.kar.nic.in
Hyperlink: A hyperlink is a connection that allows you to move easily from one
web page to another related web page. Text, images can be made into hyperlinks.
A hyperlink is usually underlined. Clicking on the hyperlink takes you to a
different page.
We can browse the information on any subjects. For example, enter the URL
www.wikipedia.org in the address bar. This is a website where you can find the information
on many subjects.
Know This!
Web server: The WebPages on the internet are stored on thecomputers that are connected to the internet these computers areknown as web servers. Any computer that has a server softwareinstalled on it and is connected to the internet can act as a webserver.

Chapter 5: Introduction to Internet 9th Standard
Karnataka Residential Educational Institutions Society 52 | P a g e
Advantages of Internet / Internet Services
Sharing information & resources E-Mail Audio /Video Conferencing Video on Demand Real-time broadcasting
Playing On-line games Newsgroups Enhanced learning Chat groups On-line shopping
Disadvantages of Internet / Internet services
Misuse of resources Hackers Uploading virus to network through the Internet
Hint
Information on the web is created by manypeople. Anyone can create the information andshare it on the web.
RememberDomain Name Meaning
.com Commercial
.gov Government
.mil Military
.ac Academic
.in Country (India)
.org Organization
.edu Education
Know This!
Homepage: On our computer, you can choose a web page thatopens immediately when you launch your web browser by using acommand in your web browser, which is known as a homepage.
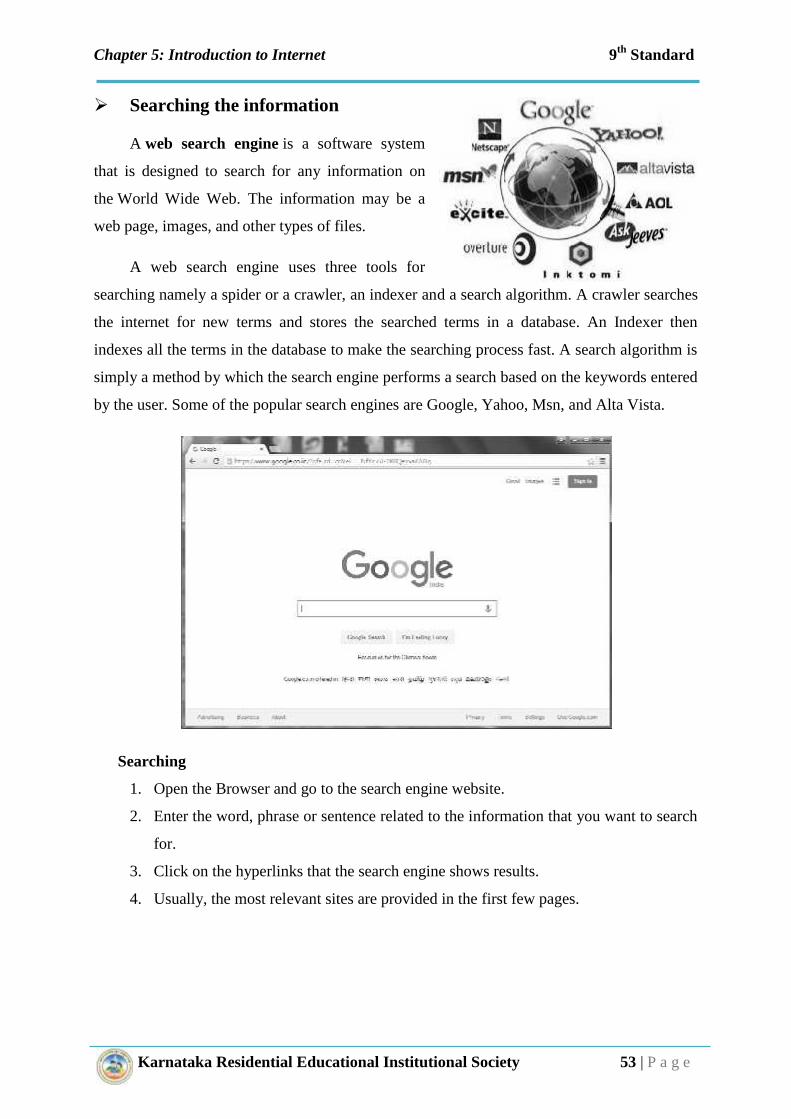
Chapter 5: Introduction to Internet 9th Standard
Karnataka Residential Educational Institutional Society 53 | P a g e
Searching the information
A web search engine is a software system
that is designed to search for any information on
the World Wide Web. The information may be a
web page, images, and other types of files.
A web search engine uses three tools for
searching namely a spider or a crawler, an indexer and a search algorithm. A crawler searches
the internet for new terms and stores the searched terms in a database. An Indexer then
indexes all the terms in the database to make the searching process fast. A search algorithm is
simply a method by which the search engine performs a search based on the keywords entered
by the user. Some of the popular search engines are Google, Yahoo, Msn, and Alta Vista.
Searching
1. Open the Browser and go to the search engine website.
2. Enter the word, phrase or sentence related to the information that you want to search
for.
3. Click on the hyperlinks that the search engine shows results.
4. Usually, the most relevant sites are provided in the first few pages.

Chapter 5: Introduction to Internet 9th Standard
Karnataka Residential Educational Institutional Society 54 | P a g e
Tips to search the web
Use specific words.
Use many words to get relevant sites.
Example: “Respiratory systems in humans” gives information on only human
Respiratory systems.
To include the complete phrase in the search use double quotes (“ ”)around the
phrase. Example: “Air and water pollution” gives websites which contain the phrase
air and water pollution.
If you want a word to be included in the search then add + before the word.
If you want a word to be excluded from the search then add – before the word.

Chapter 5: Introduction to Internet 9th Standard
Karnataka Residential Educational Institutional Society 55 | P a g e
Safety Measures for Internet Browsing and Searching
Seek permission of your teachers before using The Internet.
Don’t give your real identity to anyone you meet online. This includes your real
name, address, school information, e-mail address, password, and bank account
information.
Don’t fill out any survey, membership, or application forms asking for your personal
information from an unsecured site.
Do close the web browser immediately if you see any images of violence, nudity,
and any other contents that aren’t right for your age.
Close the pop-up. Do not perform any action requested by the pop-up. This may
cause the applications on your computer to stop working.

Chapter 6: Electronic-Mail
About E-Mail
Creation of E-Mail Account
How to send E-Mail
Attaching files to E-Mail
Learning Objectives:
After you have studied this lesson you will be able to:
Define e-mail.
Create an e-mail account.
Send and receive e-mail.
Send attachments with e-mail.
Inside
Chapter 6: Electronic-Mail
About E-Mail
Creation of E-Mail Account
How to send E-Mail
Attaching files to E-Mail
Learning Objectives:
After you have studied this lesson you will be able to:
Define e-mail.
Create an e-mail account.
Send and receive e-mail.
Send attachments with e-mail.
Inside
Chapter 6: Electronic-Mail
About E-Mail
Creation of E-Mail Account
How to send E-Mail
Attaching files to E-Mail
Learning Objectives:
After you have studied this lesson you will be able to:
Define e-mail.
Create an e-mail account.
Send and receive e-mail.
Send attachments with e-mail.
Inside

Chapter 6: E-Mail 9th Standard
Karnataka Residential Educational Institutions Society 57 | P a g e
About E-Mail
Electronic mail (also known as email or e-mail) is one of the most commonly used
services on the Internet, allowing people to send messages to one or more recipients. The
email was invented by V.A Shiva Ayyadurai in 1972.
Why use E-Mail?
The operating principle behind email is relatively simple, which has quickly made it the
most popular service used on the Internet.
As with a traditional postal service, for your message to reach your recipient, all you
need to know is their address. Its two main advantages over "paper mail" are the speed at
which the email is sent (practically instantaneous) and the lower cost (included with the cost
of an Internet connection).
Email addresses
Email addresses (both for senders and recipients) are two strings separated by the
character "@" (" at sign"): user@domain
The right-hand part describes the domain name involved, and the left-hand part refers to
the user who belongs to that domain.
An email address can be up to 255 characters long and can include the following
characters:
Lowercase letters from a to z;
Digits
The characters ".","_" and "-" (full stop, underscore, and hyphen)
In practice, an email address often looks something like this:
Free E-Mail service providers
A number of websites provide e-mail service. No fee is charged from the users until they
are using advanced features. Some of the websites that provide e-mail service are as listed
here.

Chapter 6: E-Mail 9th Standard
Karnataka Residential Educational Institutions Society 58 | P a g e
http://www.gmail.com
http://www.yahoo.com
http://www.rediffmail.com
http://www.hotmail.com
Creation of E-Mail Account
To avail e-mail service of any website a user must have an e-mail account on that
website. To create an e-mail account follows these steps:
Step 1: Start web browsers like (Internet Explorer, Mozilla Firefox, and Google Chrome
etc).
Step 2: Type the address of any e-mail service
provider. For example “www.gmail.com” in the
address bar of web browser and press Enter key.
Step 3:
Click Sign In:
A web page appears which allows the new users to
create their mail accounts and the existing users to login
into their accounts.
Step 4:
If you a new user, Click on Create an account for
registration.
Step 5:
Fill up all necessary details in the given text boxes.
Some of the entries are compulsory (indicated by a * sign)
and some optional. It is necessary to fill up all the
compulsory entries.

Chapter 6: E-Mail 9th Standard
Karnataka Residential Educational Institutions Society 59 | P a g e
Step 6:
Click on next button to complete the process of registration.
The confirmation page appears displaying your e-mail ID. Now you can send or
receive e-mail using this e-mail ID.
Step 7:
Click on next button to complete the process of
registration.
Step 8:
To check the emails click on inbox, a list of received e-mails is displayed along with
the information: Sender’s name, Subject of the message, date/time on which it is received.
How to Send E-Mail
You can send the E-mail; you must know the recipient's e-mail address. To send an E-
Mail follows these steps.
Step 1: Click on Compose button the new window will appear where we can enter the To
address, Cc (Carbon Copy), BCC (Blind Carbon Copy), subject and message box.
To: Type the recipient email id
Cc: (Carbon Copy) -If you are sending the same message to multiple recipients
Bcc: (Blind Carbon Copy) -If you are sending them a Copy and you don't wish
the other recipients to see that you sent it to this contact

Chapter 6: E-Mail 9th Standard
Karnataka Residential Educational Institutions Society 60 | P a g e
Subject: Subject of the message.
Message box: The message to be sent.
Step 2: Click on the send button, you can see the sent successful message.
Attaching files to E-Mail
Along with text message, if you want to send files, you have the option that is an
attachment. To attach files follow these steps:
1. Open your e-mail account
2. Compose your e-mail
3. Click on attach option; select the file to be sent.
4. After all attached file appears along with the message click on send button

Chapter 6: E-Mail 9th Standard
Karnataka Residential Educational Institutions Society 61 | P a g e
Do’s and Don’ts of e-mail
Do not give out any of your passwords to friends or
anyone you meet online.
Check your emails regularly.
While sending emails make sure the subject field accurately portrays the content of
your email.
Be courteous. Remember you are not talking to the screen of a computer but with a
human being. For example, if you are angry with a mail received, do not reply
immediately. Cool down and relax first.
Avoid writing a sentence in CAPs in your email except where it is synthetically
correct.
Do not send emails to multiple addresses if it is not required.
Don’t open, reply or download attachments from spam or from unknown senders.
These may contain viruses or other threats that can harm your computer.
Don’t reply to or start a conversation with people you don’t know. Don’t accept gift
offerings from them.
Don’t download any files that are given to you by people you’ve met online. Don’t
download any files from your e-mail unless they are solicited.
Do avoid posting your personal profile on the web. This may be used by online
predators against you.

Chapter 7: Online Services
E-Governance
E-Commerce
Social Networking
Learning Objectives:
After you have studied this lesson you will be able to:
Define E-governance and E-Commerce.
List the advantages and disadvantage of E-Commerce.
Use social networking.
Inside
Chapter 7: Online Services
E-Governance
E-Commerce
Social Networking
Learning Objectives:
After you have studied this lesson you will be able to:
Define E-governance and E-Commerce.
List the advantages and disadvantage of E-Commerce.
Use social networking.
Inside
Chapter 7: Online Services
E-Governance
E-Commerce
Social Networking
Learning Objectives:
After you have studied this lesson you will be able to:
Define E-governance and E-Commerce.
List the advantages and disadvantage of E-Commerce.
Use social networking.
Inside

Chapter 7: Online Services 9th Standard
Karnataka Residential Educational Institutions Society 63 | P a g e
Introduction to E-Governance
E-Governance also called Electronic Governance means using Information and
Communications Technology (ICT) to transform functioning of the Government.
It differs from E-Government as Governance is wider than Government. E-governance
may refer to governance of a Country, or the governance of an institution and also governance
of a Household by a housewife.
What is E-Government?
E-Government i.e. Electronic Government is the use of Information and
Communications Technology (ICT) to run or carry on the business of the Government of a
Country.
A Government is a group of people responsible for the administration and control of a
Country/State. It involves people like the Heads of States, Ministers, Government Employees,
etc. It also involves public participation.

Chapter 7: Online Services 9th Standard
Karnataka Residential Educational Institutions Society 64 | P a g e
Objectives of E-Governance
Following are the objectives/aims of E-Governance:
1. To build an informed society
2. To increase Government and Citizen Interaction
3. To encourage citizen participation
4. To bring transparency in the governing process
5. To make the Government accountable
6. To reduce the cost of Governance
7. To reduce the reaction time of the Government
Categories in E-Governance
• Government to Citizen (G2C) initiatives
• Government to Business (G2B) initiatives
• Government to Employee (G2E) initiatives
• Government to Government (G2G) initiatives
G2C G2B G2E G2G
Government to Citizen (G2C) initiatives
• Communication link between a government and private individuals or residents.
• G2C can take place at the central, state and local levels. Examples: India.gov.in
• Computerization of Land Records (Department of Land Resources, Government of
India)
Examples: Online Delivery of Land Records
Bhoomi Project in Karnataka
Gyandoot in Madhya Pradesh
Project FRIENDS in Kerala
Jan Mitra Project in Rajasthan
e-Seva (Andhra Pradesh)

Chapter 7: Online Services 9th Standard
Karnataka Residential Educational Institutions Society 65 | P a g e
Government to Business (G2B) initiatives
• Encompasses all activities of government which imposes upon business
organizations.
• Includes registrations under different statutes, licenses under different laws and
exchange of information between government and business.
• The objective of bringing these activities under e-Governance is
To provide a friendly environment to business.
Speed up various processes .
Provide relevant information to the business.
Example: Business.gov.in
e-Procurement Project in Andhra Pradesh and Gujarat
Government to Employee (G2E) initiatives
G2E is a transaction between government and Employee. It Includes,
Online training and conference for the employee.
Employee information.
Example: The example of Government to Employee is that e-training for employees
www.egovonline.net.
Government to Government (G2G) initiatives
The electronic sharing of data and/or information systems between government
agencies, departments or organizations.
The goal of G2G is to support e-government initiatives by improving
communication, data access, and data sharing.
G2G initiatives help in making the internal government processes more efficient.
Many a time G2C and G2B processes necessitate the improvements in G2G
processes.
Examples: http://egovstandards.gov.in
• Khajane Project ( Karnataka)
• SmartGov (Andhra Pradesh)

Chapter 7: Online Services 9th Standard
Karnataka Residential Educational Institutions Society 66 | P a g e
Advantages of E-Governance
1. Speed: Technology makes communication speedier. Internet, Phones, Cell Phones
have reduced the time taken in normal communication.
2. Cost Reduction: Internet and Phones make communication cheaper saving valuable
money for the Government.
3. Transparency: All the information of the Government would be made available on
the internet. The citizens can see the information whenever they want to see.
4. Accountability: Accountability is answerability of the Government to the people. It
is the responsibility for the activities of the Government.
E-Commerce
E-Commerce (or electric commerce) refers to the
buying and selling of goods and services using
electronic channels, primarily the Internet. E-Commerce
is a division of trade or production which deals with the
exchange of goods and services from producer to final
consumer. E-Commerce is commonly known as
electronic marketing.

Chapter 7: Online Services 9th Standard
Karnataka Residential Educational Institutions Society 67 | P a g e
E-commerce vs. E-business
We use the term e-business to refer primarily to the digital enablement of
transactions and processes within a firm, involving information systems under the
control of the firm.
E-commerce includes commercial transactions involving an exchange of value
across organizational boundaries
E-Commerce Process
A consumer uses a Web browser to connect to the home page of a merchant's Web
site on the Internet.
The consumer browses the catalog of products featured on the site and selects items
to purchase. The selected items are placed in the electronic equivalent of a shopping
cart.
When the consumer is ready to complete the purchase of selected items, it provides a
bill to and ship to address for purchase and delivery
When the credit card number is validated and the order is completed at the
Commerce Server site, the merchant's site displays a receipt confirming the
customer's purchase.
The Commerce Server site then forwards the order to a Processing Network for
payment processing and fulfillment.

Chapter 7: Online Services 9th Standard
Karnataka Residential Educational Institutions Society 68 | P a g e
Different types of E-Commerce
Business-to-Business (B2B)
Business-to-Consumer (B2C)
Business-to-Government (B2G)
Business-to-Consumer (C2C)
Business-to-Business: B2B e-commerce is simply defined as e-commerce between
companies. About 80% of e-commerce is of this type.
Examples: Intel selling microprocessor to Dell
Business-to-Consumer: B2C e-commerce is between companies and consumers, it
involves customers gathering information; purchasing physical goods or receiving
products over an electronic network.
Example: Dell selling me a laptop
Business-to-Government: B2G e-commerce is generally defined as commerce between
companies and the public sector. It refers to the use of the Internet for public
procurement, licensing procedures, and other government-related operations
Example: Business pays taxes, file reports, or sell goods and services to Govt. agencies.
Consumer-to-consumer: C2C e-commerce is simply commerce between private
individuals or consumers.
Example: Ram buying smartphone from Sam using OLX
Advantages of e-commerce
Faster buying/selling procedure, as well as easy to find products.
More reach to customers, there is no theoretical geographic limitations.
Low operational costs and better quality of services.
Customers can easily select products from different providers without moving
around physically.
Disadvantages of e-commerce
Unable to examine products personally and not everyone is connected to the Internet
There is the possibility of credit card number theft.
Mechanical failures can cause unpredictable effects on the total processes.

Chapter 7: Online Services 9th Standard
Karnataka Residential Educational Institutions Society 69 | P a g e
Social Networking
A social Networking Sites (SNS) is an online platform that allows users to create a
public profile and interacts with other users on the website.
SNS lets you stay connected to friends and family. You can also find old friends with
whom you may have lost touch. SNS are popular because they are very easy to use. All the
SNS provide some basic features like profile creation, content uploading, and content sharing.
Some Social Networking Sites
For example
Flicker has photo sharing as the main focus
YouTube has audio and video file sharing as the main focus.
Google+ provides photo upload, video upload, chat room, instant messaging and
email.
Category name and examples
Reference websites: Reference websites are an online encyclopedia,
where users or subject matter experts create content on any topic.

Chapter 7: Online Services 9th Standard
Karnataka Residential Educational Institutions Society 70 | P a g e
Video sharing: Video sharing sites allow users to upload video
files. Other users can watch, share and comment on these files.
Networking with friends: Friends’ sites allow users to create profiles,
belong to groups, list friends. A user can create content and keeps in
touch with family and friends.
Basic features of Social Networking Sites(SNS)
Register/Create profile:
Each user fills in information in a given form with data on age, education, location,
likes, dislikes and hobbies. The user can add friends, categorize them into groups, decide how
his/her profile is viewed and by whom it is viewed.
Security settings:
The user can configure settings where he/she decides which content on his/her page is
public or private. The user can block content from being viewed by a list of users, can report
SPAM and flag content.
Other activities that the user can perform with SNS:
Chat with other users.
Instant messaging with other online users.
Upload photos, videos so that they can be viewed by others.
Play games.
Enter comments on content generated by other users.
Send email.
Safety Measures and Guidelines for Online Services
Never buy anything over the Internet without your parent or guardian's approval.
On the Internet, people can pretend to be who they are not, and they may go to great
lengths to sound convincing.
Internet friendships, relationships, and conversations can never be as true, personal,
and rewarding as they are in person. If you really need to talk to someone, find a
friend, family member, or adult you trust.

Chapter 7: Online Services 9th Standard
Karnataka Residential Educational Institutions Society 71 | P a g e
Be wary of anyone who wants to know personal information about you.
Sometimes when you are on the Internet, you may accidentally meet bad people or
see things that are bad, but it's not your fault! If something you read or look at is
upsetting, stop looking at it, and go tell an adult, you trust or parent.
Ensure privacy settings on activated on all of the social media websites you use. If
you are using instant messaging or entering chat rooms, don’t allow others to harass
you or put you in an uncomfortable situation.
Always be kind to others online. Do not do anything that may hurt others including
joining in conversations discussing other people’s problems.
With access to information at the click of a button, people are increasingly spending
more and more time on SNS. Spending time on activities like writing comments and
playing games are not always productive.
As SNS content is not strictly monitored; it might prove harmful if young adults
have access to inappropriate content.
Do avoid posting your personal profile on the web. This may be used by online
predators against you.

Chapter 8: Computer Networks
Introduction
Types of Network
Network Topologies
Network and Data Security
Advantages of Networks
Learning Objectives:
After you have studied this lesson you will be able to:
Define computer network.
List types of network.
Identify network components.
List the advantages of the network.
Inside

Chapter 8: Computer Networks 9th Standard
Karnataka Residential Educational Institutions Society 73 | P a g e
Introduction
A network consists of two or more computers that are linked in order to share resources
(such as printers and CD-ROMs), exchange files, or allow electronic communications. The
computers on a network may be linked through cables, telephone lines, radio waves, satellites,
or infrared light beams.
Basic Communication Model
Communication model is used for exchanging data between two parties. For example,
the communication between a computer server and telephone (through a modem).
Source: Data to be transmitted is generated by this device. For example Telephones,
Personal Computers etc.
Transmitter: The transmitter transforms and encodes the information in such a form
to produce electromagnetic waves or signals.
Transmission System: A transmission system can be a single transmission line or a
complex network connecting source and destination.
Receiver: Receiver accepts the signal from the transmission system and converts it
to a form which is easily managed by the destination device.
Destination: Destination receives the incoming data from the receiver.
Data Communication
The exchange of data between two devices through a transmission medium is Data
Communication. The data is exchanged in the form of 0’s and 1’s. The transmission medium
used is the cable. For data communication to occur, the communication device must be part of
a communication system. Data Communication has two types Local and Remote.
Local: Local communication takes place when the communicating devices are in the
same geographical area, same building, face-to-face between individuals etc.
Remote: Remote communication takes place over a distance i.e. the devices are
farther.
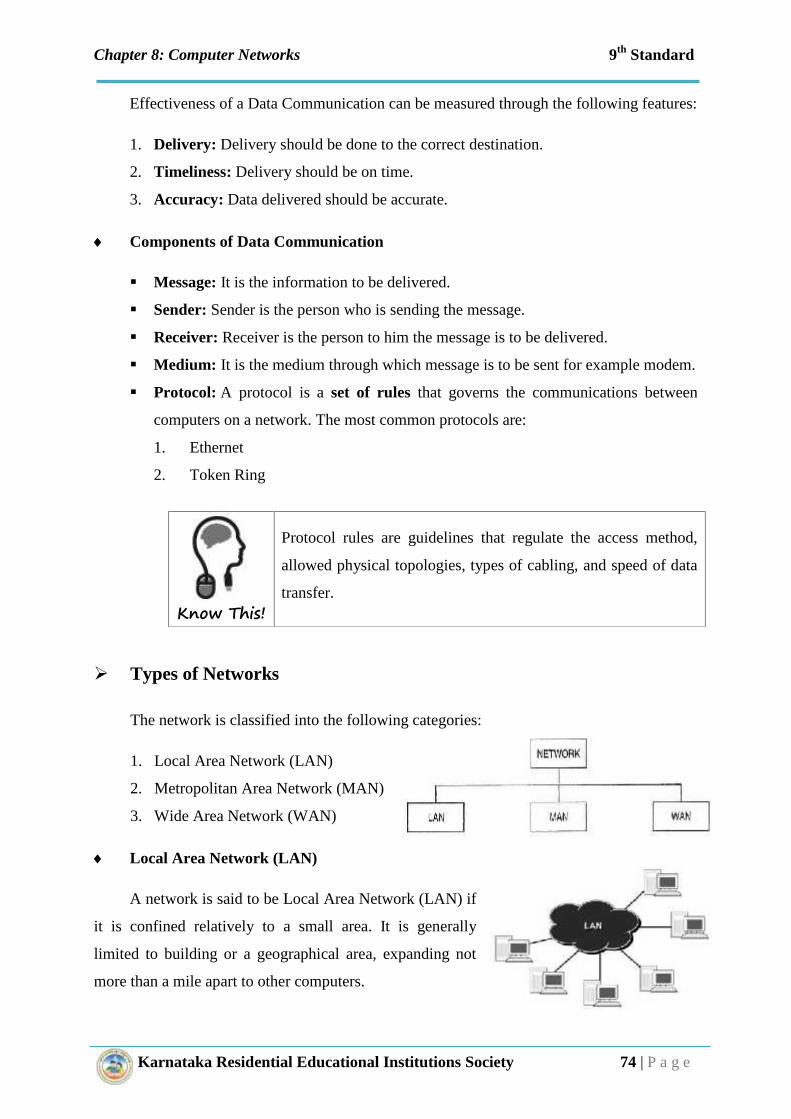
Chapter 8: Computer Networks 9th Standard
Karnataka Residential Educational Institutions Society 74 | P a g e
Effectiveness of a Data Communication can be measured through the following features:
1. Delivery: Delivery should be done to the correct destination.
2. Timeliness: Delivery should be on time.
3. Accuracy: Data delivered should be accurate.
Components of Data Communication
Message: It is the information to be delivered.
Sender: Sender is the person who is sending the message.
Receiver: Receiver is the person to him the message is to be delivered.
Medium: It is the medium through which message is to be sent for example modem.
Protocol: A protocol is a set of rules that governs the communications between
computers on a network. The most common protocols are:
1. Ethernet
2. Token Ring
Types of Networks
The network is classified into the following categories:
1. Local Area Network (LAN)
2. Metropolitan Area Network (MAN)
3. Wide Area Network (WAN)
Local Area Network (LAN)
A network is said to be Local Area Network (LAN) if
it is confined relatively to a small area. It is generally
limited to building or a geographical area, expanding not
more than a mile apart to other computers.
Know This!
Protocol rules are guidelines that regulate the access method,
allowed physical topologies, types of cabling, and speed of data
transfer.

Chapter 8: Computer Networks 9th Standard
Karnataka Residential Educational Institutions Society 75 | P a g e
LAN Configuration consists of:
A File Server: Stores all of the software that controls the network, as well as the
software that can be shared by the computers attached to the network.
A Workstation: Computers connected to the file server. These are less powerful
than the file server.
Cables: Used to connect the network interface cards on each computer.
Wireless Local Area Network (WLAN)
It is the fastest growing segment of the
computer. They are becoming very important in our
daily life because wired connections are not
possible in cars or airplane. We can access the
Internet at any place avoiding wire related troubles.
These can be used also when the telephone systems
get destroyed due to some calamity/disaster.
Metropolitan Area Network (MAN)
Metropolitan Area Network (MAN) covers larger
geographic areas, such as cities. Frequently used by, local
libraries and government agencies connect to citizens and
private industries.
Wide Area Network (WAN)
Wide Area Network (WAN) connects larger geographic
areas, like the connection between India and America or the world.
In this type of network dedicated transoceanic cabling or satellite
uplinks may be used.
Know This!
LAN networks are also widely used to share resources
like printers, shared hard-drive etc.

Chapter 8: Computer Networks 9th Standard
Karnataka Residential Educational Institutions Society 76 | P a g e
Network Topologies
Network Topology is the schematic description of a network arrangement, connecting
various devices (sender and receiver) through lines of connection. Network topologies can be
classified as follows:
1. Bus Topology
2. Ring Topology
3. Star Topology
4. Mesh Topology
5. Hybrid Topology
Bus Topology
Bus topology is a network type in where every computer
and the network device is connected to single cable. It is
cost effective and used in small networks.
Ring Topology
It is called ring topology because it forms a ring as each
computer is connected to another computer, with the last one
connected to the first. Exactly two neighbors for each device and it
is cheap to install. The Failure of one computer disturbs the whole
network
Star Topology
In this type of topology, all the computers are connected to a
single hub through a cable. This hub is the central node and all
others nodes are connected to the central node.
Mesh Topology
It is a point-to-point connection to other nodes or devices.
Traffic is carried only between two devices or nodes to which it is
connected. This topology is robust, provides security and privacy.

Chapter 8: Computer Networks 9th Standard
Karnataka Residential Educational Institutions Society 77 | P a g e
Tree Topology
It has a root node and all other nodes are connected to
it forming a hierarchy. It is also called hierarchical
topology. It should, at least have three levels of the
hierarchy.
Hybrid Topology
It is two different types of topologies which are a
mixture of two or more topologies. For example, if one
office is using bus topology and another office is using
star topology then connecting these topologies will result
in Hybrid Topology.
Client and Server
Computers connected together to create a network fall into two categories: Client and
Servers. The client-server connection is established through a network or the Internet.
Client: A “client” is a program that runs on the computer which you access in the first
place. For example Desktop computer, laptops, tablets, and mobile phone.
Server: Each client provides an interface to each of the “services” (databases, online
files, e-mail etc.) that are made available by other systems, which are called “servers.”
Servers are built to be reliable. They are much more expensive than clients.
For example Mail servers like Gmail,
information servers like Wikipedia, Online commerce
servers like Flipkart, online banking servers, and
online travel management servers like IRCTC.
Network Hardware
Networking cables
They are used to connect one network device to other network devices or to connect two
or more computers to share printer, scanner etc. Different types of network cables
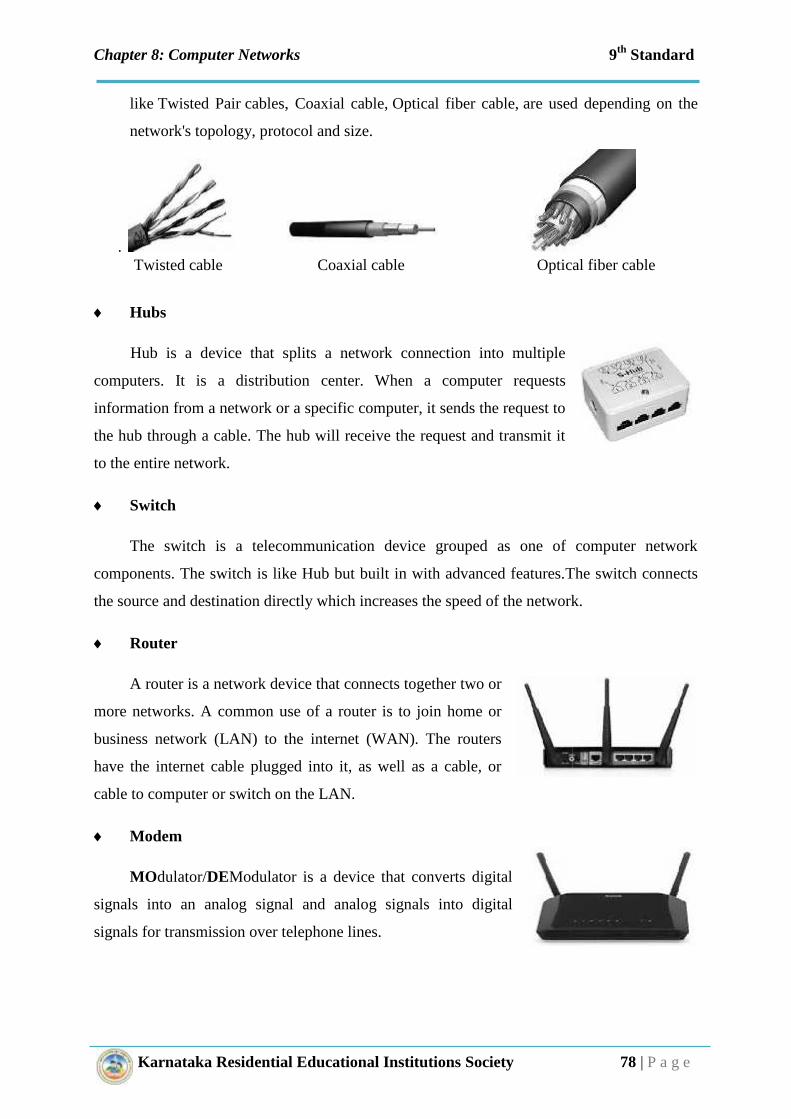
Chapter 8: Computer Networks 9th Standard
Karnataka Residential Educational Institutions Society 78 | P a g e
like Twisted Pair cables, Coaxial cable, Optical fiber cable, are used depending on the
network's topology, protocol and size.
.Twisted cable Coaxial cable Optical fiber cable
Hubs
Hub is a device that splits a network connection into multiple
computers. It is a distribution center. When a computer requests
information from a network or a specific computer, it sends the request to
the hub through a cable. The hub will receive the request and transmit it
to the entire network.
Switch
The switch is a telecommunication device grouped as one of computer network
components. The switch is like Hub but built in with advanced features.The switch connects
the source and destination directly which increases the speed of the network.
Router
A router is a network device that connects together two or
more networks. A common use of a router is to join home or
business network (LAN) to the internet (WAN). The routers
have the internet cable plugged into it, as well as a cable, or
cable to computer or switch on the LAN.
Modem
MOdulator/DEModulator is a device that converts digital
signals into an analog signal and analog signals into digital
signals for transmission over telephone lines.

Chapter 8: Computer Networks 9th Standard
Karnataka Residential Educational Institutions Society 79 | P a g e
Network and data security
Network Security
Firewall: A firewall is a system designed to prevent
unauthorized access to or from a private network.
Firewalls can be implemented in both hardware and software, or a combination of both.
Software Firewall: The software firewall is monitors the applications that access the
internet and allows only those that are approved by the user.

Chapter 8: Computer Networks 9th Standard
Karnataka Residential Educational Institutions Society 80 | P a g e
Hardware Firewall: The hardware firewall is protecting the whole LAN from people
on the Internet, a hardware firewall device (similar to a router) is placed between the LAN and
the Internet connection.
Data Security
Data security is protecting data from the destructive force and from unwanted actions of
the unauthorized user.
Encryption: It is the process of converting to plain text into a form that cannot be
easily understood by the unauthorized user.
Decryption: It is the process of converting ciphertext back into its original form, so
it can be understood by the user.
Cipher: Cipher is the code or the algorithm used in the encryption and decryption of
data.
Key: Key is the secret of the cipher known only to the authorized people.
Encryption ExamplePlain: ABCDEFGHIJKLMNOPQRSTUVWXYZKey: Replace each letter by 3th afterCipher: CDEFGHIJKLMNOPQRSTUVWXYZABClear text: Hello good morningCipher text: JGNNQ IQQF OQTPKPI
Decryption ExampleCipher: CDEFGHIJKLMNOPQRSTUVWXYZABKey: Replace each letter by 3th previousPlain: ABCDEFGHIJKLMNOPQRSTUVWXYZCipher text: JGNNQ IQQF OQTPKPIClear text: Hello good morning

Chapter 8: Computer Networks 9th Standard
Karnataka Residential Educational Institutions Society 81 | P a g e
Advantages of Networks
Speed: Sharing and transferring files within networks are very rapid. Thus, saving
time while maintaining the integrity of the file.
Cost: Individually licensed copies of many popular software programs can be costly.
Networkable versions are available at considerable savings. Shared programs, on a
network, allows for easier upgrading of the program on one single file server, instead
of upgrading individual workstations
Security: Sensitive files and programs on a network are passwords protected or
designed as “copy inhibit” so that you do not have to worry about illegal copying of
programs.
Centralized Software Management: Software can be loaded on one computer (the
file server) eliminating that need to spend time and energy installing updates and
tracking files on independent computers throughout the building.
Resource Sharing: Resources such as Printers, Fax machines and Modems can be
shared.
Flexible Access: Access their files from computers throughout the firm.
Workgroup Computing: Workgroup software allows many users to work on a
document or project concurrently.

Karnataka Residential Educational Institutions Society 82 | P a g e
Explore!
CELLULAR NETWORKS
Mobile telephony is the provision of telephone services to phones which may move
around freely rather than stay fixed in one location. Mobile phones connect to a
terrestrial cellular network of base stations (cell sites), whereas satellite phones connect to
orbiting satellites. Both networks are interconnected to the public switched telephone
network (PSTN) to allow any phone in the world to be dialed.
0G Mobile radio telephone (also known as “0G”). Mobile radio telephone systemspreceded modern cellular mobile telephony technology.
1G refers to the first generation of wireless telephone technology, mobiletelecommunications. The main difference between two succeeding mobile telephone systems,1G and 2G is that the radio signals that 1G networks use are analog while 2G networks aredigital.2G is short for second-generation wireless telephone technology.
Second generation 2G cellular telecom networks were commercially launched on theGSM standard in Finland by Radiolinja (now part of Elisa Oyj) in 1991. 2G technologiesenabled the various mobile phone networks to provide the services such as text messages,picture messages and MMS (multimedia messages). All text messages sent over 2G aredigitally encrypted, allowing for the transfer of data in such a way that only the intendedreceiver can receive and read it. These digital signals consume less battery power, so it helpsin saving the battery of mobiles.
3G stands for third-generation and refers to technology that allows mobile phones toaccess the internet – from surfing web pages to making video calls and downloading music. Itwas first used in Japan in the year 2001. 3G telecommunication networks support servicesthat provide an information transfer rate of at least 200kbit/s. 3G finds an application inwireless voice telephony, mobile Internet access, fixed wireless Internet access, video calls,and mobile TV. General Packet Radio Service (GPRS) is a packet oriented mobile dataservice on the 2G and 3G cellular communication system’s global system for mobilecommunications (GSM). GPRS provides data rates of 56-114 kbit/second.
4G is the fourth generation of mobile phone mobilecommunication technology standards. A 4G system providesmobile ultra-broadband Internet access. Conceivable applicationsinclude amended mobile web access, IP telephony, gamingservices, high-definition mobile TV, video conferencing, 3Dtelevision, and cloud computing.
5G (5th generation mobile networks or ess systems) projects to denote the next majorphase of mobile telecommunications standards beyond the current 4G/IMT-Advancedstandards. 5G is also referred to as beyond 2020 mobile communications technologies.

Chapter 9: HTML
Introduction to HTML
Document Structure
Basic Tags
Formatting
Images
Tables
Lists
Learning Outcomes:
After you have studied this lesson you will be able to:
Define HTML.
Write the structure of HTML.
Use the HTML tags.
Design a basic HTML web page.
Inside
Chapter 9: HTML
Introduction to HTML
Document Structure
Basic Tags
Formatting
Images
Tables
Lists
Learning Outcomes:
After you have studied this lesson you will be able to:
Define HTML.
Write the structure of HTML.
Use the HTML tags.
Design a basic HTML web page.
Inside
Chapter 9: HTML
Introduction to HTML
Document Structure
Basic Tags
Formatting
Images
Tables
Lists
Learning Outcomes:
After you have studied this lesson you will be able to:
Define HTML.
Write the structure of HTML.
Use the HTML tags.
Design a basic HTML web page.
Inside
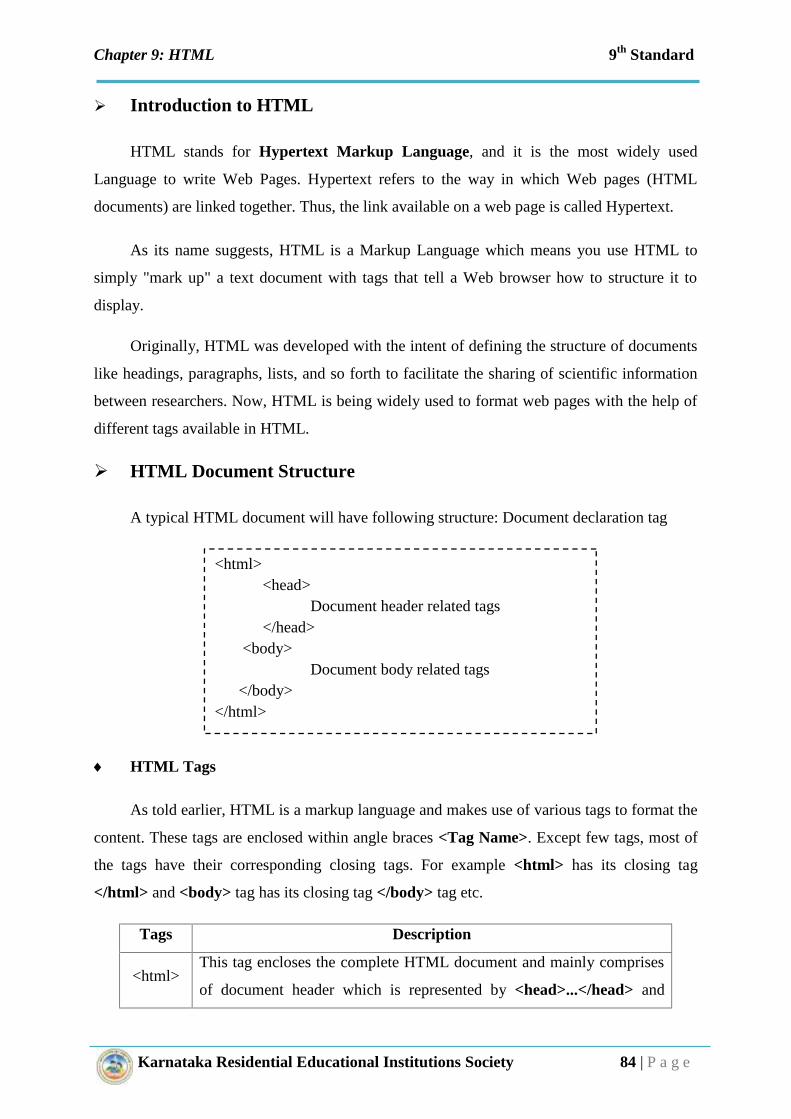
Chapter 9: HTML 9th Standard
Karnataka Residential Educational Institutions Society 84 | P a g e
Introduction to HTML
HTML stands for Hypertext Markup Language, and it is the most widely used
Language to write Web Pages. Hypertext refers to the way in which Web pages (HTML
documents) are linked together. Thus, the link available on a web page is called Hypertext.
As its name suggests, HTML is a Markup Language which means you use HTML to
simply "mark up" a text document with tags that tell a Web browser how to structure it to
display.
Originally, HTML was developed with the intent of defining the structure of documents
like headings, paragraphs, lists, and so forth to facilitate the sharing of scientific information
between researchers. Now, HTML is being widely used to format web pages with the help of
different tags available in HTML.
HTML Document Structure
A typical HTML document will have following structure: Document declaration tag
HTML Tags
As told earlier, HTML is a markup language and makes use of various tags to format the
content. These tags are enclosed within angle braces <Tag Name>. Except few tags, most of
the tags have their corresponding closing tags. For example <html> has its closing tag
</html> and <body> tag has its closing tag </body> tag etc.
Tags Description
<html>This tag encloses the complete HTML document and mainly comprises
of document header which is represented by <head>...</head> and
<html><head>
Document header related tags</head>
<body>Document body related tags
</body></html>

Chapter 9: HTML 9th Standard
Karnataka Residential Educational Institutions Society 85 | P a g e
document body which is represented by <body>...</body> tags.
<head>This tag represents the document's header which can keep other HTML
tags like <title>, <link> etc.
<title>The <title> tag is used inside the <head> tag to mention the document
title.
<body>This tag represents the document's body which keeps other HTML tags
like <h1>, <div>, <p> etc.
Executing an HTML program
The first step in creating an HTML document is to write code in the text editor. The
commonly used text editor is notepad. The notepad can be opened in the following sequence.
Click on Start Button
Type Notepad in search programs and files and
press Enter.
Notepad window will appear. Type your HTML
program and save it with the filename.htm (html)
extension.
Open the web browser, type the address of the
HTML file in address bar press Enter.
The <!DOCTYPE> Declaration
The <!DOCTYPE> declaration tag is used by the web browser to understand the version
of the HTML used in the document. Current version of HTML is 5 and it makes use of the
following declaration
<!DOCTYPE html>

Chapter 9: HTML 9th Standard
Karnataka Residential Educational Institutions Society 86 | P a g e
Basic HTML Document
In its simplest form, following is an example of an HTML document:
Let's save it in an HTML file test.htm using your favorite text editor. Finally, open it
using a web browser like Internet Explorer, Google Chrome, or Firefox etc. It shows the
following output:
HTML Basic Tags
Heading Tags
Any document starts with a heading. You can use different sizes for your headings.
HTML also has six levels of headings, which use the elements <h1>, <h2>, <h3>, <h4>,
<h5>, and <h6>. While displaying any heading, the browser adds one line before and one
line after that heading.
Example
<!DOCTYPE html><html><head>
<title>This is document title</title></head><body>
<h1>This is a heading</h1><p>Document content goes here.....</p>
</body></html>
<body><h1>This is heading 1</h1><h2>This is heading 2</h2><h3>This is heading 3</h3><h4>This is heading 4</h4><h5>This is heading 5</h5><h6>This is heading 6</h6>
</body>

Chapter 9: HTML 9th Standard
Karnataka Residential Educational Institutions Society 87 | P a g e
This will produce the following result:
Paragraph Tag
The <p> tag offers a way to structure your text into different paragraphs. Each
paragraph of text should go in between an opening <p> and a closing </p> tag as shown
below in the example:
Example
This will produce the following result:
Line Break Tag
Whenever you use the <br /> element, anything following it starts from the next line.
This tag is an example of an empty element, where you do not need opening and closing tags,
as there is nothing to go in between them. The <br /> tag has a space between the characters
br and the forward slash.
Example
This will produce the following result:
<body><p>Here is a first paragraph of text.</p><p>Here is a second paragraph of text.</p><p>Here is a third paragraph of text.</p>
</body>
<body><p>Hello<br />You delivered your assignment on time.<br /> Thanks<br />Mahnaz</p>
</body>

Chapter 9: HTML 9th Standard
Karnataka Residential Educational Institutions Society 88 | P a g e
Horizontal Lines
Horizontal lines are used to visually break up sections of a document. The <hr> tag
creates a line from the current position in the document to the right margin and breaks the line
accordingly.
For example, you may want to give a line between two paragraphs as in the given
example below:
Example
This will produce the following result:
Generic Attributes
Here's a table of some other attributes that are readily usable with many of the HTML
tags.
Attribute Options Function
Align right, left, center Horizontally aligns tags
Valign top, middle, bottomVertically aligns tags within
an HTML element.
Bgcolor numeric, hexadecimal, RGBvalues Place a background
color behind an element
Background URLPlaces a background image
behind an element
HTML Formatting
Bold Text: Anything that appears within <b>...</b> element is displayed in bold as
shown below:
Example
<body><p>This is paragraph one and should be on top</p><hr /><p>This is paragraph two and should be at bottom</p>
</body>
<body><p>The following word uses a <b>bold</b> typeface.</p>
</body>

Chapter 9: HTML 9th Standard
Karnataka Residential Educational Institutions Society 89 | P a g e
This will produce the following result:
Italic Text: Anything that appears within <i>...</i> element is displayed in italicized as
shown below:
Example
This will produce the following result:
Text Formatting Tags
Tag Description
<b> Defines bold text
<big> Defines big text
<em> Defines emphasized text
<i> Defines italic text
<strong> Defines strong text
<small> Defines small text
<sub> Defines subscripted text
<sup> Defines superscripted text
<ins> Defines inserted text
<del> Defines deleted text
<u> Underline
HTML Images
Images are very important to beautify as well as to depict many complex concepts in a
simple way on your web page. This will take you through simple steps to use images in your
web pages.
Insert Image
You can insert any image in your web page by using <img> tag. Following is the
simple syntax to use this tag. <img src="Image URL" ... attributes-list/>
<body><p>The following word uses a <i>italicized</i> typeface.</p>
</body>

Chapter 9: HTML 9th Standard
Karnataka Residential Educational Institutions Society 90 | P a g e
This will produce the following result:
You can use PNG, JPEG or GIF image file based on your comfort but make sure you
specify correct image file name in src attribute. Image name is always case sensitive.
The alt attribute is a mandatory attribute which specifies an alternate text for an image,
if the image cannot be displayed.
HTML Tables
The HTML tables allow web authors to arrange data like text, images, links, other
tables, etc. into rows and columns of cells.
The HTML tables are created using the <table> tag in which the <tr> tag is used to
create table rows and the <td> tag is used to create data cells.
Example
<body><p>Simple Image Insert</p><img src="test.png" alt="Test Image" />
</body>
<body> <table border="1"><tr>
<th>Name</th><th>Salary</th>
</tr><tr>
<td>Ramesh Raman</td><td>5000</td>
</tr><tr>
<td>Shabbir Hussein</td><td>7000</td>
</tr></table></body>

Chapter 9: HTML 9th Standard
Karnataka Residential Educational Institutions Society 91 | P a g e
This will produce the following result:
Table Tags
Tag Description
<table> Defines a table
<th> Defines a table header
<tr> Defines a table row
<td> Defines a table cell
<caption> Defines a table caption
<colgroup> Defines groups of table columns
<col> Defines the attribute values for one or more columns in a table
<thead> Defines a table head
<tbody> Defines a table body
<tfoot> Defines a table footer
HTML Lists
HTML offers web authors three ways for specifying lists of information. All lists must
contain one or more list elements. Lists may contain:
1. <ul> - An unordered list. This will list items using plain bullets.
2. <ol> - An ordered list. This will use different schemes of numbers to list your items.
3. <dl> - A definition list. This arranges your items in the same way as they are
arranged in a dictionary.
Unordered Lists
An unordered list is a collection of related items that have no special order or sequence.
This list is created by using HTML <ul> tag. Each item in the list is marked with a bullet.
Example <ul><li>Beetroot</li><li>Ginger</li><li>Potato</li><li>Radish</li>
</ul>

Chapter 9: HTML 9th Standard
Karnataka Residential Educational Institutions Society 92 | P a g e
This will produce following result:
The type Attribute
You can use type attribute for <ul> tag to specify the type of bullet you like. By default
it is a disc. Following are the possible options:
1. <ul type="square">
2. <ul type="disc">
3. <ul type="circle">
Example: Following is an example where we used <ul type="square">
This will produce the following result:
Ordered Lists
If you are required to put your items in a numbered list instead of bulleted list then
HTML ordered list will be used. This list is created by using <ol> tag.
The numbering starts at one and is incremented by one for each successive ordered list
element tagged with <li>.
Example
<body><ul type="square">
<li>Beetroot</li><li>Ginger</li><li>Potato</li><li>Radish</li>
</ul></body>
<ol><li>Beetroot</li><li>Ginger</li><li>Potato</li><li>Radish</li>
</ol>

Chapter 9: HTML 9th Standard
Karnataka Residential Educational Institutions Society 93 | P a g e
This will produce following result:
The type Attribute
You can use type attribute for <ol> tag to specify the type of numbering you like. By
default it is a number. Following are the possible options:
1. <ol type="1"> - Default-Case Numerals.
2. <ol type="I"> - Upper-Case Roman Numerals.
3. <ol type="i"> - Lower-Case Roman Numerals.
4. <ol type="a"> - Lower-Case Letters.
5. <ol type="A"> - Upper-Case Letters.
Example: Following is an example where we used <ol type="1">
This will produce the following result
List Tags
Tag Description
<ol> Defines an ordered list
<ul> Defines an unordered list
<li> Defines a list item
<dl> Defines a definition list
<dt> Defines a definition term
<dd> Defines a definition description
<menu> Deprecated. Use <ul> instead
<body><ol type="1">
<li>Beetroot</li><li>Ginger</li><li>Potato</li><li>Radish</li>
</ol></body>

Chapter 9: HTML 9th Standard
Karnataka Residential Educational Institutions Society 94 | P a g e
HTML Hyper Links
A web page can contain various links that take you directly to other pages and even
specific parts of a given page. These links are known as hyperlinks.
Hyperlinks allow visitors to navigate between Web sites by clicking on words, phrases,
and images. Thus you can create hyperlinks using text or images available on a web page.
<A href=”filename.html” title=”Next page”> Next page</A>
Anchor element allows you to link various WebPages or different sections on the
same page. The syntax of Anchor element is given below:
<A>………</A>
The various attributes of the Anchor element are HREF, NAME, TITLE, TARGET
and ALT
Href: The href (hyperlink reference) attribute specifies the location of the file or
resource that you want to provide a link to.
Name: The name attribute specifies a location within the current or the existing
document.
Title: The title attribute specifies a title for the file which you are providing a link.
Target: The target attribute specifies a position in the web page where the browser
displays a file.
Alt: The alt attribute specifies the alternative text which is displayed when an
image used as a hyperlink is not displayed.
Tools used to create HTML files:
The following are the tools used to create HTML files.
1. Notepad
2. Edit Plus
3. FrontPage
4. Textpad
5. Dreamviewer
Karnataka Residential Educational Institutions Society 95 | P a g e
Teachers’Corner
The objective of the spreadsheet is to teach features for organizing data,
performing calculations using functions, and representing data in multiple ways.
You can follow the examples to teach the concept and skill of sorting, performing
calculations and drawing graphs.
Students already know how to calculate sum and percentage. Revise this and teach
them the new skills included. Students need to understand what kind of graph is
suitable for a given example. You can encourage them to try alternate graphic
representations, and ask questions on which kind of graph is more suitable than
the other. Teach students how to draw a pie chart. For this, you can take an
example of how the government spending the amount on various items.
While discussing presentation ask students if they have seen presentations on the
computer. Show them the icon of the presentation application. Tell the students
that just as word processor consists of pages, presentation software consists of
slides. Ask them to note the similarities and differences in the options under the
menu and toolbar of a word processor, spreadsheet, presentation applications.
Tell the students that they will learn how to make their presentations more
interesting by adding sounds, video, and audio. Demonstrate how to insert a sound
file into the presentation. Inform the students, that similar steps would be followed
to insert video files.
Ask students to explore how they can view all the slides at a glance. You can give
hints on where to look for the icon. Demonstrate the use of slide sorter view to the
class. Teach the students how to print the slides. Inform them about the different
views and a number of slides they can print on each page.
The purpose of Internet is to teach about how Internet applications work. Students
should develop an understanding of how the Internet works to provide vast
amounts of information conveniently. In addition, students should know how to
use a web browser for information search.

Karnataka Residential Educational Institutions Society 96 | P a g e
Explain how the Internet facilitates sharing of information. Summarize the
discussion and tell the students about what is the web. Open an Internet
application and teach them about the browser, URL, website, web page. You can
open Wikipedia and teach them about hyperlinks. This will give them an
opportunity for exploratory learning.
Give a demonstration on the computer of using a typical search engine. You can
ask students to suggest the topic for searching information and enter it as a
keyword. Now click on the different options such as images, video, map, to show
the different search results. Tell them that not all the information on the Internet is
authentic and they should take the assistance of an adult before trusting any
information. Emphasize that young students need to be cautious while surfing the
Internet.
Explain the purpose of the email. You can mention that it is a quick, convenient
and low-cost way of keeping in touch with others.
Begin with a free web-based email account like those provided by Google’s Gmail
or Yahoo! or another local service provider. Demonstrate the steps to create an
email account. Familiarize them with the email interface and the jargon such as
compose, entering an email address, inbox, sent mail box and so on.
Tell the students that it is important to safeguard the secrecy of password in order
to avoid misuse. At the same time, mention that it is inappropriate to look at the
keyboard when another person is entering a password.
The present generation of students is already aware of social networking. The
objective of social networking is to inform the students about correct practices
associated with the use of social networking. Begin by discussing various means
of communications. You can specifically focus on mass media communication
and discuss tools that are used to communicate with several people
simultaneously.
The objective networks are to teach students about how the Internet connection is
set up. The students have been enjoying seamless Internet connectivity without
realizing how it works. These bring out the technical details of what it takes to be
able to access the Internet.