


Bahasa
Halaman
Hukum

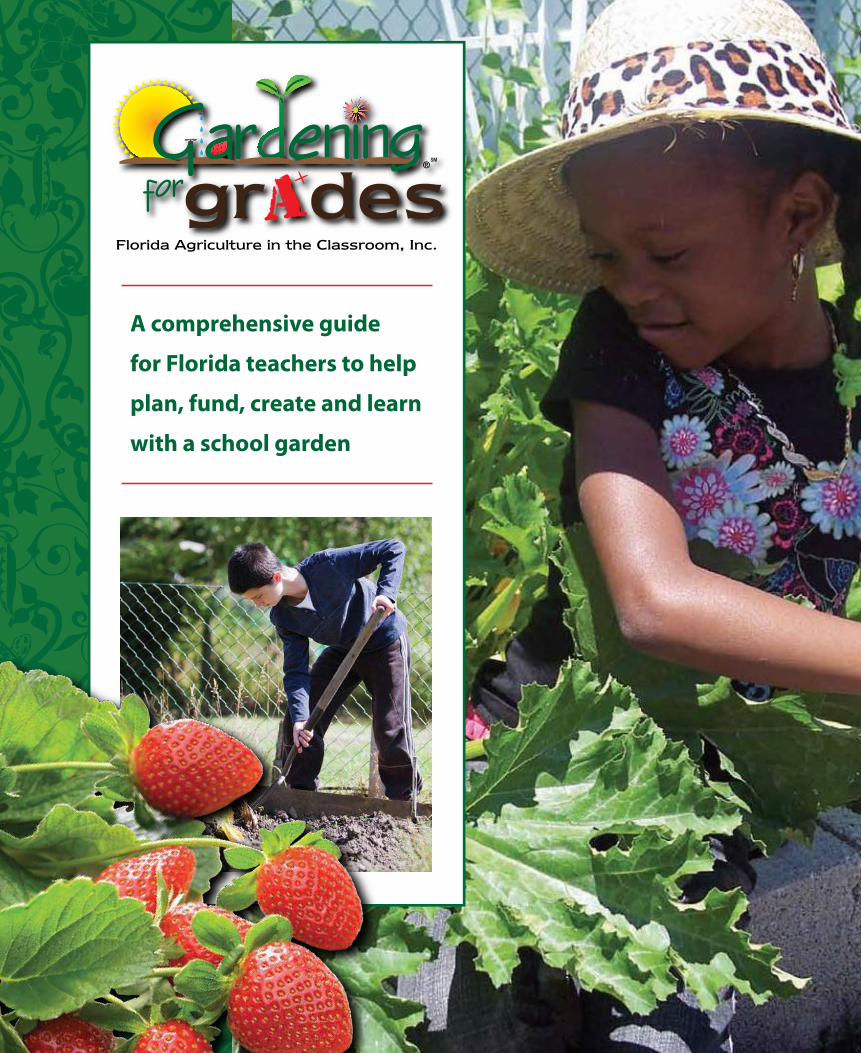
A comprehensive guide
for Florida teachers to help
plan, fund, create and learn
with a school garden
Florida Agriculture in the Classroom, Inc.
forgr desA®
SM
forgr desA®
SM
Florida Agriculture in the Classroom, Inc.
A comprehensive guide for Florida teachersto help plan, fund, create and learn with a school garden
P.O. Box 110015 • Gainesville, FL 32611-0015 • Phone (352) 846-1391 • Fax (352) 846-1390
Thank You to Our Partners for Their Financia1 Support!
ISBN 978-0-615-41694-6© 2017 Florida Agriculture in the Classroom, Inc.http://www.faitc.org
Garden text written by Trina Hofreiter.Some activities were developed by Elizabeth Wolanyk, Ag Literacy Works.Design and layout by Sean N. Sailor, Sailor Graphics: seansailor.com
Thank You to Our Affi1iated Partners!
Buckhorn NurseryClear Springs, Co.Dairy Council of FloridaFarm Credit of FloridaFarm Credit of South FloridaFlorida Aquaculture AssociationFlorida Beef CouncilFlorida Citrus MutualFlorida Department of Agriculture and Consumer ServicesFlorida Department of EducationFlorida Farm BureauFlorida Fertilizer & Agrichemical AssociationFlorida FFA Foundation
Florida Fruit & Vegetable AssociationFlorida Nursery, Growers & Landscape AssociationFlorida Peanut Producers AssociationFlorida Strawberry Growers AssociationFlorida Turf Grass AssociationKissimmee Island Cattle Co.National Watermelon Promotion BoardThe Hay ExchangeUniversity of Florida/IFAS Agricultural Education & CommunicationUniversity of Florida/IFAS 4-HUniversity of South Florida Polytechnic Florida Industrial & Phosphate
Research InstituteWm. G. Roe and Sons, Inc.
3
Chapter 1: GROW TO LEARN . . . . . . . . . . . . . . . . . . . . . . . . . . . . . . . . . . . . . . . . . . . . . . . . . . . . . . . . . . . . . . . . . . . . . .5
Chapter 2: PLANTING AND GROWING TIPS . . . . . . . . . . . . . . . . . . . . . . . . . . . . . . . . . . . . . . . . . . . . . . . . . . . .23Welcome to You Region . . . . . . . . . . . . . . . . . . . . . . . . . . . . . . . . . . . . . . . . . . . . . . . . . . . . . . . . . . . . . . . . . . . . . . . . . . . . . .23Sensory Garden . . . . . . . . . . . . . . . . . . . . . . . . . . . . . . . . . . . . . . . . . . . . . . . . . . . . . . . . . . . . . . . . . . . . . . . . . . . . . . . . . . . . .24How to: Grow You Own Pizza Garden . . . . . . . . . . . . . . . . . . . . . . . . . . . . . . . . . . . . . . . . . . . . . . . . . . . . . . . . . . . . . . . .25How to: Salsa and Soup Garden . . . . . . . . . . . . . . . . . . . . . . . . . . . . . . . . . . . . . . . . . . . . . . . . . . . . . . . . . . . . . . . . . . . . . .26How to: Square-Foot Garden . . . . . . . . . . . . . . . . . . . . . . . . . . . . . . . . . . . . . . . . . . . . . . . . . . . . . . . . . . . . . . . . . . . . . . . . .27Herbs . . . . . . . . . . . . . . . . . . . . . . . . . . . . . . . . . . . . . . . . . . . . . . . . . . . . . . . . . . . . . . . . . . . . . . . . . . . . . . . . . . . . . . . . . . . . . .29Beans . . . . . . . . . . . . . . . . . . . . . . . . . . . . . . . . . . . . . . . . . . . . . . . . . . . . . . . . . . . . . . . . . . . . . . . . . . . . . . . . . . . . . . . . . . . . . . .32Blueberries . . . . . . . . . . . . . . . . . . . . . . . . . . . . . . . . . . . . . . . . . . . . . . . . . . . . . . . . . . . . . . . . . . . . . . . . . . . . . . . . . . . . . . . . . .32Butterfly Plants . . . . . . . . . . . . . . . . . . . . . . . . . . . . . . . . . . . . . . . . . . . . . . . . . . . . . . . . . . . . . . . . . . . . . . . . . . . . . . . . . . . . . .33Cabbage . . . . . . . . . . . . . . . . . . . . . . . . . . . . . . . . . . . . . . . . . . . . . . . . . . . . . . . . . . . . . . . . . . . . . . . . . . . . . . . . . . . . . . . . . . . .34Sweet Corn . . . . . . . . . . . . . . . . . . . . . . . . . . . . . . . . . . . . . . . . . . . . . . . . . . . . . . . . . . . . . . . . . . . . . . . . . . . . . . . . . . . . . . . . .34Citrus . . . . . . . . . . . . . . . . . . . . . . . . . . . . . . . . . . . . . . . . . . . . . . . . . . . . . . . . . . . . . . . . . . . . . . . . . . . . . . . . . . . . . . . . . . . . . .35Cucumber . . . . . . . . . . . . . . . . . . . . . . . . . . . . . . . . . . . . . . . . . . . . . . . . . . . . . . . . . . . . . . . . . . . . . . . . . . . . . . . . . . . . . . . . . .36Lettuce . . . . . . . . . . . . . . . . . . . . . . . . . . . . . . . . . . . . . . . . . . . . . . . . . . . . . . . . . . . . . . . . . . . . . . . . . . . . . . . . . . . . . . . . . . . . .36Ornamental Plants . . . . . . . . . . . . . . . . . . . . . . . . . . . . . . . . . . . . . . . . . . . . . . . . . . . . . . . . . . . . . . . . . . . . . . . . . . . . . . . . . . .37Peanuts . . . . . . . . . . . . . . . . . . . . . . . . . . . . . . . . . . . . . . . . . . . . . . . . . . . . . . . . . . . . . . . . . . . . . . . . . . . . . . . . . . . . . . . . . . . . .38Peppers . . . . . . . . . . . . . . . . . . . . . . . . . . . . . . . . . . . . . . . . . . . . . . . . . . . . . . . . . . . . . . . . . . . . . . . . . . . . . . . . . . . . . . . . . . . . .38Potatoes . . . . . . . . . . . . . . . . . . . . . . . . . . . . . . . . . . . . . . . . . . . . . . . . . . . . . . . . . . . . . . . . . . . . . . . . . . . . . . . . . . . . . . . . . . . .39Squash. . . . . . . . . . . . . . . . . . . . . . . . . . . . . . . . . . . . . . . . . . . . . . . . . . . . . . . . . . . . . . . . . . . . . . . . . . . . . . . . . . . . . . . . . . . . . .40Strawberries . . . . . . . . . . . . . . . . . . . . . . . . . . . . . . . . . . . . . . . . . . . . . . . . . . . . . . . . . . . . . . . . . . . . . . . . . . . . . . . . . . . . . . . . .40Sugarcane . . . . . . . . . . . . . . . . . . . . . . . . . . . . . . . . . . . . . . . . . . . . . . . . . . . . . . . . . . . . . . . . . . . . . . . . . . . . . . . . . . . . . . . . . . .41Tomatoes . . . . . . . . . . . . . . . . . . . . . . . . . . . . . . . . . . . . . . . . . . . . . . . . . . . . . . . . . . . . . . . . . . . . . . . . . . . . . . . . . . . . . . . . . . .41Tropical Fruit . . . . . . . . . . . . . . . . . . . . . . . . . . . . . . . . . . . . . . . . . . . . . . . . . . . . . . . . . . . . . . . . . . . . . . . . . . . . . . . . . . . . . . .42Watermelon . . . . . . . . . . . . . . . . . . . . . . . . . . . . . . . . . . . . . . . . . . . . . . . . . . . . . . . . . . . . . . . . . . . . . . . . . . . . . . . . . . . . . . . . .43Woody Ornamentals . . . . . . . . . . . . . . . . . . . . . . . . . . . . . . . . . . . . . . . . . . . . . . . . . . . . . . . . . . . . . . . . . . . . . . . . . . . . . . . . .43General Pests . . . . . . . . . . . . . . . . . . . . . . . . . . . . . . . . . . . . . . . . . . . . . . . . . . . . . . . . . . . . . . . . . . . . . . . . . . . . . . . . . . . . . . . .45
Chapter 3: CURRICULUM CONNECTIONS . . . . . . . . . . . . . . . . . . . . . . . . . . . . . . . . . . . . . . . . . . . . . . . . . . . . . . .46Soil Sort:
Students become soil surgeons, dissecting soil and sorting its components and begin to discover its unique properties. . . . . . . . . . . . . . . . . . . . . . . . . . . . . . . . . . . . . . . . . . . . . . . . . . . . . . . . . . . . . . . . . . . . . . . . . . . . . . . . . . . . . . . . .46
It All Begins With Soil: Students examine soil to identify its components and ways that its structure affects plant growth. . . . . . . . . .51
Acid to Alkaline: Students explore pH with an emphasis on soil pH. . . . . . . . . . . . . . . . . . . . . . . . . . . . . . . . . . . . . . . . . . . . . . . . . . . .55
Plant It, Map It: Students use math skills to plan their garden. . . . . . . . . . . . . . . . . . . . . . . . . . . . . . . . . . . . . . . . . . . . . . . . . . . . . . . . .63
Inch by Inch, Row by Row: Students plan and map garden beds, using information about growth requirements for each plant. . . . . . . . .67
Yo Seeds, Wake Up!: Students will learn about germination and what is required for this process through seed experiments. . . . .70
We’re the Producers!: Students will discover what components are needed for photosynthesis using puzzle pieces. . . . . . . . . . . . . . .75
What Are We Eating?: Students will discover how plants grow and what part of the plant they are eating. . . . . . . . . . . . . . . . . . . . . . . .91
Feed Me – Nutritional Building Blocks: This lesson will allow students to better understand that plants don’t eat their food and teach them about the actual nutrients that plants require and sources of those nutrients. . . . . . . . . . . . . . . . . . . . . . . . . . . . . . . . . . . . . .98
Tab1e of Contents
Gardening for Grades: Tab1e of Contents3
4
Tab1e of ContentsTurning Over a New Leaf:
Students examine variations in leaves and consider how leaf adaptations can help plants survive in different environments. . . . . . . . . . . . . . . . . . . . . . . . . . . . . . . . . . . . . . . . . . . . . . . . . . . . . . . . . . . . . . . . . . . . . . . . . . . . . . . . . . . . 107
Lettuce Be Different: Students compare their own similarities and differences. Then they grow and compare several varieties of lettuce plants to explore variations within the same type of plant. . . . . . . . . . . . . . . . . . . . . . . . . . . . . . . . . . . . . 110
The Roots of Food: This activity introduces what influences students’ own food choices and those of people in different cultures. . . . . . . . . . . . . . . . . . . . . . . . . . . . . . . . . . . . . . . . . . . . . . . . . . . . . . . . . . . . . . . . . . . . . . . . . . . . . . . . . . . . . . . . . 116
The Million Dollar Can O’ Soup or Salsa: Students participate in creating a food product, identify and explain the steps in production, and describe the influence of those steps in the cost of the item. . . . . . . . . . . . . . . . . . . . . . . . . . . . . . . . . . . . . . . . . . . . . . . . . . . 118
Chapter 4: CONNECTING ThE GARDEN TO CLASSROOM INSTRUCTION . . . . . . . . . . . . . . . 120Connecting Across the Curriculum . . . . . . . . . . . . . . . . . . . . . . . . . . . . . . . . . . . . . . . . . . . . . . . . . . . . . . . . . . . . . . . . . 120Three Comprehensive Resources . . . . . . . . . . . . . . . . . . . . . . . . . . . . . . . . . . . . . . . . . . . . . . . . . . . . . . . . . . . . . . . . . . . . 120Subject-Specific Connections . . . . . . . . . . . . . . . . . . . . . . . . . . . . . . . . . . . . . . . . . . . . . . . . . . . . . . . . . . . . . . . . . . . . . . . 121Literature and Heritage Garden Reference . . . . . . . . . . . . . . . . . . . . . . . . . . . . . . . . . . . . . . . . . . . . . . . . . . . . . . . . . . . 125Curriculum Resources . . . . . . . . . . . . . . . . . . . . . . . . . . . . . . . . . . . . . . . . . . . . . . . . . . . . . . . . . . . . . . . . . . . . . . . . . . . . . 126General Gardening Guides . . . . . . . . . . . . . . . . . . . . . . . . . . . . . . . . . . . . . . . . . . . . . . . . . . . . . . . . . . . . . . . . . . . . . . . . . 126Florida Gardening Guides . . . . . . . . . . . . . . . . . . . . . . . . . . . . . . . . . . . . . . . . . . . . . . . . . . . . . . . . . . . . . . . . . . . . . . . . . . 126School Gardening Guides . . . . . . . . . . . . . . . . . . . . . . . . . . . . . . . . . . . . . . . . . . . . . . . . . . . . . . . . . . . . . . . . . . . . . . . . . . 127Butterfly Gardening . . . . . . . . . . . . . . . . . . . . . . . . . . . . . . . . . . . . . . . . . . . . . . . . . . . . . . . . . . . . . . . . . . . . . . . . . . . . . . . 127Gardening Projects Ideas . . . . . . . . . . . . . . . . . . . . . . . . . . . . . . . . . . . . . . . . . . . . . . . . . . . . . . . . . . . . . . . . . . . . . . . . . . . 127Florida Agricultural Facts . . . . . . . . . . . . . . . . . . . . . . . . . . . . . . . . . . . . . . . . . . . . . . . . . . . . . . . . . . . . . . . . . . . . . . . . . . 127Elementary School Books . . . . . . . . . . . . . . . . . . . . . . . . . . . . . . . . . . . . . . . . . . . . . . . . . . . . . . . . . . . . . . . . . . . . . . . . . . 128Middle and High Schools Novels . . . . . . . . . . . . . . . . . . . . . . . . . . . . . . . . . . . . . . . . . . . . . . . . . . . . . . . . . . . . . . . . . . . 128General Reference . . . . . . . . . . . . . . . . . . . . . . . . . . . . . . . . . . . . . . . . . . . . . . . . . . . . . . . . . . . . . . . . . . . . . . . . . . . . . . . . . 128
Chapter 5: FLORIDA STANDARDS SPELLED OUT . . . . . . . . . . . . . . . . . . . . . . . . . . . . . . . . . . . . . . . . . 129
Chapter 6: RESOURCES . . . . . . . . . . . . . . . . . . . . . . . . . . . . . . . . . . . . . . . . . . . . . . . . . . . . . . . . . . . . . . . . . . . . . . . 143Activity Authors . . . . . . . . . . . . . . . . . . . . . . . . . . . . . . . . . . . . . . . . . . . . . . . . . . . . . . . . . . . . . . . . . . . . . . . . . . . . . . . . . . 143County Contacts . . . . . . . . . . . . . . . . . . . . . . . . . . . . . . . . . . . . . . . . . . . . . . . . . . . . . . . . . . . . . . . . . . . . . . . . . . . . . . . . . . 144
Gardening for Grades: Tab1e of Contents, cont.4

5Gardening for Grades: Chapter 1 , Grow to Learn
Introduction to F1orida Schoo1 GardeningEvery year, a growing number of teachers are incorporating gardening into the academic experience for their K-12 students. School gardens provide countless ways to engage students with hands-on learning opportunities. They also offer the opportunity for school staff, parents, and community volunteers to share skills, offer wisdom and experience, and enjoy the bounty and beauty of a growing garden.
What Does a Schoo1 Garden Look Like?School gardens can take many forms. They can be established directly in the schoolyard, in raised beds, in containers, or even in water. They can produce fresh and nutritious food to use in the cafete-ria, to eat as snacks, to take home to families, or to share with those in need. They can beautify the school grounds, attract butterflies and other pollinators, and create native plant habitats.
Why Garden with Students?In whatever form a school garden takes, it can support and enhance the learning environment of the school. They help by engaging curiosity, nurturing environmental awareness, improving self-esteem and interpersonal skills, promoting healthy eating and physical activity, and fostering academic achievement. Students love being in a garden and taking care of plants, watching them grow from tiny seedlings to food-bearing plants over the course of the growing season. School gardening contributes to a nurturing learning environment for the entire school, community and beyond.
how Do I Create a Sucessfu1 Schoo1 Garden in F1orida?A Florida school garden will have some distinct differences from one grown in other regions of the country. Our particular climate and soils can be both a challenge and a boon to school gardening. This manual addresses the challenges and offers ideas for taking advantage of the positive aspects of Florida gardening. County Extension Agents with the UF Institute of Food and Agricultural Sciences (IFAS) have a wealth of experience and access to the latest research on optimizing gardens of all types. We are here to support your educational objectives and help make your Florida school garden a beau-tiful and bountiful place for students to learn.
Getting StartedBefore the first seed is even sown, a garden of any type requires careful planning. If this is your first school garden, you will be putting in some time initially gathering a garden team, assessing your edu-cational goals for the garden, making decisions about what type of garden will fit those goals, finding a site where your garden will thrive, and putting together a plan for obtaining funds and supplies. It may sound overwhelming, but this is one of the most exciting parts of the gardening adventure. Taken a step at a time, this preparation is not only achievable, it can be creative and fun. Begin to build team-work and enthusiasm before the shovel hits the soil.
P1anting the Seed | Your Gardening VisionEven though you are just starting out, and most of the specifics will be fully developed later, it is important to begin to identify a vision for your garden. It’s crucial to plan and think creatively ahead of time in order to have some solid ideas to present to the school community.
Grow to Learn
A UF/IFAS Pub1ication
Chapter One is an excerpt from school garden guide Grow to Learn, a publication created by the University of Florida Institute of Food and Agricultural Sciences (UF/IFAS) and the Florida Department of Agriculture and Consumer Services (FDACS). Florida Agriculture in the Classroom received permission from UF/IFAS to publish parts of Grow to Learn. References to page numbers in Grow to Learn are mentioned throughout the chapter. To access the full Grow to Learn publication, please visit: http://uffnp.org/wordpress1/wp-content/uploads/2015/09/FDACSFNW_Grow-to-Learn_Book-LOW-RES.pdf.
Chapter 1
5

6Gardening for Grades: Chapter 1 , Grow to Learn
Basic Questions to be ConsideredHow many students will participate?•How will it contribute to the learning environment of the school?•How will it contribute to specific goals for students?•What type of garden? In-ground? Raised bed? Container? Hydroponic?•Who will be responsible for maintenance?•Where will it be located? A convenient water source and full sun are key issues.•How will you fund the start-up as well as long-term sustainability?•How will the produce be used?•
Growing Your TeamIt takes a village to grow a garden and your first task is to begin growing that village of supportive and interested people–your garden team. For most school gardens, the first stop is the principal’s office. The principal’s support is not only necessary to move forward, but he or she may also suggest other important members for your team within the school community, and possibly in the community at large.
Be sure to cast a wide net for members of your garden team. You will be surprised at the number of gardeners in your school and community. Enthusiastic non-gardeners can also be instrumental when it comes to helping facilitate something that will be positive for students.
Growing Your Team | At SchoolFellow teachers bring ideas, enthusiasm, and expertise to the table as well as more students and •potential volunteers. Custodians, responsible for the care and maintenance of the school grounds, are vital allies in a •successful school garden. They should not be responsible for care of the garden, but will want to work closely with those who are in charge in order to keep the schoolyard safe and beautiful. Food Service Staff are great people to have on board, with their interest in nutrition and skills •regarding food preparation and safety. They may also have funding and/or be able to lend space, tools, and supplies for food preparation. After-school program and club staff may be interested in using the garden in their programs and •helping with garden chores. Parent-Teacher Associations may be able to provide volunteers and funding.•
Growing Your Team | In the CommunityNeighbors living near the school might be available to volunteer expertise and advice to the new ad-dition to the neighborhood. This can be a wonderful way to help bridge the generational gap between youth and elders.
Parents are not only potential volunteers, but will likely have community connections that will •benefit the garden. Local business representatives, from your local garden supply store to national retail outlets, •can be a huge help in making your garden sustainable. Some may even have community service programs and want to get their hands dirty. Local Service Organizations and Clubs, such as Garden Clubs, the Kiwanis, and Boy and Girl •Scouts may want to help with the garden project and even help fund it. Farmers, busy as they are, have been known to offer field trip destinations, compost materials, •extra seeds, and transplants to school gardens. They can also be guest speakers, sharing gardening knowledge on a farm-scale.UF/IFAS County Extension Agents and the FDACS Farm to School Program have up-to-date •resources on how to plan, budget, and grow your school garden. They also have information on local Junior Master Gardener programs, 4-H endeavors, and other youth agriculture activities suited to a school garden.
P1anning & Designing the GardenWhile you’re gathering and meeting with the garden team, take the next step toward bringing the vision to life:design. This section presents some of the early decisions that will need to be made and an estimated budget based on those choices. More detailed information about constructing, planting, and main-taining your garden can be found in Section II: Boots on the Ground on page 10.
7Gardening for Grades: Chapter 1 , Grow to Learn
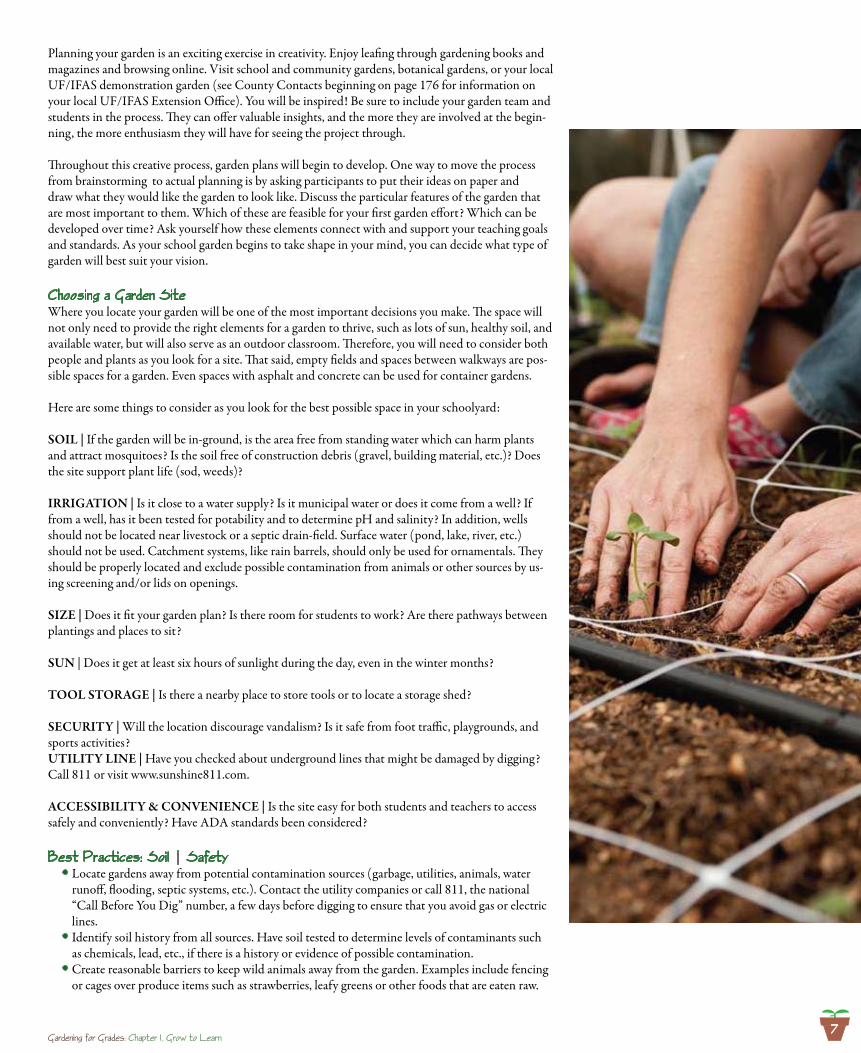
Planning your garden is an exciting exercise in creativity. Enjoy leafing through gardening books and magazines and browsing online. Visit school and community gardens, botanical gardens, or your local UF/IFAS demonstration garden (see County Contacts beginning on page 176 for information on your local UF/IFAS Extension Office). You will be inspired! Be sure to include your garden team and students in the process. They can offer valuable insights, and the more they are involved at the begin-ning, the more enthusiasm they will have for seeing the project through.
Throughout this creative process, garden plans will begin to develop. One way to move the process from brainstorming to actual planning is by asking participants to put their ideas on paper and draw what they would like the garden to look like. Discuss the particular features of the garden that are most important to them. Which of these are feasible for your first garden effort? Which can be developed over time? Ask yourself how these elements connect with and support your teaching goals and standards. As your school garden begins to take shape in your mind, you can decide what type of garden will best suit your vision.
Choosing a Garden SiteWhere you locate your garden will be one of the most important decisions you make. The space will not only need to provide the right elements for a garden to thrive, such as lots of sun, healthy soil, and available water, but will also serve as an outdoor classroom. Therefore, you will need to consider both people and plants as you look for a site. That said, empty fields and spaces between walkways are pos-sible spaces for a garden. Even spaces with asphalt and concrete can be used for container gardens.
Here are some things to consider as you look for the best possible space in your schoolyard:
SOIL | If the garden will be in-ground, is the area free from standing water which can harm plants and attract mosquitoes? Is the soil free of construction debris (gravel, building material, etc.)? Does the site support plant life (sod, weeds)?
IRRIGATION | Is it close to a water supply? Is it municipal water or does it come from a well? If from a well, has it been tested for potability and to determine pH and salinity? In addition, wells should not be located near livestock or a septic drain-field. Surface water (pond, lake, river, etc.) should not be used. Catchment systems, like rain barrels, should only be used for ornamentals. They should be properly located and exclude possible contamination from animals or other sources by us-ing screening and/or lids on openings.
SIZE | Does it fit your garden plan? Is there room for students to work? Are there pathways between plantings and places to sit?
SUN | Does it get at least six hours of sunlight during the day, even in the winter months?
TOOL STORAGE | Is there a nearby place to store tools or to locate a storage shed?
SECURITY | Will the location discourage vandalism? Is it safe from foot traffic, playgrounds, and sports activities?UTILITY LINE | Have you checked about underground lines that might be damaged by digging? Call 811 or visit www.sunshine811.com.
ACCESSIBILITY & CONVENIENCE | Is the site easy for both students and teachers to access safely and conveniently? Have ADA standards been considered?
Best Practices: Soi1 | SafetyLocate gardens away from potential contamination sources (garbage, utilities, animals, water •runoff, flooding, septic systems, etc.). Contact the utility companies or call 811, the national “Call Before You Dig” number, a few days before digging to ensure that you avoid gas or electric lines.Identify soil history from all sources. Have soil tested to determine levels of contaminants such •as chemicals, lead, etc., if there is a history or evidence of possible contamination. Create reasonable barriers to keep wild animals away from the garden. Examples include fencing •or cages over produce items such as strawberries, leafy greens or other foods that are eaten raw.
8Gardening for Grades: Chapter 1 , Grow to Learn
Consider purchasing soil that has been commercially packaged and labeled for growing food •crops. Soil purchased from a commercial source ensures traceability. Use non-toxic, non-leaching materials for raised-bed gardens, containers, stakes, or trellises. Do •not use wood treated with copper arsenate, used tires, single use plastics, or old railroad ties.
From “Food Safety Tips for School Gardens,” USDA–See “Digging Deeper” on page 11 for informa-tion on soil testing services. Contact your UF/IFAS County Extension agent for directions on how to collect and submit a soil sample. The sample analysis report will give you a fertilizer recommenda-tion for your garden.
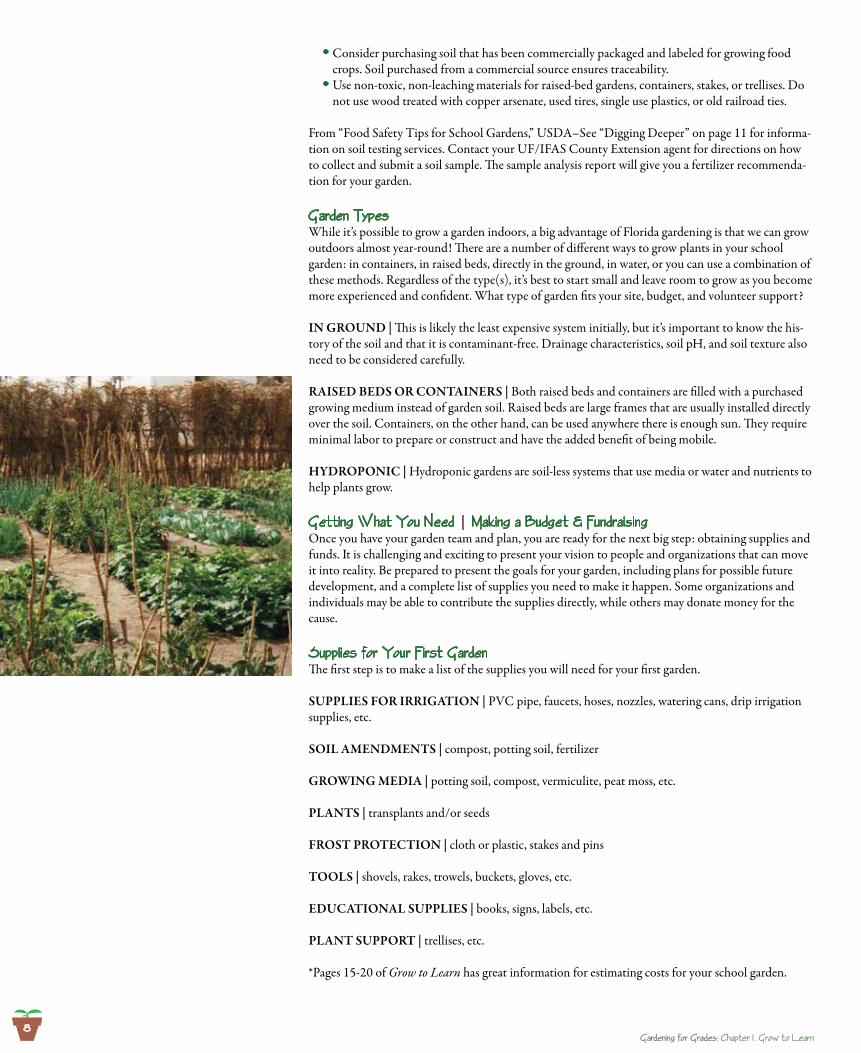
Garden TypesWhile it’s possible to grow a garden indoors, a big advantage of Florida gardening is that we can grow outdoors almost year-round! There are a number of different ways to grow plants in your school garden: in containers, in raised beds, directly in the ground, in water, or you can use a combination of these methods. Regardless of the type(s), it’s best to start small and leave room to grow as you become more experienced and confident. What type of garden fits your site, budget, and volunteer support?
IN GROUND | This is likely the least expensive system initially, but it’s important to know the his-tory of the soil and that it is contaminant-free. Drainage characteristics, soil pH, and soil texture also need to be considered carefully.
RAISED BEDS OR CONTAINERS | Both raised beds and containers are filled with a purchased growing medium instead of garden soil. Raised beds are large frames that are usually installed directly over the soil. Containers, on the other hand, can be used anywhere there is enough sun. They require minimal labor to prepare or construct and have the added benefit of being mobile.
HYDROPONIC | Hydroponic gardens are soil-less systems that use media or water and nutrients to help plants grow.
Getting What You Need | Making a Budget & FundraisingOnce you have your garden team and plan, you are ready for the next big step: obtaining supplies and funds. It is challenging and exciting to present your vision to people and organizations that can move it into reality. Be prepared to present the goals for your garden, including plans for possible future development, and a complete list of supplies you need to make it happen. Some organizations and individuals may be able to contribute the supplies directly, while others may donate money for the cause.
Supp1ies for Your First GardenThe first step is to make a list of the supplies you will need for your first garden.
SUPPLIES FOR IRRIGATION | PVC pipe, faucets, hoses, nozzles, watering cans, drip irrigation supplies, etc.
SOIL AMENDMENTS | compost, potting soil, fertilizer
GROWING MEDIA | potting soil, compost, vermiculite, peat moss, etc.
PLANTS | transplants and/or seeds
FROST PROTECTION | cloth or plastic, stakes and pins
TOOLS | shovels, rakes, trowels, buckets, gloves, etc.
EDUCATIONAL SUPPLIES | books, signs, labels, etc.
PLANT SUPPORT | trellises, etc.
*Pages 15-20 of Grow to Learn has great information for estimating costs for your school garden.
9Gardening for Grades: Chapter 1 , Grow to Learn
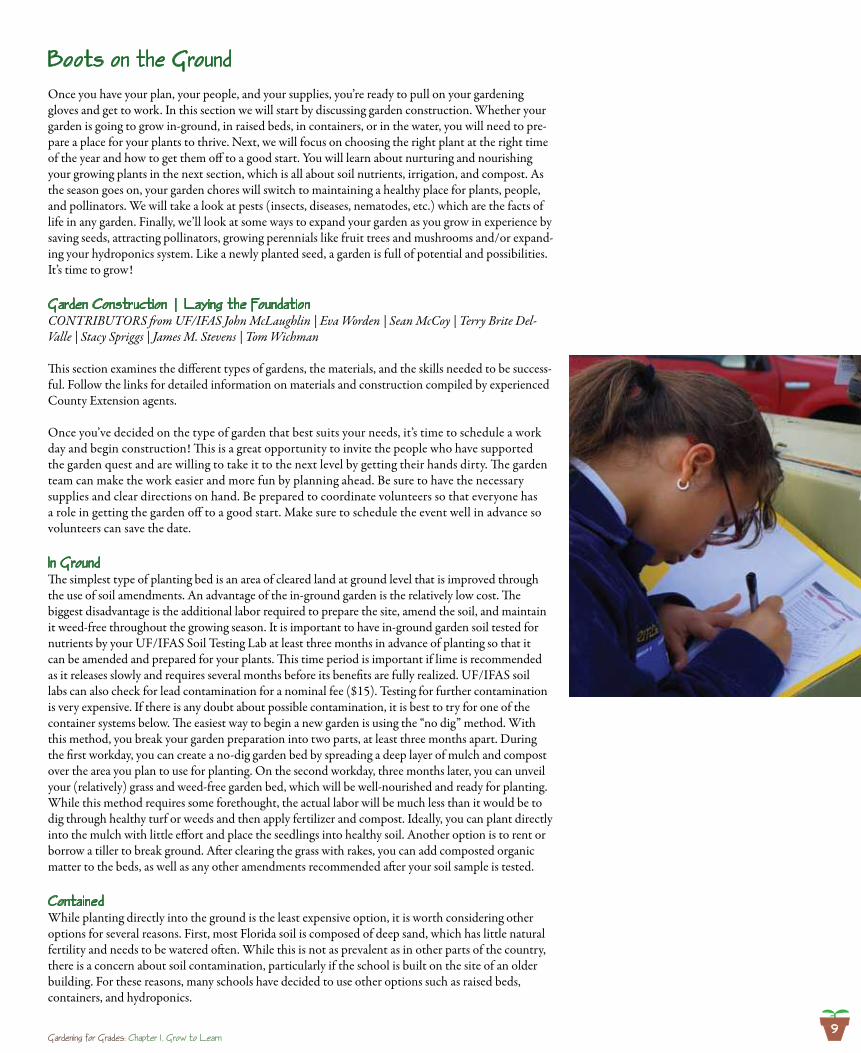
Boots on the GroundOnce you have your plan, your people, and your supplies, you’re ready to pull on your gardening gloves and get to work. In this section we will start by discussing garden construction. Whether your garden is going to grow in-ground, in raised beds, in containers, or in the water, you will need to pre-pare a place for your plants to thrive. Next, we will focus on choosing the right plant at the right time of the year and how to get them off to a good start. You will learn about nurturing and nourishing your growing plants in the next section, which is all about soil nutrients, irrigation, and compost. As the season goes on, your garden chores will switch to maintaining a healthy place for plants, people, and pollinators. We will take a look at pests (insects, diseases, nematodes, etc.) which are the facts of life in any garden. Finally, we’ll look at some ways to expand your garden as you grow in experience by saving seeds, attracting pollinators, growing perennials like fruit trees and mushrooms and/or expand-ing your hydroponics system. Like a newly planted seed, a garden is full of potential and possibilities. It’s time to grow!
Garden Construction | Laying the FoundationCONTRIBUTORS from UF/IFAS John McLaughlin | Eva Worden | Sean McCoy | Terry Brite Del-Valle | Stacy Spriggs | James M. Stevens | Tom Wichman
This section examines the different types of gardens, the materials, and the skills needed to be success-ful. Follow the links for detailed information on materials and construction compiled by experienced County Extension agents.
Once you’ve decided on the type of garden that best suits your needs, it’s time to schedule a work day and begin construction! This is a great opportunity to invite the people who have supported the garden quest and are willing to take it to the next level by getting their hands dirty. The garden team can make the work easier and more fun by planning ahead. Be sure to have the necessary supplies and clear directions on hand. Be prepared to coordinate volunteers so that everyone has a role in getting the garden off to a good start. Make sure to schedule the event well in advance so volunteers can save the date.
In GroundThe simplest type of planting bed is an area of cleared land at ground level that is improved through the use of soil amendments. An advantage of the in-ground garden is the relatively low cost. The biggest disadvantage is the additional labor required to prepare the site, amend the soil, and maintain it weed-free throughout the growing season. It is important to have in-ground garden soil tested for nutrients by your UF/IFAS Soil Testing Lab at least three months in advance of planting so that it can be amended and prepared for your plants. This time period is important if lime is recommended as it releases slowly and requires several months before its benefits are fully realized. UF/IFAS soil labs can also check for lead contamination for a nominal fee ($15). Testing for further contamination is very expensive. If there is any doubt about possible contamination, it is best to try for one of the container systems below. The easiest way to begin a new garden is using the “no dig” method. With this method, you break your garden preparation into two parts, at least three months apart. During the first workday, you can create a no-dig garden bed by spreading a deep layer of mulch and compost over the area you plan to use for planting. On the second workday, three months later, you can unveil your (relatively) grass and weed-free garden bed, which will be well-nourished and ready for planting. While this method requires some forethought, the actual labor will be much less than it would be to dig through healthy turf or weeds and then apply fertilizer and compost. Ideally, you can plant directly into the mulch with little effort and place the seedlings into healthy soil. Another option is to rent or borrow a tiller to break ground. After clearing the grass with rakes, you can add composted organic matter to the beds, as well as any other amendments recommended after your soil sample is tested.
ContainedWhile planting directly into the ground is the least expensive option, it is worth considering other options for several reasons. First, most Florida soil is composed of deep sand, which has little natural fertility and needs to be watered often. While this is not as prevalent as in other parts of the country, there is a concern about soil contamination, particularly if the school is built on the site of an older building. For these reasons, many schools have decided to use other options such as raised beds, containers, and hydroponics.

10Gardening for Grades: Chapter 1 , Grow to Learn
RAISED BEDS | Raised beds are a great option for getting your garden off the ground! They can produce a lot of veggies in a small space while contributing to the beauty of the school landscape. Raised beds offer a number of advantages. For instance, they are filled with a disease-free growing me-dium (potting soil), easy to cultivate, less likely to be damaged by foot traffic, and are a good option if there is a concern about soil contamination. The downside is that they are more costly than plant-ing directly in the ground and they can require more irrigation due to the increased loss of moisture through the sides of the bed.
Traditionally, bed walls are constructed from wood, masonry, and synthetic lumber and can be built with a minimum of skill and expertise. There are also several possibilities for filling the beds, including purchased potting soil mixes.
With enough volunteers, you may be able to construct raised beds, fill them with soil, and plant all in one work day. It is fun, hands-on work and students can assist with the construction and filling with a minimal level of skill. These can be planted immediately.
CONTAINER GARDENING | If you have a small area or don’t have the capacity to grow a large garden, container gardening might work for you. Many plants grow in pots just as well as they do in the ground. In many ways, the requirements of a small container garden are very much like those of any garden: sun, water, healthy soil, and nutrients. But you may also consider how plants are grouped together and if there is room to grow. If there will be more than one plant in the same pot, be sure that all your plants meet the same requirements for water, sun, and nutrients. Also be sure that the size of the container matches the size of your plant.
When we think of container gardens, we usually think of clay or plastic pots. However, a wide as-sortment of containers may be used, ranging from hanging baskets and flower pots to tubs and refuse cans. Almost any container is suitable as long as it is sufficiently durable, has good drainage, and is large enough to hold the fully-grown plant or plants. In this respect, gardeners are limited only by their imagination. An old bathtub might yield prize tomatoes, while an old plastic beach ball cut in half could become an excellent herb container.
Containers dry out more quickly than most in-ground gardens and require more frequent watering. Self-watering containers solve the problem with a reservoir for holding water that uses capillary action to deliver water into the growing medium, keeping the soil consistently moist. You can also make your own.
hydroponicsGROW A GARDEN WITHOUT SOIL | Hydroponics is the growing of plants in any medium other than soil. There are a number of hydroponics systems on the market. The most basic are fun and simple to put together and are also quite inexpensive. One key advantage to hydroponics garden-ing is that many diseases, insects, and nematodes can be avoided by using the liquid media. A very simple system can be created using a plastic container. This can be anything from a bucket to a storage container to a child’s swimming pool. The container should be filled with perlite and kept damp with a mix of water and soluble fertilizer. Short-term crops that like water such as lettuce, basil, mint, watercress, chives, scallions, beans, and peas are examples of crops that grow well with this approach.
P1ants for Your Garden | What to Grow, how to Grow It & When to harvestCONTRIBUTORS Wendy Wilbur | Danielle D. Treadwell | Sydney Park Brown | James Stephens | Terry Brite DelValle | Susan Webb
A wonderful selection of vegetables and herbs can be grown in your school garden during most of the school year. Choosing vegetables for your particular region and getting them off to a good start are simple tasks that have a huge impact on your success. This section will look at plant selection, place-ment in the garden, and how to actually get them into the ground and growing.
Choosing P1antsFlorida school gardeners are extremely fortunate to have a nearly year-round growing season that conforms very well to the school year. Florida gardens can be planted in both warm and cool seasons. Throughout the year, you may have multiple harvests, with the final one conveniently planned for the
1 1Gardening for Grades: Chapter 1 , Grow to Learn
week before summer vacation. Check the recommended planting dates for your region and the “days to harvest” in the Florida Vegetable Gardening Guide (See Appendix of Grow to Learn) to see what will work for your garden. Keep in mind that “days to harvest” is from seed to harvest; if you are using transplants instead, the time period will be shorter. Selecting vegetable varieties that are resistant or tolerant of pests is important for the health of your garden. Seed catalogs, seed packets, and trans-plant labels often indicate if pest resistance is a characteristic through statements or letter designa-tions. For example, a tomato variety name may be followed with VFNTA indicating that it is resistant (in this case) to Verticillium (V) and Fusarium (F) wilt diseases, Nematodes (N), Tobacco Mosaic Virus (T), and Alternaria fungus (A). Choosing the right plant at the outset can eliminate a lot of future problems. For a list of the “Top Twenty Vegetables for Florida School Gardens” see Appendix of Grow to Learn.
Seeds or Transp1ants?There are two ways to get plants started in your garden– seeds or transplants. Some plants do much better when they are directly seeded (planted right into the garden soil where they will be growing). For direct-seeding, follow the directions on the seed package or in the garden guide. Plant at the required depth and spacing and be sure to water regularly, until they begin to sprout. Root crops like carrots, radishes, turnips, and beets do best when directly seeded. There are a number of advantages to using transplants (baby plants you can grow from seed or purchase from garden stores). If you are rais-ing your own, you can care for them in a protected environment until they are strong enough to go out into the garden; there will be fewer disappointments and setbacks from unexpected freezes, heavy rainfalls or hungry insects. There is also a shorter wait between planting and harvesting. There are two other advantages: If you’ve delayed planting and have missed the window of planting from seeds, transplants allow you a 4–6 week catch up. Also, for plants that are picked over an extended period (like peppers) you really only need a limited number of plants, not all the potential plants from a seed packet. Buying them is even easier! Large chain stores don’t always carry vegetable varieties that perform well in Florida. You may have better luck shopping at small retail nurseries or feed-and-seed stores that stock locally-grown transplants. Often your local UF/IFAS County Extension Agent can recommend good varieties for each region.
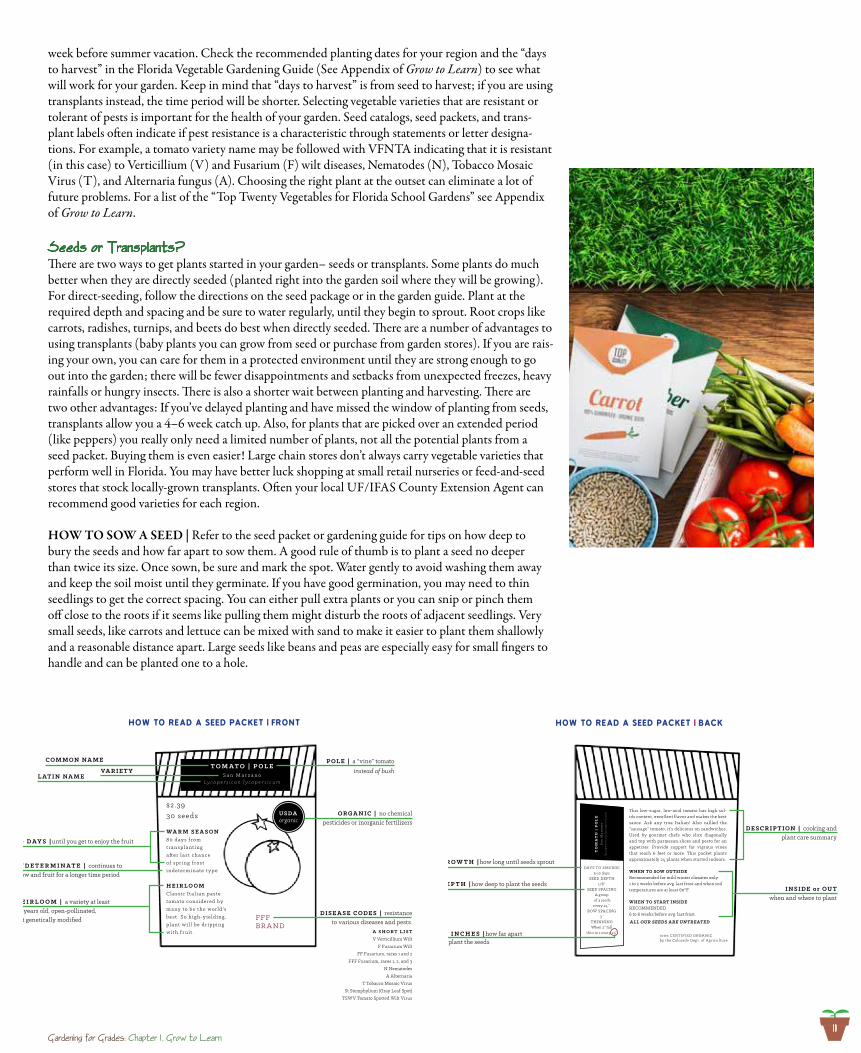
HOW TO SOW A SEED | Refer to the seed packet or gardening guide for tips on how deep to bury the seeds and how far apart to sow them. A good rule of thumb is to plant a seed no deeper than twice its size. Once sown, be sure and mark the spot. Water gently to avoid washing them away and keep the soil moist until they germinate. If you have good germination, you may need to thin seedlings to get the correct spacing. You can either pull extra plants or you can snip or pinch them off close to the roots if it seems like pulling them might disturb the roots of adjacent seedlings. Very small seeds, like carrots and lettuce can be mixed with sand to make it easier to plant them shallowly and a reasonable distance apart. Large seeds like beans and peas are especially easy for small fingers to handle and can be planted one to a hole.
HOW TO READ A SEED PACKET | BACK
This low-sugar, low-acid tomato has high sol-ids content, excellent flavor and makes the best sauce. Ask any true Italian! Also callled the “sausage” tomato, it’s delicious on sandwiches. Used by gourmet chefs who slice diagonally and top with parmesan slices and pesto for an appetizer. Provide support for vigrous vines that reach 6 feet or more. This packet plants approximately 24 plants when started indoors.
WHEN TO SOW OUTSIDERecommended for mild winter climates only.1 to 2 weeks before avg. last frost and when soiltemperatures are at least 60°F.
WHEN TO START INSIDE RECOMMENDED.6 to 8 weeks before avg. last frost.
TO
MA
TO
| P
OL
ES
an
Ma
rza
no
lyco
per
sico
n l
yco
per
sicu
m
DAYS TO EMERGE 5-10 days
SEED DEPTH1/8”
SEED SPACINGA group
of 3 seeds every 24 “.
ROW SPACING3 ‘
THINNINGWhen 2” tall
thin to 1 every 24”100% CERTIFIED ORGANICby the Colorado Dept. of Agriculture
ALL OUR SEEDS ARE UNTREATED
HOW TO READ A SEED PACKET | FRONT
T O M A T O | P O L ES a n M a r z a n o
L y c o p e r s i c o n l y c o p e r s i c u m
FFFBR A ND
$2.3930 seeds
WA R M S E A S O N80 days f romt ra nspla nt i nga ft er last cha nceof spr i ng f rosti ndeter m i nate t y pe
H E I R L O O MC lassic Ita l ia n paste tomato considered by ma ny to be t he world ’s best . So h igh-y ie ld i ng, pla nt w i l l be d r ippi ng w it h f r u it .
U S DAorganic
C OM MON NA M E
L AT I N NA M E
ORG A N IC | no chemical pesticides or inorganic fertilizers
I N D E T E R M I N A T E | continues to grow and fruit for a longer time period
H E I R L O O M | a variety at least 50 years old, open-pollinated, not genetically modified
8 0 D A Y S | until you get to enjoy the fruit
P OL E | a “vine” tomato instead of bush
DE S C R I P T ION | cooking and plant care summary
I NSI DE or OU T when and where to plant
G R O W T H | how long until seeds sprout
D E P T H | how deep to plant the seeds
2 4 I N C H E S | how far apart to plant the seeds
DI SE A SE C ODE S | resistance to various diseases and pests.
A S H O R T L I S TV Verticillium Wilt
F Fusarium WiltFF Fusarium, races 1 and 2
FFF Fusarium, races 1, 2, and 3N NematodesA Alternaria
T Tobacco Mosaic VirusSt Stemphylium (Gray Leaf Spot)
VA R I E T Y
12Gardening for Grades: Chapter 1 , Grow to Learn
HOW TO TRANSPLANT A SEEDLING | It is important to carefully remove transplants from their pots. Gently lift soil from the pot with the handle of a plastic utensil, trying to keep as much soil as possible attached to the roots. The soil level of the formerly potted plant should be even with the ground level around the hole, so dig your hole with that in mind. (Tomatoes are an exception to this; tomato roots will sprout along the buried portion of the stem, so it’s best to plant them deeply). Gently press the soil around the plant and water immediately.
HOW TO MAKE TRANSPLANTS | Some plants are best put into the garden as transplants and are very easy to grow from seed in a container. Seed trays can be filled with a very fine growing medium. Both trays and soil are usually available at garden stores. Seeds should be sown at the same depth indicated for sowing outdoors. They should be placed in a sunny, but protected area outdoors, in a sunny window with southern exposure, or under grow lights.
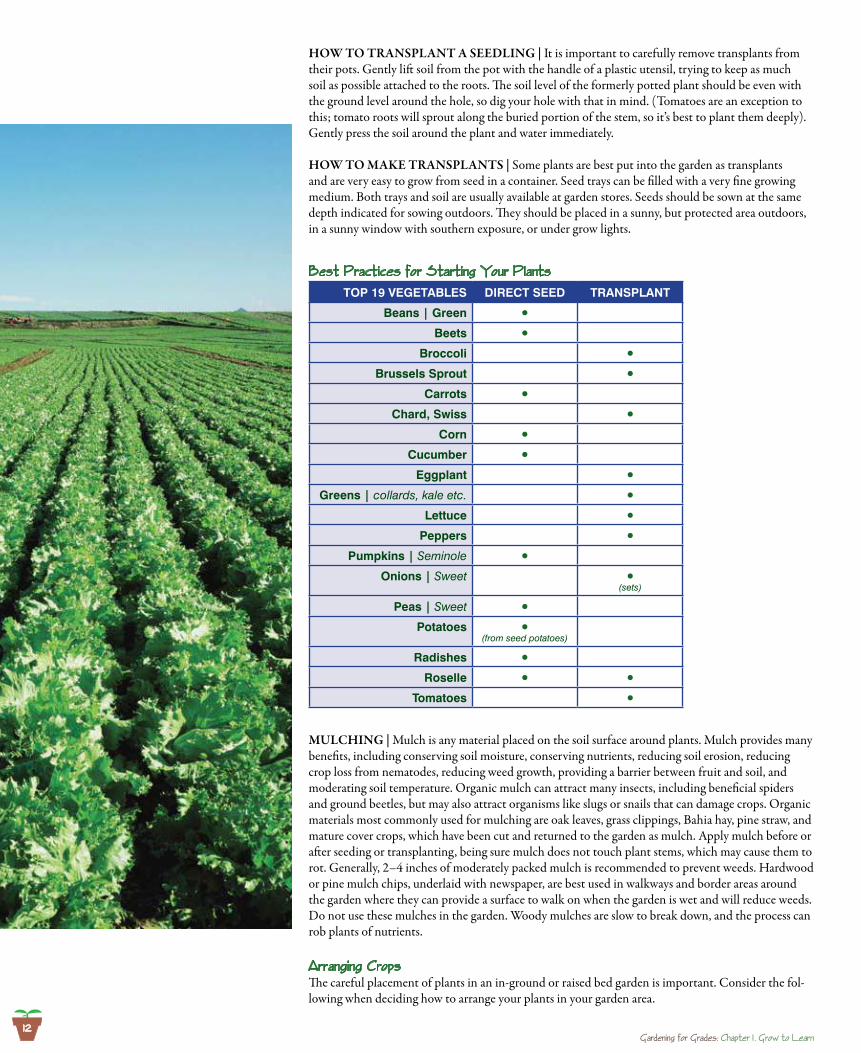
Best Practices for Starting Your P1antsTOP 19 VEGETABLES DIRECT SEED TRANSPLANT
Beans | Green ●
Beets ●
Broccoli ●
Brussels Sprout ●
Carrots ●
Chard, Swiss ●
Corn ●
Cucumber ●
Eggplant ●
Greens | collards, kale etc. ●
Lettuce ●
Peppers ●
Pumpkins | Seminole ●
Onions | Sweet ●(sets)
Peas | Sweet ●
Potatoes ●(from seed potatoes)
Radishes ●
Roselle ● ●
Tomatoes ●
MULCHING | Mulch is any material placed on the soil surface around plants. Mulch provides many benefits, including conserving soil moisture, conserving nutrients, reducing soil erosion, reducing crop loss from nematodes, reducing weed growth, providing a barrier between fruit and soil, and moderating soil temperature. Organic mulch can attract many insects, including beneficial spiders and ground beetles, but may also attract organisms like slugs or snails that can damage crops. Organic materials most commonly used for mulching are oak leaves, grass clippings, Bahia hay, pine straw, and mature cover crops, which have been cut and returned to the garden as mulch. Apply mulch before or after seeding or transplanting, being sure mulch does not touch plant stems, which may cause them to rot. Generally, 2–4 inches of moderately packed mulch is recommended to prevent weeds. Hardwood or pine mulch chips, underlaid with newspaper, are best used in walkways and border areas around the garden where they can provide a surface to walk on when the garden is wet and will reduce weeds. Do not use these mulches in the garden. Woody mulches are slow to break down, and the process can rob plants of nutrients.
Arranging CropsThe careful placement of plants in an in-ground or raised bed garden is important. Consider the fol-lowing when deciding how to arrange your plants in your garden area.
13Gardening for Grades: Chapter 1 , Grow to Learn
OPTIMAL SUNLIGHT | Run rows north and south so that exposure to sunlight is even for all rows. Also place tall plants and trellised crops at the north side of the garden so they will not shade smaller plants. Remember the sun will be low in the southern sky during winter.
WALKWAYS | Allow adequate space between rows so that groups of students can walk through without stepping on plants or tripping on raised bed supports.
PLANT LIFESPAN | Crops that span more than one season, such as strawberries or perennial crops that persist through many seasons, should be placed to one side of the garden so they do not interfere with seasonal preparation of the garden. SPACE & INTERPLANT | Be sure to use proper spacing so plants have room to grow. Interplant fast-growing crops like radish among slower-growing ones (like carrots). Fast-growing crops are out of the way before the slower-growing crop needs the space.
POLLINATION | Plant sweet corn in blocks rather than in single rows so that ample pollen is pres-ent in the air around the corn stalks. This practice should result in better pollination and full, mature corn cobs.
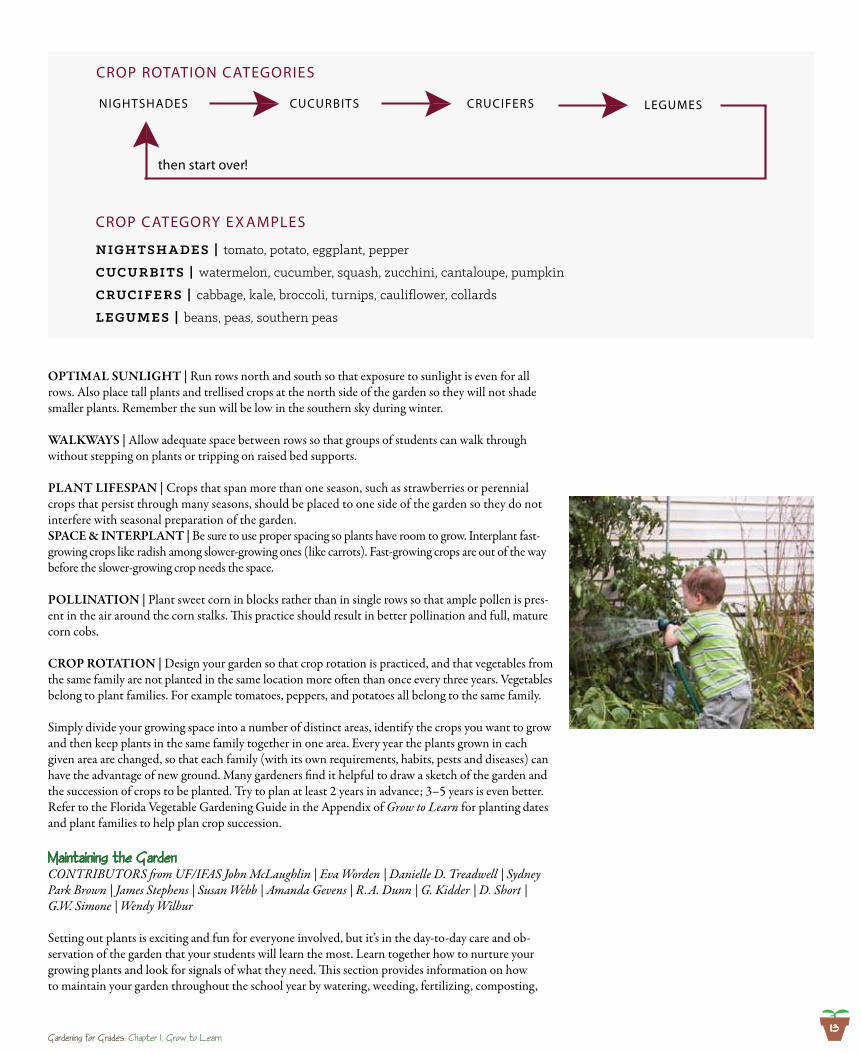
CROP ROTATION | Design your garden so that crop rotation is practiced, and that vegetables from the same family are not planted in the same location more often than once every three years. Vegetables belong to plant families. For example tomatoes, peppers, and potatoes all belong to the same family.
Simply divide your growing space into a number of distinct areas, identify the crops you want to grow and then keep plants in the same family together in one area. Every year the plants grown in each given area are changed, so that each family (with its own requirements, habits, pests and diseases) can have the advantage of new ground. Many gardeners find it helpful to draw a sketch of the garden and the succession of crops to be planted. Try to plan at least 2 years in advance; 3–5 years is even better. Refer to the Florida Vegetable Gardening Guide in the Appendix of Grow to Learn for planting dates and plant families to help plan crop succession.
Maintaining the GardenCONTRIBUTORS from UF/IFAS John McLaughlin | Eva Worden | Danielle D. Treadwell | Sydney Park Brown | James Stephens | Susan Webb | Amanda Gevens | R.A. Dunn | G. Kidder | D. Short | G.W. Simone | Wendy Wilbur
Setting out plants is exciting and fun for everyone involved, but it’s in the day-to-day care and ob-servation of the garden that your students will learn the most. Learn together how to nurture your growing plants and look for signals of what they need. This section provides information on how to maintain your garden throughout the school year by watering, weeding, fertilizing, composting,
CROP ROTATION CATEGORIES
NIGHTSHADES CUCURBITS CRUCIFERS LEGUMES
then start over!
CROP CATEGORY E X AMPLES
tomato, potato, eggplant, pepper
watermelon, cucumber, squash, zucchini, cantaloupe, pumpkin
cabbage, kale, broccoli, turnips, cauliflower, collards
beans, peas, southern peas
14Gardening for Grades: Chapter 1 , Grow to Learn
checking for pests and diseases, and “putting it to bed” for the summer. The work you put into the garden will result in a bountiful harvest as well as a crop of budding scientists.
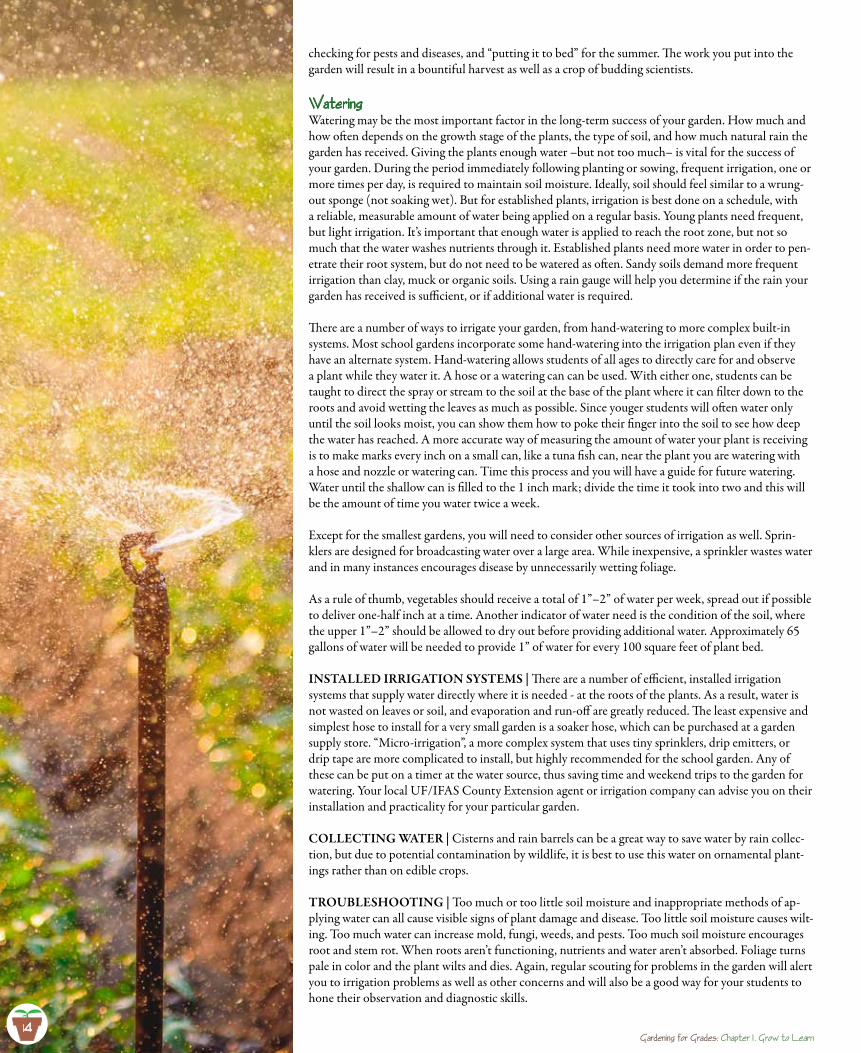
WateringWatering may be the most important factor in the long-term success of your garden. How much and how often depends on the growth stage of the plants, the type of soil, and how much natural rain the garden has received. Giving the plants enough water –but not too much– is vital for the success of your garden. During the period immediately following planting or sowing, frequent irrigation, one or more times per day, is required to maintain soil moisture. Ideally, soil should feel similar to a wrung-out sponge (not soaking wet). But for established plants, irrigation is best done on a schedule, with a reliable, measurable amount of water being applied on a regular basis. Young plants need frequent, but light irrigation. It’s important that enough water is applied to reach the root zone, but not so much that the water washes nutrients through it. Established plants need more water in order to pen-etrate their root system, but do not need to be watered as often. Sandy soils demand more frequent irrigation than clay, muck or organic soils. Using a rain gauge will help you determine if the rain your garden has received is sufficient, or if additional water is required.
There are a number of ways to irrigate your garden, from hand-watering to more complex built-in systems. Most school gardens incorporate some hand-watering into the irrigation plan even if they have an alternate system. Hand-watering allows students of all ages to directly care for and observe a plant while they water it. A hose or a watering can can be used. With either one, students can be taught to direct the spray or stream to the soil at the base of the plant where it can filter down to the roots and avoid wetting the leaves as much as possible. Since youger students will often water only until the soil looks moist, you can show them how to poke their finger into the soil to see how deep the water has reached. A more accurate way of measuring the amount of water your plant is receiving is to make marks every inch on a small can, like a tuna fish can, near the plant you are watering with a hose and nozzle or watering can. Time this process and you will have a guide for future watering. Water until the shallow can is filled to the 1 inch mark; divide the time it took into two and this will be the amount of time you water twice a week.
Except for the smallest gardens, you will need to consider other sources of irrigation as well. Sprin-klers are designed for broadcasting water over a large area. While inexpensive, a sprinkler wastes water and in many instances encourages disease by unnecessarily wetting foliage.
As a rule of thumb, vegetables should receive a total of 1”–2” of water per week, spread out if possible to deliver one-half inch at a time. Another indicator of water need is the condition of the soil, where the upper 1”–2” should be allowed to dry out before providing additional water. Approximately 65 gallons of water will be needed to provide 1” of water for every 100 square feet of plant bed.
INSTALLED IRRIGATION SYSTEMS | There are a number of efficient, installed irrigation systems that supply water directly where it is needed - at the roots of the plants. As a result, water is not wasted on leaves or soil, and evaporation and run-off are greatly reduced. The least expensive and simplest hose to install for a very small garden is a soaker hose, which can be purchased at a garden supply store. “Micro-irrigation”, a more complex system that uses tiny sprinklers, drip emitters, or drip tape are more complicated to install, but highly recommended for the school garden. Any of these can be put on a timer at the water source, thus saving time and weekend trips to the garden for watering. Your local UF/IFAS County Extension agent or irrigation company can advise you on their installation and practicality for your particular garden.
COLLECTING WATER | Cisterns and rain barrels can be a great way to save water by rain collec-tion, but due to potential contamination by wildlife, it is best to use this water on ornamental plant-ings rather than on edible crops. TROUBLESHOOTING | Too much or too little soil moisture and inappropriate methods of ap-plying water can all cause visible signs of plant damage and disease. Too little soil moisture causes wilt-ing. Too much water can increase mold, fungi, weeds, and pests. Too much soil moisture encourages root and stem rot. When roots aren’t functioning, nutrients and water aren’t absorbed. Foliage turns pale in color and the plant wilts and dies. Again, regular scouting for problems in the garden will alert you to irrigation problems as well as other concerns and will also be a good way for your students to hone their observation and diagnostic skills.
14
15Gardening for Grades: Chapter 1 , Grow to Learn
WeedingWeeds are simply plants growing in the wrong place. Unfortunately, they will compete with your plants for water, sun, and root space. While mulching will cut down on the number of weeds, their seeds are lying just below the surface waiting to sprout under the right conditions. It’s best to keep a close eye out for them and pull them when they are young. Never let weeds grow to the point of flow-ering and producing seed, or you will find more among your plants. Mowing around the outside edges of the garden where weeds grow will help prevent their seeds from drifting into the garden beds.
Keep adding mulch as the season progresses to reduce the need to weed. As the garden season wears on, the mulch you added initially around seedlings will begin to break down, improving soil structure and adding nutrients like a slow release of fertilizer. Adding mulch to maintain a depth of at least 2”–3” will continue to aid in weed suppression and water retention and continue the cycle of soil improvement. More information on mulching is found in the previous section.
Ferti1izingPlants, like people, need the proper nutrition to help them grow well. Fertilizers are composed of minerals, and many of the same minerals that are important for human health are also important for plant health. Too much, or too little, fertilizer will have a negative impact on your garden’s growth and development. Commercial fertilizer comes in a number of different formulations, or combina-tions of nutrients and their relative concentrations in the mix. The top three essential nutrients for plants are nitrogen, phosphorus, and potassium, or N, P, and K, as they are known by their chemical element abbreviation, and are found in nearly all fertilizer formulations. Several curricula address crop nutrition in greater detail.
Most plant nutrients are provided by the soil and will increase their availability by fertilizing. You are ahead of the game if you have made an effort to incorporate organic material into your garden and had your soil tested for additional nutrient needs. Similarly, carefully choosing and mixing a growing medium for raised beds or containers will help your plants get off to a good start. Soil with plenty of organic material can increase water holding capacity and help retain nutrients in soil. As your garden grows and the plants take up some of these nutrients, they will need to be replenished.
Both organic and synthetic fertilizer can contribute to plant health. Good results can be obtained by using one or the other, or a combination of both. No matter what fertilizer you use, it’s very impor-tant to use the recommended amount. Over-fertilizing can encourage excessive growth, often at the expense of the edible portion of the plant, and in extreme cases, can kill plants by interfering with metabolism. In addition, nutrient leaching and surface run-off are significant contributors to water pollution. Under-fertilization slows growth and development and leaves plants weak. Purchase only the amount needed for a season to avoid degradation, pest-management, and child safety concerns associated with long-term fertilizer storage.
More information on reading a fertilizer bag and calculating nutrient contact can be found on page 43 of Grow to Learn.
Amending with Organic Materia1sPlant nutrient deficiencies can often be diagnosed by symptoms that affect the plant’s appearance, such as leaf color and shape, as well as abnormalities in the developing fruit. Careful, regular observa-tion of plants by students can help spot problems early before the plant is weakened. Your UF/IFAS County Extension agent can help you diagnose diseases caused by nutrient deficiencies and help you put together a nutrient/fertilizer program for your garden.
In nature, earthworms, pillbugs, snails, mushrooms, bacteria, and fungi decompose dead plants and animals, breaking them into smaller particles and releasing nutrients back into the soil. Compost is produced by biological decomposition under controlled conditions. Compost is made from gar-den waste and other materials high in carbon (leaves, straw) or nitrogen (grass clippings). When the organic materials are managed to ensure optimum moisture and airflow through the pile, the decomposers use the organic matter as an energy source and break it down into smaller compounds collectively called humus. The decomposition process produces heat which furthers additional decomposition. After the material is broken down, the compost can be added into the garden to im-prove soil structure and increase the nutrient content. Research has shown that compost applied on
Tips from the Experts
SOIL | REGULAR TESTING
Regular soil testing enables you to find out the makeup of your soil and determine how much lime and fertilizer you may need to amend it. It’s important to know your soil and to keep improving this crucial compo-nent in your landscape and garden. To find out what you need to do to ensure optimal plant growth, you should know each of the following attributes of the soil.
++ CURRENT pH LEVELS | pH is measured on a scale of 1–14. If your soil is below 7, it is acidic and if it is above 7, it is alkaline. Certain essential elements for plant growth are most available for absorption when the soil is close to neutral. Generally speaking, most plants and vegetables do best at a pH of 6.5, but there are exceptions. Blueberries prefer pH of 5.5–4.0.
++ FERTILITY LEVELS OF PRINCIPLE NUTRIENTS | Our Florida soils naturally have nutrients. A soil test report will include recommendations regarding soil amendments.
Soil tests are relatively inexpensive ($7). Contact your UF/IFAS County Extension agent for directions on how to take a sample and where to have it tested.
– Wendy Wilbur, UF/IFAS Alachua County Extension
16Gardening for Grades: Chapter 1 , Grow to Learn
the surface of the garden can reduce weeds, but because of the many benefits compost imparts to soil, it is probably best to incorporate it into the soil. Apply a 1–3 inch layer of compost to the soil surface and mix it to a depth of 6–8 inches. Compost can also be used in potting media mixes at a rate of one part compost to 3 or 4 parts of other media ingredients.
Composting is easy and affordable in the presence of readily available raw materials. It also helps to reduce waste by making use of leaves, grass clippings, and other plant refuse. Florida is one of several states that have banned yard waste from landfills. If you choose to compost, it’s important to do it properly to reduce odor, to avoid attracting rodents and other scavenging animals, and to ensure food safety. Compost can be made in freestanding piles (between 3 and 5 feet, cubed) or contained in bins that allow for proper air movement.
VERMICOMPOSTING | Vermicomposting is the process of using worms and microorganisms to break down paper and vegetable scraps into rich compost. One pound of worms can turn 65 pounds of trash into vermicompost in 110 days. In a school setting, vermicomposting can set the stage for a variety of fun, interdisciplinary activities. Worms are easy to care for, produce no offensive odors, and worm castings can be used to improve the fertility and water retention of soil or potting media in your garden. Apply vermicompost at similar rates to field soil or containers as compost. Information on how to build an inexpensive worm bin that will produce compost for your garden can be obtained from your local UF/IFAS County Extension agent or found in the “Digging Deeper” section on page 49 in Grow to Learn.
Best PracticesIntegrated Pest Management
Integrated Pest Management (IPM), an effective and environ-mentally sensitive approach to pest management, is recom-mended for schools. The principles of IPM include monitoring for pests and learning to identify them, using cultural methods in the garden like crop rotation and careful plant selection, and, when necessary, using the least toxic pesticide possible (chemical pesticides are prohibited in the school garden).
Frost ProtectionFor schools in Central and North Florida, you are likely to contend with frost and below-freezing temperatures. Planting crops that are cold-hardy in the fall is wise and will usually alleviate the need for protection as long as the temperature does not stay below freezing for more than a few hours. For other plants, and for tender spring plants that are threatened by a late frost, protection must be considered. In most cases, the best option is frost cloth. This keeps the plants protected from the cool temperatures while allowing air circulation around the plants. Since most cloth allows a degree of sunlight through, plants can continue photosynthesis and the cloth can be left on for 2–3 days if needed.
Managing Pests & DiseaseWhen it comes to keeping your garden healthy, an ounce of prevention is worth a pound of cure. Good cultural practices from the outset, as described in previous sections–observing planting dates, amending the soil, having a crop rotation plan, using mulch, and providing appropriate irrigation–will give your plants the best opportunity to thrive. The Florida Vegetable Gardening Guide in the Appendix of Grow to Learn provides an extensive list of practical approaches to controlling pests that do not include synthetic pesticides, including a table that provides a list of pesticides with formulations that are approved by the United States Department of Agriculture’s National Organic Program. These products are generally available at national retail outlets and are deemed to have minimal risk to human and animal health by the Environmental Protection Agency. According to the USDA, no synthetic pesticides should be used in school gardens. Many schools have banned the use of any and all pesticides on school grounds, unless applied by a licensed pesticide applicator when students are absent from school grounds.
Tips from the Experts
RULES FOR SAFE COMPOST
++ A general rule of thumb is to layer “browns” (materials high in carbon) and “greens” (materials high in nitrogen) in equal layers 3”–4” deep.
++ Avoid stocking the pile with materials larger than 3” long or 1” in diameter.
++ Keep the pile moist, but not wet to the point of dripping when squeezed.
++ Never add cooked food.
++ Never add animal products–meat, dairy, fat, etc.
++ Always ensure your pile has attained the proper internal temperature between 130–170°F (depending on the composting methods used) to reduce the risk of plant and human disease-causing organisms. These organisms are killed when temperatures are maintained over a period of several days. Compost thermometers can be ordered online or found at many garden stores.
++ Finished compost should smell like damp soil, have a consistent and cool temperature throughout the pile and be uniform in particle size.
++ Always apply finished compost at beginning of growing season and no more than one month before harvesting.
Additional advice and published materials on composting, including the construction of composting bins, is available from your UF/IFAS County Extension service and in the “Digging Deeper” section of Grow to Learn.
17Gardening for Grades: Chapter 1 , Grow to Learn
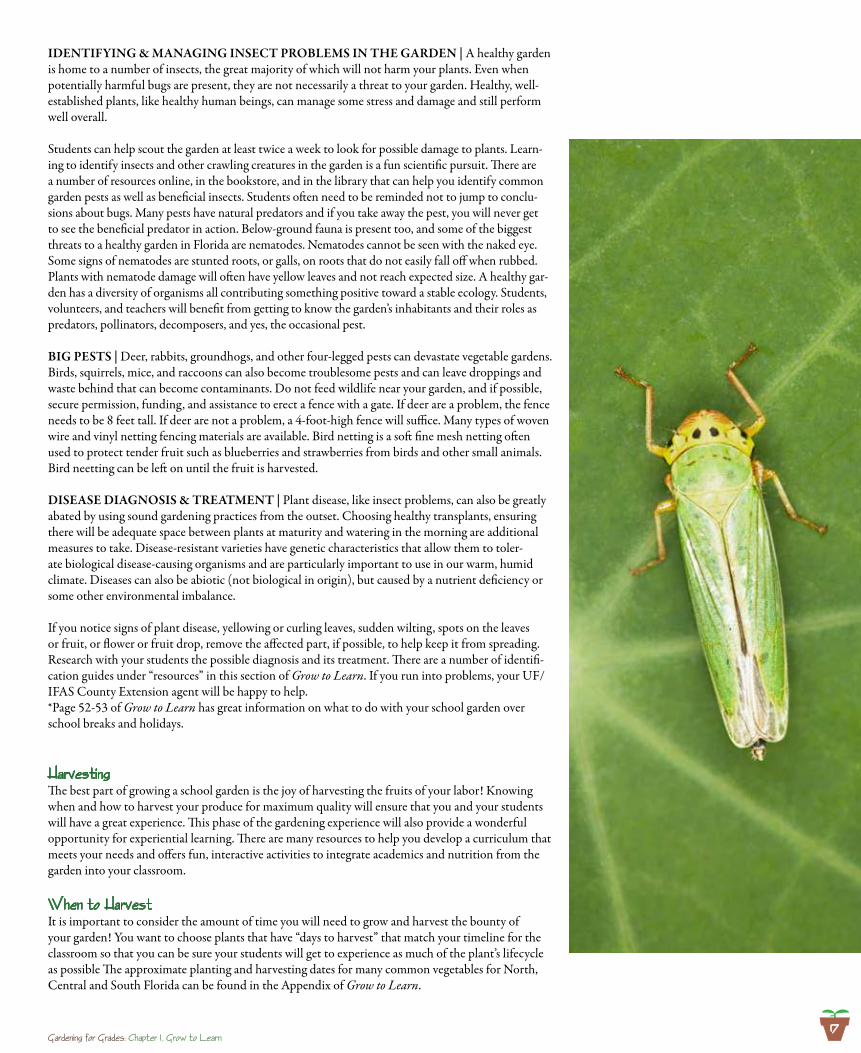
IDENTIFYING & MANAGING INSECT PROBLEMS IN THE GARDEN | A healthy garden is home to a number of insects, the great majority of which will not harm your plants. Even when potentially harmful bugs are present, they are not necessarily a threat to your garden. Healthy, well-established plants, like healthy human beings, can manage some stress and damage and still perform well overall.
Students can help scout the garden at least twice a week to look for possible damage to plants. Learn-ing to identify insects and other crawling creatures in the garden is a fun scientific pursuit. There are a number of resources online, in the bookstore, and in the library that can help you identify common garden pests as well as beneficial insects. Students often need to be reminded not to jump to conclu-sions about bugs. Many pests have natural predators and if you take away the pest, you will never get to see the beneficial predator in action. Below-ground fauna is present too, and some of the biggest threats to a healthy garden in Florida are nematodes. Nematodes cannot be seen with the naked eye. Some signs of nematodes are stunted roots, or galls, on roots that do not easily fall off when rubbed. Plants with nematode damage will often have yellow leaves and not reach expected size. A healthy gar-den has a diversity of organisms all contributing something positive toward a stable ecology. Students, volunteers, and teachers will benefit from getting to know the garden’s inhabitants and their roles as predators, pollinators, decomposers, and yes, the occasional pest.
BIG PESTS | Deer, rabbits, groundhogs, and other four-legged pests can devastate vegetable gardens. Birds, squirrels, mice, and raccoons can also become troublesome pests and can leave droppings and waste behind that can become contaminants. Do not feed wildlife near your garden, and if possible, secure permission, funding, and assistance to erect a fence with a gate. If deer are a problem, the fence needs to be 8 feet tall. If deer are not a problem, a 4-foot-high fence will suffice. Many types of woven wire and vinyl netting fencing materials are available. Bird netting is a soft fine mesh netting often used to protect tender fruit such as blueberries and strawberries from birds and other small animals. Bird neetting can be left on until the fruit is harvested.
DISEASE DIAGNOSIS & TREATMENT | Plant disease, like insect problems, can also be greatly abated by using sound gardening practices from the outset. Choosing healthy transplants, ensuring there will be adequate space between plants at maturity and watering in the morning are additional measures to take. Disease-resistant varieties have genetic characteristics that allow them to toler-ate biological disease-causing organisms and are particularly important to use in our warm, humid climate. Diseases can also be abiotic (not biological in origin), but caused by a nutrient deficiency or some other environmental imbalance.
If you notice signs of plant disease, yellowing or curling leaves, sudden wilting, spots on the leaves or fruit, or flower or fruit drop, remove the affected part, if possible, to help keep it from spreading. Research with your students the possible diagnosis and its treatment. There are a number of identifi-cation guides under “resources” in this section of Grow to Learn. If you run into problems, your UF/IFAS County Extension agent will be happy to help.*Page 52-53 of Grow to Learn has great information on what to do with your school garden over school breaks and holidays.
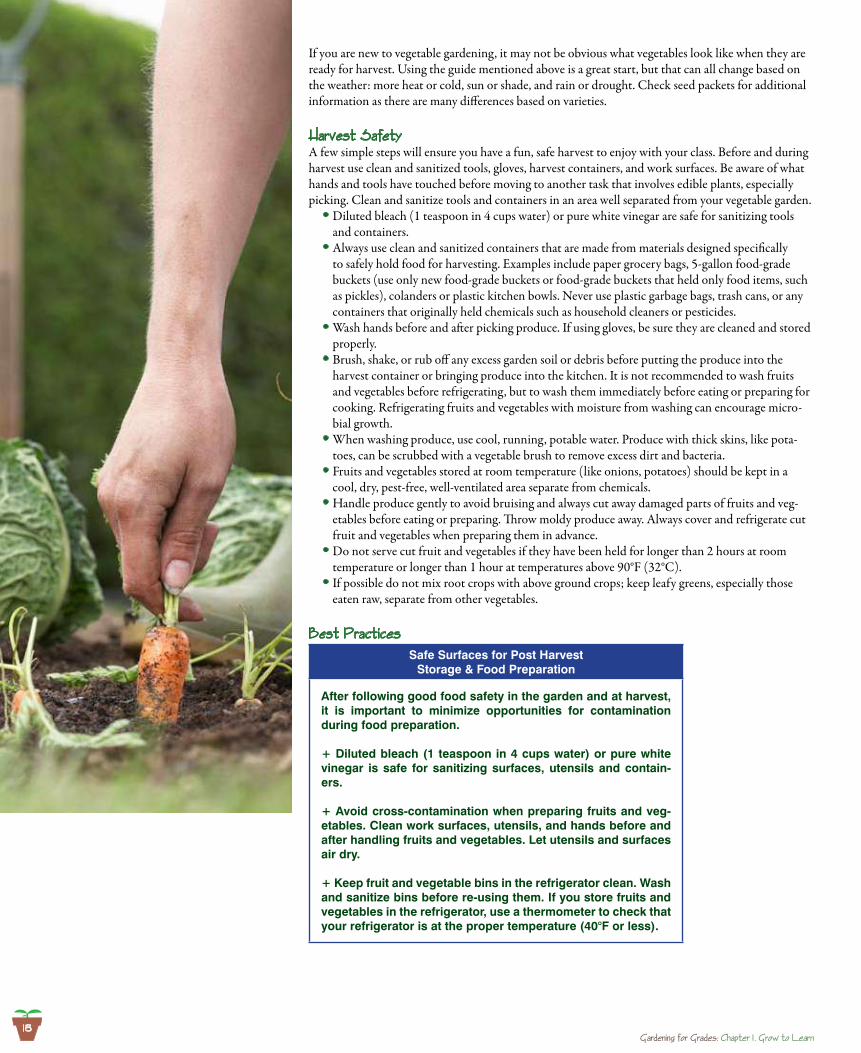
harvestingThe best part of growing a school garden is the joy of harvesting the fruits of your labor! Knowing when and how to harvest your produce for maximum quality will ensure that you and your students will have a great experience. This phase of the gardening experience will also provide a wonderful opportunity for experiential learning. There are many resources to help you develop a curriculum that meets your needs and offers fun, interactive activities to integrate academics and nutrition from the garden into your classroom.
When to harvestIt is important to consider the amount of time you will need to grow and harvest the bounty of your garden! You want to choose plants that have “days to harvest” that match your timeline for the classroom so that you can be sure your students will get to experience as much of the plant’s lifecycle as possible The approximate planting and harvesting dates for many common vegetables for North, Central and South Florida can be found in the Appendix of Grow to Learn.
18Gardening for Grades: Chapter 1 , Grow to Learn
If you are new to vegetable gardening, it may not be obvious what vegetables look like when they are ready for harvest. Using the guide mentioned above is a great start, but that can all change based on the weather: more heat or cold, sun or shade, and rain or drought. Check seed packets for additional information as there are many differences based on varieties.
harvest SafetyA few simple steps will ensure you have a fun, safe harvest to enjoy with your class. Before and during harvest use clean and sanitized tools, gloves, harvest containers, and work surfaces. Be aware of what hands and tools have touched before moving to another task that involves edible plants, especially picking. Clean and sanitize tools and containers in an area well separated from your vegetable garden.
Diluted bleach (1 teaspoon in 4 cups water) or pure white vinegar are safe for sanitizing tools •and containers. Always use clean and sanitized containers that are made from materials designed specifically •to safely hold food for harvesting. Examples include paper grocery bags, 5-gallon food-grade buckets (use only new food-grade buckets or food-grade buckets that held only food items, such as pickles), colanders or plastic kitchen bowls. Never use plastic garbage bags, trash cans, or any containers that originally held chemicals such as household cleaners or pesticides. Wash hands before and after picking produce. If using gloves, be sure they are cleaned and stored •properly. Brush, shake, or rub off any excess garden soil or debris before putting the produce into the •harvest container or bringing produce into the kitchen. It is not recommended to wash fruits and vegetables before refrigerating, but to wash them immediately before eating or preparing for cooking. Refrigerating fruits and vegetables with moisture from washing can encourage micro-bial growth. When washing produce, use cool, running, potable water. Produce with thick skins, like pota-•toes, can be scrubbed with a vegetable brush to remove excess dirt and bacteria. Fruits and vegetables stored at room temperature (like onions, potatoes) should be kept in a •cool, dry, pest-free, well-ventilated area separate from chemicals. Handle produce gently to avoid bruising and always cut away damaged parts of fruits and veg-•etables before eating or preparing. Throw moldy produce away. Always cover and refrigerate cut fruit and vegetables when preparing them in advance. Do not serve cut fruit and vegetables if they have been held for longer than 2 hours at room •temperature or longer than 1 hour at temperatures above 90°F (32°C). If possible do not mix root crops with above ground crops; keep leafy greens, especially those •eaten raw, separate from other vegetables.
Best PracticesSafe Surfaces for Post Harvest
Storage & Food Preparation
After following good food safety in the garden and at harvest, it is important to minimize opportunities for contamination during food preparation.
+ Diluted bleach (1 teaspoon in 4 cups water) or pure white vinegar is safe for sanitizing surfaces, utensils and contain-ers.
+ Avoid cross-contamination when preparing fruits and veg-etables. Clean work surfaces, utensils, and hands before and after handling fruits and vegetables. Let utensils and surfaces air dry.
+ Keep fruit and vegetable bins in the refrigerator clean. Wash and sanitize bins before re-using them. If you store fruits and vegetables in the refrigerator, use a thermometer to check that your refrigerator is at the proper temperature (40°F or less).
18
19Gardening for Grades: Chapter 1 , Grow to Learn
Expanding Your GardenCONTRIBUTORS from UF/IFAS Jaret C. Daniels | Joe Schaefer | Craig N. Huegel | Frank J. Maxxotti | Robert A. Kluson | Robert E. Rouse | Mongi Zekri | J.G. Williamson | J.H. Crane | P.M. Lyrene | J.W. Olmstead | Peter C. Anderson | Timothy E. Crocker | Jacque Breman
While it is wise to start simple and small, you may want to expand your garden as you grow in experi-ence. Adding pollinator-attracting plants and perennial food crops are two interesting ways to add beauty and depth to your vegetable garden, as well as a number of new learning experiences for your students.
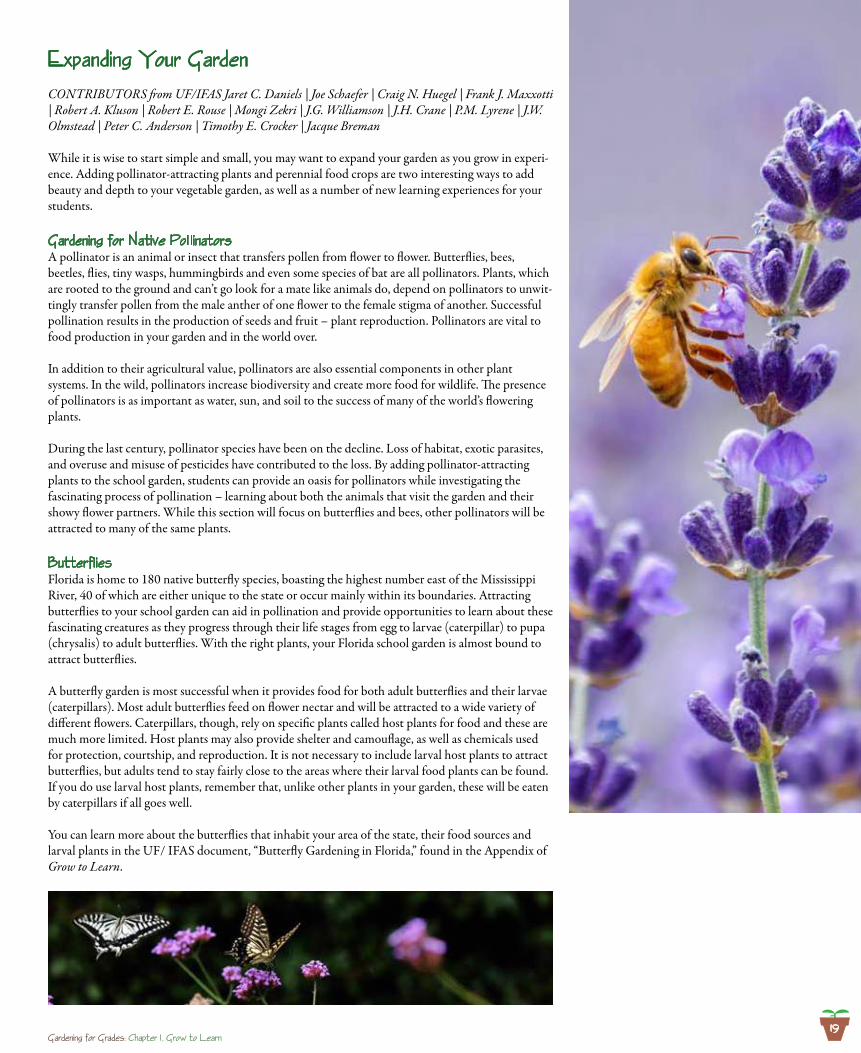
Gardening for Native Po1 1inatorsA pollinator is an animal or insect that transfers pollen from flower to flower. Butterflies, bees, beetles, flies, tiny wasps, hummingbirds and even some species of bat are all pollinators. Plants, which are rooted to the ground and can’t go look for a mate like animals do, depend on pollinators to unwit-tingly transfer pollen from the male anther of one flower to the female stigma of another. Successful pollination results in the production of seeds and fruit – plant reproduction. Pollinators are vital to food production in your garden and in the world over.
In addition to their agricultural value, pollinators are also essential components in other plant systems. In the wild, pollinators increase biodiversity and create more food for wildlife. The presence of pollinators is as important as water, sun, and soil to the success of many of the world’s flowering plants.
During the last century, pollinator species have been on the decline. Loss of habitat, exotic parasites, and overuse and misuse of pesticides have contributed to the loss. By adding pollinator-attracting plants to the school garden, students can provide an oasis for pollinators while investigating the fascinating process of pollination – learning about both the animals that visit the garden and their showy flower partners. While this section will focus on butterflies and bees, other pollinators will be attracted to many of the same plants.
Butterf1iesFlorida is home to 180 native butterfly species, boasting the highest number east of the Mississippi River, 40 of which are either unique to the state or occur mainly within its boundaries. Attracting butterflies to your school garden can aid in pollination and provide opportunities to learn about these fascinating creatures as they progress through their life stages from egg to larvae (caterpillar) to pupa (chrysalis) to adult butterflies. With the right plants, your Florida school garden is almost bound to attract butterflies.
A butterfly garden is most successful when it provides food for both adult butterflies and their larvae (caterpillars). Most adult butterflies feed on flower nectar and will be attracted to a wide variety of different flowers. Caterpillars, though, rely on specific plants called host plants for food and these are much more limited. Host plants may also provide shelter and camouflage, as well as chemicals used for protection, courtship, and reproduction. It is not necessary to include larval host plants to attract butterflies, but adults tend to stay fairly close to the areas where their larval food plants can be found. If you do use larval host plants, remember that, unlike other plants in your garden, these will be eaten by caterpillars if all goes well.
You can learn more about the butterflies that inhabit your area of the state, their food sources and larval plants in the UF/ IFAS document, “Butterfly Gardening in Florida,” found in the Appendix of Grow to Learn.
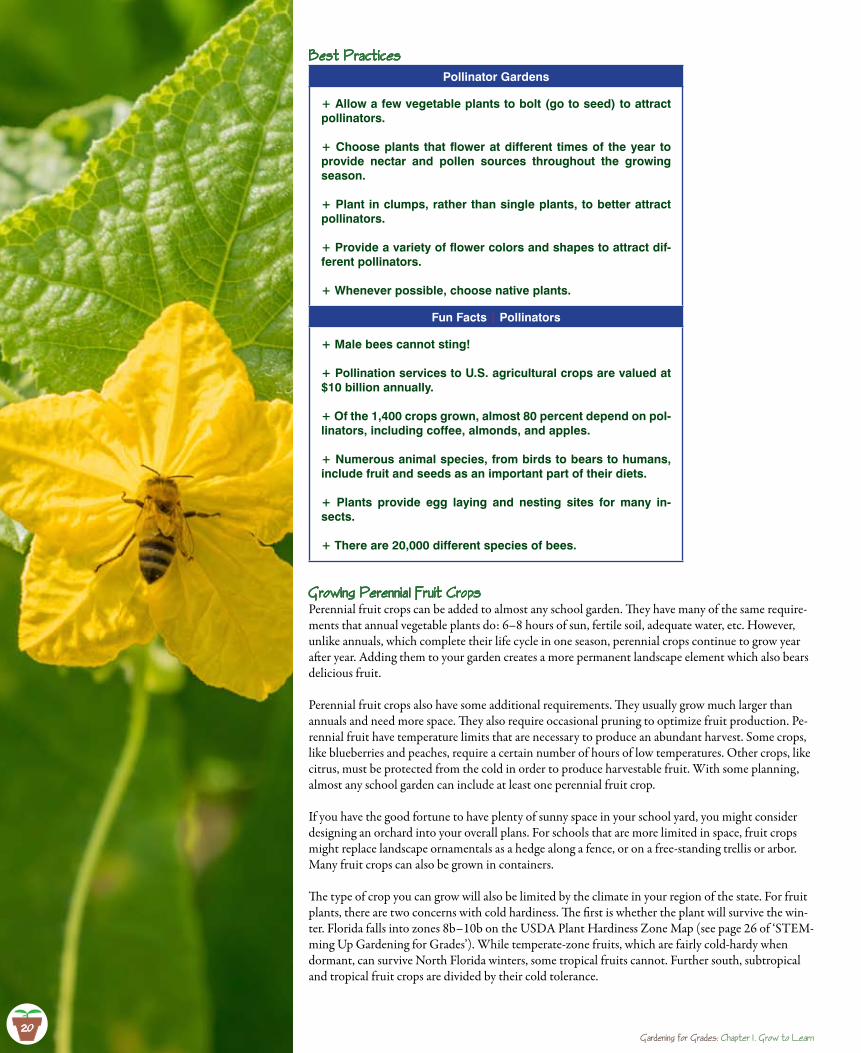
20Gardening for Grades: Chapter 1 , Grow to Learn
Best PracticesPollinator Gardens
+ Allow a few vegetable plants to bolt (go to seed) to attract pollinators.
+ Choose plants that flower at different times of the year to provide nectar and pollen sources throughout the growing season.
+ Plant in clumps, rather than single plants, to better attract pollinators.
+ Provide a variety of flower colors and shapes to attract dif-ferent pollinators.
+ Whenever possible, choose native plants.
Fun Facts | Pollinators
+ Male bees cannot sting!
+ Pollination services to U.S. agricultural crops are valued at $10 billion annually.
+ Of the 1,400 crops grown, almost 80 percent depend on pol-linators, including coffee, almonds, and apples.
+ Numerous animal species, from birds to bears to humans, include fruit and seeds as an important part of their diets.
+ Plants provide egg laying and nesting sites for many in-sects.
+ There are 20,000 different species of bees.
Growing Perennia1 Fruit CropsPerennial fruit crops can be added to almost any school garden. They have many of the same require-ments that annual vegetable plants do: 6–8 hours of sun, fertile soil, adequate water, etc. However, unlike annuals, which complete their life cycle in one season, perennial crops continue to grow year after year. Adding them to your garden creates a more permanent landscape element which also bears delicious fruit.
Perennial fruit crops also have some additional requirements. They usually grow much larger than annuals and need more space. They also require occasional pruning to optimize fruit production. Pe-rennial fruit have temperature limits that are necessary to produce an abundant harvest. Some crops, like blueberries and peaches, require a certain number of hours of low temperatures. Other crops, like citrus, must be protected from the cold in order to produce harvestable fruit. With some planning, almost any school garden can include at least one perennial fruit crop.
If you have the good fortune to have plenty of sunny space in your school yard, you might consider designing an orchard into your overall plans. For schools that are more limited in space, fruit crops might replace landscape ornamentals as a hedge along a fence, or on a free-standing trellis or arbor. Many fruit crops can also be grown in containers.
The type of crop you can grow will also be limited by the climate in your region of the state. For fruit plants, there are two concerns with cold hardiness. The first is whether the plant will survive the win-ter. Florida falls into zones 8b–10b on the USDA Plant Hardiness Zone Map (see page 26 of ‘STEM-ming Up Gardening for Grades’). While temperate-zone fruits, which are fairly cold-hardy when dormant, can survive North Florida winters, some tropical fruits cannot. Further south, subtropical and tropical fruit crops are divided by their cold tolerance.
20
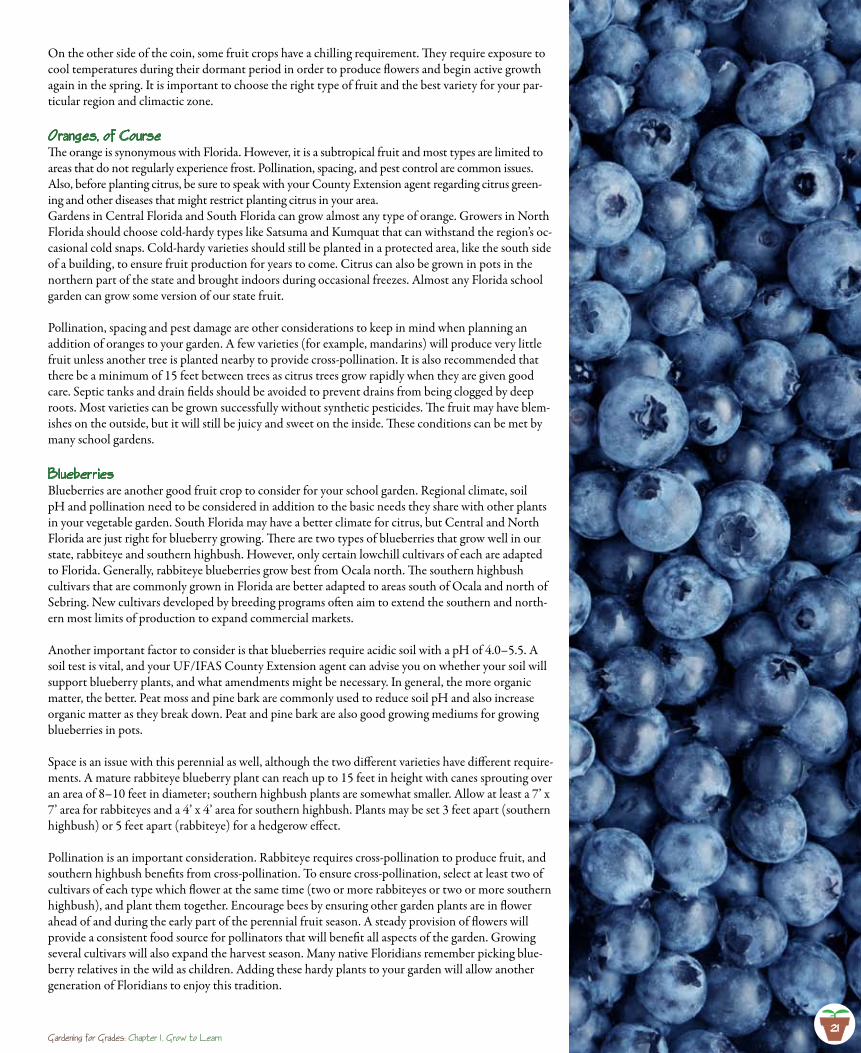
21Gardening for Grades: Chapter 1 , Grow to Learn
On the other side of the coin, some fruit crops have a chilling requirement. They require exposure to cool temperatures during their dormant period in order to produce flowers and begin active growth again in the spring. It is important to choose the right type of fruit and the best variety for your par-ticular region and climactic zone.
Oranges, of CourseThe orange is synonymous with Florida. However, it is a subtropical fruit and most types are limited to areas that do not regularly experience frost. Pollination, spacing, and pest control are common issues. Also, before planting citrus, be sure to speak with your County Extension agent regarding citrus green-ing and other diseases that might restrict planting citrus in your area.Gardens in Central Florida and South Florida can grow almost any type of orange. Growers in North Florida should choose cold-hardy types like Satsuma and Kumquat that can withstand the region’s oc-casional cold snaps. Cold-hardy varieties should still be planted in a protected area, like the south side of a building, to ensure fruit production for years to come. Citrus can also be grown in pots in the northern part of the state and brought indoors during occasional freezes. Almost any Florida school garden can grow some version of our state fruit.
Pollination, spacing and pest damage are other considerations to keep in mind when planning an addition of oranges to your garden. A few varieties (for example, mandarins) will produce very little fruit unless another tree is planted nearby to provide cross-pollination. It is also recommended that there be a minimum of 15 feet between trees as citrus trees grow rapidly when they are given good care. Septic tanks and drain fields should be avoided to prevent drains from being clogged by deep roots. Most varieties can be grown successfully without synthetic pesticides. The fruit may have blem-ishes on the outside, but it will still be juicy and sweet on the inside. These conditions can be met by many school gardens.
B1ueberriesBlueberries are another good fruit crop to consider for your school garden. Regional climate, soil pH and pollination need to be considered in addition to the basic needs they share with other plants in your vegetable garden. South Florida may have a better climate for citrus, but Central and North Florida are just right for blueberry growing. There are two types of blueberries that grow well in our state, rabbiteye and southern highbush. However, only certain lowchill cultivars of each are adapted to Florida. Generally, rabbiteye blueberries grow best from Ocala north. The southern highbush cultivars that are commonly grown in Florida are better adapted to areas south of Ocala and north of Sebring. New cultivars developed by breeding programs often aim to extend the southern and north-ern most limits of production to expand commercial markets.
Another important factor to consider is that blueberries require acidic soil with a pH of 4.0–5.5. A soil test is vital, and your UF/IFAS County Extension agent can advise you on whether your soil will support blueberry plants, and what amendments might be necessary. In general, the more organic matter, the better. Peat moss and pine bark are commonly used to reduce soil pH and also increase organic matter as they break down. Peat and pine bark are also good growing mediums for growing blueberries in pots.
Space is an issue with this perennial as well, although the two different varieties have different require-ments. A mature rabbiteye blueberry plant can reach up to 15 feet in height with canes sprouting over an area of 8–10 feet in diameter; southern highbush plants are somewhat smaller. Allow at least a 7’ x 7’ area for rabbiteyes and a 4’ x 4’ area for southern highbush. Plants may be set 3 feet apart (southern highbush) or 5 feet apart (rabbiteye) for a hedgerow effect.
Pollination is an important consideration. Rabbiteye requires cross-pollination to produce fruit, and southern highbush benefits from cross-pollination. To ensure cross-pollination, select at least two of cultivars of each type which flower at the same time (two or more rabbiteyes or two or more southern highbush), and plant them together. Encourage bees by ensuring other garden plants are in flower ahead of and during the early part of the perennial fruit season. A steady provision of flowers will provide a consistent food source for pollinators that will benefit all aspects of the garden. Growing several cultivars will also expand the harvest season. Many native Floridians remember picking blue-berry relatives in the wild as children. Adding these hardy plants to your garden will allow another generation of Floridians to enjoy this tradition.
21

22Gardening for Grades: Chapter 1 , Grow to Learn
Muscadine GrapesMuscadine grapes can be grown in most areas of Florida, although most varieties do best in the central and northern parts of the state. The muscadine is native to the southeastern United States and was the first native grape species to be cultivated in North America. Muscadines are tolerant of insect and disease pests and can be grown in a wide range of soil conditions. Muscadine grapes can be planted vineyard-style with traditional post-and-wire trellises. They can also be grown on an overhead arbor providing shade for classroom gatherings, or over an archway as an entrance to your garden. They are fast growers, and after only three years, a grape vine can easily cover a 6-foot by 15-foot horizontal area. Several cultivars could be planted together to prolong the ripening period and also to provide a variety of grape sizes, colors, and flavors.
Shiitake MushroomsAnd now for something completely different! You can take your garden in a whole new direction by cultivating mushrooms. Shiitake mushrooms have been enjoyed for centuries in Asia. Growing mushrooms is a great opportunity for your students to learn more about fungi. They can also be grown in shadier areas of your garden. You can find more information on growing Shiitake in the “Digging Deeper” section on page 71 of Grow to Learn. Ask your UF/IFAS County Extension agent for recommendations for your school garden.
Treadwell, D., S. Park-Brown, K. Brew, and A. Prizzia (Eds.). 2014. Grow to Learn: A Garden Guide for School and Community Gardens. 112 pp. Revised 2015. Published by Florida Department of Ag-riculture and Consumer Services and the University of Florida-IFAS. Available at: http://uffnp.org/wordpress1/wp-content/uploads/2015/09/FDACSFNW_Grow-to-Learn_Book-LOW-RES.pdf
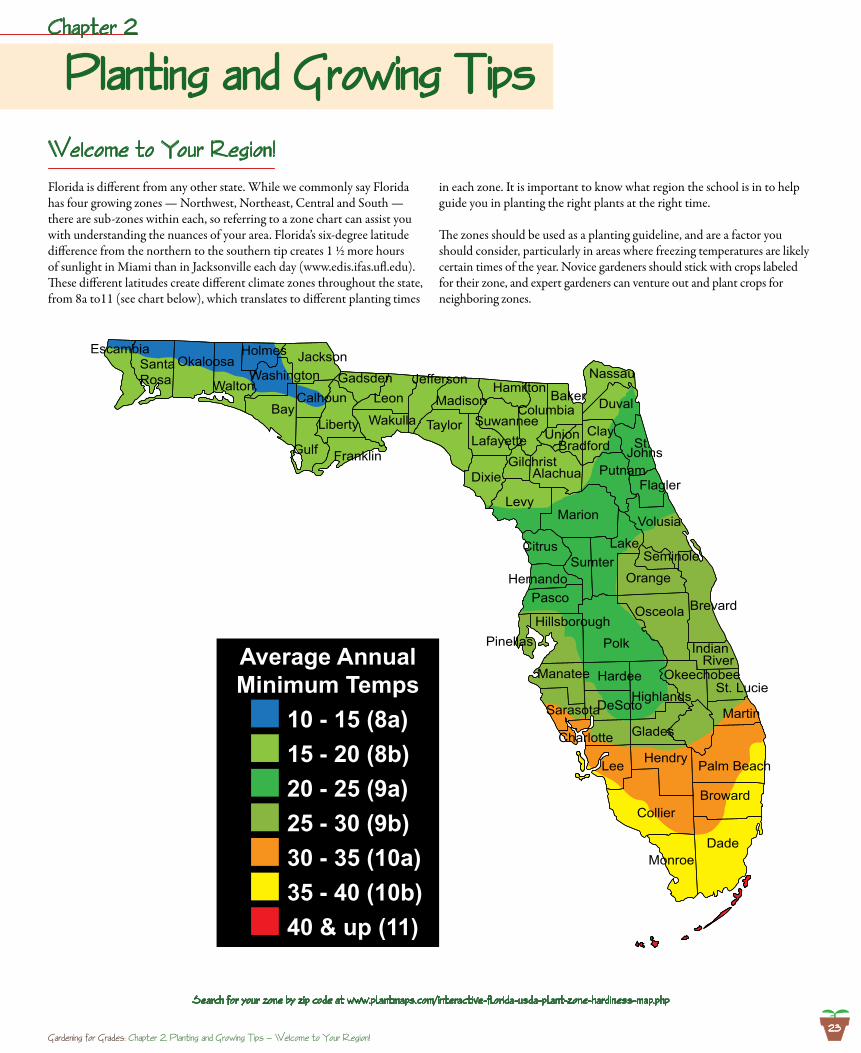
23
We1come to Your Region!
23Gardening for Grades: Chapter 2, P1anting and Growing Tips — We1come to Your Region!
Florida is different from any other state. While we commonly say Florida has four growing zones — Northwest, Northeast, Central and South — there are sub-zones within each, so referring to a zone chart can assist you with understanding the nuances of your area. Florida’s six-degree latitude difference from the northern to the southern tip creates 1 ½ more hours of sunlight in Miami than in Jacksonville each day (www.edis.ifas.ufl.edu). These different latitudes create different climate zones throughout the state, from 8a to11 (see chart below), which translates to different planting times
in each zone. It is important to know what region the school is in to help guide you in planting the right plants at the right time.
The zones should be used as a planting guideline, and are a factor you should consider, particularly in areas where freezing temperatures are likely certain times of the year. Novice gardeners should stick with crops labeled for their zone, and expert gardeners can venture out and plant crops for neighboring zones.
BrevardOsceola
Orange
Charlotte
Lee
SarasotaGlades
Highlands
IndianRiver
SumterLakeCitrus
BakerHamilton
ClayColumbia
Nassau
Madison
Jefferson
Taylor
GadsdenLeon
Jackson
Franklin
WakullaLiberty
OkaloosaEscambia
SantaRosa Walton
DadeMonroe
Collier
Okeechobee
Martin
St. LucieManatee
Polk
Hillsborough
Volusia
Putnam
St.Johns
Lafayette
Bay
Washington
Holmes
Calhoun DuvalSuwannee
Gulf BradfordUnion
AlachuaGilchrist
Dixie FlaglerLevy
Marion
Seminole
HernandoPasco
Pinellas
Hardee
DeSoto
Palm BeachHendry
Broward
Average AnnualMinimum Temps
10 - 15 (8a)15 - 20 (8b)20 - 25 (9a)25 - 30 (9b)30 - 35 (10a)35 - 40 (10b)40 & up (11)
Search for your zone by zip code at www.plantmaps.com/interactive-florida-usda-plant-zone-hardiness-map.php
P1anting and Growing TipsChapter 2
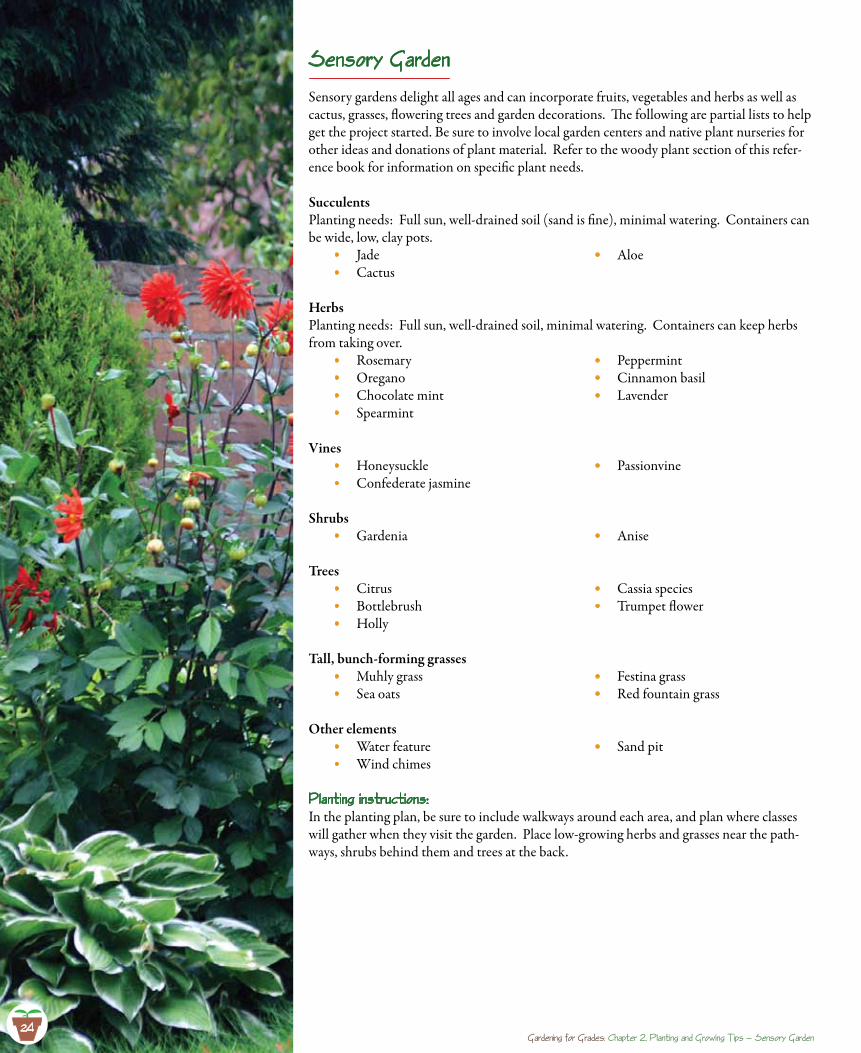
Sensory Garden
Sensory gardens delight all ages and can incorporate fruits, vegetables and herbs as well as cactus, grasses, flowering trees and garden decorations. The following are partial lists to help get the project started. Be sure to involve local garden centers and native plant nurseries for other ideas and donations of plant material. Refer to the woody plant section of this refer-ence book for information on specific plant needs.
Succulents Planting needs: Full sun, well-drained soil (sand is fine), minimal watering. Containers can be wide, low, clay pots.
HerbsPlanting needs: Full sun, well-drained soil, minimal watering. Containers can keep herbs from taking over.
Vines
Shrubs
Trees
Tall, bunch-forming grasses
Other elements
P1anting instructions:In the planting plan, be sure to include walkways around each area, and plan where classes will gather when they visit the garden. Place low-growing herbs and grasses near the path-ways, shrubs behind them and trees at the back.
Gardening for Grades: Chapter 2, P1anting and Growing Tips — Sensory Garden24
Jade •Cactus•
Aloe•
Rosemary•Oregano•Chocolate mint•Spearmint•
Peppermint•Cinnamon basil•Lavender•
Honeysuckle•Confederate jasmine•
Passionvine•
Gardenia• Anise•
Citrus •Bottlebrush•Holly•
Cassia species•Trumpet flower•
Muhly grass•Sea oats•
Festina grass•Red fountain grass•
Water feature•Wind chimes•
Sand pit•

how to: Grow Your Own Pizza Garden
Pizza is a favorite food of many, so the pizza garden is a fun layout to try in the schoolyard. This garden should be started in the spring to take advantage of Florida’s unique growing season.
Regions: All
Space needed: Gardens can be 10-to-50 feet in diameter
Plant list: Tomato seedlingsBasil seedsPepper seedlingsScallion sets (small onions; green stems are edible)Oregano plants in small pots
Supplies:1 foot stakes (enough to mark the perimeter every 5 feet)StringMalletPine straw for walkwaysHay for mulch inside planting bedsShovelsCompostFertilizerClear plastic
Remove any grass or unwanted vegetation from the site before getting started.1 . Hammer a one-foot stake into the center of the garden. Attach a string and mea-2. sure to the outside edge of the garden space (typically 10 feet).Holding the string, walk a circle along the outside-edge of the garden and hammer 3. a stake into the ground every two steps (or 5 feet).Connect the stakes with string to mark the boundaries of the garden.4. Connect the stakes across the circle to make the “slices” or wedge-shaped beds.5. The garden should be divided into eight pieces of equal size.6. With a shovel, mark a walkway along each of the radiating strings as wide as 7. needed.With a shovel, mark an observational circle around the middle stake.8. Shovel dirt from the walkway into the pizza beds to help define a boundary be-9. tween the two areas.Add fertilizer to pizza bed soil.10. Add pine straw to walkways and hay to pizza beds (except in basil area).1 1 .
Sample timeline (Central Region):January: Prepare the site and build the beds.February: Check Farmer’s Almanac or Extension Office for last frost date. Plant pep-pers, scallions, and basil after that.March: Plant oregano and tomatoes. Add fertilizer to pepper and tomato plants. Water regularly (an automatic sprinkler on a timer works well).April: Water regularly, and enjoy the harvest!May: Cover garden with clear plastic to “solarize,” or sterilize, the soil.
Gardening for Grades: Chapter 2, P1anting and Growing Tips — how to: Pizza Garden25
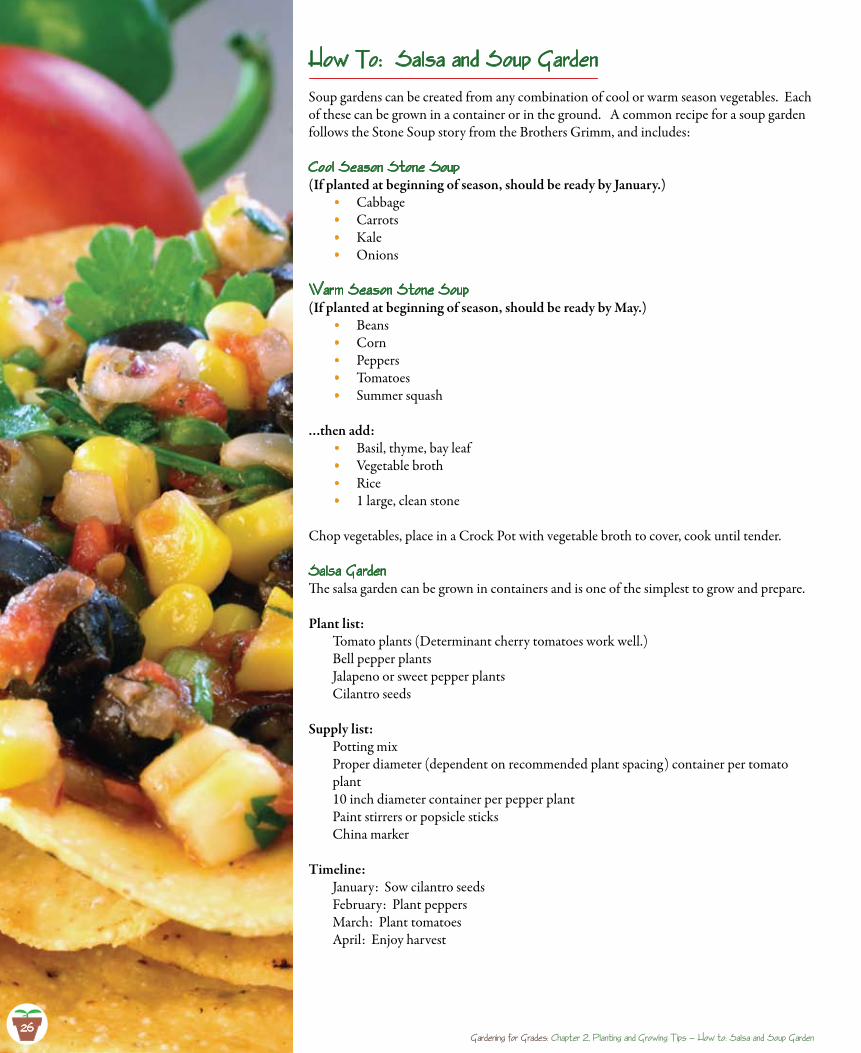
how To: Sa1sa and Soup Garden
Soup gardens can be created from any combination of cool or warm season vegetables. Each of these can be grown in a container or in the ground. A common recipe for a soup garden follows the Stone Soup story from the Brothers Grimm, and includes:
Coo1 Season Stone Soup(If planted at beginning of season, should be ready by January.)
Cabbage•Carrots•Kale•Onions•
Warm Season Stone Soup(If planted at beginning of season, should be ready by May.)
Beans•Corn•Peppers•Tomatoes•Summer squash•
…then add:Basil, thyme, bay leaf•Vegetable broth•Rice•1 large, clean stone•
Chop vegetables, place in a Crock Pot with vegetable broth to cover, cook until tender.
Sa1sa GardenThe salsa garden can be grown in containers and is one of the simplest to grow and prepare.
Plant list:Tomato plants (Determinant cherry tomatoes work well.)Bell pepper plantsJalapeno or sweet pepper plantsCilantro seeds
Supply list:Potting mixProper diameter (dependent on recommended plant spacing) container per tomato plant10 inch diameter container per pepper plantPaint stirrers or popsicle sticksChina marker
Timeline:January: Sow cilantro seedsFebruary: Plant peppersMarch: Plant tomatoesApril: Enjoy harvest
Gardening for Grades: Chapter 2, P1anting and Growing Tips — how to: Sa1sa and Soup Garden26
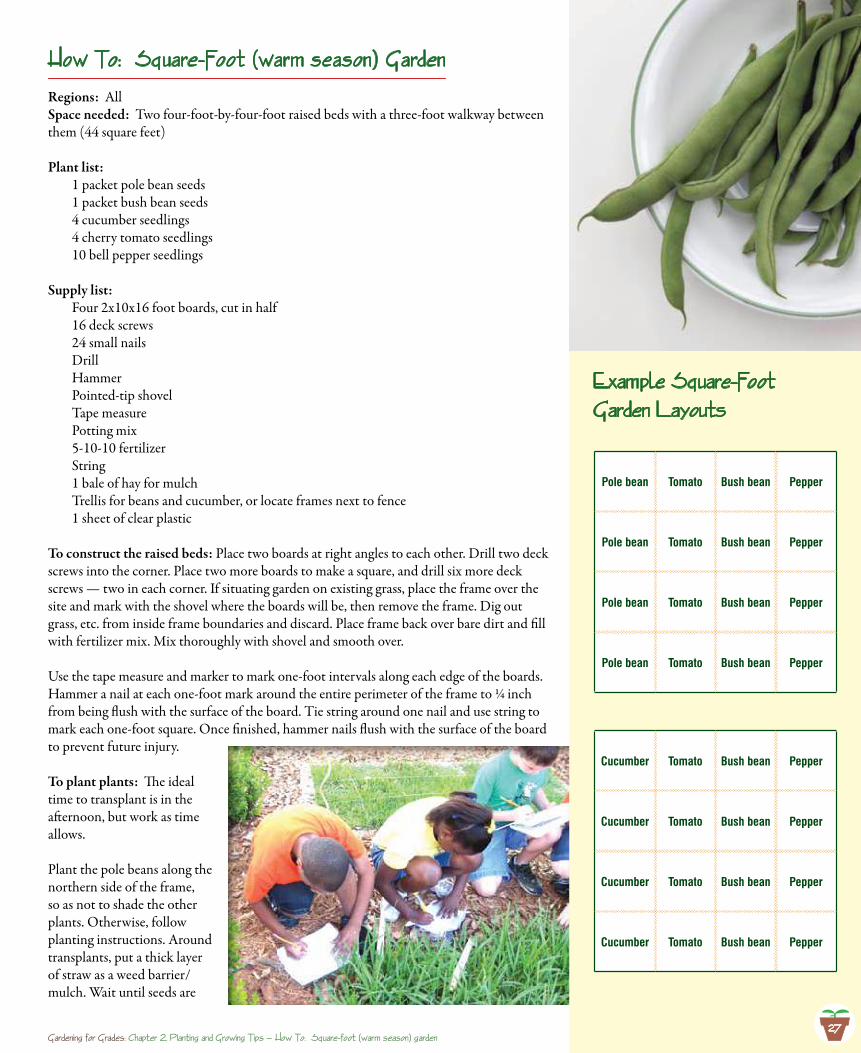
27
how To: Square-Foot (warm season) Garden
Regions: AllSpace needed: Two four-foot-by-four-foot raised beds with a three-foot walkway between them (44 square feet)
Plant list: 1 packet pole bean seeds1 packet bush bean seeds4 cucumber seedlings4 cherry tomato seedlings10 bell pepper seedlings
Supply list:Four 2x10x16 foot boards, cut in half16 deck screws24 small nailsDrillHammerPointed-tip shovelTape measurePotting mix5-10-10 fertilizerString1 bale of hay for mulchTrellis for beans and cucumber, or locate frames next to fence1 sheet of clear plastic
To construct the raised beds: Place two boards at right angles to each other. Drill two deck screws into the corner. Place two more boards to make a square, and drill six more deck screws — two in each corner. If situating garden on existing grass, place the frame over the site and mark with the shovel where the boards will be, then remove the frame. Dig out grass, etc. from inside frame boundaries and discard. Place frame back over bare dirt and fill with fertilizer mix. Mix thoroughly with shovel and smooth over.
Use the tape measure and marker to mark one-foot intervals along each edge of the boards. Hammer a nail at each one-foot mark around the entire perimeter of the frame to ¼ inch from being flush with the surface of the board. Tie string around one nail and use string to mark each one-foot square. Once finished, hammer nails flush with the surface of the board to prevent future injury.
To plant plants: The ideal time to transplant is in the afternoon, but work as time allows.
Plant the pole beans along the northern side of the frame, so as not to shade the other plants. Otherwise, follow planting instructions. Around transplants, put a thick layer of straw as a weed barrier/mulch. Wait until seeds are
Example Square-Foot Garden Layouts
Pole bean Tomato Bush bean Pepper
Pole bean Tomato Bush bean Pepper
Pole bean Tomato Bush bean Pepper
Pole bean Tomato Bush bean Pepper
Cucumber Tomato Bush bean Pepper
Cucumber Tomato Bush bean Pepper
Cucumber Tomato Bush bean Pepper
Cucumber Tomato Bush bean Pepper
Gardening for Grades: Chapter 2, P1anting and Growing Tips — how To: Square-foot (warm season) garden27
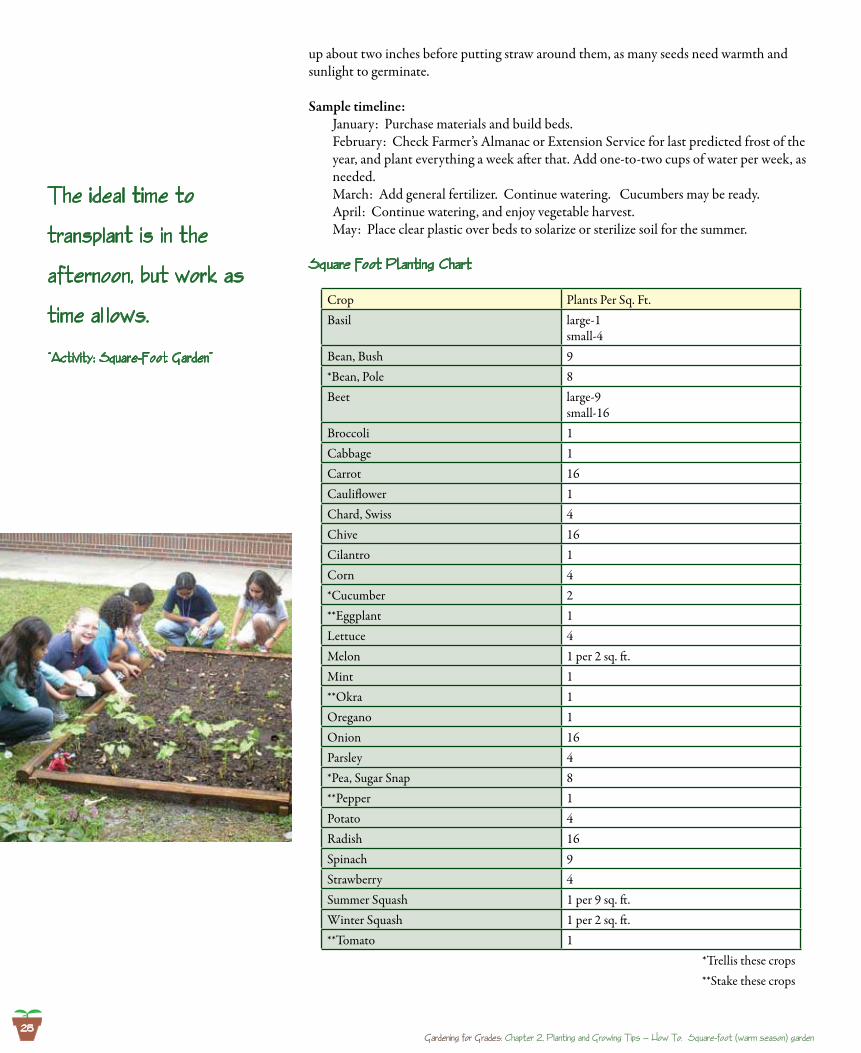
up about two inches before putting straw around them, as many seeds need warmth and sunlight to germinate. Sample timeline:
January: Purchase materials and build beds. February: Check Farmer’s Almanac or Extension Service for last predicted frost of the year, and plant everything a week after that. Add one-to-two cups of water per week, as needed.March: Add general fertilizer. Continue watering. Cucumbers may be ready.April: Continue watering, and enjoy vegetable harvest.May: Place clear plastic over beds to solarize or sterilize soil for the summer.
Square Foot Planting Chart
Crop Plants Per Sq. Ft.Basil large-1
small-4Bean, Bush 9*Bean, Pole 8Beet large-9
small-16 Broccoli 1 Cabbage 1Carrot 16Cauliflower 1Chard, Swiss 4Chive 16Cilantro 1Corn 4*Cucumber 2**Eggplant 1Lettuce 4Melon 1 per 2 sq. ft.Mint 1**Okra 1Oregano 1Onion 16Parsley 4*Pea, Sugar Snap 8**Pepper 1Potato 4Radish 16Spinach 9Strawberry 4Summer Squash 1 per 9 sq. ft.Winter Squash 1 per 2 sq. ft.**Tomato 1
*Trellis these crops **Stake these crops
The idea1 time to
transp1ant is in the
afternoon, but work as
time a1 1ows.
“Activity: Square-Foot Garden”
Gardening for Grades: Chapter 2, P1anting and Growing Tips — how To: Square-foot (warm season) garden28
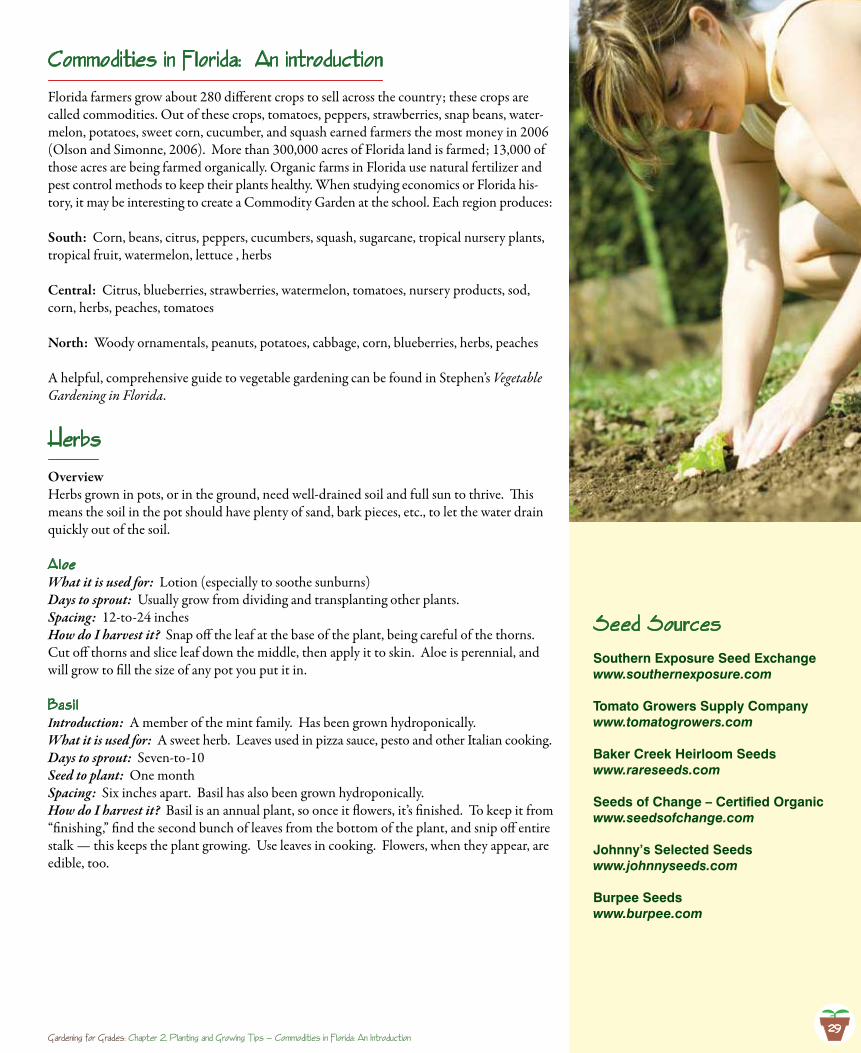
29
Commodities in F1orida: An introduction
Florida farmers grow about 280 different crops to sell across the country; these crops are called commodities. Out of these crops, tomatoes, peppers, strawberries, snap beans, water-melon, potatoes, sweet corn, cucumber, and squash earned farmers the most money in 2006 (Olson and Simonne, 2006). More than 300,000 acres of Florida land is farmed; 13,000 of those acres are being farmed organically. Organic farms in Florida use natural fertilizer and pest control methods to keep their plants healthy. When studying economics or Florida his-tory, it may be interesting to create a Commodity Garden at the school. Each region produces:
South: Corn, beans, citrus, peppers, cucumbers, squash, sugarcane, tropical nursery plants, tropical fruit, watermelon, lettuce , herbs
Central: Citrus, blueberries, strawberries, watermelon, tomatoes, nursery products, sod, corn, herbs, peaches, tomatoes
North: Woody ornamentals, peanuts, potatoes, cabbage, corn, blueberries, herbs, peaches
A helpful, comprehensive guide to vegetable gardening can be found in Stephen’s Vegetable Gardening in Florida.
herbs
OverviewHerbs grown in pots, or in the ground, need well-drained soil and full sun to thrive. This means the soil in the pot should have plenty of sand, bark pieces, etc., to let the water drain quickly out of the soil.
A1oeWhat it is used for: Lotion (especially to soothe sunburns)Days to sprout: Usually grow from dividing and transplanting other plants.Spacing: 12-to-24 inchesHow do I harvest it? Snap off the leaf at the base of the plant, being careful of the thorns. Cut off thorns and slice leaf down the middle, then apply it to skin. Aloe is perennial, and will grow to fill the size of any pot you put it in.
Basi 1Introduction: A member of the mint family. Has been grown hydroponically.What it is used for: A sweet herb. Leaves used in pizza sauce, pesto and other Italian cooking.Days to sprout: Seven-to-10Seed to plant: One monthSpacing: Six inches apart. Basil has also been grown hydroponically.How do I harvest it? Basil is an annual plant, so once it flowers, it’s finished. To keep it from “finishing,” find the second bunch of leaves from the bottom of the plant, and snip off entire stalk — this keeps the plant growing. Use leaves in cooking. Flowers, when they appear, are edible, too.
Gardening for Grades: Chapter 2, P1anting and Growing Tips — Commodities in F1orida: An Introduction
Seed SourcesSouthern Exposure Seed Exchangewww.southernexposure.com
Tomato Growers Supply Companywww.tomatogrowers.com
Baker Creek Heirloom Seedswww.rareseeds.com
Seeds of Change – Certified Organicwww.seedsofchange.com
Johnny’s Selected Seedswww.johnnyseeds.com
Burpee Seedswww.burpee.com
29
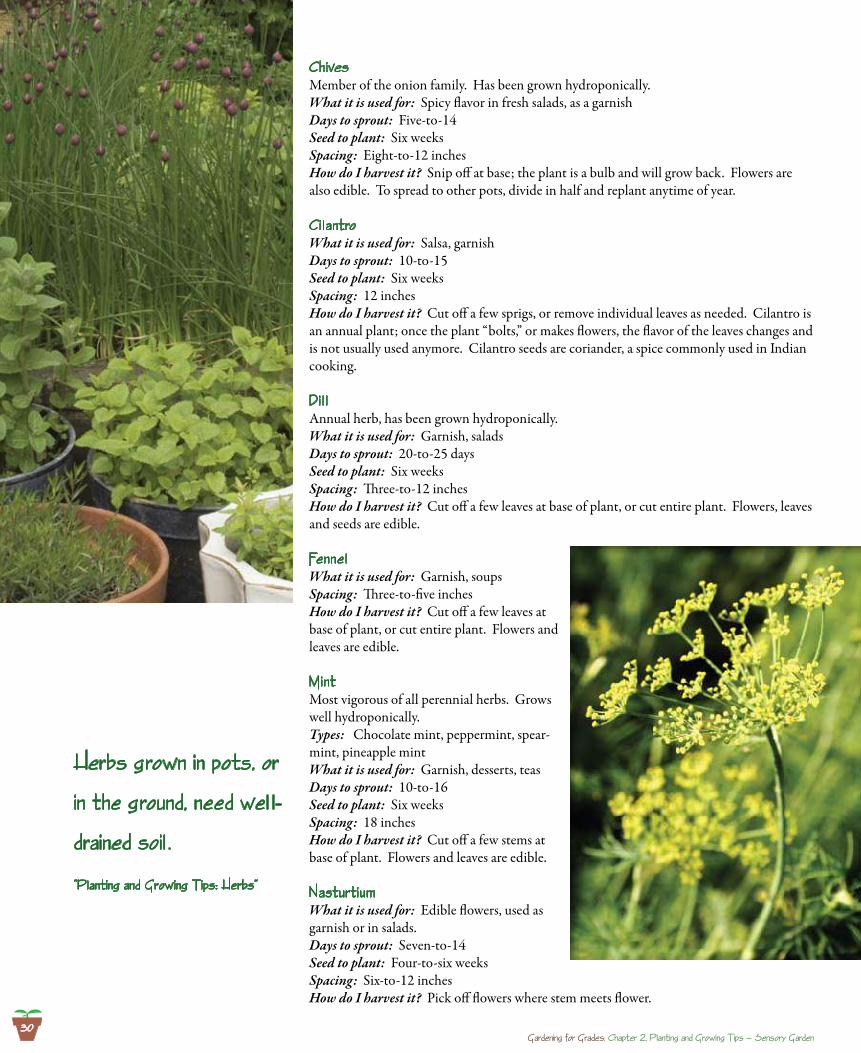
ChivesMember of the onion family. Has been grown hydroponically.What it is used for: Spicy flavor in fresh salads, as a garnishDays to sprout: Five-to-14Seed to plant: Six weeksSpacing: Eight-to-12 inchesHow do I harvest it? Snip off at base; the plant is a bulb and will grow back. Flowers are also edible. To spread to other pots, divide in half and replant anytime of year.
Ci 1antroWhat it is used for: Salsa, garnishDays to sprout: 10-to-15Seed to plant: Six weeksSpacing: 12 inchesHow do I harvest it? Cut off a few sprigs, or remove individual leaves as needed. Cilantro is an annual plant; once the plant “bolts,” or makes flowers, the flavor of the leaves changes and is not usually used anymore. Cilantro seeds are coriander, a spice commonly used in Indian cooking.
Di 1 1Annual herb, has been grown hydroponically.What it is used for: Garnish, saladsDays to sprout: 20-to-25 daysSeed to plant: Six weeksSpacing: Three-to-12 inchesHow do I harvest it? Cut off a few leaves at base of plant, or cut entire plant. Flowers, leaves and seeds are edible.
Fenne1What it is used for: Garnish, soupsSpacing: Three-to-five inchesHow do I harvest it? Cut off a few leaves at base of plant, or cut entire plant. Flowers and leaves are edible.
MintMost vigorous of all perennial herbs. Grows well hydroponically.Types: Chocolate mint, peppermint, spear-mint, pineapple mintWhat it is used for: Garnish, desserts, teasDays to sprout: 10-to-16Seed to plant: Six weeksSpacing: 18 inchesHow do I harvest it? Cut off a few stems at base of plant. Flowers and leaves are edible.
NasturtiumWhat it is used for: Edible flowers, used as garnish or in salads.Days to sprout: Seven-to-14Seed to plant: Four-to-six weeksSpacing: Six-to-12 inchesHow do I harvest it? Pick off flowers where stem meets flower.
herbs grown in pots, or
in the ground, need we1 1-
drained soi1 .
“P1anting and Growing Tips: herbs”
Gardening for Grades: Chapter 2, P1anting and Growing Tips — Sensory Garden30
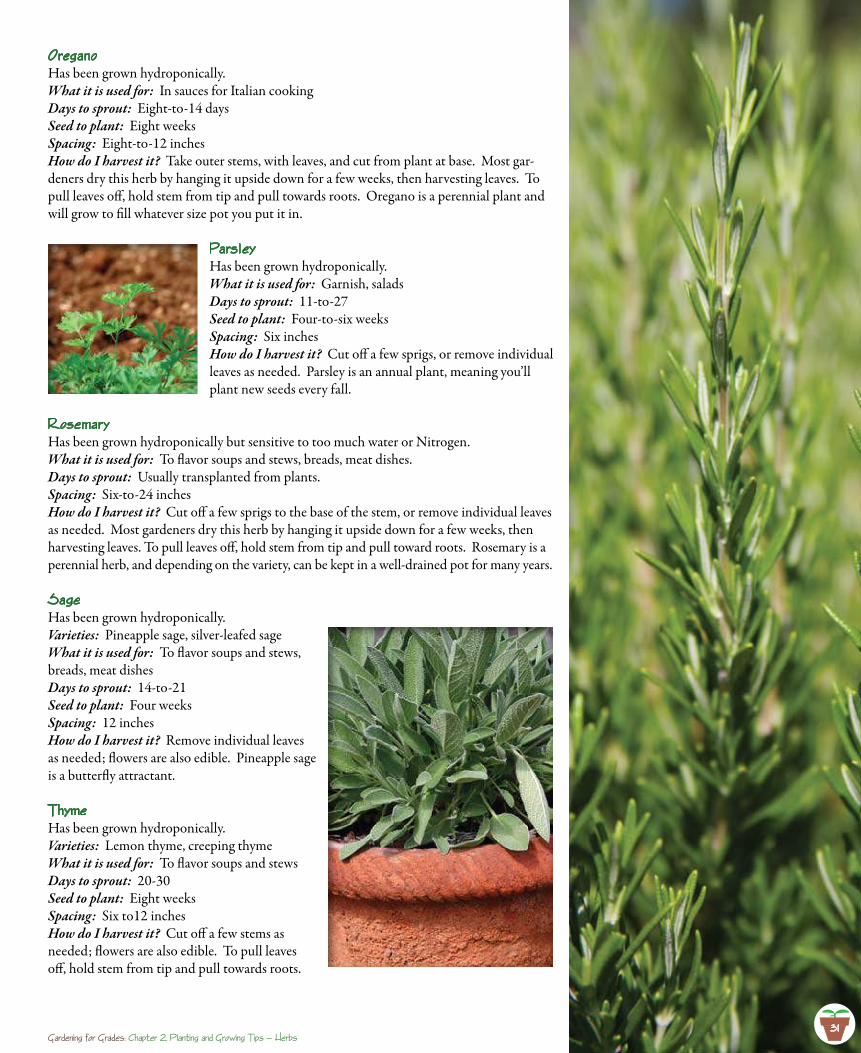
31
OreganoHas been grown hydroponically.What it is used for: In sauces for Italian cookingDays to sprout: Eight-to-14 daysSeed to plant: Eight weeksSpacing: Eight-to-12 inchesHow do I harvest it? Take outer stems, with leaves, and cut from plant at base. Most gar-deners dry this herb by hanging it upside down for a few weeks, then harvesting leaves. To pull leaves off, hold stem from tip and pull towards roots. Oregano is a perennial plant and will grow to fill whatever size pot you put it in.
Pars1eyHas been grown hydroponically.What it is used for: Garnish, saladsDays to sprout: 11-to-27Seed to plant: Four-to-six weeksSpacing: Six inchesHow do I harvest it? Cut off a few sprigs, or remove individual leaves as needed. Parsley is an annual plant, meaning you’ll plant new seeds every fall.
RosemaryHas been grown hydroponically but sensitive to too much water or Nitrogen.What it is used for: To flavor soups and stews, breads, meat dishes.Days to sprout: Usually transplanted from plants.Spacing: Six-to-24 inchesHow do I harvest it? Cut off a few sprigs to the base of the stem, or remove individual leaves as needed. Most gardeners dry this herb by hanging it upside down for a few weeks, then harvesting leaves. To pull leaves off, hold stem from tip and pull toward roots. Rosemary is a perennial herb, and depending on the variety, can be kept in a well-drained pot for many years.
SageHas been grown hydroponically.Varieties: Pineapple sage, silver-leafed sageWhat it is used for: To flavor soups and stews, breads, meat dishesDays to sprout: 14-to-21Seed to plant: Four weeksSpacing: 12 inchesHow do I harvest it? Remove individual leaves as needed; flowers are also edible. Pineapple sage is a butterfly attractant.
ThymeHas been grown hydroponically.Varieties: Lemon thyme, creeping thymeWhat it is used for: To flavor soups and stewsDays to sprout: 20-30Seed to plant: Eight weeksSpacing: Six to12 inchesHow do I harvest it? Cut off a few stems as needed; flowers are also edible. To pull leaves off, hold stem from tip and pull towards roots.
31Gardening for Grades: Chapter 2, P1anting and Growing Tips — herbs
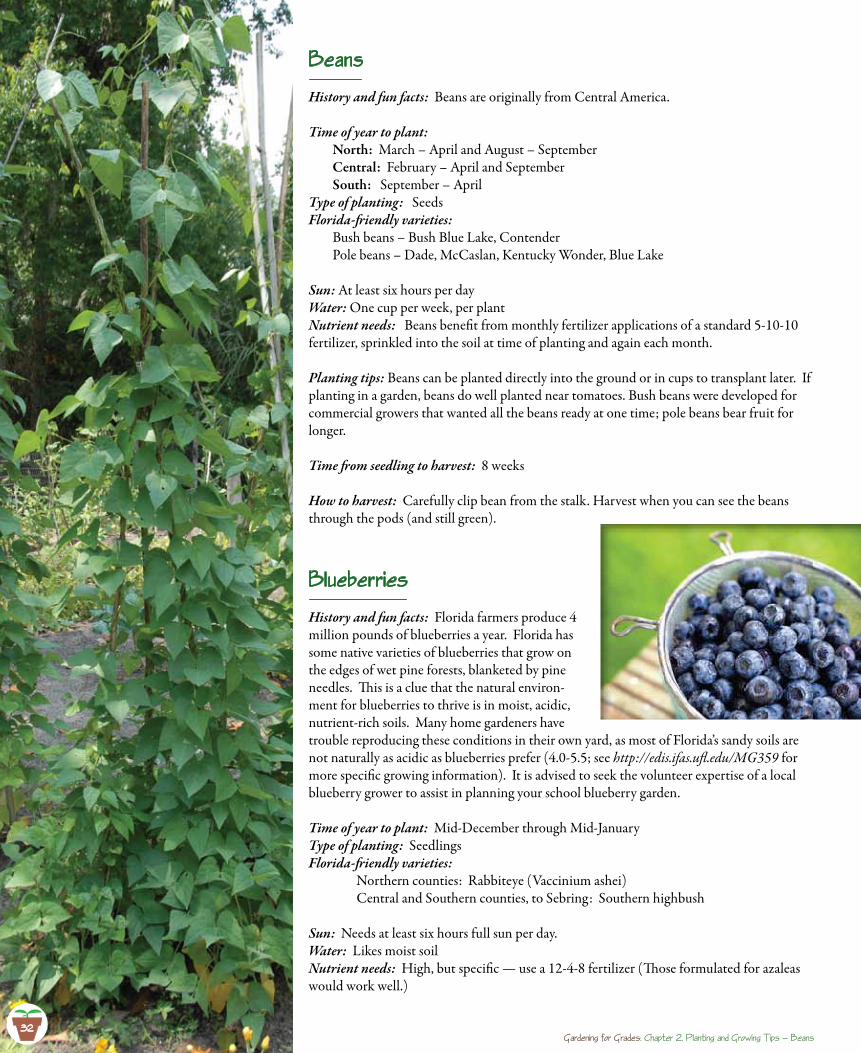
Beans
History and fun facts: Beans are originally from Central America. Time of year to plant:
North: March – April and August – SeptemberCentral: February – April and SeptemberSouth: September – April
Type of planting: SeedsFlorida-friendly varieties:
Bush beans – Bush Blue Lake, Contender Pole beans – Dade, McCaslan, Kentucky Wonder, Blue Lake
Sun: At least six hours per dayWater: One cup per week, per plantNutrient needs: Beans benefit from monthly fertilizer applications of a standard 5-10-10 fertilizer, sprinkled into the soil at time of planting and again each month.
Planting tips: Beans can be planted directly into the ground or in cups to transplant later. If planting in a garden, beans do well planted near tomatoes. Bush beans were developed for commercial growers that wanted all the beans ready at one time; pole beans bear fruit for longer.
Time from seedling to harvest: 8 weeks
How to harvest: Carefully clip bean from the stalk. Harvest when you can see the beans through the pods (and still green).
B1ueberries
History and fun facts: Florida farmers produce 4 million pounds of blueberries a year. Florida has some native varieties of blueberries that grow on the edges of wet pine forests, blanketed by pine needles. This is a clue that the natural environ-ment for blueberries to thrive is in moist, acidic, nutrient-rich soils. Many home gardeners have trouble reproducing these conditions in their own yard, as most of Florida’s sandy soils are not naturally as acidic as blueberries prefer (4.0-5.5; see http://edis.ifas.ufl.edu/MG359 for more specific growing information). It is advised to seek the volunteer expertise of a local blueberry grower to assist in planning your school blueberry garden.
Time of year to plant: Mid-December through Mid-JanuaryType of planting: SeedlingsFlorida-friendly varieties: Northern counties: Rabbiteye (Vaccinium ashei) Central and Southern counties, to Sebring: Southern highbush Sun: Needs at least six hours full sun per day. Water: Likes moist soilNutrient needs: High, but specific — use a 12-4-8 fertilizer (Those formulated for azaleas would work well.)
32Gardening for Grades: Chapter 2, P1anting and Growing Tips — Beans
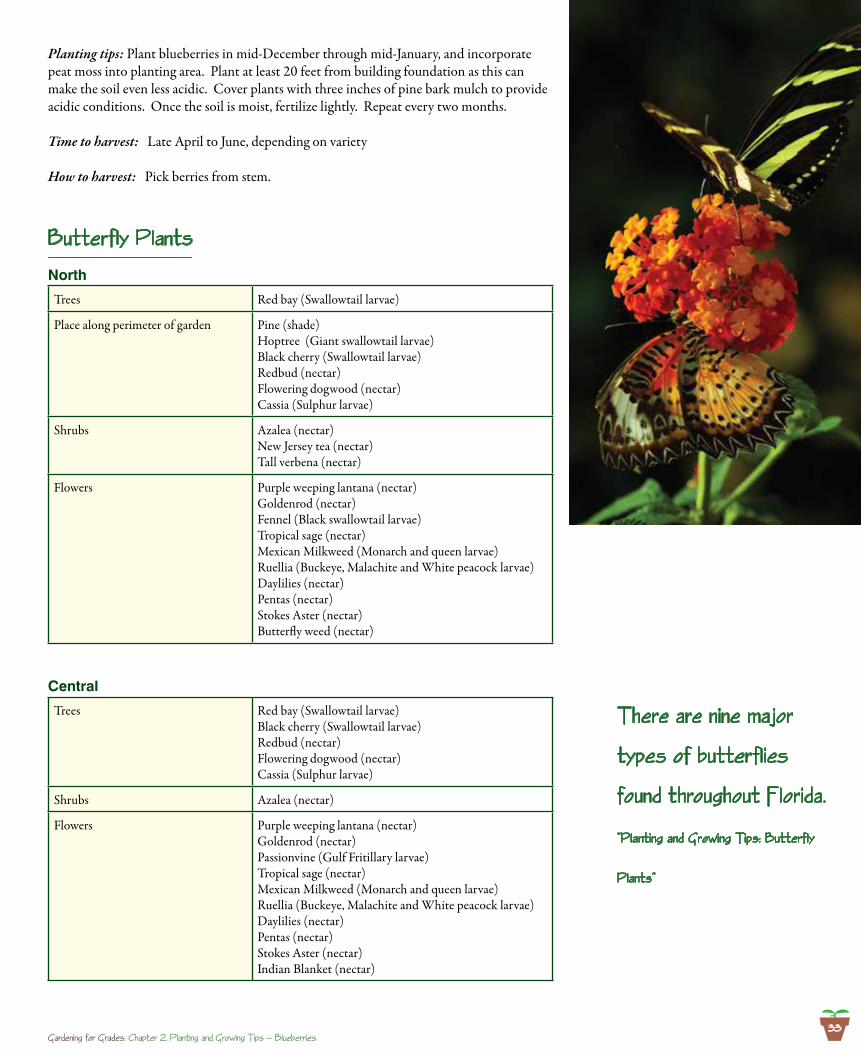
33
Planting tips: Plant blueberries in mid-December through mid-January, and incorporate peat moss into planting area. Plant at least 20 feet from building foundation as this can make the soil even less acidic. Cover plants with three inches of pine bark mulch to provide acidic conditions. Once the soil is moist, fertilize lightly. Repeat every two months.
Time to harvest: Late April to June, depending on variety
How to harvest: Pick berries from stem.
Butterf1y P1ants
North
Trees Red bay (Swallowtail larvae)
Place along perimeter of garden Pine (shade)Hoptree (Giant swallowtail larvae)Black cherry (Swallowtail larvae)Redbud (nectar)Flowering dogwood (nectar)Cassia (Sulphur larvae)
Shrubs Azalea (nectar)New Jersey tea (nectar)Tall verbena (nectar)
Flowers Purple weeping lantana (nectar)Goldenrod (nectar)Fennel (Black swallowtail larvae)Tropical sage (nectar)Mexican Milkweed (Monarch and queen larvae)Ruellia (Buckeye, Malachite and White peacock larvae)Daylilies (nectar)Pentas (nectar)Stokes Aster (nectar)Butterfly weed (nectar)
Central
Trees Red bay (Swallowtail larvae)Black cherry (Swallowtail larvae)Redbud (nectar)Flowering dogwood (nectar)Cassia (Sulphur larvae)
Shrubs Azalea (nectar)
Flowers Purple weeping lantana (nectar)Goldenrod (nectar)Passionvine (Gulf Fritillary larvae)Tropical sage (nectar)Mexican Milkweed (Monarch and queen larvae)Ruellia (Buckeye, Malachite and White peacock larvae)Daylilies (nectar)Pentas (nectar)Stokes Aster (nectar)Indian Blanket (nectar)
There are nine major
types of butterf1ies
found throughout F1orida.
“P1anting and Growing Tips: Butterf1y
P1ants”
Gardening for Grades: Chapter 2, P1anting and Growing Tips — B1ueberries
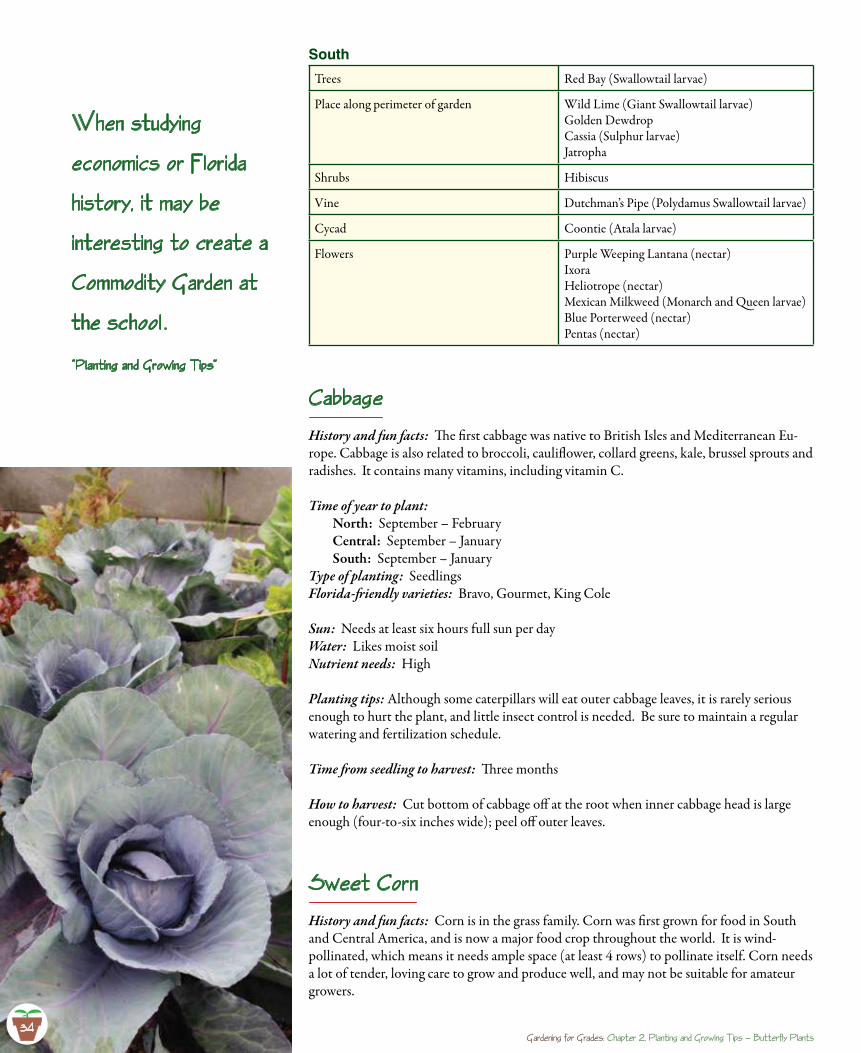
South
Trees Red Bay (Swallowtail larvae)
Place along perimeter of garden Wild Lime (Giant Swallowtail larvae)Golden DewdropCassia (Sulphur larvae)Jatropha
Shrubs Hibiscus
Vine Dutchman’s Pipe (Polydamus Swallowtail larvae)
Cycad Coontie (Atala larvae)
Flowers Purple Weeping Lantana (nectar)IxoraHeliotrope (nectar)Mexican Milkweed (Monarch and Queen larvae)Blue Porterweed (nectar)Pentas (nectar)
Cabbage
History and fun facts: The first cabbage was native to British Isles and Mediterranean Eu-rope. Cabbage is also related to broccoli, cauliflower, collard greens, kale, brussel sprouts and radishes. It contains many vitamins, including vitamin C.
Time of year to plant: North: September – FebruaryCentral: September – JanuarySouth: September – January
Type of planting: SeedlingsFlorida-friendly varieties: Bravo, Gourmet, King Cole
Sun: Needs at least six hours full sun per dayWater: Likes moist soilNutrient needs: High
Planting tips: Although some caterpillars will eat outer cabbage leaves, it is rarely serious enough to hurt the plant, and little insect control is needed. Be sure to maintain a regular watering and fertilization schedule.
Time from seedling to harvest: Three months
How to harvest: Cut bottom of cabbage off at the root when inner cabbage head is large enough (four-to-six inches wide); peel off outer leaves.
Sweet Corn
History and fun facts: Corn is in the grass family. Corn was first grown for food in South and Central America, and is now a major food crop throughout the world. It is wind-pollinated, which means it needs ample space (at least 4 rows) to pollinate itself. Corn needs a lot of tender, loving care to grow and produce well, and may not be suitable for amateur growers.
34
When studying
economics or F1orida
history, it may be
interesting to create a
Commodity Garden at
the schoo1 .
“P1anting and Growing Tips”
Gardening for Grades: Chapter 2, P1anting and Growing Tips — Butterf1y P1ants
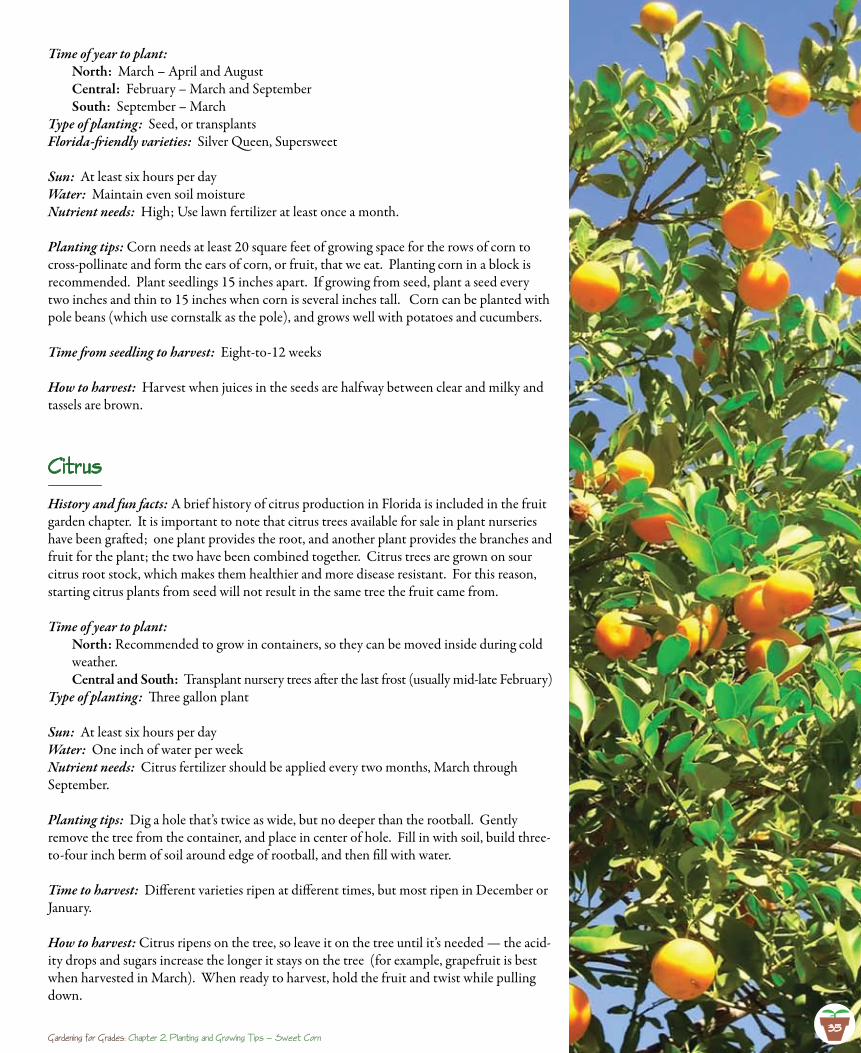
35
Time of year to plant: North: March – April and AugustCentral: February – March and SeptemberSouth: September – March
Type of planting: Seed, or transplantsFlorida-friendly varieties: Silver Queen, Supersweet
Sun: At least six hours per dayWater: Maintain even soil moistureNutrient needs: High; Use lawn fertilizer at least once a month.
Planting tips: Corn needs at least 20 square feet of growing space for the rows of corn to cross-pollinate and form the ears of corn, or fruit, that we eat. Planting corn in a block is recommended. Plant seedlings 15 inches apart. If growing from seed, plant a seed every two inches and thin to 15 inches when corn is several inches tall. Corn can be planted with pole beans (which use cornstalk as the pole), and grows well with potatoes and cucumbers.
Time from seedling to harvest: Eight-to-12 weeks
How to harvest: Harvest when juices in the seeds are halfway between clear and milky and tassels are brown.
Citrus
History and fun facts: A brief history of citrus production in Florida is included in the fruit garden chapter. It is important to note that citrus trees available for sale in plant nurseries have been grafted; one plant provides the root, and another plant provides the branches and fruit for the plant; the two have been combined together. Citrus trees are grown on sour citrus root stock, which makes them healthier and more disease resistant. For this reason, starting citrus plants from seed will not result in the same tree the fruit came from.
Time of year to plant: North: Recommended to grow in containers, so they can be moved inside during cold weather.Central and South: Transplant nursery trees after the last frost (usually mid-late February)
Type of planting: Three gallon plant
Sun: At least six hours per dayWater: One inch of water per weekNutrient needs: Citrus fertilizer should be applied every two months, March through September.
Planting tips: Dig a hole that’s twice as wide, but no deeper than the rootball. Gently remove the tree from the container, and place in center of hole. Fill in with soil, build three-to-four inch berm of soil around edge of rootball, and then fill with water.
Time to harvest: Different varieties ripen at different times, but most ripen in December or January.
How to harvest: Citrus ripens on the tree, so leave it on the tree until it’s needed — the acid-ity drops and sugars increase the longer it stays on the tree (for example, grapefruit is best when harvested in March). When ready to harvest, hold the fruit and twist while pulling down.
35Gardening for Grades: Chapter 2, P1anting and Growing Tips — Sweet Corn
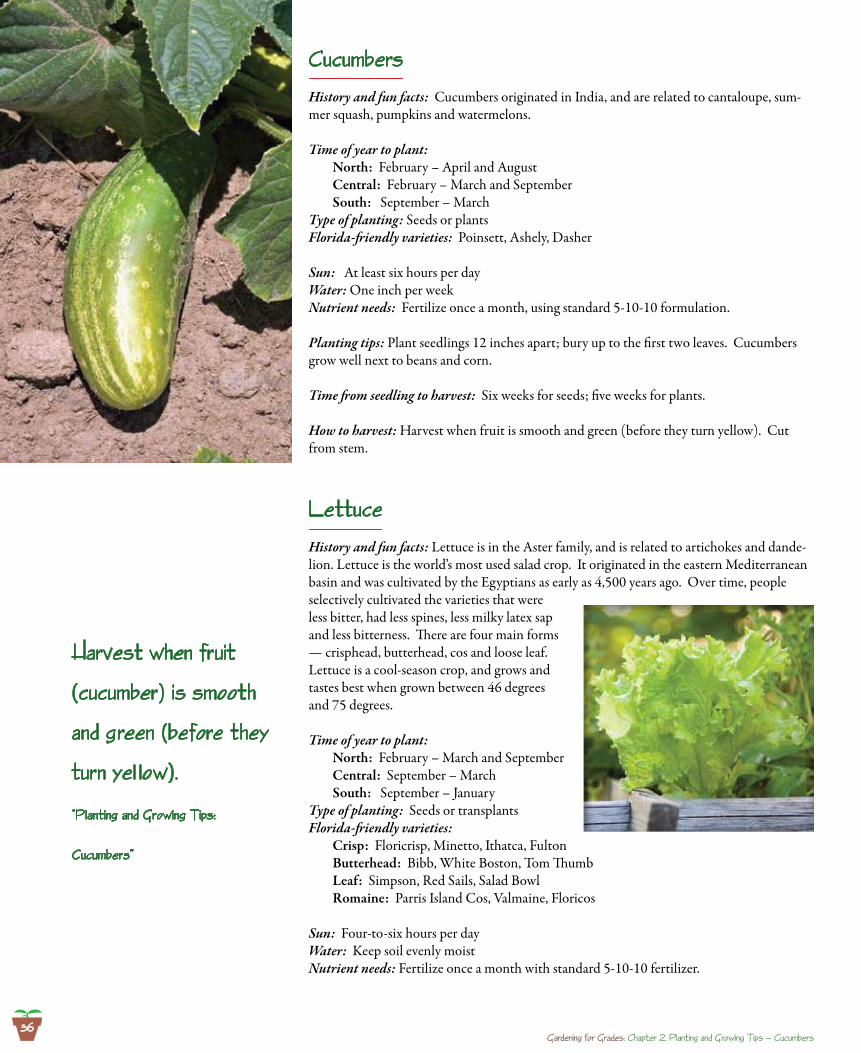
Cucumbers
History and fun facts: Cucumbers originated in India, and are related to cantaloupe, sum-mer squash, pumpkins and watermelons.
Time of year to plant:North: February – April and AugustCentral: February – March and SeptemberSouth: September – March
Type of planting: Seeds or plantsFlorida-friendly varieties: Poinsett, Ashely, Dasher
Sun: At least six hours per dayWater: One inch per weekNutrient needs: Fertilize once a month, using standard 5-10-10 formulation.
Planting tips: Plant seedlings 12 inches apart; bury up to the first two leaves. Cucumbers grow well next to beans and corn.
Time from seedling to harvest: Six weeks for seeds; five weeks for plants.
How to harvest: Harvest when fruit is smooth and green (before they turn yellow). Cut from stem.
Lettuce
History and fun facts: Lettuce is in the Aster family, and is related to artichokes and dande-lion. Lettuce is the world’s most used salad crop. It originated in the eastern Mediterranean basin and was cultivated by the Egyptians as early as 4,500 years ago. Over time, people selectively cultivated the varieties that were less bitter, had less spines, less milky latex sap and less bitterness. There are four main forms — crisphead, butterhead, cos and loose leaf. Lettuce is a cool-season crop, and grows and tastes best when grown between 46 degrees and 75 degrees.
Time of year to plant: North: February – March and SeptemberCentral: September – MarchSouth: September – January
Type of planting: Seeds or transplantsFlorida-friendly varieties:
Crisp: Floricrisp, Minetto, Ithatca, FultonButterhead: Bibb, White Boston, Tom ThumbLeaf: Simpson, Red Sails, Salad BowlRomaine: Parris Island Cos, Valmaine, Floricos
Sun: Four-to-six hours per dayWater: Keep soil evenly moistNutrient needs: Fertilize once a month with standard 5-10-10 fertilizer.
Gardening for Grades: Chapter 2, P1anting and Growing Tips — Cucumbers
harvest when fruit
(cucumber) is smooth
and green (before they
turn ye1 1ow).
“P1anting and Growing Tips:
Cucumbers”
36

37
Planting tips: Lettuce seeds are sown in the first quarter inch of soil. To make a lettuce row, take the handle of a digging tool and lay it on the ground, pressing lightly. This will make a small furrow, in which to scatter the seeds. Tip the seed packet and let the seeds scatter from the corner of the packet along the row. Use the edges of the furrow to cover the seeds lightly, and water regularly until seeds sprout. When plants have first two leaves visible, pinch plants in between until plants are at recommended spacing. As lettuce matures, daytime tempera-tures will reach above 75 degrees and the lettuce will start to grow taller in the middle. This is called “bolting.” As soon as the lettuce begins to put energy into bolting, and making a flowerhead, its leaves become bitter. Be sure to harvest the lettuce before it bolts, or let the lettuce go to seed to collect for next season.
Time from seed to harvest: Six-to-seven weeks for seeds, five-to-six weeks for seedlings
How to harvest: Take individual outer leaves off, or cut off entire plant. To save seed, allow lettuce to bolt up and form flowers. When seeds are fuzzy, pull the plant and hang it upside down in a paper bag to dry. When they’re completely dry, rub them between your hands to separate seeds from chaff, and store in a cool, dry place.
Ornamenta1 P1ants (Centra1 and Tropica1)
Florida produces the second highest value of nursery products in the country, adding $1.9 billion to Florida’s economy in 2008. Nursery products are divided into three main types: annuals, perennials and woody plants/shrubs. Twenty percent of plants sold in nurseries are small annual and perennial flowering plants. Annuals grow for only one season, then produce seeds and die. Many annuals from other parts of the country “perennialize,” or continue to grow, in Florida due to its warm weather.
The following is a list of popular annual and perennial flowers to use in creating a flower garden in the schoolyard.
Sunny Locations
Cold Season Annuals Warm Season Annuals (Planting Date)
Pansy (November – February)Snapdragon (November – March)Dianthus (November – February)
Marigold (March–June)Verbena (March–April)Salvia (March–June)Sunflowers (mid–August)
Drought-TolerantPortulaca (April–July)Gazania (N/C: March–May, S: Nov.–May) Purslane (April–June)Periwinkle (March–October)Creeping Zinnia (March–May)
Perennials
African Iris Beebalm (N/C)BlanketflowersSalviaChoreopsis
White/purple (year round)Red (April–June)Yellow, Orange, Red (March–November)Purple (year round)Yellow (April–October)
N/C – North/Central Florida S – South Florida
37Gardening for Grades: Chapter 2, P1anting and Growing Tips — Lettuce
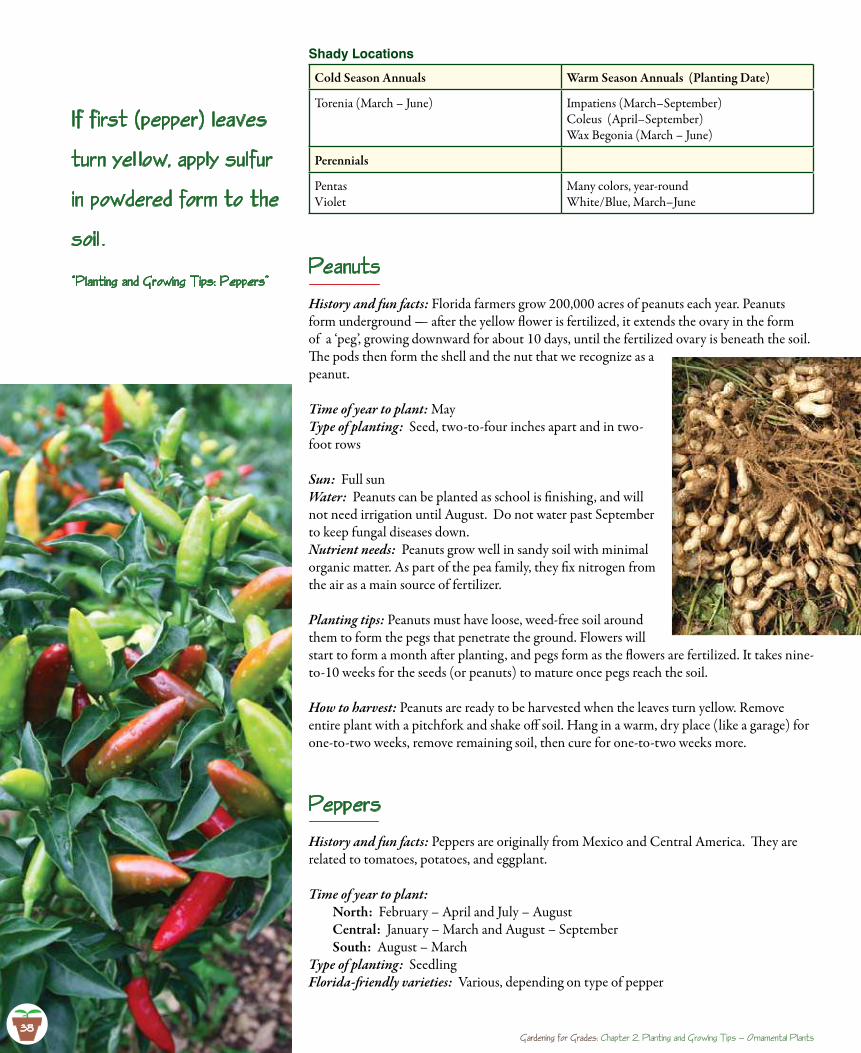
Shady Locations
Cold Season Annuals Warm Season Annuals (Planting Date)
Torenia (March – June) Impatiens (March–September)Coleus (April–September)Wax Begonia (March – June)
Perennials
PentasViolet
Many colors, year-roundWhite/Blue, March–June
Peanuts
History and fun facts: Florida farmers grow 200,000 acres of peanuts each year. Peanuts form underground — after the yellow flower is fertilized, it extends the ovary in the form of a ‘peg’, growing downward for about 10 days, until the fertilized ovary is beneath the soil. The pods then form the shell and the nut that we recognize as a peanut.
Time of year to plant: MayType of planting: Seed, two-to-four inches apart and in two-foot rows
Sun: Full sunWater: Peanuts can be planted as school is finishing, and will not need irrigation until August. Do not water past September to keep fungal diseases down. Nutrient needs: Peanuts grow well in sandy soil with minimal organic matter. As part of the pea family, they fix nitrogen from the air as a main source of fertilizer.
Planting tips: Peanuts must have loose, weed-free soil around them to form the pegs that penetrate the ground. Flowers will start to form a month after planting, and pegs form as the flowers are fertilized. It takes nine-to-10 weeks for the seeds (or peanuts) to mature once pegs reach the soil.
How to harvest: Peanuts are ready to be harvested when the leaves turn yellow. Remove entire plant with a pitchfork and shake off soil. Hang in a warm, dry place (like a garage) for one-to-two weeks, remove remaining soil, then cure for one-to-two weeks more.
Peppers
History and fun facts: Peppers are originally from Mexico and Central America. They are related to tomatoes, potatoes, and eggplant.
Time of year to plant:North: February – April and July – AugustCentral: January – March and August – SeptemberSouth: August – March
Type of planting: SeedlingFlorida-friendly varieties: Various, depending on type of pepper
If f irst (pepper) 1eaves
turn ye1 1ow, app1y su1fur
in powdered form to the
soi1 .
“P1anting and Growing Tips: Peppers”
38Gardening for Grades: Chapter 2, P1anting and Growing Tips — Ornamenta1 P1ants
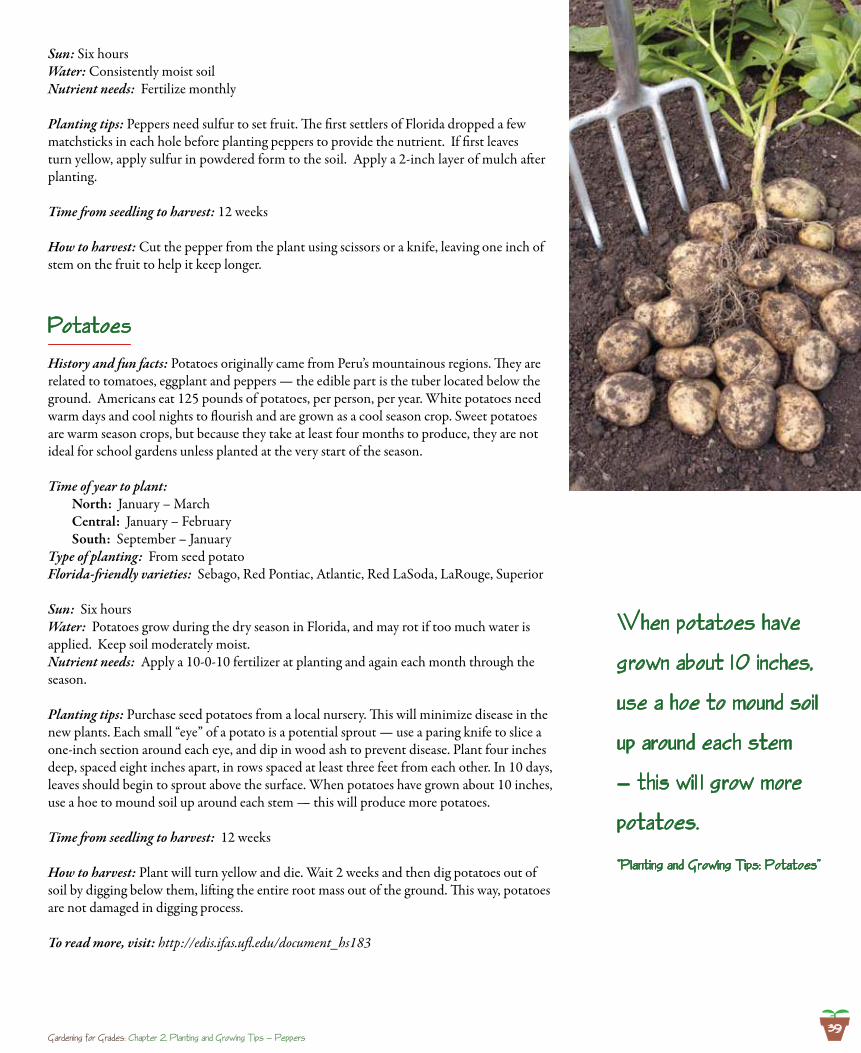
39
Sun: Six hoursWater: Consistently moist soilNutrient needs: Fertilize monthly
Planting tips: Peppers need sulfur to set fruit. The first settlers of Florida dropped a few matchsticks in each hole before planting peppers to provide the nutrient. If first leaves turn yellow, apply sulfur in powdered form to the soil. Apply a 2-inch layer of mulch after planting.
Time from seedling to harvest: 12 weeks
How to harvest: Cut the pepper from the plant using scissors or a knife, leaving one inch of stem on the fruit to help it keep longer.
Potatoes
History and fun facts: Potatoes originally came from Peru’s mountainous regions. They are related to tomatoes, eggplant and peppers — the edible part is the tuber located below the ground. Americans eat 125 pounds of potatoes, per person, per year. White potatoes need warm days and cool nights to flourish and are grown as a cool season crop. Sweet potatoes are warm season crops, but because they take at least four months to produce, they are not ideal for school gardens unless planted at the very start of the season.
Time of year to plant: North: January – MarchCentral: January – FebruarySouth: September – January
Type of planting: From seed potatoFlorida-friendly varieties: Sebago, Red Pontiac, Atlantic, Red LaSoda, LaRouge, Superior
Sun: Six hoursWater: Potatoes grow during the dry season in Florida, and may rot if too much water is applied. Keep soil moderately moist.Nutrient needs: Apply a 10-0-10 fertilizer at planting and again each month through the season.
Planting tips: Purchase seed potatoes from a local nursery. This will minimize disease in the new plants. Each small “eye” of a potato is a potential sprout — use a paring knife to slice a one-inch section around each eye, and dip in wood ash to prevent disease. Plant four inches deep, spaced eight inches apart, in rows spaced at least three feet from each other. In 10 days, leaves should begin to sprout above the surface. When potatoes have grown about 10 inches, use a hoe to mound soil up around each stem — this will produce more potatoes.
Time from seedling to harvest: 12 weeks
How to harvest: Plant will turn yellow and die. Wait 2 weeks and then dig potatoes out of soil by digging below them, lifting the entire root mass out of the ground. This way, potatoes are not damaged in digging process.
To read more, visit: http://edis.ifas.ufl.edu/document_hs183
When potatoes have
grown about 10 inches,
use a hoe to mound soi1
up around each stem
— this wi1 1 grow more
potatoes.
“P1anting and Growing Tips: Potatoes”
Gardening for Grades: Chapter 2, P1anting and Growing Tips — Peppers
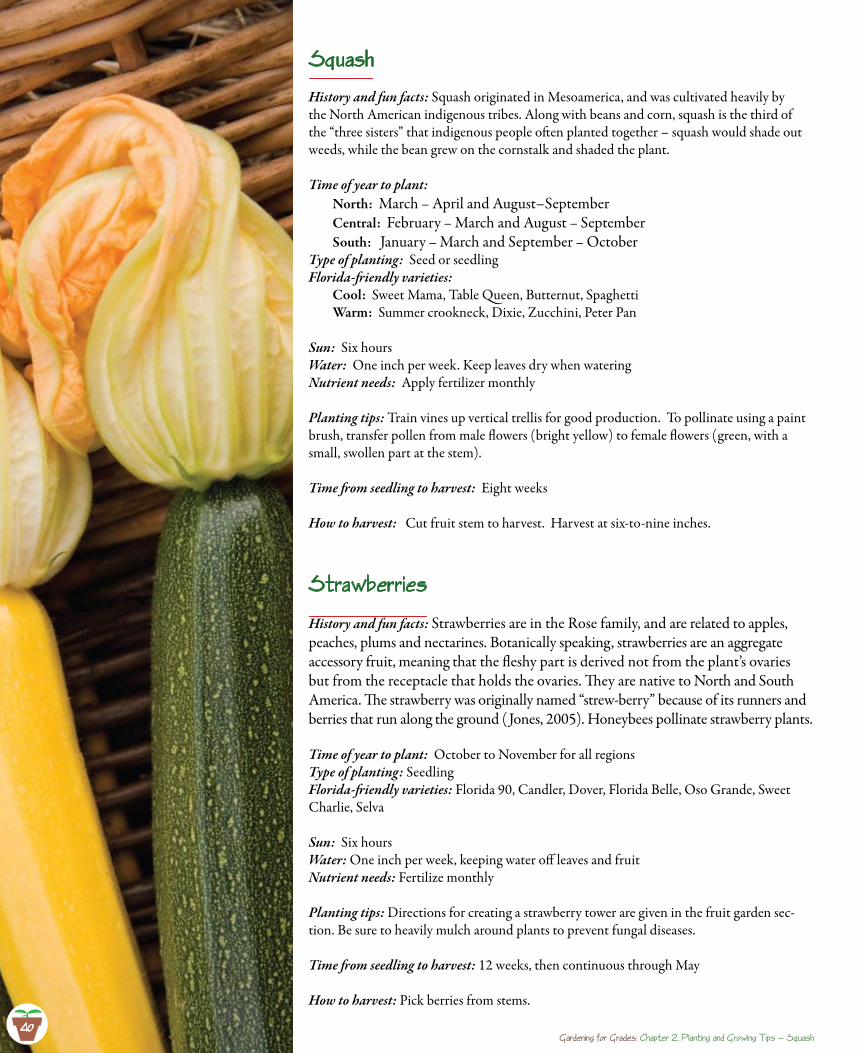
Squash
History and fun facts: Squash originated in Mesoamerica, and was cultivated heavily by the North American indigenous tribes. Along with beans and corn, squash is the third of the “three sisters” that indigenous people often planted together – squash would shade out weeds, while the bean grew on the cornstalk and shaded the plant.
Time of year to plant:North: March – April and August–SeptemberCentral: February – March and August – SeptemberSouth: January – March and September – October
Type of planting: Seed or seedlingFlorida-friendly varieties:
Cool: Sweet Mama, Table Queen, Butternut, SpaghettiWarm: Summer crookneck, Dixie, Zucchini, Peter Pan
Sun: Six hoursWater: One inch per week. Keep leaves dry when wateringNutrient needs: Apply fertilizer monthly
Planting tips: Train vines up vertical trellis for good production. To pollinate using a paint brush, transfer pollen from male flowers (bright yellow) to female flowers (green, with a small, swollen part at the stem).
Time from seedling to harvest: Eight weeks
How to harvest: Cut fruit stem to harvest. Harvest at six-to-nine inches.
Strawberries
History and fun facts: Strawberries are in the Rose family, and are related to apples, peaches, plums and nectarines. Botanically speaking, strawberries are an aggregate accessory fruit, meaning that the fleshy part is derived not from the plant’s ovaries but from the receptacle that holds the ovaries. They are native to North and South America. The strawberry was originally named “strew-berry” because of its runners and berries that run along the ground (Jones, 2005). Honeybees pollinate strawberry plants.
Time of year to plant: October to November for all regionsType of planting: SeedlingFlorida-friendly varieties: Florida 90, Candler, Dover, Florida Belle, Oso Grande, Sweet Charlie, Selva
Sun: Six hours Water: One inch per week, keeping water off leaves and fruitNutrient needs: Fertilize monthly
Planting tips: Directions for creating a strawberry tower are given in the fruit garden sec-tion. Be sure to heavily mulch around plants to prevent fungal diseases.
Time from seedling to harvest: 12 weeks, then continuous through May
How to harvest: Pick berries from stems.
40Gardening for Grades: Chapter 2, P1anting and Growing Tips — Squash
40
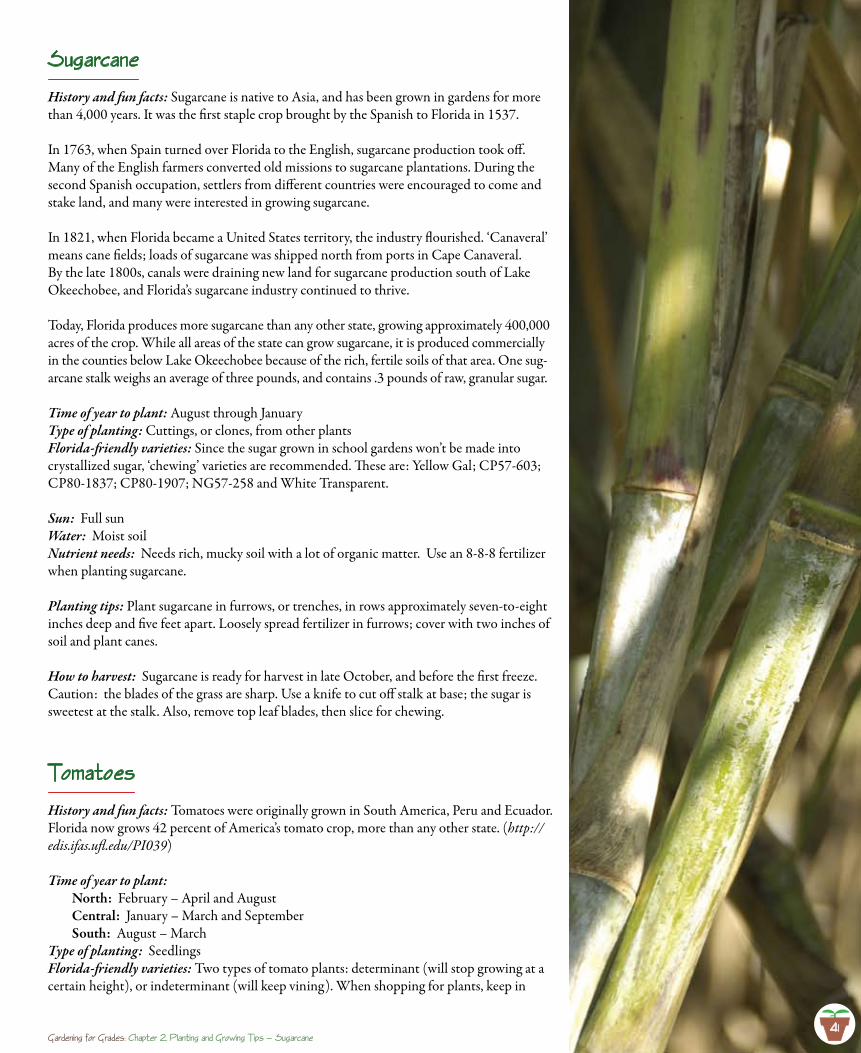
41
Sugarcane
History and fun facts: Sugarcane is native to Asia, and has been grown in gardens for more than 4,000 years. It was the first staple crop brought by the Spanish to Florida in 1537.
In 1763, when Spain turned over Florida to the English, sugarcane production took off. Many of the English farmers converted old missions to sugarcane plantations. During the second Spanish occupation, settlers from different countries were encouraged to come and stake land, and many were interested in growing sugarcane.
In 1821, when Florida became a United States territory, the industry flourished. ‘Canaveral’ means cane fields; loads of sugarcane was shipped north from ports in Cape Canaveral. By the late 1800s, canals were draining new land for sugarcane production south of Lake Okeechobee, and Florida’s sugarcane industry continued to thrive.
Today, Florida produces more sugarcane than any other state, growing approximately 400,000 acres of the crop. While all areas of the state can grow sugarcane, it is produced commercially in the counties below Lake Okeechobee because of the rich, fertile soils of that area. One sug-arcane stalk weighs an average of three pounds, and contains .3 pounds of raw, granular sugar.
Time of year to plant: August through JanuaryType of planting: Cuttings, or clones, from other plantsFlorida-friendly varieties: Since the sugar grown in school gardens won’t be made into crystallized sugar, ‘chewing’ varieties are recommended. These are: Yellow Gal; CP57-603; CP80-1837; CP80-1907; NG57-258 and White Transparent.
Sun: Full sunWater: Moist soilNutrient needs: Needs rich, mucky soil with a lot of organic matter. Use an 8-8-8 fertilizer when planting sugarcane.
Planting tips: Plant sugarcane in furrows, or trenches, in rows approximately seven-to-eight inches deep and five feet apart. Loosely spread fertilizer in furrows; cover with two inches of soil and plant canes.
How to harvest: Sugarcane is ready for harvest in late October, and before the first freeze. Caution: the blades of the grass are sharp. Use a knife to cut off stalk at base; the sugar is sweetest at the stalk. Also, remove top leaf blades, then slice for chewing.
Tomatoes
History and fun facts: Tomatoes were originally grown in South America, Peru and Ecuador. Florida now grows 42 percent of America’s tomato crop, more than any other state. (http://edis.ifas.ufl.edu/PI039)
Time of year to plant:North: February – April and AugustCentral: January – March and SeptemberSouth: August – March
Type of planting: SeedlingsFlorida-friendly varieties: Two types of tomato plants: determinant (will stop growing at a certain height), or indeterminant (will keep vining). When shopping for plants, keep in
Gardening for Grades: Chapter 2, P1anting and Growing Tips — Sugarcane41
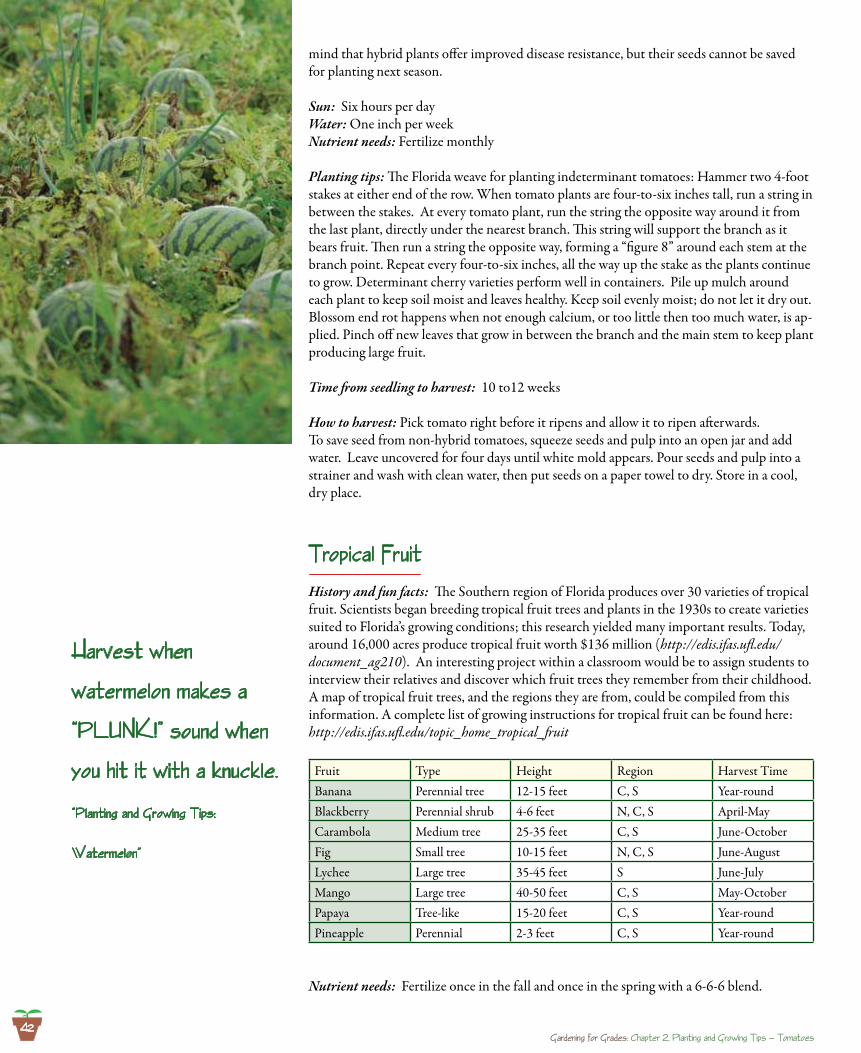
mind that hybrid plants offer improved disease resistance, but their seeds cannot be saved for planting next season.
Sun: Six hours per dayWater: One inch per weekNutrient needs: Fertilize monthly
Planting tips: The Florida weave for planting indeterminant tomatoes: Hammer two 4-foot stakes at either end of the row. When tomato plants are four-to-six inches tall, run a string in between the stakes. At every tomato plant, run the string the opposite way around it from the last plant, directly under the nearest branch. This string will support the branch as it bears fruit. Then run a string the opposite way, forming a “figure 8” around each stem at the branch point. Repeat every four-to-six inches, all the way up the stake as the plants continue to grow. Determinant cherry varieties perform well in containers. Pile up mulch around each plant to keep soil moist and leaves healthy. Keep soil evenly moist; do not let it dry out. Blossom end rot happens when not enough calcium, or too little then too much water, is ap-plied. Pinch off new leaves that grow in between the branch and the main stem to keep plant producing large fruit.
Time from seedling to harvest: 10 to12 weeks
How to harvest: Pick tomato right before it ripens and allow it to ripen afterwards.To save seed from non-hybrid tomatoes, squeeze seeds and pulp into an open jar and add water. Leave uncovered for four days until white mold appears. Pour seeds and pulp into a strainer and wash with clean water, then put seeds on a paper towel to dry. Store in a cool, dry place.
Tropica1 Fruit
History and fun facts: The Southern region of Florida produces over 30 varieties of tropical fruit. Scientists began breeding tropical fruit trees and plants in the 1930s to create varieties suited to Florida’s growing conditions; this research yielded many important results. Today, around 16,000 acres produce tropical fruit worth $136 million (http://edis.ifas.ufl.edu/document_ag210). An interesting project within a classroom would be to assign students to interview their relatives and discover which fruit trees they remember from their childhood. A map of tropical fruit trees, and the regions they are from, could be compiled from this information. A complete list of growing instructions for tropical fruit can be found here: http://edis.ifas.ufl.edu/topic_home_tropical_fruit
Fruit Type Height Region Harvest TimeBanana Perennial tree 12-15 feet C, S Year-roundBlackberry Perennial shrub 4-6 feet N, C, S April-MayCarambola Medium tree 25-35 feet C, S June-OctoberFig Small tree 10-15 feet N, C, S June-AugustLychee Large tree 35-45 feet S June-JulyMango Large tree 40-50 feet C, S May-OctoberPapaya Tree-like 15-20 feet C, S Year-roundPineapple Perennial 2-3 feet C, S Year-round
Nutrient needs: Fertilize once in the fall and once in the spring with a 6-6-6 blend.
harvest when
waterme1on makes a
“PLUNK!” sound when
you hit it with a knuck1e.
“P1anting and Growing Tips:
Waterme1on”
Gardening for Grades: Chapter 2, P1anting and Growing Tips — Tomatoes42
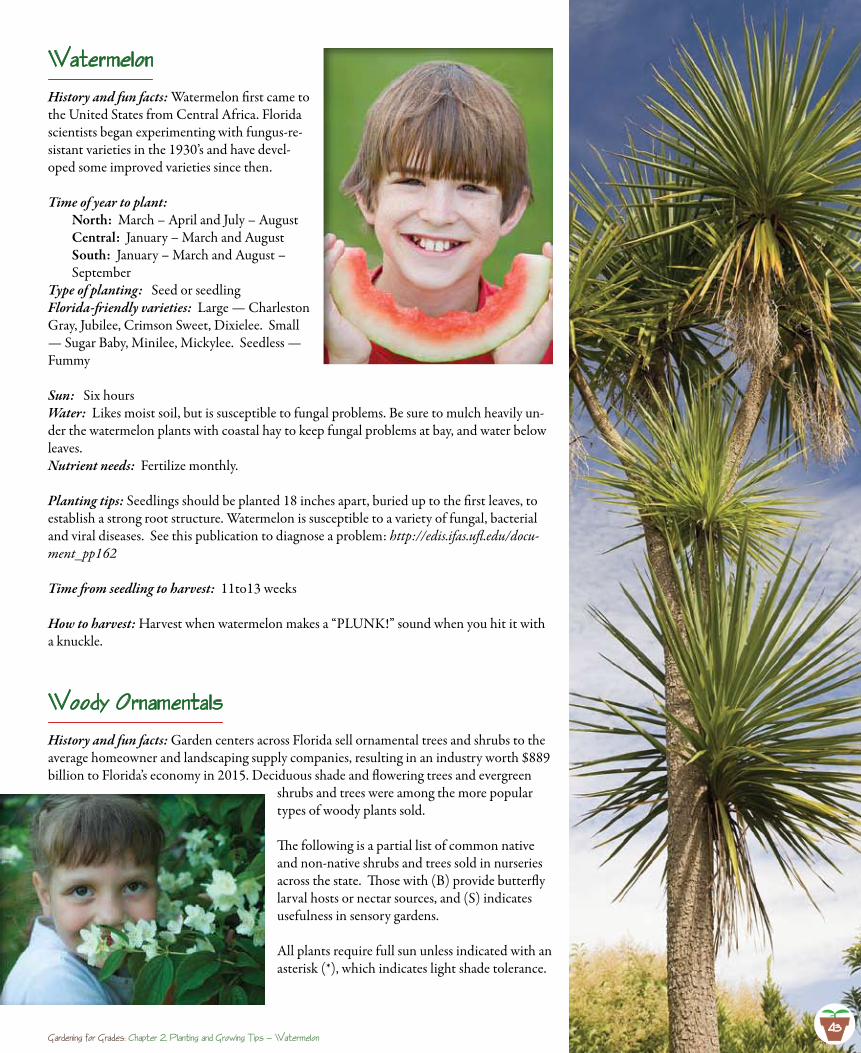
43
Waterme1on
History and fun facts: Watermelon first came to the United States from Central Africa. Florida scientists began experimenting with fungus-re-sistant varieties in the 1930’s and have devel-oped some improved varieties since then.
Time of year to plant: North: March – April and July – AugustCentral: January – March and AugustSouth: January – March and August – September
Type of planting: Seed or seedlingFlorida-friendly varieties: Large — Charleston Gray, Jubilee, Crimson Sweet, Dixielee. Small — Sugar Baby, Minilee, Mickylee. Seedless — Fummy
Sun: Six hoursWater: Likes moist soil, but is susceptible to fungal problems. Be sure to mulch heavily un-der the watermelon plants with coastal hay to keep fungal problems at bay, and water below leaves.Nutrient needs: Fertilize monthly.
Planting tips: Seedlings should be planted 18 inches apart, buried up to the first leaves, to establish a strong root structure. Watermelon is susceptible to a variety of fungal, bacterial and viral diseases. See this publication to diagnose a problem: http://edis.ifas.ufl.edu/docu-ment_pp162
Time from seedling to harvest: 11to13 weeks
How to harvest: Harvest when watermelon makes a “PLUNK!” sound when you hit it with a knuckle.
Woody Ornamenta1s
History and fun facts: Garden centers across Florida sell ornamental trees and shrubs to the average homeowner and landscaping supply companies, resulting in an industry worth $889 billion to Florida’s economy in 2015. Deciduous shade and flowering trees and evergreen
shrubs and trees were among the more popular types of woody plants sold.
The following is a partial list of common native and non-native shrubs and trees sold in nurseries across the state. Those with (B) provide butterfly larval hosts or nectar sources, and (S) indicates usefulness in sensory gardens.
All plants require full sun unless indicated with an asterisk (*), which indicates light shade tolerance.
Gardening for Grades: Chapter 2, P1anting and Growing Tips — Waterme1on43
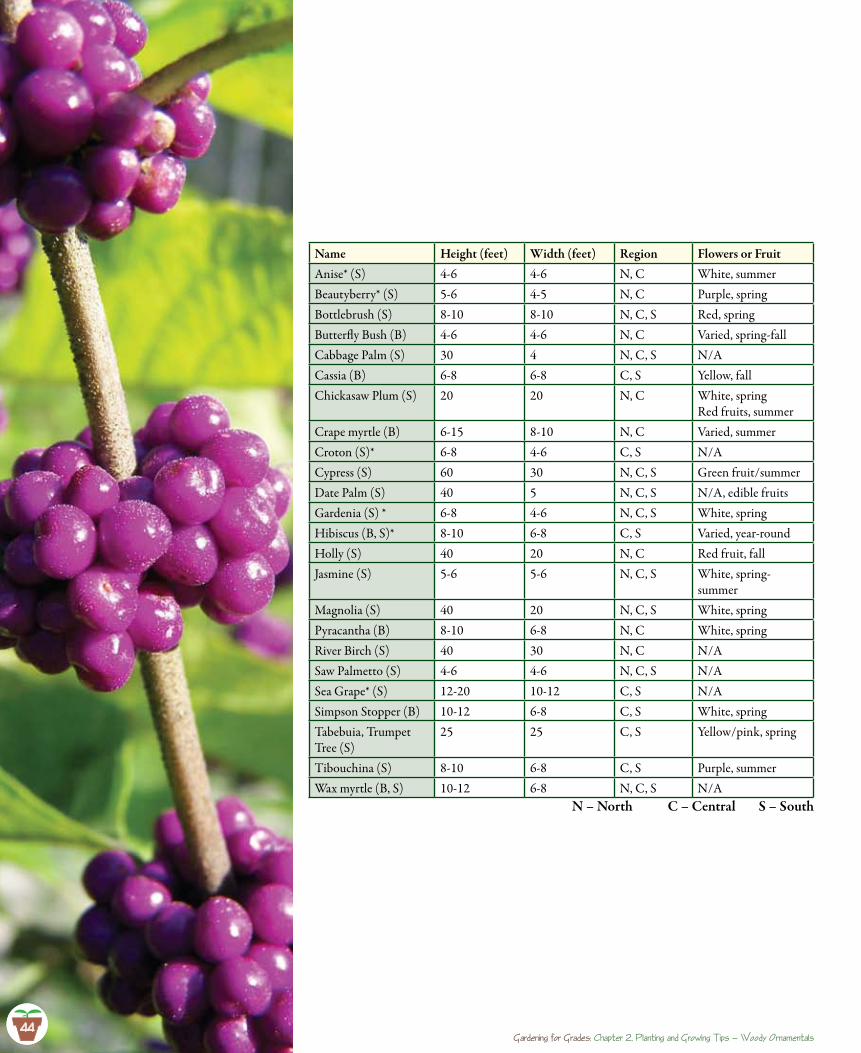
Name Height (feet) Width (feet) Region Flowers or FruitAnise* (S) 4-6 4-6 N, C White, summerBeautyberry* (S) 5-6 4-5 N, C Purple, springBottlebrush (S) 8-10 8-10 N, C, S Red, springButterfly Bush (B) 4-6 4-6 N, C Varied, spring-fallCabbage Palm (S) 30 4 N, C, S N/ACassia (B) 6-8 6-8 C, S Yellow, fallChickasaw Plum (S) 20 20 N, C White, spring
Red fruits, summerCrape myrtle (B) 6-15 8-10 N, C Varied, summerCroton (S)* 6-8 4-6 C, S N/ACypress (S) 60 30 N, C, S Green fruit/summerDate Palm (S) 40 5 N, C, S N/A, edible fruitsGardenia (S) * 6-8 4-6 N, C, S White, springHibiscus (B, S)* 8-10 6-8 C, S Varied, year-roundHolly (S) 40 20 N, C Red fruit, fallJasmine (S) 5-6 5-6 N, C, S White, spring-
summerMagnolia (S) 40 20 N, C, S White, springPyracantha (B) 8-10 6-8 N, C White, springRiver Birch (S) 40 30 N, C N/ASaw Palmetto (S) 4-6 4-6 N, C, S N/ASea Grape* (S) 12-20 10-12 C, S N/ASimpson Stopper (B) 10-12 6-8 C, S White, springTabebuia, Trumpet Tree (S)
25 25 C, S Yellow/pink, spring
Tibouchina (S) 8-10 6-8 C, S Purple, summerWax myrtle (B, S) 10-12 6-8 N, C, S N/A
N – North C – Central S – South
44Gardening for Grades: Chapter 2, P1anting and Growing Tips — Woody Ornamenta1s
4444
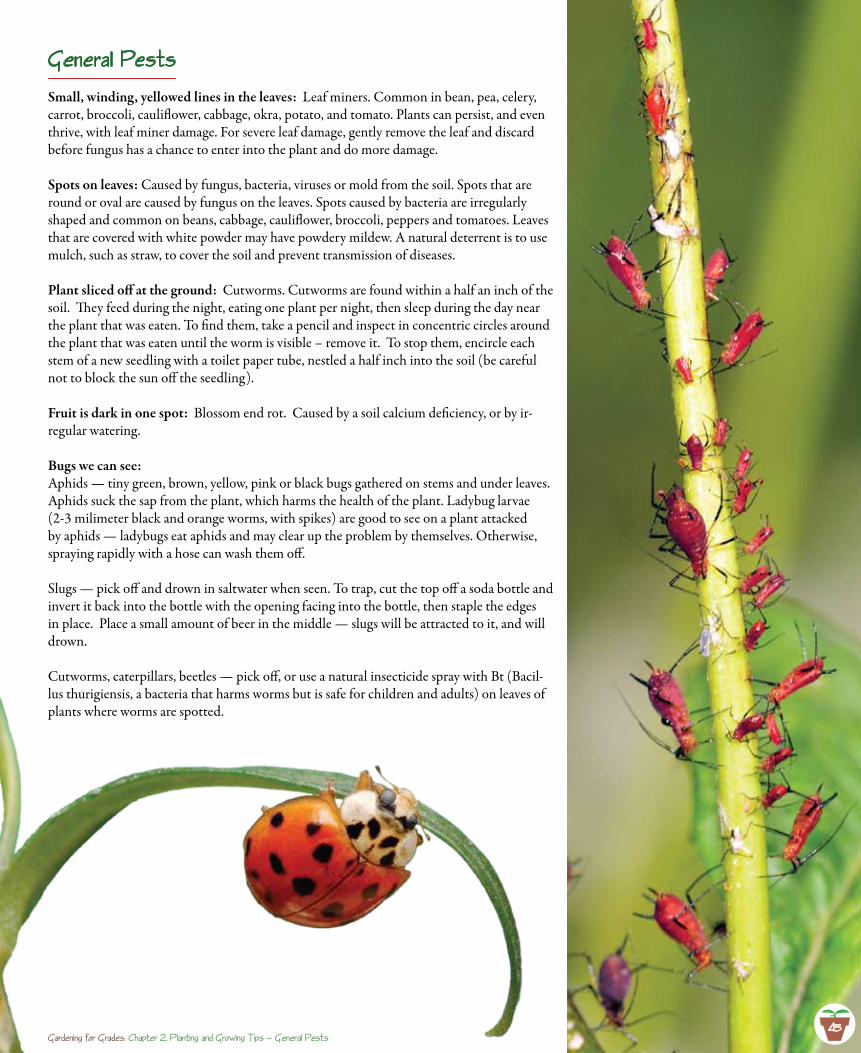
45
Genera1 Pests
Small, winding, yellowed lines in the leaves: Leaf miners. Common in bean, pea, celery, carrot, broccoli, cauliflower, cabbage, okra, potato, and tomato. Plants can persist, and even thrive, with leaf miner damage. For severe leaf damage, gently remove the leaf and discard before fungus has a chance to enter into the plant and do more damage.
Spots on leaves: Caused by fungus, bacteria, viruses or mold from the soil. Spots that are round or oval are caused by fungus on the leaves. Spots caused by bacteria are irregularly shaped and common on beans, cabbage, cauliflower, broccoli, peppers and tomatoes. Leaves that are covered with white powder may have powdery mildew. A natural deterrent is to use mulch, such as straw, to cover the soil and prevent transmission of diseases.
Plant sliced off at the ground: Cutworms. Cutworms are found within a half an inch of the soil. They feed during the night, eating one plant per night, then sleep during the day near the plant that was eaten. To find them, take a pencil and inspect in concentric circles around the plant that was eaten until the worm is visible – remove it. To stop them, encircle each stem of a new seedling with a toilet paper tube, nestled a half inch into the soil (be careful not to block the sun off the seedling).
Fruit is dark in one spot: Blossom end rot. Caused by a soil calcium deficiency, or by ir-regular watering.
Bugs we can see:Aphids — tiny green, brown, yellow, pink or black bugs gathered on stems and under leaves. Aphids suck the sap from the plant, which harms the health of the plant. Ladybug larvae (2-3 milimeter black and orange worms, with spikes) are good to see on a plant attacked by aphids — ladybugs eat aphids and may clear up the problem by themselves. Otherwise, spraying rapidly with a hose can wash them off.
Slugs — pick off and drown in saltwater when seen. To trap, cut the top off a soda bottle and invert it back into the bottle with the opening facing into the bottle, then staple the edges in place. Place a small amount of beer in the middle — slugs will be attracted to it, and will drown.
Cutworms, caterpillars, beetles — pick off, or use a natural insecticide spray with Bt (Bacil-lus thurigiensis, a bacteria that harms worms but is safe for children and adults) on leaves of plants where worms are spotted.
45Gardening for Grades: Chapter 2, P1anting and Growing Tips — Genera1 Pests
OverviewYoung students become soil surgeons, dissecting soil and sorting its components and begin to discover its unique properties.
BackgroundSee It All Begins With Soil activity on page 51.
GroundworkObjective: To understand that soil is comprised of many living and non-living components.
Students imagine they are part of a medical practice called Soil Sort, Inc. These 1 . surgeons have a very special patient — soil! Give students one-to-two cups of soil. Have the surgeons use their senses to examine their patients. Then have them perform surgery to figure out what’s inside their patients.Challenge the surgeons to dissect their patients by separating the soil into rough 2. piles of as many different types of soil components as possible. Suggest they sort the soil into categories — size, shape, color, materials. Have students use the Soil Sort worksheets to sort the soil and to record their findings.As they attempt to separate the different components, encourage students to try to 3. figure out what different parts make up the whole. In potting soil: grains of sand originally came from large rocks, and brown, light material came from tree bark or decomposed plants. (Peat moss is decomposed moss, found in peat bogs, collected and bagged for garden use.) White, round objects in potting soil is a material called vermiculite, which helps keep the soil airy and moist. Have pairs of surgeons give a ‘second opinion’ by teaming up with another pair. 4. Ask the new teams to report to the class: “What type of piles did you have in com-mon? Why do you think you did not all have the same category?”
Activity: Soi1 Sort Grades K-3
Curricu1um ConnectionsChapter 3
Gardening for Grades: Chapter 3, Curricu1um Connections — Activity: Soi1 Sort
Time:
Groundwork: 45 minutes
Exploration: Two 45-minute sessions
Making connections: Ongoing
Materia1s:
1 to 2 cups soil from the sensory •garden1 to 2 cups of potting soil•Butcher/freezer paper with shiny •surfaceToothpicks or plastic spoons•Hand lens or magnifier•Clear liter (or quart) jars•Water•Paper cups•2 clear measuring cups•Rubber surgeon’s gloves or masks•Soil Sort Worksheet•
Standards At-A -G1anceFlorida Standards Met:
SC.K.N.1.2, SC.K.N.1.3, SC.K.P.8.1, SC.1.E.6.1, SC.1.L.14.1, SC.1.L.14.3, SC.1.N.1.2, SC.1.N.1.3, SC.1.P.8.1, SC.2.E.6.2, SC.2.E.6.3, SC.3.N.1.6, SC.3.N.1.7, SC.3.P.8.2, SC.3.P.8.3, SC.3.N.1.3, SC.4.E.6.3, SC.4.P.8.1, SC.5.P.8.3, LAFS.K.SL.1.2, LAFS.K.SL.2.4, LAFS.K.SL.2.5, LAFS.1.SL.1.2, LAFS.1.SL.2.4, LAFS.1.SL.2.5, LAFS.2.SL.1.2, LAFS.3.SL.1.2, LAFS.3.SL.2.4, LAFSK.L.3.5, LAFS.1.L.3.54, MAFS.K.CC.2.5, MAFS.K.CC.3.6, MAFS.K.MD.1.1, MAFS.K.MD.1.2, MAFS.K.MD.2.3, MAFS.K.G.1.1, MAFS.1.MD.3.4, MAFS.2.MD.4.10, MAFS.3.MD.1.2
Next Generation Science Standards:
2-PS1-1, 3-LS1-1
46
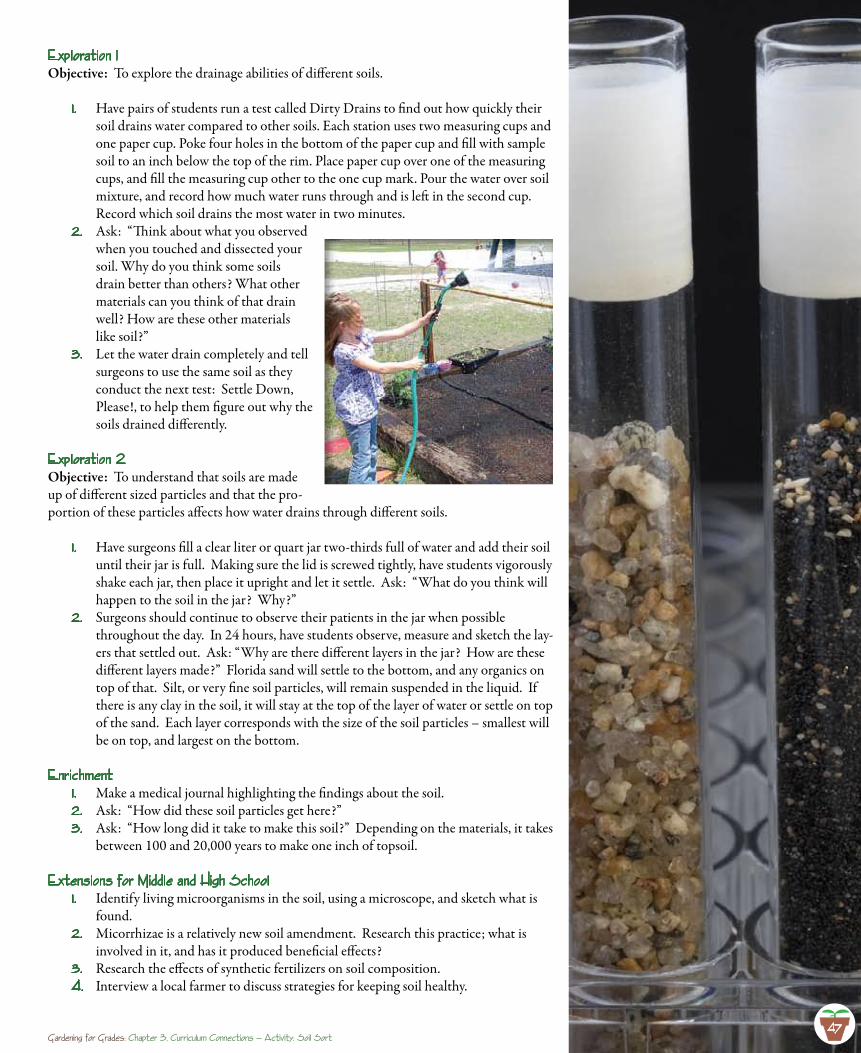
Exp1oration 1Objective: To explore the drainage abilities of different soils.
Have pairs of students run a test called Dirty Drains to find out how quickly their 1 . soil drains water compared to other soils. Each station uses two measuring cups and one paper cup. Poke four holes in the bottom of the paper cup and fill with sample soil to an inch below the top of the rim. Place paper cup over one of the measuring cups, and fill the measuring cup other to the one cup mark. Pour the water over soil mixture, and record how much water runs through and is left in the second cup. Record which soil drains the most water in two minutes. Ask: “Think about what you observed 2. when you touched and dissected your soil. Why do you think some soils drain better than others? What other materials can you think of that drain well? How are these other materials like soil?”Let the water drain completely and tell 3. surgeons to use the same soil as they conduct the next test: Settle Down, Please!, to help them figure out why the soils drained differently.
Exp1oration 2Objective: To understand that soils are made up of different sized particles and that the pro-portion of these particles affects how water drains through different soils.
Have surgeons fill a clear liter or quart jar two-thirds full of water and add their soil 1 . until their jar is full. Making sure the lid is screwed tightly, have students vigorously shake each jar, then place it upright and let it settle. Ask: “What do you think will happen to the soil in the jar? Why?”Surgeons should continue to observe their patients in the jar when possible 2. throughout the day. In 24 hours, have students observe, measure and sketch the lay-ers that settled out. Ask: “Why are there different layers in the jar? How are these different layers made?” Florida sand will settle to the bottom, and any organics on top of that. Silt, or very fine soil particles, will remain suspended in the liquid. If there is any clay in the soil, it will stay at the top of the layer of water or settle on top of the sand. Each layer corresponds with the size of the soil particles – smallest will be on top, and largest on the bottom.
EnrichmentMake a medical journal highlighting the findings about the soil.1 . Ask: “How did these soil particles get here?” 2. Ask: “How long did it take to make this soil?” Depending on the materials, it takes 3. between 100 and 20,000 years to make one inch of topsoil.
Extensions for Midd1e and high Schoo1Identify living microorganisms in the soil, using a microscope, and sketch what is 1 . found.Micorrhizae is a relatively new soil amendment. Research this practice; what is 2. involved in it, and has it produced beneficial effects?Research the effects of synthetic fertilizers on soil composition. 3. Interview a local farmer to discuss strategies for keeping soil healthy.4.
Gardening for Grades: Chapter 3, Curricu1um Connections — Activity: Soi1 Sort47

4848Gardening for Grades: Chapter 3, Curricu1um Connections — Activity: Soi1 Sort
Soi1 Sort
Medica1 Chart
Name ________________________ Date _________________
Pile # Description
Dirty DrainsSetup:
Results:
Settle Down, Please!Setup:
Results:
(Record other observations on back.)
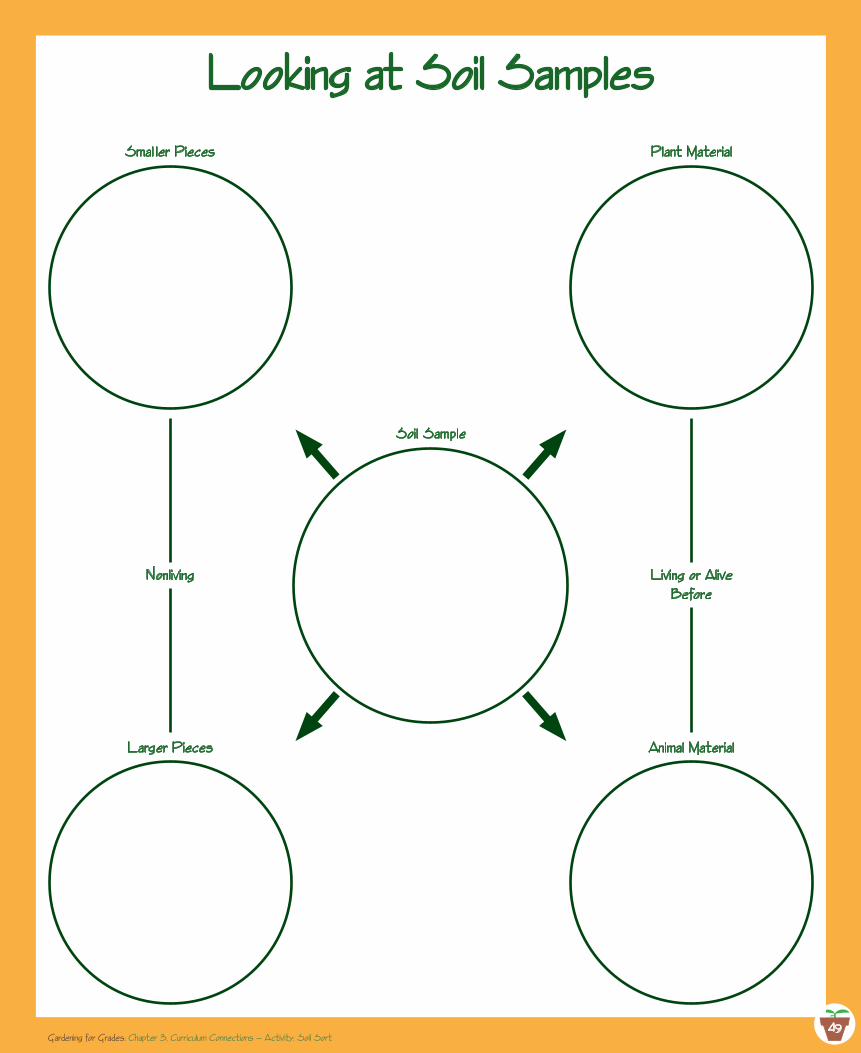
49Gardening for Grades: Chapter 3, Curricu1um Connections — Activity: Soi1 Sort
49
Looking at Soi1 Samp1esSma1 1er Pieces P1ant Materia1
Soi1 Samp1e
Non1iving Living or A1iveBefore
Larger Pieces Anima1 Materia1
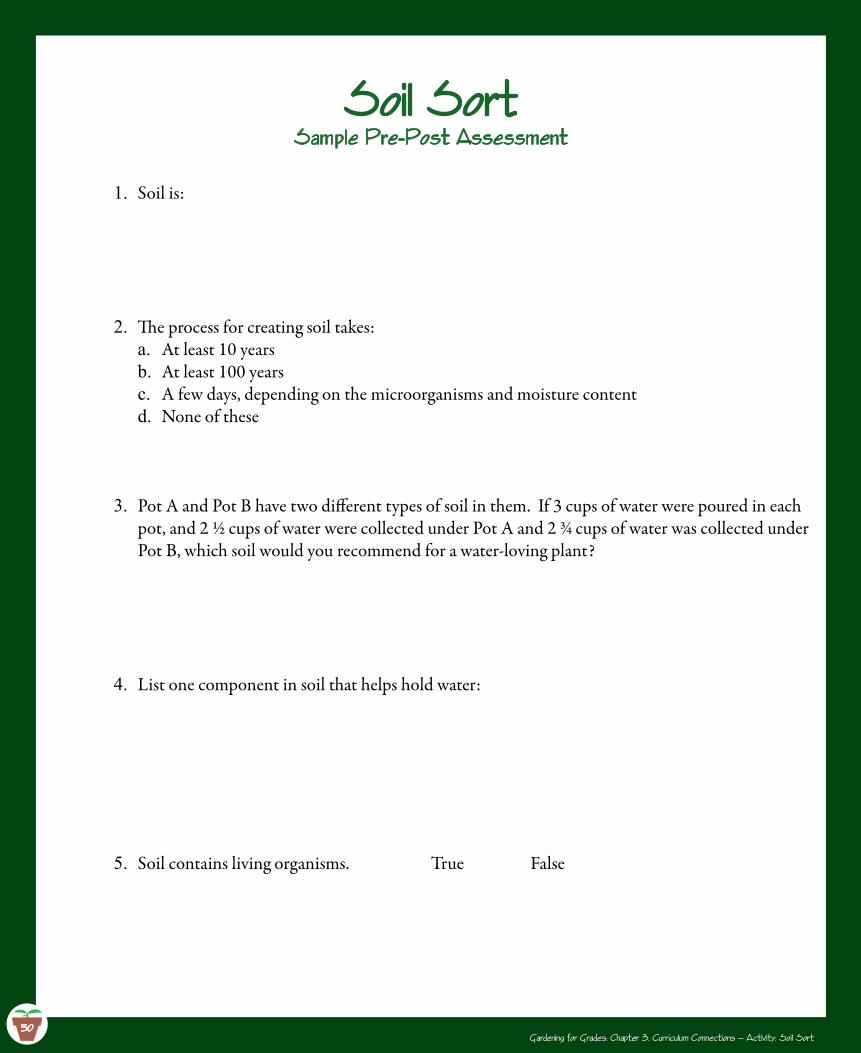
50
Soi1 SortSamp1e Pre-Post Assessment
Soil is:1.
The process for creating soil takes:2.
At least 10 yearsa.At least 100 yearsb.A few days, depending on the microorganisms and moisture contentc.None of thesed.
Pot A and Pot B have two different types of soil in them. If 3 cups of water were poured in each 3.pot, and 2 ½ cups of water were collected under Pot A and 2 ¾ cups of water was collected under Pot B, which soil would you recommend for a water-loving plant?
List one component in soil that helps hold water:4.
Soil contains living organisms. True False5.
Gardening for Grades: Chapter 3, Curricu1um Connections — Activity: Soi1 Sort50
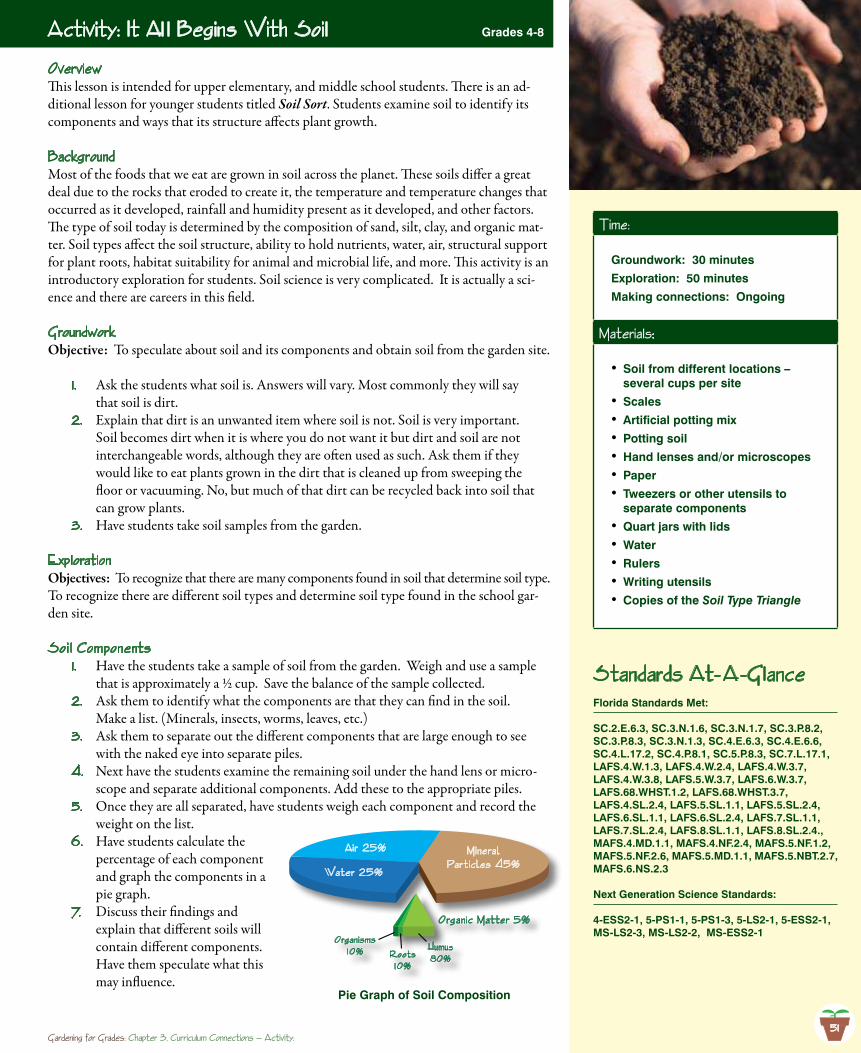
51
Activity: It A1 1 Begins With Soi1 Grades 4-8
OverviewThis lesson is intended for upper elementary, and middle school students. There is an ad-ditional lesson for younger students titled Soil Sort. Students examine soil to identify its components and ways that its structure affects plant growth.
BackgroundMost of the foods that we eat are grown in soil across the planet. These soils differ a great deal due to the rocks that eroded to create it, the temperature and temperature changes that occurred as it developed, rainfall and humidity present as it developed, and other factors. The type of soil today is determined by the composition of sand, silt, clay, and organic mat-ter. Soil types affect the soil structure, ability to hold nutrients, water, air, structural support for plant roots, habitat suitability for animal and microbial life, and more. This activity is an introductory exploration for students. Soil science is very complicated. It is actually a sci-ence and there are careers in this field.
GroundworkObjective: To speculate about soil and its components and obtain soil from the garden site.
Ask the students what soil is. Answers will vary. Most commonly they will say 1 . that soil is dirt. Explain that dirt is an unwanted item where soil is not. Soil is very important. 2. Soil becomes dirt when it is where you do not want it but dirt and soil are not interchangeable words, although they are often used as such. Ask them if they would like to eat plants grown in the dirt that is cleaned up from sweeping the floor or vacuuming. No, but much of that dirt can be recycled back into soil that can grow plants. Have students take soil samples from the garden. 3.
Exp1orationObjectives: To recognize that there are many components found in soil that determine soil type.To recognize there are different soil types and determine soil type found in the school gar-den site.
Soi 1 ComponentsHave the students take a sample of soil from the garden. Weigh and use a sample 1 . that is approximately a ½ cup. Save the balance of the sample collected.Ask them to identify what the components are that they can find in the soil. 2. Make a list. (Minerals, insects, worms, leaves, etc.)Ask them to separate out the different components that are large enough to see 3. with the naked eye into separate piles. Next have the students examine the remaining soil under the hand lens or micro-4. scope and separate additional components. Add these to the appropriate piles. Once they are all separated, have students weigh each component and record the 5. weight on the list. Have students calculate the 6. percentage of each component and graph the components in a pie graph.Discuss their findings and 7. explain that different soils will contain different components. Have them speculate what this may influence.
Time:
Groundwork: 30 minutes
Exploration: 50 minutes
Making connections: Ongoing
Materia1s:
Soil from different locations – •several cups per site
Scales•Artificial potting mix•Potting soil•Hand lenses and/or microscopes•Paper •Tweezers or other utensils to •separate components
Quart jars with lids•Water•Rulers•Writing utensils•Copies of the • Soil Type Triangle
Standards At-A -G1anceFlorida Standards Met:
SC.2.E.6.3, SC.3.N.1.6, SC.3.N.1.7, SC.3.P.8.2, SC.3.P.8.3, SC.3.N.1.3, SC.4.E.6.3, SC.4.E.6.6, SC.4.L.17.2, SC.4.P.8.1, SC.5.P.8.3, SC.7.L.17.1, LAFS.4.W.1.3, LAFS.4.W.2.4, LAFS.4.W.3.7, LAFS.4.W.3.8, LAFS.5.W.3.7, LAFS.6.W.3.7, LAFS.68.WHST.1.2, LAFS.68.WHST.3.7, LAFS.4.SL.2.4, LAFS.5.SL.1.1, LAFS.5.SL.2.4, LAFS.6.SL.1.1, LAFS.6.SL.2.4, LAFS.7.SL.1.1, LAFS.7.SL.2.4, LAFS.8.SL.1.1, LAFS.8.SL.2.4., MAFS.4.MD.1.1, MAFS.4.NF.2.4, MAFS.5.NF.1.2, MAFS.5.NF.2.6, MAFS.5.MD.1.1, MAFS.5.NBT.2.7, MAFS.6.NS.2.3
Next Generation Science Standards:
4-ESS2-1, 5-PS1-1, 5-PS1-3, 5-LS2-1, 5-ESS2-1, MS-LS2-3, MS-LS2-2, MS-ESS2-1
Gardening for Grades: Chapter 3, Curricu1um Connections — Activity:
Air 25%
Water 25%
MineralPart icles 45%
Organ ic Matter 5%
Organ isms1 0% Roots
1 0%
Humus80%
Pie Graph of Soil Composition
51
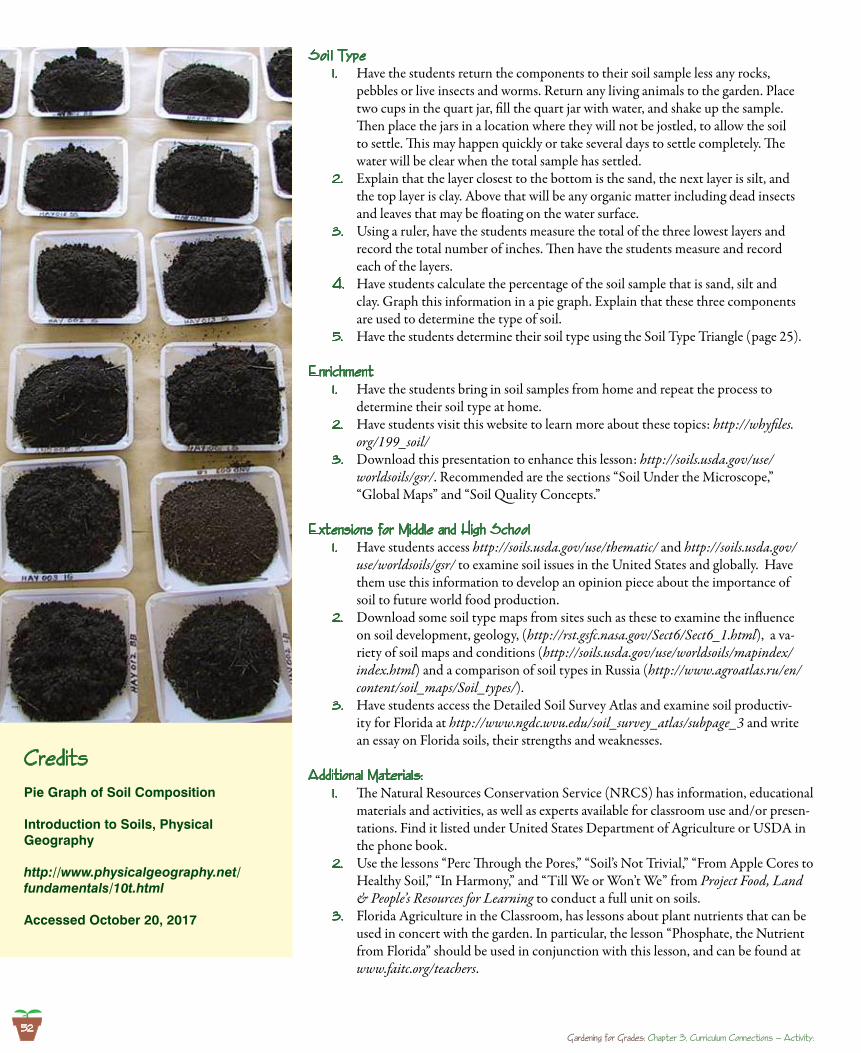
Soi 1 TypeHave the students return the components to their soil sample less any rocks, 1 . pebbles or live insects and worms. Return any living animals to the garden. Place two cups in the quart jar, fill the quart jar with water, and shake up the sample. Then place the jars in a location where they will not be jostled, to allow the soil to settle. This may happen quickly or take several days to settle completely. The water will be clear when the total sample has settled. Explain that the layer closest to the bottom is the sand, the next layer is silt, and 2. the top layer is clay. Above that will be any organic matter including dead insects and leaves that may be floating on the water surface. Using a ruler, have the students measure the total of the three lowest layers and 3. record the total number of inches. Then have the students measure and record each of the layers.Have students calculate the percentage of the soil sample that is sand, silt and 4. clay. Graph this information in a pie graph. Explain that these three components are used to determine the type of soil. Have the students determine their soil type using the Soil Type Triangle (page 25).5.
EnrichmentHave the students bring in soil samples from home and repeat the process to 1 . determine their soil type at home. Have students visit this website to learn more about these topics: 2. http://whyfiles.org/199_soil/ Download this presentation to enhance this lesson: 3. http://soils.usda.gov/use/worldsoils/gsr/. Recommended are the sections “Soil Under the Microscope,” “Global Maps” and “Soil Quality Concepts.”
Extensions for Midd1e and high Schoo1Have students access 1 . http://soils.usda.gov/use/thematic/ and http://soils.usda.gov/use/worldsoils/gsr/ to examine soil issues in the United States and globally. Have them use this information to develop an opinion piece about the importance of soil to future world food production. Download some soil type maps from sites such as these to examine the influence 2. on soil development, geology, (http://rst.gsfc.nasa.gov/Sect6/Sect6_1.html), a va-riety of soil maps and conditions (http://soils.usda.gov/use/worldsoils/mapindex/index.html) and a comparison of soil types in Russia (http://www.agroatlas.ru/en/content/soil_maps/Soil_types/).Have students access the Detailed Soil Survey Atlas and examine soil productiv-3. ity for Florida at http://www.ngdc.wvu.edu/soil_survey_atlas/subpage_3 and write an essay on Florida soils, their strengths and weaknesses.
Additiona1 Materia1s: The Natural Resources Conservation Service (NRCS) has information, educational 1 . materials and activities, as well as experts available for classroom use and/or presen-tations. Find it listed under United States Department of Agriculture or USDA in the phone book. Use the lessons “Perc Through the Pores,” “Soil’s Not Trivial,” “From Apple Cores to 2. Healthy Soil,” “In Harmony,” and “Till We or Won’t We” from Project Food, Land & People’s Resources for Learning to conduct a full unit on soils.Florida Agriculture in the Classroom, has lessons about plant nutrients that can be 3. used in concert with the garden. In particular, the lesson “Phosphate, the Nutrient from Florida” should be used in conjunction with this lesson, and can be found at www.faitc.org/teachers.
CreditsPie Graph of Soil Composition
Introduction to Soils, Physical Geography
http://www.physicalgeography.net/fundamentals/10t.html
Accessed October 20, 2017
Gardening for Grades: Chapter 3, Curricu1um Connections — Activity: 52

53
Soi1 Type Triang1e
Clay
Clay Loam
Silt
Loam
SiltyClay
Silty ClayLoam
SandyClay
SandLoamySand
SandyLoam
Sandy ClayLoam
Silt Loam
Per
cent
Cla
y Percent S
ilt
Percent Sand
102030405060708090100
10
20
30
40
50
60
70
80
90
100
10
20
30
40
50
60
70
80
90
100
53Gardening for Grades: Chapter 3, Curricu1um Connections — Activity:
First find the percentage of clay 1 .
in the soil sample along the clay side of the graph triangle. Using a ruler, draw a line across the graph parallel to the other percentage lines for clay.
Next find the percent of sand 2.
along the sand side of the triangle and draw a line across the graph parallel to the other percentage lines for sand.
Third, find the percentage of 3.
silt along the silt side of the triangle and draw a third line parallel to the percentage lines of silt.
The intersection of these three 4.
lines on the graph will fall within a soil type.
Have the students indicate the 5.
type of soil they have.
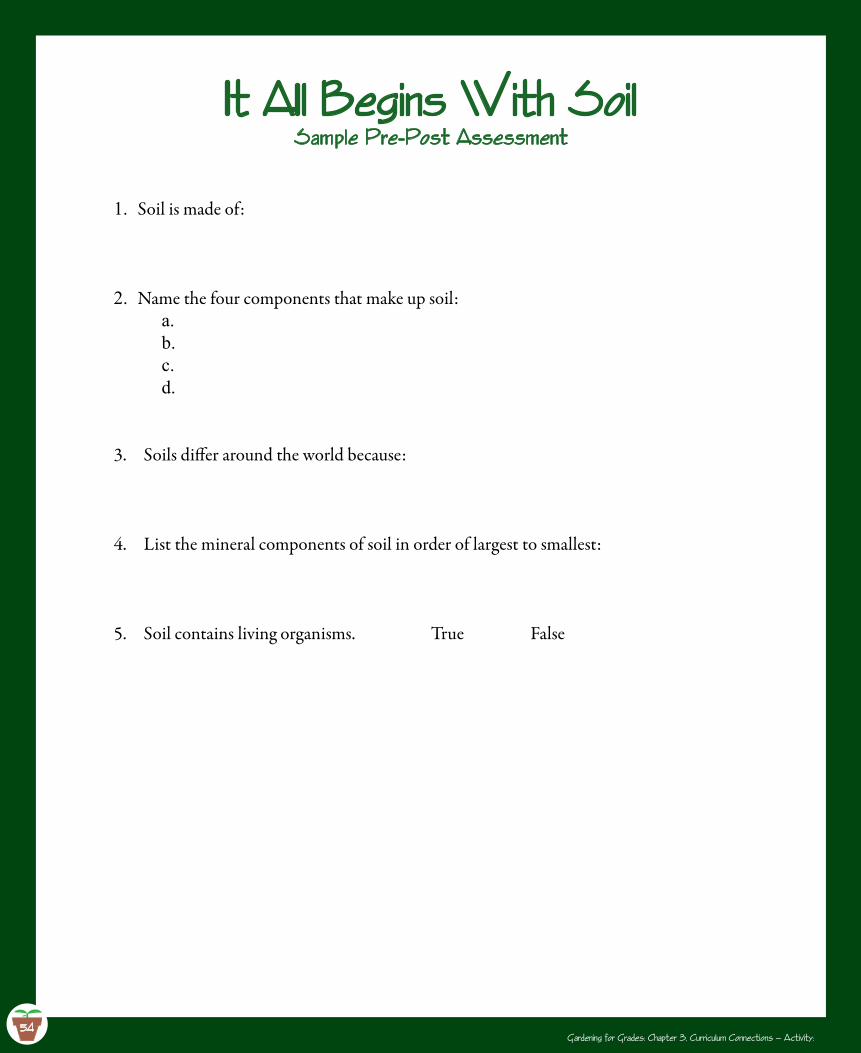
54
It A11 Begins With Soi1 Samp1e Pre-Post Assessment
Soil is made of:1.
Name the four components that make up soil:2.
a.b.c.d.
3. Soils differ around the world because:
4. List the mineral components of soil in order of largest to smallest:
5. Soil contains living organisms. True False
54Gardening for Grades: Chapter 3, Curricu1um Connections — Activity:
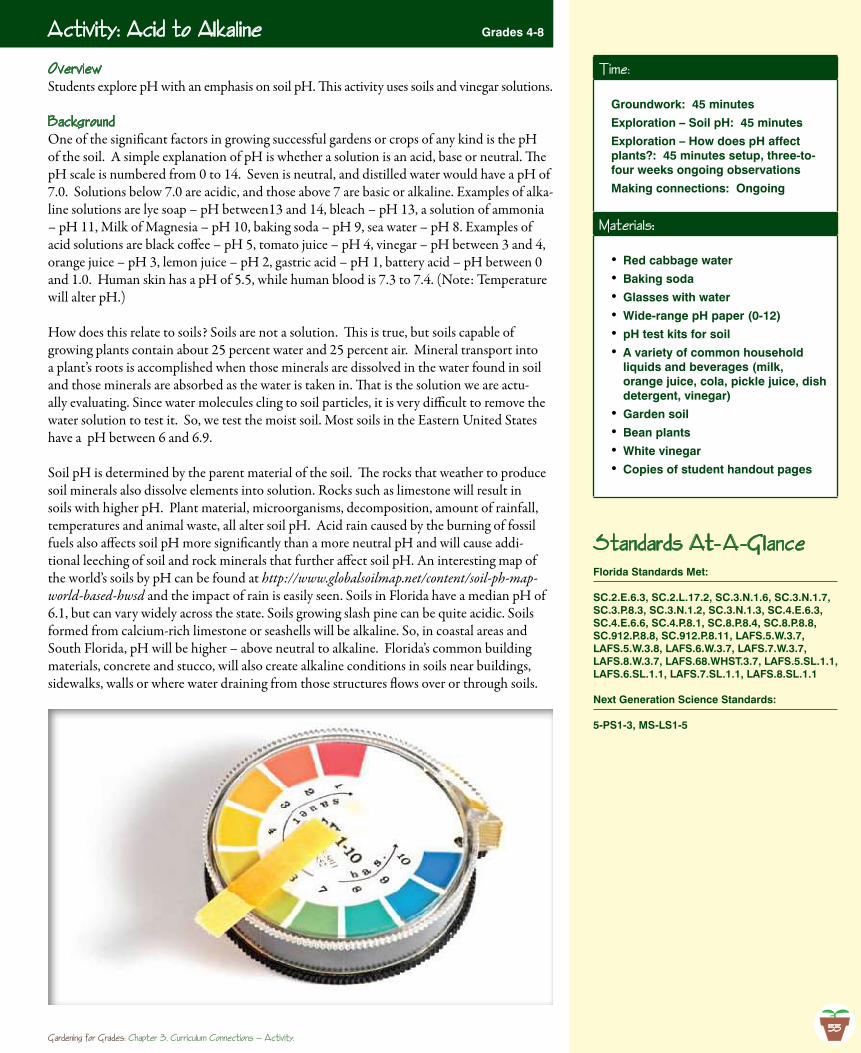
55
OverviewStudents explore pH with an emphasis on soil pH. This activity uses soils and vinegar solutions.
Background One of the significant factors in growing successful gardens or crops of any kind is the pH of the soil. A simple explanation of pH is whether a solution is an acid, base or neutral. The pH scale is numbered from 0 to 14. Seven is neutral, and distilled water would have a pH of 7.0. Solutions below 7.0 are acidic, and those above 7 are basic or alkaline. Examples of alka-line solutions are lye soap – pH between13 and 14, bleach – pH 13, a solution of ammonia – pH 11, Milk of Magnesia – pH 10, baking soda – pH 9, sea water – pH 8. Examples of acid solutions are black coffee – pH 5, tomato juice – pH 4, vinegar – pH between 3 and 4, orange juice – pH 3, lemon juice – pH 2, gastric acid – pH 1, battery acid – pH between 0 and 1.0. Human skin has a pH of 5.5, while human blood is 7.3 to 7.4. (Note: Temperature will alter pH.)
How does this relate to soils? Soils are not a solution. This is true, but soils capable of growing plants contain about 25 percent water and 25 percent air. Mineral transport into a plant’s roots is accomplished when those minerals are dissolved in the water found in soil and those minerals are absorbed as the water is taken in. That is the solution we are actu-ally evaluating. Since water molecules cling to soil particles, it is very difficult to remove the water solution to test it. So, we test the moist soil. Most soils in the Eastern United States have a pH between 6 and 6.9.
Soil pH is determined by the parent material of the soil. The rocks that weather to produce soil minerals also dissolve elements into solution. Rocks such as limestone will result in soils with higher pH. Plant material, microorganisms, decomposition, amount of rainfall, temperatures and animal waste, all alter soil pH. Acid rain caused by the burning of fossil fuels also affects soil pH more significantly than a more neutral pH and will cause addi-tional leeching of soil and rock minerals that further affect soil pH. An interesting map of the world’s soils by pH can be found at http://www.globalsoilmap.net/content/soil-ph-map-world-based-hwsd and the impact of rain is easily seen. Soils in Florida have a median pH of 6.1, but can vary widely across the state. Soils growing slash pine can be quite acidic. Soils formed from calcium-rich limestone or seashells will be alkaline. So, in coastal areas and South Florida, pH will be higher – above neutral to alkaline. Florida’s common building materials, concrete and stucco, will also create alkaline conditions in soils near buildings, sidewalks, walls or where water draining from those structures flows over or through soils.
Time:
Groundwork: 45 minutes
Exploration – Soil pH: 45 minutes
Exploration – How does pH affect plants?: 45 minutes setup, three-to-four weeks ongoing observations
Making connections: Ongoing
Materia1s:
Red cabbage water•Baking soda•Glasses with water•Wide-range pH paper (0-12)•pH test kits for soil•A variety of common household •liquids and beverages (milk, orange juice, cola, pickle juice, dish detergent, vinegar)
Garden soil•Bean plants•White vinegar•Copies of student handout pages•
Standards At-A -G1anceFlorida Standards Met:
SC.2.E.6.3, SC.2.L.17.2, SC.3.N.1.6, SC.3.N.1.7, SC.3.P.8.3, SC.3.N.1.2, SC.3.N.1.3, SC.4.E.6.3, SC.4.E.6.6, SC.4.P.8.1, SC.8.P.8.4, SC.8.P.8.8, SC.912.P.8.8, SC.912.P.8.11, LAFS.5.W.3.7, LAFS.5.W.3.8, LAFS.6.W.3.7, LAFS.7.W.3.7, LAFS.8.W.3.7, LAFS.68.WHST.3.7, LAFS.5.SL.1.1, LAFS.6.SL.1.1, LAFS.7.SL.1.1, LAFS.8.SL.1.1
Next Generation Science Standards:
5-PS1-3, MS-LS1-5
Activity: Acid to A1ka1ine Grades 4-8
Gardening for Grades: Chapter 3, Curricu1um Connections — Activity: 55
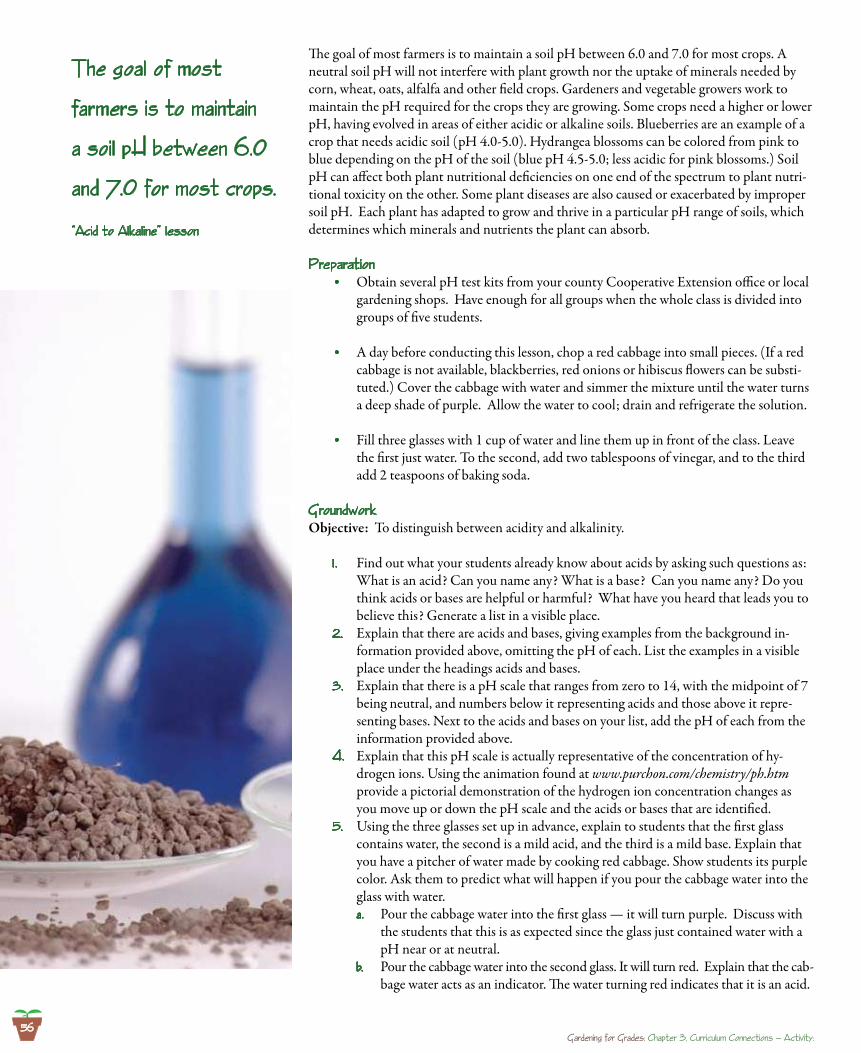
The goal of most farmers is to maintain a soil pH between 6.0 and 7.0 for most crops. A neutral soil pH will not interfere with plant growth nor the uptake of minerals needed by corn, wheat, oats, alfalfa and other field crops. Gardeners and vegetable growers work to maintain the pH required for the crops they are growing. Some crops need a higher or lower pH, having evolved in areas of either acidic or alkaline soils. Blueberries are an example of a crop that needs acidic soil (pH 4.0-5.0). Hydrangea blossoms can be colored from pink to blue depending on the pH of the soil (blue pH 4.5-5.0; less acidic for pink blossoms.) Soil pH can affect both plant nutritional deficiencies on one end of the spectrum to plant nutri-tional toxicity on the other. Some plant diseases are also caused or exacerbated by improper soil pH. Each plant has adapted to grow and thrive in a particular pH range of soils, which determines which minerals and nutrients the plant can absorb.
PreparationObtain several pH test kits from your county Cooperative Extension office or local •gardening shops. Have enough for all groups when the whole class is divided into groups of five students.
A day before conducting this lesson, chop a red cabbage into small pieces. (If a red •cabbage is not available, blackberries, red onions or hibiscus flowers can be substi-tuted.) Cover the cabbage with water and simmer the mixture until the water turns a deep shade of purple. Allow the water to cool; drain and refrigerate the solution.
Fill three glasses with 1 cup of water and line them up in front of the class. Leave •the first just water. To the second, add two tablespoons of vinegar, and to the third add 2 teaspoons of baking soda.
GroundworkObjective: To distinguish between acidity and alkalinity.
Find out what your students already know about acids by asking such questions as: 1 . What is an acid? Can you name any? What is a base? Can you name any? Do you think acids or bases are helpful or harmful? What have you heard that leads you to believe this? Generate a list in a visible place.Explain that there are acids and bases, giving examples from the background in-2. formation provided above, omitting the pH of each. List the examples in a visible place under the headings acids and bases. Explain that there is a pH scale that ranges from zero to 14, with the midpoint of 7 3. being neutral, and numbers below it representing acids and those above it repre-senting bases. Next to the acids and bases on your list, add the pH of each from the information provided above. Explain that this pH scale is actually representative of the concentration of hy-4. drogen ions. Using the animation found at www.purchon.com/chemistry/ph.htm provide a pictorial demonstration of the hydrogen ion concentration changes as you move up or down the pH scale and the acids or bases that are identified.Using the three glasses set up in advance, explain to students that the first glass 5. contains water, the second is a mild acid, and the third is a mild base. Explain that you have a pitcher of water made by cooking red cabbage. Show students its purple color. Ask them to predict what will happen if you pour the cabbage water into the glass with water.
Pour the cabbage water into the first glass — it will turn purple. Discuss with a. the students that this is as expected since the glass just contained water with a pH near or at neutral.Pour the cabbage water into the second glass. It will turn red. Explain that the cab-b. bage water acts as an indicator. The water turning red indicates that it is an acid.
The goa1 of most
farmers is to maintain
a soi1 ph between 6.0
and 7.0 for most crops.
“Acid to A1ka1ine” 1esson
Gardening for Grades: Chapter 3, Curricu1um Connections — Activity: 56
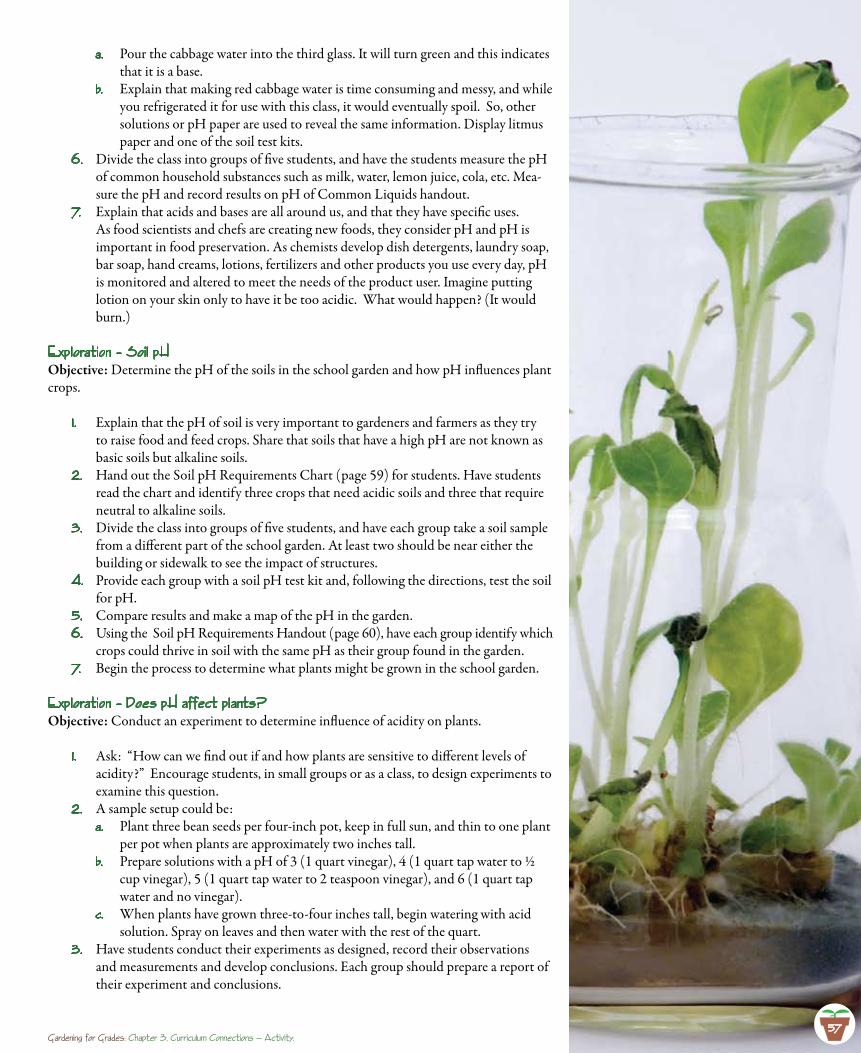
57
Pour the cabbage water into the third glass. It will turn green and this indicates a. that it is a base. Explain that making red cabbage water is time consuming and messy, and while b. you refrigerated it for use with this class, it would eventually spoil. So, other solutions or pH paper are used to reveal the same information. Display litmus paper and one of the soil test kits.
Divide the class into groups of five students, and have the students measure the pH 6. of common household substances such as milk, water, lemon juice, cola, etc. Mea-sure the pH and record results on pH of Common Liquids handout.Explain that acids and bases are all around us, and that they have specific uses. 7. As food scientists and chefs are creating new foods, they consider pH and pH is important in food preservation. As chemists develop dish detergents, laundry soap, bar soap, hand creams, lotions, fertilizers and other products you use every day, pH is monitored and altered to meet the needs of the product user. Imagine putting lotion on your skin only to have it be too acidic. What would happen? (It would burn.)
Exp1oration – Soi1 phObjective: Determine the pH of the soils in the school garden and how pH influences plant crops.
Explain that the pH of soil is very important to gardeners and farmers as they try 1 . to raise food and feed crops. Share that soils that have a high pH are not known as basic soils but alkaline soils. Hand out the Soil pH Requirements Chart (page 59) for students. Have students 2. read the chart and identify three crops that need acidic soils and three that require neutral to alkaline soils. Divide the class into groups of five students, and have each group take a soil sample 3. from a different part of the school garden. At least two should be near either the building or sidewalk to see the impact of structures.Provide each group with a soil pH test kit and, following the directions, test the soil 4. for pH. Compare results and make a map of the pH in the garden.5. Using the Soil pH Requirements Handout (page 60), have each group identify which 6. crops could thrive in soil with the same pH as their group found in the garden.Begin the process to determine what plants might be grown in the school garden.7.
Exp1oration – Does ph affect p1ants?Objective: Conduct an experiment to determine influence of acidity on plants.
Ask: “How can we find out if and how plants are sensitive to different levels of 1 . acidity?” Encourage students, in small groups or as a class, to design experiments to examine this question.A sample setup could be:2.
Plant three bean seeds per four-inch pot, keep in full sun, and thin to one plant a. per pot when plants are approximately two inches tall.Prepare solutions with a pH of 3 (1 quart vinegar), 4 (1 quart tap water to ½ b. cup vinegar), 5 (1 quart tap water to 2 teaspoon vinegar), and 6 (1 quart tap water and no vinegar). When plants have grown three-to-four inches tall, begin watering with acid c. solution. Spray on leaves and then water with the rest of the quart.
Have students conduct their experiments as designed, record their observations 3. and measurements and develop conclusions. Each group should prepare a report of their experiment and conclusions.
Gardening for Grades: Chapter 3, Curricu1um Connections — Activity: 5757
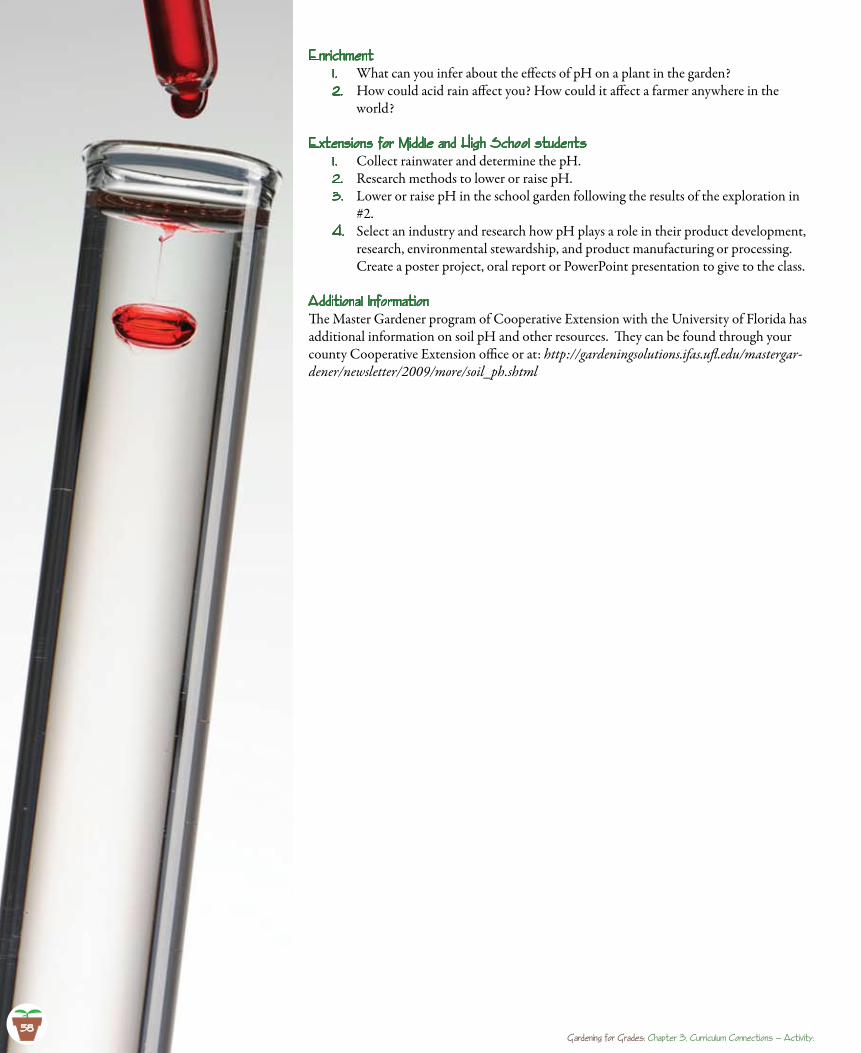
EnrichmentWhat can you infer about the effects of pH on a plant in the garden?1 . How could acid rain affect you? How could it affect a farmer anywhere in the 2. world?
Extensions for Midd1e and high Schoo1 studentsCollect rainwater and determine the pH.1 . Research methods to lower or raise pH.2. Lower or raise pH in the school garden following the results of the exploration in 3. #2.Select an industry and research how pH plays a role in their product development, 4. research, environmental stewardship, and product manufacturing or processing. Create a poster project, oral report or PowerPoint presentation to give to the class.
Additiona1 InformationThe Master Gardener program of Cooperative Extension with the University of Florida has additional information on soil pH and other resources. They can be found through your county Cooperative Extension office or at: http://gardeningsolutions.ifas.ufl.edu/mastergar-dener/newsletter/2009/more/soil_ph.shtml
58Gardening for Grades: Chapter 3, Curricu1um Connections — Activity:
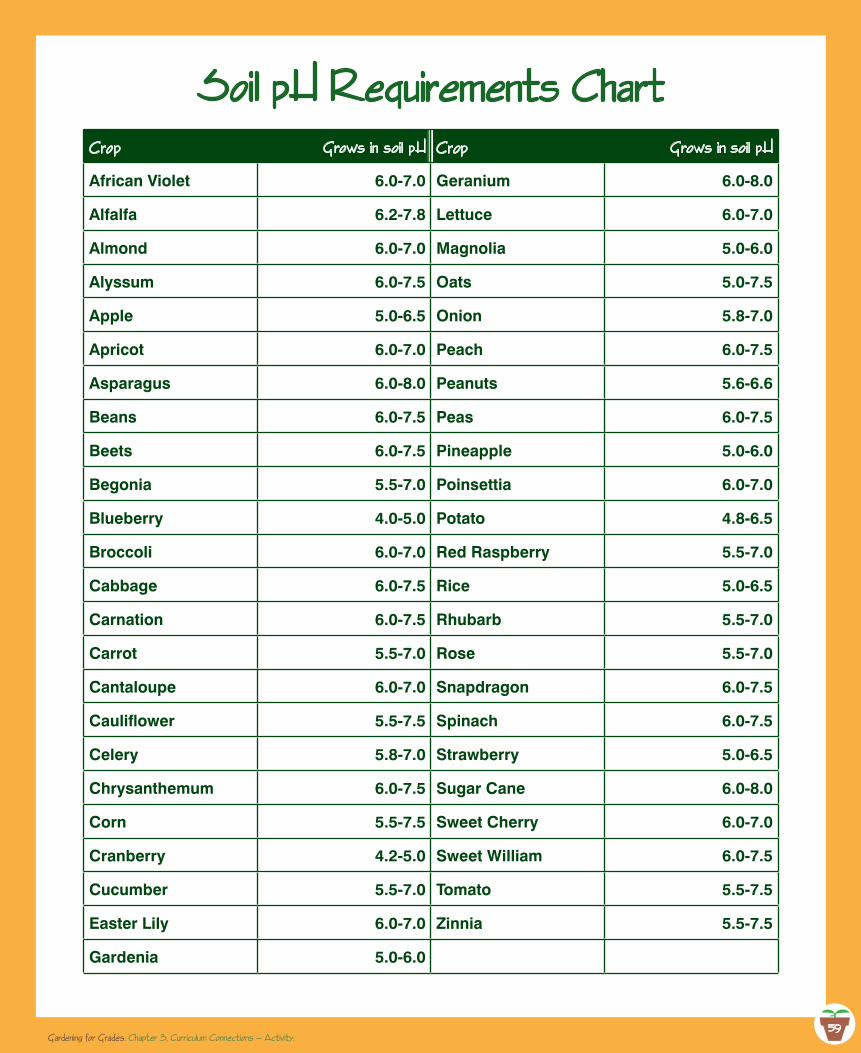
59
Soi1 ph Requirements Chart
Crop Grows in soi1 ph Crop Grows in soi1 ph
African Violet 6.0-7.0 Geranium 6.0-8.0
Alfalfa 6.2-7.8 Lettuce 6.0-7.0
Almond 6.0-7.0 Magnolia 5.0-6.0
Alyssum 6.0-7.5 Oats 5.0-7.5
Apple 5.0-6.5 Onion 5.8-7.0
Apricot 6.0-7.0 Peach 6.0-7.5
Asparagus 6.0-8.0 Peanuts 5.6-6.6
Beans 6.0-7.5 Peas 6.0-7.5
Beets 6.0-7.5 Pineapple 5.0-6.0
Begonia 5.5-7.0 Poinsettia 6.0-7.0
Blueberry 4.0-5.0 Potato 4.8-6.5
Broccoli 6.0-7.0 Red Raspberry 5.5-7.0
Cabbage 6.0-7.5 Rice 5.0-6.5
Carnation 6.0-7.5 Rhubarb 5.5-7.0
Carrot 5.5-7.0 Rose 5.5-7.0
Cantaloupe 6.0-7.0 Snapdragon 6.0-7.5
Cauliflower 5.5-7.5 Spinach 6.0-7.5
Celery 5.8-7.0 Strawberry 5.0-6.5
Chrysanthemum 6.0-7.5 Sugar Cane 6.0-8.0
Corn 5.5-7.5 Sweet Cherry 6.0-7.0
Cranberry 4.2-5.0 Sweet William 6.0-7.5
Cucumber 5.5-7.0 Tomato 5.5-7.5
Easter Lily 6.0-7.0 Zinnia 5.5-7.5
Gardenia 5.0-6.0
Gardening for Grades: Chapter 3, Curricu1um Connections — Activity: 59
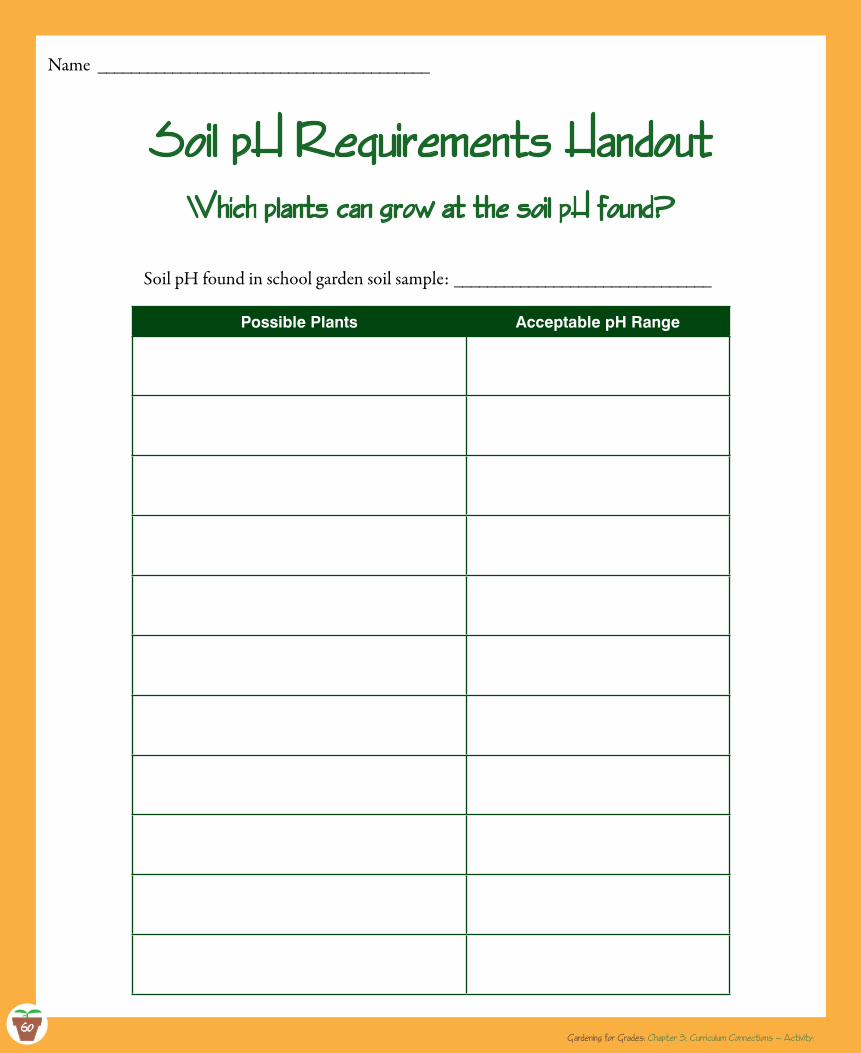
60
Name ________________________________________
Soi1 ph Requirements handoutWhich p1ants can grow at the soi1 ph found?
Soil pH found in school garden soil sample: _______________________________
Possible Plants Acceptable pH Range
Gardening for Grades: Chapter 3, Curricu1um Connections — Activity: 60
61
ph of Common Liquids ChartName ________________________________________
Liquid pH Acid or Base?
Gardening for Grades: Chapter 3, Curricu1um Connections — Activity: 61

6262
Acid to A1ka1ineSamp1e Pre-and Post Assessment
What is pH?1.
Give an example of an acid.2.
Give an example of a base.3.
List one reason why it is important to test soil pH before planting a plant:4.
Why does the pH of soil vary?5.
Gardening for Grades: Chapter 3, Curricu1um Connections — Activity:
63
OverviewUsing the information provided, students work with their teacher and resources available to plan their garden and employ math skills to do so. BackgroundLiving things compete with one another to survive and reproduce. Plants have differing characteristics unique to their species and variety. Even within species there are differences be-tween two varieties or among a host of varieties. Consider the number of squashes there are, or the variety of tomato plants. Much of the information provided in this guide sets standard parameters that plants need. But this can vary. This activity will give students the opportuni-ty to experience first-hand that math has a purpose with real-life applications, research various plant information and make decisions about the garden they will plan and plant.
Groundwork: Their Own Garden
Objective: To identify a plant they would like to plant in the school garden, specify a vari-ety, and detail its growth requirements.
Have students select vegetable plants they could plant in their own garden. Make a 1 . list of those plants. Using hard copy seed catalogs or online seed suppliers, ask students to identify the 2. number of varieties of one of these vegetables. List the names of the varieties avail-able on the student handout Plant Dimensions and use Their Our Garden Work-sheet.Ask students to identify, each variety’s growing requirements, and note them in the 3. chart provided. Then select one or two varieties of the rest of the vegetables and document the requirements for these varieties.Select the varieties to plant in their own garden and the number of plants they 4. would like to have for each variety.Then have students calculate the number of square feet their garden will require to 5. grow the number of vegetables they have selected, and create a map of their garden drawn to scale. Make sure they allow space for humans to weed, water and harvest the garden. For younger students, plants’ needs can be depicted graphically by mak-ing a paper pattern of the space needed by that plant and using these patterns to map out the garden in real-life size.
NOTE: For plants with more than 10 varieties, the students should select a specific type of that vegetable. i.e. tomatoes: select full-sized, slicing tomatoes or heir-loom, slicing tomatoes; squash: select winter squash or summer squash; peppers: select sweet bell peppers or hot peppers.
Time:
Groundwork: 40 minutes
Exploration: 30 minute setup; time for student to consider various options and develop plans
Making connections: Ongoing
Materia1s:
Seed catalogs or Internet access to •seed catalogsRulers, yardsticks, measuring tapes•Paper, graph paper or notebook (or •purchase garden planning software to use computers)Copies of the Plant Dimensions •Chart (page 65)Writing instruments•Optional: Calculators•
Standards At-A -G1anceFlorida Standards Met:
SC.1.L.17.1, SC.2.L.17.1, SC.3.L.14.1, SC.3.L.17.2, LAFS.K.W.1.2, LAFS.1.W.3.8, LAFS.2.W.3.7, LAFS.2.W.3.8, LAFS.4.W.3.8, LAFS.5.W.3.7, LAFS.5.W.3.8, LAFS.68.WHST.3.7, LAFS.68.RST.1.3, LAFS.68.RST.3.7, LAFS.K.SL.2.5, LAFS.1.SL.1.1, LAFS.5.-7.SL.1.1, LAFS.7.SL.2.4, LAFS.7.SL.2.5, MAFS.K.MD.1.1, MAFS.K.MD.1.2, MAFS.1.OA.1.1, MAFS.1.MD.3.4, MAFS.2.OA.1.1, MAFS.2.MD.1.1, MAFS.2.MD.1.2, MAFS.2.MD.1.3, MAFS.3.MD.3.6, MAFS.3.MD.3.7, MAFS.3.MD.4.8, MAFS.3.G.1.2, MAFS.4.OA.1.1, MAFS.4.MD.1.1, MAFS.4.MD.1.2, MAFS.4.MD.1.3, MAFS.5.NF.2.6, MAFS.5.MD.1.1, MAFS.6.EE.2.6, MAFS.6.EE.2.7, MAFS.7.RP.1.2
Next Generation Science Standards:
K-LS1-1, K-ESS3-1, K-ESS2-1, K-PS, 3-11-LS1-1, 3-LS1-1, 5-LS2-1, 5-ESS2-1, 3-5-ETS1-1, 3-5-ETS1-2, MS-ETS1-1, MS-ETS1-2, MS-ETS1-3
Activity: P1an It, Map It Grades K-7
Gardening for Grades: Chapter 3, Curricu1um Connections — Activity: P1an It, Map It63
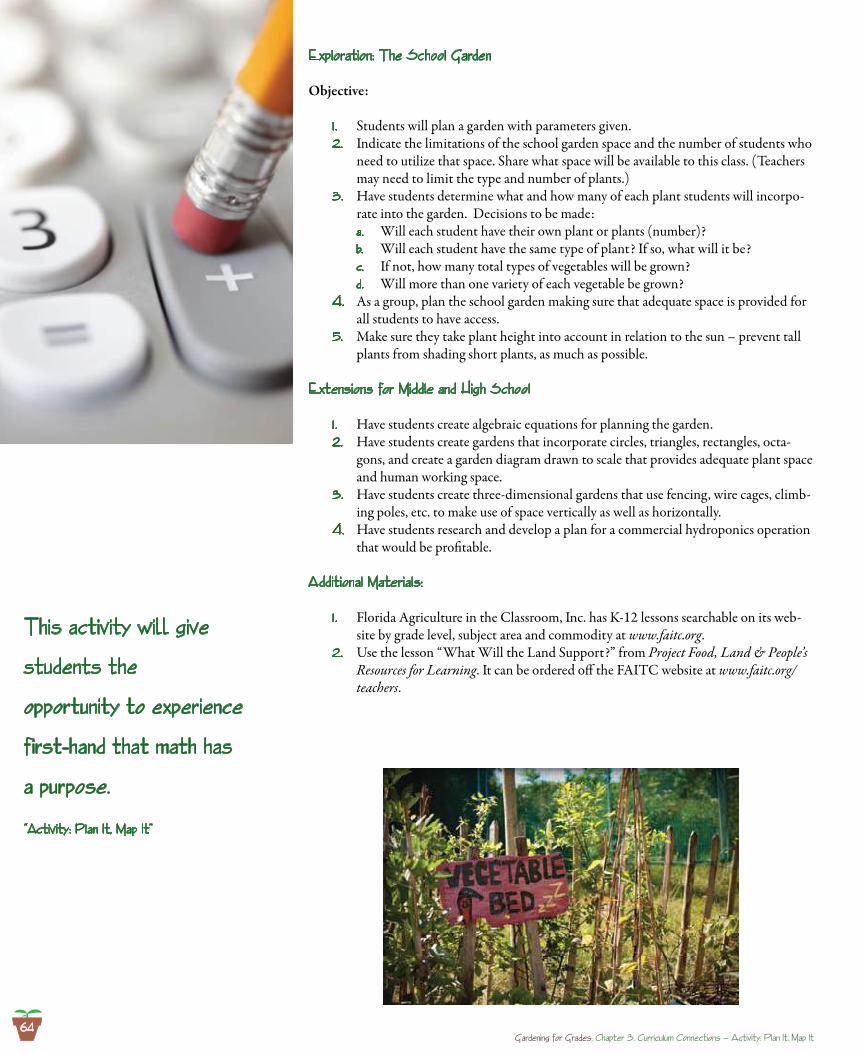
Exp1oration: The Schoo1 Garden
Objective:
Students will plan a garden with parameters given.1 . Indicate the limitations of the school garden space and the number of students who 2. need to utilize that space. Share what space will be available to this class. (Teachers may need to limit the type and number of plants.)Have students determine what and how many of each plant students will incorpo-3. rate into the garden. Decisions to be made:
Will each student have their own plant or plants (number)?a. Will each student have the same type of plant? If so, what will it be?b. If not, how many total types of vegetables will be grown?c. Will more than one variety of each vegetable be grown?d.
As a group, plan the school garden making sure that adequate space is provided for 4. all students to have access. Make sure they take plant height into account in relation to the sun – prevent tall 5. plants from shading short plants, as much as possible.
Extensions for Midd1e and high Schoo1
Have students create algebraic equations for planning the garden.1 . Have students create gardens that incorporate circles, triangles, rectangles, octa-2. gons, and create a garden diagram drawn to scale that provides adequate plant space and human working space.Have students create three-dimensional gardens that use fencing, wire cages, climb-3. ing poles, etc. to make use of space vertically as well as horizontally.Have students research and develop a plan for a commercial hydroponics operation 4. that would be profitable.
Additiona1 Materia1s:
Florida Agriculture in the Classroom, Inc. has K-12 lessons searchable on its web-1 . site by grade level, subject area and commodity at www.faitc.org.Use the lesson “What Will the Land Support?” from 2. Project Food, Land & People’s Resources for Learning. It can be ordered off the FAITC website at www.faitc.org/teachers.
This activity will give
students the
opportunity to experience
first-hand that math has
a purpose.
“Activity: P1an It, Map It”
Gardening for Grades: Chapter 3, Curricu1um Connections — Activity: P1an It, Map It64
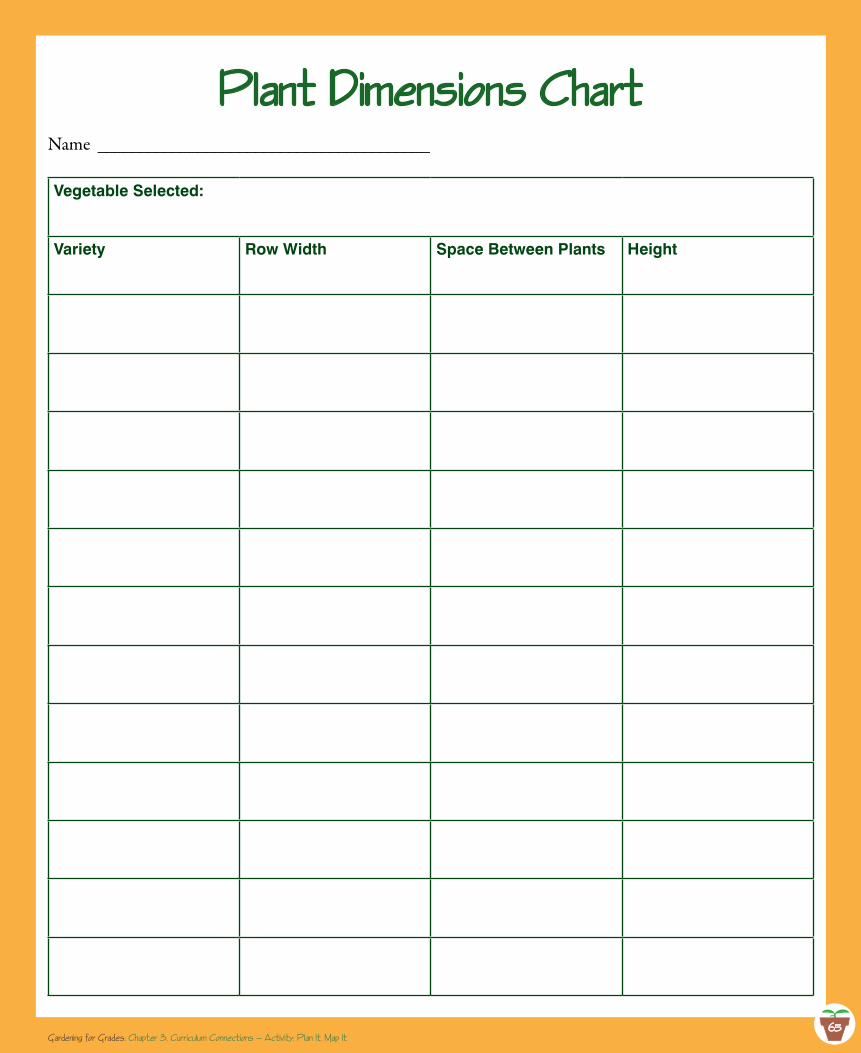
65
P1ant Dimensions ChartName ________________________________________
Vegetable Selected:
Variety Row Width Space Between Plants Height
Gardening for Grades: Chapter 3, Curricu1um Connections — Activity: P1an It, Map It65

66
P1an It, Map ItTheir Own Garden Worksheet
Name three plants you would like to grow.1.
Select one of those plants and list it below. Does this plant have any special needs?2.
How much distance should there be between this plant and the next plant in the same row?3.
If this plant were planted in several rows, how far apart should each of these rows be from the 4.next row?
How tall does this plant grow?5.
Gardening for Grades: Chapter 3, Curricu1um Connections — Activity: P1an It, Map It66

67
DescriptionStudents plan and map garden beds, using information about growth requirements for each plant.
ObjectiveTo combine several math and science skills to create a garden design, including research, mapping and drawing to scale.
BackgroundRefer to Chapter 1 on plant needs and site preparation.
GroundworkFrom the list of cool season or warm season vegetables, ask students to vote on what •plants to grow in the garden. Make a list and tally the votes on the board.•
Exp1orationAsk: “When plants grow, do they all look the same? What are some differences? 1 . What are some plant needs we should consider when planning our garden?” (Space, sunlight, water, time.) “How can we find out specific needs of each type of plant?” (Seed catalog, packets, gardening books.) “To make a map of our garden plan, what information do we need?” As a group, agree to a common scale for mapping on graph paper. 2. Divide class into five groups, and prepare to role play the spacing needs of plants. 3. Have each group gather in a small space, each huddled in a ball, and ask them to stretch out slowly to their full height. Ask: “How do they feel? Do they think they could each get enough food and wa-4. ter?” Ask them to turn to the sun. Do they think they would get enough sunlight? Now, ask every student to position themselves with “enough” space. Notice that each student chose a different amount of space: plants have the same preferences, depending on the type of plant.Distribute to each group the 5. vegetable planting guides, graph paper, pencils, straight edges, and a list of plants to be grown. Explain that each group will work on one part of the problem. Later, repre-sentatives from each group will get together to compare information and make a map.
Group 1 will draw the size and shape of the garden to scale on the graph paper, orient-ing it to the compass directions and show-ing all the permanent features, such as trees and buildings.
Group 2 will create a list of the plants to be grown according to height. They should first make a bar graph with the plant height on the y-axis and the plant name on the x-axis and use the graph to create their list. Seed packets and catalogues may be used as a reference.
Activity: Inch by Inch, Row by Row Grades 1-4
Time:
Groundwork: Variable
Exploration: 40 minutes
Making connections: Ongoing
Materia1s:
Vegetable planting information from •reference chapterList of plants to be grown•Seed packets and catalogs•Graph paper•Ruler•Magnetic compass•
Standards At-A -G1anceNext Generation Sunshine Standards Met:
SC.1.N.1.1, SC.2.N.1.1, SC.3.N.1.1, SC.4.N.1.1, SC.1.N.1.2, SC.1.N.1.3, SC.3.N.1.3, SS.1.E.1.1, SS.1.E.1.2, SS.1.E.1.3, SS.1.E.1.4, SC.2.L.16.1, SC.2.L.17.1, SC.2.L.17.2, SC.3.N.1.3, SC.3.N.1.6, SC.3.P.8.3, SC.4.N.1.4, SC.4.N.1.5, SC.4.P.8.1, SC.5.N.1.1, SC.5.N.1.2, SC.5.N.1.6, SC.6.N.1.5, LAFS.1.SL.1.1, LAFS.1.W.3.8, LAFS.2.W.3.7, LAFS.2.W.3.8, LAFS.4.W.3.8, LAFS.4.RI.3.7, MAFS.1.OA.1.1, MAFS.1.OA.1.2, MAFS.1.MD.3.4, MAFS.2.OA.1.1, MAFS.2.MD.1.1, MAFS.2.MD.1.2, MAFS.2.MD.1.3, MAFS.3.MD.3.6, MAFS.3.MD.3.7, MAFS.3.MD.4.8, MAFS.3.G.1.2, MAFS.4.OA.1.1, MAFS.4.M.D.1.2, MAFS.4.M.D.1.3
Next Generation Science Standards:
1-LS1-1, 1-ESS1-1,1-ESS1-2, 3-LS1-1, 3-5-ETS1-13, 5-ETS1-2
Gardening for Grades: Chapter 3, Curricu1um Connections — Activity: Inch by Inch, Row by Row67
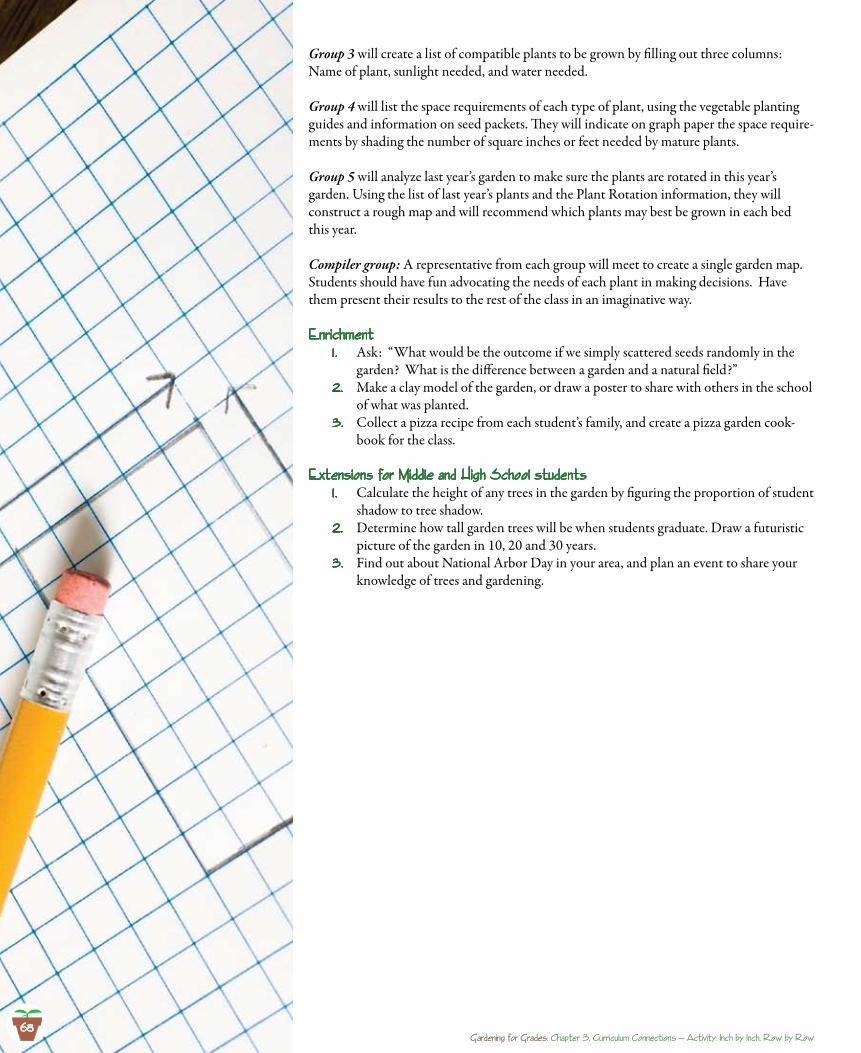
Group 3 will create a list of compatible plants to be grown by filling out three columns: Name of plant, sunlight needed, and water needed.
Group 4 will list the space requirements of each type of plant, using the vegetable planting guides and information on seed packets. They will indicate on graph paper the space require-ments by shading the number of square inches or feet needed by mature plants.
Group 5 will analyze last year’s garden to make sure the plants are rotated in this year’s garden. Using the list of last year’s plants and the Plant Rotation information, they will construct a rough map and will recommend which plants may best be grown in each bed this year.
Compiler group: A representative from each group will meet to create a single garden map. Students should have fun advocating the needs of each plant in making decisions. Have them present their results to the rest of the class in an imaginative way.
EnrichmentAsk: “What would be the outcome if we simply scattered seeds randomly in the 1 . garden? What is the difference between a garden and a natural field?” Make a clay model of the garden, or draw a poster to share with others in the school 2. of what was planted.Collect a pizza recipe from each student’s family, and create a pizza garden cook-3. book for the class.
Extensions for Midd1e and high Schoo1 studentsCalculate the height of any trees in the garden by figuring the proportion of student 1 . shadow to tree shadow.Determine how tall garden trees will be when students graduate. Draw a futuristic 2. picture of the garden in 10, 20 and 30 years.Find out about National Arbor Day in your area, and plan an event to share your 3. knowledge of trees and gardening.
Gardening for Grades: Chapter 3, Curricu1um Connections — Activity: Inch by Inch, Row by Row68
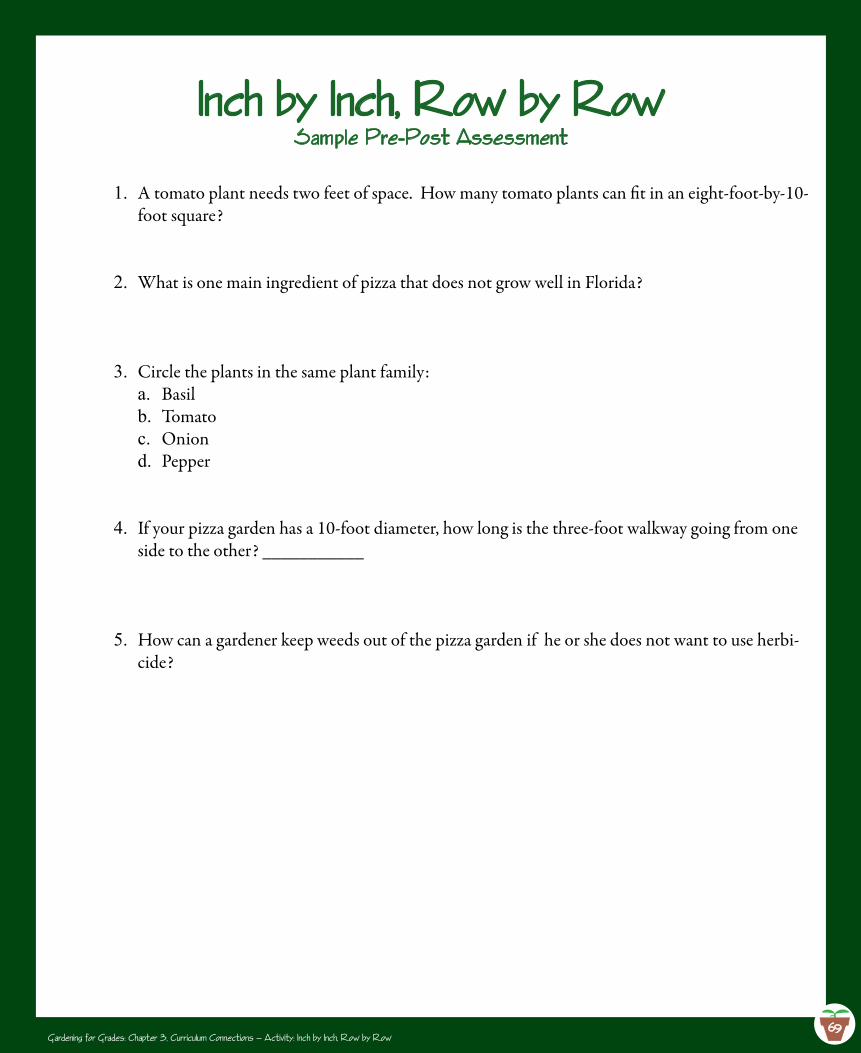
69
Inch by Inch, Row by RowSamp1e Pre-Post Assessment
A tomato plant needs two feet of space. How many tomato plants can fit in an eight-foot-by-10-1.foot square?
What is one main ingredient of pizza that does not grow well in Florida?2.
Circle the plants in the same plant family:3.Basila.Tomatob.Onionc.Pepperd.
If your pizza garden has a 10-foot diameter, how long is the three-foot walkway going from one 4.side to the other? ___________
How can a gardener keep weeds out of the pizza garden if he or she does not want to use herbi-5.cide?
Gardening for Grades: Chapter 3, Curricu1um Connections — Activity: Inch by Inch, Row by Row69
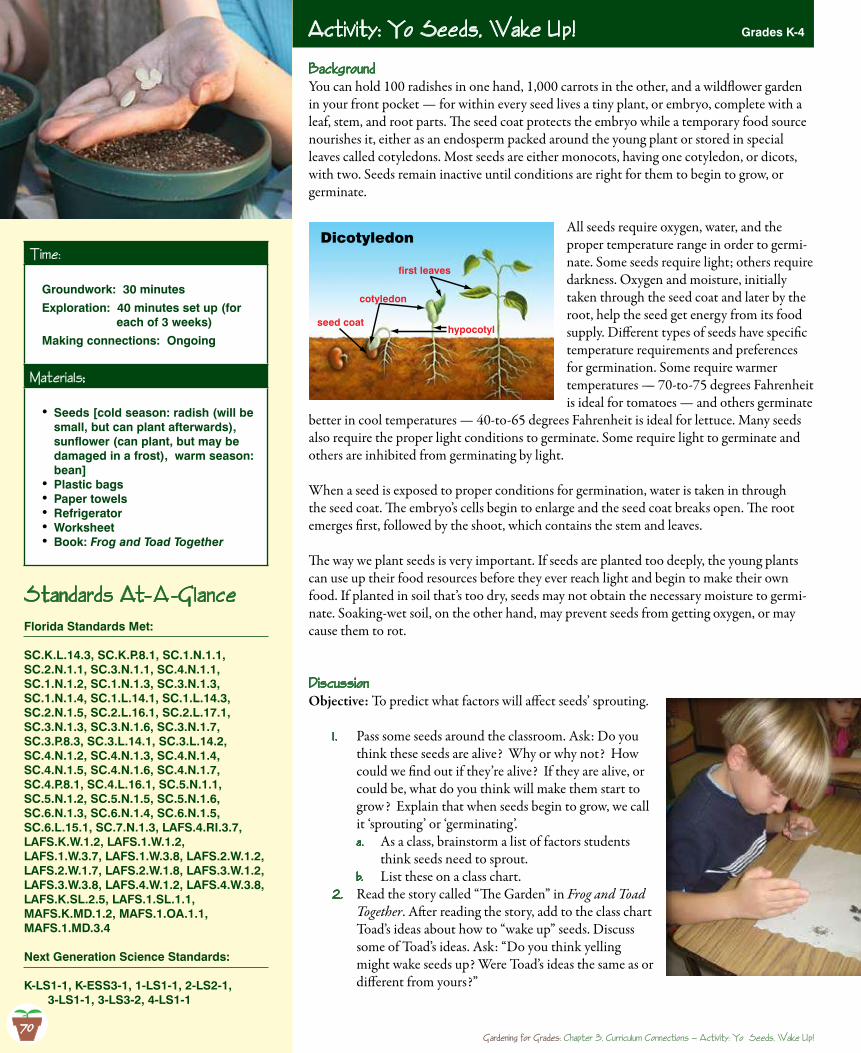
BackgroundYou can hold 100 radishes in one hand, 1,000 carrots in the other, and a wildflower garden in your front pocket — for within every seed lives a tiny plant, or embryo, complete with a leaf, stem, and root parts. The seed coat protects the embryo while a temporary food source nourishes it, either as an endosperm packed around the young plant or stored in special leaves called cotyledons. Most seeds are either monocots, having one cotyledon, or dicots, with two. Seeds remain inactive until conditions are right for them to begin to grow, or germinate.
All seeds require oxygen, water, and the proper temperature range in order to germi-nate. Some seeds require light; others require darkness. Oxygen and moisture, initially taken through the seed coat and later by the root, help the seed get energy from its food supply. Different types of seeds have specific temperature requirements and preferences for germination. Some require warmer temperatures — 70-to-75 degrees Fahrenheit is ideal for tomatoes — and others germinate
better in cool temperatures — 40-to-65 degrees Fahrenheit is ideal for lettuce. Many seeds also require the proper light conditions to germinate. Some require light to germinate and others are inhibited from germinating by light.
When a seed is exposed to proper conditions for germination, water is taken in through the seed coat. The embryo’s cells begin to enlarge and the seed coat breaks open. The root emerges first, followed by the shoot, which contains the stem and leaves.
The way we plant seeds is very important. If seeds are planted too deeply, the young plants can use up their food resources before they ever reach light and begin to make their own food. If planted in soil that’s too dry, seeds may not obtain the necessary moisture to germi-nate. Soaking-wet soil, on the other hand, may prevent seeds from getting oxygen, or may cause them to rot.
DiscussionObjective: To predict what factors will affect seeds’ sprouting.
Pass some seeds around the classroom. Ask: Do you 1 . think these seeds are alive? Why or why not? How could we find out if they’re alive? If they are alive, or could be, what do you think will make them start to grow? Explain that when seeds begin to grow, we call it ‘sprouting’ or ‘germinating’.
As a class, brainstorm a list of factors students a. think seeds need to sprout. List these on a class chart.b.
Read the story called “The Garden” in 2. Frog and Toad Together. After reading the story, add to the class chart Toad’s ideas about how to “wake up” seeds. Discuss some of Toad’s ideas. Ask: “Do you think yelling might wake seeds up? Were Toad’s ideas the same as or different from yours?”
Activity: Yo Seeds, Wake Up! Grades K-4
Time:
Groundwork: 30 minutes
Exploration: 40 minutes set up (for each of 3 weeks)
Making connections: Ongoing
Materia1s:
Seeds [cold season: radish (will be •small, but can plant afterwards), sunflower (can plant, but may be damaged in a frost), warm season: bean]Plastic bags•Paper towels•Refrigerator•Worksheet•Book: • Frog and Toad Together
Standards At-A -G1anceFlorida Standards Met:
SC.K.L.14.3, SC.K.P.8.1, SC.1.N.1.1, SC.2.N.1.1, SC.3.N.1.1, SC.4.N.1.1, SC.1.N.1.2, SC.1.N.1.3, SC.3.N.1.3, SC.1.N.1.4, SC.1.L.14.1, SC.1.L.14.3, SC.2.N.1.5, SC.2.L.16.1, SC.2.L.17.1, SC.3.N.1.3, SC.3.N.1.6, SC.3.N.1.7, SC.3.P.8.3, SC.3.L.14.1, SC.3.L.14.2, SC.4.N.1.2, SC.4.N.1.3, SC.4.N.1.4, SC.4.N.1.5, SC.4.N.1.6, SC.4.N.1.7, SC.4.P.8.1, SC.4.L.16.1, SC.5.N.1.1, SC.5.N.1.2, SC.5.N.1.5, SC.5.N.1.6, SC.6.N.1.3, SC.6.N.1.4, SC.6.N.1.5, SC.6.L.15.1, SC.7.N.1.3, LAFS.4.RI.3.7, LAFS.K.W.1.2, LAFS.1.W.1.2, LAFS.1.W.3.7, LAFS.1.W.3.8, LAFS.2.W.1.2, LAFS.2.W.1.7, LAFS.2.W.1.8, LAFS.3.W.1.2, LAFS.3.W.3.8, LAFS.4.W.1.2, LAFS.4.W.3.8, LAFS.K.SL.2.5, LAFS.1.SL.1.1, MAFS.K.MD.1.2, MAFS.1.OA.1.1, MAFS.1.MD.3.4
Next Generation Science Standards:
K-LS1-1, K-ESS3-1, 1-LS1-1, 2-LS2-1, 3-LS1-1, 3-LS3-2, 4-LS1-1
Dicotyledon
seed coathypocotyl
cotyledon
first leaves
70Gardening for Grades: Chapter 3, Curricu1um Connections — Activity: Yo Seeds, Wake Up!
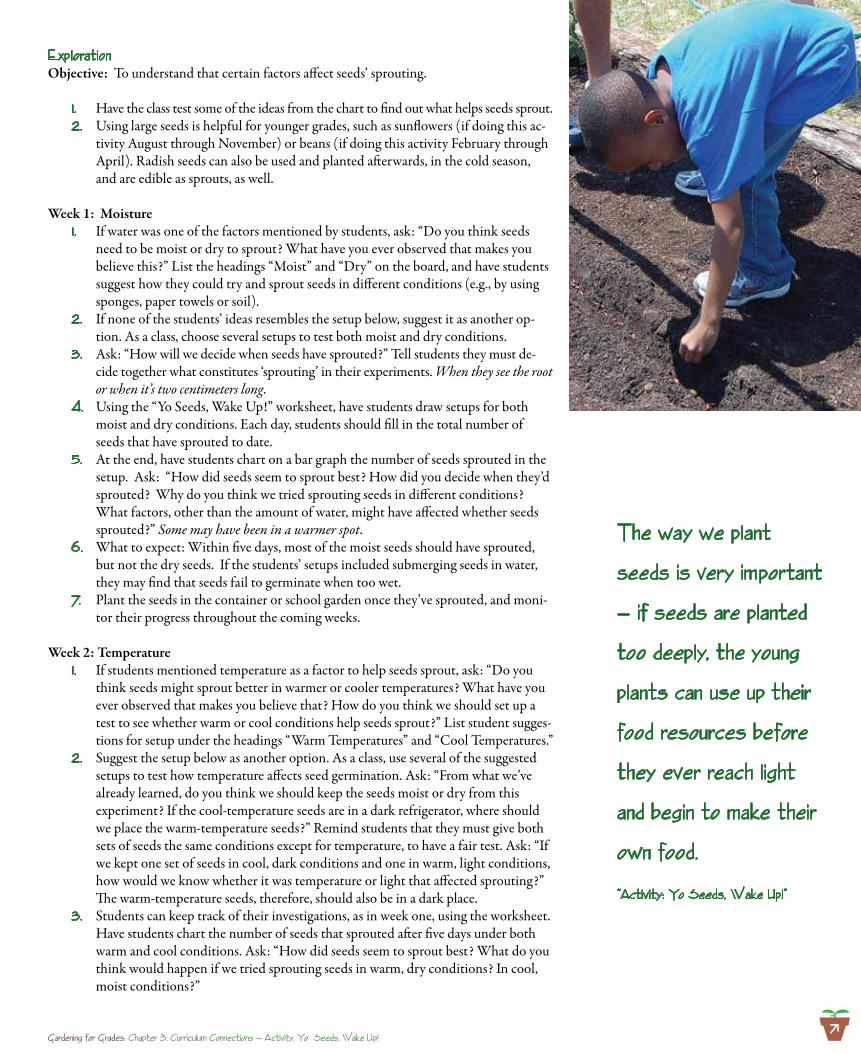
71
Exp1orationObjective: To understand that certain factors affect seeds’ sprouting.
Have the class test some of the ideas from the chart to find out what helps seeds sprout.1 . Using large seeds is helpful for younger grades, such as sunflowers (if doing this ac-2. tivity August through November) or beans (if doing this activity February through April). Radish seeds can also be used and planted afterwards, in the cold season, and are edible as sprouts, as well.
Week 1: MoistureIf water was one of the factors mentioned by students, ask: “Do you think seeds 1 . need to be moist or dry to sprout? What have you ever observed that makes you believe this?” List the headings “Moist” and “Dry” on the board, and have students suggest how they could try and sprout seeds in different conditions (e.g., by using sponges, paper towels or soil). If none of the students’ ideas resembles the setup below, suggest it as another op-2. tion. As a class, choose several setups to test both moist and dry conditions.Ask: “How will we decide when seeds have sprouted?” Tell students they must de-3. cide together what constitutes ‘sprouting’ in their experiments. When they see the root or when it’s two centimeters long.Using the “Yo Seeds, Wake Up!” worksheet, have students draw setups for both 4. moist and dry conditions. Each day, students should fill in the total number of seeds that have sprouted to date.At the end, have students chart on a bar graph the number of seeds sprouted in the 5. setup. Ask: “How did seeds seem to sprout best? How did you decide when they’d sprouted? Why do you think we tried sprouting seeds in different conditions? What factors, other than the amount of water, might have affected whether seeds sprouted?” Some may have been in a warmer spot.What to expect: Within five days, most of the moist seeds should have sprouted, 6. but not the dry seeds. If the students’ setups included submerging seeds in water, they may find that seeds fail to germinate when too wet.Plant the seeds in the container or school garden once they’ve sprouted, and moni-7. tor their progress throughout the coming weeks.
Week 2: TemperatureIf students mentioned temperature as a factor to help seeds sprout, ask: “Do you 1 . think seeds might sprout better in warmer or cooler temperatures? What have you ever observed that makes you believe that? How do you think we should set up a test to see whether warm or cool conditions help seeds sprout?” List student sugges-tions for setup under the headings “Warm Temperatures” and “Cool Temperatures.”Suggest the setup below as another option. As a class, use several of the suggested 2. setups to test how temperature affects seed germination. Ask: “From what we’ve already learned, do you think we should keep the seeds moist or dry from this experiment? If the cool-temperature seeds are in a dark refrigerator, where should we place the warm-temperature seeds?” Remind students that they must give both sets of seeds the same conditions except for temperature, to have a fair test. Ask: “If we kept one set of seeds in cool, dark conditions and one in warm, light conditions, how would we know whether it was temperature or light that affected sprouting?” The warm-temperature seeds, therefore, should also be in a dark place.Students can keep track of their investigations, as in week one, using the worksheet. 3. Have students chart the number of seeds that sprouted after five days under both warm and cool conditions. Ask: “How did seeds seem to sprout best? What do you think would happen if we tried sprouting seeds in warm, dry conditions? In cool, moist conditions?”
The way we p1ant
seeds is very important
— if seeds are p1anted
too deep1y, the young
p1ants can use up their
food resources before
they ever reach 1ight
and begin to make their
own food.
“Activity: Yo Seeds, Wake Up!”
Gardening for Grades: Chapter 3, Curricu1um Connections — Activity: Yo Seeds, Wake Up!
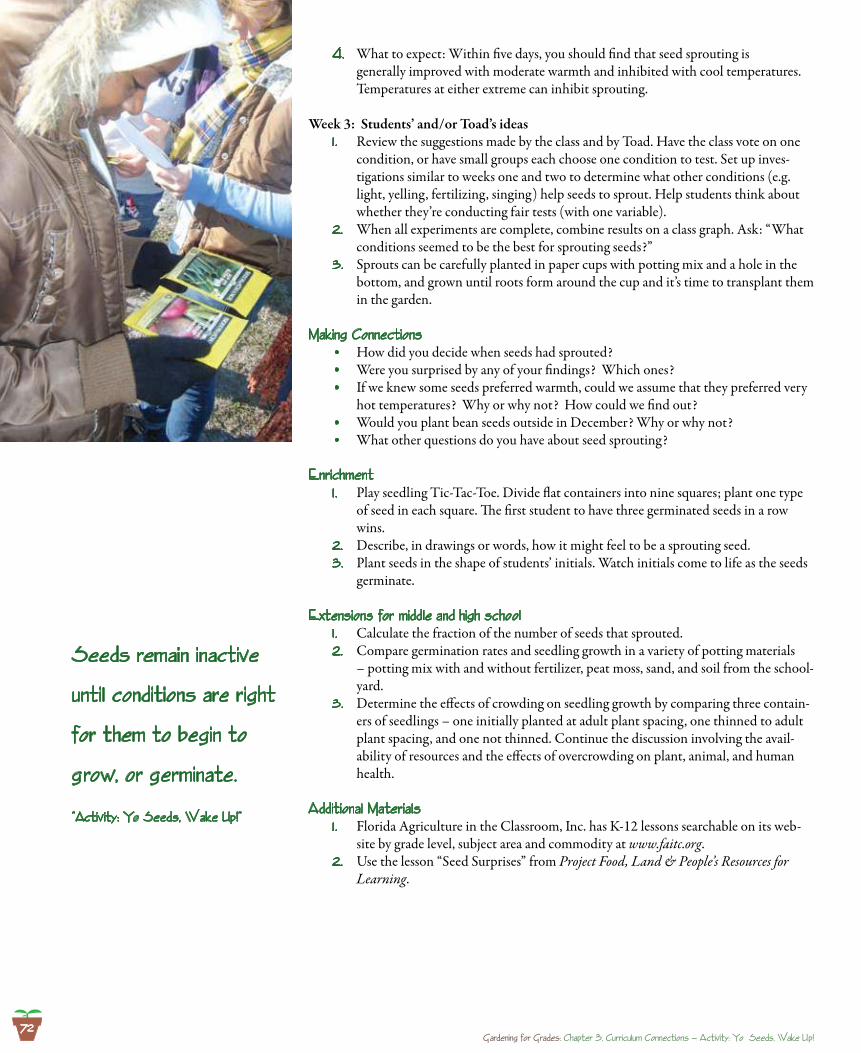
What to expect: Within five days, you should find that seed sprouting is 4. generally improved with moderate warmth and inhibited with cool temperatures. Temperatures at either extreme can inhibit sprouting.
Week 3: Students’ and/or Toad’s ideasReview the suggestions made by the class and by Toad. Have the class vote on one 1 . condition, or have small groups each choose one condition to test. Set up inves-tigations similar to weeks one and two to determine what other conditions (e.g. light, yelling, fertilizing, singing) help seeds to sprout. Help students think about whether they’re conducting fair tests (with one variable).When all experiments are complete, combine results on a class graph. Ask: “What 2. conditions seemed to be the best for sprouting seeds?”Sprouts can be carefully planted in paper cups with potting mix and a hole in the 3. bottom, and grown until roots form around the cup and it’s time to transplant them in the garden.
Making ConnectionsHow did you decide when seeds had sprouted?•Were you surprised by any of your findings? Which ones?•If we knew some seeds preferred warmth, could we assume that they preferred very •hot temperatures? Why or why not? How could we find out?Would you plant bean seeds outside in December? Why or why not?•What other questions do you have about seed sprouting?•
EnrichmentPlay seedling Tic-Tac-Toe. Divide flat containers into nine squares; plant one type 1 . of seed in each square. The first student to have three germinated seeds in a row wins.Describe, in drawings or words, how it might feel to be a sprouting seed. 2. Plant seeds in the shape of students’ initials. Watch initials come to life as the seeds 3. germinate.
Extensions for midd1e and high schoo1Calculate the fraction of the number of seeds that sprouted.1 . Compare germination rates and seedling growth in a variety of potting materials 2. – potting mix with and without fertilizer, peat moss, sand, and soil from the school-yard.Determine the effects of crowding on seedling growth by comparing three contain-3. ers of seedlings – one initially planted at adult plant spacing, one thinned to adult plant spacing, and one not thinned. Continue the discussion involving the avail-ability of resources and the effects of overcrowding on plant, animal, and human health.
Additiona1 Materia1sFlorida Agriculture in the Classroom, Inc. has K-12 lessons searchable on its web-1 . site by grade level, subject area and commodity at www.faitc.org.Use the lesson “Seed Surprises” from 2. Project Food, Land & People’s Resources for Learning.
Seeds remain inactive
unti1 conditions are right
for them to begin to
grow, or germinate.
“Activity: Yo Seeds, Wake Up!”
Gardening for Grades: Chapter 3, Curricu1um Connections — Activity: Yo Seeds, Wake Up!72
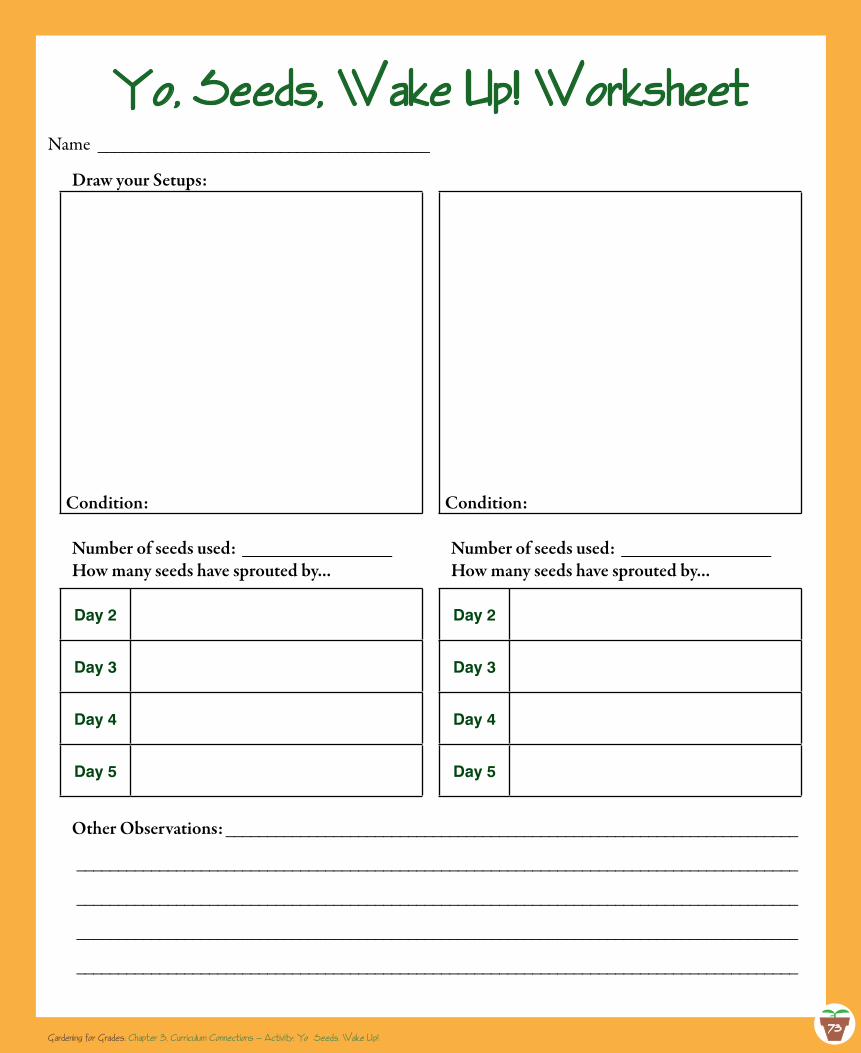
73
Yo, Seeds, Wake Up! WorksheetName ________________________________________
73Gardening for Grades: Chapter 3, Curricu1um Connections — Activity: Yo Seeds, Wake Up!
Draw your Setups:
Condition:
Number of seeds used: __________________How many seeds have sprouted by...
Day 2
Day 3
Day 4
Day 5
Condition:
Number of seeds used: __________________How many seeds have sprouted by...
Day 2
Day 3
Day 4
Day 5
Other Observations: _____________________________________________________________________
_______________________________________________________________________________________
_______________________________________________________________________________________
_______________________________________________________________________________________
_______________________________________________________________________________________
74
Yo, Seeds, Wake Up!Samp1e Pre-Post Assessment
Draw a seed that has just started to sprout, and name all the parts of the seedling:1.
What three conditions does a seed need to sprout?2.
Fertilizer, Soil, Aira.Fertilizer, Soil, Waterb.Temperature, Water, Airc.Temperature, Soil, Aird.
A seed can only germinate in soil. True False3.
What is the first part to emerge from a seed as it sprouts? ______________4.
How can the time of year affect a seed’s germination?5.
Gardening for Grades: Chapter 3, Curricu1um Connections — Activity: Yo Seeds, Wake Up!74
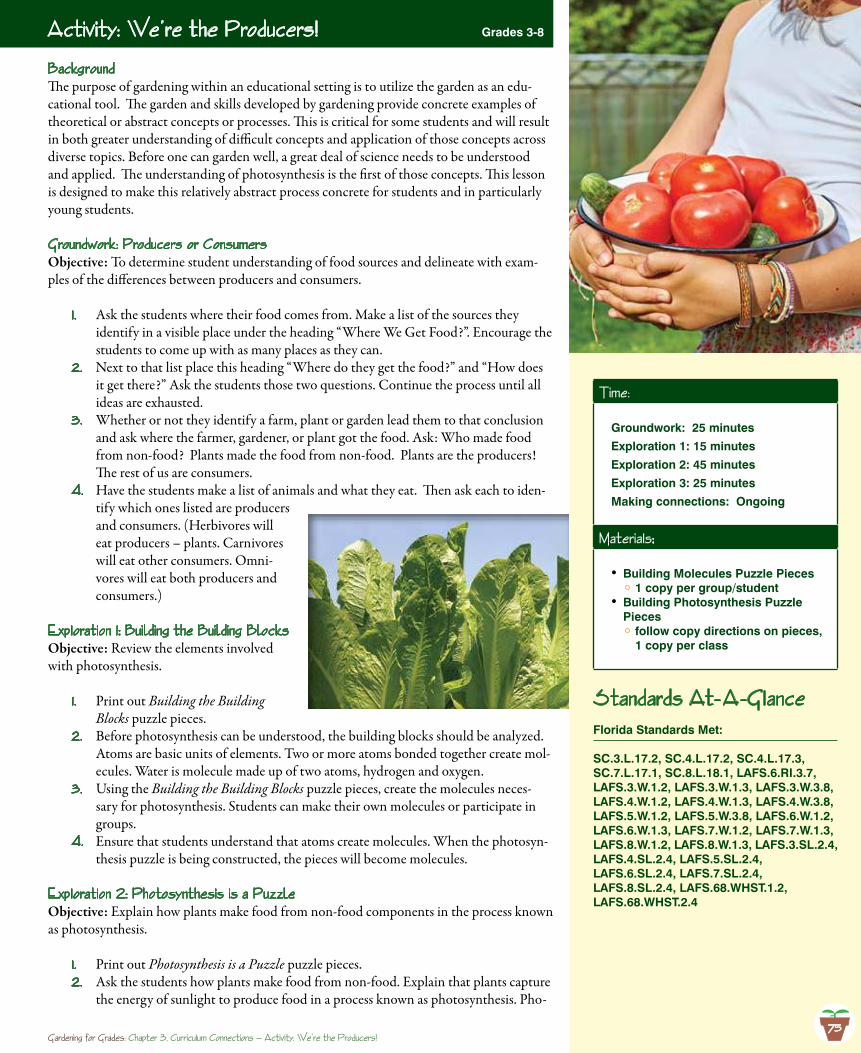
75
Activity: We’re the Producers! Grades 3-8
Time:
Groundwork: 25 minutes
Exploration 1: 15 minutes
Exploration 2: 45 minutes
Exploration 3: 25 minutes
Making connections: Ongoing
Materia1s:
Building Molecules Puzzle Pieces •1 copy per group/student
Building Photosynthesis Puzzle •Pieces
follow copy directions on pieces, 1 copy per class
Standards At-A -G1anceFlorida Standards Met:
SC.3.L.17.2, SC.4.L.17.2, SC.4.L.17.3, SC.7.L.17.1, SC.8.L.18.1, LAFS.6.RI.3.7, LAFS.3.W.1.2, LAFS.3.W.1.3, LAFS.3.W.3.8, LAFS.4.W.1.2, LAFS.4.W.1.3, LAFS.4.W.3.8, LAFS.5.W.1.2, LAFS.5.W.3.8, LAFS.6.W.1.2, LAFS.6.W.1.3, LAFS.7.W.1.2, LAFS.7.W.1.3, LAFS.8.W.1.2, LAFS.8.W.1.3, LAFS.3.SL.2.4, LAFS.4.SL.2.4, LAFS.5.SL.2.4, LAFS.6.SL.2.4, LAFS.7.SL.2.4, LAFS.8.SL.2.4, LAFS.68.WHST.1.2, LAFS.68.WHST.2.4
BackgroundThe purpose of gardening within an educational setting is to utilize the garden as an edu-cational tool. The garden and skills developed by gardening provide concrete examples of theoretical or abstract concepts or processes. This is critical for some students and will result in both greater understanding of difficult concepts and application of those concepts across diverse topics. Before one can garden well, a great deal of science needs to be understood and applied. The understanding of photosynthesis is the first of those concepts. This lesson is designed to make this relatively abstract process concrete for students and in particularly young students.
Groundwork: Producers or ConsumersObjective: To determine student understanding of food sources and delineate with exam-ples of the differences between producers and consumers.
Ask the students where their food comes from. Make a list of the sources they 1 . identify in a visible place under the heading “Where We Get Food?”. Encourage the students to come up with as many places as they can.Next to that list place this heading “Where do they get the food?” and “How does 2. it get there?” Ask the students those two questions. Continue the process until all ideas are exhausted.Whether or not they identify a farm, plant or garden lead them to that conclusion 3. and ask where the farmer, gardener, or plant got the food. Ask: Who made food from non-food? Plants made the food from non-food. Plants are the producers! The rest of us are consumers. Have the students make a list of animals and what they eat. Then ask each to iden-4. tify which ones listed are producers and consumers. (Herbivores will eat producers – plants. Carnivores will eat other consumers. Omni-vores will eat both producers and consumers.)
Exp1oration 1: Building the Building BlocksObjective: Review the elements involved with photosynthesis.
Print out 1 . Building the Building Blocks puzzle pieces.Before photosynthesis can be understood, the building blocks should be analyzed. 2. Atoms are basic units of elements. Two or more atoms bonded together create mol-ecules. Water is molecule made up of two atoms, hydrogen and oxygen.Using the 3. Building the Building Blocks puzzle pieces, create the molecules neces-sary for photosynthesis. Students can make their own molecules or participate in groups.Ensure that students understand that atoms create molecules. When the photosyn-4. thesis puzzle is being constructed, the pieces will become molecules.
Exp1oration 2: Photosynthesis is a PuzzleObjective: Explain how plants make food from non-food components in the process known as photosynthesis.
Print out 1 . Photosynthesis is a Puzzle puzzle pieces.Ask the students how plants make food from non-food. Explain that plants capture 2. the energy of sunlight to produce food in a process known as photosynthesis. Pho-
Gardening for Grades: Chapter 3, Curricu1um Connections — Activity: We’re the Producers!75
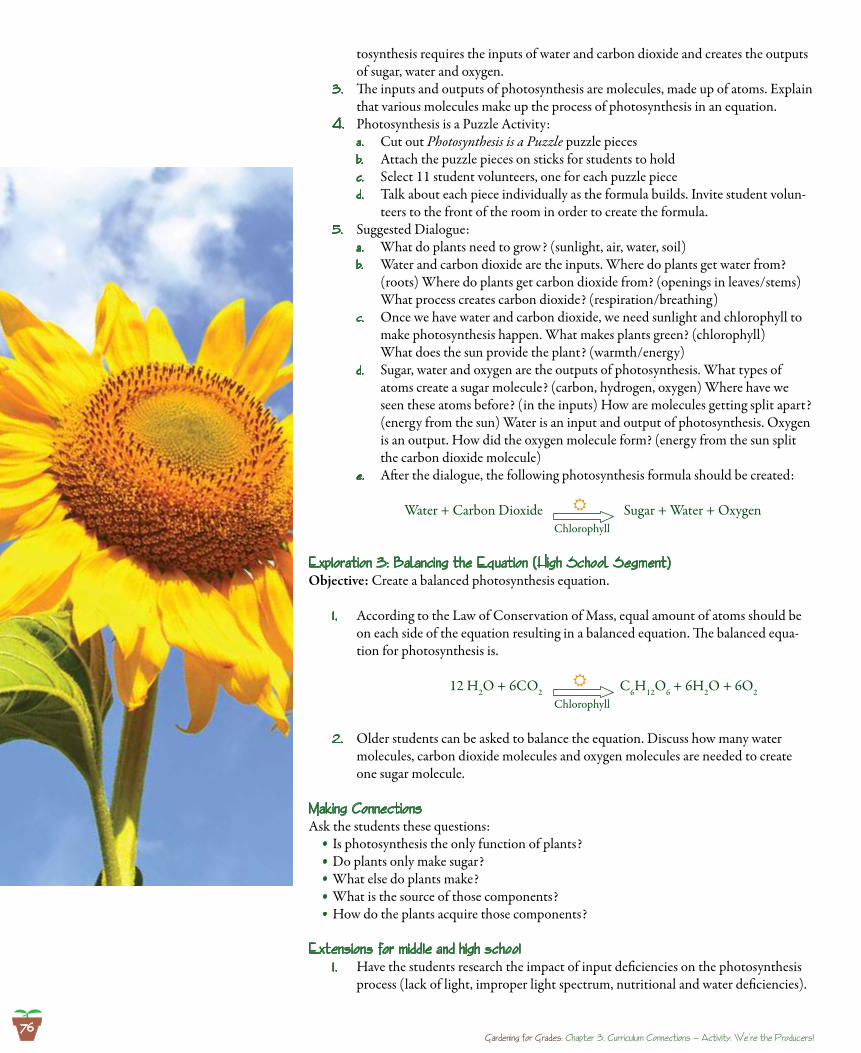
tosynthesis requires the inputs of water and carbon dioxide and creates the outputs of sugar, water and oxygen.The inputs and outputs of photosynthesis are molecules, made up of atoms. Explain 3. that various molecules make up the process of photosynthesis in an equation.Photosynthesis is a Puzzle Activity:4.
Cut out a. Photosynthesis is a Puzzle puzzle piecesAttach the puzzle pieces on sticks for students to holdb. Select 11 student volunteers, one for each puzzle piece c. Talk about each piece individually as the formula builds. Invite student volun-d. teers to the front of the room in order to create the formula.
Suggested Dialogue:5. What do plants need to grow? (sunlight, air, water, soil)a. Water and carbon dioxide are the inputs. Where do plants get water from? b. (roots) Where do plants get carbon dioxide from? (openings in leaves/stems) What process creates carbon dioxide? (respiration/breathing)Once we have water and carbon dioxide, we need sunlight and chlorophyll to c. make photosynthesis happen. What makes plants green? (chlorophyll) What does the sun provide the plant? (warmth/energy) Sugar, water and oxygen are the outputs of photosynthesis. What types of d. atoms create a sugar molecule? (carbon, hydrogen, oxygen) Where have we seen these atoms before? (in the inputs) How are molecules getting split apart? (energy from the sun) Water is an input and output of photosynthesis. Oxygen is an output. How did the oxygen molecule form? (energy from the sun split the carbon dioxide molecule) After the dialogue, the following photosynthesis formula should be created:e.
Water + Carbon Dioxide Sugar + Water + Oxygen Chlorophyll
Exp1oration 3: Balancing the Equation (high School Segment)Objective: Create a balanced photosynthesis equation.
According to the Law of Conservation of Mass, equal amount of atoms should be 1 . on each side of the equation resulting in a balanced equation. The balanced equa-tion for photosynthesis is.
12 H2O + 6CO2 C6H12O6 + 6H2O + 6O2 Chlorophyll
Older students can be asked to balance the equation. Discuss how many water 2. molecules, carbon dioxide molecules and oxygen molecules are needed to create one sugar molecule.
Making ConnectionsAsk the students these questions:
Is photosynthesis the only function of plants?•Do plants only make sugar?•What else do plants make?•What is the source of those components?•How do the plants acquire those components?•
Extensions for midd1e and high schoo1Have the students research the impact of input deficiencies on the photosynthesis 1 . process (lack of light, improper light spectrum, nutritional and water deficiencies).
Gardening for Grades: Chapter 3, Curricu1um Connections — Activity: We’re the Producers!
76
77
Have students research input excesses (carbon dioxide, water, nutrients, etc.). 2. Have the students research and identify what other atoms are needed to produce 3. starches, proteins, fats, and oils. Expand the protein building to include the human proteins that are used to build muscle, organ tissue, hair, finger and toe nails and/or plant proteins.
The garden and
sk i 1 1s deve1oped by
garden ing prov ide
concrete exam p1es
of theoret ica 1 or
abstract concepts or
processes.
“Activity: We’re the Producers!”
Gardening for Grades: Chapter 3, Curricu1um Connections — Activity: We’re the Producers!
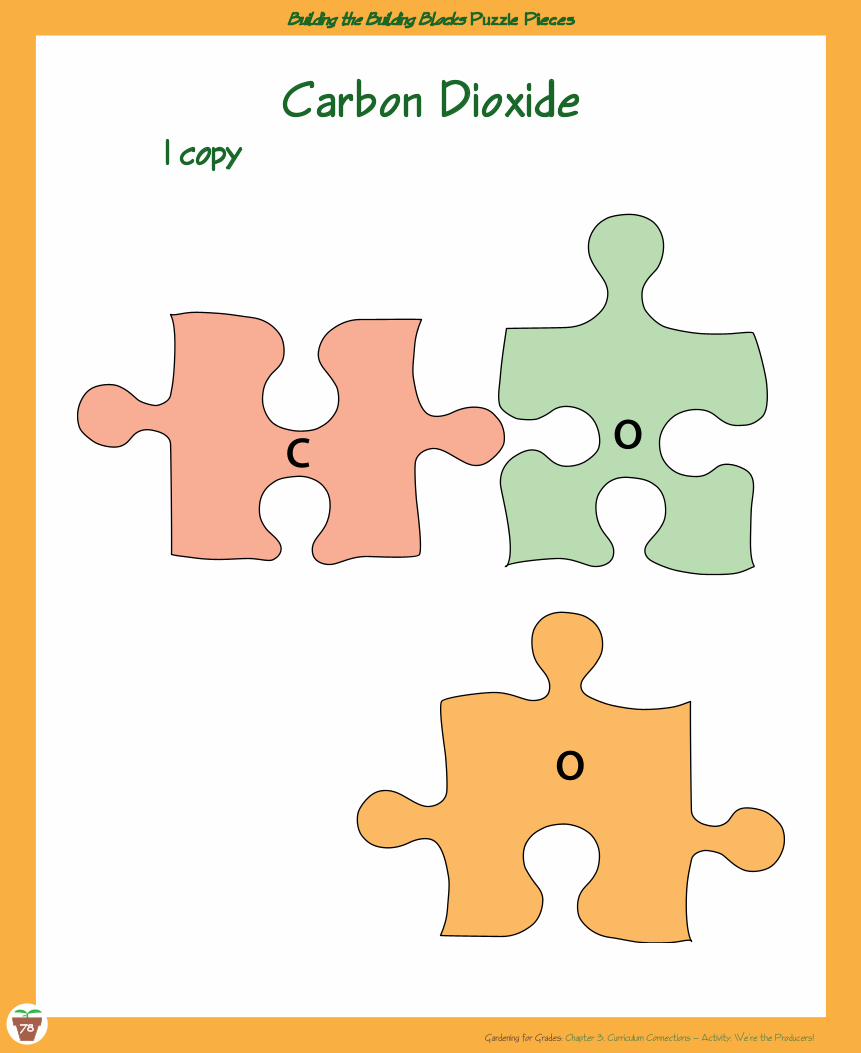
78
Carbon Dioxide
Gardening for Grades: Chapter 3, Curricu1um Connections — Activity: We’re the Producers!
C O
OO
78
1 copy
Building the Building Blocks Puzz1e Pieces
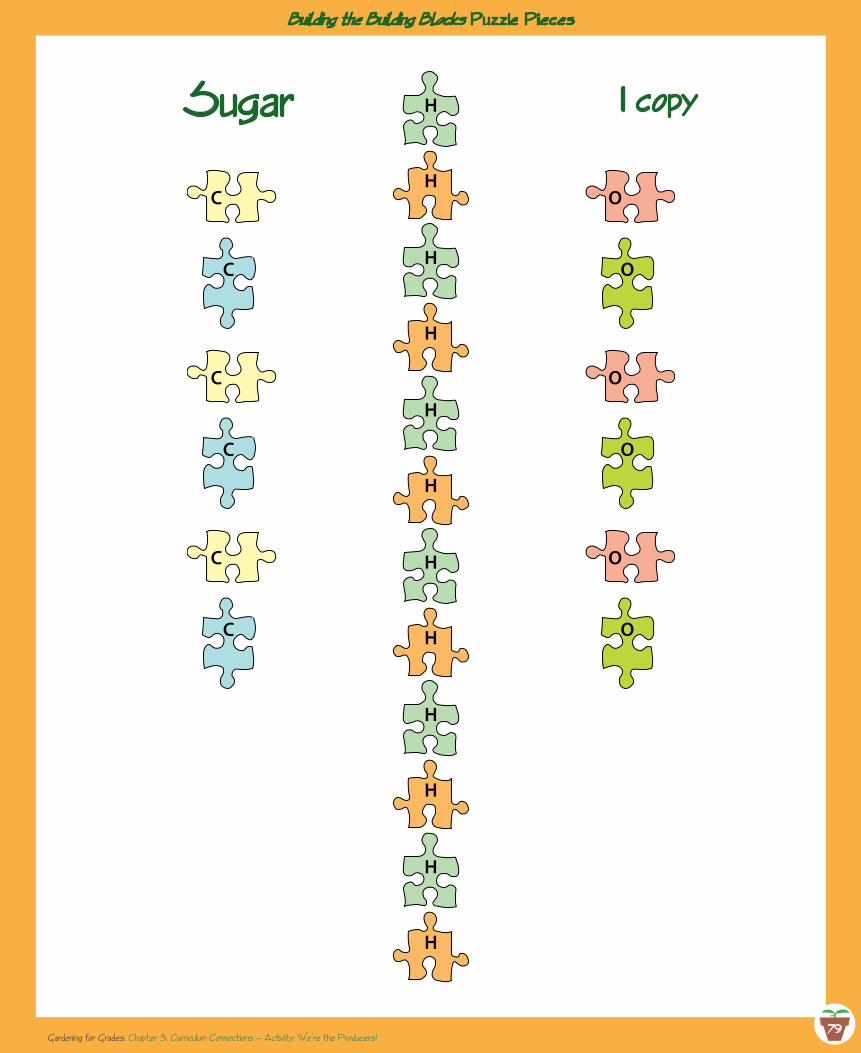
7979Gardening for Grades: Chapter 3, Curricu1um Connections — Activity: We’re the Producers!
C
C
C
C
C
C
O
O
O
O
O
O
H
OH
H
OH
H
OH
H
OH
H
OH
H
OH
Sugar 1 copy
Building the Building Blocks Puzz1e Pieces
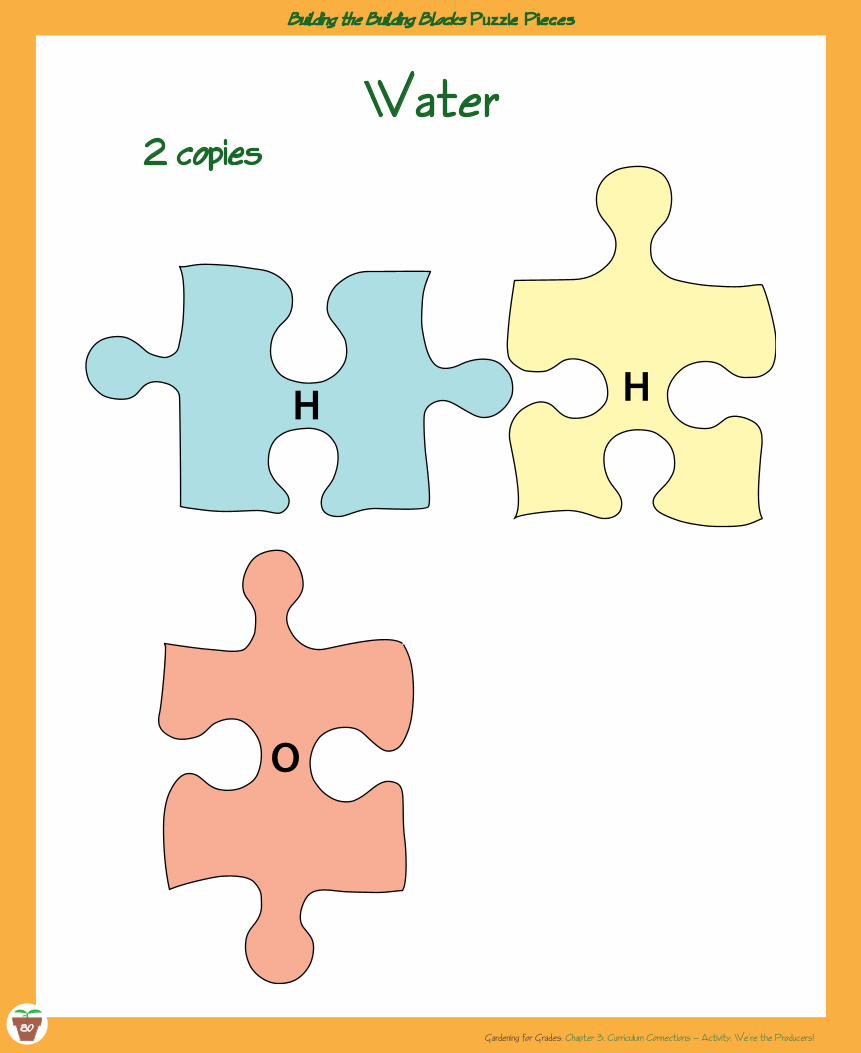
80
Water
Gardening for Grades: Chapter 3, Curricu1um Connections — Activity: We’re the Producers!
O
H H
80
2 copies
Building the Building Blocks Puzz1e Pieces
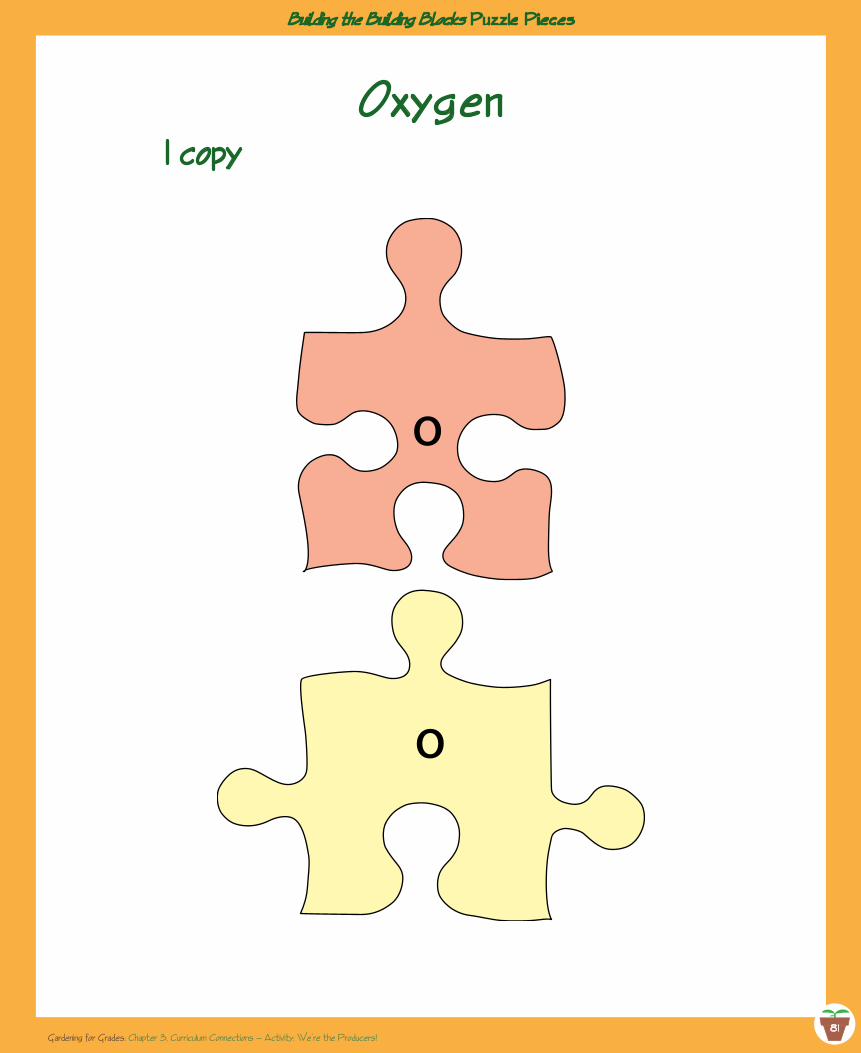
8181
Oxygen
Gardening for Grades: Chapter 3, Curricu1um Connections — Activity: We’re the Producers!
OO
O
1 copy
Building the Building Blocks Puzz1e Pieces
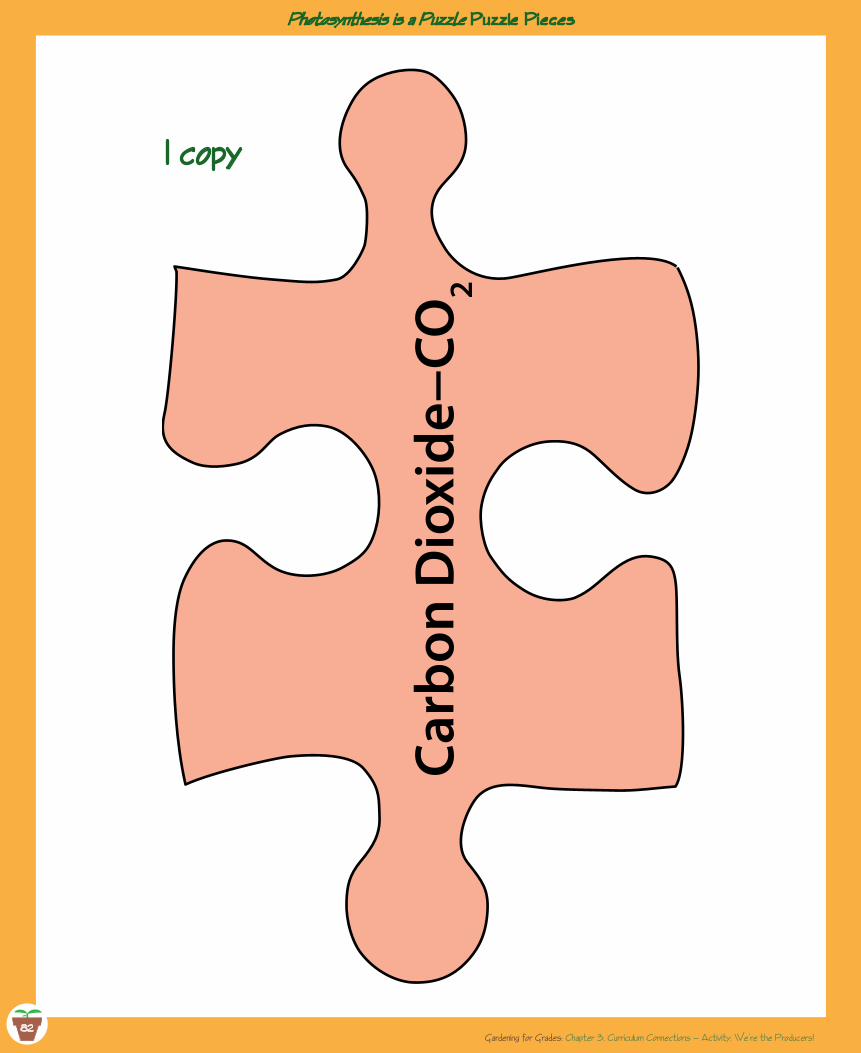
82
1 copy
Gardening for Grades: Chapter 3, Curricu1um Connections — Activity: We’re the Producers!
Carb
on D
ioxi
de−C
O2
82
Photosynthesis is a Puzzle Puzz1e Pieces

8383Gardening for Grades: Chapter 3, Curricu1um Connections — Activity: We’re the Producers!
+ Plus +
Photosynthesis is a Puzzle Puzz1e Pieces
3 copies

84Gardening for Grades: Chapter 3, Curricu1um Connections — Activity: We’re the Producers!
Sunl
ight
84
Photosynthesis is a Puzzle Puzz1e Pieces
1 copy
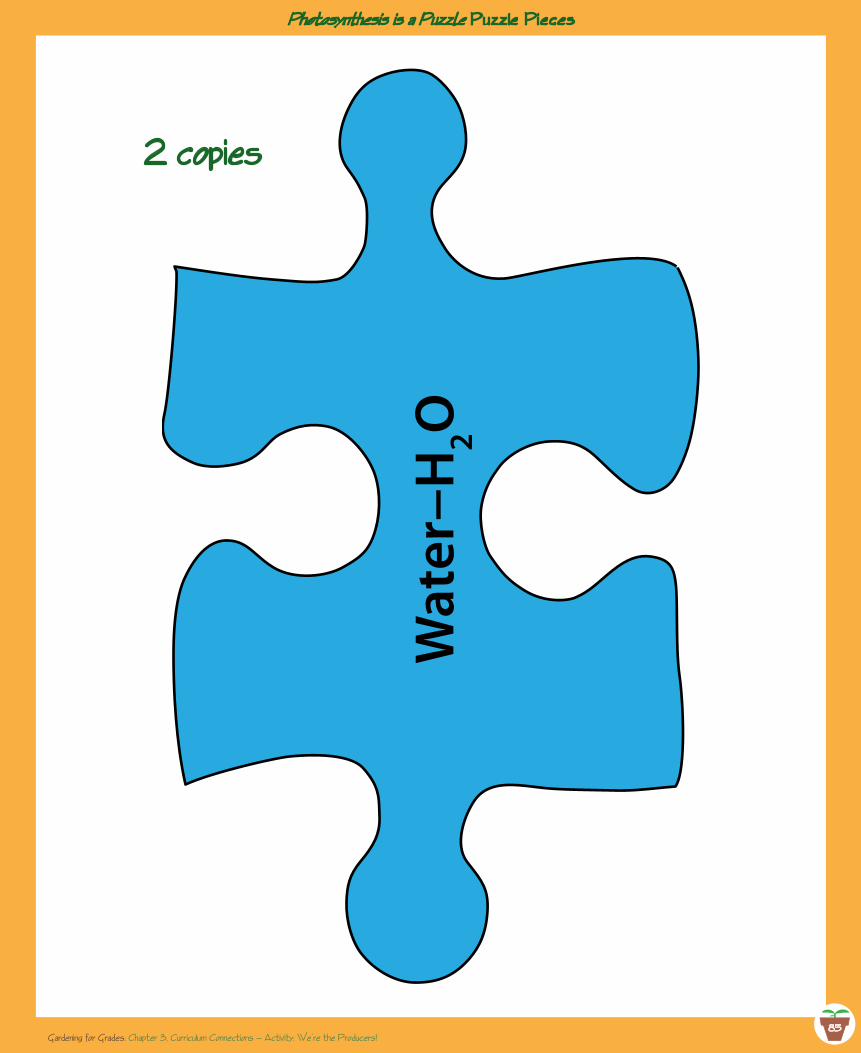
8585Gardening for Grades: Chapter 3, Curricu1um Connections — Activity: We’re the Producers!
Wat
er−H
2O
Photosynthesis is a Puzzle Puzz1e Pieces
2 copies
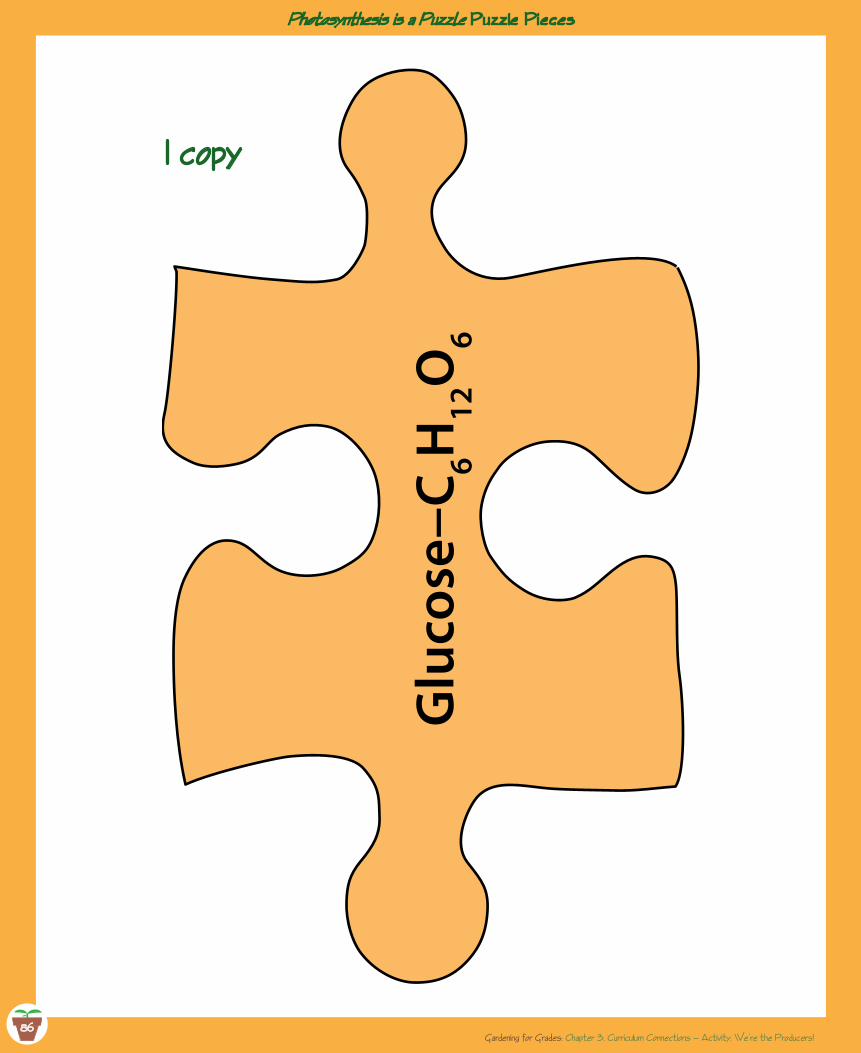
86Gardening for Grades: Chapter 3, Curricu1um Connections — Activity: We’re the Producers!
Glu
cose
−C6H
12O
6
86
1 copy
Photosynthesis is a Puzzle Puzz1e Pieces
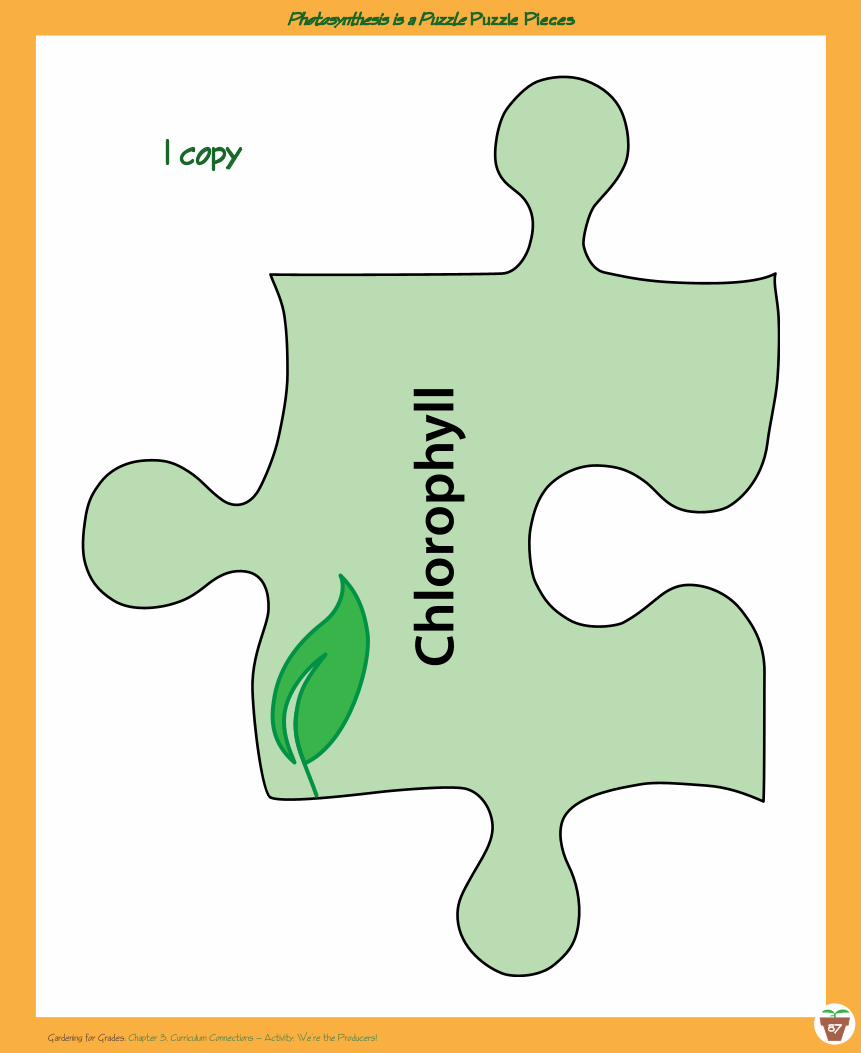
8787Gardening for Grades: Chapter 3, Curricu1um Connections — Activity: We’re the Producers!
Chlo
roph
yll
1 copy
Photosynthesis is a Puzzle Puzz1e Pieces
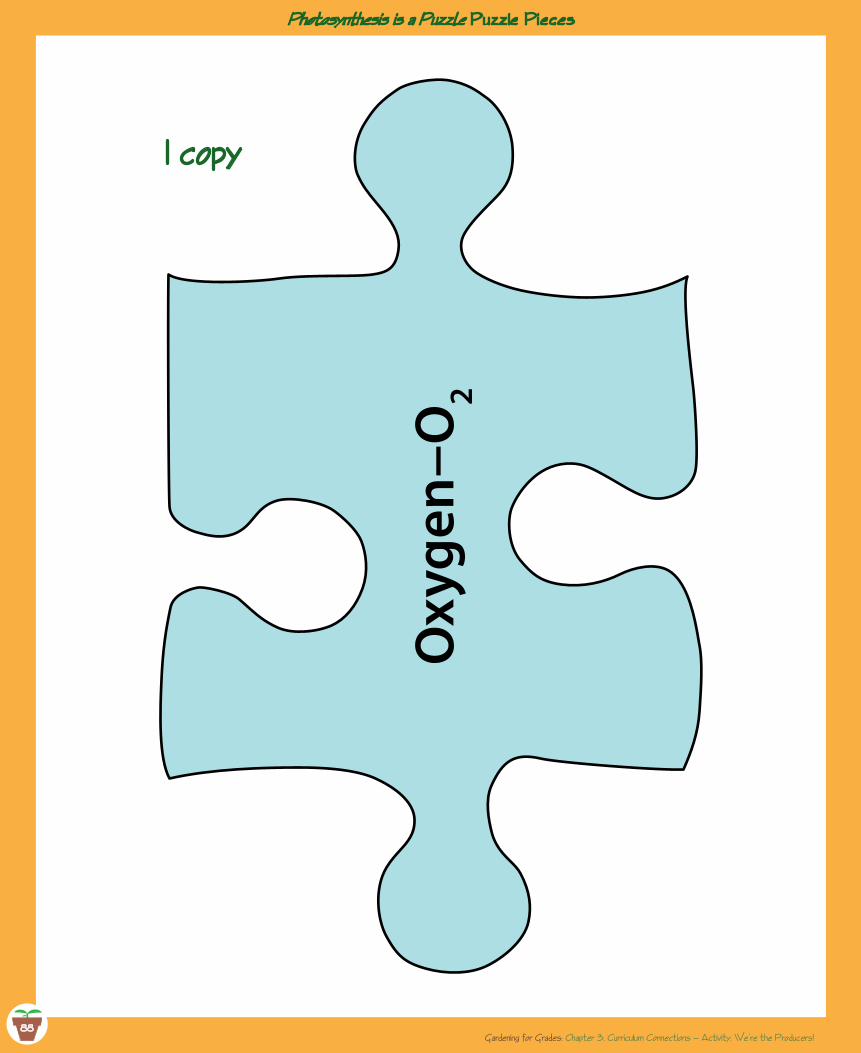
88Gardening for Grades: Chapter 3, Curricu1um Connections — Activity: We’re the Producers!
Oxy
gen−
O2
88
1 copy
Photosynthesis is a Puzzle Puzz1e Pieces

8989Gardening for Grades: Chapter 3, Curricu1um Connections — Activity: We’re the Producers!
1 copy
Photosynthesis is a Puzzle Puzz1e Pieces
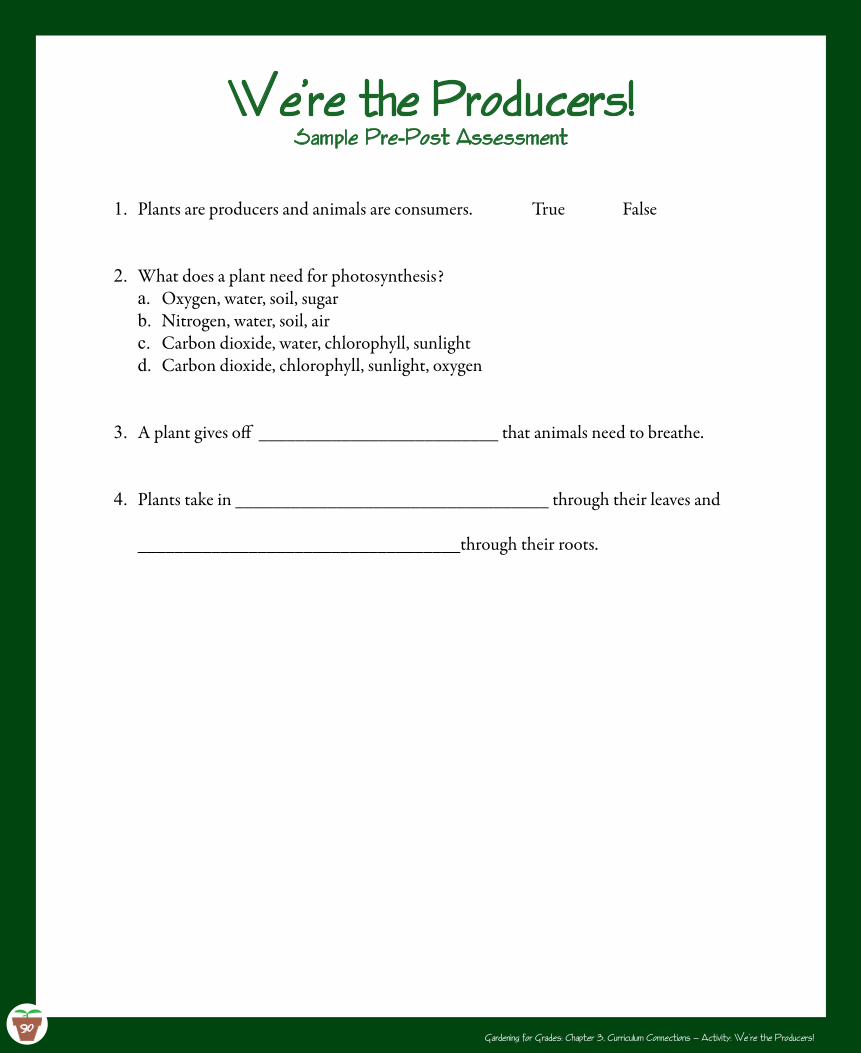
90
We’re the Producers! Samp1e Pre-Post Assessment
Plants are producers and animals are consumers. True False1.
What does a plant need for photosynthesis?2.Oxygen, water, soil, sugara.Nitrogen, water, soil, airb.Carbon dioxide, water, chlorophyll, sunlightc.Carbon dioxide, chlorophyll, sunlight, oxygend.
A plant gives off __________________________ that animals need to breathe.3.
Plants take in __________________________________ through their leaves and 4.
___________________________________through their roots.
90Gardening for Grades: Chapter 3, Curricu1um Connections — Activity: We’re the Producers!
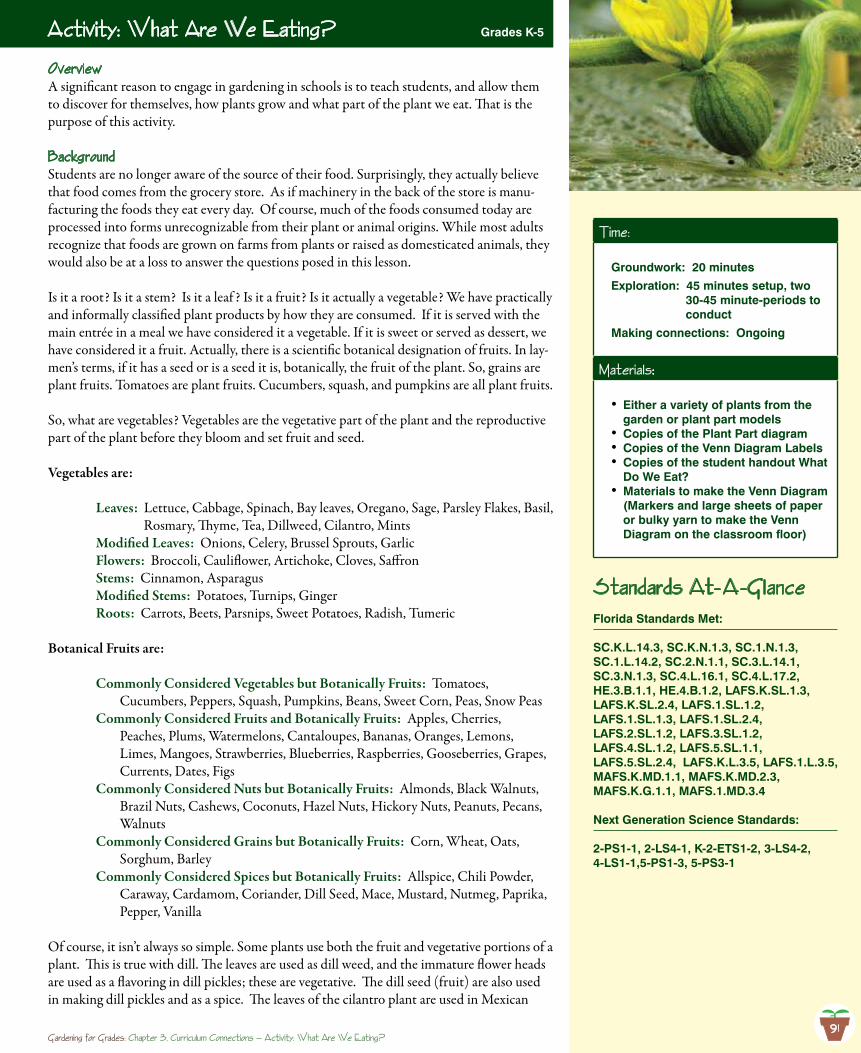
91
OverviewA significant reason to engage in gardening in schools is to teach students, and allow them to discover for themselves, how plants grow and what part of the plant we eat. That is the purpose of this activity.
Background Students are no longer aware of the source of their food. Surprisingly, they actually believe that food comes from the grocery store. As if machinery in the back of the store is manu-facturing the foods they eat every day. Of course, much of the foods consumed today are processed into forms unrecognizable from their plant or animal origins. While most adults recognize that foods are grown on farms from plants or raised as domesticated animals, they would also be at a loss to answer the questions posed in this lesson.
Is it a root? Is it a stem? Is it a leaf ? Is it a fruit? Is it actually a vegetable? We have practically and informally classified plant products by how they are consumed. If it is served with the main entrée in a meal we have considered it a vegetable. If it is sweet or served as dessert, we have considered it a fruit. Actually, there is a scientific botanical designation of fruits. In lay-men’s terms, if it has a seed or is a seed it is, botanically, the fruit of the plant. So, grains are plant fruits. Tomatoes are plant fruits. Cucumbers, squash, and pumpkins are all plant fruits.
So, what are vegetables? Vegetables are the vegetative part of the plant and the reproductive part of the plant before they bloom and set fruit and seed.
Vegetables are:
Leaves: Lettuce, Cabbage, Spinach, Bay leaves, Oregano, Sage, Parsley Flakes, Basil, Rosmary, Thyme, Tea, Dillweed, Cilantro, MintsModified Leaves: Onions, Celery, Brussel Sprouts, GarlicFlowers: Broccoli, Cauliflower, Artichoke, Cloves, Saffron Stems: Cinnamon, AsparagusModified Stems: Potatoes, Turnips, GingerRoots: Carrots, Beets, Parsnips, Sweet Potatoes, Radish, Tumeric
Botanical Fruits are:
Commonly Considered Vegetables but Botanically Fruits: Tomatoes, Cucumbers, Peppers, Squash, Pumpkins, Beans, Sweet Corn, Peas, Snow Peas
Commonly Considered Fruits and Botanically Fruits: Apples, Cherries, Peaches, Plums, Watermelons, Cantaloupes, Bananas, Oranges, Lemons, Limes, Mangoes, Strawberries, Blueberries, Raspberries, Gooseberries, Grapes, Currents, Dates, Figs
Commonly Considered Nuts but Botanically Fruits: Almonds, Black Walnuts, Brazil Nuts, Cashews, Coconuts, Hazel Nuts, Hickory Nuts, Peanuts, Pecans, Walnuts
Commonly Considered Grains but Botanically Fruits: Corn, Wheat, Oats, Sorghum, Barley
Commonly Considered Spices but Botanically Fruits: Allspice, Chili Powder, Caraway, Cardamom, Coriander, Dill Seed, Mace, Mustard, Nutmeg, Paprika, Pepper, Vanilla
Of course, it isn’t always so simple. Some plants use both the fruit and vegetative portions of a plant. This is true with dill. The leaves are used as dill weed, and the immature flower heads are used as a flavoring in dill pickles; these are vegetative. The dill seed (fruit) are also used in making dill pickles and as a spice. The leaves of the cilantro plant are used in Mexican
Activity: What Are We Eating? Grades K-5
Time:
Groundwork: 20 minutes
Exploration: 45 minutes setup, two 30-45 minute-periods to conduct
Making connections: Ongoing
Materia1s:
Either a variety of plants from the •garden or plant part modelsCopies of the Plant Part diagram•Copies of the Venn Diagram Labels•Copies of the student handout What •Do We Eat?Materials to make the Venn Diagram •(Markers and large sheets of paper or bulky yarn to make the Venn Diagram on the classroom floor)
Standards At-A -G1anceFlorida Standards Met:
SC.K.L.14.3, SC.K.N.1.3, SC.1.N.1.3, SC.1.L.14.2, SC.2.N.1.1, SC.3.L.14.1, SC.3.N.1.3, SC.4.L.16.1, SC.4.L.17.2, HE.3.B.1.1, HE.4.B.1.2, LAFS.K.SL.1.3, LAFS.K.SL.2.4, LAFS.1.SL.1.2, LAFS.1.SL.1.3, LAFS.1.SL.2.4, LAFS.2.SL.1.2, LAFS.3.SL.1.2, LAFS.4.SL.1.2, LAFS.5.SL.1.1, LAFS.5.SL.2.4, LAFS.K.L.3.5, LAFS.1.L.3.5, MAFS.K.MD.1.1, MAFS.K.MD.2.3, MAFS.K.G.1.1, MAFS.1.MD.3.4
Next Generation Science Standards:
2-PS1-1, 2-LS4-1, K-2-ETS1-2, 3-LS4-2, 4-LS1-1,5-PS1-3, 5-PS3-1
Gardening for Grades: Chapter 3, Curricu1um Connections — Activity: What Are We Eating?91
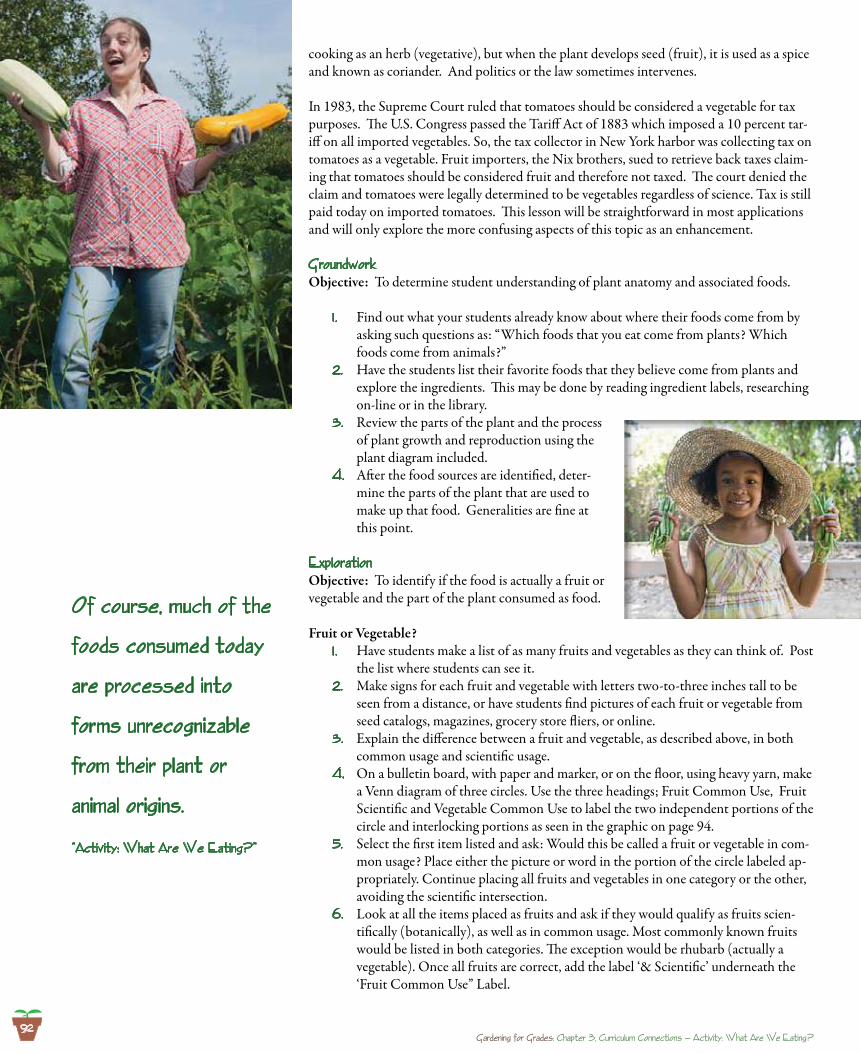
cooking as an herb (vegetative), but when the plant develops seed (fruit), it is used as a spice and known as coriander. And politics or the law sometimes intervenes.
In 1983, the Supreme Court ruled that tomatoes should be considered a vegetable for tax purposes. The U.S. Congress passed the Tariff Act of 1883 which imposed a 10 percent tar-iff on all imported vegetables. So, the tax collector in New York harbor was collecting tax on tomatoes as a vegetable. Fruit importers, the Nix brothers, sued to retrieve back taxes claim-ing that tomatoes should be considered fruit and therefore not taxed. The court denied the claim and tomatoes were legally determined to be vegetables regardless of science. Tax is still paid today on imported tomatoes. This lesson will be straightforward in most applications and will only explore the more confusing aspects of this topic as an enhancement.
GroundworkObjective: To determine student understanding of plant anatomy and associated foods.
Find out what your students already know about where their foods come from by 1 . asking such questions as: “Which foods that you eat come from plants? Which foods come from animals?”Have the students list their favorite foods that they believe come from plants and 2. explore the ingredients. This may be done by reading ingredient labels, researching on-line or in the library.Review the parts of the plant and the process 3. of plant growth and reproduction using the plant diagram included. After the food sources are identified, deter-4. mine the parts of the plant that are used to make up that food. Generalities are fine at this point.
Exp1orationObjective: To identify if the food is actually a fruit or vegetable and the part of the plant consumed as food.
Fruit or Vegetable?Have students make a list of as many fruits and vegetables as they can think of. Post 1 . the list where students can see it. Make signs for each fruit and vegetable with letters two-to-three inches tall to be 2. seen from a distance, or have students find pictures of each fruit or vegetable from seed catalogs, magazines, grocery store fliers, or online. Explain the difference between a fruit and vegetable, as described above, in both 3. common usage and scientific usage. On a bulletin board, with paper and marker, or on the floor, using heavy yarn, make 4. a Venn diagram of three circles. Use the three headings; Fruit Common Use, Fruit Scientific and Vegetable Common Use to label the two independent portions of the circle and interlocking portions as seen in the graphic on page 94.Select the first item listed and ask: Would this be called a fruit or vegetable in com-5. mon usage? Place either the picture or word in the portion of the circle labeled ap-propriately. Continue placing all fruits and vegetables in one category or the other, avoiding the scientific intersection. Look at all the items placed as fruits and ask if they would qualify as fruits scien-6. tifically (botanically), as well as in common usage. Most commonly known fruits would be listed in both categories. The exception would be rhubarb (actually a vegetable). Once all fruits are correct, add the label ‘& Scientific’ underneath the ‘Fruit Common Use” Label.
Of course, much of the
foods consumed today
are processed into
forms unrecognizab1e
from their p1ant or
anima1 origins.
“Activity: What Are We Eating?”
Gardening for Grades: Chapter 3, Curricu1um Connections — Activity: What Are We Eating?92
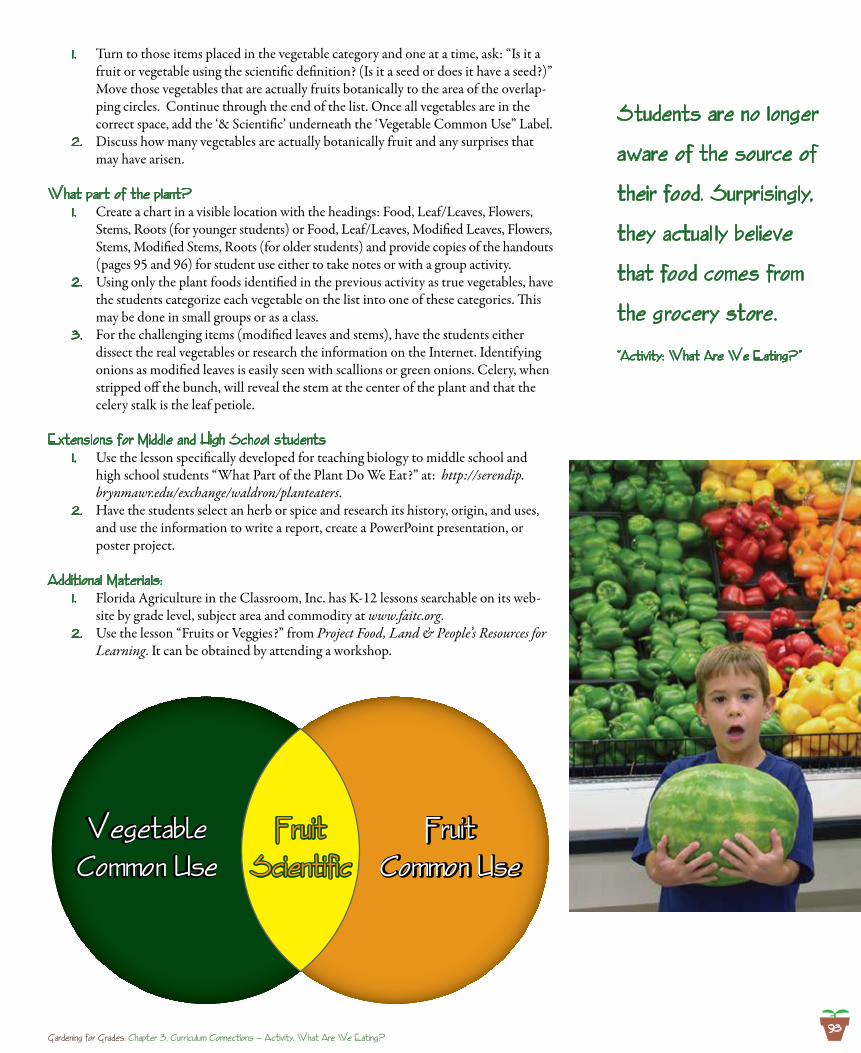
93
VegetableCommon Use
FruitCommon Use
VegetableCommon Use
FruitCommon Use
FruitScientific
FruitScientific
Turn to those items placed in the vegetable category and one at a time, ask: “Is it a 1 . fruit or vegetable using the scientific definition? (Is it a seed or does it have a seed?)” Move those vegetables that are actually fruits botanically to the area of the overlap-ping circles. Continue through the end of the list. Once all vegetables are in the correct space, add the ‘& Scientific’ underneath the ‘Vegetable Common Use” Label. Discuss how many vegetables are actually botanically fruit and any surprises that 2. may have arisen.
What part of the p1ant?Create a chart in a visible location with the headings: Food, Leaf/Leaves, Flowers, 1 . Stems, Roots (for younger students) or Food, Leaf/Leaves, Modified Leaves, Flowers, Stems, Modified Stems, Roots (for older students) and provide copies of the handouts (pages 95 and 96) for student use either to take notes or with a group activity.Using only the plant foods identified in the previous activity as true vegetables, have 2. the students categorize each vegetable on the list into one of these categories. This may be done in small groups or as a class. For the challenging items (modified leaves and stems), have the students either 3. dissect the real vegetables or research the information on the Internet. Identifying onions as modified leaves is easily seen with scallions or green onions. Celery, when stripped off the bunch, will reveal the stem at the center of the plant and that the celery stalk is the leaf petiole.
Extensions for Midd1e and high Schoo1 studentsUse the lesson specifically developed for teaching biology to middle school and 1 . high school students “What Part of the Plant Do We Eat?” at: http://serendip.brynmawr.edu/exchange/waldron/planteaters.Have the students select an herb or spice and research its history, origin, and uses, 2. and use the information to write a report, create a PowerPoint presentation, or poster project.
Additiona1 Materia1s: Florida Agriculture in the Classroom, Inc. has K-12 lessons searchable on its web-1 . site by grade level, subject area and commodity at www.faitc.org.Use the lesson “Fruits or Veggies?” from 2. Project Food, Land & People’s Resources for Learning. It can be obtained by attending a workshop.
Students are no 1onger
aware of the source of
their food. Surprising1y,
they actua1 1y be1ieve
that food comes from
the grocery store.
“Activity: What Are We Eating?”
Gardening for Grades: Chapter 3, Curricu1um Connections — Activity: What Are We Eating?
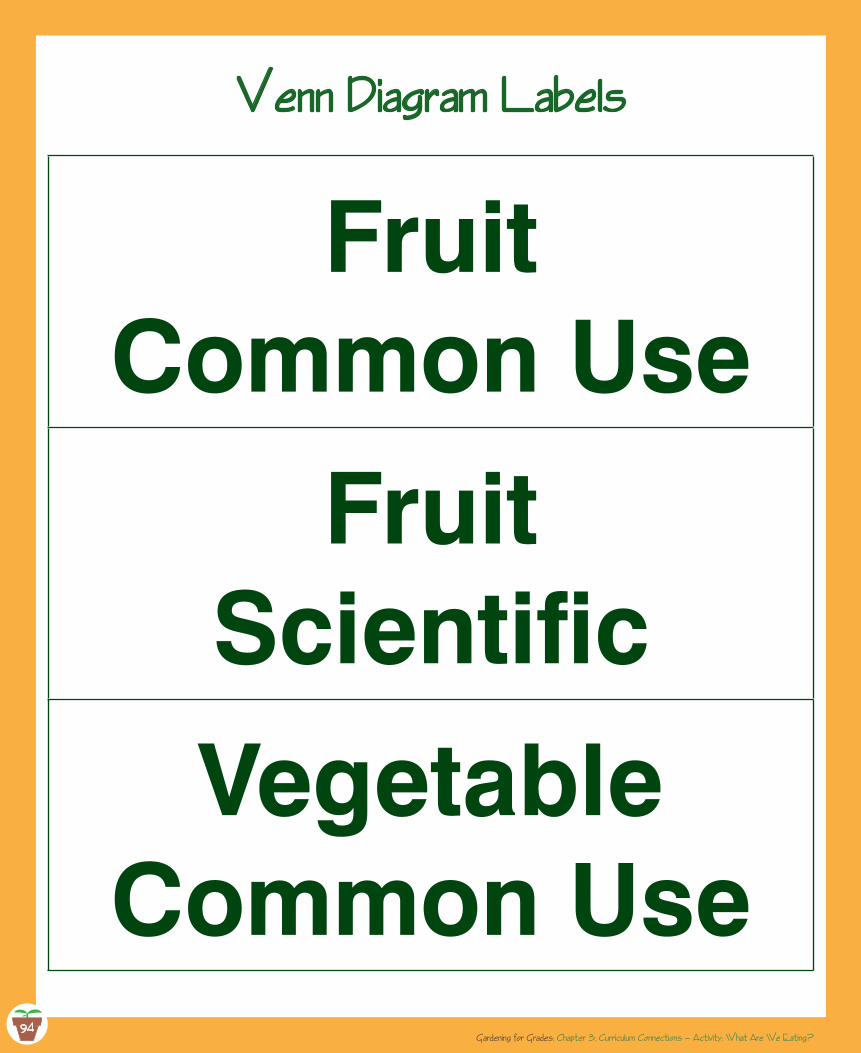
94
Venn Diagram Labe1s
FruitCommon Use
FruitScientific
VegetableCommon Use
94Gardening for Grades: Chapter 3, Curricu1um Connections — Activity: What Are We Eating?
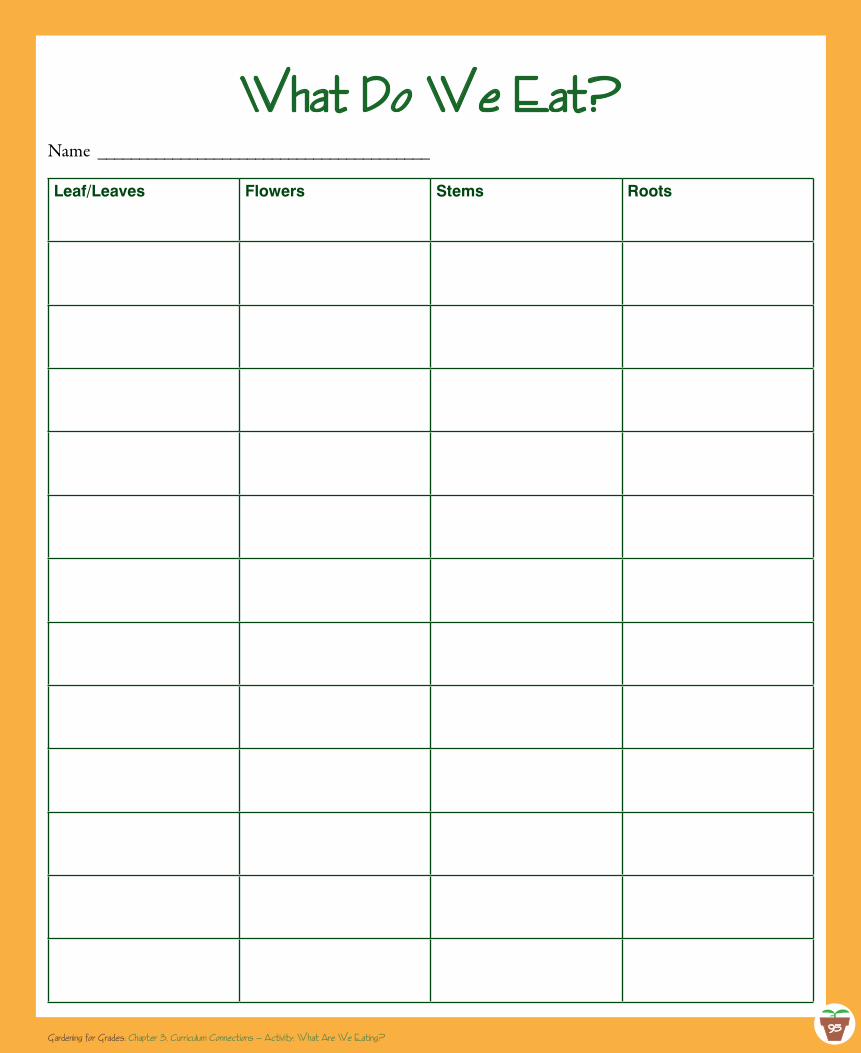
95
What Do We Eat?Name ________________________________________
Leaf/Leaves Flowers Stems Roots
Gardening for Grades: Chapter 3, Curricu1um Connections — Activity: What Are We Eating?95
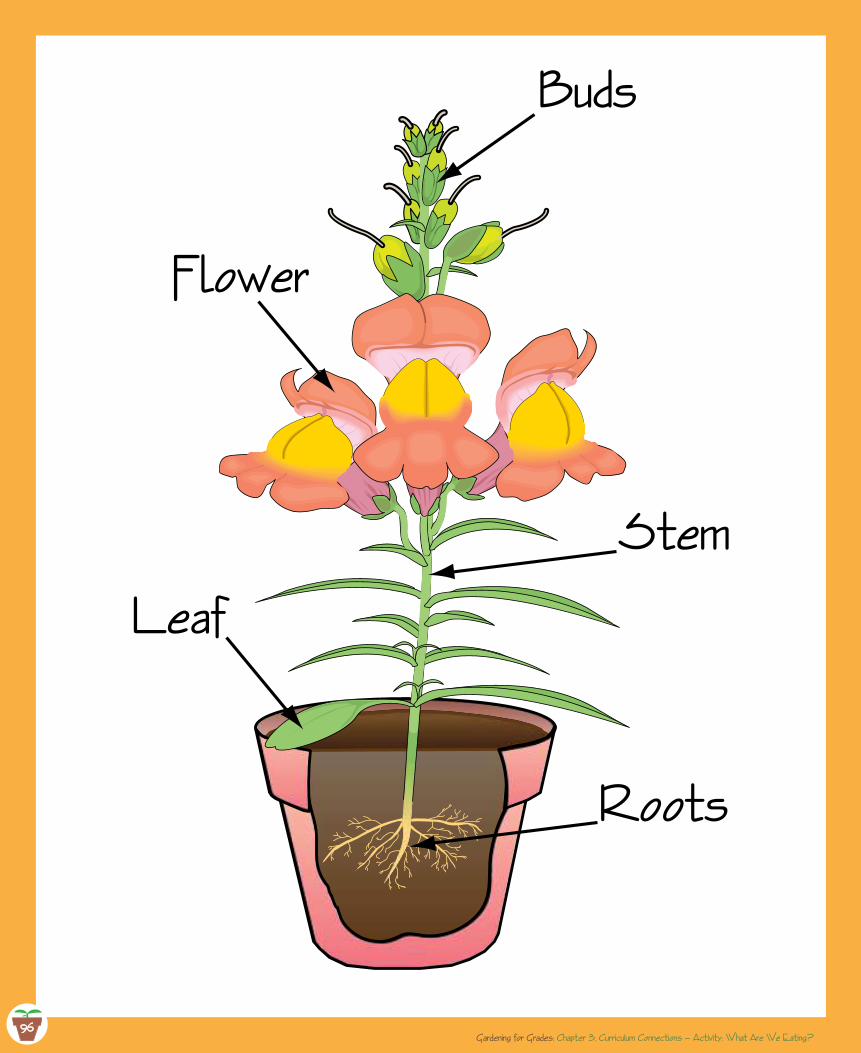
96
Flower
Buds
Stem
Leaf
Roots
Gardening for Grades: Chapter 3, Curricu1um Connections — Activity: What Are We Eating?96
97
What Are We Eating?Samp1e Pre-Post Assessment
What is the difference between a fruit and a vegetable?1.
Which of these are leaves or modified leaves:2.
Lettuce, cabbage, celerya.Brussel sprouts, lettuce, asparagusb.Lettuce, Brussel sprouts, potatoesc.Rhubarb, cabbage, asparagusd.
List two vegetables that are roots.3.
List three fruits that are commonly known as fruits and scientifically designated fruits.4.
Gardening for Grades: Chapter 3, Curricu1um Connections — Activity: What Are We Eating?97
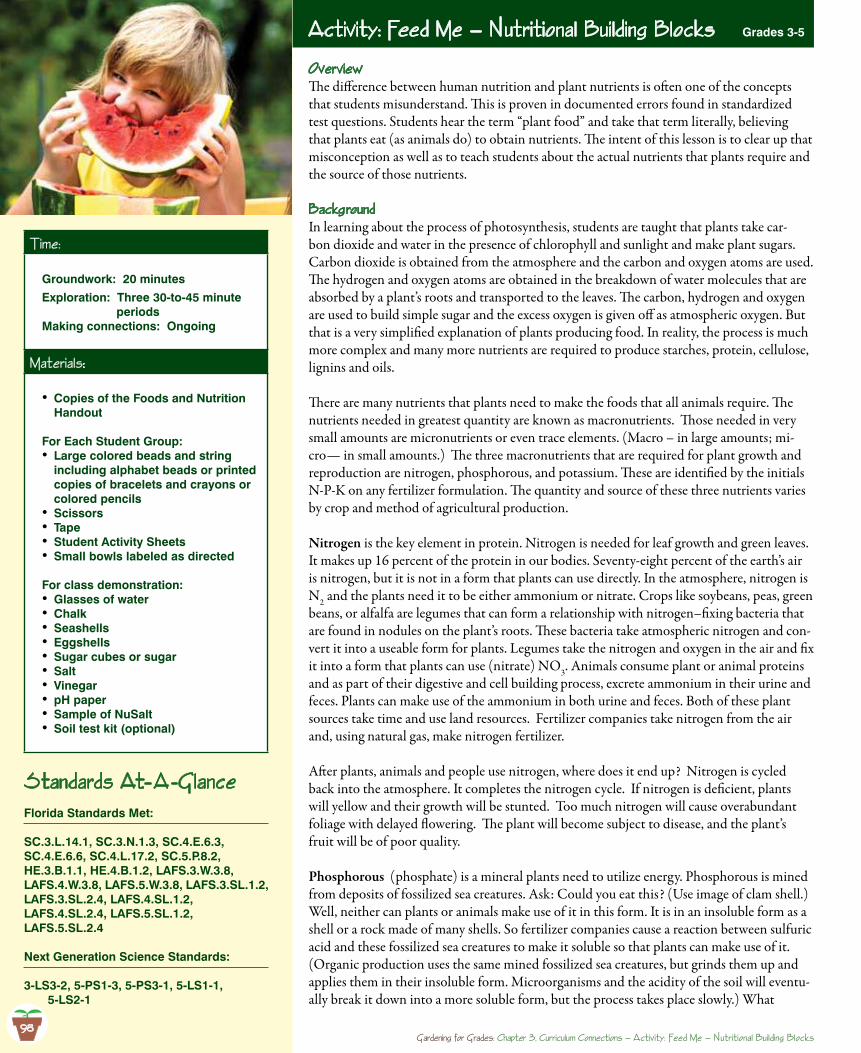
98
OverviewThe difference between human nutrition and plant nutrients is often one of the concepts that students misunderstand. This is proven in documented errors found in standardized test questions. Students hear the term “plant food” and take that term literally, believing that plants eat (as animals do) to obtain nutrients. The intent of this lesson is to clear up that misconception as well as to teach students about the actual nutrients that plants require and the source of those nutrients.
BackgroundIn learning about the process of photosynthesis, students are taught that plants take car-bon dioxide and water in the presence of chlorophyll and sunlight and make plant sugars. Carbon dioxide is obtained from the atmosphere and the carbon and oxygen atoms are used. The hydrogen and oxygen atoms are obtained in the breakdown of water molecules that are absorbed by a plant’s roots and transported to the leaves. The carbon, hydrogen and oxygen are used to build simple sugar and the excess oxygen is given off as atmospheric oxygen. But that is a very simplified explanation of plants producing food. In reality, the process is much more complex and many more nutrients are required to produce starches, protein, cellulose, lignins and oils.
There are many nutrients that plants need to make the foods that all animals require. The nutrients needed in greatest quantity are known as macronutrients. Those needed in very small amounts are micronutrients or even trace elements. (Macro – in large amounts; mi-cro— in small amounts.) The three macronutrients that are required for plant growth and reproduction are nitrogen, phosphorous, and potassium. These are identified by the initials N-P-K on any fertilizer formulation. The quantity and source of these three nutrients varies by crop and method of agricultural production.
Nitrogen is the key element in protein. Nitrogen is needed for leaf growth and green leaves. It makes up 16 percent of the protein in our bodies. Seventy-eight percent of the earth’s air is nitrogen, but it is not in a form that plants can use directly. In the atmosphere, nitrogen is N2 and the plants need it to be either ammonium or nitrate. Crops like soybeans, peas, green beans, or alfalfa are legumes that can form a relationship with nitrogen–fixing bacteria that are found in nodules on the plant’s roots. These bacteria take atmospheric nitrogen and con-vert it into a useable form for plants. Legumes take the nitrogen and oxygen in the air and fix it into a form that plants can use (nitrate) NO3. Animals consume plant or animal proteins and as part of their digestive and cell building process, excrete ammonium in their urine and feces. Plants can make use of the ammonium in both urine and feces. Both of these plant sources take time and use land resources. Fertilizer companies take nitrogen from the air and, using natural gas, make nitrogen fertilizer.
After plants, animals and people use nitrogen, where does it end up? Nitrogen is cycled back into the atmosphere. It completes the nitrogen cycle. If nitrogen is deficient, plants will yellow and their growth will be stunted. Too much nitrogen will cause overabundant foliage with delayed flowering. The plant will become subject to disease, and the plant’s fruit will be of poor quality.
Phosphorous (phosphate) is a mineral plants need to utilize energy. Phosphorous is mined from deposits of fossilized sea creatures. Ask: Could you eat this? (Use image of clam shell.) Well, neither can plants or animals make use of it in this form. It is in an insoluble form as a shell or a rock made of many shells. So fertilizer companies cause a reaction between sulfuric acid and these fossilized sea creatures to make it soluble so that plants can make use of it. (Organic production uses the same mined fossilized sea creatures, but grinds them up and applies them in their insoluble form. Microorganisms and the acidity of the soil will eventu-ally break it down into a more soluble form, but the process takes place slowly.) What
Activity: Feed Me — Nutritiona1 Bui1ding B1ocks Grades 3-5
Time:
Groundwork: 20 minutes
Exploration: Three 30-to-45 minute periodsMaking connections: Ongoing
Materia1s:
Copies of the Foods and Nutrition •Handout
For Each Student Group:Large colored beads and string •including alphabet beads or printed copies of bracelets and crayons or colored pencilsScissors•Tape•Student Activity Sheets•Small bowls labeled as directed•
For class demonstration:Glasses of water•Chalk•Seashells•Eggshells•Sugar cubes or sugar•Salt•Vinegar•pH paper•Sample of NuSalt•Soil test kit (optional)•
Standards At-A -G1anceFlorida Standards Met:
SC.3.L.14.1, SC.3.N.1.3, SC.4.E.6.3, SC.4.E.6.6, SC.4.L.17.2, SC.5.P.8.2, HE.3.B.1.1, HE.4.B.1.2, LAFS.3.W.3.8, LAFS.4.W.3.8, LAFS.5.W.3.8, LAFS.3.SL.1.2, LAFS.3.SL.2.4, LAFS.4.SL.1.2, LAFS.4.SL.2.4, LAFS.5.SL.1.2, LAFS.5.SL.2.4
Next Generation Science Standards:
3-LS3-2, 5-PS1-3, 5-PS3-1, 5-LS1-1, 5-LS2-1
98Gardening for Grades: Chapter 3, Curricu1um Connections — Activity: Feed Me — Nutritiona1 Bui1ding B1ocks
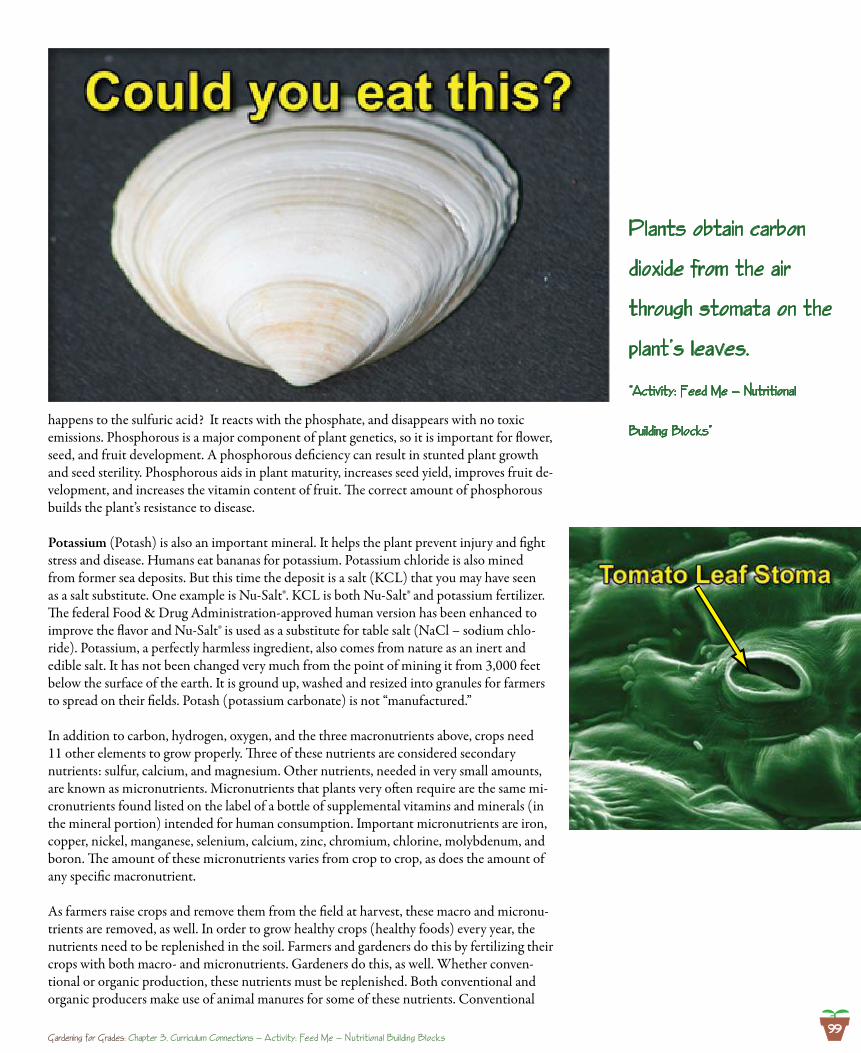
99
happens to the sulfuric acid? It reacts with the phosphate, and disappears with no toxic emissions. Phosphorous is a major component of plant genetics, so it is important for flower, seed, and fruit development. A phosphorous deficiency can result in stunted plant growth and seed sterility. Phosphorous aids in plant maturity, increases seed yield, improves fruit de-velopment, and increases the vitamin content of fruit. The correct amount of phosphorous builds the plant’s resistance to disease.
Potassium (Potash) is also an important mineral. It helps the plant prevent injury and fight stress and disease. Humans eat bananas for potassium. Potassium chloride is also mined from former sea deposits. But this time the deposit is a salt (KCL) that you may have seen as a salt substitute. One example is Nu-Salt®. KCL is both Nu-Salt® and potassium fertilizer. The federal Food & Drug Administration-approved human version has been enhanced to improve the flavor and Nu-Salt® is used as a substitute for table salt (NaCl – sodium chlo-ride). Potassium, a perfectly harmless ingredient, also comes from nature as an inert and edible salt. It has not been changed very much from the point of mining it from 3,000 feet below the surface of the earth. It is ground up, washed and resized into granules for farmers to spread on their fields. Potash (potassium carbonate) is not “manufactured.”
In addition to carbon, hydrogen, oxygen, and the three macronutrients above, crops need 11 other elements to grow properly. Three of these nutrients are considered secondary nutrients: sulfur, calcium, and magnesium. Other nutrients, needed in very small amounts, are known as micronutrients. Micronutrients that plants very often require are the same mi-cronutrients found listed on the label of a bottle of supplemental vitamins and minerals (in the mineral portion) intended for human consumption. Important micronutrients are iron, copper, nickel, manganese, selenium, calcium, zinc, chromium, chlorine, molybdenum, and boron. The amount of these micronutrients varies from crop to crop, as does the amount of any specific macronutrient.
As farmers raise crops and remove them from the field at harvest, these macro and micronu-trients are removed, as well. In order to grow healthy crops (healthy foods) every year, the nutrients need to be replenished in the soil. Farmers and gardeners do this by fertilizing their crops with both macro- and micronutrients. Gardeners do this, as well. Whether conven-tional or organic production, these nutrients must be replenished. Both conventional and organic producers make use of animal manures for some of these nutrients. Conventional
P1ants obtain carbon
dioxide from the air
through stomata on the
p1ant’s 1eaves.
“Activity: Feed Me — Nutritiona1
Bui1ding B1ocks”
Gardening for Grades: Chapter 3, Curricu1um Connections — Activity: Feed Me — Nutritiona1 Bui1ding B1ocks
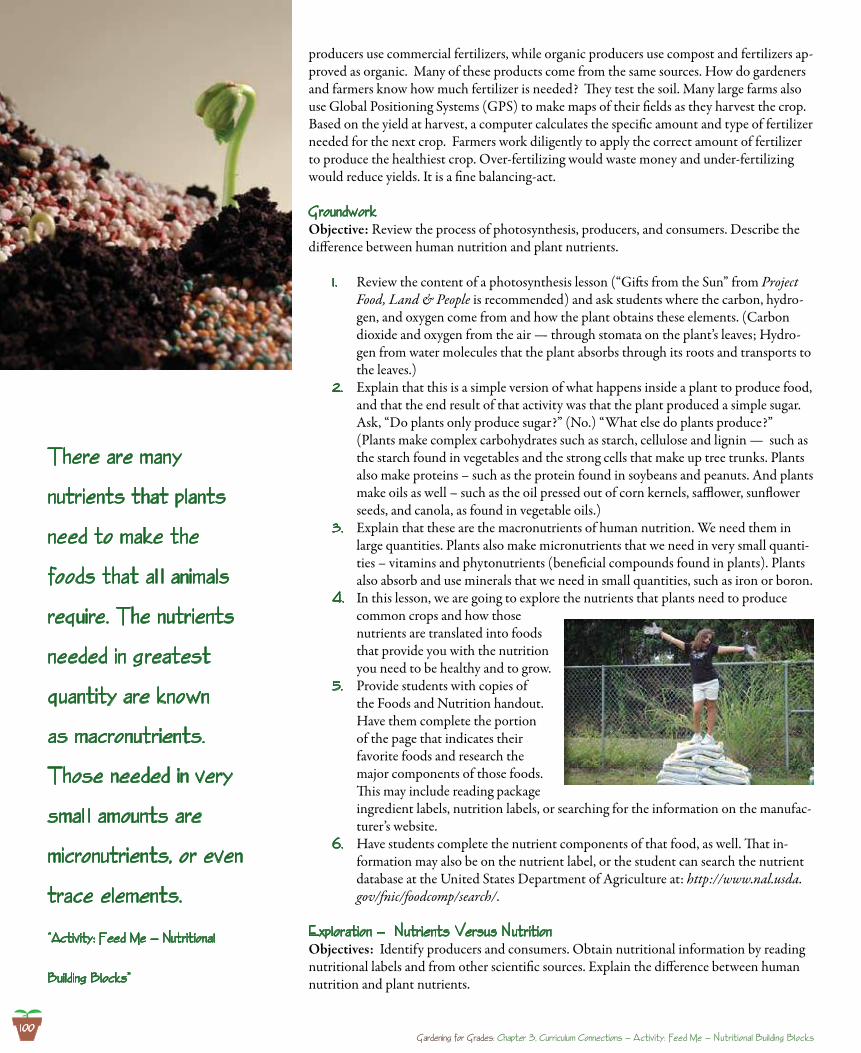
100
producers use commercial fertilizers, while organic producers use compost and fertilizers ap-proved as organic. Many of these products come from the same sources. How do gardeners and farmers know how much fertilizer is needed? They test the soil. Many large farms also use Global Positioning Systems (GPS) to make maps of their fields as they harvest the crop. Based on the yield at harvest, a computer calculates the specific amount and type of fertilizer needed for the next crop. Farmers work diligently to apply the correct amount of fertilizer to produce the healthiest crop. Over-fertilizing would waste money and under-fertilizing would reduce yields. It is a fine balancing-act.
GroundworkObjective: Review the process of photosynthesis, producers, and consumers. Describe the difference between human nutrition and plant nutrients.
Review the content of a photosynthesis lesson (“Gifts from the Sun” from 1 . Project Food, Land & People is recommended) and ask students where the carbon, hydro-gen, and oxygen come from and how the plant obtains these elements. (Carbon dioxide and oxygen from the air — through stomata on the plant’s leaves; Hydro-gen from water molecules that the plant absorbs through its roots and transports to the leaves.)Explain that this is a simple version of what happens inside a plant to produce food, 2. and that the end result of that activity was that the plant produced a simple sugar. Ask, “Do plants only produce sugar?” (No.) “What else do plants produce?” (Plants make complex carbohydrates such as starch, cellulose and lignin — such as the starch found in vegetables and the strong cells that make up tree trunks. Plants also make proteins – such as the protein found in soybeans and peanuts. And plants make oils as well – such as the oil pressed out of corn kernels, safflower, sunflower seeds, and canola, as found in vegetable oils.)Explain that these are the macronutrients of human nutrition. We need them in 3. large quantities. Plants also make micronutrients that we need in very small quanti-ties – vitamins and phytonutrients (beneficial compounds found in plants). Plants also absorb and use minerals that we need in small quantities, such as iron or boron.In this lesson, we are going to explore the nutrients that plants need to produce 4. common crops and how those nutrients are translated into foods that provide you with the nutrition you need to be healthy and to grow.Provide students with copies of 5. the Foods and Nutrition handout. Have them complete the portion of the page that indicates their favorite foods and research the major components of those foods. This may include reading package ingredient labels, nutrition labels, or searching for the information on the manufac-turer’s website.Have students complete the nutrient components of that food, as well. That in-6. formation may also be on the nutrient label, or the student can search the nutrient database at the United States Department of Agriculture at: http://www.nal.usda.gov/fnic/foodcomp/search/.
Exp1oration — Nutrients Versus NutritionObjectives: Identify producers and consumers. Obtain nutritional information by reading nutritional labels and from other scientific sources. Explain the difference between human nutrition and plant nutrients.
There are many
nutrients that p1ants
need to make the
foods that a1 1 anima1s
require. The nutrients
needed in greatest
quantity are known
as macronutrients.
Those needed in very
sma1 1 amounts are
micronutrients, or even
trace e1ements.
“Activity: Feed Me — Nutritiona1
Bui1ding B1ocks”
Gardening for Grades: Chapter 3, Curricu1um Connections — Activity: Feed Me — Nutritiona1 Bui1ding B1ocks
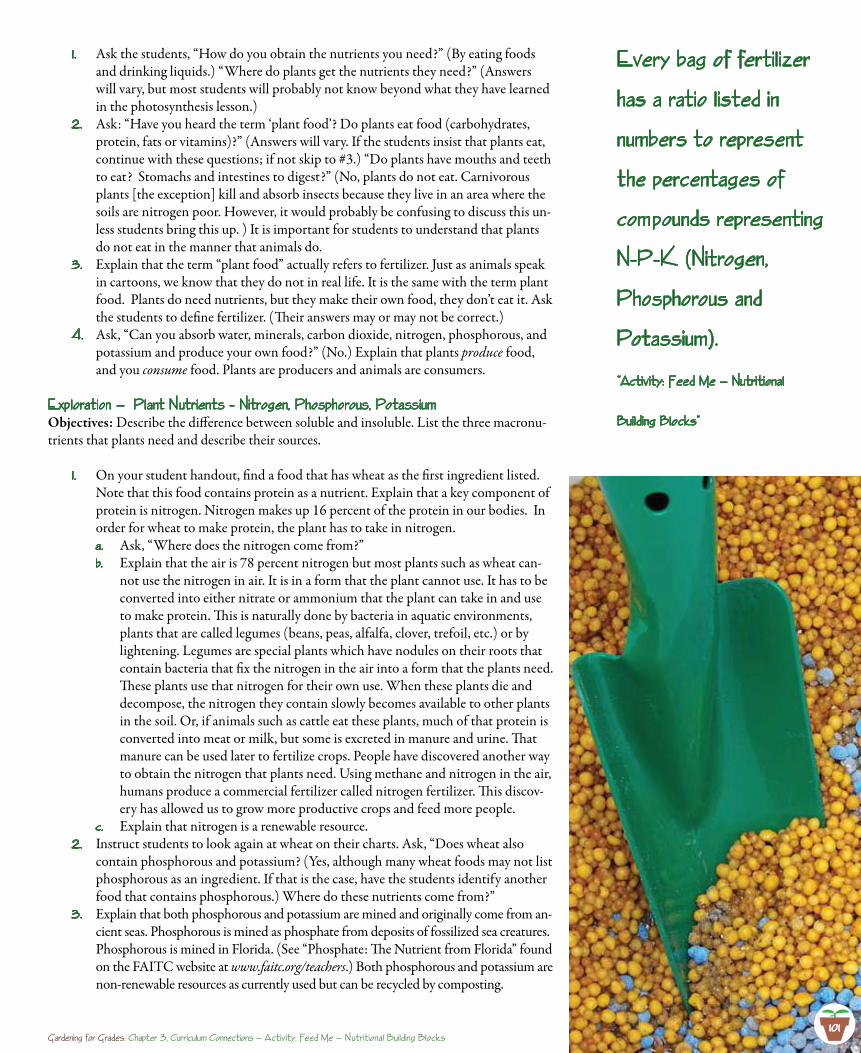
Ask the students, “How do you obtain the nutrients you need?” (By eating foods 1 . and drinking liquids.) “Where do plants get the nutrients they need?” (Answers will vary, but most students will probably not know beyond what they have learned in the photosynthesis lesson.)Ask: “Have you heard the term ‘plant food’? Do plants eat food (carbohydrates, 2. protein, fats or vitamins)?” (Answers will vary. If the students insist that plants eat, continue with these questions; if not skip to #3.) “Do plants have mouths and teeth to eat? Stomachs and intestines to digest?” (No, plants do not eat. Carnivorous plants [the exception] kill and absorb insects because they live in an area where the soils are nitrogen poor. However, it would probably be confusing to discuss this un-less students bring this up. ) It is important for students to understand that plants do not eat in the manner that animals do.Explain that the term “plant food” actually refers to fertilizer. Just as animals speak 3. in cartoons, we know that they do not in real life. It is the same with the term plant food. Plants do need nutrients, but they make their own food, they don’t eat it. Ask the students to define fertilizer. (Their answers may or may not be correct.)Ask, “Can you absorb water, minerals, carbon dioxide, nitrogen, phosphorous, and 4. potassium and produce your own food?” (No.) Explain that plants produce food, and you consume food. Plants are producers and animals are consumers.
Exp1oration — P1ant Nutrients – Nitrogen, Phosphorous, PotassiumObjectives: Describe the difference between soluble and insoluble. List the three macronu-trients that plants need and describe their sources.
On your student handout, find a food that has wheat as the first ingredient listed. 1 . Note that this food contains protein as a nutrient. Explain that a key component of protein is nitrogen. Nitrogen makes up 16 percent of the protein in our bodies. In order for wheat to make protein, the plant has to take in nitrogen.
Ask, “Where does the nitrogen come from?”a. Explain that the air is 78 percent nitrogen but most plants such as wheat can-b. not use the nitrogen in air. It is in a form that the plant cannot use. It has to be converted into either nitrate or ammonium that the plant can take in and use to make protein. This is naturally done by bacteria in aquatic environments, plants that are called legumes (beans, peas, alfalfa, clover, trefoil, etc.) or by lightening. Legumes are special plants which have nodules on their roots that contain bacteria that fix the nitrogen in the air into a form that the plants need. These plants use that nitrogen for their own use. When these plants die and decompose, the nitrogen they contain slowly becomes available to other plants in the soil. Or, if animals such as cattle eat these plants, much of that protein is converted into meat or milk, but some is excreted in manure and urine. That manure can be used later to fertilize crops. People have discovered another way to obtain the nitrogen that plants need. Using methane and nitrogen in the air, humans produce a commercial fertilizer called nitrogen fertilizer. This discov-ery has allowed us to grow more productive crops and feed more people.Explain that nitrogen is a renewable resource.c.
Instruct students to look again at wheat on their charts. Ask, “Does wheat also 2. contain phosphorous and potassium? (Yes, although many wheat foods may not list phosphorous as an ingredient. If that is the case, have the students identify another food that contains phosphorous.) Where do these nutrients come from?”Explain that both phosphorous and potassium are mined and originally come from an-3. cient seas. Phosphorous is mined as phosphate from deposits of fossilized sea creatures. Phosphorous is mined in Florida. (See “Phosphate: The Nutrient from Florida” found on the FAITC website at www.faitc.org/teachers.) Both phosphorous and potassium are non-renewable resources as currently used but can be recycled by composting.
Every bag of ferti1izer
has a ratio 1isted in
numbers to represent
the percentages of
compounds representing
N-P-K (Nitrogen,
Phosphorous and
Potassium).
“Activity: Feed Me — Nutritiona1
Bui1ding B1ocks”
Gardening for Grades: Chapter 3, Curricu1um Connections — Activity: Feed Me — Nutritiona1 Bui1ding B1ocks101
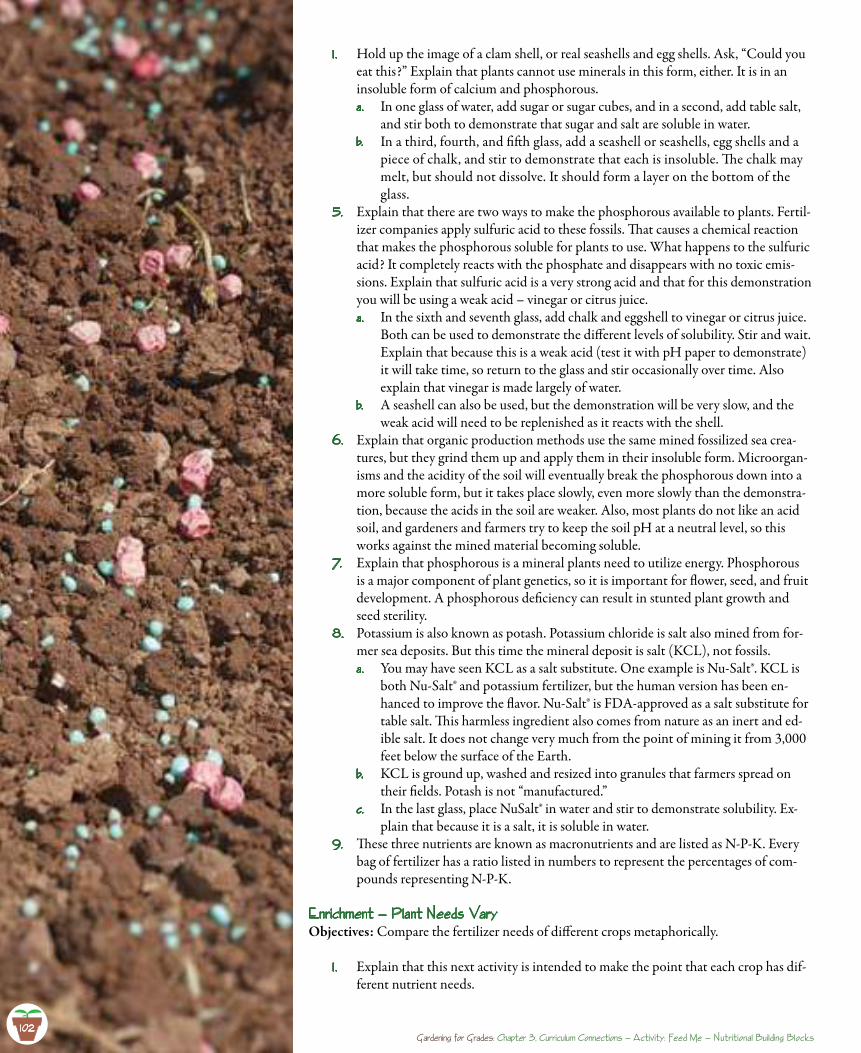
102
Hold up the image of a clam shell, or real seashells and egg shells. Ask, “Could you 1 . eat this?” Explain that plants cannot use minerals in this form, either. It is in an insoluble form of calcium and phosphorous.
In one glass of water, add sugar or sugar cubes, and in a second, add table salt, a. and stir both to demonstrate that sugar and salt are soluble in water.In a third, fourth, and fifth glass, add a seashell or seashells, egg shells and a b. piece of chalk, and stir to demonstrate that each is insoluble. The chalk may melt, but should not dissolve. It should form a layer on the bottom of the glass.
Explain that there are two ways to make the phosphorous available to plants. Fertil-5. izer companies apply sulfuric acid to these fossils. That causes a chemical reaction that makes the phosphorous soluble for plants to use. What happens to the sulfuric acid? It completely reacts with the phosphate and disappears with no toxic emis-sions. Explain that sulfuric acid is a very strong acid and that for this demonstration you will be using a weak acid – vinegar or citrus juice.
In the sixth and seventh glass, add chalk and eggshell to vinegar or citrus juice. a. Both can be used to demonstrate the different levels of solubility. Stir and wait. Explain that because this is a weak acid (test it with pH paper to demonstrate) it will take time, so return to the glass and stir occasionally over time. Also explain that vinegar is made largely of water.A seashell can also be used, but the demonstration will be very slow, and the b. weak acid will need to be replenished as it reacts with the shell.
Explain that organic production methods use the same mined fossilized sea crea-6. tures, but they grind them up and apply them in their insoluble form. Microorgan-isms and the acidity of the soil will eventually break the phosphorous down into a more soluble form, but it takes place slowly, even more slowly than the demonstra-tion, because the acids in the soil are weaker. Also, most plants do not like an acid soil, and gardeners and farmers try to keep the soil pH at a neutral level, so this works against the mined material becoming soluble.Explain that phosphorous is a mineral plants need to utilize energy. Phosphorous 7. is a major component of plant genetics, so it is important for flower, seed, and fruit development. A phosphorous deficiency can result in stunted plant growth and seed sterility.Potassium is also known as potash. Potassium chloride is salt also mined from for-8. mer sea deposits. But this time the mineral deposit is salt (KCL), not fossils.
You may have seen KCL as a salt substitute. One example is Nu-Salt®. KCL is a. both Nu-Salt® and potassium fertilizer, but the human version has been en-hanced to improve the flavor. Nu-Salt® is FDA-approved as a salt substitute for table salt. This harmless ingredient also comes from nature as an inert and ed-ible salt. It does not change very much from the point of mining it from 3,000 feet below the surface of the Earth.KCL is ground up, washed and resized into granules that farmers spread on b. their fields. Potash is not “manufactured.”In the last glass, place NuSalt® in water and stir to demonstrate solubility. Ex-c. plain that because it is a salt, it is soluble in water.
These three nutrients are known as macronutrients and are listed as N-P-K. Every 9. bag of fertilizer has a ratio listed in numbers to represent the percentages of com-pounds representing N-P-K.
Enrichment — P1ant Needs Vary Objectives: Compare the fertilizer needs of different crops metaphorically.
Explain that this next activity is intended to make the point that each crop has dif-1 . ferent nutrient needs.
Gardening for Grades: Chapter 3, Curricu1um Connections — Activity: Feed Me — Nutritiona1 Bui1ding B1ocks102
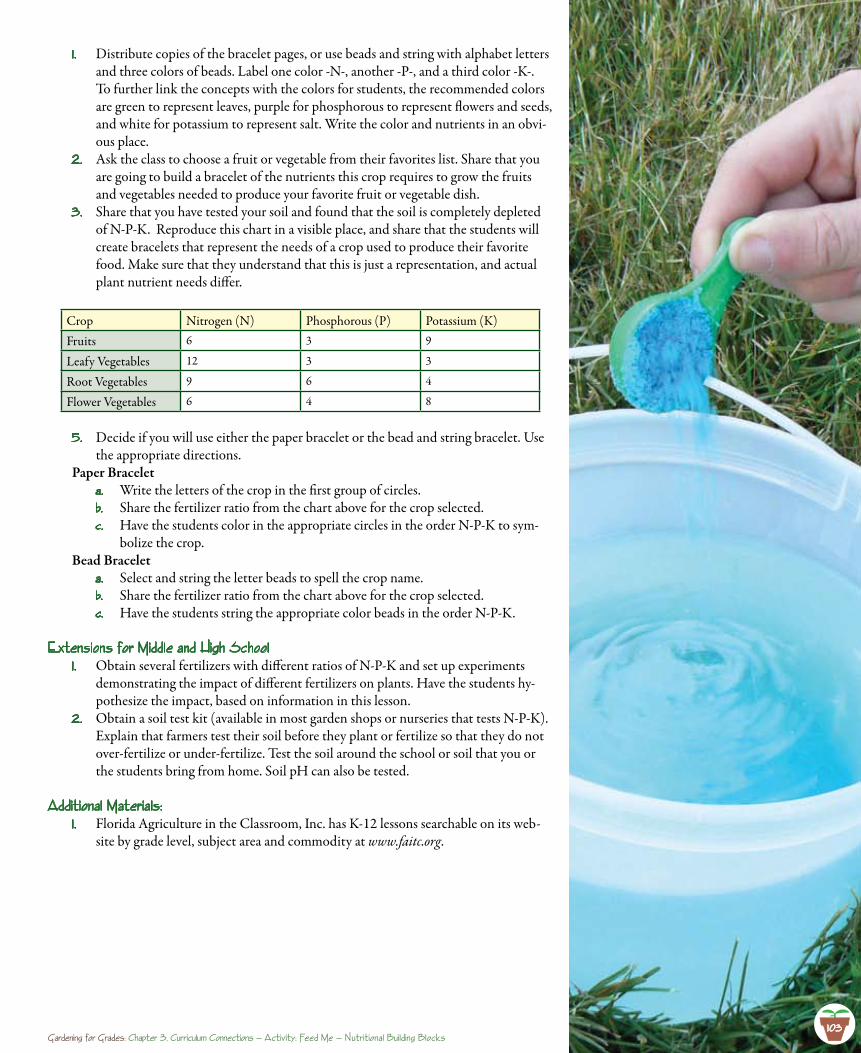
Distribute copies of the bracelet pages, or use beads and string with alphabet letters 1 . and three colors of beads. Label one color -N-, another -P-, and a third color -K-. To further link the concepts with the colors for students, the recommended colors are green to represent leaves, purple for phosphorous to represent flowers and seeds, and white for potassium to represent salt. Write the color and nutrients in an obvi-ous place.Ask the class to choose a fruit or vegetable from their favorites list. Share that you 2. are going to build a bracelet of the nutrients this crop requires to grow the fruits and vegetables needed to produce your favorite fruit or vegetable dish.Share that you have tested your soil and found that the soil is completely depleted 3. of N-P-K. Reproduce this chart in a visible place, and share that the students will create bracelets that represent the needs of a crop used to produce their favorite food. Make sure that they understand that this is just a representation, and actual plant nutrient needs differ.
Crop Nitrogen (N) Phosphorous (P) Potassium (K)Fruits 6 3 9
Leafy Vegetables 12 3 3
Root Vegetables 9 6 4
Flower Vegetables 6 4 8
Decide if you will use either the paper bracelet or the bead and string bracelet. Use 5. the appropriate directions.
Paper Bracelet Write the letters of the crop in the first group of circles. a. Share the fertilizer ratio from the chart above for the crop selected.b. Have the students color in the appropriate circles in the order N-P-K to sym-c. bolize the crop.
Bead Bracelet Select and string the letter beads to spell the crop name.a. Share the fertilizer ratio from the chart above for the crop selected.b. Have the students string the appropriate color beads in the order N-P-K.c.
Extensions for Midd1e and high Schoo1Obtain several fertilizers with different ratios of N-P-K and set up experiments 1 . demonstrating the impact of different fertilizers on plants. Have the students hy-pothesize the impact, based on information in this lesson.Obtain a soil test kit (available in most garden shops or nurseries that tests N-P-K). 2. Explain that farmers test their soil before they plant or fertilize so that they do not over-fertilize or under-fertilize. Test the soil around the school or soil that you or the students bring from home. Soil pH can also be tested.
Additiona1 Materia1s: Florida Agriculture in the Classroom, Inc. has K-12 lessons searchable on its web-1 . site by grade level, subject area and commodity at www.faitc.org.
Gardening for Grades: Chapter 3, Curricu1um Connections — Activity: Feed Me — Nutritiona1 Bui1ding B1ocks103
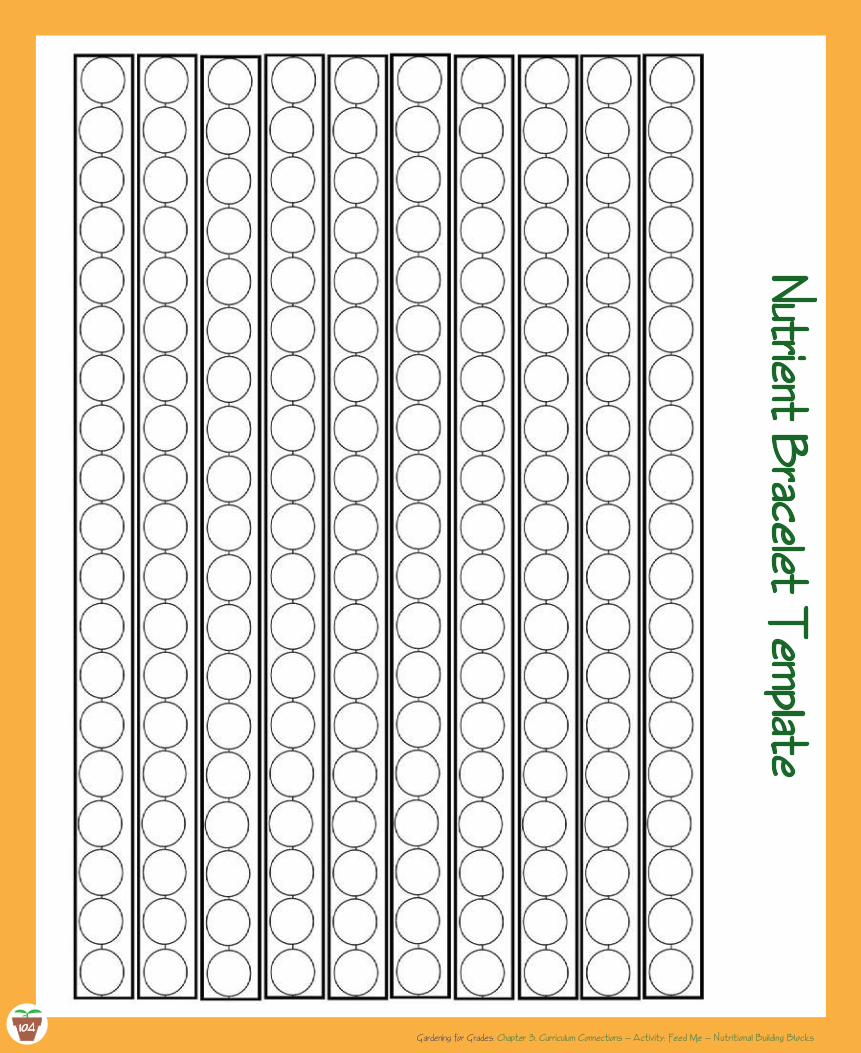
104
Nutrient Brace1et T
emp1ate
Gardening for Grades: Chapter 3, Curricu1um Connections — Activity: Feed Me — Nutritiona1 Bui1ding B1ocks104
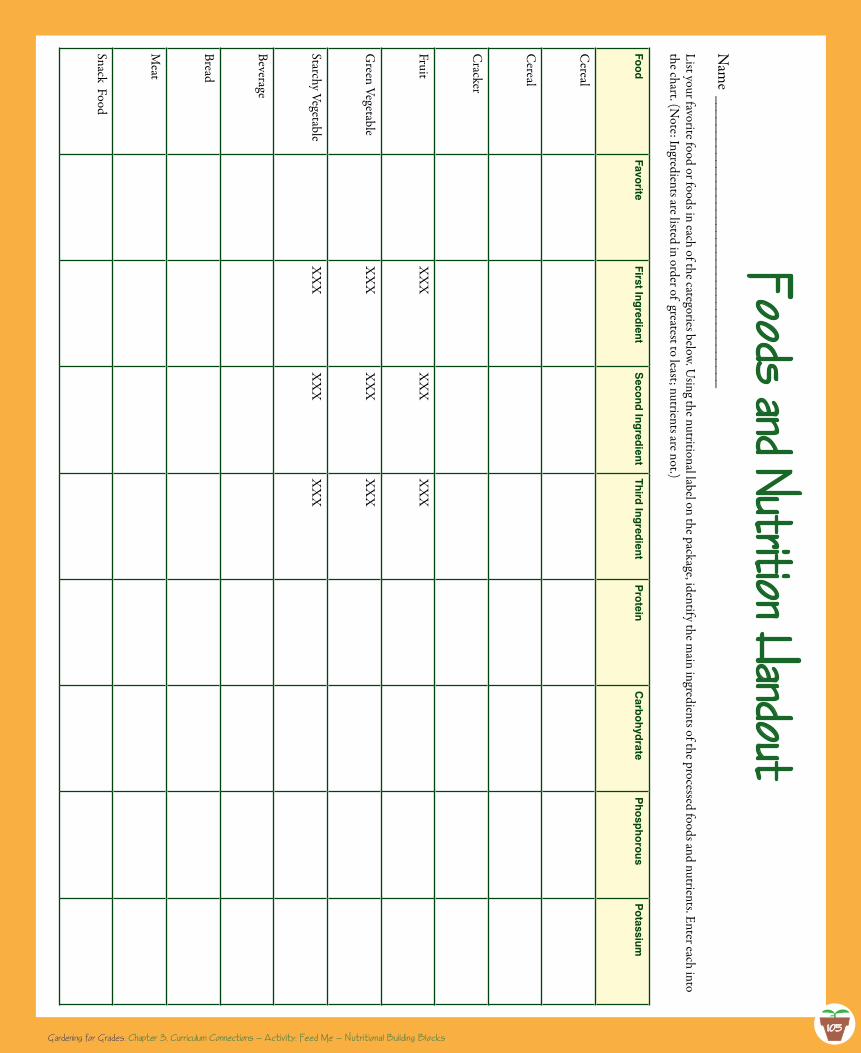
105
Foods and Nutrition handout
Nam
e _________________________________________ List your favorite food or foods in each of the categories below. U
sing the nutritional label on the package, identify the main ingredients of the processed foods and nutrients. Enter each into
the chart. (Note: Ingredients are listed in order of greatest to least; nutrients are not.)
Foo
dFavo
riteFirst Ing
redient
Seco
nd Ing
redient
Third
Ingred
ientP
rotein
Carb
oh
ydrate
Ph
osp
ho
rous
Po
tassium
Cereal
Cereal
Cracker
FruitX
XX
XX
XX
XX
Green Vegetable
XX
XX
XX
XX
X
Starchy VegetableX
XX
XX
XX
XX
Beverage
Bread
Meat
Snack Food
Gardening for Grades: Chapter 3, Curricu1um Connections — Activity: Feed Me — Nutritiona1 Bui1ding B1ocks105
106
Feed Me — Nutritiona1 Bui1ding B1ocks Samp1e Pre-Post Assessment
As plants undergo photosynthesis, they need nutrients in addition to carbon, hydrogen, and 1.oxygen. Why?
What does N – P – K stand for?2.Nurturing – Parenting – Knowinga.Nitrogen – Potassium – Kryptoniteb.Nitrogen – Phosphorous – Potassiumc.Nitrogen – Potassium – Phosphorousd.
N – P – K will be listed on a fertilizer bag as a group of numbers. What do these numbers repre-3.sent?
Why do farmers and gardeners need to fertilize their soil?4.
All grains, fruits and vegetables have the same nutrient needs. True False5.
Gardening for Grades: Chapter 3, Curricu1um Connections — Activity: Feed Me — Nutritiona1 Bui1ding B1ocks
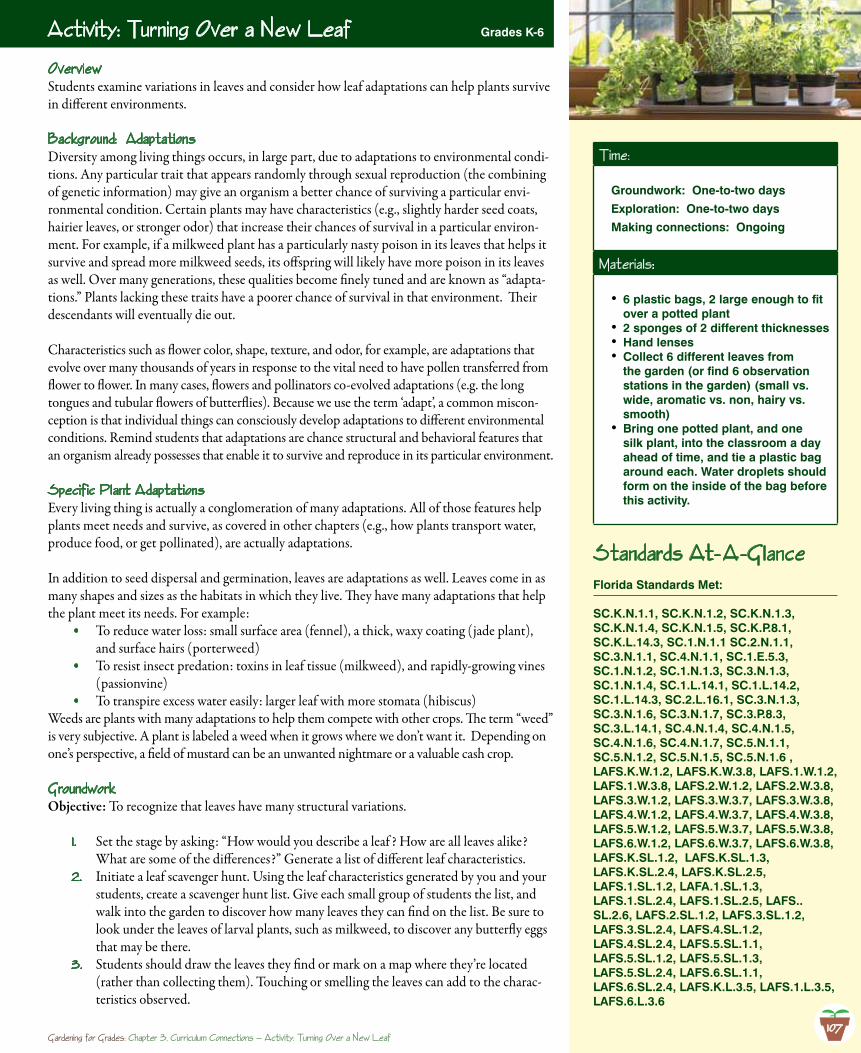
OverviewStudents examine variations in leaves and consider how leaf adaptations can help plants survive in different environments.
Background: AdaptationsDiversity among living things occurs, in large part, due to adaptations to environmental condi-tions. Any particular trait that appears randomly through sexual reproduction (the combining of genetic information) may give an organism a better chance of surviving a particular envi-ronmental condition. Certain plants may have characteristics (e.g., slightly harder seed coats, hairier leaves, or stronger odor) that increase their chances of survival in a particular environ-ment. For example, if a milkweed plant has a particularly nasty poison in its leaves that helps it survive and spread more milkweed seeds, its offspring will likely have more poison in its leaves as well. Over many generations, these qualities become finely tuned and are known as “adapta-tions.” Plants lacking these traits have a poorer chance of survival in that environment. Their descendants will eventually die out.
Characteristics such as flower color, shape, texture, and odor, for example, are adaptations that evolve over many thousands of years in response to the vital need to have pollen transferred from flower to flower. In many cases, flowers and pollinators co-evolved adaptations (e.g. the long tongues and tubular flowers of butterflies). Because we use the term ‘adapt’, a common miscon-ception is that individual things can consciously develop adaptations to different environmental conditions. Remind students that adaptations are chance structural and behavioral features that an organism already possesses that enable it to survive and reproduce in its particular environment.
Specif ic P1ant AdaptationsEvery living thing is actually a conglomeration of many adaptations. All of those features help plants meet needs and survive, as covered in other chapters (e.g., how plants transport water, produce food, or get pollinated), are actually adaptations.
In addition to seed dispersal and germination, leaves are adaptations as well. Leaves come in as many shapes and sizes as the habitats in which they live. They have many adaptations that help the plant meet its needs. For example:
To reduce water loss: small surface area (fennel), a thick, waxy coating (jade plant), •and surface hairs (porterweed) To resist insect predation: toxins in leaf tissue (milkweed), and rapidly-growing vines •(passionvine)To transpire excess water easily: larger leaf with more stomata (hibiscus)•
Weeds are plants with many adaptations to help them compete with other crops. The term “weed” is very subjective. A plant is labeled a weed when it grows where we don’t want it. Depending on one’s perspective, a field of mustard can be an unwanted nightmare or a valuable cash crop.
GroundworkObjective: To recognize that leaves have many structural variations.
Set the stage by asking: “How would you describe a leaf ? How are all leaves alike? 1 . What are some of the differences?” Generate a list of different leaf characteristics.Initiate a leaf scavenger hunt. Using the leaf characteristics generated by you and your 2. students, create a scavenger hunt list. Give each small group of students the list, and walk into the garden to discover how many leaves they can find on the list. Be sure to look under the leaves of larval plants, such as milkweed, to discover any butterfly eggs that may be there.Students should draw the leaves they find or mark on a map where they’re located 3. (rather than collecting them). Touching or smelling the leaves can add to the charac-teristics observed.
Activity: Turning Over a New Leaf Grades K-6
Time:
Groundwork: One-to-two days
Exploration: One-to-two days
Making connections: Ongoing
Materia1s:
6 plastic bags, 2 large enough to fit •over a potted plant2 sponges of 2 different thicknesses•Hand lenses•Collect 6 different leaves from •the garden (or find 6 observation stations in the garden) (small vs. wide, aromatic vs. non, hairy vs. smooth)Bring one potted plant, and one •silk plant, into the classroom a day ahead of time, and tie a plastic bag around each. Water droplets should form on the inside of the bag before this activity.
Standards At-A -G1anceFlorida Standards Met:
SC.K.N.1.1, SC.K.N.1.2, SC.K.N.1.3, SC.K.N.1.4, SC.K.N.1.5, SC.K.P.8.1, SC.K.L.14.3, SC.1.N.1.1 SC.2.N.1.1, SC.3.N.1.1, SC.4.N.1.1, SC.1.E.5.3, SC.1.N.1.2, SC.1.N.1.3, SC.3.N.1.3, SC.1.N.1.4, SC.1.L.14.1, SC.1.L.14.2, SC.1.L.14.3, SC.2.L.16.1, SC.3.N.1.3, SC.3.N.1.6, SC.3.N.1.7, SC.3.P.8.3, SC.3.L.14.1, SC.4.N.1.4, SC.4.N.1.5, SC.4.N.1.6, SC.4.N.1.7, SC.5.N.1.1, SC.5.N.1.2, SC.5.N.1.5, SC.5.N.1.6 , LAFS.K.W.1.2, LAFS.K.W.3.8, LAFS.1.W.1.2, LAFS.1.W.3.8, LAFS.2.W.1.2, LAFS.2.W.3.8, LAFS.3.W.1.2, LAFS.3.W.3.7, LAFS.3.W.3.8, LAFS.4.W.1.2, LAFS.4.W.3.7, LAFS.4.W.3.8, LAFS.5.W.1.2, LAFS.5.W.3.7, LAFS.5.W.3.8, LAFS.6.W.1.2, LAFS.6.W.3.7, LAFS.6.W.3.8, LAFS.K.SL.1.2, LAFS.K.SL.1.3, LAFS.K.SL.2.4, LAFS.K.SL.2.5, LAFS.1.SL.1.2, LAFA.1.SL.1.3, LAFS.1.SL.2.4, LAFS.1.SL.2.5, LAFS..SL.2.6, LAFS.2.SL.1.2, LAFS.3.SL.1.2, LAFS.3.SL.2.4, LAFS.4.SL.1.2, LAFS.4.SL.2.4, LAFS.5.SL.1.1, LAFS.5.SL.1.2, LAFS.5.SL.1.3, LAFS.5.SL.2.4, LAFS.6.SL.1.1, LAFS.6.SL.2.4, LAFS.K.L.3.5, LAFS.1.L.3.5, LAFS.6.L.3.6
Gardening for Grades: Chapter 3, Curricu1um Connections — Activity: Turning Over a New Leaf107
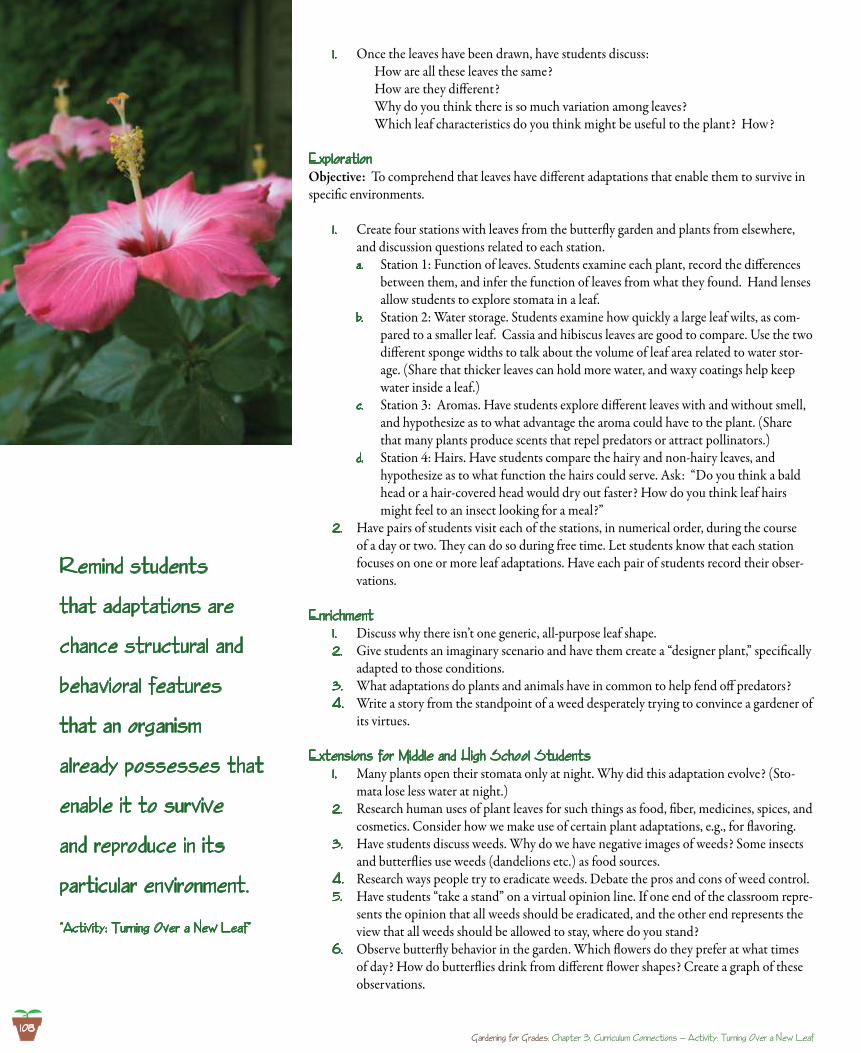
108
Once the leaves have been drawn, have students discuss: 1 . How are all these leaves the same? How are they different? Why do you think there is so much variation among leaves? Which leaf characteristics do you think might be useful to the plant? How?
Exp1orationObjective: To comprehend that leaves have different adaptations that enable them to survive in specific environments.
Create four stations with leaves from the butterfly garden and plants from elsewhere, 1 . and discussion questions related to each station.
Station 1: Function of leaves. Students examine each plant, record the differences a. between them, and infer the function of leaves from what they found. Hand lenses allow students to explore stomata in a leaf.Station 2: Water storage. Students examine how quickly a large leaf wilts, as com-b. pared to a smaller leaf. Cassia and hibiscus leaves are good to compare. Use the two different sponge widths to talk about the volume of leaf area related to water stor-age. (Share that thicker leaves can hold more water, and waxy coatings help keep water inside a leaf.)Station 3: Aromas. Have students explore different leaves with and without smell, c. and hypothesize as to what advantage the aroma could have to the plant. (Share that many plants produce scents that repel predators or attract pollinators.)Station 4: Hairs. Have students compare the hairy and non-hairy leaves, and d. hypothesize as to what function the hairs could serve. Ask: “Do you think a bald head or a hair-covered head would dry out faster? How do you think leaf hairs might feel to an insect looking for a meal?”
Have pairs of students visit each of the stations, in numerical order, during the course 2. of a day or two. They can do so during free time. Let students know that each station focuses on one or more leaf adaptations. Have each pair of students record their obser-vations.
EnrichmentDiscuss why there isn’t one generic, all-purpose leaf shape.1 . Give students an imaginary scenario and have them create a “designer plant,” specifically 2. adapted to those conditions.What adaptations do plants and animals have in common to help fend off predators?3. Write a story from the standpoint of a weed desperately trying to convince a gardener of 4. its virtues.
Extensions for Midd1e and high Schoo1 StudentsMany plants open their stomata only at night. Why did this adaptation evolve? (Sto-1 . mata lose less water at night.)Research human uses of plant leaves for such things as food, fiber, medicines, spices, and 2. cosmetics. Consider how we make use of certain plant adaptations, e.g., for flavoring.Have students discuss weeds. Why do we have negative images of weeds? Some insects 3. and butterflies use weeds (dandelions etc.) as food sources.Research ways people try to eradicate weeds. Debate the pros and cons of weed control.4. Have students “take a stand” on a virtual opinion line. If one end of the classroom repre-5. sents the opinion that all weeds should be eradicated, and the other end represents the view that all weeds should be allowed to stay, where do you stand?Observe butterfly behavior in the garden. Which flowers do they prefer at what times 6. of day? How do butterflies drink from different flower shapes? Create a graph of these observations.
Remind students
that adaptations are
chance structura1 and
behaviora1 features
that an organism
a1ready possesses that
enab1e it to survive
and reproduce in its
particu1ar environment.
“Activity: Turning Over a New Leaf”
Gardening for Grades: Chapter 3, Curricu1um Connections — Activity: Turning Over a New Leaf
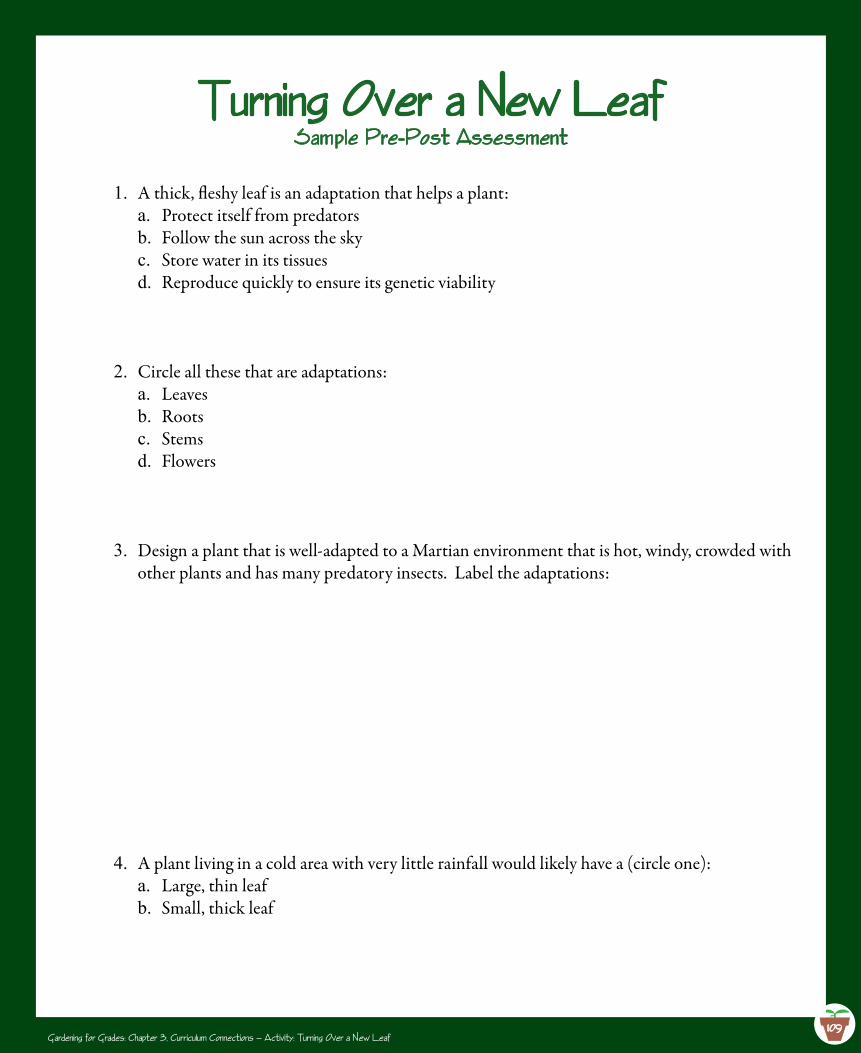
109
Turning Over a New LeafSamp1e Pre-Post Assessment
A thick, fleshy leaf is an adaptation that helps a plant:1.Protect itself from predatorsa.Follow the sun across the skyb.Store water in its tissuesc.Reproduce quickly to ensure its genetic viabilityd.
Circle all these that are adaptations:2.Leavesa.Rootsb.Stemsc.Flowersd.
Design a plant that is well-adapted to a Martian environment that is hot, windy, crowded with 3.other plants and has many predatory insects. Label the adaptations:
A plant living in a cold area with very little rainfall would likely have a (circle one): 4.Large, thin leafa.Small, thick leafb.
Gardening for Grades: Chapter 3, Curricu1um Connections — Activity: Turning Over a New Leaf
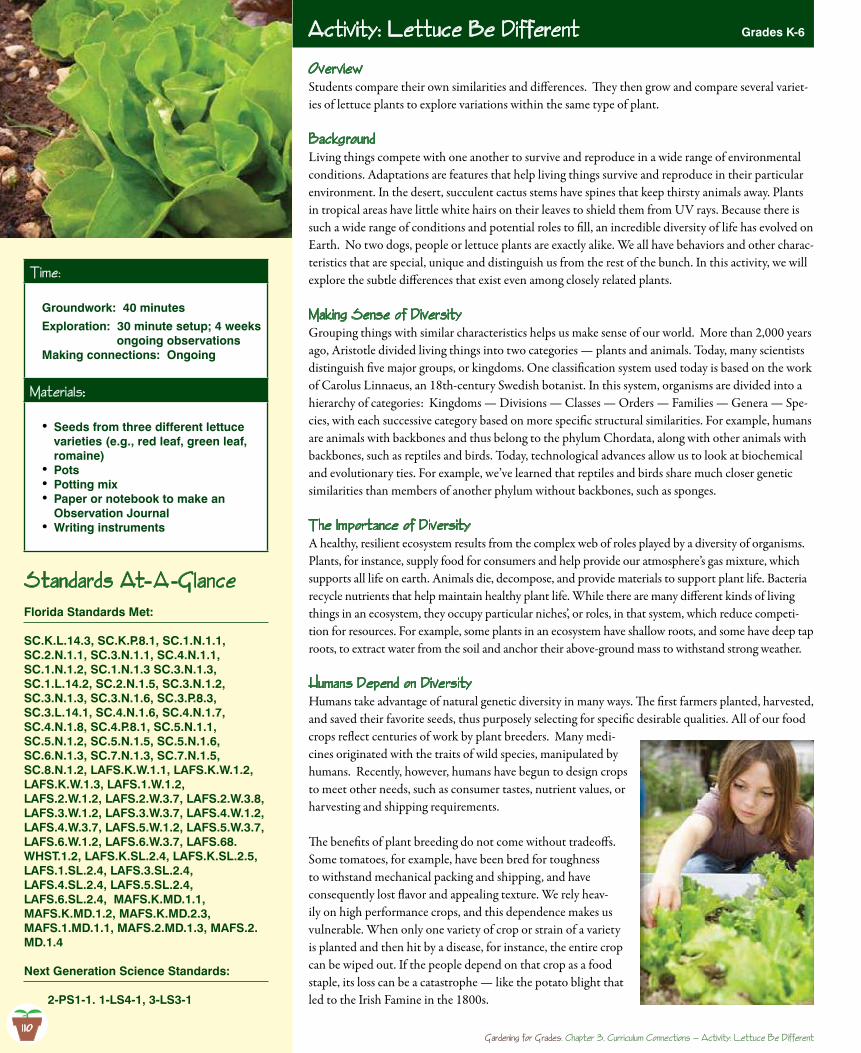
1 10
OverviewStudents compare their own similarities and differences. They then grow and compare several variet-ies of lettuce plants to explore variations within the same type of plant.
BackgroundLiving things compete with one another to survive and reproduce in a wide range of environmental conditions. Adaptations are features that help living things survive and reproduce in their particular environment. In the desert, succulent cactus stems have spines that keep thirsty animals away. Plants in tropical areas have little white hairs on their leaves to shield them from UV rays. Because there is such a wide range of conditions and potential roles to fill, an incredible diversity of life has evolved on Earth. No two dogs, people or lettuce plants are exactly alike. We all have behaviors and other charac-teristics that are special, unique and distinguish us from the rest of the bunch. In this activity, we will explore the subtle differences that exist even among closely related plants.
Making Sense of DiversityGrouping things with similar characteristics helps us make sense of our world. More than 2,000 years ago, Aristotle divided living things into two categories — plants and animals. Today, many scientists distinguish five major groups, or kingdoms. One classification system used today is based on the work of Carolus Linnaeus, an 18th-century Swedish botanist. In this system, organisms are divided into a hierarchy of categories: Kingdoms — Divisions — Classes — Orders — Families — Genera — Spe-cies, with each successive category based on more specific structural similarities. For example, humans are animals with backbones and thus belong to the phylum Chordata, along with other animals with backbones, such as reptiles and birds. Today, technological advances allow us to look at biochemical and evolutionary ties. For example, we’ve learned that reptiles and birds share much closer genetic similarities than members of another phylum without backbones, such as sponges.
The Importance of DiversityA healthy, resilient ecosystem results from the complex web of roles played by a diversity of organisms. Plants, for instance, supply food for consumers and help provide our atmosphere’s gas mixture, which supports all life on earth. Animals die, decompose, and provide materials to support plant life. Bacteria recycle nutrients that help maintain healthy plant life. While there are many different kinds of living things in an ecosystem, they occupy particular niches’, or roles, in that system, which reduce competi-tion for resources. For example, some plants in an ecosystem have shallow roots, and some have deep tap roots, to extract water from the soil and anchor their above-ground mass to withstand strong weather.
humans Depend on DiversityHumans take advantage of natural genetic diversity in many ways. The first farmers planted, harvested, and saved their favorite seeds, thus purposely selecting for specific desirable qualities. All of our food crops reflect centuries of work by plant breeders. Many medi-cines originated with the traits of wild species, manipulated by humans. Recently, however, humans have begun to design crops to meet other needs, such as consumer tastes, nutrient values, or harvesting and shipping requirements.
The benefits of plant breeding do not come without tradeoffs. Some tomatoes, for example, have been bred for toughness to withstand mechanical packing and shipping, and have consequently lost flavor and appealing texture. We rely heav-ily on high performance crops, and this dependence makes us vulnerable. When only one variety of crop or strain of a variety is planted and then hit by a disease, for instance, the entire crop can be wiped out. If the people depend on that crop as a food staple, its loss can be a catastrophe — like the potato blight that led to the Irish Famine in the 1800s.
Activity: Lettuce Be Different Grades K-6
Time:
Groundwork: 40 minutes
Exploration: 30 minute setup; 4 weeks ongoing observationsMaking connections: Ongoing
Materia1s:
Seeds from three different lettuce •varieties (e.g., red leaf, green leaf, romaine)Pots•Potting mix•Paper or notebook to make an •Observation JournalWriting instruments•
Standards At-A -G1anceFlorida Standards Met:
SC.K.L.14.3, SC.K.P.8.1, SC.1.N.1.1, SC.2.N.1.1, SC.3.N.1.1, SC.4.N.1.1, SC.1.N.1.2, SC.1.N.1.3 SC.3.N.1.3, SC.1.L.14.2, SC.2.N.1.5, SC.3.N.1.2, SC.3.N.1.3, SC.3.N.1.6, SC.3.P.8.3, SC.3.L.14.1, SC.4.N.1.6, SC.4.N.1.7, SC.4.N.1.8, SC.4.P.8.1, SC.5.N.1.1, SC.5.N.1.2, SC.5.N.1.5, SC.5.N.1.6, SC.6.N.1.3, SC.7.N.1.3, SC.7.N.1.5, SC.8.N.1.2, LAFS.K.W.1.1, LAFS.K.W.1.2, LAFS.K.W.1.3, LAFS.1.W.1.2, LAFS.2.W.1.2, LAFS.2.W.3.7, LAFS.2.W.3.8, LAFS.3.W.1.2, LAFS.3.W.3.7, LAFS.4.W.1.2, LAFS.4.W.3.7, LAFS.5.W.1.2, LAFS.5.W.3.7, LAFS.6.W.1.2, LAFS.6.W.3.7, LAFS.68.WHST.1.2, LAFS.K.SL.2.4, LAFS.K.SL.2.5, LAFS.1.SL.2.4, LAFS.3.SL.2.4, LAFS.4.SL.2.4, LAFS.5.SL.2.4, LAFS.6.SL.2.4, MAFS.K.MD.1.1, MAFS.K.MD.1.2, MAFS.K.MD.2.3, MAFS.1.MD.1.1, MAFS.2.MD.1.3, MAFS.2. MD.1.4
Next Generation Science Standards:
2-PS1-1. 1-LS4-1, 3-LS3-1
1 10Gardening for Grades: Chapter 3, Curricu1um Connections — Activity: Lettuce Be Different
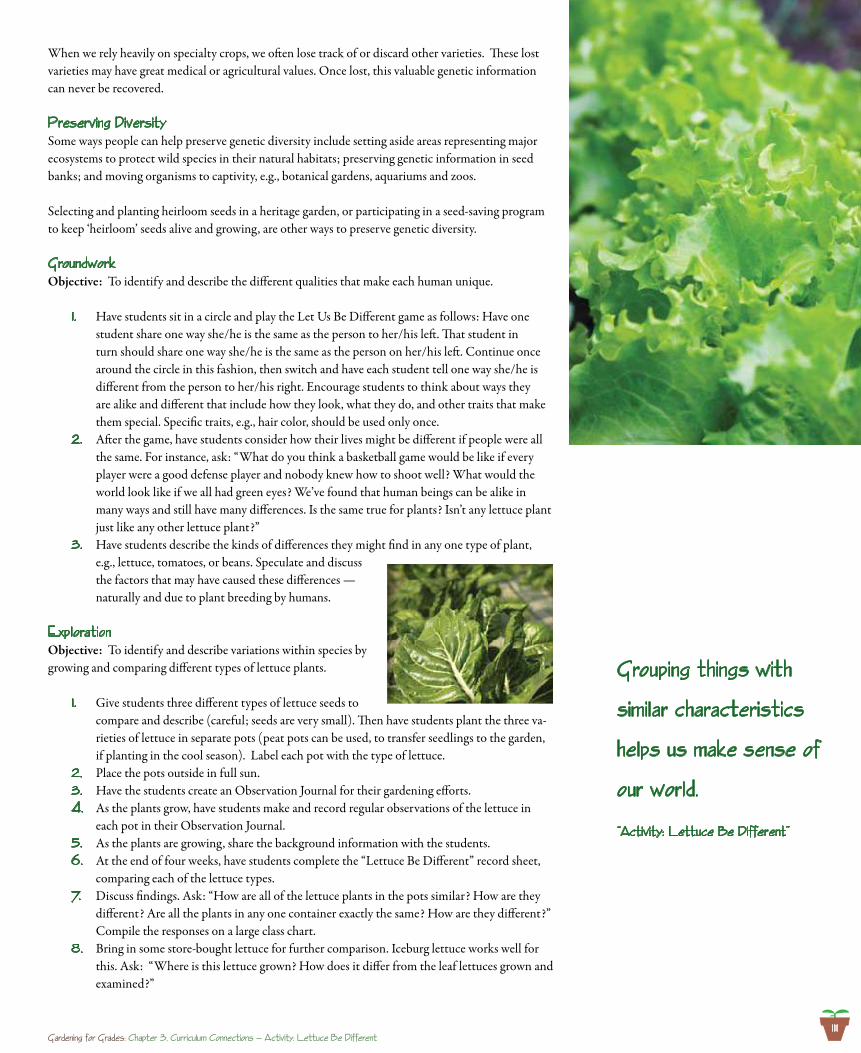
1 1 1
When we rely heavily on specialty crops, we often lose track of or discard other varieties. These lost varieties may have great medical or agricultural values. Once lost, this valuable genetic information can never be recovered.
Preserving DiversitySome ways people can help preserve genetic diversity include setting aside areas representing major ecosystems to protect wild species in their natural habitats; preserving genetic information in seed banks; and moving organisms to captivity, e.g., botanical gardens, aquariums and zoos.
Selecting and planting heirloom seeds in a heritage garden, or participating in a seed-saving program to keep ‘heirloom’ seeds alive and growing, are other ways to preserve genetic diversity.
GroundworkObjective: To identify and describe the different qualities that make each human unique.
Have students sit in a circle and play the Let Us Be Different game as follows: Have one 1 . student share one way she/he is the same as the person to her/his left. That student in turn should share one way she/he is the same as the person on her/his left. Continue once around the circle in this fashion, then switch and have each student tell one way she/he is different from the person to her/his right. Encourage students to think about ways they are alike and different that include how they look, what they do, and other traits that make them special. Specific traits, e.g., hair color, should be used only once.After the game, have students consider how their lives might be different if people were all 2. the same. For instance, ask: “What do you think a basketball game would be like if every player were a good defense player and nobody knew how to shoot well? What would the world look like if we all had green eyes? We’ve found that human beings can be alike in many ways and still have many differences. Is the same true for plants? Isn’t any lettuce plant just like any other lettuce plant?”Have students describe the kinds of differences they might find in any one type of plant, 3. e.g., lettuce, tomatoes, or beans. Speculate and discuss the factors that may have caused these differences — naturally and due to plant breeding by humans.
Exp1orationObjective: To identify and describe variations within species by growing and comparing different types of lettuce plants.
Give students three different types of lettuce seeds to 1 . compare and describe (careful; seeds are very small). Then have students plant the three va-rieties of lettuce in separate pots (peat pots can be used, to transfer seedlings to the garden, if planting in the cool season). Label each pot with the type of lettuce. Place the pots outside in full sun. 2. Have the students create an Observation Journal for their gardening efforts.3. As the plants grow, have students make and record regular observations of the lettuce in 4. each pot in their Observation Journal. As the plants are growing, share the background information with the students.5. At the end of four weeks, have students complete the “Lettuce Be Different” record sheet, 6. comparing each of the lettuce types.Discuss findings. Ask: “How are all of the lettuce plants in the pots similar? How are they 7. different? Are all the plants in any one container exactly the same? How are they different?” Compile the responses on a large class chart. Bring in some store-bought lettuce for further comparison. Iceburg lettuce works well for 8. this. Ask: “Where is this lettuce grown? How does it differ from the leaf lettuces grown and examined?”
Grouping things with
simi1ar characteristics
he1ps us make sense of
our wor1d.
“Activity: Lettuce Be Different”
Gardening for Grades: Chapter 3, Curricu1um Connections — Activity: Lettuce Be Different
1 12
EnrichmentWrite a haiku describing each type of lettuce.1 . Graph class responses to such questions as: Which lettuce is your favorite to look 2. at? Which lettuce tastes best? Which lettuce would you rather have in your salad? Which in your sandwich?Create a collage highlighting variations in one particular trait, e.g., different kind of 3. human noses, dog fur, apple varieties, or bird beaks.
Extensions for Midd1e and high Schoo1Harvest mature lettuce leaves from the soil surface and observe how each different 1 . lettuce type keeps growing. Record when it bolts (goes to seed).Have students speculate about plant breeding. Cross pollinate flowers, anticipate 2. results and grow seeds to determine genetic influences. Assess results compared to plans. Discuss challenges of plant breeding.Grow and compare different varieties of bean plants. Graph the class taste prefer-3. ences for pole versus bush bean, etc. Call several local grocery stores to discover how many different varieties of lettuce 4. they sell, and where each was grown. Graph results.Harvest the seed from a hybrid variety of plant (e.g. tomato) and grow these out to 5. fruit. How do the fruits resemble the parents and how are they different?Invite a professional plant breeder or hobby plant breeder to class to discuss their 6. work.
Additiona1 Materia1s: Florida Agriculture in the Classroom, Inc. has K-12 lessons searchable on its web-1 . site by grade level, subject area and commodity at www.faitc.org.Use the lesson “Banking on Seeds” from 2. Project Food, Land & People’s Resources for Learning. It can be obtained by attending a workshop.
A hea1thy, resi1ient
ecosystem resu1ts
from the comp1ex web
of ro1es p1ayed by a
diversity of organisms.
“Activity: Lettuce Be Different”
Gardening for Grades: Chapter 3, Curricu1um Connections — Activity: Lettuce Be Different
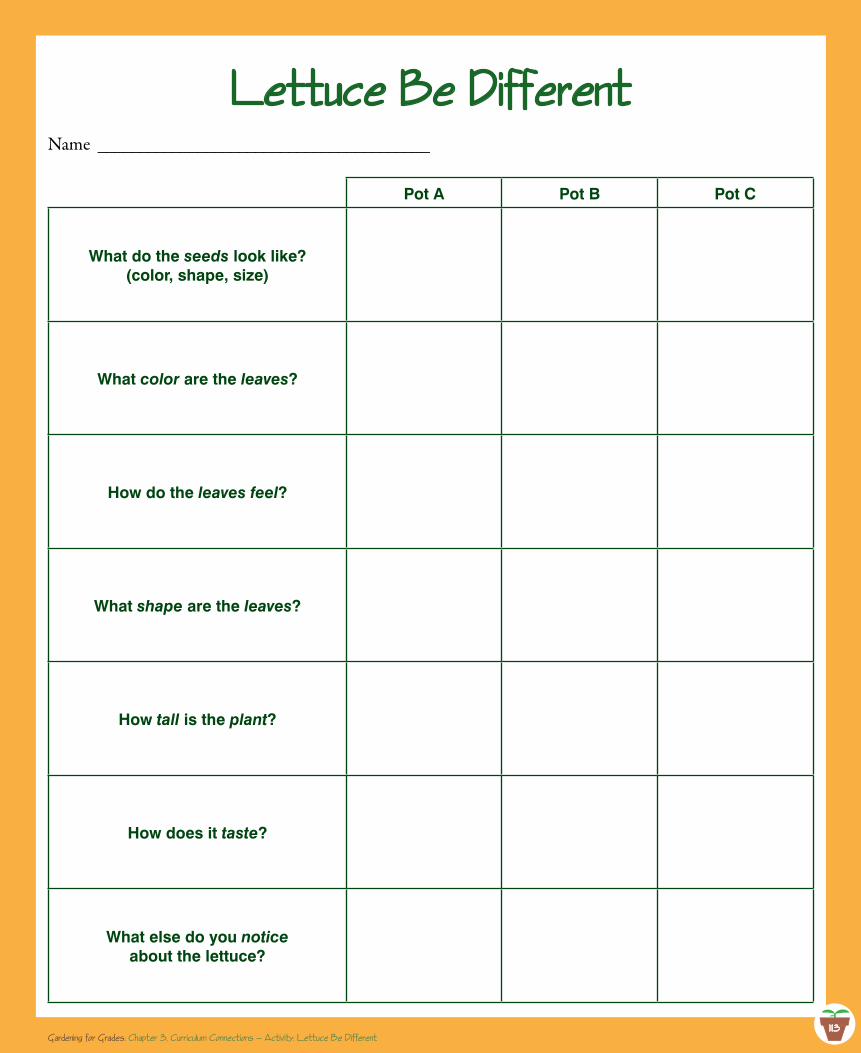
1 13
Lettuce Be DifferentName ________________________________________
Pot A Pot B Pot C
What do the seeds look like?(color, shape, size)
What color are the leaves?
How do the leaves feel?
What shape are the leaves?
How tall is the plant?
How does it taste?
What else do you noticeabout the lettuce?
1 13Gardening for Grades: Chapter 3, Curricu1um Connections — Activity: Lettuce Be Different
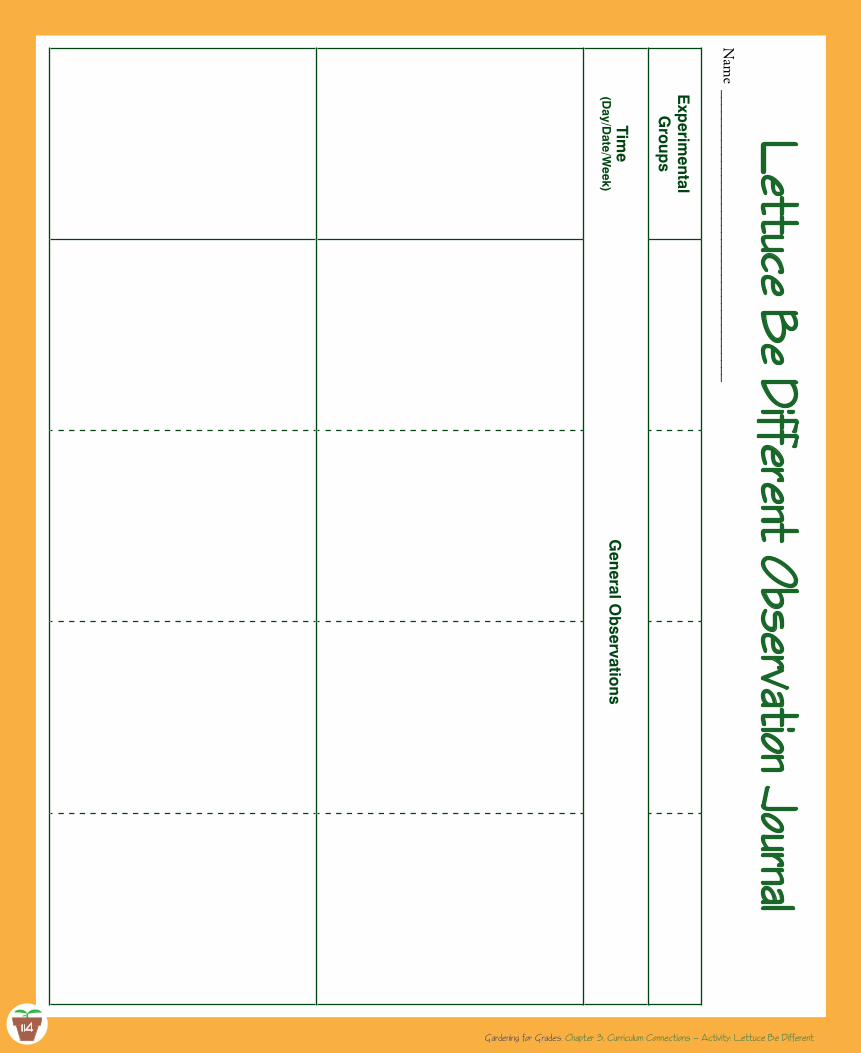
1 14
Lettuce B
e Different O
bservation Journa1N
ame _________________________________________
Exp
erimental
Gro
ups
Time
(Day/D
ate/Week)
General O
bservatio
ns
1 14Gardening for Grades: Chapter 3, Curricu1um Connections — Activity: Lettuce Be Different
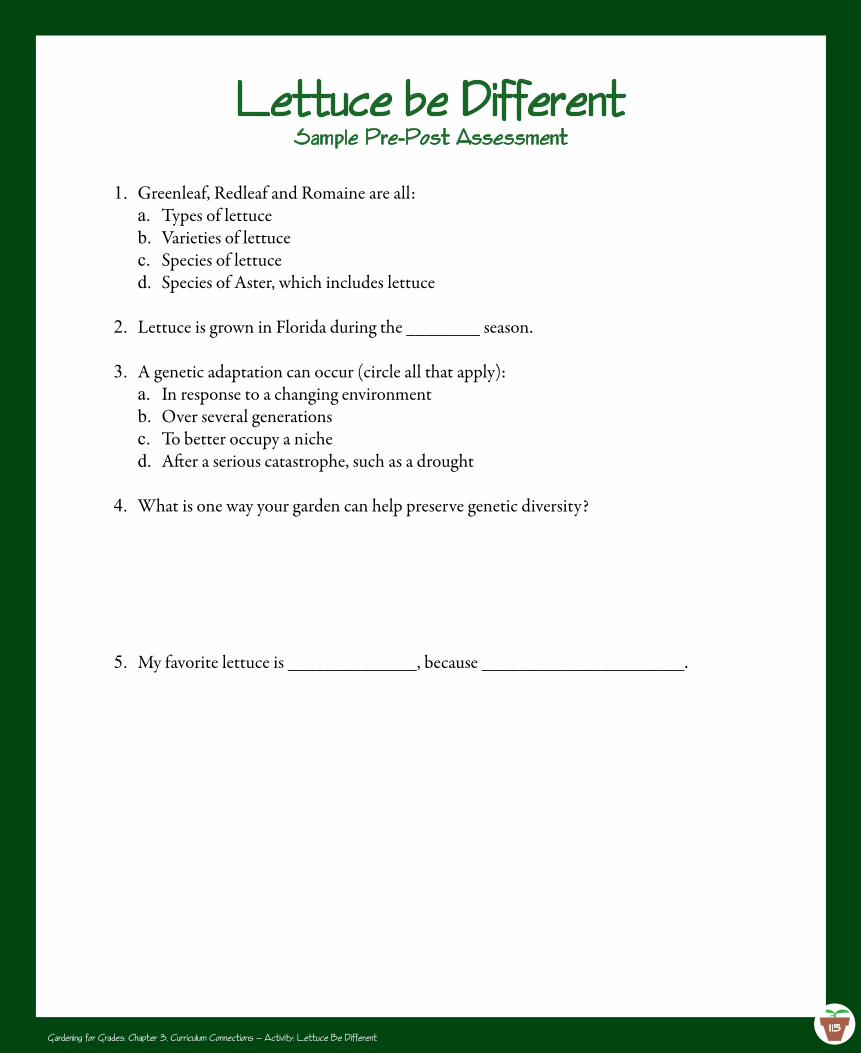
1 15
Lettuce be DifferentSamp1e Pre-Post Assessment
Greenleaf, Redleaf and Romaine are all:1.Types of lettucea.Varieties of lettuceb.Species of lettuce c.Species of Aster, which includes lettuced.
Lettuce is grown in Florida during the ________ season.2.
A genetic adaptation can occur (circle all that apply):3.In response to a changing environmenta.Over several generationsb.To better occupy a nichec.After a serious catastrophe, such as a droughtd.
What is one way your garden can help preserve genetic diversity?4.
My favorite lettuce is ______________, because ______________________.5.
Gardening for Grades: Chapter 3, Curricu1um Connections — Activity: Lettuce Be Different
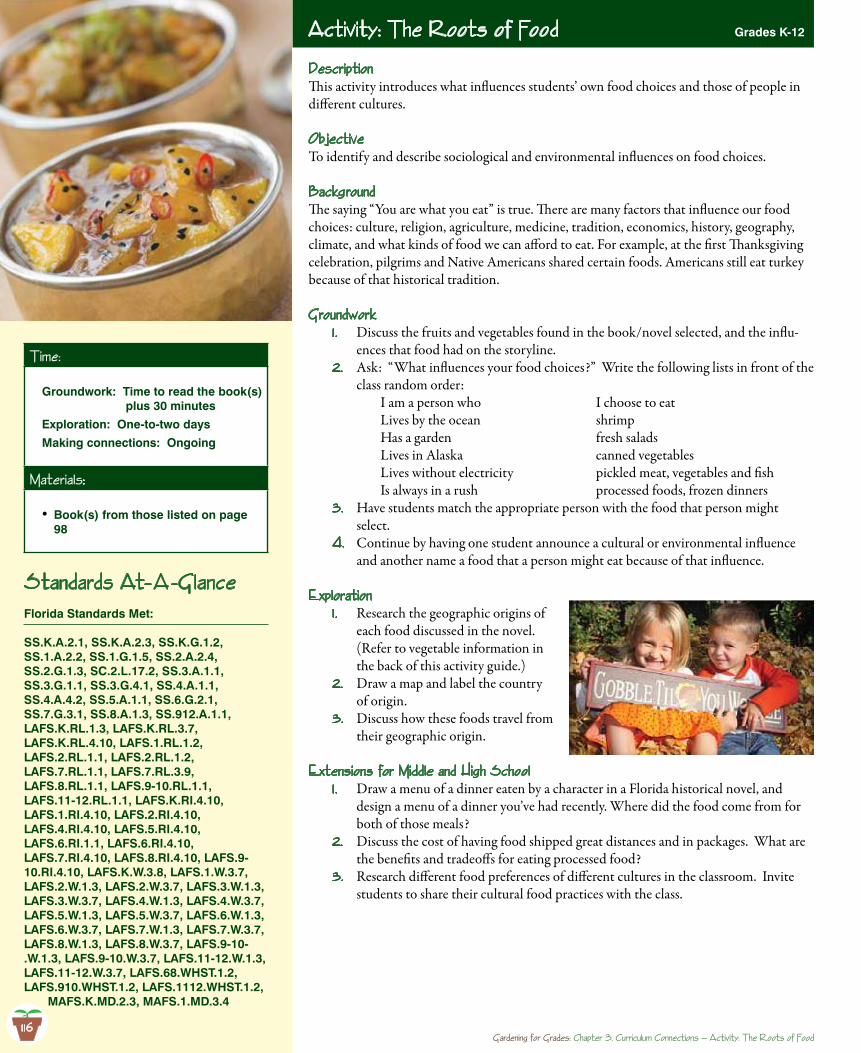
1 16
DescriptionThis activity introduces what influences students’ own food choices and those of people in different cultures.
ObjectiveTo identify and describe sociological and environmental influences on food choices.
BackgroundThe saying “You are what you eat” is true. There are many factors that influence our food choices: culture, religion, agriculture, medicine, tradition, economics, history, geography, climate, and what kinds of food we can afford to eat. For example, at the first Thanksgiving celebration, pilgrims and Native Americans shared certain foods. Americans still eat turkey because of that historical tradition.
GroundworkDiscuss the fruits and vegetables found in the book/novel selected, and the influ-1 . ences that food had on the storyline.Ask: “What influences your food choices?” Write the following lists in front of the 2. class random order:
I am a person who I choose to eatLives by the ocean shrimpHas a garden fresh saladsLives in Alaska canned vegetablesLives without electricity pickled meat, vegetables and fishIs always in a rush processed foods, frozen dinners
Have students match the appropriate person with the food that person might 3. select.Continue by having one student announce a cultural or environmental influence 4. and another name a food that a person might eat because of that influence.
Exp1orationResearch the geographic origins of 1 . each food discussed in the novel. (Refer to vegetable information in the back of this activity guide.)Draw a map and label the country 2. of origin. Discuss how these foods travel from 3. their geographic origin.
Extensions for Midd1e and high Schoo1Draw a menu of a dinner eaten by a character in a Florida historical novel, and 1 . design a menu of a dinner you’ve had recently. Where did the food come from for both of those meals? Discuss the cost of having food shipped great distances and in packages. What are 2. the benefits and tradeoffs for eating processed food?Research different food preferences of different cultures in the classroom. Invite 3. students to share their cultural food practices with the class.
Activity: The Roots of Food Grades K-12
Time:
Groundwork: Time to read the book(s) plus 30 minutes
Exploration: One-to-two days
Making connections: Ongoing
Materia1s:
Book(s) from those listed on page •98
Standards At-A -G1anceFlorida Standards Met:
SS.K.A.2.1, SS.K.A.2.3, SS.K.G.1.2, SS.1.A.2.2, SS.1.G.1.5, SS.2.A.2.4, SS.2.G.1.3, SC.2.L.17.2, SS.3.A.1.1, SS.3.G.1.1, SS.3.G.4.1, SS.4.A.1.1, SS.4.A.4.2, SS.5.A.1.1, SS.6.G.2.1, SS.7.G.3.1, SS.8.A.1.3, SS.912.A.1.1, LAFS.K.RL.1.3, LAFS.K.RL.3.7, LAFS.K.RL.4.10, LAFS.1.RL.1.2, LAFS.2.RL.1.1, LAFS.2.RL.1.2, LAFS.7.RL.1.1, LAFS.7.RL.3.9, LAFS.8.RL.1.1, LAFS.9-10.RL.1.1, LAFS.11-12.RL.1.1, LAFS.K.RI.4.10, LAFS.1.RI.4.10, LAFS.2.RI.4.10, LAFS.4.RI.4.10, LAFS.5.RI.4.10, LAFS.6.RI.1.1, LAFS.6.RI.4.10, LAFS.7.RI.4.10, LAFS.8.RI.4.10, LAFS.9-10.RI.4.10, LAFS.K.W.3.8, LAFS.1.W.3.7, LAFS.2.W.1.3, LAFS.2.W.3.7, LAFS.3.W.1.3, LAFS.3.W.3.7, LAFS.4.W.1.3, LAFS.4.W.3.7, LAFS.5.W.1.3, LAFS.5.W.3.7, LAFS.6.W.1.3, LAFS.6.W.3.7, LAFS.7.W.1.3, LAFS.7.W.3.7, LAFS.8.W.1.3, LAFS.8.W.3.7, LAFS.9-10-.W.1.3, LAFS.9-10.W.3.7, LAFS.11-12.W.1.3, LAFS.11-12.W.3.7, LAFS.68.WHST.1.2, LAFS.910.WHST.1.2, LAFS.1112.WHST.1.2,
MAFS.K.MD.2.3, MAFS.1.MD.3.4
Gardening for Grades: Chapter 3, Curricu1um Connections — Activity: The Roots of Food1 16
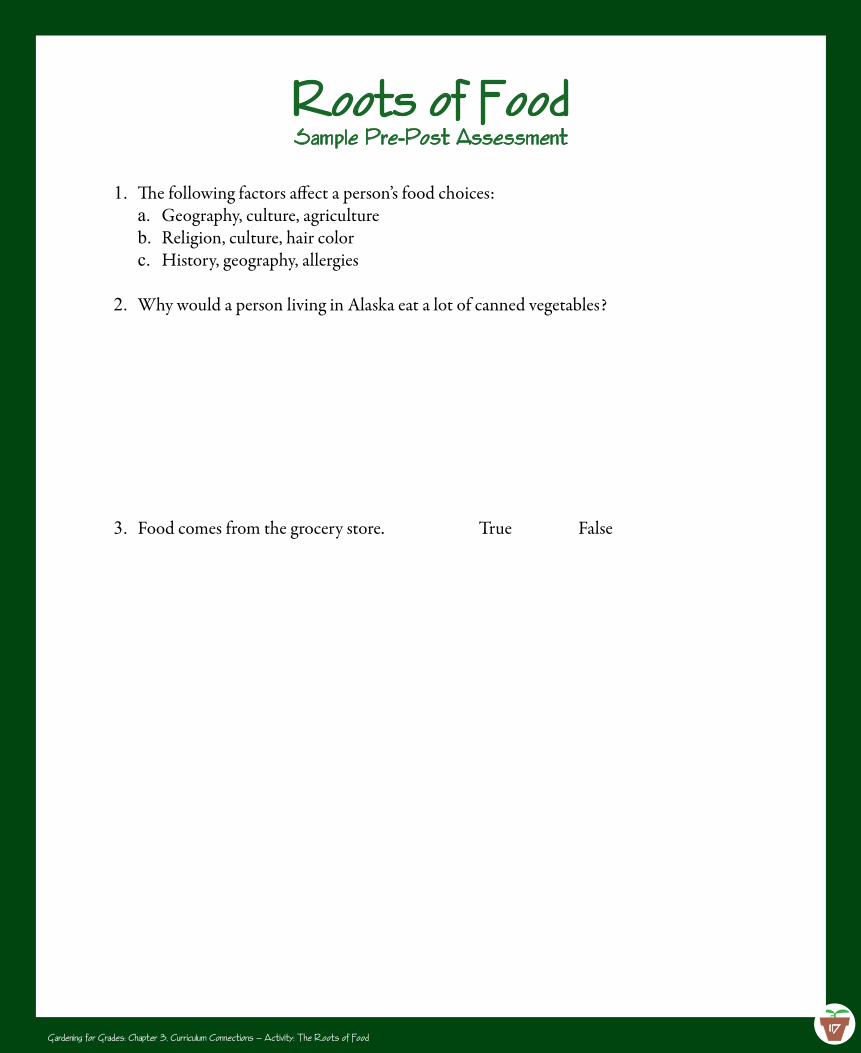
1 17
Roots of FoodSamp1e Pre-Post Assessment
The following factors affect a person’s food choices:1.Geography, culture, agriculturea.Religion, culture, hair colorb.History, geography, allergiesc.
Why would a person living in Alaska eat a lot of canned vegetables?2.
Food comes from the grocery store. True False3.
Gardening for Grades: Chapter 3, Curricu1um Connections — Activity: The Roots of Food
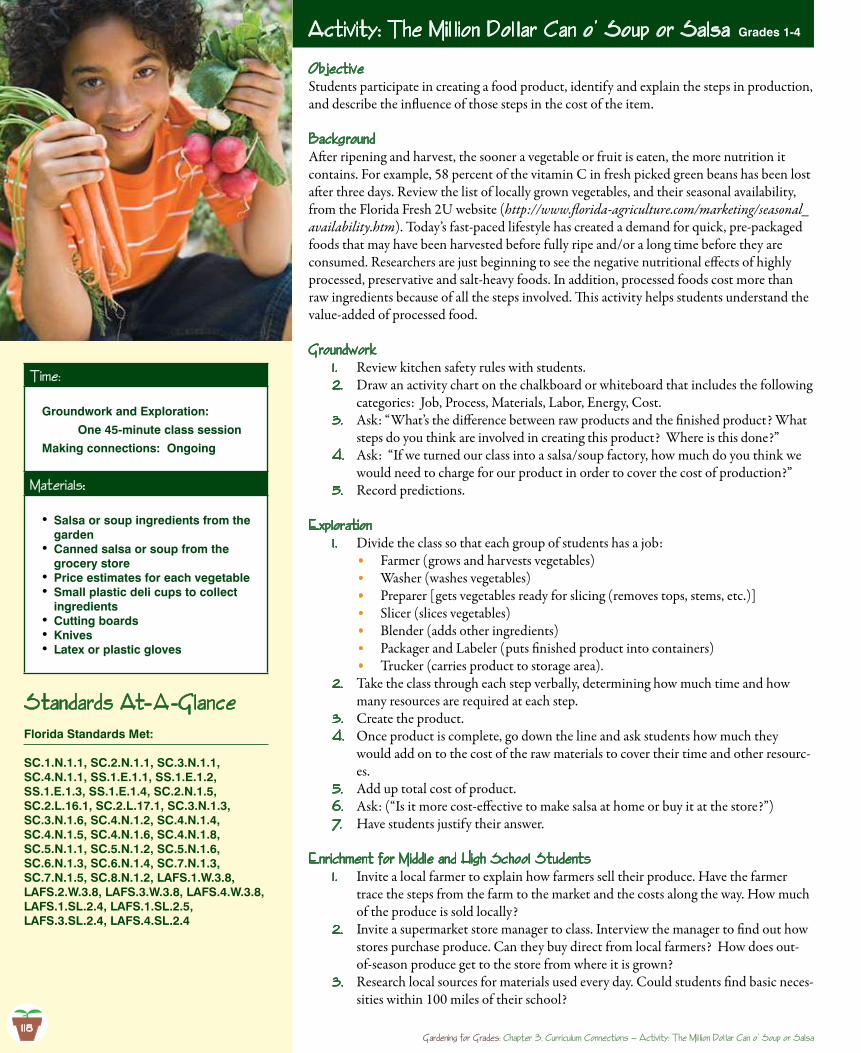
1 18
ObjectiveStudents participate in creating a food product, identify and explain the steps in production, and describe the influence of those steps in the cost of the item.
BackgroundAfter ripening and harvest, the sooner a vegetable or fruit is eaten, the more nutrition it contains. For example, 58 percent of the vitamin C in fresh picked green beans has been lost after three days. Review the list of locally grown vegetables, and their seasonal availability, from the Florida Fresh 2U website (http://www.florida-agriculture.com/marketing/seasonal_availability.htm). Today’s fast-paced lifestyle has created a demand for quick, pre-packaged foods that may have been harvested before fully ripe and/or a long time before they are consumed. Researchers are just beginning to see the negative nutritional effects of highly processed, preservative and salt-heavy foods. In addition, processed foods cost more than raw ingredients because of all the steps involved. This activity helps students understand the value-added of processed food.
GroundworkReview kitchen safety rules with students.1 . Draw an activity chart on the chalkboard or whiteboard that includes the following 2. categories: Job, Process, Materials, Labor, Energy, Cost.Ask: “What’s the difference between raw products and the finished product? What 3. steps do you think are involved in creating this product? Where is this done?”Ask: “If we turned our class into a salsa/soup factory, how much do you think we 4. would need to charge for our product in order to cover the cost of production?”Record predictions.5.
Exp1orationDivide the class so that each group of students has a job:1 .
Farmer (grows and harvests vegetables)•Washer (washes vegetables)•Preparer [gets vegetables ready for slicing (removes tops, stems, etc.)]•Slicer (slices vegetables)•Blender (adds other ingredients)•Packager and Labeler (puts finished product into containers)•Trucker (carries product to storage area).•
Take the class through each step verbally, determining how much time and how 2. many resources are required at each step.Create the product.3. Once product is complete, go down the line and ask students how much they 4. would add on to the cost of the raw materials to cover their time and other resourc-es.Add up total cost of product.5. Ask: (“Is it more cost-effective to make salsa at home or buy it at the store?”)6. Have students justify their answer.7.
Enrichment for Midd1e and high Schoo1 StudentsInvite a local farmer to explain how farmers sell their produce. Have the farmer 1 . trace the steps from the farm to the market and the costs along the way. How much of the produce is sold locally?Invite a supermarket store manager to class. Interview the manager to find out how 2. stores purchase produce. Can they buy direct from local farmers? How does out-of-season produce get to the store from where it is grown?Research local sources for materials used every day. Could students find basic neces-3. sities within 100 miles of their school?
Activity: The Mi1 1ion Do1 1ar Can o’ Soup or Sa1sa Grades 1-4
Time:
Groundwork and Exploration:
One 45-minute class session
Making connections: Ongoing
Materia1s:
Salsa or soup ingredients from the •gardenCanned salsa or soup from the •grocery storePrice estimates for each vegetable•Small plastic deli cups to collect •ingredientsCutting boards•Knives•Latex or plastic gloves•
Standards At-A -G1anceFlorida Standards Met:
SC.1.N.1.1, SC.2.N.1.1, SC.3.N.1.1, SC.4.N.1.1, SS.1.E.1.1, SS.1.E.1.2, SS.1.E.1.3, SS.1.E.1.4, SC.2.N.1.5, SC.2.L.16.1, SC.2.L.17.1, SC.3.N.1.3, SC.3.N.1.6, SC.4.N.1.2, SC.4.N.1.4, SC.4.N.1.5, SC.4.N.1.6, SC.4.N.1.8, SC.5.N.1.1, SC.5.N.1.2, SC.5.N.1.6, SC.6.N.1.3, SC.6.N.1.4, SC.7.N.1.3, SC.7.N.1.5, SC.8.N.1.2, LAFS.1.W.3.8, LAFS.2.W.3.8, LAFS.3.W.3.8, LAFS.4.W.3.8, LAFS.1.SL.2.4, LAFS.1.SL.2.5, LAFS.3.SL.2.4, LAFS.4.SL.2.4
Gardening for Grades: Chapter 3, Curricu1um Connections — Activity: The Mi1 1ion Do1 1ar Can o’ Soup or Sa1sa1 18
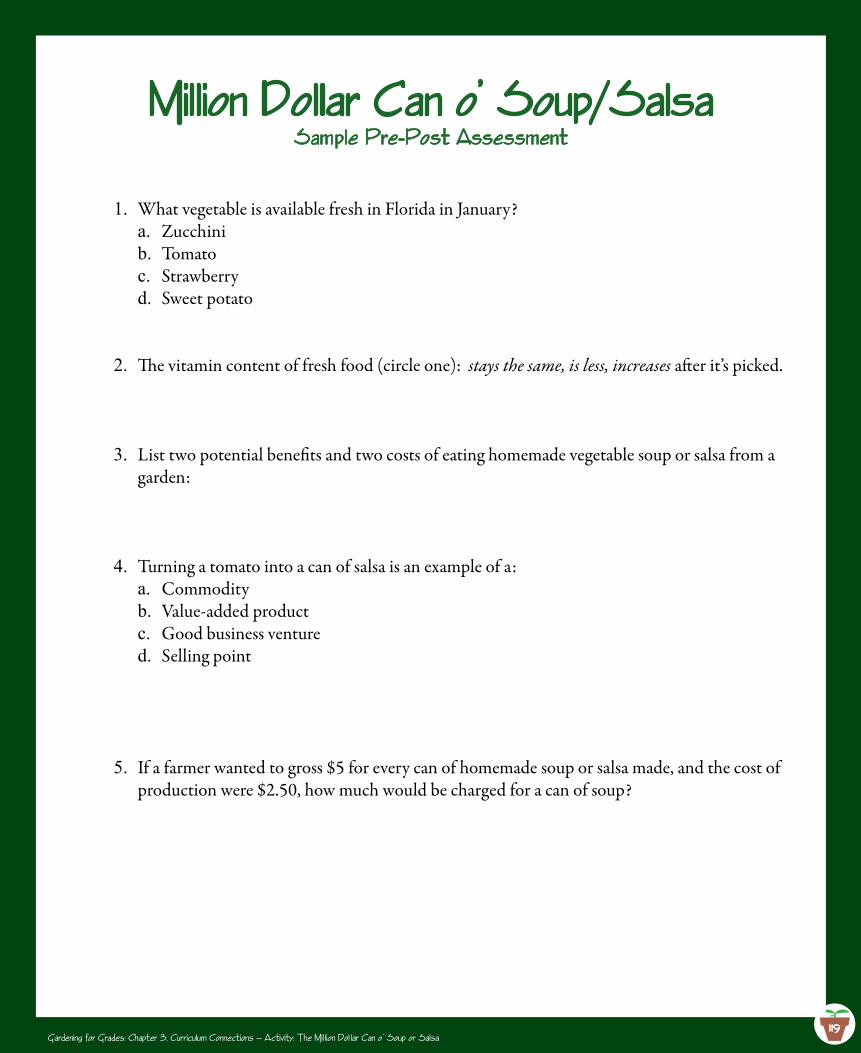
1 19
Mi11ion Do11ar Can o’ Soup/Sa1saSamp1e Pre-Post Assessment
What vegetable is available fresh in Florida in January?1.Zucchinia.Tomatob.Strawberryc.Sweet potatod.
The vitamin content of fresh food (circle one): 2. stays the same, is less, increases after it’s picked.
List two potential benefits and two costs of eating homemade vegetable soup or salsa from a 3.garden:
Turning a tomato into a can of salsa is an example of a: 4.Commoditya.Value-added productb.Good business venturec.Selling pointd.
If a farmer wanted to gross $5 for every can of homemade soup or salsa made, and the cost of 5.production were $2.50, how much would be charged for a can of soup?
Gardening for Grades: Chapter 3, Curricu1um Connections — Activity: The Mi1 1ion Do1 1ar Can o’ Soup or Sa1sa
120Gardening for Grades: Chapter 4, Connecting the Garden to the C1assroom
Connecting Across the Curricu1um
It is possible to connect activities in the garden to the curriculum in almost every subject at all grades. These are just a few suggestions to begin the process of making those connec-tions. This section is divided into major subject categories of language arts, mathematics, science, social studies with subheadings on specific topics or curriculum areas. Several ideas will fit into multiple curriculum areas, such as the concept of timelines.
The Food Timeline is an amazing website at www.foodtimeline.org with information on almost every food known to man. So where should it be placed in classroom instruction? For example it involves:
Timelines are used as an organizational tool in social studies, but the process of skill and concept development to create and utilize timelines falls into mathematics, too. So, for organizational purposes, timelines can be placed in one category with suggestions for use in other curriculum areas. They have been used as an example here. Timelines do not need to be repeated in every category.
Language Arts Recommended books for all agesEtymology of various bread names and foods Quotations
Languages other than English German cookbook in GermanSwedish American Cookbook in both languagesFoods of almost all countries
Sciences of all types Biology — yeast, fruits, vegetables, grains, fungi, Chemistry of baking soda and baking powder, pH, buffering,
potash, muriatic acid, cream of tartarTechnology
Social Studies History of food and historical connectionsFood’s influence on culturesGeography of where foods originated, how they traveled, evolu-
tion of foods due to geography and topographyFoods of every culture from ancient civilizations to today
Mathematics Collecting data, displaying data, reading graphical data displaysMeasurementTimeCost Analyses
Health/Physical Education Nutrition
Three Comprehensive Resources
There are three resources available that have already connected food and agriculture across all subject areas that use an array of teaching techniques and are technically
Connecting the Gardento C1assroom Instruction
Chapter 4
120
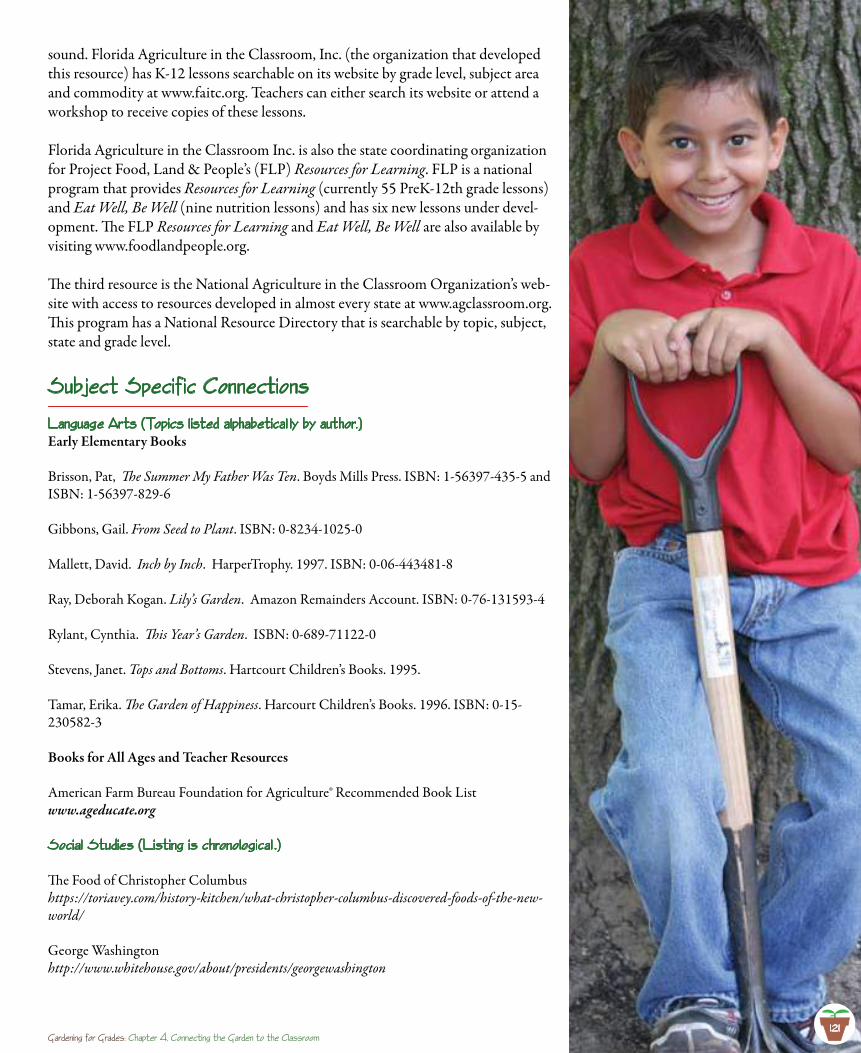
121Gardening for Grades: Chapter 4, Connecting the Garden to the C1assroom
sound. Florida Agriculture in the Classroom, Inc. (the organization that developed this resource) has K-12 lessons searchable on its website by grade level, subject area and commodity at www.faitc.org. Teachers can either search its website or attend a workshop to receive copies of these lessons.
Florida Agriculture in the Classroom Inc. is also the state coordinating organization for Project Food, Land & People’s (FLP) Resources for Learning. FLP is a national program that provides Resources for Learning (currently 55 PreK-12th grade lessons) and Eat Well, Be Well (nine nutrition lessons) and has six new lessons under devel-opment. The FLP Resources for Learning and Eat Well, Be Well are also available by visiting www.foodlandpeople.org.
The third resource is the National Agriculture in the Classroom Organization’s web-site with access to resources developed in almost every state at www.agclassroom.org. This program has a National Resource Directory that is searchable by topic, subject, state and grade level.
Subject Specif ic Connections
Language Arts (Topics 1isted a1phabetica1 1y by author.)Early Elementary Books
Brisson, Pat, The Summer My Father Was Ten. Boyds Mills Press. ISBN: 1-56397-435-5 and ISBN: 1-56397-829-6
Gibbons, Gail. From Seed to Plant. ISBN: 0-8234-1025-0
Mallett, David. Inch by Inch. HarperTrophy. 1997. ISBN: 0-06-443481-8
Ray, Deborah Kogan. Lily’s Garden. Amazon Remainders Account. ISBN: 0-76-131593-4
Rylant, Cynthia. This Year’s Garden. ISBN: 0-689-71122-0
Stevens, Janet. Tops and Bottoms. Hartcourt Children’s Books. 1995.
Tamar, Erika. The Garden of Happiness. Harcourt Children’s Books. 1996. ISBN: 0-15-230582-3
Books for All Ages and Teacher Resources
American Farm Bureau Foundation for Agriculture® Recommended Book Listwww.ageducate.org
Socia1 Studies (Listing is chrono1ogica1 .)
The Food of Christopher Columbushttps://toriavey.com/history-kitchen/what-christopher-columbus-discovered-foods-of-the-new-world/
George Washingtonhttp://www.whitehouse.gov/about/presidents/georgewashington
121
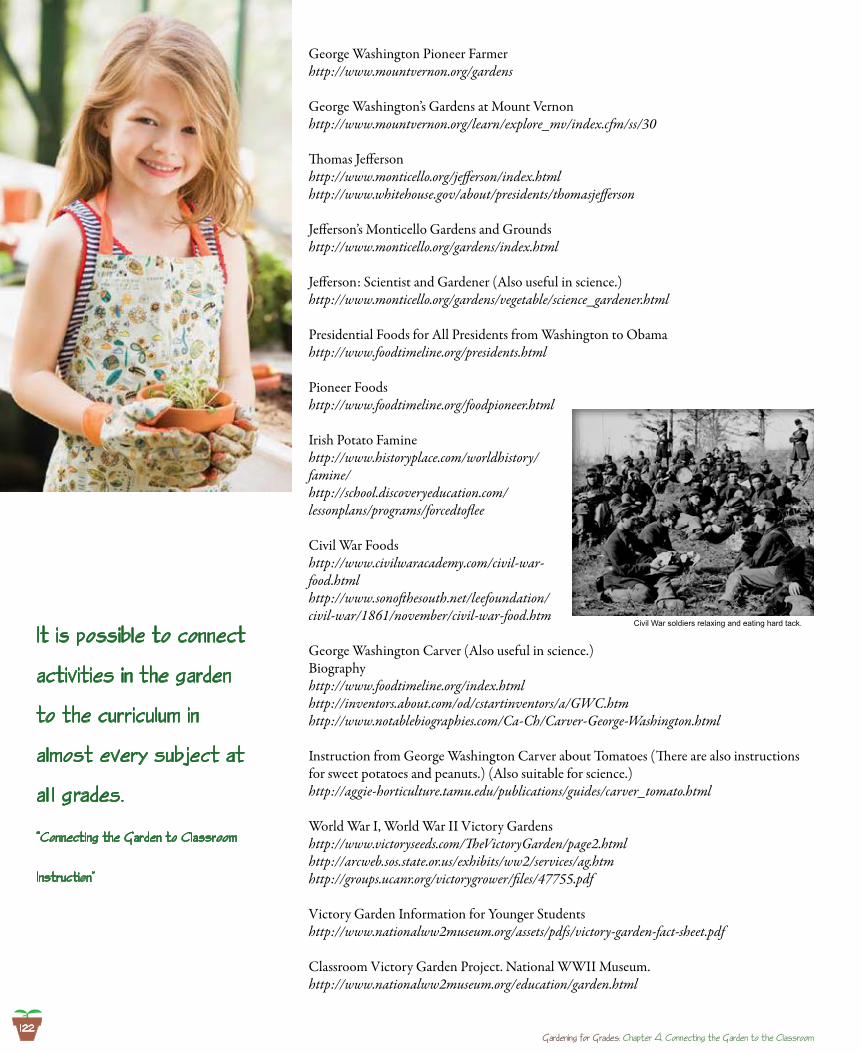
122Gardening for Grades: Chapter 4, Connecting the Garden to the C1assroom
George Washington Pioneer Farmerhttp://www.mountvernon.org/gardens
George Washington’s Gardens at Mount Vernonhttp://www.mountvernon.org/learn/explore_mv/index.cfm/ss/30
Thomas Jeffersonhttp://www.monticello.org/jefferson/index.htmlhttp://www.whitehouse.gov/about/presidents/thomasjefferson
Jefferson’s Monticello Gardens and Groundshttp://www.monticello.org/gardens/index.html
Jefferson: Scientist and Gardener (Also useful in science.)http://www.monticello.org/gardens/vegetable/science_gardener.html
Presidential Foods for All Presidents from Washington to Obamahttp://www.foodtimeline.org/presidents.html
Pioneer Foodshttp://www.foodtimeline.org/foodpioneer.html
Irish Potato Faminehttp://www.historyplace.com/worldhistory/famine/http://school.discoveryeducation.com/lessonplans/programs/forcedtoflee
Civil War Foodshttp://www.civilwaracademy.com/civil-war-food.htmlhttp://www.sonofthesouth.net/leefoundation/civil-war/1861/november/civil-war-food.htm
George Washington Carver (Also useful in science.)Biographyhttp://www.foodtimeline.org/index.htmlhttp://inventors.about.com/od/cstartinventors/a/GWC.htmhttp://www.notablebiographies.com/Ca-Ch/Carver-George-Washington.html
Instruction from George Washington Carver about Tomatoes (There are also instructions for sweet potatoes and peanuts.) (Also suitable for science.)http://aggie-horticulture.tamu.edu/publications/guides/carver_tomato.html
World War I, World War II Victory Gardenshttp://www.victoryseeds.com/TheVictoryGarden/page2.htmlhttp://arcweb.sos.state.or.us/exhibits/ww2/services/ag.htmhttp://groups.ucanr.org/victorygrower/files/47755.pdf
Victory Garden Information for Younger Studentshttp://www.nationalww2museum.org/assets/pdfs/victory-garden-fact-sheet.pdf
Classroom Victory Garden Project. National WWII Museum.http://www.nationalww2museum.org/education/garden.html
It is possib1e to connect
activities in the garden
to the curricu1um in
a1most every subject at
a1 1 grades.
“Connecting the Garden to C1assroom
Instruction”
Civil War soldiers relaxing and eating hard tack.
123Gardening for Grades: Chapter 4, Connecting the Garden to the C1assroom
Smithsonian Victory Gardenhttp://americanhistory.si.edu/house/yourvisit/victorygarden.asphttp://www.gardens.si.edu/horticulture/gardens/nmah/victory.htm
WW II Victory Gardens (This site has posters, video clips and even a cartoon.)http://sidewalksprouts.wordpress.com/2008/04/14/wwii
Victory Garden Lesson Plans. Kennesaw State University.http://www.kennesaw.edu/historymuseum/pdf/prelesson_victory.pdf
World War II Foodhttp://www.yourdiscovery.com/web/world-war-2/ww2-focus/living-with-war/food-rationinghttp://www.u-s-history.com/pages/h1674.htmlhttp://www.livinghistoryfarm.org/farminginthe40s/money_02.html
The Green Revolution, Norman Borlaug (Also suitable for science and language arts.)http://nobelprize.org/nobel_prizes/peace/laureates/1970/borlaug-bio.htmlhttp://www.theatlantic.com/past/docs/issues/97jan/borlaug/borlaug.htmhttp://www.agbioworld.org/biotech-info/topics/borlaug/index.htmlhttp://online.wsj.com/article/SB10001424052970203917304574410701828211352.html?mod=googlenews_wsj
Norman Borlaug Curriculum http://www.normanborlaug.org/curriculum.htm
Presidential Food Contest (Actually a series of presidential food trivia.)http://www.foodmuseum.com/Presidentialfoodcontest.html
List of books compiled by the Library of Congress on Presidential Food. (Also useful in language arts.)http://www.loc.gov/rr/scitech/SciRefGuides/presidentialfood.html
Mathematics (Topics 1isted a1phabetica1 1y.)
Buying Watermelons Intelligentlyhttp://demonstrations.wolfram.com/BuyingWatermelonsIntelligently
Census of Agriculture Educational Materials http://www.nass.usda.gov/Education_and_Outreach/index.asp
Census Fact Sheets (Also suitable for social studies.)http://www.agcensus.usda.gov/Publications/2007/Online_Highlights/Fact_Sheets/index.asp
Cookie Cuttinghttp://demonstrations.wolfram.com/CookieCutting
Evaluating a Hot Pizzahttp://demonstrations.wolfram.com/EvaluateHotPizza
White, Jennifer et. al. Math in the Garden. National Garden Association. 2006. ISBN: 978-0-915873-46-3http://www.gardeningwithkids.org
Wooden Stand for Christmas Treehttp://demonstrations.wolfram.com/WoodenStandForAChristmasTree
Time1ines are used as
an organizationa1 too1
in Socia1 Studies, but
the process of ski1 1 and
concept deve1opment
to create and uti1ize
time1ines fa1 1s into
Mathematics.
“Connecting the Garden to C1assroom
Instruction”
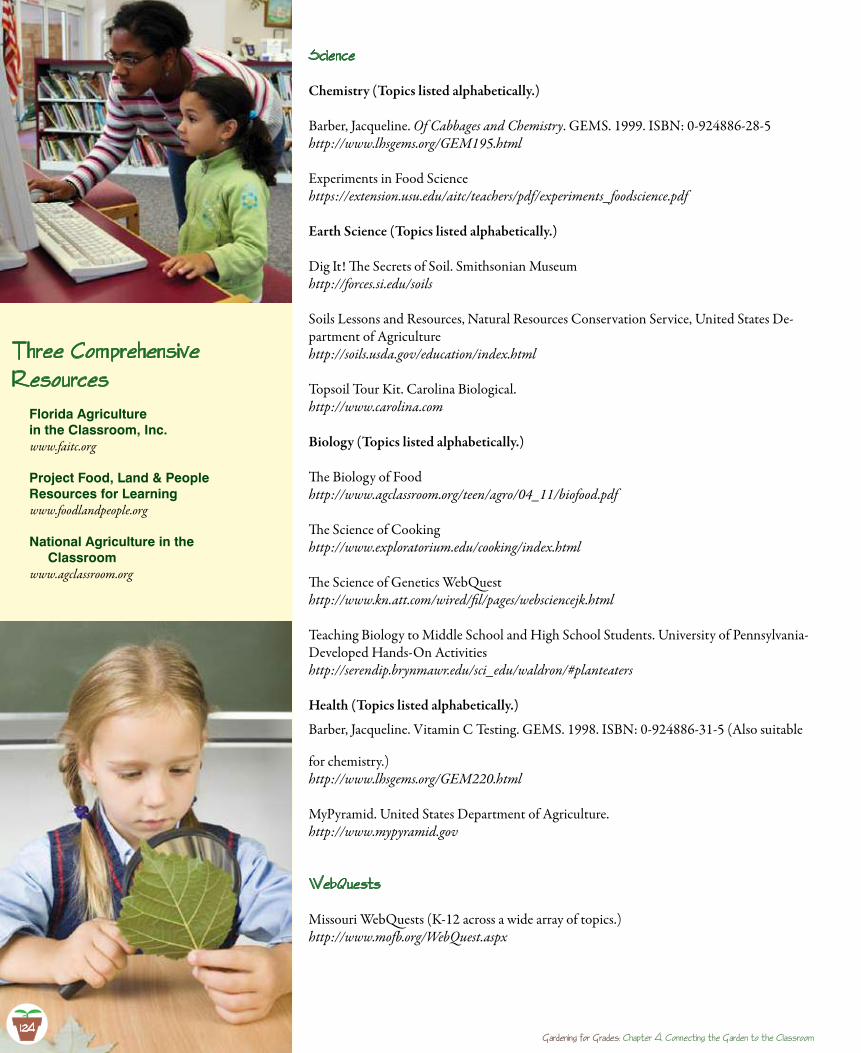
124Gardening for Grades: Chapter 4, Connecting the Garden to the C1assroom
Three Comprehensive Resources
Florida Agriculture in the Classroom, Inc.www.faitc.org
Project Food, Land & PeopleResources for Learningwww.foodlandpeople.org
National Agriculture in the Classroom
www.agclassroom.org
Science
Chemistry (Topics listed alphabetically.)
Barber, Jacqueline. Of Cabbages and Chemistry. GEMS. 1999. ISBN: 0-924886-28-5http://www.lhsgems.org/GEM195.html
Experiments in Food Science https://extension.usu.edu/aitc/teachers/pdf/experiments_foodscience.pdf
Earth Science (Topics listed alphabetically.)
Dig It! The Secrets of Soil. Smithsonian Museumhttp://forces.si.edu/soils
Soils Lessons and Resources, Natural Resources Conservation Service, United States De-partment of Agriculturehttp://soils.usda.gov/education/index.html
Topsoil Tour Kit. Carolina Biological.http://www.carolina.com
Biology (Topics listed alphabetically.)
The Biology of Foodhttp://www.agclassroom.org/teen/agro/04_11/biofood.pdf
The Science of Cookinghttp://www.exploratorium.edu/cooking/index.html
The Science of Genetics WebQuesthttp://www.kn.att.com/wired/fil/pages/websciencejk.html
Teaching Biology to Middle School and High School Students. University of Pennsylvania-Developed Hands-On Activitieshttp://serendip.brynmawr.edu/sci_edu/waldron/#planteaters Health (Topics listed alphabetically.)
Barber, Jacqueline. Vitamin C Testing. GEMS. 1998. ISBN: 0-924886-31-5 (Also suitable
for chemistry.)http://www.lhsgems.org/GEM220.html
MyPyramid. United States Department of Agriculture.http://www.mypyramid.gov
WebQuests
Missouri WebQuests (K-12 across a wide array of topics.)http://www.mofb.org/WebQuest.aspx
124
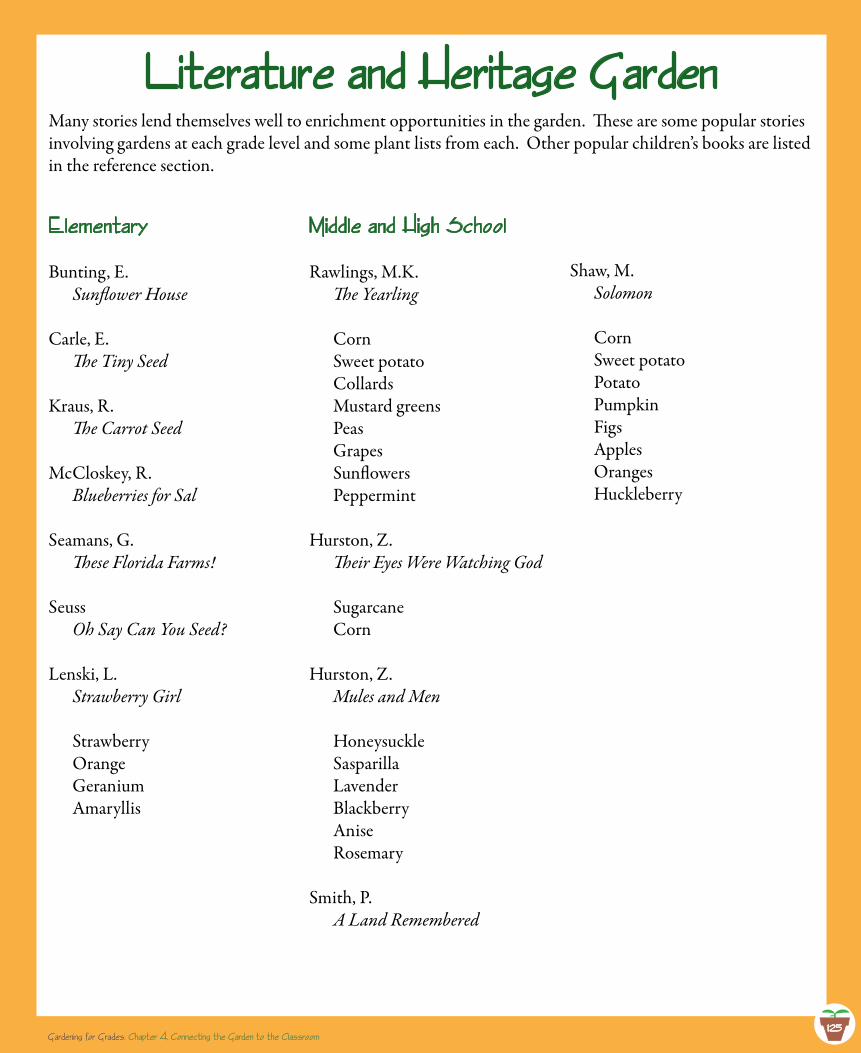
125Gardening for Grades: Chapter 4, Connecting the Garden to the C1assroom
Literature and heritage GardenMany stories lend themselves well to enrichment opportunities in the garden. These are some popular stories involving gardens at each grade level and some plant lists from each. Other popular children’s books are listed in the reference section.
E1ementary
Bunting, E. Sunflower House
Carle, E. The Tiny Seed
Kraus, R. The Carrot Seed
McCloskey, R. Blueberries for Sal
Seamans, G. These Florida Farms!
Seuss Oh Say Can You Seed?
Lenski, L. Strawberry Girl
Strawberry Orange Geranium Amaryllis
Midd1e and high Schoo1
Rawlings, M.K. The Yearling
Corn Sweet potato Collards Mustard greens Peas Grapes Sunflowers Peppermint
Hurston, Z. Their Eyes Were Watching God
Sugarcane Corn
Hurston, Z. Mules and Men
Honeysuckle Sasparilla Lavender Blackberry Anise Rosemary
Smith, P. A Land Remembered
Shaw, M. Solomon
Corn Sweet potato Potato Pumpkin Figs Apples Oranges Huckleberry
Gardening for Grades: Chapter 4, Connecting the Garden to the C1assroom125
126Gardening for Grades: Chapter 4, Connecting the Garden to the C1assroom
Curricu1um ResourcesWestern Growers Foundation — free curriculum materials online: http://www.csgn.org
Education World — free curriculum materials online: http://www.education-world.com
Florida Agriculture in the Classroom, Inc. — free curriculum materials online: http://www.faitc.org
Jaffe, R. (1990). The Growing Classroom. Addison-Wesley: New York, NY.
Pranis, E. and Hale, J. (2006). GrowLab: A Complete Guide to Gardening in the Classroom. National Gardening Association: South Berlington, VT.
Pranis, E. and Cohen, J. (2002). GrowLab: Activities for Growing Minds. National Gardening As-sociation: South Berlington, VT.
Project Food, Land & People. Curriculum makes connections between food, the environment, and society connections: http://www.foodlandpeople.org
Genera1 Gardening GuidesBartholomew, M. (1981). Square Foot Gardening. Rodale Press: Emmaus, PA.
Crockett, J.U. (1972). Vegetables and Fruits. Time-Life Books: Alexandria, VA.
F1orida Gardening GuidesAdams, W.D. and Leroy, T. R. (1992). Growing Fruits and Nuts in the South. Taylor Publishing Company: Dallas, TX.
Bruce, H. (1995). Uncommon Scents: Growing Herbs and Spices in Florida. Winner Enterprises: Altamonte Springs, FL.
DeFreitas, S. (1987). Complete Guide to Florida Gardening. Taylor Publishing Company: Dallas, TX.
MacCubbin, T. (1999). Month-By-Month Gardening in Florida. Cool Springs Press: Franklin, TN.
MacCubbin, T. (1997). Florida Home Grown. Waterview Press, Inc: Winter Park, FL.
Perry, R.L. (1977). Basic Gardening in Florida Sand. Robert L. Perry: Tampa, FL.
Stephens, J. M. (1999). Vegetable Gardening in Florida. University Press of FL: Gainesvile, FL.
127Gardening for Grades: Chapter 4, Connecting the Garden to the C1assroom
Schoo1 Gardening GuidesCalifornia School Garden Network. (2006). Gardens for Learning: Creating and Sustaining Your School Garden. California School Garden Network: Irvine, CA.
Kiever, J. and Kemple, M. (1998). Digging Deeper: Integrating Youth Gardens into Schools and Com-munities. American Community Gardening Association: Philadelphia, PA.
Louisiana Department of Agriculture and Forestry. (1995). Louisiana Guidelines and Features for Outdoor Classrooms. Office of Forestry: Baton Rouge, LA.
Ocone, L. & Pranis E. (1990). Guide to Kids’ Gardening. John Wiley and Sons, Inc: New York, NY.
Butterf1y GardeningDaniels, J. C. (2000). Your Florida Guide to Butterfly Gardening. University Press of Florida: Gaines-ville, FL.
Daniels, J.C. et al. (2008). Butterfly Gardening in Florida. Florida Cooperative Extension Service: Gainesville, FL. Available at: http://edis.ifas.ufl.edu/UW057
Emmel, T.C. (1997). Florida’s Fabulous Butterflies. World Publications: Tampa, FL.
Huegel, C. (1995). Butterfly Gardening with Florida’s Native Plants. Florida Native Plant Society: Orlando, FL.
Minno, M.C., Butler, J. F. and Hall, D.W. (2005). Florida Butterfly Caterpillars and Their Host Plants. University Press of Florida: Gainesville, FL.
Gardening Project IdeasKite, L.P. (1995). Gardening Wizardry for Kids. Barron’s Educational Services, Inc.: Hauppage, NY.
Matthews, C. (2002). Great Gardens for Kids. Sterling Publishing Co., Inc.: New York, NY.
Richardson, B. (1998). Gardening with Children. Taunton: Newtown, CT.
Stephens, J. M. and Gray S.D. (1981). 4H Vegetable Gardening. Florida Cooperative Extension Ser-vice: Gainesville, FL. Downloaded at: http://edis.ifas.ufl.edu/document_4h050 on August 5, 2008
F1orida Agricu1tura1 FactsCresap, I.K. The History of Florida Agriculture: The Early Era. University of Florida: Gainesville, FL. Downloaded at: http://palmm.digital.flvc.org/islandora/object/uf%3A43729#page/a/mode/2up
Florida Farm Bureau — http://www.floridafarmbureau.org
Seasonal availability of Florida produce: http://www.freshfromflorida.com/Divisions-Offices/Marketing-and-Development/Consumer-Resources/Buy-Fresh-From-Florida/Crops-in-Season
Commodities by county: http://www.freshfromflorida.com/Divisions-Offices/Marketing-and-Development/Education/For-Researchers/Florida-Agriculture-Overview-and-Statistics
128Gardening for Grades: Chapter 4, Connecting the Garden to the C1assroom
E1ementary Schoo1 BooksBunting, E. Sunflower House
Carle, E. The Tiny Seed
Child, L. I Will Never Not Ever Eat a Tomato
Kochenderfer, L. Victory Garden
Lemer, C. Butterflies in the Garden
Lin, G. The Ugly Vegetable
Lobel, A. Frog and Toad Together
Stewart, S. The Gardener
Steele, M. Anna’s Garden Song
Midd1e and high Schoo1 Nove1sSmith, P. (2008). A Land Remembered. Pineapple Press: Sarasota, FL.
Rawlings, M.K. (1966). The Yearling. Simon and Schuster: New York, NY.
Hurston, Z. (1995). Mules and Men. Penguin Putnam Inc.: New York, NY.
Hurston, Z. (1995). Dust Tracks on a Road. Penguin Putnam Inc.: New York, NY.
Genera1 Reference Dr. Gary Vallad, Dr. Hugh Smith, Dr. Peter Dittmar and Dr. Joshua Freeman. Vegetable Production Handbook for Florida 2016-2017. Available online at http://edis.ifas.ufl.edu/pdffiles/cv/cv29200.pdf or at your local University of Florida IFAS Extension.
Small Farms/Alternative Enterprises: http://smallfarms.ifas.ufl.edu
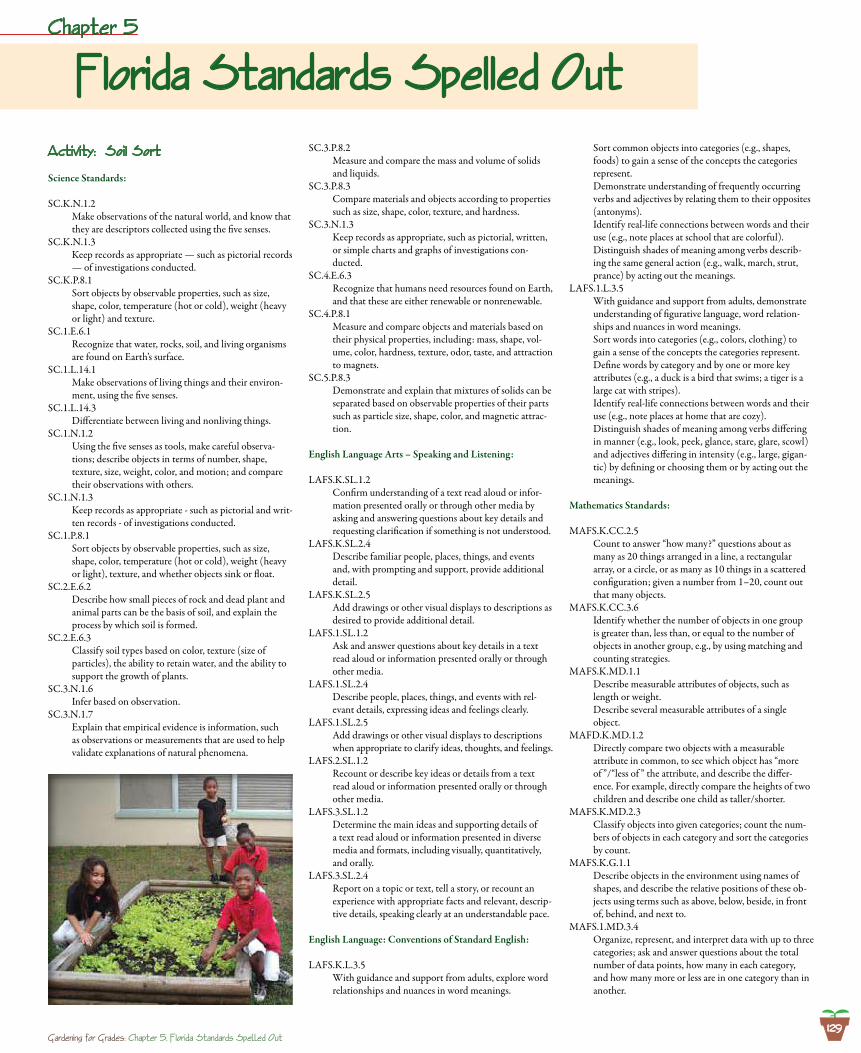
129Gardening for Grades: Chapter 5, F1orida Standards Spelled Out
Activity: Soi1 Sort
Science Standards:
SC.K.N.1.2 Make observations of the natural world, and know that
they are descriptors collected using the five senses.SC.K.N.1.3 Keep records as appropriate — such as pictorial records
— of investigations conducted.SC.K.P.8.1 Sort objects by observable properties, such as size,
shape, color, temperature (hot or cold), weight (heavy or light) and texture.
SC.1.E.6.1 Recognize that water, rocks, soil, and living organisms
are found on Earth’s surface.SC.1.L.14.1 Make observations of living things and their environ-
ment, using the five senses.SC.1.L.14.3 Differentiate between living and nonliving things.SC.1.N.1.2 Using the five senses as tools, make careful observa-
tions; describe objects in terms of number, shape, texture, size, weight, color, and motion; and compare their observations with others.
SC.1.N.1.3 Keep records as appropriate - such as pictorial and writ-
ten records - of investigations conducted.SC.1.P.8.1 Sort objects by observable properties, such as size,
shape, color, temperature (hot or cold), weight (heavy or light), texture, and whether objects sink or float.
SC.2.E.6.2 Describe how small pieces of rock and dead plant and
animal parts can be the basis of soil, and explain the process by which soil is formed.
SC.2.E.6.3 Classify soil types based on color, texture (size of
particles), the ability to retain water, and the ability to support the growth of plants.
SC.3.N.1.6 Infer based on observation.SC.3.N.1.7 Explain that empirical evidence is information, such
as observations or measurements that are used to help validate explanations of natural phenomena.
SC.3.P.8.2 Measure and compare the mass and volume of solids
and liquids.SC.3.P.8.3 Compare materials and objects according to properties
such as size, shape, color, texture, and hardness.SC.3.N.1.3 Keep records as appropriate, such as pictorial, written,
or simple charts and graphs of investigations con-ducted.
SC.4.E.6.3 Recognize that humans need resources found on Earth,
and that these are either renewable or nonrenewable.SC.4.P.8.1 Measure and compare objects and materials based on
their physical properties, including: mass, shape, vol-ume, color, hardness, texture, odor, taste, and attraction to magnets.
SC.5.P.8.3 Demonstrate and explain that mixtures of solids can be
separated based on observable properties of their parts such as particle size, shape, color, and magnetic attrac-tion.
English Language Arts – Speaking and Listening:
LAFS.K.SL.1.2 Confirm understanding of a text read aloud or infor-
mation presented orally or through other media by asking and answering questions about key details and requesting clarification if something is not understood.
LAFS.K.SL.2.4 Describe familiar people, places, things, and events
and, with prompting and support, provide additional detail.
LAFS.K.SL.2.5 Add drawings or other visual displays to descriptions as
desired to provide additional detail.LAFS.1.SL.1.2 Ask and answer questions about key details in a text
read aloud or information presented orally or through other media.
LAFS.1.SL.2.4 Describe people, places, things, and events with rel-
evant details, expressing ideas and feelings clearly.LAFS.1.SL.2.5 Add drawings or other visual displays to descriptions
when appropriate to clarify ideas, thoughts, and feelings.LAFS.2.SL.1.2 Recount or describe key ideas or details from a text
read aloud or information presented orally or through other media.
LAFS.3.SL.1.2 Determine the main ideas and supporting details of
a text read aloud or information presented in diverse media and formats, including visually, quantitatively, and orally.
LAFS.3.SL.2.4 Report on a topic or text, tell a story, or recount an
experience with appropriate facts and relevant, descrip-tive details, speaking clearly at an understandable pace.
English Language: Conventions of Standard English:
LAFS.K.L.3.5 With guidance and support from adults, explore word
relationships and nuances in word meanings.
Sort common objects into categories (e.g., shapes, foods) to gain a sense of the concepts the categories represent.
Demonstrate understanding of frequently occurring verbs and adjectives by relating them to their opposites (antonyms).
Identify real-life connections between words and their use (e.g., note places at school that are colorful).
Distinguish shades of meaning among verbs describ-ing the same general action (e.g., walk, march, strut, prance) by acting out the meanings.
LAFS.1.L.3.5 With guidance and support from adults, demonstrate
understanding of figurative language, word relation-ships and nuances in word meanings.
Sort words into categories (e.g., colors, clothing) to gain a sense of the concepts the categories represent.
Define words by category and by one or more key attributes (e.g., a duck is a bird that swims; a tiger is a large cat with stripes).
Identify real-life connections between words and their use (e.g., note places at home that are cozy).
Distinguish shades of meaning among verbs differing in manner (e.g., look, peek, glance, stare, glare, scowl) and adjectives differing in intensity (e.g., large, gigan-tic) by defining or choosing them or by acting out the meanings.
Mathematics Standards:
MAFS.K.CC.2.5 Count to answer “how many?” questions about as
many as 20 things arranged in a line, a rectangular array, or a circle, or as many as 10 things in a scattered configuration; given a number from 1–20, count out that many objects.
MAFS.K.CC.3.6 Identify whether the number of objects in one group
is greater than, less than, or equal to the number of objects in another group, e.g., by using matching and counting strategies.
MAFS.K.MD.1.1 Describe measurable attributes of objects, such as
length or weight. Describe several measurable attributes of a single
object.MAFD.K.MD.1.2 Directly compare two objects with a measurable
attribute in common, to see which object has “more of ”/“less of ” the attribute, and describe the differ-ence. For example, directly compare the heights of two children and describe one child as taller/shorter.
MAFS.K.MD.2.3 Classify objects into given categories; count the num-
bers of objects in each category and sort the categories by count.
MAFS.K.G.1.1 Describe objects in the environment using names of
shapes, and describe the relative positions of these ob-jects using terms such as above, below, beside, in front of, behind, and next to.
MAFS.1.MD.3.4 Organize, represent, and interpret data with up to three
categories; ask and answer questions about the total number of data points, how many in each category, and how many more or less are in one category than in another.
F1orida Standards Spe11ed OutChapter 5
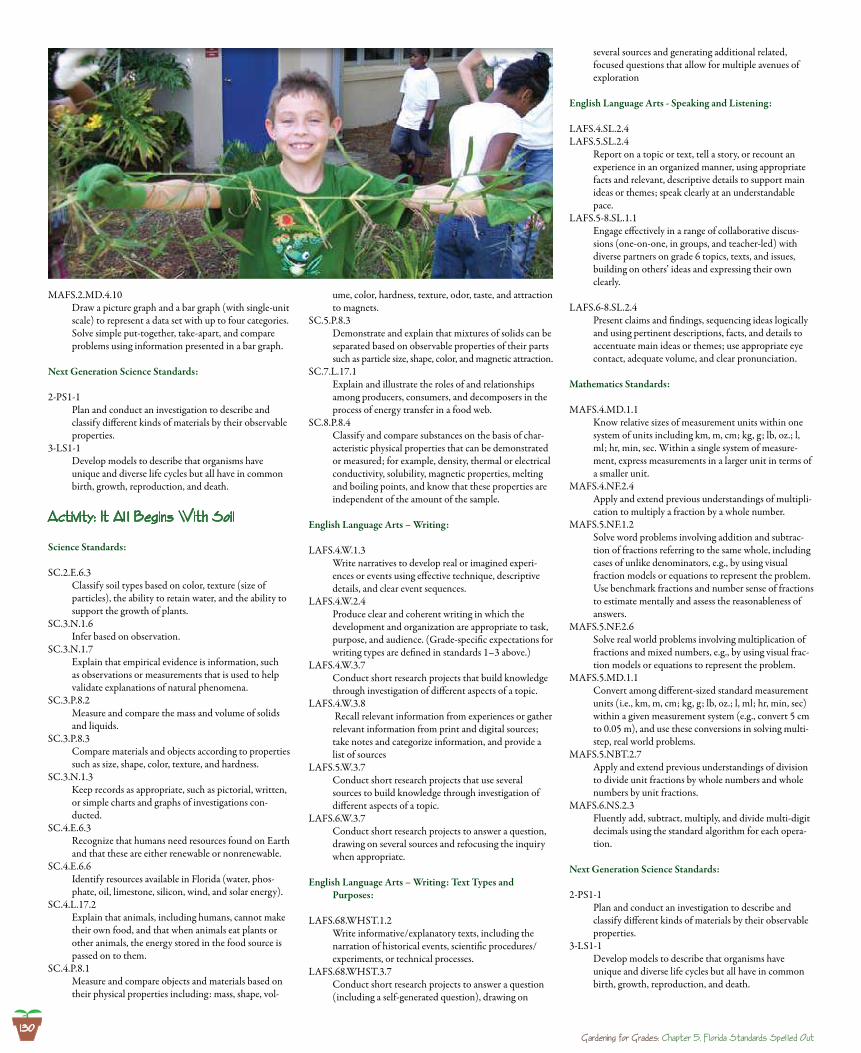
130Gardening for Grades: Chapter 5, F1orida Standards Spe1 1ed Out
MAFS.2.MD.4.10 Draw a picture graph and a bar graph (with single-unit
scale) to represent a data set with up to four categories. Solve simple put-together, take-apart, and compare problems using information presented in a bar graph.
Next Generation Science Standards:
2-PS1-1 Plan and conduct an investigation to describe and
classify different kinds of materials by their observable properties.
3-LS1-1 Develop models to describe that organisms have
unique and diverse life cycles but all have in common birth, growth, reproduction, and death.
Activity: It A1 1 Begins With Soi1
Science Standards:
SC.2.E.6.3 Classify soil types based on color, texture (size of
particles), the ability to retain water, and the ability to support the growth of plants.
SC.3.N.1.6 Infer based on observation.SC.3.N.1.7 Explain that empirical evidence is information, such
as observations or measurements that is used to help validate explanations of natural phenomena.
SC.3.P.8.2 Measure and compare the mass and volume of solids
and liquids.SC.3.P.8.3 Compare materials and objects according to properties
such as size, shape, color, texture, and hardness.SC.3.N.1.3 Keep records as appropriate, such as pictorial, written,
or simple charts and graphs of investigations con-ducted.
SC.4.E.6.3 Recognize that humans need resources found on Earth
and that these are either renewable or nonrenewable.SC.4.E.6.6 Identify resources available in Florida (water, phos-
phate, oil, limestone, silicon, wind, and solar energy).SC.4.L.17.2 Explain that animals, including humans, cannot make
their own food, and that when animals eat plants or other animals, the energy stored in the food source is passed on to them.
SC.4.P.8.1 Measure and compare objects and materials based on
their physical properties including: mass, shape, vol-
ume, color, hardness, texture, odor, taste, and attraction to magnets.
SC.5.P.8.3 Demonstrate and explain that mixtures of solids can be
separated based on observable properties of their parts such as particle size, shape, color, and magnetic attraction.
SC.7.L.17.1 Explain and illustrate the roles of and relationships
among producers, consumers, and decomposers in the process of energy transfer in a food web.
SC.8.P.8.4 Classify and compare substances on the basis of char-
acteristic physical properties that can be demonstrated or measured; for example, density, thermal or electrical conductivity, solubility, magnetic properties, melting and boiling points, and know that these properties are independent of the amount of the sample.
English Language Arts – Writing:
LAFS.4.W.1.3 Write narratives to develop real or imagined experi-
ences or events using effective technique, descriptive details, and clear event sequences.
LAFS.4.W.2.4 Produce clear and coherent writing in which the
development and organization are appropriate to task, purpose, and audience. (Grade-specific expectations for writing types are defined in standards 1–3 above.)
LAFS.4.W.3.7 Conduct short research projects that build knowledge
through investigation of different aspects of a topic. LAFS.4.W.3.8 Recall relevant information from experiences or gather
relevant information from print and digital sources; take notes and categorize information, and provide a list of sources
LAFS.5.W.3.7 Conduct short research projects that use several
sources to build knowledge through investigation of different aspects of a topic.
LAFS.6.W.3.7 Conduct short research projects to answer a question,
drawing on several sources and refocusing the inquiry when appropriate.
English Language Arts – Writing: Text Types and Purposes:
LAFS.68.WHST.1.2 Write informative/explanatory texts, including the
narration of historical events, scientific procedures/ experiments, or technical processes.
LAFS.68.WHST.3.7 Conduct short research projects to answer a question
(including a self-generated question), drawing on
several sources and generating additional related, focused questions that allow for multiple avenues of exploration
English Language Arts - Speaking and Listening:
LAFS.4.SL.2.4 LAFS.5.SL.2.4 Report on a topic or text, tell a story, or recount an
experience in an organized manner, using appropriate facts and relevant, descriptive details to support main ideas or themes; speak clearly at an understandable pace.
LAFS.5-8.SL.1.1 Engage effectively in a range of collaborative discus-
sions (one-on-one, in groups, and teacher-led) with diverse partners on grade 6 topics, texts, and issues, building on others’ ideas and expressing their own clearly.
LAFS.6-8.SL.2.4 Present claims and findings, sequencing ideas logically
and using pertinent descriptions, facts, and details to accentuate main ideas or themes; use appropriate eye contact, adequate volume, and clear pronunciation.
Mathematics Standards:
MAFS.4.MD.1.1 Know relative sizes of measurement units within one
system of units including km, m, cm; kg, g; lb, oz.; l, ml; hr, min, sec. Within a single system of measure-ment, express measurements in a larger unit in terms of a smaller unit.
MAFS.4.NF.2.4 Apply and extend previous understandings of multipli-
cation to multiply a fraction by a whole number. MAFS.5.NF.1.2 Solve word problems involving addition and subtrac-
tion of fractions referring to the same whole, including cases of unlike denominators, e.g., by using visual fraction models or equations to represent the problem. Use benchmark fractions and number sense of fractions to estimate mentally and assess the reasonableness of answers.
MAFS.5.NF.2.6 Solve real world problems involving multiplication of
fractions and mixed numbers, e.g., by using visual frac-tion models or equations to represent the problem.
MAFS.5.MD.1.1 Convert among different-sized standard measurement
units (i.e., km, m, cm; kg, g; lb, oz.; l, ml; hr, min, sec) within a given measurement system (e.g., convert 5 cm to 0.05 m), and use these conversions in solving multi-step, real world problems.
MAFS.5.NBT.2.7 Apply and extend previous understandings of division
to divide unit fractions by whole numbers and whole numbers by unit fractions.
MAFS.6.NS.2.3 Fluently add, subtract, multiply, and divide multi-digit
decimals using the standard algorithm for each opera-tion.
Next Generation Science Standards:
2-PS1-1 Plan and conduct an investigation to describe and
classify different kinds of materials by their observable properties.
3-LS1-1 Develop models to describe that organisms have
unique and diverse life cycles but all have in common birth, growth, reproduction, and death.
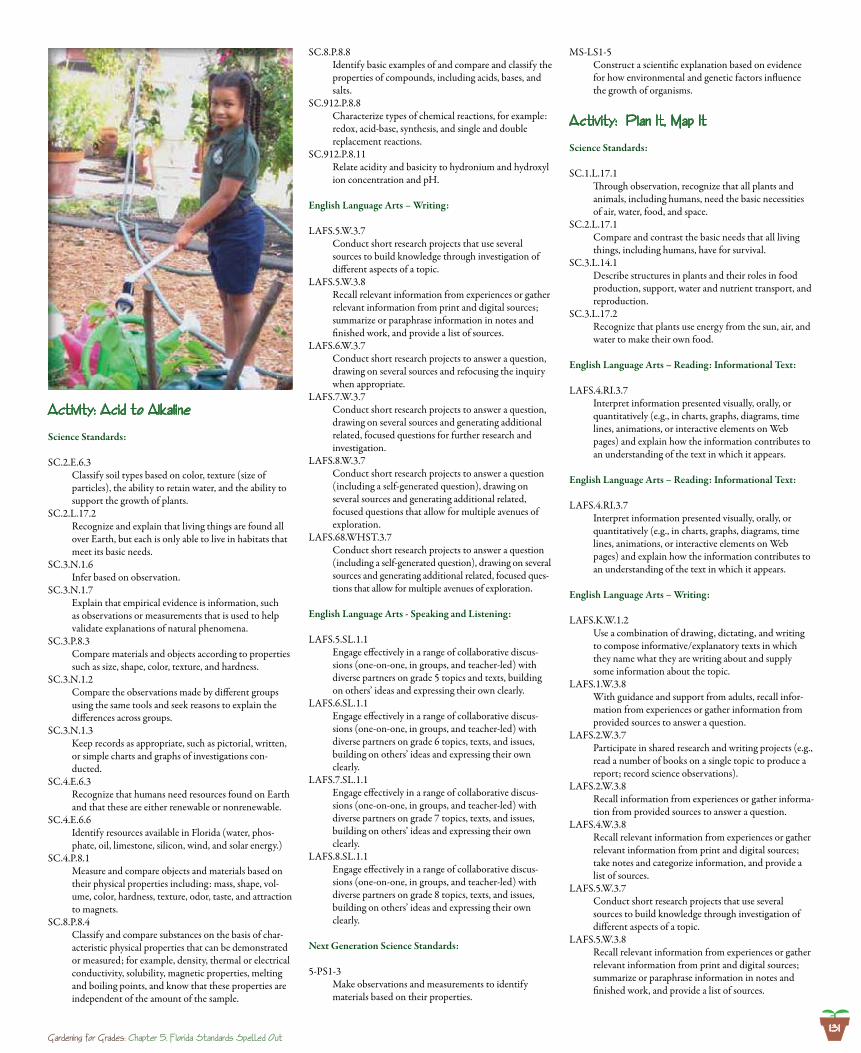
131Gardening for Grades: Chapter 5, F1orida Standards Spelled Out
Activity: Acid to A1ka1ine
Science Standards:
SC.2.E.6.3 Classify soil types based on color, texture (size of
particles), the ability to retain water, and the ability to support the growth of plants.
SC.2.L.17.2 Recognize and explain that living things are found all
over Earth, but each is only able to live in habitats that meet its basic needs.
SC.3.N.1.6 Infer based on observation.SC.3.N.1.7 Explain that empirical evidence is information, such
as observations or measurements that is used to help validate explanations of natural phenomena.
SC.3.P.8.3 Compare materials and objects according to properties
such as size, shape, color, texture, and hardness.SC.3.N.1.2 Compare the observations made by different groups
using the same tools and seek reasons to explain the differences across groups.
SC.3.N.1.3 Keep records as appropriate, such as pictorial, written,
or simple charts and graphs of investigations con-ducted.
SC.4.E.6.3 Recognize that humans need resources found on Earth
and that these are either renewable or nonrenewable.SC.4.E.6.6 Identify resources available in Florida (water, phos-
phate, oil, limestone, silicon, wind, and solar energy.)SC.4.P.8.1 Measure and compare objects and materials based on
their physical properties including: mass, shape, vol-ume, color, hardness, texture, odor, taste, and attraction to magnets.
SC.8.P.8.4 Classify and compare substances on the basis of char-
acteristic physical properties that can be demonstrated or measured; for example, density, thermal or electrical conductivity, solubility, magnetic properties, melting and boiling points, and know that these properties are independent of the amount of the sample.
SC.8.P.8.8 Identify basic examples of and compare and classify the
properties of compounds, including acids, bases, and salts.
SC.912.P.8.8 Characterize types of chemical reactions, for example:
redox, acid-base, synthesis, and single and double replacement reactions.
SC.912.P.8.11 Relate acidity and basicity to hydronium and hydroxyl
ion concentration and pH.
English Language Arts – Writing:
LAFS.5.W.3.7 Conduct short research projects that use several
sources to build knowledge through investigation of different aspects of a topic.
LAFS.5.W.3.8 Recall relevant information from experiences or gather
relevant information from print and digital sources; summarize or paraphrase information in notes and finished work, and provide a list of sources.
LAFS.6.W.3.7 Conduct short research projects to answer a question,
drawing on several sources and refocusing the inquiry when appropriate.
LAFS.7.W.3.7 Conduct short research projects to answer a question,
drawing on several sources and generating additional related, focused questions for further research and investigation.
LAFS.8.W.3.7 Conduct short research projects to answer a question
(including a self-generated question), drawing on several sources and generating additional related, focused questions that allow for multiple avenues of exploration.
LAFS.68.WHST.3.7 Conduct short research projects to answer a question
(including a self-generated question), drawing on several sources and generating additional related, focused ques-tions that allow for multiple avenues of exploration.
English Language Arts - Speaking and Listening:
LAFS.5.SL.1.1 Engage effectively in a range of collaborative discus-
sions (one-on-one, in groups, and teacher-led) with diverse partners on grade 5 topics and texts, building on others’ ideas and expressing their own clearly.
LAFS.6.SL.1.1 Engage effectively in a range of collaborative discus-
sions (one-on-one, in groups, and teacher-led) with diverse partners on grade 6 topics, texts, and issues, building on others’ ideas and expressing their own clearly.
LAFS.7.SL.1.1 Engage effectively in a range of collaborative discus-
sions (one-on-one, in groups, and teacher-led) with diverse partners on grade 7 topics, texts, and issues, building on others’ ideas and expressing their own clearly.
LAFS.8.SL.1.1 Engage effectively in a range of collaborative discus-
sions (one-on-one, in groups, and teacher-led) with diverse partners on grade 8 topics, texts, and issues, building on others’ ideas and expressing their own clearly.
Next Generation Science Standards:
5-PS1-3 Make observations and measurements to identify
materials based on their properties.
MS-LS1-5 Construct a scientific explanation based on evidence
for how environmental and genetic factors influence the growth of organisms.
Activity: P1an It, Map It
Science Standards:
SC.1.L.17.1 Through observation, recognize that all plants and
animals, including humans, need the basic necessities of air, water, food, and space.
SC.2.L.17.1 Compare and contrast the basic needs that all living
things, including humans, have for survival.SC.3.L.14.1 Describe structures in plants and their roles in food
production, support, water and nutrient transport, and reproduction.
SC.3.L.17.2 Recognize that plants use energy from the sun, air, and
water to make their own food.
English Language Arts – Reading: Informational Text:
LAFS.4.RI.3.7 Interpret information presented visually, orally, or
quantitatively (e.g., in charts, graphs, diagrams, time lines, animations, or interactive elements on Web pages) and explain how the information contributes to an understanding of the text in which it appears.
English Language Arts – Writing:
LAFS.K.W.1.2 Use a combination of drawing, dictating, and writing
to compose informative/explanatory texts in which they name what they are writing about and supply some information about the topic.
LAFS.1.W.3.8 With guidance and support from adults, recall infor-
mation from experiences or gather information from provided sources to answer a question.
LAFS.2.W.3.7 Participate in shared research and writing projects (e.g.,
read a number of books on a single topic to produce a report; record science observations).
LAFS.2.W.3.8 Recall information from experiences or gather informa-
tion from provided sources to answer a question.LAFS.4.W.3.8 Recall relevant information from experiences or gather
relevant information from print and digital sources; take notes and categorize information, and provide a list of sources.
LAFS.5.W.3.7 Conduct short research projects that use several
sources to build knowledge through investigation of different aspects of a topic.
LAFS.5.W.3.8 Recall relevant information from experiences or gather
relevant information from print and digital sources; summarize or paraphrase information in notes and finished work, and provide a list of sources.

132Gardening for Grades: Chapter 5, F1orida Standards Spe1 1ed Out
LAFS.68.WHST.3-7 Conduct short research projects to answer a question
(including a self-generated question), drawing on several sources and generating additional related, focused questions that allow for multiple avenues of exploration.
English Language Arts – Science and Technical Subjects:
LAFS.68.RST.1.3 Follow precisely a multistep procedure when carrying
out experiments, taking measurements, or performing technical tasks.
LAFS.68.RST.3.7 Integrate quantitative or technical information
expressed in words in a text with a version of that infor-mation expressed visually (e.g., in a flowchart, diagram, model, graph, or table).
English and Language Arts - Speaking and Listening:
LAFS.K.SL.2.5 Add drawings or other visual displays to descriptions as
desired to provide additional detail. LAFS.1.SL.1.1 Participate in collaborative conversations with diverse
partners about grade 1 topics and texts with peers and adults in small and larger groups.
LAFS.5-7.SL.1.1 Engage effectively in a range of collaborative discus-
sions (one-on-one, in groups, and teacher-led) with diverse partners on grade 5 topics and texts, building on others’ ideas and expressing their own clearly.
LAFS.7.SL.2.4 Present claims and findings, emphasizing salient points
in a focused, coherent manner with pertinent descrip-tions, facts, details, and examples; use appropriate eye contact, adequate volume, and clear pronunciation.
LAFS.7.SL.2.5 Include multimedia components and visual displays
in presentations to clarify claims and findings and emphasize salient points.
Mathematics Standards:
MAFS.K.MD.1.1 Describe measurable attributes of objects, such as
length or weight. Describe several measurable attri-butes of a single object.
MAFS.K.MD.1.2 Directly compare two objects with a measurable
attribute in common, to see which object has “more of ”/“less of ” the attribute, and describe the differ-ence. For example, directly compare the heights of two children and describe one child as taller/shorter.
MAFS.K.MD.2.3 Classify objects into given categories; count the num-
bers of objects in each category and sort the categories by count.
MAFS.1.OA.1.1 Use addition and subtraction within 20 to solve word
problems involving situations of adding to, taking from, putting together, taking apart, and compar-ing, with unknowns in all positions, e.g., by using objects drawings, and equations with a symbol for the unknown number to represent the problem.
MAFS.1.OA.1.2 Solve word problems that call for addition of three
whole numbers whose sum is less than or equal to 20, e.g., by using objects, drawings, and equations with a symbol for the unknown number to represent the problem.
MAFS.1.MD.3.4 Organize, represent, and interpret data with up to three
categories; ask and answer questions about the total number of data points, how many in each category, and how many more or less are in one category than in another.
MAFS.2.OA.1.1 Use addition and subtraction within 100 to solve one-
and two-step word problems involving situations of adding to, taking from, putting together, taking apart, and comparing, with unknowns in all positions, e.g., by using drawings and equations with a symbol for the unknown number to represent the problem.
MAFS.2.MD.1.1 Measure the length of an object to the nearest inch,
foot, centimeter, or meter by selecting and using ap-propriate tools such as rulers, yardsticks, meter sticks, and measuring tapes.
MAFS.2.MD.1.2 Describe the inverse relationship between the size of
a unit and number of units needed to measure a given object.
MAFS.2.MD.1.3 Estimate lengths using units of inches, feet, yards, centi-
meters, and meters.MAFS.3.MD.3.6 Measure areas by counting unit squares (square cm,
square m, square in, square ft, and improvised units).MAFS.3.MD.3.7 Relate area to the operations of multiplication and
addition. a. Find the area of a rectangle with whole-number side
lengths by tiling it, and show that the area is the same as would be found by multiplying the side lengths.
b. Multiply side lengths to find areas of rectangles with whole number side lengths in the context of solving real world and mathematical problems, and represent whole-number products as rectangular areas in math-ematical reasoning.
c. Use tiling to show in a concrete case that the area of a rectangle with whole-number side lengths a and b + c is the sum of a × b and a × c. Use area models to represent the distributive property in mathematical reasoning.
d. Recognize area as additive. Find areas of rectilinear figures by decomposing them into non-overlapping rect-angles and adding the areas of the non-overlapping parts, applying this technique to solve real-world problems.
MAFS.3.MD.4.8 Solve real-world and mathematical problems involving
perimeters of polygons, including finding the perimeter given the side lengths, finding an unknown side length, and exhibiting rectangles with the same perimeter
and different areas or with the same area and different perimeters.
MAFS.3.G.1.2 Partition shapes into parts with equal areas. Express
the area of each part as a unit fraction of the whole. For example, partition a shape into 4 parts with equal area, and describe the area of each part as 1/4 of the area of the shape.
MAFS.4.OA.1.1 Interpret a multiplication equation as a comparison,
e.g., interpret 35 = 5 × 7 as a statement that 35MAFS.4.MD.1.2 Use the four operations to solve word problems involv-
ing distances, intervals of time, and money, including problems involving simple fractions or decimals. Repre-sent fractional quantities of distance and intervals of time using linear models
MAFS.4.MD.1.3 Apply the area and perimeter formulas for rectangles
in real world and mathematical problems. For example, find the width of a rectangular room given the area of the flooring and the length, by viewing the area formula as a multiplication equation with an unknown factor.
MAFS.5.NF.2.6 Solve real world problems involving multiplication of
fractions and mixed numbers, e.g., by using visual frac-tion models or equations to represent the problem.
MAFS.5.MD.1.1 Convert among different-sized standard measurement
units (i.e. km, m, cm, kg, g, lb, oz, l, ml, hr, min, sec) within a given measurement system (e.g., convert 5 cm to 0.05 m), and use these conversions in solving multi-step, real world problems.
MAFS.6.EE.2.6 Use variables to represent numbers and write expres-
sions when solving a real-world or mathematical problem; understand that a variable can represent an unknown number, or, depending on the purpose at hand, any number in a specified set.
MAFS.6.EE.2.7 Solve real-world and mathematical problems by writing
and solving equations of the form x + p = q and px = q for cases in which p, q and x are all nonnegative rational numbers.
MAFS.7.RP.1.2 Recognize and represent proportional relationships
between quantities. a. Decide whether two quantities are in a proportional
relationship, e.g., by testing for equivalent ratios in a table or graphing on a coordinate plane and observing whether the graph is a straight line through the origin.
b. Identify the constant of proportionality (unit rate) in tables, graphs, equations, diagrams, and verbal descriptions of proportional relationships.
c. Represent proportional relationships by equations. For example, if total cost t is proportional to the number n of items purchased at a constant price p, the relationship between the total cost and the number of items can be expressed as t = pn.
Next Generation Science Standards:
K-LS1-1 Use observations to describe patterns of what plants
and animals (including humans) need to survive.K-ESS3-1 Use a model to represent the relationship between
the needs of different plants or animals (including humans) and the places they live.
K-ESS2-1 Use and share observations of local weather conditions
to describe patterns over time.K-PS3-1 Make observations to determine the effect of sunlight
on Earth’s surface.
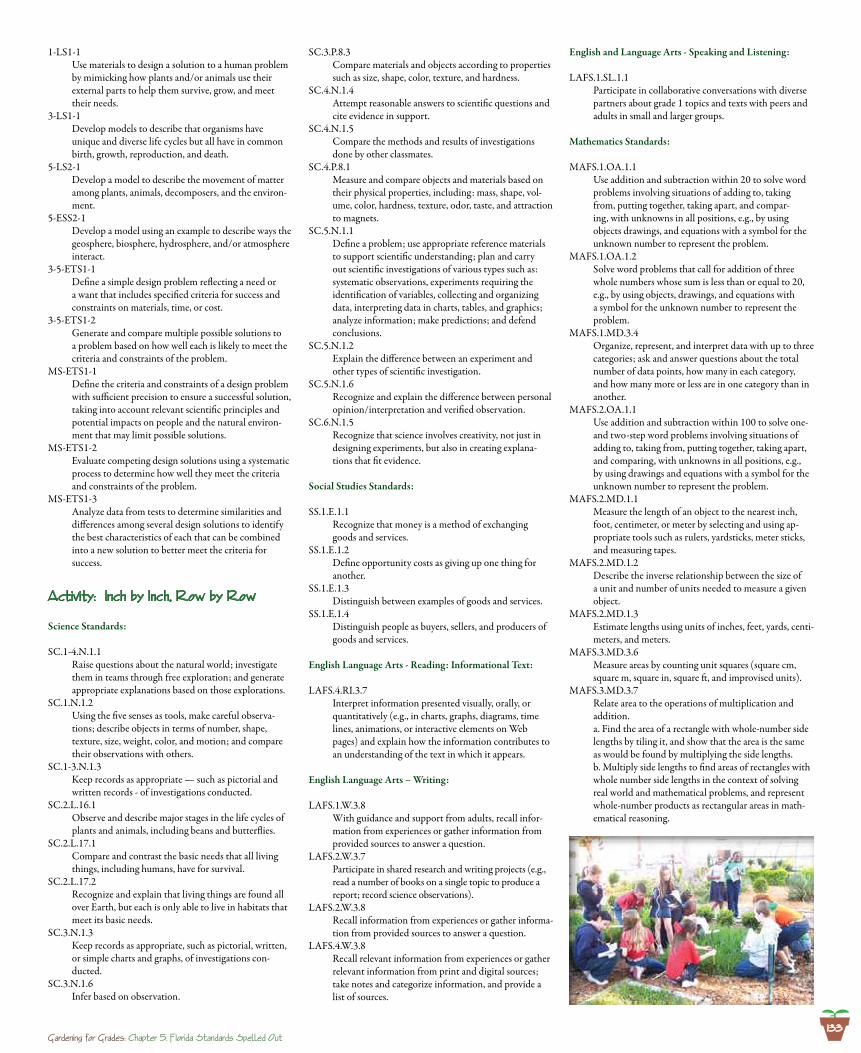
133Gardening for Grades: Chapter 5, F1orida Standards Spelled Out
1-LS1-1 Use materials to design a solution to a human problem
by mimicking how plants and/or animals use their external parts to help them survive, grow, and meet their needs.
3-LS1-1 Develop models to describe that organisms have
unique and diverse life cycles but all have in common birth, growth, reproduction, and death.
5-LS2-1 Develop a model to describe the movement of matter
among plants, animals, decomposers, and the environ-ment.
5-ESS2-1 Develop a model using an example to describe ways the
geosphere, biosphere, hydrosphere, and/or atmosphere interact.
3-5-ETS1-1 Define a simple design problem reflecting a need or
a want that includes specified criteria for success and constraints on materials, time, or cost.
3-5-ETS1-2 Generate and compare multiple possible solutions to
a problem based on how well each is likely to meet the criteria and constraints of the problem.
MS-ETS1-1 Define the criteria and constraints of a design problem
with sufficient precision to ensure a successful solution, taking into account relevant scientific principles and potential impacts on people and the natural environ-ment that may limit possible solutions.
MS-ETS1-2 Evaluate competing design solutions using a systematic
process to determine how well they meet the criteria and constraints of the problem.
MS-ETS1-3 Analyze data from tests to determine similarities and
differences among several design solutions to identify the best characteristics of each that can be combined into a new solution to better meet the criteria for success.
Activity: Inch by Inch, Row by Row
Science Standards:
SC.1-4.N.1.1 Raise questions about the natural world; investigate
them in teams through free exploration; and generate appropriate explanations based on those explorations.
SC.1.N.1.2 Using the five senses as tools, make careful observa-
tions; describe objects in terms of number, shape, texture, size, weight, color, and motion; and compare their observations with others.
SC.1-3.N.1.3 Keep records as appropriate — such as pictorial and
written records - of investigations conducted.SC.2.L.16.1 Observe and describe major stages in the life cycles of
plants and animals, including beans and butterflies.SC.2.L.17.1 Compare and contrast the basic needs that all living
things, including humans, have for survival.SC.2.L.17.2 Recognize and explain that living things are found all
over Earth, but each is only able to live in habitats that meet its basic needs.
SC.3.N.1.3 Keep records as appropriate, such as pictorial, written,
or simple charts and graphs, of investigations con-ducted.
SC.3.N.1.6 Infer based on observation.
SC.3.P.8.3 Compare materials and objects according to properties
such as size, shape, color, texture, and hardness.SC.4.N.1.4 Attempt reasonable answers to scientific questions and
cite evidence in support.SC.4.N.1.5 Compare the methods and results of investigations
done by other classmates.SC.4.P.8.1 Measure and compare objects and materials based on
their physical properties, including: mass, shape, vol-ume, color, hardness, texture, odor, taste, and attraction to magnets.
SC.5.N.1.1 Define a problem; use appropriate reference materials
to support scientific understanding; plan and carry out scientific investigations of various types such as: systematic observations, experiments requiring the identification of variables, collecting and organizing data, interpreting data in charts, tables, and graphics; analyze information; make predictions; and defend conclusions.
SC.5.N.1.2 Explain the difference between an experiment and
other types of scientific investigation.SC.5.N.1.6 Recognize and explain the difference between personal
opinion/interpretation and verified observation.SC.6.N.1.5 Recognize that science involves creativity, not just in
designing experiments, but also in creating explana-tions that fit evidence.
Social Studies Standards:
SS.1.E.1.1 Recognize that money is a method of exchanging
goods and services.SS.1.E.1.2 Define opportunity costs as giving up one thing for
another.SS.1.E.1.3 Distinguish between examples of goods and services.SS.1.E.1.4 Distinguish people as buyers, sellers, and producers of
goods and services.
English Language Arts - Reading: Informational Text:
LAFS.4.RI.3.7 Interpret information presented visually, orally, or
quantitatively (e.g., in charts, graphs, diagrams, time lines, animations, or interactive elements on Web pages) and explain how the information contributes to an understanding of the text in which it appears.
English Language Arts – Writing:
LAFS.1.W.3.8 With guidance and support from adults, recall infor-
mation from experiences or gather information from provided sources to answer a question.
LAFS.2.W.3.7 Participate in shared research and writing projects (e.g.,
read a number of books on a single topic to produce a report; record science observations).
LAFS.2.W.3.8 Recall information from experiences or gather informa-
tion from provided sources to answer a question.LAFS.4.W.3.8 Recall relevant information from experiences or gather
relevant information from print and digital sources; take notes and categorize information, and provide a list of sources.
English and Language Arts - Speaking and Listening:
LAFS.1.SL.1.1 Participate in collaborative conversations with diverse
partners about grade 1 topics and texts with peers and adults in small and larger groups.
Mathematics Standards:
MAFS.1.OA.1.1 Use addition and subtraction within 20 to solve word
problems involving situations of adding to, taking from, putting together, taking apart, and compar-ing, with unknowns in all positions, e.g., by using objects drawings, and equations with a symbol for the unknown number to represent the problem.
MAFS.1.OA.1.2 Solve word problems that call for addition of three
whole numbers whose sum is less than or equal to 20, e.g., by using objects, drawings, and equations with a symbol for the unknown number to represent the problem.
MAFS.1.MD.3.4 Organize, represent, and interpret data with up to three
categories; ask and answer questions about the total number of data points, how many in each category, and how many more or less are in one category than in another.
MAFS.2.OA.1.1 Use addition and subtraction within 100 to solve one-
and two-step word problems involving situations of adding to, taking from, putting together, taking apart, and comparing, with unknowns in all positions, e.g., by using drawings and equations with a symbol for the unknown number to represent the problem.
MAFS.2.MD.1.1 Measure the length of an object to the nearest inch,
foot, centimeter, or meter by selecting and using ap-propriate tools such as rulers, yardsticks, meter sticks, and measuring tapes.
MAFS.2.MD.1.2 Describe the inverse relationship between the size of
a unit and number of units needed to measure a given object.
MAFS.2.MD.1.3 Estimate lengths using units of inches, feet, yards, centi-
meters, and meters.MAFS.3.MD.3.6 Measure areas by counting unit squares (square cm,
square m, square in, square ft, and improvised units).MAFS.3.MD.3.7 Relate area to the operations of multiplication and
addition. a. Find the area of a rectangle with whole-number side
lengths by tiling it, and show that the area is the same as would be found by multiplying the side lengths.
b. Multiply side lengths to find areas of rectangles with whole number side lengths in the context of solving real world and mathematical problems, and represent whole-number products as rectangular areas in math-ematical reasoning.
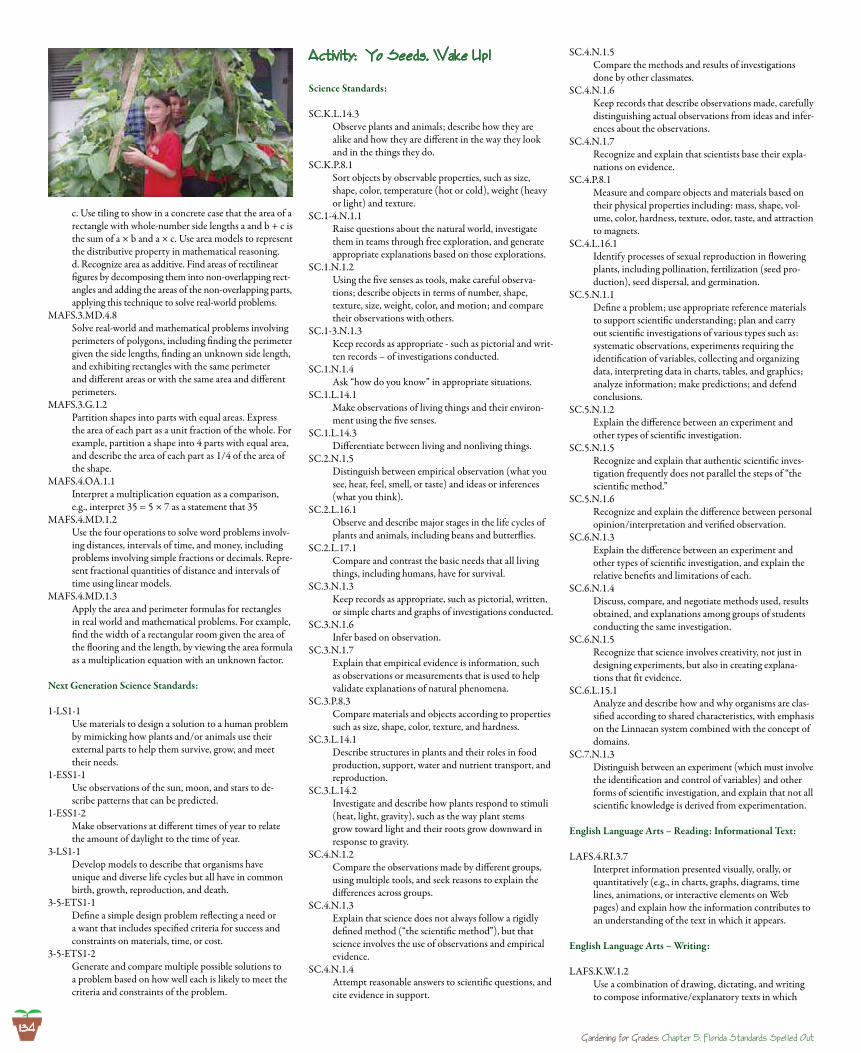
134Gardening for Grades: Chapter 5, F1orida Standards Spe1 1ed Out
c. Use tiling to show in a concrete case that the area of a rectangle with whole-number side lengths a and b + c is the sum of a × b and a × c. Use area models to represent the distributive property in mathematical reasoning.
d. Recognize area as additive. Find areas of rectilinear figures by decomposing them into non-overlapping rect-angles and adding the areas of the non-overlapping parts, applying this technique to solve real-world problems.
MAFS.3.MD.4.8 Solve real-world and mathematical problems involving
perimeters of polygons, including finding the perimeter given the side lengths, finding an unknown side length, and exhibiting rectangles with the same perimeter and different areas or with the same area and different perimeters.
MAFS.3.G.1.2 Partition shapes into parts with equal areas. Express
the area of each part as a unit fraction of the whole. For example, partition a shape into 4 parts with equal area, and describe the area of each part as 1/4 of the area of the shape.
MAFS.4.OA.1.1 Interpret a multiplication equation as a comparison,
e.g., interpret 35 = 5 × 7 as a statement that 35MAFS.4.MD.1.2 Use the four operations to solve word problems involv-
ing distances, intervals of time, and money, including problems involving simple fractions or decimals. Repre-sent fractional quantities of distance and intervals of time using linear models.
MAFS.4.MD.1.3 Apply the area and perimeter formulas for rectangles
in real world and mathematical problems. For example, find the width of a rectangular room given the area of the flooring and the length, by viewing the area formula as a multiplication equation with an unknown factor.
Next Generation Science Standards:
1-LS1-1 Use materials to design a solution to a human problem
by mimicking how plants and/or animals use their external parts to help them survive, grow, and meet their needs.
1-ESS1-1 Use observations of the sun, moon, and stars to de-
scribe patterns that can be predicted.1-ESS1-2 Make observations at different times of year to relate
the amount of daylight to the time of year.3-LS1-1 Develop models to describe that organisms have
unique and diverse life cycles but all have in common birth, growth, reproduction, and death.
3-5-ETS1-1 Define a simple design problem reflecting a need or
a want that includes specified criteria for success and constraints on materials, time, or cost.
3-5-ETS1-2 Generate and compare multiple possible solutions to
a problem based on how well each is likely to meet the criteria and constraints of the problem.
Activity: Yo Seeds, Wake Up!
Science Standards:
SC.K.L.14.3 Observe plants and animals; describe how they are
alike and how they are different in the way they look and in the things they do.
SC.K.P.8.1 Sort objects by observable properties, such as size,
shape, color, temperature (hot or cold), weight (heavy or light) and texture.
SC.1-4.N.1.1 Raise questions about the natural world, investigate
them in teams through free exploration, and generate appropriate explanations based on those explorations.
SC.1.N.1.2 Using the five senses as tools, make careful observa-
tions; describe objects in terms of number, shape, texture, size, weight, color, and motion; and compare their observations with others.
SC.1-3.N.1.3 Keep records as appropriate - such as pictorial and writ-
ten records – of investigations conducted.SC.1.N.1.4 Ask “how do you know” in appropriate situations.SC.1.L.14.1 Make observations of living things and their environ-
ment using the five senses.SC.1.L.14.3 Differentiate between living and nonliving things.SC.2.N.1.5 Distinguish between empirical observation (what you
see, hear, feel, smell, or taste) and ideas or inferences (what you think).
SC.2.L.16.1 Observe and describe major stages in the life cycles of
plants and animals, including beans and butterflies.SC.2.L.17.1 Compare and contrast the basic needs that all living
things, including humans, have for survival.SC.3.N.1.3 Keep records as appropriate, such as pictorial, written,
or simple charts and graphs of investigations conducted.SC.3.N.1.6 Infer based on observation.SC.3.N.1.7 Explain that empirical evidence is information, such
as observations or measurements that is used to help validate explanations of natural phenomena.
SC.3.P.8.3 Compare materials and objects according to properties
such as size, shape, color, texture, and hardness.SC.3.L.14.1 Describe structures in plants and their roles in food
production, support, water and nutrient transport, and reproduction.
SC.3.L.14.2 Investigate and describe how plants respond to stimuli
(heat, light, gravity), such as the way plant stems grow toward light and their roots grow downward in response to gravity.
SC.4.N.1.2 Compare the observations made by different groups,
using multiple tools, and seek reasons to explain the differences across groups.
SC.4.N.1.3 Explain that science does not always follow a rigidly
defined method (“the scientific method”), but that science involves the use of observations and empirical evidence.
SC.4.N.1.4 Attempt reasonable answers to scientific questions, and
cite evidence in support.
SC.4.N.1.5 Compare the methods and results of investigations
done by other classmates.SC.4.N.1.6 Keep records that describe observations made, carefully
distinguishing actual observations from ideas and infer-ences about the observations.
SC.4.N.1.7 Recognize and explain that scientists base their expla-
nations on evidence.SC.4.P.8.1 Measure and compare objects and materials based on
their physical properties including: mass, shape, vol-ume, color, hardness, texture, odor, taste, and attraction to magnets.
SC.4.L.16.1 Identify processes of sexual reproduction in flowering
plants, including pollination, fertilization (seed pro-duction), seed dispersal, and germination.
SC.5.N.1.1 Define a problem; use appropriate reference materials
to support scientific understanding; plan and carry out scientific investigations of various types such as: systematic observations, experiments requiring the identification of variables, collecting and organizing data, interpreting data in charts, tables, and graphics; analyze information; make predictions; and defend conclusions.
SC.5.N.1.2 Explain the difference between an experiment and
other types of scientific investigation.SC.5.N.1.5 Recognize and explain that authentic scientific inves-
tigation frequently does not parallel the steps of “the scientific method.”
SC.5.N.1.6 Recognize and explain the difference between personal
opinion/interpretation and verified observation.SC.6.N.1.3 Explain the difference between an experiment and
other types of scientific investigation, and explain the relative benefits and limitations of each.
SC.6.N.1.4 Discuss, compare, and negotiate methods used, results
obtained, and explanations among groups of students conducting the same investigation.
SC.6.N.1.5 Recognize that science involves creativity, not just in
designing experiments, but also in creating explana-tions that fit evidence.
SC.6.L.15.1 Analyze and describe how and why organisms are clas-
sified according to shared characteristics, with emphasis on the Linnaean system combined with the concept of domains.
SC.7.N.1.3 Distinguish between an experiment (which must involve
the identification and control of variables) and other forms of scientific investigation, and explain that not all scientific knowledge is derived from experimentation.
English Language Arts – Reading: Informational Text:
LAFS.4.RI.3.7 Interpret information presented visually, orally, or
quantitatively (e.g., in charts, graphs, diagrams, time lines, animations, or interactive elements on Web pages) and explain how the information contributes to an understanding of the text in which it appears.
English Language Arts – Writing:
LAFS.K.W.1.2 Use a combination of drawing, dictating, and writing
to compose informative/explanatory texts in which
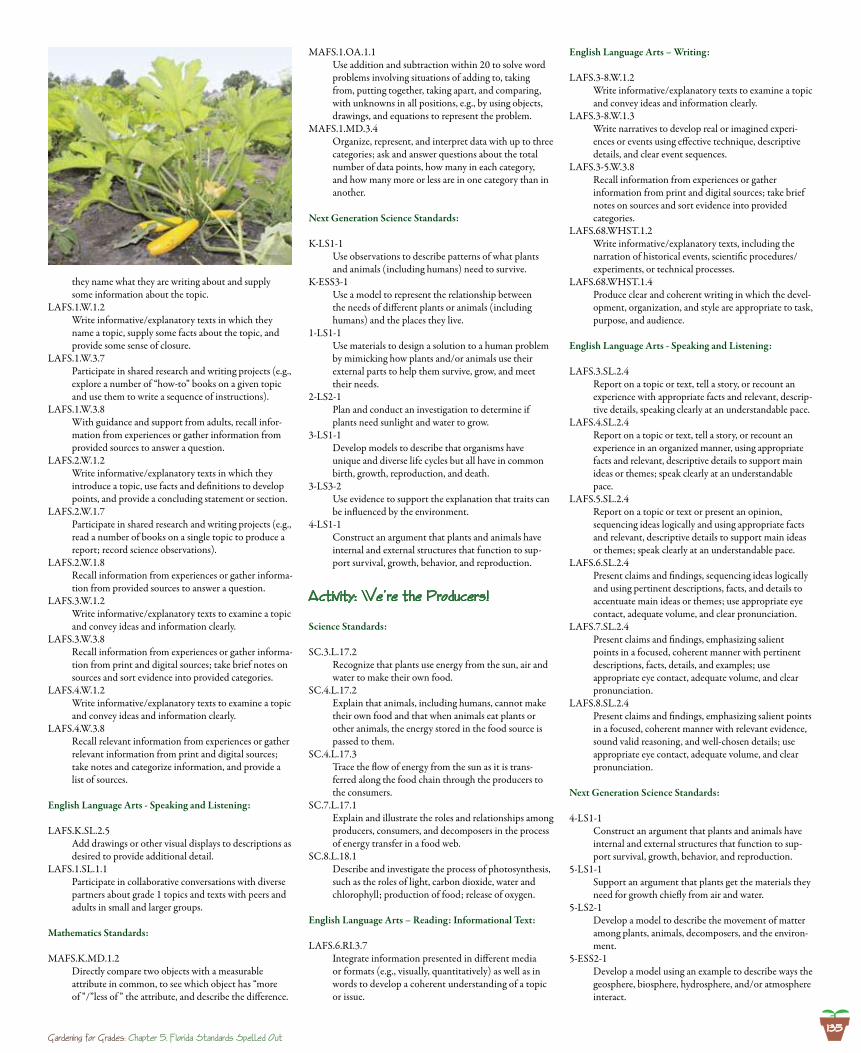
135Gardening for Grades: Chapter 5, F1orida Standards Spelled Out
they name what they are writing about and supply some information about the topic.
LAFS.1.W.1.2 Write informative/explanatory texts in which they
name a topic, supply some facts about the topic, and provide some sense of closure.
LAFS.1.W.3.7 Participate in shared research and writing projects (e.g.,
explore a number of “how-to” books on a given topic and use them to write a sequence of instructions).
LAFS.1.W.3.8 With guidance and support from adults, recall infor-
mation from experiences or gather information from provided sources to answer a question.
LAFS.2.W.1.2 Write informative/explanatory texts in which they
introduce a topic, use facts and definitions to develop points, and provide a concluding statement or section.
LAFS.2.W.1.7 Participate in shared research and writing projects (e.g.,
read a number of books on a single topic to produce a report; record science observations).
LAFS.2.W.1.8 Recall information from experiences or gather informa-
tion from provided sources to answer a question.LAFS.3.W.1.2 Write informative/explanatory texts to examine a topic
and convey ideas and information clearly.LAFS.3.W.3.8 Recall information from experiences or gather informa-
tion from print and digital sources; take brief notes on sources and sort evidence into provided categories.
LAFS.4.W.1.2 Write informative/explanatory texts to examine a topic
and convey ideas and information clearly.LAFS.4.W.3.8 Recall relevant information from experiences or gather
relevant information from print and digital sources; take notes and categorize information, and provide a list of sources.
English Language Arts - Speaking and Listening:
LAFS.K.SL.2.5 Add drawings or other visual displays to descriptions as
desired to provide additional detail.LAFS.1.SL.1.1 Participate in collaborative conversations with diverse
partners about grade 1 topics and texts with peers and adults in small and larger groups.
Mathematics Standards:
MAFS.K.MD.1.2 Directly compare two objects with a measurable
attribute in common, to see which object has “more of ”/”less of ” the attribute, and describe the difference.
MAFS.1.OA.1.1 Use addition and subtraction within 20 to solve word
problems involving situations of adding to, taking from, putting together, taking apart, and comparing, with unknowns in all positions, e.g., by using objects, drawings, and equations to represent the problem.
MAFS.1.MD.3.4 Organize, represent, and interpret data with up to three
categories; ask and answer questions about the total number of data points, how many in each category, and how many more or less are in one category than in another.
Next Generation Science Standards:
K-LS1-1 Use observations to describe patterns of what plants
and animals (including humans) need to survive.K-ESS3-1 Use a model to represent the relationship between
the needs of different plants or animals (including humans) and the places they live.
1-LS1-1 Use materials to design a solution to a human problem
by mimicking how plants and/or animals use their external parts to help them survive, grow, and meet their needs.
2-LS2-1 Plan and conduct an investigation to determine if
plants need sunlight and water to grow.3-LS1-1 Develop models to describe that organisms have
unique and diverse life cycles but all have in common birth, growth, reproduction, and death.
3-LS3-2 Use evidence to support the explanation that traits can
be influenced by the environment.4-LS1-1 Construct an argument that plants and animals have
internal and external structures that function to sup-port survival, growth, behavior, and reproduction.
Activity: We’re the Producers!
Science Standards:
SC.3.L.17.2 Recognize that plants use energy from the sun, air and
water to make their own food.SC.4.L.17.2 Explain that animals, including humans, cannot make
their own food and that when animals eat plants or other animals, the energy stored in the food source is passed to them.
SC.4.L.17.3 Trace the flow of energy from the sun as it is trans-
ferred along the food chain through the producers to the consumers.
SC.7.L.17.1 Explain and illustrate the roles and relationships among
producers, consumers, and decomposers in the process of energy transfer in a food web.
SC.8.L.18.1 Describe and investigate the process of photosynthesis,
such as the roles of light, carbon dioxide, water and chlorophyll; production of food; release of oxygen.
English Language Arts – Reading: Informational Text:
LAFS.6.RI.3.7 Integrate information presented in different media
or formats (e.g., visually, quantitatively) as well as in words to develop a coherent understanding of a topic or issue.
English Language Arts – Writing:
LAFS.3-8.W.1.2 Write informative/explanatory texts to examine a topic
and convey ideas and information clearly.LAFS.3-8.W.1.3 Write narratives to develop real or imagined experi-
ences or events using effective technique, descriptive details, and clear event sequences.
LAFS.3-5.W.3.8 Recall information from experiences or gather
information from print and digital sources; take brief notes on sources and sort evidence into provided categories.
LAFS.68.WHST.1.2 Write informative/explanatory texts, including the
narration of historical events, scientific procedures/ experiments, or technical processes.
LAFS.68.WHST.1.4 Produce clear and coherent writing in which the devel-
opment, organization, and style are appropriate to task, purpose, and audience.
English Language Arts - Speaking and Listening:
LAFS.3.SL.2.4 Report on a topic or text, tell a story, or recount an
experience with appropriate facts and relevant, descrip-tive details, speaking clearly at an understandable pace.
LAFS.4.SL.2.4 Report on a topic or text, tell a story, or recount an
experience in an organized manner, using appropriate facts and relevant, descriptive details to support main ideas or themes; speak clearly at an understandable pace.
LAFS.5.SL.2.4 Report on a topic or text or present an opinion,
sequencing ideas logically and using appropriate facts and relevant, descriptive details to support main ideas or themes; speak clearly at an understandable pace.
LAFS.6.SL.2.4 Present claims and findings, sequencing ideas logically
and using pertinent descriptions, facts, and details to accentuate main ideas or themes; use appropriate eye contact, adequate volume, and clear pronunciation.
LAFS.7.SL.2.4 Present claims and findings, emphasizing salient
points in a focused, coherent manner with pertinent descriptions, facts, details, and examples; use appropriate eye contact, adequate volume, and clear pronunciation.
LAFS.8.SL.2.4 Present claims and findings, emphasizing salient points
in a focused, coherent manner with relevant evidence, sound valid reasoning, and well-chosen details; use appropriate eye contact, adequate volume, and clear pronunciation.
Next Generation Science Standards:
4-LS1-1 Construct an argument that plants and animals have
internal and external structures that function to sup-port survival, growth, behavior, and reproduction.
5-LS1-1 Support an argument that plants get the materials they
need for growth chiefly from air and water.5-LS2-1 Develop a model to describe the movement of matter
among plants, animals, decomposers, and the environ-ment.
5-ESS2-1 Develop a model using an example to describe ways the
geosphere, biosphere, hydrosphere, and/or atmosphere interact.
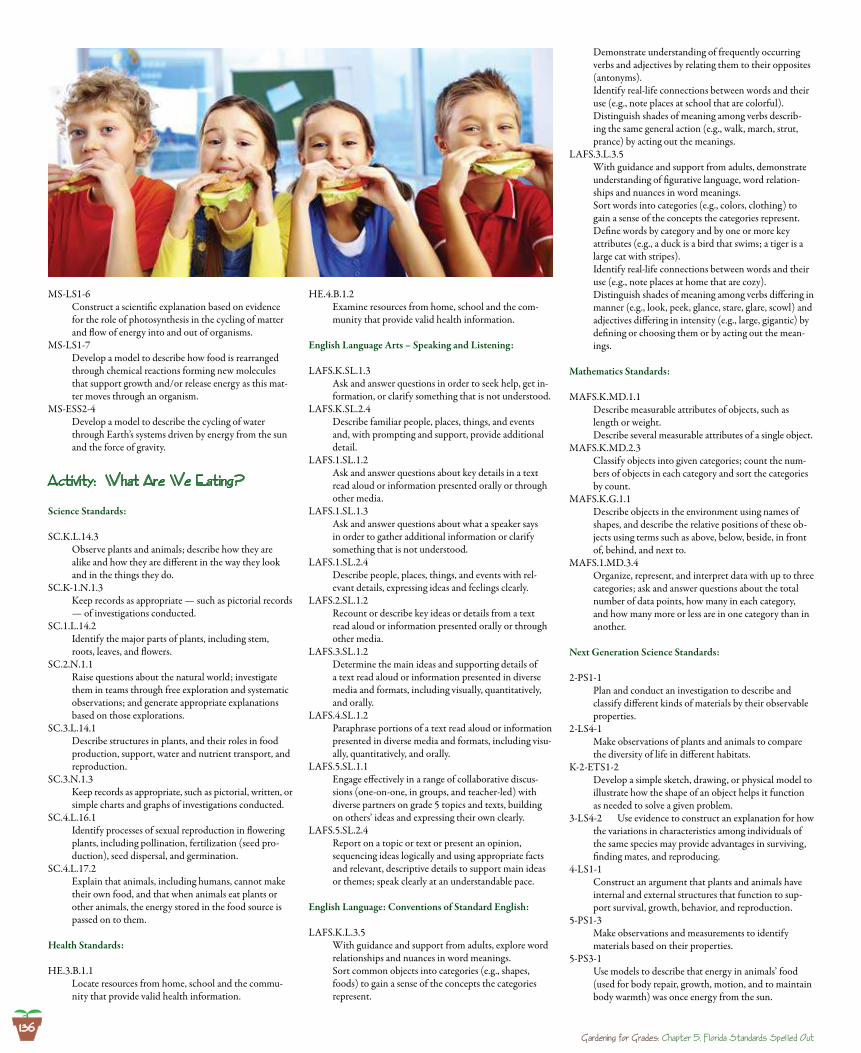
136Gardening for Grades: Chapter 5, F1orida Standards Spe1 1ed Out
MS-LS1-6 Construct a scientific explanation based on evidence
for the role of photosynthesis in the cycling of matter and flow of energy into and out of organisms.
MS-LS1-7 Develop a model to describe how food is rearranged
through chemical reactions forming new molecules that support growth and/or release energy as this mat-ter moves through an organism.
MS-ESS2-4 Develop a model to describe the cycling of water
through Earth’s systems driven by energy from the sun and the force of gravity.
Activity: What Are We Eating?
Science Standards:
SC.K.L.14.3 Observe plants and animals; describe how they are
alike and how they are different in the way they look and in the things they do.
SC.K-1.N.1.3 Keep records as appropriate — such as pictorial records
— of investigations conducted.SC.1.L.14.2 Identify the major parts of plants, including stem,
roots, leaves, and flowers.SC.2.N.1.1 Raise questions about the natural world; investigate
them in teams through free exploration and systematic observations; and generate appropriate explanations based on those explorations.
SC.3.L.14.1 Describe structures in plants, and their roles in food
production, support, water and nutrient transport, and reproduction.
SC.3.N.1.3 Keep records as appropriate, such as pictorial, written, or
simple charts and graphs of investigations conducted.SC.4.L.16.1 Identify processes of sexual reproduction in flowering
plants, including pollination, fertilization (seed pro-duction), seed dispersal, and germination.
SC.4.L.17.2 Explain that animals, including humans, cannot make
their own food, and that when animals eat plants or other animals, the energy stored in the food source is passed on to them.
Health Standards:
HE.3.B.1.1 Locate resources from home, school and the commu-
nity that provide valid health information.
HE.4.B.1.2 Examine resources from home, school and the com-
munity that provide valid health information.
English Language Arts – Speaking and Listening:
LAFS.K.SL.1.3 Ask and answer questions in order to seek help, get in-
formation, or clarify something that is not understood.LAFS.K.SL.2.4 Describe familiar people, places, things, and events
and, with prompting and support, provide additional detail.
LAFS.1.SL.1.2 Ask and answer questions about key details in a text
read aloud or information presented orally or through other media.
LAFS.1.SL.1.3 Ask and answer questions about what a speaker says
in order to gather additional information or clarify something that is not understood.
LAFS.1.SL.2.4 Describe people, places, things, and events with rel-
evant details, expressing ideas and feelings clearly.LAFS.2.SL.1.2 Recount or describe key ideas or details from a text
read aloud or information presented orally or through other media.
LAFS.3.SL.1.2 Determine the main ideas and supporting details of
a text read aloud or information presented in diverse media and formats, including visually, quantitatively, and orally.
LAFS.4.SL.1.2 Paraphrase portions of a text read aloud or information
presented in diverse media and formats, including visu-ally, quantitatively, and orally.
LAFS.5.SL.1.1 Engage effectively in a range of collaborative discus-
sions (one-on-one, in groups, and teacher-led) with diverse partners on grade 5 topics and texts, building on others’ ideas and expressing their own clearly.
LAFS.5.SL.2.4 Report on a topic or text or present an opinion,
sequencing ideas logically and using appropriate facts and relevant, descriptive details to support main ideas or themes; speak clearly at an understandable pace.
English Language: Conventions of Standard English:
LAFS.K.L.3.5 With guidance and support from adults, explore word
relationships and nuances in word meanings. Sort common objects into categories (e.g., shapes,
foods) to gain a sense of the concepts the categories represent.
Demonstrate understanding of frequently occurring verbs and adjectives by relating them to their opposites (antonyms).
Identify real-life connections between words and their use (e.g., note places at school that are colorful).
Distinguish shades of meaning among verbs describ-ing the same general action (e.g., walk, march, strut, prance) by acting out the meanings.
LAFS.3.L.3.5 With guidance and support from adults, demonstrate
understanding of figurative language, word relation-ships and nuances in word meanings.
Sort words into categories (e.g., colors, clothing) to gain a sense of the concepts the categories represent.
Define words by category and by one or more key attributes (e.g., a duck is a bird that swims; a tiger is a large cat with stripes).
Identify real-life connections between words and their use (e.g., note places at home that are cozy).
Distinguish shades of meaning among verbs differing in manner (e.g., look, peek, glance, stare, glare, scowl) and adjectives differing in intensity (e.g., large, gigantic) by defining or choosing them or by acting out the mean-ings.
Mathematics Standards:
MAFS.K.MD.1.1 Describe measurable attributes of objects, such as
length or weight. Describe several measurable attributes of a single object.MAFS.K.MD.2.3 Classify objects into given categories; count the num-
bers of objects in each category and sort the categories by count.
MAFS.K.G.1.1 Describe objects in the environment using names of
shapes, and describe the relative positions of these ob-jects using terms such as above, below, beside, in front of, behind, and next to.
MAFS.1.MD.3.4 Organize, represent, and interpret data with up to three
categories; ask and answer questions about the total number of data points, how many in each category, and how many more or less are in one category than in another.
Next Generation Science Standards:
2-PS1-1 Plan and conduct an investigation to describe and
classify different kinds of materials by their observable properties.
2-LS4-1 Make observations of plants and animals to compare
the diversity of life in different habitats.K-2-ETS1-2 Develop a simple sketch, drawing, or physical model to
illustrate how the shape of an object helps it function as needed to solve a given problem.
3-LS4-2 Use evidence to construct an explanation for how the variations in characteristics among individuals of the same species may provide advantages in surviving, finding mates, and reproducing.
4-LS1-1 Construct an argument that plants and animals have
internal and external structures that function to sup-port survival, growth, behavior, and reproduction.
5-PS1-3 Make observations and measurements to identify
materials based on their properties.5-PS3-1 Use models to describe that energy in animals’ food
(used for body repair, growth, motion, and to maintain body warmth) was once energy from the sun.

137Gardening for Grades: Chapter 5, F1orida Standards Spelled Out
Feed Me: Nutritiona1 Bui1ding B1ocks
Science Standards:
SC.3.L.14.1 Describe structures in plants and their roles in food
production, support, water, and nutrient transport, and reproduction.
SC.3.N.1.3 Keep records as appropriate, such as pictorial, written,
or simple charts and graphs of investigations con-ducted.
SC.4.E.6.3 Recognize that humans need resources found on Earth
and that these are either renewable or nonrenewable.SC.4.E.6.6 Identify resources available in Florida (water, phos-
phate, oil, limestone, silicon, wind, and solar energy).SC.4.L.17.2 Explain that animals, including humans, cannot make
their own food and that when animals eat plants or other animals, the energy stored in the food source is passed on to them.
SC.5.P.8.2 Investigate and identify materials that will dissolve in
water and those that will not and identify the condi-tions that will speed or slow the dissolving process.
Health Standards:
HE.3.B.1.1 Locate resources from home, school and community
that provide valid health information.HE.4.B.1.2 Examine resources from home, school and community
that provide valid health information.
English Language Arts – Writing:
LAFS.3.W.3.8 Recall information from experiences or gather informa-
tion from print and digital sources; take brief notes on sources and sort evidence into provided categories.
LAFS.4.W.3.8 Recall relevant information from experiences or gather
relevant information from print and digital sources; take notes and categorize information, and provide a list of sources.
LAFS.5.W.3.8 Recall relevant information from experiences or gather
relevant information from print and digital sources; summarize or paraphrase information in notes and finished work, and provide a list of sources.
English Language Arts – Speaking and Listening:
LAFS.3.SL.1.2 Determine the main ideas and supporting details of
a text read aloud or information presented in diverse media and formats, including visually, quantitatively, and orally.
LAFS.3.SL.2.4 Report on a topic or text, tell a story, or recount an
experience with appropriate facts and relevant, descrip-tive details, speaking clearly at an understandable pace.
LAFS.4.SL.1.2 Paraphrase portions of a text read aloud or information
presented in diverse media and formats, including visu-ally, quantitatively, and orally.
LAFS.4.SL.2.4 Report on a topic or text, tell a story, or recount an
experience in an organized manner, using appropriate facts and relevant, descriptive details to support main ideas or themes; speak clearly at an understandable pace.
LAFS.5.SL.1.2 Summarize a written text read aloud or information
presented in diverse media and formats, including visu-ally, quantitatively, and orally.
LAFS.5.SL.2.4 Report on a topic or text or present an opinion,
sequencing ideas logically and using appropriate facts and relevant, descriptive details to support main ideas or themes; speak clearly at an understandable pace.
Next Generation Science Standards:
3-LS3-2 Use evidence to support the explanation that traits can
be influenced by the environment.5-PS1-3 Make observations and measurements to identify
materials based on their properties.5-PS3-1 Use models to describe that energy in animals’ food
(used for body repair, growth, motion, and to maintain body warmth) was once energy from the sun.
5-LS1-1 Support an argument that plants get the materials they
need for growth chiefly from air and water.5-LS2-1 Develop a model to describe the movement of matter
among plants, animals, decomposers, and the environ-ment.
Activity: Turning Over a New Leaf
Science Standards:
SC.K.N.1.1 Collaborate with a partner to collect information.SC.K.N.1.2 Make observations of the natural world, and know that
they are descriptors collected using the five senses.SC.K.N.1.3 Keep records as appropriate -- such as pictorial records
-- of investigations conducted.SC.K.N.1.4 Observe and create a visual representation of an object
which includes its major features.SC.K.N.1.5 Recognize that learning can come from careful obser-
vation.SC.K.P.8.1 Sort objects by observable properties, such as size,
shape, color, temperature (hot or cold), weight (heavy or light) and texture.
SC.K.L.14.3 Observe plants and animals; describe how they are
alike and how they are different in the way they look and in the things they do.
SC.1-4.N.1.1 Raise questions about the natural world; investigate
them in teams through free exploration; and generate appropriate explanations based on those explorations.
SC.1.E.5.3 Investigate how magnifiers make things appear bigger
and help people see things they could not see without them.
SC.1.N.1.2 Using the five senses as tools, make careful observa-
tions, describe objects in terms of number, shape, texture, size, weight, color, and motion, and compare their observations with others.
SC.13.N.1.3 Keep records as appropriate — such as pictorial and
written records - of investigations conducted.SC.1.N.1.4 Ask “how do you know” in appropriate situations.
SC.1.L.14.1 Make observations of living things and their environ-
ment, using the five senses.SC.1.L.14.2 Identify the major parts of plants, including stem,
roots, leaves, and flowers.SC.1.L.14.3 Differentiate between living and nonliving things.SC.2.L.16.1 Observe and describe major stages in the life cycles of
plants and animals, including beans and butterflies.SC.3.N.1.3 Keep records as appropriate, such as pictorial, written,
or simple charts and graphs of investigations conducted.SC.3.N.1.6 Infer based on observation.SC.3.N.1.7 Explain that empirical evidence is information, such
as observations or measurements that are used to help validate explanations of natural phenomena.
SC.3.P.8.3 Compare materials and objects according to properties
such as size, shape, color, texture, and hardness.SC.3.L.14.1 Describe structures in plants and their roles in food
production, support, water and nutrient transport, and reproduction.
SC.4.N.1.4 Attempt reasonable answers to scientific questions, and
cite evidence in support.SC.4.N.1.5 Compare the methods and results of investigations
done by other classmates.SC.4.N.1.6 Keep records that describe observations made, carefully
distinguishing actual observations from ideas and infer-ences about the observations.
SC.4.N.1.7 Recognize and explain that scientists base their expla-
nations on evidence.SC.5.N.1.1 Define a problem; use appropriate reference materials
to support scientific understanding; plan and carry out scientific investigations of various types, such as: systematic observations, experiments requiring the identification of variables, collecting and organizing data, interpreting data in charts, tables, and graphics; analyze information; make predictions; and defend conclusions.
SC.5.N.1.2 Explain the difference between an experiment and
other types of scientific investigation.SC.5.N.1.5 Recognize and explain that authentic scientific inves-
tigation frequently does not parallel the steps of “the scientific method.”
SC.5.N.1.6 Recognize and explain the difference between personal
opinion/interpretation and verified observation.
English Language Arts – Writing:
LAFS.K.W.1.2 Use a combination of drawing, dictating, and writing
to compose informative/explanatory texts in which they name what they are writing about and supply some information about the topic.
LAFS.K.W.3.8 With guidance and support from adults, recall infor-
mation from experiences or gather information from provided sources to answer a question.
LAFS.1.W.1.2 Write informative/explanatory texts in which they
name a topic, supply some facts about the topic, and provide some sense of closure.
138Gardening for Grades: Chapter 5, F1orida Standards Spe1 1ed Out
LAFS.1.W.3.8 With guidance and support from adults, recall infor-
mation from experiences or gather information from provided sources to answer a question.
LAFS.2.W.1.2 Write informative/explanatory texts in which they
introduce a topic, use facts and definitions to develop points, and provide a concluding statement or section.
LAFS.2.W.3.8 Recall information from experiences or gather informa-
tion from provided sources to answer a question.LAFS.3.W.1.2 Write informative/explanatory texts to examine a topic
and convey ideas and information clearly.LAFS.3.W.3.7 Conduct short research projects that build knowledge
about a topic.LAFS.3.W.3.8 Recall information from experiences or gather informa-
tion from print and digital sources; take brief notes on sources and sort evidence into provided categories.
LAFS.4.W.1.2 Write informative/explanatory texts to examine a topic
and convey ideas and information clearly.LAFS.4.W.3.7 Conduct short research projects that build knowledge
through investigation of different aspects of a topic.LAFS.4.W.3.8 Recall relevant information from experiences or gather
relevant information from print and digital sources; take notes and categorize information, and provide a list of sources.
LAFS.5.W.1.2 Write informative/explanatory texts to examine a topic
and convey ideas and information clearly.LAFS.5.W.3.7 Conduct short research projects that use several
sources to build knowledge through investigation of different aspects of a topic.
LAFS.5.W.3.8 Recall relevant information from experiences or gather
relevant information from print and digital sources; summarize or paraphrase information in notes and finished work, and provide a list of sources.
LAFS.6.W.1.2 Write informative/explanatory texts to examine a topic
and convey ideas, concepts, and information through the selection, organization, and analysis of relevant content.
Introduce a topic; organize ideas, concepts, and information, using strategies such as definition, clas-sification, comparison/contrast, and cause/effect; include formatting (e.g., headings), graphics (e.g., charts, tables), and multimedia when useful to aiding comprehension.
Develop the topic with relevant facts, definitions, concrete details, quotations, or other information and examples.
Use appropriate transitions to clarify the relationships among ideas and concepts.
Use precise language and domain-specific vocabulary to inform about or explain the topic.
Establish and maintain a formal style. Provide a concluding statement or section that follows
from the information or explanation presented.LAFS.6.W.3.7 Conduct short research projects to answer a question,
drawing on several sources and refocusing the inquiry when appropriate.
LAFS.6.W.3.8 Gather relevant information from multiple print and
digital sources; assess the credibility of each source; and quote or paraphrase the data and conclusions of others while avoiding plagiarism and providing basic bibliographic information for sources.
English Language Arts - Speaking and Listening:
LAFS.K.SL.1.2 Confirm understanding of a text read aloud or infor-
mation presented orally or through other media by asking and answering questions about key details and requesting clarification if something is not understood.
LAFS.K.SL.1.3 Ask and answer questions in order to seek help, get in-
formation, or clarify something that is not understood.LAFS.K.SL.2.4 Describe familiar people, places, things, and events and,
with prompting and support, provide additional detail.LAFS.K.SL.2.5 Add drawings or other visual displays to descriptions as
desired to provide additional detail.LAFS.1.SL.1.2 Ask and answer questions about key details in a text
read aloud or information presented orally or through other media.
LAFS.1.SL.1.3 Ask and answer questions about what a speaker says
in order to gather additional information or clarify something that is not understood.
LAFS.1.SL.2.4 Describe people, places, things, and events with rel-
evant details, expressing ideas and feelings clearly.LAFS.1.SL.2.5 Add drawings or other visual displays to descriptions
when appropriate to clarify ideas, thoughts, and feelings.LAFS.1.SL.2.6 Produce complete sentences when appropriate to task
and situation.LAFS.2.SL.1.2 Recount or describe key ideas or details from a text
read aloud or information presented orally or through other media.
LAFS.3.SL.1.2 Determine the main ideas and supporting details of a text
read aloud or information presented in diverse media and formats, including visually, quantitatively, and orally.
LAFS.3.SL.2.4 Report on a topic or text, tell a story, or recount an
experience with appropriate facts and relevant, descrip-tive details, speaking clearly at an understandable pace.
LAFS.4.SL.1.2 Paraphrase portions of a text read aloud or information
presented in diverse media and formats, including visu-ally, quantitatively, and orally.
LAFS.4.SL.2.4 Report on a topic or text, tell a story, or recount an
experience in an organized manner, using appropriate facts and relevant, descriptive details to support main ideas or themes; speak clearly at an understandable pace.
LAFS.5.SL.1.1 Engage effectively in a range of collaborative discus-
sions (one-on-one, in groups, and teacher-led) with diverse partners on grade 5 topics and texts, building on others’ ideas and expressing their own clearly.
Come to discussions prepared having read or studied required material; explicitly draw on that prepara-tion and other information known about the topic to explore ideas under discussion
Follow agreed-upon rules for discussions and carry out assigned roles.
Pose and respond to specific questions by making com-ments that contribute to the discussion and elaborate on the remarks of others.
Review the key ideas expressed and draw conclusions in light of information and knowledge gained from the discussions.
LAFS.5.SL.1.2 Summarize a written text read aloud or information
presented in diverse media and formats, including visu-ally, quantitatively, and orally.
LAFS.5.SL.1.3 Summarize the points a speaker makes and explain how
each claim is supported by reasons and evidence.LAFS.5.SL.2.4 Report on a topic or text or present an opinion,
sequencing ideas logically and using appropriate facts and relevant, descriptive details to support main ideas or themes; speak clearly at an understandable pace.
LAFS.6.SL.1.1 Engage effectively in a range of collaborative discus-
sions (one-on-one, in groups, and teacher-led) with diverse partners on grade 6 topics, texts, and issues, building on others’ ideas and expressing their own clearly.
Come to discussions prepared having read or studied required material; explicitly draw on that preparation by referring to evidence on the topic, text, or issue to probe and reflect on ideas under discussion.
Follow rules for collegial discussions, set specific goals and deadlines, and define individual roles as needed.
Pose and respond to specific questions with elaboration and detail by making comments that contribute to the topic, text, or issue under discussion.
Review the key ideas expressed and demonstrate un-derstanding of multiple perspectives through reflection and paraphrasing.
LAFS.6.SL.2.4 Present claims and findings, sequencing ideas logically
and using pertinent descriptions, facts, and details to accentuate main ideas or themes; use appropriate eye contact, adequate volume, and clear pronunciation.
English Language: Conventions of Standard English:
LAFS.K.L.3.5 With guidance and support from adults, explore word
relationships and nuances in word meanings. Sort common objects into categories (e.g., shapes,
foods) to gain a sense of the concepts the categories represent.
Demonstrate understanding of frequently occurring verbs and adjectives by relating them to their opposites (antonyms).
Identify real-life connections between words and their use (e.g., note places at school that are colorful).
Distinguish shades of meaning among verbs describ-ing the same general action (e.g., walk, march, strut, prance) by acting out the meanings.
LAFS.1.L.3.5 With guidance and support from adults, demonstrate
understanding of figurative language, word relation-ships and nuances in word meanings.
Sort words into categories (e.g., colors, clothing) to gain a sense of the concepts the categories represent.
Define words by category and by one or more key attributes (e.g., a duck is a bird that swims; a tiger is a large cat with stripes).
Identify real-life connections between words and their use (e.g., note places at home that are cozy).
Distinguish shades of meaning among verbs differing in manner (e.g., look, peek, glance, stare, glare, scowl) and adjectives differing in intensity (e.g., large, gigantic) by defining or choosing them or by acting out the meanings.
LAFS.6.L.3.6 Acquire and use accurately general academic and
domain-specific words and phrases as found in grade level appropriate texts, including those that signal contract, addition, and other logical relationships.
Next Generation Science Standards:
K-LS1-1 Use observations to describe patterns of what plants
and animals (including humans) need to survive.
139Gardening for Grades: Chapter 5, F1orida Standards Spelled Out
1-LS3-1 Make observations to construct an evidence-based
account that young plants and animals are like, but not exactly like, their parents.
2-PS1-1 Plan and conduct an investigation to describe and classify
different kinds of materials by their observable properties.2-LS4-1 Make observations of plants and animals to compare
the diversity of life in different habitats.3-LS3-1 Analyze and interpret data to provide evidence that
plants and animals have traits inherited from parents and that variation of these traits exists in a group of similar organisms.
4-LS1-1 Construct an argument that plants and animals have
internal and external structures that function to sup-port survival, growth, behavior, and reproduction.
Activity: Lettuce Be Different
Science Standards:
SC.K.L.14.3 Observe plants and animals; describe how they are
alike and how they are different in the way they look and in the things they do.
SC.K.P.8.1 Sort objects by observable properties, such as size,
shape, color, temperature (hot or cold), weight (heavy or light) and texture.
SC.1-4.N.1.1 Raise questions about the natural world; investigate
them in teams through free exploration; and generate appropriate explanations based on those explorations.
SC.1.N.1.2 Using the five senses as tools, make careful observa-
tions; describe objects in terms of number, shape, texture, size, weight, color, and motion; and compare their observations with others.
SC.1-3.N.1.3 Keep records as appropriate - such as pictorial and writ-
ten records - of investigations conducted.SC.1.L.14.2 Identify the major parts of plants, including stem,
roots, leaves, and flowers.SC.2.N.1.5 Distinguish between empirical observation (what you
see, hear, feel, smell, or taste) and ideas or inferences (what you think).
SC.3.N.1.2 Compare the observations made by different groups
using the same tools and seek reasons to explain the differences across groups.
SC.3.N.1.3 Keep records as appropriate, such as pictorial, written,
or simple charts and graphs of investigations conducted. SC.3.N.1.6 Infer based on observation.SC.3.P.8.3 Compare materials and objects according to properties
such as size, shape, color, texture, and hardness.SC.3.L.14.1 Describe structures in plants and their roles in food
production; support; water and nutrient transport; and reproduction.
SC.4.N.1.6 Keep records that describe observations made, carefully
distinguishing actual observations from ideas and infer-ences about the observations.
SC.4.N.1.7 Recognize and explain that scientists base their expla-
nations on evidence.
SC.4.N.1.8 Recognize that science involves creativity in designing
experiments.SC.4.P.8.1 Measure and compare objects and materials based on
their physical properties including: mass, shape, vol-ume, color, hardness, texture, odor, taste, and attraction to magnets.
SC.5.N.1.1 Define a problem; use appropriate reference materials to
support scientific understanding; plan and carry out sci-entific investigations of various types such as: systematic observations, experiments requiring the identification of variables, collecting and organizing data, interpreting data in charts, tables, and graphics; analyze information; make predictions; and defend conclusions.
SC.5.N.1.2 Explain the difference between an experiment and
other types of scientific investigation.SC.5.N.1.5 Recognize and explain that authentic scientific inves-
tigation frequently does not parallel the steps of “the scientific method.”
SC.5.N.1.6 Recognize and explain the difference between personal
opinion/interpretation and verified observation.SC.6.N.1.3 Explain the difference between an experiment and
other types of scientific investigation, and explain the relative benefits and limitations of each.
SC.7.N.1.3 Distinguish between an experiment (which must involve
the identification and control of variables) and other forms of scientific investigation, and explain that not all scientific knowledge is derived from experimentation.
SC.7.N.1.5 Describe the methods used in the pursuit of a scientific
explanation, as seen in different fields of science such as biology, geology, and physics.
SC.8.N.1.2 Design and conduct a study using repeated trials and
replication.
English Language Arts – Writing:
LAFS.K.W.1.1 Use a combination of drawing, dictating, and writing to
compose opinion pieces in which they tell a reader the topic or the name of the book they are writing about and state an opinion or preference about the topic or book.
LAFS.K.W.1.2 Use a combination of drawing, dictating, and writing
to compose informative/explanatory texts in which they name what they are writing about and supply some information about the topic.
LAFS.K.W.1.3 Use a combination of drawing, dictating, and writing
to narrate a single event or several loosely linked events, tell about the events in the order in which they oc-curred, and provide a reaction to what happened.
LAFS.1.W.1.2 Write informative/explanatory texts in which they
name a topic, supply some facts about the topic, and provide some sense of closure.
LAFS.2.W.1.2 Write informative/explanatory texts in which they
introduce a topic, use facts and definitions to develop points, and provide a concluding statement or section.
LAFS.2.W.3.7 Participate in shared research and writing projects (e.g.,
read a number of books on a single topic to produce a report; record science observations).
LAFS.2.W.3.8 Recall information from experiences or gather informa-
tion from provided sources to answer a question.
LAFS.3.W.1.2 Write informative/explanatory texts to examine a topic
and convey ideas and information clearly.LAFS.3.W.3.7 Conduct short research projects that build knowledge
about a topic.LAFS.4.W.1.2 Write informative/explanatory texts to examine a topic
and convey ideas and information clearly.LAFS.4.W.3.7 Conduct short research projects that build knowledge
through investigation of different aspects of a topic.LAFS.5.W.1.2 Write informative/explanatory texts to examine a topic
and convey ideas and information clearly.LAFS.5.W.3.7 Conduct short research projects that use several
sources to build knowledge through investigation of different aspects of a topic.
LAFS.6.W.1.2 Write informative/explanatory texts to examine a topic
and convey ideas, concepts, and information through the selection, organization, and analysis of relevant content.
LAFS.6.W.3.7 Conduct short research projects to answer a question,
drawing on several sources and refocusing the inquiry when appropriate.
LAFS.68.WHST.1.2 Write informative/explanatory texts, including the
narration of historical events, scientific procedures/ experiments, or technical processes.
English Language Arts - Speaking and Listening:
LAFS.K.SL.2.4 Describe familiar people, places, things, and events and,
with prompting and support, provide additional detail.LAFS.K.SL.2.5 Add drawings or other visual displays to descriptions as
desired to provide additional detail.LAFS.1.SL.2.4 Describe people, places, things, and events with rel-
evant details, expressing ideas and feelings clearly.LAFS.3.SL.2.4 Report on a topic or text, tell a story, or recount an
experience with appropriate facts and relevant, descrip-tive details, speaking clearly at an understandable pace.
LAFS.4.SL.2.4 Report on a topic or text, tell a story, or recount an
experience in an organized manner, using appropriate facts and relevant, descriptive details to support main ideas or themes; speak clearly at an understandable pace.
LAFS.5.SL.2.4 Report on a topic or text or present an opinion,
sequencing ideas logically and using appropriate facts and relevant, descriptive details to support main ideas or themes; speak clearly at an understandable pace.
LAFS.6.SL.2.4 Present claims and findings, sequencing ideas logically
and using pertinent descriptions, facts, and details to accentuate main ideas or themes; use appropriate eye contact, adequate volume, and clear pronunciation.
Mathematics Standards:
MAFS.K.MD.1.1 Describe measurable attributes of objects, such as
length or weight. Describe several measurable attributes of a single
object.MAFS.K.MD.1.2 Directly compare two objects with a measurable
attribute in common, to see which object has “more
140Gardening for Grades: Chapter 5, F1orida Standards Spe1 1ed Out
of ”/“less of ” the attribute, and describe the differ-ence. For example, directly compare the heights of two children and describe one child as taller/shorter.
MAFS.K.MD.2.3 Classify objects into given categories; count the num-
bers of objects in each category and sort the categories by count.
MAFS.1.MD.1.1 Order three objects by length; compare the lengths of
two objects indirectly by using a third object.MAFS.2.MD.1.3 Estimate lengths using units of inches, feet, yards, centi-
meters, and meters.MAFS.2.MD.1.4 Measure to determine how much longer one object is
than another, expressing the length difference in terms of a standard length unit.
Next Generation Science Standards:
2-PS1-1 Plan and conduct an investigation to describe and
classify different kinds of materials by their observable properties.
2-LS4-1 Make observations of plants and animals to compare
the diversity of life in different habitats.3-LS3-1 Analyze and interpret data to provide evidence that
plants and animals have traits inherited from parents and that variation of these traits exists in a group of similar organisms.
Activity: The Roots of Food
Science Standards:
SC.2.L.17.2 Recognize and explain that living things are found all
over Earth, but each is only able to live in habitats that meet its basic needs.
Social Studies Standards:
SS.K.A.2.1 Compare children and families of today with those in
the past.SS.K.A.2.3 Compare our nation’s holidays with holidays of other
cultures.SS.K.G.1.2 Explain that maps and globes help to locate different
places, and that globes are a model of the Earth.SS.1.A.2.2 Compare life now with life in the past. SS.1.G.1.5 Locate on maps and globes the student’s local com-
munity, Florida, the Atlantic Ocean, and the Gulf of Mexico.
SS.2.A.2.4 Explore ways the daily life of people living in Colonial
America changed over time.SS.2.G.1.3 Label on a map or globe the continents, oceans, Equa-
tor, Prime Meridian, and the North and South Poles.SS.3.A.1.1 Analyze primary and secondary sources.SS.3.G.1.1 Use thematic maps, tables, charts, graphs, and photos
to analyze geographic information.SS.3.G.4.1 Explain how the environment influences settlement
patterns in the United States, Canada, Mexico, and the Caribbean.
SS.4.A.1.1 Analyze primary and secondary resources to identify
significant individuals and events throughout Florida history.
SS.4.A.4.2 Describe pioneer life in Florida.SS.5.A.1.1 Use primary and secondary sources to understand history.SS.6.G.2.1 Describe the push-pull factors (economy, natural
hazards, tourism, climate, and physical features) that influenced boundary changes within the United States.
SS.7.G.3.1 Use maps to describe the location, abundance, and
variety of natural resources in North America.SS.8.A.1.3 Analyze current events relevant to American history
topics through a variety of electronic and print media resources.
SS.912.A.1.1 Describe the importance of historiography, which
includes how historical knowledge is obtained and transmitted, when interpreting events in history.
English Language Arts – Reading: Literature:
LAFS.K.RL.1.3 With prompting and support, identify characters, set-
tings, and major events in a story.LAFS.K.RL.3.7 With prompting and support, describe the relationship
between illustrations and the story in which they appear (e.g., what moment in a story an illustration depicts).
LAFS.K.RL.4.10 Actively engage in group reading activities with pur-
pose and understanding.LAFS.1.RL.1.2 Retell stories, including key details, and demonstrate
understanding of their central message or lesson.LAFS.2.RL.1.1 Ask and answer such questions as who, what, where,
when, why, and how to demonstrate understanding of key details in a text.
LAFS.2.RL.1.2 Recount stories, including fables and folktales from
diverse cultures, and determine their central message, lesson, or moral.
LAFS.7.RL.1.1 Cite several pieces of textual evidence to support analy-
sis of what the text says explicitly as well as inferences drawn from the text.
LAFS.7.RL.3.9 Compare and contrast a fictional portrayal of a time,
place, or character and a historical account of the same period as a means of understanding how authors of fiction use or alter history.
LAFS.8.RL.1.1 Cite the textual evidence that most strongly supports
an analysis of what the text says explicitly as well as inferences drawn from the text.
LAFS.910.RL.1.1 Cite strong and thorough textual evidence to support
analysis of what the text says explicitly as well as infer-ences drawn from the text.
LAFS.1112RL.1.1 Cite strong and thorough textual evidence to support
analysis of what the text says explicitly as well as inferences drawn from the text, including determining where the text leaves matters uncertain.
English Language Arts – Reading: Informational Text:
LAFS.K.RI.4.10 Actively engage in group reading activities with pur-
pose and understanding.
LAFS.1.RI.4.10 With prompting and support, read informational texts
appropriately complex for grade 1.LAFS.2.RI.4.10 By the end of year, read and comprehend informational
texts, including history/social studies, science, and technical texts, in the grades 2–3 text complexity band proficiently, with scaffolding as needed at the high end of the range.
LAFS.4.RI.4.10 By the end of year, read and comprehend informational
texts, including history/social studies, science, and technical texts, in the grades 4–5 text complexity band proficiently, with scaffolding as needed at the high end of the range.
LAFS.5.RI.4.10 By the end of the year, read and comprehend informa-
tional texts, including history/social studies, science, and technical texts, at the high end of the grades 4–5 text complexity band independently and proficiently.
LACC.6.RI.1.1 Cite textual evidence to support analysis of what the text
says explicitly as well as inferences drawn from the text.LAFS.6.RI.4.10 By the end of the year, read and comprehend literary
nonfiction in the grades 6–8 text complexity band proficiently, with scaffolding as needed at the high end of the range.
LAFS.7.RI.4.10 By the end of the year, read and comprehend literary
nonfiction in the grades 6–8 text complexity band proficiently, with scaffolding as needed at the high end of the range.
LAFS.8.RI.4.10 By the end of the year, read and comprehend literary
nonfiction at the high end of the grades 6–8 text complexity band independently and proficiently.
LAFS.910.RI.4.10 By the end of grade 9, read and comprehend literary
nonfiction in the grades 9–10 text complexity band proficiently, with scaffolding as needed at the high end of the range.
By the end of grade 10, read and comprehend literary nonfiction at the high end of the grades 9–10 text complexity band independently and proficiently.
English Language Arts – Writing:
LAFS.K.W.3.8 With guidance and support from adults, recall infor-
mation from experiences or gather information from provided sources to answer a question.
LAFS.1.W.3.7 Participate in shared research and writing projects (e.g.,
explore a number of “how-to” books on a given topic and use them to write a sequence of instructions).
LAFS.2.W.1.3 Write narratives in which they recount a well-elaborat-
ed event or short sequence of events, include details to describe actions, thoughts, and feelings, use temporal words to signal event order, and provide a sense of closure.
14 1Gardening for Grades: Chapter 5, F1orida Standards Spelled Out
LAFS.2.W.3.7 Participate in shared research and writing projects (e.g.,
read a number of books on a single topic to produce a report; record science observations).
LAFS.3.W.1.3 Write narratives to develop real or imagined experi-
ences or events using effective technique, descriptive details, and clear event sequences.
LAFS.3.W.3.7 Conduct short research projects that build knowledge
about a topic.LAFS.4.W.1.3 Write narratives to develop real or imagined experi-
ences or events using effective technique, descriptive details, and clear event sequences.
LAFS.4.W.3.7 Conduct short research projects that build knowledge
through investigation of different aspects of a topic.LAFS.5.W.1.3 Write narratives to develop real or imagined experi-
ences or events using effective technique, descriptive details, and clear event sequences.
LAFS.5.W.3.7 Conduct short research projects that use several
sources to build knowledge through investigation of different aspects of a topic.
LAFS.6.W.1.3 Write narratives to develop real or imagined experi-
ences or events using effective technique, relevant descriptive details, and well-structured event sequences.
Engage and orient the reader by establishing a context and introducing a narrator and/or characters; organize an event sequence that unfolds naturally and logically.
Use narrative techniques, such as dialogue, pacing, and description, to develop experiences, events, and/or characters.
Use a variety of transition words, phrases, and clauses to convey sequence and signal shifts from one time frame or setting to another.
Use precise words and phrases, relevant descriptive details, and sensory language to convey experiences and events.
Provide a conclusion that follows from the narrated experiences or events.
LAFS.6.W.3.7 Conduct short research projects to answer a question,
drawing on several sources and refocusing the inquiry when appropriate.
LAFS.7.W.1.3 Write narratives to develop real or imagined experi-
ences or events using effective technique, relevant descriptive details, and well-structured event sequences.
Engage and orient the reader by establishing a context and point of view and introducing a narrator and/or characters; organize an event sequence that unfolds naturally and logically.
Use narrative techniques, such as dialogue, pacing, and description, to develop experiences, events, and/or characters.
Use a variety of transition words, phrases, and clauses to convey sequence and signal shifts from one time frame or setting to another.
Use precise words and phrases, relevant descriptive details, and sensory language to capture the action and convey experiences and events.
Provide a conclusion that follows from and reflects on the narrated experiences or events.
LAFS.7.W.3.7 Conduct short research projects to answer a question,
drawing on several sources and generating additional related, focused questions for further research and investigation.
LAFS.8.W.1.3 Write narratives to develop real or imagined experi-
ences or events using effective technique, relevant
descriptive details, and well-structured event sequences. Engage and orient the reader by establishing a context
and point of view and introducing a narrator and/or characters; organize an event sequence that unfolds naturally and logically.
Use narrative techniques, such as dialogue, pacing, de-scription, and reflection, to develop experiences, events, and/or characters.
Use a variety of transition words, phrases, and clauses to convey sequence, signal shifts from one time frame or setting to another, and show the relationships among experiences and events.
Use precise words and phrases, relevant descriptive details, and sensory language to capture the action and convey experiences and events.
Provide a conclusion that follows from and reflects on the narrated experiences or events.
LAFS.8.W.3.7 Conduct short research projects to answer a question
(including a self-generated question), drawing on sev-eral sources and generating additional related, focused questions that allow for multiple avenues of exploration.
LAFS.910W.1.3 Write narratives to develop real or imagined experi-
ences or events using effective technique, well-chosen details, and well-structured event sequences.
Engage and orient the reader by setting out a problem, situation, or observation, establishing one or multiple point(s) of view, and introducing a narrator and/or characters; create a smooth progression of experiences or events.
Use narrative techniques, such as dialogue, pacing, de-scription, reflection, and multiple plot lines, to develop experiences, events, and/or characters.
Use a variety of techniques to sequence events so that they build on one another to create a coherent whole.
Use precise words and phrases, telling details, and sensory language to convey a vivid picture of the expe-riences, events, setting, and/or characters.
Provide a conclusion that follows from and reflects on what is experienced, observed, or resolved over the course of the narrative.
LAFS.910.W.3.7 Conduct short as well as more sustained research proj-
ects to answer a question (including a self-generated question) or solve a problem; narrow or broaden the inquiry when appropriate; synthesize multiple sources on the subject, demonstrating understanding of the subject under investigation.
LAFS.112.W.1.3 Write narratives to develop real or imagined experi-
ences or events using effective technique, well-chosen details, and well-structured event sequences.
Engage and orient the reader by setting out a problem, situation, or observation and its significance, establish-ing one or multiple point(s) of view, and introducing a narrator and/or characters; create a smooth progres-sion of experiences or events.
Use narrative techniques, such as dialogue, pacing, de-scription, reflection, and multiple plot lines, to develop experiences, events, and/or characters.
Use a variety of techniques to sequence events so that they build on one another to create a coherent whole and build toward a particular tone and outcome (e.g., a sense of mystery, suspense, growth, or resolution).
Use precise words and phrases, telling details, and sensory language to convey a vivid picture of the expe-riences, events, setting, and/or characters.
Provide a conclusion that follows from and reflects on what is experienced, observed, or resolved over the course of the narrative.
LAFS.1112.W.3.7 Conduct short as well as more sustained research proj-
ects to answer a question (including a self-generated question) or solve a problem; narrow or broaden the
inquiry when appropriate; synthesize multiple sources on the subject, demonstrating understanding of the subject under investigation.
English Language Arts – Writing: Text Types and Purposes:
LAFS.68.WHST.1.2 Write informative/explanatory texts, including the
narration of historical events, scientific procedures/ experiments, or technical processes.
Introduce a topic clearly, previewing what is to follow; organize ideas, concepts, and information into broader categories as appropriate to achieving purpose; include formatting (e.g., headings), graphics (e.g., charts, tables), and multimedia when useful to aiding compre-hension.
Develop the topic with relevant, well-chosen facts, definitions, concrete details, quotations, or other information and examples.
Use appropriate and varied transitions to create cohe-sion and clarify the relationships among ideas and concepts.
Use precise language and domain-specific vocabulary to inform about or explain the topic.
Establish and maintain a formal style and objective tone.
Provide a concluding statement or section that follows from and supports the information or explanation presented.
LAFS.910.WHST.1.2 Write informative/explanatory texts, including the
narration of historical events, scientific procedures/ experiments, or technical processes.
Introduce a topic and organize ideas, concepts, and information to make important connections and dis-tinctions; include formatting (e.g., headings), graphics (e.g., figures, tables), and multimedia when useful to aiding comprehension.
Develop the topic with well-chosen, relevant, and sufficient facts, extended definitions, concrete details, quotations, or other information and examples appro-priate to the audience’s knowledge of the topic.
Use varied transitions and sentence structures to link the major sections of the text, create cohesion, and clarify the relationships among ideas and concepts.
Use precise language and domain-specific vocabulary to manage the complexity of the topic and convey a style appropriate to the discipline and context as well as to the expertise of likely readers.
Establish and maintain a formal style and objective tone while attending to the norms and conventions of the discipline in which they are writing.
Provide a concluding statement or section that follows from and supports the information or explanation presented (e.g., articulating implications or the signifi-cance of the topic).
LAFS.1112.WHST.1.2 Write informative/explanatory texts, including the
narration of historical events, scientific procedures/ experiments, or technical processes. Introduce a topic and organize complex ideas, concepts, and information so that each new element builds on that which precedes it to create a unified whole; include formatting (e.g., headings), graphics (e.g., figures, tables), and multime-dia when useful to aiding comprehension.
Develop the topic thoroughly by selecting the most significant and relevant facts, extended definitions, concrete details, quotations, or other information and examples appropriate to the audience’s knowledge of the topic.
Use varied transitions and sentence structures to link the major sections of the text, create cohesion, and clarify the relationships among complex ideas and concepts.
142Gardening for Grades: Chapter 5, F1orida Standards Spe1 1ed Out
Use precise language, domain-specific vocabulary and techniques such as metaphor, simile, and analogy to manage the complexity of the topic; convey a knowl-edgeable stance in a style that responds to the discipline and context as well as to the expertise of likely readers.
Provide a concluding statement or section that follows from and supports the information or explanation pro-vided (e.g., articulating implications or the significance of the topic).
Mathematics Standards:
MAFS.K.MD.2.3 Classify objects into given categories; count the num-
bers of objects in each category and sort the categories by count.
MACC.1. MD.3.4 Organize, represent, and interpret data with up to three
categories; ask and answer questions about the total number of data points, how many in each category, and how many more or less are in one category than in another.
Next Generation Science Standards:
K-ESS3-1 Use a model to represent the relationship between
the needs of different plants or animals (including humans) and the places they live.
2-LS4-1 Make observations of plants and animals to compare
the diversity of life in different habitats.4-LS1-1 Construct an argument that plants and animals have
internal and external structures that function to support survival, growth, behavior, and reproduction.
5-LS2-1 Develop a model to describe the movement of matter
among plants, animals, decomposers, and the environ-ment.
MS-LS2-1 Analyze and interpret data to provide evidence for
the effects of resource availability on organisms and populations of organisms in an ecosystem.
MS-LS2-2 Construct an explanation that predicts patterns
of interactions among organisms across multiple ecosystems.
MS-LS2-4 Construct an argument supported by empirical evi-
dence that changes to physical or biological compo-nents of an ecosystem affect populations.
HS-LS2-4 Use a mathematical representation to support claims
for the cycling of matter and flow of energy among organisms in an ecosystem.
HS-LS2-5 Develop a model to illustrate the role of photosyn-
thesis and cellular respiration in the cycling of carbon among the biosphere, atmosphere, hydrosphere, and geosphere.
HS-LS2-2 Use mathematical representations to support and revise
explanations based on evidence about factors affecting biodiversity and populations in ecosystems of different scales.
HS-ESS3-1 Construct an explanation based on evidence for how
the availability of natural resources, occurrence of natural hazards, and changes in climate have influenced human activity.
HS-ESS3-3 Create a computational simulation to illustrate the rela-
tionships among management of natural resources, the sustainability of human populations, and biodiversity.
Activity: The Mi1 1ion Do1 1ar Can o’ Soup or Sa1sa
Science Standards:
SC.1-4.N.1.1 Raise questions about the natural world, investigate
them in teams through free exploration, and generate appropriate explanations based on those explorations.
SC.2.N.1.5 Distinguish between empirical observation (what you
see, hear, feel, smell, or taste) and ideas or inferences (what you think).
SC.2.L.16.1 Observe and describe major stages in the life cycles of
plants and animals, including beans and butterflies.SC.2.L.17.1 Compare and contrast the basic needs that all living
things, including humans, have for survival.SC.3.N.1.3 Keep records as appropriate, such as pictorial, written,
or simple charts and graphs of investigations con-ducted.
SC.3.N.1.6 Infer based on observation.SC.4.N.1.2 Compare the observations made by different groups
using multiple tools, and seek reasons to explain the differences across groups.
SC.4.N.1.4 Attempt reasonable answers to scientific questions, and
cite evidence in support.SC.4.N.1.5 Compare the methods and results of investigations
done by other classmates.SC.4.N.1.6 Keep records that describe observations made, carefully
distinguishing actual observations from ideas and infer-ences about the observations.
SC.4.N.1.8 Recognize that science involves creativity in designing
experiments.SC.5.N.1.1 Define a problem; use appropriate reference materials to
support scientific understanding; plan and carry out sci-entific investigations of various types such as: systematic observations, experiments requiring the identification of variables, collecting and organizing data, interpreting data in charts, tables, and graphics; analyze information; make predictions; and defend conclusions.
SC.5.N.1.2 Explain the difference between an experiment and
other types of scientific investigation.SC.5.N.1.6 Recognize and explain the difference between personal
opinion/interpretation and verified observation.SC.6.N.1.3 Explain the difference between an experiment and
other types of scientific investigation, and explain the relative benefits and limitations of each.
SC.6.N.1.4 Discuss, compare, and negotiate methods used, results
obtained, and explanations among groups of students conducting the same investigation.
SC.7.N.1.3 Distinguish between an experiment (which must
involve the identification and control of variables) and other forms of scientific investigation, and explain that not all scientific knowledge is derived from experimen-tation.
SC.7.N.1.5 Describe the methods used in the pursuit of a scientific
explanation, as seen in different fields of science such as biology, geology, and physics.
SC.8.N.1.2 Design and conduct a study using repeated trials and
replication.
Social Studies Standards:
SS.1.E.1.1 Recognize that money is a method of exchanging
goods and services.SS.1.E.1.2 Define opportunity costs as giving up one thing for
another.SS.1.E.1.3 Distinguish between examples of goods and services.SS.1.E.1.4 Distinguish people as buyers, sellers, and producers of
goods and services.
English Language Arts – Writing:
LAFS.1.W.3.8 With guidance and support from adults, recall infor-
mation from experiences or gather information from provided sources to answer a question.
LAFS.2.W.3.8 Recall information from experiences or gather informa-
tion from provided sources to answer a question.LAFS.3.W.3.8 Recall information from experiences or gather informa-
tion from print and digital sources; take brief notes on sources and sort evidence into provided categories.
LAFS.4.W.3.8 Recall relevant information from experiences or gather
relevant information from print and digital sources; take notes and categorize information, and provide a list of sources.
English Language Arts Speaking and Listening:
LAFS.1.SL.2.4 Describe people, places, things, and events with rel-
evant details, expressing ideas and feelings clearly.LAFS.1.SL.2.5 Add drawings or other visual displays to descriptions
when appropriate to clarify ideas, thoughts, and feel-ings.
LAFS.3.SL.2.4 Report on a topic or text, tell a story, or recount an
experience with appropriate facts and relevant, descrip-tive details, speaking clearly at an understandable pace.
LAFS.4.SL.2.4 Report on a topic or text, tell a story, or recount an
experience in an organized manner, using appropriate facts and relevant, descriptive details to support main ideas or themes; speak clearly at an understandable pace.
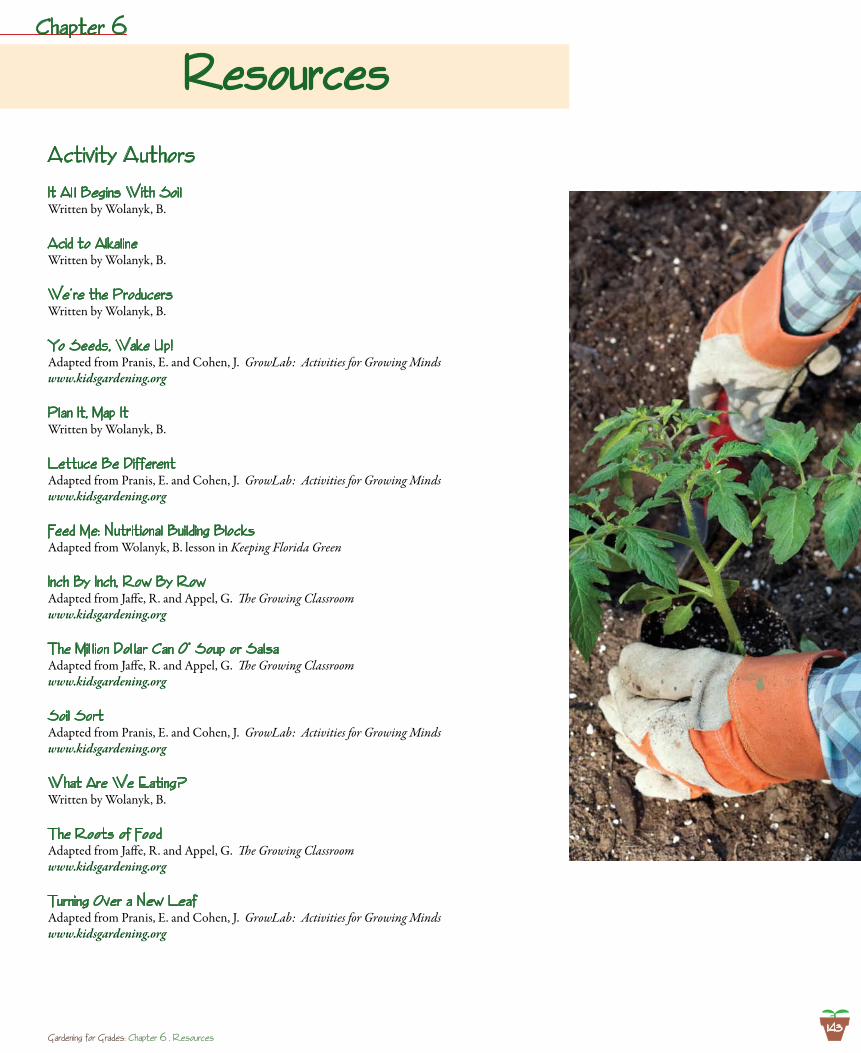
143Gardening for Grades: Chapter 6 , Resources
ResourcesChapter 6
Activity Authors
It A1 1 Begins With Soi1Written by Wolanyk, B.
Acid to A1ka1ineWritten by Wolanyk, B.
We’re the ProducersWritten by Wolanyk, B.
Yo Seeds, Wake Up!Adapted from Pranis, E. and Cohen, J. GrowLab: Activities for Growing Mindswww.kidsgardening.org
P1an It, Map ItWritten by Wolanyk, B.
Lettuce Be DifferentAdapted from Pranis, E. and Cohen, J. GrowLab: Activities for Growing Mindswww.kidsgardening.org
Feed Me: Nutritiona1 Bui1ding B1ocksAdapted from Wolanyk, B. lesson in Keeping Florida Green
Inch By Inch, Row By RowAdapted from Jaffe, R. and Appel, G. The Growing Classroomwww.kidsgardening.org
The Mi1 1ion Do1 1ar Can O’ Soup or Sa1saAdapted from Jaffe, R. and Appel, G. The Growing Classroomwww.kidsgardening.org
Soi1 SortAdapted from Pranis, E. and Cohen, J. GrowLab: Activities for Growing Mindswww.kidsgardening.org
What Are We Eating?Written by Wolanyk, B.
The Roots of FoodAdapted from Jaffe, R. and Appel, G. The Growing Classroomwww.kidsgardening.org
Turning Over a New LeafAdapted from Pranis, E. and Cohen, J. GrowLab: Activities for Growing Mindswww.kidsgardening.org
144Gardening for Grades: Chapter 6 , Resources
Alachua County
Alachua County Farm Bureau14435 NW US Hwy 441, Suite 20Alachua, FL 32615-8812(386) 418-4008
Alachua County Extension2800 NE 39 AvenueGainesville, FL 32609-2658(352) 955-2402
Baker County
Baker County Farm Bureau539 South Sixth St.Macclenny, FL 32063-2605(904) 259-6332
Baker County Extension1025 W Macclenny AvenueMacclenny, FL 32063-4433(904) 259-3520
Bay County
Bay County Farm Bureau303 Mosley DriveLynn Haven, FL 32444-5605(850) 872-2077
Bay County Extension2728 E 14th St.Panama City, FL 32401-5022(850) 784-6105
Bradford County
Bradford County Farm Bureau2270 N Temple Ave.Starke, FL 32091-1612(904) 964-6369
Bradford County Extension2266 N. Temple Ave.Starke, FL 32091-1612(904) 966-6224
Brevard County
Brevard County Farm Bureau111 Virginia Ave.Cocoa, FL 32922-8655(321) 636-4361
Brevard County Extension3695 Lake DriveCocoa, FL 32926-4219(321) 633-1702
Broward County
Broward County Farm Bureau2121 North State Road 7Margate, FL 33063-5713(954) 972-2525
Broward County Extension3245 College Ave.Davie, FL 33314-7719(954) 357-5270
Calhoun/Gulf County
Calhoun County Farm Bureau17577 Main Street NorthBlountstown, FL 32424-1768(850) 674-5471
Calhoun County Extension20816 Central Avenue E, Suite 1Blountstown, FL 32424-2292(850) 674-8323
Desoto/Charlotte County
Charlotte County Farm Bureau1278 SE US Highway 31Arcadia, FL 34266(863) 494-3636
Charlotte County Extension25550 Harbor View Road, Unit 3Port Charlotte, FL 33980-2503(941) 764-4340
Citrus/Hernando County
Citrus County Farm Bureau617 Lamar Ave.Brooksville, FL 34601(352) 796-2526
Citrus County Extension3650 W Sovereign Path, Suite 1Lecanto, FL 34461-8070(352) 527-5700
Clay County
Clay County Farm Bureau3960 Lazy Acres RoadMiddleburg, FL 32068-4908(904) 282-0644
Clay County ExtensionPO Box 278Green Cove Springs, FL 32043-0278(904) 284-6355
Collier County
Collier County Farm Bureau1011 W Main St., Ste. 2Immokalee, FL 34142-3651(239) 657-6500
Collier County Extension14700 Immokalee RoadNaples, FL 34120-1468(239) 252-4822
Columbia County
Columbia County Farm Bureau605 SW State Road 47Lake City, FL 32025-0452(386) 752-4003
Columbia County Extension164 SW Mary Ethel LaneLake City, FL 32025-1597(386) 752-5384
Dade County
Dade County Farm Bureau1850 Old Dixie HighwayHomestead, FL 33033-3212(305) 246-5514
Dade County Extension18710 SW 288 St.Homestead, FL 33030(305) 248-3311
Desoto/Charlotte County
Desoto County Farm Bureau1278 SE US Highway 31Arcadia, FL 34266-7737(863) 494-3636
Desoto County Extension2150 NE Roan St.Arcadia, FL 34266-5025(863) 993-4846
Duval County
Duval County Farm Bureau5542 Dunn Ave.Jacksonville, FL 32218-4332(904) 768-4836
Duval County Extension1010 N McDuff Ave.Jacksonville, FL 32254-2031(904) 255-7450
Escambia County
Escambia County Farm Bureau153 Highway 97Molino, FL 32577-5553(850) 587-2135
Escambia County Extension3740 Stefani RoadCantonment, FL 32533-7792(850) 475-5230
Flagler County
Flagler County Farm Bureau1000 Palm Coast Parkway SW,Suite 202Palm Coast, FL 32137(386) 447-5282
Flagler County Extension150 Sawgrass RoadBunnell, FL 32110-4325(386) 437-7464
Franklin County
Franklin County Extension66 Fourth StreetApalachicola, FL 32320-1775(850) 653-9337
Gadsden County
Gadsden County Farm Bureau2111 W. Jefferson St.Quincy, FL 32351-1909(850) 627-7196
Gadsden County Extension2140 W Jefferson St.Quincy, FL 32351-1905(850) 875-7255
Gilchrist County
Gilchrist County Farm Bureau306 W. Wade St.Trenton, FL 32693-4150(352) 463-2298
Gilchrist County Extension125 E Wade St.Trenton, FL 32693-0157(352) 463-3174
County Contacts For help with school garden questions,contact your local county Farm Bureau or UF/IFAS Extension office.
145Gardening for Grades: Chapter 6 , Resources
Glades/Hendry County
Glades County Farm BureauPO Box 1365LaBelle, FL 33975(863) 675-2535
Glades County ExtensionPO Box 549Moore Haven, FL 33471-0549(863) 946-0244
Calhoun/Gulf County
Gulf County Farm Bureau17577 Main Street NorthBlountstown, FL 32424-1768(850) 674-5471
Gulf County Extension200 N. 2nd St.Wewahitchka, FL 32465-0250(850) 639-3200
Hamilton County
Hamilton County Farm Bureau1117 US Hwy 41 NWJasper, FL 32052-5856(386) 792-1458
Hamilton County Extension1143 US Hwy 41 NWJasper, FL 32052-5856(386) 792-1276
Hardee County
Hardee County Farm Bureau1017 US Highway 17 NWauchula, FL 33873-8751(863) 773-3117
Hardee County Extension507 Civic Center DriveWauchula, FL 33873-9460(863) 773-2164
Glades/Hendry County
Hendry County Farm BureauPO Box 1365LaBelle, FL 33975-1365(863) 675-2535
Hendry County ExtensionPO Box 68LaBelle, FL 33975-0068(863) 674-4092
Citrus/Hernando County
Hernando County Farm Bureau617 Lamar Ave.Brooksville, FL 34601-3211(352) 796-2526
Hernando County Extension1653 Blaise Dr.Brooksville, FL 34601(352) 754-4433
Highlands County
Highlands County Farm Bureau6419 US Highway 27 SSebring, FL 33876-5712(863) 385-5141
Highlands County Extension4509 W George Blvd.Sebring, FL 33875-5837(863) 402-6540
Hillsborough County
Hillsborough County Farm Bureau100 S. Mulrennan RoadValrico, FL 33594-3934(813) 685-9121
Hillsborough County Extension5339 S. County Road 579Seffner, FL 33584-3334(813) 744-5519
Holmes County
Holmes County Farm Bureau1108 N. Waukesha StreetBonifay, FL 32425-1406(850) 547-4227
Holmes County Extension1169 E Hwy 90Bonifay, FL 32425-6012(850) 547-1108
Indian River County
Indian River County Farm Bureau7150 20th Street, Suite AVero Beach, FL 32966(772) 562-4119
Indian River County Extension1028 20th Place, Suite DVero Beach, FL 32960-5360(772) 770-5030
Jackson County
Jackson County Farm Bureau4379 Lafayette StreetMarianna, FL 32446-3367(850) 482-5751
Jackson County Extension2741 Pennsylvania Ave., Suite 3Marianna, FL 32448-4022(850) 482-9620
Jefferson County
Jefferson County Farm Bureau105 W. Anderson St.Monticello, FL 32344-1301(850) 997-2213
Jefferson County Extension275 N Mulberry St.Monticello, FL 32344-1423(850) 342-0187
Lafayette County
Lafayette County Farm BureauPO Box 336Mayo, FL 32066-0336(386) 294-1399
Lafayette County Extension176 SW Community Circle, Ste DMayo, FL 32066-4000(386) 294-1279
Lake County
Lake County Farm Bureau30241 State Road 19Tavares, FL 32778-4239(352) 343-4407
Lake County Extension1951 Woodlea RoadTavares, FL 32778-4407(352) 343-4101
Lee County
Lee County Farm Bureau14180 Metropolis Ave. Suite 1Fort Myers, FL 33912-4449(239) 561-5100
Lee County Extension3406 Palm Beach Blvd.Fort Myers, FL 33916-3736(239) 533-7400
Leon County
Leon County Farm Bureau3375 Capital Circle NE, Bldg. CTallahassee, FL 32308(850) 671-3276
Leon County Extension615 Paul Russell RoadTallahassee, FL 32301-7060(850) 606-5200
Levy County
Levy County Farm BureauPO Box 998Chiefland, FL 32644-0998(352) 493-4780
Levy County ExtensionPO Box 219Bronson, FL 32621-0219(352) 486-5131
Liberty County
Liberty County Farm Bureau17577 Main Street NorthBlountstown, FL 32424-1768(850) 674-5471
Liberty County Extension10405 NW Theo Jacobs WayBristol, FL 32321-0369(850) 643-2229
Madison County
Madison County Farm Bureau233 W. Base St.Madison, FL 32340-2409(850) 973-4071
Madison County Extension184 NW College LoopMadison, FL 32340(850) 973-4138
Manatee County
Manatee County Farm Bureau5620 Tara Blvd., Ste. 101Bradenton, FL 34203-8865(941) 746-6161
Manatee County Extension1303 17th St. WestPalmetto, FL 34221-2934(941) 722-4524
County Contacts, cont.
146Gardening for Grades: Chapter 6 , Resources
Marion County
Marion County Farm Bureau5800 SW 20th St.Ocala, FL 34474-9360(352) 237-2124
Marion County Extension2232 NE Jacksonville RoadOcala, FL 34470-3615(352) 671-8400
Martin County
Martin County Farm Bureau506 SW Federal Highway, Suite 102Stuart, FL 34994-2827(772) 286-1038
Martin County Extension2614 SE Dixie HighwayStuart, FL 34996-4007(772) 288-5654
Monroe County
Monroe County Extension1100 Simonton St., Room 2-206Key West, FL 33040-3110(305) 292-4501
Nassau County
Nassau County Farm BureauPO Box 5007Callahan, FL 32011-5007(904) 879-3498
Nassau County Extension543350 U.S. Highway OneCallahan, FL 32011-6486(904) 879-1019
Okaloosa County
Okaloosa County Farm Bureau921 W James Lee BlvdCrestview, FL 32536-5136(850) 682-3536
Okaloosa County Extension3098 Airport RoadCrestview, FL 32539-7124(850) 689-5850
Okeechobee County
Okeechobee County Farm Bureau401 N.W. Fourth St.Okeechobee, FL 34972-2550(863) 763-3101
Okeechobee County Extension458 Highway 98 NorthOkeechobee, FL 34972-6303(863) 763-6469
Orange County
Orange County Farm BureauPO Box 1329Christmas, FL 32709(407) 637-7727
Orange County Extension6021 S Conway Rd.Orlando, FL 32812-3604(407) 254-9200
Osceola County
Osceola County Farm Bureau1680 E Irlo Bronson Memorial HwyKissimmee, FL 34744-3729(407) 847-5189
Osceola County Extension1921 Kissimmee Valley LaneKissimmee, FL 34744-6107(321) 697-3000
Palm Beach County
Palm Beach County Farm Bureau13121 North Military TrailDelray Beach, FL 33484-1107(561) 498-5200
Western Palm Beach Farm Bureau3019 State Road 15Belle Glade, FL 33430(561) 996-0343
Palm Beach County Extension559 North Military TrailWest Palm Beach, FL 33415(561) 233-1712
Pasco County
Pasco County Farm Bureau12445 US Highway 301Dade City, FL 33525-6018(352) 567-5641
Pasco County Extension36702 State Road 52Dade City, FL 33525-5138(352) 521-4288
Pinellas County
Pinellas County Farm Bureau1165 Lakeview RoadClearwater, FL 33756-3586(727) 466-6390
Pinellas County Extension12520 Ulmerten RoadLargo, FL 33774-3602(727) 582-2100
Polk County
Polk County Farm Bureau1715 Highway 17 SouthBartow, FL 33830-6634(863) 533-0561
Polk County ExtensionPO Box 9005, Drawer HS03Bartow, FL 33831-9005(863) 519-8677
Putnam/St. Johns County
St. Johns County Farm Bureau147 South US Highway 17East Palatka, FL 32131-6070(386) 325-5822
St. John’s County Extension3125 Agriculture Center DriveSt. Augustine, FL 32092-0572(904) 209-0430
St. Lucie County
St. Lucie County Farm Bureau3327 Orange AveFort Pierce, FL 34947-3561(772) 465-0440
St. Lucie County Extension8400 Picos Road, Suite 101Fort Pierce, FL 34945-3045(772) 462-1660
Santa Rosa County
Santa Rosa County Farm BureauPO Box 490Jay, FL 32565-0490(850) 675-4572
Santa Rosa County Extension6263 Dogwood DriveMilton, FL 32570-3500(850) 623-3868
Sarasota County
Sarasota County Farm Bureau7289 Palmer Blvd.Sarasota, FL 34240-9404(941) 371-2043
Sarasota County Extension6700 Clark RoadSarasota, FL 34241-9328(941) 861-9900
Seminole County
Seminole County Farm BureauPO Box 585694Orlando, FL 32858-5694(407) 889-9705
Seminole County Extension250 W. County Home RoadSanford, FL 32773-6189(407) 665-5560
Sumter County
Sumter County Farm Bureau7610 State Road 471Bushnell, FL 33513-8734(352) 793-4545
Sumter County Extension7620 State Road 471, Ste. 2Bushnell, FL 33513-8716(352) 793-2728
Suwannee County
Suwannee County Farm Bureau407 Dowling Ave, SELive Oak, FL 32064-3222(386) 362-1274
Suwannee County Extension1302 11th Street SWLive Oak, FL 32064-3611(386) 362-2771
Taylor County
Taylor County Farm Bureau813 S Washington St.Perry, FL 32347-3372(850) 584-2371
Taylor County Extension203 Forest Park DrivePerry, FL 32348-6340(850) 838-3508
Union County
Union County Farm Bureau325 SE Sixth St.Lake Butler, FL 32054-2627(386) 496-2171
Union County Extension25 NE First St.Lake Butler, FL 32054-1701(386) 496-2321
County Contacts, cont.
147Gardening for Grades: Chapter 6 , Resources
Volusia County
Volusia County Farm Bureau3090 E. New York Ave.DeLand, FL 32724-6408(386) 734-1612
Volusia County Extension3100 E New York Ave.Deland, FL 32724-6410(386) 822-5778
Wakulla County
Wakulla County Farm Bureau2468 Crawfordville HighwayCrawfordville, FL 32327-2157(850) 926-3425
Wakulla County Extension84 Cedar Ave.Crawfordville, FL 32327-2063(850) 926-3931
Walton County
Walton County Farm Bureau684 N. Ninth St.DeFuniak Springs, FL 32433-3802(850) 892-5512
Walton County Extension732 N. Ninth St., Suite BDeFuniak Springs, FL 32433-3804(850) 892-8172
Washington County
Washington County Farm Bureau1361 Jackson Ave.Chipley, FL 32428-1774(850) 638-1756
Washington County Extension1424 Jackson Avenue, Suite AChipley, FL 32428-1602(850) 638-6180
County Contacts, cont.
Copyright © 2022 FDOKUMEN

