


Bahasa
Halaman
Hukum


Jacket photography by www.waltoncreative.com
compostthe natural way to make food for your garden
Ken Thompson
Ken Thompson
co
mp
os
t
“Compost-making doesn’t need to be hard work, it costs almost
nothing, and the only secret ingredient you need is patience.”
—Ken Thompson
Everything you throw away that was ever alive can be
recycled, and this celebration of compost shows you just
how easy it is.
However small our space, we can all make a difference to the environment by turning green waste into food for our garden. Making compost is not only simple and satisfying, it will save you money on expensive soil conditioners and mulches.
Find out how to build a simple bin, select the best tools for the job, and learn what type of mix is right for the size of your garden.
From what’s hot to rot, to bins and wormeries, Compost is the practical guide to transforming your household and garden refuse into eco-friendly fertilizer.
compostKen thompson is a plant ecologist and senior lecturer at the University of Sheffield. He writes regularly for gardening magazines, promoting the science behind gardening to the general reader. His previous books include An Ear to The Ground and No Nettles Required, both published by Eden/Transworld.
Discover more atwww.dk.com
$18.00 USA$22.00 Canada
Printed in China


Compost


CompostKen Thompson

LONDON, NEW YORK, MUNICH, MELBOURNE, DELHI
ProjectEditor Annelise Evans ProjectArtEditor Clare Shedden
SeniorEditor Helen Fewster USEditor Christine Heilman ProductionController Liz Cherry DTPDesigner Louise Waller PearsonPictureLibrary Lucy Claxton PictureResearcher Mel Watson Photographer Peter Anderson Illustrator Mark Hudson
ManagingEditor Anna Kruger ManagingArtEditor Alison Donovan
JacketConcept Peter Luff
First American Edition 2007Published in the United States byDK Publishing, 375 Hudson Street,
New York, NY 10014
07 08 09 10 10 9 8 7 6 5 4 3 2 1
Copyright © 2007 Dorling Kindersley Limited
Text copyright © 2007 Ken Thompson
All rights reserved under International and Pan-American Copyright Conventions. No part of this book may be reproduced, stored in a
retrieval system, or transmitted in any form or by any means, electronic, mechanical, photocopying, recording or otherwise, without the previous prior permission of
the copyright owner.
A Cataloging-in-Publication record for this book is available from the Library of Congress.
ISBN: 978 0 7566 1341 9DK books are available at special discounts for bulk purchases
for sales promotions, premiums, fund-raising, or educational use. For details, contact: DK Publishing Special Markets, 375 Hudson Street,
New York, NY 10014 or [email protected]
Color reproduction by MDP, UKPrinted and bound by
Hung Hing, China
Discover more atwww.dk.com

ForewordFew things are better for your plants and for the environment
than home-made garden compost, yet why is making it never
quite as straightforward as the experts would have us believe?
Perhaps unrealistic expectations, coupled with the modern desire
for instant results, are mainly to blame. The commercial garden
industry, anxious to sell us a fancy machine or secret ingredient
that promises to make compost in days, merely adds to our feeling
of inadequacy. But don’t panic, this book is here to help take the
mystery and fuss out of making compost.
It makes clear that compost making doesn’t need to be
hard work, need cost almost nothing, and that the only secret
ingredient you need is patience. It doesn’t prescribe any particular
approach, but it does explain that although things will go wrong,
if you understand the basic principles and learn from your
mistakes, you will soon arrive at a method that works for you
and suits your kind of gardening.


Contents8–61 Understandingcompost: therightstuff Whatiscompost;whyyoushouldbothertomakeit;thesciencepart—basic factorsatworkinthecompostingprocess;suitableingredients,howmuch touse,andwhattoleaveout;theimportance,ornot,of temperature.
62–95 Makingcompost: paper,prunings,andpatience Theproblemswithclassiccompost-making;compostforrealists;usingsoft waste;dealingwithaglutof grassmowings;whattodowithwoodywaste andtreeleaves;handytools.
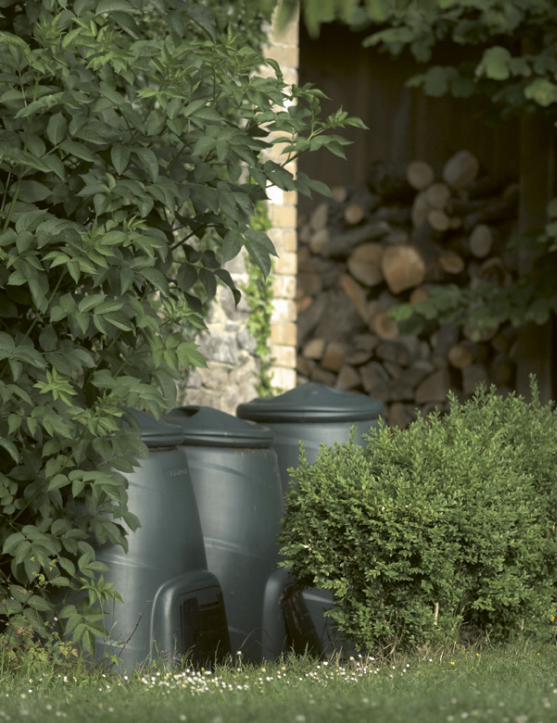
96–145 Compostbins: wood,wire,andworms Whyyoumaywanttohaveabin;choosingabin;theprosandconsof plastic andwoodenbins;makingyourownbins,fromchickenwiretostraw;whether tocoverthecompost;tumblerbins;wheretoputyourbin;themorebins,the merrier;exploitingthehotstuff;wormbins.
146–165 Usingcompost: diggingisfordummies Whencompostisready;wheretouseit;reasonsnottodig;themarvels of mulch;makingpottingmix.
166–181 Nopile?Noproblem: growyourowncompost Otherwaysof recyclingyourgardenwaste;growinggreenmanures tofeedthesoil.
182Troubleshooting 186Usefuladdresses188Index 192Acknowledgments


Understanding compost: the right stuff

10
What is compost?When animals and plants die, they decompose surprisingly quickly. The body of an adult human, if exposed to the elements, is reduced to a mere skeleton in about three weeks. The bones last longer, but not a great deal. Shakespeare was right when his gravedigger in Hamlet (Act V, Scene I) estimated there was not much left of a cadaver after eight or nine years. Even huge trees go the same way, and about as quickly.
The end product of this composting process is a remarkably
resistant and complex organic substance called humus, which
is largely responsible for the brown color of the majority of
soils in temperate regions.
Humus is a mixture of the highly altered remains of the
original organic matter—whether from plants or animals—that
arrives at the soil surface, as well as new compounds made by
bacteria and fungi. But only a small fraction of the original
material is destined to become humus. Most simply disappears,
turned back into the carbon dioxide (CO2), water, and mineral
salts from which it was first made.
11
Somewhere in this process—between the large amount of
original material and the tiny fraction that is left as humus—lies
what every gardener wants: compost.
The entire composting process can be seen on any woodland
floor. On the surface are freshly fallen, unaltered leaves. Dig down
a little way and the leaves become more fragmented and much less
distinct. Eventually, you will come to a dark, crumbly material in

12
which the original leaves are quite unrecognizable. This is usually
called leafmold, but it’s just a special variety of compost, made
only from tree leaves rather than the usual mixture of materials.
In fact, the woodland floor tells us two important things about compost. First, the transition from fresh material to finished compost is a
gradual one, with the end point being entirely a matter of opinion.
Second, if you were to rummage around in the leafmold, you would
soon turn up a few clearly identifiable twigs. Larger pieces of
tougher material (and twigs are both larger and tougher)
decompose more slowly than smaller, softer material.
Compost is “finished” when the easily decomposed parts of the
original material have disappeared, and the more resistant material
has decomposed to the extent that it is no longer recognizable, yet the
majority of the original organic matter and nutrients still remain.
Nevertheless, deciding when this perfect state has been
achieved remains a personal matter, largely affected by how much
twiggy stuff you are prepared to tolerate in the finished product.
I can’t tell you how to decide when your compost is finished, but I
can tell you how to get there in a reasonable time.


14
Why compost?There are plenty of very good reasons for gardeners to make compost, but above all, it spares the environment the damage caused by burying or burning waste, reduces the need to destroy natural habitats by excavating peat, and saves you money.
don’t dump It, Recycle ItUS household garbage adds up to more than 200 million tons a
year, or roughly 5 pounds (2 kg) per person per day, of which about
a quarter is recycled. Only about ten percent of British household
waste is recycled, which puts the UK near the bottom of the
European league. Some countries, like Germany and Denmark,
do much better, although a few are even worse. Most waste is
incinerated or ends up in landfill, yet about half of all household
waste could be composted.
At the same time, every year gardeners around the world buy
millions of tons of growing media, soil conditioners, and mulching
materials, much of it based on peat. A high proportion of this
could be replaced, free of charge, if gardeners started recycling
what they now simply throw away.

15
Incinerated waste is returned immediately to the air as
carbon dioxide (CO2) and other gases, causing air pollution and
contributing to global warming. Organic matter in landfill also
slowly decays, but the main product is methane, an even worse
greenhouse gas than CO2, and 25 percent of US methane emissions
come from biodegradable waste in landfill sites.
The soil is also the safest place for waste organic matter.
Once returned to temperate soils as compost, some organic matter
stays there, often for a long time. More widespread use of compost
by farmers and gardeners could make a small but significant
contribution to the commitments made in the Kyoto Protocol
of 1997 to reduce CO2 emissions.


17
treat your Soil
It’s hard to believe just how many benefits compost
provides for soil. Even when spread on the surface
as a mulch, and long before it actually enters the
soil, compost helps to suppress weeds, retains soil
moisture in dry conditions, and protects soil from
the damaging effects of wind and heavy rain.But it’s when organic matter gets into the soil that it really
starts to work its magic. Soil structure depends almost entirely on
organic matter. In healthy soil, the organic humus and inert mineral
particles are stuck together in tiny crumbs a fraction of an inch
across. These crumbs are held together by fine fungal strands, or
hyphae, and by organic glues produced by trillions of bacteria.
one ounce of healthy soil may contain up to
54 miles of fungal strands, that’s 3 km of hyphae for every gram of soil. And what do the fungi
and bacteria eat? Organic matter.
The crumb structure of a healthy soil is an important factor
in maintaining the soil’s water supply, because tiny pores between
the crumbs form a kind of “sponge” that is normally full of water.
The soil is also full of larger channels, which fill with water after

18
rain but are normally full of air. This air supply is vital, since
plant roots and soil animals need to breathe. Most of these
channels are created by earthworms, which eat—you guessed it—
organic matter. The more compost you make and use on the soil,
the better will be its crumb and pore structure, and the less need
there will be to water your plants in dry weather.
Compost is also a valuable source of mineral nutrients, such
as nitrogen (N) and phosphorus (P), that plants need for growth.
As organic matter breaks down, the minerals are slowly released
and made available to plants. This breakdown happens faster in
warmer weather, which of course is when the plants need them
most. Some kinds of organic matter break down and release their
nutrients relatively quickly, while others go on to form humus,
which provides a much longer-lived bank of nutrients in the soil.
Mycorrhizas, specialist symbiotic fungi that live on and in
plant roots, also break down organic matter and transfer the
nutrients directly to plants, helping to stop them from being
washed out of the soil and lost.
in short, plants need three key things from soil—
water, air, and nutrients— and compost helps provide all three.


20
good life for Wildlife
Soil is not inert: it is an almost unbelievably diverse,
living community of microbes and animals. A single
square yard (square meter) of woodland floor is
typically home to 30 million nematodes (eelworms)
and 250 different species of mites. Unlike plants, the
microorganisms and animals of the soil community
cannot make their own food and depend on organic
matter from the world above, so more organic matter
means more microbes and more soil animals. To a very large extent, everything else in the garden depends
on the health of this soil community. Healthy soil means healthy
plants, which provide plenty of nectar for pollinators and lots of
leaves for the herbivorous insects that are eaten by beetles, birds,
predatory wasps, and spiders.
The soil community also contributes directly to the well-being
of many of the larger and more conspicuous animals in the garden.
Small soil animals like springtails are food for ground-dwelling
beetles and spiders, while earthworms are a
favorite food of frogs and toads, and even of
larger animals such as raccoons and foxes.
And don’t forget the wildlife that
inhabits the compost pile itself.


23
Decaying organic matter is a favorite haunt of many animals that
would be rare or absent in a garden with no compost pile. Compost
is a favored habitat for slow worms, one of the few animals in the
garden that really like eating slugs.
A compost pile is a complete ecosystem, a world in miniature.
Worms eat decaying vegetation and excrete organic compounds
that enrich the mix, while their burrowing helps aerate the
compost. As organic matter is passed through an earthworm’s
digestive system, it is finely ground and neutralized by calcium
carbonate that is secreted by the worm’s gizzard.
Millipedes, slugs, snails, and woodlice shred the plant
materials, creating more surface area for fungi and bacteria to
work on. Fly larvae (maggots) tunnel through the pile, eating
everything in their path.
Fungi and actinomycetes (a group of organisms intermediate
between bacteria and true fungi) get to work on the tougher plant
residues that the bacteria leave behind. The microbes are food for
organisms such as mites, nematodes, and springtails, which are in
turn eaten by centipedes, ground beetles, rove beetles, spiders,
and more exotic predators such as pseudoscorpions.
Finally, larger carnivores (for example, slow
worms, shrews, and toads) move in, attracted by
the warm, sheltered environment and the
abundance of food.
Millipedes process and eat rotting plant material.

24
Compost basicsPeople write college theses on compost, but don’t let that worry you—all the science you need to know is in the next twelve pages. Essentially, the perfect compost pile needs the right mix of ingredients, plenty of water (but not too much), warmth, and lots of air.
A bAlAnCed dietUltimately, animals and microorganisms that turn plant material
into compost need to eat the same things that you do. They need
energy, most conveniently supplied by carbohydrates. In your case,
this means starch and sugars from bread, potatoes, rice, and fruit.
The main carbohydrate in plants is cellulose—you can’t break this
down, but compost microorganisms can. They also need nitrogen
and phosphorus, to make proteins and other vital molecules.
Carbohydrates contain carbon, which provides energy and
is the main structural element of living organisms. In practice,
anything that contains plenty of nitrogen usually also has lots of
phosphorus and other essential elements. A useful, shorthand way
to describe compost ingredients is therefore by referring to their
carbon:nitrogen, or C:N, ratio.

25
To understand why this ratio needs to be correct, a useful
analogy is your own diet. Without even thinking about it, you
aim to eat a balance of these two crucial elements: meat sauce
and pasta; fish and chips; cheese and bread; burger and fries; roast
beef and mashed potatoes.
You know that the perfect sandwich contains more bread
than ham or peanut butter and, in a similar fashion, your compost
pile needs more carbon than nitrogen.
Some C:n ratios• poultry manure has a C:N ratio
of only 6
• vegetable kitchen waste is about 15
• grass cuttings average around 20
• tree leaves are about 50
• straw hovers around 80
• wood and paper are much higher, at anywhere
from 100 to 500
This means, for example, that grass cuttings
are relatively nitrogen-rich, whereas wood is
mostly carbon.

26
So what is the ideal C:n ratio to aim for when building a compost pile?
Given the importance of nitrogen for making proteins, you
might think you should aim to use only stuff with the lowest
possible C:N ratio as ingredients in your compost pile. This
opinion might be reinforced by learning that the microorganisms
that do most of the work in the compost pile have a C:N ratio
between four and nine (people have a similar ratio).
However, as we’ll see (pages 28–29), nitrogen-rich material
on its own has some unfortunate implications for the air supply
to your compost pile. Moreover, bacteria don’t just need a
C:N ratio suitable for turning into more bacteria: much of the
carbon in their food is simply “burned,” or respired, away as
carbon dioxide (CO2). In fact, about two-thirds of the carbon
consumed by bacteria is given off as CO2, so
the ideal C:n ratio is somewhere around 30.

27
Because so much carbon is lost during composting, a pile
that starts off with a C:N ratio of 30 will deliver finished compost
with a ratio around 10 or 15. Comparing the ideal ratio of 30 with
the values for various compost materials, it’s easy to see that it’s a
good idea to mix some low-nitrogen, woody stuff in with the lawn
mowings and kitchen waste.
However, there’s another, even better reason to mix some low-
nitrogen waste into your compost pile, because even for bacteria,
there is more to life than food. Bacteria have to breathe too, which
will bring us to the next basic principle of composting.
A balanced diet for your pile, of roughly three parts soft, green waste to one part woody stuff, will give you rich, dark compost.

28
You CAn’t hAve too muCh Air
Composting is an aerobic process, which is a fancy
way of saying it needs air. What’s more, air is
probably even more important than food—the
average compost pile runs out of air long before
it runs out of food. If there isn’t enough air,
decomposition becomes anaerobic, which is bad
news for two reasons. First, it’s much slower than
aerobic composting, and second, some of the
products, such as ammonia and hydrogen sulfide,
don’t smell very nice.Traditional advice is to turn compost piles, specifically to
introduce more air, but the perceived need to turn piles regularly
is enough to put many gardeners off the whole idea of composting.
Which brings us to a central dilemma: nitrogen-rich materials
such as annual weeds and kitchen waste decompose quickly, but
lack structural strength. As soon as they begin decomposing,
they lose what little structure they have and collapse into an
airless, smelly mess.
It’s easy to add materials with more fiber, such as tree and
hedge prunings, and these will stop the pile from collapsing. But
they decompose much more slowly than soft material, so you end

29
up with coarse, twiggy compost. Shredding woody waste first
helps it to break down more quickly, but reduces its usefulness
in imparting structure to the pile.
Why does woody waste decompose so slowly? Because it has
a high C:N ratio and the composting bacteria are not very good
at breaking it down. Fungi are much better, but work only slowly
and usually don’t like quite the same conditions as bacteria, so
a pile that’s just right for bacteria will be less good for fungi.
Nevertheless, fungi can play an important role in making leafmold
(see pages 88–93).
So the would-be composter is faced with a dilemma—in fact,
two dilemmas for the price of one: how to give the pile structure
and what to do with large quantities of woody waste. We’ll deal
with the woody waste problem later (see pages 46–47 ), but to add
structure, we need a material that has some structure but breaks
down relatively quickly. One excellent solution is a waste material
that every household produces in abundance and is recycled far
less often than it should be: paper and cardboard.
Waste paper
is the answer to a composter’s prayer.

30
juSt enough WAter
Soil animals and microorganisms need water. The
bacteria and other microbes live in the film of water
that covers compost particles, and most soil animals—
especially worms, the most important ones—are
very intolerant of drying out. So obviously the ideal
compost pile needs to be at least moist. But not too
moist—too much water conflicts with the need for
air, and there is no faster route to a smelly, anaerobic
compost pile than waterlogging. The ideal water content for rapid composting is about
50–60 percent by weight, but knowing that isn’t very helpful, is it?
In practice, this is the water content of a well-wrung sponge. How
does this prescription square with the water content of typical
compost materials? “Not very well” is the answer.
Kitchen waste and grass cuttings are at least 80 percent
water, so a pile made entirely from such materials would be too
wet, which would contribute to a lack of oxygen. You could solve
the problem by adding drier, woody waste, shredded or otherwise,
but this would slow things down too much.
The solution once more is paper and cardboard, which not
only lowers the average water content of the pile, but also soaks up
the liquid that is released as the softer materials start to decompose.

if you take a handful from the center of your pile and you can squeeze just a few drops of moisture out of it, that’s perfect.

32
the CAlCium fACtor
The basic story of compost emphasizes the
carbon: nitrogen ratio, and rightly so—this has to
be at least nearly right, or nothing will work very
well. However, the C:N ratio is far from the whole
story, and there is one element that has not been
given quite the attention it deserves: calcium.Why might calcium be important in the compost pile? One
product of the breakdown of organic matter by bacteria is organic
acids. In a well-aerated compost pile, these organic acids are
themselves broken down in the later stages of the composting
pH 6 to 7: slightly acidic to neutral soil pH 4 to 6: acidic soil
Acid-loving plants, such as this heather, prefer soils with a low pH.
most plants, like these herbaceous perennials, grow best in neutral soils.

33
Alkaline-tolerant plants, such as lavender, thrive in high-pH soils.
process, but if there is any shortage of oxygen, they can begin to
accumulate, making the compost acidic. This is a problem because
bacteria do not like acidic conditions at all.
The pH scale measures acidity or alkalinity, and goes from
1 (very acidic) to 14 (highly alkaline). Pure water has a pH of 7 and
is described as neutral. Soil pH depends on geology and climate:
acidic rocks, like granite or sandstone, and high rainfall result in
acidic soil; calcium-rich limestone and low rainfall lead to alkaline
soil. A soil pH of 6 to 7 is ideal for most plants, but there are some
specialized species that grow best on acidic or alkaline soils. Few
plants thrive on soils with a pH of less than 4 or more than 8.
A roughly neutral pH is perfect for composting bacteria, but
they are happy in alkaline conditions, up to pH 8.5. Which is why
pH 7 to 8: alkaline soil

leaves that are low in nitrogen and calcium, like those of larch and this pine,
make truly awful compost.

35
materials containing calcium are great for the pile. Acidic soil can
easily be corrected by adding garden lime (ground limestone), but
there is no simple way of making an alkaline soil more acidic. If
your compost pile is acidic because of poor aeration, it’s far better
to treat the cause rather than attempt to treat the symptoms by
adding lime. However, although most green waste contains plenty
of calcium, some compost materials are naturally low in calcium.
For example, fall leaves of oak and hornbeam are relatively
rich—for tree leaves—in nitrogen, yet do not make good compost,
which makes sense when you discover that both are low in
calcium. Woody waste such as hedge prunings, especially of
conifers, is also short of calcium, so here there is a case for adding
lime to help it break down.
The correlation isn’t perfect, but materials that are high
in calcium also tend to be high in nitrogen, and no low-calcium
materials contain more than moderate levels of nitrogen.
high in calcium Annual and perennial weeds; brassica
leaves and stalks; kitchen vegetable waste; leaves of ash,
cherry, elm, hawthorn, linden, maple, and rose; seaweed.
low in calcium Bark, bracken, and ferns generally;
conifer needles; hay and straw; leaves of beech, birch,
hornbeam, and oak; moss; wood.

36
Compost ingredientsMaking compost is like cooking: the secret is in the correct ingredients, plus knowing what to leave out. But don’t worry—unlike baking a cake, getting the proportions right is not critical, baking time is up to you, and garbage ingredients are a positive advantage.
... from your houseThe house, and particularly the kitchen, is a major source of
compost ingredients. Any green (or orange or yellow or purple)
vegetable waste may go on the compost pile. Do not be put off by
the tough appearance of things like grapefruit skins—they will
compost just as quickly as any other vegetable matter. There’s also
no problem with leftover cooked vegetables.
Theoretically, waste meat or fish (cooked or uncooked) can
also be composted, but your compost bin must be animal-proof. In
practice, it’s quite hard to construct a compost bin that cannot be
penetrated by a determined rat.
Anything that used to be alive can be composted.

37
What goes in Coffee grounds; old cotton, silk, or wool
clothing (torn up); eggshells; floor sweepings; hair and nail
clippings; paper and cardboard; rabbit or hamster bedding;
tea bags; vacuum-cleaner dust; vegetable waste; wood ash.
What stays out Cat or dog litter, coal ash, dairy
products, disposable diapers, fish and meat waste,
oil or fats.

39
Most types of paper and cardboard make excellent compost
ingredients. Large quantities of flat paper should be avoided, and
in any case are more suitable for conventional recycling. However,
such materials may be used in moderation if you are short of other
types of waste paper—printing inks no longer contain toxic
heavy metals.
Better for compost are those types of paper that are harder
to recycle, such as used tissues and cereal boxes. Birthdays are
bonanza times for the serious composter, with all that wrapping
paper. Cardboard with laminated plastic should be avoided: the
cardboard will compost okay, but you will have the annoying job
of fishing the plastic out of the finished compost.
And if you’re alarmed by media stories of identity theft and
are worried about what to do with all those old bank statements
and credit-card bills, here’s the perfect solution—compost them.
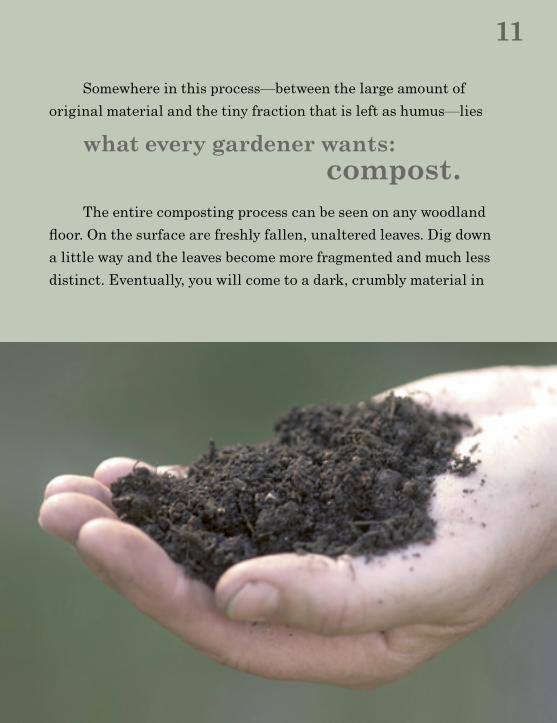
What goes in Cardboard packaging, egg cartons, old
greeting cards, shredded documents, toilet-paper rolls, used
tissues and kitchen towels, waxed paper, wrapping paper.
What stays out Laminated cardboard such as juice and
milk cartons, large quantities of newspaper, telephone
directories, very shiny magazines.

40
... from your gArden
All normal green garden waste can be composted—
after all, disposing of such material is one of the
main reasons for composting in the first place.
Nearly all of it can go on the compost pile without
any treatment, but tough stuff like brassica stalks
should first be chopped up, or smashed, with a club
hammer or spade. The same goes for tough kitchen
waste such as corn cobs. What about weed seeds? Well, they are not such a serious
problem. Even a classic, hot compost pile never achieved a
100 percent kill, so gardeners have always had to live with weed
seeds in compost. Of course, the best defense is vigilance in the
first place, so that weeds end up on the compost pile before they
get around to setting seed.
Also, keep a lookout for weeds
growing near the pile itself, or even
on it. Trials at the Royal Horticultural
Society in the UK suggest that most of
the weed seeds found in an open compost
pile were not there at the start, but
blew in while the pile was
rotting down.

A good bash with a hammer easily cures the tendency of tough, fibrous stalks and corn cobs to rot slowly.


43
The problem of weed seeds is
often exaggerated— a long spell in a compost pile will finish off many seeds.
If you adopt the preferred method of composting described
later (see pages 72–75), which depends very much on worm activity,
most of your compost pile will have passed through one or more
worms before you use it. Some seeds pass through worms
unscathed, but many do not.
Roots or rhizomes of perennial weeds, such as dandelions,
docks, and couch grass, are another problem. As far as they are
concerned, a compost pile closely resembles their usual, under-
ground habitat, so they are not damaged at all by a cool compost
pile. The secret here is to kill them before they go on the pile.
There’s more than one way of killing a perennial weed, but I
think the best is to lay them somewhere dry and sunny until they
are thoroughly shriveled. A more satisfying solution, if you don’t
have very many weeds, is to smash them thoroughly with a
hammer first. Other messier or slower solutions are to drown them
in a bucket of water for six weeks or asphyxiate them in a sealed
garbage bag for a year.
Bake to death perennial weeds before throwing them on your compost pile.

44
TriCky sTuff
Some types of garden waste require caution. One
of the undoubted virtues of “hot” composting is
that weed seeds and pathogens are killed. But
traditional, hot composting is hard to achieve in
the average garden, so what do we do with such
problematic ingredients? Fungal and bacterial
pathogens are the worst, but we do need to keep
a sense of perspective. Pests and diseases that live on leaves and stems don’t enjoy
life in the compost pile, so you don’t need to lose much sleep over
them. Mildew and black spot are unlikely to survive a long spell
in the average compost pile. On the other hand, most soil pests are
quite at home in the pile, and are all too likely to survive and be
spread around the garden, as are overwintering diseases. There
really is no alternative to keeping material with these problems
out of the compost pile.
Not very satisfactory solutions are to burn them or bury
them in an unused corner of the garden. It’s better to add them
to a habitat pile, a heap of miscellaneous woody waste intended
primarily to provide a wildlife habitat.
When looking at the examples listed opposite, bear in mind
that they are for guidance only: no list could possibly be complete,

45
and most available advice on what can be safely composted
is anecdotal and contradictory. Also, the longer a pile is left, the
smaller the chance that anything horrible will survive. And last
but not least, beneficial microbes in mature garden compost are
quite effective at controlling many common diseases. But,
if in doubt, leave it out.
What goes in Material damaged by aphids, black spot,
brown rot on fruits, canker, gray mold, leaf miners, leaf
mites, mildews, potato blight, sawfly larvae.
What stays out Material that might harbor
carrot or cabbage root fly pupae, clubroot of brassicas,
eelworms and their eggs, honey fungus, pests that overwinter
in soil such as pear midge grubs, root rots of beans and peas,
rusts, and viral diseases.

46
Woody gArden WAsTe
Larger yards, especially those with long hedges,
can generate huge quantities of woody waste.
We’ll consider what to do with it later, but why
is it a particular problem?First, prunings, hedge trimmings, and woody material
generally have a high C:N ratio, so they are high in carbon and
low in nitrogen. This in itself slows down decomposition, but that’s
only half the problem. The other half is that cellulose is only one
of the carbon-rich materials in plants. Another, which may make
up 20–30 percent of wood, is lignin. Lignin’s chief disadvantage
is that composting bacteria are not good at breaking it down.
Second, woody waste has much bigger stems than green
waste, so it has a low surface area compared to its volume. This
doesn’t give bacteria and other organisms much to work on.
The third problem is the exact opposite of that afflicting
a pile of grass mowings, which collapses and runs out of air. A
pile of raw prunings, by contrast, contains far too much air, and
dries out too quickly. For some gardeners, these problems seem so
intractable that composting doesn’t look like a serious option. But
don’t worry, there are plenty of environmentally friendly ways to deal with
even a mountain of woody prunings (see pages 78–87).


48
Active ingredients
Compost activators are materials intended to make
up some deficiency – usually of nitrogen – in the
compost heap. Some proprietary compost activators
claim to contain micro-organisms, but there should
be plenty of these in the compost heap anyway.
Direct contact between your heap and the soil will
speed up colonization of the heap by bacteria and
soil animals. To be absolutely sure, add a spadeful
of soil or compost from an existing heap. Cheapest
and best of all activators is human urine, applied
directly or diluted and added via a watering can.

49
Something all activators contain is nitrogen. However, if you
follow the high-fibre method (see pages 72–75), your heap will
already have the right carbon:nitrogen (C:N) ratio and no extra
nitrogen will be required. If your compost heap does contain too
much nitrogen, the excess will simply be broken down and lost as
gaseous nitrogen or – worse still – as ammonia, causing
a nasty smell. However, if you are composting low-nitrogen material such
as hedge prunings or autumn leaves, extra nitrogen will probably
speed things up. We’ll consider the best way to add this when we
look at the practicalities of making compost (see pages 87 and 91).
As we’ve seen, many compost materials that lack nitrogen are
also low in calcium, and some proprietary activators do contain
garden lime. Again, the high-fibre heap doesn’t require extra
calcium, but the breakdown of naturally acidic materials like
woody waste, autumn leaves, and (especially) conifer prunings
will be accelerated by the addition of lime.
good activators Ammonium sulphate (cheapest
option); comfrey leaves or liquid feed made from comfrey
(organic); dried blood (organic); lime (ground limestone);
nettle leaves; fresh or pelleted poultry manure (organic);
proprietary activator; spadeful of soil or compost; urine.


51
whAt else cAn you use?
The principal goal of composting is to recycle
organic matter on the spot, without the awful waste
of energy involved in moving it around the country
first. Therefore, imported materials should not be
added routinely to the compost heap. On the other
hand, if there are local sources of composting
ingredients that are available cheaply, or perhaps
even free, it would be foolish to ignore them. If your organic waste goes to a local composting scheme,
it will be composted at a high temperature under controlled
conditions. The resulting compost will be a clean, safe, weed-free
material that can be bought and used straightaway in the garden.
However, in common with other commercial soil conditioners that
are based on recycled garden or forestry waste, it tends to be
slightly alkaline, so is not suitable for use around rhododendrons
or other acid-loving plants.
strawy stable manure
can go straight on the garden,
while chicken manure is high in nutrients and makes an excellent
compost activator. Pigeon manure, often available even in the
centre of big cities, is similar.

52
Many other sources of organic matter are useful if available
locally, including bracken, sawdust, seaweed, spent hop waste and
mushroom compost, and straw. All these can go straight on the
garden as a mulch and will help to improve the soil structure.
Bear in mind, however, that in terms of nutrient content and
other properties, these materials are very different.
Points to ponder• mushroom compost is alkaline
• dead bracken, sawdust, and straw contain virtually
no nutrients
• material from farms may have had pesticides used on them:
always check and, if it has, compost it well before putting
it on the garden
• landowners are often happy for you to collect bracken,
but always ask first
• collect only loose seaweed washed up by the tide – do not,
whatever you do, remove live seaweed from rocks
useful materials are (from top, clockwise) poultry manure, spent hop waste, used mushroom compost, bedding from rabbit and hamster cages.


54
sorting your stuffThe lists opposite are a reminder of most of the sorts of things that you might want to compost, divided into (1) soft, nitrogen-rich, (2) moderately nitrogen-rich, and (3) tough, carbon-rich material. Bearing in mind the ideal C:N ratio of 30 for composting, a heap made entirely of rich stuff will have too much nitrogen and one entirely of tough stuff will have too little, so always try to mix the two.
ingredients: (from left) old cut flowers (rich stuff), young hedge clippings (middling stuff), and straw (tough stuff).

55
rich stuff (c:n ratio of 5–25) Annual weeds, coffee
grounds, comfrey, feathers, general kitchen waste, hair, lawn
mowings, nettles, old cut flowers, pigeon manure, pond weed,
poultry manure (raw or pelleted), seaweed, pure wool or silk
clothing (shredded), soft, green garden waste, urine.
Middling stuff (c:n ratio of 25–50) Brassica and other
fibrous, green stems, citrus skins, cotton rags, eggshells
(rich in calcium), soiled bedding from hamsters, rabbits,
guinea pigs (not dog or cat litter), spent hop waste, tea bags,
used potting compost, vacuum cleanings (but not if you have
synthetic carpets), waste from distilling, well-rotted cow/
horse/pig/sheep manure, wool shoddy, young hedge clippings
and soft prunings.
tough stuff (c:n ratio of 50–600) Bracken, cardboard,
corn cobs (crushed), hay or straw, leaves of broad-leaved trees
and shrubs, leaves of conifers, nutshells, paper, sawdust,
tough hedge clippings, waxed paper, wood ash (rich in
potash), wood shavings, woody prunings.

56
Bacteria like it hotAll biological reactions take place faster at higher temperatures, and composting is no exception. Your heap will turn into compost much more quickly in summer than in winter. If you live in a climate with severe winters, your compost heap will effectively stop completely during the coldest part of the year. Nor are all summers the same. Compost heaps work faster in Madrid or Montreal than in Manchester.
Especially in cool climates like the UK, you will make
compost faster in a sheltered, sunny spot, rather than somewhere
cool and shady or windy and exposed. In a sunny spot, a black
compost bin will work faster than a light-coloured one.
Compost also generates its own heat. A freshly constructed
compost heap contains an abundance of food, water, and air.
Faced with this bounty, bacteria grow and respire at a prodigious
rate. All this activity generates a lot of heat and the temperature
of the compost heap rises.
If it gets above about 45°C (113°F), the bacteria that live
at everyday temperatures (mesophiles) will be replaced by

57
thermophilic, or heat-loving, bacteria that can continue to thrive
to 70°C (158°F) or even beyond. It is one of life’s little mysteries
that thermophilic bacteria, which cannot grow at all at normal
temperatures, are nevertheless everywhere, just waiting for you
to make a compost heap.
the keen composter regards such high temperatures as a very good thing
for a variety of reasons. Such temperatures produce finished
compost more quickly, and they are high enough to kill weed
seeds and disease spores.
A compost heap will always be hotter in the centre and, as
the bacteria there begin to run out of food and air, turning the
heap adds more air and also mixes in the less-composted, outer
parts of the heap, setting off the whole process again. A large,
frequently turned heap can stay at a high temperature for a
surprisingly long time.
Don’t worry, by the way, that this heat is bad for other
compost heap inhabitants. Mesophilic bacteria survive as
resistant spores, and mobile animals (beetles, centipedes, worms,
and so on) simply move to the outer parts of the heap until things
start to cool down.
so much for theory.


size does matter: only huge heaps get really hot.

60
To see how easy it is for the average gardener to achieve high
composting temperatures, the Royal Horticultural Society (RHS)
in the UK set up a trial of different sizes of compost bins and
heaps at their garden at Wisley.
the trial heaps were • a standard, slatted, wooden bin bought from a large DIY
chain store, with a volume of 0.75 cubic metre (26 cu.ft)
• a typical, local authority plastic bin, of 0.3 cubic metre
(11 cu.ft)
• an open heap, also sized about 0.3 cubic metre (11 cu.ft)
All contained the same mix of typical garden waste: large,
woody material was chipped and smaller material was shredded.
The trial was started in late autumn: although the weather at this
time is too cold to be ideal for compost-making, it is one of the few
times that many gardeners will have a large quantity of waste
material available.
The trial heaps were compared with the main heap at the
RHS Garden, Wisley, which is enormous – at least 30 cubic metres
(1,060 cu.ft). Despite air temperatures below 10°C (50°F), the
temperature of this heap quickly rose to around 70°C (158°F).
After two weeks, the heap was turned and the cold air
admitted briefly reduced its temperature to below 50°C (122°F).
But it was soon back up to over 60°C (140°F) again, and remained
above 50°C, with monthly turning, for several months.

61
No such luck for the trial heaps. None ever achieved more
than a few degrees above air temperature, with or without turning.
Probably because of its larger size and better insulation, the
wooden bin was the best of a bad bunch, and the plastic bin was
slightly warmer than the open heap. Crucially however, none got
anywhere near a temperature that would kill disease pathogens
or weed seeds. So much for the bad news.
the good news is that after a year, whether turned or not, all the heaps produced
perfectly good compost.
However, the compost from the open heap contained more
weed seeds than the compost from the bins. It also had lower levels
of plant nutrients, probably because they
had been washed out by rain.


Making compost: paper, prunings, and patience


65
Classic compostingThe traditional advice for constructing a classic compost heap is quite simple. First, collect together a mixture of soft, nitrogen-rich waste and tougher, carbon-rich material. Shred any tree and shrub prunings.
Second, start filling your compost bin with layers of different
materials, adding a spadeful of compost or soil now and then – the
right micro-organisms will colonize your heap eventually anyway,
but there’s no harm in giving them a helping hand. Carry on until
your heap measures at least one cubic metre (1 cu.yd), or more if
possible. If the heap seems dry, water it. Cover it with the bin lid
or a piece of old carpet.
Your heap should soon start to get hot. When it starts to
cool, turn it and it will heat up again. When it starts to cool
again, turn it for a third time, and leave until done.
Sounds simple, doesn’t it? Unfortunately, it’s this stately
home approach that caused generations of gardeners to abandon
the whole idea of making compost. In fact, this
apparently simple advice is riddled with weasel words that gloss over real difficulties.

66
“Turn your heap when it starts to cool down.”
Modern gardeners are busy people, with their compost heap
somewhere near the bottom of their list of priorities. Turning a
large compost heap is hard work, and doing it twice sounds like
adding insult to injury. There’s also the anxiety of whether you’ve
got the timing right. Is it cooling down yet? Have I left it too long?
“Collect together at least a cubic metre of waste.”
Pardon? How often does the owner of a modern, small garden have a
cubic metre (cu. yd) of waste at one time? Pause at this point and
try to visualize a cubic metre of garden waste (go and get a tape
measure if necessary).
“Well then,” goes the advice, “gather the materials over a
period of time.”
OK, but where do you store this stuff while you are waiting
to collect enough? An even more interesting question is how you
stop the green waste from starting to compost before it goes on
the compost heap. Keep it in the fridge maybe?
Something else the books never mention.
As described, composting is clearly a batch
process, like putting a load in the
washing machine. A full load of
compost material is assembled and,
after a time, finished compost results.


68
Which raises the awkward question: what do you do with compostable
material that accumulates meanwhile? Clearly, if traditional
composting is to work at all, you must have at least two compost heaps.
“Fill your compost bin with at least a cubic metre of waste.”
Naturally, this assumes that you have a compost bin that
will hold that amount. So how big are commercial compost bins?
Many retailers sell their own version of the classic, wooden “New
Zealand” box; a quick check of catalogues and websites shows that
It’s not easy squeezing a cubic metre of waste into most compost bins.

69
the standard box bin varies from 0.3–0.75 cubic metre (11–26 cu.ft).
You can find larger bins, up to 1.3 cubic metres (46 cu.ft), but you
have to look quite hard to find them.
Plastic compost bins, of the type often provided free or at
a subsidized price by local government, are generally smaller.
A leaflet from my local authority lists three bins, ranging from
0.23–0.6 cubic metres (8–21 cu.ft). Fancier options, such as bins
disguised as beehives and tumblers, are smaller still. I’m forced
to conclude that manufacturers of compost bins do not expect the
average gardener to assemble a cubic metre of compost at one go.

70
“If the heap seems dry, add some water.”
This sounds simple enough, but in practice conceals a minefield.
We’ve already seen that moisture content has consequences for
aeration (see pages 28–29), but there are other, more subtle effects
too. All else being equal,
a wet compost heap heats up more slowly than a dry one.
Water is also a much better conductor of heat than air, which
is why cold water always feels much colder than air at the same
temperature. So a wet compost heap loses heat more quickly
than a dry one.
In fact, although this is unlikely to happen to you,
spontaneous fires at commercial composting sites are not that
uncommon, and are usually caused by a large heap that is (at least
in part) too dry. The message is that moisture content is critical:
it must be high enough to allow composting to occur, but not so
high that heat is lost too quickly. On a domestic scale, the moisture
content of a compost heap is difficult to measure or control: quite
small variations in moisture content are probably responsible for
the rather unpredictable behaviour of the typical heap.
Finally, does it work? That is, if you have survived the assault
course needed to assemble a compost heap in the required manner,
will it do what it should do? The Royal Horticultural Society
research described previously (see pages 60–61) plainly shows that

71
it probably won’t. The only simple way of ensuring a compost heap
gets hot and stays hot is to make it larger than recommended by
the books, and certainly larger than a typical compost bin.
It seems clear that classical hot composting was designed
by (and for) people with big gardens, plenty of space, and ready
access to outside sources of compost materials, typically animal
manures. In such gardens, classical composting is still alive and
well. At the RHS Garden, Wisley, in the UK, huge quantities of
waste are chipped, shredded, and mixed by special machinery, then
blended into huge heaps, typically 2x4x12m (6x12x40ft) in size, or
about 100 times the minimum recommended size of the domestic
heap. This makes excellent compost in about four months, but it’s
a process the ordinary gardener can only dream about.
Of course, I’m not saying it’s impossible to make a traditional,
hot compost heap in an average bin. It’s just that you will have to
take some elaborate precautions, probably including more than
one of these steps:
• importing composting material from outside the garden
• trying to make compost only in summer
• installing effective insulation around your bin
• siting the compost bin in the sunniest, most sheltered spot
• moving to somewhere with warmer summers.
At which point, the average gardener could be forgiven for
concluding that the game is hardly worth the candle. Gardening
is supposed to be fun, after all.


73
Compost for realistsWoody waste can cause such trouble that I’m going to start out by assuming you don’t have any. Later, we will see what can be done with woody waste, but first let’s consider what you can do realistically with the soft garden and household waste and lawn mowings.
Soft waSte For the average gardener, the easiest way to cope with most
soft waste is to make a “high-fibre” compost heap. The method
described here is based on that developed by the Centre for
Alternative Technology (CAT) in Wales, in the UK. Green kitchen
and garden waste and paper and card are essential ingredients.
Any paper or card you add to a high-fibre heap should be
crumpled to make irregular, three-dimensional shapes. Egg
boxes and toilet-roll tubes are perfect without any pre-treatment.
Start with a layer of paper and card to improve the drainage at
the base, then just add paper and green waste as it comes along –
no need for any distinct “layering”.
The only rules are to make sure that you have approximately
equal volumes of paper and green waste, and not to add pure
green waste in a layer more than 15cm (6in) deep.

74
worms are the key to this kind of composting (not earthworms that live in soil, but smaller, related species
called brandlings). In fact, this sort of compost heap is essentially
a large wormery (see pages 140–145), but a lot less trouble. Worms
should colonize naturally, but you can make sure by adding some
from an existing heap. If you’re starting from scratch, get some
worms from a compost-friendly neighbour. As a last resort, buy
them from compost specialists, but this should not be necessary.
In a high-fibre heap, most of the actual composting activity
is confined to a relatively narrow layer, with fresh material above
and maturing compost below. If your heap is working well, this
narrow layer should be very rich in worms. Since this layer-cake
arrangement is vital to the success of your heap, it follows that you
need do nothing other than add new material to the top. Certainly
no turning is required.
If you have a bin that allows access to the base of the heap,
small quantities of finished compost may be removed from the
bottom, but it’s far better to leave well alone until the bin is full.
Then just remove the undecomposed material and worm-rich layer
from the top and tip it straight into a second bin (if you have one),
or put it in the original bin after removing the finished compost.


77
a mown about graSS CuttingS
In many gardens, there may be a huge glut of lawn
mowings in the summer. The solution is simply to
stockpile surplus cardboard to make sure that you
can keep the green waste:paper ratio about equal
during these brief periods. If you can’t do this,
loosely screwed-up, single sheets of newspaper will
work just as well. An alternative is simply to use
grass clippings as a mulch (see pages 168–169).
If you have a large vegetable plot, there might
be another glut of soft green material later in the
season, when you’re disposing of old runner bean,
courgette, and tomato plants. This sort of green
waste is rarely a problem, since it has more inherent
structure than grass clippings.
Crumpled newspaper saves a grassy heap from becoming slimy and smelly.
78
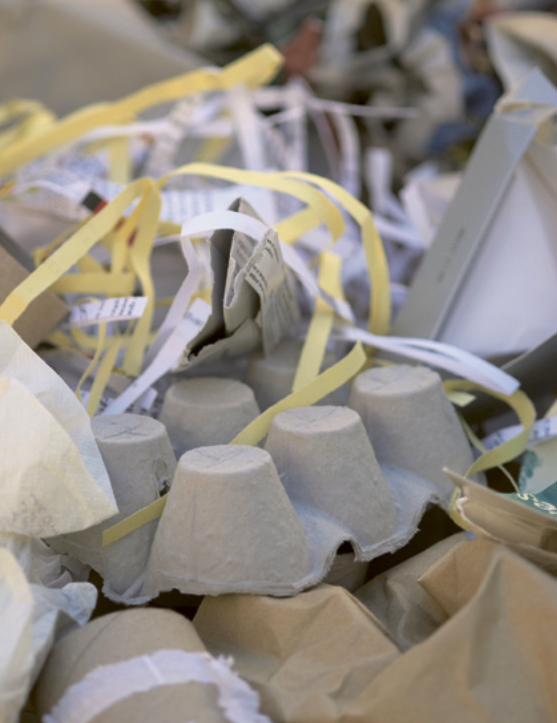
a knotty problem
The high-fibre method described in the previous
pages is not designed to deal with woody waste or
autumn leaves. Nevertheless, try to keep a sense
of perspective, and don’t panic if you have small
quantities of these things. Regular trimmings from
a modest privet hedge, or the autumn leaves that
fall on your lawn from a tree a couple of gardens
away, will probably not upset your high-fibre
heap too much.
On the other hand, if you have (like me)
sackloads of trimmings from a long beech hedge,
your high-fibre heap will not cope. But don’t worry,
there are many other good ways of dealing with
woody waste, listed overleaf in approximately
declining order of desirability.


80
1. Shred and use directly as a mulch. If you have a shredder, this is the simplest solution (see pages
82–85), which avoids completely the difficulty of composting this
material. You will read dire warnings about woody mulches
releasing toxins or using up all the nitrogen in your soil, but
both problems are much exaggerated.
For hedge prunings, an alternative is simply to push them
out of the way under the hedge, where they will slowly decompose
and also provide an ideal hiding place for hibernating hedgehogs
and other garden wildlife.
2. make a separate compost heap specifically designed for woody waste.If you do this, you can deal with the tendency of woody waste to
rot slowly and dry out, by treating it slightly differently to general
compost. To find out how easy it is to do this, see pages 85–87.
3. make a habitat pile. Dead wood is a habitat in very short
supply in the average garden, and
huge numbers of endangered
invertebrates depend entirely

81
on it for their survival. A heap of logs and thicker branches makes
a log pile; add smaller, woody stuff and it’s a habitat pile. Both are
equally good for wildlife. The best option for the wildlife gardener
with no shredder, and for any woody waste too thick to be shredded.
4. let someone else deal with it. This is a good option if your local authority or waste-disposal
company composts garden waste – especially if they are willing
to collect it. If they aren’t, ask them why not. On the other hand,
this is a much less environmentally friendly option if you have to
deliver the waste yourself.
5. burn it. While I recognize that, for some gardeners, a good bonfire is one
of the pleasures of gardening, this does put all the carbon that
was fixed in the plant material straight back into the atmosphere.
It also squanders most of the value of the waste.
At least you can recycle the wood ash, which contains some
potassium (K). In the autumn, build your bonfire immediately
before burning it, or at least check for hibernating hedgehogs
and other creatures before lighting it. Try not to annoy your
neighbours, who may not enjoy bonfires as much as you do. If
you have an open fire or suitable stove, burn larger woody waste
in the house and return the ash to the garden.

82
wood for the chop
If you have a high-fibre compost heap, it will not
object to small quantities of woody waste or autumn
leaves (especially if they are shredded first). The
point at which you decide you have so much of this
stuff that you have to find something else to do with
it is largely up to you. Because woody waste breaks down so much more slowly than
soft waste, the more you add to your heap, the coarser and more
twiggy will be the product. Whether this is a problem depends on
exactly what you want your compost for. In the end, it comes down
to personal choice. We’ll discuss the vexed question of when
compost is “ready” later on (see pages 148–151).
A lot hinges on whether you own a shredder. This in turn
depends on your attitude to cost and the noise (no shredder is
exactly quiet), and whether you think you produce enough woody
material to justify owning one. If you generate most of your woody
waste in one massive, annual burst of hedge-pruning, hiring a
shredder is an option. Joining a local gardening club that hires
out tools to members is another possibility.
Why is a shredder so important? Shredding can’t improve
the chemical composition of woody waste, but it does smash it into
small, jagged, irregular pieces, hugely increasing the area that
bacteria and other micro-organisms have to work on. Shredding

composting woody waste is not as impossible as it appears, especially if you shred it first.

84
also significantly reduces the volume of a pile of prunings and
counters the tendency of raw prunings to dry out too quickly.
Really “green” gardeners object to the energy used by
shredders, but this is trivial compared to all the other energy used
by modern living. Running a shredder for half an hour will deal
with 50kg (110lb) of prunings and uses about as much electricity
as watching television for an evening.
If you have a shredder, modest quantities of shredded, woody
material may be added to a high-fibre compost heap. They will
still break down more slowly than the soft wastes, but the smaller
Before shredding, a heap of woody prunings takes up a lot of space.

85
woody pieces will make the finished product look better. Large
quantities of shredded woody waste may simply be piled up in
their own heap and will be broken down rather slowly by fungi,
eventually producing something very like leafmould.
Unshredded woody waste can be treated in exactly the same
way as shredded, but will take an extremely long time to break
down. In fact, sticks or stems thicker than 2cm (¾in) will take so
long to rot that composting is not a realistic option – the habitat
pile or the bonfire are best for this larger stuff. To speed things up,
you need to address the tendency of woody waste to dry out.
After shredding, the prunings are dramatically reduced in volume.


87
This means it needs to go in a closed bin, ideally taller than it
is wide, so that its own weight tends to compress it and reduce the
large air spaces. It also helps to add other things that will help to
fill in the spaces, such as old potting compost and soil. When you
pull up weeds, don’t knock any of the soil off the roots: just add
the whole lot to the heap. The good thing about a heap like this is
that it will take anything not suitable for the high-fibre compost
heap – including autumn leaves.
Shredded or not, woody waste has a high carbon:nitrogen
(C:N) ratio, so will benefit from judicious additions of activators
containing nitrogen (see pages 48–49). Woody material, like many
autumn leaves, also tends to be low in calcium, so a handful of
garden lime (ground limestone) helps too. Lime is especially good
if you have many conifer prunings, which tend to be very acid.
finally, the chief necessities for composting woody waste
are patience and space. Shredded woody material with added activators should make
decent compost in a year, but on its own may take two years, while
unshredded material may take three years. This means you will
always have two or three heaps underway at any time, so you’ll
need room to accommodate these. Fortunately, the gardens that
produce large quantities of woody waste are most likely to be
those with space to deal with it.

88
Raking them in
The traditional advice on composting tree leaves is
clear and unambiguous: don’t bother. Leaves from
trees are low in nitrogen and calcium and high in
carbon, especially in tough, indigestible stuff like
lignin (the main component of wood) and tannins,
so they are best kept away from the compost heap. Yet not all tree leaves are the same, and the usual advice is
founded on the assumption that gardeners can’t tell them apart.
The real story, for gardeners who can tell them apart, is that leaves
of some trees are tough and slow to break down. However, other
leaves are much richer in nitrogen and calcium and make a useful
addition to the compost heap.
good leaves Ash, cherry, elm, lime (linden or basswood),
maple, poplar (cottonwood), willow.
Bad leaves Beech, birch, hornbeam, oak, sweet chestnut.

By far the best tool for raking leaves off a lawn is a spring-tined rake. Don’t waste money on a powered leaf-blower or vacuum.

90
If your tree identification is not up to scratch, there’s an
easy way to tell good, more readily compostable, leaves from
slower-rotting ones.
Leaves are shed by some species of trees while still
green; you can add them to the heap in moderate quantities.
Red or yellow leaves may be used in small amounts.
Brown leaves should be avoided in the mixed compost
heap, but they do make good leafmould (see overleaf).

91
Although all tree leaves have some structure and won’t
collapse in the same way as grass clippings do, avoid adding leaves
in thick layers that will end up as wet, airless slabs. If it looks like
the volume of leaves may cause a problem, mix them with paper
and card as for green waste.
Beech, oak, and other brown tree leaves break down very
slowly, unless they are chopped and mixed with more nitrogen-rich
material. An excellent way of doing this, especially if your lawn
is covered with leaves, is to run the mower over both grass and
leaves. All leaves will compost more quickly if shredded in this
way. The shredded leaf-and-grass mixture may be added to the
compost heap in moderation, or applied directly as a mulch.
in fact, leaves would make a good mulch on their own,
if they didn’t blow around so easily.
By the way, take care when collecting autumn leaves to make
leafmould. Drifts of dry leaves are favourite sites for hibernating
hedgehogs. If you’re not sure that the leaves under your hedge are
uninhabited, leave well alone.


93
An alternative, and the only option if you have a lot of the
wrong kind of leaves, is to
quarantine them in their own heap
and make leafmould. You may be told to stack leaves in a wire cage or in black,
plastic sacks. If these two pieces of advice seem contradictory,
that’s because making leafmould doesn’t need any special
conditions at all. Simply stack leaves in a heap, water, and leave –
preferably for about two years. During this time, decomposition
will be caused mainly by fungi, which are not deterred by acidic
conditions and secrete enzymes that break down lignin.
The only reason to stack leaves in a wire cage is to stop
them blowing away. Why a wire cage rather than a compost bin?
Because it’s cheaper, but you can use a compost bin if you like.
The only reason to stack leaves in plastic sacks is that it’s
a cheap way to keep them moist in dry weather. As long as you’re
happy to water your heap if the surface looks very dry, a wire
cage will be fine.

94
tooling upFor adding material from a wheelbarrow, removing finished compost, and turning a heap (if you insist), a garden fork, ideally stainless steel, is the perfect tool. For the serious composter, planning to deal with large quantities of waste and finished compost, a wheelbarrow is another must.
A bucket is almost too universally useful to be described
merely as a compost tool. Use it for transferring kitchen waste
and weeds to the heap and for distributing small quantities of
finished compost around the garden. The plastic tub trugs now
available are just as handy. Secateurs are essential for chopping
up tough plant stems or small amounts of woody stuff.
Other useful, but far from essential, tools include a shredder
and tools for chopping and smashing tough waste – an axe, club
hammer, or long-handled loppers. A soil sieve comes in handy if
you want to use garden compost to make
your own potting compost.

Few tools are absolutely essential to compost-making, but
a garden or compost fork comes as close as anything.


Compost bins: wood, wire, and worms

98
Why have a bin?In truth, you don’t need a bin to make compost. An open heap will compost eventually, and there isn’t much evidence that it takes a great deal longer than a bin or produces inferior compost. Nonetheless, there are several reasons for using a bin rather than a heap.
Open heap or bin? • any weed seeds blowing around will tend to accumulate
in an open heap, but not in a bin
• rain will wash essential plant nutrients out of an open
heap – a covered bin will not suffer such leaching
• weed and leaching problems could be solved by covering
a heap with plastic sheeting or some old carpet
• compost in a bin will be warmer than an open heap,
although the difference will be slight unless you go to
unusual lengths to insulate your bin
• an open heap takes up more room, and the surface tends
to dry out and blow around or be scattered by animals
• the high-fibre method (see pages 72–75) also works
better in a bin, since it’s hard to maintain an active
layer that is full of worms in an open heap

99
In practice, the main reason for using a bin
is simple tidiness. Nevertheless, keep the issue of bins in perspective. The correct
mix of materials will compost satisfactorily with or without a bin,
and no bin will persuade unshredded hedge prunings to compost
quickly. For most gardeners, the choice of bin should be dictated
largely by considerations of cost and convenience.

100
Choosing a binYour local authority or waste-disposal company may provide compost bins for little more than the cost of delivery, or even completely free. (This appears to be remarkably altruistic, but everything you compost is something they don’t have to collect and dispose of.) If they do supply bins, this is almost certainly your best bet.
Small hatches make it difficult to get stuck in with a fork when the compost is ready.

101
For example, in my locality, householders are provided with
a choice of three plastic bins, from 226 to 600 litre (50 to 132
gallon) capacity. Each costs around ten per cent of what they
would cost at a garden centre or shop. Which is the one for you?
Some plastic bins are one-piece, truncated cones with a
removable lid, while others require some very simple assembly. If
you doubt your ability to assemble anything and the words “flat
pack” send a shiver down your spine, a one-piece bin is for you.
One-piece bins also tend to be more sturdy. Otherwise (and this
applies to other types of bin too),
it’s mainly a question of
size and access.
None of the typical bins on the market is large enough to
produce “hot” compost reliably, so there’s no need to worry on that
score. Choose a bin that’s big enough, but not too big, bearing in
mind the quantity of material you’re likely to produce, the space
the bin takes up, and whether you want more than one bin.
The ideal bin would stop moisture escaping and let air in.
In practice, these two aims are incompatible: keeping in moisture
is more important. So don’t buy or make a bin with holes in the
sides. These allow compost at the edges to dry out, leading to an
annoying mixture of decomposed material in the centre and
undecomposed material round the edges.

102
Plastic fantastic
The simplest and smallest plastic bins are formed
from one moulded piece of plastic, with a lid. Waste
material goes in at the top and, to get at the finished
compost, you lift off the whole bin. Although some
plastic bins are green, the free or cheap ones tend to
be black. For those gardeners who object to plastic
bins on environmental grounds, it’s usually possible
to get bins made of recycled plastic. There are other
points that you may want to consider:
check whether the hole at the top is big enough.
Emptying a bucket into a small hole may not be a problem,
but if you produce enough compost material to require
a wheelbarrow, trying to fork stuff up and into a small hole
might be annoying.
Make sure that the top of the bin is not
inconveniently high for you.
Most bins (including the free ones) have a lid that simply
lifts off, but you might find a hinged lid more convenient.


assemble the bin,
then recycle the instructions
by composting them.

105
some expensive plastic bins have double walls,
but the great majority offer little in the way of insulation,
so gardeners in cold climates should consider wooden, wire
and cardboard, or straw-bale bins (see pages 108–121).
Most plastic bins don’t have any holes in them, but
a few have slatted sides with quite big gaps between the slats.
Many wooden bins are like this too, and both should be
avoided. A few small ventilation holes at the base are OK,
but that’s all. If you already have a holey bin, like the
flat-pack bin shown overleaf, you could line it with some
cardboard to keep out the draughts.
also consider whether you will want to retrieve
compost from the base of the bin. If you do, you need a bin
with a hatch at the base. Larger bins may have two or even
four hatches, allowing access from any side, but smaller ones
usually have a single hatch (see overleaf).
simple flat-pack bin, lined with cardboard (overleaf, left), and plastic bins (overleaf, right).


108
Wooden PerforMance
Not all new wooden bins make access as easy as it
should be. Beware of lift-off wooden lids, which can
become very heavy, especially when wet. A plastic
or hinged wooden lid is better. The best designs have
a front panel that consists of separate, removable
slats, which can be inserted as the bin fills up and
removed later for access to the finished product. One problem with wooden bins is cost. Wooden bins are not
inherently more expensive than the plastic ones, but they are
rarely available free or at subsidized prices. A new wooden bin can
work out quite expensive even if you buy wood to make your own.
Untreated, sawn (that is, not planed) timber is cheapest. Treated
wood will last much longer, but seriously green gardeners should
enquire what is in the wood preservative, since some contain heavy
metals or other toxic chemicals.


110
stack and unpack it!
Stacking bins make it easy to build up a heap as
well as get to the finished compost. This type of bin
is completely portable since you have to lift only one
section at a time.
• to start the heap, place one section on the ground
and begin to fill with compost material. Once it is full, place
the next section on top. If your bin has a lid, like this beehive
model, put it on top to keep the heap moist. If you have a
home-made or open stacking bin, use some other cover. Keep
building up the bin, by adding and filling a section at a time.
• Fill the bin to the top and then leave it, covered,
to rot down for six to nine months. If you wish, you could
remove the upper sections of the bin as the compost subsides
and start another heap with another cover somewhere else.
• unpack the finished heap simply by lifting off
all the sections of the bin. (Beehive models sometimes have
a crossbar at the base, so leave the base section in place.)
You can then easily shovel up the contents.


112
sticking with wood
Bins made of untreated timber should last for many
years. The weak link is often the base, which will
rot if it is in contact with permanently damp soil.
Standing the bin on bricks, slates, or some broken
paving slabs should help. Standard wooden bins are
heavy; for a more portable option, try woven hurdles
or bins made of stacking sections.
wooden options: (from left to right) hazel hurdle bin, stacking bin, and a bay made from builder’s pallets.


115
diY is worth a tryIf you are fairly competent at DIY, there are lots of materials, apart from plastic and wood, to consider. Bricks or breeze blocks make sturdy, long-lasting compost bins. Breeze blocks are cheap, quick, and easy; they don’t look as nice as bricks, but you could paint or grow climbers over them. Both need foundations at least 15cm (6in) deep and twice as wide as the walls of the bin.
Other options include corrugated iron, plastic, or chicken
wire, which should be screwed to four stout, wooden posts. Most
home-made wooden designs require posts to be driven into the
ground. Untreated posts in soil soon rot, but last much longer if
they’re fixed into metal post supports. Stop the post tops rotting
by capping them with wooden finials.
It’s not so easy to make these designs with a removable front,
but in my experience there’s nothing wrong with an open bin, with
only three sides. Material falling out of the front shouldn’t be a
problem as long as it is added carefully but, if it is a bit messy,
cover the top and front with a piece of old carpet or sacking.

116
Finding a use For it
For the serious recycler, it’s clear that the compost
bin itself should be recycled. Fortunately, there is
no shortage of suitable materials. Old floorboards,
plastic, corrugated iron, old doors, pallets, bricks,
builder’s bags, and other useful junk are thrown
away in ever-increasing quantities – good compost
bins can be made from all of them. Ask a local
supplier of recycled building materials or just keep
an eye on the contents of local skips. My compost
bins consist mostly of the remains of some scrapped
wardrobes, interspersed with bits of old kitchen
units. You may disapprove but, if you think a compost
bin should be some kind of fashion statement, you
may not be cut out for serious composting.

don’t let your old tyres moulder in a landfill site –
give them a new lease of life as a compost bin.

118
get wired up
A cheap, do-it-yourself bin is easy to make from
chicken wire by stapling it to four posts and lining
it with cardboard. A slightly more complicated
version would have two layers of wire, with the gap
between them filled in with screwed-up newspaper
or sheets of cardboard. The cardboard eventually
will rot, but is easily replaced.
• knock four 1.5m (5ft) posts into the ground, about 75cm (30in) apart and 30cm (12in) deep. Use a piece of
chicken wire, about 1.2m (4ft) wide and 2.5m (8ft) long, and
unroll it around the posts. Fix it securely to the posts with
plenty of fencing staples as you go. Leave the front open.
• once the wire is fixed to the fourth post, snip off
the excess. Check that no sharp snags of wire are sticking
out; trim or bend them back so that they cannot cause injury.
• Line the insides of the chicken wire with several
layers of flattened cardboard boxes, slotting the boxes
in-between the posts and wire to hold them in place. Start
building up your compost in the bin. Use a cover to stop the
rain soaking the compost material and to keep it warm.


120
baling out
An unorthodox, but quick, cheap, and simple bin
can be made from a few bales. Straw is an excellent
insulator, so it’s possible to make “hot” compost
from relatively small amounts of material in the bin. Eventually, of course, the bin itself will compost down, but
that’s not a problem: just buy more bales and start again. The
walls of a straw bin take up rather a lot of room, but you can
exploit this by planting into the top bales. Anything that needs
a rich soil and grows fast will look good, such as bush tomatoes,
courgettes, cucumbers, French beans, petunias, squashes, or
trailing nasturtiums.

121
• Stack six bales, on their thin sides, to form three walls.
• bang in 1.5m (5ft) stakes snugly against the
outsides of the bales, two posts to each side. Insert a 1.5m
(5ft) cane at the centre of the inside of each wall. These
supports will hold up the bales when they start to decay.
• Place another bale against the front of the bin.
Start off the heap with material that has a bit of structure,
for drainage, such as thin prunings or old bean haulms. As
the heap fills up, cover with cardboard, sacking, or old carpet.
• to plant in the top, scoop out a small hollow and
fill with compost or soil. Straw is pretty dry and has almost
no nutrients, so add some fertilizer to the mix and water well.

122
bag it and bin it
With a bit of imagination and the bare minimum of
DIY skills, a remarkable variety of junk can form
the basis of a cheap, or even free, compost bin. The
bin can even be made of compost itself – if you have
a lot of sacks of rotting leaves, use them to build a
circular wall, line it with cardboard, and hey presto!
you have a compost bin in the middle.
bin walls (below) of sacks of leaves. builder’s bag (right) on four posts.


125
Keep a lid on it with a special padded cover (top left), sacks (top right), or an old blanket (bottom).
Working undercoverI’m convinced that a compost bin needs some kind of lid or cover, whether it is old carpet or cardboard or a purpose-made cover. It helps to retain heat and stops the surface drying out in dry weather. Rain will both cool down an uncovered bin and wash out the nutrients. Having said that, there are dissenting voices.
The Centre for Alternative Technology (CAT), in Wales,
recommend that their high-fibre heap (see pages 72–75) should be
half-covered. The rationale is that this is the best way of making
sure that the heap always will provide perfect conditions for the
worms on which the system depends. The location of these ideal
conditions will move around the heap, depending on the weather,
but they will always exist in there somewhere.
Most commercial bins come with a lid anyway but, if you
have any choice, bear in mind that the lid should be easy to remove
and replace – ideally with one hand – but not so light that it blows
off in the wind. Since lids on plastic bins tend to be light, check
when buying that any removable plastic lid is a good fit.

126
Tumbler binsIt is claimed that tumbler bins solve the biggest compost problem, which is keeping the mix aerated. In fact, of course, this is one of those problems, like maintaining the correct carbon:nitrogen (C:N) ratio or a suitable pH, that is best solved by having the correct mixture of materials to start with.
The evidence is that tumblers do make decent compost
relatively quickly, but not all that much quicker than standard,
static bins. Also, the most widely available (and cheapest) design,
which turns end-over-end, is awkward to use. Once the compost
shrinks a little, it all tends to collect at the bottom, which makes
it difficult to turn. Bins that rotate like a toilet roll (see overleaf)
avoid this problem, but also tend to be very expensive.
Something else to consider before spending a lot of money
on one is your level of motivation. If they are to work well, tumbler
bins need turning every few days (ideally, every day). Will you do
that, or will it turn out like the exercise bike that you promised
you would use every day and is now gathering dust in the attic?

You will need dedication and muscle power to turn these vertical tumblers
regularly.

128
Some tumbler bins are claimed to make compost in 14 days.
Maybe so – given the right location, a large quantity of the right
material, the right time of year, and a bit of luck. Fourteen-day
compost is a major selling point, presented as something any
sensible gardener would want. And yet, I can’t help wondering
why anyone would feel the need to make compost in two weeks.
What’s the hurry?If you’re starting from scratch, I can imagine that waiting
six, ten, or even twelve months for your first batch of compost
might seem a long time. But making and using compost is part
of the normal cycle of gardening. However you choose to organize
your compost-making, it’s axiomatic that once things have been
underway for a year or so, compost material goes into the system
at the same rate that finished compost comes out at the other end.
The volume of a tumbler bin is anything from 200–600 litres
(44–132 gallons), depending on the model. Even if you produce
this volume of material every 14 days, which is in practice a tall
order, that doesn’t mean you need to make compost in a fortnight.
That rate of production implies you have a large garden – either
that or you own a hotel.
If this is the case, you probably also have enough room for
several conventional compost bins, containing compost at various
stages of maturity. Alternatively, such a large quantity of waste
would allow you to have one or two really large heaps, big enough

129
for genuine, “hot” composting. Large, hot heaps produce finished
compost in about four months, with no effort at all.
Am I trying to persuade you not to invest in a tumbler bin?
No, but I am suggesting you consider carefully four things:
• the quantity of compost material your garden produces
• how much space you are willing to devote to dealing with it
• how much time and effort you want to spend
• the cost.
The more laissez-faire your approach, and the longer you take to
make compost, the more space your compost will occupy (and the
less effort required). But you will still make compost in the end!

130
Location, locationIt’s important that a compost heap is quickly colonized by beetles, millipedes, worms, and other hungry soil animals. At the same time, you want any liquid that dribbles from the heap to soak into the soil rather than collect in a smelly puddle. Thus one of the few genuinely unbreakable rules of composting is that your bin should be sited on soil, not on a hard surface.
We’ve touched briefly on how the location of your compost
heap will affect its temperature (and therefore how fast it works),
but for most gardeners the location of the compost heap is a
compromise between aesthetics and convenience.
Few compost heaps are exactly beautiful, so it is tempting
to site your heap as far out of the way as possible. Although
neither flies nor smells should be a problem with a properly
functioning heap, the suspicion that they might be tends to
reinforce this inclination.
Remember though that, if your compost heap is too
inaccessible, you may be less likely to use it for kitchen waste,
especially when it’s dark, cold, and raining! Ideally, the compost


133
heap should be conveniently near both the sources and the final
destination of compost materials. This often means it should be
near the vegetable plot, if you have one.
For smaller, portable bins, consider not having a fixed location
at all. It seems a shame to waste the highly fertile patch that
develops directly under the bin, so
why not move the bin around? In fact, if you have a vegetable plot, why not simply incorporate
a moveable compost bin into a normal crop-rotation cycle? This
practice involves growing different crops on any specific patch of
soil in a three- or four-year cycle. Just add compost to the cycle.
In reality, some kind of smaller bin is handy for taking
household waste from the kitchen to the heap. Whether you keep
this kitchen bin indoors or out is up to you. Indoors is more
convenient, but you will need to empty it often to make sure that
you avoid any problems with flies and smells. Some fancy designs,
such as ceramic crocks, or cheaper plastic versions, come with
carbon filters that are supposed to stop smells escaping.
My personal preference is for a bin located just outside the back
door. A simple bucket is cheap and convenient if you have somewhere
under cover to put it. A welcome innovation is the biodegradable
“plastic” bag, made from corn, or maize, starch. Line your kitchen bin
with one of these, then just put the whole lot on the compost heap.
134
How many bins?It would be presumptuous of me to offer detailed prescriptions as to how you should organize your compost-making. After all, every garden is different, with a unique combination of quantities and proportions of soft and tough garden, and kitchen, waste. Every gardener is different too, with very different levels of commitment to compost-making and to recycling in general.
In a sense, things are easier in a large garden, where there
is enough material in several, distinct “waste streams” to merit
their own specialist treatment. Also, there is plenty of space.
The large garden might have a high-fibre bin to deal
with kitchen waste, paper, and some grass clippings, as
well as two “long-stay” bins full of shredded
prunings, hedge trimmings,

135
autumn leaves, spent compost, and other garden waste. You might
have one or more separate bins for leafmould, and maybe even one
to deal with gluts of lawn mowings.
In reality, most gardeners live in towns and cities, and most
urban gardens are relatively small. Here, most waste is soft (grass
clippings, kitchen scraps, annual weeds, old bedding plants), but
there’s usually an irritating trickle of tougher material.
This is enough to interfere with the proper functioning of
a pure, high-fibre heap, but not really enough to justify separate
Ingeniously designed bins of recycled plywood and window frames, with sliding front panels.

136
treatment. Certainly not enough to warrant the purchase of a
shredder. The best solution may be to accept that you’re never
going to produce compost very quickly and to have two bins, into
which you put everything except the largest, woody material.
Once one bin is full, simply leave it for a year while you fill the other bin.
This “two all-purpose bins” system works well, as long as
you make sure that each bin is big enough to take a year’s waste
without it overflowing. Because the compost includes some woody
waste, the finished product is always a bit twiggy, but that
shouldn’t be a problem.
Material that’s too tough to compost can be pushed under a
hedge or made into a habitat pile in an out-of-the-way corner. If
there’s too much of the tough stuff, take or send it to your local
community composting scheme.
This is essentially the system that operates in my garden,
with two additions. My garden is surrounded by a tall beech
hedge, and I also have about 25 sq.metres (30 sq.yds) of long grass –

137
it would be a gratuitous lie to describe it as a wildflower meadow.
Both are cut once a year, and each generates a mountain of
material that completely overwhelms the smooth running of my
normal compost system. I don’t have a shredder, so my hedge
trimmings are taken away and composted by my local waste-
disposal company. The “hay” from the “meadow” goes onto its
own, open heap, which I occasionally excavate to retrieve quite
decent compost from the bottom.
My two-bin system, made from salvaged timber, won’t win awards for looks, but does the job.

138
Feeling the heatIf you’re lucky enough to have a spare binful of compost in the spring, there’s nothing to stop you growing plants directly in the heap itself. Make a small hole in the top of the heap, fill it with soil, and plant into that. Keep it well watered and the compost will provide everything else. This works well for greedy plants that enjoy a rich soil with plenty of nutrients.
One thing to bear in mind is that you should always start with sturdy, well-grown plants. Seeds or small seedlings will simply make a meal for slugs, although you could use the compost as a “hot bed” for trays of older seedling plants or cuttings. Also this is an option only if your compost bin is located in a sunny spot.

139
Warm roots make happy plants, whether they are nasturtiums or seedlings and cuttings.
Possible plants Chilli peppers, courgettes or
marrows, cucumbers, nasturtiums, petunias, potatoes,
pumpkins and squashes, trailing tomatoes.

140
WormeriesA traditional, hot compost heap is too hot for anything other than bacteria to live in the core. But in a cool compost heap (and most are cool), a lot of the work is done by worms. So naturally worms have been domesticated in a composting process that relies entirely on worms. The result is the wormery.
hoW they WorkThe worms are variously known as brandlings, red worms, or tiger
worms. They live in decaying organic matter and are not the same
as ordinary garden earthworms, which live in the soil and would
not thrive in a wormery.
Companies that supply wormeries will also supply worms, but
they can be obtained more cheaply from fishing-tackle suppliers.
Better still, simply collect some from your compost heap, or from
a neighbour if you don’t have one. Failing that, put a bag of fresh
green waste with a hole in the bottom on any patch of bare earth
and it will rapidly be colonized by suitable worms.
A wormery consists in its simplest form of two compartments:
an upper chamber where the worms work, and a lower collection

sump where liquid collects. Since kitchen waste is mostly water,
wormeries produce a lot of liquid: it’s essential that this is kept
away from the worms (which hate being waterlogged) and that it
can easily be removed. Therefore I recommend that you consider
only a wormery with a tap at the base. More complicated models
consist of stacking trays with holes in their bases: the worms work
their way up through the trays, leaving the finished compost
(basically, worm poo) in the lower trays.
A wormery should be started off with a layer of old potting
compost, garden compost, sawdust, or damp, shredded newspaper.
The worms dislike acidity, so you need to take care over what you


143
put in. You can add most types of kitchen waste, ideally little and
often. A wormery should cope without being fed for up to four
weeks, so normal family holidays are no problem.
What goes in Coffee grounds, cooked citrus peel,
cooked garlic, cooked onions, cooked rice and pasta, finely
crushed eggshells, fruit, stale bread, tea bags, raw or cooked
vegetables, small amounts of shredded paper (not glossy),
small quantities of soft garden waste.
What stays out Anything spicy, salty, or vinegary,
bones, dairy products, fat, fish, meat, tough autumn leaves,
woody garden waste.
There’s no need to empty a simple wormery with a single
working chamber until it’s full, which will take 6–12 months.
Most of the worms will be in the top 20cm (8in), so just remove
this layer, empty the bin, and then put the top layer back in and
start again. Stacking-tray versions are simpler – just remove the
lowest tray, empty it, and replace on the top.
Worm compost may be used in the same way as ordinary
garden compost or as a constituent of home-made potting
compost. The liquid makes an excellent plant food, after being
diluted with ten parts of water to one of liquid feed.

144
For Pet-lovers only
Wormeries are not quite as simple as enthusiasts
sometimes claim. Even when working perfectly, they
can smell and they tend to attract flies, so I don’t
recommend keeping one in the kitchen. They don’t
like temperatures over 30°C (86°F), so in the summer
they need to be somewhere shady outdoors. Equally,
the worms will be killed if the wormery freezes solid,
so they need to be somewhere frost-free during the
winter. In fact, although worms don’t hibernate,
they work very slowly below about 10°C (50°F),
so unless you can keep your wormery somewhere
relatively warm in the winter, you will have to find
something else to do with your kitchen waste
during this period.

145
Coupled with an inability to deal with most kinds of garden
waste, this means that you will really need a compost heap as well
as a wormery, unless you don’t have a garden at all.
Thousands of enthusiastic gardeners keep wormeries and
will tell you how wonderful they are. However, I suggest that
they are best considered as an intriguing and slightly challenging
hobby, rather than as a reliable alternative to ordinary garden
compost-making.
If you wouldn’t even consider keeping rabbits or a hamster,
then a wormery is probably not for you.


Using compost: digging is for dummies

148
When is compost ready?Or, to put it another way, how long is a piece of string? All the dead plant material in your garden would rot down and eventually disappear of its own accord, without your assistance, if you just left it alone. The same would happen to green kitchen waste if you just threw it out of the back door onto the nearest flower bed. In practice, this means that compost is ready when you think it is.
The high-fibre heap, based on paper, card, and soft, green
waste only, will produce a fine compost relatively quickly, in
which none of the original ingredients will be recognizable.
A heap that started out with a lot of woody material will look
twiggy for a lot longer.
From a garden-worthy perspective, the difference is
immaterial: both textures of compost will do exactly the same job
in the garden, equally effectively. The only reason to prefer fine
material – apart from its appearance – is if you plan to make your
own potting compost, for which coarse material is unsuitable.
Don’t be misled into unrealistic expectations of your compost
heap. The compost shown tumbling invitingly out of the bins in

Judging when your compost is finished is partly a question of aesthetics.

150
gardening programmes and magazines has been carefully sieved
to remove all the annoying, twiggy bits. Either that, or it came
out of a sack of commercially produced soil conditioner.
In trials run in the UK by the Royal Horticultural Society,
a mixture of green and shredded, woody garden waste was
composted for 12 months. About 80 per cent of the resulting
compost could be described as “fine” particles, that is, it would
pass through a 10mm (½in) sieve. That’s good enough for me, and

151
unless you want your flower beds to look like a Chelsea Flower
Show garden, it should be good enough for you too.
Incidentally, the lack of any agreed method of deciding when
it is finished is a major obstacle to the scientific investigation of
compost. Science can study only things that can be measured
fairly objectively.
Most plants love garden compost whatever its texture, but you might have to sieve compost for use in potting mixtures.


153
Where to use compostFor many gardeners, making and using compost still has a slightly old-fashioned air, a whiff of “dig-for-victory”. It’s therefore easy to get the impression that compost is only for the vegetable plot. There is some truth in this: the vegetable plot is the only part of the garden where all plant material is routinely harvested, and if you’re taking a lot out, it pays to put something back in.
It’s also in the vegetable plot that the effect of compost is
most easily measured: tests show that you can expect application
of a 5–10cm (2–4in) layer of garden compost to double yields of
cabbages, leeks, or potatoes. Most other kinds of organic material
will work just as well, but no better –
ordinary garden compost
really is the perfect balanced diet
for plants.

154
But compost will have exactly the same beneficial impact
elsewhere in the garden, even if the effect can’t be measured in
kilograms or pounds. Your trees, shrubs, and herbaceous plants
will grow bigger and have more flowers and fruit. What’s more,
there will be other benefits – your plants will be healthier and less
affected by stresses such as drought and insect pests. In short,
you cannot have too much compost, anywhere in the garden.
Your soil will benefit from compost applied at any time of
year, but to get the best results, spread garden compost (or any
other organic material) while the soil is moist, to retain the
moisture. In practice, this usually means any time from autumn
through to spring. Winter rains may wash some nutrients out of
compost applied in autumn, but on the plus side, the compost will
help to protect the soil structure. Also, the worms will be able to
work on it during any mild periods. Applying a layer at least 5cm
(2in) thick will help to suppress weeds, and in any case you won’t
see much benefit if you spread compost around very thinly.
Even though everywhere in the garden will benefit from a
mulch of compost or other organic matter, it’s worth mentioning
that mulching dramatically improves the establishment of newly
planted trees and shrubs.
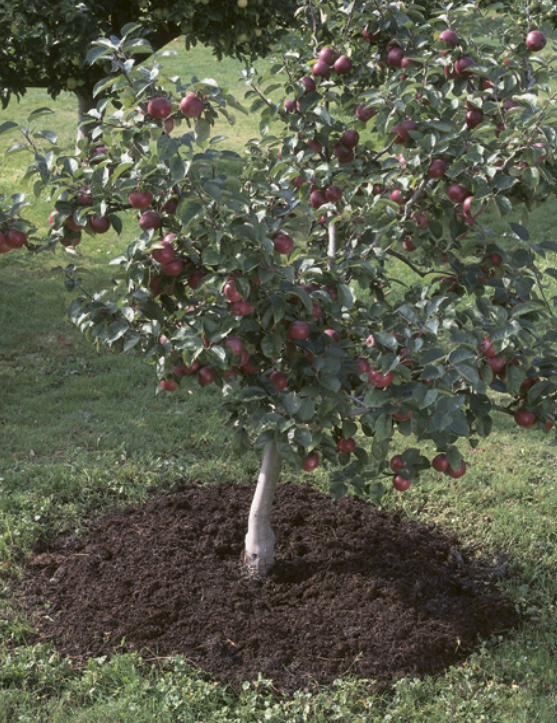

156
Having a dig?Instructions for making compost often conclude by advising that it should be dug into the soil. But why? The world got on well enough for millions of years before the invention of the spade and garden fork, so digging can hardly be crucial to soil health.
The usual reason for digging in compost is to get it down to
“where the plants need it”. But earthworms are dedicated to doing
just that, and the careful gardener takes a lot of trouble to
encourage a healthy earthworm population. Moreover, earthworm
activity is one of the major creators of good soil structure, while
digging is one of the principal destroyers of that structure.
The fine fungal, or mycorrhizal, network that breaks down
organic matter in the soil and transfers the resulting nutrients
to plant roots is extensive, but delicate. It is also not improved by
being chopped into small pieces during digging. In truth, there
are only two good reasons for digging.
The first is to alleviate the effects of soil compaction, caused
by trampling or machinery. The second is to remove deep-rooted
perennial weeds such as docks, dandelions, and thistles.
Both these problems (if present) may need some digging
initially, but once they are sorted out, further digging is

157
unnecessary except as a source of exercise and fresh air. In any
case, there’s no need to take my word for it. Tests always show that
compost applied as a mulch works just as well – in fact, sometimes
better – as when it is dug in.
If organic matter with a high C:N ratio, such as straw or
shredded prunings, is dug into the soil, it may promote the growth
of soil microbes that will compete with plants for the soil’s
nitrogen. This is never a problem if the compost is incorporated
slowly by earthworm activity, as happens with mulching, rather
than by digging in.

158
mulcH, marvellous mulcH
When used as a mulch, garden compost will not
only improve the soil structure, but will also add
significant quantities of plant nutrients. The
nourishing effect will be most noticeable on light,
sandy soils, which tend to be deficient in nutrients,
while improvements in structure will be more
evident on heavy, clay soils. There are other forms of bulky organic matter you could
use, as well as garden compost. If you’re aiming to add nutrients
(for example in the vegetable plot), garden compost or a mulch of
lawn mowings are your best bet.
leafmould or shredded prunings add organic matter but don’t contain
many nutrients.
Among materials you might “import” to your
garden, straw, wood chips, and bark are also
low in nutrients, while cocoa shells and stable
manure are high in nutrients. Proprietary soil
conditioners are very variable – always read the
label for application rates.


161
Most forms of bulky organic matter, when applied to the soil,
don’t seem to have a very significant effect on the soil pH (acidity
or alkalinity). In fact, results from mulching trials are somewhat
contradictory, with the same type of mulch sometimes having
opposite effects in different trials. The exception is mushroom
compost, which is distinctly alkaline and therefore always has
the effect of raising soil pH.
One reason for variations in the trials is that soils vary in
pH to start with (see page 33). Another is that some soils, like
clays, are much more resistant to changes in pH than others,
such as sandy soils. The best advice for those who want to grow
acid-loving plants such as camellias or rhododendrons is to be
cautious and bear in mind the following:
• if your soil is naturally acid (with a low pH), your own
garden compost is probably OK
• don’t use any proprietary soil improver without first
checking its pH – most are alkaline (with a high pH)
• avoid lavish use of highly alkaline mushroom compost – it
can even damage plants that prefer a neutral soil
• to maintain soil acidity, chipped conifer bark or conifer
leafmould are a good bet
• if you don’t mind using garden chemicals, sulphur or
ammonium sulphate should also work well.

162
Potting compostThere was a time when potting compost was a problem for green, organic gardeners. All the major brands were peat-based and if you wanted a peat-free, soil-less potting compost (that is, not a loam-based type), you had to make your own. Many of the early peat-free composts, based on coir or composted wood waste, performed poorly or were very variable.
Thankfully, things have changed and the best modern, peat-
free composts are both reliable and perform extremely well. Nor
will making your own compost from home-made ingredients
give better results than the best commercial, peat-free brands. It
will save you money but, unless you use a lot of potting compost,
not a great deal. Having said all that, if you still want to make
your own potting compost,
the key ingredient is leafmould.
Why leafmould? Because ordinary garden compost is as
variable, in pH and nutrient content, as the ingredients that were
used to make it. It also often contains weed seeds. Leafmould is

leafmould takes a year or two to make,
but the wait is worth it.

164
much more predictable and, crucially, can be relied on to be low
in nutrients. It also has a nice open, but water-retentive, texture,
and shouldn’t contain weed seeds. In fact, pure leafmould makes
an excellent seed compost.
Leafmould won’t support seedling growth for more than a
few days, so nutrients must be added for a compost with more
staying power. One way of doing this is simply to add an organic
fertilizer, for example blood, fish and bone, bonemeal, or hoof and
horn, to leafmould. Seaweed meal is a useful substitute for those
who don’t like to use animal products.

165
If you are determined to stick to home-made ingredients,
you can include sieved garden compost, which is very variable but
generally quite nutrient-rich. Equal parts leafmould and garden
compost is one possibility. Even neat garden compost should be
alright for plants that need a lot of nutrients, like tomatoes. If you
have a wormery, you could substitute worm compost for garden
compost. Worm compost has the advantage of being weed-free,
finely textured, and reliably rich in nutrients. Compost from a
high-fibre heap shares these characteristics: it’s worth having
such a heap if you want to make a lot of potting compost.
Adding horticultural grit to any mix will add more “body”
and improve the drainage. You can use garden loam, but many
experts recommend that it’s pasteurized first, and I think
pasteurizing your own loam is beyond the average gardener.
If you decide to make your own potting compost, my advice is: • treat it as a bit of an adventure, rather than as a cheap
way of producing a reliable product – don’t expect the
“same” mixture always to give the same results
• make small quantities and don’t try to store it
• water very carefully – your own mix will have quite
different physical properties to any bought compost
• be alert to the plant’s growth and feed it if necessary
• always check a mixture’s pH before trying to grow
acid-loving plants in it


No heap? No problem: grow your own compost

168
Spreading it aroundI’ve tended to assume that every sensible gardener should have a compost heap, but that’s not strictly true. You may object to the space needed by compost bins. Equally, you may regard moving large quantities of organic matter from all over the garden to the compost heap – only to move it all back again at a later date – as a pointless activity. If so, fear not: even for the green gardener, a compost heap is far from essential.
So if you don’t have a compost heap, what do you do with all
your organic waste? Grass clippings may simply be left where they
are, on the lawn. They will look untidy for a short time, but they
will soon decompose and return their nutrients straight back to
where they came from. If you prefer to collect grass
clippings, they make an excellent, high-
nutrient mulch for any part of the
garden, especially the vegetable plot.
From lawn to veg plot: empty grass clippings directly onto the soil to mulch your plants.


171
Spring growth soon covers up the evidence of old shoots cut down after last year.
If you invest in a mulching lawn mower, or recycler mower,
the grass clippings are finely chopped and forced into the turf, so
you don’t even see them. This is an attractive option if you have
a large lawn and find it hard to know what to do with all the grass
clippings, or if you spend a lot of money on lawn fertilizer. A
recycler mower solves both problems.
A large herbaceous border may produce a good deal of green
waste when it is tidied up at the end of the season, but there’s a
simple solution here.
Just cut everything down and leave it where it falls. This will look untidy during the winter, but it’s good for wildlife,
which will shelter under it, and will soon be covered up by the
fresh growth in the spring.
Autumn leaves and shredded woody material also make
excellent mulches, and don’t really need to be processed through
a compost heap. You may be told that these low-nutrient materials
will “rob” your soil of nitrogen, and so they will – but only if you
dig them in. Apply them as a mulch and this problem disappears.
You may also read that freshly shredded, woody prunings
will release toxic chemicals that will harm your plants, but there
is little or no evidence for this. The main problem is that freshly

172
shredded material doesn’t look very nice, but it soon ages and
blends in. If this bothers you, just leave the fresh material in
a heap to age for a month or so. Not much decomposition will
happen during this time, but the material will look a lot better.
Downsizing your lawn or making a new vegetable plot? Skim
off the old turf with a spade and stack it, grass-side down, for at
least a year. It should rot down into a nice, crumbly loam which
you can then use as a mulch or to top-dress the lawn.
That leaves kitchen waste. One option is a wormery (see pages
140–145) but, if you have a vegetable plot, there are others. A small
compost bin could be incorporated into the crop-rotation cycle
in a vegetable plot (see page 133), but if you want to do this, why
bother with a bin at all?
The usual objections to open compost heaps are that they
aren’t very attractive and that many of the nutrients are leached
away into the soil, but
neither of these is a serious problem if your heap occupies a spare bit of the vegetable plot.
If you think this makes your garden look too much like a
third-world shanty-town, there are more organized variations
on the same theme.

173
First, it helps to divide your plot into conveniently sized
beds and edge them with boards, bricks, or stones. These will
help to stop your compost migrating on to the paths. You can
now buy recycled plastic boards that slot neatly together and
do the same job with no effort at all.
Second, cover your chosen bed with a good layer of
newspaper or cardboard and water it well. This continuous
layer will prevent weeds from becoming a problem. Finally,
add layers of kitchen waste and, ideally, grass clippings as
they become available.
Once you have accumulated a layer about 15cm (6in)
thick, just leave it for a few months (or over winter), watering
during dry spells. You can then plant your vegetables directly
through the now-decomposed, organic layer. No need to dig.
Meanwhile, start the whole process again
on another bed in the plot.

174
Food for soilYou can’t have too much compost. A useful extra source of organic matter, principally for the vegetable garden or any temporarily unoccupied bit of the garden, is a green manure. This is any crop deliberately grown for a few months and then killed to return the organic matter to the soil.
The benefits of green manures• primarily, adding extra organic matter
• they protect the soil structure from damage by heavy rain,
especially if present over the winter
• they retain nutrients that might otherwise be washed out of
the soil – some deep-rooted green manures, such as alfalfa,
can bring extra nutrients from deeper layers of soil
• their roots can help to break up heavy soils
• they suppress weeds
• crops from the bean family capture nitrogen from the air
• they could be used as part of a pest-control strategy –
sowing a low-growing green manure such as clover beneath
brassicas is reputed to reduce damage by cabbage root fly

Clover fixes nitrogen from the air and suppresses weeds until the sweet corn has been harvested.

176
ChOOSing yOur greenS
Many gardening books will provide details of the
different green manures that are available. There
are several important things to bear in mind when
choosing one.
nutrients If you want to add (rather than merely
conserve) nutrients, you need a leguminous manure, that is,
one from the bean family. These include alfalfa (also called
lucerne), clover (alsike, crimson, or red), fenugreek, field
beans, lupin, medick, or winter tares.
hardiness Most green manures are hardy and can
withstand frost, but some, such as clover, field beans, grazing
rye, and winter tares, are particularly suitable for growing
over winter. On the other hand, you might find a less hardy
green manure is not so much trouble: buckwheat, fenugreek,
or phacelia will be killed off by the first hard frost.
growth rate If you want a green manure to fill in a
short gap in a border or vegetable patch in summer, you
need something fast-growing. Mustard is ideal.
green manures: (from top left, clockwise) mustard, clover, phacelia, and alfalfa.


178
Crop rotation Many green manures are closely related
to vegetable crops, and you need to consider this when
sowing. Leguminous green manures shouldn’t directly follow
peas or beans, and mustard is prone to all the same pests and
diseases as brassicas like cabbages and pak choi.
Fringe benefits It’s not recommended to let green
manures set seed; and if they do, some of them can become
troublesome weeds. However, if you do let them flower, some
green manures will attract pollinating insects. Most insects
like buckwheat, and phacelia is loved by bees.
Cost Green-manure seeds are broadcast sown, rather than
sown in rows. It also helps to sow at high density to smother
weeds. This means you could use a lot of seeds, so cost is an
important consideration.
Many green manures are agricultural crops, so it pays to
check agricultural seed merchants, where you will find
the seeds being sold much more cheaply than from
garden shops or websites. Always check, however,
whether agricultural seeds have been treated
with fungicides or other chemicals.

179
use your initiative! Books and magazines somehow manage to imply that there
is something special about the plants normally listed as green
manures. There isn’t. You can grow almost anything that takes
your fancy as a green manure. If you feed the birds you may have
a big sack of sunflower seeds, so why not try those? The cheapest
green manure is a good crop of annual weeds (but this is not
recommended!).
Sunflowers for green manures must be cut when young: tough, old stems won’t rot easily.

180
CuTTing The MuSTard
Guidance on growing green manures usually ends
with the advice that they should be dug into the
soil, but there’s really no need to do this. Green
manures are often sown in late summer or autumn,
when annual flower beds and vegetable plots are
being cleared. The simplest option is to grow a
manure that isn’t cold-hardy and let the frost kill
the plants for you.

181
More often, however, you want a green manure to protect the
soil over the winter, then to get rid of it before sowing or planting
new crops in the spring. Here,
the simplest solution is to cut down the green manure in the spring with a grass strimmer.
You could also chop it with a spade, if it has a nice, sharp edge.
Then cover it with old carpet, black plastic, or newspaper until
the manure has rotted. The beauty of newspaper is that it will
rot along with the manure so you need do nothing else.
Alternatively, if you have a binful of compost, use that to
cover the manure. Whatever you do, leave at least a month before
sowing or planting new crops.
If, despite my advice, you decide to dig in your green manure,
you might want to consider growing one that’s relatively easy
to dig. Alfalfa and grazing rye are hard work, while buckwheat,
fenugreek, mustard (see opposite), and phacelia are easy. Any
green manure will be easier to dig in (and will rot more quickly)
while it is still young.

182
Nothing doing in your heap? It’s probably too dry
or too low in nitrogen. These
problems often go together,
since coarse, woody material
has a very open structure that
retains little moisture and
easily dries out.
The simple solution is to try
watering the heap and see if
that makes any difference.
A better idea is to tackle the
basic problem and add more
nitrogen-rich material, such
as grass clippings or kitchen
waste. Or you could try
watering with dilute urine.
Troubleshooting Low temperatures could
also be to blame. If a heap
constructed in autumn does
nothing during the winter,
wait to see if summer solves
the problem before taking any
action. If the heap is dry and
undecomposed around the
edges, your bin probably has
too much ventilation. If it’s
dry on top, it needs a lid.
Rancid or sulphurous smells mean there’s a
shortage of oxygen some-
where in your heap – the
exact opposite of the previous
problem. It is caused by water-
logging or poor structure,
that is, too much green waste
– especially grass – at one go.
If your bin doesn’t have a
waterproof lid, then maybe
it should. If you suspect the

183
mixture is
at fault, add
more dry, carbon-rich
materials. Dry cardboard
is the ideal material for an
emergency mopping-up
operation.
Rarely, a compost heap may
smell of ammonia. This is a
sure sign of excess nitrogen,
and may mean there is too
much nitrogen-rich material,
or it may be caused by over-
zealous use of compost
activators. Add more paper,
leaves, or other carbon-rich
material, and use compost
activators only if you are sure
your heap is short of nitrogen.
If the heap collapses in a wet, slimy mess, the problem is too much soft,
green material, especially
grass clippings.
See above.
Weed seeds are killed
only by a really hot heap, and
even then the kill will not be
complete. The best solution
is not to add weed seeds to
the heap in the first place; try
to clear annual weeds before
they seed. An uncovered heap
may acquire weed seeds, so
use a covered bin.
Flies around the heap: larvae of
many flies feed on
decaying organic matter, so
flies are a normal part of the
composting process. The flies
you are most likely to notice
are fruit flies. As their name
suggests, they are attracted by
fruit, so make sure that fruit
waste is buried beneath other
compost material such as
grass clippings.
Adult flies tend to
build up in bins from

184
which they cannot escape, so
are less of a problem in a bin
that isn’t completely sealed.
• Pests or processors?
A successful compost heap
will contain many woodlice,
slugs, millipedes, centipedes,
and other invertebrates.
These are not a problem!
• Rats: compost heaps often
get blamed for attracting rats,
but are rarely the main cause
of the problem. Cooked food,
meat, or fish will attract rats,
so do not put these on your
compost heap unless you are
using a rodent-proof bin.
Since few compost bins are
rodent-proof, this amounts to
a complete ban on such waste
for the average gardener.
Rodent-proof food composters
do exist, but are outside the
scope of this book.
Rats may visit compost
heaps if they are already in
the area, but other factors are
much more important in
increasing the probability of
rats in the neighbourhood.
These include garden
livestock (rabbits, chickens,
caged birds), overgrown and
generally very untidy gardens,
proximity to agricultural
activities, and buildings in a
poor state of repair.
Mice occasionally nest in
my compost heap, but is that
a problem? I don’t think so.

185
Finally, relax.
Making compost is not like wallpapering the front room
or fixing a leaking tap, which can be done so badly that
you wish you’d never started. When it comes to making
compost, time and the tendency of all systems towards
a state of disorder are on your side.
Even if you do everything wrong, you will still make decent compost eventually.

186
Useful addressesCornell University has a
website section on composting,
http://compost.css.cornell.
edu/Composting_Homepage.
html. It comes as close as
anything on the net to telling
you everything you need to know
about composting. The web pages
are particularly strong on the
science of composting.
The Composting Association (www.compost.
org.uk) exists mainly for the
composting industry, but the
website has a section on home
composting for gardeners.
Cool Composting: a fresh approach. This factsheet from
the Centre for Alternative
Technology (CAT), in Wales in
the UK, describes the high-fibre
composting system developed
there. Order from the CAT
website: www.cat.org.uk
www.digitalseed.com is
a good site from southern
California, with an emphasis
on composting in dry climates.
Garden Organic, formerly
the Henry Doubleday Research
Association (HDRA), have lots
of good practical advice on
composting. See www.
gardenorganic.org.uk
Gardening Which? (www.
which.net/gardeningwhich)
magazine tests composting
products, including bins, and is
completely independent, so does
not take advertising. There is no
comparable gardening magazine
anywhere else in the world.
www.greencone.com sell
two devices that are claimed to
compost everything, including
raw and cooked meat or fish,
bones, and dairy products.

187
www.greenventure.ca has
good links to several composting
sites, including several with
advice on composting pet waste.
The Humanure Handbook
by Joseph Jenkins is free online
at www.weblife.org/humanure,
and is worth a try for those who
want to go even farther and
compost human waste.
www.livingsoil.co.uk advises
on the Bokashi system of waste
digestion. It will compost all
kitchen waste, including meat
and fish scraps.
Organic Gardening magazines are published
in the UK and USA. They
both often have articles
on composting. See www.
organicgardeningmagazine.
co.uk and
www.organicgardening.com
The Royal Horticultural Society (www.rhs.org.uk)
provides advice on all aspects of
gardening, including composting
and wormeries. The Garden, the
RHS magazine, sometimes has
articles on composting, and
the annual report of the RHS
Science Departments includes
information about their latest
research on composting.
www.troubleatmill.com/wormbin.htm provides
instructions for making your
own, cheap wormery.
The UK Waste and Resources Action Programme (www.wrap.
org.uk) is a government-
sponsored initiative with lots
of advice on recycling and has
a home-composting website:
www.recyclenow.com/home_
composting

188
Please note: the page numbers in bold indicate a significant entry for the subject; those in italics indicate an illustration.
Aacid-loving plants 32, 161
commercial composts for 51
actinomycetes 23activators 48–9, 183air
in compost 27, 28–9 nitrogen and 26 too much 101, 182 woody waste 46 in soil 18
air pollution 15alfalfa 176, 177, 181alkaline-tolerant plants 33ammonia smell 183ammonium sulphate 49, 161aphids 45ash 81axe 94
Bbacteria in compost 29,
56–61bean family, green manure
from 176, 178bean root rot 45beetles 23black spot 44, 45blanket as compost bin
cover 124Bokashi system 187bracken 52, 55brandlings 74, 140–7, 141brassica leaves, calcium
content 35brown rot 45buckets 67, 94, 134, 135
buckwheat 176, 178, 181builder’s bag as bin 123, 124burning waste 81
Ccabbage root fly pupae 45calcium in compost 32–5, 87canker 45carbohydrates 24carbon dioxide production
10, 15, 26, 81carbon:nitrogen ratio 24–6
correcting 49, 183 soft, middling, and tough stuff 54–5 in woody waste 46, 87
cardboard 6, 37, 38, 39, 55, 73, 77 as cover 125 and chicken-wire bin 118, 119 adding to leaves 91 soaking up excess water 30, 183
cards 39carpet as compost cover 125carrot root fly pupae 45cat litter 37centipedes 23, 184Centre for Alternative
Technology (CAT) 73, 125, 186
chicken manure see poultry manure
chicken-wire bin 115, making 118, 119
chillis, growing in compost 139
citrus skins 55clover 175, 176, 177clubroot 45coal ash 37cocoa shells as mulch 158coffee grounds 37, 55coke ash 37
comfrey leaves 49, 55compost (general only) 11
cubic metre 66–8, 68–9 fine-particled 150–1 finished 6, 11, 12, 75, 146, 148–51, 149 green:woody ratio 27 ingredients 24–7, 36–55, 67 making 62–95 open heap 58–9, 60–1, 98–9, 99 see also compost bins organisms in 23 see also soil animals, micro-organisms for potting compost 165 science behind 24–35 size of heap 58–9, 60–1, 71 structure 28–9 temperature trial 60–1 turning 28, 66, 74 water content 30, 31, 69–70 what is it? 10–13 when is it ready? 12, 148–51 where to use 152–5 why do it? 14–23
compost activators see activators
compost bins 98–145 beehive 62, 110, 111 breeze blocks 114, 115 brick 115 builder’s bag 122, 123, 124 builder’s pallets 113 chicken-wire 115 making 118, 119 commercial 68–9 corrugated iron 115 covering 98, 124, 125 flat-pack 101, 104, 106 growing plants in 138–9, 139 hatches 100, 105, 107
Index

189
hazel hurdle 96, 112 how many? 134–7 lids 98, 124, 125, 182–3 local schemes 100–1 locating 130–3 open vs closed 98 plastic 8, 69, 101, 102–5, 103, 104, 106–7, 131 recycled materials 116, 122, 122–3, 135, 137 straw-bale 120–1, 120–1 temperature of compost 56–61, 58–59 tumbler 126–9, 127, 129 types 68–9 tyres 117 wooden 64, 108–12, 109, 112–13, 135, 137 home-made 113, 115, 116, 135, 137 lids 108 stacking 62, 110, 111, 112
composting aerobic 28 anaerobic 28 classic 64, 65–71 high-fibre 6, 49, 72, 73–7, 75, 135 hot 44, 58–9, 71, 183 local schemes 51, 137
conifer needles 34, 35 prunings 87, 161
Cool Composting 186corn cobs 40, 55Cornell University 186cotton 37, 55courgettes, growing in
compost 139cow manure 55crock, ceramic 132, 133crop rotation 178cucumbers
growing in compost 139 in straw-bale bin 120
Ddairy products 37digging
compost into soil 156–7 green manure 181
digitalseed 186disease on compost material
44distillery waste 55dog litter 37dried blood 49
Eearthworms 18, 19, 20, 23,
156, 157eelworms see nematodesegg boxes 39, 73eggshells 37, 55, 143
Ffats 37feathers 55fenugreek 176, 181fertilizer
added to seed composts 164 from wormeries 143
fish waste 36, 37flies 183–4floor sweepings 37, 55flowers, spent 54, 55fork
compost 94, 95 garden 94
French beans, in straw-bale bin 120
fruit flies 183-4fruit waste 36fungi
in compost 23, 29, 156 in soil 16, 17, 18
GGarden Organic 186garden lime see lime
garden waste 40–7, 54–5 see also grass clippings, woody waste
Gardening Which? 186global warming 15grass clippings 55, 76, 77,
137, 168, 182, 183 C:N ratio 25 water content 30
green manure 174–81green waste, decomposing 28grey mould 45guinea-pig bedding 55
Hhair clippings 37, 55hammer, club 94hamster bedding 37, 53, 55hay 55
calcium content 35heather 32hedge clippings 54, 55, 80hedgehogs 23, 81herbaceous perennials
32, 171high-fibre compost 6, 49,
72, 73–7, 75, 135 covering 125 when is it ready? 148
honey fungus 45hop waste 52, 53, 55horse manure 50, 55horticultural grit 165hot bed 138–9, 139hot composting 44, 58–9,
71, 183Humanure Handbook, The
187humus
nutrients in 18 what is it? 10
hyphae, fungal 16, 17
Iincinerated waste 15

190
Kkitchen caddy 132kitchen paper towels 39kitchen waste 1, 36–9, 37, 55,
72, 134, 182 calcium content 35 C:N ratio 25 containers 132, 133 on vegetable plot 172–3 water content 30
Llandfill site 15lavender 33lawn mower, mulching
171lawns
loam from 172 see also grass clippings
layering compost 64, 65, 74 green waste 73
leaf miners 45leaf mites 45leafmould 6, 11–12, 92, 93,
162–5, 163leaves 55, 88–93
calcium content 35 C:N ratio 25 as mulch 171 in plastic sacks 92, 93, 122 types for use in compost 88–91
lignin 46lime
addition to compost 87 compost activators 49 to soil 35 to woody material 35
livingsoil 187loam 165, 172log pile 6, 80–1loppers 94lucerne 176lupins 176
Mmagazines, shiny 39maggots 23manure 50, 58–9, 158, 160
green 174–81marrows, growing in
compost 139meat waste 36, 37medick 176methane production 15microbes 23, 157
killing off pests and disease in compost 45
micro-organisms in compost, need for water 30 in soil 20
mildew 44, 45millipedes 22, 23, 184mineral nutrients in soil 18mites 20, 23, 45mulching 152, 152–61, 159
cut-down stems 170, 171 fruit trees 154, 155 grass clippings 168, 169 leaves 171
mushroom compost 52, 53, 161
mustard 176, 177, 178, 180, 181mycorrhizas 18, 156
Nnail clippings 37nappies, disposable 37nasturtiums
growing in compost 139, 139 in straw-bale bin 120
nematodes (eelworms) 20, 23, 45
nettle leaves 49, 55neutral-soil loving plants
32–3newspaper 39nitrogen
air supply in compost and 26
mulches robbing soil of 171–2 release in soil 18 too little 182 too much 183 see also carbon:nitrogen ratio
nutrients from green manure 176 see also mineral nutrients in soil
nutshells 55
Ooils 37organic acids 32–3oxygen shortage 182–3organic matter in soil
breaking down 18 as food for micro- organisms 17, 18, 20
Organic Gardening magazine 187
Ppadded cover for compost
124paper see waste paperpea root rot 45pear midge grubs 45peat 14pesticides in manure 52pests on compost material
44petunias
growing in compost 139 in straw-bale bin 120
pH of soils 32–5, 161phacelia 176, 177, 178,
181phosphorus, release in soil
18pig manure 55pigeon manure 51, 55pine needles 34

191
plastic laminated 39 see also compost bins, plastic
plastic bags, biodegradable 132, 133
pond weed 55potassium from wood ash
81potato blight 45potatoes, growing in
compost 139potting compost 55, 150–1,
162–5poultry manure 49, 53, 55
C:N ratio 25prunings 46, 47, 55, 79, 157
dealing with 78–87, 83–5 leaving on ground 170, 171 shredding 80, 82–7, 83, 84–5, 94
pseudoscorpions 23pumpkins, growing in
compost 139
Rrabbit bedding 37, 53, 55rain, effect on compost 61,
98raking leaves 89rats 36, 184red worms see brandlingsroot rots 45Royal Horticultural Society
60–1, 150–1, 187rusts 45rye, grazing 176, 181
Ssacks as compost bin covers
124sawdust 52, 55sawfly larvae 45seaweed 52, 55
calcium content 35
secateurs 94seed compost 164sheep manure 55shoddy see woolshredding 80, 82–7, 83,
84–5, 94shrews 23silk 37, 55slimy heaps 183slow worms 23slugs 23, 184snails 23soil
adding to compost 48 air in 18 animals 20–23, 30, 48 benefits of organic matter in 17–19 conditioners 158, 161 digging compost into 156 pH 32–5, 161 sieve 94 structure 17, 54, 156, 182 water retention 17–18
spent hops 52, 53, 55spiders 23springtails 20, 23squashes
growing in compost 139 in straw-bale bin 120
stalks 55 chopping up 40 smashing 41
straw 52, 54, 55 calcium content 35 C:N ratio 25 digging into soil 157 as mulch 158
straw-bale bin 120–1, 120–1strawy stable manure 50,
51, 160sulphur 161
smell of 182–3sunflowers 179, 179
Ttea bags 37, 55, 143telephone directories 39temperature of compost
heap 56–61, 98, 182tiger worms see brandlingstissues 39toads 23toilet-roll middles 39, 73tomatoes, growing in
compost 139, 165tools 94–5top-dressing lawn 172troubleatmill 187tumbler bins 126–9, 127,
129turf, loam from 172
UUK Waste and Resources
Action Programme, The 187
urine 48, 49, 55
Vvegetable garden 166vegetable plot, compost for
153, 172–3vegetable waste 36–7
chopping up 40 fibrous 55 see also kitchen waste
viral diseases 45
Wwaste paper 6, 37, 38, 39,
55, 73 adding to compost 29, 183 adding to leaves 91 C:N ratio 25 mixed with grass clippings 77 soaking up excess water 30

192
waste recycling 14–15water in compost 30–1
testing for 31watering compost 70,
182waterlogging 182–3waxed paper 39, 55weeds 55
calcium content 35 perennial 43 killing off 42, 43 seed problems 40, 43, 183
wheelbarrow 94wildlife
habitat area 44, 80–1, 136 healthy soil and 20–3
wildlife-friendly garden 21winter tares 176wood ash 37, 55, 81wood chips as mulch 158,
159wood shavings 55woodland floor 13
living organisms in 20woodlice 23, 184woody waste 6, 46, 47, 79,
78–87, 86 C:N ratio 25 decomposing 29 mixed with high-fibre compost 78 shredding 80, 82–7, 83, 84–5, 94
surface area 46 when is it ready? 148 as wildlife habitat 44
wool 37, 55wormeries 140–5
stacking tray 142 what to put in 143
worms see brandlings; earthworms
wrapping paper 39
AcknowledgementsAuthor’s acknowledgementsThanks to everyone at Dorling Kindersley, including Clare Shedden and Helen Fewster, as well as Peter Anderson, Alison Donovan, Jo Doran, Peter Luff, Rachael Smith, and Louise Waller. Thanks also to Anna Kruger for asking me to write the book in the first place, but a very special thank you to my editor, Annelise Evans, for her enthusiasm, knowledge, and ability to know what I wanted to say even before I knew myself.
Richard Gianfrancesco at Gardening Which? and Paul Alexander, at the Royal Horticultural Society, were both willing to answer my daft questions.
Finally thanks to my wife, Pat, for her uncompromising refusal to accept my second-best efforts, and to Pat, Lewis, and Rowan for their willingness to tolerate the author at work.
Publisher’s acknowledgements Dorling Kindersley would like to thank Gerry and Sylvia Smith and Bill Watkin for generously allowing us to photograph their compost bins, and Sharon and Ivan Gould for letting us photograph in their home. Thanks also to Clare Sheddon and Peter Anderson for modelling, and to Sandy Lelliott for help with photoshoot preparation.
Photographic creditsDorling Kindersley would like to thank the following for their kind permission to reproduce their photographs: p.15: Louie Psihoyos/CORBIS; p.21, centre pp.32–33, and p.166: Steven Wooster; p.67: Lotti de la Bedoyere; p.137: Ken Thompson.
All new photography by Peter Anderson.
All other images © DK Images.For further information, see: www.dkimages.com


Jacket photography by www.waltoncreative.com
compostthe natural way to make food for your garden
Ken Thompson
Ken Thompson
co
mp
os
t
“Compost-making doesn’t need to be hard work, it costs almost
nothing, and the only secret ingredient you need is patience.”
—Ken Thompson
Everything you throw away that was ever alive can be
recycled, and this celebration of compost shows you just
how easy it is.
However small our space, we can all make a difference to the environment by turning green waste into food for our garden. Making compost is not only simple and satisfying, it will save you money on expensive soil conditioners and mulches.
Find out how to build a simple bin, select the best tools for the job, and learn what type of mix is right for the size of your garden.
From what’s hot to rot, to bins and wormeries, Compost is the practical guide to transforming your household and garden refuse into eco-friendly fertilizer.
compostKen thompson is a plant ecologist and senior lecturer at the University of Sheffield. He writes regularly for gardening magazines, promoting the science behind gardening to the general reader. His previous books include An Ear to The Ground and No Nettles Required, both published by Eden/Transworld.
Discover more atwww.dk.com
$18.00 USA$22.00 Canada
Printed in China
Copyright © 2022 FDOKUMEN

