Using and Managing SaltStack Config - VMware Docs
120
Using and Managing SaltStack Config 9 September 2021 VMware vRealize Automation SaltStack Config vRealize Automation
-
Upload
khangminh22 -
Category
Documents
-
view
3 -
download
0
Transcript of Using and Managing SaltStack Config - VMware Docs

Using and Managing SaltStack Config
9 September 2021VMware vRealize Automation SaltStack ConfigvRealize Automation

You can find the most up-to-date technical documentation on the VMware website at:
https://docs.vmware.com/
VMware, Inc.3401 Hillview Ave.Palo Alto, CA 94304www.vmware.com
Copyright ©
2021 VMware, Inc. All rights reserved. Copyright and trademark information.
Using and Managing SaltStack Config
VMware, Inc. 2

Contents
1 Using and Managing SaltStack Config 5
2 SaltStack Config system architecture 6
3 Salt system architecture 9
4 SaltStack Config jobs workflow 16
5 The SaltStack Config user interface 20Dashboard 22
Reports 25
Minions 27
Minion Keys 34
Activity 37
Jobs 41
Job returns 46
Schedules 51
Pillars 55
File Server 57
6 Setting up Single Sign-On (SSO) and directory services 60Native authentication 60
Configure OAuth and OIDC single sign-on (SSO) 62
Configure SAML single sign-on (SSO) 65
Configure directory services using the LDAP protocol 76
Adding a custom message to the login screen 85
7 Setting up Role Based Access Controls (RBAC) 87Task and resource access 90
Default roles and settings 95
Advanced permissions 97
8 System metrics 102
9 Sample content 107
10 Security guidelines 111
VMware, Inc. 3

11 Troubleshooting SaltStack Config 113
12 Working with the API (RaaS) 115Setting API permissions 117
RPC Endpoints 120
Using and Managing SaltStack Config
VMware, Inc. 4

Using and Managing vRealize Automation SaltStack Config 1You can configure and use SaltStack Config (formerly SaltStack Enterprise) in vRealize Automation to provision, configure, and deploy software to your virtual machines at any scale using event-driven automation. You can also use SaltStack Config to define and enforce optimal, compliant software states across your entire environment.
What is SaltStack Config?
vRealize Automation SaltStack Config is a configuration management system that maintains virtual machines in defined states, providing assurance that specific packages are installed and that specific services are running. You can also use SaltStack Config to query and execute commands on individual VMs, or groups of VMs, at high scale and speed.
With SaltStack Config, you can provision, configure, and deploy software to your virtual machines at any scale using event-driven automation. You can also use SaltStack Config to define and enforce optimal, compliant software states across your entire environment.
SaltStack Config is powered by Salt, an open-source configuration management and automation system. If you are new to Salt and are unfamiliar with how it works, see Chapter 3 Salt system architecture.
SaltStack Config extends Salt’s automated, event-driven configuration management platform by providing additional features, such as:
n Role-based access controls - Ensures that network engineers only have access to the resources and jobs that are necessary to fulfill their specific work responsibilities.
n A user-friendly interface - In addition to the ability to execute commands from the command line, SaltStack Config also provides a graphical user interface for ease of use.
n Security automation - Optional add-ons bringing you automated vulnerability remediation and continuous compliance for hybrid IT systems.
VMware, Inc. 5

SaltStack Config system architecture 2SaltStack Config includes four or more architectural components including the RaaS server, the Master Plugin, and two central databases.
Note As part of VMware’s initiative to remove problematic terminology, the term Salt master will be replaced with a better term in SaltStack Config and related products and documentation. This terminology update may take a few release cycles before it is fully complete.
The following diagram shows the primary components of the basic SaltStack Config architecture that are relevant to installation:
VMware, Inc. 6

Salt masters and the Master Plugin
SaltStack Config is powered by Salt, an open-source configuration management and automation system. If you are new to Salt and are unfamiliar with how it works, see Chapter 3 Salt system architecture.
The Salt master is the main connection between SaltStack Config and the rest of the nodes on your network (the minions). When you issue a command from SaltStack Config (such as a job), the command goes to the Salt master for distribution to the targeted minions.
Using and Managing SaltStack Config
VMware, Inc. 7

SaltStack Config can connect to one Salt master or many masters as needed in your system. In order for SaltStack Config to communicate with a Salt master, that master must have the Master Plugin installed and its key must be accepted on SaltStack Config. The Master Plugin allows the Salt master to access jobs or processes initiated by SaltStack Config as well as external files and pillar data that are stored on the PostgreSQL database.
The plugin integrates with the existing extension points provided by Salt. For example, job returns are collected using a Salt master-side Salt external job cache, and the RaaS file server uses a Salt fileserver plugin.
Note You can connect more than one Salt master to SaltStack Config. Each Salt master that connects to SaltStack Config needs to have the Master Plugin installed.
RaaS
RaaS, which stands for Returner as a Service, is the central component in SaltStack Config. In fact, when some people refer to SaltStack Config itself, they are often talking about RaaS.
RaaS provides RPC endpoints to receive management commands from the SaltStack Config user interface, as well as RPC control endpoints to interface with connected Salt masters. All communication is sent using RPC API calls over WebSockets or HTTP(s).
SaltStack Config user interface
The SaltStack Config user interface is a web application that provides the graphical user interface front end for RaaS. Though SaltStack Config is API-first, the user interface interfaces directly with the API (RaaS) to enable simple management of all systems in your environment. Different workspaces provide users with the ability to manage minions, users, roles, jobs, and more.
PostgreSQL Database
RaaS uses a PostgreSQL database to store minion data, job returns, event data, files and pillar data, local user accounts, as well as additional settings for the user interface.
Redis Database
RaaS uses a Redis database to store certain types of data in temporary storage, such as cached data. It also uses temporary data storage to distribute queued work to background workers.
Using and Managing SaltStack Config
VMware, Inc. 8

Salt system architecture 3Most users find it helpful to understand what Salt is and how it works before they begin the installation process. Salt uses a master-client model in which a Salt master issues commands to a client and the client executes the command.
Note As part of VMware’s initiative to remove problematic terminology, the term Salt master will be replaced with a better term in SaltStack Config and related products and documentation. This terminology update may take a few release cycles before it is fully complete.
What is Salt?
SaltStack Config is powered by Salt, a Python-based open-source remote execution framework used for:
n Configuration management
n Automation
n Provisioning
n Orchestration
Salt is the technology that underlies the core functionality of SaltStack Config. SaltStack Config enhances and extends Salt, providing additional functionality and features that improve ease of use. For a summary of the SaltStack Config infrastructure, see Chapter 2 SaltStack Config system architecture.
The following diagram shows the primary components of the basic Salt architecture:
VMware, Inc. 9

The following sections describe some of the core components of the Salt architecture that are relevant to SaltStack Config installation.
Using and Managing SaltStack Config
VMware, Inc. 10

Salt masters and Salt minions
Salt uses the master-client model in which a Salt master issues commands to a client and the client executes the command. In the Salt ecosystem, the Salt master is a server that is running the Salt master service. It issues commands to one or more Salt minions, which are nodes that are running the minion service and that are registered with that particular Salt master.
Another way to describe Salt is as a publisher-subscriber model. The Salt master publishes jobs that need to be executed and minions subscribe to those jobs. When a specific job applies to that minion, it executes the job.
When a minion finishes executing a job, it sends job return data back to the Salt master. Salt has two ports used by default for the minions to communicate with their Salt master. These ports work in concert to receive and deliver data to the Message Bus. Salt’s message bus is ZeroMQ, which creates an asynchronous network topology to provide the fastest communication possible.
Targets and grains
The Salt master indicates which minions should execute the job by defining a target. A target is the group of minions, across one or many Salt masters, that a job’s Salt command applies to.
Note A Salt master can also be managed like a minion and can be a target if it is running the minion service.
The following is an example of one of the many kinds of commands that a Salt master might issue to a minion. This command indicates that all minions should install the Vim application:
salt -v '*' pkg.install vim
In this case the glob '*' is the target, which indicates that all minions should execute this
command. Many other targeting options are available, including targeting a specific minion by its ID or targeting minions by their shared traits or characteristics (called grains in Salt).
Salt comes with an interface to derive information about the underlying system. This is called the grains interface, because it presents Salt with grains of information. Grains are collected for the operating system, domain name, IP address, kernel, OS type, memory, and many other system properties. You can also create your own custom grain data.
Grain data is relatively static. However, grain data is refreshed when system information changes (such as network settings) or when a new value is assigned to a custom grain.
Open event system (event bus)
The event system is used for inter-process communication between the Salt master and minions. In the event system:
n Events are seen by both the Salt master and minions.
n Events can be monitored and evaluated by both.
Using and Managing SaltStack Config
VMware, Inc. 11

The event bus lays the groundwork for orchestration and real-time monitoring.
All minions see jobs and results by subscribing to events published on the event system. Salt uses a pluggable event system with two layers:
n ZeroMQ (0MQ) - The current default socket-level library providing a flexible transport layer.
n Tornado - Full TCP-based transport layer event system.
One of the greatest strengths of Salt is the speed of execution. The event system’s communication bus is more efficient than running a higher-level web service (http). The remote execution system is the component that all components are built upon, allowing for decentralized remote execution to spread load across resources.
Salt states
In addition to remote execution, Salt provides another method for configuring minions by declaring which state a minion should be in, otherwise referred to as Salt states. Salt states make configuration management possible. You can use Salt states to deploy and manage infrastructure with simple YAML files. Using states, you can automate recursive and predictable tasks by queueing jobs for Salt to implement without needing user input. You can also add more complex conditional logic to state files with Jinja.
To illustrate the subtle differences between remote execution and configuration management, take the command referenced in the previous section about targets and grains in which Salt installed the application Vim on all minions:
Methodology Implementation Result
Remote execution
n Run salt-v'*'pkg.installvim from the
terminal
n Remotely installs Vim on the targeted minions
Configuration management
n Write a YAML state file that checks whether Vim is installed
n This state file is then applied to the targeted minions
n Ensures that Vim is always installed on the targeted minions
n Salt analyzes the state file and determines what actions need to be taken to ensure the minion complies with the state declarations
n If Vim is not installed, it automates the processes to install Vim on the targeted minions
The state file that verifies Vim is installed might look like the following example:
# File:/srv/salt/vim_install.slsinstall_vim_now: pkg.installed: -pkgs: -vim
Using and Managing SaltStack Config
VMware, Inc. 12

To apply this state to a minion, you would use the state.apply module, such as in the following
example:
salt '*' state.apply vim_install
This command applies the vim_install state to all minions.
Formulas are collections of states that work in harmony to configure a minion or application. For example, one state might trigger another state.
The Top file
It is not practical to manually run each state individually targeting specific minions each time. Some environments have hundreds of state files targeting thousands of minions.
Salt offers two features to help with this scaling problem:
n The top.sls file - Maps Salt states to their applicable minions.
n Highstate execution - Runs all Salt states outlined in top.sls in a single execution.
The top file maps which states should be applied to different minions in certain environments. The following is an example of a simple top file:
# File: /srv/salt/top.slsbase: '*': - all_server_setup '01webserver': - web_server_setup
In this example, base refers to the Salt environment, which is the default. You can specify more
than one environment as needed, such as prod, dev, QA, etc.
Groups of minions are specified under the environment, and states are listed for each set of minions. This top file indicates that a state called all_server_setup should be applied to all
minions '*' and the state called web_server_setup should be applied to the 01webserver minion.
To run the Salt command, you would use the state.highstate function:
salt \* state.highstate
This command applies the top file to the targeted minions.
Salt pillar
Salt’s pillar feature takes data defined on the Salt master and distributes it to minions as needed. Pillar is primarily used to store secrets or other highly sensitive data, such as account credentials, cryptographic keys, or passwords. Pillar is also useful for storing non-secret data that you don’t want to place directly in your state files, such as configuration data.
Using and Managing SaltStack Config
VMware, Inc. 13

Salt pillar brings data into the cluster from the opposite direction as grains. While grains are data generated from the minion, the pillar is data generated from the Salt master.
Pillars are organized similarly to states in a Pillar state tree, where top.sls acts to coordinate
pillar data to environments and minions privy to the data. Information transferred using pillar has a dictionary generated for the targeted minion and encrypted with that minion’s key for secure data transfer. Pillar data is encrypted on a per-minion basis, which makes it useful for storing sensitive data specific to a particular minion.
Beacons and reactors
The beacon system is a monitoring tool that can listen for a variety of system processes on minions. Beacons can trigger reactors which can then help implement a change or troubleshoot an issue. For example, if a service’s response times out, the reactor system can restart the service.
Beacons are used for a variety of purposes, including:
n Automated reporting
n Error log delivery
n Microservice monitoring
n User shell activity
n Resource monitoring
When coupled with reactors, beacons can create automated pre-written responses to infrastructure and application issues. Reactors expand Salt with automated responses using pre-written remediation states.
Reactors can be applied in a variety of scenarios:
n Infrastructure scaling
n Notifying administrators
n Restarting failed applications
n Automatic rollback
When both beacons and reactors are used together , you can create unique states customized to your specific needs.
Salt runners and orchestration
Salt runners are convenience applications executed with the salt-run command. Salt runners
work similarly to Salt execution modules. However, they execute on the Salt master instead of the minions. A Salt runner can be a simple client call or a complex application.
Using and Managing SaltStack Config
VMware, Inc. 14

Salt provides the ability to orchestrate system administrative tasks throughout the enterprise. Orchestration makes it possible to coordinate the activities of multiple machines from a central place. It has the added advantage of being able to control the sequence of when certain configuration events occur. Orchestration states execute on the Salt master using the state runner module.
When you run a multi-node installation, you are actually running an orchestration to install SaltStack Config. In the multi-node installation scenario, you run an orchestration highstate designed by VMware. The highstate runs on your Salt master and sets up the multi-node environment. It installs the core SaltStack Config architecture on the three other nodes that will host PostgreSQL, Redis, and RaaS.
Using and Managing SaltStack Config
VMware, Inc. 15

SaltStack Config jobs workflow 4One of the primary reasons you might want to use SaltStack Config is to improve your system’s configuration management. You can use jobs in SaltStack Config to simplify and automate common tasks and procedures that you or your team performs on a regular basis. Using jobs for configuration management reduces the time your team spends manually installing, configuring, monitoring, and maintaining the nodes in your system. It also ensures that your system is always in a consistent desired state.
Creating and running jobs is a multi-step process that requires using a few different tools and workspaces in SaltStack Config. The following diagram provides an overview of the overall job workflow:
VMware, Inc. 16

Each step is described in the following sections:
Create targets
Before you can begin running jobs, you need to create and define targets. A target is the group of minions, across one or many Salt controllers, that a job’s Salt command applies to. A Salt controller can also be managed like a minion and can be a target if it is running the minion service. In other words, a target determines which node(s) the job will run on. You can create targets using a simple list of minions or you can create more complex targets based on the basic properties of your minions, such as their operating system or server type.
You’ll create targets using the Minions workspace. See Minions for more information.
Using and Managing SaltStack Config
VMware, Inc. 17

Create jobs
To run a job, you must first create it. Jobs are used to run remote execution tasks, apply states, and start Salt runners. In other words, the job determines which tasks, processes, or state files should be applied to the targeted node(s).
While you could just run commands against your minions any time you need to do a specific task, it’s better to create a job to record the exact processes or states that need to be applied to your minions. Jobs ensure you apply procedures consistently and save those procedures for future reuse.
When you create a job, you can leave the target undefined so that it can be applied when the job is run later.
You’ll create jobs using the Jobs workspace. See Jobs for more information.
Define roles
To maintain your system’s security, your team should only have access to the specific nodes or jobs that they are authorized to access. This approach is generally referred to as role-based access control (RBAC). RBAC means that access should be limited to resources based on the individual’s role on your team. Team members should only be given access to the resources that they need in order to fulfill their work responsibilities.
You can define roles and permissions natively in SaltStack Config or you can map access to targets and jobs to your organization’s RBAC system, such as LDAP-based systems like Active Directory or SAML-based systems like Google.
For more information, see:
n Chapter 7 Setting up Role Based Access Controls (RBAC)
n Native authentication
n Configure directory services using the LDAP protocol
n Configure SAML single sign-on (SSO)
n Configure OAuth and OIDC single sign-on (SSO)
Run jobs
Before you can run jobs, you need to define the job’s:
n Target
n Function (the command that needs to be run or state that needs to be applied)
n Permissions (who can run the job against the target)
Once you’ve defined these settings, you can run jobs on a regular schedule or you could run them only as needed. Typically, jobs that run only when needed are referred to as ad-hoc jobs.
Using and Managing SaltStack Config
VMware, Inc. 18

Create a schedule
You can schedule jobs to run at a specific time (such as a scheduled maintenance window) or at regularly repeated intervals.
You’ll create jobs using the Schedules workspace. See Schedules for more information.
Run ad-hoc jobs
You can run ad-hoc jobs using either the Minions workspace or the Jobs workspace.
For more information, see:
n Minions
n Jobs
Review job status and output
While the job is running or after it has completed, you can review the job’s status and detailed output using the Activity workspace. See Activity for more information.
Using and Managing SaltStack Config
VMware, Inc. 19

The SaltStack Config user interface 5The SaltStack Config user interface is a web application that provides the front end to RaaS. It is the central interface to manage minions, users, roles, jobs, and more. Management tasks are available through different workspaces.
Some tasks might not be available in the user interface and will only be possible through the API endpoints for RaaS.
Note Manual page refreshes might be required when changing views or performing operations. If the view does not change after you perform an action, reload the page.
Accessing the SaltStack Config user interface
To being using the user interface:
1 In a web browser, go to the SaltStack Config URL provided by your administrator. For a list of supported browsers, see Supported web browsers.
2 In the login page, enter your username and password and click Log In.
If you enter incorrect credentials, the page might load for up to 30 seconds before you are prompted to retry. For assistance, contact your administrator.
Changing your preferences
You can update various settings in the User Preferences workspace. This workspace allows you to change your password, switch to the dark or light theme, or to control other settings such as session timeout. See User preferences for a description of the available settings.
To update your user preferences:
1 From the side menu, click Settings > User Preferences.
2 Update your preferences as needed and click Save.
Changing your password
To change your password:
1 From the side menu, click Settings > User Preferences.
VMware, Inc. 20

2 Under Change Password, enter the new password in the password field. Reenter your password to confirm.
3 Click Save.
Supported web browsers
To take advantage of the SaltStack Config user interface’s full range of features, use the latest version of one of the following web browsers.
n Google Chrome
n Mozilla Firefox
User preferences
Under Preferences, you can adjust the following options:
Option Description
Session timeout From this menu, select the length of time (in minutes) you must be inactive before being logged out automatically.
Theme Choose from the dark or light theme.
Set Limit When enabled, this setting enforces a limit on the number of minions displayed in various datagrids, tables, and charts in the Reports workspace and in job returns. This setting only affects visual displays in the SaltStack Config user interface and does not impact any actual functionality. When any element is affected by the minion limit, you’ll see an alert message.
This setting is enabled by default to improve the performance of the user interface. Be aware that disabling this setting could cause performance issues.
Minion Limit Sets the number of minions that are limited when Set Limit is enabled.
Note The Settings menu also includes a Connectors workspace where you can configure API keys to connect and import security scans from third-party vendors.
Workspaces in the user interface
The following articles explain more about each workspace in the user interface:
This chapter includes the following topics:
n Dashboard
n Reports
n Minions
n Minion Keys
n Activity
Using and Managing SaltStack Config
VMware, Inc. 21

n Jobs
n Job returns
n Schedules
n Pillars
n File Server
Dashboard
The Dashboard can visualize various kinds of system metrics and network data. Using the Dashboard, you can display reports (charts and graphs) of the most recent system metrics that you are interested in.
The Dashboard creates visual reports using system metrics collected by the RaaS server. This data can be used for performance diagnostics and for monitoring system events. For example, RaaS collects data about event bus traffic, volume of Salt master commands, job frequency, minion presence, etc. Some of this data can be visualized in reports on the Dashboard to get a snapshot of your system’s most recent performance.
The Dashboard is intended to provide a high-level overview of your system metrics. For that reason, the reports can only display system data from the last 24 hours or less. To get a more detailed view of your system metrics over a longer period of time, you can use the /metrics endpoint to export system metrics to third-party tools such as Prometheus or other monitoring and alerting tools. For more information about the /metrics http endpoint, see Chapter 8 System
metrics.
You’ll see the same charts regardless of the device you use to access the Dashboard, whenever you’re logged in.
Note As part of VMware’s initiative to remove problematic terminology, the term Salt master will be replaced with a better term in SaltStack Config and related products and documentation. This terminology update may take a few release cycles before it is fully complete.
Available Dashboard reports
The following table lists and explain the various reports that are available in the Dashboard:
Report Description Available filters
Salt Events n Displays the number of Salt events over time, such as jobs or other operations
n Useful for monitoring expected or unexpected spikes in network activity
n All Salt masters or specific Salt masters
n Time range (from the past hour up to 24 hours)
Salt Event Payload Size n Displays the payload size of Salt events over time, such as jobs or other operations
n Useful for monitoring the amount of processing power or memory used to complete jobs or other operations
n All Salt masters or specific Salt masters
n Time range (from the past hour up to 24 hours)
Using and Managing SaltStack Config
VMware, Inc. 22

Report Description Available filters
Celery Queue Depth n Displays the depth of the celery queue over time, which refers to the number of jobs that were queued while waiting for CPU or database resources to become available
n Useful for identifying CPU or database bottlenecks
n All RaaS servers
n Time range (from the past hour up to 24 hours)
RaaS Webserver Requests n Displays the number of requests made to the API (RaaS) server over time
n Useful for monitoring expected or unexpected spikes in server activity
n All RaaS servers
n Time range (from the past hour up to 24 hours)
Webserver Response Time n Displays the amount of processing time required by the API (RaaS) server to respond to requests over time
n Useful for monitoring bottlenecks and the overall performance of the API (RaaS) server
n All RaaS servers
n Time range (from the past hour up to 24 hours)
RaaS Salt Master Iteration Time
n Displays the amount of time it took Salt masters connected to SaltStack Config to complete a webserver request, from beginning to end, over time
n Useful for monitoring SaltStack Config-related load on each Salt master
n All Salt masters or specific Salt masters
n Time range (from the past hour up to 24 hours)
SSE Users Authenticated n Displays the number of distinct users that were logged into SaltStack Config over time
n Useful for monitoring expected or unexpected spikes in users logging into SaltStack Config
n Time range (from the past hour up to 24 hours)
Database Activity n Displays the number of actions (deleted, read, inserted, updated) on various PostgreSQL database rows over time
n Useful for monitoring expected or unexpected spikes in read/write activity on the PostgreSQL database
n Time range (from the past hour up to 24 hours)
Database Connections n Displays the number of connections between the PostgreSQL database and the API (RaaS) server over time
n Useful for monitoring expected or unexpected spikes in activity on the PostgreSQL database
n Time range (from the past hour up to 24 hours)
Redis Commands Executed n Displays the number of commands executed against the Redis server over time
n Useful for monitoring the number of requests for information in the Redis caching layer (such as query results)
n Time range (from the past hour up to 24 hours)
Using and Managing SaltStack Config
VMware, Inc. 23

Report Description Available filters
Jobs n Displays the number of jobs that succeeded, missed returns, failed, or that were in progress over time
n Useful for evaluating overall system activity and performance
n Time range (from the past hour up to 24 hours)
Salt Masters in SSE n Displays the number of Salt masters registered in SaltStack Config over time
n Useful for monitoring whether Salt masters went down unexpectedly or if there are more Salt masters than expected over time
n Time range (from the past hour up to 24 hours)
Minion Presence n Displays the number of minions connected to Salt masters through SaltStack Config over time
n Useful for monitoring if minions went down unexpectedly or if there are more minions than expected over time
n All Salt masters or specific Salt masters
n Time range (from the past hour up to 24 hours)
Accessing the Dashboard workspace
To access the Dashboard workspace, click Dashboard on the side menu.
Adding reports
To add a report to the Dashboard:
1 In the Dashboard workspace, click Add Report to open a menu.
2 Select the name of the report you want to add to the Dashboard. For a list of the available visualizations, see Available Dashboard reports.
The report you selected now appears in the Dashboard. If you already have several reports in your Dashboard, the new report you just added appears at the top of the Dashboard on either the left or right column. It appears in whichever column had the fewest reports at the time you added it.
Filtering reports
All the reports in the Dashboard workspace can be filtered by the duration of time shown in the report, from the past hour up to 24 hours. All reports are set to 12 hours by default. To change the duration, click the duration filter in the lower left of the report to select a different time range.
Some reports have additional filters, allowing you to filter the results for a specific Salt master, minion, database, or API (RaaS) server where applicable. If these filters are available, they appear at the top of the report. You can change the filter by clicking it the filter to open a menu, then selecting the element you want to filter by.
Using and Managing SaltStack Config
VMware, Inc. 24

Downloading reports
You can download reports in either JSON or CSV format. To export a report:
1 In the Dashboard workspace, click the Download button above the report you want to download.
2 Select either Download JSON or Download CSV.
Note Some reports may have multiple download files if the chart has several metrics, Salt masters, or instances of RaaS. Each report represents an array of data that you can import into a third-party tool. One way you can check whether a report will have multiple download files is to hover your mouse over the report. The number of line items that appear on the report correlates to the number of download files for that report.
The report begins downloading in your browser.
Moving reports
To move a report, click and hold the report’s drag handle to drag the report to a different position on the Dashboard.
Deleting reports
Click the report’s Delete button to remove the report from the Dashboard.
Reports
The Reports workspace provides an overview of important metrics in your SaltStack Config environment, such as number of licenses available and used, or the Salt version installed on different nodes. You can view reports under the Home screen. Reports update automatically to reflect the current state of your system.
Report data is provided for all minions. However, some reports can be filtered by target group. See Minions for more information.
In the Reports workspace, you can view important metrics in your SaltStack Config environment. The workspace provides downloads and a graph for each report type. You can also adjust the columns displayed for each report, as well as filter column data. Reports are available in either JSON or CSV format.
Types of reports
The SaltStack Config user interface includes several reports to provide an overview of important metrics in your SaltStack Config environment.
Report data is provided for all minions. However, some reports can be filtered by target group.
Using and Managing SaltStack Config
VMware, Inc. 25

Minions are nodes running the minion service, which can listen to commands from a Salt master and perform the requested tasks. A target is the group of minions, across one or many Salt masters, that a job’s Salt command applies to. A Salt master can also be managed like a minion and can be a target if it is running the minion service. See Minions for more information.
Report Description
Key state State of all minion keys. A minion key allows encrypted communication between a Salt master (formerly called the Salt master) and Salt minion. For more on keys, see Minion Keys.
Licenses Number of SaltStack Config licenses used and number of licenses available. This report includes a line graph that shows a history of license usage over time. The License report cannot be downloaded. For more on licensing, talk to your administrator.
Salt Master version Salt master version installed on all Salt masters.
Minion version Salt minion version installed on minions within the selected target group.
OS version Operating system installed on nodes within the selected target group.
Presence Presence status of minions in the selected target group. Presence indicates whether SaltStack Config has received any job data from a minion recently, within a defined interval. See Minions for more information.
Accessing the Reports workspace
To access the Reports workspace, click Reports on the side menu.
Viewing reports
To view a report, select any report in the Reports workspace. See Types of reports for a description of the reports.
Filtering and sorting table columns
You can filter each column by selecting its filter icon and selecting or typing your filter criteria. To clear a filter, click the Clear Filters button above the report table.
You can also sort a column by selecting the column name. To customize which columns display in
the table, click the Show columns button in the lower left corner of the table.
Note Filters, column sorting, and column visibility settings are persistent for a given user, regardless of the device used to log in. This means that when a particular user logs in, he or she sees the same filtering, sorting, and visibility settings the next time he or she logs in until the filters are cleared or the sorting and visibility settings are changed.
Using and Managing SaltStack Config
VMware, Inc. 26

Downloading reports
Reports can be exported to JSON or CSV formats. To export a report:
1 In the Reports workspace, click the tab for the report you want to download.
2 Click More actions to open a menu and select either JSON or CSV.
Note Not all tables in the Reports workspace provide the option to select specific rows for export. If a report doesn’t have check boxes next to each row, that means row selection is unavailable. In these cases, you can still export the data in the report as long as the More actions menu is available above the table. The entire data in the report is exported rather than specific rows.
The report begins downloading in your browser. The report includes all available data from the rows in the report regardless of any filters you have applied.
Minions
The Minions workspace is used to view minion details, search for or sort minions by ID or other properies, run ad-hoc jobs or commands, and create new targets. You can also use this workspace to adjust target settings, such as attached pillars. run jobs, accept or reject keys, as well as assign a role or pillar to a target. See Minions for more information.
Note As part of VMware’s initiative to remove problematic terminology, the term Salt master will be replaced with a better term in SaltStack Config and related products and documentation. This terminology update may take a few release cycles before it is fully complete.
Managing minions and targets
The Minions workspace includes a list of all Salt minions that are running the minion service and that are currently managed by SaltStack Config. Minions are nodes running the minion service, which can listen to commands from a Salt master and perform the requested tasks. Salt masters can themselves run the minion service, which makes it possible to configure and manage the node running the Salt contoller service as needed.
The side panel of the workspace includes a list of targets. A target is the group of minions, across one or many Salt masters, that a job’s Salt command applies to. A Salt master can also be managed like a minion and can be a target if it is running the minion service. Defining a target for a job or operation also prevents the operation from running on nodes that should not run that operation. Targets can contain minions that are connected to any Salt master in your environment. You can attach pillar data to different targets. Pillars are structures of data defined on the Salt master and passed through to one or more minions, using targets. They allow confidential, targeted data to be securely sent only to the relevant minion. See Pillars for more information.
By default, when you open the workspace, the All Minions target is active. The All Minions target lists all the minions you have permission to access.
Using and Managing SaltStack Config
VMware, Inc. 27

Ad-hoc jobs or commands
The Minions workspace also includes a Run Command control that allows you to run a single, ad-hoc command on one or more minions without creating a reusable job. This feature is useful for executing commands quickly or for running one-off jobs that are not part of your everyday workflow, such as when troubleshooting, or during initial configuration. See Running a command for more information.
In the Minions workspace, you can run an ad-hoc job or command on:
n A single minion
n A list of minions
n A Salt master or all Salt masters (using salt-run)
n A target
See Chapter 4 SaltStack Config jobs workflow for an overview of how to use the Minions workspace along with the other workspaces in SaltStack Config to create and use jobs for configuration management.
Accessing the Minions workspace
To use the Minions workspace, click Targets on the side menu.
Viewing minion details
To view a specific minion’s details:
1 In the Minions workspace, select a minion ID from the Minion ID column to open the minion details page.
2 In the minion details page, you can view a list of grains, or information about the minion. You can also run an ad-hoc job against a single minion.
3 Select the Activity tab to view the minion’s job history. See Jobs for more information.
Downloading minion data
To download data for all minions:
1 In the Minions workspace, click More actions to open a menu.
2 In the menu, under Download table, select the required format to begin the download.
Searching for a minion
To find a specific minion:
1 In the Minions workspace, click the filter button for the column you want to search.
Using and Managing SaltStack Config
VMware, Inc. 28

2 Start typing the search criteria to see the rows filter instantly. For example, you might search for a minion ID in the Minion column.
Note You can also click any column name once to sort the rows in descending order. Click again to reverse the order. For more information about filtering, see Filtering and sorting table columns.
Filtering and sorting table columns
You can filter each column by selecting its filter icon and selecting or typing your filter criteria. To clear a filter, click the Clear Filters button above the minions table.
You can also sort a column by selecting the column name. To customize which columns display in
the table, click the Show columns button in the corner under the minions table.
Note If you filter against the All Minions target, that filter remains persistent across all your targets.
Filters, column sorting, and column visibility settings are persistent for a given user, regardless of the device used to log in. This means that when a particular user logs in, he or she sees the same filtering, sorting, and visibility settings the next time he or she logs in until the filters are cleared or the sorting and visibility settings are changed.
You can also sort a column by selecting the column name.
Running an ad-hoc job
In the Minions workspace, you can run an ad-hoc job or command on:
n A single minion
n A list of minions
n A Salt master or all Salt masters (using salt-run)
n A target
Note Targets are dynamic, and new minions are automatically added to any matching target definition. Make sure to review the minions included in a target before you run a job.
See Chapter 4 SaltStack Config jobs workflow for an overview of how to use the Minions workspace along with the other workspaces in SaltStack Config to create and use jobs for configuration management.
To run an ad-hoc job:
1 In the Minions workspace, select which minion, target, or list of minions you want to run the job against:
n To select a single minion or list of minions, check the box next to the minions in the table.
Using and Managing SaltStack Config
VMware, Inc. 29

n To select a target, click the name of the target in the Targets side panel. The name of the currently selected target shows above the minions list.
2 Click Run job to run a job.
3 In the confirmation dialog, select the job you want to run and confirm the correct target or minions are selected.
4 Select additional options as needed and click Run now.
For more on jobs and the different options available when running a job, see Jobs.
Note You can also run a job on a single minion by selecting its Minion ID and viewing the minion details page.
Running a command
In the Minions workspace, you can run an ad-hoc job or command on:
n A single minion
n A list of minions
n A Salt master or all Salt masters (using salt-run)
n A target
Note Targets are dynamic, and new minions are automatically added to any matching target definition. Make sure to review the minions included in a target before you run a job.
See Chapter 4 SaltStack Config jobs workflow for an overview of how to use the Minions workspace along with the other workspaces in SaltStack Config to create and use jobs for configuration management.
To run a command against one or more minions:
1 In the Minions workspace, select which minion, target, or list of minions you want to run the job against:
n To select a single minion or list of minions, check the box next to the minions in the table.
n To select a target, click the name of the target in the Targets side panel. The name of the currently selected target shows above the minions list.
2 Click Run Command.
3 In the Run Command dialog, confirm the correct command and target are selected, then select a function.
Note If you select the salt-run command, you can choose to run the command on all
Salt masters or on a specific Salt master. This is known as a Salt runner. See Jobs for more information.
Include any arguments as needed. For more on Salt commands and functions, see Jobs.
Using and Managing SaltStack Config
VMware, Inc. 30

4 Click Run Command.
The command is executed as a job. You can track its progress and results as for other jobs in SaltStack Config. See Job returns.
Creating a new target
Each target in SaltStack Config includes a name, Salt master, and target criteria. To define a new target including one or more minions:
1 In the Minions workspace, click All Minions in the Targets side panel.
2 Click the Create target button.
3 In the Create Target dialog in the Name field, enter a descriptive name for the new target.
4 By default, the All masters setting is enabled, which means that minions being managed by any Salt master can be included in the target. Click this button to apply this target only to a subset of minions associated with one or more Salt masters.
If you disable this setting, a menu appears that you can use to select which Salt master or Salt masters to apply the target to. See Target settings for more information.
5 Click the Grain menu and select the type of target want to use. You can target minions using grains, globs, lists, or compounds. See Target settings for more information about these targeting options. For more general background information about Salt targets, see Targeting minions.
6 Different target settings and criteria are available based on the type of target you selected in the previous step. For more information about these settings, see Target settings.
Note If you select Compound as the first criterion, you must follow the targeting syntax included in the Salt Targeting Reference, and you must include any secondary criteria in the compound target definition. SaltStack Config does not allow you to add any other criteria in the target editor. For more on compound targeting, see Target settings.
7 When complete, click Save.
Defining a simple list target
To create a new target using a simple list:
1 In the Minions workspace, click All Minions in the Targets side panel.
2 Click the checkbox next to the minions you want to include in the list and click Create target.
Note Filtering or sorting your minions can be useful for defining a list. See Filtering and sorting table columns.
The selected list is included as a criterion.
3 Enter a target name and define any additional target settings. See Target settings.
4 When complete, click Save.
Using and Managing SaltStack Config
VMware, Inc. 31

Assigning pillar to a target
To assign pillar data to a specific target of minions:
1 In the Minions workspace, select a target from the Targets side panel.
2 Click More actions.
3 In the menu, click Attach Pillar.
4 In the dialog, select the pillars you want to apply to the target.
In addition to selecting a pillar, select Refresh pillar to make the pillar available to the selected target immediately.
5 Click Update Target.
The selected pillar data is now available to all minions in the target.
Note You can also assign a pillar to a target in the Pillars Workspace. See Pillars.
Minion presence
The Presence column indicates if SaltStack Config has received any job data from the minion recently, within a defined interval called raas_presence_expiration. By default, this interval is set
to 3600 seconds. Presence can provide an indicator of machine health by using the Presence beacon installed on minions.
If the Presence beacon is in place, minions send periodic status payloads to their Salt masters, which SaltStack Config then retrieves, influencing the status displayed in the Presence column.
Beacons are used to monitor non-Salt processes. When monitored activity occurs, an event is sent that can be configured to trigger a reactor. For more on beacons, see Salt beacon reference.
Note You can check which beacons are installed and active on a minion by running a job with beacons.list on a minion’s respective target. See Jobs for more information.
SaltStack Config provides the following Presence statuses.
Status Description
Unknown SaltStack Config has never seen a response from the minion. This is the default status for newly-connected minions. Once minions have received a command, the status updates to Present.
Present SaltStack Config has seen responses from the minion within the last raas_presence_expiration interval, set to 3600 seconds by default.
Disconnected SaltStack Config has seen a response from the minion, but not within the last raas_presence_expiration interval.
Using and Managing SaltStack Config
VMware, Inc. 32

Target settings
Targeting in SaltStack Config is similar to targeting in Open Source Salt, but SaltStack Config has a simplified interface for defining targets, which also enables you to save target definitions for reuse. For more on targeting in Salt, see Salt Targeting Reference.
Each target in SaltStack Config includes a name, Salt master, and target criteria, described in detail below.
Name
Enter a target name. Target names do not have to be unique. This might result in different items displaying with the same name in the SaltStack Config user interface.
All Salt masters
By default, the target includes all Salt masters. However, you can choose to target minions that only belong to a specific Salt master. For example, if your environment has several machines responsible for running a particular application, and you have partitioned your Salt infrastructure so these machines are all connected to a single Salt master, you might create a target that includes the entire subset of minions by selecting only the Salt master.
To enable targeting by Salt master, click this radio button to deactivate this setting. A new group of settings appears.
Under the Master field, select a Salt master whose minions you want to target. All additional target criteria are applied only to the subset of minions associated with the selected Salt master.
Target criteria
Use target criteria to specify a group of minions, referring to the following field descriptions.
Targets are dynamic, and new minions are automatically added to any matching target definition. Saving your target as a list prevents new minions that match the dynamic target setting from being added to a target automatically.
Target type Description
Grain Match a specific grain value, for example, osfullname is Debian. Once you select a grain, the value list
pre-populates so you can click the field to view available options, or start typing.
For more on grains, see Salt grains reference.
Note When creating compound targets using grains, RaaS will return no minions if the grain name has a space in the name. For this reason, any space is automatically converted to a ? instead.
Glob Wildcard match using the minion ID. For example, you might enter webserver* to select multiple minions,
named webserver01, webserver02, and webserver03.
Using and Managing SaltStack Config
VMware, Inc. 33

Target type Description
List Specify a list of minions to include in the target. For example, dc3-north-db1,dc3-north-db2.
Note Specifying a list is useful if you do not want to grant access to targets dynamically. This prevents new minions that match the dynamic target criteria from being added to a target automatically.
Compound Combine multiple target interfaces, separated by conjunctions and, or, and not.
To take advantage of compound targeting in SaltStack Config, first review compound targeting in the Salt Targeting Reference.
Note If you select Compound as a criterion, you must follow Salt’s compound targeting syntax, and include any secondary criteria in the compound target definition. SaltStack Config does not allow you to include any other types of criteria in addition to a Compound criterion.
Minion Keys
The Minion Keys workspace is used to manage minion keys. A minion key allows encrypted communication between a Salt master and Salt minion. The workspace provides an overview of all minions filtered by their respective key states. On initial connection, a Salt minion sends its public key to the Salt master, which the Salt master can accept, reject, or deny.
The Minion Keys workspace is used to manage minion keys. A minion key allows encrypted communication between a Salt master and Salt minion. The workspace provides an overview of all minions filtered by their respective key states. On initial connection, a Salt minion sends its public key to the Salt master, which the Salt master can accept, reject, or deny.
Note SaltStack Config also provides the ability to manage Salt master keys.
On initial connection, a Salt minion sends its public key to the Salt master, which the Salt master can accept, reject, or deny. The minion keys workspace has three sections that sort and display keys by their current state:
Status Description
Accepted Key was accepted and the minion can communicate with the Salt master.
Pending Key is not accepted or denied. In this state, connections are not accepted from the minion and jobs are not executed.
Rejected Key was explicitly rejected using the Reject Key command. In this state, connections are not accepted from the minion and jobs are not executed.
Denied Key was rejected automatically by the Salt master. This occurs when a minion has a duplicate ID, or when a minion was rebuilt or had new keys generated and the previous key was not deleted from the Salt master. If this happens, delete the denied key to trigger key regeneration. In this state, connections are not accepted from the minion and jobs are not executed.
In the Minion Keys workspace, you can accept, reject, or delete minion keys. SaltStack Config also provides the ability to manage Salt master keysGUID-B9956C16-D9D2-4DDC-B274-E6B560E9704B#filtering-and-sorting-table-columns
Using and Managing SaltStack Config
VMware, Inc. 34

Before accepting a new minion key, you must first install the minion service on the node and configure it to communicate with the Salt master.
Deleting a minion key is useful for resetting a minion’s connection. For example, you might delete a minion key and then re-accept it.
See Minion Keys for a description of the different key states.
Note As part of VMware’s initiative to remove problematic terminology, the term Salt master will be replaced with a better term in SaltStack Config and related products and documentation. This terminology update may take a few release cycles before it is fully complete.
Accessing the Minion Keys workspace
To use the Minion Keys workspace, click Minion Keys in the side menu. Minion Keys expands to show the four different key states:
n Accepted
n Pending
n Rejected
n Denied
Select the state for the keys that you are interested in viewing or managing. See Minion Keys for a description of the different key states.
Accepting a new minion key
Before you can accept a new minion key, you must first install the minion service on the new machine, and configure it to communicate with the Salt master. See Prerequisites to accepting keys for more information.
When a user logs in, the SaltStack Config user interface polls the server every 10 seconds for pending minion and Salt master keys. If a pending key is found, the Minions Key workspace displays the key as pending and alerts the user. These alerts are global, which means you are alerted as you are accessing any workspace in SaltStack Config, not just the Minions Key workspace.
Once a pending key is found, the user interface stops polling for that key type (minion or Salt master) for the duration of the user’s session.
To accept a new minion key:
1 In the Minion Keys workspace, click Pending from the side panel.
2 Check the box next to the minion key or keys you want to accept. Then, click Accept Key.
3 Click Accept in the confirmation dialog.
Using and Managing SaltStack Config
VMware, Inc. 35

The key is now accepted. After several seconds, the minion appears under the Accepted tab, and in the Minions Key workspace.
Note In a multi-Salt master scenario, you must accept keys on all Salt masters separately. For more on multi-Salt master configurations, see Multimaster Tutorial.
For more on configuring a multi-Salt master scenario with failover, see Multimaster Failover.
Rejecting minion keys
To reject minion keys:
1 In the Minion Keys workspace on the side panel, click the key state for the key you want to reject. For example, if the key is currently pending, click Pending.
2 Check the box next to the key or keys you want to reject. Then, click Reject Key.
The keys are now rejected and connections are not accepted from the minion.
Note The key appears under the Rejected tab after several seconds.
Deleting minion keys
To remove minion keys:
1 In the Minion Keys workspace on the side panel, click the key state for the key you want to delete. For example, if the key is currently pending, click Pending.
2 Select a key state in the left panel to locate the required keys.
3 Select the keys you want to delete and click Delete Key.
The key is now deleted.
Note The key is removed after several seconds.
Searching for a minion
To find a specific minion:
1 In the side menu under Minion Keys, click the key state of the key you are searching for. If you are unsure which key state the minion is in, you could either search different key states on the side panel or use the Targets workspace. See Minions for more information.
2 Click the filter button for the column you want to search.
3 Start typing the search criteria to see the rows filter instantly. For example, you might search for a minion ID in the Minion column.
Note You can also click the column name once to sort the rows in descending order. Click again to reverse the order. See Filtering and sorting table columns for more information.
Using and Managing SaltStack Config
VMware, Inc. 36

Filtering and sorting table columns
You can filter each column by selecting its filter icon and typing your filter criteria. To clear a filter, click the Clear Filters button above the minions table.
You can also sort a column by selecting the column name. To customize which columns display in
the table, click the Show columns button in the lower left corner of the table.
Note Filters, column sorting, and column visibility settings are persistent for a given user, regardless of the device used to log in. This means that when a particular user logs in, he or she sees the same filtering, sorting, and visibility settings the next time he or she logs in until the filters are cleared or the sorting and visibility settings are changed.
Prerequisites to accepting keys
Before you can accept a new minion key, you must first complete the following on the node:
n Install the minion service.
n Configure the minion to communicate with the Salt master.
For more on minion installation, see Salt Installation Reference and follow instructions specific to the minion service. For more on minion configuration, see Minion Configuration Reference.
Activity
The Activity workspace is used to monitor the status of jobs and other activities. The Activity workspace gives visibility to many types of events and activities, such as scheduled jobs, ad-hoc jobs, compliance or vulnerability assessments.
For more on assessments, see Using and Managing SaltStack SecOps.
Note A SaltStack SecOps license is required to run compliance and vulnerability assessments.
The Activity workspace has three sections that sort jobs or other activities by status:
n Completed - Used to monitor the status of completed jobs or activities. See Job returns for more information.
n In Progress - Used to monitor the status of jobs or activities that are currently running.
n Upcoming - Used to monitor the status of upcoming jobs or activities.
The table in each section shows information about the latest jobs or activities and events, such as the event’s status, origin, schedule (if available), job, target information, and more. You can customize which columns are displayed as needed. See Filtering and sorting table columns for more information.
Using and Managing SaltStack Config
VMware, Inc. 37

Jobs and other activities move from In Progress to Completed when all associated nodes have finished reporting.
Note In some cases, a job or activity could move to Completed with Partial status. This happens if minions fail to respond when the Salt master checks whether the minion is still working on an assigned task. In these cases, SaltStack Config checks with the Salt master to see if the job or activity is running. If the Salt master reports that the job or activity has finished running, the job or activity moves to the Completed tab, but displays with Partial status.
The minions might not return anything due to system misconfiguration, network outages, client issues, or machine failures. In these cases, the job might show with Partial status under the Completed tab.
You can pause or stop jobs or activities that are in progress, or skip upcoming iterations of a scheduled job or activity. You can also adjust the table view to show or hide additional details.
Note As part of VMware’s initiative to remove problematic terminology, the term Salt master will be replaced with a better term in SaltStack Config and related products and documentation. This terminology update may take a few release cycles before it is fully complete.
Accessing the Activity workspace
To use the Activity workspace, click Activity on the side menu. Activity expands to show the three possible job or activity statuses:
n Completed
n In Progress
n Upcoming
Select the status of the jobs or activities that you are interested in viewing or managing. See Activity for a description of the different activity statuses.
Pausing a job or activity
To pause one or more ongoing jobs or activity:
1 In the Activity menu, click the In Progress sub-menu to view ongoing jobs or activities.
2 Check the box next to the jobs you want to pause.
3 Click Pause, then click Pause again in the confirmation dialog.
Note Depending on the job or activity size and progress, it may finish running before it can be paused.
Stopping a job or activity
To stop one or more ongoing job or activity:
1 In the Activity menu, click the In Progress sub-menu to view ongoing jobs or activities.
Using and Managing SaltStack Config
VMware, Inc. 38
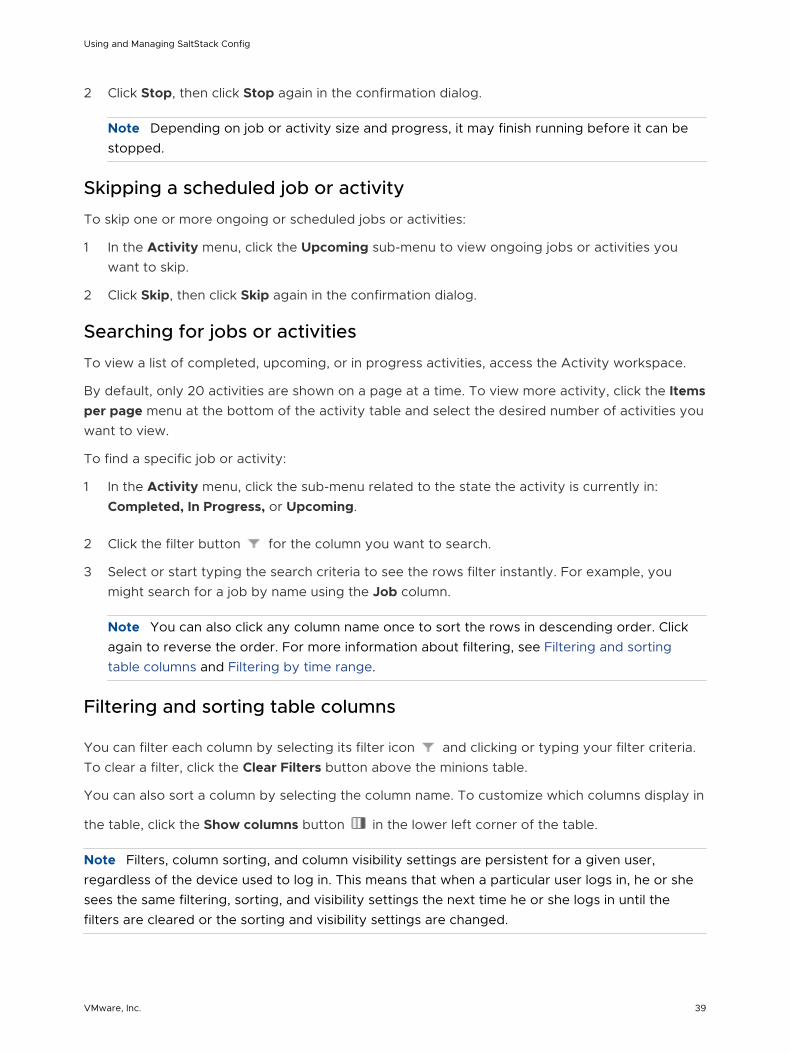
2 Click Stop, then click Stop again in the confirmation dialog.
Note Depending on job or activity size and progress, it may finish running before it can be stopped.
Skipping a scheduled job or activity
To skip one or more ongoing or scheduled jobs or activities:
1 In the Activity menu, click the Upcoming sub-menu to view ongoing jobs or activities you want to skip.
2 Click Skip, then click Skip again in the confirmation dialog.
Searching for jobs or activities
To view a list of completed, upcoming, or in progress activities, access the Activity workspace.
By default, only 20 activities are shown on a page at a time. To view more activity, click the Items per page menu at the bottom of the activity table and select the desired number of activities you want to view.
To find a specific job or activity:
1 In the Activity menu, click the sub-menu related to the state the activity is currently in: Completed, In Progress, or Upcoming.
2 Click the filter button for the column you want to search.
3 Select or start typing the search criteria to see the rows filter instantly. For example, you might search for a job by name using the Job column.
Note You can also click any column name once to sort the rows in descending order. Click again to reverse the order. For more information about filtering, see Filtering and sorting table columns and Filtering by time range.
Filtering and sorting table columns
You can filter each column by selecting its filter icon and clicking or typing your filter criteria. To clear a filter, click the Clear Filters button above the minions table.
You can also sort a column by selecting the column name. To customize which columns display in
the table, click the Show columns button in the lower left corner of the table.
Note Filters, column sorting, and column visibility settings are persistent for a given user, regardless of the device used to log in. This means that when a particular user logs in, he or she sees the same filtering, sorting, and visibility settings the next time he or she logs in until the filters are cleared or the sorting and visibility settings are changed.
Using and Managing SaltStack Config
VMware, Inc. 39

Filtering by time range
You can display activity for a specific time ranges by filtering or sorting the Start time column.
Clicking the filter icon opens a menu that allows you to select the time range for the activity you want to see, such as Past hour or Next 7 days.
You can also enter custom time ranges by selecting Custom from the filter menu. A date and time pop up box appears where you can select your desired date and time range.
Statuses
Each tab in the Activity workspace includes additional status details for each job or activity as follows.
In Progress
Status Description
Running The job or activity is currently running.
Paused The job or activity began running but was paused by a user. You can resume the activity as needed.
Pausing The job or activity will pause when there is an ideal moment between executing different tasks.
Resuming The job or activity is attempting to continue running.
Queued The job or activity is attempting to start running.
Stopping The job or activity is looking for an opportunity to stop, between executing different tasks.
Upcoming
Status Description
Scheduled The job or activity will run at a set time, indicated in the Start time column.
Skipping The scheduled job or activity will not run at its indicated time.
Disabled The job or activity is part of a disabled schedule, and will not run.
Note See Schedules for more information.
Completed
Status Description
Completed The job or activity has finished running.
Partial The job or activity is still waiting for some minions to return, though the Salt master has reported that the activity has finished running.
Skipped The job or activity was scheduled for the indicated time but did not run.
Using and Managing SaltStack Config
VMware, Inc. 40

Status Description
Disabled The job or activity is part of a disabled schedule; it was scheduled for the indicated time but did not run.
Stopped The job or activity was stopped and cannot be resumed.
Failed The job or activity ran but failed on one or more minions.
Jobs
Jobs are used to run remote execution tasks, apply states, and start Salt runners. The Jobs workspace is where you can create, configure, and save job settings for reuse. Jobs are generally intended for system operations that need to be automated and executed multiple times and saves configuration time.
For example, you might have a job that creates and deploys a virtual machine and installs a base set of applications. You could run this job every time a new virtual machine needs to be deployed to ensure the same set of applications and configurations are applied to every deployment.
See Chapter 4 SaltStack Config jobs workflow for an overview of how to use the Jobs workspace along with the other workspaces in SaltStack Config to create and use jobs for configuration management.
You can run jobs from within the Jobs workspace, the Minions workspace, or from other screens in the SaltStack Config user interface, depending on the nature of the job. You can also run jobs on a regular schedule or you could run them only as needed. Typically, jobs that run only when needed are referred to as ad-hoc jobs.
For more information about running jobs, see:
n Running a job for information about running jobs in the Jobs workspace
n Minions for information about running jobs in the Minions workspace
n Schedules for information about running jobs on a schedule
Note As part of VMware’s initiative to remove problematic terminology, the term Salt master will be replaced with a better term in SaltStack Config and related products and documentation. This terminology update may take a few release cycles before it is fully complete.
Job requirements
Each job in the Jobs workspace has predefined settings. You can edit settings on existing jobs or create a new job with its own unique settings.
In order for a job to run, it must include:
n A function (the task that the job is meant to accomplish)
n Either a target, a Salt master, or multiple Salt masters
n Role-based permissions
Using and Managing SaltStack Config
VMware, Inc. 41

You can define a target in a job’s settings or leave the target undefined to select a target each time the job runs. Defining a job’s target also prevents that job from running on nodes on which it should not be run. See Minions for more information.
The Jobs workspace allows you to define role-based access to each job. In addition to defining role access on the job, you must also assign roles permission to execute corresponding tasks in the Roles editor. See Chapter 7 Setting up Role Based Access Controls (RBAC) for more information.
You can create new jobs and edit existing ones from the Jobs workspace. Once job settings are defined, you can run ad-hoc jobs, or create schedules to run jobs in the future. See Schedules for more information.
SaltStack Config includes a Run Command control that allows you to run a single command without defining a reusable job. This is useful for executing commands quickly, or running one-off jobs that are not part of your everyday workflow, for example when troubleshooting, or during initial configuration. See Minions for more information.
You can also define which roles can view, edit, run, and delete different jobs.
Accessing the Jobs workspace
To use the Jobs workspace, click Config > Jobs on the side menu.
Creating a job
To create a new job:
1 In the Jobs workspace, click Create job.
2 Enter details for the new job. The details to enter depend on the type of job you want to create. See Job settings for more information.
3 Click Save. The job is now available to run.
Running a job
To run an ad-hoc job:
1 In the Jobs workspace, click the menu next to the job you want to run.
2 Click Run Now.
3 In the popup, select a target to run the job on.
Note If the job is configured to include a target or Salt master, this is displayed for confirmation.
4 Select additional options as required.
n Set notification preferences
n Select Run as Test (dry run) to run job as a test as required.
Using and Managing SaltStack Config
VMware, Inc. 42

5 Click Run Now.
Note You can also run jobs from the Minions workspace. See Minions.
Searching for a job
To view a list of the available jobs that have been created so far, access the Jobs workspace.
By default, only 20 jobs are shown on a page at a time. To view more jobs, click the Items per page menu at the bottom of the jobs table and select the desired number of jobs you want to view.
To find a specific job:
1 In the Jobs workspace, click the filter button for the column you want to search.
2 Start typing the search criteria to see the rows filter instantly. For example, you might search for a job by the Salt module involved in a job by filtering the Function column.
Note You can also click any column name once to sort the rows in descending order. Click again to reverse the order. For more information about filtering, see Filtering and sorting table columns.
Filtering and sorting table columns
You can filter each column by selecting its filter icon and selecting or typing your filter criteria. To clear a filter, click the Clear Filters button above the jobs table.
You can also sort a column by selecting the column name. To customize which columns display in
the table, click the Show columns button in the lower left corner of the table.
Note Filters, column sorting, and column visibility settings are persistent for a given user, regardless of the device used to log in. This means that when a particular user logs in, he or she sees the same filtering, sorting, and visibility settings the next time he or she logs in until the filters are cleared or the sorting and visibility settings are changed.
Viewing job returns
To view job returns:
1 In the side menu, click Activity and then Completed to see a list of completed jobs.
2 Select a job ID in the JID column to view the job return details. See Job returns for more information.
Editing a job
To update or change a job:
1 In the Jobs workspace, select a job.
Using and Managing SaltStack Config
VMware, Inc. 43

2 Edit job details as needed and click Save when finished.
Defining job permissions
As an administrator, you can restrict which users can run specific jobs. To define these permissions:
1 In the Jobs workspace, select a job to open the job’s details.
2 In the job details page, click Role Access.
3 In the dialog, select the level of access to enable for different roles and click Save.
4 In the job details page, click Save.
Note In addition to defining role access on the job, you must also assign roles permission to execute corresponding tasks in the Roles editor. See Chapter 7 Setting up Role Based Access Controls (RBAC) for more information.
Job settings
Define job settings based on the following options.
n Name - Enter a name for the job. This will show in the Jobs, Minions, and Activity workspaces, as well as in the Roles editor.
n Description - Enter a description for the job (optional). This description will show in your list of jobs in the Jobs workspace.
n Command - Specify the command to run, choosing from:
n salt - define a job to run on a target group of minions.
n salt-run - define a job to run on a Salt master or group of Salt masters.
Note SaltStack Config includes a Run Command control that allows you to run a single command without defining a reusable job. This is useful for executing commands quickly, or running one-off jobs that are not part of your everyday workflow, for example when troubleshooting, or during initial configuration. For more information, see Minions.
n Targets - A target is the group of minions, across one or many Salt masters, that a job’s Salt command applies to. A Salt master can also be managed like a minion and can be a target if it is running the minion service. When salt is selected in Commands, you can optionally specify
the target group of minions to run the job on. If the field is left blank, you will be prompted to select a target each time the job runs.
n All Salt Masters - The Salt master is a central node used to issue commands to minions. When salt-run is selected in Commands, you can specify which Salt master you should run
the job against. By default, All Masters is selected. If you turn this option off, the Master menu appears.
Using and Managing SaltStack Config
VMware, Inc. 44

salt-run jobs are also known as Salt runners. Salt runners are modules used to execute
convenience functions on the Salt master. For more on using salt-run, see Job settings.
n Salt Masters - When salt-run is selected in Commands and All Masters is turned off, the
Master menu appears. Click this menu and select the specific Salt master you want to run the job against. You can select multiple Salt masters if needed.
n Function - Enter a function to define what happens when the job runs. You can define a single remote execution job, a state file job, or a Salt runner job. For a list of Salt functions, see Salt Module Reference.
n Single remote execution jobs - To define a single remote execution job, include a function and any necessary arguments in the job settings.
n State file jobs - A state file job applies states to a target, and can be based on at least one command. A state function is a function contained inside a state module which can manage the application of a particular state to a system. State functions frequently call out to one or more execution modules to perform a given task. A highstate applies all states defined in the top file. You can view and add state files in the File Server. See File Server.
To apply a state file to a job, use the state.apply function. To perform a highstate, use
the state.apply or state.highstate function in the job settings.
When you add a state call to a job, additional fields display where you can select the state files you want to apply. You can also pass optional pillar overrides in JSON format.
Note Pillar data provided on the job page is sent along with the job and other authenticated minions might be able to see it. For increased data protection, assign sensitive data in standard pillar instead. See Pillars.
For more on Salt States, see the Salt documentation: How do I use Salt States?.
n Salt runners - A salt-run job applies to a Salt master or group of Salt masters. salt-run jobs are also known as Salt runners. Salt runners are modules used to execute
convenience functions on the Salt master. You can use Salt runners to run orchestration, power minions remotely, call webhooks, and more. They are useful for executing tasks centrally or from a central starting point. For example, you could apply a highstate to all minions associated with a given Salt master.
To configure an orchestration runner job, use the state.orchestrate function. When
you add an orchestration call to a job, additional fields display where you can list the orchestration files you want to apply. You can also pass optional pillar overrides in JSON format.
Note Pillar data provided on the job page is sent along with the job and other authenticated minions might be able to see it. For increased data protection, assign sensitive data in standard pillar instead. See Pillars.
Using and Managing SaltStack Config
VMware, Inc. 45

For more on Salt runners, see the Salt Runners Reference.
n Environments - Select the environment where the state or orchestration file is located. This is a subdirectory of the root directory in the File Server. See File Server.
n Test (dry run) - Run a test job and generate a mock job return. If you select Test, the job will not run and no changes will be made. If this option is left unselected, you can choose to run the job as a test later when you run the job. Test (dry run) is available only for certain functions. For more information, contact your administrator.
Job returns
The Job returns page provides details about results of each job that has finished running. You can use this page to view job details and read the output from a job. SaltStack Config includes several custom outputters to format results for common job types.
Jobs are used to run remote execution tasks, apply states, and start Salt runners. See Jobs for more information.
You can view a list of completed jobs for a given minion or from a given time period. You can also view a detailed report of each job return. For more on custom outputters included in job returns, see Custom Outputters.
Minions are nodes running the minion service, which can listen to commands from a Salt master and perform the requested tasks. See Minions for more information about minions.
Note As part of VMware’s initiative to remove problematic terminology, the term Salt master will be replaced with a better term in SaltStack Config and related products and documentation. This terminology update may take a few release cycles before it is fully complete.
Viewing job results by minion
To view the job results for a specific minion:
1 Go to the Minions workspace and select a minion ID.
2 In the Details page, select the Activity tab.
The Activity tab shows a list of up to the last 500 jobs run against the selected minion in the user interface.
3 Select the JID of the job return you want to view.
Note SaltStack Config returns data through Salt masters and then to RaaS, so the job history tab might not show data immediately. If you are viewing job results for a single job run immediately after starting the job, the results tab might show incomplete data until the Salt masters have processed the returns and pushed them back to RaaS.
Using and Managing SaltStack Config
VMware, Inc. 46

Viewing job results by time of completion
To view job results for a specific time-date range:
1 Go to Activity > Completed.
The Completed section shows a list of completed jobs. You can display activity for a specific time ranges by filtering or sorting the Start time column. For more information about filtering results by time, see Activity. For more on the Activity workspace, see Activity.
2 Click the JID of the job return you want to view to open the job details.
Downloading job results
To download the job results for a specific job:
1 Click a JID, following steps to view job results by minion or time of completion as explained in the previous sections.
2 Click Download in the upper right of the job return to open a menu, then select JSON.
The .json file starts downloading to your browser.
Job return information fields
The job results page displays the following details about the selected job run:
Title
The title of the job results page indicates the job’s function and job ID (JID).
Subtitle
The subtitle will vary depending on the type of job that was executed. The subtitle displays specific information about this job run, which may include:
n The job name
n The target (such as All Minions)
n The Salt master or Salt masters that issued the job
n The name of the user who ran the job
n Return details
Job detail views
Change the return data formatting by selecting from the following options.
Summary
A list of minions targeted by the job. Each minion includes additional details you can view by opening or closing its respective dropdown.
Custom outputter
Using and Managing SaltStack Config
VMware, Inc. 47

A customized representation of the job results designed for the function associated with the job. See Custom Outputters for more information.
Raw
Raw JSON data structure with minimal formatting.
Job info
High-level job overview, including minions expected to return as well as those that did not return.
Custom Outputters
SaltStack Config includes several custom outputters to format results for common job types. The name of the outputter varies depending on which job or function was run. The possible outputter titles include the following:
n State jobs
n test.ping
n disk.usage
n status.cpuinfo
n network.routes
n network.ipaddrs
n network.netstat
n cmd.run
n cmd.script
n pkg.list_pkgs
n User Information
Examples of Custom Outputters
This section includes examples of a selection of custom job return outputters.
State Jobs
Returns results of a given state module when running a state job, including state.sls,
state.highstate, state.apply. A state function is a function contained inside a state module
which can manage the application of a particular state to a system. State functions frequently call out to one or more execution modules to perform a given task. For more on Salt States, see Salt documentation: How do I use Salt States?. For more on jobs, see Jobs.
Using and Managing SaltStack Config
VMware, Inc. 48

Test.ping
Returns results of running test.ping for each node in the target group.
Disk Usage
Returns usage information for volumes mounted on minions in the target group.
CPU info
This outputter includes different views you can apply using the left column.
Using and Managing SaltStack Config
VMware, Inc. 49

Routes
Returns currently configured routes from routing table.
IP Address
Returns a list of IPv4 addresses assigned to the host.
Netstat
An interactive graph displays connections between minions and Salt masters.
Using and Managing SaltStack Config
VMware, Inc. 50

List packages
Displays packages currently installed on each minion.
User Information
Returns information for OS-defined user groups on the targeted minions.
Schedules
The Schedules are used to automate job execution. You can use the Schedules workspace to schedule one-off or recurring jobs to monitor your environment, run jobs continuously at any time, disable schedules and skip jobs, or run a scheduled job.
See Chapter 4 SaltStack Config jobs workflow for an overview of how to use the Jobs workspace along with the other workspaces in SaltStack Config to create and use jobs for configuration management.
Using and Managing SaltStack Config
VMware, Inc. 51

SaltStack Config includes a range of scheduling options, allowing you to build custom schedules based on your organization’s needs. Scheduling is also available through the SaltStack Config Scheduler API.
You can access your scheduled jobs by the job’s status (such as upcoming or completed), in the Activity workspace in the Upcoming section. See Activity for more information. Also see Jobs for instructions on defining job settings.
You can create schedules to run jobs at set intervals over a defined time period. The Schedules workspace also has controls you can use to run or skip a job or disable an entire schedule.
Accessing the Schedules workspace
To use the Schedules workspace, click Config > Schedules on the side menu.
Creating a schedule
To configure a job to run on a specific schedule:
1 In the Schedules workspace, click Create Schedule.
2 Enter a schedule name and define custom settings. See Schedule settings for more information.
3 Click Save.
Checking job status
To check the status of a job that is running on a schedule:
1 In the Schedules workspace, click on a schedule name.
2 You can select the different status tabs to view completed, in progress, and upcoming jobs associated with the schedule. For more about the different statuses, see Statuses.
Note You can also view the status of scheduled jobs in the Activity workspace. See Activity.
Editing a schedule
To change a schedule:
1 In the Schedules workspace, click on a schedule name.
2 Click Edit Schedule.
3 Edit the schedule settings as needed. See Schedule settings for more information.
4 Click Save.
Using and Managing SaltStack Config
VMware, Inc. 52

Running a scheduled job
To run a scheduled job:
1 In the Schedules workspace, select the checkbox associated with the scheduled job.
Note You can select more than one schedule to run multiple jobs at once.
2 Click Run now.
3 In the confirmation popup, click Run now.
Note If the Run now button appears disabled to you, you might not have permission to run schedules on this target or within the SaltStack Config user interface in general. Contact your SaltStack Config administrator to request access.
Skipping a scheduled job instance
To skip an instance of a job that has been scheduled:
1 In the Schedules workspace, click on a schedule name and go to the Upcoming tab.
2 Select the checkbox associated with the job instance you want to skip.
3 Click Skip.
4 In the confirmation dialog, click Skip.
Disabling an entire schedule
To disable an entire schedule to prevent it from running:
1 In the Schedules workspace, select the checkbox associated with the schedule.
2 Click Disable.
3 In the confirmation dialog, click Disable.
Note You can also disable or enable a schedule inside a specific schedule itself.
Schedule settings
Define schedule settings based on the following.
Job
Specify the job to include in the schedule. See Jobs for more information.
Target
A target is the group of minions, across one or many Salt masters, that a job’s Salt command applies to. A Salt master can also be managed like a minion and can be a target if it is running the minion service. This field allows you to choose either a target group or Salt master, depending on the selected command.
Using and Managing SaltStack Config
VMware, Inc. 53

Timezone
Jobs included in the schedule run based on the time zone indicated in this field. Jobs are saved as UTC, which means jobs will run at the specified UTC time no matter which time zone the RaaS server may be in. The time zone is saved for translation to or from UTC to your local time.
SaltStack Config automatically detects your local time zone from your browser and uses this time zone as your default. You cannot change your local time zone.
Schedule frequency
Choose the schedule frequency from Recurring, Repeat Date & Time, Once, or Cron Expression. Additional options are available, depending on the scheduled activity, and on the schedule frequency you choose.
Recurring
Set an interval for repeating the schedule, with optional fields for start or end date, splay, and maximum number of parallel jobs.
Repeat Date & Time
Choose to repeat the schedule weekly or daily, with optional fields for start or end date, and maximum number of parallel jobs.
Once
Specify a date and time to run the job.
Cron
Enter a cron expression to define a custom schedule based on Croniter syntax. See the CronTab editor for syntax guidelines. For best results, avoid scheduling jobs fewer than 60 seconds apart when defining a custom cron expression.
Statuses
The Schedules workspace displays the current status for each schedule. When you view details for a schedule, you can also see the current status for each scheduled job.
Schedule
Schedules can be either enabled or disabled.
Enabled
All jobs will continue to run according to schedule settings without interruption.
Disabled
All jobs included in the schedule are disabled and will not run.
Scheduled jobs
Using and Managing SaltStack Config
VMware, Inc. 54

Schedules can include completed, in progress, and upcoming jobs. See Activity for more information.
Pillars
The Pillars workspace allows you to create and manage pillar data that is stored natively in SaltStack Config. Pillars are structures of data defined on the Salt master and passed through to one or more minions, using targets. They allow confidential, targeted data to be securely sent only to the relevant minion. Pillars are useful for limiting user access to private data. For example, you could use pillars to allow a user to run a job that requires authentication to an external service without accessing those authentication credentials themselves. In this case, you would assign the user access to the given job and target, but not to the pillar containing sensitive authentication details.
Note As part of VMware’s initiative to remove problematic terminology, the term Salt master will be replaced with a better term in SaltStack Config and related products and documentation. This terminology update may take a few release cycles before it is fully complete.
Pillar data is encrypted in the SaltStack Config database and is not stored in plain text. It is encrypted during transmission, and made visible only to minions specified in the pillar target settings. For more on assigning pillar to a target, see Assigning pillar.
A target is the group of minions, across one or many Salt masters, that a job’s Salt command applies to. A Salt master can also be managed like a minion and can be a target if it is running the minion service. Minions are nodes running the minion service, which can listen to commands from a Salt master and perform the requested tasks. See Minions for more information.
Pillar data can be stored in either of the following:
n A private pillar in the Pillars workspace
n A job’s settings
n In other pillar roots in the API (RaaS) server
Pillar data stored within a job is less secure than data in a standard pillar, as any user with permission to access the job can also view the pillar data. Jobs are used to run remote execution tasks, apply states, and start Salt runners. See Jobs for more information.
For more on pillar in Salt, see Salt pillar walkthrough.
In the Pillars workspace you can create new pillars and assign pillars to targets. When you assign a pillar to a target, you can also choose to refresh the pillar.
Accessing the Pillars workspace
To use the Pillars workspace, click Config > Pillars on the side menu.
Using and Managing SaltStack Config
VMware, Inc. 55

Creating a pillar
To create a new pillar:
1 In the Pillars workspace, click Create.
2 Enter pillar data in JSON format and click Save.
Note Pillar names do not have to be unique. This might result in different items displaying with the same name in the Web Console.
Assigning pillar
To assign a pillar to a specific target:
1 In the Pillars workspace, select a pillar.
2 Click Update Targets.
3 In the dialog, select targets you want to apply the pillar to.
In addition to selecting a target, select Refresh pillar to make the pillar available to the selected target immediately.
4 Click Save.
The pillar data is now available to all minions in the selected target.
Note You can also assign a pillar to a target in the Minions workspace. See Minions.
Pillars and the All Minions target
The All Minions target is read-only, and cannot be assigned pillar data. To assign pillar data to all minions, create a new target that matches all minions (*). See Minions for more information.
Value precedence
If the same pillar data is defined in multiple sources, SaltStack Config selects the data to apply in the following order of precedence:
1 Values passed directly on the job
2 Values in the SaltStack Config user interface (in the Pillars workspace)
3 Values in other pillar roots
You can change this behavior by adjusting the order of pillar_roots in the Salt master
configuration.
Pillar data format
External pillar data must be in JSON format. YAML is not currently supported.
Using and Managing SaltStack Config
VMware, Inc. 56

Pillar dependencies
Files
Pillar data is useful for passing data into states, reactors, and other types of files. Make sure when creating or updating pillar data to also update pillar references in any corresponding files. See File Server.
Targets
Pillar data attached to a target is used when associated jobs run on the target. Make sure when updating pillar data to also refresh pillar on its associated targets. See Assigning pillar.
File Server
The file server is a location for storing both Salt-specific files, such as top files or state files, as well as files that can be distributed to minions, such as system configuration files. In the File Server workspace, you can view, author, and save state files (YAML), modules, and text files.
Files in SaltStack Config are useful for configuring states you can then apply through jobs. Jobs are used to run remote execution tasks, apply states, and start Salt runners. See Jobs for more information.
Files are also used to iterate over pillar entries in an associated pillar. Pillars are structures of data defined on the Salt master and passed through to one or more minions, using targets. They allow confidential, targeted data to be securely sent only to the relevant minion. See Pillars.
In the File Server workspace, you can create new files and clone existing ones. You can also edit and delete files.
Note As part of VMware’s initiative to remove problematic terminology, the term Salt master will be replaced with a better term in SaltStack Config and related products and documentation. This terminology update may take a few release cycles before it is fully complete.
Accessing the File Server workspace
To use the File Server workspace, click Config > File Server on the side menu.
Creating a file
To create a new file:
1 In the File Server workspace, click Create.
2 Under base, enter the base environment name.
3 Under Path Name, enter the path to the file, and file name.
Note File names do not have to be unique as long as the files are in different paths or environments. This might result in different items displaying with the same name in the SaltStack Config user interface.
Using and Managing SaltStack Config
VMware, Inc. 57

4 Enter the file body and click Save.
You can now view the file in the file server. Only Superusers can view files created by other users.
Cloning a file
To copy or duplicate a file:
1 In the File Server workspace, select the file you want to clone.
2 Click Clone.
A copy of the file is now available in the file server, with -2 appended to the file name.
Deleting a file
To delete a file:
1 In the File Server workspace, select the required file.
2 Click Delete.
3 In the confirmation dialog, click Confirm.
Integration with existing file servers
If you have existing file server backends configured, such as Git or S3, they continue to work as expected, and jobs created and executed in the user interface can use these backends with no additional configuration.
If you plan to use the SaltStack Config file server in conjunction with other file servers, be aware that files that exist in user interface take precedence if they also exist in other file servers.
fileserver_backend: -sseapi -roots -git
You can change this behavior by re-ordering the entries in the fileserver_backend section in
the /etc/salt/master.d/raas.conf file.
Environments
SaltStack Config file server provides the ability to define multiple file environments.
Environments let you isolate files that have the same path and name. By default, files and pillar data exist in the base environment. This is the environment you select when you create a state run job.
You can select the environment in which you want to create a file by specifying it during creation. See Creating a file.
Using and Managing SaltStack Config
VMware, Inc. 58

File server access
Users do not need file server privileges to run jobs. For example, if you create a job that runs the apache/init.sls file (state.applyapache), users with access to this job can run it even though
they can’t view, edit, or delete the apache/init.sls file directly.
Only Superusers can view files created by other users. Only the Superuser and Admin default roles are granted access to view and make changes to the file server. See Chapter 7 Setting up Role Based Access Controls (RBAC).
Using and Managing SaltStack Config
VMware, Inc. 59

Setting up Single Sign-On (SSO) and directory services 6SaltStack Config integrates with third-party identity and access management solutions to enable users to login to the SaltStack Config user interface.
SaltStack Config has a variety of ways to authenticate users:
n Native authentication - You can use the native authentication method by setting up local users. Local users are users whose username and password are natively stored in SaltStack Config. You can manage local user settings, such as user passwords, in the SaltStack Config user interface.
n SAML - You can also set up custom single sign-on authentication through other identity providers using Security Assertion Markup Language (SAML).
n LDAP or Active Directory - If your organization uses a Lightweight Directory Access Protocol (LDAP) or Active Directory server, you could manage those user settings in LDAP and then synchronize those settings in SaltStack Config.
n OAuth and OIDC - SaltStack Config also supports OAuth and OpenID Connect (OIDC).
This chapter includes the following topics:
n Native authentication
n Configure OAuth and OIDC single sign-on (SSO)
n Configure SAML single sign-on (SSO)
n Configure directory services using the LDAP protocol
n Adding a custom message to the login screen
Native authentication
You can set up native authentication for SaltStack Config in the user interface using the Local Users workspace. Local users are users whose username and password are natively stored in SaltStack Config. You can use this workspace to manage local user settings, such as user passwords. You can also use this workspace to create or clone local users.
VMware, Inc. 60

Roles in SaltStack Config give you the ability to create specific management roles, and then add the appropriate users to those roles. Roles control which minions each user can view and which operations a user can perform in the user interface. See Chapter 7 Setting up Role Based Access Controls (RBAC).
By default, a local user is associated with each Salt master key used for authentication.
Creating a Local User
To create a new users:
1 Click Administration > Local Users on the side menu. Then, click the Create button.
2 Enter a username and password, and select any roles you want to add the user to.
All new users are added to the User role by default. For more on roles, see Default roles and settings.
3 Click Save.
Note Only superusers, or users with Create user permission, are able to create local users. Usernames are not case-sensitive.
Cloning a Local User
1 Under Administration > Local Users, select the user you want to clone and click Clone.
2 Enter a username and password, and select any roles you want to add the user to.
3 Click Save.
Changing user settings
1 Under Administration > Local Users, select the user you want to update.
2 With the user selected, change user settings as required. You can update the username, password, and assigned roles.
3 Click Save.
Changing root password
Change the root password in the user interface using the instructions in the previous section.
Using and Managing SaltStack Config
VMware, Inc. 61

Configure OAuth and OIDC single sign-on (SSO)
You can use the Authentication workspace to configure SSO in SaltStack Config to work with an authentication system compatible with the OAuth and OIDC protocols.
Note You can use more than one system at a time to authenticate users in SaltStack Config if needed. For example, you could use both a SAML-based IdP or LDAP-based IdP while simultaneously storing some user credentials natively on the RaaS server. However, SaltStack Config does not allow configuring more two SAML providers or two LDAP providers at the same time.
About OAuth and OIDC SSO
OAuth Sign-On (SSO) is a functionality that many organizations configure during the implementation of SaltStack Config. SSO provides many benefits, including:
n Reducing the time users spend signing into services for the same identity. After users sign in to one of the services at an institution, they are then automatically authenticated into any other service that uses SSO.
n Reducing password fatigue. The user is only required to remember one set of credentials rather than several.
Many services provide implementations of the OAuth protocol with support for OIDC including OKTA, Google, Microsoft, GitLab, Zendesk, Apple, Keycloak, Salesforce, and more.
Note SaltStack Config currently only supports OAuth and OIDC authentication through OKTA and Google.
How OAuth and OIDC works with SaltStack Config
When a user attempts to login to SaltStack Config using an OAuth identity:
1 SaltStack Config requests authorization to access service resources from the user.
2 If the user authorizes the request, SaltStack Config receives an authorization grant.
3 SaltStack Config requests an access token from the authorization server (API) by presenting authentication of its own identity.
4 If the application identity is authenticated and the authorization grant is valid, the authorization server (API) issues an access token to the SaltStack Config.
5 SaltStack Config requests the resource from the resource server (API) and presents the access token for authentication.
6 If the access token is valid, the resource server (API) serves the resource to the application and the user is allowed to login to SaltStack Config.
Using and Managing SaltStack Config
VMware, Inc. 62

OAuth and OIDC authentication terminology
Term Definition
OAuth OAuth 2.0 is an open protocol (also sometimes referred to as a standard) for access delegation in which the user can perform actions on a website after the user’s identity has been authenticated with a security token. It is commonly used as a way for users to give applications access to their information on other third-party applications without giving them their access credentials (passwords).
OAuth is browser-based single sign-on (SSO). OAuth allows access tokens to be issued to third-party clients by an authorization server, with the approval of the resource owner. The third party then uses the access token to access the protected resources hosted by the resource server.
OIDC Open ID Connect
Open ID Connect (OIDC) is a simple identity layer on top of the OAuth 2.0 protocol. OIDC enables clients to verify the user’s identities based on the authentication performed by an authorization server. It can also obtain basic profile information about the user across applications.
Resource owner The resource owner is the user who authorizes an application to access their account. The application’s access to the user’s account is limited to the scope of the authorization granted, such as read or write access.
Client The client is the third-party application that needs access to the user’s account, which, in this case is SaltStack Config.
Authorization server The authorization server hosts the protected user accounts and credentials. It verifies the identity of the user and then issues access tokens to the client. It is frequently accessed through the service’s API.
Resource server The resource server is the API server that is used to access the user’s information. It handles authenticated requests after the client has obtained an access token. Smaller deployments typically have only one resource server, and is often built as part of the same code base or same deployment as the authorization server.
Large scale deployments may have more than one resource server. Each resource server is distinctly separate, but they all share the same authorization server.
Pre-configuration steps
Before configuring OAuth and OIDC in SaltStack Config, ensure that you have the necessary access to your OAuth 2.0 service for your organization (either OKTA or Google) and that you are relatively familiar with their process for registering applications.
Note SaltStack Config currently only supports OAuth and OIDC authentication through OKTA and Google.
Register SaltStack Config as an application with OKTA or Google
On your OAuth service’s website, enter basic information about SaltStack Config such as the name, website, etc. After registering the application, you’ll be given a client secret that you’ll need to provide to SaltStack Config.
Using and Managing SaltStack Config
VMware, Inc. 63

One of the most important things when creating the application is to register one or more redirect URLs the application will use. The redirect URLs are where the OAuth 2.0 service will return the user to after they have authorized the application.
Configure an identity provider
To set up SSO using your organization’s preferred OAuth and OIDC service:
1 Click Administration > Authentication on the side menu.
2 Click Create.
3 From the Configuration Type menu, select OIDC.
4 In the Name field, assign this configuration a descriptive name.
5 From the OIDC Provider menu, select either OKTA or Google.
6 Complete the following fields with the information about your SaltStack Config installation:
n Base URI
n API URL (for OKTA configurations only)
n Key
n Secret
Note For descriptions of these fields, see OIDC information fields.
7 Click Save.
The OIDC configuration for SaltStack Config is now complete.
Configure RBAC for OIDC
For OIDC, the user will first need to login to SaltStack Config in order to be added as a user in the local user database. After the users have logged in initially, the user’s roles and permissions will be managed the same way you would manage users whose credentials are stored locally in SaltStack Config on the RaaS server.
After the user has signed in initially, you can use the Roles workspace to assign appropriate roles and permissions to that user. For more on the Roles workspace, see Chapter 7 Setting up Role Based Access Controls (RBAC).
OIDC information fields
All of the OIDC authentication information fields are required. Enter information for your OIDC authentication configuration as follows.
Note If you need assistance setting up your connection, contact your administrator.
Using and Managing SaltStack Config
VMware, Inc. 64

Field Description
Name The name of the authentication connection used by SSE. This name will appear in the sidebar when you are logged into the Authentication workspace and should be unique if you are setting up multiple configurations.
OIDC Provider Select your OIDC identity provider from this menu to display settings specific to your provider.
Base URI The base URL used by your organization in SaltStack Config, also known as the host server address. This URL is formatted as either a FQDN or IP address, such as https://example.com.
API URL The API URL supplied by your identity provider. This field is only displayed if your identity provider is OKTA.
Key The key supplied by your identity provider. In OKTA, the key is referred to as the Client ID.
Secret The secret supplied by your identity provider. In OKTA, the key is referred to as the Client Secret.
Configure SAML single sign-on (SSO)
You can use the Authentication workspace to configure SSO in SaltStack Config to work with an authentication system compatible with the SAML protocol.
Note You can use more than one system at a time to authenticate users in SaltStack Config if needed. For example, you could use both a SAML-based IdP or LDAP-based IdP while simultaneously storing some user credentials natively on the RaaS server. However, SaltStack Config does not allow configuring more two SAML providers or two LDAP providers at the same time.
About SAML SSO
SAML Single Sign-On (SSO) is functionality that many organizations configure during the implementation of SaltStack Config. SSO provides many benefits, including:
n Reducing the time users spend signing into services for the same identity. After users sign in to one of the services at an institution, they are then automatically authenticated into any other service that uses SSO.
n Reducing password fatigue. The user is only required to remember one set of credentials rather than several.
Many services provide implementations of the SAML SSO protocol including ADFS, OneLogin, Okta, Shibboleth, SimpleSAMLPHP, Google Suite, and more.
How SAML SSO works with SaltStack Config
When SaltStack Config receives a successful identity assertion from any of its supported authentication integrations, it searches for a user login that matches the value of the asserted identity. If it finds a matching login, it logs in the associated user account.
Using and Managing SaltStack Config
VMware, Inc. 65

For example, if SaltStack Config receives an ADFS assertion for a user and the value for the configured identity attribute is “fred,” SSE will search for a login with a username of “fred.” If one is found, the associated user is logged in. Otherwise, the login is unsuccessful.
SAML authentication terminology
Acronym Definition
SAML Security Assertion Markup Language (SAML, pronounced SAM-el)
SAML is an open protocol (also sometimes referred to as a standard) for exchanging authentication and authorization data between parties. In particular, it is used to exchange data between an identity provider and a service provider.
SAML is browser-based single sign-on (SSO). All communications happen through the user agent (the browser). There is no communication between a service provider (such as SaltStack Config) and an identity provider (such as Azure AD). This separation allows authentication to occur across security domains where a service provider can be in one (possibly public) domain and the identity provider in a separate, secured network segment.
IdP Identity provider
The job of the IdP is to identify users based on credentials. An identity provider is software that provides a service that complies with the identity provider part of the SAML Specification. The IdP typically provides the login screen interface and presents information about the authenticated user to service providers after successful authentication.
Sample identity providers:
n ADFS
n Azure AD
n Google SAML
n Shibboleth
n Okta
n OneLogin
n PingFederated
n SimpleSAMLPHP
SP Service provider or relying party
An SP (service provider) is usually a website providing information, tools, reports, etc. to the end user. A service provider is software that provides a service that complies with the service provider part of the SAML Specification SaltStack Config. Microsoft products (such as Azure AD and ADFS) call the SP a relying party.
In this scenario, SaltStack Config is the service provider. SaltStack Config accepts authentication assertions from the IdP and allows users to login.
An SP cannot authenticate with an IdP unless it is listed in the list of approved services. Configuring an SP with a list of approved IdPs is part of the configuration process.
SSO Single sign-on
Single sign-on is an authentication system in which a user isn’t required to log in to a second service because information about the authenticated user is passed to the service.
Using and Managing SaltStack Config
VMware, Inc. 66

Acronym Definition
SLO Single logout
When a user logs out of a service, some IdPs can subsequently log the user out of all other services the user has authenticated to.
SaltStack Config does not currently support SLO.
RBAC Role-based access control
Role-based access control, also known as role-based security, is an advanced access control measure that restricts network access based on a person’s role within an organization. The roles in RBAC refer to the levels of access that employees have to the network.
Employees are only allowed to access the network resources or perform tasks that are necessary to effectively perform their job duties. For example, lower-level employees usually do not have access to sensitive data or network resources if they do not need it to fulfill their responsibilities.
SaltStack Config can support RBAC with SAML configurations using the Roles workspace. However, the user will first need to login to SaltStack Config in order to be added as a user in the local user database and managed by the Roles workspace. For more information, see Configuring RBAC for SAML.
How to create a new SAML configuration
Before creating a new SAML configuration for SaltStack Config, read through these steps to ensure you are familiar with the configuration process.
Pre-configuration steps
Before configuring SAML in SaltStack Config:
n Install the SAML identity provider (IdP) and ensure it is running. This topic will not provide instructions for the installation of any IdP. Contact your IdP administrator for support.
n Ensure that you have access to the credentials and configuration data provided by the IdP. In addition, see the following section about Creating a service provider certificate.
Creating a service provider certificate
You need to generate a certificate to add SaltStack Config as an approved service provider with your IdP. Your SaltStack Config service provider needs an RSA key pair. You enter the private and public key values in several places when you configure SAML for SaltStack Config.
Note This key pair can be generated on any system. It doesn’t need to be created on the SSE server. These commands run on any system with openssl utilities installed.Alternatively, you could use Salt to generate the self-signed certificate. See the documentation for self-signing certificates with the TLS Salt module.
To create the certificate:
1 Generate a private key, called cert.perm, using the following command:
openssl genrsa -out cert.pem 2048
Using and Managing SaltStack Config
VMware, Inc. 67

2 Create the public key associated with the private key you just created in the previous step. The following command walks you through the process:
openssl req -new -x509 -key cert.pem -out cert.pub -days 1825
3 As this command runs, answer the prompts as needed, such as your:
n Country name
n State or province name
n Locality or city name
n Organization or company name
n Organizational unit name
n Server hostname
n Email address
You now have the public and private key pair that will be used in your SAML configuration. Record these public and private key pairs for easy access when working through the rest of the configuration process. Proceed to the next section for instructions about Setting up a SAML configuration.
Setting up a SAML configuration
Before completing the steps in this section, ensure you have generated the public and private keys for SaltStack Config as your service provider. For more instructions, see Creating a service provider certificate.
To set up SAML SSO using your organization’s preferred IdP in SaltStack Config:
1 Click Administration > Authentication on the side menu.
2 Click Create.
3 From the Configuration Type menu, select SAML.
The workspace displays the supported settings for the SAML configuration type.
4 In the Settings tab, complete the following fields with the information about your SaltStack Config installation:
n Name
n Base URI
n Entity ID
n Company Name
n Display Name
Using and Managing SaltStack Config
VMware, Inc. 68

n Website
Note For descriptions of these fields, see SAML information fields.
5 In the Private Key field, copy the private key you generated when you created the service provider certificate for SaltStack Config. For more information, see Creating a service provider certificate.
6 In the Public Key field, copy the public key you generated when you created the service provider certificate for SaltStack Config.
7 Complete the fields with the relevant contact information for your:
n Technical contact
n Support contact
8 In the Provider Information section, complete the following fields with the metadata about your identity provider (IdP):
n Entity ID
n User ID
n Email
n Username
n URL
n x509 certificate
Note ADFS, Azure AD, and Google SAML are examples of common identity providers. You’ll fill in these fields with information provided by your IdP. For more information about these fields, see SAML information fields.
9 OPTIONAL: Check the Attribute Statement Check box if you want SaltStack Config to check the SAML Attribute Statements for user profiles. This option is checked by default.
10 Click Save.
The SAML configuration for SaltStack Config is now complete. Proceed to the next section for instructions about Configuring the IdP with service provider information.
Configuring the IdP with service provider information
Before completing the steps in this section, ensure you have configured SAML in SaltStack Config first. For more information, see the instructions about Setting up a SAML configuration.
To complete your SAML configuration, the identity provider needs two important pieces of data:
n The AssertionCustomerService URL
n The public (x509) certificate (public key) you generated when you created the service provider certificate for SaltStack Config. For more information, see Creating a service provider certificate.
Using and Managing SaltStack Config
VMware, Inc. 69

The AssertionCustomerService URL is the web address your service provider uses to accept SAML messages and artifacts when establishing an identity assertion. In this case, SaltStack Config is the service provider.
The following is an example of the typical format for the AssertionCustomerService URL: https://<your-sse-hostname>/auth/complete/saml
After you’ve provided this data to your IdP, proceed to the next section for instructions about Creating attribute mappings.
Creating attribute mappings
SaltStack Config pulls information about the user from the inbound SAML assertion. For that reason, the IdP must ensure that the required values are sent as additional attributes. The process for mapping these attributes is specific to each SAML identity provider. For assistance creating attribute mappings, refer to your IdP’s documentation or contact your administrator.
SaltStack Config needs to define the user’s following attributes:
n User ID
n Email
n Username
Many organizations will map all three of these values to a single attribute: the user’s email address. The user’s email address is often used because it is typically unique across an organization.
Configuring RBAC for SAML
SaltStack Config supports creating roles and permissions for users in various roles. RBAC for SAML is managed the same way you would manage users whose credentials are stored natively in SaltStack Config on the API (RaaS) server. For more on the Roles workspace, see Chapter 7 Setting up Role Based Access Controls (RBAC).
After creating roles, you can then add SAML users and assign them to roles. For more information, see the following section about Adding users.
Adding users
By default, new users are registered in SaltStack Config only after a user’s first successful login with SAML. Alternatively, you can add users manually to pre-register these users in SaltStack Config.
To manually add users:
1 In the Authentication workspace, select your SAML configuration from the list of Authentication Configs to open your configuration settings.
2 In the configuration settings, click the User tab.
3 Click the Create button.
Using and Managing SaltStack Config
VMware, Inc. 70

4 In the Username field, enter the credentials for the user you want to add. This username must be identical to their assigned SAML username.
Note Ensure that this username is accurate. Once a user has been created, their username cannot be changed or renamed.
5 In the Roles field, select any roles you want to add the user to. All new users are added to the User role by default. For more information, see Configuring RBAC for SAML.
6 Click Save.
Note After a user has been manually created, they can only be deleted before their first login. After the user has logged in initially, the delete button is still available in this workspace, but it no longer works.
Troubleshooting and validating the configuration
After you’ve configured SSO in SaltStack Config, try logging in as a typical user to ensure that the login process works as expected and that roles and permissions are correct.
To troubleshoot potential errors, try:
n Using the SAML tracer tool, which is available for Firefox and Chrome web browsers.
n Viewing the /var/log/raas/raas log messages.
Note Users cannot be deleted through the SaltStack Config user interface or using the API after initial provisioning with a successful SAML authentication.
SAML configuration reference
When configuring a SAML-based authentication system for SaltStack Config, you need to fill out various information fields. It is also possible to use the API to set up a SAML-based system, but it is not recommended.
SAML information fields
All of the SAML authentication information fields are required. Enter information for your SAML authentication configuration as follows.
Note If you need assistance setting up your connection, contact your administrator.
Basic
Using and Managing SaltStack Config
VMware, Inc. 71

Field Description
Name The name of the authentication connection used by SSE. This name will appear in the sidebar when you are logged into the Authentication workspace and should be unique if you are setting up multiple configurations. This name cannot be changed after initial creation.
Example: Acme SSO
Base URI The base URL used by your organization in SaltStack Config, also known as the host server address. This is formatted as either a FQDN or IP address, such as https://example.com. This
must not end with a slash.
Example: https://sse.example.com
Entity ID A unique ID for this SaltStack Config service provider. While SAML tradition is for this to be a URL-like string, any type of string is allowed. It must be unique compared to the other SAML applications used by your organization. Ensure that you use this same ID when registering SaltStack Config as an application.
Example: https://sse.example.com/saml
Org Information
Field Description
Company Name The name of your organization.
Display Name The name to display as your organization’s name.
Website The URL for your organization’s website. This URL can be anything and has no bearing on SSO functionality.
Private Key The private key you generated, also known as the cert.pem. This key should be in PEM format. For more information, see Creating a service provider certificate.
Public Key The public keys and certificates you generated, also known as the cert.pub. This key should be in PEM format, the cert.pub. For more information, see Creating a service provider certificate.
Technical Contact
Field Description
Name The name of the employee who is primarily responsible for the application at your organization. This information is required by the SAML protocol and will be passed on to the SAML provider. SaltStack Config does not use this information directly.
Email The email address of the technical contact.
Support Contact
Field Description
Name The name of an employee who can be contacted if the primary technical contact for the application is unavailable. This information is required by the SAML protocol and will be passed on to the SAML provider. SaltStack Config does not use this information directly.
Email The email address of the support contact.
Using and Managing SaltStack Config
VMware, Inc. 72

Provider Information
Field Description
Entity ID The Entity ID of the identity provider (IdP).
Example of an Azure AD Entity ID: https://sts.windows.net/2f09bc14-a1f0-48ce-8280-0a09e775e40d/
User ID A reference to a mapped SAML attribute that will contain the permanent user ID.
Email A reference to a mapped SAML attribute that will contain the email address.
Username A reference to a mapped SAML attribute that will contain the username.
URL The URL used to access your identity provider’s SAML endpoints.
x509 Certificate The X.509-formatted certificate with an embedded public key generated through your identity provider’s system. This key must be in PEM format.
Security Checks
Field Description
Attribute Statement Check Check this box if you want SaltStack Config to check the SAML Attribute Statements for user profiles.
Configuring SAML from the Command Line (CLI)
This guide strongly recommends configuring SAML using the SaltStack Config user interface rather than the command line. These instructions are included for reference.
To set up most configuration standards using the CLI:
1 Login as a RaaS user:
sudo su raas
2 OPTIONAL: This step is only necessary if you manually installed SaltStack Config. On the RaaS server, install the OpenSSL .xml file that is included in the installer files. Use the following command:
yum install xmlsec1-openssl
Note RedHat doesn’t have xmlsec1 readily available in any default repositories. One possible workaround is to download the RPMs from a CentOS machine and transfer them to RedHat.
3 Navigate to the directory where you intend to save the configuration file. Any directory path is acceptable.
Using and Managing SaltStack Config
VMware, Inc. 73

4 Create a YAML file with the necessary configuration information that is required by your identity service provider. For examples of how to format these configuration files, see the Sample configuration files.
Note For descriptions of the various fields, see SAML information fields.
5 Execute the configuration file using the following commands:
raas save_sso_config <filepath>
Sample configuration files
Sample SAML configuration file for Google
Replace the placeholder text in the following sample with the information provided by your IdP:
name: Googlebackend: social_core.backends.saml.SAMLAuthsettings: base_uri: https://example.com saml_sp_entity_id: raas saml_org_info: en-US: name: Name of Your Organization displayname: Display Name for Your Organization url: https://example.com saml_technical_contact: givenName: Name of Your Technical Contact emailAddress: email@my_technical_contact.com saml_support_contact: givenName: Name of Your Support Contact emailAddress: email@my_support_contact.com saml_enabled_idps: saml: entity_id: https://accounts.google.com/o/your_organization_id attr_user_permanent_id: Your organization's permanent ID attr_email: email@my_email_with_identity_provider.com attr_username: Your organization's username for the IdP url: https://accounts.google.com/o/saml2/your_organization_id x509cert: | -----BEGIN CERTIFICATE----- Insert certificate block of text here -----END CERTIFICATE----- saml_sp_private_key: | -----BEGIN PRIVATE KEY----- Insert private key block of text here -----END PRIVATE KEY----- saml_sp_public_cert: | -----BEGIN CERTIFICATE----- Insert certificate block of text here -----END CERTIFICATE-----
Sample SAML configuration file for Okta
Using and Managing SaltStack Config
VMware, Inc. 74

Replace the placeholder text in the following sample with the information provided by your IdP:
name: Oktabackend: social_core.backends.saml.SAMLAuthsettings: base_uri: https://example.com saml_sp_entity_id: https://example.com/auth/complete/saml saml_org_info: en-US: name: Name of Your Organization displayname: Display Name for Your Organization url: https://example.com saml_technical_contact: givenName: Name of Your Technical Contact emailAddress: email@my_technical_contact.comsaml_support_contact: givenName: Name of Your Support Contact emailAddress: email@my_support_contact.comsaml_security_config: wantAttributeStatement: Falsesaml_enabled_idps: okta: entity_id: https://www.okta.com/your_organization_id attr_user_permanent_id: Your organization's permanent ID attr_email: email@my_email_with_identity_provider.com attr_username: Your organization's username for the IdP url: https://example.okta.com/app/your_organization_id x509cert: | -----BEGIN CERTIFICATE----- Insert certificate block of text here -----END CERTIFICATE----- saml_sp_private_key: | -----BEGIN PRIVATE KEY----- Insert private key block of text here -----END PRIVATE KEY----- saml_sp_public_cert: | -----BEGIN CERTIFICATE----- Insert certificate block of text here -----END CERTIFICATE-----
Sample OIDC configuration file for Google
Replace the placeholder text in the following sample with the information provided by your IdP:
name: Name of Your Organizationbackend: social_core.backends.google_openidconnect.GoogleOpenIdConnectsettings: base_uri: example.com google_openidconnect_key: your_id.apps.googleusercontent.com google_openidconnect_secret: your_secret
Using and Managing SaltStack Config
VMware, Inc. 75

Updating an SSO configuration from the Command Line (CLI)
To update a configuration standard from the CLI:
1 Login as a RaaS user:
sudo su raas
2 Navigate to the directory in which you have stored the configuration file. Update the configuration file as necessary.
3 Save the configuration file using the following command:
raas save_sso_config <filepath>
Deleting an SSO configuration from the Command Line (CLI)
If access to the SaltStack Config user interface is available, it is recommended that you delete an SSO configuration using the UI. However, you can delete an SSO configuration using the API (RaaS) if needed.
To delete an SSO configuration, you need to find the slug that is assigned to the configuration that you would like to delete. The slug is a representation of the configuration’s name separated by a dash - mark with all lowercase letters. For example, the slug might be name-of-your-
organization. For SAML with Google, the slug is google.
1 In the API (RaaS), generate a list of your SSO backends using the following command:
client.api.settings.get_sso_backends()
2 From the list of SSO backends, find the slug for the configuration you want to delete. Then enter the following command, replacing the placeholder text with your configuration slug:
client.api.settings.delete_sso_config('slug-for-your-configuration')
Configure directory services using the LDAP protocol
You can use the Authentication workspace to configure directory services for SaltStack Config using the LDAP protocol. This protocol is used for connecting to services such as Active Directory or Microsoft Azure.
Note You can use more than one system at a time to authenticate users in SaltStack Config if needed. For example, you could use both a SAML-based IdP or LDAP-based IdP while simultaneously storing some user credentials natively on the RaaS server. However, SaltStack Config does not allow configuring more two SAML providers or two LDAP providers at the same time.
Using and Managing SaltStack Config
VMware, Inc. 76

Authentication process
SaltStack Config uses the following back-end process to authenticate LDAP-based systems:
n Preview - When you preview your connection settings, SaltStack Config retrieves a sample list of users and groups from your LDAP server so you can verify you have entered the correct configuration parameters.
n Login - When a user enters credentials in the SaltStack Config login form, the backend server checks for a match in the database at that time. It then initiates a multi-step lookup process and, upon finding a match, authenticates the user. Given this lookup process, enabled individual users in enabled groups do not appear in the Roles workspace until the user's first login.
n Background tasks - SaltStack Config runs a background job periodically to look up each linked group and user in the Directory Service connection to ensure it still exists. If the group or user has been removed, the backend server deactivates its link in the database.
n Archived groups and users - Any groups you remove from your Directory Service connection are archived. Even though these groups are inactive and users can’t log in, they’re still visible in the Roles workspace and can be selected. This also applies to any removed users previously visible in the Roles workspace.
n Nested groups - When working with nested groups, by enabling a parent group, you also enable all child groups by default.
Configuring an LDAP connection
To configure LDAP, first create a connection, then enable specific LDAP users and groups to authenticate to SaltStack Config. Once you have enabled groups or users, you can define their Role-Based Access Control (RBAC) settings.
You can choose to prefill the fields with default settings customized to your directory service, such as Active Directory or OpenLDAP.
Note The following steps should be completed by an experienced LDAP or Active Directory administrator who understands the overall LDAP system layout. Contact your administrator for assistance.
To set up an LDAP directory service:
1 (Optional) Before configuring LDAP, it might be helpful to test your connection and queries using a third-party tool. For AD users, you might use LDP or ADSI Edit. For Linux users, the recommended tool is ldapsearch.
Note For more on testing with these tools, see How to verify and troubleshoot a Directory Service connection in the Support Center.
2 Click Administration > Authentication on the side menu.
3 Click Create.
Using and Managing SaltStack Config
VMware, Inc. 77

4 From the Configuration Type menu, select LDAP.
5 (Optional) Under Settings, click Prefill Defaults and select your directory service from the dropdown.
The default entries populate according to your selection. However, certain entries such as User Search DN are incomplete. Make sure to verify that entries match your directory service schema, and to replace placeholder text with the correct values for your service.
6 Enter or verify information for your LDAP connection.
Basic
Field Description
Name Name of LDAP connection. Since this is a display name only, enter any name would be useful to help differentiate this authentication backend from others.
Host LDAP host server address, formatted as either a FQDN or IP address.
Port Port where LDAP server is configured. The default is 389 for unencrypted LDAP, and
636 for LDAP over SSL.
Background Sync SaltStack Config validates all users and group against the authentication backend at a set interval defined (in minutes) here.
SSL Enable SSL
Select to connect to the LDAP server over a Secure Sockets Layer (SSL) using the certificate specified in your RaaS server settings. If no configuration is provided, the system certificates store will be used to validate the SSL connection. For more on setting up the RaaS server, see Set up SSL certificates in the Installing and Configuring SaltStack Config guide.
Important As a best practice, select Enable SSL. When this option is left unselected, SaltStack Config transmits information in plain text over an insecure connection.
Validate Certificate
Select to ensure the SSL certificates are validated upon connecting. Leave unselected to skip validation, for example when using self-signed certificates (not recommended for production).
Using and Managing SaltStack Config
VMware, Inc. 78

Authentication
Field Description
Auth Base DN Base LDAP Distinguished Name. This is the location groups and users are queried from, for example DC=sse,DC=example,DC=com.
Note The LDAP details page includes separate input fields for Person Object Class, Account Attribute Name, Group Class, Group Attribute Name, and Sync Scheduling, as described below. Therefore, do not include these objects in the Base DN field.
Admin Bind DN Administrator DN configured for the LDAP server. SaltStack Config uses this to authenticate to the directory for user and group lookups. Enter input based on the following syntax: cn=Administrator,cn=Users,dc=example,dc=com.
Admin Bind DN Password The administrator’s individual password.
This is stored with encryption in the database. It is not stored in plaintext.
Auth Bind DN Filter Filter applied to select a specific user. The result of this search is a user DN that SaltStack Config uses to bind to the directory and grant the user access to SaltStack Config. This is useful for limiting the number of results that are returned from a given search.
Note Because the filter syntax can become quite complex, a best practice is to test the entry using LDP, ldapsearch, or a similar tool to validate your entry and make
any adjustments before filling out this field.
The following sample filter would return only an account matching the provided username belonging to the DevOps or Level II groups.
(&(objectclass=user)(sAMAccountName={username})(|(memberOf=CN=DevOps,OU=Groups,OU=TestCompanyHQ,DC=adtest,DC=com)(memberOf=LevelII,OU=Groups,DC=adtest,DC=com)))
If you are using prefilled defaults, make sure to replace placeholder text with the correct values for your directory service.
Note When configuring a forest structure, leave this field blank.
Remote Unique ID Attribute Name
Name of the value used to identify unique entries. This is the unique ID attribute for all entries. In AD this is ObjectGUID.
Using and Managing SaltStack Config
VMware, Inc. 79

Groups
Field Description
Group Search DN The search base for groups. For example, in AD this might be cn=Groups,dc=example,dc=com. Indicates where in the directory to search for
groups. Use along with Group Search Scope below.
Group Search Scope Indicates directory search depth from the base indicated in Group Search DN and can have one of four values:
baseObject
Value 0, often referred to as base. Use this to search only for this object and
no other.
singleLevel
Value 1, often referred to as one. Use this to consider only immediate children
of the base entry for matches.
wholeSubtree
Value 2 (or SUBTREE in ldap3), often referred to as sub. Use this to search to
base and all of its subordinates to any depth.
subordinateSubtree
Value 3, often referred to as subordinates. This is the same as wholeSubtree but the base search entry is ignored.
Group Search DN Filter Search filter for extracting groups from the directory. This is typically (objectClass=group), but in some AD configurations it might be
(objectCategory=group). Use in addition to Group Class for more granularity.
Group Class Object class name used to define groups, for example groupOfNames.
Group Name Attribute The name of the attribute that you want to use for group name. Enter a single-value attribute, not multi-value.
Group Membership Attribute The name of the attribute in the user entry that contains the group name, for example, memberOf.
Users
Field Description
User Search DN The search base for users, for example, cn=Users,dc=example,dc=com in AD or
cn=people,cn=accounts,dc=example,dc=com in other directory services. Indicates
where in the directory to search for users. Use along with User Search Scope below.
User Search Scope Indicates directory search depth from the base indicated in User Search DN and can have one of four values. See the four values described in Group Search Scope.
User Search DN Filter Search filter for extracting users from the directory. This is typically (objectClass=person) but in some AD configurations it might be
(objectCategory=user).
Using and Managing SaltStack Config
VMware, Inc. 80

Field Description
Person Class Directory Service class name containing users you want to enable to log in. Most systems (including Active Directory) use person, but some may prefer user or
inetOrgPerson.
User ID Attribute The unique name of the user account attribute. For AD, this is sAMAccountName. For
other services, it is often uid or memberUid.
User Membership Attribute The name of the attribute in the group entry that contains the user name. Possible examples include member or uniquemember.
7 To preview your settings without saving, click Update Preview.
The preview window shows users and groups selected for your connection. You can select either the Groups or Users tab to preview users and groups associated with the service as needed.
If you’re not able to successfully preview your connection, see Troubleshooting LDAP connections for tips.
8 Click Save.
Your LDAP configuration has been saved. To verify the configuration is correct, you might want to try logging in to SaltStack Config from a test user account. If you’re not able to successfully log in, see Troubleshooting LDAP connections for tips.
Note For LDAP configurations, SaltStack Config stores the connection settings, including the groups and users identified. It retrieves only groups and users within the scope you have defined and does not synchronize the entire directory. For more on how this works, see Authentication process.
Over time you might need to refresh or re-sync your LDAP directory. For example, you should update your directory if you added new users and you want to enable them in SaltStack Config.
Working with groups and users
After setting up your LDAP connection, you then need to configure directory service groups and ensure users can log in to SaltStack Config.
Enabling groups and users
To configure directory service groups:
1 In the Authentication workspace, select the required LDAP configuration.
2 Select the Groups tab to see a list of groups retrieved from your LDAP configuration.
Note If you’re retrieving a large number of groups, the page might take up to a minute to load.
3 Select the groups you want to enable in SaltStack Config.
Using and Managing SaltStack Config
VMware, Inc. 81

4 Select the Users tab to see a list of users retrieved from your LDAP configuration.
Note If you’re retrieving a large number of users, the page might take up to a minute to load.
5 Select the users you want to enable in SaltStack Config.
Note Any users included in enabled groups are already selected and can’t be deselected.
6 Click Save.
You can now define Role-Based Access Control (RBAC) settings for the selected groups. However, the Roles workspace allows you to manage settings for individual users included in the selected groups only after the user’s first login. For more information, see Authentication process.
For more on RBAC in SaltStack Config, see Chapter 7 Setting up Role Based Access Controls (RBAC).
Removing groups
To remove access for an entire group:
1 In the Authentication workspace, select the required LDAP configuration.
2 Select the Groups tab to see a list of groups included in the connection. Enabled groups are selected.
3 Deselect groups you want to remove from SaltStack Config and click Save.
Users included in the deselected groups can no longer log in to SaltStack Config.
Note Any groups you remove from your LDAP configuration are archived. Even though they're inactive and users can’t log in, they’re still visible in the Roles workspace. For more information, see Authentication process. For more on managing roles, see Chapter 7 Setting up Role Based Access Controls (RBAC).
Using and Managing SaltStack Config
VMware, Inc. 82

Removing users
To remove access and archive specific users:
1 In the Authentication workspace, select the LDAP configuration.
2 Select the Users tab to see a list of users included in the connection. Enabled users are selected.
3 Deselect users you want to remove from SaltStack Config and click Save.
Note You can’t deselect individual members of an enabled group. For more information, see Enabling groups and users.Any users you remove from your Directory Service connection are archived. Even though they’re inactive and can’t log in, they’re still visible in the Roles workspace if the user has previously logged in.For more information, see Authentication process.
Troubleshooting LDAP connections
If you’re having trouble configuring your LDAP connection, this section might help troubleshoot a few common issues.
I’m not able to preview my connection
If you’re not able to preview your groups and users, in many cases this is due to a connection problem between your LDAP server and SaltStack Config, or an invalid entry in the LDAP configuration form. Try the following:
1 Ensure that TCP connections from SaltStack Config to the selected port on the LDAP server are allowed.
2 Double-check your form entries and validate syntax using a third-party tool. See How to verify and troubleshoot a Directory Service connection
3 If neither of the previous items helps resolve the issue, see Other issues.
4 If none of the above items helps, contact SaltStack Support.
When trying to preview my connection, the page gets stuck loading
If the page gets stuck loading for over two minutes, restart the RaaS service, then delete and re-create the configuration, following these steps:
1 Open the RaaS log.
tail -f /var/log/raas/raas
The log contains an error similar to the following:
[ERROR :256][ForkPoolWorker-2:10253][ldap_preview_background_task(some_uuid)]Task ldap preview_background_task[some_uuid]raised unexpected: KeyError('ad-1_preview')
Using and Managing SaltStack Config
VMware, Inc. 83

2 Stop and then restart the RaaS service.
systemctl stop raassystemctl start raas
3 Return to the SaltStack Config user interface and delete the LDAP connection.
Note You might want to copy and paste your configuration entries into a backup text file before deleting.
4 Create the LDAP configuration again.
Other issues
If you’ve already configured and saved your LDAP connection but users aren’t able to log in, or if you are encountering any other issues, check the raas logs with extended debugging enabled to
help determine the root cause.
To enable extended debugging:
1 On RaaS, open /etc/raas/raas.
2 Make the following changes:
n Under Loggingoptions, uncomment log_file_loglevel:debug
n Under AD/LDAPdriverconfiguration, uncomment log_level and set to
log_level:EXTENDED
3 Stop and then restart the RaaS service.
systemctl stop raassystemctl start raas
4 View the raas log. For descriptions of some common error messages, see Common error
messages.
tail -f /var/log/raas/raas
Common error messages
Some common errors you might see in the logs are as follows:
n Wrong settings for connection (SSL). Adjust your SSL settings.
[raas.utils.validation.schemas.settings][DEBUG :546 ][Webserver:9096]Error while connecting to AD/LDAP Server. SSL connection issues: socketssl wrapping error: [Errno 104] Connection reset by peer
Using and Managing SaltStack Config
VMware, Inc. 84

n Wrong password for Admin BIND DN. Verify and re-enter your password.
[raas.utils.rpc ][DEBUG :284 ][Webserver:9095]Processed RPC request(129360670417695). Response:{'riq': 129360670417695, 'ret': None, 'error': {'code': 3004, 'message':'Request validation failure.', 'detail': {'_schema':['Credentials are not valid']}}, 'warnings': []}
n The prefilled default Auth Bind DN Filter is creating a conflict. Leave the field blank, or use {username} instead of {{username}}.
Note You might encounter this error when you’ve already saved your LDAP connection, but users aren’t able to log in.
[var.tmp._MEIBCyG76.raas.mods.auth.ldap][DEBUG :903 ][Webserver:9096]Running _get_auth_backend_user with this search_filter: (&(objectclass=person)(sAMAccountName={username}))
[var.tmp._MEIBCyG76.raas.mods.auth.ldap][DEBUG :931 ][Webserver:9096]Could not find any user using '(&(objectclass=person)(sAMAccountName={username}))'as the search filter in the ldap backend under the ad-1 configuration.Trying remote_uid 'None'
[var.tmp._MEIBCyG76.raas.mods.auth.ldap][DEBUG :963 ][Webserver:9096]Could not find any user using '(&(objectClass=person)(objectGUID=None))'as the search filter in the ldap backend under the ad-1 configuration.
Adding a custom message to the login screen
If desired, you can add a custom warning or informational message that appears at the top of your organization’s SaltStack Config login screen for all users. For example, you could add a legal notice or a warning to users as they log in.
The custom message can be of any length and has two available visual styles:
n info - The message is displayed in a dark blue box with white text and a informational icon.
n warning - The message is displayed in a dark orange box with white text and a warning icon.
To create a custom login screen message:
1 From the command line of the RaaS node server, navigate to the RaaS service configuration file at /etc/raas/raas and open the file in an editor.
Note In order to edit the RaaS configuration file, you need administrative access.
Using and Managing SaltStack Config
VMware, Inc. 85

2 Add the following section to the configuration file, replacing the placeholder message with your own message:
login_banner: enabled:true# Set to false to disable the message style:info# Alternate available style: warning message:> Your custom message here.
3 Save the file.
4 Restart the RaaS service:
systemctl restart raas
In a browser, verify that your custom message now appears in your organization’s SaltStack Config login page.
Removing a custom message from the login screen
To remove a custom login screen message:
1 From the command line of the RaaS node server, navigate to the RaaS service configuration file at /etc/raas/raas and open the file in an editor.
Note In order to edit the RaaS configuration file, you need administrative access.
2 Find the login_banner section of the configuration file.
3 Edit the file to set enabled to false:
login_banner: enabled:false style:info# Alternate available style: warning message:> Your custom message here.
4 Save the file.
5 Restart the RaaS service:
systemctl restart raas
In a browser, verify that your custom message has been removed.
Using and Managing SaltStack Config
VMware, Inc. 86

Setting up Role Based Access Controls (RBAC) 7With the SaltStack Config Role Based Access Control (RBAC) system, you can define permission settings for multiple users at once, as permission settings for a role apply to all users included in the role. You can define these settings in the Roles workspace in the usser interface.
Role permissions are additive. Users assigned to multiple roles receive access to a combination of all items granted from each role. This helps ensure users with similar backgrounds receive the same permission settings, and users with a range of responsibilities have access to everything they need.
SaltStack Config ships with a number of built-in roles that cannot be deleted. Additionally, you can create custom-defined roles for your organization’s unique needs. See Default roles and settings.
To give a role permission to complete a task, you must both define the permitted task, and also assign access to a resource or functional area. A permission is a broad category of allowed actions, whereas resource access allows you to define a specific resource (for example, a job or target) the action can be completed against. See Difference between permitted tasks and resource access.
Resource access for certain resource types and functional areas must be defined in the API (RaaS), rather than the Roles editor. See Resource access.
Creating a role
In some cases, cloning a role might be more convenient than creating a new one. You can clone an existing role, and then modify the clone as needed.
1 Click Administration > Roles on the side menu.
2 Click Create.
3 Enter a new name for your role.
4 Under Tasks, select permitted actions to grant the role. For a description of the available tasks, see Tasks.
5 Click Save.
You have completed the minimum steps necessary to create a role. For more on defining the role’s settings, see Editing a role.
VMware, Inc. 87

Cloning a role
1 In the Roles workspace, select the role you want to clone.
Note For security reasons, the built-in Superuser role cannot be cloned because it is a reserved name.
2 Click Clone.
3 Enter a new name for your role, and then click Save.
You have completed the minimum steps necessary to clone a role. For more on defining the role’s settings, see Editing a role.
Note Cloned roles inherit permitted tasks from the original role by default. Cloned roles do not inherit resource access, which must be defined separately. See Assigning access to a job or target.
Editing a role
1 In the Roles workspace, select the role you want to edit.
2 Select any tab (from Tasks, Resource Access, Groups, or Users) and edit role settings as needed.
For more on editing each tab, see below.
3 Click Save after making changes, before selecting a new tab.
Note The above describes how to edit a role using the standard editor. SaltStack Config also includes an advanced editor recommended for advanced users only. For more on the advanced editor, see Advanced permissions.
Setting permitted tasks
1 In the Roles workspace, select the role you want to edit.
2 Under Tasks, select permitted tasks to assign the role. Tasks represent common use cases in SaltStack Config. Enabling a task gives the role all permissions required to complete the task.
For task descriptions, see Tasks.
3 Click Save.
Note In addition to assigning a permission, you must enable access to the specific resources (such as a job or target) for the role to perform the action on. See Difference between permitted tasks and resource access.
Using and Managing SaltStack Config
VMware, Inc. 88

Assigning access to a job or target
1 In the Roles workspace, select the role you want to edit.
2 Under Resource Access, locate the required job or target, and select the access level you want to provide. For example, to allow a role to run jobs, you would select Read/Run for the job.
If the resource you want to select is not displaying, click Show all Targets or Show all Jobs, respectively.
In SaltStack Config, both jobs and targets are considered different types of resources. For more on resource access, see Resource access.
3 Click Save.
Note In addition to assigning resource access for a job, you must also assign access to a target for the job to run on, and assign permission to run jobs. See Difference between permitted tasks and resource access.
Adding or removing groups
1 In the Roles workspace, select the role you want to edit.
2 Under Groups, select the groups you want to include in the role.
Groups are imported through a directory service connection. If you don’t see the group you were expecting, ensure you have added the connection and synchronized groups.
Using and Managing SaltStack Config
VMware, Inc. 89

Any groups you remove from your Directory Service connection are archived. Even though they’re inactive and users can’t log in, they’re still visible in the Roles workspace.
Note Role permissions are additive. Users in groups assigned to multiple roles receive access to a combination of all items granted from each role.
3 Click Save.
The selected groups, including all users in those groups, are now granted all permitted tasks and resource access defined in the role settings.
Adding or removing users
Users inherit permission settings (such as being assigned to a role) from the groups they belong to. A best practice is to avoid adding individual users to a role, but rather add the user to a group that belongs to the role. All new users are included in the User role by default. See Default roles and settings.
1 In the Roles workspace, select the role you want to edit.
2 Under Users, select the users you want to include in the role.
The Roles workspace allows you to manage settings for individual users included in a Directory Service group only after the user’s first login. For more information, see Configure directory services using the LDAP protocol.
3 Click Save.
For more information
The following articles provide more in-depth information about RBAC related concepts for SaltStack Config.
This chapter includes the following topics:
n Task and resource access
n Default roles and settings
n Advanced permissions
Task and resource access
To define a role for role-based access controls (RBAC) in SaltStack Config, you must both define the permitted task and also assign resource access. A task is a specific operation that can be performed in the user interface, such a creating, editing, or running a job. A resource is an element of your environment, such specific masters, minions, targets, file data, etc.
Using and Managing SaltStack Config
VMware, Inc. 90

Tasks
Tasks represent common use cases in SaltStack Config. Enabling a task gives the role all permissions required to complete the task.
The Tasks tab includes the following options.
Task Description
Create and delete new targets
Role can create new targets. Users assigned to this role can edit and delete targets they have created, or other targets defined under Resource Access.
A target is the group of minions, across one or many Salt masters, that a job’s Salt command applies to. A Salt master can also be managed like a minion and can be a target if it is running the minion service. See Minions.
Modify pillar data Role can view, edit, and delete sensitive information stored in pillars. Users belonging to the role can edit or delete pillars they have created. They can also edit or delete other pillars if granted resource access (available through the API (RaaS) only).
Pillars are structures of data defined on the Salt master and passed through to one or more minions, using targets. They allow confidential, targeted data to be securely sent only to the relevant minion. See Pillars.
Modify file server Role can view the file server, and can create, edit, or delete files. Users belonging to the role can edit or delete files they have created. They can also edit or delete other files if granted resource access (available through the API (RaaS) only).
The file server is a location for storing both Salt-specific files, such as top files or state files, as well as files that can be distributed to minions, such as system configuration files. See File Server.
Run arbitrary commands on minions
Role can trigger commands outside of a job for the Salt master to pick up. Role is not limited to running only commands included in a given job’s definition.
Minions are nodes running the minion service, which can listen to commands from a Salt master and perform the requested tasks. See Minions.
Accept, delete, and reject keys
Role can accept, delete, and reject minion keys as needed for initial configuration.
A minion key allows encrypted communication between a Salt master and Salt minion. See Minion Keys.
Read and modify users, roles, permissions
Role can view users and associated data, as well as edit roles and permissions settings.
Note: This task applies only to the built-in Administrator and Superuser roles.
Roles are used to define permissions for multiple users who share a common set of needs.
Run commands on Salt masters
Role can run commands on Salt masters, such as to run orchestration.
Commands run against the Salt master are also called Salt runners. Salt runners are modules used to execute convenience functions on the Salt master. See Jobs. Adding this permission allows the role to be able to use the salt-run option from the Run command feature under the Minions tab.
Using and Managing SaltStack Config
VMware, Inc. 91

Task Description
Compliance - create, edit, delete, and assess
Role can create, edit, delete, and assess SaltStack SecOps Compliance policies. In addition to granting permission for this task, you must also define resource access for any targets you want the role to perform actions on. For example, if you want the OracleLinuxAdmin role to define policies for an OracleLinux target, you would assign
the role both permission to complete this task, and Read access to the OracleLinux target.
This task does not allow the role to remediate SaltStack SecOps Compliance policies.
SaltStack SecOps Compliance is an add-on to SaltStack Config that manages the security compliance posture for all the systems in your environment. See Using and Managing SaltStack SecOps for more information.
Note A SaltStack SecOps license is required.
Compliance - remediate Role can remediate any non-compliant minions detected in a SaltStack SecOps Compliance assessment.
SaltStack SecOps Compliance is an add-on to SaltStack Config that manages the security compliance posture for all the systems in your environment. See Using and Managing SaltStack SecOps.
Note A SaltStack SecOps license is required.
Compliance - update SaltStack content
Role can download updates to the SaltStack SecOps Compliance security library.
Vulnerability - create, edit, delete, and assess
Role can create, edit, delete, and assess SaltStack SecOps Vulnerability policies. In addition to granting permission for this task, you must also define resource access for any targets you want the role to run assessments against.
This task does not allow the role to remediate SaltStack SecOps Vulnerability policies.
SaltStack SecOps Vulnerability is an add-on to SaltStack Config that manages vulnerabilities on all the systems in your environment. See Using and Managing SaltStack SecOps.
Note A SaltStack SecOps license is required.
Vulnerability - remediate Role can remediate vulnerabilities detected in a SaltStack SecOps Vulnerability assessment.
SaltStack SecOps Vulnerability is an add-on to SaltStack Config that manages vulnerabilities on all the systems in your environment. See Using and Managing SaltStack SecOps.
Note A SaltStack SecOps license is required.
Resource access
The Resource Access tab allows you to define resource access for targets and jobs. A target is the group of minions, across one or many Salt masters, that a job’s Salt command applies to. A Salt master can also be managed like a minion and can be a target if it is running the minion service. Jobs are used to run remote execution tasks, apply states, and start Salt runners.
Using and Managing SaltStack Config
VMware, Inc. 92

The different levels of resource access are described below:
n Targets
n Read Only - Role can view the indicated target and its details, but cannot edit or delete it.
n Read/Write - Role can view and edit the indicated target.
n Read/Write/Delete - Role can view, edit, and delete the indicated target.
n Jobs
n Read Only - Role can view the indicated job and its details, but cannot edit or delete it, or run the job.
n Read/Run - Role can view and run the indicated job.
n Read/Run/Write - Role can view and edit the indicated job, as well as run it.
n Read/Run/Write/Delete - Role can view, edit, and delete the indicated job, as well as run it.
n Other resource types - Access to the following resource types must be defined using the API (RaaS). See Setting API permissions, or contact an administrator for assistance.
n Files in the file server
n Pillar data
n Authentication configuration
All other resource types, (excluding jobs, targets, and those listed above) do not require any specific resource access settings.
Difference between permitted tasks and resource access
A permitted task is broad category of allowed actions, whereas resource access is more granular, allowing you to specify a particular resource (such as a job or target) the action can be run against, as illustrated in the following diagram.
Using and Managing SaltStack Config
VMware, Inc. 93

In the following example, a role can run test.ping on the Linux target group. The role has the
following permissions settings:
n Read access to the Linux target
n Read/Run access to a job that includes the test.ping command
Cloned roles inherit permitted tasks from the original role by default. Cloned roles do not inherit resource access, which must be defined separately. See Assigning access to a job or target.
Using and Managing SaltStack Config
VMware, Inc. 94

Default roles and settings
SaltStack Config ships with a number of built-in roles that cannot be deleted. It also gives you tools to create custom-defined roles for your own unique needs.
Built-in roles
SaltStack Config includes the following built-in roles:
n User - The default role assigned to all new local users, SSO, and LDAP users. The User role covers fundamental permissions, such as Read access, needed to perform many basic functions. Users assigned this role can view and run jobs, as well as view job history, job returns, and reports for certain minions and job types, limited to the role’s resource access settings.
n Administrator - This role needs access to more advanced tools than the user role and thus can access System Administration. Administrators can view (and in some cases, edit) sensitive data found in user settings and pillar. The role can create, update, and delete resources such as files, jobs, and targets. Administrators can also manage keys as needed when configuring new nodes.
n Superuser - Superusers can perform any operation in SaltStack Config, which includes accessing System Administration. root is assigned to the Superuser role. The role cannot
be deleted or cloned. You can add any group or user to the role, but you cannot modify any of the role’s other settings. Only advanced users should be added to the Superuser role, as it effectively bypasses permissions restrictions.
Custom-defined roles
To supplement SaltStack Config’s built-in roles, you can create custom roles. Custom roles help you define more targeted resource access for different user profiles based on your organization’s needs. For example, you might create a CentOS Administrator role for users responsible for administering CentOS nodes, and a RedHat Administrator role for users responsible for RedHat nodes.
User
Resource type / Functional area Read Run Write Delete
Background jobs X
Commands X
File Server X
Jobs X X
License X
Salt Controller configuration X
Using and Managing SaltStack Config
VMware, Inc. 95

Resource type / Functional area Read Run Write Delete
Salt Controller file server X
Salt Controller X
Metadata Auth X
Minion X
Returner X
Schedule X X X
SaltStack SecOps Compliance Policies Note: a license is required X
SaltStack SecOps Vulnerability Policies Note: a SaltStack SecOps Vulnerability license is required
X
Targets X
All Minions commands X
Administrator
Resource type / Functional area Read Run Write Delete
Background jobs X
Commands X X X
Runner commands X
SSH commands X X X X
Wheel commands X
File Server X X X
Jobs X X X X
License X
Metadata Auth X X
Minion X X
Pillar X X X
Returner X X
Role X X X
Schedule X X X
SaltStack SecOps Compliance Policies Note: a SaltStack SecOps license is required X
Using and Managing SaltStack Config
VMware, Inc. 96

Resource type / Functional area Read Run Write Delete
SaltStack SecOps Vulnerability Policies Note: a SaltStack SecOps license is required X
Targets X X X
All Minions commands X
Users X X X
Superuser
The Superuser role can perform any operation in SaltStack Config.
Advanced permissions
In some situations, you may need to configure more granular role permissions, beyond the options available through the Tasks tab in the Roles editor. The Advanced tab provides more thorough control over tasks a role can complete.
The following steps should be completed by an experienced Salt administrator who understands your overall infrastructure.
Defining advanced permissions
1 Click Administration > Roles on the side menu. Then, select the Advanced tab.
2 Ensure the required role is selected in the Roles side panel.
3 Select or deselect permissions as needed, choosing from Read, Run, Write, or Delete for a range of functional areas.
See Items for more on available resource types and functional areas.
Minimum recommended permissions for typical user operation are highlighted in blue, as demonstrated in the following figure.
This figure shows two minimum recommended boxes on the left, one selected and the other unselected, compared with two normal boxes on the right.
4 Click Save.
Using and Managing SaltStack Config
VMware, Inc. 97

Permission types
Permission Description
Read Role can view a given type of resource or functional area. For example, if you assign the role ReadTargetGroups, the role can view the targets you specify, as well as details about each target.
Run Role can run a given type of operation. The type of operation permitted can vary, for instance you can assign permission to run arbitrary commands on minions, or to run commands on Salt controllers.
Write Role can create and edit a given type of resource or functional area. For example, you might assign WriteFileServer to an advanced user role, so the role can create or edit files in the file server. Users
with Write access can edit resources they have created, without needing any specific resource access settings.
Delete Role can delete a given type of resource or other item in a given functional area. For example, you might assign DeletePillar to a role, so the role can delete a pillar that’s no longer in use. Users with
Delete permission can delete resources they have created, without needing any specific resource access settings.
Items
When setting permissions for a role in the advanced editor, the above actions can apply to the following resources or functional areas.
Resource type / Functional area Description See also
All Minions Commands Run commands on the All Minions target. The All Minions target can vary based on the combination of minions the role has permission to access.
Minions
Admin Grants administrative privileges in the SaltStack Config user interface only. Be aware that this does not include administrative access to the API (RaaS). As a best practice, use caution when granting this level of access to a role.
See Default roles and settings for a detailed explanation of the Administrative user privileges.
Audit Log The audit log is a record of all activity in SaltStack Config that includes details of each user’s actions.
See rpc_audit or contact an administrator for assistance.
Commands A command is the task (or tasks) executed as part of a job. Each command includes target information, a function, and optional arguments.
Jobs
File Server The file server is a location for storing both Salt-specific files, such as top files or state files, as well as files that can be distributed to minions, such as system configuration files.
File Server
Groups Groups are collections of users who share common characteristics, and need similar user access settings.
Chapter 7 Setting up Role Based Access Controls (RBAC)
Jobs Jobs are used to run remote execution tasks, apply states, and start Salt runners.
Jobs
Using and Managing SaltStack Config
VMware, Inc. 98

Resource type / Functional area Description See also
License Your license includes usage snapshots, as well as details such as number of Salt controllers and minions licensed for your installation, and when the license expires.
See rpc_license, or contact an administrator for assistance.
Salt Controller Configuration
The Salt controller configuration file contains details about the Salt controller (formerly called the Salt master), such as its Salt controller ID, publish port, caching behavior, and more.
Salt Master Configuration Reference
Salt Controller Resources
The Salt controller is a central node used to issue commands to minions.
Salt Master Reference
Metadata auth The AUTH interface is used for managing users, groups, and roles through the RPC API.
See rpc_auth, or contact an administrator for assistance.
Minion Resources Minions are nodes running the minion service, which can listen to commands from a Salt controller and perform the requested tasks.
Minions
Pillar Pillars are structures of data defined on the Salt controller and passed through to one or more minions, using targets. They allow confidential, targeted data to be securely sent only to the relevant minion.
Pillars
Returner Data Returners receive the data minions return from executed jobs. They allow for the results of a Salt command to be sent to a given data store such as a database or log file for archival.
Returner Reference
Roles Roles are used to define permissions for multiple users who share a common set of needs.
Chapter 7 Setting up Role Based Access Controls (RBAC)
Runner Commands A command is the task (or tasks) executed as part of a job. Each command includes target information, a function, and optional arguments. Salt runners are modules used to execute convenience functions on the Salt controller.
Jobs
Compliance Assessment
An assessment is an instance of checking a collection of nodes for a given set of security checks, as specified in a SaltStack SecOps Compliance policy.
SaltStack SecOps Compliance - Note: A SaltStack SecOps license is required.
Compliance Policy Compliance policies are collections of security checks, and specifications for which nodes each check applies to, in SaltStack SecOps Compliance.
SaltStack SecOps Compliance - Note: A SaltStack SecOps license is required.
Compliance Remediation
Remediation is the act of correcting noncompliant nodes in SaltStack SecOps Compliance.
SaltStack SecOps Compliance - Note: A SaltStack SecOps license is required.
Compliance Content Ingest - SaltStack
Ingesting SaltStack SecOps Compliance content is to download or update the SaltStack SecOps Compliance security library.
SaltStack SecOps Compliance - Note: A SaltStack SecOps license is required.
Using and Managing SaltStack Config
VMware, Inc. 99

Resource type / Functional area Description See also
Compliance Content Ingest - Custom
Custom Compliance content allows you to define your own security standards, to supplement the library of security benchmarks and checks built into SaltStack SecOps Compliance. Ingesting custom content is to upload custom checks and benchmarks.
SaltStack SecOps Compliance - Note: A SaltStack SecOps license is required.
Compliance Custom Content
Custom Compliance content allows you to define your own security standards, to supplement the library of security benchmarks and checks built into SaltStack SecOps Compliance.
SaltStack SecOps Compliance - Note: A SaltStack SecOps license is required.
Schedules Schedules are used to run jobs at a predefined time or specific interval.
Schedules
SSH Commands Secure Shell (SSH) commands run on minions that do not have the minion service installed.
Salt SSH Reference
Target Groups A target is the group of minions, across one or many Salt controllers, that a job’s Salt command applies to. A Salt controller can also be managed like a minion and can be a target if it is running the minion service.
Minions
Users Users are individuals who have a SaltStack Config account with your organization.
Chapter 7 Setting up Role Based Access Controls (RBAC)
Vulnerability Assessment
A vulnerability assessment is an instance of scanning a collection of nodes for vulnerabilities as part of a SaltStack SecOps Vulnerability policy.
SaltStack SecOps Vulnerability - Note: A SaltStack SecOps license is required.
Vulnerability Policy A vulnerability policy is comprised of a target and an assessment schedule. The target determines which minions to include in an assessment and the schedule determines when assessments will be run. A security policy also stores the results of the most recent assessment in SaltStack SecOps Vulnerability.
SaltStack SecOps Vulnerability - Note: A SaltStack SecOps license is required.
Vulnerability Remediation
Remediation is the act of patching vulnerabilities in SaltStack SecOps Vulnerability.
SaltStack SecOps Vulnerability - Note: A SaltStack SecOps license is required.
Vulnerability Content Ingest
SaltStack SecOps Vulnerability content is a library of advisories based on the latest Common Vulnerabilities and Exposures (CVE) entries. Ingesting SaltStack SecOps Vulnerability content is to download the latest version of the content library.
SaltStack SecOps Vulnerability - Note: A SaltStack SecOps license is required.
Using and Managing SaltStack Config
VMware, Inc. 100

Resource type / Functional area Description See also
Vulnerability Vendor Import
SaltStack SecOps Vulnerability supports importing security scans generated by a variety of third-party vendors. This permission allows a user to import vulnerability scan results from a file, or through a connector.
By default, all SaltStack Config users can access the Connectors workspace. However, permission to run Vulnerability Vendor Import, as well as a SaltStack SecOps Vulnerability license, are required for a user to successfully import vulnerabilities from a connector.
Connectors, SaltStack SecOps Vulnerability - Note: A SaltStack SecOps license is required.
Wheel Commands Wheel commands control how the Salt controller operates, and are used to manage keys.
Salt Wheel Reference
Resource access in the API
Access to the following resource types must be defined using the API (RaaS):
n Files in the file server
n Pillar data
n Authentication configuration
All other resource types, (excluding jobs, targets, and those listed above) do not require any specific resource access settings.
Using and Managing SaltStack Config
VMware, Inc. 101

System metrics 8SaltStack Config exposes several system metrics that can be used for monitoring and diagnostics. These metrics are available in graphical form on the SaltStack Config user interface dashboard and in machine-readable form using the /metrics http endpoint.
This page describes the available metrics and how to connect third-party tools to SaltStack Config to retrieve metrics data. For more information about visualizing reports in the SaltStack Config user interface using the Dashboard, see Dashboard.
Machine-readable metrics
SaltStack Config exports system metrics in OpenMetrics text-based format. This format is directly consumable by Prometheus and other monitoring and alerting tools. For more information, see Configuring Prometheus to connect to SaltStack ConfigConfiguring Prometheus to connect to SaltStack Config.
SaltStack Config metrics configuration
Configuration for system metrics collection consists of the following settings in the /etc/raas/raas configuration file. Default values are shown.
# System metrics settingsmetrics: enabled: true # If True, enable the collection of system metrics prometheus: false # If True, enable the Prometheus endpoint at /metrics prometheus_username: # Static username for retrieving /metrics prometheus_password: # Static password for retrieving /metrics snapshot_interval: 60 # How often to record snapshot metrics, in seconds max_query_timedelta: 86400 # Maximum timedelta for a single call to get_system_metrics, in seconds keep: 30 # How long to retain metrics data, in days
The following settings control the handling of machine-readable system metrics:
n To disable metrics collection, set enabled:false. Note that this will also disable the SaltStack
Config built-in dashboard.
n To enable the export of machine-readable metrics from the /metrics http endpoint, set
prometheus:true. This setting does not affect the SaltStack Config built-in dashboard.
VMware, Inc. 102

n Access to the /metrics http endpoint is controlled by http Basic Authentication with
credentials configured in prometheus_username and prometheus_password. Non-empty values
are required for these settings to enable the /metrics endpoint. These credentials are stored
only in the /etc/raas/raas configuration file, are not associated with any SaltStack Config
account, and cannot be used to authenticate to SaltStack Config other than for accessing the /metrics http endpoint.
The other settings shown above relate to the SaltStack Config built-in dashboard and do not affect the collection or reporting of machine-readable system metrics. In particular, the snapshot_interval setting determines how often, in seconds, metrics are recorded for display
on the dashboard, and the keep setting determines how long, in days, metrics data will be kept in
the database before being trimmed.
Although the /metrics http endpoint is the recommended way to gather machine-readable
metrics data from SaltStack Config, you can use the API (RaaS) to retrieve the data presented on the built-in dashboard. The stats.get_system_metrics() API call lets you query metrics data
by metric name, source, and date range. The configuration item max_query_timedelta limits how
much data SaltStack Config will return from a single API call. To get metrics data from a longer time span, you can make multiple API calls with different start and end dates.
Salt Master metrics configuration
The availability of some metrics depends on the configuration of the Salt masters connected to SaltStack Config:
n Metrics on Salt events and job returns will be accurate only if the sseapi returner is
configured on the Salt masters. Metrics collection will not work properly with the sse_pgjsonb (direct-to-database) returner.
n SaltStack Config will collect low-level function runtime information from Salt masters that have master_stats:true set in their configuration. This option is disabled by default. See
master_stats in the Salt documentation for details.
n Metrics on salt job states will be accurate only if the job completion engine is enabled in the Salt Master Plugin:
engines: -jobcompletion:{}
This engine is enabled in the Salt Master Plugin default configuration.
Using and Managing SaltStack Config
VMware, Inc. 103

Configuring Prometheus to connect to SaltStack Config
You can enable a Prometheus server to scrape metrics from SaltStack Config by adding a scrape_configs job to the Prometheus configuration (typically prometheus.yml) for each API
(RaaS) server instance you have:
scrape_configs: - job_name: 'sse'
metrics_path: '/metrics' scheme: 'http'
static_configs: - targets: ['localhost:8080']
basic_auth: username: prometheus password: metrics
The credentials in the Prometheus configuration should match the prometheus_username and
prometheus_password specified in the /etc/raas/raas configuration file, as noted above.
See the Prometheus project documentation for more information on setting up scrape targets and other Prometheus configuration topics.
Note As part of VMware’s initiative to remove problematic terminology, the term Salt master will be replaced with a better term in SaltStack Config and related products and documentation. This terminology update may take a few release cycles before it is fully complete.
Metric descriptions
The machine-readable metrics that SaltStack Config exports fall into several categories:
Category Metric Name Metric Type Labels Description
Salt master low-level metrics
salt_event_size_bytes
Histogram master_id Salt event size, in bytes
salt_master_cmd_duration_seconds
Histogram master_id, cmd Salt master command duration, in seconds. Reported only if master_stats is
configured on the Salt master.
Salt Master Plugin metrics
raas_master_commands_processed
Counter master_id SSE commands processed
raas_master_master_grains_pushed
Counter master_id Salt master grains updated pushed to SaltStack Config
Using and Managing SaltStack Config
VMware, Inc. 104

Category Metric Name Metric Type Labels Description
raas_master_minion_keys_pushed
Counter master_id Minion key states updates pushed to SaltStack Config
raas_master_minion_cached_pushed
Counter master_id Minion cache updates pushed to SaltStack Config
raas_master_masterfs_pushed
Counter master_id MasterFS updates pushed to SaltStack Config
raas_master_sseapi_engine_iteration_seconds
Histogram master_id API (RaaS) engine iteration duration, in seconds
Server metrics redis_commands_executed
Counter redis_instance Redis commands executed (system cache)
redis_memory_bytes Gauge redis_instance Redis memory usage (system cache)
celery_tasks_queued Counter raas_instance, task Celery tasks queued (background jobs)
celery_tasks_executed
Counter raas_instance, task Celery tasks executed (background jobs)
celery_queue_length Gauge raas_instance Celery queue length (background jobs waiting)
raas_rpc_request_duration_seconds
Histogram raas_instance SSE RPC API call duration, in seconds
PostgreSQL metrics postgres_connections
Gauge postgres_instance Postgres connections
postgres_transactions
Counter postgres_instance Postgres transactions committed
postgres_rows_read Counter postgres_instance Postgres rows read
postgres_rows_inserted
Counter postgres_instance Postgres rows inserted
postgres_rows_updated
Counter postgres_instance Postgres rows updated
postgres_rows_deleted
Counter postgres_instance Postgres rows deleted
Using and Managing SaltStack Config
VMware, Inc. 105

Category Metric Name Metric Type Labels Description
System metrics sse_jobs_in_progress
Counter None SaltStack Config jobs in progress
sse_jobs_complete_all_successful
Counter None SaltStack Config jobs complete with all successful returns
sse_jobs_complete_missing_returns
Counter None SaltStack Config jobs complete with one or more missing returns
sse_jobs_complete_with_errors
Counter None SaltStack Config jobs complete with one or more errors
sse_masters Gauge None Total Salt masters in SaltStack Config
sse_minions Gauge None Total minions in SaltStack Config
sse_minions_present Gauge master_id Minions present within the configured time limit raas_presence_expiration
sse_minions_lost Gauge master_id Minions not present within the time limit
sse_minions_unknown Gauge master_id Unknown minions (never present)
sse_users_authenticated
Gauge None Users authenticated to SaltStack Config
Using and Managing SaltStack Config
VMware, Inc. 106

Sample content 9SaltStack Config provides several default targets and jobs along with supporting files and pillar data. Sample job files and pillar data are placed in the sse Salt environment so they don’t interfere with files and pillar data in the base environment. The sample content includes targets, jobs, pillar data, and supporting files.
To test the basic functionality of SaltStack Config, try working with some sample content in the user interface. You may need to install the Salt minion service on a few of the nodes you want to manage before trying the sample content.
Sample job files and pillar data are placed in the sse Salt environment so they don’t interfere with
files and pillar data in the base environment. See File Server for more information.
A target is the group of minions, across one or many Salt masters, that a job’s Salt command applies to. A Salt master can also be managed like a minion and can be a target if it is running the minion service. See Minions for more information.
Jobs are used to run remote execution tasks, apply states, and start Salt runners. See Jobs for more information.
Files in SaltStack Config are useful for configuring states you can then apply through jobs. Files are stored in the file server. The file server is a location for storing both Salt-specific files, such as top files or state files, as well as files that can be distributed to minions, such as system configuration files. See File Server for more information.
Pillars are structures of data defined on the Salt master and passed through to one or more minions, using targets. They allow confidential, targeted data to be securely sent only to the relevant minion. See Pillars for more information.
How to use SaltStack Config samples
Samples are used to save time setting up your SaltStack Config environment. With default jobs, you can take advantage of predefined state files and pillar data to begin running frequently-used operations.
You might also refer to samples as a model for how different system elements are configured to work together as you build your own workflows.
VMware, Inc. 107

Default targets
SaltStack Config includes a range of default target groups containing all minions of a given operating system. The following default targets are defined by matching the os grain.
n CentOS
n Linux
n MacOS
n RedHat
n SUSE
n Ubuntu
n Windows
n Windows Servers
See Minions for more information.
Sample jobs
SaltStack Config provides various state and remote execution jobs. Each is described in further detail below, with a description of related files and pillars where applicable.
Enable Presence
Enables more accurate presence detection. Presence indicates if SaltStack Config has received any job data from the minion recently, within a defined interval. See Minions for more information.
Highstate
Runs a state.highstate on targeted minions. A highstate is a state module that applies all states
configured in the top.sls file. top.sls must be user-defined and is not included as a sample file.
See Jobs for more information.
Sample Apache
files
sse/apache/init.sls
pillar
None
Installs Apache. This state contains logic to determine the correct name of the Apache package based on the target OS.
Sample Disk Usage
Runs the disk.usage command on targeted minions.
Using and Managing SaltStack Config
VMware, Inc. 108

Sample DokuWiki
files
sse/dokuwiki/init.sls,sse/dokuwiki/files/*
includes
PHP, Apache
pillar customization
n dokuwiki_url: sets the URL path where the wiki should appear, default wiki.
n wiki_title: sets the wiki title, default MyWiki.
Sample HTOP install
files
sse/htop/init.sls
pillar
None
Installs HTOP.
Sample HTOP remove
files
sse/htop/remove.sls
pillar
None
Removes HTOP.
Sample LAMP stack
files
sse/LAMP/init.sls
includes
mySQL, PHP, Apache
pillar customization
n db_user: default dbuser.
n db_name: default dbname.
n db_pass: default password.
n db_host: default localhost.
Using and Managing SaltStack Config
VMware, Inc. 109

Installs Apache, mySQL, and PHP.
Sample mySQL
files
sse/mysql/init.sls
pillar
None
Installs mySQL.
Sample PHP
files
sse/php/init.sls
pillar
None
Installs PHP.
Sample refresh pillar
Refreshes the Salt pillar on targeted minions. Run this after assigning pillar data to minions.
Sample WordPress
files
sse/wordpress/init.sls
pillar
None
Installs WordPress.
test.ping
Runs the test.ping command on targeted minions.
Using and Managing SaltStack Config
VMware, Inc. 110

Security guidelines 10Ensure that you are always following the recommended security practices for both SaltStack Config and Salt, which powers SaltStack Config.
Salt security
Consult these guides to ensure your environment is following best practices when implementing Salt in your infrastructure:
n Salt Best Practices
n Salt Hardening Guide
Automatic logout if inactive
You can set automatic logout as low as 1 minute, and up to 60 minutes. This is set to 30 minutes by default. For more on modifying this and other preferences, see Chapter 5 The SaltStack Config user interface.
Permissions
Make sure to limit access to the following tasks. For more on defining permissions, see Chapter 7 Setting up Role Based Access Controls (RBAC).
Job create and edit
Limit user access to creating and editing jobs. These privileges enable a user to run any command in the system. Together with target create and edit permission, they enable a user to run any command on any minion.
Target create and edit
Limit user access to creating and editing targets. These privileges, along with Job create and edit permission, enable a user to run available jobs on any minion in the system.
Role create and edit
Limit user access to creating and editing roles. These privileges enable a user to assign themselves any privilege in the system.
VMware, Inc. 111

Encrypted credentials
API (RaaS) Access Credentials
Connect Salt masters to the API (RaaS) through public key authentication (default), rather than through username authentication.
Database credentials
Store database credentials for both PostgreSQL and Redis in an encrypted file, rather than in plain text.
For more on credential storage, see Securing credentials in your configuration.
Using and Managing SaltStack Config
VMware, Inc. 112

Troubleshooting SaltStack Config 11Read some of the common errors that users experience using the SaltStack Config interface and how to fix them.
Pages not loading
If a page or section of a page fails to load, clicking the Reload button that appears on some pages or clicking the browser refresh button often fixes the issue.
You might also encounter situations where a lack of permissions is also causing pages or page elements to not load correctly. The following issues are often caused by insufficient permissions:
n Error loading users
n Blank roles page
n Blank file system page
n A red X after clicking Add on the Pillar page
If you encounter one of these issues, contact a Salt administrator to verify that your role membership and role privileges are set correctly.
Button labels are truncated
If button label text is partially cut off, or if the SaltStack Config user interface is otherwise not displaying correctly, make sure you are using the latest version of one of the following web browsers.
n Google Chrome
n Mozilla Firefox
Reporting a bug
To report a bug, contact Support, providing the following information:
n How to reproduce the issue in your environment using as few steps as possible.
n Any relevant screenshots in the SaltStack Config user interface.
n The “Version Info” as displayed in the “Help” dialog in the SaltStack Config user interface.
VMware, Inc. 113

n From the RaaS server: * The contents of /etc/raas/raas, with any secret information (e.g. passwords) scrubbed. * The contents of /var/log/raas/raas.
n If the problem is specific to a particular Salt master: * The contents of /etc/salt/master.d/raas.conf on the Salt master server, with any secret information (e.g. passwords) scrubbed. * The contents of /var/log/salt/master.
n Deliver the files to SaltStack support.
Using and Managing SaltStack Config
VMware, Inc. 114

Working with the API (RaaS) 12The API (RaaS) refers to the application server that SaltStack Config clients connect to. These clients include the user interface component of SaltStack Config, properly configured masters, and other users of RaaS. The application server is also known as the eAPI server.
Note The full API documentation for SaltStack Config is available in PDF form at VMware's API documentation site: https://code.vmware.com/apis/1179/saltstack-config-raas.
RaaS is organized into modules (called “resources”) and functions (called “methods”). In the API call test.echo(‘hello, world’), the resource is test and the method is echo(). Arguments can be passed to methods by position or by keyword.
RaaS can be accessed in two ways: via an RPC client and via an HTTP (or HTTPS) bridge.
To connect to RaaS, set these options in client = APIClient():
n server
n username
n password
n config_name=’internal’ Change to authentication backend name if using LDAP
n timeout=60 # Take at most 60 seconds to perform any operation
n ssl_key=None
n ssl_cert=None
n ssl_context=None
n ssl_validate_cert=True = Set to False if using self signed certs
Example:
from sseapiclient import APIClientclient = APIClient('https://localhost', 'root', 'PASSWORD', ssl_validate_cert=False)
Note In versions prior to 6.2, the API connection was made using SyncClient.connect(), which
is still compatible with versions 6.2 and up. If you are using SyncClient.connect(), no changes
are required.
VMware, Inc. 115

API syntax
client.api.<interface>.<method>(parameter=parameter_value)
Example:
from sseapiclient import APIClientclient = APIClient('https://localhost', 'root', 'PASSWORD')client.api.sec.download_content(auto_ingest=True)
Using the API (RaaS) with Curl
You can also use RaaS with directly with HTTP and JSON. The following is an example of using the API with curl. Note when xsrf is enabled you will need to obtain an xsrf cookie and token
first. See HTTP Bridge on how to obtain and use an xsrf token and cookie. When using the Python API client, this is done automatically by default.
Example:
curl --user 'root:PASSWORD' --url 'https://localhost/rpc' \ --data '{ "resource": "sec", "method": "download_content", "kwarg": {"auto_ingest": true} }'
Licensing
The SaltStack Config user interface displays notifications to warn when your license is close to expiring. As a RaaS user, you must use the License workspace to track license status and ensure it stays active. If your license expires, the RaaS service stops.
RPC client
The programmtic RPC clients in the sseapiclient module work with Python version 2.7 and Python version 3.5 or later. The clients connect to SSE via HTTP or HTTPS and authenticate. Using the RPC client has the advantage of being somewhat easier to use than the HTTP bridge.
HTTP Bridge
The HTTP (or HTTPS) bridge accepts JSON payloads POSTed to an endpoint exposed by SSE, translates the payloads into RPC calls, then returns the result as JSON. The endpoint supports cookie-based authentication so that authentication credentials need to be passed only once per session. The bridge also allows sending multiple calls in a single payload.
Using and Managing SaltStack Config
VMware, Inc. 116

If xsrf is enabled (default with state install) in the /etc/raas/raas.conf tornado_xsrf_cookies_enabled: True you will need to provide the X-Xsrftoken: on the header of the rest call. The best way is to save a cookie with a get call then use the cookie to provide the header token. This cookie is saved in the $HOME (users home) directory. The payload is a dictionary.
Example curl call with xsrf header:
curl -k -c $HOME/eAPICookie.txt -u root:PASSWORD 'https://localhost/account/login' >/dev/nullcurl -k -u root:PASSWORD -b $HOME/eAPICookie.txt \ -H 'X-Xsrftoken: '$(grep -w '_xsrf' $HOME/eAPICookie.txt | cut -f7)'' \ -X POST https://localhost/rpc \ -d '{ "resource": "sec", "method": "download_content", "kwarg": {"auto_ingest": true} }'
The samples assume:
n client=APIClient(<addr>,<user>, <pwd>)
n Default state based install of eAPI
n SSL enabled
n Import of sseapiclient. Example:
from sseapiclient import APIClient
This chapter includes the following topics:
n Setting API permissions
n RPC Endpoints
Setting API permissions
You can assign permissions to a role or user in the API (RaaS) using save_role(...) or
save_user(...) in the API AUTH interface.
Permission value syntax
Permission values in the API (RaaS) include a resource type and an action, based on the following syntax:
resource-action
Some permission values include a qualifier as follows:
resource-qualifier-action
Using and Managing SaltStack Config
VMware, Inc. 117

For example, if you want to assign permission to run commands, you would use cmd-run.
Whereas, to assign permission to run wheel commands, you would use cmd-wheel-run.
Note The previous syntax does not apply to the Super User permission, whose API value is superuser.
API Permission values by resource
The following list includes all resource types and permitted actions:
Commands
n cmd-delete
n cmd-read
n cmd-run
n cmd-write
Runner commands
n cmd-runner-run
SSH commands
n cmd-ssh-delete
n cmd-ssh-read
n cmd-ssh-run
n cmd-ssh-write
Wheel commands
n cmd-wheel-run
Formulas
n formula-delete
n formula-read
n formula-write
Filesystem
n fs-delete
n fs-read
n fs-write
Groups
n group-delete
n group-read
Using and Managing SaltStack Config
VMware, Inc. 118

n group-write
Jobs
n job-delete
n job-read
n job-run
n job-write
License
n license-read
Salt master
n master-delete
n master-read
n master-write
Salt master configuration
n master-config-delete
n master-config-read
n master-config-write
Salt master filesystem
n master-fs-delete
n master-fs-read
n master-fs-write
Minion
n minion-delete
n minion-read
n minion-write
Pillar
n pillar-delete
n pillar-read
n pillar-write
Returners
n returner-delete
n returner-read
Using and Managing SaltStack Config
VMware, Inc. 119

n returner-write
Roles
n role-delete
n role-read
n role-write
Schedules
n schedule-delete
n schedule-read
n schedule-write
Super user
n superuser
Target
n target-delete
n target-read
n target-write
n target-allminions-run
Users
n user-delete
n user-read
n user-write
RPC Endpoints
The RPC endpoint documentation is currently available in PDF form at VMware's API documentation site: https://code.vmware.com/apis/1179/saltstack-config-raas.
Using and Managing SaltStack Config
VMware, Inc. 120