The Velvet Book
360
-
Upload
khangminh22 -
Category
Documents
-
view
0 -
download
0
Transcript of The Velvet Book


THE VELVET BOOK Persona Tabletop Roleplaying
A Personanon Press Game
This project is a fan-work and is free to distribute
Shin Megami Tensei: Persona is developed and published by SEGA and Atlus
Monsters and Other Childish Things is written by Benjamin Baugh and published by Arc Dream
Publishing
The One-Roll Engine was designed by Greg Stolze
Visit this project’s Discord channel at https://discord.gg/aWZMuZP


What is Monsters and Other Childish Things?
What is Persona?
What am I reading?
The Velvet Book
So, then, without further ado...


Table of Contents
(Page #)
Chapter I: Characters What Kind of Characters are in a Velvet Book Game? 16
What Makes a Character 16
Your Stats 17
Stat Details 18
Your Skills 18
Diligent Skills 18
Gutsy Skills 19
Proficient Skills 19
Knowledgeable Skills 19
Expressive Skills 19
Your Relationships 20
Relationships, Arcana and Your True Self 21
Arcana and Psychology 21
Arcana and Gender 21
What Arcana is My Character? 22
Making your Character 23
Starting Relationships 23
ARCANA ARCHETYPES INDEX
Magician, High Priestess, Empress 24
Emperor, Hierophant, Lovers 25
Chariot, Justice, Hermit 26
Fortune, Strength, Hanged Man 27
Death, Temperance, Devil 28
Tower, Star, Moon, 29
Sun, Judgement 30
The Fool and the World 31
Chapter II: The One Roll Engine An Introduction to ORE. 34
What Sets Mean 35
Strategizing your Sets 35
Difficulty 36
Bonuses and Penalties 36
Difficulties vs Penalties 36
Multiple Actions 36
Doing One Thing Multiple Times 36
Doing Two Things at Once 37
Called Shots 37
Gobble Dice 38
Severe Action Penalties 38
Foiling Actions 38
Blocking Attacks 39
Contested Actions 39
Awesome Dice 41
Chapter III: Personas What is a Persona? 44
How Personas are the Same as Monsters 44
How Personas are Different from Monsters 44
What Personas are Made-Of: Parts 45
Should Personas have personalities? 46
3d and 5d: The two models of Personas 46
Sample 3d Persona: Orpheus 47
Sample 5d Persona: Arsene 47
What Personas are Made-Of: Qualities 48
Attacks 48
Defends 48
Useful 48
What Personas are Made-Of: Extras 49
Extras and Multiple Actions 51
Always Works and Multiple Actions 51
Special Interactions 51
What Personas are Made-Of: Hit Points 52
Putting the Pieces Together 52
Small Parts 53
The Other Essentials 53
Arcana 53
Evocation 54
Elemental Resistance and Weakness 54
What are they? 54
How they Work 54
The Elements of Persona 54
Favorite Thing 55
Persona Themes and Group Dynamics 55
Level-Up: Improving your Persona 56
Tips and Tricks for Building Personas 57
Optional Rules 59
The Voice in Your Head 59
Visible Personas 59
Useful in the Real World 59
Bizarre Personas 59
PERSONA AND ARCANA COMPENDIUM
Magician, High Priestess, Empress, Emperor,
Hierophant, Lovers, Chariot, Justice 60
Hermit, Fortune, Strength, Hanged Man, Death,
Temperance, Devil, Tower 61
Star, Moon, Sun, Judgement, The Fool, The World 62
Chapter IV: The Player’s Manual Introduction 64
Understanding your Height and Width 64
Measuring Height 64
Measuring Width 65
Specific Rules for Skills
Academics 65
Aim, Beat-Down 66
Block, Charm, Connive 67
Courage, Fighting 68
Notice, Out-Think 69
P.E., Put-Down, Reflex 70
Shop, Wind 71
Your Day-to-Day Life 72
Time Slots 72
How to Spend your Time 72
Helping Out Other Players 73

Table of Contents
(Page #)
Experience Points and Character Growth 73
Arcana Level 74
Aspects 74
Declaring New Aspects 75
Achievement Unlocked: Improving your Arcana Level 75
Perpetual Achievements 75
Unique Achievements 75
Tips for Players using Aspects 76
How GMs Work with Arcana Levels 77
ARCANA LEVEL ROUTES
The Magician 78
The High Priestess 79
The Empress 80
The Emperor 81
The Hierophant 82
The Lovers 83
The Chariot 84
Justice 85
The Hermit 86
Fortune 87
Strength 88
The Hanged Man 89
Death 90
Temperance 91
The Devil 92
The Tower 93
The Star 94
The Moon 95
The Sun 96
Judgement 97
Chapter V: Relationships The Power of Friendship 100
Casual and Intense: Language of Relationships 100
Relationship Dice 100
Relationship Shock 101
Healing Shock with Quality Time 101
Awesomely Intense Relationships 102
Relationship Reversal 102
Relationships and Personas: Arcana Boosting 103
Relationship Feedback 104
Improving Relationships 105
Chapter VI: Combat Preface I: What Persona Players Should Know about
Fighting 108
Preface II: Streamlining Monsters Combat for Persona 109
Who’s the target? 109
Battle for Everyone’s Souls: The ORE Combat Tutorial 110
The Combat Round 110
How to Attack 110
Stunning Attacks 111
Back-Up Attacks 111
Redirecting Attacks 112
Damage 112
Tracking Damage 112
Defense 113
Declaring Defense 114
Defense Strategies 114
Multiple Defense Sets 114
Attacking and Defending Simultaneously 115
Perfect Defense 115
Rallying 115
Tilting 116
Emotional Damage: Third-Degree Sick Burns 117
Playing Out Emotional Damage 118
Emotional Damage and Personas: Reverse Feedback 118
Damage Overflow 119
Weapons 119
A Brief Index of Weapons 120
Elemental Warfare 121
Physical Elements 121
Elemental Skill Names 122
Detecting Weakness and Resistances 122
One More! 123
One More! without an Extra Set 124
Playing without One More! 124
Negotiation 124
Opening Negotiations 124
Shadow Diplomacy 125
Shadows and Their Favorite Things 125
Alternatives to Negotiation 125
All-Out Attacks 126
Situational Advantages 126
Ambush 126
Sudden Attack 126
Problems: How to Make Encounters more Interesting 127
What Problems Can Do 127
Overcoming Problems 129
Seizing Problems 129
Healing 130
For Humans and Personas 130
Healing Humans 130
Healing Personas 130
Healing Under Time Restraints 132
Defending Against Area Attacks 132
Shadows 101: What Players Need to Know 133
Minor Shadows 133
Major Shadows 134
Ending a Battle 135
Example of Combat 136

Table of Contents
(Page #)
Chapter VII: The Path to Awesome Power What It Means to be Awesome 146
Awesome Humans 146
Awesome Personas 146
Awesome as a Resource 146
The First Path: Preparation (for Humans) 147
The First Path: Preparation (for Personas) 147
You can’t use Preparation to Stockpile Awesomeness 148
The Second Path: Cooperation 149
The Third Path: Sacrifice 150
The Shadow’s Path to Awesome Power: Smirking 151
Major Shadows: Awesome Might 151
Chapter VIII: Shadows What is a Shadow? 154
Where do Shadows Come From? 154
Some Shadows are Helpful 155
Shadow Styles 155
Shadow Types 155
Arcana Points 155
Minor Shadow Anatomy 156
Encountering Minor Shadows 157
Fighting Minor Shadows 157
The Shadow Compendium 157
The GM: Master of Shadows 158
Shadow Mobs 158
How Shadow Mobs are built 159
Shadow Mobs and All-Out Attacks 160
When Should Mobs be used? 160
How Major Shadows Work 161
Fighting Major Shadows 162
Gimmicks 163
Fighting to the Finish 164
Chapter IX: Useful Things Why Useful Qualities Have Their Own Chapter 166
How Useful Qualities are Supposed to Work 166
Not Everything Needs to be a Useful Quality 167
What Makes a Good Useful Quality 167
Attacks and Defends can also be useful 167
Basic Things Any Useful Quality Can Do 168
Create an Advantage 168
Counteract a Useful Effect 168
Solve a Problem 168
The Useful Gallery 169
The 10 Common Qualities 169
Analyze 169
Buff 170
The Underlying Question: What are These, Anyway? 170
Boost Power 171
Control (Element or Force) 171
Debuff 172
Timing Buffs and Debuffs 172
Stacking Buffs and Debuffs 173
Flight 173
Induce (Mental Effect) 174
Negotiation 175
Provide Information 175
Unique Movement 176
The 13 Exotic Qualities 177
Create (Object) 177
Deadly Power 177
Exotic Sense 178
Gigantic 179
Immobilize 179
Invisibility 180
Jinx 180
Nullify 181
Polymorph 181
Refresh/Revoke 182
Super Strength 183
Tranquilize 183
Warp 184
Useful Attacks 185
Useful Physical Attacks 185
Useful Elemental Attacks 185
Useful Defenses 186
Agility 186
Endurance 186
Creating Your Own Useful Qualities 187
Remember the Cost 187
Be Mindful of the Action Economy 187
Don’t Be Afraid to Bend the Rules 187
Chapter X: The Velvet Room Welcome to the Velvet Room 190
Advanced Dice Pool Guidelines 190
One Roll Education 191
What Roll for Which Class? 191
Sample Class Schedule 191
What Skill for which Assignment? 192
Work Load 192
Grades 193
Improving your School Work 193
Time Management 194
Obligation vs Freedom (aka Law vs Chaos) 194
Opportunity Cost 195
Under Pressure 195
Enemy Advantage: Engineering Minor Shadow
Encounters 197
The Golden Rule 197
The Arcana Budget 198
Further Guidelines 198
Shadow Synergy 199
Fast and Furious 199
Tough Enough 199

Table of Contents
(Page #)
Bodyguards 199
Healing 199
Useful Shenanigans 200
After-Market Modifications 200
Shadow Antics 200
Blooming Villains: Creating and Controlling Major
Shadows 201
What is a Major Shadow’s purpose? 201
Might 202
How Mighty? 202
Arcana Point Budgets for Major Shadows 203
Gimmicks 204
Do-It-Yourself Gimmicks 204
Ready-to-Play Gimmicks 205
Heavy Armor 205
Penetration 205
Unlimited Healing 205
Regeneration 205
Multitasking 205
Special Dice Pool 206
Booster 206
Summon Allies 206
Targets All 206
Guaranteed Knockdown 206
Bypass Personas 207
Preemptive Action 207
Superior Defense 207
Immunity 207
Engulf 207
Automatic Action 208
Interference 208
Damage Magnet 208
Example Major Shadows 209
King Frost 209
Shadow Mitsuo 210
Going Out with a Bang 211
Finale Attack 211
Finale Threat 211
Optional Rule: Doom Dice 212
How Much Doom? 212
Getting your Campaign Started 213
Choosing your Focus 213
The World: Building your Persona Setting 214
The Meta-Narrative Level: Themes and Tone in Persona
What is the Theme of your game? 215
What is the Tone of your Game? 215
The Cosmic Level: What is the Nature
of the Other World? 216
The Overworld 216
Dungeons 217
What Happens in the Other World? 218
Dungeon Features 218
Elemental Motif 218
Hidden Passages 219
Population 219
Automated Defenses 220
Sanctuary 221
Physical Challenge 221
Traps 222
High Security 223
Example Security Patrols 224
Hazardous Environment 225
Treasure 226
Better Threats: How to Properly Menace your Players 227
The Real World is Threatening Too 227
Standard Threats 227
Persistent Threats 228
Compound Threats 229
How Many Dice Should I Give my Threats? 229
Optional Rule: Loot and Other Valuable Things 230
Loot isn’t Mandatory 230
Where Loot Comes From 230
What is Loot, Exactly? 231
Loot Values 231
What is Loot Good for? 231
The Loot Exchange 232
The Spoils Roll 233
Attrition and Exhaustion 234
The Social Level: Creating Social Networks 235
Method 1: Player Controlled 235
Method 2: GM Controlled (aka Central Casting) 235
Method 3: Arcana Draft 235
Creating and Animating Relationship-Ready NPCs 236
All Relationships have Problems 236
Relationships are not Puzzles to be Solved 236
Give them Inner Lives 236
Arcana-Based Problems 237
Changing Arcana 240
Appendices and References
Appendix A: Sample NPCs 241
Appendix B: Shadow Compendium 248
Principles of Minor Shadow Design 282
Appendix C: Wild Cards 283
Appendix D: Expanded Weapons and Armor Rules 302
Appendix E: Expanded Weapons and Armor Catalog 309
Appendix F: Subpersonas 314
Appendix G: The Reaper 333
Appendix H: One Roll Dungeons 343
Appendix I: One Roll Social Encounters 345
Character Sheet 353
Persona Sheet 354
Reference: Characters and Personas 355
Reference: Mechanics and Other Key Rules 356
Reference: Charts and Figures 357

Preface: How to Play with The Velvet Book
What Everyone Needs: Dice!
Whether you a Game Master building and running the game or a Player engaging with it, the
main thing you will need is Ten-Sided Dice, or d10s. Each Player will need their own supply,
or pool of ten d10s. Alternately, feel free to make use of a dice rolling App or web tool.
GMs, on the other hand, will benefit from having as many d10s as they can get their
hands on, ideally in sets of 10 in matching colors. A GM can get away with a single set of dice,
but there are numerous circumstances were rolling multiple dice pools at once will be helpful to
them.
What Players Need
Everyone involved in a game using The Velvet Book is a player, but Players with a capital-P are
the persons who are operating the main characters, or Player Characters. They are the main
adventurers in the campaign created by the Game Master, or GM, who build the game world
and operates the Non-Player Characters, or NPCs.
Players are expected to read and understand the following chapters:
Chapter 1: Characters
Chapter 2: The One Roll Engine
Chapter 3: Personas
Chapter 4: The Player’s Manual
Chapter 5: Relationships
Players may also find it very helpful to read the Chapter 6: Combat if they want to get a firm
grip on how fighting works in The Velvet Book. We of course encourage Players to read Chapters
7-9 as well if they want a complete understanding of how The Velvet Book works, but when just
starting out they aren’t entirely necessary.
Players who want to keep themselves in the dark as to how The Velvet Book works under
the hood should avoid reading Chapter 10: The Velvet Room.
What GMs Need
We advise that GMs read and understand all 10 Chapters of the main text. The Appendices are
entirely optional and can be reviewed at a GM’s leisure, or when in need of some particular
resource or ruleset for their game.

(Page #)


Chapter I: Your Character
-- 16 --
What Kind of Characters are in a Velvet Book Game?
Before we get into the moving parts of a character in The Velvet Book, let’s touch briefly on what
kind of characters Persona and Monsters and Other Childish Things focus on: adolescents. Persona
aims at high schoolers, while MaOCT has a broader scope but leans more towards middle-
school age characters. Persona, it should be said, isn’t definitive in this regard. Persona 3 set the
tone for the two games that followed it as centering on teenagers, but Persona 1 and 2 had a
diverse cast stretching into adulthood that included students, detectives and journalists.
Likewise, The Velvet Book is designed first and foremost for players who want to explore
the psychodrama of teenagers struggling with finding their identifies and navigating the social
labyrinth that is high school life, and balancing these real-life struggles against the threat posed
by otherworldly forces encroaching on their reality. That being said, The Velvet Book functions
with characters of all ages. So while most players will doubtless engage with the high school
setting, there’s nothing stopping a GM from staging a game among Japanese salarymen,
elementary schoolers or recent college graduates finding their way in the world.
What is universal with these characters is the search for understanding and identity.
Persons possessing a solid and inflexible sense of self generally do not make compelling
characters in The Velvet Book. Your character should have room to grow, evolve, and challenge
their understanding of themselves and others. This is why high school is such a ripe setting:
younger characters might not be as moved to engage with this challenge, and more adult
characters, for better and for worse, are more certain, if not rigid, in their view of themselves
and the world. But, neither of these angles are directly prohibited, so go nuts.
What Makes a Character
Stats describe a character’s fundamental personal qualities—how smart, clever and tough you
are. Skills describe things that character has learned to do: run fast, fight bullies, do homework,
tell jokes. Relationships are connections that a character has with people, groups and
sometimes things that are meaningful to them and give them purpose and drive, along with
fresh and exciting problems. These three aspects combined create a functioning character in The
Velvet Book.

Chapter I: Your Character
-- 17 --
Your Stats
The Velvet Book uses 5 Stats to describe a character’s basic attributes, as follows:
Diligence: how physically tough, resilient and hard-working you are.
Guts: how brave, confident and quick to action you are.
Proficiency: how dexterous, crafty and precise you are.
Knowledge: how smart, strategic and educated you are.
Expression: how emotive, creative and smooth-talking you are.
Players familiar with Persona 3-5 should recognize the style of these Stats as those of the main
player character in those games. Rather than directly describing a character’s physical
attributes, the focus here is on what makes up a character’s personality and identity. For players
more familiar with Monsters and Other Childish Things, these correlate directly to the Stats from
that game as follows:
Diligence = Feet
Guts = Guts
Proficiency = Hands
Knowledge = Brains
Expression = Face
A Stat’s power and efficacy is measured by its Dice Pool is, on a scale of 1d to 5d:
Stat Dice Description
1d This is a glaring weakness. You are actively bad at this.
2d You’re perfectly unremarkable. This is the baseline for human ability.
3d You’re better than average through training or natural talent
4d This is professional grade. You’re extremely good in this area of expertise
5d This is the best that a person can possibly be at an ability.
(When we get into Skills they follow the same scale, but with the possibility of having 0d in a
Skill as being completely untrained and devoid of knowledge of that ability)

Chapter I: Your Character
-- 18 --
Stat Details
Diligence is your self-discipline. Characters with low Diligence are frail and shaky on their
feet because they lack the will and drive to strengthen themselves. Characters with high
Diligence are strong and steady regardless of how much strain they feel.
Guts is your moxie and bravery. Gutless people snivel and retreat; Gutsy folks run in to save
the day against overwhelming odds and danger.
Proficiency is your talent and craftiness—usually involving stuff with your hands like
painting or music. The Proficient love their work and take pride in it; a lack of Proficiency
makes you clumsy or like your hands are always coated in potato chip grease.
Knowledge is how smart and alert you are. It includes both book learning and creative
problem solving. Low-Knowledge characters are easily stumped, while Knowledgeable ones
figure can figure out complex puzzles.
Expression is your ability to deal with others with tact, grace, humor and deception. An
Expressionless person is a wallflower, while a person full of Expression is the life of the party.
Your Skills
While Stats represent a character’s natural capabilities, Skills are specific things you’ve learned
to do, either through study or hard knocks. Like Stats, Skills are measured by their Dice Pool,
but on a scale of 0d-5d. A 0d Skill means you don’t know anything about it at all. If you want to
give it a shot you’ll just be rolling your raw Stat Dice, which isn’t usually a recipe for success.
The following is a brief rundown of each Skill. Much more detailed descriptions are covered in
Chapter 4: The Player’s Manual.
Diligent Skills
Beat Down: Hit things that can’t hit back. This includes inanimate objects like doors,
lockers and crates, and living-but-helpless things like jerk Rico after kick him in the
groin.
Block: Stop things from hitting other things, whether its coming at your face or your
little brother’s.
P.E.: Running, jumping, climbing, etc, anything requiring both endurance and
coordination.

Chapter I: Your Character
-- 19 --
Gutsy Skills
Courage: Standing up to bullies and elder gods alike.
Fighting: Facing off against foes that can fight back with your fists, feet or any other
means of physical confrontation at your disposal. If your foe can’t resist you, roll Beat
Down instead.
Wind: How healthy and generally in-shape you are. Like P.E. it covers feats of physical
might, but Wind is more about raw strength and stamina instead of speed and
coordination.
Proficient Skills
Aim: How precise your eye is. Use this to throw a basketball, chuck eggs at the
principal’s car or shoot your dad’s hunting rifle. Remember kids: guns are dangerous.
Reflexes: Agile movement, whether to escape some looming harm or avoid detection.
Shop: How good you are with your hands, whether making a bird house, picking a lock
or turning a box of fireworks into a stick of dynamite.
Knowledgeable Skills
Academics: Your books-smarts and proper education.
Notice: Spotting things before they endanger you.
Out-Think: Figuring problems out. In particular, Out-Think is used for strategic
thinking in combat.
Expressive Skills
Charm: Making people like you.
Connive: Lying to and tricking people.
Put-Down: Delivering sick burns. This your primary mode of attack when engaging in
emotional combat.

Chapter I: Your Character
-- 20 --
Your Relationships
In both Persona and Monsters and Other Childish Things your character’s network of friends and
family are of central importance. In Persona 3 and 4 these were called Social Links and in Persona
5 they became Confidants, and The Velvet Book brings them both under the terminology of
MaOCT: Relationships.
Relationships are at the heart of who your character is and why they are the way they
are. They are engines of motivation and woe, trauma and catharsis. They are sources of power
but also weighty obligations inextricably shackled to your psychological matrix. Take care of
them and they can make you better, stronger and more capable. Neglect them and they become
liabilities.
Like Stats and Skills, Relationships are measured as Dice and also scale from 1d-5d:
Dice Pool Relationship Description
1d Fleeting and superficial
2d Important and meaningful
3d Close and intimate
4d Deep and devoted
5d Complete and inseparable
Relationships are usually with people but really they can involve anything that is of
emotional significance to your character. A person raised as a Muslim could have a Relationship
with the Quran—1d if they skim it once a week, 5d if they’re planning to move to Mecca and be
an Imam when they grow up. Relationships can also be with groups of people: a soccer team or
a girl scout troop; or even with large, national or worldwide organizations: the Catholic church
or the Democratic Party. In the latter case you’re going to want some local chapter that you can
apply your efforts to and spend quality time in the service of.
You can even have Relationships with other player characters, and they can even be one-
sided. Your character might be worshipfully in love with another player’s, who views you as
that weird guy who stares at them in Earth Science class.
As for what Relationships actually do, we’ll get into those rules in Chapter 5:
Relationships (page XX, to be precise). In brief, you can tap your Relationships to increase your
dice pools or to power up your Persona, but doing so risks incurring psychological damage that
can erode that relationship if you don’t take fixing it seriously enough.

Chapter I: Your Character
-- 21 --
Arcana, Relationships, and Your True Self
One of the reasons why The Velvet Book uses MaOCT as the basis for Persona is that both games
feature rules by which a character’s relationship with another person can improve their ability
to complete a task.
Persona introduces a new level to
these interactions: Arcana. Each
Relationship is linked with one of the Major
Arcana of the Tarot, which describes core
aspects of that character’s personality or his
or her circumstances. The section that
follows lists the 22 Major Arcana and what
kind of people they represent. For each of
your Relationships, choose which Arcana
best fits that character’s personality or how
you relate to that person.
Each Arcana confers certain benefits to
your character and your Persona that will be
covered later in this game; for now, just review the
list and use it as a tool to match your Relationships
to the Arcana they are archetypical of. Try and
choose a different Arcana for each Relationship.
Finally, you must choose an Arcana for your own Character—something that
resonates with who they are and what they want
in life. Each player character’s Arcana should be
unique within the game. That way the PCs
themselves can benefit from forging Relationships with each other.
The most important element of your character’s Arcana is the Arcana Route that it
designates. An Arcana Route is roadmap for a character’s emotional and psychological growth,
and advancing down this route increases a character’s Arcana Level and gifts them with several
important advantages. These rules are covered in detail in Chapter 4, starting on page @@, and
the page numbers for each Arcana’s Route is included in the list at the end of this chapter.
Arcana and Gender
The following section, the Arcana List, uses
gendered pronouns for each Arcana. These
are based on the traditional interpretation
for each Arcana’s psychological archetype
(as well as the symbolism on the Arcana
itself). It’s not absolute. You can have a male
High Priestess, a female Hierophant or a
genderfluid Lover. What matters is how they
act, not what they are.
Arcana and Psychology
Atlus didn’t adopt the Arcana system for Persona
just to add another element of mysticism to their
game. The psychologist Carl Jung, whose
interpretation of the persona and shadow serves as
the basis for this entire game, viewed the Arcana as
“archetypes” for the human condition, and
represented distinct, observable patterns of human
behavior and mental conditions. His archetypes are
listed in italics along side each Arcana.

Chapter I: Your Character
-- 22 --
What Arcana is My Character?
With 20 standard Arcana available to players, the choice of which you should choose can be
overwhelming. The following is a helpful guide that can point you in the direction of an Arcana
that fits the concept you have in mind for your character.
If you want to be the master of a specific ability or area of knowledge: • The Magician • The High Priestess • The Hermit
These Arcana all deal with developing and honing skills and expanding knowledge to the
highest degree, each in their own unique way.
If you want to be someone others look to for leadership and guidance: • The Empress • The Emperor • The Hierophant
Each of these embody being someone vested with some measure of authority whom others are
inclined to follow.
If you want to be someone facing tough decisions and difficult realities: • The Lovers • Judgement
These two Arcana are all about having to look inward and examining who you are as a person
and what choices you need to make to grow.
If you want to be a high-spirited, goal-oriented go-getter: • The Chariot • Justice • The Star • The Sun
These are all Arcana that are about taking direct action to achieve a goal, and are the best way to
embody the hot blooded, shonen anime protagonist-type character to one extent or another.
If you want to wrestle with challenging responsibilities in the face of adversity: • Strength • The Hanged Man • Temperance
These Arcana all focus on how people handle the pressures of duty and obligation, whether
they’ve been invited voluntarily or forced upon them.
If you want to deal with change and how it affects people: • Fortune • Death • The Tower
Fortune is the desire for change; the Tower is a person undergoing unwanted change, and
Death is a person who is adjusting to new, changed circumstances.
If you want to explore the darker aspects of human nature: • The Devil • The Moon
These Arcana deal with their vices, fear, dark impulses and illusions, both as flaws that hold a
person back and also as sources of creativity and inspiration.

Chapter I: Your Character
-- 23 --
Making your Character
1. All Stats start at 1d. 1d is bare minimum of human ability, and you can’t go any lower.
2. You have 10d to add to your Stats. In long-form campaigns new characters can’t
exceed 4d in any Stat during character creation, giving them a little room to grow even in
their areas of expertise. For shorter games and one-shots Players are free to build their Stats
up to their 5d maximum if desired.
3. You have 15d to add to your Skills. All Skills start at 0d, and the same limits apply to
Skills as Stats as far as long campaigns vs short ones are concerned. Once this is done you’ll
have 15d total in both your Stats and Skills.
4. You have 10 Relationship Points. There are a couple approaches for this, which are
detailed in the Starting Relationships section below.
5. Work out your personality, quirks and background. Stats and Skills are objective
measurements of ability. To make your character a distinct individual need to figure out
their inner life and what makes them tick, as in any roleplaying game. On the character
sheet there are sections for this under the “Subjective Evaluation.”
6. Finally, make your Persona. This is covered in detail in Chapter 3.
At any point during this process you will Choose your Arcana. You might have an idea in
your head from the start for a specific archetype, or it may come into focus while you’re
choosing Stats, Skills, Relationships or when building your Persona.
Starting Relationships
A new character’s Relationship Points can be spent to buy Relationship dice. The cost of each
die increases with the Relationships Level: 1d costs 1 point, 2d costs 2 points, all the way up to
5d costing 5 points, meaning the total cost of a 5d Relationship is 15 points. With 10 Points a
character can buy 1 Relationship all the way up to 4d, or spread it out across a larger number of
connections. How a Player spends these depends on the structure of the campaign. In a One
Shot or short-term campaign Players can spend all 10 Relationship points at character creation.
In a longer game, however, Players might not start with any Relationships and can spend their
initial supply of 10 Relationship Points to start and build up new ones gradually.

Arcana Archetypes Index
-- 24 --
The Magician Surpassing the plausible
The Magician makes stuff happen. They’re characters possessing extraordinary
skill in some field or area of knowledge, and they’re compelled to push that ability
as far as possible. Above all, the Magician believes themselves capable of making
miracles, even to the point of denying conventional logic. Where others see the
impossible, the Magician simply sees wonders not yet achieved.
Choose the Magician if: You want to be wildly talented and driven to exceed society’s
expectations of what’s possible.
But… Magicians are prone to magical thinking and tend to let their big ideas crowd out reason
and common sense.
Character Examples: Doc Brown (Back to the Future), Shulk (Xenoblade Chronicles), Kamina (Tengen
Toppa Gurren Lagann), Isaac Newton, Muhammed Ali Arcana Route Details: Page @@
The High Priestess Hidden influence
The High Priestess knows things. She’s deeply versed in esoteric domains of
knowledge and ability that others might overlook but which she wields with
cunning and precision. As importantly, she’s honed her instinct and intuition into
an unfaltering guide to navigate the most intractable dilemmas. When all else fails,
she can turn to her gut to point her in the right direction.
Choose the High Priestess if: You want to control things behind-the-scenes, relying on your
intuition and a set of uncommon, even secret skills unique to your background and interests.
But… High Priestesses struggle with trusting their intuition when it clashes with what others
expect of them, and their secretive nature may trend toward gossip and distrust.
Character Examples: Alice (Alice’s Adventures in Wonderland), Maya Fey (Phoenix Wright), Bulma
Briefs (Dragonball), Cleopatra, Marie Kondo Arcana Route Details: Page @@
The Empress Gentle power The Empress takes care of her people. She might do this as a doting, gentle team
mom, or as a cold, ferocious mother-bear who doesn’t stand for threats against the
people that depend on her. She supports and fortifies others, and they in turn
invest their loyalty in her command. The Empress takes this all in stride, radiating
poise, confidence and even beauty as a velvet glove enwraps an iron gauntlet.
Choose the Empress if: You want to be a compassionate leader who cares for her people’s
emotional needs as much as their material ones, and who carries herself with grace and beauty
But… Empresses often fall into a pattern of suspending their own needs in favor of others, which
can lead to emotional blockage and burnout.
Character Examples: Ellen Ripley (Aliens), The Boss (Metal Gear Solid 3), Jet Black (Cowboy Bebop),
Oprah Winfrey, Naoko Takeuchi Arcana Route Details: Page @@
Arcana Archetypes Index
-- 25 --
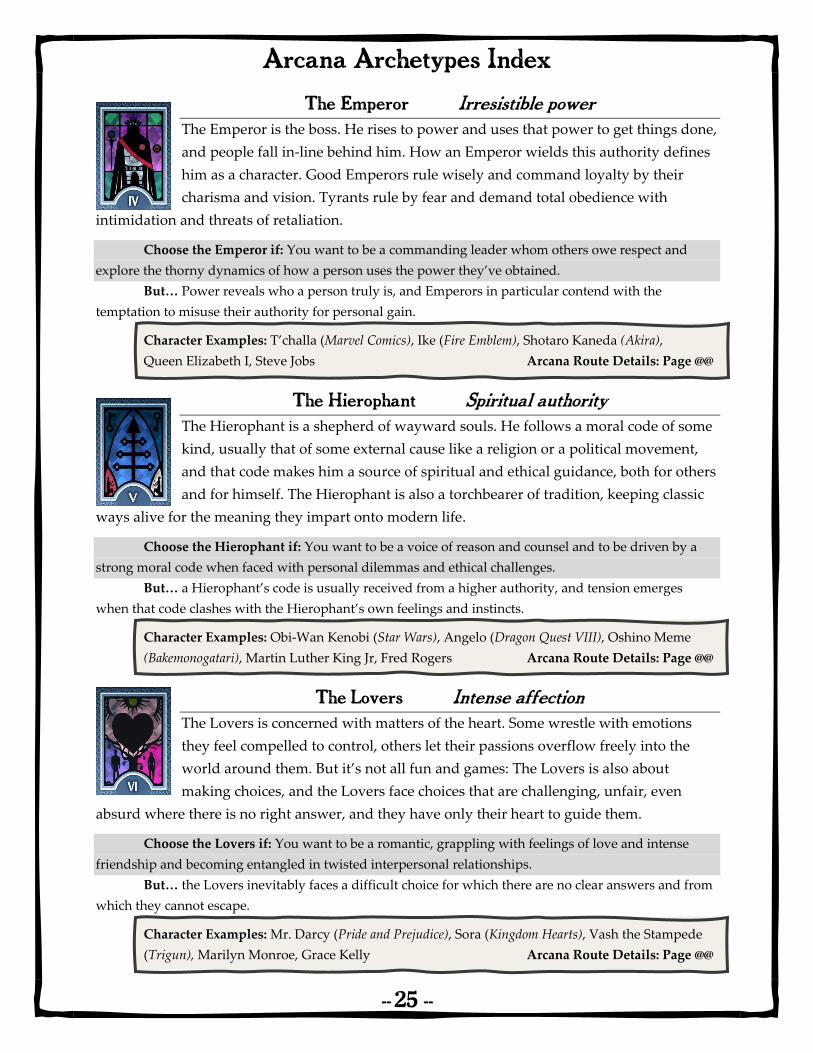
The Emperor Irresistible power The Emperor is the boss. He rises to power and uses that power to get things done,
and people fall in-line behind him. How an Emperor wields this authority defines
him as a character. Good Emperors rule wisely and command loyalty by their
charisma and vision. Tyrants rule by fear and demand total obedience with
intimidation and threats of retaliation.
Choose the Emperor if: You want to be a commanding leader whom others owe respect and
explore the thorny dynamics of how a person uses the power they’ve obtained.
But… Power reveals who a person truly is, and Emperors in particular contend with the
temptation to misuse their authority for personal gain.
Character Examples: T’challa (Marvel Comics), Ike (Fire Emblem), Shotaro Kaneda (Akira),
Queen Elizabeth I, Steve Jobs Arcana Route Details: Page @@
The Hierophant Spiritual authority The Hierophant is a shepherd of wayward souls. He follows a moral code of some
kind, usually that of some external cause like a religion or a political movement,
and that code makes him a source of spiritual and ethical guidance, both for others
and for himself. The Hierophant is also a torchbearer of tradition, keeping classic
ways alive for the meaning they impart onto modern life.
Choose the Hierophant if: You want to be a voice of reason and counsel and to be driven by a
strong moral code when faced with personal dilemmas and ethical challenges.
But… a Hierophant’s code is usually received from a higher authority, and tension emerges
when that code clashes with the Hierophant’s own feelings and instincts.
Character Examples: Obi-Wan Kenobi (Star Wars), Angelo (Dragon Quest VIII), Oshino Meme
(Bakemonogatari), Martin Luther King Jr, Fred Rogers Arcana Route Details: Page @@
The Lovers Intense affection The Lovers is concerned with matters of the heart. Some wrestle with emotions
they feel compelled to control, others let their passions overflow freely into the
world around them. But it’s not all fun and games: The Lovers is also about
making choices, and the Lovers face choices that are challenging, unfair, even
absurd where there is no right answer, and they have only their heart to guide them.
Choose the Lovers if: You want to be a romantic, grappling with feelings of love and intense
friendship and becoming entangled in twisted interpersonal relationships.
But… the Lovers inevitably faces a difficult choice for which there are no clear answers and from
which they cannot escape.
Character Examples: Mr. Darcy (Pride and Prejudice), Sora (Kingdom Hearts), Vash the Stampede
(Trigun), Marilyn Monroe, Grace Kelly Arcana Route Details: Page @@

Arcana Archetypes Index
-- 26 --
The Chariot Success in spite of resistance The Chariot is in it to win. She craves competition and hungers for victory and is
willing to smash through and overcome any roadblock in her path. In pursuit of
this ideal, a Chariot hones her strengths and skills relentlessly in preparation for
each challenge, and once in play attacks those challenges with all her energy and
will. To the Chariot it’s not enough just to be good: she must prove that she’s the best.
Choose the Chariot if: You want to be a proactive, fiery go-getter usually intensely involved in a
sport or other competitive activity in which you can strive to be The Best.
But… many Chariots hate losing even more than they want to win, and the pressure to win can
drive one into risking their safety, reputation, even their very lives.
Character Examples: Smash Williams (Friday Night Lights), Ryu (Street Fighter), Asuka Langley
Soryu (Evangelion), Napoleon Bonaparte, Bobby Fischer Arcana Route Details: Page @@
Justice The rule of law Justice fights for right against wrong. He sees clear lines between good and bad,
righteousness and evil, and he knows precisely where he stands. This can mean
adhering to and enforcing laws and standards of conduct that protect the weak
and punish the guilty, but also going outside the law to pursue a higher form of
justice or, indeed, one’s own sense of fairness and good.
Choose Justice if: You want to take a stand against injustice and unfairness, and fight for the
weak against corruption in whatever form you see it taking in your life.
But… seeing the world in stark black and white leaves little room for nuance, and Justice
characters may fall into the trap of becoming rigid and incapable of seeing things other perspectives.
Character Examples: Dale Cooper (Twin Peaks), Barret Wallace (Final Fantasy VII),
Light Yagami (Death Note), Frederick Douglass, Elliot Ness Arcana Route Details: Page @@
The Hermit Isolation The Hermit works best alone. This doesn’t necessary demand full isolation or an
inability to function in a group, but when she needs to get things done, she prefers
to do them herself. Maybe she thinks others will distract her or slow her down, or
maybe she’s got some baggage driving her need to withdraw. Whatever the case,
the Hermit only truly gets in her Zone in the tranquility of her solitary space.
Choose the Hermit if: You want to be a more secretive, withdrawn person who prefers to look
inward to build strength and get tough jobs done instead of relying on others.
But… Hermits can live up to their name when they get carried away with their introspection and
retreat from society, locking themselves away from the world altogether.
Character Examples: Elliot Alderson (Mr. Robot), Hal Emmerich (Metal Gear Solid), Iwakura Lain
(Serial Experiments Lain), Miyamoto Musashi, J.D. Salinger Arcana Route Details: Page @@

Arcana Archetypes Index
-- 27 --
Fortune The unpredictable Fortune is a risk taker. His life isn’t going the way he wants, and so he attempts to
seize and reshape his destiny. It could be he’s been dealt a bad hand and needs to
make some big bets to recover, or maybe things just aren’t quite right for him and
he’s on the hunt for an opportunity to turn them around. But Fortune plays a
dangerous game, and his efforts to reroute his life court disaster as much as winning big.
Choose Fortune if: You want to be someone looking to change their life in some big way, either
to escape a bad situation or to correct a chronic problem with your circumstances.
But… gambling comes with no guarantees, and Fortune characters risk losing what they already
have in pursuit of what they ultimately want.
Character Examples: Han Solo (Star Wars), Madeline (Celeste), Johnny Joestar (Jojo’s Bizarre
Adventure Pt. 7), Harriet Tubman, Evel Knievel Arcana Route Details: Page @@
Strength A great feat Strength is a tough cookie. Her power stems not from physical might but from
resilience, determination and resourcefulness. She needs these because Strength is
up against tremendous hardship and pressure. At times Strength finds creative
solutions to these problems, but when these don’t present themselves she still
refuses to back down, even in the face of seemingly insurmountable challenges.
Choose Strength if: You want to be a hardy, iron-willed person who refuses to give up even
when faced with grueling hardship and crushing external pressure.
But… Strength tends to face ongoing problems that can’t be easily solved and instead must be
endured, and overtime these can grind down even the most stalwart person.
Character Examples: Rocky Balboa (Rocky), Samus Aran (Metroid), Saber (Fate/Stay Night),
Florence Nightingale, Mahatma Gandhi Arcana Route Details: Page @@
The Hanged Man Sacrifice
The Hanged Man is a martyr. He voluntarily suspends his own agenda and needs
to support those of someone else, or even makes painful, personal sacrifices for the
sake of a greater good. In so doing he welcomes hardship and at least some
measure of suffering, and in exchange is rewarded with new insights into the lives
of others and of his own purpose in life.
Choose the Hanged Man if: You want to be someone who’s made a major sacrifice for the sake
of someone else or for a higher purpose and must deal with the consequences.
But… a Hanged Man’s sacrifice always seems worth it at the start, but as time drags on the
weight of their loss grows heavier and heavier.
Character Examples: Michael Bluth (Arrested Development), Kazuma Kiryu (Yakuza), Piccolo
(Dragonball Z), Marie Curie, Rosa Parks Arcana Route Details: Page @@
Arcana Archetypes Index
-- 28 --
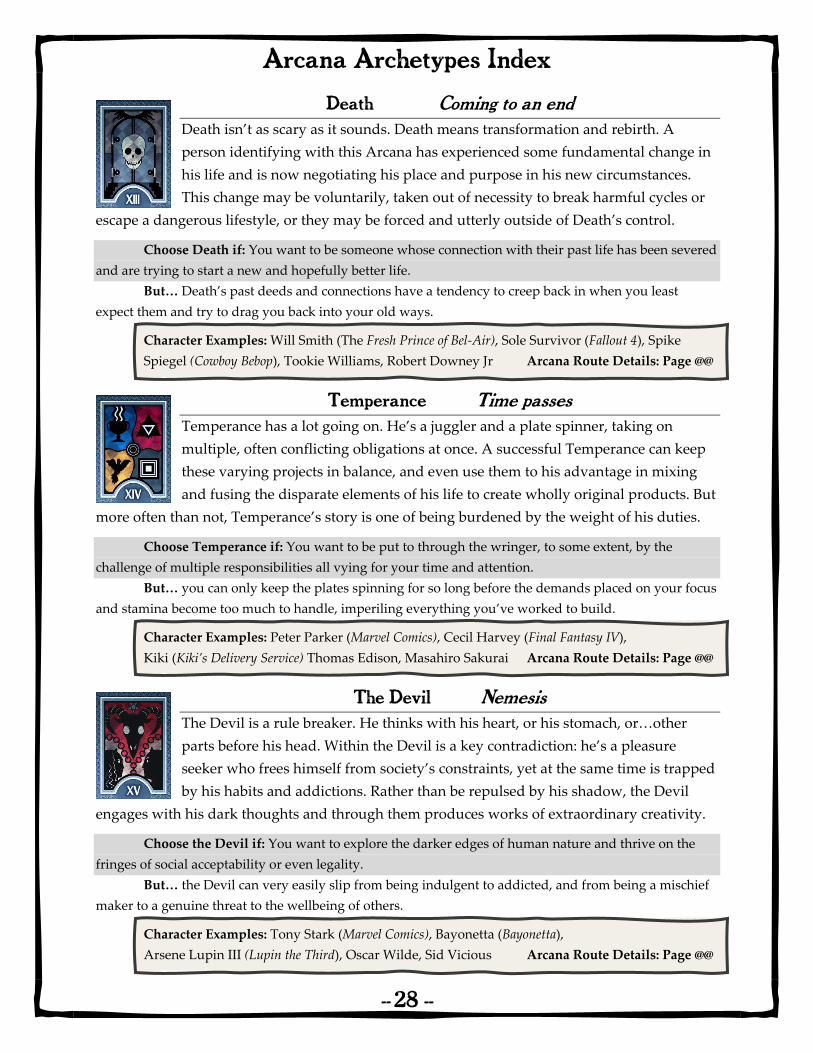
Death Coming to an end Death isn’t as scary as it sounds. Death means transformation and rebirth. A
person identifying with this Arcana has experienced some fundamental change in
his life and is now negotiating his place and purpose in his new circumstances.
This change may be voluntarily, taken out of necessity to break harmful cycles or
escape a dangerous lifestyle, or they may be forced and utterly outside of Death’s control.
Choose Death if: You want to be someone whose connection with their past life has been severed
and are trying to start a new and hopefully better life.
But… Death’s past deeds and connections have a tendency to creep back in when you least
expect them and try to drag you back into your old ways.
Character Examples: Will Smith (The Fresh Prince of Bel-Air), Sole Survivor (Fallout 4), Spike
Spiegel (Cowboy Bebop), Tookie Williams, Robert Downey Jr Arcana Route Details: Page @@
Temperance Time passes Temperance has a lot going on. He’s a juggler and a plate spinner, taking on
multiple, often conflicting obligations at once. A successful Temperance can keep
these varying projects in balance, and even use them to his advantage in mixing
and fusing the disparate elements of his life to create wholly original products. But
more often than not, Temperance’s story is one of being burdened by the weight of his duties.
Choose Temperance if: You want to be put to through the wringer, to some extent, by the
challenge of multiple responsibilities all vying for your time and attention.
But… you can only keep the plates spinning for so long before the demands placed on your focus
and stamina become too much to handle, imperiling everything you’ve worked to build.
Character Examples: Peter Parker (Marvel Comics), Cecil Harvey (Final Fantasy IV),
Kiki (Kiki’s Delivery Service) Thomas Edison, Masahiro Sakurai Arcana Route Details: Page @@
The Devil Nemesis The Devil is a rule breaker. He thinks with his heart, or his stomach, or…other
parts before his head. Within the Devil is a key contradiction: he’s a pleasure
seeker who frees himself from society’s constraints, yet at the same time is trapped
by his habits and addictions. Rather than be repulsed by his shadow, the Devil
engages with his dark thoughts and through them produces works of extraordinary creativity.
Choose the Devil if: You want to explore the darker edges of human nature and thrive on the
fringes of social acceptability or even legality.
But… the Devil can very easily slip from being indulgent to addicted, and from being a mischief
maker to a genuine threat to the wellbeing of others.
Character Examples: Tony Stark (Marvel Comics), Bayonetta (Bayonetta),
Arsene Lupin III (Lupin the Third), Oscar Wilde, Sid Vicious Arcana Route Details: Page @@

Arcana Archetypes Index
-- 29 --
The Tower Failure The Tower is having a bad time. He’s experiencing some major upheaval in his life
that’s left him reeling and without a clear idea of what he’s supposed to do now. A
Tower’s fall is often a consequence of his own pride or lack of foresight, but
sometimes he’s an unwitting victim of bad luck and other forces beyond his
control. Whatever the case, he’s left to pick up the pieces of his shattered life.
Choose the Tower if: You want to play someone who’s having the rug pulled out from under
them and are interested in exploring how a person responds to potentially traumatic upheaval.
But… Towers inevitably struggle with adapting to their new circumstances, and when the going
gets too tough are tempted to lash out, fall into old patterns, or break-down altogether.
Character Examples: Jason Street (Friday Night Lights) Big Boss (Metal Gear Solid),
Akira Fudo (Devilman), Tennessee Williams, Kurt Cobain Arcana Route Details: Page @@
The Star Distance The Star is a dreamer. She’s got a vision of what she wants to do and who she
wants to be in the future, even if it’s far off and unrealistic The Star isn’t worried
about the odds, because she’s bursting with hope, faith and inspiration, and those
elements drive her to perform, create and express her true self. No matter what
darkness the world throws at her, she can always look to her dream twinkling in the distance.
Choose the Star if: You want to play someone overflowing with hope in a distant dream that
inspires both heightened creativity and faith in yourself and others.
But… dreams are rarely easy to achieve, and Stars make it harder for themselves by having risky
and challenging dreams that, when deferred, lead to feelings of crushing defeat.
Character Examples: Luke Skywalker (Star Wars), Reisalin Stout (Atelier Ryza), Naruto Uzumaki
(Naruto), Leonard Da Vinci, Nina Simone Arcana Route Details: Page @@
The Moon Longing The Moon is a bit detached from reality, at least as other people perceive it. He
may adhere to outsider beliefs that others view with sharp skepticism, or cling to
fantasies that supersede the real world in his mind. The Moon can use these
altered states of belief to expand his mind and foster wild, original creativity, or as
a mask to hide himself from the fears and anxieties that stalk his waking hours.
Choose the Moon if: You want to play someone who others see as a bit of a weirdo or outcast
due to your conviction towards fringe beliefs and desire for to escape the real world.
But… The Moon’s strangeness and detachment can be the consequence of trauma and anxiety,
and these feelings are never far from the Moon’s thoughts.
Character Examples: Fox Mulder (The X-Files), Goro Majima (Yakuza), Ayumu “Osaka” Kasuga
(Azumanga Daioh), Nikola Tesla, David Lynch Arcana Route Details: Page @@

Arcana Archetypes Index
-- 30 --
The Sun Triumph
The Sun is an optimist. She is a fusion reactor of passion, energy and positivity
that pushes her towards her dreams with a relentless and fiery drive. She radiates
optimism and brightens the prospects of everyone around her, even in the face of
tragedy and defeat. This latter element is key, for as a near constant rule of
narrative the Sun’s bright outlook shines through a black cloud of personal adversity.
Choose the Sun if: You want to beam with confidence and optimism for your dreams no matter
what they are and be a source of boundless energy and encouragement for others.
But… as a general, though not 100% required rule, the Sun’s positivity is balanced by a major
personal hardship with which they must contend.
Character Examples: Leslie Knope (Parks and Recreation), Solaire (Dark Souls), Monkey D. Luffy
(One Piece), Julia Childs, Freddie Mercury Arcana Route Details: Page @@
Judgement Final outcome Judgement is conflicted. He’s got an important job to do, one that leads others to
turn to him as a source of authority or knowledge, and that makes him a shot-
caller. But this outward display of confidence and direction masks a deep need for
reflection and self-examination. In other words, Judgement can only grow as a
person by judging themselves, seeing their flaws in clear light and working at resolving them.
Choose Judgement if: You want to be someone with a vital job in your group or community in
which you’re responsible for making or carrying out big decisions.
But… Judgement is the only arcana whose want-- to assess others and act on that assessment--
directly conflicts with his true need, which is to examine his own weaknesses and problems.
Character Examples: Gregory House (House, M.D.), Miles Edgeworth (Phoenix Wright), James
Sunderland (Silent Hill 2), Char Aznable (Mobile Suit Gundam) Arcana Route Details: Page @@
Judgement doesn’t include any real-life examples because it’s rather unique among the 20
standard Arcana used for player characters in The Velvet Book. Judgement’s psychological arc is
about reflection and introspection, and it’s challenging to really know the inner lives of real
people. Fiction, on the other hand, loves Judgement, because it leads to characters who are at
once powerful plot drivers, yet are also deeply flawed people who need to come to terms with
those flaws to grow and learn. That’s what Judgement is about: someone who thinks they’ve
got it all together learning that they need to take a second look at who they think they are.
Judgement can be a little tricky to play as in the context of Persona, since it usually
implies a level of authority and importance that kids and teenagers don’t have. If you do intend
to play as Judgement, view these as relative. Being the head of the student government or the
“manager” of your garage band or the queen bee of the fashion squad isn’t important in the
grand scheme of things, but the microcosm of high school tells a vastly different story.

Arcana Archetypes Index
-- 31 --
There are two more Arcana worth considering that have special roles in Persona: The Fool and
the World. It’s due to these special roles that we suggest players avoid using them as Arcana for
their characters. The Fool can work but with some difficulty, whereas the World is not suited in
any way for player characters.
The Fool Carefree ignorance The Fool is a blank slate. In Persona, The Fool normally represents the main
character, as controlled by the player himself. It’s you, before all the craziness that
is life happens to you. The Fool doesn’t work very well as a player arcana because,
broadly speaking, every player begins the game as the Fool, unaware of what’s to
come but brimming with potential. Insofar as the Fool can be used as a character archetype, he’s
defined by innocence of the world’s hardships and a carefree approach to life, which can serve
both to lead him into danger and help him navigate challenging circumstances without losing
his good nature.
In Persona, the Fool is often used, not as a specific Relationship or character, but as a
representation of the character’s goals and friendship. So GMs can use The Fool in this way to
represent a player’s connection to their group as a whole.
The World Success at hand If the Fool is the start of your understanding of the universe, then The World,
fittingly, is its culmination. In Persona the World Arcana comes into play at the
very end of the game, once the mystery at the heart of the narrative is laid bare
and all other cards, literal and figurative, are on the table. To that end there’s no
real path to using the World as a player character’s archetype. The World represents the
completion of one’s journey from childhood to emotional, mental and spiritual maturity. It’s the
destination rather than the journey, and The Velvet Book is all about the journey.
In the same way that the Fool can be used to represent a player character’s connection
their group, the World can be used to represent their understanding of the truth at the end of
the story. As a person, the World works as a figure of higher power involved in the plot, either
an aide to the character’s progression through the story or its ultimate villain.

(Page #)


Chapter II: The One Roll Engine
-- 34 --
An Introduction to O.R.E.
The Velvet Book is derived from Monsters and Other Childish Things, which is itself a branch of
Wild Talents, a game of superhero adventure. These three share a common nervous system: The
One Roll Engine, or ORE. It’s the method that the GM and Players use to resolve complex
actions, jointly the game’s source code, running on text rather than a Playstation CPU, and its
interface, using dice instead of a DualShock controller. Here’s how it works.
1. Get some dice. The ORE uses d10s, so it uses “#d” to tell you how many dice you’re
rolling. Six d10s is 6d, ten d10s is 10d.
2. Roll the dice. The more dice you roll, the better your action. Unless explicitly stated, you
never roll less than 2d, and you never roll more than 10d.
3. Find Sets. A Set is two or more dice with the same number, like 4 4 or 7 7 7. The number of
dice in the Set is called its Width, and the number on the dice themselves is the Set’s Height.
A Set is written as Width x Height. So if we roll 7d and get as a result:
1 2 3 3 5 8 8
then our Sets are 2x3 and 2x8. Any dice not part of a Set are Loose Dice, so our Loose Dice are
1, 2 and 5. Most of the time Loose Dice don’t do anything, and if that changes you’ll know
about it.
4. Resolve. Generally speaking any roll that produces a Set counts as a success, but there are
lots of extenuating circumstances that make things less clear-cut and more exciting. That’s
where the fun comes in.
Finally, as an overall rule, only roll when the result is in question or would be interesting. You
don’t need to roll to walk to the store and buy milk. But if you’re fleeing on foot from Boris’s
street gang or need to hide in the shadows from a creeping horror, then the dice should come
out.
Chapter II: The One Roll Engine
-- 35 --
What Sets Mean
A Set’s Width indicates its intensity. A 2x Set is nothing to write home about, a 4x is
staggeringly strong, and a 6x is beyond the pale. In situations where speed and timing matter,
Width also tells you how fast your action is. A 2x is normal, 3x is pretty dang quick, 6x is
something out of a ninja anime.
The Velvet Book frequently uses Width to measure an ability’s effect, usually in units of
Width-1. An invisibility spell could mask your presence for Width-1 minutes, and grasping,
vine-y tendrils can ensnare and immobilize an enemy in combat for Width-1 rounds.
A Set’s Height tells you its precision and excellence. A x1 Set is clumsy, a x5 is elegant
and a x10 is a masterpiece bringing onlookers to tears with its flawless execution. In combat,
whether martial, emotional or against Shadows, a Set’s Height also tells you what part of your
enemy you’ve struck. A 2x1 targets a person’s Diligence, and a 2x10 goes against their
Expression. In dealing with Personas and Shadows, Height points to specific Parts called Hit
Locations.
Like with Width, The Velvet Book uses Height to
measure certain effects. Analyzing an enemy’s
weaknesses, for example, gives you more and better
information the Higher your Set is.
Strategizing your Sets
Which is better for you depends on what kind of action
you’re attempting. If you’re trying to be fast or
overwhelm some obstacle with raw force, you need
Width. If you’re trying to be clever, sneaky or stylish,
Height is probably more important. In complex,
dynamic situations like combat you need both: Width
to hit hard and fast, Height to hit where it counts.
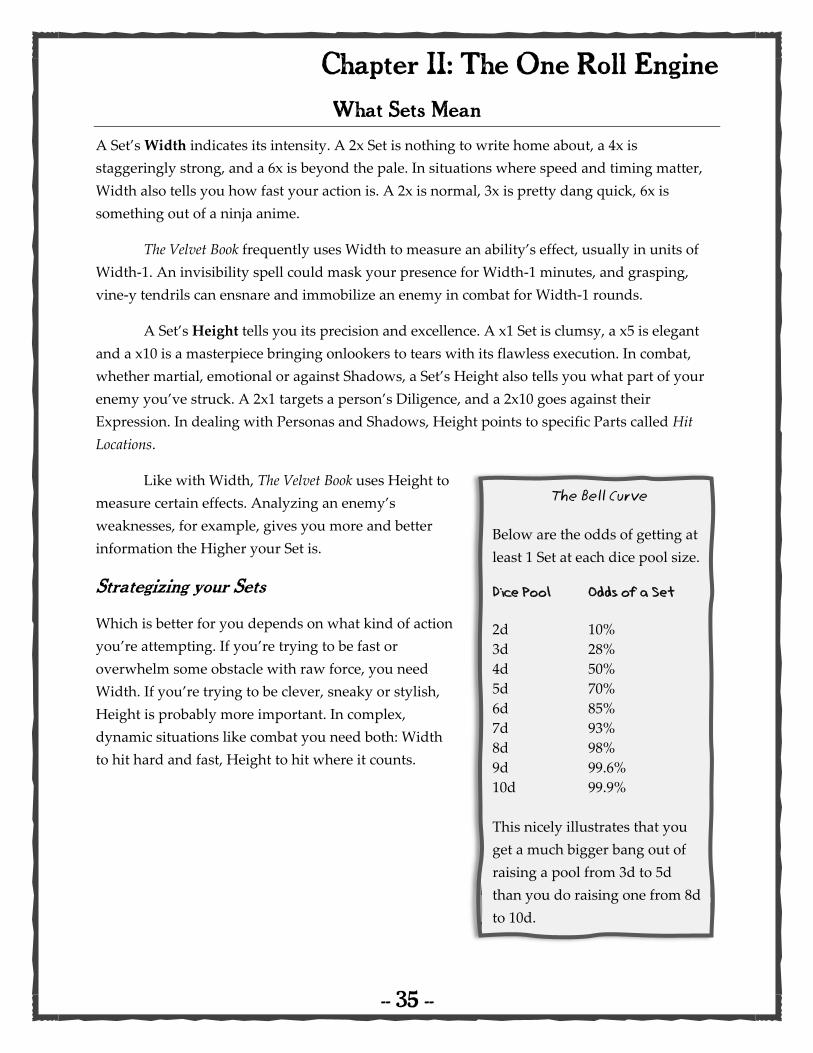
The Bell Curve
Below are the odds of getting at
least 1 Set at each dice pool size.
Dice Pool Odds of a Set
2d 10%
3d 28%
4d 50%
5d 70%
6d 85%
7d 93%
8d 98%
9d 99.6%
10d 99.9%
This nicely illustrates that you
get a much bigger bang out of
raising a pool from 3d to 5d
than you do raising one from 8d
to 10d.

Chapter II: The One Roll Engine
-- 36 --
Difficulty
An especially challenging task might face a Difficulty, which is a minimum Width or Height
requirement. Any Set that does not at least match the Difficulty’s parameter doesn’t succeed.
The most common Difficulties are related to Height, as they stand for a required level of
proficiency. Difficulties related to Width usually represent a tight time-limit—can you run and
dive under the stone temple door before it closes?
Height Difficulty Rating Width Difficulty Rating
3 Especially hard 3 Quite fast indeed
5 Professionals only 4 Catch up to a car
7 Masters only 5 Olympic sprinter speed
Bonuses and Penalties
Situational edges or disadvantages equate to Bonuses or Penalties that add to or subtract from
your dice pool. 1d is minor, 2d is significant and 3d is a major, game changing shift. These can
come from a sudden change of circumstances—a smoke bomb improving your chance to hide
or impeding your aim; or as a reward from your GM for a particularly clever tactic.
Difficulties vs Penalties
Penalties tend to be disproportionately worse for players with low dice pools versus higher
ones. An 8d roll taking a -1d penalty gets knocked down from 98% to 93% odds of a Set, while a
4d roll goes from 50% to 28%. Difficulties are lot more even-handed: that 4d roll has a better
shot of overcoming a 5-Height Difficulty than it does a -1d Penalty.
Multiple Actions
One dice roll corresponds to one discrete action. If you want to get fancy though you can
attempt Multiple Actions which uses a single dice roll to simulate two or more moves at the
same time. These break down further into two kinds: doing one thing multiple times and doing
multiple different things together.
Doing One Thing Multiple Times
Let’s say you’re trying to punch two different combatants in a scrum using Guts + Fighting.
Here’s how it’s done.

Chapter II: The One Roll Engine
-- 37 --
Take a die penalty for each additional action you’re attempting. One additional
punch is a -1d penalty. If you wanted to punch 4 times that’s -3d.
Roll and choose a Set for each action. Punching twice requires two Sets; four punches
means four Sets, and at a -3d Penalty to execute it’s hard to conceive of the scenario where the
math works out in your favor.
Doing Two Things at Once
This covers feats like driving a car and shooting a gun out the window or stripping off a
Shadow’s armor with your Persona’s acid spray before immolating them with a blast of fire.
Start with the lowest dice pool involved in the action. If your acid spray is 8d and
your fire breath is 7d, start with 7d.
Take a die Penalty for each additional action you’re attempting. Same as before,
combing acid spray with fire breath is a -1d Penalty
Roll and choose a Set for each action. If you don’t roll a Set for each action you declared,
you need to choose which goes off and which fails. Do you maintain control of your car but
miss your shot? Or do you hit your target but plow into a fruit stand?
Called Shots
A Called Shot is a combat specific move where you’re aiming at a specific hit location—whether
as a human loosing a withering Put-Down against a fellow student’s Guts or Proficiency, or as a
Persona trying to vaporize a specifically threatening Shadow component. This works because,
as will be covered in the Combat chapter, specific Stats or parts on a Persona or Shadow are
linked to specific Heights on an attack Set; these are called “Hit Locations.” In normal combat,
where you hit is at the mercy of your dice, but a Called Shot allows you to single out vulnerable
spots or threats. Here’s how it works.
Take a -1d Penalty. Called Shots are tricky, so you lose a die when you declare one.
Face a Difficulty Equal to the Hit Location’s minimum height. If you’re aiming at a
Shadow part occupying the 5-7 Location, your Difficulty is 5. Anything lower will fail, anything
5 or higher will succeed.

Chapter II: The One Roll Engine
-- 38 --
Roll your Dice. If you beat the Difficulty, your Attack hits the intended target, even if your
Called Shot was aimed at a 2 location and you rolled a 2x10. If you miss the difficulty, your
attack fails completely, even if you rolled a successful Set below it.
An intended consequence of Called Shots is that lower Hit Locations become easier to hit than
higher ones. A part at Hit Location 1-3 can be hit with any Called Shot, as once you accept the
-1d Penalty you only need to clear a Difficulty of 1, which is means any Set will work. That’s
why the first 6 Hit Locations on a human character are occupied by Diligence and Guts—the
two things best representing your character’s fortitude, while the more sensitive stats of
Proficiency, Knowledge and Expression hang out in the trickier to reach 7-10 range.
Gobble Dice
Gobble Dice are how the ORE handles blocking or interfering with another character’s actions.
Gobble Dice cancel dice from successful Sets; any Set gobbled down to 1x Width is broken, since
it turns into a useless Loose Die.
The Velvet Book uses Gobble Dice in three ways.
Severe Action Penalties
If you’re attempting an action under highly adverse circumstances, a GM can impose a Gobble
Die as a Penalty. These could include running with a broken leg or firing a weapon at an
extreme range. Used in this way, a Gobble Die will eat away at a player’s success, ruining a 2x
Width Set or weakening a stalwart 3x or 4x Width Set.
Foiling Actions
The second way that Gobble Dice come into play is when you’re trying to stop a character from
doing something. If a human character is trying to hide using Proficiency + Reflex, your goal is
to foil their attempt with Knowledge + Notice. When you roll, your Notice Set becomes Gobble
Dice, and can consume any Reflex dice of equal or lesser Height. If you break up all of the
hider’s Sets, they’re exposed.
To put this into action, here’s an example. Your prey is rolling Proficiency + Reflex (6d),
and you’re using Knowledge + Notice (7d) to detect them. You both roll:
Reflex: 1 1 6 6 7 7 Sets: 2x1, 2x6, 2x7
Notice: 1 1 3 4 6 9 9 Sets: 2x1. 2x9

Chapter II: The One Roll Engine
-- 39 --
As the character opposing another’s actions, your goal is to use one of your Sets to break up
your opponent’s Sets. On the surface this seems unfair: it’s your one Set vs all of their Sets. But
you’ve got an advantage: once a Set becomes Gobble Dice, you can freely split it up and fire off
the dice like little antimatter missiles to annihilate any dice of equal or lesser Height.
This means that your one 2x9 Notice Set can be split into two 9s, which can be used to
gobble both the 2x7 and 2x6 down to 1x7 and 1x6, which are broken sets. Unfortunately, this
means you’ve run out of ammunition before you could break their last set, the 2x1, but that’s a
pretty measly outcome on their end. Under these circumstances, your GM may rule that while
you haven’t found exactly where the other character is hiding, you were able to sniff out their
general location or glean some other advantage.
As an advanced strategy, you could declare Multiple Actions in your attempt to uncover
your enemy’s hiding spot. If you had done so and still rolled the result above, you could use
both your 2x9 and your 2x1 Sets, giving you the dice needed to Gobble the other guy into
oblivion.
Blocking Attacks
The third way that Gobble Dice are used is as a Defensive option in combat. We’ll get into that
more deeply in the Combat Chapter, but the trick is that Width becomes more important than in
a non-combat scene. That’s because Width affects an attacks speed, and you can’t block or
dodge an attack that’s too fast for you to handle. There are other factors that can modify the
outcome, but at a base level to Defend against an Attack you need to match or beat its Height
and Width.
With these examples, Gobble Dice provide a framework for adjudicating contested
actions. Height is vital—your goal is to outperform your foe. But sufficient Width or a sufficient
number of Sets can compensate for weak Height, in the same way that sheer tenancy can make-
up for a lack of skill.
Contested Actions
You won’t always be rolling against a fixed, static Difficulty or in the face of a Penalty. Very
often you will be facing off against another person or some active force trying to stop you, out-
perform you or whom you are trying to stop or out-perform. This is a Contested Action, where
both you and your adversary roll dice and compare outcomes. Here are the main kinds of
Contested Actions:

Chapter II: The One Roll Engine
-- 40 --
Height vs Height- Contests of Skill: When the goal is to show who’s smarter, funnier,
more eloquent or talented, the person who rolls greater Height usually wins. Width doesn’t
really matter much here; it might tell you how impassioned your speech is, but if what really
counts is accuracy of statement and strength of argument, Height reigns supreme.
Width vs Width- Contests of Might: When the goal is to show who’s stronger, faster or
hardier, the person who rolls greater Width usually wins. At low dice pools this will pretty
often result in a tie, as scoring more than 2 Width is less likely—if you’re using Diligence + P.E.
in a race, a tied result means you two are at an even pace. Beating this deadlock might require
adding some extra juice in the form of Relationship Dice or strategizing (using Knowledge +
Out-Think to find a short-cut or Proficiency + Reflex to trip them up).
Opposing a Roll: When your goal is to specifically stop someone from doing a thing, you
need to Gobble their Sets. This could be using Diligence + Block to stop your best friend
punching a teacher who’s been intentionally flunking him or Knowledge + Notice to detect a
Shadow trying to set-up an ambush. So Height is important, but so is Width. If you roll a 2x8
and your buddy rolled a 2x7, a 2x3 and a 2x1, you only have enough Gobble Dice to break two
of those Sets, so he’ll still stomp on Mr. Blackwood’s foot with his 2x1.
Chapter II: The One Roll Engine
-- 41 --
Awesome Dice
The final piece of the One Roll Engine owed an explanation is Awesome. Awesome is an effect
you can get that lets you change your dice after you roll them. Awesome is written as
“Awesome xY”, where Y is the number of dice you’re allowed to influence.
For example, let’s say you roll 7d and have Awesome x1. You roll:
1 2 4 5 5 7 10
So you’ve got a 2x5, but you also have Awesome x1. With that you can take your 10 and
adjust it to upgrade that 2x5 to a 3x5 or match it to your 7 to make it into a 2x7, in case those two
extra points of Height are important. If you had Awesome x2 you could move your 10 and your
7 potentially raising your 2x5 to a beefy 4x5.
Awesomeness Guarantees Success. By letting you create Sets by hand, any amount of
Awesome on an action ensures success 100% of the time. That’s why it’s Awesome. It does not,
however, guarantee that your Set will be a particularly good one, and that is because:
Awesomeness Always Shifts Downward. If you roll a (1, 10) with Awesome x1, you can
shift your 10 down to a 1 to give yourself 2x1, but you can never shift your 1 up to a 2x10. This
means that Sets created through Awesomeness tend to have less Height than ones rolled “in
nature”; consequentially, it’s impossible to create a Set with Height 10 using Awesome dice.
Awesomeness is therefore very powerful and influential, but it’s not a substitute for
having a good dice pool. Rolling 2d with Awesome x1 will always result in some measure of
success, but it will never have the range of achievement, intensity or flexibility of a good
handful of d10s.
Awesomeness Is Always Situational. Awesomeness can be earned, lucked into or
bargained for, but you are never intrinsically Awesome. The diverse ways that you can become
Awesome are explained in Chapter 7: The Path to Awesome Power.

(Page #)


Chapter III: Personas
-- 44 --
What is a Persona?
A Persona is a part of your character’s psyche and personality that manifests a physical form to
serve and protect you. One reason why Persona and Monsters and Other Childish Things go
together like chocolate and peanut butter is because of how similar Monsters and Personas are--
but they aren't the same. For folks coming into The Velvet Book by way of MaOCT, this is how
they compare.
How Personas are the Same as Monsters
Personas aren't from around here. What exactly causes a character to manifest a Persona
depends on the GM’s backstory, but it's not a normal thing that happens to people. For you to
have a Persona that you can call on, something seriously weird has happened to your life.
Personas aren’t affected by hunger, exhaustion or any other physical strain that would
endanger a normal creature.
Your Persona’s got your back. It’s your weaponized subconscious. It exists to protect you
from otherworldly threats you’d otherwise be hopelessly unequipped for, and it’s the means by
which you can combat those threats.
Personas have the same basic parts. You build a Persona the exact same way you build a
Monster: with dice, hit locations, qualities and extras. There are a few new bits but we’ll talk
about those when we get to them, and they only add a couple technical details to the process.
How Personas are Different from Monsters
Personas don’t “exist” in the “real world.” These are in quotation marks because
“exist” and “the real world” can be fluid concepts in Persona. In most versions, a Persona can’t
interact with the mundane world around you in any meaningful way. But stories taking place
in a Persona setting usually travel between our world and other, stranger ones where Personas
(among other, nastier things) are quite tangible forces. That said, we encourage a GM to freely
bend or ignore this rule if they’d prefer their setting to be one where Personas can freely
interfere with their user’s lives. It won’t break the game, we promise.
Your Persona is a part of you. There are some optional rules later in this module that
tweak this axiom, but generally speaking you have one Persona, and it's special to you because
it springs from some mystic recess of your mind. As a result, it normally takes on a form that’s
significant to you, like a character from a fairy tale your grandma recited to you when you were

Chapter III: Personas
-- 45 --
little; a fictional or mythological hero you identify with; or a weird, non-Euclidean mass of
soccerballs and astroturf congealed out of your love of sports. Whatever it is, it’s a fragment of
your own psychic matrix. It may act like an independent, separate creature, but it’s still, in some
way, a product and reflection of your own mind.
What Personas are Made-Of: Parts
Personas and Monsters from Monsters and Other Childish Things share the same design structure:
they’re made-up of Parts, Qualities and Extras. Personas also have some added bits and bobbles
that are unique to their source material, but the bones and sinews aren’t that much different
from a Monster.
First, Personas are built out of Parts. Parts the important pieces and elements of a
Persona’s design that do cool stuff. Below is an example using Persona 4’s Izanagi.
1-2 Edgy Boots 6d
3-5 Delinquent Jacket 9d
6-8 Switch Glaive 9d
9-10 Godhead Helm 6d
A Persona’s Parts are each linked to its 10 Hit
Locations. The more important the part, the more
Hit Locations number it takes up. A single Part
can’t exceed four Hit Location numbers, and a
Persona can’t have fewer than three Parts.
A Part’s Hit Locations also tells you its Dice Pool. Each Hit Location number equals
either 3 or 5 dice, depending on your Campaign. 3d Personas are weaker but have more room
for growth and are better suited for long-form adventures. 5d Personas are stronger and more
fleshed out at the start, making them ideal for one-shots.
Beyond these guidelines, you can design your Persona’s parts in any way you see fit.
You can give your Persona one powerful 4 Hit Location Part and a bunch of weaker, 1 and 2
Location Parts, or you can spread your 10 Hit Locations evenly across 5 Parts. The more Hit
Locations a Part has the more versatile and powerful it is, and the more prominent and easily
targeted it becomes.

Chapter III: Personas
-- 46 --
Should Personas have personalities?
In the Persona video games, a character's Persona can talk with its user and has a definite
personality, but it never actually factors into the player's experience with the game. Most
Personas have a few lines of dialog when they're initially summoned, and are silent for the
other 50-100 hours of game time. You can certainly play this module that way, thereby
making your Persona just a tool to solve puzzles and a weapon to vanquish evil. But we
don't recommend it. Doing so ignores key features of the tabletop role-playing format and
of Monsters and Other Childish Things in particular. We encourage players to treat their
Personas like fully formed characters with their own voices, desires, frustrations, fears and
needs. You'll get much more mileage out of the experience that way, trust us.
3d and 5d: The two models of Personas
3d Personas are best suited to long-term, campaign driven gameplay. They start
weak (3d per Hit Location, for a total of 30 dice), but it leaves a lot of room for growth and
customization, and each new die or Extra you add to your Persona feels like a major
accomplishment. It's also a good model for new players to the game, since it means you'll be
introduced to Extras and new Qualities more gradually instead of having a huge lump of
them dropped onto your character sheet at once. 3d Personas also put more emphasis on the
human side of the Persona/User equation, since their dice pools are more comparable.
5d Personas may fit better in one-shot style gameplay. These follow the standard
MaOCT rules (5d per Hit Location, a total of 50 dice), meaning you're starting the game out
slinging 8-10d dice pools with lots of Extras stacked on top. You can definitely still play a
long-term campaign with 5d Personas, but you're going to be facing severe threats from the
moment your feet touch the ground, and each additional die you earn for your Persona is
less of a big deal. 5d Personas also tend to marginalize human characters during Shadow
combat, since a 5d Persona can just deal so much more damage. A GM running one of these
games may decide to levy additional restraints on when and how a Persona can be used to
combat this.
To illustrate how these rules work, the following page has examples of each model.
It also demonstrates some of the new features introduced into Persona design.

Chapter III: Personas
-- 47 --
Orpheus (3d Persona) Arcana: The Fool
Favorite Thing: Music
Evocation: SEES Model Evoker
Resist: Fire
Weak: Dark
1-2 Mechanical Legs 5d 4 HP Defends (Fast x1)
3-4 Resonator Core 5d 4 HP Useful: Control Sound, Tough x1
5-6 Musician’s Hands 5d 4 HP Useful: Dexterity (Effective x1)
7-9 Mystic Harp 6d 4 HP Attacks (Fire, Power x1), Attacks (Physical, Area x1)
10 Mournful Visage 2d 3 HP Useful: Weaken Spirits (Always Works)
Arsene (5d Persona) Arcana: The Fool
Favorite Thing: Stealing
Evocation: Unmasking
Resist: Dark
Weak: Light
1-2 Fancy Bladed Legs 6d 9 HP Defends (Fast x2), Attacks (Power x1)
3 Gentleman's Coat 3d 7 HP Useful: Bottomless Pockets (Always Works), Tough x1
4-5 Nimble Claws 8d 9 HP Attacks (Physical), Useful: Thieving (Effective x1)
6-8 Wings of Rebellion 8d 9 HP Attacks (Dark, Power x2, Burn x1), Attacks (Wind, Power x1),
Defends, Useful: Windy Flight
9 Glowy Eyes 4d 7 HP Useful: See the Invisible (Always Works)
10 Dapper Tophat 5d 7 HP Useful: Magic Tricks (Always Works)

Chapter III: Personas
-- 48 --
What Personas are Made-Of: Qualities
Qualities are things that a Persona can do that make it unique and powerful. They don’t
necessarily define every aspect of a Persona’s behavior and interaction with the world, just the
important ones. A Persona doesn’t need a Quality like Useful (Move Around) in order to not be
locked in one place, nor does it need Useful (Sight) to have basic vision. But Useful (Rocket
Flight) allows a Persona to soar into the air on a gout of jet fuel and Useful (X-Ray Vision) lets it
peer through solid matter. That’s the good stuff.
There are three kinds of Qualities. Each body Part that a Persona owns has one free
Quality that comes with it. Additional Qualities can be loaded onto a part at a cost of 1d per
Quality. This leads to an important design rule: A Persona cannot have a dice pool greater than
10d in a single Part. Any dice above 10d must be exchanged for Qualities or Extras, which we’ll
discuss next. So if you have a 3d Persona with Part occupying its 1-4 Location, then it’s got a
12d Pool and you need to cash in at least two of those dice for extra bits.
Attacks
An Attacks Quality allows a Persona to use its Part to inflict damage. Persona attacks have a
baseline damage of Width-1, so a 3x7 attack will cause 2 damage to its target’s 7 Location.
Damage comes in two degrees: Shock, which is your nonlethal, suppressive damage, and Scars,
which leave torn and scorched carcasses behind. Personas, unless specifically instructed by their
Human User will default to inflicting Scars against everything they encounter. Attacks normally
have an elemental trait affixed to them: Physical as the default, but other elements like Fire, Ice
or Electricity are also valid and can affect the flow of combat dramatically.
Defends
A Defends Quality allows a Persona to use its Part to protect itself or an ally from harm, using
its Set to gobble dice from incoming attacks.
Useful
A Useful Quality allows a Persona to use its Part to do something, well, useful, like flying or
generating electricity or being supernaturally seductive or creating illusions. Useful Qualities
can be anything a player decides would be helpful or cool to have at their disposal for the
adventure, and creative application of Useful Qualities is at the heart of resolving puzzles and
exploring the Other World in The Velvet Book.

Chapter III: Personas
-- 49 --
What Personas are Made-Of: Extras
You can also exchange dice for Extras, which alter or enhance the powers of a Persona’s Part.
Most Extras can be taken more than once to further boost their effects, at a cost of 1d per Level.
Extras are written as “Name xLevel”, so two levels of Power reads as “Power x2” and costs 2d.
ALWAYS WORKS: A Useful Quality with this Extra can never fail. Even if you roll and
don’t get a Set it counts as a 2x1—the lowest possible successful result. Each level of Always
Works benefits one Useful Quality, which you need to specify as Useful (Ability, Always
Works). Thus a Part with two Useful Qualities would need two instances of Always Works for
them to both benefit. And it bears repeating: Only Useful Qualities can Always Work.
AREA: Attacks with the Area Extra target all enemy combatants on the field. Anyone hit by
an Area attack must roll Area Dice equal to Width-1 + Area and take 1 point of damage to each
indicated hit location (so an Attack with 3 Width and Area x2 would force the targets to roll 4d
in Area Dice). The attack itself deals no damage; its full offensive output is channeled into its
Area Dice. This means no double dipping; you don’t’ deal damage from the attack, and also
from the Area Dice. If Area is applied to a Useful Quality, each level of Area allows it to
influence one additional target. There are some other interactions of Area dice with other
Extras, which are covered in the Combat chapter on Page XX.
BURN: Each level of Burn inflicts 1 point of ongoing damage every turn after the attack lands,
lasting either for Width in rounds or until the attacker does something to extinguish the burn.
Note that this isn’t limited just to fire-- acid, poison and swarms of angry bees work just as well.
This damage is reduced by the target’s Toughness, the same as a normal attack would be.
EFFECTIVE: Each level of Effective adds +1 Width or +2 Height to a Useful or Defends Set
(but specifically not Attacks). Extra Width doesn’t affect a Set’s speed (you need Fast for that),
but Effectiveness does give you more control over Usefuls that are reliant on Width or Height.
Each level of Effectiveness can adjust either factor (so Effective x2 can add +1 Width AND +2
Height to a Useful or Defends Set). You can choose how to use your Effectiveness each time
before you roll, or you can just give if a fixed output if a specific Useful only ever cares about
one of the two values.
FAST: Each level of Fast adds +1 speed to your Set. This means a 2x4 attack with Fast x2 will
hit before a 3x5 would (since it’s effectively a 4x4 for speed purposes). Fast works just as well on
Defends and Useful Qualities too, so you can create a Persona that can zip around the
battlefield with lightning speed or ensnare its targets before they can act.

Chapter III: Personas
-- 50 --
HEAL: Heal is both an Extra and a Quality of its own. Each level of Heal will restore 2 Shock
or 1 Scar once per combat—so Heal x3 can heal 2 Shock three times or 6 Shock once. Healing
can never fail; if you don’t roll a Set your Healing action occurs at the end of the Resolve Phase
of combat, and if you do get a Set it goes off based on that Set’s timing. When Healing your
patient determines where to apply the treatment, and you can only have one patient per turn.
POWER: Each level of Power on a part increases the damage dealt by that part’s Attack
Quality by 1. So Power x3 raises an attack’s power to Width+2.
RECOIL: The Recoil Extra can be attached to a Defends Quality and does two things. First,
any attacker striking a Part with Recoil on it takes damage in return—perhaps in the form of
searing flames, spikes or some other hazard. This damage is inflicted as a pool of Recoil Dice
equal to the Part’s Recoil level, which are rolled and apply damage against the attacker in the
same way that Area Dice do. Second, if you successfully Defend against an attack, and your
Defends Quality has Recoil, you can reflect damage back to your attacker equal to your Recoil
level. Unlike passive Recoil, this kind of active recoil doesn’t scatter the attack: instead, if you
Defend using Recoil x3, your unwitting Attacker will be blasted by a 3 Damage attack, equal to
the Height of your Defense Set (this interaction is described in greater detail in the Combat
Chapter, page XX)
SPLASH: Attacks with Splash inflict damage equal to its Rank to an adjacent hit location,
kind of like a localized Area attack, except that Splash augments an attack’s damage instead of
replaces it. If your Persona hits with a 4x7 and Splash x2, the target is going to take 3 Damage to
its 7 location, plus 2 damage to an adjacent Part. If the choice is between two Parts, Splash will
always hit the Lower of the two. As with Area, Splash can be applied to Useful Qualities that
affect specific Parts as well to give them a dispersed effect.
SPRAY: Each rank of Spray on a Quality lets you declare a second use of that action without
taking a Penalty for Multiple Actions. Because each action you declare requires its own Set, how
much value Spray gives you depends largely on your dice pool. At 6d or less it’s not very likely
that you’ll roll more than one Set at all, making Spray unreliable. In the realm of 7d-9d, Spray
becomes a force multiplier as the benefit of +1d is negligible vs the benefit of an extra usable Set.
And at 10d, Spray becomes one of the best Extras. Note too that there’s little value in having
huge quantities of Spray if you don’t have enough actual dice to create Sets; at 6d, the best you
can ever have is 3 Sets, so Spray x3 won’t do much good without securing lots of bonus dice.
TOUGH: Each level of Tough on a hit location reduces the damage taken by that location by 1.
Tough is unique: it’s the only Extra where you don’t need to roll anything to activate. It’s
always on, and any time a Tough part gets hit the damage is cut.

Chapter III: Personas
-- 51 --
Extras and Multiple Actions
Remember Multiple Actions? Well, when you declare Multiple Actions using two different
Persona Parts, you can factor in their Extras.
Let's consider Izanagi on the next page. What if you wanted to Attack with his
Switch Glaive while Defending with his Edgy Boots? The Boots have Fast x1 and the Glaive
has Power x2, so you need to make sure you're applying your Extras to the appropriate Sets.
You can't use the Boots' Fastness to make his Glaive attack quicker. Your Boots Set gets to be
Faster, and your Glaive Set hits harder (which doesn't matter for the Boots anyway).
Special Interactions
Always Works and other Extras: Always Works doesn’t sync up with any other Extras,
including Effective and Fast. An Always Works set will always only ever be 2x1.
Area and Power: Each level of Power allows an Area attack to ignore 1 level of Tough on its
targets.
Effective Healing: Each level of Effectiveness increases the damage that a level of Heal can
restore, letting it fix 1 additional Shock or Scar.
Area Healing: Each level of Area also you to Heal another target per turn.
Super Effectiveness: Effective x5 is sufficient to ensure that any Useful Set will always have
a Height of 10. Since that is the highest any Set can go there is no reason to exceed Effective
x5 as far as Height is concerned.
Always Works and Multiple Actions
Always Works has a couple quirks when it comes to Multiple Actions. If you Declare
Multiple Actions and at least one of them Always Works, but you only roll one Set, Always
Works doesn’t trigger. That’s because Always Works only kicks in when you don’t roll any
Sets at all. So if you Attack and use Useful: Rakukaja (Always Works), but only roll 1 Set,
you need to choose whether you want to use that Set to attack or Buff.
Second, Always Works only works once per Round. So if you Declare two actions
and both Always Work but you don’t roll a Set, you need to pick which one goes off.

Chapter III: Personas
-- 52 --
What Personas are Made-Of: Hit Points
Hit Points, or HP measure how much combat strain a Persona can sustain before its Parts break
down. Since Personas are creatures of solidified thought, HP isn’t so much a factor of meat or
physical durability as much as how long a Persona’s part can function when put under the
stress of combat. Each point of damage that a Persona takes reduces the HP of the Part it affects.
Once that part’s HP reaches zero it stops working. If your Persona loses all its HP, it can no
longer protect you until you’re able to heal the damage in some way.
For 3d Personas, a Part’s HP is 2 + its Hit Location size. So a Part at (1-2) has 4 HP,
and a part at 7-10 has 6 HP.
For 5d Personas, a Part’s HP is 5 + its Hit Location size x2. So for a 5d Persona, a
part at (1-2) has 9 HP: 5 as its baseline, and 4 more for its Hit Location.
From a design standpoint, this means that a Persona with more Parts has more total HP, but
each part will be slightly more fragile (and have smaller dice pools).
Putting the Pieces Together
With these aspects in mind, let’s take another look at Izanagi all fleshed out with Qualities,
Extras and Hit Points.
1-2 Edgy Boots 4d 4 HP Defends (Fast x1), Useful: Swift Movement
3-5 Delinquent Jacket 7d 5 HP Useful: Hide Stolen Goods, Tough x2
6-8 Switch Glaive 6d 5 HP Attacks (Physical, Power x1), Useful: Slice through any
physical barrier (Always Works)
9-10 Godhead’s Helm 5d 4 HP Attacks (Electric), Useful: Control Electricity

Chapter III: Personas
-- 53 --
The Other Essentials
Parts, Qualities, Extras and HP cover a Persona’s primary moving parts and what you as the
player will be most frequently interacting with. The next section covers the other, more
ephemeral yet still crucial aspects of a Persona’s design.
Arcana
Your Persona’s Arcana matches your own, and its form is influenced by it. On page [XX] there’s
an index of features and qualities shared by Personas of each Arcana. Just know that Arcana is
meant to be a guide to form, not a restriction on it. We encourage you to be as creative as you
want in bringing form and life to your Persona.
Small Parts
A 4d dice pool has 50/50 odds of getting a Set, and that’s probably as low as you’re going to
want to get without installing Always Works on it Qualities. A 3d Part is going to let you
down more often than not, and a 2d Part will only cough up a Set 10% of the time.
That said, small dice pools can by viable. By feeding Relationship dice to your
Persona you can improve their pools, and you can always try to set-up advantageous
situations that your GM can award you with bonus dice for. And of course small parts are
no problem for Useful Qualities that Always Work, assuming you don’t need more than
baseline success. But you’re still going to be doing a lot more work to make the magic
happen.
On the other hand, small dice pools have a lot of room for growth. Going from a 4d
pool to a 5d pool takes your dice from 50% to 70%, whereas going from 8d to 9d is 92% to
99%-- much more incremental. So if you do want to give yourself a Part with a small dice
pool (like Izanagi’s Edgy Boots), you’ll get a lot of bang for your buck by investing XP or
Victory Dice into it.

Chapter III: Personas
-- 54 --
Evocation
Unlike Monsters, Personas don’t hide. They’re already hidden by default, squirrelled away
within their user’s consciousness. So the normal rules about Monsters having a unique Way to
Hide is flipped around: Personas have a unique way to appear. This is called their Evocation.
Depending on your GM’s story, all Persona users may have a common method of
Evocation. This is how it works in Persona 3, where Personas are forcibly launched from their
user’s minds with devices called Evokers; and in Persona 5, where users wear masks that, when
stripped off, call out their Personas. Persona 1 and 2 have no defined method of Evocation, and
in Persona 4, characters smashed hallucinatory tarot cards to unleash their Personas in various
ways (kicking, crushing by hand, shooting with a gun).
Elemental Resistance and Weakness
This is a big one. A key part of combat in Persona is
that Personas and the threats they face can be
weak against certain elemental forces and strong
against others. Exploiting this system is essentially
the core of Persona’s battle engine. It’s not quite as
important in this module, simply because grafting
those rules unchanged into MaOCT would blow
the game’s flow of battle to smithereens. But it’s
still present and accounted for.
What are they?
In Persona, Elements are the physical forces and
natural energies that Personas are subject to. They
infuse a Persona, strengthening it against certain
threats in exchange for exposing it to others.
How they Work
Weaknesses and Resistances are covered in greater
detail on page @@ of Chapter 6, but in short,
Personas take less damage from Elements they
resist, and more damage from Elements to which
they are Weak.
The Elements of Persona
Each Persona game has a unique batch of
Elements, and your GM can choose which he
wants to use for his game. He can also make-
up any that suit his setting. Bear in mind that
the more Elements you have, the more
unpredictable and granular combat can
become.
Common Elements Fire
Ice
Electric
Wind (also called Force in some games)
Dark (also called Curse in some games)
Light (also called Bless in some games)
Uncommon Elements Earth
Water
Nuclear
Psychokinesis
Gravity

Chapter III: Personas
-- 55 --
For each Resistance your Persona has, it must also have a Weakness. You don’t
need a Resistance, but it definitely makes the game feel more like Persona.
Favorite Thing
Thoughts are the molecules from which Personas are built, but not all thoughts are equal. One
thought forms the nucleus of their existence, which becomes their Favorite Thing. A Persona’s
Favorite Thing is, along with its Arcana, what shapes its personality. Arsene likes Stealing,
especially if you can do it with style. Orpheus like music, especially somber, moody music (he’s
a big fan of the Cure). Izanagi likes exposing and crushing liars and phonies.
A Favorite Thing doesn’t have too big an impact on a Persona’s activities. This differs
from Monsters and Other Favorite Things, where a player could use their Monster’s Favorite
Thing as leverage when they’re afraid, unmotivated, or being willfully difficult or capricious, as
Monsters tend to be. Personas, on the other hand, don’t generally go against their User’s
commands, so you don’t need to bribe them with their Favorite Thing.
Favorite Things do have some uses though, so keep it in mind. These are covered in the
Player’s Manual, on page @@.
Persona Themes and Group Dynamics
One last thing to give thought to when building your Persona is how it fits into the overall
game that you’re in. This facet of the process takes into account two elements:
Theme: In each Persona video game the main Personas all share a central theme. In Persona 1-3
it was Greek Mythology, and Persona 4 used Japanese mythology. Persona 5 broke from its
predecessors by building a cast of Personas drawn from history and literature, all of which were
rogues, criminals or characters linked someway with rebellion and revolt against society.
Your GM will usually already have a Theme in mind when he starts the campaign, so
you can work with him in figuring out how your Persona fits into that theme. You also don’t
need to be so well versed in the theme as to be able to write a college thesis about it. Even if you
know absolutely nothing about Norse Mythology or Renaissance Artists or whatever Theme
your GM has chosen you can still play: the fact that your Persona User has no idea what his
Persona actually is can be an interesting avenue for plot and character development you and
your GM can explore.

Chapter III: Personas
-- 56 --
The Other Players: You should also keep in mind the Personas that your other Players are
building. It’s not as if there can’t be any overlap in abilities or Elements, but it’s a good idea for
your party to have a diverse array of abilities at their disposal. Excessive overlap should be
avoided. If everyone of your Personas is an unkillable juggernaut with Tough x3 in all locations
fights aren’t going to be very fun or interesting. Your fellow Players can be a valuable resource
in working out the details of your Persona, especially if maybe you aren’t as familiar with the
Theme as they are.
Level-Up: Improving your Persona
A Persona’s growth and development is measured by its Level, which starts at 0 for a newly
awoken Persona. Each additional level grants you the following benefits:
One Additional Die per Level. You can either add this to a Part’s dice pool or you can
exchange it for a new Quality or Extra. Just remember that a Part cannot have more than 10d in
its dice pool, so once you reach that point you can only improve that Part with Qualities and
Extras.
One Additional Hit Point per Level. This can be added to any of a Persona’s Parts.
There are two ways to increase a Persona’s Level:
Experience Points. Persona Levels cost 5 experience points apiece. This is a pretty
significant investment over using XP to improve your human character, but if you have the XP
to spend and you find that your Persona is lacking in some area that a single level could fix, this
is a way to do it.
Triumph. You can view this as the “intended” way for Personas to grow stronger. When you
defeat a Major Shadow (explained in Chapter X), your Persona absorbs some of its power,
increasing its Level. In this case, the pace of your Campaign matters quite a lot. In a One-Shot or
an action packed, high-tempo story, each Major Shadow you defeat will increase your Level;
One-Shot GMs may even choose to award Triumph Levels for defeating Minor Shadows. In a
more drawn out, long form Campaign, only important, plot-significant Major Shadows grant
Triumph.

Chapter III: Personas
-- 57 --
Tips and Tricks for Building Personas
In this section we’ve provided some guidelines that new players may find helpful when
building their Personas. Persona construction should still be an organic, intuitive process: we
encourage players to choose things that they think are interesting or important to their
characters instead of purely trying to optimize their combat performance. That said, there are
certain ways that you can make a Persona straight up better, some of which are covered here.
Have a Gameplan. Do you want to be a fast, deadly attacker? Prioritize Fast and Power.
Looking to be a tanky defender? Pick up Toughness and add some Recoil and Effectiveness to
your Defends Qualities. Are you more interested in a support role? Find a couple Useful
Qualities that appeal to you and focus on making them a bit better. Don’t feel like you need to
adhere rigidly to roles like these either; you can be as versatile or as specialized as you like but
having some idea of how you want your Persona to develop will help you in the long term.
Cooperate with your Arcana. As your
human character’s Arcana Level increases,
your Persona becomes stronger by acquiring
Qualities and especially Extras based on its
Arcana. This means which Arcana you choose
affects your Persona’s strengths, as shown in
the chart on this page. So consider that when
developing both your Persona and its User, since they share the same Arcana. If you’re a High
Priestess or a Hierophant you’ll have more Effectiveness to throw around, meaning your
Usefuls will be stronger, whereas Fortunes and Towers have a lot of Recoil they can take
advantage of, so they may benefit from stronger Defends Qualities.
Don’t Sleep on Useful Qualities. Along with whatever specific abilities they grant, a
Persona’s Useful Qualities have some basic moves that they all can do. These are covered on
Page @@ or Chapter 9: Useful Things, and without going into detail here it’s enough to say that
any Useful Quality can give a Persona User and his allies critical advantages with just a little
creative problem solving. So it’s a good idea even for Personas who are dedicated towards
attack or defense to have at least one or two Useful Qualities they can fall back on. If you want
to specialize on Usefulness, investing some dice in Effective or Area can make a huge difference.
Don’t Completely Ignore Defense Either. The Defends quality may not seem a terribly
exciting option, but Defending can have some powerful effects, especially once a Persona gets
really good at it. These are covered in much greater detail on Page @@ of Chapter 6: Combat. It’s
generally accepted that every Persona should have at least one Defends Quality, and those who
Extras and their Related Arcana Area (Empress, Moon) Power (Phys.) (Emperor, Death)
Burn (Temper., Devil) Power (Elem.) (Magi., Hermit)
Effect (High Pr., Hiero.) Recoil (Fortune, Tower)
Fast (Chariot, Justice) Splash/Spray (Sun, Judgment)
Heal (Lovers, Star) Tough (Strength, Hanged Man

Chapter III: Personas
-- 58 --
choose to focus on improving their ability to Defend with more dice and Extras like Recoil,
Effective and Fast will see dividends on the battlefield.
Make Better Attacks, not More Attacks. There’s not a great reason to have multiple
Attack Qualities with the same elemental Properties on your Persona. If your Persona has
Attacks (Fire, Power x2) on a part with 8d and Attacks (Fire, Power x1, Fast x1) on a part with
5d there’s no advantage over having one Attacks (Fire, Power x3, Fast x1) on the 8d Part other
than redundancy. Personas with multiple Attack Qualities are better off having each Quality
specialize in a different Element (Physical included), that way they can deal with a wider range
of Weaknesses and Resistances.
Higher Parts are Safer, Generally. In Combat, an Attack’s Height determines its hit
location. Since Height is mostly random an Attack can hit anywhere, but there are
circumstances like Called Shots or using Awesome Dice where it becomes easier to target Parts
with Lower Hit Locations than those higher up. So while doing so doesn’t always insulate a
Persona’s most precious abilities from damage it’s not a bad idea to put Qualities you want to
protect higher up on your Persona and leave ones you can live without on lower Parts.
Spray is a Force Multiplier. Spray can vastly increase a Persona’s power if they have
enough dice on the part to reliably use it. This is because any other Extras on a Quality with
Spray on it apply to all its usable Sets. So if you have Attacks (Physical, Power x2, Spray x1) and
you roll 2 Sets, both Sets get +2 Damage on them. Of course, this also applies to regular Multiple
Actions as well, but with Spray you’re permanently committing a die to the expectation that
you’ll probably roll more than one Set. At 7d-9d that’s excellent odds, and on a Part with 10d
Spray is almost always a good investment.
How Many Parts Should I Have? The only limitation on Part numbers is that a Persona
cannot have fewer than 3 Parts. Fewer parts mean more dice per Part, but less overall HP and
fewer overall Qualities, since each Part gets 1 free Quality tacked onto it. More Parts mean more
total HP for your Persona, but each Part will itself have less HP and dice on it. This is especially
challenging for 3d Personas. On a 5d Persona a Part with 2 Hit Locations has 10d to work with,
so it can be quite powerful. On a 3d Persona a 2 HL part has only 6d, a much stricter budget. So
as a rule of thumb 3d Personas have fewer parts than 5d Personas. A 3d Persona can get by on 5
Parts without too much trouble, but most Players find that 4 Parts (two at 3 HLs and two at 2
HLs) give more breathing room in terms of available dice. For 3d Personas a Part with just 1 HL
is going to be very difficult to use effectively without either Always Works or a steady stream of
bonus dice, at least until that Persona gets some levels under its belt and can build up the dice
pool.
Chapter III: Personas
-- 59 --
Optional Rules
The material described in this chapter cover what could be called “orthodox” Persona rules:
ideas and concepts that stick pretty close to what most Persona players would recognize as the
proper way to depict Personas. However, The Velvet Book doesn’t demand strict adherence to
orthodoxy, and GMs should feel free to change the rules however they see fit. To that end, here
are some other rules and ideas that veer in various degrees from Persona canon.
Optional Rule: The Voice in your Head (Recommended!)
Normally Personas only communicate with their users in the Other World, and only when
Evoked. Under this Optional Rule, your Persona exists as a persistent voice in your mind even
when in the Real World. Depending on how you look at the games, there’s some slight support
for this in Persona canon—there are occasions when the game addresses the player when
leveling a Social Link in the voice of a sort of their Arcana, which could be construed as that of a
Persona. We strongly recommend you adopt this rule. It gives players and GMs a unique way of
interacting with the paranormal aspects of Persona without significantly impacting the
normalcy of the Real World.
Optional Rule: Visible Personas
Taking the first Optional Rule a bit further, now Personas are visible in the Real World to other
Persona Users, though they have no way of directly interacting with their surroundings other
than floating around looking weird.
Optional Rule: Useful in the Real World
This one breaks pretty severely from Persona canon, but for a single instance in Persona 3 where
a character’s Persona is able to interact in the Real World. With this rule, a Persona’s Useful
Qualities can be harnessed by their human User in the Real World, provided they have at least
some veil of subtlety to them. X-Ray Vision or Strength Enhancement is a good example of
subtle Useful Qualities. Flight and Matter Transmutation, on the other hand, are not subtle and
may not be a good fit.
Optional Rule: Bizarre Personas
Finally, you can throw all sense of subtly out the window and just make Personas active
participants in the Real World, with all their abilities intact. Doing this basically translates
Persona into Jojo’s Bizarre Adventure, so if that’s something you’re aiming for, by all means go for
it. You may need to tweak some other rules, but the bones of the game will still support that
kind of campaign.

Persona and Arcana Compendium
-- 60 --
The Magician Personas of the Magician are either explicitly
magically or are figures that have supreme
mastery of some force of the physical world.
These include nature spirits, elemental deities
or heros so exceptionally skilled that his
talents seem magical in their own right.
Examples: Djinn, Gandalf, Houdini, Jiraiya,
Nikola Tesla, Queen Mab, Susanoo, Zorro
The High Priestess Personas of the High Priestess are usually
feminine figures of wisdom and strength,
who wield their insight into the mysteries of
the universe as a powerful weapon. They
often take the form of maidens, princesses,
witches and spiritual warrior women.
Examples: Artemis, Konohana Sakuya, Lady of
the Lake, Pope Joan, Pythia, Scathach
The Empress Personas of the Empress are renowned
queens from folklore and antiquity and high
goddesses of mythology. These often wield
the dual roles of ruler and mother-goddess,
demonstrating both strength and gentility.
Examples: Durga, Echidna, Freya, Hippolyta,
Isis, Titania, Zenobia
The Emperor Personas of the Emperor are, as their name
suggests, famous emperors and kings as well
as the chief gods of different mythologies.
Their power is absolute, dominant and
irresistible, be they just rulers or tyrants.
Examples: Alexander the Great, Caesar,
Gilgamesh, Jade Emperor, Oberon, Odin, Zeus
The Hierophant Personas of the Hierophant typify figures of
immense wisdom and spiritual strength—
prophets, gurus, holy men and saints. They
are guides along the road to enlightenment
and higher understanding. Examples:
Confucius, Elijah, Pythagoras, Thoth, Virgil,
Xuanzang
The Lovers Personas of the Lovers are associated with
romance and affection both pure and tragic.
They include gods and spirits of love as well
as mythic and literary figures entangled in
love triangles, forbidden romance and
doomed affairs. Examples: Aphrodite, Carmen,
Guinevere, Ishtar, Kushinada, Lord Byron,
Tristan
The Chariot Personas of the Chariot are warriors and
heroes of extraordinary strength and skill.
Their martial prowess dominates the
battlefield swiftly and completely, and are
cause of their legend. Gods and goddesses of
war are included within this Arcana.
Examples: Ares, Arjuna, Athena, Davy Crockett,
Hercules, Lu Bu, Thor
Justice Personas of Justice are icons of law and order.
Often they enforce this role with steely
tenacity, hunting and crushing rule breakers
without mercy. They include law crafters,
enforcers and carriers of judgement.
Examples: Hammurabi, The Furies, Judge Dread,
Lady Justice, Punisher, King Enma

Persona and Arcana Compendium
-- 61 --
The Hermit The Hermit’s Personas exemplify the fruits of
contemplation and inner strength built
through meditation and knowing one’s self.
They include gods and wise men who gained
spiritual awareness through their own inward
focus as well as poets and artists whose
isolation fueled their genius. Examples: Baba
Yaga, Chiron, Dante, Diogenes, Gautama Buddha
Fortune Fortune’s Personas represent the cycles of the
world. Good luck and bad, rise and decline,
the steady march of time. These Personas
spring from myths that seek to explain these
cycles and help one cope with the
inevitability of change and the randomness of
life. Examples: Janus, Fortuna, Inari Okami, The
Norns, Pele, Persephone
Strength Strength Personas are warriors famed for
their unshakable bravery and resolve. Their
legends have them stand against terrible
dangers, driven inexorably by faith,
willpower or unbending devotion to a cause.
Examples: Beowulf, Boudicca, Hua Mulan,
Jeanne d’Arc, Sif, Siegfried, William Wallace
The Hanged Man Personas of the Hanged Man are martyrs:
gods and heroes who suffered tremendous
hardship and sacrifice in the pursuit of a
higher cause, even to the point of death and
punishment beyond. Examples: Benkei,
Prometheus, Socrates, St. Peter, Valentine
Michael Smith
Death Death: Death Personas are, naturally, beings
of death, decay and the underworld, though
many are not directly malevolent. These
figures may stand for death as the passage
from one life to the next, and so are as often
gentle guides as grim reapers. Examples:
Anubis, Baron Samedi, Charon, Daisoujou, Hel,
Osiris, Thanatos
Temperance Personas of Temperance represent order as
well as the unyielding strength of nature and
natural forces. These demonstrate that they
are unmovable by petty human affairs and
concerns. As mythic figures, they fight to
preserve life and order against forces of
chaos. Examples: The Four Chinese Symbols,
Harmonia, Kali, Talos, Vishnu
The Devil Personas of the Devil are diabolical creatures
of sin and temptation. By nature, they seem
less friendly and more sinister, luring their
victims into ruin with honeyed words and
offers of gifts and power. Examples: Circe,
Delilah, Mara, Mephistopheles, Screwtape
The Tower Tower Personas bring doom or doomed, by
fate, conspiracy or hubris. Some are legends
cursed by higher powers for impudence,
others are gods or spirits of wrath and
destruction. Examples: Abdul Alhazred, Cu
Chulainn, The Fisher King, Macbeth, Odysseus,
Set, Shiva

Persona and Arcana Compendium
-- 62 --
The Star Personas of the Star embody hope, possibility,
inspiration and faith. More specifically they
may be gods or spirits of music and art, and
even of the stars themselves, which symbolize
the yearning of human hearts for distant
desires. Examples: Buck Rogers, Calisto, Sir
Galahad, Maat, The Pleiades, Sarasvati
The Moon Personas of the Moon are creatures of
illusion, dreams, trickery and the
subconscious. These traits align them directly
with the Moon itself, and so many of these
Personas take the form of lunar spirits and
gods. Examples: Baku, Mothman, Morpheus,
Princess Kaguya, Selene, Tsukuyomi
The Sun Sun Personas are beaming sources of
goodness, beauty, vitality and positivity.
They very commonly take the form of solar
deities or heroes connected directly with light
and purity. Examples: Amaterasu, Apollo,
Baldr, Ganesha, Horus, Phoenix, Quetzalcoatl
Judgement Personas of Judgement are harbingers of The
End of All Things. They stand in judgement
of men and the world in general and decide
whether to usher in destruction or rebirth. As
a result they are linked closely with
revelations of the future and impending
cataclysm. Examples: Ancient of Days, B’olon
Yokte’, Cassandra, Gabriel, Jormungandr,
Maitreya
The Fool Personas of the Fool are special. In Personas 3-
5 they are the domain of the Protagonist, who
acts as a silent, blank slate for the player. As
such, they normally have the form of
protagonists various mythic stories. When not
directly connected to a single main character,
Fool Personas are jesters, mischief makers and
heroes that walk a fine line between carefree
innocence and hazardous ignorance.
Examples: Anansi, Candide, Coyote, Don
Quixote, Loki, Puck
The World Personas of the World are even more special.
In the Persona games they are the culmination
of the cast’s journey and struggle against the
otherworldly forces threatening them. Thus,
they aren’t “for public consumption”, so to
speak, and take the form of creation deities
and supreme, almighty gods. Examples:
Ahura Mazda, Atum, Brahma, Gaia, Izanagi-no-
Okami

Chapter IV: The Player’s Manual
-- 64 --
Introduction
The Player’s Manual is what it says on the tin: a guide for the people playing characters in a
game using The Velvet Book. It’s designed to help you get into the groove of the Persona universe
and build a deep understanding of how to play the game, as well as how to make use of some
of the One Roll Engine’s more nuanced mechanics. The Player’s Manual also contains
information about world mythologies and psychology that are often at the forefront of Persona
narratives, so that you’ll know not just how things are done but why.
Understanding your Height and Width
As laid out in Chapter 2, a Set’s Height represents its precision and quality, and its Width
represents its intensity. But as far as what those numbers actually mean in a qualitative,
measurable sense, that’s a bit more up to interpretation. To that end, this section serves as a
helpful guide for you to divine what your dice are telling you.
Measuring Height
The Higher your Set, the more accomplished, skilled, precise and overall excellent it is. A x10
P.E. set has perfect form, and a x10 Charm set used for acting in a school play brings the
audience to gasping, ugly tears. Here’s how it breaks down.
Height 1-2- Meh: You succeeded, but only by the slimmest margin. Maybe you only put in
the bare minimum of effort, or maybe you just made some critical miscalculation and your
result is held together by hopes and dreams. With this level of technical success, your GM may
choose to introduce additional complications brought on by your sloppiness.
Height 3-6- Fine: You succeeded and did a good job. Height 3 might be a little dull, and
Height 6 is just on the verge of excellent, but anywhere in this range represents an outcome that
nobody can complain about.
Height 7-9- Wow: You succeeded, and you knocked it out of the park. This is A+, Gold Star,
Blue Ribbon material, the kind of stuff that gets you noticed. A Set in this range will encourage
your GM to give you some extra windfall as a reward for your excellence.
Height 10- My God: You succeeded beyond anyone’s wildest expectations. Your result was
not only flawless but actually transcended the material given to you, and any onlookers are
dumbstruck. GMs are encouraged to hand out big-time advantages for these rolls, like a free
point of Awesome on a related roll.

Chapter IV: The Player’s Manual
-- 65 --
Measuring Width
The Wider your Set, the faster and more powerful it is. Speed is Width’s most important aspect.
If you want to do something fast, you need more Width.
Width 2- Normal: Your set isn’t remarkably fast or intense, but it gets the job done. Normal,
unhurried human activity occurs at Width 2.
Width 3- Potent: Your set is unusually fast or intense. A human running with P.E. at Width-
3 is moving very fast, and an object requiring Width 3 to move with Wind is very heavy.
Width 4- Extreme: Your set is incredibly quick or strong. Chasing a Car requires Width 4 in
speed and pushing one up a hill requires Width 4 in strength.
Width 5 or more- Freakish: Your set’s speed or power is basically superhuman. Rolling
Width 5 isn’t even possible for a normal person (Normal meaning 2d Stat + 2d Skill, which can’t
ever roll this much Width). If you do pull this off, it’s almost definitely because the stars aligned
in some way to make it happen, and it’s never going to happen again in quite that same way.
Width 6 or above is the stuff of comic books, video games, and of course, Personas and
Shadows.
Specific Rules for Skills
Academics Usual Stat: Knowledge Recite facts and figures, recall essential information, demonstrate intellect, do research
Academics is your go-to skill for being smart and well educated. With a successful Set, you can
remember useful stuff you read in a book, watched on TV or overheard at the cafeteria. In doing
so you can basically ask your GM “what do I know about this?” As the Player, you probably
have some degree of meta-game knowledge, especially if you’re familiar with the Persona series
already. But Academics, on the other hand, represents the sum of your character’s in-world
knowledge that they’ve learned or experienced but you, the Player, haven’t. Academics is also
used for demonstrating your intelligence with brainy stuff like computers and science
Academics frequently buts up against Difficulties related to how obscure the information is:
Difficulty Information Quality - Basic and commonplace
3 You’d know this if you’ve been paying attention, at school or in general
5 This information probably required some in-depth personal interest or study
7 This information is very obscure, esoteric and known only to die-hard devotees

Chapter IV: The Player’s Manual
-- 66 --
Aim Usual Stat: Proficiency Throw rocks, rotten eggs or basketballs, play pool, fire a gun, demonstrate general hand-eye coordination
Aim is a skill that’s equally useful for upstanding, all-American athletes and outright
delinquents. It’s your overall ability to put stuff where you want it at a distance, be it putting a
football in the hands of a receiver 30 yards away or putting a roll of toilet paper over a tree-
branch in your algebra teacher’s front yard. It’s also the skill you roll if you’re using a ranged
weapon like a gun or bow and arrow, meaning it’s particularly useful for fighting Shadows. It’s
also useful for fighting people too, but bringing a deadly-weapon to a school fight is a fantastic
way to get yourself on the evening news. Aim also covers playing games of precision like pool,
horseshoes, ping-pong (or beer pong, for that matter).
Aim often faces Difficulties when you’re trying to hit stuff under especially inclement
conditions. These are things like heavy darkness, extreme wind, fog or smoke or when aiming
at a very distant or quickly moving target.
Difficulty Number of Challenging Conditions 0 None. Your vision is clear and nothing is in your way.
3 1-3 Conditions
5 4-5 conditions
7 5 or more Conditions
Beat-Down Usual Stat: Diligence Smash down doors, break furniture, force open locks, kick a guy when they’re down
Beat-Down is what you use to apply a lot of force to something inanimate—like the door to the
bathroom stall Suzie J and her minions locked you in—or against other, helpless people. When
you use Beat-Down on a person, you inflict Width in damage, instead of the Width-1 you’d
normally deal with Fighting. So you can dish out quite a thrashing, but only if your target can’t
fight back. You can achieve this by Fighting them into submission, terrorizing them with Put-
Down, or catching them off guard with a sucker-punch. Bullies like this skill because it
synergizes nicely harassing smaller, weaker kids. For ostensibly “good” kids, Beat-Down still
comes in handy, whether it’s for demolishing physical obstacles or unleashing righteous fury
after getting in a lucky swing (think Ralphie vs Scut Farkus in A Christmas Story). But be
warned: Beat-Downs, while satisfying, tend to draw a lot of attention from nearby adults.

Chapter IV: The Player’s Manual
-- 67 --
Block Usual Stat: Diligence Deflect a punch, hold someone at bay, shield others from harm, take a hit for someone else
Block is the skill for stopping dangerous things from hitting you or your buddies. You can Block
punches, kicks, shoulder-tackles and the like with your bare, raw muscles no problem, but if
someone is coming at you with a weapon, you need something study to Block with, like a
shield, a weapon or, like, a chair or whatever. You can still Block that kind of harm unaided, but
all you’ll be doing is redirecting the attack to your Diligence (which may still be preferable if
you’re trying to avoid damage to another location). You can also use Block when you want to
physically stop someone from performing some action, like grabbing a bolting perp or holding
back a charging linebacker.
Block and Reflex have a shared role of defending you from attacks, but they have
different niches. Block lets you protect other people as well as yourself, but only against
dangers that can, indeed, be stopped with human strength. No amount of Block dice will
protect you from getting hit by a car.
Charm Usual Stat: Expression Tell a joke, offer comfort, flirt effectively, act suave and sophisticated, be theatrical
Charm is what you use to make people like you and want to be friends with you. You can
diffuse tense situations with humor, convince skeptical teachers of your innocence (assuming
that you’re actually being sincere). It’s also a catch-all for using your Expression Stat
constructively, like if you’re acting in a school play or singing in the choir. Since Charm is
instrument for positive psychological action, it’s also closely linked with your Persona. Once
per day you can roll Expression + Charm to commune with and better understand your
Persona, which allows you to heal damage it’s taken up to your Set’s Width (this requires deep,
meditative introspection, and so it consumes a Time Slot, explained later in this chapter).
Connive Usual Stat: Expression Bluff, lie and deceive, give excuses, set traps, disguise yourself, hear and spread rumors
Connive is the catch-all skill for being dishonest with people, with a bit of general skullduggery
added-on. When you lie to someone, usually they’re going to roll against you with either their
Knowledge + Notice (to see if you look suspicious) or Knowledge + Out-Think (to determine if
your story holds together), depending on what kind if lie you tell. If their Height beats yours,
their dice will Gobble your Set. If your Set gets Gobbled down to 1x Width, it breaks. If you roll
multiple Sets, your interrogator will need to break all of them, but if even one gets Gobbled it
usually means something smells fishy to them. If they all break, your goose is cooked.

Chapter IV: The Player’s Manual
-- 68 --
Courage Usual Stat: Guts Stand-up to bullies, resist freaking out, face supernatural threats with resolve, ask someone out on a date
Courage comes into play when you’re confronted with a situation that rattles you. It could be as
mundane as getting in line for a roller coaster or as esoteric as confronting some eldritch being
eating away at mankind’s collective consciousness. If you fail a Courage check you Freak Out,
and must choose to Flee (escape the scene), Freeze (stand addled from terror) or Fight (lash out
uncontrollably and without your Persona’s protection, if facing Shadows).
You risk Freaking Out when at least three of your Stats are damaged down to 0. Apart
from that, different causes for fear have varying Difficulties associated with them. If you fail to
match the Difficulty of a Courage check, you Freak Out.
Difficulty Fear Factor - Mild; Walking through the woods alone, talking to the cute boy in geometry
3 Unnerving; Subtle, eerie phenomena, being lost in a scary place, midterms
5 Daunting; Clearly observed unnatural events, speaking before your entire school
7 Extreme; Your worst phobia come to life, the threat of painful impending death
Your GM will determine what situations require a Courage check. Usually they’re based on
your character and their backstory. What frightens your character may not even faze someone
else’s, and vice versa. You also won’t need to make Courage checks against every weird thing
you face, only when it’s significant to the story.
Fighting Usual Stat: Guts Punch, kick, wrestle, pin and strike people who are willing and able to fight back
You can use Fighting to attack and hurt someone as long as he’s signaling to you somehow that
he’s not finished yet. This could be verbal (“Is that the best you got, you wimp?”) or with body
language (getting back-up and coolly wiping blood from his lip with his thumb). Against such a
foe, Fighting inflicts Width-1 in damage. The damage is normally Shock if you’re using your
hands and feet, but can escalate to Scars as well as whole points of extra damage if you bring
weapons into the fray. Similarly, Fighting inflicts damage against Shadows in the Other World,
but only when you attack them while properly armed (see the “Weapons” section in Chapter 3).
If you want to avoid causing serious harm, you can also use Fighting to push, pull, pin,
trip and disarm an aggressor; in each case you won’t do any damage, but kicking Blaine
Wilson’s switchblade out of his hand might take the wind out of his sails entirely. In many
cases, you can use Fighting to avoid the conflict altogether.

Chapter IV: The Player’s Manual
-- 69 --
Notice Usual Stat: Knowledge Survey your surroundings, spot traps, hear whispers, smell deadly gas, sense feelings
Notice is your all-in-one perception skill. It encompasses all five senses plus your ability to pick
upon the subtle nuances of others’ emotions. You don’t need to treat Notice like an active sensor
that you need to sweep through every room you’re in. If something is in plain sight, you should
be able to see it. What Notice does is allow you to see possibly dangerous things before they
have a chance to spring at you, and detect hidden, obscure or easily overlooked details in your
surroundings that can give you an edge.
(Telling your GM “I’m rolling Notice” is also a good way to communicate to him that
you’re interested in the scene he’s created but want to know more about it. In return, your GM
can ask you “What are you looking for in particular?”, which gives you some say in the material
of the world around you.)
You can also use Notice to suss out how other people are feeling. This includes lies using
Connive, but also other feelings they may be trying to mask. If they’re especially reluctant to
come clean they can resist with Expression + Charm to mask their feelings or Expression +
Connive to lie to you straight-up, at which point you’ll need to Gobble their roll with your own.
Out-Think Usual Stat: Knowledge Determine motives, find vulnerabilities, scrutinize clues, solve puzzles, reconstruct events
Out-Think is your Skill for being crafty, strategic and detail-oriented. Unlike Academics, which
is a general display of how smart you are, Out-Think involves creative thinking and problem
solving rather than raw intellect. Most notably, Out-Think has a number of combat uses. To wit,
your combined Knowledge + Out-Think pool determines the order in which you Declare your
actions each round. The higher your total, the later in the Round you Declare, which gives you
more information as to what your enemies and allies are doing. Someone with lots of Out-Think
can therefore better plan out their moves. Out-Think also lets you analyze a person’s, Shadow’s
or Persona’s characteristics to work out what it’s capable of. A successful Set for this can tell you
what a Shadow’s body part can do, how many dice it has, what its weaknesses are, etc.
Out-Think also has a variety of uses outside of fighting. Whereas Notice is good for
finding clues, Out-Think lets you examine them closely to unravel their secrets. Out-Think can
expose liars trying to Connive you with false narratives. You can use it to play chess or deduce
the opposing football team’s strategy, and it can craft high-class burns to drop on unwitting
interlocutors during a social skirmish. All-in-all, a pretty good skill.

Chapter IV: The Player’s Manual
-- 70 --
P.E. Usual Stat: Diligence Run away, give chase, jump ravines, climb fences, hang onto ledges, go swimming
P.E. stands for physical education and describes your quickness and agility. When you’re trying
to outrun (or out-climb, or out-swim, etc) someone, Width is generally more important. If you
both score the same Width, your distance doesn’t change, but if one runner scores greater
Width, she gains ground (either to escape or pursue). Height comes into play if the terrain is in
some way difficult, like running across a slippery, frozen pond; through dense undergrowth; or
through a junkyard littered with sharp, clunky debris. In that case, any Set that fails to meet the
terrain’s Difficulty is unusable. You’ll lose ground as you slip, trip or get tangled-up.
If two people are running, swimming or climbing towards a set destination, the GM will
establish a set amount of Width, and whoever accumulates that amount gets there first. In races
like this, runners can use other skills like Out-Think to look for short-cuts or Fighting to trip up
their opponent, but doing so requires Multiple Actions.
Put-Down Usual Stat: Expression Trash-talk, taunt, provoke, belittle, scold, lay out brutal, harsh truths
Put-Down is your go-to method for inflicting psychological wounds on your peers. It’s like
Fighting but with cruel, stinging words, and rules for inflicting this kind of damage are covered
in the Combat Chapter, in the Emotional Damage section. This works because, for a kid, being
called out as a gross weirdo will probably hurt as badly as being kicked in the stomach.
More constructively, Put-Down can coerce others by scolding and browbeating them
into compliance. This doesn’t cause damage unless you really want it to, so it can be a good way
of getting through to people who aren’t responding to reason or your charming personality.
Put-Down also doesn’t have to be fueled by cruelty or anger either. Put-Down can be used for
good natured ribbing between friends without fear of leaving lasting mental scars.
Reflex Usual Stat: Proficiency Dodge blows, dive for cover, sneak around unnoticed, keep your balance, make sudden moves
Reflex describes your ability to move your entire body in a quick, coordinated, precise manner.
Along with Block, it’s your character’s primary way of avoiding pain and suffering, in this case
by getting out of the way before it’s inflicted upon you. Reflex is nice because it can avoid
anything, from a punch to the jaw to a piano falling on you. However, it only works on you. You
can’t use Reflex to defend other people from attacks.
Chapter IV: The Player’s Manual
-- 71 --
Reflex also involves acrobatic or careful movement, best seen when you’re trying to be
stealthy. Using Reflex in this manner is normally an opposed check against the Knowledge +
Notice of anyone who might be on the lookout for skulking delinquents. Any successful Notice
Sets will attempt to Gobble your Reflex Set if they have enough Height. If you run out of Reflex
Sets in this manner, you’re busted. If one of your Sets get Gobbled but you still have at least one
Set as a back-up, you’re still unnoticed, but the watch has been tipped off that something’s afoot.
Note too that while Reflex allows for sudden, fast moves, it’s not good at covering distance. If
you want to move stealthily and quickly, for example, you need to use Multiple Actions for
both Reflex and P.E.
Shop Usual Stat: Proficiency Build a birdhouse, fix a flat tire, pick a lock, pick a pocket, cheat at cards, play a video game
Shop combines your overall handiness with your manual dexterity. You can use Shop to make
stuff (like combining a box of fireworks into a quarter-stick of dynamite), fix stuff (like knocking
a dent out of your dad’s Volvo so he doesn’t realize you took it joyriding), use sleight-of-hand
and anything else proving you don’t have stupid fingers. Like Academics, Shop is your main
skill for demonstrating aptitude, though in this case it’s more about craftiness than braininess.
Wind Usual Stat: Guts Run a marathon, hold your breath, lift heavy weights, stay up all night, resist sickness
Wind, like P.E., is related to your overall fitness, but it’s focused more on stamina, endurance
and raw strength instead of physical conditioning. Anytime you want to show how strong or
healthy you are, you’re using Wind. Wind gauges your tolerance for poison, sickness or other
threats to your internal health. Apart from that, Wind is used whenever you’re doing something
physical for a long time. Run down the block? That’s Diligence + P.E. Run home from school?
That’s Guts + Wind.
Wind also measures your applied physical strength. Of course, as a high schooler you
probably aren’t going to come across many situations where you need to demonstrate your
brawn and might, but if you ever need to lift, push or carry something especially heavy, you’re
using Wind. Most reasonably heavy objects can be lifted with any old Set, but if you need to
move something especially massive for some reason, like when the Honda you bought for
$900.00 breaks down because you forgot to change the oil for 18 months, you may need a Width
of 3 or more to get the job done.

Chapter IV: The Player’s Manual
-- 72 --
Your Day to Day Life
A major piece of the Persona puzzle is playing with—and often in the face of—a defined
schedule. You’ve got a multifaceted agenda, and a limited time frame in which to execute it.
You need to go on a date with your crush, work part-time at the beef bowl restaurant, help
around the house, hang with your new buddy to build camaraderie, and also infiltrate a
nightmarish parallel universe to fight existential threats set against mankind. And you’ve got
midterms next week.
You aren’t necessarily going to be playing out a full 365 day year (and in fact we
discourage GMs from being quite so detailed), but each session or set of sessions in your
campaign should focus on a sequence of days within a specific timeframe. These could be
regular (as in Persona 3, where the deadline came around every 28 days), variable (as in Persona
5, where each Palace needed to be cleared within a time limit established at the outset of the
operation) or seemingly unpredictable (as in Persona 4, where the timeframe was based on the
weather).
Time Slots
Each day that your game focuses on has a number of Time Slots, during which stuff happens.
How many Time Slots are present each day is based on the GM’s plan for how fast the time will
move in the campaign. Fast campaigns will normally only have two Time Slots, like School and
After School (the Persona 4 model). For more detailed, methodical campaigns, you could have
three or even four Time Slots each day, like School, After School, Evening, and so forth (the
Persona 3 model).
How to Spend your Time
Players can mostly do whatever they want during a Time Slot (unless their actions are restricted
for some in-universe reason, like getting detention), but here are some common examples.
Going to School: During the regular School Week one of your Time Slots is dedicated to
School. Your GM might even have multiple Time Slots for school if he really wants to run
through the minutiae of your scholastic experience (Morning Classes, Lunch, Afternoon
Classes, for instance). If you’re a good boy or girl you’ll be making Class Rolls during this Slot,
as required by your GM. If you’re a rotten apple you can goof off or even skip classes entirely.
Spending Quality Time with Relationships: Chilling with one of your Relationships can
improve your bond with them and mend any nasty strain on your connection. This is called
Quality Time, and is described in detail in the Chapter 5: Relationships.

Chapter IV: The Player’s Manual
-- 73 --
Self-Improvement: If you spend a Time Slot on hitting the books, working out, exercising
self-care or any other form of personal maintenance and edification, the game rewards you with
tangible benefits. This is called Personal Time, and it’s one of your primary sources of
Awesome Dice. You can find the rules for this in Chapter 7: The Path to Awesome Power.
Getting into Trouble: This a catch-all for exploring town, meeting new people and
venturing into the Other World.
Helping Out Other Players
Sometimes you need to give your buddy a boost to get over a wall, or let them peek at your
math quiz, or cheer them on in the playoffs. Sometimes just having another pair of hands
around can be helpful, even if you don’t have the same technical skill they do.
Giving help is a Stat + Skill roll—Expression + Charm to shout encouragement,
Proficiency + Shop to peek under the hood of an old car, Guts + Fighting to spar. If you succeed,
you can add your Width in bonus dice to your pal’s next roll. Helping has a Difficulty equal to
the Skill that the other person is trying to use (it’s harder to provide meaningful assistance to a
5d master of a skill than it is to bail out a clueless 1d greenhorn). If you miss the Difficulty you
still give them +1d—at least you tried, right?
Helping is a human-only ability. Personas lack the psychological flexibility to conceive
of doing so, unless they have a specific Useful Quality for it.
Experience Points and Character Growth
A character’s potential for growth is represented by Experience Points. Your GM distributes
Experience Points after a successful game Session, which you can expend to improve your
character’s Stats, Skills and Relationships. How much XP is determined by the length of the
Campaign and what was accomplished in the session.
Achievement One-Shot Short Campaign Long Campaign Minor Advancement 3 XP 2 XP 1 XP
Large Strides 5 XP 4 XP 3 XP
Major Development 7 XP 6 XP 5 XP
Improvement One-Shot Short Campaign Long Campaign Skills 1 XP per die 2 XP per die 2 XP per die
Stats 3 XP per die 4 XP per die 5 XP per die
Relationships Improving a Relationship costs XP equal to its next level
Chapter IV: The Player’s Manual
-- 74 --
Arcana Level
A Player Character’s Arcana Level is a measurement of his or her emotional and psychological
growth towards true understanding of their self. It charts one’s progress from being a wet-eyed
newcomer to awareness at Level 0 to being a fully self-actualized, mature, complete person at
Level 5. Your Arcana Level also serves two mechanical functions:
1. You can add your Arcana Level to the Height of certain rolls you make as a Human. This happens in specific circumstances that you define, based on your character’s
Arcana. Once you reach certain benchmarks, you are also able to increase the Width of your Sets as well. This kicks in at Levels 3 (+1 Width) and 5 (+1, total of +2 Width).
2. Each Odd Arcana Level (1, 3, 5) gives your Persona x1 Rank of your Arcana Extra, and each Even Level (2, 4) gives a free Quality. These Extras are the same as
with Arcana Boosting: High Priestesses get Effective, Towers get Recoil, Chariots get Fast, etc…
The Qualities at Levels 2 and 4 can be freely chosen. In this way, as you grow as a person your
Personal experiences sympathetic improvement as well.
Aspects
A character accesses their Arcana Level by means of their Aspects, which describe how their
identity and desires define their relationship with their Arcana. These take the form of
questions that each character answers for themselves. The Emperor, for example, faces these
questions:
• Of Whom are you the Leader?
• What kind of Power do you have?
• Who Looks up to you?
The answers to these questions form that character’s Aspects:
• I Lead the 3rd Street Czars
• I have the Power to sway people with fiery speeches
• The Basketball Team looks up to me
Just like with a Relationship, any situation involving your Aspects benefits from your Arcana
Level, letting you increase your Height and Width accordingly. Unlike a Relationship, though,
there’s no risk posed to using your Arcana Level: every time you involve yourself in your
Aspects, you reap its benefits.
Chapter IV: The Player’s Manual
-- 75 --
Declaring New Aspects
A character gains 2 Aspects at Arcana Level 1, then 1 additional Aspect at levels 2 and 4, for a
total of 4 Aspects. Of note, you can use the same prompt to create multiple Aspects: an Emperor
could choose to base all of his Aspects around the first question (“Of Whom are you the
Leader?”) to embody the roll of The Boss, or he could take multiple Aspects of the third
question (“Who looks up to you?”) to become more of a Mentor. It all depends on the player’s
vision for the character and the path he wants to take.
Achievement Unlocked: Improving your Arcana Level
A character progresses through their Arcana’s route by unlocking Achievements, which mark
moments of major engagement with their Arcana. By pursuing these, a character learns more
about who they are as a person, about their role in society, and about how they view that role.
At each Arcana Level, a character has 4 possible Achievements they can claim. To advance to the next level of one’s Arcana, one must claim 3 Achievements. The exception is
Level 5, which requires all 4 of its Achievements to be met. These 4 Achievements are split into
two groups.
Perpetual Achievements
Every Arcana has two Perpetual Achievements which it can claim at every single Level. These
represent things and behaviors that the Arcana always seeks, no matter the extent of its
maturity.
The trick with Perpetual Achievements is that they get stale, which drives a person to
push themselves and reach for greater heights. An activity that satisfied the needs of Level 1
won’t cut it at Level 4; you need to try harder and dig deeper to make progress.
Unique Achievements
Each Level also has two Unique Achievements that represent elements of the Arcana’s
psychological profile that evolve as one advances through it. The further down the route a
character progresses, the more complex and difficult to reach they become, guiding a player to
embody the deepest and more profound qualities of their Arcana.
At Levels 1 through 3, one of the Achievements will be Upright, representing the nobler
face of the Arcana, while another will be Reversed, representing its negative qualities. Both
satisfy the requirements to advance to the next level, as exploring an Arcana’s dark side still

Chapter IV: The Player’s Manual
-- 76 --
counts as engaging with it. But progress through Levels 4 and 5 require turning one’s back on
the Reversed path, as that leads away from maturity and self-actualization and towards self-
destruction and spiritual decay. A person can still embody those qualities, but they’ll do him no
good in the pursuit if psychological completeness. That way lies the path of shadow.
In contrast, the Perpetual Achievements are neither explicitly Upright nor Reversed, and
can manifest as either depending on the character’s choices.
Tips for Players using Aspects
When and how you can invoke an Aspect may not always be immediately clear, so here are
some tips and tricks to help you get the most of your character’s decisions.
Aspects Should be Actionable
In other words, don’t get too vague or high concept with your Aspects, because then you’ll find
them hard to interact with. If you’re playing a Moon and one your Aspects is “I Fear the
Inevitable Collapse of Civilization due to Mankind’s Greed”, that’s kind of hard to translate into
stuff that you can do. It can still work, but you’re going to get less value out of than in a more
concrete Aspect like “I Fear Being Alone” or “I Fear Failing out of School and Disappointing my
Parents.” Those are more immediately actionable; Fearing loneliness can be used to help you
get out situations where you’d find yourself isolated, and Fear of bad grades will help you
study and do better at classwork.
Figuring Out What your Aspects Can Do
Basically, to figure out what a specific Aspect covers, you can think about how that Aspect
affects you as a person. Plug the Aspect into a prompt like this:
Because _________, I can…
So if you’re a Magician whose Talent is playing video games on a competitive level, you can say
“Because I’m a Pro Gamer, I can keep a cool head under pressure, handle and dish out smack
talk, arrange travel to remote locations, pull long nights practicing for events.” None of these
necessarily require you be playing a video game; instead they’re side-effects of having that
Aspect, and whenever they come up you can increase your Height and Width accordingly.
As with Relationships, this is a conversation with your GM, and they reserve the right to
veto an Aspect’s affect on a roll if you’re pushing too far to justify how an Aspect benefits you.

Chapter IV: The Player’s Manual
-- 77 --
How GMs Work with Arcana Levels
Aspects Tell You What is Important to your Characters
A character’s Relationships provide color and contrast to their stories, but their Aspects more
acutely define who they are and what they want for themselves. The Emperor can be a Leader
of a group; what happens when that Group is threatened? They may possess Power; what
happens when that Power is challenged? Someone looks up to them; what happens if their
protégé gets in trouble? By focusing on these Aspects you can successfully create a personal arc
for each of your player characters.
Arcana Level Tells You Who Needs More Attention
If everyone in your party is at Arcana Level 3 except one person who is just working on getting
his Level 2 Achievements, then the game is telling you that person needs a little more spotlight
in the game. Look at the Achievements they have before them and give them prime
opportunities to complete them.
Arcana Level Helps Pace your Story
Once your Party reaches Arcana Level 4, you should start moving towards the final act of your
Campaign. By the time they are Level 5, your Campaign should be entering its Endgame. It
shouldn’t end immediately, because then they don’t get to enjoy the power offered by Arcana
Level 5 (+5 Height and +2 Width is nothing to sneeze at!), but the end should be in sight.
Story Informs the Pace of Arcana Levelling Too
Levels 1 and 2 are supposed to be lenient; feel free to let your Players get these at whatever pace
seems natural to them. But 3-5 should be a bit more serious. Achievements at these Levels
shouldn’t be easy come, easy go; they should represent major investments of time and energy to
reach. Arcana Level 3-4 should occupy most of your intended mid-game as you really dig into
what makes your character’s tick.
Pay Attention to Reversed Achievements
If a Player reaches Level 3 using 2 or more Reversed Achievements (those marked with a ▽),
then it means they’ve embraced the darker aspects of their Arcana. While not required by the
game, it can be interesting storytelling to make them face these dark aspects by generating a
Shadow in the Other World reflecting their negative qualities that they must vanquish before
they can reach Level 4.

Arcana Routes
-- 78 --
The Magician
Aspects
• What is your Talent?
• What Asset can you Focus?
• Of what Implausible Dream are you Convinced?
The Magician is a person who makes things
happen. Most do this by means of a Talent: some
craft, art or field of knowledge in which he
professes mastery. He also has Assets at hand:
material resources, physical energy, personal
connections, tireless obsessions, which can be
Focused into the intense pursuit of his great work.
His connection with this objective is so strong that
no matter how Implausible his Dream appears, the
Magician pursues it with fierce determination.
Perpetual Achievements ☐--Make Something: The Magician brings new
things into existence-- a device, a work of art, a
performance. This Achievement must be in some
way Tangible: you must be able to hold it, see it,
taste, smell or hear it.
☐--Expand your Mind: This isn’t just about getting
smarter, it means reaching out for brand new
spiritual, emotional and psychological experiences
that bring the Magician face to face with ideas and
beliefs he’d never before considered.
Level 0: Nascence △--Eureka Moment: Experience a sudden burst of
insight to solve a troublesome problem.
▽--Hesitate to Act: When given an opportunity to
take decisive action, let uncertainty hold you back.
Level 1: Melanosis △--Be Resourceful: Find a creative solution to a
problem which you lack the proper tools to solve.
▽--Get Frustrated: Lash out others when faced
with an inability to realize a plan or design.
Level 2: Leucosis △--Manifest Willpower: Push yourself onward
even when exhausted or depleted of resources.
▽--Manipulate Maliciously: Use your prodigious
skills to trick, cheat and deceive the innocent.
Level 3: Xanthosis △--Overcome a Barrier: Conquer a long-time
hindrance holding you back from your goals.
△--Soul Connection: Show that your creativity is
fueled by higher values than ego or materialism.
Level 4: Iosis △--Work a Miracle: Successfully complete a work
or perform a feat thought to be wholly impossible.
△--Realize your Absolute Self: At a critical
moment find a way to embody the ideal person
that you want yourself to be.
Level 5: Magnum Opus

Arcana Routes
-- 79 --
The High Priestess
Aspects
• What Rare Knowledge do you Possess?
• What do your Instincts tell you?
• What Secrets to you wish to Uncover?
The High Priestess radiates quiet confidence as
mistress (or master; femininity is not demanded) of
the arcane. She wields unique, Rare Knowledge
overlooked by others as too obscure or
unimportant to solve intractable problems and has
keen Instincts that guide her through tough
choices. These make her adept at finding and
deciphering Secrets too baroque for lesser minds.
Perpetual Achievements ☐--Solve the Arcane: The High Priestess pursues
dominance over problems too esoteric and
frustratingly obtuse for others to fix. Each lock
dismantled and knot unwound brings her one step
closer to understanding how the world truly works.
☐--Trust your Gut: The High Priestess knows that
empirical proof can be wrong, and cold reason can
tell an incomplete story. When faced with an
important decision, she chooses to heed her inner
voice even when contradicted by external evidence
or seeming concrete rationality.
Level 0: Nascence △--Control your Emotions: Remain calm and
centered when things get heated or out of hand.
▽--Ignore your Instincts: You ignored your Gut’s
urging, and took a path that lead to trouble.
Level 1: Acolyte △--Expose Lies: Bring the hurtful deception of
another person to the light of day.
▽--Spread Deceit: If not outright lies, nurture half-
truths and gossip among those who trust you.
Level 2: Nightingale △--Show Empathy: Demonstrate to a person in
distress that you truly understand their troubles.
▽--Withhold Troubling Secrets: Neglect to
disclose crucial information to avoid consequences.
Level 3: Oracle △--Provide Guidance: Use your knowledge and
skills to aid another through a profound personal
crisis.
△--Access Your Subconscious: Become aware of
needs and desires which have gone unvoiced.
Level 4: Reverend Mother △--Know the Unknowable: Solve a mystery or
obtain knowledge that has remained secret for ages.
△--Pull Back the Veil: Demonstrate that your
tireless, masterful work behind the scenes has
ensured victory over a crisis.
Level 5: Divine Feminine

Arcana Routes
-- 80 --
The Empress
Aspects
• Who Depends on You?
• Towards What are you Compassionate?
• With What Beauty are you Engaged?
The Empress embodies loyalty earned through
compassion and feeling, and power wielded with
firm but gentle care. Others Depend on her, for
material support, emotional support or often both,
and she turns her Compassion towards a specific
focus-- a person, group or cause for which her heart
demands action. The Empress is deeply connected
with the idea of elegance and Beauty, which she
Engages with in a specific way-- art, fashion,
luxury, social grace or the raw beauty of nature.
Perpetual Achievements ☐--Be Nurturing: The Empress acts as a profound
source of emotional support for others,
encouraging them to reach their goals and helping
shoulder their burdens when the stresses of life
become too great to bear alone.
☐--Be Regal: The Empress is also a Queen and is
obligated to act like one. This means being
composed under pressure, inspiring the hopeless
during crises, and demanding obedience with a
calm demeanor and perhaps an imperious threat.
Level 0: Nascence △--Be Responsible: Willingly take on a new
obligation, or own up to a problem you caused.
▽--Reject Agency: Allow someone else to take on a
responsibility that’s rightfully yours to carry out.
Level 1: Foremost of Noble Ladies △--Protect Someone: Shield someone important to
you from emotional or even physical harm.
▽--Shoulder Too Much: Run into trouble from
being weighed down with others problems.
Level 2: Most Illustrious △--Demonstrate Maternal Instinct: Risk personal
loss or suffering to support an ally, Dependent or
Relationship in their time of need.
▽--Nurture Dependence: Encourage someone to
surrender control of their personal agency to you.
Level 3: Sacred and Divine Empress △--Embrace Mother Earth: Take the time to escape
modernity and center your spirit amidst nature.
△- Celebrate Abundance: Find success in a major
personal venture, and share its profit with others.
Level 4: The Great △--Empty your Nest: Help those whom you lead
or who Depend on you to see that they can thrive
outside of your guidance or protection.
△--Celebrate Yourself: Satisfy an important
personal need that has gone long unfulfilled as you
pursued the interests of others.
Level 5: Gloriana

Arcana Routes
-- 81 --
The Emperor
Aspects
• Of Whom are You the Leader?
• What kind of Power do you have?
• Who looks up to you?
The Emperor’s path is one of Power and Authority,
consolidated as a Domain: the area or entity that
recognizes him as The Boss. Good Emperors use
their power wisely, to help make their Domain a
better place and expand its borders to help others.
But in so doing they risk becoming tyrants, using
their Power to force the unwilling to accept their
Authority.
Perpetual Achievements ☐--Seize Power over a Situation: Good kings rise
to the occasion of a dangerous or out of control
situation, taking charge when others panic. Tyrants
do so opportunistically, annexing power from the
weak to enrich themselves.
☐--Obtain Respect: Authority is intrinsic to the
Emperor, but making others acknowledge that
authority is another matter. Good kings do so by
merit of their wisdom, courage and justice. Tyrants
harvest respect with fear and intimidation.
Level 0: Nascence △--Expand your Domain: Increase the Power of
your Domain in some meaningful way, whether by
reinforcing its horizons or reaching for new ones.
▽--Force your Will on Others: Sometimes naked
Force is the only way to quell disobedience.
Level 1: All Hail the King △--Demonstrate Leadership: Cause others to
follow you by merit of your charisma, vision and
personality.
▽--Lash Out at Weakness: Break something, hurt
someone, do something reckless in response to
your Power falling short.
Level 2: Oh Captain, My Captain △--Lead by Example: Show that you’d never ask
another to do something you’re unwilling to do.
▽--Rule by Fear: Motivate others through threats
of terrible consequences should they decline.
Level 3: Divine Right △--Rule Wisely: Demonstrate that your Power is
moved by mercy, justice and reason.
△--Defend your Domain: Protect what you’ve
built from destruction by invasion or treason.
Level 4: Veni Vidi Vici △--Risk your Crown: Prove your Domain’s safety
and glory is more important than your own.
△--Relinquish your Throne: A great Emperor is
one whose Domain endures beyond his reign.
Level 5: The Once and Future King

Arcana Routes
-- 82 --
The Hierophant
Aspects
• What Doctrine do you Follow?
• To what Tradition do you Adhere?
• Who are your Flock?
The Hierophant is the voice of reason, morality and
spiritual guidance. His wisdom is received, usually
from a Doctrine, which itself can be religious or
secular, that dictates proper behavior. This
guidance can also manifest as Traditions to which
the Hierophant conforms which give him stability
and routine. The subjects of a Hierophant’s
guidance are the Flock to which the Hierophant
feels responsibility, even if no authority has
officially appointed him their shepherd.
Perpetual Achievements ☐--Give Guidance: The Hierophant carries out his
central purpose when he provides advice and
counsel to others on matters of judgement and
morality. The trick is that for this to count, your
advice must be followed, not just heard.
☐--Faith Without Works is Dead: The Hierophant
must do more than just express his convictions
through fancy words. He needs to translate them
into action, actively demonstrating that his beliefs
are sincere and not just for show.
Level 0: Nascence △--Undertake a Ritual: Be an active part of a
tradition or practice significant to your beliefs.
▽--Be Dogmatic: Be unreasonably rigid or strict in
forcing your beliefs or traditions into a situation.
Level 1: Disciple △--Walk by Faith: Trust the code you’ve been
taught, even when doing so seems ill-advised.
▽--Be Woefully Hypocritical: Advertise principles
to others that you willfully violate yourself.
Level 2: Chaplain △--Make Disciples: Convince several non-
believers, or one adversary, of your beliefs’ value.
▽--Crucify your Gut: Take actions demanded by
your institution over your own conscience.
Level 3: Apostle △--Invite Ridicule: Hold to practices that others
look upon as old-fashioned, absurd or just wrong.
△--Access the Divine: Connect authentically with
the source of the code that you follow.
Level 4: Pontiff △--Devote Yourself: Commit the next phase of
your life wholly to your belief’s institution, be it a
religious covenant or enlistment in a secular cause.
△--Be Your Own Lantern: Prove that you live
according to how you truly believe, not just by rote
or for the sake of conforming to doctrine.
Level 5: Good Shepherd

Arcana Routes
-- 83 --
The Lovers
Aspects
• For Whom does your Heart burn?
• How do you Express your Feelings?
• What Decision do you Face?
The Lovers is a person who is guided by their
heart. They fall into mad, whirlwind romances,
make fierce, loyal friendships and live for
excitement and passion. However, the heart can be
a treacherous compass, and inevitably leads the
Lovers to points where they must make difficult,
painful choices for which there are no clear right or
wrong answers, choices they alone must decide for
themselves.
Perpetual Achievements ☐--Confess Your Feelings: The Lovers’ passions
burn within them and seek release. This doesn’t
mean confessing your undying devotion to your
crush, but that you reveal how your deeply and
often painfully feel about something important to
someone important.
☐--Make a Difficult Choice: The Lovers’ life
course of listening to their heart leads them to
fraught junctures. These choices are difficult either
because they lack a clear moral mandate, or
because all outcomes lead to some kind of pain.
Level 0: Nascence △--Demonstrate Feeling: Use some meaningful
gesture to show someone what they mean to you.
▽--Escape a Decision: When faced with a hard
choice, you freeze, flee or otherwise fail to decide.
Level 1: Yearning △--Stand-up for your Feelings: Don’t back down
when your emotions and beliefs are questioned.
▽--Flirt with Disaster: You followed your heart,
and it lead you straight off a cliff and into some
kind of stupid, painful drama.
Level 2: Passion △--Love Conquers All: Connect with someone
who normally bears antipathy towards you.
▽--Entangle Others’ Hearts: Ensnare others in
your foolhardy plans, leading to emotional distress.
Level 3: Devotion △--Reconcile Consequences: Navigate the messy,
possibly disastrous fallout of a prior decision.
△--Risk Heartbreak: Face a decision that threatens
to shatter your emotional make-up.
Level 4: Agape △--To Thine Own Self Be True: Face your own
weaknesses, flaws and past errors, accept them,
and face the future with no regrets.
△--Commit Yourself: Face the final Decision to
which you will devote the next phase of your life.
Level 5: The Ever-Fixed Mark

Arcana Routes
-- 84 --
The Chariot
Aspects
• What is your Arena?
• What adds Fuel to your Engine?
• What make you Lose Control?
The Chariot pursues victory with the fierceness of a
racing vehicle pulled by hungry lions. His Arena is
the field in which he aspires to this victory--
baseball, pro gaming, academic debate, etc. The
Chariot can be driven by two forces: that which
Fuels him, motivating him with positivity by
cheering crowds, school spirit or family pride; and
that which makes him Lose Control, tapping into
feelings of anger, fear or ego so that he charges
ahead with heedless abandon.
Perpetual Achievements ☐--Win a Contest: Triumphing in any endeavor
with a clear winner or loser strengthens the
Chariot. This includes fighting when done in
pursuit of titles or recognition, but not for survival.
☐--Overcome an Obstacle: These are anything that
obstructs the Chariot’s path and growth-- a
nefarious rival, feelings of doubt, even one’s own
physical limitations. These roadblocks cannot be
circumnavigated: they must be challenged head-on
and broken through by grit, skill and willpower.
Level 0: Nascence △--Boldly Go: Show a willingness to face a
dangerous situation with a confident, cool head.
▽--Jump the Gun: Invite trouble by leaping into a
critical situation without forethought.
Level 1: First Gear △--Manifest Discipline: Remain focused on your
goals when tempted by distractions or offers of an
easy way forward.
▽--Hit a Roadblock: Encounter a challenge or
obstacle from which you shrink way from facing.
Level 2: Second Gear △--Assert Yourself: Boldly take a stand for what
you want when facing doubt or criticism.
▽--Inflict Collateral Damage: Cause needless
suffering to another person while chasing a win.
Level 3: Top Gear △--Moral Victory: Forgo a clear win in favor of
helping others or otherwise doing the right thing.
△--Snatched from the Jaws of Defeat: Take
decisive action to rescue yourself or others from
certain disaster.
Level 4: Going the Distance △--Become Formless: Prove your victory is not
dependent on specific tools, strategies or abilities.
△--Win Without Fighting: Force a mighty foe to
surrender using only your wits, reputation and
confidence.
Level 5: Sweet Victory

Arcana Routes
-- 85 --
Justice Aspects
• To What Law do you Adhere?
• Where does Fairness Matter Most to You?
• What Wrong do you Need to Right?
Justice is someone whose worldview is shaped by
clear, sharp concepts of good and bad which can
manifest in many ways. For some they’re drawn to
specific Laws that state with authority how a
person should act-- do not steal, do not lie, do not
covet. It can also be less about rules and more
about being Fair in a specific area of endeavor, like
business, school or human relations. And
sometimes Justice is about correcting a specific
Wrong that one has personally suffered.
Perpetual Achievements ☐--Uphold Truth: Justice cannot coexist with
deception. A person of the Justice Arcana is driven
to expose falsehoods and hold liars, cheats and
frauds to account. They stick to the honest course,
even when grappling with difficult Truths.
☐--Take a Stand: True Justice demands action, not
mere moralizing. When a person of this Arcana
sees or experiences injustice he acts decisively to
oppose it, even when doing so risks ridicule, hatred
and threats of retaliation.
Level 0: Nascence △--Repay Someone: Go out of your way to return
a favor to someone who’s helped you.
▽--Be Rigid: Refuse any slack of lenience when
facing a situation that calls for tact and flexibility.
Level 1: Training Day △--Accept Responsibility: Own up to the
consequences of a course of action, good or bad.
▽--Rush to Judgement: Ignore context or crucial
evidence when making a decision based on one of
your Aspects.
Level 2: Law and Order △--Be Unbiased: Treat as an equal someone highly
regarded or seen as unsavory by others.
▽--Thumb on the Scale: Deceive or manipulate
others to achieve an outcome appeasing your sense
of justice.
Level 3: Thin Blue Line △--Commute a Sentence: Elect not to stand against
a lawbreaker due to extenuating circumstances
△--Admit Fault: Own up to a moral lapse you’ve
committed and make amends for it.
Level 4: Heat △--Embrace the Gray: Openly reject black and
white thinking and demonstrate understanding of
the real world’s ethical ambiguities.
△--Be Reckoned: Accept the weighty, life altering
consequences of a choice you made or of a verdict
handed down to you.
Level 5: Untouchable
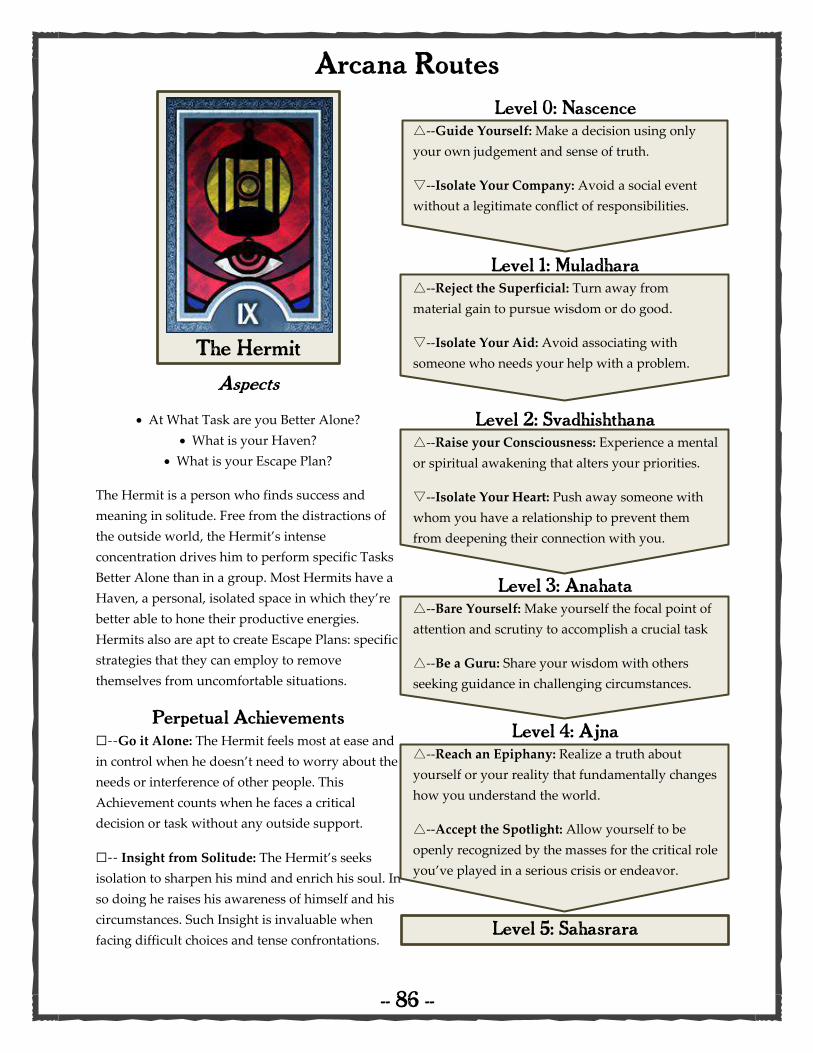
Arcana Routes
-- 86 --
The Hermit
Aspects
• At What Task are you Better Alone?
• What is your Haven?
• What is your Escape Plan?
The Hermit is a person who finds success and
meaning in solitude. Free from the distractions of
the outside world, the Hermit’s intense
concentration drives him to perform specific Tasks
Better Alone than in a group. Most Hermits have a
Haven, a personal, isolated space in which they’re
better able to hone their productive energies.
Hermits also are apt to create Escape Plans: specific
strategies that they can employ to remove
themselves from uncomfortable situations.
Perpetual Achievements ☐--Go it Alone: The Hermit feels most at ease and
in control when he doesn’t need to worry about the
needs or interference of other people. This
Achievement counts when he faces a critical
decision or task without any outside support.
☐-- Insight from Solitude: The Hermit’s seeks
isolation to sharpen his mind and enrich his soul. In
so doing he raises his awareness of himself and his
circumstances. Such Insight is invaluable when
facing difficult choices and tense confrontations.
Level 0: Nascence △--Guide Yourself: Make a decision using only
your own judgement and sense of truth.
▽--Isolate Your Company: Avoid a social event
without a legitimate conflict of responsibilities.
Level 1: Muladhara △--Reject the Superficial: Turn away from
material gain to pursue wisdom or do good.
▽--Isolate Your Aid: Avoid associating with
someone who needs your help with a problem.
Level 2: Svadhishthana △--Raise your Consciousness: Experience a mental
or spiritual awakening that alters your priorities.
▽--Isolate Your Heart: Push away someone with
whom you have a relationship to prevent them
from deepening their connection with you.
Level 3: Anahata △--Bare Yourself: Make yourself the focal point of
attention and scrutiny to accomplish a crucial task
△--Be a Guru: Share your wisdom with others
seeking guidance in challenging circumstances.
Level 4: Ajna △--Reach an Epiphany: Realize a truth about
yourself or your reality that fundamentally changes
how you understand the world.
△--Accept the Spotlight: Allow yourself to be
openly recognized by the masses for the critical role
you’ve played in a serious crisis or endeavor.
Level 5: Sahasrara

Arcana Routes
-- 87 --
Fortune Aspects
• What Treasure do you seek?
• What do you Wager?
• To what new Circumstances can you Adapt?
Fortune is a person who actively seeks to rebuild,
redefine and reroute his circumstances. This may
take the form his Treasure: a life-changing goal he
chases. Fortune is apt to Wager in pursuit of this
and other goals, putting his money, time, energy,
relationships or safety on the line. Yet despite his
efforts, he cannot avoid the reality is that he is at
the mercy of the Universe and must either Adapt to
its ever-turning wheel or be run over by it.
Perpetual Achievements ☐--Take a Risk: Fortune favors the bold, and a
person walking this route can’t get anywhere if he
isn’t willing to lose something. The greater the
potential loss, the greater the possible payout.
☐--What Goes Around Comes Around: The wheel
of Fortune has a tendency to bring you face to face
with things from your past. Sometimes it brings
unexpected windfalls, but more often it forces you
do deal with the consequences of prior actions.
Negotiating this karmic knot shapes the growth of
a person down Fortune’s route.
Level 0: Nascence △--Hope for Good Fortune: When things look bad,
fortify yourself and others that your luck will turn.
▽--Resist Change : When circumstances suddenly
change you fight with all your strength to stop it.
Level 1: Opening Bid △--Prove Yourself: Succeed in demonstrating that
the Change you desire is actually achievable.
▽--Rage against Change: Lash out against the
world when unwanted Change is forced upon you.
Level 2: Up the Ante △--Seize Opportunity: Find a way to turn a bad
situation around and profit from it.
▽--Lament a Lost Gambit: Run a risky enterprise
or gambit and undergo a breakdown when it
crashes and burns.
Level 3: High Stakes △--Break a Cycle: Free yourself from a negative
cycle that holds you back even as it defines you.
△--The Real Treasure All Along: Recognize that
there are more important things in the world than
achieving your personal ambitions.
Level 4: All In △--Change is the Only Constant: Willingly accept
a profound change that upends one of the defining
qualities of your life and identity.
△--All or Nothing: Take the plunge and reach for
the life-altering opportunity the Universe extends.
Level 5: Winning Hand

Arcana Routes
-- 88 --
Strength Aspects
• Of What are you Unafraid?
• By What Emotion are you Empowered?
• Against what Threat are you Fortified?
Strength is the arcana of courage, endurance and
inner power, steeling a person against trials and
pressures that would crush another. It renders
them confident and Unafraid of perils which they
know they can overcome, and reins in their raw
Emotions like anger, guilt or sadness. By these they
are Empowered, rather than held back. These traits
gift Strength with Fortitude against specific
Threats, be they from human antagonists or the
overbearing strain of modern life itself.
Perpetual Achievements ☐--Tame the Ferocious: Strength’s blending of
confidence and might can Tame dangerous threats,
whether from intelligent opponents or inanimate
forces. Taming is more than simply overpowering a
threat: it must actively submit to Strength’s power.
☐--Be Persistent: Strength embodies relentless
determination to meet a goal despite bad odds and
stern opposition. A person following this route will
never give up or slacken their effort, trying again
and again to accomplish the task at hand.
Level 0: Nascence △--Strengthen Yourself: Make a concerted effort to
improve your stamina or willpower.
▽--Run on Empty: Exhaust yourself in pursuit of
your goals or helping others.
Level 1: Owain △--Be Persuasive: Solve a crisis with diplomacy,
tact and personal connection instead of force.
▽--Lose Your Temper: Lash out explosively and
do something rash you’ll later regret.
Level 2: Sampson △--Face your Fears: Stand up against some threat
or situation that personally terrifies you.
▽--Crisis of Confidence: Reject an important
course of action out of doubt that you’ll succeed.
Level 3: Hercules △--Tame your Own Beast: Resist being overcome
by animal instincts and gut reactions during a
critical challenge.
△--Share your Strength: Use your willpower and
perseverance to help another through a personal
crisis.
Level 4: Gilgamesh △--Take on an Ultimate Test: Face the limit of
your determination in a final test of your personal
resolve and goals.
△--Banish Doubt: Demonstrate confidence in a
crisis that targets your greatest weakness or
vulnerability.
Level 5: Lionheart

Arcana Routes
-- 89 --
The Hanged Man
Aspects
• For What Cause have You Sacrificed Yourself?
• What has your Sacrifice Taught You?
• What Unique Perspective do you have?
The Hanged Man has made a Sacrifice: he’s given
up something or put it on hold for the present.
Many do so in pursuit of some worthy Cause for
which they’re willing to suffer. Sacrifices can also
Teach new knowledge, gained either from new
circumstances or the hard-knocks that come with
accepting discomfort. And by willingly upending
their life, the Hanged Man can gain new
Perspectives that they hadn’t before considered.
Perpetual Achievements ☐--Hang for your Principles: The Hanged Man’s
will to surrender what’s important to them extends
beyond their initial Sacrifice. Hanging for your
Principles means accepting suffering or difficulty
out of moral duty, because it’s The Right Thing.
☐--Hang for Someone Else: A Hanged Man can
also Sacrifice themselves on behalf of someone else,
setting aside their own needs or wants or accepting
pain to spare someone important to them from
suffering. In both of these cases, the Hanged Man
demonstrates the sincerity of their Sacrifice.
Level 0: Nascence △--Be Patient: Instead of rushing into a situation,
pause and consider all the possible options.
▽-- Stall Needlessly: Delay having to make a
difficult choice or take on a difficult task.
Level 1: From a Wind Rocked Tree △--Shift your Perspective: See some aspect of the
world from an angle you never considered before.
▽--Be a Phony: Use your Sacrifice to garner social
credit or manipulate other’s emotions.
Level 2: Nine Nights Hung △--Bear your Cross: Turn down a chance to spare
yourself the personal cost of your Sacrifice.
▽--Use a Proxy: Cause someone else to make a
serious Sacrifice in place of yourself.
Level 3: Pierced by Thyself △--Turn the Other Cheek: Refuse an opportunity
to respond in kind when seriously mistreated.
△--Inspire Others: Through your self-sacrificing
example, motivate others to improve themselves.
Level 4: Downwards Peering △--Leap into the Unknown: Take decisive action
at a critical moment without fully knowing the
possible outcome.
△--Come Down from your Post: Either reclaim the
possession or circumstance you initially Sacrificed,
or release yourself from its hold altogether.
Level 5: Forthwith Back Thou Fell

Arcana Routes
-- 90 --
Death Aspects
• What have you Buried?
• As What do you Seek Rebirth?
• What Haunts You?
Death is a story of transformation. It represents a
person leaving one aspect of their life behind and
focusing on a new opportunity. Some strive to Bury
unwanted elements of their past: a bad choice, an
unwholesome lifestyle, personal pain, etc. Others
focus fully on what they are becoming, their
Rebirth, channeling their energies into redefining
themselves. Yet Death is frequently Haunted by the
ghosts of one’s prior life looking to drag them back
to the existence they’re trying to abandon.
Perpetual Achievements ☐--Try Something New: Even if Death looks
forward to a specific Rebirth Aspect, they still seek
new experiences in other domains. As one moves
down this route, one finds increasingly unique and
exotic experiences in which to be immersed.
☐--Leave Something Old: Death must learn not to
cling to fragments of the past that hold them back.
To change they may need to abandon treasured
possessions, hobbies, even friends whose
associations chain them to what they’ve left behind.
Level 0: Nascence △--Be Imaginative: Help resolve a problem by
envisioning a new possibility for those involved.
▽--Defer Opportunity: Turn aside from a new
experience out of anxiety toward the unknown.
Level 1: Styx △--Get a Makeover: Refresh your look, behavior or
role in a group to fit the transformation you’re after.
▽--Be Intractable: Refuse to change your mind or
behavior in a delicate situation.
Level 2: Lethe △--Fight Your Past: Resist some force attempting
to draw you back into what you’ve left behind.
▽--Dig Up Your Own Grave: Return to your old
ways when facing a crisis or critical decision.
Level 3: Asphodel △--Ferry Another’s Crossing: Help someone else
achieve their own transformation.
△--Face the Flames: Accept some personal risk to
yourself, whether social, emotional or physical, in
the pursuit of your transformation.
Level 4: Elysium △--Purge your Soul: Undergo a spiritual or
psychological ordeal in an effort to sever the last
connections to your old way of life.
△--Be Reborn: Complete the transformation into
your new life and be recognized fully for your new
state and purpose.
Level 5: Rebirth

Arcana Routes
-- 91 --
Temperance
Aspects
• What is Your Balancing Act?
• What Elements can you Fuse?
• To What Long Term Goal to You Strive?
Temperance is all about balance and stability,
conditions that are profoundly difficulty to achieve
in a busy, chaotic world. Many Temperances cope
with a Balancing Act: the need to carry out
multiple, often conflicting obligations at once.
Temperance can also focus on the idea of Fusion, of
mixing disparate ingredients to form a cohesive
whole. This can be literal- a chef mixing contrasting
cuisines, or figurative, as in a blended family.
Temperance’s quest for stability also embodies a
Long-Term Goal that they build towards.
Perpetual Achievements ☐--Keep Your Cool: Temperance applies not just
to actions but to feelings. A Temperate person tries
to control their emotions, resisting the need to lash
out or break down even when under intense strain.
☐--Stabilize a Crisis: Temperance seeks to
introduce harmony into disharmonious
circumstances by acting as a mediator, a voice of
reason, a firm peacekeeper or a human anchor
whose calmness others rely on in turbulent seas.
Level 0: Nascence △--Be Moderate: Resist diving too deep into your
passions or interests when offered free rein.
▽--Overindulge: Eat, drink, party or otherwise
engage excessively with your material wants.
Level 1: Spring Serpent △--Take on a New Duty: Accept a new
responsibility into your existing list of obligations.
▽--Exceed your Grasp: Run into trouble by
accepting more obligation than you can handle.
Level 2: Summer Phoenix △--Be the Cornerstone: Allow others to depend on
you as the focal point of an important endeavor.
▽--Rupture the Tension: Abandon your
obligations as the stress of maintaining them
overwhelms you.
Level 3: Autumn Tiger △--Think Long Term: Make a difficult choice
based on long-term fallout, not short-term results.
△--Heal Yourself: Mend a source of emotional
anguish in your past or current circumstances.
Level 4: Winter Tortoise △--Take the Plunge: Commit fully to one of the
numerous paths or options you’ve been juggling,
setting it as your true priority.
△--Cast Off the Unneeded: Release yourself from
obligations and duties which you’ve claimed but
do not bring you personal completeness.
Level 5: Eternal Dragon

Arcana Routes
-- 92 --
The Devil Aspects
• What is your Vice of choice?
• What is your Creative Outlet?
• What Dark Impulse do you Harbor?
The Devil is a person driven by urges and base
desires, who when faced with a choice prefers
instant gratification over the thrill of anticipation,
which more often than not leads them down the
path of Vice. The Devil also represents a person in
touch with their dark side, their Shadow, which
seeks freedom and expression; when properly
channeled, these impulses can be a wellspring of
Creativity.
Perpetual Achievements ☐--Taste the Fruit: The Devil seeks freedom from
society’s rules, and does so by transgressing its
laws, written or unwritten. Whenever a Devil does
something that is in some way forbidden, they
progress further down their route.
☐--Not Afraid of the Dark: The Devil is not
repelled by darkness: it is nourished by it. The
Devil gets in touch with their shadow-side, and is
willing to lie, cheat, steal and act deviously and
maliciously to get things done. This doesn’t make
them bad, but they definitely aren’t entirely good.
Level 0: Nascence △--Seek Satisfaction: Make a choice that leads to
instant gratification over long-term benefits.
▽--Tempt the Innocent: Lure at least one other
person to indulge in your brand of transgression.
Level 1: Fallen Angel △--Offer Freedom: Convince another person to
free themselves from restrictive rules or dogma.
▽--Deny your Guilt: Ignore the pangs of your
conscience as you pursue your dark course.
Level 2: Paradise Lost △--Get Wild: Help yourself and others to release
pent-up feelings and frustration in a raucous
endeavor.
▽--Enchain Yourself: Lose control of yourself to
your material or physical desires.
Level 3: First Serpent △--Dark Opus: Bring others to marvel at the
masterwork inspired by your dark imaginings
△--Heart like Hellfire: Demonstrate fierce,
consuming attachment to a person close to you.
Level 4: Great Dragon △--Release the Final Shackle: Free yourself of
your dependence on vice or material obsession so
that it no longer drives your life.
△--Embrace your Shadow: Confront your darkest
self and accept it as a part of your complete soul.
Level 5: Morning Star

Arcana Routes
-- 93 --
The Tower
Aspects
• Against What are you Hardened?
• What has the Fall Taught You?
• How do you Cope with Stress?
The Tower is having a bad time. Their life has been
upended by some recent crisis or revelation and
they’re left to pick up the pieces and figure out
what went wrong. This upheaval can Harden a
Tower against the harsh realities of life and drives
them to find ways to Cope with the crushing stress
left by the fallout. Their Fall, painful as it is, can
Teach critical lessons that will benefit them as they
try to rebuild the shattered remains of their life.
Perpetual Achievements ☐--Deal with Fallout: The Tower’s Fall is the gift
that keeps on giving. The shockwaves and falling
debris it leaves become people and problems that
get in the way of the Tower’s reconstruction and
which they must overcome to move forward.
☐--Discover Something About Yourself: As the
Tower sifts through the wreckage of their life they
often come across pieces of themselves they never
knew about-- new interests can be unearthed and
old beliefs may be called into question. These are
the stones upon which a new life can be built.
Level 0: Nascence △--Sense Danger: Use your disaster-honed
awareness to detect trouble before it erupts.
▽--Gloom and Doom: Channel your helplessness
and anger into the people and space around you.
Level 1: Thunderstruck △--Protect What’s Left: Fiercely defend what
fragments of your old life remain intact.
▽--Reject Revelation: Ignore an uncomfortable
truth or new opportunity obtained from your Fall.
Level 2: Falling Down △--Embrace Freefall: Find a moment of true
serenity when things seem at their most chaotic.
▽--Cling to the Ruins: Fight tooth and nail to hold
onto a collapsing part of your pre-Fall existence.
Level 3: The Crash △--Don’t Give Up: Show resilience and emotional
strength when at your lowest point.
△--Break Free: Demonstrate that you’ve broken
free from an old way of thinking that held you back.
Level 4: Amidst the Ruins △--Avert Catastrophe: Take decisive action to
prevent a crisis even greater than your own from
striking.
△--Lay the Cornerstone: Show that you’ve
accepted your Fall and are now sincerely
committed to building a new life.
Level 5: Rise Again

Arcana Routes
-- 94 --
The Star
Aspects
• What is your Art?
• For What do you Hope?
• What Inspires You?
The Star stands for a person shining with hope,
energy and excitement, one who aspires to a great,
if distant Dream. Some Stars channel this into
Artistic endeavors, producing works that speak
from their yearning heart. Other Stars Hope
intensely for a goal or change in their circumstances
that will rewrite their reality for the better, while
yet others burst with Inspiration from some outside
source that drives them forward.
Perpetual Achievements ☐--Chase your Dream: Whatever the Star’s Dream
is, following it fills them with purpose. No matter
how remote or unrealistic it is, when they take
active steps to achieve it they deepen their
connection to the Arcana.
☐--Shine Bright: The Star doesn’t necessarily crave
the spotlight, but they do sparkle beneath it. Rather
than hiding their light from others, they stand and
let themselves be seen, and use their energy, hope
and inspiration to command attention.
Level 0: Nascence △--Be Uplifted: Have an experience that fills you
with hope and energizes you to seek your Dream.
▽--Let your Faith Waver: Show that your hope in
your Dream isn’t as rock solid as you thought.
Level 1: Protostar △--Recognize your Potential: Discover an area of
untapped power and ability within yourself.
▽--Get Ground Down: Allow the boring, banal
routines of your life drain your spirit and hope.
Level 2: White Dwarf △--Pass a Test of Faith: Face a dilemma that tests
your faith and prove your devotion to your Dream.
▽--Get Ambushed by Disaster: The universe
threw you a curveball, and your inability to deal
with it leaves you in despair.
Level 3: Main Sequence △--Share your Light: Devote your energy to
assisting those who’ve helped you get this far.
△--Be Entrusted: Undertake a critical task for
which others are depending on your to succeed.
Level 4: Supergiant △--Don’t Dream it, Be It: Inspire another person to
begin chasing their own distant dream.
△--Don’t Stop Believing: Hold onto your feelings
of hope and faith when facing impossible odds or
certain defeat.
Level 5: Supernova

Arcana Routes
-- 95 --
The Moon
Aspects
• What do you Fear?
• Of What Mystery are you Convinced?
• What Grounds you to Reality?
The Moon is a person caught in the shadow of
illusion and has obtained a blurred conception of
reality. This can subject them to potent Fears which
drive their quirks, and it can also install beliefs in
Mysteries widely disregarded by the culture at
large: fortune telling, UFOs, cryptids, guardian
angels, etc… Moons usually need something
concrete and real to Ground them, less they lose
their grip on what’s real altogether.
Perpetual Achievements ☐--Get Spooky: Immerse yourself in the
mysterious, the uncanny, the unsolved, and the
machinations of the Other World. The Moon’s
objective isn’t to resolve these, but to gain insight
about themselves.
☐--Confront your Dark Side: Fear, anxiety and
dark subconscious thoughts plague the Moon,
contributing to their slack hold on reality. The
Moon needs to confront these feelings and work at
freeing themselves from the illusions that they
create.
Level 0: Nascence △--Trust your Feelings: Let your intuition guide
you through a tricky problem.
▽--Escape Reality: Rather than deal with a harsh
truth or problem, retreat deeper into your illusions.
Level 1: New Moon △--Seek Guidance: Connect with some source of
counsel to better understand your problems.
▽--Bury your Feelings: Pretend that nothing is
wrong even when wracked with distress.
Level 2: Crescent Moon △--Dispel Illusions: Break down another person’s
self-deceptions or fantasies that control them.
▽--Succumb to Fear: Let your anxieties and
phobias hold you back at a critical moment.
Level 3: Half-Moon △--Use your Illusion: Express your eccentricities
creatively so others can understand their draw.
△--Reconcile Past Trauma: Revisit and overcome a
past negative experience to break free of its hold.
Level 4: Waxing Moon △--Return to Earth: Learn to finally encapsulate
your fears, fantasies or obsessions, recalling them
as needed but no longer being defined by their pull.
△--Obtain Great Insight: Attain peerless
understanding of the Other World at great risk to
your personally safety or sanity.
Level 5: Full Moon

Arcana Routes
-- 96 --
The Sun
Aspects
• Towards what Endeavor are you Optimistic?
• What Invigorates You?
• What Can’t Hold You Back?
The Sun is a warm, shining source of positive
energy in a cold and dark world. They radiate
immense Optimism toward a certain Endeavor,
which allows them to pursue success regardless of
setbacks and challenges. When their own inner
drive isn’t enough, they can be readily Invigorated
from some external source of energy, and by their
talent, wits and sheer will the Sun refuses to be
Held Back by challenges that would stop others.
Perpetual Achievements ☐--Pierce the Darkness: Life is unfair and full of
dark, cold quandaries, but the Sun’s radiance
pierces even the thickest gloom. This Achievement
stands for the Sun’s knack for shining on when
things seem at the darkest and most hopeless.
☐--Grasp Success: The Sun is a person with big
goals, and their inner fire grows stronger each time
they get closer to achieving them. With each
measurable, definite feat of success in their
personal or professional goals, the Sun grows more
and more radiant.
Level 0: Nascence △--Spark Joy: Experience sincere, deep happiness
from an activity that you’re engaging in.
▽--Get Balked: Fail in your quest for success on
account of some frustrating set-back.
Level 1: Rising Sun △--Warm the Cold-Hearted: Help someone in a
depressed state regain a positive outlook.
▽--Feel the Sting of Hubris: Get in trouble or face
defeat due to overconfidence.
Level 2: Solar Powered △--Help Others Succeed: Use your energy to help
someone else reach their goals.
▽--Become Eclipsed: Lose sight of your goals and
let despair and depression overshadow your
enthusiasm and positivity.
Level 3: Le Roi Soleil △--Give Generously: Selflessly donate major sums
of your energy and resources to those in need.
△--See the World Clearly: Show that your
positivity does not blind you to harsh realities.
Level 4: Grossly Incandescent △--Never Surrender: Push through and refuse to
give-up when faced with the extreme limit of your
endurance and vitality.
△--Create a Brighter Tomorrow: Through your
efforts, leave at least a small part of your world
better off than when you started.
Level 5: Sol Invictus

Arcana Routes
-- 97 --
Judgement
Aspects
• Over What do you Judge?
• For Whom do you Advocate?
• What do you Execute?
Judgement is a complex Arcana whose focus is on
making assessments and acting on the results. As a
Judge, one has a Court in which their word is
considered final, like an academic discipline or
facet of school culture. As an Advocate, Judgement
focuses being the voice of a person, group or cause.
Finally, as an Executioner Judgement is tasked with
carrying out the orders of a higher authority. Yet
while these Aspects focus on Judgement’s role as
an arbiter, this route’s Achievement demand self-
reflection, for Judgement to Judge itself.
Perpetual Achievements ☐--Look in the Mirror: To progress through this
arcana, Judgement’s scrutiny must turn inward.
Make the effort to examine yourself as you truly
are, warts and all, and see what needs to change.
☐--Improve Your Circumstances: Judgement is a
call to action to embrace your potential. Answering
that call means taking direct action to fix the frayed
and dysfunctional parts of your life, starting with
small details and working up to major overhauls.
Level 0: Nascence △--Size Someone Up: Make an accurate
assessment of another person’s inner qualities.
▽--Deny your Flaws: Double down on a mistake
you’ve made rather than admit error.
Level 1: All Rise △--Learn from the Past: Use knowledge you’ve
acquired from a prior mistake to solve a problem.
▽--Beat Yourself Up: Push yourself into an
emotional crisis over your failures.
Level 2: Opening Statement △-- Saved by Foresight: Avert disaster by way of
your instinct and judgement.
▽--Ignore the Call: Turn your back on a call to
action that requires risking your safety and comfort.
Level 3: Make Your Case △--Realize a Hidden Truth: Demonstrate that
you’ve changed a key position or value that has
proved false or otherwise detrimental.
△--Silence Doubt: Show confidence in the face of a
situation with which you’ve previous struggled.
Level 4: Deliberation △--Be Absolved: Demonstrate that you are no
longer held back by your past mistakes and
imperfections.
△--Answer the Call: Step up and accept the future
that is calling to you, allowing it to shape the next
phase of your life.
Level 5: The Verdict
(Page #)


Chapter V: Relationships
-- 100 --
The Power of Friendship
Chapter 1 described what Relationships are. This chapter discuses what they do.
Casual and Intense: The Language of Relationships
As a preamble, some of the rules for Relationships depend on whether a Relationship is Casual
or Intense, so let’s talk about these for a moment.
Relationship Levels 1 - 3 are Casual. Casual Relationships are still important, but they
haven’t yet woven themselves inextricably into a character’s psyche. If they’re damaged or
somehow lost they’re a blow to you, but one you can get over without too much lingering pain.
Relationship Levels 4 & 5 are Intense. Intense Relationships are chiseled onto your soul
and can reshape and redefine the course of your life and your own sense of identity.
Relationship Dice
Whenever your Human character finds themselves in a situation where the experience of one of
their Relationships comes into play, you can add some of those Relationship Dice to your dice
pool. If you’re trying to sneak onto school grounds after-hours, your bond with your
Delinquent Older Brother (3d) can help you, and if you’re standing up to a bully your Dad’s
(2d) encouragement will do the same.
You can add up to +2d in Relationship Dice to any relevant dice roll. These are
pretty flexible, and how and when they come into play is a conversation between you and your
GM. If you have a Relationship with Doc Weiss, the weird German scientist who lives in the
creepy manor at the end of the street, you could easily say that that Relationship makes you
better at smart, sciencey stuff and test taking. But maybe you need to sneak out of your house
while grounded without your parental units noticing, and you want to use your Doc Weiss dice
to help you. Since this isn’t an obvious use of that Relationship your GM will ask you to explain
how that works, and you relate that you’ve had to sneak out numerous times at odd hours to
help Doc Weiss out with weird experiments. Your GM agrees that this seems like something
that would happen, so you get the bonus dice.
This doesn’t give you license to bend a Relationship into any possible scenario. Instead
it’s a way to explore your character and his or her bond with others, building up your stories
and place in the world. And now that you’ve put it in the ether that Doc Weiss makes these 3am
calls, don’t be surprised if your GM springs one on you in the near future.

Chapter V: Relationships
-- 101 --
Relationship Shock
It’s not all fun and games though. When you use a Relationship in this way you’re opening up a
part of your heart and letting another person’s experience influence you, and that can go wrong.
When you add Relationship Dice to a roll and still fail, your Relationship suffers Shock equal to the Dice you used. Your Dad told you to stand up to bullies, you did, and
you got beaten into the dirt. Now you’re thinking “Dad didn’t know crap!” Shock reduces the
supply of Dice you can draw from that Relationship. In this way, a 3d Relationship suffering 2
points of Shock can only cough up a single die when you need it. Shock can also be imposed on
a relationship through other interactions, such as through insults, betrayal and just being a
dumb teen prone to social errors and poor judgement.
This means that an advantage of high-level Relationships is that they are more resilient
to the effects of Shock than lesser Relationships. If a 5d Relationship suffers 2 points of Shock,
it’s still got 3d left that you can pull from, and since you can only ever add +2d to a roll anyway,
it can still take 1 more Shock before you actually start to feel its negative effects. A 3d
Relationship, on the other hand, is seriously hampered by those same 2 points of Shock, and a
2d Relationship is rendered useless.
Like physical damage, Relationship Shock can be healed, but not with medicine or
mystical powers. It takes time, Quality Time.
Healing Shock with Quality Time
When a Relationship is Shocked, you need to actively work at repairing it, which means taking
time out of your busy schedule for Quality Time. The damage is in your head, after all. Your
Dad doesn’t know his advice lead to you eating pavement, and Doc Weiss doesn’t know how
mad your parents are that they caught you sneaking out after hours. They’re not going to mend
the frayed threads of your bond, that’s your job bub.
Quality Time means committing a Time Slot to meaningful interaction with that
Relationship. It means talking to your Dad and having him teach you some boxing moves or
staying afterschool to help your English Teacher clean-up the library after punk kids tore it up.
During this scene, you’re going to make a dice roll with a Difficulty equal to 2 + how
much Shock your Relationship has. The roll can be whatever fits the scene—Guts + Fighting to
train with your dad, Diligence + Academics to fix-up the Library. If you succeed you repair
Width in Shock from that Relationship. Failure still heals 1 Shock, since even if you were not
particularly productive the time you spent counts towards fixing your internal rift with them.

Chapter V: Relationships
-- 102 --
Awesomely Intense Relationships
One of the other chief differences between Casual and Intense Relationships is that Intense
Relationship can be tapped as a source of Awesome Dice. They’re simply so inspiring and
emotionally fulfilling that they can elevate your abilities to new heights.
Once per Time Slot you can channel an Intense Relationship into Awesome x1. This follows the same rules as using Relationship Dice. You need to Declare that you’re
channeling a Relationship in this way before you roll, and you need to explain how this
Relationship motivates you to be awesome in your current circumstances.
If you channel an Intense Relationship into Awesomeness and still fail, your Relationship takes 3 Shock. This can only happen if you’re pitted against a Difficulty that
you just can’t quite reach even with Awesome or are in conflict with another person who just
rolled better than you.
So, what happens if an Intense Relationship already has some amount of Shock in it, and it
takes 3 Shock because you failed a roll where you tapped it for Awesome, with the result being
that it’s Shock exceeds its Level? That, dear readers, is called Reversal.
Relationship Reversal
Reversal is something that can only happen to Intense Relationships that have been put under
severe strain, as in the following example:
Example
It’s the state soccer championship, and Carla needs to do well because there are some college
scouts watching. She needs to make a Diligence + P.E. roll to outplay Denise, her rival. She decides to use
her 4d Relationship with her mom as a source of Awesomeness. But things with her mom have been kind
of rocky recently, and that relationship currently has 2 Shock on it. Still, her Mom is her strongest
relationship, so she channels it into Awesome x1 on her roll and goes for it.
Unfortunately for Carla even with Awesome x1 she didn’t roll well enough and Denise wrecks
her. Carla’s relationship with her Mom takes 3 Shock. Combined with the 2 Shock already present, that’s
a total of 5 Shock on a 4d Relationship, which brings her effective level down to -1d. Her Relationship
with her mom is now in Reversal.
When a Relationship is in Reversal, a GM can turn it against a player in the same circumstances
where a player might try to draw on it. In Carla’s case, any roll she encounters where her
Relationship with her mom could weigh now suffer a -1d Penalty instead of a bonus.
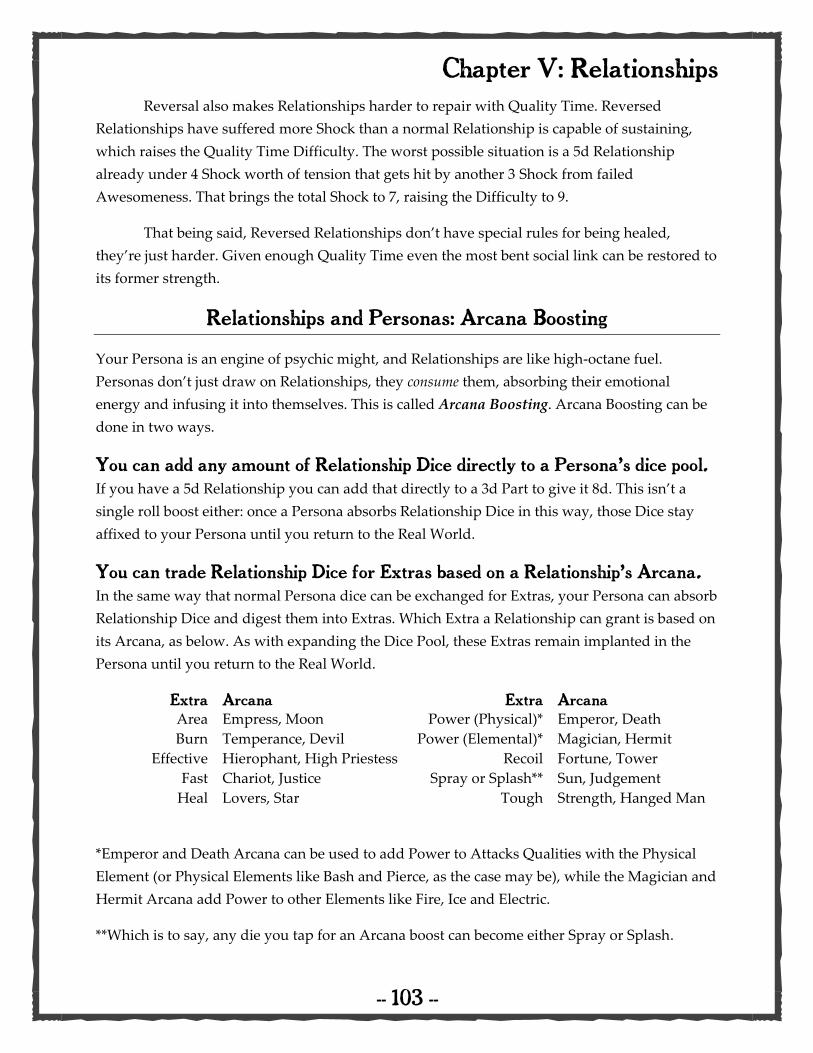
Chapter V: Relationships
-- 103 --
Reversal also makes Relationships harder to repair with Quality Time. Reversed
Relationships have suffered more Shock than a normal Relationship is capable of sustaining,
which raises the Quality Time Difficulty. The worst possible situation is a 5d Relationship
already under 4 Shock worth of tension that gets hit by another 3 Shock from failed
Awesomeness. That brings the total Shock to 7, raising the Difficulty to 9.
That being said, Reversed Relationships don’t have special rules for being healed,
they’re just harder. Given enough Quality Time even the most bent social link can be restored to
its former strength.
Relationships and Personas: Arcana Boosting
Your Persona is an engine of psychic might, and Relationships are like high-octane fuel.
Personas don’t just draw on Relationships, they consume them, absorbing their emotional
energy and infusing it into themselves. This is called Arcana Boosting. Arcana Boosting can be
done in two ways.
You can add any amount of Relationship Dice directly to a Persona’s dice pool. If you have a 5d Relationship you can add that directly to a 3d Part to give it 8d. This isn’t a
single roll boost either: once a Persona absorbs Relationship Dice in this way, those Dice stay
affixed to your Persona until you return to the Real World.
You can trade Relationship Dice for Extras based on a Relationship’s Arcana. In the same way that normal Persona dice can be exchanged for Extras, your Persona can absorb
Relationship Dice and digest them into Extras. Which Extra a Relationship can grant is based on
its Arcana, as below. As with expanding the Dice Pool, these Extras remain implanted in the
Persona until you return to the Real World.
Extra Arcana Extra Arcana Area Empress, Moon Power (Physical)* Emperor, Death
Burn Temperance, Devil Power (Elemental)* Magician, Hermit
Effective Hierophant, High Priestess Recoil Fortune, Tower
Fast Chariot, Justice Spray or Splash** Sun, Judgement
Heal Lovers, Star Tough Strength, Hanged Man
*Emperor and Death Arcana can be used to add Power to Attacks Qualities with the Physical
Element (or Physical Elements like Bash and Pierce, as the case may be), while the Magician and
Hermit Arcana add Power to other Elements like Fire, Ice and Electric.
**Which is to say, any die you tap for an Arcana boost can become either Spray or Splash.

Chapter V: Relationships
-- 104 --
Relationship Feedback
Feeding Relationship Dice to your Persona seems like a pretty sweet deal, but it comes at a risk:
if your Persona gets wrecked, that trauma reverberates through the psychic link between you
and your Persona, damaging your Relationship. This effect is called Feedback, and it’s why the
choice to power up your Persona with friendship-fuel shouldn’t be made lightly.
Arcana Boosting your Persona exposes that Relationship to damage from whatever Part the dice or Extras attach to. If you add 3d worth of Relationship Dice to
one of your Persona’s Parts, that Relationship can take up to 3 Shock if that Part is damaged. If
you decided to spread that 3d across three different Parts, each part would only cause 1 point of
Shock if it’s harmed, but it becomes that much more likely that your Relationship will suffer
Feedback if it’s being channeled into three Parts instead of one.
Feedback ignores all Ranks of Tough. Even if your Persona is an impenetrable bastion of
spiritual might able to shrug off any conceivable physical threat, your Relationship isn’t.
Relationships are sensitive, fragile things, and you can’t shield yourself from the risks of using
them as tinder for your Persona by planting their dice into a Part with lots of Tough.
(Elemental Resistances and Weaknesses still apply to Feedback, since they affect all Parts of a
Persona equally)
So, putting it all together: when you add Relationship Dice to a Persona, that
Relationship becomes part of the Persona when it enters battle, and is subject the same damage
the Persona faces. This is both the strength and risk of Intense Relationships: dumping 5d worth
of dice and Extras into your Persona is a huge increase in power all at once, but you’re anteing
up your human connections in exchange for otherworldly power, and that exchange is fraught
with peril.
Example
Lucas feeds his Persona Gilgamesh 2d from his Relationship with his twin brother Claus. He adds them
both to Gilgamesh’s Divine Lion Steed. During battle that Part takes 4 points of damage, which
translates to 2 point of Shock to his relationship with Claus.
Similarly, Claus feeds 3d from his Relationship with Sensei Matt, his Karate Teacher, to his
Persona Enkidu. He adds them to Enkidu’s Earth-Caked Wildman Muscles, which has Tough x3. In the
fight Enkidu takes hit dealing 4 damage to his Muscles. This is reduced to 1 damage by Enkidu’s
Toughness, but his Relationship with Sensei Matt still takes the full 3 Shock from the attack’s Feedback.

Chapter V: Relationships
-- 105 --
Improving Relationships
A relationship’s level is increased by at the cost of Experience Points, the same as any other
character attribute.
The XP cost of increasing a Relationship is equal to its next Level. So going from
1d to 2d costs 2 XP, and 4d to 5d costs 5 XP. Altogether it costs 15 XP to bring a Relationship
from 0d to 5d. There are, however, some other rules that apply which don’t necessarily apply to
other aspects of your character.
A Relationship must be free of Shock to be improved. Lingering emotional baggage
slows the growth of a relationship, so you need to clear any Shock away before it can expand.
You need to back-up Relationship growth In-Character. You can’t just say “I’m
spending 3 XP to raise this Relationship from 2d to 3d” without laying the groundwork with
that Relationship in-game. You need to demonstrate how that Relationship is intensified and
what it means for both parties. How long this takes depends on the Campaign’s pacing. A short,
fast campaign might allow a Relationship to expand every Session, while a slower Campaign
may take longer. In the latter case, a good rule to follow is improving a Relationship requires
dedicated Time Slots equal to its next Level, same as its XP cost. Whatever method you choose,
once you and the GM are both happy with how things have gone, you need to dedicate a
special Time Slot to a scene showing the Relationship’s growth.
You can spend XP to improve a Relationship mid-game. Unlike Stats and Skills
which are improved between game sessions, if the opportunity arises during a game to improve
a Relationship and you can afford its XP cost, you can increase its level right then and there.

(Page #)


Chapter VI: Combat
-- 108 --
Preface I: What Persona Players Should Know about Fighting Since the core rules for staging fights in The Velvet Book are the same as in Monsters and Other
Childish Things, we’ll take a second to help those readers coming into this fresh from Persona to
get acclimated.
The big thing to understand is that you’re not just trading a PlayStation controller for
some dice and paper—the translation from the TV to the tabletop means a whole new way of
engaging with the mechanics. You’re not going to be getting into a hundred random encounters
with Shadows on your way to some destination, and the fights that do erupt aren’t going to end
in 16 seconds after your meticulously crafted and leveled team stomps them into the ground
with Elemental Skills and All-Out Attacks. That works great as a single-player electronic RPG
experience. It doesn’t work as a cooperative tabletop game.
Fights in Monsters and Other Childish Things and, by association, this Persona module are
more detailed, free-flowing and unpredictable. They don’t necessary take place in vast, empty
hallways but in dynamic environments that both sides can use their advantage. Your GM isn’t
going to throw wave after wave of identical encounters at you: he has the tools to make each
fight unique, whether they’re against groups of weaker Minor Shadows or terrifying, solitary
Major Shadows.
Fights also take longer. Persona games are notorious for having blazingly fast combat for
a turn-based RPG. The One Roll Engine is an attractive fit to that because it’s quick and simple
but even then, a minor fight might take 5-15 minutes and a serious boss encounter could stretch
on for over an hour. This isn’t a flaw, it’s a feature. In going from the TV to the table, your
character and Persona aren’t shackled with a set of canned attack animations and scripted
interactions. Players and GMs are encouraged to be florid and elaborate in how they describe
what they are doing and how it works, not just to say “I attack. I got a 3x8. I do 2 Fire damage.”
Each player is now a programmer of the game’s mental code and an animator of its cinematics.
Go nuts.
We have, however, taken great pains to incorporate as many pieces from Persona’s
combat architecture as possible. They don’t work exactly as they do in the video games, because
they’ve been adapted to take advantage of how things happen at the tabletop, but they’ve been
included to create as faithful a Persona experience as possible.

Chapter VI: Combat
-- 109 --
Preface II: Streamlining Monsters Combat for Persona This section is for Players coming into the Velvet Book with experience playing Monsters and
Other Childish Things. In that game the expectation is that in a fight involving Monsters, both a
Kid and his Monster will have their own separate actions that they declare, roll and resolve.
That’s not how this module works. During the declare phase, each player declares one action.
So, either your Persona hurls a screaming ball of fire at an enemy Shadow, OR your Persona
User tries to sneak around fringes the melee to snatch the treasure the Shadows are protecting.
You can attempt to do both but declaring actions for a Persona and its User in the same Round
requires Multiple Actions, which are explained in Chapter 2.
This is a departure from those core MaOCT rules, but there are some good reasons why.
Your Persona is a part of you. Depending on how your GM sets up the story your
Persona may have its own will and a mind of its own, but no matter what it’s still a fragment of
your subconscious rendered in stunning 3D technicolor, and it acts on your behalf. For it to do a
thing you need to Evoke it, command it and infuse it with your own drive and will, which takes
up a good chunk of the character’s focus.
It keeps fights brisk. When Personas and Users have separate actions you end up with twice
as much rolling, dice and Sets to keep track of and it slows down the flow of combat. Battles in
Persona are lightning fast, and by streamlining things this module brings the action of MaOCT a
little closer to that.
Who’s the target?
Since the battle economy has been tightened up, the players have less options for what they can
do in a fight. To compensate, your enemies also have a key restraint on their attacks: If you
declare an action with your Persona, your Persona takes any damage coming at you that turn.
In other words, if you attack with your Persona, your Persona will be the target of an enemy’s
attacks. If your Persona User decides to do something else, they’re exposing themselves to
possible direct harm.
This means it’s generally a good thing for characters to rely on their Personas during
fights. They’re tougher, hit harder and can soak up more damage than the flesh pink meat bags
they’re attached to. But Personas can’t do everything and eventually you’re going to find
yourself in a situation where that fleshy, pink meat bag will have to do something crazy and
dangerous that the psychic monstrosity living his brain won’t be able to help with.

Chapter VI: Combat
-- 110 --
Battle for Everyone’s Souls: The ORE Combat Tutorial Combat in the One Roll Engine as a structured encounter is designed to be fast, dynamic and
lethal, exactly the kind of thing you’d want for a Persona game. You don’t need to drop into
these rules each time someone throws a punch, but when you want to trigger a full-blown fight
scene, these are the rules.
The Combat Round
Combat in ORE is broken up into Rounds, which is usually a few seconds but is really as long as
it needs to be for everything to happen. Each Round is broken up into three phases.
Phase 1- Declare: During the Declare phase, each combatant announces what they intend to
do during that Round, usually involving rolling some dice. The order in which each fighter
Declares is determined by their Knowledge + Out-Think pool (for Humans Characters) or their
Brains pool (for Shadows), which is done lowest to highest. The result is that character with low
Out-Think who are prone to leaping impulsively into action Declare before characters with high
Out-Think, who are more perceptive and strategic. This lets the high-Thinkers plan their moves
better to better react to what everyone in the battle is doing.
Phase 2- Roll: During the Roll phase, everyone rolls their dice at once and sorts out their Sets.
For a GM controlling multiple combatants this means rolling a bunch of dice so having multiple
sets of different colors helps keeps things straight. Hang onto all your Sets; even if you only
Declared one action, your other Sets may still come in handy.
Phase 3- Resolve: During the Resolve phase, each Declared Action occurs based on the Speed
of their Set. Speed is a factor of Width plus any ranks of Fastness applied to the action, or
indeed any other effects that may modify its timing (a 2x7 with Fast x2 occurs before a 3x8). Sets
with identical speed are resolved based on greater Height; Sets with identical speed and Height
occur simultaneously. The GM can smoothly run the Resolve phase by determining who has the
highest speed that Round, then counting down from there, so that each player or combatant he
controls can announce their Actions when their time comes.
How to Attack The most basic and important action in combat is Attack. Humans attack using Fighting, in
close quarters, and Aim, at range. They also use Beat-Down, but only against people or things
that can’t fight back. Personas and Shadows use their Attacks Qualities.
As a baseline, a successful Attack inflicts Width-1 Damage to the Hit Location indicated
by the Set’s Height. This amount is modified in several ways.

Chapter VI: Combat
-- 111 --
Beat-Down: Beat-Down inflicts Width in Damage as a baseline instead of Width-1. But, again,
it can only be used against inanimate objects or helpless foes cowering for mercy.
Weapons: Humans use Weapons to enhance their ability to inflict harm. Hand-to-hand
weapons use Fighting or Beat-Down, as specified above. Ranged weapons like slingshots and
guns always use Aim.
Extras: Persona and Shadow Attacks with the Power Extra add one point of damage per
Rank. So an attack with Power x4 inflicts Width+3 Damage. On the other hand, a Persona or
Shadow with the Tough Extra on one of their Parts takes one less damage per rank from every
Attack against that Part.
Weaknesses and Resistances: Striking a Persona or Shadow with an elemental attack to
which it is Weak inflicts +1 Damage. The opposite is true for Resistances: if hitting a Persona or
Shadow with an element it Resists reduces your damage by 1.
Stunning Attacks An important concept in ORE combat is the idea of stunning, which is when you Declare an
Attack, but you get hit by another Attack before it’s your turn to Resolve. This would happen if,
for instance, you rolled a 3x8 as an Attack, but someone else hits you with a 3x4 with Fast x1
(giving it a speed of 4 vs your speed of 3). In this case, you lose a die off either your Highest or
Widest Set; in the preceding example your 3x8 would get knocked down to a 2x8. If you get hit
again you lose another die, and your 2x8 is knocked down to a 1x8, which fails. If all your
Attack Sets are broken in this fashion you’ve been stunlocked.
Stunning allows a combatant to turn offense into defense. By hitting your enemy before
they hit you weaken their attack; do this enough in one Round and you’ve stunlocked them into
oblivion. This isn’t perfectly reliable though: some Minor Shadows have abilities that protect
their Sets from being stunned, and all Major Shadows have some level of stun-resistance.
A successful Attack will still stun even if its damage is negated entirely by the target’s
Tough. It’s the effect of contact that counts, not the wound it leaves behind.
Only Attack Sets can be stunned. Defense and Useful Sets aren’t affected.
Back-Up Attacks
Outside of Multiple Actions, you can only hit with one Attack Set you roll each round. But if
that Set is broken either by getting stunned or defended against, you can fall back on another
Set you rolled.

Chapter VI: Combat
-- 112 --
Going back to the last example, let’s say you rolled a 3x8 and a 2x5, but you get hit
twice, first by a 4x6 and then by that 3x4 with Wicked Fast x1. Those two attacks break your
3x8, but your 2x5 is untouched. If it’s still intact when its time to Resolve rolls around, you’re
free to hit with it. This is why it’s important to hang-onto all of your Sets you roll, even if you
only Declared one action.
Redirecting Attacks This one is easy: if you Declare an Attack, and someone else blasts your target into next week
before you hit, you can shift to a different target. That way your carefully aimed fireball or
masterful samurai slash won’t be wasted on a dead enemy.
Damage Successful attacks inflict Damage, whether from of bolts of arcane energy sizzling across your
Persona’s scaley armor or a searing insult that rocks you to your core. Damage comes in two
types. Shock is light damage, easily shaken off and forgotten, the kind that comes from being
bonked on the head by a heavy bookbag. Scars are the nasty, lingering sort of harm that leaves
a mark and doesn’t just go away when your Mom kisses it better.
Human Damage: When Humans take damage, that damage is applied against their Stats, as
determined by the Attack’s Height. If a person takes 3 Shock to their 4d Guts, their Guts are
reduced to 1d.
Persona Damage: When Personas take damage it subtracts from the HP of the Part that was
hit, based on the attack’s Height.
Tracking Damage
The Character Sheets used by The Velvet Book have special sections for tracking your damage.
You can track your damage for each Stat or Part using a / mark for Shock and an X mark for
Scars in the appropriate area.
Humans Personas

Chapter VI: Combat
-- 113 --
Defense Defense in ORE is interesting. Unlike many other tabletop RPGs there’s no passive defense
value—any attack directed at you that isn’t deliberately avoided or intercepted with will hit.
Stunning is one way to avoid being hit. The other way is Defense.
Human characters can defend themselves with Proficiency + Reflex to dodge threats,
and they can protect themselves and others with Diligence + Block, but only against threats that
can indeed be blocked. Personas can protect themselves and others against any threat using a
Part with a Defends Quality on it.
When you roll a Defense Set, your Set becomes Gobble Dice as outlined in Chapter 2.
You can then use those dice to delete dice from incoming Attack Sets of equal or lower Height.
Here’s the rub: you can only Defend against attacks of equal or lesser speed. If you roll a 3x8 you can
block a 3x7, but you’re helpless against a 2x5 with Fast x2, since it’s speed is 4 compared with
your 3. It’s too fast for you.
Translation: good Defense in ORE requires both factors. If you take Fastness out of the
equation, your Defense Set must match or exceed both the Width and Height of the attack
you’re preventing. Not enough Width and you’re too slow; not enough Height and you’re too
sloppy.
It’s easy to think then that Defense is a sucker’s game, and that ORE combat is rocket
tag, where the best way to win is to alpha-strike the other guy. This isn’t entirely false; it’s part
of ORE’s design to keep combat fast and impactful. The trick, though, is that when you’re really
good at Defense you can make a huge impact on the battle. Here’s an example:
Three Shadows Declare Attacks against you, and you respond with one of your
Persona’s Defends Qualities. You roll a 3x8 and they roll a 2x3, a 2x4 and a 2x7. With your one
Set you can wipe all three of those Attacks out, as a.) once a Set becomes Gobble Dice you can
split it up however you want, b.) Gobble Dice retain the speed of their original Set, and c.) you
only need to Gobble an Attack down to 1x Width to break it.
Now let’s look at it another way. Let’s say that the same thing happens, but instead of
three Shadows attacking you, the beefy tank, it’s a Major Shadow with lots of Multiple Actions
targeting your allies. With your 3x8 you can stop all three of those attacks, clearing the path for
your comrades to attack with impunity.
Bottom line: ORE Defense in The Velvet Book isn’t always easy, but it is powerful. You can
get by without it, but it can and will save your hide against the most monstrous opponents your
GM throws at you.

Chapter VI: Combat
-- 114 --
Declaring Defense
When you Declare a Defensive action, you announce who you are Defending. You can say “I’m
Defending myself”, which allows you to use your Sets against any attacks coming at you from
any adversaries. You can also Declare “I’m Defending Player X”, which lets you use your Sets
against any attacks aimed at a specific Player. Finally, you can say “I’m Defending against
Enemy Y”, which allows you to use your Sets against any Attacks that a specific enemy
launches, no matter who the target is.
Defense Strategies The One-Roll Engine’s active defense rules lead to a number of strategic decisions that a player
needs to make when they declare a Block, Reflex or Persona Defense. Here are the two big ones.
Multiple Defense Sets
Let’s say you roll 7d to Defend and you get a 3x4 and a 2x9. You’ve got a choice to make: which
one is better?
It’s tempting to say the 2x9, because it can block a greater range of Height, but it’s going
to be useless if you’re being attacked with a 3x1, because it’s not fast enough. Your 3x4 could
block that attack easily, but it can’t touch anything Higher than 4. So, again: which is better?
Here’s the rule: When you roll two or more Defensive Sets, you can choose
which one you want to use the instant an attack comes at you, and doing so
locks you into that Set. So if your GM tells you that Jack Frost is throwing an icy 3x2 blast at
your Persona, you can choose to use your 3x4 to stop it, but if it’s followed up by a 2x8, you’re
Defenseless. On the other hand you could choose to take the hit from the 3x2 (maybe your
Persona’s 2 Location is super Tough) in order to lean on your 2x9’s higher range of shielding.
You’re never going to be completely in the dark; because you make this decision during
the Resolve phase, you’ll already know how many attacks your GM has directed at you. If only
one Shadow aims at you then you know you only need to deal with one, maybe two Sets. If
you’re being dogpiled though you’ll need to put some more thought into which Parts are vital
to the combat effort and which are vestigal.
You can also raise your Defenses by declaring Multiple Actions. If you did that in the
above roll then you could use both your 3x4 and your 2x9 and weave around everything coming
at you, Mohammed Ali style.

Chapter VI: Combat
-- 115 --
Attacking and Defending Simultaneously
Speaking of Multiple Actions, if you Declare both an Attack and a Defense in the same roll, the
same rules apply. If you roll 2 Sets they can be used for either action, up until the moment you
commit them to one or the other. If you roll a 3x9 and a 2x10, either one can be used to Attack or
Defend, but if your GM tells you that a 3x7 attack is coming in your direction and you choose to
Defend with your 3x9, your 2x10 automatically becomes your Attack Set. Inversely if your turn
comes up to Resolve and both your Sets are still live, and you decide to Attack with your 3x9
you’re committing your 2x10 to Defense.
Perfect Defense Not all Defenses are created equal. If you roll a Defense Set and are able to completely Gobble up
a target’s Attack dice, you’ve performed a Perfect Defense. A+, nice work. This means doing
more than just breaking their Sets. You need to clear the table of their offensive effort. So if you
roll a 2x10 and they’re attacking with a 2x7 and a 2x5, you can’t score a Perfect Defense, because
you only have enough Gobble Dice to bust them down to 1x7 and 1x5. You’ve successfully
stopped the attacks, but only just.
On the other hand, if you rolled a 4x8, you have enough dice to not just break their Sets
but obliterate them entirely. Or if they only rolled a 2x7 your 2x10 would have the same effect:
you can negate every single attack die they bring against you, scoring a Perfect Defense.
Pulling off a Perfect Defense gives you a One More Bonus, which is covered in this
Chapter on Page XX.
Rallying At the end of each Round, any unused Defense Dice become Rally Dice for the next Round.
This could happen because:
1. you rolled more Defense Dice than you needed (you rolled 3x7 but only needed to Defend
against 2x3, leaving one 7 unspent);
2. your Defense Set couldn’t be used (you rolled a 2x2 and all every attack that Round had
more Height and Width than you could handle); or
3. you choose not to use them (you rolled a 2x9 to Defend and faced a 2x8, and decided to
break that Set to 1x8 rather than go for a Perfect Defense).
Rally Dice represent the overall strategic edge of having someone to run interference for the
party. Taking point to break-up the opposition’s offensive creates openings and situational
advantages that they and others can cash in on. Even if your Defense fails (#2 above), your

Chapter VI: Combat
-- 116 --
presence still serves as a focal point for the rest of the Party to rally behind, hence the name
Rally Dice.
Rally Dice act as bonus dice that can be used for any action on the following Round.
Generally, the defender chooses who gets to benefit from them, including themselves. When
narrating the ensuing action, Players should indicate exactly how they use the momentum
accrued from the Defender’s action to propel the action forward.
Tilting Defends Qualities have another passive use along with their ability to Gobble Attacks. If you’re
hit by a successful attack you can choose to relocate the damage from that attack to a Part with a
Defends Quality on it. This is called Tilting. Tilting represents a sudden, desperate act to protect
yourself from an attack, one that partially works, in that it deflects the attack from its intended
target, but in the end still hurst you.
Example: Val’s Persona Sedna is struck by a devastating 4x7 (Power x2) attack that would
inflict 5 Wind damage to her Sea Monster Harpoon, which only has 3 HP left. This would not
only break the Harpoon, but it would spill one point of damage over to another part. So Val
chooses to Tilt the attack to Sedna’s Ice Mantle, which has a Defends Quality on it along with 7
HP.
She describes Sedna whipping the mantle around at the last instant to shield herself without
hardening it first so that the biting wind tears away at its frozen surface.
Some notes on usage:
You don’t need to roll to Tilt attacks that hit you. Tilting is something you can always
do as long as you have at least one functional Defends Quality.
You can Tilt to any Part that has a Defends Quality on it. This means that if you
have multiple Defends Parts, you can choose which one takes the Tilt. In turn, if you have a
Defends Quality on every Part you have full control over how your Persona takes damage.
Tilting Voids your Resistances and reduces your Toughness by Half. This halving
is Rounded down, so Tilting to a Part with Tough x1 reduces that Toughness to 0, and Tough x3
becomes Tough x1.
You always Tilt the Full Damage amount. If you get by 7 Damage, you can’t Tilt 4 to a
Defends location and leave 3 behind. It’s all or nothing.

Chapter VI: Combat
-- 117 --
Tilting when Defending Others: If you Declare a Defense to protect an ally from an attack,
but your Defense Set fails, you can Tilt the Damage to the Part you’re Defending with. This is
essentially jumping in front of a bullet for your ally. Note that doing so consumes your Set, so it
can’t be used for Rally Dice.
Emotional Damage: Third-Degree Sick Burns Persona Users are generally children and teenagers, and children and teenagers are raw nerves
of emotion and self-doubt. This makes them as vulnerable to mental trauma as they are to
physical harm. This uses the same rules as physical combat. Hits to your psyche register as
damage to your Stats, and as it piles up your blown confidence and crumbling emotional matrix
make you less capable of everyday tasks.
Here are the primary ways in which emotional damage occurs.
Emotional Conflicts: Being called a fat loser can hurt as much as being punched in your
admittedly sizable gut. Emotional Conflicts weaponize your Put-Down Skill to inflict Width in
Damage (that’s a full Width, not Width-1). In a normal bout of cafeteria trash-talking this causes
Shock, but if you’ve got social leverage, like knowing someone’s dirty secret, then you can
inflict Scars. Emotional Damage delivered to or by a Relationship can also leave Scars.
You can deepen the burn of a Put-Down with a little public humiliation. A small chorus
of two or three people laughing at you causes Width+1 damage. A big group (about a dozen)
inflicts Width+2. A huge group, like an entire classroom, deals Width+3.
Stress: Stress represents a singularly keen source of psychological pain levied against your
character, like choking on stage at the school talent show or being stood-up for a date with the
person you’ve been crushing on since 4th grade. When this occurs , you can make a Stat +
Courage roll to hold together the shattered fragments of your spirit, the Stat being the one
affected by the Stressor. Failure means suffering Shock to that Stat. A Stressor’s effect is
measured by its Intensity, which is the Difficulty you need to clear to harden yourself.
Intensity Damage Description 1 1 Mild emotional disturbance, shaken off after a few hours
3 2 Significant anxiety, enough to keep you up at night
5 3 Serious emotional trauma, enough to flatten a normal person
7 4 Gut-wrenching, catatonia-inducing mental anguish
As in Emotional Conflict, a Stressor’s damage is Shock unless it targets your soft underbelly—
your darkest secrets and most paralyzing fears, or when it’s at the hands of someone you have a
Relationship with. Then it leaves Scars.

Chapter VI: Combat
-- 118 --
Playing Out Emotional Damage
Physical harm is easy to visualize. If you take damage to your 2 location in a fight it means you
sprained your ankle. But what does emotional damage to that same location mean?
Vs Diligence: You’re not as tough and strong as you thought you are. This kind of
psychological erosion translates into physical fragility. Your legs quiver, the soles of your feet
go slick with cold, sour sweat and you can barely stand. You feel weak, powerless, like a light
wind could blow you over. And don’t even think about any heavy lifting. You’re feeble.
Vs Guts: Your confidence is shot. This trauma causes a sinking feeling in your stomach like
you swallowed a sack of quarters. This is the gnawing, nauseating dread of knowing you
screwed up and there’s nothing you can do about it. At its worst, each point of damage could
translate into a bout of puking your guts out.
Vs Proficiency: This kind of emotional harm leaves you with numb, shaking hands; useless
sweaty palms; and fingers that seize up like a 80 year old arthritis patient. All your claims to
skill or talent, voiced or internalized, are collapsing around you like a badly timed souffle.
You’re a hack and a fraud and everyone knows it.
Vs Knowledge: You’re not as smart as you thought you are. If you’re already not the
sharpest tool in the shed this is just another knock against your self-esteem, but it’s arguably
worse if you’re a self-proclaimed genius. Whether you miscalculated, misremembered or were
just flatly outfoxed by a wilier opponent, you’re exposed as being as dumb as everyone else.
Vs Expression: You’re not as smooth, clever or interesting as you thought you are. Your
façade of coolness and likeability crumbles, revealing a shy, or dull, or embarrassing wreck of a
person hiding behind it. Laughs and high fives turn into scowls and cringes of second-hand
embarrassment. You’re a dork and a loser and nobody likes you or cares what you have to say.
Emotional Damage and Personas: Reverse Feedback Remember Feedback? The friendly little rule that when your Persona taps one of your
Relationship it exposes that Relationship to Shock? Well, your Persona has a relationship with
you, and you guys are permanently synced. Whenever a Persona User takes Emotional
Damage, their Persona takes an equal amount of physical Damage to their corresponding Hit
Location: Shock for Shock, Scar for Scar. So if you bomb your SATs and take 3 points of Shock
to your Knowledge, your Persona is going to take 3 Shock to its 9 Location. If your damaged
Stat has more than 1 Hit Location (like Guts, at 3-6), you can choose which Location within that
range is affected, but it’s always a single part; you can’t spread 3 Guts Shock out over 3 Parts.

Chapter VI: Combat
-- 119 --
Damage Overflow If a Human’s Stat is reduced to 0d, or a Persona’s Part is reduced to 0 HP, any further damage
to that location flows into an adjacent one. If a Human’s Guts (3-6) reaches 0d and he takes
another hit to his 6, that damage either goes to Diligence (1-2) or Proficiency (7-8).
In the case of Personas, overflow damage ignores Tough. If a Persona’s (3-4) Part is
destroyed, and both its (1-2) and (5-7) Parts have Tough x3, those levels of Tough won’t absorb
additional damage flowing into their parts from hits to the Persona’s (3-4). That damage is
being directed into the shattered remains of the destroyed Part, and is reverberating into those
nearby locations; no amount of exterior toughness can protect from critical hits like that.
Weapons Personas are real good at fighting. They can conjure thunderbolts from clear skies and mash up
smaller baddies with their toothy jaws. Their Users aren’t so lucky. To even the odds, they need
a little outside help.
A weapon is really anything you can use to inflict extra damage on another person. A
rock is a weapon the same as samurai sword, the same as a .38 snub-nose revolver. The nastier
the weapon, the more damage it deals.
Which skill you use for a Weapon attach depends on how you’re using it. If you’re going
up against someone ready for a fight, roll Guts + Fighting. If you’re attacking a defenseless
person, roll Diligence + Beat Down. If you’re throwing something or using a firearm, roll
Proficiency + Aim but be careful: using weapons like this can escalate a situation very quickly,
and guns tend to draw a lot of attention.
Most of the time using a weapon against a classmate (or any other human) isn’t
necessary or even a very good idea, but it’s a different story when you’re fighting Shadows. In
their world it’s kill or be killed, so don’t pull your punches. Normal Human weapons deal
Width-1 in Scars against Shadows. All other features of a weapon, like extra points of Power or
Spray that make them super lethal against people don’t really matter for Shadows.
On the plus side, just about anything can be used as a weapon against Shadows as long
as you’re devoted enough to its use. Persona games have seen characters fight with shoes, razor
blades, coins, fans, folding chairs, sling-shots and wrenches. What the weapon is doesn’t really
matter. The important part is that you believe it will protect you, and your psychological
investment in it does the rest. This also means that while bringing a bigger gun to the Other
World won’t necessarily let you kill Shadows better, a more spiritually meaningful weapon will
give you an edge over one in which you don’t have as much belief invested.

Chapter VI: Combat
-- 120 --
When you attack Shadows you’re pretty much always rolling Guts + Fighting or
Proficiency + Aim depending on whether your attack is close quarters or ranged, respectively.
You could also create a custom weapon skill in the blank skill slot for each Stat; this is especially
the case if your GM wants to make Weapons REALLY important in the game.
You should know, though, that most of the time your Persona will be better at crushing
Shadows than you are. After all that’s kind of the reason it exists. But if you, for some reason,
can’t Evoke your Persona, or if there’s some specific advantage to using a weapon, then you’ll
definitely be glad you brought it with you.
A Brief Index of Weapons Weapons usually aren’t terribly important to gameplay in The Velvet Book, but in the event
that your human Persona Users need to arm themselves, you can follow this short index.
Weapons are distinguished by their Rank, which dictates how nasty they are. Rank means
different things to Shadows than it does to other Humans. A Machine Gun is a Rank 5
Human weapon, but without emotional investment it’s just Rank 1 against Shadows. On the
other hand, a baseball bat autographed by your favorite slugger does the same damage
against Humans as one you just bought from Target, but it’s much more effective against
stuff in the Other World.
Hand-to-Hand Weapons
Rank Damage Mundane Examples
1 Width in Shock Table Leg, 2x4, Folding Chair, Frying Pan
2 Width+1 Shock Baseball Bat, Shovel, Small but Vicious Animal
2 Width in Scars Pocket Knife, Wrench, Broken Bottle, Large Dog
3 Width +2 Shock Aluminum Baseball Bat, Metal Pipe
3 Width Scars, +1 Shock Hammer, Baseball Bat with Nails in It, Hatchet
4 Width +1 Scars Fire Axe, Older Brother’s Samurai Sword
5 Width +2 Scars Mauled by a Bear, Chainsaw
Ranged Weapons
1 Width -1 Shock Thrown Rock, Sling Shot, Boomerang
2 Width in Shock BB Gun, Paintball Bun, Ninja Stars
3 Width +1 Shock Pepper Spray, Roman Candle
3 Width in Scars Bow and Arrow
4 Width +2 Shock Taser, Rubber Bullets
4 Width +1 Scars Handgun, Small Caliber Rifle
5 Width +2 Scars Rifle, Large Caliber Handgun
5 Width +1Scars, Spray x2 Shotgun, Machine Gun

Chapter VI: Combat
-- 121 --
Elemental Warfare We briefly talked about the Elemental forces in the Persona creation section. Since they mainly
impact the combat rules, we’ll go into more detail here.
All Attack Qualities, whether on a Shadow or
a Persona, have an Elemental trait that describes kind
of damage they throw out, which looks like this:
Attacks (Fire). Each Attack Quality can only have one
Element; if you want to use multiple Elements, each
one is a separate Attacks Quality. Attacks that work
without explicitly elemental force, like biting, cutting,
and crushing, instead use the Physical Element.
When you hit a target using an Element it is Weak to, you always inflict at least 3 Damage. This ignores Toughness, so if you attack
with Ice against a target with Tough x5 in all locations
but a Weakess to Ice, you’re always going to inflict at
least 3 Damage.
At the same time, if you hit a target with an Element it Resists, you never inflict more than 3 Damage. Even if you have Power x7 on
your Ice Attack, if you strike a Shadow that Resists Ice
you only deal 3 Damage.
Therefore, it’s a good idea not to turn your
Persona into an almighty arsenal of Elemental force.
It’s possible for Shadows to resist physical damage, but
our advice to GMs is to keep them few and far
between, since that shuts down a lot of a party’s options in combat. So as a tip, you should
consider giving your Persona at least some ability to attack physically. In fact, Persona has a long
history of giving pure physical bruisers the spotlight, so don’t feel like your boy is somehow
weaker because he can’t launch every element under the sun at the enemy.
In addition to extra damage, there’s another major advantage to attacking an enemy’s
Weaknesses, which is covered in the next section.
Physical Elements By default, all Physical Attacks and
Human Weapons have the same
elemental trait: Physical. Shadows
generally aren’t weak to Physical Attacks,
but most don’t Resist them either. A GM
can diversify the usefulness of Physical
Attacks by adding Physical Damage
types to the combat equation.
Shadows (and Personas) can be weak or
resistant to different types of Physical
damage, so if you have a sword and you
come across a Shadow that’s Weak to
slashing attacks, suddenly your Persona
User’s second-hand katana becomes a
valid offensive option.
If you do add Physical Damage types to
the game, then they can also be applied
to a Persona or Shadow’s attack qualities,
the same as any other Element.
Common examples
Slash (swords, knives, claws)
Strike (clubs, staves, fists)
Pierce (spears, arrows, spikes)
Firearm (guns, explosives)

Chapter VI: Combat
-- 122 --
Detecting Weaknesses and Resistances
When you hit a Shadow with an element it's Weak or Resistant to, you'll generally know it.
Your GM will describe how it laughs off the attack or gets blown across the room by it. But you
don't always need to play a guessing game to suss an enemy's elemental affinities.
A Persona User can roll Knowledge + Out-Think to scope out a Shadow and try to identify Weaknesses and Resistances. Maybe there's something about the way it
looks or moves, or maybe the way that the air around you smells more ozone-y that makes you
think it's got some electrical qualities. The Height of your Set determines if you identify...
1-4 ...one of its Weaknesses or Resistances
5-8 ...all of its Weaknesses or Resistances
9-10 ...all of its Weaknesses AND Resistances
Be careful though: detection leaves your Persona User open to Shadowy attacks, unless he tries
to use Multiple Actions to keep his Persona active too.
Personas can also Detect, but they need a specific Useful Quality that allows them to do so. In that case, you can scan to your heart's content without worrying about
exposing your Persona User.
Elemental Skill Names If you want to inject a little more Persona flavor into your game, you can use the traditional
Shin Megami Tensei names for Elemental attacks, listed below
Common Elements Skill Name Uncommon Elements Skill Name
Fire Agi Psychokinesis Psi
Ice Bufu Nuclear Frei
Electric Zio Water Aqua
Wind Garu Earth Magna
Dark Eiha Gravity Gry
Light Kouha Force Zan
Almighty* Megido
*Almighty is a unique element in that it cannot be Resisted, and is generally reserved for
only the most powerful Personas and dangerous Shadows players might encounter as they
near the climax of the story.

Chapter VI: Combat
-- 123 --
One More! Persona 3 introduced the One More mechanic that, in many ways, has come to define the flow of
combat in modern Persona. The Velvet Book integrates that mechanic into the heart in a form that
takes advantage of the One Roll Engine’s unique conflict resolution system.
One More! is a free Multiple Action given as a reward for doing well in combat. To that end, there are three ways to earn One More, one for each type of Quality.
1. Attack a Shadow’s Weakness or Break a Part. Any successful attack targeting a
Shadow’s elemental Weakness grants One More!, and anytime you reduce a Shadow’s Part
to 0 HP it gives you One More. 2. Perform a Perfect Defense. As described on Page XX of this chapter, a Perfect
Defense is when your Defense Set completely Gobbles all of your enemy’s attack dice. 3. Roll a Useful Set with 8 or more Height. Anytime you declare a Useful action and
roll a Set with 8-10 height, you get One More! You don’t even need to use that Set for your
Useful action (maybe you want to use a Different Set with better Width, for instance). As
long as you roll it, you earn it. This must be a natural Set. A 2x6 with Effective x2 might
count as a 2x10, but it won’t give you One More!
For example, let’s say you use your 8d Fire Attack against a Shadow with a Weakness to Fire.
You roll the following:
1,3,5,5,7,7,9,10
Out of that you have two Sets: 2x5 and 2x7. You barbeque the Shadow with 2x7, inflicting 2
Scars against it (Width-1 for base damage, +1 for hitting a Weakness). You describe how nailing
that Weakness causes the Shadow to erupt into a towering pyre of flame for a few seconds,
sending its fellows scattering from the intense heat and getting your character’s blood and
neurotransmitters pumping.
And since you hit a Weakness, you can use One More Set that you rolled, so you put
that 2x5 to work too. Here’s how:
1. Knockdown the Shadow you just Targeted. Your One More Set can be used as a
follow-up action that flattens your target, leaving them sprawled and prone for Width-1
rounds. Downed characters take Width-1 in additional Hitstun when they fall and grant +1d
to anyone that wants to go after them till they get up. A downed combatant can stand back
up early if they choose, but it takes a full round, so most Shadows won’t even bother unless
they’re down for more than 1 round.
Chapter VI: Combat
-- 124 --
2. Make an Attack against a different target. You can channel your momentum from
that righteous blow and use your One More Set as another attack against a different enemy
in the fight. And if you happen to hit ANOTHER weakness, then get One More again,
though you need a third Set for that to work. If you manage to roll 4 Sets, that’s potentially
Three More actions you can take, as long as you keep chaining Weaknesses.
3. Use your One More Set for some other action. Heal someone, help a friend, call out
encouragement, activate a Useful Quality, insult an enemy to draw their attention. Under
these circumstances, your Human character can use a One More Set for one of their own
actions without exposing themselves to direct harm from Shadows.
4. Pass the Baton. Baton Passing is described in Chapter 7: The Path to Awesome Power, but
in brief you can use your One More Set to grant Awesome to another member of your party.
One More! without an Extra Set
When you score One More! but don’t have an Extra set,
you’re not entirely out of luck. In this case, you can claim a
free 2x1 Set as a consolation prize. This Set looks like an
Always Works Set, but it can be used for Attacks or
Defenses and benefits from any Extras on the Quality you
use it for. A character can only do this once per Round,
however, so you can’t repeatedly generate Sets out of thin air by using them to attack
Weaknesses.
Negotiation Shadows are vicious and dangerous, but most aren’t so utterly mindless that they’re immune to
what passes for reason in the Other World. Often they can be Negotiated.
Opening Negotiations
How you start Negotiating with a Shadow or a Group of Shadows depends largely on the
circumstances of the battle. If you’re dealing with a highly motivated warrior Shadow you may
need to pacify it first by Knocking it Down. On the other hand if they’re part of a troupe of
trouble makers just out to give you a hard time, you might be able to open Negotiations with
the right words or tricks. Personas can be very helpful in this respect. Some have Useful
Qualities that can directly open Negotiations (see Chapter 9, Page XX).
Playing without One More! If you want to play more in line with
Persona 1 and 2, crop this mechanic
out of your fights. It won’t break
anything and will better simulate
the experience of those games.

Chapter VI: Combat
-- 125 --
Shadow Diplomacy
During Negotiation, a Persona User can use his other, generally non-combative Skills to try and
sway, intimidate or amuse a Shadow. The Shadow will roll its dice to try and resist, counter or
downplay the User’s action. If the User succeeds then the Shadow can be won over, but if the
Shadow comes out on top it regains lost HP equal to its Width-1.
In a successful Hold Up, the Width of your Set determines the outcome.
Width Result 2 It’s open to your side of things. It won’t attack you in the next round and you
may continue negotiations. Two of these in a row is the equivalent to a Width 3
result.
3 It’s on board with you. It will leave the fight, give you information or stuff or
even let you benefit from a Useful ability it has.
4+ It wants to be your friend. It will side with you in the battle and might even
follow you around for a little while.
Note that Negotiation doesn’t pause or divert combat. On top of that, characters
engaged in Negotiation aren’t protected by their Personas, so any damage they take goes to
their soft, squishy human bodies. If you’re determined to Negotiate with a Shadow, or if your
mission demands it, you may need to have your allies watch your back.
You can only Negotiate with a given Shadow once per fight; after that it’s wise to your
shenanigans and won’t listen to what you have to say.
Shadows and Their Favorite Things
Like Personas, Shadows have Favorite Things too, and by enticing them with these you can get
bonus dice to your Negotiation roll. If your offer is really good it might even be worth a free
point of Awesome. Some Shadows are forthright with their Favorite Things and will ask you for
them directly. Others are secretive or shy about their desires, and you’ll need to either weasel
out the info through research or guile.
Alternatives to Negotiation In Persona 3 and 4, most Shadows were strange, abstract creatures lacking the means to
communicate or, seemingly, any kind of higher intelligence, making conversation
impossible. In Persona 5, Shadows could only be negotiated with after being Knocked
Down, a process called Hold Up.

Chapter VI: Combat
-- 126 --
All-Out Attacks The other half of the lingering changes to combat brought into the game by Persona 3 is the
ability to launch an All-Out Attack when every Shadow on the battlefield has been Knocked
Down and the characters rush into beat them all down from within a cloud of smoke. It’s part of
what makes combat in Persona 3-5 so fast paced: with the right moves you can defeat an entire
field of enemies before the battle theme finishes its first loop.
The Velvet Book preserves All-Out Attacks as one of the ways to end a fight. Simply put:
When the Shadows can no longer Attack the players, the Encounter can be concluded with an All-Out Attack. This generally happens when the Players have
inflicted enough damage to a group of Shadows that all their Attacking parts have been
reduced to 0 HP. Without any offensive capability, the Encounter no longer poses a threat to the
Players, and they’re left with a choice: Show Mercy, or go All-Out.
Showing Mercy is what it sounds like: you let the Shadows scurry away to whatever
dark recesses they sprang from, maybe asking for some measure of cooperation in exchange for
their lives.
An All-Out Attack ends the Encounter by the Players pounding the now disarmed
Shadows into ethereal dust. You don’t need to roll anything, each player just Describes how
they partake in the Thrashing. They can use their Personas, their weapons or their bare hands
and feet, whatever. Since Shadows are beings composed of thought, physical might is irrelevant
once they’ve been defeated in this way, and so Humans who are so inclined can take the
opportunity to turn them into psychic punching bags.
Situational Advantages There are other ways to get an edge on your enemies. Here are a couple examples.
Ambush: If you’re able to get the drop on a group of Shadows you get a free Round of actions
all to yourselves. If your hit them hard and fast enough you can wipe them out they can react.
Sudden Attack: An Ambush amounts to catching the enemy completely unaware. Suddenly
Attacking is when your enemy is aware of you, but not necessarily that you’re spoiling for a
fight. If you’re having a friendly chat and decide to flip the tables and start Evoking without
warning, you get a +1d bonus to your actions for the first round of the fight—however, your
side will always Declare First, so the Shadows will have an opportunity to react. A successful
Sudden Attack may require some measure of subterfuge: careful use of Expression + Connive,
for instance, to convince them you don’t want any trouble when, in fact, you do want trouble.

Chapter VI: Combat
-- 127 --
Problems: How to Make Encounters more Interesting In Persona, as with most Japanese roleplaying video games, combat is a pretty linear experience.
Your boys line up on one side of the screen, the bad guys line up on the other side, and you all
take turns lunging or firing at each other until one side is dead. The end, cue the victory or
game-over music.
With The Velvet Book, combat has the opportunity to be a lot more creative in how things
pan out. Since movement and positioning don’t especially matter, fighters are free to describe
their movements around the battlefield however they want; in fact, they should be encouraged to
do so, because it creates a much more interesting and dynamic sequence of actions than just “I
Declare X” and “I hit with Y”.
The downside of this freeform system is that it can make the actual structure of an
encounter inconsequential. Where the fighters are, what’s around them, what’s happening in
the background, it’s all just window dressing. This can lead to fights feeling two-dimensional,
and it can drive players towards sticking with the same moves instead of branching out and
trying new strategies.
GMs looking to add a third dimension to their encounters can deploy Problems. A
Problem is some physical or narrative factor of the battlefield that makes the encounter just a bit
trickier for the Players. Maybe the Shadows are positioning in a fiendishly difficult orientation
to successfully attack. Maybe there is some external force bearing down on them. Or maybe
there is an additional objective that the Players must deal with. In each case, a Problem presents
a unique opportunity for Players to interact with the game system in new and novel ways.
What Problems Can Do
A Problem is and does whatever the GM wants it to, so instead of a fixed set of rules, The Velvet
Book provides more of a framework of how to effectively use them. Here are some basic ways to
handle them:
Problems give Advantages to Minor Shadows. These could be whole dice, Extras or both. A
Shadow with the In The Way Problem gets bonus dice when Attacking or Defending against
Personas trying to bypass their position to pursue targets beyond them, and a Shadow with
Under Cover Problem gains Toughness from whatever barrier shields them from damage.
Problems like this can go as high as the GM thinks the Players can handle: +1d or Extra x1 for a
minor challenge, up to +5d or Extra x5 for a monumentally difficult Problem to be pitted against
only the highest level Persona Users.

Chapter VI: Combat
-- 128 --
Problems Can make things Harder for Players. Problems like this inflict dice penalties, negate
Extras or make certain actions straight-up impossible. A Shadow that is Out of Range or Hard
to See might inflict a dice penalty when being Attacked, and a battlefield suffering High
Gravity can reduce a Persona User’s Fastness. Meanwhile, Thunderous Noise might make it
impossible for characters to communicate or call out to each other during a fight, while an
Impenetrable Force Field could insulate a Shadow from attacks of any kind.
Note that Penalties should be used with care, as they affect smaller dice pools far more
than they do larger ones. For lower-level Personas a Problem shouldn’t inflict more than -2d in
dice Penalties; Problems more challenging than that are better off making an action Impossible
until they’re overcome.
Problems Can Introduce Threats into the Encounter. Threats make combat more dynamic by
introducing additional, external forces weighing in on things. Environmental Hazards are a
common example. Acid rain strips away Toughness, crossfire from battles outside the perimeter
damage Personas, and poison gas threatens the Persona Users and their pulpy, human lungs.
Threats like these are rolled and resolved at the start of each Round before the Declare phase.
Useful Effects come into play right away so that Players must deal with them during the Round,
while Damage is tacked on at the end of the Round. Threats can also things that reshape the
structure of the Encounter. If a battle is occurring on a series of fast moving vehicles, like a scene
from Mad Max, then the Threat can reposition fighters, place humans in mortal danger and
introduce whole new Problems at the GM’s discretion in co-operation with the dice.
For Threats, the greater the Problem the more dice it’s given. A simple Problem might
have 6-8d; a complex Problem, 9-12d; and for a severe, ludicrously dangerous Problem the sky
is the limit.
Problems Can Introduce Additional Objectives. Additional Objectives are elements of an
Encounter that players need to give attention to that aren’t the Shadows trying to delete them
from existence. Hostages are helpless persons or valuable objects held captive and actively
threatened by the Shadows. VIPs are persons or things in the Players’ custody that they must
protect. Secondary Targets are persons or things that the Shadows are protecting which the
Players must capture or destroy. In each case these are Objectives are non-combative: they don’t
roll dice, attack, defend or act usefully. Additional Objectives may have their own HP values
that are whittled down, or they may be binary, either alive or dead, with the goal being the
protection, seizure or destruction of a certain number of targets.

Chapter VI: Combat
-- 129 --
Overcoming Problems
So how do Players deal with a Problem? One way is to suck it up. Take your dice penalty or
your extra hits from a Problematic Shadow and power through it. Problems that are directly
linked with specific Shadows can also be negated simply by defeating that Shadow. But these
can be grueling experiences. The player’s alternative to brute forcing a Problem is to get creative
using their Useful Qualities.
Useful Qualities are very good at Overcoming Problems. If a Shadow is Out of
Range, you can bridge the distance in a flash with Useful: Teleportation, or you can enhance
your aim with Useful: All Seeing Eyes. If it’s boosting its Defensive actions by Hiding in the
Trees, you can use Useful: Control Plants to turn them against it, or Useful: Control Fire to burn
down his cover. If the battlefield is Threatening you with toxic gasses, you can use Useful:
Create Storms to blow them away or Useful: Purifying Incense to cleanse them into a vanilla
and sage potpourri.
Simple Problems can be overcome with a Set of any Height or Width, while more
entrenched Problems may involve a Difficulty or accumulating a certain amount of Width or
Height. An ongoing environmental Threat may not be able to be permanently overcome, but a
Persona’s Useful Qualities may immunize it from being Threatened for Width-1 (+Effective)
Rounds; that way a Player can put themselves in a position to not need to worry about being
hammered by a Threat every single turn.
Seizing Problems
Problems that are based on the geometry of or objects within an Encounter can be Seized by the
players and turned against the Shadows, usually by defeating the Shadow occupying the
Problem. If your Persona destroys a Shadow occupying a sniper’s nest he can Seize that
problem and now you have the High Ground, or if a Shadow is benefiting from an Arcane
Circle of Protection you can knock them out of it and take over, Seizing it and turning it from a
Problem for the Players into a Problem for the Shadows.
Chapter VI: Combat
-- 130 --
Healing When it comes to Healing damage, there are two things to consider:
1. How do Humans and Personas Heal Damage?
2. What kind of Damage are you healing?
For Humans and Personas
Healing Shock Each Scene: After every scene where your Stats or Persona Parts take
damage (such as a combat Encounter) you heal 1 point of Shock from each Stat or Part.
Healing Humans
Humans, while squishy bags of meat and blood, are remarkably resilient when it comes to
recover from and indeed ignoring damage. A kind word or an afternoon of self-care can work
wonders on nursing a damaged human character back to health.
Healing Shock: Humans heal all of their Shock with a good night’s rest. If that’s not good
enough, a Human character can heal Width-1 in Shock when they spend Quality Time with a
Relationship.
Healing Scars: A Human whose Stats are free of Shock can heal 1 Scar with a good night’s
rest. Humans can also heal 1 additional Scar by receiving medical treatment for physical injuries
or emotional support from a Quality Time Set with a Height great than 7.
Healing Personas
Personas aren’t natural creatures, and they’re subject to wildly unnatural sources of harm. Thus
their means of recover from that harm is different from Humans. Specifically, Personas have
few means of passive HP recovery. They still regenerate 1 Shock from every Location after each
fight, but that’s about it. The rest must come from other sources.
Using the Healing Extra in Battle: This is covered in Chapter 3, where we explained the
function of the Heal Extra. Just remember, this kind of Healing always works. Even if your roll
fails the only negative is that the Healing occurs at the end of the Resolve Phase.
Using the Healing Extra Outside of Battle: Healing using your Extras works the same
way out of battle as it does in a combat, but your supply of “overworld” Healing is on a Time
Slot basis instead of an Encounter basis. So a Part with Heals x3 can restore a total of 6 Shock or
3 Scars per Time Slot. Once you hit that limit, that Part can’t Heal anymore till the next Time

Chapter VI: Combat
-- 131 --
Slot rolls around. Since most journeys into the Other World only last for 1 Time Slot, this
usually means you’re tapped out for the rest of the mission.
But don’t worry though: In-Combat and Out-of-Combat Healing don’t overlap.
If you exhaust your supply of overworld Healing, you can still use your Heals Extra during a
shadow Encounter. This is because the Heals Extra is an abstraction representing your Persona’s
overall ability to sew together injured Parts, and medically inclined Persona will always reserve
its Healing ability for Combat, when it’s most critically needed. All you need to do is keep track
of these two supplies.
Healing Personas using their Favorite Things: Back in Chapter 3 we described Favorite
Things, the one idea that forms the core of a Persona’s psychic structure and personality. A
Favorite Thing is designed largely as a guide for roleplaying, but it also has a mechanical
benefit as well. Once per Time Slot, you can heal your Persona’s Damage by indulging its
Favorite Thing. How much damage you heal depends on how dedicated you are to its Favorite
Thing.
Level of Dedication Healing Achieved
Minor 1 point of Damage
Significant Half its Total damage
Major All of its Damage
For an example of these, let’s use Persona 3’s Orpheus, whose favorite thing is Music,
specifically gloomy new wave music like The Cure or The Smiths. Minor Healing can be
accomplished just by listening to your playlist during your commute to school, something you
can do casually as long as you’re conscious of your Persona’s Favorite Thing. Significant
Healing requires dedicating a full Time Slot, like going to a record store and browsing their
goth rock collection and listening to some new records. Major Healing also requires a full time
slot, and needs to be a serious undertaking, like going to a live concert.
As with other forms of Healing, Healing using Favorite Things prioritizes Shock over
Scars. Only when a Persona’s Shock has been completely healed can you begin to repair its
Scars.

Chapter VI: Combat
-- 132 --
Taken together, Favorite Thing Healing ensures that if you’re in sync with what your
Persona wants it’s not difficult to recover its battle damage between jaunts into the Other
World, provided you’re not under such an intense time crunch that you need to repeatedly
intrude into the Other World in a short time frame.
Defending Against Area Attacks Attacks with the Area Extra are a bit trickier to Defend against than normal focused attacks. The
method itself is the same: you use Reflex, Block or a Defends Quality to Gobble the attack’s Set.
However, there a few extra details to consider
Area Attacks target all enemies on the field. If a successful Area Set is rolled, any
target that didn’t declare a Defense against it will bit hit. This makes Area Attacks extremely
dangerous in the hands of humans with a high Out-Think or Shadows with lots of Brains. They
can Declare an Area attack without giving their slower-witted enemies the chance to react.
An Area Attack’s Set is applied to each target individually. You could say that an
Area Attack’s Set gets duplicated and shot out at everyone on the field, and they each deal with
themselves. If you Defend you’re fine, but that won’t help the guy who didn’t see it coming.
Example
A Shadow declares an Attack (Fire, Area x3) against three Persona Users: Jack and his Persona Ares,
Penny and her Persona Sedna, and Rodney and his Persona Anansi. Penny and Rodney have more Out-
Think that the Shadow has brains, so they see the attack coming and command their Personas to Defend.
Jack, however, already declared an attack against a different Shadow, and so has no Defense ready.
The Shadow rolls a 3x8. Penny rolls a 3x9, so she’s fine. Rodney rolls a 2x8, but Anansi’s Defends
Quality has Fast x2, so he’s able to Gobble the attack coming at him down to 1x8, which breaks it. He’s
also fine. Jack cannot defend himself and so he gets hit and must roll 3 Area Dice worth of damage.
Healing Under Time Restraints As outlined in this section, your Human Character’s Shock damage usually gets wiped out
after each day. Healing from one hour to the next doesn’t really matter, unless it actually
does because you’re in a situation where you can’t stop and rest and need to soldier on
under duress. If you need to simulate the gradual recovery of your faculties, you can do so
by healing half your total Shock rounded down per Time Slot.

Chapter VI: Combat
-- 133 --
If Penny or Rodney had declared Multiple Actions they might have been able to use a second
Defends Set to shield the otherwise unprotected Jack, so as always teamwork can make-up for
one character’s flaws. Area Attacks are also subject to being Stunned, like any other attack.
Jumping on Grenades. A fighter can also try to block an Area attack altogether, shielding
his allies from the attack with his own body. This is much harder due to the destructive yield of
an Area attack. As a result, a defender takes a -1d Penalty to their Defends Roll when
attempting this maneuver. If successful, the rest of the party will be protected, but the Defender
takes the full force of the blast on himself. Not only is he not protected from the attack against
himself, but he must also roll Area Dice equal to what his friends would have rolled as well. If
it’s an Area x3 Attack against three targets, he’s taking 9 Area Dice of damage.
Mundane Area Attacks are indiscriminate. Persona and Shadow Area Attacks are
mystical and hit who they’re supposed to. Firecrackers, dynamite and bombs don’t differentiate
friend from foe, and anyone in their radius must react or be blown way.
Shadows 101: What Players Need to Know Shadows are the enemy. Whereas Personas are born from a person’s idealize sense of self and
the need to be protected from the dangers of the world around them, Shadows spring from the
dark side of the human soul. If your Persona represents what you’d most like to be, your
Shadow is what you are afraid you already are.
The in-depth rules for how Shadows work are in Chapter 9: Shadows. But since the
players are going to be face to face with Shadows on a regular basis, this section will prepare
them for what they are and how to beat them.
Minor Shadows
Most Shadows are Minor Shadows. Minor Shadows are the maggots that hatch from
humanity’s negative thoughts. They are simple, relatively weak and they populate the Other
World like cockroaches. Destroying Minor Shadows might clear the path to your goal but they
won’t solve the greater issues at hand: there are always more where they came from.
A Minor Shadow has an Arcana, 2-3 hit locations with their own dice pools, some
Qualities and Extras and some Weaknesses and Resistances. These all factor into a Shadow’s
Arcana Points (AP). Below is an example of a 7 AP Minor Shadow.

Chapter VI: Combat
-- 134 --
Jack Frost Magician-7
(1-5) Icy Body 6d, 4 HP- Attacks (Ice, Fast x1, *Power x2*), Attacks
(Fire, Power x1), Defends, Useful (Icy Tricks, Effect x1),
(6-10) Impish Face 5d, 4 HP- Useful (Sense of Humor), *Brains*
Resist: Ice Weak: Fire Favorite Thing: Jokes
Description: A European winter fairy resembling a jolly snowman in a purple cap.
Normally friendly, if provoked he’ll kill his victim by freezing him in ice and snow.
Where it says *Power* it means that the Shadow a free level of that Extra, thanks to its Arcana
(like the Arcana Boost system). Each Quality after the first costs 1 AP, as does each Extra. AP
can also be used to add dice to the Minor Shadow’s dice pools; otherwise they have 1d per hit
location number. Where it says *Brains*, it’s telling you that the body part it uses for
Declaration, making it the equivalent of a human’s Knowledge + Out-Think pool.
A single Minor Shadow isn’t usually much of a threat. But Minor Shadows are rarely
alone. Usually they come in groups, but sometimes they’re the minions of far stronger Major
Shadows.
Major Shadows
The most dangerous Shadows are Major Shadows. Major Shadows are born of the complex
desires, illusions, prejudices and vices of people in the real world, cooked together in a big
psychic pot until it boils over into a tangible, menacing form in the Other World. Major
Shadows may be attached to a specific individual, or they may be the congealed mental
pollution of the collective subconscious. Either way they’re bad news. They can threaten both
the real world and the Other World, and it’s up to you to stop them.
Major Shadows are built like Personas, with their own hit locations and dice pools. They
also have Gimmicks like being able to take more than one action per turn or summon Minor
Shadows, which make them singular threats that need to be opposed by a whole group of
Persona Users. This module discusses them in full detail in Chapter 8: Shadows.

Chapter VI: Combat
-- 135 --
Ending a Battle Destroy the Shadows: A Shadow whose Parts have been reduced to 0 HP is destroyed,
reduced to a puff of arcane vapor. If all the Shadows in an Encounter are destroyed, it’s over.
All-Out Attack: As explained earlier in this chapter, a Shadow or group of Shadows who
have lost their ability to attack the Players can be eliminated in one fell swoop by an All-Out
Attack, against which they are helpless to defend themselves.
Negotiation: If you can convince your enemies to lay down their arms, the Battle will end
peacefully. This could be done through dialog, or you might have to resort to some kind of
alternate test—arm wrestling, a foot race, bribery, breakdancing, or a game of Mahjong.
Retreat: If things for the Players are going especially poorly they can decide “Screw it” and
flee. This may require Diligence + P.E. to make a break for it, Proficiency + Reflex to hide until
the heat dies down, or one of their Persona’s Useful Qualities to evade Shadow pursuit
Defeated by Shadows: Things can go badly for a Player in a fight in a couple ways. If three
of their Stats get reduced to 0d, they Freak Out (see Chapter 4, page @@). If all of their Stats hit
0d, they’re helpless and can no longer fight. They aren’t necessarily dead, per say, but that’s one
outcome if it makes sense for the game.
Whenever a Persona’s Body Part is reduced to 0 HP, its User will take 1 Scar to the Stat
that corresponds to that Location (so if the Body Part is at Location 1-2, its destruction will cause
1 Scar to the User’s Diligence). If all Body Parts are reduced to 0 HP, the Persona is Dispersed
and cannot be Evoked at all until it Heals at least 1d to each of its Parts.

Chapter VI: Combat
-- 136 --
Example of Combat
The following pages detail a sample combat encounter against a group of Minor Shadows. For
all intents and purposes this is a real battle: all Sets presented were rolled in reality, with only a
few changes made for instructional purposes. This encounter focuses on basic mechanics
presented in this chapter to give the reader a sense of the flow of combat in The Velvet Book.
There are some instances where mechanics described later in this book are used, such as Baton
Passing, but these shouldn’t be to the detriment of the reader's understanding of the action.
Preamble: The Fighters The Players: Phantom Thieves
All Personas are Level 1, having gained one
die, Extra or Quality and one HP added
somewhere to their structure.
Joker and his Persona, Arsene
1-2 Gentleman’s Attire 5d, 4 HP
Defends (Effective x1)
3-5 Thieving Claws 8d, 7 HP
Attacks (Physical, Fast x1), Useful: Steal Anything
6-8 Wings of Rebellion 7d, 6 HP
Attacks (Dark, Power x1), Useful: Troubling Pinions
9-10 Tricky Top Hat 6d, 4 HP
Useful: Sleep Gas
Resist: Dark Weak: Light
Morgana and his Persona, Zorro
1-3 Fancy Fencer Feet 7d, 5 HP
Useful (Boost Power), Heal x2
4-7 Quicksilver Sword 7d, 7 HP
Attacks (Physical, Powerx1, Fastx2), Defends, Recoilx1
8-10 Mask of Mystery 7d, 5 HP
Attacks(Wind, Powerx1), Attacks (Ice), Useful: Refresh
Resist: Wind Weak: Electric
Ryuji and his Persona, Captain Kidd
1-4 Smoking Cannon 8d, 6 HP
Attacks (Electric, Power x2), Useful: Tarukaja
(Effective x1), Tough x1
5-7 Buccaneer’s Cape 6d, 5 HP
Defends, Useful (Immobilize, Effective x1), Tough x1
8-10 Sneering Ship 5d, 6 HP
Attacks(Physical, Area x2), Useful: Boost Power
Resist: Electric Weak: Wind
Ann and her Persona, Carmen
1-3 Tight Leash 6d, 5 HP
Defends, Heal x2
4-6 Fickle Dancer 7d, 6 HP
Attacks (Fire, Power x1, Fast x1), Tough x1
7-10 Pretty Face 9d, 6 HP
Useful: Lingering Jinx (Effective x2, Fast x1)
Resist: Fire Weak: Ice
As stated, while each of these players would
likely have Relationship dice by this stage of
the game, they aren’t the focus on this
simulation.

Chapter VI: Combat
-- 137 --
The Shadows
Bicorn Hermit-9
1-6 Dirty Beast 6d, 7 HP
Defends, Useful: Crushing Hooves, Tough x2
7-10 Wicked Horns 6d, 5 HP
Attacks (Physical), Attacks (Dark, *Power x1*) Useful:
Sense Corruption (Effective x1), Brains
Resist: Dark Weak: Fire
Jack O’Lantern Magician-14
1-8 Pumpkin Head 7d, 6 HP
Defends (Fast x1), Useful: Induce Fear, Brains
7-10 Lantern 7d, 6 HP
Attacks (Fire, Power x3), Attacks (Dark, *Power
x1*,Area x1), Useful: Spooky Illusions (Always Works)
Resist: Fire Weak: Ice
Pixie, x2 Lovers-7
1-4 Flitting Wings 5d, 4 HP
Defends, Useful (Flight)
5-10 Flirtatious Sprite 7d, 6 HP
Attacks (Wind, Fast x1), Useful: Magic Mischief
(Effective x1), *Heals x1* (Effective x1), Brains
Resist: Light Weak: Ice
The Terms
The Phantom Thieves are pushing their way
through Suguru Kamoshida’s Palace, having
rescued Ann Takamaki and helped her
awaken her Persona; from this first victory
they venture further into Kamoshida’s
cognitive domain, facing increasingly
challenging threats.
This encounter is intended to be of
Medium Difficulty.
Declaration Order, based on Brains vs
Knowledge + Out-Think:
Ryuji, Bicorn, Ann, Morgana, Both Pixies,
Joker, Jack O’Lantern
The Pixies, Jack O’Lantern, and Joker all have
equal Brains vs Out-Think scores, so the GM
decides to position Joker after the Pixies, but
before Jack O’Lantern.
ROUND 1
Ryuji kicks things off by declaring an Electric
attack (Power x2) against the Bicorn using
Captain Kidd’s Smoking Cannon.
Bicorn sees the attack coming and tries to
evade, Defending itself against the electric
blast.
Ann commands Carmen to blow a seductive
Kiss (Effective x2) at the Jack O’Lantern in
hopes of Jinxing it.
Morgana orders Zorro to Defend Carmen
with his Quicksilver Blade (Fast x1, Recoil x1),
hoping to score a counterattack with the
sword’s Recoil in the process.
The Pixies both throw out some Wind attacks
(Fast x1), the first aimed at Captain Kidd and
the second aimed at Arsene.
Joker sees the Wind attack revving up and
tries to intercept it with a Physical attack from
Arsene’s Thieving Claws (Fast x1).
Jack O’Lantern ignites his lantern and
declares a Fire attack (Power x3) against
Carmen

Chapter VI: Combat
-- 138 --
Rolling Round 1
Ryuji (8d) 2x4
Ann (9d) 2x10, 2x4, 2x2
Morgana (7d) 2x8
Joker (8d) 2x5
Bicorn (6d) 2x3
Pixie 1 (7d) 2x9
Pixie 2 (7d) 2x1
Jack O’Lantern (7d) 2x7, 2x3
(Ann, 2x10 with Fast x1) Carmen presses her
fingers to her lips and blows a Phantom Heart
across the battlefield, where it strikes true
against the glass of Jack’s Lantern (location 9-
10). Immediately the flame flickers and twists
as its elemental nature itself entranced by the
Carmen’s Pretty Face, whose Effective x2 Jinx
inflicts a -1d Penalty for the next 3 Rounds.
(Ann, One More!) Rolling a Height of 8 or
better on her Useful Quality gives Ann One
More! As Jack O’Lantern is reeling from the
Jinx she placed on his instrument, Ann feels
herself infused with energy and thirst for
battle. She channels this into Carmen’s Fire
Attack using her 2x4 against the Pixie
preparing to blast Ryuji into next week.
Because this is a One More! action it goes off
immediately, striking the Pixie’s Flitting
Wings for 1 Fire Damage. The scorching
damage stuns her and breaks up her Wind
attack.
(Joker, 2x9 with Fast x1) The Second Pixie
conjures up her own wind strike against
Arsene, but before it can condense into a
coherent stormfront the Persona streaks
ahead in a blur of black feathers and slashes
its claws across the Pixie’s body. The
Flirtatious Sprite (Location 5-10) takes 1
Physical damage and its wind attack is
dispersed before it can complete.
(Jack O’Lantern, 2x7) Jack smacks his Lantern
to whip its flame back into shape and
launches a stream of deadly fire across the
battlefield, aimed at Ann. However:
(Morgana, 2x8, Fast x1) Zorro steps in and
effortlessly splits the incinerating beam in two
with his Blade. (Jack O’Lantern, 2x3) Because
Jack rolled two Sets he tries again, but the
second blast is also deflected by the
shimmering Quicsksilver, as Morgana’s 2x8
Defends Set is fast enough to react to both of
the Jack’s attacks, and his two 8s can be split
up to Gobble both attacks down to Width 1x,
ruining each. As a final measure, his Blade’s
Recoil x1 triggers from the successful Defends
Set, and Zorro launches a swift riposte that
strike Jack O’Lantern’s 8 Location for 1
damage.
(Ryuji, 2x4) Captain Kidd wipes his boney
brow as it witnesses the Pixie’s Wind attack
that would have struck its weakness collapse,
then grins and blasts a devasting electric
discharge from his Smoking Cannon. The
Bicorn’s defense is too low (2x3 cannot block
2x4) to protect it from the coruscating bolt
that nails the Dirty Beast (Location 1-6) for 3
Electrical damage; however, that Part is
Tough x2, so it only takes 1 damage.
(Bicorn, 2x3) Bicorn shakes off Captain
Kidds’s attack; because it’s 2x3 Defense Set
couldn’t be used to block the attack, it
becomes Rally Dice on the next turn as the

Chapter VI: Combat
-- 139 --
creature uses its agility to prance through the
battlefield to gain a better attack position.
(Pixie 1’s 2x9 fails due to Stun from Carmen)
(Pixie 2’s 2x1 fails due to Stun from Arsene)
ROUND 2
Ryuji realizes two things: first, the Pixies
need to die, and two, he needs a bigger gun.
He declares Multiple Actions with his
Smoking Cannon: one to boost its damage
with Tarukaja (Effective x1), and another to
attack Pixie 1 with Electricity (Power x2).
Bicorn cashes in his 2d Rally Dice to rapidly
ascend a spiral staircase to a higher vantage
point from which he can view his adversaries;
from on high he soaks in their psychic auras,
using Useful: Sense Corruption to fuel his
own malice.
Ann wants to really start wearing down the
Pixies, and so she as Carmen declare a Fire
attack (Power x1) against Pixie 1 alongside
Ryuji. She declares a Called Shot on Pixie 1’s
Wings, which have already been damaged by
her flames.
Morgana joins in and uses Zorro’s Mask of
Mystery to launch an Ice Attack at Pixie 1.
Pixie 1 looks in dread at the three attacks
aimed her way and chooses to Defend in
hopes that she can avoid at least one attack.
Pixie 2 sees an opportunity to attack Captain
Kidd while he’s over-extending himself with
two actions and prepares a Wind attack (Fast
x1) against him.
Joker goes to intercept Pixie 2 again using
Arsene’s Wings of Rebellion, declaring
Multiple Actions to launch both a Dark attack
(Power x1) and slow her down with his
Troubling Pinions’ Sukunda effect.
Jack O’Lantern, unharassed by the events,
aims more Fire at Carmen in revenge for
Jinxing his lantern, but most deal with a -1d
Penalty in doing so.
Rolling Round 2
Ryuji (8d-1d) 2x3
Ann (7d-1d) 3x8
Morgana (7d) 3x6, 2x7
Joker (7d-1d) 3x6, 2x5
Bicorn (6d+2d) 3x8, 2x6
Pixie 1 (5d) 2x3
Pixie 2 (7d) 2x4, 2x3
Jack O’Lantern (7d-1d) 2x2
Because Ryuji only rolled 1 Set on his
Multiple Actions he chooses to use it for
Useful: Tarukaja.
(Ann, 3x8, Fast x1) Carmen uses her Fickle
Dancer part to wheel around and cast out a
searing ribbon of fire towards the first Pixie.
Her attack would normally hit her 8 Location,
but because it is a successful Called Shot at
her Flitting Wings it strikes her 1-4 instead,
inflicting 3 Fire Damage. The Pixie shrieks as
her gossamer wings are reduced to 0 HP,
Breaking them and giving her One More!
Since Ann only rolled one Set, she claims a
free 2x1 Set, which she uses to place a
Lingering Jinx on Bicron’s Horns (his 1
Location) for 3 Turns.
(Bicorn, 3x8) Bicorn’s Wicked Horns act as
antennas, absorbing the Phantom Thieves’

Chapter VI: Combat
-- 140 --
negative thoughts and dark impulses. This
fuels it, granting Power x3 to its next attack.
(Morgana, 3x6) Before Pixie 1 can fully
recover from Carmen’s fire she’s struck by
Zorro’s icy blast as he whips off his Mask of
Mystery and slings a frozen shard from it.
The attack strikes the Flirtatious Sprite;
normally it would deal just 2 Ice damage, but
Pixies are Weak to Ice, and so it takes a
minimum of 3 Damage instead.
(Morgana, One More!) Hitting Pixie’s
Weakness amps up Zorro and Morgana, who
look to push their momentum further.
“Lookin cool Joker!” Morgana cheers.
“Show’em we mean business!” Morgana
jumps up to hi-five Joker, giving him a Baton
Pass with his 2x7 worth Awesome x1.
(Joker, 3x6, Awesome x1) Joker immediately
cashes in his Awesome x1, shifting a loose 9
he rolled down to another 6, giving him 4x6
to use as his Dark Attack. Arsene’s Wings
launch a vicious curse at the second Pixie,
crushing the Shadow with 4 Dark Damage to
her Spritely form. This stuns her 2x4, but she
still has a 2x3 to put to use.
(Pixie 2, 2x3, Fast x1) The second Pixie drags
itself from the writhing mass of dark energy
enveloping it, and whips up a torrent of high
pressure air that slams Captain Kid against
the Castle Walls by his Cannon arm (Location
1-4). Captain Kid’s Smoking Cannon has
Tough x2 so normally would take 0 damage
from an attack that only inflicts 1 Wind, but
because Captain Kidd is Weak to Wind the
attack ignores his Armor and inflicts 3
Damage.
(Joker, 2x5) No sooner does the second Pixie’s
attack complete than does it find itself
ensnared by a cloak of thick, oily black down
from Arsene’s Troubling Pinions, dragging it
to the ground and slowing its next action
down with Sukunda.
(Ryuji, 2x3) Fortunately for Ryuji, Useful Sets
don’t get Stunned by attacks, and as Captain
Kidd prys himself from the pirate shaped
crater he’s been slammed into he takes out a
battery with a skeletal bunny on it and jams it
into his Cannon Arm, activating his Tarukaja
(Effective x1), giving him Power x2 on his
next two attacks.
(Jack O’Lantern, 2x2) “Hey, I’m still here
guys!” Jack shouts, and launches a gout of
flame from his Lantern at Carmen. With
Power x3 this would usually deal 4 Fire
Damage, but Carmen Resists Fire and
therefore doesn’t take more than 3 damage
from any Fire Attack. The flames lash at
Carmen’s Tight Leash and the heart-faced
thrall attached to it, who begs for more.
(Pixie 1’s 2x3 fails due to Stun from Carmen)
ROUND 3
Ryuji’s feeling hot to trot and readies his
Smoking Cannon to take a piece off the Bicorn
with its Electric Attack (Power x2, +Power x2
from Tarukaja). Knowing that the creature’s
Body is Tough, he’s hoping to strike it’s
Wicked Horns.
Bicorn sees Morgana as a tempting target, as
he’s the only one who hasn’t yet been subject
to an attack, and uses his Wicked Horns to
launch a Dark Attack (Power x1, +Power x3
from Sense Corruption buff).

Chapter VI: Combat
-- 141 --
Ann sees the damage that’s been inflicted by
the fight so far and decides to mitigate some
of it. She uses both Heal ranks on her Tight
Leash to remove 2 Shock to her Tight Leash
and 1 Scar from Captain Kidd’s Cannon.
Morgana sees Bicorn accumulating Dark
energy in his horns and declare a Defense
with Zorro’s Quicksilver Blade.
Pixie 1 is getting desperate. Unable to fly or
avoid attacks it resorts to Trickery, hoping to
use its Fairie Magic to Jinx Zorro’s mask and
keep it from dishing out any more ice. At the
same time she aims to use her Heals (Effective
x1) to put herself back together.
Pixie 2 isn’t doing much better. Her wings are
okay, but Arsene’s dark attack nearly ripped
her body apart and her next action loses -2
Speed. She uses multiple Actions to both Heal
(Effective x1) herself and shoot some more
wind at Ryuji. Since Healing doesn’t require a
Set to function she only needs to roll 1 Set for
both actions to occur, though she still takes a -
1d Penalty for declaring two moves.
Joker sees an opportunity to finish Pixie 2 off
and declares another Dark Attack against her.
Jack O’Lantern is still wrestling with his
Jinxed Lantern, and is getting frustrated. He
decides to forego fire and unleash a Dark
Area Attack (Area x1, Power x1) against the
entire group of Persona Users.
Rolling Round 3
Ryuji (8d) 3x10, 2x6
Ann (6d) 2x8, 2x1
Morgana (7d) 2x10
Joker (7d) 2x8
Bicorn (6d-1) 2x8, 2x5
Pixie 1 (7d-1d) 2x8, 2x1
Pixie 2 (7d-1d) 2x3, 2x2
Jack O’Lantern (7d-1d) 2x1
(Ryuji, 3x10) Ryuji’s persistence and
preparation finally pays off as points Captain
Kidd’s Cannon at Bicorn and from its
smoking maw erupts a thunderous ray of
amped up electrical energy. As Bicorn rears
up to unleash its dark fury on Morgana the
beam arcs through its horns, inflicting 6
Electrical Damage, taking his Horns from 5 to
0 HP in one shot and causing 1 damage to
bleed into its lower body.
(Ryuji, One More!) Shattering Bicorn’s
Wicked Horns give Ryuji One More! on his
2x6 Set, which he channels into a second
Electrical attack, this time aimed at the Jack
O’Lantern that’s been hovering around the
perimeter of the battle. He takes careful aim
and with his 2x6 sends 5 Electrical Damage
through the creature’s Pumpkin Head,
blasting off a huge pulpy chunk, leaving that
part with a mere 1 HP and stunlocking his
Fire attack.
(Morgana, 2x10) Because Bicorn’s attack was
broken, Morgana has nothing to Defend
against, so his 2x10 Set becomes Rally Dice.
(Joker, 2x8) As Pixie 2 winds up to launch a
crosswind suckerpunch at Captain Kidd,
Arsene overshadows her and with black
wings curling over rains down a blast of
cursed energy that tears her apart for 2 Dark
damage. This both cancels the attack and
destroys her Flirtatious Spite HP, which also
prevents her from using its Healing extra. All

Chapter VI: Combat
-- 142 --
that remains is a fragmentary blip of pixie
dust floating around on two helpless wings.
(Pixie 1, 2x8) Pixie 1 uses her Magic to
befuddle Zorro’s Mask of Mystery,
telekinetically twisting it up to make inflict a -
2d Jinx the next time it's used
(Ann, 2x8) Ann heals 1 Scar from Captain
Kidd’s Cannon.
(Pixie 1, 2x1) Pixie 1 heals 2 Scars, bringing its
Flirtatious Sprite HP to 5.
(Bicorn’s 2x8 fails due to Stun from Captain
Kidd, and he cannot use his 2x6 as a back-up
set because the Attacking Part is destroyed)
(Pixie 2’s 2x3 fails due to Stun from Arsene,
and it’s 2x2 Useful Set cannot be used because
the Useful Part is destroyed)
(Jack O’Lantern’s 2x1 fails due to Stun from
Captain Kidd)
ROUND 4
Both Bicorn and Pixie 2 have lost their
Attacking parts. These parts also contained
their Brains, meaning they now Declare First.
Bicorn, its horns broken, can only use its
hooves to either avoid attacks or break down
enemy defenses with Rakunda. Hoping to
weaken Captain Kid’s armor it use its hooves
to inflict Rakunda on him.
Pixie 2 is even worse off, as its fragmentary
remains can only flit about and try to defend
itself.
Ryuji sees an opportunity to do a little extra
damage across the board, and commands
Captain Kidd to use his Sneering Ship’s
Physical Attack (Area x2) to crash through the
enemy formation.
Ann targets Jack O’Lantern, declaring a
Called Shot against its Pumpkin Head (1-7) in
the event that Ryuji fails to hit for its last
point of HP.
Morgana, rather than contend with Zorro’s
tangled mask, aims his Quicksilver Blade
towards
Pixie 1 tries to intercept Ryuji’s wrath with
another burst of Wind.
Joker grins and takes aim at Pixie 1 as Arsene
sharpens her claws and prepares to rend it
into dust like the other.
Jack O’Lantern, hoping to protect itself from
the onslaught coming his way, panics and
tries to cast a Spooky Illusion to hide itself
from follow-up attacks.
Morgana translates his Rally Dice into Zorro
leaping into the air and cutting down a
chandelier, causing it to crash down on the
Shadow formation and scattering them. He
lets Ann and Ryuji each take +1d as their
Persona leap through the chaos created.
Rolling Round 4
Ryuji (5d+1d) 2x7, 2x5
Ann (7d+1d-1d) 2x4
Morgana (7d) 2x10, 2x1
Joker (8d) 2x6
Bicorn (6d) 3x4
Pixie 1 (7d) 2x4, 2x3
Pixie 2 (5d) 2x8
Jack O’Lantern (7d-1d) 2x3

Chapter VI: Combat
-- 143 --
(Morgana, 2x10, Fast x2) Zorro streaks
through the air, swinging on the severed
chandelier chain and strikes through the
Jack’s Lantern itself with his Quicksilver
blade for 2 Physical Damage, shattering its
glass windows and leaving it half broken.
(Joker, 2x6, Fast x1) Arsene continues its
work of driving the Pixies to extinction,
descending on Pixie 1 like an owl on a mouse
and raking her with his Claws for 1 Physical
Damage, leaving its Flirtatious Body with 4
HP and stunning its first Attack Set.
(Bicorn, 3x4) Having counted the scheming
steed out, Bicorn lunges at Captain Kidd and
batters him with its hard hooves, cracking the
armor of its cannon and body reducing its
Toughness by 2 for the next two Attacks
against it.
(Ann, 2x4, Fast x1) As Captain Kidd is trying
to shake off the rampaging broken-horned
horse, Carmen dances through the wreckage
of the fallen chandelier, grabbing a candle
and blowing through its flame that turns into
a sizzling heart-shaped fireball. It blasts into
Jack O’Lantern’s Pumpkin for 2 Fire Damage,
enough to burn the gourd down to nothing
and bleeding 1 damage into the floating,
ghostly Lantern that remains.
(Pixie 1, 2x3, Fast x1) As soon as Captain
Kidd throws the Bicorn off himself, a blast of
wind rips through him and seeks to drive him
Cannon first into the ground. To protect his
Cannon, Ryuji chooses to Tilt the damage to
his Buccaneer’s Cape using its Defends
Quality. Captain Kidd takes 3 Wind Damage
to his Cape, and a point of Stun to his 2x7.
(Ryuji, 2x5) Now he’s mad. Captain Kidd
erupts from the castle floor and a wave of
thunder erupts from the stern of his Sneering
Ship, which he uses a wave to surf on and
crash through everyone left on the battlefield.
Only the fragment of Pixie 2 remains
unharmed, with its 2x8 defense having
enough stuff to escape harm.
All other shadows roll 2 Area dice and take a
point of damage to each location indicated:
Bicorn 3, 9
Pixie 1 1, 3
Jack O’Lantern 6, 7
Bicorn’s Tough x2 ignores the 1 damage to its
Dirty Beast (1-6) HP, but the 1 damage to its 9
strikes the weak point left behind by his
broken Wicked Horns, bleeding into his lower
Parts.
Pixie 1 takes 2 damage to its Wings, which are
also broken and therefore flow into her
Flirtatious Sprite HP, leaving her with just 2
HP.
And finally, Jack O’Lantern’s only remaining
part is his Lantern, and the 2 damage it takes
finishes it off as well. The Lantern is crushed
beneath Captain Kidd’s keel.
TIME FOR AN ALL-OUT ATTACK
The Shadow left on the field capable of Attack
is Pixie, whose Flirtatious Sprite part has just
2 HP left. All other Shadows are either
destroyed or disarmed. The GM declares the
battle won and the Players finish the job with
an All-Out Attack.

(Page #)

Chapter VII: The Path to Awesome Power
-- 146 --
What It Means to be Awesome
Chapter 2 explains what Awesomeness does: it lets you change your dice after you roll them to
create or enhance Sets. But what exactly is it?
Awesomeness measures your character’s ability to shift events in their favor, seizing
control of their destiny and directing the fiction of the game. It’s the ability to turn failure into
success, and success into triumph. On a strictly game-mechanical level, it’s the method by
which you can wrench the One Roll Engine to your advantage and force it to do your bidding.
Awesome Humans
Human Awesomeness is always linked to a Stat. So you could have Awesome x2 in
Guts, which you can use with any Guts-related roll. It won’t, however, help you with your
Diligence, Knowledge, Proficiency or Expression.
Humans can only be Awesome in one Stat at a time. If you currently have Awesome
Guts and you want to have Awesome Knowledge instead, you need to abandon the
Awesomeness you have and start fresh with Knowledge. Players may find it more productive
to focus on using their existing supply Awesome instead of junking it to start a new batch.
Awesome Personas
A Persona has a general supply of Awesome. A Persona doesn’t need to link its
Awesome to one of its Parts or Qualities. Any points of Awesome it has can be used for any
action in its arsenal.
Awesome as a Resource
As these rules imply, a character’s level of Awesome isn’t a static value, but a resource. If you
have Awesome x3, that stands for 3 dice whose outcomes you can change after you roll them.
Once you do that, you’re all out. You can space this out, using those three levels of Awesome on
three separate actions, or you can blow the wad on one all-important roll. But once you tap a
level of Awesome, it’s spent.
So let’s talk about how you become Awesome: The Threefold Path to Awesome Power.

Chapter VII: The Path to Awesome Power
-- 147 --
The First Path: Preparation (for Humans)
By dedicating Personal Time to exercise, training, study or practice, you can build up a stock of
Awesomeness related to what you were working on. This works a little differently depending
on whether you’re taking Personal Time to make your Human or your Persona Awesome.
Step 1- Identify your Goal: What are you trying to be Awesome at? Are you trying to
improve your athleticism, studying for class, or testing out dance moves for the Winter Formal?
Based on this, your Goal should translate into one of your five Stats.
Step 2- Make a Roll: This is how you plan on achieving your goal. Roll Diligence + P.E. to
work out, Knowledge + Academics to study, Expression + Courage to practice dance moves. As
in the last case, these rolls can use non-standard Stat + Skill combos, as long as there’s some
logic to it.
Step 3- Add it Up: A Successful Personal Time Set gives Width in Awesome to a chosen Stat.
Roll a 4x Set, get Awesome x4. Not bad. Failing to roll a Set still gives Awesome x1. Personal
Time can never be wasted entirely; at worst, it’s just unproductive.
Because Awesome is linked to a Stat it can be used for things other than the exact Skill or
task you prepared for. If you studied for a history exam and gained Awesome x3 in Knowledge
you can use that Awesomeness for any Knowledge check—Academics, Notice or Out-Think.
Your mental exertion sharpens your whole mind, not just your ability to do remember
Mesopotamian kings.
The First Path: Preparation (for Personas)
For Personas, accumulating Awesome means kicking down the door of the Other World and
busting Shadow skulls in your spare time. Yes, dear player, we’re talking about Grinding,
something no true Persona game would be complete without.
Thankfully, Grinding in The Velvet Book is abstracted, so you don’t need to play out
fighting dozens of Shadows for two hours. All it takes is declaring that you’re committing a
Time Slot to the Grind, then following these steps:
Step 1- Declare your Intensity: Are you looking for a casual work out, or are you looking
to push yourself and your Persona to their limit? Greater Intensity yields more Awesome but
also exposes your Persona to greater risk. The three levels of Intensity are casual, serious and
grueling.

Chapter VII: The Path to Awesome Power
-- 148 --
Step 2- Roll Dice: Roll with one of your Persona’s Parts to represent the effort spent in the
Grind. For best results roll your best dice pool, but be aware of the risks presented by Step 3.
Step 3- Calculate Awesomeness and Attrition: Your Awesomeness is based on your
Width and your Intensity. Each level of Intensity also comes with a Grind Difficulty. If your
Height fails to meet the Difficulty, then the difference between the two is Attrition- damage you
took along the way.
Intensity Difficulty Awesome Gained Minimum Attrition
Casual 5 Width Awesome x1 Difference
Serious 7 Width+1 Awesome x2 Difference +3
Grueling 9 Width+2 Awesome x3 Difference +5
The Minimum for each Intensity Level is how much Awesome you get if you fail to roll a Set at
all. Doing so counts as having a Height of 0, so minimum Awesome means maximum Attrition.
Attrition is always Shock and ignores Tough. At least half your Attrition must target the Part you used for your Grinding Roll. The rest is rolled randomly, as with
Area damage.
Example
Carter dedicates a Time Slot to some Serious Grinding with his Persona Alexander. The two venture into
the Other World and Carter decides to use Alexander’s Conqueror’s Greatsword 8d for his Grinding roll.
He rolls and gets two Sets: a 3x4 and a 2x6.
In choosing which Set to use he has to weigh the consequences. The 3x4 will give him more
Awesome, but also more damage, whereas the 2x6 is the opposite. Carter ends up taking the 3x4,
reasoning that Alexander would push him to take risks in pursuit of glory. He comes away from the
Grind with Awesome x4 and 6 points of attrition damage. He takes 3 Shock to his Greatsword and rolls to
spread the rest out across Alexander’s other Parts.
IMPORTANT NOTE You can’t use Preparation to Stockpile Awesomeness
If you dedicate two (or more) back-to-back Time Slots to Preparation, you don’t
accumulate two slots worth of Awesomeness. Instead, you get to keep whatever the
better result is. If you rolled a 2x Width in the afternoon and a 4x Width in the evening,
you can keep the 4x result instead of hording 6x worth of Awesome.

Chapter VII: The Path to Awesome Power
-- 149 --
The Second Path: Cooperation
The First Path awards you with Awesomeness for thinking ahead and being proactive. The
Second Path rewards you for teamwork when facing danger and, instead of thinking about
your own safety and glory, you spare yourself the spotlight to give someone else an edge. In
Persona this is called a Baton Pass.
When you score One More! while in Combat, you can use your One More Set for a Baton Pass. Doing so awards another player on your side with Width-1 in
Awesomeness that they can expend during that Encounter. If that player’s turn to Resolve their
action hasn’t come up yet, they can even use their newfound Awesomeness immediately to
bolster whatever Set they’re waiting to use.
A Baton Pass signifies a moment of pure synchronicity between two Persona Users. One
scores a great feat—a critical blow, a clutch defense or a triumphant display of usefulness—and
in so doing allows another User to become more Awesome. The players should narrate how this
happens. Does one create some crucial opening that the other exploits, or is it simply a shout of
encouragement and a cool joint pose that gives another Persona User a jolt of confidence and
willpower?
Example
Karl commands his Persona Jormungandr to use his Serpentine Body (7d)’s Useful (Crushing Coil)
quality to restrict a powerful Shadow’s movement. He rolls the following:
1,3,3,3,7,10,10
Since he rolled a natural 2x10 with a Useful Quality, he scores a One More! for his efforts. He uses his
2x10 for his Crushing Coil and decides to use his 3x3 for a Baton Pass. He turns to another Persona
User, Monique and shouts “It’s your turn! Show ‘em what happens when they mess with Foley Street!”
They both throw out the matching hand signals of their street gang, and high five as Monique is infused
with vigor and the spirit of teamwork in the form of Awesome x2. She immediately uses one level of
Awesome to improve the Set she rolled from a 2x5 to a 3x5, and saves the other level for the next turn.
Since Baton Passing is a thing that can happen on almost any turn, it’s a good idea for players to
hold onto their Loose Dice even after they roll. A player may never know when a Baton Pass
might come their way and give them the opportunity to use their sudden supply of
Awesomeness to shift some unused dice around.

Chapter VII: The Path to Awesome Power
-- 150 --
The Third Path: Sacrifice
What happens, though, if you desperately need a shot of Awesomeness and there’s none to be
had? The stock you Grinded for is tapped out, and your allies are barely able to keep
themselves together, never-mind worrying about getting fancy with Baton Passing. What if you
absolutely must get a Set, or you have a Set and you need it to be better? You need to push
yourself past your limits, and when that happens things tend to break.
You can instantly give yourself Awesome x1 on a roll by Sacrificing one of your Persona’s Qualities. Where on your Persona it says Useful: Command Animals, put a big
fat X through it. You can’t use it anymore. In exchange, you get Awesome x1 on the roll you’re
about to do or the one you just made. You can Sacrifice as many Qualities as you want at a time
in exchange for equivalent amounts of Awesomeness, but you need to use them right away.
What goes on when this happens is that forcing Awesomeness from dire circumstances
causes collateral damage to your Persona. A piece of shrapnel strikes its Third Eye, so it can no
longer read minds. The heat of its attack sears away pages from its own grimoire, so it can’t use
its strength enhancing runes anymore. Its war-cry shatters its voice and it can no longer
hypnotize others with its siren’s call.
Useful Qualities are Sacrificed first, then Defends, and finally Attacks. This
actually provides an interesting incentive to collect Useful Qualities. The more Usefuls you
have, the more you can Sacrifice for Awesomeness without compromising base combat efficacy.
Sacrificed Qualities can be restored by spending Quality Time with your Persona. Each Quality you Sacrifice requires one Time Slot spent engaging with your Persona
to bring back. If its Third Eye is broken you need to meditate with it atop an Other World
mountain to regrow it. If its grimoire has been burned you need to visit a Shadow Library to
restore the missing pages. If its voice is damaged, you need to go on a short quest to collect
honey from Wasp Queen to soothe it. If appropriate, other players can join you and provide
support, or even make it a double date if two Personas might recover Sacrificed Qualities from
the same source.
When you recover a Sacrificed Quality, you can change what it does. This mostly
applies to Useful Qualities since they have so many possible effects, but it works for Attacks too
if you want to change its elemental properties. In this way if your Sacrificed your Third Eye’s
Useful: Read Minds, you can choose to reconstruct it with a new Useful effect like X-Ray Vision
or See the Future. You can thereby use these rules to scrap a Useful Quality that isn’t living up
to what you hoped it would and replace it with a something else.

Chapter VII: The Path to Awesome Power
-- 151 --
The Shadow’s Path to Awesome Power: Smirking
This chapter’s focus has been on how Humans and Personas can earn Awesomeness, but
Awesome Dice are as useful to Shadows as they are to anyone else. To become Awesome, both
Minor and Major Shadows take advantage of a mechanic called Smirking.
Smirking works the same as Baton Passing. Whenever a Shadow scores One More! it
can choose to use an extra Set for Smirking, generating Width-1 in Awesome.
Smirking only gives Awesome to the Shadow that earned it. Whereas Baton Passing
is driven by teamwork and shared fighting spirit, Smirking is a Shadow relishing its dominance
and empowering itself with its own sense of superiority. This gives it Awesomeness but doesn’t
help any other Shadows on the field.
Major Shadows: Awesome Might
Along with Smirking, Major Shadows have a second source of Awesomeness they can draw
from.
Major Shadows gain Awesome x3 for each point of Might they possess. This
works like Prepared Awesome in that it’s a fixed pool they can draw from at any time during
battle.

(Page #)

Chapter VIII: Shadows
-- 154 --
What is a Shadow? Shadows are creatures native to the Other World that want to do you (and the rest of humanity)
physical, psychological and/or spiritual harm. They can take a wide array of forms and shapes,
including figures from mythology and folklore or weird crystallizations of human fears and
desires.
Most Shadows are simple, single-minded entities called Minor Shadows, which
represent negative impulses and emotions common to people everywhere. But a tiny minority
are Major Shadows: powerful, dangerous monstrosities born from unique, singular sources of
emotional distress, malcontent and misspent willpower.
Personas and their Users are often responsible for hunting down and dismantling Major
Shadows and the hordes of Minor Shadows that act as their minions.
Where do Shadows Come From? Various Persona games take different approaches to the origin of these species. GMs should
work out their own logic behind where Shadows come from. Here are some examples.
Shadows are the consequence of suppressed negative desires. Selfishness, greed,
jealousy, self-hatred, resentment, pride—when people repress these feelings instead of working
through them, they spawn Shadows in the Other World. In areas where these thoughts are
concentrated, great masses of Minor Shadows congregate, potentially around a powerful Major
Shadow that acts as a kind of dark Persona of one twisted individual.
Shadows are the natural citizens of the Other World. The act of venturing from our
world to theirs marks a Persona User a target as an unwelcome invader. Shadows like these
aren’t universally hostile, especially if you know how to handle their idiosyncrasies.
Shadows are created to serve a purpose. It may be a piece of a larger conspiracy, but
sometimes bad people with the right know-how unleash Shadows in pursuit of a personal
agenda.
Whatever their source, Shadows present a looming threat to whatever real space their fragment
of unreality has intersected with. If the nature of the Other World allows them to influence the
real world, they do so by infecting people with negative emotions and hostile thoughts,
expanding the same darkness in the collective subconscious that they’re bred form. If the Other
World is more isolated from our own, its Shadows occupy an alien ecosystem that the Persona
Users must bushwhack through to accomplish their objectives.

Chapter VIII: Shadows
-- 155 --
Shadow Types As mentioned briefly in the Combat Chapter, Minor Shadows are simple creatures with a
couple hit locations and attributes, whereas Major Shadows are constructed the same way that
Personas are, with many hit locations and lots of dice. Minor Shadows are common foes that
Persona Users will usually face in groups, while Major Shadows are designed to be drastic,
unique encounters that require the party’s full, focused attention.
Arcana Points A Shadow’s strength is measured in
Arcana Points (AP), which represents
how much psycho-spiritual power the
Shadow is infused with.
For Minor Shadows, AP is the sum of its
various traits, including its dice pool,
extras, resistances and other features.
The greater its AP, the tougher and
stronger it is. For Major Shadows, AP
measures how much extra stuff it gets on
top of its normal dice pools.
Shadow Styles In Persona 3 and 4 Shadows were weird amorphous creatures like giant masked boulders,
floating mouths and bizarre animals. Shadows in Persona 5 are drawn from the standard
stock of Shin Megami Tensei enemies like Pixie and Jack Frost. Shadows described in The
Velvet Book are based on the latter approach, but both styles are valid and are available to
the GM’s discretion.
Some Shadows are Helpful There’s precedent in some Persona games for Shadows with an unusual amount of self-
awareness to help the party or even join forces with them like Metis in Persona 3 and Teddie
in Persona 4. These beings should be built like normal NPC characters instead of using
Shadow rules.

Chapter VIII: Shadows
-- 156 --
Minor Shadow Anatomy Here’s the example of a Minor Shadow from the Combat Chapter for us to examine:
Jack Frost Magician-9 (1-5) Icy Body 6d, 5 HP- Attacks (Ice, *Power x2*, Fast x1) Attacks (Fire,
Fast x1), Defends, Useful: Icy Tricks (Effective x1)
(6-10) Impish Face 6d, 5 HP- Useful: Sense of Humor, Brains
Resist: Ice Weak: Fire Favorite Thing: Jokes
Description: A European winter fairy resembling a jolly snowman in a purple cap.
Normally friendly, if provoked he’ll kill his victim by freezing him in ice and snow.
Name: What the Shadow is called.
Arcana: All Shadows have an Arcana that informs what kind of creature it is. A Shadow’s
Arcana also grants it a free Level of a specific Extra (here it’s a free level of Power on an
elemental Attack.) That Extra is indicated by *asterisks* around it, hence why Jack Frost has
Attacks (Ice, *Power x2*).
AP: The 9 after Magician is the Shadow’s Arcana Points, which inform everything that comes
next.
Body Parts: Minor Shadows have between 2-3 Body Parts, covering the same 1-10 Hit
Locations as a Persona.
Dice Pools: Each Body Part gets 1d per Hit Location Number. Dice can be added to the pool
for 1 AP each or shifted from one location to another to fit the Shadow’s purpose.
Hit Points: Each Body Part starts with HP equal to its Dice Pool-1. You can buy 2 points of
additional HP per AP spent, and you can freely shift around HP as needed.
Qualities: Like a Persona, each Part gets one free Quality, with additional Qualities buyable at
1 AP each. All Shadows must have at least 1 Attacks Quality.
Extras: Each Extra is also worth 1 AP, except the Free Arcana Extra.
Brains: A Minor Shadow Declares its action in combat based on whichever Hit Location is
most directly linked to its senses or cognitive ability, its equivalent to a human’s Knowledge +
Out-Think. This is marked as *Brains*. Brains don’t cost any AP.

Chapter VIII: Shadows
-- 157 --
Resist/Weak: Each Resistance costs 1 AP, and each Weakness refunds -1 AP. In Jack Frost’s
case, they cancel out.
Favorite Thing: Shadows like things too. Leaning on a Shadow’s Favorite Thing can be
helpful when you’re negotiating with them.
Description: This tells you about the Shadow’s appearance, disposition and personality. GMs
pulling from the vast canon of Persona enemies can also find illustrations of the critters online.
Encountering Minor Shadows The Other World is lousy with Minor Shadows. Sometimes they’re enlisted as henchmen and
foot soldiers of Major Shadows, other times they just prowl the dark jungles of mankind’s
collective consciousness, driven by inscrutable motives.
How a Shadow behaves when you run into it depends on how your GM interprets their
role in the narrative. Traditionally, Shadows in Persona are openly hostile and their first instinct
is to attack any outsiders they see, but that doesn’t have to be the case here. Shadows can have
as wide a ray of reactions to meeting Persona Users so you may be able to vary up your
approach. Or don’t and just leave a trail of ectoplasmic gore in your wake.
Fighting Minor Shadows A Shadow’s Hit Points are its form and constitution. Deplete them and it’s kaput, ripped to
shreds that evaporate back into the psychic ether from whence it came. If every Shadow in an
Encounter is reduced to 0 HP, the fight ends. If instead you merely knock out all their Attack-
capable parts the group is neutralized and is at your mercy to be spared or executed by way of
an All-Out Attack.
Individual Minor Shadows are relatively weak, but you rarely find them alone. They
tend to group together, and these groupings can offset the specific deficiencies of individual
Shadows. Take Jack Frost above; it can Attack with Ice
and Fire, set-up nasty traps with Icy Tricks or try and
disarm a Persona with its humor, but it’s quite fragile.
But if it’s grouped up with a Shadow with a healthy
Defense, the two can work together to cause a lot more
havoc than either could accomplish individually.
Sometimes you can simply overpower groups
of Shadows with naked force, but often it’s prudent to
divide and conquer. A timely Expression + Put-Down
The Shadow Compendium The Appendices of the The Velvet Book
include the Shadow Compendium, a
catalog of ready-to-play Shadows at the
GM’s disposal. Feel free to use the
Compendium to build Shadow
encounters or as inspiration for your
own creations.

Chapter VIII: Shadows
-- 158 --
roll can sow dissent among the ranks of especially well synergized Minor Shadows (“What’s
wrong, Jack? Too much of a wuss to fight me without your pals?)
Shadow Mobs Many Shadows are so simple or singularly weak that fighting one at a time is a waste of time,
both for the Players and the GM. You don’t kill termites individually, you spray the lot of them
and exterminate thousands in one go, and the same principle underlies the idea behind Shadow
Mobs.
Shadow Mobs are what the GM can use when he wants to pit a huge swarm of weak
enemies at the Players. A Shadow Mob could be a couple dozen Slimes, hundreds of Pixies or
thousands of angry buzzing Shadow Wasps, all attacking in a big messy group.
Shadow Mobs have a single Dice Pool and Hit Point Pool, and no Hit Locations.
The bigger the dice pool, the nastier the Mob. Very importantly, Shadow Mobs can roll dice
pools greater than 10d. Any Mob with a pool greater than 10d guarantees at least one Set each
time they roll. And since they have a single HP pool and no Hit Locations, every hit they take
has the same effect regardless of Height (unless they use a Defends Quality to block you).
Shadow Mobs can use every Set they roll. The great number of combatants in a Mob
equips it with limitless Multiple Actions. The GM can Declare every possible move they can
make, but he only needs to Declare for one Quality at a time (“The mob is attacking you!” or “the
mob is falling back to protect itself!”) to describe the overall tenor of their group action. Either
way he’s free to use any Sets he rolls for any of the Mob’s Qualities. The GM also doesn’t need
to declare specific targets: he can choose who is the victim of each Set during the Resolve phase.
To balance out this advantage, Mobs always Declare first each Combat Round.
The GM: Master of Shadows This Chapter is about the rules for how Shadows work and what they can do. The GM’s
Chapter, the Velvet Room, has rules specifically for engineering Shadow encounters, so
go check that out if you’re interesting on the behind-the-scenes of how these scenarios
are set-up.

Chapter VIII: Shadows
-- 159 --
Mob Sets are weak and cannot exceed 3x Width. Any Sets with a Width of 4x or
greater must be split up into narrower Sets (turning a 4x7 into two 2x7s, or a 5x4 into 3x4 and
2x4).
Mobs become weaker the more damage they take. Each point of damage you
inflict equates to one or more members of the Mob being taken out of the fight, and as their
numbers dwindle so does their efficacy. At 50% HP, a Mob is Thinned, and their dice pool is
reduced by -2d. At 25% HP, a Mob is Scattered, and their dice pool falls by -4d.
Area Attacks are very good against Mobs. Attacks with the Area extra hit
targets in a wide radius, and Mobs tend to occupy a wide radius. When fighting a Mob each
level of Area on an attack translates into +1 damage, the same as Gnarly would.
As an example, here’s how you build a Mob of Jack Frosts:
The Hee-Ho Horde Magician Mob-28 11d Attacks (Ice, Power x1, Fast x1), Attacks (Electric, Power x1), Useful (Blizzard Conditions,
Effect x1), Useful (Sense of Humor), Defends
Hit Points: 16 Thinned (-2d): 8 HP Scattered (-4d): 4 HP
Resist: Ice Weak: Fire Favorite Thing: Jokes
Useful (Blizzard Conditions): The Hee-Ho Horde can whip up a storm of ice and snow that
covers the area in a wintery mix that lasts for Width in Rounds. While in effect, all Persona
attacks that don’t have the Ice Element have a Difficulty of 3, and all Ice attacks gain Power x1.
Useful (Sense of Humor): Individual Jack Frosts in the Horde can use their Sense of Humor to
play pranks on Humans and Personas, which inflict a dice penalty equal to their Width to the
targetted Hit Location for one Round.
How Shadow Mobs are built
Dice Pool: Each die in a Mob’s dice pool is 2 Arcana Points. The number of dice tells you how
big and nasty the mob is.
Dice Pool Description 8d A modest group of weaklings, or a small gang of tough guys. Not super serious.
11d An army of weaker shadows, or a small but powerful and coordinated squadron.
14d+ A major threat—a whole horde of vicious monstrosities, each worse than the last.
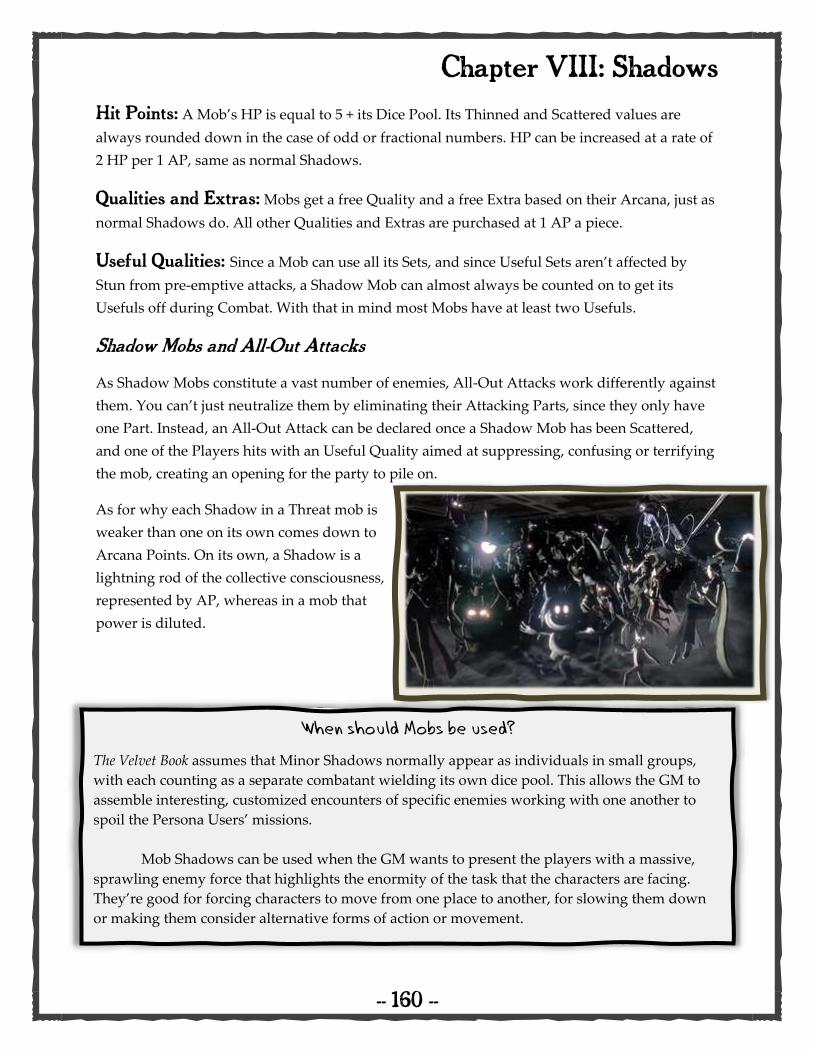
Chapter VIII: Shadows
-- 160 --
Hit Points: A Mob’s HP is equal to 5 + its Dice Pool. Its Thinned and Scattered values are
always rounded down in the case of odd or fractional numbers. HP can be increased at a rate of
2 HP per 1 AP, same as normal Shadows.
Qualities and Extras: Mobs get a free Quality and a free Extra based on their Arcana, just as
normal Shadows do. All other Qualities and Extras are purchased at 1 AP a piece.
Useful Qualities: Since a Mob can use all its Sets, and since Useful Sets aren’t affected by
Stun from pre-emptive attacks, a Shadow Mob can almost always be counted on to get its
Usefuls off during Combat. With that in mind most Mobs have at least two Usefuls.
Shadow Mobs and All-Out Attacks
As Shadow Mobs constitute a vast number of enemies, All-Out Attacks work differently against
them. You can’t just neutralize them by eliminating their Attacking Parts, since they only have
one Part. Instead, an All-Out Attack can be declared once a Shadow Mob has been Scattered,
and one of the Players hits with an Useful Quality aimed at suppressing, confusing or terrifying
the mob, creating an opening for the party to pile on.
As for why each Shadow in a Threat mob is
weaker than one on its own comes down to
Arcana Points. On its own, a Shadow is a
lightning rod of the collective consciousness,
represented by AP, whereas in a mob that
power is diluted.
When should Mobs be used? The Velvet Book assumes that Minor Shadows normally appear as individuals in small groups,
with each counting as a separate combatant wielding its own dice pool. This allows the GM to
assemble interesting, customized encounters of specific enemies working with one another to
spoil the Persona Users’ missions.
Mob Shadows can be used when the GM wants to present the players with a massive,
sprawling enemy force that highlights the enormity of the task that the characters are facing.
They’re good for forcing characters to move from one place to another, for slowing them down
or making them consider alternative forms of action or movement.

Chapter VIII: Shadows
-- 161 --
How Major Shadows Work Major Shadows are the big mama-jama. The nastiest things you’ll face in the Other World.
They’re tumors of malice needing excision from the collective consciousness and the powerful,
twisted dark Personas of corrupt humans in the Real World. Once you start encountering Major
Shadows it means you’ve started poking the Other World where it counts.
Major Shadows are built like Personas: 1-10 hit locations, 3-5d per Location, same
Qualities and Extras. If you know how to build a Persona, you’re 90% of the way there to
building a Major Shadow. Here’s an example, based on the Shadow Priestess from Persona 3.
Shadow Priestess (3d Campaign) Might x2 High Priestess-8
Favorite Thing: Sowing Doubt
Arcana Points: 8
Resist: (+3) Ice, Dark, Light
Weak: --
1-2 (+1) Sacrilegious Gown 7d 9 HP
Attacks (Physical, Fast x2), Tough x2
3-4 (+1) Boaz and Jachin 8d 9 HP
Defends (Recoil), Tough x3
5-8 (+1) Heretical Scrolls 10d 11 HP
Attacks (Ice, Power x3, Splash x3), Defends, Useful: Entangling
Grasp (Effect x1), Useful: Frightening verse (*Effect x2*)
9-10 (+2) Shadow Mask 8d 9 HP
Attacks (Dark, Power x2), *Useful Gimmick: Summon Allies*, Tough x2, Brains
Let’s analyze what we’re looking at here.
Campaign Level: Like a Persona, a Major Shadow’s Parts have dice pools based on how
many Hit Locations they cover, and follow the same base-dice rules as their Persona adversaries
(in other words, a Major Shadow in a 3d Campaign has 3d per Hit Location)
Might: Might is a measurement of how much stronger a Major Shadow is than an individual
Persona. Each level of Might increases the Shadow’s dice-per-location, meaning the Shadow
Priestess has 5d per Location, as well as its HP per Location. It also provides some other edges
described in Chapter 10: The Velvet Room.

Chapter VIII: Shadows
-- 162 --
Arcana: Like Minor Shadows, Major Shadows have an Arcana that grant them a free use of a
specific Extra. Unlike Minor Shadows, though, a Major Shadow’s Arcana gives it two levels of
its signature Extra. So under “Heretical Scrolls” where it says *Effect x2*, that means the
Shadow Priestess didn’t have to spend any dice or AP to score both levels of that Extra.
Arcana Points: Like a Minor Shadow, a Major Shadow’s AP is used to buy dice, Qualities,
Extras and HP. However, since Major Shadows have a lot more dice to work with, its AP is
more like bonus points it can spend on top of using its natural dice to buy stuff.
Resist/Weak: Major Shadows don’t need to balance their Resistance and Weaknesses the
way that Personas do. Instead they can buy Resistance for 1 AP each, as well as offset that cost
by taking Weaknesses.
Hit Points: A Major Shadow’s HP is based on three Factors. 3d Shadows have 2 HP + Hit
Location Size, and 5d Shadows have 5 HP + Hit Location Size x2, just like Personas. They also
add their Might as HP to each location. Finally, their total AP becomes HP that you can
distribute to parts as you see fit.
Gimmicks: Lastly, take a look at the 9-10 Location, the Shadow Mask. It has this *Useful
Gimmick: Summon Allies*. Gimmicks are special abilities that are unique to Major Shadows. In
this case, the Shadow Priestess can use her Shadow Mask to summon Width-1 in Minor
Shadows to her aid, each with a dice pool equal to the Height of her roll. All Major Shadows get
one Gimmick for free. Additional Gimmicks cost varying amounts of AP.
Brains: When a Major Shadow is an independent being, it will have a Brains hit location the
same as a Minor Shadow. If the Shadow is instead linked with a human being in some way, it
will declare based on that person’s Knowledge + Out-Think pool, the same way a Persona
would.
Fighting Major Shadows The rules for fighting Major Shadows are mostly the same as for Minor Shadows, except for the
vast gulf in power between the two classes of beings. Only a few things change.
Major Shadows don’t give you One More when you hit their weaknesses. A lot of
Major Shadows don’t even have Weaknesses, but if they do all they offer is more damage. You
can still get One More if you reduce one of its Parts to 0 HP. Along with this, you can’t Knock Down Major Shadows with regular attacks. So you can’t just hammer away at
a Major Shadow and get a million hits in by chasing their Elemental vulnerabilities.

Chapter VIII: Shadows
-- 163 --
That doesn’t mean that a Major Shadow can’t be knocked down; it’s just that it takes
more than picking the right elemental attack. It’s more of a combat puzzle negotiated between
the players and the GM, who has customized the circumstances to require creative thinking.
For example, imagine that the players are fighting the Shadow Priestess in an out-of-
control train car, as is the case in Persona 3. She’s embedded herself into the car by driving her
Heretical Scrolls into its metal walls. By breaking her loose from those points of contact, the
Shadow Priestess loses the grasp and collapses when struck by a follow-up attack, knocking her
down and giving the Persona Users an opening. This series of actions requires coordination
from all the Persona Users as they need to cut her loose from the train and then strike her in a
single Round.
Other instances of viable knock down strategies include attacking or exploiting a Major
Shadow’s favorite thing or even trying to talk sense into its human host (if it has one). Whatever
the case, the same rule applies for Major Shadows as for Minor: Major Shadows can’t be
knocked down more than once per fight.
Gimmicks The full list of Gimmicks for Major Shadows is in Chapter 10, but here’s a sneak preview.
Remember, Major Shadows get 1 Gimmick for free.
Multitasking lets a Major Shadow roll two separate actions each Round. If the Shadow
Priestess had this Gimmick, she could roll 10d to attack with her Heretical Scrolls and 8d to
defend with Jachin and Boaz. This only works if each action uses a different Location, though.
Endless Healing lets a Major Shadow use a Healing Extra as many times as it likes, without
being limited by how many levels it has. A Major Shadow that fights flanked by Minor
Shadows can get a lot of mileage out of this Gimmick by keeping its minions topped-off and
deadly.
Heavy Armor knocks 1 Width off every attack that hits the Major Shadow. This means that
any Set with a Width of 2 simply fails outright, and every other attack loses damage before even
calculating the Major Shadow’s Resistances and Toughness.
Penetration allows a Major Shadow’s Attacks Quality to ignore all points of Tough on its
target. It doesn’t apply to every Attacks Quality the Shadow has, unless the GM spends the AP
to equip every one of its Attacks with Penetration.

Chapter VIII: Shadows
-- 164 --
Some Gimmicks act like Extras that apply to specific Qualities (like Penetration and
Endless Healing). Others are Qualities on their own, like the Shadow Priestess’s Summon Allies
ability. Still others are passive traits that are always on an affect a Major Shadow’s entire
presence, like Multitasking. Each one has its own rules and opens new avenues for encounter
design for a GM.
Fighting to the Finish Fights against Major Shadows don’t always go until the Shadow has been blasted down to
0 HP in all locations. Your GM has a slew of options (detailed in The Velvet Room chapter
of this module) for how to stage the climax of one of these encounters to make sure they
end with a bang, not a whimper.


Chapter IX: Useful Things
-- 166 --
Why Useful Qualities Have Their Own Chapter Because you asked for it!
When developing The Velvet Book, we learned that what at first seemed like a simple
transaction actually had a lot of underlying strategy: what can Useful Qualities do? In the
original game of Monsters and Other Childish Things, Useful Qualities were descriptive and
mostly up to interpretation between the Players and GM, and that’s fine, because MaOCT isn’t
built for a lot of mechanical rigor. With The Velvet Book, we found that by increasing the focus on
technical Combat, Usefuls were being left in the dust. Players weren’t sure what a Useful
Quality could do in a fight. One of the most common questions we received was “How are
Useful Qualities supposed to work?”
That question led to this chapter, explaining how Useful Qualities are supposed to work.
How Useful Qualities are Supposed to Work Put simply, a Useful Quality is any Persona ability that neither inflicts or prevents damage.
Taken in a bit more detail, a Useful Quality has two kinds of effects.
Outside of Combat, Useful Qualities are a Persona’s primary way of interacting with the
world in interesting, constructive and unique ways. Useful: X-Ray Vision allows a Persona to
see through solid barriers, Useful: Cunning Linguist can baffle Shadows with its silver tongue
and Useful: Nuclear Rocket Flight lets it fly around on fusion thrusters. These effects are usually
self-evident and don’t need a ton of rules to back them up.
Within the context of a fight against Shadows, Useful Qualities need to be examined a
little more closely. Any time that a Player decides to roll Useful Quality in combat is a Round
where they are not Attacking or Defending, unless they’re betting on Multiple Actions. This
means that a good Useful Quality needs to have a significant, meaningful impact on the fight to
make it worth using over throwing fireballs or dodging bullets. X-Ray Vision detects
weaknesses in Shadow armor, letting your attacks pierce Tough; Cunning Linguist can Confuse
a Shadow into diverting its attacks to the wrong targets; and Nuclear Rocket Flight can lift a
Persona out of direct range of combat, protecting it from Area attacks. These Qualities aren’t
always preferable to Attacking or Defending, but they open up new strategic options and can
change the flow of a Combat Encounter.
These are the basic ideas behind Useful Qualities. If you grasp them, you understand
what Usefuls are for. But there’s still some room for clarification and expansion of the concept,
which we’ll discuss next.

Chapter IX: Useful Things
-- 167 --
Not Everything needs to be a Useful Quality You don’t need a Useful Quality for every single material element of a Persona’s Part. If your
Persona is Arthur Pendragon, his Excalibur part doesn’t need Useful: Cuts Things in order to
cut a rope or slice cheese. That’s obvious and not special, so it doesn’t need to be a Useful
Quality. Any Persona Part can always be counted on for obvious tasks. Sun
Wukong’s Heavenly Staff can be used to wedge open a door and Tyr’s Flaming Blade can be
counted on to set a rug on fire, even without Qualities like Useful: Apply Leverage and Useful:
Start Fires. To put it another way, a Part’s name acts as kind of a Useful quality of its own. If it
makes sense for Grendel’s Ravenous Maw to do something that a big gob of teeth can do, go for
it, even if it is not covered by a Useful Quality.
What Makes a Good Useful Quality Useful Qualities are Special. What makes Excalibur different from an ordinary sword, or
what makes Athena’s Aegis different from an ordinary shield? What makes Arsene’s Top Hat
important that a normal hat wouldn’t do?
Useful Qualities are Not-Obvious. It’s obvious that Icarus’s Waxen Wings could be
used to stir up puffs of air, that’s what wings do. But what if that wind had hurricane force?
And what if they could be used to coat things in wax? Those are both worth being Useful
Qualities, because those are things that you don’t immediately associate with having wings.
Useful Qualities are Important. Obviously Icarus’s Wings should allow it to fly, but
flying around is a pretty major thing, so it should be a Useful Quality. Same goes for
Excalibur—it’s Excalibur, so of course it can cut through solid stone, but that’s a pretty serious
feat nonetheless, so it’s also a Useful Quality. Applying this to Tyr’s Flaming Sword, you
wouldn’t give it a Useful like “Start Fires” because that’s not important or impressive; but
Useful: Conjure and Control Flame is much better because it demonstrates that the Flaming
Sword can create and fully manipulate fire at will, which is more significant than just lighting a
camp stove. This is an almighty psychic entity we’re dealing with, not a Zippo lighter.
Attacks and Defends can also be Useful Just because these Qualities are specifically designed with combat in mind doesn’t mean they
can’t be used in everyday adventuring. One can think of plenty of times that throwing bolts of
lightning or dodging around with supersonic speed might be convenient. Specific guidelines for
these are covered later in this Chapter, starting on page @@.

Chapter IX: Useful Things
-- 168 --
Basic Things Any Useful Quality Can Do Useful Qualities give your Persona unique abilities that only it can do, but there are some
actions that are universal enough that you can do them with any Useful Quality, so long as you
can explain how it works.
These all involve creative interpretation of your Persona’s skills and how they interact
with the environment and your enemies. Other than the need for creativity, the one restriction is
that you can’t use the same Useful Quality + Basic Effect combination twice in an Encounter.
This is usually natural to the flow of combat: Usefuls have the power to drastically affect the
battlefield, and their effects are usually not repeatable in the same way (once you’ve smashed
down a wall with your Useful: Titanic Strength, you can’t smash it down again).
Create an Advantage
Your Persona can use its Useful abilities to give itself or your allies the upper-hand in a
situation. Major Tom’s rockets set fire to the ground, D’Artangan’s blade cuts down a
conspicuously hanging chandelier, Kali’s aura of darkness engulfs the arena in shadow; each of
these Creates an Advantage, a favorable situation for you and your allies. An Advantage takes
the form of a pool of bonus dice equal to your Width (+ its Effective Level; all these moves
benefit from Effectiveness) that your party can pull from to enhance their rolls. The only cost is
that must describe how he makes creative use of the Advantage to strengthen his action.
Counteract a Useful Effect
When a Shadow activates one of its Useful Qualities to make life more difficult for you and
your allies, you may use your Persona’s own Useful Qualities to Counteract a Useful Effect. An
ally that has been frozen in ice can be freed using Apollo’s Solar Radiance to melt their bonds,
and if the Shadows are obscured by a dense cloud of smog, Susanoo’s Control Wind can expose
them by blowing it away. Unless specifically stated, any successful Set can Counteract a Useful
Effect regardless of its Height or Width, though this still obeys standard timing rules if speed is
a factor. Note that Buffs and Debuffs (pages @@ and @@) cannot be negated this way; those
require a special Useful Quality, Refresh/Revoke (page @@).
Solve a Problem
By “problem” we mean both the capital-P Problems that your GM builds to imperil you (see
Chapter 6, page @@), and the more general problems posed by hostile Shadows and the Other
World in general. Solving a Problem can mean overcoming a specific strategic Problem posed
by a combat encounter as well as attacking Threats in creative ways (Room is flooding? Plug the
inlet with Anansi’s sticky webbing).

Chapter IX: Useful Things
-- 169 --
The Useful Gallery In this section you’ll find a list of Ready-To-Play Useful Qualities. Many of these cover standard
Persona Skills, so if you’ve got one of them in mind then here’s a good place to start. Players and
GMs can also use this as a reference for gauging the strength of their bespoke Qualities. In each
case, we’ve shown how a Useful Quality can work both in and out of combat as well.
Most of these Qualities are intentionally generic, so Players and
GMs should use them as templates to create more interesting abilities.
Don’t give your Persona Useful: Negotiation, give them Useful:
Autocratic Tone or Useful: Rousing Debate. These are separated into
two categories: Common, for ones that can be slotted into almost any
Persona, and Exotic, for ones with more rarified uses.
Analyze Non-Combat: Analyze reveals the hidden details of things. It always
looks at a specific object—a door, a statue, a person, and only reveals
solid facts about it: what it’s made of, whether it conceals a trap, etc.
Analyze can’t be used to observe the world at large, and it can’t pierce
intelligent minds, so you can’t Analyze a person’s thoughts to tell if they
are lying.
When Analyzing, your Height determines the quality of the information.
Height Insight 1-2 Confirm obvious information (“the Golden Idol is made of real gold”)
3-7 Detailed, non-obvious information (“the Idol is hollow and is filled with gas”)
8-10 Extremely specific and exotic information (“the gas is a neurological agent that
will prevent you from Evoking your Persona, and it’s booby-trapped to go off if
you handle it wrong”)
Combat: Analyze can be used to uncover crucial combat details about enemy Shadows—their
Resistances, Weaknesses and Qualities—based on your Set’s Height.
Height Information Discovered 1-3 One Weakness, Resistance or Quality
4-6 All Weaknesses or Resistances, or all Qualities on a specific Part
7-9 All Weaknesses and Resistances, or one Major Shadow Gimmick
10 All Major Shadow Gimmicks
The 10 Common Qualities
Analyze
Buff
Boost Power
Control (Element or
Force)
Debuff
Flight
Induce (Mental Effect)
Negotiation
Provide Information
Unique Movement

Chapter IX: Useful Things
-- 170 --
Buff This isn’t a single Useful Quality, but a category of Qualities that cover abilities that enhance a
Persona’s baseline abilities, usually by adding a temporary Extra. In Persona language, these
correspond to the Rakukaja, Sukujaka and Tarukaja Skills, and The Velvet Book treats them as
distinct Useful Qualities, so you don’t have Useful: Buff, you have Useful: Tarukaja, or Useful:
Enhance Kinetic Force if you want to be more technical, less mystical.
Rakukaja
Non-Combat: Rakukaja makes things resistant to harm, turning wood or glass hard as iron. If
you feel like quantifying it, it multiplies an object’s durability by Width; so a 2x2 makes an
object twice as strong as it normally would be, and a 4x5 makes it 4x sturdier.
Combat: Rakukaja adds Tough x1 to all of a Persona’s Parts against Width-1 attacks.
Sukukaja
Non-Combat: Sukukaja makes things greasy fast, whether it’s a souped-up motorcycle or a
bowling ball rolling across the floor. Numerically it works the same as Rakukaja: whatever
you’re affecting gets its speed cranked up by your Width, for what that’s worth.
Combat: Sukukaja adds Fast x2 to a selected Persona Part for Width-1 Actions.
Tarukaja
Non-Combat: Tarukaja weaponizes stuff. An object influenced by this Quality becomes
immediately capable of inflicting physical harm, even if before it was literally a wet noodle. A
Width of 2x-3x lets if inflict Width-1 in Shock; at 4x Width it becomes a Scarring weapon.
Combat: Tarukaja adds Power x2 to one of a Persona’s Attacks Qualities for Width-1 Actions.
The Underlying Question: What are These, Anyway?
In Persona, these Buffs are just glowy, vaguely magical effects. You can stick with that, or
you can get creative. Maybe your Persona’s Rakukaja works by encrusting its target in a
protective stone shell. Maybe your Sukukaja attaches tiny little Hermes wings to make its
subject move faster. And maybe your Tarukaja causes sharp spikes to erupt from its affected
surface. It’s fine to just treat them as mystical auras, but it’s also fun to give them a physical
state in the game-world as well.

Chapter IX: Useful Things
-- 171 --
Boost Power Non-Combat: Personas are mighty, but sometimes their base capabilities aren’t enough. Useful
:Boost Power kicks it up a notch. By meditating, praying, bellowing a war-cry or otherwise
working up some serious heat, Boost Power accumulates Width in bonus dice for a specific
action. The key is that a Boost Power Quality can only affect one kind of action—physical,
mental, magical, etc. In this way it emulates Persona Skills like Charge and Concentration.
Combat: The Combat use of Useful : Boost Power is the same as its Non-Combat application.
Again, a Persona can only use this quality to grant bonus dice to a specific kind of action. Useful
:Battle Cry can add to a physical strike, while Useful: Mantra can boost an elemental attack.
Attentive players will notice that Boost Power’s effect is pretty much identical to the
Create an Advantage effect from the Basic Moves, except more restricted (it only affects you, and
it only affects one kind of action). And you’d be correct. So here’s the kicker: Boost Power allows you to exceed the 10d limit on dice pools. If you’ve got a 9d pool and you use
Boost Power to add 3d, now you get to roll 12d on your next action. Nice.
Control (Element or Force) Non-Combat: This Quality gives a Persona fine control over an elemental force like fire, water,
ice, wind or electricity. This is different from having an elemental attack, like Attacks (Fire). An
Attack is a raw burst of might, constrained only by the Persona’s aim. Control gives a far more
versatile toolset. A Persona with Control Fire can light a candle, start a camp-fire, cook a fish,
melt iron bars, ignite a fuse or commit selective arson. The Higher your Set, the more finesse
and precision you can exert, whereas Width is commensurate with the gross amount of
elemental force you can handle. A 2x Control Fire Set is enough to cook by, while a 5x Set could
engulf an entire building in a sheet of flame.
Combat: Control works combatively to amplify an elemental attack, or to raise your defense
against an attack from that element. When you roll a Control Set, you can add your Width to the
Width of an Attack Set of the same element, or to a Defense set against that element. There are
lots of ways to approach this: you can roll Control on one turn to amp up your elemental fury,
then unleash next turn; you can declare Multiple Actions to try and enhance and attack on the
same turn; you can even use Control to boost an ally’s Set if they’re attacking with or defending
against that Element. In the latter two cases, the speed of your Control Set doesn’t matter. If your
Control Ice is a 2x3, it can still be used to add 2x Width to an Ice attack at 5x speed. This would,
naturally, raise that attack’s Speed to 7x, and could be the difference between victory and
gruesome death.

Chapter IX: Useful Things
-- 172 --
Debuff Like the Buff Quality, Debuff isn’t a single Useful Quality but a category covering any ability that
dampens a target’s attributes. In Persona, these are equivalent to the Rakunda, Sukunda and
Tarunda Skills, and they function inversely to the -Kaja Buffs.
Rakunda
Non-Combat: Rakunda makes sturdy things fragile and easily broken, allowing you to smash
through impenetrable barriers and rip apart unbreakable obstacles.
Combat: Rakunda negates Tough x2 from a targeted Part for Width-1 attacks.
Sukunda
Non-Combat: Sukunda makes fast things slow and easy to avoid or strike.
Combat: Sukunda makes a targeted Part act with 2 less Speed (so a 4x7 would have the speed
of a 2x7) for Width-1 Actions.
Tarunda
Non-Combat: Tarunda blunts weaponry and saps the strength of normally damaging threats.
Combat: Tarunda reduces the damage output of a targeted Attacks Quality by 2 for Width-1
Actions (so that an attack that inflicts Width+3 damage would be lowered to Width+1).
Timing Buffs and Debuffs
You’ll notice that the timing for Buffs and Debuffs is measured in Actions rather than
Rounds. This allows for Buffs to go into effect immediately during Combat. If you use
Tarukaja on an ally and roll a 3x4, their next two attacks gain Power x2. If their attacks
already Resolved in that Round, it will take effect next Round. But if they haven’t Resolved
they can go into effect right away. Debuffs work the same way: if you hit a foe with 2x5 of
Tarunda it affects their next attack, whether it come in the current Round or the next.
Buffs and Debuffs that affect Tough are a little different, since Tough is a passive
effect. Rakukaja grants Tough against Width-1 attacks, and Rakunda strips Tough for
Width-1 attacks. So the timing of these abilities are based, not on actions taken by the
target, but on actions taken against them.

Chapter IX: Useful Things
-- 173 --
Flight Non-Combat: Personas and Shadows are creatures of pure thought and aren’t so strongly
bound by physical laws like gravity, so they tend to float comfortably a few feet above the
ground. A Persona with Useful: Flight) has a much greater range of aerial movement. With Flight
a Persona can wing-flap, rocket-boot or levitate freely to any point in space that its User can see.
Width tells you how fast it gets there—2x is a casual trip, 6x is super-sonic. Height comes into
play if something adds turbulence to your flight-plan: a hurricane, withering anti-air fire or a
hungry gravity well.
Combat: A Persona can use Flight to distance itself from the frontline of battle. A Flight Set
creates a Width-1 dice penalty against any attacks aimed at it. If you take Flight with 3x8, any
attacks coming at you lose 2d off their roll while you remain airborne. On the downside, a
Persona in Flight suffers the same penalty on its attacks against ground targets.
Flight capable Personas can compensate for this in two ways. It can combine Flight with
its Attack as a Multiple Action to swoop in and strike (this would incur only the normal penalty
for Multiple Actions, instead of whatever the Flight penalty is). Done this way, your new Flight
Set replaces the previous one, but doesn’t affect the timing of your attack. Alternately, it can
combine an Attack with a Useful Quality that compensates for its distance, such as an Exotic
Sense that gives it telescopic vision.
One last thing: Personas and Shadows in-flight are unaffected by Area attacks.
Stacking Buffs and Debuffs
Buffs and Debuffs are not strictly additive. You can’t grant Power x8 by dumping ridiculous
amounts of Tarukaja on someone. Buffs don’t stack, they overwrite, and only for whatever
their variable factor is. If someone is hit with Sukunda for 2x1 they’d have 2 less speed for 1
Action; if they then got hit with another Sukunda for 4x1, the duration increases to 3
Actions, but it’s still just -2 Speed. That’s because Sukunda always causes -2 Speed; the
variable is how long it lasts, which gets overwritten by the new value if it is greater than the
old.
Similarly, if a Buff granted Width-1 in an Extra for 1 Round, using it multiple times
would replace the Buff’s value with that of the Wider Set. So you can’t just Buff yourself
into the stratosphere, or Debuff an enemy into the dirt.

Chapter IX: Useful Things
-- 174 --
Induce (Mental Effect) Non-Combat: Induce: Mental Effect is an extremely diverse category of Useful Qualities that
encompass messing with a Shadow’s mind or neurological state. There are also lots of ways to
do this: Magic, hypnosis, brain spores, holographic illusions or just having a very commanding
presence. Like with Control, you need to specify what kind of Mental State your Quality causes.
Out of combat, these generally last for Width-1 minutes, and a Shadow will usually roll with its
Brain dice pool to resist your influence.
Combat: The following are some of the standard Persona Mental Effects that a Shadow (or a
Persona!) can fall under using this Quality. Shadows automatically roll their Brain part to resist
being Induced, and Major Shadows can add their Might to the Height of their Set. If a Persona is
targeted by an Induce Quality, then their human User must make a Knowledge + Wind roll to
resist.
Induce (Charm)
A charmed fighter has been bewitched by an adversary and will not attack them (but their allies
are still valid targets). By Negotiating with a Charmed foe they can be drawn over to fight on
the Charmer’s side for this effect’s duration.
Induce (Confusion)
Confused combatants find it difficult to distinguish friend from foe. Whenever they attack, they
must roll a Confusion die whose Height determines the effect:
Height Consequence 1-3 Attack is redirected to a random ally (each rolls 1d, lowest die is hit)
4-6 Attack is redirected to a random enemy (same as above)
7-10 No negative effect
Induce (Fear)
Terrified fighters have lost their nerve and cannot attack on consecutive turns or make Multiple
attacks in a single turn. The No Attack effect kicks in on the first round of Fear, so even if you
only roll a 2x Set you’re guaranteed 1 round of panic. Combatants experiencing Fear gain +2d to
their Defense rolls or to any Useful actions based on running away and hiding.
Induce (Rage)
Enraged combatants won’t use Useful or Defends Qualities, only Attacks. But watch out since
this effect also allows them to ignore up to 2 points of stun from your attacks.

Chapter IX: Useful Things
-- 175 --
Negotiation Non-Combat: Negotiation is a fill-in-the-blank for any Useful Quality that allows a Persona to
skillfully interact with others. Seduction, intimidation, comedy routines, these are all forms of
Negotiation, and different Shadows have unique responses to each approach. Powerful,
masculine Shadows might be brought low by Useful: Feminine Wiles while noble, chivalrous
Shadows will respond better to Useful: Royal Decree. Whichever your strategy, casually
attempting Negotiation with Shadows usually just requires a successful Set, but particularly
obstinate listeners will resist with their Brains.
Combat: Normally, to negotiate with a hostile Shadow you need to work them over a bit to
get them in a talking mood. If your Persona has a Useful: Negotiation Quality you can initiate
dialog at will with a successful Set, as long as your subject/target/victim is inclined towards
your particular method of persuasion. By this we mean that beefy warrior type is likely to
succumb to Useful: Manly Bravado or Useful: Seductive Allure, but not so much Useful: Academic
Discourse. You can also use Negotiation during Shadow conversation, but a Shadow can only be
swayed by one of these Qualities once, after which it’s likely to catch on to your tricks.
Negotiation can also be used to augment Induce: Mental Effect in the same way that
Control: Force or Element can enhance an elemental attack, as long as your rhetorical technique is
aligned with the effect you’re trying to create. Useful: Talk in Riddles can enhance your ability to
Induce Confusion, but not Induce Fear, while Useful: Demon Warlord’s Command can enhance Fear
but probably not Charm.
Provide Information Non-Combat: Your Persona is privy to realms of extraordinary knowledge far exceeding your
own. A Provide Information Quality is specific to each Persona. Sun Tzu would naturally have
Useful: Arts of War, giving him vast knowledge of tactics and strategy, whereas Odin would
have Useful: Knowledge of Magic. Any time this knowledge would come in handy, you can make
a roll to use your Persona’s Provide Information Quality to invoke it.
Combat: Providing Information has a vast array of non-combat uses, so its battlefield
applications are a bit more limited than other Useful Qualities. It is however very good at
Creating Advantages. In the two examples above, Arts of War could come into play easily any
time you are fighting against Shadows armed with swords, spears or other weapons, while
Knowledge of Magic can very easily Create Advantages against faeries and other overtly mystical
foes, simply by sharing what your Persona knows about these sort of threats.

Chapter IX: Useful Things
-- 176 --
Unique Movement Non-Combat: Your Persona has a special method of getting around. Can it walk on water or
walk up walls, or walk through walls? Can it dig through the ground or swim sleekly through
water? A Unique Movement Set uses Width to determine how quickly it gets around (2x for
casual traversal, 5x for lighting fast speed) and Height when its movement is made difficult by
the environment.
Combat: Useful: Unique Movement can be used in Combat to achieve a superior tactical position
for either Attack or Defense. You can do this in one Round, and then cash it in on the following
Round, or you can attempt a Multiple Action to perform a Unique Movement along with an
Attack or Defense.
Attacks benefiting from Unique Movement are difficult to Defend against, because they
come from unexpected or impossible angles and directions. To block or evade such an attack, a
fighter must first Gobble the Unique Movement Set, whether it was rolled on the prior turn or the
current as a Multiple Action (so keep track of what Set you rolled!). As an example, if you have
a Unique Movement Set of 3x2 and an Attack Set of 3x6, anyone trying to Defend against you
would need to Gobble your 3x2 Unique Movement first, even though the Attack Set poses a much
greater threat.
When you Defend in conjunction with a Unique Movement, your mobility makes you
harder to hit and gives you fresh vantage points from which to interrupt attacks. This lets you
add a Unique Movement Set’s Width or Height to your Defends Set, whichever is more helpful.
In both cases, your Unique Movement only confers strategic advantages on the turn it is
used (if part of a Multiple Action) or the one following. You can’t use a Unique Movement and
then three turns later make your attack harder to block or your Defense harder to bypass.
Moreover, a Useful: Unique Movement Quality only works if the environment allows. If
your Persona is the Hindu water god Varna possessing Useful: Flawless Aquatic Movement it’s not
going to help you if you’re doing battle in a desert, and neither will Useful: Walk through Walls if
you’re in an open plain.
As with any Useful Quality, don’t allow these specific instances to limit your thinking.
Being able to navigate an environment in an unconventional way has myriad possibilities,
which this chapter gives GMs the tools to translate into tangible effects.

Chapter IX: Useful Things
-- 177 --
Create (Object) Non-Combat: With this Quality, your Persona can conjure up some
form of matter on demand—Useful: Create Ice Structures or Useful:
Unlimited Candy Supply or Useful: All the Bullets, whatever makes sense
for your Persona’s nature. The fun part is figuring out where it comes
from. Maybe the stuff just appears miraculously or is recalled from a
pocket dimension of infinite stuffed animals or is transmuted from
nearby matter. The greater your Width, the more of it you can make: 2x
is a reasonable supply, 5x is more than anyone would ever need or
could reasonably use. If your object varies in quality, Height comes into
play. A dessert at Height 1 is a stale chunk of Hershey Bar, and at
Height 10 it is the most delicious slice of cake ever made, a platonic
ideal of sugary delight.
Combat: Create Object serves two main functions in Combat. First, it’s
a handy way of appeasing Shadows by giving them stuff they want.
Minotaurs, for instance, love sweets, so if your Persona is Marie
Antoinette and she has Useful: Let Them Eat Cake, you’re golden.
Create Object is also an excellent vector for Creating Advantages,
as it allows you to introduce new elements into the battle at will. From there all you need to do
is narrate how your creation provides a strategic advantage, like using Useful Create Ice
Sculptures to fashion a gorgeous, huge ice swan that your allies can shelter behind against an
attack, or Useful Summon Sick Ramps to build a launch platform that a rocket-powered ally can
blast off from and bolster his attack.
Deadly Power Non-Combat: A Persona with Useful: Deadly Power has access to some manner of immediately
lethal force. This normally (but not always) takes one of two flavors: either a searing, holy
radiance that burns away forces of evil, or a creeping, malevolent darkness that leaves decay in
its wake. Deadly Powers like these can be an effective source of intimidation when aimed at
Persons and Shadows vulnerable to its side of the light-side/dark-side spectrum.
Combat: Deadly Power lines up with Persona’s Instant Death Skills like Hama (the light version)
and Mudo (the dark version). They aren’t technically attacks because they don’t inflict damage;
instead, Killing Power aims to remove a target from battle all at once by banishing it with a wave
of divine light or devouring it in inky blackness (or whatever element fuels your deadliness).
The 13 Exotic Qualities
Create (Object)
Deadly Power
Exotic Sense
Gigantic
Immobilize
Invisibility
Jinx
Nullify
Polymorph
Refresh/Revoke
Super Strength
Tranquilize
Warp

Chapter IX: Useful Things
-- 178 --
Erasing an enemy from the face of the battlefield at will is a pretty drastic action, as it
bypasses the whole Attack/Defense/HP exchange of normal Shadow Combat. To balance it out
there are couple restrictions.
Deadly Power is Difficult to use. If you try to use Deadly Power to instantly defeat a
Shadow, you must beat a Difficulty based on whether it Resists the elemental aspect of your
Deadly Power:
Status Deadliness Difficulty Neutral 6
Weak 4
Resistant 8
Deadly Power exacts a toll. If you successfully use it to one-hit-KO a Shadow, half their
remaining HP is inflicted upon your Persona as Shock damage, directed at the Part hosting your
Deadly Power. Generally, you won’t know how much HP this is ahead of time, though you can
use your Persona User’s Out-Think Skill or a Persona’s Useful: Analyze Quality to fix that. So
using Deadly Power in this way is a dire risk. On the one hand, you can instantly remove an
enemy from a fight, no matter their defenses or remaining HP, but at the cost of possibly
calamitous sums of damage to yourself.
Deadly Power works differently against Major Shadows, or when used by Shadows
against Personas. You can’t OHKO these kinds of targets; instead, Deadly Power can be used to
instantly reduce a Part to 0 HP. It can be any part you choose as long as your Deadly Power Set’s
Height is sufficient to affect it (so if you roll a 2x7 against a Major Shadow who’s Neutral to
your Deadly Power’s element you can wipe out a Part at hit location 1-7, but not 8-10).
Using Deadly Power against a Major Shadow takes an even greater toll. They add their
Might to both the Deadliness Difficulty and the damage you take, and it’s Scars, not Shock.
Moreover, wielding Deadly Power against a Major Shadow Sacrifices that Quality, and you can’t
use it again until you spend some Quality Time with your Persona to restore it.

Chapter IX: Useful Things
-- 179 --
Exotic Sense Non-Combat: Your Persona can see through solid matter, smell treasure, taste lies, hear
emotions or feel the history of objects, usually relaying this information to their User as if this
sense was their own. A Persona with Useful: Exotic Sense can easily detect dangers hidden from
normal perception, such as Shadows employing Useful: Invisibility in preparation of ambushes,
as long as the Exotic Sense could reasonably be used in that way. In this case, an Exotic Sense Set
can Gobble a concealment Set regardless of its Height (so a 2x1 Exotic Sense could beat a 2x10
Invisibility, but wouldn’t have enough Width to fully break down a 4x10)
Combat: Aside from being able to counteract the edge awarded by Useful Qualities like
Invisibility, an Exotic Sense sharpens your Persona’s focus on a specific target, honing their
ability to track and predict their movements and penetrate their defenses. This translates into a
+2d bonus to all your attacks against a specific target for Width-1 Rounds.
Gigantic Non-Combat: Shadow Combat is a battle of thoughts where physical size is unimportant—
until it’s not. Some ideas are bigger than others, after all. Extreme size disparities can be
modelled with the Useful: Gigantic Quality applied to whatever Part is most representative of
the Persona’s immensity (or even on multiple Parts if you so choose). A Gigantic Set can be used
for any situation where hugeness would be an asset—bridging a vast chasm, holding up a
collapsing roof or reaching up to an extreme height.
Combat: Using Gigantic in combat means actively leveraging your size. You always use it as a
Multiple Action with some other move, usually an attack. In doing so a Persona gains Width-1
in Tough to all its Parts and Width-1 in Power to all its attacks for the duration of that Round.
This doesn’t come free though: when a Gigantic Persona throws its weight around like this it
loses Width-1 in speed from all its actions. So while it hits harder and shrugs off damage, it’s
movements are slower and more ponderous.
Immobilize
Non-Combat: Useful: Immobilize describes any Quality that meaningfully restricts a target’s
movement. Ensnaring vines, sticky excretions, telekinesis or gravitational control, they all have
the same effect of holding someone or something in place and stopping it from doing
something. Immobilization is forcibly broken by the target Gobbling your Width with an
appropriate roll to extricate themselves from a Persona’s grasp.

Chapter IX: Useful Things
-- 180 --
Combat: Immobilizing a foe makes them easy to hit, inflicting a Gobble Die on any Defense Sets
they attempt while restrained for Width-1 Rounds. It also disables any Useful Qualities based
on movement (like Useful: Flight) for its duration. An Immobilize Set loses a point of Width
against enemies that are very large, and as in the case of this Quality’s non-combat usage an
Immobilized combatant can fight free with an appropriate ability of their own.
Invisibility Non-Combat: Useful: Invisibility lets a Persona vanish from sight without being recalled to its
User’s mind, allowing it remain fully active on the battlefield. An Invisible Persona remains
active and primed for action while going unseen by others around it, unless a Shadow has a
Useful Quality that would allow it to roll against you. Invisibility is good for surveillance,
infiltration and setting ambushes.
Combat: When a Persona (or a Shadow) uses Invisibility in battle it can’t be targeted by any
attacks for Width-1 Rounds unless, as said above, a Shadow has a Useful Quality that would
allow it to penetrate its concealment. This isn’t as perfect a defense as it seems, since by default
Invisibility doesn’t extend to the Persona’s User, who remains a visible and juicy Shadow target.
An Invisible Persona can still take hits for their User, but doing so breaks their concealment, as
does Attacking or using Useful Qualities with obvious effects. As long as Invisibility isn’t
broken, however, a Persona gains +1d to attacking unaware enemies.
Invisibility benefits from strategy and cooperation. If a Persona becomes Invisible it can
buff itself or Analyze free from enemy molestation while another Persona steps in to Defend its
User. Invisibility can also be used as part of a Multiple Action, allowing a Persona to strike then
vanish again before it can make itself target of attack.
Jinx Non-Combat: Useful: Jinx is a catch-all for being mischievous. Under its influence, things tend
to go wrong—machines stop working, pictures fall off walls, guns jam, and lightbulbs suddenly
blow out at inopportune times.
Combat: Jinx can work in one of two ways. Either it inflicts a lingering -1d penalty on a
selected Part for Width-1 Rounds or it carries a sudden, powerful jamming effect that inflicts a
Width-1 dice penalty on that Part for a single Round. A single Useful: Jinx Quality never does
both, so you need to choose which one is your Persona’s style. Like with Deadly Power, Jinxing a
Part requires a Set with enough Height to hit said Part. If you roll a Height 9 you can Jinx any
part at 9 or lower, but not 10.

Chapter IX: Useful Things
-- 181 --
Nullify Non-Combat: All Personas are resistant to certain elemental forces, but one with Useful:
Nullify can straight-up immunize itself to the threat posed by fire, ice, electricity, psionics, or
really anything that could conceivably cause it trouble. A Persona who can Nullify Lies can
never be deceived, or with Nullify Fear remain defiant of intimidation. Used out of combat, a
Nullify Set will completely negate a threat regardless of its Height or Width.
Combat: Useful: Nullify shields a selected Persona from a threat for Width-1 Rounds. What this
shield does depends on what kind of force is being Nullified.
If a Persona is Nullifying an attack type, like Useful: Nullify Fire or Useful: Nullify
Electricity, then its shield adds the appropriate Resistance to all its Parts. If that Persona is
already Resistant, its protection is doubled (turning it into Tough x2 against that attack type).
If the Nullification is aimed at a non-damaging effect, like Charm or Confusion, then that
Persona is rendered immune to those effects for the duration of the shield. No amount of knock-
out gas will tranquilize it, and no coercion will sway it.
Polymorph Non-Combat: Useful: Polymorph allows you to change the physical form of things in a
proscribed fashion. Midas uses his Golden Touch to turn things into gold, Medusa uses her
Gorgon Stare to turn things into stone, and Medea uses her Porcine Curse to turn things into pigs.
Personas can normally revert these changes, but that need not always be the case. If you want to
transform things into more than one form you need separate Polymorph Qualities for each.
Since a Set’s Width equals its intensity you need greater Width to Polymorph very large
or numerous subjects/targets/victims:
Approximate Size Required Width Human or smaller, or a swarm of tiny things 2
Automobile sized, or several humans 3
Elephant sized , or a crowd of humans 5

Chapter IX: Useful Things
-- 182 --
Combat: Transforming a hostile combatant into something harmless or immobile is a powerful
tactical option. It’s also difficult—the action and energy exchanged during combat tends to foul
up Polymorphic forces, so you need to hit a Difficulty of 5. When in combat, Shadows are
actively more resistant to this kind of thing too: if your Polymorph succeeds, your target will
automatically roll to repel the effect with its largest dice pool.
If both of these conditions meet with success for your Persona, POOF. You turn your
target into a frog, an armoire or whatever for Width-1 Rounds and lose their ability to
meaningfully contribute to the fight. If they’re changed into something immobile like stone or
ice, they also can’t defend but gain Tough x2 to all their Locations. If they can still move they
retain their lowest Defends dice pool, but that’s all they can do. All their other abilities are
cancelled until they revert. They also lose all their Elemental resistances and weaknesses.
If you want a less drastic implementation of this Quality, you can use Polymorph to
Disable an enemy by transforming some part of their make-up into something harmless or
useless. If a horde of Shadows is coming at you with knives, turning those knives into bananas
will pretty effectively short-circuit their offense. If your GM decides that full Polymorphing is too
disruptive to the flow of the game, this is your primary use for it.
Major Shadows can’t be wholly Polymorphed unless you decide to use this ability as
flavor for a finishing blow after it’s been defeated. They can be Disabled though.
Refresh/Revoke Non-Combat: Useful: Refresh is the ability to cleanse or expel a force or presence that’s harmful
to you, and Useful: Revoke is the ability to cancel a force or presence aiding your adversaries. A
Persona could do this mystically with Useful: Beams of Cleansing Light; mechanically with Useful
Cleansing Antidote; or via more mundane methods, like Useful: Invigorating Warcry. Whatever the
case, you need to specify what kind of force you’re able to Refresh or Revoke; in the prior
examples, malicious darkness, toxic miasma or fear and demoralization.
Combat: Refresh shortens the effect of Debuffs affecting you and your allies, while Revoke does
the same for Buffs affecting your enemies. In this way Refresh works as Dekunda and Revoke as
Dekaja from Persona. These are separate Qualities: one Quality can never do both, you either
pick yourself up or bring the baddies down.
Whichever side the Quality lands on, the effect is the same: it shortens the Buff or
Debuff’s duration by Width-1 and can potentially cancel it immediately if the result is 0 or
lower. These affect all Debuffs or Buffs currently on a Target, but only against one Target per
Set, plus one additional target for each level of Area linked to the Quality.

Chapter IX: Useful Things
-- 183 --
Super Strength Non-Combat: A Persona with Useful: Super Strength is a lever that can move the Earth. With
Super Strength, a Persona can push, lift, pull and throw enormous amounts of mass around, on
the scale of industrial construction equipment. The greater your Width, the more weight your
Persona can manhandle.
Width Approximate Weight Limit 2x A small automobile
3-4x A tank or small building
5x or more A large building or cruise ship
Combat: A strong Persona would use an Attacks Quality to use its strength to break stuff and
hurt Shadows, and if its strength translates into martial prowess it does so with Power. So
where does Useful: Super Strength come into play?
Aside from being a good tool for Creating Advantages (pull down the ceiling so the
sunlight can invigorate Amaterasu’s power!) and Disabling Enemies (hold them down so they
can’t attack!), a Super Strength Set can be used to Knock-Down a Shadow, even without hitting
an elemental Weakness. This Knock-Down does no damage, but if you combine it with an
attack as a Multiple Action it goes off at the same time as the attack (so if you have a 3x5 attack
and a 2x6 Super Strength Set, you don’t need to wait until the 2x6 comes around to knock the
Shadow flat; it happens immediately).
Tranquilize Non-Combat: Lulling a foe into peaceful repose has a lot of practical applications, and
Shadows generally oppose this condition with their Brain Part. The fun part is figuring out how
your Persona does it. Does it release a cloud of soporific spore powder? Shoot knock-out darts?
Employ hypnosis or a magical lullaby? When successful, your Width determines how long they
stay down: 2x is a brief nap, 5x is a deep, lengthy slumber.
Combat: Knocking a Shadow’s lights out in a fight also presents obvious strategic advantages.
Sleeping combatants can’t attack or defend, and anyone targeting one gains Awesome x1 to
their attack. Since combat involves elevated mental activity it’s harder to Tranquilize during a
fight—on top of provoking an automatic Brain roll to resist this ability, your Tranquilize Set
must overcome a difficulty equal to the Shadow’s current Brain Part dice pool. Tranquilizing in
a battle lasts for Width-1 Rounds, or until the sleeping target takes damage.
Major Shadows are even harder to put down for naps, and can add their Might to the
Tranquilize Difficulty.

Chapter IX: Useful Things
-- 184 --
Warp Non-Combat: Like with Useful: Flight, Personas can generally appear and disappear at will, so
Useful: Warp implies a greater effect. Warping transfers a Persona and its User from their current
location to another, predetermined location. Each rank of Area on this Quality allows it to
teleport one additional person. Be creative with the method. Can you walk through mirrors, or
do you burst into a cloud of butterflies that flutter away and reassemble elsewhere?
Combat: Warp works the same in and out of combat. Warping in a fight can be used to Create
an Advantage, but more often it’s used as an emergency escape mechanism to evacuate a party
of Persona Users from a fight that’s gotten out of hand.

Chapter IX: Useful Things
-- 185 --
Useful Attacks Attack Qualities are designed first and foremost to inflict damage on one’s enemies. That’s their
primary use in Combat, but it’s not all they can do both in and out of a fight.
Useful Physical Attacks Non-Combat: Attacks (Physical) allows a Persona to demonstrate its physical prowess in some
useful way as described by the mode of attack, which itself is informed by the Part that the
Attack is installed in. If Attacks (Physical) is a Quality of Artemis’s Crescent Moon Bow, then it
could be used to make extremely precise trick-shots; if on the other hand it’s a Quality of
Hercules’ Demigod Muscles then it’s good for wielding extreme strength.
Combat: Aside from inflicting Width-1 damage, Attacks (Physical) can take advantage of a
combat effect called Straining. Straining allows a Persona or Shadow to force itself past its
normal physical limitations to enhance a physical attack at the cost of harming its parts. When
you use Attacks (Physical) you can take 1 point of Shock to your attacking part to increase your
Damage by 1 or to inflict 1 Round of Knockdown. 3d Personas can take up to 3 Strain per attack,
while 5d Personas can take up to 5 Strain. A fighter can freely mix and match his Strain effects:
in this way 3 Strain could give you +2 Damage and +1 Round of Knockdown.
Straining is announced when you Declare your attack, and its self-damage is cancelled if
your attack fails or is stopped in any way. Using Straining allows players to recreate the classic
Persona mechanic of powerful physical skills that cost HP to use.
Useful Elemental Attacks Non-Combat: Attacks (Element) allows a Persona to show off its mastery over that element’s
physical properties and ability to bend that force to its will. Attacks (Fire) can light a campfire or
burn down a forest and Attacks (Ice) can build a snowman or freeze a lake. This has the same
effect as Useful: Control Element or Force on page @@ of this chapter. The greater your Height, the
finer your control the Element, and the greater your Width, the more gross amount of substance
or energy you can manipulate.
Combat: In addition to inflicting Width-1 Damage, Attacks (Element) can apply the same basic
Combat effect as Useful: Control Element or Force to amplify an Elemental move’s power, with
two important differences. First, Control’s effect is based on Width, whereas Attack (Element) is
based on Width-1. And second, as a Useful Quality Control Element or Force can benefit from the
Effective Extra to increase its Width and Height.
This means that while Attacks (Element) and Control Element can do some of the same
things, Control is fundamentally better at manipulating Elements creatively, and can be enriched

Chapter IX: Useful Things
-- 186 --
via Effectiveness to an extreme degree. Attacks (Element), on the other hand, isn’t as good at
manipulation and finesse, but that’s because the Quality is focused on destroying things first
and foremost. Players familiar with the Persona video games might look at Chie Satonaka and
Teddie from Persona 4 as examples of this dichotomy. Chie’s Persona, Tomoe, is primarily a
Physical attacker but can use Ice skills as well, whereas Teddie’s Persona, Kintoki-Douji, uses
Ice as his primary mode of attack. Translated into The Velvet Book, Tomoe would still have
Attacks (Ice), whereas Kintoki-Douji would almost certainly have Attacks (Ice) and Useful:
Controls Ice. For Chie, Attacks (Ice) is a strategic option that gives her extra coverage in the event
that she encounters Shadows weak against Ice or resistant to her physical attacks, while for
Teddie Attacks (Ice) forms the core of his Persona’s abilities, and being able to augment that with
Useful: Controls Ice is a valuable investment.
Useful Defenses Compared with the Attacks Qualities, Defends Qualities are much more straightforward. A
Defends Quality doesn’t have any special Combat functions outside of what is shown in the
Combat chapter. That’s because a Defends Quality can already do quite a lot: Gobble attack
dice, tilt damage, create Rally Dice and score Perfect Defenses. Outside of Combat, a Defends
Quality can do one of two things, depending on how its Persona uses it to protect itself.
Agility Defends Qualities that are based around avoiding or intercepting attacks can be used as Agility
in a Non-Combat situation. Agility allows a Persona to make sudden, fast, acrobatic and precise
movements at a moment’s notice whenever that would be Useful.
Endurance Defends Qualities that are rely on a Persona’s physical strength and hardiness can be used as
Endurance in a Non-Combat context. Endurance lets a Persona withstand physical trauma and
pressure without cracking or losing ground.
Players and GMs may choose to write on their Persona or Shadow sheets whether a
Defends Quality is an Agility or Endurance type, or they may just keep it as a mental note since
these are usually evident by the description of the Part the Defends Quality is installed in. A
Defends Quality on Anansi’s Spider-Senses Part would use Agility, while Athena’s Invincible
Aegis would certainly use Endurance for its Defense. And remember, these don’t affect a
Quality’s Combat performance in any way. They both do the same thing when it comes to
dealing with enemy attacks.

Chapter IX: Useful Things
-- 187 --
Creating Your Own Useful Qualities Creating Useful Qualities isn’t supposed to be hard. It should be as simple as “My Persona is
Athena and her Aegis Shield can repel harmful curses,” and from there you’re done. And for
the most part you are. With the Basic Effects alone, players and GMs have the tools they need to
make any Useful Quality effective both in the structured environment of combat, and the more
narrative environment of exploration and social interaction. That said, if you want to create a
customized and unique combat effect for a Useful Quality, here are some guidelines.
Remember the Cost
A Useful Quality costs 1d to acquire, and that’s 1d that could be used as an Extra or as one more
die in your pool, making your action overall more effective. So ask yourself: is this Useful
Quality’s effect as good as an Extra or +1d?
This is why Buffs grant x2 of an Extra instead of x1; if it was just x1 then it’s strictly
worse than the Extra. But here the Buff gives a better outcome than the Extra, at the cost of not
being always on. Exotic Sense is another example. It gives a +2d bonus in combat, in addition to
being able to pierce Invisibility. Speaking of which, that’s another example. It grants just +1d, but
it also comes with the effect of making a Persona an invalid combat target.
Be Mindful of the Action Economy
Useful Qualities need a Set for their effects to come into play, unlike Extras or dice which are
just always there. And, barring Multiple Actions, a turn spent activating a Useful Quality is a
turn not spent Attacking, Defending or Healing. So its effect should be significant to the flow of
battle.
Useful Qualities generally accomplish this in two ways: either by making the effect
really good or making it less good but with a duration. Gigantic is an example of the first: it only
works as a Multiple Action, but it makes you a lot stronger and tougher for the duration of that
action. Flight is an example of the second. It makes you harder but not impossible to hit for
several turns, while also hitting you with the same penalty.
Don’t Be Afraid to Bend the Rules (or Create New Ones!)
Control Element or Force and Super Strength violate the rules of ORE Combat by allowing a Set’s
effect to go off independent of its timing when used as a Multiple Action, and Induce Confusion
invents a whole new kind of dice mechanic. If you’re comfortable with playing around with the
source code of The Velvet Book, go for it! As long as the GM is cool with it, it should be fine.

(Page #)


Chapter X: The Velvet Room
-- 190 --
Welcome to the Velvet Room The Velvet Room is a special chapter of The Velvet Book written to help prospective GMs run
campaigns and one shots in the Persona style. Players who aren't interested in what goes on
behind the curtain should turn back now. We're not saying it's going to spoil your fun, but if
you want to preserve the mystery and intrigue of how your GM has set his game up, as well as
how some of his nefarious challenges work, give this chapter a skip.
Advanced Dice Pool Guidelines Sometimes a situation comes up where you need to roll some dice that you haven’t planned for.
Actually that happens quite a lot. The question is, how many dice should you roll? Here are
some suggestions for how you should treat each Dice Pool and it’s chances of rolling at least
one Set.
3d, 28%, Unthreatening: It’s pretty unlikely that this pool will produce any Sets at all, so
you should roll this when you want someone or something to have only a very remote chance
of beating a player.
4d, 50%, Crapshoot: A 4d pool has even odds of getting a Set, and it’s possible though
unlikely that it’ll roll more than one. It’s entirely random whether the Set will be any good,
however. This is the minimum pool for someone that isn’t outright terrible at the task at hand.
5d, 70%, Competent: This pool is very likely to roll a Set and has a decent shot at it being a
good one. This is the baseline dice pool for anything meant to be mildly threatening.
6d, 85%, Serious: With 6d, it’s almost certain that you’ll get a Set, and it’s pretty easy to get
good or multiple Sets. This nicely represents people or threats that are very good at what they
do.
7d, 93%, Very Serious: You can roll 7d with full confidence that you’ll get a good Set or
two or more Sets. 7d is the ceiling for “casual” threats and represent clear and present dangers,
especially against new or low powered characters.
8-10d, 98-99%, Extraordinary: At 8d and above, your odds of getting a single Set don’t
change much, but your odds of getting very wide or lots of Sets skyrocket. Dice pools in this
range should be conserved for challenges that are meant to severely test and endanger players.
Chapter X: The Velvet Room
-- 191 --
One Roll Education Every Persona game to date has taken place in a high school setting, so we’ve compiled a set of
rules that you can use to run your players through the rigors of reading boring British literature,
climbing up ropes and failing geometry. There’s a significant degree of abstraction in this
system, so you won’t be grading them on each individual class they took during the day.
Instead, you’ll be looking at a snapshot of each day, and accumulating those snapshots to chart
a student’s academic performance over a week, a month, even an entire school year.
Each School Day focuses on one Class. Your students may share a schedule, so that
Monday is Math, Tuesday is P.E., Wednesday is Literature, and so forth. Or they could have
unique schedules, so that on Monday Ryan has Math while Lynn has History. It doesn’t really
matter as long as you’re consistent.
Students roll to see how well they did in their Class. Their Width determines the
quantity of work completed, while the Height describes the quality of that work. Since it’s
assumed that a student is always doing some amount of work (unless they declare that they’re
ditching class or, perhaps secretly assembling lockpicks behind their textbook), a student can
choose a single die as a Set with 1x Width. This can be done even if they rolled an actual Set; if
for instance a student rolls a 2x1, but they really need to push for a higher grade, they can
instead use a higher Loose Die they rolled for that day’s effort.
What Roll for Which Class?
The Stat used in this roll is determined by the Class, while the Skill is based on the student’s
approach to the assignment. There’s no set rule as to which Stat goes to which—that’s up to you
to decide. The rules that you do need to follow are that you must be:
1. Consistent in which Classes uses which Stat, and
2. Even handed in the use of each Stat. This means that one Stat shouldn’t be more important
to school-work than any other Stat. So make sure that every Stat has the same number of
classes that it’s useful in (you probably don’t want to deal with more than 2 classes per Stat)
Sample Class Schedule
Monday P.E. Diligence
Tuesday Math Guts
Wednesday Home Ec. Proficiency
Thursday History Knowledge
Friday Literature Expression
Chapter X: The Velvet Room
-- 192 --
This is just one way of doing it. You could decide that Math is more about Knowledge than
Guts, and replace History with Drama requiring Guts to get on stage and act your heart out. As
long as your players know that a given class always uses a certain Stat, it’s fine.
What Skill for which Assignment?
Generally, Students can choose which Skill within their Stat they want to use during their
assignment. This is because, unless you want to force them to experience a specific test, we’re
looking at each class abstractly. Gym class is more than just running around with Diligence +
P.E., it’s could also be about testing your Reflexes in a game of dodgeball or a display of
physical might to run someone over in basketball. The goal is for your player to demonstrate
how much effort he’s exerting in the class, which this system models quite nicely. Plus it’s
interesting to see how a player explains his use of Guts + Fighting to literally brute force
solutions to a math test, while another player uses Guts + Wind to steady her nerves so she can
work out the right answer.
A GM can choose to allow players to perform non-standard Stat + Skill combos, but it’s
risky. It might make sense to roll Guts + Academics for a math test, but you don’t want to find
yourself in a situation where a player us using the same Skill for every assignment, just with a
different Stat each time to get the best result. If you trust your players not to abuse the system, it
can work. Otherwise, either avoid it or impose some restrictions (like you can’t use the same
Skill twice in one week).
Work Load
Each week, students will have a Width quota that they will need to meet to stay on top of their
school work.
Easy Breezy 6 Width
Average Week 9 Width
Crushing Grind 12 Width
Students who reach their quota before the end of the week can continue to work to improve
their Grade for that week, or they can take it easy and focus their school time more on
improving their Relationships or sneaking off to the library to look at the anatomy books.
Students who are lagging in their productivity may find themselves the subject of
unwanted academic scrutiny.

Chapter X: The Velvet Room
-- 193 --
Grades
The total Height from each education roll is added together each week to determine that
Student’s grade: his overall level of scholastic performance.
Total Height Grade
41 or more A
31-40 B
16-30 C
8-15 D
0-7 F
Note that high marks aren’t always desirable. A Straight A student will undoubtedly attract a
lot of attention from his school’s faculty, which can make it hard to slip away at odd hours to
fight psychic horrors from beyond time and space. Low marks are generally always bad
(though if your teachers have written you off as a born failure any further suspicious activity
you undertake will probably just be lumped in with the rest of your bad behavior).
Improving your School Work
As with any skill roll, you can use your Relationships to add bonus dice to your roll, but be
careful: if you fail to roll a complete Set, you incur Shock even though you can still use a single
loose die as a 1x Set. Additionally, students can only use each Relationship once per week for
Education rolls.
A more reliable way to do better in school is good old-fashioned studying. Studying
counts as Personal Time, and Personal time gives you Awesomeness that you can use to
improve your classroom performance. This is a huge advantage, as it gives that student
significant control over both their Width and Height, so as the GM you should make sure to
emphasize the opportunity cost of that time slot. While the other players are hanging out at
soda fountain enjoying a nice malt, or whatever kids these days do, or while they’re in the
Other World slaying shadows, he’s stuck reading about the Teapot Dome Scandal all night.

Chapter X: The Velvet Room
-- 194 --
Time Management Since Persona 3, a key element of the franchise has been testing the player’s ability get things
done within a time constraint. Each game is a series of deadlines that must be met to avoid a
game-over, but between those benchmarks are dozens of smaller decision points about how to
use one’s time. Do you go into the Other World to train, or do you study to improve your Stats?
Do you practice with your soccer team or hang-out with your prospective girlfriend? And if the
latter, which? You’ve got half a dozen potential romantic interests to follow-up on, and god
help you if you get caught trying to juggle them. Oh, and you still have to go to school. All the
while, one of those deadlines is creeping steadily closer. Part of the fun is managing to get as
much done as you can within that limit, but it’s also a source of much of the story’s drama and
tension.
As the GM, you’re the master of your game’s scheduling, and you have the ability to set
up interesting time management opportunities and dilemmas to run your Players through.
Obligation vs Freedom (aka Law vs Chaos)
The tabletop platform gives your Players a lot more freedom of choice than you get when
playing Persona on a console. They’re not limited by pre-programmed choices, and unless
you’re determined to railroad them into inescapable scenarios, they can always choose not to do
something even if your carefully crafted plot demands it.
Experienced GMs know this is normal, but for newer GMs it can be a difficult—but
crucial—concept to grasp. The key is to be flexible and adaptable and to build narratives that
aren’t as dependent on very specific sequential actions; or if they are, be prepared to engage
with the consequences of those actions not happening. That said, your players’ choices aren’t
beyond a certain level of control (or at least predictability).
Instead of forcing your players to do certain things, set up Obligations. Don’t present a
mandatory task as “But Thou Must…”, present it as something they’re asked to do by a friend,
authority figure, or by society as a whole. If not, you can make the consequences of not
following through very clear, which can cause them to assume the Obligation themselves.
Characters who take on and follow a lot of Obligations are behaving in a Lawful way.
Ones who avoid or shirk Obligations are acting Chaotic. With Lawful Characters you can
produce a lot of dramatic tension out of setting up conflicting Obligations. For Chaotic
Characters you can create dilemmas based around their attempts to avoid Obligations and the
fallout that ensues when they succeed.

Chapter X: The Velvet Room
-- 195 --
Whatever a character’s disposition is, don’t try to load up every Time Slot a character
has with Obligations. Even the most Lawful Characters need some amount of free time to care
for stuff like training, practice, improving their Relationships or exploring new ones. A very
Lawful character may still only have a couple unscheduled Time Slots per week, while a very
Chaotic character is probably the opposite, and even then, he might try to bail anyway.
Opportunity Cost
Regardless of whether your players are Lawful or Chaotic, they’re going to butt up against
Opportunity Cost when it comes to managing their time. Do they study, and therefore do better
in school which makes their parents and teachers happy? Or do they hang out with their friends
which gives them a chance to improve their Relationships or mend Shock? Do they spend their
time exercising physically to store up a P.E. Practice Set, or a Notice Set so they’re better able to
avoid ambushes, or an Outthink Set to spot a weakness in an enemy?
As your Players become accustomed to their options, they’ll start making value
judgements about these costs. Is there a strategic deadline coming up? Then they’ll start
ignoring classmates or even skipping out on schoolwork to prepare themselves for the threat.
Are they growing especially attached to certain Relationships? Then they’ll prioritize them over
other Relationships or Obligations.
Time is the universal resource in The Velvet Book. It’s the only currency that really
matters. Everything costs Time, and roughly everything has the same price in Time (just a
single Slot). So it’s up to players to determine what the most important things in their
character’s lives are.
Under Pressure
The closer you get to a major deadline—an exam, prom night or a world-ending existential
crisis—the weightier these choices become. If a character feels that she may not live to see
another full moon she may be less inclined to study and more inclined to a.) get her affairs in
order (especially if she’s Lawfully inclined) or b.) live it up (if she’s more Chaotic).
When these time periods arise, you can add drama and tension by increasing the social
pressure on your characters. There’s no need to go overboard but throwing in a couple small
hiccups can have snowballing effects, setting up interesting and compelling dilemmas for your
players. What if the guy you’ve been crushing on is throwing a wild New Year’s party the day
before you’re planning to venture into the Other World to face some immense threat?
A well-constructed time crunch does two things. First it generates interesting set-pieces
for your players to navigate. Second, it adds atmosphere to your game. With disaster looming,

Chapter X: The Velvet Room
-- 196 --
can the characters maintain the façade of their normal lives, knowing fully that mankind could
be sucked into a whirling maw of oblivion at any moment? How long can you maintain your
dual identities of normal high-schooler and evil vanquishing psychic warrior without the
people closest to you taking note?
One last thing: once you’ve applied this pressure, ease off. Your goal is to introduce
drama, tension and excitement into the game, not to be the boot of society stomping down on
your players’ collective face every session. When your players have successfully navigated the
more treacherous waters of your game world, reward them with a calm sea and a tailwind.
They’ll appreciate the freedom, but they’ll know that choppy seas still lay ahead.
Chapter X: The Velvet Room
-- 197 --
Enemy Advantage: Engineering Minor Shadow Encounters When you’re setting up a fight for your Players against some Minor Shadows, the overriding
guideline you need to keep in mind is the purpose of the encounter. Generally, there are three
reasons for your players to fight Minor Shadows.
1. Make Them Feel Cool and Powerful. This works especially well when you send
large numbers of weak Minor Shadows or Threats against your Players. Describing how
they cut fiery swathes through hordes of enemies is awesome for both the Players and you
as the GM, so lay it on thick: let them feel like raging engines of psychic destruction.
2. Weaken Them and Consume Resources. Your biggest advantage as the GM
running a Minor Shadow encounter is the fact that your boys don’t need to survive the fight,
whereas the Players do. This means that every point of damage you inflict on them matters.
They must carry that damage into the next encounter, which increases its difficulty and
forces them to make decisions about using their Relationships, which is their primary
resource. And when they use those Relationships to shore up damaged Personas, they risk
incurring Shock to that Relationship, which needs to be repaired via Quality Time in the real
world. This is the grand feedback loop of the game.
3. Challenge Them. Minor Shadow encounters can be just as intricate and difficult as a
Major Shadow boss battle if you want them to be. With Minor Shadows, you can assemble
unique, high-difficulty combat challenges by combining Minor Shadows that synergize with
each other, such that the whole is greater than the sum of its parts. We’ll talk about that in-
depth later in this section.
A successful Minor Shadow encounter should align with at least one of those purposes, and
ideally two or all three. There’s a wholly different sense of accomplishment in dispatching a
hard band of enemies as there is in toasting a trash mob, limping away bruised but victorious.
The Golden Rule
Whatever your purpose for building an encounter, there’s one thing you should never do:
Never create a Minor Shadow Encounter with the intention of flatly destroying your players.
Sometimes that happens anyway with some lucky rolls, but don’t make it your goal from the
outset. If you find that a certain combination of Shadows and their traits are punching way
above their weight-class, feel free to modify their attributes before or even during the fight to
ensure your players have more than a razor’s edge chance to survive.

Chapter X: The Velvet Room
-- 198 --
The Arcana Budget All Minor Shadows have their strength measured in Arcana Points (AP), and more AP means a
stronger foe. Adding the AP of the Shadows involved in a fight gives a total that serves as a
gauge for how challenging the fight is. This the Arcana Budget.
Your Arcana Budget is based on two factors: how hard you want it to be, and how
stronger your Players are. Here’s the steps; note that these are written with 3d Personas in
mind.
1. Start with a fixed amount of AP per Player in the fight. This amount is based on
the difficulty of the fight, as follows:
Difficulty Starting AP Amount Easy 8 AP per Player
Medium 12 AP per Player
Hard 15 AP per Player
2. Add 1 AP per Persona Level in your Party. If, collectively, your players have
gained 10 Persona levels, that’s 10 AP added to the budget.
3. If your Players are using 5d Personas, double the final amount. 5d Personas are
magnitudes stronger than their 3d cousins, so they can stand-up to far nastier baddies.
Once you’ve got your Arcana Budget, it’s time to blow it on whatever nasties you want to
menace your players with. For that, you can cook them up yourself using the rules posted in
Chapter 5, or you can pick and choose from the Shadow Compendium in the back of this book.
Further Guidelines
While the Arcana Budget informs most of your encounter design, there are a couple additional
pointers that you should consider.
The most Minor Shadows you should throw against your Players is their Party Size +2. This is as much for your benefit as theirs. Fights with too many actors take forever,
even using the One Roll Engine’s fairly speedy resolution system.
Never have more than 10 combatants in a fight. If you’ve got a very high AP Budget,
go for Quality over Quantity. If you really want to pit your players against a small army of
Shadows, build them as a Mob instead of as individual fighters.

Chapter X: The Velvet Room
-- 199 --
Shadow Synergy With your AP Budget in hand, your next step is figuring out what Minor Shadows to include in
your encounter. While you can just throw any ‘ol Shadows into the mix, creating a truly
memorable fight requires some thought. Here are some reliable staples.
Fast and Furious
Shadows mixing Fast with Power present an immediate danger for their ability to strike first
and strike hard. Hitting first means breaking incoming attack Sets, so this allows you to build a
defense out of offense. These Shadows usually aren’t very durable, but if they can get a hit or
two in before folding they’ve served their purpose. A gang of nothing but Fast, Powerful
Shadows can be a serious if short-lived threat, and if complimented by tougher supporting
Shadows, they can be the spearhead of a deadly, multifaceted attack.
Tough Enough
Every Shadow benefits from Tough. Even Tough x1, a reasonably cheap investment, can mean
the difference of between being blasted into uselessness in a single round and sticking around
long enough to get some shots off. If you find that your Players are slinging around a lot of
damage, adding a little more Tough to your encounters can make things more challenging and
interesting. Just don’t go crazy; if your players don’t have a reliable way of dishing out copious
amounts of damage, throwing a Shadow with Tough x4 against them will just be frustrating.
Bodyguards
A Shadow that chooses to Defend itself is often just wasting its turn, because a turn spent
Defending is a turn not spent harassing the players. But when Shadows Defend each other, it’s
another story. A single Shadow with lots of Tough and a strong, Fast and Effective Defends part
can block attacks aimed at its better armed but more fragile allies. Bodyguards are also
instrumental in encounters where one or more Shadows has a Useful ability you want to
showcase before the Players wreck their pool. This isn’t to say that every encounter needs a
Bodyguard, just that they can be deceptively powerful.
Healing
Healing isn’t a very good use of a Shadow’s turn unless they’re really good at it. If you can only
heal 2-4 Shock on a damaged shadow, that’s a wasted turn. If you can heal a half-broken
Shadow up to full in a single action, that’s something your Players will notice. Try combining
Heals with Effectiveness and Area. Focus on better healing over being able to heal more times,
since your Players will only want to see that happen once before trying to nuke your Healer.
Chapter X: The Velvet Room
-- 200 --
Useful Shenanigans
Every Shadow has at least one Useful Quality, and it can be tempting to show off every single
one of them during a fight. Don’t do that. Even if you succeed your Shadows will probably take
enough damage in the process that they can’t capitalize on the chaos they’ve sown. Instead,
focus on one Useful as the tactical theme of the encounter.
For example, Oberon (Emperor-21) has the Rallying Call ability, which he can roll to
cause another Shadow to not lose dice when it’s hit by an attack for Width-1 Rounds. This
allows that Shadow to inflict damage much more reliably. So you can construct an encounter
around that power by supporting Oberon with a pair of Tough, Powerful Shadows like Oni
(Strength-10). That way he can use his Rallying Call on one Oni while the other Defends him.
When both Oni are Rallied, he can switch to attacking directly, at which point the players will
have to contend with two Onis attacking with Power x2 whose Sets aren’t affected by being
struck first, and Oberon’s own Power x3, Fast x2 Fairy King’s Sword.
After-Market Modifications
If you’re using Shadows from the Compendium, know that their statistics aren’t written in
stone. Any and all of them can be altered and adjusted for whatever purpose you want for your
game. This is especially important if you’re running a 5d Persona game, which by its nature has
a much higher AP Budget floor for even Easy encounters. A Jack Frost or Pixie right off the shelf
isn’t going to threaten a group of 5d Personas, so if you want to use them in an encounter you
should use your abundant AP supply to make them tougher, stronger and better.
Or say you want to use Titan in a fight, but your players don’t really have any means of
getting around the Tough x4 on its Impenetrable Armor. Maybe they didn’t put much
importance into Power, or their Powerful parts are busted from an earlier fight, and they don’t
have any Usefuls that could practically strip away the armor. Instead of running the encounter
as-is, forcing them to smash their heads pointlessly against Titan’s immense bulk, you can trade
a point or two of Tough for Area or Spray on his attack location. He’s still a significant threat,
but no longer an immovable one.
Shadow Antics
Throughout the fight, remember that Shadows are strange, quirky creatures with bizarre
fixations and needs. A Shadow may not act entirely rationally in all situations, which could
translate to attacking when it would be better to run or stall or triggering a Useful when the
more optimal tactic is to attack directly. Encourage your players to take advantages of these
quirks as alternate strategies for taking down Minor Shadows.

Chapter X: The Velvet Room
-- 201 --
Blooming Villains: Creating and Controlling Major Shadows We outlined the rules for and aspects of Major Shadows in Chapter 4, but we’re saving the
specifics for this section, since it’s not really important for Players to know how the big
monsters they’re fighting are put together.
What is a Major Shadow’s purpose?
A Major Shadow encounter is meant to pose a singular threat to the players. Whereas Minor
Shadows attack in groups, each one a relative weakling combining their powers, Major
Shadows stand alone, or with a small entourage of weaker minions. So if you want to create an
encounter against a single enemy, use a Major Shadow.
Major Shadows can generally be sorted into two classes that should be recognizable to
anyone who’s played a roleplaying game: Bosses, which are big, nasty enemies connected with
major Plot points; and Minibosses, which are often powerful minions of a Boss, or even just
unusually strong but still common enemies. Minibosses are an effective way to ratchet up the
tension and threat-level of a situation as the players venture deeper into uncharted territory in
the Other World.
Whichever the case, a Major Shadow’s purpose is simple: they test the Persona Users’ strength, resourcefulness and resolve. If you decide to pit your Players against a
Major Shadow, they should have some method of overcoming it, if not defeat it outright. Don’t
set up deliberately unwinnable encounters; if you feel you must put your players against
something that’s literally and intentionally impossible for them to beat, they should know it so
they aren’t wasting their resources trying to move an immovable object. Instead, try to have the
mindset that all Major Shadows should be beatable by the players.
Which isn’t to say they should be easily beaten. By default, a Major Shadow possesses
more raw power than any individual Persona and has as its disposal an arsenal of abilities that
are unique to its species and allows it to threaten an entire group of Personas. The players
should always feel like total destruction is a real possibility when facing a Major Shadow, even if
you’ve tuned the encounter such that there’s little chance of a full party wipe-out.
Now that the design philosophy behind Major Shadows is out of the way, let’s get down
to brass tacks.

Chapter X: The Velvet Room
-- 202 --
Might Major Shadows are built out of dice, the same as Personas. If the Players are using 3d Personas,
then their Major Shadow adversaries also have 3d per Hit Location. Major Shadows are also
infused with huge quantities of power from the Other World. This power is its Might.
Each level of Might gives a Major Shadow the following advantages:
More Dice. Might raises a Major Shadow’s dice-per-location. In a 3d Campaign, a Might x1
Major Shadow would have 4d per Location.
More Health. Each level of Might directly translates to an extra point of HP on each Part.
More Actions. A Major Shadow gets free Multiple Actions equal to its Might. They still
follow the “roll the lowest dice pool” rule, but a Might x2 Major Shadow can Declare up to 3
actions without taking a dice penalty.
More Force. A Major Shadow’s Might allows it to ignore Stun from attacks. This is in
proportion to its Might: Might x1 allows a Shadow to ignore one attack, Might x3 ignores up to
three each turn.
More Damage. Might acts as additional Power on all Major Shadow Attacks. This is additive
with any normal Power on its Parts: a Might x2 Shadow attacking with a Part with Power x3
hits with a whopping Width +4 damage.
Awesomeness. Each point of Might gives a Major Shadow Awesome x3 to work with when
you encounter it.
How Mighty?
How much Might a Major Shadow has depends on its position in your story. Is it a speedbump,
or is it a roadblock? The greater its importance, the more threatening and Mighty it is.
Might x1: These are your Dungeon minibosses, your nastier-than-normal Shadows
designed to raise the stakes but not grind your players into dust.
Might x2: This is the real deal. Might x2 Major Shadows are the end-bosses of
dungeons and dues-paying members of the Big Bad Union. Deploy sparingly.
Might x3: The worst nightmares a group of players can face. A Might x3 Major
Shadow could be expected to be the final fight of an entire Campaign arc.

Chapter X: The Velvet Room
-- 203 --
Arcana Point Budgets for Major Shadows As with Minor Shadows, a Major Shadow is infused with Arcana Points (AP) which further
increases its power, letting it buy Extras and Qualities without decreasing its dice pools. To
determine how much AP to give a Minor Shadow, follow these steps:
1. Take your Party’s combined Persona Levels and Divide by Half. Remember to
always Round Down as in most situations where fractions are involved in ORE.
2. Add 2 AP for each Player Character involved in the fight. This means that even
if their Personas haven’t gained any additional Levels since they were first evoked, you’ve
still got some AP to spend.
3. Increase AP based on how extra hard you want the fight to be. This is mostly
subjective, but here’s some suggestions
An Unusually Tough Fight +15% to +30%
An Extremely Strong Boss +50% to +70%
An Atrociously Powerful, Climactic Battle +75% to 100%
Example: Here’s the calculation if you wanted an Extremely Strong Boss to fight a 3-player
party who’ve each gained 3 Persona Levels:
(Total Levels Dice: 9)/ 2 = 4; + (2 per player: 6) = 10; + (50-65%, let’s say 60%, which is 6) = 16 AP

Chapter X: The Velvet Room
-- 204 --
Gimmicks Every Major Shadow has one or more Gimmicks that let them bend the rules of the game in
their favor, giving them the tools they need to deal with a whole party of Persona Users.
Gimmicks cost either Dice (just like Extras) or AP, and their price can vary based on how
big an impact they have on the fight. Many Gimmicks apply only to a single hit location, while
others affect the Shadow’s entire body. Before you go hog-wild, though, here’s a few reminders:
1. Every Major Shadow gets 2 AP worth of Free Gimmicks. If you choose to equip
a Major Shadow with a free Gimmick worth more than 2 AP, it’s cost is discounted.
2. Powerful Gimmicks should have limitations. A good example of this is the
Penetration Gimmick, which allows a Major Shadow to ignore all levels of Tough on its
attack. If you pick this Gimmick, it’s good to impose some restraint on its use, like it always
goes last during the Resolve phase, or it can’t be used on consecutive turns.
3. Gimmicks should make sense. Don’t just grab every Gimmick you like just because
you can afford it, ask yourself: why does this Shadow have this Gimmick? What purpose
does it serve when the Players are fighting it?
4. Gimmicks should encourage players to think outside the box. When you put a
Gimmick on a Major Shadow, your first thought should be “what can my players do to
defuse this?” Gimmicks are a wonderful way to encourage players to make creative
application of their Useful Qualities instead of just all-out attacking. This helps Major
Shadow encounters stand-out from normal Minor Shadow battles, which can often be
merely smashed through with pure offense.
Do-It-Yourself Gimmicks
As a GM, you can freely whip-up your own Gimmicks once you have a firm grasp on the basics.
It’s mostly freeform, but for your own sake try not to make them too complex. If it takes half a
page to write what a Gimmick does, it probably has too many moving parts. Players should be
able to pretty quickly grasp what a Gimmick is doing just on your incidental descriptions of the
action, without needing you to pause the action for ten minutes to go over each stage in your
master plan to wreck them.

Chapter X: The Velvet Room
-- 205 --
Ready-to-Play Gimmicks
Heavy Armor 2 AP Heavy Armor knocks one die off every Set that strikes its location. This means that a set with 3-
Width will be reduced to 2-Width, and a set with 2-Width is knocked down to 1-Width, which
fails entirely. You can put Heavy Armor on multiple locations, and you can buy multiple levels
of Heavy Armor to knock more dice off incoming attacks. You probably shouldn’t go higher
than Heavy Armor x2 though (since that already makes it immune to any Set with less than 4-
Width), unless there’s some way to disable its protection
Penetration 3 AP Any Attacks Quality with Penetration will ignore all levels of Tough on its targets. This can be
potentially crippling for Personas that rely on Tough for survivability but it can also encourage
teamwork to protect vulnerable allies.
Unlimited Healing 2 AP A Heals Part with this Gimmick never runs out of uses. All Lovers and Star Major Shadows get
this Gimmick for free. This allows a Major Shadow to focus its resources on better healing with
Effective, Area and Spray vs more healing. Unlimited Healing works best when a Major Shadow
has a supply of Minions at its side, or when it can easily heal itself while doing other things.
Regeneration 3 AP Each level of Regeneration on a Hit Location allows it to automatically recover 1d in damage at
the start of each Declare Phase, unless the Location has been reduced to 0d (so Regeneration x3
heals 3d each Round). If this feels too powerful, you can reduce it to going off every other turn
(you can knock 1 AP off its cost if that’s the case) or provide the Persona Users some obvious
way to negate its effect.
Multitasking 4 AP Multitasking allows a Major shadow to Declare and Roll two different dice pools each Round.
You can combine Multitasking with Multiple Actions, so that each of those dice pools can
themselves be multiple actions. Multitasking should be reserved for powerful Boss Major
Shadows; they’re already stronger than the players’ Personas, and they get double the actions.

Chapter X: The Velvet Room
-- 206 --
Special Dice Pool 1 AP A Major Shadow with a Special Dice Pool has a supply of dice that aren’t linked to a hit
location. This can represent a special attack, defense or useful ability which the Players have no
real way of affecting. Each die in this pool costs 1 AP, and you can also spend for Qualities or
Extras, even other Gimmicks. You should impose some kind of rule on how the Special Dice
Pool works (maybe it takes a turn to charge up, or maybe it can be damaged in certain
conditions), and its Sets are still prone to being Stunned the Shadow is hit before the Sets go off.
Booster 1 AP Booster is a special Gimmick that allows you to get double the dice or Extras that you’d
normally get per AP, but only under limited circumstances. For instance, for 3 AP you could
give your Major Shadow +2d, Power x2 and Fast x2 to a location, but only if plugs its power-
cord tail into an electrical energy source; if the players destroy the tail or the power source, then
those dice and extras can’t be accessed. This is a good way to engineer scenarios requiring
creative thinking on the Players’ part to overcome.
Summon Allies 2 AP This is a special Gimmick that applies to a Useful Quality that permits a Major Shadow to
summon Width-1 in Minor Shadows with a successful roll. What the Shadows are is up to you;
as a rule of thumb, Major Shadows can’t summon Minor Shadows with a greater AP level. So a
10 AP Major Shadow can’t summon a 12 AP Minor Shadow. If you want to improve your
Shadow’s minions, you can add AP directly to the Summon Allies quality to increase your
Major Shadow’s overall AP level; this basically means you’re creating a relatively weaker Major
Shadow whose strength lies in summoning powerful subjects.
Targets All 3 AP When this Gimmick is added to an Attack or Useful quality, it affects every Player Character on
the battlefield. If it’s an Attack, everyone will need to make some kind of Defense to avoid it or
else be hit, and unlike a normal Area attack they take the full damage indicated by the Set. If it’s
a Useful Quality it acts as if it has unlimited Area.
Guaranteed Knockdown 2 AP A successful Set from a Quality with Guaranteed Knockdown always knocks its target to the
ground, enforcing all the standard conditions that result therefrom. This can be used on Usefuls
and even on Defends Qualities—you can imagine a block so forceful or an evasion so masterful
that it sends the assailant sprawling.

Chapter X: The Velvet Room
-- 207 --
Bypass Personas 5 AP One of the most dangerous Gimmicks available, this causes an Attack or Useful Quality to
ignore the presence of a Persona entirely and go right for its User. Sets empowered by this
Gimmick can still be Defended and Knocked-Off by Personas, but the target is always a human,
whether or not that human has declared an action with his Persona.
Preemptive Action 2 AP This Gimmick allows you to roll one of your Major Shadow’s Useful Qualities immediately
when a fight begins, before the players have a chance to declare their own actions. This gives
your Major Shadow a chance to use abilities or set-up situations that are central to the
encounter, before the players have a chance to foil it with a lucky roll. This only works for
Useful Qualities. If you really want you can give this Gimmick to an Attacks Quality, but you
should always prompt the players to roll some kind of Defense in response to it.
Superior Defense 3 AP Any Defense Quality with this Gimmick attached to it will always have its Sets rolled with a
Height of 10. This means that Height it taken out of the equation: as long as the Set has enough
speed to react and enough Width to gobble the attack down, it will always Defend against an
incoming Attack. Use this Gimmick on a Major Shadow that you want to present as
overwhelming, arrogantly resistant to attack.
Immunity 3 AP Immunity protects a Major Shadow’s Hit Location from all damage from a specific Element
(including Physical Damage). You can buy this Gimmick for multiple Hit Locations, and you
can buy it multiple times on the same Location to add additional Immunities. Immunities
should never be permanent. You don’t want to wind up in a situation where one party member
is basically useless when it comes to attacking (unless you know they’re cool with that). Players
should always be able to short-circuit an Immunity, or else it should be purely temporary.
Engulf 3 AP Engulf allows an action, usually an Attack but Usefuls work too, to affect every Hit Location on
its target. So if you hit with a 3x1, your target is going to take 2 damage to every one of its body
parts. Be careful with this: if you stack it with Extras like Gnarly and Spray and Gimmicks like
Penetration, you can blast Personas into next week with a single Set. Use some restraint.

Chapter X: The Velvet Room
-- 208 --
Automatic Action 1 AP This Gimmick allows a Useful ability to activate whenever a certain condition is met, even
outside of the normal Declare-Roll-Resolve cycle. For example, imagine a Major Shadow in the
form of a giant tank with Useful (Lock-On) as an Automatic Action on one of its parts. It can roll
this Useful to gain Width-1 in Gnarly for 2 turns against a specific target; the condition for its
activation is “Whenever its Lock-On expires, as long as it’s not targeting the same person
twice”. So after those two turns expire, the Shadow can automatically reroll Lock-On against
another player character. Another example would be to add an Automatic Action to a Useful
(Heals) power, which triggers automatically whenever the Major Shadow is hit by an attack of a
specific element. In both cases, you roll the ability whenever the condition is met, and it doesn’t
count as the Major Shadow’s action for that turn. This lets you set up interesting combat puzzles
where the players must work around the Major Shadow’s automatically scheduled behavior.
Interference 3 AP This Gimmick is inspired by the infamous Wild Talents Extra of the same name, and the two
work the same way. It lets a Defends Quality gobble any dice equal to or less than its Height,
regardless of timing. This means that if you roll a 2x10 with Interference, you can gobble a 3x8
with Fast x5, which would normally be waaay too fast for you to stop. Interference normally
represents some kind of pervasive, well, interference that hinders or gets in the way of attacks,
like a fierce blizzard or a field of heavy gravity.
Damage Magnet 5 AP Damage Magnet allows one Part absorb damage from another Part. If you put this Gimmick on
a part that has lots of Tough or Heavy Armor, it can render a Major Shadow nigh invulnerable
to direct attack, so don’t choose this Gimmick unless your Players have some reasonably
effective means of shutting down the Magnetized body part. This Gimmick works well on
Shadows that have some large, overridingly tough physical aspect, like a robot whose
Righteous, Invincible Steel Plating presents a severe obstacle to any offensive.

Chapter X: The Velvet Room
-- 209 --
Example Major Shadows To show how these rules can be put into practice, let’s show how they can build a couple well
known Persona boss-type enemies: King Frost and Shadow Mitsuo.
King Frost (3d Campaign) Might x1 Emperor-10
Favorite Thing: Ice Cream
Resist: Ice, Fire
Weak: --
1-4 Icebox Chest 10d 12 hp
Attacks (Targets All, Spray x2), Defends, Tough x2
5-6 Royal Vanilla Scepter 7d 7 hp
Attacks (Ice, Power x3), Useful: Create Blizzard (Effective x1,
Preemptive Action, Always Works)
7-10 Jolly, Coal-Black Face 8d 10 hp
Attacks (Ice, Burn x1, Area x2), *Useful: Summon Allies (Always
Works)*, Useful: King’s Decree (Always Works), Tough x2, *Brains*
Starting from the top, we have the Icebox Chest that unleashes a horde of Mini-Jacks across the
battlefield, which swamp the players with their tiny, icy fists. This deals Width in Physical
Damage (thanks to its Might x1), so it’s not especially powerful; however, the location has a lot
of dice (10d), and has Spray x2, so anyone hit by the attack takes extra damage to random Parts.
Since Targets All comes into play, every player on the field will have to deal with this attack,
and since this is a Might x1 Shadow it can use 2 Sets it rolls thanks to its free Multiple Actions
bonus. This is a pretty nasty attack so it has some stipulations. First, let’s say it can’t be used on
consecutive turns; second, that it can’t be used as a Multiple Action with any action other than
itself; and third, when using this power he always Declares first.
The Royal Vanilla Scepter has the Preemptive Action Gimmick, so when the fight begins
he can automatically roll to Create Blizzard, which generates a snowstorm in the arena for
Width in Rounds. While it’s in effect, any Personas that don’t Resist Ice lose the benefit of their
Fastness. This ability Always Works, so even a failed roll creates a blizzard for 1 turn (since
Always Works sets can’t benefit from Effectiveness).
Finally, his Jolly, Coal-Black Face can Summon Width-1 in Jack Frost minions. These are
boosted from their normal 8 AP to a much stronger 12 AP by adding 2d to both their dice pools.
King Frost can’t have more than 2 Jack Frosts on the field at a time. King’s Decree is the
Shadow’s broadly defined Useful quality, and in combat it lets him nullify a Persona’s
Resistances for Width-1 Rounds with the mystic power of his icy authority.

Chapter X: The Velvet Room
-- 210 --
Shadow Mitsuo (5d Campaign) Might x2 Hermit-16
Favorite Thing: Video Games
Resist: --
Weak: --
Special Pool- Player One 9d 12 HP
Attacks (Fire) Attacks (Electric), Attacks (Ice), Defends, Useful:
Character Set-Up (Always Works, Effective x1, *Preemptive
Action*), Useful: Cheat Code (Always Works), *Brains*
1-2 Voxel Greaves 9d 12 HP
Attacks (Guaranteed Knockdown), Defends, Tough x3,
3-5 Digital Cuirass 10d 14 HP
Attacks (Fire, Area x2, Power x2), Defends, Heavy Armor x2,
Useful: Item Pouch
6-8 8-Bit Excalibur 8d 14 HP
Attacks (Physical, Power x4, Fast x1) Attacks (Electric, Power x1, Fast x3), Tough x1
9-10 Virtual Helm 6d 12 HP
Attacks (Ice, Area x1), Useful: Protective Ward (Always Works, Effect x2), Heavy Armor x1, Tough x2
Other Gimmicks: Multitasking
When Shadow Mitsuo is encountered, his Player One form (a floating, fetus like being)
is visible, but will immediately use its Preemptive Action to execute Character Set-Up, which
assembles Mitsuo the Hero around it. As long as the Hero has three or more of its locations
intact, Player One cannot be hurt by attacks, and Shadow Mitsuo isn’t destroyed until Player
One is defeated.
Each of Mitsuo the Hero’s locations are extremely powerful. His Voxel Greaves can
inflict Physical Damage and will always Knock Down their target. His Digital Cuirass has
Heavy Armor x2, so any Attack Sets will have their Width reduced by 2 on contact, a crippling
defense against anything with less than 4 Width. It can also use its Item Pouch to pull out useful
trinkets that can levy any number of negative effects on its enemies, not the least of which are
Bombs that inflict Area x2 and Width+3 Fire damage. To counter this exceptional defense, the
players can attempt to strip off the armor with Usefuls of brute strength or technological nature.
The 8-Bit Excalibur its by far its most dangerous part. It can inflict deadly Physical
(Width+5 Damage, Fast x1) and swift Electrical (Width+2 Damage, Fast x3) Attacks. Finally, the
Virtual Helm is another brick wall, and can activate a Protective Ward that will grant Mitsuo an
Elemental Resistance of its choosing for Width+1 Rounds.

Chapter X: The Velvet Room
-- 211 --
To deal with Shadow Mitsuo, the Players will need to destroy two of its Parts first.
When that happens, Mitsuo’s Hero form shatters and Player One is exposed. Player One is far
more vulnerable, and while he can attack with elemental power, his preferred method of
defense is to use Character Set-Up again to rebuild his Hero, which he can do once per Round.
Doing so after the Hero has been destroyed once requires an accumulated 5 Width, and each
time the Hero is remade, it loses 3 HP from all its Parts.
Shadow Mitsuo’s Player One form can also use its Cheat Codes ability to prevent
Players from using Awesomeness for Width-1 Rounds. As a final note, all forms of the Major
Shadow benefits from the Multitasking Gimmick, so he can roll two separate actions each turn,
and as a Might x2 Shadow he can declare up to 3 Multiple Actions on each roll without taking a
Penalty. This is especially vital for its Player One form, as it allows the squishy, vulnerable
lifeform to defend itself while attempting to rebuild its shattered outer shell.
Going Out with a Bang Towards the end of a Major Shadow encounter, chances are your once big baddie has had his
dice pools blasted so low that he’s not got much of a chance to fight back. When this happens,
the fight is basically over. This can feel anticlimactic, so instead of letting your boss monster die
like a wet fart, here are some options to set-up a more dramatic finish.
Finale Attack
The Shadow has one last, desperate trick up his sleeve. A single, all-powerful attack unleashed
upon the players with lots of Power, Fastness and Spray. Finale Attacks are always declared
first, giving Players a chance to react to avoid being ripped apart by the Shadow’s dying wrath.
Once the Finale Attack goes off, the Major Shadow is left weak and depleted, giving the Persona
Users a chance at an All-Out Attack to finish it off.
Finale Threat
Beating the Shadow isn’t the end of the encounter. With its fading strength, the Shadow does
something that sets up a Threat that the Persona Users need to escape. Maybe he causes the
structure around them to collapse, or maybe his body simply explodes into a huge plague of
ravenous Shadow Locusts. Finale Threats should always be big (at least 10d) and scary but bear
in mind that you might have to live-tune their challenge if the Players have been beaten to a
pulp and can barely stand. This goes for the Finale Attack as well. The point of these is to create
an exciting climax for the encounter, not to ensure that the players are wiped out.

Chapter X: The Velvet Room
-- 212 --
Optional Rule: Doom Dice Doom Dice are another method by which Major Shadows can hold their own against Persona
Users. Doom Dice are equivalent to a Major Shadow’s Relationships, but instead of representing
connections that a human has to others around her, Doom Dice describe what makes a villain
villainous. A Major Shadow controlled by a human might have Doom Dice like “Sense of
Superiority 4d” and “Desperation 2d”. A Major Shadow acting under its own motivation might
have Doom Dice like “Rage 5d” and “Insatiable Hunger 3d”.
Doom Dice can be used in two ways.
Empower: When you Empower a Major Shadow with Doom Dice, you’re using them the way
a Human uses a Relationship, meaning you add up to 2d to a roll for one action. If your action
succeeds, awesome. If it fails, you lose the Doom Dice you added.
Consume: When a Major Shadow Consumes its Doom Dice, you're using them the way that
Personas use Relationships by removing Dice from your Doom Pool and adding them directly
to one of your Shadow's Parts, either as whole dice or as Extras. You can Consume Doom Dice
slowly, one at a time, to counteract the slow erosion of a Major Shadow's Parts by Persona
damage, or you can gorge on them all at once to suddenly ramp up the Shadow's power to a
new phase.
What Doom Dice represent aren’t important to their use, but the trick is that when you use them
it's your cue to change-up how the Shadow is acting, and it provides some characterization for
its behavior. If a Major Shadow has as its Doom Dice "Rage 5d" and "Fear 2d"and you deplete
all of its Rage Dice, when you start eating Fear Dice the way your describing the Major Shadow
turns from attacking out of anger to attacking out of a sense of survival. Or you can turn it
around: begin by starting with the Fear dice, to represent the Major Shadow's shock at being
attacked, and then start in on the Rage dice as its worry is replaced by anger.
(Alternately if you are running a Major Shadow as controlled or influenced by a human,
you can build its Doom Dice as normal Relationship Dice if that makes more sense)
How Much Doom?
A Major Shadow's Doom Dice is determined by its Arcana Points. For every 2 AP a Major
Shadow has, give it 1 Doom Die. So a 16 AP Major Shadow has 8 Doom Dice.

Chapter X: The Velvet Room
-- 213 --
Getting your Campaign Started This section and the ones to follow provide guidelines, especially for new GMs, to help them
piece together a Campaign in the Persona universe using The Velvet Book. There’s no “right” way
to build a campaign. Every experienced GM has his or her own method and approach that’s
worked in the past, and there’s nothing so ground-breaking in The Velvet Book that demands
they throw those methods in a fire. But, to the credit of the original writers and producers of the
original video games, Persona has some unique elements that both rookie and experienced GMs
will benefit from learning.
Choosing your Focus In the broadest of terms, there are three approaches that a GM can take when cooking up a
Persona game. These form a framework on which the entire campaign will rest.
Exploration Focus: This kind of campaign is about venturing into the unknown and
discovering the weird, wonderful and awful secrets of the Other World. A game with an
Exploration Focus often leans towards a more open, sandbox experience, and most of the plot’s
secrets will be locked behind the veil of the Other World. If you want to run an Exploration
Focused game, you should put a lot of thought into the Cosmic Level aspects of your game (see
the next page).
Plot Focus: A campaign with a Plot Focus emphasizes twisting conspiracies, esoteric
mysteries and startling revelations, normally transcending the barrier between the Real World
and the Other World. In a Plot Focuses game, your players are uncovering some dark secret
infesting their town or city, or unravelling some hidden truth about the past; this means you
need to have a strong idea of what, exactly, that secret or truth is. Having a strong grip on your
world’s Physical Level aspects helps with this, but the most important rule is to remember that
you’re all playing a group game, not reading a novel that you wrote. Your players should feel
that they have a meaningful impact on the plot instead of just being carted from one story beat
to another.
Character Focus: Like the Exploration Focus, a Character Focused campaign is more of a
sandbox environment, but it’s a sandbox that emphasizes character interaction and growth.
Character Focused campaigns can be tricky, since they’re about dealing with emotions, past
trauma and reconciliation over toppling government conspiracies and killing monsters. To run
a Character Focused campaign, you need to put a lot of work into your world’s Social Level
aspects. On top of that, make sure you and your players are all on the same page, and be
flexible; if the game is nothing but getting-to-know-you nonsense, even the most introspective
players will probably get bored.

Chapter X: The Velvet Room
-- 214 --
The World: Building your Persona Setting The world of Persona is complex and multi-levelled. It’s not just the ground beneath the
characters’ feet and the air they breathe, it’s the reason for why the normal elements of their lives
have become so twisted.
This section is designed to help you as the GM to create a compelling, cohesive game
world. To accomplish this, we’ve divided the various aspects of a Persona setting into four
Levels, each of which has questions whose answers will assist you in setting up the madness
that will ensue.
1. The Meta-Narrative Level: a. What’s are the Themes of your campaign?
b. What kind of Tone are you going for?
2. The Cosmic Level: a. What’s the nature of the Other world?
b. What happens in the Other world?
c. How do Personas work?
d. Where do they come from?
3. The Physical Level: a. When and where does your game take place?
b. What kind of characters are your Players creating?
c. What are they supposed to be doing?
4. The Social Level: a. Who are the major Non-Player Characters involved in the game?
b. What kind of people will your Players interact with?
c. Who are their Relationships?
Each Level informs the ones below it, trickling down like frosting poured on a multi-tiered cake.
This process isn’t mandatory; if you have a grasp on your setting already, you’ve probably
answered most or all of these questions already. This section then contains guidelines for
working out the finer points of those questions and giving you the tools to flesh out and exploit
them to make your game the best that it can be.

Chapter X: The Velvet Room
-- 215 --
The Meta-Narrative Level: Themes and Tone in Persona What is the Theme of your game?
Themes are critical to Persona. Every game in the series has at its core a Theme that shapes the
plot, atmosphere and even designs of the characters, and a Velvet Book campaign should be no
different. Below is how the various Persona games have approached their Themes.
Persona 1 & 2- Thoughts Shape Reality: Persona 1 &2 explore the idea of a world where
rumors and wishes can influence the fabric of reality , and the chaos that ensues. As the story
develops, it becomes clear that, if one can gain control over the Collective Unconsciousness of
mankind, they can alter the past and present to suit their own needs and desires.
Persona 3- Mortality: The fear and reality of death are a looming shadow over the cast of
Persona 3. If they slip up in their mission, humanity itself will be erased from existence. Every
character has been touched by death in some way, be it a relative or friend. Their method for
Evoking their Personas even reflects this theme: a gun pointed at their head.
Persona 4- Reach Out for the Truth: The plot of Persona 4 is a murder mystery, with the
main cast determined to find the culprit. When faced with an easy answer, they need to
persevere in that search, since the truth is never easy to uncover. Again, this influences their
Personas—in this version, trouble in the Other World is the result of people who don’t accept
truths about themselves, and by facing those truths they gain the power of to control Personas.
Persona 5- Rebellion: The world of Persona 5 sucks. The city is corrupt and near every
authority figure you meet is some morally compromised jerk who needs to be taken down a peg
or two. By embracing that desire to rebel and seize control of events plagued by injustice, the
cast unlocks their Personas and uses them to force the change they want to see in the world.
This even manifests in the design of the Personas themselves—all are based on rogues,
criminals and figures of revolt and rebellion from literature and history.
What is the Tone of your Game?
Is your game a light-hearted, fantastical romp accented by moments of solemnity or a darkly
comic lecture on the human condition? Both MaOCT and Persona handle a wide array of tones.
MaOCT, by design, swings from Pokémon to The Adams Family to Invader ZIM without stretching
its muscles too badly, generally leaning towards “fantastical, but with a darkly comic tinge”.
Persona can have an equally broad tonal range, from Persona 3, which is moody, atmospheric,
and suffused with a sense of impending dread; to Persona 4, which is normally described as
“Scooby-Doo in Japan”.

Chapter X: The Velvet Room
-- 216 --
The Cosmic Level: What is the Nature of the Other World? In Persona, the Other World is where the action happens. The plot invariably revolves around
machinations surrounding the Other World, whether it’s some force from the Other World
threatening the peace and stability of the Real World, or a person or organization from the Real
World trying to use the Other World for their villainous purpose.
The Other World can be divided into two facets: the Overworld and Dungeons.
The Overworld
The Overworld is the Other World at large—its full breadth and scope. With the Overworld you
define the universal rules of the Other World that apply wherever you are (unless for some
reason they don’t!) and its general feel and tone.
Depending on how you want the game to go the Overworld could play either a
background role or it could be the heart and soul of your campaign. In the Persona games, the
Overworld is usually background in favor of Dungeons, but with The Velvet Book you’re free to
make it a deeply explorable world of its own. This is especially good if your game has an
Exploration Focus. A dedicated, flexible GM can turn the Overworld into an Open World, a
sandbox environment where the players can go and do anything they want.
For reference, here are the Overworlds for Personas 3-5 (Persona 1 and 2 don’t really have
Overworlds as such).
Persona 3- The Dark Hour: Every night at midnight, time stops for one hour, and humans
gifted with the potential to Evoke Personas can explore a sinister, twisted reflection of the Real
World, populated by hungry Shadows where normal humans are sealed within impenetrable
black coffins. The Dark Hour’s epicenter is Tartarus, a vast labyrinthine tower erupting from the
grounds of Gekkougan High School. Every full moon, a powerful Arcana Shadow appears,
inexorably encroaching upon Tartarus. If it reaches its goal it would spell cataclysmic
destruction for both Worlds.
Persona 4- The Midnight Channel: On certain nights at midnight, strange images can be
seen through the static of a switched-on TV. Humans with a special sensitivity to supernatural
forces can physically pass through the screen of a television and enter the dimension pictured
on the Midnight Channel. The Midnight Channel is a caricature of the Real World by way of a
television studio set, suffused with a sickening, impenetrable fog requiring special glass lenses
to see through. The Midnight Channel is inhabited by Shadows, some deadly, some friendly,
but more dangerously a human who winds up trapped there may be forced into a life or death
confrontation with their own Shadow, their repressed fears and traits made manifest.

Chapter X: The Velvet Room
-- 217 --
Persona 5- The Metaverse: The Metaverse is all around us, we just don’t see it. It’s shaped
by Cognitions—the collective thoughts, beliefs and subconscious ideas of humanity. A person
can access the Metaverse with a smartphone app called the Metaverse Navigator. The
Metaverse shadows the Real World—it occupies the same space and people appear as mere
silhouettes unaware of a navigator’s presence. Humans in the real world with intense desires
give shape to sprawling Palaces within the Metaverse, and the Metaverse itself is built upon
Mementos, an underground maze brought to life by the sum of a population’s cognition.
Dungeons
In many games, Dungeons are where the meat of the Other World lies. Dungeons are focal
points of Shadow activity and plot relevance. Usually accomplishing anything significant to the
story of a Plot Focused game climaxes in a Dungeon. Where the Overworld is a broad expanse
of alien strangeness, Dungeons are concentrations of weird stuff and danger. Some pointers:
1. Have a Theme in mind. A Dungeon should be cool, exciting and evocative. Persona
games have had dungeons in the form of a steamy bathhouse, an underground laboratory, a
child’s vision of heaven, a geometrically abstract art museum and an Egyptian tomb. A
Dungeon’s form and design may be anchored to the personality and issues of a single
human character, so if you’re doing something similar with your Dungeons you can use the
character’s quirks and interests to give it color.
2. Don’t just make a maze. The Dungeons in Persona 3 and 4 were simple mazes of
corridors where you ran from or into Shadows until you found the passage to the next level.
Don’t do that. You can create a physical map for your players to follow, but just making a
maze doesn’t take full advantage of the Velvet Book or the tabletop environment. Instead of
making a maze, make a place. A town, a jungle, an alien planet, a space station with its own
people, rules, quirks and culture that the players can interact with. Make it an interesting an
fun place to be in and explore, not just conquer. Make it less like a thing that must be
conquered and more like an arc that must be completed.
3. Build your Dungeon with your Player’s abilities in mind. Does one of the humans
have a particularly good P.E. skill? Give them a wall to climb. Can one of their Persona’s
fly? Make that necessary to figuring out how to get past a certain obstacle. And do the
opposite too: if one of your Players is always using a certain skill or Useful, create situations
where that skill can’t be used, or where using it has some drawback. Just don’t go
overboard. There’s a balance between making every problem obviously designed for one
person to fix and designing a Dungeon specifically to make one person feel useless.

Chapter X: The Velvet Room
-- 218 --
The Cosmic Level: What Happens in the Other World? There’s no limit or restrictions to what can and can’t happen in the Other World except what
you program into its laws. This section is to give you some useful tools in bringing your ideas to
life.
Dungeon Features A GM is free to build Dungeons however he chooses. They can be so realistic that the Players
may struggle to tell the Other World apart from the Real World, and they can be utterly
fantastical, with their own rules adhering closer to dream logic than anything the natural world
would offer.
There are certain traits, however, that are common enough among Dungeons that they
can be formalized. These are called Dungeon Features. This section details 10 types of common
Dungeon Features, each arranged into three tiers of increasing intensity and importance.
Using these, it is possible to randomly generate the concept and design for a Dungeon,
the rules for which are listed in Appendix H on page @@.
Elemental Motif This Feature indicates that the Dungeon is themed after one of the
core Persona Elements, like Fire, Ice, Darkness, etc. Here’s another
chart if you want to roll that randomly too.
Undertone: The motif is clear and distinct but does not
overshadow other aspects of the Dungeon. It’s more of a garnish
than the main course but it adds some interesting aesthetics and
puzzle opportunities. All Minor Shadow encounters should
feature at least one Shadow that Resists the motif Element and
one that Attacks with it.
Overtone: The Element is a primary theme of the Dungeon.
Your players will probably reflect on it as “The one with all the
ice” if that’s the element you chose. Interacting with and
exploiting the element is probably the Dungeon’s core
mechanic. All Shadows should Resist the motif Element, and the Dungeon’s Boss should be
themed around it. Shadows and Players can score a +1d Environmental Advantage when
creatively harnessing the motif.
Random Elemental Motifs Height Element
1 Fire
2 Ice
3 Wind
4 Electricity
5 Dark
6 Light
7 Water
8 Earth
9 Telekinesis
10 Nuclear
Feel free to modify this list to
fit the needs of your game.

Chapter X: The Velvet Room
-- 219 --
Dominance: The motif suffuses every aspect of the Dungeon from the moment you step in
and is a constant feature that your players must deal with almost all the time. If the element
is Water, your Dungeon is probably at the bottom of the ocean and your players must wear
scuba gear, for instance. Environmental Advantage is promoted to +2d.
Hidden Passages Things aren’t always as seen with this Feature. Hidden Passages could hide neat little extras for
those clever enough to uncover them or protect keys or resources vital for completing the
Dungeon. Just make sure you don’t make the passage too obscure if it’s necessary for your
Players to find it. That way lies frustration.
Auxiliary: The Dungeon has 1 or 2 Hidden Passages that are not vital to completing the
Dungeon but might afford the players some shortcut or advantage if they can find them.
Consider placing some handy, but not life-saving resources behind them or use them to give
your players some better vantage point on some tricky puzzle you’ve devised.
Central: Your Dungeon has 3-5 Hidden Passages and is likely themed around finding and
exploring hidden passages. At this stage most of the important stuff in your Dungeon is
probably locked behind Hidden Passages that your players must find. Make sure you have a
good handle on where the Passages are and where they lead to. Consider having an NPC in
the Dungeon there to guide your players in the right direction.
Critical: The entire Dungeon may be a warren of Hidden Passages and concealed grottos,
but more importantly there is one Passage that must be uncovered in order to complete it. It
may contain the Dungeon’s Boss or a person you’re trying to rescue or a Treasure or Artifact
that must be retrieved.
Population Rarely is a Dungeon ever completely devoid of life (if you can really call what lives in the Other
World as “life”), but this Feature signifies a Dungeon with a distinctive population and who are
more than just enemies to kill or set dressing. Interacting with the Dungeon’s Population may
be a significant part of its completion.
Scattered: The Dungeon’s population is sparse. Has it been recently depopulated by some
calamity? Was it only colonized a brief time ago and its inhabitants are still settling in? Or is
there something strange and unsettling about it that scares most Dungeon dwellers away?

Chapter X: The Velvet Room
-- 220 --
Communal: The Dungeon’s population is the equivalent of
a small town with its own unique personality and quirks.
Have you stumbled into a Shadow village? An island resort?
A military base? You’ll be meeting “people” left and right
and figuring out the dynamics of the community may be key
to solving the Dungeon.
Teeming: The Dungeon’s population is the dense, the
equivalent to a city. Its inhabitants jam up corridors, run
from (or to!) your Shadow battles and engage one another in
a full-blown Other World economy. A Dungeon with this
Feature might have its players dealing with political power
struggles, civil unrest and the various urban blights that they
may be all-too familiar with in the Real World. If you’re
using the Random Dispositions chart, you might want to roll a couple times to determine the
Natures of different factions or sub-groups within the larger Population.
Automated Defenses Dungeons are normally defended by Shadows that engage interlopers in deadly combat, but
this Feature adds another layer of protection against unwanted guests. Automated Defenses
work by giving you a pool of dice that you can build Threats out of. You can trade-in dice for
Extras like Power to create deadlier defenses or Toughness to create more durable ones. You
can choose to concentrate your Automated Defense dice in one area to create a fortified choke-
point or bastion, or you can spread them around your Dungeon to create a defensive perimeter.
Lightly Defended (12d): The Dungeon’s Automated Defenses augment its natural
hazards and Shadow population, acting as a distraction and source of attrition damage rather
than a clear and present danger.
Fortified (24d): A Fortified Dungeon uses its Automated Defenses as a first line of defense.
Fortified Defenses are clearly and immediately dangerous and could be as dangerous as the
Shadows that back them up.
Bristling (48d): Ouch. A Dungeon Bristling with Defenses is monstrously dangerous to
approach head-on. You should have in mind a way for your Players to bypass Bristling
Defenses rather than engage them directly.
Random Population Dispositions
Height Nature 1 Friendly
2 Suspicious
3 Wounded
4 Curious
5 Feral
6 Worldly
7 Treacherous
8 Desperate
9 Adventurous
10 Unknowable

Chapter X: The Velvet Room
-- 221 --
Sanctuary A Sanctuary is a place (or places) within your Dungeon that provides shelter and refreshment
for human characters and their Personas. As a GM, a Sanctuary can be a way for you to up the
difficulty of your Shadows and Threats since you’re giving your players a way to heal-up after
taking a beating. Sanctuaries aren’t necessarily inviolate, and Shadows can make use of them as
well as Persona Users.
First Aid: The Sanctuary can heal 2 Shock from all Persona Parts and Human Stats with a
short rest. If the Players are bold enough to stick around for in the Dungeon for a full Time
Slot (if that’s possible in your game), they can heal as if they had a full night’s sleep.
Medicinal: The Sanctuary can heal all Shock from Personas and Humans and can restore a
total of 3 Scars to each pair. Medicinal Zones should be hard to come by and well hidden or
guarded to prevent casual use.
Surgical: A Surgical Sanctuary zone can heal all damage from Personas and Humans and
even reconstruct a Dispersed Persona or an unconscious Human. A Surgical Zone should be
the centerpiece of a Dungeon and inaccessible without major effort on the part of the Players,
whether through crafty negotiation, infiltration or a hard-fought Shadow battle.
Physical Challenge Most Dungeons should have some element of physicality to them, since it rewards Players who
build characters for more than just brains and charm and because a lot of Useful Persona
Qualities involve movement or interacting physically with the environment. This Feature,
though, describes a Dungeon that poses unusually intense Physical Challenges or where athletic
conquest is its central theme. Completing these Challenges requires each person involved to
accumulate a set of amount of Width against a certain level of Difficulty. You can divide the
total Width into several small tasks or pile it all together into one massive Challenge.
Remember too that Physical Challenge doesn’t just mean “Diligence + P.E.” Your Players
may need to roll Proficiency + Reflex to scoot across a narrow rock outcropping, Guts + Wind to
endure bone-chilling cold or Diligence + Beat Down to break down a rugged tomb wall.
Vigorous: 5-Width, Difficulty 0. The Dungeon may involve a bracing mountain climb,
careful navigation of a collapsing bridge or a series of leaps over a precarious height. The
actions themselves aren’t especially tricky but are still physically taxing. Failure results in
setbacks or being cut off from certain paths, but not severe injury.

Chapter X: The Velvet Room
-- 222 --
Grueling: 8-Width, Difficulty 3. Not only is the athletic aspect challenging, but it
requires a greater-than-normal level of skill to achieve. More athletic characters may want to
assist their frailer comrades, as failure may result in real harm.
Unrelenting: 12-Width, Difficulty 5. At this Width you’re almost certainly dealing
with more than one Challenge, unless the Challenge is something expected to last the
entirety of the Dungeon, like if they are climbing Shadow Everest.
Traps Traps are like Automated Defenses, except your Players don’t know they’re there unless they’re
on the lookout, or until it’s too late. Traps are built as Threats, and Players have a few options
when confronting one. If they know it’s there (as the result of a Notice or Out-Think check, for
instance), they can roll against its dice pool to disarm it or maneuver around it. If they don’t
know it’s there and they walk into it, the trap is triggered. They still get a chance to roll to
escape the trap (using P.E., Block, Reflex, etc…), but the Trap gets Awesome x2 added to its
pool.
Light Entrapment (8d): Detection Difficulty 3. Traps at this concentration are
usually non-lethal and are more about separating or inconveniencing Dungeoneers than
seriously harming them. Things like walls closing behind them, bridges collapsing after
they’ve been crossed or heavy weights crushing needed resources.
Heavy Concentration (16d): Detection Difficulty 5. This is where things get
worrisome for your players. Dungeons built with this level of trapping pose a severe threat
to progress and physical well-being. Included here are traps that maim, like spikes hidden in
walls; and traps that incapacitate, like tanks of poison gas; as well ones your bottomless
pitfalls and slowly lowering ceilings.
Actual Deathtrap (24d): Detection Difficulty 7. Players confronted with an Actual
Deathtrap are going to take things slowly and may wind up poking everything in their path
with a 10-foot stick before advancing. With this level of Trapping you might want to ignore
the Detection Difficulty altogether and make your traps open and obvious, yet still difficult
to avoid, and disastrous if suffered.

Chapter X: The Velvet Room
-- 223 --
High Security This Feature allows to you simulate patrols of Shadows or surveillance equipment through a
Dungeon. It can be an interesting addition to your planned Shadow encounters (getting into a
fight under High Security can increase the difficulty of the battle), or indeed instead of planned
Shadow Encounters. Like several other Features, High Security is represented as a Threat dice
pool, one that’s rolled each time the Players transition from one area of your Dungeon to
another, or whenever they spend too long in one place. A Set represents someone or something
searching for them. Players can attempt to evade Security by beating the Set with Reflex, P.E. or
other skills, but otherwise the Higher and Wider the Set, the nastier the encounter.
To create a Security System, first determine the mix of Shadows in your Dungeon, and
then arrange a series of standard Encounters and place them on a 1-10 Height chart (see the
example on the next page). Then factor in Width: the greater the Width, the more intense the
Encounter, translated into more and nastier Shadows. If the players get busted by Security, your
Set informs what patrol catches them. If you’re using a Security System to augment planned
Shadow encounters, do the same but instead of assigning whole encounters to your Sets, assign
specific Shadows that you add into the battle.
Evasion (5d): The Dungeon is lightly patrolled or monitored by guards either too few to
fully cover the terrain needed or too lazy or disinterested to pose a serious threat. A talented
infiltration team should be able outfox them if they’re careful.
Caution (8d): This level of Security requires extreme care on the part of the infiltration
team. Corridors are well patrolled and guards are alert and determined. Confrontation may
be postponed with careful maneuvering, but it’s almost certainly inevitable.
Alert (11d): They know you’re here, and they’re after you. At this level, each Security roll is
guaranteed to produce at least 1 Set. It would be good to mention here that Security Levels
should be fluid. If your Players can find a way to reduce the Security Level, you can knock it
down from Alert to Caution and then down to a minimum of Evasion. As part of the One-
Roll Dungeon system, these entries merely establish a Dungeon’s default security level

Chapter X: The Velvet Room
-- 224 --
Example Security Patrols Example 1: Full Battles
Height Width x2-3 Width x4 or more 1-5 Jack Frost x2, Unicorn x2 Jack Frost, Jack O’Lantern x2, Unicorn x2
4-8 Jack O’Lantern, High Pixie x2 Jack O’Lantern x2, High Pixie x2 , Omoikane x1
9-10 Jack O’Lantern 3x, Jinn x1 Ame-no-Uzume x1, Jinn x3
With this set-up, your Security Set represents an entire Minor Shadow Encounter. The
greater the Height and Width, the nastier the fight. This quite closely emulates how the
Persona Video games work in that they use fixed Shadow combinations.
Example 2: Random Battles
Height Shadow 1-2 Jack Frost
3-4 Unicorn
5-6 Jack O’Lantern
7 High Pixie
8 Omoikane
9 Jinn
10 Ame-no-Uzume
This set-up allows you to generate completely random Encounters. It takes into account
all of the Sets that you roll: a Set’s Height indicates the type of Shadow, and its Width tells
you the number of Shadows, so if you roll a 3x4 and a 2x7 that means your players must
fight 3 Unicorns and 2 High Pixies.
Example 3: Augmenting Encounters
You can use the same chart as above to allow your Security Sets to augment your planned
Shadow Encounters. To do that, choose one Set from your roll, and add Width-1 in that
Shadow to the fight. So a 2x8 would add one Omoikane into whatever fight you have
planned for a certain part of the Dungeon.
Chapter X: The Velvet Room
-- 225 --
Hazardous Environment This Feature represents a Dungeon whose environment is hostile
to human exploration due to heat, toxicity, radiation or some other
harmful quality. It works via a dice pool: at regular intervals, you
roll the Hazard Pool against your Players’ Guts + Wind. If they
cannot gobble your Sets, they feel the negative effects of the
Environment. If their Personas have some Useful Quality that can
protect them from these effects that works too, but Players don’t
often consider that when building their Personas, so this Feature
can be seriously debilitating for unprepared Players. Consider
giving them a way to compensate: warm clothes to protect from
cold or oxygen masks against a noxious atmosphere.
Mild (4d): Mild Hazards are more a reminder of the fact that your Players are invading an
alien ecosystem than a real threat, though humans with weak constitutions will still suffer
under their effects. Note that Hazards overall don’t need to be all-pervasive. Consider giving
your Player safe-spots and alternate routes offering shelter from the Environment, but at the
cost of forcing them down a longer path fraught with Traps or Shadows. Mild Hazard Sets
normally inflict Width-1 in Shock.
Intense (7d): Intense Hazards sift the men and women from the boys and girls. This is the
point where you should seriously consider giving your Players access to protective gear that
provides Tough to their delicate human characters against the dangers of your Dungeon’s
environment. Remember: to face a Hazard unscathed, a human character must gobble all of
the Hazard’s Sets down to at least Width x1. Intense Hazard Sets normally inflict Width in
Shock.
Severe (10d): Severe Hazards present nightmare scenarios to your Players. Only the
toughest characters can brave them head-on, so unless your Players are okay with their
humans being flattened by whatever you’ve got prepared, there should be some safe path
through the storm. Just don’t neuter your Hazard entirely. Even if they only encounter it
directly once or twice, a Severe Hazard should be memorable. Severe Hazard Sets normally
inflict Width+1 in Shock +1 Scar.
Random Environments Height Hazard
1 Heat
2 Cold
3 Poison Gas
4 Diseased Air
5 Stinging Insects
6 Electric Discharges
7 Stormy Weather
8 Thin Air
9 Crushing Gravity
10 Radiation
Chapter X: The Velvet Room
-- 226 --
Treasure How Treasure works in your Dungeons really depends on your overall Campaign. There are
rules for Loot and Other Resources on page (XX) of this Section, but generally speaking
Treasure is anything tangible that your Players will badly want and will be of significant value
to their human characters, either intrinsically (riches!) or practically (weapons!). Putting
Treasure in your Dungeon would seem like a net-positive for your Players, but you can always
use it to tempt them into pursuing more dangerous routes through the Dungeon or as bait for
Traps. Major Shadows often guard high value treasures as well, drawing your players into
tricky combat encounters they might otherwise want to avoid.
Nice: This Treasure is worth getting but it’s neither mission critical nor so valuable as to
suppress higher brain functions in all but the greediest characters. There’s no pressing need
to place it under murderously intense security. Getting it could be as simple as finding the
right key elsewhere in the Dungeon.
Jackpot: This Treasure is going to be a major part of your Dungeon. It could be the whole
reason for going in there in the first place, or if it’s not, it’s discovery could completely divert
the Players exploration towards “we need to get that.” It’s definitely going to be booby
trapped or guarded or otherwise inaccessible without jumping through some hoops, but
laying claim to a Jackpot can be a game changer for the Dungeon.
Motherload: Jackpots can turn the tables on a Dungeon, but Motherloads can turn the
tables on an entire campaign. They could make a human character instantly rich beyond their
wildest dreams; give a major boost to a Persona or even provide the means to take the Big
Bad Guy down a notch. A Motherload will almost always be guarded by the Dungeon’s
Boss, and that’s the case it gives you license to ratchet up the Encounter difficulty.

Chapter X: The Velvet Room
-- 227 --
Better Threats: How to Properly Menace your Players One of the key tools for GMs introduced in Monsters and Other Childish Things: Bigger Bads are
Threats. We mentioned Threats in the One-Roll Dungeon entries as well as in the chapter on
Shadows, and Bigger Bads of course offers a comprehensive tour of the mechanic.
In brief, a Threat is a big dice pool (one of the few times in the game you’re allowed to
roll more than 10d!) that represents some equally big source of danger, like a horde of enemies
or a hazardous environment or scenario that the Players must overcome. Threats work great
with the Velvet Book, and we’ve expanded the GM’s ability to tailor interesting Threats for
various situations.
Standard Threats
Standard Threats are those presented in Bigger Bads. Standard Threat dice pools always have the
Attacks Quality, and you can pile on whatever other Qualities or Extras you want, and like all
Threats they get to use every Set that they roll. The goal of the Players is to overcome the Threat
with their Skills, Attacks and Useful Qualities, each time knocking dice off its pool until it’s
been defeated. So it’s like fighting a Shadow with a single big, nasty Part. Pretty simple.
Example: Murder of Shadow Crows 12d Standard Threat Attacks, Useful (Thieving Jerk Birds), Fast x2
This is a simple Threat. It can do two things: it can claw at humans and Personas to deal Width-
1 damage and can steal anything that hasn’t been deliberately protected by the Players,
prompting an action on the Player’s part back what was taken.
Standard Threats can also be used to simulate large groups of Minor Shadows, as in the
example of Jack’s Frosty Reception on Page [XX] of Chapter 8.
The Real World is Threatening Too
These rules are located under the Cosmic Level guidelines, but Threats are just as likely to
occur in the Real World as in the Other World. They’ll probably be more mundane—
escaping a house fire instead of fleeing an erupting volcano—but the rules can be used all
the same.
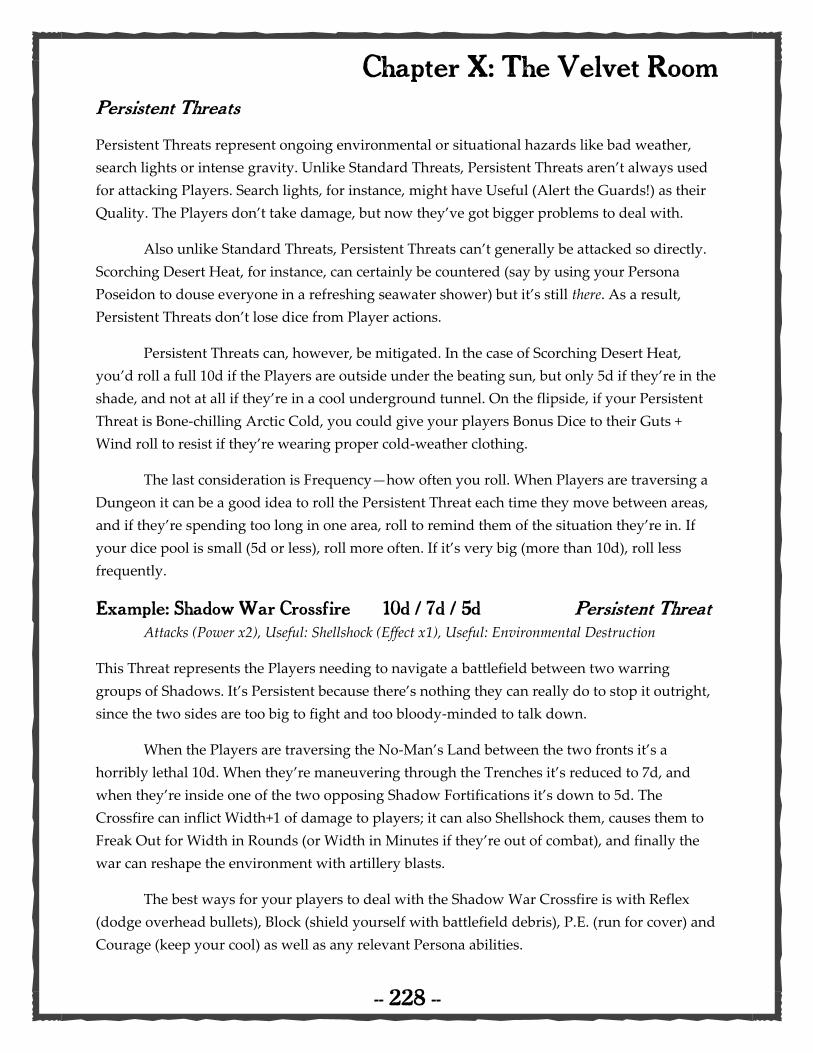
Chapter X: The Velvet Room
-- 228 --
Persistent Threats
Persistent Threats represent ongoing environmental or situational hazards like bad weather,
search lights or intense gravity. Unlike Standard Threats, Persistent Threats aren’t always used
for attacking Players. Search lights, for instance, might have Useful (Alert the Guards!) as their
Quality. The Players don’t take damage, but now they’ve got bigger problems to deal with.
Also unlike Standard Threats, Persistent Threats can’t generally be attacked so directly.
Scorching Desert Heat, for instance, can certainly be countered (say by using your Persona
Poseidon to douse everyone in a refreshing seawater shower) but it’s still there. As a result,
Persistent Threats don’t lose dice from Player actions.
Persistent Threats can, however, be mitigated. In the case of Scorching Desert Heat,
you’d roll a full 10d if the Players are outside under the beating sun, but only 5d if they’re in the
shade, and not at all if they’re in a cool underground tunnel. On the flipside, if your Persistent
Threat is Bone-chilling Arctic Cold, you could give your players Bonus Dice to their Guts +
Wind roll to resist if they’re wearing proper cold-weather clothing.
The last consideration is Frequency—how often you roll. When Players are traversing a
Dungeon it can be a good idea to roll the Persistent Threat each time they move between areas,
and if they’re spending too long in one area, roll to remind them of the situation they’re in. If
your dice pool is small (5d or less), roll more often. If it’s very big (more than 10d), roll less
frequently.
Example: Shadow War Crossfire 10d / 7d / 5d Persistent Threat Attacks (Power x2), Useful: Shellshock (Effect x1), Useful: Environmental Destruction
This Threat represents the Players needing to navigate a battlefield between two warring
groups of Shadows. It’s Persistent because there’s nothing they can really do to stop it outright,
since the two sides are too big to fight and too bloody-minded to talk down.
When the Players are traversing the No-Man’s Land between the two fronts it’s a
horribly lethal 10d. When they’re maneuvering through the Trenches it’s reduced to 7d, and
when they’re inside one of the two opposing Shadow Fortifications it’s down to 5d. The
Crossfire can inflict Width+1 of damage to players; it can also Shellshock them, causes them to
Freak Out for Width in Rounds (or Width in Minutes if they’re out of combat), and finally the
war can reshape the environment with artillery blasts.
The best ways for your players to deal with the Shadow War Crossfire is with Reflex
(dodge overhead bullets), Block (shield yourself with battlefield debris), P.E. (run for cover) and
Courage (keep your cool) as well as any relevant Persona abilities.

Chapter X: The Velvet Room
-- 229 --
Compound Threats
A Compound Threat is one where dealing with one Threat contributes to another. Let’s start
with an example:
Example: The Building is on Fire! 11d Initial Threat Attacks (Fire, Power x1, Burn x2), Defends
The Building is Collapsing! -- Secondary Threat Attacks (Physical, Area x2, Fast x1) Useful: Cut off Escape Route (Always Works)
It begins with the Initial Threat, the Building is on Fire! which can inflict Width in Damage and
Burns and can foul up Player actions with its choking smoke or the fear of burning to death.
Players can overcome the Threat by attempting to extinguish the fire or by escaping it.
However, each die that they knock off from the Initial Threat goes to the Compound Threat.
As a GM, you should start rolling both Threats as soon as you have enough dice to roll a
Set with both, and reveal the Secondary Threat once you get a Set (in this case it will happen
right away since Cut Off Escape Routes Always Works). The Building is Collapsing can attack
by dropping debris on their heads, using its Area x2 to squash the entire Party and can force
Players to find a new route as their current one is blocked or falls away in front of them.
Meanwhile, they also must deal with the Fire nipping at them, and each die that they knock off
from the Fire is another die that gets added to the Collapse.
A Compound Threat ends when both dice pools have been overcome. Dice knocked off
the Initial Threat will continue to add to the Secondary Threat, but dice knocked off of the
Secondary Threat leave play entirely.
How Many Dice Should I Give my Threats?
Standard and Compound Threats should probably never have less than 8d against human
characters, and never less than 10d if they have access to their Personas at the time. This is
because they lack staying power: each successful roll a Player gets against the Threat reduces its
potency, so they need a high starting point to be effective.
Persistent Threats work differently. They can be circumstantially reduced or mitigated,
but never completely wiped out. You probably don’t need to go higher than 10d on a Persistent
Threat, and one that goes off with a high frequency should maybe cap at 6d, unless you want
your Players to really feel it.

Chapter X: The Velvet Room
-- 230 --
Optional Rule: Loot and Other Valuable Things Monsters and Other Childish Things isn’t a loot game where your characters accrue steadily
improved equipment throughout a campaign, and thankfully neither are the Persona video
games. Your weapons and armor in that game are mostly there to help you keep pace with the
strength of the enemy, and don’t really bestow any important bonuses.
To that end, The Velvet Book uses a fairly simple Loot system to give Players tangible
rewards for their adventures. Loot is basically an abstraction: it represents how many goodies
overall they’ve picked up from the Other World, rather than the specific amount of dollars, yen,
macca or whatever currency your setting uses.
Loot isn’t Mandatory
Not every game benefits from adding Loot to it. Games with a heavy Plot or Character Focus
can do just fine without worry about the raw lucre the human characters have pillage. On the
other hand, a game with a strong Exploration Focus might do well incorporating Loot as
another way to measure Player Progress.
Moreover, certain Players expect Loot from their games: to some, there’s an implicit
agreement that if they’re going into a Dungeon, there sure better be some treasure chests stuffed
with gold and potions and weapon upgrades.
Where Loot Comes From
Loot comes generally from two places.
Dungeon Treasure: Whether hidden away in a locked chest or sealed behind a stony wall of
hieroglyphics, Dungeons may hold large concentrations of Loot that you can use to lure the
Players into dangerous scenarios or reward them for creative thinking and problem solving.
Battle Spoils: Defeating a group of Minor Shadows will net you a random assortment of Loot
by means of a Spoils Roll. The better you fought, the more dice you get to roll and the more
Loot you get.

Chapter X: The Velvet Room
-- 231 --
What is Loot, Exactly?
Put simply, Loot is whatever the GM decides it is. It could be wads of actual, real world money
or Shadowbucks valued only in the Other World. One common option used in Persona is to
have Players collect weird little relics, baubles and fragments from defeated Shadows which can
be sold or exchanged for useful stuff. Using Loot this way is a good way for you to expand the
scope of your setting. Does the Other World have a functioning economy with its own official
currency, or is it everything purely barter based; and if so, what kinds of things do they value?
Loot Values
What Loot actually is doesn’t really matter that much. What does matter is its value. A piece of
Loot has its value measured along one of four currencies, which tells you what it can be used
for. These are based on the four Minor Arcana of the Tarot.
Coins: This Loot has actual monetary value, either intrinsically (like a piece of gold or a ruby),
economically (as officially recognized Real World currency) or just because Shadows are weird
and are attracted to weird stuff.
Cups: This Loot carries restorative properties. Maybe it’s a healing herb or a piece of magic
stone that revitalizes you, or maybe it’s just a ticket for one hour of soothing Shadow body
massages.
Wands: This Loot looks like it can be used in a variety of marketable applications, like
alchemical reagents, weavable plant fibers or robot power cells. The stuff made from it will
come in handy in exploring the Other World.
Swords: This Loot has clear uses in warfare, like a chunk of metal or an animal’s fang or a
spent shell casing. Its value is in being recycled and repurposed to continue the cycle of Other
World violence.
An important thing to grasp is that Cups, Wands and Sword Loot can’t be used on its
own. It’s only use is to be sold, traded or refined into Items, which do have uses.
What is Loot Good for?
Buying Stuff: Your Players can use Loot to conduct Commerce in the Other World, or even in
the Real World if you decide that they can exchange their Cait Sith whiskers for cold hard cash.
Wheeling and Dealing: Loot is good to have when entering Shadow Negotiation, as you
can sweeten your deal by offering the right valuables in exchange for cooperation.

Chapter X: The Velvet Room
-- 232 --
The Loot Exchange This big fat table should help you figure out what certain items are worth in Loot.. If there’s an
item that you want and don’t see it in the list below, go ahead and add it whatever price point
you feel is appropriate. Some Loot, like healing, is described in general terms so you can flavor
it as whatever makes the most sense for your setting.
Price Item Notes Cups- Restorative Items
5 Human Healing (Lv. 1) Heals 3 Shock from one Human Character
10 Human Healing (Lv. 2) Heals 5 Shock from one Human Character
15 Human Healing (Lv. 3) Heals All Shock from one Human Character
10 Party Healing (Lv. 1) Heals 1 Shock from every Human Character in the Party
20 Party Healing (Lv. 2) Heals 3 Shock from every Human Character in the Party
30 Party Healing (Lv. 3) Heals 5 Shock from every Human Character in the Party
15 Scar Repair Heals 1 Scar from one Human Character
7 Persona Healing (Lv. 1) Heals 2 Shock from one Persona
14 Persona Healing (Lv. 2) Heals 4 Shock or 2 Scars from one Persona
21 Persona Healing (Lv. 3) Heals 6 Shock or 3 Scars from one Persona
25 Part Repair Restores a Persona Part reduced to 0 HP to half its max
50 Persona Resurrection Restore a Dispersed Persona to half HP in each its Parts
Wands- Exploration Items 5 Lockpick Add +2d to your Shop roll to pick a lock
5 Illuminator Turn a dark room lit
5 Rough Map Shows a rough layout of the Dungeon
10 Shadow Bait Add +2d to your Reflex roll to sneak past Shadows
10 Shadow Ping Tells you whether Minor Shadows are in the area
10 Quality Map Shows what rooms are in a Dungeon
15 Defusal Kit +2d to Shop roll to disable a Trap
15 Shadow Diviner Tells you what kind of Minor Shadows are in the area
20 Exquisite Map Shows where traps, hidden passages and treasures are
Swords- Combat Items X Elemental Attack Single-use Xd attack item. Add Extras to increase its Price
10 Distraction Device Escape a Minor Shadow Encounter
20 Armor Capsule Grants Tough x1 to all Parts or Stats for 1 Round
20 Accelerant Grants Fast x1 for one Action
20 Steroids Grants Power x1 for one Action
Coins- General Commerce 2 Exchange Rate Coins can be used to purchase other Items at a 2:1 rate
5 Favorite Thing (Common) Something that may appeal to a local Shadow…
10 Favorite Thing (Rare) Something that may appeal to a local Shadow…
15 Favorite Thing (Exotic) Something that may appeal to a local Shadow…
30 Favorite Thing (Unique) Something that may appeal to a local Shadow…
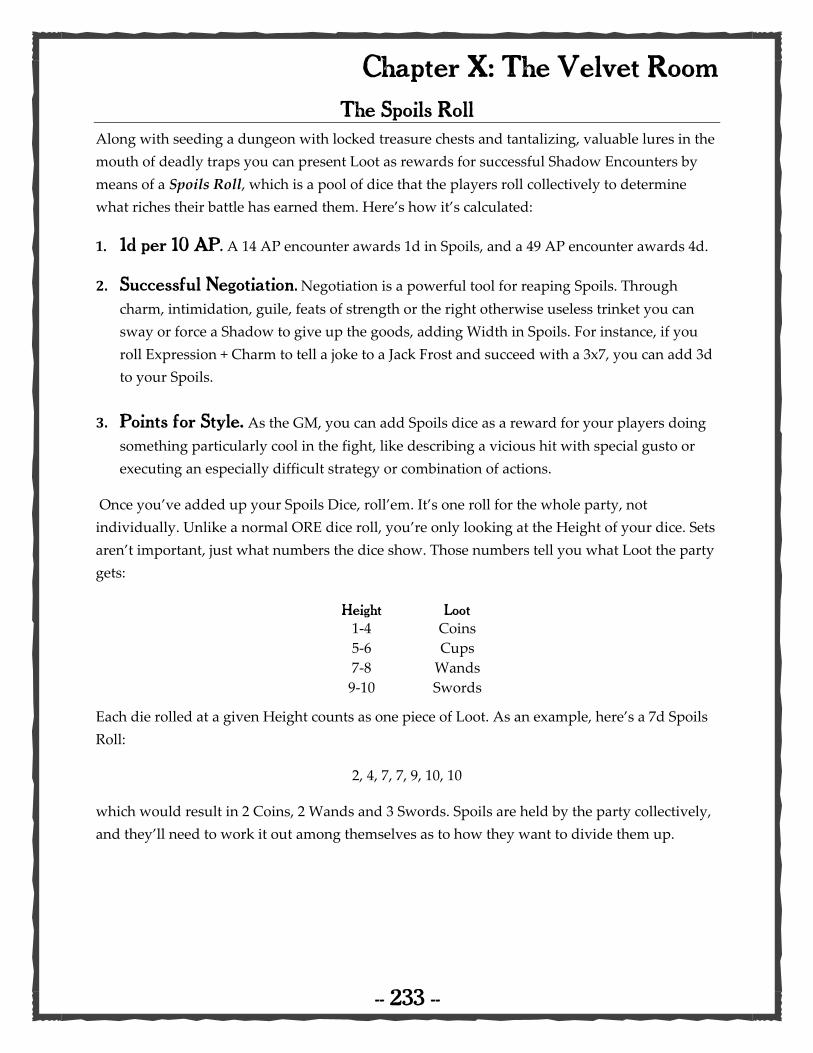
Chapter X: The Velvet Room
-- 233 --
The Spoils Roll Along with seeding a dungeon with locked treasure chests and tantalizing, valuable lures in the
mouth of deadly traps you can present Loot as rewards for successful Shadow Encounters by
means of a Spoils Roll, which is a pool of dice that the players roll collectively to determine
what riches their battle has earned them. Here’s how it’s calculated:
1. 1d per 10 AP. A 14 AP encounter awards 1d in Spoils, and a 49 AP encounter awards 4d.
2. Successful Negotiation. Negotiation is a powerful tool for reaping Spoils. Through
charm, intimidation, guile, feats of strength or the right otherwise useless trinket you can
sway or force a Shadow to give up the goods, adding Width in Spoils. For instance, if you
roll Expression + Charm to tell a joke to a Jack Frost and succeed with a 3x7, you can add 3d
to your Spoils.
3. Points for Style. As the GM, you can add Spoils dice as a reward for your players doing
something particularly cool in the fight, like describing a vicious hit with special gusto or
executing an especially difficult strategy or combination of actions.
Once you’ve added up your Spoils Dice, roll’em. It’s one roll for the whole party, not
individually. Unlike a normal ORE dice roll, you’re only looking at the Height of your dice. Sets
aren’t important, just what numbers the dice show. Those numbers tell you what Loot the party
gets:
Each die rolled at a given Height counts as one piece of Loot. As an example, here’s a 7d Spoils
Roll:
2, 4, 7, 7, 9, 10, 10
which would result in 2 Coins, 2 Wands and 3 Swords. Spoils are held by the party collectively,
and they’ll need to work it out among themselves as to how they want to divide them up.
Height Loot 1-4 Coins
5-6 Cups
7-8 Wands
9-10 Swords

Chapter X: The Velvet Room
-- 234 --
Attrition and Exhaustion In Persona 3, the player’s party members could only explore the Dark Hour for so long before
becoming exhausted and weak, resulting in a hard cap on the amount of effective exploration
you could do in a given day. As a GM, this can also be useful to you (especially in games with a
heavy Exploration Focus) as a way to add tension to the experience of travelling through the
Other World. The more time your players spend in their extra-dimensional incursion, the
greater the toll it takes on their body and mind. This can also be used to prevent players from
exploring too deeply into uncharted terrain that you may not be fully prepared to reveal to
them.
Attrition is the term used for this slow erosion of a character’s stamina and condition. It
takes the form of damage inflicted at regular intervals after extended exertion. Once exhauston
sets in, each player rolls 1d after every scene (including Combat Encounters)and takes a point of
Shock to both their Human character (draining them physically) and their Persona (draining
them mentally). Humans can resist Attrition with Guts + Wind, but Personas cannot, and this
kind of damage ignores any levels of Tough the afflicted part has.
If players persevere despite these rigors, a GM can bump the attrition rate up to 2d, but
no higher.

Chapter X: The Velvet Room
-- 235 --
The Social Level: Creating Social Networks In standard Monsters and Other Childish Things, the Players are given free reign over deciding
their Human character’s Relationships. In Persona, the main character is always a blank slate,
moving to a new area with zero human contacts. Clearly this presents a slight conflict in
approach, so to help GMs synthesize a solution here are some rules for setting up your players’
Social Networks.
Method 1: Player Controlled
This is the Monsters and Other Childish Things option. The players choose their Relationships at
character creation, and they can choose to open new Relationships with any characters they’re
interested in interacting with. For a GM this requires a great deal of flexibility as any NPC they
introduce could be a potential Relationship, and it means they may need to assign an Arcana to
that Relationship on the fly.
Method 2: GM Controlled (aka Central Casting)
This is the Persona option. When the game starts the GM creates a cast of characters that they
intend to be Relationships for the players. This obviously requires a lot of work, and there’s no
guarantee that the players will be even remotely interested in these characters, but on the other
hand it preserves the element of mystery and discovery in exploring these Relationships from
the original games.
Method 3: Arcana Draft
This option splits the difference. It gives players control over what kind of characters they want
to have Relationships with, but it keeps the mystery of who those characters are and what their
deal is.
The way it works is the players take turns choosing, not the NPCs they want to have
Relationships with, but their Arcana. There’s no repeating allowed, and NPCs can’t share an
Arcana with another Player Character—if one of the PCs its of the Moon Arcana, the others are
going to need to get to know them if they want a Moon Relationship.
Arcana Drafting works well as a Session 0 exercise along with character construction. It
tells the GM what sort of interpersonal interactions each player is interested in. If one Player
picks Devil right off then he’s showing that he’s interested in dealing with someone on the
darker-side, while a player who grabs Emperor and Empress is especially interested in the
dynamics of authority in relationships. One fun variation to this is to have each player design
one of the Relationships chosen by someone-else.

Chapter X: The Velvet Room
-- 236 --
Creating and Animating Relationship-Ready NPCs Relationships are the crux of the Social Level in The Velvet Book, so GMs should take care in how
they write and run them for their Players. This section lays down some helpful suggestions to
that end.
All Relationships have Problems
At the core of a Relationship is its Problem, the personal or social dilemma that the person
struggles with. Quality Time with a Relationship frequently, but not always, focuses on helping
them with this Problem, and improvement to the Relationship often comes with helping them
advance past a stumbling block or deepening your understanding of their Problem. However,
there is a word of caution about problems:
Relationships are not Puzzles to be Solved
This is essentially how Social Links in Persona are handled. Each S. Link has a personal problem
they’re struggling with, and it’s the player’s job to help them navigate that problem until they
reach a resolution whereby the Problem has been overcome.
This is a value approach for a One-Shot or a short-term campaign, but in long campaigns
it’s not viable, because if a Relationship’s personality is defined by their Problem, solving the
Problem undermines their personality and robs the Relationship of meaning. If the sole reason
you’re hanging out with someone is because of X, and you solve X, then what reason do you
have to spend time with them?
Good Problems are based on inherent character flaws, not circumstances. Circumstances can change, but Flaws rarely do. You can help a Relationship recognize his or
her Flaws and cope with the aftermath of succumbing to that Flaw, but it’s never going to be
truly gone within the scope of the Campaign. You could have a Fortune Relationship with
someone who is trying to open a business to strike it rich; their Problem isn’t “Running a
business is hard”, their problem is that they’re so driven to improve their economic station that
they take needless risks, and will continue to do so whether the business fails or soars. That’s a
good Problem.
Give them Inner Lives
What music do they listen to? What’s their favorite food? How’s their relationship with their
parents, their teachers, their other friends? Even if these things aren’t germane to their Problem,
it helps flesh them out and make them feel more real and interesting to your players.

Chapter X: The Velvet Room
-- 237 --
Arcana-Based Problems If you want ideas for the kinds of problems that a Relationship might have, you can look to their
Arcana. While no two Relationships of the same Arcana should have the same problem, this
provides a guide of the sort of trouble they tend to fall into.
The Magician: Magicians tend to overestimate themselves and get in over their head.
Sometimes this verges on magical thinking where they believe that something deeply
implausible can be done because they’re smart enough, talented enough or charming enough to
will it into reality.
The High Priestess: Priestesses struggle with reconciling their feelings and intuition with
obligations or expectations placed upon them. Their gut tells them one thing, but their family,
teachers or other sources of authority say the opposite, and the High Priestess is forced to
confront this contradiction.
The Empress: Empresses have problems keeping their feelings in balance respecting their
positions and become overprotective, co-dependent or controlling towards others. This can
result in them becoming “blocked” in some way—creatively, socially, intellectually or
emotionally— as their responsibility toward others crowds out their own needs.
The Emperor: The Emperor’s quest for power and authority is fertile ground for problems.
Many Emperors are tempted to follow cruel or unsavory paths to attain power, and once they
have it, are then tempted to abuse it to satisfy their personal whims. Keeping a balanced view of
power is, for many Emperors, a life-long struggle.
The Hierophant: Hierophants are sources of spiritual or philosophical guidance, but as
people they often chafe against the very doctrines and principles they teach others. This can
vary from mere doubt and self-inspection to outright rebellion. Hierophants represent the status
quo, and their problems arise from questioning it’s correctness.
The Lovers: Lovers have obvious problems usually hard-wired into their concept. Lovers are
all about being forced to make choices and the search for guidance and support in making that
choice. GMs running a Lovers relationship should be careful not to make their choices obvious
or one-sided, and, once the choice is made, to focus on the consequences of that choice.
The Chariot: Chariots tend to be underdogs and their problems are apparent therein. They’re
fighting to win against huge odds, and need all the help they can get. When these challenges
become too much for them they struggle to remain motivation or find direction, which can
divert them from their goal altogether.

Chapter X: The Velvet Room
-- 238 --
Justice: Justice Relationships view reality through high-contrast lenses, with clear delineations
between right and wrong. Their problems arise when this world view is challenged, either
externally, by a person or event who defies their ideology, or internally, from their own actions
and feelings that contradict their moral code.
The Hermit: Like Lovers, Hermit problems are usually self-evident. They’re isolated for some
reason, either imposed by circumstances or adopted out of some internal need for withdrawal,
and as a consequence they struggle to interact with society as a whole. Problems like this often
can never be fully solved, only managed with care and compassion.
Fortune: Fortunes are their own worst enemies. They’re proactive people who take big risks to
reshape their circumstances, and those are as likely to turn back and bite them as they are to
pay off. This tendency toward high-risk behavior often seeps through other aspects of their
lives, not just their core goal, and makes their lives interesting in all the wrong ways.
Strength: Strength Relationships demonstrate courage and fortitude against crushing
pressure, and that pressure is usually the cause of their problems. Stalwart as they might be,
nobody is unbreakable, and Strengths cope with feelings of depletion and hopelessness and
may lash out explosively as the pressure seems too much to bear.
The Hanged Man: Hanged Men make themselves into martyrs for a cause, and in so doing
create their problem. Usually this takes shape when their idealism rams up against reality and
they question whether their cause is worth what they’re putting themselves through. They may
lament their choice and even look for an escape hatch.
Death: Death Relationships are with people who’ve made major changes in their lives, and
their problems normally stem from their dead lives returning from the grave to haunt them.
Deaths may also struggle with letting go of their past and accepting their present circumstances,
of if they are currently undergoing a transformation, they may resist it’s current.
Temperance: Temperance Relationships make life hard for themselves by trying to do too
much at once, and their problems almost always arise from their inability to do successfully.
Like Fortune, this often extends beyond their core problem and weighs in on almost every
decision they made.
The Devil: Devils are tricky because they tend to be the source of other people’s problems.
Their own problems center on their struggle against society’s judgement, or on their own sense
of self-worth measured against their vices. Be careful to avoid giving a Devil an arc that ends
with them going straight, since this effectively severs their connection to their arcana.

Chapter X: The Velvet Room
-- 239 --
The Tower: Towers are defined by destruction, either as its cause or its victim. A Tower is a
person who’s life is approaching or undergoing imminent upheaval, or who brings upheaval on
others. That upheaval itself is the Tower’s problem, and their struggle is in how they react to it,
relate to it and try to either resist it or cope with it.
The Star: Stars are dreamers, and the remoteness of that dream is usually the heart of their
problem. The greater the goal the more distant it is and the greater the need for faith that the
Star can reach it, and nobody’s faith is impregnable. As reality erodes their hope, they become
detached and overwhelmed, feeling that their dream is unreachable.
The Moon: Moons are like Towers and have very blatant problems. Moons retreat from the
real world, preferring comfortable illusions to harsh truth. This central problem is the catalyst
for innumerable other problems that sprout up like weeds in their subconscious. Like the Devil,
it can be a challenge not to have a Moon’s problem solved too quickly.
The Sun: With Suns you get to be creative for their problems. The Sun is normally a person
brimming with optimism, whose success is right at hand. So their problem becomes “What are
they succeeding in spite of?” Then their challenge becomes maintaining that optimism without
being dragged down by that problem.
Judgement: Judgements carry weighty responsibilities, and the gravity they feel from those
responsibilities can become their problem. As they consider the lives that their decisions can
affect, they begin to doubt and criticize themselves, and even try to ignore their calling and try
to shed their burden of responsibility.

Chapter X: The Velvet Room
-- 240 --
Changing Arcana Sometimes a Relationship evolves in a way you didn’t anticipate. A Devil gives up his vices and
goes straight, or an Empress becomes divorced and her family situation is redefined. This can
bring them into conflict with their own Arcana, or less directly, it can cause them to identify
more strongly with a different Arcana.
If this happens, the best way to approach the Relationship is simply to change its
Arcana. Towers who endure their disaster and move past it become Deaths. Devils who get
their act together and try to help others do the same become Hanged Men. A Fortune who,
against all odds, succeeds at his goal and builds a better life becomes a Sun. This allows
Relationships the freedom to evolve organically without being constrained by their given
Arcana.
It also changes up the way that Players can use those Relationships, for one very
important Reason: When a relationship changes its Arcana, it retains its original Extra along with its new one. If your Tower becomes Death, it can Arcana Boost your
Persona with both Recoil and physical Power.

Appendix A: Sample NPCs
-- 241 --
If you’re a GM looking to flesh out the population of his campaign (or a player looking for
inspiration for your own character), the next few pages list 20 pre-made characters, one for each
of the primary Arcana.
Note that while each NPC has the same Stat total, their Skill totals may differ. Adult
characters especially have a lot more Skill points than teenagers (about 45 or so), and that even
younger characters have more Skill points than starting characters (around 25 instead of 15).
This lets them present more interesting and compelling challenges when a player’s character is
asked to roll with or (more often) against them.
The list alternates between American/European/generally Western characters and
distinctly Japanese ones, in order to present a bridge between the Monsters and Other Childish
Things and Persona default settings.
Dr. Helmut Weiss The Magician Description: The wily, white haired resident of that Frankenstein-looking place down at the end
of Berkley Lane, Doc Weiss is an eccentric yet brilliant inventor and scientist in need of a young
assistant to help him out with errands and his experiments.
Problems: Doc Weiss was once a highly respected expert in his field, but was ostracized from
the scientific community for his fringe theories, and then again from the local community for
just being kind of weird. Parents tell their kids to avoid his property, and kids in turn make up
stories about what goes on inside his estate.
Diligence 2d (Beat-Down +0, Block +0, P.E. +2)
Guts 2d (Courage +3, Fighting +0, Wind +2)
Proficiency 4d (Aim +3, Reflex +2, Shop +5)
Knowledge 5d (Academics +4, Notice +3, Out-Think +4, Super Science +5)
Expression 2d (Charm +2 Connive+3, Put-Down +2, Creeping People Out +3)
Yanagi Misa The High Priestess Description: Misa, a blue-haired third year student, is better than you at video games. Like, a lot
better. Her dad owns a retro game store in the city so she was practically born with a controller
in her hands. More than sheer skill, she has a deep intuition when it comes to games that's
allowed to her excel on the competitive scene.
Problems: Misa’s homelife is a wreck. Her parents are negotiating a messy divorce and her
older brother just got kicked out of his university. For all her skill in virtual reality, she feels
woefully ill-equipped to deal with actual reality.
Diligence 3d (Beat-Down +1, Block +0, P.E. +0)
Guts 2d (Courage +2, Fighting +2, Wind +1)
Proficiency 4d (Aim +1, Reflex +2, Shop +1. Pro Gaming +3)
Knowledge 3d (Academics +1, Notice +2, Out-Think +2)
Expression 3d (Charm +1, Connive+2, Put-Down +4)

Appendix A: Sample NPCs
-- 242 --
Bonnie Grissom The Empress Description: Mrs. Grissom is the wife of Kyle Grissom, the school’s basketball coach. Calm yet
firm in her convictions, she’s often the eye of the storm that is high school athletics. Like it or
not, she’s become an authority figure, especially among female students who see her as a
striking icon of poise.
Problems: The irony of Bonnie’s situation is her own strained relations with her daughter Elle;
moreover, the stress put on her and her husband by the school’s expectations for the basketball
team incur visible wear on her psyche.
Diligence 4d (Beat-Down +0, Block +3, P.E. +2) Guts 3d (Courage +3, Fighting+2, Wind+2, ) Proficiency 2d (Aim +2, Reflex +2, Shop +2, Home Cooking +3) Knowledge 2d (Academics +3, Notice +3, Out-Think +3, Detect BS +5) Expression 4d (Charm +3, Connive +1, Put-Down +2, Calm Frazzled Teenagers +4)
Shirai Masutaro The Emperor Description: Taro is the strong, tall, handsome captain of the high school's baseball team. The
other players look up to him as their leader-- they've even taken to calling him "The Colonel" for
his commanding presence and the way he's able to keep the unruly team in check.
Problems: Taro loves baseball more than anything, and especially more than school work.
While a good athlete and a natural leader, his future prospects beyond baseball look bleak, as
no serious schools or teams have yet shown any interest in him.
Diligence 4d (Beat-Down +2, Block +1, P.E. +2) Guts 2d (Courage +1, Fighting +3, Wind +2) Proficiency 3d (Aim +3, Reflex +2, Shop +2) Knowledge 2d (Academics +0, Notice +0, Out-Think +0) Expression 4d (Charm +3, Connive +2, Put-Down +2)
Coach Kyle Grissom The Hierophant Description: Kyle is the coach of the school’s basketball team. Last year he took the struggling
underdogs to the state championship, and expectations are high for a repeat. When not
courtside, Coach Grissom find himself as the father figure in an ad hoc family of young athletes
wrestling with questions of identity and morality common to adolescents.
Problems: Despite Coach Grissom’s upright reputation, he’s got his own moral struggles to
contend with--most immediately, whether to accept a higher paying position at another school,
leaving his team in the lurch and forcing another move for his beleaguered family.
Diligence 3d (Beat-Down +2, Block +2, P.E. +3) Guts 5d (Courage+3 , Fighting +3, Wind +2, Ignore Heckling +2) Proficiency 2d (Aim +3, Reflex +2, Shop +2) Knowledge 3d (Academics +2, Notice +2, Out-Think +3, Basketball Strategy +4) Expression 3d (Charm +2, Connive +2, Put-Down +2, Pep Talk +4)

Appendix A: Sample NPCs
-- 243 --
Oyakawa Yuji The Lovers Description: Yuji is a glowing reactor of talent and great hair. He’s the captain of the tennis
team and the president of the drama club. Last year he took home the trophy at the Prefectural
Grand Slam contest while also directing the school’s rendition of Les Miserables.
Problems: Yuji has been offered a sports scholarship to Japan’s most prominent college athletics
program and a scholarship to the nation’s leading performing arts school. And he is utterly
terrified of having to choose one over the other.
Diligence 4d (Beat-Down +0, Block +1, P.E. +3) Guts 2d (Courage +1, Fighting +1, Wind +3) Proficiency 2d (Aim +3, Reflex +3, Shop +0) Knowledge 3d (Academics +1, Notice +2, Out-Think +0) Expression 4d (Charm +3, Connive +1, Put-Down +0, Theater +3)
Alexandra Macklemore The Chariot Description: Alex is an exceptionally bright young woman with an even brighter future ahead
of her, despite coming from the boonies of Nowhereville, USA. Her work ethic is seemingly
unreal, by which she hopes to be the first member of her family to attend college, and in a STEM
field at that.
Problems: There are some very real reasons why Alex is set to be the first college graduate in
her family. They’re dirt poor, numerous, and, to put it politely, set in their ways. They don’t put
any merit in higher education and do little to support Alex’s academic endeavors.
Diligence 4d (Beat-Down +2, Block +1, P.E +2, Pulling an All Nighter +3) Guts 3d (Courage +2, Fighting +2, Wind +1) Proficiency 2d (Aim +2, Reflex +0, Shop +3) Knowledge 4d (Academics +2, Notice +1, Out-Think +2, ) Expression 2d (Charm +0, Connive +0, Put-Down +2)
Maniwa Kaito Justice Description: People, usually adults, often describe Kaito as “squirrely and clearly up to no
good.” That doesn’t bother him though, as he has a higher calling than mainstream approval:
he’s a self-proclaimed hacker of righteousness, using his skills to dig up the hidden deeds of his
corrupt society crying out for punishment.
Problems: Kaito’s crusade hasn’t gone unnoticed, and there’s a cybercrime division slowly but
surely zeroing in on his identity. He knows this and it’s making him paranoid, yet he can’t
bring himself to stop even in the face of certain disaster.
Diligence 2d (Beat-Down +2, Block +0, P.E. +0) Guts 4d (Courage +2, Fighting +2, Wind +0) Proficiency 3d (Aim +0, Reflex +2, Shop +2, Crafting Elaborate Calling Cards +3) Knowledge 4d (Academics +2, Notice +1, Out-Think +2, Computer Hacking +4) Expression 2d (Charm +0, Connive +3, Put-Down +2)

Appendix A: Sample NPCs
-- 244 --
Julian Hall The Hermit Description: A gruff teenager with a weariness in his eyes beyond his years, Julian keeps a low
profile. He’s an average student, and an average athlete with only a few friends. He rarely
speaks in class but when he does it reveals a young man with a keen mind who’s been through
the wringer more times than he rightly should.
Problems: Julian’s on his last strike. Growing up on the wrong side of the tracks lead him onto
the law’s bad-side, and the System’s chewed him up and spit him out. He’s been in three
schools in the past four years, and his probation officer warned him that the next time he
crosses the line, his age won’t save him from real incarceration.
Diligence 3d (Beat-Down +3, Block +2, P.E. +2, Sneaking Around +3) Guts 2d (Courage +2, Fighting +3, Wind +0) Proficiency 3d (Aim +1, Reflex +0, Shop +2) Knowledge 3d (Academics +0, Notice +1, Out-Think +0) Expression 4d (Charm +1, Connive +2, Put-Down +1, Keep a Low Profile +2)
Shinohara Ritsuko Fortune Description: Ritsuko is the owner of Shinohara Exploration and Recovery, an underwater
salvage operation. From the wheel of her trustworthy vessel, the Ishizaka-maru, Ritsuko true
objective is to strike it rich by dredging up sunken treasure from ancient wrecks.
Problems: Ritsuko’s enterprise has not been successful. It might be if she would only stick to
reputable, sensible jobs, but she’s wasted huge sums of money and man-hours following leads
and hunches that pulled in exactly zilch. If she can’t right her course soon, the business is sunk.
Diligence 3d (Beat-Down +0, Block +0, P.E. +2, Scuba Diving +4) Guts 3d (Courage +3, Fighting +1, Wind +3) Proficiency 4d (Aim +3, Reflex +2, Shop +4, Boat Operation +2) Knowledge 2d (Academics +3, Notice +3, Out-Think +2, Searching for Treasure +4) Expression 3d (Charm +2, Connive +1, Put-Down +1, Convincing Investors +3)
Dr. Kamala Montes Strength Description: Kamala is medical resident at the city’s largest and busiest hospital. Because she
specializes in oncology, she’s brought face-to-face with many of the hospitals most challenging
and tragic medical cases, testing not just her skill but even more-so her resolve.
Problems: Kamala has it hard enough dealing with the fact that many of the patients she treats
don’t have much hope of survival, but her life has been further complicated by the fact that she
and her husband Christian are expecting a baby just two short months.
Diligence 3d (Beat-Down +0, Block +2, P.E. +3) Guts 2d (Courage +3, Fighting +1, Wind +3) Proficiency 5d (Aim +2, Reflex +3, Shop +2, Surgery +3) Knowledge 3d (Academics +3, Notice +3, Out-Think +4, Medicine +4) Expression 2d (Charm +3, Connive +2, Put-Down +0, Bedside Manner +4)

Appendix A: Sample NPCs
-- 245 --
Hada Takeshi The Hanged Man Description: Takeshi had a promising future as an educator. He could have taught at the
nation’s highest institutions. Instead, defying every one of his peers and advisors, he accepted a
position at the prefecture’s most troubled and poorly performing high school.
Problems: Takeshi is disrespected by his students and distrusted by his fellow teachers, who
refuse to believe that someone of his stature would willingly torpedo his own future. He’s far
away from home-town and has a pathetically feeble grasp of how city life works. Not a day
goes by where he doesn’t wonder if he’s made a colossal error.
Diligence 2d (Beat-Down +0, Block +2, P.E. +2, Withstand Exhaustion +4) Guts 4d (Courage +2, Fighting +1, Wind +2, Keep Cool in Bad Neighborhoods +2) Proficiency 2d (Aim +2, Reflex +3, Shop +1, Throw Eraser +3) Knowledge 4d (Academics +4, Notice +3, Out-Think +2, Eyes in the Back of his Head +3) Expression 3d (Charm +3, Connive +2, Put-Down +2, Inspire Students +2)
Mr. Chadee Death Description: Dhipyamongkol Chadee (he usually goes by just his last name) owns and operates
the Curry Express food-truck. Friendly and cordial, he’s started to attract some minor acclaim
for his creative takes on traditional and modern Thai cuisine.
Problems: In another life and hemisphere, Mr. Chadee was known as the Operator, one of the
most feared and renowned fighters in the asian mixed martial arts circuit. That all ended one
day a decade ago when he accidentally killed a man in the ring. Seeing it as a wake-up call, Mr.
Chadee swore off fighting forever.
Diligence 3d (Beat-Down +4, Block +4, P.E. +3) Guts 4d (Courage +1, Fighting +5, Wind +3) Proficiency 4d (Aim +2, Reflex +4, Shop +3, Thai Cuisine +2) Knowledge 2d (Academics +0, Notice +3, Out-Think +0) Expression 3d (Charm +2, Connive +1, Put-Down +4, Threatening Glare +4 )
Ubukata Okura Temperance Description: Okura is involved in the chess club, the go club, the mahjong club, the debate club,
the model U.N., the community beautification club, the tea club, the animation club, the
academic olympics, and is the treasurer and vice-president of the student council.
Problems: Okura’s membership in virtually every extracurricular group he sign-up for has him
stretched thin, and more importantly it’s taken a toll on his normal school work. If he doesn’t
figure out how to balance his schedule he’s headed for scholastic peril.
Diligence 2d (Beat-Down +0, Block +3, P.E. +0, Punctuality +2) Guts 2d (Courage +0, Fighting +0, Wind +1) Proficiency 4d (Aim +2, Reflex +0, Shop +3, Setting Up Displays and Murals +2) Knowledge 4d (Academics +1, Notice +2, Out-Think +1, Board Games +2) Expression 3d (Charm +2, Connive +1, Put-Down +1, Parliamentary Procedure +2)

Appendix A: Sample NPCs
-- 246 --
Jessie Wu The Devil Description: Jessie is a junior, a good student and popular with her teachers. Her parents are
pharmaceutical chemists and she seems well poised to follow in their footsteps. Always well
dressed and fashionable, she’s well liked for her friendly, relaxed attitude.
Problems: No one even suspects that Jessie is her school’s #1 hook-up for party drugs. She steals
some from her parents’ lab, others she cooks up on school grounds, using the cover of a pre-
college extra-credit course. Through it all she never relents on her sunny demeanor, firm in the
belief that she’s engaged in a victimless crime.
Diligence 2d (Beat-Down +2, Block +0, P.E. +1) Guts 3d (Courage +2, Fighting +1, Wind +0) Proficiency 3d (Aim +1, Reflex +1, Shop +0, Sticky Fingers +3) Knowledge 3d (Academics +2, Notice +1, Out-Think +1, Chemistry +3) Expression 4d (Charm +1, Connive +2, Put-Down +1, Appear Upstanding +3)
Mikami Yasuko The Tower Description: Yasuko owns a stationery store in the city, but her real business happens behind
the shop, where she runs a back-alley market of strange and interesting products, most of
foreign make, and many of questionable legality.
Problems: Yasuko’s “side job” is a linked with a company called Better Futures Now. It has all
the telltale markings of a pyramid scheme, and it’s draining her and her family dry without her
even realizing it.
Diligence 3d (Beat-Down +0, Block +3, P.E. +2) Guts 3d (Courage +2, Fighting +1, Wind +3) Proficiency 3d (Aim +2, Reflex +3, Shop +3, Conceal Contraband +4) Knowledge 2d (Academics +3, Notice +2, Out-Think +2, Identify Clients +5) Expression 4d (Charm +3, Connive +3, Put-Down +1, Salespersonship +3)
Anthony Singer The Star Description: Tony Singer is an idealistic young man with an undying faith in democracy and his
country’s promise of opportunity. He’s channeled that enthusiasm into volunteering for his
community and getting involved in local city government.
Problems: Tony’s wide-eyed idealism blinds him to the seedier side of politics, and he takes it
very personally when his idols don’t live up to what he’s built them up to be. Most of all, he’s
afraid of becoming as jaded and callous as many of the career politicians he encounters in his
various internships.
Diligence 3d (Beat-Down +1, Block +2, P.E. +0) Guts 4d (Courage +1, Fighting +3, Wind +2, Cling to Idealism +2) Proficiency 2d (Aim +1, Reflex +0, Shop +0) Knowledge 3d (Academics +1, Notice +1, Out-Think +1, Empathy +3) Expression 4d (Charm +2, Connive +1, Put-Down +1, Impassioned Speech +3)

Appendix A: Sample NPCs
-- 247 --
Kitamura Sho The Moon Description: Sho is the richest kid in the school and makes sure everyone knows it. He has a
personal driver who drops him off each day, he wears designer clothes from his socks to his
sunglasses and he throws elaborate parties at his parent’s estate when they’re out of town.
Problems: Sho’s frivolous spending and exaggerated high-roller lifestyle masks deep-seated
feelings of neglect. Both of his parents are businesspersons and spend virtually no time with
him, expecting that their affection, such as it is, is demonstrated through gifts and luxuries.
Diligence 3d (Beat-Down +2, Block +1, P.E. +1) Guts 2d (Courage +0, Fighting +0, Wind +2) Proficiency 4d (Aim +3, Reflex +0, Shop +0, Organize Parties +3) Knowledge 2d (Academics +0, Notice +2, Out-Think +0) Expression 4d (Charm +3, Connive +2, Put-Down +2, Impress with Wealth +4)
Erika Freeman The Sun Description: Erika is an energetic, cheerful senior with a passion for gymnastics. She’s been
training in the sport virtually since she could walk and is one of the top performers in the state.
She has one all-consuming goal: Olympics or bust.
Problems: Erika has a genetic condition that rendered her blind at age 7. She hasn’t allowed it to
slow down her ambitions or her performance, but it’s made it difficult for the major athletic
programs she’s aiming at to take her seriously. As she enters her final year of high school, she’s
doubled down on her training, refusing to surrender to circumstances.
Diligence 5d (Beat-Down +0, Block +0, P.E. +2, Gymnastics +3) Guts 3d (Courage +2, Fighting +2, Wind +1, Never Give Up +4) Proficiency 3d (Aim +0, Reflex +3, Shop +0) Knowledge 2d (Academics +1, Notice +0, Out-Think +0, Use Other Senses +4) Expression 2d (Charm +1, Connive +1, Put-Down +2)
Ishihara Hisato Judgement Description: Ishihara is an urban developer whose company has begun acquiring property in
the city, starting with its most run-down districts. He talks about saving these poverty-racked
neighborhoods from their woeful mismanagement, but his grand plans leave the current
residents uneasy about their futures.
Problems: Ishihara doesn’t want to be a bad guy, and he privately laments the impact his work
has on poor and historic communities. He struggles at times to view his job with the
pragmatism demanded by his investors.
Diligence 3d (Beat-Down +2, Block +3, P.E +1) Guts 2d (Courage +2, Fighting +2, Wind +2, Answering to the Investors +3) Proficiency 3d (Aim +3, Reflex +2, Shop +4) Knowledge 4d (Academics +3, Notice +3, Out-Think +4, Urban Development +3) Expression 3d (Charm +1, Connive +2, Put-Down +0, Inspire Fear of Eviction +5)
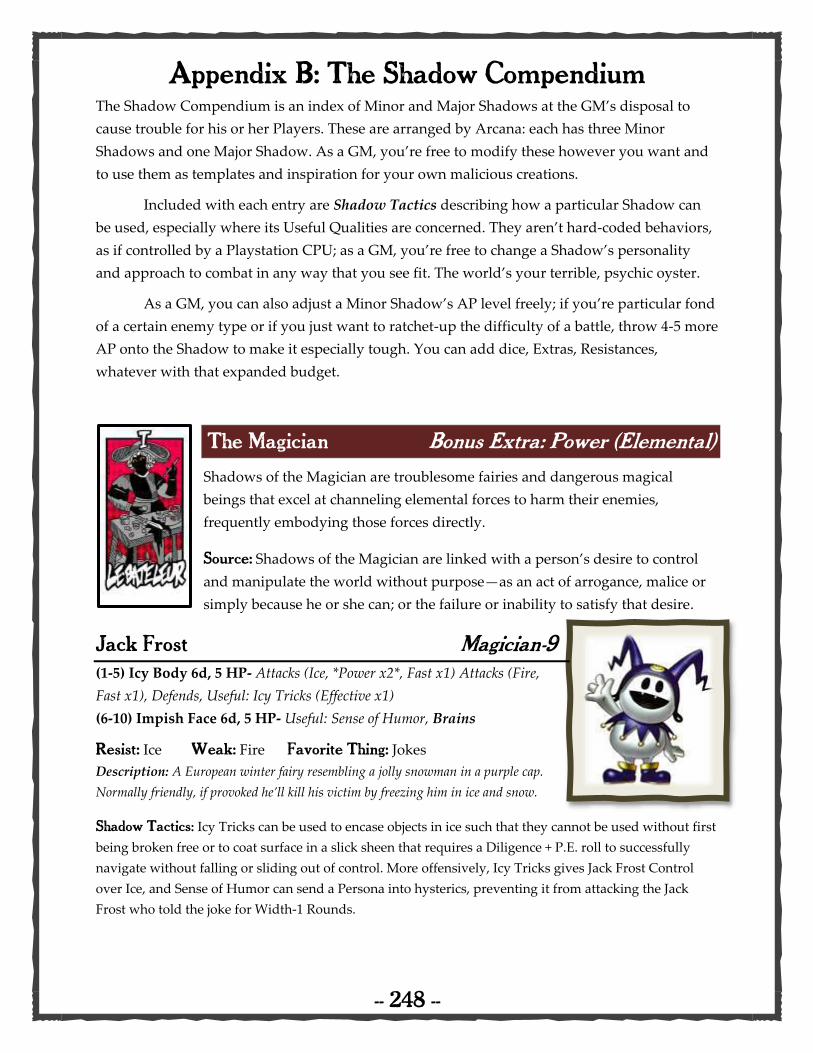
Appendix B: The Shadow Compendium
-- 248 --
The Shadow Compendium is an index of Minor and Major Shadows at the GM’s disposal to
cause trouble for his or her Players. These are arranged by Arcana: each has three Minor
Shadows and one Major Shadow. As a GM, you’re free to modify these however you want and
to use them as templates and inspiration for your own malicious creations.
Included with each entry are Shadow Tactics describing how a particular Shadow can
be used, especially where its Useful Qualities are concerned. They aren’t hard-coded behaviors,
as if controlled by a Playstation CPU; as a GM, you’re free to change a Shadow’s personality
and approach to combat in any way that you see fit. The world’s your terrible, psychic oyster.
As a GM, you can also adjust a Minor Shadow’s AP level freely; if you’re particular fond
of a certain enemy type or if you just want to ratchet-up the difficulty of a battle, throw 4-5 more
AP onto the Shadow to make it especially tough. You can add dice, Extras, Resistances,
whatever with that expanded budget.
The Magician Bonus Extra: Power (Elemental) Shadows of the Magician are troublesome fairies and dangerous magical
beings that excel at channeling elemental forces to harm their enemies,
frequently embodying those forces directly.
Source: Shadows of the Magician are linked with a person’s desire to control
and manipulate the world without purpose—as an act of arrogance, malice or
simply because he or she can; or the failure or inability to satisfy that desire.
Jack Frost Magician-9 (1-5) Icy Body 6d, 5 HP- Attacks (Ice, *Power x2*, Fast x1) Attacks (Fire,
Fast x1), Defends, Useful: Icy Tricks (Effective x1)
(6-10) Impish Face 6d, 5 HP- Useful: Sense of Humor, Brains
Resist: Ice Weak: Fire Favorite Thing: Jokes
Description: A European winter fairy resembling a jolly snowman in a purple cap.
Normally friendly, if provoked he’ll kill his victim by freezing him in ice and snow.
Shadow Tactics: Icy Tricks can be used to encase objects in ice such that they cannot be used without first
being broken free or to coat surface in a slick sheen that requires a Diligence + P.E. roll to successfully
navigate without falling or sliding out of control. More offensively, Icy Tricks gives Jack Frost Control
over Ice, and Sense of Humor can send a Persona into hysterics, preventing it from attacking the Jack
Frost who told the joke for Width-1 Rounds.

Appendix B: The Shadow Compendium
-- 249 --
Jack O’Lantern Magician-14 (1-8) Pumpkin Head 7d, 6 HP- Defends (Fast x1), Useful: Induce Fear, Brains
(9-10) Lantern 7d, 6 HP- Attacks (Fire, Power x3), Attacks (Dark, *Power x1*,
Area x1), Useful: Spooky Illusions (Always Works)
Resist: Fire Weak: Ice Favorite Thing: Candy
Description: A phantom who tricked his way out of the underworld. He wanders the Earth
wearing a carved gourd for a head while carrying a faint ember to light his path.
Shadow Tactics: Spooky Illusions have a broad array of effects, including
disguising Jack O’Lantern to look like inanimate objects or even as other Minor Shadows or creating
illusory objects to fool Persona Users. These Illusions can create duplicates of Jack O’Lantern which
confuse a Persona’s ability to target it for Width-1 Rounds; unless a Persona User rolls Knowledge +
Notice vs the Illusion’s Height, any time they attack Jack O’Lantern, they must roll 1d separately, and if
its Height is less than the Illusion their attack will miss.
Jinn Magician-25 (1-3) Magic Lamp 5d, 9 HP- Defends, Useful: Hide (Always Works), Tough x3
(4-9) Conniving Spirit 9d, 13 HP- Attacks (Fire, *Power x3*), Attack (Wind,
Area x2), Useful: Perceive Desires, Brains
(10) Cosmic Power 5d, 4 HP- Useful: Grant Wish (Always Works, Effect x1)
Resist: Fire Weak: Light Favorite Thing: Caring for its lamp
Description: A spirit of wind and fire from Arabian lore. Contained in a magic vessel,
Jinns can be helpful, wish granting beings or nefarious creatures leading men astray.
Shadow Tactics: Hiding lets Jinn contain itself in its Lamp. It cannot attack while
Hidden, but it gains Tough x3 to all its Locations for Width-1 Rounds (any damage
directed at it still hits as indicated by Height). Jinn can Grant Wishes to his fellow Shadows, giving them
any of the standard Buffs, and after Perceiving Desires of a Human or Persona he can Grant Wishes to
Charm them for Width in Rounds.
The High Priestess Bonus Extra: Effective Shadows of the High Priestess are witches, feminine fairies and mystical beasts
who often seem harmless, but such appearances are a crafty illusion belying
cruel, menacing intelligence.
Source: Shadows of the High Priestess come from a conflict between instinct
and intellect, precipitating either a failure to trust one’s intuition leading to
inaction at best and disaster at worst.

Appendix B: The Shadow Compendium
-- 250 --
Unicorn High Priestess-9 (1-6) Mighty Stallion 7d, 6 HP- Attacks (Physical), Defends, Useful: Swift
(Always Works), Tough x1
(7-10) Horn of Purity 6d, 4 HP- Attacks (Light), Heal x1, Useful: Sense
Motive (Effect x1), Brains
Resist: Light Weak: Fire Favorite Thing: Pure hearted humans
Description: A horse with a single horn between its eyes. It can read the hearts of
others and is said to be tamable only by a pure maiden; all others face its violent wrath.
Shadow Tactics: Unicorn’s Swiftness allows it to gallop at high speeds through battle and adds Width-1
in Fastness to attacks performed by itself or its rider. Its Sense Motivations ability allows it to detect the
intentions of possible adversaries. When used against a Persona User, Unicorn will always Declare after
that person, regardless of its normal initiative, for Width Rounds.
High Pixie High Priestess-18 (1-5) Humming Wings 6d, 5 HP- Defends, Useful: Flight (Always Works)
(6-10) Mystic Armor 8d, 11 HP- Attacks (Electric, Power x1), Attacks (Ice)
Useful: Fae magic (*Effect x3*), Useful: Authority, Heals x2, Brains
Resist: Elec Weak: Ice Favorite Thing: Giving orders
Description: An armored, winged sprite that commands younger fairies. They’re still
every bit as mischievous as their smaller counterparts.
Shadow Tactics: High Pixie’s Fae Magic can be used for any all sorts of troublesome effects. It can create
illusions, Tranquilize for Width+2 Rounds and command forest life. Authority lets it command Pixies:
The GM can set aside one Authority Set for use by any Pixies on the battlefield.
Ame-no-Uzume High Priestess-24
(1-7) Goddess Body 10d, 11 HP- Defends, Useful: Alluring Dance (*Effect
x2*, Spray x2), Tough x2, Brains
(8-10) Magical Fans 8d, 7 HP- Attacks (Wind, Power x2, Area x2), Attack
(Fire), Attacks (Ice), Heals x2
Resist: Dark Weak: Fire Favorite Thing: Dancing
Description: The Japanese goddess of entertainment. Her irresistible dance lured the
sun goddess Amaterasu from her seclusion, thus returning light to the world.
Shadow Tactics: Alluring Dance can entrance Personas, Disabling any Hit Locations targeted by the
Dance’s Set or Spray Dice. Alluring Dance can also drastically weaken a Persona’s combat resolve,
stripping away Width+1 in Power from their next Attack.

Appendix B: The Shadow Compendium
-- 251 --
The Empress Bonus Extra: Area Shadows of the Empress are powerful female figures, usually depicted as regal
and dominating. Though their outward appearances may seem calm and
gentle, they belie a deep store of dangerous power.
Source: Shadows of the Empress arise from a person who surrenders her
personal power, authority, or independence by being too wrapped up in the
affairs of other people. Trapped, she feels like a spectator in her own life.
Leanan Sidhe Empress-10 (1-5) Waifish Figure 7d, 7 HP- Defends, Useful: Captivating Beauty (Effect x1)
(6-10) Sweetheart’s Face 7d, 7 HP- Attacks (Dark, Power x1, *Area x2*),
Useful: Vampiric Inspiration, Brains
Resist: Dark Weak: Ice Favorite Thing: Attractive humans
Description: A beautiful fairy of Irish folklore that yearns for the love of a human. She
drains her lovers life-force in exchange for artistic inspiration.
Shadow Tactics: Captivating Beauty uses Leanan Sidhe glamor to inflict Tarunda for Width-1 Attacks.
Vampiric Inspiration affects a Persona’s User regardless of whether his Persona acted that turn. It
transfers Width-1 in dice from the User’s highest Stat to his Expression (or 2nd highest, if Expression is
highest). The only way to counteract this life drain is by defending with Courage. The effect lasts until the
victim experiences a full night’s rest. This cannot affect humans who already have 5d in Expression.
Titania Empress-21 (1-2) Fairy Wings 3d, 2 HP- Useful: Flight (Always Works)
(3-7) Regal Gown 6d, 7 HP- Defends, Heal x2 (Area x2), Tough x2
(8-10) Monarch’s Visage 7d, 10 HP- Attacks (Ice, Power x2), Useful:
Demand Respect (Area x2, Effective x1), Brains
Resist: Electric Weak: Ice Favorite Thing: Her subjects
Description: The Queen of the Fairies. Delicate yet proud and stunningly beautiful, she
resides in the Kingdom of Fairyland with her husband, Fairy King Oberon.
Shadow Tactics: Demand Respect is a powerful force that imposes a -2d penalty against any action using
the Targeted Persona’s hit location for Width in Rounds, while also launching 2 Area Dice at the rest of
the Party. Any hit location rolled on these Dice will be penalized for the next Round as well (if both Dice
are the same location, the effect is extended for 2 Rounds).

Appendix B: The Shadow Compendium
-- 252 --
Alilat Empress-26 (1-8) Heavenly Black Stone 10d, 9 HP- Heal x3, Tough x2, Defends (Recoil x2, Effect x1)
(9-10) Divine Engravings 9d, 6 HP- Attacks (Almighty, *Area x3*, Power x2), Attacks (Ice)
Useful: Inspire Reverence (Effective x1), Tough x1, Brains
Resist: Fire Weak: -- Favorite Thing: Being worshipped
Description: The Arabian mother goddess worshipped by desert nomads. She is thought to reside within
the Black Stone at the Kaaba in Mecca.
Shadow Tactics: In addition to saturating inferior minds with awe, Inspire Reverence causes
all attacks that strike its Divine Engravings to instead be routed to its Heavenly Black Stone.
This effect lasts for Width in Rounds, and any Persona User who successfully defeats the
Height of the Reverence roll using Out-Think can ignore its effect.
The Emperor Bonus Extra: Power (Physical) Shadows of the Emperor are powerful, physically impressive figures of
masculine authority and might with a broad preference for demolishing their
enemies with overwhelming bodily force.
Source: Shadows of the Emperor are the product of an unfulfilled thirst for
power or, in someone who already possesses power, its rampant abuse. He
will do anything to procure more power, and will hold onto it at all costs.
Forneus Emperor-10 (1-6) Aquatic Monstrosity 7d, 8 HP- Attacks (Physical, *Power x2*)
Defends, Useful: Powerful Swimmer, Tough x2
(7-10) Eloquent Orator 7d, 6 HP- Useful: Great Conversationalist,
*Brains*
Resist: Fire Weak: Elec Favorite Thing: Spirited conversation
Description: One of the 72 spirits of the Goetia. He appears as a sea monster, yet
is a skilled linguist and delights in demonstrating his rhetorical prowess
Shadow Tactics: Outside of battle, Great Conversationalist can be used in any task when a human might
use their Expression Stat. When involved in a fight, he can convince a Persona not to attack him, causing
it to hesitate and inflicting Sukunda for Width-1 Rounds. Powerful Swimmer enhances Forneus’s own
strength when fighting in a watery environment, giving it Fast x1 and raising its Attack to Power x3 for
Width-1 Rounds

Appendix B: The Shadow Compendium
-- 253 --
Oberon Emperor-21 (1-2) Regal Wings 4d, 3 HP- Useful: Flight (Always Works)
(3-5) Fairy King’s Sword 8d, 7 HP- Attacks (Physical, *Power x3*, Fast x2)
Defends (Effective x1)
(6-10) Royal Splendor 7d, 6 HP- Useful: Rallying Call, Attacks (Electric,
Power x1) Tough x2, Brains
Resist: Elec Weak: Ice Favorite Thing: Young couples in love
Description: The king of fairies and consort of Titania. Though a handsome, powerful
monarch, he is cursed with the appearance of a small child.
Shadow Tactics: Oberon’s Rallying Call can be used to bolster and embolden
other fairies as well as creatures of the forest and spirits of nature, all of which bend the knee to his
authority. Any Shadows influenced in this way by Oberon’s Rallying Call won’t lose dice when they are
hit by attacks before they can land their own for Width-1 Rounds. Oberon himself is not affected by this
skill, however, and so must rely on his own skill with the blade for protection.
Baal Emperor-26 (1-5) The Master’s Armor 8d, 8 HP- Defends, Tough x3,
(6-8) The Master’s Strength 9d, 11 HP- Attacks (Physical, *Power x4*),
Attacks (Electric, Power x2), Useful (Super Strength), Tough x2, Brains
(9-10) The Master’s Cup 4d, 3 HP- Useful: Fertility Power (Always Works,
Effective x1)
Resist: Elec Weak: Fire Favorite Thing: Revelry
Description: The chief Canaanite god, whose name simply means Lord or Master. He
was worshipped as a god of rain, fertility and agriculture.
Shadow Tactics: Baal’s Fertility Power encourages living things to grow and
spread according to his divine will, entangling his foes with creeping roots
and vines. More dramatically, by casting the contents of his cup skyward, he
fulfills his role as a rain god by summoning a torrential downpour for Width in Rounds. While this
condition is active, any and all Electrical Resistances are negated (except Baal’s), and all Electrical attacks
ignore Tough.

Appendix B: The Shadow Compendium
-- 254 --
The Hierophant Bonus Extra: Effective Shadows of the Hierophant radiate intellect and wisdom, but instead of
sharing it they obsessively horde their knowledge. Their wisdom grants them
substantial mystical powers, which they favor over direct force.
Source: Shadows of the Hierophant stem from a person who sticks to
tradition and fallbacks so rigidly that they become burdensome and restrictive
(either to themself or others), inviting rebellion against the current order.
Berith Hierophant-9 (1-5) Fiery Steed 7d, 6 HP- Attacks (Fire), Defends, Useful: Forceful Charge
(6-10) Armored Duke 7d, 6 HP- Attacks (Physical), Useful: Truthsaying
(Effective x1) Tough x2, Brains
Resist: Fire Weak: Light Favorite Thing: Good manners
Description: One of the 72 spirits of the Goetia. Known to be a contemptible liar, he
reveals truths about the past or future if asked correctly and persistently.
Shadow Tactics: Berith’s Truthsaying ability allows him to perceive both the past
and future, thus serving as a conduit for vital information from the GM if a Persona User is able to
successfully negotiate with him. When applied against the Users, Truthsaying carries the Rakunda
Debuff, stripping Tough x2 from a target for the next (Width) attacks aimed at it. Forceful Charge, when
combined with an attack as a Multiple Action, insulates Berith from Width-1 in Stun.
Omoikane Hierophant-19 (1-5) Synaptic Tendrils 7d, 8 HP- Attacks (Physical, Fast x1), Useful:
Tangling Grasp, Useful: Close Examination (Effective x2, Always Works)
(6-10) Cerebral Cortex 8d, 9 HP- Attacks (Electric, Power x2), Useful:
Knowledge of All Things (*Effect x1*, Always Works), Tough x2, Brains
Resist: Elec Weak: Dark Favorite Thing: Intellectual discourse
Description: The Japanese deity of knowledge, his name means “to combine thought”,
meaning the wisdom of many people. To students, he is the god of exam-taking
Shadow Tactics: Omoikane’s Close Examination uses the eyes of his Synaptic Tendrils to probe hostile
Personas for weaknesses, granting Width+1 in Power to his next attack. His Cerebral Cortex’s Knowledge
of All Things is a powerful diverse Useful Quality with any number of applications in combat, it can add
new Resistances to itself or its allies for Width in Rounds.

Appendix B: The Shadow Compendium
-- 255 --
Daisoujou Hierophant-30 (1-4) Mummified Flesh 9d, 8 HP- Useful: Radiant Spirituality (Effect x3)
Heal x3 (Area x2), Tough x2, Brains
(5-8) Holy Vestments 8d, 7 HP- Defends (Effective x1), Tough x3
(9-10) Reaper’s Bell 6d, 5 HP- Attacks (Light, Power x2) Useful: Channel
Samsara (Always Works, *Effective x1*)
Resist: Dark Weak: Fire Favorite Thing: Prayer
Description: A monk who died while fasting. His spiritual power preserves his body as a mummy. It is said that he
will appear before people on the day of salvation.
Shadow Tactics: Radiate Spirituality can be used to invigorate fellow Shadows, granting a total of
Width+2 in bonus dice that can be spread amongst them in the next Round. Channel Samsara is an even
more potent ability that allows Daisoujou to tap into the universal cycle of rebirth. Each time it is used in
a fight, Daisoujou adds its Width to a running total. When it accumulates 6 Width, each Player rolls 1d
and reduces the Persona Part they rolled to 0 HP, as the veil of Samara parts to unleash its Deadly Power.
The Lovers Bonus Extra: Heal Shadows of the Lovers are beautiful, whimsical and enchanting, radiating an
irresistible glamour. They specialize in healing and supporting others, but, like
love itself, they can have a cruel bite.
Source: Shadows of the Lovers originate from feelings of indecision, especially
when a person is faced with life-changing decisions. Plagued by doubt, they
retreat from making any choice at all, falling into a chasm of stagnation.
Pixie Lovers-7 (1-4) Flitting Wings 5d, 4 HP- Defends, Useful (Flight)
(5-10) Flirtatious Sprite 7d, 6 HP- Attacks (Wind, Fast x1), Useful: Magic
Mischief (Effective x1), *Heals x1* (Effective x1), Brains
Resist: Light Weak: Ice Favorite Thing: Good-natured pranks
Description: A good natured fairy who plays pranks on humans. They are usually
palm sized but can grow to human size as well. They love to sing and dance.
Shadow Tactics: Magic Mischief can be used to simulate sounds, steal things and move objects at a
distance. In combat, Magic Mischief allows Pixie to inflict a Lingering Jinx for Width Rounds.

Appendix B: The Shadow Compendium
-- 256 --
Queen Mab Lovers-20 (1-4) Dreamy Shroud 6d, 7 HP- Defends, Tough x2, Useful: Vanish
(5-6) Strange Brew 6d, 5 HP- Useful: Intoxicate (Effective x1, Always Works)
(7-10) Beguiling Glamour 8d, 9 HP- Attacks (Fire, Spray x1), Useful:
Bewildering Magic, *Heal x2* (Effective x1), Brains
Resist: Light Weak: Ice Favorite Thing: Moonlit revelry
Description: The Irish Fairy Queen of Connacht. Her name means “she who intoxicates.”
She offers mead mixed with her own blood to seduce her many consorts and lovers.
Shadow Tactics: Intoxicate can cause others to fall into a delirious state, but in combat, its effect is more
concentrated, allowing it to induce the Confusion state. Bewildering Magic can be used to Disable
Persona abilities, but any Intoxicated Personas afflicted by Bewildering Magic becomes berserk and turns
against the Party for Width-1 Rounds.
Narcissus Lovers-25 (1-7) Flawless Body 8d, 9 HP- Defends (Recoil x2), Attacks (Wind, Power x2),
(8-10) Beautiful Face 10d, 9 HP- Useful: Staggering Beauty (Effect x2, Area x3),
*Heal x3* (Effective x1, Area x2), Brains
Resist: Wind Weak: Ice Favorite Thing: His own appearance
Description: A beautiful, vain, cruel man cursed by the goddess of retribution to fall in love
with his own reflection. He wasted away, becoming a flower that bears his name.
Shadow Tactics: Staggering Beauty prevents up to 4 Personas from targeting Narcissus for Width+1
Rounds. A Persona User can end this effect with Put-Down at a difficulty equal to the current HP of
Narcissus’ Beautiful Face (maximum Difficulty 7).
The Chariot Bonus Extra: Fast Shadows of the Chariot are vicious, powerful killing machines, creatures of
violence, wrath and destruction that want nothing more to rip and tear
through everything before them and have very little time for subtlety.
Source: Shadows of the Chariot are symptoms of a person whose feels like
their life is out of control. Like a car without brakes, they feel powerless to stop
it from careening towards an untimely fate.

Appendix B: The Shadow Compendium
-- 257 --
Eligor Chariot-8 (1-5) Mighty Charger 7d, 6 HP- Useful: Unstoppable Charge
(6-10) Armored Warlord 7d, 6 HP- Attacks (Physical, Power x1, *Fast x2*)
Defends, Tough x1, Brains
Resist: Dark Weak: Light Favorite Thing: Feats of strength
Description: One of the 72 spirits of the Goetia, he appears in the form of a noble knight.
He grants honor from lords and military leaders and musters armies for war.
Shadow Tactics: Unstoppable Charge gives Eligor exceptional movement abilities and the ability to plow
through obstacles and barriers. It can also be used to add Width-1 in extra Stun to his next attack, which
he can do this as part of a Multiple Action, in which case the Charge’s Set goes off with the Attack Set.
Minotaur Chariot-16 (1-6) Warrior’s Body 9d, 10 HP- Attacks (Physical, Power x2, Fast x2), Defends,
Tough x2
(7-10) Bull’s Head 7d, 8 HP- Attacks (Physical, *Fast x1*), Useful: Unbridled
Rage (Always Works), Brains
Resist: Fire Weak: Ice Favorite Thing: Sugar
Description: A monster with the body of a man and the head of a bull. The king of Crete
imprisoned him in a labyrinth and sent in beautiful youths to be sacrificed to its wrath.
Shadow Tactics: Minotaur’s Unbridled Rage sends it into a violent fit for Width-1
Rounds. He loses Tough x1 from his Warrior’s Body but his attack Sets cannot be Stunned. Unbridled
Rage can also terrify a Persona User, forcing them to roll Courage against Freaking-Out.
Futsunushi Chariot-27 (1-5) Divine Blades 10d, 9 HP- Attacks (Physical, Power x3, Spray x3,
*Fast x3*), Defends (Effective x2) Tough x2
(6-10) Spirit of the Sword 8d, 7 HP- Useful: Blessing of Steel (Effect x1)
Useful: Firm Stance, Useful: Summon Blades, Tough x2, Brains
Resist: Wind Weak: -- Favorite Thing: Swords
Description: The Japanese god of swords and martial arts. He is a General for the
sun goddess Amaterasu and requires his priests to wear swords when on duty.
Shadow Tactics: Blessing of Steel imbues a weapon with Futsunushi’s divine might, granting its target
the Tarukaja buff for Width in Rounds. Firm Stance trades Divine Blade’s Fast x3 for Tough x3 on Spirit
of the Sword for Width in Rounds. Finally, Summon Blades acts as an unlimited Healing ability, but only
for the purpose of replenishing HP to its Divine Blades.

Appendix B: The Shadow Compendium
-- 258 --
Justice Bonus Extra: Fast Shadows of Justice are figures of heavenly power and authority, often
manifesting as angelic creatures whose purpose is to enforce divine judgement
and order.
Source: Shadows of Justice are the product of a twisted or corrupt sense of
right and wrong—one that is deprived of mercy and balance, or has been
tainted by greed, corruption and ego.
Angel Justice-11 (1-3) Heavenly Wings 7d, 5 HP- Useful: Flight (Always Works), Defends
(4-10) Divine Messenger 7d, 8 HP- Attacks (Light, Power x1, *Fast x2*),
Useful: Word of God (Effective x1), Heal x1, Brains
Resist: Light Weak: Dark Favorite Thing: Scripture
Description: Ninth of the nine orders of angels. Their name means “messenger”. They
interact with people often and so their form matches that of humans.
Shadow Tactics: Angels can use Word of God to communicate over great
distances, acting as the mouth-pieces for others; in the process, they can amplify the speaker’s sense of
power and authority, forcing a Courage roll to resist being cripplingly intimidated. In Combat, Word of
God can overwrite a target’s Weakness with Light for Width Rounds (and cancel any Light resistances).
Power Justice-19 (1-3) Mighty Wings 4d, 3 HP- Useful (Flight, Always Works)
(4-6) Heaven’s Armaments 7d, 6 HP- Attacks (Physical, Power x2, Fast x2),
Defends, Tough x2
(7-10) Holy Soldier 8d, 7 HP- Attacks (Light, Splash x2), Useful: Banishment,
Tough x1, Brains
Resist: Dark Weak: Wind Favorite Thing: Smiting the wicked
Description: Sixth of the nine orders of angels. Their full name means “Power of God”
and they are Heaven’s first line of defense against invasion.
Shadow Tactics: Banishment is a powerful repelling force harmful to anyone opposing Power’s will or
cause. Anyone struck by it without mounting some kind of defense will be thrown back by Height x 10
feet; and Powers like to use Multiple Actions with Banishment, forcing the target to resist two Sets. As a
more direct combat effect, Banishment can forcibly eject a character from the scene of a battle, requiring
Width-1 Rounds for him to return.

Appendix B: The Shadow Compendium
-- 259 --
Throne Justice-26 (1-7) Fiery Wheel 10d, 9 HP- Attacks (Physical, Fast x2, Power x1),
Attacks (Fire, *Fast x1*, Power x2), Useful: Heavenly Chariot, Defends
(Recoil x1)
(8-10) Angelic Sage 9d, 8 HP- Attacks (Light, Power x1), Attacks
(Light, Area x2) Useful: Holy Wisdom (Area x2), Tough x1, Brains
Resist: Fire Weak: -- Favorite Thing: Dignity
Description: Third of the nine orders of angels. They carry the throne of God,
and govern dignity, thought and knowledge.
Shadow Tactics: Throne’s Heavenly Chariot ability allows it to travel over and through any terrain
without hindrance, including through thin air and between spaces otherwise closed off by supernatural
means. It’s also an extremely powerful means of pursuit against fleeing enemies. Holy Wisdom affects up
to 2 allies, and it grants Awesome x1 to all actions involving elemental forces (including attacks) for
Width-1 Rounds.
The Hermit Bonus Extra: Power (Elemental) Shadows of the Hermit are mythological creatures known for their solitude. It
may be by choice, or they may be exiles, either by the prejudice of others or
because of their own distasteful character.
Source: Shadows of the Hermit appear when a person has been driven or has
driven himself into a state of harmful isolation. Instead of pursuing
contemplation and understanding, they shut out the world in its entirety.
Bicorn Hermit-9 (1-6) Dirty Beast 6d, 7 HP- Defends, Useful: Crushing Hooves, Tough x2
(7-10) Wicked Horns 6d, 5 HP- Attacks (Physical), Attacks (Dark, *Power
x1*) Useful: Sense Corruption (Effective x1), Brains
Resist: Dark Weak: Fire Favorite Thing: Lies
Description: An evil stallion with two curved horns. It represents impurity and
according to some legends feeds off of disloyal husbands.
Shadow Tactics: Crushing Hooves can be used to smash armor and other hard material to dust, inflicting
the Rakunda debuff effective. Sense Corruption can be used to detect a person’s negative impulses;
Bicorn can then share these insidious secrets freely, and can fuel its own maliciousness, adding Width in
Power to its next attack.

Appendix B: The Shadow Compendium
-- 260 --
Arahabaki Hermit-21 (1-6) Clay Sculpted Body 7d, 6 HP- Defends (Recoil x2) Tough x2
(7-8) Powerful Claws 7d, 6 HP- Attacks (Physical, Power x1)
(9-10) False God’s Face 8d, 7 HP- Attacks (Light, *Power x1*) Attack
(Dark, Power x1), Useful: Heretical Power (Area x2), Brains
Resist: Physical Weak: Electric Favorite Thing: Rebellion
Description: The chief god of ancient Japan. When Shinto became the dominant
religion, it and its worshipers were persecuted as rebels and heretics.
Shadow Tactics: Heretical Power is the Arahabaki’s divine might, twisted
and darkened by the status that has been forced upon it. Its withering power
debilitates up to 3 Personas with -1 Damage, -1 Speed and -1 Tough until the end of the next Round.
Nidhoggr Hermit-26 (1-3) Too Many Legs 6d, 9 HP- Useful: Climbing, Attacks
(Physical)
(4-8) Massive Wormy Body 10d, 9 HP- Defends, Useful: Wrap
(Effective x2), Tough x3
(9-10) Gnawing Jaws 9d, 8 HP- Attacks (Physical, Power x1),
Attacks (Ice, *Power x2*), Brains
Resist: Ice Weak: Electric Favorite Thing: Huge Quantities of Food
Description: An evil worm that gnaws on the roots of Yggdrasil, the World Tree. It rules over all evil serpents and
survives the world’s end by eating the corpses of the slain who float down to its lair.
Shadow Tactics: Climbing allows Nidhoggr to scale any vertical structure, be it a tree or a skyscraper,
giving it a form of Unique Movement that lets it get the drop on Persona Users. By Wrapping its
immense, segmented body around a Persona, it can Disable any action requiring the use of its limbs for
Width in Rounds. While Wrapped, a Persona’s Toughness has no effect against Nidhoggr’s Jaws attacks.
Fortune Bonus Extra: Bounce Shadows of Fortune are linked with luck and fate. They usually take the form
of beings believed to manipulate a person’s future, whether malevolently or
merely as impassive forces.
Source: Shadows of Fortune emerge from a person who feels that he’s the
victim of unwarranted, awful luck. Life has dealt him a series of bad hands,
and he doesn’t see any way to reconstruct his shattered future.

Appendix B: The Shadow Compendium
-- 261 --
Clotho Fortune-8 (1-7) Fate-Woven Robe 7d, 6 HP- Defends (*Recoil x2*, Fast x1), Tough x1
(8-10) Thread of Life 6d, 5 HP- Attacks (Wind), Useful: Living String (Always
Works), Brains
Resist: Wind Weak: Fire Favorite Thing: Nice clothes
Description: One of the three sisters of fate in Greek mythology that govern destiny. The
youngest of the three, Clotho spins the thread of life the others measure and cut.
Shadow Tactics: Clotho’s Living String can move of its own volition, snaking through the air with a life
of its own. It can wrap itself around a Persona’s body part, allowing Clotho to use one of that Part’s
Qualities as part of her Thread of Life.
Fortuna Fortune-18 (1-2) Slender Limbs 6d, 5 HP- Attacks (Physical, Fast x1)
(5-8) Wheel of Fortune 9d, 8 HP- Attacks (Wind, Spray x2), Defends (*Recoil
x2*), Useful: Chance Time
(9-10) Veiled Face 6d, 5 HP- Useful: Perceive Fate (Always Works), Brains
Resist: Wind Weak: Ice Favorite Thing: Games of chance
Description: The Roman goddess of luck, she spins the Wheel of Fortune. She is often
depicted as blind or veiled to symbolize fate’s impartiality.
Shadow Tactics: Fortuna can Perceive Fate to peer into a character’s future, and observe secrets about
what will befall that person. In combat it allows all of her Defends Sets to gobble attacks regardless of
speed for Width-1 Rounds. With Chance Time, each target she hits suffers Bad Luck for Width-1 Rounds.
While under this effect, Fortuna rolls 1d for each target; any actions with Height below the roll fails as ill
fortune foils their move.
Norn Fortune-27 (1-8) Three Goddesses 8d, 11 HP- Defends (*Recoil x4*), Tough x4, Brains
(9-10) Chronometer 10d, 9 HP- Attacks (Wind, Power x3), Attacks
(Electric, Area x2), Useful: Forecast Fate, Tough x2
Resist: Wind Weak: -- Favorite Thing: Clocks
Description: Norse goddesses of fate. They live below the roots of the World Tree and
control the destinies even of other gods.
Shadow Tactics: When Forecast Fate is used on a target, a countdown begins
starting at 6 minus Width, reducing automatically by 1 each turn. When 0 is
reached, the target loses all Tough and all enemies gain Power x2 to attack that target for one turn.

Appendix B: The Shadow Compendium
-- 262 --
Strength Bonus Extra: Tough Shadows of Strength are creatures of extreme physical might and fortitude,
their myths preserving them as paragons of valor in battle and immortalizing
their feats of brawn.
Source: Shadows of Strength are linked with a lack of courage and inner
fortitude. A person in this condition shrinks back from what they think is right
due to outside pressure, a severe lack of self-confidence or some other complex.
Oni Strength-10 (1-7) Red Skinned Giant 7d, 6 HP- Attacks (Physical, Power x2), Defends,
Tough x2
(8-10) Horned Demonhead 5d, 4 HP- Useful: Warcry (Always Works)
*Tough x2*, Brains
Resist: Fire Weak: -- Favorite Thing: Breaking things
Description: Monstrous creatures of Japanese mythology. Their powerful red bodies are
tough as iron, and they plunder villages for their food, riches and women.
Shadow Tactics: Warcry can intimidate Oni’s enemies, prompting a Courage check against freezing or
retreating in terror. In combat, it also invigorates the Shadow so that its attacks inflict an extra point of
Stun for Width-1 Rounds.
Titan Strength-19 (1-6) Impenetrable Armor 8d, 13 HP- Defends (Recoil x2), *Tough x3*
(7-10) Titanic Muscle 8d, 7 HP- Attacks (Physical, Power x2), Useful: Huge
Size (Effective x1), Tough x2, Brains
Resist: Ice Weak: Electric Favorite Thing: Polishing his armor
Description: In Greek mythology, Titans were the children born of Gaia and Uranus,
having human form. They ruled over the world until the Olympians overthrew them.
Shadow Tactics: Titan’s greatest asset is its Huge Size. It easily towers over most
other Shadows and dwarfs Persona Users, presenting an intimidating sight. By
leveraging its Huge Size, either in preparation for an attack or combined with an attack as a Multiple
Action, Titan gains the benefit of the Gigantic Useful effect.

Appendix B: The Shadow Compendium
-- 263 --
Valkyrie Strength-29 (1-5) Divine Steed 9d, 10 HP- Defends (Fast x1), Useful: Flight, *Tough x3*
(6-10) Maiden of Battle 9d, 10 HP- Attacks (Physical, Fast x2, Power x2),
Attacks (Ice, Fast x2, Power x1), Useful: Recruit the Fallen (Effect x2), Tough x3,
Brains
Resist: Ice Weak: Wind Favorite Thing: Brave fighters
Description: Odin’s daughters in Norse mythology. They ride through the skies above
battles to guide valiant slain warriors to Valhalla.
Shadow Tactics: Valkyrie’s can Fly with her Divine Steed, soaring at high speeds through the sky to
escape a Persona’s range or drop in suddenly for a surprise attack. Recruit the Fallen embodies the
Valkyrie’s purpose. It can use this skill on any defeated Shadow in battle; doing so causes the Shadow to
return to the fight as a ghost of its former self. These phantoms have their normal dice pools but vanish if
they are hit with a successful attack, or naturally after Width+1 Rounds.
The Hanged Man Bonus Extra: Tough Shadows of the Hanged Man are entities linked with sacrifice, whether self-
imposed or forced by outside influence. Often they exhibit all the negative
feelings brought on by such loss—frustration, spite and anger.
Source: Shadows of the Hanged Man are the result of a person who resents the
sacrifices they’ve made, or else have twisted what should be a selfless act into
one driven by ego or other ulterior, debased motives.
Inugami Hanged Man-7 (1-7) Long Dog Body 7d, 6 HP- Attacks (Physical), Useful: Spectral Howl (Area x1),
Defends, *Tough x1*
(8-10) Bad Dog Head 5d, 4 HP- Useful: Possession, Tough x2, Brains
Resist: Dark Weak: Fire Favorite Thing: Dog treats
Description: A dog spirit said to possess people in Japanese lore, carrying out acts of vengeance
on behalf of their owner. The possessed are in a state of “inu-tsuki” and lose control of their body.
Shadow Tactics: Inugami’s Spectral Howl can signal to other Shadows across vast
distances, and in combat Induce Fear against two targets. This synergizes with its Possession ability,
which seizes control of a target for Width-1 Rounds, with a +2d bonus against targets under the influence
of a mental condition (such as Fear). A Persona can still act when Possessed, but Inugami is able to use
any of that Persona’s Parts whose Height is equal to or less than its Possession Set.

Appendix B: The Shadow Compendium
-- 264 --
Hell Biker Hanged Man-18 (1-5) Deadly Wheels 7d, 8 HP- Attacks (Fire, Power x1), Attacks (Physical,
Fast x1), Defends (Fast x1), Useful: Ride Like Hell (Always Works), *Tough x1*
(6-10) Ghostly Rider 8d, 7 HP- Attacks (Dark), Useful: Sinful Stare (Effect x1)
Tough x2, Brains
Resist: Dark, Fire Weak: Light Favorite Thing: Speed
Description: A biker-turned-fiend whose hatred of the world and reliance only on his
own power turned him into an abominable creature.
Shadow Tactics: Ride Like Hell allows Hell Biker to move at infernal speeds and traverse any physical
barriers or obstacles in its way without hinderance. When used in combat, any actions using Hell Biker’s
Deadly Wheels occur first in the Resolve Phase, pre-empting any other action for Width-1 turns,
including other attacks, defenses and useful qualities. Its Sinful Stare withers physical objects with its
baleful energy and carries the Rakunda debuff effect for Width in Rounds.
Moloch Hanged Man-26 (1-4) Furnace Body 8d, 6 HP- Attacks (Fire, Power x2), Tough x3
(5-8) Well-Adorned Deity 8d, 10 HP- Attacks (Physical, Power x1),
Defends (Recoil x1), Useful: Claim Sacrifice (Burn x1), Tough x2
(9-10) Bull God’s Head 7d, 6 HP- Useful: Accept Burnt Offering,
Attacks (Dark, Spray x2), *Tough x1*, Brains
Resist: Fire Weak: Electric Favorite Thing: Well done meat
Description: A Canaanite god of fire. A bronze statue of a man with a bull’s head
stands at his altar, and children were thrown into it as sacrifices.
Shadow Tactics: Moloch can Claim Sacrifices, using its powerful body to
grab and hold people or objects in an unbreakable grasp. When used in combat, it allows the Shadow to
grab and crush a Persona’s Part, disabling it for Width-1 Round and inflicting 1 point of Burn damage on
that Part for each turn it is Claimed. When Moloch Accepts Burnt Offering, it consumes the matter and
converts it into a useful boon; the fresher the meat, the more valuable the result. In combat, Moloch
observes with pleasure how many Fire Attacks are used by itself, its fellow Shadows and the Persona
users. Each attack adds 1 to its Offering counter. When it Accepts Burnt Offerings in this way, it grants
Power equal to the total Offering (distributed between the available recipients) for Width-1 Rounds, or
else it heals damage equal to Width-1 + Offering.

Appendix B: The Shadow Compendium
-- 265 --
Death Bonus Extra: Power (Physical) Shadows of Death are, naturally, beings who are closely linked with death,
darkness and decay. This include minor attendants or harbingers of the
hereafter to the very reapers of the dead themselves.
Source: Shadows of Death arise when a person cannot let go of their past, and
instead invites it to consume their present circumstances and future course of
action. These pitiable souls are, in a sense, haunted by their own history.
Mokoi Death-9 (1-7) Stumpy Body 7d, 6 HP- Defends, Useful: Become the Shadows (Effect x1),
Brains
(8-10) Evil Boomerang 6d, 5 HP- Attacks (Physical, *Power x2*, Fast x1), Useful:
Death Curse
Resist: Dark Weak: -- Favorite Thing: Hunting
Description: An evil creature of Australian mythology, believed to be a reborn shadow. They
kidnap and eat children and strike down practitioners of black magic.
Shadow Tactics: When Mokoi becomes the Shadows, it merges with the ambient darkness, allowing it to
move instantly across any shadowed surface as a form of Unique Movement. Its Boomerang, in addition
to being a source of powerful, fast physical damage, can inflict its victims with decay as a form of Dark-
type Deadly Power.
Chernobog Death-17 (1-4) Deathcap Roots 7d, 5 HP- Useful: Toxic Spores (Effect x1, Area x1)
(5-10) Black God 8d, 8 HP- Attacks (Physical, *Power x3*), Defends (Fast x1),
Useful: Withering Touch (Effect x2); Useful: Induce Fear, Tough x2, Brains
Resist: Dark Weak: Fire Favorite Thing: Mushrooms
Description: The god of night, evil and death in Slavic lore. His name means “Black God”
and the faithful sought to avoid rather than worship or appease him.
Shadow Tactics: Chernobog uses his Toxic Spores to choke the air with poison that
drains his prey of their constitution, and when used in Combat this installs a
weakness to Physical attacks on up to two targets for Width Rounds. Withering
Touch is another instance of Death Shadow’s affinity for Deadly Power, inflicting Width+1 in killing
power, and Chernobog can Induce Fear to enfeeble its victims.

Appendix B: The Shadow Compendium
-- 266 --
Alice Death-28 (1-8) Servant Host 8d, 13 HP- Useful: Die For Me! (Effect x3), Attacks (Physical,
*Power x2*, Area x4), Defends (Effective x2)
(9-10) Curious Girl 10d, 9 HP- Attacks (Dark, Burn x2), Useful: Eerie Happenstance
(Area x2), Brains
Resist: Dark Weak: - Favorite Thing: Stories
Description: A mysterious blonde girl with immense powers. Some say she’s the phantom of a poor
English girl who died an unfortunate death, others that she disappeared in a strange world.
Shadow Tactics: Alice’s primary mode of attack is her Servant Host, which is a small army
of familiars in the form of toys and playing cards that arrive to her aid. When Alice
commands them to “Die for Me!” they can carry out any physical task required of them, after which they
self-destruct, only to be replaced by more. When used in Combat, this terrifying attack is a form of
Deadly Power with Width+2 Potency. They are also very good at Defending Alice, earning +2 Width or +4
Height on their Sets. When Alice invokes her Eerie Happenstance, strange events begin to occur all
around her, and in Combat, they do so to the detriment of her enemies, Revoking their Buffs.
Temperance Bonus Extra: Burn Shadows of Temperance are mythological creatures identified with balance and
the immobility of nature in the face of mankind’s desires. Most are beasts
instead of human figures, typifying their resistance to man’s endeavors.
Source: These Shadows come from a person who is failing to maintain balance
in their life and flounders in the ensuing turmoil.
Apsaras Temperance-9 (1-5) Flowing Garments 5d, 6 HP- Defends (Fast x1), Useful: Divine Grace (Always
Works)
(5-10) Heavenly Nymph 5d, 6 HP- Attacks (Ice, *Burn x2*), Useful: Celestial Dance
(Effective x1, Area x1), Brains
Resist: Ice Weak: Electric Favorite Thing: Dancing
Description: Water spirits of Hindu mythology. They are beautiful women who dance for the
gods and guide fallen warriors in battle.
Shadow Tactics: Divine Grace allows Apsaras to move effortlessly through water as a
form of Unique Movement. Celestial Dance can inspire others with a state of holy
reverie and can Induce Charm against 2 targets for Width Rounds.

Appendix B: The Shadow Compendium
-- 267 --
Genbu Temperance-19 (1-5) Coiling Serpent 7d, 6 HP- Attacks (Physical, Fast x3), Useful: Coil (Always
Works), Brains
(5-10) Black Tortoise 8d, 7 HP- Attacks (Ice, Power x1, *Burns x3*), Defends (Effect
x1), Useful: Magnetic Force (Effect x1), Tough x2, Brains
Resist: Ice Weak: Electric Favorite Thing: Pleasant snowfall
Description: One of the Four Heavenly Beasts of Chinese myth. It represents the direction
north, the season of winter, and the element of water. It supports the foundations of the Earth.
Shadow Tactics: Both of Genbu’s locations count as its Brains, and it Declares based on
which Part it chooses to use that Round, or the higher of the two if it uses Multiple Actions. The Serpent’s
Coil ability allows it to extend itself over great distances, then coil back in to snatch things from afar, and
in Combat it can render a Persona incapable of using its Defends abilities for Width-1 Rounds. The Black
Tortoise’s Magnetic Force gives it broad control over magnetism, and allows it to magnetically attack
itself to the ground, becoming an immovable object that cannot be Staggered or Knocked-Down for
Width Rounds. In this state, any actions that the Tortoise takes are done at -2 Speed, while its Serpent is
unaffected.
Byakko Temperance-26 (1-3) 500 Year Tail 7d, 6 HP- Attacks (Wind, Power x1, Area x3), Heal x2,
Useful: Tailwind (Always Works, Area x1)
(4-6) Radiant Pelt 7d, 7 HP- Defends (Recoil x2), Tough x1
(7-10) King of Beasts 7d, 9 HP- Attacks (Physical, *Burns x4*), Useful:
Rending Strength, Tough x1, Brains
Resist: Physical, Wind Weak: Ice Favorite Thing: Grooming
Description: One of the Four Heavenly Beasts of Chinese myth. It represents the
direction west, the season of autumn, and the element of wind. He is believed to be the king of all beasts.
Shadow Tactics: Byakko’s Tailwind gives it Control over wind and storms, and by bestowing itself or its
allies with a favorable, strong wind it grants the Sukukaja Buff on up to two targets. Its Rending Strength,
along with giving it the might to tear and destroy most any physical structure opposing it, allows its next
Physical attack to ignore all Tough from its Target. If used as a Multiple Action, the attack is timed to the
slower of the Sets; if Rending Strength’s set is 2x3 and the Attack is 3x7, the attack will Resolve as if it had
a speed of 2x3. And as the King of Beasts, any target struck by Byakko’s physical blows suffers Burn x4
damage from the deep, grievous wounds it leaves behind.

Appendix B: The Shadow Compendium
-- 268 --
The Devil Bonus Extra: Burn Shadows of the Devil are, as one would expect, diabolical, infernal creatures
born of the promise of eternal torment. The play on humanity’s fears and worst
impulses, seeking to drive them to terrible fates.
Source: Devil Shadows arise out of individuals enslaved by their base impulse:
lust, greed, pride and all manner of covetousness. Instead of engaging
productively with these very human drives, they fall beneath their lash.
Andras Devil-8 (1-5) Feathered Fiend 6d, 5 HP- Defends, Useful: Silent Flight (Always Works)
(5-10) Owl Head 6d, 5 HP- Attacks (Dark, *Burn x2*), Useful: Stoke Rage, Useful:
Quench Ferocity, Tough x1, Brains
Resist: Electric Weak: Wind Favorite Thing: Stoking anger
Description: One of the 72 beings of the Goetia. He appears where battles erupt to stoke the
hatred within soldiers. Intensely violent, he helps defeat the enemies of those who summon him.
Shadow Tactics: With Silent Flight, Andras can fly unnoticed to set ambushes against his
enemies, requiring a Notice check to detect. With Stoke Rage and Quench Anger, Andras
can manipulate the fiery emotions of others, allowing him to either Induce Rage in
targets or suppress their feelings of battle readiness and inflicting the Rakunda debuff to strip away their
Toughness.
Abaddon Devil-16 (1-3) Bulbous Hide 6d, 9 HP- Defends (Effective x1, Recoil x2)
(4-10) Bottomless Gullet 8d, 7 HP- Attacks (Physical, *Burn x2*, Area x3),
Useful: Summon Locusts, Useful: Swallow Whole (Effective x1), Brains
Resist: Physical Weak: Light Favorite Thing: Bugs
Description: The “destroyer” and angel of the bottomless pit, as described in the ancient
scriptures. He controls locusts and uses them to lay waste to villages while tempting humans with sloth and discord.
Shadow Tactics: Abbadon’s dominion over Locusts manifests as an Attack inflicting both Area x3
damage while leaving behind a Burn x2 effect the locusts gnaw away at their targets. He can also
Summon Locusts to carry out his orders, including Jinxing his enemies with a -2d Penalty for Width-1
Rounds as they infest their Parts. Finally, Abaddon can Swallow Whole any object or foe he pleases;
when used in Combat, a Swallowed Persona is removed from Battle for Width Rounds, or until it fights
its way out by accumulating Width in attack or useful Sets equal to the Gullet’s current HP.

Appendix B: The Shadow Compendium
-- 269 --
Lilith Devil-25 (1-4) Wicked Snake 9d, 8 HP- Attacks (Physical, *Burns x1*), Useful: Master
of Lies (Effect x2)
(5-10) First Woman 10d, 9 HP- Attacks (Electric, Burn x3, Fast x2), Defends
(Recoil x2), Useful: Irresistible Temptation (Effect x1), Tough x2, Brains
Resist: Electric Weak: Ice Favorite Thing: Fruit
Description: Said to be the first wife of Adam, the first man. There are many stories of her
fall from Eden, but all highlight her pride and unfaithfulness to her husband.
Shadow Tactics: The Wicked Snake’s Master of Lies ability adds +4 to the Height
of its Sets with the purpose of deceiving other and sowing distrust among their
ranks. It can even use this ability in Combat to plant seeds of doubt in a person’s mind, which cuts them
off from using a specific Relationship for Width-1 Rounds; this is against a Difficulty of the Persona
User’s Courage + the Relationship’s Rank, but Lilith gains +4 to her Height to do so. As the First Woman,
Lilith can tempt others with objects of their desire; this Induces Charm for Width in Rounds.
The Tower Bonus Extra: Recoil Shadows of the Tower are bringers of doom and destruction, or otherwise are
once heroic figures whose fall from grace lead them to tragic fates. Arguably the
most ominous of all Arcana, these Shadows are cruel and malicious
Source: Tower Shadows are the doubts, anxieties and fears that plague the mind
of a person undergoing severe tribulation given form. The more a person
succumbs to the despair of their situation, the stronger these Shadows become.
Belphegor Tower-7 (1-3) Porcelain Throne 6d, 7 HP- Useful: Flush (Area x1)
(4-10) Thoughtful Imp 7d, 6 HP- Attacks (Physical), Defends (*Recoil x2*),
Useful: Inspire Invention, Brains
Resist: Dark Weak: Light Favorite Thing: Reading material
Description: Governor of the deadly sin of sloth, he also excels at invention and discovery. He
may be derived from Ba’al Pe’or, Syrian god of abundant crops.
Shadow Tactics: When Belphegor Flushes his Porcelain throne it creates a vortex that sucks in
surrounding matter. When he uses it in combat, it Refreshes any Debuffs levied against Belphegor and
one other ally. Inspire Invention allows Belphegor to come up with ingenious ideas for solving even
fiendish problems, which in combat grants the Rakukaja buff.

Appendix B: The Shadow Compendium
-- 270 --
Chemtrail Tower-20 (1-2) Panicked Legs 5d, 4 HP- Defends
(3-6) Shredded Turbines 8d, 7 HP- Attacks (Physical, Power x2), *Recoil x3*
(7-10) Vapor Ports 8d, 7 HP- Attacks (Physical, Burn x2, Spray x1), Useful:
Fog Breath (Area x2), Brains
Resist: Light Weak: Electric Favorite Thing: Rumors
Description: A conspiracy theory that vapor trails left by airplanes contain harmful
metals. The negative energy collected by this belief coalesces to form a Shadow.
Shadow Tactics: Chemtrail’s sole Useful Quality is its Fog Breath, which disperses a cloud of
impenetrably dense vapor from its mouths. It is impossible to see further than the end of one’s arm
within this fog without some form of Exotic Sense that can pierce it. When used in Combat, this cloud
covers up to three Targets and it reduces the Height of every roll made against Chemtrail or its allies by 3
for Width-1 Rounds. This includes all action types: Attack, Defends and Usefuls, but does not affect
Useful Qualities that do not target Chemtrail and its allies (such as buffs).
Seth Tower-28 (1-3) Wings of Destruction 6d, 5 HP- Attacks (Wind, Burns x2, Area x2),
Useful: Flight, Recoil x1
(4-7) Entropic Dragon 9d, 8 HP- Defends (*Recoil x3*), Useful: Desert God
(Effective x1), Tough x1
(8-10) Maw of Chaos 8d, 7 HP- Attacks (Power x4), Useful: Roar of Chaos,
Brains
Resist: Fire Weak: Light Favorite Thing: Sand
Description: The Egyptian god of the desert, chaos and evil. He murdered his brother Osiris and sought to be the
chief god, but was castrated by Osiris’s son, Horus.
Shadow Tactics: As the Desert God, Seth commands sand, scorching winds and all manner of vicious
creature native to his domain. He can use this power in combat either as a form of Elemental Control to
enhance his Wings of Destruction, or to Revoke a foe’s Buffs with searing heat or withering blasts of sand
to erode their defenses, slow their haste and sap their strength. Seth’s Roar of Chaos is a destructive force
against his physical surroundings, making structures crumble and twisting nature to his will. When used
in Combat, Roar of Chaos excels at creating Advantages for Seth and his allies and can Induce Confusion
in a target on whom he focuses his entropic wrath.

Appendix B: The Shadow Compendium
-- 271 --
The Star Bonus Extra: Heal Star Shadows have many faces. Many are astrological figures representing stars
and heavenly bodies, while others stand for the Star’s connection with creativity
and inspiration, as deities with many spheres of influence.
Source: Star Shadows result from the pain of a dream deferred. When a dreamer
feels their aspiration is too distant, the despair they feel erodes their faith and
willingness to pursue that dream, which take the form of these creatures.
Kaiwan Star-8 (1-5) Wishless Star 7d, 6 HP- Defends (Effective x1), *Heals x2* (Effective x1),
(6-10) Bearded Sky God 7d, 6 HP- Attacks (Ice, Fast x1), Useful: Stellar Warp,
Brains
Resist: Ice Weak: Dark Favorite Thing: Rings
Description: An Assyrian sky god associated with the planet Saturn. Worshipped once by
Israel, its name became synonymous with detestation of images and false gods.
Shadow Tactics: Kaiwan’s Heals x2 restores 3 Shock or 2 Scars per use. His Stellar Warp ability allows
him to traverse great distances and create distortions in the fabric of space-time. When used in Combat it
creates Advantages by fashioning portals and altering physics to benefit its allies and can grant itself or
another Shadow Resistance to Physical attacks for Width-1 Rounds.
Neko Shogun Star-15 (1-6) Mighty Conqueror 8d, 7 HP- Attacks (Wind, Fast x1), Useful: War Banner
(Area x2), Defends, Tough x1
(7-10) Adorable Feline 7d, 6 HP- Attacks (Physical, Power x1), *Heals x3* (Area
x2), Useful: Cat Antics, Brains
Resist: Dark Weak: Fire Favorite Thing: Discussing military strategy
Description: A prophetic Taoist god, originally known as Mao Shogun. Due to a linguistic
error involving the Chinese word for cat, his name is remembered as Neko Shogun.
Shadow Tactics: Neko Shogun’s Heals x3 can affect up to 3 allies at a time, allowing him to refresh an
entire group of Shadows in a single turn. He wields his War Banner with great dexterity, using it as a tool
to distract foes or create gusts of wind, and when he plants in on the ground in battle it rallies his forces,
bestowing Rakukaja on up to three party members as their resolve translates to Toughness. His Cat
Antics, on the other hand, grant him the agility and senses of a cat, and through cuteness can disarm an
enemy’s ferocity with the Tarunda Debuff.

Appendix B: The Shadow Compendium
-- 272 --
Saturnus Star-27 (1-3) Stellar Flame 8d, 7 HP- Attacks (Fire), Useful: Control Heat
(4-7) Deep Space Titan’s Remains 8d, 11 HP- Attacks (Ice), Defends, Useful:
Control Cold, Useful: Nurture Growth, Brains
(8-10) Neutron Core 8d, 8 HP- Useful: Gamma Radiance, *Heal x4* (Effective
x3), Tough x2
Resist: Fire Weak: Electric Favorite Thing: Hot baths
Description: The Roman god of agriculture who ruled over a Golden Age of peace and
plenty amidst the heavens until he was overthrown by his offspring.
Shadow Tactics: Saturnus’s spectacular restorative ability allows him to Heal 5 Shock or 4 Scars a total of
4 times each Encounter. As a Star God he Controls both the heat of burning suns and the deadly cold of
deep space, which he can bend to his will and use to augment the Width of his or an ally’s Fire and Ice
abilities. As a god of agriculture, he can Nurture Growth to bring forth plant life at his command and
strengthen his allies (but not himself) with any of the standard Buffs. Within his torso he carries a
Neutron Core, the dense heart of an ancient star whose Gamma Radiance generates Fiery Deadly Power.
The Moon Bonus Extra: Area Shadows of the Moon embody vice, deception and delusion. At best they are
whimsical in their alienness, but more often they are bent on bewitching and
undermining a person’s force of reason.
Source: Shadows of the Moon are born from delusion and abandonment of
reality. A person whose mind spawns these creatures prefers dreams and
illusion to facing the world as it is.
Nue Moon-8 (1-7) Tanuki Body 7d, 6 HP- Attacks (Physical), Defends, Tough x1
(8-10) Monkey Face 6d, 5 HP- Useful: Dark Cloud (*Area x2*, Always Works),
Brains
Resist: Electric Weak: Light Favorite Thing: Scaring people
Description: A monster of Japanese mythology with a monkey’s face, racoon dog’s body,
tiger’s limbs and a snake tail. It dwelled in a black cloud that attacked the emperor’s palace.
Shadow Tactics: Nue’s Dark Cloud forms a space of complete darkness where light cannot penetrate. In
Combat, it shrouds up to three friendly targets for Width-1 Rounds so that any attacks launched against
them are randomized: each Shadow rolls 1d and the lowest roll is hit.

Appendix B: The Shadow Compendium
-- 273 --
Mothman Moon-12 (1-5) Lunar Wings 7d, 7 HP- Useful: Levitating Flight, Defends (Fast x2),
(6-10) Red-Eyed Cryptid 7d, 7 HP- Attacks (Electric, Power x1, Fast x1),
Useful: Eerie Signal (Always Works, *Area x2*), Brains
Resist: Dark Weak: Fire Favorite Thing: Bright lights
Description: An elusive creature first sighted in the USA, in the 1960s, and linked to
UFO sightings. It’s said to walk on two feet and fly without moving its appendages.
Shadow Tactics: Eerie Signal broadcasts as unsettling audio-visual wave that worms its way into a
person’s mind, inducing feelings of worry and paranoia (requiring Knowledge + Out-Think to overcome).
In combat, it prevents up to 3 Persona Users from accessing their Relationships or Awesomeness for
Width-1 Rounds.
Girimehkala Moon-26 (1-7) Monstrous Pachyderm 9d, 10 HP- Defends (Recoil x1), Useful:
Earthquake Stomp (Area x2), Useful: Fearsome Trumpet, Tough x3
(8-9) Unholy Steel 7d, 6 HP- Attacks (Physical, Power x3)
(10) Evil Eye 8d, 7 HP- Useful: Malevolent Gaze (*Area x3*, Effect x1),
Brains
Resist: Physical Weak: Light Favorite Thing: Roasted nuts
Description: A monstrous elephant of Sri Lankan lore. It’s portrayed as the mount of
Mara, the Evil One, and whoever looks into its evil eye is stricken with misfortune.
Shadow Tactics: Girimehkala’s bulk generates seismic waves with its Earthquake Stomp, shaking
structures to rubble and inflicting Width-1 in Stun on up to 3 enemies from the shuddering ground or
falling debris. Its Fearsome Trumpet is likewise a rattling blast of sonic energy which inflicts Rakunda for
Width-1 Rounds. It’s deadliest skill, though, is its Malevolent Gaze, which curses its targets with
misfortune, and in Combat is a Dark-type Deadly Power against 4 targets with Potency equal to is Width.
The Sun Bonus Extra: Spray or Splash Shadows of the Sun manifest as solar deities and creatures closely associated
with light and good fortune. Under normal circumstances these would be
benevolent entities, but the Other World twists their images into monstrosities.
Source: Sun Shadows are caused by the frustration and anger of a successful
person weighed down by the inequities of society, or one who finds it difficult
to maintain optimism in dire circumstances.

Appendix B: The Shadow Compendium
-- 274 --
Cu Sith Sun-9 (1-6) Faerie Watchdog 6d, 5 HP- Attacks (Light, *Splash x3*), Defends
(7-10) Floppy Eared Face 7d, 6 HP- Useful: Fae Bark (Effect x1), Useful: Glide,
Brains
Resist: Dark Weak: Fire Favorite Thing: Ear Scritches
Description: A horse sized faerie resembling a dog. They glide silently with their ears and
its bark is fatal if heard three times.
Shadow Tactics: Cu Sith’s Fae Bark is a form of Light-based Deadly Power with Width in Potency. Out of
combat it fills living things with dread. Cu Sith’s Glide uses its large, batlike wings as Unique Movement.
Queztalcoatl Sun-15 (1-5) Immaculate Plumage 8d, 8 HP- Attacks (Wind, *Spray x1*, Fast x1),
Defends (Fast x1), Useful: Control Atmosphere, Useful: Flight
(6-10) Sky Serpent 8d, 8 HP- Attacks (Light, Spray x1, Power x1), Useful: Solar
Power, Useful: Cycle of Rebirth, Brains
Resist: Wind Weak: Ice Favorite Thing: Seashells
Description: Aztec god of the sun and wind and the giver of breath. He created humans by
sprinkling blood on the bones of a fallen civilization. His heart is said to be the planet Venus.
Shadow Tactics: Quetzalcoatl’s abilities Control Atmosphere and Solar Power allow it fine control over
air, wind, sunshine and light in general which he can bend to his will. In combat, these Qualities function
as Control Wind and Control Light, respectively. Quetzalcoatl’s Cycle of Rebirth can be used to grant life
to inanimate matter and resurrect a fallen Shadow with Width-1 HP in all its Parts once per battle.
Ganesha Sun-27 (1-5) Vedic Physique 8d, 7 HP- Defends (Effective x1), Tough x2
(6-8) Many Arms 10d, 9 HP- Attack (Physical, *Spray x3*), Useful: Miracle Punch
(Spray x2)
(9-10) Elephant’s Head 7d, 6 HP- Attack (Light, Power x3), Useful: Good Fortune,
Brains
Resist: Dark Weak: Electric Favorite Thing: Neck massages
Description: Hindu lord of wisdom, wealth and good fortune. As a young man his head was
removed through misadventure by Shiva, who replaced it with that of an elephant.
Shadow Tactics: Ganesha’s Miracle Punch fortifies and brings happiness to any subject he strikes and can
use up to three Sets to grant Buffs to his allies. His Good Fortune bestows luck and success to a target,
giving that target Width-1 in Awesome for their next action.

Appendix B: The Shadow Compendium
-- 275 --
Judgement Bonus Extra: Spray or Splash Judgment Shadows are figures related to Judgement Day or are gods and
beings directly linked to judgement of humankind, either as a whole or as
individuals answering for their actions in life.
Source: Judgement Shadows are produces by the anxiety of a person who feels
the weight of judgement on their shoulders, either as its executor or as the one
receiving the verdict.
Turdak Judgement-10 (1-4) Executioner’s Blades 7d, 6 HP- Attacks (Physical, *Spray x1*, Power x1),
Defends
(6-10) Skeletal Deity 7d, 8 HP- Attacks (Dark, Splash x2), Useful: Dimensional
Gate, Brains
Resist: Dark Weak: Light Favorite Thing: Fresh milk
Description: The Hindu executor of judged souls, under the command of Yama, the god of Death. When Yama
passes his judgment, Turdak is tasked with carrying it out.
Shadow Tactics: As Yama’s executioner, Turdak has the ability to open Dimensional Gates so that he can
haul the judged to the place of their punishment. This allows Turdak to open portals between any two
locations he is conscious of, and in combat he can use this power as a Unique Movement to out-maneuver
his enemies or to escape battle entirely.
Anubis Judgement-20 (1-6) Embalmed Body 6d, 5 HP- Defends, Useful: Preserve Flesh (Effect x1)
(7-8) Soul Scales 8d, 7 HP- Useful: Weigh Heart (Effect x1)
(9-10) Jackal Head 8d, 7 HP- Attacks (Fire, Power x2, *Spray x1*, Splash x3)
Useful: Consign to Beyond, Brains
Resist: Wind Weak: Ice Favorite Thing: His pet crocodile-dog, Ammit
Description: A jackal headed god of Egyptian myth. He weighs the hearts of the deceased to determine their final
destination and taught mankind the art of embalming to preserve the dead.
Shadow Tactics: Anubis can Preserve Flesh to strengthen organic matter against damage and decay,
granting Rakukaja for Width in Rounds. When Anubis Weighs a person’s Heart he can divine any
negative aspects of their personality. This in turn allows him to add Width in Effectiveness when he
Consigns them to Beyond. Consign to Beyond is a Dark-type Deadly Power that can remove things and
creatures from physical existence, transmitting them to their ultimate destination.

Appendix B: The Shadow Compendium
-- 276 --
Ardha Judgement-30 (1-6) Binary Body 10d, 9 HP- Attacks (Ice, *Spray x1*), Attacks (Fire, Spray x1),
Defends, Useful: Divine Paragon, Tough x2
(7-9) Trinary Arms 9d, 8 HP- Attacks (Almighty, Power x3, Fast x1), Useful:
Mudra (Spray x1)
(10) Conjoined Mind 8d, 7 HP- Useful: Reincarnate (Effect x2), Brains
Resist: -- Weak: -- Favorite Thing: Suntanning
Description: A dual-gendered god whose appearance is half that of the destroyer, Shiva, and
half his wife, Parvati. Ardha is the ideal figure of Shaktism, the perfect god.
Shadow Tactics: With their Divine Paragon ability, Ardha manifest their divine superiority as a perfect
being, allowing them to Boost Power to any action using their Body or Arms. Ardha is also perfectly
fluent in Mudra, the language of hand gestures seen in Hindu iconography, and uses them to convey
complex thoughts and feelings into a person’s mind with a single gesture. When used in Combat, they
can install a state of focus, vigor and enlightenment that adds +1 Width to one of the target’s Sets for
Width-1 Rolls; with Spray x1 Ardha can apply this benefit to two of their allies. Reincarnate can
reconstitute dead lives into new forms, and for Ardha themselves it restores Width+1 HP to one of their
parts that has been reduced to 0 HP. Ardha can use this power on themselves without limit each Combat
Encounter.
But Wait, There’s More! The standard Compendium begins with The Magician and ends with Judgement, which is in
line with the Arcana of most significant characters you may encounter. This allows a GM to
match Shadows with individuals if they so desire to populate an Other World space based on
that person’s emotional state (as is done in Persona 4 and 5).
Two Arcana are omitted from this list: The Fool and The World. Due to the special
connotations of these Arcana it is not likely that players would encounter Shadows of these
Arcana in an Other World derived from a Real World character’s cognition. Instead, Shadows
of The Fool and The World act as Wild Cards and may appear in any Other World space
without compromising its psychological underpinnings.
Of course, GMs who are not creating Other World spaces based on characters in the Real
World are also free to use these and any other Shadows as they please. As well, if a GM sticking
with the Shadow Source mechanic wants to use a Shadow of an Arcana that doesn’t specifically
synchronize with a specific character’s emotional state, they’re free to do so. It’s more important
that a Shadow encounter be compelling than that it is psychiatrically canonical.
Rather than getting a free Rank of a specific Extra, Shadows of the Fool and the World
benefit from one free Quality of their choice.

Appendix B: The Shadow Compendium
-- 277 --
The Fool Extra Free Quality Shadows of the Fool are tricksters and mischief makers as well as creatures
whose very origins are defined by clouded by mystery and ambiguity. This
makes them more genial than other Shadows, but no less dangerous.
Source: Foolish Shadows can crop up anywhere, as they’re the result of raw
psychic potential that hasn’t been fully realized into a specific Arcana.
Slime Fool-5 (1-7) Viscous Pseudopods 7d, 6 HP- Attacks (Physical), *Useful: Absorb*,
Defends, Tough x1
(8-10) Morose Nucleus 6d, 5 HP- Attacks (Fire, Splash x1), Brains
Resist: Physical Weak: Ice Favorite Thing: Dark, dirty places
Description: A primitive Shadow with a viscous body. There are various theories as to its origin, but it is still
under debate. Said to compulsive collect shiny objects.
Shadow Tactics: This Simple Shadow’s only Useful ability is to Absorb things by encapsulating them in
its grotesque mass. Once Absorbed, the Slime assimilates some of its physical properties; in Combat this
translates to granting Slime one of its Target’s Extras for Width-1 Rounds, and changing its Resistances
and Weaknesses to match that of the creature it Absorbed.
Jack Squat Fool-7 (1-4) Track Clothes 7d, 6 HP- Defense, *Useful: Run Real Fast*, Useful: Squat
(Always Works)
(6-10) Rotund Head 6d, 7 HP- Attacks (Ice#), Useful: Occasional Insight, Brains
Resist: Ice Weak: Wind# Favorite Thing: Quick cash
Description: A weak yet boastful Shadow with a curious sense of fashion prone to getting in
over his head. Some say he’s simply a normal Jack Frost who found a pair of pants and shoes.
#This Attack type and Weakness are changed to Psi in campaigns featuring that Element.
Shadow Tactics: Jack Squat’s Run Real Fast Quality is a rapid movement ability that leaves a cloud of
Jack Squat shaped dust behind. This Quality grants Sukukaja for Width-1 Rounds, and when applied to
one of his allies equips them with a set of Track Clothes for the effect’s duration. Squatting allows Jack
Frost to position himself on non-horizontal surfaces as easily as flat ground, a form of Unique Movement.
Occasional Insight spurs Jack Squat’s normally dim wit to Provide Information about the Shadow World
as a whole.

Appendix B: The Shadow Compendium
-- 278 --
Ose Fool-16 (1-3) Presidential Mantle 7d, 6 HP- Defends, *Useful: Cape of
Delusion* (Effect x1)
(4-5) Twin Slashers 7d, 6 HP- Attacks (Physical, Spray x1), Useful:
Hone Steel
(6-10) Scholarly Leopard 6d, 5 HP- Attacks (Electric, Power x1),
Useful: Reshape Physiology, Useful: Focus Wisdom, Brains
Resist: Physical Weak: Ice Favorite Thing: Forms
Description: One of the 72 spirits of the Goetia. He can freely shift his shape from
leopard to human and can change a person’s appearance without them noticing.
Shadow Tactics: Ose’s Cape of Delusion can implant maddening thoughts into a person’s head,
convincing them that their identify has changed. If this is used in Combat it causes a Persona User to lose
their connection to their own Arcana. This disables any Extras on their Persona connected with that
Arcana (so an Emperor would lose all ranks of Power on their Physical Attacks) for Width in Rounds.
When he Hones Steel he Boosts Power to his Twin Slashers, enhancing them so that he can cut through
any physical matter, and similarly Focusing Wisdom Boosts Power to his mystical abilities like his
Electrical attack, his Cape of Delusion and Reshaping Physiology. Reshaping Physiology allows him to
alter a person’s appearance however he pleases. Out of Combat it lasts for ten minutes per Height, and in
combat it is adept at Disabling Qualities by Width-1 Rounds by altering the Parts they are embedded in.
Black Frost Fool-19 (1-5) Black Ice Body 9d, 8 HP- Attacks (Ice, Power x1, Area x3), *Useful:
Cruel Frost*, Defends, Tough x3
(6-10) Diabolical Face 8d, 7 HP- Attacks (Fire, Power x2), Useful: Absolute
Zero (Effect x1), Brains
Resist: Ice, Fire Weak: Light Favorite Thing: Nasty pranks
Description: An ordinarily cheerful winter sprite that remembered its fiendish origins
and evolved from a small prankster to a massively powerful entity
Shadow Tactics: Cruel Frost exemplifies Black Frost’s nature as a trickster turned malevolent. It allows
the Shadow to Control Ice, but always in a nefarious and mean-spirited way—creating patches of
invisible ice under old ladies or freezing skin to cold metal. When used in Combat it augments both his
Ice Attack and his Absolute Zero ability in the same manner as Control Ice would. Absolute Zero is a Ice-
type Deadly Power where by Black Frost bites or licks an object or creature and negates all heat from it,
causing them to break down on the molecular level (in so far as Personas and Shadows possess structure
akin to molecules).

Appendix B: The Shadow Compendium
-- 279 --
Crystal Skull Fool-25 (1-7) Unidentified Presence 9d, 8 HP- Attacks (Physical, Power x2, Fast x2),
Defends, *Useful: Mystify* (Area x2, Effective x1)
(8-10) Quartzite Cranium 10d, 9 HP- Attacks (Light, Spray x2), Useful:
Spectral Shift (Effect x1), Useful: Quantum Displacement, Tough x3, Brains
Resist: -- Weak: -- Favorite Thing: Travel
Description: An ancient Out-of-Place artifact found in Central and South America. It is
said that if 13 are collected in one spot, the truth of the universe will be revealed.
Shadow Tactics: Crystal Skull can Mystify whole crowds of onlookers by unveiling tiny shreds of the
universal knowledge it contains, holding them captive to its wonder. When used in combat this has the
effective of so bewildering a group of foes as to stagger their reaction times, inflicting Sukunda against up
to three targets for Width in Rounds. Its Spectral Shift changes its make-up to align with that of any
primal elemental force (Fire, Wind, Ice or Electricity), imbuing it with those characteristics. When used
combatively this changes Crystal Skull’s resistance accordingly for Width Rounds, while also giving it a
corresponding Weakness (Fire – Ice, Wind – Electric). Spectral Shift also changes the attack type of the
Unidentified Presence accordingly. Quantum Displacement is Crystal Skull’s propensity to vanish when
not observed; as long as no-one is looking at the Skull it can use this quality to Warp to any other
Location it is aware of, provided that location is also unobserved.
Loki Fool-28 (1-3) Wicked Wings 7d, 6 HP- Attacks (Ice, Area x3, Power x1), *Useful:
Fold Space* (Always Works)
(4-7) Bound Trickster 8d, 6 HP- Attacks (Dark, Fast x3), Defends (Recoil
x2)
(8-10) Mind for Trouble 8d, 7 HP- Useful: God of Mischief (Effect x2,
Spray x1), Useful: Flyting, Brains
Resist: Ice Weak: Wind Favorite Thing: Pancakes
Description: The Norse god of mischief. He is known as a trickster, and while not always driven by malice he is
impulsive and devious. His involvement with the death of Odin’s son Balder leads to Ragnarok, the World’s End.
Shadow Tactics: Rather than enabling flight, Loki’s Wicked Wings can Fold Space around him, distorting
it so that can instantly travel between two locations while appearing for a brief moment to exist in both,
which acts as a form of Unique Movement. As the God of Mischief, Loki can impose immensely powerful
Jinxes on targets, and can do so using two Sets at once, striking their Parts with his choice of Width+1 In
Penalty dice for 1 Round, or -1d for Width+1 Rounds. Finally, Flyting is a Norse term meaning “contest of
insults”, which Loki can use to lob incendiary rhetoric at vulnerable foes that shatter their resolve and
inflict Tarunda for Width-1 Rounds as a result.

Appendix B: The Shadow Compendium
-- 280 --
The World Extra Free Quality Shadows of the World embody the irresistibility the universe itself. They take
the form of dragons and other monstrous creatures mythologically linked to
nature’s unyielding power.
Source: World Shadows can appear wherever they’re needed but owing to their
immense power they are rarely seen in all but the most challenging
environments.
Kraken World-19 (1-8) Octopods 8d, 7 HP- Attacks (Physical, Spray x1), *Useful: Drag to the
Abyss*, Defends (Recoil x2), Useful: Depth Dweller
(9-10) Jaws of the Deep 8d, 7 HP- Attacks (Wind, Area x3), Useful:
Control Weather, Useful: Mortal Terror (Effect x1), Brains
Resist: Fire Weak: -- Favorite Thing: Toy boats
Description: A sea monster whose true form is unknown that drags ships to the
depths of the sea. It is so immense that some have disembarked upon its back, thinking
it an island.
Shadow Tactics: Kraken’s ability to Drag to the Abyss is a form of Ice-Type Deadly Power that attempts
to pull objects or creatures either to a watery grave or into its own gnashing jaws, never to be seen again.
As a Depth Dweller, Kraken can move freely through even the deepest, darkest and coldest water, giving
it a form of Unique Movement in aquatic environments. By Controlling Weather, it can create storms and
other atmospheric hazards. When used in Combat these storms last for Width-1 Rounds, and during that
time his Wind Attack ignores all Toughness on its targets. Finally, it can inspire Mortal Terror in a target,
inducing Fear for Width in Rounds.

Appendix B: The Shadow Compendium
-- 281 --
Ouroboros World-24 (1-4) Quicksilver Rings 7d, 6 HP- Attacks (Electric, Power x2, Fast x2)
(6-10) Moebius Serpent 10d, 9 HP- Attacks (Almighty, Spray x1), Defends
(Fast x1) Useful: Transmutation, Heal x4 (Effect x3, Area x2), Tough x2, Brains
Resist: Electric Weak: -- Favorite Thing: Flawless mathematics
Description: A dragon that signifies eternity. Biting its own tail, it forms an endless
circle. In alchemy it is thought to be an important material to create the Philosopher’s
Stone
Shadow Tactics: Ouroboros can Heal 5 Shock or 4 Scars four times per Encounter and can distribute this
healing across up to 3 patients at once. Its sole Useful Quality is that of Transmutation, which is the
ability to change the physical make-up of things. In so doing it can change any object, even living things,
into whatever fundamental element it so desires—strong things like iron and gold, or weak things like
carbon and tin, giving Ouroboros immense control over its material surroundings. In Combat,
Transmutation does two things. If its Quicksilver Rings are broken, Transmutation can restore them to
Height -3 HP (meaning a roll of 3 or lower fails entirely). Otherwise, Transmutation allows Ouroboros to
remove Extras from one target and implant them in an ally for Width-1 Rounds. How many Ranks of an
Extra is determined by the Transmutation Roll’s Height: 1-5 will Transmute 2 Ranks, and 6-10 will
Transmute *all* Ranks of an Extra from a selected Part.
Leviathan World-30 (1-3) Thrashing Fins 7d, 6 HP- Useful: Thrash About (Effect x2)
(4-8) Sea Monster’s Body 7d, 6 HP- Attacks (Physical, Power x2, Fast x2),
*Defends* (Recoil x2), Useful: Hermetic Scales, Tough x3
(9-10) Draconic Jaws 8d, 7 HP- Attacks (Fire, Power x2, Splash x2), Useful:
Shattering Roar, Brains
Resist: Physical Weak: -- Favorite Thing: Hippopotamus meat
Description: A sea monster spoken of in the scriptures as having impenetrable scales
who emits fire from its mouth. It and Behemoth battle at the World’s End, killing one
another.
Shadow Tactics: Thrash About stirs Leviathan into a violent, frenzied rage that can obliterate his physical
surroundings, and when used in Combat it grants Leviathan both Sukukaja for Width+1 actions and
Recoil x2 against Width+1 Attacks. Hermetic Scales create an impenetrable seal around Leviathan’s entire
body, immunizing him against any harmful environments as well as any Debuffs for Width-1 Rounds.
His Shattering Roar unleashes a force akin to a hurricane wind and can Knockdown any target it strikes
for Width-1 Rounds. If combined with any other Attack as a Multiple Action its speed will be equal to
that of the attack regardless of the Width rolled (in the same way that Super Strength functions when
used in this manner).

Appendix B: The Shadow Compendium
-- 282 --
Principles of Minor Shadow Design The 69 Minor Shadows of this Compendium represent a cross section of the human collective
consciousness turned feral and ready to attack your Players. But the Persona and Shin Megami
Tensei canon far exceeds what are listed here, so the following guidelines can help you when
building your own Minor Shadows.
Tiers Minor Shadows can generally be sorted into three Tiers based on their AP level. Tier 1 is
between 5 and 10 AP, Tier 2 is between 10 and 20 AP, and Tier 3 is between 21 and 30 AP. The
higher a Minor Shadow’s Tier, the more power is available to it and the more diverse its ability
pool can be.
Body Part Patterns Minor Shadows have between 2 and 3 parts, which generally fall into a few consistent patterns.
As a rule of thumb more valuable abilities go on higher Parts, due to the ability of Called Shots
to make lower parts very easy to attack.
2-Parters- These Shadows have Parts at (1-5) and (6-10), representing Shadows with two
roughly equal components. Often the lower Part carries a Defense Quality, while the upper part
houses a stronger Attack Quality.
Bottom Heavy- These have one Part at (1-7) or (1-8) and a second part occupying a much
smaller top portion of its Hit Locations. These are Shadows with one large, main component
and a smaller, harder to hit component that may contain a singularly powerful ability it wants
to protect.
Top Heavy- These have one Part at (1-2), (1-3) or (1-4) and a second part occupying a larger
upper section. In this case, the smaller, lower part is more vestigial and can be lost without
significantly weakening the Shadow, whereas the top component is bulky and powerful.
3-Parters- These are by necessity are either Tier 2 or Tier 3 Shadows; Tier 1s just don't have
enough dice and AP to spread across the parts. Generally, the bottom part is something it can
afford to lose, like Defense or a movement quality; the middle part is where the meat of its
attack power lies; and the top part is a powerful Useful Quality.
Bending the Rules for Useful Qualities Shadows, since they’re mostly designed to be destroyed by players, get a little more leeway in
what their Useful Qualities can do to give them some more oomph. Tier 1s and 2s are mostly
beholden to the conventions laid out in Chapter 9, but Tier 3s can defy those conventions more
freely. See Jinn’s Wish Granting Quality as an example of this, which contains all Buffs and
Debuffs in a single Quality, or Ouroboros’ ability to Transmute Extras.

Appendix C: Wild Cards
-- 283 --
What is a Wild Card Character? A Wild Card Character is an Optional Ruleset for The Velvet Book that emulates the way that the
main character in Persona 3-5 works. In these games, the protagonist doesn’t have a single
Persona, but instead is a Wild Card, meaning he possesses a collection of Personas that he can
swap control of. So in truth, this ruleset actually brings to the fore what most people directly
experience when playing Persona.
The reason why these are Optional Rules is that, while true that main character of
Persona 3-5 is a Wild Card, they’re also a vague, blank slate of a character, and their collection of
Personas says almost nothing about who they are as a person. This is by design, as these
protagonists are meant to be ciphers for the player to fit themselves into, rather than unique
persons with defined traits and thoughts. But that’s not really a great fit for the kind of game
that The Velvet Book is looking to create, where one’s Persona is meant to be an expression of
their unconscious mind which grows stronger as the User’s experience expands.
With that being said, this Appendix provides a ruleset for Players and GMs interested in
exploring this side of the game’s universe. Playing as a Wild Card is very different from playing
as a normal Persona User, but the two are designed to be balanced with each other, so having a
party mixing Wild Cards with standard Users should not pose much of a problem.
Characterizing Wild Cards In the source material, Wild Cards are blank slates, and their ability to obtain and use multiple
Personas is a reflection of that intentional emptiness. In The Velvet Book, a Wild Card isn’t quite
so nebulously played, but there is a difference between a standard Persona User and a Wild
Card. A Standard Persona User is strongly characterized by their Arcana and has a close bond
with their Persona. Wild Cards, on the other hand, are meant to have a weaker sense of self—
they’re less certain about their place in the world and what they’re meant to do with their
power, and that manifests in a splintered psychic matrix enabling them to manifest multiple
weaker Personas rather than a single powerful one.
On the flip side, this splintering makes Wild Cards more open to the influence of others.
Where a Standard Persona User harnesses power from his Relationships as needed to
strengthen his Persona, a Wild Card’s Relationships define how strong his Personas already are.
So, to put it in a nutshell, Wild Cards should be a little more uncertain about who they
are as individuals, but intensely focuses on helping and supporting others around them. These
traits of course aren’t limited to Wild Cards, but Wild Cards as a general rule exhibit them more
strongly.

Appendix C: Wild Cards
-- 284 --
What Makes a Wild Card: The Spread As stated, a Wild Card doesn’t have a single Persona; instead they have an entire party of them.
Technically they can possess an army of Personas, but only a handful can be brought out at a
given time. This small collection of on-hand Personas are arranged into the Wild Card’s Spread.
A Spread looks like a Persona, but instead of having Parts it has Slots that can be
inhabited by one of their Personas. So an empty Spread might look like this:
(1-2) Slot 1
(3-4) Slot 2
(5-7) Slot 3
(8-9) Slot 4
(10) Slot 5
A Wild Card cannot have fewer than 3 slots, and no more than 6, and a Slot cannot exceed 5 Hit Locations. Beyond that, the orientation of your Spread is to your
liking. You can have lots smaller slots, a few big ones, or one big one supported by a collection
of tiny ones.
A Wild Card’s Spread is Fixed during Gameplay. You’re free to change your Spread’s
structure between sessions, but it’s not a good idea to do it while everyone is at the table
playing the game since it can be a fairly laborious process. It’s all bookkeeping, which is best
done off the game clock.
What Makes a Wild Card: Slot Dice and HP Each Slot has its own dice pool. This pool is pure dice; they can’t be traded for Extras or
Qualities because it’s a raw expression of your psychic potential, channeled into that position of
your psychological matrix. The bigger the slot, the bigger its dice pool. In the same way, each
Slot has a supply of HP equal to its number of Hit Locations
Slot Size Dice Pool Hit Points 1 Hit Location 0d 1 HP
2 Hit Locations 2d 2 HP
3 Hit Locations 5d 3 HP
4 Hit Locations 7d 4 HP
5 Hit Locations 9d 5 HP
Note that the 1 and 2 Hit Location Slots seem like they don’t have a lot going on, but that’s
okay, because a Wild Card’s power is not limited to the structure of their Spread.

Appendix C: Wild Cards
-- 285 --
What Makes a Wild Card: Personas Each Persona in a Wild Card’s Arsenal is individually less complex than one controlled by a
standard Persona User. Rather than having discrete Parts, it becomes a part of a larger whole
when it’s planted into a Slot. Below is what it looks like:
Jack Frost (Magician-Base) 2d, 2 HP Resist: Ice, Weak: Fire Level 0
Attacks (Ice, *Power x1*), Useful: Icy Tricks Favorite Thing: Jokes
As seen here, WC Personas have their own supply of dice, HP, Resistances and Weaknesses
and, while a Wild Card’s Slots provide dice and HP, their Qualities and Extras are entirely
dependent upon their collection of Personas. In the following sections, we’ll break down each of
these pieces to explain how they work.
Base Personas When a Wild Card first Awakens to his nature as a Persona User, his Spread is populated by a
collection of Base Personas. There are two kinds of Base Personas.
All but one of their Slots are inhabited by regular Base Personas which represent some
aspect of the user’s psyche or that of their social network, by way of Arcana (see the next
section). This can be custom made by the Player or GM, or you can adapt any of the Shadows in
the Compendium. However, their last Slot will be occupied by a special Base Persona called the
Core Persona.
The Core Persona
A Wild Card’s Core Persona is a unique representation of their self within their Spread. It’s the
equivalent to Orpheus in Persona 3, Izanagi in Persona 4 and Arsene in Persona 5. Whereas two
Wild Cards could share other Base Personas, their Core Persona is theirs alone and has some
special rules.
A Core Persona matches the Wild Card’s Arcana. If the Wild Card is an Emperor, his
Core Persona will also be an Emperor. (Arcana is extremely important to Wild Cards and is
covered in the next section).
A Core Personas always occupies a Wild Card’s largest Slot. If their Spread has one
singular big Slot, that’s where it goes. If it has two or more Slots of the same Largest size (so if
its Spread is 1-2, 3-4, 5-7, 8-10 it could fit into either the 5-7 or 8-10 Slots), the Wild Card may
freely choose which Slot their Core Persona inhabits.

Appendix C: Wild Cards
-- 286 --
Wild Cards and Arcana Standard Persona Users interact with the Arcana system whenever they’re using their
Relationships to obtain Boosts for their Personas, but Wild Cards engage with it constantly, for
one key reason: the kind of Personas a Wild Card can use are defined by the Arcana.
Specifically, a Wild Card can only use Personas meeting any one of these criteria:
1. Their Arcana Matches that of the Wild Card. A Wild Card High Priestess can
always use High Priestess Personas.
2. Their Arcana Matches one of the Wild Card’s Relationships. This is the most
important rule, because it gives Wild Cards access to a much wider array of Personas and
their abilities.
3. Fools are Fair Game. Since the Fool Arcana represents a blank slate and openness, a
Wild Card can always use Personas of the Fool Arcana.
Base Personas and Arcana
These rules shape the nature of a Wild Card’s Base Personas. We’ve touched on Core Personas
already, so that one is clear. But what about the rest of a Wild Card’s Spread? The answer
depends on how the game is set up.
If the Character has Pre-Existing Relationships: If a freshly awoken Wild Card already
has Relationships set-up, then his Base Personas will have Arcana that match his Relationships,
apart from his Core Persona.
If the Character has Pending Relationships via an Arcana Draft: In this case, the
Base Personas will be from Arcana matching those of the Relationships they’ve drafted. In a
sense then they act as previews of what those Relationships will eventually bring to the table.
If the Character has no Current or Pending Relationships: In the case of a truly blank
slate Wild Card like this, their Base Personas will either be Fools or share the Wild Card’s
Arcana.
Note that you don’t need to represent all of your Relationships in your Spread; if your Spread
only has three Slots but you have 5 Relationships, you’re free to pick and choose which ones
you want to embody into Personas.

Appendix C: Wild Cards
-- 287 --
Grades, Dice and Hit Points Notice on our sample Wild Card Persona it says “Magician-Base.” In this case, “Base” indicates
the Persona’s Grade, which is a measurement of its strength and overall Quality. Think of it like
Arcana Points, except for Personas. These break down as follows:
Persona Grade Dice Hit Points Base/Core 3d 2 HP
E 4d 3 HP
D 5d 4 HP
C 6d 5 HP
B 7d 6 HP
A 7d, +1 Arcana Extra 7 HP
As is the case with Personas and Shadows, these dice can be traded in for Extras and Qualities.
This leads to an important fact: Wild Card Personas can function with 0d. This is
because they don’t act on their own: you plug them into a Slot and you combine their dice with
the Slot Dice. So if you have a Grade E Persona you can exchange all of 4d its dice for Extras and
Qualities and put them into a 4 Hit Location Slot and roll 7d to use those Qualities and Extras.
To that end, a second caveat emerges: A Wild Card Persona can’t inhabit a Slot if the Total Dice Pool would exceed 10d. Jack Frost, for example, has 2d, which means
he couldn’t fit into a 5 Hit Location Slot with 9d, because that would be 11d. He’d need to be
put in a Slot with a smaller dice pool.
Resistances and Weaknesses One of the things that sets Wild Cards apart from Standard Persona Users is that their
Resistances and Weaknesses vary depending on which Personas they have in their Spread.
Whereas all of a Standard Persona’s Parts have the same Weaknesses and Resistances, each
Slotted Persona in a Wild Card’s Spread can and probably will have a unique combination of
Weakness and Resistance. This is both a blessing and a curse, because while it means a Wild
Card is less likely to be seriously threatened by one specific Element, it’s likely that at any given
time they’ll have at least one Persona in their Spread that’s vulnerable to what an enemy
Shadow is throwing around.
Level We’ll cover special rules for Wild Card Levels later in this section, but they do the same as
normal Persona Levels: each adds +1d and +1 HP to that Persona.

Appendix C: Wild Cards
-- 288 --
Qualities and Extras A Wild Card Persona’s Final Component are its Qualities and Extras. Like a Part on a Standard
Persona, a Wild Card Persona gets one free Quality, and like a Shadow they also get one free
Rank of an Extra associated with their Arcana. This is the same method utilized for Arcana
Boosting and Shadows, and is printed below:
Extra Arcana Extra Arcana Area Empress, Moon Power (Physical)* Emperor, Death
Burn Temperance, Devil Power (Elemental)* Magician, Hermit
Effective Hierophant, High Priestess Recoil Fortune, Tower
Fast Chariot, Justice Spray or Splash Sun, Judgement
Heal Lovers, Star Tough Strength, Hanged Man
*Emperor and Death Arcana can be used to add Power to Attacks Qualities with the Physical
Element (or Physical Elements like Bash and Pierce, as the case may be), while the Magician and
Hermit Arcana add Power to other Elements like Fire, Ice and Electric.
Personas of the Fool and the World enjoy a Second Free Quality. This represents
their shifting and malleable natures.
Things to Remember When Building Wild Card Personas Since Wild Card Personas differ so greatly from the standard model, here are some helpful
guidelines for Players and GMs putting them together.
WC Personas are Part of a Whole
This is probably the most important detail to keep in mind. When you’re creating or translating
a Shadow into a Wild Card Persona it’s tempting to try and incorporate as many aspects of its
design as possible into the final product. If you do this, though, you’ll end up with an
ineffectual Persona that lacks a clear reason for existing and doesn’t have enough to do its job.
Instead, think about what your want a Persona to accomplish as part of your Team.
Does it have a powerful attack you want it to use? Is it your Healer? Is it your star Defender?
Does it have a specific Useful Trick that it can pull at to help your Party? Focus on that role and
build it around one or two Qualities at most. Once you have access to higher Grade Personas
with lots of dice to share you can add a third or even fourth Quality, but until then it’s best to
keep it simple.

Appendix C: Wild Cards
-- 289 --
What Slot Will it Occupy?
Big Slots give you lots of dice, which means you can focus more on a Persona’s Extras and
Qualities, but they can be hit by a wider range of attacks. Small Slots need Personas to
contribute dice to be viable, meaning you’re left with fewer to spend on Extras and Qualities,
but they’re a bit harder to hit. Also consider what position on your Spread you want the
Persona to sit in; the higher up it is, the better protected it will be from Called Shots and other
Height-dependent effects.
Staying Organized
The biggest challenge for Wild Card vs standard Persona Users is keeping track of your Spread
and your Deck. In lieu of a single character sheet we’ve included a template that you can print
and cut out into 3x5 index cards. This way you can slot your Personas in and out of your Spread
and keep the rest in a literal Deck to the side.
Adopting New Personas: Grades and Relationships Before we get into the nitty gritty of how to expand your Persona arsenal, let’s talk about
Relationships. There are two things to understand about this process:
1. A Wild Card can only adopt a new Persona matching his Arcana, one of his Relationships, or the Fool and the World. This is based on the idea that a Wild
Card’s ability to associate with a Persona relies on his understanding of people in the Real
World and the problems and struggles that they go through. If you encounter a Shadow of
the Hanged Man but don’t have experience with the mental and emotional underpinnings
which define that archetype, it won’t be compatible with your Spread.
2. The power of a Persona you adopt is determined by the strength of your Relationship. This corresponds directly with their Grade: the higher the Grade, the deeper
your Relationship with a person of that Arcana must be if you want to recruit them.
Persona Grade Relationship Level E 1d
D 2d
C 3d
B 4d
A 5d
These limits don’t exist for Fools, Worlds and Personas that share the Wild Card’s Arcana, but
instead they use the Wild Card’s Arcana Level in place of a Relationship Level.

Appendix C: Wild Cards
-- 290 --
Adopting New Personas: Where They Come From Wild Cards have two ways of adopting new Personas, both of which involve the Other World.
These are Shadow Negotiation, and Exploration.
Recruitment by Negotiation
When you engage in Negotiation with a Shadow of a compatible Arcana during an Encounter
(see page @@ of the Combat Chapter), you can recruit them onto your side by scoring a 4x
Width result on your Negotiation, and then offering it its Favorite Thing. As far as its Favorite
Thing is concerned, you could hand over a sample right away, or you could offer to satisfy its
craving at a future time, but you must do so in a timely manner or else the Persona will vacate
your Deck. Recruited Personas become domesticated once appeased in this way and won’t
continually threaten to abandon you unless you keep feeding them their Favorite Thing.
The amount of AP the Shadow has translates into its Grade as a Wild Card Persona.
Max Shadow AP Value Persona Grade 10 AP E
15 AP D
20 AP C
25 AP B
25+ AP A
Recruitment by Exploration
A Wild Card can also adopt Personas from Shadows and other similar entities encountered
while exploring the Other World outside of the context of battle. This could happen just
casually—the party enters a saloon in an Other World space themed after the Wild West, and
the Wild Card discovers that the Oni bartender is of the Strength Arcana and asks if he wants to
join them. This requires a little bit of extra work on the GM’s part, either in populating
prospective Other World spaces with adoptable Shadows or in being quick enough to assign
Arcana as needed. A Persona with the Analyze ability or a relevant ability to Provide Information
can be instrumental in identifying the Arcana of local Shadows.

Appendix C: Wild Cards
-- 291 --
A Wild Card can also use a Time Slot to enter the Other World with the express purpose
of locating and recruiting a new Persona. This involves rolling to delve into the haunts where a
prospective Persona may reside, using one of your Stats to do so. Which Stat is used depends on
the Arcana of the Shadow you’re pursuing, and you can always use Relationship Die to
improve this roll.
Arcana Stat Needed Arcana Stat Needed Magician Proficiency Strength Guts
High Priestess Knowledge Hanged Man Diligence
Empress Expression Death Guts
Emperor Guts Temperance Diligence
Hierophant Knowledge Devil Expression
Lovers Expression Tower Diligence
Chariot Proficiency Star Expression
Justice Diligence Moon Knowledge
Hermit Knowledge Sun Proficiency
Fortune Proficiency Judgment Guts
Add this Stat to the dice pool of the Persona you’re going to rely on as your primary aid on this
journey; it can be any of your Personas, but if it’s one that matches the Arcana you can increase
the Height of your roll by 2.
The final part of the equation is the Grade of Persona you’re seeking. The higher the
Grade, the more Height you need. This target number is cumulative; if you fail to reach it in one
incursion, your progress is saved and can be added to the next, so that eventually you’ll be able
to locate a prime specimen of even the highest Grade.
Grade Sought Total Height Required E 4
D 6
C 8
B 10
A 12
A Set with Height 10 with +2 from a Persona with a matching Arcana equals 12, so it is possible
to track down a Grade A Persona in one shot if you roll extremely well. If you fail to roll a Set, it
counts as adding 1 Height to your outcome, so even under the worse circumstances you’re
making forward progress. If you roll with a Persona matching the Arcana you seek, this
becomes 3 Height.

Appendix C: Wild Cards
-- 292 --
How this all plays out is straightforward. You’re given a lead about where a potential
Persona may be found, either by a figure in the Other World or by your Persona passing along
information known to it, and your roll represents the effort put forth into tracking it down. The
Stat used, in turn, indicates the nature of your trial.
Diligence stands for a grueling physical challenge—scaling a mountain, boating across an
ocean, crossing a blazing desert or frozen glacier. Only by proving one’s bodily fortitude and
determination will a Persona reveal itself to the Wild Card.
Guts stands for a fraught challenge to your courage and mental resolve. It may be that you’re
confronted with sources of mortal terror, tests of will or, in the case of The Emperor, fearsome
and demanding power.
Proficiency represents a rigorous test of skill, talent and practical knowledge. Locating a
Persona gated by this Stat may require demonstrating mastery of some game or art, either as a
way of earning passage to their abode or their respect and attention.
Knowledge confronts the Wild Card with a riddle, puzzle or other test of insight, strategy and
observation to earn a Persona. Said Persona could be your opponent in a dangerous game of Go
it may be meditating at the end of a devious nest of traps and secrets.
Expression tests your ability to charm, coerce and connect socially with individuals in the
Other World who may help you or impede you in finding the Persona you seek. A quest like
this demands subtlety, guile and more than a little bit of dirty dealing most of the time.
Adopting New Personas: Making it Your Own New Wild Card Personas are nothing more than a concept, a Quality, an Extra and some dice.
It’s the player’s job to bring it to life. How they do this depends on hey they obtained the
Persona.
Translating a Shadow into a Persona
When you adopt a Shadow, usually by way of negotiating for their loyalty in combat, your
objective is to compress their traits into the shape of a Wild Card Persona, with their Grade
representing the budget of what you’re allowed to bring over. For example, let’s translate
Minotaur into a Wild Card Persona. Here are his stats as a Shadow:

Appendix C: Wild Cards
-- 293 --
Minotaur Chariot-16 (1-6) Warrior’s Body 9d, 11 HP- Attacks (Physical, Power x2, Fast x2), Defends,
Tough x2
(7-10) Bull’s Head 7d, 9 HP- Attacks (Physical, *Fast x1*), Useful: Unbridled
Rage (Always Works), Brains
Resist: Fire Weak: Ice Favorite Thing: Sugar
Description: A monster with the body of a man and the head of a bull. The king of Crete
imprisoned him in a labyrinth and sent in beautiful youths to be sacrificed to its wrath.
At 16 AP he is the equivalent of a Grade C Persona, giving you one Free Quality, 1 Rank of Fast,
and 6d to work with. So as a Wild Card Persona he could look something like this:
Minotaur (Chariot-C) 3d, 5 HP Resist: Fire, Weak: Ice Level 0
Attacks (Physical, *Fast x1*, Power x1), Useful: Unbridled Rage, Tough x1 Favorite Thing: Sugar
Of course, this is just one way he could be built; if a Wild Card intended to use Minotaur in a
large slot with a big dice pool he could use the rest of his 3d to pump up his Attack with more
Power or add Always Works to his Unbridled Rage Useful. The point, though, is that Minotaur
as a Wild Card Persona carries the same spirit he had as a Shadow, but in a smaller form.
Forging Fresh Personas
Wild Card Personas obtained from Exploration may not have a Shadow to use a Template; in
this case a Wild Card is free to use the dice budget allotted by their Grade in any way that they
want to create the Persona envisioned by their design. The only restrictions are those placed by
its Arcana.
Improving Wild Card Personas: Gaining Levels As with a normal Persona, each Persona in a Wild Card’s collection can improve itself by
gaining Levels. Each Level affords that Persona +1d and +1 HP. One of the key differences is
while a normal Persona User can assign these improvements to two different Parts of his
Persona, a Wild Card cannot. Each level applies specifically to one Wild Card Persona, and
gives its benefits to that Persona alone. Added to this, there are some additional considerations.
A Wild Card Persona cannot exceed Level 3. This is the trade-off for allowing a Wild
Card to possess many Personas; moreover, as these Personas originate from places exterior to
the Wild Card’s consciousness, their individual capacity for growth is limited.

Appendix C: Wild Cards
-- 294 --
A Wild Card’s Core Persona can reach Level 5. Because the Core Persona is an
expression of the Wild Card’s inner self, it has a greater potential for improvement. However, as
it’s forced to share psychic bandwidth with other Personas, it still has a finite amount of power
that can be attained through raw experience.
A Wild Card must keep track of the total Levels he has gained. His gross levels are
still a vital measurement of his total power and factor into a GM’s calculations for enemy
encounter difficulty.
If a Wild Card gains a Level and all his Personas are at their Cap, this level is held in reserve for a later time. So you can never lose out on a level, just save it for later
when you have a fresh Persona open for some extra juice.
What all this means is that a Wild Card’s array of Personas can only become so strong
on their own effort and merit. But that doesn’t mean their ability to grow stops when that
ceiling is reached. If a Wild Card has a Persona that he dearly wishes to improve that has
reached its maximum level, he has one other option: Fusion.
Improving Wild Card Personas: Fusion In the source material of the Persona games, Fusion is a unique ability of the Wild Card where
two or more Personas can be merged together to create a new, stronger Persona. In these games
this is accomplished through a complex chart that The Velvet Book does not attempt to replicate.
Instead, this system uses a more streamlined approach.
Fusion involves taking one Persona and breaking it down into essence, then infusing
that essence into another Persona so that it absorbs some of its power and grows stronger. The
Persona being broken down is called the Donor, and the Persona receiving its power is called
the Host.
The Host gains Dice and HP equal to the Donor’s Level. These dice can be used as
whole dice, Extras or Qualities, with two rules:
1. Any new Extras or Qualities gained by the Host Persona must be taken from the Donor.
2. At least 1d must be exchanged for the Arcana Extra of the Donor Persona
Given these rules, if you were to use a Level 3 Minotaur as a Donor, it would donate 3 HP, 2d
and Fast x1 to the host. Those 2d could be used as whole dice, or they could be traded for any
of Minotaur’s Extras and Qualities (its Physical Attack, Power or its Unbridled Rage Useful
Quality). If it were a Level 1 Minotaur, it would only pass along 1 HP and Fast x1.

Appendix C: Wild Cards
-- 295 --
Fusion destroys the Donor Persona. While losing one of your Personas seems like a
harsh cost to pay, doing so frees up a Slot in your Spread for a new Persona, one that may be of
a higher Grade. Moreover, a Persona at its maximum level cannot gain additional power
outside of fusion; thus through Fusion you’re strengthening individual Personas above their
natural limits while opening up space for new Personas to gain Levels.
Strategizing Fusion
The results of Fusion can vary. If you Fuse a Grade D, Level 3 Persona and replace it with
another Grade D at Level 0, what you’ve done is transferred a net total of 3d and 3 HP from one
part of your Spread to another, but you’ve also expanded your capacity for growth. If you
instead replace that Grade D with a Grade C or B at Level 0, you’ve stepped your game up a
little; your Spread has gained +1d or +2d in total dice, and you’ve got another 3 Levels that you
can grow in. And in both cases, adding the equivalent of 3 levels to another Persona is a huge
increase in strength.
It’s also important to consider what kind of traits the Host will be inheriting. Let’s say
for example your Host is Minotaur, and you’re Fusing a Level 3 Jack Frost into it. Now Jack
Frost’s Arcana Extra is Elemental Power, which on its own doesn’t help Minotaur since he
doesn’t have any Elemental Attacks. So you could instead choose to fuse Jack Frost into a
different Persona, one that does rely on elemental damage. Or, since you have 3 Levels to draw
on, you can also grab Jack Frost’s Attacks (Ice). Now you’ve given Minotaur a whole new
option for attack, one that he’d never have under normal circumstances.
Fusion and The Velvet Room
Fusion isn’t something a Wild Card can do unassisted. To do so, he must visit the Velvet Room,
a space in the Other World that exists to aid Persona Users on their journeys. Provided that
entrance to the Velvet Room isn’t impeded by the story itself, doing so is relatively quick and
can be done at no time cost as the Wild Card prepares to embark to handle matters elsewhere.
The Velvet Room is likewise where a Wild Card can exchange Personas from his Spread with
those in his Deck as needed.
Playing as a Wild Card Despite what the prior 12 and a half pages have indicated, playing as a Wild Card is actually
not very different from playing as a normal Persona User. The biggest difference is just in
setting up and improving one’s Spread and Personas, but when that mechanic isn’t being
directly engaged with the rest of the game follows standard procedures. There are only a few
extra details that worth noting.

Appendix C: Wild Cards
-- 296 --
Wild Cards Can’t Use Arcana Boosts
Normal Persona Users can donate their Relationship dice to their Personas to give them
immediate boosts of power. That’s not how Wild Cards work. For a Wild Card, their
Relationships determine the fundamental strength of their Personas, rather than acting as a
source of on-demand bonus power. When all is said and done, the math works largely out: a
Grade A Persona has +5d more dice than a Base Grade Persona, whereas a Normal Persona
User would have access to 5d worth of Arcana Boosts from a Relationship.
The key point of difference is that a Wild Card Persona’s dice are fixed, whereas a
Normal Persona user can translate his +5d into dice or extras as the situation calls for it; on the
other hand, he only gets those dice when needed, whereas the Wild Card’s heightened state of
power is ongoing as long as that Grade A Persona is in his Spread. Which is better depends on a
person’s perspective, which would inform whether they want to be a Wild Card or not.
Healing Wild Card Personas with their Favorite Things
One other difference has to do with healing Damage taken by a Wild Card Persona. Persona
Users can do this in the real world by indulging in their Persona’s Favorite Thing. For Wild
Cards, they’re saddled with a host of Personas, which means they have 3-6 Favorite Things to
juggle. So the key here is that satisfying a Favorite Thing only heals that Persona. If you go to a
Stand-Up Comedy show it counts as Major Healing, but only for Jack Frost, whose favorite
things is Jokes. It doesn’t do anything for Minotaur’s sweet tooth.
Swapping out Damaged Personas
A quick and dirty way of dealing with Damage sustained by your Personas is to swap out the
wounded Persona for a fresh one in your Deck. This is fine, but when you swap out a damaged
Persona, it will shift as much of its damage as possible to the Slot’s HP, and keep whatever is
left when it goes back to your Deck.
For example, say you have a Grade D Persona (4 HP) in a 3 Hit Location Slot (3 HP), for
a total of 7 HP. After a particularly nasty battle, that Persona took 5 Damage, and so you decide
to retire him for a bit and switch him for a Persona in your Deck. Before he leaves he’s going to
move as much of that Damage to his Slot as he can, in this case 3 points, and keeps the rest.
Now he’s sitting in your Deck with 2 Damage, and the Persona you swapped him for is now in
a Slot that’s already short 3 HP.
Finally with regards to healing, only Personas in your Spread can be healed with their
Favorite Things. Those in your Deck are dormant and ignorant of your actions.

Appendix C: Wild Cards
-- 297 --
Fighting as a Wild Card Declaring Actions and Taking Damage as a Wild Card
A Wild Card can Declare an action with any Persona in his Spread, or multiple Personas using
Multiple Actions. When they do so they’re establishing that Persona or Personas as Active.
If a Wild Card takes damage to a Non-Active Persona’s Hit Location, he can choose
whether the damage will be inflicted upon the that Persona as indicated, or if their Active
Persona will instead tank the damage (if Multiple Actions were Declared, he can choose any
Active Personas).
Example Wild Card Jun Declares an action with his Persona Mothman (Slot 5-7). On that turn he is hit by a 3x2
attack, which would hit his High Pixie currently sitting in his (1-2) Slot. He elects to have Mothman take
the damage instead of High Pixie.
To visualize this, imagine than an attack hitting a Slot other than the one your Active
Persona is in misses it, and instead strikes a ghostly image of the Persona inhabiting that
location. This is because Non-Active Personas in your Slot are still aware of the battle, and an
attack that bypasses your Active Persona targets you instead, and their protective instincts will
kick in to reflexively shield you from damage.
Useful Effects are the Same as Standard Personas
This applies mostly to Debuffs which would normally afflict a Persona’s entire structure. If
these are used against a Wild Card they infect the entire Spread, not just the Active Persona. If
Useful Quality is designed to affect a Specific Part, like Jinx, then it drags that Persona out from
the psychic bunker where it’s hiding and punishes it.
Wild Card Feedback
For Standard Persona Users, Feedback occurs when a Part they’ve Arcana Boosted receives
damage. Wild Cards can’t Arcana Boost, but they’re still subject to Feedback because their
Personas are more tightly linked to their Relationships.
Feedback occurs when a Wild Card Persona is reduced to 0 HP. When this
happens, the Relationship it shares its Arcana with takes Feedback equal to the Damage dealt
by the finishing blow.
Wild Cards take Feedback from their own Arcana and Fools. This is in the form of
Width in Stat Damage to whatever Stat lines up with the Slot the Persona occupies.

Appendix C: Wild Cards
-- 298 --
GMing for Wild Cards GMs need to remember that Wild Cards have an extra set of needs that conventional player
characters don’t experience. An orthodox Persona User’s growth rate is self-contained and
defined almost entirely by experience points. A Wild Card’s growth is largely dependent on his
access to better Personas.
To that end, GMs need to make sure that their Wild Card can get those Personas. Wild
Cards can take some initiative on this—by choosing the Exploration option, they can delve into
the Other World and hunt down Personas on their own time. But Personas attained from
Negotiation or from casual encounters during gameplay are dependent on the GM’s designs.
Wild Cards should be able to Adopt new Personas from Combat at least 30% of the time. All this means is that, as a rule of thumb, you should be including a Persona of an
Arcana compatible with their Relations about every third fight. This is a minimum; there’s no
massive downside to letting them snag a Persona from every fight, even, since no matter how
many are in their Deck they only have so much space in their Spread and only so many Levels
to go around. It’s okay if their cup runneth-over, you just shouldn’t short them the resources
they need to improve themselves.
Be Aware of the Wild Card’s current power level and Relationships. Has he
recently ranked up one of his Relationships? That means he now can obtain higher Grade
Personas from that Arcana. Whereas orthodox Persona Users benefit immediately from better
Relationships through Arcana Boosting, Wild Cards only do so when they translate that
improvement into better Personas.
Feel free to adjust Shadow AP Values to line up with Grades. There are a lot of
Shadows in the Compendium in the 1-10 AP Range (Grade E), but not as many in the 11-15 AP
Range (Grade D), so GMs are encouraged to add or subtract AP from different Shadows in
order to fit them into Grades that your Wild Card can use.
Finally, Don’t Make the Game About the Wild Card. If you have a party with three
standard Persona Users and one Wild Card it’s tempting to treat them like The Special and
assign them a uniquely important role in your plot. That is, after all, how the Persona video
games work. But that kind of spotlighting can kill a tabletop RPG. Wild Cards aren’t special,
they’re just different, and while their presence at the table does require that certain
considerations be added to the game, it should not weigh the narrative in their favor.

Appendix C: Wild Cards
-- 299 --
Sample Wild Card Spread To cap off this Appendix, here’s an example of what a complete Wild Card Spread looks like
with a variety of Grades and Levels in play. For the sake of clarity let’s assume that no Fusions
have taken place with this spread; in this arrangement, the Wild Card’s DM demoted Titania
(Empress-21) to a C Rank Persona by deducting 2 AP.
First, here’s what the Personas look like on their own. We’re showing the math here so that it’s
clear where all the numbers are coming from.
Arahabaki Hermit-B (7d) 4d (4+0) 7 HP (7+0) Res: Elec, Wk: Ice L: 0
Attacks (Dark, *Power x1*), Useful: Heretical Power (Area x1), Tough x1 Favor: Rebellion
Titania Empress-C (6d) 4d (3+1) 7 HP (6+1) Res: Elec, Wk: Ice L: 1
Useful: Demand Respect (*Area x2*, Effective x1), Useful; Flight Favor: Her Subjects
Pixie Lovers-E (4d) 3d (1+2) 5 HP (5+2) Res: Elec, Wk: Ice L: 2
Attacks (Wind, Fast x1), *Heal x2* (Effective x1) Favor: Good Natured Pranks
Cu Chulainn Tower-Core (3d) 3d (1+2) 6 HP (2+4) Res: Elec, Wk: Ice L: 4
Attacks (Physical, Power x1), Defends (*Recoil x1*), Tough x1, Useful: Torque
Favor: One-on-One Competition
Now, here’s them in a Spread. Again, we’ve broken out the math so you can see how everyone
got where they are now.
(1-2) Titania (Empress-C) 7d (2+6) 9 HP (2+7) Res: Elec, Wk: Ice L: 1
Useful: Demand Respect (*Area x2*, Effective x1), Useful: Flight Favor: Her Subjects
(3-5) Pixie (Lovers-E) 8d (5+3) 8 HP (3+5) Res: Light, Wk: Ice L: 2
Attacks (Wind, Fast x1), *Heal x2* (Effective x1) Favor: Good Natured Pranks
(6-8) Cu Chulainn (Tower-Core) 8d (5+3) 9 HP (3+6) Res: Wind, Wk: Dark L: 4
Attacks (Physical, Power x1), Defends (*Recoil x1*), Tough x1, Useful: Torque
Favor: One-on-One Competition
(9-10) Arahabaki (Hermit-B) 6d (2+4) 9 HP (2+7) Res: Phys, Wk: Elec L: 0
Attacks (Dark, *Power x1*), Useful: Heretical Power (Area x1), Tough x1 Favor: Rebellion

Appendix C: Wild Cards
-- 300 --
Wild Card Reference Sheet This Appendix has had a lot of new information spread across it, so this page brings it all
together in one convenient place, starting with a master chart of Persona Grades and what they
mean.
Grade Dice Hit Points
Relationship Level
Max AP Value
Total Exploration Height
Core/Base 3d 2 HP - - -
E 4d 3 HP 1d 10 AP 4
D 5d 4 HP 2d 15 AP 6
C 6d 5 HP 3d 20 AP 8
B 7d 6 HP 4d 25 AP 10
A 7d, +1 Arcana Extra 7 HP 5d 26+ AP 12
Spreads and Slots
Slot Size Dice Pool Hit Points 1 Hit Location 0d 1 HP
2 Hit Locations 2d 2 HP
3 Hit Locations 5d 3 HP
4 Hit Locations 7d 4 HP
5 Hit Locations 9d 5 HP
-A Spread is built like a full Persona,
but with Slots instead of Parts
-A Spread has between 3 and 6 Slots
-A Slot’s Dice and HP are combined
with those of the Persona inhabiting it
-A Persona cannot inhabit a Slot if the
combined dice pool exceeds 10d.
Building Wild Card Personas
• A Wild Card Persona has 1 Free Quality, 1
rank of its Arcana Extra, and dice equal to
its Grade.
• Dice can be exchanged for Qualities and
Extras per normal Persona rules.
• Wild Card Personas are permitted to have
0d as their dice pool, but they can only
inhabit Slots with more than 1 Hit Location.
• Wild Card Personas adopted from Shadows
draw their Qualities and Extras from those
of its shadow form.
Leveling and Fusing Personas
• Wild Card Personas start at Level 0.
• Each Level grants +1d and +1 HP to that
Persona.
• A Core Persona can reach a maximum
Level of 5. All others max out at Level 3.
• Fusion is when a Persona donates Dice
and HP equal to its Level to a Host
Persona.
• The Host Persona must use at least 1d for
the Donor’s Arcana Extra
• The Donor is destroyed in the process

PERSONAARCANA
Weak
TotalLevels
ReserveLevels
Slot
PersonaHit Points Slot Total
Damage(/ for Shock, X for Scars)
PersonaDice Pool Extras and QualitiesSlot Total
Grade
Favorite Thing
Resist
PERSONAARCANA
Weak
LevelSlot
PersonaHit Points Slot Total
Damage(/ for Shock, X for Scars)
PersonaDice Pool Extras and QualitiesSlot Total
Grade
Favorite Thing
Resist
PERSONAARCANA
Weak
LevelSlot
PersonaHit Points Slot Total
Damage(/ for Shock, X for Scars)
PersonaDice Pool Extras and QualitiesSlot Total
Grade
Favorite Thing
Resist
PERS
ONA
ARCA
NA
Wea
k
Leve
lSl
ot
Pers
ona
Hit
Poin
tsSl
otTo
tal
Dam
age
(/forShock,XforScars)
Pers
ona
Dice
Pool
Extr
asan
dQu
alit
ies
Slot
Tota
l
Grad
e
Favo
rite
Thin
g
Resi
st
WILD CARD
Arcana
SPREADSlot Persona

Appendix D: Expanded Weapons and Armor Rules
-- 302 --
Why Weapons and Armor Matter Players coming into The Velvet Book directly from the Persona video games may be used to their
human characters having a bit more to do in combat than this game presents. In Persona the
Persona Users themselves spend quite a lot of time running up to and hitting Shadows with
swords, fans and folding chairs, and when the Shadows counterattack it’s directed at their
human enemies, not at their Personas.
The Velvet Book departs from this because frankly it’s more fun and interesting to narrate
Shadows and Personas duking it out with each other. Both get to bend the rules of physics and
logic a lot more than flesh and blood people can, so that’s where this game places its emphasis.
Chapter 6 lists a very brief armory on page @@.
But for players and GMs looking to make Persona Users more relevant to combat, this
Appendix contains an expanded list of weapons and rules for human armor that will give the
Users more teeth and staying power when pitting themselves directly against the Other World.
These rules are Optional. GMs who aren’t interested in Human-on-Shadow violence
should be clear about excluding them from their campaigns.
Important Definitions Mundane vs Other World: Mundane Equipment describes weapons and armor that’s
effective primarily in the Real World, whereas Other World Equipment is effective against
Shadows. There’s some overlap-- a metal pipe or a chainsaw is going to have at least some effect
in both theaters. But Mundane Weapons are largely defined by their physical lethality, whereas
the effect of an Other World Weapon is chiefly a factor of the psychological connection it has to
its wielder and that User’s belief in its power. Alternately, advanced technology or occult arts
can construct weapons that are equally good against Mundane and Other World targets.
Armor works the same way. Mundane Armor is defined by its resilience to physical
trauma, while Other World Armor is more concerned about the User’s trust in its
protectiveness.
Rank: Both Weapons and Armor carry a Rank between 1 and 5, which defines how good it is
at causing or deflecting harm. Mundane Weapons increase in Rank as they become more lethal,
and Other World Weapons gain Rank as their take on greater emotional or spiritual weight.
Weapon Skills: By default, Melee Weapons use a human’s Fighting Skill when engaging
with an enemy willing and able to defend itself, and Beat-Down when used against helpless

Appendix D: Expanded Weapons and Armor Rules
-- 303 --
victims, while Ranged Weapons use Aim regardless of the circumstances. However, a GM may
choose to implement specific Weapon Skills if they intend for human Weapons to play a large
role in the game. A Weapon Skill can fall under any Stat that makes sense; weapons that require
precision and dexterity fall under Proficiency, while those with elaborate functionality and
complex calculations to work properly fit better with Knowledge. Extremely large and heavy
weapons require Diligence, while lighter, close quarter implements demand Guts.
GMs using Weapon Skills should give their Players 1 free die in whatever Weapon they
want to specialize in.
Damage Type: Weapons inflict Physical Damage unless they’re particularly exotic, advanced
or mystical. Many games using The Velvet Book don’t use varying Physical elements, but for the
sake of those that do a Weapon’s type (Strike, Slash, Firearms, etc…) is included here. These can
be modified by GMs in any way as needed.
Ammunition: Many Ranged Weapons may use Ammunition. Not every game benefits from
rigorously tracking how many bullets, arrows or razor-edged throwing cards a character has.
Naoto from Persona 4 never worried about this, while the Phantom Thieves in Persona 5 weren’t
so lucky. If a GM wants to keep track of a player’s ammo, The Velvet Book uses a simplified
system to do so.
Any weapon that uses ammunition has an Ammo Rating. During an Encounter a
character using a Ranged Weapon should track how many successful Attack Sets they rolled
using it. If their total hits for the Encounter are equal to or less than the weapon’s Ammo Rating,
then they are being Careful with their Ammo, and don’t need to worry it. If they exceed their
Ammo Rating during that Encounter, then they are Not Careful and will be Empty after the
Encounter no matter how many additional attacks are used. This means that a character who is
very concerned about how many bullets they have can make the effort to keep themselves
supplied for as long as they want, while a character unconcerned can spray to their hearts
content with the knowledge that once the Encounter is done, they’re going to need to scrounge
up some more bullets. And remember: missed or failed attacks don’t count against your Ammo.

Appendix D: Expanded Weapons and Armor Rules
-- 304 --
Acquiring Weapons and other Equipment How difficult it is for player characters to acquire Mundane Weaponry depends largely on the
design of the campaign’s setting. In most Velvet Room games human on human violence isn’t a
constant threat or even a wise approach for problem solving. In games like this Mundane
Weapons are mostly whatever a player can scrounge up or justify having access to. For many
characters this would include baseball bats, wrenches and crowbars, wood planks and pipes,
and if they’re especially serious about causing damage they might carry a pocket-knife or even
a handgun.
On the other hand, The Velvet Book works just fine for games with a dimmer view of the
value of human life. The dystopic cyberpunk near-future, the post-apocalypse, even the early
90s gang scene in Los Angeles can work for a gritter, bloodier Persona game, and in settings like
that player characters would likely be interested in being armed better and more frequently. In
a game like that, a GM would want to put more thought into how players come across
weapons. Are there legit gun and sword shops on street corners, or do they rely on black
market arms dealers to outfit themselves?
When it comes to Other World Weapons and Armor, higher quality gear is usually a
result of adventuring and making connections with others. A normal baseball bat is a Rank 1
Other World weapon, but the bat your uncle who played for the Braves gave you is Rank 2, and
if you can get it signed by one of your favorite ball players, now it’s Rank 3.
Other World Equipment may also be acquired from the Other World itself. GMs can
award Weapons of an appropriate Rank to players as rewards for successful dungeoneering,
and if they’re using the Loot rules from page @@ they can be bought from mysterious Shadow
vendors with Swords (for weapons), Cups (for armor) or Coins (for both). In the latter case, the
Expanded Weapon and Armor Index in Appendix E includes a Loot Value for each Rank of
Other World weapon.

Appendix D: Expanded Weapons and Armor Rules
-- 305 --
Weapon Dice Like a Persona’s Part, a Weapon’s functionality is built with Dice called Weapon Dice. Mundane
Weapons have dice equal to their Rank, and Other World Weapons are Rank +2d.
These dice can be used in two ways.
Accuracy: Weapon Dice can be held onto as whole dice which are added to a human’s Stat +
Skill roll. This is a weapon’s Accuracy, which can range from +0 to +3d.
Properties: Weapon Dice can also be traded for Extras and even a Useful Quality. A Weapon
can have as many Extras as it can afford, but no more than one Useful Quality.
Special Weapon Extras Weapons for the most part enjoy the same Extras as a Persona’s Attack Qualities, but there are a
couple distinct ones worth noting. As with all other Extras each cost 1 Weapon Die.
POWER for MUNDANE WEAPONS: When Power is added to a Mundane Weapon
the damage it adds is either Shock or Scars depending on the Weapon’s Rank.
For Rank 1 and 2 Weapons, each rank of Power deals 1 Shock, or you can combine two
Ranks of Power to inflict 1 Scar.
For Rank 3 Weapons, each rank of Power deals either 1 Scar or 1 Shock
For Rank 4 and 5 Weapons, each rank of Power inflicts either 1 Scar or 2 Shocks.
This doesn’t apply to Other World Weapons, which always inflict Scars.
SCARRING: This Extra lets a Rank 1 or 2 Weapon to deal Scars as its base damage. Rank 3
and up don’t need this: Rank 3 can cause either type and Ranks 4 and 5 always inflict Scars.
MORE AMMO: The More Ammo Extra increases a Ranged Weapon’s Ammo Rating by 1
per Level. As a rule, Rank 1 and 2 Weapons have base Ammo Ratings of 4, Ranks 3 and 4 have
Ratings of 3, and Rank 5 Ranged Weapons have a base Ammo Rating of 2.
RANGE: The Range Extra allows a weapon to attack a distance instead of requiring its user to
get into close quarters. These distinctions are mostly narrative; measuring exact distances isn’t
important in either Mundane or Other World combat most of the time. If a particular enemy
can’t be engaged with using a Melee Weapon that’s a Problem imposed by the GM, but that’s
about as complex as it gets.

Appendix D: Expanded Weapons and Armor Rules
-- 306 --
Armor Armor is equipment that a human character wears that protects them from physical injury. Like
Weaponry, how much value a campaign gets out of using these rules depends on the GMs and
players’ expectations. If human characters anticipate beomg put into physically dangerous
circumstances on a regular basis then they’ll want to be better protected.
Like Weaponry, Armor in The Velvet Book comes in Mundane and Other World varieties.
Mundane Armor is always practical, as its goal is to resist actual physical trauma. Other World
Armor gets to be more creative, as it’s less about shielding its wearer physical and more about
giving them an aura of protection and vigor that will allow them to better withstand Shadow
attacks. To that end Other World Armor is as much about style and symbolism as it is
functionality.
Armor is Ranked from 1 to 5, the same as weapons. For Mundane Armor, the greater its
Rank the more durable and, typically, the heavier and more restrictive it is. As with Weaponry,
the Ranking of Other World Armor is based on emotional and psychological weight.
Armor Grants 2 Hit Points per Rank to its Wearer. This is significant because
normally Humans don’t have any Hit Points, as physical damage is deducted directly from their
Stats. Armor lets them withstand a bit more of a beating before it starts to affect them. These Hit
Points can absorb damage at the wearer’s discretion, so you can use them to soak up attacks
aimed at your weaker or more important Stats at the expense of Stats you care less about being
damaged.
Armor Grants Tough x1 at Ranks 3 and 5. In other words, Ranks 3 and 4 Armor get
Tough x1, and Rank 5 Armor gets Tough x2. As opposed to Armor HP, an Armor’s Toughness
is locational, so you need to choose which Stat is toughened by the Armor. With Rank 5 Armor
you can make one Stat Tough x2 or make two Stats Tough x1. Unlike Armor HP, which the
wearer chooses to apply against attacks, an Armor’s Toughness always works and never runs
out.
Ranks 1 and 2 Armor is ineffective against firearms. Guns simply utilize too much
focused kinetic energy for armor this weak to be of any use at all. It’s for this reason that most
human characters in The Velvet Book generally want to avoid being put into situations where
they are being shot at.
Armor cannot protect from Emotional Damage. No amount of padding or
bulletproofing can shield a person from having their deepest insecurities sniped at or their guts
ripped out by heartbreak.

Appendix D: Expanded Weapons and Armor Rules
-- 307 --
Other World Weapons and Armor Determining a Mundane Weapon’s Rank is pretty easy: much badly can it hurt someone? For
Other World Weapons, however, the rules are a bit different. It’s not about “how much damage
can I do with this weapon”, it’s “how important and meaningful is this weapon to me? The
greater the importance and the deeper the meaning, the higher its Rank.
Any Mundane Weapon or Armor can be used as a Rank 1 Other World Gear. Whether it’s a sledgehammer, a shotgun, a bowie knife or a bow and arrow, in the Other World
it counts as Rank 1. Additionally:
Anything you can imagine using as a Weapon or Armor can be used as a Rank 1 in the Other World. In Persona 4 Chie’s sneakers and Yukiko’s paper fans were deadly
weapons, and in Persona 5 the guns that the Phantom Thieves use are actually toy replicas. The
Other World is a place whose reality can be bent by human cognition, and simply believing in
something’s weaponized potential can make it so. The same applies to Armor: most of the
Armor you get in the Persona games are strange and quasi-mystical outfits that would confer no
real protection outside of the Other World.
Improving Other World Weapons and Armor
An Other World Weapon or Armor’s Rank is a factor of its psychological connection to its user.
So when figuring out how to Rank a weapon you can measure this connection by answering
some basic questions. For each question that gets a Yes answer you can increase the Rank by 1
or more at your GM’s discretion.
• Does it Evoke Intense Emotions? The easiest of these is fear: weapons that are particularly
fearsome have an increased Rank. A Chainsaw, for instance, is Rank 2 in the Other world,
because using a Chainsaw as a weapon is terrifying.
• Does it have a Storied History? Gear like these are invested with greater Other World
power by the collective consciousness of the surrounding culture.
• Is it Enhanced by Scientific or Supernatural Means? Advanced or mad science and fringe
beliefs and practices strengthen your gear, even if they have no real world functionality.
Dipping a coat in holy water from a church doesn’t make it physically stronger, but it will
stand up better against Shadows.
• Is it Special to You? A chipped and rusted jackknife isn’t a particularly strong weapon in
the real world, but if it’s a keepsake from your grandfather who passed away and left it to
you, that’s some strong juju.

Appendix D: Expanded Weapons and Armor Rules
-- 308 --
Useful Other World Weapon Qualities Other World Weaponry and Armor isn’t constrained by the laws of physics and rationality the
way that the Mundane Versions are. This gives them the potential to be much more unique and
powerful.
Other World Weapons have two more weapon dice they can use for Accuracy, Extras or
Useful Qualities. These give human characters new tactical options when fighting alongside
their Personas. Remember though that just like Mundane Weapons, Other World Weapons are
limited to just one Useful Quality.
As is the case with Persona Qualities, Useful Qualities can be whatever the player and
GM decide. The following are just some examples of Useful Weapon Qualities. Many Weapon
Qualities can synchronize with their attacks; this means that when they’re used as a Multiple
Action along with an attack, the Useful effect happens at the same time as the Attack, rather
than being based on its set’s Width.
Other World Armor Extras and Qualities Real World Armor only does one thing, which is make you more resistant to physical injury.
Other World Armor makes you resistant to Shadow attacks, but it can also enhance its human
wearer in any number of ways. This includes picking up defensive Extras like Recoil and Tough
as well as Effectiveness that can be applied to a human’s Block or Reflex skills.
Other World Armor can also grant its wearer the same kind of Elemental Resistances
that a Persona or Shadow might have.
Other World Armor can also take on Useful Qualities, though these may work
differently than those of Weapons or Persona Parts. Since wearing armor is itself a passive
action, Useful Qualities implanted in Other World Armor can function automatically as well.
Armor that grants Useful benefits its wearer automatically does so based on its Rank; Rank 1
gives the equivalent of Width 1 and Rank 5 gives Width 5. Automatic Armor effects don’t need
to be rolled for and can be triggered at the wearer’s discretion, but the downside is that their use
is limited. An armor granting 3x worth of Tarunda can buff its Human user’s attacks 3 times
before running out of juice.
Useful Qualities that are not automatic are activated using a specified Stat + Skill roll.
Armor Extras and Qualities are purchased using points of HP. Extras cost 1 HP each,
while Useful Qualities cost 2 HP; and like with Weapons, a piece of Armor can only have one
Useful Quality on it.

Appendix E: Expanded Weapons and Armor Catalog
-- 309 --
Mundane Hand-to-Hand Weapons Description Rank Acc Properties Total Damage Tree branch, 2x4, frying pan)
(Simple blunt instruments) 1 +0d Power x1 Width in Shock
Bamboo practice weapon
(Weapons meant for training) 1 +1d -
Width-1 in
Shock
Baseball bat, police baton, shovel
(Strong blunt instruments) 2 +0d Power x2
Width+1 in
Shock
Pocket knife, broken bottle, box cutter
(Small edged weapons) 2 +1d Scarring
Width-1 in
Scars
Chain, nunchaku
(Flailing weapons) 2 -1d* Power x2, Fast x1
Width+1 in
Shock
Staff
(Long blunt weapons) 2 +1d Power x1 Width in Shock
Kitchen or combat knife
(Full sized knives) 2 +0d Power x1, Scarring Width in Scars
Aluminum bat, wrench, brass knuckles
(Heavy blunt instruments) 3 +0d Power x3
Width+2 in
Shock
Baseball bat with nails in it
(Improvised deadly weapons) 3 +0d Power x3
Width in Scars,
+1 Shock
Hammer or hatchet
(Small deadly weapons) 3 +1d Power x2
Width+1 in
Scars
Fire axe, samurai sword
(Large edged weapons) 4 +1d Power x3
Width+2 in
Scars
Spear
(Long edged weapon) 4 +2d Power x2
Width+1 in
Scars
Sledgehammer, medieval mace
(Large blunt instruments) 4 +0d Power x4
Width +2 in
Scars, +2 Shock
Chainsaw
(Carnage inducing weapon) 5 +1d Power x3, Spray x1
Width+2 in
Scars
*Flailing weapons are unique for having a negative accuracy rating to represent the particular difficulty
of using them effectively in a fight; in exchange for this negative rating, flails gain a level of Fastness.
Mundane Armor Description Rank Hit Points Toughness Bullet Resistant Skateboard padding 1 2 - No
Football or hockey gear 2 4 - No
Police-grade bullet proof vest 3 6 Tough x1 Yes
SWAT-team equipment 4 8 Tough x1 Yes
Military grade body armor 5 10 Tough x2 Yes

Appendix E: Expanded Weapons and Armor Catalog
-- 310 --
Mundane Ranged Weapons Description Rank Acc Ammo Properties Total Damage Stone, soda bottle, coffee cup
(Small, light thrown objects) 1 +0d n/a Range
Width-1 in
Shock
Paintball gun, pellet gun, slingshot
(Hobby weapons) 2 +0d 4 Range, Power x1 Width in Shock
Ninja stars, throwing knives
(Specialized throwing weapons) 2 +0d 4 Range, Scarring
Width-1 in
Scars
Pepper spray
(Chemical deterrent) 3 +1d 3 Range, Burn x1
Width-1 in
Shock
Taser
(Electrical deterrent) 3 +0d 3
Range, Burn x1,
Power x1 Width in Shock
Rubber bullets, bean bag rounds
(Less lethal ammunition) 3 +0d 3 Range, Power x2
Width +1 in
Shock
Bow and arrow, crossbow
(Basic deadly ranged weapons) 3 +0d 4 Range, Power x1 Width in Scars
Pistol, revolver (9mm, .38)
(Handguns) 4 +0d 3
Range, Power x2,
Extra Ammo x1
Width +1 in
Scars
Hunting rifle, sport rifle (.22, .30-06)
(Small caliber rifles) 4 +1d 2 Range, Power x2
Width+1 in
Scars
Shotgun
(Large bore firearms) 5 +1d 2
Range, Powerx2,
Splashx1
Width+1 in
Scars
.45 Magnum, Desert Eagle
(Large caliber handgun) 5 +0d 3
Range, Power x3,
Extra Ammo x1
Width +2 in
Scars
Scoped Rifle
(Extreme range rifle) 5 +2d 2 Range, Power x3
Width+1 in
Scars
AK-47, AR-15
(Assault rifles) 5 +0d 2
Range, Spray x2,
Power x2
Width+1 in
Scars
.50 caliber rifle
(High power rifle) 5 +0d 2 Range, Power x4
Width+3 in
Scars
Mundane Explosives Mundane explosives follow their own scale as described below and inflict area damage on anyone in
their Radius. Rank 4 and 5 explosives have 2 radii; the first inflicts Scars, the second Shocks.
Description Rank Area Radius (ft) Properties Damage Small Firecracker
(Mostly for fun) 1 x2 5 - Shock
Cherry Bomb
(Good for property damage) 2 x4 5 - Shock
M-80 Firecracker
(Actually dangerous) 3 x6 10 Power x1 Half Shock, Half Scars
Pipe Bomb, IED
(Designed to maim and kill) 4 x8 15/45 Power x2 Scars/Shock
Hand Grenade, Dynamite
(Military & industrial grade) 5 x10 15/45 Power x3 Scars/Shock

Appendix E: Expanded Weapons and Armor Catalog
-- 311 --
Weapon and Armor Loot Prices Weapons Armor
Rank Swords Coins Rank Cups Coins 1* 15 20 1 10 13
2 30 40 2 20 25
3 50 65 3 50 65
4 75 95 4 85 110
5 105 135 5 120 155
* Only Rank 1 Other World Weapons carry a loot price. Rank 1 Mundane Weapons are universally
simple, improvised weapons like tree branches and rocks which do not carry a meaningful cost.
Example Useful Qualities for Other World Weapons Useful Quality Effect
Armor Piercing Next Attack ignores Toughness equal to the weapon’s Rank. Synchronizes with
Attacks.
Charge Attack Applies the Boost Power effect to the next attack using that weapon.
Counter Hit If you are hit before your Attack Resolves, you can immediately attack the
fighter that struck you. Synchronizes with Attacks.
Elemental Charge Change your Weapon’s damage type to a specific Element for Width-1 attacks.
Meatbone Strike Adds Width in Power to next attack but reduces Speed to 1. Synchronizes with
Attacks.
Silencing Blank Prevents target from using Elemental Attacks for Width-1 Rounds.
Example Useful Qualities for Other World Armor Useful Quality Effect Auto-Rakukaja Grants wearer the Rakukaja buff against Attacks equal to its Rank. Automatic.
Auto-Sukukaja Grants wearer the Sukukaja buff on actions equal to its Rank. Automatic.
Auto-Tarukaja Grants wearer the Tarukaja buff on Attacks equal to its Rank. Automatic.
Death-Proof Negates points of Killing Power equal to the Armor’s Rank. Automatic.
Inhuman Movement Grants the wearer the Unique Movement effect when using their P.E. or Reflex
Skills.
Unshakeable Wearer can roll Guts + Wind to gain Width-1 in Stun Resistance.

Appendix E: Expanded Weapons and Armor Catalog
-- 312 --
Sample Other World Weapons and Armor Other World Weapons and Armor are generally so bespoke that it’s unlikely two games of The
Velvet Book would ever re-use the same piece of equipment. Instead, this section is more a
guideline of what completed pieces of Other World Weaponry and Armor look like.
Other World Weapons Description Rank Acc Properties Total Damage
Lucky Pool Cue 1 +1d Power x1, Fast x1 Width in Scars
(Physical)
A pool stick that’s never let you down and once won you a crucial match against a local hustler.
Locksley Bow
Ammo: 4 2 +1d
Power x1, Range
Useful (Steal Coins)
Width in Scars
(Physical)
A bow and arrow set said to belonged to the famous outlaw himself whose stories you remember from childhood.
Blessed Heirloom Estoc 3 +1d Power x2, Fast x1
Useful (Killing Power)
Width+1 in Scars
(Light)
An old sword passed down by your family dating back to the French Revolution. You had its blade inlaid with
holy silver in preparation for a battle against an undead fiend.
The Rectifier
Ammo: 2 4 +2d Power x2, Spray x1, Range
Width+1 in Scars
(Physical)
A fearsome paintball gatling gun you built with your older brother, inspired by your great-great grandfather’s
Civil War experience. The paint you loaded into it contains a powerful anti-Shadow chemical.
The God Hands 5 +2d Power x3, Splash x1
Useful (Counter Hit)
Width+2 in Scars
(Physical)
A pair of boxing gloves that once belonged to a famous heavyweight champ who inspired you to learn to protect
yourself. They are infused with the power of a mighty Shadow whom you defeated in single combat.
Other World Armor Description Rank HP Properties Resist/Weak Shrine Maiden Robes 1 2 - -/-
A set of clothing resembling that of a Shinto priestess designed to ward off evil.
Cardboard Mecha Armor 2 3 Useful (Unshakeable) Electric/Fire
A cardboard tribute to your favorite animated giant robot that makes you feel 60 feet tall.
Cloak of Mercy 3 4 Tough x1, Heals x2 -/-
A white lab coat that reminds you of the doctor who treated you for childhood leukemia. It has been blessed by the
Asclepius, God of Healing.
Nightmare Pajamas 4 6 Tough x1
Useful (Immune to Fear) Dark/-
A set of silk PJs with animated dancing tapirs on them that you stole from Baku the Dream Eater. They emit a
baleful aura, yet you find them oddly comforting as you owned a similar pair when you were a child.
Galahad’s Reinforced
Armor 5 7
Tough x2, Recoil x2,
Useful (Auto-Tarukaja) -/-
A suit of knight’s armor worn by Sir Galahad the pure, enhanced with cybernetic systems. It reminds you of
watching Monty Python with your mom and makes you feel brave and noble.

Appendix E: Expanded Weapons and Armor Catalog
-- 313 --
Random Other World Weapons and Armor This page and the next can be used to generate a random piece of equipment using a 2d roll to
create a number between 1 and 100, using one die as the 1s and another as the 10s digit. A third
die can be used to assign a random Rank to the item as follows:
1-2: Rank 1 3-4: Rank 2 5-6: Rank 3 7-8: Rank 4 9-10: Rank 5
Weapons Armor 1 Axe 26 Harpoon 51 Animal Costume 76 Metal Pot
2 Baseball Bat 27 Knife 52 Band Merch 77 Army Uniform
3 Baton, Club 28 Magic Wand 53 Bandana 78 Mini Skirt
4 Beam Sword 29 Mallet, Hammer 54 Baseball Cap 79 Monk Robes
5 Boat Oar 30 Microphone 55 Bucket 80 Pajamas
6 Book 31 Nunchaku 56 Business Suit 81 Pirate Costume
7 Boomerang 32 Paintball/Airsoft Gun 57 Cape 82 Plate Armor
8 Bow and Arrow 33 Pen 58 Cardboard Armor 83 Police Uniform
9 Boxing Glove 34 Phone 59 Chef’s Hat 84 Priest Cassock
10 Brass Knuckles 35 Playing Cards 60 Cocktail Dress 85 Wrestling Belt
11 Briefcase 36 Rapier, Jian 61 Crown 86 Ragged Cloths
12 Broadsword 37 Razor Blade 62 Cuirass 87 Sailor Costume
13 Broom, Mop 38 Rifle 63 Denim Jacket 88 Samurai Costume
14 Bullwhip 39 Samurai Sword 64 Doctor’s Coat 89 Scarf
15 Coins 40 Shotgun 65 Fedora 90 School Uniform
16 Cue Stick 41 Skateboard 66 Formalwear 91 Sequined Jumper
17 Curved Sword 42 Sling Shot 67 Fur Coat 92 Sports Uniform
18 Fan 43 Soccer Ball 68 Hawaiian Shirt 93 Straw Hat
19 Fishing Rod 44 Spear, Polearm 69 Hockey Mask 94 Superhero Costume
20 Flute, Ocarina 45 Squirt Gun 70 Jeans 95 Sweater
21 Frying Pan 46 Staff 71 Karate Gi 96 Swimwear
22 Game Controller 47 Statuette 72 Kimono 97 Tattered T-Shirt
23 Golf Club 48 Toolbox 73 Leather Body Suit 98 Track Suit
24 Guitar, Banjo or
Mandolin
49
Trumpet, Trombone,
Saxophone 74 Leather Jacket
99 Trench Coat
25 Handgun 50 Yoyo 75 Leather Pants 100 Tuxedo
If you want to specifically generate a Weapon you just need to subtract 50 from any result
between 51-100; similarly, you can always generate Armor by adding 50 to a result from 1-50.

Appendix F: Subpersonas
-- 314 --
An Introduction to Subpersonas Subpersonas (originating from Persona Q) are modifiers applied to a character’s primary
Persona that modify resistances and grant extras, elements, Qualities when equipped. They
serve as a sort of half-measure for Wild Card-like functionality, allowing for characters with
specific combat roles to have a small set of Extras and Qualities that can be swapped around.
In The Velvet Book, a Subpersona is an additional psychic entity, similar to a Persona,
which is manifested by human characters for the purpose of magic and combat. They can be
wielded by any Persona user, even those without the Wild Card ability, but those with the
psychic fortitude to channel them find that Subpersonas will empower their true Persona.
Whereas a Persona User’s Persona determines the bulk of what they are capable of
doing in combat, a Subpersona adds a little extra oomph, makes them just a little more resistant
to attacks, or changes the fundamental nature of the attacks and abilities they command.
Subpersona Stats A Subpersona has a name, an arcana, a level, resistances, weaknesses, and skills.
Arcana, Resistances, and Weaknesses function as they do in normal Personas, though a
Subpersona does not have its own dice pools and cannot benefit from Arcana Boosts.
Levels and Skills are covered in greater detail in their own sections, but in short: for each
level possessed by a Subpersona, it acquires one skill, starting from the top of its skill list.
Further skills can be acquired through fusion. Every Subpersona also has a Skill tied to the
Arcana of its creator.
Skill descriptions will be omitted most of the time to make stat blocks easier to read through.
Refer to Sample Skills on page @@ to see the exact rules for the most common skills.
Author’s Note
The credit for these rules is owed toTogen on the Velvet Book Discord, who both built and refined
these mechanics. These are presented largely unmodified from his original work. Major additions
made by this book’s author are included in textboxes like these.

Appendix F: Subpersonas
-- 315 --
Level and Compatibility Subpersona Level is a measure of the strength a Subpersona has over its wielder. This results in
greater mental strain needed to channel a Subpersona alongside the main Persona, but also
greater benefits while channeled.
A Subpersona’s Level ranges from 1 to 5, and all dice pools affected by channeling it
have their dice reduced by the Subpersona’s Level. This includes Persona dice pools which do
not gain any Extras from the Subpersona, since their resistances are still affected.
For the purposes of multiple action penalties, channeling a Subpersona to affect your
Persona is separate from channeling a Subpersona to affect the Persona User. If you take a -3d
penalty by channeling a Subpersona to affect your Persona while also rolling to Out-Think, the
penalty only applies to the Persona, and not the Persona User, but you are still forced to use the
smaller dice pool.
The penalty for channeling a Subpersona can be reduced based on your compatibility
with its Arcana. Should any text mention “compatible Subpersona”, “compatible Arcana”, etc.,
a character is considered to be compatible with a Subpersona if they can channel it with no
penalty.
Compatibility
Compatibility is a numerical value between 0 and 5. Its primary use is to reduce or completely
eliminate penalties gained from channeling Subpersona. A character’s Compatibility with any
given Arcana is mainly determined in two ways.
Relationships: for each die in a relationship, a character counts as having 1 level of
compatibility with its associated Arcana. You can, thus, increase Compatibility as long as you
have enough experience to advance a Relationship, but if you put too much strain on your
relationship dice, you can lose compatibility with some of your Subpersonas.
Arcana Level: This is usually how a character advances the Compatibility of their own
Arcana. Increasing Compatibility this way is harder, but you do not run the risk of losing
Compatibility as you do with Relationships.
Should a character somehow gain Compatibility through both means, their Compatibility is
instead the sum of the numbers given by both of these methods.

Appendix F: Subpersonas
-- 316 --
Managing Subpersonas Characters normally begin play with 4 slots for Subpersonas, and this number may be increased
or decreased as needed to suit the game, or to reflect major accomplishments. Additionally,
characters have any number of “temporary” slots that can be filled only for the purpose of
trading or fusion. These temporary slots are emptied as soon as you change which Subpersona
you have equipped. If you need a sanity limit on these, consider allowing players no more than
2 temporary slots.
The act of carrying a Subpersona may be represented any number of ways. In games
where Personas and Subpersonas have a physical presence in the real world, they may be
represented as voodoo dolls, activated by the wielder’s will. In games where they cannot
normally act upon the material world, they might exist only in conditions where one’s Persona
does, safely tucked away in some mental realm or spiritual lockbox.
Channeling Subpersonas and Using their Skills In order to provide any benefit other than an additional voice in your head, a Subpersona must
be channeled. A Persona User can channel the same Subpersona to both their Persona and
themselves, but they cannot channel multiple Subpersonas simultaneously for any reason.
While channeled, a Subpersona grants a series of benefits to the user’s Persona, based on
its Level, what Creator Bonus (see page @@) it possesses, and what it has gained through Fusion
(page @@). Furthermore, channeling the Subpersona also applies its elemental resistances and
vulnerabilities regardless of what other benefits are gained, if any.
The vast majority of Skills that can be granted by Subpersona are Infusions, which grant
Extras to the Part which most closely matches the requirements provided by the Infusion.
Power (Magic): Versatile (Attack) ↑ grants a rank of Power to an Elemental Attack Quality
wielded by the Persona, preferring whichever part has the most Attack options (and in the
event of a tie, whichever one has a higher height.)
What all this means Any Persona User can use any Subpersona regardless of its level or Arcana as a shot in the
arm of power, but using Subpersonas with whom they lack sufficient Compatibility eats
into their dice pools. So as a guiding principle it’s a good idea for players to seek out
Subpersonas that match up with their Arcana and Relationships, and not to use
Subpersonas whose level exceeds your Compatibility with them unless you’re willing to
accept the penalty.

Appendix F: Subpersonas
-- 317 --
Channeling Subpersonas as a Human Persona Users channeling Subpersonas can choose to heighten their own abilities, rather than
those of their Persona. However, this comes with some caveats.
1. You take an additional -1d penalty while channeling the Subpersona, unaffected by
compatibility: your status as a squishy, material being almost always guarantees there’ll be
some fundamental incompatibility between you two.
2. Characters incapable of using magic, or psychic abilities other than the Persona ability,
generally gain fewer benefits. Always Works and Effective only apply to already
magical/psychic abilities, and Adapt Infusions which grant new Usefuls are only applicable
if the character can already use Useful abilities.
3. Characters incapable of using magic, or psychic abilities other than the Persona ability, can
wield magical attacks by using an Adapt Infusion to modify any of their existing combat
skills or weapons.
4. You generally cannot channel Subpersonas under circumstances where you are not able to
channel a Persona, and the GM may elect to ban this practice entirely.
Humans don’t handle Subpersonas very well A human’s Persona is a manifestation of their own subconscious, and they can command
it as easily as they can a part of their own bodies. Subpersonas, on the other hand, are
entities from the Other World that have been recruited by a Persona User and
boostrapped into their psychic matrix. Hence, the above mechanics represent the
challenge facing a human attempting to manifest and manipulate the powers of a wholly
alien being residing in their mind.

Appendix F: Subpersonas
-- 318 --
Subpersona Skills A Subpersona’s Skill describes what it brings to the table when it infuses its power into a
Persona. Each Skill looks something like this:
Power (Physical): Big ↑
Power is the Skill’s Type, which describes what the Skill adds to the Persona’s action, usually in
the form of a specific Extra or Quality; in this case, the Skill adds Physical Power to an attack.
Big ↑ is the Skill’s Location, which describes which Part or Quality the Skill can be applied to. In
this case, Big ↑ describes a Skill that applies to a Persona’s Part with the most hit locations, and
in the case of a tie it will defer to the Part with the greater Height; if that arrow were flipped to
↓, the Skill would apply to the Lower location in the case of a tie.
If a Skill’s Location refers to a specific Quality and a Persona has two Qualities that
exactly fit the bill, choose which one the Skill favors and mark it with a star: that’s the Quality
which the Skill will attach itself to until the tie is resolved. If multiple qualities all vie for the
attention of Skill or a group of Skills then multiple Stars can be used to generate a hierarchy of
Skill priority. Note, thought that this is extremely unlikely thanks to the effect of Height arrows;
anecdotally this never actually occurred during playtesting.
Consequently, there’s no guesswork when it comes to where and when a Subpersona’s
Skill can be used. The bonuses granted by a Subpersona are generally non-mutable, and they
will consistently apply to the same parts and qualities every turn. A Persona User cannot build
a Subpersona with a lot of Tough bonuses and then redirect those as needed.
Using Subpersona Skills in Battle
In battle, switching out, equipping, or unequipping a Subpersona does not require a roll. This
change takes effect just before the character’s declaration would. If a character’s current
Subpersona gives Power, but the one they are switching to does not, they would lose that
Power as soon as they take action that round.

Appendix F: Subpersonas
-- 319 --
Building Subpersona Skills How many Skills a Subpersona has and how good those skills are is determined by three
factors:
1. Arcana: Every Subpersona begins its life with 1 Skill at rank 1 based on the Arcana of the
Person who recruited or fused it. Thus, a Persona User of the Chariot or Justice Arcana
could obtain a fresh Subpersona with the skill Fast: Lucky ↑. Note that only the Skill Type is
affected by the User’s Arcana; Skill Location can be selected by the User.
2. Level and Species: A Subpersona gains Skills or Skill Ranks equal to its Level based on
its nature and design, much like how Shadows are built. Since every Subpersona begins at
Level 1 it means that every Subpersona has at least 2 points worth of skills. To continue the
above example, this Level 1 Persona could have:
a. Fast: Lucky ↑ and Power (Elemental): Versatile (Attack) ↓, or
b. Fast: Lucky ↑ x2
In this way a Level 5 Subpersona would have 6 Skills or Skill Ranks based on these first
two factors alone.
3. Fusion: Fusion is the most potent method of improving a Subpersona’s Skills. These rules
are covered in detail on page @@, but through various modes of Fusion a Subpersona can
acquire up to 10 additional Skill or Skill Ranks
Putting it all Together Now that the concept of a Subpersona and their Skills has been explained, below are two
examples of complete Subpersonas to see how everything fits together.
Nanook Level 1 Kappa Level 3 Resist: Elec, Weak: Dark Resist: Ice, Weak: Elec
• Fast: Powerful ↑ • Adapt (Ice): Small ↑
• Tough: Biggest ↓ • Area: Powerful ↑ x2
• Power: Versatile (Attack) ↑
Who chooses the skills? A Subpersona’s Arcana Skill is determined by the player who recruits or creates it. Its
Species Skills are normally determined by the GM, but GMs can also choose to leave this
in the player’s hands as well. Fusion Skills are selected by the Player, but they must follow
special rules as laid out in Fusion section of this Appendix.

Appendix F: Subpersonas
-- 320 --
Skill Types There is a Skill Type corresponding to each Extra, plus a handful of additional Skills with more
rarified uses.
Extra-Based Skills
Always Works Adds 1 Always Works to a Useful dictated by the Skill Location. Recommended: Versatile (Useful) ↑, Effective ↑, Unlucky ↓
Area Adds 1 Area to an Attack/Useful dictated by the Skill Location. Recommended: Powerful ↑, Effective ↑, Lucky ↑
Burn Adds 1 Burn to an Attack dictated by the Skill Location. Recommended: Powerful ↑, Versatile (Attack) ↑, Lucky ↑
Effective Adds 1 Effective to a Useful dictated by the Skill Location. Recommended: Spray ↑, Versatile (Useful), Lucky ↑
Fast Adds 1 Fast to a Quality dictated by the Skill Location. Recommended: Versatile (Attack) ↑, Versatile (Useful) ↑, Lucky ↑
Heal Adds 1 Heal to a Part dictated by the Skill Location. Recommended: Versatile (Useful) ↑, Toughest ↓, Lucky ↑
Power (Elemental) Adds 1 Power to an Elemental Attack dictated by the Skill Location. Recommended: Splash ↑, Versatile (Attack) ↑, Lucky ↑
Power (Physical) Adds 1 Power to a Physical Attack dictated by the Skill Location. Recommended: Splash ↑, Versatile (Attack) ↑, Lucky ↑
Recoil Adds 1 Recoil to a Defense dictated by the Skill Location. Recommended: Lucky ↑, Fast ↑, Toughest ↓
Splash Adds 1 Splash to an Attack dictated by the Skill Location. Recommended: Lucky ↑, Versatile (Attack) ↑, Powerful ↑
Spray Adds 1 Spray to an Attack/Useful dictated by the Skill Location. Recommended: Lucky ↑, Versatile (Attack) ↑, Versatile (Useful) ↑
Tough Adds 1 Tough to a Part dictated by the Skill Location. Recommended: Tender ↓, Heal ↑, Recoil ↓

Appendix F: Subpersonas
-- 321 --
Special Skills
Adapt
Adds new options to Attacks or Useful Qualities.
In the case of an Adapt Skill where an attack name is given, that Skill is
itself given as an Extra to an appropriate attack. When an attacker
chooses to activate Adapt, that changes the element of the attack, and
possibly its behavior. Infusions of these nature may be abbreviated:
“Adapt (Ice)” and “Adapt (Ice Attack)” are equivalent to “Ice”.
Example: Adapt (Ice) can be attached to an Attack Quality of any other
Element, including Physical or Fire, enabling that Attack Quality to be used as
if it were the Ice Element.
When a Useful (Adapt: Rakunda) name is given, that Adapt Skill
instead attaches itself to a Useful, benefitting from its Extras but
otherwise behaving as a separate Useful.
Example: Adapt (Speak with Animals) can be attached to Useful (Jinx,
Effective x2), benefiting from Jinx’s Effectiveness but otherwise behaving as a
different ability.
When determining where an Adapt Skill goes, it always ignores Attacks
of the same element, and Usefuls with the same basic function.
Absorb (Element)
When an enemy executes an attack of the specified element that targets
you, use an unused set as if you had declared a Heal. This Skill counts
as a rank of Heal to determine how many times you can Heal over the
course of a battle, but you must have actual Heal ranks to manually
restore health.
Null (Element)
When an enemy executes an attack of the specified element, select an
unused set: you can use this set to defend against the attack as a
reaction, using a Defends quality on whichever part has this Infusion.
The attack does not have to target you.
Resist (Element) Adds a rank of resistance towards the associated element.
Note that the Absorb, Null and Resist Skills are intended to be rarer Skills generated by Special
fusions or Fusion accidents (see page @@).

Appendix F: Subpersonas
-- 322 --
Skill Locations
Big Favors the Part with the largest size.
Small Favors the Part with the smallest size.
Lucky Favors the Part with the largest dice pool.
Unlucky Favors the Part with the smallest dice pool.
Reliable Favors the Useful Quality that Always Works.
Unreliable Favors the Useful Quality without Always Works.
Wide Favors Quality with the most Area.
Focused Favors the Quality with the least Area.
Burn Favors the Attacks Quality with the most Burn.
Effective Favors the Useful Quality with the most Effective.
Ineffective Favors the Useful Quality with the least Effective.
Fast Favors the Quality with the most Fast.
Slow Favors the Quality with the least Fast.
Heal Favors the Part with the most Heal.
Powerful Favors the Attacks Quality with the most Power.
Powerless Favors the Attacks Quality with the least Power.
Mighty Favors the Attacks (Physical preferred) Quality with the most Power.
Dull Favors the Attacks (Physical preferred) Quality with the least Power.
Magical Favors the Attacks (Magical preferred) Quality with the most Power.
Dim Favors the Attacks (Magical preferred) Quality with the least Power.
Recoil Favors the Defends Quality with the most Recoil.
Splash Favors the Attacks Quality with the most Splash.
Spray Favors the Quality with the most Spray.
Tough Favors the Part with the most Tough.
Tender Favors the Part with the least Tough.
Durable Favors the Part with the highest maximum HP.
Delicate Favors the part with the lowest maximum HP.
Highest Favors the Part with the highest height.
Lowest Favors the Part with the lowest height.
Versatile Favors the Part with the most Qualities. (Attack), (Useful), or (Defend) may
be appended to apply to the part with the most Qualities of that type.
Specialized Favors the Part with the fewest Qualities. (Attack), (Useful), or (Defend) may
be appended to only count Parts with Qualities of that type.

Appendix F: Subpersonas
-- 323 --
Hunting for Subpersonas Assuming a Persona-like schedule format, where every part of the day is a distinct “time-slot”,
players may spend a time-slot to hunt for Subpersonas.
Step 1: Choose your Stats. Players first begin by choosing one of the following:
• Diligence + P.E.
• Guts + Courage or Fighting
• Knowledge + Academics
• Expression + Charm or Connive
Other combos are acceptable with sufficient justification.
Step 2: Build your Dice Pool. Multiply the dice you would normally roll by two. Any dice
in excess of 10d are removed from the pool and instead kept as your Budget. You can also
voluntarily remove dice from your pool and add them to your Budget.
Step 3: Roll your Dice. Each Set contributes Width-1 to your Range, which is the number of
potential Subpersonas you have.
Step 4: Determine your Arcana. This part varies from game to game and is largely based
on how a GM organizes Subpersonas. He could use a deck of cards or a custom chart to roll on,
for instance, and you can draw or roll on the chart equal to your Range.
Being that this quantity varies between games, these rules present one such option,
which is a table using 2d to generate a 01-100 outcome, using one die as the ones digit and
another as the 10s digit, based on the 20 standard Major Arcana (alternately a single 20-sided
die can be used if you have access). As is standard for the Velvet Book it excludes the Fool and the
World, but those can still be made valid options for Subpersonas at the GM’s discretion.
2d Arcana 2d Arcana 2d Arcana 2d Arcana 01-05 1- Magician 26-30 6- Lovers 51-55 11- Strength 76-80 16- Tower
06-10 2- H. Priestess 31-35 7- Chariot 56-60 12- Hanged M. 81-85 17- Star
11-15 3- Empress 36-40 8- Justice 61-65 13- Death 85-90 18- Moon
16-20 4- Emperor 41-45 9- Hermit 66-70 14- Temperance 91-95 19- Sun
21-25 5- Hierophant 46-50 10- Fortune 71-75 15- Devil 96-100 20- Judgement
Give attention to the order in which each Arcana is determined, as this affects the next step.
If you fail to roll any Sets at all during this Step, continue as if your sole result was a
Level 1 Subpersona.

Appendix F: Subpersonas
-- 324 --
Step 5: Determine your Subpersonas’ Levels. This is done by taking the Width of each
Set and assigning it to each Arcana (or other categorization system) that you determine in Step
4, in order, starting with the Widest. If your widest Set is Width x3, the first Arcana you roll in
Step 4 would be Level 3. This continues through your Sets; if you run out of complete Sets, any
further Subpersonas will be Level 1.
Example: You’re on the Hunt for Subpersonas and roll 10d to do so. You score the following:
1 ,1, 2, 4, 4, 4, 5, 5, 7, 9
Your Sets are 2x1, 3x4, and 2x5. These give you a total Range of 4. You roll 4 times on the Arcana Chart
on the prior page and assign your Set’s Width as Levels. Since you only rolled 3 Sets but have a Range of
4, your 4th Subpersona will be Level 1.
Roll 1: 67 Temperance, Level 3
Roll 2: 18 Emperor, Level 2
Roll 3: 80 Tower, Level 2
Roll 4: 31 Chariot, Level 1
Step 6: Make Adjustments. The player may spend from their Budget to make adjustments
to the pool of results that he would be able to pick Subpersonas from.
Shifting between Compatible Arcana Free
Shifting from an Incompatible Arcana to a Compatible One -0.5 Budget
Shifting from a Compatible Arcana to an Incompatible One -1 Budget
Shifting from one Incompatible Arcana to another Incompatible Arcana -2 Budget
Decreasing a Subpersonas Level +0.5 Budget / Level
Increasing a Subpersona’s Level while retaining Compatibility -2 Budget / Level
Increasing a Subpersona’s Level while sacrificing Compatibility -3 Budget / Level
Transforming a Subpersona into a Core Subpersona Free, once / Hunt
Increasing a Subpersonas Level may involve changing that Subpersona’s species to a stronger
one within that Arcana, based on the Player’s preference.
Once this is complete, a player can take as many Subpersonas from the Hunt that they
can carry based on the rules being used.

Appendix F: Subpersonas
-- 325 --
It is recommended that any absentee players have Subpersona Hunting rolled on their
behalf, and upon their return, allow them to decide how to use their budget and interact with
the results.
Summoning Subpersonas If the GM is willing to introduce a resource by which to perform this method, that resource can
be spent to perform Subpersona Summoning. The same rules are used as Hunting, but with the
following changes:
• Summoning does not consume a timeslot.
• Summoning does not result in doubling dice.
• A player can acquire one Subpersona from the result list for each resource spent. No
resources are lost if no results are taken, but repeated attempts at summoning will not
generate a new set of results until sufficient time has passed.
• A player can exchange one resource for one Budget after rolling.
• No benefit is granted from decreasing a result’s level, unless the player pays to keep the
downgraded Subpersona.
Core Subpersonas Core Subpersonas are those designed for a specific character, to enhance the capabilities of their
Persona. Core Subpersonas might be used to create thematic similarities for a party which
normally has none (such as Core Subpersonas who are all Egyptian gods), or to reflect parts of
their character that their Persona does not touch upon.
Example: One such Core Subpersona, from a party that had been granted Goetic demons as
Personas, if Pluto of the Moon Arcana, from Edgar Allen Poe's works, which reflects its master's
hatred for his stepfather." Let's also merge the last sentence into ", though special fusions are
easy to implement, and help to give each player simple goals to work towards.
Core Subpersonas generally have unique skills that can’t be obtained anywhere else and are
constructed as such that the character with whom they are associated will gain the greatest
benefit overall. Core Subpersonas should be easily reacquired by players after their initial
discovery; the exact method of doing so is left to the GM’s discretion
We suggest also limiting these to special fusions, if only to give each player a simple
goal to work towards.

Appendix F: Subpersonas
-- 326 --
Fusion Subpersona fusion allows Subpersonas to pass on unlocked skills and elemental resistances to
build more effective Subpersonas, or to level up and gain more of their natural skills.
GMs should determine some method to determine how different Arcana interact for fusion. A
Fusion Chart would produce consistent results but require preparation, or you might sum up
the compatibility levels of each Subpersona being fused and select an equal number of random
Arcana, for one to be chosen by the player performing the fusion.
When a fusion method allows skills to be passed down to a Subpersona, this also includes
resistances. A player may pass on only skills, only resistances, or a mix of the two.
Double Fusion is the standard form of Fusion that occurs. Two Subpersonas are combined,
and a Subpersona of a different Arcana will appear. The resultant Subpersona gains a number
of inherited skills not exceeding the player’s compatibility with the resultant Subpersona’s
Arcana. The level of the resultant Subpersona is equal to the average between the two material
Subpersonas, rounded up.
Triple Fusion adds another Subpersona to the mix. The number of inherited skills is
increased, allowing the player to add their compatibility with the resultant Subpersona and the
average of their compatibility with the Subpersonas used as material, rounded to the nearest
integer. Under ideal circumstances, this means inheriting a total of 10 skills from all 3
Subpersonas used as material. This is the only way to inherit above 5 skills.
(For suggestions on how to determine the Arcana of a Subpersona created through Double or
Triple Fusion, see the next page)
Hereditary Fusion consumes one Subpersona to improve another. You can grant the base
Subpersona skills and resistances from the consumed Subpersona, and/or additional levels to
unlock more Skills in the base Subpersona’s own list. The number of inherited skills and levels
may not exceed your Compatibility with the base Subpersona. Any skills and levels above this
limit are forever lost.
Where allowed by the GM, Weapon Fusion can be used on a Subpersona with Skills suitable
for combat to imbue its Skills into a weapon, like a sword or a gun. Naturally, Skills and Extras
unsuitable for weapons will be lost during the process.

Appendix F: Subpersonas
-- 327 --
Fusion Accidents
Fusion Accidents can occur rarely when trying to carry out fusions: roll to get a percentile value,
using either 2d10 with the order of the dice determined beforehand, or a 100-sided die. If you
get a 100 (or a 0 on dice that have it), a Fusion Accident occurs, resulting in the following:
• In the case of fusions that result in a new Subpersona, the resultant Arcana is random.
• Except for resistances, the skills available to be passed down are randomized, using the
rules described in the Generating Subpersonas section. Instances of Adapt instead
become rare skills such as Absorb (Element), Resist (Element), and Null (Element).
Depending on the circumstances, a GM may rule that there is an increased likelihood of Fusion
Accidents (such as trying to fuse a Subpersona while ill, or while certain weather conditions are
in effect), or provide a way to guarantee consistent Fusion Accidents.
Fusion without Fusion Charts
An alternate method exists to determine the results of a Double Fusion or Triple Fusion without
referencing a premade fusion chart. Take the lowest compatibility value (except Fool) involved
from the Subpersonas used as material, and select an amount of random Arcana equal to that
number. The player performing the fusion then chooses which result they want.
Fusions of the same Arcana always return that Arcana. Fusions where the Fool Arcana is
fused with another arcana instead makes the Fool Arcana Subpersona count as being the same
Arcana as every other Subpersona involved: Fool/Magician counts as Magician/Magician,
which produces Magician without fail. Fool/Empress/Emperor instead counts as
Empress/Emperor. Fusions where the World Arcana is fused with other Arcana always result in
World Arcana Subpersonas, but World/World fusions instead result in Fool Arcana.
For the purpose of Triple Fusions where there is a set result, the two weakest
Subpersonas are fused first (player’s choice in the event of a tie), and then the resultant
Subpersona is fused with the remaining one. Thus, World 3/World 3/World 5 generates
Fool/World, which in turn generates World.

Appendix F: Subpersonas
-- 328 --
Subpersonas as Non-Player Characters GMs are encouraged to have Subpersonas act as separate entities: they can have personalities
and Favorite Things, though none of the basic mechanics described here make those
particularly important in any way.
If you want to make it important to please Subpersonas, you can have the way they’re
treated affect the odds of Fusion Accidents. They might also present players with opportunities
to voluntarily transform their Skills, like how demons in Shin Megami Tensei often do.
Given the possibility to have multiple Subpersonas who all want different things, and
the possibility to be constantly gaining new ones due to Fusion and recruitment, it’s best to
reward positive treatment of Subpersonas, rather than penalize inaction: if a Kappa agrees to
serve a Persona User, it probably likes them enough to not be super bummed-out when they’re
not including cucumbers in their groceries.

Appendix F: Subpersonas
-- 329 --
Randomly Generated Subpersonas These rules describe how to randomly create a Subpersona based only on a few dice rolls. The
purpose here is to create not just a single Subpersona, but an entire Subpersona species, with a
complete natural Skill progression charting Levels 1 to 5.
Step 1: Determining Elemental Alignment
If you want to generate a Subpersona randomly, first choose an element set. Determine your
primary element, then roll to determine your secondary element and your weakness. You can
override these choices if you want, but the charts have been designed so that resistances and
weaknesses to each element occur roughly as often as their “opposites”: Fire/Ice, Electric/Wind,
Light/Dark, Nuke/Psi, Water/Earth, and Physical/Gun.
Feel free to rename, add, or swap out elements as needed for your game. You might, for
example, change “Gravity” to “Poison” to better complement its counterpart Psychokinesis, or
you might split Physical into subcategories like with earlier Persona games.
Persona 4 Style Elements
Primary Secondary Weakness Primary Secondary Weakness
Physical
Pick another,
take secondary
from its list
Pick another,
take weakness
from its list
Fire
1-2 Electric
3-4 Physical
5-6 Wind
7-8 Light
9-0 Dark
1-6 Ice
7-8 Wind
9-0 Physical
Ice
1-2 Wind
3-4 Physical
5-6 Electric
7-8 Light
9-0 Dark
1-6 Fire
7-8 Light
9-0 Physical
Electric
1-4 Physical
5-6 Fire
7-8 Light
9-0 Ice
1-6 Wind
7-8 Dark
9-0 Ice
Wind
1-4 Physical
5-6 Ice
7-8 Dark
9-0 Fire
1-6 Electric
7-8 Physical
9-0 Fire
Light
1-4 Fire
5-6 Ice
7-8 Wind
9-0 Electric
1-6 Dark
7-8 Fire
9-0 Wind
Dark
1-4 Ice
5-6 Fire
7-8 Electric
9-0 Wind
1-6 Light
7-8 Physical
9-0 Electric

Appendix F: Subpersonas
-- 330 --
Physical/Gun Split Elements
Primary Secondary Weakness Primary Secondary Weakness
Physical
Pick another,
take secondary
from its list
Pick another,
take weakness
from its list
Gun
Pick another,
take secondary
from its list
Pick another,
take weakness
from its list
Fire
1-2 Electric
3-4 Gun
5-6 Wind
7-8 Light
9-0 Dark
1-6 Ice
7-8 Wind
9-0 Physical
Ice
1-2 Wind
3-4 Physical
5-6 Electric
7-8 Gun
9-0 Dark
1-6 Fire
7-8 Light
9-0 Electric
Electric
1-4 Gun
5-6 Fire
7-8 Light
9-0 Ice
1-6 Wind
7-8 Dark
9-0 Ice
Wind
1-4 Physical
5-6 Ice
7-8 Dark
9-0 Fire
1-6 Electric
7-8 Gun
9-0 Fire
Light
1-4 Fire
5-6 Ice
7-8 Wind
9-0 Electric
1-6 Dark
7-8 Fire
9-0 Physical
Dark
1-4 Ice
5-6 Fire
7-8 Electric
9-0 Wind
1-6 Light
7-8 Gun
9-0 Fire
Persona 5 Elements
Primary Secondary Weakness Primary Secondary Weakness
Physical
Pick another,
take secondary
from its list
Pick another,
take weakness
from its list
Gun
Pick another,
take secondary
from its list
Pick another,
take weakness
from its list
Fire
1-2 Electric
3-4 Gun
5-6 Wind
7-8 Light
9-0 Dark
1-6 Ice
7-8 Wind
9-0 Physical
Ice
1-2 Wind
3-4 Physical
5-6 Nuclear
7-8 Gun
9-0 Psi
1-6 Fire
7-8 Light
9-0 Nuclear
Electric
1-2 Gun
3-4 Fire
5-6 Physical
7-8 Psi
9-0 Nuclear
1-6 Wind
7-8 Dark
9-0 Psi
Wind
1-2 Physical
3-4 Ice
5-6 Nuclear
7-8 Dark
9-0 Fire
1-6 Electric
7-8 Psi
9-0 Nuclear
Light
1-4 Fire
5-6 Ice
7-8 Wind
9-0 Electric
1-6 Dark
7-8 Fire
9-0 Psi
Dark
1-4 Ice
5-6 Fire
7-8 Electric
9-0 Wind
1-6 Light
7-8 Gun
9-0 Nuclear
Nuclear
1-2 Physical
3-4 Wind
5-6 Electric
7-8 Gun
9-0 Light
1-4 Psi
5-6 Physical
7-8 Electric
9-0 Gun
Psi
1-2 Electric
3-4 Fire
5-6 Ice
7-8 Dark
9-0 Light
1-4 Nuclear
5-6 Physical
7-8 Ice
9-0 Gun

Appendix F: Subpersonas
-- 331 --
Twelve Element Set
Primary Secondary Weakness Primary Secondary Weakness
Physical
Pick another,
take secondary
from its list
Pick another,
take weakness
from its list
Gun
Pick another,
take secondary
from its list
Pick another,
take weakness
from its list
Fire
1-2 Electric
3-4 Gun
5-6 Wind
7-8 Light
9-0 Dark
1-4 Ice
5-6 Wind
7-8 Water
9-0 Earth
Ice
1-2 Wind
3-4 Physical
5-6 Water
7-8 Gun
9-0 Earth
1-4 Fire
5-6 Electric
7-8 Light
9-0 Gravity
Electric
1-2 Gun
3-4 Fire
5-6 Physical
7-8 Psycho
9-0 Earth
1-4 Wind
5-6 Dark
7-8 Earth
9-0 Psycho
Wind
1-2 Ice
3-4 Gun
5-6 Gravity
7-8 Dark
9-0 Water
1-6 Electric
5-6 Psycho
7-8 Earth
9-0 Gravity
Light
1-4 Fire
5-6 Ice
7-8 Wind
9-0 Water
1-6 Dark
7-8 Fire
9-0 Psycho
Dark
1-4 Ice
5-6 Fire
7-8 Electric
9-0 Earth
1-6 Light
7-8 Water
9-0 Gravity
Gravity
1-2 Physical
3-4 Wind
5-6 Electric
7-8 Fire
9-0 Light
1-4 Psi
5-6 Physical
7-8 Electric
9-0 Wind
Psycho
1-2 Electric
3-4 Fire
5-6 Ice
7-8 Dark
9-0 Light
1-4 Gravity
5-6 Gun
7-8 Ice
9-0 Water
Earth
1-2 Physical
3-4 Electric
5-6 Gravity
7-8 Psycho
9-0 Dark
1-4 Water
5-6 Physical
7-8 Fire
9-0 Gravity
Water
1-2 Ice
3-4 Wind
5-6 Gravity
7-8 Psycho
9-0 Light
1-4 Earth
5-6 Gun
7-8 Ice
9-0 Psycho

Appendix F: Subpersonas
-- 332 --
Step 2: Determining Skills
After choosing an element set and your Subpersona’s favored elements, you can roll to
determine their skills. Roll 2d for each Skill you want to create.
First Die Result First Die Result 1-7 Refer to “Extra Infusion” 8-10 Refer to “Special Ability”
Second Die Extra Infusion Second Die Extra Infusion 1 Always Works 6 Heal
2 Area 7 Power
3 Burn 8 Recoil
4 Effective 9 Splash/Spray
5 Fast 10 Recoil
Second Die Special Ability Second Die Special Ability 1-4 Adapt Attack (Primary Element) 5-6 Adapt Attack (Secondary Element)
7 Adapt Attack (Physical/Gun) 8-10 Adapt Useful
Now for the Hard Part: Putting it Together
As an example, let’s generate a Psychic Subpersona species using the Twelve Element
set. We roll 2d10 to get the secondary element and weakness, which comes out to 1 and 2, being
Electric and Gravity respectively.
We then roll 2d10 five times to get the full set of skills. The dice come out to (2, 6), (3, 9),
(4, 4), (1, 4) and (5, 6). These result in a Heal Infusion, a Splash Infusion, a Sweet Infusion,
another Sweet Infusion, and then another Heal infusion. Due to the strong healing focus, we
christen this Subpersona as “Witch Doctor”, and assign it the High Priestess Arcana.
You may have noticed that no mechanism has been provided to determine which part
any given bonus goes to. This is on purpose: design your Subpersona as such that it grants these
bonus Extras to whichever part would be most useful. In this case, Witch Doctor needs to favor
parts that have lots of Effectiveness, or at least make a good back-up option if a character’s
luckiest part isn’t their Effective part.
Here’s the completed species. Depending on the Witch Doctor’s starting level some of
these may be available immediately, while others only after upgrading through Fusion.
Witch Doctor Resist: Psycho, Weak: Gravity
• Level 1: Heal: Effective ↑
• Level 2: Splash: Lucky ↑
• Level 3: Effective: Lucky ↑
• Level 4: Effective: Lucky ↑ (becoming Effective: Lucky ↑ x2)
• Level 5: Heal: Effective ↑ (becoming Heal: Effective ↑ x2)

Appendix G: The Reaper
-- 333 --
What is The Reaper? This is The Reaper.
He is not your friend.
The Reaper is an enemy introduced in Persona 3 who has since become a staple of the series. He
is an extremely tough, high difficulty enemy designed to present a recurring and persistent
danger to the Players.
In Persona 3 The Reaper is a powerful Shadow that roams Tartarus, the central region of
the Dark Hour, and pursues and attacks the Player if they linger too long on each floor. The
Reaper has a similar role in Persona 5, where he occupies the lower levels of Mementos, a
Metaverse space constructed from the collective unconscious of Tokyo. In Persona 4, the Reaper
haunts treasure special treasure chests that contain powerful weapons and equipment for each
character, and in the various side games like Persona Q the Reaper appears in different
capacities as well.
Regardless of how the Reaper manifests in each game, his driving purpose is the same:
to menace the players with a threat so powerful that they have no hope of surviving direct
confrontation, not until they’ve significantly increased their power.

Appendix G: The Reaper
-- 334 --
Why Use The Reaper? Not every game using The Velvet Book benefits from involving the Reaper. The Reaper is best
used in games involving the following criteria:
A Central Other World Space to Explore: These are akin to Tartarus in Persona 3 and
Mementos in Persona 5. As opposed to a game’s more themed dungeons, these Central
Dungeons are an area that the Players will need to return to and explore repeatedly to achieve
some main goal. These are the Reaper’s playgrounds.
Players Who Enjoy Tension: People play RPGs for all kinds of reasons, and for some it’s a way
to relax and let off the steam accumulated from real life. These kinds of players may not
necessarily appreciate the addition of an unkillable monster relentlessly hunting them down in
their spare time. For others, though, the feeling that a creature like that could be lurking around
the corner is thrilling and interesting, and for thsse the Reaper can be a compelling addition.
How the Reaper Works in The Velvet Book In the Persona games, The Reaper is simply an extremely powerful enemy who, when first
encountered, the Player cannot defeat and so must avoid, and in the event that they are caught
that’s probably a game over. The Reaper’s strength remains constant, though, and eventually
the Player’s strength will have grown to equal it, at which point they stand a chance of
defeating it in battle.
This method doesn’t exactly work for The Velvet Book, because unwinnable fights are, as
a general rule, not very fun in tabletop RPGs. So simply building The Reaper as a Might 3 Major
Shadow and throwing him against your players at the game’s start isn’t going to lead to a good
time.
Instead, this Appendix uses two different models to represent the danger posed by The
Reaper, which will change as the story progresses and the players evolve.
The Reaper as a Threat: This is the form that The Reaper takes when the players initially
encounter it. Rather than an enemy to defeated, the scale of The Reaper’s overwhelming power
is best represented as a Threat that cannot be destroyed or stopped, merely avoided or at best
temporarily repelled.
The Reaper as a Major Shadow: Once the Players gain sufficient power, The Reaper can
be engaged with as a Major Shadow encounter instead of as a Threat. It is at this stage only that
the Reaper can be defeated once and for all.

Appendix G: The Reaper
-- 335 --
The Reaper as a Threat This is The Reaper that the Players are pointedly not supposed to fight. He is an unkillable
juggernaut that will hound them until they escape his hunting ground, and even then, he’ll
search them out again until they leave the Other World altogether.
Before we get into its Threat Stats, here are some facts about The Reaper to keep in mind.
The Reaper goes wherever he wants. He’s not impeded by physical obstacles of any kind. He
can phase through walls and obstructions or just destroy anything in his way if he prefers. The
only way to escape is to keep running.
The Reaper cannot be reasoned with. He cannot be frightened, seduced, intimidated or
negotiated with. He is an intelligent, thinking being, but lacks all empathy or motivations
beyond malice.
The Reaper is not All Knowing. While he can’t be plied with social wiles or threats, he can be
deceived, distracted or misled by superior tactics and trickery. However, The Reaper learns
from his mistakes, so what worked one to distract or suppress him likely won’t work again
Now that these facts are established, here are the Reaper’s Threat Stats.
The Reaper 2d+ Persistent Threat Useful: Cut Off (Effect x2), Useful: Destroy Part (Effect x2), Useful: Capture Trespassers (Effect x2)
Seems pretty straightforward, right? “What so scary about that?” one might ask. To answer
that, let’s consider what each of these Useful Qualities does.
Cut Off: With this Quality, the Reaper can cut off a player’s escape route, either by destroying
it or by appearing in their path. Any Sets used for this purpose gain +1 Width and +2 Height.
Players can attempt to overcome this Set to proceed, or simply choose an alternate path. This set
is persistent: each character attempting to bypass being Cut Off must make their own roll to do
so.
Destroy Part: With this Quality, the Reaper reduces one of a Persona’s Parts to 0 HP in a
single strike. No damage calculation, no toughness, it’s just gone. A Persona can attempt to
Gobble this action using a Defends Quality or a Useful Quality that would allow them to
creatively avoid the attack, but the Reaper gains +4 Height to his Destroy Part Set, and if even a
single Die from this Set remains Ungobbled, that Part is wiped out.

Appendix G: The Reaper
-- 336 --
Capture Trespassers: The Reaper can easily kill any human unprotected by a Persona,
without effort. Since that’s not exactly fun for the Players, this Quality adds some extra tension
by having him instead grab and drag them away to a more isolated and private place in which
to execute them (or perform whatever other nefarious acts The Reaper is deployed for). The
Reaper can use this Quality against any humans he encounters, and against Non-Persona Users
it Always Works. Persona Users have more resilience and can Evoke their Personas to protect or
rescue them, but doing so requires that they Gobble the Reaper’s Width+2 Capture Set.
Now, on the surface these three Qualities are dangerous, but hardly earth shattering when
compared with something like a volcano or a swarm of killer bees. Well, The Reaper as a Threat
has a couple Gimmicks.
Gimmick #1: Rate of Aggression. Up in The Reaper’s Threat Stats is shows its dice pool as
2d+. That + means that The Reaper’s dice pool increases the longer he’s on the prowl, and the
pace of that increase is the Rate of Aggression. Rate of Aggression has two factors:
• How Often does it increase?
• How Much does it increase by?
How Often is mostly determined by the conditions in which the Players are exploring the Other
World. If they’re able to spend whole days in the Other World then it may increase every hour
or so, whereas if their time is far shorter, like within span of the Dark Hour, then The Reaper
can accumulate dice every few minutes that the Players are in a certain area.
How Much is derived from the disposition of The Reaper himself. A patient, unhurried
Reaper gains +1d at a time, making him more of a remote threat, while a psychotically
predatory one gains +3d each time its Rate ticks over. This could be an innate facet of The
Reaper’s behavior in a game, or it could be variable, determined by things like phases of the
moon or the players’ proximity to sensitive Other World areas.
Gimmick #2: The Awesomeness of The Reaper. The Reaper’s Dice pool maxes out at
13d, but its aggression does not. Instead, any additional increases in its Threat add Awesome x1
to its rolls. This is cumulative: if The Reaper reaches 13d, then gains another increase, it’s next
roll will be 13d, Awesome x1. If it increases yet again, it’s next roll will be 13d, Awesome x2,
and so forth.

Appendix G: The Reaper
-- 337 --
Gimmick #3: Adaptation. If a Player successfully outfoxes The Reaper, it will take steps to
ensure that it doesn’t happen again. Each time the players encounter The Reaper, it may gain
one additional Quality whose aim is to counteract a specific strategy that the Players previously
employed. If, for example, the players succeeded in defeating the Reaper by creating illusory
duplicates, The Reaper will gain Useful: Dispel Illusions the next time he is encountered. To
make these even more challenging, The Reaper’s Useful Adaptations come with intrinsic
Awesome x1.
Encountering The Reaper as a Threat
GMs can use The Reaper in any way they see fit, but for the most part The Reaper has two
modes of threatening the Players.
Stalk and Menace: This iteration of the Reaper attacks the Players as a group. More of a
ludicrously over-zealous security guard, The Reaper seeks out the Players and attacks on sight,
mostly trying to inflict as much damage as it can while preventing them from reaching a
specific destination.
Isolate and Execute: This is the more insidious version of The Reaper, akin to a horror
movie villain. Rather than cutting of the Players as a group to prevent them from reaching their
goal, he cuts of individual players, trying to separate them, especially if any stand out out as
particularly weak or vulnerable. Once isolated, The Reaper can begin dismantling that Player’s
Persona before Capturing his human character properly.
Either version is valid, and both can be used in different circumstances. The Reaper may begin
with a Stalk and Menace mandate but switch to Isolate and Execute when presented with a
juicy target.
Overcoming The Reaper as a Threat
In this form, The Reaper cannot be defeated or even really harmed all that much by a Persona’s
attacks. The Player’s best bet here is evasion and escape using movement Qualities to keep
ahead of him, and if confronted trying to distract or occupy The Reaper long enough to get
away.
One particularly desperate tactic is for a Persona User to essentially sacrifice their
Persona to keep The Reaper busy while their allies secure their exit. In this situation The Reaper
will likely tear the Persona apart, but each Set used to Destroy is a Set not used to Cut Off the
party’s one route to escape.

Appendix G: The Reaper
-- 338 --
The Reaper as a Major Shadow Eventually, the Players will reach a stage in the game where their Personas are strong enough to
directly confront The Reaper and attempt to defeat it once and for all. When this occurs is
largely dependent on the flow of the campaign. It shouldn’t really be before the midpoint of the
story, but if your Players are demonstrating that The Reaper as a Threat is no longer a
compelling source of tension, that can be a good signal that it’s time to transition to The Reaper
as a Major Shadow.
Below is the Major Shadow Template for The Reaper. As are the case with all Major
Shadow stats, these present The Reaper’s core strengths and abilities rather than his complete,
final numbers. This allows a GM to tailor The Reaper to the current power level of his
campaign.
The Reaper (3d Campaign) Might x3 Judgement-14
Favorite Thing: The Hunt
Resist: -- Weak: --
1-2 Killer’s Coat 10d 13 HP
Defends, Tough x4
3-5 Heart of Darkness 10d 10 HP
Attacks (Dark, Area x2), Useful: Debilitating Darkness
(Effect x2, Targets All), Useful: Concentrated Darkness
(Effect x2), Heavy Armor
6 Binding Chains 4d 7 HP
Attacks (Physical, Guaranteed Knockdown), Useful:
Unyielding Restriction (Pre-emptive Action, Spray x1)
7 Evil Eye 4d 7 HP
Attacks (Almighty, Penetration), Useful: Channel Malice
(*Spray x1*) Useful: Curse
8-10 Hell Revolvers 10d 10 HP
Attacks (*Elemental Shells*, *Spray x1*, Power x3, Fast x2), Recoil x2, Tough x1
Other Gimmicks Multitasking (does not factor into AP total, see explanation)

Appendix G: The Reaper
-- 339 --
The Reaper’s Qualities and Gimmicks
Might x3 The Reaper possesses extreme Might. This factors into his HP and Dice Pools, and effectively
gives him unlimited unpenalized Multiple Actions. The Reaper ignores up to three points of
Stun and adds Power x3 to all his attacks. Finally, The Reaper’s Might gives him a supply of
Awesome x9 to use during battle.
Multitasking The Reaper has a unique form of Multitasking that grants it total Rolls equal to the size of the
Players’ party minus 1, with a minimum of 2 separate Rolls. So against a Party of 4 Persona
Users the Reaper can make 3 separate Rolls. Rather than being grouped together in the Declare
Phase, the GM will distribute these actions evenly through the Phase in a consistent fashion,
always giving The Reaper the last Declaration of the Round.
Example: Against four Players, The Reaper gets to act three times. The GM assigns the
Declaration Order as follows:
Player 1, The Reaper, Player 2, Player 3, The Reaper, Player 4, The Reaper.
Because of this functionality, The Reaper does not have a Brains location.
Useful: Debilitating Darkness (Effective x2, Targets All) Debilitating Darkness unleashes a cloud of palpable shadow that snuffs out sources of light and
energy. In combat it Revokes Width+1 in Buffs from the entire party, thanks to its Targets All
Gimmick.
Useful: Concentrated Darkness (Effective x2, Interference) Concentrated Darkness gives The Reaper the Refresh ability, cleansing itself of Width+1 in
Debuffs. This Quality benefits from the Interference Gimmick, allowing it to trigger at the start
of the Resolve Phase before any other actions occur.
Useful: Unyielding Restriction (Spray x1, Pre-Emptive Action) Unyielding Restriction attaches The Reaper’s chains to a targeted Persona Part and from there
enwraps their whole body, inflicting a -2d Penalty on all Attack and Defends actions for Width-
1 Rounds. A chained Persona can break this restriction at any time, but doing so causes the Part
that the chain is attached to lose half its max HP. Unyielding Chains has Spray x1, allowing it to
use two Sets to chain two Personas, and can do so as a Pre-Emptive Action at the start of
combat, before anyone else on the battlefield can act.

Appendix G: The Reaper
-- 340 --
Useful: Channel Malice (Spray x1) The Reaper’s Channel Malice Quality is a Boost Power effect that allows it to add two Sets
worth of Width as bonus dice to his next action. This can easily add +4d or more to an action
and can exceed 10d, making Malice-boosted actions immensely dangerous.
Useful: Curse The Reaper’s Curse flat out disables one of a Persona’s Qualities for Width-1 Rounds. Any
Quality can be cursed as long as the Part it is located on is within the Curse Set’s Height, be it
Attacks, Defends or Useful, though if he curses an Attack that is in progress it will only be
shutdown after it Resolves (following the rule that Useful Qualities cannot stop attacks before
they hit). A Persona can break the Curse before it expires, but at a cost: they can use their
Quality once, and afterward it is Sacrificed as if it had been used for Awesomeness.
Attacks (Elemental Shells, Spray x1, Power x3, Fast x2) The Reaper’s Hell Revolvers have a unique Gimmick, Elemental Shells, which allows them to
declare Attacks using any Element used by the campaign other than Almighty. This means that
The Reaper can strike any Persona’s Weaknesses at will, though he still must Declare what
Element or Elements he is using.
Shadow Tactics for The Reaper
The Reaper begins each encounter with a Pre-Emptive use of Unyielding Restriction against as
many Personas as possible before they can react.
The Reaper never has fewer than two Actions per Round and gains more Actions as the
Players’ party size grows. Wherever possible he will always use one of those Actions as an
attack, and the second to keep the party in check, either by Revoking their Buffs or Refreshing
Debuffs placed on him. The Players may use this to their advantage, as every action spend
Revoking or Refreshing is an Acton not spent attacking.
The Reaper’s main form of offense is his Revolvers, which can and will hit any
Weakness a Persona might have. These have Spray x1 so he can use two Attack Sets per round,
which can be to the Player’s benefit because it makes it somewhat unlikely that he will have
many additional Sets to use for the One More! bonuses he will inevitably get.
Every Part of The Reaper is dangerous except his Killer’s Coat, which has no offense at
all. This means that every Part except the Coat must be destroyed for the fight to end. If his
Heart of Darkness is broken, The Reaper will be Knocked Down.

Appendix G: The Reaper
-- 341 --
Modifying The Reaper
The Template posed for The Reaper are his base capabilities, with no additional dice, HP or
extras added. These are some suggestions for GMs who are building up the Reaper to pit
against their Players:
More Dice: Most of The Reaper’s AP budget goes towards his Gimmicks, leaving his base
template pretty bare as far as dice are concerned. So a GM’s first priority should be adding as
many Dice as possible to his pools to get all of them into the 8-10d Range, especially those with
Spray.
Toughness: Only the Killer’s Coat and Heart of Darkness have any innate durability, so
Toughness should be added to his other parts to increase staying power. Note that his Coat
should always be his Toughest part.
Power and Effectiveness over Fastness: The Reaper is a methodical killing machine that
is extremely resistant to both damage and Hitstun, making speed somewhat less vital for him.
So while some Fast can be added to his Revolvers or Chains, it should be less of a priority over
raw damage or improving the Effectiveness of his Useful Qualities.
Area Attacks: The Heart of Darkness’s Dark Attack can be modified to increase its Area
damage and to add more Power. Just remember that Might gives Power to Area attacks as well,
so The Reaper’s Might x3 already allows its Dark Area attack to blast through three layers of
Toughness
More Spray: The Reaper has three innate instances of Spray on him, but that’s just for
starters. Spray can be added to just about any of his Qualities to vastly improve his ability to
damage or hinder the Party.
Deadly Power: For an added bit if trouble, The Heart of Darkness can be given a Dark-type
Deadly Power to give the Reaper an alternate mode of attack.
No Buffs or Debuffs: The Reaper is a killer, not a schemer. If a GM wants to expand his
arsenal of Qualities he should avoid both Buffs and Debuffs.
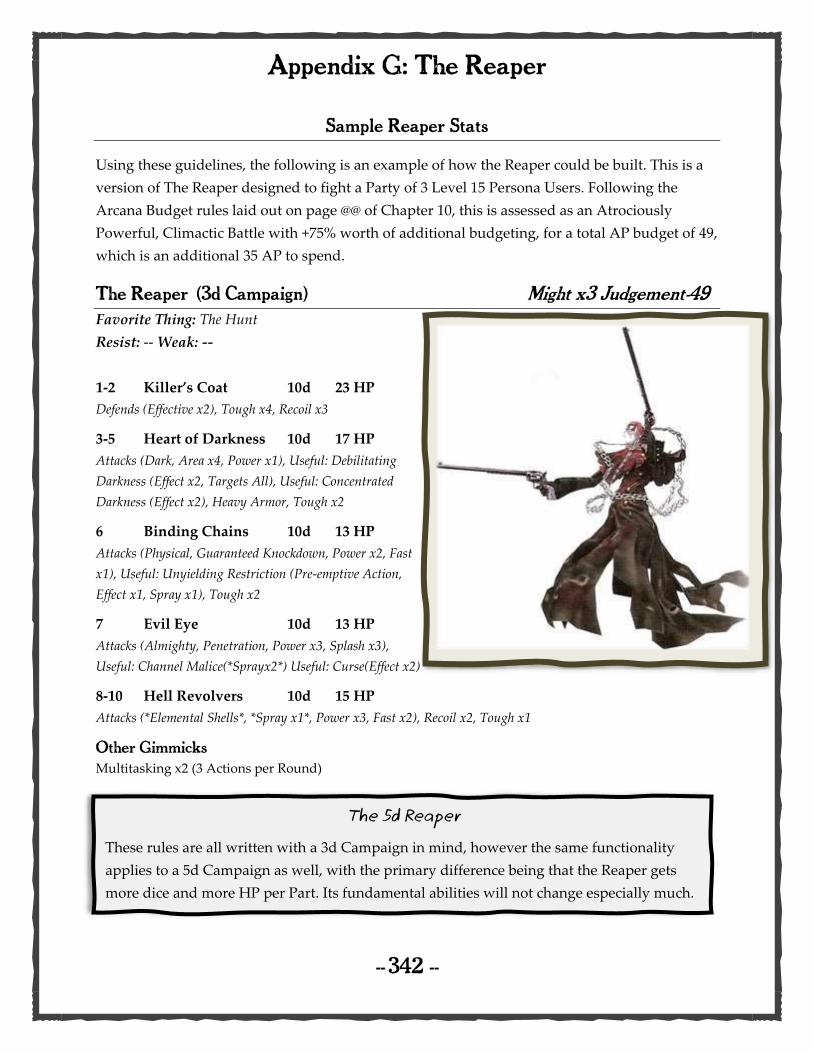
Appendix G: The Reaper
-- 342 --
Sample Reaper Stats
Using these guidelines, the following is an example of how the Reaper could be built. This is a
version of The Reaper designed to fight a Party of 3 Level 15 Persona Users. Following the
Arcana Budget rules laid out on page @@ of Chapter 10, this is assessed as an Atrociously
Powerful, Climactic Battle with +75% worth of additional budgeting, for a total AP budget of 49,
which is an additional 35 AP to spend.
The Reaper (3d Campaign) Might x3 Judgement-49
Favorite Thing: The Hunt
Resist: -- Weak: --
1-2 Killer’s Coat 10d 23 HP
Defends (Effective x2), Tough x4, Recoil x3
3-5 Heart of Darkness 10d 17 HP
Attacks (Dark, Area x4, Power x1), Useful: Debilitating
Darkness (Effect x2, Targets All), Useful: Concentrated
Darkness (Effect x2), Heavy Armor, Tough x2
6 Binding Chains 10d 13 HP
Attacks (Physical, Guaranteed Knockdown, Power x2, Fast
x1), Useful: Unyielding Restriction (Pre-emptive Action,
Effect x1, Spray x1), Tough x2
7 Evil Eye 10d 13 HP
Attacks (Almighty, Penetration, Power x3, Splash x3),
Useful: Channel Malice(*Sprayx2*) Useful: Curse(Effect x2)
8-10 Hell Revolvers 10d 15 HP
Attacks (*Elemental Shells*, *Spray x1*, Power x3, Fast x2), Recoil x2, Tough x1
Other Gimmicks Multitasking x2 (3 Actions per Round)
The 5d Reaper These rules are all written with a 3d Campaign in mind, however the same functionality
applies to a 5d Campaign as well, with the primary difference being that the Reaper gets
more dice and more HP per Part. Its fundamental abilities will not change especially much.

Appendix H: One Roll Dungeons
-- 343 --
Why One Roll Dungeons? There’s no substitute for a carefully crafted Dungeon built to the specifications of your Player’s
strengths and weaknesses. But if you want some help getting an idea on paper, or if you want to
make something a bit more unpredictable, then a One Roll Dungeon may be helpful.
These rules use the Dungeon Features described in Chapter 10, combined with some
One Roll mechanics that will allow a GM to randomly generate the concept for an entire Other
World space with only a handful of dice.
How it Works 1. Roll 11d. Rolling more than 10d guarantees at least 1 Set, which is what you want here.
2. Sort your Sets and Loose Dice. Sets determine the features of your Dungeon, while
Loose Dice determine what kind of Shadows inhabit it. You can reroll if you have too many
Loose Dice, and you can change any Loose Dice you want if you want to expand some of
your Set’s Widths. A Set’s Height tells you what the feature is, and its Width tells you how
extreme that feature is.
3. Put it all together. The result of a One-Roll Dungeon is only an outline of what it can do.
It’s your job to turn the disparate elements into a cohesive hole.
Below is the master One-Roll Dungeon chart. The pages that follow flesh out what it all means.
Height Sets: Features Loose Dice: Shadows 1 Elemental Motif Magician Hermit
2 Hidden Passages High Priestess Hierophant
3 Populated Empress Moon
4 Automated Defenses Emperor Death
5 Sanctuary Lovers Star
6 Physical Challenge Chariot Justice
7 Traps Fortune Tower
8 High Security Strength Hanged Man
9 Hazardous Environment Temperance Devil
10 Treasure Sun Judgment
Features are on a scale of 2x to 4x Width; if you roll a Set of 5x Width, you can convert the
excess Width into a Loose Die and add a new Shadow into your Dungeon’s mix.

Appendix H: One Roll Dungeons
-- 344 --
Sets: Dungeon Features Height x1: Elemental Motif pg@@ 2x1: Undertone
3x1: Overtone
4x1: Dominance
Height x2: Hidden Passages pg@@ 2x2: Auxiliary
3x2: Central
4x2: Critical
Height x3: Population pg@@ 2x3: Scattered
3x3: Communal
4x3: Teeming
Height x4: Automated Defenses pg@@ 2x4: Lightly Defended (12d)
3x4: Fortified (24d)
4x4: Bristling (48d)
Height x5: Sanctuary pg@@ 2x5: First Aid
3x5: Medicinal
4x5: Surgical
Height x6: Physical Challenge pg@@ 2x6: Vigorous (5-Width, Diff 0)
3x6: Grueling (8-Width, Diff 3)
4x6: Unrelenting (12-Width, Diff 5)
Height x7: Traps pg@@ 2x7: Light Entrapment (8d, Diff 3)
3x7: Heavy Concentration (16d, Diff 5)
4x7: Actual Deathtrap (24d, Diff 7)
Height x8: High Security pg@@ 2x8: Evasion (5d)
3x8: Caution (8d)
4x8: Alert (11d)
Height x9: Hazardous Environment pg@@ 2x9: Mild (4d)
3x9: Intense (7d)
4x9: Severe (10d)
Height x10: Treasure pg@@ 2x10: Nice
3x10: Jackpot
4x10: Motherload
Loose Dice: Minor Shadows 1
Magician
Hermit
Curious, Troublemaking, Playful, Deceitful
Solitary, Unfriendly, Meditative, Rude
2 High Priestess
Hierophant
Insightful, Brave, Clever, Secretive
Spiritual, Wise, Inflexible, Arrogant
3 Empress
Moon
Elegant, Regal, Understanding, Domineering
Mysterious, Quixotic, Alien, Elusive
4 Emperor
Death
Proud, Decisive, Imperious, Demanding
Calm, Sorrowful, Merciless, Nihilistic
5 Lovers
Star
Passionate, Indecisive, Amorous, Attractive
Creative, Inspired, Forlorn, Driven
6 Chariot
Justice
Adventurous, Thrill-seeking, Fierce, Boastful
Fair, Level-headed, Rigid, Self-Righteous
7 Fortune
Tower
Optimistic, Gullible, Desperate, Hopeful
Cruel, Fatalistic, Destructive, Pessimistic
8 Strength
Hanged-Man
Courageous, Warm, Self-Assured, Over-confident
Self-sacrificing, Mournful, Complaining, Resolved
9 Temperance
Devil
Balanced, Even-tempered, Unyielding, Stable
Hedonistic, Persuasive, Cunning, Short-sighted
10 Sun
Judgement
Triumphant, Encouraging, Undoubting, Fiery
Certain, Dispassionate, Focused, Depressed

Appendix I: One Roll Social Encounters
-- 345 --
What is a Social Encounter? Parties. School Dances. Football Games. Loitering behind the Circle K in a bad neighborhood.
These and many more are situations in which player characters might find themselves where
they engage with a complex, dynamic social engine. Maybe they’re doing so in pursuit of some
specific objective, or maybe they’re just trying to survive without being humiliated.
A GM can script out a series of intended encounters for the players to confront, and
that’s fine. But if you want to make it a bit more unpredictable for both you and the party, you
can use the One Roll Engine to create a series of Social Encounters. Using a One Roll Social
Encounter isn’t necessarily easier than a set of scripted encounters, because both require a bit of
prep-work, and with a One Roll Social Encounter you need to really have your improv muscles
stretched since you’re going to working out what happens at the shindig on the fly. But these
kinds of Encounters are great for simulating the spontaneity of a living social space.
This section includes some Ready to Play Social Encounters that you can use for your
players, but they’re just a sample of what this system can do, and GMs will get far more value
out of learning how to Do It themselves. Here’s what you need.
Preparing a Social Encounter
1. Determine the Players’ Goal. Usually these fall into two categories. In a Survival situation, the Players simply need to endure the Encounter till it reaches a set number of
Rounds. A school dance is a good example. It starts at 7pm and goes till 10pm and
constitutes maybe 7-8 Rounds of activity. The players probably have their own goals within
that timeframe to accomplish, but once it’s over that’s it. The other type is Investigate,
which describes a Social Encounter where the players are pursuing some specific objective—
a piece of information, an important item or an accumulation of points. In this case the
Encounter may last as long as the Players need to complete their goal, with the risks and
fallout increasing the longer they take. It’s also possible for Investigative Encounters to have
a Round limit, which makes it possible for the Players to fail outright.
2. Determine what your Sets and Loose Dice Mean. Sets are things that Can happen
to the players during a Social Encounter, while Loose Dice are things that Will happen in
one form or another. At a Party, for instance, Sets usually represent a Direct Interaction with
another party-goer, while Loose Dice describe Background events occurring around them.
Players need to deal with their Direct Interactions and can potentially leverage the
Background in doing so.

Appendix I: One Roll Social Encounters
-- 346 --
3. Determine the Height Chart. Both for Sets and Loose Dice, your Height tells you
exactly what is going on in the Encounter. For a very complex Encounter, each Height might
be its own event, while more straightforward Encounters can group Heights together kind
of like Hit Locations. Sets and Loose Dice should be related. In this way a 3x8 and a
Loose 8, while not describing the same thing, are both related to the same sort of action or
theme. The Ready to Play Encounters in the next section will demonstrate this.
4. Determine what Width Means. In most Social Encounter, a Set’s Width indicates the
intensity of the Interaction. At a Party, for instance, a 2x1 is someone casually offering you a
drink, while a 5x1 is a group of your peers serious pressuring you into drinking with them.
This is carried out in one of two ways: Either as a Difficulty the player must overcome or as
a Dice Pool rolled against the player as a Contested Action, both increasing in challenge as
Width grows.
5. For Survival, Determine the Threat Posed. This is usually framed as Shock to
specific Stat if a Player is unable to deal with the Set confronting them. Alternately, Players
can be graded on their performance, with each Set they overcome adding to that Grade.
6. For Investigations, Determine the Win Condition. This is usually done via
Accumulated Width, with each successful Contest between the Players and the Encounter
contributing its Width. Once the requisite Width is reached, the Players achieve their goal.
The more difficult the win condition, the more Width is needed.
Win Threshold Requisite Width Mildly Challenging 3 Width per Player +1
Genuinely Difficult 5 Width per Player +2
Mercilessly Hard 6 Width per Player +3
7. Finally, determine the Encounter’s Dice Pool. This is largely a factor of how dense
the Encounter is. A house full of rowdy teens is going to be 12-15d, while a quiet, dark
alleyway would only be about 7d. GMs are allowed to roll more than 10d at a time.

Appendix I: One Roll Social Encounters
-- 347 --
Running a Social Encounter
Running a One Roll Social Encounter isn’t that different from a Combat Encounter. It’s
separated into Rounds in which players are each allowed to do one thing (or more if they
choose Multiple Actions). Each Round flows like this:
1. Roll the Encounter Dice. Sort out your Sets and Loose Dice and determine what is
happening to and around your players. If you don’t like one aspect of your roll, maybe
because it’s Round 3 and you happened to roll the same Height for the third time in a row,
you can shift or reroll whatever you want to mix things up.
2. Confront your Players with each problem you rolled. Depending on how you
build the Encounter, each player will need to contend with a Difficulty or a dice pool rolled
against them.
3. Deploy your Loose Dice. Loose Dice that function just as set dressing to describe the
atmosphere and surroundings of an Encounter can be laid out along with the Sets, so the
players get an idea of what’s going on. But Loose Dice can also be used to introduce
complications into an Encounter, and a GM can thus reveal their effects as the Players
struggle to deal with the Encounter.
4. Let your Players React. Each Player in a Round can take one Action to deal with the
Sets or Difficulty confronting them, or if they are unchallenged, to help their allies or
advance their personal or group objectives. Players can act in whatever order they want as
long as it makes sense and roll whenever appropriate and with whatever Skill is useful to
the circumstances in which they’ve found themselves.
5. Resolve and Advance. How did the Players do? Did they forward their goal, or did
they lose ground? What about the Encounter itself; is it intensifying or waning? A Party
usually starts at a lower dice pool, increases as it heads up, then dies out as people go home
or pass out. Based on this you can increase or reduce the Dice pool for the next Round.

Ready-to-Play Social Encounters
-- 348 --
The House Party Premise: Miranda Branch, one of the richest
and most popular students in your class, is
throwing a huge party at her parent’s house
when they’re out of town. The Players,
against all odds, have been invited and
turning her down would be social suicide.
Objective- Survive: The invite says “7pm
to ???”, but the neighbors will call the cops if
it goes on past midnight. Each hour is broken
into 2 Rounds, and the Party can decide how
early or late they want to arrive and leave.
Dice Pool: Based on the hour of the Party:
7pm (7d) 8pm (10d) 9pm (12d)
10pm (13d) 11pm (9d)
Other Notes: --There should be at least one
Relationship per Player present at the Party.
-- You can roll below if you want to randomly
determine where a Set takes place.
(1-2) Living Room (3) Kitchen
(4-5) Pool & Patio (6-7) Backyard
(8) Basement (9) Bedrooms
(10) Woods Out Back
Sets: Party Fouls Each Set presents the player with a Party-
based confrontation. If the Player fails, any
Un-Gobbled Dice become Shock to the
specified Stat.
Width Effect- Peer Pressure: Width-2x: Casual 4d
Width-3x: Aggressive 6d
Width-4x: Overtly Hostile 8d
Width-5x: Actively Threatening 10d
x1- Underage Drinking (vs Diligence) Or smoking, or drugs. C’mon, everyone’s doing it!
x2- Backyard Scrimmage (vs Diligence) The greater the Width, the fiercer the competition.
x3- Beef (vs Guts) Someone wants a piece of you. You gonna take that?
x4- Risky Party Game (vs Guts) Spin the Bottle, Never Have I Ever, etc. Yikes.
x5- Game On (vs Proficiency) Cards or video games. Put up or shut-up.
x6- Too Many People Here (vs Proficiency) You’re packed in like sardines. Something’s gotta give.
x7- Spirited Debate (vs Knowledge) That thing you like? It’s stupid and so are you.
x8- The Music Sucks (vs Knowledge) It’s so loud and bad it hurts to think.
x9- Your Style is Broke (vs Expression) You look like trash. How’d you even get in here?
x10- Teen Dance Party (vs Expression) They’re all watching you. Hope you have the moves.
Loose Dice: Background Noise Things happening in the background that can
be leveraged by Players or the GM for +1d.
1- Teenage Idiocy 6- Something Got Broken
2- Roughhousing 7- Playing a Movie
3- Fight Breaks Out 8- The Guy with a Guitar
4- Spreading Gossip 9- Spills and Messes
5- Prank Gone Wrong 10- The Party Animal
Outcome: Each Round you endure awards
1 Reputation Die, which can be spent to boost
dice rolls in social situations. Every 2 Rounds
you spend with a Relationship counts as
Quality Time.

Ready-to-Play Social Encounters
-- 349 --
Where’s Gilly Finn? Premise: Gilligan “Gilly” Finn is a tabloid
reporter and conspiracy theorist who knows
about the Other World. He sent the Party a
message asking for a meeting, but never
showed. The Party must search his
neighborhood, Sucker Row, for clues as to his
whereabouts.
Objective- Investigate: The Players must
accumulate a total of 3 Width per Player
worth of successful investigation Sets. Once
this is set, the last person they encounter will
give them the information they need.
Dice Pool 11d: For Parties exceeding 3, add
+2d per additional Player.
Other Notes: Every Turn spent in Sucker
Row accumulates +2d towards Suckerpunch
LTD (starting at 2d), a local street gang. Once
the Encounter is complete, this total becomes
a Threat against the Players
Sets: Locals Each Set presents the player with a resident of
Sucker Row to talk to. The Width determines
how cooperative they are. Each resident may
resist the Player’s investigation in some way
(verbally or physically), represented as a dice
roll, or request a favor first, represented by a
Difficulty
Width Effect- Cooperativeness
Width-2x: Friendly 4d No Difficulty
Width-3x: Defensive 6d Difficulty 3
Width-4x: Hostile 8d Difficulty 5
Width-5x: Dangerous 10d Difficulty 7
x1- Homeless Vagrant Ragged and unstable, but they know their streets…
x2- Aspiring Athlete His game’s gonna bring him all the way to the top.
x3- Petty Crook Surviving on Sucker Row means skirting the law.
x4- Street-Corner Musician or Band Their music suffuses the background of Sucker Row.
x5- Food Truck (or Stand, or Cart) Good or bad, everyone seems to gather around them.
x6- Street Artist Life on the street is their inspiration.
x7- Wannabe Gangsters One day, they’re gonna run this whole town.
x8- Struggling Single Parent Two jobs, two kids, half a nerve left.
x9- Old Timer Who’s Been Around Forever A goldmine of experience and boring stories.
x10- Beat Cop The face of the Law in Sucker Row, for better or worse.
Loose Dice: Disposition Loose Dice can be assigned to Sets to give
their Locals specific character traits
1- Paranoid 6- Too Busy for You
2- Hot-Headed 7- Trash Talker
3- Jumpy 8- Worn Out
4- Demanding 9- Nostalgic
5- Impatient 10- Territorial
Outcome: Gilly’s whereabouts are whatever
suits the GM’s narrative.
Suckerpunch, LTD Standard Threat Attacks (Physical or Emotional), Defends, Useful:
Chase you down dark alleys, Useful: Intimidate

Ready-to-Play Social Encounters
-- 350 --
Battle of the Bands Premise: The player’s garage band has
landed a set at the Battle of the Bands at the
Maus, one of the area’s better known indie
venues. Doing well means a paycheck, and
even more valuable, exposure.
Objective- Survive: Their Set lasts 6
Rounds, 2 Rounds per Song (or more/less
depending on if one of their songs is, like, a 7
minute epic).
Dice Pool 12d: In the week leading up to
the Battle, the band can reduce the
Encounter’s dice by -1d for every Time Slot
they spend practicing.
Other Notes: The band’s performance is
graded along two axes. Accumulated Width
determines how well they do in the Battle
itself. Accumulated Height dictates how well
their performance is received and reviewed
amidst the local music scene.
Sets: Your Band Sucks Each Set confronts a player with the reality of
being a squad of amateurs playing a cheap set
at a gig that doesn’t care about them.
Overcoming one of these Sets add the Player’s
Width and Height to the Band’s total. Failing
incurs a point of Shock to the Stat used.
Width Effect- Stage Fright Factor
Width-2x: Nervous No Difficulty
Width-3x: Actual Fear Difficulty 3
Width-4x: Gonna Throw Up Difficulty 5
Width-5x: Need New Pants Difficulty 7
x1- Background Noise Ambient interference threatens to drown you out.
x2 - 3- Why Are There So Many People?! You didn’t expect the audience would be so big
x4- How does the Song Go Again? If you forget, better make something up and pray.
x5- Crappy Equipment Either work around it or distract the audience.
x6 - 7- The Jaded Audience How are you gonna catch their attention?
x8- 9 The Guys Before You Were Better How do you regain confidence and compete with them?
x10- This Place is a Dump Playing here is physically dangerous.
Loose Dice: New Fans Each Loose Die you roll equates to 3 people
walking away from the show as actual fans of
your work.
Outcome: Battle Results are announced
after the Encounter concludes, while
Reception appears online two days later.
Battle Results 1st Place: 6 Width per Player +3 ($3,000)
Top 3: 5 Width per Player +2 ($500)
Top 5: 3 Width per Player +1 No Prize
Reception Cumulative Height ★★★★★ 40 x Party Size
★★★★☆ 30 x Party Size
★★★☆☆ 20 x Party Size
★★☆☆☆ 10 x Party Size
★☆☆☆☆ Less than 10 x Party Size

Ready-to-Play Social Encounters
-- 351 --
Example of Play The GM has opted to adapt Where’s Gilly Finn for
his campaign with three player characters: Kevin,
Rochelle and Marco. They require a total of 10
Width to complete the Encounter.
Round 1: The GM rolls the following:
2,4,4,4,5,9,9,9,10,10,10
This gives him 3x4 (Defensive Street Musician or
Band), 3x9 (Defensive Old Timer) and 3x10
(Defensive Beat Cop). His Loose Dice are 2 (Hot-
Headed) and 5 (Impatient). He decides to make the
Street Musician Hot-Headed and the Beat Cop
Impatient.
Kevin meets with the Street Musician, an aspiring
rapper named Pavo, doing his thing outside a
Sucker Row bodega. He’s extremely zealous and
vocal about his raps and talks about he’s going to
walk to the top of the charts over the corpses of his
haters. His verses though are rough, to say the
least. Kevin can either use Expression + Charm vs
Difficulty 3 to help him workshop new lyrics, or
Expression + Put-Down vs his 6d Pool to talk
sense into him. He elects to straight-talk Pavo
with his 7d worth of Put-Down. He rolls a 2x7 vs
Pavo’s 2x4 to shoot back at him. While wounded,
Kevin’s words strike a chord with Pavo, who takes
them to heart. He says that he’s seen Gilly around
for the past week but not since two days ago, and
doesn’t know his current whereabouts. The Party accumulates 2 Width. Suckerpunch LTD is at 4d.
Rochelle meets with the Old Timer, Boris, a man
with an eyepatch sitting quietly at a chess table in
the park outside the Javawhama Café. She sits
down and asks the Old Timer if he’s seen Gilly. He
gruffly ask what’s her business with Gilly, to
which she briefly explains the situation. Dubious,
Boris says he’ll talk but only if she’ll play with
him. Rochelle uses her 6d Knowledge + Out-Think
pool against Boris’s 6d. She rolls a 2x8 and he
rolls a 3x6. The GM determines that while she
doesn’t defeat Boris, she demonstrates enough skill
and sincerity that he’s willing to open up. Gilly
and Boris play chess every week and he was
expecting to meet him here today, but he never
showed, hence his reluctance to talk to her at first.
Sadly, he doesn’t know his current whereabouts
either. The Party accumulates 2 Width, for a total of 4 out of 10. Suckerpunch LTD is at 6d
Marco encounters Derek, a uniformed bike Cop
assigned to Sucker Row. Derek is in a hurry to
respond to a fender bender and isn’t in a mood to
talk to dumb kids. Marco uses Diligence + P.E. to
keep up with him. He rolls 5d against a Difficulty
of 3 and rolls 3x4, and his persistence pays off. He
keeps pace with Derek and eventually the officer
stops his bike and takes a minute to answer
Marco’s questions about Gilly, whom he saw
yesterday at a newsstand arguing with the owner,
probably over something in one of the tabloids he
writes for. The Party accumulates 3 Width, for a total of 7 out of 10. Suckerpunch LTD is at 9d.
Round 2: The GM rolls the following:
2,3,3,4,5,6,6,6,7,8,8
This gives him 2x3 (Friendly Petty Crook), 3x6
(Defensive Street Artist) and 2x8 (Friendly,
Struggling Single Parent). His Loose Dice are 2
(Hot-Headed), 4 (Demanding), 5 (Impatient) and
7 (Trash Talker). He elects to add make his Crook a
Trash Talker and his Single Parent Demanding,
and leave the other two Loose dice aside since he’s
already used them both on the last Round.
Kevin deals with the Crook, Davis, who’s selling
bootleg Nikes out of his hatchback. Davis jabs at
Kevin for his broke shoes and overall lack of style,
urging him to buy a pair of his fresh sneakers.
Kevin uses his Charm + Connive (6d) to appear
interested in the deal vs Davis’s 4d pool. Kevin

Ready-to-Play Social Encounters
-- 352 --
rolls a measly 2x1, while Davis manages a 2x4.
Davis realizes that Kevin is trying to hustle him
for information and gets frustrated and prepares to
leave. Out of desperation Kevin offers to buy a pair
of Nikes in exchange for info; the GM allows this
and determines this is worth 1 Width in exchange
for all the cash Kevin currently has. Still burned a
little, Davis relates how he was a Thai restaurant
the other night and saw a crazy dude that looked
like Gilly at a booth eating and looking very
squirrely and paranoid. The Party accumulates 1 Width, for a total of 8 out of 10. Suckerpunch LTD is at 11d. Rochelle comes across the Street Artist, a graffiti
artist named Fatima currently working on a mural
in a vacant lot in memory of a Sucker Row
resident who was killed in a gang shooting. She’s
jumpy when encountered, but Rochelle reassures
her, then offers to keep watch for cops so she can
finish her painting. Rochelle rolls her Knowledge +
Notice (7d) vs a Difficulty of 3. She easily clears it
with 2x7 and warns Fatima of a cop car cruising
by, giving her enough time to put the finishing
touches and scurry away. The Party accumulates 2 Width, for a total of 11 out of 10, completing the Investigation. Suckerpunch LTD is at 13d.
Meeting up with her around the corner, Fatima
thanks Rochelle and tells her that she saw what
happened to Gilly. Last night she was painting
and saw him head down an alleyway and used a
crowbar on a metal door at the end. He entered,
and she heard him yell something. Fatima went
over and peeked through the door and saw a room
with no obvious doors or windows, but no Gilly
either. Fatima tells Rochelle where to find that
door, and Rochelle leaves to inform the other
players.
They head to the block where the alley is located,
but when they arrive, they’re greeted by a crowd of
rowdy teens on mopeds and a beat-up Volkswagon
Bettle blocking the street. The leader, a senior from
a neighboring high school, introduces himself with
a business card that says “Suckerpunch, LTD”
and says that they’ve been watching the three of
them snooping around the neighborhood, and
think they’re out to narc on the gang to the cops.
Before the Threat Encounter begins properly, the
GM gives the players one Round to try and
convince Suckerpunch that they’ve got it all
wrong; if successful, this can weaken their dice
pool, but no amount of convincing is going to
prevent open hostilities, as the boss, Patrick, wants
to teach them a lesson just in case.

Knowledge(Brains 9)
Proficiency(Hands 7‐8)
Guts(Torso 3‐6)
Diligence(Feet 1‐2)
Expression(Face 10)
Beat‐DownBlockP.E
CourageFightingWind
AimReflexShop
AcademicsNoticeOut‐Think
CharmConnivePut‐Down
School Name
Student Name
Sex
DOB
Relationships
ShockName
Arcana Boost Extra
ArcanaPersona
THE VELVET BOOK
AWESOMENESSMeMy Persona
ShockName
Arcana Boost Extra
ShockName
Arcana Boost Extra
ShockName
Arcana Boost Extra
ShockName
Arcana Boost Extra
0 1 2 34 5
ArcanaRoute
Arcana Levels and Achievements
Lv
Experience

THOU ART I
I AM THOU
PERSONAARCANAFavorite Thing
Evocation
Appearance
Personality
PERSONA CAPABILITIESHit Location Number and Name
(Qualities and Extras) DiceDamage
(/ for Shock, X for Scars) Boosts
ResistWeak
Level
HP

Reference: Characters and Personas
-- 355 --
Human Stats and Skills Diligence: Physical toughness and resilience
Skills: Beat-Down, Block, P.E.
Guts: Bravery and readiness to take action
Skills: Courage, Fighting, Wind
Proficiency: Craftiness and precision
Skills: Aim, Reflex, Shop
Knowledge: Education and strategic thinking
Skills: Academics, Notice, Out-Think
Expression: Charisma and Creativity
Skills: Charm, Connive, Put-Down
Character Construction • All Stats start at 1d, all Skills start at 0d • Add 10d to Stats, 15d to Skills
• In a Long Campaign, starting Stats and Skills cannot
exceed 4d
• Stats and Skills cannot exceed 5d.
• New characters have 10 XP in starting Relationships
Stat and Skill Dice Values 0d- You have no ability to do this. Only for Skills
1d- You are actively bad at this
2d- Unremarkable. Baseline for human ability
3d- Trained. Better than average
4d- Elite. Extremely good at this
5d- Mastery. You’re as good as a person can be.
Arcana List 1- The Magician 11- Strength
2- The High Priestess 12- The Hanged Man
3- The Empress 13- Death
4- The Emperor 14- Temperance
5- The Hierophant 15- The Devil
6- The Lovers 16- The Tower
7- The Chariot 17- The Star
8- Justice 18- The Moon
9- The Hermit 19- The Sun
10- Fortune 20- Judgement
Special, Non-Standard Arcana
0- The Fool 21- The World
XP and Character Growth One-Shot Short Campaign Long Campaign
Skills 1 XP/ die 2 XP/ die 3 XP/ die
Stats 3 XP/ die 4 XP/ die 5 XP/ die
Relationships XP equal to its next level
Building a Persona 10 Hit Locations, organized into a minimum of 3 parts.
3d Personas: 3d per Hit Location number
5d Personas: 5d per Hit Location number
Each part has 1 free Quality.
Exchange dice for Qualities and Extras.
Dice pools cannot exceed 10d. Any extra dice must be
used to purchase Qualities and Extras.
Additional Qualities cost 1d each.
Attacks: Inflicts Width-1 Damage
Defends: Gobbles attack dice
Useful: Any other helpful action
Extras cost 1d Each
Always Works Area Burn Effective Fast
Fast Heal Power Recoil Spray Splash Tough
Hit Points:
3d Personas: 2 + Hit Location Size
5d Personas: 5 + (Hit Location Size x2)
Weak/Resist: 1 Weakness for every Resistance
Favorite Thing: Used to Heal Persona damage in Real World
Useful Effects Basic things any Useful Quality Can Do
Create an Advantage: Generate Width in bonus dice for you
and your allies to use.
Counteract a Useful Effect: Cancel the effect of an enemy’s
Useful Quality. Doesn’t work on Buffs and Debuffs
Solve a Problem: Overcome Problems and Threats imposed
by Shadows and the Other World
Common Useful Effects
Analyze Buff (Rakukaja, Tarukaja, Sukukaja) Boost Power
Control (Element / Force) Debuff (Rakunda, Tarunda, Sukunda)
Flight Induce (Charm, Confusion, Fear) Negotiation
Provide Information Unique Movement
Exotic Useful Effects
Create (Object) Deadly Power Exotic Sense Gigantic
Immobilize Invisibility Jinx Nullify Polymorph
Refresh/Revoke Super Strength Tranquilize Warp
Persona Levels and Growth All Personas start at Level 0.
Each Level grant +1d and +1 HP to any Part (they don’t need
to be the same Part)
Experience Points: 5 XP per Level
Triumph: Important Major Shadows grant 1 Level when
defeated.

Reference: Mechanics and Other Key Rules
-- 356 --
One Roll Engine Basics Roll a pool of d10s. Written as #d (6 dice = 6d)
Look for matched Sets (2, 2 or 4, 4, 4)
# of Matches is Width. Value of the dice is Height.
Sets are written as Width x Height (4, 4, 4 is 3x4)
Width describes speed and intensity.
Height describes quality and precision.
Dice not in a Set are called Loose Dice.
General tasks succeed with any Set.
Difficulty specific a certain Height or Width for success.
Bonuses add dice, Penalties subtract them.
Multiple Actions Doing one thing twice: -1d, roll, look for two sets
Doing two things at once: pick smaller dice pool, -1d, roll,
look for one Set for each action.
Each additional action is another -1d (3 actions = -2d)
If you only roll 1 Set, you pick which action goes off.
Called Shots Used to target a specific Persona or Shadow Part.
-1d Penalty. Difficulty = the Part’s lowest Hit Location #.
Any Set that meets or beats the Difficulty succeeds.
Gobble Dice When you roll to foil another’s action, your Set becomes
Gobble Dice.
Gobble Dice negate dice from Sets of equal or less Height.
A Set that has been gobbled down to 1 Width fails
Gobble dice can be split up and used against multiple Sets (a
2x8 can break a 2x7 and 2x6).
Awesome Dice Your amount of Awesome is written as “Awesome x#”
Spend Awesome to change 1 Loose Die after rolling.
Only shift down: (1, 10) can only become 2x1, not 2x10
Human Awesomeness is linked to a specific Stat.
Persona Awesomeness can be used for any action.
Earning Awesomeness
Personal Time, Humans: Spend a Time Slot for yourself.
Grants Width-1 in Awesome (minimum x1)
Personal Time, Personas: Grind in the Other World.
Baton Pass: When you score One More in combat, you can
use a spare Set to give an ally Width-1 Awesome.
Sacrifice: Disable your own Quality for Awesome x1.
Sacrifice Priority: Useful, then Defends, then Attacks.
Intense Relationships: A 4d or higher Relationship
can give Awesome x1 once per Time Slot.
Relationships You can draw up to +2d from a Relationship for a roll related
to your bond with that character.
If you use a Relationship and still fail, it takes Shock.
Shock reduces the total dice in the Relationship.
Heal Shock with Quality Time.
Roll based on what you’re doing with them.
Success heals Width in Shock. Failure heals 1 Shock.
Difficulty = total Shock +2
Arcana Boosting
Personas can absorb dice from Relationships. These can
increase a dice pool or trade for Extras for 1 Time Slot.
No limit to how many Boosts a Persona can have.
Each die Boosting a Persona’s Part exposes that Relationship
to an equal amount of Feedback. Feedback is Shock directed
at a Relationship if that Part is damaged .
Flow of Combat 1- Declare: All fighters say what they do in order of low to
high Knowledge + Out-Think or Brains
2- Roll: All fighters roll simultaneously
3- Resolve: Sets occur in order of high to low Width (+Fast).
Attack and Defense Attack: Humans use Beat-Down, Fighting or Aim. Personas
and Shadows use Attacks Qualities. Damage is Width-1 +
Power (Beat-Down uses Width, but only vs helpless foes).
Defense: Humans use Block or Reflex. Personas and
Shadows use Defends Qualities.
A Defends Set Gobbles attacks of equal or lesser Height and
Speed (Width + Fast).
Hit Stun Hitting an enemy before their Attack Resolves causes Stun.
Stun knocks 1 die off one of their Sets.
If all their Sets are reduced to 1x Width, their Attack fails.
Special Defense Options Perfect Defense: If you completely Gobble all of an enemy’s
attack dice, it is a Perfect Defense.
Rally Dice: Any unused Defense Sets become Bonus Dice for
the defender’s Party on the next Round.
Tilting: A Defense lacking Width but with greater
Height can move damage from the targeted Part by a
number of Hit Location #s equal to the difference between
the Attack’s Height and the Defense’s. Tilting always uses
the Toughness of the original Part that was hit.
One More! One More! lets you use an extra Set you rolled as a free
Multiple Action. It is triggered in combat as follows:
Attacks: Hit a Weakness or reduce a Part to 0 HP
Defends: Score a Perfect Defense
Useful: Roll a Set with a natural 10 Height
A One More! Set can be used for the following:
Knockdown your Target for Width-1 Rounds
Attack another enemy
Any other Useful or Defends quality you have
Baton Passing

Reference: Charts and Figures
-- 357 --
One- Roll Engine Success Percentage Curve 2d- 10% 5d- 70% 8d- 93%
3d- 28% 6d- 85% 9d- 99.6%
4d- 50% 7d -93% 10d- 99.8%
11d or more- 100% (only used in special cases)
General Difficulties Height Width
3- Hard 3- Very Fast
5- Very Hard 4- Fast as a car
7- Extremely Hard 5- Fast as a bullet
Bonuses and Penalties +/- 1d Minor, not hard to get
+/- 2d Significant, a noteworthy situation
+/- 3d Major, a one in a million boost or problem
Persona Grinding Outcomes Intensity Awesome Gained Attrition
Casual (Dif. 5) Width+1 (min. x1) Difference
Serious (Dif.7) Width+3 (min. x2) Difference+3
Grueling (Dif.9) Width+5 (min x3) Difference+5
Extras and their Related Arcana Area (Empress, Moon) Power (Phys.) (Emperor, Death)
Burn (Temper., Devil) Power (Elem.) (Magi., Hermit)
Effect (High Pr., Hiero.) Recoil (Fortune, Tower)
Fast (Chariot, Justice) Splash/Spray (Sun, Judgment)
Heal (Lovers, Star) Tough (Strength, Hanged Man)
Noteworthy Skill Outcomes Academics (Height Based Results)
- Basic and commonplace
3 You’ve been paying attention, at school or in general
5 Requires in-depth study or interest
7 Very obscure, esoteric, only known to hardcore students
Aim (Difficulties based on complications)
- No complications
3 1-3 complications
5 4-5 complications
7 5 or more complications
Courage (Difficulties based fear factor)
- Mild; Walking through the woods alone at night
3 Unnerving; Subtle, eerie phenomena
5 Daunting; Clearly observed unnatural events
7 Extreme; Facing your worst fear in the flesh
Experience Point Rates (per Campaign Type) Session Result One-Shot Short Long
Minor Achievement 3XP 2XP 1XP
Large Strides 5XP 4XP 3XP
Major Development 7XP 6XP 5XP
Weapon Rankings (Sh. for Shock, Sc. for Scars) Rank Hand-to-Hand Ranged
1 Width in Shock Width -1 Shock
2 Width +1 Sh., Width Scars Width in Shock
3 Width Sc. +1 Sh, Width+2 Sh. Width+1 Sh, Width Sc.
4 Width +1 Scars Width+2 Sh, Width+1 Sc
5 Width +2 Scars Width+2 Scars
5 Width+1 Scars, Sprayx2
Emotional Damage Modifiers Emotional Leverage Damage becomes Scars
2-6 Onlookers +1 Damage
Up to a Dozen Onlookers +2 Damage
Entire Classroom of Onlookers +3 Damage
Emotional Stressors Intensity Damage Description
1 1 Mild disturbance, easily shaken off
3 2 Significant anxiety, can’t sleep
5 3 Serious emotional trauma
7 4 Gut-wrenching mental anguish
Out-Thinking to Discover Resist/Weak Height Information
1-4 One Weakness or Resistance
5-8 All Weaknesses or Resistances
9-10 All Weaknesses and Resistances
Combat Analysis Results Height Information
1-3 One Weakness, Resistance or Quality
4-6 All Weaknesses or Resistances or Qualities on a Part
7-9 All Weaknesses & Reistances, or 1 Gimmick
10 All Gimmicks
Negotiation Results Width Result
2 Won’t attack next round. 2 of these = Width 3
3 Leave fight, give information, use Useful Quality
4 Joins your side, sticks around for a while
Standard Buff/Debuff Effects Rakukaja +2 Power for Width-1 Attacks
Rakunda -2 Damage for Width-1 Attacks
Sukukaja +2 Fast for Width-1 Attacks
Sukunda -2 Speed for Width-1 Attacks
Tarukaja +2 Tough against next two attacks
Tarunda -2 Tough against next two attacks
School Work Workload (Width): 7 (Easy) 10 (Normal) 13 (Hard)
Grades (Cumulative Height per Week):
0-7: F, 8-15: D, 16-30: C, 31-40: B, 41 or more: A

(Page #)