The Ultimate VB .NET and ASP.NET Code Book
89
The Ultimate VB .NET and ASP.NET Code Book KARL MOORE
-
Upload
independent -
Category
Documents
-
view
1 -
download
0
Transcript of The Ultimate VB .NET and ASP.NET Code Book

The Ultimate VB .NETand ASP.NET Code Book
KARL MOORE
*1062_ch00_CMP3 6/3/03 9:45 AM Page i

The Ultimate VB .NET and ASP.NET Code Book
Copyright ©2003 by Karl Moore
All rights reserved. No part of this work may be reproduced or transmitted in any form or by
any means, electronic or mechanical, including photocopying, recording, or by any information
storage or retrieval system, without the prior written permission of the copyright owner and
the publisher.
ISBN (pbk): 1-59059-106-2
Printed and bound in the United States of America 12345678910
Trademarked names may appear in this book. Rather than use a trademark symbol with every
occurrence of a trademarked name, we use the names only in an editorial fashion and to the
benefit of the trademark owner, with no intention of infringement of the trademark.
Technical Reviewer: Franky Wong, Stjepan Pejic
Editorial Board: Dan Appleman, Craig Berry, Gary Cornell, Tony Davis, Steven Rycroft,
Julian Skinner, Martin Streicher, Jim Sumser, Karen Watterson, Gavin Wright, John Zukowski
Assistant Publisher: Grace Wong
Project Manager: Nate McFadden
Copy Editor: Tom Gillen of Gillen Editorial, Inc.
Production Manager: Kari Brooks
Proofreader: Lori Bring
Compositor: Diana Van Winkle, vwdesign.com
Indexer: Valerie Perry
Cover Designer: Kurt Krames
Manufacturing Manager: Tom Debolski
Distributed to the book trade in the United States by Springer-Verlag New York, Inc., 175 Fifth
Avenue, New York, NY, 10010 and outside the United States by Springer-Verlag GmbH & Co. KG,
Tiergartenstr. 17, 69112 Heidelberg, Germany.
In the United States: phone 1-800-SPRINGER, email [email protected], or visit
http://www.springer-ny.com. Outside the United States: fax +49 6221 345229, email
[email protected], or visit http://www.springer.de.
For information on translations, please contact Apress directly at 2560 Ninth Street, Suite 219,
Berkeley, CA 94710. Phone 510-549-5930, fax 510-549-5939, email [email protected], or visit
http://www.apress.com.
The information in this book is distributed on an “as is” basis, without warranty. Although every
precaution has been taken in the preparation of this work, neither the author(s) nor Apress shall
have any liability to any person or entity with respect to any loss or damage caused or alleged to
be caused directly or indirectly by the information contained in this work.
The source code for this book is available to readers at http://www.apress.com in the Downloads
section. You will need to answer questions pertaining to this book in order to successfully
download the code.
*1062_ch00_CMP3 6/3/03 9:45 AM Page ii

CHAPTER 7
More .NET Secrets
I HAD TO OVERCOME two big obstacles in writing this book. The first was the threeyears I invested in discovering these secrets, then writing and debugging to ensurethey worked on every platform and in every possible situation. The second wasorganizing them.
The .NET world is a huge one, and not everything can be easily categorized.We’ve already covered some of the biggies: Windows applications, Web sites, data-bases, and special project types. This chapter covers most of the other stuff.
Split into seven subsections, the following pages examine working with theInternet; manipulating files and folders; dates, numbers, and strings; graphics andfonts; using the registry and event log; distributed computing; and useful VisualStudio .NET tips.
It was, probably, one of most exciting chapters to write. It provides ready-to-rungolden code snippets that show you how to give your application extra intelligencethrough the use of clever code. It shows you how to do things most .NET developerswill never even be aware that the language is capable of.
I’ll show you how to convert HTML to pure text, and in just a couple of lines ofcode. You’ll be given a function to add a Web shortcut to the Favorites menu. I’lldemonstrate how to transform bytes into an English file size, like 1.44MB. You’lluncover the secrets of generating memorable user passwords, plus discover howto put together your own .NET screensaver and learn the tricks of encrypting datawith just twelve simple lines of Visual Basic code. The advanced stuff is coveredhere too: XML, transactions with COM+, MSMQ, and more.
It’s diverse, but it’s fun. These are the code snippets you’ll learn once andnever forget.
Developer Secrets
Wanting to dive into all those beefy miscellaneous tips and techniques? Here’s arundown of what we’re going to cover in this jam-packed chapter....
221
*1062_ch07_CMP2 5/31/03 6:13 PM Page 221
Working with the Internet
• Creating Your Own Web Browser
• How to Snatch the HTML of a Web Page
• How to Snatch HTML, with a Timeout
• Tricks of Parsing a Web Page for Links and Images
• Converting HTML to Text, Easily
• Real Code for Posting Data to the Web
• Adding a Web Shortcut to the Favorites
• Retrieving Your IP Address—And Why You May Want To
• Is an Internet Connection Available?
Manipulating Files and Folders
• Two Easy-to-Use Functions for Reading and Writing Files
• Files: Moving, Deleting, Attributes, and More!
• Checking Whether Two Files Are Identical
• The Trick to Temporary Files
• Doing Directories
• “Watching” a Directory for Changes
• How Big Is That File—in English?
• Retrieving Special Folder Paths
• Which Program Handles That File Extension?
• Retrieving a Drive Serial Number
• The .NET Replacement for App.Path
• INI Files Will Never Die: How to in .NET
Chapter 7
222
*1062_ch07_CMP2 5/31/03 6:13 PM Page 222
Dates, Numbers, Strings
• Is That a Whole Number, or Not?
• Checking for a Date the Intelligent .NET Way
• 1st, 2nd, 3rd: Using Ordinal Numbers in Your App
• Random Numbers… That Work!
• Finding the Number of Days in a Month
• Adding and Subtracting Days, Months, Years
• Calculating the Next Working Day
• Easy Check for a Leap Year
• Figuring out Quarters
• Calculating the Years Between Two Dates
• Converting a String to “Proper Case”
• Storing Text Snippets on the Clipboard
• Generating Memorable Passwords, Automatically
• Encryption in Just Twelve Lines of Code
• Implementing Powerful MD5 Encryption
• Converting a String into the Color Type
• Binding a Combo Box to Enumeration Values
Graphics and Fonts
• Designing Your Own Arty Icons
• The Basics of Working with Fonts
• Crafty Conversion Between Graphic Formats
• Rotating and Flipping Is Easy!
More .NET Secrets
223
*1062_ch07_CMP2 5/31/03 6:13 PM Page 223

• Drawing with Windows Forms
• Add an Exciting Gradient Backdrop, in Code!
• Starting Your Own Screensaver
Using the Registry and Event Log
• How to Read and Write the Registry
• Putting Messages in the Event Log
Distributed Computing
• The Cheat’s Guide to XML
• Six Steps to Basic Transactions with COM+
• Quick Guide to Using MSMQ
• Which to Choose: Web Services vs. Remoting
Visual Studio Tips
• Writing a Developer TODO: List
• Storing Often-Used Code in the Toolbox
• Organizing Your Project with Folders
• Figuring out the Command Window
• Discovering Whether You’re Running in the IDE
• Saving Time by Recording Macros
• Using the VS .NET Command Prompt
• The Old School: Upgrading, COM, and the API
Chapter 7
224
*1062_ch07_CMP2 5/31/03 6:13 PM Page 224

Working with the Internet
From parsing a Web page for links to adding your shortcut to the Favorites, thissection contains a whole bundle of techniques for utilizing the Internet with yourfavorite programming language.
Creating Your Own Web Browser
The WebBrowser control we became oh-so-familiar with in Visual Basic 6 has no.NET equivalent. To use it, we need to step back into the world of COM.
To add a WebBrowser control to a Windows form, right-click on the toolboxand select Customize Toolbox. Browse the list of available COM components andcheck the Microsoft Web Browser option, then click on OK. This will automaticallycreate a “wrapper” for you, allowing you to use the COM component in .NET.
At the bottom of your toolbox control list, you’ll now see an Explorer item.Draw an instance of this onto your form, and that’s your browser window!
So, what can you do with it? Everything you could before. Let’s review the mostpopular methods, most of which are self-explanatory:
AxWebBrowser1.Navigate ("http://www.vbworld.com/")
AxWebBrowser1.GoBack
AxWebBrowser1.GoForward
AxWebBrowser1.Stop
AxWebBrowser1.Refresh
AxWebBrowser1.GoHome ' Visits the homepage
AxWebBrowser1.GoSearch ' Visits the default search page
TOP TIP It may be a neat control, but the WebBrowser is prone to generatingwhopping great big error messages for any silly little matter. As such, don’t feelbad for using those old “On Error Resume Next” statements liberally.
We also have a number of particularly interesting properties:
strPageTitle = AxWebBrowser1.LocationName
strURL = AxWebBrowser1.LocationURL
AxWebBrowser1.Document... ' Accessing page HTMLDocument object
More .NET Secrets
225
*1062_ch07_CMP2 5/31/03 6:13 PM Page 225

You’ll also find that the browser supports a bundle of cool events, including DocumentComplete (which fires when any Web page has finished loading), BeforeNavigate2 (which fires before a page is visited—set the Cancelproperty to True to cancel the request), and ProgressChange (which fires wheneverthe progress bar in Internet Explorer would change).
That’s all you need to get your favorite Web control into .NET. (See Figure 7-1for my sample application.) Good luck!
TOP TIP If you want to manipulate data inside a Web page, automaticallyfilling out forms and extracting data, you’ll need to do some heavy-duty workwith the WebBrowser.Document object. Alternatively, check out the new WebZinc.NET component at www.webzinc.net for an easier solution.
Figure 7-1. My Web browser application visiting some totally random Web site
Chapter 7
226
*1062_ch07_CMP2 5/31/03 6:13 PM Page 226

How to Snatch the HTML of a Web Page
Download supporting files at www.apress.com.
The files for this tip are in the “Ch7—Snatch HTML” folder.
Need to visit a competitor Web page and parse out the latest rival product prices?Looking to retrieve data from a company that hasn’t yet figured out Web services?Whatever your motives, if you’re looking to grab the HTML of a Web page, the fol-lowing little function should be able to help.
Just call the following GetPageHTML function, passing in the URL of the page youwant to retrieve. It’ll return a string containing the HTML:
Public Function GetPageHTML(ByVal URL As String) As String
' Retrieves the HTML from the specified URL
Dim objWC As New System.Net.WebClient()
Return New System.Text.UTF8Encoding().GetString( _
objWC.DownloadData(URL))
End Function
Here’s an example of its usage:
strHTML = GetPageHTML("http://www.karlmoore.com/")
An extremely short function, but incredibly useful.
How to Snatch HTML, with a Timeout
Download supporting files at www.apress.com.
The files for this tip are in the “Ch7—Snatch HTML with Timeout” folder.
The function I demonstrated in the last tip (“How to Snatch the HTML of a WebPage”) is great for many applications. You pass it a URL, and it’ll work on grabbingthe page HTML. The problem is that it will keep trying until it eventually eithertimes out or retrieves the page.
More .NET Secrets
227
*1062_ch07_CMP2 5/31/03 6:13 PM Page 227

Sometimes, you don’t have that luxury. Say you’re running a Web site thatneeds to retrieve the HTML, parse it, and display results to a user. You can’t waittwo minutes for the server to respond, then download the page and feed it back toyour visitor. You need a response within ten seconds—or not at all.
Unfortunately, despite numerous developer claims to the contrary, thiscannot be done through the WebClient class. Rather, you need to use some of themore in-depth System.Net classes to handle the situation. Here’s my offering,wrapped into a handy little function:
Public Function GetPageHTML(ByVal URL As String, _
Optional ByVal TimeoutSeconds As Integer = 10) _
As String
' Retrieves the HTML from the specified URL,
' using a default timeout of 10 seconds
Dim objRequest As Net.WebRequest
Dim objResponse As Net.WebResponse
Dim objStreamReceive As System.IO.Stream
Dim objEncoding As System.Text.Encoding
Dim objStreamRead As System.IO.StreamReader
Try
' Setup our Web request
objRequest = Net.WebRequest.Create(URL)
objRequest.Timeout = TimeoutSeconds * 1000
' Retrieve data from request
objResponse = objRequest.GetResponse
objStreamReceive = objResponse.GetResponseStream
objEncoding = System.Text.Encoding.GetEncoding( _
"utf-8")
objStreamRead = New System.IO.StreamReader( _
objStreamReceive, objEncoding)
' Set function return value
GetPageHTML = objStreamRead.ReadToEnd()
' Check if available, then close response
If Not objResponse Is Nothing Then
objResponse.Close()
End If
Catch
' Error occured grabbing data, simply return nothing
Return ""
End Try
End Function
Chapter 7
228
*1062_ch07_CMP2 5/31/03 6:13 PM Page 228

Here, our code creates objects to request the data from the Web, setting theabsolute server timeout. If the machine responds within the given timeframe, theresponse is fed into a stream, converted into the UTF8 text format we all under-stand, and then passed back as the result of the function. You can use it a little like this:
strHTML = GetPageHTML("http://www.karlmoore.com/", 5)
Admittedly, this all seems like a lot of work just to add a timeout. But it does itsjob—and well. Enjoy!
TOP TIP Remember, the timeout we’ve added is for our request to be acknowl-edged by the server, rather than for the full HTML to have been received.
Tricks of Parsing a Web Page for Links and Images
Download supporting files at www.apress.com.
The files for this tip are in the “Ch7—Parse Links and Images” folder.
So, you’ve retrieved the HTML of that Web page and now need to parse out all thelinks to use in your research database. Or maybe you’ve visited the page and wantto make a note of all the image links, so you can download at some later point.
Well, you have two options. You can write your own parsing algorithm, con-sisting of ten million InStr and Mid statements. They’re often slow and frequentlybuggy, but they’re a truly great challenge (always my favorite routines to write).
Alternatively, you can write a regular expression in VB .NET. This is where youprovide an “expression” that describes how a link looks and what portion you wantto retrieve (that is, the bit after <a href=" but before the next " for a hyperlink).Then you run the expression and retrieve matches. The problem with these is thatthey’re difficult to formulate. (See Chapter 8, “The Hidden .NET Language” formore information.)
So, why not cheat? Following you’ll find two neat little functions I’ve alreadyput together using regular expressions. Just pass in the HTML from your Web page,and it’ll return an ArrayList object containing the link/image matches:
Public Function ParseLinks(ByVal HTML As String) As ArrayList
' Remember to add the following at top of class:
' - Imports System.Text.RegularExpressions
Dim objRegEx As System.Text.RegularExpressions.Regex
More .NET Secrets
229
*1062_ch07_CMP2 5/31/03 6:13 PM Page 229

Dim objMatch As System.Text.RegularExpressions.Match
Dim arrLinks As New System.Collections.ArrayList()
' Create regular expression
objRegEx = New System.Text.RegularExpressions.Regex( _
"a.*href\s*=\s*(?:""(?<1>[^""]*)""|(?<1>\S+))", _
System.Text.RegularExpressions.RegexOptions.IgnoreCase Or _
System.Text.RegularExpressions.RegexOptions.Compiled)
' Match expression to HTML
objMatch = objRegEx.Match(HTML)
' Loop through matches and add <1> to ArrayList
While objMatch.Success
Dim strMatch As String
strMatch = objMatch.Groups(1).ToString
arrLinks.Add(strMatch)
objMatch = objMatch.NextMatch()
End While
' Pass back results
Return arrLinks
End Function
Public Function ParseImages(ByVal HTML As String) As ArrayList
' Remember to add the following at top of class:
' - Imports System.Text.RegularExpressions
Dim objRegEx As System.Text.RegularExpressions.Regex
Dim objMatch As System.Text.RegularExpressions.Match
Dim arrLinks As New System.Collections.ArrayList()
' Create regular expression
objRegEx = New System.Text.RegularExpressions.Regex( _
"img.*src\s*=\s*(?:""(?<1>[^""]*)""|(?<1>\S+))", _
System.Text.RegularExpressions.RegexOptions.IgnoreCase Or _
System.Text.RegularExpressions.RegexOptions.Compiled)
' Match expression to HTML
objMatch = objRegEx.Match(HTML)
' Loop through matches and add <1> to ArrayList
While objMatch.Success
Dim strMatch As String
strMatch = objMatch.Groups(1).ToString
arrLinks.Add(strMatch)
objMatch = objMatch.NextMatch()
End While
' Pass back results
Return arrLinks
End Function
Chapter 7
230
*1062_ch07_CMP2 5/31/03 6:13 PM Page 230

Here’s a simplified example using the ParseLinks routine. The ParseImagesroutine works in exactly the same way:
Dim arrLinks As ArrayList = ParseLinks( _
"<a href=""http://www.marksandler.com/"">" & _
"Visit MarkSandler.com</a>")
' Loop through results
Dim shtCount As Integer
For shtCount = 0 To arrLinks.Count - 1
MessageBox.Show(arrLinks(shtCount).ToString)
Next
One word of warning: many Web sites use relative links. In other words, animage may refer to /images/mypic.gif rather thanhttp://www.mysite.com/images/mypic.gif. You may wish to check for this in code(perhaps look for the existence of “http”)—if the prefix isn’t there, add it program-matically.
And that’s all you need to know to successfully strip links and images out ofany HTML. Best wishes!
Converting HTML to Text, Easily
Download supporting files at www.apress.com.
The files for this tip are in the “Ch7—HTML to Text” folder.
Whether you want to convert an HTML page into pure text so you can parse outthat special piece of information, or you simply want to load a page from the Netinto your own word processing package, this mini function could come in handy.
It’s called StripTags and accepts an HTML string. Using a regular expression, itidentifies all <tags>, removes them, and returns the modified string. Here’s the code:
Public Function StripTags(ByVal HTML As String) As String
' Removes tags from passed HTML
Dim objRegEx As _
System.Text.RegularExpressions.Regex
Return objRegEx.Replace(HTML, "<[^>]*>", "")
End Function
More .NET Secrets
231
*1062_ch07_CMP2 5/31/03 6:13 PM Page 231

Here’s a simple example demonstrating how you could use this function incode (see Figure 7-2 for my sample application):
strData = StripTags("<body><b>Welcome!</b></body>")
I admit, it doesn’t look like much, but this little snippet can be a true lifesaver,especially if you’ve ever tried doing it yourself using Instr and Mid statements.Have fun!
Figure 7-2. My sample application, retrieving HTML from www.bbc.co.uk, then con-verting it to text
Real Code for Posting Data to the Web
One of my early tasks when working with .NET was figuring out how to take astream of data (in my case, an XML document) and post it to a CGI script, in code.
It wasn’t easy. I ended up with two pages of code incorporating practicallyevery Internet-related class in the .NET Framework. Months later now, and I’vemanaged to refine this posting technique to just a few generic lines of code. Andthat’s what I’d like to share with you in this tip.
Chapter 7
232
*1062_ch07_CMP2 5/31/03 6:13 PM Page 232

The following chunk of code starts by creating a WebClient object and setting anumber of headers (which you can change as appropriate). It then converts mystring (MyData) into an array of bytes, and then uploads direct to the specifiedURL. The server response to this upload is then converted into a string, whichyou’ll probably want to analyze for possible success or error messages.
' Setup WebClient object
Dim objWebClient As New System.Net.WebClient()
' Convert data to send into an array of bytes
Dim bytData As Byte() = System.Text.Encoding.ASCII.GetBytes(MyData)
' Add appropriate headers
With objWebClient.Headers
.Add("Content-Type", "text/xml")
.Add("Authorization", "Basic " & _
Convert.ToBase64String( _
System.Text.Encoding.ASCII.GetBytes( _
"MyUsername:MyPassword")))
End With
' Upload data to page (CGI script, or whatever) and receive response
Dim objResponse As Byte() = objWebClient.UploadData( _
"http://www.examplesite.com/clients/upload.cgi", _
"POST", bytData)
' Convert response to a string
Dim strResponse As String = _
System.Text.Encoding.ASCII.GetString(objResponse)
' Check response for data, errors, etc...
I initially used this code to submit details of new store locations automaticallyto mapping solution provider Multimap.com. It accessed the destination CGIscript, providing all necessary credentials, streamed my own XML documentacross the wire, and then checked the XML response for any errors.
A few pointers here. Firstly, you can easily remove the “Authorization” header.This was included to demonstrate how you can upload to a protected source—which, although a common request, is not everyone’s cup of tea. Secondly, thecontent type here is set to “text/xml”. You can change this to whatever contenttype you deem fit—“text/html” for example, or perhaps “application/x-www-form-urlencoded” if you want to make the post look as though it were comingfrom a Web form. Finally, you don’t always have to upload pure data like this;
More .NET Secrets
233
*1062_ch07_CMP2 5/31/03 6:13 PM Page 233

you can also upload files with the .UploadFile function, or simulate a true formpost, by submitting key pairs (such as text box names and related values) with the .UploadValues function.
Adding a Web Shortcut to the Favorites
Download supporting files at www.apress.com.
The files for this tip are in the “Ch7—Adding Favorites” folder.
This is one of those cute little code snippets that you have a use for in practicallyevery application. Applications that can do this look cool and intelligent—and ittakes just a few simple lines of code. I’m talking about adding an Internet shortcutto the user’s Favorites menu.
How do you do it? Well, the following function encompasses all the logic foryou. It accepts a page title and a URL. Then it locates the current Favorites folder(which could vary greatly depending on the machine setup) and creates a URL file in that folder, based on the title you passed. Inside that file, it includes a littlerequired text for an Internet shortcut, alongside your URL. And that’s it—shortcutcreated!
Here’s the code:
Public Sub CreateShortcut(ByVal Title As String, ByVal URL As String)
' Creates a shortcut in the users Favorites folder
Dim strFavoriteFolder As String
' Retrieve the favorite folder
strFavoriteFolder = System.Environment.GetFolderPath( _
Environment.SpecialFolder.Favorites)
' Create shortcut file, based on Title
Dim objWriter As System.IO.StreamWriter = _
System.IO.File.CreateText(strFavoriteFolder & _
"\" & Title & ".url")
' Write URL to file
objWriter.WriteLine("[InternetShortcut]")
objWriter.WriteLine("URL=" & URL)
' Close file
objWriter.Close()
End Sub
Chapter 7
234
*1062_ch07_CMP2 5/31/03 6:13 PM Page 234

To finish off this snippet, here are a couple of interesting calls to this procedure (see Figure 7-3 to see the created shortcuts in Internet Explorer):
CreateShortcut("Karl Moore.com", "http://www.karlmoore.com/")
CreateShortcut("Send mail to Karl Moore", "mailto:[email protected]")
Figure 7-3. A couple of plug-plug Internet shortcuts added by my sample code
Retrieving Your IP Address—And Why You May Want To
Download supporting files at www.apress.com.
The files for this tip are in the “Ch7—IP” folder.
You may want to discover the IP address of your local machine for a number ofreasons. You may, for example, be developing a messaging-style application usingthe .NET equivalent of the Winsock control—the Socket class (look up “Socketclass” in the help index) and need to register the local IP in a central databasesomewhere.
More .NET Secrets
235
*1062_ch07_CMP2 5/31/03 6:13 PM Page 235

So, how can you find out your IP address? The code is easy:
Dim objEntry As System.Net.IPHostEntry = _
System.Net.Dns.GetHostByName( _
System.Net.Dns.GetHostName)
Dim strIP As String = CType( _
objEntry.AddressList.GetValue(0), _
System.Net.IPAddress).ToString
Here, we pass our machine name to the GetHostByName function, which returnsa valid IPHostEntry object. We then retrieve the first IP address from the entryAddressList array and convert it to a string. Simple!
Is an Internet Connection Available?
Download supporting files at www.apress.com.
The files for this tip are in the “Ch7—IsConnectionAvailable” folder.
Checking whether an Internet connection is available isn’t always as easy as itsounds.
Admittedly, there is a Windows API call that can check whether a connectionexists, but it’s extremely fragile and returns incorrect results if the machine hasnever had Internet Explorer configured correctly. Oops.
The best method is to actually make a Web request and see whether it works.If it does, you’ve got your connection. The following neat code snippet doesexactly that. Just call IsConnectionAvailable and check the return value:
Public Function IsConnectionAvailable() As Boolean
' Returns True if connection is available
' Replace www.yoursite.com with a site that
' is guaranteed to be online - perhaps your
' corporate site, or microsoft.com
Dim objUrl As New System.Uri("http://www.yoursite.com/")
' Setup WebRequest
Dim objWebReq As System.Net.WebRequest
objWebReq = System.Net.WebRequest.Create(objUrl)
Dim objResp As System.Net.WebResponse
Try
' Attempt to get response and return True
Chapter 7
236
*1062_ch07_CMP2 5/31/03 6:13 PM Page 236

objResp = objWebReq.GetResponse
objResp.Close()
objWebReq = Nothing
Return True
Catch ex As Exception
' Error, exit and return False
objResp.Close()
objWebReq = Nothing
Return False
End Try
Here’s how you might use this function in your application:If IsConnectionAvailable() = True Then
MessageBox.Show("You are online!")
End If
Manipulating Files and Folders
Wanting to “watch” a directory for file changes? Or find out the .NET replacementfor App.Path? Or uncover how big that file is... in English? If you’re looking for thebest file and folder techniques for your VB .NET applications, simply read on.
Two Easy-to-Use Functions for Reading and Writing Files
Download supporting files at www.apress.com.
The files for this tip are in the “Ch7—Read and Write Files” folder.
Reading and writing to simple text files is perhaps one of the most common tasksin the programming world. The old VB6 way of doing this is now defunct, and anew .NET method is here, involving objects within the System.IO namespace.
The following functions help simplify the process of reading and writing tofiles. The first is called ReadTextFromFile and accepts a filename as a parameter. Itreturns the text from the specified file:
Public Function ReadTextFromFile(ByVal Filename As String) As String
' Returns text from the specified file
On Error Resume Next
Dim strFileText As String
More .NET Secrets
237
*1062_ch07_CMP2 5/31/03 6:13 PM Page 237

' Open the file and launch StreamReader object
Dim MyReader As System.IO.StreamReader = _
System.IO.File.OpenText(Filename)
' Read all text through to the end
strFileText = MyReader.ReadToEnd
' Close the stream
MyReader.Close()
' Return data
Return strFileText
End Function
The second code snippet is a method called WriteTextToFile, and it accepts afilename and the text to write as parameters:
Public Sub WriteTextToFile(ByVal Filename As String, ByVal Text As String)
' Writes the passed Text into the specified file
' Create file and StreamWriter object
Dim MyWriter As System.IO.StreamWriter = _
System.IO.File.CreateText(Filename)
' Write text to the stream
MyWriter.Write(Text)
' Close the stream
MyWriter.Close()
End Sub
Here is an example of each of these code snippets in action:
WriteTextToFile("c:\myfile.txt", TextBox1.Text)
MessageBox.Show(ReadTextFromFile("c:\myfile.txt"))
Files: Moving, Deleting, Attributes, and More!
If you’re looking to manipulate files using the .NET Framework base classes, youshould be heading to the System.IO.File class, where you’ll find functions to deletefiles, copy files, check file attributes, and much more.
Here is a commented example demonstrating the most common uses of theFile class:
Chapter 7
238
*1062_ch07_CMP2 5/31/03 6:13 PM Page 238

Dim objFile As System.IO.File
' Check for existence of a file
Dim blnExists As Boolean
blnExists = objFile.Exists("c:\unlikely.txt")
' Delete a file
objFile.Delete("c:\goodbye.txt")
' Copy a file
objFile.Copy("c:\source.txt", "e:\destination.txt")
' Move a file
objFile.Move("c:\oldlocation.txt", "e:\newlocation.txt")
' Check whether a file is read-only
Dim blnReadOnly As Boolean
blnReadOnly = CType(objFile.GetAttributes("c:\readonly.txt").ReadOnly, Boolean)
' Check whether a file is hidden
Dim blnHidden As Boolean
blnHidden = CType(objFile.GetAttributes("c:\hidden.txt").Hidden, Boolean)
' Check a file creation date
Dim datCreated As DateTime
datCreated = objFile.GetCreationTime("c:\created.txt")
It’s worth noting that you don’t have to create a new File object to use thisfunctionality. The File class consists of what are known as shared methods,meaning that you can call them directly without having to instantiate a newobject. This means you can delete a file with one direct line of code, like this:
System.IO.File.Delete("c:\goodbye.txt")
Checking Whether Two Files Are Identical
Download supporting files at www.apress.com.
The files for this tip are in the “Ch7—Check Files Are Identical” folder.
Checking whether the contents of two files are identical is a surprisingly commonrequest in the programming world, but, beyond simply comparing file sizes, manydevelopers are unsure about how to actually check this.
There’s no need to worry. This excellent CompareFiles function does it all foryou, initially comparing by size and then byte by byte. If the two file paths youpass in as arguments match, the function passes back a True; otherwise, it returnsFalse.
More .NET Secrets
239
*1062_ch07_CMP2 5/31/03 6:13 PM Page 239

Here’s the code:
Public Function CompareFiles(ByVal File1 As String, _
ByVal File2 As String) As Boolean
' Compares contents of two files, byte by byte
' and returns true if no differences
Dim blnIdentical As Boolean = True
Dim objFS1 As System.IO.FileStream = _
New System.IO.FileStream(File1, System.IO.FileMode.Open)
Dim objFS2 As System.IO.FileStream = _
New System.IO.FileStream(File2, System.IO.FileMode.Open)
' Begin by checking length
If (objFS1.Length <> objFS2.Length) Then
blnIdentical = False
Else
' Start looping through, comparing bytes
Dim intByteF1 As Integer
Dim intByteF2 As Integer
Do
intByteF1 = objFS1.ReadByte()
intByteF2 = objFS2.ReadByte()
If intByteF1 <> intByteF2 Then
blnIdentical = False
Exit Do
End If
Loop While (intByteF1 <> -1)
End If
' Close files and set return value
objFS1.Close()
objFS2.Close()
Return blnIdentical
End Function
Here’s how you might call this function in your code:
If CompareFiles("c:\1.txt", "c:\2.doc") Then
MessageBox.Show("Files are identical!")
Else
MessageBox.Show("Files do not match!")
End If
Chapter 7
240
*1062_ch07_CMP2 5/31/03 6:13 PM Page 240

The Trick to Temporary Files
Download supporting files at www.apress.com.
The files for this tip are in the “Ch7—Writing to Temp File” folder.
Temporary files are incredibly useful. Most applications use them to store infor-mation while running some sort of processing. And you can too. When you’refinished, either delete the temporary file or leave it for the next Windows “DiskCleanup” operation to thwart.
But how do you go about working with temporary files? Well, firstly you needto get a temporary filename, and the System.IO.Path has a shared function calledGetTempFileName to help you here. Then you simply write to the file as normal.
This handy little function wraps all this functionality up for you into one neatfunction. Simply call WriteToTempFile and pass in your data. It’ll return your tem-porary file path:
Public Function WriteToTempFile(ByVal Data As String) As String
' Writes text to a temporary file and returns path
Dim strFilename As String = System.IO.Path.GetTempFileName()
Dim objFS As New System.IO.FileStream(strFilename, _
System.IO.FileMode.Append, _
System.IO.FileAccess.Write)
' Opens stream and begins writing
Dim Writer As New System.IO.StreamWriter(objFS)
Writer.BaseStream.Seek(0, System.IO.SeekOrigin.End)
Writer.WriteLine(Data)
Writer.Flush()
' Closes and returns temp path
Writer.Close()
Return strFilename
End Function
Here’s how you might call this function in your code:
Dim strFilename As String = WriteToTempFile("My data for the temp file")
MessageBox.Show(strFilename)
More .NET Secrets
241
*1062_ch07_CMP2 5/31/03 6:13 PM Page 241

Doing Directories
When it came to working with directories in Visual Basic 6, we had MkDir, RmDir,and CurDir. If you wanted anything more complicated, you either had to writeyour own API routines and sacrifice a few hours of development time, or referencethe external FileSystemObject DLL and sacrifice the size of your final project, and,potentially, application speed.
In VB .NET, however, it’s plain sailing... introducing the System.IO.Directoryclass!
Cram packed with shared methods, this class provides you with everythingyou need to create, move, delete, and check for the existence of directories. It alsoallows you to retrieve a list of files from a directory, plus obtain a list of the logicaldrives on your system.
Here’s a chunk of sample code showing you how:
Dim objDir As System.IO.Directory
' Creates a directory
objDir.CreateDirectory("c:\mydata")
' Delete a directory, recursively
objDir.Delete("c:\temp", True)
' Get current directory
Dim strCurDir As String = objDir.GetCurrentDirectory
' Check whether a directory exists
Dim blnExists As Boolean = objDir.Exists("c:\mydata")
' Get string array of all directories in a path
Dim strDirectories() As String = objDir.GetDirectories("c:\Program Files\")
' Get files in a directory
Dim strFiles1() As String = objDir.GetFiles("c:\winnt")
' Get all *.DOC files in a directory
Dim strFiles2() As String = objDir.GetFiles("c:\my documents", "*.doc")
' Move a directory
objDir.Move("c:\backup", "c:\original")
' Retrieve array of drives
Dim strDrives() As String = objDir.GetLogicalDrives
As with the System.IO.File class, it’s worth noting that you don’t have to createa new Directory object to use this functionality. The Directory class consists ofshared methods, meaning that you can call them directly without having to instan-tiate a new object. This means that you can create a directory with one direct lineof code, like this:
System.IO.Directory.CreateDirectory("c:\mydata")
Chapter 7
242
*1062_ch07_CMP2 5/31/03 6:13 PM Page 242

“Watching” a Directory for Changes
Directory “watching” is one of those really cool techniques that took quite a largelump of skill to implement successfully in Visual Basic 6. With this latest version of VB, however, you can get such functionality by utilizing the brand new FileSystemWatcher class.
The new System.IO.FileSystemWatcher class can be set up either in code or,rather easier, by dragging and dropping the FileSystemWatcher component fromthe toolbox Component tab onto your application.
Next, you need to start setting properties. First, there’s the Path property,which you need to set to the path of the directory that you wish to monitor, suchas “c:\” or “e:\whitecliff\”. Next, there’s the Filter property, where you specifywhich files you want to monitor. You can use “*.*” to keep an eye on everything inthe directory, something like “*.doc” to check Word documents, or simply use anexact filename, such as “datalog.txt”.
There’s also the NotifyFilter property, which lists exactly what you want your FileSystemWatcher object to inform you about. The default is “FileName,DirectoryName, LastWrite,” which means that you’re informed when a filename or directory name is changed, or a file is written (that is, the LastWrite date andtime changes). You can specify your own in code by typing the options from thedropdown list, separated by commas, or in code using the bitwise “Or” operator.Finally, there’s the IncludeSubdirectories property. Change this to True if you wantto monitor all subdirectories—or False otherwise.
And after you’ve set up your FileSystemWatcher object? Simply respond to itsevents (ensure that the EnableRaisingEvents property is set to True). You have theChanged, Created, Deleted, and Renamed events all at your disposal. Each will fire offwhenever a related action occurs. For example, if you’re monitoring “c:\mydata\”,with a filter of “*.txt” and the default NotifyFilter property value, and your user oran application edits the contents of “c:\mydata\test.txt”—the Changed event will fire.
From within the event, you can use the “e” argument (the System.IO.FileSystemEventArgs object) to find out more about the altered file. You may use the e.FullPath property to find out the filename, for example—oranalyze the ChangeType or Path.
TOP TIP There’s an Error event associated with the FileSystemWatcher com-ponent, too. It only ever comes into play when far too many changes are beingmade at once (typically a result of badly chosen properties, or mass file alter-ations by the user) and the system just cannot cope. If it ever occurs, you’ll knowthe events raised may not cover all items. Not always good to experience, butcertainly a great event to be aware of.
More .NET Secrets
243
*1062_ch07_CMP2 5/31/03 6:13 PM Page 243

And that, quite simply, is how you can easily plug directly into the file systemand directly monitor its contents. Doddle!
TOP TIP Certain users of the FileSystemWatcher component complain theyreceive multiple (sometimes delayed) events firing in their application, for eventhe simplest of operations. You may receive two or three notifications for asimple file copy in Windows Explorer, for example. The official explanation isthat each operation consists of a number of simpler actions, which each raisetheir own events (see the note in ‘FileSystemWatcher class, about FileSys-temWatcher class’ in the help index). Unofficially, Microsoft has identified thisas an issue and is working to resolve it. If this problem affects you, you need tocreate your own workaround—such as maintaining your own unique list ofalterations and then running your code a few seconds after the last event has fired.
How Big Is That File—in English?
Download supporting files at www.apress.com.
The files for this tip are in the “Ch7—English File Size” folder.
Humans and computers sometimes just don’t get along. Take file sizes, forexample. What a human being would call one gigabyte, a computer would call1073741824 bytes. How do you translate one into the other? Pull up a chair.
The following handy function takes a number of bytes and translates it into areadable “human” string. Here’s the code:
Public Function ConvertBytes(ByVal Bytes As Long) As String
' Converts bytes into a readable "1.44 MB", etc. string
If Bytes >= 1073741824 Then
Return Format(Bytes / 1024 / 1024 / 1024, "#0.00") _
& " GB"
ElseIf Bytes >= 1048576 Then
Return Format(Bytes / 1024 / 1024, "#0.00") & " MB"
ElseIf Bytes >= 1024 Then
Return Format(Bytes / 1024, "#0.00") & " KB"
ElseIf Bytes > 0 And Bytes < 1024 Then
Return Fix(Bytes) & " Bytes"
Else
Return "0 Bytes"
End If
End Function
Chapter 7
244
*1062_ch07_CMP2 5/31/03 6:13 PM Page 244
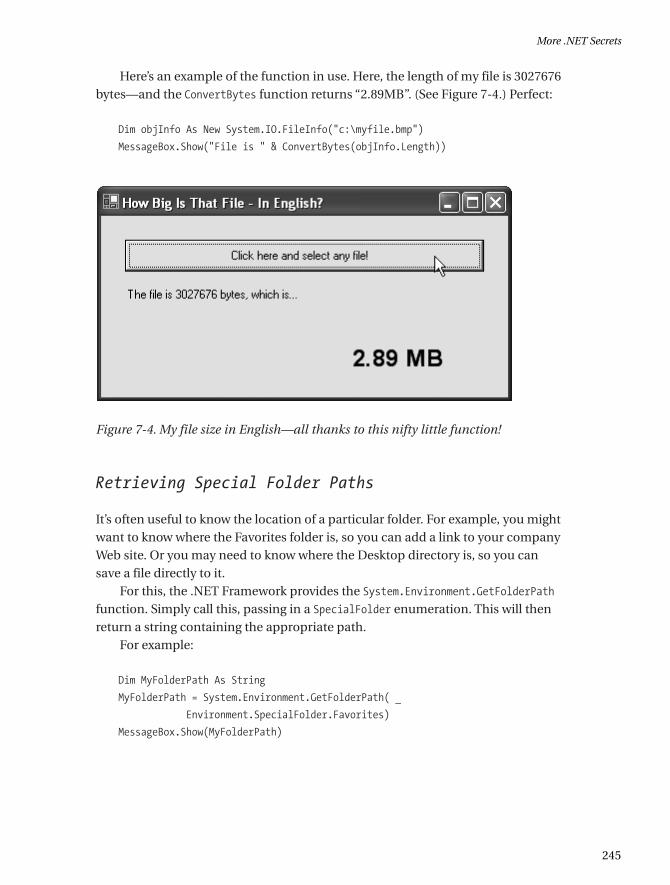
Here’s an example of the function in use. Here, the length of my file is 3027676bytes—and the ConvertBytes function returns “2.89MB”. (See Figure 7-4.) Perfect:
Dim objInfo As New System.IO.FileInfo("c:\myfile.bmp")
MessageBox.Show("File is " & ConvertBytes(objInfo.Length))
Figure 7-4. My file size in English—all thanks to this nifty little function!
Retrieving Special Folder Paths
It’s often useful to know the location of a particular folder. For example, you mightwant to know where the Favorites folder is, so you can add a link to your companyWeb site. Or you may need to know where the Desktop directory is, so you cansave a file directly to it.
For this, the .NET Framework provides the System.Environment.GetFolderPathfunction. Simply call this, passing in a SpecialFolder enumeration. This will thenreturn a string containing the appropriate path.
For example:
Dim MyFolderPath As String
MyFolderPath = System.Environment.GetFolderPath( _
Environment.SpecialFolder.Favorites)
MessageBox.Show(MyFolderPath)
More .NET Secrets
245
*1062_ch07_CMP2 5/31/03 6:13 PM Page 245

Which Program Handles That File Extension?
Download supporting files at www.apress.com.
The files for this tip are in the “Ch7—File Associations” folder.
Looking to open a program in its default application? Simply use the Start classand let Windows do the rest of the work for you, like this:
System.Diagnostics.Process.Start("c:\myfile.doc")
But sometimes you want a little more. Sometimes you want to retrieve theexact path to the default program associated with that file type.
With a little rummaging around in the registry, that’s exactly what this nextcode snippet manages to achieve. Simply pass it the file extension, and it’ll returnthe path of the associated application. Passing in the .doc extension on a machinerunning Office XP, for example, will return the exact path to the Microsoft Wordexecutable.
It’s worth noting that this function automatically handles system defined vari-ables, plus removes a number of the excess parameters included in some registryentries. In other words, it works—and well, too, unlike many samples of this tech-nique currently floating around the Internet.
Here’s the function:
Public Function GetAssociatedProgram(ByVal FileExtension As String) As String
' Returns the application associated with the specified FileExtension
' ie, path\denenv.exe for "VB" files
Dim objExtReg As Microsoft.Win32.RegistryKey = _
Microsoft.Win32.Registry.ClassesRoot
Dim objAppReg As Microsoft.Win32.RegistryKey = _
Microsoft.Win32.Registry.ClassesRoot
Dim strExtValue As String
Try
' Add trailing period if doesn't exist
If FileExtension.Substring(0, 1) <> "." Then _
FileExtension = "." & FileExtension
' Open registry areas containing launching app details
objExtReg = objExtReg.OpenSubKey(FileExtension.Trim)
strExtValue = objExtReg.GetValue("")
objAppReg = objAppReg.OpenSubKey(strExtValue & "\shell\open\command")
' Parse out, tidy up and return result
Dim SplitArray() As String
SplitArray = Split(objAppReg.GetValue(Nothing), """")
Chapter 7
246
*1062_ch07_CMP2 5/31/03 6:13 PM Page 246
If SplitArray(0).Trim.Length > 0 Then
Return SplitArray(0).Replace("%1", "")
Else
Return SplitArray(1).Replace("%1", "")
End If
Catch
Return ""
End Try
End Function
And here’s how you might call it in your application:
Dim strPath As String = GetAssociatedProgram(TextBox1.Text)
System.Diagnostics.Process.Start(strPath)
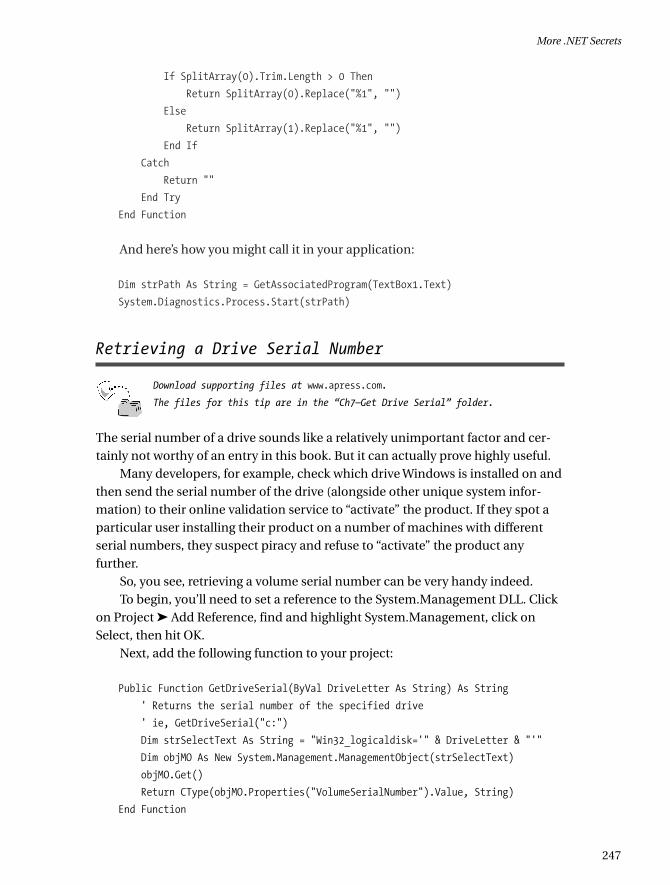
Retrieving a Drive Serial Number
Download supporting files at www.apress.com.
The files for this tip are in the “Ch7—Get Drive Serial” folder.
The serial number of a drive sounds like a relatively unimportant factor and cer-tainly not worthy of an entry in this book. But it can actually prove highly useful.
Many developers, for example, check which drive Windows is installed on andthen send the serial number of the drive (alongside other unique system infor-mation) to their online validation service to “activate” the product. If they spot aparticular user installing their product on a number of machines with differentserial numbers, they suspect piracy and refuse to “activate” the product anyfurther.
So, you see, retrieving a volume serial number can be very handy indeed.To begin, you’ll need to set a reference to the System.Management DLL. Click
on Project ➤ Add Reference, find and highlight System.Management, click onSelect, then hit OK.
Next, add the following function to your project:
Public Function GetDriveSerial(ByVal DriveLetter As String) As String
' Returns the serial number of the specified drive
' ie, GetDriveSerial("c:")
Dim strSelectText As String = "Win32_logicaldisk='" & DriveLetter & "'"
Dim objMO As New System.Management.ManagementObject(strSelectText)
objMO.Get()
Return CType(objMO.Properties("VolumeSerialNumber").Value, String)
End Function
More .NET Secrets
247
*1062_ch07_CMP2 5/31/03 6:13 PM Page 247

And this is our GetDriveSerial function. It works by creating an instance of theManagementObject, then using an SQL-like string to retrieve details about the spec-ified disk. We then pick out and return the “VolumeSerialNumber” property.
Here’s how we might call this function in code:
Label1.Text = GetDriveSerial("C:")
The .NET Replacement for App.Path
A lot of confusion surrounds how to find out the startup path of your application—the .NET equivalent of the App.Path property we had in Visual Basic 6. I’ve per-sonally written my own elongated routines, when in fact the solution is incrediblysimple.
If you want to find out the application path of your Windows application, justreference the StartupPath property of the Application object, as so:
Dim strPath As String = Application.StartupPath
Note that the returned path doesn’t include a trailing slash.If you’re developing a class library or similar project, however, you might
stumble upon a slight problem. You see, not all projects support the Applicationobject. In these cases, you can use the System.Reflection class to analyze the exe-cuting assembly and return its location. A little like this:
Dim strPath As String = System.Reflection.Assembly.GetExecutingAssembly().Location
A bit more in depth, but still pretty darn simple.
INI Files Will Never Die: How to in .NET
Download supporting files at www.apress.com.
The files for this tip are in the “Ch7—INI Files” folder.
Microsoft has been trying to get developers to move away from INI files for quitesome time, pithily suggesting using the registry instead... despite the fact that it’srarely a suitable replacement. Well, this “hint” persists with .NET, which proudlyboasts absolutely no intrinsic support for INI files.
But, of course, there’s always a workaround.
Chapter 7
248
*1062_ch07_CMP2 5/31/03 6:13 PM Page 248

In previous versions of Visual Basic, you’d access your INI file through the API.Well, in VB .NET, we can simply do the same. Admittedly, Microsoft would preferus to run “safe,” “managed” code within the .NET Framework—it can then auto-matically handle resources for you and ensure a more error-free environment.
However, you can still access “unmanaged” code, such as functions within theWindows API and COM components, with great ease.
In fact, here I’ve developed a class to encapsulate the functionality of some ofthose older INI file API functions. The fact that they’re wrapped up in a class alsomeans that, should you ever implement another method of handling such set-tings, you can simply edit your code while the interfaces remain the same.
Anyway, enough talk—here’s my class code:
Public Class IniFile
' API functions
Private Declare Ansi Function GetPrivateProfileString _
Lib "kernel32.dll" Alias "GetPrivateProfileStringA" _
(ByVal lpApplicationName As String, _
ByVal lpKeyName As String, ByVal lpDefault As String, _
ByVal lpReturnedString As System.Text.StringBuilder, _
ByVal nSize As Integer, ByVal lpFileName As String) _
As Integer
Private Declare Ansi Function WritePrivateProfileString _
Lib "kernel32.dll" Alias "WritePrivateProfileStringA" _
(ByVal lpApplicationName As String, _
ByVal lpKeyName As String, ByVal lpString As String, _
ByVal lpFileName As String) As Integer
Private Declare Ansi Function GetPrivateProfileInt _
Lib "kernel32.dll" Alias "GetPrivateProfileIntA" _
(ByVal lpApplicationName As String, _
ByVal lpKeyName As String, ByVal nDefault As Integer, _
ByVal lpFileName As String) As Integer
Private Declare Ansi Function FlushPrivateProfileString _
Lib "kernel32.dll" Alias "WritePrivateProfileStringA" _
(ByVal lpApplicationName As Integer, _
ByVal lpKeyName As Integer, ByVal lpString As Integer, _
ByVal lpFileName As String) As Integer
Dim strFilename As String
' Constructor, accepting a filename
Public Sub New(ByVal Filename As String)
strFilename = Filename
End Sub
More .NET Secrets
249
*1062_ch07_CMP2 5/31/03 6:13 PM Page 249

' Read-only filename property
ReadOnly Property FileName() As String
Get
Return strFilename
End Get
End Property
Public Function GetString(ByVal Section As String, _
ByVal Key As String, ByVal [Default] As String) As String
' Returns a string from your INI file
Dim intCharCount As Integer
Dim objResult As New System.Text.StringBuilder(256)
intCharCount = GetPrivateProfileString(Section, Key, _
[Default], objResult, objResult.Capacity, strFilename)
If intCharCount > 0 Then GetString = _
Left(objResult.ToString, intCharCount)
End Function
Public Function GetInteger(ByVal Section As String, _
ByVal Key As String, ByVal [Default] As Integer) As Integer
' Returns an integer from your INI file
Return GetPrivateProfileInt(Section, Key, _
[Default], strFilename)
End Function
Public Function GetBoolean(ByVal Section As String, _
ByVal Key As String, ByVal [Default] As Boolean) As Boolean
' Returns a boolean from your INI file
Return (GetPrivateProfileInt(Section, Key, _
CInt([Default]), strFilename) = 1)
End Function
Public Sub WriteString(ByVal Section As String, _
ByVal Key As String, ByVal Value As String)
' Writes a string to your INI file
WritePrivateProfileString(Section, Key, Value, strFilename)
Flush()
End Sub
Public Sub WriteInteger(ByVal Section As String, _
ByVal Key As String, ByVal Value As Integer)
' Writes an integer to your INI file
WriteString(Section, Key, CStr(Value))
Chapter 7
250
*1062_ch07_CMP2 5/31/03 6:13 PM Page 250

Flush()
End Sub
Public Sub WriteBoolean(ByVal Section As String, _
ByVal Key As String, ByVal Value As Boolean)
' Writes a boolean to your INI file
WriteString(Section, Key, CStr(CInt(Value)))
Flush()
End Sub
Private Sub Flush()
' Stores all the cached changes to your INI file
FlushPrivateProfileString(0, 0, 0, strFilename)
End Sub
End Class
After you’ve added this class code to your application, here’s how you maywant to use it:
Dim objIniFile As New IniFile("c:\data.ini")
objIniFile.WriteString("Settings", "ClockTime", "12:59")
Dim strData As String = _
objIniFile.GetString("Settings", "ClockTime", "(none)")
TOP TIP As I mentioned earlier, Microsoft doesn’t really like people using INIfiles. It doesn’t fit in with its vision. They would prefer developers use code likethis only as a stop-gap measure while upgrading existing systems, then moveonto an XML-based method of storing settings. Visit www.gotdotnet.com/userfiles/demeester/XMLINIFile.zip for an INI file replacement, using XML.But, of course, it’s completely up to you.
Dates, Numbers, Strings
Not all techniques neatly fit under one header. This one covers a whole bundle oftricks, from the intelligent way to identify a date to an algorithm generating mem-orable passwords, from encryption in a mere twelve lines of code to randomnumbers... that actually work. And then some. Just read on!
More .NET Secrets
251
*1062_ch07_CMP2 5/31/03 6:13 PM Page 251

Is That a Whole Number, or Not?
It’s sometimes useful to check whether the user has entered a whole number, suchas 5, or perhaps a decimal, such as 3.142.
No problem: the following little function will check for you. Simply pass inyour number to IsWholeNumber. It checks whether the item passed is numeric, thenverifies that it’s a whole number. If so, it returns True; anything else and it passesback False.
Here’s the code:
Public Function IsWholeNumber(ByVal Number As Object) As Boolean
' Returns true if the passed item is a whole number
If IsNumeric(Number) Then
If CInt(Number) = Number Then Return True
End If
End Function
And, finally, here’s how you might use it:
Dim blnIsWhole As Boolean
blnIsWhole = IsWholeNumber(5)
blnIsWhole = IsWholeNumber(3.142)
Checking for a Date the Intelligent .NET Way
Download supporting files at www.apress.com.
The files for this tip are in the “Ch7—IsDate” folder.
Back in good ol’ Visual Basic 6, we had one function dedicated to letting us knowwhether something was a date or not. It was called, appropriately enough, IsDate.With .NET, however, that function has been reserved for the Microsoft.VisualBasicnamespace—and, if you use that, you’re deemed one of the “old crowd.”
A much better way of checking for a date is to write an equivalent .NETfunction for the job. Or rather, just copy mine.
The following replacement function is also called IsDate, however is muchsmarter than its VB6 equivalent. For example, not only is “01/01/2004” interpretedas a date, but so are “Jan 1, 2004” and “28 February 1975”—which is something theold IsDate couldn’t even imagine.
Chapter 7
252
*1062_ch07_CMP2 5/31/03 6:13 PM Page 252

Ready? Here’s the code you’ll need. Just pass in a string and it’ll return aBoolean result, depending on whether the passed item is in a recognized dateformat:
Public Function IsDate(ByVal DateIn As String) As Boolean
Dim datDateTime As DateTime
Dim blnIsDate As Boolean = True
Try
' Attempt to parse date
datDateTime = DateTime.Parse(DateIn)
Catch e As FormatException
' Error parsing, return False
blnIsDate = False
End Try
Return blnIsDate
End Function
And here’s how you might call the function:
If IsDate("Jan 1, 2004") Then
MessageBox.Show("This is a date!")
Else
MessageBox.Show("This is NOT a date!")
End If
But what if you do get someone passing in something like “January 1, 2004”and want to translate it into a DateTime (Date equivalent) data type—ready for, say,storing in a database? Simply use the sixth line of code from our function tochange your text into the required data type. Easy!
1st, 2nd, 3rd: Using Ordinal Numbers in Your App
Download supporting files at www.apress.com.
The files for this tip are in the “Ch7—Ordinal Numbers” folder.
As a human being, I like to read my dates properly. That means “December 1st2002”, rather than “December 1 2002”. But computers don’t have much of a cluewhen it comes to such quirks of the English language. They simply care fornumbers—not ordinals, like “2nd” or “43rd”.
More .NET Secrets
253
*1062_ch07_CMP2 5/31/03 6:13 PM Page 253

Something like that requires intelligence. And that’s exactly what the followingneat function builds into your application. Pass it a number and it’ll look up theappropriate suffix through a series of Select routines, and then return the ordinalvalue.
Here’s the code:
Public Function GetOrdinal(ByVal Number As Integer) As String
' Accepts an integer, returns the ordinal suffix
' Handles special case three digit numbers ending
' with 11, 12 or 13 - ie, 111th, 112th, 113th, 211th, et al
If CType(Number, String).Length > 2 Then
Dim intEndNum As Integer = CType(CType(Number, String). _
Substring(CType(Number, String).Length - 2, 2), Integer)
If intEndNum >= 11 And intEndNum <= 13 Then
Select Case intEndNum
Case 11, 12, 13
Return "th"
End Select
End If
End If
If Number >= 21 Then
' Handles 21st, 22nd, 23rd, et al
Select Case CType(Number.ToString.Substring( _
Number.ToString.Length - 1, 1), Integer)
Case 1
Return "st"
Case 2
Return "nd"
Case 3
Return "rd"
Case 0, 4 To 9
Return "th"
End Select
Else
' Handles 1st to 20th
Select Case Number
Case 1
Return "st"
Case 2
Return "nd"
Case 3
Chapter 7
254
*1062_ch07_CMP2 5/31/03 6:13 PM Page 254

Return "rd"
Case 4 To 20
Return "th"
End Select
End If
End Function
Here’s how you may use this GetOrdinal function in code. (See Figure 7-5 formy sample application.) Enjoy:
Dim strNumber As String
strNumber = "38" & GetOrdinal(38)
MessageBox.Show(strNumber)
Figure 7-5. Enter a number and get its suffix with this sample application.
Random Numbers… That Work!
Download supporting files at www.apress.com.
The files for this tip are in the “Ch7—Random Numbers” folder.
After reading at least a dozen articles on how to generate random numbers, I’msorry to say that technical writers are still getting it wrong.
Don’t misunderstand me: generating random numbers is actually very easy.You simply create a new instance of the System.Random class, passing in a “seed”value. Then you use the object .Next method to return a fresh value. The problemis that most developers place the new instance of the Random class inside thefunction that generates the number itself.
More .NET Secrets
255
*1062_ch07_CMP2 5/31/03 6:13 PM Page 255

This means that, if the function is run a number of times at speed, the “seed”(typically a value based on the number of “ticks” for the current date and time)given to the Random class may be the same each time. Now, the Random class is nevertruly random and simply runs a formula to “randomize” the next number. Becausemost developers are declaring a new instance of the class inside the function, itgets created afresh with every single call, follows its same formula with the sameseed to generate a random number—and creates one exactly the same as the last!(Until, at least, the tick “seed” value alters.)
The trick is to declare the new Random class outside of the function thatretrieves the next random number. This way you generate the seed only once andare getting the “randomizer” formula to cycle through its formula and ensure thenext chosen number is truly random.
Here’s my code. Note that you no longer have to declare new objects (such asobjRandom, here) at the top of your class or module; you can do it just above thefunction, to aid clarity of code:
Dim objRandom As New System.Random( _
CType(System.DateTime.Now.Ticks Mod System.Int32.MaxValue, Integer))
Public Function GetRandomNumber( _
Optional ByVal Low As Integer = 1, _
Optional ByVal High As Integer = 100) As Integer
' Returns a random number,
' between the optional Low and High parameters
Return objRandom.Next(Low, High + 1)
End Function
And here’s how you may use this function in code:
Dim intDiceRoll As Integer
intDiceRoll = GetRandomNumber(1, 6)
MessageBox.Show("You rolled a " & intDiceRoll.ToString)
Finding the Number of Days in a Month
If you knew how many complicated VB6 algorithms I’ve written to calculate thenumber of days in a month, you’d think me a crazed developer. I’ve written codethat accepts a month and year, then formats the month so it’s the start of the nextmonth, then takes away one day, then retrieves the actual day part of the date...and so on, et cetera.
Chapter 7
256
*1062_ch07_CMP2 5/31/03 6:13 PM Page 256

When I first visited .NET, I continued writing these complicated functions.Until, that is, I discovered some of the delights of System.DateTime.
This structure includes a shared DaysInMonth function. Just pass it the year andmonth and it’ll return an integer containing the number of days in that month,useful for business applications and calendar-based programs.
Here’s a little sample code demonstrating the function in use:
Dim shtDayCount As Short
shtDayCount = System.DateTime.DaysInMonth("2003", "2")
MessageBox.Show("There are " & shtDayCount.ToString & _
" days in that month")
Easy when you know how, isn’t it?
Adding and Subtracting Days, Months, Years
Many tips never made it to this book, simply because I deemed them “mustknows” that any Visual Studio .NET programmer would easily grasp on their own,without some strange author regurgitating the obvious. The Replace function ofthe String class, for example.
That was almost the case with this tip, but, over the past three months, I’veseen five different printed code snippets demonstrating how to add days, months,and years to a date. And they all looked extremely confusing.
The truth is, adding or subtracting days, months, and years is easy!Like the String class, the DateTime class includes its own shared supporting
methods and functions—including AddDays, AddMinutes, AddHours, AddYears, andAddMonths. Simply call them, passing in a number (positive or negative), and it’llchange your variable value.
For example:
Dim MyDate As DateTime
MyDate = Now
MyDate.AddDays(7) ' Change date to one week from now
MessageBox.Show(MyDate)
Simple, isn’t it?
More .NET Secrets
257
*1062_ch07_CMP2 5/31/03 6:13 PM Page 257

Calculating the Next Working Day
Download supporting files at www.apress.com.
The files for this tip are in the “Ch7—Next Working Day” folder.
Sometimes you don’t just want to add a certain number of days to a date, you wantto take working days into account: five working days until delivery, or two workingdays in which the customer needs a response.
Difficult? Not at all. The following nifty AddWorkingDays function does it all foryou. Simply pass in a date, alongside the number of working days you want to shiftthe date by. For example, pass in a 5 to get the fifth working day after your date, or“-1” to return the last working day.
Here’s the code you’ll need:
Public Function AddWorkingDays(ByVal DateIn As DateTime, _
ByVal ShiftDate As Integer) As DateTime
' Adds the [ShiftDate] number of working days to DateIn
Dim datDate As DateTime = DateIn.AddDays(ShiftDate)
' Loop around until we get the need non-weekend day
While Weekday(datDate) = 1 Or Weekday(datDate) = 7
datDate = datDate.AddDays(IIf(ShiftDate < 0, -1, 1))
End While
Return datDate
End Function
And here’s how you might call it in your application:
Dim datNewDate As DateTime = AddWorkingDays(Today, -1)
MessageBox.Show("The last working day was " & datNewDate)
Easy Check for a Leap Year
Checking for a leap year used to be a sticky task. But, after reading the “Finding theNumber of Days in a Month” snippet, you might think it’s as simple as checkingthe number of days in February. You’re wrong: it’s even easier.
The System.DateTime class includes a neat little shared IsLeapYear function. Itaccepts a year and returns a True or False as appropriate. Here’s a little samplecode showing it in action:
Chapter 7
258
*1062_ch07_CMP2 5/31/03 6:13 PM Page 258

Dim blnIsLeapYear As Boolean
blnIsLeapYear = System.DateTime.IsLeapYear( _
DateTime.Now.Year)
MessageBox.Show("This " & _
IIf(blnIsLeapYear, "is", "is not") & " a leap year")
This code takes the current year and passes it to the IsLeapYear function. Itthen displays a message, confirming whether this is a leap year or not. Easy!
Figuring Out Quarters
Download supporting files at www.apress.com.
The files for this tip are in the “Ch7—Quarters” folder.
Business applications often need to figure out quarters, which are the four three-month periods in any year, beginning at the start of January and going through tothe end of March, then April to June, July to September, and finally, October toDecember.
Calculating the opening and closing quarter dates for a particular date is acommon task for programmers. So, to save you from figuring out how to write thatcode, the following ready-to-run functions do it all for you:
Public Function FirstDayOfQuarter(ByVal DateIn As DateTime) As DateTime
' Calculate first day of DateIn quarter,
' with quarters starting at the beginning of Jan/Apr/Jul/Oct
Dim intQuarterNum As Integer = (Month(DateIn) - 1) \ 3 + 1
Return DateSerial(Year(DateIn), 3 * intQuarterNum - 2, 1)
End Function
Public Function LastDayOfQuarter(ByVal DateIn As DateTime) As DateTime
' Calculate last day of DateIn quarter,
' with quarters ending at the end of Mar/Jun/Sep/Dec
Dim intQuarterNum As Integer = (Month(DateIn) - 1) \ 3 + 1
Return DateSerial(Year(DateIn), 3 * intQuarterNum + 1, 0)
End Function
To use either of these functions, simply pass in the date you wish to retrievethe quarter for, and it’ll return the appropriate beginning/end date as a DateTimedata type (an exact equivalent of the Date data type).
More .NET Secrets
259
*1062_ch07_CMP2 5/31/03 6:13 PM Page 259

And here’s an example of how you might call these functions. (See Figure 7-6for my sample application.)
Dim CurrentQuarterStart As DateTime = FirstDayOfQuarter(Now)
Dim CurrentQuarterEnd As DateTime = LastDayOfQuarter(Now)
MessageBox.Show("Current quarter start: " & CurrentQuarterStart & _
Chr(10) & Chr(13) & "Current quarter end: " & CurrentQuarterEnd)
Figure 7-6. Using the MonthCalendar control to display the current quarter startand end dates
Calculating the Years Between Two Dates
Download supporting files at www.apress.com.
The files for this tip are in the “Ch7—Years Between Dates” folder.
Business applications often find it useful to calculate the number of years betweentwo particular dates, such as the date a customer first ordered and the presentdate, perhaps to see whether they apply for a “loyalty” discount or a free gift.
Don’t scramble in the code window. Just use my next little snippet. Simply call YearsBetweenDates, passing in a start date and end date. It’ll return an Integercontaining the number of full years between the specified dates:
Chapter 7
260
*1062_ch07_CMP2 5/31/03 6:13 PM Page 260

Public Function YearsBetweenDates(ByVal StartDate As DateTime, _
ByVal EndDate As DateTime) As Integer
' Returns the number of years between the passed dates
If Month(EndDate) < Month(StartDate) Or _
(Month(EndDate) = Month(StartDate) And _
(EndDate.Day) < (StartDate.Day)) Then
Return Year(EndDate) - Year(StartDate) - 1
Else
Return Year(EndDate) - Year(StartDate)
End If
End Function
Converting a String to “Proper Case”
Download supporting files at www.apress.com.
The files for this tip are in the “Ch7—Proper Case” folder.
Initiating someone into the use of the StrConv function to generate “proper case”text was always exciting for me. This was built-in intelligence, and I used to use itto excite every new Visual Basic 6 programmer I taught.
You can still access the StrConv function to capitalize the first letter of everyword and lowercase the rest, like this:
Dim strSentence As String = "MaRlenA on THE WAll"
strSentence = Microsoft.VisualBasic.StrConv(strSentence, _
VbStrConv.ProperCase)
' Returns: Marlena On The Wall
However, this is using the Microsoft.VisualBasic namespace, which wasincluded to help VB6 programmers shift to .NET. What we really need is a pure.NET Framework method of converting to title case. And that’s just what I havehere, in this nifty little function:
Public Function ProperCase(ByVal Text As String) As String
' Converts the passed chunk of text to "Proper Case"
Dim objCulture As New System.Globalization. _
CultureInfo("en-US")
Return objCulture.TextInfo.ToTitleCase(Text.ToLower)
End Function
More .NET Secrets
261
*1062_ch07_CMP2 5/31/03 6:13 PM Page 261

Here, we create a new CultureInfo class, passing in the culture code forAmerica (“en-US”, or “en-GB” for Great Britain—however, this really makes no difference to this snippet). We then use the TextInfo object within that class,passing a lowercased version of our text to the ToTitleCase function. We convert tolowercase first because fully capitalized words are not automatically converted to title case in this culture. We then return our result.
And that’s it: a true .NET technique for implementing proper case. (See Figure 7-7 for my sample application.)
Figure 7-7. My sample “proper case” application
Storing Text Snippets on the Clipboard
We’ve all worked with the Windows clipboard before, whether to copy a picturefrom Adobe PhotoShop over to PowerPoint, or simply cut and paste a bundle oftext in Microsoft Word.
And adding clipboard integration to your own application isn’t as difficult as itsounds. You simply need to use the Clipboard object. To set data to the clipboard,simply pass it as a parameter to the SetDataObject method, as so:
Clipboard.SetDataObject(TextBox1.Text)
You can also retrieve data from the clipboard, using the GetDataObject.GetDatafunction. Here, we’re retrieving simple text from the clipboard, but you could usethe GetDataObject.GetDataPresent function to find out what’s on the clipboard,then retrieve and manipulate anything from sound files to bitmaps:
TextBox1.Text = Clipboard.GetDataObject.GetData(DataFormats.Text)
Chapter 7
262
*1062_ch07_CMP2 5/31/03 6:13 PM Page 262
Generating Memorable Passwords, Automatically
Download supporting files at www.apress.com.
The files for this tip are in the “Ch7—Memorable Passwords” folder.
Generating automatic passwords for your users is a common programming sce-nario. However, due to the techniques typically employed, most autogeneratedpasswords end up looking like YPSWW9441—which, although highly secure, alsoend up completely unmemorable.
The following function generates a password using alternating friendly conso-nants and vowels, making for much more memorable passwords. Asking thefunction to generate a five-character password, for example, may result in BONESor LAMOT.
To use this function, call GeneratePassword, passing in the length of yourdesired password. The final password will be returned as a string:
Public Function GeneratePassword(ByVal Length As Integer) As String
' Creates a memorable password of the specified Length
Dim blnOnVowel As Boolean
Dim strTempLetter As String
Dim strPassword As String
Dim intCount As Integer
For intCount = 1 To Length
If blnOnVowel = False Then
' Choose a nice consonant - no C, X, Z, or Q
strTempLetter = CType(Choose(CType(GetRandomNumber(1, 17), Double), _
"B", "D", "F", "G", "H", "J", "K", "L", "M", _
"N", "P", "R", "S", "T", "V", "W", "Y"), String)
' Append it to the password string
strPassword += strTempLetter
' Swich to vowel mode
blnOnVowel = True
Else
' Choose a vowel
strTempLetter = CType(Choose(CType(GetRandomNumber(1, 5), Double), _
"A", "E", "I", "O", "U"), String)
' Append it to the password string
strPassword += strTempLetter
More .NET Secrets
263
*1062_ch07_CMP2 5/31/03 6:13 PM Page 263

' Switch back again, ready for next loop round
blnOnVowel = False
End If
Next
Return strPassword
End Function
Dim objRandom As New System.Random(CType((System.DateTime.Now.Ticks _
Mod System.Int32.MaxValue), Integer))
Public Function GetRandomNumber(Optional ByVal Low As Integer = 1, _
Optional ByVal High As Integer = 100) As Integer
' Returns a random number,
' between the optional Low and High parameters
Return objRandom.Next(Low, High + 1)
End Function
You could use the GeneratePassword function as so (see Figure 7-8 for mysample application):
Dim MyPassword As String
MyPassword = GeneratePassword(5)
MessageBox.Show(MyPassword)
Figure 7-8. Generating a memorable five-character password in just one click
Chapter 7
264
*1062_ch07_CMP2 5/31/03 6:13 PM Page 264

Encryption in Just Twelve Lines of Code!
Download supporting files at www.apress.com.
The files for this tip are in the “Ch7—Simple Encryption” folder.
At times, you may want to very simply encrypt a small piece of text to store in theregistry, a database, or file, but you don’t want the overhead or complexity of agovernment-standard encryption technique.
A much simpler encryption method is required, and the following functionprovides just that. It’s called Crypt: pass it your plain text and it’ll encrypt it; pass ityour encrypted text and it’ll decrypt it. It’s simple and all in fewer than fifteen linesof code:
Public Function SimpleCrypt(ByVal Text As String) As String
' Encrypts/decrypts the passed string using a
' simple ASCII value-swapping algorithm
Dim strTempChar As String, i As Integer
For i = 1 To Len(Text)
If Asc(Mid$(Text, i, 1)) < 128 Then
strTempChar = CType(Asc(Mid$(Text, i, 1)) + 128, String)
ElseIf Asc(Mid$(Text, i, 1)) > 128 Then
strTempChar = CType(Asc(Mid$(Text, i, 1)) - 128, String)
End If
Mid$(Text, i, 1) = Chr(CType(strTempChar, Integer))
Next i
Return Text
End Function
It’s not recommended for highly confidential information (as anyone with thisscript could also decrypt your data), but it’s nonetheless highly useful. Here’s howyou might use this function (see my sample application in Figure 7-9):
Dim MyText As String
' Encrypt
MyText = "Karl Moore"
MyText = Crypt(MyText)
MessageBox.Show(MyText)
' Decrypt
MyText = Crypt(MyText)
MessageBox.Show(MyText)
More .NET Secrets
265
*1062_ch07_CMP2 5/31/03 6:13 PM Page 265

Figure 7-9. An example that uses our simple Crypt function to both encrypt anddecrypt at once
Implementing Powerful MD5 Encryption
Download supporting files at www.apress.com.
The files for this tip are in the “Ch7—MD5” folder.
So, simple encryption just isn’t good enough for you, huh? Well, you may as wellrocket straight to the top and check out the power of MD5 (Message Digest 5)encryption, a powerful data security algorithm used by many large organizationsthroughout the globe.
Pass data to the MD5 algorithm and it’ll return a small “fingerprint” of thedata. If the data changes, no matter how small the alteration, the fingerprintchanges. This is one-way encryption: the fingerprint can’t be turned back into theoriginal data. You can only compare the fingerprint with the source data and see ifthey match.
For example, you may store password fingerprints (“message digests”) in adatabase password field. When the user logs on, you simply compare his or hertyped password with the fingerprint using MD5: if they match, you grant the useraccess.
It’s all ultra-secure: you aren’t storing the actual password anywhere, only thefingerprint.
Sound powerful? The .NET Framework includes cryptography classes directlysupporting the MD5 standard, and I’ve created two functions to perform its twomost common operations.
Chapter 7
266
*1062_ch07_CMP2 5/31/03 6:13 PM Page 266

The first, GetMD5Hash, accepts your data as a simple string. It then calculatesand passes back the MD5 fingerprint—the “message digest”, the “hash”—as anarray of bytes ready for you to perhaps store in your database. Don’t forget, this isone-way. Once something is encrypted, you can’t decrypt it.
The second, CheckMD5Hash, accepts an array of bytes (your hash) and a string,such as the byte array from your database password field and the password thatyour user has entered. The string is then converted into a hash itself and the indi-vidual bytes compared, bit by bit. If it all matches, you’ve got a winner—and a Trueis returned.
Here’s the code:
Public Function GetMD5Hash(ByVal Text As String) As Byte()
' Generates an MD5 hash for the specified Text
On Error Resume Next
Dim objAscii As New System.Text.ASCIIEncoding()
Dim bytHash As Byte() = _
New System.Security.Cryptography.MD5CryptoServiceProvider(). _
ComputeHash(objAscii.GetBytes(Text))
Return bytHash
End Function
Public Function CheckMD5Hash(ByVal OriginalHash As Byte(), _
ByVal Text As String) As Boolean
' Checks an MD5 hash against the specified Text
' Returns True if we have a match
On Error Resume Next
Dim objAscii As New System.Text.ASCIIEncoding()
Dim intCount As Integer, blnMismatch As Boolean
Dim bytHashToCompare As Byte() = GetMD5Hash(Text)
If OriginalHash.Length <> bytHashToCompare.Length Then
Return False
Else
For intCount = 0 To OriginalHash.Length
If OriginalHash(intCount) <> bytHashToCompare(intCount) Then
Return False
End If
Next
Return True
End If
End Function
More .NET Secrets
267
*1062_ch07_CMP2 5/31/03 6:13 PM Page 267

Here’s a simple example using the two preceding functions. The first line generates an MD5 hash, and the second checks it against our password:
Dim bytHash() As Byte = GetMD5Hash("password")
Dim blnMatch As Boolean = CheckMD5Hash(bytHash, "password")
Remember that this is highly powerful, currently unbreakable encryption. Andall in just a few lines of cool .NET code. Exciting stuff.
Converting a String into the Color Type
It’s often useful to be able to convert from a string into an actual type, and viceversa—a technique that may seem especially difficult when it comes to colors.Imagine, for example, that your program allows users to customize their appli-cation colors. You need a method of storing the settings, probably as strings in theregistry. Maybe your program actually prompts the user to type in a color. Theymay request green, or aqua, or just plain old gray, but you need a method of con-verting this value into an actual Color type.
Thankfully, the .NET Framework team figured you might want to do that, andinclude a neat ColorConverter class to help you.
Here’s an example designed for a Windows application. The first chunk takesthe string “Green” and changes it into a Color type, finally setting it as the BackColorof your form (“Me”). The second takes a Color type and displays a matching colorstring:
' Instantiate ColorConverter class
Dim objCConv As New System.Drawing.ColorConverter()
' Retrieve a Color object from a string
Dim objColor As System.Drawing.Color = _
CType(objCConv.ConvertFromString("Green"), Color)
Me.BackColor = objColor
' Retrieve a string from a Color object
Dim strColor As String = _
objCConv.ConvertToString(Me.BackColor)
MessageBox.Show(strColor)
That’s it! Don’t forget: Windows applications also have access to the Color-Dialog control, which allows the user to select a color and returns a Color type. Youmay wish to integrate this into applications that use such color conversion code.Good luck!
Chapter 7
268
*1062_ch07_CMP2 5/31/03 6:13 PM Page 268

Binding a Combo Box to Enumeration Values
Download supporting files at www.apress.com.
The files for this tip are in the “Ch7—Enum Binding” folder.
By their very nature, enumerations lend themselves easily to being displayed inlist controls, such as the combo box. You want to take their text entries and displaythem to the user, with the related values being stored alongside each item.
This was impossible in previous versions of Visual Basic, but it’s easily donewith .NET.
Firstly, let’s look at a Web example. Here, we have a custom function thataccepts a System.Type object, along with the actual list control you want popu-lated. It then clears the box and adds all items from the enumeration, along withtheir related item values. You can then use and reference the items (and values) inthe box as you would normally.
Here’s the code:
Public Sub AddEnumToList(ByVal GetSystemType As System.Type, _
ByVal List As System.Web.UI.WebControls.ListControl)
' Populates the specified list with the
' names and values of the passed system type
Dim strNames As String(), arrValues As System.Array
Dim intCount As Integer
strNames = [Enum].GetNames(GetSystemType)
arrValues = [Enum].GetValues(GetSystemType)
List.Items.Clear()
For intCount = LBound(strNames) To UBound(strNames)
List.Items.Add(New _
System.Web.UI.WebControls.ListItem(strNames(intCount), _
arrValues.GetValue(intCount)))
Next
End Sub
And here’s an example of how you could use this function. Note the use ofGetType surrounding the name of your enumeration:
AddEnumToList(GetType(NameOfEnum), DropDownList1)
With Windows forms, it works a little differently. The provided list controls donot inherently support individual item values, unless you’re performing a morecomplex binding operation; therefore, the simplest method is to list the text itemsfrom the enumeration, then figure out the related values later (if required at all).
More .NET Secrets
269
*1062_ch07_CMP2 5/31/03 6:13 PM Page 269
So, to get the list of items, set the DataSource equal to a string array con-taining the items from your enumeration. You can obtain this through theSystem.Enum.GetNames function. Here’s a code sample demonstrating how to dothis:
ComboBox1.DataSource = System.Enum.GetNames(GetType(NameOfEnum))
This takes the individual text items from your enumeration and adds them to your list-based control in the order of their related values, from lowest tohighest (and not in the order in which you declared them). Then, when you needto figure out the underlying value of the selected item, you’ll need to run code alittle like this:
Dim strNames As Array = _
System.Enum.GetValues(GetType(NameOfEnum))
Dim strValue As String = _
strNames(ComboBox1.SelectedIndex)
And that’s how to bind a list control to an enumeration. It sounds difficult, butonce you know how....
Graphics and Fonts
The visual side of your applications can be very exciting, and the following bundleof drawing code snippets will help you really take advantage of some of the newgraphic capabilities in your VB .NET. Use my ready-to-run code snippets to doeverything from converting file image formats to writing your own screensavers,designing your own arty icons to adding gradient backdrops in code. Read on,Rembrandt!
Designing Your Own Arty Icons
You can create your own icons in VB .NET by selecting Project ➤ Add New Itemfrom the menu, then choosing Icon File and clicking on Open. From here, use anyof the dozen drawing tools to create your perfect ICO file. (See Figure 7-10.)
To change a Windows form to use this icon, click on the ellipsis next to its Iconproperty in the Properties window. Then navigate to your project folder and selectthe ICO file you just created.
Chapter 7
270
*1062_ch07_CMP2 5/31/03 6:13 PM Page 270

Figure 7-10. Strangely, I didn’t pass art....
The Basics of Working with Fonts
You can list all the currently installed TrueType and OpenType fonts on your systemby cycling through the font families in the System.Drawing.FontFamily.Familiesnamespace.
For example:
Dim MyFontFamily As FontFamily
For Each MyFontFamily In System.Drawing.FontFamily.Families
ComboBox1.Items.Add(MyFontFamily.Name)
Next
You can set the font for a particular control in code by creating a new Fontobject, then setting it to the control Font property. For example:
Dim MyFont As Font
MyFont = New Font("Verdana", 8)
TextBox1.Font = MyFont
More .NET Secrets
271
*1062_ch07_CMP2 5/31/03 6:13 PM Page 271

Crafty Conversion Between Graphic Formats
Download supporting files at www.apress.com.
The files for this tip are in the “Ch7—Convert Image Format” folder.
Need a function to convert between bitmap, GIF, EMF, JPEG, PNG, WMF, and ICOimage formats, among others? Don’t buy a third-party control: this conversion isexactly what my next crafty little snippet does. And all in a mere dozen lines ofcode.
Just call ConvertImage, passing in the filename of your current file, the desiredformat of your new file (using the enumeration), and your new filename. Andthat’s it:
Public Sub ConvertImage(ByVal Filename As String, _
ByVal DesiredFormat As System.Drawing.Imaging.ImageFormat, _
ByVal NewFilename As String)
' Takes a filename and saves the file in a new format
Try
Dim imgFile As System.Drawing.Image = _
System.Drawing.Image.FromFile(Filename)
imgFile.Save(NewFilename, DesiredFormat)
Catch ex As Exception
Throw ex
End Try
End Sub
Here’s an example of using this to convert a GIF image into a Windowsbitmap:
ConvertImage("c:\img1.gif", _
System.Drawing.Imaging.ImageFormat.Bmp, "c:\img2.bmp")
Chapter 7
272
*1062_ch07_CMP2 5/31/03 6:13 PM Page 272

Rotating and Flipping Is Easy!
Download supporting files at www.apress.com.
The files for this tip are in the “Ch7—Rotate Image” folder.
Back in the golden olden days of programming, rotating and flipping an imageeither meant performing complicated bit-by-bit image swaps or getting out yourwallet to plunk down for a third-party control.
With the .NET Framework, the System.Drawing namespace makes it mucheasier. As we saw in the last tip, the Image class provides functionality that will bowlover graphic developers of old.
This book isn’t about graphics, however, and so it isn’t my intention to focuson them. But rotating and flipping images is a relatively common businessrequirement, especially with the number of letters scanned into modern applica-tions and faxes received through the Internet, so this little tip is designed todemonstrate just how easy it can be.
Firstly, load your image into your application—either directly into an Imageobject or into the PictureBox control, as so:
PicBox.Image = System.Drawing.Image.FromFile("c:\sample.gif")
PicBox.SizeMode = PictureBoxSizeMode.StretchImage
Then, behind your rotate buttons, add functions similar to the following:
Dim objImage As Image = PicBox.Image
objImage.RotateFlip(RotateFlipType.Rotate90FlipNone)
PicBox.Image = objImage
Here, we extract the graphic from behind our PictureBox control as an Imageobject. We then run the .RotateFlip method, passing in one of many possible enu-meration arguments: here, we’re using Rotate90FlipNone, meaning that it shouldrotate the image 90 degrees and not flip it. We could, however, have chosenRotateNoneFlipX for a horizontal flip. Or any of the other fourteen options.
Finally, we set the Image property of our PictureBox back to our Image object,and the control displays our newly rotated image. A complete doddle!
More .NET Secrets
273
*1062_ch07_CMP2 5/31/03 6:13 PM Page 273

Drawing with Windows Forms
Download supporting files at www.apress.com.
The files for this tip are in the “Ch7—Drawing” folder.
This book deals primarily with the business world. We’ve talked about databases,setting up Web services, and utilizing powerful encryption algorithms. But wehaven’t discussed drawing in your application. So, in the interest of developingyour all-round super programmer mindset, let this tip serve as a quick overview.
First off, you may have noticed that there’s no Shape control with .NET. If youwant to draw, you need to revert to code. Thankfully, it’s not all sticky API codeanymore. Microsoft has repackaged all that old drawing functionality, added alittle more, and christened it GDI+ (the old system was known as the GDI,standing for graphical device interface).
How can you use it? Basic drawing is actually pretty simple. You need to knowjust three core pieces of information. First, when drawing, you need a digital“sheet of paper” to work with. This is an object based on the Graphics class, and, ifyou worked a lot with graphics in VB6, you’re probably best imagining this as anencapsulated Windows device context.
When you have this area to work on, you need to know what tools to workwith, and there are really only two possibilities here. There’s our second item, thePen class, which allows you to set up the style of line you want. And then there’s ourthird item, the Brush class, which is designed for filling in areas and defining howthat “fill” will look.
Once you have the items, you use methods of the Graphics object (our sheet ofpaper) to put the tools into work. All the Draw... methods take your pen style anddraw something, and all the Fill... methods take your brush style and fill some-thing. So, for example, I may call the FillRectangle function of my Graphics object,passing in a purple Brush object and various dimensions, and a purple rectanglewould be drawn for me.
Let’s look at a little sample code to help explain away this weird-soundingphenomenon. This commented snippet is intended to run behind a Windowsform:
' Get Graphics object from our form, our "sheet of digital drawing paper"
Dim objGraphics As System.Drawing.Graphics = Me.CreateGraphics
' Create new Pen, color blue, width 10
Dim objPen As New Pen(Color.Blue, 10)
' Draw line using pen from
Chapter 7
274
*1062_ch07_CMP2 5/31/03 6:13 PM Page 274

' 45 across, 45 down to 95 across, 95 down
objGraphics.DrawLine(objPen, 45, 45, 95, 95)
' Draw arc, this time using built-in green pen
' 8 across, 10 down to 30 across, 30 down
' with a 90 degree start angle and 180 degree sweep
objGraphics.DrawArc(Pens.Green, 8, 10, 30, 30, 90, 180)
' Create new Brush-based object, color purple
Dim objBrush As New SolidBrush(Color.Purple)
' Draw rectangle area using brush
' start at 100 across, 100 down,
' carry on for 50 across, 50 down
objGraphics.FillRectangle(objBrush, 100, 100, 50, 50)
' Draw ellipse, this time using built-in orange brush
objGraphics.FillEllipse(Brushes.Orange, 10, 10, 30, 30)
Understand what is happening here? We’re just setting up our Pen- or Brush-inherited objects, then passing them along with parameters to methods of theGraphics object. (See Figure 7-11 for the result.)
Figure 7-11. The colorful result of our lines of code
More .NET Secrets
275
*1062_ch07_CMP2 5/31/03 6:13 PM Page 275
Speaking of the Graphics object, here’s a reference list of the most populardrawing methods, alongside their core parameters (most of which have multipleoverloaded implementations):
• DrawArc: Draws part of an ellipse. Parameters are Pen object, list of coordi-nates, and start/end angle values for the arc in degrees.
• DrawBezier: Draws a Bezier curve. Parameters are Pen object and list ofcontrol points from which the curve is generated.
• DrawLine: Draws a straight line. Parameters are Pen object and list of coordi-nates.
• DrawString: Draws text to your area. Parameters are text to add, Font object,Brush-inherited object, and coordinates.
• FillEllipse: Draws a filled ellipse (circle). Parameters are Brush-inheritedobject (such as the SolidBrush) and list of coordinates (or Rectangle objectdefining those points).
• FillPie: Draws a pie section. Parameters are Brush-inherited object, list ofcoordinates (or Rectangle object), and start/end angle values for the piesegment in degrees.
• FillPolygon: Draws a polygon (think a circle with eight sides). Parametersare Brush-inherited object, array of seven points, and fill mode. The seventhpoint automatically connects to the last to create the polygon.
• FillRectangle: Draws a rectangle. Parameters are Brush-inherited object andlist of coordinates.
Of course, that’s not all. You can create transparent brush fills, for example.You can also use the GraphicsPath and Transform classes, which form the real “plus”part of GDI+. You can even incorporate DirectX to give your graphics real spunk.
Look up “drawing” (and related subitems) in the help index for more infor-mation. Alternatively, check out http://msdn.microsoft.com/vbasic/donkey.asp for“Donkey .NET”—a rehash of a classic game, created in Visual Basic .NET andincorporating graphics to blow your socks off.
Chapter 7
276
*1062_ch07_CMP2 5/31/03 6:13 PM Page 276

Add an Exciting Gradient Backdrop, in Code!
Download supporting files at www.apress.com.
The files for this tip are in the “Ch7—Gradient” folder.
Want to add a little more visual impact to your application? How about adding anappealing gradient backdrop to your forms and in just a few lines of code?
That’s exactly what this next snippet of code does for you. It accepts top andbottom gradient colors as arguments, then defines the brush and area to paint anddisplays the effect. Here’s the code you’ll need:
Private Sub DrawFormGradient(ByVal TopColor As Color, ByVal_
BottomColor As Color)
' Draws a gradient using the specified colors
' on the entire page
Dim objBrush As New Drawing2D.LinearGradientBrush _
(Me.DisplayRectangle, _
TopColor, _
BottomColor, _
Drawing2D.LinearGradientMode.Vertical)
Dim objGraphics As Graphics = Me.CreateGraphics()
objGraphics.FillRectangle(objBrush, Me.DisplayRectangle)
objBrush.Dispose()
objGraphics.Dispose()
End Sub
Next, you need to call the code—typically in response to the Paint event ofyour Form, like this:
Private Sub Form1_Paint(ByVal sender As Object, _
ByVal e As System.Windows.Forms.PaintEventArgs) Handles MyBase.Paint
DrawFormGradient(Color.Blue, Color.AliceBlue)
End Sub
More .NET Secrets
277
*1062_ch07_CMP2 5/31/03 6:13 PM Page 277

Here, we’re running our function each time that our form is “painted” (that is,“drawn” on the computer screen). It then paints our gradient: a rich blue mixinginto a lighter blue. (See Figure 7-12.) Of course, if that’s too bold, you may opt forthe more subtle White blending into PapayaWhip. Or the mysterious Black merginginto DarkOrchid. Or the XP-styled White into CornflowerBlue. But the coloring is, ofcourse, up to you.
Two quick tips: with a little editing, you can change the brush from paintingVertical to Horizontal, ForwardDiagonal, or BackwardDiagonal; and, in the interest ofgeneral usability, don’t overuse gradients. It could be scary.
Figure 7-12. My blue to alice blue form. In black and white.
Starting Your Own Screensaver
Download supporting files at www.apress.com.
The files for this tip are in the “Ch7—Screensaver” folder.
Screensavers are often seen as a no-go area for VB .NET programmers. They’re noteven EXE files and surely fall more within the realm of graphic designers and gamedevelopers. Incorrect.
The simple fact is that a screensaver, with a .scr file extension, is nothing morethan a renamed executable. It’s a regular Windows application that has tradi-tionally been developed to display images and look pretty, warding off the terrorsof now nonexistent screen burnout.
Chapter 7
278
*1062_ch07_CMP2 5/31/03 6:13 PM Page 278

If you view the Display options through the control panel, you’ll see a list ofexisting screensavers. These are simply files with the .scr extension found in theWindows system directory (that is, c:\Windows\System32).
But how do these applications know to respond to do things such as displaythe settings box or launch the screensaver? By using parameters. (See “The Powerof Command-Line Parameters” tip in Chapter 2 to find out how to read these.)Imagine you click on the Preview button—Windows launches the related SCR file,along with the parameter “/p”. The application then needs to look at this value and“preview” display the screensaver.
Other standard parameters are available as well: “/s” informs the screensaverthat it needs to display its settings box, and “/a” tells you to display a “changepassword” dialog box. Then there’s the big one: the “/s” parameter indicates thatyou should run your full screensaver, perhaps displaying graphics in code andexiting when the user moves his or her mouse.
Seem simple enough? Matters like this are almost always best demonstratedthrough example—and, thankfully, Microsoft has made that task a little easier forme. Surf over to http://msdn.microsoft.com/vbasic/downloads/samples/ and clickthe screensaver sample link, or access it directly at http://msdn.microsoft.com/library/en-us/dnvssamp/html/vbcs_CreateaScreensaverwithGDI.asp. (The files arealso available at www.apress.com, alongside the source for this entire book.)
It doesn’t demonstrate the more-advanced features, such as password supportor utilizing preview mode, but it does provide a solid grounding on the basics. I’vepersonally written articles on some of the more-advanced features; you may wantto check out Developer.com at www.developer.com to dig these up, or you candownload existing .NET screensaver code by performing a quick search atwww.googlegroups.com.
And that’s it: a screensaver is just an EXE file renamed with an .scr extensionand placed in the Windows system directory. It accepts parameters and respondsaccordingly.
Your task is to merge this knowledge together with a little nifty graphics codeto create your own screensaver: perhaps a logo-based application that scrollscompany news across the screen, or a saver that displays family photographs,selectable through the settings screen. Good luck!
Using the Registry and Event Log
Want to store your settings in the registry? Or are you looking for a ready-to-runfunction for writing to the Event log? Then sit back and begin reading: this is thesection for you!
More .NET Secrets
279
*1062_ch07_CMP2 5/31/03 6:13 PM Page 279

How to Read and Write the Registry
Download supporting files at www.apress.com.
The files for this tip are in the “Ch7—Registry” folder.
The registry is a great place to store your application settings. It’s used by almostevery Windows application, and you can view its entire contents by selecting Start ➤ Run and launching regedit.exe.
To manipulate the registry in your code, you need to use objects inside theMicrosoft.Win32 namespace. To simplify this process, the following functionsencapsulate all the required code for you, allowing you to read from or write to the registry in just a line of code.
The first function is called ReadFromRegistry. It accepts a location and name ofthe key to retrieve, returning a string value:
Public Function ReadFromRegistry(ByVal Location As String, _
ByVal Name As String) As String
' Returns a value from the registry
Dim MyKey As Microsoft.Win32.RegistryKey
MyKey = Microsoft.Win32.Registry.CurrentUser.OpenSubKey(Location)
ReadFromRegistry = CType(MyKey.GetValue(Name), String)
MyKey.Close()
End Function
The second block of code is a method called WriteToRegistry. It accepts alocation, key name, and the actual string to store with the key:
Public Sub WriteToRegistry(ByVal Location As String, _
ByVal Name As String, ByVal Data As String)
' Writes a value to the registry
Dim MyKey As Microsoft.Win32.RegistryKey
MyKey = Microsoft.Win32.Registry.CurrentUser.CreateSubKey(Location)
MyKey.SetValue(Name, Data)
MyKey.Close()
End Sub
You could use the preceding functions as follows:
WriteToRegistry("Software\White Cliff\MyApp", "Username", "John")
MessageBox.Show(ReadFromRegistry("Software\White Cliff\MyApp", _
"Username"))
Chapter 7
280
*1062_ch07_CMP2 5/31/03 6:13 PM Page 280

Note that my sample functions save and retrieve data specific to the currentuser in the CurrentUser (HKEY_CURRENT_USER) portion of the registry. If youwish to store global data, accessible by whomever is logged in, simply change thisto use the LocalMachine class.
You can also store other types of data in the registry. For more information,look up “Registry class, about Registry class” in the help index, or check out theMicrosoft MSDN feature at http://msdn.microsoft.com/library/en-us/dv_vstechart/html/vbtchaccessingregistrywithvisualbasicnet.asp.
Putting Messages in the Event Log
Download supporting files at www.apress.com.
The files for this tip are in the “Ch7—Event Log” folder.
The event log is a haven for system administrators. All the great programs use it torecord details of how everything went: the batch update completed successfully,the midnight virus update failed, peak usage on Monday occurred at 13:37 P.M.
Now, you too can plug into and place your entry in the log. Here’s my ownlittle function to show you how:
Public Function WriteToEventLog(ByVal Entry As String, _
Optional ByVal AppName As String = "VB.NET Application", _
Optional ByVal EventType As _
EventLogEntryType = EventLogEntryType.Information, _
Optional ByVal LogName As String = "Application") As Boolean
' Writes an entry to the Event Log
Dim objEventLog As New EventLog()
Try
' Register app as an Event Source
If Not objEventLog.SourceExists(AppName) Then
objEventLog.CreateEventSource(AppName, LogName)
End If
objEventLog.Source = AppName
' Send entry
objEventLog.WriteEntry(Entry, EventType)
Return True
Catch Ex As Exception
Return False
End Try
End Function
More .NET Secrets
281
*1062_ch07_CMP2 5/31/03 6:13 PM Page 281

To use, simply call the WriteToEventLog function, passing in an empty string.You can also optionally specify the application name, event type, and the log touse (that is, “Application”). If you specify a nonexistent log, one will be created foryou. The function returns a Boolean dependent on its success.
To finish us off, here are examples of WriteToEventLog in use (see Figure 7-13to see what this does in the event log):
' Simple event log addition
WriteToEventLog("Application has failed to find STARTUP.INI")
' Slightly more complex sample
WriteToEventLog("Unable to parse request LOGON", _
"Authenticator", EventLogEntryType.Error, "Special Log")
TOP TIP If you take time to explore the EventLog class, you’ll find many inter-esting properties to take your work with the event log even further. Mostimportantly, you’ll find .Clear and .Delete methods at your disposal, allowingyou to perform actions even the Event Viewer doesn’t support.
Figure 7-13. Our complex event log sample shown in the Event Viewer
Chapter 7
282
*1062_ch07_CMP2 5/31/03 6:14 PM Page 282

Distributed Computing
It’s a term that covers a whole bundle of technologies. So here’s a section to match:a whole mound of secrets dedicated to the world of distributed computing. Fromthe quick guide to using MSMQ, to the cheat’s guide to XML, to the five steps totransactions with COM+, and more!
The Cheat’s Guide to XML
They write entire books on it. They hold conferences dedicated to it. I know atleast three cafés named after it. It’s XML, it’s eXtensible Markup Language, it’s anexcellent addition to your résumé
But just what is it, really? XML is a method of storing structured data in a puretext format. It uses a system of tags to embed its information, such as a list of cus-tomers and their orders. And, as an XML “document” is simply one chunk of text(no matter how in depth or complex the information it holds or the relationshipsamong the individual chunks of information), it is still simply text, making XML anideal cross-platform data storage mechanism.
TOP TIP You can learn more about the official XML specification by checkingout documents from the World Wide Web Consortium at www.w3.org/XML/.
To demonstrate this concept, here’s a sample, relatively simple XML document:
<?xml version="1.0"?>
<articles>
<article id="10">
<site>VB World</site>
<type>codesnippet</type>
<title>The Cheat's Guide to XML</title>
<shortname>xmlcheat</shortname>
<description>Need to learn XML fast? .e.t.c. </description>
<author>Karl Moore</author>
<authorEmail>[email protected]</authorEmail>
<pages>
<page number="1">
<title>Introduction</title>
<body>Yadda ... yadda ... yadda ...</body>
</page>
More .NET Secrets
283
*1062_ch07_CMP2 5/31/03 6:14 PM Page 283

<page number="2">
<title>Getting More Complicated</title>
<body>Etc ... etc ... etc ... </body>
</page>
</pages>
</article>
<article id="11">
<site>VB Square</site>
<type>review</type>
<title>Review of WebZinc .NET</title>
<shortname>webzinc</shortname>
... and so on ..
</article>
</articles>
Here, you can see we have a top-level <articles> tag, containing numerous<article> items. Each item contains an associated unique id attribute, plusnumerous subelements that list details such as the site, author name, and arelated <pages> segment, listing individual pages and the body text. See how itworks? Articles, to article, to pages, to page. It’s relational data, stored in a pure textformat.
TOP TIP One simple way to demonstrate the relational style of XML documentis to add an XML file (Project ➤ Add New Item) to your Visual Studio .NETproject, type in something similar to the preceding XML, then click on Data.You’ll be shown your data in grid format—ready for viewing, editing, or adding to!
So, you pretty much understand what an XML document is: it looks a bit likeHTML, stores relational data in tags, plus it’s pure text so it can be used cross-platform. What can you use it for? Imagine it as the new, cooler, slightly youngerbrother of the comma-separated or tab-delimited file format. Anything they cando, XML can do better.
How can you integrate XML with your VB .NET applications? Well, there arefive key techniques:
• Create a Web service to expose data from your application. (See Chapter 4,“The Lowdown on Web Services.”)
• Read an XML document in code.
Chapter 7
284
*1062_ch07_CMP2 5/31/03 6:14 PM Page 284

• Write an XML document in code.
• Use XML with your DataSets.
• Use XML with SQL Server.
The rest of this tip provides working examples of these last four techniques.
Reading an XML Document in Code
The XmlDocument class in the System.Xml namespace provides everything you needto parse XML data. To use, simply create a new instance of the class, use the .Loador .LoadXml method to get data into the object, then start parsing using theavailable methods and functions.
Such techniques are typically best demonstrated through sample code—sohere’s a snippet that uses a common method of cycling through various nodes inthe XmlDocument object, retrieving key pieces of information. It’s based on thesample XML document shown earlier, and, with a little cross-referencing, shouldbe relatively easy to follow through:
' Create new XmlDocument object
Dim objDoc As New System.Xml.XmlDocument()
' Load actual XML
objDoc.Load("c:\filename.xml")
' Create placeholders for node list and individual nodes
Dim objNodeList As System.Xml.XmlNodeList
Dim objNode, objNodeChild As System.Xml.XmlNode
' Retrieve list of article elements
objNodeList = objDoc.GetElementsByTagName("article")
' Cycle through all article elements
For Each objNode In objNodeList
' Display article ID numbers
MessageBox.Show(objNode.Attributes("id").InnerText)
' Cycle through all child node of article
For Each objNodeChild In objNode
' Display article site names
If objNodeChild.Name = "site" Then
MessageBox.Show(objNodeChild.InnerText)
End If
Next
Next
More .NET Secrets
285
*1062_ch07_CMP2 5/31/03 6:14 PM Page 285

After a little reviewing, you can see this is really pretty simple, and thisrecursive-style code can be easily ported to practically any situation. No matterwhether you’re handling an XML file created by another application or parsing anXML stream straight from the Net (for example, www.slashdog.org/slashdot.xml),the XmlDocument object can help you out.
TOP TIP When loading an XML document, you may want to check its structure,ensuring that it adheres to the expected . You do this through an XML schema.We don’t cover this here, but you can learn more by looking up “XML, validatingXML” in the help index.
Writing an XML Document in Code
The XmlTextWriter class in the System.Xml namespace can be jolly useful when itcomes to outputting XML. To use it, create a new instance of the class, passing anew filename or an appropriate stream in the constructor, plus a potential“encoding” option.
Next, start your document with the .WriteStartDocument method and continue using others, such as .WriteStartElement, .WriteAttributeString,WriteElementString, and .WriteEndElement to create the document. When you’refinished, .WriteEndDocument to close all open tags, .Flush to save changes to the file, then .Close.
This is another beast best explained by example, so here goes:
' Create a new XmlTextWriter object
Dim objWriter As New System.Xml.XmlTextWriter( _
"c:\mydocument.xml", System.Text.Encoding.UTF8)
With objWriter
' Set the formatting to use neat indentations
.Formatting = Xml.Formatting.Indented
' Write document opening
.WriteStartDocument()
' Begin core XML
.WriteStartElement("articles")
' First article...
.WriteStartElement("article")
.WriteAttributeString("id", "10")
.WriteElementString("site", "VB-World")
.WriteElementString("type", "codesnippet")
.WriteElementString("author", "Karl Moore")
Chapter 7
286
*1062_ch07_CMP2 5/31/03 6:14 PM Page 286

' Write list of associated pages
.WriteStartElement("pages")
.WriteStartElement("page")
.WriteAttributeString("number", "1")
.WriteElementString("title", "My Title")
.WriteElementString("body", "This is my body text")
.WriteEndElement()
.WriteStartElement("page")
.WriteAttributeString("number", "2")
.WriteElementString("title", "My Second Title")
.WriteElementString("body", "This is my 2nd body text")
' Close open elements
.WriteEndElement()
.WriteEndElement()
.WriteEndElement()
.WriteEndElement()
' ... Add any further articles here ...
' Close document
.WriteEndDocument()
.Flush()
.Close()
End With
Simple enough? It’s a very straightforward procedural method of creating anXML file that should suit all XML developers. (See Figure 7-14 for the results of thissample, displayed in Internet Explorer.)
But why not simply build your own XML string and write it straight to a file?Three reasons. First, there are situations in which extra XML tags need to be addedto adhere to the official specification. For example, you may be storing HTML inone of your elements. HTML, of course, contains <tags> that may be misinter-preted as actual XML elements. As such, the XmlTextWriter follows the officialspecification and adds CDATA clauses to the statement, ensuring that any readerscorrectly identify this as text, not actually part of the document structure. So,firstly, it’s a bit more intelligent than a quick file-write routine.
Second, it’s very good at automatically handling developer cock-ups, which means, if you have any tag that you’ve forgotten to close correctly, the XmlTextWriter will automatically step in and fill the gap for you. How kind.
And third—well, it can save data in that pretty indented manner. Personally,I’d prefer not to attempt implementing this with just a regular string. Way toomessy.
That’s it: the XmlTextWriter. Simple, elegant, procedural. An understated classthat could save you hours.
More .NET Secrets
287
*1062_ch07_CMP2 5/31/03 6:14 PM Page 287

Figure 7-14. Our produced XML document, viewed in Internet Explorer
Using XML and DataSets
DataSets were covered back in Chapter 4 (“Working with Data”). They’re basicallymultitable Recordsets with a few extra frills—and one of those frills is their abilityto both accept and output XML with ease.
But how? You need to know about three key DataSet members.First, there’s .GetXml. This excellent function returns an XML representation of
the data in your DataSet. It’s simple to use and returns a string containing datafrom all the tables in your DataSet. For example:
Chapter 7
288
*1062_ch07_CMP2 5/31/03 6:14 PM Page 288

<MyDataSet xmlns="http://www.karlmoore.com/MyDataSetSchema.xsd">
<wc_vbwn_article_listing>
<id>5</id>
<tag>bettersplit</tag>
<siteListingid>1</siteListingid>
<type>3</type>
<userLevel>3</userLevel>
<title>VB: A Better Split Function</title>
<description>When using the Split function ...</description>
<authorCommunityListingid>3</authorCommunityListingid>
<added>2002-10-20T13:38:00.0000000+01:00</added>
<live>true</live>
</wc_vbwn_article_listing>
</MyDataSet>
The second useful member is the .WriteXml method, which accepts a streamor filename and essentially writes the results of .GetXml directly to it. It saves youwriting a separate file-save routine and automatically applies all the fancyindenting, too.
Well, we’ve had two methods of getting XML out of the DataSet, so now here’sour third handy DataSet member—the .ReadXml function, which loads XML intothe DataSet. You can use this function with practically any XML source, but I’d rec-ommend sticking to either a simple XML stream, or one that you’ve previouslyextracted from the DataSet or have an XSD schema for. It’s not required; it’s simplya recommendation from experience: complex XML structures aren’t as easilymanipulated through a DataSet.
TOP TIP If you’re creating a DataSet and want to read straight from an XMLfile, you may want to first specify an XML schema definition (XSD) so you cancatch any data errors. To do this, simply use the schema equivalents of themembers we’ve covered here—.GetXmlSchema, .WriteXmlSchema, and .ReadXmlSchema—passing your XSD filename as appropriate. If you don’t have an XML schema,you can create one manually in VS .NET (Project ➤ Add New Item ➤ XMLSchema), or allow it to generate one for you by creating a typed DataSet. See the“Quick, Editable Grid” tips in Chapter 4 (“Working with Data”) for a demon-stration of generating this XSD “template.” If you’re completely confused andhave no idea what an XML schema is, imagine it as a rulebook for the data inyour XML document. Look up “XML Schema, about XML Schema” for moreinformation.
More .NET Secrets
289
*1062_ch07_CMP2 5/31/03 6:14 PM Page 289

The Three Words to SQL Server XML Success
Three simple words: For XML Auto. Adding these to the end of your SQL statementwill result in SQL Server 2000 (and above) returning an XML representation of yourdata, rather than your regular table of information.
For example, a statement such as SELECT username, password FROM users FORXML AUTO may return something like this:
... <users username="KarlMoore" password="TEST123"/>
<users username="SuzanneVega" password="MARLENA123"/> ...
How can you extract and use this data? My favorite method is simplyextracting the XML from the first returned field using .ExecuteScalar, thenslapping it straight into an XmlDocument object. After that, I can do what I like—save it, edit it, XSL it, whatever:
' Setup Command
Dim objCommand As New System.Data.SqlClient.SqlCommand( _
"SELECT field1, field2, field3, field4 " & _
"FROM table1 FOR XML AUTO", _
MyConnection)
' Retrieve XML
Dim strXML As String = _
objCommand.ExecuteScalar
' Load data into XmlDocument, adding root level <data> tags
Dim objDoc As New System.Xml.XmlDocument()
objDoc.LoadXml("<data>" & strXML & "</data>")
' … continue as appropriate …
The SqlCommand object actually provides its own method—.ExecuteXmlReader—specifically for handling XML data coming back from SQL Server. This functionreturns an XmlReader object, a sort of forward-only, read-only version of the XmlDocument. Here, I cycle through a few entries, then close the reader:
' Setup Command
Dim objCommand As New System.Data.SqlClient.SqlCommand( _
"SELECT field1, field2, field3, field4 " & _
"FROM table1 FOR XML AUTO", _
SqlConnection1)
' Retrieve XMLReader object
Dim objReader As System.Xml.XmlReader = _
objCommand.ExecuteXmlReader
Chapter 7
290
*1062_ch07_CMP2 5/31/03 6:14 PM Page 290

' Loop round entries
Do While objReader.Read
MessageBox.Show(objReader.GetAttribute("field3"))
Loop
' Close XMLReader, freeing up connection
objReader.Close
Personally, I don’t like working with the XMLReader like this—it’s relativelyinflexible and ties up your connection until you close the object—but it hascertain niche uses, so is listed here for completeness.
Quick XML Review
XML is an interesting topic. Although a lot of unwarranted industry hype sur-rounds what is still simply a chunk of HTML-like text, there’s no denying that thatchunk of text is still a great idea and one that won’t be fading away anytime soon.
Here, in this rather elongated tip, we’ve covered the basics of working withXML. There’s still much more you might want to learn, however. You may wish totake a further look at more-complex schemas and really understand how they canhelp you validate your XML, for example. (Look up “XML Schemas, ADO. NETdatasets and” and “XML Schemas, creating” in the help index to assist in solidi-fying these concepts.)
Or you may wish to explore the whole bundle of extra classes in the System.Xmlnamespace we haven’t covered here (the XmlValidatingReader class, for example) orcheck out the extra XML-related features of SQL Server (the XMLDATA parameter, forinstance).
And that’s not all. There’s also the world of XSL (Extensible Style Sheet Lan-guage). You can imagine this almost like a “mail merge” document for your XML. Itcontains HTML and various XSLT (XSL Transformation) elements, and tells it howto process your XML: put this there, change that to this, cycle through these ele-ments and display them here. It’s practically a mini programming language on itsown. Find out more for yourself by following a VS .NET walkthrough; look up “XSL,identity transformation” in the help index.
Not everyone will use XML, and fewer still will go all the way with schemasand XSL, so we’re going to end this tip here. But remember: XML is a growingstandard and beginning to infiltrate all areas of development. So, whether youthink it concerns you or not, it might be worthwhile giving XML a peek. You mightjust surprise yourself.
Further reading: check out www.apress.com for the latest XML titles.
More .NET Secrets
291
*1062_ch07_CMP2 5/31/03 6:14 PM Page 291

Six Steps to Basic Transactions with COM+
It took me a good few weeks to get my head around the world of transactions in.NET. I spent an absolute age trying to figure out what had happened to MicrosoftTransaction Server (MTS).
If you’re in the same boat, I’m sorry to inform you that MTS died some timeago. It was merged into a host of services christened COM+ (“We didn’t commu-nicate that very well,” a Microsoft publicist told me) and is now incorporated inclasses under the System.EnterpriseServices namespace. It’s all done very differ-ently from the days of yesteryear, too: transactional components in .NET requireno complicated configuration nor manual registration. Transactions can be set upand performed entirely in code.
TOP TIP Many developers used MTS for the database connection pooling itoffered. If that’s all you’re wanting, good news: in .NET, all the SqlConnectionobjects used on a machine are automatically pooled for you, regardless ofwhether you’re using COM+ (the “new MTS”). Look up “connection pooling,ADO. NET connections” in the help index for more information.
ANOTHER TOP TIP If you’re looking to implement transactions and are onlyusing one database on one machine, you probably don’t need the power noroverhead of COM+ transactions. Check out the SQL Server transaction samplein the Essentials section of Chapter 4 for more information.
But let’s start at the beginning. What exactly is a transaction? A transaction is an operation that must be undertaken as a whole, or not at all. The age-oldexample of a bank still stands: if your application takes money out of one accountto deposit in another, and your machine crashes halfway through, you really don’twant to lose that money. You either need to do it all or nothing. If an error occursduring any part of that process, the whole thing needs to be undone.
That’s what COM+ enables you to do: implement a stable, time-tested undomechanism in your code, easily. It can automatically “roll back” your edits in anytransaction-aware application, such as SQL Server or Microsoft Message Queue—even if the edits are made on different machines. On the other hand, if all goeswell, all edits (no matter which machine they are made upon) are “committed.”
Chapter 7
292
*1062_ch07_CMP2 5/31/03 6:14 PM Page 292
How can you put all this into play? Well, you need to start with a class thatinherits the “ServicedComponent” class, the base functionality of any transaction.You can then add attributes to your class and its methods, depending on how youwant to implement your transaction. You can also work with a ContextUtil object,to commit or abort the transaction.
TOP TIP Looking for a walkthrough guide to creating your first transaction? Surf to the MSDN article at http://support.microsoft.com/default.aspx?scid=kb;en-us;Q315707 for a simple Northwind database sample project.
Six core steps are involved in setting up an automatically registering COM+transactional class. Simply open your project—Windows application, class library,or other—and follow this to-do list:
1. Reference the System.EnterpriseServices DLL. Click on Project ➤ Add Reference, select System.EnterpriseServices, then click on OK.
2. Create your core transaction-aware class. Click on Project ➤ Add NewItem, and select Transactional Component. Enter a name, click on Open, and then alter the TransactionOption.Supported value to TransactionOption.Required. Alternatively, click on Project ➤ Add Classand use the following “neater” base for your work.
' Automatic transaction template
Imports System.EnterpriseServices
<Transaction(TransactionOption.Required)> _
Public Class ClassName
Inherits ServicedComponent
End Class
TOP TIP Here, we have the Transaction attribute set with the value TransactionOption.Required, the most common setting. This means that, if you are already inside a transaction and call a member of this class, it runs itscode and informs the parent transaction how the operation went (and, if itfailed, will likely rollback the results of parent transactions, a sort of codedomino effect). On the other hand, if you are not in a transaction, this optionwill create one for you. Other possible options here are Disabled, NotSupported,RequriesNew, and Supported.
More .NET Secrets
293
*1062_ch07_CMP2 5/31/03 6:14 PM Page 293

3. Add your transaction-aware methods and functions. If you want to takeadvantage of automatic committing, which ‘saves’ all changes if no erroroccurs, or performs a rollback if an exception does occur, then use codesimilar to the following:
<AutoComplete()> Public Sub MemberName()
' Do processing here, such as accessing
' a transaction-aware database.
' If exception occurs, transaction fails.
End Sub
4. Use ContextUtil if you wish to control transactions manually. Instead ofrelying on an exception to be caught, you may wish to control the wholetransaction manually. You do this using the ContextUtil object, with codesimilar to the following:
Public Sub MemberName()
' Do processing here, maybe with error handling
' When you’re satisfied all has worked, run...
ContextUtil.SetComplete()
' If, however you have experienced problems or caught
' an exception, roll everything back by running...
ContextUtil.SetAbort()
End Sub
5. Generate a “strong name” for your application. To take part in a trans-action, COM+ requires your application to have a strong name. This is arandom public/private key, merged with your application name, versionnumber, and culture information (if available). To generate the strongname key pair, click on Programs ➤ Microsoft Visual Studio .NET ➤ VisualStudio .NET Tools ➤ Visual Studio .NET Command Prompt. From theDOS-style window, type “sn –k c:\mykeyname.snk” and press Return. Youshould get a “Key pair written” success message. Open the directory (inthis case, the root of the c: drive) to check the file is there—this is yourrandom public/private key pair file. Next, add the following line to Assem-blyInfo.vb, telling the application which key pair to utilize for the strongname (for simplicity, we’re using a hard coded reference to the path here;using a relative path appears to behave inconsistently between certain VS .NET builds):
<Assembly: AssemblyKeyFileAttribute("c:\mykeyname.snk")>
Chapter 7
294
*1062_ch07_CMP2 5/31/03 6:14 PM Page 294

TOP TIP If you plan to use your transactional component outside of the .NETworld, you’ll need to do three things at this point: provide your assembly with atitle in the AssemblyInfo.vb file (used for the COM+ Catalog), manually exposeyour .NET assembly to COM (see “exposing .NET Framework components toCOM”), and register your component in the COM+ Catalog (see “automatictransactions, .NET Framework classes”, step four).
6. Start using your transactional component! If you’ve developed an internalclass, simply call it directly from within your application. Or if you’vecreated the class inside a Class Library project, compile your assemblyand then reference from another application.
And that’s all there is to implementing basic cross-machine transactions inyour applications. Don’t get me wrong: COM+ supports many, many more fea-tures, such as object and thread pooling, nested transactions, remoting, trueMSMQ integration, special security mechanisms, and more. But these simplesteps at least provide a handy reference to the base method of handling transac-tions across multiple machines, our method of ensuring it all happens together...or not at all.
For further reading, check out Distributed .NET Programming in VB.NET fromApress (ISBN 1-59059-068-6).
TOP TIP You can view your COM+ transactional components by clicking onPrograms ➤ Administrative Tools ➤ Component Services, and then navigatingdown to Component Services ➤ Computers ➤ My Computer ➤ COM+ Applica-tions. (See Figure 7-15.) Here, you should be able to view your automaticallyregistered transactional component, plus see any transactions in progress.(Look out for those exciting animated icons!)
More .NET Secrets
295
*1062_ch07_CMP2 5/31/03 6:14 PM Page 295

ANOTHER TOP TIP By simply running our application like this, our COM+transactional component is automatically registered for us the first time it isused. This isn’t a bad thing, but you should be aware of a few things about it.First, your transactional component is registered as a library component,meaning you can’t view success/failure statistics via the Distributed TransactionCoordinator. (In Component Services, navigate to My Computer ➤ DistributedTransaction Coordinator). You can change this manually through your appli-cation properties (in Component Services, navigate to My Computer ➤ COM+Applications, view properties for your app, select Activation tab)—or look up“COM+ services, registering serviced components” in the help index for moreinformation. Second, if you change the type of your transaction component(that is, from RequiresNew to Supported), you’ll need to reregister your assembly(see the preceding help topic), or alter the COM+ application properties. COM+does not automatically comprehend that you’ve changed the transaction attri-bute. Third, due to a number of interoperability issues, Windows XP and 2000machines will not show the animated Component Services icon when a librarycomponent is involved in a transaction. It’s not a huge issue, but certainly oneworry to cross off your list of debugging concerns.
Figure 7-15. Viewing our transactional components in Component Services
Chapter 7
296
*1062_ch07_CMP2 5/31/03 6:14 PM Page 296

Quick Guide to Using MSMQ
Download supporting files at www.apress.com.
The files for this tip are in the “Ch7—MSMQ Sample” folder.
Microsoft Message Queue (MSMQ) is one of those widgets a lot of developers haveheard about, but few really feel confident playing with. It’s a tool for the big boys,or so many will have you believe, and not a technology that those working in com-panies turning over less than ten billion a year should be using.
This, as you may suspect, is balderdash.But, just in case you haven’t heard of MSMQ, let’s start at the beginning. What
exactly is it? MSMQ is a product now integrated into Windows 2000 and 2003. Itallows your applications to send messages and for other applications to pick upthose messages. The message may be sent to applications on the same computer,or on a different computer. The other computer doesn’t even have to be onlinewhen the message is sent; it will be automatically delivered when a connection is made.
In other words, MSMQ is email for your code.Here’s how it works. To send a message, you set up a MessageQueue object, spec-
ifying a queue “path.” (If you’re playing along with the email analogy, imagine thisas the mail address.) You check whether the queue path exists: if not, you create it.Next, you simply send your message. It’ll then wait in your analogical Outbox andsend itself to that queue when possible (say, immediately, or the next time youconnect to the network).
So that’s how you send a message. But how about receiving one?To receive a message, your application needs to “tune in” to your queue path
and turn up the volume. When your application notices that a message has beenreceived, your MessageQueue object fires off an event for you to respond to. You maylook at the message and confirm payment on a customer order, add a comment tothe user profile, or update existing stock levels. Your message doesn’t just have tobe pure text either: you can “serialize” objects and send those as well.
Let’s look at how we can implement MSMQ technology in our applications insix easy steps:
1. Check that Microsoft Message Queue is installed. It’s likely you’ve alreadygot MSMQ on your machine, but, just in case, open up the control paneland go to Add/Remove Programs. Click on the Add/Remove WindowsComponents button and ensure that Message Queuing is checked. If not,check it and follow through the wizard. If you’re using Windows NT 4,download the option pack from www.microsoft.com/NTServer/nts/downloads/recommended/NT4OptPk/ and select to install Microsoft Message QueueServer 1.0.
More .NET Secrets
297
*1062_ch07_CMP2 5/31/03 6:14 PM Page 297

2. Reference System.Messaging.dll. With your project open, click on Project➤ Add Reference and select the System.Messaging.dll, then click on OK.
3. Add a MessageQueue object to your class. Drag and drop the MessageQueueitem from the Components tab on the toolbox onto your form or class inDesign mode.
4. Change the Path property. Alter the Path property to the queue you wish touse. This is a combination of the machine name and the queue (“mailbox”)name. On my machine, for example, I’m using “nemean\private$\testapp”as my Path property. Nemean is the name of the other computer on thenetwork, testapp is the name of my queue, and the private$ bit in themiddle indicates that this is a private queue. (Public queues are alsoavailable, and these work in exactly the same way, but are “published”throughout the network, unlike private queues. They also require thatyour administrator first set up a special MSMQ network. A sample queuePath for a public queue might be nemean\testapp.)
TOP TIP You can browse the existing queues, either on your local machines ormachines on your network, by clicking on View ➤ Server Explorer, then navi-gating to a machine and viewing the Message Queues node. (See Figure 7-16.)
5. In your client application, add the code to send your message. The fol-lowing chunk of sample code demonstrates checking for the existing of aqueue, creating it if it isn’t available, and then sending a message. Themessage is split into two parts: the body and a “label” (the equivalent ofan email subject line), as shown here:
' Check for existence of queue
If MessageQueue1.Exists(MessageQueue1.Path) = False Then
MessageQueue1.Create(MessageQueue1.Path)
End If
' Send message - body and "label"
MessageQueue1.Send( _
"ConfirmOrderTotal: $69.95", _
"Customer:952")
Chapter 7
298
*1062_ch07_CMP2 5/31/03 6:14 PM Page 298

6. In your server application, add code to “receive” your message. First,you’ll need to tune in by running the .BeginReceive function of your MessageQueue object. You may do this when your application starts, say, in response to the form Load event:
' Run this at the beginning to
' "listen" for new messages
MessageQueue1.BeginReceive()
When a message drops in, the ReceiveCompleted event of the MessageQueueobject kicks in, passing with it a “handle” to the message. You then use this toreceive the whole message, process it, then once again begin “listening” for anynew messages. Here’s sample code to do just that, to be used in response to theReceiveCompleted event:
' Receive message
Dim objMsg As System.Messaging.Message = _
MessageQueue1.EndReceive(e.AsyncResult)
' Process the message -
' here, we're simply showing it to the user
MessageBox.Show(objMsg.Label & " - " & objMsg.Body)
' Begin "listening" again
MessageQueue1.BeginReceive()
That’s it: this is literally all you need to do to send and receive messages inyour application. These, of course, are just the facts. To bring them to life in thereal world, you need to add imagination. Which applications would benefit frombeing able to communicate through messages? How can this technology helpthose with laptops, those who are often on the road and offline for most of theday? Where in your company is there a need to perhaps serialize and queue upCustomer, Order, or Stock objects, waiting to be processed? And that is where youcome in.
For further reading, check out www.apress.com for the latest MSMQ titles.
More .NET Secrets
299
*1062_ch07_CMP2 5/31/03 6:14 PM Page 299

TOP TIP There’s more to be discovered in the world of MSMQ. To learn moreabout serializing objects so they can be sent through MSMQ, look up “serial-izing messages” in the help index. To “peek” at messages without actuallyremoving the message from the original queue, look up “peeking at messages”in the help index. To find out about receiving a delivery acknowledgment for amessage you sent, look up “message queues, acknowledging delivery to” in thehelp index.
Figure 7-16. Viewing available queues through the Server Explorer
Which to Choose: Web Services vs. Remoting
Web services and remoting are both methods of getting computers to commu-nicate and share data with each other. Both techniques can work through IIS, bothcan pass data through firewalls, both can use HTTP for communication, and bothcan use SOAP-compliant data formatting. But, ever since Microsoft dropped thecurtains on the .NET Framework, developers have been asking, “Erm, so what’sthe difference between the two?”
Chapter 7
300
*1062_ch07_CMP2 5/31/03 6:14 PM Page 300

It’s a good question—and one that few Microsoft support engineers enjoyanswering. However, there is a difference, and this tip will reveal all.
Web services are part of ASP.NET and hosted in IIS. With Web services, you canexpose stateless functions to the world, which are typically called through HTTPand a SOAP XML-based response automatically returned.
Remoting is a technology that allows .NET applications to talk to each other,instantiating classes running on another machine. Remoting is more flexible thanWeb services, but it doesn’t necessarily conform to any open standard. It can bethought of as the most flexible replacement for DCOM and requires a programrunning on the target machine as the “server.”
Yes, there’s some overlap between the two technologies, but the decision overwhich to choose is relatively simple.
Do you need to expose your data to the outside world using open standards?Do you need to utilize caching easily? Are your clients working on a non-.NETplatform? Do you need any of the special IIS features, such as security and logging?Are you unable to run a remoting “server” program on the target machine? If youanswered yes to any of these questions, then you need to use Web services. Checkout Chapter 5 for more information. Sample Web services include an online tele-phone directory or a product query service.
Do you need to use stateful objects in your development work? Do you requirethe use of properties and events? Do you need to use the raw binary TCP socket for faster communication? Do you need a custom “server” host for your program? Are 100% of your clients going to be .NET applications? Would you prefer not touse IIS, but rather peer-to-peer communication? If you answered yes to any ofthese questions, then you need to use .NET remoting. Try looking up “remotingcommunication” in the help index to learn more. Sample uses for .NET remotinginclude a proprietary instant messaging application or the excellent Terrariumproject (www.gotdotnet.com/terrarium/).
If, however, you’re somewhat indifferent to all of these questions, go for Webservices. They’re easier to get started with and, seasoned with a few custom hacks,can be expanded upon to do most things.
So there we have it: Web services are easy, they’re for open standards, they’refor SOAP and IIS. Remoting is for .NET-to-.NET applications, it’s for complexobjects, it’s for speed and customization. They are different, but they do overlap.That’s just the way it is.
For further reading, check out Distributed .NET Programming in VB.NET fromApress (ISBN 1-59059-068-6).
More .NET Secrets
301
*1062_ch07_CMP2 5/31/03 6:14 PM Page 301

Visual Studio Tips
Figure out how to really use your Visual Studio development environment to themax with this ace collection of secrets. From your quick guide to upgrading, COMand the API, to the tricks behind the VS .NET Command window, from a little-known place you can store often-used code to how you can tell if you’re running inthe IDE—and much more.
Writing a Developer TODO: List
The Task window in VB .NET is a great way of keeping track of tasks that are relatedto your project. For example, if you have code issues or compile errors, VB .NETwill automatically list them here.
You can also add your own comments to the Task list, with the TODO keyword.To use this feature, simply add a comment to your code that starts with the TODOkeyword. It will automatically be added to your existing Task list. For example:
' TODO: Rewrite function so works with .DOC files
To view the Task list, select View ➤ Other Windows ➤ Task List from the menu, or press Ctrl+Alt+K. The Task list often filters its contents, so it displays only certain information. To view everything, right-click on your list and select All Tasks ➤ All. (See Figure 7-17.)
TOP TIP Fed up with the TODO keyword? Users of Visual Studio .NET 2003(Everett) have automatic support for the “HACK” prefix, which works in theexact same way as TODO yet attracts much more kudos. You can edit the Task listkeywords yourself by editing the values in Tools ➤ Options ➤ Environment ➤Task List.
Figure 7-17. If only all TODO lists were this short….
Chapter 7
302
*1062_ch07_CMP2 5/31/03 6:14 PM Page 302

Storing Often-Used Code in the Toolbox
There’s an easy way to store often-used code and templates in VS .NET. Simplydrag and drop your code straight onto one of the toolbox tabs, such as the Generaltab. (See Figure 7-18.) When you need to use it again, simply drag and drop backinto your code window. And, best of all, these snippets persist from project toproject, saving even more development time.
Figure 7-18. Adding code to the toolbox
Organizing Your Project with Folders
Overwhelmed with the number of files that now make up your application?Starting to loose track of which VB files do what? Well, there’s a simple method ofkeeping track. Use folders!
Right-click on your project in the Solution Explorer and select Add ➤ NewFolder. Then simply drag and drop your existing code files into the new folders.For example, you may have one folder called “User Interface” to store your forms,or a folder called “Database Code” to store your data access classes.
More .NET Secrets
303
*1062_ch07_CMP2 5/31/03 6:14 PM Page 303

Don’t worry: there’s no extra configuration required, and your entire projectcompiles as normal with no extra effort. It simply allows you to organize yourproject the way it should be.
A simple tip, but one that can turn chaos into control within minutes. (SeeFigure 7-19.)
Figure 7-19. One of my company C# projects, really taking advantage of folders
Figuring out the Command Window
The Command window in Visual Studio .NET allows you to both performcommand operations as well as evaluate statements (see Figure 7-20), dependingon its mode. To open the Command window, select View ➤ Other Windows ➤Command Window from the menu, or press Ctrl+Alt+A.
Chapter 7
304
*1062_ch07_CMP2 5/31/03 6:14 PM Page 304

The Command mode allows you to access common Visual Studio .NET com-mands. To enter this mode, type “>cmd” into the window and press the Enter key.After this, you can access the various menu commands by typing them directlyinto this window (for example, Window.CloseAllDocuments to close all current docu-ments). Type “alias” for a full list of alias shortcuts (for example, CloseAll).
The more-useful Immediate mode is used for evaluating and executing state-ments while your code is paused at runtime. To enter this mode, type “immed” intothe window and press Enter. After this, you can use the window to run commands,set variables, or read values (for example, MyVariable = "Etc" or ? MyVariable).Visual Studio .NET 2003 users also get the popup properties/methods list, allowingthem to browse an object.
Press the F1 key while inside the Command window for more information onthe commands available.
Figure 7-20. A sample command window in use
Discovering Whether You’re Running in the IDE
Previous versions of Visual Basic made it easy to figure out whether you wererunning your application through the IDE (Integrated Development Environment).It simply allowed you to check which “mode” your application was in. VB .NET,however, isn’t quite as easy going.
The most common method of figuring out whether the application is runningin the .NET IDE is to check the System.Diagnostics.Debugger.IsAttached propertyto determine whether if a debugger is attached to the currently executing code. Ifso, you can safely assume your code is running from within the IDE.
If you’re designing your own controls, you might also run into the situationwhere your code is running in design mode—while you want it to execute onlyduring “full” runtime. In this situation, simply check the DesignMode property ofyour component (that is, from inside your control: Me.DesignMode). If it returnsTrue, you’re running in the IDE—so cut your code short.
Simple solutions to common questions, and definitely worth remembering.
More .NET Secrets
305
*1062_ch07_CMP2 5/31/03 6:14 PM Page 305

Saving Time by Recording Macros
If you have a repetitive task that you often perform in the Visual Studio .NETdevelopment environment, you might want to consider creating it as a macro andrunning it when you require that functionality once more.
For example, you might create a macro to print all the open documents, addcustomized revision markers, change project properties to standardize your devel-opment, or insert common routines.
You can get highly in-depth with macros, writing code to perform almost any task. However, the simplest method is to simply record your activities andhave Visual Studio .NET write the code for you. You can do this by selecting Tools ➤ Macros ➤ Record TemporaryMacro. To play it back, select Run TemporaryMacro from the same menu, or press Ctrl+Shift+P.
For more information on recording macros, look up “macros, recording” inthe help index. For more information on macros in general, look up “macros,Visual Studio .NET” in the help index.
Using the VS .NET Command Prompt
As you work through the Visual Studio .NET documentation, you’ll start to realizejust how many tools require you to run them from the command line for fullcontrol.
However, setting the proper directory and locating the exact EXE file requiredvia the command prompt can prove troublesome. Thankfully, Visual Studio .NETcomes with a feature that automatically sets up a command prompt with all thecorrect environment variables ready for you to use.
To access this, select Start ➤ Programs ➤ Microsoft Visual Studio .NET ➤Visual Studio .NET Tools ➤ Visual Studio .NET Command Prompt. (See Figure 7-21.)Task complete!
Figure 7-21. The command prompt, ready for use
Chapter 7
306
*1062_ch07_CMP2 5/31/03 6:14 PM Page 306

The Old School: Upgrading, COM, and the API
Most books like to dedicate a good couple of chapters to moving from the oldschool of Visual Basic 6 programming. This one is different, of course. In theinterest of saving your time and cutting all those excess pages, I’m going to chop itall down to just three simple paragraphs—one dedicated to each of the maintopics: upgrading, COM, and the API.
First, upgrading. Yes, you can do it; simply open your existing Visual Basic 6project in VS .NET, and an upgrade wizard will pop up and do its darned hardest tomove your code to .NET. Most of the time it simply alters your functions so theyuse those in the rather uncool Microsoft.VisualBasic namespace, implemented inthe .NET Framework to allow VB6 people to upgrade without feeling lost. On thewhole, I’d recommend only fresh development work be undertaken in .NET:simple “ports” like this never really work or are done for all the wrong reasons.
Second, COM. Frankly, it’s just too big to die. If you want to use a COMDLL/EXE in your application (for automating Word, say), click on Project, Add Reference, and select your item through the COM tab, then click OK. If you want to use a COM control, right-click on the toolbox, select Customize Toolbox, checka COM component, and click on OK. Note that you may experience a slight per-formance knock due to .NET having to interoperate with the world of COM, but on the whole things should work pretty much the same as they did before. Also, ifyou want COM-supporting languages to see your .NET widgets, that’s possible too.Look up “exposing .NET Framework components to COM” in the help index formore information.
Finally, the Windows API. Although it’s still available on Windows machines,Microsoft is trying to drag everyone into the .NET Framework, which allows you towrite “managed” code, with resources monitored and allocated for you automati-cally. It also fits in with the long-term Microsoft vision of a “sort of”platform-independent programming language (that is, one based on a framework,not Windows). You can, however, still call the API directly with ease (as demon-strated in the “INI Files Will Never Die: How to in .NET” tip earlier in this chapter).You can read more about this by looking up “Windows API, calling” in the helpindex. Still, if possible, I’d recommend that you figure out a .NET alternative to theAPI; either search the newsgroups at www.googlegroups.com or check out the .NETsection of www.allapi.net, a Web site listing API functions and their related .NET equivalents. (Although the site has unfortunately stopped updating its pages, it still serves as a highly useful reference.)
More .NET Secrets
307
*1062_ch07_CMP2 5/31/03 6:14 PM Page 307