The Settlers - User Manual - TheCompany.pl
418
Instructions Manual
-
Upload
khangminh22 -
Category
Documents
-
view
1 -
download
0
Transcript of The Settlers - User Manual - TheCompany.pl

Instructions Manual
pm5.settl#u1/u4#eng 04.03.1995, 14:45 Uhr1

1
pm5.manual#eng#settl 03.03.1995, 18:52 Uhr1

2
CREDITS:
Programming and conception Volker WertichGraphics Christoph WernerMusic Haiko RuttmannManual Volker Wertich, Stefan PiaseckiLayout Stefan PiaseckiEnglish translation Arts of WordsProduction Thomas HertzlerPC adaptation Alexander Jorias
Ingo FrickVolker Wertich
Introduction Christoph Werner (graphics),Ingo Frick (program)
Tests Matthias BestFrank GrimmMichael PassmannBirgit Krause
Software, manual and artworks (C) 1993 by Blue Byte Software GmbH
pm5.manual#eng#settl 03.03.1995, 18:52 Uhr2

3
TABLE OF CONTENTS
0. Preface1. On the right path...
1.1 Computer specifications1.2 The Settlers - Presentation1.3 Configuration1.4 Hard disk installation1.5 The status screen
2. To get started...2.0.1 Copy protection
2.1 The main menu2.2 The game - the commands2.3 The map2.4 The castle2.5 Constructing buildings2.6 Constructing roads2.7 The first settlers2.8 Demolition2.9 Saving and ending the game
3. Training3.1 Game 1 - Rural property3.2 Game 2 - Construction materials3.3 Game 3 - Food3.4 Game 4 - The riches of earth and their exploitation3.5 Game 5 - Fabrication of tools and weapons3.6 Game 6 - Attack
pm5.manual#eng#settl 03.03.1995, 18:52 Uhr3

4
4. The economy4.1 The economic system4.2 Your first large colony (village, city)4.3 About statistics
4.3.1 The first statistics4.3.2 The statistics curves4.3.3 The supply statistics
4.4 The warehouses4.5 Information about the buildings and the flags4.6 The distribution menus
5. Rules of combat5.1 The knight menus
6. To continue...6.1 The other menus6.2 Messages and preferences6.3 Renewable games6.4 Demonstration and Team mode6.5 The options6.6 Special functions for the map
7. Hints7.1 The most important rules: be observant...7.2 The behaviours of the opponents7.3 Hints and tips: professions7.4 Need help?7.5 The end of the game
8. Annexes8.1 If you have a problem...
pm5.manual#eng#settl 03.03.1995, 18:52 Uhr4

5
0. Preface
Dear Blue Byte client. What you have in your hands is not simplya game manual. It is an adventure guide that will become an epic andthat will probably lastingly change your life in the coming months,along with your attitude towards entertainment.
"The Settlers" is a program that you can play as often as you likeand that will teach you new things.
After playing for a few hours, you will agree with us when we saythat this game has no equal in terms of style or graphics.
For the first time, users can enter a world so complex, so detailed,that they will literally want to plunge themselves into the game. WithThe Settlers, we have achieved the goal that programmers have setfor themselves since the beginnings of video games: create a newworld for the player, where the adventure never finishes and cancontinue, based on the desires of the players, to grow for years tocome. The text in the box is very clear: if you have had enough of dailylife and you would like to forget about it for a while, you no longer haveto save up to buy yourself a new State. The Settlers will allow you toconstruct your own refuge, one that you can modify and enlarge asyou like. We will be pleased if you can find the peace and calm in yourrealm that is missing from your daily existence. In fact, we are surethat you will. This manual has been written to help you achieve thisfreedom; it will:
pm5.manual#eng#settl 03.03.1995, 18:52 Uhr5

6
0. Preface
1. - allow you to install The Settlers on your computer.2. - familiarize you with the basic principals that... (see 3).3. - you can apply and try for the first time.4. - give you general information.5. - allow you to understand how the game functions.6. - teach you new things if necessary.7. - help you understand any areas that are not clear.8. - address itself to users who want to know everything about thegame, right down to the last detail.
At the end of this manual, we have included a troubleshootingguide along with an index that will be extremely useful. Don’t beintimidated by the bulk of information. We have designed thismanual to be clear. You don’t need to be a student in economics inorder to understand it. You can always find the information you need.The Settlers is a game that will provide you with an enormous amountof pleasure and entertainment.
The Blue Byte team. October 1993.
pm5.manual#eng#settl 03.03.1995, 18:52 Uhr6

7
1. On the right pat h...
1. On the right path...
1.1 Computer specifications
The Settlers requires an Amiga or an IBM PC or compatible (386minimum) with a hard disk. As this program will exploit eachcomputer to the best of its capabilities, you do not have to worry aboutyour configuration, especially if you are using a PC. Based on yourcomputer’s memory capacity, the program will automatically usethis memory as needed. If you have more than enough memory, thegame will be even more enjoyable to play because you can play withthe sound effects, music and other new possibilities of the game.
1.2 The Settlers - Presentation
Congratulations! By purchasing The Settlers, you have justacquired an extraordinary program that will fully exploit thecapabilities of your Amiga or PC. This is true whether you are usingan Amiga 500 with 1 MB, an Amiga 4000 with 10 MB and a hard drive,or a PC 386 or DX2 486. The Settlers is an "intelligent" program thatthinks for you and a game where you are not required to take care ofeverything yourself.
The Settlers is a "linear timing" program: no matter what you door what calculations are made by the computer, the settlers willalways work or fight at the same speed. This is a new feature that doesnot exist for programs as complex as this one. You will decide where
pm5.manual#eng#settl 03.03.1995, 18:53 Uhr7

8
1. On the right path...
you want your settlers to construct buildings, how the roads will bemade, where to search for raw materials, and where they will attackthe enemy. You can also modify numerous parameters that will affectthe behaviour of your settlers.
The computer will handle the execution of your decisions and itcommands your numerous settlers. The men will build houses, cutdown trees, work in the mines, construct weapons and tools,dispatch construction materials in the places where they are needed,defend their castles against enemy knight attacks, provide theminers with food, and many other things!
The Settlers will allow you to play in several ways: alone, in teamsor in training mode. Alone or in a team against the computer, aloneor in a team against opponents controlled by the computer that youhave chosen yourself, in 2 player mode and against opponentscontrolled by the computer, or just with players controlled by thecomputer in order to watch the world evolve without you having tointervene.
The goal of the game is to build a prosperous and well organizedcity and to gain control of the enemy cities. This might initially seemsimple to do, but in reality it is much more complex. If you considerall the game’s problems inversely, that is from the end of the gamefirst, you will understand better:In order to conquer the enemy castles, you will need many knights.To keep their moral up, you will need gold, and for the weapons, you
pm5.manual#eng#settl 03.03.1995, 18:53 Uhr8

9
1. On the right path...
will need iron and coal. These raw materials are found in mines. Themines must be provided with food and the raw materials must bemelted in a foundry.
The food supply is insured by the fishermen and the farmers, butthey need tools, as do all other workers. These tools are made bysmiths. To build huts, houses, castles you will need constructionmaterials and workers...
But don’t worry, you won’t have to remember all this for themoment; everything will be explained along the way. We hope thatyou will enjoy this game.
The Blue Byte team
1.3 Configuration
This paragraph concerns the Amiga version only.
The program will try to use all the capabilities of your computer.We recommend that you read the following paragraphs carefully toinsure its proper functioning. If you are not familiar with computersand the words "Chipram" and "Fastram" don’t mean anything to you,do not read chapters 1.3 and 1.5.
pm5.manual#eng#settl 03.03.1995, 18:53 Uhr9
10
1. On the right path...
a) General remarks about the configuration
Do not forget that any program already loaded when the game islaunched will take up memory space; memory space that might beneeded by the Settlers game in order to run properly. We recommend,therefore, that you do not load other programs into memory if you aregoing to use the game. If several programs are automatically loadedwhen the computer boots up, use another startup-sequence for TheSettlers.
b) Configuration for 512 KB of Chipram or 1 MB of totalmemory only.
If you have 1 MB of Chipram and at least 1.5 MB of RAM total, youcan skip this paragraph. The program uses Chipram memory for thescreens, the animation, the sound effects and the music. If you haveonly 512 KB of Chipram, you will have to sacrifice something: you willhear only part of the sound effects, and no music at all. The soundeffects are loaded based on the available memory. You can increasethe available memory by:
- disconnecting unnecessary disk drives- not activating the hard disk (if it contains Chipram)- avoiding to launch other programs
The rest of the available memory is used by the program for the
pm5.manual#eng#settl 03.03.1995, 18:53 Uhr10

11
1. On the right path...
data, the scenery, and the graphics. In order to use the scenarios withonly 1 MB of memory, we recommend that you reread the pointsmentioned above.
1.4 Hard disk installation
If you want to use the game from floppy disks, you can skip thisparagraph.
PC:
WARNING!!! Before using the original floppy disks, we recommendthat you make a backup copy of them.
1) Turn your computer on as usual
2) When the system is operational, insert the first game disk into oneof the drives
3) Enter the letter of this drive followed by a colon (:) and press theReturn key. For the internal drive, for example, enter the letter a:. Ifyou have a second drive, this is usually designated by the letter b:.
4) Enter the installation program’s name (INSTALL), then press theRETURN key.
pm5.manual#eng#settl 03.03.1995, 18:53 Uhr11

12
1. On the right path...
5) When the program has been launched, you will have to specify thepath for the installation. If you want to change the path proposed bythe program by default, enter the new path and confirm by pressingthe RETURN key. The installation of the program will begin.To quitthe installation program before the end of the installation procedure,press the ESCAPE key.
6) When the installation program is finished, enter (SETTLERS) tolaunch the game.
AMIGA:
WARNING!!! Before using the original floppy disks, we recommendthat you make a backup copy of them.
1) Start up your AMIGA as usual from the hard disk. When theWorkbench screen appears, insert the first disk (with the installationprogram) into one of the drives.
2) Open the disk by double clicking on its icon. A window will opencontaining other icons. One of these icons, "Install", represents theinstallation program for Blue Byte games.
3) Launch the installation program by double clicking on its icon.
4) In the installation program’s window, you will see two dialogueboxes. Enter the name of the drive where the installation program is
pm5.manual#eng#settl 03.03.1995, 18:53 Uhr12

13
1. On the right path...
located in the upper dialogue box. This will normally be the internaldrive "DFO:" and this is the drive indicated by the program by default.If the installation floppy disk is located on the external drive, enter thecorresponding letter (DF1-DF3). Confirm by pressing the RETURNkey.
The lower dialogue box is only used for the target drive. As this disknormally carries the name "DHO:3", it is the drive selected by default.If you want to install the program in another directory, enter the pathcorresponding to your configuration. As you have probably createda special folder for your games, you can also specify the directory inwhich you want to install the game, for example:
dhO:games/bluebyte/
If the specified directory does not exist, it will be createdautomatically by the installation program.
1.5 Status screen
As the PC version differs in terms of the utilisation of the system’scapabilities, PC users can skip this chapter as the status screen willbe of no use for them. When you launch the program, the statusscreen is displayed. It will tell you how the program is using yourcomputer. It displays the following information:
pm5.manual#eng#settl 03.03.1995, 18:53 Uhr13

14
1. On the right path...
1. WorkbenchIndicates whether the workbench has been deactivated (which allowsthe user to free up memory), if the workbench has not beendeactivated, if start-up programs have been loaded, or if the workbenchhas not been opened.
2. ProgramIndicates if the program is stored in Fastram. If this is the case, theprogram is much faster because it can work in tandem with theBlitter.
3. DataIndicates, as for the program, if the data is stored in Fastram (therebyfurther increasing the speed of the program).
4. SoundsIndicates if the sound effects (none or a part) are loaded or not intomemory (based on the size of the Chipram memory available).
5. MusicIf you have 1 MB of memory, the music must be loaded into memory.
6. The game worldsThe number indicates the maximum size of the game’s world. Thiswill depend on the size of the available memory and can be limited bythe storage device (see 9) or the processor (see 8). You will find moreprecise information in the table at the end of this chapter.
pm5.manual#eng#settl 03.03.1995, 18:53 Uhr14

15
1. On the right path...
7. MissionsYou can undertake missions beginning with a size three world.
8. ProcessorIndicates the type of processor(s) installed in your Amiga.
9. Storage deviceThe games are saved on hard disk or floppy disk. The size of a game’sworld is limited to 5 for floppy disks (size 7 represents 1.6 MB).Moreover, a size 5 world is already immense.
If you play on a PC, do not worry about all this information. Asindicated above, your computer will load all necessary data into itsmemory based on your system’s configuration .
pm5.manual#eng#settl 03.03.1995, 18:53 Uhr15
16
2. To get started...
2. To get started...
2.0.1 Copy protection
When the program is launched, the computer will ask you to entera code. You will be presented with 16 different symbols. For example,if the program asks you which combination of symbols is found at thetop of page 18, look on the page in question and click with the mouseon the corresponding symbols in the correct order. If you click on thecorrect symbols, the program will continue.
2.1 The main menu
This is where all the preliminary parameters are displayed beforethe launching of the game. A maximum of 4 groups of settlers canparticipate in the game. A group of settlers is controlled by the player,by the computer or by two players working as a team.To choose a game mode, click on the second icon from the left. Theicon’s graphic and the text will indicate the game mode chosenamong the following modes:
Mission: Orders fixed; opponents controlled by the computer(1 player), or 2 players in a team, with blue settlers.
Training: Orders fixed for new players (1 or 2 players in a teamwith blue settlers).
pm5.manual#eng#settl 03.03.1995, 18:53 Uhr16

17
2. To get started...
1 player: Opponents that can be modified at will and game for1 player or 2 players in a team with blue settlers.
2 players: Opponents that can be modified at will and gamefor 2 players against each other. One of the players plays withthe blue settlers, the other with the red settlers.
Demo mode: Here you are only an observer. You watch thecomputer colonize itself.
In the lower half of the screen, you see the participants of thegame. In the left part of the screen, you will see an image. Onthis image, you will see a friendly settlement (if this is thegroup of settlers that you control) or a less-friendly adversary(the computer). If you do not see an image, this groupof settlers does not exist in the game. The different
opponents controlled by the computer have their ownpersonalities, and can be aggressive or reserved, ready to takerisks or preoccupied by their own security. You will findfurther on indications concerning the personality of theseopponents. On the right side of the image, you will see three barshaving the colours of blue, green and red. These indications arevery important. The blue bar indicates the state of the stocks ofa settlement (city) at the beginning of the game. A large stockallows for rapid expansion and procures certain advantages. Asmall stock creates problems when the city begins to expand.If you are a novice, make sure that the blue bar is always above the
pm5.manual#eng#settl 03.03.1995, 18:53 Uhr17

18
2. To get started...
50% level. The green bar indicates the intelligence level of the playerscontrolled by the computer. This level affects the rapidity of theiractions and reactions. For the players, the green bar is always at itsmaximum (we assume that you are extraordinarily intelligent...) andhas no other signification.
The red bar represents the growth rate. The higher it is, the fasteryour settlements will reproduce, and the faster you can expand.Novices should try to keep this bar above the 50% level.
According to the game mode chosen, you can modify certain otherparameters. To start off, we recommend that you try the traininggame No1.
Mission: You will see, in the middle of the screen, the current level(beginning 1), the password (at the beginning "START") and twoarrows. When you accomplish a mission, the program will display thepassword that allows you to restart the game at the same level. Clickon the password and enter the new password. Do not forget to pressthe Return key to confirm. If the password is incorrect, the message"FALSE" will be displayed. If the password is correct, you will see thelevel to which you will have access.
With the arrows displayed to the right of the password, you canreturn to the levels already completed. You can also activatethe team mode by clicking with the mouse in the left frame.
You will see two mice. We recommend that you do not try the
pm5.manual#eng#settl 03.03.1995, 18:53 Uhr18
19
2. To get started...
mission orders right away.
- Training game: there is no password for training. You can directlyselect each available training game by using the arrows. As for themissions, you can activate the team mode by clicking with the mouse.
- 1 player, 2 players and demo mode: You can modify numerousparameters for these game modes. The size of the world isdisplayed in the centre. To modify it, click on the small or thelarge planet. Novices should probably not play with worlds with
a size greater than 3, as they will be quickly submerged by the trainof events... You can modify all data concerning a group of settlers:
- the blue bar for the state of the stocks- the green bar for the intelligence (when the opponents are controlledby the computer).- the red bar for the growth rate- the button to activate or deactivate the opponents controlledby the computer- the image of the adversary controlled by the computer, to chooseanother.
The initial data is chosen randomly. If you are a novice, werecommend that you change the parameters to your advantage,especially where the stocks are concerned, because a large stock isvery important. If you want to see the game in demo mode, you canincrease the intelligence level of the players controlled by the computer,
pm5.manual#eng#settl 03.03.1995, 18:53 Uhr19

20
2. To get started...
but reduce their stock. The combination of numbers displayed to theright is a randomly chosen number for the creation of a world. Thisnumber decides the location for the mountains, lakes, deserts,forests, etc. in this world. The same combination of numbers willproduce, therefore, the same world. To change worlds, click on theicon to the left with the question mark and another combinationof numbers will immediately be chosen. The icon remaining inthe middle of the screen and the turning star, that you have perhapsalready noticed, will be explained in the following section.
In 1 player, 2 player, or demo mode, you will want to set the valuesof each participant at the same level. In the middle of the frame tothe right, you will see a small arrow. Click on the icon and the datafor the player (or the adversary controlled by the computer), which islocated to the far right, will be the same for all the other participants.The player situated furthermost to the right is always used, becausethe only players that have modifiable levels of intelligence are thosecontrolled by the computer.
To launch the game, click on the "START" icon. The screen willfade to black and the computer will calculate the game’sworld. A red bar will inform you of the progression of the
calculations.
To reload a previously saved game, select the "LOAD" option. A fewseconds later a window will appear with a list of files saved on diskor floppy disk. If you want to change floppy disks, insert the new disk
pm5.manual#eng#settl 03.03.1995, 18:53 Uhr20

21
2. To get started...
and click on the change disk icon. Click on the name of thesaved game and then on "load" to load the game, or on "Exit"to cancel. When a game is loaded, a message appears on the
screen to tell you if the loading procedure went well or if there wereany errors encountered. Click on "Exit". If the game was correctlyloaded, a new screen will be displayed and you will see all theopponents and all the values of the beginning of the game. This isimportant if you do not remember against whom you played, or thestrength of your opponents. With the exception of the title, only the"Start" and "Cancel" icons remain activated. The "Start" icon allowsyou to continue the game, the "Cancel" icon to return to the mainmenu. To quit the game, click on the EXIT icon in the upper left cornerof the screen.
The additional options icon is discussed in paragraph 6.5.
2.2 The game - The commands
You can play alone or with two players, with all functions beingidentical. The only differences are that in 2 player mode the screenis divided in two, the image of the world is smaller and the icons arecloser together. As no additional explanation is generally required forthe 2 player mode, it will only be rarely discussed in the informationthat follow. After launching the game, you will see a part of the worldon the screen: perhaps some grass with some trees or a lake. Tosimplify future explanations, this part of the world will be called the
pm5.manual#eng#settl 03.03.1995, 18:53 Uhr21

22
2. To get started...
"screen" from now on. At the bottom of the screen are 5 differentround icons that have different functions. They will be called the"Menu" from now on.
As we have already mentioned, you will only see a part of a worldon the screen. According to the size of the screen, the world can rangefrom 10 to 1200 times this size for giant worlds. To move around ina world, press the right mouse button and drag it in the desireddirection. When you arrive at the desired destination, release themouse button. Look at the scenery for a moment. You will see deserts,lakes, forests, mountains, and many other things.
Perhaps you have noticed your pointer in the middle of the imagewhen you launched the game. It is made of a central symbol and 6
surrounding points. You position this pointer whereyou want to activate one of the game options. If, forexample, you want to construct a house or a roadsomewhere, you must first place your pointer on thisarea. To place the pointer on the desired area, just
click on the screen with the left mouse button. The pointer’s centralicon, which is also displayed in the lower left of the menu, willprobably change. We will discuss this in the following paragraphs.
SPECIAL CLICK: further on in this manual, we will often use theterm "Special Click". This means that you do not click only on the leftbutton as usual but you must additionally press the right button.Therefore, a click on the left button while pressing the right button
pm5.manual#eng#settl 03.03.1995, 18:53 Uhr22

23
2. To get started...
is called a "special click". Why? Certain functions in the game are verypowerful! For example, an accidental click on the mouse coulddestroy an important building. This special click is moreover oftenused for additional functions.
2.3 The map
In the middle of the menu, you will see a "map" icon. Click on thisicon with the mouse. A new window will appear above the game’s
world. You will see a geographic map with different icons. Onthis map, the prairies are indicated in green, the deserts inyellow, the lakes in blue and the mountains (according to their
height) in brown and white. If you click somewhere on the map, yourscreen will move to the corresponding area and the world and mapwill disappear. Try clicking on a lake or a desert: it will immediatelyappear on the screen. You can similarly select a faraway area veryquickly by scrolling through the world until you reach the area, asexplained in chapter 6.
A world is "endless", which is to say that if you continue movingto the left you will eventually return to your point of departure. Theworld does not have, therefore, any „edges“. You will understand thisbetter if you select the map again and click on the icon located nextto the magnifying glass in the lower right area. You will seeslanted and horizontal lines that define the size of the world.For example, if you have selected size 3, you will notice that the world
pm5.manual#eng#settl 03.03.1995, 18:53 Uhr23

24
2. To get started...
is represented 4 times on the map, and 16 times for a size 1 world.The different sections are connected to each other and this is why thegame’s terrain has no limits. The size 5 world will fit perfectly in themap section. The size 8 world is enormous. You will only see oneeighth of the world on the map! With size 3 and larger worlds, you canmove both the map and the screen: press the right mouse button anddrag in the desired direction. Do not forget that this movement is notpossible for smaller worlds (as they adapt themselves to the sectionof the map).
With the magnifying glass icon, you can zoom in on the map. Theother icons displayed at the bottom of the map are discussed furtheron in paragraph 3, because it is first of all necessary to haveconstructed something to see their utility.
2.4 The castle
At the beginning of the game, you begin by constructing yourcastle, which will serve as headquarters. The area where youplace this castle is of utmost importance for the rest of thegame. If you are a novice and you have a large amount of
stocks, you will not run into any immediate problems and thelocation of the headquarters does not have an extreme importance.However, if you have limited stocks, a poorly placed castle can entailfatal consequences if you should lack certain materials when theenemy is already constructing weapons. To illustrate the most
pm5.manual#eng#settl 03.03.1995, 18:53 Uhr24

25
2. To get started...
important aspects, we have established a list of conditions that arefavourable to the construction of your castle:
- avoid narrow valleys in the mountains. Look for a relatively flat area.
- choose an area with raw materials that are close to the castle for theconstruction of new houses (trees and grey granite).
- choose a terrain that has a large amount of underground riches.
The first two points can easily be verified on the screen. If there area few trees and some granite, and if the environment isnot too inhospitable, these conditions will be fulfilled.The underground riches are also very important. Theunderground riches are: gold, iron, coal and granite.They are found only in the mountains. To see howmuch underground riches are in the zone displayed on
the screen, you can ask the geologist who will give you anoverall estimation of the area’s riches. The second icon to theleft on the menu represents the geologist. Click on this icon toobtain the desired information. You will know what riches are presentand where they are located, from top to bottom: gold, iron, coal andgranite.
All the values do not need to be at a maximum, but if there is nocoal, iron or gold, or only small quantities of the three, look foranother area. Click on the Exit icon to back up a step. The importance
pm5.manual#eng#settl 03.03.1995, 18:53 Uhr25
26
2. To get started...
of the underground riches also depends on your strategy. You willunderstand this as you read this manual. Often with the size 1worlds, it is possible that certain riches do not exist at all, or thatthere are no mountains (and therefore no riches). In this case, donot look desperately for another area and forget about the riches.With the friendly geologist, you only have an estimation of the
riches in the area, but you do not know exactly in which mountainsthey are to be found, or if you are going to find them. Your settlers willhave to find them for themselves, later in the game.
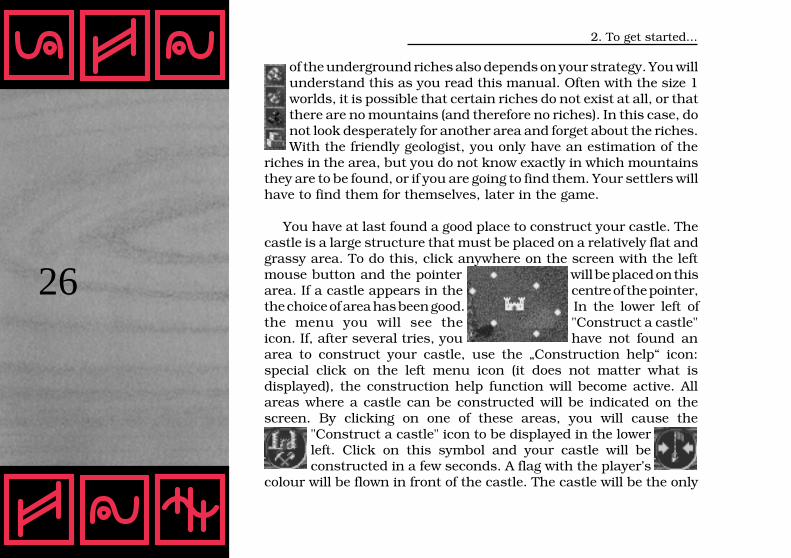
You have at last found a good place to construct your castle. Thecastle is a large structure that must be placed on a relatively flat andgrassy area. To do this, click anywhere on the screen with the leftmouse button and the pointer will be placed on thisarea. If a castle appears in the centre of the pointer,the choice of area has been good. In the lower left ofthe menu you will see the "Construct a castle"icon. If, after several tries, you have not found anarea to construct your castle, use the „Construction help“ icon:special click on the left menu icon (it does not matter what isdisplayed), the construction help function will become active. Allareas where a castle can be constructed will be indicated on thescreen. By clicking on one of these areas, you will cause the
"Construct a castle" icon to be displayed in the lowerleft. Click on this symbol and your castle will beconstructed in a few seconds. A flag with the player’s
colour will be flown in front of the castle. The castle will be the only
pm5.manual#eng#settl 03.03.1995, 18:53 Uhr26

27
2. To get started...
building that will be "freely" given to you. All the other houses will bebuilt by your settlers. At a certain distance from the castle,you will see a barrier of black and white poles, or of redposts in the water. They indicate the limits of your propertyand, therefore, where you have the right to build otherbuildings.
The geologist’s help will be available to you only at the beginningof the game. Once your castle is built, you will have to manage byyourself.
2.5 Constructing buildings
You have taken the first step. Your castle has been constructed. Youcan now have your settlers build other houses. If you place yourpointer somewhere within the limits around your castle, the centralicon will tell you the type of buildings that you can construct:
Two arrows: you cannot construct here.
Flag: You can only place a flag here.
pm5.manual#eng#settl 03.03.1995, 18:53 Uhr27
28
2. To get started...
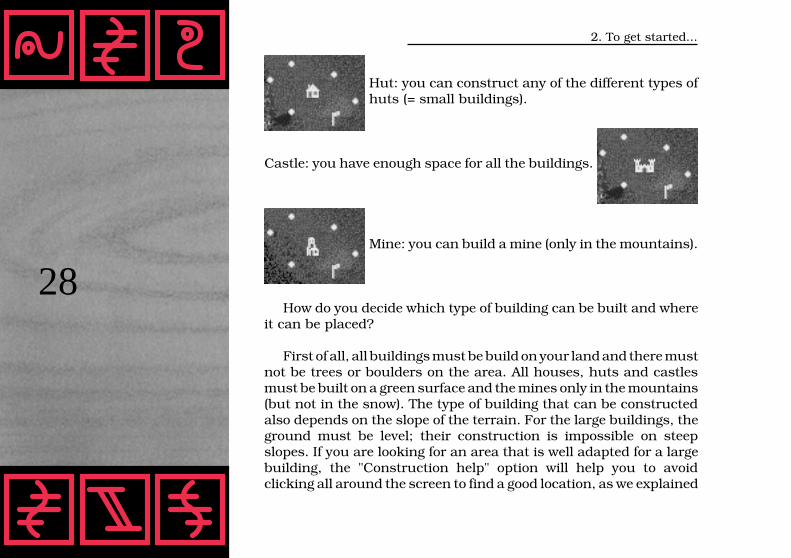
Hut: you can construct any of the different types ofhuts (= small buildings).
Castle: you have enough space for all the buildings.
Mine: you can build a mine (only in the mountains).
How do you decide which type of building can be built and whereit can be placed?
First of all, all buildings must be build on your land and there mustnot be trees or boulders on the area. All houses, huts and castlesmust be built on a green surface and the mines only in the mountains(but not in the snow). The type of building that can be constructedalso depends on the slope of the terrain. For the large buildings, theground must be level; their construction is impossible on steepslopes. If you are looking for an area that is well adapted for a largebuilding, the "Construction help" option will help you to avoidclicking all around the screen to find a good location, as we explained
pm5.manual#eng#settl 03.03.1995, 18:53 Uhr28

29
2. To get started...
for the castle. Special click on the left menu icon. You will immediatelysee the areas where you can construct a building on the screen. Youcan now choose an area. To deactivate the construction help, specialclick again on the left menu icon.
Depending on which icon is in the centre of the pointer, you willalso see other icons in the lower left of the menu: "Place a flag",
"Construct a hut", or "Construct a largebuilding". When you click on theseoptions, a star appears above the
construction symbol in the menu, along with a new window with achoice of buildings. To construct a large building, you have a choiceamong 20 buildings. As they do not all fit into one window, you canscroll through them by clicking on the "change page" icon. All thebuildings are discussed in more detail further on in this manual. Forthe moment, chose one of them and click on it to give the order toconstruct. The window disappears and you will see the firststone of the construction or a cross on the screen. The firststone means that a house will be built in this place. The cross has thesame meaning, but the ground must be levelled first so that it canprovide a solid foundation for the large building that you havechosen.
If you decide not to construct a building on the chosen area, clickon the turning star and quit the construction mode. To transform aconstruction site into a finished building, you must construct a roadbetween the castle and the site. We will discuss this in the followingparagraph.
pm5.manual#eng#settl 03.03.1995, 18:54 Uhr29

30
2. To get started...
2.6 Constructing roads
The settlers need roads so that they can access the different areasof their city. These roads always run from one flag to another. Yournetwork of roads is very important. A good network ensures the rapidtransfer of goods and, when there are problems with the transportation,allows you to more readily find other solutions. The flags serve asintersections. 6 roads can begin at each flag to lead to other flags.There is a flag in front of each one of your buildings.
In the beginning, you must construct a road when you want tobuild your first house. You will see a flag in front of the construction,
just like the flag in front of your castle. Click on one of the twoflags and a symbol for the construction of roads will appear inthe pointer and in the lower left of the menu. Select the
icon in the lower left of the menu. A turning star will appearand the pointer will contain two new symbols. You are now in"Road construction" mode.
The different symbols around the pointer have the followingsignifications:
- zone hatched in red and yellow: you cannot construct roads inthis direction.
- different slope symbols that range from red (very steep ascents anddescents) to green (flat) and passing by the yellow: you can
pm5.manual#eng#settl 03.03.1995, 18:54 Uhr30

31
2. To get started...
construct roads in this direction.
- "UNDO" symbol
If you click on this icon, you destroy the last part of the road made.If you click on one of the slope icons and a part of the road appears,the pointer contains new symbols. Repeat this operation until theroad meets the other flag. The star in the lower left disappears andthe pointer takes its initial form. The road is constructed and you willquit the construction mode. The first settlers will begin to leave yourcastle. Do not worry about them for the moment. We will discussthem in the following paragraph. The meaning of the different slopeicons is very simple: when you look from left to right, the iconindicates the slope of the terrain: a rapid ascent will be indicated, forexample, by a slope on the icon that climbs from left to right. Thecolour is an additional help. It allows you to see at a glance the slopeof a road. Red indicates a steep slope, yellow a moderate slope andgreen a flat terrain. The flatter the terrain, the faster the merchandisecan be distributed, because the settlers will tire much more quicklyon slopes than on flat ground. It is often preferable to make a smalldetour if you can avoid a red, or very steep, slope. Novices will nothave to worry too much about slopes. If you construct a road and thendecide that you no longer want it, click on the turning star. You willquit the "road construction" mode and the road will be erased.
If you want to branch off from an already existing road, you mustplace a flag on the road. Click on the desired area. If it is possible to
pm5.manual#eng#settl 03.03.1995, 18:54 Uhr31
32
2. To get started...
place a flag there, a flag will appear in the pointer and in the left ofthe menu. If it is not possible to place a flag there, use the"construction help" function. It is possible that placing another flagin a road is impossible because there is already a flag on this road thatis very short, right next to the chosen spot, or because there are treesin this spot. If you can create a new intersection, you will see the"Place flag" icon in the menu. Click on this icon to construct the newintersection. You also can prolong an existing road or complete theroad with a special click and, if possible, a flag will be placedsimultaneously.
You can also construct water ways. Two flags must be on thebanks of a lake for a water way to be built. Construct a water waybetween the two flags in the usual fashion. Do not forget to connectthis water way with your network of roads. The water way serves asa guide for the navigator who will use it later to transport merchandise.It is clear that the other settlers cannot use a water way! This is whythe water ways are used only for the transport of merchandise andare not very important for novices. When constructing your roads,make sure that a road runs on the land OR on the water, but not bothat the same time!
2.7 The first settlers
When the road leading to the first construction site is built, thefirst settlers will begin to leave your castle. This paragraph will
pm5.manual#eng#settl 03.03.1995, 18:54 Uhr32

33
2. To get started...
explain what they are doing.
The first settler who leaves the castle is a transporter. He takes 100steps on the new road and looks and sees if there is somemerchandise that needs to be transported. As soon as he sees
some merchandise on the road to transport, he will take it to the nextflag.
At the beginning of the game, you will have 20 settlers. Some ofthem already have jobs, others are waiting for jobs.
If you want to build a large building, a settler with a orange helmetand a shovel (the leveler) will arrive and begin walking towardsthe construction site. Once there, he will begin to level the
ground. When he has finished, the cross on the site will become thefirst stone and the settler will return to the castle.
If you want to build a small building, a settler with a yellow helmet(construction worker) will arrive looking for his work area. Hewill then wait for the construction material to arrive so he can
begin building the house.
Another settler will distribute the construction material from thecastle to the construction site: this will always be wood and,eventually, stones (according to what type of building is beingbuilt). The transporter will take the merchandise and carry itto the construction site. The construction worker will
pm5.manual#eng#settl 03.03.1995, 18:54 Uhr33

34
2. To get started...
immediately begin working and soon you will see scaffolding and,eventually, the building itself. The small huts will be built veryquickly; a castle takes longer.
A worker returns to the castle as soon as he finishes his job. Aworker will then arrive to start working in the new house. Theoccupation of the worker who moves in depends on the type of housethat you built for him. The functions of each worker and of eachbuilding are explained further on.
If you construct a water way, a settler with a boat will leave thecastle and walk towards the new water way and wait for
merchandise.
You do not have to wait for the construction of your house to befinished before doing other things. You can give orders to constructother things (houses, roads, etc.).
Your settlers will go about their tasks automatically, which is tosay that they will do their best to do the work with what they have attheir disposal. This is true not only for the transporters and theconstruction workers that we just saw, but also for all the people thatyou will see later on in the game, such as the forest rangers, thelumberjacks, the carpenters, the quarrymen, the miners, thefishermen, the farmers, the pig farmers, the millers, the bakers, thebutchers, the different knights, the casters, the locksmiths, theblacksmiths and the armorers.
pm5.manual#eng#settl 03.03.1995, 18:54 Uhr34

35
2. To get started...
2.9 Demolition
You may want to demolish a building, a road or a flag for a numberof reasons. This operation is discussed in this paragraph. To avoiddemolishing something by inadvertently pressing a mouse button, aspecial click is required when demolishing something.
Demolishing buildings: Click on the desired building. Thesecond menu icon from the left will transform into a ruin.Special click on this ruin to set the building on fire and burnit down. If a settler is living in the building, he will return to the castleand wait for a new job.
Demolishing roads: Click anywhere on a road and the "demolishroad" icon will appear in the menu. Special click on this iconto remove the road. The transporters that worked on this roadwill return to the castle and wait for a new work. The other
settlers on this road will run towards the next flag and continue ontheir way.
Demolishing flags: You can demolish a flag only if it does notbelong to a building and if it is not yet connected to something elseby a road, or if there are exactly two roads leading to the flag. Thereasons are simple: if one road leads to the flag, it would leadsuddenly into nothing, whereas three or more roads can intersectwithout needing a flag. When there are two flags, the flag can beremoved and the two roads will merge into a single road. Click on the
pm5.manual#eng#settl 03.03.1995, 18:54 Uhr35

36
2. To get started...
flag that you want to remove and a ruin will appear in the menu (ifthe flag’s demolition is possible).
New construction: If you want to construct a new building in theplace of another, you do not have to demolish the old building, waitfor it to burn down and then give the order to construct. You candirectly give the new order to construct in the desired location byplacing the pointer on the old building and selecting the constructionfunction as usual. For security reasons, you will have to choose thebuilding with a special click to avoid accidentally destroying animportant building. The old building will be burned down and youcan order the construction of a new building.
2.9 Saving and ending the game
In 2 player mode, these options can only be activated by the playeron the left. Click on the right menu icon and new options willbe displayed. For now, do not pay attention tothe upper icons, but only to the "SAVE" options
and "END" at the bottom of the screen.
To quit the current game, click on the "End" option. The programwill ask you to confirm. If you have been playing for more than oneminute or if you have not saved the game for more than one minute,the program will ask you to confirm a second time. You will thenreturn to the main menu.
pm5.manual#eng#settl 03.03.1995, 18:54 Uhr36

37
2. To get started...
The "SAVE" option allows you to access the saved file menu. Thelist of saved files will be displayed on the screen. If you want to changefloppy disks, insert the new and click NEXT on the "Change Disk"option. To save the current game, click on one of the 10 areas andthen on the "New name" option to enter a new name. You canalso enter the date when the game was saved to avoid anyconfusion. If you want to save a game with the same name as a gamealready saved, you don’t have to enter a new name. Be careful! Thegame already saved will be erased by the new game. Click on theSAVE option to save the current game. Always read the floppy disk’smessage to see if the game has been correctly saved. If you save ontofloppy disk, we recommend that you format several floppy disks andthat you put labels on them before beginning to play. We alsorecommend that you save the game onto two different floppy disks foradditional security. If one of the floppy disks is defective, you will haveonly lost an hour or so of the game.
If you want to load (save) from a floppy disk, insert the new floppydisk and click on the change floppy disk icon. The list of files on thenew floppy disk will be displayed.
pm5.manual#eng#settl 03.03.1995, 18:54 Uhr37
38
3. Training
3. Training
You now know the game’s basic principals and can begin with thefirst training games. Each building will be explained to you and theprogram will tell you where you should be careful. Each traininggame contains orders that will be specified in the instructions. Youcan then play and follow the game’s progression on the screen. Theparagraphs contain the corresponding explanations and you willquickly learn how to play and the game will become more interesting.
In the training games, you have a large stock that allows you toobtain tools, food, construction materials and large quantities ofsettlers.
Do not hesitate to save training (or other) games from time to time.If, in the instructions for advanced players, you find some usefulinformation, you can use the saved games (which already containmany buildings) to test this information. When certain important
events occur, you will be directly informed. You will hear a noiseand a small blinking piece of paper will appear in the bottom left
of the menu. The different events about which you will be informedwill be discussed in detail in this manual. If you click on the piece ofpaper, a message will be displayed on the screen and the computerwill move the screen to the place where the event is taking place. Ifyou click on the hook in the window, the message will disappear.
pm5.manual#eng#settl 03.03.1995, 18:54 Uhr38

39
3. Training
3.1 Game 1 - rural property
Guard huts, watch towers, castles and the geographic map.
Orders: have your settlers construct aguard hut, a watch tower and a castle.
Explanations: After beginning the game,you will choose a location to build yourcastle. You don’t need to worry aboutthe fertility of the soil or the trees. Givethe order to construct the 3 requiredbuildings and wait (use the help
functions for construction if you cannot find a good location rightaway). For the watch tower and the castle, a leveler will begin bylevelling the ground. You will have to have the construction materialstransported. While the hut requires only one delivery of wood andstones, the castle will require at least 10. A second transporter will
leave the castle to help his colleague. As soon as the guard hutis built, a knight will leave your castle in order to occupy it.When the first knight arrives in a guard hut, a watch tower ora castle, your rural property will grow. Look and you will see itslimits move. So that you will be informed of this growth (if youwere looking elsewhere in the world), you will hear a noise tellingyou that you have received a message. Click on the piece ofpaper and you will learn that another building has beenoccupied by a knight. Next, some gold will be brought to the hut,
pm5.manual#eng#settl 03.03.1995, 18:54 Uhr39

40
3. Training
but we will look at this a little later. A white flag will be flown in frontof the guard hut. Later, flags will also be flown on the watch tower andon the castle towers. These flags have the following significations:
- The flags’ height indicate the building’s occupation rate. A hutcan contain 3 knights, a watch tower 6 knights and a castle 12knights.
- the icon on the flag indicates the enemy’s distance. The whiteflag signifies that there is no enemy colony and that you will notbe attacked in the immediate future. If, later, you play againstopponents controlled by the computer or another player, you will seeother symbols.
When the enemy is closing in, a black stripe will appear on the flagand, when the enemy approaches, the stripe changes to a blackcross. When the enemy is right outside your door, the flag has a verythick black cross. In the latter case, you will have to prepare for anattack. Your settlers are probably still in the process of constructingthe watch tower and the castle. This is a good time to familiarizeyourself with the geographic map. Click on the map icon and the mapwill be displayed. Outside the scenery, you will see several blue dotswhere your buildings (finished or still under construction) arelocated. To better see the size of the world, click on the right iconunder the map. The left icon activates the presentation mode in oneof the 3 following modes:
pm5.manual#eng#settl 03.03.1995, 18:54 Uhr40
41
3. Training
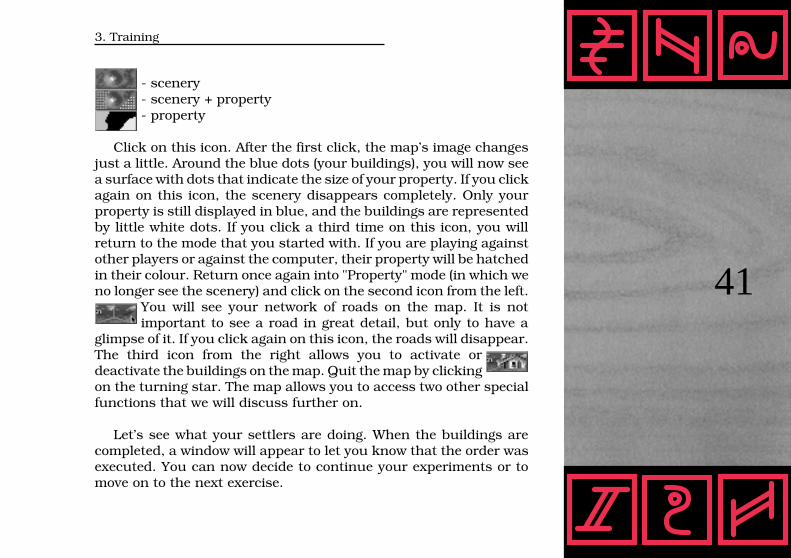
- scenery- scenery + property- property
Click on this icon. After the first click, the map’s image changesjust a little. Around the blue dots (your buildings), you will now seea surface with dots that indicate the size of your property. If you clickagain on this icon, the scenery disappears completely. Only yourproperty is still displayed in blue, and the buildings are representedby little white dots. If you click a third time on this icon, you willreturn to the mode that you started with. If you are playing againstother players or against the computer, their property will be hatchedin their colour. Return once again into "Property" mode (in which weno longer see the scenery) and click on the second icon from the left.
You will see your network of roads on the map. It is notimportant to see a road in great detail, but only to have a
glimpse of it. If you click again on this icon, the roads will disappear.The third icon from the right allows you to activate ordeactivate the buildings on the map. Quit the map by clickingon the turning star. The map allows you to access two other specialfunctions that we will discuss further on.
Let’s see what your settlers are doing. When the buildings arecompleted, a window will appear to let you know that the order wasexecuted. You can now decide to continue your experiments or tomove on to the next exercise.
pm5.manual#eng#settl 03.03.1995, 18:54 Uhr41

42
3. Training
3.2 Game No 2 - Construction materials
Forest house, a lumberjack’s hut, a saw mill, and a quarry
Order: Fabricate new construction materials. At least 5 units ofwood and 5 units of stone.
Explanation: This time, you will have to watch the scenery veryclosely. Choose an area with trees and (especially) a few slabs ofgranite (the large grey boulders) and place your headquarters next toit.
You must obtain stones and wood. These materials are necessaryfor the construction of buildings and are generally the first thingsthat you must take care of in a new settlement. The stones come fromthe slabs of granite that a worker will look for in a quarry. The woodis a little more complicated. You need a lumberjack to cut down treesand a carpenter to transform the trunks into boards. The wood canthen be used. The forest ranger is described in this chapter becausehe is the one who plants the new trees.
Place a lumberjack’s hut near the trees, preferably in the middleof a small forest, and a quarry somewhere near the slabs of granite.
pm5.manual#eng#settl 03.03.1995, 18:54 Uhr42

43
3. Training
Look for an appropriate location for the saw mill (which is a largebuilding) and place the forest house where there are not too manytrees. Connect the buildings with roads. If you have done everythingcorrectly, your work is finished. The rest will be done by your settlers!
They will progressively build huts, level the ground for the sawmill, and the workers will arrive after the construction.
The lumberjack will go to his hut and leave it a little while later tofind a tree to cut down. After cutting it down, he will lop off thebranches and bring the trunk to his hut. He will then rest a while
before returning to work. A transporter will see the trunk and willcome and take it. As your saw mill is probably still under construction,the trunk will be temporarily stored in the castle.
The quarryman will climb on a slab of granite and hammer it withhis pickaxe until he extracts a few stones. He will put them infront of his hut where, as for the lumberjack, a transporter will
come and take them to the castle (if the stones are not needed on aconstruction site).
The forest ranger is constantly in the process of planting newtrees. After a while, the trees will grow and can then be cut down.If you cut the trees down without planting new ones, you will
quickly find yourself confronted with a shortage of wood. You candirectly place a forest ranger next to a lumberjack. The two complementeach other very well. If there is no lumberjack next to the forest
pm5.manual#eng#settl 03.03.1995, 18:54 Uhr43

44
3. Training
ranger, you will soon have a new forest.
The saw mill will certainly be the last building to be completed asit is the largest of the four. The carpenter will go to the saw milland wait for the tree trunks. They will be brought from the castle
or directly by the lumberjack. He will cut them up and put the boardsin front of the mill. These boards will be stored in the castle until theyare used.
You would like to know how you can have regular supply ofgranite? You can plant new trees, but this does not work for stones.However, even when you have used all the slabs of granite there willstill be some deposits of these extremely hard stones under theground. We will discuss the mines later, in another scenario...
As soon as you have fabricated the materials asked for, you willhaveaccomplished your mission.
3.3 Scenario 3 - Food
Fisherman’s hut, farm, wind mill, bakery, farm, butcher’s shopand pipes for the construction of houses and roads.
Objective: Fabricate 5 units of each of the following foods: fish,meat, and bread.
pm5.manual#eng#settl 03.03.1995, 18:54 Uhr44

45
3. Training
Explanation: This time, you will need a lake for your fisherman thatis located close to the castle. You will also need a large area for thefarm, so that the farmer can grow his wheat. On the other hand, youwill not need any underground riches or other raw materials.
To allow your settlers to work during the following explanations,construct the 6 required buildings:
- the farm (a large building), preferably with a lot offree space, as the farmer needs land to plant thewheat.
- the fisherman’s hut, as close as possible to the lake,
- the pigsty, the bakery, the butcher’s shop and the windmill in thelocations of your choice.
If you connect the buildings with roads, be careful not to buildroads on the banks of the lake because the fisherman will not stay onthe roads as he does not want to hinder the transportation of
pm5.manual#eng#settl 03.03.1995, 18:54 Uhr45

46
3. Training
merchandise. While your settlers start to work, we will give you somedetails on the food.
You have 3 possibilities to make the foods:
- the simplest method is by fishing. A fisherman goes fishing and hisfish can be used directly as food. One drawback: you need a lake, andwhen there are too many fishermen on a little lake, it is quicklydevoided of fish. As long as there are fish, they will reproduce. It isrecommended not to "over fish" if you want to continue fishing for along time.
- the second method is by making bread. The farmer grows the wheat.When the wheat is mature, it will be harvested and a transporter willtake it to the miller, who will transform it into flour. The sacks of flourare then taken to the baker who will use them to make bread. You willnote that this method requires much more patience, but its return isbetter and all you will need is some farmland.
- The third method takes as much time as the previous method, butrequires less space. The farmer will also provide the pig farmer withwheat, who will then use it to feed his pigs. When the pigs reproduce,the farmer will remove a pig from his farm. It will be taken to thebutcher who will use it to make meat.
But what is all this food for? It is used in other places, the mines,for example, to feed the miners who work in the mountains. They will
pm5.manual#eng#settl 03.03.1995, 18:54 Uhr46

47
3. Training
strike if they don’t have anything to eat and will stop extracting rawmaterials. The miners eat fish, bread or meat. You will thereforeprovide the food that is easiest for you to fabricate. Looking at thegame once again, your fisherman is already in action and the otherbuildings are still under construction. Be patient: cultivating wheatand raising pigs takes some time. Let’s use this occasion to look atsome useful information concerning road construction. This is notvery important for your current settlement, but it will be when youwill have built 20 or more houses.
Take a look at your settlement. There is often a lot of circulationin front of the castle. Later on, when you have constructed severalbuildings, you will have to place them strategically and build roadsin a practical manner. For example, the transportation of wheat ona road between the farm and the mill that passes in front of the castlewill likely slow down the transportation of construction materials. Werecommend that you group all related buildings together and to builda system of roadways that does not pass in front of the castle. You canput a sawmill near a lumberjack’s hut, for example. As you did notknow this when you were building your city, the screen will show youwhat you should not do. It is also very important to have a goodnetwork of roads.
To accomplish this, you need to take several factors into account.The construction of an additional small connecting road canconsiderably improve the transportation of merchandise. It is difficultto give you precise advice about this because each method has its
pm5.manual#eng#settl 03.03.1995, 18:54 Uhr47

48
3. Training
advantages and disadvantages. The experience that you will acquireafter a few games will help you. But we will nonetheless give you a fewtips:
- Avoid dark or light red (steep slope) sections of road; it is better tomake a detour by using two other road sections because: the speedwith which the merchandise is transported on a road always dependson the SLOWEST section of the road.
- Do not clog up a flag’s 6 possible branches with a road (that, forexample, goes only half way around the flag). You will otherwise havea hard time enlarging your network of roads. In this case, try toconstruct a straighter road.
- It is possible to construct two parallel roads between two flags.When one of the roads is crowded, the other one will be used totransport the merchandise. This solution is not necessary if youconstruct several cross-over roads, but it is very important to have agood network. If certain lanes of transport are crowded and themerchandise begins to pile up, your settlers will be intelligent enoughto transport the merchandise on another, less crowded, road - as longas it exists! The least efficient type of network is the one in the shapeof a star beginning at the castle. In this case, all merchandise will betransported on one of the star’s branches and will have to pass infront of the castle in order to access another branch. An efficientnetwork is a "grided" network that looks like a piece of graph paper.There are many ways to go from one point to another. To simplify
pm5.manual#eng#settl 03.03.1995, 18:54 Uhr48
49
3. Training
things: construct several connections between the buildings andyour city will grow more quickly and with less effort. If you display theroads on the map in "Property" mode, you will clearly see the placeswhere the "cross-over" connections are missing.
Let’s look at our game again and the men at work:
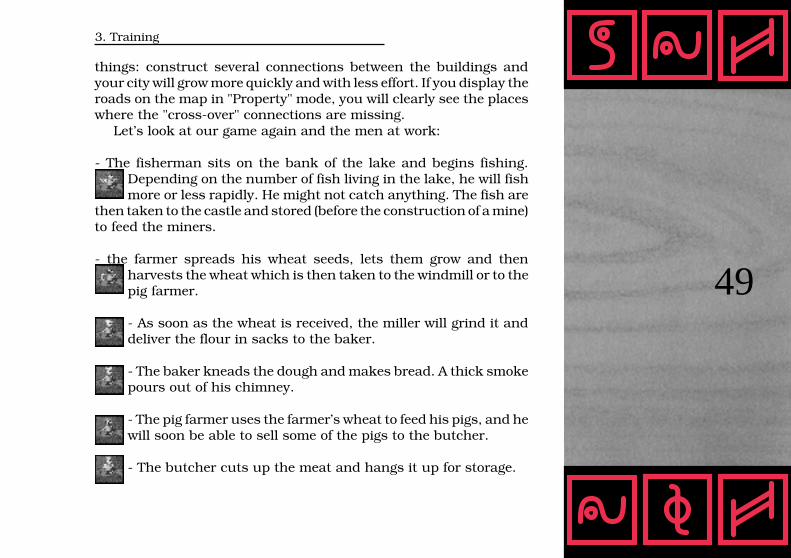
- The fisherman sits on the bank of the lake and begins fishing.Depending on the number of fish living in the lake, he will fishmore or less rapidly. He might not catch anything. The fish are
then taken to the castle and stored (before the construction of a mine)to feed the miners.
- the farmer spreads his wheat seeds, lets them grow and thenharvests the wheat which is then taken to the windmill or to thepig farmer.
- As soon as the wheat is received, the miller will grind it anddeliver the flour in sacks to the baker.
- The baker kneads the dough and makes bread. A thick smokepours out of his chimney.
- The pig farmer uses the farmer’s wheat to feed his pigs, and hewill soon be able to sell some of the pigs to the butcher.
- The butcher cuts up the meat and hangs it up for storage.
pm5.manual#eng#settl 03.03.1995, 18:55 Uhr49

50
3. Training
As you have seen, the farmer provides the pig farmer and the millerwith wheat. His production might at times be insufficient and he willnot be able to deliver his wheat to both of them, even though they arecontinually awaiting a new delivery. In this case, demolish the farmor the windmill, after ensuring that the quantity asked for will havebeen produced and used. Wait for all the foods to be fabricated beforemoving on to the next game.
3.4 Scenario 4 - The riches of the earth and theirexploitation
Gold mine, coal mine, iron mine, granite mine, gold foundry, ironfoundry
Objective: Search for the underground riches and find at least 5units of gold and of iron.
Explanation: the underground riches are extracted from themines in the mountains. Gold and raw ores will be transported fromthe mines to the foundries. You will then have iron and unrefined
pm5.manual#eng#settl 03.03.1995, 18:55 Uhr50

51
3. Training
gold. Iron is the most important raw material because it will allow youto forge new weapons and tools. Gold is also very important becauseit raises the moral of the knights. When the knights think about theirfuture fortune, they will fight with more vigour. Coal is also veryimportant. You will need coal for the foundries and to extract the goldand iron. The blacksmith will also need coal to forge the weapons.Granite is the least important raw material. However, if there are nomore slabs of granite on the surface, the situation could change anda granite mine might become extremely important. You will alwaysneed stones for all the large buildings. As we have already explained,the riches are found in the mountains. Put your headquarters in amountainous region and do not forget to ask for the geologist’s help.Place your castle close to the area where you will find coal, iron ANDgold. Immediately construct guard huts in the area in order to expandyour rural property and prospect in more mountains to findunderground riches. We can now move on to the first geologicalprospections. You must place a flag somewhere in the mountains.Connect this flag to the rest of the network and special click on it. Awindow with a few symbols will be displayed. Disregard them allexcept for the geologist’s head, at the bottom.
Click on the geologist and he will tell you that he has received hismission orders. He will then leave the castle and head off towardsthe mountains. Once there, he will examine the ground and take
a few samples. If he finds any riches, he will jump for joy andplant a sign in the ground to indicate what he has found. Thissign shows a small circle if there are small quantities of underground
pm5.manual#eng#settl 03.03.1995, 18:55 Uhr51

52
3. Training
riches and a large circle if he had detected a large quantity ofunderground riches. The circle can be one of several colours: yellow
for gold, red for iron, black for coal, and light grey for granite. Ifthe geologist does not find anything, he will plant a blank sign.
When he finds underground riches for the first time, you will receivea message, because you will not always be there to watch him work.
You can send the geologist towards any flag (as long as it isconnected to the network of roads) and even towards the flags in frontof buildings. The geologist will examine the area and return home ifhe does not find any mountains. To accomplish the goal of yourtraining mission, you must find coal, gold and iron. Do not hesitateto send several geologists into the mountains and to expand yourproperty by constructing guard huts if underground riches are notnearby. You have certainly noticed already that the guard hutscannot be constructed in the mountains. You will have to „surround“the large mountains with guard huts if you want to find a maximumof underground riches.
Begin constructing a mine as soon as you have found a likelylocation. As soon as the mine is connected to the network of roads,a mason will arrive and go to work.
If you have given the order to construct at least one mine for theexploitation of gold, one for iron and one for coal, you must now beginthinking about building some foundries. Select a location near thecastle and have your settlers construct the gold and iron foundries.
pm5.manual#eng#settl 03.03.1995, 18:55 Uhr52

53
3. Training
Your settlers will construct the mines and the foundries while theminers are looking for the necessary raw materials. They will befed by the castle. The raw materials that you find will be taken
to the foundries where the unrefined gold will be transformedinto gold and the iron ore into iron. As you don’t need either ofthese raw materials for your city, they will be stored in the castle. Wewill give you some additional information while the game progresses.
If your network of roads has been poorly constructed, you will seeit in this training scenario. The mines will produce too many rawmaterials and if you have set up only one road (which will also besteep!) between the mines and the foundries, you will have troublewith the merchandise.
Build other roads if your settlers cannot transport these rawmaterials on such a steep road. You will see that the new roads willbe used and that the merchandise will get to its destination muchmore quickly. Underground riches are, naturally, not unlimited.When a deposit starts to run low, the miner will find fewer rawmaterials. The mine will become unproductive because: the minersthat work in the mountains must be fed from the valley. You willreceive a message as soon as a mine has been devoided of rawmaterials. If your food stocks are also low, demolish the mine. A minerwho doesn’t receive food will strike and begin marching in front of themine to show his anger.
The geologist’s signs will progressively disappear. You can, however,
pm5.manual#eng#settl 03.03.1995, 18:55 Uhr53

54
3. Training
ask for a prospection at any time to see if there are any remainingunderground riches in the areas surrounding a mine.
If you are not in a hurry to build the mines, wait until the geologistplants several signs so that you can be sure to find a profitabledeposit. On the other hand, if you are playing against other playersor against opponents controlled by the computer, you should constructthe mines as soon as you think a deposit might exist because eachminute counts. Naturally, the chances of barking up the wrong treeare greater, and you will have fewer geologists and workers at yourdisposal. If the program denies your request for a geologist thismeans that you do not have any more workers or tools available. Youmust, moreover, wait for 2 seconds before asking for anothergeologist. We will discuss this topic further on. To conclude, here isa tip to better place your flags in the mountains. When you place aflag for a geologist, it is because you plan to construct a mine in thislocation later on. If there are underground riches, click on theconstruction help function and choose a location to build your mine.Next place the flag next to this location, in the lower right. Later, youwill construct a mine next to the flag, and you will not need a new roador a new transporter and the mine will be built more rapidly.
pm5.manual#eng#settl 03.03.1995, 18:55 Uhr54

55
3. Training
3.5 Scenario 5 - Making tools and weapons
Blacksmith, iron worker, Ship maker and Warehouses
Objective: Make at least 10 weapons, 10 tools and 5 boats.
Explanation: This game will allow you to see 5 new buildings. Youwill learn how to fabricate objects with the materials that you haveextracted in the preceding chapter. The blacksmith will fabricateweapons with iron but he will also need coal. The iron worker willmake diverse tools from wood and iron that will be used by the othersettlers. The ship maker only needs wood to construct his boats. Heis the least useful worker and is generally needed only in worldscontaining large expanses of water. The warehouse is the lastbuilding discussed in this chapter. It will be used to store merchandise.It is also the place where the workers wait for new work (as at thecastle). This is why the warehouse is, with the castle, the mostimportant building.
This time, you can choose a location without worrying about therichness of the ground because you already have the necessarymaterials stored in your castle at the beginning of the game. Chooseany location that provides enough space for several large buildings.
pm5.manual#eng#settl 03.03.1995, 18:55 Uhr55

56
3. Training
Construct a forge, a shop for the iron worker, a naval shipyard anda warehouse. While the men are working we will give you some usefulinformation.
The ship maker will receive wood and deliver the first boats shortlyafter. The workers will then take these boats to the banks of thelake and transport their merchandise on this water way. This
method of transportation is often quicker than the land routes.
The blacksmith will be supplied with coal and iron. He will forgeswords and shields that you will need for the knights that guardyour castle and attack the enemy. The weapons will be delivered
to the castle where each new knight will be able to take what he needs.
The iron worker will receive wood and iron to make 9 differenttools: hammer, saw, hatchet, shovel, scythe, pick, fishing pole,pliers and butcher’s knife. These tools will be delivered to the
castle and used by the workers. According to their professions, theywill need different tools. Some will not need any tools and others willneed two:
- the leveler : shovel
- the fisherman - fishing pole
- the butcher - butcher’s knife
- the farmer - scythe
pm5.manual#eng#settl 03.03.1995, 18:55 Uhr56

57
3. Training
- the lumberjack - hatchet
- the woodworker - saw
- the miner - pickaxe
- the quarryman - pickaxe
- construction worker - hammer
- the ship maker - hammer
- the geologist - hammer
- the iron worker - hammer and saw
- the blacksmith - hammer and pliers
You might wonder why you must make the tools when the workerswill automatically leave the castle with their tools in hand. It isbecause at the beginning of the game, you have a certain stock ofconstruction materials, food and tools. For the training scenarios youwill have a large stock to start off with and will therefore not have tofabricate tools or merchandise. We will explain this in detail later on.
The warehouse is, along with your castle, the most importantbuilding because in a relatively large city, the castle will quickly reachits capacity without an additional warehouse. As soon as thewarehouse is built, a settler will leave the castle and go to thewarehouse. You will thereby have a sort of "second castle". If the
pm5.manual#eng#settl 03.03.1995, 18:55 Uhr57

58
3. Training
expansion of your city continues, it will be difficult to control if youonly have a castle. The workers will need too much time to go fromthe castle to the construction site, or they will produce so muchmerchandise that it will start to pile up on the road to the castle andthe transporters will no longer be able to do their job. Evenlydistribute the warehouses to avoid all this. The warehouse offerspractically all the same benefits as your castle:
- When you receive new men, they will be divided up between thecastle and the warehouse.
- Useless merchandise was brought to the castle up until now. It willnow be taken to the nearest warehouse thereby cutting down onreturn trips.
- merchandise (on a construction site for example) will be orderedfrom the nearest warehouse having the required materials. Thedistance to the site will thereby be reduced.
- A worker will no longer return to the castle after his work is finishedbut will go to the nearest warehouse and wait for his next job. The tripfor your workers to their worksite will therefore be reduced.
- If a building requires the presence of a new worker, he will be hiredfrom the nearest warehouse. His trip will thereby be shorter.
These various points demonstrate that an even distribution of
pm5.manual#eng#settl 03.03.1995, 18:55 Uhr58

59
3. Training
warehouses is essential. As soon as your warehouse is built, you willreceive a message displaying the new warehouse.
3.6 Scenario 6 - Attack
Objective: The conquest of several enemy buildings
Explanation: The objective of this scenario consists of conqueringcertain buildings with your knights. Click on the geographic map andexamine the locations of the enemy’s buildings. Choose your locationclose to the enemy so that you will not have to travel very far to attack.Construct several castles, watchtowers and guard huts around yourcastle. While your settlers are working (the castle is the largestbuilding and needs the most time to build), we will take a look at theknights.
There are 5 kinds of knights in the game, and they are all differentand of differing strength. When you receive a new knight, he will startat the lowest level. He can, however, receive training in the castle (orlater in a warehouse) and change levels. A knight can also receivetraining in a guard tower or in the castles, but he will progress veryslowly as he will have to work at the same time. However, during hisservice (when he goes onto duty in a castle or another building, forexample) he will not improve his skills if he sits down and does
pm5.manual#eng#settl 03.03.1995, 18:55 Uhr59

60
3. Training
nothing in the guard hut. The advantages and disadvantages areclear: if you leave the knights in the castle, they will be well trainedbut your city will be poorly guarded. If you send your knights outside,your buildings will be well guarded but the enemy will perhaps havemore powerful knights that could pose problems for you. As you havebuilt several castles and guard huts, your knights will rapidly go tothem. In this training scenario, however, your opponents are stilldefenseless. Don’t worry though...
You will only attack castles, guard towers or guard huts belongingto the enemy. A knight must not attack a farmer or a fisherman. Whenyou attack, your knights will leave their castles etc... and marchtowards the enemy buildings where they will prepare for battle. Aknight will come out of the enemy building and the combat will begin.One of the two knights will be victorious. After a while, either theattackers or the defending knights in the enemy building will beeliminated. If there are no longer any knights in the enemy building,the attacker is victorious and will take control of the building. Thefrontiers of your city will be consequently modified. The enemy willburn any other building that it can. Such a defeat can be devastatingfor a city. If, for example, your only coal mine or warehouse is inflames, your will have problems.
When you have built your first huts and they are occupied byknights, you will see flags with a thick cross. All guard huts that arelocated near the enemy’s territory and that can be targeted for attackare marked by this cross. Special click on any enemy building having
pm5.manual#eng#settl 03.03.1995, 18:55 Uhr60

61
a thick cross on its flag. A new window will appear allowing you toenter the number of knights that will attack it. The 4 numbers in themiddle indicate the number of available knights: in the surroundingareas, far away, or very far away. The distance is notan essential factor but the knights will need moretime to reach the enemy. If all the numbers are zeros, there are notenough knights in your buildings. You should know that all theknights that enter a castle cannot be send into battle because someof them will be needed to defend the castle should it be attacked byenemies. Later on, we will explain how you can influence the outcomeof the combats. Hold on a little and launch a new attack. The twoarrows will allow you to modify the number of knights that will attackthe enemy. Watch the battle to see the eventual outcome.
If you have sent all your available knights into combat, you cannotlaunch other attacks. You will see, however, other knights immediatelyleave your castle to replace those who have left for battle. Whenyou seize an enemy building, you will receive a message. A littlelater, your victory over the enemy will most likely be definitive.
If, in the course of a game, an enemy counter attacks and theknights meet at a specific place, you can expect a furious combatbecause each enemy knight will be attacked. We will see later how tosend a troop of knights off to intercept the enemy and how toefficiently defend a guard hut with only 3 knights. Lastly, a final pointthat does not directly concern the knights, but rather your ruralproperty: do not construct buildings (especially large ones, because
3. Training
pm5.manual#eng#settl 03.03.1995, 18:55 Uhr61

62
3. Training
of the long delays) near the enemy frontier. For example, if the enemyconstructs a guard hut at the same time as you near the frontier andhe finishes before you do, the frontier will be modified and you willhave to burn down your construction. A castle situated near thefrontier will be of no help to you because its construction will takemuch too long. You can construct a guard hut and try to finish itbefore the enemy or place your buildings in a safer location. You cannaturally do the same thing to your enemy if he or she had the badidea of constructing a warehouse too close to the frontier... Thischapter, consecrated to the training scenarios, is now finished.
You now know the basic principles of the game, the differentbuildings, the various professions and merchandise, you know howto prospect for the underground riches and attack the enemy. Wehope that you have begun to enjoy the game and we guarantee thatit will provide you with hours of entertainment to come and that youwill continually find new ways of doing things and new strategies. Thefollowing chapters address themselves to more experienced playerswho already know the game well.Have fun!
pm5.manual#eng#settl 03.03.1995, 18:55 Uhr62

63
4. The economy
4. The economy
4.1 The economic system
From now on, we will no longer give you precise instructions onhow to solve certain levels, just explanations, advise and many, manytips and new ideas. It is essential to know the economic context ofeach building to rapidly ascertain its needs and its production. Hereis a brief summary:
The food chain:
... production of fish, meat and bread to feed the miners.
The fisherman fishes for fish that can be eaten directly. The farmerplants and harvests wheat that is taken to the pig farmer who feedshis pigs with it, or ground by the miller in his windmill andtransformed into flour. The pigs reproduce and can be slaughtered.The baker makes bread with the flour. In both cases, you will havefood at your disposal.
Merchandise:
... fabrication of tools, weapons, boats, gold and construction ofbuildings.
The tools, weapons and boats will be stored in the warehouses.
pm5.manual#eng#settl 03.03.1995, 18:55 Uhr63

64
4. The economy
The gold will be guarded in the castle, the watchtowers and the guardhuts. The tool maker needs wood and iron. The wood comes from thesawmill where the tree trunks furnished by the lumberjack are cutup. The iron will be worked on in a foundry. The caster needs ore andcoal for the forge. These two materials are extracted from the mines.To fabricate weapons, the blacksmith needs iron and coal. The shipmaker needs wood for his boats. For the construction of yourbuildings, you will need (in most cases) wood and granite. The use ofiron, coal and wood for the fabrication of tools has already beendiscussed. The granite is found either above ground, in a quarry, orin a mine. The gold is refined by a goldsmith from unrefined gold. Theunrefined gold is extracted from the mines. Did you get all that? Whatfollows will allow you to better understand the numerous factors thataffect the game.
During the first training scenarios,you undoubtedly thought that youcould possess an unlimited numberof settlements and merchandise, andthat you could influence the game’sprogression. All the parameters aredefined so that you will have nodifficulty in completing the requiredmissions. More experienced playerswill want to influence the game’sprogression more directly and knoweverything about the game, from the
pm5.manual#eng#settl 03.03.1995, 18:55 Uhr64

65
4. The economy
stocks at their disposal to the production capacities. All these aspectswill be discussed in the manual.
4.2 Your first large city
You now know about all the buildings. You should be able to finda good location for each building and choose the right time to buildit. A large stock will allow you to build the little buildings first as youwill have enough materials to expand later on. If you have a smallstock at the beginning of the game, however, be very cautious rightfrom the beginning.
It is essential to build an "active" city. To do this, you will need allthe buildings (except for rare occasions). Your stocks will not be asimportant as in the training scenarios. You will be responsible for theexploitation of the necessary raw materials and buildings. Choosethe first scenario. You will play against a player controlled by thecomputer. You will experience an exciting adventure. Your level ofintelligence is rather low and you do not have large stocks. You willhave to be careful right from the start of the game. We will tell you howto build a functioning city in the rest of this chapter. Or you could tryto build a city all by yourself...
The first thing to do is to find a good location for your castle. Wehave already discussed this in detail. Try to expand your ruralproperty because if you see that you don’t have enough space when
pm5.manual#eng#settl 03.03.1995, 18:55 Uhr65
66
4. The economy
you are cultivating your land, you will have to wait before annexingnew land. Place 2 or 4 guard huts near the frontier. The constructionof watchtowers and castles requires more time and will slow downyour expansion. Take everything you can without having to go intocombat. Make sure that you have a good stock of constructionmaterials because you will have big problems if you cannot build thenecessary buildings. Place a lumberjack, a sawmill and a quarryman’shut in appropriate locations.
After completing these three tasks, the game will become morecomplex. Depending on the layout of your land, you can do certainthings that we will discuss in general terms. As soon as possible, sendthe geologists into the mountains. Based on their findings, constructmines in the appropriate locations. Construct a gold or iron foundry,a forge or a tool factory (based on the underground riches found). Ifyou can rapidly fabricate weapons, you will have the advantageduring combats. As soon as the geologists start prospecting in themountains, think about how you are going to feed the mine workers.If there is a lake in the area, build a fisherman’s hut. The fish hecatches can be stored before the first mines are built. Meat productionand the fabrication of bread take some time. When the castle’s wheatreserves (for the pigs and the windmill) run low, you will have to waitfor a farmer to plant and harvest more wheat. If no lake is in the area,build a farm as quickly as possible. You will prefer meat or bread,depending on the situation. If the enemies are still far away and youpossess a lot of land, choose the bread. Place windmills and bakersclose to the farmlands. The bread is the most productive food. If you
pm5.manual#eng#settl 03.03.1995, 18:55 Uhr66

67
4. The economy
don’t have enough space, we recommend pig farming. You will needone farmer to supply the pig farmers with wheat. Don’t forget that thelumberjacks will cut down all the trees and that you might realize thistoo late. Try to plant trees as soon as possible by using the forestrangers.
If the region contains large lakes, take advantage of the speed ofthe water ways. You will eventually need a ship maker if you are shorton boats.
Above all, do not forget to build warehouses. They will alleviatecongestion on the roads and you will progress more rapidly.
The guard towers and castles will be used essentially to protectimportant buildings, especially the warehouses. Depending of theprogression of the game, a mine or a tool maker could also be veryimportant (especially if you only have one of them!). Place your castlesin these areas and don’t let the enemy destroy your economic systembecause of a small victory!
Watch the enemy closely! Find a free moment in your schedule tosee what your adversary is doing. Is he already in the process ofmaking weapons? How far away is he? Which lands should youoccupy before the enemy annexes them? Which locations are poorlyprotected where an attack could be successful?
Your first attempt to construct a city with several huts and different
pm5.manual#eng#settl 03.03.1995, 18:56 Uhr67

68
4. The economy
houses will perhaps not be entirely satisfactory. Don’t be discouraged.The next time, you will better plan your city and you will not make thesame mistakes. Experience will help you to resolve many problems.Read the following chapters while playing at the same time.
You will learn many new things in this way.
4.3 About statistics
4.3.1 The first statistics
The statistics about a person, buildings and warehouses. In thischapter, we will look at these first statistics. They will allow you toquickly get an idea about all important areas. At the beginning of thegame, the statistics will not be very interesting; you will, however,have to look at them regularly during the course of the game to see,for example, when you will be short on wood or food. We will first ofall look at the statistics concerning people, buildings and warehouses.
To see the statistics, click on the second icon menu from the right.8 other icons will be displayed. Each icon corresponds tospecific statistics. By activating one icon, you can move fromone statistic to another and from one menu to another. If you
click on the middle icon, the buildings’ statistics will be displayed.They will indicate the number of buildings that you have at your
pm5.manual#eng#settl 03.03.1995, 18:56 Uhr68
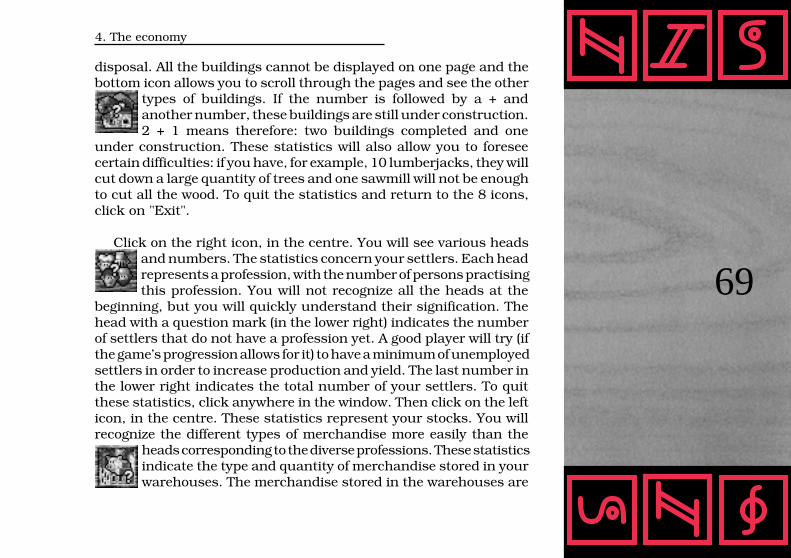
69
4. The economy
disposal. All the buildings cannot be displayed on one page and thebottom icon allows you to scroll through the pages and see the other
types of buildings. If the number is followed by a + andanother number, these buildings are still under construction.2 + 1 means therefore: two buildings completed and one
under construction. These statistics will also allow you to foreseecertain difficulties: if you have, for example, 10 lumberjacks, they willcut down a large quantity of trees and one sawmill will not be enoughto cut all the wood. To quit the statistics and return to the 8 icons,click on "Exit".
Click on the right icon, in the centre. You will see various headsand numbers. The statistics concern your settlers. Each headrepresents a profession, with the number of persons practisingthis profession. You will not recognize all the heads at the
beginning, but you will quickly understand their signification. Thehead with a question mark (in the lower right) indicates the numberof settlers that do not have a profession yet. A good player will try (ifthe game’s progression allows for it) to have a minimum of unemployedsettlers in order to increase production and yield. The last number inthe lower right indicates the total number of your settlers. To quitthese statistics, click anywhere in the window. Then click on the lefticon, in the centre. These statistics represent your stocks. You willrecognize the different types of merchandise more easily than the
heads corresponding to the diverse professions. These statisticsindicate the type and quantity of merchandise stored in yourwarehouses. The merchandise stored in the warehouses are
pm5.manual#eng#settl 03.03.1995, 18:56 Uhr69
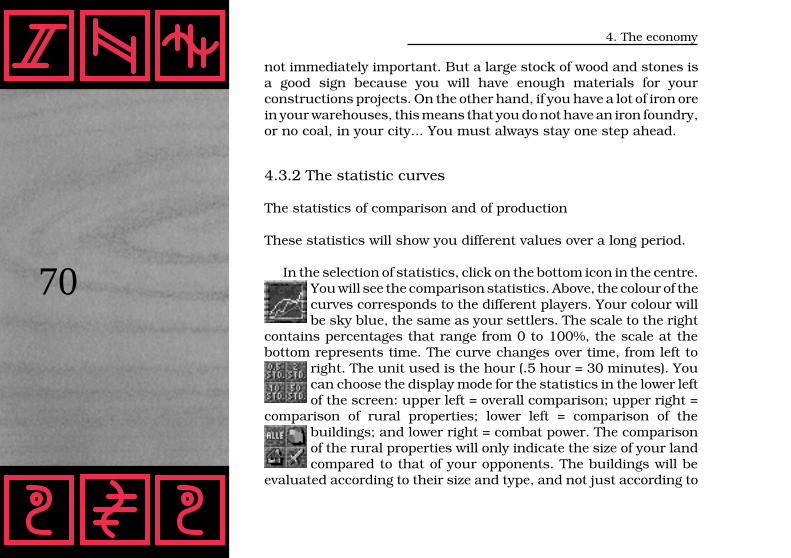
70
4. The economy
not immediately important. But a large stock of wood and stones isa good sign because you will have enough materials for yourconstructions projects. On the other hand, if you have a lot of iron orein your warehouses, this means that you do not have an iron foundry,or no coal, in your city... You must always stay one step ahead.
4.3.2 The statistic curves
The statistics of comparison and of production
These statistics will show you different values over a long period.
In the selection of statistics, click on the bottom icon in the centre.You will see the comparison statistics. Above, the colour of thecurves corresponds to the different players. Your colour willbe sky blue, the same as your settlers. The scale to the right
contains percentages that range from 0 to 100%, the scale at thebottom represents time. The curve changes over time, from left to
right. The unit used is the hour (.5 hour = 30 minutes). Youcan choose the display mode for the statistics in the lower leftof the screen: upper left = overall comparison; upper right =
comparison of rural properties; lower left = comparison of thebuildings; and lower right = combat power. The comparisonof the rural properties will only indicate the size of your landcompared to that of your opponents. The buildings will be
evaluated according to their size and type, and not just according to
pm5.manual#eng#settl 03.03.1995, 18:56 Uhr70

71
4. The economy
their quantity. The combat powerdepends on the number, type andmotivation of your knights. The overallcomparison allows you to obtainaverage curves based on these threevalues. This is not all, however! In thelower right, you will see 4 other iconsthat correspond to the time. The 4positions correspond to .5 hours, 2hours, 10 hours and 50 (!) hours. Youwill see that a large and energeticcombat between different groups ofsettlers can become a long and excitingadventure...
These statistics are the only way to obtain precise informationabout your adversary. You will know who has the most powerful armyand who possess the most land. If the curves rise very quickly at thebeginning of the game, do not worry. It is not an error, because theplayer who places his castle first will be momentarily the only personto possess land and a building (100%). This has no importance for theprogression of the game. An icon will moreover allow you to see the
statistics concerning the opponents in the game. To see theproduction statistics, click on the lower left icon. They willindicate the type and quantity of merchandise produced by
your settlers. The scale to the right corresponds to the quantity, inunits. The horizontal scale represents the time. In these statistics,
pm5.manual#eng#settl 03.03.1995, 18:56 Uhr71

72
4. The economy
the time counted is around 2 hours.At the beginning of the game, thesestatistics will be at zero (you have notproduced anything yet). Later on,however, you can choose at the bottomof the screen the merchandise thatyour settlers produce. From trees totools, you will find all the differenttypes of merchandise. If you have, forexample, selected the trees at thebottom and the red surface of thevertical scale stays at 1, this meansthat your lumberjacks will cut downaround 1 tree per minute. This might
seem rather uninteresting, but you will progressively learn how tobetter interpret these statistics. For example, if the tree curvedescends, there will soon be no more trees to cut down. As thisstatistic is very important, look at it from time to time. It will save youfrom being unpleasantly surprised. These production curves aremoreover „smoothed“ to be clear and more readable.
4.3.3 The supply statistics
The food chain, the merchandise, the statistics about the professions.
In these 3 statistics, small pointers will indicate the state of yoursupply. The food chain and the merchandise are the most important
pm5.manual#eng#settl 03.03.1995, 18:56 Uhr72
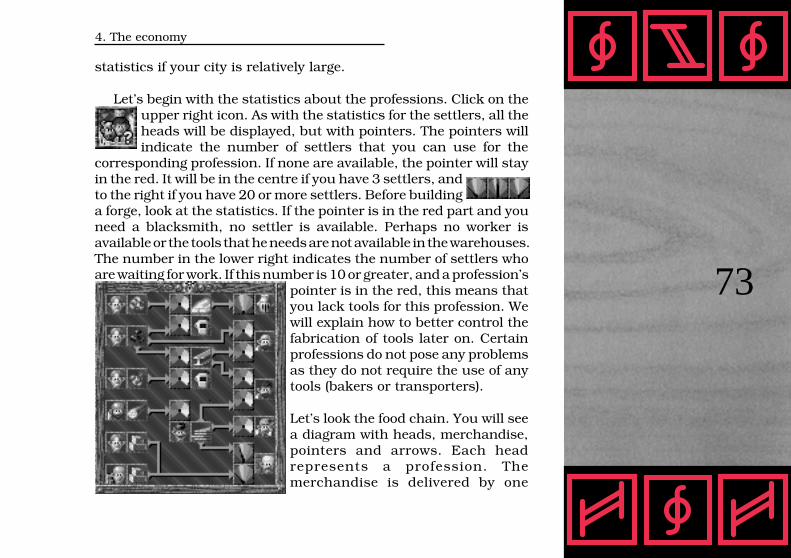
73
4. The economy
statistics if your city is relatively large.
Let’s begin with the statistics about the professions. Click on theupper right icon. As with the statistics for the settlers, all theheads will be displayed, but with pointers. The pointers willindicate the number of settlers that you can use for the
corresponding profession. If none are available, the pointer will stayin the red. It will be in the centre if you have 3 settlers, andto the right if you have 20 or more settlers. Before buildinga forge, look at the statistics. If the pointer is in the red part and youneed a blacksmith, no settler is available. Perhaps no worker isavailable or the tools that he needs are not available in the warehouses.The number in the lower right indicates the number of settlers whoare waiting for work. If this number is 10 or greater, and a profession’s
pointer is in the red, this means thatyou lack tools for this profession. Wewill explain how to better control thefabrication of tools later on. Certainprofessions do not pose any problemsas they do not require the use of anytools (bakers or transporters).
Let’s look the food chain. You will seea diagram with heads, merchandise,pointers and arrows. Each headrepresents a profession. Themerchandise is delivered by one
pm5.manual#eng#settl 03.03.1995, 18:56 Uhr73

74
4. The economy
profession to another profession, in the direction of the arrow. Thediagram is presented as follows: the farmer (in the upper right)delivers the wheat to the miller and the pig farmer. The miller deliversthe flour to the baker who, in turn, delivers the bread. The pig farmerdelivers pigs to the butcher who delivers the meat. The fisherman (inthe lower left) delivers the fish. The bread, meat and fish are the 3foods that will be delivered to the 4 types of mines. The pointers arespecial in this diagram. There are two types:
1. The supply pointer (for the farmer or the miners, for example).
The dial is, from left to right: red (no supply), yellow (good supply) andgreen (excellent supply). This dial indicates the supply of theprofessions: the more merchandise they receive, the better off theyare. The pig farmer prefers having a lot of wheat to feed his pigs, ratherthan a meagre, or non-existent, supply.
2. The activity pointer (for the miller or butcher, for example).
This dial is, from left to right: red (no work), green (a lot of work) andyellow (too much work). This means that the ideal situation for theperson receiving the merchandise is to receive neither too much nortoo little. If the miller does not receive enough wheat, he will have nowork and his windmill will be useless. If he receives a normal delivery,his mill is active and he will be busy. If he receives too much wheat,however, he will not be able to keep up with the work. The mill willturn constantly, but the wheat will arrive too quickly and will beginto pile up. After a while, you will have to put this surplus in a
pm5.manual#eng#settl 03.03.1995, 18:56 Uhr74

75
4. The economy
warehouse. If you build another windmill, you can produce moreflour. Later, when you will have 10 millers, you will be able to see theaverage activity rate for all the windmills. These statistics willindicate potential problems and the buildings that need to be builtalong with the buildings that are functioning normally. You will seeif the mines are well supplied, and if the pig farmer is receivingenough wheat to feed his pigs. Chapter 6.1 will explain how you caninfluence the delivery of merchandise. Don’t be surprised if you don’tsee a pointer at the beginning of the game, as the food supply for amine cannot be indicated if it does not exist.
Merchandise
These statistics are identical to those for food, except that theyrepresent all merchandise except for food. The suppliers ofraw materials are indicated to the left (miners, lumberjacksand quarry workers). The intermediate professions are in the
centre (workers at the forge and the mill). The users are to the right(knights, blacksmiths, iron workers, ship makers and masons). Thearrows indicate the direction of the delivery, as explained above. Theothers function as for the food chain. The only difference is thatcertain professions (casters, blacksmiths, iron workers and masons)cannot do anything if there is iron but no coal... These statistics willalso help you to foresee any difficulties.
pm5.manual#eng#settl 03.03.1995, 18:56 Uhr75

76
4. The economy
4.4 The warehouses
You already know how to build a warehouse. But there are also otherways of receiving information about the warehouses and of givingorders. If you special click on a warehouse (if there are none, use acastle), a window will appear indicating the state of the stock in thiswarehouse. By changing the page with the arrow, you will see thesettlers that are in this warehouse. The third page contains two iconshaving different symbols. The upper icon concerns the merchandise,the lower icon concerns the settlers located in this warehouse. Thehook can be located in three places. Look at the merchandise first: inthe beginning, the hook is at the top. The merchandise will be storedin this warehouse. When the hook is in the middle, no moremerchandise can be stored in the warehouse; it can only be delivered.When the hook is at the bottom, the warehouse will be emptied of itsmerchandise and nothing else can be stored there. For the settlers,the signification is practically the same: when the hook is at the top,they must go to the warehouse after work. If it is in the middle, no
other settler will be accepted. If it is at the bottom, all thesettlers must leave the warehouse. You can determine thestate of the warehouse. With a special click you can activatethe two lower options. What are these options for? If theenemy approaches your warehouse and you can no longer
defend your position, you will lose all your merchandise in theensuing fire. Only certain settlers will be able to escape. You will haveto be able to retreat and fight if you want to minimize your losses.Don’t forget that you will need time to empty a warehouse or evacuate
pm5.manual#eng#settl 03.03.1995, 18:56 Uhr76

77
4. The economy
the settlers. If you fight back too late when retreating, you will saveonly a few settlers. The warehouses are, moreover, crucial for youreconomy. If a warehouse no longer accepts merchandise or settlers,the others will be overstocked. The evacuation of the merchandiseand settlers will have a negative effect. Think before deciding if it isbetter to retreat and fight. Do not build your warehouses too close tothe enemy, or protect them with castles. If a warehouse appears notto be safe, stop the reception of merchandise in time so that you don’taccumulate it for no reason, and to be able to save it in time.
You will sometimes have problems when the unemployed settlersare in the warehouse and the weapons and tools are stored elsewhere.In this case, your settlers will automatically go to a warehouse wheretools are stocked and wait there for work. You will have similarproblems with the tools when the pliers are in a warehouse and thehammers in another. No blacksmith can set up shop, as he needsboth tools. This holds true for the iron worker (saw and hammer) andfor the knights (sword and shield). In this situation, the tools andweapons will automatically be taken to the other warehouse.
4.5 Information concerning the buildings and the flags
The statistics will give you an overview of your total development.You might, at certain times, want to know specific things about thestate of the stock in a particular building, etc... You will see theavailable information for the buildings. This information is always
pm5.manual#eng#settl 03.03.1995, 18:56 Uhr77

78
4. The economy
activated with a special click.
If you special click on a construction site, you will see the buildingthat you are in the process of building. Questions like "Where am Igoing to place my windmill?" or "I don’t remember where I built thefarm..." become extraneous because they don’t carry much importanceat the beginning of the construction phase, and you can thereforeforget about what you wanted to construct and where. Special clickon one of your mines. You will immediately see the mine’s yield. Thecalculation will be made in function of the number of trips the minersmade into the mine (with merchandise). Remember that it will requireseveral trips into the mines before you can use this information. It isuseful essentially in the future demolition of these mines, because ifa mine no longer has a yield, the miner will eat the food (which canbecome rare, depending on the progression of the game) that will beneeded in other mines. You will also see the food stock that a minehas at its disposal. As the miner will accept fish as well as bread ormeat, this quantity is indicated by the meat icon. If nothing isindicated, there is no food in this mine and the miner will strike. If youspecial click on the castle, a guard tower or a guard hut, you can seethe position of your knights. Most importantly, you will see thestrength of the castle to be defended.
As for the mines, you will also see the state of the stocks, but thistime it concerns the gold. The guard huts receive a maximum of twounits, the guard towers can receive a maximum of four units and thecastles can receive a maximum of eight units.
pm5.manual#eng#settl 03.03.1995, 18:56 Uhr78

79
4. The economy
You will see the state of the stock for all of the following buildings:
Naval shipyard (wood)Sawmill (tree trunks)Farm land (wheat)Butcher’s shop (pigs)Mill (wheat)Baker (flour)Iron foundry (iron ore and coal)Gold foundry (unrefined gold and coal)Forge (iron and coal)Iron worker (iron and wood)
You will not have to learn all that by heart. It just means that allthe buildings need merchandise. The woodcutter huts, the foresthouses, the fishermen huts, the huts for the quarrymen and farmersdo not provide the same information because they deliver merchandise,they don’t require or store any. You will also know if a settler is alreadyworking in a building. To conclude, special click on any intersection.You have already seen the geologist’s window. In the upper sectionyou will see a flag. In each direction, when a road branches out fromthe flag, you will see a hook or a line. If everything is normal, you willsee a hook. If you click on a flag where large quantities of merchandiseare being transported, you could experience traffic problems. Theywill be indicated by a line. In other terms, there is a lot of merchandiseto distribute in this direction, but the settlers cannot get by, and thetraffic jam will disappear after they have distributed all the
pm5.manual#eng#settl 03.03.1995, 18:56 Uhr79

80
4. The economy
merchandise that is blocking the road. You are not required toimmediate alleviate a traffic jam, but you can find other solutions sothat the settlers can distribute the merchandise by making a detour.In locations that are often busy, take a close look at the network ofroads and think about constructing a new warehouse. Do not waituntil several flags are blocked up by the merchandise.
Furthermore, you can construct a road that passes directly infront of the flag with a special function. An extra icon will be availablewhen this is possible.
This chapter covered how to obtain a multitude of informationabout your city. You learned how to access to the various informativestatistics, foresee eventual problems, or simply to watch the evolutionof your kingdom. In this game, observing and learning are twoimportant factors. If you expand and construct without understandingwhat is happening around you, you will not achieve your objectives.
4.6 The distribution menus
In the next 3 chapters, we will discuss the menus in detail. Thesemenus allow you to modify various parameters and to influencethe life of your city. To activate the menus, click on the lowericon. As with the statistics, you may activate several menus
and return to the main selection.
pm5.manual#eng#settl 03.03.1995, 18:56 Uhr80

81
4. The economy
In each menu, a Default button allows you to reset all theparameters back to zero.
The first 3 menus are distribution menus for merchandise. Thereare several types of merchandise (food, wood, iron, coal and wheat)which will be delivered to the different professions. The tree trunkswill only be delivered to the sawmills, but iron will be delivered to theblacksmiths and iron workers. Your iron stock will sometimes be low,and you will want to fabricate weapons rather than tools, and viceversa. You can modify these parameters in the distribution menus.
Click on the top left icon. You will see the different foods displayedat the top of the screen, with the mine below, each with
a "supply bar". These bars show the food supplyreceived by each mine. If you have a very small stock of foodand you want to supply the iron and coal mines in order to
continue fabricating weapons, lower the supply bar for the othermines to zero (left), and raise the supply bar of the iron and coal minesto the maximum (right).
The second menu allows you to organize the wood and irondeliveries. Wood is used for construction sites, tools and boats. If you
have a ship maker, stop delivering wood to him if you don’twant him to construct any unnecessary boats. You will needmore wood for the two other professions. The iron will be
delivered to the blacksmith and iron worker. If you are short of iron,priorities will be established according to your evaluation of the
pm5.manual#eng#settl 03.03.1995, 18:56 Uhr81

82
4. The economy
situation and the condition of your stocks.
The third distribution menu concerns coal and wheat. The coalwill be delivered to the foundries and the blacksmiths. Theretoo, the distribution will depend on the situation of the game.If you are short of coal, decrease deliveries to the gold foundry.
The wheat will be delivered to the pigsties and the farms. Yourpreferences will depend upon your city and your plan of distribution.
If you set one of the parameters at zero, the type of buildingselected will not receive any merchandise. If a bar is two times longerthan another one, it means that the building receives twice as muchmerchandise as the other one. But your settlers are also thinking alot, too. If the merchandise is very rare, they will only deliver it to themost important building concerned. If the stock is somewhat higher,they will deliver a small amount of merchandise to the otherbuildings. If your stock is large enough, they will also deliver to theless important buildings.
pm5.manual#eng#settl 03.03.1995, 18:56 Uhr82

83
5. Rules of combat
5. Rules of combat
5.1 The knight menus
Two menus allow you to modify various parameters for theknights. Click on the lower left icon in the menu. A newwindow will be displayed with 4 icons on the left, and 2 textsrelating to each icon. The left image shows the castles in
various positions based on their distance from the frontier:
- on the front line: your castles, watchtowers and guard hutslocated right on the frontier with the enemy are indicated bya thick black cross on their flag.- on second line: The castles, etc... located behind the front areindicated by a normal black cross on their flag.- on third line: The castles, etc... located far from the frontierare notthreatened directly. Their flag bears a black stroke.- in the hinterland: The enemy is not visible, and the castlesflag is white.
In each case, you will have to decide how many knights will beplaced in these buildings (castles, watchtowers and guard huts). Theoptimal occupation rate will be indicated next to the 4 images. Thebuildings located on the front line should be full, the ones on thesecond line should be well occupied, the ones on the third linemoderately full, and the castles in the hinterland should be rather
pm5.manual#eng#settl 03.03.1995, 18:56 Uhr83

84
5. Rules of combat
empty. Your buildings will thus be better protected, and you willavoid a situation where most of your knights are located in thehinterlands, while there is only one in your castle located on the frontline. The second word indicates the maximum acceptable drop of theoccupation rate of the building should you decide to use knights toattack the enemy: "good" for the front line, "average" for behind thefront, "weak" for the third line and "minimum" for the hinterland.
Here are some examples: if you read "full/good", this means thatall buildings must be occupied to the maximum. If your troops attackthe enemy, you will only send out a few knights, keeping enough ofthem inside to maintain a "good" occupation rate. If you choose "full/full", the knights will occupy the buildings equally, and none of themwill leave for this attack. Your front-line will thus be protected to themaximum. But in this case, the knights remaining in remote buildingswill need more time to get to the front-line, as the road to travel islonger. With "full/minimum" settings, all knights will leave thebuilding to attack the enemy, except one. Of course, this means thatyour building will be poorly guarded. You can use such settings forthe buildings located in the hinterland if you have many knightsavailable. This will allow you to have more knights available in theevent of an attack. But don’t forget that your knights will be bettertrained if they stay inside the building...
Do not use settings that could be too straining. If you don’t haveenough knights, your guard huts, etc... will be too emptysooner or later. To change these settings, click on the + and
pm5.manual#eng#settl 03.03.1995, 18:56 Uhr84
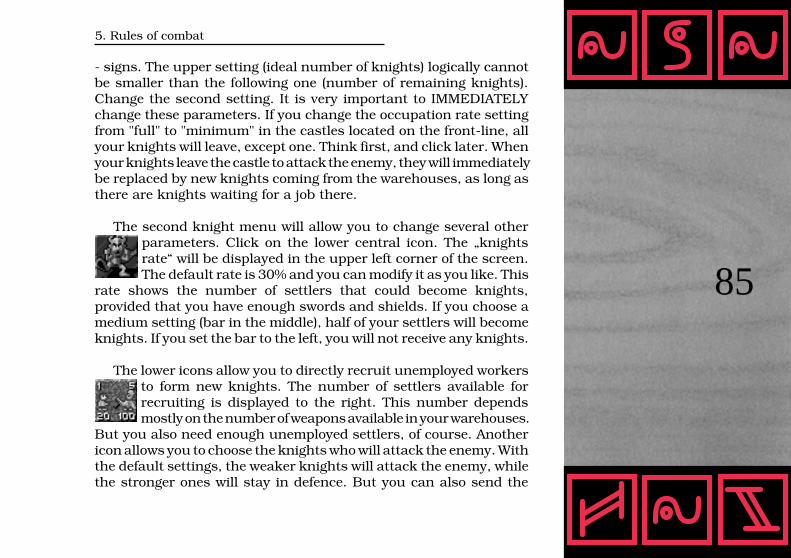
85
5. Rules of combat
- signs. The upper setting (ideal number of knights) logically cannotbe smaller than the following one (number of remaining knights).Change the second setting. It is very important to IMMEDIATELYchange these parameters. If you change the occupation rate settingfrom "full" to "minimum" in the castles located on the front-line, allyour knights will leave, except one. Think first, and click later. Whenyour knights leave the castle to attack the enemy, they will immediatelybe replaced by new knights coming from the warehouses, as long asthere are knights waiting for a job there.
The second knight menu will allow you to change several otherparameters. Click on the lower central icon. The „knightsrate“ will be displayed in the upper left corner of the screen.The default rate is 30% and you can modify it as you like. This
rate shows the number of settlers that could become knights,provided that you have enough swords and shields. If you choose amedium setting (bar in the middle), half of your settlers will becomeknights. If you set the bar to the left, you will not receive any knights.
The lower icons allow you to directly recruit unemployed workersto form new knights. The number of settlers available forrecruiting is displayed to the right. This number dependsmostly on the number of weapons available in your warehouses.
But you also need enough unemployed settlers, of course. Anothericon allows you to choose the knights who will attack the enemy. Withthe default settings, the weaker knights will attack the enemy, whilethe stronger ones will stay in defence. But you can also send the
pm5.manual#eng#settl 03.03.1995, 18:56 Uhr85

86
5. Rules of combat
stronger ones on attack and keep the weak ones to defend yourbuildings. Both options have advantages and drawbacks. But it isusually better to send the weaker knights in combat and to maintaina good defence in your castles. You will decide which strategy is thebest. An icon, to the right, allows you to organize your knight relief.When you click on this icon, one or more knights will leave yourcastles, etc... if the occupation rate is high enough (as explainedearlier) and will go to the closest warehouses. New knights willreplace them. The advantage of this is that the weakest knights willgo back to the warehouses to receive some more training, while thestronger ones will take their place. When you use this option, youmust consider the following factors:
- If you fear an attack in the upcoming minutes, wait. You will preventa sudden drop in the occupation rate of your buildings during a shortmoment.
- Make sure you have enough well trained knights in your warehouses.If not, changing the settings is not useful.
- Your knights’ strength depends not only on their training level, butalso on the amount of gold stored in their city. Your knights strengthwill always be the same when they are defending, but it will dependon their motivation during combats. They will be very motivated ifyour city shelters a lot of gold. At the beginning of the game, it isextremely difficult to win a battle. You did not extract any gold yet,and your knights are not trained enough. If you want to stand a
pm5.manual#eng#settl 03.03.1995, 18:56 Uhr86
87
5. Rules of combat
chance to win, the strength ratio must be 4:1. Your losses will ofcourse be higher than your opponent’s, and you must carefullychoose the place of the attack. If your attack allows you to take controlover an enemy gold mine or his (or her) only food producing building,it can be profitable even if you suffer heavy losses, because:
1) The enemy will suffer heavy damage, and
2) The enemy knights will be weak at the beginning of the game, andit will also be very hard for them to recapture their lost territory.
As soon as you have enough gold, your knights will be stronger,and they will be better in attack than in defence. You can thenconsider the complete destruction of your enemies. But be careful ifyou play against several opponents.
You can know the motivation level of the enemy knights in theattack menu. Each gold unit stocked in a castle, a watchtower or aguard hut will have a positive effect. While transported, the gold is notconsidered as being stored somewhere.
You have probably already noticed that the attack menu displaysnot only the combat strength, but also the total number of gold unitsowned by the player. The number of knights defending the castle isdisplayed at the bottom of the screen. You can change this numberby clicking on the arrows. If you think that your situation is hopeless,you can click on the white flag to quit the game.
pm5.manual#eng#settl 03.03.1995, 18:57 Uhr87
88
5. Rules of combat
You can also attack an enemy castle. But don’t forget that theenemy may have left more knights than usual in his castle. If youconquer the castle, it will be burned down. Just like the warehouses,the winner will strike a decisive blow on his opponent, causing himto lose the merchandise and settlers that were in the castle.Furthermore, your knights moral will strengthen, while the enemyknights are really down. If you think you can easily conquer a castle,launch an attack. But if you loose a castle, don’t give up. If enoughwell trained knights are available, you can win the battle, but it willnot be a piece of cake!
The attack menu allows you to specify the number of knightsremaining in the castle to defend it. Don’t forget that the castle isimportant not only for your troops’ moral, but also because it is theonly warehouse directly protected by knights, and thus much saferthan the warehouses you constructed later in the game.
pm5.manual#eng#settl 03.03.1995, 18:57 Uhr88

89
6. To continue...
6. To continue...
6.1 The other menus
- Tool fabrication, merchandise priorities, and evacuation menu.
In the menu, click on the central left icon. The 9 different tools willbe displayed with a bar showing the number of toolsmanufactured by your workers. The default settings are asfollows: high rate of hammers and picks, low rate for scythes
and pliers. Masons, geologists, blacksmiths and iron workers needhammers, but scythes are only needed by the farmers. You canmodify the tool fabrication rate during the game. For example, if youurgently need a specific tool (you may have enough hammers, but youneed pliers for a new blacksmith), you can speed up the manufacturingrate for the pliers while reducing that rate for the other tools. Don’tforget to change these settings later on in the game. The length of thebars shows the number of manufactured tools. If the hammer bar istwice as long as the saw bar, this means that your workers willmanufacture two hammers for each saw. But as long as you don’thave a blacksmith, this menu is not useful. If you want to avoidhaving to set priorities for the tools, manufacture as many tools aspossible and as soon as you can. This will allow to more easily controlthe warehouse statistics.
Click on the central icon to open the merchandise priorities menu.You will see a list of merchandise and icons. This menu allows you
pm5.manual#eng#settl 03.03.1995, 18:57 Uhr89

90
6. To continue...
to define priorities for merchandise: some of them will betransported in priority by your transporters. The wood is thefirst priority in the default settings, because it is very important
for construction works and must be delivered as soon as possible tothe sawmills. Gold, inversely, has a lower priority level: even if itstrengthens your troops moral, its transportation is less urgent, andthis will have no negative effect on the game. But you may also haveyour very own idea, and you can change these priority settings. Clickon the desired merchandise. The small arrows allow you tolower or raise the priority level, the large one to place the
merchandise directly at the top or bottom of the priority list.The upper left icon allows you to return to the initial
settings. If you are fighting against the enemy, weapons shouldgenerally be transported in priority, before construction materials.The choice of the best strategy is up to you.
The most important menu allows you to evacuate merchandise,and is activated by the central right icon: If the enemy gets too closeto one of your warehouses and you decide to evacuate it, it would bea pity to save more wheat than gold. In this menu, you will decide theevacuation priority of the merchandise. This option works like thedelivery priorities menu.
6.2 Messages and preferences
During the game, you will always know what the important events
pm5.manual#eng#settl 03.03.1995, 18:57 Uhr90

91
6. To continue...
are with the messages displayed by the program. But you can also usethese messages for playing the game. This chapter is related to thevarious messages sent during the game.
You will receive a message for the following events:
- A new guard building is occupied for the first time by a knight. Youwill thus annex new territories and will be able to plan your city’sexpansion.- A new warehouse has been constructed.- A geologist discovered new underground riches.- A mine yields no more ore and must be demolished as it consumesfood for nothing.- You are attacked.- You conquered an enemy guard building and gained new territories.- One of your buildings has been taken over by the enemy.- The enemy placed a hut near your territory, and you lost some land.- Same as above, but you lost land and one or more buildings.- The construction materials stock in your castle is too low. Anemergency program is started, and the only construction works toreceive materials will be the woodcutter huts, the sawmills and thequarries.- The emergency program is stopped, the construction worksmentioned above have been provided with materials, and theirdelivery has been carried on.
You don’t need to read all the messages when they arrive. The
pm5.manual#eng#settl 03.03.1995, 18:57 Uhr91
92
6. To continue...
program will memorize more than 50 of them for you, so you will havetime to finish what you are currently doing, if for example you arecreating new routes. To view a message, click on the hook in thewindow. If the message displayed doesn’t interest you and there aresome more, click on the sheet to view the next message. An arrow alsoallows you to come back to the previous message.
"THE SETTLERS" also includes other options. For example, youcan send yourself a message. How? The message will be delayed forseveral good reasons. This option is in fact a "recall" option, and youcan use it in two ways:
a) It allows you to be called to a certain place after a specified lengthof time.
b) It allows you to be called in a menu or a warehouse after a specifiedlength of time. The different watches allow you to specify the lengthof time with brackets of 5, 10, 20, 30 or 60 minutes. When this timehas expired, you will receive a message and you will be automaticallyrecalled to the desired place or menu. Here are a few examples on howto use this option:
- You urgently need a certain type of tool and you decide to halt themanufacture of other tools with the production menu. But if youforget to change the production settings later on, no other tool will bemanufactured, and you can easily foresee the consequences... . Clickon a watch in the tools menu. After the specified length of time, you
pm5.manual#eng#settl 03.03.1995, 18:57 Uhr92

93
6. To continue...
will be informed that you still have something to do in this menu.
- Your mine workers are on strike and you urgently need food. Youcan modify the delivery priorities for the merchandise. Fish, meat andbread will be delivered in priority, before the construction materials.But when the problem is resolved, the recall option will allow you tochange the settings again and set new priorities.- You want to build new huts for fishermen in a certain place, but youhave not yet annexed the land, and the guard huts are still underconstruction. Specify the desired length of time after which you willbe recalled to this place. The situation may be different later on.- You realize that the enemy is suddenly constructing many castles,and you want to keep an eye on him. You just have to precise thelength of time after which you will be recalled to a certain place to seehow the situation evolved.- It is sometimes useful to use the recall option if you want to changethe merchandise and/or settlers settings again later on in the game.- You must also consider this: if you play in team mode with anotherplayer (blue settlers), the right player on the screen may not use thewatches, and all the messages also arrive to the left player. But you’replaying in team, right?
6.3 Renewable games
Back to the main menu. In 1 & 2 player mode and in demo mode,an icon will be displayed in the centre of the screen. We did not
pm5.manual#eng#settl 03.03.1995, 18:57 Uhr93

94
6. To continue...
discuss this icon earlier in this manual. As you already know, the 16digit number affects the world’s appearance. Thus, the same numberalways produces the same world. If you click on this icon, the samecombination will be used for your opponents. The turning star at thebottom of the screen indicates that the world AND your opponents arederived from the same combination of digits.
What is the real advantage of this? For example, say you choosethe 6355174823325876 combination and a size 4 world. At the endof the game, if you consider that it was interesting and challenging,you can give that combination and the world size to a friend. He willbe able to play the same game using the arrow icon, because the worldAND opponents data is always based on the digits combination andthe world’s size.
The 16 digits (between 1 and 8) allow about 270.000 billioncombinations, but some are not interesting. Examine carefully youropponent’s abilities, and decide if you want to accept this game or not.If you want to play another game, click on the arrow to obtain a newcombination, and click again on the bottom arrow. You can do thisas many times as you want. If another player gave you a combination,click on the dialogue box and enter the combination, which mustinclude 16 digits. Don’t forget to note the world size and thecombination if you want to pass the game to another player.
If you find a fantastic combination, please feel free to send it to us.Here at Blue Byte, we also like to colonize, when we have some rare
pm5.manual#eng#settl 03.03.1995, 18:57 Uhr94

95
6. To continue...
free time.
6.4 Demo and team mode
In demo mode, you can watch a game entirely controlled by thecomputer. Even if you only watch the game, "THE SETTLERS" is anentertaining and interesting game. In demo mode, the statistics, themenus, the map and the usual buildings information are availablelike in a normal game. You may change some menus and statisticsoptions, but you cannot change the settings or construct buildingsor roads.
Relax and watch the opponents fight for the control of the land.
The team mode has been developed to allow 2 players to playtogether against computer controlled opponents. As both playerscontrol the same settlers group (the blue ones), the scenarios areidentical. Team play has an advantage: you will have more time tothink and decide. But there is also a drawback: you might experiencesome coordination problems from time to time... In team mode, thegame is slightly different. Both players CANNOT activate the menus,the attack option and the geologist simultaneously. But this is not areal constraint, as the players are supposed to inform each other ofany change in the settings.
pm5.manual#eng#settl 03.03.1995, 18:57 Uhr95

96
6. To continue...
6.5 The options
Experienced players want to rapidly activate the options and avoidlong mouse controls. "THE SETTLERS" allows you to defineseveral extra options for each player. These options areactivated when clicking on the icon on the main menu or the
play menu.
You can toggle the music on or off with the corresponding icon.You can also assign the sound effects to 2 different channels whenplaying in 2 player mode. The left player will hear sound on the leftchannel, the right player on the right channel. In that case, no musicwill be available in the game.
Messages: the game includes 4 different message display modes.3) All messages are displayed.2) All messages are displayed, except the messages concerning newlyconstructed buildings and geologists.1) Only important messages are displayed (attacks, victories, defeats,building losses and emergency program).0) No message displayed.
Scrolling when building roads: if you get close to the edge of theplayscreen while building a road, the world will scroll automaticallyand you will hear a sound.
Fast construction click: If you click twice on the pointer, this will
pm5.manual#eng#settl 03.03.1995, 18:57 Uhr96
97
6. To continue...
have the same result than clicking on the construction icon. Clicktwice on a flag to build a road, or on an empty place to construct abuilding.
Fast map click: Double click on the right mouse button to displaythe map. Double click again to close it. If your right mouse buttondoes not work properly, do not use this function, you could activatethe map display while trying to scroll the playscreen.
6.6 Special functions for the map
The map includes a special option: display the map and specialclick on the buildings icon. A new window with buildings will bedisplayed. This window is identical to the statistics window.
The change page icon allows you to see the other buildings.Choose a building and click on it. The buildings will disappear andthe map will be displayed.
A new icon is displayed at the bottom of the screen. The mapwill only display the selected building. This option allows you
to quickly see where your warehouses, etc... are located. In very largeworlds, this option is very useful. The buildings currently underconstruction will also be displayed for your convenience, allowing abetter planning.For example, if you look for the right spot to place anew baker, you can see where your windmills are located. When you
pm5.manual#eng#settl 03.03.1995, 18:57 Uhr97

98
6. To continue...
close the map, the option is still activated, and the selected buildingswill still be displayed on the map when reactivated.
To return to normal mode, click "normally" on the icon. To selectanother type of building, special click again.
You can also use the flag to select the type of buildings displayedon the map. Click on the flag. A new icon will be displayed below the
map. But all flags will not be displayed, only the ones whereall roads are not used. This allows you to see where your
network is jammed by the transport of merchandise. Also, when aroad is not used, there might be two reasons:
1 - No worker has arrived on this road. Or you just built it, and youhave to wait a while. Or you do not have enough workers.
2 - There has been a traffic jam at this crossroad (read the correspondingchapter in this manual). With this option, you can immediately seewhere the transportation of merchandise is posing problems.
Another special option will soon be essential for playing the game:the magnifying glass icon, next to the map icon, which allows you tozoom in on the game map.
pm5.manual#eng#settl 03.03.1995, 18:57 Uhr98

99
7. Hints
7. Hints
7.1 The most important rules: be observant...
You have already understood that "THE SETTLERS" is a veryspecial game. As soon as you change one of the settings, your settlers(small groups or hundreds of them) will act differently in order tofollow your new instructions. A small change may have profoundeffects. It is wiser to carefully plan your construction schedule andyour strategy, instead of building things haphazardly and constantlyattacking your enemies. You should examine the situation carefullyand analyze it before making a decision. The winner of the game is notthe one who clicks quicker on the icons, it’s the one who develops thebest tactics and strategies. In this chapter, we will give you some morehints to play the game.
Look at your statistics from time to time, analyze your developmentmistakes or the negative results of an operation, and find the bestsolution. You can solve a problem in many ways. Let’s take anexample: your construction works are halted because your woodsupply is exhausted. Your analysis could be as follows: first you takeinto consideration the number of woodcutters chopping down trees,then you construct a new sawmill if enough carpenters are available.
In case of a grave crisis, demolish a few roads to reduce merchandisedeliveries to certain areas in your city. Some workers are using thewood needed for your construction works? Reduce deliveries to the
pm5.manual#eng#settl 03.03.1995, 18:57 Uhr99
100
7. Hints
ship makers or iron workers wood until the crisis is over. Do you haveenough tools to allow this, or do you have more urgent problems tosolve in this area? How will you do to have a sufficient stock of woodrapidly enough? Did you train enough forest rangers? Will you be ableto solve the crisis more rapidly by cutting the trees down in a newforest? If there is no forest around, a new guard hut will allow you toannex new lands if you need one. Several factors play an importantrole in the game, and you will always find new tasks in "THESETTLERS", because each game is different.
Carefully examine your opponent’s territory to determine what heis preparing and his level of strength. Determine his weak points sothat you will be able to attack him. Has he built only one iron mine,which will allow you to deprive him of his raw materials? Is one of hiswarehouses easy to take, or lacking food, and can you interrupt theproduction of the enemy? The problems posed by a city are the samefor your opponents. There are several ways to freeze up his economy.
Depending on the size of the world, the number of settlers islimited to the following number (sizes 1-8):
500/1000/2000/4000/8000/16000/32000/64000.
4 players, for example, face off in a size 5 world will each receiveadditional settlers, fairly distributed. The birth rate does not influencethe total number of settlers controlled by each player, but only on thefrequency at which new settlers arrive.
pm5.manual#eng#settl 03.03.1995, 18:57 Uhr100

101
7. Hints
7.2 The behaviours of your opponents
Adversaries have very different behaviours, as you will noticeduring the various events. Here is a brief presentation of the principalcharacter types:
1) Lady AmalieAn inoffensive lady, reserved, who goes about her workpeacefully.
2) Kumpy OnefingerA very hostile character, who loves gold above all else.
3) Balduin, a former monkA very discrete character, who worries chiefly about theprotection of his lands and his important buildings.
pm5.manual#eng#settl 03.03.1995, 18:57 Uhr101

102
7. Hints
4) FrollinHis unpredictable behaviour will always take you by surprise.He will "pilfer" away lands that are not occupied.
5) KallinaShe is a fighter who attempts to block the enemy’s food supplyby using strategic tactics.
6) Rasparuk the druidHis tactics consist in amassing large stocks of raw materials.But he attacks slyly.
7) Count AldabaProtect your warehouses well, because he is aggressive andknows exactly where he must attack.
pm5.manual#eng#settl 03.03.1995, 18:57 Uhr102

103
7. Hints
8) The King Rolph VIIHe is a prudent ruler, without any particular weakness. Hewill try to check the supply of construction materials of hisadversaries.
9) Homen DoublehornHe is the most aggressive enemy. Watch your buildingscarefully, otherwise he might take you by surprise.
10) Sollok the JokerA sly and repugnant adversary, he will try to stop the supplyof raw materials of his enemies right from the beginning of thegame.
7.3 Hints and tips: professions
This chapter contains other tips concerning the choice of locationfor buildings.
Demolition: when you demolish a road, you interrupt the transportof merchandise passing in this direction. Try to figure out a way to
pm5.manual#eng#settl 03.03.1995, 18:57 Uhr103

104
7. Hints
always leave a road, and do not destroy the only important connectingroad. Merchandise has to wait for the arrival of a new transporterbefore being transported on a new road. Any modification of yournetwork affects the transportation of merchandise. Construct,therefore, right from the start, a well organized network.
Castle: you already know how to choose a good location for yourcastle, but observe also the positions of your opponent’s castles. Donot place yourself too close to a powerful adversary. The opponentscontrolled by the computer can fight among themselves andconsequently destroy themselves.
Large buildings: the land for the construction of large buildings israre, and consequently, expensive. Do not construct huts and smallroads on land where you could construct a larger building.
Ship maker: For the large lakes, a short cut by using a water wayis very efficient to quickly transport merchandise.
Fishermen: A lake that is as big as the game screen will containenough fish for 3 or 4 fishermen. Make sure that the fishermen arespread out on the lake. If they all fish in the same spot, they will finishby catching nothing.
Farmer: he needs unoccupied lands in order to transform theminto fields. The roads cannot be considered as unoccupied lands. Donot construct too many roads around a farm. To avoid the farmer
pm5.manual#eng#settl 03.03.1995, 18:57 Uhr104
105
7. Hints
losing time travelling to his fields, do not have him use steep roads.
Miller and baker: One miller and one baker are enough for severalfarms. But make sure that the roads used for transporting theirmerchandise are not too long.
Butcher: he works quickly and in spite of his deliveries to thefarmers, he generally does not have any problems with his work.
Lumberjack and forest ranger: they complement each otherperfectly. The forest ranger can replace the trees cut down after thepassing of the lumberjack. Wood is the raw material with the highestdemand. Use several lumberjacks and forest rangers. The forestrangers cannot plant trees on the roads. Do not place them, therefore,in the general vicinity of the castle or near the warehouses thatrequire several roads for the transportation of merchandise. Placethem a little ways away, even in places that are not perfectly flat andthat cannot be used for other things.
Miller: One miller is sufficient for several lumberjacks. But you willhave to quickly construct several sawmills.
Ship maker: Make sure that the ship maker does not use up allyour wood to build a fleet of boats. As soon as he has finished hiswork, do not give him any more wood.
Miner: If he can no longer find anything, burn the mine down so
pm5.manual#eng#settl 03.03.1995, 18:57 Uhr105

106
7. Hints
you will not have to feed him. In the mountains, construct a networkof roads with numerous branches to facilitate the transport of rawmaterials to the valley.
Caster: The cast takes a little while and the caster cannot cast theore of several mines fast enough without falling behind. But he willbe able to catch up as soon as the deliveries slow down. Dependingon the size of his backlog, you can hold back on new constructions.
Geologist: When the geologists return home after their prospections,they will stay in the warehouses without anything to do. From timeto time, send them back in the mountains to look for new undergroundriches. You might discover a new vein of gold that you had missedbefore.
How do the settlers choose the road on which to transport themerchandise? It is a rather complicated procedure. It is important toknow where the merchandise is needed. A mill can be very close andcontains a lot of wheat, even though the stock of another mill that isfurther away will be dried up. Moreover, certain merchandise isdistributed according to the menu parameters. When a destinationhas been found for the merchandise, the settlers take the shorterroute. The essential element is the number of roads that themerchandise will have to pass by: a very long road between two flagsis faster than a shorter voyage with an intermediate flag. The playerhas, therefore, a great advantage, because he can influence thechoice of road chosen for the transportation. Here is an example:
pm5.manual#eng#settl 03.03.1995, 18:57 Uhr106

107
7. Hints
You have placed a flag on each side of a warehouse and a road toconnect it to your network. All merchandise that must transitthrough the warehouse is already keeping the crossroad very busy,and the merchandise transported from one flag to the other, and inboth directions, blocks traffic even more. On the other hand, if youcreate a new connection between the two flags (even if it makes anapparent detour around the warehouse), the traffic will no longerpass in front of the warehouse, but by the new road that allows youto avoid it. This principle allows you to construct complex networksaround important warehouses or castles, which, in turn, allows youto transport merchandise more rapidly. Do not forget that anyconstruction, demolition and transformation of road initially hasnegative effects on the transportation of merchandise. It is only whenthe settlers will be adapted to the new situation that the transportationof merchandise will proceed normally. Your workers will often haveto cross over enemy land to cut down trees or harvest wheat. In themines, you can take advantage of this situation and steal undergroundriches from the enemy.
Other loading options
If you know the CLI for the Amiga, you can launch the programwith different options:
-f: Save/Load to FloppyThe files will be loaded and saved from the floppy disk drive. If you
do not use the -f parameter, the files will be saved in the "THE
pm5.manual#eng#settl 03.03.1995, 18:58 Uhr107

108
7. Hints
SETTLERS\save\". directory.
-s: Single playerThe game is limited to one player. This option is useful if you only
have 512 KB of RAM, if you play alone and if you want to use thememory for the sound effects. The game for 2 players in a team is notavailable if this option is activated.
-mx: Force mapsize xX is a number between 1 and 8. It indicates the size of the game’s
world. The program has a size 3 world by default, because this is thesize of world used for the training scenarios.
-n: Force NTSCIf your system is in the PAL standard, the screen will be in NTSC
mode. You will thereby save memory (the screen is smaller), and theprogram can load more sound effects if you have more than 512 KBof RAM.
-q: quickgrafix disabledThe rapid graphics (that are reserved for computers having 1 MB
or more) take the priority over the music. This option allows you togive the priority to the music. If there is any space remaining, theprogram will use the rapid graphics.
pm5.manual#eng#settl 03.03.1995, 18:58 Uhr108

109
7. Hints
7.4 Need help?
During the game, you can sometimes find yourself in a „no wayout“ situation. For example, if you have lumberjacks but no morewood, the construction of a lumberjack’s hut can pose a seriousproblem. All is not yet lost, however, because you can always sendyour knights into combat. If you do not have any stocks at thebeginning of the game, you might end up quickly lacking materials.If you do not watch your production closely, you will see that you lackone unit of wood for the sawmill too late... and you will have to restartat zero.
To avoid this, an "emergency program" is placed at the beginningof the game. This program is, in fact, a reserve of 2 units of graniteand 7 units of wood that allow you to construct a lumberjack’s hut,a sawmill and a quarryman’s hut.
If you need materials, these construction sites will receive them inpriority in order to ensure the minimal supply, because these threebuildings will open all the doors. You can also find yourself in a deadend with the tool maker: if you don’t have a tool maker, and all thehammers have been distributed to the construction workers and tothe geologists, you can no longer send an iron worker to work and thefabrication of tools becomes impossible. It is for this reason that atthe beginning of the game, certain settlers take the necessary tools.Early in the game, you will not have too many problems. Everythinghas been foreseen. But, later on, you will be the sole person
pm5.manual#eng#settl 03.03.1995, 18:58 Uhr109

110
7. Hints
responsible for your mistakes. You now know everything about theprogram, and your knowledge is sufficient to be able to confront thecomputer or to challenge another player.
7.5 The end of the game
The game finishes when there is only one city remaining in thegame’s world. You can quit a game when playing by clicking on thewhite flag. If the adversary controlled by the computer decides to quit,you can decide whether or not to continue the game. There might beinstances when several cities remain in the game. In this case, thegame will be a draw. This situation can happen when no city hasenough knights and all the deposits of ore and coal are dried up,prohibiting the fabrication of weapons. In this case, there is nowinner.
pm5.manual#eng#settl 03.03.1995, 18:58 Uhr110

111
8. Annexes
8. Annexes
8.1 If you have a problem...
Configuration problems concerning the Amiga-version:
Less than 20% of the sound effects were loaded!Cause: You do not have enough memory. Before launching the
game, deactivate the resident programs or unplug unused floppy diskdrives. They use memory that is needed by The Settlers.
The music was not loaded, even though I have 1 MB of Chipram andmore than 1 MB of memory!
Cause: see above.
The program or a part of the data does not go into Fastram as I wouldhave liked.
Cause: Verify the size of the available Fastram. Your extensionhas, perhaps, a memory capacity of COOOOOO. These extensionshave been integrated in the Amiga 2000, and can be obtained inseveral versions (512 KB, 1.7 MB) for the internal drive of the Amiga500. These extensions are not REAL Fastram. But do not bediscouraged; this only means that the program will function a littlemore slowly.
pm5.manual#eng#settl 03.03.1995, 18:58 Uhr111

112
8. Annexes
Only a part of the data is in the Fastram, even though the list says"yes".
Cause: a part of the Fastram is probably being used by otherprograms.
The size of the world indicated in the list has not been reached!Cause: a part of the Fastram or Chipram is being used by other
programs. You will find a complete list of possible configurations andof their effects on "The Settlers" on the following page.
pm5.manual#eng#settl 03.03.1995, 18:58 Uhr112

113
8. Annexes
Configuration examples: This list allows you to see the differentpossible configurations and the performances of the program on themachine:
Your Computer Sound Size Fastram MissionsChipram Fastram Effects Music (in Screens) Program Data512 Kb 512 Kb ca.25% no 1-3 (37) yes yes yes512 Kb 1 MB ca.25% no 1-5 (150) yes yes yes512 Kb 2 MB ca.25% no 1-6 (600) yes yes yes512 Kb 4 MB ca.25% no 1-8 (1200) yes yes yes1 MB none ca.25% no 1-3 (37) no no yes1 MB 1 MB all yes 1-5 (150) yes yes yes1 MB 2 MB all yes 1-6 (600) yes yes yes1 MB 4 MB all yes 1-8 (1200) yes yes yes2 MB none all yes 1-5 (300) no no yes2 MB 1 MB all yes 1-7 (600) yes some yes2 MB 2 MB all yes 1-7 (600) yes some yes2 MB 4 MB all yes 1-8 (1200) yes yes yes
pm5.manual#eng#settl 03.03.1995, 18:58 Uhr113

114
Notes
pm5.manual#eng#settl 03.03.1995, 18:58 Uhr114
115
Notes
pm5.manual#eng#settl 03.03.1995, 18:58 Uhr115

116
Notes
pm5.manual#eng#settl 03.03.1995, 18:58 Uhr116
117
Notes
pm5.manual#eng#settl 03.03.1995, 18:58 Uhr117

118
Notes
pm5.manual#eng#settl 03.03.1995, 18:58 Uhr118

119
Notes
pm5.manual#eng#settl 03.03.1995, 18:58 Uhr119
120
Notes
pm5.manual#eng#settl 03.03.1995, 18:58 Uhr120
121
Notes
pm5.manual#eng#settl 03.03.1995, 18:58 Uhr121

122
Notes
pm5.manual#eng#settl 03.03.1995, 18:58 Uhr122

123
Notes
pm5.manual#eng#settl 03.03.1995, 18:58 Uhr123

124
Notes
pm5.manual#eng#settl 03.03.1995, 18:58 Uhr124

125
Notes
pm5.manual#eng#settl 03.03.1995, 18:58 Uhr125

126
Notes
pm5.manual#eng#settl 03.03.1995, 18:58 Uhr126

127
Notes
pm5.manual#eng#settl 03.03.1995, 18:58 Uhr127

128
Notes
pm5.manual#eng#settl 03.03.1995, 18:58 Uhr128

129
Notes
pm5.manual#eng#settl 03.03.1995, 18:58 Uhr129

130
Notes
pm5.manual#eng#settl 03.03.1995, 18:58 Uhr130

131
Notes
pm5.manual#eng#settl 03.03.1995, 18:58 Uhr131

132
Notes
pm5.manual#eng#settl 03.03.1995, 18:58 Uhr132

133
Notes
pm5.manual#eng#settl 03.03.1995, 18:58 Uhr133

134
Notes
pm5.manual#eng#settl 03.03.1995, 18:58 Uhr134

135
Notes
pm5.manual#eng#settl 03.03.1995, 18:58 Uhr135

136
pm5.manual#eng#settl 03.03.1995, 18:58 Uhr136

Blue Byte Software GmbHAktienstraße 62, D-45473 Mülheim
GERMANY
pm5.settl#u1/u4#eng 04.03.1995, 14:45 Uhr2

Digital scans by RoniWorlds ([email protected])


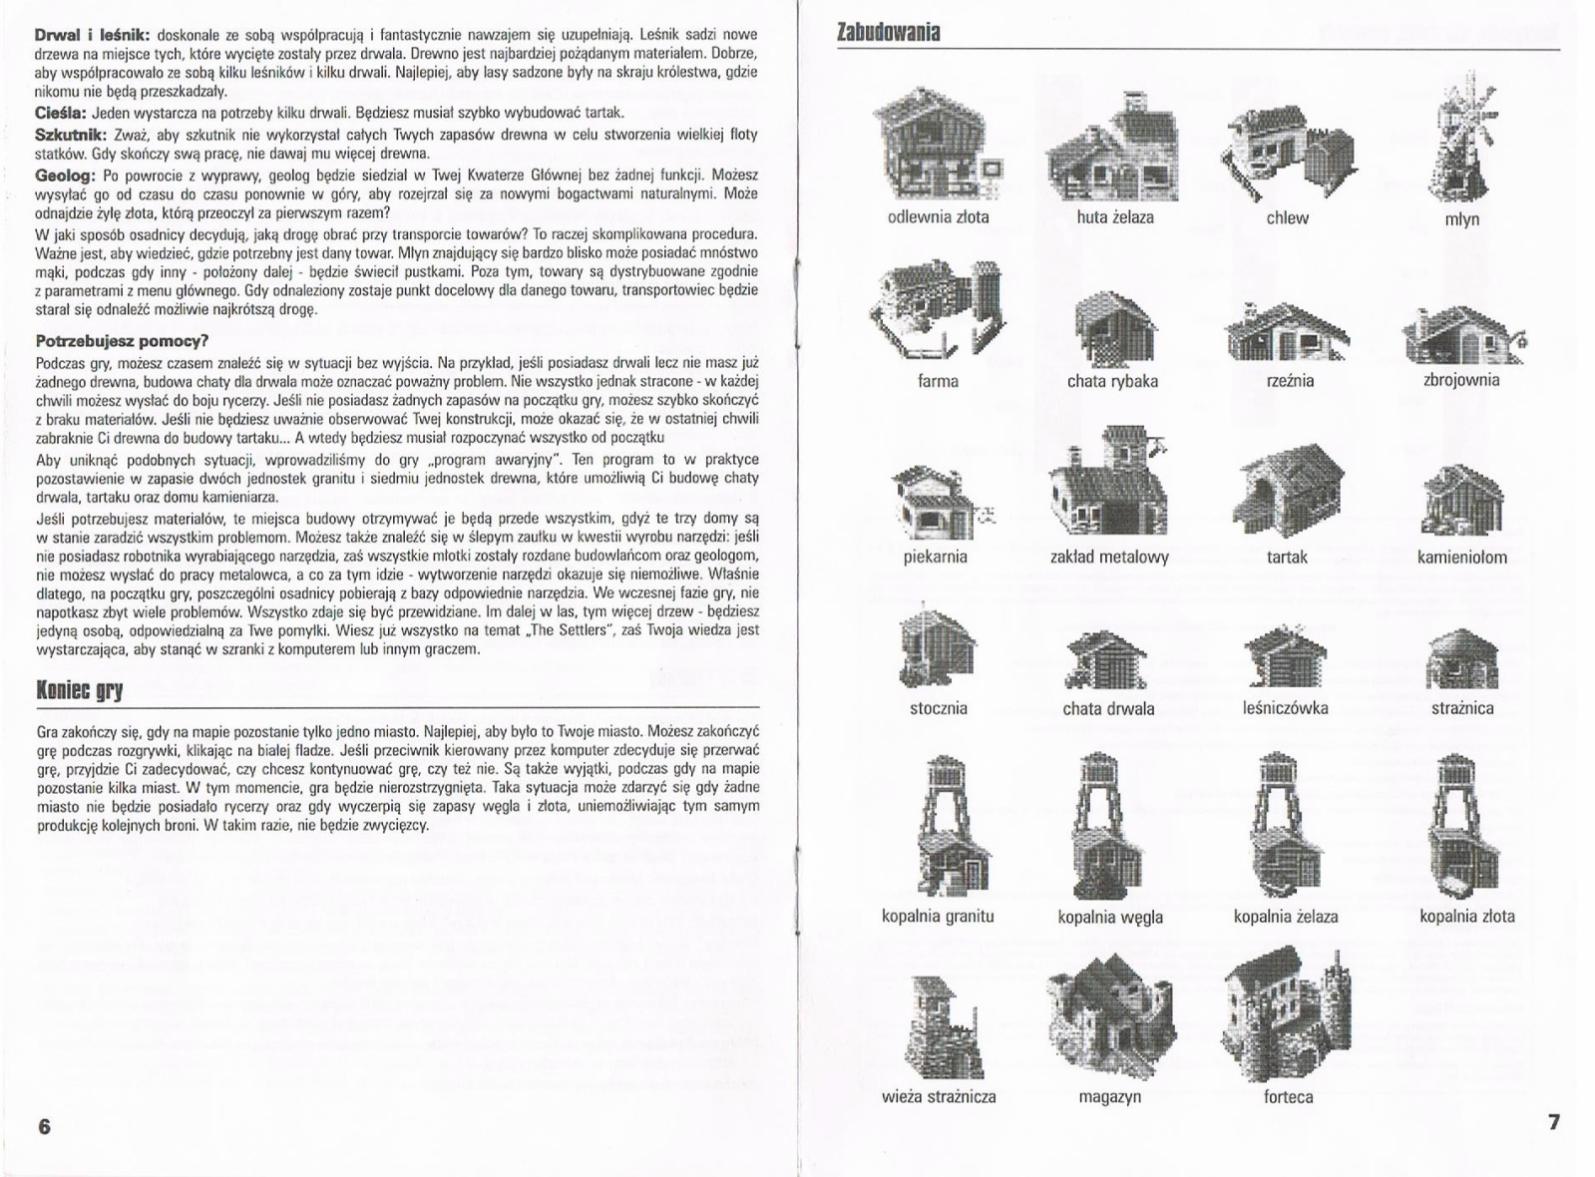


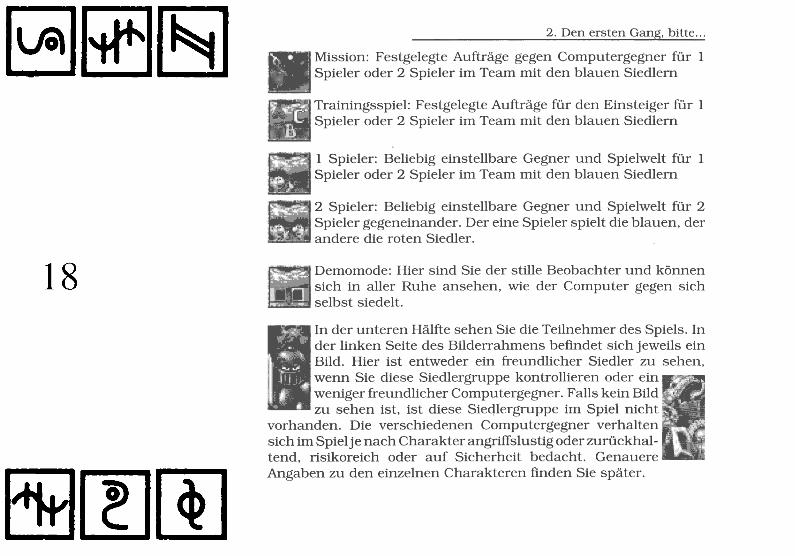


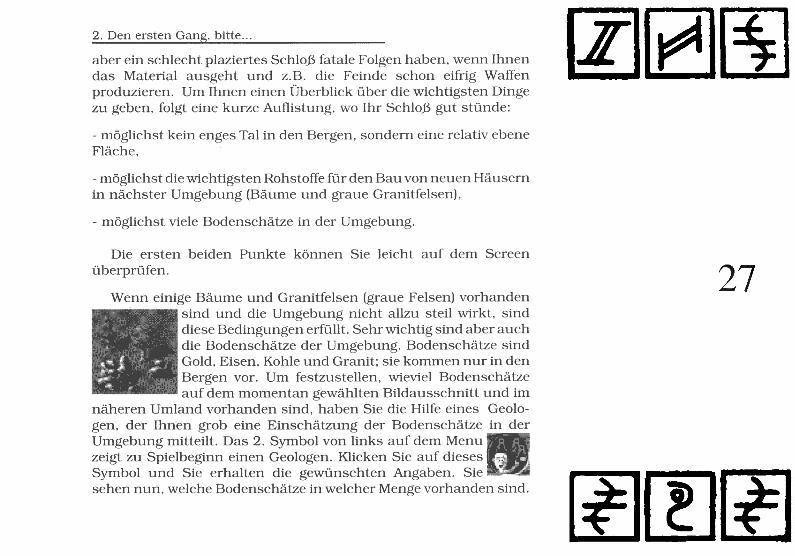


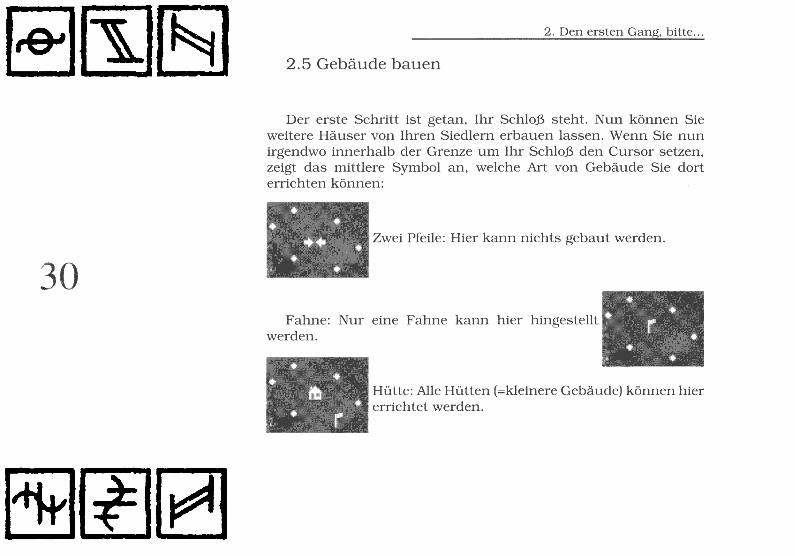


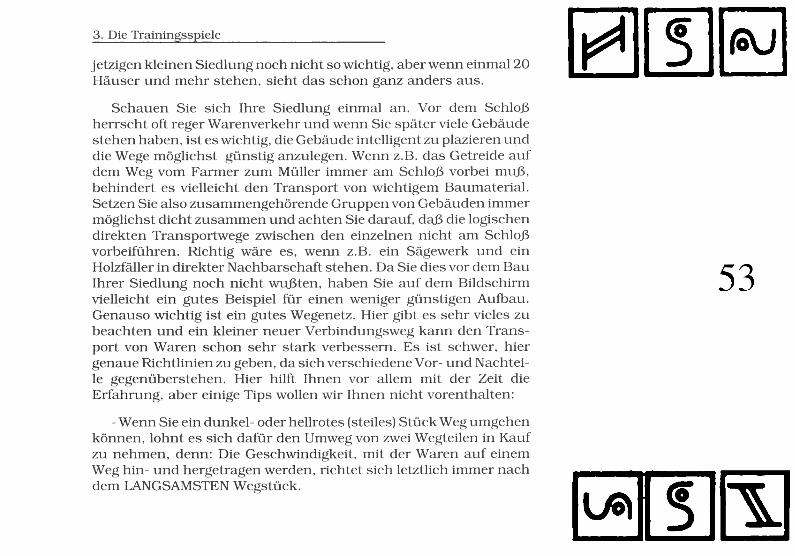

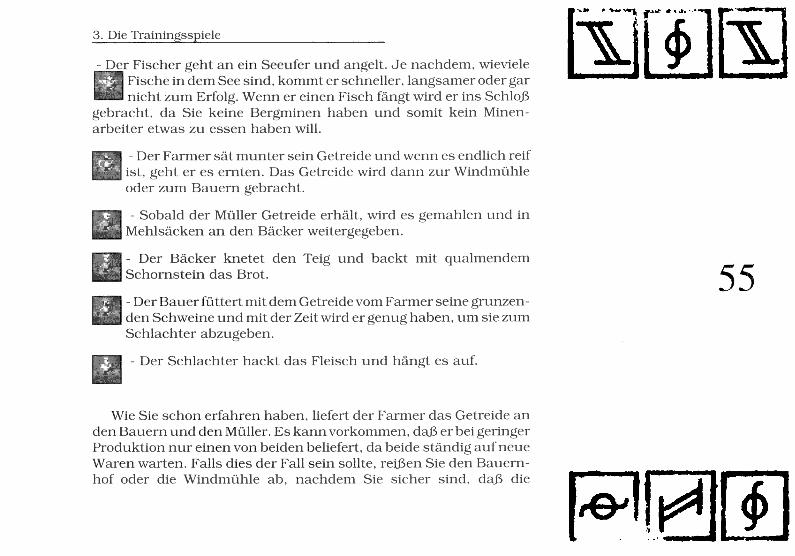


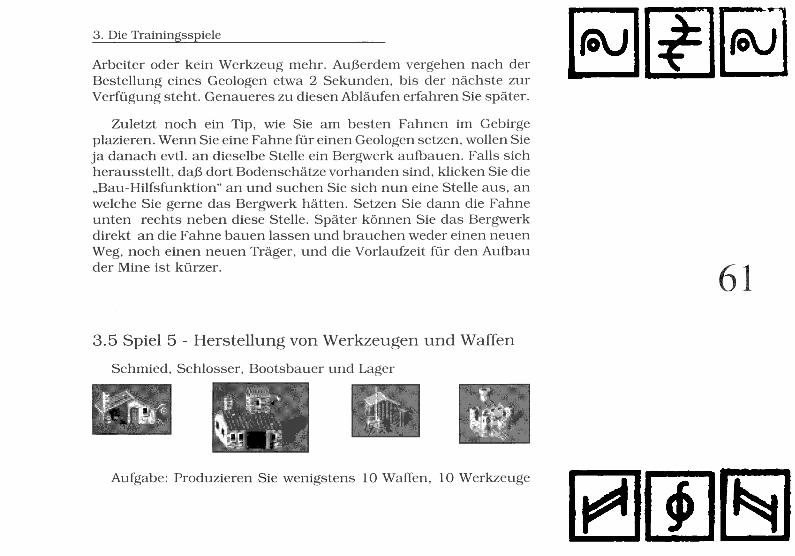


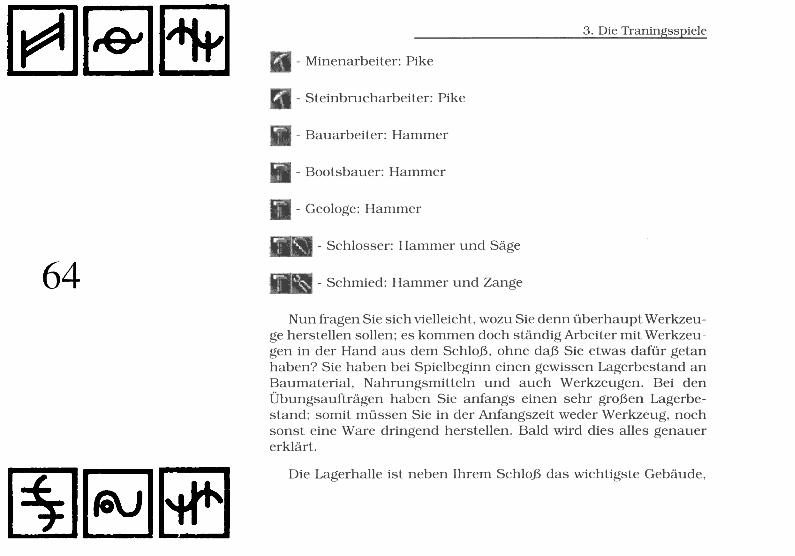


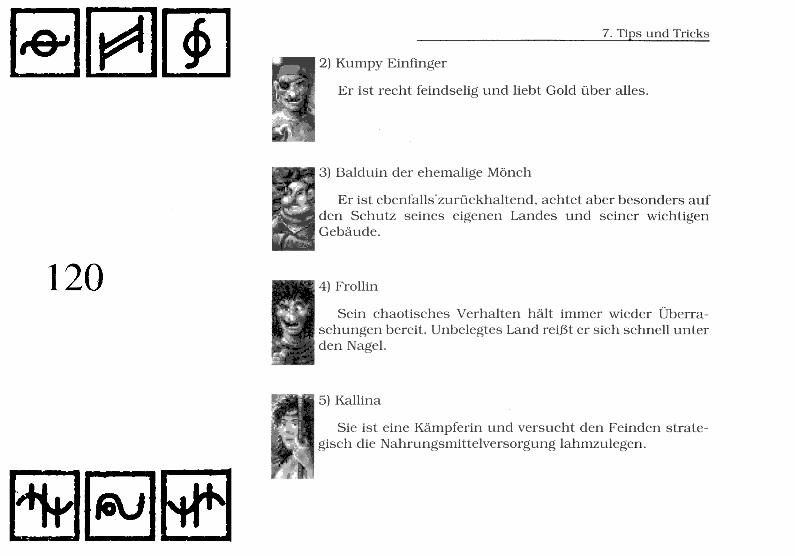


CREDITS :
Programmation et conception: Volker WertichGraphismes: Christoph WernerMusique: Haiko RuttmannManuel: Volker Wertich, Stefan
PiaseckiOn-game musique: Markus KludzuweitMise en page: Stefan PiaseckiTraduction française: Art Of WordsProduction: Thomas HertzlerAdaptation PC: Alexander Jonas
Ingo FnckVolker Wertich
Introduction: Christoph Werner (graphismes),
Ingo Frick (programme)Tests: Matthias Best
Frank GrimmMichael PassmannBirgit Krause
Software, manual and artworks (C) 1993 by Blue Byte Software GmbH

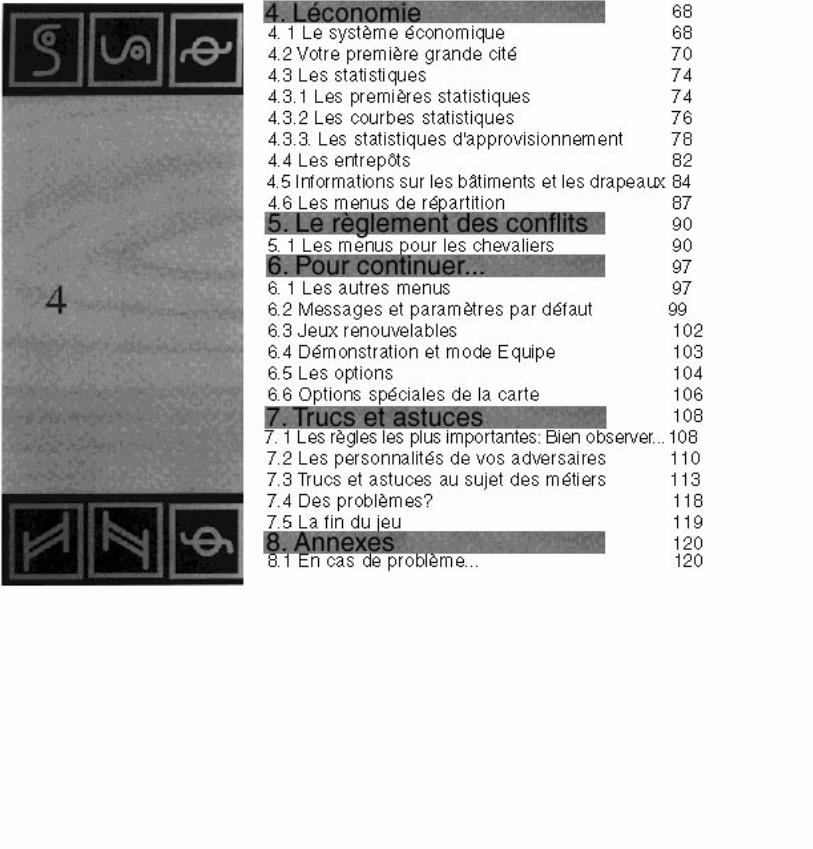
Précédent Sommaire
O. Préface
Cher client de Blue Byte. Ce que vous avez entre vosmains n’est pas simplement le manuel d’un jeu. C’est leGuide d’une aventure qui deviendra une épopée, et quichangera probablement votre vie de manière durable dansles mois à venir, ainsi que votre comportementvis-a-vis des loisirs.
“The Settlers” est un programme auquel vous pouvezjouer aussi souvent que vous le souhaitez, et qui vouspermettra en plus d’acquérir des connaissances.
Après quelques heures de jeu vous serez d’accord avecnous pour dire que ce jeu est un programme qui n’avaitpas d’équivalent, ni dans le style, ni dans les graphismes.
Pour la première fois, les utilisateurs pourront entrer dansun monde si complexe. si détaillé, qu’ils voudrontcomplètement se plonger dans le jeu. Avec The Settlers,nous avons enfin atteint le but que les créateurs delogiciels se sont donné depuis l’apparition des premiersjeux micro-informatiques: créer pour le joueur un monde àpart, où l’aventure ne finit jamais, et qui, selon le plaisir dechacun, peut être agrandi pendant des années. Le texte dela boîte est bien clair: si vous en avez assez du quotidienet que vous cherchez à l’oublier, vous n’avez plus besoinde faire des économies pour vous acheter votre Etat. TheSettlers va vous permettre de construire votre proprerefuge, que vous pourrez
O. Préfacemodifier et agrandir comme bon vous semble. Nous serionsheureux si vous pouviez trouver dans votre royaume le calmeet la sérénité que votre vie quotidienne ne peut vous offrir. Enfait, nous en sommes sûrs.
Ce manuel a été rédigé en conséquence, et:1. - vous permettra d'installer The Settlers sur votreordinateur.2. - vous familiarisera avec les principes de base que... (voir 3)3. - ... vous pourrez appliquer et essayer pour la première fois.4. - vous donnera des informations d'ordre général et... (voir 5)5. - vous permettra de comprendre le fonctionnement du jeupour une meilleure utilisation.6. - si nécessaire, vous permettra d'approfondir vosconnaissances.7. - vous aidera à comprendre les points qui peuvent vousparaître obscurs.8. - s'adresse aux utilisateurs qui veulent tout connaître dujeu, jusqu'à la plus petite information.
A la fin de ce manuel, nous avons inclus un guide de cas deproblèmes techniques. Ne vous laissez pas troubler par toutesces informations. Nous avons conçu ainsi ce manuel pour desraisons de clarté, et vous n'avez pas besoin d'avoir fait desétudes de sciences économiques pour le lire. Vous trouverezainsi toujours ce que vous cherchez. The Settlers est un jeuqui vous procurera énormément de plaisir et d'amusement.
L'équipe Blue Byte. Octobre 1993.

1. Sur le bon chemin...
1.1 Matériels nécessaires
Le jeu “The Settlers” nécessite un Amiga ou un IBM PC oucompatible de type 386 minimum, avec disque dur. Etantdonné que le programme exploite au mieux chaqueordinateur, vous n’avez pas besoin de vous inquiéter pourvotre configuration. surtout si vous utilisez le jeu sur un PC.Selon la mémoire de votre ordinateur, le programmeoccupera automatiquement cette mémoire selon sesbesoins. Si vous disposez de plus de mémoire, le jeu vousprocurera encore plus de plaisir, car vous pourrez profiterdes effets sonores et des musiques, et de nouvellespossibilités dejeu.
1.2 The Settlers - Présentation
Félicitations! En achetant The Settlers, vous venezd’acquérir un programme extraordinaire, qui utiliserapleinement les capacités de votre Amiga ou de votre PC,que vous possédiez un Amiga 500 1 Mo, un Amiga 4000 10Mo et disque dur, un PC 386 ou un DX2 486. The Settlersest un programme “intelligent” qui réfléchit pour vous, et unjeu où vous n’êtes pas obligé de vous occuper de tout vous-même.
The Settlers est un programme à,”timing linéaire”: quoiquevous
1. Sur le bon chemin...
fassiez et quels que soient les calculs effectués par leprogramme, les colons travailleront ou combattront toujours à lamême vitesse. C’est une nouveauté qui n’existait pas pour desprogrammes aussi complexes.Vous déciderez à quel endroitvos colons vont construire des bâtiments, comment seront faitsles chemins où ils chercheront les richesses souterraines, et àquel endroit ils attaqueront l’ennemi. De plus, vous pourrezmodifier de nombreux paramètres qui affecteront lecomportement de vos colons.
L’ordinateur se charge de l’exécution de vos décisions et ilcommande vos colons. Les hommes construiront des maisons,abattront des arbres, travailleront dans les mines, fabriquerontdes armes et des outils, achemineront les matériaux deconstruction dans les endroits où ils sont nécessaires,défendront leurs châteaux-forts contre les attaques deschevaliers ennemis, approvisionneront les mineurs ennourriture, et beaucoup d’autres choses!
The Settlers vous permet dejouer de plusieurs manières: seul,en équipe ou en mode entraînement. Seul ou en équipe contrel’ordinateur, seul ou en équipe contre des adversaires contrôléspar l’ordinateur et que vous choisissez vous-même, à 2 joueursface à face et contre des adversaires contrôlés par l’ordinateur,ou uniquement avec des joueurs controlés par I’ordinateur, pourregarder le monde évoluer sans aucune intervention de votrepart.
Le but du jeu est de construire une cité prospére et bienorganisée, et de prendre le controle des cités ennemies. Deprime abord, la chose

1. Sur le bon chemin...
mais en réalité c'est beaucoup plus complexe. Si I'on prendI'ensemble des problèmes inversement, en partant du but dujeu, vous allez mieux comprendre:
Pour vaincre les châteaux-forts ennemis, vous aurez besoinde beaucoup de bons combattants. Pour entretenir le moraldes chevaliers, il vous faut de I'or, et pour les armes, vousdevez disposer de fer et de charbon. Ces richessessouterraines sont exploitées dans les mines. Les minesdoivent être approvisionnées en nourriture, et les richessessouterraines fondues dans des fonderies.
L'approvisionnement en nourriture est assuré par despêcheurs, des exploitants agricoles et des paysans. mais ilsont besoin d'outils, comme tous les autres travailleurs. Cesoutils sont fabriqués par les serruriers. Pour pouvoirconstruire les huttes, maisons et châteaux-forts, il faut desmatériaux de construction et des ouvriers... Mais ne vousinquiétez pas. vous n'aurez pas besoin de vous souvenir detout ça pour I'instant, tout vous sera expliqué au fur et àmesure. Nous espérons que vous prendrez beaucoup deplaisir avec ce jeu.
L'équipe de Blue Byte
1.3 Configuration
Ce paragraphe concerne seulement la version Amiga.

1. Sur le bon chemin...
Le programme tentera d’utiliser au maximum lespossibilités de votre ordinateur. Pour que celui-cifonctionne correctement sur votre système, nous vousconseillons de lire attentivement les paragraphes suivants.Si vous êtes encore inexpérimenté dans le domaine del’informatique et si les mots “Chipram” et “Fastram” ne vousdisent rien quand on vous parle de l’amiga, ne lisez pas leschapitres 1.3 et 1.5.
a) Remarques générales sur la configuration
N’oubliez pas que chaque programme déjà chargé lors dulancement du jeu mobilise de la mémoire, qui pourrait êtrenécessaire pour le bon fonctionnement de “The Settlers”.Nous vous conseillons donc de ne pas charger d’autresprogrammes en mémoire pour utiliser le jeu. Si plusieursprogrammes résidents sont lancés lors de I’initialisation dusystème, utilisez une autre séquence de démarrage pourThe Settlers.
b) Configuration pour 512 Ko de Chipram OU 1 Mo demémoire totale seulement.
Si vous disposez de 1 Mo de Chipram ET d’au moins 1,5Mo de RAM au total, vous pouvez sauter ce paragraphe.Le programme utilise la mémoire Chipram pour les écrans,les animations, les effets sonores et la musique. Si vousn’avez que 512 Ko de Chipram, il faudra évidemment fairedes sacrifices: vous n’entendrez qu’une
1. Sur le bon chemin...
partie des effets sonores, et pas de musique du tout. Les effetssonores sont chargés en fonction de la mémoire disponible.Vous pouvez augmenter la mémoire disponible en:
- déconnectant les lecteurs de disquettes supplémentairesinutilisés- n'activant pas le disque dur (s'il contient de la Chipram)- évitant de lancer d'autres programmes.
Le reste de la mémoire disponible est utilisée par leprogramme pour les données, les paysages et lesgraphismes. Pour pouvoir effectuer les scénarios avecseulement 1 Mo de mémoire, nous vous recommandons derelire attentivement les points mentionnés ci-dessus.
1.4 Installation sur disque dur
Si vous voulez utiliser le jeu à partir de disquettes, vouspouvez sauter ce paragraphe.
PC:ATTENTION!!! Avant d'utiliser les disquettes originales,
nous vous conseillons d'effectuer une copie de sauvegarde.
1) Allumez votre ordinateur comme d'habitude.
2) Lorsque le système est opérationnel, insérez la première disquette

1. Sur le bon chemin...
du jeu dans I'un des lecteurs.
3) Entrez la lettre de ce lecteur suivi de deux points (:) etappuyez sur la touche Return. Pour le lecteur interne, parexemple, vous entrez la lettre a:. Si vous disposez d'undeuxième lecteur, celui-ci est généralement assigné à lalettre b:.
4) Entrez le nom du programme d'installation (INSTALL),puis appuyez sur la touche RETURN.
5) Une fois le programme lancé, vous devrez spécifier lechemin d'accès pour I'installation. Si vous voulez modifier lechemin d'accès par défaut proposé par le programme, entrezle nouveau chemin d'accès, et confirmez en appuyant sur latouche RETURN. L'installation du programme commencera.Pour quitter le programme d'installation avant la fin de laprocédure d'installation, appuyez sur la touche ESCAPE.
6) Lorsque I'installation du programme est terminée, tapezSETTLERS pour lancer le jeu.
AMIGA:ATTENTION!!! Avant d'utiliser les disquettes originales,
nous vous conseillons d'effectuer une copie de sauvegarde.
1) Démarrez votre AMIGA comme d'habitude à partir du disque dur.

1. Sur le bon chemin...
Dès I'apparition de l'écran Workbench, placez la premièredisquette (sur laquelle se trouve le programme d'installation)dans I'un des lecteurs.
2) Ouvrez la disquette en double-cliquant sur son icône. Unefenêtre s'ouvrira, comportant d'autres icônes. L'une de cesicônes « Install », représente le programme d'installation desjeux Blue Byte.
3) Lancez le programme d'installation en double-cliquant surson icône.
4) Dans la fenêtre du programme d'installation, vous verrezdeux boîtes de dialogue. Entrez le nom du lecteur danslequel se trouve votre disquette d'installation dans la boîte dedialogue du haut. Il s'agit en principe du lecteur interne «DFO: », et c'est le lecteur indiqué par défaut par leprogramme. Si la disquette d'installation se trouve dans unlecteur externe, entrez la lettre correspondante (DFI-DF3).Confirmez en appuyant sur la touche RETURN.
La boîte de dialogue inférieure n'est destinée qu'au lecteurcible. Etant donné que le disque dur porte généralement lenom «DHO:3 », c'est le lecteur sélectionné par défaut. Si vousvoulez installer le programme dans un autre répertoire, entrezle chemin d'accès correspondant à votre configuration.Comme vous avez certainement créé un dossier spécial pourles jeux, vous pouvez également spécifier le répertoire danslequel vous voulez installer le jeu, par exemple:

1. Sur le bon chemin...
dhO:jeux/bluebyte/
Si le répertoire spécifié n'existe pas, il seraautomatiquement créé par le programme d'installation.
1.5 Ecran de statut
La version PC étant différente au niveau de I'utilisation desperformances du système, les utilisateurs de PC peuventsauter ce chapitre, l'écran de statut n'ayant aucune utilité.Lorsque vous lancez le programme, l'écran de statut estaffiché. Il vous indique de quelle manière votre ordinateur estutilisé par le programme. Il affiche ce qui suit:
1. WorkbenchIndique si le workbench a été désactivé, ce qui permet delibérer de la mémoire. Si le workbench n'a pas été désactivé,des programmes résidents sont chargés, ou le workbenchn'a pas été ouvert.
2. ProgrammeIndique si le programme est stocké dans la Fastram. Si c'estle cas, le programme est beaucoup plus rapide, car il peuttravailler en parallèle avec le Blitter.
3. DonnéesLà aussi, le programme est plus rapide si toutes les données se

1. Sur le bon chemin...
trouvent dans la Fastram.
4. SonsIndique si les effets sonores (aucun ou une partie) sontchargés ou non en mémoire (selon la taille de la mémoireChipram disponible).
5. MusiqueSi vous disposez d'1 Mo de mémoire, la musique doit êtrechargée en mémoire .
6. Le monde du jeuLe chiffre indique la taille maximale du monde du jeu. Celui-ci dépend de la taille de mémoire disponible, et peutcependant être limité par le support (voir 9) ou lemicroprocesseur (voir 8). Vous trouverez des informationsplus précises dans le tableau à la fin de ce chapitre.
7. MissionsVous pouvez effectuer les missions à partir de la taille 3 dumonde du jeu.
8. ProcesseurIndique le type de processeur(s) installé(s) dans votreAmiga.

1. Sur le bon chemin...
9. SauvegardeLes parties en cours sont sauvegardées sur disque dur ousur disquette. Pour les disquettes, la taille du monde du jeuest limitée à 5, car la taille 7 nécessite déjàjusqu'à 1.6 Mo.De plus, un monde de taille 5 est déjà immense.
Si vous jouez sur un PC, ne tenez pas compte de cesremarques. Comme précisé plus haut, votre ordinateurcharge lui-même, et selon la configuration de votre système,toutes les données dans la mémoire pour les utiliserultérieurement.

2. Démarrage
2. Démarrage2.0. 1 Protection contre la copie
Au démarrage du programme, I'ordinateur vous demanderad'introduire un code. Four cela, il vous présentera 16symboles différents. Si le programme vous demande parexemple quelle combinaison de symboles se trouve en hautde la page 18, regardez la page en question et cliquez avecla souris et dans le bon ordre sur les symbolescorrespondants. Si vous cliquez sur les bons symboles, leprogramme continue.
2.1 Le menu principal
C'est ici que sont indiqués tous les paramètres préliminairesavant le lancement du jeu. Un maximum de 4 groupes decolons peuvent participer au jeu. Un groupe de colons estcontrôlé par un joueur, par I'ordinateur ou par deux joueurss'ils sont en équipe. Pour choisir le mode du jeu, cliquez surla deuxième icône à partir de la gauche. Le graphisme deI'icône et le texte vous indiquent le mode de jeu choisi parmiles modes suivants:
Mission: Ordres fixes contre des adversairescontrôlés par I'ordinateur(1 joueur), ou 2 joueurs enéquipe, avec les colons bleus.

2. DémarrageEntraînement: Ordres fixes pour les nouveaux joueurs(1 joueur ou 2 joueurs en équipe avec les colonsbleus).
1 joueur: Adversaires modifiables à volonté et jeu pour1 joueur ou 2 joueurs en équipe avec les colons bleus.
2 joueurs: Adversaires modifiables à volonté et jeu pour 2joueurs I'un contre I'autre. L'un des joueurs joue avec lescolons bleus, I'autre avec les colons rouges.
Mode démo: Ici vous êtes uniquement un observateur.Vous regardez I'ordinateur coloniser contre lui-même.
Dans la moitié inférieure de l'écran, vous voyez lesparticipants du jeu.Dans la partie gauche de l'écran, vousverrez une image. Sur cette image, vous verrez un colon«gentil » (si c'est ce groupe de colons que vous contrôlez)ou un adversaire moins gentil (I'ordinateur). Sivous ne voyez pas d'image, ce groupe de colonsn'existe pas dans le jeu. Les différents
adversaires contrôlés par I'ordinateur ont leur proprepersonnalité, et peuvent être agressifs ou réservés, prêtsà prendre des risques ou simplement préoccupés par leursécurité. Vous trouverez plus loin des indicationsconcernant la personnalité de ces adversaires.Sur le côté droit deI'image, vous verrez trois barres de couleur bleue, verte et rouge.Ces indications sont très importantes. La barre bleue indique l'état

2. Démarrage
du stock d'une colonie (cité) au début du jeu. Un stockimportant permet une expansion rapide et procuredes avantages. Un petit stock crée des problèmes lorsde I'agrandissement de la cité. Si vous êtes undébutant, veillez à ce que la barre bleue soit toujoursà plus de la moitié.
La barre verte indique le niveau d'intelligence des joueurscontrôlés par I'ordinateur. Celui-ci affecte la rapidité de leursréactions et de leurs actions. Pour les joueurs, la barre verte esttoujours au maximum (nous estimons que vous êtesextraordinairement intelligents...) et n'a pas d'autre signification.
La barre rouge représente le taux de croissance. Plus elle esthaute, plus vos colons se reproduiront rapidement, et plusvous pourrez prendre de I'expansion. Pour les débutants, cettebarre doit également se trouver au moins à la moitié.
Selon le mode de jeu choisi, vous pouvez modifier d'autresparamètres. Pour commencer, nous vous conseillons de fairele jeu d'entraînement n°1..Mission: Vous verrez au milieu de I'écran le niveau (au début
1), le mot de passe (au début "START') et deux flèches.Lorsque vous réussirez une mission, le programme vousindiquera un mot de passe pour reprendre le jeu au mêmeniveau. Cliquez sur le mot de passe et entrez le nouveaumot de passe. N'oubliez pas d'appuyer sur la touche «Return » pour confirmer. Si le mot de passe est incorrect, le

2. Démarrage
message «FAUX » sera affiché. Si le mot de passe estcorrect, vous verrez apparaître le niveau (level) auquel vousaurez accès.
Avec les flèches affichées à droite du mot de passe,vous pourrez revenir aux niveaux déjà terminés. Deplus, vous pouvez activer le mode équipe encliquant sur la souris dans le cadre de gauche.Vousverrez alors deux souris. Nous vous conseillons ne pasessayer tout de suite les ordres de mission.
- Jeu d'entraînement: Il n'y a pas de mot de passe pourI'entraînement. Vous pouvez donc sélectionner chaque jeud'entraînement disponible directement en vous servant desflèches. Comme pour les missions, vous pouvez activer lemode en équipe en cliquant sur la souris.
1 joueur. 2 joueurs et mode démo: Pour ces modes dejeu, vous pouvez modifier à volonté de nombreuxparamètres. La taille du monde est affichée au centre.Pour la modifier, cliquez sur la petite ou la grande
planète. Pour les débutants, il est déconseillé de jouer avecdes mondes dépassant la taille 3, étant donné vous serezrapidement submergé par les événements... De plus, vouspouvez modifier toutes les données d'un groupe de colonsselon vos désirs:
- la barre bleue pour l'état du stock- la barre verte pour I'intelligence (dans le cas d'adversaires contrôlés

2. Démarrage
par I'ordinateur),- la barre rouge pour le taux de croissance,- le bouton, pour activer ou désactiver les adversairesgérés par I'ordinateur.- I'image de I'adversaire contrôlé par I'ordinateur, pour enchoisir une autre.
Les données de départ sont choisies de manière aléatoire.Si vous êtes débutant, nous vous conseillons de vousmodifier les paramètres à votre avantage, notamment en cequi concerne le stock, car un gros stock est important. Si vousavez envie de regarder le jeu en mode démo, vous pouvezaugmenter le niveau d'intelligence des joueurs contrôlés parI'ordinateur, mais réduire leur stock. La combinaison dechiffres affichée à droite est une valeur aléatoire utilisée pourla création du monde. Cette valeur décide des endroits où setrouveront les montagnes, les lacs, les déserts, les forêts etc..dans ce monde. La même combinaison de chiffres mènedonc toujours au même monde. Pour changer de monde,cliquez sur I'icône à gauche avec le point d'interrogation etune autre combinaison de chiffres sera immédiatementchoisie. L'icone restant au milieu de l'écran et I'étoiletournante, que vous avez peut-être déjà remarqué sur le bordinférieur, vous seront expliquées par la suite.
En mode 1 joueur, 2 joueurs ou démo, vous voudrezsouvent mettre les valeurs de chaque participant aumême niveau. Dans le milieu du cadre à droite, vousverrez une petite flèche. Cliquez sur I'icône et les donnéesdu joueur (ou de I'adversaire contrôlé par I'ordinateur)

2. Démarrage
qui se trouve le plus à droite seront les mêmes pour tous lesautres participants. Le joueur situé le plus à droite esttoujours utilisé, car les seuls joueurs dont le niveaud'intelligence peut être modifié sont ceux qui sont contrôléspar I'ordinateur.
Pour lancer le jeu, cliquez sur I'icône "START".L'écran virera au noir et I'ordinateur calculera lemonde de jeu. Une barre rouge vous informera de laprogression des calculs.
Pour recharger une partie sauvegardée,sélectionnez I'option " LOAD ". Vous verrez unefenêtre comportant la liste des fichiers sauvegardéssur disquette ou sur disque dur. Si vous voulez
changer de disquette, insérez la nouvelle disquette et cliquezsur I'icône de changement de disquette. Cliquez sur le nomde la sauvegarde, puis sur "load" pour charger la partie, ousur "Exit" pour annuler. Une fois la partie chargée, unmessage apparaîtra sur l'écran pour vous indiquer si lechargement s'est bien passé ou s'il y a eu des erreurs.Cliquez sur "Exit". Si la partie a été correctement chargée, unnouvel écran sera affiché et vous verrez tous les adversaireset toutes les valeurs de début du jeu. Ceci est important sivous ne vous souvenez pas très bien contre qui vous avezjoué, ni de quelle force étaient vos adversaires. A I'exceptiondu titre, seules les icônes "Start" et, "Abort" restent encoreactivées. L'icône "Start" permet de continuer la partie, I'icône"Abort" de revenir au menu principal. Pour quitter le jeu, cliquezsur I'icône EXIT, dans le coin supérieur gauche de l'écran.

2. Démarrage
L'icône des options supplémentaires est abordée dans leparagraphe6.5.
2.2 Le jeu - Les commandes
Vous pouvez jouer seul ou à deux, toutes les fonctions étantidentiques. La seule différence est qu'en monde 2 joueursI'écran est divisé en deux, I'image du monde est donc pluspetite, et les icônes sont un peu plus serrées. C'est pourcette raison que le mode 2 joueurs n'est abordé querarement dans les explications qui vont suivre, aucuneexplication supplémentaire n'étant généralement nécessairepour ce mode de jeu. Après le lancement, vous verrez surl'écran une partie du monde: peut-être de I'herbe, avecquelques arbres ou un lac. Cette partie du monde seratoujours appelée "écran" à partir de maintenant, pour éviterdes explications trop compliquées. En bas de l'écran setrouvent 5 icônes rondes différentes, qui ont des fonctionsdifférentes. Nous les appellerons par la suite "Menu"
Comme nous I'avons déjà mentionné, vous ne verrezqu'une partie du monde sur l'écran. Selon la taille de cetécran, le monde pourra faire seulement 10 fois, ou jusqu'à1200 fois cette taille pour les mondes géants Pour vousdéplacer dans le monde, maintenez le bouton droit dela souris enfoncé et déplacez-la dans la direction devotre choix. Quand vous serez arrivé à I'endroitsouhaité, relâchez le bouton de la souris. Regardezbien le paysage. Vous y découvrirez des déserts, deslacs, des forêts, des montagnes et beaucoup d'autres

2. Démarrage
choses. Peut-être avez-vous remarqué, aulancement du jeu, votre pointeur au milieu deI'image. Il est composé d'un symbole centralet de 6 points. Vous déplacez ce pointeur surI'endroit où vous voulez activer une desoptions du jeu. Si par exemple vous voulezconstruire une maison ou un chemin quelque
part, vous devez d'abord placer le pointeur à cet endroit.Pour placer le pointeur à I'endroit de votre choix, il suffit decliquer sur l'écran avec le bouton gauche de la souris. L'icônecentrale du pointeur, affichée également à gauche en bas dumenu, changera probablement. Nous vous en parleronsdans les paragraphes suivants.
CLIC SPECIAL: Plus loin dans ce manuel, il sera souventquestion du «Clic spécial ». Cela signifie que vous ne cliquezpas seulement sur le bouton gauche de la souris commed'habitude, mais qu'EN PLUS vous devez maintenir lebouton droit enfoncé: donc, un clic sur le bouton gauche enmaintenant le bouton droit enfoncé s'appelle un "clic spécial".Et pourquoi ça? Certaines fonctions dans le jeu ont deseffets importants! Par exemple, il arrive facilement qu'un clicinvolontaire sur la souris détruise un bâtiment important. Deplus, le clic spécial est souvent utilisé pour des fonctionssupplémentaires.
2.3 La carte
Au milieu du menu, vous verrez une icône « carte ». Cliquez surcette icône avec la souris.Une nouvelle fenêtre apparaîtra au-dessus
2. Démarrage
du monde de jeu. Vous verrez une carte géographique avecdifférentes icônes. Sur cette carte, les prairies sontindiquées en vert, les déserts en jaune. les lacs enbleu et les montagnes (selon leur hauteur) enmarron et blanc. Si vous cliquez sur un endroit de la
carte, votre écran sera placé à I'endroit correspondant dansle monde et la carte disparaîtra. Faites un essai en cliquantsur un lac ou un désert, qui apparaîtra immédiatement surI'écran. Vous pouvez ainsi sélectionner beaucoup plus viteun endroit très éloigné au lieu de faire défiler le mondejusqu'à cet endroit, comme expliqué dans le chapitre 6.
Le monde est «sans fin », c'est-à-dire que si vous allez deplus en plus vers la gauche, vous vous retrouverezau bout d'un moment à I'endroit de départ. Le monden'a donc pas de "bord".Vous le verrez plus clairement si voussélectionnez encore une fois la carte et cliquez sur I'icônequi se trouve à côté de la loupe, en bas à droite. Vous verrezdes lignes horizontales et obliques limitant la taille du monde.Par exemple, si vous avez sélectionné la taille 3, vousconstaterez que le monde est représenté 4 fois sur la carte,et 16 fois pour la taille 1. Les différentes parties sont cependantimbriquées les unes dans les autres, et c'est pour cetteraison que le terrain de jeu n'a pas de bord. Le monde detaille 5 rentre exactement dans la section de la carte. Lemonde de taille 8 est immense. Vous ne verrez qu'un huitièmedu monde sur la carte! A partir de la taille 3, vous pouvezdéplacer aussi bien la carte que I'écran: maintenez le boutondroit de la souris enfoncé et déplacez-la dans la directioncorrespondante. N'oubliez pas que pour les petits mondes ce

2. Démarrage
déplacement n`est pas possible (étant donné qu’ilss’adaptent à la section de la carte).
Avec l’icône “loupe”, vous pouvez zoomer sur la carte. Lesautres icônes affichées en bas de la carte sont abordéesplus longuement dans le paragraphe 3, car il est d’abordnécessaire d’avoir construit quelque chose pourcomprendre leur utilité.
2.4 Le château
Au début du jeu, vous commencerez par construire votrechateau,qui vous servira de quartier général.L’endroit où vous placerez ce château est d’unegrande importance pour la suite du jeu. Si, en tantque débutant, vous possédez un grand stock, vousne risquez pas de difficultés immédiates et l’endroit
du quartier général n’est pas d’une importance capitale.Mais si vous n’avez que des stocks moyens ou très réduits,un château mal placé peut avoir des conséquences fatales,si jamais vous manquez de matériaux alors que l’ennemifabrique déjà des armes. Pour vous donner un aperçu deschoses les plus importantes, nous avons établi une listedes conditions favorables à la construction de votrechâteau:
- évitez les vallées étroites dans les montagnes, maischerchez un endroit relativement plat.
- choisissez de préférence les matières brutes pour laconstruction de

2. Démarrage
de nouvelles maisons le plus près possible du château (desarbres et des rochers de granite gris).
- choisissez un terrain avec un maximum de richessessouterraines dans les environs.
Les deux premiers points sont facilement vérifiables surI'écran. S'il y a quelques arbres et des rochers de granite(rochers gris), et si I'environnement n'est pas tropinhospitalier, ces conditions sont remplies.
Mais les richesses souterraines des environs sont égalementtrès importantes. Les richesses souterrainessont: I'or, le fer, le charbon et le granite. On neles trouve que dans les montagnes. Poursavoir combien il y a de richessessouterraines dans la zone affichée sur l'écranet dans les environs, vous pouvez faire appelà un géologue, qui vous donnera une
estimation globale de ces richesses. La deuxième icône àgauche correspond au géologue. Cliquez sur cetteicône pour obtenir les renseignements désirés. Voussaurez quelles sont les richesses des environs et leurquantité, de haut en bas: or, fer, charbon et granite.
Toutes les valeurs n'ont pas besoin d'être élevées, mais s'iln'y a pas de charbon, de fer ou d'or, ou en quantité réduite,cherchez un autre endroit. Cliquez sur I'icône Exit pourrevenir au jeu.

2. Démarrage
L'importance de chaque richesse souterraine dépend ausside votre stratégie. Vous comprendrez tout cela en lisant cemanuel. Il arrive parfois notamment dans les mondes de taille1, que certaines richesses soient inexistantes, ou qu'il n'y aitpas de montagnes (et donc pas de richesses souterraines).Dans ce cas-là, ne cherchez pas désespérément un endroitfavorable pendant des heures, et oubliez les richesses
souterraines. Grâce à votre aimable géologue, vous n'avez euqu'une estimation globale assez vague des richesses dans lesenvirons, mais vous ne savez pas dans quelles montagnes ellesse trouvent, ni ce que vous allez trouver. Vos colons devront lestrouver eux-mêmes, plus tard dans le jeu.
Vous avez enfin trouvé un endroit propice pour construire votrechâteau. Le château est un grand bâtiment qui doit être placé
sur une surface relativement plane, avec del'herbe. Cliquez sur n'importe quel endroit del'écran avec le bouton gauche de la souriset le pointeur sera placé à cet endroit. Siun château-fort apparaît au centre dupointeur, cet endroit est approprié. En bas à
gauche dans le menu, vous verrez I'icône de " construction dechâteau". Si après quelques tentatives vous n'avez toujours pastrouvé d'endroit pour construire votre château, utilisez I'icône "
Aide à la construction ": Faites un clic spécial sur I'icônede gauche du menu (peu importe ce qui est affiché), lafonction d'aide à la construction devient active.Tous les endroits propices à la construction
d'un château seront indiqués sur l'écran. En cliquantsur l'un de ces endroits, vous ferez apparaître en bas
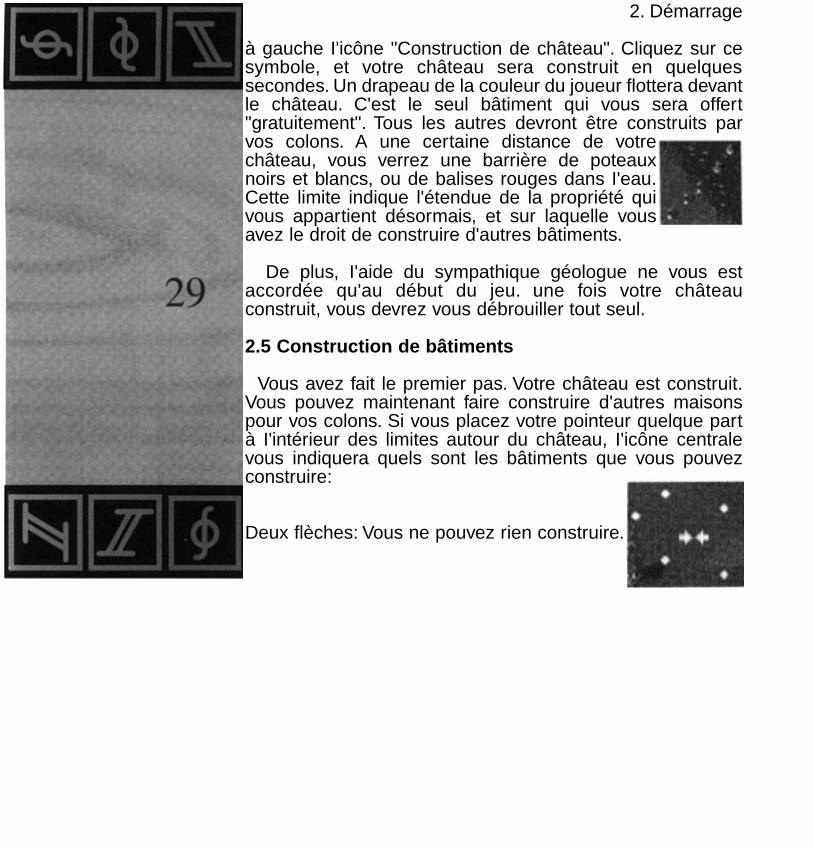
2. Démarrage
à gauche I'icône "Construction de château". Cliquez sur cesymbole, et votre château sera construit en quelquessecondes. Un drapeau de la couleur du joueur flottera devantle château. C'est le seul bâtiment qui vous sera offert"gratuitement". Tous les autres devront être construits parvos colons. A une certaine distance de votrechâteau, vous verrez une barrière de poteauxnoirs et blancs, ou de balises rouges dans I'eau.Cette limite indique l'étendue de la propriété quivous appartient désormais, et sur laquelle vousavez le droit de construire d'autres bâtiments.
De plus, I'aide du sympathique géologue ne vous estaccordée qu'au début du jeu. une fois votre châteauconstruit, vous devrez vous débrouiller tout seul.
2.5 Construction de bâtiments
Vous avez fait le premier pas. Votre château est construit.Vous pouvez maintenant faire construire d'autres maisonspour vos colons. Si vous placez votre pointeur quelque partà I'intérieur des limites autour du château, I'icône centralevous indiquera quels sont les bâtiments que vous pouvezconstruire:
Deux flèches: Vous ne pouvez rien construire.

2. Démarrage
Drapeau: Vous ne pouvez placer qu'undrapeau à cet endroit.
Hutte: Vous pouvez construire toutes leshuttes (petits bâtiments).
Château-fort: Vous avez suffisamment deplace pour tous les bâtiments.
Mine: Vous pouvez construire une mine(uniquement dans les montagnes).
Comment décider du type de bâtiment qui peut êtreconstruit et de I'endroit où il peut I'être?
Tout d'abord, tous les bâtiments doivent êtreconstruits sur votre terrain et il ne doit y avoir niarbres, ni rochers à cet endroit. Toutes les maisons,cases et châteaux-forts doivent être construits sur une

2. Démarrage
surface verte, et les mines uniquement dans lesmontagnes (mais pas dans la neige). Le type de batimentconstructible dépend de la pente du terrain. Pour lesgrands bâtiments, le sol doit être plat, et leur constructionest impossible sur des pentes trop raides. Mais si vouscherchez un endroit adapté à un grand bâtiment, l’option“Aide à la construction” (Bau-Hilfsfunktion) vous évited’avoir à cliquer partout sur l’écran pour trouver le bonemplacement, comme nous vous l’avons déjà expliquépour le château. Faites un clic spécial sur l’icône à gauchedu menu. Vous verrez immédiatement sur l’écran quelssont les endroits où vous pouvez construire le bâtiment. Ilvous suffit ensuite de choisir cet endroit. Pour désactiverl’aide à la construction, faites à nouveau un clic spécial surl’icône de gauche, dans le menu.
Selon l’icône qui se trouve au centre du pointeur, vousverrez également en bas àgauche (dans le “menu”)diverses icônes: “Placer undrapeau”, “Construire unehutte”, “Construire un grandbâtiment” ou “Construire
une mine”. Lorsque vous cliquez sur ces options, uneétoile apparait au-dessus du symbole de construction dansle menu, ainsi qu’une nouvelle fenêtre avec un choix debâtiments. Pour “construire un grand bâtiment”, vous avezle choix entre environ 20 bâtiments. Comme ils ne tiennentpas tous dans une seule fenêtre, vous pouvez faire défilerles autres pages en cliquant sur l’icône “changer la page”.Tous les bâtiments sont abordés plus loin dans ce manuel.Pour le moment, choisissez-en un et cliquez dessus pourdonner l’ordre de construction. Vous reviendrez à l’écrande jeu et vous verrez la
2. Démarrage
première pierre du chantier ou une croix de marquage. Lapierre signifie qu'une maison sera construite à cet endroit. Lacroix a la même signification, mais il faut d'abord aplanir lesol, ce qui permettra de construire une fondation solide pourle grand bâtiment que vous avez choisi.
Si vous décidez de ne pas construire de bâtiment à I'endroitchoisi, cliquez sur l'étoile tournante et quittez le mode deconstruction. Pour que le chantier devienne un bâtiment fini,vous devez construire un chemin entre le château et lechantier. Nous vous expliquerons ce procédé dans leparagraphe suivant.
2.6 Construction des chemins
Pour que les colons puissent se rendre dans tous lesendroits de leur cité, ils ont besoin de chemins. Ces cheminsvont toujours d'un drapeau à un autre. Votre réseau dechemins est très important. Un bon réseau favoriseI'acheminement rapide des marchandises et, en cas deproblèmes de transport, permet de trouver plus facilementdes solutions. Les drapeaux servent de croisements. 6chemins peuvent partir de chaque drapeau pour mener àd'autres drapeaux. Devant chacun de vos bâtiments, il y a undrapeau.
Au début, vous devez construire un cheminquand vous voulez construire votre premièremaison. Vous verrez un drapeau devant lechantier, tout comme devant votre château.

2. Démarrage
Cliquez maintenant sur I'un des deux drapeaux: un symbolepour la construction des chemins apparaîtra dans lepointeur et en bas à gauche dans le menu.Sélectionnez maintenant I'icône en bas à gauchedans le menu. Une étoile tournante apparaît à cetendroit et le pointeur comporte de nouveaux symboles. Vousêtes maintenant en mode " construction de chemins "
Les différents symboles autour du pointeur ont lasignification suivante:
- zone hachurée en rouge/jaune: vous ne pouvez pasconstruire de chemin dans cette direction.
- différents symboles de pentes allant du rouge (très raide enmontant et en descendant) au vert (plat) enpassant par le jaune: vous pouvez construire deschemins dans cette direction.
-symbole " UNDO "
Si vous cliquez sur cette icône, vous détruisez ladernière partie du chemin. Si vous cliquez sur I'une desicônes de pentes et qu'une partie de chemin apparaît,le pointeur comporte de nouveaux symboles. Répétezcette opération jusqu'à ce que le chemin rejoigne I'autredrapeau. L'étoile en bas à gauche disparaît et le pointeurreprend sa forme initiale. Le chemin est construit, etvous avez quitté le mode de construction. Les premierscolons sortiront alors de votre château. Au début, n'entenez pas compte. Nous nous en occuperons dans le

2. Démarrage
paragraphe suivant.
La signification des différentes icônes de pentes est trèssimple: Si on la regarde de la gauche vers la droite, I'icôneindique la pente du terrain: une montée très raide sera parexemple indiquée par une pente sur I'icône montant degauche à droite. La couleur est une aide supplémentaire. Ellepermet de voir au premier coup d'oeil quelle est la pente duchemin. Le rouge indique une pente très raide, le jaune unepente moyenne, et le vert un terrain plat. Plus le terrain estplat, plus les marchandises pourront être acheminéesrapidement, car les colons se fatiguent beaucoup plus sur unterrain en pente. Il est souvent préférable de faire un petitdétour, si on peut ainsi éviter un chemin " rouge ", donc avecbeaucoup de pente. Les débutants n'ont pas tellement à tenircompte des pentes. Construisez les chemins comme vousI'estimez nécessaire. Si vous avez construit un chemin etconsidérez que finalement vous n'en voulez plus, cliquez surl'étoile tournante. Vous quitterez ainsi directement le mode "construction de chemins " et le chemin commencé sera effacé.
Si vous voulez créer un embranchement à partir d'unchemin existant, vous devez placer un drapeau sur lechemin. Cliquez sur I'endroit de votre choix: un drapeauapparaîtra dans le pointeur et dans le menu à gauche, s'il estpossible d'y placer un drapeau. Dans le cas contraire, utilisez lafonction d'aide à la construction. Il peut arriver que dans unchemin il soit impossible de placer un autre drapeau: il peutdéjà y avoir un drapeau sur un chemin très court juste à côtéde I'endroit choisi, ou des arbres. Si vous pouvez placer

2. Démarrage
un nouveau croisement. Vous verrez I'icône " Placer drapeau" dans le menu. Cliquez sur cette icône pour construire lenouveau croisement. Vous pouvez aussi rallonger un cheminou le terminer par un clic spécial et, si c'est possible, undrapeau sera placé en même temps.
De plus, vous pouvez aussi créer des liaisons fluviales. Pourcela, deux drapeaux doivent se trouver au bord d'uneétendue d'eau. Construisez un chemin entre les deuxdrapeaux, de la manière habituelle. N'oubliez pas de reliercette voie d'eau à votre réseau de chemins. La voie d'eausert de marquage pour le navigateur qui I'utilisera pourtransporter des marchandises. Il est évident que les autrescolons ne peuvent emprunter cette voie! C'est pour cela queles voies d'eau n'ont de I'importance que pour le transportdes marchandises, et ne sont pas essentielles pour lesdébutants. En construisant vos chemins, veillez à ce qu'UNchemin passe toujours sur la terre ou sur I'eau, mais pas lesdeux en même temps!
2.7 Les premiers colons
Dès que le chemin vers le premier chantier sera construit,les premiers colons sortiront de votre château. Ceparagraphe vous explique leurs activités.
Le premier colon à sortir du château est un porteur,qui fait les cent pas sur le nouveau chemin enregardant s'il n'y a pas de marchandises àtransporter. Dès qu'il voit quelque chose à transporter
2. Démarrage
sur son chemin, il achemine les marchandises jusqu'audrapeau suivant.
Au début du jeu, vous disposez de 20 colons. Certainsd'entre eux ont déjà un métier, d'autres attendent du travail.
Si vous voulez construire un grand bâtiment, un colonavec un casque orange et une pelle (le niveleur)arrivera et se mettra en route vers le chantier. Une fois
sur place, il commencera à niveler progressivement le sol.Lorsqu'il aura terminé, la croix sur le chantier deviendra lapremière pierre, et le colon retournera au château.
Ensuite, ou si vous construisez un petit bâtiment, uncolon avec un casque jaune (ouvrier en bâtiment)viendra prendre son poste. Il attendra ensuite les
matériaux nécessaires pour construire la maison.
Un autre colon acheminera les matériaux deconstruction du château au chantier: il s'agittoujours de bois et éventuellement de pierres, selonle type de bâtiment. Le porteur prendra la
marchandise et I'apportera sur le chantier. L'ouvriercommencera immédiatement son travail et vous verrezquelque temps après un échafaudage, et enfin le bâtimentlui-même. Les petites huttes se construisent très vite, unchâteau-fort demande plus de temps.

2. Démarrage
Dès que I'ouvrier a terminé, il rentre au château. Ensuite,un autre ouvrier viendra commencer son travail dans lenouveau bâtiment. La spécialité de I'ouvrier qui viendras'installer dépend du bâtiment construit. Les fonctions dechaque ouvrier et de chaque bâtiment sont expliquées plusloin.
Si vous avez créé une voie d'eau, un colon portant unbateau sortira du château et ira vers cette nouvelle voiede transport pour y ramer en attendant des
marchandises.
Vous n'avez évidemment pas besoin d'attendre que laconstruction de votre bâtiment soit terminée. Vous pouvezconstruire d'autres bâtiments ou des chemins.
Vos colons feront tout cela automatiquement: ils essaierontde faire au mieux avec les moyens dont ils disposent, etferont leur travail. Ceci est valable non seulement pour lesporteurs et les maçons, mais aussi pour tous ceux dont vousferez la connaissance plus tard, comme les gardesforestiers, les bûcherons, les menuisiers, les carriers, lesmineurs, les pêcheurs, les exploitants agricoles, les éleveursde porcs, les meuniers, les boulangers, les bouchers, leschevaliers, les fondeurs, les serruriers, les forgerons et lesarmateurs.

2. Démarrage
2.8 Démolition
Vous pouvez avoir envie de démolir un bâtiment, un cheminou un drapeau pour plusieurs raisons. Cette opération estabordée dans ce paragraphe. Pour éviter une démolitioninvolontaire si vous cliquez par inadvertance sur le bouton dela souris, cette opération ne peut se faire que par un clicspécial.
Démolition de bâtiments: Cliquez sur le bâtimentcorrespondant. La deuxième icône du menu, enpartant de la gauche, se transformera en ruine. Faitesun clic spécial sur cette ruine pour mettre le feu au bâtiment.Si un colon habitait ce bâtiment, il retournera au châteaupour attendre un nouveau travail.
Démolition des chemins: Cliquez sur n'importe quelendroit du chemin et I'icône "Démolir chemin"apparaîtra dans le menu. Faites un clic spécial sur
cette icône pour supprimer le chemin. Les porteurs quitravaillaient sur ce chemin rentreront au château etattendront un nouveau travail. Les autres colons qui setrouvaient sur le chemin iront vers le drapeau suivant etpoursuivront leur route.
Démolition des drapeaux: Vous ne pouvez démolir undrapeau que s'il ne fait pas partie d'un bâtiment, et s'iln'est pas encore relié à autre chose par un chemin, ou s'ily a exactement deux chemins menant au drapeau. Lesraisons sont simples: si un seul chemin arrive au drapeau,celui-ci s'arrêterait soudainement dans le vide, alors que

2. Démarrage
trois chemins ou plus se croiseraient sans drapeau. Quand ily a deux chemins, le drapeau peut être enlevé et les deuxchemins sont réunis en un seul. Cliquez sur le drapeau àretirer et une ruine apparaîtra dans le menu (si la démolitiondu drapeau est possible).
Nouvelle construction: Si vous voulez construire un nouveaubâtiment à la place d'un autre, vous n'avez pas besoin dedémolir le vieux bâtiment d'abord, d'attendre qu'il ait brûlé etde donner un nouvel ordre de construction. Vous pouvezconstruire directement à I'endroit choisi en plaçant lepointeur sur le vieux bâtiment et en sélectionnant la fonctionde construction de la manière habituelle. Pour des raisons desécurité, il vous faudra également choisir le bâtiment par unclic spécial, pour ne pas en détruire accidentellement. Levieux bâtiment sera brûlé et vous pourrez ordonner laconstruction du nouveau.
2.9 Sauvegardes et fin du jeu
En mode 2 joueurs, ces options ne peuvent êtreactivées que par le joueur de gauche. Cliquez surI'icône de droite dans le menu et de nouvelles options
seront affichées. Pour le moment, ne tenez pas compte desicones du haut. mais seulement des options "SAVE " (" Sauvegarde ") et " END " (" Fin "),en bas de l'écran.
Pour quitter la partie en cours, cliquez sur I'option "End" ("Fin").Leprogramme vous demandera de confirmer. Si vous jouez depuis
Précédent Sommaire
2. Démarrage
plus d’une minute ou si vous avez sauvegardé la partiedepuis plus d’une minute, le programme vous demanderaune deuxième fois de confirmer l’abandon de la partie encours. Vous reviendrez au menu principal.
L’option “SAVE” (“SAUVEGARDE”) permet d’accéder aumenu des sauvegardes. La liste des sauvegardes seraaffichée sur l’écran. Si vous voulez changer de disquette,insérez la nouvelle disquette et cliquez ENSUITE surl’option “Change Disk”. Pour sauvegarder la partie encours, cliquez sur l’un des 10 emplacements, puis surl’option “New Name” (“Nouveau Nom”) pour entrer unnouveau nom. Vous pouvez également centrer la date dela sauvegarde afin d’éviter des erreurs. Si vous voulezsauvegarder avec le nom d’une partie existante, vousn’avez pas besoin d’entrer un nouveau nom. Maisattention! La partie déjà sauvegardée sera écrasée etremplacée par la nouvelle sauvegarde! Cliquez ensuite surl’option SAUVEGARDE pour sauvegarder la partie encours. Dans tous les cas, lisez le message de la disquettepour savoir si le jeu a bien été sauvegardé. Si voussauvegardez sur disquettes, nous vous conseillons d’enformater plusieurs avant de commencer à jouer, et de lesétiqueter. par ailleurs, nous vous recommandons desauvegarder sur 2 disquettes différentes pour plus desécurité. Si une disquette est défectueuse, vous n’aurezpeut-être perdu qu’une heure du jeu.
Si vous voulez charger (sauvegarder) à partir d’une autredisquette, insérez la nouvelle disquette et cliquez surl’icône de changement de disquette. La liste des fichiers dela nouvelle disquette sera affichée.
3. Entrainement
3. Jeux d’entraînement
Vous connaissez maintenant les principes de base du jeuet vous pouvez vous lancer dans les premiers jeuxd’entraînement. Chaque bâtiment est abordé en détail et lemanuel vous explique ce que vous devez surveiller.
Chaque jeu d’entrainement contient des ordres qui serontspécifiés dans les instructions. Vous pourrez ensuite joueret suivre le déroulement du jeu sur l’écran. Lesparagraphes contiennent les explications correspondanteset vous apprendrez ainsi à jouer plus rapidement et le jeudeviendra beaucoup plus intéressant.
Dans les jeux d’entraînement, vous disposez d’un grosstock vous permettant d’obtenir des outils, de la nouniture,des matériaux de construction et des colons en quantité.
N’hésitez pas à sauvegarder les parties d’entrainement (etles autres) de temps en temps. Si vous trouvez desexplications qui vous intéressent dans les instructions pourles joueurs confirmés, vous aurez à votre disposition dessauvegardes dans lesquelles se trouvent déjà beaucoupde bâtiments, et qui vous permettront de tester cesexplicalions. Lors de certains événements importants, vousserez informé directement. Vous entendrez un bruit et unepetite feuille clignotante apparaîtra en bas à gauche dansle menu. De nombreuxévénements sont abordés de façon plus détaillée dans ce
manuel. Si vous cliquez sur la feuille de papier, un messagesera affiché sur l’écran
3. Entrainement
et I'ordinateur déplacera l'écran à I'endroit où I'évènement aeu lieu. Si vous cliquez sur le crochet dans la fenêtre, lemessage disparaîtra.
3.1 Scénario 1 - Propriété rurale
Cases de garde, tours de guets, châteaux-forts et la carte.
Ordres: Faites construire parvos colons au moins unehutte de garde, une tour deguet et un château-fort.
Explications: Après avoirlancé le jeu, vous choisirezun endroit pour y construirevotre château. Ne vouspréoccupez pas desrichesses du sol ou desarbres. Donnez I'ordre de
construction pour les 3 bâtiments demandés et attendez(pensez à la fonction d'aide à la construction si vous netrouvez pas tout de suite un endroit approprié). Pour latour de guet et le château-fort, un niveleur commencerapar aplanir le sol. Il faudra aussi apporter plus dematériaux. Alors que la hutte ne nécessite qu'une livraisonde bois et de pierres, le château-fort en aura besoin de10. Un deuxième porteur sortira peut-être du châteaupour aider son collègue. Dés que la hutte de garde seraconstruite, un chevalier sortira de votre château pour s'yinstaller. Lorsque le premier chevalier arrive dans

3. Entrainement
une hutte de garde, une tour de guet ou un château-fort, votre propriété rurale s'agrandit. Regardez l'écran,et vous verrez les limites se déplacer. Pour vousinformer de cet agrandissement (si jamais vous êtesailleurs) vous entendrez un signal sonore indiquantqu'un message est arrivé. Cliquez sur la feuille depapier, et vous apprendrez qu'un autre bâtiment a étéoccupé par un chevalier. Ensuite, de I'or sera apportédans la hutte, mais nous verrons cela plus tard. Undrapeau blanc flottera alors devant la hutte de garde.
Plus tard, des drapeaux flotteront aussi sur la tour de guet etsur les tours du château-fort. Ces drapeaux ont lasignification suivante:
La hauteur du drapeau indique le taux d'occupation dubâtiment. Une hutte peut contenir 3 chevaliers, unetour de guet 6 et un château-fort 12.
- I'icône sur le drapeau vous indique à quelle distancese trouve I'ennemi. Le drapeau blanc signifie qu'il n'y apas de colonie ennemie et que vous ne serez donc pasattaqué dans un proche avenir. Si vous jouez ensuitecontre des joueurs contrôlés par I'ordinateur ou unautre joueur, vous verrez d'autres symboles.
Lorsque I'ennemi n'est plus très loin, une bande noireapparaît sur le drapeau, et dès qu'il se rapproche cettebande devient une croix noire. Quand I'ennemi se trouvedevant votre porte. le drapeau porte une croix noire trèsépaisse. Dans ce cas, vous devez vous préparer à uneattaque. Vos colons sont probablement encore en train de

3. Entrainement
construire la tour de guet et le château-fort. C’est unebonne occasion pour vous familiariser avec la cartegéographique. Cliquez sur l’icône de la carte et la cartesera affichée. En dehors du paysage, vous verrezplusieurs points bleus aux endroits où se trouvent vosbâtiments terminés ou en construction. Pour pouvoir mieuxreconnaître la taille du monde, cliquez sur l’icône de droite,sous la carte que vous connaissez déjà. L’icone de gaucheactive le type d’affichage, selon les 3 modes suivants:
-Terrain
-Terrain + Propriété
-Propriété
Cliquez sur cette icône. Après votre premier clic, l’imagede la carte ne change que très peu. Autour des pointsbleus représentant vos bâtiments, des points indiquent lataille de votre propriété. Si vous cliquez à nouveau surcette icône, le paysage disparaît complètement. Votrepropriété est toujours affichée en bleu, et les batimentssont représentés par des petits points blancs. Si vouscliquez une troisième fois sur cette icône, vous revenez aumode de départ. Si vous jouez contre d’autres joueurs oucontre l’ordinateur, leur propriété sera hachurer dans leurcouleur. Réactivez le mode “Propriété” etcliquez sur la deuxiéme icône à partir de la gauche. Vousverrez votre réseau de chemins sur la carte. Il n’est pasimportant de voir le tracé exact d’un chemin, maisseulement d’en avoir un aperçu. Si vous cliquez à nouveausur cette icône, les chemins disparaîtront. La troisièmeicône à partir de la droite permet
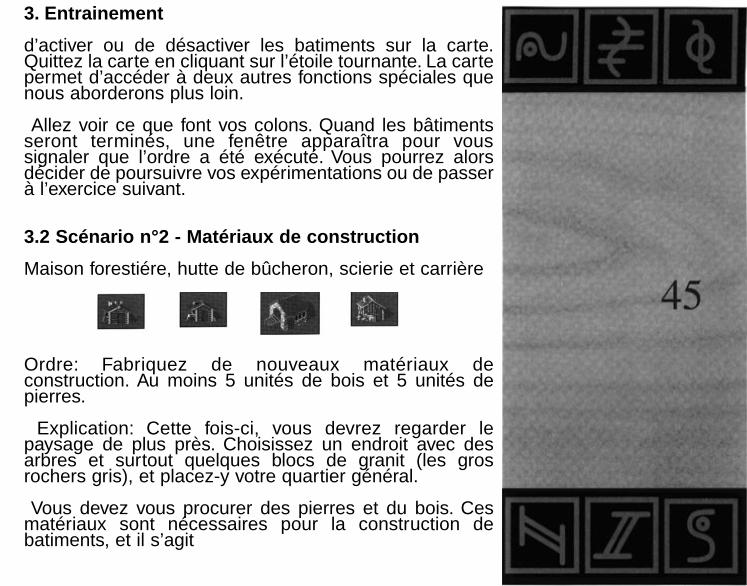
3. Entrainement
d’activer ou de désactiver les batiments sur la carte.Quittez la carte en cliquant sur l’étoile tournante. La cartepermet d’accéder à deux autres fonctions spéciales quenous aborderons plus loin.
Allez voir ce que font vos colons. Quand les bâtimentsseront terminés, une fenêtre apparaîtra pour voussignaler que l’ordre a été exécuté. Vous pourrez alorsdécider de poursuivre vos expérimentations ou de passerà l’exercice suivant.
3.2 Scénario n°2 - Matériaux de construction
Maison forestiére, hutte de bûcheron, scierie et carrière
Ordre: Fabriquez de nouveaux matériaux deconstruction. Au moins 5 unités de bois et 5 unités depierres.
Explication: Cette fois-ci, vous devrez regarder lepaysage de plus près. Choisissez un endroit avec desarbres et surtout quelques blocs de granit (les grosrochers gris), et placez-y votre quartier général.
Vous devez vous procurer des pierres et du bois. Cesmatériaux sont nécessaires pour la construction debatiments, et il s’agit

3. Entrainement
généralement des premières tâches à effectuer dans unenouvelle colonie. Les pierres proviennent des blocs de granitqu'un ouvrier va chercher dans une carrière. Pour le bois,c'est un peu plus compliqué. Vous avez besoin d'unbûcheron pour abattre les arbres, et d'un menuisier pourtransformer les troncs d'arbres en planches. Le bois estensuite prêt à être utilisé. Le garde forestier est décrit dansce chapitre car c'est lui qui plante les nouveaux arbres.
Placez une hutte de bûcheron près des arbres, depréférence au milieu d'un petit bois, et une carrière àproximité des blocs de granit. Cherchez un endroit appropriépour la scierie (il s'agit d’un grand bâtiment) et placez unemaison forestière à un endroit où il n'y a pas encorebeaucoup d'arbres. Reliez ensuite les bâtiments par deschemins. Si vous avez tout fait correctement, votre travail estfini. Le reste est à faire par vos colons!
Ils construiront progressivement des huttes, nivelleront le solpour la scierie, et les ouvriers arriveront après la constructiondes bâtiments.
Le bûcheron ira dans sa hutte et en ressortira un peu plustard pour choisir un arbre à abattre. Après I'avoir abattu,il coupera les branches et emportera le tronc qu'ildéposera devant sa hutte. Ensuite, il se reposera avant
de repartir au travail. Un porteur verra le tronc et il viendra lechercher. Comme votre scierie sera probablement encore enconstruction, le tronc sera provisoirement stocké dans lechâteau. L'ouvrier de la carrière grimpera sur un bloc de granitet tapera avec sa pioche jusqu'à ce qu'il puisse emporter

3.Entrainement
quelques pierres. Il les posera devant sa hutte, où, commepour le bûcheron, un porteur viendra les chercher et lesportera dans le château, si l’on n’a pas besoin de cespierres sur un chantier.
Le garde Forestier est continuellement en train deplanter de nouveaux arbres. Ces arbres grandiront etpourront donc être abattus. Si vous abattez les arbres
sans en replanter de nouveaux, vous allez très vite vousretrouver à court de bois. Vous pouvez aussi placer ungarde forestier à côté d’un bûcheron. Les deux secomplètent très bien. S’il n’y a pas de bûcheron près d’ungarde forestier, vous aurez bientôt une nouvelle forêt.
La scierie sera certainement le demier bâtimentconstruit, car c’est le plus grand. Le menuisier iraalors s’y installer et attendra les troncs d’arbres. Ils lui
seront apportés du château ou par le bûcheron. Il lesdébitera et posera les planches devant la scierie. Cesplanches seront stockées dans le château jusqu’à leurutilisation.

3. Entrainement
Vous aimeriez savoir comment vous pouvez êtreapprovisionné régulièrement en granite? Il est possiblede replanter un arbre, mais les pierres ne repoussentpas. Mais même si vous avez utilisé tous les blocs degranite, il restera toujours des gisements de ces pierresparticulierement dures sous terre. Mais nous nousoccuperons des mines plus tard, dans un autrescénario...Dès que vous aurez fabriqué les matériaux demandés,
vous aurez atteint votre objectif.
3.3 Scénario 3 - Nourriture
Hutte de pêcheur, exploitation agricole, moulin à vent,boulangerie, ferme, boucherie et conseils pour laconstruction des maisons et des chemins.
Objectif: Fabriquer 5 unités de chacun des alimentssuivants: poisson, viande et pain.
Explications: Cette fois-ci, vous aurez besoin d’un lacpour votre pêcheur qui se trouve près du château. Ilfaudra également disposer d’un Grand espace pourl’exploitation agricole, où l’agriculteur pourra cultiver sonblé. Par contre, vous n’aurez pas besoin de richessessouterraines, ni d’autres matières premières.
Pour permetre à vos colons de travailler pendant la suitede ces explications, installez les 6 bâtimentsnécessaires:
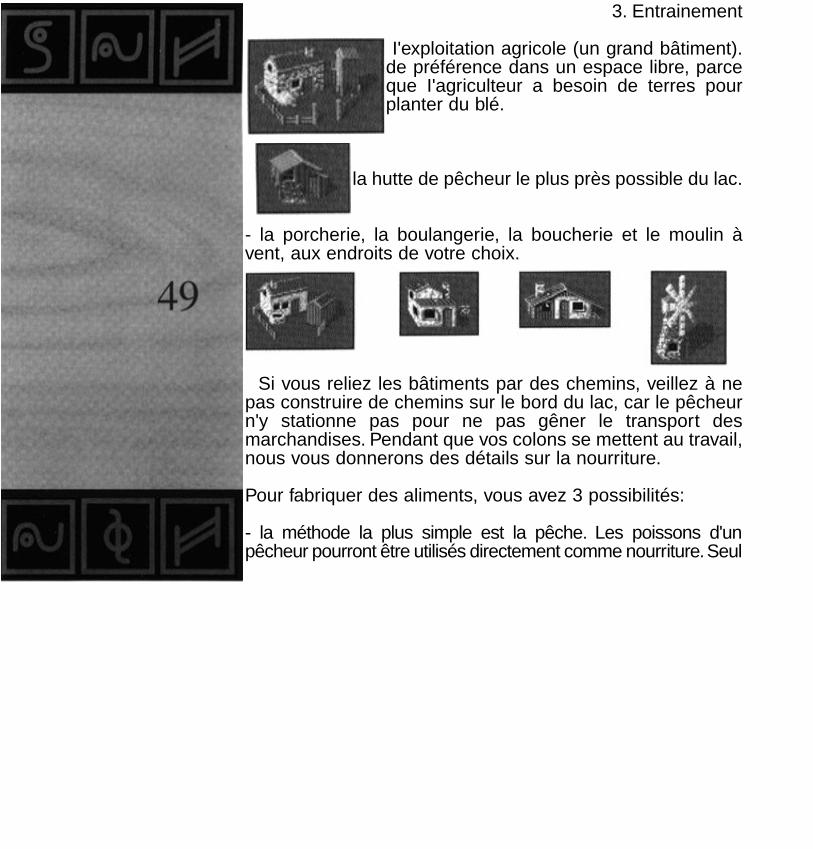
3. Entrainement
I'exploitation agricole (un grand bâtiment).de préférence dans un espace libre, parceque I'agriculteur a besoin de terres pourplanter du blé.
la hutte de pêcheur le plus près possible du lac.
- la porcherie, la boulangerie, la boucherie et le moulin àvent, aux endroits de votre choix.
Si vous reliez les bâtiments par des chemins, veillez à nepas construire de chemins sur le bord du lac, car le pêcheurn'y stationne pas pour ne pas gêner le transport desmarchandises. Pendant que vos colons se mettent au travail,nous vous donnerons des détails sur la nourriture.
Pour fabriquer des aliments, vous avez 3 possibilités:
- la méthode la plus simple est la pêche. Les poissons d'unpêcheur pourront être utilisés directement comme nourriture.Seul

3. Entrainement
inconvénient: il faut un lac, et quand il y a trop de pêcheurspour un petit lac, celui-ci se vide. Tant qu'il y aura despoissons, ils se reproduiront. Il est donc conseillé de pêcherpeu de poissons si vous voulez en pêcher pendantlongtemps.
- La deuxième méthode consiste à faire du pain. L'exploitantagricole cultive du blé. Quand le blé est mûr, il est récolté. Unporteur I'achemine vers le meunier, qui le transforme enfarine. Les sacs de farine sont ensuite livrés au boulanger,qui fait du pain. Vous constaterez que cette méthodenécessite beaucoup plus de patience. Mais son rendementest meilleur, et vous n'aurez besoin que de terres pourI'exploitation agricole.
La troisième méthode est aussi longue que la dernière, maisnécessite moins de place. L'exploitant agricole fournitégalement du blé à l'éleveur, qui s'en sert pour nourrir sescochons. Ces derniers se reproduisent et l'éleveur en sort unde temps en temps. Il est livré au boucher qui en fait de laviande.
Mais à quoi serviront donc tous ces aliments? Dans d'autresendroits, par exemple pour nourrir les mineurs qui travaillentdans les montagnes. S'ils n'ont plus rien à manger, ils semettront en grève et ne fourniront plus de matières premières.Les mineurs mangent du poisson, du pain ou de la viande.Vous fabriquerez donc ce qui sera le plus facile pour vous.Revenons maintenant au jeu.Votre pêcheur est déjà en route,et les autres bâtiments sont encore en construction. Armez-vous de patience, car la culture du blé et I'élevage des porcs

3. Entrainement
prennent du temps. Profitons de I'occasion pour vous donnerquelques conseils utiles pour la construction des chemins.Ceux-ci ne jouent pas encore un rôle très important dansvotre colonie actuelle, mais quand vous aurez construit 20maisons ou plus, ce sera différent.
Jetez un coup d'oeil sur votre colonie. Devant le château, ily a souvent un gros trafic. Plus tard, lorsque vous aurezconstruit beaucoup de bâtiments, il faudra les installer demanière stratégique, et construire les chemins de façonpratique. Par exemple, le transport du blé sur un cheminentre la ferme et le moulin, mais qui passe devant le château,risque de gêner le transport des matériaux de construction.Nous vous conseillons donc de regrouper tous les bâtimentsqui vont ensemble et de faire en sorte que les chemins detransport directs ne passent pas par le château. Parexemple, vous pouvez placer une scierie près d'une hutte debûcheron. Un bon réseau de chemins est essentiel pour lejeu, et vous devez prendre en compte plusieurs choses. Laconstruction d'un petit chemin de liaison supplémentairepeut améliorer considérablement le transport desmarchandises. Il est difficile de donner des conseils précis,chaque méthode ayant ses avantages et ses inconvénients.
L'expérience acquise après quelques parties vous aidera.Mais nous allons tout de même vous donner quelquesconseils:
- Si vous pouvez éviter un chemin rouge foncé ou rouge clair (penteraide), il vaut mieux faire un détour par deux autres chemins, car: larapidité avec laquelle les marchandises sont transportées sur un

3. Entrainement
chemin dépend toujours de la partie la PLUS LENTE duchemin.
Ne bouchez pas les 6 embranchements possibles d'undrapeau par un chemin (qui par exemple contourneseulement le drapeau à moitié). Vous aurez ensuite desdifficultés pour élargir votre réseau. Dans ce cas, préférez unchemin plus raide.
Il est possible de construire deux chemins parallèles entredeux drapeaux. Quand I'un des deux est surchargé, I'autresera utilisé pour le transport des marchandises. Cette solutionn'est pas nécessaire si vous construisez beaucoup dechemins de traverses, mais il est très important d'avoir un bonréseau. Si certaines voies de transport sont surchargées etque les marchandises s'accumulent, vos colons seront assezintelligents pour les transporter en faisant un détour par unchemin moins encombré, à condition toutefois qu'il existe! Letype de réseau le moins efficace est un réseau partant enétoile du château. Dans ce cas-là, les marchandises seronttransportées sur une des branches de I'étoile et devrontobligatoirement passer devant le château pour arriver sur uneautre branche. Un réseau efficace est un réseau "tramé",semblable à une feuille de papier quadrillée. Il existebeaucoup de possibilités pour aller d'un point à un autre. Pourne pas compliquer trop les choses: construisez beaucoup dechemins entre les bâtiments, votre cité s'agrandira plus vite etplus facilement. Si vous affichez les chemins sur la carte enmode "Propriété", vous verrez nettement les endroits où ilmanque encore des "liaisons transversales".

3. Entrainement
Revenons à notre jeu et regardons les hommes au travail:
- Le pêcheur va sur le bord du lac et se met à pêcher.Selon le nombre de poissons vivant dans le lac, il
pêchera plus ou moins vite. et peut même ne pas en attraperdu tout. Les poissons sont ensuite apportés au château etstockés en attendant I'installation d'une mine, pour nourrirles mineurs.
L'exploitant agricole sème son blé, le laisse pousseret moissonne. Le blé est ensuite apporté au moulin ouchez l'éleveur.
- Dès la réception du blé, le meunier le moudra et feralivrer les sacs de farine au boulanger.
- Le boulanger pétrit la pâte et fait du pain. Uneépaisse fumée sort de sa cheminée.
- L'éleveur se sert du blé de I'exploitant agricole pournourrir ses cochons, et il fournit des cochons auboucher.
- Le boucher débite la viande et I'accroche sur sonétal.
Comme vous le savez, I'exploitant agricole fournit son blé al'éleveur et au meunier. Sa production sera parfois insuffisante et ilne pourra pas livrer les deux, alors qu'ils ont constamment besoin

3. Entrainement
d'une nouvelle livraison. Dans ce cas, démolissez la fermeou le moulin, après vous être assuré que la quantitédemandée aura été produite et utilisée.Attendez que tous lesaliments aient été fabriqués avant de passer au jeu suivant.
3.4 Scénario 4 - Les richesses du sol et leur exploitation.
Mine d'or, mine de charbon, mine de fer, mine de granite,fonderie d'or, fonderie de fer
Objectif: Chercher des richesses souterraines et trouver aumoins 5 unités d'or et de fer.
Explication: Les richesses souterraines sont exploitées dansles mines, que vous ne pouvez construire que dans lesmontagnes. L'or et le minerai brut seront transportés desmines vers les fonderies. Vous disposerez alors de fer et d'orpur. Le fer est la matière première la plus importante, car ilpermet de forger de nouvelles armes et de nouveaux outils.L'or est également très important, car il influeconsidérablement sur le moral des chevaliers. Quand ceux-ci se

3. Entrainement
réjouissent à I'avance de leur future fortune, ils combattentavec plus d'entrain. Le charbon est également essentiel. Vousen aurez besoin pour les fonderies, et pour extraire I'or et lefer. Le forgeron aura également besoin de charbon pourforger les armes. Le granite est la matière première la moinsimportante. Mais s'il n'y a plus de blocs de granite en surfacedans les environs, les choses peuvent changer, et une minede granite pourra devenir primordiale. Vous aurez toujoursbesoin de pierres pour les grands bâtiments. Comme nousvous I'avons déjà expliqué, les richesses souterraines setrouvent dans les montagnes. Placez votre quartier généraldans une zone montagneuse, et n'oubliez surtout pas de faireappel au géologue. Placez votre château près d'un endroit oùvous trouverez du charbon, du fer ET de I'or. Pour agrandirvotre propriété rurale et prospecter dans les montagnes,faites immédiatement construire des huttes de garde àproximité. Il est ensuite temps de passer aux premièresprospections géologiques. Vous devez placer un drapeauquelque part dans les montagnes. Reliez ce drapeau au restedu réseau et faites un clic spécial dessus. Une fenêtrecomportant des icônes sera affichée. Nous n'en tiendrons pascompte, à I'exception de la tête du géologue, en bas.
Cliquez sur le géologue: il vous confirmera qu'il a bien reçuson ordre de mission. Il sortira ensuite du château et partira
vers les montagnes. Là, il examinera le sol et ilprélèvera des échantillons. S'il découvre des
richesses souterraines, il sautera de joie et planteraune pancarte dans le sol pour vous signaler ce qu'il atrouvé. Cette pancarte comporte un petit cercle s'il y a peu

3. Entrainement
de richesses souterraines, et un grand cercle dans le cascontraire, avec des couleurs variées. Le jaune indiquede I'or, le rouge du fer, le noir du charbon, et le gris clairdu granite. Si le géologue ne trouve rien, il plantera une
pancarte vide. Quand il trouvera des richesses souterrainespour la première fois, vous recevrez un message, car vousne serez pas toujours là pour surveiller son travail.
Vous pouvez envoyer un géologue vers n'importe queldrapeau, y compris ceux qui sont placés devant les bâtiments,à condition que celui-ci soit relié au réseau de chemins. Ilexaminera les environs et rentrera chez lui s'il ne trouve pasde montagnes. Pour atteindre I'objectif de votre missiond'entraînement, vous devez trouver du charbon, de I'or et dufer. N'hésitez pas à envoyer beaucoup de géologues dans lesmontagnes et à agrandir votre propriété en construisant deshuttes de garde, si jamais les richesses souterraines ne setrouvent pas à proximité.Vous avez certainement constaté queles huttes de garde ne peuvent pas être construites dans lesmontagnes. Il faudra donc «encercler » les grandesmontagnes avec des huttes de garde si vous voulez trouver unmaximum de richesses souterraines.
Dés que vous aurez trouvé un endroit propice, commencezla construction de la mine. Vous pourrez vous faire aider par lafonction d'aide à la construction. Dès que la mine sera reliéeau réseau de chemins, un maçon viendra pour y travailler.
Si vous avez donné I'ordre de construire au moins une mine pourI'exploitation de I'or, une pour le fer et une pour le charbon, il sera

3. Entrainementgrand temps de penser aussi à la construction des fonderies.Choisissez un endroit à proximité de votre château, et faitesconstruire les fonderies d'or et de fer.
Vos colons construiront les mines et les fonderies pendantque les mineurs chercheront les matières premièresdemandées. Ils seront approvisionnés en nourriture parle château. Les matières brutes que vous aureztrouvées seront transportées dans les fonderies,
où I'or brut et le fer seront transformés. Comme vousn'aurez besoin ni de I'un ni de I'autre pour votre cité,tout sera stocké dans le château. Pendant ledéroulement de ces événements, nous allons vous donnerquelques explications supplémentaires:Si votre réseau de chemins a été mal construit, vous le
verrez dans ce scénario d'entraînement. Les minesproduisent beaucoup de matières brutes, et si vousn'avez prévu qu'un seul chemin (et en pente, en plus!)entre les mines et les fonderies, il faudra vous attendre àun encombrement de marchandises. Si vos colons nepeuvent pas transporter toutes ces matières premièressur un chemin aussi raide, construisez d'autres chemins.Vous verrez qu'ils seront utilisés et que les marchandisesarriveront plus vite à destination. Evidemment, lesrichesses souterraines ne sont pas illimitées. Quand ungisement s'épuise, le mineur trouve de moins en moinsde matières premières. La mine deviendra doncimproductive, car les mineurs qui travaillent dans lesmontagnes doivent être nourris à partir de la vallée. Vousrecevrez un message dès qu'une mine sera épuisée. Sivos stocks de nourriture s'épuisent également,

3. Entrainement
démolissez la mine. Un mineur qui ne reçoit plus denourriture se met en grève, et se met à marcher de long enlarge devant sa mine pour bien montrer sa colère.
Les panneaux des géologues disparaissentprogressivement, mais vous pourrez à tout momentdemander une prospection pour savoir s'il reste desrichesses souterraines dans les environs d'une mine.
Si vous n'êtes pas pressé pour la construction des mines,attendez que le géologue ait installé beaucoup de pancartespour être sûr qu'il s'agit d'un gisement profitable. Par contre,si vous jouez contre d'autres joueurs ou des adversairesacharnés contrôlés par I'ordinateur, il vaut mieux construirela mine dès les premières prospections positives, car chaqueminute compte. Evidemment, le risque de tomber sur unmauvais filon est plus grand, et vous aurez moins degéologues et d'ouvriers à votre disposition. Si le programmerefuse votre demande lorsque vous cliquez pour obtenir ungéologue, vous n'avez plus d'ouvriers ou d'outils disponibles.De plus, vous devez attendre 2 secondes avant decommander un autre géologue. Nous aborderons ce sujetplus loin.
Pour terminer, voici un conseil pour placer au mieux vosdrapeaux dans les montagnes. Lorsque vous placez undrapeau pour un géologue, c'est que vous avez I'intention deconstruire plus tard une mine à cet endroit. S'il y a desrichesses souterraines, cliquez sur la fonction d'aide à laconstruction et choisissez un endroit pour y construire votremine. Placez ensuite le drapeau à côté de cet endroit,

3. Entrainement
en bas à droite. Plus tard, vous ferez construire la mine àcôté du drapeau, et vous n’aurez besoin ni d’un nouveauchemin ni d’un nouveau porteur, et la mine sera construiteplus rapidement.
3.5 Scénario 5 - Fabrication d’outils et d’armes
Forgeron, Serrurier, Armateur et Entrepôts
Objectif: Fabriquer au moins 10 armes, 10 outils et 5bateaux.
Explication: Dans ce scénario, vous construirez 5nouveaux bâtiments. Vous apprendrez à fabriquer desobjets avec les matériaux stockés dans le chapitreprécédent. Le forgeron fabriquera des armes avec le fer,mais il aura également besoin de charbon. Le serrurierfabriquera des outils avec du bois et du fer, qui serontutilisés par d’autres colons. L’armateur n’aura besoin quede bois pour construire ses bateaux. C’est l’ouvrier lemoins utile, et il n’est généralement sollicité que dans lesmondes comportant de grandes étendues d’eau.L’entrepôt est le dernier bâtiment abordé dans ce chapitre.Il sert à stocker les marchandises. C’est égalementl’endroit où se trouvent les ouvriers qui attendent unnouveau travail (comme au château). C’est pour cetteraison que l’entrepôt est, avec votre château, le

3. Entrainement
bâtiment le plus important.
Cette fois-ci, vous pourrez choisir un emplacement sans tenircompte des richesses du sol, car vous aurez déjà lesmatériaux nécessaires, stockés dans votre château depuis ledébut du jeu. Choisissez n'importe quel endroit qui offresuffisamment d'espace pour plusieurs grands bâtiments.Faites construire une forge, une serrurerie, un chantier navalet un entrepôt. Pendant que les hommes feront leur travail,nous vous donnerons des explications pour vous aider.
L'armateur recevra du bois et livrera peu de tempsaprès ses premiers bateaux. Des ouvriers porteront cesbateaux au bord du lac et transporteront des
marchandises sur cette voie d'eau. Cette méthode detransport est souvent plus rapide que par les chemins de terre.
Le forgeron sera approvisionné en charbon et en fer.Il forgera les épées et les boucliers pour les chevaliersqui garderont vos châteaux et qui attaqueront
I'ennemi. Les armes seront livrées au château, où chaquenouveau chevalier se servira.
- serrurier recevra du bois et du fer pour fabriquerdifférents outils parmi les 9 suivants: marteau, scie,hache, pelle, faux, pioche, canne à pêche, pince et
hachette de boucher. Ces outils seront livrés au château etutilisés par les ouvriers. Selon leur professions, ils aurontbesoin de différents outils: certains n'utilisent rien, d'autresont besoin de deux outils:
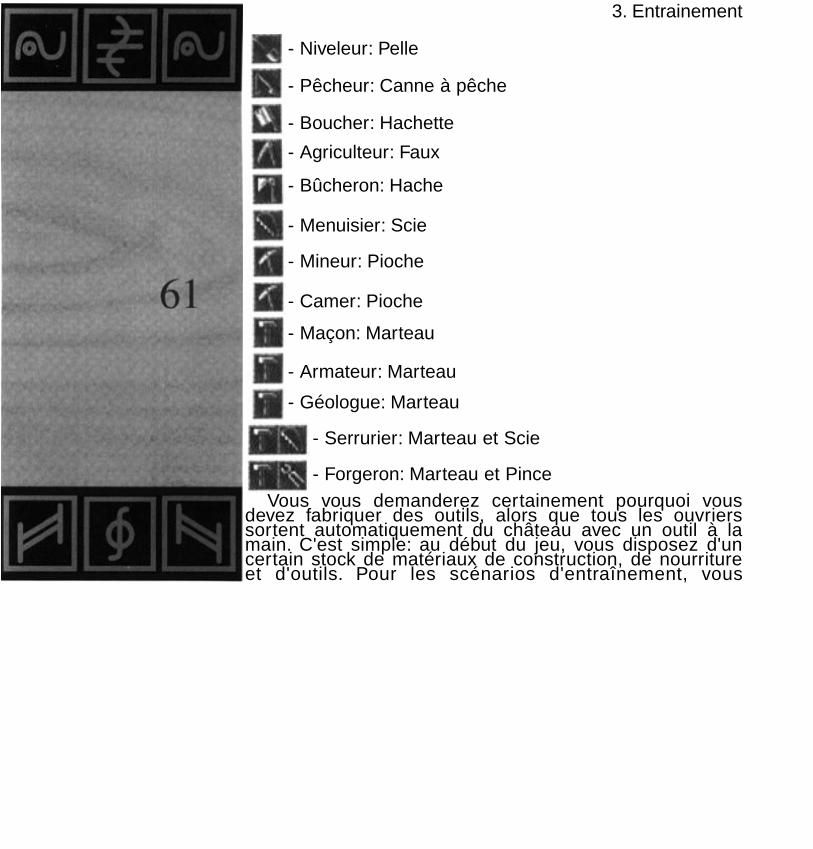
3. Entrainement
- Niveleur: Pelle
- Pêcheur: Canne à pêche
- Boucher: Hachette
- Agriculteur: Faux
- Bûcheron: Hache
- Menuisier: Scie
- Mineur: Pioche
- Camer: Pioche
- Maçon: Marteau
- Armateur: Marteau
- Géologue: Marteau
- Serrurier: Marteau et Scie
- Forgeron: Marteau et PinceVous vous demanderez certainement pourquoi vous
devez fabriquer des outils, alors que tous les ouvrierssortent automatiquement du château avec un outil à lamain. C'est simple: au début du jeu, vous disposez d'uncertain stock de matériaux de construction, de nourritureet d'outils. Pour les scénarios d'entraînement, vous
3. Entrainement
disposez d'un très gros stock de départ, et vous n'aurez doncpas besoin de fabriquer d'outils ou de marchandises. Nousvous expliquerons tout cela en détail un peu plus loin.
L'entrepôt est, avec votre château, le bâtiment le plusimportant, car dans une ville d'une certaine taille, le châteauserait vite surchargé sans un entrepôt. Dès que I'entrepôtsera construit, un colon sortira du château pour entrer danscet entrepôt. Vous aurez ainsi en quelque sorte un "secondchâteau". Si I'expansion de votre cité se poursuit, elle seravite difficile à contrôler si vous n'avez qu'un château. Lesouvriers mettront trop de temps pour aller du château auchantier, ou produiront tellement de marchandises quecelles-ci s'accumuleront sur le chemin du château, et lesporteurs n'arriveront plus à faire leur travail. Pour éviter cela,répartissez bien les entrepôts. L'entrepôt offre pratiquementles mêmes possibilités que votre château:
- Lorsque vous recevrez de nouveaux hommes, ceux-ciseront répartis entre le château et I'entrepôt.
Une marchandise inutile stockée dans le château seradésormais livrée dans I'entrepôt le plus proche, réduisantainsi les trajets.
Une marchandise nécessaire (par exemple sur un chantier)sera commandée à I'entrepôt disposant de matériaux deconstruction le plus proche. Le trajet sera ainsi plus court àI'aller.

3. Entrainement
- Un ouvrier ne rentrera plus au château après son travail,mais se rendra à I'entrepôt le plus proche, pour y attendreson prochain travail. Le trajet de vos ouvriers vers leur travailsera donc plus court.
Si un bâtiment nécessite I'emploi d'un nouvel ouvrier, il seraembauché dans I'entrepôt le plus proche. Son trajet seraainsi plus court.
Ces divers points démontrent qu'une bonne répartition desentrepôts est essentielle. Dès que votre entrepôt seraconstruit, vous recevrez un message montrant le nouvelentrepôt.
3.6 Scénario 6 - Attaque
Objectif: Conquête de plusieurs bâtiments ennemis
Explication: L'objectif de ce scénario consiste à conquérircertains bâtiments avec vos chevaliers. Cliquez sur la cartegéographique et examinez I'emplacement des bâtimentsadverses. Installez-vous à proximité de I'ennemi, pour que votretrajet soit le plus court possible. Faites construire plusieurschâteaux-forts, des tours de garde et des huttes de garde toutautour de votre château. Pendant que vos colons construisent(le château est le bâtiment le plus grand et nécessite plus detemps), nous allons nous occuper des chevaliers.
3. Entrainement
Il y a 5 sortes de chevaliers dans le jeu, ils sont tousdifférents et de force variable. Lorsque vous recevrez unnouveau chevalier, celui-ci sera au niveau le plus bas. Mais ilpeut s'entraîner dans le château (ou plus tard dansI'entrepôt) et changer de niveau. Un chevalier peutégalement s'entraîner dans les tours de garde ou dans leschâteaux, mais il ne progressera que très lentement, car ildevra en même temps faire son travail. Pendant son service,s'il monte la garde dans un château ou un autre bâtiment, ouqu'il reste assis dans une hutte de garde, il n'améliorera passes capacités. Les avantages et les inconvénients sontévidents: si vous laissez un maximum de chevaliers dans lechâteau, ils seront très bien entraînés, mais votre cité seramal gardée. Si vous envoyez tous vos chevaliers à I'extérieur,vos bâtiments seront bien gardés, mais I'ennemi aura peut-être des chevaliers plus puissants qui pourront vous poserdes problèmes. Comme vous aurez construit beaucoup dechâteaux et de huttes de garde, vos chevaliers iront lesoccuper assez rapidement. Mais, dans ce scénariod'entraînement, vos adversaires sont encore sans défense,ne vous inquiétez donc pas...
Vous n'attaquerez que des châteaux, des tours de garde ou deshuttes de garde appartenant à I'ennemi. Un chevalier ne doit pasattaquer un fermier ou un pêcheur. Lorsque vous lancerez uneattaque, vos chevaliers sortiront et marcheront en direction dubâtiment ennemi, où ils livreront bataille. Un chevalier sortira dubâtiment et le combat commencera. Un des deux chevaliers seravictorieux. Au bout d'un moment, il n'y aura plus d'attaquants oude chevaliers pour défendre le bâtiment ennemi. S'il n'y a plus
3. Entrainement
de chevalier dans le bâtiment ennemi, I'attaquant estvictorieux et en prend le contrôle. Les frontières de sa citéseront modifiées en conséquence. De plus, le vainqueur ferabrûler les bâtiments qui tomberont entre ses mains. Une telledéfaite peut être un contrecoup terrible pour une cité. Parexemple, si votre unique mine de charbon ou votre entrepôtest en flammes, vous aurez quelques problèmes.
Lorsque vous aurez construit vos premières huttes et qu'ellesseront occupées par les chevaliers, vous verrez des drapeauxavec une grosse croix. Toutes les huttes de garde se trouvantprès du pays ennemi et risquant d'être attaquées serontsignalées par cette croix. Faites un clic spécial sur n'importequel bâtiment ennemi signalé par une grosse croix noire sur sondrapeau. Une nouvelle fenêtre sera affichée pour vouspermettre d'indiquer le nombre de chevaliers qui doiventattaquer. Les 4 chiffres du milieu indiquent lenombre de chevaliers disponibles en fonctionde la distance: dans les environs immédiats, assez loin, ou trèsloin. La distance n'est pas un facteur essentiel, mais leschevaliers mettront plus de temps pour atteindre I'ennemi. Sitous les chiffres indiquent 0, vos bâtiments n'hébergent pasencore assez de chevaliers. Vous devez savoir que tous leschevaliers entrant dans un château ne peuvent être envoyés aucombat, car certains d'entre eux sont indispensables pour ladéfense de votre château en cas d'attaque ennemie. Plus tard,nous vous expliquerons de quelle manière vous pourrezinfluencer I'issue des combats. Attendez encore un peu etlancez une nouvelle attaque. Les deux flèches vous permettrontde modifier le nombre de chevaliers qui attaqueront I'ennemi.
3. Entrainement
ensuite la bataille pour en connaître I'issue.
Si vous avez envoyé tous les chevaliers disponibles aucombat, vous ne pourrez plus lancer d'autre attaque. Maisvous verrez d'autres chevaliers sortir immédiatement devotre château pour remplacer ceux qui sont partis aucombat. Lorsque vous vous emparez d'un bâtimentennemi, vous recevrez un message. Un peu plus tard, votrevictoire sur I'ennemi sera probablement totale.
Si, au cours d'une partie, un ennemi contre-attaque et queles chevaliers se rencontrent en un point précis, attendez-vous à une furieuse mêlée, car chaque chevalier ennemisera attaqué. Nous verrons plus tard comment envoyer unetroupe de chevaliers pour intercepter I'ennemi, et commentdéfendre efficacement une hutte de garde avec seulement3 chevaliers. Enfin, un dernier point qui ne concerne pasdirectement les chevaliers, mais votre propriété rurale: neconstruisez pas de bâtiments (surtout les plus grands, àcause du délai de construction plus long) près de la frontièreavec I'ennemi. Par exemple, si celui-ci construit commevous une hutte de garde près de la frontière et qu'il latermine en premier, la frontière sera modifiée et vous devrezbrûler votre chantier. Un château situé près de la frontière nevous sera d'aucun secours, car sa construction demanderabeaucoup de temps. Vous pouvez construire vous aussi unehutte de garde en essayant de la terminer plus vite queI'ennemi, ou placer vos bâtiments dans un endroit plus sûr.Vous pouvez bien sûr faire la même chose à votre

3. Entrainement
adversaire si celui-ci a eu la mauvaise idée de construire unentrepôt trop près de la frontière...
Ce chapitre consacré aux scénarios d'entraînement estmaintenant terminé.Vous connaissez les principes de basedu jeu, les différents bâtiments, les diverses professions etmarchandises, vous savez prospecter les richesses du sol etattaquer I'ennemi. Nous espérons que vous avez déjà puapprécier le jeu, et nous vous assurons qu'il vous offriraencore de nombreuses heures de plaisir, et que voustrouverez toujours de nouvelles astuces, et des tactiques etstratégies différentes. Les chapitres suivants s'adressent auxjoueurs plus expérimentés qui connaissent déjà bien le jeu.Amusez-vous bien!

4. L’économie
4.1 Le système économique
A partir de maintenant, nous ne vous donnerons plusd’instructions précises, mais uniquement des explications,des conseils et beaucoup, beaucoup de trucs et d’astuces.Il est essentiel de bien connaitre le contexte économiquede chaque bâtiment pour savoir immédiatement quelsseront ses besoins et sa production. Voici un bref résumé:
La chaîne alimentaire:
... production de poisson, de viande et de pain pour nourrirles mineurs.
Le pêcheur pêche des poissons qui pourront êtreconsommés directement. L’exploitant agricole sème etrécolte du blé qui sera fourni à l’éleveur de porcs pournourrir ses cochons, ou moulu par le meunier dans sonmoulin, et donc transformé en farine. Les cochons sereproduiront et pourront être abattus. Le boulangerfabriquera du pain avec la farine. Dans les deux cas, vousaurez des aliments à votre disposition.
Chaîne de marchandises:

4. L'économie
fabrication d'outils, d'armes, de bateaux, d'or et constructionde bâtiments.
Les outils, les armes et les bateaux seront stockés dans desentrepôts. L'or sera gardé dans les châteaux, les tours degarde et les huttes de garde. La fabrique d'outils a besoin debois et de fer. Le bois vient de la scierie où sont débités lestroncs d'arbres abattus par les bûcherons. Le fer sera travaillédans une fonderie, qui a besoin de minerai et de charbon pourfonctionner. Ces deux matériaux sont exploités dans les mines.Pour la fabrication d'armes, le forgeron a besoin de fer et decharbon. L'armateur a besoin de bois pour ses bateaux. Pour laconstruction de tous vos bâtiments, vous aurez besoin de bois,et de granite dans la plupart des cas. L'utilisation du fer, ducharbon et du bois pour la fabrication d'outils a déjà été
abordée. Le granite est exploitésoit en surface, dans unecarrière, soit dans une mine. L'orest travaillé par I'orfèvre à partirdu minerai brut. Il aura bien sûrbesoin de charbon pour letravail de I'or. L'or brut estexploité dans les mines. Vousavez tout compris? La suitevous permettra peut-être demieux comprendre lesnombreux facteurs qui entrenten ligne de compte dans le jeu.
Pendant les premiers scénarios
4. L’économie
d’entraînement, vous avez certainement pensé que vouspouviez disposer d’un nombre illimité de colons et demarchandises, et que vous pouviez influencer ledéroulement du jeu. Tous les paramètres sont définis detelle maniére que vous n’aurez aucune difficulté à remplirles objectifs prévus. Mais les joueurs plus expérimentésvoudront influencer davantage le déroulement du jeu, eten connaitre tous les détails, du stock dont ils disposentaux possibilités de production. Tous ces aspects sontabordés dans la suite de ce manuel.
4.2 Votre première grande cité
Vous connaissez maintenant tous les bâtiments. Vousdevrez trouver le bon emplacement pour chaquebâtiment et choisir le bon moment pour sa construction.Un gros stock vous permettra de construire les petitsbâtiments d’abord. Il vous restera suffisamment dematériaux pour vous agrandir plus tard. Mais si vous nedisposez au début du jeu que d’un stock réduit, soyezprudent dès le départ.
Il est essentiel de construire une cité “active”, et vousaurez besoin pour cela de tous les bâtiments, car vous nepourrez pas vous passer d’eux, sauf dans de raresoccasions. Votre stock ne sera pas aussi important quedans les scénarios d’entraînement. Vous serezresponsable de I’exploitation des matiéres premières etde la construction des bâtiments nécessaires. Choisissezle premier scénario. Vous jouerez contre un adversairecontrolé par l’ordinateur.

4. L'économie
Vous allez vivre une aventure passionnante. Votre niveaud'intelligence est assez bas, et vous ne disposez pas d'unstock énorme. Vous devrez être prudent dès le début du jeu.Dans la suite de ce chapitre, nous allons vous expliquercomment construire une cité qui fonctionne. Mais vouspouvez aussi n'en faire qu'à votre tête...
Votre première tâche consiste à chercher un bonemplacement pour votre château. Nous avons déjà abordé cepoint en détail. Pensez ensuite à agrandir votre propriété rurale,car si vous n'avez plus assez de place au moment de cultivervos terres, vous devrez attendre avant d'annexer de nouvellesterres. Placez alors 2 ou 4 huttes de garde près de la frontière.La construction des tours de garde et des châteaux demanderaplus de temps et ralentira votre expansion. Prenez tout ce quevous pouvez sans avoir à combattre. Ensuite, assurez votreapprovisionnement en matériaux de construction, car si vousen manquez pour construire les bâtiments nécessaires, vousaurez de gros problèmes. Placez un bûcheron, une scierie etune carrière dans des endroits adaptés.
Après avoir fait le nécessaire pour ces trois points, le jeudeviendra plus complexe. Selon l'état de vos terres, vous aurezplusieurs possibilités, que nous allons évoquer dans leursgrandes lignes. Dès que possible, envoyez des géologues dansles montagnes. Selon le résultat de leur prospection,construisez des mines. Construisez également une fonderied'or ou de fer, une forge ou une usine de fabrication d'outils,selon les richesses souterraines découvertes. Si vous pouvezfabriquer rapidement des armes, vous aurez I'avantage

4. L’économie
lors des combats. Dès que les géologues prospecterontdans les montagnes, pensez à leur nourriture. Si un lac setrouve à proximité, construisez une hutte de pêcheur.Celui-ci pêchera des poissons qui pourront être stockésavant l’ouverture des premières mines. La production dela viande et la fabrication du pain prennent du temps.Quand les réserves de blé (pour la nourriture descochons et les moulins) du château seront épuisées, ilfaudra attendre que l’exploitant agricole sème du blé et lerécolte. Si aucun lac ne se trouve à proximité, installezune exploitation agricole le plus vite possible. Vouspréfèrerez la viande ou le pain, selon la situation. Sil’ennemi est encore loin et que vous possédez beaucoupde terres, optez pour le pain. Installez des moulins et desboulangers à proximité des exploitations agricoles. Lepain est l’aliment le plus productif. Si vous n’avez pasassez de place, nous vous conseillons l’élevage de porcs.Pour l’approvisionnement de plusieurs fèrmes, il vousfaudra une seuleexploitation agricole.
N’oubliez pas que vos bûcherons abattront tous lesarbres, et vous risquez de vous en apercevoir trop tard.Pensez donc à faire replanter des arbres assez tôt par lesgardes forestiers.
Si la région comporte des grands lacs, profitez de larapidité des voies d’eau. Vous aurez éventuellementbesoin d’un armateur si vous manquez de bateaux.
Surtout, n’oubliez pas de construire des entrepôts. Ilssoulageront les voies de transport et vous irez plus vite.

4. L'économie
Les tours de garde et les châteaux vous servirontessentiellement à protéger les bâtiments importants,notamment les entrepôts. Mais, selon le déroulement du jeu,une mine ou une fabrique d'outils peuvent être égalementessentielles (surtout si vous n'en avez qu'une!). Placez voschâteaux près de ces endroits, et ne laissez pas I'ennemidétruire votre système économique grâce à une victoiremineure!
Observez bien I'ennemi! Trouvez un moment libre dansvotre planning pour voir ce que fait I'adversaire. Est-il déjà entrain de fabriquer des armes? A quelle distance se trouve-t-il? A quel endroit faut-il occuper des terres avant queI'ennemi ne les annexe? Quels sont les endroits malprotégés où une attaque pourrait être profitable?
Votre première tentative de construction d'une citécomportant beaucoup de huttes et de maisons différentes nevous donnera peut être pas entière satisfaction. Ne vousdécouragez pas. La prochaîne fois, vous planifierez mieuxvotre ville vous ne ferez pas les mêmes erreurs. L'expériencevous aidera à surmonter beaucoup de problèmes.
Lisez les chapitres suivants en jouant et en expérimentant.Vous y apprendrez beaucoup de choses.

4. L'économie
4.3 Les statistiques
4.3.1 Les premières statistiques
Les statistiques sur les colons, les bâtiments et lesentrepôts. Dans ce chapitre, nous allons aborder lespremières statistiques. Elles pourront vous donner un aperçurapide dans tous les domaines. Au début du jeu, lesstatistiques ne sont pas très intéressantes: il faut par contreles consulter régulièrement pendant le jeu, pour savoir parexemple à quel moment vous manquerez de bois ou denourriture. Nous allons d'abord examiner les statistiquesconcernant les colons, les bâtiments et les entrepôts.
Pour voir les statistiques, cliquez sur la deuxièmeicône du menu à partir de la droite. 8 autres icônesseront affichées. Chaque icône correspond à desstatistiques spécifiques. De plus, en activant uneicône, vous pourrez passer d'une statistique à une
autre et d'un menu à I'autre. Si vous cliquez sur I'icône dumilieu, les statistiques des bâtiments sont affichées. Ellesindiquent le nombre de bâtiments dont vous disposez. Tous
les bâtiments ne tenant pas sur une page, I'icone dubas permet de faire défiler les pages et voir lesautres types de bâtiments. Si le chiffre est suivi d'un+ et d'un second chiffre, certains sont encore enconstruction. 2 + 1 signifie donc: deux bâtiments
terminés, un en construction. Ces statistiques vouspermettent également de prévoir certaines difficultés: sivous avez par exemple 10 bûcherons, ils

4. L'économie
abattront beaucoup d'arbres, et une scierie ne suffira pas àles débiter. Pour quitter les statistiques et revenir aux 8icônes, cliquez sur «Exit ».
Cliquez sur I'icône de droite, au centre. Vous verrezdes têtes et des chiffres. Ces statistiques concernentvos colons. Chaque tête représente un métier, avecle nombre de colons exerçant ce métier. Vous ne
reconnaîtrez pas toujours ces têtes au début, mais vous vousy habituerez très vite. Celle avec un point d'interrogation (enbas à droite) indique le nombre de colons n'ayant pas encorede profession. Un bon joueur essayera (si le déroulement dujeu le permet) d'avoir un minimum de colons chômeurs pouraugmenter la production et le rendement. Le dernier chiffre enbas à droite indique le nombre total de colons. Pour quitterces statistiques, cliquez sur un endroit quelconque de la
fenêtre. Cliquez ensuite sur I'icône de gauche, aucentre. Ces statistiques sont celles de vos stocks.Vous reconnaîtrez plus facilement les différentesmarchandises que les têtes correspondant aux divers
métiers. Ces statistiques indiquent le type et la quantité demarchandises stockées dans vos entrepôts. Lesmarchandises stockées dans les entrepôts ne sont pas utilesdans I'immédiat. Mais un gros stock de bois et de pierres estbon signe, car vous disposerez de suffisamment dematériaux pour vos projets de construction. Par contre, sivous avez beaucoup de minerai de fer dans vos entrepôts,cela signifie que vous n'avez pas de fonderie de fer, ou pasde charbon dans votre cité... Vous devez donc toujourspenser à tout.
4. L'économie
4.3.2 Les courbes statistiques
Les statistiques de comparaison et de production.
Ces statistiques vous montreront différentes valeurs surune longue période.
Dans le menu des statistiques, cliquez sur I'icône en bas aucentre.Vous verrez les statistiques de comparaison. En haut, lacouleur des courbes correspond à chaque joueur. La vôtre serableu ciel, comme vos colons. L'échelle de droite comporte despourcentages allant de O à 100%, l'échelle du bas
représentant le temps. La courbe évolue dans letemps, de gauche à droite. L'échelle utilisée est I'heure(0.5 heure = 30 minutes).Vous pouvez choisir le moded'affichage des statistiques en bas à gauche del'écran: en haut à gauche = comparaison globale, enhaut à droite = comparaison des propriétés rurales, enbas à gauche = comparaison des bâtiments, et en basà droite = puissance du combat. La comparaison despropriétés rurales vous indiquera uniquement la taillede vos terres par rapport à celles de vos adversaires.Les bâtiments seront évalués selon leur type et taille,et pas seulement selon leur nombre. La puissance decombat dépend du nombre, du type et de la motivation
de vos chevaliers. La comparaison globale permet d'obtenirdes courbes moyennes selon ces trois valeurs. Mais ce n'estpas tout! En bas à droite, vous verrez 4 autres icônescorrespondant au temps. Les 4 graduations correspondent à0.5 heures, 2 heures, 10 heures et 50

4. L'économie
(!) heures. Vous voyez qu'uncombat de grande envergureentre différents groupes decolons peut devenir une aventurelongue et passionnante...
Ces statistiques sont le seulmoyen d'obtenir des informationsprécises sur votre adversaire.Vous saurez qui a I'armée la pluspuissante, et qui possède le plusde terres. Si les courbes montentde façon incroyable au début du
jeu, ne vous inquiétez pas. Il ne s'agit pas d'une erreur, carle joueur qui placera son château en premier sera pendantun court instant le seul à posséder des terres et unbâtiment (100%). Pour le déroulement du jeu, celan’a aucune importance. De plus, une icône vouspermet de voir les statistiques concernant lesadversaires dans le jeu.
Pour voir les statistiques de production, cliquez sur I'icône enbas à gauche. Elles indiquent le type et la quantité demarchandises produites par vos colons. L'échelle de droitecorrespond à la quantité, en unités. L'échelle horizontalecorrespond au temps. Dans ces statistiques, le temps pris encompte est d'environ 2 heures. Au début du jeu, ces statistiquesseront nulles (vous n'avez encore rien produit). Plus tard, parcontre, vous pourrez choisir en bas de l'écran lesmarchandises que vos colons produisent. De I'arbre abattu aux

4. L'économie
outils, vous trouverez toutesles marchandises. Si vousavez par exemple sélectionnéle tronc d'arbre en bas et quela surface rouge de l'échelleverticale reste sur 1, celasignifie que vos bûcheronsabattent environ 1 arbre à laminute. Ceci peut vousparaître inintéressant, maisvous apprendrez progressivementà mieux interpréter cesstatistiques. Par exemple, si lacourbe des arbres descend, iln'y aura bientôt plus d'arbres à
abattre. Cette statistique étant très importante, regardez-lade temps à autre. Elle vous épargnera bien des mauvaisessurprises. Ces courbes de production sont d'ailleurs «lissées» pour être plus claires et lisibles.
4.3.3 Les statistiques d'approvisionnement
La chaîne alimentaire, la chaîne des marchandises, lesstatistiques sur les métiers.
Dans ces 3 statistiques, des aiguilles indiquent l'état devotre approvisionnement. La chaîne alimentaire et la chaînedes marchandises sont les statistiques les plus importantessi votre cité est assez grande.

4. L'économie
Commençons par les statistiques sur les métiers. Cliquez surI'icône en haut à droite.Comme dans les statistiques survos colons, toutes les têtes seront affichées, mais avecdes aiguilles. Celles-ci indiquent le nombre de colonsdont vous pourrez disposer pour la profession
correspondante. Si personne n'est disponible, I'aiguille resteradans le rouge. Elle sera au centre si vous disposez de 3 colons,et à droite si vous disposez de 20 colons ou plus.Avant de construire une forge, par exemple,examinez les statistiques. Si I'aiguille est dans la partie rouge etque vous avez besoin d'un forgeron, aucun colon n'est disponiblepour le moment, ou les outils dont il a besoin ne sont pasdisponibles dans les entrepôts. Le chiffre en bas à droite indiquele nombre de colons qui attendent du travail. Si ce chiffre indique10 ou·plus, et que I'aiguille d'un métier est dans le rouge, celasignifie que vous manquez d'outils pour ce métier. Nous vous
expliquerons plus tard commentmieux contrôler la fabricationd'outils. Certains métiers neposent aucun problème car ils nenécessitent aucun outil(boulangers ou porteurs).
Examinons maintenant lachaîne alimentaire. Vous verrezun diagramme avec des têtes,des marchandises, des aiguilleset des flèches. Chaque têtereprésente un métier. Lesmarchandises sont livrées

4. L’économie
par un métier à un autre métier, en direction de la flèche.Le diagramme se présente comme suit: l’exploitantagricole (en haut à droite) livre du blé au meunier et àl’éleveur de porcs. Le meunier livre de la farine auboulanger qui lui livre du pain. L’éleveur de porcs livre descochons au boucher qui livre de la viande. Le pêcheur (enbas à gauche) livre les poissons. Le pain, la viande et lepoisson sont les 3 aliments qui seront livrés aux 4 typesde mines. Les aiguilles sont parliculières dans cediagramme. II y en a deux sortes:
1. L’aiguille d’approvisionnement (par exemple pourles fermiers ou les mineurs) Le cadran indique, degauche à droite: rouge (pas d’approvisionnement),
jaune (bon approvisionnement) et vert (excellentapprovisionnement). Il indique le tauxd’approvisionnement des métiers: plus ils reçoivent demarchandises, mieux ils se portent.L’éleveur préfère avoirbeaucoup de blé pour nourrir ses cochons, plutôt qu’unapprovisionnement maigre ou inexistant.
2 L’aigullle d’occupation (p.ex.: pour le meunier ou leboucher).
Ce cadran est, de gauche à droite: rouge (pas de travail),vert (beaucoup de travail) et jaune (trop de travail). Celasignifie que l’idéal, pour celui qui reçoit la marchandise,est d’en avoir ni trop, ni trop peu. Si le meunier ne reçoitpas de blé, il n’a pas de travail, et son moulin est inutile.S’il est livré normalement, son moulin travaille, et il peutêtre occupé normalement. Par contre, s’il reçoit trop deblé, il ne pourra pas faire face au travail nécessaire. Lemoulin tournera donc constamment, mais le blé arriveratrop vite et s’entassera. Au

4. L’économie
bout d’un moment, il faudra mettre ce surplus de blédans un entrepôt. Si vous construisez un autre moulin,vous pourrez produire plus de farine. Plus tard, quandvous aurez 10 meuniers, vous connaîtrez le taux moyend’occupation de tous les moulins. Ces statistiques vouspermettent donc de prévoir les problèmes possibles etles bâtiments à construire, et de voir quels sont ceux quitravaillent normalement. Vous saurez si les mines sontbien approvisionnées, et si l’éleveur reçoit assez de blépour nourrir ses cochons. Le chapitre 6.1 vous expliqueracomment vous pouvez influencer la livraison desmarchandises. Ne vous étonnez pas si vous ne voyezpas d’aiguille au début du jeu, car l’approvisionnementen nourriture d’une mine d’or ne peut pas être indiquétant qu’elle n’existe pas
La chaîne des marchandises.
Ces statistiques sont identiques à celles de lanourriture, mais elles indiqnent toutes lesmarchandises, à l’exception des aliments. Lesfoumisseurs de matières premières sont indiquésà gauche (mineurs, bûcherons et carriers). Les
professions intermédiaires sont au centre (fondeurs etmenuisiers). Les utilisateurs sont à droite (chevaliers,forgerons. serruriers, armateurs et maçons). Les flèchesindiquent le sens de la livraison, comme expliqué plushaut. Le reste fonctionne comme pour la chaînealimentaire, la seule différence étant que certainsmétiers (fondeurs, forgerons, serruriers et maçons)reçoivent deux marchandises et ont donc deux aiguilles,car un forgeron ne peut rien faire s’il a du fer mais pas decharbon... Ces statistiques vous aideront également àprévoir d’éventuelles

4. L’économie
difficultés.
4.4 Les entrepôts.
Vous savez déjà construire un entrepôt. Mais il y existed’autres possibilités de se renseigner sur les entrepôts etde donner des ordres. Si vous faites un clic spécial sur unentrepôt (s’il n’y en a pas, prenez le château), une fenêtreapparaitra, vous indiquant l’état du stock de cet entrepôt.En changeant de page avec la flèche, vous verrez lenombre de colons qui se trouvent dans cet entrepôt. Latroisième page comporte deux icônes avec des symbolesdifférents. L’icône supérieure concerne les marchandises,l’icône inférieure les colons se trouvant dans l’entrepôt. Lecrochet peut se trouver à trois endroits. Examinonsd’abord les marchandises: au début, le crochet est enhaut. Les marchandises sont à stocker dans cet entrepôt.Quand le crochet est au milieu, on ne peut plus stocker demarchandises dans l’entrepôt, mais seulement les livrer.Quand le crochet est en bas, l’entrepôt sera vidé de sesmarchandises et plus rien ne pourra y être stocké. Pour
les colons, la signification estpresque la même: quand le crochet en haut, ilsdoivent aller dans cet entrepôt aprés leur travail.S’il est au milieu, aucun autre colon ne seraaccepté. S’il est en bas, tous les colons doiventquitter l’entrepôt. Vous pouvez décider de l’état del’entrepôt. Un clic spécial vous permet d’activer les
deux options inférieures. A quoi servent ces options? Sil’ennemi s’approche de votre entrepôt et que vous nepouvez plus défendre votre position,

4. L'économie
vous perdrez toutes vos marchandises dans I'incendie devotre entrepôt. Seuls certains colons parviendront à s'enfuir.Il faut savoir battre en retraite si nécessaire pour limiter lespertes. Mais n'oubliez pas qu'il faut du temps pour vider unentrepôt ou évacuer les colons. Si vous battez en retraite troptard, vous ne sauverez que quelques colons. De plus, lesentrepôts sont importants pour votre économie. Si unentrepôt n'accepte plus de marchandises ou de colons, lesautres seront surchargés. L'évacuation des marchandises etdes colons d'un entrepôt aura un effet négatif. Réfléchissezavant de décider s'il vaut mieux battre en retraite. Neconstruisez pas vos entrepôts trop près de I'ennemi, ouprotégez-les avec des châteaux. Si un entrepôt ne vousparait pas absolument sûr, stoppez la réception demarchandises à temps pour ne pas les accumulerinutilement, et pouvoir les sauver à temps.
Vous aurez parfois des problèmes lorsque les colonschômeurs sont dans un entrepôt, les outils et les armes étantstockés ailleurs. Dans ce cas, vos colons irontautomatiquement dans un entrepôt où sont stockés desoutils pour y attendre un travail. Vous aurez des problèmessimilaires pour les outils, si jamais les pinces sont dans unentrepôt et les marteaux dans un autre. Aucun forgeron nepourra s'installer, étant donné qu'il a besoin des deux outils.Il en est de même pour le serrurier (scie et marteau) et pourles chevaliers (épée et bouclier). Dans cette situation, lesoutils et les armes seront automatiquement acheminés versI'autre entrepôt.

4. L’économie
4.5 Informations sur les bâtiments et les drapeaux
Les statistiques vous donneront un aperçu de votredéveloppement total. A certains moments, vous aurez envie d’apprendredes choses concrètes sur l’état du stock d’un bâliment enpartirulier, etc... Vous verrez une des informationsdisponibles pour les bâtiments. Ces informations sonttoujours activées par un clic spécial.
Si vous faites un clic spécial sur un chantier, vous verrezle bâtiment que vous êtes en train de construire. Lesquestions du type: “Où vais-je placer mon moulin à vent?”ou “Je ne sais plus où j’ai fait construire l’exploitationagricole?” deviennent superflues, car il n’y a pas grand-chose à voir au début de la phase de construction, etvous pouvez donc oublier ce que vous avez vouluconstruire et à quel endroit. Faites un clic spécial sur l’unede vos ruines. Vous connaîtrez immédiatement lerendement de cette mine. Le calcul sera fait en fonctiondu nombre de voyages des mineurs dans la ruine (avecune marchandise). Tenez compte du fait qu’il faudraplusieurs voyages dans les mines avant de pouvoirexploiter cette information. Elle sert essentiellement à la démolition ultérieure de ces ruines.car si une mine n’a plus de rendement. le mineurconsommera la nourriture (qui peut devenir rare, selon ledéroulement du jeu) qui manqnera à d’autres mines. Deplus, vous connaîtrez le stock de nourriture dont disposela mine. Les mineurs consommant aussi bien du poissonque du pain ou de la viande, cette quantité est indiquéepar l’icône “viande”. S’il n’y a rien d’indiqué, il n’y a pas denourriture dans cette mine et le mineur se mettra engrève. Si vous faites un clic spécial sur

4. L'économie
un château, une tour de garde ou une hutte de garde, vouspourrez voir la position de vos chevaliers. Vous saurezsurtout quelle est la force du château à défendre.
Comme pour les mines, vous verrez également l'état dustock, mais cette fois il s'agira de I'or. Les huttes de garde enreçoivent au maximum deux unités, les tours de garde quatreunités, et les châteaux jusqu'à huit unités.
Vous verrez l'état du stock pour tous les bâtiments suivants:
Chantier naval (bois)Scierie (troncs d'arbres)Exploitation agricole (blé)Boucherie (cochons)Moulin (blé)Boulangerie (farine)Fonderie de fer (Minerai de fer et charbon)Fonderie d'or (or brut et charbon)Forge (fer et charbon)Serrurerie (fer et bois)
Vous n'avez pas besoin d'apprendre cet état par coeur. Ils'agit simplement de tous les bâtiments qui ont besoin demarchandises. Les huttes de bûcherons, les maisonsforestières, les huttes de pêcheurs, les carrières et lesexploitations agricoles ne disposent pas des mêmesinformations, car elles livrent des marchandises, mais
4. L'économie
n'en ont pas besoin, et n'en stockent pas. Vous saurezégalement si un colon travaille déjà dans chaque bâtiment.Enfin, faites un clic spécial sur un croisement quelconque.Vous connaissez déjà la fenêtre du géologue. Dans la moitiésupérieure, vous verrez un drapeau. Dans chaque direction,lorsqu'un chemin part du drapeau, vous verrez un crochet ouun trait. Si tout est normal, vous verrez un crochet. Si vouscliquez sur un drapeau où transitent beaucoup demarchandises, des embouteillages peuvent se former. Ilssont indiqués par un trait. En d'autres termes, il y a beaucoupde marchandises à acheminer dans cette direction, mais lescolons ne peuvent pas passer, et I'embouteillage disparaîtralorsqu'ils auront acheminé toutes les marchandises quiencombrent la voie. Vous n'êtes pas tenu de résorberimmédiatement un embouteillage, mais vous pouvez trouverd'autres solutions pour que vos colons puissent acheminerles marchandises en faisant un détour. Dans les endroitssouvent encombrés, examinez attentivement le réseau dechemins et pensez à construire un nouvel entrepôt.N'attendez pas que trop de drapeaux soient encombrés parles marchandises.
De plus, vous pourrez construire un chemin qui passeradirectement devant le drapeau avec une fonction spéciale.Une icône supplémentaire sera affichée si cela est possible.
Ce chapitre vous a indiqué comment obtenir une multituded'informations sur votre cité.Vous avez remarqué les nombreusesstatistiques conçues pour vous informer, prévoir les problèmeséventuels, ou simplement examiner l'évolution de votre royaume.

4. L'économie
Dans ce jeu, I'observation et I'apprentissage ont une trèsgrande importance. Si vous construisez sans tenir compte ducontexte, vous n'arriverez pas à vos fins.
4.6 Les menus de répartition
Dans les 3 prochains chapitres, nous allons aborder en détailles menus. Dans ces menus, vous pourrez modifiercertains paramètres et agir ainsi sur la vie de votrecité. Pour activer ces menus, cliquez sur I'icône enbas du menu. Comme pour les statistiques, vous
pourrez activer différents menus et revenir à la sélectionprincipale. Dans tous les menus, un bouton Défaut permet deremettre tous les paramètres à zéro.
Les trois premiers menus sont les menus de répartition desmarchandises. Il existe plusieurs types de marchandises(nourriture, bois, fer, charbon et blé), qui sont livrées auxdifférents corps de métier. Les troncs d'arbres sont livrésuniquement aux menuisiers, mais le fer est livré au forgeronet au serrurier. A certains moments, votre stock de fer seraréduit, et vous préférerez la fabrication d'armes à celled'outils, ou vice-versa. Vous pourrez faire votre choix dansles menus de répartition.
Cliquez sur I'icône en haut à gauche. Vous verrez en haut lesaliments, et au-dessous les 4 mines avec une barred'approvisionnement pour chaque mine. Ces barres indiquent

4. L'économie
I'importance de I'approvisionnement pour chaquemine. Si vous avez très peu de nourriture et quevous préférez en livrer aux mines de fer et decharbon pour continuer à fabriquer des armes,
mettez la barre des deux autres mines à zéro (à gauche) etcelles des mines de fer et de charbon aumaximum (à droite).
Le deuxième menu permet de répartir les livraisons de boiset de fer. Le bois peut être utilisé pour les chantiers,la fabrication d'outils et la construction de bateaux.Si vous disposez d'un armateur, stoppezéventuellement les livraisons de bois pour éviter la
construction de bateaux dont vous n'aurez pas besoin. Vousen aurez plus besoin pour les deux autres corps de métier.Le fer sera livré au forgeron et au fabricant d'outils. Si vousmanquez de fer, les priorités seront fixées selon votreestimation de la situation et l'état des stocks.
Le troisième menu de répartition concerne le charbon et leblé. Le charbon sera livré aux deux types defonderies et au forgeron. Là aussi, la répartitiondépendra de la situation du jeu. Si vous manquez decharbon, diminuez la livraison à la fonderie d'or. Le
blé sera livré à I'exploitation agricole et à la ferme. Vospréférences dépendront de votre cité et de votreplanification.
Si vous mettez I'un des réglages sur zéro, le type de bâtimentconcerné ne recevra plus de marchandises.Si une barre est deux foisplus longue qu'une autre, la livraison de marchandises sera deux

4. L'économie
fois plus importante. Mais les colons réfléchissent beaucoup,eux aussi. Si la marchandise est particulièrement rare, seulle bâtiment le plus important sera livré. S'il y en a un peuplus, une petite partie sera livrée aux bâtiments moinsimportants. S'il y a suffisamment de marchandises, lesbâtiments les moins importants seront également livrés.

5. Règlement des conflits
5. Règlement des conflits5.1 Les menus pour les chevaliers.Deux menus vous permettent de modifier les différents
paramètres pour vos chevaliers. Cliquez sur I'icôneen bas à gauche dans le menu. Une nouvelle fenêtreavec quatre icônes sera affichée à gauche, avecdeux textes pour chaque icône. Le dessin de gauche
vous montre les châteaux-forts dans différentes positions parrapport aux frontières:
au front: les châteaux-forts, tours de garde et huttesde garde qui se trouvent directement à la frontièreavec I'ennemi sont marqués d'une croix noireépaisse sur leurs drapeaux.- en deuxième ligne: Les châteaux-forts, etc... situésderrière le front sont marqués d'une croix noiremoins épaisse sur leurs drapeaux.- en troisième ligne: Ces châteaux-forts, etc... sontsitués encore plus loin et ne sont pas directementmenacés. Leurs drapeaux portent un trait noir.- dans I'arrière-pays: L'ennemi n'est visible ni de loinni de près, et le drapeau de ces châteaux-forts estdonc entièrement blanc.
Vous déciderez dans chacun de ces 4 cas du nombrede chevaliers à placer dans ces bâtiments (châteaux-forts, tours de garde et huttes de garde). Le tauxd'occupation idéal est indiqué à côté des 4 dessins.

5. Règlement des conflits
Les bâtiments situés sur le front devraient être remplis, ceuxplacés en deuxième ligne bien remplis, ceux situés entroisième ligne moyennement occupés, et ceux de I'arrière-pays faiblement occupés. Vos bâtiments seront ainsi mieuxprotégés, et cela vous évitera d'avoir tous vos chevaliersstationnés dans I'arrière-pays, alors que le château-fort situésur le front n'en abrite qu'un seul. Le deuxième mot indiquela baisse maximum acceptable du taux d'occupation desbâtiments si vous utilisez des chevaliers pour attaquerI'ennemi: "bon" quand il s'agit du front, "moyen" pour ladeuxième ligne, "faible" pour la troisième ligne et "minimum"pour I'arrière-pays.
Quelques exemples: Le paramètre «plein/bon » sur le frontsignifie que les bâtiments doivent être occupés au maximum.Si vos propres troupes passent à I'attaque, vous ne laisserezsortir que quelques chevaliers. pour que votre bâtiment soit"bien" occupé. Si vous choisissez le paramètre "plein/plein",les bâtiments seront occupés de manière égale, et aucunchevalier ne sortira pour cette attaque. Le front sera ainsiprotégé au maximum. Mais, dans ce cas, les chevaliers devos bâtiments situés dans I'arrière-pays mettront plus detemps à arriver, leur trajet étant plus long. Avec un réglage"plein/ minimum", tous les chevaliers seront envoyés àI'attaque, sauf un. Evidemment, dans ce cas, le bâtiment nesera presque pas gardé. Vous pourrez utiliser ce paramètresi vous avez beaucoup de chevaliers stationnés assez loin.Vous disposerez d'un plus grand nombre de chevaliers pourune attaque. Mais n'oubliez pas que les chevaliers serontmieux entraînés s'ils restent dans le bâtiment...

5. Règlement des conflits
Ne choisissez pas des réglages trop gourmands. Si vous nedisposez pas de suffisamment de chevaliers, il arrivera unmoment où vos huttes de garde, etc... ne seront plussuffisamment occupées.
Pour modifier les paramètres de ce menu, cliquez sur lessignes + et -. Le paramètre supérieur (nombre dechevaliers idéal) ne peut logiquement être inférieurau paramètre suivant (nombre de chevaliersrestants). Modifiez ce second paramètre. Il est très importantde modifier IMMEDIATEMENT ces paramètres. Si vousmodifiez le taux d'occupation des châteaux situés sur lefront: de "plein" à "minimum", tous les chevaliers partirontsauf un. Réfléchissez bien d'abord, et cliquez ensuite.Lorsque des chevaliers sortent d'un château-fort pourattaquer I'ennemi, ils sont immédiatement remplacés par denouveaux chevaliers venant des entrepôts, tant qu'il restedes chevaliers disponibles dans ces entrepôts.
Le deuxième menu des chevaliers vous permettra demodifier beaucoup d'autres paramètres. Cliquez surI'icône en bas au centre. Le "taux de chevaliers" seraaffiché en haut à gauche de l'écran. Ce taux est fixéà 30%, et vous pourrez le modifier à souhait. Il
indique le nombre de colons qui peuvent devenir chevalierssi vous avez assez d'épées et de boucliers. Si vous réglez labarre sur le milieu, un colon sur 2 deviendra chevalier. Sivous la mettez à gauche, vous ne recevrez automatiquementplus de chevaliers.
Les icônes affichées au-dessous vous permettent derecruter directement des chômeurs afin d'avoir plus dechevaliers. Le nombre

5. Règlement des conflits
de colons que vous pouvez recruter est affiché àdroite. Ce chiffre dépend principalement de laquantité d'armes dont vous disposez dans vosentrepôts. Mais il vous faudra évidemment aussi
suffisamment de colons sans travail. Une icône permetensuite de choisir les chevaliers pour I'attaque. Avec lesparamètres par défaut, les chevaliers faibles attaquent et lesplus forts restent pour la défense, mais vous pourrez aussifaire I'inverse. Ces deux options ont des avantages et desinconvénients, mais il est généralement préférable d'envoyerles plus faibles à I'attaque, pour que vos châteaux-fortssoient bien gardés. A vous de choisir. Une icône à droite vouspermet d'assurer la relève des chevaliers. Lorsque vouscliquez sur cette icône, un (ou plusieurs) chevalier sortira deson château-fort, etc... si leur taux d'occupation est suffisant(comme expliqué plus haut) et se rendra dans I'entrepôt leplus proche. Un nouveau chevalier viendra le remplacer.L'avantage: les plus faibles seront renvoyés et ironts'entraîner dans les entrepôts, les plus forts viendront lesrelever. En activant cette option, vous devrez tenir comptedes éléments suivants:
- Si une attaque est à craindre dans les minutes quisuivent, attendez, pour éviter qu'un de vos bâtiments nesoit pas assez occupé pendant un court moment.
Assurez-vous de disposer de suffisamment de chevaliersbien entraînés dans vos entrepôts. Sinon, ce changementne se justifie pas.

5. Règlement des conflits
- La force de vos chevaliers ne dépend pas seulementde leur niveau d’entraînement, mais aussi de la quantitéd’or trouvée dans leur cité. En défense, vos chevaliersseront toujours de la même force, mais lors descombats, elle dépendra de leur motivation. Ils seront trèsmotivés si votre cité dispose de beaucoup d’or. Au débutdu jeu, il est trés difficile de gagner un combat. Vousn’avez pas encore d’or, et vos chevaliers sont de faibleniveau. Pour avoir une chance de gagner, le rapport desforces en votre faveur doit être de 4 pour 1. Vos pertesseront évidemment plus grandes que celles del’adversaire, et vous devez bien choisir l’endroit de votreattaque. Si une attaque vous permet de prendre lecontrôle d’une mine d’or ennemie ou de l’uniqueconstruction qui produit de la nourriture, elle peut êtreprofitable malgré de nombreuses pertes, car:
1) L’ennemi subira des dégats importants, et
2) Les chevaliers ennemis sont encore faibles au débutdu jeu, et auront autant de mal que vous à reconquérirune région perdue.
Quand vous disposerez de suffisamment d’or, la forcede vos chevaliers augmentera, et ils seront plusefficaces en attaque qu’en défense. Vous pourrez alorsenvisager la destruction totale de I’ennemi. Mais soyezprudent si vous jouez contre plusieurs adversaires.
Vous pouvez connaître la motivation de vos chevaliersdans le menu d’attaque. Chaque unité d’or stockée dansle château, un

5. Règlement des conflits
entrepôt, une hutte de garde, une tour de garde ou unchâteau-fort aura des effets positifs. Pendant son transport,I'or n'est pas encore considéré comme stocké.
Vous avez certainement constaté que le menu d'attaqueindique non seulement la force de combat, mais aussi laquantité totale des unités d'or en possession du joueur.
Le chiffre définissant le nombre des chevaliers défendant lechâteau est indiqué en bas.Vous pourrez le modifier avec lesflèches. Si vous pensez que votre situation est sans espoir,vous pouvez cliquer sur le drapeau blanc pour abandonner.
Vous pourrez aussi attaquer un château ennemi. Maisn'oubliez pas que I'ennemi peut avoir laissé un nombre dechevaliers plus élevé que d'habitude dans un château-fort. Sivous réussissez à conquérir un château, il sera brûlé.Comme pour les entrepôts, le gagnant portera un coupdécisif à I'adversaire, en lui faisant perdre les marchandiseset les colons qui s'y trouvent. De plus, le moral de voschevaliers remontera, alors que celui des chevaliers ennemisbaissera considérablement. Si vous pensez pouvoirfacilement conquérir un château, tentez une attaque. Mais sivous perdez un château, n'abandonnez pas. Si vousdisposez de suffisamment de chevaliers bien entraînés, vouspourrez vaincre I'ennemi, mais ce ne sera pas facile! Lemenu d'attaque vous permet de définir le nombre dechevaliers qui resteront dans votre château pour le protéger.N'oubliez pas que le château est important non seulementpour le moral de vos

5. Règlement des conflits
chevaliers, mais aussi parce que c'est le seul entrepôtprotégé directement par les chevaliers, et donc plus sûr queles entrepôts construits ultérieurement.
6. Pour continuer6. Pour continuer
6. 1 Les autres menus
Fabrication d'outils, menus de priorité et d'évacuation desmarchandises
Dans la sélection des menus, cliquez sur I'icône à gauchedu centre. Les 9 outils seront affichés, une barreindiquant le nombre qui sera fabriqué par vosouvriers. Les paramètres par défaut sont lessuivants: fabrication intensive de marteaux et de
pioches, peu de faux et de pinces. Les maçons, lesgéologues, les forgerons et les serruriers ont besoin demarteaux, mais les faux ne sont nécessaires que pour lescultivateurs. Vous pourrez modifier cette répartition pendantle jeu. Si vous avez besoin d'urgence d'un outil spécifique(vous pouvez par exemple disposer de suffisamment demarteaux, mais manquer de pinces pour un nouveauforgeron), vous pouvez accélérer la fabrication de cet outil etréduire celle des autres. N'oubliez pas de modifier à nouveauces paramètres plus tard. La longueur des barres représentela quantité d'outils fabriqués. Si la barre correspondant auxmarteaux est deux fois plus longue que celle des scies, vosouvriers fabriqueront deux fois plus de marteaux que descies. Mais tant que vous n'aurez pas de forgeron, ce menusera sans importance. Pour ne pas avoir à intervenir sur leurfabrication, fabriquez rapidement une grosse quantité dechaque type d'outil.Vous contrôlerez ainsi plus facilement lesstatistiques des entrepôts.
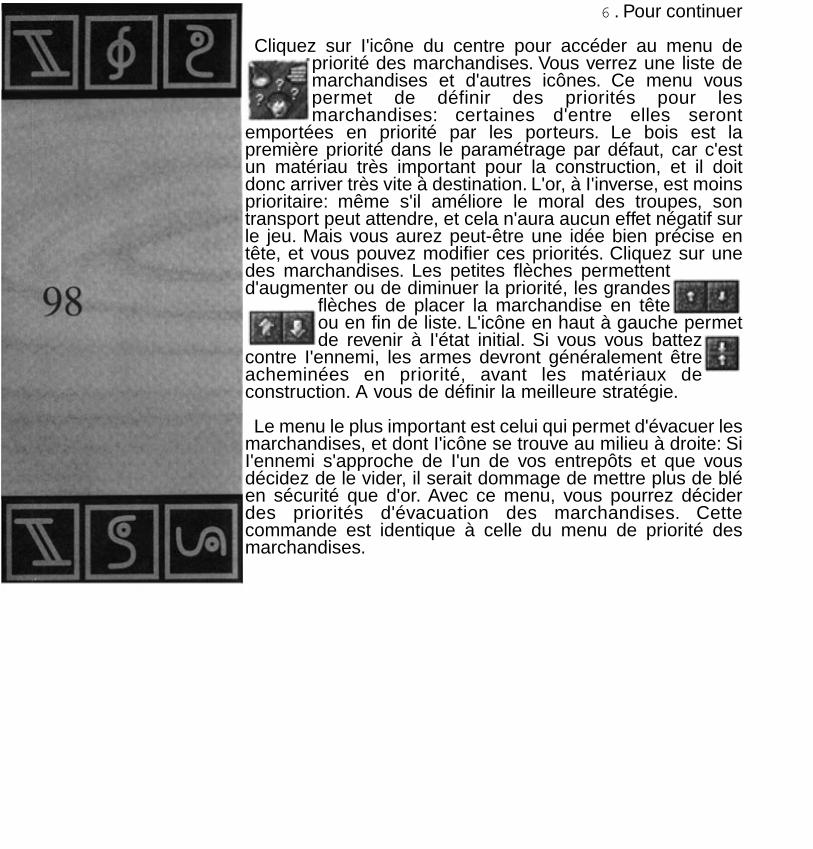
6 . Pour continuer
Cliquez sur I'icône du centre pour accéder au menu depriorité des marchandises. Vous verrez une liste demarchandises et d'autres icônes. Ce menu vouspermet de définir des priorités pour lesmarchandises: certaines d'entre elles seront
emportées en priorité par les porteurs. Le bois est lapremière priorité dans le paramétrage par défaut, car c'estun matériau très important pour la construction, et il doitdonc arriver très vite à destination. L'or, à I'inverse, est moinsprioritaire: même s'il améliore le moral des troupes, sontransport peut attendre, et cela n'aura aucun effet négatif surle jeu. Mais vous aurez peut-être une idée bien précise entête, et vous pouvez modifier ces priorités. Cliquez sur unedes marchandises. Les petites flèches permettentd'augmenter ou de diminuer la priorité, les grandes
flèches de placer la marchandise en têteou en fin de liste. L'icône en haut à gauche permetde revenir à I'état initial. Si vous vous battez
contre I'ennemi, les armes devront généralement êtreacheminées en priorité, avant les matériaux deconstruction. A vous de définir la meilleure stratégie.
Le menu le plus important est celui qui permet d'évacuer lesmarchandises, et dont I'icône se trouve au milieu à droite: SiI'ennemi s'approche de I'un de vos entrepôts et que vousdécidez de le vider, il serait dommage de mettre plus de bléen sécurité que d'or. Avec ce menu, vous pourrez déciderdes priorités d'évacuation des marchandises. Cettecommande est identique à celle du menu de priorité desmarchandises.

6. Pour continuer
6.2 Messages et paramètres par défaut
Au cours du jeu, vous serez donc constamment informé detous les événements importants. Mais vous pouvez utiliserces messages pour le déroulement de la partie. Ce chapitreest consacré aux divers messages du jeu.
Vous recevrez un message lors des événements suivants:
- Un nouveau bâtiment de garde est occupé pour la premièrefois par un chevalier. Vous annexez ainsi de nouvelles terreset vous pouvez planifier I'expansion de votre cité.- Un nouvel entrepôt est terminé.- Un géologue a trouvé de nouvelles richesses souterraines.- Une mine est épuisée et doit donc être détruite, car elleconsomme inutilement de la nourriture.- Vous êtes attaqué.- Vous avez conquis un bâtiment de garde ennemi, et doncgagné des terres.- Vous avez perdu un bâtiment de garde en faveur deI'ennemi.- L'ennemi a placé une hutte tout près de votre territoire, etvous avez perdu des terres.- Identique au message précédent, mais vous avez perdudes terres et un ou plusieurs bâtiments.- Vous manquez de matériaux de construction dans votrechâteau. Un programme d'urgence est mis en place, et seulsles chantiers de construction de huttes de bûcherons, demenuiseries et de carrières

6. Pour continuer
seront désormais livrés.- Le programme d'urgence est abandonné, les chantiersmentionnés ci-dessus ont été approvisionnés et la livraisondes matériaux de construction est assurée.
Vous n'avez pas besoin de lire immédiatement lesmessages. Le programme peut en mémoriser plus de 50,vous aurez donc le temps de terminer par exemple laconstruction de votre nouveau chemin. Pour voir unmessage, cliquez sur le crochet dans la fenêtre. Si cemessage ne vous intéresse pas et qu'il y en a d'autres,cliquez sur la feuille pour voir le message suivant. Une flèchepermet également de revenir sur les messages précédents.
« THE SETTLERS » comporte d'autres options. Vouspouvez par exemple vous envoyer un message. Comment?Le message sera envoyé en temps différé, et pour plusieursbonnes raisons. Cette option est une option de rappel, etpeut être utilisée de deux manières:
a) Elle permet de se rendre à un endroit précis après un lapsde temps défini.
b) Elle permet de se rendre dans un menu ou un entrepôtaprès un temps défini. Les montres vous permettent depréciser le laps de temps par tranches de 5, 10, 20, 30 ou 60minutes. Lorsque ce temps sera écoulé, vous recevrez unmessage et vous vous retrouverez automatiquement àI'endroit ou dans le menu souhaité. Voici quelques

6. Pour continuer
exemples vous montrant I'utilité de cette fonction:
- Vous avez besoin d'urgence d'un certain type d'outil, etvous stoppez donc la production des autres outils dans lemenu de production. Mais si vous oubliez d'intervenir plustard pour rééquilibrer votre production, aucun autre outil nesera fabriqué, et vous imaginez facilement lesconséquences. Cliquez sur une montre dans le menu desoutils. Après le laps de temps spécifié, vous serez informéqu'il vous reste quelque chose à faire dans ce menu .- Vos mineurs sont en grève et vous avez besoin d'urgencede nourriture. Vous allez donc modifier les priorités detransport des marchandises. Le poisson, la viande et le painsont désormais les marchandises prioritaires, avant lesmatériaux de construction. Mais lorsque le problème serarésolu, I'option de rappel vous évitera d'oublier d'intervenir ànouveau sur la priorité des transports de marchandises .- Vous avez I'intention de construire d'autres huttes depêcheurs à un certain endroit. Malheureusement, ces terresne vous appartiennent pas encore, et les huttes de gardesont encore en construction. Spécifiez un laps de temps aubout duquel vous désirerez être rappelé à cet endroit. Lasituation aura peut-être changé quand vous reviendrez.- Vous constatez que I'ennemi se met à construire soudainbeaucoup de châteaux-forts et vous voulez le surveiller. Ilvous suffit de préciser le laps de temps au bout duquel vousserez appelé à cet endroit de la carte, pour voir comment lasituation a évolué. Il est parfois utile de vous faire rappelerdans un entrepôt si vous voulez modifier les paramètres desmarchandises et / ou des colons.

6. Pour continuer
paramètres des marchandises et / ou des colons.Vous devez également tenir compte du fait suivant: si vousjouez en mode 2 joueurs et en équipe (colons bleus), lejoueur à droite de I’écran ne peut pas utiliser les montres,et tous les messages arrivent aussi au joueur de gauche.Mais vous jouez en équipe, n’est-ce pas?
6.3 Jeux renouvelables
Revenons au menu principal. En modes 1 ou 2 joueurs eten mode démo, vous verrez au centre une icône qui n’apas été abordée jusqu’à maintenant. Comme vous lesavez, le nombre à 16 chiffres décide de l’apparence dumonde. Le même nombre mène donc toujours au mêmemonde. Si vous cliquez sur cette icône, la mêmecombinaison de chiffres sera utilisée pour vosadversaires. L’étoile qui tourne, en bas de l’écran, indiqueque le monde ET vos adversaires dépendent de la mêmecombinaison de chiffres. Quel est l’avantage? Vouschoisissez par exemple la combinaison6355174823325876 et un monde de taille 4. A la fin de lapartie, si vous l’avez trouvée intéressante et d’un niveausuffisant, vous pouvez communiquer cette combinaison etla taille du monde à un ami. Il pourra alors jouer la mêmepartie en cliquant sur l’icône de la flèche, car toutes lesdonnées du monde ET des adversaires dépendent de lacombinaison de chiffres et de la taille du monde.
Les 16 chiffres (compris entre 1 et 8) permettent environ270.000 billions de combinaisons, mais toutes ne sontpas intéressantes.
6. Pour continuer
Examinez bien les capacités de vos adversaires et décidezsi vous voulez commencer ou non cette partie. Si vousvoulez un autre jeu, cliquez sur la flèche pour obtenir unenouvelle combinaison, et cliquez à nouveau sur la flèche dubas. Vous pouvez recommencer aussi souvent que vous lesouhaitez. Si un joueur vous a transmis une combinaison dechiffres, cliquez sur la boîte de dialogue et entrez lacombinaison, qui doit comporter 16 chiffres. Retenez bien lataille du monde avec la combinaison de chiffres si vousvoulez transmettre une partie à un autre joueur.
Si vous avez trouvé une combinaison fantastique, n'hésitezpas à nous I'envoyer. Ici, à Blue Byte, nous aimons bien«coloniser », nous aussi, pendant nos rares moments deloisirs.
6.4 Mode démo et équipe
En mode démo, vous pouvez assister à une partieentièrement contrôlée par ordinateur. «THE SETTLERS »est un jeu drôle et intéressant, même si vous n'êtes qu'unsimple spectateur. Dans ce mode, les statistiques et lesmenus sont accessibles, ainsi que la carte, et lesinformations sur les bâtiments, comme dans le jeu normal.En mode démo, vous pouvez modifier certaines options desmenus et statistiques, mais vous ne pourrez pas intervenirdans les paramètres, ou construire des bâtiments ou deschemins.
Relaxez-vous, et regardez les adversaires s'affronter.

6. Pour continuer
Le mode équipe a été développé pour permettre à 2joueurs d’affronter ensemble les adversaires contrôlés parl’ordinateur. Les deux joueurs controlant le même groupede colons (les bleus), les missions sont identiques. Lejeuen équipe a un avantage: vous aurez plus de temps pourréfléchir. Mais il a aussi un inconvénient: vous risquezd’avoir de temps en temps quelques problèmes decoordination... En mode équipe, le jeu est Iégérementdifférent. Les deux joueurs NE PEUVENT PAS activer lesmenus, la fonction attaque et l’aide du géologueSIMULTANEMENT. Mais ce n’est pas véritablement unecontrainte, car les joueurs sont censés communiquer toutemodification à leur partenaire.
6.5 Les options
Les joueurs confirmés préfèrent activer rapidement lesoptions et éviter les longues manipulations de la souris.“THE SETTLERS” comporte plusieurs optionssupplémentaires paramétrables pour chaque joueur. Cesoptions sont accessibles en cliquant sur l’icône du menuprincipal ou du menu en cours de partie.
Vous pouvez activer et désactiver la musique avec l’icônecorrespondante. De plus, vous pourrez assigner les effetssonores à 2 canaux différents en mode 2 joueurs. Lejoueur de gauche entendra les sons sur le canal gauche etcelui de droite sur le canal droite. Dans ce cas, vous nepourrez pas bénéficier de la musique.

6. Pour continuer
Messages: le jeu comporte quatre modes d'affichage3) Affichage de tous les messages2) Ne pas afficher les messages annonçant les bâtimentsnouvellement occupés et ceux du géologue1) Affichage des messages les plus importants (attaque,victoire, défaite, perte d'un bâtiment et programmed'urgence)0) Aucun message
Scrolling lors de la construction de chemins: Si vousapprochez du bord de l'écran pendant la construction d'unchemin, I'image se déplacera automatiquement, et vousentendrez un signal sonore.
Clic rapide de construction: Si vous cliquez une deuxièmefois sur le pointeur, vous obtiendrez le même résultat qu'encliquant sur I'icône de construction: cliquez deux fois sur undrapeau pour construire un chemin, ou sur un endroit nonbâti pour construire une maison.
Clic rapide sur la carte: Double-cliquez sur le bouton droitde la souris pour voir immédiatement la carte. Double-cliquezà nouveau pour la faire disparaître. Si le bouton droit de votresouris ne fonctionne pas très bien, n'utilisez pas cettefonction, pour éviter d'activer la carte lorsque vous voulezdéplacer l'écran de jeu.

6. Pour continuer
6.6 Options spéciales de la carte
La carte comporte une option spéciale: activez-la et faitesun clic spécial sur I'icône des bâtiments. Une nouvellefenêtre avec des bâtiments sera affichée. Elle est identique àcelle des statistiques. L'icône de changement de page vouspermet de voir les autres bâtiments. Sélectionnez unbâtiment quelconque et cliquez dessus. Les bâtimentsdisparaissent et la carte réapparaît.
Une nouvelle icône est affichée au bas de l'écran. Vous neverrez sur la carte que le type de bâtiments quevous avez sélectionné. Vous pourrez ainsi voirrapidement où se trouvent vos entrepôts, etc....
Dans les mondes plus grands, cette fonction est très utile.Les bâtiments en construction seront également affichéspour une meilleure planification. Si vous cherchez un endroitpropice à I'installation d'un nouveau boulanger, vous pouvezvoir où se trouvent vos moulins. Si vous quittez la carte, cettefonction reste active et les bâtiments sélectionnés resterontaffichés lorsque vous la réactivez.
Pour revenir au mode normal, cliquez normalement surI'icône. Pour sélectionner un autre bâtiment, faites à nouveauun clic spécial.
Vous pouvez également choisir les bâtiments à afficher surla carte avec le drapeau. Cliquez sur ce drapeau.Une nouvelle icône apparaîtra sous la carte. Maistous les drapeaux ne seront pas affichés,
uniquement ceux dont les chemins ne sont pas utilisés. Vouspourrez ainsi voir où sont les points embouteillés par le

6. Pour continuer
transport de marchandises. De plus lorsqu'un chemin n'estpas utilisé, il n'y a que deux raisons possibles:
1 - Aucun ouvrier n'est arrivé jusqu'à ce chemin. Ou bienvous venez de le construire et vous devez attendre un peu,ou bien vous n'avez pas assez d'ouvriers.
2 - Il y a eu un embouteillage de marchandises à cecroisement (voir le chapitre correspondant dans ce manuel).A I'aide de cette option, vous pouvez voir instantanément oùle transport de marchandises pose des problèmes.
Une autre option spéciale vous sera bientôt indispensable:I'icône en forme de loupe, à côté de I'icône qui permetd'afficher la carte, et qui permet de zoomer sur le terrain.

7. Trucs et astuces
7. Trucs et astuces
7. 1 Les règles les plus importantes: Bien observer
Vous avez déjà compris que «THE SETTLERS » est un jeutrès spécial. Dès que vous modifiez quelque chose, voscolons (par petits groupes ou par centaines) changent decomportement pour tenir compte de vos nouvelles directives.Une petite modification peut avoir des effets importants. Il estdonc sage de ne pas construire n'importe comment de nepas attaquer sans arrêt I'ennemi. Il vaut mieux bien observerla situation, I'analyser et prendre la meilleure décision. Legagnant ne sera pas celui qui clique plus vite que les autres,mais celui qui développe les meilleures stratégies ettactiques. Dans ce chapitre, nous allons vous donnerquelques conseils supplémentaires pour le jeu.
Examinez de temps en temps vos statistiques, analysez voserreurs de développement ou les résultats négatifs d'uneopération, et trouvez des solutions. Chaque problème peutêtre réglé de plusieurs manières. Prenons un exemple: voschantiers s'arrêtent parce qu'il n'y a plus de bois, et votrestock est épuisé. Votre analyse pourrait être la suivante:examiner tout d'abord le nombre de menuisiers qui débitentles troncs d'arbres, puis construire une nouvelle scierie si cenombre de menuisiers est suffisant. En cas de crise grave,détruisez certains chemins pour limiter les livraisons àcertains secteurs de votre cité. Des ouvriers d'autresprofessions prennent du bois dans

7. Trucs et astuces
les chantiers? Réduisez alors I'approvisionnement en boisdes armateurs ou des fabricants d'outils jusqu'à la fin de lacrise. Avez-vous suffisamment d'outils pour pouvoir vous lepermettre, ou y a-t-il des problèmes encore plus importantsdans ce domaine? Comment ferez-vous pour réunirrapidement un stock de bois suffisant? Avez-vous formésuffisamment de gardes forestiers? Pourrez-vous sortir plusrapidement de la crise en faisant abattre les arbres d'unenouvelle forêt? Si vous avez besoin d'une nouvelle forêt, unenouvelle hutte de garde pourra vous permettre d'annexer denouvelles terres. Plusieurs facteurs jouent un rôle important,et vous trouverez toujours dans "THE SETTLERS" denouvelles tâches à accomplir, car chaque partie seradifférente des précédentes.
Examinez attentivement le terrain de I'adversaire pourconnaître ses points forts et ses intentions. Déterminez sespoints faibles pour pouvoir I'attaquer. A-t-il construit uneseule mine de fer, ce qui vous permettrait de le priver dematières premières? Un de ses entrepôts est-il facile àprendre, ou en manque de nourriture, et pouvez-vousinterrompre la production de I'ennemi? Les problèmes poséspar une cité sont les mêmes pour votre adversaire. Il existede nombreuses manières de bloquer son économie.
Selon la taille du monde, le nombre de colons est limitéaux chiffres suivants (taille 1 - 8) :
500/1000/2000/4000/8000/16000/32000/6400
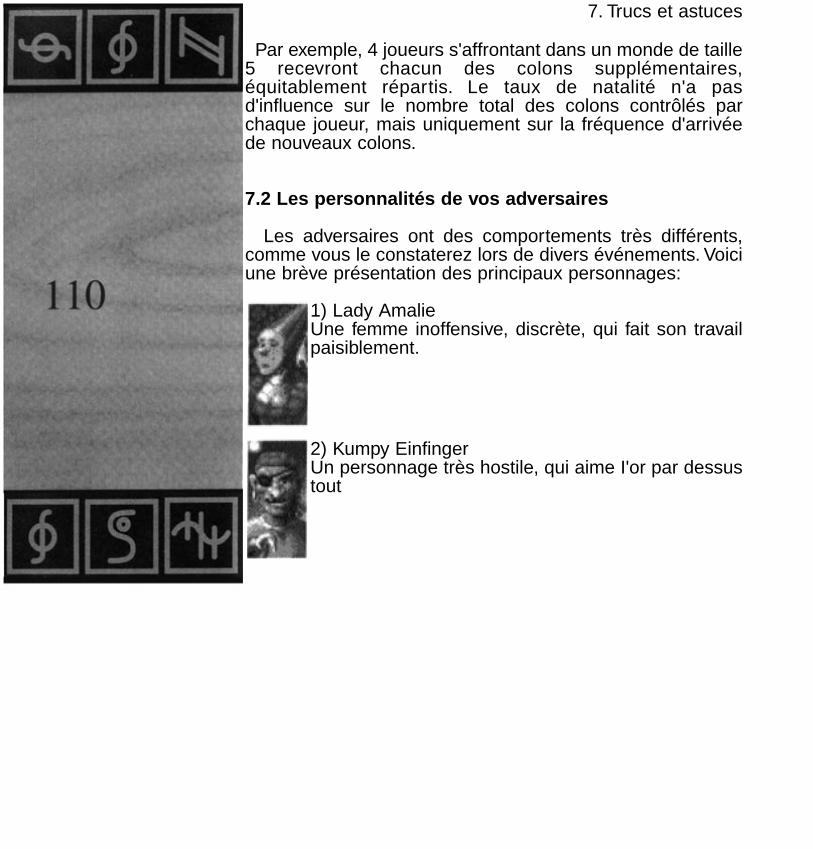
7. Trucs et astuces
Par exemple, 4 joueurs s'affrontant dans un monde de taille5 recevront chacun des colons supplémentaires,équitablement répartis. Le taux de natalité n'a pasd'influence sur le nombre total des colons contrôlés parchaque joueur, mais uniquement sur la fréquence d'arrivéede nouveaux colons.
7.2 Les personnalités de vos adversaires
Les adversaires ont des comportements très différents,comme vous le constaterez lors de divers événements. Voiciune brève présentation des principaux personnages:
1) Lady AmalieUne femme inoffensive, discrète, qui fait son travailpaisiblement.
2) Kumpy EinfingerUn personnage très hostile, qui aime I'or par dessustout

7.Trucs et astuces
3) Balduin, l’ancien moineUn personnage très discret, qui s’occupesurtout de laprotection de ses terres et de ses bâtimentsimportants.
4) FrollinSon comportement imprévisible vous réserveraconstamment des surprises. Il “grignote”facilement les terrains inoccupés.
5) KallinaC’est une combattante qui tente de bloquerl’approvisionnement en nourriture de l’ennemien usant de stratégie.
6) Rasparuk le druideSa tactique consiste à amasser des stocksconsidérables de matières premières. Mais ilattaque aussi de façon sournoise.

7. Trucs et astuces
7) Comte AldabaProtégez bien vos entrepôts, car il est agressif et saitexactement où il doit attaquer.
8) Le roi Rolph VIIC'est un souverain prudent, sans faiblessesparticulières.Il enraye de préférenceI'approvisionnement en matériaux de construction deses adversaires.
9) Homen DoppelhornC'est I'ennemi le plus agressif. Surveillez bien vosbâtiments importants, sinon vous risquez d'avoir dessurprises.
10) Sollok le JokerC'est un adversaire sournois et très désagréable, ilessaye d'enrayer I'approvisionnement en matièrespremières de ses ennemis dès le début du jeu.

7. Trucs et astuces
7.3 Trucs et astuces au sujet des métiers
Ce chapitre contient d'autres conseils supplémentaires pourle choix de I'emplacement des bâtiments.
Démolition: En démolissant un chemin, vous interrompez letransport des marchandises dont le trajet passe par cechemin. Arrangez-vous pour qu'il reste toujours un chemin,et ne détruisez pas la seule liaison importante. Lesmarchandises doivent attendre I'arrivée d'un nouveauporteur avant de pouvoir être transportées sur un nouveauchemin. Toute modification de votre réseau affecte letransport de marchandises. Construisez donc dès le départun réseau bien organisé.
Châteaux: Vous savez déjà comment choisir I'emplacementidéal pour votre château, mais surveillez aussiI'emplacement des châteaux de vos adversaires. Ne vousinstallez pas trop près d'un adversaire puissant. Lesadversaires contrôlés par I'ordinateur se détruiront peut-êtremutuellement.
Grands bâtiments: Les terrains pour la construction desgrands bâtiments sont rares, et donc chers. Ne construisezpas de huttes ou de petits chemins sur des terrains où vouspouvez construire un bâtiment plus grand.
L'armateur: Pour les grands lacs, un "raccourci" par voied'eau est très efficace pour transporter rapidement lesmarchandises.

7. Trucs et astuces
Pêcheurs: Un lac de la taille de l'écran de jeu contientsuffisamment de poissons pour 3 ou 4 pêcheurs. Veillez à ceque les pêcheurs soient bien répartis autour du lac. S'ilspêchent tous au même endroit, ils finiront par ne plus rienpêcher du tout.
L'agriculteur: Il a besoin de terres inoccupées pour lescultiver. Les chemins ne peuvent pas être considérés commetels. Ne construisez pas trop de chemins autour d'uneexploitation agricole. Pour éviter que I'exploitant agricole neperde du temps en allant vers ses champs, ne le faites pastravailler sur des pentes trop raides.
Meunier et boulanger: Un meunier et un boulanger suffisentpour plusieurs exploitations agricoles, mais arrangez-vouspour que les chemins de transport ne soient pas trop longs.
Le boucher: Il travaille vite, et malgré ses livraisons àquelques fermiers, il n'a généralement pas de problème dansson travail.
Bûcheron et garde forestier: Ils se complètent parfaitement.Le garde forestier peut remplacer les arbres abattus après ledessèchement de la souche. Le bois est la matière premièrela plus demandée. Utilisez beaucoup de bûcherons et degardes forestiers. Les gardes forestiers ne plantent pasd'arbres sur les chemins. Il ne faudra donc pas les placerdans la partie centrale autour du château, ou près desentrepôts nécessitant beaucoup de chemins pour letransport des marchandises. Placez-les un peu à I'écart,même a des endroits en pente qui ne peuvent pas vousservir à autre chose.

7. Trucs et astuces
Menuisier: Un menuisier est suffisant pour plusieursbûcherons, mais il faudra vite construire plusieursscieries.
Armateur: Veillez à ce que l’armateur n’utilise pas toutvotre bois pour construire des centaines de bateaux.Des qu’il aura fini son travail, ne lui fournissez plus debois.
Mineur: S’il ne trouve plus rien, brûlez la ruine pour neplus avoir a le nourrir. Dans les montagnes, construisezun réseau de chemins à plusieurs ramifications, pourfaciliter le transport des matières premières vers lavallée.
Fondeur: La fonte prend un peu de temps et le fondeurne pourra pas fondre assez vite le minerai de plusieursmines sans prendre du retard. Mais il se rattrapera dèsque les livraisons seront moins importantes. Selonl’importance de sa surcharge, vous pouvez renoncer àde nouvelles constructions.
Géologue: Quand les géologues rentrent chez euxaprès leur prospection, ils restent dans les entrepôtssans rien faire. De temps en temps, renvoyez-les dansles montagnes pour découvrir de nouvelles richessessouterraines. Vous pourriez tomber sur un nouveau filonque vous n’aviez pas découvert auparavant.
Comment les colons choisissent-ils leur chemin pourtransporter les marchandises? C`est un choix assezcomplexe. II est d’abord important de savoir à quelendroit la marchandise est nécessaire. Un

7 Trucs et astuces
moulin peut être très proche et contenir beaucoup deblé, alors que le stock d’un autre moulin plus éloignésera épuisé. De plus, certaines marchandises sontacheminées selon les paramètres des menus.
Quand une destination a été trouvée pour lamarchandise, les colons prennent toujours le chemin leplus court. L’élément essentiel est le nombre dechemins que la marchandise devra parcourir: un chemintrès long entre deux drapeaux est plus rapide qu’unchemin plus court avec un drapeau intermédiaire. Lejoueur a ainsi un gros avantage, car il peut influencer lechoix du chemin de transport. Voici un exemple: vousavez installé un drapeau de part et d’autre d’unentrepôt, avec un chemin le desservant. Comme toutesles marchandises devant transiter par l’entrepôtreprésentent déjà un gros trafic pour le croisement, lesmarchandises transportées d’un drapeau à l’autre, etdans les deux sens, encombrent encore plus le trafic.Par contre, si vous créez une nouvelle liaison entre lesdeux drapeaux (même si c’est apparemment un détourau tour de I’entrepôt), le trafic nr passera plus parI’entrepôt, car cette nouvelle voie permettra de l’éviter.Ce principe permet de construire des réseauxcomplexes de cheminsautour des entrepôts importants ou des chateaux, quipermettront de transporter plus rapidement lesmarchandises. N’oubliez pas que toute construction,démolition ou transformation de chemin a initialementdes effets négatifs sur le transport des marchandises.Ce n’est que lorsque les colons se seront adaptés à lanouvelle situation que le transport de marchandisess’écoulera normalement.

7. Trucs et astuces
De plus, vos ouvriers traversent parfois les terresennemies, pour abattre des arbres ou récolter du blé.Dans les mines, vous pourrez en profiter pour voler desrichesses souterraines à l’ennemi.
Autres options de chargement
Si vous connaissez le CLI de I’Amiga, vous pouvez,lancer le programme avec différentes options:
-f: Save/Load to FloppyLes fichiers seront chargés et sauvegardés sur le lecteurde disquettes. Si vous n’utilisez pas le paramètre -f, lesfichiers seront sauvegardés dans le répertoire “THESETTLERS:save/”.
-s: Single playerLejeu sera limité à un seul joueur. Cette option est
pratique si vous ne disposez que de 512 Ko de RAM, sivous jouez seul, ou si vous voulez utiliser la mémoirepour les effets sonores. Le jeu à 2 joueurs en équipe n’estpas disponible si cette option est activée.
-mx: Force mapsize xx est un chiffre compris entre 1 et 8. Il indique la taille du
monde de jeu. Le programme est paramétré par défautavec des mondes de taille 3, car c’est la taille des mondesutilisés pour les scénariosd’entraînement.

7. Trucs et astuces
7.4 Des problèmes?
Pendant le déroulement du jeu “THE SETTLERS”,vous pourrez parfois vous retrouver dans une situationsans issue. Par exemple, si vous n’avez plus de bûcheronet qu’il n’y a plus de bois, la construction d’une hutte debûcheron risque de poser un sérieux problème. Bien sûr,vous n’avez pas encore perdu, car vous pourrez toujoursenvoyer vos chevaliers au combat. Si vous ne disposezpas de stock au début du jeu, vous risquez de manquerrapidement de matériaux. Si vous ne surveillez pas bienvotre production, vous vous apercevrez trop tard qu’ilvous manque une unité de trois pour la scierie... et vousdevrez recommencer à zéro. Pour éviter cela, un“programme d’urgence” est mis en place au début du jeu.Ce programme est en fait une réserve de 2 unités degranite et de 7 unités de bois permettant la constructiond’une hutte de bûcheron, d’une scierie et d’une carrière.Si vous manquez de matériaux, ces chantiers lesrecevront en priorité absolue pour assurerl’approvisionnement de base, car ces trois bâtimentsvous ouvrent toutes les possibilités. Vous pourriezégalement vous trouver dans une impasse avec lefabricant d’outils: si aucun de vos colons ne fait ce métiéret que tous les marteaux ont été distribués aux maçonset aux géologues, vous ne pouvez plus envoyer deserrurier au travail, et la fabrication d’outils sera doncimpossible. C’est pour cette raison qu’au début du jeucertains colons prennent les outils nécessaires.
Au début du jeu, vous n’aurrez donc pas trop deproblèmes. Tout est prévu. Mais pendant la partie, vousserez seul responsable de vos
7. Trucs et astuces
erreurs.Vous savez maintenant tout sur le programme, et vosconnaissances sont suffisantes pour affronter I'ordinateur oupour défier un autre joueur.
7.5 La fin du jeu
Le jeu se termine lorsqu'il ne reste plus qu'une seule citédans le monde. Vous pouvez abandonner une partie encours en cliquant sur le drapeau blanc. Si I'adversairecontrôlé par I'ordinateur décide d'abandonner, vous pouvezou non continuer le jeu.
Il arrive parfois que plusieurs cités restent enjeu. Dans cecas, la partie est nulle. Cette situation peut se produire siaucune cité n'a suffisamment de chevaliers, et que tous lesgisements de minerai et de charbon sont épuisés, interdisantla fabrication de nouvelles armes. Dans ce cas, il n'y a pasde vainqueur.

8. Annexes
8. Annexes
8. 1 En cas de problème...
Problèmes de configuration:
Moins de 20% d'effets sonores ont été chargés!Cause: Vous n'avez pas assez de mémoire. Avant de lancer
le jeu, désactivez les programmes résidents ou débranchezles lecteurs de disquettes inutiles. Ils mobilisent de lamémoire nécessaire pour The Settlers .
-"La musique n'a pas été chargée, alors que j'ai 1 Mo deChipram et de plus d'l Mo de mémoire totale !"
Cause: voir ci-dessus.
- Le programme ou une partie des données ne se trouventpas dans la Fastram comme prévu.
Cause: Vérifiez la taille de Fastram disponible. Votreextension a peut-être une capacité de mémoire de C00000.Ces extensions avaient été intégrées en série dans l'Amiga2000, et proposées en plusieurs versions (512 Ko, 1,7 Mo).Ces extensions ne sont pas de la VRAIE Fastram. Mais nevous découragez pas, cela signifie seulement que leprogramme fonctionnera un peu plus lentement.

8. Annexes
- Les données sont dans la Fastram en partie seulement,alors que la liste dit ,.oui" !
Cause: Une partie de la Fastram semble mobilisée pard'autres programmes.
- La taille du monde indiquée dans la liste n'a pas étéatteinte!Cause: Une partie de la Fastram ou de la Chipram est
mobilisée par d'autres programmes.
Vous trouverez une liste complète des configurationspossibles et de leurs effets sur "The Settlers" sur la pagesuivante.

8. Annexes
Exemples de configuration: cette liste vous permet de voirles différentes configurations possibles et les performancesdu programme sur la machine.
Votre Computer Sons Taille Fastram ScénariosChipram Fastram Effets Musique (en écrans) Programmme Données512 Ko 512 Ko ca.25% non 1-3(37) oui oui oui512 Ko 1MO ca.25O% non 1-5 (150) oui oui oui512 Ko 2 MO ca.250/o non 1-6 (600) oui oui oui512 Ko 4 MO ca.25% non 1-8 (1200) oui oui oui1 MO aucun ca.25% non 1-3 (37) non non oui1 MO 1MO tous oui 1-5(150) oui oui oui1.MO 2 MO tous oui 1-6(600) oui oui oui1 MO 4 MO tous oui 1-8(1200) oui oui oui2 MO aucun tous oui 1-5 (300) non non oui2 MO 1 MO tous oui 1-7(600) oui partie oui2 MO 2 MO tous oui 1-7 (600) oui partie oui2 MO 4 MO tous oui 1-8 (1200) oui oui oui