Pupil User Manual
45
PUPIL Program for User Package Interfacing and Linking User Manual PUPIL version 2.0.0 08 January 2013 Revision: User Manual v7.0f
Transcript of Pupil User Manual

PUPIL
Program for User Package Interfacing and Linking
User Manual
PUPIL version 2.0.0
08 January 2013
Revision: User Manual v7.0f

PUPIL User Manual
2
I. Disclaimer
PUPIL (Program for User Package Interface and Linking) is free software. You may redistribute it and/or modify it only under the terms of the GNU General Public License as published by the Free Software Foundation; either version 2 of the License, or (at your option) any later version.
PUPIL is distributed in the hope that it will be useful, but WITHOUT ANY WAR-RANTY, including but not limited to any implied warranty of MERCHANTABILITY or FITNESS FOR A PARTICULAR PURPOSE or NON-INFRINGEMENT. See the GNU General Public License for more details.
You should have received a copy of the GNU General Public License along with this software; if not, write to the Free Software Foundation, Inc., 51 Franklin Street, Fifth Floor, Boston, MA 02110-1301, USA.
Neither the names of the Quantum Theory Project, EEI, the University of Florida, the Universitat Politècnica de Catalunya, the National Science Foundation, nor the names of any of the copyright holders of PUPIL may be used to endorse or promote any products derived from this Software without specific, prior, written permission from at least one of the three Original Design contributors listed below.
II. Acknowledgments
Partial support from U.S. National Science Foundation ITR Grant DMR-0325553 is acknowledged with thanks. This material is based upon work also supported by the National Science Foundation under the following programs: Partnerships for Advanced Computational Infrastructure, Distributed Terascale Facility (DTF) and Terascale Extensions: Enhancements to the Extensible Terascale Facility. The authors also acknowledge the University of Florida High-Performance Computing Center and Teragrid (Grants TG-MCA05S010 and TG-CHE060072T) for providing computational resources and support.
III. Trademarks
“Gaussian 03” and “Gaussian 09” are registered trademarks of Gaussian, Inc. (340 Quinnipiac St Bldg 40, Wallingford, CT 06492, USA).
We have endeavored to be scrupulous regarding trademarks. If we have overlooked a trademark reference, we will be pleased to correct the oversight. Please contact one of the three “Original Design” contributors listed below.
IV. Contributions
Original Design, MNDO97 interface:
– Juan Torras EEI, Univ. Politècnica de Catalunya, Spain
– Erik Deumens QTP, University of Florida, USA
– Samuel B. Trickey QTP, University of Florida, USA

PUPIL User Manual
3
Amber and Gaussian 03 Interfaces – Adrian Roitberg QTP, University of Florida, USA
– Gustavo M. Seabra DQF, Universidade Federal de Pernambuco, Brazil
– Benjamin Roberts University of Auckland, New Zealand
– Zheng Fu QTP, University of Florida, USA
deMon2kInterface – Oscar Bertran EEI, Univ. Politècnica de Catalunya, Spain
– Juan Torras EEI, Univ. Politècnica de Catalunya, Spain
NWChem Interface
– Juan Torras EEI, Univ. Politècnica de Catalunya, Spain
– Oscar Bertran EEI, Univ. Politècnica de Catalunya, Spain
DL_POLY and SIESTA Interfaces – Hai-Ping Cheng QTP, University of Florida, USA
– Chao Cao Hangzhou Normal University, China
– Yao He Yunnan University, China
Domain Identifier – Krishna Muralidharan Matl. Sci. Eng., University of Arizona, USA
Continued Evolution, User Guide:
– Juan Torras EEI, Univ. Politècnica de Catalunya, Spain
– Erik Deumens QTP, University of Florida, USA
– Samuel B. Trickey QTP, University of Florida, USA
– Gustavo M. Seabra DQF, Universidade Federal de Pernambuco, Brazil
– Benjamin Roberts University of Auckland, New Zealand
V. Standard Citations
Scientific papers and presentations incorporating results obtained using PUPIL must reference the code as follows:
“PUPIL, Program for User Package Interfacing and Linking, a software product of the University of Florida Quantum Theory Project, J. Torras, E. Deumens, S.B.Trickey, H-P.Cheng, C.Cao, Y. He, K. Muralidharan, A. Roitberg, G. M. Seabra, B. P. Roberts, O. Bertran, and Z. Fu.”
Users also are requested to cite at least one of the following four papers about PUPIL:
[1] “PUPIL: A systematic approach to software integration in multi-scale simulations”, J. Torras, Y. He, C. Cao, K. Muralidharan, E. Deumens, H.-P. Cheng, and S. B. Trickey, Computer Physics Communications 177, 265-279 (2007).

PUPIL User Manual
4
[2] “Software integration in multi-scale simulations: the PUPIL system”, J. Torras, E. Deumens, and S. B. Trickey, J. Computer-Aided Materials Design, 13, 201-212 (2006).
[3] “A versatile Amber-Gaussian QM/MM interface through PUPIL”, J. Torras, G. M. Seabra, E. Deumens, S. B. Trickey, and A. E. Roitberg. J. Comput. Chem. 29, 1564-1573 (2008).
[4] “Incorporation of deMon2k as a new parallel quantum mechanical code for the PUPIL system”, O. Bertran, S. B. Trickey, and J.Torras, J. Comput. Chem. 31, 2669-2676 (2010).
PUPIL User Manual
5
VI. Table of Contents
1. INTRODUCTION ................................................................................................................. 7
2. INSTALLATION ................................................................................................................... 9
2.1 PREREQUISITES ................................................................................................................... 9 2.2 PUPIL DIRECTORY STRUCTURE ............................................................................................... 9 2.3 BUILDING THE PLATFORM‐INDEPENDENT COMPONENTS ............................................................. 12 2.4 BUILDING THE PLATFORM‐DEPENDENT COMPONENTS ............................................................... 14 2.4.1 BUILDING LOOSELY COUPLED USER PACKAGES. ........................................................................... 14 2.4.2 BUILDING TIGHTLY COUPLED USER PACKAGES ............................................................................ 14 2.4.2.1 Conditioning Source Code .............................................................................................. 15 2.4.2.2 Linking User Package Objects with PUPIL Libraries ........................................................ 15 2.5 TESTING YOUR PUPIL INSTALLATION ..................................................................................... 16
3. RUNNING SIMULATIONS ................................................................................................. 18
3.1 PREPARING SIMULATION INPUT FILES .................................................................................... 18 3.2 THE RUN SHELL SCRIPT ....................................................................................................... 18 3.3 THE TEMPLATE SHELL FOR PARALLEL EXECUTION ...................................................................... 19 3.4 OUTPUT SIMULATION FILES ................................................................................................. 20 3.4.1 MANAGER OUTPUT FILES ........................................................................................................ 20 3.4.1.1 AppServer.log ................................................................................................................. 20 3.4.1.2 output.xml ...................................................................................................................... 21 3.4.2 WORKER OUTPUT FILES .......................................................................................................... 21
4. GUI – GRAPHICAL USER INTERFACE ................................................................................. 22
4.1 SIMULATION ..................................................................................................................... 22 4.1.1 NEW/MODIFY SIMULATION. .................................................................................................... 22 4.1.2 CALCULATION UNITS SPECIFICATION. ......................................................................................... 24 4.1.2.1 Force Generation (QM) .................................................................................................. 25 4.1.2.2 Domain Identification ..................................................................................................... 26 4.1.2.2.1 Manual Region Specification. ...................................................................................... 27 4.1.2.2.2 Saving/Loading Partitioning Rules ............................................................................... 29 4.1.2.2.3 Domain Identification through an External Program .................................................. 34 4.1.2.3 QM Applications Currently Implemented ...................................................................... 35 4.1.2.4 Molecular Dynamics (MD). ............................................................................................. 38 4.1.2.5 MD Applications Currently Implemented ...................................................................... 38 4.1.2.6 Domain Identification (DI) .............................................................................................. 39 4.1.3 KEYMM/KEYQM MAPPING .................................................................................................... 39 4.1.4 SHOW SIMULATION TREE ........................................................................................................ 40 4.2 RESULTS .......................................................................................................................... 41

PUPIL User Manual
6
4.2.1 QM SIMULATION SUMMARY ................................................................................................... 41 4.2.2 EXTRACT XMOL FILE ................................................................................................................ 41
5. XML SIMULATION FILE .................................................................................................... 42
5.1 THE SIMULATIONROOT ELEMENT ..................................................................................... 42 5.1.1 THE ATOMDICTIONARY ELEMENT ........................................................................................ 42 5.1.2 THE RESIDUEDICTIONARY ELEMENT ..................................................................................... 42 5.1.3 THE KEYMM ELEMENT .......................................................................................................... 42 5.2 THE SIMULATION ELEMENT .............................................................................................. 42 5.3 EXAMPLE XML INPUT FILE ................................................................................................... 43

PUPIL User Manual
7
1. INTRODUCTION
PUPIL, Program for User Package Interfacing and Linking, is a software environment – the program – to allow developers to accomplish an increasingly important task, namely, systematic, efficient linking of several independent pieces of software or “user packages” – that have been and are actively being developed by researchers. PUPIL is general and can be used to link user packages from any scientific or engineering domain. However, it was originally developed with multi-scale simulation in materials physics and chemistry in mind, and several of the interfaces included in this release show that heritage.
This manual explains how to download, build, and install PUPIL. It also explains how to set up and perform a calculation. In this Introduction, we give a brief overview of the PUPIL architecture so you can gain a basic understanding of how PUPIL works. However, to get a thorough understanding, you should read the publications listed in the Standard Citations section above. Also, please keep in mind the Standard Citations requirement listed in the preliminary material of this manual.
The design philosophy of PUPIL is to provide an environment for the software developer of user packages to do simulations in which data and simulation control are transferred from one user package to another in a straightforward manner. A design requirement is to do this without creating a monolithic, single-threaded code. A further design requirement is that changes in any of the user packages needed to couple them to PUPIL should be small and systematic. To make such changes, one obviously must understand the user package. However, a PUPIL design objective is to avoid the need to have a complete and exhaustive understanding such as usually is required when one wants to create a combined user package from multiple, independently developed user packages.
PUPIL itself acts as a supervisor program, coordinating execution and communication between the user packages, each of which provides a calculation unit (CU). The supervisor is implemented as a distributed program with one manager and several workers, one worker for each CU. The manager and the workers communicate using the CORBA1 (Common Object Request Broker Architecture) protocol. Workers communicate with tightly coupled user packages via subroutine calls, and with loosely coupled user packages through data files. The manager and the worker codes are written in Java. The Java code for each worker calls C code in the CU through the JNI2 (Java Native Interface). The CUs, often written in Fortran or C, communicate with their workers via a PUPIL library, written in C.
Throughout this manual, we observe a few naming and typographical conventions. Commands to be typed in at a prompt are given in monospace and follow a $ sign (which denotes the shell prompt). Directory and file names that are not given as part of a command are shown in italics. The terms “coordinates” and “system coordinates” mean
1 Object Management Group, OMG Common Object Request Broker Architecture: Core Specification.Web
site:http://www.omg.org/2 Oracle,JavaNativeInterface6.0specification

PUPIL User Manual
8
coordinates of nuclei and/or residues. (Electronic coordinates are internal to quantum mechanical CUs.)

PUPIL User Manual
9
2. INSTALLATION
This chapter discusses in detail the steps needed to build and install PUPIL on your computer system. This information is most valuable to the system administrator. In addition, developers who want to interface their user packages with other user packages through PUPIL will find the information essential. Researchers who want to use PUPIL together with a set of already configured user packages do not have to read this chapter.
2.1 Prerequisites
To build and install PUPIL, the following software components must be installed on your computer system:
Java SDK 1.6 http://www.oracle.com/
technetwork/java/javase/overview/index.html
Warning: Some compilations problems have been detected using Java 1.7. We recommend the use of version 1.6 instead.
Apache Ant http://ant.apache.org
GNU make (“gmake”) http://www.gnu.org/software/make
The present release of PUPIL includes support for seven user packages. To use any one of them, you must have access to it or else obtain a licensed copy and install that package on your computer system. We strongly recommend testing each user package by itself before using it with PUPIL.
User Packages:
– Amber v12 http://ambermd.org/
– deMon2k v2.4 http://www.demon-software.com/
– DL_CLASS v1.9 http://www.ccp5.ac.uk/DL_POLY_CLASSIC/
– Gaussian 03 or 09 http://www.gaussian.com/
– MNDO97 (Walter Thiel, v 5.0 April 1998)
– NWChem 6.1.1 http://www.emsl.pnl.gov/docs/nwchem/
– SIESTA v3.1 http://www.icmab.es/siesta/
To view molecular and material structures in its graphical user interface, PUPIL uses the Jmol tool, which is included with PUPIL as a precompiled jar library.
Jmol: http://jmol.sourceforge.net
2.2 PUPIL Directory Structure
Download the latest release of PUPIL from http://pupil.sourceforge.net. Extract all files from the .tar file. In the resulting directory, you will find the following subdirectories:
doc/ PUPIL manual and JavaDoc of class diagram
jmol/ Directory containing the precompiled Jmol library
scripts/ Directory containing the shell scripts needed to run PUPIL

PUPIL User Manual
10
src/ Source code
tests/ Directory containing tests of the PUPIL system and some binaries
You also will find the following files:
build.xml.head and build.xml.tail: Two files used, along with information garnered at configure time, to prepare build.xml, the build file (similar to a Makefile) required by Apache Ant
configure: A script that will prepare the build.xml and various Makefiles appropriately for your system
Makefile.in: Used by configure to build a Makefile
Inside the directories mentioned above, you will find the following files:
src/ directory:
– pupil.idl
IDL file for a Java Development Kit (JDK) CORBA compiler
– pupil-interface/
Directory which contains the PUPIL machine-dependent code, including source code for the C interface (JNI), source code for various “stub” programs that are used primarily for testing and development, source code for PUPIL utility programs, and patches for CUs themselves.
– jmol/
Directory which contains the parts of the Jmol code that have been modified to work with PUPIL. (Note: To save space, the full Jmol source code is not included with PUPIL. Developers who wish to rebuild the JmolBean.jar supplied with PUPIL will need to obtain the remainder of the Jmol source code separately.)
– PUPIL/
Directory which contains the Java source code for the PUPIL manager and workers.
tests/ directory:
– sio2/
Simple tests using silicon dioxide; these test the MD programs stubMD and DL_POLY, and the QM programs stubQM, DeMon2k, Gaussian 03, MNDO97, NWChem, and Siesta.
– ala-di/
Simple test of alanine dipeptide QM/MD in explicit water; this tests the Amber MD program and the QM programs stubQM, DeMon2k, Gaussian 03, Gaussian 09, and NWChem.

PUPIL User Manual
11
– ala3/
Simple link atom test for a system consisting of a simple peptide, ACE-(ALA)3-NME, in explicit water. This test uses the Amber MD program and the QM programs stubQM, Gaussian 03, Gaussian 09, and NWChem.
– ala3-forces/
As with ala3 (see above), this test uses the Amber MD program and the QM programs Gaussian 03 and Gaussian 09. It is a much longer test that uses the Amber debugging routines to compare and contrast forces computed by analytical differentiation and those computed numerically.
– ubiquitin/
A test for the GUI. It contains a single *.xml input file (e.g., data.xml) which, when loaded into the GUI and written out again, should yield the same result (with exceptions for trivial re-ordering, e.g., of hash table entries).
– Many scripts, Makefiles, etc., which run most tests based on the contents of the directories described above. Of particular importance are the files pupil-run-test.sh, a piece of shell code that should be included in any new test script, and Makefile.in, from which a Makefile is generated when configure is run in the parent directory.
scripts/ directory:
(NOTE: The files in the scripts/ directory are copied into $PUPIL_PATH/bin at installation time)
– pupil-clean.sh
A shell script to remove output and temporary files from a PUPIL execution directory. Since PUPIL uses standard names for its output, in most cases this script should be usable as is.
– pupil-gui
A script to open the PUPIL GUI.
– pupil-run.sh
A template shell script to execute a PUPIL calculation. This shell script must be modified by the user for any particular calculation before execution.
– pupil_paraRun.sh
A template shell script for use of an MPI-compatible (OpenMPI) QM program with PUPIL.
– pupil_paraRun_demon2k.sh
A modification of the template shell script pupil_paraRun.sh to be used specifically with the deMon2k package.
– pupil-timings.sh
A script to extract timing information from a PUPIL run.
– pcforcempi.sh

PUPIL User Manual
12
Specific template to start the parallel pcforce program, external to PUPIL package, in a general OpenMPI environment. (used only with NWChem and deMon2k QM programs, see §4.1.2.3)
Throughout this manual, we assume that the environment variable PUPIL_PATH contains the directory into which PUPIL’s binaries and libraries will be installed. This variable can be set in shells such as sh or bash by the following command, which can also be added to your .bashrc file:
$ export PUPIL_PATH=/path/to/pupil
where /path/to/pupil is replaced by the path to the directory in which PUPIL is installed (such as /usr/local/pupil-2.0.0 or /opt/pupil-2.0.0).
2.3 Building the Platform-independent Components
The graphical user interface (GUI) (see below) and PUPIL Supervisor are implemented in Java. Compilation is done using ant, which is called using make.
1. Extract the PUPIL code from the archive.
$ tar -xjvf pupil-2.0.0.tar.bz2
2. Go into the resulting directory.
$ cd pupil-2.0.0
3. Configure PUPIL:
$ ./configure
When running configure, there are many options at your disposal to refine the configuration. Perhaps the most notable of these are --prefix, with which you can change the install location (default: /usr/local); the --with-[executable] options, which allow you to specify where the calculation unit executables will be located (and can be used even if the executables, or the special versions needed by PUPIL, are not yet built); and environment variables such as CC and FC, allowing choice of compiler. Running the command ./configure --help will show the available options.
4. Build the PUPIL binaries and libraries:
$ make
5. Run some preliminary tests (stubs and loosely coupled user packages):
$ make check
Also, you can choose to split serial and parallel preliminary tests. So, to execute all QM serial and SMP execution programs, you should perform the following command:
$ make check-serial
In addition, for all the preliminary tests using a QM program with parallel execution (MPI environment), you should perform the command:
$ make check-parallel
6. Install the PUPIL binaries and libraries:

PUPIL User Manual
13
$ make install
Two Java jar files will be created and stored in the EPREFIX/lib directory:
– PupilServer.jar
This has the PUPIL supervisor code and the shared PUPIL worker codes to be used in any simulation. See Chapter 3 for execution details.
– PupilClient.jar
The graphical user interface. See Chapter 4 for execution details.
Three shared libraries also will be placed in the same directory:
– libPUPIL.so
Main Interface between User Packages and the Java PUPIL supervisor.
– libPUPILTime.so
Library with routines to compute timing.
– libPUPILBlind.so
Library with stub functions. If a particular User Package does not define certain functions (usually because it does not need them), the stub library will provide a dummy replacement, so that the linking step can complete successfully.
Note: When linking any program to PUPIL, libPUPILBlind.so always should be placed at the end of the link line.
Four binaries also will be made. Three of them are stubs to test the functionality of the manager in the simulation, each corresponding to one of the three roles that any application can play in a multi-scale simulation. The fourth, pcforce (see §4.1.2.3), is a parallel MPI binary, needed with some QM user packages, that calculates a force correction to classical particles as a result of the QM region. All of them will be installed in the EPREFIX/bin directory. The four binaries are:
stubMD Simulates the calls to/from the PUPIL library by a Molecular Dynamics Calculation Unit for a few steps.
stubDI Simulates the calls to/from the PUPIL library by a Domain Identification Unit.
stubQM Simulates the calls to/from the PUPIL library by a Quantum Mechanics Calculation Unit.
pcforce A utility provided with PUPIL (but external to PUPIL per se) to calculate the forces upon the embedding point charges due to the interaction with the electron density of the quantum zone.
A JavaDoc describing the PUPIL conceptual model (data structures and their relationships) also will be created in javadoc/index.html.
7. Add the PUPIL library path to the $LD_LIBRARY_PATH environment variable:

PUPIL User Manual
14
$ export LD_LIBRARY_PATH=$LD_LIBRARY_PATH\:$PUPIL_PATH/lib
Note: On some platforms it may be necessary to specify the Java libraries in the LD_LIBRARY_PATH as well, for example:
$ export LD_LIBRARY_PATH$JAVA_HOME/jre/lib:$JAVA_HOME/jre/lib/$PROC:$JAVA_HOME/jre/lib/$PROC/server:$LD_LIBRARY_PATH
where $JAVA_HOME is a variable with the full path to the Java installation (or equivalent) and $PROC is the type of processor in your computer. Check your Java installation for specific details.
2.4 Building the Platform-dependent Components
The procedure to build the platform-dependent PUPIL binaries and libraries is described in this section. The steps are listed in the order in which they should be executed.
2.4.1 Building Loosely Coupled User Packages.
Some QM User Packages run as independent executables called by the PUPIL system. These packages do not require any source-code modification or recompilation to work with PUPIL. This mode of CU operation is called Start-Stop (SS), because a new instance of the QM CU is executed at each force evaluation. Loosely coupled CUs should be compiled by themselves as usual, following their own instructions. Their locations can be made known to PUPIL by means of the --with-[CU] options at configure time (see above). For testing purposes, PUPIL will expect to find any CU whose path is not specified in this way in $PUPIL_PATH/bin, though a symbolic link there is sufficient.
Currently, the User Packages that run in Start-Stop mode with PUPIL are:
– MNDO97
– SIESTA v3.1
– Gaussian 03
– Gaussian 09
– deMon2k v2.4
– NWChem v6.1.1
Some User Packages require extra data files, such as basis set libraries. (An example is the pair of files AUXIS and BASIS used by deMon2k. To run preliminary tests of the deMon2k program, you should set the DEMON2K_AUXIS and DEMON2K_BASIS environment variables with the correct AUXIS and BASIS paths, respectively.) These files must be visible at the location specified for that User Package executable, on every computer where the package will be run by PUPIL. These data files do not need to reside inside the $PUPIL_PATH tree.
2.4.2 Building Tightly Coupled User Packages
Tightly coupled User Packages require source-code modification and linking with the PUPIL libraries to be used with the PUPIL interface. Three steps are required to build such tightly coupled User Packages: Conditioning the source code (see next Subsection), compiling PUPIL libraries, and finally, building the new tightly coupled User Package binaries linked to the new PUPIL libraries compiled in the preceding step.

PUPIL User Manual
15
2.4.2.1 Conditioning Source Code
The User Packages that have an interface to interact directly with the PUPIL system should be conditioned (i.e., modified) before their compilation. The exact conditioning process varies among User Packages.
– DL_POLY and SIESTA
Source code patches for these programs are distributed with PUPIL in a separate file (dlpoly_siesta_PUPILpatches-v2_0.tar.gz). The steps to patch the original source code are the following:
1. Download source code for the User Package to build the new Calculation Unit (DL_POLY or SIESTA) to plug into PUPIL. This source code will be modified during the compilation dl_class_1.9 siesta-3.1
2. If not already downloaded, download the patch file from http://pupil.sourceforge.net.
3. Decompress and extract the patch file: tar -xvzf dlpoly_siesta_PUPILpatches-v2_0.tar.gz
4. Change to the extracted patch directory and edit the patching shells *.sh, as follows.
Add the correct directory in the configuration section of the script. This directory corresponds to the place where the source code of the User Package to be patched with the PUPIL Interface is located. (See the README file.)
5. Execute the patching shell from this directory
The patches currently tested with PUPIL package correspond to DL_CLASSIC v1.9 and SIESTA v3.1.
– Amber, versions 10,11, and 12
Up through Amber version 12, the source code already includes the modifications necessary to interface with the PUPIL library, so further conditioning is not necessary to support use with PUPIL. See §2.4.2.2 for instructions on compiling and linking the “sander” binary.
2.4.2.2 Linking User Package Objects with PUPIL Libraries
All User Packages (CUs) tightly coupled with PUPIL must be linked with the PUPIL libraries previously compiled and the platform-dependent Java libraries (see §2.3). The environment variables LD_LIBRARY_PATH, PUPIL_PATH, and JAVA_HOME also must be set.
– DL_POLY and SIESTA
1. Change to the source code directory of the already patched packages. The patched source code contains a Makefile already prepared for a default machine but a sanity check is strongly recommended. Make sure you have the

PUPIL User Manual
16
correct Makefile, and the PUPIL libraries have been added correctly (see §2.3 points 6 and 7).
2. Compile and copy the binaries in the directory specified in the configuration step of PUPIL. (see §2.3 point 3, using --prefix, and --with-
[executable] options):
– Amber, versions 10, 11, and 12
Before you continue, make sure you have applied all the bug fixes for Amber (available from http://ambermd.org/bugfixes), and that you can build and successfully test a fully functioning stand-alone (serial) version of Amber from the patched code. See the Amber manual for details.
1. Change to the $AMBERHOME/src/sander/ directory:
$ cd $AMBERHOME/src/sander
2. Compile the updated sander code and link it with PUPIL libraries in order to incorporate the PUPIL interface, as follows:
$ make sander.PUPIL
2.5 Testing Your PUPIL Installation
To test the compiled PUPIL libraries, CU binaries, and the Java supervisor, execute the Makefile located in $PUPIL_PATH/tests. All the binaries, or symbolic links to them, must be present in the $PUPIL_PATH/bin directory following the naming convention used above. This Makefile is used for several tests, e.g. the SiO2 molecule, alanine dipeptide, and alanin tripeptide are run using all the possible combinations of the stub, MNDO97, SIESTA, Gaussian 03, Gaussian 09, deMon2k, and NWChem as QM Calculation Units and the stub, Amber, and DL POLY as the MD Calculation Units (Amber is not included on the testing with the SiO2 molecule). It is assumed that mndo, dlpoly, siesta, g03, g09, demon2k, nwchem, and all the stubs are stored in the $PUPIL_PATH/bin directory. Any deviation from this name convention must be accounted for directly in the Makefile in the $PUPIL_PATH/tests directory.
1. In the PUPIL source directory, run the following command:
$ make check
This command runs a number of tests. It skips combinations for which the calculation units cannot be found. For other combinations, it will perform a short PUPIL calculation and compare the result against a saved file, reporting a failure if the differences are not of an acceptable type.
Note: Small numerical differences between the energy values in the AppServer.log file created during the simulation and those in the reference AppServer.log.save file can result in false reports of failures. Check the real differences between those files, which are stored in the simulation directory as *_diff.txt, to avoid confusion with false errors.

PUPIL User Manual
17
Also, please notice that some differences have been observed in the number of calls for forces calculations from the Amber program (PUPIL calls) depending on the Amber version. Of course, that gives a different number of simulation steps reported in the AppServer.log file between Amber versions v11 and v12. Results from v12 have an extra iteration at the last MD step which also can lead to artificial failure reports.

PUPIL User Manual
18
3. RUNNING SIMULATIONS
3.1 Preparing Simulation Input Files
The PUPIL system allows the user to link all the calculation units (CUs) easily, but it is the user’s responsibility to prepare all the input files for each CU so that each one will work correctly within the simulation. The PUPIL manager does not check the validity of the input files for the individual CUs. Please refer to the respective User Package manuals for instructions on input file preparation.
The coordinates of the molecular system, cluster, or extended system, as well as the classical type of each atom, are specified in the input files for the Molecular Dynamics CU. Different potentials for the same element can be represented as different atom types. For example, in a simulation of silica with water we could have two kinds of classical Oxygen atom, Oxygen from silica and Oxygen from water.
The input file for the QM CU supplies the general quantum variables except for the system coordinates. The quantum types of the particles also are obtained from this input file. The PUPIL system parses this file to record the different quantum particles that the user has defined in the multi-scale simulation. Following the same example of silica and water, we could assign different basis sets to the Oxygen atoms belonging to the silica and to those belonging to water. Beware: if an element of the periodic table occurs two or more times in ways that differ in any respect, then each different occurrence must have a unique atom name. For example, two Oxygen atoms with different basis sets must be named differently.
With the two kinds of particles, classical and quantum, recorded, PUPIL creates a default mapping between them, indexed by the atomic number. The default mapping can be modified using the PUPIL GUI (see §4.1.3).
3.2 The Run Shell Script
The pupil-run.sh script included in this package is made to build the simulation environment by starting the PUPIL supervisor, and all required CUs which are specified in the input XML file used by PUPIL to run the simulation (e.g., file.xml). Construction of this file is discussed in Section 4 and its structure is discussed in Section 5. Unlike in previous versions of PUPIL, this XML file may have any name. The PUPIL run script can be used with the following syntax:
pupil-run.sh file.xml >&2
The script has several sections that are described below in the order that they appear:
– PBS directives
PUPIL is designed to work with a cluster queue system. This section has PBS (Portable Batch System) directives to submit the job using a PBS queue manager. The user must modify this section to comply with local queue management usage requirements and practices.

PUPIL User Manual
19
– Configuration variables
In this section some environment variables are set, and after others are obtained from the operating system. Execution of CORBA Name Server
To exchange information between the different CUs working at the same time in the simulation, a CORBA Name Server is started from the Java Development Kit (JDK) Package. The script will try to start the nameserver on an unused port on the machine that runs the script, starting at port 3000 and trying up to port 3010. If no unused port can be found within this range, PUPIL will fail. Modify the script if local port assignments are the cause of this failure.
– Execution of Application Server
The PUPIL supervisor is started; it runs the desired CUs.
3.3 The Template Shell for Parallel Execution
Prior to starting any parallel worker (QM or MD), the parallel environment must be initiated in accordance with local hardware and software cluster characteristics and policies. A startup shell script is generated from the PUPIL core following a user-provided shell script template which incorporates those local cluster characteristics and policies. An example would be the MPI environment commands to get the worker running in the local hardware environment and the execution syntax for the corresponding CU.
The PUPIL Manager creates a startup shell script to initialize the parallel code based on a template shell given and/or modified by the user (pupil_paraRun.sh). The way to accommodate the given template shell for parallel execution is via environment variables which values are provided from the PUPIL Manager; it knows the correct values for them. The user should place these environment variables properly inside the template in order to get a startup parallel shell script that is correct for the user's computing environment. Currently supported environment variables for the parallel shell build are the following:
PUPIL_WORKPATH Directory where the parallel CU will be executed by default.
PUPIL_RESOURCES List of resources (processors or nodes) to be used in the upcoming parallel CU execution
PUPIL_EXE Line command to start the parallel program. Includes all the PUPIL additions to initiate the CU and JVM.
PUPIL_FILE_IN Input file for the parallel CU execution.
PUPIL_FILE_OUT Output file from the parallel CU.
PUPIL_FILE_ERR File where all the error messages from the parallel CU are to be stored.

PUPIL User Manual
20
Moreover, three template shells for parallel execution are provided in the directory $PUPIL_PATH/scripts.
- pupil_paraRun.sh
General template that starts a general OpenMPI environment to run a general PUPIL Worker properly (used with the NWChem CU).
- Pupil_paraRun_demon2k.sh
Specific template to start the parallel deMon2k CU execution in a general OpenMPI environment.
- pcforcempi.sh
Specific template to start the parallel pcforce program in a general OpenMPI environment (see §4.1.2.3).
The user must NOT change the value of the general environment PUPIL variables for the template, since doing so would result in erroneous behavior of the simulation package
3.4 Output Simulation Files
3.4.1 Manager Output Files
There are two types of files that consolidate all the outputs from PUPIL simulations, AppServer.log and the output files from distributed CUs.
3.4.1.1 AppServer.log
This file is written by the PUPIL Manager. All the CUs exchange information and events with the Manager, which is in charge of writing them in this log file. There are four different levels of output detail:
-1 Only errors are printed.
0 Normal comments and errors are printed (default level).
5 Debugging information, except for system coordinates, is printed.
10 All coordinates and debugging information are printed.
Every entry in the log file has the origin of the message enclosed in brackets, [ ], at the beginning of the line. The most common sources of comment entries are the following:
– CoordinatesServer
This is the general MD worker, which receives the classical system coordinates and generates the QM system coordinates.
– CoordIntfc
This Java class implements the CORBA server for the CoordinatesServer. Usually, CoordIntfc receives the quantum forces from the general QM worker and the quantum zone from the General DI worker.

PUPIL User Manual
21
– ForcesServer
This is the general CycleQM worker. It receives the quantum forces from the quantum packages through the PUPIL library and sends those forces to CoordIntfc.
– ForcesIntfc
This Java class implements the CORBA server for ForcesServer. It receives the quantum system coordinates and puts them into the cycleQM package through the PUPIL library.
– DomainsServer
This is the general DI worker. It receives the atom numbers that belong to the quantum zone from the DI packages through the PUPIL library and sends that information to CoordIntfc
– DomainsIntfc
This Java class implements the CORBA server for DomainsIntfc. It receives the classical particle coordinates, atom types, and other variables to pass through the PUPIL library to the program that will determine the quantum domain.
– PUPIL.Domain
These specialized Java classes from the System Domain are responsible for any specific CU behavior, such as THMNDOQMJob, SiestaQMJob, etc. See References [1] and [2] listed in the Standard Citations.
3.4.1.2 output.xml
This file has a structure similar to that of the simulation XML input file (*.xml, see Chapter 5) but with all the intermediate results obtained in the simulation. The user decides how many steps will be taken before writing a new record to output.xml. This output file is useful for following the multi-scale simulation. However, the output can become quite large when the physical system has a large number of particles. If the number of particles is very large, writing this file may exceed available memory, causing PUPIL to crash. The memory resources are monitored in the AppServer.log file. To avoid crashing PUPIL when the physical system has a very large number of particles, the user may have to consult whatever intermediate files the CU may provide to analyze the simulation results instead of adding new intermediate steps to be stored in the output.xml file (see §4.1.2.4).
3.4.2 Worker Output Files
The standard output and standard error channels for all general workers are redirected to files (one standard output file and one standard error file for each worker). All the normal output from the workers is contained within these files. Errors that occurred in any worker can be monitored in these files as well as in the general log file. The debug messages from the worker–PUPIL interfaces and the PUPIL C libraries also may be found in these files.

PUPIL User Manual
22
4. GUI – Graphical User Interface
PUPIL’s graphical user interface helps the user to build the input file with a XML format (e.g., data.xml) for a multi-scale simulation. This chapter explains the GUI options.
The GUI is started using the following command:
$ pupil-gui
4.1 Simulation
The simulation input consists of a brief description of the whole simulation task and the information necessary to run each Calculation Unit. All this information will be stored in memory in the same way as in the XML input file (e.g., data.xml) created to run the simulation (see Chapter 5).
4.1.1 New/Modify Simulation.
In the first step, a new simulation must be created via the Simulation → New Simulation Input menu option. The following fields must be completed:
– Simulation Name
A user-defined name for this simulation.
Figure 1. PUPIL GUI screen shot which shows the state immediately after loading the QM CalculationUnit files. In this example, Gaussian03 is being used as the QM CU.

PUPIL User Manual
23
– Base Directory
This is the path of the working directory in the file system where PUPIL will create the output and temporary files. A period (decimal point or full stop, “.”) may be used to indicate the directory in which the initial shell script (pupil-run.sh) is executed.
– Log Level
Shows the level of printing from the PUPIL system during the simulation. Three possibilities are accessible from the GUI:
– Without log printing: Only errors will be printed.
– Normal log printing: Basic output will be printed, allowing the user to follow the simulation’s progress.
– Debug log printing: Detailed information about the data (except for particle coordinates) from each worker will be printed at each simulation step.
Though not accessible from the GUI, there is a fourth, extremely verbose log level which prints the coordinates of each atom at every step. This level may be accessed by giving the optPrint element in the input XML file (*.xml; see Chapter 5 for a brief description of this file) a value of 10.
– Max. number of Java Threads
For shared-memory (SMP) machines, this input allows one to specify the number of threads to be created by the Java code, and with which the PUPIL Manager will work in parallel.
Version Note: At present, no calculation takes advantage of this facility and it has been deactivated. In the past, the calculation of forces over point charge used Java threads (now done with pcforce and Gaussian). Extension of their use to the rest of the PUPIL core is under consideration for a future major release.
– Java Memory
Each PUPIL worker creates a Java Virtual Machine (JVM), which is started with an initial amount of memory (heap). The Java heap is where the objects of a Java program live. It is a repository for current active java objects, dead objects, and free memory. When any of those objects no longer can be reached from any pointer in the running program, it is considered “garbage” and ready to be cleaned. Sometimes, depending on system size, that memory could be insufficient and more memory should be set. The JVM has three parameters to manage the memory assigned to each java program.
- Initial memory
Figure 2. New simulation dialogue box

PUPIL User Manual
24
This is the initial and minimum size of the heap (MB). Some JVM developers recommend that this value be set to the same size as the maximum heap size.
- Maximum memory
The default maximum heap size is a dynamic value determined by the amount of free physical memory in the computer system. A good practice in order to avoid paging is to limit the maximum heap size. This value will depend on the size of the system under simulation and the available computer resources. Usually the value should be less than 75% of physical memory in the computer system.
- Stack size
Each thread in the JVM gets a stack. The number of possible threads is limited by the stack size. If the stack size is too big you will run out of memory as each thread is allocated more memory than it needs. However, for simulating big systems the stack size should be increased in order to avoid memory problems. PUPIL by default requests 16 MB of stack space, which should be ample for most situations.
4.1.2 Calculation Units specification.
The main GUI panel (Figure 1) is divided in two sections. On the left is a list of the CUs that are supported by the PUPIL system.
Note: CUs for which support is under development may show in the panel but not be fully supported. Also, CUs will be listed even if not installed at your site.
On the right is the main window for the Jmol application (http://jmol.sourceforge.net) that helps visualize the classical and quantum system read by PUPIL from the input files discussed in §3.1. JMol has been embedded into the PUPIL GUI.
The CU panel is divided into three sections, one for each role that a CU can play in the PUPIL multi-scale simulation.
You must specify one Molecular Dynamics (MD), one Force Generation (QM), and one Domain Identification method for the simulation. All CUs involving MD and QM methods have a common set of parameters to be assigned when selected:
– Executable
The user specifies the path and name of the binary that will be associated with the CU. PUPIL will make a copy of the binary within the working directory for the simulation; this copy will be executed during the simulation.
– Run application in parallel using MPI
This option controls whether this particular calculation unit is to be run in parallel using MPI. It should not be used for CUs that rely on shared-memory (SMP) processing.

PUPIL User Manual
25
– Number of MPI tasks to run
This option is available only if a parallel run using MPI has been requested (see above). It specifies the number of MPI processors associated with the CU. If “Run application in parallel using MPI” is enabled, this value should be an integer greater than 1. A shell script template, pupil_paraRun.sh (from the PUPIL software), is used to build a proper script to start the QM MPI calculation. The template is found in the $PUPIL_PATH/scripts/ directory. At each execution, PUPIL enters appropriate values for all the internal environment variables contained in the template. Prior to this, however, the user must:
1. Edit the template (pupil_paraRun.sh) to match the MPI package installed on the target system, and
2. Copy the result into the simulation directory where the PUPIL starting run shell script (pupil-run.sh) has been placed.
4.1.2.1 Force Generation (QM)
To obtain the quantum forces, some common parameters must be specified for each CU involved in the simulation. This section is devoted to those parameters that are general for any QM CU only. Later, the specific parameters for each specific CU are given; see §4.1.2.3.
– Save output and error files at this interval (steps)
This option instructs PUPIL to save the information written by the QM CU to standard output and standard error every so many steps. If this option is left unchecked, the QM CU output will be overwritten at the start of each new QM force evaluation.
– Use Periodic Boundaries
This option is needed only if the classical system has 3D periodicity in a parallelepiped or cubic MD cell. Only orthogonal unit cell vectors are allowed so far (no hexagonal unit cells). If this option is selected, PUPIL will translate the atomic coordinates using the periodicity of the system, such that the quantum zone ends up at the center of the unit cell for the QM calculation.
Version Note: Full periodic boundary conditions are not implemented in the present release of PUPIL.
– Use cyclic QM (through CORBA)
Warning! This option applies only to tightly coupled QM packages. If this option is
Figure 3. Gaussian QM specification

PUPIL User Manual
26
checked and the binary does not have the corresponding cycleQM behavior compiled with a proper PUPIL interface, the simulation will fail in a deadlock.
This option tells the PUPIL Manager that the current CU will have the CycleQM behavior (see references [1] and [2] in Standard Citations. Section V). The binary will be put into execution once, then used repeatedly. It will be restarted only when the quantum zone changes.
– Chain Rule for pairs of link atoms
If this option is checked and the simulation has link atoms in the embedding zone (see Embedding Rules, below), the Chain Rule will be applied to every pair of link atoms to distribute the force over the link associated with them.
– QZ-PC correction for PC
Most QM user packages do not compute the force exerted by the QM region on the surrounding classical atoms (which typically are represented to the QM program as fixed point charges). If this option is checked and the simulation has point charges in the embedding zone (see Embedding Rules), two different ways to obtain those forces will be used, depending upon which CU is used to perform the simulation. The Gaussian CU obtains those forces through the field at each point charge, whereas deMon2K and NWChem obtain them through a simple integration between the point charges and the electronic density calculated over the system volume (see reference [3] in Standard Citations. Section V). This approximation attempts to calculate and correct this force component, modifying the forces on the classical atoms associated with the point charges.
– Total charge of embedding region
Introduction of a link atom in the quantum zone can cause a charge neutrality violation. To correct this, PUPIL will adjust the total charge of the embedding region to the current value introduced by the user.
Note: the charge introduced in this box is the net charge of the embedding (classical) region only.
4.1.2.2 Domain Identification
This module is used to control QM/MM partitioning, where the inner QM region and the external MM (classical) region are set. Currently, two kinds of Domain Identification are allowed: Manual Region Specification and Domain Identification through an External Program. The former is required to specify manually the QM region, the link-pairs connecting the quantum and classical regions, and the embedding particles used as point charges.
When no embedding rules are specified and no external DI program is running, the entire classical system will be considered as a single quantum zone and will be mapped following the default mapping rules between the classical and quantum kinds of atoms (see §4.1.3), based on atomic numbers.

PUPIL User Manual
27
4.1.2.2.1 Manual Region Specification.
This dialogue box (Figure 4) provides the user with the option to assign, by means of a specific set of rules, a fixed quantum zone and its embedding. The dialogue box allows the user to distinguish among three Regions (or Zones), namely the QUANTUM, CLASSICAL, and STATIC-CHARGE regions. Each particle must be assigned to one of these three regions. Also, five different check-boxes allow the user to define all atom/residues belonging to any of the three regions:
- Specification of the QM Region: Use this box to assign specific atoms or residues directly to the QM region.
- Specification of the MM Region: Use this box to assign specific atoms or residues directly to the MM (classical) or static charge regions.
- Specification of the Fixed Link Pairs: Use this box for direct assignment of link-pairs atoms that connect quantum and classical regions. The link-pairs defined at this point will be kept fixed during all the simulation.
- Specification of Distance-Based Link Pairs: Use this box to define link-pairs based on distances between quantum and classical atoms. This assignment will be re-evaluated at each simulation step.
- Specification of Distance-Based Residues: Use this box to assign residues outside the QM region to the MM or static charge region using criteria of distance from any particle in the QM region.
The PUPIL GUI dialogue allows the user to apply four kinds of basic rules to atoms and/or residues:
– Direct atom/residue type assignment
This rule is used to define a relationship between a classical particle (identified by its atom number) and the particle associated with it in the quantum calculation (i.e., a point charge or a full QM atom), on a particle-by-particle basis. The user must specify here all particles that will not be accounted for correctly by any of the more general rules. This definition may assign the atom as a quantum atom or as a member of the first embedding layer, referred to as CLASSICAL on the dialogue boxes, or the second embedding layer, referred to as STATIC-CHARGE (but no farther). Also, the particle must be given a quantum-atom type or specified as a point charge.
Residues with both quantum and classical parts cannot be fully assigned to either the QM zone (“QUANTUM”) or either of the two classical zones (“CLASSICAL”, “STATIC-CHARGE”) defined below. As a result, all atoms in these residues, except the classical counterparts of possible link atoms, must be specified individually here, and assigned to the corresponding point charge or QM atom.
When the MD CU has an option to describe sets of atoms, (e.g., “molecules” in DL_POLY or “residues” in AMBER), PUPIL groups those sets as residues. A

PUPIL User Manual
28
direct relationship is established by default between any classical residue (defined by its residue number) and its associated quantum particles. The default mapping may be overridden by the user to provide rules for mapping between the classical atom types belonging to a specific residue and the corresponding quantum atom types (see §4.1.3).
Atom/residue selection. In all cases the user can choose between selecting a set of atoms (residues) by mean of a range specification, or the user can choose a single atom (residue) to be assigned at any of the QM/MM partitioning region. The range syntax has to be specified with an “hyphen” between the minimum and the maximum of involved atom numbers (residue numbers).
In the Ubiquitin example shown (Figure 4), all particles selected by either atom range and/or residue range, have a default QM type or MM type. Only in the case of a single-atom assignment is it mandatory to specify the corresponding mapping type (QM or MM type).
– Fixed Link Pairs.
This rule allows specification of fixed link-pairs to the quantum zone during the whole simulation. Link pairs are necessary when covalent bonding is defined between atoms of different regions. The user must identify the atom in the quantum region (QM-host) and its counterpart in the classical region (MM-host). The link-atom is the atom with which to replace the MM-host in the quantum calculation in order to saturate dangling bonds. Also, the user must assign a new bond distance and new QM type for the defined link atom.
For example, the quantum zone depicted in Figure 1 (right hand side), representing the quantum region of the Ubiquitin simulation, shows two closing residues. Each of those residues is connected to two other residues in the protein, with the cycle of the P19 residue being cut. Thus, there are six link atoms in total. The screenshot in Figure 4 shows the assignment of those six link atoms. Since the residues connected to the quantum zone are neither completely quantum nor completely classical, all remaining atoms of those residues must be specified in the upper left-hand area of the dialogue box (Specification of QM Region). This distinguishes them from the remaining classical atoms, which will be assigned later in the right-hand area of the dialogue box (Specification of MM Region). All atoms belonging to this residue that are not assigned yet will be mapped as static point charges in the embedding region of the QM/MM partition.
– Distance-Based Link Pairs.
This rule has a different philosophy from that of the fixed link-pair assignment rule. The distance-based rule will assign all particles as link-atoms that have a specific type (MM type) and are located inside a user-defined shell (“neighborhood”) around the nearest, already-assigned QM zone. Thus, all the classical particles that

PUPIL User Manual
29
(i) have a specific atom type defined in the “MM atom type” column, and
(ii) are separated from any particle belonging to the quantum region by a distance within the limits defined by the “rMin” and “rMax” column,
will be assigned as link-atoms together with their closest QM-host, and will substitute the MM-host in the quantum calculation with the new “Link QM type” defined on the fourth column. Also, the user must assign a new bond distance between the defined link-pair.
– Neighboring residue type assignment.
This is a more general rule to map classical particles belonging to a specific residue to quantum particles based on the distance between the residue center of mass and the nearest, already-assigned quantum particle. This field can be used to assign any particles that have not yet been defined in the previous boxes. The assignment is done by residue type and distance. Thus, any particle that:
(i) belongs to one of the residue types listed in the “MM residue type”, and
(ii) falls within the distance range defined by “rMin” and “rMax”, and
(iii) has not been defined in any of the previous rules,
is assigned to the embedding zone designated in the “zone” column.
4.1.2.2.2 Saving/Loading Partitioning Rules
This new capability allows the user to save partitioning rules to an external file in order to create, transfer, and edit them easily between different simulations.
Figure 4. The dialogue box for specifying the embedding rules and assigning atoms to classical orquantum zones.

PUPIL User Manual
30
- Loading rules set.
To load a set of rules into the Partitioning Rules Editor dialogue box, just open the file by clicking the “Load” button and look for a txt file format containing the new set of rules. When the new set of embedding rules is loaded, the existing rules in the Partitioning Rules Editor dialogue box are flushed and replaced by the new set. The changes will become permanent after accepting the dialogue box button.
- Saving rules set.
To save the rules in the current Partitioning Rules Editor dialogue box, click the “Save” button, and a new txt file will be stored with the name and in the location that the user chooses.
- Editing an external file of partitioning rules.
The partitioning rules file has a txt format, and can be created and edited outside the PUPIL GUI. The file structure is made by grouping partitioning rules in the three allowed zones for PUPIL simulations: quantum particles (QPR), classical particles (CPR), and static charge particles (SCR). The blocks of rules are defined by the directive #block … #endblock:
#block “Name_of_partition”
#endblock
Allowed partition names: QPR, CPR, and SCR.
It is mandatory that any partition rules file must include definitions of all three partition rule blocks, independent of whether any block is empty or not.
There are four types of partitioning rules that can be defined inside the above-cited blocks of rules.
Set Rules (SETR)
This rule allows specification of a set of UNITs (ATOM or RESIDUE) belonging to one of the partition zones: quantum, classical, and static charges
Syntax:
SETR {ATOM | RESIDUE} ini_unit_number[- end_unit_number]
The ATOM or RESIDUE units from ini_unit_number through the end_unit_number (the latter being optional) will be assigned to the specific

PUPIL User Manual
31
block partition in which this rule is defined. The new type of particle will be assigned by default. So, on the QPR block only QM_types are considered, whereas on the CPR and SCR blocks, only MM_types (as point charges) are considered.
Examples:
SETR ATOM 300-302
SETR RESIDUE 57
Syntax:
SETR ATOM unit_number {QM_type | MM_type}
A specific ATOM unit is allowed to be assigned as a given QM_type (quantum zone only) or MM_type (as a new static charge on the embedding zone).
Examples:
#block QPR
SETR ATOM 902 C
#endblock
#block CPR
SETR ATOM 310 P19.HB2
SETR ATOM 885 L56.N
#endblock
where C references a quantum type of particle already defined in the input file of the quantum mechanics program and both P19.HB2 and L56.N are classical particles (residue.atom_name) defined from the input file of the molecular dynamics program.
Fixed Link Pair Rules (FLPR)
This rule allows specification of a link pair that connects the quantum and classical zones and is fixed during the whole simulation. This is the most common link-pair definition used in QM/MM simulations.
This rule is only allowed to be defined in the classical particles block (CPR).

PUPIL User Manual
32
Syntax:
FLPR QMHost unit_number MMHost unit_number QMLinkType QM_type new_distance
The QMHost ATOM unit and its corresponding MMHost ATOM unit, through which the classical and quantum zone respectively are to be connected, are defined. The new particle type in the quantum calculation of MMHost is specified as QM_type. It will be placed at the new_distance from QMHost along the bond direction between QMHost and MMHost.
Examples:
FLPR QMHost 316 MMHost 318 QMLinkType H 1.0
FLPR QMHost 300 MMHost 289 QMLinkType H 1.0
where a new link-pair is made by atom 316 in the quantum zone and atom 318 in the classical zone. The latter will be substituted by a Hydrogen atom placed 1.0 Angstrom from the QMHost along the bond that crosses quantum and classical zone. Similarly, the second example defines another pair-link, this one involving atom 300 and 289, which reside in the quantum and classical zone, respectively.
Neighboring Rules (NBHR)
This rule allows specifying a set of UNITs (ATOM or RESIDUE) belonging to any of the CPR and SCR blocks which is distance-based to any of the currently defined quantum particles.
Syntax:
NBHR RESIDUE MM_type min_distance max_distance
All classical RESIDUE units on the system which are holding a MM_type, and are located between min_distance and max_distance to any of the already defined quantum particle, will be taken as a part of the CPR and SCR block. All residue atoms defined by this rule will be mapped by default to its MM_type as a point charge.
Example:
NBHR RESIDUE ALA 0.0 200.0

PUPIL User Manual
33
where all ALA residues on the system that are placed up to 200.0 Angstrom from any quantum particle will be mapped to its default of static charge particles, following the already-defined default KeyMM/KeyQM mapping table (see section 4.3.1).
Neighboring Link Pair Rules (NLPR)
This rule allows specification of a distance-based link pair which it connects the quantum and classical zones. It is recalculated at each simulation step.
Syntax:
NLPR ATOM MMHostType MM_type min_distance max_distance QMLinkType QM_type new_distance
All classical atoms in the system which have an MM_type and are located between min_distance and max_distance to any of the already-defined quantum particles, will be taken as MMHost on a new pair-link. A new set of pair-links will be created at each simulation step between those quantum and classical atoms that follow this rule, with the MMHost particle substituted by the newly defined QM_type, and placed at the new_distance along the bond between QMHost and MMHost.
Example:
NLPR ATOM MMHostType ALA.C 0.0 1.5 QMLinkType H 1.0
where all ALA.C atom types will be taken as MMHost in a new pair-link made of this atom and the one on the quantum zone that has a distance between 0.0 and 1.5 Angstrom. The new QMHost will be placed as a Hydrogen atom at 1.0 Angstrom upon the bond crossing between the quantum and classical zones.
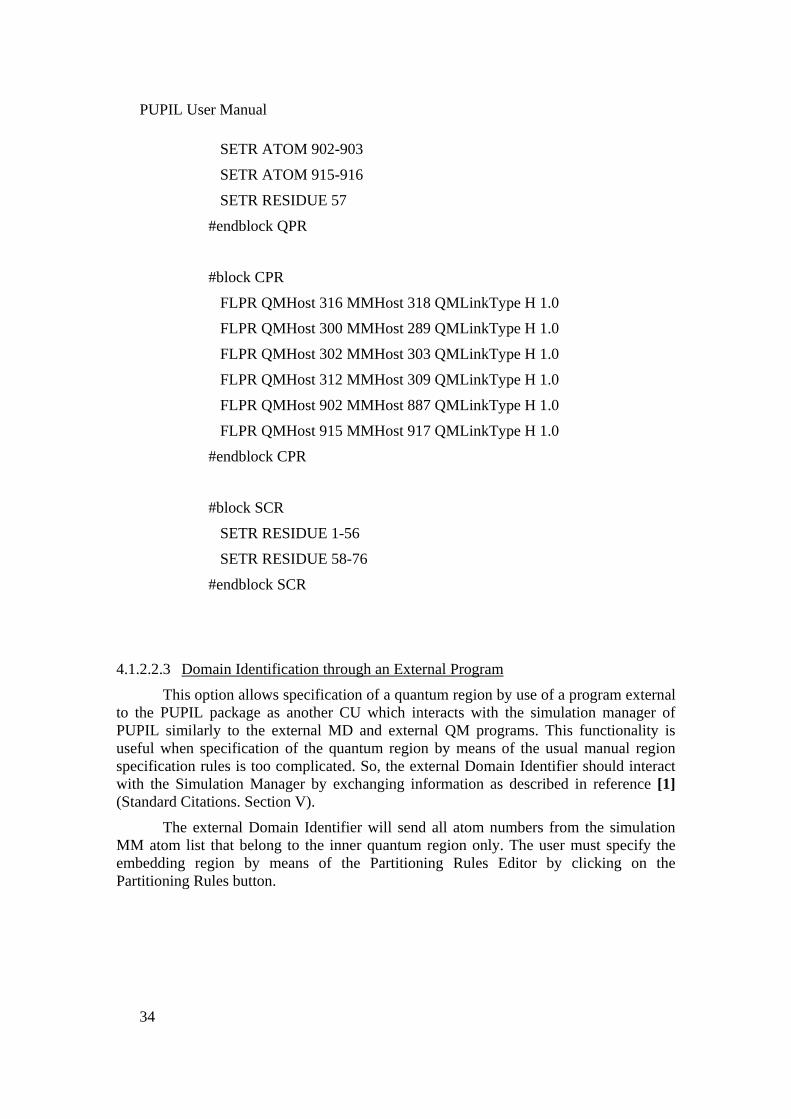
Next we show the rules defined from the Ubiquitin test as a general example of the Partitioning Rules File:
#block QPR
SETR ATOM 300-302
SETR ATOM 312-317
PUPIL User Manual
34
SETR ATOM 902-903
SETR ATOM 915-916
SETR RESIDUE 57
#endblock QPR
#block CPR
FLPR QMHost 316 MMHost 318 QMLinkType H 1.0
FLPR QMHost 300 MMHost 289 QMLinkType H 1.0
FLPR QMHost 302 MMHost 303 QMLinkType H 1.0
FLPR QMHost 312 MMHost 309 QMLinkType H 1.0
FLPR QMHost 902 MMHost 887 QMLinkType H 1.0
FLPR QMHost 915 MMHost 917 QMLinkType H 1.0
#endblock CPR
#block SCR
SETR RESIDUE 1-56
SETR RESIDUE 58-76
#endblock SCR
4.1.2.2.3 Domain Identification through an External Program
This option allows specification of a quantum region by use of a program external to the PUPIL package as another CU which interacts with the simulation manager of PUPIL similarly to the external MD and external QM programs. This functionality is useful when specification of the quantum region by means of the usual manual region specification rules is too complicated. So, the external Domain Identifier should interact with the Simulation Manager by exchanging information as described in reference [1] (Standard Citations. Section V).
The external Domain Identifier will send all atom numbers from the simulation MM atom list that belong to the inner quantum region only. The user must specify the embedding region by means of the Partitioning Rules Editor by clicking on the Partitioning Rules button.

PUPIL User Manual
35
4.1.2.3 QM Applications Currently Implemented
The QM force generation applications currently implemented to run with the PUPIL system are:
– MNDO97
A computational chemistry package that uses semi-empirical quantum chemistry methodology. The user may choose to use the conventional parameters provided in the package or to use the Transfer Hamiltonian (TH) parameterization via an external file where the TH parameters are stored. This package works with PUPIL in Start-Stop (SS) mode. At each MD step, the PUPIL Manager writes a modified input file with the corresponding quantum coordinates and executes the MNDO97 binary. The MNDO option file has to be a formatted file following the MNDO97 standards (see the MNDO manual). That file is parsed by PUPIL to obtain needed information. If the user wants to modify the Hamiltonian parameters, the fort.14 file must be added as an External Parameters file.
– SIESTA
A computational chemistry and materials package that implements density functional theory (DFT). It has a specific interface made to work with the PUPIL system in both Start-Stop and CycleQM modes (see reference [1], §2.4.1 and §2.4.2). The main input file (.fdf) has to be specified and the remaining files (.psf) must be added in a general list box with the label “Other required files :”(See bottom Figure 3.) After compilation of the SIESTA source code, patched to include the CycleQM capability, the siesta binary recognizes a new keyword in the .fdf input file that controls the CycleQM behavior. Thus, to activate CycleQM the user must include the following line in the .fdf file:
MultiScale .true.
– Gaussian 03 & Gaussian 09
Two versions of a general and widely used computational chemistry package that has many QM methods. This package works with the PUPIL system in Start-Stop (SS) mode (see reference [3]).
Classical (embedding) particles are represented in Gaussian as immovable point charges through the CHARGE and NOSYMM keywords. PUPIL automatically provides these keywords to Gaussian, along with a list of the classical particles and their charges. Gaussian ignores the electrostatic force exerted on the classical particles by the QM region. Therefore, for a multi-scale simulation, a quantum zone – point charge force correction is necessary (see §4.1.2.3).
Beginning with PUPIL version 1.3, this force correction is performed using Gaussian. The Prop=(Field,Read) keyword is given to Gaussian. That requests a calculation of the electrostatic field supplied by the quantum region at a list of points in space. PUPIL supplies this list, using the coordinates of the classical particles, and calculates the forces from the relevant entries in the Gaussian log file. The PUPIL part of this calculation runs as a single thread, and completes within seconds.
PUPIL User Manual
36
– deMon2k
This is a DFT code which uses robust Coulomb fitting for speed and supports calculation of a large variety of molecular properties for many functionals. In the same way that classical (embedding) particles are represented in Gaussian as immovable point charges, when deMon2K is used as the QM program to generate forces on the quantum zone, a similar implementation is carried out. PUPIL automatically provides the required keywords for that embedding to deMon2k, along with a list of the classical particles and their charges. deMon2k ignores the electrostatic force exerted on the classical particles by the QM region. Therefore, for a multi-scale simulation, a quantum zone – point charge force correction is necessary (see §4.1.2.1).
The current force correction method uses the MPI-enabled PUPIL utility pcforce, which must be provided in the “Other required files” list (see Figure 5). This program calculates the forces on those classical zone atoms due to the QM zone atoms, something not ordinarily done in molecular QM codes that support classical-array embedding. In the case of deMon2K, the QZ-PC correction calculation was done via representation of the electron density on a dense point grid using the so-called “RHO” file (see the deMon2k manual for more details). PUPIL prepares the input file for the pcforce external program, including only the points at which the absolute value of the charge density is greater than the charge density threshold (see Figure 5) and next paragraph. While this process is computationally intensive and time-consuming, significant speed-up may occur if pcforce is run with several processors (more than 2).
- Charge density threshold
A deMon2k RHO file is used to obtain the QM electronic density at each MD/MM step. The RHO file is a text file containing an approximate description of the charge distribution of the QM region. It uses a regularly spaced grid, each with a partial charge (similar to the Cube file from Gaussian03 or 09). Those grid-point charges are, in turn, used to calculate the electrostatic force exerted by the QM region on MM atoms. It is common for many of the grid-point charges to be negligible, and calculation of the electrostatic force is faster if these points are skipped. The charge density threshold is the charge level below which a grid point will be skipped. A typical value for the charge density threshold is 1 × 10⁻⁶.
– Number of grid divisions in RHO file
These three boxes (labeled as X:, Y: and Z: in Figure 5) allow one to set the total number of divisions along the three grid axes to build the RHO file. The number of divisions determines the accuracy with which the total number of system electrons is recovered by integrating the discretized charge density. Obviously an excessively large number of divisions will lead to excessive demand on computing time and resources. The user must find an appropriate number of divisions to allow a balance between system size and available resources.

PUPIL User Manual
37
Warning! Both pupil_paraRun_demon2k.sh and pcforcempi.sh should be placed in the simulation working directory, together with the XML input, in order to build the correct shell script to start up the parallel execution of the deMon2k and pcforce programs, respectively.
Version Note: For compatibility reasons, the deMon2K interface only allows the same number of divisions along each of the three axes of the RHO file.
– Other required files
This text box (see Figure 5) allows the user to specify other required programs and files. In particular, the program pcforce can be added here; by use of the “+” button. Pcforce is a utility which is shipped with current version of PUPIL and which produces an output file with the forces over each point charge involved in the classical embedding over the QZ. (see §4.1.2.3). Also the BASIS and AUXIS file should be named in this box to carry out deMon2K calculation properly. Any other required file for deMon2K should be placed here as well.
– NWChem
The implementation for this CU is similar to that for deMon2k. However, the NWChem program builds a Cube file to represent the electron density on a dense grid (80 × 80 × 80 points) by default. PUPIL automatically provides necessary keywords to NWChem, along with a list of the classical particles and their charges (see Figure 6).
- Charge density threshold
The value given to this parameter allows the neglect of many of the grid-points in the Cube file. (See more details in previous deMon2k section). A typical value for this parameter is 1 × 10⁻⁶.
Figure 6. NWChem QM specification
Figure 5. DeMon2k QM specification

PUPIL User Manual
38
- Number of grid divisions in Cube file
Similar to the deMon2k interface implementation; see above. However, in this case the number of divisions refers to the three grid axes to build the Cube file from the NWChem CU.
- Other required files
Pcforce program should be named in this box. (See more details in previous deMon2K section)
Warning! Both templates pupil_paraRun.sh and pcforcempi.sh should be placed in the simulation working directory, together with the XML input file, in order to build the correct shell script to start the parallel execution of the NWChem and pcforce programs, respectively.
4.1.2.4 Molecular Dynamics (MD).
The CU that controls the time evolution in the simulation is the Molecular Dynamics unit. At each MD step, the MD unit asks PUPIL for the forces on the quantum particles, and those forces are evaluated through the PUPIL interface. There is only one common parameter to set for all the MD Calculation Units.
– MD Steps to extract result.
This field determines the frequency (in MD steps) at which the PUPIL Manager will take a snapshot of the system and store all the system coordinates and other internal variables in memory to dump, later on, into the output.xml or other intermediate files.
4.1.2.5 MD Applications Currently Implemented
The MD packages that currently interface with PUPIL are DL_CLASSIC (DL_POLY) and Amber 12 (See §2.4.2):
DL_CLASSIC (DL_POLY)
The interface included in this package connects with the corresponding PUPIL library in serial execution. A mechanical embedding scheme with a simple force difference correction is included (see reference [1]). In it, the difference between classical and quantum forces in the quantum zone is considered constant for a predefined number of classical steps. Any improvement and modification of the physics treatment of the forces and energy obtained beyond this approximation from the quantum mechanical computation is the responsibility of the user.
Amber, versions 10, 11 and 12
The Amber12 source code has the modifications needed to interface properly with PUPIL in a standard QM/MM scheme of electrostatic embedding (see reference

PUPIL User Manual
39
[3]). The user must build (or have available) the corresponding sander.PUPIL binary; for instructions, see §2.4.2.2.
The Amber input file does not know about the QM/MM manager. The QM/MM controls in Amber must not be invoked because all the QM/MM directives are introduced through PUPIL packages and QM worker input files:
A correction to the forces on point charges must be applied (see reference [3]) (see §4.1.2 QZ-PC correction for PC)
The quantum and embedding zones are defined through the PUPIL Graphical User Interface, as well as the link atoms. (see §4.1.2.2)
The method and level of approximation for the QM calculation should be specified in the QM package input file (e.g., a Gaussian input file). This file is loaded into the GUI and incorporated into the PUPIL XML input.
4.1.2.6 Domain Identification (DI)
Partitioning of the system into regions of quantum and classically generated forces can be done using a set of simple rules (discussed above) or through an external program that analyzes the system variables to determine where the quantum zone is located. In the PUPIL architecture, external programs that perform this function are called Domain Identification (DI) CUs. The user has the option to call a DI CU several times during the simulation. This opens the possibility of a dynamic treatment for the quantum zone.
Steps to Dom. Ident.
This parameter tells the Manager how many MD steps are to be taken between two DI calls.
Version Note: At present, no DI interfaces are provided. However, a stub program is supplied as an exemple of how this functionality interacts with PUPIL. The user may use this stub as a template to create his/her own domain identifier.
4.1.3 KeyMM/KeyQM Mapping
Note: This mapping is applied only to the atoms not defined in the embedding rules described above (see §4.1.2.2).
As discussed in the previous sections, the parsers in the PUPIL GUI extract the kinds of atoms associated with the classical (KeyMM) and the quantum (KeyQM) systems. A simple mapping between the two kinds of particles is done by the PUPIL system using the atomic number,
Figure 7. Default KeyMM/KeyQM Mapping

PUPIL User Manual
40
as shown in Figure 7. This default solution may not be sufficiently general for all user needs. For this reason the KeyMM/KeyQM mapping panel allows the user to change the default mapping between classical and quantum particle identifiers.
The key used in the mapping may be different depending on internal details of the CU in which the key will be used. The basic convention is as follows:
– Classical particles: {residue}.{atom}
The partition between residue and classical particle (e.g. Amber uses WAT.H1, ALA.CA …) or molecule and atom (e.g. DL_POLY uses SILICON.SI) will be kept in the keyMM and extracted from the input files. To define a custom partitioning of the classical system, a more specific mapping between classical and quantum kind of atoms is allowed.
– Quantum particles: [PC.][{residue}.]{atom}
The quantum keys come from two sources: The first source is the QM CU input files. They yield the user-defined quantum atoms and the point charges (PC) associated with any classical particle from the MD input files. All point charges have by default a “PC.” prefix before the normal key (i.e. PC.0.36). They will also have a residue field if it is supplied by the MD input file (i.e. PC.ALA.CA or PC.SILICON.SI).
Warning! Every time that the user parses the QM input files, a new mapping between keyMM and keyQM is created automatically from scratch and all the mapping data stored previously is discarded. After each and every parsing, the user must remap all the key associations not automatically generated by default or by the embedding rules. A sanity check always should be done to the KeyMM/KeyQM default mapping.
The default PUPIL mapping works in the following way: Every pair KeyMM/KeyQM mapping is assigned by atomic number first. If several KeyQM are defined for the same atomic number, the first KeyQM in alphabetical order is assigned. For example, from QMAtomLabel.BasisSet with Gaussian03 inputs, one could have hydrogens with two basis sets: H.BS1 and H.BS2. Or there could be several MM labels for a single atomic weight. The result of this assignment rule (atomic number, then alphabetic) can be incorrect, depending on the particle labeling and the user’s intentions. The user must check this mapping and edit it manually if needed. Use the KeyMM/KeyQM PUPIL window interface (see Figure 7).
4.1.4 Show Simulation Tree
This panel has the purpose of showing the internal memory structure of the PUPIL Domain and all its values. It should be the same structure as the XML file produced by the GUI with only minor naming differences. The panel allows the user to see which values are stored in memory and analyze the parsed commands. Another way to obtain this same information is to view the XML file using a general browser.

PUPIL User Manual
41
4.2 Results
There is an option to tell the PUPIL system to store intermediate results from the simulation. This capability is a little primitive in this release, but will be developed in future releases. The basic idea is to monitor the results of the simulation. That could be done through the output files of each CU or through a log file from data being transmitted between CU workers. The option that is implemented in this release allows extraction of some data from the QM CU when it works in Start-Stop mode. Data extraction in CycleQM mode is not implemented yet because of its significant performance impact.
4.2.1 QM Simulation Summary
This GUI panel (Figure 8) allows the user to obtain a rapid view of the quantum energy obtained at each step. The data can be exported to a *.csv (Comma Separated Value) file format easily with the “Write file” button option situated at the bottom of the panel.
4.2.2 Extract xmol file
The coordinates of the quantum zone are stored at intervals depending on the value of MD Steps to extract result (See Molecular Dynamics in §4.1.2). With this option, the coordinates can be stored in XML format.
Figure 8. Results

PUPIL User Manual
42
5. XML SIMULATION FILE
The XML (EXtensible Markup Language) format was designed to describe and store structured data. Simulation data typically is very structured, with complex relationships among input files of CUs, simulation parameters, intermediate and final results and data parsed and/or extracted from CU input files. Therefore, a consistent and comprehensive way to store all that information is to use an XML file. The PUPIL GUI helps the user build this simulation file.
In this section we list the principal XML elements included in the input/output Simulation file.
5.1 The SIMULATIONROOT Element
The main element is the root element (SIMULATIONROOT). It has four sub-elements. Three of them are described within this subsection; a fourth, the SIMULATION element, is described below (see §5.2).
5.1.1 The ATOMDICTIONARY Element
This sub-element stores all the types of quantum atoms that PUPIL holds. The identification for the kind of atom is a serial number <idUnit>, but there is a direct relationship with the keyQM that is parsed from the QM CU input file and stored as a <label> element.
5.1.2 The RESIDUEDICTIONARY Element
This sub-element stores all the types of residues needed in PUPIL for the calculation. The internal identification for the kind of residue is a serial number, marked as <idUnit>, but there is a direct relationship with the label, which is parsed from the MD Calculation Unit input file and stored as a <label> element. Each residue stores also all the keyMM particles belonging to it. Every atom particle belonging to a given residue must have a different keyMM.
5.1.3 The KEYMM Element
This sub-element stores the default mapping between the keyMM and the keyQM. The keyMM values are obtained from the MD CU input files, and the keyQM values from the QM CU input files.
5.2 The SIMULATION Element
The simulation element is organized as a number of jobs. Each job belongs to a specific CU and stores all the variables necessary to run it. The job is stored as a nested sequence of records from bottom upward, in which the most specialized records contain the more general records. For instance, an AMBERMDJOB element contains an MDJOB element, which in turn contains a JOB element. First we find the more specialized values and, as we go down the tree branches, we find the more general stored values.
Continuing the example, an AMBERMDJOB element is one of the most specialized elements from the SIMULATION element, containing an MDJOB sub-element and a
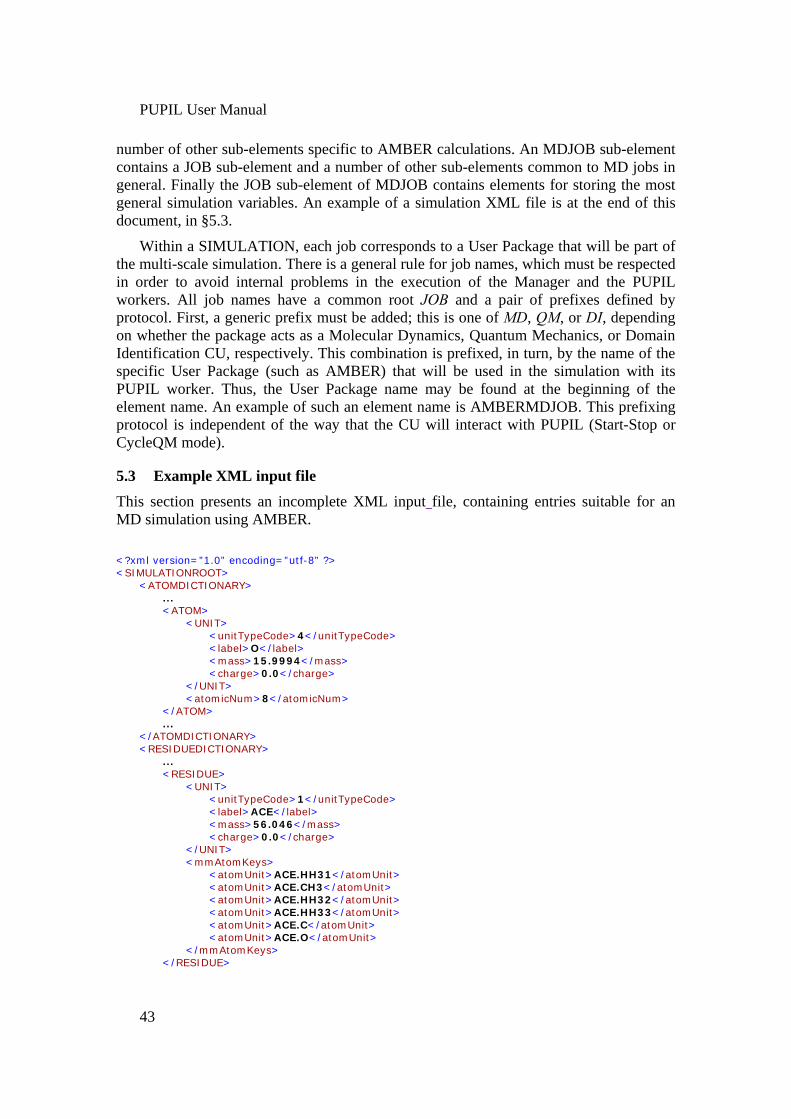
PUPIL User Manual
43
number of other sub-elements specific to AMBER calculations. An MDJOB sub-element contains a JOB sub-element and a number of other sub-elements common to MD jobs in general. Finally the JOB sub-element of MDJOB contains elements for storing the most general simulation variables. An example of a simulation XML file is at the end of this document, in §5.3.
Within a SIMULATION, each job corresponds to a User Package that will be part of the multi-scale simulation. There is a general rule for job names, which must be respected in order to avoid internal problems in the execution of the Manager and the PUPIL workers. All job names have a common root JOB and a pair of prefixes defined by protocol. First, a generic prefix must be added; this is one of MD, QM, or DI, depending on whether the package acts as a Molecular Dynamics, Quantum Mechanics, or Domain Identification CU, respectively. This combination is prefixed, in turn, by the name of the specific User Package (such as AMBER) that will be used in the simulation with its PUPIL worker. Thus, the User Package name may be found at the beginning of the element name. An example of such an element name is AMBERMDJOB. This prefixing protocol is independent of the way that the CU will interact with PUPIL (Start-Stop or CycleQM mode).
5.3 Example XML input file
This section presents an incomplete XML input file, containing entries suitable for an MD simulation using AMBER.
<?xml version=”1.0” encoding=”utf-8” ?> <SIMULATIONROOT>
<ATOMDICTIONARY> ... <ATOM>
<UNIT> <unitTypeCode>4</unitTypeCode> <label>O</label> <mass>15.9994</mass> <charge>0.0</charge>
</UNIT> <atomicNum>8</atomicNum>
</ATOM> ...
</ATOMDICTIONARY> <RESIDUEDICTIONARY>
... <RESIDUE>
<UNIT> <unitTypeCode>1</unitTypeCode> <label>ACE</label> <mass>56.046</mass> <charge>0.0</charge>
</UNIT> <mmAtomKeys>
<atomUnit>ACE.HH31</atomUnit> <atomUnit>ACE.CH3</atomUnit> <atomUnit>ACE.HH32</atomUnit> <atomUnit>ACE.HH33</atomUnit> <atomUnit>ACE.C</atomUnit> <atomUnit>ACE.O</atomUnit>
</mmAtomKeys> </RESIDUE>

PUPIL User Manual
44
... </RESIDUEDICTIONARY> <MMKEY>
... <mmKey>
<key>ACE.O</key> <QMkey>4</QMkey>
</mmKey> ...
</MMKEY> <SIMULATION>
... <jobs>
<AMBERMDJOB> <MDJOB>
<JOB> <jobID>AmberMDJob3</jobID> <exe>
<path>../../../bin/sanderLinux</path> </exe> <useMpi>false</useMpi> <numMpiTasks>0</numMpiTasks> <files>
<PUPILFILE> <fileID>mdin</fileID> <path>../data/mdin</path> <sections></sections>
</PUPILFILE> <PUPILFILE>
<fileID>ala3.parm7</fileID> <path>../data/ala3.parm7</path> <sections></sections>
</PUPILFILE> <PUPILFILE>
<fileID>ala3.inpcrd</fileID> <path>../data/ala3.inpcrd</path> <sections></sections>
</PUPILFILE> </files> <coordinates>
… </coordinates> <residues>
… </residues>
</JOB> <stepSaveInterval>2</stepSaveInterval>
</MDJOB> <amberfiles>
<PUPILFILE> <fileID>mdin</fileID> <path>../data/mdin</path> <sections></sections>
</PUPILFILE> <PUPILFILE>
<fileID>prmtop</fileID> <path>../data/ala3.parm7</path> <sections></sections>
</PUPILFILE> <PUPILFILE>
<fileID>inpcrd</fileID> <path>../data/ala3.inpcrd</path> <sections></sections>
</PUPILFILE> </amberfiles>
</AMBERMDJOB>

PUPIL User Manual
45
... </jobs>
</SIMULATION> </SIMULATIONROOT>