The purpose of operating a crawler tractor is to provide ... - AWS
91
CRM LESSON PLAN REPORT OPERATE A CRAWLER TRACTOR (CRM) 052-12N10C04 / 1 © Approved 28 Sep 2017 Effective Date: 28 Sep 2017 SCOPE: The purpose of operating a crawler tractor is to provide you, the student with the skills and knowledge required to operate a crawler tractor effectively in a combat and peacetime environment. ____________________________ Distribution Restriction: Approved for public release; distribution is unlimited. Destruction Notice: None Foreign Disclosure: FD1 - This training product has been reviewed by the training developers in coordination with the Ft. Leonard Wood, MO/MSCOE foreign disclosure officer. This training product can be used to instruct international military students from all approved countries without restrictions. 1
-
Upload
khangminh22 -
Category
Documents
-
view
4 -
download
0
Transcript of The purpose of operating a crawler tractor is to provide ... - AWS

CRM LESSON PLAN REPORT
OPERATE A CRAWLER TRACTOR (CRM)
052-12N10C04 / 1 ©
Approved 28 Sep 2017
Effective Date: 28 Sep 2017
SCOPE: The purpose of operating a crawler tractor is to provide you, the student with the skills and knowledgerequired to operate a crawler tractor effectively in a combat and peacetime environment. ____________________________ Distribution Restriction: Approved for public release; distribution is unlimited. Destruction Notice: None Foreign Disclosure: FD1 - This training product has been reviewed by the training developers in coordination with the Ft. Leonard Wood, MO/MSCOE foreign disclosure officer. This training
product can be used to instruct international military students from all approved countries without restrictions.
1

SECTION I. ADMINISTRATIVE DATA
All CourseMasters/POIsIncluding ThisLesson
Courses
CourseNumber
Version Title Phase Status
None
POIs
POI Number Version Title Phase Status
713-12N10 (NS) 1.0 © Horizontal Construction Engineer 0 Analysis
Task(s)Taught(*) orSupported
Task Number Task Title Status
Individual
052-12N-1007 Clear Land with a Crawler Tractor Approved
052-12N-1009 Push Load a Wheel Tractor-Scraper with a CrawlerTractor
Approved
052-12N-1010 (*) Construct a Berm with a Crawler Tractor Approved
052-12N-1008 (*) Excavate with a Crawler Tractor Approved
ReinforcedTask(s) Task Number Task Title Status
052-12N-1006 Perform Operators Preventive Maintenance Checks andServices (PMCS)
Approved
052-12N-1011 Excavate a Sidehill Bench with a Crawler Tractor Approved
2

Knowledge Knowledge Id Title Taught Required
011-1528K knowledge of safety precautions in the workplace Yes Yes
031-K-627-004 Knowledge of Personal Protection Equipment (PPE) andits uses
No Yes
K0604 Knowledge of The Army Maintenance ManagementSystem
No Yes
101-K-12 Knowledge of Material Safety Data Sheets (MSDS) No Yes
301-K-69 The operational environment. Yes Yes
K8077 What references will apply Yes Yes
052-K-00282 Know Safety Procedures Yes Yes
052-K-00323 Know Construction Equipment Capabilities Yes Yes
91L-K-002 Know which DA Forms are used in EquipmentMaintenance
No Yes
91L-K-004 Know the procedures for using Safety Equipment Yes Yes
91L-K-140 Knowledge of the transmission gear select indicatorlocation
Yes Yes
K0601 Knowledge of Environmental Considerations No Yes
K0602 Knowledge of Equipment Operator Responsibilities No Yes
K0603 Knowledge of Notes, Warnings, and Caution statements No Yes
K0605 Knowledge of Equipment Maintenance Responsibilities No Yes
K0606 Knowledge of Petroleum, Oils, and Lubricants No Yes
K0607 Knowledge of Equipment Deficiencies No Yes
K0608 Knowledge of how to use a grease gun No Yes
K0609 Knowledge of how to Obtain and Utilize the AppropriateEquipment Technical Manual
No Yes
K0610 Knowledge of how to Obtain and Utilize the AppropriateEquipment Lubrication Order
No Yes
K0611 Knowledge of Appropriate Equipment Maintenance FormsUtilized
No Yes
K0612 Knowledge of Performing an Equipment walk AroundInspection
Yes Yes
K0613 Knowledge of Before, During, After, Weekly, and MonthlyEquipment Inspections
No Yes
K0614 Knowledge of Correcting Operator Level EquipmentDeficiencies
No Yes
K0615 Knowledge of Equipment Fluid Capacities Yes Yes
K0616 Knowledge of how to Read, Interpret and Relay Hand andArm Signals
Yes Yes
K0617 Starting/Stopping Equipment Engines Yes Yes
K0618 Maneuver across various types of Terrain Yes Yes
K0619 Slowing/Stopping Equipment Yes Yes
K0620 Up-shifting/Down-shifting Equipment Yes Yes
K0621 Operate Equipment Hydraulic Controls Yes Yes
K0622 Equipment Implement Travel Positions Yes Yes
K0623 Read and Interpret Construction Grade Stakes No Yes
3

Skill Skill Id Title Taught Required
S0837 Ability to read and follow checklist No Yes
551-S-0054 Ability to identify faults or deficiencies during amaintenance inspection
No Yes
805C-S-0724 Ability to collect, analyze and record data No Yes
S0072 Record Data on Maintenance Forms No Yes
551-S-0022 Ability to read and interpret maintenance forms andrecords
No Yes
91L-S-013 Read the Instrument Panel Gauges Yes Yes
S0602 Ability to Communicate Effectively in Writing No Yes
101-S-M002 Ability to read, interpret and perform instructions. No Yes
551-S-0048 Ability to read, interpret, and relay visual hand and armsignals
Yes Yes
S0600 Ability to Read, Comprehend, and Record Data onMaintenance Forms
No Yes
S0601 Ability to Read and Comprehend Information on aComputer Screen
No Yes
S0603 Ability to Read, Comprehend, and Analyze Information onInstrument Panel Gauges
Yes Yes
S0604 Ability to Read, Comprehend, and Perform Instructions inEquipment Technical Manuals
No Yes
S0605 Ability to Read, Comprehend, and Perform Instructions inEquipment Lubrication Orders
No Yes
S0606 Ability to Utilize Equipment Maintenance Hand Tools No Yes
S0607 Ability to Safely Handle Petroleum, Oils, and Lubricants No Yes
S0608 Ability to Read and Comprehend, and Comply withEnvironmental Considerations
No Yes
S0609 Ability to Read, Comprehend, and Comply with MaterialSafety Data Sheets
No Yes
S0610 Coordinate Movement of Arms and Legs No Yes
S0611 Manipulate Hydraulic Controls Yes Yes
S0778 Locate, Read and Interpret Information Recorded onGrade Stake
No Yes
052-S-00356 Recognize and Report Trends in an OperationalEnvironment
Yes Yes
Administrative/AcademicHours
The administrative/academic (50 min) hours required to teach this lesson are as follows:
Academic Resident Hours / Methods
Yes 1 hr 10 mins Lecture
Yes 9 hrs 0 mins Hardware-Oriented Test
Yes 4 hrs 10 mins Demonstration
Yes 25 hrs 20 mins Practical Exercise (Hands-On/Written)
Yes 0 hrs 10 mins Test Review
________________________________________________________________________
Total Hours(50 min): 40 hrs 0 mins
InstructorActionHours
The instructor action (60 min) hours required to teach this lesson are as follows:
Hours/Actions
0 hrs 15 mins Classroom Breakdown
0 hrs 15 mins Classroom Setup
0 hrs 30 mins Course AAR
0 hrs 30 mins Grade Test
0 hrs 30 mins Student Counseling
1 hrs 0 mins Student Re-test
1 hrs 0 mins Student Re-train
3 hrs 0 mins Training Event Clean-up/Breakdown (non-FTX)
________________________________________________________________________
Total Hours (60 min): 7 hrs 0 mins
4

Test Lesson(s) Hours Lesson Number Version Lesson Title
None
PrerequisiteLesson(s) Hours Lesson Number Version Lesson Title
None
TrainingMaterialClassification
Security Level: This course/lesson will present information that has a Security Classification of: U - Unclassified.
ForeignDisclosureRestrictions
FD1. This training product has been reviewed by the training developers in coordination with the Ft. Leonard Wood,MO/MSCOE foreign disclosure officer. This training product can be used to instruct international military students fromall approved countries without restrictions.
ReferencesNumber Title Date
AR 200-1 ENVIRONMENTAL PROTECTION ANDENHANCEMENT
13 Dec 2007
AR 385-10 The Army Safety Program 24 Feb 2017
ATP 3-34.5 Environmental Considerations 10 Aug 2015
ATP 5-19 (Change 001 09/08/2014 78Pages)
RISK MANAGEMENT 14 Apr 2014
DA FORM 2028-E RECOMMENDED CHANGES TO PUBLICATIONSAND BLANK FORMS (EGA)
01 Feb 1974
DA FORM 5987-E MOTOR EQUIPMENT DISPATCH (EGA) 01 Mar 1991
DA FORM 5988-E Equipment Inspection Maintenance Worksheet 01 Mar 1991
DD FORM 518 ACCIDENT-IDENTIFICATION CARD 01 Oct 1978
LO 5-2410-241-13 D7R Series II Dozer Type I with Winch (NSN 2410-01-565-2605) Lubrication Order D7R Series II DozerType I with Winch D7R Series II Dozer Type II withRipper (NSN 2410-01-565-2603)
14 Oct 2011
PAM 750-8 The Army Maintenance Management System(TAMMS) Users Manual.
22 Aug 2005
SF FORM 91 MOTOR VEHICLE ACCIDENT REPORT 01 Feb 1993
Sup 1 to AR 385-10 The Army Safety Program 12 Feb 2015
TM 3-34.62 Earthmoving Operations (MCRP 3-17.71) 29 Jun 2012
TM 5-2410-241-10 Operator’s Manual for D7R Series II Dozer Type I withWinch (NSN 2410-01-565-2605) D7R Series II DozerType II with Ripper (NSN 2410-01-565-2603)
31 Oct 2011
Student StudyAssignment Study student guide.
Review class notes.
Study reference material.
InstructorRequirements One instructor course certified and licensed.
SupportPersonnelRequirements
Certified and licensed fuel handler
Licensed qualified construction equipment operator
Instructor course certified and licensed.
5

AdditionalSupportPersonnelRequirements
NameStudent
Ratio QtyMan
Hours
Assistant Instructor, 12NRemarks: Utilized for the classroom Introduction and writtenexamination on each equipment phase.
0:0 1 40.0
Fuel HandlerRemarks: Needed to fuel equipment. Must be available during the40.0 hours of training, but fueling time is approximately 2.0 hoursper equipment phase.
0:0 2 40.0
Licensed Water Distributor OperatorRemarks: Required to operate the water distributor for keeping thedust down during training and also area maintenance.
0:0 2 40.0
Licensed Construction Equipment OperatorRemarks: Required to operate the rollers for range maintenance,and assist with the water distributor in keeping the dust down.Moving equipment back and forth to maintenance.
0:0 4 40.0
6

EquipmentRequiredfor Instruction
ID - Name StudentRatio
InstructorRatio Spt Qty Exp
2320-01-534-1117 - Truck Tank withoutWinch, Heavy Expanded Mobility, FuelServicingRemarks: Needed to fuel equipment.Must be available during the 40.0 hours oftraining, but fueling time is approximately10.0 hours per week of each equipmentphase.
0:0 0:0 Yes 1 No
2320-01-544-2251 - Truck: PalletizedLoadingRemarks: Required for keeping the dustdown during training (See Silica studyfindings) and support to training areamaintenance. Equipment to operate nearcontinuously during training.
0:0 0:0 Yes 1 No
2330-01-303-5197 - Trailer: PalletizedLoading 8x20 M1076Remarks: Required for keeping the dustdown during training (See Silica studyfindings) and support to training areamaintenance. Equipment to operate nearcontinuously during training.
0:0 0:0 Yes 1 No
2340-01-420-2816 - Utility Vehicle, 4WDRemarks: Recommend purchasing thisUtility Vehicle (UTV) with these options inlieu of the M-Gator.
R18RVAD1B1 30 RANGER Crew DieselSage Green
2882189 30 XP 900 / Crew Tip-Out GlassWindshield
2883242 30 Crew XP Poly Sport Roof
2882175 30 Crew XP Poly Sport RoofPremium Liner
2879015 30 XP Glass Slide Open RearPanel
2881253 30 XP 900 / Crew HingedWindow Doors
2879641 30 Crew XP Poly Rear Doors
2879685 30 Crew XP / 570-6 BatteryConnectionCable
2880023 30 XP 900 / CrewHeater/Defroster Kit
2879754 30 XP 900 / Crew Glass Wiper /Washer Kit
2879969 30 RANGER Rearview Mirror Kit
2879277 30 Turn Signal Kit
2879273 30 Mid-Size / XP 900 / CrewHorn Kit
0:0 0:0 Yes 1 No
2410-01-565-2603 - Tractor, Full Tracked,Low Speed: D7R Dozer with RipperRemarks: The 11 additional crawlertractors are for site maintenance.
0:0 0:0 Yes 11 No
2410-01-565-2605 - Tractor, Full Tracked,Low Speed: D7RIIRemarks: The 4 in the support column isto accommodate for maintenance.
1:1 0:0 Yes 4 No
3805-01-431-8439 - High SpeedCompactorRemarks: One is required for each of theequipment phases. Utilized for rangemaintenance. Must be available duringthe 40.0 hours of training, but actual timeutilization is approximately 15.0 hours perweek of each equipment phase.
0:0 0:0 Yes 4 No
7

3825-01-577-2713 - Distributor, Water,Tank Type, Palletized Loading System(PLS)Remarks: Required for keeping the dustdown during training (See Silica studyfindings) and support to training areamaintenance. Equipment to operate nearcontinuously during training.
0:0 0:0 Yes 2 No
3895-01-456-2735 - Roller, MotorizedRemarks: One is required for each of theequipment phases. Utilized for rangemaintenance. Must be available duringthe 40.0 hours of training, but actual timeutilization is approximately 15.0 hours perweek of each equipment phase.
0:0 0:0 Yes 1 No
4240-00-022-2946 - Protector, HearingRemarks: Required Personal ProtectiveEquipment. The 6 additional are forsupport personnel/visitors.
1:1 1:1 Yes 6 No
4240-00-052-3776 - Goggles, IndustrialRemarks: Required Personal ProtectiveEquipment. The 6 additional are forsupport personnel/visitors.
1:1 1:1 Yes 6 No
4930-00-253-2478 - Lubricating Gun,Hand, Lever Operated, 14 OunceCapacityRemarks: Utilized for requiredmaintenance. The 6 additional are toreplace damaged grease guns.
1:1 0:0 Yes 6 No
5450-00-501-7239 - Bleacher, Portable,18 Feet Wide, 9 Rows HighRemarks: Outdoor seating at the fourtraining fields for students duringinstruction, break, and study time.
0:0 0:0 Yes 4 No
5810-01-523-6682 - Workstation, KG-235,ARL-C/I/MRemarks: Required for instructors tocommunicate with chain of command(ITRO), preparing for classes (OE).
0:0 1:1 No 0 No
5820-01-C02-2261 - Radio, MobilePortable Remote: M/A-COM/P7150Remarks: Purchase the radio’s throughGSA. The 6 listed in the support block isfor phase chief and support personnel.
1:1 1:1 Yes 6 No
5965-01-572-7797 - Headset, Dual LandCommunicationRemarks: Required for use with theradio's to communicate with studentswhile operating equipment.
1:1 1:1 Yes 6 No
5999-01-460-3294 - Kit, PalletizedLoading System (PLS) Power InterfaceRemarks: Required for keeping the dustdown during training (See Silica studyfindings) and support to training areamaintenance. Equipment to operate nearcontinuously during training.
0:0 0:0 Yes 1 No
7830-01-127-6874 - Table, Picnic, HeavyDuty, 15 Foot Long, Aluminum with SteelPipe FrameRemarks: Utilized to hold the studentwater coolerson the training site.
Utilized for small group trainingreinforcement on the training site.
Utilized for student/instructortraining/inspection materials on thetraining site.
0:0 0:0 Yes 24 No
7920-00-205-1711 - Rag, Wiping, Cotton,Unbleached, Mixed ColorRemarks: One is required for each of the7 equipment phases. Utilized for requiredmaintenance. Rags come in bundles.
0:0 0:0 Yes 1 Yes
8415-00-268-7868 - Gloves Leather:Men’s Work Cream Color Strap ClosureGauntlet Cuff, Size 5Remarks: Required Personal ProtectiveEquipment. Gloves for students areexpended, gloves for support personneland instructors are not.
1:1 1:1 Yes 6 Yes
8

8415-00-857-4915 - Helmet, Safety,Yellow, Size 6-1/2 to 8Remarks: Required Personal ProtectiveEquipment. The 6 additional are forsupport personnel/visitors.
1:1 1:1 Yes 6 No
8430-00-624-3135 - Boots, Safety, Men's,Size 10RRemarks: Required Personal ProtectiveEquipment. Boots for students areexpended, boots for support personneland instructors are not.
1:1 1:1 No 0 Yes
9905-00-527-4997 - Marker Traffic-RubberRemarks:
0:0 0:0 Yes 100 No
(Note: Asterisk before ID indicates a TADSS.)
MaterialsRequired Instructor Materials:
All PPE
Lesson plan
TM 5-2410-241-10
Power point slides
Student Materials:
All PPE
Pen or pencil
Student guide
TM 5-2410-241-10
Equipment records folder
9
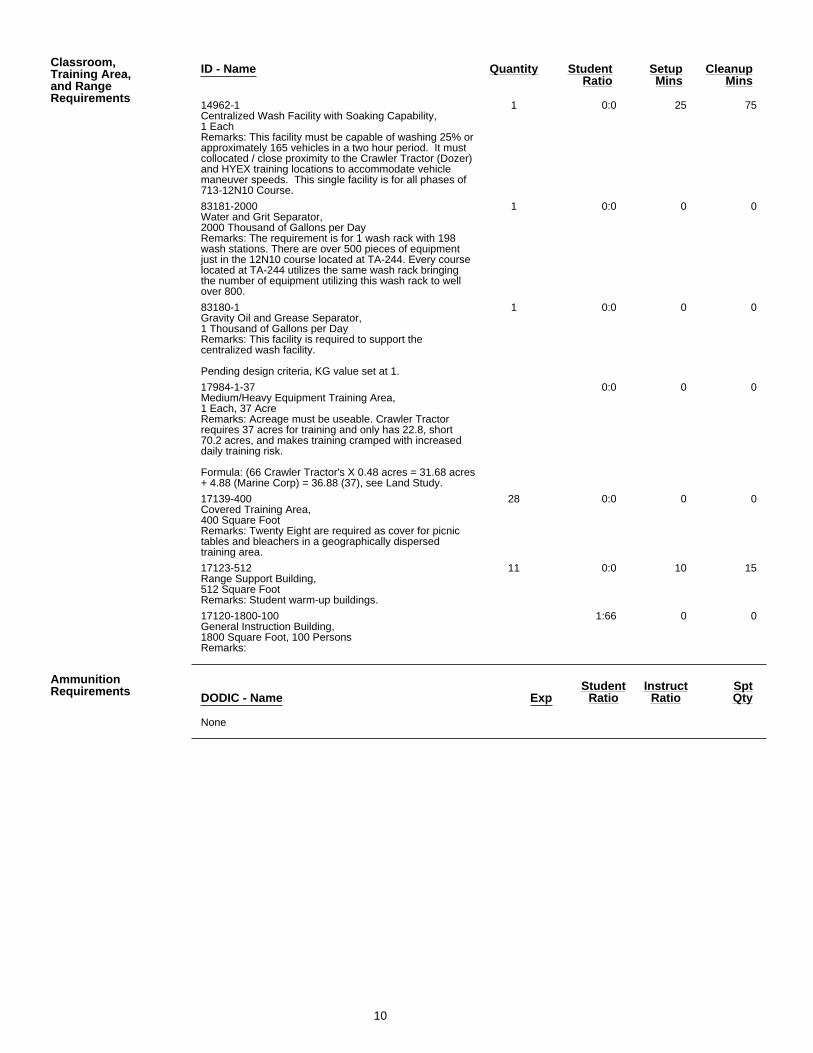
Classroom,Training Area,and RangeRequirements
ID - Name Quantity StudentRatio
SetupMins
CleanupMins
14962-1Centralized Wash Facility with Soaking Capability,1 EachRemarks: This facility must be capable of washing 25% orapproximately 165 vehicles in a two hour period. It mustcollocated / close proximity to the Crawler Tractor (Dozer)and HYEX training locations to accommodate vehiclemaneuver speeds. This single facility is for all phases of713-12N10 Course.
1 0:0 25 75
83181-2000Water and Grit Separator,2000 Thousand of Gallons per DayRemarks: The requirement is for 1 wash rack with 198wash stations. There are over 500 pieces of equipmentjust in the 12N10 course located at TA-244. Every courselocated at TA-244 utilizes the same wash rack bringingthe number of equipment utilizing this wash rack to wellover 800.
1 0:0 0 0
83180-1Gravity Oil and Grease Separator,1 Thousand of Gallons per DayRemarks: This facility is required to support thecentralized wash facility.
Pending design criteria, KG value set at 1.
1 0:0 0 0
17984-1-37Medium/Heavy Equipment Training Area,1 Each, 37 AcreRemarks: Acreage must be useable. Crawler Tractorrequires 37 acres for training and only has 22.8, short70.2 acres, and makes training cramped with increaseddaily training risk.
Formula: (66 Crawler Tractor's X 0.48 acres = 31.68 acres+ 4.88 (Marine Corp) = 36.88 (37), see Land Study.
0:0 0 0
17139-400Covered Training Area,400 Square FootRemarks: Twenty Eight are required as cover for picnictables and bleachers in a geographically dispersedtraining area.
28 0:0 0 0
17123-512Range Support Building,512 Square FootRemarks: Student warm-up buildings.
11 0:0 10 15
17120-1800-100General Instruction Building,1800 Square Foot, 100 PersonsRemarks:
1:66 0 0
AmmunitionRequirements DODIC - Name Exp
StudentRatio
InstructRatio
SptQty
None
10

Instructional Guidance/Conduct of Lesson NOTE: Before presenting this lesson, instructors must thoroughly prepare by studying this
lesson and identified reference material.
1. Ensure classroom is set-up for training:
- One student guide per student.
- Ensure the computer interface is operational.
- Required equipment on hand.
- Required references on hand.
- Visitors book on hand.
- Keep students informed.
- Promote a competitive attitude among Soldiers.
- Avoid answering questions with yes or no responses.
- Facilitate students to interact during instruction.
- Encourage all students to participate in answering questions asked from other students.
- Maintain a clean classroom.
2. Prepare training site for training:
- Training equipment is on site and operational.
- All support equipment is on site and operational.
- Maintain training site daily in support of training equipment.
3. Have inclement weather plans on hand and ready for implementation.
Proponent LessonPlan Approvals Name Rank Position Date
Jesse Rutledge Not available Approver 28 Sep 2017
11

SECTION II. INTRODUCTION
Method of Instruction: Lecture
Mode of Delivery: Resident Instruction
Instr Type (I:S Ratio): Civilian - ICH (1:66)
Time of Instruction: 5 mins
MotivatorNOTE: Show PPt #1 - 3
Explain the Operational Environment (OE) to include lessons learned throughout this lesson.
Ensure the students are aware of how it will affect them during their future assignments. For the
most current information visit the CALL web site at HTTP://call.army.mil. Review all material to
be used from CALL site to prevent release of sensitive information.
Note: Relate instruction to current world countries where they could be deployed.
- Explain how the eight interrelated operational variables: political, military, economic,
social, information, infrastructure, physical environment, and time could apply to your
role as an operator.
NOTE: Show PPt #4
TerminalLearningObjective
NOTE. Inform the students of the following Terminal Learning Objective requirements.
At the completion of this lesson, you [the student] will:
Action: Operate a Crawler TractorConditions:
Given a guided discussion on the characteristics, capabilities, limitations,
uses, and safety concerns, an equipment walk around of the crawler
tractor, a crawler tractor, an area marked for constructing a berm, an area
for excavation, an equipment technical manual (TM), an equipment
records folder, a student guide, and all personal protective equipment.Standards:
Identify the characteristics, capabilities, limitations, uses, components,
controls and instruments, safety and perform an equipment walk around of
the crawler tractor. Answer all questions correctly when asked throughout
the introduction.
Construct a berm with a crawler tractor 60 feet long, 24 feet wide, and 5
foot high maintaining a uniform surface and a slope of approximately 2:1
on the sides. Perform all steps adhering to all warning and caution
statements in the TM without error and with no damage to equipment or
injury to personnel.
Excavate a ditch 75' long ± 6’, 3' deep ± 6”, maintaining a uniform ditch
bottom and a slope of approximately 4:1 on the entrance and exit ramps.
Stockpile material a minimum of approximately 5 feet high, with
approximately a 2:1 slope ratio. Level the area cutting the high areas and
filling the low area’s maintaining a smooth surface. Spread the stockpile
by overlapping each pass using approximately 1/3 of the blade to back fill
12

ditch. Backfill ditch and level the surface to match surrounding area and
existing drainage leaving a smooth surface. Perform all steps adhering to
all Warning and Caution statements in the TM, without error and with no
damage to equipment, environment or injury to personnel.LearningDomain - Level:
Cognitive - Understanding
No JPME LearningAreas Supported: None
SafetyRequirements NOTE: Show PPt #5
In a training environment, leaders must perform a risk assessment in accordance with ATP 5-
19, Risk Management. Leaders will complete the current Deliberate Risk Assessment
Worksheet in accordance with the TRADOC Safety Officer during the planning and completion
of each task and sub-task by assessing mission, enemy, terrain and weather, troops and
support available-time available and civil considerations, (METT-TC). Note: During MOPP
training, leaders must ensure personnel are monitored for potential heat injury. Local policies
and procedures must be followed during times of increased heat category in order to avoid heat
related injury. Consider the MOPP work/rest cycles and water replacement guidelines IAW FM
3-11.4, Multiservice Tactics, Techniques, and Procedures for Nuclear, Biological, and Chemical
(NBC) Protection, FM 3-11.5, Multiservice Tactics, Techniques, and Procedures for Chemical,
Biological, Radiological, and Nuclear Decontamination. Review local training area SOP. Know
and adhere to all hand and arm signals. Perform an equipment walk-around before and after
operation. Maintain three points of contact when mounting and dismounting. Wear goggles and
gloves when checking batteries, hydraulic tank, and fueling the equipment. Wear hearing
protection, kevlar / hard hats, safety boots and seat belts when operating or around running
equipment. Do not wear loose clothing or jewelry. Utilize drip pans and always look in the
direction of travel. Use caution when working on hills, banks, or steep slopes to avoid tipping.
DO NOT place transmission in neutral to allow the equipment to coast.
Risk AssessmentLevel
Low - Dismounted Troop Movement
Assessment: Medium
Controls: Class leader will march troops.
Use road guards w/proper safety gear.
Utilize safe path and route step.
Leader Actions: Daily Safety Briefs.
Safety person monitor.
Instructor's spot check.
Low - Uneven/rough/slick surfaces
Assessment: Medium
Controls: Plan alternate route to avoid these areas.
Utilize safe path and route step.
Leader Actions: Daily Safety Briefs.
Safety person monitor.
Instructor's spot check.
13

Low - Traffic
Assessment: Medium
Controls: Use road guards w/proper safety gear.
Utilize safe path and route step.
Speed limits and road signs will be obeyed.
Utilize ground guides when backing.
Leader Actions: Daily Safety Briefs.
Safety person monitor.
Instructor's spot check.
Low - Darkness/Low light
Assessment: High
Controls: Use road guards w/proper safety gear.
Utilize reflective vests/belts and flashlights.
Utilize safe path and route step.
Leader Actions: Daily Safety Briefs.
Safety person monitor.
Instructor's spot check.
Low - Severe weather
Assessment: Medium
Controls: Delay movement.
Take appropriate shelter.
Utilize wet weather gear.
Plan severe weather shelter locations.
Leader Actions: Daily Safety Briefs.
Post shelter locations.
Instructor's reinforce.
Low - Hot Weather
Assessment: High
Controls: Drink sufficient water prior to movement.
Continue to drink water to stay hydrated.
Utilize the "Buddy" system.
Leader Actions: Daily Safety Briefs.
Instructor's reinforce.
Low - Cold Weather
Assessment: High
Controls: Utilize appropriate cold weather gear.
Continue to drink water to stay hydrated.
Utilize the "Buddy" system.
Leader Actions: Daily Safety Briefs.
14

Instructor's reinforce.
Low - Insect bites and sunburns
Assessment: Medium
Controls: Utilize sunscreen and bug spray.
Cover exposed skin.
Utilize the "Buddy" system.
Leader Actions: Daily Safety Briefs.
Instructor's reinforce.
Low - Medication
Assessment: Medium
Controls: Inform training personnel of medication.
Ensure permanent profiles train IAW their profiles.
Ensure all activities are conducted IAW FM 21-20.
Leader Actions: Daily Safety Briefs.
Instructor's reinforce.
Low - Fire
Assessment: Medium
Controls: Insure all Fire Extinguishersare clearly marked.
Insure all exits clearly marked.
Correct use of fire extinguishers.
Leader Actions: Daily Safety briefing.
Low - Falling asleep
Assessment: Medium
Controls: Have student to stand up and drink water.
Leader Actions: Daily Safety briefing.
Low - Extension Cords
Assessment: Medium
Controls: Caution statements.
Cover or tape down to avoid tripping.
Use flat extension cords.
Leader Actions: Daily Safety briefing.
Low - Slippery Floors
Assessment: Medium
Controls: Caution statements.
Use floor mats.
Post wet floor signs.
Remove mud/snow/ice from boots.
15

Leader Actions: Daily Safety briefing.
Low - Active Shooter
Assessment: High
Controls: Exit the facility
Hide if you cannot exit.
Fight if you have no other choice.
Report the incident as soon as possible.
Stay aware of your environment and any possible dangers.
Leader Actions: Daily Safety briefing.
Low - PMCS on a crawler tractor
Assessment: Medium
Controls: Do NOT operate engine in enclosed areas.
PMCS with all attachments lowered to the ground.
Transmission in neutral/park brake applied.
Keep hands, arms and loose clothing away from fan blades.
Leader Actions: Instructors demonstrate/supervise/correct.
Adhere to all TM warnings and cautions.
Daily Safety briefing.
Low - Burns from hot fluids
Assessment: Medium
Controls: Wear PPE ie. Gloves, goggles.
Have eye wash stations/stationary/portable showers on site.
Add fluid when engine is cool.
Place drip pan under equipment.
Leader Actions: Instructors demonstrate/supervise/correct.
Adhere to all TM warnings and cautions.
Daily Safety briefing.
Low - Daily Safety briefing.
Assessment: Medium
Controls: Wear PPE, remove all jewelry.
Do not use jumper cables, use slave receptacle.
Have eye wash stations/stationary/portable showers on site.
Leader Actions: Instructors demonstrate/supervise/correct.
Adhere to all TM warnings and cautions.
Mark all Hazmat items.
Daily Safety briefing.
Low - Electrical Shock
Assessment: Medium
Controls: Remove all jewelry/rings/IDtags/watches/bracelets.
16

Do not use jumper cables, use slave receptacle.
DO NOT Use NATO slave cable missing insulation.
Do NOT allow disabled and booster machines to come in contact.
Leader Actions: Instructors demonstrate/supervise/correct.
Adhere to all TM warnings and cautions.
Daily Safety briefing.
Low - Class I & II Fluid Leaks
Assessment: Medium
Controls: Check fluid levels more frequently.
Place drip pan underneath leak.
Utilize spill kits as needed.
Utilize chock blocks.
Leader Actions: Instructors demonstrate/supervise/correct.
Adhere to all TM warnings and cautions.
Mark all Hazmat items.
Daily Safety briefing.
Low - Class III Fluid Leaks
Assessment: Medium
Controls: Shut engine down immediately.
Place drip pan underneath leak.
Utilize spill kits as needed.
Utilize chock blocks.
Report immediately.
Leader Actions: Instructors demonstrate/supervise/correct.
Adhere to all TM warnings and cautions.
Mark all Hazmat items.
Daily Safety briefing.
Low - Fuel Leaks
Assessment: Medium
Controls: Shut engine down immediately.
Place drip pan underneath leak.
Utilize spill kits as needed.
Utilize chock blocks.
Leader Actions: Instructors demonstrate/supervise/correct.
Adhere to all TM warnings and cautions.
Mark all Hazmat items.
Daily Safety briefing.
Low - Starter Damage
Assessment: Medium
Controls: DO NOT crank engine over 30 seconds.
17

Repeat at 2 minute intervals as required.
Leader Actions: Instructors demonstrate/supervise/correct.
Adhere to all TM warnings and cautions.
Daily Safety briefing.
Low - Engine Damage
Assessment: Medium
Controls: No oil pressure within 15 seconds after start, stop engine.
Service air pre-cleaner and air cleaner with engine stopped.
DO NOT use a damaged primary element.
Compressed air for cleaning filters should never exceed 30 psi.
Wear PPE when cleaning filters.
Leader Actions: Instructors demonstrate/supervise/correct.
Adhere to all TM warnings and cautions.
Daily Safety briefing.
Low - Adding fluid
Assessment: Medium
Controls: Wear PPE
Remove fill caps slowly to vent pressure.
Coolant will only be added when engine is cold.
Place drip pan under equipment.
Have eye wash stations/stationary/portable showers on site.
Leader Actions: Instructors demonstrate/supervise/correct.
Adhere to all TM warnings and cautions.
Mark all Hazmat items.
Daily Safety briefing.
Low - Refueling
Assessment: Medium
Controls: Ensure hose nozzle is grounded.
Do not smoke.
Wear fuel resistant gloves.
Refuel in a well-ventilated area.
Use respirator/goggles/ventilation systems in enclosed areas.
Have eye wash stations/stationary/portable showers on site.
Place drip pan under equipment.
Leader Actions: Instructors demonstrate/supervise/correct.
Adhere to all TM warnings and cautions.
Mark all Hazmat items.
Daily Safety briefing.
Low - Cleaning Equipment
Assessment: Medium
18

Controls: User must wear protective goggles/face shield/gloves.
Compressed air for cleaning should never exceed 30 psi.
Leader Actions: Instructors demonstrate/supervise/correct.
Adhere to all TM warnings and cautions.
Daily Safety briefing.
Low - Contact with moving components
Assessment: Medium
Controls: Keep all attachments lowered/grounded.
Engine OFF during BEFORE & AFTER operation checks.
Leader Actions: Instructors demonstrate/supervise/correct.
Adhere to all TM warnings and cautions.
Daily Safety briefing.
Low - Handling Chemicals
Assessment: Medium
Controls: Wear PPE ie. Gloves, goggles, rags.
Wear long sleeve shirt.
Remove sparks/flames/other ignition sources.
Use chemical products in a well-ventilated area.
Use respirator/internal ventilation systems in enclosed areas.
Have eye wash stations/stationary/portable showers on site.
Leader Actions: Instructors demonstrate/supervise/correct.
Adhere to all TM warnings and cautions.
Mark all Hazmat items.
Daily Safety briefing.
Low - High pressure fluids
Assessment: Medium
Controls: Wear gloves/safety goggles/long sleeve shirts.
Have eye wash stations/stationary/portable showers on site.
Leader Actions: Adhere to all TM warnings and cautions.
Mark all Hazmat items.
Daily Safety briefing.
Low - Fumes/toxic gases
Assessment: Medium
Controls: Use petroleum /chemical products in a well-ventilated area.
Use respirator/goggles/ventilation systems in enclosed areas.
Do not operate w/inspection cover plates removed.
Leader Actions: Adhere to all TM warnings and cautions.
Mark all Hazmat items.
Daily Safety briefing.
19

Low - Explosions
Assessment: Medium
Controls: Keep sparks/fumes/other ignition sources away from batteries.
Do not use jumper cables, use slave receptacle.
Use solvents in well-ventilated area.
Do not smoke around fuel/flammables.
Leader Actions: Adhere to all TM warnings and cautions.
Mark all Hazmat items.
Daily Safety briefing.
Low - Hearing Loss
Assessment: Medium
Controls: Wear hearing protection while operating.
Wear hearing protection when within 23 feet of running machine.
Wear hearing/eye protection around compressed air (30) psi.
Leader Actions: Instructors demonstrate/supervise/correct.
Adhere to all TM warnings and cautions.
Daily Safety briefing.
Low - Mounting/Dismounting Equipment
Assessment: Medium
Controls: Maintain three-point contact.
Do NOT use steering wheel as a handhold.
Use caution on wet, smooth, and slippery surfaces.
Wear hard hat and hearing protection when operating.
Leader Actions: Instructors demonstrate/supervise/correct.
Adhere to all TM warnings and cautions.
Daily Safety briefing.
Low - Falling Off Equipment
Assessment: Medium
Controls: Maintain three points of contact.
Face the equipment while mounting or dismounting.
Clear surface of all debris.
Do NOT operate machine unless seat belt has been fastened.
Leader Actions: Instructors demonstrate/supervise/correct.
Adhere to all TM warnings and cautions.
Daily Safety briefing.
Low - Falling attachments
Assessment: Medium
Controls: Wear PPE
PMCS with all attachments lowered to the ground.
Transmission in neutral/park brake applied.
20

Use 3 points of contact mounting/dismounting.
Use caution on wet, smooth, and slippery surfaces.
Use lock-out-tag-out procedures.
Leader Actions: Adhere to all TM warnings and cautions.
Daily Safety briefing.
Low - Falling attachments
Assessment: Medium
Controls: Wear PPE
PMCS with all attachments lowered to the ground.
Transmission in neutral/park brake applied.
Use 3 points of contact mounting/dismounting.
Use caution on wet, smooth, and slippery surfaces.
Use lock-out-tag-out procedures.
Leader Actions: Adhere to all TM warnings and cautions.
Daily Safety briefing.
Low - Equipment Rolling
Assessment: Medium
Controls: Never leave equipment without applying the parking brake.
Lower all attachments to the ground.
Leader Actions: Instructors demonstrate/supervise/correct.
Adhere to all TM warnings and cautions.
Daily Safety briefing.
Low - Pinch Points
Assessment: Medium
Controls: Always stop engine BEFORE working in pinch point area's.
If engine is running, do not work in area pinch point area's.
Use lock-out-tag-out procedures.
Leader Actions: Instructors demonstrate/supervise/correct.
Adhere to all TM warnings and cautions.
Daily Safety briefing.
Low - Servicing Cooling System
Assessment: Medium
Controls: Do NOT service cooling system while engine is hot.
Do NOT remove cooling system radiator cap when engine is hot.
Allow engine to cool down.
Wear effective eye/glove/skin protection when handling coolants.
Place drip pan under equipment.
Leader Actions: Instructors demonstrate/supervise/correct.
Adhere to all TM warnings and cautions.
Daily Safety briefing.
21

Low - Servicing Cooling System
Assessment: Medium
Controls: Do NOT service cooling system while engine is hot.
Do NOT remove cooling system radiator cap when engine is hot.
Allow engine to cool down.
Wear effective eye/glove/skin protection when handling coolants.
Place drip pan under equipment.
Leader Actions: Instructors demonstrate/supervise/correct.
Adhere to all TM warnings and cautions.
Daily Safety briefing.
Low - Inadvertent Steering movement.
Assessment: Medium
Controls: Do not work in area of crawler tractor unless cab is NOT occupied.
Use lock-out-tag-out procedures.
Leader Actions: Instructors demonstrate/supervise/correct.
Adhere to all TM warnings and cautions.
Daily Safety briefing.
Low - Equipment/Personnel working in Close Proximity
Assessment: Medium
Controls: Wear PPE around equipment.
Clear personnel from around equipment while backing/operating.
Apply parking brake when stopped.
Utilize ground guides.
Ensure back-up alarm is on high and working.
Maintain awareness of location of other site equipment.
Leader Actions: Instructors demonstrate/supervise/correct.
Adhere to all TM warnings and cautions.
Daily Safety briefing.
Low - High Voltage Power Lines
Assessment: Medium
Controls: Wear PPE around equipment.
Utilize ground guides.
Clear personnel from around equipment while backing/operating.
Maintain awareness of power line location.
Leader Actions: Instructors demonstrate/supervise/correct.
Adhere to all TM warnings and cautions.
Daily Safety briefing.
EnvironmentalConsiderations NOTE: Instructor should conduct a risk assessment to include environmental considerations
IAW the current environmental considerations publication, and ensure students are briefed on
22

hazards and control measures.
Instructors must complete a risk assessment before conducting training, operations, or C-1
logistical activities. Abide with all applicable laws and regulations.
Based on its commitment to environmental protection, the Army will conduct its operations in
ways that minimize environmental impacts.
• Comply with all environmental laws and regulations. This includes federal, state, local, and
Host Nation laws.
• Prevent pollution at the source by reducing, reusing, and recycling material that causes
pollution.
• Conserve and preserve natural and cultural resources so that they will be available for present
and future generations.
• Ensure drip pans and spill kits are on hand to prevent / mitigate any Petroleum, Oil, and
Lubricant (POL) spills.
• During refueling operations ensure fuel nozzle is properly in the fuel tank, operator has
physical control of the fuel nozzle/handle and is trained on reacting to a fuel or POL spill.
Units and installations will prepare an environmental risk assessment using the before, during,
and after checklist. The checklist should supplement local and state environmental regulations
applicable to your area.
InstructionalLead-in The crawler tractor is a versatile piece of engineer equipment that can be used for multiple
tasks on construction projects. When using the ripper, the crawler tractor can rip hard material
to include large rocks, asphalt and in the next minute be excavating a trench or finishing slopes.
It can also be used to push load scrapers, stockpile materials, winch equipment from mud or
soft material and is also the primary piece of equipment used for clearing and grubbing
operations. Listen close and pay attention and you will learn how to operate the crawler tractor
to successfully perform your mission.
NOTE: Show PPt # 6
23

SECTION III. PRESENTATION
NOTE: Inform the students of the Enabling Learning Objective requirements.
A. ENABLING LEARNING OBJECTIVE
ACTION: Introduction to the Crawler TractorCONDITIONS:
Given a guided discussion on the characteristics, capabilities, limitations, uses, and
safety concerns, an equipment walk around of the crawler tractor, a crawler tractor,
an equipment technical manual (TM), an equipment records folder, a student guide,
and all personal protective equipment.
STANDARDS:Identify the characteristics, capabilities, limitations, uses, components, controls and
instruments, safety and perform an equipment walk around of the crawler tractor.
Answer all questions correctly when asked throughout the introduction.
LEARNINGDOMAIN - LEVEL:
Cognitive - Understanding
No JPMELEARNING AREASSUPPORTED:
None
ELO A - LSA 1. Learning Step / Activity ELO A - LSA 1. Identify Characteristics of a Crawler Tractor
Method of Instruction: Lecture
Mode of Delivery: Resident Instruction
Instr Type (I:S Ratio): Civilian - ICH (1:66)
Time of Instruction: 5 mins
Media Type: PowerPoint Presentation / Student Guide / Conference
Other Media: Unassigned
Security Classification: This course/lesson will present information that has a SecurityClassification of: U - Unclassified.
Note: Do not discuss any vehicle's up-armor with foreign students.
NOTE: Show PPt #7
Crawler Tractor Characteristics.
1. Nomenclature: Tractor-Dozer, Self-Propelled Crawler, Diesel Engine Driven (DED),
(T9) Model D7R-II Type I with Winch, or (T9) Model D7R-II Type II with Ripper.
a. Crawler tractors are classified by:
1) Weight
2) Drawbar pull
b. Maximum stabilized drawbar force of 105,820 lb (48,000 kg)
c. Maximum vertical drawbar load of 52,910 lb (24,000 kg).
2. There are three classifications for crawler tractors.
NOTE: Show PPt #8
3. Light (D3-D5) 0-20,992 lbs.
NOTE: Show PPt #9
4. Medium (D6-D8) 30,750-86,900 lbs.
NOTE: Show PPt #10
5. Heavy (D9-D11) 106,618-248,500 lbs. and up.
24

NOTE: Show PPt #11
6. Major Assemblies of the Crawler tractor
a. A center section containing the power source and the operator's controls
b. Two side sections consisting of track frames to which tracks are mounted
extending almost the full length of the tractor
7. Major functions of the crawler tractors
a. Clearing and grubbing (trees and brush).
b. Moving soil and rocks.
c. Push loading scrapers.
NOTE: Show PPt #12
Check on Learning:NOTE: Instructors have the latitude to change these
questions and ask questions based on the student
needs.
Q: How are crawler tractors classified?
A: Weight and Drawbar pull.
Q: How many classifications for crawler tractors are there?
A: 3
Review Summary:During this block of instruction, we have reviewed and
discussed:
- Characteristics of a Crawler Tractor
Are there any questions?
ELO A - LSA 2. Learning Step / Activity ELO A - LSA 2. Identify Crawler Tractor Capabilities
Method of Instruction: Lecture
Mode of Delivery: Resident Instruction
Instr Type (I:S Ratio): Civilian - ICH (1:66)
Time of Instruction: 5 mins
Media Type: PowerPoint Presentation / Student Guide / Conference
Other Media: Unassigned
Security Classification: This course/lesson will present information that has a SecurityClassification of: U - Unclassified.
NOTE: Show PPt #13
CAUTION: When operating on severe slopes, maintain engine oil level to FULL
mark. Engine should never be overfilled with oil. Damage to engine may result.
1. The D7R dozer is the primary piece of equipment used for most earth moving
operations. It features:
a. Excellent maneuverability
b. Fast, precise blade control without drift
c. Superior visibility, convenience, and safety
d. Advanced cab design featuring joysticks for control
2. Crawler tractors with the ripper attachment are designed for dozing, ripping soil,
rocks, asphalt, concrete, and can penetrate and rip compacted soil embedded with
boulders.
3. Crawler tractors with the winch attachments are designed for dozing and pulling or
25

lifting loads.
4. Crawler tractors are capable of operating in all types of weather and terrain
primarily due to their low ground bearing pressure;
a. Type 1 (winch) 12.4 psi
b. Type 2 (ripper) 13.0 psi
CAUTION: Do not ford even the narrowest stream more than 30 in. (76 cm deep.
Failure to follow this caution may result in damage to machine.
NOTE: Fording speed should not exceed 3-4 mph (5-6 km/h). Once in the water,
do not stop until the opposite bank is reached.
5. Crawler tractors are capable of fording water at depths up to 30 inches deep.
CAUTION: The machine is capable of operating on an ascending or descending
slope of up to 60 percent (28 degrees) while maintaining proper lubrication.
When operating on severe slopes, quantity of oil in powertrain may be increased
up to 10 percent. After work on severe slope is completed, excess oil must be
drained from bevel gear case. Notify Field Maintenance. Prolonged operation
with additional oil can cause high powertrain oil temperatures.
The D7R crawler tractor has fast, precise blade control without drift; superior
visibility, convenience, and safety; and an advanced cab design featuring
joysticks for control.
6. The crawler tractor is capable of operating on an incline and decline of 60 percent
(28 degrees).
7. When equipped with a reinforced blade, the crawler tractor is capable of assisting
scrapers in push loading operations.
NOTE: Show PPt #14
8. Limitations.
1. Crawler tractors are very slow moving: (6.55 mph forward / 8.44 mph reverse).
2. Crawler tractors must be transported long distances due to their slow speed,
weight, and wear on tracks.
3. Operating range for the D7R is 50-300 feet.
4. When crossing improved surfaces dunnage (tires, wood, AM-2 matting) is required
to keep from damaging surface.
NOTE: Show PPt #15
Check on Learning:NOTE: Instructors have the latitude to change these
questions and ask questions based on the student
needs.
Q: What is the maximum water depth a crawler tractor can
ford?
A: 30 in.
Q: What percent slope can the crawler tractor operate on?
A: 60
26

Q: What is the effective operating range of the D7R crawler
tractor?
A: 50-300 feet.
Q: What is utilized to assist crawler tractors when crossing
improved surfaces (pavement, concrete)?
A: Tires, wood, and AM-2 matting
Review Summary:During this block of instruction, we have reviewed and
discussed:
- Crawler Tractor Capabilities/Limitations.
Are there any questions?
ELO A - LSA 3. Learning Step / Activity ELO A - LSA 3. Identify Crawler Tractor Uses
Method of Instruction: Lecture
Mode of Delivery: Resident Instruction
Instr Type (I:S Ratio): Civilian - ICH (1:66)
Time of Instruction: 5 mins
Media Type: PowerPoint Presentation / Student Guide / Conference
Other Media: Unassigned
Security Classification: This course/lesson will present information that has a SecurityClassification of: U - Unclassified.
NOTE: Show PPt #16
Crawler Tractor Uses.
ENVIRONMENTAL: During operation, damage caused by erosion due to rain,
must be limited by dressing off the work area at the end of each day. Dust and
exhaust created by equipment also affects the environment, avoid any
unnecessary equipment usage.
NOTE: Show PPt #17
1. Leveling
a. Also known as straight dozing. Leveling is simply cutting high areas and filling the
low areas to create a level surface.
b. If the blade digs in, the rear of the tractor will rise. To keep a level cut, raise the
blade until the tractor is level again.
c. If the blade starts to ride over the material, the front of the tractor raises. To keep a
level cut, lower the blade until the tractor is again level.
NOTE: Show PPt #18
2. Stockpiling
Stockpiling is a basic function of the crawler tractor in which large quantities of
material are pushed into a pile and/or leveled.
NOTE: Show PPt #19
3. Ditching
a. Flat Bottom Ditching (Slot Dozing)
1) Slot dozing is recommended for stockpiling because of its high production output.
27

Slot dozing uses the spillage from the first few passes to hold the material in the slot
for all sequential passes.
2) To increase production output, move the dozer over to either side leaving a
narrow uncut section between slots.
3) Used for large amounts of water drainage.
4) Can be used to hide equipment.
5) Increases work productivity by 20%.
NOTE: Show PPt #20
b. V-Ditching
1) The tilt cylinder on the crawler tractor blade is designed to allow the crawler tractor
to cut shallow v-ditches by tilting the blade, allowing the corner of the blade to
penetrate the ground.
2) The crawler tractor can be used to cut larger ditches by cutting at right angles to
the center line of the ditch.
3) Once the desired depth has been reached, complete the ditch by smoothing the
sides and bottom.
NOTE: Show PPt #21
4. Push loading
a. The crawler tractor can also be used to assist scrapers in loading operations.
b. By centering the reinforced portion of the bull blade on the push block of the
scraper, the crawler tractor can be used to help the scraper load on all types of
material.
NOTE: Show PPt #22
5. Blade to Blade Dozing
a. Also known as "Buddy Dozing", blade to blade dozing is normally used for moving
large amounts of material.
b. By putting both bull blades together, you can increase production output due to the
larger area of excavation.
c. Remove the uncut section by normal dozing, and if the soil conditions are good,
production output can be increased by as much as 15-25%.
NOTE: Show PPt #23
6. Downhill Dozing
a. When using the downhill dozing method, you must push the material all the way to
the bottom of the hill.
b. After several loads are piled at the brink of the hill, push them all to the bottom at
the same time.
c. Use caution when steering on steep down grades. The tractor may respond to the
steering controls differently.
NOTE: Gravity may force the tractor to move forward faster when the track is
disengaged.
NOTE: Show PPt #24
7. Clearing and Grubbing
a. Brush and Small Trees- Travel forward with your blade lowered into the ground
only as far as it takes to cut the brush and tree roots. It may be necessary to back up
28

occasionally to clear the blade of roots.
b. Medium Trees- Raise the blade as high as it will go, ease into the tree in low track
speed and push. As the tree falls over, back up and lower the blade under the exposed
roots. Raise the blade to lift out the trunk and roots of the tree as the dozer travels
forward.
c. Large Trees- First, gently and cautiously probe the tree for dead limbs that could
fall. Determine the tree’s natural direction of lean, if any; this is the best direction for
pushing the tree over. Then, position the blade high and center it on the tree for
maximum leverage. If possible, push the tree over the same as a medium tree.
However, if the tree has a massive, deeply embedded root system, use the following
method:
1) Start on the side opposite the proposed direction of fall, and make a cut deep
enough to sever some of the large roots. Make the cut like a V-ditch, tilted downward
laterally toward the roots.
2) Cut side two.
3) Cut side three.
4) Build an earth ramp on the same side as the original cut to obtain greater pushing
leverage. Then push the tree over and, as the tree starts to fall, reverse the dozer
quickly to avoid the rising root mass. After felling the tree, fill the stump hole so that it
will not collect water.
NOTE: Show PPt #25
8. Berms and Dikes
a. Earth, 20 feet or less in height, should have a crest at least 3 feet wide.
b. Earth more than 20 feet in height, should be at least 5 feet wide at the top.
c. The slope shouldn't be steeper than 2:1 to reduce erosion and ease maintenance.
NOTE: Show PPt #26
Check on Learning:NOTE: Instructors have the latitude to change these
questions and ask questions based on the student
needs.
Q: What are the 2 main types of ditches constructed
utilizing the crawler tractor?
A: Flat bottom and v-ditch.
Q: What does leveling consist of?
A: Cutting high areas and filling the low areas to create a
level surface.
Q: What does clearing and grubbing consist of?
A: Clearing brush and small trees.
Review Summary:During this block of instruction, we have reviewed and
discussed:
- Crawler Tractor Uses.
Are there any questions?
ELO A - LSA 4. Learning Step / Activity ELO A - LSA 4. Identify Crawler Tractor Components
29

Method of Instruction: Lecture
Mode of Delivery: Resident Instruction
Instr Type (I:S Ratio): Civilian - ICH (1:66)
Time of Instruction: 10 mins
Media Type: PowerPoint Presentation / Student Guide / Conference
Other Media: Unassigned
Security Classification: This course/lesson will present information that has a SecurityClassification of: U - Unclassified.
NOTE: Show PPt #27
1. Blades
A dozer blade consists of a moldboard, (3) cutting edges and (2) end bits. Blades
vary in size and design based on their different earth moving functions. At 1" from
moldboard the cutting edges may be rotated, however the end bits must be replaced.
a. Straight blade
1) Used for cutting ditches and breaking through crusted material. It is mounted in a
fixed position, perpendicular to the line of travel.
NOTE: Bulldozer blade is factory set to a NEUTRAL pitch angle which, under
most circumstances, will provide ample bulldozing capacity. Blade can be
adjusted to provide more or less pitch angle based on bulldozing requirements.
Pitching blade back causes blade to carry more material. Pitching blade forward
causes blade to carry less material. If bulldozer blade pitch angle must be
adjusted, notify Field Maintenance.
2) It can be tilted laterally 13 degrees left or right of center with the use of the
hydraulic controlled tilt cylinder.
3) Reinforced for push loading scrapers.
b. Angle Blade
1) Effectively used to side cast material for back filling or making side hill cuts. It is
also used for rough grading, spreading piles, or windrowing materials.
2) This blade can be set at 90 degrees for normal dozing operations or at angles of
25 degrees left or right for side casting operations.
3) With the angle blade attached to the D7R, the blade cannot be tilted.
NOTE: Show PPt #28
2. Roll over protective structure (ROPS): Protects the operator in the event of an
accidental roll over.
3. Winterized Cab: Protects the operator from severe weather.
WARNING: Never turn or back up with the rippers in the down position.
NOTE: Show PPt #29
4. Ripper
a. For ripping soft material, all three shanks can be used. For medium material the
outer two shanks should be used. For hard material, one shank should be used and it
must be the middle shank.
b. crawler tractors equipped with rippers normally have only three teeth mounted at
the rear. Most ripping operations should be performed in first gear.
NOTE: Show PPt #30
WARNING: Personal injury or death can result from unexpected movement of
30

objects. Be sure all persons are clear of cable and objects before a machine is
winched or moved. A safe distance of at least one and a half times working
length of cable should be maintained. Tail end of a moving object can throw
debris at bystanders.
- When reeling in objects, be sure all personnel are clear of load.
- A minimum of five complete wraps of cable must be maintained on winch
drum. Do not handle a load with a winch drum that has less than five wraps.
- Do not operate winch under loads that exceed maximum rated bare drum line
pull. If excessive loads are encountered, use a multi-part line and sheave blocks.
Any attempt to exceed capacity of one winch is extremely hazardous. Never try
to couple two or more machines together.
- Do not jerk loads and avoid sudden shock to loads. These types of operations
cause heavy loads in excess of winch rated capacity, which in turn may result in
cable failure or winch failure.
- Winch is not designed or intended to be used for lifting or moving persons.
- Do not release winch brake to reel out a suspended load. Use only reel-out
function.
- Wear leather gloves when handling winch cable.
- NEVER attempt to maintain cable tension by allowing cable to slip through
your hands. Use hand-over-hand technique only.
- Keep hands and clothing away from winch drum and rollers.
- Verify ground is stable before winching in a load.
- Failure to follow these warnings may result in death or injury to personnel.
CAUTION: Warm-up procedures are mandatory when ambient temperature is
below 40ºF (4ºC). Failure to follow this caution may result in damage to
equipment.
NOTE: Always attempt to line up rear of machine with load so load can be
winched in a straight path. This avoids unnecessary strain and wear on winch
side rollers, and helps wind cable onto drum in level layers.
- Maintain a sufficient clearance between machine and load to allow machine to
turn.
- Winch is not equipped with free spool function.
- Refer to TB 43-0142 for winch cable inspection procedures.
5. Winch is used for recovery of other equipment or self recovery.
CAUTION: To avoid injury, ensure area is clear of personnel up to 1 1/2 times
the distance of wire rope that is reeled out. Always winch in a direct line and
always wear gloves when working with wire rope.
a. Crawler tractors equipped with winch's can be used for recovery of vehicles,
towing, and holding a load.
1) The winch cannot be used to pull when there is less than five wraps of cable on
the winch drum.
2) Winch speeds are proportional to control lever position. Greater movement of
lever causes winch to operate faster.
3) Keep tow line angle to a minimum. Do not exceed a 30 degree angle from the
31

straight ahead position.
NOTE: Show PPt #31
Check on Learning:NOTE: Instructors have the latitude to change these
questions and ask questions based on the student
needs.
Q: What does a crawler tractor blade consist of?
A: Moldboard, (3) cutting edges and (2) end bits.
Q: When ripping material with the crawler tractor, must the
teeth be adjusted to the type of material being ripped?
A: Yes
Q: What is the safety stand-off distance for personnel when
utilizing the winch?
A: 1 1/2 times the distance of wire rope that is reeled out.
Review Summary:During this block of instruction, we have reviewed and
discussed:
- Crawler Tractor Components.
Are there any questions?
ELO A - LSA 5. Learning Step / Activity ELO A - LSA 5. Identify Crawler Tractor Operators Compartment Controlsand Instruments.
Method of Instruction: Lecture
Mode of Delivery: Resident Instruction
Instr Type (I:S Ratio): Civilian - ICH (1:66)
Time of Instruction: 20 mins
Media Type: PowerPoint Presentation / Student Guide / Conference
Other Media: Unassigned
Security Classification: This course/lesson will present information that has a SecurityClassification of: U - Unclassified.
NOTE: Show PPt #32
1. Left Joystick Steering, Parking Brake, and Transmission Controls.
a. Parking brake control knob
1) Pull knob up to engage parking brake and lock joystick to prevent steering or
transmission engagement.
2) Push knob down to disengage parking brake and unlock joystick.
b. Transmission directional selector
1) Rotate joystick twist handle to “F” (FORWARD) position to engage transmission
forward gears. Joystick remains in forward position when released.
2) Rotate joystick twist handle to “N” (NEUTRAL) position to disengage transmission.
3) Rotate joystick twist handle to “R” (REVERSE) position to engage transmission
reverse gears. Joystick remains in reverse position when released.
c. Steering control lever
1) While traveling in a forward direction:
a) Push joystick forward to steer machine to the left.
b) Pull joystick backward to steer machine to the right.
32

2) While traveling in a reverse direction:
a) Push joystick forward to steer machine to the right.
b) Pull joystick rearward to steer machine to the left.
3) With transmission in NEUTRAL:
a) Push joystick forward to cause a counterclockwise pivot turn.
b) Pull joystick backward to cause a clockwise pivot turn.
4) Release joystick to return joystick to NO STEER position.
5) Turning speed is proportional to joystick position.
c. Upshift button
Push button once to manually upshift transmission to next higher gear.
d. Downshift button
Push button once to manually downshift transmission to next lower gear.
NOTE: Show PPt #33
2. Right joystick controls
a. Hold
Joystick returns to HOLD position when released, except when joystick is in FLOAT
position. Dozer blade remains in position.
b. Lower blade: - Arms extended to side at shoulder height with closed fist and
thumbs extended downward.
Push joystick forward to lower dozer crawler tractor. Crawler tractor blade lift cylinder
speed is proportional to joystick position.
c. Float
1) Push joystick forward past detent to activate crawler tractor blade float mode.
2) Joystick remains in FLOAT position until operator moves joystick out of detent or
until engine is shut down.
3) Float mode allows blade to follow ground contour.
d. Raise blade: - Arms extended to side at shoulder height with closed fist and
thumbs extended up.
Pull joystick back to raise crawler tractor blade. Crawler tractor blade lift cylinder
speed is proportional to joystick position.
e. Lower Blade End – Arm extended to side at shoulder height with thumb pointing
down and opposite arm to side.
1) Push joystick right to lower right side dozer blade.
2) Release joystick, joystick returns to HOLD position. Crawler tractor blade remains
in position.
f. Raise Blade End – Arm extended to side at shoulder height with thumb pointing up
and opposite arm to side.
1) Pull joystick left to raise right side crawler tractor blade.
2) Release joystick, joystick returns to HOLD position. Crawler tractor blade remains
in position.
NOTE: For safety reasons, the students will not manipulate the winch controls
unless supervised by an instructor.
NOTE: Show PPt #34
3. Winch control lever
33

a. Brake on
Default joystick position. Winch drum held in place by winch brake.
b. Brake off
NOTE: Winch does not have “free spool” function.
- Push lever right past detent to release winch brake. Lever will remain in BRAKE OFF
position until moved back to BRAKE ON (default) position.
c. Reel in
1) Move lever forward to reel in cable.
2) Release lever to stop winch. Lever returns to BRAKE ON (default) position.
3) Winch speed is proportional to lever position.
d. Reel out
1) Move lever rearward to reel out cable under power.
2) Release lever to stop winch. Lever returns to BRAKE ON (default) position.
3) Winch speed is proportional to lever position.
e. Low lock switch
Press switch to activate LOW LOCK. Low lock provides maximum reel-in power while
turning at slowest speed.
f. Low lock indicator
Indicator illuminates when low lock feature is activated.
NOTE: The students will not manipulate the ripper controls unless supervised
by an instructor.
NOTE: Show PPt #35
4. Ripper Control
a. Hold
Default position for lever. Ripper movement stops.
b. Shank in
1) Push lever forward to tilt ripper shanks in closer to machine.
2) Release lever, ripper shanks remain in position. Lever returns to HOLD position.
c. Shank out
1) Pull lever rearward to tilt ripper shanks out away from machine.
2) Release lever, ripper shanks remain in position. Lever returns to HOLD position.
d. Ripper Down – Arm perpendicular to the body with forearm vertical, fingers
extended and spread moving down in a lowering motion.
1) Push lever right to lower ripper.
2) Release lever, ripper remains in position. Lever returns to HOLD position.
c. Ripper Up – Arm perpendicular to the body with forearm vertical, fingers extended
and spread moving up in a raise motion.
1) Pull lever to left to raise ripper.
2) Release lever, ripper remains in position. Lever returns to HOLD position.
NOTE: Show PPt #36
5. Horn Button, Throttle Control Switch, Arctic Heater Switch, and Hydraulic Lockout
Switch
a. Horn button
Press to activate horn.
34

b. Throttle control switch
1) Engine high and low idle speeds are factory set and cannot be adjusted.
2) Press top of switch to activate engine high idle.
3) Press bottom of switch to deactivate high idle and resume low engine idle speed.
Set maximum operating speed at a point less than high idle as follows:
a) Activate high idle.
b) Depress deceleration pedal until desired speed is reached.
c) Press and hold top of switch for three seconds, then release.
4) Deceleration pedal will function normally, reducing engine speed from maximum
operating speed. To deactivate maximum operating speed, press top of switch to
reactivate high idle.
c. Arctic heater switch (if equipped)
1) Press top of switch to activate arctic heater. Switch illuminates when activated.
2) Press bottom of switch to deactivate.
d. Hydraulic lockout switch
1) Press top of switch to deactivate (lock) dozer blade and ripper/ winch controls.
2) Press bottom of switch to activate (unlock) dozer blade and ripper/winch controls.
NOTE: Show PPt #37
6. Service Brake Control and Decelerator Pedal.
a. Service brake control
1) Depress pedal to slow and stop machine.
2) Depress pedal while on a downgrade to prevent engine overspeeding and while
changing direction on a steep slope.
b. Decelerator pedal
1) Depress pedal to reduce engine speed below maximum operating speed.
2) Depress pedal to override throttle control.
3) Depress pedal to reduce engine speed for directional shifts and while
maneuvering in tight locations.
7. Cab dome lamp switch
a. Press top of switch to turn dome lamp on.
b. Press bottom of switch to turn dome lamp off.
NOTE: Show PPt #38
8. Mirror
Used to view objects behind machine.
a. Knob
Loosen knob to allow mirror adjustment. Tighten knob to lock mirror in desired
position.
9. Incline meter
Shows angle of machine while traversing an incline.
NOTE: Show PPt #39
35

10. Light Switches and Heater/Air Conditioning Controls
a. Rear-facing floodlight switch
1) Press top of switch to activate rear-facing floodlights when main light switch is in
either floodlight or headlight position.
2) Press bottom of switch to deactivate.
b. Main light switch
1) Turn switch counterclockwise to OFF position.
2) Turn switch clockwise one detent to activate dash panel lights.
3) Turn switch clockwise to second detent to activate forward facing rear floodlights.
4) Turn switch clockwise to third detent to activate headlights.
c. Temperature control
Adjust temperature from minimum (full left) to maximum (full right).
d. Fan speed switch
1) Turn switch counterclockwise to OFF position. Turn switch clockwise to operate
fan at low, medium, high, and max speeds.
2) To pressurize cab and prevent dust entry when neither heating nor cooling is
desired, adjust fan speed and temperature to comfortable levels. Do not activate air
conditioning.
e. Air conditioning switch
1) Push top of switch to activate air conditioning. Turn Temperature Control switch
counterclockwise to close heater valve.
2) Push bottom of switch to deactivate air conditioning.
3) To defog windshield, activate air conditioning and adjust fan speed and
temperature to decrease moisture level in cab.
11. Status Indicators – Upper Panel
a. Parking brake
Illuminates when parking brake is engaged.
b. Hydraulic lockout
Illuminates when hydraulic lockout switch has been activated.
c. Auto kickdown
Illuminates when auto kickdown has been activated.
d. Bidirectional shift - 2F/1R
Illuminates when second gear forward to first gear reverse bidirectional shift setting is
enabled.
e. Bidirectional shift - 2F/2R
Illuminates when second gear forward to second gear reverse bidirectional shift
setting is enabled.
f. Bidirectional shift - 1F/2R
Illuminates when first gear forward to second gear reverse bidirectional shift setting is
enabled.
12. Alert Indicators, Digital Display Window, and Action Lamp – Upper Panel
a. Engine oil pressure
36

Illuminates when engine oil pressure is too low. If action lamp also comes on, shut off
engine immediately.
b. Charging system
Flashes when charging system voltage is too high or too low.
c. Inlet manifold temperature
Flashes when intake air temperature is too high. if action lamp also flashes, change in
machine operation is required.
d. Fuel level
Illuminates when fuel level is at ten percent of total tank capacity.
e. Digital display window
1) Displays engine RPM, gear selection and direction of travel, and indication of
engine overspeed.
2) Tachometer will flash continuously, indicating engine overspeed greater than
2,800 rpm. Additionally, action alarm will sound if engine attains speed over 3,000 rpm.
f. Action lamp
Flashes when other alert indicators illuminate when machine system malfunction
occurs.
NOTE: Show PPt #40
13. Window Wiper and Washer Controls
For all wiper controls;
a. Turn control knob clockwise to first detent to turn wipers on LOW speed.
b. Turn control knob clockwise to second detent to turn wipers on HIGH speed.
c. Turn knob counterclockwise to turn wipers off.
d. Push knob to activate washers.
1) Front window wiper/washer control
2) Left door window wiper/washer control
3) Right door window wiper/washer control
4) Rear window wiper/washer control
14. Gauges
a. Engine coolant temperature
1) Indicates engine coolant temperature.
2) Red area indicates coolant temperature too high at 225ºF (107ºC).
b. Torque converter oil temperature
1) Indicates powertrain oil temperature at torque converter outlet.
2) Red area indicates oil temperature too high at 265ºF (129ºC).
c. Fuel level
1) Indicates relative amount of fuel in fuel tank.
2) Red area indicates 10 percent fuel remaining.
d. Hydraulic oil temperature
1) Indicates hydraulic oil temperature.
2) Red area indicates oil temperature too high at 215ºF (102ºC
NOTE: Show PPt #41
15. Alert Indicators, Digital Display Window, and Operator Switch – Lower Panel
a. Air filter restriction
37

Illuminates when air filter restriction exists.
b. Brake system
Illuminates when problem exists in brake system.
c. Powertrain oil filter bypass
Illuminates when oil flow is bypassing transmission oil filter due to filter restriction.
d. Transmission system
Illuminates when problem exists in transmission system.
e. Engine system
Illuminates when problem exists in engine system.
f. Implement system
Illuminates when problem exists in implement system (dozer blade, ripper, or winch).
g. Operator switch
1) Meter mode, Travel Distance mode, or Service Code mode.
2) Also used to stop tachometer flashing when engine overspeed occurs (engine
speed greater than 2,800 rpm). Engine speed must be reduced to below 2,600 rpm
and button must be pressed before a 30-second timer expires.
h. Digital display window
Provides information in three modes:
1) Service Meter mode
2) Travel Distance mode
3) Service Code mode.
NOTE: Show PPt #42
16. Auto Kickdown Switch, Auto Shift Switch, and Engine Start Switch
a. Auto shift switch
1) Press switch once to enable bidirectional shift mode in First Gear Forward to
Second Gear Reverse setting.
2) Press switch second time to enable Second Gear Forward to Second Gear
Reverse setting.
3) Press switch third time to enable Second Gear Forward to First Gear Reverse
setting.
4) Pressing switch continuously will scroll through all settings, then turn off
bidirectional shift mode.
5) Appropriate indicator on upper display module will illuminate, signifying which
setting is active.
b. Auto kickdown switch
1) Press auto kickdown switch to enable auto kickdown mode (transmission
automatic downshifting) and activate first set point. Auto kickdown indicator illuminates
when mode is enabled.
2) Press switch again to activate second set point.
3) Press switch again to disable auto kickdown mode. Auto kickdown indicator shuts
off when mode is disabled.
c. Engine start switch
1) Turn switch clockwise one detent to ON position to activate cab circuits and
38

initiate monitoring system self- diagnostic functional test.
2) Turn switch clockwise to START position to start engine. Release switch when
engine starts.
3) Turn switch counterclockwise to OFF position to stop engine and deactivate cab
circuits.
17. Auxiliary action lamp
Flashes when other alert indicators illuminate when machine system malfunction
occurs.
NOTE: Show PPt #43
Check on Learning:NOTE: Instructors have the latitude to change these
questions and ask questions based on the student
needs.
Q: How many ripper control positions are there on the D7R
crawler tractor?
A: 5
Q: Which joy stick lever controls the steering?
A: Left Joystick
Review Summary:During this block of instruction, we have reviewed and
discussed:
- Crawler Tractor Operators Compartment Controls and
Instruments.
Are there any questions?
ELO A - LSA 6. Learning Step / Activity ELO A - LSA 6. Identify Crawler Tractor Safety Procedures
Method of Instruction: Lecture
Mode of Delivery: Resident Instruction
Instr Type (I:S Ratio): Civilian - ICH (1:66)
Time of Instruction: 5 mins
Media Type: PowerPoint Presentation / Student Guide / Conference
Other Media: Unassigned
Security Classification: This course/lesson will present information that has a SecurityClassification of: U - Unclassified.
NOTE: Read all warnings and cautions in the TM before operating the machine.
Warning: Hearing protection is required when standing within 26 ft (8 m) of the
machine while it is operating. Failure to wear hearing protection may result in
hearing loss.
NOTE: Show PPt # 44
1. Hard hats and hearing protection will be worn when on or around the equipment.
2. Use three points of contact when climbing in, on or out of the equipment.
3. Remain aware of your surroundings.
4. Wear your seat belt.
5. When acting as the ground guide, always maintain eye to eye contact with the
operator.
39

6. If you have a ground guide, remember they are in control. "PAY ATTENTION"
7. At the first sign of lightning, dismount the equipment and find shelter.
NOTE: Show PPt # 45
8. Definitions:
WARNING - Indicates a hazard which may result in injury or death to personnel.
CAUTION - A reminder of safety practices or directs attention to usage practices that
may result in damage to equipment.
NOTE - A statement containing information that will make the procedures easier to
perform.
NOTE: Safety depends on our ability to communicate.
NOTE: Show PPt # 46 & 47
Check on Learning:NOTE: Instructors have the latitude to change these
questions and ask questions based on the student
needs.
Q: What does a WARNING indicate?
A: A hazard which may result in injury or death to
personnel.
Q: What does a CAUTION indicate?
A: Directs attention to usage practices that may result in
damage to equipment.
Review Summary:During this block of instruction, we have reviewed and
discussed:
- Crawler Tractor Safety Procedures
Are there any questions?
ELO A - LSA 7. Learning Step / Activity ELO A - LSA 7. Conduct an Equipment Walk Around.
Method of Instruction: Demonstration
Mode of Delivery: Resident Instruction
Instr Type (I:S Ratio): Civilian - ICH (1:3)
Time of Instruction: 1 hr
Media Type: Actual Equipment / Conference/Demonstration / Student Guide
Other Media: Unassigned
Security Classification: This course/lesson will present information that has a SecurityClassification of: U - Unclassified.
NOTE: Bulldozer blade is factory set to a NEUTRAL pitch angle which, under
most circumstances, will provide ample bulldozing capacity. Blade can be
adjusted to provide more or less pitch angle based on bulldozing requirements.
Pitching blade back causes blade to carry more material. Pitching blade forward
causes blade to carry less material. If bulldozer blade pitch angle must be
adjusted, notify Field Maintenance.
1. Left Side Machine
a. End bit
b. Cutting edges
40

c. Blade lift cylinder
d. Blade arm
e. Tracks
f. Chain
g. Track shoes and bolts
h. Lower rollers
i. Idler wheel
j. Drive sprocket
k. Track tension
Slack adjuster/Recoil mechanism.
l. Left side engine compartment door
m. Coolant level sight glass
n. Engine air precleaner
o. Engine oil fill tube
p. Fuel/water separator and primer
q. Engine oil level indicator
r. Arctic heater if equipped
s. Slave receptacle (24V)
t. Engine compartment work light
u. Grab handle
v. Door catch
w. Cab door (Primary exit)
x. Grab handle
y. Battery disconnect access cover
z. Fuse/circuit breaker access
aa. Step
bb. Battery compartment
cc. Pivot shaft oil reservoir
d. Arctic heater battery case
ee. Fuel tank cap
2. Right Side Machine
a. Ripper log
b. Ripper cylinder
c. Ripper shank
d. Ripper tooth
e. Winch
f. Drum
g. Cable
h. Hook
i. Rear work lights
j. Hydraulic tank filler cap
k. Hydraulic tank sight gauge
l. Final drive
m. Transmission stick & filler tube
41

n. Fire extinguisher
o. Cab door (Alternate exit)
p. Grab handles
q. Exhaust stack
r. Cab fresh air filter
s. Recoil spring/oil fill access cover
t. Right side engine compartment door
u. Radiator cap access door
v. Engine drive belts
w. Blade arm
x. Blade tilt cylinder
y. Blade lift cylinder
z. End bit
aa. Cutting edges
3. Operators compartment
a. Inner door latch
b. Door lock
c. Latch release lever
d. Latch
e. Seat/Seat belt
f. Left joy stick
g. Right joy stick
h. Winch/Ripper control lever
i. Ripper control lever
j. Right side operator control panel
k. Floor controls
l. Cab dome light
m. Mirror
n. Incline meter
o. Light Switches and Heater/Air Conditioning Controls
p. Window Washer and Wiper Controls
q. Gauges
r. Status Indicators – Upper Panel
s. Alert Indicators, Digital Display Window, and Action Lamp – Upper Panel
t. Alert Indicators, Digital Display Window, and Operator Switch – Lower Panel
u. Auto Kickdown Switch, Auto Shift Switch, and Engine Start Switch
v. Auxiliary Action Lamp
w. Monitoring system
CAUTION: DO NOT crank starter motor for more than 30 seconds at a time. After
30 seconds, allow starter motor to cool for at least 2 minutes before attempting
to start engine again. Excessive heating of starter motor may result in damage
or premature starter failure.
- Turbocharger damage can result if engine rpm are not kept low until engine oil
pressure is sufficient.
42

- If low engine oil pressure alert indicator does not turn off within 10 seconds
after engine starts, stop engine and perform troubleshooting.
- Failure to follow these cautions may result in engine damage.
4. Start the engine
WARNING: DO NOT operate engine in enclosed areas due to the dangers of
carbon monoxide poisoning from exhaust fumes. Always start and operate
engine in a well-ventilated area and, if in an enclosed area, vent exhaust to the
outside. Failure to follow this warning may cause injury or death to personnel.
- BE ALERT for personnel in the area while operating machine. Always check to
ensure area is clear of personnel and obstructions before starting engine.
Failure to follow this warning may result in injury or death to personnel.
- Hearing protection is required if within 20 ft (6 m) of an operating machine.
Hearing protection is also required if operating machine without ROPS/FOPS
during transport procedures. Failure to wear hearing protection may cause
hearing loss.
a. Check to make sure all bystanders are clear of machine and briefly sound horn
before starting engine.
b. Ensure left joystick is in NO STEER position and parking brake is engaged.
WARNING: The monitoring system will perform an automatic self-diagnostic
functional test whenever engine start switch is turned to the ON position. If
action alarm
does not sound or monitoring displays are not functioning, do not start engine.
Notify Field Maintenance. Failure to follow this warning may result in injury or
death to personnel, as any Warning Category 3 notifications will not be relayed
to the operator.
NOTE: The automatic self-diagnostic functional test verifies that all outputs
(gauges, alert indicators, and alarms) are operating correctly.
- Alert and status indicators in upper and lower panels must illuminate briefly.
- Action lamp must illuminate briefly.
- Auxiliary action lamp must illuminate briefly.
- Gauges must sweep to vertical, then left, right, and finally settle at current
actual value.
- Upper digital display window must show readouts in the following sequence:
- “888888888888”
- “0 RPM P”
- Lower digital display window must show readouts in the following sequence;
- “Deg C”, “kPa”, “miles”, “kilometers”, “rpm”, and “liters”
- “X 10”
- Hourglass symbol for service meter
- “888.8.8.8”
- Current service meter value
NOTE: Monitoring system self-diagnostic functional test takes approximately 10
seconds to complete.
43

c. Turn engine start switch to ON position, but do not start engine. Allow monitoring
system to perform self-diagnostic functional test.
CAUTION: Do not crank engine for more than 30 seconds. Allow starting motor
to cool for two minutes before cranking again or damage to starting motor or
batteries may result.
- Shut down engine if engine oil pressure does not register on gauge or if engine
oil pressure indicator remains lit 10 seconds after start up.
- Failure to follow this caution may result in engine damage.
d. Turn and hold engine start switch to START. Release engine start switch when
engine starts.
5. Machine Warm-up
a. Allow engine to warm up at low idle for five minutes.
b. Slowly operate hydraulics (blade and implements) to allow warm hydraulic oil to
circulate through all hydraulic cylinders and lines.
c. Begin machine operation only after engine coolant temperature gauge begins to
move.
CAUTION: Do not crank engine for more than 30 seconds. Allow starting motor
to cool for two minutes before cranking again or damage to starting motor or
batteries may result.
- Shut down engine if engine oil pressure does not register on gauge or if engine
oil pressure indicator remains lit 10 seconds after start up.
- Failure to follow these cautions may result in engine damage.
- Although gear changes and directional changes at full engine speed are
possible, deceleration and/or braking when you change direction is highly
recommended.
Failure to follow this caution may result in powertrain component failure.
WARNING: To prevent injury, make sure that no maintenance work is being
performed on or near machine.
- The monitoring system will perform an automatic self-diagnostic functional test
whenever engine start switch is turned to the ON position. If action alarm does
not
sound or monitoring displays are not functioning, do not start engine. Notify
Field Maintenance. Failure to follow this warning may result in injury or death to
personnel, as any Warning Category 3 notifications will not be relayed to the
operator.
- Keep machine under control at all times in order to prevent injury. Reduce
engine speed when you maneuver in tight quarters or when you break over a
rise.
- Select gear range that is appropriate before you start downhill. Do not change
gears when you are going downhill. Do not allow engine to overspeed when you
are unloaded and moving down a slope. Watch tachometer and use service
brakes. Use service brakes near the top of slope to prevent excessive engine
speed.
- When you drive down a grade, use same gear used when driving up the grade.
44

- Machine will turn (counter-rotate) when transmission is in NEUTRAL, parking
brake is disengaged, and left joystick (steering lever) is pushed forward or
pulled rearward.
- Ensure all personnel are clear of machine before disengaging parking brake.
- Engage parking brake to lock left joystick and prevent machine movement.
- Do not allow riders on machine.
- If machine begins to sideslip, discard load and turn machine downhill.
- Whenever possible, operate machine up and down slopes, not across slope.
- Always use a ground guide when moving machine up or down a ramp when
loading/unloading. Failure to use a ground guide may result in an accident,
causing death or
injury to personnel or damage to equipment.
- Failure to follow these warnings may result in injury or death to personnel.
6. Perform Engine Shut-Down Procedures
CAUTION: Stopping the engine immediately after it has been working under load
can result in overheating and accelerated wear of engine components.
a. Operate engine at low idle for five minutes to allow engine and components to cool
gradually.
b. Turn engine start switch to OFF position.
WARNING: Use caution and maintain three-point contact at all times when
dismounting machine. Failure to follow this warning may result in injury or death
to personnel.
c. Exit cab through left door.
d. Use steps and hand holds to dismount. Face machine when dismounting.
e. Turn battery disconnect switch to OFF position
7. Perform all After Operator PMCS procedures.
8. Secure machine against vandalism. Lock all covers and compartments.
NOTE: Always clean tracks and frames before leaving for the day.
Check on Learning:NOTE: Instructors have the latitude to change these
questions and ask questions based on the student
needs.
Q: How many ripper control positions are there on the D7R
crawler tractor?
A: 5
Q: Which joy stick lever controls the steering?
A: Left Joystick
Review Summary:During this block of instruction, we have reviewed and
discussed:
- Crawler Tractor Operators Compartment Controls and
Instruments.
Are there any questions?
45

CHECK ON LEARNING (ELO A):Q: What classification does the D7R belong to?
A: Medium (D6-D8) 30,750-86,900 lbs.
Q: Does the D7R have high or low ground bearing pressure?
A: Low
Q: What is the minimum amount of cable required for winch use?
A: Five wraps
Q: What is blade to blade "Buddy Dozing" dozing?
A: Two crawler tractor bull blades locked together.
REVIEW SUMMARY(ELO A):During this block of instruction, we have reviewed and discussed:
- Identify Characteristics of the Crawler Tractor.
Are there any questions?
B. ENABLING LEARNING OBJECTIVE
ACTION: Construct a Berm with a Crawler TractorCONDITIONS:
Given an area for excavation, a crawler tractor, an equipment TM, a student guide,
an equipment technical manual, and all personal protective equipment.
STANDARDS:Construct a berm with a crawler tractor 60 feet long, 30 feet wide, and 5 foot high
maintaining a uniform surface and a slope of approximately 2:1 on the sides. Backfill
the excavation utilizing the berm. Overlapping each pass using approximately 1/3 of
the blade to backfill the excavation. Level the surface to match surrounding area and
existing drainage leaving a smooth surface. Perform all steps adhering to all Warning
and Caution statements in the TM, without error and with no damage to equipment,
environment or injury to personnel.
LEARNINGDOMAIN - LEVEL:
Cognitive - Understanding
No JPMELEARNING AREASSUPPORTED:
None
ELO B - LSA 1. Learning Step / Activity ELO B - LSA 1. Perform Pre-Start Safety Procedures.
Method of Instruction: Demonstration
Mode of Delivery: Resident Instruction
Instr Type (I:S Ratio): Civilian - ICH (1:3) (1:3 PE 1)
Time of Instruction: 8 hrs 30 mins (8 hrs 25 mins PE)
Media Type: Actual Equipment / Conference/Demonstration / Student Guide
Other Media: Unassigned
Security Classification: This course/lesson will present information that has a SecurityClassification of: U - Unclassified.
1. Perform operator's preventive maintenance checks and services.
2. Perform a complete visual walk around the equipment.
3. Recover drip pan.
3. Turn battery disconnect switch to ON position.
5. Mount the crawler tractor.
a. Enter operator's compartment from left side.
46

Note: Maintain a minimum three-points of contact at all times, i.e., two feet and
one hand or two hands and one foot.
b. Face machine when mounting and dismounting.
c. Ensure ladders and grab handles are clean and secure before using them.
6. Utilize all Personal Protective Equipment (PPE).
7. Adjust the seat.
8. Adjust left and right interior rearview mirrors.
9. Fasten and adjust the seat belt.
10. Ensure left joystick is in NO STEER position.
11. Ensure parking brake is engaged.
12. Ensure all personnel are clear of machine.
Check on Learning:NOTE: Instructors have the latitude to change these
questions and ask questions based on the student
needs.
Q: What position must the left joy stick before starting the
engine?
A: NO STEER position.
Q: When mounting/dismounting the crawler tractor, what is
meant by three-points of contact?
A: Two feet and one hand or two hands and one foot.
Review Summary:During this block of instruction, we have reviewed and
discussed:
- Performing Pre-Start Safety Procedures
Are there any questions?
ELO B - LSA 2. Learning Step / Activity ELO B - LSA 2. Prepare the Crawler Tractor for Operation.
Method of Instruction: Demonstration
Mode of Delivery: Resident Instruction
Instr Type (I:S Ratio): Civilian - ICH (1:3)
Time of Instruction: 5 mins
Media Type: Actual Equipment / Conference/Demonstration / Student Guide
Other Media: Unassigned
Security Classification: This course/lesson will present information that has a SecurityClassification of: U - Unclassified.
CAUTION: DO NOT crank starter motor for more than 30 seconds at a time. After
30 seconds, allow starter motor to cool for at least 2 minutes before attempting
to start engine again. Excessive heating of starter motor may result in damage
or premature starter failure.
- Turbocharger damage can result if engine rpm are not kept low until engine oil
pressure is sufficient.
- If low engine oil pressure alert indicator does not turn off within 10 seconds
after engine starts, stop engine and perform troubleshooting.
- Failure to follow these cautions may result in engine damage.
1. Start the engine
47

WARNING: DO NOT operate engine in enclosed areas due to the dangers of
carbon monoxide poisoning from exhaust fumes. Always start and operate
engine in a well-ventilated area and, if in an enclosed area, vent exhaust to the
outside. Failure to follow this warning may cause injury or death to personnel.
- BE ALERT for personnel in the area while operating machine. Always check to
ensure area is clear of personnel and obstructions before starting engine.
Failure to follow this warning may result in injury or death to personnel.
- Hearing protection is required if within 26 ft (8 m) of an operating machine.
Hearing protection is also required if operating machine without ROPS/FOPS
during transport procedures. Failure to wear hearing protection may cause
hearing loss.
a. Check to make sure all bystanders are clear of machine and briefly sound horn
before starting engine.
b. Ensure left joystick is in NO STEER position and parking brake is engaged.
WARNING: The monitoring system will perform an automatic self-diagnostic
functional test whenever engine start switch is turned to the ON position. If
action alarm does not sound or monitoring displays are not functioning, do not
start engine. Notify Field Maintenance. Failure to follow this warning may result
in injury or death to personnel, as any Warning Category 3 notifications will not
be relayed to the operator.
NOTE: The automatic self-diagnostic functional test verifies that all outputs
(gauges, alert indicators, and alarms) are operating correctly.
- Alert and status indicators in upper and lower panels must illuminate briefly.
- Action lamp must illuminate briefly.
- Auxiliary action lamp must illuminate briefly.
- Gauges must sweep to vertical, then left, right, and finally settle at current
actual value.
- Upper digital display window must show readouts in the following sequence:
- “888888888888”
- “0 RPM P”
- Lower digital display window must show readouts in the following sequence;
- “Deg C”, “kPa”, “miles”, “kilometers”, “rpm”, and “liters”
- “X 10”
- Hourglass symbol for service meter
- “888.8.8.8”
- Current service meter value
NOTE: Monitoring system self-diagnostic functional test takes approximately 10
seconds to complete.
c. Turn engine start switch to ON position, but do not start engine. Allow monitoring
system to perform self-diagnostic functional test.
CAUTION: Do not crank engine for more than 30 seconds. Allow starting motor
to cool for two minutes before cranking again or damage to starting motor or
batteries may result.
48

- Shut down engine if engine oil pressure does not register on gauge or if engine
oil pressure indicator remains lit 10 seconds after start up.
- Failure to follow this caution may result in engine damage.
d. Turn and hold engine start switch to START. Release engine start switch when
engine starts.
2. Machine Warm-up
a. Allow engine to warm up at low idle for five minutes.
b. Slowly operate hydraulics (blade and implements) to allow warm hydraulic oil to
circulate through all hydraulic cylinders and lines.
c. Begin machine operation only after engine coolant temperature gauge begins to
move.
CAUTION: Do not crank engine for more than 30 seconds. Allow starting motor
to cool for two minutes before cranking again or damage to starting motor or
batteries may result.
- Shut down engine if engine oil pressure does not register on gauge or if engine
oil pressure indicator remains lit 10 seconds after start up.
- Failure to follow these cautions may result in engine damage.
- Although gear changes and directional changes at full engine speed are
possible, deceleration and/or braking when you change direction is highly
recommended. Failure to follow this caution may result in powertrain component
failure.
WARNING: To prevent injury, make sure that no maintenance work is being
performed on or near machine.
- The monitoring system will perform an automatic self-diagnostic functional test
whenever engine start switch is turned to the ON position. If action alarm does
not sound or monitoring displays are not functioning, do not start engine. Notify
Field Maintenance. Failure to follow this warning may result in injury or death to
personnel, as any Warning Category 3 notifications will not be relayed to the
operator.
- Keep machine under control at all times in order to prevent injury. Reduce
engine speed when you maneuver in tight quarters or when you break over a
rise.
- Select gear range that is appropriate before you start downhill. Do not change
gears when you are going downhill. Do not allow engine to overspeed when you
are unloaded and moving down a slope. Watch tachometer and use service
brakes. Use service brakes near the top of slope to prevent excessive engine
speed.
- When you drive down a grade, use same gear used when driving up the grade.
- Machine will turn (counter-rotate) when transmission is in NEUTRAL, parking
brake is disengaged, and left joystick (steering lever) is pushed forward or
pulled rearward.
- Ensure all personnel are clear of machine before disengaging parking brake.
- Engage parking brake to lock left joystick and prevent machine movement.
- Do not allow riders on machine.
49

- If machine begins to sideslip, discard load and turn machine downhill.
- Whenever possible, operate machine up and down slopes, not across slope.
- Always use a ground guide when moving machine up or down a ramp when
loading/unloading. Failure to use a ground guide may result in an accident,
causing death or injury to personnel or damage to equipment.
- Failure to follow these warnings may result in injury or death to personnel.
d. Disengage parking brake and unlock joystick.
e. Configure the crawler tractor to the travel position.
Note: Before starting any work, ensure a digging permit has been issued and
then walk the area to uncover any hazards and plan the job. Check for buried
utilities lines and pipes and always check overhead clearance.
Check on Learning:NOTE: Instructors have the latitude to change these
questions and ask questions based on the student
needs.
Q: Once the engine start switch is turned to the ON
position, what must the operator wait on?
A: The monitoring system to perform self-diagnostic
functional test.
Q: How long does the engine need to warm up?
A: Five minutes at low idle.
Review Summary:During this block of instruction, we have reviewed and
discussed:
- Preparing the Crawler Tractor for Operation.
Are there any questions?
ELO B - LSA 3. Learning Step / Activity ELO B - LSA 3. Familiarization of Maneuvering a Crawler Tractor
Method of Instruction: Demonstration
Mode of Delivery: Resident Instruction
Instr Type (I:S Ratio): Civilian - ICH (1:3) (1:3 PE 1)
Time of Instruction: 1 hr 10 mins (1 hr PE)
Media Type: Actual Equipment / Conference/Demonstration / Student Guide
Other Media: Unassigned
Security Classification: This course/lesson will present information that has a SecurityClassification of: U - Unclassified.
NOTE: The demonstration will be conducted at the training site. The instructor
will explain the control operations while using the appropriate hand and arm
signals to communicate with the operator. Hand signals and manipulation of
controls will be performed simultaneously with maneuver operations.
CAUTION: Before using hand signals, the equipment operator and signal person must
clearly understand the meaning of each signal.
1. Perform Manipulation of Controls Using Hand and Arm Signals.
a. Left Joystick Steering, Parking Brake, and Transmission Controls.
1) Parking brake control knob
a) Pull knob up to engage parking brake and lock joystick to prevent steering or
50

transmission engagement.
b) Push knob down to disengage parking brake and unlock joystick.
2) Transmission directional selector
a) Rotate joystick twist handle to “F” (FORWARD) position to engage transmission
forward gears. Joystick remains in forward position when released.
b) Rotate joystick twist handle to “N” (NEUTRAL) position to disengage transmission.
c) Rotate joystick twist handle to “R” (REVERSE) position to engage transmission
reverse gears. Joystick remains in reverse position when released.
3) Steering control lever
a) While traveling in a forward direction:
(1) Push joystick forward to steer machine to the left.
(2) Pull joystick backward to steer machine to the right.
b) While traveling in a reverse direction:
(1) Push joystick forward to steer machine to the right.
(2) Pull joystick rearward to steer machine to the left.
c) With transmission in NEUTRAL:
(1) Push joystick forward to cause a counterclockwise pivot turn.
(2) Pull joystick backward to cause a clockwise pivot turn.
d) Release joystick to return joystick to NO STEER position.
e) Turning speed is proportional to joystick position.
3) Upshift button
Push button once to manually upshift transmission to next higher gear.
4) Downshift button
Push button once to manually downshift transmission to next lower gear.
b. Right joystick controls
1) Hold
Joystick returns to HOLD position when released, except when joystick is in FLOAT
position. Dozer blade remains in position.
2) Lower blade: - Arms extended to side at shoulder height with closed fist and
thumbs extended downward.
Push joystick forward to lower dozer blade. Dozer blade lift cylinder speed is
proportional to joystick position.
3) Float
a) Push joystick forward past detent to activate dozer blade float mode.
b) Joystick remains in FLOAT position until operator moves joystick out of detent or
until engine is shut down.
c) Float mode allows blade to follow ground contour.
4) Raise blade: - Arms extended to side at shoulder height with closed fist and
thumbs extended up.
Pull joystick back to raise dozer blade. Dozer blade lift cylinder speed is proportional
to joystick position.
5) Lower Blade End – Arm extended to side at shoulder height with thumb pointing
down and opposite arm to side.
a) Push joystick right to lower right side dozer blade.
51

b) Release joystick, joystick returns to HOLD position. Dozer blade remains in
position.
6) Raise Blade End – Arm extended to side at shoulder height with thumb pointing up
and opposite arm to side.
a) Pull joystick left to raise right side dozer blade.
b) Release joystick, joystick returns to HOLD position. Dozer blade remains in
position.
NOTE: For safety reasons, the students will not manipulate the winch controls
unless supervised by an instructor.
c. Winch control lever
1) Brake on
Default joystick position. Winch drum held in place by winch brake.
2) Brake off
NOTE: Winch does not have “free spool” function. Push lever right past detent
to release winch brake. Lever will remain in BRAKE OFF position until moved
back to BRAKE ON (default) position.
3) Reel in
a) Move lever forward to reel in cable.
b) Release lever to stop winch. Lever returns to BRAKE ON (default) position.
c) Winch speed is proportional to lever position.
4) Reel out
a) Move lever rearward to reel out cable under power.
b) Release lever to stop winch. Lever returns to BRAKE ON (default) position.
c) Winch speed is proportional to lever position.
5) Low lock switch
Press switch to activate LOW LOCK. Low lock provides maximum reel-in power
while turning at slowest speed.
6) Low lock indicator
Indicator illuminates when low lock feature is activated.
NOTE: The students will not manipulate the ripper controls unless supervised by
an instructor.
d. Ripper Control
1) Hold
Default position for lever. Ripper movement stops.
2) Shank in
a) Push lever forward to tilt ripper shanks in closer to machine.
b) Release lever, ripper shanks remain in position. Lever returns to HOLD position.
3) Shank out
a) Pull lever rearward to tilt ripper shanks out away from machine.
b) Release lever, ripper shanks remain in position. Lever returns to HOLD position.
4) Ripper Down – Arm perpendicular to the body with forearm vertical, fingers
extended and spread moving down in a lowering motion.
a) Push lever right to lower ripper.
b) Release lever, ripper remains in position. Lever returns to HOLD position.
52

5) Ripper Up – Arm perpendicular to the body with forearm vertical, fingers extended
and spread moving up in a raise motion.
a) Pull lever to left to raise ripper.
b) Release lever, ripper remains in position. Lever returns to HOLD position.
e. Configure the crawler tractor to the travel position.
1) Raise the blade 12 to 14 inches off the ground.
2) Level the blade
3) Raise the ripper attachment (if applicable)
f. Configure the crawler tractor to the park line position.
1) Level the blade.
2) Lower the blade to the ground.
3) Place blade control in the float position.
4) Lower the ripper attachment (if applicable).
WARNING: To prevent injury, make sure that no maintenance work is being
performed on or near machine.
- Keep machine under control at all times in order to prevent injury. Reduce
engine speed when you maneuver in tight quarters or when you break over a
rise
- Select gear range that is appropriate before you start downhill. Do not change
gears when you are going downhill. Do not allow engine to overspeed when you
are unloaded and moving down a slope. Watch tachometer and use service
brakes. Use service brakes near the top of slope to prevent excessive engine
speed.
- When you drive down a grade, use same gear used when driving up the grade.
- Machine will turn (counter-rotate) when transmission is in NEUTRAL, parking
brake is disengaged, and left joystick (steering lever) is pushed forward or
pulled rearward.
- Ensure all personnel are clear of machine before disengaging parking brake.
- Engage parking brake to lock left joystick and prevent machine movement.
- Do not allow riders on machine.
- If machine begins to sideslip, discard load and turn machine downhill.
- Whenever possible, operate machine up and down slopes, not across slope.
- Failure to follow these warnings may result in injury or death to personnel.
- Always use a ground guide when moving machine up or down a ramp when
loading/unloading. Failure to use a ground guide may result in an accident,
causing death or injury to personnel or damage to equipment.
2. Maneuvering the Crawler Tractor
a. Start the crawler tractor
b. After engine is warmed up, place crawler tractor blade into the travel position
c. Hold service brake pedal down and disengage parking brakes.
NOTE: When parking brake is engaged, transmission defaults to neutral. When
parking brake is disengaged, transmission will stay in neutral until desired
direction and gear are selected.
53

d. Rotate transmission direction selector to desired direction.
CAUTION: Although gear changes and directional changes at full engine speed
are possible, deceleration and/or braking when you change direction is highly
recommended. Failure to follow this caution may result in power train
component failure.
e. Press up shift or downshift button to engage desired gear.
f. Release service brake to allow machine movement.
g. Set maximum operating speed at a point less than high idle as follows:
1) Press top of throttle control switch to set high idle.
2) Depress decelerator pedal until desired speed is reached.
3) Press and hold top of throttle control switch for three seconds. Maximum operating
speed is now set.
a) Decelerator pedal will function normally, reducing engine speeds when depressed.
b) To return to high idle, press top of throttle control switch.
c) To return to low idle, press bottom of throttle control switch.
CAUTION: Although directional changes at full engine speed are possible,
deceleration and/or braking when you change direction is recommended. Failure
to follow this caution may result in power train component failure.
3. Changing Gears and Direction
a. Depress decelerator pedal or brake pedal to decrease engine/machine speed.
b. Rotate transmission direction selector forward or rearward.
c. Release decelerator pedal or brake pedal to increase engine/machine speed.
d. Use up shift or downshift switches to select desired gear.
4. Stopping the Machine
CAUTION: Do not engage parking brakes to stop machine unless an emergency
exists. Failure to follow this caution may result in damage to parking brake
system.
NOTE: Park the machine on a level surface. If it is necessary to park on a grade,
chock tracks securely.
a. Apply service brakes to stop machine.
b. Place transmission direction selector in NEUTRAL position.
c. Engage parking brakes.
d. Lower attachments (bulldozer blade and ripper) to ground and apply slight
downward pressure
e. Engage hydraulic lockout control.
Check on Learning:NOTE: Instructors have the latitude to change these
questions and ask questions based on the student
needs.
Q: What does the left joystick control?
A: Steering, Parking Brake, and Transmission Controls.
Q: What recommended action must be taken before shifting
to higher/lower gear?
A: Depress decelerator pedal or brake pedal to decrease
54

engine/machine speed.
Review Summary:During this block of instruction, we have reviewed and
discussed:
- Maneuvering Operations.
Are there any questions?
ELO B - LSA 4. Learning Step / Activity ELO B - LSA 4. Construct a Berm.
Method of Instruction: Demonstration
Mode of Delivery: Resident Instruction
Instr Type (I:S Ratio): Civilian - ICH (1:3) (1:3 PE 1)
Time of Instruction: 6 hrs 30 mins (5 hrs 35 mins PE)
Media Type: Actual Equipment / Conference/Demonstration / Student Guide
Other Media: Unassigned
Security Classification: This course/lesson will present information that has a SecurityClassification of: U - Unclassified.
Note : Before starting any work, ensure a digging permit has been issued and
then walk the area to uncover any hazards and plan the job. Check for buried
utilities lines and pipes and always check overhead clearance.
1. Interpret the data on construction stakes.
a. Determine the direction for excavation.
b. Position the crawler tractor.
2. Construct a berm with excavated material.
a. Slowly lower the blade to a depth of 4-6 inches and maintain a smooth cut.
b. Push material being excavated toward the berm keeping the excavation to depth to
between 4-6 inches.
c. When you are one crawler tractor length from the berm start point, begin to raise
the blade slowly allowing the material fall under the blade to start forming a ramp at
approximately a 2:1 ratio.
d. Position the crawler tractor at the start point with approximately 1/3 of the blade
overlapped onto the first pass.
e. Maintain a direction directly toward the original berm.
f. Ensure the area that material is being cut from remains level. DO NOT back blade to
level.
g. Berm the material on each successive cut in the same manner.
h. Construct the berm higher on each pass until it reaches the desired height.
3. Correct excavation irregularities.
NOTE: The slower the engine RPM, the more sluggish your blade control. If you
attempt to cut too deep, you will create a washboard effect consisting of a series
of high areas followed by low areas in the bottom of the ditch.
a. To correct a washboard effect, cut the top of each high spot and fill the low spots.
b. Do not attempt to straighten the excavation in one pass.
c. If bottom of the excavation is not level:
a) Back up to the last level point in the excavation.
b) Make a light cut, cutting just enough to level the bottom of the excavation.
55

d. Do not over correct the blade.
4. Back Fill Material
a. Start the crawler tractor moving forward and lower the blade to desired height.
b. Adjust the blade to the height of the surrounding area and move the crawler tractor
into the side of the berm using approximately 1/3 of the blade to cut.
c. Continue to work to the left side of the berm.
NOTE: Depending on the size of the berm, you should not cut into the berm
straight on. Large berms should be worked from the side, cutting material away
from the berm, using 1/3 of the blade. When moving materials higher than the
midpoint of the ROPS, you must adjust the height of the cut to eliminate the
danger of falling overhangs. On the successive cuts, follow the procedures for
normal spreading operations using the first cut height as a guide for blade
depth.
d. Raise and lower the blade without stalling the dozer or spinning the tracks.
e. Move forward while spreading material and slowly raising the blade until all material
is feathered to match the surrounding area.
f. Place the crawler tractor in reverse after the blade has been emptied.
g. Raise the blade high enough to clear any obstacles and back the crawler tractor
back to the berm.
h. Reposition the crawler tractor for another cut again cutting into the berm using 1/3
of the blade.
i. Repeat steps until the berm has been leveled and spread over the designated area.
j. Restore the area as close as possible to its original state to match the surrounding
area and existing drainage.
Check on Learning:NOTE: Instructors have the latitude to change these
questions and ask questions based on the student
needs.
Q: How deep are the cuts to excavate material to construct
a berm?
A: 6-8 inches.
Q: How much blade overlap is used after the first cut?
A: 1/3 of the blade.
Review Summary:During this block of instruction, we have reviewed and
discussed:
- Constructing a Berm.
Are there any questions?
ELO B - LSA 5. Learning Step / Activity ELO B - LSA 5. Performance Evaluation
Method of Instruction: Hardware-Oriented Test
56

Mode of Delivery: Resident Instruction
Instr Type (I:S Ratio): Civilian - ICH (1:3)
Time of Instruction: 3 hrs
Media Type: Actual Equipment / Student Guide
Other Media: Unassigned
Security Classification: This course/lesson will present information that has a SecurityClassification of: U - Unclassified.
1. Ensure students have required materials.
2. Give detailed instructions on what is expected during evaluation.
3. The service member shall not receive any assistance from the instructor or other
students during the evaluation.
4. Evaluate the students' performance to effectively achieve the standard.
5. Ensure students complete the evaluation within the allotted time.
Check on Learning:1. Critique the students' performance.
2. Explain any short comings and corrective action
necessary to achieve the standard.
3. Provide remedial training as required.
4. Was all the evaluation information understood?
5. Were all the performance steps on the evaluation
understood?
6. Did the evaluation reflect the contents of the lesson plan
and the information taught?
7. Does any portion of the class need more or less time,
clarification, or practical exercise?
8. What percentage of students missed any one
performance step?
9. Check each performance step and clarify as needed.
10. Was the time for the evaluation adequate?
Review Summary:During this evaulation block, you have been evaulated on
performance steps for:
- Construct a Berm with a Crawler Tractor.
Are there any questions?
ELO B - LSA 6. Learning Step / Activity ELO B - LSA 6. Test Review
Method of Instruction: Test Review
Mode of Delivery: Resident Instruction
Instr Type (I:S Ratio): Civilian - ICH (1:3)
Time of Instruction: 5 mins
Media Type: Actual Equipment / Student Guide
Other Media: Unassigned
Security Classification: This course/lesson will present information that has a SecurityClassification of: U - Unclassified.
1. Soliciting student questions and explanations.
2. Asking questions and receiving answers from the students.
3. Correcting student misunderstandings.
Check on Learning:
57

1. Did the student understand all the evaulation
information?
2. Did the student understand all the steps on the
evaulation?
3. Did the evaulation reflect the contents of the lesson plan
and the information taught?
Review Summary:During this evaulation block, you have been evaulated on
performance steps for:
- Construct a Berm with a Crawler Tractor.
Are there any questions?
CHECK ON LEARNING (ELO B):Q: How should the ground be maintained while excavating material for the
berm?
A: Level.
Q: When constructing a berm, what is the berm ramp ratio?
A: 4:1 ratio.
Q: How do you correct a wash board effect when excavating?
A: Cut the top of each high spot and fill the low spots.
.
REVIEW SUMMARY(ELO B):During this block of instruction, we have reviewed and discussed:
- Constructing a Berm with a Crawler Tractor.
Are there any questions?
C. ENABLING LEARNING OBJECTIVE
ACTION: Excavate with a Crawler TractorCONDITIONS:
Given an area for excavation, a crawler tractor, an equipment TM, a student guide,
an equipment technical manual, and all personal protective equipment.
STANDARDS:Perform excavation operations by excavating a ditch 75' long ± 6’, 3' deep ± 6”,
maintaining a uniform ditch bottom and a slope of approximately 4:1 on the entrance
and exit ramps. Stockpile material a minimum of approximately 5 feet high, with
approximately a 2:1 slope ratio. Level the area cutting the high areas and filling the
low area’s maintaining a smooth surface. Spread the stockpile by overlapping each
pass using approximately 1/3 of the blade to back fill ditch. Backfill ditch and level the
surface to match surrounding area and existing drainage leaving a smooth surface.
Perform all steps adhering to all Warning and Caution statements in the TM, without
error and with no damage to equipment, environment or injury to personnel.
LEARNINGDOMAIN - LEVEL:
Cognitive - Understanding
No JPMELEARNING AREASSUPPORTED:
None
ELO C - LSA 1. Learning Step / Activity ELO C - LSA 1. Perform Pre-Start Safety Procedures
58

Method of Instruction: Demonstration
Mode of Delivery: Resident Instruction
Instr Type (I:S Ratio): Civilian - ICH (1:3)
Time of Instruction: 20 mins
Media Type: Actual Equipment / Conference/Demonstration / Student Guide
Other Media: Unassigned
Security Classification: This course/lesson will present information that has a SecurityClassification of: U - Unclassified.
Note: LSA 1 & 2 do not have to be taught again, just reinforced.
1. Perform operator's preventive maintenance checks and services.
2. Perform a complete visual walk around the equipment.
3. Recover drip pan.
4. Turn battery disconnect switch to ON position.
5. Mount the crawler tractor.
a. Enter operator's compartment from left side.
Note: Maintain a minimum three-points of contact at all times, i.e., two feet and
one hand or two hands and one foot.
b. Face machine when mounting and dismounting.
c. Ensure ladders and grab handles are clean and secure before using them.
6. Utilize all Personal Protective Equipment (PPE).
7. Adjust the seat.
8. Adjust left and right interior rearview mirrors.
9. Fasten and adjust the seat belt.
10. Ensure left joystick is in NO STEER position.
11. Ensure parking brake is engaged.
12. Ensure all personnel are clear of machine.
Check on Learning:NOTE: Instructors have the latitude to change these
questions and ask questions based on the student
needs.
Q: What position must the left joy stick before starting the
engine?
A: NO STEER position.
Q: When mounting/dismounting the crawler tractor, what is
meant by three-points of contact?
A: Two feet and one hand or two hands and one foot.
Review Summary:During this block of instruction, we have reviewed and
discussed:
- Performing Pre-Start Safety Procedures
Are there any questions?
ELO C - LSA 2. Learning Step / Activity ELO C - LSA 2. Prepare the Crawler Tractor for Operation.
Method of Instruction: Demonstration
Mode of Delivery: Resident Instruction
59

Instr Type (I:S Ratio): Civilian - ICH (1:3)
Time of Instruction: 15 mins
Media Type: Actual Equipment / Conference/Demonstration / Student Guide
Other Media: Unassigned
Security Classification: This course/lesson will present information that has a SecurityClassification of: U - Unclassified.
Note: LSA 2 does not have to be taught again, just reinforced.
CAUTION: DO NOT crank starter motor for more than 30 seconds at a time. After
30 seconds, allow starter motor to cool for at least 2 minutes before attempting
to start engine again. Excessive heating of starter motor may result in damage
or premature starter failure.
- Turbocharger damage can result if engine rpm are not kept low until engine oil
pressure is sufficient.
- If low engine oil pressure alert indicator does not turn off within 10 seconds
after engine starts, stop engine and perform troubleshooting.
- Failure to follow these cautions may result in engine damage.
1. Start the engine
WARNING: DO NOT operate engine in enclosed areas due to the dangers of
carbon monoxide poisoning from exhaust fumes. Always start and operate
engine in a well- ventilated area and, if in an enclosed area, vent exhaust to the
outside. Failure to follow this warning may cause injury or death to personnel.
- BE ALERT for personnel in the area while operating machine. Always check to
ensure area is clear of personnel and obstructions before starting engine.
Failure to follow this warning may result in injury or death to personnel.
- Hearing protection is required if within 26 ft (8 m) of an operating machine.
Hearing protection is also required if operating machine without ROPS/FOPS
during transport procedures. Failure to wear hearing protection may cause
hearing loss.
a. Check to make sure all bystanders are clear of machine and briefly sound horn
before starting engine.
b. Ensure left joystick is in NO STEER position and parking brake is engaged.
WARNING: The monitoring system will perform an automatic self-diagnostic
functional test whenever engine start switch is turned to the ON position. If
action alarm does not sound or monitoring displays are not functioning, do not
start engine. Notify Field Maintenance. Failure to follow this warning may result
in injury or death to personnel, as any Warning Category 3 notifications will not
be relayed to the operator.
NOTE: The automatic self-diagnostic functional test verifies that all outputs
(gauges, alert indicators, and alarms) are operating correctly.
- Alert and status indicators in upper and lower panels must illuminate briefly.
- Action lamp must illuminate briefly.
- Auxiliary action lamp must illuminate briefly.
- Gauges must sweep to vertical, then left, right, and finally settle at current
60

actual value.
- Upper digital display window must show readouts in the following sequence:
- “888888888888”
- “0 RPM P”
- Lower digital display window must show readouts in the following sequence;
- “Deg C”, “kPa”, “miles”, “kilometers”, “rpm”, and “liters”
- “X 10”
- Hourglass symbol for service meter
- “888.8.8.8”
- Current service meter value
NOTE: Monitoring system self-diagnostic functional test takes approximately 10
seconds to complete.
c. Turn engine start switch to ON position, but do not start engine. Allow monitoring
system to perform self-diagnostic functional test.
CAUTION: Do not crank engine for more than 30 seconds. Allow starting motor
to cool for two minutes before cranking again or damage to starting motor or
batteries may result.
- Shut down engine if engine oil pressure does not register on gauge or if engine
oil pressure indicator remains lit 10 seconds after start up.
- Failure to follow this caution may result in engine damage.
d. Turn and hold engine start switch to START. Release engine start switch when
engine starts.
2. Machine Warm-up
a. Allow engine to warm up at low idle for five minutes.
b. Slowly operate hydraulics (blade and implements) to allow warm hydraulic oil to
circulate through all hydraulic cylinders and lines.
c. Begin machine operation only after engine coolant temperature gauge begins to
move.
CAUTION: Do not crank engine for more than 30 seconds. Allow starting motor
to cool for two minutes before cranking again or damage to starting motor or
batteries may result.
- Shut down engine if engine oil pressure does not register on gauge or if engine
oil pressure indicator remains lit 10 seconds after start up.
- Failure to follow these cautions may result in engine damage.
- Although gear changes and directional changes at full engine speed are
possible, deceleration and/or braking when you change direction is highly
recommended. Failure to follow this caution may result in powertrain component
failure.
WARNING: To prevent injury, make sure that no maintenance work is being
performed on or near machine.
- The monitoring system will perform an automatic self-diagnostic functional test
whenever engine start switch is turned to the ON position. If action alarm does
not sound or monitoring displays are not functioning, do not start engine. Notify
Field Maintenance. Failure to follow this warning may result in injury or death to
61

personnel, as any Warning Category 3 notifications will not be relayed to the
operator.
- Keep machine under control at all times in order to prevent injury. Reduce
engine speed when you maneuver in tight quarters or when you break over a
rise.
- Select gear range that is appropriate before you start downhill. Do not change
gears when you are going downhill. Do not allow engine to overspeed when you
are unloaded and moving down a slope. Watch tachometer and use service
brakes. Use service brakes near the top of slope to prevent excessive engine
speed.
- When you drive down a grade, use same gear used when driving up the grade.
- Machine will turn (counter-rotate) when transmission is in NEUTRAL, parking
brake is disengaged, and left joystick (steering lever) is pushed forward or
pulled rearward.
- Ensure all personnel are clear of machine before disengaging parking brake.
- Engage parking brake to lock left joystick and prevent machine movement.
- Do not allow riders on machine.
- If machine begins to sideslip, discard load and turn machine downhill.
- Whenever possible, operate machine up and down slopes, not across slope.
- Always use a ground guide when moving machine up or down a ramp when
loading/unloading. Failure to use a ground guide may result in an accident,
causing death or injury to personnel or damage to equipment.
- Failure to follow these warnings may result in injury or death to personnel.
d. Disengage parking brake and unlock joystick.
e. Configure the crawler tractor to the travel position.
Note: Before starting any work, ensure a digging permit has been issued and
then walk the area to uncover any hazards and plan the job. Check for buried
utilities lines and pipes and always check overhead clearance.
Check on Learning:NOTE: Instructors have the latitude to change these
questions and ask questions based on the student
needs.
Q: Once the engine start switch is turned to the ON
position, what must the operator wait on?
A: The monitoring system to perform self-diagnostic
functional test.
Q: How long does the engine need to warm up?
A: Five minutes at low idle.
Review Summary:During this block of instruction, we have reviewed and
discussed:
- Preparing the Crawler Tractor for Operation.
Are there any questions?
ELO C - LSA 3. Learning Step / Activity ELO C - LSA 3. Excavate Material.
62

Method of Instruction: Demonstration
Mode of Delivery: Resident Instruction
Instr Type (I:S Ratio): Civilian - ICH (1:3) (1:3 PE 1)
Time of Instruction: 11 hrs 20 mins (10 hrs 10 mins PE)
Media Type: Actual Equipment / Conference/Demonstration / Student Guide
Other Media: Unassigned
Security Classification: This course/lesson will present information that has a SecurityClassification of: U - Unclassified.
Note : Before starting any work, ensure a digging permit has been issued and
then walk the area to uncover any hazards and plan the job. Check for buried
utilities lines and pipes and always check overhead clearance.
1. Determine the stockpile location.
a. Position off the job site.
b. Position downhill if possible.
c. Construct the stockpile ramp at a 2:1 slope ratio.
2. Lower the blade to strip material.
a. Slowly lower the blade to a depth of 6" to 8" and maintain a smooth cut.
b. On the first pass excavate material from a designated start point to a stockpile area
approximately 75' away.
c. Back the crawler tractor back to the beginning of the excavation site.
d. Position the crawler tractor at the start point with approximately 1/3 of the blade
overlapped onto the first pass.
e. Maintain a direction directly toward the original stockpile. Do not build a berm.
f. Ensure the area that material is being cut from remains level. DO NOT back blade to
level.
g. Make successive cuts the same as in step 2 above.
3. Correct excavation irregularities.
NOTE: The slower the engine RPM, the more sluggish your blade control. If you
attempt to cut too deep, you will create a washboard effect consisting of a series
of high areas followed by low areas in the bottom of the ditch.
a. To correct a washboard effect, cut the top of each high spot and fill the low spots.
b. Do not attempt to straighten the ditch in one pass.
c. If bottom of ditch is not level:
1) Back up to the last level point in the ditch.
2) Make a light cut, cutting just enough to level the ditch bottom.
d. Do not over correct the blade.
4. Construct a flat bottom ditch.
a. Position the crawler tractor in as level a position as possible.
b. Lower blade approximately 1/2 foot off the ground.
c. Adjust blade until it is level.
d. Place crawler tractor in motion.
e. Lower blade gradually to make approximately a 6" to 8" deep marking cut.
f. Maintain a uniform cut for approximately 75'.
g. Gradually raise blade to construct an exit ramp that is no steeper than
63

approximately a 4:1 slope ratio.
h. Raise the blade all the way and back the crawler tractor to the starting point
keeping the crawler tractor in the same path.
i. On each remaining ditch cut, maintain control of the crawler tractor while cutting a
maximum of 6" to 8”.
j. Maintain a uniform ditch bottom and a slope of approximately a 4:1 ratio on the
entrance and exit ramps.
k. Continue ditching until the ditch reaches desired ditch stake specifications.
NOTE: You will not be constructing a V-Ditch while here in training.
5. Construct a V-ditch.
a. Tilt the blade to the right or left for ditching.
b. Place the crawler tractor in 1st gear forward.
c. Excavate a 4" to 6" deep marking cut.
d. Maintain depth of cut for length of ditch.
e. Tilt the blade to the right or left for ditching.
f. Excavate as deep as possible.
g. Remove excess material from shoulders.
h. Level remaining windrows.
i. Adjust the blade to remove excess material in ditch.
j. Move excess material away from the ditch.
k. Correct a washboard surface.
l. Correct an unlevel ditch bottom.
m. Continue excavation until the ditch reaches desired ditch stake specifications.
6. Stockpile Material
a. Push material being excavated toward the stockpile keeping the excavation to
depth to between 6-8 inches.
b. When you are one crawler tractor length from the stockpile start point, begin to
raise the blade slowly allowing the material fall under the blade forming a ramp at
approximately a 2:1 ratio.
c. Stockpile the material on each successive cut in the same manner.
d. Construct the stockpile higher on each pass until it reaches the desired height.
7. Back Fill Material
a. Start the crawler tractor moving forward and lower the blade to desired height.
b. Adjust the blade to the height of the surrounding area and move the crawler tractor
into the side of the pile using approximately 1/3 of the blade to cut.
c. Continue to work to the left side of the stockpile.
NOTE: Depending on the size of the pile, you should not cut into the pile
straight on. Large piles should be worked from the side, cutting material away
from the stockpile, using 1/3 of the blade. When moving materials higher than
the midpoint of the ROPS, you must adjust the height of the cut to eliminate the
danger of falling overhangs. On the successive cuts, follow the procedures for
64

normal spreading operations using the first cut height as a guide for blade
depth.
d. Raise and lower the blade without stalling the dozer or spinning the tracks.
e. Move forward while spreading material and slowly raising the blade until all material
is feathered to match the surrounding area.
f. Place the crawler tractor in reverse after the blade has been emptied.
g. Raise the blade all the way and back the crawler tractor to the stockpile.
h. Reposition the crawler tractor for another cut again cutting into the stockpile using
1/3 of the blade.
i. Repeat steps until the stockpile has been leveled and spread over the designated
area.
j. Restore the area as close as possible to its original state to match the surrounding
area and existing drainage.
8. Spread a Stockpile.
CAUTION: When spreading materials that are higher than the midpoint on the
rollover protection system (ROPS), adjust the height of the cut to eliminate the
danger of falling overhangs.
1. Position the crawler tractor on the backside of the stockpile.
2. Adjust blade to spread a stockpile.
a. Cut small piles using the full blade.
b. Cut large piles from the side using 1/3 of the blade.
3. Adjust the length of push based on the soil conditions.
a. In soft material or on an unstable slopes, let the second bladeful push the first
bladeful over the edge.
b. Ensure that no part of the tracks hang over the edge.
c. Ensure that oversized materials are not backfilled.
9. Perform leveling operations.
a. Determine the direction to level the area.
b. Cut the high areas and fill the low areas.
c. Adjust blade as necessary to maintain a uniform cut.
d. Feather material evenly.
e. Repeat steps until the area has been leveled to construction stake specifications.
Check on Learning:NOTE: Instructors have the latitude to change these
questions and ask questions based on the student
needs.
Q: Before starting any work, what must be obtained?
A: Digging permit.
Q: What is the slope ratio for the exit ramp of a flat bottom
ditch?
A: 4:1
Review Summary:During this block of instruction, we have reviewed and
65

discussed:
- Crawler Tractor Excavation Procedures
Are there any questions?
ELO C - LSA 4. Learning Step / Activity ELO C - LSA 4. Performance Evaluation
Method of Instruction: Hardware-Oriented Test
Mode of Delivery: Resident Instruction
Instr Type (I:S Ratio): Civilian - ICH (1:3)
Time of Instruction: 6 hrs
Media Type: Actual Equipment
Other Media: Unassigned
Security Classification: This course/lesson will present information that has a SecurityClassification of: U - Unclassified.
1. Ensure students have required materials.
2. Give detailed instructions on what is expected during evaluation.
3. The service member shall not receive any assistance from the instructor or other
students during the evaluation.
4. Evaluate the students' performance to effectively achieve the standard.
5. Ensure students complete the evaluation within the allotted time.
Check on Learning:1. Critique the students' performance.
2. Explain any short comings and corrective action
necessary to achieve the standard.
3. Provide remedial training as required.
4. Was all the evaluation information understood?
5. Were all the performance steps on the evaluation
understood?
6. Did the evaluation reflect the contents of the lesson plan
and the information taught?
7. Does any portion of the class need more or less time,
clarification, or practical exercise?
8. What percentage of students missed any one
performance step?
9. Check each performance step and clarify as needed.
10. Was the time for the evaluation adequate?
Review Summary:During this evaulation block, you have been evaulated on
performance steps for:
- Excavate with a Crawler Tractor.
Are there any questions?
ELO C - LSA 5. Learning Step / Activity ELO C - LSA 5. Test Review
Method of Instruction: Test Review
Mode of Delivery: Resident Instruction
Instr Type (I:S Ratio): Civilian - ICH (1:3)
Time of Instruction: 5 mins
Media Type: Actual Equipment
Other Media: Unassigned
66

Security Classification: This course/lesson will present information that has a SecurityClassification of: U - Unclassified.
1. Soliciting student questions and explanations.
2. Asking questions and receiving answers from the students.
3. Correcting student misunderstandings.
Check on Learning:1. Did the student understand all the evaulation
information?
2. Did the student understand all the steps on the
evaulation?
3. Did the evaulation reflect the contents of the lesson plan
and the information taught?
Review Summary:During this evaulation block, you have been evaulated on
performance steps for:
- Excavate with a Crawler Tractor.
Are there any questions?
CHECK ON LEARNING (ELO C):Q: When ripping, how is the forward shank angle adjustment determined?
A: Adjust the shank angle forward until the tractor feels “pulled into” or
pinned to the ground.
Q: How do you correct a wash board effect when excavating?
A: Cut the top of each high spot and fill the low spots.
Q: When constructing a stockpile, what is the stockpile ramp ratio?
A: Form a ramp at approximately a 2:1 ratio.
Q: When backfilling utilizing a large stockpile, how should the stockpile be
worked?
A: From the backside cutting material away from the stockpile, using 1/3 of
the blade.
REVIEW SUMMARY(ELO C):During this block of instruction, we have reviewed and discussed:
- Excavating with a Crawler Tractor.
Are there any questions?
67

SECTION IV. SUMMARY
Method of Instruction: LectureMode of Delivery: Resident InstructionInstr Type(I:S Ratio): Civilian - ICH (1:66)Time of Instruction: 5 mins
Check onLearning In this lesson we have learned how to identify characteristics of the crawler tractor, construct a
berm, and excavate, skills you will need to perform your part in your units mission.
Review/Summary During this phase of instruction, we have reviewed and discussed:
• Identifying Characteristics of a Crawler Tractor.
• Constructing a Berm with a Crawler Tractor.
• Excavating with a Crawler Tractor.
Are there any questions pertaining to "Crawler Tractor Operations"?
68

SECTION V. STUDENT EVALUATION
TestingRequirements The students are not given a written examination at the end of the annex unless 20% or more of
the class has not been attended. The students are performance evaluated as they complete the
practical exercises in this annex.
Upon completion of this lesson, the students' performance will be evaluated with a hardware
oriented (TE1) examination for which a GO must be achieved on all performance measures to
receive a GO on the performance evaluation.
The students’ performance will be evaluated with a non-hardware oriented (TE2) examination
for which a minimum score of 70% must be achieved. This exam will only be given in the event
20% or more of the class has not been attended or inclement weather required classroom
training in place of hands-on training.
FeedbackRequirements Contact students that identified training shortfalls on their student critiques. Provide remedial
instruction as needed. Instructors will remind students to complete their lesson critiques and to
provide feedback to the instructors, verbally and/or in writing. Remind them that the Training
Branch Chief reviews their course critiques, and that feedback will be used to improve
courseware.
69

Appendix A - Viewgraph Masters
Operate a Crawler Tractor (CRM)052-12N10C04 / Version 1 ©
Sequence Media Name Media Type
1 Crawler Tractor Introduction PPT
A-1

Appendix B - Assessment Statement and Assessment Plan
Assessment Statement: Refer to the individual student assessment plan in the student guide.
Assessment Plan: None.
B-1

Appendix C - Practical Exercises and Solutions
PRACTICAL EXERCISE SHEET 052-12N10C04 PE1
Time: 8 hours 25 minutes
I:S Ratio: 1:3
PRACTICAL EXERCISE(S)/SOLUTION(S) FOR LESSON 052-12N10C04 Version 1 ©
Title Perform Operator's Preventive Maintenance Checks and Services.
LessonNumber/Title
052-12N10C04 Version 1 © / Operate a Crawler Tractor (CRM)
Security Classification Unclassified
IntroductionThe crawler tractor is a versatile piece of engineer equipment that can be used for multiple
tasks on construction projects. When using the ripper, the crawler tractor can rip hard material
to include large rocks, asphalt and in the next minute be excavating a trench or finishing slopes.
It can also be used to push load scrapers, stockpile materials, winch equipment from mud or
soft material and is also the primary piece of equipment used for clearing and grubbing
operations. Listen close and pay attention and you will learn how to operate the crawler tractor
to successfully perform your mission.
MotivatorExplain the Operational Environment (OE) to include lessons learned throughout this lesson.
Ensure the students are aware of how it will affect them during their future assignments. For the
most current information visit the CALL web site at HTTP://call.army.mil. Review all material to
be used from CALL site to prevent release of sensitive information.
Note: Relate instruction to current world countries where they could be deployed.
- Explain how the eight interrelated operational variables: political, military, economic, social,
information, infrastructure, physical environment, and time could apply to your role as an
operator.
LearningStep/Activity NOTE. The instructor should inform the students of the following Learning Step/Activity requirements (ELO B - LSA
1). At the completion of this lesson, you [the student] will:
Action: Perform Pre-Start Safety Procedures.
SafetyRequirements In a training environment, leaders must perform a risk assessment in accordance with ATP 5-
19, Risk Management. Leaders will complete the current Deliberate Risk Assessment
Worksheet in accordance with the TRADOC Safety Officer during the planning and completion
of each task and sub-task by assessing mission, enemy, terrain and weather, troops and
support available-time available and civil considerations, (METT-TC). Note: During MOPP
training, leaders must ensure personnel are monitored for potential heat injury. Local policies
and procedures must be followed during times of increased heat category in order to avoid heat
related injury. Consider the MOPP work/rest cycles and water replacement guidelines IAW FM
3-11.4, Multiservice Tactics, Techniques, and Procedures for Nuclear, Biological, and Chemical
(NBC) Protection, FM 3-11.5, Multiservice Tactics, Techniques, and Procedures for Chemical,
Biological, Radiological, and Nuclear Decontamination. Review local training area SOP. Know
C-1

and adhere to all hand and arm signals. Perform an equipment walk-around before and after
operation. Maintain three points of contact when mounting and dismounting. Wear goggles and
gloves when checking batteries, hydraulic tank, and fueling the equipment. Wear hearing
protection, kevlar / hard hats, safety boots and seat belts when operating or around running
equipment. Do not wear loose clothing or jewelry. Utilize drip pans and always look in the
direction of travel. Use caution when working on hills, banks, or steep slopes to avoid tipping.
DO NOT place transmission in neutral to allow the equipment to coast.
Risk AssessmentLevel
Low
EnvironmentalConsiderations NOTE: Instructor should conduct a risk assessment to include environmental considerations
IAW the current environmental considerations publication, and ensure students are briefed on
hazards and control measures.
Instructors must complete a risk assessment before conducting training, operations, or C-1
logistical activities. Abide with all applicable laws and regulations.
Based on its commitment to environmental protection, the Army will conduct its operations in
ways that minimize environmental impacts.
• Comply with all environmental laws and regulations. This includes federal, state, local, and
Host Nation laws.
• Prevent pollution at the source by reducing, reusing, and recycling material that causes
pollution.
• Conserve and preserve natural and cultural resources so that they will be available for present
and future generations.
• Ensure drip pans and spill kits are on hand to prevent / mitigate any Petroleum, Oil, and
Lubricant (POL) spills.
• During refueling operations ensure fuel nozzle is properly in the fuel tank, operator has
physical control of the fuel nozzle/handle and is trained on reacting to a fuel or POL spill.
Units and installations will prepare an environmental risk assessment using the before, during,
and after checklist. The checklist should supplement local and state environmental regulations
applicable to your area.
EvaluationNone - Required Reinforcement Equipment Maintenance Training.
InstructionalLead-in The crawler tractor is a versatile piece of engineer equipment that can be used for multiple
tasks on construction projects. When using the ripper, the crawler tractor can rip hard material
to include large rocks, asphalt and in the next minute be excavating a trench or finishing slopes.
It can also be used to push load scrapers, stockpile materials, winch equipment from mud or
soft material and is also the primary piece of equipment used for clearing and grubbing
operations. Listen close and pay attention and you will learn how to operate the crawler tractor
to successfully perform your mission.
ResourceRequirements Instructor Materials:
All PPE
Lesson plan
P.E. Solutions
C-2

TM 5-2410-241-10
Student Materials:
All PPE
Pen or pencil
Student guide
TM 5-2410-241-10
Practical Exercises
Equipment records folder
SpecialInstructions 1. If the weather does not permit outdoor training due to thunder storms, lighting, excessive
heat or excessive cold etc., the phase will implement their inclementweather training plans and
continue training indoors.
2. If 20% or more of performance training is missed due to inclement weather, the written
examination will be administered to the students. The students must receive a minimum of 70%
on the written examination to receive a passing score.
3. Inform the students where to go in case of a severe storm or tornado.
4. This PMCS P.E. contains the 25 minutes of before operations PMCS and the 25 minutes for
after operations PMCS for the 1st day. The following is the breakdown for each day 1.0 hr.
every day (.5 before, .5 after). Day 5 has 4.5 hrs., .5 before, 4 hrs. to wash, lubricate and
perform weekly maintenance for a total of 8.5 hours.
5. The performance of PMCS has already been taught and tested in the TAMM'S portion of this
course. This maintenance is required on each peice of equipment and reinforces the initial
maintenance block of training received in TAMM'S.
ProceduresNOTE: The performance of PMCS has already been taught and tested in the TAMM'S
portion of this course. This maintenance is required weekly on each peice of equipment
and reinforces the initial maintenance block of training received in TAMM'S.
1. Practical Exercise Instructions
a. Ensure students have required materials and references.
b. Students will assist each other in performing required maintenance.
c. Clarify students' questions.
d. Check on students' progress and provide assistance as necessary throughout the exercise.
e. Ensure students complete the practical exercise within the allotted time.
f. Provide solutions to the practical exercise.
FeedbackRequirements Contact students that identified training shortfalls on their student critiques. Provide remedial
instruction as needed. Instructors will remind students to complete their lesson critiques and to
provide feedback to the instructors, verbally and/or in writing. Remind them that the Training
Branch Chief reviews their course critiques, and that feedback will be used to improve
courseware.
C-3

SOLUTION FORPRACTICAL EXERCISE 052-12N10C04 PE1
None - Required Reinforcement Equipment Maintenance Training.
C-4

PRACTICAL EXERCISE SHEET 052-12N10C04 PE2
Time: 1 hours 0 minutes
I:S Ratio: 1:3
Title Familiarization of Maneuvering a Crawler Tractor
LessonNumber/Title
052-12N10C04 Version 1 © / Operate a Crawler Tractor (CRM)
Security Classification Unclassified
IntroductionThe crawler tractor is a versatile piece of engineer equipment that can be used for multiple
tasks on construction projects. When using the ripper, the crawler tractor can rip hard material
to include large rocks, asphalt and in the next minute be excavating a trench or finishing slopes.
It can also be used to push load scrapers, stockpile materials, winch equipment from mud or
soft material and is also the primary piece of equipment used for clearing and grubbing
operations. Listen close and pay attention and you will learn how to operate the crawler tractor
to successfully perform your mission.
MotivatorExplain the Operational Environment (OE) to include lessons learned throughout this lesson.
Ensure the students are aware of how it will affect them during their future assignments. For the
most current information visit the CALL web site at HTTP://call.army.mil. Review all material to
be used from CALL site to prevent release of sensitive information.
Note: Relate instruction to current world countries where they could be deployed.
- Explain how the eight interrelated operational variables: political, military, economic,
social, information, infrastructure, physical environment, and time could apply to your
role as an operator.
LearningStep/Activity NOTE. The instructor should inform the students of the following Learning Step/Activity requirements (ELO B - LSA
3). At the completion of this lesson, you [the student] will:
Action: Familiarization of Maneuvering a Crawler Tractor
SafetyRequirements In a training environment, leaders must perform a risk assessment in accordance with ATP 5-
19, Risk Management. Leaders will complete the current Deliberate Risk Assessment
Worksheet in accordance with the TRADOC Safety Officer during the planning and completion
of each task and sub-task by assessing mission, enemy, terrain and weather, troops and
support available-time available and civil considerations, (METT-TC). Note: During MOPP
training, leaders must ensure personnel are monitored for potential heat injury. Local policies
and procedures must be followed during times of increased heat category in order to avoid heat
related injury. Consider the MOPP work/rest cycles and water replacement guidelines IAW FM
3-11.4, Multiservice Tactics, Techniques, and Procedures for Nuclear, Biological, and Chemical
(NBC) Protection, FM 3-11.5, Multiservice Tactics, Techniques, and Procedures for Chemical,
Biological, Radiological, and Nuclear Decontamination. Review local training area SOP. Know
and adhere to all hand and arm signals. Perform an equipment walk-around before and after
operation. Maintain three points of contact when mounting and dismounting. Wear goggles and
C-5

gloves when checking batteries, hydraulic tank, and fueling the equipment. Wear hearing
protection, kevlar / hard hats, safety boots and seat belts when operating or around running
equipment. Do not wear loose clothing or jewelry. Utilize drip pans and always look in the
direction of travel. Use caution when working on hills, banks, or steep slopes to avoid tipping.
DO NOT place transmission in neutral to allow the equipment to coast.
Risk AssessmentLevel
Low
EnvironmentalConsiderations NOTE: Instructor should conduct a risk assessment to include environmental considerations
IAW the current environmental considerations publication, and ensure students are briefed on
hazards and control measures.
Instructors must complete a risk assessment before conducting training, operations, or C-1
logistical activities. Abide with all applicable laws and regulations.
Based on its commitment to environmental protection, the Army will conduct its operations in
ways that minimize environmental impacts.
• Comply with all environmental laws and regulations. This includes federal, state, local, and
Host Nation laws.
• Prevent pollution at the source by reducing, reusing, and recycling material that causes
pollution.
• Conserve and preserve natural and cultural resources so that they will be available for present
and future generations.
• Ensure drip pans and spill kits are on hand to prevent / mitigate any Petroleum, Oil, and
Lubricant (POL) spills.
• During refueling operations ensure fuel nozzle is properly in the fuel tank, operator has
physical control of the fuel nozzle/handle and is trained on reacting to a fuel or POL spill.
Units and installations will prepare an environmental risk assessment using the before, during,
and after checklist. The checklist should supplement local and state environmental regulations
applicable to your area.
EvaluationNone, Required Reinforcement Equipment Maintenance Training.
InstructionalLead-in The crawler tractor is a versatile piece of engineer equipment that can be used for multiple
tasks on construction projects. When using the ripper, the crawler tractor can rip hard material
to include large rocks, asphalt and in the next minute be excavating a trench or finishing slopes.
It can also be used to push load scrapers, stockpile materials, winch equipment from mud or
soft material and is also the primary piece of equipment used for clearing and grubbing
operations. Listen close and pay attention and you will learn how to operate the crawler tractor
to successfully perform your mission.
ResourceRequirements Instructor Materials:
All PPE
Lesson plan
P.E. Solutions
TM 5-2410-241-10
C-6

Student Materials:
All PPE
Pen or pencil
Student guide
TM 5-2410-241-10
Practical Exercises
Equipment records folder
SpecialInstructions 1. If the weather does not permit outdoor training due to thunder storms, lighting, excessive
heat or excessive cold etc., the phase will implement their inclement weather training plans and
continue training indoors.
2. If 20% or more of performance training is missed due to inclement weather, the written
examination will be administered to the students. The students must receive a minimum of 70%
on the written examination to receive a passing score.
3. Inform the students where to go in case of a severe storm or tornado.
Note: These two steps (Perform pre-start safety procedures, and Prepare a Crawler
Tractor for operation) are required for each task but are taught initially in "Construct a
Berm with a Crawler Tractor". They must still be performed in the same sequence , but
as reinforcement training.
4. The last four hours of this phase will be utilized to perform maintenance. Equipment will be
washed, lubricated and will operators will perform weekly PMCS.
5. The performance of PMCS has already been taught and tested in the TAMM'S portion of this
course. This maintenance is required weekly on each peice of equipment and reinforces the
initial maintenance block of training received in TAMM'S.
6. Maneuvering the crawler tractor and manipulation of controls will be taught and practiced at
the same time. The instructor will place themself's in view of the students in the maneuvering
area and give hand ands arm signals to the students maneuver by them.
ProceduresNOTE: The performance of PMCS has already been taught and tested in the TAMM'S
portion of this course. This maintenance is required weekly on each peice of equipment
and reinforces the initial maintenance block of training received in TAMM'S.
1. Practical Exercise Instructions
a. Ensure students have required materials and references.
b. Students will assist each other in performing required maintenance.
c. Clarify students' questions.
d. Check on students' progress and provide assistance as necessary throughout the exercise.
e. Ensure students complete the practical exercise within the allotted time.
f. Provide solutions to the practical exercise.
FeedbackRequirements Contact students that identified training shortfalls on their student critiques. Provide remedial
instruction as needed. Instructors will remind students to complete their lesson critiques and to
provide feedback to the instructors, verbally and/or in writing. Remind them that the Training
Branch Chief reviews their course critiques, and that feedback will be used to improve
courseware.
C-7

SOLUTION FORPRACTICAL EXERCISE 052-12N10C04 PE2
None, Required Reinforcement Equipment Maintenance Training.
C-8

PRACTICAL EXERCISE SHEET 052-12N10C04 PE3
Time: 5 hours 35 minutes
I:S Ratio: 1:3
Title Construct a Berm with Excavated Material
LessonNumber/Title
052-12N10C04 Version 1 © / Operate a Crawler Tractor (CRM)
Security Classification Unclassified
IntroductionThe crawler tractor is a versatile piece of engineer equipment that can be used for multiple
tasks on construction projects. When using the ripper, the crawler tractor can rip hard material
to include large rocks, asphalt and in the next minute be excavating a trench or finishing slopes.
It can also be used to push load scrapers, stockpile materials, winch equipment from mud or
soft material and is also the primary piece of equipment used for clearing and grubbing
operations. Listen close and pay attention and you will learn how to operate the crawler tractor
to successfully perform your mission.
MotivatorExplain the Operational Environment (OE) to include lessons learned throughout this lesson.
Ensure the students are aware of how it will affect them during their future assignments. For the
most current information visit the CALL web site at HTTP://call.army.mil. Review all material to
be used from CALL site to prevent release of sensitive information.
Note: Relate instruction to current world countries where they could be deployed.
- Explain how the eight interrelated operational variables: political, military, economic,
social, information, infrastructure, physical environment, and time could apply to your
role as an operator.
LearningStep/Activity NOTE. The instructor should inform the students of the following Learning Step/Activity requirements (ELO B - LSA
4). At the completion of this lesson, you [the student] will:
Action: Construct a Berm.
SafetyRequirements In a training environment, leaders must perform a risk assessment in accordance with ATP 5-
19, Risk Management. Leaders will complete the current Deliberate Risk Assessment
Worksheet in accordance with the TRADOC Safety Officer during the planning and completion
of each task and sub-task by assessing mission, enemy, terrain and weather, troops and
support available-time available and civil considerations, (METT-TC). Note: During MOPP
training, leaders must ensure personnel are monitored for potential heat injury. Local policies
and procedures must be followed during times of increased heat category in order to avoid heat
related injury. Consider the MOPP work/rest cycles and water replacement guidelines IAW FM
3-11.4, Multiservice Tactics, Techniques, and Procedures for Nuclear, Biological, and Chemical
(NBC) Protection, FM 3-11.5, Multiservice Tactics, Techniques, and Procedures for Chemical,
Biological, Radiological, and Nuclear Decontamination. Review local training area SOP. Know
and adhere to all hand and arm signals. Perform an equipment walk-around before and after
operation. Maintain three points of contact when mounting and dismounting. Wear goggles and
gloves when checking batteries, hydraulic tank, and fueling the equipment. Wear hearing
C-9

protection, kevlar / hard hats, safety boots and seat belts when operating or around running
equipment. Do not wear loose clothing or jewelry. Utilize drip pans and always look in the
direction of travel. Use caution when working on hills, banks, or steep slopes to avoid tipping.
DO NOT place transmission in neutral to allow the equipment to coast.
Risk AssessmentLevel
Low
EnvironmentalConsiderations NOTE: Instructor should conduct a risk assessment to include environmental considerations
IAW the current environmental considerations publication, and ensure students are briefed on
hazards and control measures.
Instructors must complete a risk assessment before conducting training, operations, or C-1
logistical activities. Abide with all applicable laws and regulations.
Based on its commitment to environmental protection, the Army will conduct its operations in
ways that minimize environmental impacts.
• Comply with all environmental laws and regulations. This includes federal, state, local, and
Host Nation laws.
• Prevent pollution at the source by reducing, reusing, and recycling material that causes
pollution.
• Conserve and preserve natural and cultural resources so that they will be available for present
and future generations.
• Ensure drip pans and spill kits are on hand to prevent / mitigate any Petroleum, Oil, and
Lubricant (POL) spills.
• During refueling operations ensure fuel nozzle is properly in the fuel tank, operator has
physical control of the fuel nozzle/handle and is trained on reacting to a fuel or POL spill.
Units and installations will prepare an environmental risk assessment using the before, during,
and after checklist. The checklist should supplement local and state environmental regulations
applicable to your area.
EvaluationThis test evaluates the service member’s ability to safely and effectively construct a berm with a
crawler tractor in accordance with the technical manual. The evaluator will observe the service
member’s performance of constructing a berm with a crawler tractor. The service member shall
not ask for or be given any assistance from the evaluator or other service member. The service
member’s performance shall be measured as a GO/NO GO score. If a NO GO is received on
any portion of this test, the service member shall receive a written counseling and remedial
training for a minimum of one hour before being re-evaluated. The evaluator shall also observe
the service member for any safety violations which could potentially cause death/injury to
personnel and /or damage to equipment. Any safety violation observed shall constitute an
automatic performance failure.
InstructionalLead-in The crawler tractor is a versatile piece of engineer equipment that can be used for multiple
tasks on construction projects. When using the ripper, the crawler tractor can rip hard material
to include large rocks, asphalt and in the next minute be excavating a trench or finishing slopes.
It can also be used to push load scrapers, stockpile materials, winch equipment from mud or
soft material and is also the primary piece of equipment used for clearing and grubbing
operations. Listen close and pay attention and you will learn how to operate the crawler tractor
C-10

to successfully perform your mission.
ResourceRequirements Instructor Materials:
All PPE
Lesson plan
P.E. Solutions
TM 5-2410-241-10
Student Materials:
All PPE
Pen or pencil
Student guide
TM 5-2410-241-10
Practical Exercises
Equipment records folder
SpecialInstructions 1. If the weather does not permit outdoor training due to thunder storms, lighting, excessive
heat or excessive cold etc., the phase will implement their inclementweather training plans and
continue training indoors.
2. If 20% or more of performance training is missed due to inclement weather, the written
examination will be administered to the students. The students must receive a minimum of 70%
on the written examination to receive a passing score.
3. Inform the students where to go in case of a severe storm or tornado.
Note: Perform pre-start safety procedures, and prepare a crawler tractor for operation is taught
in "Construct a Berm" and has been performed from that point on. They must still be performed
in the sequence in all remaining crawler tractor training, but as reinforcement training.
4. This PMCS P.E. contains the 25 minutes of before operations PMCS and the 25 minutes of
after operations PMCS for the 1st day. After the first day the following is the breakdown for days
2-4 and 1.0 hr. every day (.5 before, .5 after). Day 5 has 4.5 hrs., .5 before, 4 hrs. to wash,
lubricate and perform weekly maintenance.
5. The performance of PMCS has already been taught and tested in the TAMM'S portion of this
course. This maintenance is required weekly on each peice of equipment and reinforces the
initial maintenance block of training received in TAMM'S.
ProceduresNOTE: The students may be tested on this task at any time during this phase of training. If the
student tests out on this task early THEY ARE STILL REQUIRED TO COMPLETE THE
ENTIRE BLOCK OF TRAINING.
1. Practical Exercise Instructions
a. Ensure students have required materials and references.
b. Clarify students' questions.
c. Check on students' progress and provide assistance as necessary throughout the exercise.
d. Ensure students complete the practical exercise within the allotted time.
e. Provide solutions to the practical exercise.
FeedbackRequirements Contact students that identified training shortfalls on their student critiques. Provide remedial
instruction as needed. Instructors will remind students to complete their lesson critiques and to
provide feedback to the instructors, verbally and/or in writing. Remind them that the Training
C-11

Branch Chief reviews their course critiques, and that feedback will be used to improve
courseware.
C-12

SOLUTION FORPRACTICAL EXERCISE 052-12N10C04 PE3
Action: Construct a Berm with a Crawler Tractor
Service Members Name: __________________________________ Date: ____________
Class Number: ___________ Service: _________________
1st 2nd
PERFORMANCE MEASURES GO NO GO GO NO GO
Construct a Berm
The student successfully:
1. Excavated 4-6“ deep approximately 60 ‘ long. ____ ________ ____ ________
2. Overlaped each pass using 1/3 of the blade. ____ ________ ____ ________
3. Aligned dozer on subsequence passes to end at the same
point. ____ ________ ____ ________
4. Maintained blade angle and control on successive cuts. ____ ________ ____ ________
5. Maintained a level cut area. ____ ________ ____ ________
6. Constructed the berm at end of excavation 30' wide and
5' high. ____ ________ ____ ________
7. Corrected excavation irregularities. ____ ________ ____ ________
Safety
The student successfully:
1. Performed 360° walk around before/after. ____ ________ ____ ________
2. Used 3 points of contact mounting/dismounting. ____ ________ ____ ________
3. Utilized hearing protection. ____ ________ ____ ________
4. Utilized seat belt. ____ ________ ____ ________
5. Performed all operations with no damage to
equipment or injury to personnel. ____ ________ ____ ________
Evaluator’s Comments:
________________________________________________________________________________________
________________________________________________________________________________________
________________________________________________________________________________________
________________________________________________________________________________________
________________________________________________________________________________________
________________________________________________________________________________________
________________________________________________________________________________________
________________________________________________________________________________________
________________________________________________________________________________________
________________________________________________________________________________________
________________________________________________________________________________________
________________________________________________________________________________________
________________________________________________________________________________________
C-13

________________________________________________________________________________________
________________________________________________________________________________________
________________________________________________________________________________________
________________________________________________________________________________________
Evaluator's Signature: ______________________________________________________________
Evaluator's Signature: ______________________________________________________________
C-14

PRACTICAL EXERCISE SHEET 052-12N10C04 PE4
Time: 10 hours 10 minutes
I:S Ratio: 1:3
Title Excavate with a Crawler Tractor
LessonNumber/Title
052-12N10C04 Version 1 © / Operate a Crawler Tractor (CRM)
Security Classification Unclassified
IntroductionThe crawler tractor is a versatile piece of engineer equipment that can be used for multiple
tasks on construction projects. When using the ripper, the crawler tractor can rip hard material
to include large rocks, asphalt and in the next minute be excavating a trench or finishing slopes.
It can also be used to push load scrapers, stockpile materials, winch equipment from mud or
soft material and is also the primary piece of equipment used for clearing and grubbing
operations. Listen close and pay attention and you will learn how to operate the crawler tractor
to successfully perform your mission.
MotivatorExplain the Operational Environment (OE) to include lessons learned throughout this lesson.
Ensure the students are aware of how it will affect them during their future assignments. For the
most current information visit the CALL web site at HTTP://call.army.mil. Review all material to
be used from CALL site to prevent release of sensitive information.
Note: Relate instruction to current world countries where they could be deployed.
- Explain how the eight interrelated operational variables: political, military, economic,
social, information, infrastructure, physical environment, and time could apply to your
role as an operator.
LearningStep/Activity NOTE. The instructor should inform the students of the following Learning Step/Activity requirements (ELO C - LSA
3). At the completion of this lesson, you [the student] will:
Action: Excavate Material.
SafetyRequirements In a training environment, leaders must perform a risk assessment in accordance with ATP 5-
19, Risk Management. Leaders will complete the current Deliberate Risk Assessment
Worksheet in accordance with the TRADOC Safety Officer during the planning and completion
of each task and sub-task by assessing mission, enemy, terrain and weather, troops and
support available-time available and civil considerations, (METT-TC). Note: During MOPP
training, leaders must ensure personnel are monitored for potential heat injury. Local policies
and procedures must be followed during times of increased heat category in order to avoid heat
related injury. Consider the MOPP work/rest cycles and water replacement guidelines IAW FM
3-11.4, Multiservice Tactics, Techniques, and Procedures for Nuclear, Biological, and Chemical
(NBC) Protection, FM 3-11.5, Multiservice Tactics, Techniques, and Procedures for Chemical,
Biological, Radiological, and Nuclear Decontamination. Review local training area SOP. Know
and adhere to all hand and arm signals. Perform an equipment walk-around before and after
operation. Maintain three points of contact when mounting and dismounting. Wear goggles and
gloves when checking batteries, hydraulic tank, and fueling the equipment. Wear hearing
C-15

protection, kevlar / hard hats, safety boots and seat belts when operating or around running
equipment. Do not wear loose clothing or jewelry. Utilize drip pans and always look in the
direction of travel. Use caution when working on hills, banks, or steep slopes to avoid tipping.
DO NOT place transmission in neutral to allow the equipment to coast.
Risk AssessmentLevel
Low
EnvironmentalConsiderations NOTE: Instructor should conduct a risk assessment to include environmental considerations
IAW the current environmental considerations publication, and ensure students are briefed on
hazards and control measures.
Instructors must complete a risk assessment before conducting training, operations, or C-1
logistical activities. Abide with all applicable laws and regulations.
Based on its commitment to environmental protection, the Army will conduct its operations in
ways that minimize environmental impacts.
• Comply with all environmental laws and regulations. This includes federal, state, local, and
Host Nation laws.
• Prevent pollution at the source by reducing, reusing, and recycling material that causes
pollution.
• Conserve and preserve natural and cultural resources so that they will be available for present
and future generations.
• Ensure drip pans and spill kits are on hand to prevent / mitigate any Petroleum, Oil, and
Lubricant (POL) spills.
• During refueling operations ensure fuel nozzle is properly in the fuel tank, operator has
physical control of the fuel nozzle/handle and is trained on reacting to a fuel or POL spill.
Units and installations will prepare an environmental risk assessment using the before, during,
and after checklist. The checklist should supplement local and state environmental regulations
applicable to your area.
EvaluationThis test evaluates the service member’s ability to safely and effectively excavate with a crawler
tractor in accordance with the technical manual. The evaluator will observe the service
member’s performance of excavating with a crawler tractor. The service member shall not ask
for or be given any assistance from the evaluator or other service member. The service
member’s performance shall be measured as a GO/NO GO score. If a NO GO is received on
any portion of this test, the service member shall receive a written counseling and remedial
training for a minimum of one hour before being re-evaluated. The evaluator shall also observe
the service member for any safety violations which could potentially cause death/injury to
personnel and /or damage to equipment. Any safety violation observed shall constitute an
automatic performance failure.
InstructionalLead-in The crawler tractor is a versatile piece of engineer equipment that can be used for multiple
tasks on construction projects. When using the ripper, the crawler tractor can rip hard material
to include large rocks, asphalt and in the next minute be excavating a trench or finishing slopes.
It can also be used to push load scrapers, stockpile materials, winch equipment from mud or
soft material and is also the primary piece of equipment used for clearing and grubbing
C-16

operations. Listen close and pay attention and you will learn how to operate the crawler tractor
to successfully perform your mission.
ResourceRequirements Instructor Materials:
All PPE
Lesson plan
P.E. Solutions
TM 5-2410-241-10
Student Materials:
All PPE
Pen or pencil
Student guide
TM 5-2410-241-10
Practical Exercises
Equipment records folder
SpecialInstructions 1. If the weather does not permit outdoor training due to thunder storms, lighting, excessive
heat or excessive cold etc., the phase will implement their inclementweather training plans and
continue training indoors.
2. If 20% or more of performance training is missed due to inclement weather, the written
examination will be administered to the students. The students must receive a minimum of 70%
on the written examination to receive a passing score.
3. Inform the students where to go in case of a severe storm or tornado.
4. This PMCS P.E. contains the 25 minutes of before operations PMCS and the 25 minutes for
after operations PMCS for the 1st day. The following is the breakdown for each day 1.0 hr.
every day (.5 before, .5 after). Day 5 has 4.5 hrs., .5 before, 4 hrs. to wash, lubricate and
perform weekly maintenance for a total of 8.5 hours.
5. The performance of PMCS has already been taught and tested in the TAMM'S portion of this
course. This maintenance is required on each peice of equipment and reinforces the initial
maintenance block of training received in TAMM'S.
ProceduresNOTE: The students may be tested on this task at any time during this phase of training.
If the student tests out on this task early THEY ARE STILL REQUIRED TO COMPLETE
THE ENTIRE BLOCK OF TRAINING.
1. Practical Exercise Instructions
a. Ensure students have required materials and references.
b. Clarify students' questions.
c. Check on students' progress and provide assistance as necessary throughout the exercise.
d. Ensure students complete the practical exercise within the allotted time.
e. Provide solutions to the practical exercise.
FeedbackRequirements Contact students that identified training shortfalls on their student critiques. Provide remedial
instruction as needed. Instructors will remind students to complete their lesson critiques and to
provide feedback to the instructors, verbally and/or in writing. Remind them that the Training
Branch Chief reviews their course critiques, and that feedback will be used to improve
courseware.
C-17

SOLUTION FORPRACTICAL EXERCISE 052-12N10C04 PE4
Action: Perform Excavation Operations with a Crawler Tractor
Service Members Name: __________________________________ Date: ____________
Class Number: ___________ Service: _________________
1st 2nd
PERFORMANCE MEASURES GO NOGO GO NO GO
Excavation Operations
1. Determined the stockpile location. ____ ________ ____ ________
2. Constructed a flat bottom ditch. ____ ________ ____ ________
3. Constructed a marking cut 6-8” deep approximately
75’ long from ramp to ramp. ____ ________ ____ ________
4. Excavated ditch cuts up to a maximum
of 6 to 8" while maintaining control of dozer. ____ ________ ____ ________
5. Maintained a uniform ditch bottom. ____ ________ ____ ________
6. Maintained a 4:1 slope on entrance
and exit ramps. ____ ________ ____ ________
7. Repeated ditching cycle until ditch is approximately
3’ deep. ____ ________ ____ ________
Spread a Stockpile
1. Positioned the crawler tractor on the backside
of the stockpile. ____ ________ ____ ________
2. Adjusted blade to spread a stockpile. ____ ________ ____ ________
3. Overlapped each pass using 1/3 of the blade. ____ ________ ____ ________
Backfilling Procedures
1. Aligned 1/3 of the blade on the stockpile for
each pass. ____ ________ ____ ________
2. Leveled the stockpile without excessive track
spin. ____ ________ ____ ________
3. Maintained same direction of travel while
backfilling ____ ________ ____ ________
4. Feathered material on each pass. ____ ________ ____ ________
5. Restored site to surrounding area. ____ ________ ____ ________
Leveling Operations
1. Determined the direction to level the area. ____ ________ ____ ________
C-18

2. Cut the high areas and filled the low areas. ____ ________ ____ ________
3. Adjusted blade as necessary to maintain a
uniform cut. ____ ________ ____ ________
4. Feathered material evenly. ____ ________ ____ ________
5. Repeated steps until the area has been leveled to
construction stake specifications. ____ ________ ____ ________
Safety
1. Performed 360° walk around before/after. ____ ________ ____ ________
2. Used 3 points of contact
mounting/dismounting. ____ ________ ____ ________
3. Utilized hearing protection. ____ ________ ____ ________
4. Utilized seat belt. ____ ________ ____ ________
5. Utilized park brake correctly as needed. ____ ________ ____ ________
6. Maintained proper foot placement. ____ ________ ____ ________
7. Performed all operations with no damage
to equipment or injury to personnel. ____ ________ ____ ________
Evaluator’s Comments:
____________________________________________________________________________________
____________________________________________________________________________________
____________________________________________________________________________________
____________________________________________________________________________________
____________________________________________________________________________________
____________________________________________________________________________________
Evaluator's Signature: ______________________________________________________________
Evaluator's Signature: ________________________________________________________________
C-19

Appendix D - Student Handouts
Operate a Crawler Tractor (CRM)052-12N10C04 / Version 1 ©
Sequence Media Name Media Type
2 Crawler Tractor Student Guide PDF
D-1