Star-Struck City: Mordheim for Kings of War.docx
20
The Star-Struck City: A skirmish rules supplement for Kings of War by darkPrince010 Some sailors said the Forsaken Isles were cursed, and that the three islands were scoured clean of any trace of the Primovantor cities there in retribution for their meddling with the very essence of Mantica itself. Tales speak of the smiting of the colonies by a tidal wave, wrought by a silver star from the skies themselves that landed in the waters nearby. Others claimed that the colonies were abandoned due to an onslaught of creatures from the waves. They say that the treasure and ruins from the islands were taken to fill the war coffers of the various nation-states throughout the ages following the fall of the Primovantor, leaving the barren isles seen today. However, they were all mistaken. There was a fourth island of the Primovantor, forgotten to time and hidden by the cruel waves of the Inant Sea. Only the most arcane tomes of the Celestials, untouched by living gazes for millennia, have seen the truth: This island was home to the largest of the Primavantor colony-cities, the city of Casa- Omicidi and jewel of the Primavantor empire. Even from there merest hints in these ancient texts, the lost wealth from this city alone could fill a treasury for the greediest king a thousand times over, and both their technology as well as magical knowledge would dwarf the finest examples of the respective crafts as a mountain dwarfs a pebble. Unfortunately, this great wealth was locked in the grip of the waves and was lost to all of Mantica… Lost, that is, until a recent sundering of the distant seabed forced the forgotten island to the surface. Now, the city has been exposed, the coral and barnacle-encrusted ruins towering over the other three islands and with water still spilling from windows and balconies even days after the city’s emergence. Treasure-hunters and mercenaries from across the k nown world have flock ed here to seek their fortune, already discovering shards of the star that fell and smote the city. The smiths and magi of the various nations value this metal even beyond gold due to its properties of strength and magical conductivity (Colloquially referred to as “Starmetal”). A unique feature of this “starmetal” is that every piece, regardless of size, has both a silvered and a blackened side, and both facings offer unique magical properties. The reflective black side enhances weapons to give them an edge unmatched by any other blade, while the silvered side creates a temporary magical ward on armor or skin that can repel even the strongest of blows. Additionally, these facings seem to be far more malleable to wielders of pure or corrupted intentions, and as a result have become known as Abyssalite or Celestium. However, constant use of these unstable materials have begun to warp minor yet noticeable changes in the individuals using them, and one can only guess at what would occur with long-term use of the starmetals. Casa-Omicidi is now a battlefield, with a thousand tiny wars and skirmishes fought in an equal number of streets, alleys, and courtyards. In many places the water runs red from blood spilt over even the smallest of baubles, and the waters surrounding the city are filled with a constant supply of flotsam and jetsam from the dozens of naval engagements as the various factions fight for rights to salvage and land on the island. Indeed, many of the various ruling princes and kings are using this discovery as an excuse to hinder the interests of their opponents, and fights over political documents or to assassinate an enemy official are not unheard of. Worse yet, not all of the blood has been spilt by newcomers to the city: Inspection has found the enormous unbreakable metal star in the center of the city is hollow, and the interior was covered in hundreds of sets of scratching claw and talon marks up to a foot in depth; Bodies have been
-
Upload
khangminh22 -
Category
Documents
-
view
0 -
download
0
Transcript of Star-Struck City: Mordheim for Kings of War.docx

The Star-Struck City: A skirmish rules supplement for Kings of War
by darkPrince010 Some sailors said the Forsaken Isles were cursed, and that the three islands were scoured clean
of any trace of the Primovantor cities there in retribution for their meddling with the very essence of Mantica itself. Tales speak of the smiting of the colonies by a tidal wave, wrought by a silver star from the sk ies themselves that landed in the waters nearby. Others claimed that the colonies
were abandoned due to an onslaught of creatures from the waves. They say that the treasure and ruins from the islands were taken to fill the war coffers of the various nation-states throughout the ages following the fall of the Primovantor, leaving the barren isles seen today. However, they were all mistaken. There was a fourth island of the Primovantor, forgotten to time and hidden by the cruel waves of the Inant Sea. Only the most arcane tomes of the Celestials, untouched by living gazes for millennia, have seen
the truth: This island was home to the largest of the Primavantor colony-cities, the city of Casa-Omicidi and jewel of the Primavantor empire. Even from there merest hints in these ancient texts, the lost wealth from this city alone could fill a treasury for the greediest k ing a thousand times
over, and both their technology as well as magical knowledge would dwarf the finest examples of the respective crafts as a mountain dwarfs a pebble. Unfortunately, this great wealth was locked in the grip of the waves and was lost to all of Mantica… Lost, that is, until a recent sundering of the distant seabed forced the forgotten island to the surface. Now, the city has been exposed, the coral and barnacle-encrusted ruins towering over the other three islands and with water still spilling from windows and balconies even days after the city’s
emergence. Treasure-hunters and mercenaries from across the known world have flocked here to seek their fortune, already discovering shards of the star that fell and smote the city. The smiths and magi of the various nations value this metal even beyond gold due to its properties of
strength and magical conductivity (Colloquially referred to as “Starmetal”). A unique feature of this “starmetal” is that every piece, regardless of size, has both a silvered and
a blackened side, and both facings offer unique magical properties. The ref lective black side enhances weapons to give them an edge unmatched by any other blade, while the silvered side creates a temporary magical ward on armor or sk in that can repel even the strongest of blows.
Additionally, these facings seem to be far more malleable to wielders of pure or corrupted intentions, and as a result have become known as Abyssalite or Celestium. However, constant use of these unstable materials have begun to warp minor yet noticeable changes in the
individuals using them, and one can only guess at what would occur with long-term use of the starmetals. Casa-Omicidi is now a battlefield, with a thousand tiny wars and sk irmishes fought in an equal number of streets, alleys, and courtyards. In many places the water runs red from blood spil t over even the smallest of baubles, and the waters surrounding the city are filled with a constant supply
of flotsam and jetsam from the dozens of naval engagements as the various factions fight for rights to salvage and land on the island. Indeed, many of the various ruling princes and k ings are using this discovery as an excuse to hinder the interests of their opponents, and fights over
political documents or to assassinate an enemy official are not unheard of. Worse yet, not all of the blood has been spilt by newcomers to the city: Inspection has found the
enormous unbreakable metal star in the center of the city is hollow, and the interior was covered in hundreds of sets of scratching claw and talon marks up to a foot in depth; Bodies have been

found cut raggedly in half, even those of feral werewolves and ogre mercenaries, as if by a huge claw or blade; Numerous reports speak of enormous tentacles and fanged maws both plunging
ships into the depths as well as dragging unlucky soldiers off of the docks and into the abyssal waters; And of course, the crazed surviviors of unlucky warbands have been known to attack and cannibalize whatever they can k ill, warped by the maddening influence of the damned city. All of these dangers are considered to be well worth the possible rewards, and as a result the city sees a steady influx of new treasure-seekers, attempting to better their own fortunes however
they can. As the surviving veterans of the Star-Struck City have said: Casa-Omicidi now only offers riches or death. What will you find? This rule supplement is for KoW, and is based off of that ruleset. Any changes are noted below.
Creating the Warband: First, pick a Warband. Each warband has a selection of Models they may pick from. Usually games start with 50 gold (gp) per side to purchase Models, Equipment, and Artifacts (Unless
otherwise agreed upon by your group or opponent). Any unused gold may be saved to spend after the scenario (See Aftermath: Equipment for general Equipment and their prices) Each Warband must select a single Model to upgrade to a Hero (This can be a model with the Large or Cavalry rules, but not the Beast special rule). The Hero has +1 Toughness (Toughness, or To, replaces KoW’s Nerve), is Inspiring, has +1 to any single stat (Including another
Toughness bonus if you’d like), and costs 10 more gp than the listed cost is for that type of Model. In addition, they start with 15 Experience, although cannot pick Skills for this starting Experience. This initial Hero is also considered your Leader, and grants certain bonuses while he
is still alive. Other models may become Heroes through experience or if your original Hero is slain. Your heroes are usually much tougher and more powerful than other models in your Warband, but can set you at a strong disadvantage if they are killed. A Warband may have up to one model with the Large special rule and one model with the Cavalry special rule per at least 50 gp in value of the overall warband (So 60 gp would be 2 Large
and 2 Cavalry, 150 gp would be 3 Large and 3 Cavalry, 270 gp would be 6 Large and 6 Cavalry, etc). If you have a model with both the Large and Cavalry special rules, it counts as both for determining how many Large and Cavalry models you may include. Melee and Ranged cannot be increased beyond a 3+ by any means, and Def cannot be increased beyond a 6+, either from a Hero bonus, Experience, and/or Equipment/Artifact
bonuses. Note that penalties from Aftermath results may only reduce stats to the following minimums: Sp to 0, Me to 7+, Ra to 7+, At to 0, De to 2+, and To to 1/3. Each player totals their Warband’s total gold value, and does so before every new scenario. The value is the total sum of all models, Equipment, Artifacts, and experience points (+1 gp per Experience point) in the warband, but does not include unspent gold or any starmetal.
Changes to KoW rules: Movement: All models count as having the Individual Rule, but this does not confer the To-Hit penalty for shooting. Essentially they have Nimble and no “flanks” to speak of. However, Large creatures and Cavalry do not gain the Nimble conferred by the Individual special rule. (So they must move in a
straight line, although they can do so in any direction, with a limited number of turns per movement phase) Models are not required to be in any distance of each other, even if equipped identically. Rigid regiments are an unwieldy liability in the Star-Struck City.

Climbing: Models may climb up or down a ladder or similar object up to 3” without harm as if they
were moving horizontally as normal. You may Charge but cannot Climb with At the Double moves. If they need to climb more than 3”, they may climb vertically up to their movement, but must roll 1d6. If the roll is lower than their Sp stat, they suffer no penalty. If the roll is equal to or
greater (And a roll of 6 always fails, no matter their Spd stat), they suffer from falling as described below counting as only having fallen 3”. Any Charges while Climbing count as being Disrupted (-1 to hit). Cavalry models without Fly cannot Climb. Climbing Down: Models may carefully climb down. You may Charge but cannot climb Down with At the Double moves. The distance climbed down does count against the model’s movement for
this turn. You may climb down the first 3” without any kind of check. After the first 3”, they must roll 1d6 per additional 3” they are Climbing Down. If they roll under their Spd stat for each test, they climb down the distance without taking any damage. If they fail any of the tests, however
(And a roll of 6 always fails, no matter their Spd stat), then they suffer falling damage as described below as if they had Fallen from halfway down their initial Climbing Down point. Any Charges while Climbing Down count as being Disrupted (-1 to hit). Cavalry models without Fly
cannot Climb Down. Jumping Down: Models may jump down. You may Charge but cannot Jump Down with At the Double moves. Jumping down does not count against the model’s movement for this turn. They must roll 1d6 per 3” they are Jumping Down. If they roll under their Spd stat for each test, they
drop the distance without taking any damage. If they fail any of the tests, however (And a roll of 6 always fails, no matter their Spd stat), then they suffer falling damage as described below as if they had Fallen from their initial Jumping Down point. Any Charges while Jumping Down count as
being Disrupted (-1 to hit). Cavalry models without Fly cannot willingly Jump Down beyond 3”. Jumping Across: Models may also attempt to jump across a horizontal gap if they have sufficient
movement remaining. You may Charge but cannot Jump Across with At the Double moves. The model may move their normal Sp, but must roll 1d6. If the roll is lower than their Sp stat, they successfully cross the gap. If the roll is equal to or greater (And a roll of 6 always fails, no matter
their Spd stat), they suffer from falling as described below, counting as haven fallen from the midpoint of the gap they were crossing (If a Jumping Across for a Charge is failed, the Charge is failed as well). Any charges while Jumping Across count as being Disrupted (-1 to hit). Cavalry
can Jump Across as normal. Falling Damage: A model suffers 1d3 hits per 3” fallen and must make a Toughness check if they
suffer damage as normal. Any model that suffers any damage from Falling damage ends their movement immediately afterwards. If the model did not suffer damage from Falling, they may move any remaining distance they have left, counting the distance Fallen as part of their
movement. A Charging unit which Fell but did not take damage from the fall can charge a new enemy if they
have enough remaining movement, counting the spot they landed on as their start point for the purpose of penalties due to charging farther-away enemies. Models with Fly always pass any Climbing, Jumping Down, or Jumping Across moves they may need to make, and can make them with At the Double moves. If your model can see an enemy model that is not in Cover, but decides to Charge a non-Large enemy model that is farther away, they will suffer a penalty in the following Melee.

Shooting: For LOS purposes, treat a model with at least half its torso covered as being in Cover. If your model can see an enemy model that is not in Cover, but decides to fire on a non-Large and non-Cavalry enemy model that is farther away, they suffer a -1 to hit. Shooting at a Fallen model incurs a -1 penalty to-hit. If modifiers would make you halve your attacks, you may still make a single attack if you have only 1 Att. However, this attack may not benefit from Elite or Vicious. Melee: If your model can see an enemy model that is not in Cover, but decides to Charge a non-Large
and non-Cavalry enemy model that is farther away, they suffer a -1 to hit in the following Melee. If modifiers would make you halve your attacks, you may still make a single attack if you have
only 1 Att. However, this attack may not benefit from Elite or Vicious. If you cause an enemy to be Fallen in melee, they are Fallen and not Steady (Unlike with
Wavering in melee for standard KoW). However, you must still move the 1” backwards as normal for failing to cause the enemy to be a Casualty. The 1” retreat after a failed melee can force a unit to move off a ledge, and if they fail the resulting test (As if they were Jumping Down), then they take Falling damage as detailed in the Movement section. Critical Hits: If you roll a natural 6 to-hit with any die for shooting or melee, immediately roll another die to-hit
as if you had an additional Att or Fire. If this is also a 6, you may repeat this until you fail to roll a
6. These dice are then rolled for damage. If you roll a natural 6 to-damage, immediately roll
another die to-damage as if you had another successful Hit previously. If this is also a 6, you may
repeat this until you fail to roll a 6. However, if a to-hit roll needs a 7+ to hit, it still hits on a 6+ but
cannot cause a Critical Hit. The roll to-wound can still be a Critical as normal.
Toughness: Toughness tests are taken on 1d6 instead of Kow’s 2d6 for Nerve. Add any damage taken to the die roll, compare it to the To values. The values are for Fallen/Casualty instead of Wavering/Rout
like Nerve. If a 1 is rolled for To, the model is always Steady (If the model was Fallen when it took the test and a 1 is rolled, it remains Fallen) regardless of modifiers. If a 6 is rolled for To, the model is always Fallen unless the To check would cause it to be a Casualty. Headstrong allows
the model to roll to see if it recovers from Fallen at the start of its turn, and Steadfast ignores Fallen entirely. If a model rolls equal to or above its Fallen value, place the model on its side to indicate that it is Fallen. A Fallen model can take no action of any kind, and Melee attacks double against it while Ranged attacks get a penalty to-hit them. Fallen models remain Fallen for their next turn, and
become Steady at the start of the following turn. If a Model rolls above their Fallen value for a To check while Fallen, they are a Casualty. Inspiring does not allow a reroll if the Model suffers a Fallen result, only if the Model suffers a Casualty result. If a model that is Fallen rolls a To result to become Steady, they remain Fallen instead
(See below on how Fallen is removed.

Large Models and Combat: If a non-Large model is hit in close combat by a Large model, it is moved backwards by 1d3”
(This movement applies only once, no matter how many attacks from the Large model hit), stopping at any impassible terrain. If the other model (Large or otherwise) suffered a Fallen result from the Melee and their attacker was Large, the model is moved back directly away from the
Large model 2d3” instead”, stopping at any impassible terrain. If this moves the Fallen model over a ledge to a lower area, place the Fal len model directly below
on that area. The Fallen model suffers 1d3 hits per full 3” vertically he dropped, just as for Falling damage in Movement. This dropping damage from Melee does apply to Models with Fly, unlike Falling from regular movement (They’ve been momentarily knocked out of the air!). If the model is unable to be moved back the full distance (Such as if there is another model or impassable terrain in the way), then they are moved into contact with whatever stopped them,
and they suffer a single hit from the abrupt impact. If they were moved into another model, that model suffers a single hit as well (as they are bowled over by the knocked-back individual) Other Any Equipment or abilities which grant Breath Weapon, Zap, Elite, Vicious, Piercing, Crushing
Strength, Heal, and Dark Surge are cumulative. For example, if you have an Equipment that grants Zap (2) and another that grants Zap (1), the model may use Zap (3). The following Special Rules have been changed, or noted here for reference (Note that any Special Rules in the standard KoW rules that refer to Ne now refer to To instead): Bloodbath: If this unit inflicts any damage to an enemy unit in Melee, it may remove a single point of damage from itself per damage caused to the enemy. Cowardly: While this unit has taken a Toughness check and is Fallen, add 1 damage counter to the unit. Elite becomes Elite (n): You may reroll a number of missed to-hit dice equal to n. This can allow you to reroll the same die multiple times (So if n=2, and you roll 2 attacks, you can reroll each die 1 time or 1 die twice) Evil Dead: If this unit inflicts any damage to an enemy unit in Melee, it may remove a single point of damage from itself. Fly: Automatically passes any rolls for Climbing, Jumping Down, or Jumping Across (Detailed in
the Movement section), and ignores terrain. Inspiring: Friendly models within 6” who get Casualty results for a To check may force their
opponent to reroll the die. The second roll stands, and you cannot force a reroll if the model was merely Fallen. Invisible: When attacking this unit, the enemy must halve their attacks (Exactly as if the to-hit roll needed was greater than a 6). If the to-hit roll needed is greater than a 6, then the attacks are instead quartered. Noxious Miasma: Mark a unit which has taken Noxious Miasma with a suitable model or marker. The Noxious Miasma can be used once only and then the model or marker should be
removed. The Noxious Miasma is used when your opponent is about to attack the unit in Melee but before any dice are rolled. Declare you are using the Noxious Miasma and
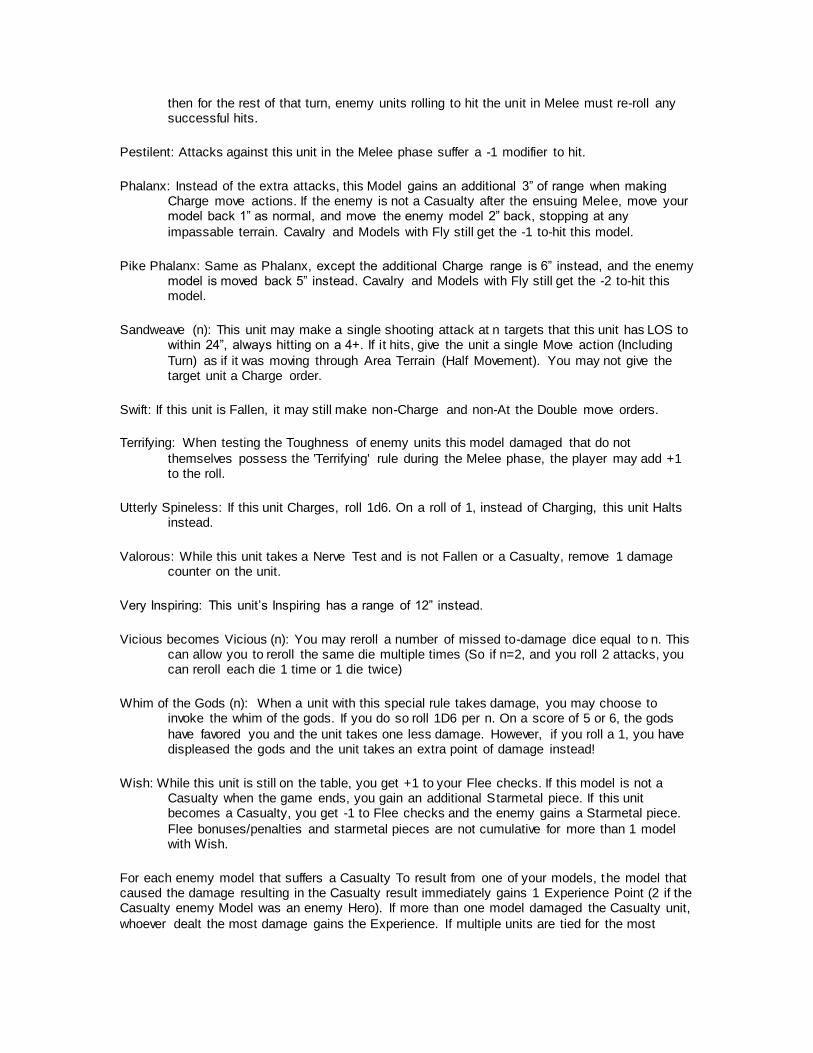
then for the rest of that turn, enemy units rolling to hit the unit in Melee must re-roll any successful hits. Pestilent: Attacks against this unit in the Melee phase suffer a -1 modifier to hit. Phalanx: Instead of the extra attacks, this Model gains an additional 3” of range when making Charge move actions. If the enemy is not a Casualty after the ensuing Melee, move your model back 1” as normal, and move the enemy model 2” back, stopping at any
impassable terrain. Cavalry and Models with Fly still get the -1 to-hit this model. Pike Phalanx: Same as Phalanx, except the additional Charge range is 6” instead, and the enemy model is moved back 5” instead. Cavalry and Models with Fly still get the -2 to-hit this model. Sandweave (n): This unit may make a single shooting attack at n targets that this unit has LOS to within 24”, always hitting on a 4+. If it hits, give the unit a single Move action (Including
Turn) as if it was moving through Area Terrain (Half Movement). You may not give the target unit a Charge order. Swift: If this unit is Fallen, it may still make non-Charge and non-At the Double move orders. Terrifying: When testing the Toughness of enemy units this model damaged that do not
themselves possess the 'Terrifying' rule during the Melee phase, the player may add +1 to the roll. Utterly Spineless: If this unit Charges, roll 1d6. On a roll of 1, instead of Charging, this unit Halts instead. Valorous: While this unit takes a Nerve Test and is not Fallen or a Casualty, remove 1 damage counter on the unit. Very Inspiring: This unit’s Inspiring has a range of 12” instead. Vicious becomes Vicious (n): You may reroll a number of missed to-damage dice equal to n. This can allow you to reroll the same die multiple times (So if n=2, and you roll 2 attacks, you can reroll each die 1 time or 1 die twice) Whim of the Gods (n): When a unit with this special rule takes damage, you may choose to invoke the whim of the gods. If you do so roll 1D6 per n. On a score of 5 or 6, the gods
have favored you and the unit takes one less damage. However, if you roll a 1, you have displeased the gods and the unit takes an extra point of damage instead! Wish: While this unit is still on the table, you get +1 to your Flee checks. If this model is not a Casualty when the game ends, you gain an additional Starmetal piece. If this unit becomes a Casualty, you get -1 to Flee checks and the enemy gains a Starmetal piece.
Flee bonuses/penalties and starmetal pieces are not cumulative for more than 1 model with Wish. For each enemy model that suffers a Casualty To result from one of your models, the model that caused the damage resulting in the Casualty result immediately gains 1 Experience Point (2 if the Casualty enemy Model was an enemy Hero). If more than one model damaged the Casualty unit,
whoever dealt the most damage gains the Experience. If multiple units are tied for the most

damage, pick which model gains the Experience. These can be used at the end of a battle for bonuses. If you lost 25% or more of the models you started the scenario with, you must take a Flee test at the start of each turn. Roll 1d6: If you lost 25% or more of your models (Round up), you pass the
Flee test on a 4+. If you lost 50% or more of your models (Round up), you pass the Flee test on a 5+. If you lost 75% or more of your models (Round up), you pass the Flee test on a 6+. If your Leader is not a Casualty, you get +1 to this roll. (So for example, a warband of 11 models would
test for Fleeing (25%) after 3 casualties, passing on a 4+ if their leader was a casualty and a 3+ if their leader was not a Casualty). A roll of 1 is always a failure, and a roll of 6 is always a success. When you Flee, remove all your models from the table. Any Steady models do not count as Casualties when removed in this way, but any models that are Fallen when your troops Flee are counted as Casualties. You may voluntarily choose to fail a Flee test before rolling if you wish.
Usually when all but one warband Flees, a Scenario is over.
Scenarios Roll 3d6 on the following table to pick what scenario to play. In all cases, play is recommended on a 4’x4’ board crammed with as much terrain as you can fit, especially on multiple levels. For all
references to pts, instead use gp (Including the value of any gp the Equipment or Artifacts a model may be carrying when determining their value). Setup is both players rolling off for a table edge, then the winner setting up within 12” of that edge and the loser setting up within 12” of the
opposite edge (For a 2’x2’ table, instead they must deploy within 6” of that table edge). Players then roll off to see who goes first. Unless otherwise stated, the scenario ends when all warbands but one Flee, rather than a turn limit (Note that whoever Flees may not always be the loser of the scenario, as the victor is determined by the Scenario type). When a scenario has players place Starmetal pieces, they
place them in the same fashion as KoW Objectives in Pillage! Games except that they must be 3” apart instead of 12”. Any model that touches a starmetal piece at any time immediately picks it up. If this model becomes a Casualty, place all the starmetal pieces it was carrying where the model fell, and if a model is not a Casualty when a warband Flees, they receive this starmetal in addition to any they
find from exploration. If a warband does not flee the table and wins the scenario, they get both all the starmetal their models are carrying, in addition to any unclaimed starmetal on the table. 3-5: Player with the lower Warband gp value picks the scenario 6: Scenario 1: Landfall 7: Scenario 2: Smash and Grab 8: Scenario 3: Deadly Alley 9: Scenario 4: Loot Cache 10-11: Scenario 5: Finders Keepers 12: Scenario 6: Bloodbath 13: Scenario 7: Stronghold 14: Scenario 8: No Mans Land 15: Scenario 9: Assasination 16-18: Scenario 10: They Come Scenario 1: Landfall Setup is on a 4’x4’ board, but approximately ½ of the board should be counted as water, with a single boat or ship of some kind in the center, either touching the non-water part of the board
(The docks) or attached with a piece of pier no more than 6” long attached to as close to the center of the board as you can. If you are playing in a 3+ player game, instead make ¼ of the

board count as water with the ship in the middle of that with the 6” pier attached to as close to the center of the board as you can. The water counts as Impassible terrain. Any models Falling into the water for any reason are dragged into the depths by some monstrous tentacles (Count as a Casualty). The player with the lowest full warband value (For multiple equal values, roll off to find the lowest value) begins with their entire warband on the ship. All the other players set up as normal within
6” of a dock board edge. If the player who started on the boat manages to get at least one model from their warband to a table edge, they win the Scenario. Otherwise, the last warband on the table wins the scenario. Scenario 2: Smash and Grab Setup is as per a normal game, using the full 4’x4’ board. One player (The one with the greatest full warband value. Roll off if both are equal) sets up anywhere within 6” from the center of the board. The remaining players set up on opposite edges within 6” of the table edge as normal. Place D3+4 Starmetal pieces at the center of the map. The central player cannot pick up these pieces (But they may pick up the pieces if another model picks them up but becomes a Casualty).
The winner is the last warband standing, with the central player receiving an additional 1d3 pieces of starmetal if at last half of the starmetal pieces are unclaimed or held by his own models when the game is over. Scenario 3: Deadly Alley Make a single winding street at least 3’ long and 3” wide from one board edge to the opposite
one, bordered on both sides by ruined buildings or large pieces of area terrain at least 4-6” deep. Any area of the table outside of the terrain touching the central street is considered impassable (It may help to keep this area free of terrain to remember that it’s unusable). If you have more than 2
players, have the streets meet at some crossroads approximately in the middle of the board. Players set up within 6” of the board edge on the street or in a building. The first player to get a model to the enemy board edge wins. Otherwise, last warband standing
is the winner. Scenario 4: Loot Cache Setup is as per a normal game, using the full 4’x4’ board. Players set up on opposite edges within 6” of the table edge as normal. Place D3+4 starmetal pieces. Last warband standing is the winner Scenario 5: Finders Keepers Setup is as per a normal game, using the full 4’x4’ board. Players set up on opposite edges within 6” of the table edge as normal. Place D3+2 starmetal pieces. Last warband standing is the winner Scenario 6: Bloodbath

Setup is as per a normal game, using the full 4’x4’ board. Players set up on opposite edges within 6” of the table edge as normal. Last warband standing is the winner. Scenario 7: Stronghold Setup is as per a normal game, using the full 4’x4’ board, but with a large piece of terrain like an inn or small fort in the center of the table. Players set up on opposite edges within 6” of the table edge as normal. After both players have had a turn, the central building always causes 1d3 hits on every Model
within 12” as the people inside fire out at the attackers! In addition, after this round of attacks, any model within 3” of the building gains a single piece of starmetal. Winner is the last warband standing. Scenario 8: No Mans Land Setup is as per a normal game, using the full 4’x4’ board, but with two rivers creating a minimum
6” wide strip of land between the rivers, and each river with a single crossing point like a ford or bridge. In the case of more than two players, each player should be separated from the others by a river, with a single bridge to the central island. Players set up on opposite edges within 6” of the table edge as normal. Each model you control on an enemy starting area of land (But not on their bridge) grants a single piece of starmetal. Last warband standing is the winner. Scenario 8: Assassination Setup is as per a normal game, using the full 4’x4’ board. Players set up on opposite edges within 6” of the table edge as normal. If a player does not have a Hero model, they must nominate one model as their Leader before deploying. If you kill the enemy Leader (Or highest-experience Hero or non-Hero model if they have no Leader), you gain 1d6 pieces of starmetal. Winner is last warband standing. Scenario 10: They Come Setup is as per a normal game, using the full 4’x4’ board. Players set up on opposite edges within 6” of the table edge as normal. At the end of both players turns, roll 1d6. If the roll is equal to or less than the current turn number, the Deeplings come bursting out of the ground now and after every round after this (After
all players have had their turns). Measuring from the center of the board, roll 1d6 and double it. Imagining the board as a clock
with 12 straight ahead, the Deeplings appear 4d6” away in the direction rolled. Repeat this a number of times equal to the current turn number (So if this is turn 4, place 4 Deeplings)

Each Deepling has the following profile:
Model Spd Me Ra Def Att To Cost (gp) Special
Deepling 6 3+ - 4+ 1 5/6 7 Crushing Strength (1)
After placing a Deepling at each rolled location, the Deepling will charge any model apart from other Deeplings within its charge range, always charging the closest model. Otherwise, it moves
At the Double towards the closest model other than another Deepling. Deeplings always have their turn after all other players have a turn. Players still gain experience for causing Casualties on these monsters as well as those from causing Casualties on any enemy Warband members, and at any point after they begin to emerge the a player may choose to leave the board and flee at the start of their turn, even if they
still have more than 75% of their warband remaining. However, the game is not over until all players have fled the field, instead of being limited by a number of turns. Winner is whichever player kills the most Deeplings.
Aftermath: Injuries After the battle, roll 1d66 (Roll 2d6, with one die counting as the ‘10s’ and another as the ‘1s’) for
any Casualties, and consult the following chart. Ignore any result that would reduce a stat below the allowed minimums. 11-13: Dead as a post. The model has been killed, and any Equipment or Artifacts they were carrying are lost. 14-21: Plain Unlucky: Roll twice on this table, rerolling further results of 21 or less. 22: Organ Damage: -1 Def. 23: Broken Arm: -1 Att. 24: Shattered Ribs: -1 To. 25: Twitchy: Model is now Utterly Spineless. If they were already Utterly Spineless, they are now Cowardly. 26: Gouged-out Eye: -1 Ra. 31: Mangled Hand: -1 Me. 32: Broken leg: -1 Spd. 33: Torn Muscle: -1 to Vicious (n), if any. 34: Nerve Damage: -1 to Elite (n), if any. 35: Power Drain: -1 to Zap (n), Heal (n), Dark Surge (n), Sandweave (n), or -2 to Breath Weapon (n), if any. 36: Captured: The enemy warband captures this model (If multiple enemy warbands, roll to see which one). You get the model back if you pay half the model’s total value in gp to the other warband. If you do not, the enemy warband can either ransom the model for the
same cost to your nation (You lose the model and they gain half the model’s value in gp), or they may add the model to their own warband if the model was not your warband Leader (The model loses all Equipment and Artifacts they had, and purchases Equipment
as per other models from their new warband. They retain all their Experience and Skills) 41: Deep Wound: The model cannot fight in the next battle, but otherwise recovers and may fight as normal after that battle. 42: Dropped in the Confusion. The Model must discard 1 Equipment or Artifact they had. 43-56: Just a Flesh Wound. The Model recovers fully to fight as normal in the next battle 61: Dark Binding: Roll 1d6. On a 1-2, this model cannot fight in the next battle, but otherwise
recovers and may fight as normal after that battle. On a 3+, this unit gains Evil Dead (If this Model was the warband Leader, the Warband immediately becomes Evil if it was not

already. Note that this will prevent you from hiring Allies from your warband’s army if your warband’s army was Good) 62: Vengeance: This Model gains Elite (1) and Vicious (1) against that same enemy warband. 63: Jaded: If unit was Cowardly, unit loses Cowardly and becomes Utterly Spineless. If unit was Utterly Spineless, unit loses Utterly Spineless. If unit was not Utterly Spineless, unit gains
Headstrong. If model was Headstrong, model becomes Steadfast. 64: Extensive Scars: The Model gains Terrifying 65: Forced Conversion: Roll 1d6. On a 1-2, model cannot fight in the next battle, but otherwise
recovers and may fight as normal after that battle. On a 3+, this unit gains Heal (1) (If this Model was the warband Leader, the Warband immediately becomes Good if it was not already. Note that this will prevent you from hiring Allies from your Warband’s army if
your warband’s army was Evil) 66: Learning Experience. The Model gains 1 Experience point and may fight in the next battle as normal. If your Leader Model has been killed, you must elect another of your Heroes to become the new Leader (Models with the Beast special rule can never become warband Leaders). If you have no
other Heroes, you must upgrade an existing Model to a Hero if possible (Gold cost for the upgrade to a Hero is +10, and they do not get any bonuses. They count as having 15 XP, and gain no additional Skills for having such). If you have no Heroes and cannot upgrade a model to a
new one, you may still use the Warband but you will always go last in turn order (This includes if your Leader suffered a Deep Wound injury result as well) Searching for Starmetal: After each battle, you may roll for any Starmetal you’ve discovered. All players always count as having found 1 starmetal piece. Each non-Casualty model in the Warband rolls 1d6, to a
maximum of 5 dice, and total the result to see what you find from the table below on your exploration. Whoever won the scenario gains an additional die to roll automatically, that does not count against the 5-die limit. Each roll of an odd number (1, 3, or 5) indicates an additional piece
of starmetal has been found.
1. Uncover a wizard’s library. You may purchase any Magic Item Equipment without rolling
to find it. 2. Find a gold-plated statue worth 3d6 gp 3. Save the life of a foreign merchant. You may purchase any non-Artifact Equipment from
any warband list without rolling to find it. 4. Due to the reagents in an unlooted alchemist’s shop, you ignore the first -1 from warband
value for starmetal value during this Aftermath. 5. You see a glint of a single gold coin in a puddle, and pick it up. Gain 1 gp. 6. Find an additional piece of starmetal in the gullet of a fish. 7. Find a wrinkled coinpurse with 1d6 gp inside. 8. Inside a ruined guard tower you find some old usable watchmen equipment. Roll 1d6: on
a 1-3, you find a Lantern. On a 4-6, you find 1d3 Torches 9. Find a small waterlogged chest with 2d6 gp inside 10. Find 1d3 extra pieces of starmetal in an old barrel 11. You come across a recently-slain human and his equipment, his fall from a ruined tower
unbroken by a waterlogged haypile. You find a Dual Weapon, and roll 1d6: On a 1-2 you
find a Thrown Weapon, on a 3-4 you find a Hand Crossbow, and on a 5-6 you find a Pistol.
12. You find a stained map on the bodies of a pair of squid fishermen dead in the street. You
gain a Vague Map. 13. You find a ruined house with several armored statues inside. Roll 1d6. On a 1-3, you find
1d3 Shields. On a 4-6, one of your models gains +1 Def permanently. 14. Find a huge silver-wrought chest with 4d6 gp inside
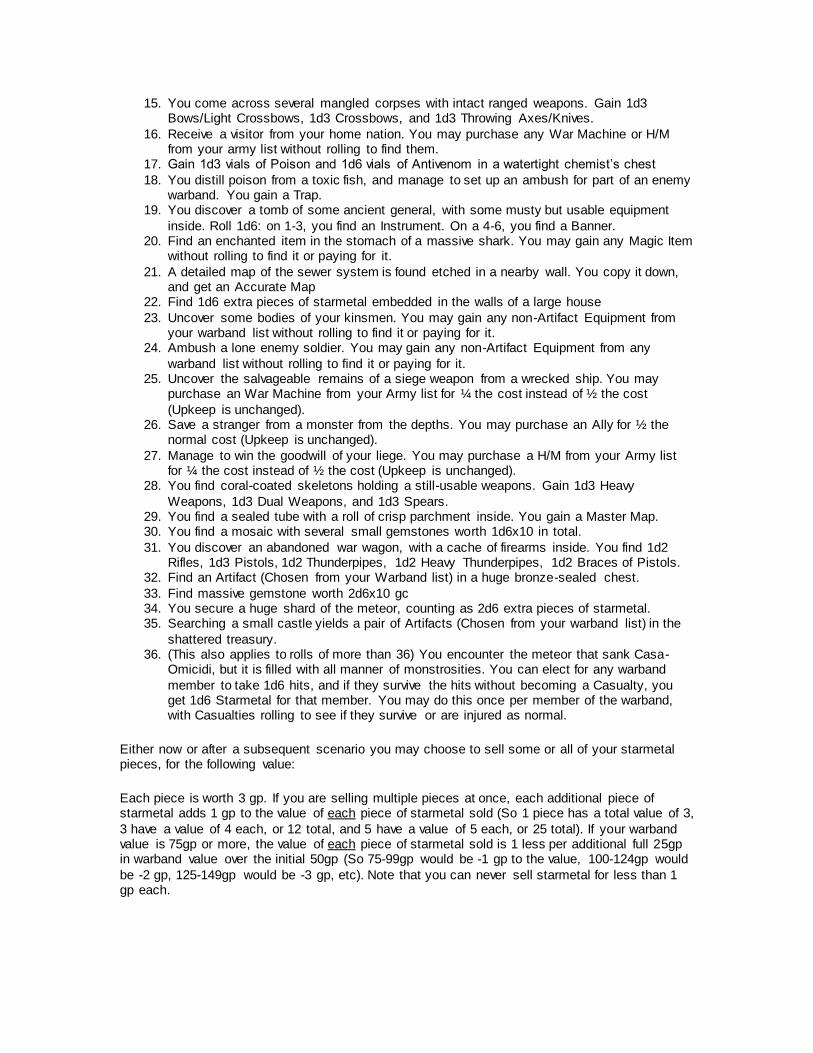
15. You come across several mangled corpses with intact ranged weapons. Gain 1d3 Bows/Light Crossbows, 1d3 Crossbows, and 1d3 Throwing Axes/Knives.
16. Receive a visitor from your home nation. You may purchase any War Machine or H/M from your army list without rolling to find them.
17. Gain 1d3 vials of Poison and 1d6 vials of Antivenom in a watertight chemist’s chest 18. You distill poison from a toxic fish, and manage to set up an ambush for part of an enemy
warband. You gain a Trap. 19. You discover a tomb of some ancient general, with some musty but usable equipment
inside. Roll 1d6: on 1-3, you find an Instrument. On a 4-6, you find a Banner. 20. Find an enchanted item in the stomach of a massive shark. You may gain any Magic Item
without rolling to find it or paying for it. 21. A detailed map of the sewer system is found etched in a nearby wall. You copy it down,
and get an Accurate Map 22. Find 1d6 extra pieces of starmetal embedded in the walls of a large house 23. Uncover some bodies of your kinsmen. You may gain any non-Artifact Equipment from
your warband list without rolling to find it or paying for it. 24. Ambush a lone enemy soldier. You may gain any non-Artifact Equipment from any
warband list without rolling to find it or paying for it. 25. Uncover the salvageable remains of a siege weapon from a wrecked ship. You may
purchase an War Machine from your Army list for ¼ the cost instead of ½ the cost
(Upkeep is unchanged). 26. Save a stranger from a monster from the depths. You may purchase an Ally for ½ the
normal cost (Upkeep is unchanged). 27. Manage to win the goodwill of your liege. You may purchase a H/M from your Army list
for ¼ the cost instead of ½ the cost (Upkeep is unchanged). 28. You find coral-coated skeletons holding a still-usable weapons. Gain 1d3 Heavy
Weapons, 1d3 Dual Weapons, and 1d3 Spears. 29. You find a sealed tube with a roll of crisp parchment inside. You gain a Master Map. 30. You find a mosaic with several small gemstones worth 1d6x10 in total. 31. You discover an abandoned war wagon, with a cache of firearms inside. You find 1d2
Rifles, 1d3 Pistols, 1d2 Thunderpipes, 1d2 Heavy Thunderpipes, 1d2 Braces of Pistols. 32. Find an Artifact (Chosen from your Warband list) in a huge bronze-sealed chest. 33. Find massive gemstone worth 2d6x10 gc 34. You secure a huge shard of the meteor, counting as 2d6 extra pieces of starmetal. 35. Searching a small castle yields a pair of Artifacts (Chosen from your warband list) in the
shattered treasury. 36. (This also applies to rolls of more than 36) You encounter the meteor that sank Casa-
Omicidi, but it is filled with all manner of monstrosities. You can elect for any warband
member to take 1d6 hits, and if they survive the hits without becoming a Casualty, you get 1d6 Starmetal for that member. You may do this once per member of the warband, with Casualties rolling to see if they survive or are injured as normal.
Either now or after a subsequent scenario you may choose to sell some or all of your starmetal pieces, for the following value: Each piece is worth 3 gp. If you are selling multiple pieces at once, each additional piece of starmetal adds 1 gp to the value of each piece of starmetal sold (So 1 piece has a total value of 3,
3 have a value of 4 each, or 12 total, and 5 have a value of 5 each, or 25 total). If your warband value is 75gp or more, the value of each piece of starmetal sold is 1 less per additional full 25gp in warband value over the initial 50gp (So 75-99gp would be -1 gp to the value, 100-124gp would
be -2 gp, 125-149gp would be -3 gp, etc). Note that you can never sell starmetal for less than 1 gp each.

Experience Each model that fought in the battle and was not killed from any Injuries they may have received
from becoming a Casualty gains +1 Experience. If their warband won the scenario, each of their models gains an additional +1 Experience. If you fought against a Warband with a converted gp value at least 50 gp greater than yours (Their overall warband, not just the models used in the last scenario), each surviving model in your group at the end of the game gains +1 Experience per 50 gp in value they were more than
your warband. (So if your warband is 75gp, and you fight a warband worth 200gp, it would grant an additional +2 Experience) Each Experience point on a model increases the value of your Warband (For the purpose of determining equal warband sizes for scenarios and bonus XP for fighting larger warbands) by 1 gp. If a non-Hero ever gains 15 or more Experience points total, they now count as a Hero (And so
may carry an Artifact if you find one), but do not gain the stat bonuses or Inspiring that the initial purchased Leader Hero does. Heroes also require more Experience to get a new Skill. After every 3 Experience points (5 for Heroes), a model may pick one of the following Skills. If a model picks a skill twice, it is considered “_____ Expertise” (So for example Hawkeye Expertise or Warrior Focus Expertise), and “_____ Mastery” if picked a third time (So for example Hawkeye
Mastery or Warrior Focus Mastery). No skill can be picked more than three times by the same model, and remember the earlier limits for Me, Ra, and De, as well as that some Skills do not stack, such as Target Priority or Warrior Focus (Making Expertise of Mastery with them useless). If the model already had a special rule from a weapon or inherent ability, any bonus from skills stack on that (So a model with a Crossbow and Crippling Shot would have Piercing (2)). Keep in
mind the limits for Me, Ra, and De still apply when considering Skill bonuses, and that some special rules don’t stack (Like Regeneration or Bloodbath). The skills are as follows:
Shooting Skill Effect
Hip Shooter Model may shoot after being Charged, instead of being Disrupted
Hawkeye Model adds +3” to the range of their weapon (Not Zap or Breath
Weapon)
Quickload Model ignores the Reload! Special rule
Crippling Shot Model gains Piercing (1)
Target Priority Model ignores penalty for shooting at non-closest enemies
Ballistics Model gains Indirect Fire
Combat Skill Effect
Rage Model gains +1 Att
Blademaster Model gains +1 Me

Immense
Strength Model gains Crushing Strength (1)
Warrior Focus Model ignores penalty for charging non-closest enemies
Rending Blow Model gains Vicious (1)
Firm Stance Large Attacks vs this model get -2” to knock-back effect
Protection Skill Effect
Impenetrable Model gains +1 Def
Stouthearted Model gains Headstrong. If already Headstrong, model becomes Steadfast
Bravery Model gains +1 To
Dodge Ranged attacks get an additional -1 to hit this model (Does not apply to Zap and Breath Weapon)
Parry Enemy attacks in Melee vs this model get an additional -1 to hit
Endurance Model gains Regeneration (Expertise only)
Magic Skill Effect
Burning Hands Model gains Breath Weapon (2)
Lightning Bolt Model gains Zap! (1)
Forceful Presence
Model gains Inspiring. If model was already Inspiring, model gains Very Inspiring (Mastery only)
Mana Wind Model gains Sandweave (1) (Expertise only)
Dispel Breath Weapon and Zap get -1 to hit this model
Eagle Vision Model adds +3” to the range of their Breath Weapon and Zap
Agility Skill Effect
Sneaky Model gains Stealthy. If model was already Stealthy, model gains Invisible (Mastery only)
Ambusher Model gains Vanguard
Sprinter Model gains +2 Spd
Precise Blow Model gains Elite (1)
Leaping Charge Model ignores penalty for charging through terrain

Reflexes Model is not Shambling. If model was already not Shambling, model
gains Swift
Note that only Good or Neutral warband models may choose these skills. If your Neutral warband models have chosen any Good skills, no warband members cannot choose any Evil skills (Including Mercenaries)
Good Skill Effect
Healing Aura Model gains Heal (1)
Miracle Model gains Wish (Mastery only)
Angelic Blessing Model gains Fly (10” Spd) (Expertise only)
Bravery Model gains Valorous
Rallying Cry If this model is on the table, gain +1 to all Flee checks (Does not stack with other models with the Rallying Cry skill)
Note that only Evil or Neutral warband models may choose these skills. If your Neutral warband models have chosen any Evil skills, no warband members cannot choose any Good skills
(Including Mercenaries)
Evil Skill Effect
Enormous Growth
Model becomes Large (Expertise only)
Dark Blessing Model gains Whim of the Gods (1)
Crimson Rage Model gains Evil Dead. If model already had Evil Dead, model gains Bloodbath (Mastery only)
Unholy Speed Model gains Dark Surge (1)
Diseased Model gains Pestilent. If model was already Pestilent, model gains Noxious Miasma.
Equipment: The cost to the model from choosing the Equipment is shown in parentheses after the weapon.
Non-Hero Large models and models with the Beast special rule can never pick any kind of Equipment. When you first buy a unit, they can start with any of the equipment below marked with a star, or Equipment from their warband. You do not need to roll for this starting Equipment.
However, after the initial starting Equipment, you must roll for In Stock of every other item you look for. A model may only carry up to 2 Equipment from each category (Melee, Ranged, and Miscellaneous) at any time (Bonuses from any Equipment used stack). No single model may
carry duplicates of any Equipment, and only Leader and Hero models can carry Artifact Equipment. A Leader or Hero may only carry a single Artifact at any time, and may not purchase Artifacts (They can only be won with certain Aftermath results. They still add the gold value as
given to the warband value, even though the Artifact was free). Hero Large models have a limit of 3 Equipment instead, but can carry an Artifact as normal if they are the warband Leader. Models

with the Beast rule can never become Warband leaders, and can never carry any Equipment at any time. If you wish to purchase equipment from a warband list that is not your own (Either in the warband list, or labeled as “From X warband”), the cost is double what is indicated. Note that you can
never carry an Artifact from another warband for any reason. When purchasing Equipment, Magic Items, or Mercenaries, you must roll to make sure the
Equipment or model is In Stock. To do so, roll 1d6 and get a 5+. If the warband or army list of the unit or Equipment shares your alignment, you get +1 to the roll. If you are opposite alignments (Good and Evil), you get -1 to the roll. If the item is marked with a star, you get a +3 to the roll. If
the roll is unsuccessful, then the Equipment or model is not In Stock, and you cannot purchase it or roll again for it until after you have played another Scenario. If you want to purchase more than one Equipment, Item, or Mercenary and have already successfully found the item or model In
Stock, you may check to see if additional identical items or models are In Stock, but each additional item or model checked for in this way incurs an additional -1 penalty to the In Stock roll (So the second Spear would be a -1 to the roll, and if successful, you could look for a third spear
with a -2 to the roll, and a fourth on a -3 to the roll). A natural roll of 6 always indicates the item or model is In Stock, and a natural roll of 1 always indicates the item is Not In Stock, regardless of bonuses or penalties. The following Equipment can be purchased and used by any warband: Melee weapon (Each model can only use 1 per scenario): *Heavy Weapon (3): Crushing Strength (1), Cannot use a Shield *Dual Weapons (3): +1 Att, Cannot use a Shield *Spear (3): Phalanx Rapier (3): +1 Me, Cannot use a Shield Whip (6): Phalanx, +1 Att, Cannot use a Shield Lance (6): Crushing Strength (1), Phalanx, Cavalry Only Pike (6): Pike Phalanx, Cannot use a Shield. From Human warband. Ranged Weapon (Each model can only use 1 per scenario): *Bow/Light Crossbow (6): 24”, -1 Me Cannot use a Shield *Crossbow (9): 24”, Piercing (1), -1 Me, Reload, Cannot use a Shield *Throwing Axe/Knife (3): 12”, -1 Me, Cannot use Shield Rifle (12): 24”, Piercing (2), Reload, Cannot use a Shield. From Human and Dwarf warband. Thunderpipe (9): Breath Weapon (2), Cannot use a Shield. From Abyssal Dwarf warband Heavy Thunderpipe (9): Breath Weapon (1), Piercing (1), Reload, Cannot use a Shield. From
Abyssal Dwarf warband. Pistol (6): 12”, Piercing (1), Cannot use a Shield. From Human warband. Brace of Pistols (9): 12”, Piercing (1), +1 Att, Cannot use a Shield. From Human warband. Hand Crossbows (6): 12”, +1 Att, Cannot use a Shield. From Twilight Kin warband. Repeating Crossbow (12): 24”, Piercing (1), +1 Att, Reload!, Cannot use a Shield. From Twilight
Kin warband. Throwing Scimitar (5): 12”, Can use a Shield. From Sons of Al’Babali warband. Clawshot and Pavise (18): Unit gains a 36” ranged attack with Reload!, Piercing (1), +1 At, and
5+ Def vs Shooting attacks in front arc. Cannot use a Shield. From Ratmen
warband.
Miscellaneous (Each model can use all their Miscellaneous Equipment in each scenario): *Shield (3): +1 De Map (20): One use only, during Aftermath. When purchased, roll 1d6 for type:

1-2=Vague: You may choose to reroll the next Scenario if you dislike what was rolled (If both players have this, roll to see who gets to use theirs).
3-4= Accurate: You may choose the next scenario as if you had rolled a 4 or less and had the smaller of the two warbands. If both players have this, roll to see who gets to use theirs).
5-6= Master: +1 die during Exploration, and does not count against the 5-die limit. Limit one additional die from a Master Map per warband. Lucky Charm (5): Ignore the first hit per Scenario against this model on a 4+ roll. Trap (15): One use only. Roll 1d6 for effect:
6= You may nominate one enemy model to take a To test before the start of the game. 2-5= The opposing player may select which of their models must take the To test. 1= The model with the Trap must take a To test. No model can be affected by more than one Trap Equipment per Scenario.
Poison (6): One use only. This model gains Piercing (2) and Crushing Strength (2) for this
scenario. Antivenom (1): One use only. Enemy models attacking this model ignore any Piercing or Crushing Strength bonuses they get from Poison Equipment for this scenario. Lantern (9): Ignore a single -1 to-hit with ranged attacks against enemies within 6” of this model. Does not stack with other Lanterns or Torches. Torch (3): One use only. Ignore a single -1 to-hit with ranged attacks against enemies within 6” of
this model for this scenario. Does not stack with other Lanterns or Torches. Banner (15): +1 to your Flee checks. Limit 1 per warband. Instrument (15): -1 to opponent Flee checks. Limit 1 per warband. Ale Cask (9): One use only. Model gains -1/+3 To, but -1 Mel, -1 Ran, and Shambling for this scenario. Cannot by used by Shambling models. Un/Holy Water (12): One use only. +1 damage for the first damaging attack against a warband
model of the opposite alignment with this model, or prevent the first damage to this model from a model of an opposite alignment, whichever occurs first. Cannot be used by Neutral warbands. Rations (10): Ignore one -1 to starmetal value from warband value. Limit 1 Rations per warband. Garlic (1): One use only. Enemies attacking this model in Melee lose Bloodbath and instead gain Evil Dead for this scenario. In addition, warbands can purchase Magic Items, which cost a number of gp equal to the point cost of the magic item. Magic Items are always considered to be Miscellaneous items of no
alignment (Meaning they are always In Stock on a 5+). Trading You may upgrade your Warband, purchasing non-Hero Models and purchasing or selling Equipment/Artifacts as you like. Keep in mind you cannot sell any current units in your roster. You may sell any Equipment for half of its original value, rounding up. Mercenaries: You can also hire models from other warbands than your own, as well as War Machines and H/M
units from the army list that is the same as your Warband list to supplement your warband. If you want to get a Mercenary, you must see if they are In Stock and available for hire (See above for rolling for In Stock). A model from another warband is equipped and costs exactly as if they were
a model from that warband for the purpose of item costs and availability. A H/M or War Machine costs half their points value in gc, and are equipped exactly as if they were a model from your warband. Mercenary units can gain experience, equipment, and Skills as normal, but can never
become your Warband leader under any circumstances. For any units purchased from an army list, their To is equal to half their Ne, rounded down (So Ne 8/10 becomes To 4/5, Ne 11/13 becomes To 5/6, etc.). In addition, if the model does not specifically have the Individual special rule, they are considered to be Large (Counting against

the normal restriction for Large units in your warband). Finally, if any unit special rules refer to requiring a “Solid” unit of a specific type, you must have at least 1 model of the specified “Solid”
type in your warband in order to purchase the unit. At the start of the Aftermath for a warband, before rolling for or selling Starmetal, you must pay ⅕
of the total value of the Mercenary unit in gc or else they leave your warband and cannot be recovered (In addition, any Equipment they are carrying is lost). For H/M or War Machines, the total value is equal to their Experience plus their equipment plus half their points value in gc. If your warband list has no corresponding army list, you may pick a single army list of the same alignment that your warband can then pick H/M or War Machines from. You cannot change this
choice of army list later. If you hire a Hero/Monster marked with [1], they leave immediately after the battle (They don’t gain any Experience or Equipment), and you may not hire the same [1] H/M two games in a row. No two warbands can purchase the same [1]-marked H/M for the same battle. If this occurs,
players roll off for who actually gets to use the H/M, with the other player having the gold spent on the H/M refunded to them after the battle. Any Mercenaries, including [1]-marked H/M, always count for the purposes of additional Experience from enemy warband value, and reduced starmetal value when selling due to warband size. Starmetal: During the Aftermath portion after a scenario, warbands will usually acquire some quantity of
starmetal. This can either be sold at the indicated prices (See above), or any number of models can elect before deployment to use up to 5 pieces of starmetal each. Each piece used in this way is deducted from the number of starmetal of the warband. Starmetal can be used in either its
Abyssalite or its Celestium form, and a model can only use one type of starmetal (So they cannot use Celestium and Abyssalite at the same time). Any starmetal used as Abyssalite or Celestium is discarded at the end of the scenario, whether or not the using model passed any Stunned
checks. Each piece of Abyssalite adds 1 damage to any successful damage caused in Melee. The bonus
for each piece can only be used once (So if you had 4 pieces, you could apply 4 extra damage to one hit, 2 damage to 2 attacks, 1 damage to 4 attacks, etc). However, even if you have already used all the bonus damage for the starmetal for the game, the model still rolls for Stunned. Each
piece of Celestium prevents 1 damage over the course of the entire scenario (And again, you can elect to apply this all to a single group of damage, or prevent damage from several attacks), and any subsequent damage applies as normal without reduction. Again, even if you have already
reduced the damage from all your Celestium, the model still rolls for Stunned as normal. At the start of a players turn, each model using any number of starmetal pieces must roll 1d6. If
they roll above the number of starmetal pieces they are using, they may act as normal this turn. If they roll equal to or less than the number of pieces, then they are Stunned by the force of the starmetal shards and can not perform any actions of any kind this turn (If the model was Fallen,
they still stand up at the end of their turn). A roll of 1 always fails, and a roll of 6 always passes for the Stunned check. Neutral warbands get no initial bonus or penalty when using starmetals. Warbands with Evil alignment get +1 on their Stunned check when using Abyssalite, and -1 when using Celestium. Good warbands get +1 on the Stunned rolls for Celestium and -1 for Abyssalite. If a single model
is using 5 pieces of starmetal and passes at least one Stunned check during the game, they gain the skill “Attuned to Abyssalite/Celestium,” as per whichever type of starmetal they were using,

during the Aftermath of the scenario. Attuning gives an additional +1 bonus when attempting to pass a Stunned check with that type of starmetal. If a model is Attuned to one type of Starmetal
and later passes a Stunned check for 5 pieces of the other type, they lose the Attunement with the initial type and gain Attunement with the starmetal type they just passed the check for.
Use in Kings of War You can use your Warband in regular KoW in the following way: Each model in your Warband can be purchased as a Troop (1) with a limit of 1 ( [1] ) and if the model is not Large it gains the Individual Special Rule. If the model is carrying any Equipment or Artifacts, these factor into the statline and cost for the model, doubling the To values. However,
Elite (n) and Vicious (n) just become Elite and Vicious. The final cost of the Troop is 5 times the value of the model in gp if it is non-Large (Including experience, Equipment, and Artifacts). Large models are 2 times the total value of the model in gp. If you purchase any of the Warband members, you must also purchase your Hero. Follow the same guidelines as above, but instead of a Troop the Hero counts as a H/M (Requiring a Solid
Model as normal). If you purchase ever member of the Warband as above, they all count as a single overall Solid Model (And so you can make an entire legal KoW army using just the models of your warband and your Hero)

Warband Name: _________________________ Warband Type:____________________ Leader: __________________________________Starmetal: _________________ Warband Gp Value: ______________________ Gold Pieces:_______________ Warband Members:
Model Spd Me Ra Def Att To Value (gp)
Special Rules and Equipment
Experience


![Star (with Answers)[1]](https://static.fdokumen.com/doc/165x107/631e9db04c5c8fb3a00e4680/star-with-answers1.jpg)