
SOLUTION-2 #9280 - T.J. Snow
109
SOLUTION-2 #9280 TABLE OF CONTENTS STANDARD WELDING FUNCTIONS WARRANTY INSTALLATION INSTALLATION INSTRUCTIONS . . . . . . . . . . . . . . . . . . . . . . . . . . . . . . .I-1 PRESSURE TRANSDUCER MOUNTING (OPTION). . . . . . . . . . . . . . . .I-6 HOOK-UP DIAGRAM . . . . . . . . . . . . . . . . . . . . . . . . . . . . . . . . . . . . . . . . I-7 SOFT TOUCH SETUP AND OPERATION . . . . . . . . . . . . . . . . . . . . . . . .I-16 SPECIAL OPTIONS _ DIRECTIONS FOR USE _ INITIAL SET-UP PROCEDURE - SUCCESS WITH THE MINIMUM OF PAIN . . . . . . . . . . . . . . . . . . . . . .SU-1 A OVERALL OPERATION LOGIC OF SOLUTION-2 . . . . . . . . . . . . . . . . SU-2 - DIRECT ACCESS SET-UP NUMBERS . . . . . . . . . . . . . . . . . . . . . . . . .SU-4 B INITIAL CONFIGURATION OF SOLUTION-2 . . . . . . . . . . . . . . . . . . . .SU-6 C WELDER INITIATION SETUP . . . . . . . . . . . . . . . . . . . . . . . . . . . . . . . .SU-9 D SETTING TIP FORCE CALCULATOR . . . . . . . . . . . . . . . . . . . . . . . . . SU-11 E INITIAL SETTING AND USE OF AVC SYSTEM . . . . . . . . . . . . . . .. . . SU-14 F SETTING CURRENT READING SYSTEM, PRIMARY . . . . . . . . . . . . .SU-15 G SETTING CURRENT READING SYSTEM, SEC . . . . . . . . . . . . . . . . . SU-18 H SETTING CURRENT BLANKING . . . . . . . . . . . . . . . . . . . . . . . . . . . . .SU-21 K SETTING PRINTER FUNCTIONS . . . . . . . . . . . . . . . . . . . . . . . . . . . . SU-22 L SETTING LOAD CELL RANGE . . . . . . . . . . . . . . . . . . . . . . . . . . . . . . SU-23 M SETTING COUNTER FUNCTION . . . . . . . . . . . . . . . . . . . . . . . . . . . . .SU-24 N SELECTING FULL CYCLE/HALF CYCLE TIME . . . . . . . . . . . . . . . . . SU-26 O SELECTING CHAIN SPEED . . . . . . . . . . . . . . . . . . . . . . . . . . . . . . . .. SU-26 P CHOOSING LIGHT CURTAIN FUNCTION . . . . . . . . . . . . . . . . . . . .. ;SU-28 Q ASSIGNING FAULT AND ACCEPT RELAY OUTPUTS . . . . . . . . . . . SU-30 R SET FAULT, ACCEPT, AND EHR RELAY ON TIME . . . . . . . . . . . . . SU-33 S SELECT KEYBOARD LOCK MODE . . . . . . . . . . . . . . . . . . . . . . . . . . SU-39 DIRECTIONS FOR USE OVERVIEW OF CHAIN/LINK LOGIC . . . . . . . . . . . . . . . . . . . . . . . . . . . U-1 FLOW SEQUENCE . . . . . . . . . . . . . . . . . . . . . . . . . . . . . . . . . . . . . . . . .U-2 THREE SIMPLE STEPS TO MAKE A CHAIN . . . . . . . . . . . . . . . . . . . . U-5 1. DEFINING THE TASK . . . . . . . . . . . . . . . . . . . . . . . . . . . . . . . . . . . . U-5 2. ENTERING PROGRAMS WITH SEQUENCE . . . . . . . . . . . . . . . . . . U-5 SEAM WELDING IN A LINK . . . . . . . . . . . . . . . . . . . . . . . . . . . . .U-8 3. ASSEMBLING THE CHAIN . . . . . . . . . . . . . . . . . . . . . . . . . . . . . . . . U-9 a. HOW CHAINS CAN BE USED . . . . . . . . . . . . . . . . . . . . . . . . U-10 b. SELECTING MANUAL/AUTOMATIC CHAIN . . . . . . . . . . .. . .U-16 TESTING CHAIN . . . . . . . . . . . . . . . . . . . . . . . . . . . . . . . . . . . . . . . . . . .U-17 RUNNING PRODUCTION . . . . . . . . . . . . . . . . . . . . . . . . . . . . . . . . . . . .U-19 LIGHT CURTAIN FEATURE . . . . . . . . . . . . . . . . . . . . . . . . . . . . . . . . . . U-20
-
Upload
khangminh22 -
Category
Documents
-
view
0 -
download
0
Transcript of SOLUTION-2 #9280 - T.J. Snow

SOLUTION-2 #9280
TABLE OF CONTENTS
STANDARD WELDING FUNCTIONS
WARRANTY
INSTALLATION INSTALLATION INSTRUCTIONS . . . . . . . . . . . . . . . . . . . . . . . . . . . . . . .I-1 PRESSURE TRANSDUCER MOUNTING (OPTION). . . . . . . . . . . . . . . .I-6 HOOK-UP DIAGRAM . . . . . . . . . . . . . . . . . . . . . . . . . . . . . . . . . . . . . . . . I-7 SOFT TOUCH SETUP AND OPERATION . . . . . . . . . . . . . . . . . . . . . . . .I-16
SPECIAL OPTIONS _ DIRECTIONS FOR USE _
INITIAL SET-UP PROCEDURE
- SUCCESS WITH THE MINIMUM OF PAIN . . . . . . . . . . . . . . . . . . . . . .SU-1 A OVERALL OPERATION LOGIC OF SOLUTION-2 . . . . . . . . . . . . . . . . SU-2 - DIRECT ACCESS SET-UP NUMBERS . . . . . . . . . . . . . . . . . . . . . . . . .SU-4 B INITIAL CONFIGURATION OF SOLUTION-2 . . . . . . . . . . . . . . . . . . . .SU-6 C WELDER INITIATION SETUP . . . . . . . . . . . . . . . . . . . . . . . . . . . . . . . .SU-9 D SETTING TIP FORCE CALCULATOR . . . . . . . . . . . . . . . . . . . . . . . . . SU-11 E INITIAL SETTING AND USE OF AVC SYSTEM . . . . . . . . . . . . . . .. . . SU-14 F SETTING CURRENT READING SYSTEM, PRIMARY . . . . . . . . . . . . .SU-15 G SETTING CURRENT READING SYSTEM, SEC . . . . . . . . . . . . . . . . . SU-18 H SETTING CURRENT BLANKING . . . . . . . . . . . . . . . . . . . . . . . . . . . . .SU-21 K SETTING PRINTER FUNCTIONS . . . . . . . . . . . . . . . . . . . . . . . . . . . . SU-22 L SETTING LOAD CELL RANGE . . . . . . . . . . . . . . . . . . . . . . . . . . . . . . SU-23 M SETTING COUNTER FUNCTION . . . . . . . . . . . . . . . . . . . . . . . . . . . . .SU-24 N SELECTING FULL CYCLE/HALF CYCLE TIME . . . . . . . . . . . . . . . . . SU-26 O SELECTING CHAIN SPEED . . . . . . . . . . . . . . . . . . . . . . . . . . . . . . . .. SU-26 P CHOOSING LIGHT CURTAIN FUNCTION . . . . . . . . . . . . . . . . . . . .. ;SU-28 Q ASSIGNING FAULT AND ACCEPT RELAY OUTPUTS . . . . . . . . . . . SU-30 R SET FAULT, ACCEPT, AND EHR RELAY ON TIME . . . . . . . . . . . . . SU-33 S SELECT KEYBOARD LOCK MODE . . . . . . . . . . . . . . . . . . . . . . . . . . SU-39
DIRECTIONS FOR USE OVERVIEW OF CHAIN/LINK LOGIC . . . . . . . . . . . . . . . . . . . . . . . . . . . U-1 FLOW SEQUENCE . . . . . . . . . . . . . . . . . . . . . . . . . . . . . . . . . . . . . . . . .U-2 THREE SIMPLE STEPS TO MAKE A CHAIN . . . . . . . . . . . . . . . . . . . . U-5
1. DEFINING THE TASK . . . . . . . . . . . . . . . . . . . . . . . . . . . . . . . . . . . . U-5 2. ENTERING PROGRAMS WITH SEQUENCE . . . . . . . . . . . . . . . . . . U-5
SEAM WELDING IN A LINK . . . . . . . . . . . . . . . . . . . . . . . . . . . . .U-8
3. ASSEMBLING THE CHAIN . . . . . . . . . . . . . . . . . . . . . . . . . . . . . . . . U-9 a. HOW CHAINS CAN BE USED . . . . . . . . . . . . . . . . . . . . . . . . U-10 b. SELECTING MANUAL/AUTOMATIC CHAIN . . . . . . . . . . .. . .U-16
TESTING CHAIN . . . . . . . . . . . . . . . . . . . . . . . . . . . . . . . . . . . . . . . . . . .U-17 RUNNING PRODUCTION . . . . . . . . . . . . . . . . . . . . . . . . . . . . . . . . . . . .U-19 LIGHT CURTAIN FEATURE . . . . . . . . . . . . . . . . . . . . . . . . . . . . . . . . . . U-20

TABLE OF CONTENTS (continued) WARNING CODES . . . . . . . . . . . . . . . . . . . . . . . . . . . . . . . . . . . . . . . . . U-22
USING OPTIONS CURRENT MONITORING OPTION #9181-22A, 22B . . . . . . . . . . . . .OP-1 HEAT STEPPER OPTION #9281-15 . . . . . . . . . . . . . . . . . . . . . . . . . . OP-5 PRESSURE TRANSDUCER OPTION #9181-05, 05C . . . . . . . . . . . . . OP-11
AVC HIGH/LOW MONITOR OPTION #9181-06A . . . . . . . . . . . . . . . . .OP-17
SAMPLE PROGRAM CHAINS
SAMPLE PROGRAM CHAIN #1 . . . . . . . . . . . . . . . . . . . . . . . . . . . . . . . E-1 SAMPLE PROGRAM CHAIN #2 . . . . . . . . . . . . . . . . . . . . . . . . . . . . . . . E-3 SAMPLE PROGRAM CHAIN #3 . . . . . . . . . . . . . . . . . . . . . . . . . . . . . . . E-8 SAMPLE PROGRAM CHAIN #4 . . . . . . . . . . . . . . . . . . . . . . . . . . . . . . . E-13
SERVICE INFORMATION
CONTROL BOARD SCHEMATIC . . . . . . . . . . . . . . . . . . . . . . . . . . . . . . .S-1 VOLTAGE SUPPLIES SCHEMATIC . . . . . . . . . . . . . . . . . . . . . . . . . . . .S-2 POWER SUPPLY AND 1/O BOARD SCHEMATIC . . . . . . . . . . . . . . . . . S-3

SOLUTION #9280 RESISTANCE WELDING CONTROL SYSTEM
SOLUTION-2 FEATURES: Up to 45 LINKS (function sets) per chain Up to 15 separate CHAINS (of 45 LINKS each for a total of 675 LINKS) Up to 75 direct access PROGRAMS using BINARY SELECT NO CODES TO LEARN, EVER! Can BRANCH from CHAIN to CHAIN for almost unlimited sequences DOES NOT USE LADDER LOGIC PROGRAMMING 75 complete NEMA weld program memory; Does not require complex linking Ability to use the same weld PROGRAM at multiple locations in a CHAIN AVC Automatic Line Voltage Compensation; +/-2% output for +/-10% line voltage input Can insert time delay (dwell) and stop sequences at any point of the chain Uses a simple 14 button keypad similar to a touch tone phone Full 32 character alpha/numeric readout in PLAIN ENGLISH; NO CODES 26 (optional 38) 1/O: 7 initiation inputs (discrete, binary or BCD) dry contact or PNP 4 (upgradable to 16) programmable 115V valve outputs INIT. Input for reading binary code, dry contact or PNP 5 assignable proximity switch inputs, dry contact or PNP WATER SAVER 115V valve output (remains ON 1 minute after last weld) 3 ASSIGNABLE FAULT OR ACCEPT OUTPUTS, dry contact (NO or NC) EHR, End of Hold Relay (sequence completion), dry contact (NO or NC) ES, Emergency Stop input, dry contact or PNP NO WELD, external dry contact or PNP, and also on keypad Transformer overtemperature input, dry contact or PNP SCR overtemperature input, dry contact or PNP Valve outputs (4 to 16) can be independently designated in any program to:
a. Turn on or off at the start of any link b. Turn on or off at the end of any link (for between link functions) c. Turn on at a time delay after the start of any link (FORGE DELAY) d. Turn on with time delay and then start welding sequence (INTENSIFIER)
Includes ANTI-TIEDOWN, ANTI REPEAT, and 2 STAGE INITIATION functions Can control up to 15 SCR contactors (multi-SCR option) Can read up to 16 optional Differential Pressure Transducers (option) KEYBOARD KEYLOCK is standard Counter computes individual welds or finished parts Can be initiated in 4 different ways:
a. Single switch closure to select any of 7 CHAINS b. Two level switch closure to select any of 3 CHAINS c. BCD switch input to select any of 15 chains d. Binary switch input to directly select any of the 75 PROGRAMS
Chain steps can be run in 3 different modes: a. Sequence one step of the chain for each switch closure (JOG mode, to verify
sequence) b. Run the entire chain after a switch has been closed momentarily (NON-BEAT
mode, for automatic or PLC operated systems) c. Operate successive steps with a maintained switch closure, stop each time switch
opens (BEAT mode, for use on manually operated welders).

SOLUTION #9280
RESISTANCE WELDING CONTROL SYSTEM
STANDARD WELDING FUNCTIONS IN EACH OF 75 PROGRAMS
NAME OPERATION RANGE APPLICATION SQUEEZE DWELL BEFORE FIRING 0-99 CY ALLOWS TIPS TO FULLY CLOSE BEFORE WELDING . WELD MAIN HEAT & WELD TIME 0-99 CY MAIN HEAT IN ALL 0.99% HEAT PROGRAMS . SEAM WELD CONTINUOUS OR INTER- - SEAM WELDING MITTENT SEAM WELDING . PREHT. COOL1 DELAY ATER PREHEAT 0-99 CY GALVANIZED WELDING . HOLD DWELL AFTER WELDING 0-99 CY. ALLOWS NUGGET TO COOL COOL-1 DELAY AFTER PREHEAT 0-99 CY. GALVANIZED WELDING PREHEAT SETTING BEFORE UPSLOPE 0-99 CY. TO PREHEAT PARTS FOR 0-99% HEAT FIT-UP PROBLEMS UPSLOPE RAMPS CURRENT UPWARD 0-99 CY. GALVANIZED AND COATED TO WELD HEAT % 0-99 INIT. % METAL; PROJECTIONS DOWNSLOPE RAMPS CURRENT DOWNWARD 0-99 CY. ALUMINUM; HIGH CARBON FROM WELD HEAT % 0-99 FINAL % STEEL POSTHEAT SETTING AFTER DOWNSLOPE 0-99 CY. REDEFINES GRAIN STRUC- 0-99% HEAT TURE IN STEEL PULSATION REPEATS WELD SEQUENCE 0-99 PULSES HEAVY METAL WELDING WITHOUT OPENING TIPS 0-99 INTERPULSE AND GALVANIZED METAL COOL-2 DELAY TIME BTWEEN PULS. 0-99 CY. PULSATION WELDING QUENCH & COOL AND REHEAT AT END 0-99 CY. HEAT REDUCES BRITTLENESS IN TEMPER OF WELDING CYCLES 0-99% HEAT HIGH CARBON STEELS 0.99 CY. COOL DWELL TIME BETWEEN LINKS IN 0-99 CY. TIME TO ALLOW FOR PART BETWEEN A CHAIN OR WELD HEAD MOVEMENT
OPTIONAL FUNCTIONS
NAME OPERATION RANGE APPLICATION PRESSURE STARTS WELD WHEN 1-99 psi. PRECISION TIP PRESSURE TRANSDUCER PRESSURE IS REACHED KEYPAD SET FOR CONSISTENT WELDS CURRENT MONITORS AND SETS 0-100 KA CONTINUOUS PRODUCTION MONITOR UPPER / LOWER LIMITS CONTROL PRINTER RECORDS WELD SCHEDULE 0-100 KA PRODUCTION CONTROL WELD CURRENT / FORCE 0-9, 000 LBS PRINTER EXPORTS WELD DATA RS-232, PRODUCTION CONTROL & PORT TO PRINTER RS-485 QUALITY CONTROL
HEAT STEPPER MODIFY WELD HEAT UP TO 16 COATED METALS
ELECTRICAL SPECIFICATIONS
VOLTAGE RANGE = 208, 230, 380, 460, 575. FREQUENCY = 50 / 60 Hz.

INSTALLATION

SOLUTION-2 #9280 INSTALLATION INSTRUCTION
PAGE 1-1
Carefully unpack system and inspect for damage. Report any problems to the factory at once. If damage is obvious from outside of carton, report to carrier immediately. If this is a control supplied with SCR contactor(s) already installed, skip to step 2. + + + + + + + + + + + + + + + + + + + + + + + + + + + + + + + + + + + + + + + + + + + + + + + + + FOR INSTALLATION OF RETROFIT CONTROLS #9280-SOO, #9280-GOO (supplied without contactor or cabinet), #9280-SCO, #9280-GCO (supplied without contactor but in an enclosure) 1a. Mark the four gate/cathode wires from the existing SCR(s) to the existing control with
K1, G1, K2, G2 to match the existing control’s terminal markings. If these are not marked with the above nomenclature, contact the Unitrol Service Department for assistance.
1b. Remove all existing components from the old control leaving only the SCR contactor(s).
The new control contains all power supplies and SCR firing boards. 1c. If this retrofit control has been supplied complete with a white metal cabinet, mount
the cabinet as close as possible to the existing control enclosure. It is often convenient to mount the new box with one side bolted to a side of the existing enclosure. In this case, holes can be drilled through the “common” wall and grometed for clean wire passage between the two enclosures. Skip to step 1j below.
Most welding control problems are traced to installation errors. Please take the time to read over the entire installation direction section FIRST before starting any steps. You will thank us for this! If at any time during the installation you have a question or are unsure of a step, pick up the phone and call the Unitrol Service Department. They will be more than delighted to walk you through any problems. We at Unitrol are proud of this product and want to be sure that it performs properly the first time. Thank you for taking this extra step.

1d. Mount the new power supply in the existing cabinet near the top using the mounting
bracket supplied.
SOLUTION-2 #9280 INSTALLATION INSTRUCTION
PAGE 1-2
1e. Punch or drill a 1-3/4” dia (1-1/4” electrical KO) hole in the existing cabinet to allow the
control cable to be connected to the power supply. Locate the hole at the top of the cabinet near the power supply installed in step 1d. IT IS IMPORTANT THAT NO METAL CHIPS ENTER ANY OF THE ELECTRONIC COMPONENTS IN THE CABINET! PROTECT POWER SUPPLY AND CONTACTOR DURING THESE DRILLING AND INSTALLATION OPERATIONS. WHEN COMPLETE, REMOVE ALL CHIPS FROM THIS CABINET BEFORE APPLYING POWER.
1f. Because the plug shell is too large to pass through the hole made in step 1e., carefully
remove two screws holding the black plug shell together on the cable end that is on the thread side of the large silver connector and remove the two cover halves. Note that the two jack screws in this plug will come free when the shells are removed.
1g. Pass this end of the plug through the cabinet hole and install the tooth nut on the inside. 1h. Carefully install the two black plug shells back on the plug, being sure that the two jack
screws are installed and free. 1i. Pull enough cable through to comfortably plug into the upper rear of the power supply.
Hand tighten the two jack screws on this plug. 1j. Connect the gate/cathode wires from the existing SCR contactor to the G1/K1 and G2/K2
terminals on the power supply (wires marked in step 1a.). For multi-SCR contactor systems, note that these wires go to the K1/G1, K2/G2
terminals marked SCR-1, SCR-2, etc. as shown on the hook-up diagram. It is critical that the K1 connection on each of the SCRs traces to the same side of each SCR contactor that goes to L1 of the incoming power (as shown on the hook-up diagram). Check the Unitrol hook-up diagram to be sure the SCR contactors are connected correctly. If in doubt, contact the Unitrol Service Department.
1k. Skip to step 6 below. * * * * * * * * * * * * * * * * * * * * * * * * * * * * * * * * * * * * * * * * * * * * * * * * * * * * * * * * * * * * * * *
2. Select location for power supply cabinet, being sure that the cabinet door will clear all welder components when open. It is usually an advantage to locate this cabinet as close to eye level as possible for easy installation and servicing.
3. Drill welder to match the four mounting holes in the cabinet. Install cabinet.
4. Drill or punch power cable hole either through the back, side or bottom of the cabinet.
Drill or punch a second hole to handle the return cable to the welder transformer. IT IS IMPORTANT THAT NO METAL CHIPS ENTER ANY OF THE ELECTRONIC COMPONENTS IN THE CABINET! PROTECT POWER SUPPLY AND CONTACTOR

DURING THESE DRILLING AND INSTALLATION OPERATIONS. WHEN COMPLETE, REMOVE ALL CHIPS FROM THIS CABINET BEFORE APPLYING POWER.
SOLUTION-2 #9280 INSTALLATION INSTRUCTION
PAGE 1-3 5. Drill or punch an access hole to handle the foot pedal, palm buttons, valve outputs, and
machine control input/output wires at a convenient location in the bottom of the cabinet. OBSERVE THE CAUTIONS IN THE STEP ABOVE. After cleaning interior of all chips, install liquid tight or rigid conduit at all locations. Consult local codes for proper wire size. Wire should be sized for a maximum of 50% duty cycle load.
6. Connect power wires as shown in the WIRING HOOK-UP DIAGRAM. Be sure that all
connections are cleaned prior to insertion, and that all connectors are fully tightened. Loose connections will cause heating problems in the control, and eventually create intermittent welds.
7. Connect weld transformer(s) as shown on the WIRING HOOK-UP DIAGRAM. Try to
route these large current conducting cables so that they are not near any of the control lines (input/output lines). This will eliminate the possibility for inductive “cross talk”.
If this is a multiple SCR contactor control that will operate multiple transformers, it is good practice to be sure that the connection from the SCR terminal be connected to the transformer input terminal marked either + or with a dot. This will help on multiple transformer systems to reduce “recirculating current loop” problems.
8. Connect foot pedal, palm buttons, valves, and machine control input wires per WIRING
HOOK-UP DIAGRAM. Note that this control can be used in a large variety of input schemes. Proper attention to the WIRING HOOK-UP DIAGRAM will save problems. Note that is is not necessary to put a jumper on any of the PS (pressure/proximity switch) inputs (terminals 17 – 21) when they are not being used. The system will take care of this later. Be sure that all control input/output lines are routed away from heavy current carrying cables. Control cables should never be run in the same raceway as heavy current carrying cables. NOTE: If the control is being mounted on a manually operated welder, you should consider adding another operator button to allow REPEAT LAST WELD operation. When pushed, the control steps back to the link just used and allows repeat after the initiation switch (foot or hand) has been pushed. This is useful in cases where a spot has missed the proper location. If you are installing the REPEAT LAST WELD switch, connect to the INIT. terminal as shown on the WIRING HOOK-UP DIAGRAM. Note that this switch cannot be used if the system is set for BINARY initiation.
9. If the weld transformer(s) uses a high temperature thermal switch, connect the Normally
Closed (opens on high temperature) switch wires to terminals 23 and 24. If no transformer thermal switch exists, jump these terminals.
10. If system uses water cooled SCR contactors, connect water hoses to fittings on side of
cabinet. In/out direction of water is not important unless the system has been supplied with the #9181-28 water flow switch. The SCR high temperature thermal switch has been factory connected on systems supplied with an SCR contactor. For retrofit systems

supplied without an SCR, either wire the Normally Closed SCR contactor thermal switch wires to terminals 22 and 23, or jump these terminals.
SOLUTION-2 #9280 INSTALLATION INSTRUCTION
PAGE 1-4
If this control is a MODEL #9280 (with remote data input console), skip to step 15 below. * * * * * * * * * * * * * * * * * * * * * * * * * * * * * * * * * * * * * * * * * * * * * * * * * * * * * * * * * * * * * * * If this control is a MODEL #9280M, #9280L, or #9280D (all components in one enclosure) do the following:
11. If the control is mounted in the door (9280D) of the cabinet, skip to step 12. If it is mounted on either side of the enclosure ((9280M, 9280L), remove the four outer screws on the control face plate. Carefully rotate the front panel from the top to expose the wiring terminals. A bracket is provided to prevent the panel from going more than 90o.
12. Connect the YELLOW wire at upper right of power supply chassis board to a terminal that
most closely matches your supply. CAUTION: IF THE ACTUAL LINE VOLTAGE IS MORE THAN 25% HIGHER THAN THE TERMINAL MARKING, PERMANENT DAMAGE CAN OCCUR TO THE SYSTEM.
13. Connect line power as shown on the HOOK-UP diagram. Locate terminal on SCR.
marked L1. If this control has high speed fuse, the connection marked L1 will be on the fuse tag. Connect one side of the line to this point. The second side, as shown on the drawing, is a light blue color wire marked L2. Connect as shown to the other side of the power line.
14. If control was rotated out of cabinet in step 11, carefully rotate back into cabinet, being
sure that terminal at top clears cabinet. Replace screws.
SKIP TO STEP 20 BELOW
* * * * * * * * ** * * * * * * * * * * * * * * * * * * * * * * * * * * * * * * * * * * * * * * * * * * * * * * * * * * * * *
15. Select appropriate location for the SOLUTION-2 control remote console. Be sure that the console face is clear of the worst anticipated location of parts to be welded, and is not in the direct path of weld flash. Use the supplied swivel bracket.
16. Carefully plug control cable into the rear of console. After pushing plug all the way
inward, fasten with the two jack screws on the cable plug. HAND TIGHTEN ONLY. DO NOT USE A SCREWDRIVER. DO NOT USE EXCESSIVE FORCE ON THESE JACK SCREWS SINCE THEY BREAK EASILY WHEN OVER STRESSED.
17. Route the cable to the power supply cabinet and push the excess cable into the large
compression fitting supplied on the cabinet top. Be sure that there is enough of a loop at the console to allow full movement of the console. Tighten fitting. Remote cable extensions are available at time of purchase or can be field added to allow up to 25 feet distance between the console and the power cabinet. Be sure that this control cable is routed away from any high current carrying cables and is not routed in the same trough with such heavy cables.

SOLUTION-2 #9280 INSTALLATION INSTRUCTION
PAGE 1-5
18. Secure all wires inside power supply cabinet and check to be sure that connections are
made correctly and that no loose strands of wire are at any terminal point. 19. Locate wire at lower edge of the power supply chassis circuit board that is marked “F1”
and connect to voltage terminal that most closely matches your supply. Check this one more time to be sure this terminal is correct. Connection to a lower voltage terminal will cause permanent damage that will not be covered by the Unitrol warranty in any way.
20. If a factory installed CIRCUIT BREAKER is in this system, locate adjustment setting on
breaker and set to the closest or higher range calculated from the following formula: SETTING = (KVA - Line voltage) X 3,000 Where KVA is that shown on the welder nameplate. As an example: KVA = 75 Line voltage = 460 SETTING = (75 - 460) X 3,000 = .163 X 3,000 = 489.13
The circuit breaker should be set to the nearest higher level. Note that this circuit breaker has a MAGNETIC mechanism only to protect the SCR contactor against very fast and high current surges.
21. Take a moment to inspect all connections one more time. Be sure that all terminals are
tight, and that no stray strands of wire are visible.
22. Turn power on and check the control module. If the system is working correctly, the control will go through the diagnostic program and finish with the read-out showing “PROGRAM # “ if the memory was cleared at the factory or previous installation, or will display, “PROGRAM # # READY” if program was left in the memory. If no display is present, check that line voltage is present and matches that selected in step 15. If some other phrase is displayed, check page 10 in DIRECTIONS FOR USE to find the problem. Consult factory service department if difficulty is encountered at this point. Do not attempt to service control without proper information.
23. System should now be ready for operation.

SPECIAL OPTIONS

INITIAL SET-UP PROCEDURE
SOLUTION-2 #9280

INITIAL SET-UP PROCEDURE
PAGE SU-1
SUCCESS WITH THE MINIMUM OF PAIN
The SOLUTION-2 control is an extremely advanced piece of Engineering. It allows the user to specify simple or complex welding and automation sequences using the simplest possible programming steps.
The design team at Unitrol STRONGLY recommend the
following sequence for first time users:
1. Read the entire direction book cover to cover FIRST before
attempting to operate this system.
2. Then start back at page SU-2 and follow the directions step by step. In this way you will be sure that all original
configuration settings in the SOLUTION-2 are correct, and
that the system will respond properly to your input commands.
3. If at any time during this process you have a question or find
a problem, please contact the Service Department at Unitrol for assistance at 847-480-0115. Our regular business hours are 8:30 AM to 5:00 PM CST, Monday to Friday. While personnel are often available at other times and days, a message left on our 24 hour answering system will get a response at the start of the next business day.
SOLUTION-2 #9280

INITIAL SET-UP PROCEDURE
PAGE SU-2
Before proceeding further, be sure that all steps of the installation section, pages 1-1 through 1-5, have been completed.
A WORD ON THE OVERALL OPERATION LOGIC OF THE SOLUTION-2 SYSTEM This SOLUTION-2, like all SOLUTION controls, uses a very simple format of entry: A1. A line will come up on the display with a value or mode shown. A2. If this line is part of an initial configuration setting in the system, the following
display will then be alternately shown: CHANGE 1 = YES, 0 = NO This says that if you want to CHANGE the number or mode shown on the display,
press 1 (“YES”, change). If you do not want to change the value or mode shown, press 0 (“NO”, do not change)
A3. If the line is a NUMBER, just enter the new number and then press ENTER to go
to the next question. If the line is a MODE and there are only two MODES from which to choose, the
new MODE will appear and then the system will automatically advance to the next question. For example using PROGRAM 90:
HOLDING MODE CHANGE 1 = YES, 0 = NO Press 1 (“YES, CHANGE”) MOMENTARY MODE and then will step to the next question or exit automatically A4. If the line is a MODE and there are more than two MODES from which to choose,
the choices will now be displayed one at a time with a number following each as in this example from PROGRAM 79:
3-CHAIN, 2 – STAGE or other initiation mode CHANGE 1 = YES, 0 = NO
SOLUTION-2 #9280
INITIAL SET-UP PROCEDURE

PAGE SU-3
Press 1, and the display will show:
3-CHAIN, 2 STAGE = 1
7-CHAIN, 1 STAGE = 2
15-CHAIN – BIN. = 3
75-PROG, BINNARY = 4
KEYPAD PRG. SEL = 5 At this time, by pressing the numbers 1 to 5, the chosen mode will be chosen for
messages that will appear during normal welding sequences. A5. ENTRY ERRORS: If a number is entered that does not match one of the choices
shown on the display (for example, the number 8 in the LANGUAGE example above), the display will show:
INCORRECT ENTRY
and then display the original question again. Pressing of the ENTRY button at this
time will set the SOLUTION-2 back to the original mode or number without making any change.
THAT’S ALL THERE IS TO UNDERSTANDING SOLUTION-2 ENTRY PROCEDURES!
SOLUTION-2 #9280 INITIAL SET-UP PROCEDURE
PAGE SU-4

DIRECT ACCESS SET-UP NUMBERS
The SOLUTION-2 control has a large variety of functions that can be performed for various types of welding situations. The pages that follow in the INITIAL SET-UP PROCEDURE and DIRECTIONS FOR USE will show how to locate and make entry into these locations to customize your SOLUTION-2. * * * * * * * * * * * * * * * * * * * * * * * * * * * * * * * * * * * * * * * * * * * * * * * * * * * * * * * * * * * * * IMPORTANT NOTE: ALL functions listed as “standard function” should be set for all systems. Functions not listed as “standard function” are OPTIONS and only require setting if the option is installed on this control. * * * * * * * * * * * * * * * * * * * * * * * * * * * * * * * * * * * * * * * * * * * * * * * * * * * * * * * * * * * * * The following is a master list of these DIRECT ACCESS NUMBERS used on the following pages to set your SOLUTION-2 for desired functions and values. There are two ways to get to any of these setting programs: A. If you know the program number of the function to be set (see table below), press:
PROGRAM, ##, ENTER where # # is the PROGRAM NUMBER listed in the table. On numbers that are listed as 97 / ##, press: PROGRAM, 87, ENTER, ##.
B. If you do not have the table available, you can go to the master directory by
pressing: PROGRAM, 0, ENTER. By continuing to press the STEP button, the display will show the same setting programs in order as shown in the table.
To use the setting program displayed, press the PROGRAM button and answer
the questions on the display. After making entry into that program, the system will bring you back to the next setting program. If you want to exit this master directory, press SINGLE, NO WELD, or REPEAT.
SOLUTION-2 #9280
INITIAL SET-UP PROCEDURE
PAGE SU-5

DIRECT ACCESS SET-UP NUMBERS PROGRAM NUMBER FUNCTION USED WITH OPTION PAGE 76 ASSIGN TRANSDUCER TO #9181-05 MULTIPLE PRESSURE SU-13 VALVES TRANSDUCER OPTION 77 PRINT PROGRAMS DATA #9181-22A/B PRINTER OPTIONS SU-22 78 TRANSDUCER SET-UP #9181-05 PRESSURE TRANSDUCER SU-13 79 CHOOSE TYPE OF CHAIN STANDARD FUNCTION SU-9 80 CHAIN SETUP STANDARD FUNCTION U-9 81 PRINT FAULTS / WELDS #9181-21A/B PRINTER & PORT SU-22 #9181-22A/B CURRENT MONITOR 82 MAN/AUTO FAULT RESET 9181-O5C TRANSD. HIGH/LOW OP-4 #9181-06A AVC HIGH/LOW 83 CURRENT BLANKING #9181-22A/B CURRENT MONITOR SU-21 84 I-READ / REACT / OFF #9181-22A/B CURRENT MONITOR 0P-1 . 85 I-CALIBRATION #9181-22A/B CURRENT MONITOR SU-16 86 SOFTWARE VERSION standard function SU-23 86 PRINTS SYSTEM SETUP #9181-21/A PRINTER OPTIONS SU-23 87/01 INIT. CONFIGURATION standard function SU-6 . (SV, SCRs, PS, ETC.) 87/90 FAULT & EHR RELAY ON STANDARD OR HIGH SPEED. SU-27 TIME; CHAIN SPEED SET TIME RELAYS STAY CLOSED 87/92 CURRENT RANGES #9181-22B CURRENT MONITOR SU-20 87/96 KEYLOCK SECURITY Sets keyboard lock mode SU-39 87/93 LIGHT CURTAIN standard function SU-28 87/97 SET TYPE OF PRINTER #9181-21A/B PRINTER SU-22 87/98 LOAD CELL MULTIPLIER #9181-05D LOAD CELL SU-23 87/99 PRI / SEC. CURRENT SEL #9181-22A/B CURRENT MONITOR SU-17 /18 88 HEAT STEPPER SETUP #9281-15 MULTI HEAT STEPPER SU-8 89 AVC VOLTAGE SETUP standard function SU-14 90 MOM./ HOLDING INIT. standard function SU-10A 91 WELD / PART COUNTER standard function SU-24 93 FULL / HALF CY. COUNT standard function SU-26 94 + / - FIRST ½ CYCLE standard function SU-26 95 0-99 or 0-999 CY TIME standard function SU-27 96 TRANSDUCER PROGRAM $9181-05 PRESSURE TRANSDUCER OP-11 97 MAJOR / MINOR / SPECIAL select relay output for SU-30 FAULT OUTPUT various fault conditions 98 AVC ON / OFF standard function SU-14 - AVC HIGH / LOW #9181-06A SU-14 99 CLEAR MEMORY PROGRAM standard function
SOLUTION-2 #9280
INITIAL SET-UP PROCEDURE
PAGE SU-6
B. INITIAL CONFIGURATION OF SOLUTION-2
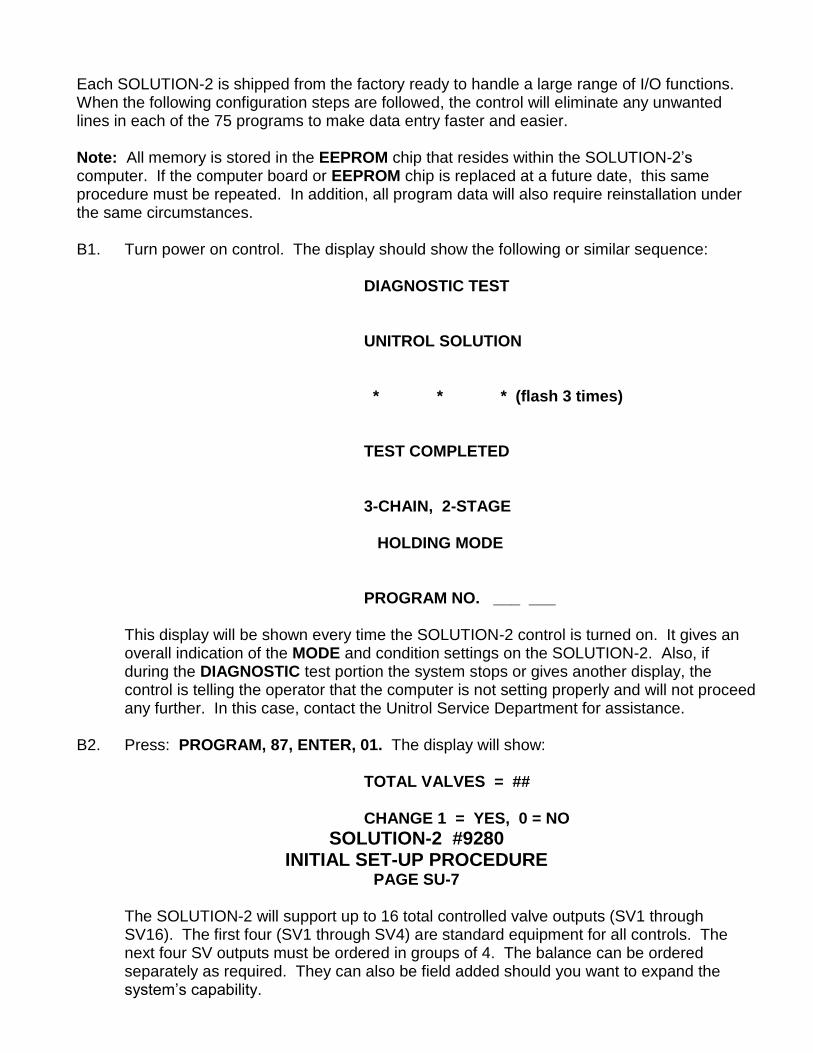
Each SOLUTION-2 is shipped from the factory ready to handle a large range of I/O functions. When the following configuration steps are followed, the control will eliminate any unwanted lines in each of the 75 programs to make data entry faster and easier. Note: All memory is stored in the EEPROM chip that resides within the SOLUTION-2’s computer. If the computer board or EEPROM chip is replaced at a future date, this same procedure must be repeated. In addition, all program data will also require reinstallation under the same circumstances. B1. Turn power on control. The display should show the following or similar sequence: DIAGNOSTIC TEST UNITROL SOLUTION * * * (flash 3 times) TEST COMPLETED 3-CHAIN, 2-STAGE HOLDING MODE PROGRAM NO. ___ ___
This display will be shown every time the SOLUTION-2 control is turned on. It gives an overall indication of the MODE and condition settings on the SOLUTION-2. Also, if during the DIAGNOSTIC test portion the system stops or gives another display, the control is telling the operator that the computer is not setting properly and will not proceed any further. In this case, contact the Unitrol Service Department for assistance.
B2. Press: PROGRAM, 87, ENTER, 01. The display will show: TOTAL VALVES = ## CHANGE 1 = YES, 0 = NO
SOLUTION-2 #9280 INITIAL SET-UP PROCEDURE
PAGE SU-7
The SOLUTION-2 will support up to 16 total controlled valve outputs (SV1 through SV16). The first four (SV1 through SV4) are standard equipment for all controls. The next four SV outputs must be ordered in groups of 4. The balance can be ordered separately as required. They can also be field added should you want to expand the system’s capability.

Note: Pressing STEP after any display is shown will skip to the next question without changing the value or mode shown. B3. This number should have been set at the factory to match the quantity of outputs ordered
with the system. a. If you wish to reduce the number of SV lines in each of the 75 programs,
press 1 to allow the change, and then enter this number. Note that this number can always be returned to the maximum in the future without affecting programs previously entered. Also, if you choose a number higher than the quantity of SV output circuits installed on the control, the control will allow entry for these SV outputs in each program even though no output circuit exists. After entry of a number, press ENTER.
b. If you do not want to change this number, press O.
B4. The display will now alternately show: TOT. PS INPUT = # CHANGE 1 = YES, - = NO All SOLUTION-2 controls have the hardware capacity to monitor the condition of up to
five proximity of mechanical switches during the start of each program LINK (to be explained later). Press 1 (“YES”, change), and then enter the quantity of proximity / limit / pressure switches that have been connected to terminals PS1 through PS5. IMPORTANT NOTE: If you are going to use either the LOOP IF PS5 ON or PS5 OFF, NEXT mode (see pages U-8 through U-11), select a maximum of four PS switches (i.e., TOT. PS INPUT = 1, TOT. PS INPUT = 2, TOT. PS INPUT = 3, or TOT. PS INPUT = 4).
B5. Press ENTER and the display will alternately show: TOTAL TRANSD. = ## CHANGE 1 = YES, 0 = NO
This number should have been entered at the factory to match the hardware (transducer options) installed. a. If this control does not have a #9181-05 DIFFERENTIAL PRESSURE
TRANSDUCER option, the number should be 00. If another number is shown, press: 1 (“YES”, change), 00, ENTER. If it is correct, press STEP.
SOLUTION-2 #9280
INITIAL SET-UP PROCEDURE
PAGE SU-8 b. If this control has a single #9181-05 DIFFERENTIAL PRESSURE TRANSDUCER
installed, the number should be 01. If another number is shown, press 1 (“YES”, change), 01, ENTER. If it is correct, press STEP.
c. If this control has more than one #9181-05 DIFFERENTIAL PRESSURE

TRANSDUCER installed, this number should match that quantity even if all will not be used for a particular setup. If an incorrect number is shown, press the proper number, and then ENTER. If it is correct, press STEP.
B6. The display will now show: TOTAL SCRS = ## CHANGE 1 = YES, 0 = NO
The SOLUTION-2 control can support up to 15 SCR contactors. The correct number should have been set at the factory. c. If this control has a single SCR contactor installed, the number should be 01.
If another number is shown, press 1, 01, ENTER. If it is correct, press STEP.
c. If this control has more than one SCR contactor installed, this number should
match that quantity even if all will not be used for a particular setup. If an incorrect number is shown, press 1, the proper number, ENTER. If it is correct, press STEP.
B7. If your control has been purchased with the #9281-15 HEAT STEPPER option, the display will now show: TOT. STEPPERS = ## CHANGE = YES, 0 = NO The SOLUTION-2 control can support up to 16 HEAT STEPPERS. Press 1 (to change) and install the number of steppers that will be used. This number can be changed at any time in the future and should represent the maximum number you feel will be used at this time. Now press STEP. B8. The display will now show: READY TO WELD
SOLUTION-2 #9280
INITIAL SET-UP PROCEDURE
PAGE SU-9
C. HOW DO YOU WANT WELDER INITIATION TO OPERATE? This control can be initiated in various ways. Since the software is universal, it is now necessary to tell the control what initiation mode is to be used. The five choices are:

C1. SELECTION OF UP TO 3 CHAINS USING DOUBLE STAGE FOOT SWITCHES AND/OR DUAL ANTI-TIEDOWN HAND SWITCHES: (3-CHAIN, 2-STAGE)
This initiation mode is typically used for two types of welders: 1. Single transformer pedestal welders with one or more solenoid valves. In this case,
SOLUTION-2 set in this initiation mode will allow up to 45 welds to be made in a CHAIN to provide the proper weld schedule for each location. It can also be used to operate an automatic retract system if the welder has retract hardware.
2. Multiple transformer, multiple valve welding systems that will be manually initiated by an operator (typical manual load/unload systems). This initiation mode allows selection of up to three separate CHAINS that each can have up to 45 LINKS. If more than 45 LINKS are needed, two or more CHAINS can be connected. IMPORTANT: Set jumper on upper left corner of power supply to the FS position. C2. SELECT UP TO 7 CHAINS USING SINGLE STAGE SWITCHES: (7-CHAIN, 1-STAGE) This initiation mode is typically used for single or multiple transformer, multiple valve welding systems that are being operated from a PLC or other external control system. The weld area is normally protected by light curtains or mechanical barriers. Initiation is done by seven separate single contact switches or solid state PNP switches. Selection can also be done through a single pole multi-point selector switch. This provides up to seven CHAINS that each can have up to 45 LINKS of sequence. If more than 45 LINKS are needed, two or more CHAINS can be connected. IMPORTANT: Set jumper on upper left corner of power supply to the FS position. C3. BINARY SELECTION OF UP TO 15 CHAINS: (15-CHAIN-BIN) This mode is typically used in automatic systems that require more than 7 CHAINS. Initiation uses four data inputs driven by dry contacts or solid state PNP switches in a PLC or other external control system to select one of 15 CHAINS (01-75) using BINARY code. This can also be accomplished using a thumbwheel switch or a single pole switch with diodes.
SOLUTION-2 #9280
INITIAL SET-UP PROCEDURE
PAGE SU-10 Fifteen CHAINS (01 to 15) that each can have up to 45 LINKS of sequence can be randomly selected in this mode. If more than 45 LINKS are needed, two or more CHAINS can be connected. While BINARY PROGRAM totally eliminates any restrictions of the maximum quantity of steps that can be used, time for hand shakes makes it slower than a CHAIN mode.

Note that BINARY 0 is not a legal selection and will generate a LOGICAL ERROR message if used. IMPORTANT: When using BINARY mode, set jumper on upper left corner of power supply to the BP position. If it is in the FS position, the system will initiate as soon as any binary code input switch has been closed. This will cause races in reading the binary code and can result in selection of random programs! C4. BINARY SELECTION OF UP TO 75 PROGRAMS: (75-PROG, BINARY) This initiation mode is typically used for single or multiple transformer, multiple valve welding systems that are being operated from a PLC or other external control system where the SOLUTION-2 is basically a slave. In this case, the PLC or other external control system operates the majority of valve functions, and the SOLUTION-2 is used more for control of weld schedules and transformer firing. Initiation is done by seven separate single contact switches or solid state PNP switches using BINARY code 01-75. This provides up to seventy-five PROGRAMS that can be BINARY selected in a NON-CHAIN MODE. Note that BINARY 0 is not a legal selection and will generate a LOGICAL ERROR message if used. This allows the PLC or other switch selection system to “call” any PROGRAM and have that program operated when the INIT input is closed. After the selected PROGRAM has been finished, the EHR relay will close for the time set in PROGRAM 87/90 to “tell” the PLC that this PROGRAM has been complete. INPORTANT: When using BINARY mode, set jumper on upper left corner of power supply to the BP position. If it is in the FS position, the system will initiate as soon as any binary code input switch has been closed. This will cause races in reading the binary code and can result in selection of random programs! C5. KEYPAD PROGRAM SELECT: (KEYPAD PRG. SEL) This initiation mode is typically used for manual welding stations where it is desired to weld with the last PROGRAM entered. In this mode, the welding control will not use the CHAIN sequence. Note that if this is a multi-SCR system, the selected PROGRAM must specify the SCR being fired. If the REPEAT button is pushed, the PROGRAM will be repeated with off time between each weld as set in the DWELL BETWEEN line,. IMPORTANT: Set jumper on upper left corner of power supply to the FS position.
SOLUTION-2 #9280
INITIAL SET-UP PROCEDURE
PAGE SU-10A
SELECTING DESIRED INITIATION MODE To select one of the above INITIATION MODES, press: PROGAM, 79, ENTER. The display will alternately show:

3-CHAIN, 2-STAGE or other initiation mode CHANGE 1 = YES, 0 = NO Press 1, and select the number that matches the desired initiation mode: 3-CHAIN, 2 STAGE = 1 7-CHAIN, 1 STAGE = 2 15-CHAIN – BIN. = 3 75 – PROG, BINARY = 4 KEYPAD PRG. SEL = 5 C6. SELECTING MOMENTARY OR HOLDING INITIATION MODE 1. In MOMENTARY mode, initiating the control for any time over 50 ms. will start the sequence. This is used in systems where either the electrodes are spaced less than ¼”
apart, or guarding is present (light curtain, mechanical gate, etc.) to prevent the operator from placing any body part between the electrodes.
2. In HOLDING mode, if the initiation switch is opened before the first weld cycle
has started, the system will go back to all conditions at the start of this particular LINK. This function happens for every LINK of the CHAIN. HOLDING mode MUST BE USED for all situations where electrode spacing is more than ¼” and the electrode area is not guarded (i.e., no light curtain or mechanical guard). HOLDING MODE will only operate if you have selected MANUAL CHAIN in PROGRAM 80.
Press: PROGRAM 90, ENTER, and choose the desired mode.
SOLUTION-2 #9280
INITIAL SET-UP PROCEDURE
PAGE SU-11
D. SETTING TIP FORCE CALCULATOR The SOLUTION-2 control converts TIP FORCE numbers that you enter in each program into required air psi. (pounds per square inch) that should be set on the air regulator(s) of the welder. Even if the #9181-05 DIFFERENTIAL PRESSURE TRANSDUCER option is not installed, this TIP FORCE CALCULATOR system is still in place.

When installing a new control, a value called LB/PSI must be calculated and entered into the SOLUTION-2. This value, when multiplied by the psi setting of the air supplied to the welding cylinder, will yield the TIP FORCE that will be created between the electrode and the metal being welded. * * * * * * * * * * * * * * * * * * * * * * * * * * * * * * * * * * * * * * * * * * * * * * * * * * * * * * * * * * * * * *
The formula for TIP FORCE is written as:
TIP FORCE = AIR psi X lb / PSI * * * * * * * * * * * * * * * * * * * * * * * * * * * * * * * * * * * * * * * * * * * * * * * * * * * * * * * * * * * * * To find the LB/PSI number of your welder, follow the one step below that matches your welder’s cylinder system: D1. For use on welding systems that use DOUBLE or TRIPLE PISTON air cylinders (“gun” cylinders), check manufacturers data sheet for the correct effective total cylinder area.
This number is normally part of the model number stamped on each double or triple piston cylinder. For example: On Grossel cylinders, a model 2-GA-765-1.5 means that LB/PSI = 7.65 (7.65 in 2 effective area). On Savair cylinders, a model A-G-436-6A means that the LB/PSI = 4.36 (4.36 in 2 effective area). On an OHMA intensifier type cylinder, a model 8716-RH-.25-12A means that the LB/PSI = 16 (16in 2 effective area). Note that on an intensifier cylinder, the air pressure must be measured at the INTENSIFIER port located furthest away from the piston end of the cylinder. Now go to step D5 below for entry of this LB/PSI value into the SOLUTION-2.
SOLUTION-2 #9280
INITIAL SET-UP PROCEDURE
PAGE SU-12
D. SETTING TIP FORCE CALCULATOR (Cont.)
D2. Some SINGLE CYLINDER PEDESTAL WELDERS list the WELD FORCE RATIO on the name plate. This number, when multiplied by air pressure, will yield the actual force between the welding electrodes (tips). If this is shown, the value will be the LB/PSI to be entered into the SOLUTION-2.

If this ratio is not shown, but a chart showing tip force for various air pressure settings is on the welder, calculate LB/PSI as follows:
TiP FORCE AT 50 PSI
LB/PSI = __________________ 50 Now go to step D5 below for entry of this LB/PSI value into the SOLUTION-2. D3. On all other PRESS and PROJECTION (non-rocker arm type) welders, the LB/PSI value
can be calculated using the following formula:
LB/PSI = CYLINDER DIAMETER X CYLINDER DIAMETER X .785 Where CYLINDER DIAMETER is the inside dimension across the cylinder. This is
typically about 1/8” smaller than the outside cylinder diameter. Most cylinders installed on U.S. made welders use ½” increments in size.
The following are areas of common cylinder sizes: ________________________________________ INSIDE CYLINDER DIAMETER LB/PSI (AREA) 3 in . . . . . . . . . . . . . . . . . . . . 7.1 in 3-1/2 in . . . . . . . . . . . .. . . . . . 9.6 in 4 in . . . . . . . . . . . . . . . . . . . . 12.6 in 4.5 in . . . . . . . . . . . . . . . . . . 15.9 in 5 in . . . . . . . . . . . . . . . . . . . . 19.6 in 6 in . . . . . . . . . . . . . . . . . . . . 28.3 in 8 in . . . . . . . . . . . . . . . . . . . . 50.2 in 10 in . . . . . . . . . . . . . . . . . . . . 78.5 in ________________________________________
SOLUTION-2 #9280
INITIAL SET-UP PROCEDURE
PAGE SU-13
D. SETTING TIP FORCE CALCULATOR (Cont.)
D4. If you are operating a ROCKER ARM WELDER, you must first calculate the machine ARM LEVERAGE as follows:
ARM LEVERAGE = (A - B) A = distance from the weld cylinder rod to the weld arm pivot B = distance from the weld arm pivot to the weld tip

As an example, on a ROCKER ARM WELDER with a 5” diameter cylinder that measures
18” from the cylinder rod to the weld arm pivot (“A”), and 24” from the weld arm pivot to the welding tip (“B”):
ARM LEVERAGE = 18 - 24 = .75 LB/PSI = ARM LEVERAGE X CYLINDER AREA = .75 X 19.6 = 14.7 Note: This LB/PSI number will change on a ROCKER ARM WELDER every time the
length of the welding arm is changed (moved inward or outward). Now go to step D5 below for entry of this LB/PSI value into the SOLUTION-2. D5. ENTRY OF THE LB/PSI VALUE: The value from one of the above steps must now be
entered into the SOLUTION-2 so that it can calculate the required air psi needed for each TIP FORCE value. To do this, press: PROGRAM, 78, ENTER. The display will now show:
TRANSDUCER SETUP then alternately: TRI = ##.# LB/PSI CHANGE 1 = YES, 0 = NO If this control has either no DIFFERENTIAL PRESSURE TRANSDUCER (option #9181-
05) or only one TRANSDUCER installed, press 1 and enter the LB/PSI value. If the number of 0 or 1 was installed in step B5 earlier, the display will now show:
READY TO WELD
SOLUTION-2 #9280
INITIAL SET-UP PROCEDURE
PAGE SU-14
D. SETTING TIP FORCE CALCULATOR (cont.) If this control has more than one DIFFERENTIAL PRESSURE TRANSDUCER (option
#9181-05) installed, a separate value must be installed for each one even if they are all the same. To do this, enter the LB/PSI value that matches the cylinder plumbed to TRANSDUCER 01 in the SOLUTION-2 cabinet, press STEP, and the display will alternately show:

TR2 = ##.# LB/PSI CHANGE 1 = YES, 0 = NO Continue to enter the values for each cylinder connected to a transducer. If the correct
quantity of transducers was entered during step B5 earlier, the program will have the following display when the ENTER button is pushed after the last value has been entered:
READY TO WELD You can review these values by again pressing: PROGRAM, 78, ENTER and push the
STEP button once for each line. D6. ASSIGN TRANSDUCERS TO VALVES: If the system has more than one transducer,
press: PROGRAM, 76, ENTER and the display will ask for a valve (SV) number to be assigned for each transducer. This is used in PROGRAM 96 when checking the operation of each transducer. In this way, when the CHECK TIP FORCE or CHECK AIR PSI? tests are made in Program 96, the valve assigned here will energize so that values can be read. This valve assignment will not be used in any way during normal operation of control sequences.
SOLUTION-2 #9280 INITIAL SET-UP PROCEDURE
PAGE SU-15
E. INITIAL SET-UP OF AVC AUTOMATIC VOLTAGE COMPENSATION This control contains a system that continuously monitors the incoming line voltage, compares it to a reference voltage, and then modifies the firing angle (% HEAT) of each half cycle of weld to maintain the welder voltage within a + / - 2% window. When a new control has been installed, or when a new control pendant is installed, the system must be set to measure and store the reference “zero line” voltage. To do this: E1. Press: PROGRAM, 89, ENTER. The display will show: VOLT CALIBRATION

SYSTEM VOLT. = - - - E2. Using a digital or analog voltage meter, carefully measure the actual incoming line
voltage. Enter this number. Then press ENTER. The display will show: READING VOLTAGE For the next 20 seconds, the SOLUTION-2 will make hundreds of line voltage readings,
convert these into digital numbers for the internal computer, then average these numbers to arrive at an “average” line voltage. This will be displayed as:
SYSTEM VOLT. = ### E3. The reference voltage is now set. At this time, the AVC circuitry is turned OFF. To turn it
on, press: PROGRAM, 98, ENTER. The display will show: VOLTCOMP. IS OFF CHANGE 1 = YES, 0 = NO E4. Press 1, and the display will show: VOLTCOMP. IS ON E5. The control is now set to operate with VOLTAGE COMPENSATION operative. * * * * * * * * * * * * * * * * * * * * * * * * * * * * * * * * * * * * * * * * * * * * * * * * * * * * * * * * * * * * * * *
AVC HI/LOW OPTION
If your control has been purchased with the #9181-06A AVC HI/LOW OPTION, the system will check to see if the line voltage has gone more than 10% above or below the “BASELINE” as learned above (or during the constant current setup procedure). If this happens, the display will show the voltage and indicate HIGH or LOW. This fault can also be sent to one of the FAULT RELAYS by assigning it in PROGRAM 97.
SOLUTION-2 #9280
INITIAL SET-UP PROCEDURE
PAGE SU-16
F. SETTING CURRENT READING SYSTEM, PRIMARY COIL If your control does not have a CURRENT MONITOR system option, skip to page SU-23. If this control uses the #9181-22B CURRENT MONITOR / LIMITER with SECONDARY current coil, skip to page SU-18. F1. BEING SURE THE SOLUTION-2 IS IN PRIMARY CURRENT MODE: It is first important
to check and see if the SOLUTION-2 has been set to read PRIMARY current. To do this, press: PROGRAM, 87, ENTER, 99. The display will alternately show:
PRIME 1 SYSTEM or SECOND 1 SYSTEM

CHANGE 1 = YES, 0 = NO If PRIME 1 SYSTEM is shown on the readout, press 0 to not change, otherwise, 0. The
display will now alternately show:
1 COIL CODE = ####
CHANGE 1 = YES, 0 = NO This value represents the current transformer size that was factory installed. This COIL CODE should have been set at Unitrol before shipment and noted in the first page of this
direction book. For example, a 400:5 current transformer will require a COIL CODE = 0400.
If the maximum PRIMARY current developed through this CT during a weld exceeds the
current transformer maximum rating (400 amps in the above example), the display will show:
CURRENT OVERFLOW In this case, contact Unitrol to obtain the correct current transformer to match your
application. F2. If your control has the #9181-22A CURRENT MONITOR/LIMITER option, a single
current transformer (CT) has been factory installed around line L1 inside the white control box. This CT converts current passing through the center of the coil into a proportional current in the coil. A voltage is now sent to the SOLUTION-2 computer to represent the primary current.
SOLUTION-2 #9280
INITIAL SET-UP PROCEDURE
PAGE SU-17
F. SETTING CURRENT READING SYSTEM, PRIMARY COIL(cont.) F3. TURNS RATIO: Voltage sent from the CT represents the PRIMARY CURRENT. This
value must be multiplied by the SOLUTION-2 computer to calculate SECONDARY CURRENT. This multiplier is called the TURNS RATIO.
As an example, for a 220 volt rated transformer having a 3.2 volt secondary (on the tap
setting being used), the calculation to find the TURNS RATIO would be: LINE VOLTAGE 220 TURNS
RATIO = ____________________ = _____ = 68.7 SECONDARY VOLTAGE 3.2

Rounded upward, TURNS RATIO = 69. F4. If the welding transformer has a TAP SWITCH, the SECONDARY VOLTAGE will be
different for each TAP SWITCH position. The welding transformer nameplate will typically contain the HIGH SECONDARY VOLTAGE and LOW SECONDARY VOLTAGE values.
You need first to calculate the voltage steps created by each tap switch position. To do
this, use the following formula: (HIGH SECONDARY VOLTAGE – LOW SECONDARY VOLTAGE)
VOLTS PER STEP = _______________________________________________________ (NUMBER OF TAP POSITIONS - 1
For example, on a transformer that has LOW SECONDARY VOLTAGE = 6.9V, a HIGH SECONDARY VOLTAGE = 9.0V, and four tap switch positions: (9.0 - 6.9) 2.1 VOLTS PER STEP = _________ = _____ = .7 VOLTS PER STEP (4 - 1) 3
SECONDARY VOLTAGE on any particular TAP SWITCH position is: SECONDARY VOLTAGE = LOW SECONDARY + (VOLTS PER STEP X (TAP #-1)
As an example, the SECONDARY VOLTAGE of the above transformer with the tap switch on position #3 is: TAP #3 SEC. VOLTAGE = 6.9 + (.7 X (3-1) = 6.9 + (.7 x 2) = 6.9 + 1.4 = 8.3V
FOR CONTROLS WITH ONLY ONE SCR CONTACTOR SOLUTION-2 #9280
INITIAL SET-UP PROCEDURE
PAGE SU-18
F. SETTING CURRENT READING SYSTEM, PRIMARY COIL (cont.)
F5. FOR CONTROLS WITH ONLY ONE SCR CONTACTOR: If your control has only ONE SCR contactor (as selected in PROGRAM 87/01), press
PROGRAM 85, ENTER. The display will alternately show: TURNS RATIO 00 CHANGE 1 = YES, 0 = NO Press 1 to change, and then enter the TURNS RATIO for the tap switch position being
used as shown in section F3 or F4 on the previous page.

FOR CONTROLS WITH MORE THAN ONE SCR CONTACTOR If, in PROGRAM 87/01, this control has been configured with more than one(1) SCR, the
calibration number for each transformer will have to be calculated. After PROGRAM 85, ENTER has been pushed, the display will show:
TURN R = 00, XMR #01 CHANGE 1 = YES, 0 = NO Press 1 to change. Enter the TURNS RATIO, as calculated in section F3, for the tap
switch position being used on the transformer wired to SCR #1. Press STEP and the display will request the TURNS RATIO for each additional SCR.
* * * * * * * * * * * * * * * * * * * * * * * * * * * * * * * * * * * * * * * * * * * * * * * * * * * * * * * * * * * * * * IMPORTANT NOTE: If in the future a transformer tap switch is changed on any transformer, the new TURNS RATIO must be entered into the SOLUTION-2 for the system to calculate secondary current properly! * * * * * * * * * * * * * * * * * * * * * * * * * * * * * * * * * * * * * * * * * * * * * * * * * * * * * * * * * * * * * * *
SOLUTION-2 #9280
INITIAL SET-UP PROCEDURE
PAGE SU-19
G. SETTING CURRENT READING SYSTEM, SECONDARY COIL G1. If your control has the #9181-22B CURRENT MONITOR/LIMITER option installed, it is
only necessary to set the control for the desired CURRENT RANGE. The system has been factory calibrated to Unitrol standards in PROGRAM 97/91. The calibration numbers are shown on the serial number page in front of this book.
If it is desired to check or change this calibration (ZERO and SPAN), press: PROGRAM,
97, ENTER, 91. The display will show first if the ZERO is being added (+) or subtracted (-) from the reading. The second display will show the ZERO value, and the third will show the SPAN.
It is not normally necessary to change this calibration. However, if you desire to calibrate
the system to another standard, contact the Unitrol Service Department at 847-480-0115 for assistance.

G2. SETTING THE MAXIMUM CURRENT RANGE. The SOLUTION-2 system should be
set to a MAXIMUM CURRENT RANGE that is the first one above the maximum possible value of secondary current that can be produced by your welder.
If the range chosen is too low, a CURRENT OVERFLOW fault will be displayed during
each welding sequence. If the range chosen is too high, readings will be less accurate (greater steps during the
reading process). If the system is set correctly, readings should be within ½% maximum error. TWO STEPS are now required in setting this range. Note that both steps must match or
the values displayed by the system will be completely wrong. STEP #1 Now select the MAXIMUM CURRENT to be read by pressing: PROGRAM, 87, ENTER,
99. The display should alternately show: SECOND. 1 SYSTEM CHANGE 1 = YES, 0 = NO (Note: If PRIMARY 1 SYSTEM is displayed, press 1 to change to SECONDARY 1.)
SOLUTION-2 #9280
INITIAL SET-UP PROCEDURE
PAGE SU-20
H. SETTING CURRENT READING SYSTEM, SECONDARY COIL (cont.)
STEP #17
G1. Press 0 (to leave at SECONDARY 1 SYSTEM). The display will now alternately show: 1 MAX 50 KA = 2 CHANGE 1 = YES, 0 = NO G2. To select the correct range, press 1, and the display will show: 1 MAX 100 KA = 1 (100,000 amp. maximum)

1 MAX 50 KA = 2 (50,000 amp. maximum) 1 MAX 25 KA = 3 (25,000 amp. maximum) 1 MAX 10 KA = 4 (10,000 amp. maximum) G3. Press the number that is the first one above the highest current output possible from
your welding system.
STEP #2
ON #9280 SERIES SOLUTION-2 WITH REMOTE KEYPAD CONSOLES: G4. Open the back of the SOLUTION-2 control pendant and locate the four segment DIP
switch on the lower right corner of that circuit board. Push the switch down next to the correct range value as selected in STEP #1 above (100 = 100,000A, etc.). Set the remaining three switches down on the side away from the numbers.
______ 100 ______ 50 PUSH 3 DOWN ON THIS SIDE ______ 25 SELECT ONE ONLY ON THIS SIDE ______ 10
SOLUTION-2 #9280
INITIAL SET-UP PROCEDURE
PAGE SU-21
G. SETTING CURRENT READING SYSTEM, SECONDARY COIL (cont.) G5. Remove the four outer screws on the white keypad plate and rotate control forward.
Locate the four section DIP switch on top of the front circuit board. The switches are hanging over the edge of the circuit board.
G6. Push the switch that matches the current range set in STEP #1 above towards the front
white plate (50 = 50,000a, etc.). Be sure that the other three switches are pushed away from the white plate.
Push only one switch towards white front plate on this side to select range ____10____25____50____100____

_______________________________ Pull the other three switches away from the white front plate on this side. G7. Note that on older SOLUTION-2 controls manufactured before 9/97, the range is 7,500A,
15,000A, and 60,000A. If the numbers on the DIP switch are 7.5, 15, 30, 60, the hardware is set for this range group. The system must recognize this in PROGRAM 87/92. In this case, be sure this range is selected.
SOLUTION-2 #9280 INITIAL SET-UP PROCEDURE
PAGE SU-22
H. SETTING CURRENT BLANKING At the beginning of each weld, a few half cycles of time are normally required before the electrode has fully made contact with the metal and current flow is stabilized. For this reason, these first few half cycles are often ignored or BLANKED so that the readings over the entire weld will be more stable. This is done in measurements coming from both a primary and secondary coil system. H1. To enter a CURRENT BLANKING, press: PROGRAM, 83, ENTER. The display will
show: BLANK 00 HALF CY H2, Now enter the desired number of HALF cycles at the beginning of the WELD portion only
that will not be measured. Obviously for welds of ½ or 1 cycle duration, no blanking should be made. Note: If the number of BLANK cycles equals or exceeds the number of WELD cycles, no current will be read!
H3. For welds of up to 12 cycles, blanking of two(2) half cycles will work well. For welds over 12 cycles, blanking of 4 half cycles is typical.

H4. Press ENTER when the desired number has been inserted. 1. SELECTING “FAULT RESET “ MODE
11. The SOLUTION-2 use various options to monitor various parameters during each weld. They are:
A. CURENT FAULT (options #9181-22A and #9181-22B): current out of HIGH 1/LOW 1 window
B. FORCE FAULT (option #9181-05C): Computed electrode force is above or below program variation
C. LINE VOLTAGE FAULT (option #9181-06A): Measured line voltage is out of +/-10% window from baseline
12. When any of these errors is detected, the system has two possible modes of response:
1. MANUAL RESET: Stop the weld sequence and keep the electrodes closed. The
initiation switch must be opened and closed again to release the electrodes. Welding will continue when the initiation switch has been closed one additional time. This mode is typically used on manually operated welders where the operator is operating the foot or hand switches.
2. AUTOMATIC RESET: Allow the sequence to continue without the need to close
the initiation switch. This mode is typically used on automatic systems where the FAULT RELAYS are being monitored for action by a PLC or other external system. For either MANUAL or AUTOMATIC RESET modes, you can assign output relays to communicate FAULTS or ACCEPTABLE conditions to an external system (i.e., PLC, etc.). See page SU-30 for assignment instructions.
SOLUTION-2 #9280 INITIAL SET-UP PROCEDURE
PAGE SU-23
K. SETTING PRINTER FUNCTIONS TYPE OF PRINTER K1. Skip to SU-24 if system does not have a printer option installed. If this control has the
#9181-22A printer port, or #9181-22B built-in printer option installed, it will be necessary to set the correct type of printer that will be operated. To do this, press: PROGRAM, 87, ENTER, 97. The display will alternately show:
BUILT-IN PRINTER or
“EPSON” PRINTER
CHANGE 1 = YES, 0 = NO K2. If this control has been supplied with the #9181-22B built-in 2-1/4” printer, the BUILT-IN-
PRINTER is the correct setting (should have been set at the factory). If this control has been supplied without a printer to drive your external serial printer,
“EPSON” PRINTER is the correct setting.

K3. If the type printer shown on the display is correct, press 0 to exit without changing. If the type printer shown on the display is not correct, press 1 to change to the other type.
The new type printer will be displayed, and then the system will exit this program. SELECTING WHAT WILL BE PRINTED K4. The SOLUTION-2 can print in two modes:
PRINT ALL WELDS: This printing mode will print lines of data for every weld made even if all functions measured are within proper range. PRINT FAULTS ONLY: This mode will print only welds that have at least one out of range measurement. This can be CURRENT (with option #9181-22A or #9181-22B), TIP FORCE (with option #9181-05), or LINE VOLTAGE (with option #9181-06A). K5. To select the desired printing mode, press: PROGRAM, 81, ENTER. The display will alternately show:
PRINT FAULT ONLY or
PRINT ALL WELDS
CHANGE 1 = YES, 0 = NO K6. If the correct printing mode is being displayed, press 0. If the display is not correct, press
1. The new printing mode will now be displayed. SEE SECTION 0P-17 FOR PRINTER OPTION OPERATION.
SOLUTION-2 #9280
INITIAL SET-UP PROCEDURE
PAGE SU-24 M4. PRINTING BASIC SYSTEM SETTINGS: By pressing: PROGRAM, 86, ENTER, you will
display the software version. If a printer option is installed in this control, the printer will now record control system settings. These are the same settings shown when the control is first being powered ON.
L. SELECTING LOAD CELL RANGE If your control does not have the #9181-05C LOAD CELL option installed, skip to page SU-25. The SOLUTION-2 control can measure TIP FORCE with one of two optional devices: A DIFFERENTIAL PRESSURE TRANSDUCER, or a DIRECT READING LOAD CELL. The control must be set for the correct device for all readings to be accurate. L1. To check the TIP FORCE device and setting, press: PROGRAM, 87, ENTER, 98. The
display will show:
SCALE MULT. = ##.#

L2. If this control utilizes the #9181-05 DIFFERENTIAL PRESSURE TRANSDUCER option, it should have been factory set at a value of 00.0. If this is not on the display, enter 000, ENTER. The system will now be ready for operation.
L3. If this utilizes the #9181-05D LOAD CELL option, it should have been set at the factory
at a value to match the full load range of the load cell. This number should be the range shown on the load cell divided by 100.
For example, for a 0-250 LB load cell, the SCALE MULT. should be 02.5. If the number
on the display is not correct, make the proper entry and then press ENTER. The system will now be ready for operation.
SOLUTION-2 #9280
INITIAL SET-UP PROCEDURE
PAGE SU-25
M. SETTING COUNTER FUNCTION M1. The SOLUTION-2 incorporates a multi function counter system. It will allow counting of individual welds or complete parts. To use this system, press: PROGRAM, 91, ENTER, and the display will show: ##### PARTS MADE or ##### WELDS MADE Then alternately display: RESET COUNTER ? PRESS: 1 = YES, 0 = NO M2. If you want to set the counter to zero, press 1. Otherwise to leave the count press 0. Now the display will alternately show: COUNTER IS ON CHANGE 1 = YES, 0 = NO

M3. If the counter is to be turned OFF so that welds will not be counted, press 1. In this case,
when each LINK has been completed, the display will continue to show the welding sequence just used(i.e., S, W, H, etc.) rather than the count. In this way you know that if the counter is being displayed, it is turned on and operating. To leave the counter ON, press 0.
M4. COUNTING PARTS WHEN USING CHAINS The display will now give choices on counting PARTS or WELDS. If the control has been set to use any of the three CHAIN modes (PROGRAM 79 set to:
3-CHAIN, 2-STAGE or 7-CHAIN, 1 STAGE or 15-CHAIN-BIN.), the display will be: CHAINS / PART ### If a part is to be completed using one CHAIN (any number of LINKS) and you want to
count COMPLETED PARTS either 00000 or 00001 will work. In this case, the display will show:
##### PARTS MADE at the end of every CHAIN.
SOLUTION-2 #9280
INITIAL SET-UP PROCEDURE
PAGE SU-26
M. SETTING COUNTER FUNCTION(continued) Note that if the control has been set to loop chains and/or use a string of chains (any
mode in PROGRAM 80 except ONE CHAIN ONLY), the displayed count will be made at the end of the last CHAIN no matter how many were used or how many times they were looped. In this way, the PARTS MADE count should represent the actual number of weldments produced.
In some cases, welding will be done on one part of a component, the component moved,
and then the same exact pattern repeated at another place on the same part. In this case, enter the number of chains required for completion. Note that if you are looping and/or using strings of chains (any mode in PROGRAM 80 except ONE CHAIN ONLY), a “CHAIN” count will be the entire group.
In this case, enter the number of total CHAINS (or complete CHAIN groups) required to
complete the part. Every time that number has been completed, the counter will index one number to actually represent the finished PARTS produced.
M5. COUNTING WELDS OR PARTS WHEN NOT USING CHAINS If the control is in BINARY PROGRAM SELECT mode (PROGRAM 79 set to: 75-
PROG-BINARY), the SOLUTION-2 does not know how many welds are required to

produce a finished part. Therefore, in this case, the display of PROGRAM 91 will automatically change to:
WELDS / PART ###
If 00000 or 00001 is entered, the counter will assume that you want to count WELDS only, and after each weld, the indexed number one will display:
##### WELDS MADE If 00002 or greater is entered, the counter will assume that you want to count PARTS. After this number of welds have been completed, the display will be indexed by one and display: ##### PARTS MADE IMPORTANT NOTE: If a particular PROGRAM does not have any welding functions (i.e., only valve and time dwells), the system will not count that operation as a WELD. For example, if the PLC chooses fifteen different PROGRAMS to complete a part and only three have weld heat functions, the counter will see this as 3 WELDS and count accordingly.
SOLUTION-2 #9280
INITIAL SET-UP PROCEDURE
PAGE SU-27
N. SELECTING FULL CYCLE OR HALF CYCLE COUNT TIMING N1. This control has the ability to use ½ cycle of weld heat, or even an odd number of ½
cycles. This is useful for welding very thin materials. To use, press: PROGRAM, 93, ENTER. The display will show: FULL CYCLE COUNT CHANGE 1 = YES, 0 = NO If it is desired to use ½ cycle count for the WELD portion only, press 1 (to change). If this
is done, the display will show: HALF CYCLE COUNT If you are not welding with ½ cycle of weld heat, skip to N3. N2. If using ½ cycle of weld on thin materials, the direction of this ½ cycle of weld heat
(positive or negative) often has a noticeable effect on the weld strength. Since the actual direction of this current is a combination of control signal and transformer wiring, the direction when first connected is a “coin toss”.

Therefore make a weld with the system in the default POSITIVE direction, then one in the
NEGATIVE direction. Set the control in the direction that makes the best weld. To set the direction, press: PROGRAM, 94, ENTER. The display will show: POSITIVE START CHANGE 1 = YES, 0 = NO To change direction, press 1. The display will now show: NEGATIVE START N3. Normal spot welding is done with a maximum of 99 cycles of weld time. However, if you
are using this system for RESISTANCE BRAZING or RESISTANCE ANNEALING processes, 99 cycles of time (1.65 seconds) is probably not long enough.
SOLUTION-2 #9280
INITIAL SET-UP PROCEDURE
PAGE SU-28
N. SELECTING FULL CYCLE OR HALF CYCLE COUNT TIMING(cont.)
To change the system to a maximum of 999 cycles of time (16.5 seconds), press: PROGRAM, 95, ENTER. The display will show:
0-99 CYCL. WELD CHANGE 1 = YES, 0 = NO To change, press 1, and the display will show: 0-999 CYCLE WELD
When the system is in this extended time, three digits will be available in each weld program for data entry.
O. SELECTING CHAIN SPEED If this control contains only one SCR, skip to the next section on page U-1. If this control uses more than one SCR and will fire many transformers in cascade, the time between firing of each SCR can have a noticeable effect on the overall time required to run a large part. This is particularly important in cross wire or other pass-through welders that have many SCR firings per row and many rows per part.

Under normal operation, the upper row of display on the SOLUTION console shows the CHAIN being operated and the last LINK just performed. This is useful for diagnostic purposes. However, this display routine takes computer time. Elimination of this feature will gain approximately 2 line cycles between each SCR firing. Therefore, in a welder that has 8 SCRs fired in cascade, the display between welds will add extra time of 7 X 2 cycles or 14 line cycles of time per row of welds. In 20 rows of welding, this will account for 280 line cycles or 4.7 seconds of time. If saving of this time is important, press PROGRAM, 87, ENTER, 90. The display will show: STD. SPEED RUN standard speed CHANGE 1 = YES, 0 = NO To eliminate the upper row display during the chain, press 1. The display will show: HIGH SPEED RUN Note that in this mode, if the SINGLE button has been pushed (to operate the CHAIN one link at a time), the upper row display will appear to aid in trouble shooting.
SOLUTION-2 #9280
INITIAL SET-UP PROCEDURE
PAGE SU-29
P. CHOOSING LIGHT CURTAIN FUNCTION P1. The SOLUTION-2 has a special function available to monitor a LIGHT CURTAIN input.
The function uses the PS-4 input port and eliminates PS-4 response in all programs. P2. If you are using a LIGHT CURTAIN, set the SOLUTION-2 for this function by pressing:
PROGRAM, 87, ENTER, 93. The display will show: PS4 = PROX. SWITCH CHANGE 1 = YES, 0 = NO P3. At this time, the control is set to use PS4 input as a normal proximity switch port. That is,
it will monitor the requested condition in each LINK and wait until that condition (TO BE OPEN, TO BE CLOSED, or TO BE EITHER) has been satisfied before moving forward. To change this to act as a LIGHT CURTAIN function input, press 1 and the display will show:
PS4 = LIGHT CURTAIN P4. LIGHT CURTAIN OPERATION Your LIGHT CURTAIN should be set so that breaking of the beam will open the circuit
connected to PS4 on the SOLUTION-2. If the beam is clear, the circuit will close.

The sequence of operation is as follows: CONDITION 1: Light Curtain beam is already broken when initiation is tried. RESPONSE:
a. The display will show: LIGHT CURTAIN OPN and the control will not start operation. b. If, while initiation is still closed the light beam is cleared, the display will show: RELEASE INITIAT. and no operation will be started.
SOLUTION-2 #9280
INITIAL SET-UP PROCEDURE
PAGE SU-30
P. CHOOSING LIGHT CURTAIN FUNCTION(cont.)
d. Once the initiation has been released, the display will show:
PLEASE INITIATE and wait for the initiation switch to be closed before the operation begins. CONDITION 2: Curtain is broken when system is anywhere in a LINK. RESPONSE: a. The display will show: LIGHT CURTAIN OPN b. Even if weld heat has started to flow, welding will stop and all valves that came in at the start of that LINK will be released. If any of the valves were already on from the previous LINK (i.e., previous link had either SV# ON , END ON, or SV# OFF, END ON), these valves will remain in the ON condition. c. If the light curtain has been cleared but the initiation is still closed, the display will show:
RELEASE INITIAT.

and no operation will be started. d. With the light curtain cleared, once the initiation has been released, the display will show: PLEASE INITIATE and wait for the initiation switch to be closed before the operation begins. The
sequence will start at the beginning of the LINK where the light curtain was opened.
e. If Emergency Stop is pushed (even if the curtain is still broken), the CHAIN will be reset, and all valves will be opened.
SOLUTION-2 #9280
INITIAL SET-UP PROCEDURE
PAGE SU-31
Q. ASSIGNING FAULT AND ACCEPT RELAY OUTPUTS
Q1. The SOLUTION-2 monitors various conditions during the welding sequence. These include: a. WELDING CURRENT (0ption #9181-22A or #9181-22B) b. ELECTRODE FORCE out of range (Option #9181-05C) c. LINE VOLTAGE out of range (Option #9181-06A) d. HEAT STEPPER exhausted (Option #9281-15) Q2. In each of these functions, you can decide which of three relays you want to transfer and
(except for the HEAT STEPPER) if you want the assigned relay transfer for a FAULT or for an ACCEPT sequence. To assign functions to relays, press: PROGRAM,
97, ENTER. The display will show: CURRENT TEST FOR NOT ASSIGNED = 7 CHANGE 1 = YES, 0 = NO This means that if Option #9181-22A or #9181-22B is in this control and an out of current condition is detected, no output relay will be operated. Q3. If 1 is pressed, the display will show the following one after the other: CURRENT TEST FOR Current out of range will cause REJECT – MAJOR = 1 the MAJOR relay to close

CURRENT TEST FOR Current within range will cause ACCEPT – MAJOR = 2 the MAJOR relay to close CURRENT TEST FOR Current out of range will cause REJECT – MINOR = 3 the MINOR relay to close CURRENT TEST FOR Current within range will cause ACCEPT – MINOR = 4 the MINOR relay to close CURRENT TEST FOR Current out of range will cause REJECT – SPECIAL = 5 the SPECIAL relay to close CURRENT TEST FOR Current within range will cause ACCEPT – SPECIAL = 6 the SPECIAL relay to close CURRENT TEST FOR No relay will close for either NOT ASSIGNED = 7 Current within or out of range
SOLUTION-2 #9280
INITIAL SET-UP PROCEDURE
PAGE SU-32
Q. ASSIGNING FAULT AND ACCEPT RELAY OUTPUTS(cont.) Q4. Press the number that matches your desired response. In this way an external system (i.e., PLC, etc.) can monitor either FAULTS or GOOD conditions for each weld. Q5. The display will now show: FORCE TEST FOR NOT ASSIGNED = 7 CHANGE 1 = YES, 0 = NO This means that if option #9181-05C is in this control, and the Electrode Force is
above or below the selected window, no relay will be operated. Q6. If 1 is pushed, the following will be displayed: FORCE TEST FOR Force out of range will cause REJECT – MAJOR = 1 the MAJOR relay to close FORCE TEST FOR Force within range will cause ACCEPT – MAJOR = 2 the MAJOR relay to close FORCE TEST FOR Force out of range will cause REJECT – MINOR = 3 the MINOR relay to close FORCE TEST FOR Force within range will cause
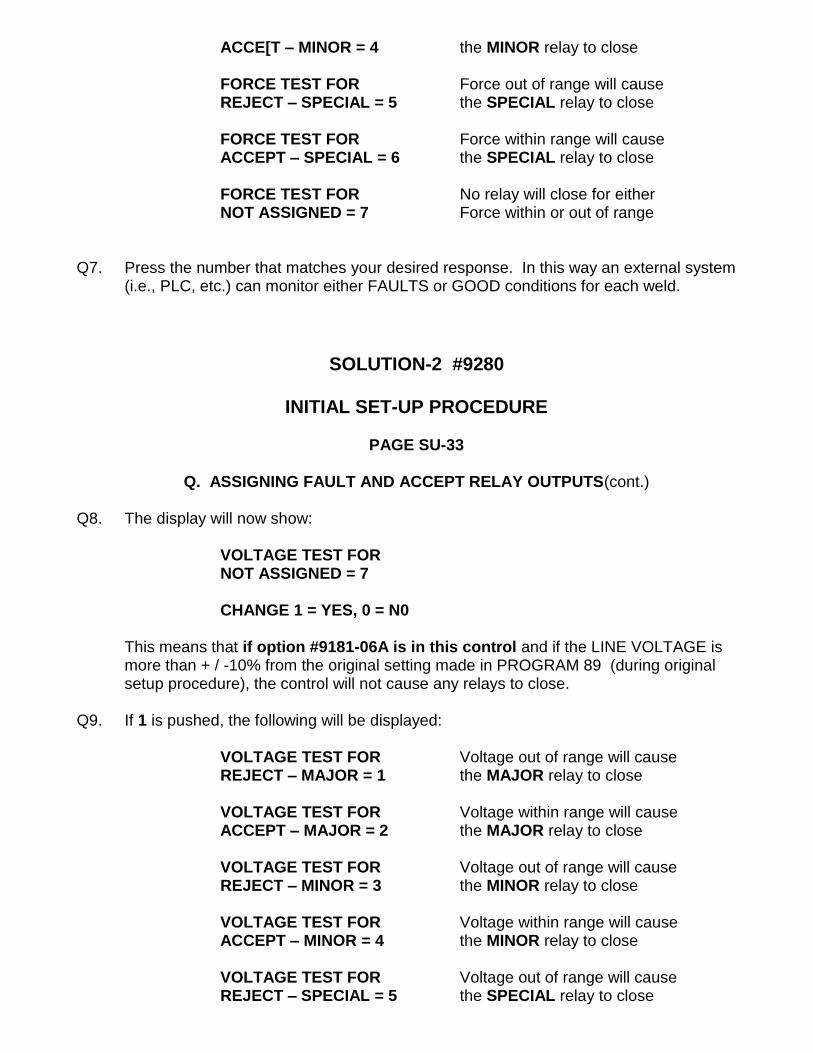
ACCE[T – MINOR = 4 the MINOR relay to close FORCE TEST FOR Force out of range will cause REJECT – SPECIAL = 5 the SPECIAL relay to close FORCE TEST FOR Force within range will cause ACCEPT – SPECIAL = 6 the SPECIAL relay to close FORCE TEST FOR No relay will close for either NOT ASSIGNED = 7 Force within or out of range Q7. Press the number that matches your desired response. In this way an external system
(i.e., PLC, etc.) can monitor either FAULTS or GOOD conditions for each weld.
SOLUTION-2 #9280
INITIAL SET-UP PROCEDURE
PAGE SU-33
Q. ASSIGNING FAULT AND ACCEPT RELAY OUTPUTS(cont.)
Q8. The display will now show: VOLTAGE TEST FOR NOT ASSIGNED = 7 CHANGE 1 = YES, 0 = N0
This means that if option #9181-06A is in this control and if the LINE VOLTAGE is more than + / -10% from the original setting made in PROGRAM 89 (during original setup procedure), the control will not cause any relays to close.
Q9. If 1 is pushed, the following will be displayed: VOLTAGE TEST FOR Voltage out of range will cause REJECT – MAJOR = 1 the MAJOR relay to close VOLTAGE TEST FOR Voltage within range will cause ACCEPT – MAJOR = 2 the MAJOR relay to close VOLTAGE TEST FOR Voltage out of range will cause REJECT – MINOR = 3 the MINOR relay to close VOLTAGE TEST FOR Voltage within range will cause ACCEPT – MINOR = 4 the MINOR relay to close VOLTAGE TEST FOR Voltage out of range will cause REJECT – SPECIAL = 5 the SPECIAL relay to close

VOLTAGE TEST FOR Voltage within range will cause ACCEPT – SPECIAL = 6 the SPECIAL relay to close VOLTAGE TEST FOR No relay will close for either NOT ASSIGNED = 7 Voltage within or out of range Q10. Press the number that matches your desired response. In this way an external system
(i.e., PLC, etc.) can monitor either FAULTS or GOOD conditions for each weld.
SOLUTION-2 #9280
INITIAL SET-UP PROCEDURE
PAGE SU-34
Q. ASSIGNING FAULT AND ACCEPT RELAY OUTPUTS(cont.) Q11. The display will now show: EXPIRED STEPPER NOT ASSIGNED = 4 CHANGE 1 = YES, 0 = NO This means that if option #9182-15 is in this control, and one or more HEAT
STEPPER has expired, no relay will be operated. Q12. If 1 is pushed, the following will be displayed: EXPIRED STEPPER An expired stepper will cause A MAJOR OUTPUT = 1 the MAJOR relay to close EXPIRED STEPPER An expired stepper will cause A MINOR OUTPUT = 2 the MINOR relay to close EXPIRED STEPPER An expired stepper will cause A SPEC. OUTPUT = 3 the SPECIAL relay to close EXPIRED STEPPER An expired stepper will not NOT ASSIGNED = 4 cause any relay to close Q13. Press the number that matches your desired response. In this way an external system
(i.e., PLC, etc.) can monitor when one or more stepper has expired.

R. SETTING TIME FOR FAULT AND EHR (END OF HOLD) RELAY TO REMAIN CLOSED R1. For any of the above fault or accept conditions, the assigned relay(s) will close. If no
fault is detected, the EHR relay will close. The time of all relay closings is determined by a setting you install.
R2. To set this time delay, press: PROGRAM, 87, ENTER, 90. The display will show: FLT / EHR RELAY = ## CHANGE 1 = YES, 0 = NO R3. Enter the amount of time, in line cycles, for the relay(s) to close. For example, ¼ second
closure = 15 cycles (15/60 sec.). If there are more than one fault detected on a weld, all fault relays will close at the same time and release at the same time. If this happens in the last LINK of a CHAIN, the EHR relay will close after the fault relays have been released.
SOLUTION-2 #9280
INITIAL SET-UP PROCEDURE
PAGE SU-35
S. KEYBOARD SECURITY LOCK SYSTEM The SOLUTION-2 control has a two level security lock system. There are two levels of security:
1. STANDARD KEYLOCK: This mode is a typical security level used for most manually operated welders. It allows the ability to view programs, view chains, but will not allow any changes to be made.
2. TOTAL KEYLOCK: This mode is typically used on automatic welding systems where absolutely no change is allowed.
If the key switch is in the locked position, and a change to any locked function is attempted, the control will refuse to make such a change, and the display will show “KEYBOARD LOCKED”. To select the desired KEYBOARD SECURITY LOCK mode:
1. Press: PROGRAM, 87, ENTER, 96. The display will show:
KEYBOARD LOCK IS or KEYBOARD LOCK IS STANDARD KEYLOCK TOTAL KEYLOCK
CHANGE 1 = YES, 0 = NO

Select the desired keylock mode by pushing 1 to change the display as shown, or 0 to keep the mode as shown. Note that when the control is first turned on, the KEYLOCK mode will be one of the phrases displayed during the diagnostic test.
DIRECTIONS FOR USE

SOLUTION-2 #9280
DIRECTIONS FOR USE
PAGE U-1
SIMPLE - LOGICAL - POWERFUL
Think of the SOLUTION-2 programming as connecting a series of LINKS in a CHAIN. Each LINK of the CHAIN contains a PROGRAM. Each PROGRAM consists of a complete set of instructions that you enter to operate valves, check inputs, and, if desired, do a complete weld sequence (SQUEEZE, WELD, HOLD, ETC.). There is space for 75 complete PROGRAMS in the SOLUTION-2 memory. Notice that since the same PROGRAM can be used in any number of LINKS, it is only necessary to enter repetitive operations one time.

The SOLUTION-2 then performs the selected PROGRAMS one LINK at a time. By selecting various operating modes, this sequence can be continuous, or can be interrupted at various points and continued as desired. The SOLUTION-2 comes with the ability to store and use up to 7 different CHAINS. Each CHAIN can have up to 45 LINKS. Each LINK can select from 75 PROGRAMS in the control’s electronic memory bank.
SOLUTION –2 #9280
DIRECTIONS FOR USE
PAGE U-2
SOLUTION-2 FLOW SEQUENCE
Think of the SOLUTION-2 as a logical CHAIN. Once you have initiated the CHAIN (by closing a switch), the SOLUTION-2 control performs the instructions of the first LINK of this CHAIN, then the next LINK of the CHAIN, and so forth until all LINKS of this CHAIN have been completed. You assign a PROGRAM (one of 75 in memory) to each LINK. Each PROGRAM contains lines that direct how valve outputs, proximity switch inputs, and welding functions will function. ______________________________________________________________________
SETS BEGINNING VALVE CONDITIONS If SV# - ON, END OFF or SV# - ON, END ON turns ON valve # If SV# = OFF, END OFF or SV# = OFF, END ON turns OFF valve #
This sets conditions for all valve (SV#) outputs (4 to 16). ______________________________________________________________________
then ________________________________________________________
CHECKS TIP FORCE (#9181-05 OPTION)
If this option is in system, reads DIFFERENTIAL PRESSURE TRANSDUCER and displays WAIT: TIP FORCE until the selected TIP FORCE has been reached. If system has more than one PRESSURE TRANSDUCER, control monitors transducer per line: USE TRANSDUCER ## _______________________________________________________
then

SOLUTION-2 #9280 DIRECTIONS FOR USE
PAGE U-3
SOLUTION-2 FLOW SEQUENCE(cont) _________________________________________________________________
INTERROGATES PROXIMITY SWITCH INPUTS
If line in PROGRAM is: PS# TO BE EITHER
does not sample this PS# input and continues to the next line. If line in PROGRAM is: PS# TO BE CLOSED waits until input PS# goes high before going to the next line. While waiting, control displays: CLOSE PS# until satisfied. If line in PROGRAM is: PS# TO BE OPEN
waits until input PS# goes to 0 before going to the next line. While waiting, control displays: OPEN PS# until satisfied. The control checks PS1 first, then each successive PS (up to 5) and will not
continue to the next function until all conditions have been satisfied. NOTE: If the PS4=LIGHT CURTAIN has been chosen in PROGRAM 87 / 93 the control will ignore anything entered on the PS4 line.
______________________________________________________________________
then _________________________________________________
WAITS FOR SQUEEZE/DWELL TIME Waits for the number of cycles in PROGRAM line: SQUEEZE / DWELL = ##. Each cycle is 1/60 second. __________________________________________________
then __________________________________________________
PERFORMS WELDING SEQUENCE
Fires welding transformer with the SCR contactor, from PREHEAT

through HOLD TIME, as directed by values you have entered in this PROGRAM. If control has more than one SCR, SCR firing signal will be sent to SCR specified in line: SCR NUMBER = ## _________________________________________________
then
SOLUTION-2 #9280 DIRECTIONS FOR USE
PAGE U-4
SOLUTION-2 FLOW SEQUENCE (cont)
SETS FINAL VALVE CONDITIONS FOR PERIOD OF TIME BEFORE NEXT LINK
All valves will now be set for the END condition during the time specified in this PROGRAM as: DWELL BETWEEN = ##. If SV# = ON, END OFF or SV# = OFF, END OFF turns OFF valve # If SV# = ON, END ON or SV# = OFF, END ON turns on valve # If a valve is controlling a component such as a clamp that is to remain closed for the entire process, set that valve using the SV# = ON, END ON instruction. If a valve is being used to index the system between LINKS, or to eject a part between LINKS, use SV# = OFF, END ON. ___________________________________________________________________________
then ______________________________________________
STOPS OR CONTINUES PROGRAM If program line is: PROGRAM STOP = NO control will exit this LINK . . If program line is: PROGRAM STOP = YES, control will stop at this point and wait for a new initiation. If the initiation input is still closed, it must be released and closed again. While waiting for a new initiation, the display will show: PROGRAM STOP ______________________________________________
then goes to the next LINK
ASSEMBLE THE CHAIN
You “assemble” the CHAIN in PROGRAM 80 by assigning a PROGRAM to LINK 01, another to LINK 02, etc. A CHAIN can have up to 45 LINKS.

Note that you can assign a particular PROGRAM to more than one LINK if the exact sequence within this PROGRAM is needed more than one time within the CHAIN. PROGRAMS do not need to be used in any particular order. This allows changing of sequences, or inserting functions between sequences without having to rewrite existing PROGRAMS. * * * * * * * * * * * * * * * * * * * * * * * * * * * * * * * * * * * * * * * * * * * * * * * * * * * * * * * * * * * * * * *
THAT’S ALL THERE IS TO UNDERSTANDING THE OPERATION OF THE SOLUTION-2!
SOLUTION-2 #9280 DIRECTIONS FOR USE
PAGE U-5
THREE SIMPLE STEPS TO MAKE A CHAIN
Setting information into the SOLUTION-2 is done in a very logical and simple procedure using the following three steps for each CHAIN: * * * * * * * * * * * * * * * * * * * * * * * * * * * * * * * * * * * * * * * * * * * * * * * * * * * * * * * * * * * * * * *
STEP 1: DEFINING THE TASK
Write out the overall TASK to be accomplished in a simple “START TO FINISH” sequence. For example: a. Operator places channels and hinges on panel using a drop-in fixture. b. With the foot pedal held down, 12 welds are made along top edge joining top angle to
panel. c. After operator rotates part, three hinges are welded along one long edge using 3 spots per hinge. d. After operator rotates part, last 9 welds are made along bottom edge to join bottom angle to panel. * * * * * * * * * * * * * * * * * * * * * * * * * * * * * * * * * * * * * * * * * * * * * * * * * * * * * * * * * * * * * * *
STEP 2: ENTERING PROGRAMS WITH THE DESIRED SEQUENCE OF OPERATION
2.1 Write, step by step, the exact condition of INPUTS and OUTPUTS and desired
WELDING PROGRAM (if any) for each LINK of the CHAIN for operation as shown in the FLOW SEQUENCE on the previous pages. Keep in mind that a program used in one LINK can contain both INPUT/OUTPUT instructions as well as welding data.
2.2 Select a PROGRAM number for each unique combination of valve operations, input monitoring, and welding sequence (if any). This PROGRAM NUMBER can be random, or can be some scheme that makes sense within your product mix. For example, an operation loaded into a single PROGRAM can be: OPERATION #1 (welding of angles to panel) a. Bring weld head down using SV1. b. Check to be sure that PS1 proximity switch is closed. c. Weld using the following schedule:
TIP FORCE = 550 POUNDS

WELD = 12 CYCLES at 76% HOLD TIME = 5 CYCLES d. After the end of HOLD TIME, release SV1 to bring weld head UP. e. Wait for 35 cycles f. Put above information in PROGRAM 6 as follows:
SOLUTION-2 #9280 DIRECTIONS FOR USE
PAGE U-6 THREE SIMPLE STEPS TO MAKE A CHAIN
ENTERING PROGRAMS WITH THE DESIRED SEQUENCE OF OPERATION(cont.)
PROGRAM 06 SV1 ON, END OFF PSI TO BE CLOSED WELD TIME 12 WELD HEAT 76% HOLD TIME 05 DWELL BETWEEN = 35 TIP FORCE 0550LB 2.3 Enter the desired functions for each unique group of functions from above by pressing: PROGRAM, ##, ENTER, where ## is a number you select between 01 and 75. The display will now show, line by line, the information as shown in the chart shown on page U-7. 2.4 Enter the desired values and conditions on each line and then press ENTER to step to the next line.
STEPPING THROUGH A PROGRAM
Each time the STEP button is pushed momentarily , the next line will appear. If the STEP button is pushed and held down, lines in the PROGRAM that either contain data (01-99), have CLOSED selected (limit switches), or have ON selected (valves) will be shown for ½ second each. If the STEP button is released, the last line will remain. Each time the BLOCK button is pushed, the next block of data will be shown. These blocks are shown on page U-7 between lines. If you go to a line that is past the one desired, push the BACK button one time for each backstep. 2.5 On lines that have space for a number (i.e., WELD TIME, etc.), enter the number using
the appropriate key strokes. 2.6 On lines that show a condition (i.e., SV1, PS1 etc,) press any of the numbered buttons on the keypad to change the display. 2.7 For the Proximity Switch condition lines, one of three conditions (i.e., PS1 TO BE EITHER, PS1 TO BE OPEN, PS1 TO BE CLOSED) can be selected by pushing any numbered button on the keypad. Each push will show the next state and will start from the top after the last one has been displayed.
If four states can be used (i.e., SV1 OFF, END OFF; SV1 ON, END OFF; SV1 ON, END ON, SV1 OFF, END ON), each button push will go to the next state. Then the series will start over again.
2.8 Remember that even though this combination will be repeated many times, it only has

to be entered one time. 2.9 The displays will be shown in the following order. If, in the SET-UP procedure in PROGRAM 87/01, less than the full quantity of SV (valve outputs) and PS (proximity switch inputs) are chosen, extra lines will be eliminated in each table.
SOLUTION-2 #9280 DIRECTIONS FOR USE
PAGE U-7
THREE SIMPLE STEPS TO MAKE A CHAIN
ENTERING PROGRAMS WITH THE DESIRED SEQUENCE OF OPERATION(cont.)
75 PROGRAMS EACH CONTAIN THE FOLLOWING LINES
THAT ARE USED PER THE FLOW SEQUENCE ON PAGES U-2 THROUGH U-4 SV1 OFF(or ON), END = OFF(or ON) Turns indicated valve output ON or SV2 OFF(or ON), END = OFF(or ON) OFF at the start of this program, SV3 OFF(or ON), END = OFF(or ON) then turns the valve ON or OFF at SV4 OFF(or ON), END = OFF(or ON) the end of this program SV5 OFF(or ON), END = OFF(or 0N) To Same function as above for optional SV16 OFF(or ON), END = OFF(or ON) valve outputs SV5 – SV16 PS1 TO BE OPEN/CLOSED/EITHER condition of PS1 input before continuing) PS2 TO BE OPEN/CLOSED/EITHER condition of PS2 input before continuing) PS3 TO BE OPEN/CLOSED/EITHER condition of PS3 input before continuing) PS4 TO BE OPEN/CLOSED/EITHER condition of PS4 input before continuing) PS5 TO BE OPEN/CLOSED/EITHER condition of PS5 input before continuing) SQUEEZE/DWELL TIME (time before current flow, or just a dwell time) WELD TIME WELD HEAT % HOLD TIME TRANSFORMER TAP NUMBER (records transformer tap switch position) DWELL BETWEEN (dwell time between links) INITIAL SQUEEZE TIME (in continuous welding, SQUEEZE for first weld only) NUMBER OF PULSES PULSAT. COOL 2 (cool cycles between pulses when in PULSATION) PREHEAT TIME PREHEAT % PREHEAT COOL 1 (cool time between PREHEAT and WELD. For galvanized) UPSLOPE INITIAL % UPSLOPE TIME DOWNSLOPE TIME DOWNSLOPE FINAL % POSTHEAT TIME POSTHEAT % QUENCH TIME TEMPER TIME TEMPER HEAT PROGRAM STOP YES/NO stops sequence after HOLD, starts on re-initiation) TIP FORCE (differential pressure transducer/load cell option) READ TRANSD. # (option: selects pressure transducer being used HIGH CURRENT LIMIT (optional, current monitor) LOW CURRENT LIMIT (optional, current monitor

SCR NUMBER optional, for up to 15 SCR contactor systems) STEPPER NUMBER optional, selects HEAT STEPPER 1 to 16) SEAM/PS3 CL. (Used to do SEAM WELDING in a LINK. See page U-8.
SOLUTION-2 #9280 DIRECTIONS FOR USE
PAGE U-8 SEAM WELDING IN A LINK
2.10 SEAM WELDING can be done in any LINK of the CHAIN. To do this, go to the last line in the desired PROGRAM. It will show:
SEAM / PS3 CL. = NO CHANGE 1 = YES, 0 = N0 Press 1 to change. If CONTINUOUS SEAM operation is desired, set WELD TIME to 4 and WELD HEAT to desired value. If INTERMITTENT SEAM is desired, set WELD
TIME to the number of ON cycles desired, and PULSAT.COOL 2 time to the desired number of OFF cycles. When you enter the LINK that contains this PROGRAM, the control will make one WELD pulse and then check to see if PS3 is still CLOSED. If it is CLOSED, it will continue. Seam will stop when PS3 has been OPENED.
2.11 When this program is used for one or more links, the system will use this data as shown in the FLOW SEQUENCE on pages U-2 through U-4. 2.12 NOTE ON INTENSIFIER VALVE FUNCTIONS: If you are operating INTENSIFIER TYPE welding cylinders, assign the FLUID TANK air line to one SV output and the INTENSIFIER line to a second SV output.
If your system uses a PRESSURE SWITCH on the INTENSIFIER air line, connect this to one of the PS inputs. Set the FLUID TANK SV output as an ON, END = ON in one LINK. In the next LINK of the CHAIN, select ON, END = OFF for both this SV as well as the SV used on the INTENSIFIER line. If your system does not use a PRESSURE SWITCH on the INTENSIFIER air line, set the FLUID TANK SV output as an ON, END = ON and enter a DWELL TIME long enough to allow electrode closing (typically 15-25 cycles). In the next LINK select ON, END = OFF for both this SV as well as the SV used on the INTENSIFIER line. In either case, if your control has been supplied with a DIFFERENTIAL PRESSURE TRANSDUCER option, connect the HIGH (red) tubing to the INTENSIFIER port of the cylinder and the LOW (green) tubing to the RETURN port of the cylinder.
2.12.1 NOTE ON MULTIPLE SCR OPERATION: If more than one SCR contactor is being
used, enter the desired SCR NUMBER to be fired in this link. If no welding will occur during this link, set the SCR NUMBER = 0.
2.12.2 MPORTANT SAFETY NOTE ON VALVE PROTECTION CHOICE: Valve outputs are
protected against operation before a hard input switch has been closed. This is done through use of an electromechanical relay that only allows 115V. to the valve solid state input chips when an input switch has been closed.
A plug jumper is provided for each valve (SV) output channel. Always place the jumper plug in the SPURIOUS OPERATION SAFETY-ON position for any SV output that operates a welding cylinder or any device that can injure personnel.

The jumper plug can be installed in the SPURIOUS OPERATION SAFETY-OFF position ONLY IF operation of this output cannot cause injury to the operator. This can allow an output to stay ON after the last LINK has been performed.
SOLUTION-2 #9280
DIRECTIONS FOR USE
PAGE U-9
THREE SIMPLE STEPS TO MAKE A CHAIN
STEP 3: ASSEMBLING THE CHAIN
It is now time to “assemble” the LINKS of the CHAIN. 3.1.1 The control has to know how many CHAINS will be used and how many LINKS will be in
each chain. To make things simple the first time around, let’s only work with one chain. 3.1.2 To this, press: PROGRAM, 80, ENTER. The display will now show:
CHAIN SETUP
TOTAL CHAINS # = 3,.3 For this first time, enter 1, ENTER. The display will now show: CHAIN #1 NO. OF LINKS = 00 3.4.1 Enter the desired number of LINKS for this part. You can come back later and change
this number if the sequence is shorter or longer than originally planned.
Remember that each LINK will use the PROGRAMS set in STEP #2 on the previous pages. Even if the same PROGRAM is used many times in the chain, you must count every time it is used as one LINK.
3.4.2 Now press ENTER and the display will show:
CHAIN #1 LINK 01 = PROG. –
3.61.1 Enter the PROGRAM number that contains desired operational instructions to be used just after the initiation switch has been closed. This will form the first LINK in the CHAIN.
3/7 When this has been done, press ENTER and the display will show: CHAIN #1 LINK 02 = PROG. --

SOLUTION-2 #9280 DIRECTIONS FOR USE
PAGE U-10
THREE SIMPLE STEPS TO MAKE A CHAIN
STEP 3: ASSEMBLING THE CHAIN(continued) 3.8.1 As with the first LINK, enter the PROGRAM that will do the desired operation during the
second sequence after initiation. 3.9 Continue in this manner until the last LINK has been assigned (the number of links is set in
step 3.4 on the previous page). After you enter the last LINK and press ENTER, the display will show:
CHAIN #1
ONE CHAIN ONLY = 1 CHAIN #1 CHANGE 1 = YES, 0 = NO BACKSTEP: If you press the BACK button on the keypad while in the middle of a CHAIN, the control will go to the previous line. This can only be done if you are working on a CHAIN that has already been programmed. BLOCK KEY: If you press the BLOCK button, the control will step forward to the next CHAIN. The number of the current chain will always be shown at the top of the display. DWELL BETWEEN: A time delay can be inserted after one LINK and before the next LINK using this line in the PROGRAM before the desired delay. This can be used to allow tooling to move out of the way between LINKS.
HOW CHAINS CAN BE USED At this time, you can choose to operate this CHAIN #1 in one of six ways: a. ONE CHAIN ONLY: In this mode, the chain, as just assembled, will operate one time after initiation and then stop after the last link has been run. The sequence looks like: START CHAIN RUN LINK 1 RUN LINK 2 RUN LASK LINK STOP

SOLUTION-2 #9280
DIRECTIONS FOR USE
PAGE U-11
THREE SIMPLE STEPS TO MAKE A CHAIN
STEP 3: ASSEMBLING THE CHAIN (continued) b. LOOP IF PS5 ON: In this mode, the chain, as just assembled, will operate through the end of the last link. When this last link has been run, the control will sample the PS-5 proximity/limit switch input. If the PS-5 switch is CLOSED at that time, the entire chain will be run again from link 1.
This continues until PS-5 is read as open after running the last link. At this time, the system stops operation. APPLICATION: This sequence is useful for operating a weld sequence that repeats many times as a part is being indexed or rotated. When the last weld operation has been performed, indexing will open a proximity/limit switch wired to PS-5 on the control, and all operations stop.
LOGIC SEQUENCE
INITIATE CHAIN RUN LINK 1 RUN LINK 2 . . RUN LAST LINK YES IS PS-5 CLOSED? NO STOP
IMPORTANT NOTE: If you are using this mode, be sure that no more than four PS switches have been selected during the set-up procedure on page S-7. Otherwise any PS-5 condition instructions will be honored in each PROGRAM.
SOLUTION-2 #9280

DIRECTIONS FOR USE
PAGE U-12
STEP 3: ASSEMBLING THE CHAIN (continued)
c. PS5 OFF, NEXT: In this mode, the chain, as just assembled, will operate through the
end of the last link. When this last link has been run, the control will sample the PS-5 proximity/limit switch input. If the PS-5 switch is CLOSED at that time, the entire chain will be run again from LINK 1. This continues until PS-5 is read as open after running the last link. At this time, the system starts operation of the next CHAIN. This continues until the last chain has been run. APPLICATION: Like the LOOP IF PS5 ON mode above, this sequence is useful for operating a weld sequence that repeats many times as a part is being indexed or rotated. When the last weld operation has been performed, indexing will open a proximity/limit switch wired to PS-5 on the control. The control will now go to the next CHAIN that might be an eject procedure, a part rotation, or a pick-and-place sequence for loading other components into the fixture. This might then lead to the next chain that welds these new parts, or might just exit out. You can even group chains in sets. For example, CHAIN 1 & CHAIN 2 might weld the left hand weldment with CHAIN 2 set as ONE CHAIN ONLY. Then CHAIN 3 & CHAIN 4 might be set to weld the right hand weldment with CHAIN 4 set for ONE CHAIN ONLY. LOGIC SEQUENCE: In the following example, CHAIN 5 has been set for PS5 OFF, NEXT mode, and CHAIN 6 has been set for ONE CHAIN ONLY mode.
INITIATE CHAIN 3 GO TO CHAIN 4 RUN LINK 1 RUN LINK 1 RUN LINK 2 RUN LINK 2 . . . . RUN LAST LINK RUN LAST LINK YES STOP IS PS-5 CLOSED? NO IMPORTANT NOTE: If you are using this mode, be sure that a maximum of four PS switches has been selected during the set-up procedure on page SU-7.
SOLUTION-2 $9280

DIRECTIONS FOR USE
PAGE U-13
STEP 3: ASSEMBLING THE CHAIN (continued)\
d. DO NEXT CHAIN: In this mode, the existing chain is completed and then the next starts. APPLICATION: If the 45 LINKS of a chain are not enough to do the desired sequence,
this DO NEXT CHAIN mode will allow operation of one chain after another. This can extend to the total 15 CHAINS of 45 LINKS each to give a total of 675 possible LINKS.
Also note that in this mode, you can start from the middle of a group of CHAINS for test purposes (i.e., If CHAIN 2 and CHAIN 3 are connected, closing initiation for CHAIN 2 will operate both in sequence, but closing initiation for CHAIN 3 will only run CHAIN 3.
LOGIC SEQUENCE
INITIATE CHAIN 2 GO TO CHAIN 3 RUN LINK 1 RUN LINK 1 RUN LINK 2 RUN LINK 2
. . . .
RUN LAST LINK RUN LAST LINK STOP
In this mode, the chain, as just assembled, will operate through the end of the last link and then repeat for up to 99 times as chosen in the line ## REPEAT LOOPS. After the last link of the last loop has been completed, the next CHAIN will start. APPLICATION: This sequence is useful for operating a weld sequence that repeats many times as a part is being indexed or rotated. At the end of the last loop, the next CHAIN can be used to index the part and do another operation, or it can be used to eject the part.
SOLUTION-2 #9280 DIRECTIONS FOR USE
PAGE U-14
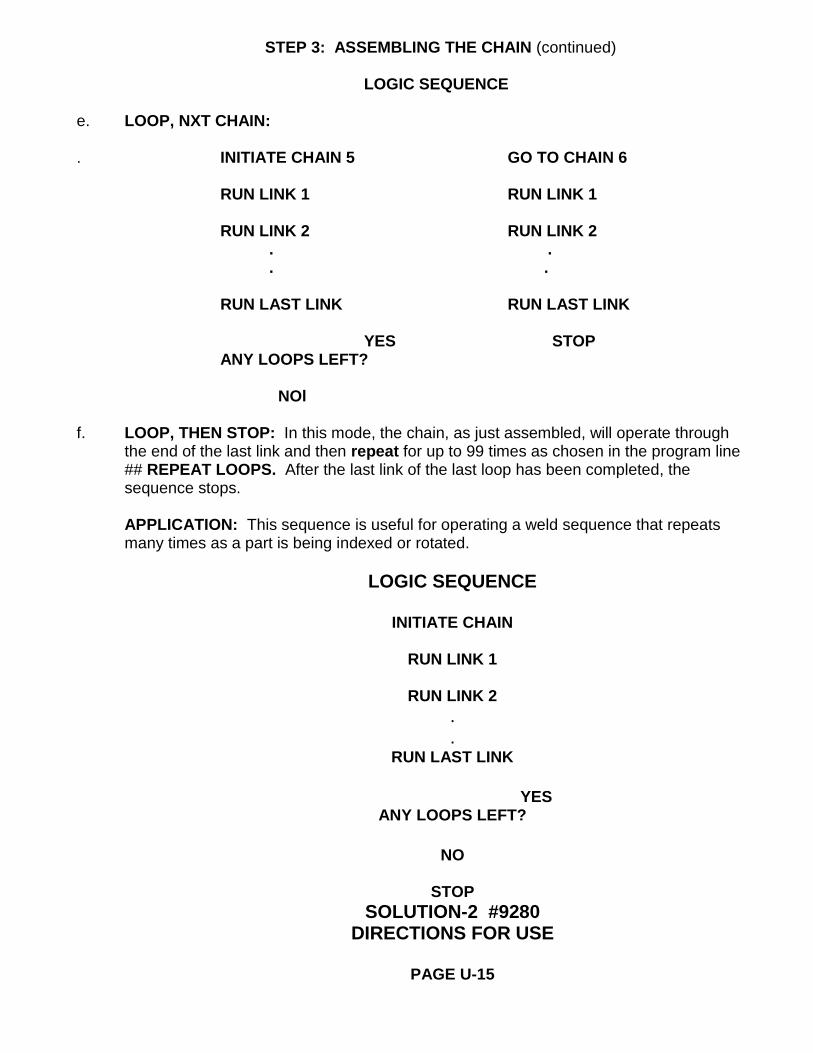
STEP 3: ASSEMBLING THE CHAIN (continued)
LOGIC SEQUENCE e. LOOP, NXT CHAIN: . INITIATE CHAIN 5 GO TO CHAIN 6 RUN LINK 1 RUN LINK 1 RUN LINK 2 RUN LINK 2 . . . . RUN LAST LINK RUN LAST LINK YES STOP ANY LOOPS LEFT? NOl f. LOOP, THEN STOP: In this mode, the chain, as just assembled, will operate through
the end of the last link and then repeat for up to 99 times as chosen in the program line ## REPEAT LOOPS. After the last link of the last loop has been completed, the sequence stops.
APPLICATION: This sequence is useful for operating a weld sequence that repeats many times as a part is being indexed or rotated.
LOGIC SEQUENCE
INITIATE CHAIN
RUN LINK 1
RUN LINK 2
.
. RUN LAST LINK
YES
ANY LOOPS LEFT?
NO
STOP
SOLUTION-2 #9280 DIRECTIONS FOR USE
PAGE U-15

STEP 3: ASSEMBLING THE CHAIN (continued) 0
SELECTING CHAIN MODE If the desired mode is already on the readout, press 0 (to not change), and skip to 3.10 below: If it is desired to change the displayed mode, press 1 (to change), and the display will show: CHAIN #1 ONE CHAIN ONLY = 1 CHAIN #1 LOOP IF PS5 ON = 2 CHAIN #1 PS5 OFF, NEXT = 3 CHAIN #1 DO NEXT CHAIN = 4 CHAIN #1 LOOP, NXT CHAIN = 5 CHAIN #1 LOOP, THEN STOP = 6 Press 1 – 6 to select the desired mode. Than press ENTER. If either LOOP, NXT CHAIN or LOOP, THEN STOP is chosen, a new line will be shown on the display: CHAIN #1 ## REPEAT LOOPS Enter the number of times you want to repeat this CHAIN (01 – 99 times).
SOLUTION-2 #9280
DIRECTIONS FOR USE
PAGE U-16

STEP 3: ASSEMBLING THE CHAIN (continued)
SELECTING MANUAL OR AUTOMATIC CHAIN 3.10 The display will now show:
CHAIN #1 MANUAL CHAIN or CHAIN #1 AUTOMATIC CHAIN CHAIN #1 CHANGE 1 = YES, 0 = NO
1. AUTOMATIC CHAIN. This mode is typically used with PLC controlled systems. In this mode. the initiation switches are closed only one time to start a chain into operation. Opening of the switch at any point in the chain will not stop the chain. Only opening of the EMERGENCY STOP switch will stop and reset a chain with this mode.
2. MANUAL CHAIN: This mode is typically used with a manually operated welder to allow stopping of a sequence at any point in the CHAIN. In this mode, opening of the initiation switches will stop the chain after the contents of the current link have been performed. Closing of the initiation switch again will continue the chain from this point. This can be done as many times as desired during a single chain.
If the mode shown on the display is not the one desired, press 1 to change to the alternate mode. If it is correct, press 0 to exit this program without making a change. * * * * * * * * * * * * * * * * * * * * * * * * * * * * * * * * * * * * * * * * * * * * * * * * * * * * * * * * * * * * * * *
THAT’S ALL THERE IS TO IT! YOU ARE NOW READY TO RUN PRODUCTION.
SOLUTION-2 #9280
DIRECTIONS FOR USE
PAGE U-17
TESTING CHAIN

4.1.1 After the CHAIN has been assembled, press the NO WELD button once. The NO WELD
and SINGLE LEDs will light. This will allow you to STEP through the entire CHAIN one link at a time without welding as you go through the following steps.
4.1.2 Now close the initiation switch to start CHAIN #1 (see hook-up diagram for type of
initiation mode being used), and the SOLUTION-2 will display:
1 / LINK = 01, PRG = ## CLOSE PS1
The upper display shows that CHAIN #1 is being used, LINK 01 is being performed, and that this LINK 01 is using PROGRAM ##. The lower display shows that, in this example, the SOLUTION-2 is waiting for proximity switch connected to PS1 to close.
4.1.3 At the same time, the red window at the left corner of the main display will show which
SV valve output is on at that time. Note that this will only show SV1 through SV8. The balance are shown on indicator lights inside the main power enclosure. For example, if the display shows:
1 2 4 7
this indicates that SV1, SV2, SV4, and SV7 are on at this time. 4.4 If all proximity switch (PS) conditions were met, this display would then show first:
WAIT: TIP FORCE
If the #9181-05 DIFFERENTIAL PRESSURE TRANSDUCER option is installed. Then when the TIP FORCE matches that in the program, and if this LINK has welding data, the display will show:
S W H or other letters to indicate from left to right: Squeeze time, Preheat, Cool time, Upslope, Weld, Downslope, Postheat, Quench time, Temper, and Hold time.
4.5 Each time the initiation switch is closed, the LINK number will increment by one, and the
PROGRAM number will show that chosen during the CHAIN ASSEMBLY in Step #3. If at any time you want to stop this step-by-step process, press any button on the
4.6 keypad or press the external EMERGENCY STOP button, and the unit will reset.
SOLUTION-2 #9280
DIRECTIONS FOR USE
PAGE U-18
TESTING CHAIN (continued)

4.7 After you are satisfied that the CHAIN sequence is correct, press the NO WELD button
two times. The NO WELD and REPEAT LEDs will light. Initiate the control as before. 4.7 The SOLUTION-2 will now go through all LINKS in the CHAIN without stopping but will
not weld. Check pages SU-11 and SU-12 to see various ways that the initiation switch input will affect the operation of this CHAIN.
4.8 After the functions within the last link have been performed, the EHR relay will close for a
period set in PROGRAM 87/90, the control beeper will sound briefly, and the control will reset. Even if the initiation switch is closed at this time, a new CHAIN will not start.
4.9 Now test this CHAIN one step at a time but with welding by pressing the SINGLE button
and repeat the steps starting at 4.2. 4.7.1 If any changes are required, press: PROGRAM, ##, ENTER for each PROGRAM
requiring data modification. This can be done at any point in the CHAIN, and the system will reset automatically.
SOLUTION-2 #9280
DIRECTIONS FOR USE
PAGE U-19
RUNNING PRODUCTION

5.1 After you are satisfied that the CHAIN is correct, press the RUN button and the RUN LED
will light. Initiate the control as before. 5.2 The SOLUTION-2 will now go through all LINKS in the CHAIN without stopping and weld
as directed. Check pages SU-9 and SU-10 to see various ways that the initiation switch input will affect the operation of this CHAIN. If it is desired to go through the entire CHAIN without welding, press the NO WELD button until both the NO WELD and RUN LEDs are on.
5.3 After the functions within the last LINK have been performed, the EHR relay will close for
the time set in PROGRAM 87/90, the control beeper will sound briefly, and the control will reset. Even if the initiation switch is closed at this time, a new CHAIN will not start.
SOLUTION-2 #9280
DIRECTIONS FOR USE
PAGE U-20
LIGHT CURTAIN FEATURE
The SOLUTION-2 can be operated with a LIGHT CURTAIN or GUARD GATE safety system that closes a switch when clear. To use LIGHT CURTAIN function, follow directions on page SU-28 to assign PS4 as a LIGHT CURTAIN input port.

If the SOLUTION-2 has been set for LIGHT CURTAIN operation, it will function as follows: 6.1 If the LIGHT CURTAIN beam has been broken (input PS4 is OPEN) when initiation is
attempted, no action will occur and the display will show:
LIGHTCURTAIN OPN
If the LIGHT CURTAIN beam is then cleared (PS4 closed) while the initiation is still closed, no action will occur and the display will show: RELEASE INITIAT. requesting that the initiation be released (opened). After the LIGHT CURTAIN beam has been cleared (PS4 closed), closing the initiation again will start the sequence.
6.2 If the LIGHT CURTAIN beam has been broken (input PS4 is OPEN) at any point
within a LINK a. All valves that came ON at the beginning of that LINK will be reset to the
condition they were in at the end of the previous LINK. b. If the control was in the middle of a weld, that weld sequence will stop.
d. The display will show:
LIGHTCURTAIN OPN 6.3 Once the LIGHT CURTAIN input PS4 has been closed, the display will show:
PLEASE INITIATE Alternately, if the LIGHT CURTAIN input is closed while the initiation is still closed, no action will occur and the display will show: RELEASE INITIATE requesting that the initiation be opened.
SOLUTION-2 #9280
DIRECTIONS FOR USE
PAGE U-21
LIGHT CURTAIN FEATURE (continued)
SELECTING LIGHT CURTAIN FEATURE:

6.3 (continued) After the LIGHT CURTAIN has been cleared (PS4 closed), closing the initiation again will run the entire interrupted LINK again. 6.4 To select LIGHT CURTAIN operation, press: PROGRAM, 87, ENTER, 93. The display
will show: PS4 = PROX. SWITCH CHANGE 1 = YES, 0 = NO 6.5 If you want to use PS4 as a LIGHT CURTAIN input port, press 1 to change displayed
function. The display will now show:
PS4 = LIGHTCURTAIN 6.6 While the SOLUTION-2 is using the PS4 = LIGHT CURTAIN mode, the system will
ignore the PS4 line in all PROGRAMS. 6.7 If it is ever desired to return PS4 as a normal proximity input port, press: PROGRAM
87, ENTER, 93. The display will show:
PS4 = LIGHTCURTAIN CHANGE 1 = YES, 0 = NO
Press 1 and PS4 will now show: PS4 = PROX. SWITCH and return to normal proximity switch function.
SOLUTION-2 #9280
DIRECTIONS FOR USE PAGE U-22
WARNING CODES RECOMMENDED DISPLAY POSSIBLE CAUSE ACTION THERMOSTAT ON WELDER CHECK WATER FLOW TRANSFORMER OVERTEMP TRANSFORMER TRIPPED IN TRANSFORMER CHECK WATER FLOW SCR OVERTEMP THERMOSTAT ON SCR IN SCR EMERGENCY STOP PUSHED RELEASE SWITCH

EMERGENCY STOP LINE VOLTAGE IS LOW CHECK LINE VOLTS NO MODE HAS BEEN PUSH SINGLE, N0- CHOOSE MODE SELECTED WELD OR REPEAT INITIATION CLOSED ON CHECK AND OPEN OPEN INITIATION! POWER UP SWITCHES INITIATION RELEASED HOLD BUTTONS TO PB RELEASED EARLY BEFORE WELD SEQUENCE END OF SQUEEZE KEY SWITCH IN LOCKED INSERT KEY AND KEYBOARD LOCKED POSITION ROTATE TO OPEN TRYING TO WELD WITHOUT ENTER DESIRED PLEASE PROGRAM SPECIFYING PROGRAM PROGRAM NUMBER WELD TRANSFORMER NO ZERO CROSS SIGNAL SWITCH SET TO OFF CHECK SCR/Z-CROSS SCR IS SHORTED CHECK, REPLACE CHAIN INITIATED IS GO TO PROGRAM 80 LOGICAL ERROR NOT PROGRAMMED AND ENTER CHAIN WAITING FOR INITIATION CLOSE FOOT SWITCH PLEASE INITIATE WHEN USING PROGRAM 96 OR HAND BUTTONS TO TO CHECK TIP FORCE MEASURE FORCE PRESSURE TRANSDUCER WAIT: TIP FORCE NOT SATISFIED INCREASE AIR SETTING (OPTION 9181-05) ON AIR REGULATOR SYSTEM SET FOR LIGHT LIGHTCURTAIN OPN CURTAIN: PS4 IS OPEN CLEAR LIGHT CURTAIN PRI. CURRENT: CHANGE VOLTAGE FROM CURRENT CT. OR CT. RESISTER CURRENT OVERFLOW INPUT DEVICE EXCEEDS SYSTEM MAXIMUM VALUE SEC. CURRENT: CHANGE
CURENT RANGE & DIP SW PS INPUT THAT, IN THE CHECK TO SEE WHY LINK, HAS BEEN PROGRAM- SWITCH IS CLOSED. OPEN PS# MED: PS# TO BE OPEN CHANGE LINK OR IS STILL CLOSED REPLACE SWITCH PS INPUT THAT, IN THE CHECK TO SEE WHY LINK, HAS BEEN PROGRAM- SWITCH IS OPEN. CLOSE PS# MED: PS# TO BE CLOSED CHANGE LINK OR IS STILL OPEN REPLACE SWITCH

USING OPTIONS
SOLUTION-2 #9280
USING OPTIONS
PAGE OP-1
CURRENT MONITORING OPTION #9181-22A/B
CONCEPT Current measurement options in the SOLUTION-2 control all produce direct measured (#9181-22B) or computed (#9181-22A) secondary current. This current is measured only during the WELD portion of each welding sequence. No measurement is made during any of the other welding sequences (i.e., UPSLOPE, PREHEAT, POSTHEAT, DOWNSLOPE, TEMPER). In this way, the readings recorded in the control will match those on welding schedule sheets.

It also means that if any of the other welding sequences are included in the weld program, a reading made with an external current monitor (that reads the entire heat envelope) will be lower than that read by the SOLUTION-2. The advantage of having internal reading by the weld control is that it can be selective in its reading and provide more useful numbers.
GETTING STARTED
Before proceeding further, be sure that all setup steps have been completed as shown starting on page SU-16. Without making the proper original steps, nothing of the following will work!
SETTING CURRENT LIMITS
Each program has a setting for UPPER and LOWER current limits. Do the following for each welding schedule that is being used: 6.1 To set the control for reading current, press: PROGRAM, 84, ENTER
If the display shows: 1 – READ ONLY = 1 CHANGE 1 = YES, 0 = NO Press 0 (to not change setting). If another phrase is on the readout or if it is desired to check the available options, press #1 to display the following: 1 – READ ONLY = 1 read and display current only 1 – READ & REACT = 2 compare reading to limits 1 – READ OFF = 3 no reading or reaction
SOLUTION-2 #9280
USING OPTIONS
PAGE OP-2
CURRENT MONITORING OPTION #9181-22A/B(continued)
Now select I-READ ONLY by pressing 1. 6.2 Set the desired welding schedule and make welds on coupons until an acceptable weld
has been achieved. Ignore the lines in the program that show HIGH 1 and LOW 1 settings. Do this by selecting one of the PROGRAMS that fires the desired welding program and weld cylinder or SCR, and placing it in PROGRAM 80 as a chain with ONE link. In this way, every time you close the initiation switch, only this desired weld head or transformer will operate.

6.3 The average RMS current of the weld will be displayed on the upper readout after each sequence has been completed. Make several welds to be sure that this number is reasonably constant.
6.4 Decide on the limits of current above and below that observed in step #2 above. To do
this, make welds as you continue to LOWER the % HEAT setting in 1% steps until the weld has fallen below minimum desired strength. Increase the displayed current value slightly and write down this number as the LOW 1 (low current) number in that program.
Now go back to the original % HEAT and start RAISING it in 1% steps until metal expulsion has started. Lower this value slightly and write down this number as HIGH 1 (high current) in the program. On REGULAR CURRENT MEASURING systems (low current range welding) (under 10,000 amps), a variation of + / - 400 amps is reasonable. On higher current welding, a range of + / - 700 amps is a typical setting. On LOW CURENT MEASURING systems, a variation of + / - 50 to 100 amps is reasonable.
6.5 Now press the STEP button until the display shows:
HIGH 1 = 00000 A
Enter the HIGH 1 value from the above step. Note that the right hand O will not change. Be sure that the number displayed is as desired.
6.6 Now press the STEP button one more time and the display will show:
LOW 1 = 00000 A
Enter the LOW 1 value from step #4. 6.7 Repeat the above steps for every welding spot in the part being made.
SOLUTION-2 #9280
USING OPTIONS
PAGE OP-3
CURRENT MONITORING OPTION #9181-22A/B(continued)
MEASURING CURRENT DURING PRODUCTION
Follow the following procedure to utilize the current comparison QC system during production. 6.8 Press: PROGRAM, 84, ENTER
and the display will show:
1 – READ ONLY = 1

CHANGE 1 = YES, 0 = NO Press 1 to change this current reading mode. The display will now show: 1 – READ ONLY = 1 read and display current only 1 – READ & REACT = 2 compare reading to limits 1 – READ OFF = 3 no reading or reaction Now select 1 – READ & REACT by pressing 2. 6.9 Now enter the weld schedule used earlier and start welding. As each weld is made, the system will show the current as averaged over the WELD portion of each sequence.
NOTE: When the READ & REACT function is active in the SOLUTION, an “*” will show on the upper right corner of the display. IF THIS “*” IS NOT SHOWN BUT CURRENT READINGS ARE SHOWN, THE SYSTEM IS IN READ ONLY MODE AND NO FAULT INDICATION WILL BE MADE UNDER ANY CIRCUMSTANCES.
SOLUTION-2 #9280
USING OPTIONS
PAGE OP-4
CURRENT MONITORING OPTION #9181-22A/B(continued) 6.10.1 If the current, as shown on the upper display, is ABOVE or BELOW that in the weld
schedule, one of two fault conditions will occur depending on the setup of the SOLUTION-2.
A. If PROGRAM 82 is set to MANUAL RESET, the system will stay in the present
LINK and display on the upper row the current being measured and an “E” to show that an error has occurred. To go to the next LINK, close the initiation switch once to reset the fault. Then close a second time to continue the chain from that point.

B. If PROGRAM 82 is set to AUTOMATIC RESET, the system will not stop and the next LINK will operate.
FAULT OR ACCEPT RELAY OUTPUT: See page SU-30 for action of selectable output relays.
6.11 If it is desired to turn the current reading system OFF, press: PROGRAM 84 ENTER The display will now show: 1 – READ & REACT = 2 CHANGE 1 = YES, 0 = NO Press 1 to change this current reading mode. The display will now show: 1 – READ ONLY = 1 read and display current only 1 – READ & REACT = 2 compare reading to limits 1 – READ OFF = 3 no reading or reaction Now select 1-READ OFF by pressing 3.
In this condition, no current will be displayed, and no current comparison will be made during any welding sequence.
SOLUTION-2 #9280 USING OPTIONS
PAGE OP-5
HEAT STEPPER OPTION #9281-15
* * * * * * * * * * * * * * * * * * * * * * * * * * * * * * * * * * * * * * * * * * * * * * * * * * * * * * * * * * * * * * * NOTE: When a control has been ordered with CONSTANT CURRENT software, the HEAT STEPPER OPTION is not available. * * * * * * * * * * * * * * * * * * * * * * * * * * * * * * * * * * * * * * * * * * * * * * * * * * * * * * * * * * * * * * * When welding galvanized or other coated metals, electrode pick-up is unavoidable. In galvanized metal, for example, zinc from the galvanized coating alloys with the copper electrode to form BRASS. This does two things. First, this coating effectively increases the contact diameter of the electrode. Because of this, the AMPS PER SQUARE INCH within the weld zone will be DECREASED. For example, if the contact area of an electrode increases from.250” diameter to .275” diameter (an increase of 10% in contact diameter), this will cause a 21% decrease of AMPS PER SQUARE INCH and a proportional decrease of weld strength.

Second, the new coating (brass in this example) will have a higher resistance value than the original copper electrode. While this is not as important as changes in contact area, the effect will still be seen in the weld strength. This leaves only two choices. Choice #1: Dress the electrodes every 25 to 50 welds to maintain electrode contact area. Choice #2: Increase the % heat to compensate for the change in electrode contact area. The HEAT STEPPER accomplishes Choice #2. In the traditional heat stepper, the user enters the number of welds for each step and the increase in % heat for that step. In this way a progressive change will be made over the desired maximum number of welds prior to dressing of tips. The Unitrol concept differs from the traditional in that the SOLUTION computer chip is pro-grammed with a classic heat stepper curve. Therefore, it is only necessary to enter the maximum number of welds to be made and the maximum % heat increase to be accomplished during the last weld. The computerized curve will increase the % heat the greatest amount during the early welds, and less as the stepper approaches the maximum quantity of welds. Unlike the traditional stepper systems, these steps are done continuously. When the last weld has been made in the stepper, the SOLUTION display will instruct the operator and also sound the beep tone. Since the SOLUTION-2 HEAT STEPPER option comes with the ability to operate as many as 16 heat steppers, the system is designed to allow easy assignment and operation of these separate steppers. One stepper can be assigned to each welding program, or the same stepper can be shared by several programs.
SOLUTION-2 #9280
USING OPTIONS
PAGE OP-6
HEAT STEPPER OPTION #9281-15(continued)
INITIAL CONFIGURATION OF STEPPERS 7.1.1 The HEAT STEPPER function is an option in the SOLUTION-2 system. It can be
ordered with the original control or added later. If the HEAT STEPPER option is in this control, the letter H will be included in the option codes at the end of the model number of the system.
Install the desired maximum number of HEAT STEPPERS you think will be used following step B7 in the SET-UP section of these directions.

7.1.2 Now it is necessary to set each of the desired heat steppers for maximum number of welds and maximum % heat increase. To do this, press: PROGRAM, 88, ENTER, and the display will show:
HEAT STEPPER #01 WELDS LEFT = ####
If #### = 0000, skip[ to 7.4. If #### is not 0000, the display will show: HEAT STEPPER #01 RESET STEPPER? HEAT STEPPER #01 PRESS: 1 = YES, 0 = N0 7.3 If you are in the middle of a heat stepper run and are installing new electrodes (or have
decided to address the existing ones),you can reset the stepper at this point by pressing 1. Otherwise, press 0 and the stepper will not reset.
SOLUTION-2 #9280
USING OPTIONS
PAGE OP-7
HEAT STEPPER OPTION #9281-15(continued)
7.4 The display will now show:
HEAT STEPPER #01 HEAT STEPPER ON or HEAT STEPPER #01 HEAT STEPPER OFF HEAT STEPPER #01 CHANGE 1 = YES, 0 = NO

If the heat stepper is ON and you want to turn it off, press 1. Otherwise press 0. Or if the heat stepper is OFF and you want to torn it ON, press 1. Otherwise press 0. 7.5 The display will now show:
HEAT STEPPER #01 TOTAL WELDS = #### HEAT STEPPER #01 CHANGE 1 = YES, 0 = NO
If the number shown is correct, press 0. Otherwise press 1 and enter the maximum number of welds to be made on this stepper. For typical galvanized welding, a number of 700 to 1,500 is common. Some companies try for as high as 3,000 with reasonable results. Start with a lower number and increase as experience dictates. Remember that a greater number of welds made between tip dressing means that there will be more material to remove from the electrodes.
7,6 Now press: STEP and the display will show: HEAT STEPPER #01 MAX. INCREASE = ##% HEAT STEPPER #01 CHANGE 1 = YES, 0 = NO
SOLUTION-2 #9280
USING OPTIONS
PAGE OP-8
HEAT STEPPER OPTION #9281-15(continued)
This is the % heat increase over the initial % heat of the program(s) assigned to this stepper. This will occur near the end of the number of welds chosen in 7.5 above. This % increase will be used for all heat functions (i.e., PREHEAT, UPSLOPE, WELD, DOWNSLOPE, POSTHEAT, TEMPER). Press 1 to change this number and then enter the desired % heat increase. Typical numbers are 04% to 10%. If this is the first time you are making this entry for a particular metal combination, this % increase number is found as follows: a. With the heat stepper OFF, make a weld on a single dressed electrode and adjust
the program parameters until a successful weld has been accomplished. b. Continue to make welds on this same electrode and increase the % heat as necessary to maintain the desired weld quality on each weld. If various heat

functions are being used, increase all functions by the same % each time. c. Continue this process until the maximum desired number of welds has been made.
d. Note this weld count along with the increase in % heat from the original (step a above) to the last weld. For example, if you started with 83% and made the last
weld with 87%, the MAX. INCREASE = 04%. e. Install these numbers in 7.5 and 7.6 above. Make a record of the numbers for future use on this combination of metals. 7.7.1 Press STEP and the same data for HEAT STEPPER #2 will be shown. 7.7.2 Continue in this manner until all desired steppers have been loaded. Note that the
number of steppers that will be available in PROGRAM 88 will match that chosen in step B7 of the SETUP section in these directions.
7.9 OVERALL OPERATING NOTE: If you want to go to a particular heat stepper without
walking through others, press PROGRAM in step 7.3 until the desired heat stepper is shown on the upper display. Then proceed at step 7.3. If you are finished with heat stepper data entry and you are not in the last heat stepper, press SINGLE, NO WELD, or REPEAT to exit at that point.
SOLUTION-2 #9280
USING OPTIONS
PAGE OP-9
HEAT STEPPER OPTION #9281-15(continued)
ASSIGNING HEAT STEPPERS TO WELDING PROGRAMS
If the HEAT STEPPER option is installed, each of the 75 PROGRAMS will have a line that displays: HEAT STEPPER = #-- If 00 is entered, no heat stepper will be used during any LINK that this PROGRAM has been assigned. If a number is entered in this line that matches one of the heat steppers as set up in the above steps, this stepper number will be used every time this PROGRAM is being performed in a LINK.

MULTIPLE PROGRAMS USING A SINGLE HEAT STEPPER: It is possible to use the same heat stepper in more than one PROGRAM. This might be useful if the electrode(s) is being used more than one time on a part (part index, etc.). In this case, the total number of welds used by this stepper will be used for the stepper’s counting and increase functions.
HEAT STEPPER REACHES MAXIMUM NUMBER OF WELDS If during a CHAIN one or more heat steppers has reached the MAXIMUM WELDS number, one of two things will happen: * * * * * * * * * * * * * * * * * * * * * * * * * * * * * * * * * * * * * * * * * * * * * * * * * * * * * * * * * * * * * *
CONTROL IN “AUTO FAULT RESET “
7.10.1 If in PROGRAM 82 the system has been set in the AUTO FAULT RESET mode, the display at the end of the chain will show:
RESET STEPPER = 88
This directs the operator to go to PROGRAM 88 (PROGRAM, 88, ENTER).
EXPIRED RELAY OUTPUT: See page SU-33 for instruction on assigning an output relay to transfer when one or more heat steppers has expired.
7.10.2 If it is desired to complete a run of parts before dressing any electrodes, just continue
welding without making any keypad entries. The heat stepper(s) that has been run to the maximum number of welds will remain at the last % heat increase level no matter how many more welds are made. The FAULT indication will still come on and the assigned FAULT OUTPUT will continue to momentarily close at the end of each CHAIN.
SOLUTION-2 #9280 USING OPTIONS
PAGE OP-10
HEAT STEPPER OPTION #9281-15(continued) 7.10.3 If it is desired to reset an expired heat stepper and dress the electrodes, press:
PROGRAM, 88, ENTER. The display will show:
RESET STEPPER? PRESS: 1 = YES, 0 = NO
7.13.1 If you want to only check condition of all steppers, go to 7.15 below. If you do want to
reset all exhausted steppers, Press 1 and the display will show:
HEAT STEPPER #-- DRESS TIP - - RESET
This is the lowest number heat stepper that has reached the maximum number of welds. Press STEP and the heat stepper number displayed on the upper row of the display will be reset.

7.13.2 If this is the only heat stepper that has been exhausted, the SOLUTION will return to the welding program. However, if more than one heat stepper has been exhausted during this CHAIN, the next exhausted heat stepper will be displayed as in 7.13. By pressing STEP, each successive heat stepper will be reset. The system will return to the welding program after the last heat stepper has been reset.
7.13.3 If it is just desired to check the condition of all heat steppers at this point without
automatically resetting any or all of them, press 0 and the control will go through the same sequence as shown starting in step 7.2 for all steppers. You can, then, just not condition of a particular stepper or reset it.
NOTE: If you change either the TOTAL WELDS or MAX. INCREASE % in a heat stepper that is not expired, the system will automatically reset that heat stepper.
* * * * * * * * * * * * * * * * * * * * * * * * * * * * * * * * * * * * * * * * * * * * * * * * * * * * * * * * * * * * * * * CONTROL IN “MAN. FAULT RESET”
7.16.1 If in PROGRAM 82 the system has been set in the MAN. FAULT RESET mode and a
particular LINK contains a heat stepper that has expired, welding in the CHAIN will stop, the beep tone will sound continuously, and the display will show:
HEAT STEPPER # - - DRESS TIP - - RESET
Press STEP and the heat stepper number displayed on the upper row of the display will be reset.
EXPIRED RELAY OUTPUT: See page SU-33 for instruction on assigning an output relay to transfer when one or more heat steppers has expired.
* * * * * * * * * * * * * * * * * * * * * * * * * * * * * * * * * * * * * * * * * * * * * * * * * * * * * * * * * * * * * *
SOLUTION-2 #9280 / #9181-09
USING OPTIONS
PAGE OP-11
PRESSURE TRANSDUCER OPTION #9181-05 & -05C
THEORY: A major variable in the resistance welding process is tip force. Since the electrical resistance between parts being joined decreases as force between the welding electrodes increases, the heat generated during the weld changes accordingly. Additionally, since the tip force also acts as a forge in the nugget development process, variations will greatly affect weld strength and ductility. Lastly, if current starts to flow before proper tip force has been reached, metal expulsion (flash) will occur causing part indentation, tip pick-up of metal, and potential danger to the operator and others in the area of the welder. _________________________________________________________

Welding before proper tip force has been reached DRASTICALLY lowers the quantity of welds possible between tip dressing, and REDUCES overall weld strength, consistency, and appearance. _________________________________________________________ APPLICATION: This SOLUTION option is designed to start current flow in the welder at the EXACT tip force desired. As shown in the graph on the next page, air pressure in the welding cylinder, as measured by the DOUBLE SIDED (differential) PRESSURE TRANSDUCER supplied with this option changes in three steps: 1. As the welder head starts to move, and before the electrode touches the electrode,
volume in the upper half of the cylinder starts to INCREASE. Therefore, during this same time, air pressure in the VARIABLE volume cylinder builds only slightly as required to overcome friction and inertia. This varies depending on air temperature, viscosity, oil content in air, temperature of welder bearings, etc. The SOLUTION read-out will show: WAIT: TIP FORCE during this time.
3. When the weld electrode touches the work piece, the cylinder stops moving, and the now
FIXED volume of the cylinder causes each additional amount of air to increase pressure. This continues until the pressure inside the cylinder has reached that of the welder’s pressure regulator. THIS IS THE EXACT POINT THAT WELD CURRENT FLOW SHOULD BE STARTED, and the TIP FORCE IS LOW readout will be turned off.
4. This level now remains as long as the welder’s solenoid is on.
SOLUTION-2 #9280 / #9181-09 USING OPTIONS
PAGE OP-12
PRESSURE TRANSDUCER OPTION #9181-05 & -05C(continued) TIP FORCE (in pounds), as shown in the graph, remains at zero (0) until the electrode touches the work piece. Then the tip force increases in direct proportion to the change in air pressure. The #9181-05 DIFFERENTIAL PRESSURE TRANSDUCER option connects to the weld cylinder as shown in the diagram below. Note that the hose connected to the UPPER (forward) port of the weld cylinder connects to the SOLUTION cabinet bulkhead fitting marked H (high), and that the hose connected to the LOWER (return) port of the weld cylinder connects to the fitting marked L (low). If these are reversed, the system will not work. * * * * * * * * * * * * * * * * * * * * * * * * * * * * * * * * * * * * * * * * * * * * * * * * * * * * * * * * * * * * * * BE SURE THAT THE TRANSDUCER CONNECTIONS ARE INSTALLED BEFORE THE FLOW CONTROLS AS SHOWN. OTHERWISE, THE SYSTEM WILL BE RESPONDING TO THE SETTING OF THE FLOW CONTROLS RATHER THAN TO THE ACTUAL WELDING CYLINDER RESPONSE. The transducer, provided in the option, subtracts the air pressure on the underside of the cylinder piston from that of the top. The resultant is the exact air pressure acting on the cylinder rod. Note that the pressure measurement is taken BEFORE any flow control devices.

Use of a DIFFERENTIAL type transducer eliminates error and false signals caused by changes in welder head advance speed as set by flow controls in the air system. Also, unlike mechanical pressure switches, this device is accurate to better than ½ psi. and will not change even under large temperature swings and changes in air density and composition. Use of this option will present the SAME EXACT FORCE CONDITIONS every time that the weld has started. Because of this, the inter resistance of the parts being joined will be constant and, therefore, reproduce weld strength and ductility throughout the production run. LEGEND AIR CYLINDER PRESSURE _______________ TIP FORCE _____________________________
SOLUTION-2 #9280 / 9181-09
USING OPTIONS
PAGE OP-13
PRESSURE TRANSDUCER OPTION #9181-05 & -05c(continued)
* * * * * * * * * * * * * * * * * * * ** * * * * * * * * * * * * * * * * * * * * * * * * * * * * * * * * * * * * * * * * * * 1. See page SU-13 for assigning a solenoid valve for each transducer.
2. On systems with more than one transducer, there will be a separate line for measuring
TIP FORCE and INPUT (air PSI) for each transducer in the system. See page SU-7 for installing the desired number of transducers. * * * * * * * * * * * * * * * * * * * * * * * * * * * * * * * * * * * * * * * * * * * * * * * * * * * * * * * * * * * * * * * TO CHECK TIP FORCE AND AIR PRESSURE READINGS: 1. Press: PROGRAM 96, ENTER
If the readout will show: TRANSDUCER ON or TRANSDUCER OFF

CHANGE 1 = YES, 0 = NO If TRANSDUCER OFF is shown, press 1 to turn it on. If TRANSDUCER ON is shown, press 0 to leave this way. 2. The display will now show:
TRANSD. 01, SV - ## CHECK TIP FORCE? PRESS: 1 = YES, 0 = N0
The SV-## matches the assignment made on page SU-13 3. Press 1 to check the TIP FORCE on this transducer. The display will show:
PLEASE INITIATE and wait for you to close the foot switch or hand buttons of any initiation input. 4. Once you have done this, the output for SV## shown on the upper row of the display will
turn on and turn on the solenoid valve wired to that SV output terminal. This output will remain on without the need to keep the initiation switch closed. Also, no actual welding will occur.
SOLUTION-2 #9280 / #9181-09
USING OPTIONS
PAGE OP-14
PRESSURE TRANSDUCER OPTION #9181-05 & -05VC(continued)
5. The display will now show:
TRANSD. 01, SV - ## TIP FORCE = ####LB
Note that, while the display shows readings every ½ second, the computer is updating continuously. The value shown will be calculated as: TIP FORCE = (AIR PSI) X (LBS / PSI) You can now adjust the welder’s air regulator to reach the desired TIP FORCE. Note that it is always desirable to have this setting slightly above the desired value since the system will wait a long time for the last “drop” of air to enter the cylinder each weld sequence if the actual TIP FORCE and the program TIP FORCE are equal. To release, press STEP.

6. TO CHECK CALIBRATION ON YOUR PRESSURE GAGE:
After the above step, the readout will show: TRANSD. 01, SV - ## CHECK INPUT? PRESS: 1 = YES, 0 = N0 The SV-## matches the assignment made on page SU-13.
7. Press 1 to check the DIFFERENTIAL AIR PRESSURE as read by the transducer. The
display will show:
PLEASE INITIATE
and wait for you to again close the foot switch or hand buttons of any initiation input.
8. Once you have done this, the output for SV## shown on the upper row of the display will again turn on and turn on the solenoid valve wired to that SV output terminal. This output will remain on without the need to keep the initiation switch closed. Also, no actual welding will occur.
SOLUTION-2 #9280 / #9181-09
USING OPTIONS
PAGE OP-15
PRESSURE TRANSDUCER OPTION #9181-05 & -05C(Continued)
9. The display will now show:
TRANSD. 02, SV - ##
AIR PRES. = ##PSI
Note that, while the display shows readings every ½ second, the computer is updating continuously. To release, press STEP.
10. If your control has more than one transducer installed, the display will show:
TRANSD. 02, SV - ## CHECK TIP FORCE? PRESS: 1 = YES, 0 = NO

The SV-## matches the assignment made on page SU-13. By repeating steps 2-9 above, the system will check each transducer one at a time for TIP FORCE and AIR PSI.
USING TRANSDUCER OPTION IN PRODUCTION 1. With the desired CHAIN entered, press SINGLE, NO WELD, or RUN as desired to set the control for welding. 2. As shown on page U-2, when the foot pedal or hand switches are closed, and before the selected tip force has been reached within any LINK, the readout will show: WAIT: TIP FORCE and welding will not start. Once the differential air pressure meets or exceeds the setting, the rest of this LINK will be performed. Note that if you are in MOMENTARY initiation (program 90) and the air pressure is below the required setting, the system will not release when the foot or hand switch has been opened. 3. TO RELEASE at this point, either increase air pressure, press EMERGENCY STOP, or press any button on the keypad.
SOLUTION-2 #9280 / #9181-09 USING OPTIONS
PAGE OP-16
PRESSURE TRANSDUCER OPTION #9181-05 & -05C(Continued) #9181-05C HIGH / LOW PRESSURE TRANSDUCER OPTION: If the correct TIP FORCE is reached at the start of the weld, but the air regulator is set much higher than necessary, the TIP FORCE will be much higher than desirable at some point during the weld. This will reduce the electrical resistance between the parts being welded to reduce heat created by the weld current. This will greatly reduce weld strength and nugget penetration. Conversely, if the air pressure sags below the desired point during the weld, excessive metal expulsion will cause poor surface appearance of the weld nugget and can greatly reduce electrode life. If your control has the #9181-05C HIGH / LOW TRANSDUCER option, it will first operate the same as STEPS 1 and 2. This option adds a second measurement after the weld has been completed to see if the TIP FORCE has gone ABOVE or BELOW the PSI VARIATION that has been entered into the system. This value is entered by pressing: PROGRAM, 96, ENTER. The display will show: PSI VARIATION ----

Enter the largest variation of air pressure (PSI) that will not affect the weld quality. Typically this value is 4-5psi. NOTE: If you do not want to use this feature, set PSI VARIATION = 00. With this function operational, a reading above or below the air pressure displayed each time you exit a PROGRAM will cause a fault condition. If the welder has been set in MANUAL FAULT RESET mode (PROGRAM 82), this FAULT will stop at the end of this LINK and the air pressure measured at the end of the LINK will now be displayed. At the same time, an output relay can be assigned to communicate a fault or accept condition to an external control (i.e., PLC, etc.). See page SU-31 for information on assigning these relays. To continue the sequence (next LINK in the chain), close the initiation switch. If the welder has been set in AUTOMATIC FAULT RESET mode (PROGRAM 82), the sequence will continue without the need for closure of the initiation. As with the MANUAL FAULT RESET mode above, an output relay can be assigned to communicate a fault or accept condition to an external control (i.e., PLC, etc). See page SU-31 for information on assigning these relays. In either MANUAL or AUTOMATIC FAULT RESET mode, if a PRINTER PORT or PRINTER option is installed in this control, the last value measured will be printed, and the work F-FLT will show at the end of the line.
SOLUTION-2 #9280 / #9181-09
USING OPTIONS
PAGE OP-17
AVC HIGH / LOW MONITOR OPTION #9181-06A This option will continuously check to see if the line voltage is more than 10% above or below the value measured during the original setup of AVC (page SU-4, line E2). If this option is installed, the average line voltage for each weld being made will be shown on the printout of options #9181-21A or #9181-21B. Since the AVC function can only compensate within the + / - 10% range, anything over this range will have no compensation. For example, if the line voltage drops 12%, the AVC system will compensate for the first 10%, but the output will now be 2% - 3% low. This option will cause a relay to transfer every time a weld is being made and the system is out of the + / - 10% range. See page SU-32 for information on assigning this relay. The function operates continuously as long as AVC is turned on in PROGRAM 98, and does not require any keypad input to activate.

SAMPLE PROGRAMS

SOLUTION-2 #9280 DIRECTIONS FOR USE
PAGE E-1
SAMPLE PROGRAM CHAINS
Read through the following examples to see how the three steps shown on the previous pages are actually put to practice.
SAMPLE WELD CHAIN #1
EQUIPMENT SETUP:
a. Rocker Arm welder b. Double pressure regulator system with a solenoid valve to provide higher pressure c. A single foot switch, 2 stage d. Manual load/unload and manual movement e. SOLUTION control is set for 3-CHAIN, 2-STAGE mode f. SOLUTION control contains PRESSURE TRANSDUCER option * * * * * * * * * * * * * * * * * * * * * * * * * * * * * * * * * * * * * * * * * * * * * * * * * * * * * * * * * * * * * * *
STEP #1: THE TASK a. Operator places channels and hinges on panel using a drop-in fixture b. With the foot pedal held down, 12 welds are made along top edge joining top angle to panel. c. After operator rotates part, three hinges are welded along one long edge using 3 spots per hinge. d. After operator rotates part, last 9 welds are made along bottom edge to join bottom angle to panel. * * * * * * * * * * * * * * * * * * * * * * * * * * * * * * * * * * * * * * * * * * * * * * * * * * * * * * * * * * * * * * STEP #2: ENTERING PROGRAMS WITH THE DESIRED SEQUENCE OF OPERATION

OPERATION #1 (welding of angles to panel): a.. Bring weld head down using SV1. b. Weld using the following schedule: TIP FORCE = 550 POUNDS WELD = 12 cycles AT 76% HOLD TIME = 5 CYCLES c. After the end of HOLD TIME, release SV1 to bring weld head UP d. Wait for 35 cycles e. Put above information in PROGRAM 6 as follows: PROGRAM 06
SV1 ON, END OFF WELD TIME 12 WELD HEAT 76% HOLD TIME 05
All other lines in PROGRAM 06 are to be set to 00 or OFF, or OPEN
SOLUTION-2 #9280
DIRECTIONS FOR USE
PAGE E-2
SAMPLE PROGRAM CHAINS (Continued)
SAMPLE WELD CHAIN #1 (Continued)
OPERATION #2 (welding hinges to panel): a. Bring weld head down with SV1 using high pressure selected by SV2. b. Weld using the following schedule: TIP FORCE = 690 POUNDS WELD = 17 CYCLES at 84% HOLD TIME = 6 CYCLES c. After the end of HOLD TIME, release SV1 to bring weld head UP d. Wait for 15 cycles e, Put above information in PROGRAM 7 as follows: PROGRAM 07 SV1 ON, END OFF
SV2 ON, END ON WELD TIME 17 WELD HEAT 84% HOLD TIME 06 DWELL BETWEEN = 15 TIP FORCE 0690LB
All other lines in PROGRAM 07 are to be set to 00, off, or OPEN

* * * * * * * * * * * * * * * * * * * * * * * * * * * * * * * * * * * * * * * * * * * * * * * * * * * * * * * * * * * * *
STEP #3: ASSEMBLING THE CHAIN All that remains is to tell the SOLUTION-2 control a. There are 30 LINKS in the chain b. LINK 1 through LINK 12 = PROGRAM 6 c. LINK 13 THROUGH LINK 21 = PROGRAM 7 d. LINK 22 THROUGH LINK 30 = PROGRAM 6 e. ONE CHAIN ONLY f. MANUAL CHAIN or AUTOMATIC CHAIN * * * * * * * * * * * * * * * * * * * * * * * * * * * * * * * * * * * * * * * * * * * * * * * * * * * * * * * * * * * * * * *
THAT’S IT! YOU ARE NOW READY FOR PRODUCTION
SOLUTION-2 #9280
DIRECTIONS FOR USE
PAGE E-3
SAMPLE PROGRAM CHAINS (Continued)
SAMPLE WELD CHAIN #2
EQUIPMENT SETUP:
a. A-Frame welder b. One welding transformer c. Two welding cylinders, separate solenoid valve for each d. Table shuttle cylinder e. Part clamp f. Manual load/unload, automatic movement g. SOLUTION control is set for 3-CHAIN, 2-STAGE mode h. SOLUTION control contains PRESSURE TRANSDUCER option * * * * * * * * * * * * * * * * * * * * * * * * * * * * * * * * * * * * * * * * * * * * * * * * * * * * * * * * * * * * * * *
STEP #1: THE TASK Clamp part, shuttle table with fixture to bring part under two weld heads, weld first one head then the other, retract fixture, open clamp. * * * * * * * * * * * * * * * * * * * * * * * * * * * * * * * * * * * * * * * * * * * * * * * * * * * * * * * * * * * * * * *
STEP #2: ENTERING PROGRAMS WITH THE DESIRED SEQUENCE OF OPERATION

OPERATION #1: a. Clamp part in weld nest using SV3. b. Wait until the clamp proximity switch connected to PS1 closes c. Check to be sure that both welding heads are UP using limit switch on first head connected to PS3 and on second head connected to PS4 d. Pub above information in PROGRAM 3 as follows: PROGRAM 03 SV3 ON, END ON PS1 TO BE CLOSED PS3 TO BE CLOSED PS4 TO BE CLOSED All other lines in PROGRAM 03 are to be set to 00, OFF, or OPEN
SOLUTION-2 #9280
DIRECTIONS FOR USE
PAGE E – 4
SAMPLE PROGRAM CHAINS(Continued)
SAMPLE WELD CHAIN #2 (Continued)
OPERATION #2: a. Shuttle table with fixture under weld head using SV2 b. Wait until the table limit switch connected to PS2 closes c. Put information in PROGRAM 17 as follows: PROGRAM 17 SV2 ON, END ON SV3 ON, END ON PS1 TO BE CLOSED PS2 TO BE CLOSED PS3 TO BE CLOSED PS4 TO BE CLOSED All other lines in PROGRAM 17 are to be set to 00, OFF, or OPEN OPERATION #3: a. Bring the first WELD HEAD down by turning on SV1. b. Weld with the following schedule: TIP FORCE = 550 POUNDS UPSLOPE = 6 CYCLES starting at 35% WELD = 12 CYCLES AT 83% HOLD TIME = 7 CYCLES c. After HOLD TIME has been completed, return the first WELD HEAD to the UP position

d . Put information in PROGRAM 4 as follows:
PROGRAM 04 SV1 ON, END OFF SV2 ON, END ON SV4 ON, END ON PS1 TO BE CLOSED PS2 TO BE CLOSED WELD TIME 12 WELD HEAT 83% HOLD TIME 07 TIP FORCE 0550LB UPSLOPE INIT 35% UPSLOPE TIME 06 All other lines in PROGRAM 04 are to be set to 00, off, or OPEN
SOLUTION-2 #9280
DIRECTIONS FOR USE
PAGE E-5
SAMPLE PROGRAM CHAINS(Continued)
SAMPLE WELD CHAIN #2
OPERATION #4: a. Bring the second WELD HEAD down by turning SV4 on b. Weld with the following schedule: TIP FORCE = 560 POUNDS UPSLOPE = 6 CYCLES starting at 42% WELD = 15 CYCLES at 89% PULSATION = 2 with 5 CYCLES COOL TIME HOLD TIME = 7 CYCLES c. After HOLD TIME has been completed, return the second WELD HEAD to the UP
position by releasing SV4. d. Put information in PROGRAM 2 as follows: PROGRAM 02 SV2 ON, END ON SV3 ON, END ON SV4 0N, END OFF PS1 TO BE CLOSED PS2 TO BE CLOSED PS3 TO BE CLOSED WELD TIME 15 WELD HEAT 89%

HOLD TIME 07 TIP FORCE 0550LB NO. OF PULSES 02 PULSAT COOL 2=05 All other lines in PROGRAM 02 are to be set to 00, OFF, or OPEN.
SOLUTION-2 #9280
DIRECTIONS FOR USE
PAGE E-6
SAMPLE PROGRAM CHAINS(Continued)
SAMPLE WELD CHAIN #2 (Continued)
OPERATION #5: a. Wait until both weld head LIMIT SWITCHES are closed to verify that both WELD HEADS
are UP. b. Wait an additional ½ second for security that WELD HEADS are fully clear of WELDING
FIXTURE. c. Put information in PROGRAM 15 as follows: PROGRAM 15 SV2 ON, END ON SV3 ON, END ON PS1 TO BE CLOSED PS2 TO BE CLOSED PS3 TO BE CLOSED PS4 TO BE CLOSED SQUEEZE/DWELL 30 All other lines in PROGRAM 15 are to be set to 00, OFF, or OPEN OPERATION #6: a. Bring the TABLE WITH FIXTURE back to the HOME POSITION by turning SV2 OFF. b. Wait until the TABLE IN POSITION LIMIT SWITCH connected to PS2 has opened. c. Wait for 1 second to allow table to travel to home position. d. Release CLAMP by turning SV3 OFF. e. Put information in PROGRAM 7 as follows:

PROGRAM 01 SV3 ON, END OFF PS1 TO BE CLOSED PS3 TO BE CLOSED PS4 TO BE CLOSED SQUEEZE/DWELL 60 All other lines in PROGRAM 01 are to be set to 00, OFF, or OPEN. * * * * * * * * * * * * * * * * * * * * * * * * * * * * * * * * * * * * * * * * * * * * * * * * * * * * * * * * * * * * * *
SOLUTION-2 #9280
DIRECTIONS FOR USE
PAGE E-7
SAMPLE PROGRAM CHAINS(Continued)
SAMPLE WELD CHAIN #2
SAMPLE WELD CHAIN #2(Continued)
STEP #3: ASSEMBLING THE CHAIN All that remains is to tell the SOLUTION-2 control that there are 6 LINKS in the chain, and that:: a. LINK 1 = PROGRAM 03 b. LINK 2 = PROGRAM 17 c. LINK 3 = PROGRAM 04 d. LINK 4 = PROGRAM 02 e. LINK 5 = PROGRAM 15 f. LINK 6 = PROGRAM 01 g ONE CHAIN ONLY h. MANUAL CHAIN or AUTOMATIC CHAIN. * * * * * * * * * * * * * * * * * * * * * * * * * * * * * * * * * * * * * * * * * * * * * * * * * * * * * * * * * * * * * * *
THAT’S IT! YOU ARE NOW READY FOR PRODUCTION.

SOLUTION-2 #9280 DIRECTIONS FOR USE
PAGE E-8
SAMPLE PROGRAM CHAINS(continued)
SAMPLE WELD CHAIN #3
EQUIPMENT SETUP: a. Three weld heads (cylinders), one welding transformer b. Two button ANTI-TIEDOWN initiation c. Air operated shuttle for part with an IN limit switch d. Manual load / unload e. A limit switch is installed on each of the three weld heads for UP position verification. f. A limit switch is installed on each of the three weld heads for DOWN position verification.
All three are wired in parallel. g. SOLUTION control is set for 2-LEVEL, 2 CHAIN mode. * * * * * * * * * * * * * * * * * * * * * * * * * * * * * * * * * * * * * * * * * * * * * * * * * * * * * * * * * * * * * * *
STEP #1: THE TASK After operator closes two hand buttons (ANTI-TIEDOWN), one flange on a center rein-forcement “hat” section is welded with three spots. Part is indexed to place the electrodes over the other flange, and the last three spots are made. * * * * * * * * * * * * * * * * * * * * * * * * * * * * * * * * * * * * * * * * * * * * * * * * * * * * * * * * * * * * * * * STEP #2: ENTERING PROGRAMS WITH THE DESIRED SEQUENCE OF OPERATION OPERATION #1 (bringing weld head #1 down and weld): a. Weld head #1 goes down using SV1 b. Check to be sure that heads #2 and #3 are UP using PS2 and PS3 c. Weld with the following program: SQUEEZE TIME = 15 CYCLES WELD = 09 CYCLES at 71% HOLD TIME = 5 CYCLES d. After HOLD TIME, return head #1 by releasing SV1. e. Put the above information in PROGRAM 9 as follows:

PROGRAM 09
SV1 ON, END OFF PS2 TO BE CLOSED PS3 TO BE CLOSED SQUEEZE/DWELL 15 WELD TIME 09 WELD HEAT 71% HOLD TIME 05
All other lines in PROGRAM 09 are to be set to 00 or OFF, or OPEN
SOLUTION-2 #9280 DIRECTIONS FOR USE
PAGE E-9
SAMPLE PROGRAM CHAINS(continued)
SAMPLE WELD CHAIN #3(continued) OPERATION #2 (bring weld head #2 down and weld): a. Weld head #2 goes down using SV2 b. Check to be sure that head #1 and #3 are UP using PS1 and PS3 c. Weld with the following program SQUEEZE TIME = 15 CYCLES WELD = 09 CYCLES at 71% HOLD TIME = 5 CYCLES d. After HOLD TIME, return head #2 by releasing SV2. e. Put the above information in PROGRAM 10 as follows: PROGRAM 10 SV2 ON, END OFF PS1 TO BE CLOSED PS3 TO BE CLOSED SQUEEZE/DWELL 15 WELD TIME 09 WELD HEAT 71% HOLD TIME 05 All other lines in PROGRAM 10 are to be set to 00, or OFF, or OPEN OPERATION #3 (bring weld head #3 down and weld): a. Weld head #3 goes down using SV3 b. Check to be sure that heads #1 and #2 are UP using PS1 and PS2 c. Weld with the following program SQUEEZE TIME = 15 CYCLES WELD = 09 CYCLES at 71% HOLD TIME = 5 CYCLES d. Put the above information in PROGRAM 11 as follows:

PROGRAM 11 SV3 ON, END OFF PS1 TO BE CLOSED PS2 TO BE CLOSED SQUEEZE/DWELL 15 WELD TIME 09 WELD HEAT 71% HOLD TIME 05 All other lines in PROGRAM 11 are to be set to 00 or OFF or OPEN
SOLUTION-2 #9280 DIRECTIONS FOR USE
PAGE E-10
SAMPLE PROGRAM CHAINS(continued)
SAMPLE WELD CHAIN #3(continued)
OPERATION #4 (check to see that all heads are UP: a. Check to be sure that heads are UP using PS1, PS2, and PS3 b. Time delay after all heads are UP for 15 cycles for security. c. Put this information into PROGRAM 20 as follows: PROGRAM 20 PS1 TO BE CLOSED PS2 TO BE CLOSED PS3 TO BE CLOSED DWELL BETWEEN = 15 All other lines in PROGRAM 20 are to be set to 00, or OFF, or OPEN OPERATION #5 (index part) a. Index part using SV4 b. Check to be sure table is all the way forward using PS4 c. Delay for 10 cycles for security d. Put this information in PROGRAM 21 as follows: PROGRAM 21 SV4 ON, END ON PS1 TO BE CLOSED PS2 TO BE CLOSED PS3 TO BE CLOSED PS4 TO BE CLOSED DWELL BETWEEN = 10 All other lines in PROGRAM 21 are to be set to 00 or OFF, or OPEN OPERATION #6 (bringing weld head #1 down and weld):

a. Weld head #1 goes down using SV1 b. Check to be sure that heads #2 and #3 are UP using PS2 and PS3 c. Weld with the following program: SQUEEZE TIME = 15 CYCLES WELD = 09 CYCLES at 71% HOLD TIME = 5 CYCLES d. After HOLD TIME, return head #1 by releasing SV1.
SOLUTION-2 #9280 DIRECTIONS FOR USE
PAGE E-11
SAMPLE PROGRAM CHAINS(continued)
SAMPLE WELD CHAIN #3(continued) e. Put the above information in PROGRAM 22 as follows: PROGRAM 22 SV1 ON, END OFF PS2 TO BE CLOSED PS3 TO BE CLOSED PS4 TO BE CLOSED SQUEEZE/DWELL 15 WELD TIME 09 WELD HEAT 71% HOLD TIME 05 All other lines in PROGRAM 22 are to be set to 00 or OFF, or OPEN OPERATION #7 (bring weld head #2 down and weld): a. Weld head #2 goes down using SV2 b. Check to be sure that head #1 and #3 are UP using PS1 and PS3 c. Weld with the following program SQUEEZE TIME = 15 CYCLES WELD = 09 CYCLES at 71% HOLD TIME = 5 CYCLES d. After HOLD TIME, return head #2 by releasing SV2. e. Put the above information in PROGRAM 23 as follows:
PROGRAM 23 SV2 ON, END OFF PS1 TO BE CLOSED PS3 TO BE CLOSED PS4 TO BE CLOSED SQUEEZE/DWELL 15 WELD TIME 09 WELD HEAT 71% HOLD TIME 05 All other lines in PROGRAM 23 are to be set to 00 or OFF, or OPEN

OPERATION #8 (bring weld head #3 down and weld): a. Weld head #3 goes down using SV3 b. Check to be sure that heads #1 and #2 are UP using PS1 and PS2 c. Weld with the following program SQUEEZE TIME = 15 CYCLES WELD = 09 CYCLES at 71% HOLD TIME = 5 CYCLES
SOLUTION-2 #9280
DIRECTIONS FOR USE
PAGE E-12
SAMPLE PROGRAM CHAINS(continued)
SAMPLE WELD CHAIN #3(continued)
d. Put the above information in PROGRAM 24 as follows:
PROGRAM 24 SV3 ON, END OFF PS1 TO BE CLOSED PS2 TO BE CLOSED PS4 TO BE CLOSED SQUEEZE/DWELL 15 WELD TIME 09 WELD HEAT 71% HOLD TIME 05 All other lines in PROGRAM 24 are to be set to 00 or OFF, or OPEN * * * * * * * * * * * * * * * * * * * * * * * * * * * * * * * * * * * * * * * * * * * * * * * * * * * * * * * * * * * * * * *
STEP #3: ASSEMBLING THE CHAIN All that remains is to tell the SOLUTION-2 control a. There are 8 LINKS in the chain b. LINK 1 = PROGRAM 9 c. LINK 2 = PROGRAM 10 d. LINK 3 = PROGRAM 11 e. LINK 4 = PROGRAM 20 f. LINK 5 = PROGRAM 21 g. LINK 6 = PROGRAM 22 h. LINK 7 = PROGRAM 23 i. LINK 8 = PROGRAM 24 j. ONE CHAIN ONLY k. MANUAL CHAIN or AUTOMATIC CHAIN

* * * * * * * * * * * * * * * * * * * * * * * * * * * * * * * * * * * * * * * * * * * * * * * * * * * * * * * * * * * * * * *
THAT’S IT! YOU ARE NOW READY FOR PRODUCTION.
SOLUTION-2 #9280 DIRECTIONS FOR USE
PAGE E-13
SAMPLE PROGRAM CHAINS(continued)
SAMPLE WELD CHAIN #4
EQUIPMENT SETUP:
a. Three weld heads (cylinders) on SV1, three welding transformers b. Two button ANTI-TIEDOWN initiation c. Air operated shuttle (SV2) for part with an IN limit switch PS4 d. Manual load/unload e. A limit switch is installed on each of the three weld heads for UP position verification (PS1, PS2, PS3) f. SOLUTION control is set for 3-CHAIN, 2 STAGE mode * * * * * * * * * * * * * * * * * * * * * * * * * * * * * * * * * * * * * * * * * * * * * * * * * * * * * * * * * * * * * * *
STEP #1: THE TASK After operator closes two hand buttons (ANTI-TIEDOWN), one flange on a center reinforcement “hat” section is welded with three spots. Part is indexed to place the electrodes over the other flange, and the last three spots are made. * * * * * * * * * * * * * * * * * * * * * * * * * * * * * * * * * * * * * * * * * * * * * * * * * * * * * * * * * * * * * * *
STEP #2: ENTERING PROGRAMS WITH THE DESIRED SEQUENCE OF OPERATION OPERATION #1 (bringing all three heads down, weld with SCR1): a. All three welding heads go down using SV1 b. Check to be sure that heads are not up using PS1, PS2 and PS3 c. Allow ½ second (30 cycles) for cylinders to move and pressurize d. Weld with the following program on SCR1 SQUEEZE TIME = 30 CYCLES WELD = 09 CYCLES at 71% e. Put the above information in PROGRAM 9 as follows:
PROGRAM 09
SV1 ON, END ON PS1 TO BE OPEN PS2 TO BE OPEN PS3 TO BE OPEN

SQUEEZE TIME 30 WELD TIME 09 WELD HEAT 71% SCR NUMBER = 1 All other lines in PROGRAM 09 are to be set to 00 or OFF, or open
SOLUTION-2 #9280 DIRECTIONS FOR USE
PAGE E-14
SAMPLE PROGRAM CHAINS(continued)
SAMPLE WELD CHAIN #4(continued)
OPERAION #2 (with heads still down, weld with SCR2): a. All three welding heads remain down using SV1 b. Check to be sure that heads are not up using PS1, PS2 and PS3 c. Weld with the following program on SCR2 WELD = 09 CYCLES at 71% d. Put the above information in PROGRAM 20 as follows: PROGRAM 20 SV1 ON, END ON SV2 OFF, END OFF PS1 TO BE OPEN PS2 TO BE OPEN PS3 TO BE OPEN WELD TIME 09 WELD HEAT 71% SCR NUMBER = 2 All other lines in PROGRAM 10 are to be set to 00 or OFF, or OPEN OPERATION #3 (with heads still down, weld with SCR3): a. All three welding heads remain down using SV1 b. Check to be sure that heads are not up using PS1, PS2 AND PS3 c. Weld with the following program on SCR3 WELD = 09 CYCLES at 71% HOLD TIME = 5 CYCLES d. Put the above information in PROGRAM 23 as follows: PROGRAM 23 SV1 ON, END OFF SV2 OFF, END OFF PS1 TO BE OPEN PS2 TO BE OPEN PS3 TO BE OPEN PS4 TO BE OPEN WELD TIME 09

WELD HEAT 71% HOLD TIME 05 SCR NUMBER = 3 All other lines in PROGRAM 10 are to be set to 00 or OFF, or OPEN
SOLUTION-2 #9280
DIRECTIONS FOR USE
PAGE E-15
SAMPLE PROGRAM CHAINS(continued)
SAMPLE WELD CHAIN #4(continued)
OPERATION #4 (check weld heads before shuttle of table) a. Be sure that all weld heads are retracted by using PS1, PS2 and PS3 b. Put the above information in PROGRAM 25 as follows: PROGRAM 25 SV1 OFF, END OFF SV2 ON, END ON PS1 TO BE CLOSED PS2 TO BE CLOSED PS3 TO BE CLOSED All other lines in PROGRAM 09 are to be set to 00 or OFF, or OPEN OPERATION #5 (shuttle table and be sure that it is in position) a. Move table using SV2 b. Be sure that the table is in position using PS4 c. Put the above information in PROGRAM 28 PROGRAM 28 SV1 OFF, END OFF SV2 ON, END ON PS1 TO BE CLOSED PS2 TO BE CLOSED PS3 TO BE CLOSED PS4 TO BE CLOSED All other lines in PROGRAM 09 are to be set to 00 or OFF, or OPEN OPERATION #6 (bring all welding heads down, weld with SCR1): a. All three welding heads go down using SV1 b. Check to be sure that heads are not up using PS1, PS2 and PS3 c. Check to be sure table is still in shuttle position using PS4 d. Allow ½ second (30 cycles) for all heads to go forward and pressurize e. Weld with the following program on SCR1

SQUEEZE TIME = 30 CYCLES WELD = 09 CYCLES AT 71%
SOLUTION-2 #9280
DIRECTIONS FOR USE
PAGE E-16
SAMPLE PROGRAM CHAINS(continued) d. Put the above information in PROGRAM 29 as follows: PROGRAM 29 SV1 ON, END ON SV2 ON, END ON PS1 TO BE OPEN PS2 TO BE OPEN PS3 TO BE OPEN PS4 TO BE CLOSED SQUEEZE/DWELL 30 WELD TIME 09 WELD HEAT 71% SCR NUMBER = 1 All other lines in PROGRAM 09 are to be set to 00 or OFF, or OPEN OPERATION #7 (bring all welding heads down, weld with SCR2): a. All three welding heads go down using SV1 b. Check to be sure that heads are not up using PS1, PS2 and PS3 c. Check to be sure table is still in shuttle position using PS4 d. Weld with the following program on SCR2 WELD = 09 CYCLES at 71% e. Put the above information in PROGRAM 44 as follows: PROGRAM 44 SV1 ON, END ON SV2 ON, END ON PS1 TO BE OPEN PS2 TO BE OPEN PS3 TO BE OPEN PS4 TO BE CLOSED WELD TIME 09 WELD HEAT 71% SCR NUMBER = 2 All other lines in PROGRAM 09 are to be set to 00 or OFF, or OPEN

SOLUTION-2 #9280 DIRECTIONS FOR USE
PAGE E-17
SAMPLE PROGRAM CHAINS(continued)
SAMPLE WELD CHAIN #4(continued)
OPERATION #8 (bring all welding heads down, weld with SCR3): a. All three welding heads go down using SV1 b. Check to be sure that heads are not up using PS1, PS2 and PS3 c. Check to be sure table is still in shuttle position using PS4 d. Weld with the following program on SCR3 e. Release the welding heads WELD = 09 CYCLES at 71% HOLD TIME = 05 CYCLES f. Put the above information in PROGRAM 49 as follows: PROGRAM 49 SV1 ON, END OFF SV2 ON, END ON PS1 TO BE OPEN PS2 TO BE OPEN PS3 TO BE OPEN PS4 TO BE CLOSED WELD TIME 09 WELD HEAT 71% HOLD TIME 05 SCR NUMBER = 3 All other lines in PROGRAM 09 are to be set to 00 or OFF, or OPEN OPERATION #9 (check to be sure all welding heads are up) a. Check to be sure that heads are up using PS1, PS2 and PS3 b. Check to be sure table is still in shuttle position using PS4 c. After heads are up, dwell for ½ second (30 cycles) d. Put the above information in PROGRAM 16 as follows: PROGRAM 16 SV1 OFF, END OFF SV2 ON, END ON PS1 TO BE CLOSED PS2 TO BE CLOSED PS3 TO BE CLOSED PS4 TO BE CLOSED

All other lines in PROGRAM 09 are to be set to 00 or OFF, or OPEN
SOLUTION-2 #9280
DIRECTIONS FOR USE
PAGE E-18
SAMPLE PROGRAM CHAINS(continued)
SAMPLE WELD CHAIN #4(continued)
OPERATION #10 (return table to unloading position ): a. Release table solenoid valve using SV2 b. Wait until table limit switch PS4 opens c. Put the above information in PROGRAM 33 as follows: PROGRAM 33 SV1 OFF, END OFF SV2 OFF, END OFF PS1 TO BE CLOSED PS2 TO BE CLOSED PS3 TO BE CLOSED PS4 TO BE CLOSED All other lines in PROGRAM 10 are to be set to 00 or OFF, or OPEN * * * * * * * * * * * * * * * * * * * * * * * * * * * * * * * * * * * * * * * * * * * * * * * * * * * * * * * * * * * * * * *
STEP #3: ASSEMBLING THE CHAIN
All that remains is to tell the SOLUTION-2 control a. There are 10 LINKS in the chain b. LINK 1 = PROGRAM 9 c. LINK 2 = PROGRAM 20 d. LINK 3 = PROGRAM 23. e. LINK 4 = PROGRAM 25 f. LINK 5 = PROGRAM 28 g. LINK 6 = PROGRAM 29 h LINK 7 = PROGRAM 44 I. LINK 8 = PROGRAM 49 j. LINK 9 = PROGRAM 16 k. LINK 10 = PROGRAM 33 l. ONE CHAIN ONLY m. MANUAL CHAIN or AUTOMATIC CHAIN * * * * * * * * * * * * * * * * * * * * * * * * * * * * * * * * * * * * * * * * * * * * * * * * * * * * * * * * * * * * * *

THAT’S IT! YOU ARE NOW READY FOR PRODUCTION
SERVICE INFORMATION