![Quest [Spring 1999] - CORE](https://static.fdokumen.com/doc/165x107/6332b87eb0ddec4616073edb/quest-spring-1999-core.jpg)
SharePlex Preinstallation Checklist - Quest Software
28
Quest® SharePlex™ 8.6 (8.6.6) Preinstallation Checklist
-
Upload
khangminh22 -
Category
Documents
-
view
0 -
download
0
Transcript of SharePlex Preinstallation Checklist - Quest Software

Quest® SharePlex™ 8.6 (8.6.6)
Preinstallation Checklist

Copyright 2017 Quest Software Inc.
ALL RIGHTS RESERVED.This guide contains proprietary information protected by copyright. The software described in this guide is furnished under asoftware license or nondisclosure agreement. This softwaremaybe used or copied only in accordance with the termsof theapplicable agreement. No part of this guidemaybe reproduced or transmitted in any form or byanymeans, electronic ormechanical, including photocopying and recording for anypurpose other than the purchaser’s personal use without the writtenpermission of Quest Software Inc.
The information in this document is provided in connection with Quest Software products. No license, expressor implied, byestoppelor otherwise, to any intellectual property right is granted by this document or in connection with the sale of Quest Software products.EXCEPT ASSET FORTH IN THETERMSANDCONDITIONSASSPECIFIED IN THELICENSEAGREEMENT FOR THISPRODUCT, QUEST SOFTWAREASSUMESNOLIABILITYWHATSOEVER ANDDISCLAIMSANYEXPRESS, IMPLIED ORSTATUTORYWARRANTYRELATINGTO ITSPRODUCTS INCLUDING, BUT NOT LIMITED TO, THE IMPLIEDWARRANTYOF MERCHANTABILITY, FITNESSFOR APARTICULAR PURPOSE, OR NON-INFRINGEMENT. IN NOEVENT SHALLQUEST SOFTWAREBELIABLEFOR ANYDIRECT, INDIRECT, CONSEQUENTIAL, PUNITIVE, SPECIALOR INCIDENTALDAMAGES (INCLUDING,WITHOUT LIMITATION, DAMAGESFOR LOSSOF PROFITS, BUSINESS INTERRUPTIONORLOSSOF INFORMATION) ARISINGOUT OF THEUSEOR INABILITYTOUSETHISDOCUMENT, EVEN IF QUESTSOFTWAREHASBEEN ADVISEDOF THEPOSSIBILITYOF SUCHDAMAGES. Quest Softwaremakesno representationsorwarrantieswith respect to the accuracyor completenessof the contents of this document and reserves the right to make changes tospecificationsand product descriptionsat any time without notice. Quest Software doesnot make any commitment to update theinformation contained in this document.
If you have anyquestions regarding your potential use of thismaterial, contact:
Quest Software Inc.
Attn: LEGALDept
4 PolarisWay
Aliso Viejo, CA 92656
Refer to our Web site (www.quest.com) for regional and international office information.
PatentsQuest Software is proud of our advanced technology. Patents and pending patentsmayapply to this product. For themost currentinformation about applicable patents for this product, please visit our website at www.quest.com/legal.
TrademarksQuest, and theQuest logo are trademarksand registered trademarksof Quest Software Inc. in the U.S.A. and other countries. Fora complete list of Quest Software trademarks, please visit our website at www.quest.com/legal. All other trademarks, servicemarks,registered trademarks, and registered servicemarksare the property of their respective owners.
Legend
WARNING: A WARNING icon indicates a potential for property damage, personal injury, or death.
CAUTION: A CAUTION icon indicates potential damage to hardware or loss of data if instructionsare not followed.
IMPORTANT, NOTE, TIP, MOBILE, or VIDEO: An information icon indicates supporting information.
SharePlex Preinstallation ChecklistUpdated - 2/1/2017Version - 8.6.6
SharePlex 8.6 (8.6.6) Preinstallation Checklist 2

Contents
SharePlex preinstallation checklist 4Overview 4Network checklist 4Installer Checklist 6Unix and Linux system checklist 8Windows system checklist 11Oracle Database Checklist 12Open Target Checklist 16
Configure SharePlex in an Oracle cluster 20Overview of SharePlex Oracle cluster support 20Configure SharePlex in anOracle cluster 21
Assign SharePlex users to security groups 24Overview of SharePlex security groups 24Description of the SharePlex security groups 24
Create and populate SharePlex groups on Unix and Linux 25Create and populate SharePlex groups onWindows 26
About us 27Contacting Quest 27Technical support resources 27
SharePlex 8.6 (8.6.6) Preinstallation Checklist 3

1
SharePlex preinstallation checklistContents
OverviewNetwork checklistInstaller ChecklistUnix and Linux system checklistWindows system checklistOracle Database ChecklistOpen Target Checklist
OverviewReview and satisfy all of the requirements in this checklist before installing SharePlex or before your SharePlexconsultant arrives, if you have contracted with our Professional Services team.
NOTE: The requirements in this checklist apply to all source and target systems where SharePlex will beinstalled unless otherwise noted.
Network checklistRequirement Completed?
(Y/N)
Add SharePlex users and groups to the nameserver.If you are installing SharePlex in a network managed by a nameserver such as NIS orNISPLUS, do the following before you install SharePlex:
l Add SharePlex users to the nameserver.
l Add the SharePlex groups to the nameserver.
SharePlex 8.6 (8.6.6) Preinstallation ChecklistSharePlex preinstallation checklist
4

Requirement Completed?(Y/N)
The SharePlex security groups spadmin (administrator), spopr (operator), and spview(viewer) control access to SharePlex processes. Add each SharePlex user to one ofthese groups on the nameserver. The groups are described in Assign SharePlex users tosecurity groups
To add the user groups:
1. For NIS add the groups to the group.byname and group.bygid maps. ForNISPLUS, add them to the group.org_dir table.
2. Add the SharePlex Administrator user to the spadmin group on the nameserver.
3. Create the spadmin group in the /etc/group file (on Unix and Linux) or the UserAccounts control panel (Windows), and then add the SharePlex Administratoruser to the group.
To add SharePlex groups to the local system after you install SharePlex see AssignSharePlex users to security groups
Ensure that SharePlex can resolve host names.If you find that SharePlex cannot connect to a host, try mapping the host name to analphanumeric alias in the following locations:
l Network: The NIS and DNS servers
l Unix and Linux: Local /etc/hosts file
l Windows: Local hosts file
In these files, put each entry on an individual line. The following is an example, wheresysA and sysB are aliases:
111.22.33.44 sysA.company.com sysA # source system55.66.77.88 sysB.company.com sysB # target system
Verify the SharePlex port number.By default SharePlex uses the port number 2100 (hex equivalent is 834) for both TCP/IPand UDP. If port 2100 is available to SharePlex, no further action is needed. You willneed to enter the SharePlex port number during the installation procedure, at which timeyou can specify a different port number if needed.
NOTE: In Oracle 9.2.x, port 2100 is used by an Oracle XML daemon, so it cannot be usedby SharePlex.
IMPORTANT! The SharePlex port number must be the same one on all machines in thereplication configuration so that they can communicate through TCP/IP connections.Make certain the SharePlex port number is open for both TCP/IP and UDP on the firewall.
Verify TCP/IP settingsSharePlex replicates over any TCP/IP network connection. Typically, if all of the tables ina database are being replicated, SharePlex replicates about 33 percent of the redo logvolume, the remainder being mostly maintenance data used by the Oracle software. Thefollowing is a formula for determining bandwidth.
SharePlex 8.6 (8.6.6) Preinstallation ChecklistSharePlex preinstallation checklist
5
Requirement Completed?(Y/N)
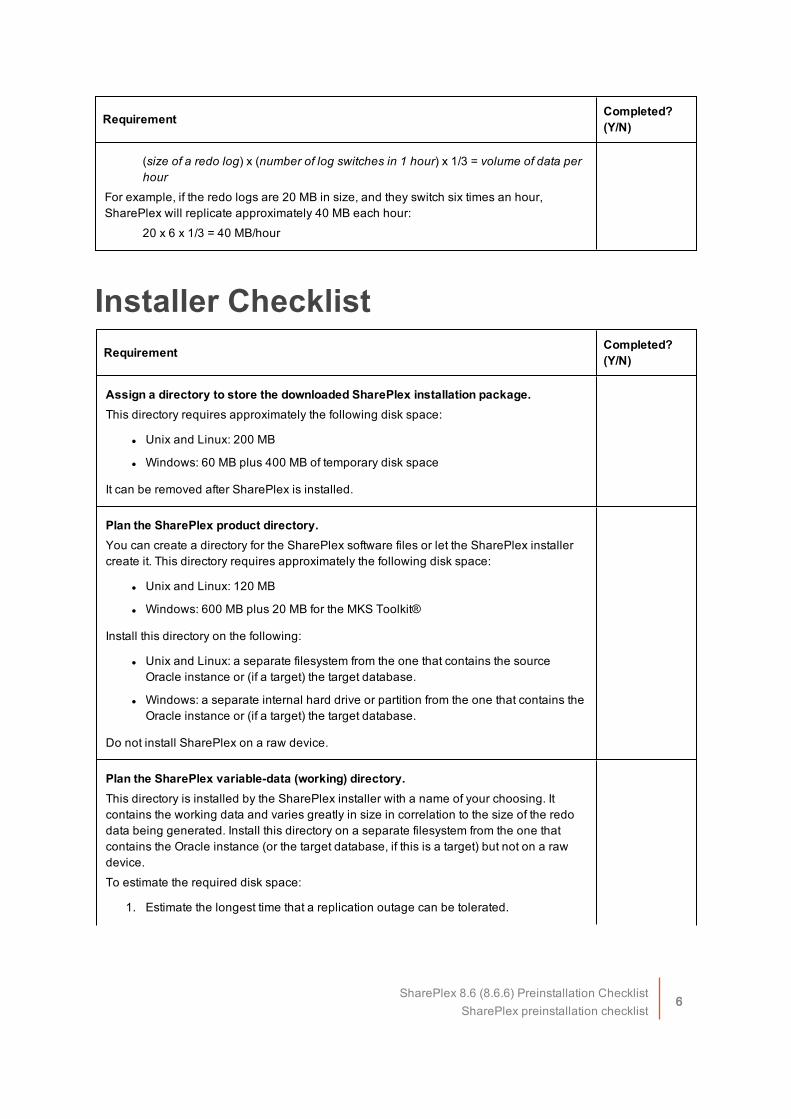
(size of a redo log) x (number of log switches in 1 hour) x 1/3 = volume of data perhour
For example, if the redo logs are 20 MB in size, and they switch six times an hour,SharePlex will replicate approximately 40 MB each hour:
20 x 6 x 1/3 = 40 MB/hour
Installer ChecklistRequirement Completed?
(Y/N)
Assign a directory to store the downloaded SharePlex installation package.This directory requires approximately the following disk space:
l Unix and Linux: 200 MB
l Windows: 60 MB plus 400 MB of temporary disk space
It can be removed after SharePlex is installed.
Plan the SharePlex product directory.You can create a directory for the SharePlex software files or let the SharePlex installercreate it. This directory requires approximately the following disk space:
l Unix and Linux: 120 MB
l Windows: 600 MB plus 20 MB for the MKS Toolkit®
Install this directory on the following:
l Unix and Linux: a separate filesystem from the one that contains the sourceOracle instance or (if a target) the target database.
l Windows: a separate internal hard drive or partition from the one that contains theOracle instance or (if a target) the target database.
Do not install SharePlex on a raw device.
Plan the SharePlex variable-data (working) directory.This directory is installed by the SharePlex installer with a name of your choosing. Itcontains the working data and varies greatly in size in correlation to the size of the redodata being generated. Install this directory on a separate filesystem from the one thatcontains the Oracle instance (or the target database, if this is a target) but not on a rawdevice.
To estimate the required disk space:
1. Estimate the longest time that a replication outage can be tolerated.
SharePlex 8.6 (8.6.6) Preinstallation ChecklistSharePlex preinstallation checklist
6

Requirement Completed?(Y/N)
2. Use the following formula to estimate the amount of data SharePlex wouldreplicate during that amount of time.
[size of a redo log] x [number of log switches per hour] x .333 x [number of hoursdowntime] = required disk space
For example:
[500 MB redo log] x [5 switches per hour] x [.333] x [8 hours] = 6.5 GB disk space
To replicate data from more than one database or Oracle instance on a system, use avariable-data directory for each one. Ideally they should be on different filesystems.
Do not install the variable-data directory within the SharePlex product directory. Bothdirectories contain identically named files, and SharePlex utilities that clean up theenvironment (if this becomes necessary) could remove the wrong files. You can installboth directories under one parent directory if desired.
NOTE: Always monitor disk usage when there is an active SharePlex configuration,especially when there are unexpected peaks in user activity.
Install on the correct node in a cluster (including Oracle RAC)Most shared storage solutions can be used to house SharePlex. Such file systemsinclude, but are not limited to:
l Oracle Cluster File System (OCFS2)
l Oracle Automatic Storage Management (ASM) Cluster File System (ACFS)
l Oracle DataBase File System (DBFS)
l OCFS2 NOTE: This file system must be mounted nointr. Both SharePlex andOracle report interrupt errors if nointr is not specified.
l Most general purpose cluster file systems
In a cluster, the SharePlex working files must be available to all nodes in a cluster tosupport seamless failover, as follows:
Unix and Linux:The SharePlex product and variable-data directories must be installed on ashared, non-raw disk, separate from any database files, that can be mounted onany cluster node.
Windows:Product directory:On Windows, SharePlex must be installed on all nodes of a cluster, on the sameport number, with identical path names. This is required to make the binaries andthe required MKS Toolkit components available to all nodes, and to establishRegistry entries. Quest recommends providing SharePlex with an internal harddrive or partition that is dedicated and separate from the database.
Variable-data directory:The SharePlex variable-data directory must be installed on a shared disk that canbe mounted on any Windows cluster node. The installer installs a variable-datadirectory on each node, but you will configure SharePlex to use the one on the
SharePlex 8.6 (8.6.6) Preinstallation ChecklistSharePlex preinstallation checklist
7

Requirement Completed?(Y/N)
shared disk during the post-installation procedure.
See Configure SharePlex in an Oracle cluster for additional SharePlex requirements in acluster. Many of those steps must be performed before you install SharePlex, whileothers are performed after installation.
Create the SharePlex security groups.SharePlex provides three security groups to enable access control through sp_ctrl. OnUnix and Linux, unless you install SharePlex as a root user, the SharePlex Administratoruser and the SharePlex admin group must exist prior to installation. See AssignSharePlex users to security groups.
NOTE: If you install as root, you are prompted by the installer to create these groups.
Choose a DBA-privileged operating system group to own SharePlex.The SharePlex Administrator user must be in the Oracle dba group. For Oracle RAC andASM 11gR2 and above, the user must also be in the Oracle Inventory group. Forexample: $ useradd –g spadmin –G dba,oinstall. The membership in Oracle Inventorygroup must be listed explicitly in the etc/group file.
Get a valid SharePlex license key.You must have a valid permanent or trial license key from Quest to run SharePlex. Theinstaller prompts for the license key and the text string in the Site Message that QuestSoftware provides with the license.
The current license model for SharePlex is to license for a specific host, which dependingon edition is licensed by core(s) or socket(s) and specific message repository (i.e.database, JMS/text files) etc. Specifics of license terms should be obtained from youraccount manager.
Unix and Linux system checklistRequirement Completed?
(Y/N)
Confirm that the platform is supported.See the SharePlex Release Notes for supported operating system platforms.
Allocate at least 4 GB of memory for SharePlex processes.Plan for per-process memory up to 256 MB. This recommendation enables the Post andRead processes to allocate larger sets of memory when necessary.
Disable the disk cache option.(Source system) Place the redo logs, archive logs, and SharePlex files on a file systemthat does not have a cache option. Disk caching may interfere with the capture process.
SharePlex 8.6 (8.6.6) Preinstallation ChecklistSharePlex preinstallation checklist
8

Requirement Completed?(Y/N)
For more information, see the SharePlex Knowledge Base article 30895.
Set the number of semaphores per process.Semaphores help ensure the stability of the SharePlex processes. The requiredSharePlex settings depend on the platform, as follows:
HP-UX:
l semmnu: 255
l shmmax: 60 MB
Oracle Solaris:
l semmni: 70
l semmns: 255
l semmnu: 255
l semmsl: 128
l semume: 255
l shmmax: 60 MB
l shmmni: 100
Red Hat Linux:
l semmni*: 70
l semmns*: 255
l semmnu: 255
l semmsl: 128
l semopm: 64
l semume: 255
l shmmax: 60 MB
l shmmin: 1MB
l shmmni: 100
l shmseg: 26
*These are additive. Add the Oracle minimum values to the SharePlex minimumvalues to determine the correct setting.
An alternative is to set the value to the number of queues you will be using plus 2. Formore information about SharePlex queues, see the SharePlex Administrator Guide.
Set the ulimit (number of system file descriptors) to as close to 1024 as possible.The ulimit can be set either as a system hard limit or a session-based soft limit, asfollows:
SharePlex 8.6 (8.6.6) Preinstallation ChecklistSharePlex preinstallation checklist
9

Requirement Completed?(Y/N)
l Set a hard limit: (Recommended) A root user and system restart are required tochange the hard limit, but the value remains fixed at the correct level to supportSharePlex. Consult your System Administrator for assistance.
l Set a soft limit: A soft limit setting stays in effect only for the duration of the sp_copsession for which it was set, and then it reverts back to a default value that may belower than the hard limit and too low for SharePlex.
Set core file parameters.
l Set the system core dump block size as large as system resources canaccommodate, at minimum 1.5 million blocks. The default is usually 0. Core fileshelp Quest support representatives resolve SharePlex support cases. Higher sizesettings ensure that enough data is captured to be useful.
l Set the core file output location to the dump sub-directory of the SharePlexvariable-data directory.
l Set the naming convention of core files to either core or core.pid.NOTE: SharePlex renames all core files named core to core.pid, except for thosegenerated by sp_cop.
If these requirements are not met, the SharePlex event log might report that a core filewas not generated, even though a file exists.
Install the ksh shell.Install the ksh shell before you install SharePlex. The SharePlex monitoring scripts andother features required this shell.
A version of ksh called pdksh is included with the Red Hat Linux builds. Refer to the RedHat Linux documentation for more information.
Install Native POSIX Threading Library (NPTL)Quest recommends using the Native POSIX Threading Library (NPTL) on Linux. NPTL isfaster and behaves more like other Unix operating systems than LinuxThreads. AlthoughLinuxThreads can be enabled per process by using the LD_ASSUME_KERNELenvironment variable, setting that variable adversely affects the performance ofSharePlex. If LD_ASSUME_KERNEL is employed, use a setting of 2.4.21.
Set the UNIX account that installs SharePlex to -rwsr-s--x using set-user-id.The value of -rwsr-s--x enables the database setup utility (ora_setup) to connect to anOracle database through SQL*Plus to install the SharePlex database account andobjects that supports replication. The UNIX account that installs SharePlex owns thisprogram. The program is located in the bin subdirectory of the SharePlex installationdirectory.
(Debian Linux)Create a symbolic link to the /lib64/libc.so.6 library path.On Debian Linux, the /libc.so.6 library files are not in the /lib64/libc.so.6 location that
SharePlex 8.6 (8.6.6) Preinstallation ChecklistSharePlex preinstallation checklist
10

Requirement Completed?(Y/N)
SharePlex expects. Before installing SharePlex on Debian Linux, create a symbolic linkto /lib64/libc.so.6.
(Oracle Database) Configure the oratab file.Make sure that the correct ORACLE_SID and ORACLE_HOME values are explicitly listedin the oratab file. SharePlex refers to this file to set its environment.
On Sun machines, SharePlex only uses the oratab file that is in the /var/opt/oracledirectory. If there is a copy of the oratab file in the /etc directory ensure that this file isidentical to the one in the /var/opt/oracle directory.
Windows system checklistRequirement Completed?
(Y/N)
Confirm that the Windows version is supported.See the SharePlex Release Notes for supported Windows versions.
Address FAT security issues.The SharePlex user groups determine who can control the SharePlex processes. Thesegroups only function as designed on an NTFS partition. A FAT partition lacks file security,and any user who logs onto a FAT partition has full control of SharePlex.
If SharePlex must be installed on a FAT partition, allow the SharePlex admin group to login locally, and allow the spopr and spview groups to log in remotely only. Remote loginsto a FAT partition preserve group assignments. For more information about SharePlexsecurity groups, see Assign SharePlex users to security groups.
Be prepared to restart the system.On the Windows platform, SharePlex installs the MKS Toolkit® operating environmentfrom Parametric Technology Corporation (PTC). The default folder for the MKS Toolkit®is C:\Program Files\MKS Toolkit.Set system permissions so that the MKS Toolkit files cannot be moved or removed afterthey are installed.
For more information about the MKS Toolkit, see Appendix C: SharePlex installed itemsin the SharePlex Installation Guide. If this is a first-time MKS Toolkit installation, you willbe prompted to restart the system.
Some restarts are required after installation.
Adjust the page size.SharePlex needs an additional 200 MB of page file size if more than 80 percent of thecurrent total page file size is being used. Greater page size enables SharePlex toprocess large transactions more quickly.
SharePlex 8.6 (8.6.6) Preinstallation ChecklistSharePlex preinstallation checklist
11

Requirement Completed?(Y/N)
Assign a user who will own the SharePlex directories.Assign a member of the Windows Administrator group to own the SharePlex installationand variable-data directories. This user must exist before you run the SharePlex installerand must have system privileges to read the Oracle redo logs.
(Oracle Database) Verify the Oracle Registry entries.(Test machines only) On machines where Oracle has been installed and uninstalledmany times, the Oracle entries in the Registry may be corrupted. Before you installSharePlex on a test machine, uninstall all Oracle software and delete all Oracle Registryentries. Then, re-install Oracle by using the Oracle installation program, which createsRegistry entries correctly. SharePlex relies on these entries to obtain databaseenvironment information.
(Oracle Database) Set ORACLE_HOME as the first entry in the PATH variable.SharePlex expects the path to the Oracle binaries to be the first entry in the WindowsPATH system variable. Change the variable, if needed, and verify that the path is correct.
Oracle Database ChecklistRequirement Completed?
(Y/N)
Perform any required database upgrades.Perform any required database upgrades before you install SharePlex. This ensures thatSharePlex gets the most current object definitions when you run Database setup duringthe installation and setup steps.
Confirm the Oracle release version and processor type.(Oracle source and target databases)
l Verify that the Oracle release version is supported by SharePlex. See the SystemRequirements in the SharePlex Release Notes for more information.
l Confirm that the database is a 64-bit version. SharePlex does not support 32-bitOracle versions.
Enable supplemental logging.(Oracle source databases)SharePlex requires the minimum level of supplemental logging to be enabled. If you areinstalling SharePlex in a cluster, enable the logging on all nodes. Some SharePlexfeatures require the logging of primary key values. For more information aboutconfiguring Oracle logging, see Set up Oracle redo logging to support SharePlex in theSharePlex Administration Guide.
SharePlex 8.6 (8.6.6) Preinstallation ChecklistSharePlex preinstallation checklist
12

Requirement Completed?(Y/N)
(Recommended) Enable the logging of primary and unique keys.(Oracle source databases)To eliminate the need for SharePlex to query the database for key values, it isrecommended that you enable supplemental logging of primary and unique keys.Making a query to obtain key values adds overhead that reduces the performance of theRead process.
See the following topics in the SharePlex Administration Guide for additional information:
l Set up Oracle database objects for replication
l Set up Oracle redo logging to support SharePlex
Set privileges to capture TDE-protected data.(Oracle source databases)To decrypt TDE-protected data from the redo log, the SharePlex Administrator must openthe Oracle Wallet with the wallet password. By default, only the Oracle Wallet owner-userhas read and write permissions for this file. To enable SharePlex to open the wallet, youcan either of the following:
Grant read permission to the wallet file to the dba group, because the SharePlexAdministrator user is a member of that group.
Or...
Have the owner of the wallet start SharePlex.
For more information about configuring SharePlex to support TDE, see Set up TDESupport in the SharePlex Administration Guide.
Check the redo log location on ASM(Oracle source databases)If the database uses ASM, the Oracle redo logs (online and archive) cannot be locatedunder the ASM root directory.
Plan the SharePlex Oracle account.(Oracle source and target databases)During SharePlex installation, you will run a database setup utility named ora_setup tocreate a database account (user and schema) for SharePlex. The following is a list ofprivileges required for the database user who runs the this utility:
Non-multitenant (standard) databaseThe user who runs the setup utility must have DBA privileges, but if support for TDE isrequired, then this user must have SYSDBA privileges.
Multitenant databaseThe user who runs the setup utility should have SYSDBA privileges (recommended), butat minimum the user should be a DBA user with privileges for sys.users$ and sys.enc$.The minimum following grants are required for the SharePlex user:
SharePlex 8.6 (8.6.6) Preinstallation ChecklistSharePlex preinstallation checklist
13

Requirement Completed?(Y/N)
create user c##sp_admin identified by sp_admin;
grant dba to c##sp_admin container=ALL;
grant select on sys.user$ to c##sp_admin with grant optioncontainer=ALL;
If TDE support is required for the CDB, then the following additional priviledge isrequired:
grant select on sys.enc$ to c##sp_admin with grant optioncontainer=ALL;
Plan the SharePlex objects tablespace.(Oracle source and target databases)The setup utility installs some tables into a tablespace of your choosing. All but theSHAREPLEX_LOBMAP table use the default storage settings of the tablespace.
The SHAREPLEX_LOBMAP table contains entries for LOBs stored out-of-row. It iscreated with a 1 MB INITIAL extent, 1 MB NEXT extent, and PCTINCREASE of 10. TheMAXEXTENTS is 120, allowing the table to grow to 120 MB.
The default storage usually is sufficient for SHAREPLEX_LOBMAP, permitting more than4 million LOB entries. If the Oracle tables to be replicated have numerous LOB columnsthat are inserted or updated frequently, consider increasing the size the SharePlextablespace accordingly. Take into account that this table shares the tablespace with otherSharePlex tables.
If the database uses the cost-based optimizer (CBO) and the tables that SharePlexprocesses include numerous LOBs, incorporate the SHAREPLEX_LOBMAP table intothe analysis schedule.
NOTE: A new installation of SharePlex does not change storage parameters from aprevious installation.
Plan the SharePlex temporary tablespace.(Oracle source and target databases)The setup utility prompts for a temporary tablespace for SharePlex to use for sorts andother operations, including sorts performed by the compare commands. The defaulttemporary tablespace is the one where the SharePlex objects are installed. If you plan touse the compare commands to compare large tables, especially those without a primaryor unique key, specify a dedicated temporary tablespace for SharePlex. For moreinformation about the compare command, see the SharePlex Reference Guide.
Plan for theSharePlexindex tablespace.(Oracle source and target databases)The setup utility prompts for a tablespace to store the indexes for the SharePlex tables.The default index tablespace is the one where the SharePlex objects are installed. Tominimize I/O contention, specify a different index tablespace from the one where thetables are installed.
NOTE: If indexes from a previous version of SharePlex are installed in the SharePlex
SharePlex 8.6 (8.6.6) Preinstallation ChecklistSharePlex preinstallation checklist
14

Requirement Completed?(Y/N)
objects tablespace, you can move them to a different tablespace and then specify thattablespace when you run the setup utility.
Install the Oracle client.(Oracle source and target databases)The Oracle client libraries are needed both for installation and setup as well as for theoperation of SharePlex.
Consider character sets(Oracle source and target databases)For SharePlex to replicate all characters within the Oracle character sets that you areusing, one of the following must be true:
l The character sets are identical on the source and target
l The character set of the source database is a subset of the character set of thetarget database (all characters contained on the source exist in the character setof the target)
For more information about how character set conversion is handled and how to applydata without conversion, see Set up an Oracle database to support SharePlex inSharePlex Administration Guide.
Check the log buffer size.(Oracle target database)The number of database writers has an impact on replication, especially when there arenumerous concurrent transactions. Whenever a transaction is committed, its buffereddata is flushed to disk. If most transactions are small, but the buffer is large, this cancause slow posting. When a large transaction is committed while another, more normal-sized transaction is committed, the second COMMIT must wait while the entire buffer isflushed to disk.
Reducing the size of the buffer that is flushed to disk can speed the Post process. Trydecreasing the size of the log buffer to 1024 KB, or even 512 KB if possible.
Adjust the SHAREPLEX_TRANS table(Oracle target database)SharePlex updates the SHAREPLEX_TRANS table to maintain read consistency for thetarget database. You might need to adjust the initrans setting of this table to improvereplication performance and reduce contention on that table:
l If the production database has between 500 and 1,000 concurrent users, rebuildthe SHAREPLEX_TRANS table to have an initrans of 30.
l If the production database has more than 1,000 concurrent users, rebuild theSHAREPLEX_TRANS table to have an initrans value of 40.
Set the Oracle PROCESSES, SESSIONS, and OPEN_CURSPRS parameters.
SharePlex 8.6 (8.6.6) Preinstallation ChecklistSharePlex preinstallation checklist
15
Requirement Completed?(Y/N)
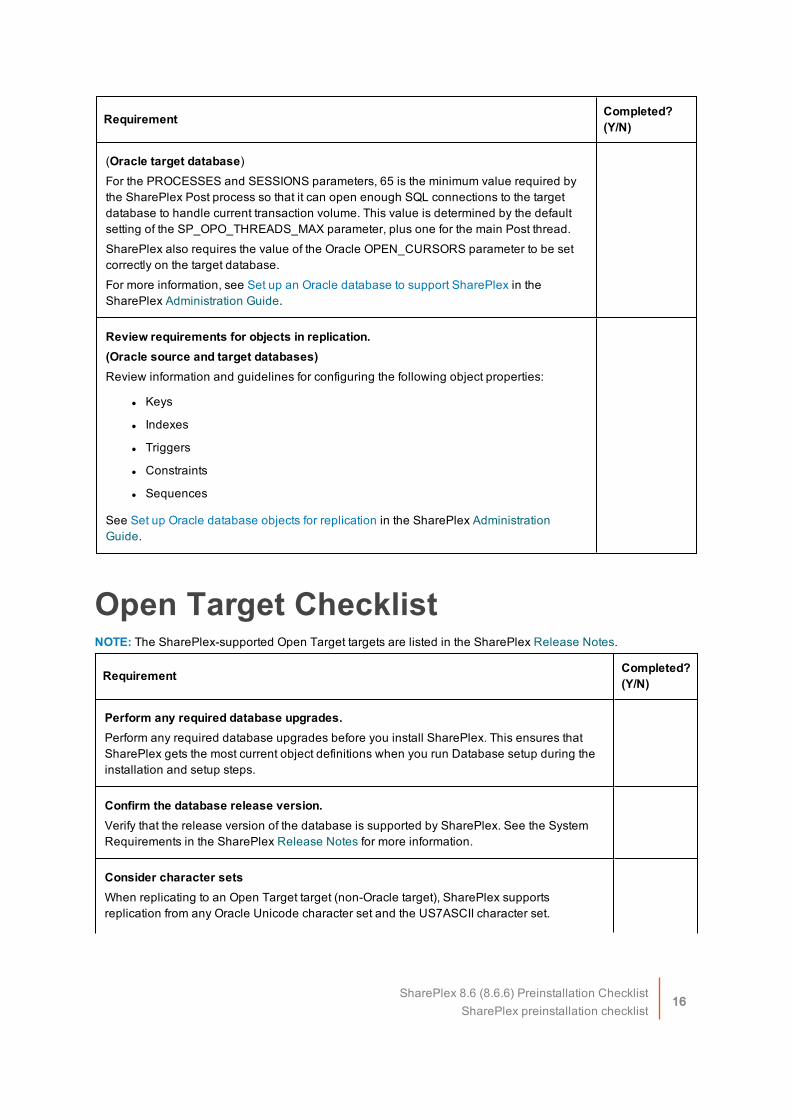
(Oracle target database)For the PROCESSES and SESSIONS parameters, 65 is the minimum value required bythe SharePlex Post process so that it can open enough SQL connections to the targetdatabase to handle current transaction volume. This value is determined by the defaultsetting of the SP_OPO_THREADS_MAX parameter, plus one for the main Post thread.
SharePlex also requires the value of the Oracle OPEN_CURSORS parameter to be setcorrectly on the target database.
For more information, see Set up an Oracle database to support SharePlex in theSharePlex Administration Guide.
Review requirements for objects in replication.(Oracle source and target databases)Review information and guidelines for configuring the following object properties:
l Keys
l Indexes
l Triggers
l Constraints
l Sequences
See Set up Oracle database objects for replication in the SharePlex AdministrationGuide.
Open Target ChecklistNOTE: The SharePlex-supported Open Target targets are listed in the SharePlex Release Notes.
Requirement Completed?(Y/N)
Perform any required database upgrades.Perform any required database upgrades before you install SharePlex. This ensures thatSharePlex gets the most current object definitions when you run Database setup during theinstallation and setup steps.
Confirm the database release version.Verify that the release version of the database is supported by SharePlex. See the SystemRequirements in the SharePlex Release Notes for more information.
Consider character setsWhen replicating to an Open Target target (non-Oracle target), SharePlex supportsreplication from any Oracle Unicode character set and the US7ASCII character set.
SharePlex 8.6 (8.6.6) Preinstallation ChecklistSharePlex preinstallation checklist
16

Requirement Completed?(Y/N)
SharePlex posts data to Open Target in the Unicode character set, and therefore if thesource data is Unicode or US7ASCII, no conversion on the target is required.
However, if the following are true, conversion is required on the target:
l If the character set of the source data is anything other than Oracle Unicode orUS7ASCII, you must install an Oracle client on the target to perform the conversion toUnicode for posting to the target.
l If the data must be posted to the target database in any character set other thanUnicode, you must install an Oracle client on the target to perform the conversion anduse the target command to identify the target character set for Post to use. See theSharePlex Reference Guide for more information about this command.
To perform conversion with an Oracle client on Linux
1. Install an Oracle Administrator client on the target system. The client must be theAdministrator installation type. The Instant Client and Runtime installation types arenot supported.
2. Set ORACLE_HOME to the client installation. Set ORACLE_SID to an alias or a non-existing SID. SharePlex does not use them and a database does not have to berunning.
3. Download the Oracle-based SharePlex installer, rather than the Open Targetinstaller, to install SharePlex on the target system. The Oracle-based installerincludes functionality that directs Post to use the conversion functions from the Oracleclient library to convert the data before posting to the target database.
4. Follow the instructions for installing SharePlex for Oracle (not the ones for installingon Open Target).
5. Make certain the SP_OPX_NLS_CONVERSION parameter is set to the default of 1.
To perform conversion with an Oracle client on Windows
1. Install an Oracle Administrator client on the target system. The client must be theAdministrator installation type. The Instant Client and Runtime installation types arenot supported.
2. In the SharePlex Registry key \HKEY_LOCAL_MACHINE\SOFTWARE\Wow6432Node\QuestSoftware\SharePlex\port_number, setORACLE_HOME to the Oracle client installation location, and set ORACLE_SID to analias or a non-existing SID. No Oracle database is required. SharePlex only needs touse the client libraries.
3. Install SharePlex using the Windows installer.
4. Make certain the SP_OPX_NLS_CONVERSION parameter is set to the default of 1.
To apply Unicode and US7ASCII data without conversionIf the source data is Unicode or US7ASCII and you are not replicating LOB data, noconversion or Oracle client is needed. Set the SP_OPX_NLS_CONVERSION parameter to 0to disable conversion, and then restart Post if it is running.
SharePlex 8.6 (8.6.6) Preinstallation ChecklistSharePlex preinstallation checklist
17

Requirement Completed?(Y/N)
Install the appropriate ODBC driver.Verify that the appropriate ODBC driver is installed for your target, and install one if there isnot one present.
For Microsoft SQL Server, make certain to do the following:
Install the Microsoft SQL Server ODBC Driver. It must be that driver, not the Microsoft SQLServer Native Client, or SharePlex will return an error when you run mss_setup toconfigure Post to connect to the database. To tell the difference between the two drivers:
l The Microsoft SQL Server ODBC Driver has versions such as 06.02.9200.
l The Microsoft SQL Server Native Client has versions such as 11.00.3513.
To test a driver with SharePlex you can use the OTS utility. You can use a standaloneversion of this utility before you install SharePlex, or you can run the utility from theinstallation directory after you install SharePlex. See the OTS documentation in theSharePlex Reference Guide for more information. NOTE: SharePlex is already certified towork through ODBC with SQL Server, PostgreSQL, and Sybase targets.
Enable case sensitivity on key columnsEnable case-sensitivity for the data of any character-based primary key columns or columnsthat form a unique index. This ensures that Post compares the correct source and target keyvalues so that it updates the correct target row and prevents unique constraint errors. Unlessthe key values are case sensitive, cases like the following can happen:
Create table Sales (CustName varchar(20) primary key);
insert into Sales values (‘abc company’);
(Succeeds)
insert into Sales values (‘ABC Company’);
(Fails with unique constraint violation error)
Disable triggers on the target tables.Triggers must be configured to ignore Post operations.
To get additional informationAdditional post-installation setup steps are required to support Open Target databasetargets. See the SharePlex Administration Guide for instructions on setting up an OpenTarget database after you install SharePlex.
(SQL Server) Configure a System Data Source NameCreate a System (not User) Data Source Name (DSN) for the SQL Server database on theWindows system. The DSN can use either Windows NT authentication or SQL Serverauthentication. If you configure the DSN to use NT authentication and are using SQLServer 2012 or later, grant the NTAuthority\SYSTEM user the sysadmin fixed server role. ( For earlier versions of SQL Server, sysadmin is granted to the NT Authority\SYSTEM userby default.)
SharePlex 8.6 (8.6.6) Preinstallation ChecklistSharePlex preinstallation checklist
18

Requirement Completed?(Y/N)
Test connection to the database through this DSN.
SharePlex 8.6 (8.6.6) Preinstallation ChecklistSharePlex preinstallation checklist
19

2
Configure SharePlex in an Oraclecluster
ContentsOverview of SharePlex Oracle cluster supportConfigure SharePlex in an Oracle cluster
Overview of SharePlex Oracle clustersupportSharePlex integrates with Oracle Clusterware cluster hardware and software to maintain the high availability ofdata capture and uninterrupted replication to your targets. If the node where SharePlex is running fails or mustbe taken out of the cluster for maintenance, SharePlex can be started on another server by the cluster software.SharePlex start and stop is controlled through the cluster.
These instructions assume that the cluster solution is already installed, tested, and is functioning, and they arenot a substitute for the cluster vendor's documentation. Additional steps that are specific to your clusterinstallation may be required.
The following diagram shows SharePlex installed into an Oracle RAC cluster:
SharePlex 8.6 (8.6.6) Preinstallation ChecklistConfigure SharePlex in an Oracle cluster
20

Configure SharePlex in an Oraclecluster
1. Ask your system administrator for an IP address on the public subnet (not configured through DHCP) thatwill serve as the Virtual IP (VIP) for SharePlex. The VIP must be able to resolve to the active node uponfailover. The cluster software maps the VIP to the SharePlex server and migrates it during a failover.
2. Set the VIP for SharePlex in the system environment on each node.
l Unix and Linux: export SP_SYS_HOST_NAME=VIP_address
l Windows: In the Windows Registry, set the SP_SYS_HOSTNAME entry under HKEY_LOCAL_MACHINE/SOFTWARE/Wow6432Node/QuestSoftware/SharePlex/port#. Create this entry if itdoes not exist.
3. Map a host alias to the virtual IP address in the /etc/hosts file (on Unix and Linux) or the hosts file (onWindows) on all nodes to establish a consistent host name across all nodes in the cluster. The alias isexported in the SharePlex user profile and used in the SharePlex configuration parameters.Alternatively, this mapping can be done in a nameserver. The alias cannot contain non-alphanumericcharacters, such as underscores ( _ ) or dots (.). For example:
1.0.1.6 LocalSys #permanent IP address
1.0.1.7 HACluster #floating IP address
SharePlex 8.6 (8.6.6) Preinstallation ChecklistConfigure SharePlex in an Oracle cluster
21

4. Create the same tns_alias name for SharePlex to use to connect to the database on each node. Atns_alias establishes global connection information that supercedes local instance names andenables SharePlex to connect to the failover instance without requiring a configuration reactivation.SharePlex identifies the correct Oracle instance from the configuration file. Set load balance to off andset failover to on.
NOTE: Set load balance to off and set failover to on. (Load balancing cannot be enabled duringthe activation of a SharePlex configuration. A workaround is to disable load balancing beforeactivation and then enable it after activation.)
SPLEX =(DESCRIPTION =(ADDRESS_LIST =
(ADDRESS = (PROTOCOL = TCP)(HOST = RAC1)(PORT = 1521))(ADDRESS = (PROTOCOL = TCP)(HOST = RAC2)(PORT = 1521))
)(LOAD_BALANCE = OFF)(FAILOVER = ON)(CONNECT_DATA =(SERVICE_NAME = ORCL)))
5. Add this tns_alias to the oratab file on each cluster node that SharePlex is expected to start onduring a failover.
6. If the Oracle instances in the cluster have different ORACLE_HOMEs, edit the oratab file on each nodeand on the nameserver, if applicable, to use a symbolic link in place of the actual ORACLE_HOME path:
SID:/path_to_symbolic_link:N
7. Install SharePlex according to the installation instructions for the platform you are using.
NOTE THE FOLLOWING:
l See the Installer Checklist for important information about where to install SharePlex in a cluster.
l Make certain to install a SharePlex license on each node in the cluster.
l When you run the database setup utility (ora_setup), reply No to the prompt for a BEQUEATHconnection. This response generates a prompt for a tns_alias. Supply the tns_alias that youcreated in the previous steps.
Will SharePlex install be using a BEQUEATH connection? No
Enter the TNS alias for which SharePlex should be installed: SPLEX
NOTE: On Windows, SharePlex must be installed on all nodes of a cluster, on the same portnumber, with identical path names. This is required to make the binaries and the required MKSToolkit components available to all nodes, and to establish Registry entries. Additionally,Database Setup must be run on each node after installation.
SharePlex 8.6 (8.6.6) Preinstallation ChecklistConfigure SharePlex in an Oracle cluster
22

8. Incorporate SharePlex into the cluster failover routines so that it migrates with the other applicationsduring failover and so the sp_cop process is started on the adoptive node by the cluster software. Atminimum, this includes creating a startup script for SharePlex and a cluster script for SharePlex tohandle failover. Note the following:
l The sp_cop program is the only process that the cluster software should start. The sp_copprocess must be allowed to start the other SharePlex processes. All SharePlex processes, exceptsp_cop, can be controlled through the sp_ctrl interface.
l Do not attempt to start or stop sp_cop yourself through the command interface; otherwisethe cluster software will attempt to restart it. If you need to stop sp_cop, use the clustersoftware commands.
l If possible, configure SharePlex and Oracle into a single global cluster package. Thecombination of SharePlex and Oracle in the same package allows the cluster software to startand stop SharePlex and Oracle in the proper sequence if any component of the package fails.Configure Oracle to start before SharePlex.
l Assistance for creating startup and cluster scripts is available through SharePlex Professional(PSO) Services.
9. Use the SharePlex tns_alias in the datasource portion of the configuration file if this is a sourceSharePlex instance or in the routing map if this is a target SharePlex instance:
datasource:o.tnsalias
or...myhost@SPLEX
10. Make certain your systems administrators understand that any changes or upgrades they perform to theoperating system on any node in the cluster must be implemented on all nodes in the cluster so thatSharePlex fails over to an identical environment.
11. See Set up SharePlex in a Windows cluster for additional post-installation requirements forWindows clusters.
SharePlex 8.6 (8.6.6) Preinstallation ChecklistConfigure SharePlex in an Oracle cluster
23

3
Assign SharePlex users to securitygroups
The SharePlex security groups provide access control to the SharePlex command and control system. Withoutproper configuration of these groups, anyone with permissions on the system can use the commands that view,configure, and control data replication.
ContentsOverview of SharePlex security groupsCreate and populate SharePlex groups on Unix and LinuxCreate and populate SharePlex groups on Windows
Overview of SharePlex security groupsTo monitor, control, or change SharePlex replication, a person must be assigned to one of the SharePlexsecurity groups on the systems where he or she will be issuing commands. Each group corresponds to anauthorization level, which determines which SharePlex commands a person can issue. To execute a command,a user must have that command’s authorization level or higher.
Use the authlevel command to determine your authorization level for issuing SharePlex commandson a system.
Description of the SharePlex security groupsRefer to the following table to determine the group and authorization level that you want to grant eachSharePlex user.
SharePlex 8.6 (8.6.6) Preinstallation ChecklistAssign SharePlex users to security groups
24

User Authorization Levels and Roles
Authlevel
User type Usergroup
User roles
1 Administration spadmin* You need at least one user with Administrator rights on each source andtarget system.
Can issue all SharePlex commands. Commands that can only be issuedby a SharePlex Administrator are:
l startup, shutdown
l all configuration commands relating to an active configuration
l all parameter commands except list param
l start capture
l stop capture
l abort capture
l truncate log
The SharePlex Administrator user must be in the Oracle dba group. ForOracle RAC and ASM 11gR2 and above, the user must also be in theOracle Inventory group. For example: $ useradd –g spadmin –Gdba,oinstall. The membership in Oracle Inventory group must be listedexplicitly in the etc/group file.
On Unix and Linux, unless you install SharePlex as a root user, theSharePlex Administrator user and the SharePlex admin group must existprior to installation.
2 Operator spopr Can issue all SharePlex commands except those listed above.
3 Viewer spview Can view lists, status screens, and logs to monitor replication only.
NOTE: The default name for the SharePlex administrator group is spadmin, but you can designate any group orspecify any name for that group during installation.
Create and populate SharePlex groupson Unix and LinuxWhere and when to create the SharePlex groups on Unix and Linux depends on whether you install SharePlexas a root or non-root user.
l If you install as non-root, create the groups in the /etc/group file before you run the SharePlex installer.In a cluster, create them on all nodes.*
l If you install SharePlex as a root user, you can direct the installer to create the groups in the /etc/groupfile. If you install in a cluster, the installer creates the groups on the primary node, but you must createthem yourself on the other nodes.
SharePlex 8.6 (8.6.6) Preinstallation ChecklistAssign SharePlex users to security groups
25

* The groups must exist because the installer adds the SharePlex Administrator user to the spadmingroup during the installation process. In a cluster, this user is only added to the primary node. You mustadd the SharePlex Administrator user to the other nodes.
To create the groups in /etc/group# groupadd spadmin# groupadd spopr# groupadd spview
To assign a user to a group
1. Open the /etc/group file.
2. Add the Unix or Linux user name to the appropriate group. To assign a list of user names to a group, usea comma-separated list (see the following example).
spadmin:*:102:spadmin,root,jim,jane,joyce,jerry
If the password field is null, no password is associated with the group. In the example, the asterisk (*)represents the password, “102” represents the numerical group ID, and spadmin is the group. The groupID must be unique.
3. Save the file.
Users can verify their authorization levels by issuing the authlevel command in sp_ctrl.
Create and populate SharePlexgroups on WindowsOn Windows, the SharePlex groups are created in the Windows User Accounts control panel by the SharePlexinstaller. To assign users to these groups, use that control panel after you install SharePlex.
Users can verify their authorization levels by issuing the authlevel command in sp_ctrl.
SharePlex 8.6 (8.6.6) Preinstallation ChecklistAssign SharePlex users to security groups
26

About us
We are more than just a nameWe are on a quest to make your information technology work harder for you. That is why we build community-driven software solutions that help you spend less time on IT administration and more time on businessinnovation. We help you modernize your data center, get you to the cloud quicker and provide the expertise,security and accessibility you need to grow your data-driven business. Combined with Quest’s invitation to theglobal community to be a part of its innovation, and our firm commitment to ensuring customer satisfaction, wecontinue to deliver solutions that have a real impact on our customers today and leave a legacy we are proud of.We are challenging the status quo by transforming into a new software company. And as your partner, we worktirelessly to make sure your information technology is designed for you and by you. This is our mission, and weare in this together. Welcome to a new Quest. You are invited to Join the Innovation.
Our brand, our vision. Together.Our logo reflects our story: innovation, community and support. An important part of this story begins with theletter Q. It is a perfect circle, representing our commitment to technological precision and strength. The space inthe Q itself symbolizes our need to add the missing piece — you — to the community, to the new Quest.
Contacting QuestFor sales or other inquiries, visit www.quest.com/company/contact-us.aspx or call +1 949 754-8000.
Technical support resourcesTechnical support is available to Quest customers with a valid maintenance contract and customers who havetrial versions. You can access the Quest Support Portal at https://support.quest.com.
The Support Portal provides self-help tools you can use to solve problems quickly and independently, 24 hoursa day, 365 days a year. The Support Portal enables you to:
l Submit and manage a Service Request
l View Knowledge Base articles
l Sign up for product notifications
l Download software and technical documentation
l View how-to-videos
SharePlex 8.6 (8.6.6) Preinstallation ChecklistAbout us
27

l Engage in community discussions
l Chat with support engineers online
l View services to assist you with your product
SharePlex 8.6 (8.6.6) Preinstallation ChecklistAbout us
28