Scratch Lessons: - Scrolling Background - TECHBRARIAN
12
1 Scratch Lessons: Scrolling Background 1. Let’s begin by creating a variable called “scrollX”. This will signal the different backgrounds how to scroll. Choose the “Variables” category and click “Make a Variable”. Name the variable “Scroll X”. 2. Drag “set ScrollX to 0” under a “When green flag is clicked” code block. A A
-
Upload
khangminh22 -
Category
Documents
-
view
0 -
download
0
Transcript of Scratch Lessons: - Scrolling Background - TECHBRARIAN

1
Scratch Lessons: Scrolling Background
1. Let’s begin by creating a variable called “scrollX”. This will signal the different backgrounds how to scroll. Choose the “Variables” category and click “Make a Variable”. Name the variable “Scroll X”.
2. Drag “set ScrollX to 0” under a “When green flag is clicked” code block.
A
A

2
4. Our goal is to have the background scroll left everytime our player moves right and the background scroll left evertime the player moves left-- why? Because that way it looks like the background is moving past our player. The code will be forever if the right arrow is pressed change scrollX by -10 and if the left arrow is pressed, change scrollX by 10.
3. Make sure your player is in front of the background by clicking on the “Looks” catergory and dragging “go to front” below “set scrollX to 0”.
A
A

3
5. Next, create a new sprite. This will be your first background. Paint a scene from your life in New York where DRAMA occurs. For example, your room, the park, classroom, shop, or a bodega. OR, better yet, im-port an image from SketchUp.
- OR -
A
B
4
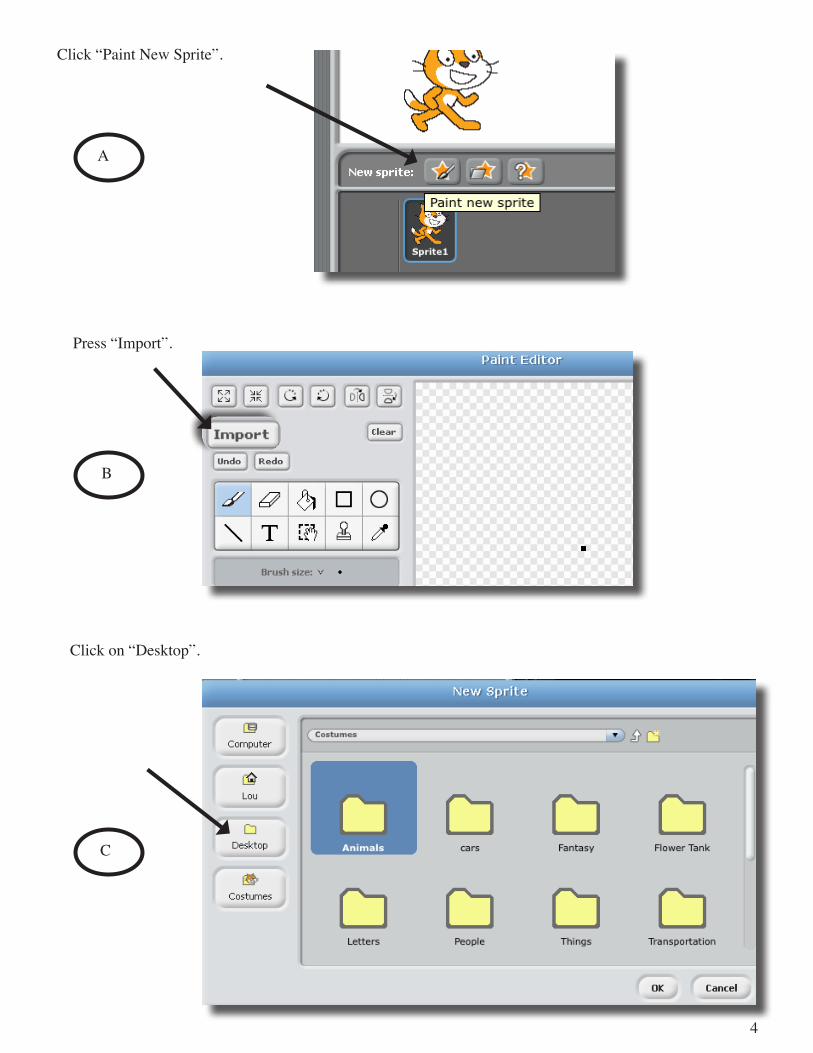
Click “Paint New Sprite”.
Press “Import”.
Click on “Desktop”.
A
B
C

5
Click on “Dropbox” and locate an image you created in SketchUp (when you did File --> Export--> 2D).
Find your grade and name. Double click on a background you created.
D
E

6
Click “Grow” once so that the image fits perfectly into the screen. Then click “OK”
6. Change the name Sprite2 into “background1”. Next drag “When green flag is clicked” “set y to 0” . This makes sure that the background is vertically centered.
F
A

7
7. Before we take on the next step of telling the background which way to move horizontally, take a look at this diagram of the stage in Scratch:
X
X
480 Pixels Wide
480 Pixels Wide
-240
-240
240
240
0
0
So far, you’ve made one background. It is also 480 pixels wide. For it to sit at the center of the stage, set its X to 0.
Stage

8. But you don’t just want your background to sit still. As you character moves right, you want your background to scroll left so it looks like your character is moving. If you look at the diagram below, your background scrolling “left” means it’s scrolling in the negative direction (its X gets smaller).
X
480 Pixels Wide
-240 2400
In order to do this, your character has to send a message to your background to scroll left (negative). If you look back at the code for your character we said “If the right key is pressed, change scrollX by -10”.
So we’re going to take the variable “scrollX” and use it on our background to tell it how to scroll.
Reminder:

Here’s the code:
A
B
C
D
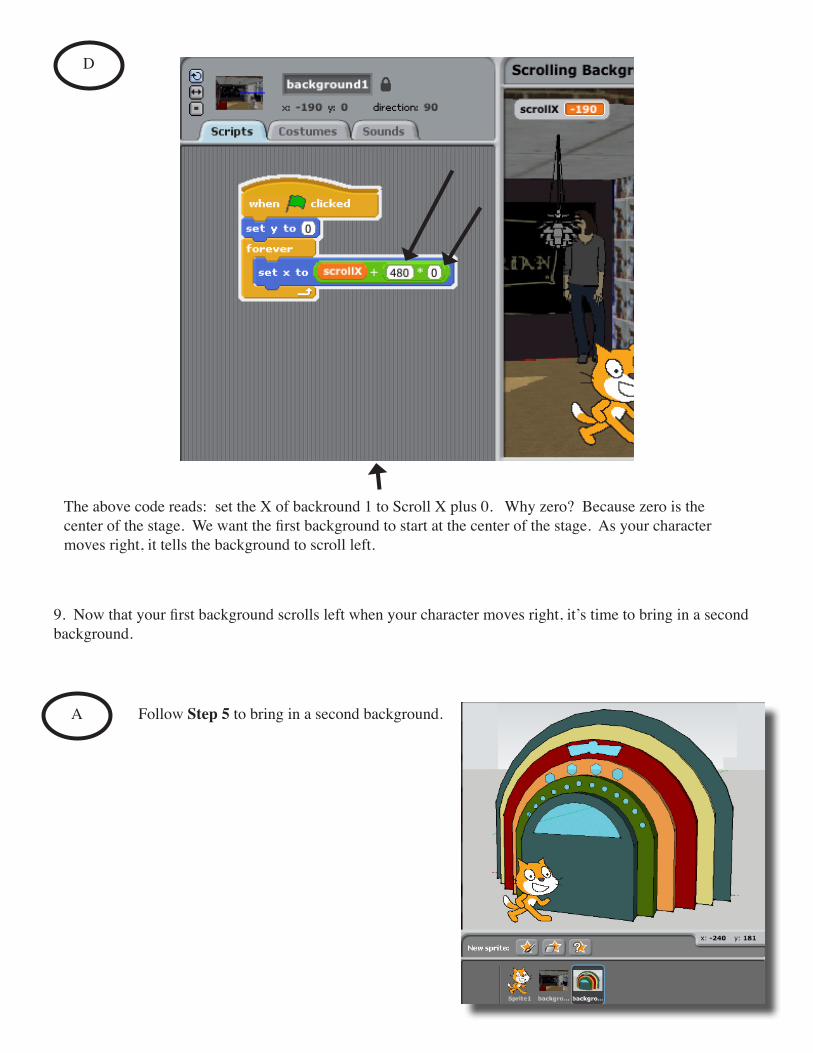
The above code reads: set the X of backround 1 to Scroll X plus 0. Why zero? Because zero is the center of the stage. We want the first background to start at the center of the stage. As your character moves right, it tells the background to scroll left.
9. Now that your first background scrolls left when your character moves right, it’s time to bring in a second background.
A Follow Step 5 to bring in a second background.
480-240 -240240 240
Off StageOn Stage
0
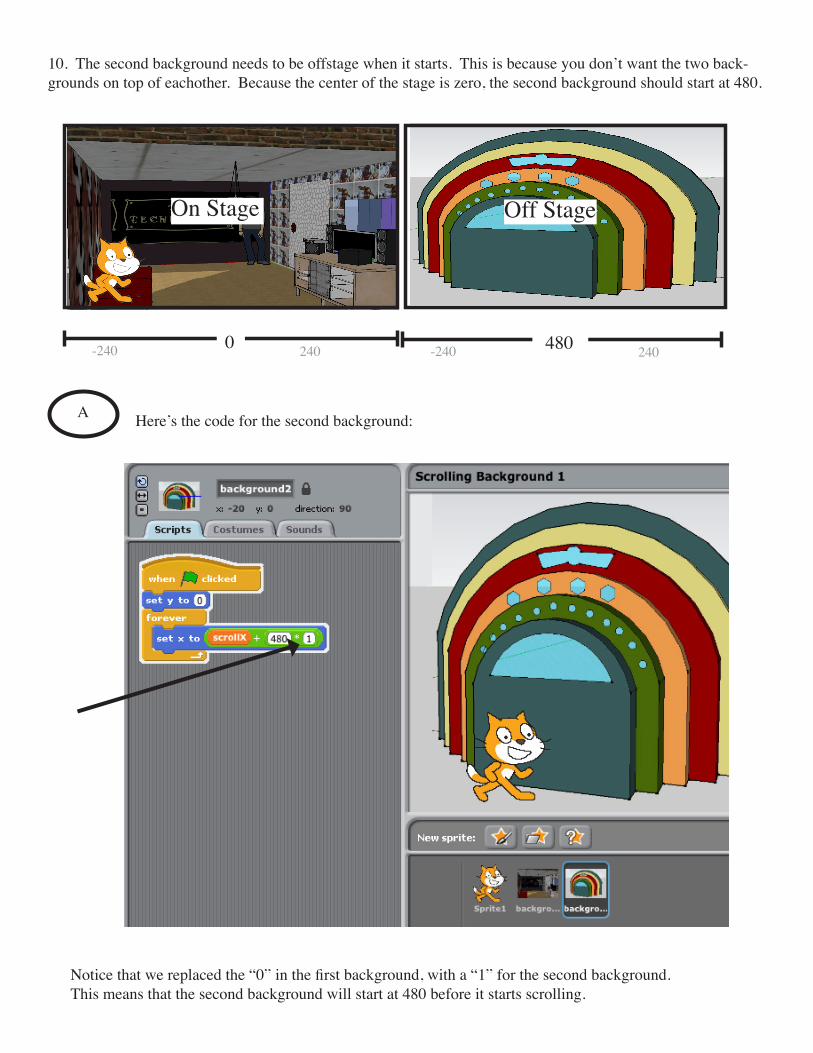
10. The second background needs to be offstage when it starts. This is because you don’t want the two back-grounds on top of eachother. Because the center of the stage is zero, the second background should start at 480.
A Here’s the code for the second background:
Notice that we replaced the “0” in the first background, with a “1” for the second background. This means that the second background will start at 480 before it starts scrolling.

11. As you add more backgrounds, simply increase each background by 1. For example, for the third back-ground the script would be: