PeopleSoft 9.2 Application Installation for DB2 for z/OS ...
708
PeopleSoft 9.2 Application Installation for DB2 for z/OS (PeopleSoft PeopleTools 8.56) July 2018
-
Upload
khangminh22 -
Category
Documents
-
view
0 -
download
0
Transcript of PeopleSoft 9.2 Application Installation for DB2 for z/OS ...

PeopleSoft 9.2 Application Installationfor DB2 for z/OS (PeopleSoft PeopleTools 8.56)
July 2018

PeopleSoft 9.2 Application Installationfor DB2 for z/OS (PeopleSoft PeopleTools 8.56)Copyright © 2018, Oracle and/or its affiliates. All rights reserved. This software and related documentation are provided under a license agreement containing restrictions on use and disclosure and are protected by intellectual property laws. Except as expressly permitted in your license agreement or allowed by law, you may not use, copy, reproduce, translate, broadcast, modify, license, transmit, distribute, exhibit, perform, publish, or display any part, in any form, or by any means. Reverse engineering, disassembly, or decompilation of this software, unless required by law for interoperability, is prohibited.The information contained herein is subject to change without notice and is not warranted to be error-free. If you find any errors, please report them to us in writing.If this is software or related documentation that is delivered to the U.S. Government or anyone licensing it on behalf of the U.S. Government, then the following notice is applicable:U.S. GOVERNMENT END USERS: Oracle programs, including any operating system, integrated software, any programs installed on the hardware, and/or documentation, delivered to U.S. Government end users are "commercial computer software" pursuant to the applicable Federal Acquisition Regulation and agency-specific supplemental regulations. As such, use, duplication, disclosure, modification, and adaptation of the programs, including any operating system, integrated software, any programs installed on the hardware, and/or documentation, shall be subject to license terms and license restrictions applicable to the programs. No other rights are granted to the U.S. Government.This software or hardware is developed for general use in a variety of information management applications. It is not developed or intended for use in any inherently dangerous applications, including applications that may createa risk of personal injury. If you use this software or hardware in dangerous applications, then you shall be responsible to take all appropriate fail-safe, backup, redundancy, and other measures to ensure its safe use. Oracle Corporation and its affiliates disclaim any liability for any damages caused by use of this software or hardware in dangerous applications.Oracle and Java are registered trademarks of Oracle and/or its affiliates. Other names may be trademarks of their respective owners.Intel and Intel Xeon are trademarks or registered trademarks of Intel Corporation. All SPARC trademarks are used under license and are trademarks or registered trademarks of SPARC International, Inc. AMD, Opteron, the AMD logo, and the AMD Opteron logo are trademarks or registered trademarks of Advanced Micro Devices. UNIX is a registered trademark of The Open Group.This software or hardware and documentation may provide access to or information about content, products, and services from third parties. Oracle Corporation and its affiliates are not responsible for and expressly disclaim all warranties of any kind with respect to third-party content, products, and services unless otherwise set forth in an applicable agreement between you and Oracle. Oracle Corporation and its affiliates will not be responsible for anyloss, costs, or damages incurred due to your access to or use of third-party content, products, or services, except asset forth in an applicable agreement between you and Oracle.Documentation AccessibilityFor information about Oracle's commitment to accessibility, visit the Oracle Accessibility Program website at http://www.oracle.com/pls/topic/lookup?ctx=acc&id=docacc.Access to Oracle SupportOracle customers that have purchased support have access to electronic support through My Oracle Support. For information, visit http://www.oracle.com/pls/topic/lookup?ctx=acc&id=info or visit http://www.oracle.com/pls/topic/lookup?ctx=acc&id=trs if you are hearing impaired.

Copyright © 2018, Oracle and/or its affiliates. All Rights Reserved. 3
Contents
PrefaceAbout This Documentation ................................................................................................................................. 19Understanding This Documentation ...................................................................................................................... 19Audience ................................................................................................................................................................ 19Typographical Conventions ................................................................................................................................... 20Products .................................................................................................................................................................. 21Related Information ............................................................................................................................................... 22Comments and Suggestions ................................................................................................................................... 22
Part I ...................................................................................................................................................................... 23Mandatory Installation ........................................................................................................................................... 23
Chapter 1Preparing for Installation .................................................................................................................................... 25Understanding the PeopleSoft Installation ............................................................................................................. 25Understanding the PeopleSoft Installation Using Deployment Packages .............................................................. 27
Understanding the PeopleSoft Deployment Packages Required for Installation .............................................. 27Reviewing the PeopleSoft PeopleTools DPKs ................................................................................................. 28Reviewing the PeopleSoft Application Images ................................................................................................ 29Reviewing the Installation Choices .................................................................................................................. 31Reviewing the DPK Installation Process (Microsoft Windows) ...................................................................... 31Reviewing the Installation Process on HP-UX ................................................................................................. 32Reviewing the Installation Process with IBM WebSphere (AIX, Linux, Microsoft Windows, or Solaris) ..... 34
Understanding the PeopleSoft Upgrade Source Deployment Packages ................................................................ 35Reviewing the PeopleSoft Upgrade Source Image Usage ................................................................................ 35Reviewing the PeopleSoft Upgrade Source Image ........................................................................................... 36Reviewing the PeopleSoft Upgrade Source Image Installation ........................................................................ 37
Reviewing Hardware Requirements ...................................................................................................................... 38Reviewing Hardware Requirements for Microsoft Windows .......................................................................... 39Reviewing Hardware Requirements on IBM AIX, Linux, or Oracle Solaris ................................................... 40
Reviewing Software Requirements ........................................................................................................................ 40Reviewing Software Requirements on Microsoft Windows ............................................................................ 41Reviewing Software Requirements on Linux ................................................................................................... 41Reviewing Software Requirements on Solaris ................................................................................................. 41

Contents
4 Copyright © 2018, Oracle and/or its affiliates. All Rights Reserved.
Reviewing Software Requirements on AIX ..................................................................................................... 41Reviewing Requirements for the Puppet Software on Microsoft Windows ..................................................... 42Reviewing Requirements for the Puppet Software on Linux ........................................................................... 43Reviewing Requirements for the Puppet Software on Solaris .......................................................................... 44Reviewing Requirements for the Puppet Software on AIX .............................................................................. 44
Using Oracle Software Delivery Cloud to Obtain Installation Files ...................................................................... 45Considering Project Planning ................................................................................................................................. 46Planning Your Initial Configuration ...................................................................................................................... 46
Understanding Workstations ............................................................................................................................. 46Understanding PeopleSoft Servers and Clients ................................................................................................ 47Defining the PeopleTools Client ....................................................................................................................... 48Defining the File Server .................................................................................................................................... 48Defining the Database Server ........................................................................................................................... 49Defining the Application Server ....................................................................................................................... 49Defining the Process Scheduler (Batch) Server ................................................................................................ 49Defining Installation Locations ......................................................................................................................... 50Defining the Web Server .................................................................................................................................. 52
Planning Database Creation ................................................................................................................................... 53Understanding Database Creation ..................................................................................................................... 53Using Multiple Databases ................................................................................................................................. 53Determining Databases and Database Names ................................................................................................... 54Using Standard Database Names ...................................................................................................................... 54Choosing Owner ID Processing Option ............................................................................................................ 55
Planning Multilingual Strategy .............................................................................................................................. 57Understanding Multilingual Issues ................................................................................................................... 58Choosing a Base Language ............................................................................................................................... 59Selecting Additional Languages ....................................................................................................................... 61Selecting a Database Character Set ................................................................................................................... 61
Verifying Database Server Sizing .......................................................................................................................... 62Defining DB2 for z/OS Subsystem Configuration ................................................................................................. 62
Understanding DB2 Configuration Requirements ............................................................................................ 62Defining EDM Pool Considerations ................................................................................................................. 62Defining Decimal Arithmetic ........................................................................................................................... 63Using DSMAX .................................................................................................................................................. 63Using CMTSTAT/IDTHTOIN ......................................................................................................................... 63Using CCSID and DB2 z/OS Database Storage Encoding Schemes ............................................................... 64Using DECIMAL .............................................................................................................................................. 64
Installing Supporting Applications ........................................................................................................................ 64Setting Up Database Connectivity ......................................................................................................................... 66Using Connect ID ................................................................................................................................................... 66
Understanding Connect ID ............................................................................................................................... 66Using Connect ID ............................................................................................................................................. 67

Contents
Copyright © 2018, Oracle and/or its affiliates. All Rights Reserved. 5
Setting Up z/OS User IDs ...................................................................................................................................... 68Understanding User ID Setup ........................................................................................................................... 69Creating PeopleSoft User IDs ........................................................................................................................... 69
Performing Backups ............................................................................................................................................... 71
Chapter 2Installing the PeopleSoft Homes ......................................................................................................................... 73Obtaining the PeopleSoft Application Images and PeopleTools DPKs ................................................................. 73Obtaining the PeopleSoft Upgrade Source Images ................................................................................................ 74Reviewing the DPK Setup Script Options ............................................................................................................. 75Running the DPK Setup Script to Install PS_HOME and PS_APP_HOME ......................................................... 78
Understanding the PS_HOME and PS_APP_HOME Installation .................................................................... 78Installing PS_HOME and PS_APP_HOME on Microsoft Windows ............................................................... 78Installing PS_HOME and PS_APP_HOME on Linux, AIX, or Solaris ........................................................... 82Reviewing the Deployment Results .................................................................................................................. 86
Obtaining Operating System Packages Required by Puppet ................................................................................. 87Removing a Deployed PeopleSoft Environment ................................................................................................... 88
Understanding the Removal Process ................................................................................................................ 88Using the DPK Setup Script to Remove the PeopleSoft Environment on Microsoft Windows ....................... 88Using the DPK Setup Script to Remove the PeopleSoft Environment on AIX, Linux, or Solaris ................... 89Using Puppet to Remove the PeopleSoft Environment on Microsoft Windows .............................................. 90Using Puppet to Remove the PeopleSoft Environment on Linux, AIX, or Solaris .......................................... 90Troubleshooting the Removal Process on Microsoft Windows ....................................................................... 91Troubleshooting the Removal Process on Linux, AIX, or Solaris ................................................................... 92
Chapter 3Completing the DPK Initialization with Customizations ................................................................................. 95Understanding PeopleSoft Environment Customizations ...................................................................................... 95Preparing Customization Files for Linux, AIX, or Solaris Users and Groups ....................................................... 99
Preparing the Customization File for a Single User and Single Group ............................................................ 99Preparing the Customization File for a New Single User, New Primary Group, and Existing Secondary Group .
100Preparing the Customization File for Existing Users and Groups .................................................................. 102
Preparing the Customization File for PeopleSoft Domain Definitions ................................................................ 104Preparing the psft_customizations.yaml file ................................................................................................... 104Reviewing the Domain Definitions in psft_configuration.yaml ..................................................................... 104Reviewing the Customization File for a Single Application Server Domain ................................................. 109Reviewing the Customization File for an Application Server Domain with Custom PS_CFG_HOME ........ 110Reviewing the Customization File for a PIA Domain on a Separate Host ..................................................... 111Reviewing the Customization File for Multiple Domains .............................................................................. 112
Preparing the Customization File to Create PeopleSoft Domains Without Configuration .................................. 117
Contents
6 Copyright © 2018, Oracle and/or its affiliates. All Rights Reserved.
Preparing the Customization File for Component Software Locations ............................................................... 117Preparing the Customization File for Unicode ..................................................................................................... 119Preparing the Customization File for the PeopleSoft Homes .............................................................................. 120
Preparing the Customization File for the PS_HOME Location ...................................................................... 120Preparing the Customization File for the PS_APP_HOME Location ............................................................ 121Preparing the Customization File for the PS_CFG_HOME Location ............................................................ 122
Preparing the Customization File for Jolt SSL and WSL SSL Ports ................................................................... 122Preparing the Customization File for Mid-Tier Connection to a DB2 z/OS Database ........................................ 124Completing the Customized Deployment ............................................................................................................ 127
Chapter 4Setting Up the Install Workstation ................................................................................................................... 129Understanding the Install Workstation ................................................................................................................. 129Prerequisites ......................................................................................................................................................... 129Starting Configuration Manager .......................................................................................................................... 130Setting Startup Options ........................................................................................................................................ 130Editing the Default Profile ................................................................................................................................... 131Running Client Setup ........................................................................................................................................... 133
Chapter 5Setting Up the Batch Environment on z/OS .................................................................................................... 135Understanding COBOL and the Batch Environment ........................................................................................... 135Setting Up Your Batch Environment ................................................................................................................... 136Completing the Preinstallation Worksheet ........................................................................................................... 136Allocating z/OS Partitioned Datasets ................................................................................................................... 143Using PeopleSoft Server Transfer ........................................................................................................................ 144
Understanding PeopleSoft Server Transfer .................................................................................................... 144Running the PeopleSoft Server Transfer Program .......................................................................................... 145Transferring Files to Host Manually ............................................................................................................... 147Mapping PeopleSoft Installation Directories to z/OS ..................................................................................... 148
Setting up the USS Environment Variables and Granting Access to USS Files ................................................. 149Installing SQR for z/OS ....................................................................................................................................... 150Binding the SQR DB2 Plan .................................................................................................................................. 150Assembling PeopleTools Programs ..................................................................................................................... 150Compiling and Link-Editing DB2 COBOL ......................................................................................................... 151Compiling and Link-Editing COBOL .................................................................................................................. 151Changing the IBM Enterprise COBOL Compiler Version .................................................................................. 152

Contents
Copyright © 2018, Oracle and/or its affiliates. All Rights Reserved. 7
Chapter 6Creating a Database ........................................................................................................................................... 153Understanding Database Creation ........................................................................................................................ 153Planning Your Installation ................................................................................................................................... 154
Using %UpdateStats ....................................................................................................................................... 154Using Temporary Tables ................................................................................................................................. 155
Transferring DDL Scripts to z/OS ....................................................................................................................... 156Creating PS.PSDBOWNER Table ....................................................................................................................... 157Granting Privileges on PS.PSDBOWNER .......................................................................................................... 158Granting Privileges to Owner ID ........................................................................................................................ 158Creating DB2 Databases, Storage Groups, and Tablespaces ............................................................................... 158
Understanding DB2 Databases, Storage Groups, and Tablespaces ................................................................ 158Customizing the Database Name .................................................................................................................... 159Working with Tablespaces .............................................................................................................................. 161
Creating Tables .................................................................................................................................................... 164Configuring the DB2 Connect Gateway .............................................................................................................. 165Creating Data Mover Import Scripts .................................................................................................................... 165
Understanding Data Mover Import Scripts ..................................................................................................... 165Working with Multilingual Databases ............................................................................................................ 166Running Database Setup to Create Data Mover Import Scripts ..................................................................... 166
Running Data Mover Import Scripts .................................................................................................................... 173Understanding Data Mover Import Scripts ..................................................................................................... 173Populating Tables in the PeopleSoft Database ............................................................................................... 174
Cleaning Up Orphaned Language Data ............................................................................................................... 174Checking the Log Files and Troubleshooting ...................................................................................................... 175
Checking the Log Files ................................................................................................................................... 175Running Data Mover ....................................................................................................................................... 175Troubleshooting .............................................................................................................................................. 176Improving Performance .................................................................................................................................. 178Improving Execution ...................................................................................................................................... 178
Creating Indexes ................................................................................................................................................... 178Running the DB2 RUNSTATS Utility ................................................................................................................ 179Creating PeopleSoft Views .................................................................................................................................. 179
Understanding PeopleSoft Views ................................................................................................................... 180Creating Views in Data Mover ....................................................................................................................... 180Creating Views in Application Designer ........................................................................................................ 180
Building Temporary Tables ................................................................................................................................. 183Understanding Temporary Tables ................................................................................................................... 184Running SQR SETSPACE.SQR ..................................................................................................................... 184Correcting Invalid Database/Tablespace Combinations ................................................................................. 185
Contents
8 Copyright © 2018, Oracle and/or its affiliates. All Rights Reserved.
Setting the Number of Temporary Tables ...................................................................................................... 186Using the Volatile Table Attribute .................................................................................................................. 186Building the Temporary Tables and Their Indexes ........................................................................................ 187
Creating PeopleSoft Triggers ............................................................................................................................... 190Understanding PeopleSoft Triggers ................................................................................................................ 190Creating Triggers in Data Mover .................................................................................................................... 190Creating Triggers in Application Designer ..................................................................................................... 190
Running Additional Data Mover Scripts .............................................................................................................. 193Running SQR Reports .......................................................................................................................................... 194
Understanding Running SQR Reports ............................................................................................................ 194Binding the dbcalls.bnd .................................................................................................................................. 194Running SQRs on the Client Workstation ...................................................................................................... 195Creating a Shortcut to Run SQRs ................................................................................................................... 197
Updating PeopleSoft System Tables .................................................................................................................... 198Understanding PeopleSoft System Tables ...................................................................................................... 198Updating PeopleSoft System Tables ............................................................................................................... 198
Binding DB2 Plans ............................................................................................................................................... 198Changing the Base Language ............................................................................................................................... 199Checking the Database ......................................................................................................................................... 199Disabling %UpdateStats ....................................................................................................................................... 200
Chapter 7Deploying Mid-Tier Components ..................................................................................................................... 201Understanding the Mid-Tier Deployment ............................................................................................................ 201Running the DPK Setup Script for Mid-Tier Deployment .................................................................................. 201
Understanding the Mid-Tier Deployment ....................................................................................................... 201Prerequisites .................................................................................................................................................... 202Running with the Mid-Tier Option on Microsoft Windows ........................................................................... 203Running with the Mid-Tier Option on Linux, AIX, or Solaris ....................................................................... 209
Completing Installation Tasks .............................................................................................................................. 215
Chapter 8Completing the Installation ............................................................................................................................... 217Completing Post-Installation Steps ...................................................................................................................... 217
Using Fluid User Interface .............................................................................................................................. 217Updating the Installation Table ....................................................................................................................... 220Setting Options for Multilingual Databases .................................................................................................... 221Updating PeopleTools Options ....................................................................................................................... 221Updating Time Zone Information ................................................................................................................... 222Updating Database Information ...................................................................................................................... 222

Contents
Copyright © 2018, Oracle and/or its affiliates. All Rights Reserved. 9
Using the PeopleSoft Installation ......................................................................................................................... 222Accessing the PeopleSoft Environment .......................................................................................................... 222Reviewing the Deployment File System ......................................................................................................... 223Reviewing the Deployed Users ....................................................................................................................... 224Managing PeopleTools Domains with PSADMIN ......................................................................................... 225
Chapter 9Deploying the PeopleTools Client DPK ............................................................................................................ 227Deploying the PeopleTools Client DPK .............................................................................................................. 227
Understanding the Standalone Mode Deployment ......................................................................................... 227Preparing for the PeopleTools Client DPK Deployment ................................................................................ 228Deploying in Standalone Mode ...................................................................................................................... 228
Part II .................................................................................................................................................................. 233Discretionary Installation ..................................................................................................................................... 233
Chapter 10AInstalling and Compiling COBOL on Windows ............................................................................................. 235Understanding COBOL ........................................................................................................................................ 235Prerequisites ......................................................................................................................................................... 236Preparing COBOL for a PeopleTools-only Upgrade ........................................................................................... 236Installing Micro Focus Net Express on Microsoft Windows ............................................................................... 236
Prerequisites .................................................................................................................................................... 236Obtaining Installation Files for Micro Focus Net Express from Oracle Software Delivery Cloud ................ 237Installing Micro Focus Net Express Wrap Pack 6 .......................................................................................... 238Installing Micro Focus Net Express Wrap Pack 14 ........................................................................................ 249
Managing Micro Focus Net Express Compiler Licenses ..................................................................................... 254Understanding Micro Focus Net Express Compiler Licenses ........................................................................ 254Configuring a Full License with the License Server ...................................................................................... 255Configuring a Timed License with the License Server .................................................................................. 265Revoking the License Using the License Management System ..................................................................... 272Revoking the License by Removing the Installation ...................................................................................... 274
Using the Micro Focus COBOL Compiler on Microsoft Windows .................................................................... 276Understanding COBOL Compilation ............................................................................................................. 277Compiling COBOL on Microsoft Windows with a PS_HOME Setup ........................................................... 277Compiling COBOL on Microsoft Windows with a PS_CUST_HOME Setup .............................................. 281Recompiling COBOL on Microsoft Windows ............................................................................................... 286Setting Up the Micro Focus Net Express Runtime ......................................................................................... 286Defining the GNT and INT Files .................................................................................................................... 288

Contents
10 Copyright © 2018, Oracle and/or its affiliates. All Rights Reserved.
Distributing COBOL Binaries ........................................................................................................................ 289
Chapter 10BInstalling and Compiling COBOL on UNIX ................................................................................................... 291Understanding COBOL ........................................................................................................................................ 291Prerequisites ......................................................................................................................................................... 292Preparing COBOL for a PeopleTools-only Upgrade ........................................................................................... 292Installing Micro Focus Server Express for UNIX ................................................................................................ 292
Understanding Micro Focus Server Express ................................................................................................... 292Prerequisites .................................................................................................................................................... 293Obtaining the Installation Files for Micro Focus Server Express from Oracle Software Delivery Cloud ..... 294Installing Micro Focus Server Express ........................................................................................................... 294
Using the Micro Focus COBOL Compiler on UNIX .......................................................................................... 300Understanding COBOL Compilation ............................................................................................................. 300Modifying the Liblist64 File (IBM AIX) ........................................................................................................ 301Compiling COBOL on UNIX with a PS_HOME Setup ................................................................................. 301Compiling COBOL on UNIX with a PS_CUST_HOME Setup .................................................................... 302Linking COBOL ............................................................................................................................................. 303Recompiling COBOL on UNIX ..................................................................................................................... 304
Installing IBM COBOL on IBM AIX .................................................................................................................. 304Understanding the IBM COBOL for AIX Installation ................................................................................... 305Prerequisites .................................................................................................................................................... 305Installing IBM COBOL for AIX v4.1.1.1 ....................................................................................................... 305
Using the IBM COBOL Compiler on IBM AIX ................................................................................................. 307Setting Environment Variables for IBM COBOL .......................................................................................... 307Compiling COBOL on AIX with a PS_HOME Setup .................................................................................... 308Troubleshooting the IBM COBOL Compiler ................................................................................................. 309Setting Up the IBM COBOL Runtime ............................................................................................................ 313Removing the IBM COBOL Installation ........................................................................................................ 317
Chapter 11Installing Web Server Products ........................................................................................................................ 321Installing Oracle WebLogic Server ...................................................................................................................... 321
Understanding the Oracle WebLogic Installation ........................................................................................... 321Reviewing Troubleshooting Tips .................................................................................................................... 322Obtaining Oracle WebLogic Installation Files from Oracle Software Delivery Cloud .................................. 323Installing JDK ................................................................................................................................................. 324Installing Oracle WebLogic on Microsoft Windows ...................................................................................... 326Installing Oracle WebLogic on UNIX in Silent Mode ................................................................................... 335Configuring JDK for Daylight Savings Time Change .................................................................................... 338

Contents
Copyright © 2018, Oracle and/or its affiliates. All Rights Reserved. 11
Removing the Oracle WebLogic Installation on Microsoft Windows ........................................................... 339Removing the Oracle WebLogic Installation on UNIX ................................................................................. 343
Installing IBM WebSphere Application Server ................................................................................................... 344Understanding IBM WebSphere Installation .................................................................................................. 345Prerequisites .................................................................................................................................................... 345Obtaining IBM WebSphere Installation Files ................................................................................................. 346Installing IBM WebSphere 9.0.0.0 ND .......................................................................................................... 346Installing IBM HTTP Server 9.0.0.0 .............................................................................................................. 346Installing IBM WebSphere Plug-ins 9.0.0.0 ................................................................................................... 346
Chapter 12Installing Additional Components .................................................................................................................... 347Reviewing Additional Components ..................................................................................................................... 347Installing Oracle Tuxedo ...................................................................................................................................... 348
Understanding Oracle Tuxedo ........................................................................................................................ 348Prerequisites .................................................................................................................................................... 349Debugging the Oracle Tuxedo Installer .......................................................................................................... 350Obtaining the Oracle Tuxedo Installation Files from Oracle Software Delivery Cloud ................................ 350Obtaining the Oracle Tuxedo Patches from My Oracle Support .................................................................... 351Removing Existing Oracle Tuxedo Installations from Microsoft Windows (Optional) ................................. 352Designating the Application Server Administrator on Microsoft Windows .................................................. 353Installing Oracle Tuxedo on Microsoft Windows in GUI Mode .................................................................... 354Installing the Oracle Tuxedo Patch on Microsoft Windows ........................................................................... 370Installing Oracle Tuxedo on Microsoft Windows in Silent Mode .................................................................. 372Uninstalling the Oracle Tuxedo Patch on Microsoft Windows ...................................................................... 373Uninstalling Oracle Tuxedo in GUI Mode ..................................................................................................... 374Checking the Windows Service Account ....................................................................................................... 375Restricting Domain Process Privileges ........................................................................................................... 376Setting Up the Windows Services for Oracle Tuxedo .................................................................................... 377Verifying the Server Installation on Microsoft Windows ............................................................................... 379Removing Existing Oracle Tuxedo Installations from UNIX (Optional) ....................................................... 380Completing the Preinstallation Checklist on UNIX ........................................................................................ 380Designating the Oracle Tuxedo Owner on UNIX ........................................................................................... 381Installing Oracle Tuxedo in Silent Mode on UNIX ........................................................................................ 382Installing the Oracle Tuxedo Patch on UNIX ................................................................................................. 384Uninstalling the Oracle Tuxedo Patch from UNIX ........................................................................................ 384Uninstalling Oracle Tuxedo from UNIX Using Silent Mode ......................................................................... 385Verifying the Server Installation on UNIX ..................................................................................................... 385Ensuring that Oracle Tuxedo Coexists with Earlier Versions ........................................................................ 385

Contents
12 Copyright © 2018, Oracle and/or its affiliates. All Rights Reserved.
Chapter 13AConfiguring the Application Server on Windows ........................................................................................... 389Understanding the Application Server ................................................................................................................. 389Prerequisites ......................................................................................................................................................... 390Creating a Wallet for the SSL/TLS Setup ............................................................................................................ 391
Using the Delivered Wallet ............................................................................................................................. 391Creating a Wallet with OpenSSL .................................................................................................................... 391
Setting Up COBOL for Remote Call ................................................................................................................... 395Verifying Database Connectivity ......................................................................................................................... 395Creating, Configuring, and Starting an Initial Application Server Domain ........................................................ 395
Creating, Configuring, and Starting the Application Server Domain ............................................................. 395Testing the Three-Tier Connection ................................................................................................................. 400Importing an Existing Application Server Domain Configuration ................................................................. 402Setting Up a Custom Application Server Domain Configuration .................................................................. 405Troubleshooting Common Errors ................................................................................................................... 407
Chapter 13BConfiguring the Application Server on UNIX ................................................................................................. 409Understanding the Application Server ................................................................................................................. 409Understanding the Application Server Domain Processes ................................................................................... 410Prerequisites ......................................................................................................................................................... 410Creating a Wallet for the SSL/TLS Setup ............................................................................................................ 411
Using the Delivered Wallet ............................................................................................................................. 411Creating a Wallet with OpenSSL .................................................................................................................... 411
Setting Environment Variables ............................................................................................................................ 415Setting Up COBOL for Remote Call ................................................................................................................... 415Verifying Database Connectivity ......................................................................................................................... 416Creating, Configuring, and Starting an Initial Application Server Domain ........................................................ 416
Creating, Configuring, and Starting the Application Server Domain ............................................................. 416Testing the Three-Tier Connection ................................................................................................................. 421Importing an Existing Application Server Domain Configuration ................................................................. 422Setting Up a Custom Application Server Domain Configuration .................................................................. 425Troubleshooting Common Errors ................................................................................................................... 427
Chapter 14Setting Up the PeopleSoft Pure Internet Architecture in Silent Mode ......................................................... 429Understanding PeopleSoft Pure Internet Architecture ......................................................................................... 429Using Authentication Domains in the PeopleSoft Pure Internet Architecture Installation .................................. 431

Contents
Copyright © 2018, Oracle and/or its affiliates. All Rights Reserved. 13
Installing the PeopleSoft Pure Internet Architecture in Silent Mode ................................................................... 431Understanding the Silent Installation and the Response File .......................................................................... 432Editing the Response File ............................................................................................................................... 432Running the Silent Mode Installation ............................................................................................................. 437
Configuring the SSL/TLS Port for JSL ................................................................................................................ 437Testing and Administering the PeopleSoft Pure Internet Architecture Installation ............................................. 438
Verifying the PeopleSoft Pure Internet Architecture Installation ................................................................... 438Starting and Stopping Oracle WebLogic ........................................................................................................ 438Starting and Stopping IBM WebSphere Application Servers ......................................................................... 439Using PSADMIN to Start and Stop Web Servers ........................................................................................... 442Accessing the PeopleSoft Signon ................................................................................................................... 443
Completing Post-Installation Steps ...................................................................................................................... 445Using Fluid User Interface .............................................................................................................................. 445Updating the Installation Table ....................................................................................................................... 448Setting Options for Multilingual Databases .................................................................................................... 449Updating PeopleTools Options ....................................................................................................................... 449Updating Time Zone Information ................................................................................................................... 450Updating Database Information ...................................................................................................................... 450
Chapter 15ASetting Up Process Scheduler on Windows ..................................................................................................... 451Prerequisites ......................................................................................................................................................... 451Setting Up Process Scheduler Security ................................................................................................................ 452
Understanding Process Scheduler Security .................................................................................................... 452Changing User Account to Start ORACLE ProcMGR V12.2.2.0.0_VS2015 ................................................ 452Granting Process Scheduler Administrative Rights ........................................................................................ 455
Setting Up Process Scheduler to Transfer Reports and Logs to the Report Repository ...................................... 456Understanding Report Distribution ................................................................................................................. 457Setting Up Single Signon to Navigate from PIA to Report Repository ......................................................... 459Determining the Transfer Protocol ................................................................................................................. 459Starting the Distribution Agent ....................................................................................................................... 460Setting Up the Report Repository ................................................................................................................... 460Setting Up the Distribution for Your Process Scheduler Server ..................................................................... 477Setting Up Sending and Receiving of Report Folders in the Report Manager ............................................... 478
Setting Environment Variables ............................................................................................................................ 478Setting Up Process Scheduler Server Agent ........................................................................................................ 478
Understanding Process Scheduler Server Agent ............................................................................................. 479Creating and Configuring a Process Scheduler Server ................................................................................... 479Reconfiguring a Process Scheduler Server ..................................................................................................... 484Verifying the Process Scheduler Server Status ............................................................................................... 486
Starting Process Scheduler as a Windows Service (Optional) ............................................................................. 487

Contents
14 Copyright © 2018, Oracle and/or its affiliates. All Rights Reserved.
Configuring the Process Scheduler for Microsoft Word (Optional) .................................................................... 490Configuring Process Scheduler ....................................................................................................................... 490Executing Winword on Mapped Drive ........................................................................................................... 492
Configuring Setup Manager ................................................................................................................................. 493Installing Products for PS/nVision ....................................................................................................................... 494
Understanding the PS/nVision Setup .............................................................................................................. 495Installing Products for PS/nVision in Excel Automation Mode ..................................................................... 495Installing Microsoft .NET Framework 4.6.1 .................................................................................................. 495Installing Microsoft Open XML SDK for PS/nVision ................................................................................... 496
Chapter 15BSetting Up Process Scheduler on UNIX ........................................................................................................... 501Prerequisites ......................................................................................................................................................... 501Setting Up Process Scheduler Security ................................................................................................................ 502
Understanding Process Scheduler Security .................................................................................................... 502Granting Process Scheduler Administrative Rights ........................................................................................ 502
Setting Up Process Scheduler to Transfer Reports and Logs to the Report Repository ...................................... 503Understanding Report Distribution ................................................................................................................. 504Setting Up Single Signon to Navigate from PIA to Report Repository ......................................................... 506Determining the Transfer Protocol ................................................................................................................. 506Starting the Distribution Agent ....................................................................................................................... 507Setting Up the Report Repository ................................................................................................................... 507Setting Up the Distribution for Your Process Scheduler Server ..................................................................... 522Setting Up Sending and Receiving of Report Folders in the Report Manager ............................................... 523
Setting Up Process Scheduler Server Agent ........................................................................................................ 523Understanding Process Scheduler Server Agent ............................................................................................. 523Changing the Default Operating System ........................................................................................................ 524Creating and Configuring a Process Scheduler Server ................................................................................... 524Reconfiguring a Process Scheduler Server ..................................................................................................... 529Verifying the Process Scheduler Server Status ............................................................................................... 531
Chapter 15CSetting Up Process Scheduler on z/OS ............................................................................................................. 533Prerequisites ......................................................................................................................................................... 533Granting Required Authorization in DB2 and UNIX System Services ............................................................... 534
Setting UNIX System Services Authorization ................................................................................................ 534Setting DB2 Authorization ............................................................................................................................. 536
Setting Up Process Scheduler Security ................................................................................................................ 536Understanding Process Scheduler Security .................................................................................................... 537Granting Process Scheduler Administrative Rights ........................................................................................ 537

Contents
Copyright © 2018, Oracle and/or its affiliates. All Rights Reserved. 15
Setting Up Process Scheduler to Transfer Reports and Logs to the Report Repository ...................................... 538Understanding Report Distribution ................................................................................................................. 539Setting Up Single Signon to Navigate from PIA to Report Repository ......................................................... 541Determining the Transfer Protocol ................................................................................................................. 541Starting the Distribution Agent ....................................................................................................................... 542Setting Up the Report Repository ................................................................................................................... 542Setting Up the Distribution for Your Process Scheduler Server ..................................................................... 552Setting Up Sending and Receiving of Report Folders in the Report Manager ............................................... 553
Setting Up Process Scheduler Server Agent ........................................................................................................ 553Understanding Process Scheduler Server Agent ............................................................................................. 554Changing the Default Operating System ........................................................................................................ 554Setting Up Your Environment ........................................................................................................................ 554Validating and Editing the ODBC Initialization File ..................................................................................... 555Creating a Process Scheduler Server .............................................................................................................. 555Configuring Process Scheduler Server ........................................................................................................... 556Working with Shell JCL Templates ................................................................................................................ 561Starting a Process Scheduler Server ............................................................................................................... 567Verifying the Process Scheduler Server Status ............................................................................................... 568Stopping the Process Scheduler Server ........................................................................................................... 568
Chapter 16Installing and Configuring DB2 Connect ........................................................................................................ 571Understanding DB2 Connect ............................................................................................................................... 571Verifying Supported Versions .............................................................................................................................. 572Defining DB2 Connect Architecture .................................................................................................................... 572
Understanding DB2 Connect Architecture ..................................................................................................... 572Using DB2 Connect Enterprise Edition .......................................................................................................... 573Using DB2 Connect Personal Edition ............................................................................................................. 574Defining PeopleSoft Three-Tier Configuration with DB2 Connect ............................................................... 574
Setting Up DDF on the Mainframe ...................................................................................................................... 575Configuring TCP/IP on the Client ........................................................................................................................ 576Configuring the DB2 Connect Gateway on Windows ......................................................................................... 577
Configuring Database Connectivity on Clients with DB2 Connect Version 9.x or Earlier ........................... 578Configuring Database Connectivity on Clients with DB2 Connect Version 10.x or Later ............................ 588Configuring an ODBC Data Source for Connectivity on Microsoft Windows (Optional) ............................ 589
Binding DB2 Connect Packages for an EBCDIC Installation ............................................................................. 590Binding DB2 Connect Packages for a Unicode Installation ................................................................................ 594Binding DB2 Connect Packages for DB2 Connect Version 10 or later .............................................................. 603Setting DB2CodePage for a Unicode Database ................................................................................................... 603Setting Up the DB2 Connect Gateway on UNIX ................................................................................................. 604Confirming DB2 Connect/ODBC Settings .......................................................................................................... 604

Contents
16 Copyright © 2018, Oracle and/or its affiliates. All Rights Reserved.
Setting CLI/ODBC Trace with the Client Configuration Assistant ..................................................................... 606
Chapter 17Installing PeopleSoft Change Assistant ............................................................................................................ 609Understanding PeopleSoft Change Assistant ....................................................................................................... 609Installing PeopleSoft Change Assistant in Silent Mode ...................................................................................... 610
Understanding Silent Mode for PeopleSoft Change Assistant ....................................................................... 610Using the Silent Mode Script .......................................................................................................................... 610
Configuring and Using PeopleSoft Change Assistant ......................................................................................... 611Verifying the Path Variable ............................................................................................................................ 611Specifying Options .......................................................................................................................................... 612Scanning the Workstation ............................................................................................................................... 612Exporting Jobs to XML, HTML, or Microsoft Excel Format ........................................................................ 612
Validating Change Assistant Settings .................................................................................................................. 612
Chapter 18Installing PeopleSoft Change Impact Analyzer .............................................................................................. 615Prerequisites ......................................................................................................................................................... 615Installing and Removing PeopleSoft Change Impact Analyzer in Silent Mode .................................................. 615
Understanding Silent Mode for PeopleSoft Change Impact Analyzer ........................................................... 616Installing PeopleSoft Change Impact Analyzer in Silent Mode ..................................................................... 616Removing the PeopleSoft Change Impact Analyzer Installation in Silent Mode ........................................... 617Removing and Installing PeopleSoft Change Impact Analyzer in Silent Mode ............................................. 617
Chapter 19Adding New Product Modules .......................................................................................................................... 619Adding New Modules to PeopleSoft Installations ............................................................................................... 619
Chapter 20Installing PeopleSoft Online Help ..................................................................................................................... 621Understanding PeopleSoft Online Help (PeopleBooks) ...................................................................................... 621Using the PeopleSoft Online Help Web Site for Context-Sensitive Help ........................................................... 622
Understanding the PeopleSoft Online Help Web Site .................................................................................... 622Setting Up Context-Sensitive Help with the PeopleSoft Online Help Web Site ............................................ 622Setting Up F1 Help with the PeopleSoft Online Help Web Site .................................................................... 625
Configuring Context-Sensitive Help with Local Installations ............................................................................. 625Enabling the Help Link from the Application Pages with Local Installations ............................................... 625Enabling F1 Help with Local Installations ..................................................................................................... 626

Contents
Copyright © 2018, Oracle and/or its affiliates. All Rights Reserved. 17
Creating the Help Index for Multi-Product Installations ................................................................................ 626Installing PeopleSoft Online Help Locally .......................................................................................................... 627
Prerequisites .................................................................................................................................................... 627Obtaining the PeopleSoft Documentation Files from Oracle Software Delivery Cloud ................................ 627Deploying PeopleSoft Documentation Library on a WebLogic Server ......................................................... 628Removing the PeopleSoft Online Help Deployment ...................................................................................... 639Setting Up Help for Multiple Product Lines on the Same Machine ............................................................... 642
Chapter 21Installing Software for PS/nVision Drilldowns ............................................................................................... 645Understanding PS/nVision DrillDown Add-ins ................................................................................................... 645Installing the DrillToPIA Add-In ......................................................................................................................... 646
Understanding Drilldown with DrillToPIA Add-in ........................................................................................ 646Installing the DrillToPIA Add-in on the Microsoft Excel Environment ........................................................ 646
Installing the nVisionDrill Add-In ....................................................................................................................... 647Understanding PS/nVision DrillDown Using Web Services .......................................................................... 647Understanding Security for DrillDown Using nVisionDrill VSTO Add-in ................................................... 647Installing the nVisionDrill Add-in for Microsoft Excel ................................................................................. 647
Installing the nVisionDrill Add-Ins for Multi-Language Installations ................................................................ 648Setting Up PeopleSoft Integration Broker for Using Web Service Capability with nVisionDrill Add-in .......... 648
Chapter 22Installing Web Application Deployment Tools ................................................................................................ 653Prerequisites ......................................................................................................................................................... 653Installing the Web Application Deployment Tool in Silent Mode ...................................................................... 654
Understanding the Web Application Deployment Tool Silent Mode Installation and the Response File ..... 654Editing the Web Application Deployment Tool Response File to Deploy DES ............................................ 654Running the Web Application Deployment Tool Silent Mode Installation to Deploy DES .......................... 657
Testing and Troubleshooting the Web Application Deployment ........................................................................ 658
Chapter 23Setting Up a Unicode Database ......................................................................................................................... 659Prerequisites ......................................................................................................................................................... 659Defining Conversion Pages for Unicode Conversion Services ............................................................................ 659Fulfilling Connectivity Requirements .................................................................................................................. 660
Appendix AUsing the PeopleSoft Tablespace DDL Automation Assistance Tool ............................................................ 661

Contents
18 Copyright © 2018, Oracle and/or its affiliates. All Rights Reserved.
Understanding the PeopleSoft Tablespace DDL Automation Assistance Tool ................................................... 661Understanding PSTAAT Workstation Requirements .......................................................................................... 662Understanding the PSTAAT Graphical User Interface ........................................................................................ 662Understanding the Various PSTAAT Input and Output Files ............................................................................. 673Using PSTAAT to Create TBDDL and IXDDL .................................................................................................. 677Using PSTAAT to Customize DDL ..................................................................................................................... 682
Understanding How PSTAAT Assigns an Object Naming Convention ........................................................ 682Choosing a Primary Database Prefix and Maximum Number of Tables per Tablespace and Tablespaces perDatabase .......................................................................................................................................................... 682Using the New Name Parameter to Override Tablespace Name .................................................................... 683Customizing DDL Scripts ............................................................................................................................... 684Recalculating Primary and Secondary Space Allocations and Setting a Minimum Secondary Space AllocationWith PSTAAT ................................................................................................................................................ 685Using PSTAAT to Override the Default Bufferpool Assignment .................................................................. 687Using PSTAAT to Override the Default Segment Size .................................................................................. 688Validating Input .............................................................................................................................................. 689
Using PSTAAT to Reassign Temporary Tables to Additional Tablespaces ....................................................... 691Using PSTAAT to Isolate Other Tables to Individual Tablespaces .................................................................... 695Using PSTAAT to Convert EBCDIC DDL to Unicode DDL ............................................................................. 696
Understanding the EBCDIC DDL to Unicode DDL Conversion ................................................................... 696Creating Database, Tablespace, and Table Shell DDL for an EBCDIC to Unicode Database Conversion ... 697
Using PSTAAT to Install PeopleSoft Databases ................................................................................................. 701
Appendix BDescribing Debugger Requirements ................................................................................................................. 703Describing Debugger Requirements for the AIX Operating System ................................................................... 703Describing Debugger Requirements for the HP-UX Operating System .............................................................. 703Describing Debugger Requirements for the Linux Operating System ................................................................ 703Describing Debugger Requirements for the Oracle Solaris Operating System ................................................... 704Describing Debugger Requirements for the z/OS Operating System .................................................................. 704
Appendix CEncrypting Passwords for Customizations on Linux, AIX, or Solaris .......................................................... 707Encrypting Passwords for Customization Files on Linux, AIX, or Solaris ......................................................... 707

Copyright © 2018, Oracle and/or its affiliates. All Rights Reserved. 19
About This Documentation
This preface discusses:
• Understanding This Documentation
• Audience
• Typographical Conventions
• Products
• Related Information
• Comments and Suggestions
Understanding This Documentation
This documentation is designed to direct you through a basic PeopleSoft installation. It is not a substitute for the database administration documentation provided by your relational database management system (RDBMS) vendor, the network administration documentation provided by your network vendor, or the installation and configuration documentation for additional software components that are used with PeopleSoft products.This documentation is divided into two parts. The chapters in Part 1 include the information that is required to complete a basic PeopleSoft installation. The chapters and appendices in Part 2 include information for less common or optional tasks.Addenda to the recent PeopleTools installation guides are periodically posted in My Oracle Support on the same page as the initial posting.This documentation includes the instructions for installing Oracle's PeopleSoft PeopleTools and PeopleSoft applications. You also need the installation instructions that are specific to your PeopleSoft application, which areprovided in a separate document for the PeopleSoft application. For instance, if you are installing Oracle's PeopleSoft Customer Relationship Management (CRM), you need both this installation guide and the additional instructions provided for installing PeopleSoft CRM.To find the installation documentation for PeopleSoft PeopleTools or for your PeopleSoft application, go to My Oracle Support and search for the installation guide for your product and release.
Note. Before proceeding with your installation, check My Oracle Support to ensure that you have the latest version of this installation guide for the correct release of the PeopleSoft product that you are installing.
Audience
This documentation is written for the individuals responsible for installing and administering the PeopleSoft environment. This documentation assumes that you have a basic understanding of the PeopleSoft system. One of the most important components in the installation and maintenance of your PeopleSoft system is your on-site expertise.You should be familiar with your operating environment and RDBMS and have the necessary skills to support that environment. You should also have a working knowledge of:
• SQL and SQL command syntax.

Preface
20 Copyright © 2018, Oracle and/or its affiliates. All Rights Reserved.
• PeopleSoft system navigation.
• PeopleSoft windows, menus, and pages, and how to modify them.
• Microsoft Windows.
Oracle recommends that you complete training, particularly a PeopleSoft Server Administration and Installation course, before performing an installation.See Oracle University, http://education.oracle.com.
Typographical Conventions
To help you locate and understand information easily, the following conventions are used in this documentation:
Convention Description
Monospace Indicates a PeopleCode program or other code, such as scripts that you run during the install. Monospace is also used for messages that you may receive during the install process.
Italics Indicates field values, emphasis, and book-length publicationtitles. Italics is also used to refer to words as words or letters as letters, as in the following example:
Enter the letter O.
Italics are also used to indicate user-supplied information. For example, the term domain is used as a placeholder for the actual domain name in the user's environment. When twosuch placeholders are used together, they may be set apart with angle brackets. For example, the path <PS_CFG_HOME>/appserv/<domain> includes two placeholders that require user-supplied information.
Initial Caps Field names, commands, and processes are represented as they appear on the window, menu, or page.
lower case File or directory names are represented in lower case, unless they appear otherwise on the interface.
Menu, Page A comma (,) between menu and page references indicates that the page exists on the menu. For example, "Select Use, Process Definitions" indicates that you can select the ProcessDefinitions page from the Use menu.
Cross-references Cross-references that begin with See refer you to additional documentation that will help you implement the task at hand.We highly recommend that you reference this documentation.
Cross-references under the heading See Also refer you to additional documentation that has more information regarding the subject.

Preface
Copyright © 2018, Oracle and/or its affiliates. All Rights Reserved. 21
Convention Description
⇒ (line-continuation arrow) A line-continuation arrow inserted at the end of a line of code indicates that the line of code has been wrapped at the page margin. The code should be viewed or entered as a continuous line of code, without the line-continuation arrow.
" " (quotation marks) Indicate chapter titles in cross-references and words that are used differently from their intended meaning.
Note. Note text. Text that begins with Note. indicates information that you should pay particular attention to as you work with your PeopleSoft system.
Important! Important note text. A note that begins with Important! is crucial and includes information about what you need to do for the system to function properly.
Warning! Warning text. A note that begins with Warning! contains critical configuration information or implementation considerations;for example, if there is a chance of losing or corrupting data. Pay close attention to warning messages.
Products
This documentation may refer to these products and product families:
• Oracle® BPEL Process Manager
• Oracle® Enterprise Manager
• Oracle® Tuxedo
• Oracle® WebLogic Server
• Oracle's PeopleSoft Application Designer
• Oracle's PeopleSoft Change Assistant
• Oracle's PeopleSoft Change Impact Analyzer
• Oracle's PeopleSoft Data Mover
• Oracle's PeopleSoft Process Scheduler
• Oracle's PeopleSoft Pure Internet Architecture
• Oracle's PeopleSoft Customer Relationship Management
• Oracle's PeopleSoft Enterprise Learning Management
• Oracle's PeopleSoft Enterprise Performance Management
• Oracle's PeopleSoft Financial Management
• Oracle's PeopleSoft Human Capital Management
• Oracle's PeopleSoft Interaction Hub
• Oracle's PeopleSoft Pay/Bill Management
• Oracle's PeopleSoft PeopleTools

Preface
22 Copyright © 2018, Oracle and/or its affiliates. All Rights Reserved.
• Oracle's PeopleSoft Staffing Front Office
• Oracle's PeopleSoft Supply Chain Management
See the Products area on the Oracle web site, http://www.oracle.com/us/products/product-list/products-a-z/index.html.
Related Information
Oracle provides reference information about PeopleSoft PeopleTools and your particular PeopleSoft Application. You can access documentation for recent releases of PeopleSoft PeopleTools and PeopleSoft Applications at the PeopleSoft Hosted Documentation site. You can also find documentation by searching for the product name on My Oracle Support.
• My Oracle Support. This support platform requires a user account to log in. Contact your PeopleSoft representative for information.
To locate documentation on My Oracle Support, search for the title and select PeopleSoft Enterprise to refine the search results.
See My Oracle Support, https://support.oracle.com.
• PeopleTools: Getting Started with PeopleTools for your release. This documentation provides a high-level introduction to PeopleTools technology and usage.
See Oracle PeopleSoft Online Help, http://www.peoplesoftonlinehelp.com.
• PeopleSoft Application Fundamentals for your PeopleSoft Application and release. This documentation provides essential information about the setup, design, and implementation of your PeopleSoft Application.
To install additional component software products for use with PeopleSoft products, including those products thatare packaged with your PeopleSoft products as well as products from other vendors, you should refer to the documentation provided with those products, as well as this documentation. For those additional components that are offered by Oracle, such as Oracle Middleware products, see the documentation on the Oracle Help Center.
See Also
Oracle Help Center, https://docs.oracle.com/en/
Comments and Suggestions
Your comments are important to us. We encourage you to tell us what you like, or what you would like changed about PeopleSoft documentation and other Oracle reference and training materials. Please send your suggestions to:[email protected] we cannot guarantee to answer every email message, we will pay careful attention to your comments and suggestions. We are always improving our product communications for you.

Copyright © 2018, Oracle and/or its affiliates. All Rights Reserved. 23
Part I
Mandatory Installation
The chapters in the first part of this installation guide cover only those tasks that are required for a basic PeopleSoft installation. Everyone carrying out an installation should use the tasks in Part I. After setting up the Application Server, PeopleSoft Pure Internet Architecture, and Process Scheduler Server, you verify that you can sign into the PeopleSoft installation in a browser.

Copyright © 2018, Oracle and/or its affiliates. All Rights Reserved. 25
Chapter 1
Preparing for Installation
This chapter discusses:
• Understanding the PeopleSoft Installation
• Understanding the PeopleSoft Installation Using Deployment Packages
• Understanding the PeopleSoft Upgrade Source Deployment Packages
• Reviewing Hardware Requirements
• Reviewing Software Requirements
• Using Oracle Software Delivery Cloud to Obtain Installation Files
• Considering Project Planning
• Planning Your Initial Configuration
• Planning Database Creation
• Planning Multilingual Strategy
• Verifying Database Server Sizing
• Defining DB2 for z/OS Subsystem Configuration
• Installing Supporting Applications
• Setting Up Database Connectivity
• Using Connect ID
• Setting Up z/OS User IDs
• Performing Backups
Understanding the PeopleSoft Installation
This chapter will help you plan and prepare for a basic PeopleSoft installation. Before you begin the installation, please note:
• Before you begin your PeopleSoft installation, use the PeopleSoft hardware and software requirements information in the My Oracle Support Certifications area to verify that you have the correct hardware and software in place to support a successful installation. In addition to the information in the Certifications area, review the application-specific hardware and software documentation available on My Oracle Support.
See hardware and software requirements for PeopleSoft PeopleTools and your PeopleSoft application on My Oracle Support.
See My Oracle Support, Certifications.

Preparing for Installation Chapter 1
26 Copyright © 2018, Oracle and/or its affiliates. All Rights Reserved.
Warning! If you are unable to meet any of the criteria outlined in the hardware and software requirements andcertification information on My Oracle Support, contact Oracle before going forward with the installation. Attempting to complete an installation on an unsupported configuration can be a very costly decision, and Oracle will not provide support for such PeopleSoft installations.
• Use the My Oracle Support Certifications area to determine the latest certified versions of additional components, such as Oracle Tuxedo or IBM WebSphere, which are supported for the PeopleSoft PeopleTools release you are installing.
• If you will be upgrading your current release after you perform this installation, you also need to install Change Assistant. The page on My Oracle Support containing your upgrade documentation and files includes information on which tool you need.
• For critical issues related to the installation process, see the My Oracle Support web site. Be sure to read the "Required for Upgrade" incidents on the Patches and Updates page for the PeopleSoft PeopleTools version that you are installing.
• You will use the PeopleSoft application deployment packages (DPKs) for your PeopleSoft installation. The DPKs deliver pre-installed PeopleSoft components, which can be installed on virtualization platforms as well as directly on traditional, non-virtual machines ("bare-metal").
Review the known issues on the PeopleSoft Update Manager (PUM) Home Page, My Oracle Support, Doc ID1641843.2, for any issues related to the PeopleSoft application DPK installation.
• For online technical support information, use the My Oracle Support web site. My Oracle Support includes tools for self-directed searches of information including reference documents and problem resolutions, as wellas service request management tools.
See My Oracle Support, https://support.oracle.com.
• To download software and documentation, use the Oracle Software Delivery Cloud portal, and the Oracle Technology Network.
See Oracle Software Delivery Cloud, http://edelivery.oracle.com.
See Oracle Technology Network, http://www.oracle.com/technetwork/index.html.
• Be aware that not all application releases are certified and supported to run on all PeopleSoft PeopleTools releases. Check the PeopleSoft policy information on My Oracle Support for further details on the support policy for your particular application. If you are planning to do a PeopleTools-only upgrade, do not continue until you have verified that your application is supported on the target PeopleSoft PeopleTools release.
See Lifetime Support Summary for PeopleSoft Releases, My Oracle Support, Doc ID 2238983.2.
• This installation guide may refer you to other PeopleSoft documentation resources for more information or instructions. You can access Oracle's PeopleSoft Hosted Documentation online during the installation process.For PeopleSoft PeopleTools 8.53 and later, you also have the option to install PeopleSoft Online Help documentation, a dynamic, interactive, accessible HTML version of the documentation formerly known as "PeopleBooks."
See Also
"Installing PeopleSoft Online Help"Oracle's PeopleSoft Hosted Documentation, http://www.peoplesoftonlinehelp.com"Installing PeopleSoft Change Assistant"

Chapter 1 Preparing for Installation
Copyright © 2018, Oracle and/or its affiliates. All Rights Reserved. 27
Understanding the PeopleSoft Installation Using Deployment Packages
This section discusses:
• Understanding the PeopleSoft Deployment Packages Required for Installation
• Reviewing the PeopleSoft PeopleTools DPKs
• Reviewing the PeopleSoft Application Images
• Reviewing the Installation Choices
• Reviewing the DPK Installation Process (Microsoft Windows)
• Reviewing the Installation Process on HP-UX
• Reviewing the Installation Process with IBM WebSphere (AIX, Linux, Microsoft Windows, or Solaris)
Understanding the PeopleSoft Deployment Packages Required for InstallationTo install PeopleSoft applications built on PeopleSoft PeopleTools 8.56 (PeopleSoft 9.2 applications as well as PeopleSoft Interaction Hub 9.1), you will use the PeopleSoft Application Images, which are comprised of deployment packages (DPKs). For most installation scenarios, you will also download the PeopleSoft PeopleTools DPKs separately.The PeopleSoft DPKs are the delivery method for many PeopleSoft installation, upgrade, and maintenance products. This documentation refers to the set of DPKs that are used for a fresh installation of a PeopleSoft application environment as PeopleSoft Application Images. These images can also be deployed differently, and used for applying maintenance for PeopleSoft applications. In that use case, they are typically referred to as PeopleSoft Update Images, or PIs.See PeopleSoft Update Manager (PUM) Home Page, My Oracle Support, Doc ID 1641843.2, for information on applying maintenance updates with the PIs.See PeopleSoft PeopleTools 8.56 Deployment Packages Installation, "Learning About the PeopleSoft Deployment Process."The PeopleSoft DPKs deliver pre-installed PeopleSoft components that can be deployed onto your environment. The PeopleSoft DPKs offer the flexibility of deployment on supported operating system platforms, both directly ("bare-metal") and on virtualization platforms. The DPKs are available on My Oracle Support and Oracle Software Delivery Cloud as zip files, and are delivered with a setup script that automates the procedure to set up aPeopleSoft environment. The script is an interactive script that verifies that the downloaded DPKs are correct, andprompts the user for the information required to set up the environment. The script also enables a user to choose various types of environments, such as a full tier, including a PeopleSoft database, or a mid-tier, with Application Server, web server and Process Scheduler, that connects to an existing database.See "Installing the PeopleSoft Homes," Reviewing the DPK Setup Script Options.The DPKs are delivered with the PeopleSoft Puppet modules, which are initialization and management scripts based upon the open-source Puppet software. In addition to the convenience of using the interactive DPK setup script, you can take advantage of the Puppet Hiera functionality to customize and control the installation. Note that some installation scenarios require customizations to complete the deployment. See "Completing the DPK Initialization with Customizations."

Preparing for Installation Chapter 1
28 Copyright © 2018, Oracle and/or its affiliates. All Rights Reserved.
This section describes the DPKs used in the PeopleSoft installation and overviews of the installation process for various scenarios. The PeopleSoft Application Images are available as Microsoft Windows, Linux, and Oracle VM VirtualBox DPKs. The VirtualBox DPKs are used for PUM maintenance, and are not covered in this documentation. The PeopleSoft PeopleTools 8.56 DPKs are available for IBM AIX, Linux, Microsoft Windows, and Oracle Solaris on SPARC operating systems. You can also install on an HP-UX operating system using PeopleSoft PeopleTools installation files in the non-DPK format.See Reviewing the Installation Choices.
Note. Oracle recommends that you use the Native OS for Linux or Native OS for Windows DPKs for a fresh installation, not the VirtualBox DPKs.
Note. Oracle supports a number of versions of UNIX and Linux, in addition to Microsoft Windows, for the PeopleSoft installation. Throughout this book, there are references to operating systems. Where necessary, this book refers to specific operating systems by name (for example, Oracle Solaris, IBM AIX, or Linux); however forsimplicity and brevity, the word UNIX is sometimes used to refer to all UNIX-like operating systems, including IBM AIX, Linux, HP-UX, and Oracle Solaris for SPARC. For the most up-to-date information on operating system support for your database platform, see the Certification information on My Oracle Support.
Reviewing the PeopleSoft PeopleTools DPKsThe PeopleSoft PeopleTools DPKs are delivered for each PeopleTools patch. The files are double-zipped. This table describes the downloaded zip files and the embedded zip files. When you follow the instructions provided inthis documentation you will extract the first zip file to get the DPK setup script. When you run the setup script, it takes care of extracting the remaining zip files. Do not unzip before reading the instructions.
Downloaded Zip Files Embedded Zip Files Description
PEOPLETOOLS-<OS>-8.56.xx_1of4.zip
The setup folder and other files Setup DPK
PEOPLETOOLS-<OS>-8.56.xx_2of4.zip
PT-DPK-<OS>-8.56.xx-1of2.zip PeopleTools server, Part 1
PEOPLETOOLS-<OS>-8.56.xx_3of4.zip
PT-DPK-<OS>-8.56.xx-2of2.zip PeopleTools server, Part 2
PEOPLETOOLS-<OS>-8.56.xx_4of4.zip
PTC-DPK-<OS>-8.56.xx-1of1.zip PeopleTools Client for 8.56
The filenames include the following:
• <OS> is one of these operating systems:
• AIX for IBM AIX
• LNX for Linux
• WIN for Microsoft Windows
• SOL for Oracle Solaris for SPARC
• xx refers to the patch number.

Chapter 1 Preparing for Installation
Copyright © 2018, Oracle and/or its affiliates. All Rights Reserved. 29
Reviewing the PeopleSoft Application ImagesThe PeopleSoft application software is delivered in the PeopleSoft Application Images posted on My Oracle Support. The DPKs that comprise the PeopleSoft Application Images are double-zipped. When you follow the instructions provided in this documentation you will extract the first zip file to get the DPK setup script. When you run the setup script, it takes care of extracting the remaining zip files. Do not unzip before reading the instructions.The first four zip files in the PeopleSoft Application Images are the same type as the four zip files in the PeopleTools patches; that is, two PeopleTools server DPKs, a PeopleTools client DPK, and a setup DPK. However, because the PeopleSoft Application Images and the PeopleTools patches follow different schedules, thepatch releases will not be the same.
Note. The PeopleTools Client DPKs are specific to Microsoft Windows operating systems. The operating system for the PeopleTools server DPKs that are packaged with the PeopleSoft Application Image is the same as the other DPKs that make up the PeopleSoft Application Image.
This table describes the zip files that you download for the Native Linux and Windows DPKs, and the embedded zip files. Note that the content description is also available in the manifest that is posted on the same pages where you can find links to the most current image. On the PeopleSoft Update Image (PUM) Home Page, select the PeopleSoft Update Images tab, and then select the update image home page for your PeopleSoft application. The links and manifest are located in the Update Image Link section.The VirtualBox version of the PeopleSoft Application Images have a slightly different set of DPK zip files; that is, the VirtualBox Shell OVA and the Elasticsearch DPK are included in the VirtualBox images. These DPKs are not included for the Native OS for Windows and Native OS for Linux DPKs. The current documentation does notdescribe the installation of the VirtualBox images.See PeopleSoft Deployment Packages for Update Images Installation (PeopleSoft PeopleTools 8.56), PeopleSoft Update Image (PUM) Home Page, My Oracle Support, Doc ID 1641843.2.
Downloaded Zip Files Files After First Extraction1 Description
<Product>-920-UPD-<PI_Number>-<OS>_1of11.zip
The setup folder and other files Setup DPK
<Product>-920-UPD-<PI_Number>-<OS>_2of11.zip
PT-DPK-<OS>-8.56.xx-1of2.zip PeopleTools server, Part 1
<Product>-920-UPD-<PI_Number>-<OS>_3of11.zip
PT-DPK-<OS>-8.56.xx-2of2.zip PeopleTools server, Part 2
<Product>-920-UPD-<PI_Number>-<OS>_4of11.zip
PTC-DPK-WIN8.54.xx-1of1.zip PeopleTools Client for 8.54
<Product>-920-UPD-<PI_Number>-<OS>_5of11.zip
PTC-DPK-WIN8.55.xx-1of1.zip PeopleTools Client for 8.55
<Product>-920-UPD-<PI_Number>-<OS>_6of11.zip
PTC-DPK-WIN8.56.xx-1of1.zip PeopleTools Client for 8.56
<Product>-920-UPD-<PI_Number>-<OS>_7of11.zip
ODC-DPK-WIN-12.1.0.2-xxxxxx-1of1.zip
Oracle Database client

Preparing for Installation Chapter 1
30 Copyright © 2018, Oracle and/or its affiliates. All Rights Reserved.
Downloaded Zip Files Files After First Extraction1 Description
<Product>-920-UPD-<PI_Number>-<OS>_8of11.zip
ODS-DPK-<OS>-12.1.0.2-xxxxxx-1of1.zip
Oracle Database server
<Product>-920-UPD-<PI_Number>-<OS>_9of11.zip
APP-DPK-<OS>-<Product_Name>92-8.56.xx-1of3.zip
PeopleSoft Application DPK, Part 1
<Product>-920-UPD-<PI_Number>-<OS>_10of11.zip
APP-DPK-<OS>-<Product_Name>92-8.56.xx-2of3.zip
PeopleSoft Application DPK, Part 2
<Product>-920-UPD-<PI_Number>-<OS>_11of11.zip
APP-DPK-<OS>-<Product_Name>92-8.56.xx-3of3.zip
PeopleSoft Application DPK, Part 3
1 The filenames will vary depending upon the date posted or the associated release and patch. Note that the DPK setup script will carry out the first extraction. The names are given here for information.The filenames for the downloaded zip files have the following format:<Product>-920-UPD-<PI_Number>-<OS>_#ofn.zipFor example:HCM-920-UPD-024-LNX_1of11.zipHCM-920-UPD-024-LNX_2of11.zip[...]HCM-920-UPD-024-LNX_11of11.zipThe files names are comprised of the following parts:
• <Product> is an abbreviation that represents the PeopleSoft application name, as described in the following table.
PeopleSoft Application Product Name Abbreviation
PeopleSoft Customer Relationship Management CRM
PeopleSoft Campus Solutions CS
PeopleSoft Enterprise Learning Management ELM
PeopleSoft Financials and Supply Chain Management FSCM
PeopleSoft Human Capital Management HCM
PeopleSoft Interaction Hub IH
• <PI_Number> is the PI image number, such as 024.
• <OS> is one of these operating systems:
• LNX for the Native OS DPKs for Oracle Linux
• WIN for the Native OS DPKs for Microsoft Windows
• OVA for the VirtualBox DPKs

Chapter 1 Preparing for Installation
Copyright © 2018, Oracle and/or its affiliates. All Rights Reserved. 31
• n represents the total number of zip files.
Reviewing the Installation ChoicesThis section includes overviews of the methods to install the PeopleSoft Application Images, depending upon your operating system and other components.If you want to use the PeopleSoft 9.2 application PIs to create a PeopleSoft Update Manager (PUM) source for applying updates and fixes, see PeopleSoft Deployment Packages for Update Images Installation.See PeopleSoft Update Manager (PUM) Home Page, My Oracle Support, Doc ID 1641843.2.
Installation Format Operating System Web Server Overview Section
PeopleTools and PeopleSoft application DPKs
Microsoft Windows Oracle WebLogic Reviewing the DPK Installation Process (Microsoft Windows)
Traditional PeopleTools installation media (VCD)
PeopleSoft application DPKs
HP-UX Oracle WebLogic Reviewing the Installation onHP-UX
PeopleTools and PeopleSoft application DPKs
• AIX
• Linux
• Microsoft Windows
• Solaris for SPARC
IBM WebSphere Reviewing the Installation with IBM WebSphere (AIX, Linux, Microsoft Windows, or Solaris)
Reviewing the DPK Installation Process (Microsoft Windows)These are the high-level steps for using the PeopleSoft Application Images to perform a fresh installation (that is, you are not upgrading or updating an existing environment):1. Locate the Native OS DPKs for Microsoft Windows for your PeopleSoft 9.2 Application, and download the
PeopleSoft Application DPK, Part 1.
Do not unzip the file. If you need to FTP the file, use binary mode.
See "Installing the PeopleSoft Homes," Obtaining the PeopleSoft Application and PeopleTools DPKs.
2. Download the PeopleTools 8.56 DPKs for Windows.
Select the PeopleTools patch release specified for the PeopleSoft 9.2 application.
3. Install PS_HOME and PS_APP_HOME using the PeopleTools DPKs.
PS_HOME includes the PeopleTools utilities that you use in the next step. PS_APP_HOME includes the files needed to create an application database.
Note. Before running the DPK setup script, review the setup script options. Certain installation situations require a customized procedure.
See "Installing the PeopleSoft Home," Reviewing the DPK Setup Script Options.
4. Combine PS_HOME and PS_APP_HOME into a separate third installation directory, referred to here as PTOOLS_APP_HOME.

Preparing for Installation Chapter 1
32 Copyright © 2018, Oracle and/or its affiliates. All Rights Reserved.
5. In the Preinstallation Worksheet, define Transfer Parameter 2 – PeopleSoft File Server High Level Directory, as PTOOLS_APP_HOME.
See "Setting Up the Batch Environment," Completing the Preinstallation Worksheet.
6. Use pstrans.exe to transfer files from PTOOLS_APP_HOME to the z/OS mainframe.
See "Setting Up the Batch Environment," Using PeopleSoft Server Transfer.
7. Delete PTOOLS_APP_HOME if desired.
8. Create a DEMO or SYS database.
9. Use the PeopleTools DPK setup script to install Oracle Tuxedo and Oracle WebLogic, and configure the application server, PeopleSoft Pure Internet Architecture (PIA) and Process Scheduler domains.
10. Complete optional tasks, such as installing and compiling COBOL.
Reviewing the Installation Process on HP-UXIf you are installing on a supported HP-UX operating system, you must install PeopleSoft PeopleTools 8.56 using the installation files delivered in the traditional format, for all operating systems. You use a Microsoft Windows or Linux computer to download and transfer the PeopleSoft Application software from the PeopleSoft DPKs. Here is a high-level overview of the steps.Use Case 1For this use case you use a separate Linux server to download and deploy the PeopleSoft application DPK and transfer required files to the HP-UX server.1. Obtain the installation files for PeopleSoft PeopleTools 8.56 for all operating systems, in the non-DPK format.
You can access links to the latest PeopleSoft PeopleTools patch releases from the PeopleSoft PeopleTools Patches Home Page. Select the tab PeopleTools 8.56 Patches, and then PeopleTools 8.56 Patches on Other Operating Systems.
See PeopleSoft PeopleTools Patches Home Page, My Oracle Support, Doc ID 2062712.2.
2. Install PeopleSoft PeopleTools (PS_HOME) on HP-UX using the PeopleSoft installer.
See PeopleSoft PeopleTools 8.56 Installation (for your database platform), "Using the PeopleSoft Installer."
To locate the documentation, go to Oracle's PeopleSoft PeopleTools 8.56 Home Page, My Oracle Support, Doc ID 2259140.2, and select the Installation and Upgrade tab. Go to Installation Documentation, and access the installation guides in the section PeopleSoft PeopleTools.
3. Install necessary supporting software, such as Oracle Tuxedo, database server and connectivity software, and web server software, on the HP-UX server.
See "Installing Additional Components."
See "Installing Web Server Products."
4. Download the DPKs for PeopleSoft PeopleTools 8.56 and your PeopleSoft Application Image in the Native OS for Linux format.
Note. The PeopleSoft PeopleTools 8.56 DPKs must be obtained separately.
See "Installing the PeopleSoft Homes," Obtaining the PeopleSoft Application and PeopleTools DPKs.
5. On a Linux server or VM, use the DPK setup script to install the PeopleSoft Application installation directory,PS_APP_HOME.
When running the DPK setup script, specify a FRESH installation, which installs the files needed for the PeopleSoft application database creation.

Chapter 1 Preparing for Installation
Copyright © 2018, Oracle and/or its affiliates. All Rights Reserved. 33
See "Installing the PeopleSoft Homes," Reviewing the DPK Script Options.
6. On the Linux server or VM, tar the PS_APP_HOME directory.
7. Using FTP, transfer the PS_APP_HOME tar file from the Linux server or VM to the HP-UX server.
8. On the HP-UX server, untar PS_APP_HOME.
9. Create a System or Demo application database.
See the chapters on creating databases in this documentation.
10. Create Application Server, Process Scheduler, and web server domains using PSADMIN.
See the chapters on configuring Application Server in this documentation.
See the chapters on setting up the PeopleSoft Pure Internet Architecture in this documentation.
See the chapters on configuring Process Scheduler in this documentation.
Use Case 2For this use case you use Oracle VirtualBox on a Microsoft Windows server to deploy the PeopleSoft ApplicationImage and transfer the required files to the HP-UX server. 1. Obtain the installation files for PeopleSoft PeopleTools 8.56 for all operating systems, in the non-DPK format.
You can access links to the latest PeopleSoft PeopleTools patch releases from the PeopleSoft PeopleTools Patches Home Page. Select the tab PeopleTools 8.56 Patches, and then PeopleTools 8.56 Patches on Other Operating Systems.
See PeopleSoft PeopleTools Patches Home Page, My Oracle Support, Doc ID 2062712.2.
2. Install PS_HOME on HP-UX using the PeopleSoft installer.
See PeopleSoft PeopleTools 8.56 Installation (for your database platform), "Using the PeopleSoft Installer."
To locate the documentation, go to Oracle's PeopleSoft PeopleTools 8.56 Home Page, My Oracle Support, Doc ID 2259140.2, and select the Installation and Upgrade tab. Go to Installation Documentation, and access the installation guides in the section PeopleSoft PeopleTools.
3. Install necessary supporting software, such as Oracle Tuxedo, database server and connectivity software, and web server software, on the HP-UX server.
See "Installing Additional Components."
See "Installing Web Server Products."
4. Install VirtualBox on a Microsoft Windows computer.
Note that you must install Oracle VirtualBox on a physical computer, not a virtual machine (VM).
See PeopleSoft Deployment Packages for Update Images Installation.
The installation guide is available on PeopleSoft Update Manager (PUM) Home Page, My Oracle Support, Doc ID 1641843.2. Select the PeopleSoft Update Images Home Pages tab. On the page for your PeopleSoft application, expand the section Installation Documentation.
5. Download the PeopleSoft Application Image in the VirtualBox format to the Microsoft Windows computer.
You can access links to the PeopleSoft Application Images from the PeopleSoft Update Manager (PUM) Home Page. Select the PeopleSoft Update Images Home Pages tab. On the page for your PeopleSoft application, in the update image link section, select the link for Native OS.
See PeopleSoft Update Manager (PUM) Home Page, My Oracle Support, Doc ID 1641843.2.
6. Use the DPK setup script to install the complete PeopleSoft environment from the VirtualBox DPK.
Choose the Bridged Adapter option, and specify a FRESH installation, which installs the files needed for the PeopleSoft application database creation.

Preparing for Installation Chapter 1
34 Copyright © 2018, Oracle and/or its affiliates. All Rights Reserved.
Note. The DPK setup script creates a Linux VM in VirtualBox, and installs a full-tier PeopleSoft application environment, including PS_HOME, PS_APP_HOME, PS_CFG_HOME, and so on. Although all of these items are not needed for the next steps, the full-tier installation is the only supported method when deploying with VirtualBox.
See PeopleSoft Deployment Packages for Update Images Installation, PeopleSoft Update Manager (PUM) Home Page, My Oracle Support, Doc ID 1641843.2.
7. In the VirtualBox VM, tar the PS_APP_HOME directory.
8. Using FTP, transfer the PS_APP_HOME tar file from the VirtualBox VM to the HP-UX server.
9. On the HP-UX server, untar PS_APP_HOME.
10. Create a System or Demo application database.
See the chapters on creating a database in this documentation.
11. Create Application Server, Process Scheduler, and web server domains using PSADMIN.
See the chapters on configuring Application Server in this documentation.
See the chapters on setting up the PeopleSoft Pure Internet Architecture in this documentation.
See the chapters on configuring Process Scheduler in this documentation.
12. Complete optional tasks, such as installing and compiling COBOL
Reviewing the Installation Process with IBM WebSphere (AIX, Linux, Microsoft Windows, or Solaris)The PeopleTools DPKs install Oracle WebLogic as the web server. This section provides an overview of the stepsneeded to use IBM WebSphere as the web server with the PeopleSoft Application Images and the PeopleTools DPKs. To install the PeopleSoft Application Images and use IBM WebSphere as the web server for your PeopleSoft installation:1. Download the necessary DPK from the PeopleSoft Application Image, and the PeopleTools 8.56 DPKs.
For installations on IBM AIX, Linux, or Oracle Solaris, download the Native OS DPK for Linux. For installations on Microsoft Windows, download the Native OS DPK for Windows. Do not unzip the file. If youneed to FTP the file, use binary mode.
Note. You must obtain and download the PeopleTools 8.56 DPKs separately.
See "Installing the PeopleSoft Homes," Obtaining the PeopleSoft Application and PeopleTools DPKs.
2. Use the DPK setup script command psft-dpk-setup.bat --env_type midtier --deploy_only on Microsoft Windows or ./psft-dpk-setup.sh --env_type midtier --deploy_only on Linux to install the PeopleSoft PeopleTools installation directory, Oracle Tuxedo, and Oracle WebLogic software.
This option deploys the PS_HOME directory, as well as the Oracle Tuxedo and Oracle WebLogic software, but does not create the PeopleSoft Application Server, web server, and Process Scheduler domains. Because there is no script option to install Oracle Tuxedo alone, we install both, but do not use the Oracle WebLogic installation.
See "Installing the PeopleSoft Homes," Reviewing the DPK Script Options.
3. Obtain and install IBM WebSphere 9.0.0.0.
See "Installing Web Server Products," Installing IBM WebSphere Application Server.

Chapter 1 Preparing for Installation
Copyright © 2018, Oracle and/or its affiliates. All Rights Reserved. 35
4. Create a System or Demo application database.
See the chapters on creating database in this documentation.
5. Create the Application Server domain using PSADMIN.
See the chapters on configuring Application Server in this documentation.
6. Set up PeopleSoft Pure Internet Architecture (PIA). and specify IBM WebSphere in the silent mode response file.
For example:
# Web server type. Possible values are "weblogic", "websphere"SERVER_TYPE=websphere# WebSphere Home, the location where IBM WebSphere is installed (for⇒ WebSphere deployment only)WS_HOME=C:/IBM/WebSphere/AppServer
See "Setting Up the PeopleSoft Pure Internet Architecture in Silent Mode."
7. Configure the Process Scheduler.
See the chapters on configuring Process Scheduler in this documentation.
8. Complete optional tasks, such as installing and compiling COBOL
Understanding the PeopleSoft Upgrade Source Deployment Packages
This section discusses:
• Reviewing the PeopleSoft Upgrade Source Image Usage
• Reviewing the PeopleSoft Upgrade Source Image
• Reviewing the PeopleSoft Upgrade Source Image Installation
Reviewing the PeopleSoft Upgrade Source Image UsageThe PeopleSoft Upgrade Source Images can be used during a PeopleSoft application upgrade to install a demo database, and are available for each PeopleSoft application. Keep in mind that the PeopleSoft Upgrade Source Images are not interchangeable with the PeopleSoft application images. Here is an overview of the differences:
• The PeopleSoft Upgrade Source Image is released on a different schedule, and the version numbering sequence is independent of both the PeopleSoft application images and the PeopleSoft PeopleTools patches.
• The PeopleSoft Upgrade Source Image zip file names include UPG rather than UPD.
See Reviewing the PeopleSoft Upgrade Source Image.
• The VirtualBox version of the PeopleSoft application image is not recommended for use with a fresh installation, but the VirtualBox version of the Upgrade Source Image can be used to install an upgrade demo database.
• The DPK setup script recognizes the type of DPK, and suppresses unnecessary prompts.
See Reviewing the PeopleSoft Upgrade Source Image Installation.

Preparing for Installation Chapter 1
36 Copyright © 2018, Oracle and/or its affiliates. All Rights Reserved.
Reviewing the PeopleSoft Upgrade Source ImageThe DPKs for the Upgrade Source Image are double-zipped. When you follow the instructions provided in this documentation you will extract the first zip file to get the DPK setup script. When you run the setup script, it takescare of extracting the remaining zip files. Do not unzip before reading the instructions.The first four zip files in the Upgrade Source Image are the same type as the four zip files in the PeopleTools patches; that is, two PeopleTools server DPKs, a PeopleTools client DPK, and a setup DPK. However, because the Upgrade Source Image and the PeopleTools patches follow different schedules, the patch releases will not be the same.This table describes the zip files that you download for the Native OS for Linux and Windows DPKs, and the embedded zip files. Note that the content description is also available in the manifest posted on the upgrade pages where you can find links to the most current Upgrade Source Image. See Reviewing the PeopleSoft Upgrade Source Image Installation.The VirtualBox DPKs have a slightly different set of zip files; that is, the VirtualBox Shell OVA and the Elasticsearch DPK are available for VirtualBox DPKs. These two DPKs are not included for the Native OS DPKsfor Microsoft Windows and Linux. The current documentation does not describe the installation of the VirtualBoxDPKs.See PeopleSoft Deployment Packages for Update Images Installation (PeopleSoft PeopleTools 8.56), PeopleSoft Update Image (PUM) Home Page, My Oracle Support, Doc ID 1641843.2.
Downloaded Zip Files Files After First Extraction1 Description
<Product>-920-UPG-<Img_Number>-<OS>_1of11.zip
The setup folder and other files Setup DPK
<Product>-920-UPG-<Img_Number>-<OS>_2of11.zip
PT-DPK-<OS>-8.56.xx-1of2.zip PeopleTools server, Part 1
<Product>-920-UPG-<Img_Number>-<OS>_3of11.zip
PT-DPK-<OS>-8.56.xx-2of2.zip PeopleTools server, Part 2
<Product>-920-UPG-<Img_Number>-<OS>_4of11.zip
PTC-DPK-WIN8.54.xx-1of1.zip PeopleTools Client for 8.54
<Product>-920-UPG-<Img_Number>-<OS>_5of11.zip
PTC-DPK-WIN8.55.xx-1of1.zip PeopleTools Client for 8.55
<Product>-920-UPG-<Img_Number>-<OS>_6of11.zip
PTC-DPK-WIN8.56.xx-1of1.zip PeopleTools Client for 8.56
<Product>-920-UPG-<Img_Number>-<OS>_7of11.zip
ODC-DPK-WIN-12.1.0.2-xxxxxx-1of1.zip
Oracle Database client
<Product>-920-UPG-<Img_Number>-<OS>_8of11.zip
ODS-DPK-<OS>-12.1.0.2-xxxxxx-1of1.zip
Oracle Database server
<Product>-920-UPG-<Img_Number>-<OS>_9of11.zip
APP-DPK-<OS>-<Product_Name>92-8.56.xx-1of3.zip
PeopleSoft Application DPK, Part 1

Chapter 1 Preparing for Installation
Copyright © 2018, Oracle and/or its affiliates. All Rights Reserved. 37
Downloaded Zip Files Files After First Extraction1 Description
<Product>-920-UPG-<Img_Number>-<OS>_10of11.zip
APP-DPK-<OS>-<Product_Name>92-8.56.xx-2of3.zip
PeopleSoft Application DPK, Part 2
<Product>-920-UPG-<Img_Number>-<OS>_11of11.zip
APP-DPK-<OS>-<Product_Name>92-8.56.xx-3of3.zip
PeopleSoft Application DPK, Part 3
1 The filenames will vary depending upon the date posted or the associated release and patch. After you extract the first zip file manually, note that the DPK setup script will carry out the first extraction. The names are given here for information.The filenames for the downloaded zip files have the following format:<Product>-920-UPG-<Img_Number>-<OS>_#ofn.zipFor example:HCM-920-UPG-003-LNX_1of11.zipHCM-920-UPG-003-LNX_2of11.zip[...]HCM-920-UPG-003-LNX_11of11.zipThe files names are comprised of the following parts:
• <Product> is an abbreviation that represents the PeopleSoft application name, as described in the following table.
PeopleSoft Application Product Name Abbreviation
PeopleSoft Customer Relationship Management CRM
PeopleSoft Campus Solutions CS
PeopleSoft Enterprise Learning Management ELM
PeopleSoft Financials and Supply Chain Management FSCM
PeopleSoft Human Capital Management HCM
PeopleSoft Interaction Hub IH
• <Img_Number> is the Upgrade Source Image version number, such as 03.
• <OS> is LNX for the Native OS DPKs for Oracle Linux, WIN for the Native OS DPKs for Microsoft Windows, or OVA for the VirtualBox DPKs.
• n represents the total number of zip files.
Reviewing the PeopleSoft Upgrade Source Image InstallationThe installation process for the Upgrade Source Image is similar to the installation of the PeopleSoft application images, with a few differences outlined here.

Preparing for Installation Chapter 1
38 Copyright © 2018, Oracle and/or its affiliates. All Rights Reserved.
Note. These instructions apply to the Upgrade Source Image that is created with PeopleSoft PeopleTools 8.56.
To install the PeopleSoft Upgrade Source Image for use as an upgrade demo database:1. Download the Upgrade Source Image for your PeopleSoft 9.2 application.
See Reviewing the Upgrade Source Image for information on the naming convention for the downloaded DPKs.
To find usage information and the links to the latest Upgrade Source Image, select the Upgrade Source Image tab on the following upgrade home pages:
• Campus Solutions Upgrade Home Page, My Oracle Support, Doc ID 2078564.2
• CRM Upgrade Home Page, My Oracle Support, Doc ID 1961844.2.
• ELM Upgrade Home Page, My Oracle Support, Doc ID 1962959.2.
• FSCM Upgrade Home Page, My Oracle Support, Doc ID 1963697.2
• HCM Upgrade Home Page, My Oracle Support, Doc ID 1959519.2
2. Obtain the installation guide.
• If you are installing the Native OS for Linux or Windows DPKs, use the installation guide you are currently reading.
See Oracle's PeopleSoft PeopleTools 8.56 Home Page, My Oracle Support, Doc ID 2259140.2. Select Installation and Upgrade, Installation Documentation, PeopleSoft 9.2 Application Deployment Packages.
• If you are installing the VirtualBox version of the Upgrade Source Image, use PeopleSoft Deployment Packages for Update Images Installation (PeopleSoft PeopleTools 8.56).
You can find this installation guide on the PeopleSoft Update Manager Home Page. Select the Update image home page for your PeopleSoft application (for example, HCM Update Image Home Page), and locate the Installation Documentation section.
See PeopleSoft Update Image (PUM) Home Page, My Oracle Support, Doc ID 1641843.2.
3. Download the PeopleTools 8.56 DPKs.
• Select the operating system you want to install on. The PeopleTools 8.56 DPKs are available for AIX, Linux, Microsoft Windows, and Solaris for SPARC.
• Select the PeopleTools patch release specified for the PeopleSoft 9.2 application.
4. Use the PeopleTools DPK setup script to deploy the PeopleSoft environment.
When running the DPK setup script, you will not see the following prompt for the installation type, which is included when deploying the PeopleSoft application images.
Enter the PeopleSoft installation [PUM or FRESH] type [PUM]:
Task 1-1: Reviewing Hardware Requirements
This section discusses:
• Reviewing Hardware Requirements for Microsoft Windows
• Reviewing Hardware Requirements on IBM AIX, Linux, or Oracle Solaris

Chapter 1 Preparing for Installation
Copyright © 2018, Oracle and/or its affiliates. All Rights Reserved. 39
Task 1-1-1: Reviewing Hardware Requirements for Microsoft WindowsYou can install the PeopleSoft Application Image deployment packages (DPKs) directly on a system running a Microsoft Windows operating system. The PeopleSoft DPKs are certified to run on those Microsoft Windows operating systems that are certified for PeopleSoft PeopleTools 8.56. The Microsoft Windows system can be a physical computer or a virtual machine.Oracle strongly recommends that you dedicate a Microsoft Windows machine for the PeopleTools client. This should be a machine that is not used for other PeopleSoft purposes.See "Deploying the PeopleSoft PeopleTools Deployment Packages," Deploying the PeopleTools Client DPK in Standalone Mode, for information on installing the PeopleTools client utilities.
• Host computer: The PeopleSoft DPKs can be deployed on any supported Microsoft Windows host, bare-metalor virtual.
If you deploy on a virtual host computer, you are responsible for provisioning the virtual machine before beginning the deployment.
• Host operating system: The host operating system (OS) must be a 64-bit platform that is certified by Oracle for PeopleSoft systems.
Note. My Oracle Support Certification notes include information about the PeopleSoft PeopleTools components that are certified for each operating system. Some OSs are certified only for browsers and clients. If you want to deploy a full PeopleSoft environment, verify that the OS you want to use is certified for server installation.
See My Oracle Support, Certifications.
See PeopleSoft PeopleTools Certifications, My Oracle Support, Doc ID 747587.1, for help searching PeopleSoft Certifications.
• RAM (Memory): A minimum of 8 GB RAM is required to run a PeopleSoft environment.
• Disk space: The disk space requirements vary depending upon the type of environment you set up.
See "Preparing to Deploy," Understanding PeopleSoft Components.
• 25–35 GB free disk space for the downloaded zip files
You may remove these files after you have successfully initialized your virtual machine.
• 150 GB free disk space is required to deploy and set up a full tier PeopleSoft environment.
• 75 GB free disk space is required to deploy and set up a db-tier PeopleSoft environment.
• 25 GB free disk space is required to deploy and set up a mid-tier PeopleSoft environment.
See Also
Tech Update - Main Page, My Oracle Support, Doc ID 764222.1

Preparing for Installation Chapter 1
40 Copyright © 2018, Oracle and/or its affiliates. All Rights Reserved.
Task 1-1-2: Reviewing Hardware Requirements on IBM AIX, Linux, or OracleSolarisYou can install the PeopleSoft Application Image deployment packages (DPKs) directly on a system running a Linux operating system. You can install the PeopleSoft PeopleTools deployment packages (DPKs) directly on a system running an IBM AIX, Linux, or Oracle Solaris for SPARC operating system. The PeopleSoft Application Images and PeopleSoft PeopleTools DPKs are certified to run on those operating systems that are certified for PeopleSoft PeopleTools 8.56. The AIX, Linux, or Solaris system can be a physical computer or a virtual machine.
• Host computer: The PeopleSoft DPKs can be deployed on any supported AIX, Linux, or Solaris host, either a physical computer or virtual machine. The PeopleSoft DPKs can also be deployed on Oracle Exalogic Elastic Cloud.
If you deploy on a virtual host computer, you are responsible for provisioning the virtual machine before beginning the deployment.
• Host operating system: The host operating system must be a 64-bit platform that is certified by Oracle for PeopleSoft systems.
See My Oracle Support, Certifications.
See PeopleSoft PeopleTools Certifications, My Oracle Support, Doc ID 747587.1, for help searching PeopleSoft Certifications.
• RAM (Memory): A minimum of 8 GB RAM is required to run a PeopleSoft environment.
• Disk space: The disk space requirements vary depending upon the type of environment you set up.
See "Preparing to Deploy," Understanding PeopleSoft Components.
• 25–35 GB free disk space for the downloaded zip files
You may remove these files after you have successfully initialized your virtual machine.
• 150 GB free disk space is required to deploy and set up a full tier PeopleSoft environment.
• 75 GB free disk space is required to deploy and set up a db-tier PeopleSoft environment.
• 25 GB free disk space is required to deploy and set up a mid-tier PeopleSoft environment.
See Also
My Oracle Support, Certifications.Tech Update - Main Page, My Oracle Support, Doc ID 764222.1
Task 1-2: Reviewing Software Requirements
This section discusses:
• Reviewing Software Requirements on Microsoft Windows
• Reviewing Software Requirements on Linux
• Reviewing Software Requirements on Solaris
• Reviewing Software Requirements on AIX
• Reviewing Requirements for the Puppet Software on Microsoft Windows
• Reviewing Requirements for the Puppet Software on Linux

Chapter 1 Preparing for Installation
Copyright © 2018, Oracle and/or its affiliates. All Rights Reserved. 41
• Reviewing Requirements for the Puppet Software on Solaris
• Reviewing Requirements for the Puppet Software on AIX
Task 1-2-1: Reviewing Software Requirements on Microsoft WindowsHere are the software requirements for using the PeopleSoft Deployment Packages on a Microsoft Windows machine:
• Administrative permission
• As of the PeopleSoft PeopleTools 8.56.06 patch release, the DPK setup script can be run from any drive, regardless of the drive where the Windows operating system is installed.
• Web Browser
You need a version certified for the current PeopleSoft PeopleTools release for end-users.
See My Oracle Support, Certifications.
• Zip utility
You need a utility that is able to extract (unzip) the DPK zip files for your operating system.
• Verify that the PATHEXT environment variable includes the extension .bat.
This is a requirement for running Puppet. For example:
PATHEXT=.COM;.EXE;.BAT;.CMD;.VBS;.VBE;.JS;.JSE;.WSF;.WSH;.MSC
Task 1-2-2: Reviewing Software Requirements on LinuxHere are the software requirements for using the PeopleSoft Deployment Packages on a Linux machine:
• You must have root access to run the DPK setup script.
• If you are installing the PeopleSoft DPKs on Oracle Linux 6 or 7 with Unbreakable Enterprise Kernel (UEK), apply the latest UEK kernel from the Oracle YUM repository at http://public-yum.oracle.com/index.html.
• Zip utility
You need a utility that is able to extract (unzip) the DPK zip files for your operating system; for example, tar or unzip.
Task 1-2-3: Reviewing Software Requirements on SolarisHere are the software requirements for using the PeopleSoft Deployment Packages on Oracle Solaris for SPARC:
• You must have root access to run the DPK setup script.
• Zip utility
You need a utility that is able to extract (unzip) the DPK zip files for your operating system; for example, tar or unzip.
• OpenSSL
Obtain the latest version of OpenSSL for your operating system and install it on the host.
Task 1-2-4: Reviewing Software Requirements on AIXHere are the software requirements for using the PeopleSoft Deployment Packages on an IBM AIX machine:

Preparing for Installation Chapter 1
42 Copyright © 2018, Oracle and/or its affiliates. All Rights Reserved.
• You must have root access to run the DPK setup script.
• Utilities for extracting the DPK zip files
You need both the gunzip and unzip utilities for your operating system in order to extract the DPK zip files, and the PATH for the root user must include the gunzip and unzip locations.
• OpenSSL
Obtain the latest version of OpenSSL for your operating system and install it on the host.
• JDK 8.0
You must manually install JDK 8.0 from the IBM web site. To obtain 64-bit IBM JDK for IBM AIX:
1. Go to the IBM JDK download and service site.
http://www.ibm.com/developerworks/java/jdk/aix/service.html
Note. You need a user name and password for downloading IBM JDK. If you don't have the required credentials, contact IBM AIX support.
2. Select the link for Java 8 64-bit under Java SE Version 8.
3. Provide the required information to sign in.
4. Install the JDK on the AIX computer where you will install the PeopleSoft AIX DPK.
5. Make a note of the installation location.
For the AIX DPK installation, you must perform the deployment using the DPK customizations, and specify the AIX JDK installation location.
See "Completing the DPK Initialization With Customizations," Preparing the Customization File for JDK on AIX.
Task 1-2-5: Reviewing Requirements for the Puppet Software on Microsoft WindowsThe PeopleSoft DPKs are delivered with the PeopleSoft Puppet modules, which are initialization and management scripts based upon open-source Puppet software.
• Installation requirements
In most cases, the Puppet software will be installed by the DPKs. In some scenarios it may be necessary for you to install either Puppet or its dependencies directly. If so, use these guidelines:
• The DPK deployment requires open-source Puppet software.
See the Puppet Labs Web site at www.puppetlabs.com to download the software.
• Customer installation of Puppet is supported for Microsoft Windows operating systems.
• These are the minimum requirements for the software versions associated with using Puppet with the PeopleSoft DPKs on Microsoft Windows operating systems:
• Puppet Agent 1.5.2
• Puppet 4.5.2
• Hiera 3.2.0
• Facter 3.2.0
• Ruby 2.1.9
• Operating system packages required for Puppet

Chapter 1 Preparing for Installation
Copyright © 2018, Oracle and/or its affiliates. All Rights Reserved. 43
The Puppet software used for the DPK deployment is dependent on certain OS-level packages, which may notbe present in the delivered DPKs. In this case, you can use the information in the DPK setup log file to determine which packages are needed. It is the responsibility of the user to obtain and install the required packages.
See "Deploying the PeopleSoft PeopleTools Deployment Packages," Obtaining Operating System Packages Required for Puppet.
• Installation location
Puppet software is installed in a standard location by the DPKs. The DPK deployment checks for existing Puppet installations only in that standard location. If Puppet software was installed in a different location, for example for other business or development requirements, the DPK will not recognize or try to remove that existing Puppet installation. It will install to the standard location dictated by the DPK requirement, and the other Puppet installation may subsequently cause problems.
Task 1-2-6: Reviewing Requirements for the Puppet Software on LinuxThe PeopleSoft DPKs are delivered with the PeopleSoft Puppet modules, which are initialization and management scripts based upon open-source Puppet software.
• Installation requirements
In most cases, the Puppet software will be installed by the DPKs. In some scenarios it may be necessary for you to install either Puppet or its dependencies directly. If so, use these guidelines:
• The DPK deployment requires open-source Puppet software.
See the Puppet Labs Web site at www.puppetlabs.com to download the software.
• Customer installation of Puppet is supported for Linux operating systems.
• These are the minimum requirements for the software versions associated with using Puppet with the PeopleSoft DPKs on Linux operating systems:
• Puppet Agent 1.5.2
• Puppet 4.5.2
• Hiera 3.2.0
• Facter 3.2.0
• Ruby 2.1.9
• Operating system packages required for Puppet
The Puppet software used for the DPK deployment is dependent on certain OS-level packages, which may notbe present in the delivered DPKs. In this case, you can use the information in the DPK setup log file to determine which packages are needed. It is the responsibility of the user to obtain and install the required packages.
See "Deploying the PeopleSoft PeopleTools Deployment Packages," Obtaining Operating System Packages Required for Puppet.
• Installation location
Puppet software is installed in a standard location by the DPKs. The DPK deployment checks for existing Puppet installations only in that standard location. If Puppet software was installed in a different location, for example for other business or development requirements, the DPK will not recognize or try to remove that existing Puppet installation. It will install to the standard location dictated by the DPK requirement, and the other Puppet installation may subsequently cause problems.

Preparing for Installation Chapter 1
44 Copyright © 2018, Oracle and/or its affiliates. All Rights Reserved.
Task 1-2-7: Reviewing Requirements for the Puppet Software on SolarisThe PeopleSoft DPKs are delivered with the PeopleSoft Puppet modules, which are initialization and management scripts based upon open-source Puppet software.
• Installation requirements
In most cases, the Puppet software will be installed by the DPKs. In some scenarios it may be necessary for you to install either Puppet or its dependencies directly. If so, use these guidelines:
• The DPK deployment requires open-source Puppet software.
See the Puppet Labs Web site at www.puppetlabs.com to download the software.
• Customer installation of Puppet is not supported for Oracle Solaris for SPARC operating systems.
If you are installing the PeopleSoft DPKs for Oracle Solaris for SPARC, you must use the Puppet softwarethat is delivered with the DPKs.
• Before installing the PeopleSoft DPKs for Oracle Solaris for SPARC, check the Puppet web site for Puppet dependencies or limitations for those operating systems.
• These are the minimum requirements for the software versions associated with using Puppet with the PeopleSoft DPKs on Oracle Solaris for SPARC operating systems:
• Puppet 4.5.2
• Hiera 3.2.0
• Facter 3.2.0
• Ruby 2.1.9
• Operating system packages required for Puppet
The Puppet software used for the DPK deployment is dependent on certain OS-level packages, which may notbe present in the delivered DPKs. In this case, you can use the information in the DPK setup log file to determine which packages are needed. It is the responsibility of the user to obtain and install the required packages.
See "Deploying the PeopleSoft PeopleTools Deployment Packages," Obtaining Operating System Packages Required for Puppet.
• Installation location
Puppet software is installed in a standard location by the DPKs. The DPK deployment checks for existing Puppet installations only in that standard location. If Puppet software was installed in a different location, for example for other business or development requirements, the DPK will not recognize or try to remove that existing Puppet installation. It will install to the standard location dictated by the DPK requirement, and the other Puppet installation may subsequently cause problems.
Task 1-2-8: Reviewing Requirements for the Puppet Software on AIXThe PeopleSoft DPKs are delivered with the PeopleSoft Puppet modules, which are initialization and management scripts based upon open-source Puppet software.
• Installation requirements
In most cases, the Puppet software will be installed by the DPKs. In some scenarios it may be necessary for you to install either Puppet or its dependencies directly. If so, use these guidelines:
• The DPK deployment requires open-source Puppet software.
See the Puppet Labs Web site at www.puppetlabs.com to download the software.

Chapter 1 Preparing for Installation
Copyright © 2018, Oracle and/or its affiliates. All Rights Reserved. 45
• Customer installation of Puppet is not supported for IBM AIX operating systems.
If you are installing the PeopleSoft DPKs for IBM AIX, you must use the Puppet software that is deliveredwith the DPKs.
• If you are installing the PeopleSoft DPKs for IBM AIX, check the Puppet web site for Puppet dependencies orlimitations for those operating systems.
• These are the minimum requirements for the software versions associated with using Puppet with the PeopleSoft DPKs on AIX operating systems:
• Puppet 4.5.2
• Hiera 3.2.0
• Facter 3.2.0
• Ruby 2.1.9
• Operating system packages required for Puppet
The Puppet software used for the DPK deployment is dependent on certain OS-level packages, which may notbe present in the delivered DPKs. In this case, you can use the information in the DPK setup log file to determine which packages are needed. It is the responsibility of the user to obtain and install the required packages.
See "Deploying the PeopleSoft PeopleTools Deployment Packages," Obtaining Operating System Packages Required for Puppet.
• Installation location
Puppet software is installed in a standard location by the DPKs. The DPK deployment checks for existing Puppet installations only in that standard location. If Puppet software was installed in a different location, for example for other business or development requirements, the DPK will not recognize or try to remove that existing Puppet installation. It will install to the standard location dictated by the DPK requirement, and the other Puppet installation may subsequently cause problems.
Task 1-3: Using Oracle Software Delivery Cloud to Obtain Installation Files
Before beginning the installation, you should have obtained the PeopleSoft installation software by downloading the necessary zip files from the Oracle Software Delivery Cloud portal or My Oracle Support. Use the information available in the PeopleSoft documentation and My Oracle Support Certifications to be sure that you obtain all the zip files required for your environment.See Oracle Software Delivery Cloud, http://edelivery.oracle.com.See My Oracle Support, https://support.oracle.com.In case you have not yet obtained the necessary files, this documentation includes sections on obtaining the files at appropriate points during the installation process.
Note. If your PeopleSoft installation uses Oracle SOA Suite, note that the 32-bit versions of the Oracle SOA Suite10g media components on the Oracle Software Delivery Cloud portal are certified to run on the Linux x86-64 andthe Microsoft Windows 64-bit operating system platforms.
See Also
Downloading Software from Oracle Software Delivery Cloud, My Oracle Support, Doc ID 2098595.1

Preparing for Installation Chapter 1
46 Copyright © 2018, Oracle and/or its affiliates. All Rights Reserved.
Task 1-4: Considering Project Planning
Identify the maintenance schedule for upcoming PeopleSoft PeopleTools and PeopleSoft application releases. These releases are typically on a regular schedule (for example, quarterly, biannually) and should be included in your project planning and budgeting processes. Maintenance schedules are posted on My Oracle Support. It is important to plan regular maintenance in your overall project plans. For example, for a year-long enterprise upgrade, development, and conversion project, make sure to set aside time for applying the PeopleSoft PeopleTools minor releases that ship during that time frame. Otherwise, if you fall behind, you may find that you need a fix shipped with one of the minor releases that cannot be backported as a patch.Search for the term "maintenance schedules" on My Oracle Support. You can find schedules by year and quarter for PeopleSoft PeopleTools and PeopleSoft applications. The schedules include lists of bundles and maintenance packs for individual products.
Task 1-5: Planning Your Initial Configuration
This section discusses:
• Understanding Workstations
• Understanding PeopleSoft Servers and Clients
• Defining the PeopleTools Client
• Defining the File Server
• Defining the Database Server
• Defining the Application Server
• Defining the Process Scheduler (Batch) Server
• Defining Installation Locations
• Defining the Web Server
Note. Oracle supports a number of versions of UNIX and Linux in addition to Microsoft Windows for the PeopleSoft installation. Throughout this book, there are references to operating systems. Where necessary, this book refers to specific operating systems by name (for example, Oracle Solaris, IBM AIX, or Linux); however, for simplicity the word UNIX is often used to refer to all UNIX-like operating systems, including Linux.
Understanding Workstations
Using the PeopleTools Development Environment (Microsoft Windows-Based Clients)
Microsoft Windows-based clients are referred to as the PeopleTools Development Environment. These clients—which run on supported Microsoft Windows platforms—can connect to the PeopleSoft database directly using client connectivity software (a two-tier connection) or through a PeopleSoft application server (a three-tier connection).

Chapter 1 Preparing for Installation
Copyright © 2018, Oracle and/or its affiliates. All Rights Reserved. 47
Three-tier connectivity offers great performance advantages over two-tier (especially over a WAN), reduces network traffic, and generally does not require that you install database connectivity on the client. However, any Microsoft Windows-based clients that will be running Data Mover scripts against the database, or running COBOL or Structured Query Report (SQR) batch processes on the client, must have database connectivity installed.
Note. COBOL is not needed for PeopleTools or for applications that contain no COBOL programs. Check My Oracle Support for details about whether your application requires COBOL.
See Installing Supporting Applications.
You need to have the PeopleTools Development Environment set up to create your database. For more information on setting up the PeopleTools Development Environment, refer to the product documentation for PeopleSoft Configuration Manager.See the PeopleTools: System and Server Administration product documentation for more information about using PeopleSoft Configuration Manager.For installation purposes, you must set up at least one Microsoft Windows-based client for sign-on using a two-tier connection to the database, so that it can create and populate the PeopleSoft database. This documentation refers to this client as the install workstation. Depending on your installation plan, you may want to set up more than one install workstation so that you can perform asynchronous installation tasks in parallel.
Note. The Microsoft Windows machine that you use to perform your PeopleSoft PeopleTools installation must berunning in 256-color mode or higher when running the PeopleSoft installation and database configuration on Microsoft Windows. This is not necessary for UNIX or console mode.
Using Workstations Equipped with Supported Web Browsers
To run the PeopleSoft Pure Internet Architecture, the client workstation only needs a web browser that is HTML 4.0 compliant. You may need an additional workstation for demonstration and testing purposes if you plan to use a browser running on a platform other than Microsoft Windows—such as Macintosh or UNIX.See PeopleTools: Portal Technology.See My Oracle Support, Certifications.
Understanding PeopleSoft Servers and ClientsHere is a summary of the functionality included in the PeopleSoft servers and clients:
• File Server
All Client executables (such as PeopleSoft Application Designer and Configuration Manager), PS/nVision, Change Assistant, files and directories necessary to perform upgrade, and Client SQR.
See Defining the File Server
• PeopleTools Client
All Client executables (such as PeopleSoft Application Designer and Configuration Manager), PS/nVision, Change Assistant, Change Impact Analyzer, PeopleSoft Test Framework, PSEM Agent, and Client SQR.
See Defining the PeopleTools Client.
• Application Server
PSADMIN and COBOL for remote call
• Database Server

Preparing for Installation Chapter 1
48 Copyright © 2018, Oracle and/or its affiliates. All Rights Reserved.
Scripts and data directories, files necessary to run Data Mover.
• Process Scheduler Server
PSADMIN, COBOL, and SQR.
• Web Server
The Web Server contains all the scripts file, Portal Search data files, and PeopleSoft Pure Internet Architecture (PIA) installation tools that can assist in setting up a web server domain. However, to run the PeopleSoft Pure Internet Architecture, the client workstation only needs a web browser that is HTML 4.0 compliant.
Task 1-5-1: Defining the PeopleTools ClientThe PeopleTools Client is the environment repository for the PeopleSoft PeopleTools Development environment. The PeopleTools Client provides two-tier and three-tier connectivity to PeopleSoft applications.To install the PeopleTools Client, use the script included with the PeopleTools Client DPK. Keep in mind that the PeopleTools Client can be installed only on supported Microsoft Windows operating systems.
Note. The client may be referred to as the PeopleTools Client, PT Client, or PeopleSoft Microsoft Windows clientin this documentation.
See "Deploying the PeopleTools Client DPK."
Task 1-5-2: Defining the File ServerThe file server is the environment (or file) repository for the PeopleTools Development Environment, which is needed for the Database Configuration Wizard. The file server is also the repository for the files necessary to perform an upgrade. This includes Change Assistant and all of the executables and scripts that are necessary to perform an upgrade. You will apply patches and updates from My Oracle Support directly to the file server and then copy the updated files to your other servers. In addition, the file server is a source repository for COBOL andSQR.
Important! Remember, a COBOL compiler is not needed for PeopleSoft PeopleTools unless your application contains COBOL programs. If your application requires COBOL and you are running on Microsoft Windows, we require that you maintain a central repository of your COBOL source code on the Windows file server. See the task Installing Supporting Applications later in this chapter for details on where you should install your COBOL compiler.
For DB2 z/OS, the file server is used as a staging location to FTP files to the z/OS batch server only. If you are installing a file server on DB2 z/OS, when running the PeopleSoft Installer, you need to select all PeopleSoft Servers. This will ensure that all of the files needed by Server Transfer are installed to the PeopleSoft File Server.If you follow the default procedures recommended in this documentation, the install workstations, Microsoft Windows batch servers, and Microsoft Windows report servers will access the PeopleSoft files on the file server by pointing to a directory referred to in this documentation as PS_HOME on a shared network drive. You can install SQR on the file server, or install them locally on Microsoft Windows batch servers and on Microsoft Windows-based clients that will be running these processes locally.Setting up a file server is part of installations on both UNIX and Microsoft Windows environments. If you are doing an installation only for UNIX computers, you need a Microsoft Windows file server. If you are working only on Microsoft Windows, and you install the file server along with the other servers, you do not need to repeat the file server setup.

Chapter 1 Preparing for Installation
Copyright © 2018, Oracle and/or its affiliates. All Rights Reserved. 49
If you need to set up the file server on a separate Microsoft Windows machine, you should install PeopleSoft PeopleTools, any PeopleSoft applications, and the Multilanguage files.In some cases you may choose to set up local copies of the PeopleSoft executables on the PeopleTools Development Environment and Windows batch servers, rather than mapping to a shared directory on the file server. You can use the instructions in the chapter "Using the PeopleSoft Installer" to perform such local installations.
Task 1-5-3: Defining the Database ServerThe servers that host your PeopleSoft databases need sufficient processing, storage, and networking resources to process the database requests, store the data and transaction logs, and communicate freely to the clients of this data. These databases will include your own PeopleSoft database prototypes as well as any system and demonstration databases delivered directly from Oracle with the PeopleSoft installation media.See Planning Database Creation.Database sizes vary depending on the applications that you install. The size of your prototype PeopleSoft databasewill also depend on the amount of data to be converted from your legacy system. A good rule of thumb for estimating the size of your prototype PeopleSoft database is to estimate the amount of disk space needed for the data to be converted from your legacy system, add to this the size required for the PeopleSoft System database, and then add an additional 50 percent of this combined figure to allow for growth.
Note. If possible, you may want to separate your PeopleSoft applications into their own subsystem away from other applications. Most sites have separate subsystems for production, development, and testing.
Task 1-5-4: Defining the Application ServerThe application server is the centerpiece of the PeopleSoft Pure Internet Architecture. It connects to the PeopleSoft database and handles almost all SQL-intensive interactions with the database server required during online transaction processing. Microsoft Windows-based clients, in three-tier, communicate with the application server using Oracle Tuxedo messages. In the PeopleSoft Pure Internet Architecture, the application server interacts with user workstations through a web server.The application server also provides functionality required for application messaging and for implementing the PeopleSoft Pure Internet Architecture. An application server is required in all PeopleSoft installations.When installing the PeopleSoft software on the z/OS mainframe, you must install one or more dedicated UNIX orWindows application servers. You should plan to connect the application server to the database using the highest bandwidth connection available.All application servers require database connectivity to the database server. Before beginning your installation, make sure that you can connect from the application server machine to the database server using a SQL tool. This topic will be addressed later in this chapter.
See Also
PeopleTools: Portal Technology
Task 1-5-5: Defining the Process Scheduler (Batch) ServerThe term batch server is equivalent to the term Process Scheduler server. PeopleSoft batch processes, such as COBOL and SQR, are scheduled and invoked by a Process Scheduler server. In almost all configurations, batch server SQR and COBOL files are located and executed on the same computer as the database server.

Preparing for Installation Chapter 1
50 Copyright © 2018, Oracle and/or its affiliates. All Rights Reserved.
For the DB2 z/OS batch server on the mainframe, the SQR and COBOL files must be transferred from the file server, and COBOL source files must be compiled.Oracle supports setting up the batch environments on a dedicated server, an application server, or even on the database server.For Windows-specific batch processes—such as nVision reports, Cube Builder, or Microsoft Word—you need to set up a Windows batch environment on a Microsoft Windows application server or on a dedicated Microsoft Windows workstation.Any computer operating as a batch server must have database connectivity installed so that it can make a two-tier connection to the PeopleSoft database.
See Also
PeopleTools: Process Scheduler
Task 1-5-6: Defining Installation Locations
Understanding Installation Locations
As you proceed through the PeopleSoft PeopleTools installation, you are asked to specify several installation locations. Use the information in this section to choose how to specify the installation locations for the various components in a PeopleSoft installation.In addition to these installation locations, there are home directories for the various supporting software, such as Oracle WebLogic, which are described in the appropriate chapters.
Defining the DPK Base Directory
When you use the PeopleSoft DPKs to install a PeopleSoft environment, you specify a base directory, referred to in this documentation as BASE_DIR. The DPK setup script creates the following directories under BASE_DIR:
• BASE_DIR/dpk
• The script uses this directory to extract the archives from the PeopleSoft DPKs.
• The Puppet YAML files for the installation configuration are installed in BASE_DIR/dpk/puppet/production.
• BASE_DIR/pt
The script deploys the PeopleSoft components to the following installation locations:
• PS_HOME is installed by default in <BASE_DIR>/pt/ps_home<peopletools_patch_version>, where <peopletools_patch_version> is the full release; for example, ps_home8.56.12.
• PS_APP_HOME is installed by default in <BASE_DIR>/pt/<app>_app_home, where <app> is the PeopleSoft product, such as fscm_app_home.
• The Oracle Tuxedo software is installed by default in BASE_DIR/pt/bea/tuxedo.
• The Oracle WebLogic software is installed by default in BASE_DIR/pt/bea/wlserver.
• The supported JDK software is installed by default in <BASE_DIR>/pt/jdk<version>, where <version> isthe supported JDK version; for example, jdk1.8.0_74.
• For a full-tier installation, the files needed to install the supported version of the PeopleSoft PeopleTools client software are installed in BASE_DIR/pt/tools_client.

Chapter 1 Preparing for Installation
Copyright © 2018, Oracle and/or its affiliates. All Rights Reserved. 51
• BASE_DIR/db
This directory is used for an Oracle RDBMS full-tier installation.
• Oracle database server software is installed by default in BASE_DIR/db/oracle-server.
• For a full-tier installation, Oracle container database (CDB) and pluggable database (PDB) files and tablesfor the PeopleSoft application are installed by default in BASE_DIR/db/oradata.
Defining PS_HOME
The PS_HOME directory holds the PeopleSoft PeopleTools files. For information on setting up PS_HOME as a read-only environment, see the PeopleTools: System and Server Administration product documentation on securing PS_HOME and PS_CFG_HOME.PS_HOME can be used in the following ways:
• Multiple hosts can access PS_HOME on a shared (Microsoft Windows) or mounted (UNIX) location.
• Several Application Server, PIA, and Process Scheduler domains can use the same PS_HOME.
Defining PS_APP_HOME
The PS_APP_HOME location holds the PeopleSoft application files, in a location that is separate from PS_HOME. The PS_APP_HOME location is sometimes referred to as "Application Home."
Note. The PeopleSoft DPK setup requires that PS_APP_HOME be installed to a different location than PS_HOME. In earlier PeopleSoft releases, it was possible to set up an environment with the PS_APP_HOME location the same as the PS_HOME location .This configuration is not supported for the DPK installations.
Defining PS_CFG_HOME
The PS_CFG_HOME location holds the configuration files for the application server, batch server and search server domains.It also holds the configuration files for web server domains if PIA_HOME, defined in the next section, is equal to PS_CFG_HOME. This location is sometimes referred to as "Config Home."When you install PeopleSoft PeopleTools and the PeopleSoft application software, the PeopleSoft installer places the required files into the specified PS_HOME directory. When you create an application server, batch server, or search server domain, the configuration files associated with that domain are installed into a directory referred to as PS_CFG_HOME.By default, the system separates the binary files (executables and libraries) stored in PS_HOME from the ASCII files (configuration and log files) associated with a domain stored in PS_CFG_HOME. This separation applies only to these servers:
• PeopleSoft Application Server
• PeopleSoft Process Scheduler Server
• PeopleSoft Search Server
The DPK deployment creates the PS_CFG_HOME directory in the following locations:
Operating System PS_CFG_HOME Default Location
UNIX /home/psadm2/psft/pt/<peopletools_version>

Preparing for Installation Chapter 1
52 Copyright © 2018, Oracle and/or its affiliates. All Rights Reserved.
Operating System PS_CFG_HOME Default Location
Microsoft Windows %USERPROFILE%\psft\pt\<peopletools_version>
For example, if USERPROFILE is C:\Users\psftuser and the PeopleTools version is 8.56, by default PS_CFG_HOME would be C:\Users\psftuser\psft\pt\8.56. The configuration and log files for the application server, process scheduler server, and search server are installed below this directory.
Note. The PS_CFG_HOME directory is associated with the PS_HOME from which it was originally generated. The DPK deployment process supports a single PS_CFG_HOME to be used for all domains for a given environment.
This server domain configuration allows for a more flexible installation. You also have the opportunity to place different security restrictions on the binary and configuration files. For installations using DPKs, use the Puppet customizations to change the PS_CFG_HOME.
Defining PS_CUST_HOME
The PS_CUST_HOME location holds customized file system objects (that is, objects you provide as opposed to being installed with the software). Anything that is changed from the file system objects that are delivered with the PeopleSoft application installation should be placed here. The sub-directory structure must mirror the PS_APP_HOME upon which it is based. For example, when you install your PeopleSoft application, the directory structure includes SQR scripts in PS_APP_HOME/sqr. If you have customized SQR scripts, you would place them in PS_CUST_HOME/sqr.To define a PS_CUST_HOME location, use the Puppet customizations.
Defining PIA_HOME
When you install the PeopleSoft Pure Internet Architecture, the files are installed in the PIA_HOME directory. The PIA_HOME location holds the webserv directory, and the files for the PeopleSoft Pure Internet Architecture installation. The directory where you install PeopleSoft Pure Internet Architecture, PIA_HOME, does not have to be the same as the location where you install PeopleSoft PeopleTools and the PeopleSoft application software, PS_HOME. You have the option to specify the installation location for the PeopleSoft Pure Internet Architecture by using the Puppet customizations. The PS_CFG_HOME directory is created the first time that the PSADMIN utility starts. PSADMIN recognizes that PS_CFG_HOME is not present and creates it when necessary. This is done before any domains are created. When you invoke PeopleSoft Pure Internet Architecture, the installer checks your environment to determine the PS_CFG_HOME. If the environment variable PS_CFG_HOME is defined, the PS_CFG_HOME location is seen as the directory to which that environment variable points. If PS_CFG_HOME is not defined the default value is used.See the product documentation for using the %V Meta variable in PeopleTools: System and Server Administrationproduct documentation for more information about setting the PS_CFG_HOME environment variable.
Task 1-5-7: Defining the Web ServerA web server is required to run the PeopleSoft Pure Internet Architecture. The PeopleSoft Pure Internet Architecture is certified to work with either of the following two J2EE web application servers (also commonly referred to as web servers):

Chapter 1 Preparing for Installation
Copyright © 2018, Oracle and/or its affiliates. All Rights Reserved. 53
• Oracle WebLogic Server
• IBM WebSphere Server
The PeopleSoft DPKs install Oracle WebLogic. If you want to use IBM WebSphere for your environment, you must install it manually and set up the application server and Process Scheduler domains using the traditional method with PSADMIN.Refer to the Certifications page on My Oracle Support for supported web server combinations.To find support information for the HTTP servers that can be used as reverse proxy servers (RPS), see the following:
• For Oracle WebLogic, see the Oracle WebLogic documentation, included with Oracle Fusion Middleware.
• For IBM WebSphere, see the information for PeopleSoft PeopleTools on My Oracle Support, Certifications.
Oracle WebLogic, IBM WebSphere, and the supported reverse proxy servers will provide out-of-the-box SSL support across all supported operating systems. Oracle WebLogic and IBM WebSphere provide demo digital certificates, but for production grade SSL you must purchase digital certificates from a Certificate Authority supported by the web server that you are using (for example, Verisign, Baltimore, Entrust, and so on).
Task 1-6: Planning Database Creation
This section discusses:
• Understanding Database Creation
• Using Multiple Databases
• Determining Databases and Database Names
• Using Standard Database Names
• Choosing Owner ID Processing Option
Understanding Database CreationWhen performing a PeopleSoft installation, you will create these types of PeopleSoft databases:
• System (also called SYS) databases, which contain the PeopleSoft PeopleTools and product-specific metadatarequired for development of a production database.
• Demo (DMO) databases, which are populated with sample data for study, demonstration, or training purposes.
Note. If you are If you are using the PeopleSoft Upgrade Source Image, you must create a Demo database.
The System and Demo PeopleSoft databases are installed using a multiple-database strategy, where the "logical" PeopleSoft database actually comprises multiple "physical" databases that share a common DB2 owner ID. This isexplained in more detail in the following section.
Task 1-6-1: Using Multiple DatabasesTo facilitate optimal performance and minimal use of shared mainframe resources, Oracle employs a multiple-database strategy on DB2 z/OS. Oracle uses multiple DB2 databases for installing both Demo and System PeopleSoft databases.This multiple-database strategy provides the following benefits:

Preparing for Installation Chapter 1
54 Copyright © 2018, Oracle and/or its affiliates. All Rights Reserved.
• Reducing database descriptor (DBD) size improves performance by easing virtual storage constraints.
• Avoids exceeding the DB2 restriction limiting DBD size to no more than 25 percent of environmental descriptor manager (EDM) pool size.
• Improves DDL concurrency in certain PeopleSoft operations.
For instance, when Process Scheduler is invoked, it holds share locks on the DBD of the database where the Process Scheduler tables are located. Isolating these tables to their own database avoids potential lockouts of other processes running concurrently with Process Scheduler.
The installation process creates all of the DB2 objects with the same DB2 owner ID. The PeopleSoft reference to this owner ID equates to the CREATOR field found in the SYSIBM SYSTABLES Catalog table. A PeopleSoft database is a logical concept that includes all of the PeopleSoft objects and application data belonging to a single PeopleSoft product line sharing the same owner ID, distributed across multiple physical DB2 databases. The owner ID common to all of these objects is stored in the PeopleSoft PeopleTools tables PS.PSDBOWNER and PSSTATUS. The DB2 owner ID and its use in the PeopleSoft system is discussed in the section Choosing Owner ID Processing Options.Oracle defines a standard set of DB2 databases for each product line in a DDL script that you will be instructed toedit and run in the "Creating a Database" chapter.
Task 1-6-2: Determining Databases and Database NamesBefore you begin the installation process, you should determine how many PeopleSoft databases (System or Demo) of which type you need and how you intend to use them. You should also determine the names of the databases at this point, using database names that:
• Are UPPERCASE.
• Capture information about the PeopleSoft product line and the type of database.
For example, you may want to create two databases with the names PSHRDMO and PSHRSYS, using the twocharacters HR (for Human Resources) to indicate the product line.
The PeopleSoft System and Demo databases are delivered with a seven-character database name that serves two functions. It serves as:
• The name of the PeopleSoft logical database (which, for the System and Demo databases is actually composedof multiple DB2 databases).
• The seven-character name of the "root" physical DB2 database, from which the names of the additional physical DB2 databases that comprise the single PeopleSoft logical database are derived.
The DB2 database naming convention is explained in more detail in the following section, Using Standard Database Names.
Task 1-6-3: Using Standard Database NamesThe PeopleSoft database naming convention for DB2 z/OS uses one seven-character DB2 database name for a database containing all of the PeopleSoft system tables except for tables used by Process Scheduler. We refer to this database as the root database. A second database name with an eighth character of T is reserved just for Process Scheduler due to persistent share locks. The remaining DB2 database names have an eighth character, appended to the root database name, identifying a specific application group within a PeopleSoft product line.

Chapter 1 Preparing for Installation
Copyright © 2018, Oracle and/or its affiliates. All Rights Reserved. 55
Later in this guide, you will run a Data Mover Import script that requires you to select a database name to identifythis PeopleSoft database. This database name is actually nothing more than a label that serves two purposes. It enables the DB2 Connect connectivity software to identify the appropriate configuration to connect to your DB2 subsystem, and it is the high-level key on the table PS.PSDBOWNER from which the owner ID of the objects in the PeopleSoft database is derived during the sign-on process. When users sign on to a PeopleSoft database from a client workstation, they enter this database name in the PeopleSoft sign-on panel. The database name must be catalogued in the IBM DB2 Connect connectivity software in order to complete the database connection.See "Creating a Database."
Task 1-6-4: Choosing Owner ID Processing OptionThis section discusses:
• Understanding Owner ID Processing
• Using Primary Authorization ID Processing
• Using Secondary Authorization ID Processing
Understanding Owner ID Processing
This section summarizes the relationship between the PeopleSoft access ID and the DB2 owner ID. Other PeopleSoft IDs, such as the connect ID, are discussed later in this chapter. For more information on the various PeopleSoft authorization IDs, see the PeopleTools: Security Administration product documentation. The owner ID is a DB2 z/OS concept and owns the DB2 tables and views. For information on DB2 z/OS security, see the IBM DB2 documentation.
Note. Refer to the DB2 z/OS database platform documentation for information about access ID and password length requirements. The PeopleSoft system accepts access ID passwords between 8 and 30 characters in length toaccommodate different database and operating system platforms.
Each PeopleSoft database that you create must have a valid DB2 owner ID. All of the objects in a PeopleSoft database will share the same owner ID. Besides being found in the CREATOR field of the SYSIBM system catalog tables, such as SYSIBM.SYSTABLES, this value is stored in the OwnerID field of the PS.PSDBOWNERand PSSTATUS PeopleSoft PeopleTools tables.Oracle recommends that you not use an owner ID used by a non-PeopleSoft application, because this can create problems when auditing your database.There are two security-related processing options to choose from when establishing the owner ID:
• Primary authorization ID processing
• Secondary authorization ID processing
The PeopleSoft installation uses various authorization IDs and passwords to control user access, including user ID, access ID, and connect ID. The PeopleSoft access ID is directly linked to the decision to use primary or secondary authorization ID processing. Functionally, this is the ID that has the DB2 access and authorities to perform the bulk of the SQL processing within the PeopleSoft database. Individual PeopleSoft user IDs would notbe granted the level of DB2 authority that the access ID possesses. There will either be a direct relationship between the name of the PeopleSoft access ID and the DB2 owner ID, or an indirect one, depending on which authorization method is chosen.

Preparing for Installation Chapter 1
56 Copyright © 2018, Oracle and/or its affiliates. All Rights Reserved.
Using Primary Authorization ID Processing
The primary authorization ID is the simplest implementation of table ownership. The primary authorization ID and the DB2 owner ID of the PeopleSoft database objects are the same ID. In this option, the owner ID defined in DB2 will be the same name as the PeopleSoft access ID defined in the PeopleSoft PeopleTools tables. The PeopleSoft access ID is the DB2 owner ID.The following table summarizes the roles and authorities of the DB2 owner ID, primary and secondary authorization IDs and the access IDs for primary authorization ID processing:
Roles and Authorities Primary Authorization ID Secondary Authorization ID
Same ID as DB2 Object Owner ID (CREATOR)
Yes NA
Database Log On Access Yes NA
DB2 Object Access Yes NA
Same ID as PeopleSoft Access ID Yes NA
SET CURRENT SQLID statement required?
No NA
Using Secondary Authorization ID Processing
Most PeopleSoft customers use secondary authorization ID processing to establish an owner ID.The DB2 owner ID of the PeopleSoft database objects is established as an external security system group, referredto as a "secondary authorization ID," rather than a primary authorization ID. A secondary authorization ID is not given direct logon access to the database, but because it is the DB2 owner ID, it has direct access to the PeopleSoft database objects. Logon access is generally granted to a primary authorization ID, but with secondary authorization ID processing, the primary authorization ID has no direct access to the PeopleSoft database objects.A primary authorization ID can "transform" itself into the secondary authorization ID by issuing the following SQL command:SET CURRENT SQLID = <secondary authorization ID>
Running this command enables the primary authorization ID to acquire all of the database object permissions owned by the secondary authorization ID. The mainframe security maintenance package (for example, RACF, Top Secret, or ACFII) keeps track and monitors what secondary authorization IDs can be used by a primary authorization ID.When setting up a PeopleSoft application using secondary authorization ID processing, the access ID is established as a primary authorization ID that has the authority to issue a SET CURRENT SQLID statement setting itself equal to the secondary authorization ID.

Chapter 1 Preparing for Installation
Copyright © 2018, Oracle and/or its affiliates. All Rights Reserved. 57
The following table summarizes the roles and authorities of the DB2 owner ID, primary and secondary authorization IDs and the access IDs for secondary authorization ID processing:
Roles and Authorities Primary Authorization ID Secondary Authorization ID
Same ID as DB2 Object Owner ID (CREATOR)
No Yes
Database Log On Access Yes No
DB2 Object Access No Yes
Same ID as PeopleSoft Access ID Yes No
SET CURRENT SQLID statement required?
Yes NA
In secondary authorization ID processing, at sign on, PeopleSoft PeopleTools, under authorization of the access ID, issues the SET CURRENT SQLID statement to the DB2 owner ID. This also occurs when you run COBOL on either the client or the host, or when you run SQR on the client or host.
Note. The access ID does not need SYSADM authority to the DB2 subsystem.
With SYSADM authority, the access ID may issue a SET CURRENT SQLID statement to any authorization ID. If you do not have SYSADM authority, you may issue SET CURRENT SQLID only to your valid authorization IDs. Your DB2 owner ID has a certain profile in the mainframe security maintenance package (RACF or its equivalent) and that profile contains all your assigned secondary authorization groups, which are used as valid authorization IDs. You can issue SET CURRENT SQLID only to the authorization IDs assigned to you.The PeopleSoft installation is delivered with secondary authorization groups that are equal to the owner of the tables. The access ID is added to this secondary authorization group, and thus the access ID can issue a SET CURRENT SQLID statement only to the owner of the tables (remember owner = RACF group). Using this approach, it is not necessary to grant SYSADM authority to the access ID. The bottom line is that the access ID must have proper security to issue SET CURRENT SQLID to the owner of the PeopleSoft tables but this does notrequire SYSADM authority to the DB2 subsystem.See E-DB2: Mainframe Security and PeopleSoft, My Oracle Support, Doc ID 1060956.1.
Task 1-7: Planning Multilingual Strategy
This section discusses:
• Understanding Multilingual Issues
• Choosing a Base Language
• Selecting Additional Languages
• Selecting a Database Character Set

Preparing for Installation Chapter 1
58 Copyright © 2018, Oracle and/or its affiliates. All Rights Reserved.
Understanding Multilingual IssuesBefore beginning your installation, you should determine which languages your PeopleSoft system will need to support. If multiple languages are required, determine which language will be used most often. These decisions will affect tasks at various stages of the installation, including file server setup, database creation, and the ability to change the base language of the PeopleSoft database after it is created. Even if you do not plan on running yoursystem in more than one language, you should decide the following information before completing this task:
• Database base language
• Additional languages (if any)
• Database character set (Unicode recommended)
The current languages provided by Oracle and their language codes are listed in the following table, as well as thecorresponding database character sets for that language. These are the languages for which Oracle provides pre-translated products. If you plan to provide users access to your applications in these languages, Oracle recommends that you install the translations during your initial installation. This approach will keep you from having to perform an upgrade if you decide to add the Oracle-provided translations at a later date. After installation, you also have the option of performing your own translations, and adding additional languages.In considering which languages to include, whether for pre-translated objects or for your own application development, keep in mind that certain languages require a Unicode database. Oracle recommends Unicode character sets rather than non-Unicode character sets, including Western European and Japanese Shift-JIS, for all installations and upgrades regardless of the languages used.See Selecting a Database Character Set.
Language Code Language Database Character Set
ARA Arabic Unicode only
CFR Canadian French Unicode recommended
CZE Czech Unicode only
DAN Danish Unicode recommended
DUT Dutch Unicode recommended
ENG US English Unicode recommended
FIN Finnish Unicode recommended
ESP Spanish Unicode recommended
FRA French Unicode recommended
GER German Unicode recommended
HUN Hungarian Unicode only
ITA Italian Unicode recommended

Chapter 1 Preparing for Installation
Copyright © 2018, Oracle and/or its affiliates. All Rights Reserved. 59
Language Code Language Database Character Set
JPN Japanese Unicode only
KOR Korean Unicode only
NOR Norwegian Unicode recommended
POL Polish Unicode only
POR Portuguese Unicode recommended
ROM Romanian Unicode only
RUS Russian Unicode only
SVE Swedish Unicode recommended
THA Thai Unicode only
TUR Turkish Unicode only
UKE United Kingdom English Unicode recommended
ZHS Simplified Chinese Unicode only
ZHT Traditional Chinese Unicode only
See Also
PeopleTools: Global Technology
Task 1-7-1: Choosing a Base LanguageEach PeopleSoft database can have only one base language. PeopleSoft databases ship with English as the default base language. Typically, the base language of your database should match the language most commonly used by your organization, as it affects the performance of PeopleSoft applications.

Preparing for Installation Chapter 1
60 Copyright © 2018, Oracle and/or its affiliates. All Rights Reserved.
When PeopleSoft PeopleTools attempts to open language-sensitive objects (such as pages and menus), it first compares the operator's preferred language to the base language of the database. If the preferred language matchesthe base language, PeopleSoft PeopleTools immediately loads the required definition from the base language PeopleSoft PeopleTools tables. However, if the user's preferred language differs from the database's base language, PeopleSoft PeopleTools must first query the related language tables for the object. Should a translation of the object not be found in the operator's preferred language, a query is then performed on the base language tables. The following process flow illustrates the selection of the language used for language-sensitive objects, beginning with the language selected when the user signs in to the PeopleSoft application:
Language selection process using the base language and the preferred language
While these queries typically occur very quickly, they still take up valuable processing time. To optimize performance you can set the base language of your database as the language that is used most often by your users.Another consideration is that because PeopleSoft databases are shipped with a base language of English, maintenance is simpler if English remains the base language. Both configurations are supported by Oracle.

Chapter 1 Preparing for Installation
Copyright © 2018, Oracle and/or its affiliates. All Rights Reserved. 61
Task 1-7-2: Selecting Additional LanguagesOracle provides translations of all end-user objects with the Global Multi-Language installation files. It is much easier to install additional languages upon initial database creation than to add them later in your implementation process, so we recommend that you choose which additional languages may be required now. There is no limit to the number of languages that can coexist in a single PeopleSoft database; however, remember that each language will require additional storage space, primarily for PeopleSoft PeopleTools objects.
Task 1-7-3: Selecting a Database Character SetThis section discusses:
• Understanding Character Sets
• Using Unicode Databases
Understanding Character Sets
Oracle recommends Unicode, but also supports non-Unicode (legacy) code sets, in PeopleSoft databases.Please refer to the discussion of CCSID later in this chapter for further information regarding character sets.See Defining DB2 for z/OS Subsystem Configuration.The following table lists a selection of the CCSIDs and languages that the PeopleSoft software supports for DB2 for z/OS:
CCSIDs Languages Supported
CCSID 37 EBCDIC English
CCSID 500 EBCDIC International
CCSID UNICODE Unicode
See PeopleTools: Global Technology, "Selecting and Configuring Character Sets."
Using Unicode Databases
In addition to supporting several legacy character sets, the PeopleSoft software supports creating Unicode databases using DB2 for z/OS New Function Mode. Unicode enables you to maintain data in virtually any modern language in a single database. Prior to Unicode, many languages could not coexist in one database, as they did not share a common character set.See "Setting Up a Unicode Database."To create a DB2 for z/OS Unicode database, you must specify the CCSID UNICODE option of the CREATE DATABASE statement. Unicode databases are required if the languages that you selected do not share the same character set. Typically, a single character set can encode all languages written in a single script. For example, English, French, and Spanish all share the same script (Latin), so they can coexist in a non-Unicode database. However, Japanese does not sharethe same script as French, so if you need to have Japanese and French coexist in a single system, you need a Unicode database.

Preparing for Installation Chapter 1
62 Copyright © 2018, Oracle and/or its affiliates. All Rights Reserved.
If you decide to use Unicode for your database, you do not need to select a character set.See Understanding Multilingual Issues.See Understanding Character Sets.
Task 1-8: Verifying Database Server Sizing
On your database server, the direct access storage device (DASD) volume(s) making up your storage group(s) should have sufficient space for the demo database. If you plan to substantially increase the size of tables in your demo database, ensure that these volumes have plenty of space, or add additional volumes, so that your file systems have ample space to accommodate growth. You must also alter the primary and secondary quantities of the tablespaces and indexes that you expect to expand. In addition to space requirements, the Database Administrator should verify that ample VTOC directory space is available to avoid problems during installation.
Note. Because many PeopleSoft tables are delivered empty, they take up no physical space in the tablespace, whereas indexes, even those created on an empty table, require a minimum of one track each.
Task 1-9: Defining DB2 for z/OS Subsystem Configuration
This section discusses:
• Understanding DB2 Configuration Requirements
• Defining EDM Pool Considerations
• Defining Decimal Arithmetic
• Using DSMAX
• Using CMTSTAT/IDTHTOIN
• Using CCSID and DB2 z/OS Database Storage Encoding Schemes
• Using DECIMAL
Understanding DB2 Configuration RequirementsThe following information provides recommendations for the configuration of the DB2 subsystem that will house the PeopleSoft database. We recommend dedicating a DB2 subsystem to your PeopleSoft application. This will allow you to customize the DB2 ZPARM settings for the subsystem without having an impact on your existing applications.
Task 1-9-1: Defining EDM Pool ConsiderationsThe PeopleSoft installation procedure places all tables for the product you are installing into multiple physical databases using a shared tablespace methodology. Depending on the applications you are installing, the DB2 subsystem could have a minimum EDM Pool Size of 10 to 30 MB.

Chapter 1 Preparing for Installation
Copyright © 2018, Oracle and/or its affiliates. All Rights Reserved. 63
If the pool size is too small, the database administrator should either increase it or manually edit the DDL scripts provided to create additional databases. If you use DB2 Dynamic SQL Cache, you will need to increase the EDM pool size. It is difficult to recommend an optimum size for the EDM pool. Like buffer pools, there is a tradeoff between performance and memory usage. It also depends very heavily on the mix of transactions versus batch processes executing at a point in time. Customers traditionally allocate between 50 and 100 MB when Dynamic SQL Cache is enabled.Place the DB2 Dynamic SQL Cache in a Data Space. This will allow for separating the cache from the EDM pool, which and results in less competition for EDM space. It also allows for a larger Dynamic SQL Cache (up to 2 GB).
Task 1-9-2: Defining Decimal ArithmeticArithmetic operations involving decimal numbers in the PeopleSoft system require a greater decimal precision than earlier versions of PeopleSoft software. DEC31 rules allow a maximum precision of 31 digits in a result rather than only 15. This allows for a greater number of digits in the scale (digits to the right of the decimal), resulting in more accurate calculations, particularly when the "unrestricted" result contains many digits to the right of the decimal. DB2 truncates any digits beyond the calculated scale of the result, without rounding. For example, the number 1.45697, the result of multiplying or dividing another number by 1.456 (assume a scale of 3)will be significantly different from 1.4569 (assume a scale of 4). In addition, in further support of greater accuracyin decimal operations, the PeopleSoft system is utilizing new functionality that permits calculation of a minimum scale of 6 digits in decimal division operations. In prior releases, 3 digits was the maximum, minimum scale.In past releases, the PeopleSoft system had specific requirements for the DB2 zparms DECARTH, DECDIV3 andMINDVSCL. Through a joint development effort with IBM, functionality has been enhanced to enable control of the functionality provided by these zparms at the DB2 connection level, without impact to other applications running within the same DB2 subsystem.PeopleSoft code executes the statement SET CURRENT PRECISION = "D31,6" for each connection into the database, which will have the effect of running the application in a DB2 subsystem with zparm settings of DECARTH=31 and MINDVSCL=6, overriding what the actual zparm settings may be. DECDIV3 is overridden by MINDVSCL so whether DECDIV3 is YES or NO has no impact on the PeopleSoft application.
Task 1-9-3: Using DSMAXTo reduce the open and close activity of data sets, it is important to set DSMAX correctly. DSMAX should be larger than the maximum number of data sets that are open and in use at one time. For best performance, leave enough margin in your specification of DSMAX that frequently used CLOSE YES data sets can remain open afterthey are no longer referenced. If data sets are opened and closed frequently, such as every few seconds, you can improve performance by increasing DSMAX. The maximum value for DSMAX is 100000.See Important PTFs for PeopleSoft on DB2 for z/OS, My Oracle Support, (search for the article title).
Task 1-9-4: Using CMTSTAT/IDTHTOINWe recommend setting the CMTSTAT parameter to INACTIVE and setting the IDTHTOIN parameter to 0 (i.e. the IDTHTOIN zparm is ignored when CMTSTAT=INACTIVE). PeopleSoft two-tier and three-tier environmentswill function properly regardless of the values of CMTSTAT and IDTHTOIN. CMTSTAT is set in DSNTIPR andit specifies whether to make a thread active or inactive after it successfully commits or rolls back and holds no database locks or cursors. ACTIVE threads use memory resources as well as contributing to the MAXDBAT limit.

Preparing for Installation Chapter 1
64 Copyright © 2018, Oracle and/or its affiliates. All Rights Reserved.
Task 1-9-5: Using CCSID and DB2 z/OS Database Storage Encoding SchemesPeopleSoft PeopleTools supports only EBCDIC and Unicode data storage encoding schemes (not ASCII) on the z/OS database server. Be careful to set the default system encoding scheme (SCCSID as specified in DSNHDECP) in your subsystem for valid EBCDIC translation. PeopleTools Unicode installations will override the SCCSID value by explicitly specifying Unicode as the CCSID when creating the individual databases that willcompose a Unicode installation. Consult the DB2 zOS Installation and SQL Reference guides for assistance in setting the default CCSID for your subsystem. Note that unexpected results may occur when a binary sort is deployed from, or when the collating sequence on a remote machine is different from the host—such as when running COBOL from a Windows or UNIX based platform, and accessing DB2 for z/OS. In house, PeopleSoft has tested with CCSIDs of 37 and 500. For more information, and especially if you use a CCSID other than 37, consult the PeopleTools: Global Technology and PeopleTools: System and Server Administration product documentation for more details about the use of %BINARYSORT and PSOPTIONS. Also, never change the CCSID in your subsystem without first consulting IBM technical support. Corruption and loss of data could result.
Task 1-9-6: Using DECIMALPeopleSoft PeopleTools supports zparm settings of both DECIMAL=PERIOD and DECIMAL=COMMA. The PeopleTools API is able to identify the zparm value on your particular subsystem. For those subsystems with zparm DECIMAL=PERIOD, no additional logic is invoked. For those subsystems with DECIMAL=COMMA, a parsing routine is invoked to "reformat" any necessary SQL statements to avoid confusion by the DB2 parser in distinguishing a decimal point from a comma. For COBOL programs running on the mainframe, a message is displayed in the job log indicating whether the parsing routine has been activated. Customers running with zparm DECIMAL=COMMA should verify that the parsing function has indeed been activated. Customers running with zparm DECIMAL=PERIOD, should verify that the parsing function is not activated, as it is unnecessary and could have negative performance implications.While PeopleSoft PeopleTools fully supports either setting for zparm DECIMAL, not all product lines support both settings. SQR does not go through the PeopleTools API interface, and therefore each program must be inspected for compliance. Product lines that do not use SQR would support both zparm DECIMAL settings by default (for example, CRM). Product lines that only support one setting will support DECIMAL=PERIOD. Refer to the product line specific Installation addenda for information on whether your product line supports zparm DECIMAL=COMMA.
Task 1-10: Installing Supporting Applications
Oracle requires that a number of supporting applications be installed for the PeopleSoft installation on batch servers and on any Windows-based client on which batch processes will be run locally. (Throughout the rest of this section we refer to these Windows-based clients as two-tier clients.) Be sure to check My Oracle Support, Certifications to ensure that you are installing software versions that are certified by Oracle.COBOL
• Consult the PeopleSoft information on My Oracle Support to verify whether your application requires COBOL. Remember that COBOL is not needed for PeopleSoft PeopleTools or for applications that do not contain COBOL programs.

Chapter 1 Preparing for Installation
Copyright © 2018, Oracle and/or its affiliates. All Rights Reserved. 65
See PeopleSoft Enterprise Frequently Asked Questions about PeopleSoft and COBOL Compilers, My Oracle Support, (search for the article name).
See PeopleSoft Enterprise Frequently Asked Questions about PeopleSoft and the IBM COBOL Compiler, My Oracle Support, (search for the article name).
• For PeopleSoft applications written in COBOL, install the appropriate version of the COBOL compiler on the server where you will compile.
See "Installing and Compiling COBOL on Windows."
See "Installing and Compiling COBOL on UNIX."
• For UNIX servers, install Micro Focus Server Express or IBM Compiler for IBM AIX.
• For Microsoft Windows servers, install the appropriate version of Micro Focus Net Express.
• For z/OS servers, install the appropriate version of IBM Enterprise COBOL for z/OS and OS/390.
• If all your servers are on Microsoft Windows operating systems, Oracle recommends that you install a COBOL compiler on the file server.
You can install PeopleSoft PeopleTools plus any patches on the file server, compile your COBOL there, and then copy the COBOL binaries to your application and batch servers.
• If your application and batch servers are on UNIX operating systems, we recommend that you designate a single server as the compile server, so that you can compile COBOL from this central location and then distribute it to the rest of your application and batch servers.
If you use this approach, you only need to copy patches or customizations over to the compile server. In this case, you would install a COBOL compiler on the master (or compile) server and either the COBOL compiler or runtime on the rest. You can also copy patches or customizations from the file server to all of your UNIX servers and compile the COBOL on each machine.
Note that the compile server must have the same operating system as any destination application or batch servers. For example, if your compile server is an IBM AIX machine, you can only copy COBOL compiled there to other IBM AIX application and batch servers. Oracle recommends this approach. It will help you keepyour COBOL source code in sync and only requires that you install COBOL in a single location.
• The format of COBOL source file names of patches or customizations on the file server should always be UPPERCASE.cbl to ensure compatibility with your UNIX servers.
• The PeopleSoft Installer installs COBOL source code from the installation directory to your Microsoft Windows file server and to all UNIX servers, but not to the rest of your Microsoft Windows servers.
SQR
• You must install SQR on any non-Windows batch server.
• On Microsoft Windows batch servers and two-tier clients, you have the option of installing SQR locally, or mapping to a copy installed on the file server.
• Because SQR does not require any local registry settings, you can execute SQR from any Microsoft Windows batch server or two-tier client once SQR has been installed to a shared directory. Installing SQR locally will result in improved performance; over a slow network connection the improvement will be significant.
JRE
• z/OS customers should install the appropriate IBM z/OS Java to support JDK/JRE requirements for PeopleSoft software.
• The minimum support level required for PeopleSoft PeopleTools 8.56 is JRE 1.8.xx.
Microsoft OfficeInstall Microsoft Office (Excel and Word) on any Windows batch server or two-tier client that will be running PS/nVision or Microsoft Word batch processes.

Preparing for Installation Chapter 1
66 Copyright © 2018, Oracle and/or its affiliates. All Rights Reserved.
Microsoft Office must be installed locally, because it requires registry settings.
See Also
My Oracle Support, Certifications
Task 1-11: Setting Up Database Connectivity
As part of preparation, you may wish to set up database connectivity components on the mainframe, set up TCP/IP on database clients (including application servers and any dedicated batch servers), and install software for the DB2 Connect Gateway. However, it makes sense to wait until after the PeopleSoft database has been created before configuring the DB2 Connect Gateway—using either Client Configuration Assistant (Microsoft Windows) or the Command Line Processor (UNIX)—so that the connection to the database can be tested.
Note. The LDAP client (FMID HRSL180) is required for PSAE on z/OS. On z/OS, the LDAP client resides as a DLL named GLDCLDAP in /usr/lib. Note that /usr/lib must be part of the LIBPATH environment variable.
Note. Before you can run the Process Scheduler from z/OS UNIX System Services, the DB2 systems programmermust have installed DB2 ODBC.
See Also
"Creating a Database""Installing and Configuring DB2 Connect"IBM DB2 Connect documentationIBM DB2 Installation Guide (for DB2 ODBC)
Task 1-12: Using Connect ID
This section discusses:
• Understanding Connect ID
• Using Connect ID
Understanding Connect IDAll two-tier connections use the PeopleSoft PeopleTools connect ID feature.

Chapter 1 Preparing for Installation
Copyright © 2018, Oracle and/or its affiliates. All Rights Reserved. 67
Two-tier connections include both client workstations and application servers. The connect ID feature allows customers to associate multiple PeopleSoft operators with the same connect ID. The connect ID is granted the minimum privileges required to connect to the database—that is, it has only SELECT privileges on specific PeopleTools tables. After connection, PeopleSoft Security uses the PeopleSoft user ID to control access to objectsin the database. The PeopleSoft sign-on process validates the connect ID on the database server, rather than the user ID. Connect ID simplifies database security maintenance. It is not necessary to define and maintain individual user IDs within the database server security. For DB2 z/OS implementations, only the connect ID must be defined in the z/OS security management software (for example, RACF, ACF2, TopSecret), with logon capabilities. The connect ID option eliminates the need to set up each user ID as a valid z/OS ID. One z/OS ID can be created and then many PeopleSoft operators can use this ID as the connect ID to sign on to the PeopleSoft system. This arrangement may be an appropriate choice at customer sites where the PeopleSoft user's only required access to the mainframe is to use the PeopleSoft applications.The connect ID is granted access using the following steps:
• Define the connect ID as an ID with logon capabilities to the z/OS server in the z/OS security management software.
• Execute script Grant.sql against the database, after the table objects have been created. Grant.sql grants SELECT access to the PeopleTools tables PS.PSDBOWNER, PSSTATUS, PSACCESSPROFILE, and PSOPRDEFN.
In addition, the connect ID and connect ID password must be defined in either the Configuration Manager setting to allow a two-tier connection from the client workstation, or in the application server configuration setting, to allow connection to the database from the application server.
See Also
PeopleTools: System and Server Administration, "Using PeopleSoft Configuration Manager"
Task 1-12-1: Using Connect IDAs an example, when logging into a PeopleSoft database in two-tier mode, the user enters a database name, PeopleSoft user (operator) ID, and password in the PeopleSoft Signon dialog box.After making the initial connection to the database, the sign-on process performs SELECT statements against a series of PeopleTools tables to obtain data required for sign-on and security. The PeopleSoft user ID and password are validated against the PSOPRDEFN table, regardless of the sign-on option. The access ID and password, which are encrypted, are obtained from the PSACCESSPROFILE table.The sign-on process disconnects, and then connects again as the access ID, which has all Data Manipulation Language (DML) authorities and certain DDL authorities on the PeopleSoft database. If you are using the Secondary Authorization ID option, the sign-on process then sets the current SQLID equal to the DB2 owner ID obtained from the PS.PSDBOWNER table.The example below details the logon and connection process to the PeopleSoft database on z/OS. This example uses the following parameter values:
• Database Name: PT84
• User ID/Pswd: PSUSER1/PSUSER1
• Connect ID/Pswd: PSCONCT/PSCONCT
• Access ID/Pswd: PSACCES1/PSACCESS1
• Object Owner ID: PSDBOWNR

Preparing for Installation Chapter 1
68 Copyright © 2018, Oracle and/or its affiliates. All Rights Reserved.
Activity Parameter Value and/or Underlying Statements
User initiates logon by entering the database name, user ID and password.
PT84/PSUSER1/PSUSER1
The connection is established to DB2 z/OS using the database name, the connect ID (not the user ID), and the password.
Connect to PT84 user PSCONCT using PSCONCT
Get PeopleSoft Database owner ID. SELECT OWNERID FROM PS.PSDBOWNER⇒ WHERE DBNAME = :1
:1 = PT84, value returned for OWNERID = PSDBOWNR
Check PSSTATUS. SELECT OWNERID, TOOLSREL,⇒ LASTREFRESHDTTM, LASTCHANGEDTTM⇒ FROM PSDBOWNR.PSSTATUS
Validate the user ID and password. SELECT VERSION, OPERPSWD,⇒ ENCRYPTED, SYMBOLICID, ACCTLOCK⇒ FROM PSDBOWNR.PSOPRDEFN WHERE⇒ OPRID = :1
:1 = PSUSER1. The OPERPSWD retrieved is validated against the value entered when the user initiated the log on.
Get the access ID and password. SELECT ACCESSID, ACCESSPSWD,⇒ ENCRYPTED FROM PSDBOWNR.PSACCESSPRO⇒FILE WHERE SYMBOLICID = :1
The ACCESSID and ACCESSPSWD retrieved into the buffer are PSACCES1/PSACCES1
The current connection with the connect ID is disconnected. Disconnect
A new connection is established, logging on with the access ID.
Connect to PT84 USER PSACCES1 USING PSACCES1
The "Set Current SQLID" statement is issued to permit access to the PeopleSoft tables via the access ID without requiring explicit qualification of the SQL statements with the Object Owner ID (PSDBOWNR).
Set CURRENT SQLID = :1
:1 = PSDBOWNR
At this point, access within the PeopleSoft application is governed by PeopleSoft security, based on the permissions defined in the PeopleTools security tables for the user ID that was entered when the logon was initiated (PSUSER1).
Task 1-13: Setting Up z/OS User IDs
This section discusses:
• Understanding User ID Setup

Chapter 1 Preparing for Installation
Copyright © 2018, Oracle and/or its affiliates. All Rights Reserved. 69
• Creating PeopleSoft User IDs
Understanding User ID SetupOnce you have determined your sign-on strategy, as described in the preceding task, you are ready to create a set of z/OS user IDs required for the PeopleSoft PeopleTools sign-on process and database table access.
Note. All IDs that you create must be in UPPERCASE.
Task 1-13-1: Creating PeopleSoft User IDsUse this procedure to create new user IDs for the application. To create PeopleSoft user IDs:1. Create a mainframe user ID for connecting to the PeopleSoft database. This mainframe user ID needs to
match the PeopleSoft connect ID.
Note. Once your PeopleSoft connect ID is created, you can specify the ID in either the Configuration ManagerStartup tab for Windows client connections or the Startup section in the application server configuration file for application server connections. This is done so the client or the application server pass the correct ID to connect to the database.
Note. The connect ID password must be 30 characters or less. Connect ID password should not contain any forward-slash characters (/) (Windows) or percent characters (%) (UNIX).
You must explicitly grant SELECT authority to this mainframe user ID on specific PeopleSoft PeopleTools tables, before attempting to connect to the PeopleSoft database.
2. Create a second mainframe user ID to be used as the PeopleSoft access ID.
The access ID, which is stored in encrypted form in the PeopleSoft database, should either be granted all DML authorities and certain DDL authorities on the PeopleSoft database if using Primary Authorization ID access, or associated with a Secondary Authorization ID with this access, if using Secondary Authorization IDaccess (the next step). The access ID and access password must be tightly controlled. Both are encrypted in the PeopleSoft database.
Note. The access ID password must be 30 characters or less.
Oracle recommends that you set up the access ID in z/OS with a non-expiring password. If company standardsmandate that you periodically change the access ID's password, or if the access ID is set up in the z/OS security system with a password that will expire, special processing will be necessary. You must ensure that PeopleSoft databases are updated with the access ID's new password before the password changes in the z/OS security system. The PeopleSoft Security Administrator provides the functionality to change the access ID's password stored in the security tables.
If the mainframe password for the access ID has expired or has been changed before the PeopleSoft database has been updated with the new password, no one will be able to access the PeopleSoft online system.
3. If you are using the Secondary Authorization ID option, set up an external security system group as the owner ID. Make the access ID a member of this group, with authority to SET CURRENT SQLID = <Owner ID>.

Preparing for Installation Chapter 1
70 Copyright © 2018, Oracle and/or its affiliates. All Rights Reserved.
4. Grant SELECT authority to owner ID on SYSIBM DB2 catalog tables.
There are certain PeopleSoft processes that perform queries against the SYSIBM DB2 catalog tables. For this reason you must grant SELECT authority on these catalog tables to the owner ID that you choose for the PeopleSoft database. The following table lists DB2 catalog tables used by the PeopleSoft system, with corresponding PeopleSoft processes or utilities.
Table PeopleSoft Process or Utility
SYSIBM.SYSTABLES Application Designer
DDDAUDIT.SQR
SETDBNAM.SQR
SETSPACE.SQR
SETTMPIN.SQR
%UpdateStats MetaSQL function
SYSIBM.SYSTABLESPACE SETSPACE.SQR
SETDBNAM.SQR
SYSIBM.SYSTRIGGERS Application Designer
DDDAUDIT.SQR
SYSIBM.SYSCOLUMNS Application Designer
SYSIBM.SYSINDEXES Application Designer
DDDAUDIT.SQR
SETBUFF.SQR
SYSIBM.SYSKEYS Application Designer
SYSIBM.SYSINDEXPART SETINDEX.SQR
SYSIBM.SYSDATABASE NA
SYSIBM.SYSVIEWS NA
If the Owner ID does not have proper authority to the SYSIBM tables, 551 SQL codes will result and it will mostly occur when you are attempting to SQL Create or Alter a table using Application Designer. If you are running the listed SQRs outside the PeopleSoft environment, the ID used to run the SQR will need SELECT access to the listed tables.
See Also
"Creating a Database"PeopleTools: Portal TechnologyPeopleTools: Data Management

Chapter 1 Preparing for Installation
Copyright © 2018, Oracle and/or its affiliates. All Rights Reserved. 71
Task 1-14: Performing Backups
Before proceeding, you should back up all servers and workstations that are set up for installation so you can recover to this point if necessary. Do the following:
• Back up any changes you made to the database server in setting up your PeopleSoft system.
• Back up any changes you made to your file server while setting aside space for your PeopleSoft system and setting up access privileges.
• Once you set up your install workstations to access the file server and database server simultaneously, back upthe workstations.


Copyright © 2018, Oracle and/or its affiliates. All Rights Reserved. 73
Chapter 2
Installing the PeopleSoft Homes
This chapter discusses:
• Obtaining the PeopleSoft Application Images and PeopleTools DPKs
• Obtaining the PeopleSoft Upgrade Source Images
• Reviewing the DPK Setup Script Options
• Running the DPK Setup Script to Install PS_HOME and PS_APP_HOME
• Obtaining Operating System Packages Required by Puppet
• Removing a Deployed PeopleSoft Environment
Task 2-1: Obtaining the PeopleSoft Application Images and PeopleTools DPKs
If you have not already done so, this section describes how to locate and obtain the PeopleSoft Application Images and PeopleTools DPKs required for a fresh installation.The PeopleSoft Application Images and PeopleTools DPKs are available on My Oracle Support. Contact Oracle if you need a user ID and password for My Oracle Support.1. Go to the PeopleSoft Update Manager Home Page, My Oracle Support, Doc ID 1641843.2, to find the
information on locating and downloading the current PeopleSoft Application Image.
Note. On the PeopleSoft Update Manager Home Page, the term PeopleSoft Update Image (PI) is used for the images.
2. Select the tab PeopleSoft Update Image Home Pages, and select the link for your PeopleSoft application.
3. Expand the Update Image Link section, and then select the link for Native OS to find the details for the current PeopleSoft Application Image for Microsoft Windows.
4. In the Update Image Link table on the PeopleSoft Update Image Home Page, download or open the Update Image Manifest, and note the following:
• The PeopleTools patch release in the Software Version Included column.
• The file name for Application DPK Zip 1, normally FILENAME_9of11.zip.
5. To obtain the PeopleTools DPK, in My Oracle Support, select the Patches & Updates tab.
6. Select Product or Family (Advanced).
7. Specify the following information, and then click Search:
• PeopleSoft Enterprise PT PeopleTools as the Product
• The current PeopleSoft PeopleTools 8.5x release, such as 8.56, as the Release
• Your operating system, IBM AIX, Linux, Microsoft Windows, or Oracle Solaris on SPARC, as the

Installing the PeopleSoft Homes Chapter 2
74 Copyright © 2018, Oracle and/or its affiliates. All Rights Reserved.
Platform
8. On the search results page, locate the PeopleTools patch corresponding to the patch release that you noted in step 4, and download the DPKs into a single directory, referred to in this documentation as DPK_INSTALL.
Note. You can also find links to the most recent PeopleTools patches on the PeopleSoft PeopleTools Patches Home Page, My Oracle Support, Doc ID 2062712.2.
9. To obtain the PeopleSoft Application DPK Zip1, return to the PeopleSoft Update Image Home Page, and in the Update Image Links table, select the link in the column <Product> Update Image Link.
10. From the patch page, download the zip file for Application DPK Zip 1 to the same DPK_INSTALL directory as in step 8.
For PeopleSoft installations on Linux, AIX, or Solaris, download the PeopleSoft Application DPK for Linux. Do not unzip the file at this point. If you download to a Windows computer and FTP to your Linux, AIX, or Solaris computer, FTP in binary mode.
The first Application DPK Zip 1 includes the content needed for the PeopleSoft application, PS_APP_HOME.The other Application DPK files are not needed for this installation.
See "Preparing for Installation," Understanding the PeopleSoft Installation to review a list of the contents of the DPKs and file name syntax.
Task 2-2: Obtaining the PeopleSoft Upgrade Source Images
If you have not already done so, this section describes how to locate and obtain the Upgrade Source Images from My Oracle Support. Contact Oracle if you need a user ID and password for My Oracle Support.1. Go to the upgrade home page for your PeopleSoft application, and select the tab <Product> Upgrade Source
Images.
2. In the Upgrade Source Image Link and Manifest table, locate the row Native OS for Microsoft Windows.
3. Download or open the software manifest, and note the following:
• The PeopleTools patch release in the Software Version Included column.
• The file name for Application DPK Zip 1, normally FILENAME_9of11.zip.
4. To obtain the PeopleTools DPK, in My Oracle Support, select the Patches & Updates tab.
5. Select Product or Family (Advanced).
6. Specify the following information, and then click Search:
• PeopleSoft Enterprise PT PeopleTools as the Product
• The current PeopleSoft PeopleTools 8.5x release, such as 8.56, as the Release
• Your operating system, IBM AIX, Linux, Microsoft Windows, or Oracle Solaris on SPARC, as the Platform
7. On the search results page, locate the PeopleTools patch corresponding to the patch release that you noted in step 4, and download the DPKs into a single directory, referred to in this documentation as DPK_INSTALL.
Note. You can also find links to the most recent PeopleTools patches on the PeopleSoft PeopleTools Patches Home Page, My Oracle Support, Doc ID 2062712.2.
8. To obtain the PeopleSoft Application DPK, return to the PeopleSoft Upgrade Source Image page, and in the table, select the link in the column Link to Upgrade Source Image.
9. From the patch page, download the zip file for Application DPK Zip 1 to the same DPK_INSTALL directory

Chapter 2 Installing the PeopleSoft Homes
Copyright © 2018, Oracle and/or its affiliates. All Rights Reserved. 75
as in step 8.
For PeopleSoft installations on Linux, AIX, or Solaris, download the PeopleSoft Application DPK for Linux. Do not unzip the file at this point. If you download to a Windows computer and FTP to your Linux, AIX, or Solaris computer, FTP in binary mode.
The first Application DPK Zip 1 includes the content needed for the PeopleSoft application, PS_APP_HOME.The other Application DPK files are not needed for this installation.
See "Preparing for Installation," Understanding the PeopleSoft Installation Using Deployment Packages to reviewa list of the contents of the DPKs and file name syntax.
Task 2-3: Reviewing the DPK Setup Script Options
The PeopleSoft PeopleTools DPK setup script alleviates the installation process by automating most of the manual tasks on a virtual or bare-metal host running a supported operating system. By convention, the setup DPK is the first zip file (FILENAME_1ofn.zip) in the group of PeopleSoft DPK zip files you download from My OracleSupport. The DPK setup zip file includes two scripts, a Microsoft Windows script (psft-dpk-setup.bat) and a shell script forLinux, AIX, or Solaris, (psft-dpk-setup.sh). To set up a PeopleSoft environment, run the script pertinent to the host operating system (OS) platform on which the DPK setup script is invoked. The DPK setup script offers a variety of options for setting up mid-tier components, PS_HOME folder, and PeopleSoft domains, depending upon the options you supply. The script is an interactive script that detects the downloaded DPKs and verifies thatthey are correct. It also prompts the user for input, and once that information is gathered, will set up a complete functional PeopleSoft mid-tier environment connecting to an existing PeopleSoft database.
Note. The DPK setup script does not provide any default passwords. It is a good idea to be prepared to supply passwords such as user ID, PeopleSoft Connect ID, Application Server Domain Connection, and so on.
The following table lists the options available for the DPK setup script, psft-dpk-setup.bat for Microsoft Windowsand psft-dpk-setup.sh for Linux, AIX, or Solaris. The suffix <ext> in the table refers to the operating system specific extension.Note that the command options require two dashes when running on either Microsoft Windows, Linux, AIX, or Solaris.
Note. The commands in the table include line feeds to improve readability.
Deployment DPK Setup Script Command
Perform the following:
• Install the software required for the mid-tier components, including Oracle Tuxedo, Oracle WebLogic, and Oracle database client.
• Deploy and set up the domains for the mid-tier components (Application Server, web server, Process Scheduler and Oracle database client).
The deployment sets up one each of Application Server, web server, and Process Scheduler domains.
• Install the PS_HOME directory.
psft-dpk-setup.<ext> --env_type midtier

Installing the PeopleSoft Homes Chapter 2
76 Copyright © 2018, Oracle and/or its affiliates. All Rights Reserved.
Deployment DPK Setup Script Command
Perform the following:
• Install the software required for the mid-tier components, including Oracle Tuxedo, Oracle WebLogic and Oracle database client, without setting upthe mid-tier domains.
• Install the PS_HOME directory.
psft-dpk-setup.<ext> --env_type midtier --deploy_only
or
psft-dpk-setup.<ext> --env_type midtier --deploy_only--deploy_type all
Deploy the PS_HOME directory only.
This option does not set up any domains.
*There is additional information following this table.
psft-dpk-setup.<ext> --env_type midtier --deploy_only --deploy_type tools_home
Deploy the PS_APP_HOME directory only.
This option does not set up any domains. This option requires the presence of PeopleSoft application DPK zip files, as well as the PeopleTools DPK zip files, in the deployment folder.
*There is additional information following this table.
psft-dpk-setup.<ext> --env_type midtier --deploy_only --deploy_type app_home
Deploy the PS_HOME and PS_APP_HOME directories only.
This option does not set up any domains. This option requires the presence of PeopleSoft application DPK zip files, as well as the PeopleTools DPK zip files, in the deployment folder.
*There is additional information following this table.
psft-dpk-setup.<ext> --env_type midtier --deploy_only --deploy_type app_and_tools_home
Deploy and set up the domain for the Application Server only.
psft-dpk-setup.<ext> --env_type midtier --domain_type appserver
Deploy and set up the domain for the Process Scheduler only.
psft-dpk-setup.<ext> --env_type midtier --domain_type prcs
Deploy and set up the domain for PIA only.
Note. Before beginning the PIA domain deployment, ensure that Application Server and Process Scheduler domains are available.
psft-dpk-setup.<ext> --env_type midtier --domain_type pia
Deploy and set up the domains for the Application Server and the Process Scheduler.
psft-dpk-setup.<ext> --env_type midtier --domain_type appbatch
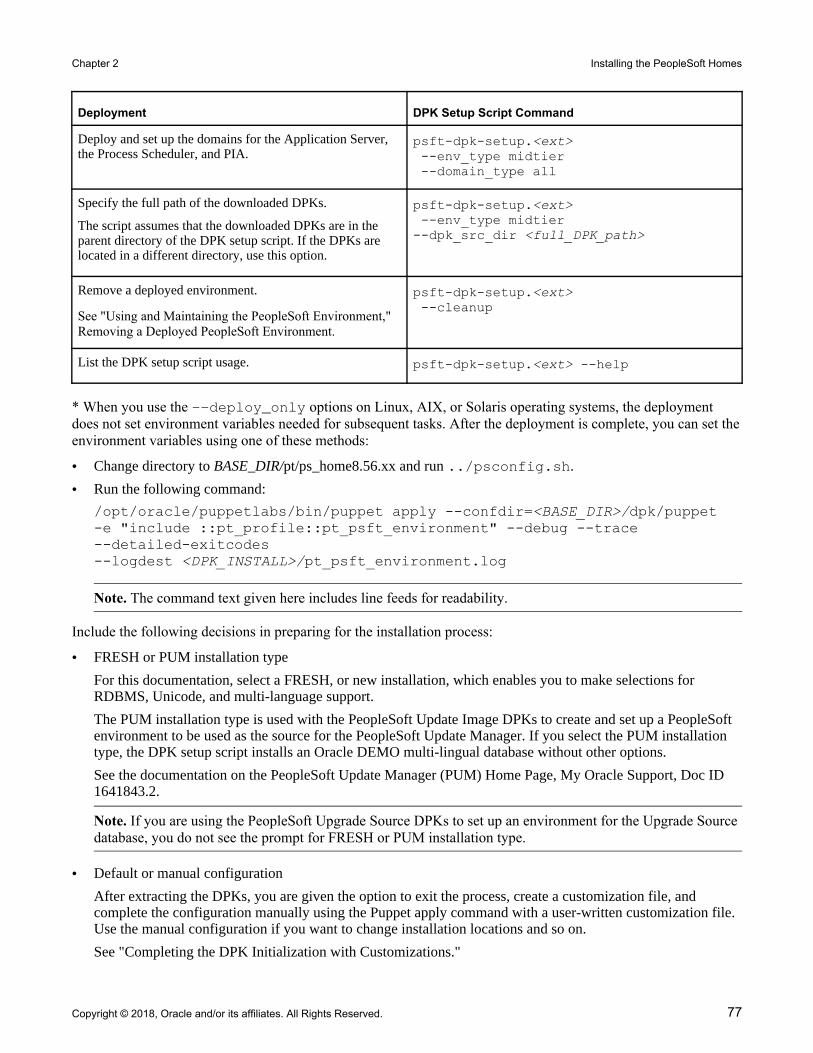
Chapter 2 Installing the PeopleSoft Homes
Copyright © 2018, Oracle and/or its affiliates. All Rights Reserved. 77
Deployment DPK Setup Script Command
Deploy and set up the domains for the Application Server, the Process Scheduler, and PIA.
psft-dpk-setup.<ext> --env_type midtier --domain_type all
Specify the full path of the downloaded DPKs.
The script assumes that the downloaded DPKs are in the parent directory of the DPK setup script. If the DPKs are located in a different directory, use this option.
psft-dpk-setup.<ext> --env_type midtier--dpk_src_dir <full_DPK_path>
Remove a deployed environment.
See "Using and Maintaining the PeopleSoft Environment," Removing a Deployed PeopleSoft Environment.
psft-dpk-setup.<ext> --cleanup
List the DPK setup script usage. psft-dpk-setup.<ext> --help
* When you use the --deploy_only options on Linux, AIX, or Solaris operating systems, the deployment does not set environment variables needed for subsequent tasks. After the deployment is complete, you can set theenvironment variables using one of these methods:
• Change directory to BASE_DIR/pt/ps_home8.56.xx and run ../psconfig.sh.
• Run the following command:
/opt/oracle/puppetlabs/bin/puppet apply --confdir=<BASE_DIR>/dpk/puppet -e "include ::pt_profile::pt_psft_environment" --debug --trace --detailed-exitcodes --logdest <DPK_INSTALL>/pt_psft_environment.log
Note. The command text given here includes line feeds for readability.
Include the following decisions in preparing for the installation process:
• FRESH or PUM installation type
For this documentation, select a FRESH, or new installation, which enables you to make selections for RDBMS, Unicode, and multi-language support.
The PUM installation type is used with the PeopleSoft Update Image DPKs to create and set up a PeopleSoft environment to be used as the source for the PeopleSoft Update Manager. If you select the PUM installation type, the DPK setup script installs an Oracle DEMO multi-lingual database without other options.
See the documentation on the PeopleSoft Update Manager (PUM) Home Page, My Oracle Support, Doc ID 1641843.2.
Note. If you are using the PeopleSoft Upgrade Source DPKs to set up an environment for the Upgrade Source database, you do not see the prompt for FRESH or PUM installation type.
• Default or manual configuration
After extracting the DPKs, you are given the option to exit the process, create a customization file, and complete the configuration manually using the Puppet apply command with a user-written customization file. Use the manual configuration if you want to change installation locations and so on.
See "Completing the DPK Initialization with Customizations."

Installing the PeopleSoft Homes Chapter 2
78 Copyright © 2018, Oracle and/or its affiliates. All Rights Reserved.
The following installation scenarios require manual configuration using the customizations:
• Installing on an AIX operating system
See Reviewing the Software Requirements on AIX
See Preparing the Customization File for JDK on AIX.
• Connecting to a non-Oracle RDBMS platform
See Preparing the Customization File for Mid-Tier Connection to a DB2 z/OS Database
• User IDs and password
The DPK setup script does not provide any default passwords. It is a good idea to be prepared to supply passwords such as user ID, PeopleSoft Connect ID, Application Server Domain Connection, and so on.
• Multi-language support
You are given the option to use the DPK setup script to deploy translated files to PS_APP_HOME for a multi-language installation.
• Unicode or non-Unicode
While running the DPK setup script, you can choose to install a Unicode or non-Unicode environment.
Alternatively, specify Unicode using the customizations and Puppet apply command.
See "Completing the DPK Initialization with Customizations," Preparing the Customization File for Unicode.
Task 2-4: Running the DPK Setup Script to Install PS_HOME and PS_APP_HOME
This section discusses:
• Understanding the PS_HOME and PS_APP_HOME Installation
• Installing PS_HOME and PS_APP_HOME on Microsoft Windows
• Installing PS_HOME and PS_APP_HOME on Linux, AIX, or Solaris
• Reviewing the Deployment Results
Understanding the PS_HOME and PS_APP_HOME InstallationUse the DPK setup script to install the PeopleSoft PeopleTools software in PS_HOME and the PeopleSoft application software in PS_APP_HOME, using the --deploy_only --deploy_type app_and_tools_home option. This deployment requires the presence of PeopleSoft application DPKs in the deployment folder, DPK_INSTALL.
Note. You can also use the DPK setup script to deploy the PS_HOME and PS_APP_HOME individually. See Reviewing the DPK Setup Script Options.
This procedure assumes that you have downloaded all of the required PeopleSoft Application Image DPKs for Linux or Microsoft Windows, and saved them in a location referred to here as DPK_INSTALL.
Task 2-4-1: Installing PS_HOME and PS_APP_HOME on Microsoft WindowsTo use the DPK setup script for deployment only:1. Extract the first zip file (FILENAME_1ofn.zip).

Chapter 2 Installing the PeopleSoft Homes
Copyright © 2018, Oracle and/or its affiliates. All Rights Reserved. 79
Note. It is a good idea to extract into the same directory where you downloaded the zip files, DPK_INSTALL.
The extraction creates the DPK_INSTALL/setup folder and other files.
2. Open a command prompt with Run as Administrator.
3. Change directory to DPK_INSTALL/setup.
4. Run the script with the options for deployment only.
Note. If you see an error message similar to "The application has failed to start because its side-by-side configuration is incorrect," it indicates that your machine does not include the necessary Microsoft C++ runtime libraries. Go to the Microsoft Web site, locate the Microsoft Visual C++ redistributable package for your system, and install as directed.
• If you extracted the first zip file into the same directory where you downloaded the zip files, use this command:
psft-dpk-setup.bat --env_type midtier --deploy_only --deploy_type app_⇒and_tools_home
• If you extracted the first zip file into a different directory, include the option dpk_src_dir to specify the location of the downloaded zip files, such as DPK_INSTALL, as follows:
psft-dpk-setup.bat --dpk_src_dir DPK_INSTALL --env_type midtier --⇒deploy_only --deploy_type app_and_tools_home
5. Wait while the script locates the valid PeopleSoft zip files and extracts them.
The system displays messages indicating the steps in the setup process. The success or failure of each step is indicated by [ OK ] or [FAILED].
The script locates the valid PeopleSoft zip files and extracts them. After it completes the extraction, it deletes the original downloaded zip files.
See "Preparing for Installation," Understanding the PeopleSoft Installation Using Deployment Packages, for the filename syntax of the DPK zip files.
Starting the PeopleSoft Environment Setup Process:
Validating User Arguments: [ OK ]Validating PeopleSoft Supported Platform: [ OK ]
Extracting the Zip File FILENAME_1of11.zip: [ OK ]Extracting the Zip File FILENAME_2of11.zip: [ OK ]...Extracting the Zip File FILENAME_11of11.zip: [ OK ]
6. Specify whether to install the Puppet software if necessary at the next prompt.
The script verifies if Puppet software is installed in the default location specified by the DPKs. If not, answer y (yes) to install the Puppet software and n to abort the PeopleSoft environment setup process. The default action (if nothing is entered at the prompt) is to install the software.
If there is any error during the Puppet software installation, the script aborts the setup process.
Verifying if Puppet Software is Installed:
Puppet Software is not installed on the Windows Host. If PeopleSoft

Installing the PeopleSoft Homes Chapter 2
80 Copyright © 2018, Oracle and/or its affiliates. All Rights Reserved.
environment needs to be setup on this Host, Puppet softwareshould be Installed.
Do you want to proceed with the Puppet Installation? [Y|n]: y
Installing Puppet Software on the Windows Host: [ OK ]
The script verifies whether the eYAML Hiera files are installed.
Verifying if eYAML Hiera Backend is Installed: [ OK ]
The script verifies if the DPKs are available in DPK_INSTALL, and aborts with the message [FAILED] if theyare not.
Preparing the Windows 2012 Server VM for PeopleSoft Environment:
Checking if PeopleSoft DPKs are Present: [ OK ]
7. At the following prompt, enter a location that is accessible to the host to be used as the PeopleSoft base directory, referred to here as BASE_DIR.
The base directory is used to extract the DPKs as well as for deploying PeopleSoft components. The script creates the base directory if it does not exist.
Use forward slashes only (/) when specifying the base directory; for example, C:/psft. Do not use a base directory name that begins with a number.
The base folder is used to extract the PeopleSoft DPKs. It is alsoused to deploy the PeopleSoft components. This folder should beaccessible on the Windows VM, must have write permissions and shouldhave enough free space
Enter the PeopleSoft Base Folder: C:/psftAre you happy with your answer? [Y|n|q]:
The script validates if there is enough free space available under the specified base directory for the PeopleSoft environment. The PeopleSoft environment setup is aborted if there is not enough free space.
Note. A mid-tier setup of a PeopleSoft environment requires about 25 GB of disk space.
Checking if the Base Folder has Enough Free Space: [ OK ]
8. Review the status messages as the script validates the files found in the download directory, DPK_INSTALL.
The script carries out validations for the specified mid-tier deployment. If any of the validations fail, the PeopleSoft environment setup is aborted.
Validating the PeopleSoft DPKs in the Windows VM:Validating the PeopleSoft Application DPK: [ OK ]Validating the PeopleSoft PeopleTools Server DPK: [ OK ]Validating the PeopleSoft PeopleTools Client DPK: [ OK ]Validating the Manifest Information in Peoplesoft DPKs: [ OK ]
9. Review the status messages as the script extracts the archives from the DPKs.
Note. The PeopleSoft application name will vary.
Extracting the PeopleSoft DPK Archives in the Windows VM:

Chapter 2 Installing the PeopleSoft Homes
Copyright © 2018, Oracle and/or its affiliates. All Rights Reserved. 81
Extracting the PeopleSoft <Product> Application DPK Archives: [ OK ]Extracting the PeopleSoft PeopleTools Server DPK Archives: [ OK ]
10. Review the status messages as the script sets up the Puppet file system.
The script sets up Puppet on the host. It then copies the PeopleSoft Puppet modules to the standard location (BASE_DIR\dpk) and updates the YAML files to reflect the type of PeopleSoft environment setup.
Setting up Puppet on the Windows VM:Generating eYAML Hiera Backend Encryption Keys: [ OK ]Updating the Puppet Hiera YAML Files in the Windows VM: [ OK ]Updating the Role in Puppet Site File for the Windows VM: [ OK ]
11. Enter FRESH as the installation type.
Note. If you are using the PeopleSoft Upgrade Source Image to set up an environment for the Upgrade Sourcedatabase, you do not see this prompt.
Enter the PeopleSoft installation [PUM or FRESH] type [PUM]: FRESH
12. Specify the information for your database platform.
a. For the database platform, enter DB2ODBC for DB2 for z/OS.
Enter the PeopleSoft database platform [ORACLE]: DB2ODBC
b. Enter y (yes) to indicate that the database you are connecting to is a Unicode database, or n (no) for a non-Unicode database.
Is the PeopleSoft database unicode? [Y|n]: y
13. Enter y if you want the script to include multi-language files in the installation.
Do you want Multi Language support in PeopleSoft database? [y|N]: y
14. Enter y to continue with the script.
Are you happy with your answers? [y|n]: yEncrypting the Passwords in the User Data: [ OK ]Updating the Puppet Hiera YAML Files with User Data: [ OK ]
15. If you want to continue running the initialization script using the default configuration, answer y (yes) to the following prompt, and continue with the next step.
The components that are installed during a default initialization are described in the section Reviewing the Installation Results. The process for completing the initialization with customizations is described in the chapter "Completing the DPK Initialization with Customizations."
If you want to customize the PeopleSoft environment using the Puppet YAML files, answer n (no) to stop the script.
The bootstrap script is ready to deploy and configure the PeopleSoftenvironment using the default configuration defined in the PuppetHiera YAML files. You can proceed by answering 'y' at the followingprompt. And, if you want to customize the environment by overridingthe default configuration, you can answer 'n'. If you answer 'n', youshould follow the instructions in the PeopleSoft Installation Guidefor creating the customization Hiera YAML file and running the Puppet'apply' command directly to continue with the setup of the PeopleSoftenvironment

Installing the PeopleSoft Homes Chapter 2
82 Copyright © 2018, Oracle and/or its affiliates. All Rights Reserved.
Do you want to continue with the default initialization process? [y|n]:
16. Review the status messages as the script runs Puppet profiles to set up the PeopleSoft environment.
A message of [ OK ] indicates that the profile has been applied successfully while a message [FAILED] indicates that the profile application failed.
The script stops and exits the first time a profile application fails, and displays an error message. This exampleshows the error message after the first step failed:
Starting the Deployment of PeopleSoft Components:
Deploying Application Components: [FAILED]
The initialization of PeopleSoft environment setup failed. Check thelog file [C:\DPK_INSTALL\setup\psft_dpk_setup.log] for the errors.After correcting the errors, run the following commands to continuewith the setup of PeopleSoft environment.
1. cd /d C:\psft\dpk\puppet\production\manifests2. "C:\Program Files\Puppet Labs\Puppet\bin\puppet.bat" apply --confdir=⇒C:\psft\dpk\puppet site.pp --debug --trace
Exiting the PeopleSoft environment setup process.
Upon successful completion, the DPK setup script displays the following message:
Starting the Deployment of PeopleSoft Components:
Deploying Application Components: [ OK ]Deploying PeopleTools Components: [ OK ]
The PeopleSoft Environment Setup Process Ended.
The complete setup log is written to the file psft_dpk_setup.log in the same location as the DPK setup script.
See Obtaining Operating System Packages Required by Puppet if you see messages about missing packages inthe log.
Task 2-4-2: Installing PS_HOME and PS_APP_HOME on Linux, AIX, or SolarisTo use the DPK setup script for deployment only:1. Extract the first zip file (FILENAME_1ofn.zip).
Note. It is a good idea to extract into the same directory where you downloaded the zip files, DPK_INSTALL.
The extraction creates the DPK_INSTALL/setup folder and other files.
2. Open a terminal window and change directory to DPK_INSTALL/setup.
3. As a user with root access, run the psft-dpk-setup.sh script with the options for deployment only.
• If you extracted the first zip file into the same directory where you downloaded the zip files, run the script with no options, as follows:
./psft-dpk-setup.sh --env_type midtier --deploy_only --deploy_type⇒

Chapter 2 Installing the PeopleSoft Homes
Copyright © 2018, Oracle and/or its affiliates. All Rights Reserved. 83
app_and_tools_home
• If you extracted the first zip file into a different directory, use the option dpk_src_dir to specify the location of the downloaded zip files, such as DPK_INSTALL, as follows:
./psft-dpk-setup.sh --dpk_src_dir DPK_INSTALL --env_type midtier --⇒deploy_only --deploy_type app_and_tools_home
4. Wait while the script locates the valid DPK zip files and extracts them.
The system displays messages indicating the steps in the setup process. The success or failure of each step is indicated by [ OK ] or [FAILED].
See "Preparing for Installation," Understanding the PeopleSoft Installation Using Deployment Packages, for the filename syntax of the DPK zip files.
Starting the PeopleSoft Environment Setup Process:
Validating User Arguments: [ OK ]Validating PeopleSoft Supported Platform: [ OK ]
Extracting the Zip File FILENAME_1of11.zip: [ OK ]Extracting the Zip File FILENAME_2of11.zip: [ OK ]...Extracting the Zip File FILENAME_11of11.zip: [ OK ]
5. Specify whether to install the Puppet software if necessary at the next prompt.
The script verifies if Puppet software is installed in the default location specified by the DPKs. If not, answer y (yes) to install the Puppet software and n to abort the PeopleSoft environment setup process. The default action (if nothing is entered at the prompt) is to install the software.
If there is any error during the Puppet software installation, the script aborts the setup process.
Verifying if Puppet Software is Installed: [ OK ]
Puppet Software is not installed on the Linux Host. If PeopleSoftenvironment needs to be setup on this Host, Puppet softwareshould be Installed.
Do you want to proceed with the Puppet Installation? [Y|n]: y
Installing Puppet Software on the Host: [ OK ]
The script verifies whether the eYAML Hiera files are installed:
Verifying if eYAML Hiera Backend is Installed: [ OK ]
The script verifies if the DPKs are available in DPK_INSTALL, and aborts with the message [FAILED] if theyare not.
Preparing the Linux VM for PeopleSoft Environment:
Checking if PeopleSoft DPKs are Present: [ OK ]
6. At the following prompt, enter a location that is accessible to the host to be used as the PeopleSoft base directory, referred to here as BASE_DIR.
The base directory is used to extract the PeopleSoft DPKs as well as for deploying PeopleSoft components. The script creates the directory if it does not exist.

Installing the PeopleSoft Homes Chapter 2
84 Copyright © 2018, Oracle and/or its affiliates. All Rights Reserved.
Use forward slashes only (/) when specifying the base directory; for example, /opt/oracle/psft. Do not use a base directory name that begins with a number.
The base folder is used to extract the PeopleSoft DPKs. It is alsoused to deploy the PeopleSoft components. This directory should beaccessible on the Linux VM, must have write permissions and shouldhave enough free space..Enter the PeopleSoft Base Directory: /opt/oracle/psftAre you happy with your answer? [Y|n|q]:
The script validates if there is enough free space available under the specified base directory for the PeopleSoft environment. The PeopleSoft environment setup is aborted if there is not enough free space. The script creates the base directory if it does not exist.
Note. A mid-tier setup of a PeopleSoft environment requires about 25 GB of disk space.
Checking if the Base Directory has Enough Free Space: [ OK ]
7. If the default home directory is not writable, enter a new location at the following prompt.
The DPK setup creates local users on the host. These users deploy the PeopleSoft components and own the PeopleSoft runtime domains. The script checks whether the default home directory for the PeopleSoft users (/home) is writable. If not, it will prompt the user to enter a new location to be used for creating the home directories for these local users.
Checking if Default User Home Directory /home is Writable: [WARNING]
The PeopleSoft environment setup creates local users on the Linux VM.The default Home directory [/home] do not have write permission to create the user's home directory. Pleaseensure this directory is writable or provide a new directory on theLinux VM that is writable.
Enter a directory on the Linux VM that is writable [/home]: /ds1Are you happy with your answer? [y|n|q]:
If the /home directory is writable, no response is required.
Checking if Default User Home Directory /home is Writable: [ OK ]
8. Review the status messages as the script validates the files found in the download directory, DPK_INSTALL.
The script carries out validations for the specified mid-tier deployment. If any of the validations fail, the PeopleSoft environment setup is aborted.
Validating the PeopleSoft DPKs in the Linux VM:Validating the PeopleSoft Application DPK: [ OK ]Validating the PeopleSoft PeopleTools Server DPK: [ OK ]Validating the PeopleSoft PeopleTools Client DPK: [ OK ]Validating the Manifest Information in PeopleSoft DPKs: [ OK ]
9. Review the status messages as the script extracts the archives from the DPKs.
Note. The PeopleSoft application name will vary.
Extracting the PeopleSoft DPK Archives in the Linux VM:Extracting the PeopleSoft PeopleTools Server DPK Archives: [ OK ]

Chapter 2 Installing the PeopleSoft Homes
Copyright © 2018, Oracle and/or its affiliates. All Rights Reserved. 85
Extracting the PeopleSoft <Product> Application DPK Archives: [ OK ]
10. Review the status messages as the script sets up the Puppet file system.
The script sets up Puppet on the host. It then copies the PeopleSoft Puppet modules to the standard location (BASE_DIR/dpk) and updates the YAML files to reflect the type of PeopleSoft environment setup.
Setting up Puppet on the Linux VM:Generating eYAML Hiera Backend Encryption Keys: [ OK ]Updating the Puppet Hiera YAML Files in the Linux VM: [ OK ]Updating the Role in Puppet Site File for the Linux VM: [ OK ]
11. Enter FRESH as the installation type.
Note. If you are using the PeopleSoft Upgrade Source Image to set up an environment for the Upgrade Sourcedatabase, you do not see this prompt.
Enter the PeopleSoft installation [PUM or FRESH] type [PUM]: FRESH
12. Specify the information for your database platform.
a. For the database platform, enter DB2ODBC for DB2 for z/OS.
Enter the PeopleSoft database platform [ORACLE]: DB2ODBC
b. Enter y (yes) to indicate that the database you are connecting to is a Unicode database, or n (no) for a non-Unicode database.
Is the PeopleSoft database unicode? [Y|n]: y
13. Enter y if you want the script to include multi-language files in the installation.
Do you want Multi Language support in PeopleSoft database? [y|N]:
14. Enter y to continue with the script.
Are you happy with your answers? [y|n]: yEncrypting the Passwords in the User Data: [ OK ]Updating the Puppet Hiera YAML Files with User Data: [ OK ]
15. If you want to continue running the initialization script using the default configuration, answer y (yes) to the following prompt, and continue with the next step.
The components that are installed during a default initialization are described in the section Reviewing the Installation Results. The process for completing the initialization with customizations is described in the chapter "Completing the DPK Initialization with Customizations."
If you want to customize the PeopleSoft environment using the Puppet YAML files, answer n (no) to stop the script.
The bootstrap script is ready to deploy and configure the PeopleSoftenvironment using the default configuration defined in the PuppetHiera YAML files. You can proceed by answering 'y' at the followingprompt. And, if you want to customize the environment by overridingthe default configuration, you can answer 'n'. If you answer 'n', youshould follow the instructions in the PeopleSoft Installation Guidefor creating the customization Hiera YAML file and running the Puppet'apply' command directly to continue with the setup of the PeopleSoftenvironment

Installing the PeopleSoft Homes Chapter 2
86 Copyright © 2018, Oracle and/or its affiliates. All Rights Reserved.
Do you want to continue with the default initialization process? [y|n]:
16. Review the status messages as the script runs Puppet profiles to set up the PeopleSoft environment.
A message of [ OK ] indicates that the profile has been applied successfully while a message [FAILED] indicates that the profile application failed.
The script stops and exits the first time a profile application fails, and displays an error message. This exampleshows the error message after the first step failed:
Starting the Deployment of PeopleSoft Components:
Setting Up System Settings [FAILED]
The initialization of PeopleSoft environment setup failed. Check thelog file [DPK_INSTALL/setup/psft_dpk_setup.log] for the errors.After correcting the errors, run the following commands to continuewith the setup of PeopleSoft environment.
1. cd /opt/oracle/psft/dpk/puppet/production/manifests2. PUPPET_DIR/puppet apply --confdir=/opt/oracle/psft/dpk/puppet⇒ site.pp --debug --trace
Exiting the PeopleSoft environment setup process.
Note. For Linux, PUPPET_DIR is /opt/puppetlabs/bin. For AIX or Solaris, PUPPET_DIR is /opt/oracle/puppetlabs/bin.
See "Completing the DPK Initialization with Customizations."
Upon successful completion, the DPK setup script displays the following message:
Starting the Deployment of PeopleSoft Components:
Setting Up System Settings [ OK ]Deploying Application Components: [ OK ]Deploying PeopleTools Components: [ OK ]
The PeopleSoft Environment Setup Process Ended.
The complete setup log is written to the file psft_dpk_setup.log in the same location as the DPK setup script.
Task 2-4-3: Reviewing the Deployment ResultsThis section describes some of the files and folders installed by the script. These are the standard default locations. If you want to change the installation locations, see "Completing the DPK Initialization with Cutomizations." The script creates the following three sub-directories under the user-specified base directory, BASE_DIR:
• BASE_DIR/pt
The script uses this directory to deploy the PS_HOME and PS_APP_HOME utilities and scripts, including thefollowing:
• PS_HOME installed to the default location under the DPK base directory, BASE_DIR/pt/ps_home8.56.xx.
• PS_HOME/appserv/PSADMIN.exe

Chapter 2 Installing the PeopleSoft Homes
Copyright © 2018, Oracle and/or its affiliates. All Rights Reserved. 87
• PS_HOME/bin/client/winx86/pscfg.exe (Configuration Manager)
• PS_HOME/bin/client/winx86/psdmt.exe (Data Mover)
• PS_HOME/bin/client/winx86/pside.exe (Application Designer)
• PS_HOME/scripts
• PS_HOME/setup/PsMpPIAInstall (PeopleSoft Pure Internet Architecture installer)
• PS_HOME/setup/PsMpDbInstall (Database installer)
• PS_HOME/setup/PsCA (Change Assistant installer)
• PS_HOME/setup/PsCIA (Change Impact Analyzer installer)
• PS_HOME/setup/PsMpWebAppDeployInstall (Web Application Deployment installer)
• PS_APP_HOME installed to the default location under the DPK base directory, BASE_DIR/pt/<Product>_app_home, where <Product> is the abbreviation for the PeopleSoft application; for example, hcm_app_home for PeopleSoft Human Capital Management.
Note. The DPK setup requires a decoupled PS_APP_HOME; that is, the installation location of PS_APP_HOME is different from PS_HOME.
Files for the specific PeopleSoft application, including files needed for database creation.
If you answered yes when asked whether you wanted multi-language support during the DPK setup script process, the files required for translations are installed under BASE_DIR/pt/<Product>_app_home.
• BASE_DIR/dpk
The script uses this directory to extract the archives from the PeopleSoft DPKs, and contains the Puppet YAML files for the deployment. Do not alter the installed Puppet YAML files.
See Completing the DPK Initialization with Customizations for information on creating a YAML file to customize the environment.
• BASE_DIR/db
This directory is not used for this deployment.
• Microsoft Visual C++ Redistributable Packages for Visual Studio, which include required Microsoft C++ runtime libraries.
Task 2-5: Obtaining Operating System Packages Required by Puppet
The Puppet software used for the DPK deployment is dependent on certain OS-level packages, which may not be present in the delivered DPKs. In this case, you can use the information in the log file that is generated when you run the DPK setup script to determine which packages are needed. It is the responsibility of the user to obtain and install the required packages. This is a one-time requirement, for a specific Puppet version, the first time the host is set up. If you are using a virtual machine (VM), depending upon your organization's standards, you can add the missing packages to the standard OS from which you instantiate VMs, or create a custom OS image and re-use it later.1. If you are using a virtual OS platform, create a new VM instance.
2. Use the DPK setup script, psft-dpk-setup.bat (Microsoft Windows), or psft-dpk-setup.sh (Linux, AIX, or Solaris) to deploy on the host.
3. Review the deployment log file in DPK_INSTALL\setup.

Installing the PeopleSoft Homes Chapter 2
88 Copyright © 2018, Oracle and/or its affiliates. All Rights Reserved.
The log file will list any missing OS packages.
4. Remove the PeopleSoft environment created by the DPK deployment, using psft-dpk-setup.bat --cleanup (Microsoft Windows) or psft-dpk-setup.sh --cleanup (Linux, AIX, or Solaris).
5. If you are using a virtual OS platform, recreate the VM instance.
6. Obtain and load the missing OS packages on the new OS instance.
7. Rerun the DPK setup script.
The log file should not list any missing packages.
Task 2-6: Removing a Deployed PeopleSoft Environment
This section discusses:
• Understanding the Removal Process
• Using the DPK Setup Script to Remove the PeopleSoft Environment on Microsoft Windows
• Using the DPK Setup Script to Remove the PeopleSoft Environment on AIX, Linux, or Solaris
• Using Puppet to Remove the PeopleSoft Environment on Microsoft Windows
• Using Puppet to Remove the PeopleSoft Environment on Linux, AIX, or Solaris
• Troubleshooting the Removal Process on Microsoft Windows
• Troubleshooting the Removal Process on Linux, AIX, or Solaris
Understanding the Removal ProcessThere will be times when an existing PeopleSoft environment needs to be completely removed. For example, applying a new PeopleSoft PeopleTools patch requires that an existing environment be cleaned up and a new one created. The cleanup process described here conducts an orderly shutdown and removal of all the configured runtime domains — Application Server, Process Scheduler, and PIA domains. Additionally, it will remove all the deployed components. The PeopleSoft environment can be cleaned up either using the PeopleSoft DPK setup script or using a Puppet apply command. You can use the PeopleSoft DPK setup script cleanup for environments created with the default initialization or with the psft_customizations.yaml file.
Note. The Puppet software that is installed by the DPK setup script is not removed by the cleanup process.
Task 2-6-1: Using the DPK Setup Script to Remove the PeopleSoft Environment on Microsoft WindowsUse these steps to remove a deployed PeopleSoft environment using the PeopleSoft DPK setup script on Microsoft Windows:1. Open a command prompt window; for example:
• Select Start, and navigate to Accessories, Command Prompt.
• Right-click and select Run as Administrator.
2. Go to DPK_INSTALL\setup and run the following command:
psft-dpk-setup.bat --cleanup
3. Specify the base directory (BASE_DIR) that you want to remove.

Chapter 2 Installing the PeopleSoft Homes
Copyright © 2018, Oracle and/or its affiliates. All Rights Reserved. 89
Enter the PeopleSoft Base Folder specified during setup:
You see this prompt only when there is more than one deployment, and you are removing the most recent deployment. If there is a single deployment, or if you are removing a second deployment, the script does not display this prompt. For example:
• You carried out deployment A followed by deployment B.
• You removed the second deployment B. For the cleanup of deployment B, you do not see this prompt for the BASE_DIR.
• You run the script a second time. At the prompt, specify the BASE_DIR for deployment A.
4. Review the cleanup log file in DPK_INSTALL\setup.
The DPK setup script displays [OK] for each step of the process, and [FAILED] if any of the steps are not successful. After completing these steps, verify that the DPK installation directories (BASE_DIR/pt and BASE_DIR/db) have been cleared. On Microsoft Windows, verify that any services have been removed. If anything remains, the cleanup process was not successful. Try running the process again, and if it is still not successful, you may need to carry out advanced cleanup.See Troubleshooting the Removal Process on Microsoft Windows.
Task 2-6-2: Using the DPK Setup Script to Remove the PeopleSoft Environment on AIX, Linux, or SolarisUse these steps to remove a deployed PeopleSoft environment using the PeopleSoft DPK setup script on AIX, Linux, or Solaris:1. Open a terminal window as a user with root permission.
2. Go to DPK_INSTALL\setup and run the following command:
sh psft-dpk-setup.sh --cleanup
3. Specify the base directory (BASE_DIR) that you want to remove.
Enter the PeopleSoft Base Folder specified during setup:
You see this prompt only when there is more than one deployment, and you are removing the most recent deployment. If there is a single deployment, or if you are removing a second deployment, the script does not display this prompt. For example:
• You carried out deployment A followed by deployment B.
• You removed the second deployment B. For the cleanup of deployment B, you do not see this prompt for the BASE_DIR.
• You run the script a second time. At the prompt, specify the BASE_DIR for deployment A.
4. Review the cleanup log file in DPK_INSTALL\setup.
The DPK setup script displays [OK] for each step of the process, and [FAILED] if any of the steps are not successful. After completing these steps, verify that the DPK installation directories (BASE_DIR/pt and BASE_DIR/db) have been cleared. On Linux, AIX, or Solaris, check for leftover processes. If anything remains, the cleanup process was not successful. Try running the cleanup process again, and if it is still not successful, you may need to carry out advanced cleanup.See Troubleshooting the Removal Process on Linux, AIX, or Solaris.

Installing the PeopleSoft Homes Chapter 2
90 Copyright © 2018, Oracle and/or its affiliates. All Rights Reserved.
Task 2-6-3: Using Puppet to Remove the PeopleSoft Environment on Microsoft WindowsUse the puppet apply command to remove the PeopleSoft environment manually. When you run the puppet apply --confdir=BASE_DIR/dpk/puppet site.pp --debug --trace command, the debug and trace messages appear in the command prompt. If you want to save them as a file, see the Puppet Labs documentation for the correct options.See Puppet Labs Documentation, http://docs.puppetlabs.com.To remove the environment manually on Microsoft Windows:1. Open the file BASE_DIR/dpk/puppet/production/data/defaults.yaml in a text editor, such as Notepad.
See "Using the Puppet Hiera YAML Files for Customization."
2. Change the value of the ensure attribute from present to absent.
3. Open a command prompt.
4. If the Puppet environment is not set, run the following command (optional):
C:\"Program Files\Puppet Labs\Puppet\bin\puppet_shell.bat"
5. Change directory to the BASE_DIR/dpk/puppet/production/manifests folder.
6. Run the following command:
"C:\Program Files\Puppet Labs\Puppet\bin\puppet.bat" apply --confdir=⇒BASE_DIR/dpk/puppet site.pp --debug --trace
Note. The options require double dashes.
To redirect the output to a file, use the logdest option:
"C:\Program Files\Puppet Labs\Puppet\bin\puppet.bat" apply --confdir=⇒BASE_DIR/dpk/puppet site.pp --debug --trace --logdest "BASE_DIR/dpk⇒/dpk.log"
Task 2-6-4: Using Puppet to Remove the PeopleSoft Environment on Linux,AIX, or SolarisTo remove the environment manually on Linux, AIX, or Solaris:1. Open the file BASE_DIR/dpk/puppet/production/data/defaults.yaml in a text editor, such as vi.
See "Using the Puppet Hiera YAML Files for Customization."
2. Change the value of the ensure attribute from present to absent.
3. Open a new session and log in as root.
4. Change directory to the BASE_DIR/dpk/puppet/production/manifests directory.
5. Run the following command.
Note. The options require double dashes.
On Linux:

Chapter 2 Installing the PeopleSoft Homes
Copyright © 2018, Oracle and/or its affiliates. All Rights Reserved. 91
/opt/puppetlabs/bin/puppet apply --confdir=BASE_DIR/dpk/puppet site.pp -⇒-debug --trace
On AIX or Solaris:
/opt/oracle/puppetlabs/bin/puppet apply --confdir=BASE_DIR/dpk/puppet⇒ site.pp --debug --trace
To redirect the output to a file, use the logdest option:
On Linux:
/opt/puppetlabs/bin/puppet apply --confdir=BASE_DIR/dpk/puppet site.pp -⇒-debug --trace --logdest "BASE_DIR/dpk/dpk.log"
On AIX or Solaris:
/opt/oracle/puppetlabs/bin/puppet apply --confdir=BASE_DIR/dpk/puppet⇒ site.pp --debug --trace --logdest "BASE_DIR/dpk/dpk.log"
Task 2-6-5: Troubleshooting the Removal Process on Microsoft WindowsThis section includes advanced steps to be used only if the previous procedures in this section failed. If the cleanup process on Microsoft Windows was not totally successful, the BASE_DIR folders may not be entirely cleared, or you may have trouble when carrying out another deployment. Before carrying out the advanced steps in this section:1. Run the command psft-dpk-setup.bat --cleanup.
2. If the script displays a FAILED message, run it again.
3. If it succeeds, check the BASE_DIR folders to be sure everything has been deleted.
4. If the BASE_DIR folders are not clear, or if a subsequent deployment is not successful, carry out the steps below.
For the advanced manual cleanup on Microsoft Windows, there are several steps. The steps in this section should be performed by someone familiar with modifying the Microsoft Windows registry. Depending upon where the cleanup process failed, some of the items mentioned in these steps may have already been removed. The user should remove whatever remains in this order: 1. Start Services.
2. Stop the services OracleServiceCDB<Product> (for example, OracleServiceCDBFSCM) and OracleOraDB12cHomeTNSListener<Listener_Name> (for example, OracleOraDB12cHomeTNSListenerpsft_listener) by highlighting the names, right-clicking and selecting Stop.
Note. When you stop the service for the CDB (Oracle container database), you may see a message informing you that it will also stop the services for the PeopleSoft application server and Process Scheduler domains thatwere deployed for that database.
3. Stop the service for the PeopleSoft PIA domain.
4. Open a command prompt, running as administrator, and remove the two database services and the PeopleSoft domains services with the commands:
sc delete OracleServiceCDB<Product>sc delete OracleOraDB12cHomeTNSListener<Listener_Name>

Installing the PeopleSoft Homes Chapter 2
92 Copyright © 2018, Oracle and/or its affiliates. All Rights Reserved.
sc delete PsftAppServerDomain<Appserver_domain_name>Servicesc delete PsftPrcsDomain<ProcSched_domain_name>Servicesc delete PsftPIADomain<PIA_domain_name>Service
5. In the Services window, stop ORACLE ProcMGR V12.2.2.0.0_VS2015 and TListen 12.2.2.0.0_VS2015(Port3050) by highlighting the names, right-clicking and selecting Stop.
6. In the Services window, right-click each of the services in step 5, select Properties, and copy the correct service name (rather than the alias).
7. Open a command prompt and remove the two preceding services with the command:
sc delete <service_name>
8. Open the Microsoft Windows registry; for example, select Start, Run, and enter regedit.
9. In the Registry Editor, locate the HKLM\SOFTWARE\ORACLE folder.
Select the following keys and verify that they contain references to the DPK installation locations in BASE_DIR:
• KEY_OraDB12cHome (BASE_DIR\db by default)
• KEY_OraTux1222Home (BASE_DIR\pt\bea\tuxedo by default)
• KEY_OraWL1213Home (BASE_DIR\pt\bea by default)
10. In the Registry Editor, locate the HKLM\SOFTWARE\ORACLE\TUXEDO folder.
Select the 12.2.2.0.0_VS2015 key and verify that it contains references to the DPK installation locations in BASE_DIR (BASE_DIR\pt\bea\tuxedo by default).
11. In the Registry Editor, only for the keys from step 9 and 10 that reference the DPK installation locations, right-click and select Delete.
12. Close the Registry Editor window.
13. Open the file C:\Program Files\Oracle\Inventory\ContentsXML\inventory.xml in a text editor.
14. Locate the three lines that reference the DPK deployment:
<HOME NAME="OraWL1213Home" LOC="C:/psft/pt/bea" TYPE="O" IDX="16"/><HOME NAME="OraTux1222Home" LOC="C:\psft\pt\bea\tuxedo" TYPE="O" IDX=⇒"17"/><HOME NAME="OraDB12cHome" LOC="C:\psft\db\oracle-server\12.1.0.2" TYPE=⇒"O" IDX="18"/>
15. Delete only the lines referencing the DPK deployment, and save the file.
16. Remove everything under the BASE_DIR folder (BASE_DIR\db, BASE_DIR\dpk, and BASE_DIR\pt).
Note. You may get a message that some of the file names are too big for the recycle bin. Click OK to accept.
17. Remove C:/User/<username>/psft/pt/8.56 (PS_CFG_HOME).
Task 2-6-6: Troubleshooting the Removal Process on Linux, AIX, or SolarisThis section includes advanced steps to be used only if the previous procedures in this section failed. If the cleanup process on Linux, AIX, or Solaris was not totally successful, the BASE_DIR folders may not be entirely cleared, or you may have trouble when carrying out another deployment. Before carrying out the advanced steps in this section:1. Run the command ./psft-dpk-setup.sh --cleanup.

Chapter 2 Installing the PeopleSoft Homes
Copyright © 2018, Oracle and/or its affiliates. All Rights Reserved. 93
2. If the script displays a FAILED message, run it again.
3. If it succeeds, check the BASE_DIR folders to be sure everything has been deleted.
4. If the BASE_DIR folders are not clear, or if a subsequent deployment is not successful, try the following troubleshooting steps.
Here are a few things to check for the advanced manual cleanup on Linux, AIX, or Solaris. Depending upon where the cleanup process failed, some of the items mentioned may have already been removed.
• Kill any left-over processes.
1. For example, use this command, and look for PeopleSoft processes:
ps -aux|more
2. To stop the processes, for example, use this command with the process ID:
kill -STOP <PID>
• Check for left-over PeopleSoft users.
When you carry out the cleanup using the DPK setup script, it should remove the PeopleSoft users cleanly. However, if the users' home directory was deleted by mistake before running the cleanup, the user definition may remain.
1. Check for the four PeopleSoft user IDs using this command:
id psadm1id psadm2id psadm3id oracle2
If the commands give an output, it means the user exists.
2. Check for running processes associated with the users with this command:
ps -ef|grep <user_id>
3. Stop any running processes associated with the users, if necessary.
4. Delete the users, with this command:
userdel -r <user_id>


Copyright © 2018, Oracle and/or its affiliates. All Rights Reserved. 95
Chapter 3
Completing the DPK Initialization with Customizations
This chapter discusses:
• Understanding PeopleSoft Environment Customizations
• Preparing Customization Files for Linux, AIX, or Solaris Users and Groups
• Preparing the Customization File for PeopleSoft Domain Definitions
• Preparing the Customization File to Create PeopleSoft Domains Without Configuration
• Preparing the Customization File for Component Software Locations
• Preparing the Customization File for Unicode
• Preparing the Customization File for the PeopleSoft Homes
• Preparing the Customization File for Jolt SSL and WSL SSL Ports
• Preparing the Customization File for Mid-Tier Connection to a DB2 z/OS Database
• Completing the Customized Deployment
Understanding PeopleSoft Environment Customizations
The PeopleSoft DPK setup script allows setup of a PeopleSoft environment quickly using the default data from the packaged Hiera YAML files. This section gives a few examples of ways to use the YAML files for customization, but is not meant to be an exhaustive list of the possible customizations. Always use the documented procedures to make changes to your environment. Doing so will allow you to retain your customizations when removing a deployment before deploying a new patch or version.Use these guidelines when customizing your environment:
• Do not change any of the original delivered YAML files.
This practice enables you to retain your customizations after deploying a new patch or update.
When you deploy the PeopleSoft DPKs, the YAML files associated with the deployment are installed in the following location:
• BASE_DIR/dpk/puppet/production/data/defaults.yaml
• BASE_DIR/dpk/puppet/production/data/psft_configuration.yaml
• BASE_DIR/dpk/puppet/production/data/psft_deployment.yaml
• BASE_DIR/dpk/puppet/production/data/psft_unix_system.yaml
• Start with the DPK setup script and choose not to continue with the default initialization.
Answer no at the prompt "Do you want to continue with the default initialization process? [y|n]:" to exit the script and bypass the default initialization process.

Completing the DPK Initialization with Customizations Chapter 3
96 Copyright © 2018, Oracle and/or its affiliates. All Rights Reserved.
To set up a customized PeopleSoft environment, the DPK setup script can still be used to automate the tasks of extracting the DPK zip files, installing Puppet (if not installed), and copying the Puppet modules and Hiera data YAML files from the DPK into the location where Puppet looks for these files during the orchestration process.
• Always use the customizations for these setups:
• Installing on an AIX operating system
• Connecting to a non-Oracle RDBMS platform.
• Always create a psft_customizations.yaml file to use for modified parameters.
Never modify the delivered YAML files. Instead, copying the parameters that you want to modify into the psft_customizations.yaml file gives you the option to save the customization.
• Verify the content of the delivered YAML files with each release.
The YAML files may have changed since this document was published. It is important that you copy the appropriate section of code from the YAML files you install with each new deployment, and use it as the basisfor your psft_customizations.yaml file.
• Do not create new parameters for psft_customizations.yaml.
The deployment recognizes only those parameters in the delivered YAML files or given in the product documentation.
• Use a single psft_customizations.yaml file.
You can copy sections from more than one of the delivered YAML files and include them in a single psft_customizations.yaml file.
• Include the remove: false attribute to retain your customizations through the clean up process.
To ensure that your customizations are not removed when removing a deployed environment:
• For each segment of customization parameters in the psft_customizations.yaml file, include the remove:false attribute at the end of the segment.
• If you remove the environment using the puppet apply command, set the ensure attribute to absent in default.yaml.
If you remove the environment using the --cleanup option for the PeopleSoft DPK setup script, you donot need to set the attribute first because it is part of the script process.
• Remove the environment using the --cleanup option for the PeopleSoft DPK setup script, as described in this documentation.
See "Installing the PeopleSoft Homes," Removing a Deployed PeopleSoft Environment.
• Copy an entire section containing the parameter to be modified, and be sure to retain the indentation from the delivered YAML file.
The hierarchy and alignment of the YAML files are very important to the correct operation. In addition to the brief overview given here, review the information in the appendix "Using the Puppet Hiera YAML Files for Customization."
• The YAML files include scalar type and collection type parameters.
Scalar parameters are of the form key: value; for example:
db_platform: ORACLE
Collection type parameters include a parameter name followed by one or more indented lists of key:value pairs. In this case, the value of the collection parameter is defined by the indented list of values; for example:
ps_home:

Chapter 3 Completing the DPK Initialization with Customizations
Copyright © 2018, Oracle and/or its affiliates. All Rights Reserved. 97
db_type: "%{hiera('db_platform')}" unicode_db: "%{hiera('unicode_db')}" location: "%{hiera('ps_home_location')}"
• When you locate a parameter that you want to modify, be sure to locate the section heading that begins at the first column of the YAML file. This ensures that the deployment operation modifies the correct parameter.
• Be sure to retain the indentation from the delivered YAML file.
Typically there is an indentation of 2 or 3 spaces for each successive subsection. This is necessary in orderfor the parameters to be correctly interpreted.
Note. Be sure when copying and pasting that you retain the indentation. Depending upon the authoring or editing tools you use, the desired indentation may be lost when you copy and paste. It is a good idea to double-check the final psft_customizations.yaml file, especially for the special cases where you copy a sample from this documentation.
• When copying and modifying collection type parameters, use only spaces, not tabs, to indent the subsections.
• Use the encrypted passwords from the generated YAML files.
The DPK setup script encrypts user-supplied passwords and includes them in the generated YAML files. If you copy a section of a YAML file with encrypted passwords, do not replace or remove the encrypted text.
The encrypted passwords are quite long. Be sure to copy the entire string, without adding spaces, tabs, or line feeds.
Note. For the majority of the customizations described in this documentation, you copy the encrypted passwords from the generated YAML files. If that is not possible, see the appendix "Encrypting Passwords forCustomizations on Linux, AIX, or Solaris."
• Replace the entire attribute string.
The parameters in the delivered YAML files are written with Hiera interpolation functions that act as variables. To modify each parameter, you must replace the entire string after the colon, and enclose your new value in double quotes. For example, in the psft_deployment.yaml file, the location for an Oracle WebLogic installation is given by the following parameters
weblogic_location: "%{hiera('pt_location')}/bea"weblogic: location: "%{hiera('weblogic_location')}"
The second Hiera function refers to the first. When pt_location is set as C:/psft, Oracle WebLogic will beinstalled in C:/psft/bea. To change this, remove both strings of text "%{hiera('pt_location')}/bea" and "%{hiera('weblogic_location')}", and replace them with the full path to the new location. Retain the two-space indentation, and use a forward slash (/) for paths on Microsoft Windows, Linux; AIX, or Solaris; for example:
On Microsoft Windows:
weblogic_location: "C:/psft/weblogic"weblogic: location: "C:/psft/weblogic"
On Linux, AIX, or Solaris:
weblogic_location: "/opt/bea/weblogic"weblogic:

Completing the DPK Initialization with Customizations Chapter 3
98 Copyright © 2018, Oracle and/or its affiliates. All Rights Reserved.
location: "/opt/bea/weblogic"
• Do not use the customizations to set up a non-Unicode environment if you are deploying the PeopleSoft Update Image DPKs for use with PeopleSoft Update Manager.
The environments for the PeopleSoft Update Images are required to be Unicode.
• Verify existing installations before beginning deployment.
You have the option to use existing installations, for example for Oracle WebLogic, but you have the responsibility to ensure that the installation is supported, complete, and correct. The deployment script does not verify whether an installation directory includes a valid, working installation.
• Set the Puppet environment if necessary.
The last step in the examples given in this chapter is to run the puppet apply command. If you receive a message saying that the term "puppet" is not recognized when running this command, it probably means that the Puppet software is not included in your system's path. You should also set the Puppet environment if you need to run puppet apply after the script execution has ended with an error.
• On Microsoft Windows, to set the Puppet environment, run this command:
"C:\Program Files\Puppet Labs\Puppet\bin\puppet_shell.bat"
• On Linux, specify the following environment variables before running the puppet apply command:
export PUPPET_DIR=/opt/puppetlabsexport PUPPET_BIN=${PUPPET_DIR}/binexport PUPPET_LIB=${PUPPET_DIR}/libexport PATH=${PUPPET_BIN}:$PATHexport LD_LIBRARY_PATH=${PUPPET_LIB}:$LD_LIBRARY_PATH
• On AIX, specify the following environment variables before running the puppet apply command:
export PUPPET_DIR=/opt/oracle/puppetlabsexport PUPPET_BIN=${PUPPET_DIR}/binexport PUPPET_LIB=${PUPPET_DIR}/libexport PATH=${PUPPET_BIN}:$PATHexport LIBPATH=${PUPPET_LIB}:$LIBPATH
• On AIX or Solaris operating systems, instead of using the export commands above, you can use the pspuppet.sh script to set the Puppet environment.
Use this method if the DPK setup script is interrupted, either intentionally to apply customizations, or by an error, and you need to proceed by running puppet apply. The script will set the Puppet PATH and LIBRARY environment variables. The pspuppet.sh script is installed by the DPK setup script in /opt/oracle/puppetlabs. Source the script by entering the following command:
. /opt/oracle/puppetlabs/pspuppet.sh
The dot, or period (".") at the beginning of the command is a source operator that ensures that the script commands persist in the shell environment that you are deploying from. After sourcing the script, continuewith the deployment by running the puppet apply command.
• See the Puppet Labs documentation if you want to save the log files.
When you run the --confdir=BASE_DIR/dpk/puppet site.pp --debug --trace command, the debug and trace messages appear in the command prompt. If you want to save them as a file, see the Puppet Labs documentation for the correct options.
See Puppet Labs Documentation, http://docs.puppetlabs.com.

Chapter 3 Completing the DPK Initialization with Customizations
Copyright © 2018, Oracle and/or its affiliates. All Rights Reserved. 99
Task 3-1: Preparing Customization Files for Linux, AIX, or Solaris Users and Groups
This section discusses:
• Preparing the Customization File for a Single User and Single Group
• Preparing the Customization File for a New Single User, New Primary Group, and Existing Secondary Group
• Preparing the Customization File for Existing Users and Groups
Note. If you want to set up your environment to use existing LDAP or existing users and groups on Linux, AIX, or Solaris, you must meet these requirements: 1) The user home directory should have read/write/execute permission for the root user. 2) The user default shell should be bash.
Note. To use an encrypted password with one of the customization files in this section, note that the successful use of the encrypted password depends on the presence of the public and private keys in the BASE_DIR/dpk/puppet directory referred to in the eyaml encrypt command. You cannot save an encrypted password and use it with an installation with a different BASE_DIR.
Task 3-1-1: Preparing the Customization File for a Single User and Single GroupThis user customization applies to Linux, AIX, and Solaris OS platforms only. If you choose the default initialization when running the DPK setup script, the Puppet framework creates local users and default groups, which are contained in the generated psft_unix_system.yaml file. Use the sample customization file in this sectionif you do not want to use the default users and groups, and instead want to set up your environment with a different single user and single group for the whole PeopleSoft environment. This user customization applies to the following scenarios:
• New single user + new single group
• New single user + existing single group
• Existing single user + new single group
• Existing single user + existing single group
This customization will create a single user and single group. You must specify values for two parameters that arenot included in the generated psft_unix_system.yaml file, psft_user and psft_group.
• groups/psft_group
• Use the groups/psft_group collection parameter only if you want to create a group for a single user. The DPK process will create the group. If there is an existing group with the same name, the script will skip it.
• Specify the same value for groups/psft_group/name and for users/psft_user/gid.
Use a group name (string), not a GID (number), for both the name in the group collection parameter, and the gid in the users collection parameter.
• Note that you must use the parameters exactly as given in this documentation. If you try to create a different parameter name or alter the parameter, the DPK process will not recognize it.
• users/psft_user
• Use the users/psft_user collection parameter to create a new user and add that user to the group specified by groups/psft_group.

Completing the DPK Initialization with Customizations Chapter 3
100 Copyright © 2018, Oracle and/or its affiliates. All Rights Reserved.
• This group is the primary group for the new user.
• Specify the same value for users/psft_user/name and for the scalar parameter psft_runtime_user_name.
• users/psft_user/home_dir
When you run the DPK setup script, it includes a prompt for the users' home directory. That value is included in the generated psft_unix_system.yaml file. You can accept that same value in this customization file for users/psft_user/home_dir, or you can change it here. If you change it, the DPK process will create the new home directory.
To prepare the customization file:1. Create a psft_customizations.yaml using a standard editing tool such as vi, and save it in the same location as
the psft_unix_system.yaml file.
By default, the DPK setup script installs the YAML files in BASE_DIR/dpk/puppet/production/data.
2. Use the sample below in creating the psft_customizations.yaml file, and modify the values as needed.
Note. Be sure that your final psft_customizations.yaml file includes the indentation shown here. The indentation may be lost if you copy from this documentation and paste into the file.
In this example, the new single user newusr will be created and assigned to the primary group newgrp.
---groups: psft_group: name: newgrp remove: false
psft_runtime_user_name: newusr
users: psft_user: name: newusr gid: newgrp home_dir: /dpk_base/home/userhome password: ENC[PKCS7,MIIBeQYJKoZIhvcNA...........] remove: false
• Ensure that the file begins with three dashes (---).
• Replace the password sample above with an encrypted password.
Enter the encrypted password on a single line. Do not include spaces or line feeds. See the instructions later in this documentation to generate the encrypted password.
See "Encrypting Passwords for Customizations on Linux, AIX, or Solaris."
3. Save the file.
Task 3-1-2: Preparing the Customization File for a New Single User, New Primary Group, and Existing Secondary GroupThis user customization applies to Linux, AIX, and Solaris OS platforms only. If you choose the default initialization when running the DPK setup script, the Puppet framework creates local users and default groups, which are contained in the generated psft_unix_system.yaml file. Use the sample customization file in this sectionif you do not want to use the default users and groups, and instead want to set up your environment with a new single user assigned to two groups.

Chapter 3 Completing the DPK Initialization with Customizations
Copyright © 2018, Oracle and/or its affiliates. All Rights Reserved. 101
This customization will create a new single user and a new group, the primary group. The new user is also assigned to an existing, secondary group. You must specify values for two parameters that are not included in the generated psft_unix_system.yaml file, psft_user and psft_group.
• groups/psft_group
• Use the groups/psft_group collection parameter only if you want to create a new group for a single user. The DPK process will create the group. If there is an existing group with the same name, the script will tryto overwrite it.
• Specify the same value for groups/psft_group/name and for users/psft_user/gid.
Use a group name (string), not a GID (number), for both the name in the group collection parameter, and the gid in the users collection parameter.
• Note that you must use the parameters exactly as given in this documentation. If you try to create a different parameter name or alter the parameter, the DPK process will not recognize it.
• users/psft_user
• Use the users/psft_user collection parameter to create a new user and add that user to the new group specified by groups/psft_group/name.
• Specify the same value for users/psft_user/name and for the scalar parameter psft_runtime_user_name.
• The new group specified by users/psft_user/gid and groups/psft_group/name is the primary group for the new user.
• The existing group specified by users/psft_user/groups is the secondary group for the new user.• users/psft_user/home_dir
When you run the DPK setup script, it includes a prompt for the users' home directory. That value is included in the generated psft_unix_system.yaml file. You can accept that same value in this customization file for users/psft_user/home_dir, or you can change it here. If you change it, the DPK process will create the new home directory.
To prepare the customization file:1. Create a psft_customizations.yaml using a standard editing tool such as vi, and save it in the same location as
the psft_unix_system.yaml file.
By default, the DPK setup script installs the YAML files in BASE_DIR/dpk/puppet/production/data.
2. Use the sample below in creating the psft_customizations.yaml file, and modify the values as needed.
Note. Be sure that your final psft_customizations.yaml file includes the indentation shown here. The indentation may be lost if you copy from this documentation and paste into the file.
In this example, the new single user newusr2 will be created and assigned to the newly created primary group primgrp and the existing secondary group secgrp.
---groups: psft_group: name: primgrp remove: false
psft_runtime_user_name: newusr2
users: psft_user: name: newusr2

Completing the DPK Initialization with Customizations Chapter 3
102 Copyright © 2018, Oracle and/or its affiliates. All Rights Reserved.
gid: primgrp groups: secgrp home_dir: /dpk_base/home/userhome password: ENC[PKCS7,MIIBeQYJKoZIhvcNA...........] remove: false
• Ensure that the file begins with three dashes (---).
• Replace the password sample above with an encrypted password.
Enter the encrypted password on a single line. Do not include spaces or line feeds. See the instructions later in this documentation to generate the encrypted password.
See "Encrypting Passwords for Customizations on Linux, AIX, or Solaris."
3. Save the file.
Task 3-1-3: Preparing the Customization File for Existing Users and GroupsThis user customization applies to Linux, AIX, and Solaris OS platforms only. If you choose the default initialization, the Puppet framework creates default local users and groups. However, your security policies may prohibit creating these OS users. In such a scenario, you can override these default users using the customizations file. The customizations file can refer to one or more existing users or existing groups and Puppet will use them instead of the delivered users. Ensure you fulfill these requirements:
• The users, groups, and GIDs that you specify in the psft_customizations.yaml file are present before you beginthe installation.
• Do not use the same name for the four group parameters. Ensure that the names that you specify for these parameters in psft_cutomizations.yaml are different.
• psft_runtime_group_name
• psft_app_install_group_name
• oracle_install_group_name
• oracle_runtime_group_name
• The customizations file does not specify new passwords, because it is assumed that the passwords associated with the existing users will be used.
• When you run the DPK setup script, you must specify a user home directory in which the existing user resides.
1. Locate the psft_unix_system.yaml file, which includes default users and groups.
By default, the DPK setup script installs the YAML files in BASE_DIR/dpk/puppet/production/data.
Note. The code examples in this topic are for illustrative purposes only. Remember to use the text from the YAML files you install with each new deployment as the basis for your psft_customizations.yaml file.
2. If necessary, create a psft_customizations.yaml using a standard editing tool such as vi, and save it in the samelocation as the psft_unix_system.yaml file.
If this is the first entry in the psft_customizations.yaml file, ensure that the file begins with three dashes (---).
3. Copy the entire section for the users and groups from the psft_unix_system.yaml file into the psft_customizations.yaml file and modify the values as needed.

Chapter 3 Completing the DPK Initialization with Customizations
Copyright © 2018, Oracle and/or its affiliates. All Rights Reserved. 103
Note. Be sure that your final psft_customizations.yaml file includes the indentation from the generated YAML file. The indentation may be lost when you copy and paste.
For example:
---psft_install_user_name: psadmx5psft_runtime_user_name: psadmx6psft_app_install_user_name: psadmx7oracle_user_name: oraclex3
psft_runtime_group_name: psftrungrppsft_app_install_group_name: psftappgrporacle_install_group_name: orainstgrporacle_runtime_group_name: orarungrp
user_home_dir: /data1/homeusers: tools_install_user: name: "%{hiera('psft_install_user_name')}" gid: orainstgrp groups: "%{hiera('psft_runtime_group_name')}" home_dir: "%{hiera('user_home_dir')}/%{hiera('psft_install_user_⇒name')}"
psft_runtime_user: name: "%{hiera('psft_runtime_user_name')}" gid: orainstgrp home_dir: "%{hiera('user_home_dir')}/%{hiera('psft_runtime_user_⇒name')}"
app_install_user: name: "%{hiera('psft_app_install_user_name')}" gid: psftappgrp home_dir: "%{hiera('user_home_dir')}/%{hiera('psft_app_install_user_⇒name')}"
oracle_user: name: "%{hiera('oracle_user_name')}" gid: orainstgrp home_dir: "%{hiera('user_home_dir')}/%{hiera('oracle_user_name')}"
es_user: name: esuserx3 gid: users home_dir: /data1/home/esuserx3
• The four default users psadm1, psadm2, psadm3, and oracle2 have been replaced by psadmx5, psadmx6, psadmx7, and oraclex3, respectively.
• The default psft_runtime_group_name has been replaced by psftrungrp. This group is the primary group for the psft_runtime_user.
• The default psft_app_install_group_name has been replaced by psftappgrp. This group is the primary

Completing the DPK Initialization with Customizations Chapter 3
104 Copyright © 2018, Oracle and/or its affiliates. All Rights Reserved.
group for the app_install_user.
• The tools_install_user must belong to the psft runtime group as a secondary group. To satisfy this requirement, the value for users/tools_install_user/groups is set to the interpolation function "%{hiera('psft_runtime_group_name')}".
• The oracle_install_group_name has been replaced by orarungrp. This group is the primary group for the oracle_user.
4. Save the file.
Task 3-2: Preparing the Customization File for PeopleSoft DomainDefinitions
This section discusses:
• Preparing the psft_customizations.yaml file
• Reviewing the Domain Definitions in psft_configuration.yaml
• Reviewing the Customization File for a Single Application Server Domain
• Reviewing the Customization File for an Application Server Domain with Custom PS_CFG_HOME
• Reviewing the Customization File for a PIA Domain on a Separate Host
• Reviewing the Customization File for Multiple Domains
Task 3-2-1: Preparing the psft_customizations.yaml fileUse this information if you want to customize the PeopleSoft domains — the application server, Process Scheduler, and PIA domains. For example, you may want to create multiple Application Server domains rather than a single domain.1. Locate the psft_configuration.yaml file, which was installed by the deployment, in BASE_DIR/
dpk/puppet/production/data.
Note. The code examples in this topic are for illustrative purposes only. Remember to use the text from the YAML files you install with each new deployment as the basis for your psft_customizations.yaml file.
2. If necessary, create a psft_customizations.yaml using a standard editing tool, such as Notepad on Microsoft Windows or vi on Linux, AIX, or Solaris, and save it in the same location as the psft_configuration.yaml file.
If this is the first entry in the psft_customizations.yaml file, ensure that the file begins with three dashes (---).
3. Copy the sections that you want to customize from the psft_configuration.yaml file into the psft_customizations.yaml file and modify the values as needed.
The following sections include sample psft_customizations.yaml files.
4. Save the file.
Task 3-2-2: Reviewing the Domain Definitions in psft_configuration.yamlTo customize the PeopleSoft domains, you begin with the psft_configuration.yaml file, which lists the attributes pertinent to the PeopleSoft domains.

Chapter 3 Completing the DPK Initialization with Customizations
Copyright © 2018, Oracle and/or its affiliates. All Rights Reserved. 105
Note. The psft_configuration.yaml file includes definitions for Automated Configuration Manager (ACM) plug-ins, which configure components such as Integration Broker and Report Distribution. Depending upon the PeopleSoft domain being set up, certain ACM configurations will run as part of the deployment.
This sample shows a portion of a psft_configuration.yaml file, with annotations added (marked by ###) for the purposes of this explanation. The default application server name, APPDOM, is defined in the first portion of the file for the parameter appserver_domain_name, which is then referenced with an interpolation token "%{hiera('appserver_domain_name')}" in the appserver_domain_list section.The DPK setup script encrypts user-supplied passwords and includes them in the generated YAML files. The encrypted text will be a long single line of letters and numbers. Be sure to copy the text in one unbroken line, withno spaces or line feeds. This sample includes short strings of text beginning with "ENC" to represent encrypted passwords.---db_name: FS85606Cdb_user: VP1
############################################################### Replace this password sample with encrypted text from the ## generated psft_configuration.yaml file ###############################################################db_user_pwd: ENC[xxxxxxxxxxxxxxxxxxxxxxxxxxxxxxxxxx]
db_connect_id: people
############################################################### Replace this password sample with encrypted text from the ## generated psft_configuration.yaml file ###############################################################db_connect_pwd: ENC[xxxxxxxxxxxxxxxxxxxxxxxxxxxxxxxxxx]
domain_user: "%{hiera('psft_runtime_user_name')}"ps_config_home: "C:/Users/%{::env_username}/psft/pt/8.56"appserver_template: smallappserver_domain_name: APPDOM prcs_domain_name: PRCSDOMprcs_domain_id: "PRCS%{::rand}"report_node_name: "%{hiera('prcs_domain_id')}"pia_domain_name: peoplesoftpia_site_name: pspia_http_port: 8000pia_https_port: 8443jolt_port: 9033wsl_port: 7000db_port: 1521gateway_node_name: QE_LOCALpia_gateway_user: administrator
############################################################### Replace this password sample with encrypted text from the ## generated psft_configuration.yaml file ###############################################################

Completing the DPK Initialization with Customizations Chapter 3
106 Copyright © 2018, Oracle and/or its affiliates. All Rights Reserved.
pia_gateway_user_pwd: ENC[xxxxxxxxxxxxxxxxxxxxxxxxxxxxxxxxxx]
webserver_type: weblogicpia_webprofile_name: PRODpia_psserver_list: "%{::fqdn}:%{hiera('jolt_port')}"report_repository_dir: "%{hiera('ps_config_home')}/psreports"
############################################################### Replace this password sample with encrypted text from the ## generated psft_configuration.yaml file ###############################################################domain_conn_pwd: ENC[xxxxxxxxxxxxxxxxxxxxxxxxxxxxxxxxxx]
help_uri: pt854pbh1tns_dir: "%{hiera('db_location')}"tns_admin_list: "%{hiera('db_name')}": db_host: "%{::fqdn}" db_port: "%{hiera('db_port')}" db_protocol: TCP db_service_name: "%{hiera('db_name')}"
db2_server_list: "%{hiera('db_name')}": db2_type: "%{hiera('db_platform')}" db2_host: "%{::fqdn}" db2_port: "%{hiera('db_port')}" db2_node: TCPLNX01 db2_target_db: "%{hiera('db_name')}"
mssql_server_list: "%{hiera('db_name')}": mss_server_name: "%{::fqdn}" mss_odbc_name: "ODBC Driver 11 for SQL Server"
##################################################################### Copy the entire section beginning here for ## application server customization. #####################################################################
appserver_domain_list: "%{hiera('appserver_domain_name')}": os_user: "%{hiera('domain_user')}" ps_cfg_home_dir: "%{hiera('ps_config_home')}" template_type: "%{hiera('appserver_template')}"
db_settings: db_name: "%{hiera('db_name')}" db_type: "%{hiera('db_platform')}"

Chapter 3 Completing the DPK Initialization with Customizations
Copyright © 2018, Oracle and/or its affiliates. All Rights Reserved. 107
db_opr_id: "%{hiera('db_user')}" db_opr_pwd: "%{hiera('db_user_pwd')}" db_connect_id: "%{hiera('db_connect_id')}" db_connect_pwd: "%{hiera('db_connect_pwd')}"
config_settings: Domain Settings/Domain ID: "%{hiera('appserver_domain_name')}" PSAPPSRV/Min Instances: 2 PSAPPSRV/Max Instances: 2 PSAPPSRV/Max Fetch Size: 15000 Security/DomainConnectionPwd: "%{hiera('domain_conn_pwd')}" JOLT Listener/Port: "%{hiera('jolt_port')}" JOLT Listener/Address: 0.0.0.0 Workstation Listener/Port: "%{hiera('wsl_port')}"
feature_settings: PUBSUB: "Yes" QUICKSRV: "No" QUERYSRV: "No" JOLT: "Yes" JRAD: "No" WSL: "Yes" DBGSRV: "No" RENSRV: "No" MCF: "No" PPM: "Yes" PSPPMSRV: "Yes" ANALYTICSRV: "No" SERVER_EVENTS: "Yes" DOMAIN_GW: "No"###################################################################### End application server section. ######################################################################
###################################################################### Copy the entire section beginning here for ## Process Scheduler customization ######################################################################
prcs_domain_list: "%{hiera('prcs_domain_name')}": os_user: "%{hiera('domain_user')}" ps_cfg_home_dir: "%{hiera('ps_config_home')}"
db_settings: db_name: "%{hiera('db_name')}" db_type: "%{hiera('db_platform')}" db_opr_id: "%{hiera('db_user')}" db_opr_pwd: "%{hiera('db_user_pwd')}" db_connect_id: "%{hiera('db_connect_id')}" db_connect_pwd: "%{hiera('db_connect_pwd')}"
config_settings:

Completing the DPK Initialization with Customizations Chapter 3
108 Copyright © 2018, Oracle and/or its affiliates. All Rights Reserved.
Process Scheduler/PrcsServerName: "%{hiera('prcs_domain_id')}" Security/DomainConnectionPwd: "%{hiera('domain_conn_pwd')}"
feature_settings: MSTRSRV: "Yes" APPENG: "Yes"##################################################################### End Process Scheduler section. #####################################################################
##################################################################### Copy the entire section beginning here for PIA customization. #####################################################################pia_domain_list: "%{hiera('pia_domain_name')}": os_user: "%{hiera('domain_user')}" ps_cfg_home_dir: "%{hiera('ps_config_home')}" gateway_user: "%{hiera('pia_gateway_user')}" gateway_user_pwd: "%{hiera('pia_gateway_user_pwd')}" auth_token_domain: ".%{::domain}"
webserver_settings: webserver_type: "%{hiera('webserver_type')}" webserver_home: "%{hiera('weblogic_location')}" webserver_admin_user: system
############################################################### Replace this password sample with encrypted text from the ## generated psft_configuration.yaml file ############################################################### webserver_admin_user_pwd: ENC[xxxxxxxxxxxxxxxxxxxxxxxxxxxxxxxxxx]
webserver_admin_port: "%{hiera('pia_http_port')}" webserver_http_port: "%{hiera('pia_http_port')}" webserver_https_port: "%{hiera('pia_https_port')}"
site_list: "%{hiera('pia_site_name')}": appserver_connections: "%{hiera('pia_psserver_list')}" domain_conn_pwd: "%{hiera('domain_conn_pwd')}"
webprofile_settings: profile_name: "%{hiera('pia_webprofile_name')}" profile_user: PTWEBSERVER
############################################################### Replace this password sample with encrypted text from the ## generated psft_configuration.yaml file ############################################################### profile_user_pwd: ENC[xxxxxxxxxxxxxxxxxxxxxxxxxxxxxxxxxx]

Chapter 3 Completing the DPK Initialization with Customizations
Copyright © 2018, Oracle and/or its affiliates. All Rights Reserved. 109
report_repository_dir: "%{hiera('report_repository_dir')}"##################################################################### End PIA section. #####################################################################
ohs_domain: name: ohsdom
######################################################### Remaining text removed for brevity. #########################################################
Task 3-2-3: Reviewing the Customization File for a Single Application Server DomainThis sample shows a psft_customizations.yaml file for a single application server domain with the domain name APPDOM1. Note that the indentation in the original psft_configuration.yaml file must be maintained when creating a psft_customizations.yaml file.
Note. Do not modify the ps_cfg_home_dir parameter. If you want to customize the PS_CFG_HOME location, see the next section.
---appserver_domain_list:
### Custom domain name ### "APPDOM1": os_user: "%{hiera('domain_user')}" template_type: "%{hiera('appserver_template')}" ps_cfg_home_dir: "%{hiera('ps_config_home')}" db_settings: db_name: "%{hiera('db_name')}" db_type: "%{hiera('db_platform')}" db_opr_id: "%{hiera('db_user')}" db_opr_pwd: "%{hiera('db_user_pwd')}" db_connect_id: "%{hiera('db_connect_id')}" db_connect_pwd: "%{hiera('db_connect_pwd')}" config_settings: Domain Settings/Domain ID: IBUPG0 PSAPPSRV/Min Instances: 3 PSAPPSRV/Max Instances: 5 JOLT Listener/Port: "%{hiera('jolt_port')}" Workstation Listener/Port: "%{hiera('wsl_port')}"
feature_settings: PUBSUB: "Yes" QUICKSRV: "No" QUERYSRV: "No" JOLT: "Yes" JRAD: "No"

Completing the DPK Initialization with Customizations Chapter 3
110 Copyright © 2018, Oracle and/or its affiliates. All Rights Reserved.
WSL: "Yes" DBGSRV: "No" RENSRV: "No" MCF: "No" PPM: "Yes" PSPPMSRV: "Yes" ANALYTICSRV: "No" SERVER_EVENTS: "Yes" DOMAIN_GW: "No"
Task 3-2-4: Reviewing the Customization File for an Application Server Domain with Custom PS_CFG_HOMEIf you want to create application server domains in a non-default PS_CFG_HOME location, you must also specifythe value for ps_config_home above the appserver_domain_list section:---### Custom PS_CFG_HOME location ###ps_config_home: C:/user/psft_config/8.56 appserver_domain_list:### Custom domain name ### "APPDOM2": os_user: "%{hiera('domain_user')}" template_type: "%{hiera('appserver_template')}"
### Custom PS_CFG_HOME location ### ps_cfg_home_dir: C:/user/psft_config/8.56 db_settings: db_name: "%{hiera('db_name')}" db_type: "%{hiera('db_platform')}" db_opr_id: "%{hiera('db_user')}" db_opr_pwd: "%{hiera('db_user_pwd')}" db_connect_id: "%{hiera('db_connect_id')}" db_connect_pwd: "%{hiera('db_connect_pwd')}" config_settings: Domain Settings/Domain ID: IBUPG0 PSAPPSRV/Min Instances: 3 PSAPPSRV/Max Instances: 5 JOLT Listener/Port: "%{hiera('jolt_port')}" Workstation Listener/Port: "%{hiera('wsl_port')}"
feature_settings: PUBSUB: "Yes" QUICKSRV: "No" QUERYSRV: "No" JOLT: "Yes" JRAD: "No" WSL: "Yes" DBGSRV: "No" RENSRV: "No"

Chapter 3 Completing the DPK Initialization with Customizations
Copyright © 2018, Oracle and/or its affiliates. All Rights Reserved. 111
MCF: "No" PPM: "Yes" PSPPMSRV: "Yes" ANALYTICSRV: "No" SERVER_EVENTS: "Yes" DOMAIN_GW: "No"
Task 3-2-5: Reviewing the Customization File for a PIA Domain on a Separate HostIf you want to set up an environment in which the PIA domain and web server are not on the same machine as theapplication server domain, you must use customizations to specify the machine where the application server is installed. This customization is required for the Integration Broker configuration.The generated psft_configuration.yaml includes the following parameter, which sets the host for Integration Broker to the PIA host, which by default is the machine where the DPK setup script is run:env.ib_appserver_host: "%{hiera('pia_host_name')}"
If you use the DPK setup script to set up a PIA domain only, and the PIA domain is not on the same machine as your application server domain, the value for the env.ib_appserver_host parameter must be set to application server machine name.See "Deploying the PeopleSoft PeopleTools Deployment Packages," Running the DPK Setup Script to Deploy a PIA Domain.Copy the entire component_postboot_setup_list collection section from psft_configuration.yaml and paste it into psft_customizations.yaml. Change the value for env.ib_appserver_host to point to the host where the application server is set up, for example ps_app_server1. This sample shows a sample psft_customizations.yaml file, with annotations added (marked by ###) for the purposes of this explanation. ---component_postboot_setup_list: integration_broker: run_control_id: intbroker os_user: "%{hiera('domain_user')}"
db_settings: db_name: "%{hiera('db_name')}" db_type: "%{hiera('db_platform')}" db_opr_id: "%{hiera('db_user')}" db_opr_pwd: "%{hiera('db_user_pwd')}" db_connect_id: "%{hiera('db_connect_id')}" db_connect_pwd: "%{hiera('db_connect_pwd')}"
acm_plugin_list: PTIBActivateDomain: domain.activate_retry_count: 10 domain.activate_wait_time: 10
PTIBConfigureGatewayNodes: env.gateway_host: "%{hiera('pia_host_name')}" env.gateway_port: "%{hiera('pia_http_port')}"

Completing the DPK Initialization with Customizations Chapter 3
112 Copyright © 2018, Oracle and/or its affiliates. All Rights Reserved.
env.gateway_ssl_port: "%{hiera('pia_https_port')}" env.use_ssl_gateway: false env.default_local_node: "%{hiera('gateway_node_name')}" env.gateway_user: "%{hiera('pia_gateway_user')}" env.gateway_password: "%{hiera('pia_gateway_user_⇒pwd')}"
###Custom application server name ### env.ib_appserver_host: ps_app_server1 env.ib_jolt_port: "%{hiera('jolt_port')}" env.ib_node_proxy_userid: "%{hiera('db_user')}" env.ib_node_proxy_password: "%{hiera('db_user_pwd')}" env.tools_release: "%ToolsRelease" env.ib_appserver_domain_password: "%{hiera('domain_conn_pwd')}" env.ib_set_as_default_node: true
PTIBConfigureGatewayProperties: env.gateway_keystore_password: password PTWebServerConfigUpdate: env.domainname: "%{hiera('pia_domain_name')}" env.sitename: "%{hiera('pia_site_name')}" env.piahome: "%{hiera('ps_config_home')}" env.psserver: "" env.KeyStorePwd: ""
acm_plugin_order: - PTIBActivateDomain - PTIBConfigureGatewayNodes - PTIBConfigureGatewayProperties - PTWebServerConfigUpdate
Task 3-2-6: Reviewing the Customization File for Multiple DomainsFor multiple domains, duplicate the entire domain section, again maintaining the indentation from the original psft_configuration.yaml file. This sample shows a psft_customizations.yaml file for two application server domains, two PIA domains, and two Process Scheduler domains, with annotations added (marked by ### characters) for the purposes of this explanation.Follow these guidelines in creating a psft_customizations.yaml file for customized PeopleSoft domains. The letters correspond to those in the code sample above:
• (A) For more than one application server, include the pia_psserver_list entry at the top of the psft_customizations.yaml definitions. List the application server domains that are used by the PIA domains, using the format <application_server_host>:<Jolt port>. Separate the entries with a comma.
• (B) Copy the entire section for the domains that you want to customize.
• (C) Specify unique names for each domain.
• (D) Specify unique ports for each domain.
• (E) If specifying more than one application server domain, you must configure the REN server to use a uniqueport by setting the attribute PSRENSRV/default_http_port to a value other than the default, 7180 in the psft_customizations.yaml.

Chapter 3 Completing the DPK Initialization with Customizations
Copyright © 2018, Oracle and/or its affiliates. All Rights Reserved. 113
Note. The REN server setting is also a requirement for a traditional PeopleSoft installation when setting up more than one application server on a single machine.
• (F) If specifying more than one Process Scheduler domain, you must specify unique Process Scheduler server names.
In this sample, the first Process Scheduler server uses the default value, which is defined as an interpolation token. The second Process Scheduler server has a different name, PRCS222.
(G) In addition, the Master Scheduler Server should be enabled for the first Process Scheduler domain (MSTRSRV: "Yes"), and disabled for subsequent Process Scheduler domains (MSTRSRV: "No").
See PeopleTools: Process Scheduler, "Understanding PeopleSoft Master Scheduler Server."
• (H) If specifying more than one PIA domain, you must specify different site names for each.
In this sample, the first PIA site name uses the default value, which is defined as an interpolation token. The second PIA site name has a different name, ps222.
---pia_psserver_list: "hostname.example.com:9033,hostname.example.com:9043" ### (A) ###
appserver_domain_list: "APPDOM111": ###(B), (C)### os_user: "%{hiera('domain_user')}" template_type: "%{hiera('appserver_template')}" ps_cfg_home_dir: "%{hiera('ps_config_home')}" db_settings: db_name: "%{hiera('db_name')}" db_type: "%{hiera('db_platform')}" db_opr_id: "%{hiera('db_user')}" db_opr_pwd: "%{hiera('db_user_pwd')}" db_connect_id: "%{hiera('db_connect_id')}" db_connect_pwd: "%{hiera('db_connect_pwd')}" config_settings: Domain Settings/Domain ID: IBUPG0 PSAPPSRV/Min Instances: 3 PSAPPSRV/Max Instances: 5 JOLT Listener/Port: 9033 ###(D)### Workstation Listener/Port: 7000 ###(D ###
feature_settings: PUBSUB: "Yes" QUICKSRV: "No" QUERYSRV: "No" JOLT: "Yes" JRAD: "No" WSL: "Yes" DBGSRV: "No" RENSRV: "No" MCF: "No" PPM: "Yes" PSPPMSRV: "Yes"

Completing the DPK Initialization with Customizations Chapter 3
114 Copyright © 2018, Oracle and/or its affiliates. All Rights Reserved.
ANALYTICSRV: "No" SERVER_EVENTS: "Yes" DOMAIN_GW: "No"
"APPDOM222": ###(B), (C)### os_user: "%{hiera('domain_user')}" template_type: "%{hiera('appserver_template')}" ps_cfg_home_dir: "%{hiera('ps_config_home')}" db_settings: db_name: "%{hiera('db_name')}" db_type: "%{hiera('db_platform')}" db_opr_id: "%{hiera('db_user')}" db_opr_pwd: "%{hiera('db_user_pwd')}" db_connect_id: "%{hiera('db_connect_id')}" db_connect_pwd: "%{hiera('db_connect_pwd')}" config_settings: Domain Settings/Domain ID: IBUPG0 PSAPPSRV/Min Instances: 3 PSAPPSRV/Max Instances: 5 JOLT Listener/Port: 9043 ###(D)### Workstation Listener/Port: 7001 ###(D)### PSRENSRV/default_http_port: 7191 ###(E)###
feature_settings: PUBSUB: "Yes" QUICKSRV: "No" QUERYSRV: "No" JOLT: "Yes" JRAD: "No" WSL: "Yes" DBGSRV: "No" RENSRV: "No" MCF: "No" PPM: "Yes" PSPPMSRV: "Yes" ANALYTICSRV: "No" SERVER_EVENTS: "Yes" DOMAIN_GW: "No"
pia_domain_list: "PIADOM111": ###(B), (C)### os_user: "%{hiera('domain_user')}" ps_cfg_home_dir: "%{hiera('ps_config_home')}" gateway_user: "%{hiera('pia_gateway_user')}" gateway_user_pwd: "%{hiera('pia_gateway_user_pwd')}" auth_token_domain: ".%{::domain}"
webserver_settings: webserver_type: "%{hiera('webserver_type')}" webserver_home: "%{hiera('weblogic_location')}"

Chapter 3 Completing the DPK Initialization with Customizations
Copyright © 2018, Oracle and/or its affiliates. All Rights Reserved. 115
webserver_admin_user: system
############################################################### Replace this password sample with encrypted text from the ## generated psft_configuration.yaml file ############################################################### webserver_admin_user_pwd: ENC[xxxxxxxxxxxxxxxxxxxxxxxxxxxxxxxxxx]
webserver_admin_port: 8000 ###(D)### webserver_http_port: 8000 ###(D)### webserver_https_port: 8443 ###(D)### site_list: "%{hiera('pia_site_name')}": ###(H)### appserver_connections: "%{hiera('pia_psserver_list')}" domain_conn_pwd: "%{hiera('domain_conn_pwd')}"
webprofile_settings: profile_name: "%{hiera('pia_webprofile_name')}" profile_user: PTWEBSERVER
############################################################### Replace this password sample with encrypted text from the ## generated psft_configuration.yaml file ############################################################### profile_user_pwd: ENC[xxxxxxxxxxxxxxxxxxxxxxxxxxxxxxxxxx]
report_repository_dir: "%{hiera('report_repository_dir')}"
"PIADOM222": ###(B), (C)### os_user: "%{hiera('domain_user')}" ps_cfg_home_dir: "%{hiera('ps_config_home')}" gateway_user: "%{hiera('pia_gateway_user')}" gateway_user_pwd: "%{hiera('pia_gateway_user_pwd')}" auth_token_domain: ".%{::domain}"
webserver_settings: webserver_type: "%{hiera('webserver_type')}" webserver_home: "%{hiera('weblogic_location')}" webserver_admin_user: system
############################################################### Replace this password sample with encrypted text from the ## generated psft_configuration.yaml file ############################################################### webserver_admin_user_pwd: ENC[xxxxxxxxxxxxxxxxxxxxxxxxxxxxxxxxxx]
webserver_admin_port: 8002 ###(D)### webserver_http_port: 8002 ###(D)### webserver_https_port: 8445 ###(D)### site_list: "ps222": ###(H)###

Completing the DPK Initialization with Customizations Chapter 3
116 Copyright © 2018, Oracle and/or its affiliates. All Rights Reserved.
appserver_connections: "%{hiera('pia_psserver_list')}" domain_conn_pwd: "%{hiera('domain_conn_pwd')}"
webprofile_settings: profile_name: "%{hiera('pia_webprofile_name')}" profile_user: PTWEBSERVER
############################################################### Replace this password sample with encrypted text from the ## generated psft_configuration.yaml file ############################################################### profile_user_pwd: ENC[xxxxxxxxxxxxxxxxxxxxxxxxxxxxxxxxxx]
report_repository_dir: "%{hiera('report_repository_dir')}"
prcs_domain_list: "PRCSDOM111": os_user: "%{hiera('domain_user')}" ps_cfg_home_dir: "%{hiera('ps_config_home')}"
db_settings: db_name: "%{hiera('db_name')}" db_type: "%{hiera('db_platform')}" db_opr_id: "%{hiera('db_user')}" db_opr_pwd: "%{hiera('db_user_pwd')}" db_connect_id: "%{hiera('db_connect_id')}" db_connect_pwd: "%{hiera('db_connect_pwd')}"
config_settings: Process Scheduler/PrcsServerName: "%{hiera('prcs_domain_id')}" ###⇒(F)### Security/DomainConnectionPwd: "%{hiera('domain_conn_pwd')}"
feature_settings: MSTRSRV: "Yes" ###(G)### APPENG: "Yes"
"PRCSDOM222": os_user: "%{hiera('domain_user')}" ps_cfg_home_dir: "%{hiera('ps_config_home')}"
db_settings: db_name: "%{hiera('db_name')}" db_type: "%{hiera('db_platform')}" db_opr_id: "%{hiera('db_user')}" db_opr_pwd: "%{hiera('db_user_pwd')}" db_connect_id: "%{hiera('db_connect_id')}" db_connect_pwd: "%{hiera('db_connect_pwd')}"
config_settings: Process Scheduler/PrcsServerName: PRCS222 ###(F)###

Chapter 3 Completing the DPK Initialization with Customizations
Copyright © 2018, Oracle and/or its affiliates. All Rights Reserved. 117
Security/DomainConnectionPwd: "%{hiera('domain_conn_pwd')}"
feature_settings: MSTRSRV: "No" ###(G)### APPENG: "Yes"
Task 3-3: Preparing the Customization File to Create PeopleSoft Domains Without Configuration
The default DPK initialization includes pre-boot and post-boot processes that use Automated Configuration Manager (ACM) plug-ins to configure and start the PeopleSoft domains. The ACM configuration, for example, sets up Integration Broker and the report repository for the Process Scheduler. Use this customization if you want to install the necessary software for the PeopleSoft Application Server, PIA, and Process Scheduler servers without configuring and running the domains. After you complete the DPK deployment with this customization, you can use the PSADMIN utility to set up and start the domains.See PeopleTools: System and Server Administration, "Using the PSADMIN Utility."The generated psft_configuration.yaml file includes the parameters for the ACM plug-ins. However, note that the two parameters specified in this section for this customization are not included in the generated psft_configuration.yaml file.To prepare the customization file:1. Create a psft_customizations.yaml using a standard editing tool such as Notepad for Microsoft Windows or vi
for Linux, AIX, or Solaris, and save it in the same location as the generated YAML files.
By default, the DPK setup script installs the YAML files in BASE_DIR/dpk/puppet/production/data.
2. Use the sample below in creating the psft_customizations.yaml file, and modify the values as needed.
Ensure that the file begins with three dashes (---), and add the two parameters shown here.
---run_preboot_config_setup: falserun_postboot_config_setup: false
3. Save the file.
Task 3-4: Preparing the Customization File for Component Software Locations
Use the information in this section if you want to customize an installation location, for example to use an existing installation of Oracle Tuxedo or Oracle WebLogic. 1. Locate the psft_deployment.yaml file in BASE_DIR/dpk/puppet/production/data.
Note. The code examples in this topic are for illustrative purposes only. Remember to use the text from the YAML files you install with each new deployment as the basis for your psft_customizations.yaml file.
The installation locations for Oracle Tuxedo, Oracle WebLogic, and JDK are defined in the psft_deployment.yaml file that is installed with the deployment.
2. If necessary, create a psft_customizations.yaml using a standard editing tool, such as Notepad on Microsoft

Completing the DPK Initialization with Customizations Chapter 3
118 Copyright © 2018, Oracle and/or its affiliates. All Rights Reserved.
Windows or vi on Linux, AIX, or Solaris, and save it in the same location as the psft_deployment.yaml file.
If this is the first entry in the psft_customizations.yaml file, ensure that the file begins with three dashes (---).
3. Select one or more of the sections corresponding to the components that you want to customize, and copy them to the psft_customizations.yaml file.
As previously mentioned, setting the optional attribute remove: false means that the parameters in this section will not be deleted when the deployed environment is removed.
• For JDK, copy the jdk_location scalar parameter, and the entire jdk collection-type section from thepsft_deployment.yaml file into the psft_customizations.yaml file. Be sure to set the locations to the same value. Do not indent jdk_location or jdk, as shown in this example:
---jdk_location: C:/jdkjdk: location: C:/jdk remove: false
• For Oracle Tuxedo, copy both the tuxedo_location scalar parameter and the entire tuxedo collection-type section from the psft_deployment.yaml file into the psft_customizations.yaml file. Be sure to set the locations to the same value. Do not indent tuxedo_location or tuxedo, as shown in this example:
---tuxedo_location: C:/psft/tuxedotuxedo: location: C:/psft/tuxedo remove: false
• For Oracle WebLogic, copy both the weblogic_location scalar parameter and the entire weblogiccollection-type section from the psft_deployment.yaml file into the psft_customizations.yaml file. Be sure to set the locations to the same value. Do not indent weblogic_location or weblogic, as shown in this example:
---weblogic_location: C:/psft/weblogicweblogic: location: C:/psft/weblogic remove: false
• If you want to customize JDK, Oracle Tuxedo, and Oracle WebLogic, add all three entries to psft_customizations.yaml; for example:
---
jdk_location: C:/jdkjdk: location: C:/jdk remove: false
tuxedo_location: C:/psft/tuxedotuxedo: location: C:/psft/tuxedo remove: false

Chapter 3 Completing the DPK Initialization with Customizations
Copyright © 2018, Oracle and/or its affiliates. All Rights Reserved. 119
weblogic_location: C:/psft/weblogicweblogic: location: C:/psft/weblogic remove: false
4. Save the file.
Task 3-5: Preparing the Customization File for Unicode
Use these instructions if you want to change the Unicode designation for your database. 1. Locate the psft_deployment.yaml file.
Note. The code examples in this topic are for illustrative purposes only. Remember to use the text from the YAML files you install with each new deployment as the basis for your psft_customizations.yaml file.
By default, the DPK setup script installs the YAML files in BASE_DIR/dpk/puppet/production/data.
The unicode_db parameter is part of the ps_home section.
ps_home: db_type: "%{hiera('db_platform')}" unicode_db: "%{hiera('unicode_db')}" location: "%{hiera('ps_home_location')}"
2. If necessary, create a psft_customizations.yaml using a standard editing tool, such as Notepad on Microsoft Windows or vi on Linux, AIX, or Solaris, and save it in the same location as the psft_deployment.yaml file.
If this is the first entry in the psft_customizations.yaml file, ensure that the file begins with three dashes (---).
3. Copy the entire ps_home section from psft_deployment.yaml, maintaining the indentation, into the psft_customizations.yaml file.
For a Unicode database, set the value for unicode_db to true:
---ps_home: db_type: "%{hiera('db_platform')}" unicode_db: true location: "%{hiera('ps_home_location')}"
For a non-Unicode database, set the value for unicode_db to false:
---ps_home: db_type: "%{hiera('db_platform')}" unicode_db: false location: "%{hiera('ps_home_location')}"
4. Save the file.

Completing the DPK Initialization with Customizations Chapter 3
120 Copyright © 2018, Oracle and/or its affiliates. All Rights Reserved.
Task 3-6: Preparing the Customization File for the PeopleSoft Homes
This section discusses:
• Preparing the Customization File for the PS_HOME Location
• Preparing the Customization File for the PS_APP_HOME Location
• Preparing the Customization File for the PS_CFG_HOME Location
Task 3-6-1: Preparing the Customization File for the PS_HOME LocationBy default, the DPK setup script creates the PS_HOME directory in BASE_DIR/pt/ps_home<release>, where <release> is the PeopleSoft PeopleTools patch release, such as 8.56.12. Use these steps to specify a different PS_HOME location. 1. Locate the psft_deployment.yaml file in BASE_DIR/dpk/puppet/production/data.
Note. The code examples in this topic are for illustrative purposes only. Remember to use the text from the YAML files you install with each new deployment as the basis for your psft_customizations.yaml file.
The PS_HOME installation location is specified by the ps_home section.
ps_home: db_type: "%{hiera('db_platform')}" unicode_db: "%{hiera('unicode_db')}" location: "%{hiera('ps_home_location')}"
2. If necessary, create a psft_customizations.yaml using a standard editing tool, such as Notepad on Microsoft Windows or vi on Linux, AIX, or Solaris, and save it in the same location as the psft_deployment.yaml file.
If this is the first entry in the psft_customizations.yaml file, ensure that the file begins with three dashes (---).
3. Copy the entire section from the psft_deployment.yaml file into the psft_customizations.yaml file and modify the location value as needed.
For example, on Linux, AIX, or Solaris:
---ps_home: db_type: "%{hiera('db_platform')}" unicode_db: "%{hiera('unicode_db')}" location: "/home/psft8.56.12"
For example, on Microsoft Windows:
---ps_home: db_type: "%{hiera('db_platform')}" unicode_db: "%{hiera('unicode_db')}" location: "C:/psft8.56.12"
4. Save the file.
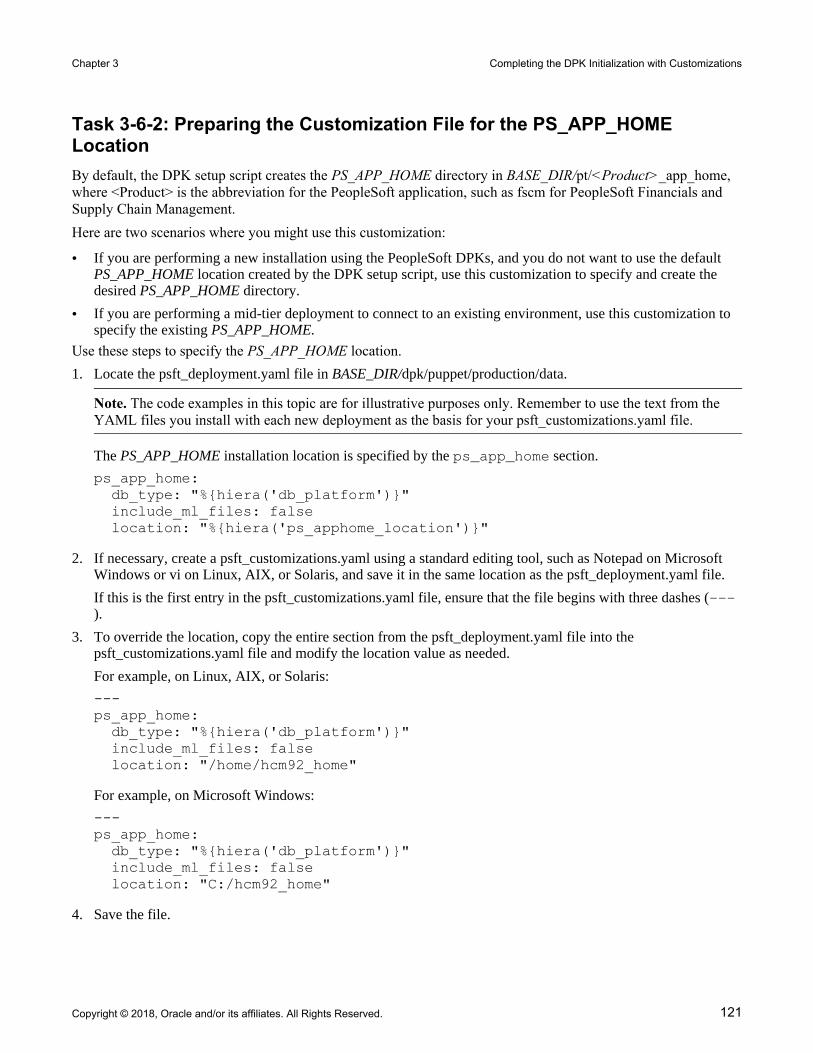
Chapter 3 Completing the DPK Initialization with Customizations
Copyright © 2018, Oracle and/or its affiliates. All Rights Reserved. 121
Task 3-6-2: Preparing the Customization File for the PS_APP_HOME LocationBy default, the DPK setup script creates the PS_APP_HOME directory in BASE_DIR/pt/<Product>_app_home, where <Product> is the abbreviation for the PeopleSoft application, such as fscm for PeopleSoft Financials and Supply Chain Management. Here are two scenarios where you might use this customization:
• If you are performing a new installation using the PeopleSoft DPKs, and you do not want to use the default PS_APP_HOME location created by the DPK setup script, use this customization to specify and create the desired PS_APP_HOME directory.
• If you are performing a mid-tier deployment to connect to an existing environment, use this customization to specify the existing PS_APP_HOME.
Use these steps to specify the PS_APP_HOME location. 1. Locate the psft_deployment.yaml file in BASE_DIR/dpk/puppet/production/data.
Note. The code examples in this topic are for illustrative purposes only. Remember to use the text from the YAML files you install with each new deployment as the basis for your psft_customizations.yaml file.
The PS_APP_HOME installation location is specified by the ps_app_home section.
ps_app_home: db_type: "%{hiera('db_platform')}" include_ml_files: false location: "%{hiera('ps_apphome_location')}"
2. If necessary, create a psft_customizations.yaml using a standard editing tool, such as Notepad on Microsoft Windows or vi on Linux, AIX, or Solaris, and save it in the same location as the psft_deployment.yaml file.
If this is the first entry in the psft_customizations.yaml file, ensure that the file begins with three dashes (---).
3. To override the location, copy the entire section from the psft_deployment.yaml file into the psft_customizations.yaml file and modify the location value as needed.
For example, on Linux, AIX, or Solaris:
---ps_app_home: db_type: "%{hiera('db_platform')}" include_ml_files: false location: "/home/hcm92_home"
For example, on Microsoft Windows:
---ps_app_home: db_type: "%{hiera('db_platform')}" include_ml_files: false location: "C:/hcm92_home"
4. Save the file.

Completing the DPK Initialization with Customizations Chapter 3
122 Copyright © 2018, Oracle and/or its affiliates. All Rights Reserved.
Task 3-6-3: Preparing the Customization File for the PS_CFG_HOME LocationBy default, the DPK setup script creates the PS_CFG_HOME directory in <user_profile>/psft/pt/8.56, such as C:/users/username/psft/pt/8.56 on Microsoft Windows, and /home/psadm2/psft/pt/8.56 on Linux, AIX, or Solaris. Note that you cannot specify different PS_CFG_HOME locations for different PeopleSoft domains. The DPK installation requires the same PS_CFG_HOME be used for all domains. Use these steps to specify the PS_CFG_HOME location. 1. Locate the psft_configuration.yaml file in BASE_DIR/dpk/puppet/production/data.
Note. The code examples in this topic are for illustrative purposes only. Remember to use the text from the YAML files you install with each new deployment as the basis for your psft_customizations.yaml file.
The PS_CFG_HOME installation location is specified by the ps_config_home parameter.
ps_config_home: "%{hiera('user_home_dir')}/%{hiera('domain_⇒user')}/psft/pt/8.56"
2. If necessary, create a psft_customizations.yaml using a standard editing tool, such as Notepad on Microsoft Windows or vi on Linux, AIX, or Solaris, and save it in the same location as the psft_configuration.yaml file.
If this is the first entry in the psft_customizations.yaml file, ensure that the file begins with three dashes (---).
3. Copy the entire section from the psft_configuration.yaml file into the psft_customizations.yaml file and modify the location value as needed.
For example, on Linux, AIX, or Solaris:
---ps_config_home: "/home/pt856_config"
For example, on Microsoft Windows:
---ps_config_home: "C:/pt856_config"
4. Save the file.
Task 3-7: Preparing the Customization File for Jolt SSL and WSL SSL Ports
You have the option to use the Secure Socket Layers/Transport Layer Security (SSL/TSL) protocol for Workstation Listener and Jolt Listener ports for the application server configuration. To use this protocol you must set up an Oracle wallet for the digital certificates.See PeopleTools: Integration Broker, "Installing Web Server-Based Digital Certificates."1. Locate the psft_configuration.yaml file in BASE_DIR/dpk/puppet/production/data.
Note. The code examples in this topic are for illustrative purposes only. Remember to use the text from the YAML files you install with each new deployment as the basis for your psft_customizations.yaml file.
2. If necessary, create a psft_customizations.yaml using a standard editing tool, such as Notepad on Microsoft

Chapter 3 Completing the DPK Initialization with Customizations
Copyright © 2018, Oracle and/or its affiliates. All Rights Reserved. 123
Windows or vi on Linux, AIX, or Solaris, and save it in the same location as the psft_configuration.yaml file.
If this is the first entry in the psft_customizations.yaml file, ensure that the file begins with three dashes (---).
3. Copy the entire appserver_domain_list section from psft_configuration.yaml to psft_customizations.yaml:
4. Add the following parameters to the psft_customizations.yaml file:
Note. These parameters are not included in the delivered psft_configuration.yaml file.
• Specify the SSL/TSL port for the Jolt listener; for example 9010.
JOLT Listener/SSL Port: 9010
• Specify the SSL/TSL port for the Workstation listener, for example 9010:
Workstation Listener/SSL Port: 9010
• Specify the location of the wallet containing the certificates:
Oracle Wallet/SEC_PRINCIPAL_LOCATION: test/security
• Specify the wallet name, for example psft:
Oracle Wallet/SEC_PRINCIPAL_NAME: psft
• Specify the wallet password:
Oracle Wallet/SEC_PRINCIPAL_PASSWORD:
5. Modify the psft_customizations.yaml file, including the added parameters from the previous step, with values for your environment.
Note. Be sure to retain the indentation shown in this example.
This sample psft_customizations.yaml file shows the parameters added from step 4 in bold font:
---
appserver_domain_list: "%{hiera('appserver_domain_name')}": os_user: "%{hiera('domain_user')}" ps_cfg_home_dir: "%{hiera('ps_config_home')}" template_type: "%{hiera('appserver_template')}"
db_settings: db_name: "%{hiera('db_name')}" db_type: "%{hiera('db_platform')}" db_opr_id: "%{hiera('db_user')}" db_opr_pwd: "%{hiera('db_user_pwd')}" db_connect_id: "%{hiera('db_connect_id')}" db_connect_pwd: "%{hiera('db_connect_pwd')}"
config_settings: Domain Settings/Allow Dynamic Changes: Y Domain Settings/Domain ID: "%{hiera('appserver_domain_⇒name')}"

Completing the DPK Initialization with Customizations Chapter 3
124 Copyright © 2018, Oracle and/or its affiliates. All Rights Reserved.
PSAPPSRV/Min Instances: 2 PSAPPSRV/Max Instances: 2 PSAPPSRV/Max Fetch Size: 15000 Security/DomainConnectionPwd: "%{hiera('domain_conn_⇒pwd')}" JOLT Listener/Port: "%{hiera('jolt_port')}" JOLT Listener/Address: 0.0.0.0 JOLT Listener/SSL Port: 9010 Workstation Listener/Port: "%{hiera('wsl_port')}" Workstation Listener/SSL Port: 9010 Oracle Wallet/SEC_PRINCIPAL_LOCATION: test/security Oracle Wallet/SEC_PRINCIPAL_NAME: psft Oracle Wallet/SEC_PRINCIPAL_PASSWORD:
feature_settings: PUBSUB: "Yes" QUICKSRV: "No" QUERYSRV: "No" JOLT: "Yes" JRAD: "No" WSL: "Yes" DBGSRV: "No" RENSRV: "No" MCF: "No" PPM: "Yes" PSPPMSRV: "Yes" ANALYTICSRV: "No" SERVER_EVENTS: "Yes" DOMAIN_GW: "No"
6. Save the file.
Task 3-8: Preparing the Customization File for Mid-Tier Connection to a DB2 z/OS Database
Use these steps to set up PeopleSoft mid-tier components to connect to a DB2 z/OS database. The DPK setup script does not identify or verify the database client software on the host machine. You have the responsibility to ensure that the installation is supported, complete, and correct. This section assumes:
• You installed the appropriate client software for DB2 z/OS on the host machine and made a note of the DB2 client installation location.
• When running the DPK setup script, you specified DB2 z/OS (DB2ODBC) as the database platform.
1. Locate the psft_configuration.yaml and psft_deployment.yaml files in BASE_DIR/dpk/production/puppet/data.

Chapter 3 Completing the DPK Initialization with Customizations
Copyright © 2018, Oracle and/or its affiliates. All Rights Reserved. 125
Note. The code examples in this topic are for illustrative purposes only. Remember to use the text from the YAML files you install with each new deployment as the basis for your psft_customizations.yaml file.
You need parameters from both files. The db_platform parameter appears in psft_deployment.yaml, and the db2_server_list section appears in psft_configuration.yaml.
2. If necessary, create a psft_customizations.yaml using a standard editing tool, such as Notepad on Microsoft Windows or vi on Linux, AIX, or Solaris, and save it in the same location as the psft_configuration.yaml file.
If this is the first entry in the psft_customizations.yaml file, ensure that the file begins with three dashes (---).
3. Copy the db_platform section from psft_deployment.yaml to psft_customizations.yaml:
db_platform: DB2ODBC
4. Copy the db_name, db_user and db_user_password sections from psft_configuration.yaml to psft_customizations.yaml and change for your environment:
db_name: EP92DMOdb_user: VP1db_user_pwd: ENC[xxxxxxxxxxxxxxxxxxxxxxxxxxxxx]
5. Copy the db2_server_list section from psft_configuration.yaml to psft_customizations.yaml:
db2_server_list: "%{hiera('db_name')}": db2_type: "%{hiera('db_platform')}" db2_host: "%{::fqdn}" db2_port: "%{hiera('db_port')}" db2_node: TCPLNX01 db2_target_db: "%{hiera('db_name')}"
6. Add the db2_client section:
db2_client: sqllib_location: /home/ibm/sqllib instance_user: ibm remove: false
7. If necessary for your environment, add db2_user_name. db2_user_pwd, and instance_user (Linux, AIX, or Solaris).
8. Modify the psft_customizations.yaml for your environment.
For example, on Linux, AIX, or Solaris:
---db_platform: DB2ODBCdb_name: EP92DMOdb_user: VP1db_user_password: ENC[xxxxxxxxxxxxxxxxxxxxxxxxxxxxx]
############################################################### Replace this password sample with encrypted text from the ## generated psft_configuration.yaml file ###############################################################
db2_client:

Completing the DPK Initialization with Customizations Chapter 3
126 Copyright © 2018, Oracle and/or its affiliates. All Rights Reserved.
sqllib_location: /home/ibm/sqllib instance_user: ibm remove: false
db2_server_list: "EP92DMO": db2_type: DB2ODBC db2_host: sysb21 db2_port: 5126 db2_node: TCPDS3B db2_target_db: DB2DS3B db2_user_name: psftuser db2_user_pwd: password remove: false
Note. The instance_user attribute only applies to Linux, AIX, or Solaris platforms. This refers to the user name where the sqllib is installed.
On Microsoft Windows:
----db_platform: DB2ODBCdb_name: EP92DMOdb_user: VP1db_user_password: ENC[xxxxxxxxxxxxxxxxxxxxxxxxxxxxx]
############################################################### Replace this password sample with encrypted text from the ## generated psft_configuration.yaml file ###############################################################
db2_client: sqllib_location: C:/db2105 remove: false
db2_server_list: "EP92DMO": db2_type: DB2ODBC db2_host: sysb21 db2_port: 5126 db2_node: TCPDS3B db2_target_db: DB2DS3B db2_user_name: psftuser db2_user_pwd: password remove: false
Use these guidelines in completing the psft_customizations.yaml:
• EP92DMO is the logical PeopleSoft database name, and also the name of the ODBC system DSN.
• For db_platform and db2_type specify DB2ODBC to indicate the RDBMS, DB2 for z/OS.
• For db_user and db_user_password, specify the PeopleSoft User ID (operator ID) such as VP1 or PS, and the password.
• For db_name, specify the database name you supplied to the DPK setup script, EP92DMO in this

Chapter 3 Completing the DPK Initialization with Customizations
Copyright © 2018, Oracle and/or its affiliates. All Rights Reserved. 127
example. Use the same name as the first entry in the db2_server_list section. The DB2 z/OS systemuses this as the database alias.
• For db2_host, specify the host name where the DB2 zOS subsystem resides, sysb21 in this example.
• For db2_port, specify the TCP port used by the DB2 zOS subsystem, 5126 in this example.
• For db2_node, specify the TCP/IP node, TCPDS3B in this example.
• For db2_target_db, specify the DB2 subsystem name, DB2DS3B in this example.
• For db2_user_name and db2_user_password, specify the access ID, psftuser in this example, and the password.
9. The DPK will generate the following catalog statements as a result of using this psft_customizations.yaml file:
db2 catalog TCPIP node TCPDS3B remote sysb21 server 5126 ostype os390 db2 catalog db EP92DMO at node TCPDS3B authentication DCS db2 catalog dcs db EP92DMO as DB2DS3B
10. Save the file.
Task 3-9: Completing the Customized Deployment
Use these steps to complete the customized deployment of the PeopleSoft environment:1. Run the DPK setup script as previously described.
2. Answer n (no) to the following prompt:
Do you want to continue with the default initialization process? [y|n]: ⇒n
The script stops.
3. Prepare the psft_customizations.yaml file as previously described and save it in BASE_DIR/dpk/puppet/production/data.
4. Open a command prompt, running as administrator, and change directory to the Puppet manifest directory, BASE_DIR/dpk/puppet/production/manifests.
5. Run the following command to set up the PeopleSoft environment using the modified YAML files.
The debug and trace messages appear in the window where you run the command. See the next step if you want to capture them.
Note. The confdir, debug, and trace options begin with two dashes.
On Microsoft Windows:
"C:\Program Files\Puppet Labs\Puppet\bin\puppet.bat" apply --confdir=⇒BASE_DIR/dpk/puppet site.pp --debug --trace
On Linux:
/opt/puppetlabs/bin/puppet apply --confdir=BASE_DIR/dpk/puppet site.pp -⇒-debug --trace
On AIX or Solaris:
/opt/oracle/puppetlabs/bin/puppet apply --confdir=BASE_DIR/dpk/puppet⇒ site.pp --debug --trace

Completing the DPK Initialization with Customizations Chapter 3
128 Copyright © 2018, Oracle and/or its affiliates. All Rights Reserved.
6. To redirect the output to a log file, add the logdest option.
Note. Since these commands redirect the output to a log file, you cannot follow the progress. The process is complete when the prompt returns.
On Microsoft Windows:
"C:\Program Files\Puppet Labs\Puppet\bin\puppet.bat" apply --confdir=⇒BASE_DIR/dpk/puppet site.pp --debug --trace --logdest "BASE_DIR\dpk⇒\dpklog.log"
On Linux:
/opt/puppetlabs/bin/puppet apply --confdir=BASE_DIR/dpk/puppet site.pp ⇒ --debug --trace --logdest "BASE_DIR/dpk/dpklog.log"
On AIX or Solaris:
/opt/oracle/puppetlabs/bin/puppet apply --confdir=BASE_DIR/dpk/puppet⇒ site.pp --debug --trace --logdest "BASE_DIR/dpk/dpklog.log"

Copyright © 2018, Oracle and/or its affiliates. All Rights Reserved. 129
Chapter 4
Setting Up the Install Workstation
This chapter discusses:
• Understanding the Install Workstation
• Prerequisites
• Starting Configuration Manager
• Setting Startup Options
• Editing the Default Profile
• Running Client Setup
Understanding the Install Workstation
This chapter describes how to set up a PeopleSoft Windows-based client for connecting to the database server in two-tier mode, specifically for the purpose of performing install-related tasks from the workstation. You must configure at least one two-tier Windows-based client for running the Server Transfer, Data Mover, and SQR processes required for setting up the batch server and for creating the PeopleSoft database. For some installations you may wish to set up multiple install workstations, so that you can perform asynchronous tasks at the same time; for example, you could create and populate multiple databases simultaneously. You can quickly configure multiple workstations by exporting a configuration file from one workstation and importing it to another workstation.
See Also
PeopleTools: System and Server Administration
Prerequisites
The following tasks are prerequisites for setting up the install workstation:
• The workstation must have database connectivity software installed.
• You must have planned your database creation strategy. You should know the precise names of the databases that you intend to create.
• Make sure that you have created your connect strategy. You must use a Connect ID. You should know both the Connect ID and Connect password.
For information on PeopleSoft Connect ID and Connect password, consult the PeopleTools: System and Server Administration product documentation for information on setting Application Server domain parameters.

Setting Up the Install Workstation Chapter 4
130 Copyright © 2018, Oracle and/or its affiliates. All Rights Reserved.
• The workstation must have a logical drive mapped to PS_HOME on the file server (or, if the file server and install workstation are one and the same, PS_HOME can be installed on a local drive).
• The person performing the installation must have read access to the PS_HOME directory.
If this is the same workstation on which the PeopleSoft PeopleTools installation was performed, it should have a PeopleTools 8.5 installation program group, which was created when you loaded the PeopleTools software. This isn't a requirement, but it does make it more convenient to run the PeopleTools install applications.
See Also
"Preparing for Installation""Using the PeopleSoft Installer"
Task 4-1: Starting Configuration Manager
Configuration Manager is a utility for configuring workstations being used as the PeopleTools Development Environment. These are its principal functions:
• Sets up and make changes to PeopleSoft configuration settings.
• Creates a program group containing Microsoft Windows shortcuts to PeopleSoft applications.
• Installs local DLLs.
The first time you run Configuration Manager on the client, it will populate certain fields with default values specified in a configuration file stored on the file server, specifically: PS_HOME\setup\pstools.cfg. This configuration file was set up when you ran the installation. Once you set up and run Configuration Manager, it will populate fields using values that are stored in the Windows system registry.To start Configuration Manager, do one of the following:
• On Microsoft Windows 7, select Start, Programs, PeopleTools 8.56, Configuration Manager. (This program group will be available if you installed PeopleSoft PeopleTools on this workstation.)
• On Microsoft Windows 8 or 2012 R2, access the Apps screen, navigate to the PeopleTools 8.56 category, and select Configuration Manager.
Note. See the documentation for your operating system for information on accessing the Apps screen.
• If the PeopleTools 8.56 program group was not installed on this workstation, run pscfg.exe directly from the PS_HOME\bin\client\winx86 directory on the file server.
Task 4-2: Setting Startup Options
The Startup tab of Configuration Manager sets the default options for the PeopleSoft sign-on screen that is used for connecting to a PeopleSoft database. It also contains a setting that specifies the local directory for storing cached PeopleSoft data.To set Startup options:1. Confirm that you are viewing the Configuration Manager Startup tab (this tab is what you see if you started
Configuration Manager as described in the previous task).
2. Set the following options:

Chapter 4 Setting Up the Install Workstation
Copyright © 2018, Oracle and/or its affiliates. All Rights Reserved. 131
• Database type — Verify the type of RDBMS. This should already be set to DB2 UDB for OS/390.
• Application Server Name — This option appears if you select a database type of Application Server. It is where you enter your application server name if you are setting up a three-tier connection.
• Database name — The name of the default database to connect to. Enter the name of one of the databases that you intend to create.
• User ID — The name of the default user that will appear in the sign-on screen. This can be any valid user name, although for installation setup it normally matches the name of one of the built-in PeopleSoft users (typically PS or VP1) that will be installed in the database.
If you have decided to modify the PeopleSoft database directly and use a user ID other than a user ID delivered by PeopleSoft, type your user ID into this field.
• Connect ID and Connect Password — Type your connect ID and password into these fields. Connect ID is required for this PeopleSoft release. The connect ID and password must match the z/OS ID that you set up in the chapter "Preparing for Installation."
See Also
"Preparing for Installation," Using Connect ID
Task 4-3: Editing the Default Profile
Begin by editing the default profile for the workstation. Among other things, this will verify that the paths to PS_HOME and its subdirectories are correctly set, which is required for subsequent tasks.For more information on using Configuration Manager, see the PeopleTools: System and Server Administration product documentation for configuring user profiles.To edit the default profile:1. Select the Profile tab in Configuration Manager.
Only one profile, the Default Profile, has been defined.
2. Select Edit to display the Edit Profile dialog box, and then select the Process Scheduler tab.

Setting Up the Install Workstation Chapter 4
132 Copyright © 2018, Oracle and/or its affiliates. All Rights Reserved.
3. In the Process Scheduler tab verify the options listed below the example.
These should have been set correctly by the PeopleSoft installation program.
Edit Profile dialog box: Process Scheduler tab
• Verify that the PeopleSoft Home Directory (PS_HOME) field is set to the path to PS_HOME on the file server.
• On Microsoft Windows operating systems, set the Database Drivers (DBBIN) field to the location of the database connectivity files on the workstation.
The example shows the default for DB2 z/OS, c:\sqllib\bin.
• Set the SQR Executables (SQRBIN) field to the file server directory where SQR for Windows was installed when you ran the PeopleSoft Installer.
• Set the SQR Flags (PSSQRFLAGS) field to -ZIF<PS_HOME>\sqr\pssqr.ini.
• Set the SQR Report Search 1 (PSSQR1) field to PS_HOME\sqr. The remaining SQR Report Search fields can be left blank, because no additional SQR report directories have been created yet.

Chapter 4 Setting Up the Install Workstation
Copyright © 2018, Oracle and/or its affiliates. All Rights Reserved. 133
4. Select the Common tab of the Edit Profile dialog box, shown in this example:
Edit Profile dialog box: Common tab
The following fields on the Common tab are used to set Data Mover default input, output, and log directories.
• Verify that the Input Directory and Output Directory fields are set to PS_HOME\data. This directory will store the Data Mover scripts and .DAT files required to populate the PeopleSoft database.
• Set the Log Directory to a local workstation directory to store the Data Mover log files. The default is C:\TEMP.
Data Mover will not create a new directory under PS_APP_HOME or PS_HOME for log files. If you wantData Mover to write log files into PS_APP_HOME, you must create a new directory named log under PS_APP_HOME.
5. Select OK to close the Edit Profile dialog box.
Task 4-4: Running Client Setup
The Client Setup tab does the following:
• Installs a PeopleSoft program group on the workstation.

Setting Up the Install Workstation Chapter 4
134 Copyright © 2018, Oracle and/or its affiliates. All Rights Reserved.
• Installs system DLLs on the workstation.
These Client Setup functions are performed when you click OK or Apply from Configuration Manager only if theInstall Workstation option on the Client Setup tab is selected.
Note. Any files installed by Client Setup on the workstation from the file server use the paths specified in the default profile.
To run Client Setup:1. Select the Client Setup tab in Configuration Manager.
2. In the Group Title text box enter the name of the program group for the icons you want on the client workstation. (A program group name cannot contain any of the following characters: \ / : * ? " < > |)
You can call the program group anything you want, but this documentation uses PeopleTools 8.56.
3. If you do not have a PeopleTools 8.56 program group set up on the workstation, be sure to check the following two options for installing shortcuts to applications essential for installation.
Note. When you run Client Setup, it will uninstall any existing shortcuts in the PeopleTools 8.56 program group, and install shortcuts for the applications you have selected. If you subsequently want to install or uninstall shortcuts, you can always re-run Client Setup.
• Data Mover
• Configuration Manager
4. Select the option Install Workstation.
This check box determines whether Client Setup runs when you click Apply or OK in Configuration Manager.If this option is not selected, Client Setup will create or update settings in the registry, but it will not set up thePeopleTools 8.56 program group or install local DLLs.
5. Click OK to run Client Setup and close Configuration Manager.

Copyright © 2018, Oracle and/or its affiliates. All Rights Reserved. 135
Chapter 5
Setting Up the Batch Environment on z/OS
This chapter discusses:
• Understanding COBOL and the Batch Environment
• Setting Up Your Batch Environment
• Completing the Preinstallation Worksheet
• Allocating z/OS Partitioned Datasets
• Using PeopleSoft Server Transfer
• Setting up the USS Environment Variables and Granting Access to USS Files
• Installing SQR for z/OS
• Binding the SQR DB2 Plan
• Assembling PeopleTools Programs
• Compiling and Link-Editing DB2 COBOL
• Compiling and Link-Editing COBOL
• Changing the IBM Enterprise COBOL Compiler Version
Understanding COBOL and the Batch Environment
This chapter describes how to compile and link PeopleSoft ASSEMBLER and COBOL batch programs, if necessary. Note that COBOL is no longer needed for PeopleTools because the Process Scheduler is written in C++. In addition, COBOL is not required for applications that contain no COBOL programs.
Note. We require that you maintain a "central repository" of your COBOL source code on the file server. The multiplatform installer will place all the needed COBOL source code on your Microsoft Windows and UNIX servers during the initial install. However, if you download any COBOL patches or make any customizations, youshould apply them to your file server. From there you can transfer the updated COBOL source code out to any relevant application or batch servers. This approach will help you keep your COBOL source code in sync, even if it resides on multiple machines. For Microsoft Windows operating systems, COBOL stored SQL statements are only installed on the file server as well.
Carry out the procedures in this chapter to set up COBOL if your batch (Process Scheduler) server is on a supported z/OS operating system. See the My Oracle Support, Certifications area for the supported COBOL compilers for PeopleSoft PeopleTools.
If you are using IBM Enterprise COBOL for z/OS follow the instructions in this chapter. Otherwise, to compile COBOL on Microsoft Windows and UNIX operating systems, see the chapters "Installing and Compiling COBOL on Windows" and "Installing and Compiling COBOL on UNIX."

Setting Up the Batch Environment on z/OS Chapter 5
136 Copyright © 2018, Oracle and/or its affiliates. All Rights Reserved.
See Also
PeopleTools: Global TechnologyMy Oracle Support, Certifications
Setting Up Your Batch Environment
This chapter describes how to set up your batch environment on a z/OS database server. This process involves compiling and linking PeopleSoft COBOL batch programs that you will use for such PeopleSoft products as PeopleSoft Human Capital Management's Payroll or PeopleSoft Financial Management's General Ledger. The PeopleSoft Server Transfer program creates a script that your FTP program will use to transfer files from the file server to the database or batch server. It also creates scripts to configure the batch environment.
Note. Remember, COBOL is not required for applications that contain no COBOL programs.
The batch environment components reside in two locations: the z/OS server and UNIX System Services. COBOL,SQR and other installation-related components reside on the z/OS server; Process Scheduler and Application Engine components reside in UNIX System Services.The Server Transfer process must be executed using an ID that has the authority to access both the z/OS Server and UNIX System Services (USS). PDS and PDSE members will be created on the z/OS server, and directories and files will be created in UNIX System Services. UNIX System Services security requires that any IDs or USER values deployed in subsequent batch processes must belong to the same GROUP as the User ID that initially created the libraries and files on USS. During batch execution, both permanent and temporary files are written to UNIX Systems Services, and the ID creating these files must have the proper authority to create directories and files. Oracle recommends that this be administered at the UNIX security GROUP level.After you compile your COBOL components in the following steps you will only need to re-compile COBOL in the following situations:
• Any COBOL programs change
• The supported COBOL compiler changes
• You change the version of your RDBMS
• You change your version of your operating system
• You apply a patch or a fix
See Also
My Oracle Support, CertificationsMy Oracle Support, Patches & Updates
Task 5-1: Completing the Preinstallation Worksheet
Use the preinstallation worksheet below to record site-specific information to expedite editing and transferring COBOL and SQR files to z/OS. Try to complete it before going on to the next step. Typically, z/OS and DB2 systems administrators should be able to supply the required information.

Chapter 5 Setting Up the Batch Environment on z/OS
Copyright © 2018, Oracle and/or its affiliates. All Rights Reserved. 137
Parameter values will be blank the first time you run the PeopleSoft Server Transfer program. You must specify your own site-specific values. The sample values, where provided, are only suggestions. In subsequent executionsof the Server Transfer program, the program will use the values stored in %TEMP%\PSXFR.CFG, built during the initial run. Note that %TEMP% is a system or environment variable.
Transfer Parameters Site-Specific Value Sample Value
1. z/OS Dataset High Level Qualifier
The high-level qualifier used for PeopleSoft COBOL and SQR datasets.
Suggested usage: hlq.ppvvv
where hlq is the highest-level qualifier, and ppvvv is the PeopleSoft product andrelease (such as HR920).
Note. This documentation often uses HLQ.PPVVV as an example.
<enter value> PS.HR920
2. PeopleSoft File Server High Level Directory
Set to PS_HOME, the directory to which you installed the PeopleSoft software, such as N:\HR920.
<enter value> N:\HR920
3. Target Directory for Generated Files
The workstation directory that will contain a variety of files generated when you run the PeopleSoft Server Transfer program, including file transfers, COBOL compile JCL, and translated SQRs (for example [ and ] translated to \).
Suggested usage: PS_HOME\STAGE
<enter value> N:\HR920\STAGE
4. File Transfer Method
Indicates which file transfer protocol will be used.
Suggested usage: Microsoft FTP
<enter value> Microsoft File Transfer Protocol (FTP)
5. Database Server Host/Node Name
FTP Only: Symbolic IP Name For z/OSSystem
Suggested usage: IP Name of Server
If you do not use FTP, specify any alphanumeric character in this field.
<enter value> Server IP name

Setting Up the Batch Environment on z/OS Chapter 5
138 Copyright © 2018, Oracle and/or its affiliates. All Rights Reserved.
Transfer Parameters Site-Specific Value Sample Value
6. Database Server Login ID
FTP Only: z/OS user ID used to connect to z/OS server and create files and directories on USS.
Note: This ID MUST be in the same UNIX GROUP as any IDs under which subsequent batch processing will be executed.
Suggested usage: LOGONID
If you do not use FTP, specify any alphanumeric character in this field.
<enter value> USER1
7. Job Card Line 1
This is the first line of a job card that will be inserted into JCL files by the PeopleSoft Server Transfer program.
Enter // in first two positions followed by job card information such as job name, keyword JOB, account information, and so on. If the job card extends to two lines, end the first line with a comma and complete Job Card Line 2.
Note: Any USER= parm coded MUST be in the same UNIX GROUP as the Database Server Logon ID noted in Parameter 6 above.
<enter value> //PSHR920 JOB (PSOFT),'J',CLASS=A,MSGCLASS=A
8. Job Card Line 2
This is the second line of a job card thatwill be inserted into JCL files by the PeopleSoft Server Transfer program.
Enter // in first two positions followed by at least one space before continuing to add job card information.
Suggested usage: //*
<enter value> //REGION=OM,MSGLEVEL=(1,1),USER=BATCHID1,PASSWORD=BPSWD1
9. Job Card Line 3
This is the third line of a job card that will be inserted into JCL files by the PeopleSoft Server Transfer program.
Enter // in first two positions followed by at least one space before continuing to add job card information.
Suggested usage: //*
<enter value> // NOTIFY=&SYSUID

Chapter 5 Setting Up the Batch Environment on z/OS
Copyright © 2018, Oracle and/or its affiliates. All Rights Reserved. 139
Transfer Parameters Site-Specific Value Sample Value
10. OS390z/OS/DB2 Operator ID
This parameter is for PeopleSoft internal use. Let it default to OPRID.
<enter value> OPRID
11. OS390z/OS/DB2 Table Owner ID
This is the PeopleSoft table owner ID—the high-level qualifier for DB2 tables. (also known as "CREATOR" in the IBM SYS Catalog tables). If you are using secondary authorization, this will be your secondary authorization ID, otherwise it will be your primary authorization ID.
Suggested usage: PSOWNER
<enter value> PS001
12. DB2 Subsystem Name
This is the DB2 Subsystem used for thePeopleSoft application you are currently installing (DMO or SYS).
Suggested usage: DDDD
<enter value> DSNT
13. DB2 System Dataset Containing DSN Member
This is the DB2 system dataset that contains member DSN.
<enter value> DSNn10.SDSNLOAD
(n is an alphanumeric variable)
14. DB2 System Dataset Containing DSN3@ATH Member
This is the DB2 system dataset that contains member DSN3@ATH. DSN3@ATH is a sample authorization exit. By implementing the sample authorization exits you can provide group names as secondary authorizationIDs.
<enter value> DSNn10.SDSNEXIT
(n is an alphanumeric variable)
15. DB2 System Dataset Containing DSNTEP2 Member
This is the DB2 runtime system dataset containing member DSNTEP2.
<enter value> DSNn10.RUNLIB.LOAD
(n is an alphanumeric variable)
16. PeopleSoft Database Name
Suggested usage: DB
<enter value> PSHR920

Setting Up the Batch Environment on z/OS Chapter 5
140 Copyright © 2018, Oracle and/or its affiliates. All Rights Reserved.
Transfer Parameters Site-Specific Value Sample Value
17. Plan Name for PTPSQLRT via TSOAttach Facility
This is DB2 Plan used by PTPSQLRT (the COBOL/DB2 API used by COBOL batch and process scheduler jobs).
Suggested usage: PTPSQLRT
<enter value> PTPSQLRT
18: Package Name for PTPSQLRT via TSO Attach Facility
This is the DB2 Package used by PTPSQLRT (the COBOL/DB2 API used by COBOL batch and process scheduler jobs).
Suggested usage: PAKSQLRT
<enter value> PAKSQLRT
19. Plan Name for PTPSQLRT via Call Attach facility (for USS)
Suggested usage: PTPSQLRA
<enter value> PTPSQLRA
20: Package Name for PTPSQLRT via CALL Attach facility (for USS)
Suggested usage: PAKSQLRA
<enter value> PAKSQLRA
21. Language Environment runtime library (that is, CEE.SCEERUN)
We recommend that you ensure the LE runtime libraries are present on the system:
xxx.SCEERUNxxx.SCEERUN2
<enter value> Check with System Administrator for installation LE library name.
For example:
SYS1.CEE.SCEERUN
22. Language Environment linkedit library (that is, CEE.SCEELKED)
Note that SQR uses PM Binder CEE.SCEEBIND.
<enter value> CEE.SCEELKED

Chapter 5 Setting Up the Batch Environment on z/OS
Copyright © 2018, Oracle and/or its affiliates. All Rights Reserved. 141
Transfer Parameters Site-Specific Value Sample Value
23. CBL System Dataset Containing IGY* Members
This is the COBOL load library containing modules used by COBOL compiler. Its members include IGYCASM1, IGYCINIT, and so on.
Suggested usage:
• For IBM Enterprise COBOL V4.2:
• IGY.V4R2M0.SIGYCOMP
• IGY.V4R2M0.SIGYCOMP forANSI Database (EBCDIC)
• IGY.V4R2M0.SIGYCOMP forUnicode Database
• For IBM Enterprise COBOL V5.1 (Version 5 Release 1):
IGY.V5R1M0.SIGYCOMP
• For IBM Enterprise COBOL V6.1 (Version 6 Release 1):
IGY.V6R1M0.SIGYCOMP
See Changing the IBM Enterprise COBOL Compiler Version
<enter value> Check with the System Administrator for the installation of IBM Enterprise COBOL V4.2, V5.1, or V6.1.
For example:
• IGY.V4R2M0.SIGYCOMP
• IGY.V5R1M0.SIGYCOMP
• IGY.V6R1M0.SIGYCOMP
24. COBOL Compiler
Select the COBOL compiler version from the drop-down list:
• IGY61
IBM Enterprise COBOL V6.1 (Version 6 Release 1)
• IGY51
IBM Enterprise COBOL V5.1 (Version 5 Release 1)
• IGY42
IBM Enterprise COBOL V4.2 (Version 4 Release 2)
See Changing the IBM Enterprise COBOL Compiler Version
<enter value> IGY51

Setting Up the Batch Environment on z/OS Chapter 5
142 Copyright © 2018, Oracle and/or its affiliates. All Rights Reserved.
Transfer Parameters Site-Specific Value Sample Value
25. System Storage Name for Temporary Datasets
This is the storage device name used fortemporary datasets—used in sorting, passing temporary datasets, and so forth—that are deleted after the job completes.
Suggested usage: SYSTEMP
<enter value> SYSTEMP
26. System Storage Name for Permanent Datasets
This is the storage device name used forpermanent datasets used in dataset allocation, such as those used to store COBOL and SQR files.
Suggested usage: SYSPERM
<enter value> SYSPERM
27. Assembler System Dataset Containing STIMER
<enter value> SYS1.MACLIB
28. Assembler Program Name <enter value> ASMA90
29. SQR High Level Qualifier
This is the high-level qualifier used for SQR datasets.
Suggested usage: PS.HR920.SQR
<enter value> PS.HR920.SQR
30. SQR Program Name Found in SQR Load Library
This is the name of the SQR program contained in the SQR Load Library.
Suggested usage: SQR
<enter value> SQR
31. SQR Plan Name
This is the DB2 Plan name assigned forSQR.
Suggested usage: DBCALLS
<enter value> SQR920
32: SQR Package Name
This is the DB2 Package name assignedfor SQR.
Suggested usage: PAKSQR
<enter value> PAKSQR
33. Target Server Hardware Platform <enter value> UNIX System Services (OS390z/OS)

Chapter 5 Setting Up the Batch Environment on z/OS
Copyright © 2018, Oracle and/or its affiliates. All Rights Reserved. 143
Transfer Parameters Site-Specific Value Sample Value
34. PeopleSoft Unix System Services Home Directory
Suggested usage: /u/data001/dbname
<enter value> /u/data001/PSHR800
35. Library for DB2 CLI Load Module (that is, DSNAOCLI)
<enter value> DSNn10.SDSNLOAD
(n is an alphanumeric variable)
36. Plan Name for CLI Packages (that is, DSNACLI)
Suggested usage: DSNACLI
<enter value> DSNACLI
37. Attachment Type for ODBC to Connect to DB2
Suggested usage: RRSAF
<enter value> RRSAF (Resource Recovery Services Attachment Facility)
38. HFS path to top level of the 31-bit JDK product
This will provide the value for the JDK_HOME environment variable in the psconfig.sh file.
Suggested usage: /usr/lpp/java/J1.8
<enter value> /usr/lpp/java/J1.8
Task 5-2: Allocating z/OS Partitioned Datasets
Allocate a z/OS partitioned dataset as HLQ.PPVVV.CNTL, where HLQ is the highest-level dataset qualifier, and PPVVV is the current release of your PeopleSoft software (such as HR920).File attributes are: FB, LRECL=80,BLKSIZE=6160, Dir Blks 5, SPACE (Primary 15 Tracks, Secondary 5 Tracks). This dataset will be used to transfer allocation JCL.To complete allocating the datasets:1. Transfer PS_HOME\SRC\CBL\MVS\PSLIBCBL.JCL to HLQ.PPVVV.CNTL(PSLIBCBL).
2. Transfer PS_HOME\SRC\CBL\MVS\PSLIBSQR.JCL to HLQ.PPVVV.CNTL(PSLIBSQR).
3. Log on to z/OS and edit PSLIBCBL and PSLIBSQR to reflect the appropriate values for your site as follows:
a. Add a job card.
b. Change all occurrences of $PSHLQ$ to the z/OS Dataset High Level Qualifier determined in the preinstallation worksheet.
c. Change all occurrences of $SYSPERM$ to the System Storage Name for Permanent Datasets value determined in the preinstallation worksheet.
d. Change all occurrences of $SQRHLQ$ to the z/OS Dataset High Level Qualifier determined in the preinstallation worksheet.
See Completing the Preinstallation Worksheet.4. Submit (PSLIBCBL) and (PSLIBSQR) to allocate files.
Setting Up the Batch Environment on z/OS Chapter 5
144 Copyright © 2018, Oracle and/or its affiliates. All Rights Reserved.
Task 5-3: Using PeopleSoft Server Transfer
This section discusses:
• Understanding PeopleSoft Server Transfer
• Running the PeopleSoft Server Transfer Program
• Transferring Files to Host Manually
• Mapping PeopleSoft Installation Directories to z/OS
Understanding PeopleSoft Server TransferThe PeopleSoft Server Transfer program simplifies editing and transferring COBOL and SQR files to z/OS. Pre-compile, Compile, Linkedit, binds, and Process Scheduler-initiated COBOL and SQR jobs are ready to submit following the file transfer, assuming the worksheet values you enter are correct.
Note. Remember, before you can run the Server Transfer program to set up a batch server on z/OS, you need to have run the PeopleSoft Installer, as described in the chapter "Using the PeopleSoft Installer." Run it on a Microsoft Windows machine, making sure to select all of the PeopleSoft servers. This Microsoft Windows machine will then function as your file server, from which you can run Server Transfer.
The PeopleSoft Server Transfer program performs the following functions:
• Generates a file containing transfer commands to transfer files to z/OS and UNIX System Services (USS). This file is named PSFTXFR.TXT for transferring files to z/OS using FTP.
• Generates COBOL compile JCL — program preparation JCL.
• Edits various JCL and PRC files to site-specific standards using values from the transfer parameters specified in the PeopleSoft Server Transfer program.
• Translates [ and ] characters to a \ (backslash) to correct an ASCII-to-EBCDIC translation problem that occursduring the transfer of SQR files.
Later in this chapter you will learn how workstation file directories relate to z/OS partitioned datasets.See Mapping PeopleSoft Installation Directories to z/OS.Before running the PeopleSoft Server Transfer program, ensure that an environment variable (%TMP%) is set to a"temporary" directory to which you have write access. Oracle recommends using C:\temp for this use.The transfer program writes the following two files to the %TMP% directory:
• PSXFR.LOG — a log file that summarizes the program's execution.
• PSXFR.CFG — a configuration file that stores the parameters you selected.
Note. The PeopleSoft Server Transfer program writes the above files to the %TMP% directory, or to the %TEMP% directory if the %TMP% environment variable is undefined.
See "Using the PeopleSoft Installer."
Note. In PeopleTools 8.4 and above, the Server Transfer program is used only to transfer files to your batch server. On UNIX or Windows, to install files to your application server, file server, web server, and so on, you should use the PeopleSoft Installer.

Chapter 5 Setting Up the Batch Environment on z/OS
Copyright © 2018, Oracle and/or its affiliates. All Rights Reserved. 145
Task 5-3-1: Running the PeopleSoft Server Transfer ProgramTo run the PeopleSoft Server Transfer program:1. Start PeopleSoft Server Transfer.
Enter the following path into the Run dialog box:
PS_HOME\BIN\CLIENT\WINX86\pstrans.exe
Alternatively, select the Server Transfer shortcut, if you elected to create a Program Group during the PeopleSoft PeopleTools installation.
The PeopleSoft Server Transfer screen appears, as shown in this example, which contains all of the parameters whose values you should have determined while filling out the preinstallation worksheet.
Entering transfer parameters in the PeopleSoft Server Transfer dialog box
2. Enter the appropriate value for each parameter.
Using the preinstallation worksheet you completed earlier, enter the parameter values describing how you want to install the PeopleSoft batch environment on your database server. Some of the parameter values may already exist either as default values or as values from a previous execution of the Server Transfer program. To select an individual row, just click it. To enter or change a particular parameter value, either select from predefined values in a drop-down list or enter the values manually if there is no drop-down list.
Note. You must specify a value for each edit field. If you are not sure what value to use, type in the default suggested by Oracle for PeopleSoft software (see the preinstallation worksheet for a list of suggested usage) and edit the parameter value following the file transfer on z/OS.
For parameters that require a directory path, you may enter it directly. If you don't know the exact location, click Browse to select the directory from the Select Directory dialog box. The Browse button is available

Setting Up the Batch Environment on z/OS Chapter 5
146 Copyright © 2018, Oracle and/or its affiliates. All Rights Reserved.
when you click in a field that requires a directory path.
3. Enter the appropriate value for Host/Node Login ID Password. This value should be the password for the Host/Node Name specified as parameter number 5 in the Server Transfer panel.
This password is mandatory regardless of your database platform or site specifications. Microsoft's FTP software requires a password.
4. Once you enter all the correct parameter values for your site, click OK. (If instead you want to clear all of your entries and start over, press Reset. To close this instance of the PeopleSoft Server Transfer, press Cancel.)
The PeopleSoft Server Transfer prepares the files for transfer, which can take from a few seconds to a few minutes, depending on the number of files and the type of processing required.
The PeopleSoft Server Transfer program will generate a number of files that will be located in the Target Directory for Generated Files that you specified previously.
5. In the PeopleSoft Server Transfer Output window, if you want to verify that the Transfer program created all the proper files, click the Display Log button.
The Display Log button calls the PSXFR.LOG in your %TMP% directory (or %TEMP% directory if %TMP% is undefined) and displays it in Microsoft Notepad. PSXFR.LOG provides summary information about the transfer program's execution that can be helpful for identifying potential errors and inconsistencies. It contains the following sections:
• SELECTED PARAMETERS: Shows the parameters you selected from the PeopleSoft Server Transfer main window.
• SUMMARY OF SELECTED FILES: Shows which files—and how many of them—will be transferred. It also shows which directory they were copied from and their new location.
• FILE TRANSFER NOTES: Shows important details regarding your transfer process, such as the command line option and where log files are located.
Note. Only click Close if you want to dismiss the PeopleSoft Server Transfer Output window and transfer the files manually from the command line.
6. Click the Transfer Now button to begin the transfer process. This button will launch the file transfer method that you selected on the server transfer main screen.
Note. The Transfer Now button assumes that the destination partitioned datasets exist. See "Allocating z/OS Partitioned Datasets."
7. When the transfer has completed, the FTPOUT.LOG will display in Notepad. You should review this file for any errors that may have occurred during the transfer. The file is located in the Target Directory for GeneratedFiles that you specified previously.
8. Close Notepad and press the CLOSE button on the PeopleSoft Server Transfer Output Panel.
Note. If your transfer is unsuccessful or you would rather transfer the files manually, read the following section.

Chapter 5 Setting Up the Batch Environment on z/OS
Copyright © 2018, Oracle and/or its affiliates. All Rights Reserved. 147
The following table summarizes the files generated during the use of the PeopleSoft Server Transfer utility, in the order in which they are generated, along with their locations and a description.
File Name Location Contents
PSXFR.CFG %TMP% Configuration file generated by the PeopleSoft Server Transfer Utility. It contains the parameters entered in a somewhat cryptic format.
PSXFR.LOG %TMP% Summary file generated by the PeopleSoft Server Transfer Utility. It contains a summary of the parameters entered, the files that will be transferred, and instructions on how to manually transfer the files, if you choose to do so later.
PSFTXFR.TXT The Target Directory for Generated Files that you specified previously.
A Microsoft FTP command file that contains the FTP statements to be executed to transfer the files. This file is only generated if you selected the Microsoft FTP file transfer protocol option.
FTPEXEC.BAT The Target Directory for Generated Files that you specified previously.
The .bat file that calls either the Microsoft FTP command file, from which the FTP process is initiated. The PeopleSoft Server Transfer Utility will initiate this batch file if you select the Transfer Now option.
FTPOUT.LOG The Target Directory for Generated Files that you specified previously.
This is the FTP log file generated by the FTP utility that details the transfer results for each file processed.
Task 5-3-2: Transferring Files to Host ManuallyFrom a command line utility (DOS shell) in Microsoft Windows, transfer application files to z/OS using the transfer/send file generated by the PeopleSoft Server Transfer program. For the Microsoft FTP file transfer protocol, the file containing transfer commands is in PS_HOME\STAGE and is called PSFTXFR.TXT.You can initiate either Server Transfer by executing the FTPEXEC.BAT file in PS_HOME\STAGE. Allow at least 45 minutes to complete the file transfer. If the transfer fails:
• Make sure the z/OS datasets to which the files are transferred have been allocated.
• Check whether a z/OS dataset is underallocated or allocated on a volume with insufficient space.
• Verify that the Database Server Login ID specified in Parameter 6 has write access to z/OS and UNIX SystemServices.

Setting Up the Batch Environment on z/OS Chapter 5
148 Copyright © 2018, Oracle and/or its affiliates. All Rights Reserved.
Task 5-3-3: Mapping PeopleSoft Installation Directories to z/OSThe following tables shows the mapping between workstation files and the suggested z/OS target datasets. The root directory is assumed to be PPVVV, which denotes the high-level PeopleSoft directory, such as \HR920. Eachtable lists the files, datasets, and descriptions for a subdirectory of PPVVV.Mapping in subdirectory \SRC\CBL\BASE:
Files z/OS Dataset Description
??P*.CBL HLQ.PPVVV.SRCLIB COBOL programs
??C*.CBL HLQ.PPVVV.COPYLIB COBOL copy members
Mapping in subdirectory \SRC\CBL\MVS:
Files z/OS Dataset Description
??P*.CBL HLQ.PPVVV.SRCLIB z/OS specific programs
??C*.CBL HLQ.PPVVV.COPYLIB z/OS COBOL copy members
*.ASM HLQ.PPVVV.SRCLIB Assembler programs
*.JCL HLQ.PPVVV.JCLLIB Compile, bind, Process Scheduler jobs
*.PRC HLQ.PPVVV.PROCLIB Procs for compile, bind, assemble
*.JCT /u/datax/ppvvv/appserv/prcs/shelljcl JCL Shells for COBOL and SQR Processes
Mapping in \SQR subdirectory:
Files z/OS Dataset Description
*.SQR HLQ.PPVVV.SQRSRC Application SQRs
*.SQC HLQ.PPVVV.SQRINC Application SQR include members
SQRPARMS.PAR HLQ.PPVVV.PARMLIB SQR parameter file
SQRSAMP.JCL HLQ.PPVVV.JCLLIB Sample SQR JCL
SQRPROC.PRC HLQ.PPVVV.PROCLIB SQR cataloged procedures

Chapter 5 Setting Up the Batch Environment on z/OS
Copyright © 2018, Oracle and/or its affiliates. All Rights Reserved. 149
Mapping in \SCRIPTS subdirectory:
Files z/OS Dataset Description
??DDL.SQL HLQ.PPVVV.DDLLIB DDL script files used to build PeopleSoft database in the chapter Creating a Database
??DDLU.SQL HLQ.PPVVV.DDLLIB Script files for Unicode databases
Mapping in \APPSERV\PRCS subdirectory:
Files z/OS Dataset Description
*.IN /u/datax/ppvvv/appserv PSADMIN program utility files
psprcsunix.val /u/datax/ppvvv/appserv/prcs Process Scheduler value Validation file
Mapping in \BIN\SERVER subdirectory:
Files z/OS Dataset Description
*.* /u/datax/ppvvv/bin Process Scheduler executables for USS
Note. The \SRC\CBL\MVS directory contains files specifically for the DB2 for z/OS platform. Certain files will appear in both the \SRC\CBL\BASE and \SRC\CBL\MVS directories. The *.CBL files in the \SRC\CBL\BASE directory will be transferred first, followed by the *.CBL files in the \SRC\CBL\MVS directory. As a result, the z/OS-specific files will overwrite the generic files. In other words, the order in which files are FTPed to the serverdoes matter. The PeopleSoft Server Transfer program FTPs the files to the server in the correct order.
Task 5-4: Setting up the USS Environment Variables and GrantingAccess to USS Files
Before installing SQR for z/OS, you need to set up USS environment variables by executing the psconfig.sh shell script, and grant access to specific libraries in UNIX System Services by executing the psmv.sh shell script.To execute the psconfig.sh and psmv.sh shell scripts:1. Locate the files psconfig.sh and psmv.sh in USS Home directory /u/datax/ppvvv.
This is the same directory specified in the preinstallation worksheet, parameter 30. Make this directory your current working directory.
2. Grant execute authority to the file by entering the following at the prompt:
chmod 755 psmv.sh
3. Execute the scripts by entering psconfig.sh and psmv.sh at the prompt.

Setting Up the Batch Environment on z/OS Chapter 5
150 Copyright © 2018, Oracle and/or its affiliates. All Rights Reserved.
Task 5-5: Installing SQR for z/OS
To install SQR in the designated partitioned dataset, you need to run the INSTALLSQR.SH shell script. The shell script performs the following tasks:
• Copies all SQR installation binary files from the HFS directory PS_HOME/bin/sqr into the designated SQR sequential data sets.
• Submits HLQ.PPVVV.JCLLIB (RECVSQR) that will use IBM's RECV utility to migrate all the binaries fromthe sequential data set to the designated SQR partitioned dataset.
To execute the installsqr.sh shell script:1. Change directory to the USS Home directory /u/datax/ppvvv. This is the same directory specified in the
preinstallation worksheet (item 30).
2. Enter installsqr.sh at the prompt.
When the shell script submits the JCL to unpack all the SQR binaries from the installation sequential data set, review the status of the JCL from TSO to verify that all steps using the RECV utility have successfully completed with return code of 0.
Task 5-6: Binding the SQR DB2 Plan
Once SQR is installed, you have to run the DSN subcommand BIND to build an application plan for SQR. All DB2 programs require an application plan to allocate resources and to support SQL requests made during execution. The keywords and parameters you should use when exercising the DSN BIND commands follow. Refer to the IBM DB2 Command and Utility Reference Manual for further information on BIND.To create the DB2 Plan for SQR, submit the following JCL job:HLQ.PPVVV.JCLLIB(PSBNDSQR)
Note. To execute an XPLINK program, the SCEERUN2 as well as the SCEERUN data set must be in the z/OS program search order (see the {_PLIB_PREFIX} environment variable). The following data sets are also used: The data sets {_PLIB_PREFIX}.SCEERUN and {_PLIB_PREFIX}.SCEERUN2 contain the runtime library programs. These data sets are listed here for information only, to assist in identifying the correct data sets to be added to the z/OS program search order. The default value is "CEE".
Task 5-7: Assembling PeopleTools Programs
You need to assemble the PeopleSoft program PTPSQLTM. PTPSQLTM, called by PTPSQLRT, collects time-interval data to produce the statistics report.In z/OS, submit the following job:HLQ.PPVVV.JCLLIB (PSASM)
On job output, the expected return code is 0 or 4.

Chapter 5 Setting Up the Batch Environment on z/OS
Copyright © 2018, Oracle and/or its affiliates. All Rights Reserved. 151
Note. In the catalogued procedure PSASM, the ASM step EXEC statement contains the assembler program specified during the PeopleSoft Server Transfer program. $ASMLIB$ is replaced by the "Assembler Program Name" transfer parameter. The expected assembler program name is ASMA90. However, IEV90 may also be used, but the SYSLIN DD statement in the ASM step must be commented first to be assembled successfully.
Task 5-8: Compiling and Link-Editing DB2 COBOL
Precompile, compile, and link-edit PTPSQLRT (PeopleSoft's COBOL/DB2 API) as follows:
• Submit HLQ.PPVVV.JCLLIB(PSCOB*). Acceptable return codes are 0 and 4 for pre-compiles and compiles,and 0 for the link-edit step.
• PSCOBDA: for DB2 precompile, compile and linkedit of program PTPSQLRT for Native CAF for USS.
• PSCOBDE: for DB2 precompile, compile and linkedit of program PTPSQLRT for TSO CAF.
• PSCOBNET: for compile and linkedit COBOL program PTPNETRT for Native CAF for USS.
Common compile errors include:
• Users inadvertently introducing tab characters into source code while viewing it using workstation editors before file transfer. Check to see if you have X'05' (or other odd hex values) in the z/OS source.
• Failure to transfer all the BASE and z/OS copy members from the file server, or perhaps overwriting the z/OS versions with the BASE versions. Check PSFTXFR.TXT to see the order in which the files were transferred.
• Failure in LINKEDIT of PSCOBNET with error message "Attempt to get file status for an HFS file failed..." usually results when the User ID under which the PSCOBNET job is running does not have read access to the necessary USS file.
Note. Oracle delivers procedure library members PSCOBD, PSCOBDA, and PSCOBDE, which set the DB2 precompiler options DATE(ISO) and TIME(ISO). Do not change these settings, because PeopleSoft applications rely on the ISO format for date and time processing.
Task 5-9: Compiling and Link-Editing COBOL
Submit HLQ.PPVVV.JCLLIB(PSCOB*) to compile COBOL programs.
Note. Previous versions of PSCOB had to be manually divided into multiple jobs if they contained more than 125 COBOL programs to compile. This step is now done by the Server Transfer process, which will create the PSCOB* members.
Next, serialize compile jobs to avoid problems associated with concurrent PDS updating, and submit the PSCOB job(s). Acceptable return codes are 0 or 4 for pre-compiles and compiles, and 0 for the link-edit step.Common compile errors include:
• Users inadvertently introducing tab characters to source code while viewing them using workstation editors before file transfer. Check to see if you have X'05' (or other odd hex values) in the z/OS source.
• Failure to transfer all the BASE and z/OS copy members from the file server, or perhaps overlaying the z/OS versions with the BASE versions. Check PSFTXFR.TXT to see the order in which the files were transferred.

Setting Up the Batch Environment on z/OS Chapter 5
152 Copyright © 2018, Oracle and/or its affiliates. All Rights Reserved.
Task 5-10: Changing the IBM Enterprise COBOL Compiler Version
After you have run the PeopleSoft Server Transfer program, pstrans.exe, use this procedure if you want to change the version of the IBM Enterprise COBOL compiler manually.1. Locate the following procs in the COBOL PROCLIB (that is, HLQ.PPVVV.PROCLIB):
• For IBM Enterprise COBOL for z/OS V6.1, PSSTCCN5 and PSOPTCN5
Note. IBM Enterprise COBOL for z/OS V6.1 uses PSSTCCN5 and PSOPTCN5 since the parameters haven't changed between versions V5.1 and V6.1.
• For IBM Enterprise COBOL for z/OS V5.1, PSSTCCN5 and PSOPTCN5
• For IBM Enterprise COBOL for z/OS V4.2, PSSTCCN4 and PSOPTCN4
2. Make backup copies of PSSTCCOB and PSOPTCOB.
3. To use IBM Enterprise COBOL for z/OS V5.1 or V6.1, perform these steps on TSO:
a. Copy PSSTCCN5 to PSSTCCOB, overwriting the proc PSSTCCOB with PSSTCCN5.
b. Copy PSOPTCN5 to PSOPTCOB, overwriting the proc PSOPTCOB with PSOPTCN5.
4. To use IBM Enterprise COBOL for z/OS V4.2, perform these steps on TSO:
a. Copy PSSTCCN4 to PSSTCCOB, overwriting the proc PSSTCCOB with PSSTCCN4.
b. Copy PSOPTCN4 to PSOPTCOB, overwriting the proc PSOPTCOB with PSOPTCN4.
5. Compile COBOL programs as done previously; that is, run PSCOBDA.JCL, PSCOBDE.JCL, and PSCOBNET.JCL.
6. To confirm the COBOL compiler version, review the JCL output.
The COBOL compiler version 4.2, 5.1, or 6.1 is included in the JOB output.

Copyright © 2018, Oracle and/or its affiliates. All Rights Reserved. 153
Chapter 6
Creating a Database
This chapter discusses:
• Understanding Database Creation
• Planning Your Installation
• Transferring DDL Scripts to z/OS
• Creating PS.PSDBOWNER Table
• Granting Privileges on PS.PSDBOWNER
• Granting Privileges to Owner ID
• Creating DB2 Databases, Storage Groups, and Tablespaces
• Creating Tables
• Configuring the DB2 Connect Gateway
• Creating Data Mover Import Scripts
• Running Data Mover Import Scripts
• Cleaning Up Orphaned Language Data
• Checking the Log Files and Troubleshooting
• Creating Indexes
• Running the DB2 RUNSTATS Utility
• Creating PeopleSoft Views
• Building Temporary Tables
• Creating PeopleSoft Triggers
• Running Additional Data Mover Scripts
• Running SQR Reports
• Updating PeopleSoft System Tables
• Binding DB2 Plans
• Changing the Base Language
• Checking the Database
• Disabling %UpdateStats
Understanding Database Creation
This section describes the tasks required to create a PeopleSoft product database. During a standard PeopleSoft installation you will execute these tasks to create two distinct types of databases.

Creating a Database Chapter 6
154 Copyright © 2018, Oracle and/or its affiliates. All Rights Reserved.
• System: The System (SYS) database has no company specific data, and can be used to load your data and begin development of your production database.
• Demo: The Demo (DMO) database contains data for a sample company, and can be used immediately for demonstration, for testing, and as a development reference.
Note. The PeopleTools System Database (PTSYS) is not available with the current release. As an alternative, install the latest PeopleSoft Interaction Hub database.
Note. If you are using the PeopleSoft Upgrade Source Image, you must create a Demo database.
The requirements for these databases vary, so not all of this section's tasks apply to each database. The instructions will note any distinctions between creating a Demo and a System database.
• You must have installed the Database component of your PeopleSoft application installation software to your database server.
• You must have the PeopleTools Development Environment set up to create your database.
Important! Do not forget that application-specific installation steps are provided in a separate document specific to the application. For instance, if you are performing PeopleSoft CRM installation, you need both this documentation for the basic installation of PeopleSoft PeopleTools and the PeopleSoft Application, and any additional instructions provided by CRM. Search in My Oracle Support for the installation documentation specificto your application.
See Also
"Preparing for Installation," Planning Database Creation"Setting Up the Install Workstation"
Planning Your Installation
This section discusses:
• Using %UpdateStats
• Using Temporary Tables
Note. Two features that impact how you install your PeopleSoft database are the %UpdateStats MetaSQL function, and the Application Designer Object Type of "Temporary Table."
Using %UpdateStats%UpdateStats is an optional feature that lets you invoke the DB2 Utility RUNSTATS from within an Application Engine or COBOL process. Consider the following if you plan to use %UpdateStats:
• You can initiate RUNSTATS dynamically via the IBM stored procedure DSNUTILS. Before you can use %UpdateStats, the stored procedure DSNUTILS must be configured in the DB2 subsystem in which you run the PeopleSoft applications. If %UpdateStats is enabled but DSNUTILS is not in place, a processing error willresult. Please refer to your IBM Systems documentation for instructions on enabling and configuring the DSNUTILS stored procedure.
• Using %UpdateStats with COBOL requires modifications to some delivered PeopleSoft code. These modifications are described in the PeopleTools: Data Management product documentation.

Chapter 6 Creating a Database
Copyright © 2018, Oracle and/or its affiliates. All Rights Reserved. 155
• %UpdateStats can be enabled or disabled based on the DBFLAGS Process Scheduler configuration parameter.Disabling %UpdateStats will cause the functionality to be bypassed, without causing any processing errors. Note that the default setting for DBFLAGS for UNIX and Windows Process Schedulers is ON (DBFLAGS=0). The default setting for USS is DBFLAGS=0 (Enable Second DB Connection).
• The %UpdateStats MetaSql targets a table, whereas the DB2 z/OS RUNSTATS utility processes at the tablespace level. This can present a performance issue with the default PeopleSoft database installation strategy, which combines multiple tables into a single tablespace. To alleviate this issue and assist you in installing your database to optimally utilize the %UpdateStats feature, consider using the PeopleSoft Tablespace DDL Automation Tool (PSTAAT). PSTAAT can be used to better optimize the mapping of tables among tablespaces and databases.
See Appendix: "Using The PeopleSoft Tablespace DDL Automation Assistance Tool" for more details.
The scripts that are required for PeopleSoft products are listed in the section "Transferring DDL Scripts to z/OS".
Using Temporary TablesTemporary tables are an object type defined in Application Designer to support Application Engine concurrent processing. For PeopleSoft installations, we refer to these objects as temporary tables, but to the DB2 z/OS database they will be defined as "permanent" SQL tables. Each temporary table defines a base table from which additional instances or copies of the base table are scripted and physically created on your DB2 z/OS PeopleSoft database. Only the definition of the base table is stored in Application Designer. The actual number of instances isgoverned by a global value for Online concurrent processes, and a value defined either at a Global level (for EPM) or at the Application Engine Process Level for batch processes. See PeopleTools: Application Engine.In an attempt to limit the number of potentially unused objects created on your database, we have reduced the number of temporary table instances to a minimum setting. Depending on the actual products you are installing, your processing characteristics and workloads, you may need to modify the number of temporary table instances to improve performance. This will become evident if you have a number of processes queuing to use a limited number of temporary table instances. The actual scripting and creation of the temporary tables are performed as a separate step in the installation process, so you may intervene during this process to increase the number of temporary table instances if you feel you have substantial batch processing workloads and/or a large volume of online transaction processing. Temporary tables can be regenerated at any time in the life of your database, so youdon't need to determine the exact number of instances that will be right for your environment at installation time.When the number of instances of the temporary tables within the PeopleSoft application is changed, all temporarytables should be regenerated. The same values in the PeopleTools tables that are used to determine how many temporary tables instances should be created, are also used to determine how many should be available to an Application Engine process. The expectation is that the number of instances defined within the PeopleTools tablesactually exists on the database. A later task in this chapter describes how to create the temporary tables.Lastly, since each instance of a base temporary table is not defined within the PeopleTools tables, database and tablespace information is not stored for these instances. When the DDL is generated to create the base temporary table and its instances, each instance is put in the same database and tablespace as the base temporary table. To avoid concurrency issues and obtain optimal performance, each temporary table instance should also be assigned to its own unique tablespace, particularly when the temporary table is also the object of the %UpdateStats functionality, described earlier. Use the PeopleSoft Tablespace DDL Automation Assistance Tool (PSTAAT) to put the base temporary table and each of its instances in separate tablespaces. See the appendix "Using the PeopleSoft Tablespace DDL Automation Assistance Tool" for more details.

Creating a Database Chapter 6
156 Copyright © 2018, Oracle and/or its affiliates. All Rights Reserved.
Task 6-1: Transferring DDL Scripts to z/OS
If you have set up your batch environment on the z/OS mainframe following the instructions in the chapter "Setting Up the Batch Environment on z/OS," these files have already been transferred and you can skip this step.The DDL script files to create the DB2 objects for the PeopleSoft database reside in the PS_HOME\scripts or the PS_APP_HOME\scripts directory. See Defining Installation Locations in the chapter "Preparing for Installation" for information about the PS_HOME and PS_APP_HOME directories.This task requires that you manually transfer these DDL script files to z/OS. Each of these files must be customized with site-specific values and standards before you submit them either through SPUFI or DSNTEP2.To transfer DDL scripts:1. Allocate a partitioned dataset named HLQ.PPVVV.DDLLIB on z/OS, where HLQ is the highest-level dataset
qualifier, and PPVVV is the current release of your PeopleSoft software (such as HR920).
File attributes are: FB, LRECL=80, Dir Blks 10, SPACE (Primary 800 Tracks, Secondary 300 Tracks). For example, DCB=(RECFM=FB,LRECL=80,BLKSIZE=6160) SPACE=(TRK,(800,300,10)).
2. Transfer the PSDDL.SQL file from the PS_HOME\scripts directory, as a member of the HLQ.PPVVV.DDLLIB PDS library using Microsoft File Transfer Protocol (FTP).
This script contains the DDL statements to create the PS.PSDBOWNER table.

Chapter 6 Creating a Database
Copyright © 2018, Oracle and/or its affiliates. All Rights Reserved. 157
3. Transfer the following files from the PS_APP_HOME\scripts directory, as a member of the HLQ.PPVVV.DDLLIB PDS library using Microsoft File Transfer Protocol (FTP).
This table lists and gives a brief description for each script, and defines the naming convention.
Files in the PS_APP_HOME/scripts subdirectory Description
XXDDL.SQL† This script contains all the DDL statements to create database, storage groups, and table spaces
XXDDLU.SQL† This script contains all the DDL statements to create database, storage groups, and table spaces for a UNICODE database.
TBDDL.SQL This script contains all the CREATE TABLE statements for the product line.
TBDDLU.SQL This script contains all the CREATE TABLE statements for the product line for a UNICODE database.
IXDDL.SQL This script contains all the CREATE INDEX statements for the product line.
† Substitute these product line values for XX:
• Use CS for PeopleSoft Campus Solutions.
• Use CR for PeopleSoft Customer Relationship Management.
• Use LM for PeopleSoft Enterprise Learning Management.
• Use PF for PeopleSoft Enterprise Performance Management.
• Use EP for PeopleSoft Financials/Supply Chain Management.
• Use EA for PeopleSoft Financials/Supply Chain Management Argentina.
• Use EB for PeopleSoft Financials/Supply Chain Management Brazil.
• Use HC for PeopleSoft Human Capital Management.
• Use PA for PeopleSoft Interaction Hub (Portal Solutions).
Task 6-2: Creating PS.PSDBOWNER Table
You can skip this step if a PS.PSDBOWNER table already exists in the same DB2 subsystem as your new database. This would be the case if you already have an existing PeopleSoft database in the target DB2 subsystem. You will have one PS.PSDBOWNER table per subsystem.Edit and execute HLQ.PSvvv.DDLLIB(PSDDL) using SPUFI or DSNTEP2. The PS.PSDBOWNER must exist ineach DB2 subsystem where PeopleSoft databases will be installed and it is the only table that Oracle provides for PeopleSoft software where an OWNERID cannot be customized. PeopleSoft PeopleTools applications select fromthis table to obtain the Owner ID and Database Name information during the PeopleSoft Sign-on process.
Note. For UNICODE databases, it is not necessary to use the CCSID=UNICODE option of the Create Database statement when creating the PSOWNRDB (this contains the PS.PSDBOWNER table). IBM supports the use of Unicode, EBCDIC, and ASCII tables in the same subsystem, and the ability to join data using any of these encoding schemes in DB2 for z/OS New Function Mode.

Creating a Database Chapter 6
158 Copyright © 2018, Oracle and/or its affiliates. All Rights Reserved.
Task 6-3: Granting Privileges on PS.PSDBOWNER
Grant the ALL authority to the table owner ID used for the PeopleSoft database:GRANT ALL ON TABLE PS.PSDBOWNER TO <Owner_ID> WITH GRANT OPTION;
Task 6-4: Granting Privileges to Owner ID
Before creating your DB2 databases, make sure the owner ID has authorization to use the following DB2 resources:Grant use of bufferpool to the Owner ID:GRANT USE OF BUFFERPOOL BP1 TO <Owner_ID>;GRANT USE OF BUFFERPOOL BP2 TO <Owner_ID>;GRANT USE OF BUFFERPOOL BP3 TO <Owner_ID>;GRANT USE OF BUFFERPOOL BP32K TO <Owner_ID>;
Task 6-5: Creating DB2 Databases, Storage Groups, and Tablespaces
This section discusses:
• Understanding DB2 Databases, Storage Groups, and Tablespaces
• Customizing the Database Name
• Working with Tablespaces
Understanding DB2 Databases, Storage Groups, and TablespacesOracle delivers a generic script to create the DB2 for z/OS storage groups, database shells and tablespaces. Unlessyou are installing the System (SYS) or Demo (DMO) database using the generic defaults in the script, you need toedit various parameters to comply with the standard at the customer site. These parameters include:
• Storage group names and volumes (if you have already created stogroups, you may comment out the statements in the script to create them)
• Database names
• Tablespace names
• Bufferpool names
• Owner_ID

Chapter 6 Creating a Database
Copyright © 2018, Oracle and/or its affiliates. All Rights Reserved. 159
Note. There is a SET CURRENT SQLID = 'OWNER#ID' statement in the script. It is recommended that the Current SQLID be set to the ID that will be used to "own" all the database tables (even though no tables are being created in this step). This will either be the Secondary Authorization ID, if using Secondary Authorization ID processing, or the Primary Authorization ID, if not. (In the scripts to create the tables found in the next step, this value is referred to as OBJ#OWNER). The "CREATOR" field in the SYSIBM.SYSTABLESPACE catalog table will be the same value as the "CREATOR" field in the SYSIBM.SYSTABLES catalog table. Having these two fields being the same value will facilitate running the optional SQR SETDBNAM and creating the temporary tables, mentioned later in the chapter.
The following instructions detail where to make these edits as necessary.
• Using SPUFI, DSNTEP2, or an equivalent product, create your DB2 objects (that is, databases, storage groups, and tablespaces) using the HLQ.PPVVV.DDLLIB(XXDDL/XXDDLU) file.
• Use the XXDDL version for the non-Unicode installation, and the XXDDLU version for Unicode installation.
• Use the product line values listed in the task Transferring DDL Scripts to z/OS in HLQ.PPVVV.DDLLIB(XXDDL/XXDDLU).
Task 6-5-1: Customizing the Database NameThis section discusses:
• Understanding Database Name Customization
• Editing the XXDDL.SQL or XXDDLU.SQL Script
Understanding Database Name Customization
You can customize the database name found in the CREATE DATABASE statements to your organization standards. However, make note of the database names you change because you will have to make corresponding changes to the DDL scripts for creating the tables. Because of the large number of objects delivered in the database, and to facilitate performance, multiple physical databases are deployed to contain the single, logical PeopleSoft database. The objects in the physical databases are unified into one logical database by sharing the same Owner ID (the CREATOR field in SYSIBM.SYSTABLES). For consistency, and to facilitate editing, the physical database names all share a common root value of seven characters. A unique eighth character is appended to the root name, resulting in a distinct database name. As an example, the Human Capital Management product is delivered with a "root" value of PSHRDMO for the database name. The actual physical database names include PSHRDMO, PSHRDMOB, PSHRDMOH, PSHRDMOP, PSHRDMOT, PSHRDMO1 and PSHRDMO2. The PeopleSoft applications contain a substantial number of DB2 objects, and we do not recommend putting all these objects into a single database. Doing so will require an inordinately large EDM pool size, and will produce undesirable results in your DB2 system. Note also that the PTPRC tablespace is assigned to its own database PSxxDMOT. This tablespace contains all the tables used by Process Scheduler. Combining these tables in one of the other databases could potentially cause the lockout of other processes, such as DB2 utilities running concurrently with Process Scheduler. Beginning with PeopleSoft PeopleTools 8.53, the tablespace PSIMAGE2 is delivered and is assigned to its own database PSXXDMOX, where XX refers to application-specific product identifiers. This tablespace contains tables with PeopleSoft Long data types.See PeopleTools 8.53 Release Notes, My Oracle Support.

Creating a Database Chapter 6
160 Copyright © 2018, Oracle and/or its affiliates. All Rights Reserved.
See the information on creating field definitions in the PeopleTools: Application Designer Developer's Guide product documentation.Finally, note that several tablespaces specify LOCKSIZE ROW. If any tables we deliver within these tablespaces are moved, they should only be moved to a tablespace that was defined with row-level locking.
Note. Use the PeopleSoft Tablespace DDL Automation Assistance Tool (PSTAAT) to customize the physical database names that constitute your logical PeopleSoft database. See the appendix "Using the PeopleSoft Tablespace DDL Automation Assistance Tool" for more details.
Editing the XXDDL.SQL or XXDDLU.SQL Script
To edit the XXDDL.SQL (or XXDDLU.SQL for Unicode) script, edit the CREATE STOGROUP statements to site-specific values. Storage group name defaults are PSSGTSxx and PSSGIXxx for tablespaces and index spaces,respectively, but you can change them to comply with your organization's standards. You may also comment out the CREATE STOGROUP statements if you have already established Stogroups on your DB2 subsystem, but youwill still need to edit the CREATE TABLESPACE statements with your site-specific Stogroup value.Verify that your XXDDL.SQL or XXDDLU.SQL script includes the following statements:
Note. You can also copy these statements from the PTDDL.SQL (EBCDIC) or PTDDLU.SQL (Unicode) scripts.
• To create the PSXXDMOX database for EBCDIC databases:
CREATE DATABASE PSXXDMOX STOGROUP PSSGTSPT ; COMMIT;
To create the PSXXDMOX database for Unicode databases:
CREATE DATABASE PSXXDMOX STOGROUP PSSGTSPT CCSID UNICODE; COMMIT;
• To grant permissions to the PSXXDMOX database, for EBCDIC or Unicode databases:
GRANT DBADM ON DATABASE PSXXDMOX TO OBJOWNER; COMMIT; SET CURRENT SQLID='OBJOWNER'; COMMIT;
• To create the PSIMAGE2 tablespace, for EBCDIC or Unicode databases:
CREATE TABLESPACE PSIMAGE2 IN PSXXDMOX USING STOGROUP PSSGTSPT PRIQTY 172800 SECQTY 8640 FREEPAGE 0 PCTFREE 10 SEGSIZE 32 BUFFERPOOL BP32K LOCKSIZE ANY CLOSE NO ; COMMIT;
We highly recommend that you use standard PeopleSoft tablespace names when installing the demonstration database to simplify the installation process. The script contains the GRANT DBADM commands for each DB2 database you plan to create for your PeopleSoft database. This is the easiest way to grant the required privileges to the owner ID. This enables the owner ID to perform other tasks, such as starting and stopping the PeopleSoft database, and running DB2 utilities such as RUNSTATS.

Chapter 6 Creating a Database
Copyright © 2018, Oracle and/or its affiliates. All Rights Reserved. 161
Note. References to owner ID in this document, and in the accompanying scripts, refer to the DB2 Secondary Authorization ID if using Secondary Authorization ID processing, or to the DB2 Primary Authorization ID, if not.
The options are to grant DBADM to the Owner ID or to issue individual grants for the following:
• Grant bind capability to the Owner ID:
GRANT BINDADD TO <Owner_ID>;
• Grant create tablespace capabilities to the Owner ID:
GRANT CREATETS ON DATABASE <database_name> TO <Owner_ID>;
• Grant create table capability to the Owner ID:
GRANT CREATETAB ON DATABASE <database_name> TO <Owner_ID>;
Note. You may use the PeopleSoft Tablespace DDL Automation Assistance Tool (PSTAAT) to customize tablespace DDL. See the appendix "Using the PeopleSoft Tablespace DDL Automation Assistance Tool" for more details.
Task 6-5-2: Working with TablespacesThis section discusses:
• Using Tablespaces
• Following the Standard Tablespace Name Formats
• Naming Tablespace Defaults
• Parsing Tablespaces
Using Tablespaces
For tablespaces in your PeopleSoft installation, Oracle provides a strategy for Demo and System databases aimed at identifying high growth and frequently updated tables. This limits the number of tables the DBA must monitor and analyze, and simplifies capacity planning and database tuning activities. In addition, with PeopleSoft Release 8 and higher, a new type of table was introduced referred to as a temporary table. A temporary table is permanently created in the database, but its usage, by Application Engine programs, is temporary. The tables are delivered empty, but because of the potential for a volatile increase and decrease in the number of rows populating the table during the execution of a process, the temporary tables are also segregated into their own tablespaces, buffer pool, and databases. This segregation seeks to facilitate administration of these tables and tablespaces separate from the tablespaces in which the core application tables reside. For customers that elect to use the %UpdateStats functionality, use the PeopleSoft Tablespace DDL Automation Assistance Tool (PSTAAT) to place each table that is the target of the %UpdateStats function in its own tablespace. See the appendix "Using the PeopleSoft Tablespace DDL Automation Assistance Tool" for more details.
Note. For multilingual installs, the PTTBL, PTTLRG and PSIMAGE tablespaces may need to be increased in size.
Following the Standard Tablespace Name Formats
The standard tablespace names that Oracle delivers categorize tables as follows:

Creating a Database Chapter 6
162 Copyright © 2018, Oracle and/or its affiliates. All Rights Reserved.
• High growth and frequently updated tables for Applications are grouped together into tablespaces named XXLARGE, where XX is a PeopleSoft application identifier. Similarly, the PeopleTools tables identified as large tables or frequently updated tables are grouped in the PTTLRG tablespace. Depending on customer-specific requirements and environment, it may be advisable to move those tables containing the largest amount of data from this shared tablespace into their own segmented or partitioned tablespaces. This should be done for performance and concurrency reasons.
• Tables with static or relatively minimal growth are grouped into tablespaces named XXAPP, where XX is a PeopleSoft application identifier. These tablespaces are defined with a moderate free space specification.
• Tables that are classified by record type as Temporary tables are grouped into tablespaces named XXWORK, where XX is a PeopleSoft application identifier.
• Tables with rows exceeding 4K in length are placed in the PSIMAGE tablespace, which is created using a 32K buffer pool.
• Tables that benefit from row-level locking exist in the following tablespaces:
• PTPRC — Tables used by the Process Scheduler
• PTPRJWK — Tools Project Work Table
• PTAUDIT — Table used by PeopleTools Audit functionality
• PTAMSG — Tables used by Application Messaging
• PTLOCK — PSLOCK and PSVERSION tables are stored in this tablespace. These tables consist of multiple rows and are used for concurrency and version control respectively.
• PTRPTS — Tables used by Report Repository processes
• PSIMGR — Tables that benefit from row level locking that also require use of a 32K bufferpool.
• Other tablespaces exist to group tables in PeopleSoft PeopleTools by functionality (that is, PTTREE for tree tables, and PTAPPE for Application Engine tables).
Simple or partitioned tablespaces (one table per tablespace) are not supported for the initial installation, but may be implemented for demonstration and production databases using the PeopleTools Application Designer.
Naming Tablespace Defaults
The following tables lists and describes common tablespaces:
Tablespaces Comments
PTAPP, PTTBL Contain moderate sized PeopleTools tables with little expected growth.
PTTLRG Contains larger PeopleTools tables that have the potential to grow large.
PTAUDIT Contains table PSAUDIT used by PeopleTools audit functionality. Row level locking is specified for this tablespace.
PSIMAGE Contains PeopleSoft Application and PeopleSoft PeopleTools tables that contain LONG field types which require a 32KB page size.

Chapter 6 Creating a Database
Copyright © 2018, Oracle and/or its affiliates. All Rights Reserved. 163
Tablespaces Comments
PSIMAGE2 Contains PeopleSoft Application and PeopleSoft PeopleTools tables that contain LONG field types which require a 32KB page size.
PSIMGR Contains tables requiring a 32K bufferpool size that also benefit from row level locking. Row level locking is specified for this tablespace.
PTAMSG Tables used by Application Messaging. Row level locking isused for this tablespace.
PTAPPE Tables used for Application Engine. Please note that other AE tables exist in PSIMAGE because they require 32K bufferpool.
PTLOCK Contains PSLOCK and PSVERSION. Row level locking is used for this tablespace.
PTTREE Contains tables specific to PeopleTools trees.
PTPRC All tables used by Process Scheduler. Row level locking is used for this tablespace.
PTPRJWK Contains table PSPROJECTWRK. Row level locking is used for this tablespace.
PTRPTS Contains tables associated with Report Repository functionality. Row level locking is used for this tablespace.
XXWORK Contain PeopleSoft PeopleTools and PeopleSoft Application"temporary" tables.
XXLRG Application tablespaces containing tables identified as high growth and high update, where the xx corresponds to the two-character application identifier (FS, PC, AF, and so on).
XXAPP Application tablespaces identified as static or with the potential for relatively minimal growth, where the xx corresponds to the two-character application identifier (FS, PC, AF, and so on).
XXIMAGE Contain Application tables requiring 32K buffer pool size.

Creating a Database Chapter 6
164 Copyright © 2018, Oracle and/or its affiliates. All Rights Reserved.
Parsing Tablespaces
In this multiple database strategy, the tablespaces are distributed to different databases based on the key application group within the product line. This parsing strategy serves as a good starting point to build a PeopleSoft database in your development environment. We recommend that you install the Demonstration database with the delivered strategy to expedite the database creation. You may consider tailoring the delivered DDL script files to implement your own strategy to build your System PeopleSoft database.Below are some guidelines that were used in determining a parsing strategy:
• PeopleSoft PeopleTools tablespaces are created in a "root" database, with one exception ("root" being the seven-character database name without addition of the eighth character).
• Tablespace PTPRC (also a PeopleSoft PeopleTools tablespace) is placed in its own database, with an added eighth character of T, to avoid contention between Process Scheduler and any other processes that may be running.
• Tablespace PSIMAGE2 (shared between PeopleSoft Application and PeopleSoft PeopleTools tablespaces) is assigned to its own database PSXXDMOX.
Refer to the summary found in the specific XXDDL.SQL script, for the exact database or tablespace parsing strategy for the Product Line.
Note. You can further improve performance by remapping tables to additional tablespaces, and tablespaces to additional databases with the PeopleSoft Tablespace DDL Automation Assistance Tool (PSTAAT). Consult the appendix "Using the PeopleSoft Tablespace DDL Automation Assistance Tool" to help you plan a strategy for implementing production PeopleSoft databases.
See PeopleTools: Data Management.
Task 6-6: Creating Tables
The CREATE TABLE statements to build the tables for the application group are in Partitioned Data Set HLQ.PPVVV.DDLLIB. To create the tables, use TBDDL for non-Unicode databases, and TBDDLU for Unicode databases. If any changes were made to the names of the databases or tablespaces in the HLQ.PPVVV.DDLLIB(XXDDL) or HLQ.PPVVV.DDLLIB(XXDDLU) script, you must make the same parameter changes to the file you will use to create the tables. The key values you need to modify are:
• Owner#ID — This value equates to the "CREATOR" field in the SYSIBM.SYSTABLES catalog table and is offered to facilitate Secondary Authorization ID processing.
• OBJ#OWNER — This value should equate to the CREATOR field in the SYSIBM.SYSTABLES catalog table.
• Database names
• Tablespace names — Only if you changed the default names specified in the HLQ.PPVVV.DDLLIB(XXDDL) or HLQ.PPVVV.DDLLIB(XXDDLU) script.
After reviewing all your changes, submit this file, preferably through DSNTEP2, since this task will take betweenone and two hours.
Warning! By default DSNTEP2 allows 10 errors, failing on the 11th error. Allowing 10 errors before the script stops could leave your database in an inconsistent state. It is important that your script stop at the first error so youcan assess the problem, fix it and resubmit the job. You may want to change the default for DSNTEP2 to fail on the first error or use SPUFI to submit the TBDDL.

Chapter 6 Creating a Database
Copyright © 2018, Oracle and/or its affiliates. All Rights Reserved. 165
Note. You may use the PeopleSoft Tablespace DDL Automation Assistance Tool (PSTAAT) to optimize the default installation DDL scripts (XXDDL, XXDDLU, TBDDL) for a production environment. See the appendix "Using the PeopleSoft Tablespace DDL Automation Assistance Tool" for more details.
Task 6-7: Configuring the DB2 Connect Gateway
Because subsequent installation tasks require connectivity to the remote database, you now need to configure the DB2 Connect Gateway, cataloging an alias for the PeopleSoft database. You also need to perform any additional tasks required for connectivity that you didn't already complete during preparation. For instructions on performingthese tasks, see the appendix "Installing and Configuring DB2 Connect." For details on DB2 Connect configuration, refer to your IBM DB2 Connect documentation.
Task 6-8: Creating Data Mover Import Scripts
This section discusses:
• Understanding Data Mover Import Scripts
• Working with Multilingual Databases
• Running Database Setup to Create Data Mover Import Scripts
Understanding Data Mover Import ScriptsThe Data Mover Import scripts are used to populate the PeopleSoft database with data. You use the Database Setup feature of the PeopleSoft Data Mover utility to create the Data Mover import scripts.You must perform this procedure for each type of database that you create (System and Demo databases). Also, if your database supports Unicode, you must decide whether to use an Unicode or EBCDIC database before carrying out this procedure.See PeopleTools: Global Technology.To complete the database creation procedure you must supply information on various authorization IDs and passwords, including Access ID, Connect ID, Symbolic ID, and User IDs. Before beginning this procedure, review the information in the section Planning Database Creation and make a note of the authorization information for your environment. For PeopleSoft PeopleTools 8.53 and later releases, the user profiles in PeopleTools demo databases are delivered disabled. During the procedure to create Data Mover import scripts you will choose whether to enable the delivered user profiles, and how to assign passwords for the profiles. In addition, you will supply several passwords that were previously provided as defaults. Be sure to note the passwords that you supply, as they will be needed for subsequent installation procedures.See the information on administering user profiles in the PeopleTools: Security Administration product documentation.See "Preparing for Installation," Planning Database Creation.

Creating a Database Chapter 6
166 Copyright © 2018, Oracle and/or its affiliates. All Rights Reserved.
Task 6-8-1: Working with Multilingual DatabasesAll PeopleSoft releases are shipped with English as the database's base language. Therefore when selecting components for the Data Mover Import script, you must select the English components in addition to any other languages you are installing. After the installation is complete, you can change the database's base language to thelanguage that you plan to use most frequently, or leave the base language as English.Read the section Planning Multilingual Strategy for information on installing multiple languages and changing your base language.See "Preparing for Installation," Planning Multilingual Strategy.If you are creating a database and want to load Oracle-provided translations for non-English languages, you must load English (ENG) in addition to the foreign language components.If you are creating a non-Unicode database, you must ensure that the languages you select are all supported by thecharacter set you used to create your database.
Task 6-8-2: Running Database Setup to Create Data Mover Import ScriptsTo create the import scripts using Data Mover:See PeopleTools: Data Management.1. Run Configuration Manager by using one of the following methods:
• On Microsoft Windows 2012 R2, access the Apps screen and navigate to PeopleTools 8.56, ConfigurationManager.
• Run PS_HOME\bin\client\winx86\pscfg.exe.

Chapter 6 Creating a Database
Copyright © 2018, Oracle and/or its affiliates. All Rights Reserved. 167
2. Verify in the Signon Defaults on the Startup page that the Database Type of DB2 UDB for OS/390 is selected,as shown in the example.
Startup tab on the Configuration Manager dialog box
3. Verify that the connect ID is correct.
If you accepted all defaults, the connect ID is people. Enter and confirm a value for the connect ID password.
4. Run Data Mover by using one of these methods:
• On Microsoft Windows 2012 R2, access the Apps screen and navigate to PeopleTools 8.56, Data Mover.
• Run PS_HOME\bin\client\winx86\psdmt.exe.
5. Log on using the Access ID and password you defined in your mainframe security software application; this will start Data Mover in bootstrap mode.
See Checking the Log Files and Troubleshooting, Running Data Mover.
Note. You must limit the Access ID to eight characters or less. You must limit the Access password to 30 characters or less.

Creating a Database Chapter 6
168 Copyright © 2018, Oracle and/or its affiliates. All Rights Reserved.
See "Preparing for Installation," Planning Database Creation.
6. Select File, Database Setup.
The Database Setup dialog box appears, as shown in this example:
Selecting target database and character set on the Database Setup dialog box
7. Select your database platform from the Select Target Database drop-down list.
8. Select your database type, Unicode or non-Unicode, and character set.
Note. The database setup does not actually modify the encoding scheme of your database. That is accomplished during creation. The database setup process only creates customized scripts based on your selection.
9. Select the Demo or System radio button, depending on which type of PeopleSoft database you are installing.
Note. If you are using the PeopleSoft Upgrade Source Image, you must create a Demo database.
10. Select the Products for which you want to create a Data Mover script from the PeopleSoft Application list box, and move the items you have selected into the Data Mover Scripts to Create list box by clicking on the

Chapter 6 Creating a Database
Copyright © 2018, Oracle and/or its affiliates. All Rights Reserved. 169
Add or Add All button.
If you installed the Multilanguage software, each application will be listed several times, once for each language. If you are installing languages other than English, make sure to select the appropriate language data files for each application you select in English. This will load the translated database objects.
See "Preparing for Installation," Planning Multilingual Strategy.
If you are installing an application in any language other than English, you must also select the English component of the application. For example, if you select PeopleSoft Fin/SCM - French, you must also select PeopleSoft Fin/SCM Database - US English. This ensures that you install the necessary base-language components.

Creating a Database Chapter 6
170 Copyright © 2018, Oracle and/or its affiliates. All Rights Reserved.
11. Set the database parameters described below and then click Finish.
Specifying Database Parameters on the Database Setup dialog box
• Database Name: Specify the logical DB2 database name determined in the chapter "Preparing for Installation" in the task Planning Database Creation.
The database name must also be defined as an alias in DB2 Connect to establish a successful connection toyour PeopleSoft database, as described in the chapter "Installing and Configuring DB2 Connect."
• Symbolic ID: Specify the key to retrieve ACCESSID and ACCESSPSWD from PSACCESSPROFILE.
For initial installation set it equal to the Database Name. The Symbolic ID cannot be longer than eight characters.
• Access ID: Specify the PeopleSoft Access ID defined in the chapter "Preparing for Installation" in the taskPlanning Database Creation.
This is also the User ID value with which you should be currently logged on to Data Mover. This value is case sensitive.
• Access Password: Specify the PeopleSoft Access Password defined in the chapter "Preparing for Installation" in the task Planning Database Creation.
This is also the User password value with which you should be currently logged on to Data Mover.

Chapter 6 Creating a Database
Copyright © 2018, Oracle and/or its affiliates. All Rights Reserved. 171
• Connect ID: For DB2 for z/OS, specify the Connect ID that can be used for the initial connection to DB2 for z/OS. This ID is used for connecting to the database.
Note. The Connect ID must be defined as a valid logon ID in the database security management software. The Connect ID only needs to be granted SELECT access on PS.PSDBOWNER, PSACCESSPROFILE, PSOPERDEFN, and PSSTATUS. This ID should be granted no other database authorities.
• Application Server ID: The Application Server ID has privileges to start or shut down the Application Server domain. It is also used during the Application Server configuration. Enter one of the delivered PeopleSoft user IDs.
• Application Server Password: Specify a password for the Application Server ID.
• Web Server Password: Specify a password for the Web Server ID.
The default Web Server ID, as displayed in the example, is PTWEBSERVER. The Web Server ID, also referred to in this documentation as Web Profile User ID, is used to access the web profile information from the database through the Application Server Jolt service.
• Enable All Profiles: Select this check box to leave the User profiles (other than the Application Server profile and the Web Server User profiles) unchanged.
If you do not select this option, all of the User profiles in the database, with the exception of the Application Server profile and Web Server User profiles, remain disabled as delivered.
• Set Global Password: If you enabled all profiles, you can choose to set the same password for all of the profiles.
Note. This option is enabled when the Enable All Profiles option is selected, as shown in the example.
• Global Password: Enter the password to be used for all user profiles.
Note. This option is enabled when the Set Global Password option is selected, as shown in the example.
• Table Owner: The name of the table owner ID determined in the chapter "Preparing for Installation" in the task Planning Database Creation.
This value will populate the CREATOR field in the system catalog table SYSIBM.SYSTABLES. It is thisvalue that identifies all the tables as belonging to the logical PeopleSoft database.
• Index Storage Group: Specify the storage group where the index spaces will be created.
Later you have to edit the delivered script IXDDL.SQL with this value.
• Tablespace Storage Group: Specify the storage group for tablespaces.
This value must be the same as that used in the XXDDL.SQL/XXDDLU.SQL script described earlier whenthe Tablespaces were created.

Creating a Database Chapter 6
172 Copyright © 2018, Oracle and/or its affiliates. All Rights Reserved.
12. Select your database's base language.
Note. This window appears only if you selected a database for a language other than English. If you see this window it is critical to select the correct base language. When you select a base language other than ENG, DBSETUP generates the Data Mover import script with the SWAP_BASE_LANGUAGE command to swap the base language.
See "Preparing for Installation," Planning Multilingual Strategy.
See Working with Multilingual Databases.
Selecting a base language in the Database Setup dialog box
Use the following information in making your selection:
• If you have not already done so, read the earlier section on multilingual strategy before determining whether to install multiple languages and whether to change your base language.
• If you are creating a database and want to load Oracle-provided translations for non-English languages, you must load English (ENG) in addition to the foreign language components.
• All PeopleSoft releases are shipped with English as the database's base language. Therefore when selecting components for the Data Mover Import script, you must select the English components in addition to any other languages you are installing. During the Database Setup wizard, you need to select the database's base language that you plan to use most frequently. If your database's base language is different than the Database Setup wizard generate the SWAP_BASE_LANGUAGE command in the Data Mover Import script to swap the language.
• If you are creating a non-Unicode database, you must ensure that the languages you select are all

Chapter 6 Creating a Database
Copyright © 2018, Oracle and/or its affiliates. All Rights Reserved. 173
supported by the character set you used to create your database.
13. Click Finish.
Note. If the Database Setup - Base Language window does not appear, click Finish after supplying the parameters on the Database Setup - Database Parameters window.
A script <dbname>dbo.dms is created in the PS_HOME\scripts directory, and the script is displayed in the Data Mover input window. The log files will be written to the location you have specified for the Data Mover Log Directory in the Configuration Manager profile.
Note. If you selected a Database Type of System in the Database Setup dialog box (above), you must use the Data Mover DBSPACE command to properly override the default database names in the generated Data Mover script (script <dbname>dbo.dms). The appendix "Extracting DDL for PTSYS Database" discusses a sample script that you can use to customize the database names for your location. Refer to this appendix for information on creating a PTSYS database.
See Also
PeopleTools: Data ManagementPeopleTools: Security Administration, "PeopleSoft Authorization IDs""Extracting DDL for PTSYS Database"
Task 6-9: Running Data Mover Import Scripts
This section discusses:
• Understanding Data Mover Import Scripts
• Populating Tables in the PeopleSoft Database
Understanding Data Mover Import ScriptsNow you will run the Data Mover scripts (DMS) that you created in the preceding task to import the data for yourPeopleSoft database. The Data Mover script creates either a system (SYS) or a demo (DMO) database.When you initially logged onto Data Mover to create the DMS scripts, you logged in with the Access ID and password, using bootstrap mode. You need to use bootstrap mode to run the Data Mover import script, because there are not yet any PeopleSoft security tables in the database.
Note. You should already be signed on in bootstrap mode from having completed the previous task.
Verify that the same Connect ID was used in the Database Setup, and Configuration Manager panel. If you accepted all defaults, the Connect ID is people.See PeopleTools: Data Management.
Warning! The Data Mover utility uses the INSERT SQL command to populate all the tables in PeopleSoft database. Notify your systems programmer and operations staff that this activity will generate more DB2 z/OS logging activity than usual.

Creating a Database Chapter 6
174 Copyright © 2018, Oracle and/or its affiliates. All Rights Reserved.
See Also
Checking the Log Files and Troubleshooting, Running Data Mover
Task 6-9-1: Populating Tables in the PeopleSoft DatabaseTo populate tables in the PeopleSoft database:1. The DMS import script for your application will contain hard-coded file names for log files and data files.
Modify the DMS script if you have moved any files from the delivered directories or want to write log files to another location than that specified in the script.
2. If you have logged out of Data Mover after creating the DMS script, log back on again in Bootstrap mode; otherwise skip the next instruction.
3. Choose File, Open to open the DMS script you created earlier.
Browse the directory where the script was created: PS_HOME\scripts. Open the DMS script with the name <dbname>DBO.dms, where <dbname> is the name of the database you provided when creating the script.
4. One of the statements in the script grants select authority on PS.PSDBOWNER to the Connect ID.
GRANT SELECT ON PS.PSDBOWNER TO <Connect ID>;
5. If you have not granted the Access ID (the ID that you used to log on to Data Mover to execute the script) a level of authority that would permit it to execute this statement, the Data Mover script will fail and stop at the statement.
You can exercise three options to prevent this failure:
• Grant SELECT access on PS.PSDBOWNER to PUBLIC, and remove this GRANT statement from the script.
• Remove this GRANT statement from the script and perform it later with an ID that is authorized to issue grants on PS.PSDBOWNER.
• Grant authority to the Access ID to grant access on PS.PSDBOWNER to other user IDs.
6. Select File, Run to execute the script.
When you run the script, Data Mover typically performs the following actions:
• IMPORT *
Load data into PeopleTools and application tables.
• ENCRYPT_PASSWORD *
Encrypt security information for the database.
Task 6-10: Cleaning Up Orphaned Language Data
Perform this task if you are a Multilingual customer and are installing non-English languages. This task assumes that you have loaded the necessary language files. If you have not yet loaded the language files, follow the instructions in the Global Technology product documentation.See PeopleTools: Global Technology, "Adding Translations to an Existing Database on the Same PeopleTools Version."

Chapter 6 Creating a Database
Copyright © 2018, Oracle and/or its affiliates. All Rights Reserved. 175
The Application Engine program PTIACLEANLNG removes any orphaned related language objects that do not have a matching base language object.1. Run the following SQL statement using the appropriate SQL query tool for your RDBMS.
For <Log Path>, specify the path where you want the log for the application engine program in step 2 to be generated, such as c:\temp\.
set current sqlid = '<db owner name>'; UPDATE PS_PTIASPDMPARAM SET PTIASPPROPVAL ='<Log Path>' WHERE⇒ PTIASPPROPNM='DMLOGPATH';
2. Run the PTIACLEANLNG application engine program.
From the command line utility, the syntax is::
<PS_HOME>\bin\client\winx86\psae -CD <dbname> -CT DB2ODBC -CO <oprid> -⇒CP <pswd> -R <run_control> -AI PTIACLEANLNG
Use the values for the database name and user ID that you entered on the startup tab of the Configuration Managerfor <dbname> and <userid> respectively. However, be aware that <userpswd> is not the same as the connect password you entered on the Configuration Manager startup tab. Enter a value for <userpswd> that is the password associated with the <userid>.
Task 6-11: Checking the Log Files and Troubleshooting
This section discusses:
• Checking the Log Files
• Running Data Mover
• Troubleshooting
• Improving Performance
• Improving Execution
Task 6-11-1: Checking the Log FilesAfter running each Data Mover script, examine the .LOG files to make sure that all the commands were executed successfully. The log files are located in the directory you specified in the Data Mover script.This is the same directory you specified for the Data Mover Log Directory in the Configuration Manager profile, unless you edited this location in the DMS script.See "Setting Up the Install Workstation," Editing the Default Profile.
Task 6-11-2: Running Data MoverUse one of these methods to run Data Mover.Microsoft Windows
• On Microsoft Windows 2012 R2, access the Apps screen, and navigate to PeopleTools 8.56, Data Mover to run a graphical user interface (GUI mode).
• Run PS_HOME\bin\client\winx86\psdmt.exe from the command line.

Creating a Database Chapter 6
176 Copyright © 2018, Oracle and/or its affiliates. All Rights Reserved.
On UNIX, run PS_HOME/bin/psdmtx from the command line.If you use the access ID that you specified during the database configuration to log on, you log on in "bootstrap mode." When you start Data Mover in bootstrap mode, the word "BootStrap" appears in the Data Mover status bar.If you use a valid PeopleSoft Operator ID, such as PS for Human Capital Management or VP1 for Financials/Supply Chain Management, you log on in "user mode." In this mode, no designation appears in the Data Mover status bar.
See Also
PeopleTools: Data Management
Task 6-11-3: TroubleshootingIf the DMS script has stopped midway (this can happen for a number of reasons) you need to edit the script and start again.To edit and restart the DMS script:1. Determine the record that was being imported (that is, which IMPORT command was running) when the
script stopped, and use the following guidelines to edit and rerun the DMS scripts.
When building a DMO database or a multilingual database, adding the SET START statement can be tricky because the Data Mover script used to load the database will include more than one IMPORT statement. The key is to view the log files and determine which IMPORT section of the script Data Mover failed on.
• If the failure occurred during the first IMPORT statement, add the SET START statement before the first IMPORT *; statement.
• If the failure occurred during a subsequent IMPORT statement, comment out all statements preceding the IMPORT *; statement where the failure occurred and add the SET START statement before the IMPORT *; statement of the section in which the failure occurred.
• This is very important: If you see any "unique index constraint" error messages in the "Building required indexes" section, or in the "Creating Indexes" section later in this chapter, your IMPORT script failed during a subsequent IMPORT but the SET START statement was added to the first IMPORT. In this situation, you can run the Data Mover script in its originally generated form, with only one modification. In the first IMPORT section, change the statement "IMPORT *;" to "REPLACE_DATA *;". This will delete all the data in the tables, and re-import it. This process will take some time to run, and you will needto separately create each of the indexes that failed.
2. Run Data Mover as previously described.
See Running Data Mover.
The PeopleSoft Logon dialog box appears.
3. Log on using the Access ID to start Data Mover in bootstrap mode.
Use the Access ID you specified when you created the Data Mover scripts with the Database Setup utility.
The input window should display the DMS import script for the database. The script has the format <dbname>dbo.dms.
4. If necessary, select File, Open, and browse to the PS_HOME/scripts directory to find the appropriate DMS script.
5. Add the following line before the offending IMPORT command (the one being executed when the failure occurred):

Chapter 6 Creating a Database
Copyright © 2018, Oracle and/or its affiliates. All Rights Reserved. 177
SET START <RECORD NAME>;
<RECORD NAME> is the name of the record that failed. Make sure to review the Data Mover log file to see where the script failed and locate the last record that imported successfully. The SET START command will begin the Data Mover import at the specified record name.
<RECORD NAME> is the PeopleSoft record name as defined in PSRECDEFN, not necessarily the same as the DB2 table name. With the exception of the PeopleSoft PeopleTools tables, most PeopleSoft record names are appended with PS_ to create the DB2 table name.
Note. It is a good idea to change the name of the log file in the script before each attempt at running it. This ensures that you have a separate log file for each attempt, if you run the import more than once.
For example, if the script stops and the table is partially inserted with a message similar to this one:
Importing PSPNLFIELDRows inserted into PSPNLFIELD
First delete the rows from the partially inserted table (for example, record) by using the DELETE FROM <table> command, and then restart Data Mover at the record that failed using the SET START command and continue the Data Mover import. This can be done in a single pass.
Add the following lines before the offending IMPORT *; command (the one being executed when the failure occurred):
SET START <RECORD NAME>;DELETE FROM <RECORD NAME>;
where <RECORD NAME> is the name of the record that failed. The SET START statement will begin the Data Mover import at the specified <RECORD NAME>.
Example of the original script:
REM - PeopleSoft Database - US English/SET LOG epengs.log;SET INPUT epengs.db;SET NO RECORD;SET NO VIEW;SET NO SPACE;SET NO TRACE;SET UNICODE ON;IMPORT *;
Example of script after modification, with changes in bold font:
REM - PeopleSoft Database - US English/SET LOG epengs2.log;SET INPUT epengs.db;SET NO RECORD;SET NO VIEW;SET NO SPACE;SET NO TRACE;SET UNICODE ON;SET START PSPNLFIELD;DELETE FROM PSPNLFIELD;IMPORT *;

Creating a Database Chapter 6
178 Copyright © 2018, Oracle and/or its affiliates. All Rights Reserved.
For the DELETE statement, for records with a recname without a leading PS, add PS_ to the beginning of the recname; otherwise the table will not be found. For example, PS_<RECNAME>.
6. Restart the script (File, Run Script).
Task 6-11-4: Improving PerformanceThe following tips can help you save time when running the Data Mover scripts:
• Run only a single instance of Data Mover, and do not have any other applications running during the import.
• In the PeopleSoft Configuration Manager, turn off all trace options.
Tracing during a DMS load will add considerable time to the process.
Task 6-11-5: Improving ExecutionData Mover, by default, commits at the end of each table. If you prefer, when running Data Mover, you can include a SET COMMIT command (such as SET COMMIT 5000) to force a commit after the specified number of rows have been inserted into the table. However, if you use this option, and Data Mover ends abnormally again, you must mass delete the rows contained in the current table.If the script stops and the table is partially inserted with the message below:Importing PSPNLFIELDRows inserted into PSPNLFIELD5000, 10000, 15000
Bypass the record using the SET START AFTER command and complete the import. In a second pass, import thepartially inserted table using this command:Replace_data <record_name>;
Task 6-12: Creating Indexes
All DDL statements to create the indexes for your application are located in the HLQ.PPVVV.DDLLIB(IXDDL) file. Edit the IXDDL file to make changes to the delivered DDL to customize the OWNER#ID, OBJ#OWNER, DEFINE YES, DEFINE NO, and STOGROUP values to the specific values used at your site:
Note. You may then use the IXDDL script with the PeopleSoft Tablespace DDL Automation Assistance Tool (PSTAAT) to further optimize index DDL. See the appendix "Using the PeopleSoft Tablespace DDL Automation Assistance Tool" for more details.
• OWNER#ID: The statement SET CURRENT SQLID may be used, but is not required. All objects in the CREATE INDEX statements are fully qualified.
• OBJ#OWNER: This value should equate to the CREATOR field in the SYSIBM.SYSINDEXES catalog table.
• DEFINE YES or DEFINE NO: The default for the delivered index DDL is DEFINE NO.
If you do not want to defer creation of the underlying VSAM index datasets until rows are inserted into tables (DEFINE NO), edit the IXDDL file in ISPF as follows:
change all 'DEFINE NO' to 'DEFINE YES'
or

Chapter 6 Creating a Database
Copyright © 2018, Oracle and/or its affiliates. All Rights Reserved. 179
change all 'DEFINE NO' to ' '
If you want to permanently change the delivered default for index DDL to DEFINE YES, edit the Data Mover script PS_HOME/scripts/DDLDB2.DMS by removing DEFINE NO from the end of the index model statement. Terminate the statement with a semi-colon and save the script. For example:
Original:
CREATE [UNIQUE] INDEX **OWNER**.[IDXNAME] ON **OWNER2**.[TBNAME] (⇒[IDXCOLLIST]) USING STOGROUP **STOGROUP** PRIQTY **PRIQTY** SECQTY⇒ **SECQTY** [CLUSTER] BUFFERPOOL **BUFFERPL** CLOSE NO DEFINE NO;
New:
CREATE [UNIQUE] INDEX **OWNER**.[IDXNAME] ON **OWNER2**.[TBNAME] (⇒[IDXCOLLIST]) USING STOGROUP **STOGROUP** PRIQTY **PRIQTY** SECQTY⇒ **SECQTY** [CLUSTER] BUFFERPOOL **BUFFERPL** CLOSE NO;
After you edit the script, you must run the STOREDDL.DMS script to update the index model ddl definition.
See Updating PeopleTools System Tables.
• STOGROUP
Save your changes and submit the DDL statements either through SPUFI or DSNTEP2. It is preferable to submit this in batch mode using DSNTEP2. This task can take several hours to complete, depending on the product line you are installing.If you decide to submit this through SPUFI, verify that the designated output data set is allocated with sufficient tracks or cylinders to hold the result of processing all the CREATE INDEX statements. You should consider creating a SPUFI output dataset with file attributes: VB,Record Length =4092,Blk size=4096, SPACE (Primary 20 cylinders, Secondary 5 cylinders).
Important! Do not change the name of any index. All indexes in this script are cataloged in the PeopleSoft system tables. If you change an index name, the physical index will not match the index definition stored in PeopleTools. These index discrepancies will be reported as exceptions in the DDDAUDIT report.
Task 6-13: Running the DB2 RUNSTATS Utility
It is recommended that you run the DB2 RUNSTATS utility against the xxWORK tablespaces at this point. The tables in these tablespaces are designated as temporary tables or tables against which %UpdateStats is being performed.
Note. The PeopleSoft Tablespace DDL Automation Assistance Tool (PSTAAT) isolates temporary tables to individual tablespaces named as follows: TMP00001, TMP00002 and so on. Do not run RUNSTATS against any of the TMPnnnnn tablespaces at this time because this could prove detrimental to performance. The TMPnnnnn tablespaces should also be excluded from routine RUNSTATS and other database maintenance jobs. See the appendix "Using the PeopleSoft Tablespace DDL Automation Assistance Tool" for more details.
Task 6-14: Creating PeopleSoft Views
This section discusses:
• Understanding PeopleSoft Views

Creating a Database Chapter 6
180 Copyright © 2018, Oracle and/or its affiliates. All Rights Reserved.
• Creating Views in Data Mover
• Creating Views in Application Designer
Understanding PeopleSoft ViewsWhen creating the PeopleSoft Views, you can use Data Mover or Application Designer to create the objects directly, or you may use Application Designer to generate a DDL script of SQL statements, which can then be runusing another utility such as SPUFI or DSNTEP2 and/or a User ID other than the Access ID.
Task 6-14-1: Creating Views in Data MoverTo create views in Data Mover:1. Start Data Mover in User mode using a valid PeopleSoft operator ID, for example, PS or VP1.
See Running Data Mover.
2. Select File, Open from the Data Mover menu and navigate to PS_HOME\scripts.
3. Select the script CREATEVW.dms.
4. Select File, Run to execute the script.
5. Exit Data Mover.
Task 6-14-2: Creating Views in Application DesignerTo create views in Application Designer:1. Start Application Designer; for example:
• On Microsoft Windows 7, select Start, Programs, PeopleTools 8.56, Application Designer.
• On Microsoft Windows 8 or 2012 R2, access the Apps screen and navigate to PeopleTools 8.56, Application Designer.
• Run PS_HOME\bin\client\winx86\pside.exe.
2. Create a new project. Choose File, New, and then select Project from the New dialog.
3. Insert all PeopleTools view records into the project:
a. Choose Insert, Definitions into Project. The Insert into Project dialog box appears.
b. Select a Definition Type of Records.
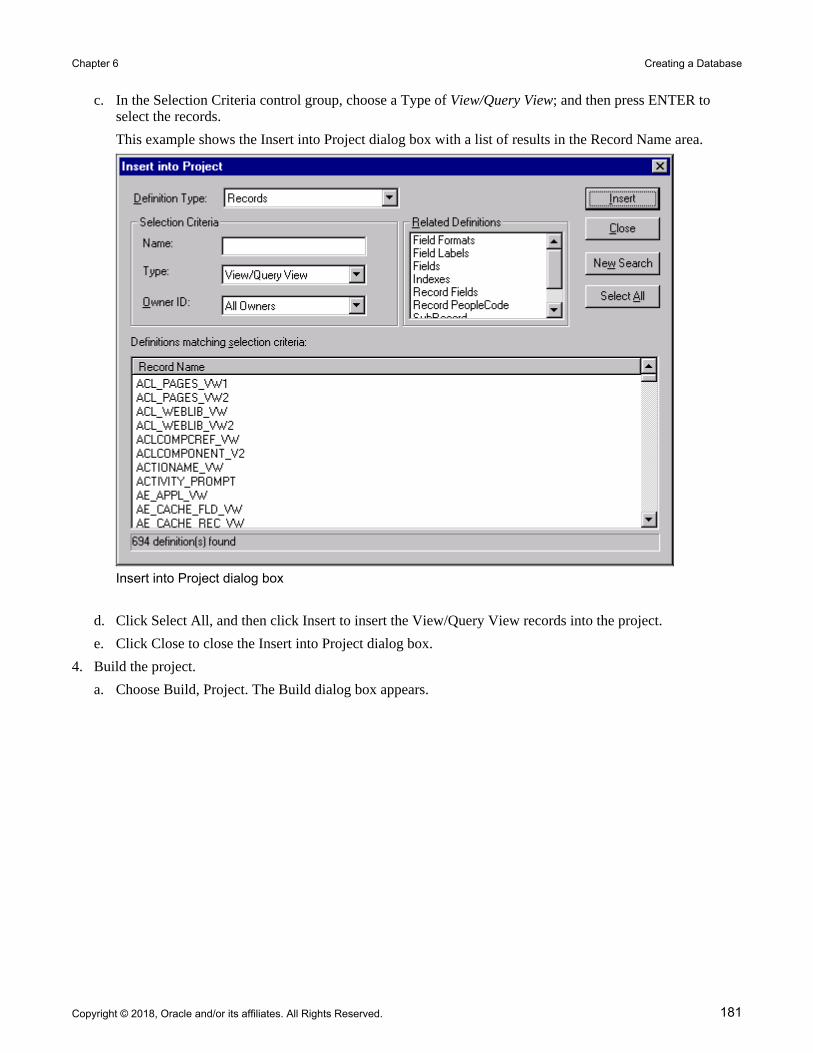
Chapter 6 Creating a Database
Copyright © 2018, Oracle and/or its affiliates. All Rights Reserved. 181
c. In the Selection Criteria control group, choose a Type of View/Query View; and then press ENTER to select the records.
This example shows the Insert into Project dialog box with a list of results in the Record Name area.
Insert into Project dialog box
d. Click Select All, and then click Insert to insert the View/Query View records into the project.
e. Click Close to close the Insert into Project dialog box.
4. Build the project.
a. Choose Build, Project. The Build dialog box appears.

Creating a Database Chapter 6
182 Copyright © 2018, Oracle and/or its affiliates. All Rights Reserved.
b. In the Build Options group, select the Create Views check box. In the Build Execute Options group, select the Execute SQL now radio button to create the views directly, or the Build script file radio button to generate a DDL script of CREATE VIEW statements.
Selecting Create Views and Execute SQL now in the Build dialog box

Chapter 6 Creating a Database
Copyright © 2018, Oracle and/or its affiliates. All Rights Reserved. 183
c. If you select Build script file, click Settings, go to the Scripts tab, and enter the output directory and filename where you want the DDL statement script written in the area All Output File Name.
In this example, the directory and filename are c:\pshrdmo\scripts\createvw.sql.
Build Settings dialog box: Scripts tab
d. Click OK to return to the Build dialog box.
e. Click Build to build the views in the project.
Depending on the Build Execute Option you selected, Application Designer will either directly build the views on the database or generate a script file of CREATE VIEW DDL statements. If you have opted to generate the script file, execute the DDL statements either through SPUFI or DSNTEP2. Because of the time it may take the script to complete, we recommend submitting this script in batch mode using DSNTEP2. You may also need to prefix the script with the SQL command SET CURRENT SQLID = <ownerid>.
Note. On DB2 z/OS, when an object is dropped, all the dependent objects are automatically dropped. As a result some of the drop view statements could fail—and generate errors—if they were dependent on the view earlier dropped in the script. Please ignore these errors and restart the remaining part of the script.
Task 6-15: Building Temporary Tables
This section discusses:
• Understanding Temporary Tables

Creating a Database Chapter 6
184 Copyright © 2018, Oracle and/or its affiliates. All Rights Reserved.
• Running SQR SETSPACE.SQR
• Correcting Invalid Database/Tablespace Combinations
• Setting the Number of Temporary Tables
• Using the Volatile Table Attribute
• Building the Temporary Tables and Their Indexes
Understanding Temporary TablesIn this task you use Application Designer to create temporary tables. PeopleSoft software has a temporary table structure where the number of instances for each base temporary table is controlled internally to PeopleSoft PeopleTools. The definition of each base temporary table is stored in the PeopleSoft PeopleTools table PSRECDEFN. The temporary table instances themselves are not defined. The table PSRECTBLSPC contains the database and tablespace values for each record defined in PSRECDEFN. The DDL generated by Application Designer to create the temporary tables uses the database and tablespace information from the base temporary table definition in PSRECTBLSPC. The delivered database and tablespace values are in synch with the XXDDL or XXDDLU script that you ran earlier to create the databases and tablespaces. If you changed the database or tablespace name values in this script for tablespaces originally named xxWORK, you need to either update the PSRECTBLSPC table or revise the DDL script to be generated to create the temporary tables.Oracle recommends that you run SQR SETSPACE.SQR against your database and use the output from the SQR as a guide in making the necessary updates or revisions. How and where to make the adjustments is discussed in the later section "Correcting Invalid Database/Tablespace Combinations."
Note. If you used the PeopleSoft Tablespace DDL Automation Assistance Tool (PSTAAT) to optimize the installation DDL, run the SETSPACE.SQR to update table PSRECTBLSPC with the database and tablespace values created by PSTAAT.
Task 6-15-1: Running SQR SETSPACE.SQRIn this procedure, you run SQR SETSPACE.SQR to update table PSRECTBLSPC with the database and tablespace values from the DB2 system catalog. Application Designer uses the database and tablespace values stored in PSRECTBLSPC to generate DDL statements to create the tables.SETSPACE.SQR serves multiple purposes:
• It updates PSRECTBLSPC with the database/tablespace values from the DB2 system catalog table SYSIBM.SYSTABLES for the tables defined in the DB2 System Catalog.
• It reports tables in PSRECTBLSPC that are updated with a new database or tablespace name.
• It reports tables that are defined in PSRECTBLSPC, but not defined in the DB2 system catalogs, and whether the database/tablespace combination defined for the record is valid or invalid (not defined in the DB2 system catalog table SYSIBM.SYSTABLESPACE).
• It syncs up the database/tablespace combinations used in PSRECTBLSPC with the PeopleTools "master" tablespace table PSTBLSPCCAT by inserting the valid combinations in PSTBLSPCCAT if they have not already been defined.
• It reports those database/tablespace values added to the PSTBLSPCCAT table.
• It summarizes and reports database/tablespace combinations defined in PSTBLSPCCAT that are not valid. The reports are a valuable tool in determining how and where to make revisions so the temporary tables are created in the correct location, and without error.
To run SQR SETSPACE.SQR:

Chapter 6 Creating a Database
Copyright © 2018, Oracle and/or its affiliates. All Rights Reserved. 185
Submit the Job PSHLQ.PPVVV.JCLLIB(SETSPACE) to execute the SQR on the mainframe.The SDSF logs will display the results of running the SQR and information related to the success of executing thisSQR.An output file will be written to PSHLQ.PPVVV.SQRLIST(SETSPACE) detailing the records processed and actions taken.
Note. The SQR can be run multiple times without any negative impact, but the output file will be overwritten witheach execution. You may want to rename the member PSHLQ.PPYYY.SQRLIST(SETSPACE) to another name before each resubmission of the SQR.
Task 6-15-2: Correcting Invalid Database/Tablespace CombinationsReview the output in PSHLQ.PPVVV.SQRLIST(SETSPACE). Note any messages with "Table Undefined — DB/TS Invalid," but most importantly, note any Warning messages in the second Phase of the output report. These warning messages summarize the database/tablespace name combinations defined in PSRECTBLSPC that have not been defined in the DB2 system catalog tables.There are five options for making the necessary revisions. Of these options, Option 1 is the recommended one, forseveral reasons. Editing can be done globally; no table data will be impacted as it would in other options; you are guaranteed that the temporary table will be built in the database and tablespace that you intend; and you may havealready found it necessary to edit the script file of DDL statements to create the Temporary table for other reasons.
• Option 1 (Recommended): Proceed through the installation process and build a script file of the DDL statements to create the temporary tables. After the script has been generated, but before executing it, globally edit the database/tablespace name combinations using the second Phase of the output report as a guide to the "before" values, changing them to your preferred site specific values.
• Option 2: Update the PSRECTBLSPC table directly via the database interface of choice before building the script file of DDL statements to create the temporary tables. Use the second Phase of the output report as a guide. The SQL to correct each invalid database/tablespace combination would be scripted as follows:
UPDATE PSRECTBLSPC SET DBNAME = '<new dbname>', DDLSPACENAME = '<new tablespacename>'WHERE DBNAME = '<old dbname>'AND DDLSPACENAME = '<old tablespacename>'AND DBTYPE = (SELECT MAX(A.DBTYPE) FROM PSRECTBLSPC A WHERE RECNAME = A.RECNAME AND A.DBTYPE IN (' ','1'))
• Option 3: Run SQR SETDBNAM to update the database value in PSRECTBLSPC with a "best guess" value based on the tablespace value defined in PSRECTBLSPC. The accuracy of this SQR is based on the followingcaveats:
• The ID or Current SqlID that was used to create the tablespaces must be the same value as the owner ID ofthe tables comprising the logical PeopleSoft database. In other words, the CREATOR field value in SYSIBM.SYSTABLESPACE must be the same value as the CREATOR field in SYSIBM.SYSTABLES.
• The given tablespace name and CREATOR value in SYSIBM.SYSTABLESPACE must represent a unique relationship. For a given CREATOR, if you have defined a given tablespace name in more than one database, the SQR will use the database value associated with the tablespace that contains the fewest number of tables.
If either of these requirements is not met, either a database value will not be found and PSRECTBLSPC will not be updated, or PSRECTBLSPC could be updated with a database value different from that intended.

Creating a Database Chapter 6
186 Copyright © 2018, Oracle and/or its affiliates. All Rights Reserved.
To run the SQR SETDBNAM, follow the same procedure as running SQR SETSPACE, using the JCL Job PSHLQ.PPVVV.JCLLIB(SETDBNAM) instead.
• Option 4: Log into the database via Application Designer, and update the record definitions with valid database/tablespace combinations, before building the script of DDL statements to create the temporary tables.Use the first Phase of the output report as a guide. (This could be a tedious and time-consuming process and isnot recommended over the previously described options.)
• Option 5: Create the database/tablespace combinations in DB2 so they are no longer invalid, before executing the script file of DDL statements to create the Temporary tables. Use the second Phase of the output report as a guide to the databases and tablespaces that need to be created. (This is not recommended simply because it is likely to contradict the naming standards established for your DB2 installation.)
Task 6-15-3: Setting the Number of Temporary TablesNormally, you will leave the number of temporary tables set to the default defined in the database. You may want to change this setting for optimal performance, depending on various aspects of your implementation, including account transaction volumes, benchmark numbers for the current hardware and database platform, and your service-level requirements. Oracle delivers a minimum of three temporary table instances in most cases. You cannot adjust the number of temporary tables unless you have installed the PeopleSoft Pure Internet Architecture. (See "Setting Up the PeopleSoft Pure Internet Architecture in GUI Mode" or "Setting Up the PeopleSoft Pure Internet Architecture in Console Mode.") You may skip this step entirely, and come back to it after PeopleSoft Pure Internet Architecture has been installed and you have a better idea of how many instances of the temporary tables might best fit your processing requirements. Another option is to update the PeopleTools table that controls the number of temporary table instances directly. Using the Database SQL interface of choice, issue the following SQL:
UPDATE PSOPTIONS SET TEMPTBLINSTANCES = <#>, TEMPINSTANCEONLINE = <#>⇒ WHERE TEMPINSTANCEBATCH = 0
The number of instances (#) for either field should not be less than 3 or greater than 9.For non-EPM applications, it is strongly recommended that the TEMPTBLINSTANCES and TEMPINSTANCEONLINE values be the same. For EPM applications we strongly recommend that you take the delivered defaults.
Note. Again, this step can be performed at installation and/or at any time during the life of your database. The only caveat is that when any of the parameters are changed that would impact the number of temporary table instances, all temporary tables should be regenerated.
Task 6-15-4: Using the Volatile Table AttributeBeginning with PeopleSoft PeopleTools 8.48 and later, all temporary tables are created using the volatile keyword. Sample DB2 for z/OS volatile temporary DDL follows:CREATE TABLE Q848902.PS_AEEXT_TAO (PROCESS_INSTANCE DECIMAL(10) NOT NULL, AE_INT_1 SMALLINT NOT NULL, AE_APPLID CHAR(12) NOT NULL, AE_SECTION CHAR(8) NOT NULL, AE_STEP CHAR(8) NOT NULL) VOLATILE IN Q848902.PTAPPE;
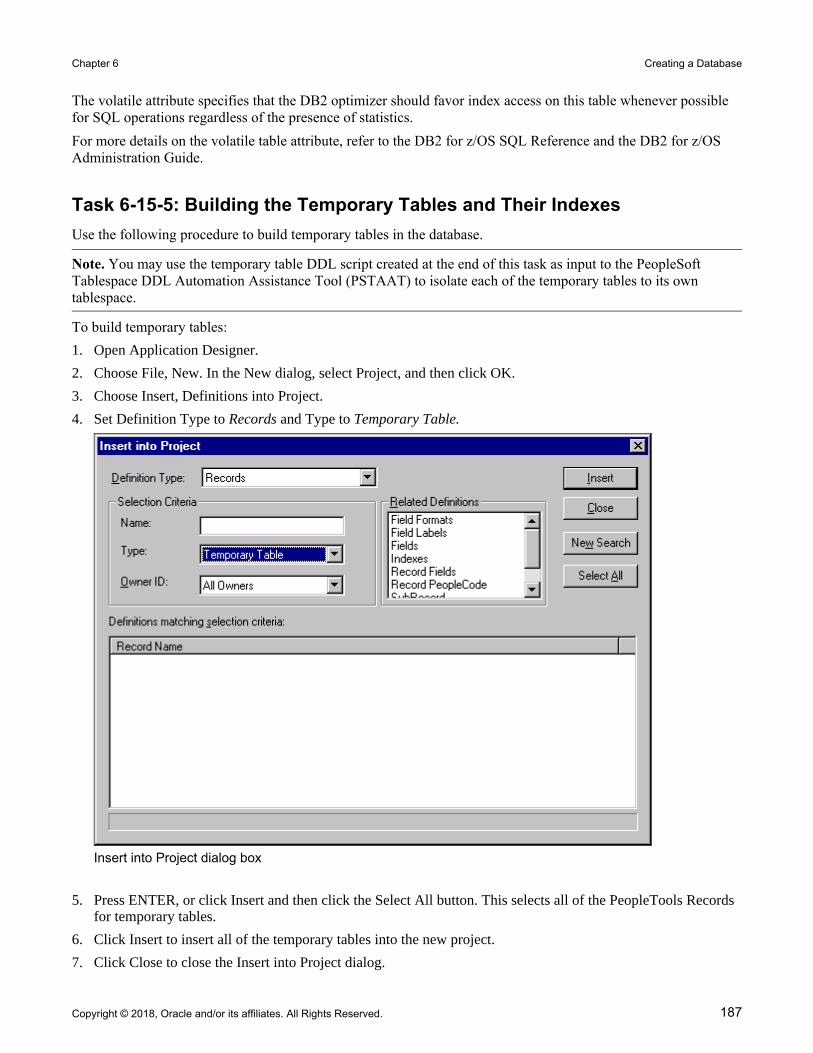
Chapter 6 Creating a Database
Copyright © 2018, Oracle and/or its affiliates. All Rights Reserved. 187
The volatile attribute specifies that the DB2 optimizer should favor index access on this table whenever possible for SQL operations regardless of the presence of statistics. For more details on the volatile table attribute, refer to the DB2 for z/OS SQL Reference and the DB2 for z/OS Administration Guide.
Task 6-15-5: Building the Temporary Tables and Their IndexesUse the following procedure to build temporary tables in the database.
Note. You may use the temporary table DDL script created at the end of this task as input to the PeopleSoft Tablespace DDL Automation Assistance Tool (PSTAAT) to isolate each of the temporary tables to its own tablespace.
To build temporary tables:1. Open Application Designer.
2. Choose File, New. In the New dialog, select Project, and then click OK.
3. Choose Insert, Definitions into Project.
4. Set Definition Type to Records and Type to Temporary Table.
Insert into Project dialog box
5. Press ENTER, or click Insert and then click the Select All button. This selects all of the PeopleTools Records for temporary tables.
6. Click Insert to insert all of the temporary tables into the new project.
7. Click Close to close the Insert into Project dialog.

Creating a Database Chapter 6
188 Copyright © 2018, Oracle and/or its affiliates. All Rights Reserved.
8. Before building the project, you should save it. Choose File, Save Project As and enter a project name such as TEMPTBL.
9. Choose Build, Project. The Build dialog appears.
10. In the Build Options group, select the Create Tables check box. The Create Index check box should be selected by default.
11. Select Build script file to direct the DDL to a file.
12. Click the Settings button. The Build Settings dialog appears.
13. On the Create tab, select Recreate table if it already exists (if it is not already selected) under Table Creation Options.
Selecting the Recreate table if it already exists in the Build Settings dialog box
14. Select the Scripts tab, and select Output to Single File under Script File Options.

Chapter 6 Creating a Database
Copyright © 2018, Oracle and/or its affiliates. All Rights Reserved. 189
15. Under Script File Names, specify the path and filename for the output file to contain the DDL to create the Temporary tables and their indexes (for example, PS_HOME\scripts\TEMPDDL.SQL).
The path and filename in this example is c:\pshrdmo\scripts\createtmp.sql.
Specifying the path and filename in the All Output File Name section
16. Click OK to accept the build settings.
17. Click Build to build temp tables. You may receive a warning message, which you can disregard because the temp tables do not contain any existing data.
18. After the script generation process has finished, click Close in the Build Progress dialog box to return to Application Designer.
19. Transfer the file of DDL statements just created to the mainframe server PDS HLQ.PPVVV.DDLLIB(filename).
20. If you have corrected the invalid database/tablespace combinations following Option 1 described earlier, and not updated the PSRECTBLSPC table with the database and tablespace names used in your installation, you need to edit the file, changing both the database and tablespace names from the values as would be noted in the second Phase of the output report from SQR SETSPACE, to your site-specific values.
Note. If you intend to use the %UpdateStats functionality, you should use the PeopleSoft Tablespace DDL Automation Assistance Tool (PSTAAT) to isolate each of the temporary tables to its own tablespace to avoid contention in any concurrently running processes. See the appendix "Using the PeopleSoft Tablespace DDL Automation Assistance Tool."
21. When the file has been edited with the appropriate database and tablespace name values, save your changes and submit the DDL statements either through SPUFI or DSNTEP2. It is preferable to submit this in batch mode using DSNTEP2, because the task could take over an hour to complete.

Creating a Database Chapter 6
190 Copyright © 2018, Oracle and/or its affiliates. All Rights Reserved.
Task 6-16: Creating PeopleSoft Triggers
This section discusses:
• Understanding PeopleSoft Triggers
• Creating Triggers in Data Mover
• Creating Triggers in Application Designer
Understanding PeopleSoft TriggersWhen creating the PeopleSoft Triggers, you can use Data Mover or Application Designer to create the objects directly, or you can use Application Designer to generate a DDL script of SQL statements, which can then be run using another utility such as SPUFI or DSNTEP2, and with a UserID with a greater level of database authority.
Task 6-16-1: Creating Triggers in Data MoverTo create triggers in Data Mover:1. Start Data Mover in User mode, using a valid PeopleSoft operator ID, for example, PS or VP1.
See Running Data Mover.
2. Choose File, Open from the Data Mover menu and navigate to PS_HOME\scripts.
3. Select the script CREATETRGR.dms.
4. Choose File, Run to execute the script.
5. Exit Data Mover.
Task 6-16-2: Creating Triggers in Application DesignerTo create triggers in Application Designer:1. Start Application Designer, for example:
• On Microsoft Windows 7, select Start, Programs, PeopleTools 8.56, Application Designer.
• On Microsoft Windows 8 or 2012 R2, access the Apps screen, and navigate to PeopleTools 8.56, Application Designer.
• Run PS_HOME\bin\client\winx86\pside.exe.
2. Create a new project. Choose File, New, and then select Project from the New dialog.
3. Insert all PeopleTools Table records into the project.
To insert the Table records:
a. Choose Insert, Definitions into Project. The Insert into Project dialog appears.
b. Select a Definition Type of Records.

Chapter 6 Creating a Database
Copyright © 2018, Oracle and/or its affiliates. All Rights Reserved. 191
c. In the Selection Criteria control group, choose a Type of Table; and then press ENTER to select the records.
Insert into Project dialog box
d. Click Select All, and then click Insert to insert the Table records into the project.
e. Click Close to close the Insert into Project dialog.
4. Build the project.
a. Choose Build, Project. The Build dialog displays.

Creating a Database Chapter 6
192 Copyright © 2018, Oracle and/or its affiliates. All Rights Reserved.
b. In the Build Options group, select the Create Trigger check box. In the Build Execute Options group, select either the Execute SQL now radio button to create the triggers directly, or the Build script file radio button to generate a DDL script of CREATE TRIGGER statements.
Build dialog box

Chapter 6 Creating a Database
Copyright © 2018, Oracle and/or its affiliates. All Rights Reserved. 193
c. If you have selected the Build script file radio button, click the Settings button, go to the Scripts tab, and enter the output directory and filename where you want the DDL statement script written.
Build Settings dialog box
d. Click OK to return to the Build dialog.
5. Click Build to build the triggers associated with the tables in the project.
Depending on the Build Execute Option selected, Application Designer will either directly build the triggers on the database or generate a script file of CREATE TRIGGER DDL statements. If you have opted to generate the script file, execute the DDL statements either through SPUFI or DSNTEP2. Because of the time it may take the script to complete, we recommend submitting this script in batch mode using DSNTEP2. You may also need to prefix the script with the SQL command SET CURRENT SQLID = <ownerid>.
Task 6-17: Running Additional Data Mover Scripts
To import additional data for your specific PeopleSoft database, or to make other required changes, you may needto run additional Data Mover scripts. These script files have the extension .dms and are sometimes referred to as "DMS scripts." They are located in the PS_HOME\scripts or PS_APP_HOME\scripts directory of your file server,and need to be run from the file server by means of Data Mover.For the details on which additional application-specific Data Mover scripts to run, consult your application-specific installation instructions.

Creating a Database Chapter 6
194 Copyright © 2018, Oracle and/or its affiliates. All Rights Reserved.
Task 6-18: Running SQR Reports
This section discusses:
• Understanding Running SQR Reports
• Binding the dbcalls.bnd
• Running SQRs on the Client Workstation
• Creating a Shortcut to Run SQRs
Understanding Running SQR ReportsThe instructions in this section describe how to run SQR reports from the client workstation. On the Microsoft Windows client, you may prefer to create a shortcut to allow you to run the reports repeatedly. You can use these instructions to run SQRs required in the upcoming task Checking the Database.You can also choose to run SQR reports from the command line in console mode. Before running SQR from the command line on Microsoft Windows operating systems, set PS_HOME from the prompt. For example:set PS_HOME=C:\PT856
See Also
PeopleTools: SQR for PeopleSoft DevelopersPeopleTools: SQR Language Reference for PeopleSoft
Task 6-18-1: Binding the dbcalls.bndYou need to bind the dbcalls.bnd before running SQR reports.To bind dbcalls.bnd:1. Using an ID with mainframe logon and BINDADD privileges, log on to DB2 Connect Command Line
Processor:
db2 => CONNECT TO <database name> USER <mainframe User Id>
Note. Enter your current password for "mainframe User Id": <mainframe User Id password>.
2. The Windows SQR bind executable is located in the File or Report Server directory (for example, PS_HOME\bin\sqr\db2\BINW\dbcalls.bnd).
• Issue the following bind command for an EBCDIC installation:
db2 => bind <ps_home>\bin\sqr\db2\BINW\dbcalls.bnd blocking all grant⇒ public⇒ sqlerror continue
• For a Unicode installation, you must bind the windows SQR executable with encoding unicode as follows:
db2 -> bind <ps_home>\bin\sqr\db2\BINW\dbcalls.bnd encoding unicode⇒ blocking⇒

Chapter 6 Creating a Database
Copyright © 2018, Oracle and/or its affiliates. All Rights Reserved. 195
all grant public sqlerror continue
Note. The executable program PSSQR.EXE is a wrapper program used by PeopleSoft Process Scheduler to run SQR reports. It is not designed to run manually outside of Process Scheduler. That is, the PeopleSoft system does not support running PSSQR from the command line.
Task 6-18-2: Running SQRs on the Client WorkstationTo run an SQR on the client workstation:1. Select Start, Run, click Browse, and navigate to PS_HOME\bin\sqr\DB2\binw.
Select sqrw.exe and click Open.

Creating a Database Chapter 6
196 Copyright © 2018, Oracle and/or its affiliates. All Rights Reserved.
2. Add any needed flags at the end of the command line.
Refer to the table that follows. For those flags that require attributes, append the attributes to the flags with no intervening spaces (for example, –fE:\fsdmo\bin\sqr\pssqr.ini).
Microsoft Windows Run dialog box launching SQRW
The following table summarizes the SQR report arguments used by PeopleSoft software. (For a full listing of report arguments, press the Help button to view the SQR help topic for this dialog box.)
Flag Description
-I Specifies the directories that SQR will search for the #INCLUDE files. (A trailing slash is required.)
-f Specifies the directory where the report output will be sent.
If you use the –keep flag, you must specify the directory with a trailing slash.
If you use the –printer flag, specify a full pathname with a filenamefor the HTML file.
-ZIF Sets the full path and name of the SQR initialization file. The -ZIF flag should point to your PS_HOME\sqr\pssqr.ini file.
-keep Keeps the .SPF file after the program runs. This enables you to view the report with the SQR viewer.
-printer:ht Generates the output file in HTML format. Specify the filename, with path location, with the –f flag.

Chapter 6 Creating a Database
Copyright © 2018, Oracle and/or its affiliates. All Rights Reserved. 197
3. Click OK.
The SQR for PeopleSoft V8.56 dialog box appears, displaying the attributes that you entered in the Run dialogbox. The fields on this dialog box are described in the next step:
Note. The report arguments in this example have been arranged for readability.
SQR for PeopleSoft dialog box with DDDAUDIT.SQR
4. Enter the following values:
• Enter the report name.
You must specify the full path.
• Enter the access ID in the Username field.
• Enter the access password in the Password field.
• Enter the database name.
5. Click OK to run the SQR report.
Task 6-18-3: Creating a Shortcut to Run SQRsIf you think you may need to run the SQR reports more than once, you may want to create a shortcut on the Windows client workstation. To save the report arguments:1. Open Windows Explorer on the machine on which you want to run SQR.
2. Navigate to PS_HOME\bin\sqr\DB2\binw.
3. Right-click sqrw.exe and click Create Shortcut.
4. Right-click the shortcut that you just created and select Properties.
5. On the Shortcut tab, add the same sqr flags that you used in the previous task after sqrw.exe in the Target entry box.
6. Click OK.
7. To run the report, double-click the shortcut and specify the following information in the dialog box:
• Report Name: Enter the full path and the name.

Creating a Database Chapter 6
198 Copyright © 2018, Oracle and/or its affiliates. All Rights Reserved.
• Database name
• Username: Enter the access ID.
• Password: Enter the access password.
• Report arguments: Make any necessary modifications to the saved arguments.
8. Click OK.
Task 6-19: Updating PeopleSoft System Tables
This section discusses:
• Understanding PeopleSoft System Tables
• Updating PeopleSoft System Tables
Understanding PeopleSoft System TablesIn this task, you run SQR scripts that update PeopleTools tables with information from the DB2 system catalog tables.
• SETSPACE.SQR was run in an earlier task, but should be re-run at this point. It updates PSRECTBLSPC with the database and tablespace information captured from the DB2 system catalog table SYSIBM.SYSTABLES, inserts valid database and tablespace combinations defined in PSRECTBLSPC that have not yet been defined in PSTBLSPCCAT, and provides an audit report of actions taken and invalid database and tablespace combinations defined in PSRECTBLSPC but not defined in the DB2 system catalog table SYSIBM.SYSTABLESPACE. You can run this SQR multiple times without negative impact.
• SETTMPIN.SQR inserts rows into PSRECTBLSPC to store the database and tablespace location for each temporary table instance defined in the DB2 system catalog table SYSIBM.SYSTABLES. You need to run this SQR after each time you create or refresh the temporary tables on your database. You can run this SQR multiple times without negative impact.
Note. This SQR will not facilitate regeneration of the temporary tables by ensuring that each instance is rebuilt in the database/tablespace location to which it was originally assigned. The purpose of the SQR is to capture the location of each temporary table instance after it has been created in the database, and sync PSRECTBLSPC with the DB2 system catalog.
Task 6-19-1: Updating PeopleSoft System TablesTo update PeopleSoft system tables initiate SQRW.exe as you did in the task Running SQR Reports and run the SETSPACE.SQR and SETTMPIN.SQR (if applicable) programs.
Note. Oracle also provides SETINDEX.SQR and SETBUFF.SQR, which will help the PeopleSoft DBA keep the PeopleSoft system tables in sync with the DB2 catalogs.
Task 6-20: Binding DB2 Plans
If you are not planning to run COBOL on the mainframe, this step is not necessary.

Chapter 6 Creating a Database
Copyright © 2018, Oracle and/or its affiliates. All Rights Reserved. 199
You need to bind the following DB2 Plans used by PTPSQLRT—the first one is for the Native Attach Facility forUNIX System Services, and the second one is for the Call Attach Facility. On the z/OS server, submit the following two JCL jobs:HLQ.PPVVV.JCLLIB(BINDAADD)HLQ.PPVVV.JCLLIB(BINDEADD)
The only acceptable message reads:BIND SUCCESSFUL
If you receive any other message, it means you have encountered an error. Common bind errors include:
• Program PTPSQLRT failed to precompile (jobs PSCOBDA and/or PSCOBDE) and the DBRM was not generated. If this is the case, run PSCOBDA or PSCOBDE again, and carefully examine the return codes.
• If you get a "Plan Already Exists" error, do a bind/replace using BINDAREP and BINDEREP.
Task 6-21: Changing the Base Language
The information in the earlier task Planning Multilingual Strategy will help you determine whether you should change your base language, and lists the currently supported languages.See "Preparing for Installation," Planning Multilingual Strategy.See PeopleTools Certifications — Supported Languages, My Oracle Support (search for article name).This task applies only if your users will be operating PeopleSoft applications primarily in one particular language other than English. It gives a performance boost to the language you designate as the base language, but requires more administrative overhead than leaving English as the base language. The details are spelled out in the PeopleTools: Global Technology product documentation.
Task 6-22: Checking the Database
Run and examine the SQR reports to verify that your database is complete.See Running SQR Reports.See Updating PeopleTools System Tables.To verify that the database is complete, run the following SQR reports from the PS_HOME\sqr directory:
• dddaudit.sqr
• sysaudit.sqr
• swpaudit.sqr, if you plan to swap your base language
For further information about these reports, consult PeopleSoft product documentation. This documentation includes specific information on how to interpret the reports and how to fix any errors found there.It is good practice to run and read the audit reports, which include sysaudit, dddaudit, swpaudit, and alter audit, after making changes such as applying patches, bundles, and upgrades to the database, to make sure that the tablesare internally and externally in synch. It is also a good idea to schedule regular maintenance, for example weekly, in which you run and review the reports. You can find information on these audit reports in the PeopleTools: Data Management product documentation.See PeopleTools: Global Technology, "Running the Swap Audit Report."

Creating a Database Chapter 6
200 Copyright © 2018, Oracle and/or its affiliates. All Rights Reserved.
Note. If any records show up in the VIEWS-2 or TABLE-3 section of dddaudit and are contained within the PPLTLS84CURDEL project, you may safely drop these records using the SQL query tool for your platform.
See Also
PeopleTools: Data ManagementPeopleTools: System and Server Administration
Task 6-23: Disabling %UpdateStats
The %UpdateStats meta-SQL function allows an Application Engine program to update DB2 catalog statistics after it has populated temporary tables with transient data used for intermediate query result sets. This allows the DB2 optimizer to choose a better access path when these tables are joined to other tables. To optimally use %UpdateStats for DB2 z/OS, it is highly recommended that tables subject to this feature be placed in their own tablespace. %UpdateStats invokes the DB2 RUNSTATS utility through the IBM DSNUTILS stored procedure. Because RUNSTATS executes at the tablespace level, having multiple tables in a given tablespace can degrade the performance of an Application Engine program that invokes this utility through %UpdateStats. Consider usingPSTAAT (see the appendix "Using the PeopleSoft Tablespace DDL Automation Assistance Tool") to optimize the table to tablespace mapping for Application Engine temporary tables. If you have not installed and authorized the DSNUTILS stored procedure for use in your environment, or, if you have not isolated Application Engine temporary tables to individual tablespaces, you may wish to consider disabling the %UpdateStats function by setting DBFLAGS to 1 in your Process Scheduler configuration file. See the previous section, Using %UpdateStats, or search the PeopleSoft documentation for more details on using DBFLAGS to disable %UpdateStats.If you have not implemented the DSNUTILS stored procedure and/or followed the traditional installation path, you might consider disabling recognition of the %UpdateStats function by setting DBFLAGS to 1 in your ProcessScheduler configuration file. See the previous section, "Using %UpdateStats," or search the PeopleSoft documentation for more details on using DBFLAGS to disable %UpdateStats.See PeopleTools: Data Management.

Copyright © 2018, Oracle and/or its affiliates. All Rights Reserved. 201
Chapter 7
Deploying Mid-Tier Components
This chapter discusses:
• Understanding the Mid-Tier Deployment
• Running the DPK Setup Script for Mid-Tier Deployment
• Completing Installation Tasks
Understanding the Mid-Tier Deployment
After you complete the database creation, run the PeopleTools DPK setup script again to deploy the mid-tier components for the PeopleSoft environment. Specify the same BASE_DIR that you specified when you used the DPK setup script to install the software. The default mid-tier deployment performs the following:
• Sets up a single application server domain, Process Scheduler domain, and PIA domain.
• On Microsoft Windows, sets up services for the PeopleSoft domains.
Note. On Microsoft Windows, when running the setup script to deploy mid-tier components for previously-created domains, first stop and delete services for configured domains to avoid errors.
• Installs Oracle Tuxedo and Oracle WebLogic software, unless the DPK setup script installed them in previous deployment to the same BASE_DIR/pt location.
The DPK installation does not support IBM WebSphere. If you want to use IBM WebSphere rather than Oracle WebLogic as the web server software, you must install it manually and use traditional methods to set up the domains.
Task 7-1: Running the DPK Setup Script for Mid-Tier Deployment
This section discusses:
• Understanding the Mid-Tier Deployment
• Prerequisites
• Running with the Mid-Tier Option on Microsoft Windows
• Running with the Mid-Tier Option on Linux, AIX, or Solaris
Understanding the Mid-Tier DeploymentUse this procedure to install the PeopleSoft mid-tier components The deployment includes the following:

Deploying Mid-Tier Components Chapter 7
202 Copyright © 2018, Oracle and/or its affiliates. All Rights Reserved.
• PS_HOME installed to the default location under the DPK base directory
• Oracle Tuxedo installed to the default location under the DPK base directory
• Oracle WebLogic installed to the default location under the DPK base directory
• Oracle database client installed to the default location under the DPK base directory
• Deployed and set up PeopleSoft domains. There is a single Application Server domain, single Process Scheduler domain, and single PIA domain.
• Microsoft Visual C++ Redistributable Packages for Visual Studio, which include required Microsoft C++ runtime libraries
PrerequisitesBefore performing the mid-tier deployment, ensure that you have fulfilled the following requirements:
• You have downloaded all of the required PeopleSoft PeopleTools DPKs, and saved them in a location accessible to the Microsoft Windows, Linux, AIX, or Solaris host, referred to here as DPK_INSTALL.
See Obtaining the PeopleSoft PeopleTools DPKs.
Note. After the DPK setup script extracts the downloaded zip files, it will delete the original zip files in DPK_INSTALL. If you want to save the original zip files, make a backup copy in a different folder.
Note. If you want to have a PeopleSoft application-specific local node, for Integration Broker or Report Node,configured during the mid-tier creation, you must also download the first application DPK (normally zip file 9ofn.zip). If the application DPK is not present, the mid-tier deployment will create a PeopleTools-specific default local node.
See "Installing the PeopleSoft Homes," Obtaining the PeopleSoft Application and PeopleTools DPKs.
• Remove any previous installations of the same version of Oracle Tuxedo.
• You extracted the first zip file. The extraction gives a setup folder and other files.
See "Deploying the PeopleSoft Homes."
• The user running the script must have administrative permission on Microsoft Windows, and root access on Linux, AIX, or Solaris.
Note. Restarting services for the deployed PeopleSoft environment, such as those for Oracle Tuxedo, must be performed by the same user (with administrative permission) who carried out the installation.
• There is enough space on the host for the PeopleSoft environment.
See "Prerequisites," Reviewing Hardware Requirements on Microsoft Windows.
• For deployment on Linux, AIX, or Solaris, there is a writable directory available for the home for the users that own the PeopleSoft environment. The default is /home.
• For deployment with the AIX DPK, you have installed JDK.
See Reviewing Software Requirements.
• You have installed database connectivity software for the database that you want to access on the machine on which you deploy the mid-tier components.
See "Completing the DPK Initialization with Customizations."

Chapter 7 Deploying Mid-Tier Components
Copyright © 2018, Oracle and/or its affiliates. All Rights Reserved. 203
Note. When installing mid-tier components for environments on DB2 z/OS, you must use customizations to complete the installation. The delivered YAML files may not include the necessary RDBMS client information for your environment. Create a psft_customizations.yaml file, and include the correct client information. See the chapter "Completing the DPK Initialization with Customizations."
• You have the information for the database to connect to, including:
• RDBMS platform
• Database name, service name, host, and listening port
• Unicode or non-Unicode database
• You have the information for the user IDs and passwords needed for the deployment, including the following:
• PeopleSoft Connect ID and password
• PeopleSoft operator ID (such as PS or VP1) and password
• Application Server Domain Connection password (optional)
• PTWEBSERVER web profile user password
• Oracle WebLogic server administrator password
• Integration Gateway administrator
Task 7-1-1: Running with the Mid-Tier Option on Microsoft WindowsTo deploy mid-tier components on physical or virtual Microsoft Windows hosts:1. Open a command prompt window with Run as Administrator.
2. Change directory to the location where you extracted the first zip file, DPK_INSTALL/setup.
3. Run the script with the mid-tier option to set up the Application Server, PIA, and web server mid-tier components.
Note. If you see an error message similar to "The application has failed to start because its side-by-side configuration is incorrect," it indicates that your machine does not include the necessary Microsoft C++ runtime libraries. Go to the Microsoft Web site, locate the Microsoft Visual C++ redistributable package for your system, and install as directed..
• If you extracted the first zip file into the same directory where you downloaded the zip files, use this command:
psft-dpk-setup.bat –-env_type midtier
• If you extracted the first zip file into a different directory, include the option dpk_src_dir to specify the location of the downloaded zip files, such as DPK_INSTALL.
psft-dpk-setup.bat --dpk_src_dir DPK_INSTALL –-env_type midtier
Note. Running the DPK setup script with the --env_type midtier option deploys all servers. If you want todeploy one of the servers (application server, Process Scheduler server, PIA, or application server and Process Scheduler server) see the command options in "Installing the PeopleSoft Homes," Reviewing the DPK Setup Script Options.
4. Wait while the script locates the valid PeopleSoft DPK zip files and extracts them.
The system displays messages indicating the steps in the setup process. The success or failure of each step is indicated by [ OK ] or [ FAILED ].

Deploying Mid-Tier Components Chapter 7
204 Copyright © 2018, Oracle and/or its affiliates. All Rights Reserved.
After the script completes the extraction, it deletes the original files. Make a backup copy if you want to keep them.
See "Preparing for Installation," Understanding the PeopleSoft Installation Using Deployment Packages, for the filename syntax of the DPK zip files.
Starting the PeopleSoft Environment Setup Process:
Validating User Arguments: [ OK ]Validating PeopleSoft Supported Platform: [ OK ]
Extracting the Zip File FILENAME_1of4.zip: [ OK ]Extracting the Zip File FILENAME_2of4.zip: [ OK ]Extracting the Zip File FILENAME_3of4.zip: [ OK ]Extracting the Zip File FILENAME_4of4.zip: [ OK ]
5. Specify whether to install the Puppet software if necessary at the next prompt.
The script verifies if Puppet software is installed in the default location specified by the DPKs. If not, answer y (yes) to install the Puppet software and n to abort the PeopleSoft environment setup process. The default action (if nothing is entered at the prompt) is to install the software.
If there is any error during the Puppet software installation, the script aborts the setup process. Review the log file in DPK_INSTALL/setup. If there are missing operating system packages, you will need to carry out additional steps.
See Obtaining Operating System Packages Required for Puppet.
Starting the PeopleSoft Environment Setup Process:
Validating User Arguments: [ OK ]Validating PeopleSoft Supported Platform: [ OK ]
Verifying if Puppet Software is Installed: [ OK ]
Puppet Software is not installed on the Host. If this Host isused to setup a PeopleSoft environment, Puppet Software shouldbe Installed.
Do you want to Install Puppet Software on this Host? [Y|n]: y
Installing Puppet Software on the Host: [ OK ]
The script verifies the eYAML software.
Verifying if eYAML Hiera Backend is Installed: [ OK ]
The script verifies if the DPKs are available in DPK_INSTALL, and aborts with the message [FAILED] if theyare not.
Preparing the Windows 2012Server VM for PeopleSoft Environment:
Checking if PeopleSoft DPKs are Present: [ OK ]
6. At the following prompt, enter a location that is accessible to the host to be used as the PeopleSoft base directory.
The base folder is used to extract the PeopleSoft DPKs as well as for deploying PeopleSoft components. The script creates the folder if it is not present.

Chapter 7 Deploying Mid-Tier Components
Copyright © 2018, Oracle and/or its affiliates. All Rights Reserved. 205
Note. When entering the path for the base folder, use forward slashes (/). For example, C:/psft. Enclose any names with special characters in double quotes. Do not use a name for the base folder that begins with a number.
The base folder is used to extract the PeopleSoft DPKs. It is alsoused to deploy the PeopleSoft components. This folder should beaccessible on the Windows VM, must have write permissions and shouldhave enough free space.
Enter the PeopleSoft Base Folder: C:/psft Are you happy with your answer? [Y|n|q]:
The script validates if there is enough free space available under the specified base directory for the PeopleSoft environment. The PeopleSoft environment setup is aborted if there is not enough free space.
Note. A mid-tier setup of a PeopleSoft environment requires about 25 GB of disk space.
Checking if the Base Folder has Enough Free Space: [ OK ]
The script creates the following three sub-directories under the user provided base directory, BASE_DIR:
• BASE_DIR\dpk
The script uses this directory to extract the archives from the PeopleSoft DPKs, and contains the Puppet YAML files for the deployment.
• BASE_DIR\pt
The script uses this directory to deploy PeopleSoft components.
• BASE_DIR\db
This directory is not used for a mid-tier deployment.
7. Review the status messages as the script validates the files found in the download folder, DPK_INSTALL.
The script carries out validations for the mid-tier deployment. If any of the validations fail, the PeopleSoft environment setup is aborted.
Validating the PeopleSoft DPKs in the Windows VM:Validating the PeopleSoft PeopleTools Server DPK: [ OK ]Validating the PeopleSoft PeopleTools Client DPK: [ OK ]Validating the Manifest Information in PeopleSoft DPKs: [ OK ]
8. Review the status messages as the script extracts the archives from the DPKs.
Extracting the PeopleSoft DPK Archives in the Windows VM:Extracting the PeopleSoft PeopleTools Server DPK Archives: [ OK ]Extracting the 8.56 PeopleTools Client DPK Archive: [ OK ]
9. Review the status messages as the script sets up the Puppet file system.
The script sets up Puppet on the host or VM. It then copies the PeopleSoft Puppet modules to the standard location under the base folder (BASE_DIR\dpk) and updates the YAML files to reflect the type of PeopleSoft environment setup.
Setting up Puppet on the Windows VM:Generating eYAML Hiera Backend Encryption Keys: [ OK ]Updating the Puppet Hiera YAML Files in the Windows VM: [ OK ]Updating the Role in Puppet Site File for the Windows VM: [ OK ]

Deploying Mid-Tier Components Chapter 7
206 Copyright © 2018, Oracle and/or its affiliates. All Rights Reserved.
10. Specify the installation type.
Enter the PeopleSoft installation [PUM or FRESH] type [PUM]: FRESH
Note. You see this prompt only when PeopleSoft application DPKs that were built on the same PeopleTools release, are present in DPK_INSTALL.
Note. If you are using the PeopleSoft Upgrade Source Image to set up an environment for the Upgrade Sourcedatabase, you do not see this prompt.
11. Specify the information for the database that you want to connect to.
a. Enter DB2ODBC for a DB2 for z/OS database platform.
Enter the PeopleSoft database platform [ORACLE]: DB2ODBC
b. Enter y (yes) if the database you are connecting to is a Unicode database, or n (no) for a non-Unicode database.
Is the PeopleSoft database unicode? [Y|n]:
c. Enter y (yes) if you want to install the files needed for multi-language support.
Note. You see this prompt only when PeopleSoft application DPKs that were built on the same PeopleTools release, are present in DPK_INSTALL.
Do you want Multi Language support in PeopleSoft database? [y|N]:
d. Enter the database name.
Enter a new PeopleSoft database name. Ensure that the databasename start with a letter and contains only uppercase letters andnumbers and is no more than 8 characters in length [HCM92]:
e. Enter the name of the host where the database is installed, and the port number:
Use forward slashes if necessary. If the host name includes non-alphanumeric characters such as periods, enclose the name in double quotes. For example, "host.example.com".
Enter the PeopleSoft database host name:Enter the PeopleSoft database port [1521]: 1521
12. Enter the PeopleSoft Connect ID at the following prompt:
The default is people.
Enter a new PeopleSoft database Connect ID. Ensure that the IDcontains only alphanumeric characters and is at most 8 charactersin length [people]:
13. Enter a password for the PeopleSoft Connect ID, and enter again on the next line, at the following prompt.
Enter the PeopleSoft database Connect ID [people] password: Ensurethe password contains only alphanumeric characters and is between 6and 30 characters in length:
Re-Enter the PeopleSoft database Connect ID password:
14. Enter the PeopleSoft Operator ID (user ID) at the next prompt:

Chapter 7 Deploying Mid-Tier Components
Copyright © 2018, Oracle and/or its affiliates. All Rights Reserved. 207
Enter the PeopleSoft database Operator ID [PS]:
15. Enter the password twice for the PeopleSoft operator ID, such as PS or VP1.
Enter a new PeopleSoft database Operator ID [PS] password. Ensurethe password contains only alphanumeric characters and is between 1and 32 characters in length:
Re-Enter the PeopleSoft Operator ID password:
16. Enter the Application Server Domain Connection password, following the guidelines in the prompt.
The window does not display masking characters as you type. There is no default password.
Note. This is an optional password. If no password is entered, the connection between Web Server and Application Server will not be password protected.
[Optional] Enter a new Application Server Domain connection password.Ensure the password contains only alphanumeric characters and isbetween 8 and 30 characters in length:
Re-Enter the Application Server Domain connection password:
17. Enter the Oracle WebLogic Server Admin password, following the guidelines in the prompt.
The default Oracle WebLogic server administrator is system. The window does not display masking characters as you type. There is no default password.
Enter a new WebLogic Server Admin user [system] password. Ensure that the password is between 8 and 30 characters in length with at least one lowercase letter, one uppercase letter and one number or one special character (!@#$%^&):Re-Enter the WebLogic Server Admin user password:
18. Enter the password for the PTWEBSERVER web profile user.
Note. The guideline in the prompt for the PTWEBSERVER user password does not allow special characters. However, the PeopleSoft system does allow special characters for the PTWEBSERVER password. If you want to change the password to include special characters, you have the option to do so in the PeopleSoft PureInternet Architecture (PIA) after you complete the installation and domain creation.
See PeopleTools: Security Administration, "Working with Passwords."
Enter a new PeopleSoft WebProfile user [PTWEBSERVER] password. Ensurethat the password contains only alphanumeric characters and is between8 and 30 characters in length:Re-Enter the PeopleSoft WebProfile user password:
19. Enter the Integration Gateway user ID and password at the following prompt.
The default user ID is administrator.

Deploying Mid-Tier Components Chapter 7
208 Copyright © 2018, Oracle and/or its affiliates. All Rights Reserved.
Note. The guideline in the prompt for the Integration Gateway user ID password does not allow special characters. However, the PeopleSoft system does allow special characters for the Integration Gateway user ID password. If you want to change the password to include special characters, you have the option to do so in the PeopleSoft Pure Internet Architecture (PIA) after you complete the installation and domain creation.
See PeopleTools: Security Administration, "Working with Passwords."
Enter the PeopleSoft Integration Gateway user [administrator]:Enter the PeopleSoft Integration Gateway user [administrator] password.Ensure the password contains only alphanumeric characters and is between 8 and 30 characters in length:Re-Enter the PeopleSoft Integration Gateway user password:
20. If you want to change any of the answers to the previous questions, enter n (no) at the following prompt, or enter y (yes) to continue:
Are you happy with your answers? [y|n]:
21. Review the status messages as the script updates the Puppet YAML files with the user input.
Encrypting the Passwords in the User Data: [ OK ]Updating the Puppet Hiera YAML Files with User Data: [ OK ]
22. Answer n (no) to indicate that you do not want to continue running the initialization script using the default configuration.
The script stops. Follow the instructions for using customizations for mid-tier connectivity to complete the mid-tier deployment.
Note. The "cd /d" command included in the prompt changes to the correct drive in the command prompt.
See "Completing the DPK Initialization with Customizations."
The bootstrap script is ready to deploy and configure the PeopleSoftenvironment using the default configuration defined in the PuppetHiera YAML files. You can proceed by answering 'y' at the followingprompt. And, if you want to customize the environment by overridingthe default configuration, you can answer 'n'. If you answer 'n', youshould follow the instructions in the PeopleSoft Installation Guidefor creating the customization Hiera YAML file and running the Puppet'apply' command directly to continue with the setup of the PeopleSoftenvironment.
Do you want to continue with the default initialization process? [y|n]: ⇒n
You have decided not to continue with the default PeopleSoft environmentsetup process. Any customizations to the PeopleSoft environment should⇒ bedone in the Hiera YAML file 'psft_customizations.yaml' and place it⇒ under[c:\psft\dpk\puppet\production\data] folder. After making thenecessary customizations, run the following commands to continue with⇒ thesetup of PeopleSoft environment.

Chapter 7 Deploying Mid-Tier Components
Copyright © 2018, Oracle and/or its affiliates. All Rights Reserved. 209
1. cd /d C:\psft\dpk\puppet\production\manifests2."C:\Program Files\Puppet Labs\Puppet\bin\puppet.bat" apply --confdir=⇒C:\psft\dpk\puppet site.pp --debug --trace
Exiting the PeopleSoft environment setup process.
The complete setup log is written to the file psft_dpk_setup.log in the same location as the DPK setup script.
Task 7-1-2: Running with the Mid-Tier Option on Linux, AIX, or SolarisTo deploy mid-tier components on Linux, AIX, or Solaris hosts:1. Open a terminal window and change directory to DPK_INSTALL/setup.
2. As a user with root access, run the script as follows:
• If you extracted the first zip file into the same directory where you downloaded the zip files, use this command:
./psft-dpk-setup.sh --env_type midtier
• If you extracted the first zip file into a different directory, include the option dpk_src_dir to specify the location of the downloaded zip files, such as DPK_INSTALL.
./psft-dpk-setup.sh --dpk_src_dir DPK_INSTALL --env_type midtier
Note. Running the DPK setup script with the --env_type midtier option deploy all servers. If you want to deploy one of the servers (application server, Process Scheduler server, PIA, or application server and Process Scheduler server) see the command options in "Installing the PeopleSoft Homes," Reviewing the DPK Setup Script Options.
3. Wait while the script locates the valid PeopleSoft DPK zip files and extracts them.
The system displays messages indicating the steps in the setup process. The success or failure of each step is indicated by [ OK ] or [FAILED].
After the script completes the extraction, it deletes the original files. Make a backup copy if you need to keep them.
See "Preparing for Installation," Understanding the PeopleSoft Installation Using Deployment Packages, for the filename syntax of the DPK zip files.
Starting the PeopleSoft Environment Setup Process:
Validating User Arguments: [ OK ]Validating PeopleSoft Supported Platform: [ OK ]
Extracting the Zip File FILENAME_1of4.zip: [ OK ]Extracting the Zip File FILENAME_2of4.zip: [ OK ]Extracting the Zip File FILENAME_3of4.zip: [ OK ]Extracting the Zip File FILENAME_4of4.zip: [ OK ]
4. Specify whether to install the Puppet software if necessary at the next prompt.
The script verifies if Puppet software is installed in the default location specified by the DPKs. If not, answer y (yes) to install the Puppet software and n to abort the PeopleSoft environment setup process. The default action (if nothing is entered at the prompt) is to install the software.
If there is any error during the Puppet software installation, the script aborts the setup process. Review the log file in DPK_INSTALL/setup. If there are missing operating system packages, you will need to carry out

Deploying Mid-Tier Components Chapter 7
210 Copyright © 2018, Oracle and/or its affiliates. All Rights Reserved.
additional steps.
See Obtaining Operating System Packages Required for Puppet.
Starting the PeopleSoft Environment Setup Process:
Validating User Arguments: [ OK ]Validating PeopleSoft Supported Platform: [ OK ]
Verifying if Puppet Software is Installed: [ OK ]
Puppet Software is not installed on the Host. If this Host isused to setup a PeopleSoft environment, Puppet Software shouldbe Installed.
Do you want to Install Puppet Software on this Host? [Y|n]:
Installing Puppet Software on the Host: [ OK ]
The script verifies the eYAML software.
Verifying if eYAML Hiera Backend is Installed: [ OK ]
The script verifies if the DPKs are available in DPK_INSTALL, and aborts with the message [FAILED] if theyare not.
Preparing the Linux VM for PeopleSoft Environment:
Checking if PeopleSoft DPKs are Present: [ OK ]
5. At the following prompt, enter a location that is accessible to the host to be used as the PeopleSoft base directory.
The base directory is used to extract the PeopleSoft DPKs as well as for deploying PeopleSoft components. The directory /cs1/psft is used in this example:
Note. When entering the path for the base directory, use forward slashes (/). For example, /cs1/psft. If thename includes any non-alphanumeric characters such as periods, enclose the name in double quotes. Do not use a name for the base directory that begins with a number.
The base directory is used to extract the PeopleSoft DPKs. It is alsoused to deploy the PeopleSoft components. This directory should beaccessible on the Linux VM, must have write permissions and shouldhave enough free space.
Enter the PeopleSoft Base Directory: /cs1/psftAre you happy with your answer? [Y|n|q]:
The script validates if there is enough free space available under the specified base directory for the PeopleSoft environment. The PeopleSoft environment setup is aborted if there is not enough free space.
Note. A mid-tier setup of a PeopleSoft environment takes about 25 GB of disk space.
Checking if the Base Directory has Enough Free Space: [ OK ]
The script creates the following three sub-directories under the user provided base directory, BASE_DIR:
• BASE_DIR/dpk

Chapter 7 Deploying Mid-Tier Components
Copyright © 2018, Oracle and/or its affiliates. All Rights Reserved. 211
The script uses this directory to extract the archives from the PeopleSoft PeopleTools DPKs, and contains the Puppet YAML files for the deployment.
• BASE_DIR/pt
The script uses this directory to deploy PeopleSoft components.
• BASE_DIR/db
This directory is not used for this deployment.
6. If the default home directory is not writable, enter a new location at the following prompt.
The DPK setup creates local users on the host. These users deploy the PeopleSoft components and own the PeopleSoft runtime domains. The script checks whether the default home directory for the PeopleSoft users (/home) is writable. If not, it will prompt the user to enter a new location to be used for creating the home directories for these local users.
Checking if Default User Home Directory /home is Writable: [WARNING]
The PeopleSoft environment setup creates local users on the Linux VM.The default Home directory [/home] do nothave write permission to create the user's home directory. Pleaseensure this directory is writable or provide a new directory on theLinux VM that is writable.
Enter a directory on the Linux VM that is writable [/home]: /ds1Are you happy with your answer? [y|n|q]:
If the /home directory is writable, no response is required.
Checking if Default User Home Directory /home is Writable: [ OK ]
7. Review the status messages as the script validates the files found in DPK_INSTALL.
The script carries out validations for the mid-tier deployment. If any of the validations fail, the PeopleSoft environment setup is aborted.
Validating the PeopleSoft DPKs in the Linux VM:Validating the PeopleSoft PeopleTools Server DPK: [ OK ]Validating the PeopleSoft PeopleTools Client DPK: [ OK ]Validating the Manifest Information in PeopleSoft DPKs: [ OK ]
8. Review the status messages as the script extracts the archives from the DPKs.
Extracting the PeopleSoft DPK Archives in the Linux VM:Extracting the PeopleSoft PeopleTools Server DPK Archives: [ OK ]Extracting the 8.56 PeopleTools Client DPK Archive: [ OK ]
9. Review the status messages as the script sets up the Puppet file system.
The script sets up Puppet on the host or VM. As part of this setup, if the EYAML files are installed, it will generate the encryption keys. It then copies the PeopleSoft Puppet modules to the standard location (BASE_DIR/dpk) and updates the YAML files to reflect the type of PeopleSoft environment setup.
Setting up Puppet on the Linux VM:Generating eYAML Hiera Backend Encryption Keys: [ OK ]Updating the Puppet Hiera YAML Files in the Linux VM: [ OK ]Updating the Role in Puppet Site File for the Linux VM: [ OK ]
10. Specify FRESH for the installation type.

Deploying Mid-Tier Components Chapter 7
212 Copyright © 2018, Oracle and/or its affiliates. All Rights Reserved.
Enter the PeopleSoft installation [PUM or FRESH] type [PUM]: FRESH
Note. You see this prompt only when PeopleSoft application DPKs that were built on the same PeopleTools release, are present in DPK_INSTALL.
Note. If you are using the PeopleSoft Upgrade Source Image to set up an environment for the Upgrade Sourcedatabase, you do not see this prompt.
11. Specify the information for the database that you want to connect to.
a. Enter DB2ODBC for a DB2 for z/OS database platform.
Enter the PeopleSoft database platform [ORACLE]: DB2ODBC
b. Enter y (yes) if the database you are connecting to is a Unicode database, or n (no) for a non-Unicode database.
Is the PeopleSoft database unicode? [Y|n]:
c. Enter y (yes) if you want to install the files needed for multi-language support.
Note. You see this prompt only when PeopleSoft application DPKs that were built on the same PeopleTools release, are present in DPK_INSTALL.
Do you want Multi Language support in PeopleSoft database? [y|N]:
d. Enter the database name.
Enter a new PeopleSoft database name. Ensure that the databasename start with a letter and contains only uppercase letters andnumbers and is no more than 8 characters in length [HCM92]:
e. Enter the name of the host where the database is installed, and the port number:
Use forward slashes if necessary. If the host name includes non-alphanumeric characters such as periods, enclose the name in double quotes. For example, "host.example.com".
Enter the PeopleSoft database host name:Enter the PeopleSoft database port [1521]: 1521
12. Enter the PeopleSoft Connect ID at the following prompt:
The default is people.
Enter a new PeopleSoft database Connect ID. Ensure that the IDcontains only alphanumeric characters and is at most 8 charactersin length [people]:
13. Enter a password for the PeopleSoft Connect ID, and enter again on the next line, at the following prompt.
Enter a new PeopleSoft database Connect ID [people] password. Ensurethe password contains only alphanumeric characters and is between 6and 30 characters in length:
Re-Enter the PeopleSoft database Connect ID password:
14. Enter the PeopleSoft Operator ID (user ID):
Enter the PeopleSoft database Operator ID [PS]:

Chapter 7 Deploying Mid-Tier Components
Copyright © 2018, Oracle and/or its affiliates. All Rights Reserved. 213
15. Enter the password twice for the PeopleSoft operator ID, such as PS or VP1.
Enter a new PeopleSoft database Operator ID [PS] password. Ensurethe password contains only alphanumeric characters and is between 1and 32 characters in lengthRe-Enter the PeopleSoft Operator ID password:
16. Enter the Application Server Domain Connection password, following the guidelines in the prompt.
The window does not display masking characters as you type. There is no default password.
Note. This is an optional password. If no password is entered, the connection between Web Server and Application Server will not be password protected.
[Optional] Enter a new Application Server Domain connection password.Ensure the password contains only alphanumeric characters and isbetween 8 and 30 characters in length:Re-Enter the Application Server Domain connection password.
17. Enter the Oracle WebLogic Server Admin password, following the guidelines in the prompt.
The default Oracle WebLogic server administrator is system. The window does not display masking characters as you type. There is no default password.
Enter a new WebLogic Server Admin user [system] password. Ensure that the password is between 8 and 30 characters in length with at least one lowercase letter, one uppercase letter, one number or one special character (!@#$%^&):Re-Enter the WebLogic Server Admin user password:
18. Enter the password twice for the PTWEBSERVER web profile user.
Note. The guideline in the prompt for the PTWEBSERVER user password does not allow special characters. However, the PeopleSoft system does allow special characters for the PTWEBSERVER password. If you want to change the password to include special characters, you have the option to do so in the PeopleSoft PureInternet Architecture (PIA) after you complete the installation and domain creation.
See PeopleTools: Security Administration, "Working with Passwords."
Enter a new PeopleSoft WebProfile user [PTWEBSERVER] password. Ensure the password contains only alphanumeric characters and is between8 and 30 characters in length:Re-Enter the PeopleSoft WebProfile user password:
19. Enter the Integration Gateway user ID and password.
The default user ID is administrator.
Note. The guideline in the prompt for the Integration Gateway user ID password does not allow special characters. However, the PeopleSoft system does allow special characters for the Integration Gateway password. If you want to change the password to include special characters, you have the option to do so in the PeopleSoft Pure Internet Architecture (PIA) after you complete the installation and domain creation.
See PeopleTools: Security Administration, "Working with Passwords."
Enter the PeopleSoft Integration Gateway user [administrator]:Enter the PeopleSoft Integration Gateway user [administrator] password.

Deploying Mid-Tier Components Chapter 7
214 Copyright © 2018, Oracle and/or its affiliates. All Rights Reserved.
Ensure the password contains only alphanumeric characters and is between 8 and 30 characters in length:Re-Enter the PeopleSoft Integration Gateway user password:
20. If you want to change any of the answers to the previous questions, enter n (no) at the following prompt, or enter y (yes) to continue:
Are you happy with your answers? [y|n]:
21. Review the status messages as the script updates the Puppet YAML files with the user input.
If EYAML files are installed, the passwords are encrypted and updated in the YAML file.
Encrypting the Passwords in the User Data: [ OK ]Updating the Puppet Hiera YAML Files with User Data: [ OK ]
22. Answer n (no) to indicate that you do not want to continue running the initialization script using the default configuration.
The script stops. Follow the instructions for using customizations for mid-tier connectivity to complete the mid-tier deployment.
See "Completing the DPK Initialization with Customizations."
The bootstrap script is ready to deploy and configure the PeopleSoftenvironment using the default configuration defined in the PuppetHiera YAML files. You can proceed by answering 'y' at the followingprompt. And, if you want to customize the environment by overridingthe default configuration, you can answer 'n'. If you answer 'n', youshould follow the instructions in the PeopleSoft Installation Guidefor creating the customization Hiera YAML file and running the Puppet'apply' command directly to continue with the setup of the PeopleSoftenvironment.
Do you want to continue with the default initialization process? [y|n]: ⇒n
You have decided not to continue with the default PeopleSoft environmentsetup process. Any customizations to the PeopleSoft environment should⇒ bedone in the Hiera YAML file 'psft_customizations.yaml' and place it⇒ under[/cs1/psft/dpk/puppet/production/data] folder. After making thenecessary customizations, run the following commands to continue with⇒ thesetup of PeopleSoft environment.
1. cd /cs1/psft/dpk/puppet/production/manifests2. PUPPET_DIR/puppet apply --confdir=/cs1/psft/dpk/puppet site.pp --⇒debug --trace
Exiting the PeopleSoft environment setup process.The PeopleSoft Environment Setup Process Ended.
Note. For Linux, PUPPET_DIR is /opt/puppetlabs/bin. For AIX or Solaris, PUPPET_DIR is /opt/oracle/puppetlabs/bin.

Chapter 7 Deploying Mid-Tier Components
Copyright © 2018, Oracle and/or its affiliates. All Rights Reserved. 215
23. Review the status messages as the script runs Puppet profiles to set up the PeopleSoft environment.
A message of [ OK ] indicates that the profile has been applied successfully while a message [FAILED] indicates that the profile application failed.
The script stops and exits the first time a profile application fails, and displays an error message. This exampleshows the error message after the first step failed:
Starting the Default Initialization of PeopleSoft Environment:
Setting Up System Settings: [FAILED]
The initialization of PeopleSoft environment setup failed. Check thelog file [DPK_INSTALL/setup/psft_dpk_setup.log] for the errors.After correcting the errors, run the following commands to continuewith the setup of PeopleSoft environment.
1. cd /cs1/psft/dpk/puppet/production/manifests2. PUPPET_DIR/puppet apply --confdir=/cs1/psft/dpk/puppet site.pp --⇒debug --trace
Exiting the PeopleSoft environment setup process.The PeopleSoft Environment Setup Process Ended.
Note. For Linux, PUPPET_DIR is /opt/puppetlabs/bin. For AIX or Solaris, PUPPET_DIR is /opt/oracle/puppetlabs/bin.
See "Completing the DPK Initialization with Customizations."
Upon successful completion, the DPK setup script displays the following message:
Starting the Default Initialization of PeopleSoft Environment:Setting Up System Settings: [ OK ]Deploying PeopleTools Components: [ OK ]DSetting up PeopleSoft OS Users Environment: [ OK ]Setting up PeopleSoft Application Server Domain: [ OK ]Setting up PeopleSoft Process Scheduler Domain: [ OK ]Setting up PeopleSoft PIA Domain: [ OK ]Changing the Passwords for the Environment: [ OK ]Configuring Pre-Boot PeopleSoft Environment: [ OK ]Starting PeopleSoft Domains: [ OK ]Configuring Post-Boot PeopleSoft Environment: [ OK ]Setting up Source Details for PeopleTools Client: [ OK ]The PeopleSoft Environment Setup Process Ended.
The complete setup log is written to the file psft_dpk_setup.log in the same location as the DPK setup script.
Task 7-2: Completing Installation Tasks
After completing the installation process, be sure to go to the chapter "Completing the Installation." This chapter includes information on accessing the PeopleSoft environment, as well as post-installation steps. It is important that you perform the tasks in the section Completing Post-Installation Steps that apply to your environment.


Copyright © 2018, Oracle and/or its affiliates. All Rights Reserved. 217
Chapter 8
Completing the Installation
This chapter discusses:
• Completing Post-Installation Steps
• Using the PeopleSoft Installation
Task 8-1: Completing Post-Installation Steps
This section discusses:
• Using Fluid User Interface
• Updating the Installation Table
• Setting Options for Multilingual Databases
• Updating PeopleTools Options
• Updating Time Zone Information
• Updating Database Information
Task 8-1-1: Using Fluid User InterfaceWhen you sign in to your PeopleSoft application, you may see the PeopleSoft Fluid User Interface by default. To access the menu items, as seen in the classic user interface, from the PeopleSoft Fluid User Interface:

Completing the Installation Chapter 8
218 Copyright © 2018, Oracle and/or its affiliates. All Rights Reserved.
1. On the PeopleSoft Fluid User Interface, shown in this example, select (press) the NavBar button at the top right (diamond inside a circle).
PeopleSoft Fluid User Interface home page
The Navigation bar (NavBar) side page appears.

Chapter 8 Completing the Installation
Copyright © 2018, Oracle and/or its affiliates. All Rights Reserved. 219
2. Select (press) Navigator.
NavBar side page
The menu structure appears.

Completing the Installation Chapter 8
220 Copyright © 2018, Oracle and/or its affiliates. All Rights Reserved.
3. Navigate to the desired item, such as Set Up HCM or PeopleTools.
Navigator side page with PeopleSoft menu items
See Also
PeopleTools: Applications User's Guide, "Working With Fluid Homepages"PeopleTools: Fluid User Interface Developer's Guide
Task 8-1-2: Updating the Installation TableAfter you complete the installation process, creating the database, installing the Application Server, and installing the PeopleSoft Pure Internet Architecture, you must complete this additional step. This postinstallation step ensures that only the products you are entitled to use are active in the installation. The location of the installation table in the PeopleSoft system varies depending upon the PeopleSoft application that you installed.
Note. For information on the products you are entitled to use, contact your Oracle Support representative.
1. Sign on to the PeopleSoft system in a browser.
2. Select Set Up Application_name (where Application_name is the PeopleSoft application you installed), Install, Installation Table.
3. Select the Products tab.

Chapter 8 Completing the Installation
Copyright © 2018, Oracle and/or its affiliates. All Rights Reserved. 221
4. Clear the check boxes for the products that you are not entitled to use.
Task 8-1-3: Setting Options for Multilingual Databases
Setting the Data Field Length Checking Option
The value to specify data field length checking must be set correctly in order for PeopleSoft applications to perform correctly in a browser. Use one of these methods to set the data field length checking option:
• Select PeopleTools, Utilities, Administration, PeopleTools Options, and select the Data Field Length Checking option from the drop-down list.
• Alternatively, use the SQL tool for your database platform to modify the DBLENGTHTYPE parameter in the PSOPTIONS table.
See PeopleTools: Global Technology, "Setting Data Field Length Checking."See PeopleTools: Global Technology, "Selecting Character Sets."Use the guidelines in this table to select the correct option for your environment:
Environment PeopleTools Option Page Selection PSOPTIONS.DBLENGTHTYPE Value
Unicode-encoded database or a non-Unicode SBCS database
Others N
Japanese database on DB2 LUW DB2 MBCS D
Non-Unicode Japanese database
Note. If your installation uses the Shift-JIS character set for Japanese, you mustuse this option.
MBCS
Note. The MBCS option is not supported for DB2 z/OS.
M
Setting the Unicode Enabled Option
If you are running a Unicode database, verify that the UNICODE_ENABLED parameter in the PSSTATUS table is set correctly. For example:
• For non-Unicode databases, including those using the Shift-JIS character set for Japanese, set UNICODE_ENABLED=0.
• For Unicode databases, set UNICODE_ENABLED=1.
See the information on converting to Unicode in the PeopleTools: Global Technology product documentation.
Task 8-1-4: Updating PeopleTools OptionsYou can set the following options on the PeopleTools Options page:
• Multi-Currency — Select this check box if you plan to use currency conversion.
See PeopleTools: Global Technology, "Using System-Wide Multicurrency Settings."
• Base Time Zone — Enter a value for the base time zone for your PeopleTools database.

Completing the Installation Chapter 8
222 Copyright © 2018, Oracle and/or its affiliates. All Rights Reserved.
See PeopleTools: Global Technology, "Setting the Base Time Zone."
• Sort Order Option — If you specified a non-binary sort order for your database, choose the Sort Order Option that most closely approximates your database sort order.
See PeopleTools: Global Technology, "Setting the Sort Order."
Task 8-1-5: Updating Time Zone InformationAdditional steps may be required to configure your time zone after you complete the installation.See PeopleTools: Global Technology, "Maintaining Time Zones."
Task 8-1-6: Updating Database InformationThe database information updated in this procedure is used by the PeopleSoft software update tools to identify your PeopleSoft database when searching for updates. These steps should be followed for all additional databases that you create to enable the accurate identification of your databases.1. Sign on to your PeopleSoft database.
2. Navigate to PeopleTools, Utilities, Administration, PeopleTools Options.
3. Specify long and short names for your environment. For example:
• Environment Long Name — Customer HR Demo Database
• Environment Short Name — HR Demo DB
4. Select a system type from the drop-down list. For example, Demo Database.
5. Save your changes.
Task 8-2: Using the PeopleSoft Installation
This section discusses:
• Accessing the PeopleSoft Environment
• Reviewing the Deployment File System
• Reviewing the Deployed Users
• Managing PeopleTools Domains with PSADMIN
Task 8-2-1: Accessing the PeopleSoft EnvironmentAfter you complete the initialization of the virtual machine the PeopleSoft installation will be available. This section includes brief information to help you work with the PeopleSoft environment. For detailed definitions, andinformation on working with the components in a PeopleSoft installation, see the PeopleSoft documentation referenced earlier.To sign in to the deployed PeopleSoft environment in a browser (that is, use the PeopleSoft Pure Internet Architecture, or PIA), use a URL with this format:http://<host_name>:<http_port>/<PIA_site_name>/signon.htmlFor example, for a deployment with the default port, 8000, and default PIA site name, ps, the URL would be http://server1.example.com:8000/ps/signon.html.

Chapter 8 Completing the Installation
Copyright © 2018, Oracle and/or its affiliates. All Rights Reserved. 223
Task 8-2-2: Reviewing the Deployment File SystemThe PeopleSoft installation deployed by the PeopleSoft DPKs sets up an environment comprised of several directories. This table lists the directories with the location, contents of the directory, and the owner.
Directory Description Default Location Access
PS_HOME The binary installation files are placed into a secure ps_home<peopletools_patch_version> directory, where <peopletools_patch_version>is the full release, for example 8.56.01.
BASE_DIR/pt/ps_home<peopletools_patch_version>
This directory can only be written to by the PeopleSoft administrator, psadm1.
PS_CFG_HOME The Application Server and Process Scheduler server configuration files are placedinto a PS_CFG_HOME directory named <peopletools_major_version>, where <peopletools_major_version> does not include patch numbers; for example, 8.56.
• On AIX, Linux, or Solaris, /home/psadm2/psft/pt/<peopletools_major_version>
• On Microsoft Windows, C:\%USERPROFILE%\psft\pt\<peopletools_major_version>
For example, if the USERPROFILE environment variable is C:\Users\username, the location is C:\Users\username\psft\pt\8.56.
This directory is owned by psadm2.
PS_APP_HOME The PeopleSoft application installation files are located in the <Product>_app_homedirectory, where <Product> is an abbreviation for the PeopleSoft application, such as hcm for PeopleSoft Human Capital Management.
BASE_DIR/pt/<Product>_app_home
This directory can only be written to by psadm3.

Completing the Installation Chapter 8
224 Copyright © 2018, Oracle and/or its affiliates. All Rights Reserved.
Directory Description Default Location Access
ORACLE_HOME (Oracle RDBMS software)
This includes the Oracle RDBMS database server and client connectivity software, including the SQL*Plus program.
The Oracle RDBMS client installation is the 64-bit client used by PeopleSoft PeopleTools to connect from the PeopleSoft Application Server and Process Schedulerdomains to the PeopleTools Database.
Note. The default listener port is 1521.
BASE_DIR/db/oracle-server This directory is owned by user oracle2.
Oracle WebLogic This includes the installation files for the Oracle WebLogic web server.
BASE_DIR/pt/bea/wlserver This directory is owned by psadm1.
Oracle Tuxedo This includes the installation files for Oracle Tuxedo.
BASE_DIR/pt/bea/tuxedo This directory is owned by psadm1.
PeopleSoft database files (on Oracle RDBMS)
This includes the Oracle database files and tables for the PeopleSoft application.
BASE_DIR/db/oradata The owner of the database tables is oracle2 and its group is oinstall.
Note. This is different from the users for the PeopleSoft installation and configuration.
See Also
PeopleTools: System and Server Administration, "Securing PS_HOME and PS_CFG_HOME"
Task 8-2-3: Reviewing the Deployed UsersThe deployed configuration includes the default users and default passwords described in the following table.
Important! All default, non-root passwords are set to expire immediately. On the first login of one of the non-root users, the system will prompt you to provide new passwords.
In the case of the passwords that expire immediately, such as those for psadm1 and so on, if you do not log in as the user specified in this table and change the password, the default passwords documented here remains in effect.
New passwords must include the following characteristics:
• At least 14 characters long

Chapter 8 Completing the Installation
Copyright © 2018, Oracle and/or its affiliates. All Rights Reserved. 225
• At least one digit (0–9)
• At least one special character (for example, * or #)
• At least one lowercase letter (a–z)
• At least one uppercase letter (A–Z)
User Name Default Password Role Definition
psadm1 0radmin (the first character is the number zero)
The PeopleSoft installation administrator who owns PS_HOME.
This user cannot write into PS_CFG_HOME.
psadm2 0radmin (the first character is the number zero)
The PeopleTools domain user who creates and configures the Application Server domain, Process Scheduler (batch server) domain, and the PIA. This user cannot write to PS_HOME, but has read-execute access.
psadm3 0radmin (the first character is the number zero)
The PeopleSoft installation administrator who owns PS_APP_HOME.
oracle2 oracle The Oracle Database Server user name.
See Also
"Completing the DPK Initialization with Customizations," Preparing the Customization File for Linux, AIX, or Solaris Users
Task 8-2-4: Managing PeopleTools Domains with PSADMINUse the PSADMIN utility to manage any of the PIA, Application Server, or Process Scheduler domains. You can find the PSADMIN utility in PS_HOME/appserv. You must first sign in with the PeopleTools domain user psadm2, described in the section Reviewing the File System and Users. When you sign in as the PeopleTools domain user, the psconfig.sh script is automatically invoked through the user's profile. This is referred to as sourcing the psconfig.sh script. This ensures that all of the required environment variables are set prior to workingwith PSADMIN. You can perform all the usual administrative options for PIA, Application Server, and Process Scheduler domains using PSADMIN. You may reconfigure the existing domains, shut them down, restart them and create additional domains if necessary. The environment as delivered has however been sufficiently configured to perform many of the activities for which this virtual machine has been created.
See Also
PeopleTools: System and Server Administration, "Using the PSADMIN Utility"


Copyright © 2018, Oracle and/or its affiliates. All Rights Reserved. 227
Chapter 9
Deploying the PeopleTools Client DPK
This chapter discusses:
• Deploying the PeopleTools Client DPK
Task 9-1: Deploying the PeopleTools Client DPK
This section discusses:
• Understanding the Standalone Mode Deployment
• Preparing for the PeopleTools Client DPK Deployment
• Deploying in Standalone Mode
Task 9-1-1: Understanding the Standalone Mode DeploymentUse the standalone mode (SA mode) deployment for the PeopleTools Client DPKs when deploying the DPKs alone, without first deploying the PeopleSoft application or PeopleSoft PeopleTools DPKs. Use this method, for example, when carrying out a PeopleTools-only upgrade.Use SA mode deployment for the following tasks:
• PeopleTools Upgrade
The deployment process installs a PeopleTools client PS_HOME that includes the directories needed for a PeopleSoft PeopleTools-only upgrade, such as data, projects, and scripts directories.
• PeopleTools Patch
The deployment process installs a PeopleTools client PS_HOME that includes the directories needed for a PeopleSoft PeopleTools patch application, such as the PTP directory.
See "Learning About the PeopleSoft Deployment Process," Reviewing the PeopleTools Patch DPKs.
• PeopleTools Client
The deployment process installs a PeopleTools client PS_HOME. Choose the deployment type "None of the above" for this deployment.
• Change Assistant installation
You can install Change Assistant as part of the PeopleTools Client deployment, or as a separate installation. The deployment process installs, but does not configure Change Assistant. To use Change Assistant for a PeopleSoft PeopleTools-only upgrade or to apply a PeopleSoft PeopleTools patch, you must configure Change Assistant manually. See the PeopleTools upgrade or patch documentation for information.
If there is an existing Change Assistant installation, the deployment process removes or upgrades it to the current release, and saves a configuration file with the existing setup.
See the PeopleTools installation guide for your database platform, "Installing PeopleSoft Change Assistant."

Deploying the PeopleTools Client DPK Chapter 9
228 Copyright © 2018, Oracle and/or its affiliates. All Rights Reserved.
• Change Impact Analyzer
You can install Change Impact Analyzer as part of the PeopleTools Client deployment, or as a separate installation.
• PeopleSoft Test Framework (PTF) installation
You can install PeopleSoft Test Framework as part of the PeopleTools Client deployment, or as a separate installation.
• PeopleSoft Test Framework (PTF) configuration
If you choose to configure PTF, the deployment process prompts you for setup parameters. You can configurePTF either at the same time that you install it or later. For example, you may choose to configure PTF separately if you install and configure it first, and then later the middle-tier components in your environment change. In this case, you do not need to install, but you can use the deployment process to reconfigure PTF.
• Configuration Manager
If you accept the option to configure the PeopleTools client, the information that you supply is used to configure Configuration Manager.
• The PeopleTools Client deployment installs Microsoft Visual C++ Redistributable Packages for Visual Studio, which include required Microsoft C++ runtime libraries.
Task 9-1-2: Preparing for the PeopleTools Client DPK DeploymentTo deploy the PeopleTools Client DPK:1. Go to the download location for the PeopleSoft PeopleTools DPKs, and download only the last zip file to a
location known as DPK_INSTALL on a Microsoft Windows computer.
The last zip file, for example Filename_4of4.zip, is the PeopleSoft PeopleTools client DPK.
See Obtaining the PeopleSoft PeopleTools Patch DPKs.
2. Extract the downloaded zip file, which yields another zip file.
3. Extract the resulting zip file to a local or shared directory; for example C:\tools-client.
Task 9-1-3: Deploying in Standalone ModeThis section assumes that the user running the script has administrative permission.To deploy the PeopleTools Client DPK in SA mode:1. Verify that the Microsoft Windows folders options are set to show known file extensions.
Hidden file extensions may interfere with the script. To show file extensions, for example:
a. Open Windows Explorer and select Tools, Folder Options.
Note. Depending upon the Microsoft Windows operating system, you may use a different method to set the folder options.
b. On the Folder Options dialog box, select the View tab.

Chapter 9 Deploying the PeopleTools Client DPK
Copyright © 2018, Oracle and/or its affiliates. All Rights Reserved. 229
c. Verify that the check box for Hide extensions for known file types is not selected, as shown in this example:
Folder Options dialog box: View tab
d. Click OK to close the box.
2. Open a command prompt, running as administrator, and change directory to the C:\tools_client folder.
The tools_client folder includes various sub-folders, and the following files:
• SetupPTClient.bat
The interactive script that installs the PeopleSoft PeopleTools components such as Application Designer, Change Assistant, Change Impact Analyzer, and PeopleSoft Test Framework.
• readme.txt
3. Run the setup script with the following command:
SetupPTClient.bat -t
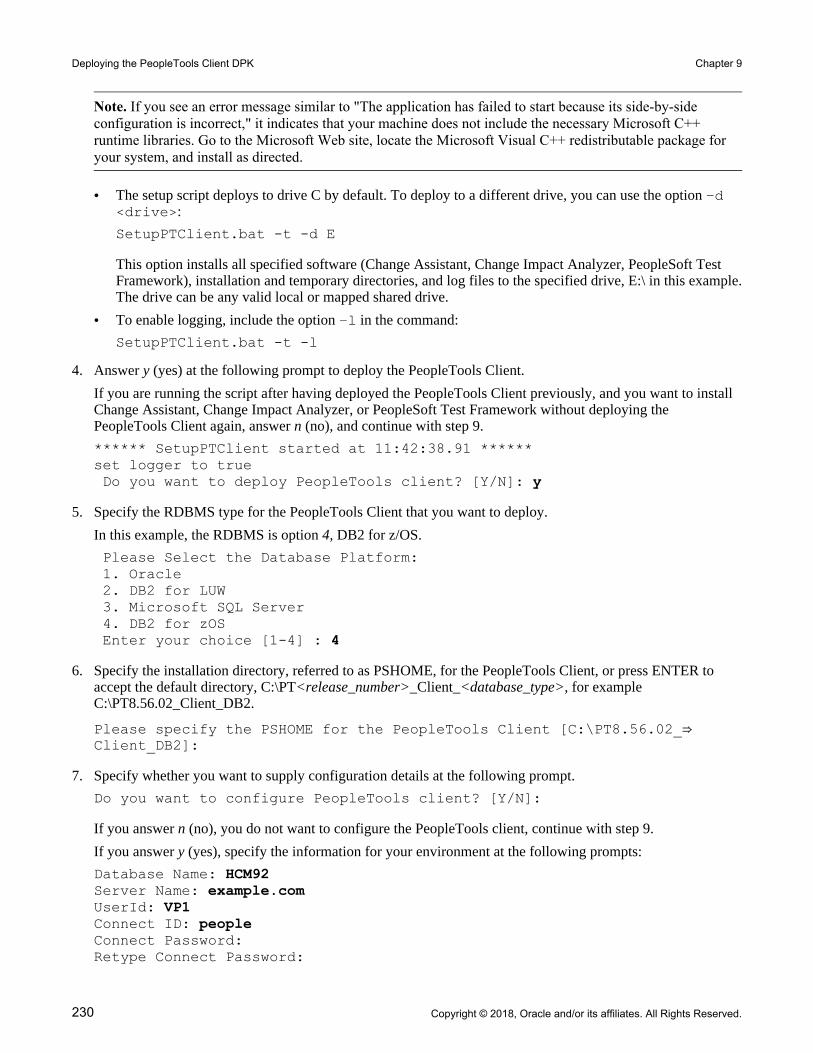
Deploying the PeopleTools Client DPK Chapter 9
230 Copyright © 2018, Oracle and/or its affiliates. All Rights Reserved.
Note. If you see an error message similar to "The application has failed to start because its side-by-side configuration is incorrect," it indicates that your machine does not include the necessary Microsoft C++ runtime libraries. Go to the Microsoft Web site, locate the Microsoft Visual C++ redistributable package for your system, and install as directed.
• The setup script deploys to drive C by default. To deploy to a different drive, you can use the option -d <drive>:
SetupPTClient.bat -t -d E
This option installs all specified software (Change Assistant, Change Impact Analyzer, PeopleSoft Test Framework), installation and temporary directories, and log files to the specified drive, E:\ in this example.The drive can be any valid local or mapped shared drive.
• To enable logging, include the option -l in the command:
SetupPTClient.bat -t -l
4. Answer y (yes) at the following prompt to deploy the PeopleTools Client.
If you are running the script after having deployed the PeopleTools Client previously, and you want to install Change Assistant, Change Impact Analyzer, or PeopleSoft Test Framework without deploying the PeopleTools Client again, answer n (no), and continue with step 9.
****** SetupPTClient started at 11:42:38.91 ******set logger to true Do you want to deploy PeopleTools client? [Y/N]: y
5. Specify the RDBMS type for the PeopleTools Client that you want to deploy.
In this example, the RDBMS is option 4, DB2 for z/OS.
Please Select the Database Platform: 1. Oracle 2. DB2 for LUW 3. Microsoft SQL Server 4. DB2 for zOS Enter your choice [1-4] : 4
6. Specify the installation directory, referred to as PSHOME, for the PeopleTools Client, or press ENTER to accept the default directory, C:\PT<release_number>_Client_<database_type>, for example C:\PT8.56.02_Client_DB2.
Please specify the PSHOME for the PeopleTools Client [C:\PT8.56.02_⇒Client_DB2]:
7. Specify whether you want to supply configuration details at the following prompt.
Do you want to configure PeopleTools client? [Y/N]:
If you answer n (no), you do not want to configure the PeopleTools client, continue with step 9.
If you answer y (yes), specify the information for your environment at the following prompts:
Database Name: HCM92Server Name: example.comUserId: VP1Connect ID: peopleConnect Password: Retype Connect Password:
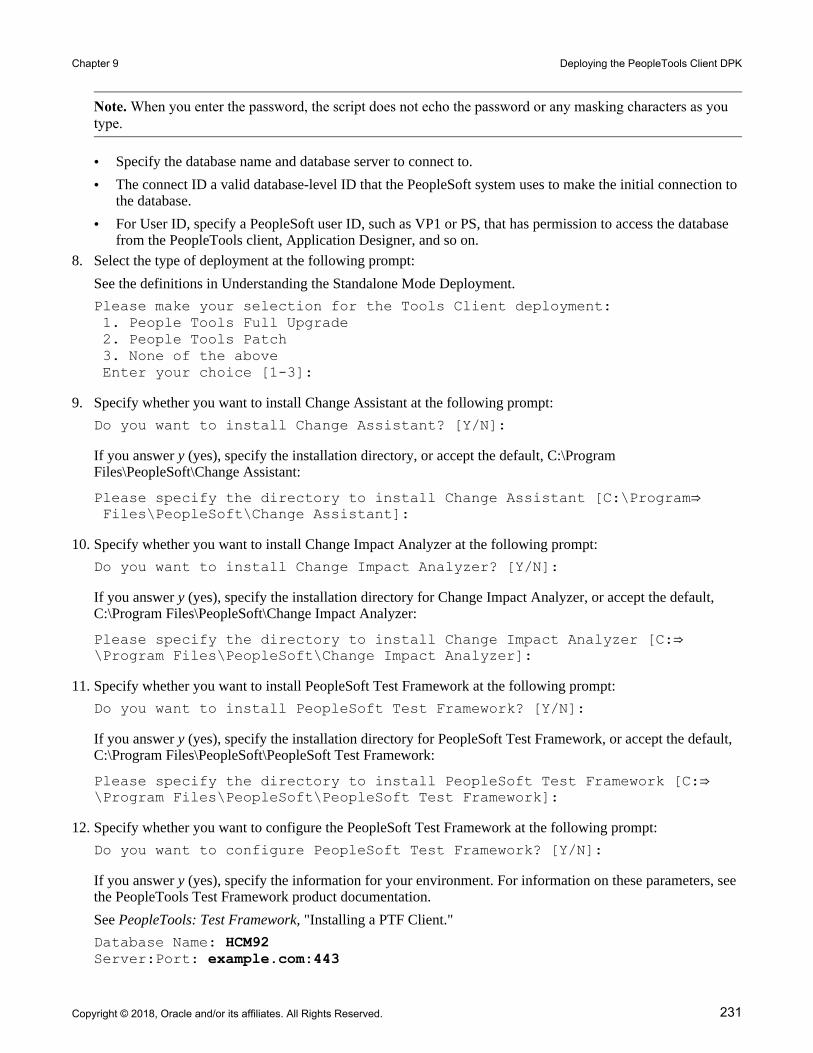
Chapter 9 Deploying the PeopleTools Client DPK
Copyright © 2018, Oracle and/or its affiliates. All Rights Reserved. 231
Note. When you enter the password, the script does not echo the password or any masking characters as you type.
• Specify the database name and database server to connect to.
• The connect ID a valid database-level ID that the PeopleSoft system uses to make the initial connection to the database.
• For User ID, specify a PeopleSoft user ID, such as VP1 or PS, that has permission to access the database from the PeopleTools client, Application Designer, and so on.
8. Select the type of deployment at the following prompt:
See the definitions in Understanding the Standalone Mode Deployment.
Please make your selection for the Tools Client deployment: 1. People Tools Full Upgrade 2. People Tools Patch 3. None of the above Enter your choice [1-3]:
9. Specify whether you want to install Change Assistant at the following prompt:
Do you want to install Change Assistant? [Y/N]:
If you answer y (yes), specify the installation directory, or accept the default, C:\Program Files\PeopleSoft\Change Assistant:
Please specify the directory to install Change Assistant [C:\Program⇒ Files\PeopleSoft\Change Assistant]:
10. Specify whether you want to install Change Impact Analyzer at the following prompt:
Do you want to install Change Impact Analyzer? [Y/N]:
If you answer y (yes), specify the installation directory for Change Impact Analyzer, or accept the default, C:\Program Files\PeopleSoft\Change Impact Analyzer:
Please specify the directory to install Change Impact Analyzer [C:⇒\Program Files\PeopleSoft\Change Impact Analyzer]:
11. Specify whether you want to install PeopleSoft Test Framework at the following prompt:
Do you want to install PeopleSoft Test Framework? [Y/N]:
If you answer y (yes), specify the installation directory for PeopleSoft Test Framework, or accept the default, C:\Program Files\PeopleSoft\PeopleSoft Test Framework:
Please specify the directory to install PeopleSoft Test Framework [C:⇒\Program Files\PeopleSoft\PeopleSoft Test Framework]:
12. Specify whether you want to configure the PeopleSoft Test Framework at the following prompt:
Do you want to configure PeopleSoft Test Framework? [Y/N]:
If you answer y (yes), specify the information for your environment. For information on these parameters, see the PeopleTools Test Framework product documentation.
See PeopleTools: Test Framework, "Installing a PTF Client."
Database Name: HCM92Server:Port: example.com:443

Deploying the PeopleTools Client DPK Chapter 9
232 Copyright © 2018, Oracle and/or its affiliates. All Rights Reserved.
Node ID: node_nameUser ID: VP1Proxy [Y/N]: yProxy Server: proxyserver.comProxy Port: 5000Proxy User: usernameProxy Password:*******Retype Proxy Password:*******
13. Review the setup steps.
The messages you see depend upon your choices.
Starting Tools Client Deployment!Deploying PeopleTools 8.56.02 Client in C:\PT8.56.02_Client_DB2Configuring PeopleTools 8.56.02 ClientDeployment of PeopleTools Client Complete.Tools Client Deployment Ended.***** SetupPTClient ended at 11:35:08.91 ******Please review C:\PeopleSoft\PTClientDeploy.log for additional⇒ information.
14. To review the log file for the setup process, go to %USERPROFILE%\AppData\Local\Temp\PeopleSoft\PTClientDeploy.log.
For example, if the USERPROFILE environment variable is C:\Users\username, the log file location is C:\Users\username\AppData\Local\Temp\PeopleSoft\PTClientDeploy.log.
Note. If you used the -d <drive> option to deploy to a drive other than drive C:\, the log file is found in <drive>:\Users\<username>\AppData\Local\Temp\PeopleSoft\PTClientDeploy.log and creates the directory ifit does not exist.
The PTClientDeploy.log file includes a record of each of the steps in the PeopleTools Client deployment process. If any of the steps fail, a detailed error or warning message will be written to the same log file.

Copyright © 2018, Oracle and/or its affiliates. All Rights Reserved. 233
Part II
Discretionary Installation
The second part of the installation guide includes optional tasks, tasks that are only required by certain environments, and those that you may decide to defer until after the initial installation.


Copyright © 2018, Oracle and/or its affiliates. All Rights Reserved. 235
Chapter 10A
Installing and Compiling COBOL on Windows
This chapter discusses:
• Understanding COBOL
• Prerequisites
• Preparing COBOL for a PeopleTools-only Upgrade
• Installing Micro Focus Net Express on Microsoft Windows
• Managing Micro Focus Net Express Compiler Licenses
• Using the Micro Focus COBOL Compiler on Microsoft Windows
Understanding COBOL
This chapter describes how to compile and link PeopleSoft COBOL batch programs, if necessary.COBOL is not needed for PeopleSoft PeopleTools because the Process Scheduler is written in C++. In addition, COBOL is not required for PeopleSoft applications that contain no COBOL programs. See My Oracle Support forthe details on whether your application requires COBOL.The chapter includes instructions for the Micro Focus Net Express COBOL compiler.
Warning! If your database server is DB2 for z/OS and your CCSID is not 37, you must read the CCSID discussion under Defining DB2 for z/OS Subsystem Configuration in the chapter "Preparing for Installation."
For information on %BINARYSORT, see the product documentation on sorting in PeopleTools: Global Technology.
For information on PeopleTools options and PSOPTIONS, see the product documentation on PeopleTools utilities in PeopleTools: System and Server Administration.
See Also
"Preparing for Installation," Installing Supporting ApplicationsPeopleSoft Enterprise Frequently Asked Questions About PeopleSoft and COBOL Compilers, My Oracle Support, (search for the article name)PeopleSoft Enterprise Frequently Asked Questions About PeopleSoft and the IBM COBOL Compiler, My Oracle Support, (search for the article name)PeopleTools Certifications - Suggested Fixes COBOL, My Oracle Support, (search for the article name and selectthe current release)

Installing and Compiling COBOL on Windows Chapter 10A
236 Copyright © 2018, Oracle and/or its affiliates. All Rights Reserved.
PeopleTools: Global Technology, "Understanding COBOL in a Unicode Environment"PeopleTools: Global Technology, "Understanding Running COBOL in a z/OS Unicode Environment"
Prerequisites
Before you attempt to run COBOL from the command line you should do the following:
• Make sure the variable PS_SERVER_CFG points to a valid psprcs.cfg file.
• Make sure %PS_HOME%\bin\server\winx86 is in your path. It should appear before %PS_HOME%\bin\client\winx86 if that also appears in the path.
• Before compiling COBOL, you must obtain and install Perl on the machine used to compile COBOL.
Perl is used to perform conversions on COBOL source files. Make sure the Perl installation location is included in the system's PATH environment variable. Contact the Perl vendor for installation and reference documentation.
Task 10A-1: Preparing COBOL for a PeopleTools-only Upgrade
When performing a PeopleTools-only upgrade, if you have COBOL modules, recompile all PeopleSoft PeopleTools and PeopleSoft application COBOL programs, as explained in a later section.Ensure that the following COBOL runtime files in your client and server bin directories match those of your Micro Focus Net Express installation:
• CBLINTS.DLL
• CBLRTSS.DLL
• CBLVIOS.DLL
• COB32API.DLL
See Recompiling COBOL on Microsoft Windows.
Task 10A-2: Installing Micro Focus Net Express on Microsoft Windows
This section discusses:
• Prerequisites
• Obtaining Installation Files for Micro Focus Net Express from Oracle Software Delivery Cloud
• Installing Micro Focus Net Express Wrap Pack 6
• Installing Micro Focus Net Express Wrap Pack 14
PrerequisitesMicro Focus® Net Express™ 5.1 Wrap Pack 14 is the supported COBOL compiler on Microsoft Windows for thecurrent PeopleSoft PeopleTools release. This Wrap Pack is an product update and does require a previous version of the product to be installed. Micro Focus Net Express 5.1 Wrap Pack 14 can upgrade any of the following releases or any combination of these releases:

Chapter 10A Installing and Compiling COBOL on Windows
Copyright © 2018, Oracle and/or its affiliates. All Rights Reserved. 237
• Micro Focus Net Express 5.1 Wrap Pack 6
• Micro Focus Net Express 5.1 Wrap Pack 7
• Micro Focus Net Express 5.1 Wrap Pack 8
• Micro Focus Net Express 5.1 Wrap Pack 9
• Micro Focus Net Express 5.1 Wrap Pack 10
• Micro Focus Net Express 5.1 Wrap Pack 11
• Micro Focus Net Express 5.1 Wrap Pack 12
• Micro Focus Net Express 5.1 Wrap Pack 13
If you are running a Wrap Pack prior to Wrap Pack 6 or have no Net Express version installed, install Wrap Pack 6 before installing Wrap Pack 14.See Installing Micro Focus Net Express Wrap Pack 6.Check the certification information on My Oracle Support for the supported version for Microsoft Windows operating systems.Note that Oracle is the exclusive reseller of the Micro Focus COBOL compiler for use with PeopleSoft applications.
See Also
PeopleSoft Enterprise Frequently Asked Questions About PeopleSoft and COBOL Compilers, My Oracle Support, Doc ID 747059.1Using the Micro Focus COBOL Compiler on Microsoft Windows
Task 10A-2-1: Obtaining Installation Files for Micro Focus Net Express fromOracle Software Delivery CloudThe Micro Focus Net Express installation files are available on Oracle Software Delivery Cloud. At this point youmay have already downloaded the necessary files. This section includes additional information on finding and using the files for Micro Focus Net Express if necessary.See "Preparing for Installation," Using Oracle Software Delivery Cloud to Obtain Installation Files.See Oracle Software Delivery Cloud, https://edelivery.oracle.com.To obtain the files for the Micro Focus Net Express installation:1. Log in to Oracle Software Delivery Cloud at https://edelivery.oracle.com.
2. Enter Micro Focus in the type-ahead Product field, and select Micro Focus International Ltd. Net Express COBOL for Windows.
The product is added to the Download Queue.
3. Click Continue.
4. Click Continue.
5. Read the license agreement, select the check box to acknowledge that you accept the agreement, and then click Continue.
6. Click one of the filenames to download an individual zip file, or click Download All to obtain all of the files listed.
The files include software, wrap packs, and documentation. Save the zip files to a temporary directory on your

Installing and Compiling COBOL on Windows Chapter 10A
238 Copyright © 2018, Oracle and/or its affiliates. All Rights Reserved.
local system. The directory where you save the zip files for both versions is referred to in this documentation as NE_INSTALL. You must extract (unzip) each file on the platform for which it is intended. For example, if you download the zip file for Microsoft Windows, you must unzip it on Microsoft Windows to avoid problems.
Task 10A-2-2: Installing Micro Focus Net Express Wrap Pack 6The following procedure assumes that you saved the installation files from Oracle Software Delivery Cloud in thedirectory NE_INSTALL.
Note. Micro Focus Net Express Wrap Pack 6 is a full product release and does not require a previous version of the product to be installed.
To install Micro Focus Net Express Wrap Pack 6:1. Double-click NE_INSTALL/nxp3251060079.exe.
If a security screen appears, click Run to launch the installer.
Open File - Security Warning for the Micro Focus installation executable
The Install Shield Wizard starts extracting files. This may take a few minutes until the files are extracted, and then the Installation Wizard dialog box appears.

Chapter 10A Installing and Compiling COBOL on Windows
Copyright © 2018, Oracle and/or its affiliates. All Rights Reserved. 239
2. Click Next on the welcome window.
The screen includes a button to open a Readme file.
Micro Focus Net Express Installation Wizard Welcome window

Installing and Compiling COBOL on Windows Chapter 10A
240 Copyright © 2018, Oracle and/or its affiliates. All Rights Reserved.
3. Read the terms of the License Agreement, select the option to accept the terms, and click Next.
License Agreement window for Micro Focus Express
4. Complete the Customer Information window:
a. Enter your name in the User Name field, and enter your Company Name.
In the example shown below, the user name is USER NAME, and the Company Name is ORACLE.
b. Leave the Serial Number and W.O. Number fields blank. Oracle does not provide these numbers to you and they are not required.
Note. The message at the top of the window reads "We STRONGLY recommend you enter your Serial Number and Works Order (W.O.) number here. You will need them later to obtain a full license key." Theexample here leaves these fields blank.

Chapter 10A Installing and Compiling COBOL on Windows
Copyright © 2018, Oracle and/or its affiliates. All Rights Reserved. 241
c. Click Next.
Customer Information window

Installing and Compiling COBOL on Windows Chapter 10A
242 Copyright © 2018, Oracle and/or its affiliates. All Rights Reserved.
5. The Custom Setup window appears as in this example, with all of the options selected initially:
Custom Setup window before selecting features

Chapter 10A Installing and Compiling COBOL on Windows
Copyright © 2018, Oracle and/or its affiliates. All Rights Reserved. 243
6. You must clear several features on the Custom Setup window before proceeding.
You can turn off a feature by clicking on the drop-down button beside the feature and selecting the option "X This feature will not be available," as shown in this example:
Custom Setup window displaying selection and deselection options
The Traditional Graphical User Interfaces feature is the only feature required for the PeopleSoft installation. (The Traditional Graphical User Interfaces feature also includes Dialog System and Class Library Files.) Clearthe following features:
• Net Express support for .NET
Note. Microsoft .NET framework is not required for compiling and running COBOL applications in PeopleSoft architecture. Neither is .NET required for successful installation of MicroFocus Net Express 5.1.
• Interface Mapping Toolkit
When you clear this feature, the Workflow Capture Server option is automatically cleared also.
• Enterprise Server
• UNIX Option
• XDB Relational Database

Installing and Compiling COBOL on Windows Chapter 10A
244 Copyright © 2018, Oracle and/or its affiliates. All Rights Reserved.
7. Verify that your final selection matches this example, with only Traditional Graphical User Interfaces, Dialog System, and Class Library Files, selected:
Custom Setup window with options selected for PeopleSoft applications
8. Highlight Traditional Graphical User Interfaces.
The installation directory is listed below the feature list. If you want to install to another location, click Change. If not, click Next.
This documentation refers to the installation directory as NE_HOME. The Micro Focus Net Express 5.1 default installation directory, for 64-bit systems, is:
C:\Program Files (x86)\Micro Focus\Net Express 5.1

Chapter 10A Installing and Compiling COBOL on Windows
Copyright © 2018, Oracle and/or its affiliates. All Rights Reserved. 245
9. Click Install.
Micro Focus Net Express Installation window: Ready to Install the Program
The installation status window appears, tracking the installation progress.

Installing and Compiling COBOL on Windows Chapter 10A
246 Copyright © 2018, Oracle and/or its affiliates. All Rights Reserved.
Installation status for the Micro Focus Net Express Installation
10. Click Finish.
Installation Wizard Completed window

Chapter 10A Installing and Compiling COBOL on Windows
Copyright © 2018, Oracle and/or its affiliates. All Rights Reserved. 247
11. To confirm the installation, select Start, All Programs, Micro Focus Net Express 5.1, Net Express.
Selecting Micro Focus Net Express from the Microsoft Windows Start menu
The Net Express Integrated Development Environment (IDE) appears.

Installing and Compiling COBOL on Windows Chapter 10A
248 Copyright © 2018, Oracle and/or its affiliates. All Rights Reserved.
12. On the Micro Focus Management System dialog box, read the information under Current License Status, indicating that there is a 30-day license for the compiler that you installed.
Micro Focus License Management System dialog box
13. Click Help, About Net Express.
Micro Focus Net Express Integrated Development Environment Help menu

Chapter 10A Installing and Compiling COBOL on Windows
Copyright © 2018, Oracle and/or its affiliates. All Rights Reserved. 249
14. Verify that the following information is included on the message box that appears:
Net Express 5.1
Version: 5.106.0079
About Micro Focus Net Express window with version number
Task 10A-2-3: Installing Micro Focus Net Express Wrap Pack 14The following procedure assumes that you saved the installation files from Oracle Software Delivery Cloud in thedirectory NE_INSTALL, and that Micro Focus Net Express Wrap Pack 6 or later is installed.To update to Micro Focus Net Express Wrap Pack 14:
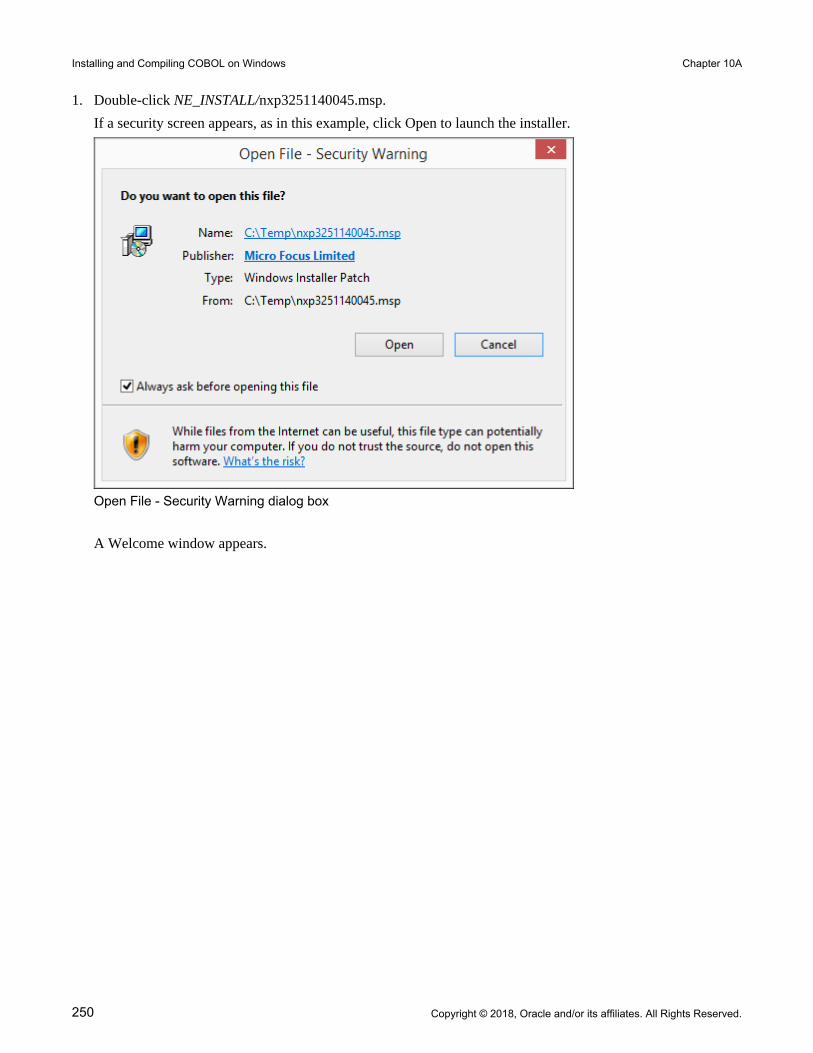
Installing and Compiling COBOL on Windows Chapter 10A
250 Copyright © 2018, Oracle and/or its affiliates. All Rights Reserved.
1. Double-click NE_INSTALL/nxp3251140045.msp.
If a security screen appears, as in this example, click Open to launch the installer.
Open File - Security Warning dialog box
A Welcome window appears.

Chapter 10A Installing and Compiling COBOL on Windows
Copyright © 2018, Oracle and/or its affiliates. All Rights Reserved. 251
2. Click Update to continue, as in this example:
Welcome to the Micro Focus Net Express 5.1 WrapPack #14 window
You see a window indicating the progress of the installation.

Installing and Compiling COBOL on Windows Chapter 10A
252 Copyright © 2018, Oracle and/or its affiliates. All Rights Reserved.
Micro Focus Net Express 5.1 Installation Wizard progress indicator
3. After the installation is complete, click Finish on the completion window, as in this example:
Installation Wizard Completed window

Chapter 10A Installing and Compiling COBOL on Windows
Copyright © 2018, Oracle and/or its affiliates. All Rights Reserved. 253
4. To verify the installation, select Start, All Programs, Micro Focus Net Express 5.1, Net Express.
Alternatively, you can run NE_HOME\Base\Bin\MFNETX.EXE, where NE_HOME refers to the directory where you installed Micro Focus Net Express, such as C:\Program Files\Micro Focus.
The Micro Focus Net Express 5.1 Integrated Development Environment (IDE) opens.
5. On the Micro Focus License Management System dialog box, read the information under Current License Status.
In this example, the current license status indicates 29 days remaining on the license. Click OK.
Micro Focus License Management System dialog box
6. Click Continue on the Welcome to Micro Focus Net Express window.

Installing and Compiling COBOL on Windows Chapter 10A
254 Copyright © 2018, Oracle and/or its affiliates. All Rights Reserved.
7. Select Help, About Net Express.
Verify that the following information is included on the message box that appears:
Net Express 5.1
Version 5.114.0045
About Micro Focus Net Express 5.1 message box
Task 10A-3: Managing Micro Focus Net Express Compiler Licenses
This section discusses:
• Understanding Micro Focus Net Express Compiler Licenses
• Configuring a Full License with the License Server
• Configuring a Timed License with the License Server
• Revoking the License Using the License Management System
• Revoking the License by Removing the Installation
Understanding Micro Focus Net Express Compiler LicensesThe Micro Focus Net Express 5.1 Wrap Pack 14 compiler can be licensed with a Micro Focus License Server or with the Request Key/Response Key mechanism. This section discusses the License Server method, which Oraclerecommends because it is more flexible and licensing is immediate. For more details, see the Micro Focus documentation.There are two types of Micro Focus Net Express licenses. Here is a brief comparison:

Chapter 10A Installing and Compiling COBOL on Windows
Copyright © 2018, Oracle and/or its affiliates. All Rights Reserved. 255
• Timed License
• Timed Licenses expire after the specified duration and can be renewed over the network.
• Timed Licenses are the default given by the license server.
• There are two types of Timed Licenses; one is valid for seven days, and other for one day.
• Full License
• Full Licenses do not expire.
• The user can request and revoke Full Licenses using the License Management System.It is a good idea to use Timed Licenses, unless you have a compelling demand. Mostly developers who work withCOBOL on a daily basis should use a Full License. If you require COBOL for a few compiles, and only for some days, use a Timed License. When the Timed License expires, you can renew it again.
Task 10A-3-1: Configuring a Full License with the License ServerTo configure a Full License for permanent use:1. Select Start, All Programs, Micro Focus Net Express 5.1, Configuration, License Management System.
Note. Alternatively, run NE_HOME\Base\Bin\protcfg.exe, where NE_HOME is the directory where you installed Micro Focus Net Express.

Installing and Compiling COBOL on Windows Chapter 10A
256 Copyright © 2018, Oracle and/or its affiliates. All Rights Reserved.
2. Select the option Use Network Licensing, and click Connection Wizard, as shown in this example:
MICRO FOCUS License Management System Configuration window

Chapter 10A Installing and Compiling COBOL on Windows
Copyright © 2018, Oracle and/or its affiliates. All Rights Reserved. 257
3. Click Next on the License Server Connection Wizard window, shown in this example:
License Server Connection Wizard window

Installing and Compiling COBOL on Windows Chapter 10A
258 Copyright © 2018, Oracle and/or its affiliates. All Rights Reserved.
4. Enter information for the server location, and then click Next.
License Server Connection Wizard - Server Location window
• Server Name—Enter the name of the license server; for example, server.example.com.
• Virtual Directory; for example, /LS4.
• Port Number—The default is 80, as shown in the example.
Select a port that is not in use by another application.

Chapter 10A Installing and Compiling COBOL on Windows
Copyright © 2018, Oracle and/or its affiliates. All Rights Reserved. 259
5. You see a message saying the wizard found the server, as in this example.
Click Next.
License Server Connection Wizard - Searching window

Installing and Compiling COBOL on Windows Chapter 10A
260 Copyright © 2018, Oracle and/or its affiliates. All Rights Reserved.
6. Enter your group ID, which is COBOL_GROUP_1 in this example, and 1 for the number of days before you have to renew the license.
Note. Although you enter one day here, you complete a step later that requests permanent license status.
Click Next.
License Server Connection Wizard - Configuration window

Chapter 10A Installing and Compiling COBOL on Windows
Copyright © 2018, Oracle and/or its affiliates. All Rights Reserved. 261
7. Click Finish to exit the wizard, as shown in this example:
License Server Connection Wizard - The End window

Installing and Compiling COBOL on Windows Chapter 10A
262 Copyright © 2018, Oracle and/or its affiliates. All Rights Reserved.
8. In the details list on the MICRO FOCUS License Management System Configuration dialog box, select the check box for Net Express, and then click Request Full License, as shown in this example:
MICRO FOCUS License Management System Configuration window

Chapter 10A Installing and Compiling COBOL on Windows
Copyright © 2018, Oracle and/or its affiliates. All Rights Reserved. 263
9. Click Yes to confirm that you want to request a full license, as shown in this example.
The warning message says that requesting a full license permanently removes a license from the license server.
Warning message box when requesting a Full License

Installing and Compiling COBOL on Windows Chapter 10A
264 Copyright © 2018, Oracle and/or its affiliates. All Rights Reserved.
10. Click OK on the License Information dialog box.
License Management System Configuration - License Information window

Chapter 10A Installing and Compiling COBOL on Windows
Copyright © 2018, Oracle and/or its affiliates. All Rights Reserved. 265
11. Verify that the License Status for Net Express has changed to Full License, as shown in this example, and click Close.
MICRO FOCUS License Management System Configuration window with Full License status
Task 10A-3-2: Configuring a Timed License with the License ServerTo configure a Timed License for temporary use:1. Select Start, All Programs, Micro Focus Net Express 5.1, Configuration, License Management System.
Note. Alternatively, run NE_HOME\Base\Bin\protcfg.exe, where NE_HOME is the directory where you installed Micro Focus Net Express.

Installing and Compiling COBOL on Windows Chapter 10A
266 Copyright © 2018, Oracle and/or its affiliates. All Rights Reserved.
2. Select the option Use Network Licensing, and click Connection Wizard, as shown in this example:
MICRO FOCUS License Management System Configuration window

Chapter 10A Installing and Compiling COBOL on Windows
Copyright © 2018, Oracle and/or its affiliates. All Rights Reserved. 267
3. Click Next on the License Server Connection Wizard window, shown in this example:
License Server Connection Wizard window
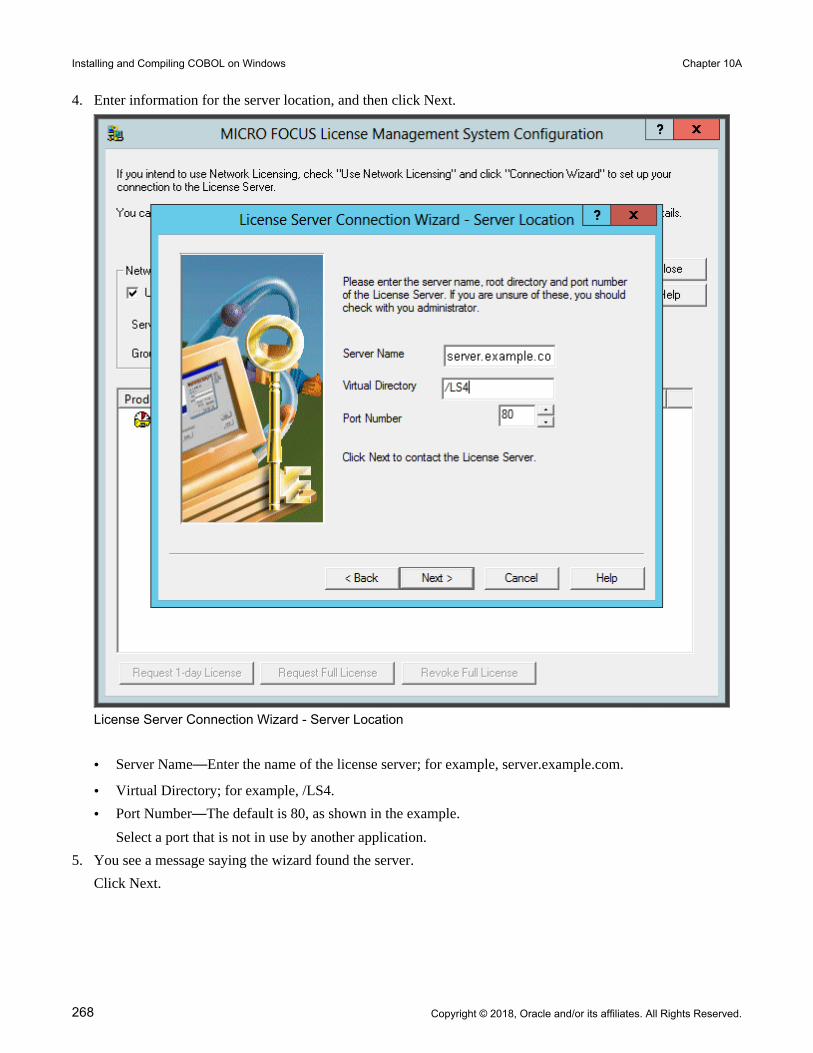
Installing and Compiling COBOL on Windows Chapter 10A
268 Copyright © 2018, Oracle and/or its affiliates. All Rights Reserved.
4. Enter information for the server location, and then click Next.
License Server Connection Wizard - Server Location
• Server Name—Enter the name of the license server; for example, server.example.com.
• Virtual Directory; for example, /LS4.
• Port Number—The default is 80, as shown in the example.
Select a port that is not in use by another application.
5. You see a message saying the wizard found the server.
Click Next.

Chapter 10A Installing and Compiling COBOL on Windows
Copyright © 2018, Oracle and/or its affiliates. All Rights Reserved. 269
6. Enter your group ID, which is COBOL_TEMP_1 in this example, and specify the number of days before you have to renew the license, which is 1 (one) day in this example.
Click Next.
License Server Connection Wizard - Configuration window
7. Click Finish to exit the wizard.
8. In the details list on the MICRO FOCUS License Management System Configuration dialog box, select the check box for Net Express, and then click Request 1-day License.
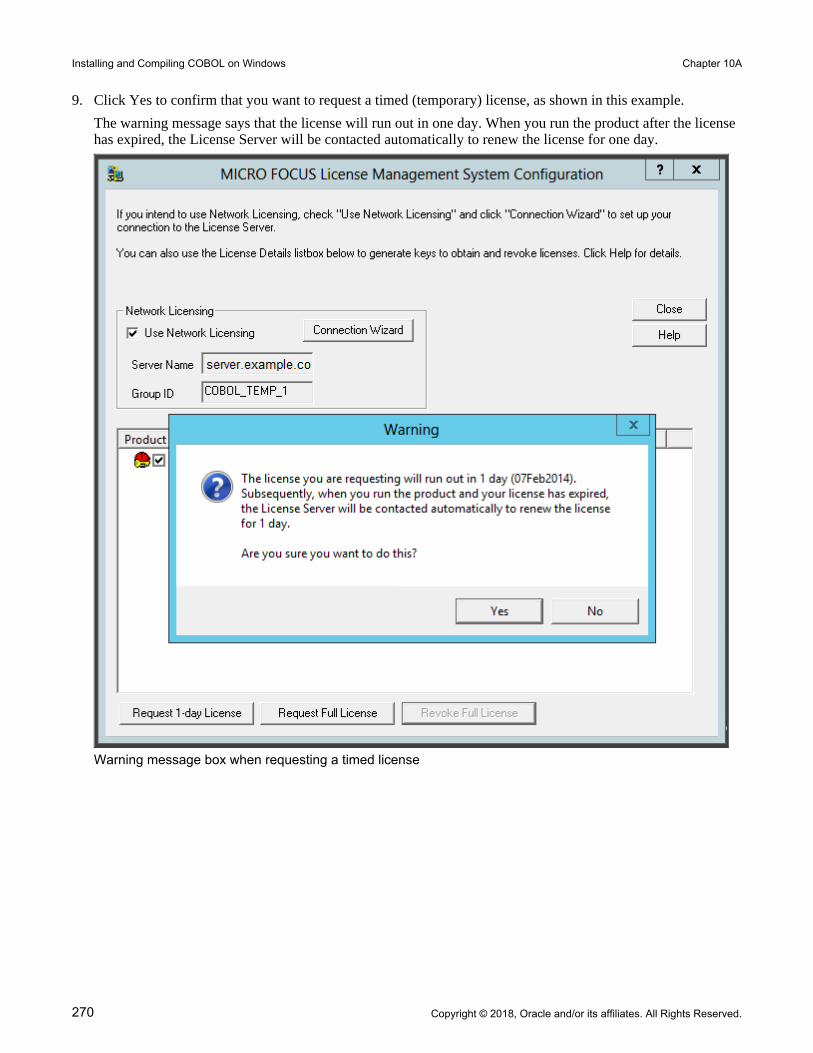
Installing and Compiling COBOL on Windows Chapter 10A
270 Copyright © 2018, Oracle and/or its affiliates. All Rights Reserved.
9. Click Yes to confirm that you want to request a timed (temporary) license, as shown in this example.
The warning message says that the license will run out in one day. When you run the product after the license has expired, the License Server will be contacted automatically to renew the license for one day.
Warning message box when requesting a timed license
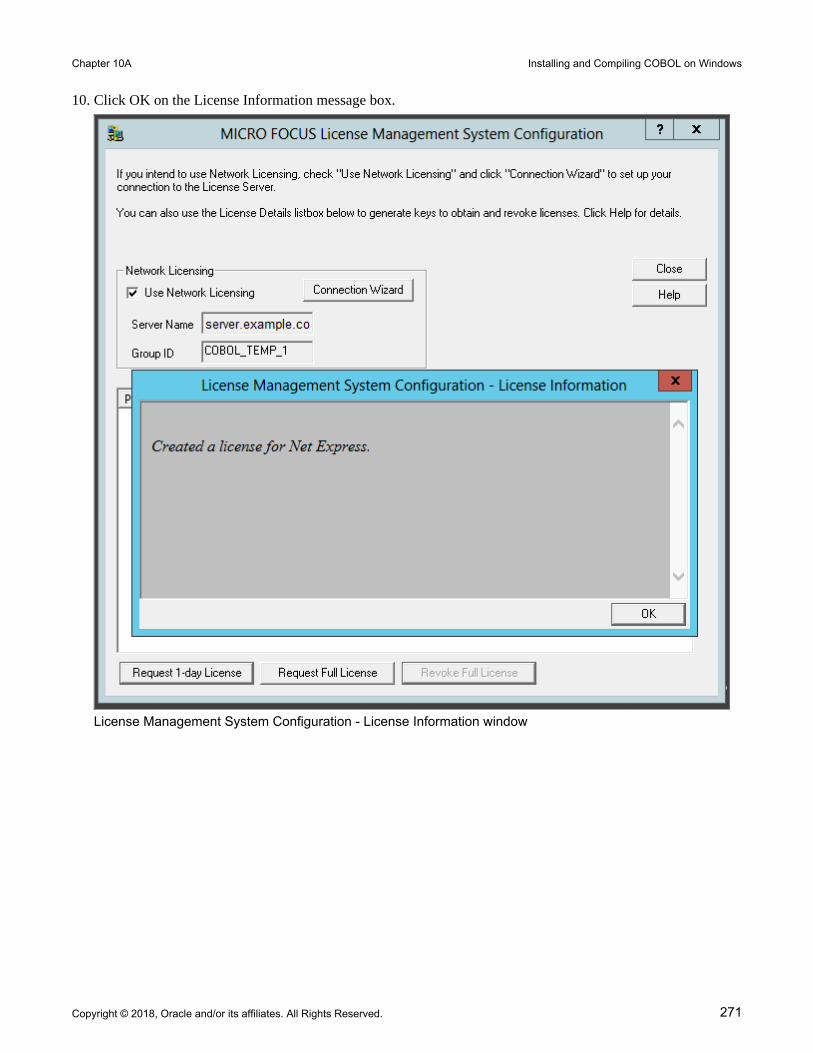
Chapter 10A Installing and Compiling COBOL on Windows
Copyright © 2018, Oracle and/or its affiliates. All Rights Reserved. 271
10. Click OK on the License Information message box.
License Management System Configuration - License Information window

Installing and Compiling COBOL on Windows Chapter 10A
272 Copyright © 2018, Oracle and/or its affiliates. All Rights Reserved.
11. Verify that the license status has changed to "1 day left on this license," as shown in this example, and click Close.
MICRO FOCUS License Management System Configuration window showing Timed License
Task 10A-3-3: Revoking the License Using the License Management SystemRevoking (unallocating) the compiler license returns it to the license pool, and makes it available for re-use, eitherby you or another user. This section describes how to use the Micro Focus License Management System to revokea compiler license. For information on revoking the license by completely removing the Micro Focus Net Expressinstallation, see the following section.See Revoking the License by Removing the Installation.To revoke a Full License using the Micro Focus License Management System:

Chapter 10A Installing and Compiling COBOL on Windows
Copyright © 2018, Oracle and/or its affiliates. All Rights Reserved. 273
1. Select Start, All Programs, Micro Focus Net Express 5.1, Configuration, License Management System.
2. Select the check box for Net Express under Product in the details list, and click Revoke Full License.
3. Click Yes on the warning message box to confirm that you want to revoke a full license, as shown in this example.
The warning message says that revoking a full license means that you will no longer have a valid license.
Warning message box on Revoking a Full License

Installing and Compiling COBOL on Windows Chapter 10A
274 Copyright © 2018, Oracle and/or its affiliates. All Rights Reserved.
4. Click OK.
The License Information message box says that the Net Express license has been revoked.
License Management System Configuration - License Information
5. Verify that the license status has changed to "license has expired" and click Close.
Task 10A-3-4: Revoking the License by Removing the InstallationRevoking (unallocating) the compiler license returns it to the license pool, and makes it available for re-use, eitherby you or another user. This section describes how to revoke the license by completely removing the Micro FocusNet Express 5.1 installation. For information on using the Micro Focus License Management System to revoke a compiler license, see the previous section.See Revoking the License Using the License Management System.To remove the installation and revoke the license:
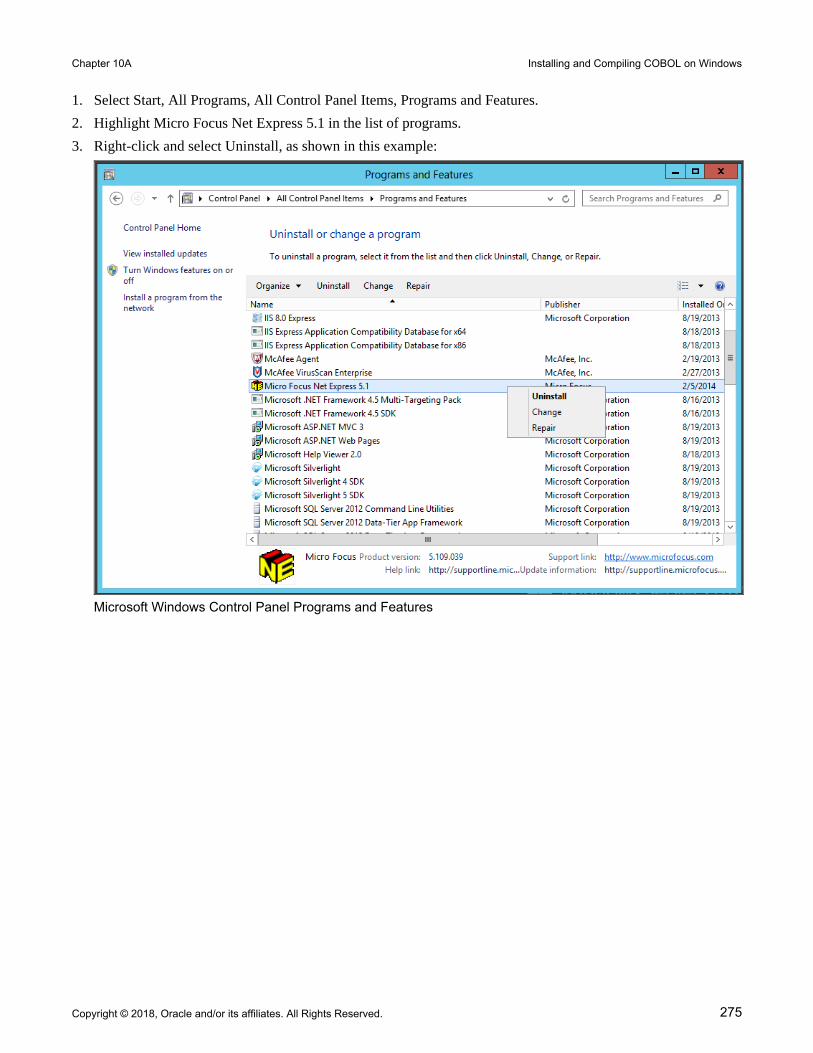
Chapter 10A Installing and Compiling COBOL on Windows
Copyright © 2018, Oracle and/or its affiliates. All Rights Reserved. 275
1. Select Start, All Programs, All Control Panel Items, Programs and Features.
2. Highlight Micro Focus Net Express 5.1 in the list of programs.
3. Right-click and select Uninstall, as shown in this example:
Microsoft Windows Control Panel Programs and Features

Installing and Compiling COBOL on Windows Chapter 10A
276 Copyright © 2018, Oracle and/or its affiliates. All Rights Reserved.
4. Click Revoke on the Uninstalling Product Warning message box, as shown in this example:
Uninstalling Product Warning message box
The MICRO FOCUS License Management System Configuration window appears.
5. Follow the instructions in the previous section to revoke the license.
See Revoking the License Using the License Management System.
6. When the process to revoke the license is complete, close the MICRO FOCUS License Management System Configuration window, and complete the process to remove Micro Focus Net Express 5.1.
Task 10A-4: Using the Micro Focus COBOL Compiler on MicrosoftWindows
This section discusses:
• Understanding COBOL Compilation
• Compiling COBOL on Microsoft Windows with a PS_HOME Setup
• Compiling COBOL on Microsoft Windows with a PS_CUST_HOME Setup
• Recompiling COBOL on Microsoft Windows
• Setting Up the Micro Focus Net Express Runtime
• Defining the GNT and INT Files

Chapter 10A Installing and Compiling COBOL on Windows
Copyright © 2018, Oracle and/or its affiliates. All Rights Reserved. 277
• Distributing COBOL Binaries
Understanding COBOL CompilationWith PeopleSoft PeopleTools 8.50 and higher, your COBOL always needs to be compiled on Microsoft Windows. (This is a change from previous versions of PeopleSoft PeopleTools, which delivered compiled COBOL for Microsoft Windows.) This section assumes that you are carrying out the compile process from your file server. (The COBOL compiler itself does not need to be on the file server, as long as the user can write to the file server and can link to the src and bin directories.) The recommended approach for the PeopleSoft installation is to use CBLBLD.BAT to compile all your COBOL source files at once. Another alternative is CBLMAKE.BAT, which you can use to compile selected COBOL files.The way that you set up your installation environment determines how you compile COBOL. This section includes different procedures for the different installation environments, as follows:
• PS_HOME Setup
If you installed the PeopleSoft PeopleTools and PeopleSoft Application software to the PS_HOME location, follow the instructions in these sections:
• Compiling COBOL on Microsoft Windows with a PS_HOME Setup
• Defining the GNT and INT Files
• PS_CUST_HOME Setup
For PeopleSoft PeopleTools 8.53 and later, you have the option to place customized COBOL baseline sources into a location referenced by the environment variable PS_CUST_HOME.
The PS_CUST_HOME directory structure must replicate that of PS_HOME; that is, any COBOL source file that is customized should be placed in the same relative path as was present in the original location.
If your environment includes customized files in a PS_CUST_HOME directory, follow the instructions in these sections:
• Compiling COBOL on Microsoft Windows with a PS_CUST_HOME Setup
• Defining the GNT and INT FilesFor those systems on which you only need to run COBOL, but do not need to compile it, you must install and license the Micro Focus Net Express Runtime.See Setting Up the Micro Focus Net Express Runtime.Make certain to check whether you need to apply any late-breaking patches.See My Oracle Support, Patches & Updates.
See Also
"Preparing for Installation," Defining Installation Locations.
Task 10A-4-1: Compiling COBOL on Microsoft Windows with a PS_HOME Setup
This section discusses:
• Prerequisites
• Compiling with CBLBLD.BAT with a PS_HOME Setup

Installing and Compiling COBOL on Windows Chapter 10A
278 Copyright © 2018, Oracle and/or its affiliates. All Rights Reserved.
• Compiling with CBLMAKE.BAT with a PS_HOME Setup
Prerequisites
This section assumes that you installed both PeopleSoft PeopleTools and PeopleSoft Application software to PS_HOME, and that you have not set PS_CUST_HOME.
Compiling with CBLBLD.BAT with a PS_HOME Setup
To compile COBOL with CBLBLD.BAT:1. Set up two environment variables, %PS_HOME% and %COBROOT%, on the machine from which you'll
compile COBOL. (This should be either your file server or a machine that has access to your file server.)
You can do this from a command prompt window. This table gives the environment variables and their purposes.
Environment Variable Purpose
PS_HOME PeopleSoft home directory—that is, the drive letter and high-level PeopleSoft directory where you installed PeopleTools and the application.
COBROOT Drive letter and root directory of the COBOL compiler.
For example, you could enter the following in the DOS command prompt:
set PS_HOME=C:\HR92set COBROOT="C:\Program Files\Micro Focus\Net Express 5.1\base"
2. Open a command prompt window if you do not have one open already, and change directories to PS_HOME\setup.
3. Execute CBLBLD.BAT as follows:
cblbld <compile drive> <compile directory> EBCDIC
In this command, <compile drive> is the drive where the compile takes place, and <compile directory> is the temp directory where the compile takes place.
EBCDIC is a parameter for collating sequence comparisons on DB2 z/OS (by default it compiles with ASCII mode)
The CBLBLD.BAT file will create the compile directory for you if it does not already exist.
Note. If the database server is DB2 for z/OS, the EBCDIC parameter is required; it is not needed for other platforms.
Note. Make sure to include a space between the <compile drive> and <compile directory> parameters; they are treated as two different parameters within the CBLBLD.BAT batch program. Also ensure that you have write permission to <compile drive> and <compile directory> as the compile process will take place there.
For example, the following command will take the COBOL source from PS_HOME\src\cbl and do the compile process under c:\temp\compile:
cblbld c: \temp\compile

Chapter 10A Installing and Compiling COBOL on Windows
Copyright © 2018, Oracle and/or its affiliates. All Rights Reserved. 279
Make note of the information that is displayed on the screen while the process is running; it provides the locations of important files that you will need to examine.
4. After you have successfully compiled your source code, all of the executables should have been placed in your <PS_HOME>\CBLBIN<X> directory (this directory will be named CBLBINA, CBLBINU, or CBLBINE, depending on whether you are using ANSI, Unicode or EBCDIC). Make sure that all of the files were copied correctly to this directory.
5. If the files were copied correctly, you can delete the entire temporary compile directory to free space on your disk drive.
Note. You may want to keep the files in the compile directory for testing purposes. Make sure that you have enough space on the drive where <compile directory> is located. Estimate about three times the amount in the<PS_HOME>\CBLBIN<X> directory.
Note. If you chose the Unicode option while running the PeopleSoft Installer, the file UNICODE.CFG was created in the setup directory. UNICODE.CFG automatically triggers the batch file CBL2UNI.BAT when yourun CBLBLD.BAT. Another batch file, CBLRTCPY.BAT, copies four DLLs (CBLINTS.DLL, CBLRTSS.DLL, CBLVIOS.DLL, COB32API.DLL) from the Microfocus compiler directory (identified by %COBROOT% setting) into the appropriate CBLBIN directory (CBLBINA, CBLBINU, or CBLBINE) when you run CBLBLD. These files are needed for COBOL to run; they can reside anywhere as long as they are in the path. You can run either of these BAT files independently from the command line (they reside in PS_HOME\setup). For CBLRTCPY.BAT you need to specify a target directory.
Compiling with CBLMAKE.BAT with a PS_HOME Setup
CBLBLD.BAT compiles all your COBOL source files at once, which can take a lot of time. CBLMAKE.BAT, in contrast, lets you employ one or more parameters to compile a specific COBOL source file or a selected group of COBOL source files. Unlike CBLBLD.BAT, however, CBLMAKE.BAT does not automatically trigger the batchfile CBL2UNI.BAT or CBLRTCPY.BAT.Here is the basic syntax for CBLMAKE.BAT:
CBLMAKE.BAT [] [ALL] [wildcard filename[ALL]] [wildcard filename |⇒ wildcard⇒ filename without extension[INT | GNT | EXE]] [EBCDIC] [LIST]
Note. The switches are well documented in the CBLMAKE.BAT file in the form of comments.
Note. If you are running DB2 z/OS, you must use the EBCDIC parameter.
Note. If the change in the COBOL source is a copy member, you must compile all of the COBOL programs usingCBLBLD.BAT. You know it is a copy member when the third letter in the file name is a C, as in PTCSQLRT.CBL.
The following table describes the various options for CBLMAKE.BAT.
Option Purpose
Cblmake Compiles all source
Cblmake all Compiles all source

Installing and Compiling COBOL on Windows Chapter 10A
280 Copyright © 2018, Oracle and/or its affiliates. All Rights Reserved.
Option Purpose
Cblmake EBCDIC Compiles all source files for DB2 for z/OS
Cblmake PT* Compiles all source files that start with PT
Cblmake PT* ALL Compiles all source files that start with PT
Cblmake PT* INT Generates INT files for all source files that start with PT
Cblmake PT* GNT Generates GNT files for all source files that start with PT
Cblmake PT* EXE Generates EXE files for all source files that start with PT
Cblmake PTPDBTST INT Generates PTPDBTST.INT file
Cblmake PTPDBTST INT LIST Generates PTPDBTST.INT and source listing file
Cblmake PTPDBTST GNT Generates PTPDBTST.GNT file
Cblmake PTPDBTST EXE Generates PTPDBTST.EXE file
The LIST option creates a source listing file under <compile directory>\<filename>.lis. The LIST option is useful when the compile fails during the debugging phase. The source listing files show exactly where an error occurred. This option is not recommended when the program compiles successfully because the .LIS files can grow to be quite large.
Note. By default, when the program fails to compile, the system will generate a .LIS file.
To compile with CBLMAKE.BAT:1. Verify that the %PS_HOME% and %COBROOT% environment variables are set up correctly.
2. Open a command prompt window.
3. Make sure the compile directory exists; it may already exist if you've run CBLBLD.BAT. If it does exist, remove any files residing there—just as a safeguard. If it does not exist, you need to create it.
Note. Make sure you have write permission to <compile directory> as the compile process will take place there.
4. Change to the PS_HOME\setup directory.
5. If the installation is Unicode, run CBL2UNI (with no parameters).
6. Execute the following command to copy all the COBOL source files from the PS_HOME directory to the compile directory:
cblsrc <source directory> <compile directory>
where <source directory> is the drive and directory where the source resides (it should be the same as PS_HOME), and <compile directory> is the drive and directory to which the source files will be copied.
For example, the following command will take the COBOL source from PS_HOME and copy all the necessary files to the location where the compile process will take place.

Chapter 10A Installing and Compiling COBOL on Windows
Copyright © 2018, Oracle and/or its affiliates. All Rights Reserved. 281
cblsrc PS_HOME c:\temp\compile
If the COBOL source that will be compiled is different from the one under PS_HOME, copy that COBOL source to <compile directory>.
Note. The compile in the next step will generate a GNT file unless the exception file, CBLINT.XX already exists (the XX represents the Product ID). CBLINT.XX contains the list of files that need to be compiled to theINT file. Make sure the intended CBLINT.XX is located under <compile directory> before executing CBLMAKE.
7. After CBLSRC completes, change directories to the compile directory, and run CBLMAKE.BAT, using the basic syntax as well as the CBLMAKE table shown earlier as your guide.
8. After CBLMAKE.BAT completes, copy the EXE, GNT, or INT files to the appropriate PS_HOME\CBLBINXdirectory (CBLBINA, CBLBINU, or CBLBINE).
copy *.exe PS_HOME\cblbinacopy *.gnt PS_HOME\cblbinacopy *.int PS_HOME\cblbina
Note. You have to copy these files to the appropriate cblbin directory manually when you use CBLMAKE; they are not copied automatically, as when you use CBLBLD.
Task 10A-4-2: Compiling COBOL on Microsoft Windows with a PS_CUST_HOME Setup
This section discusses:
• Prerequisites
• Compiling with CBLBLD.BAT with a PS_CUST_HOME Setup
• Compiling with CBLMAKE.BAT with a PS_CUST_HOME Setup
Prerequisites
This section assumes that you have set up a PS_CUST_HOME environment variable for customized COBOL source files.
Compiling with CBLBLD.BAT with a PS_CUST_HOME Setup
The usage for running CBLBLD.BAT is:cblbld <compile drive> <compile directory> [BUILD_option] [BUILD_home]
Substitute the appropriate values as follows:
• <compile drive>
Enter the drive letter for the drive containing the directory where the compile takes place.
• <compile directory>
Enter the directory where the compile takes place. Be sure to include a space between <compile drive> and <compile directory>.
• BUILD_option

Installing and Compiling COBOL on Windows Chapter 10A
282 Copyright © 2018, Oracle and/or its affiliates. All Rights Reserved.
The allowed values are nothing (blank), ASCII, EBCDIC, or Unicode.
BUILD_option refers to the encoding scheme of your PeopleSoft installation. This parameter is optional.
• BUILD_home
The allowed values are nothing (blank), PS_HOME, or PS_CUST_HOME.
Note. The values PS_HOME and PS_CUST_HOME are case-insensitive.
BUILD_home refers to the directory from which the COBOL source files will be compiled.
This parameter is optional.
• If the option is PS_HOME, the COBOL source files placed under %PS_HOME%\src\cbl will be compiled.
• If the option is PS_CUST_HOME, the COBOL source files placed under %PS_CUST_HOME%\src\cbl will be compiled.
• If the option is blank, the COBOL source files under %PS_HOME%\src\cbl and under %PS_CUST_HOME%\src\cbl will be compiled one after the other.
To compile COBOL sources on Microsoft Windows:1. In a command prompt, set the environment variables described in this table:
Environment Variable Purpose
PS_HOME PeopleSoft PeopleTools home directory—that is, the drive letter and high-level directory where you installed PeopleSoft PeopleTools.
PS_CUST_HOME PeopleSoft Application customized home directory—that is, the drive letter and high-level directory containing your customized PeopleSoft COBOL programs.
COBROOT Drive letter and root directory of the COBOL compiler.
For example:
set PS_HOME=C:\PTcompileset COBROOT="C:\Program Files\Micro Focus\Net Express 5.1\base"set PS_CUST_HOME=C:\CUSTcompile
2. Change directory to PS_HOME\setup:
cd %PS_HOME%\setup
3. Run CBLBLD.BAT, using one of these methods:
• To compile all the COBOL source files under your PeopleSoft application, that is, all PeopleSoft PeopleTools source files, all PeopleSoft Application source files, and all customized PeopleSoft source files, run this command:
cblbld <compile drive> <compile directory>
For example:
cblbld c: \temp\PTcompile
• To compile only PeopleSoft PeopleTools and PeopleSoft Application COBOL source files, run this
Chapter 10A Installing and Compiling COBOL on Windows
Copyright © 2018, Oracle and/or its affiliates. All Rights Reserved. 283
command:
cblbld <compile drive> <compile directory> PS_HOME
For example:
cblbld c: \temp\PTcompile PS_HOME
• To compile only customized PeopleSoft Application or PeopleSoft PeopleTools COBOL source files, run this command:
cblbld <compile drive> <compile directory> PS_CUST_HOME
For example:
cblbld c: \temp\CUSTcompile PS_CUST_HOME
Delivered (that is, non-customized) PeopleSoft PeopleTools and PeopleSoft Application COBOL compiled executables will be placed under the <PS_HOME>\CBLBIN<X> directory. Customized PeopleSoft Application or PeopleSoft PeopleTools COBOL compiled executables will be placed under the <PS_CUST_HOME>\CBLBIN<X> directory. CBLBIN<X> will be one of the following:
• CBLBINA if you are using ANSI encoding scheme
• CBLBINU if you are using Unicode encoding scheme
• CBLBINE if you are using EBCDIC encoding scheme
Compiling with CBLMAKE.BAT with a PS_CUST_HOME Setup
CBLBLD.BAT compiles all your COBOL source files at once, which can take a lot of time. CBLMAKE.BAT, in contrast, lets you employ one or more parameters to compile a specific COBOL source file or a selected group of COBOL files. The procedure is slightly different depending upon whether the file that you want to compile is a PeopleSoft Application, PeopleSoft PeopleTools, or customized COBOL source file. Both procedures are coveredin this section.
Note. The options for CBLMAKE.BAT are defined in a table in the previous section Compiling with CBLMAKE.BAT with a PS_HOME Setup.
To compile a customized COBOL file with CBLMAKE.BAT:1. Open a command prompt window.
2. Verify that the PS_HOME, COBROOT, and PS_CUST_HOME environment variables are set, as previously defined.
See Compiling with CBLBLD.BAT with a PS_CUST_HOME Setup.
3. Verify that the environment variable PS_compile_cust is set, as follows:
set PS_compile_cust=Y
Important! This variable setting is required for individual file compilation with CBLMAKE.BAT.
4. Ensure that the compile directory, <compile directory>, exists, and that you have write permission to it.
This directory may already exist if you have run CBLBLD.BAT before. If it does exist, remove any files residing there—just as a safeguard. If it does not exist, you need to create it.
5. Change to the PS_HOME\setup directory.
6. If the installation is Unicode, run CBL2UNI (with no parameters).

Installing and Compiling COBOL on Windows Chapter 10A
284 Copyright © 2018, Oracle and/or its affiliates. All Rights Reserved.
7. Execute the following command to copy all the COBOL source files from the PS_CUST_HOME directory to the compile directory:
cblsrc <source directory> <compile directory>
Here <source directory> is the drive and directory where the source resides (it should be the same as PS_CUST_HOME), and <compile directory> is the drive and directory to which the source files will be copied.
For example, the following command will take the COBOL source files from PS_CUST_HOME and copy all the necessary files to the location where the compile process will take place, c:\temp\CUSTcompile in this example:
cblsrc %PS_CUST_HOME% c:\temp\CUSTcompile
Note. The compile in the next step will generate a GNT file unless the exception file, CBLINT.XX already exists (the XX represents the Product ID). CBLINT.XX contains the list of files that need to be compiled to theINT file. Make sure the intended CBLINT.XX is located under <compile directory> before executing CBLMAKE.
8. After CBLSRC completes, change directories to the compile directory, and run CBLMAKE.BAT, using the basic syntax as well as the CBLMAKE table shown earlier as your guide.
For example, to compile a file named GPPDPRUN, run this command:
cblmake GPPDPRUN
9. After CBLMAKE.BAT completes, copy the EXE, GNT, or INT files to the appropriate <PS_CUST_HOME>\CBLBIN<X> directory (CBLBINA for ANSI, CBLBINU for Unicode, or CBLBINE for EBCDIC).
These examples use the ANSI encoding:
copy *.exe %PS_CUST_HOME%\cblbinacopy *.gnt %PS_CUST_HOME%\cblbinacopy *.int %PS_CUST_HOME%\cblbina
Note. You have to copy these files to the appropriate cblbin directory manually when you use CBLMAKE; they are not copied automatically, as when you use CBLBLD.
10. Verify that the compiler runtime files (CBLINTS.DLL, CBLRTSM.DLL, CBLRTSS.DLL, CBLVIOM.DLL, CBLVIOS.DLL, COB32API.DLL, MFLANGDF.lbr) are present in the <PS_CUST_HOME>\CBLBIN<X> directory.
If they are not present, then you will have to run %PS_HOME%\setup\cblrtcpy.bat as follows:
cblrtcpy %PS_CUST_HOME%\cblbina
The procedure to compile a PeopleSoft PeopleTools COBOL file with CBLMAKE.BAT is similar, but the environment variable PS_compile_cust must not be set.1. Open a command prompt window.
2. Verify that the PS_HOME and COBROOT environment variables are set, as previously defined.
See Compiling with CBLBLD.BAT with a PS_HOME Setup.
3. Verify that the environment variable PS_compile_cust is not set, as follows:
set PS_compile_cust=

Chapter 10A Installing and Compiling COBOL on Windows
Copyright © 2018, Oracle and/or its affiliates. All Rights Reserved. 285
Important! Unsetting this environment variable is required for individual file compilation with CBLMAKE.BAT for PeopleSoft PeopleTools files.
4. Make sure the compile directory, <compile directory>, exists, and that you have write permission to it.
This directory may already exist if you have run CBLBLD.BAT before. If it does exist, remove any files residing there—just as a safeguard. If it does not exist, you need to create it.
5. Change to the PS_HOME\setup directory.
6. If the installation is Unicode, run CBL2UNI (with no parameters).
7. Execute the following command to copy all the COBOL source files from the PS_HOME directory to the compile directory:
cblsrc <source directory> <compile directory>
Here <source directory> is the drive and directory where the source resides (it should be the same as PS_HOME), and <compile directory> is the drive and directory to which the source files will be copied.
For example, the following command will take the COBOL source from PS_HOME and copy all the necessary files to the location where the compile process will take place, c:\temp\PTcompile in this example:
cblsrc %PS_HOME% c:\temp\PTcompile
8. After CBLSRC completes, change directories to the compile directory, and run CBLMAKE.BAT, using the basic syntax as well as the CBLMAKE table shown earlier as your guide.
For example, to compile a file named PTPDBTST, run this command:
cblmake PTPDBTST
9. After CBLMAKE.BAT completes, copy the EXE, GNT, or INT files to the appropriate <PS_HOME>\CBLBIN<X> directory (CBLBINA for ANSI, CBLBINU for Unicode, or CBLBINE for EBCDIC).
These examples use the ANSI encoding:
copy *.exe %PS_HOME%\cblbinacopy *.gnt %PS_HOME%\cblbinacopy *.int %PS_HOME%\cblbina
Note. You have to copy these files to the appropriate cblbin directory manually when you use CBLMAKE; they are not copied automatically, as when you use CBLBLD.
10. Verify that the compiler runtime files (CBLINTS.DLL, CBLRTSM.DLL, CBLRTSS.DLL, CBLVIOM.DLL, CBLVIOS.DLL, COB32API.DLL, MFLANGDF.lbr) are present in the <PS_HOME>\CBLBIN<X> directory.
If they are not present, then you will have to run %PS_HOME%\setup\cblrtcpy.bat as follows:
cblrtcpy %PS_HOME%\cblbina
Note. If you plan to use cblmake.bat to compile a single (or a set) of PeopleSoft PeopleTools or PeopleSoft Application COBOL program at the same time, it would be a good idea to use two different command prompts and two different compile directories—one for PeopleSoft PeopleTools COBOL programs and the other for the PeopleSoft Application COBOL programs. This avoids setting and unsetting the PS_compile_cust environment variable.

Installing and Compiling COBOL on Windows Chapter 10A
286 Copyright © 2018, Oracle and/or its affiliates. All Rights Reserved.
Task 10A-4-3: Recompiling COBOL on Microsoft WindowsYou always need to compile at installation, so you will only need to recompile COBOL in the following situations:
• You are installing PeopleSoft software for the first time.
• The supported COBOL compiler changes.
• You change the version of your RDBMS.
• You change the version of your operating system.
• You apply a PeopleSoft PeopleTools upgrade, patch, or fix.
You can recompile selected COBOL files by using CBLMAKE.BAT, or recompile all your COBOL source files by using CBLBLD.BAT.
Note. If you want to recompile all your COBOL, you can follow the appropriate procedure for compiling COBOL, as described earlier.
See Compiling COBOL on Microsoft Windows with a PS_HOME Setup or Compiling COBOL on Microsoft Windows with a PS_CUST_HOME Setup.
Task 10A-4-4: Setting Up the Micro Focus Net Express RuntimeThis section discusses:
• Understanding the Micro Focus Net Express Runtime
• Installing the Runtime Files and Setting Up the License
• Removing the Runtime License
• Troubleshooting
Understanding the Micro Focus Net Express Runtime
The Micro Focus Net Express 5.1 Runtime provides the COBOL runtime environment required for COBOL programs to run. Install and license the runtime on each system that will run PeopleSoft COBOL applications. Typically, PeopleSoft COBOL application programs are run on PeopleSoft application server systems and PeopleSoft batch (Process Scheduler) systems. The Micro Focus Net Express 5.1 Runtime consists of the following components:
• Six DLLs
• CBLINTS.DLL
• CBLRTSM.DLL
• CBLRTSS.DLL
• CBLVIOM.DLL
• CBLVIOS.DLL
• COB32API.DLL
• A Microsoft Windows registry entry for ASLMF
For 64-bit Microsoft Windows systems, the entry is:

Chapter 10A Installing and Compiling COBOL on Windows
Copyright © 2018, Oracle and/or its affiliates. All Rights Reserved. 287
HKEY_LOCAL_MACHINE\SOFTWARE\Wow6432Node\MICRO FOCUS\ASLMF
• The directory that contains the runtime license database, C:\psft-mf-nx-as-license, which contains the following files:
• mfasdb
• prodfile
• semfile
• The Application Server License Manager Service
The Micro Focus Net Express 5.1 Runtime DLLs installation is done automatically as part of the COBOL compilation process. When CBLBLD.bat is run, it invokes CBLRTCPY.bat to copy the COBOL runtime DLLs listed above, from the %COBROOT%\bin directory to %PS_HOME%\CBLBINx directory. CBLBINx is CBLBINA, or CBLBINU, based on the compilation mode of ASCII or Unicode respectively. If you have already set up the Micro Focus Net Express COBOL compiler on a system, there is no explicit installation necessary for the runtime. For those systems where you only want to run COBOL, but have no need tocompile it, use the following instructions in the section Installing the Runtime Files and Setting Up the License.
Installing the Runtime Files and Setting Up the License
The license files are included with the files that you downloaded from Oracle Software Delivery Cloud. The Micro Focus Net Express 5.1 Wrap Pack 14 Runtime Licensing files are contained in the self-extracting zip file, MFLicense_51WP14.exe. This executable provides the COBOL runtime system with unlimited runtime Net Express licenses specifically for PeopleSoft installations.Always use the runtime files created for the version of the compiler that you used in compiling the COBOL files. For example, use the MFLicense_51WP14.exe runtime license file for the Micro Focus Net Express 5.1 Wrap Pack 14 compiler.This section assumes that:
• You installed and compiled the PeopleSoft COBOL application files on the runtime system.
• You saved the files from Oracle Software Delivery Cloud in a directory referred to as NE_INSTALL.
To set up the runtime license:1. Set the environment variable PS_HOME to the directory where your PeopleSoft software is installed.
For example, use this command in a command prompt window:
set PS_HOME=C:\HR92
2. Delete the following Microsoft Windows registry entry if it exists:
\HKEY_LOCAL_MACHINE\SOFTWARE\Wow6432Node\Micro Focus\ASLMF
3. Delete the directory C:\psft-mf-nx-as-license if it exists.
4. Go to NE_INSTALL, and run the self-extracting zip file MFLicense_51WP14.exe.
5. Specify the directory to save the files, for example C:\MFLicense-Extract-51WP14.
6. Change directory to C:\MFLicense-Extract-51WP14 and run the script setupMF.bat.
This script makes the following changes:
• Installs the Micro Focus Net Express Application Server License Database.
• Creates the Microsoft Windows registry entry \HKEY_LOCAL_MACHINE\SOFTWARE\Wow6432Node\Micro Focus\ASLMF, which point to the directory c:\psft-mf-nx-as-license.

Installing and Compiling COBOL on Windows Chapter 10A
288 Copyright © 2018, Oracle and/or its affiliates. All Rights Reserved.
• Adds the files mfasdb, prodfile, and semfile to the directory C:\psft-mf-nx-as-license.
7. Run the command MFLMWin with the option to install, as follows:
MFLMWin.exe -i
8. To verify that the Micro Focus license manager was installed, run Microsoft Windows Services.
For example, run the following command in the command prompt window:
services.msc
You should see the service Micro Focus License Manager with status Started, and the Startup type should be Automatic.
Removing the Runtime License
To uninstall the runtime license:
• Delete the Microsoft Windows registry key:
\HKEY_LOCAL_MACHINE\SOFTWARE\Wow6432Node\Micro Focus\ASLMF
• Delete the C:\psft-mf-nx-as-license directory and its contents.
Troubleshooting
If you install the Micro Focus Net Express 5.1 Runtime License on a system where the Micro Focus Net Express 5.1 compiler is already installed, you see an error message that mentions that Runtime DLL CBLRRSS is not found. Use one of the following solutions:
• If the system where you are installing the license will be used only for running COBOL programs, but not compiling, remove the Micro Focus Net Express 5.1 COBOL compiler installation, and then re-install the Micro Focus Net Express 5.1 Runtime License.
• If the system where you are installing the license will be used for both compiling and running COBOL programs, just ignore the error message. The Net Micro Focus Express 5.1 COBOL compiler is already installed, and has an embedded runtime, which will be used to execute the COBOL programs. Thus there is noneed to install and license the Micro Focus Net Express 5.1 Runtime.
If you see an error "ASLM: Errno 1000" it means the runtime license is not installed. Use the instructions in the earlier section to install the license.See Installing the Runtime Files and Setting Up the License.
Task 10A-4-5: Defining the GNT and INT FilesBy default, the compile generates a GNT file unless the exception file, CBLINT.XX already exists. CBLINT.XX contains the list of files that need to be compiled to the INT file.
Note. The INT exception file is sometimes needed to overcome Micro Focus execution error with GNT files.
For example, the exception file, CBLINT.PT, where PT represents PeopleTools, would contain the following information:Call cblcrint <file name without file extension>
or:Call cblcprint PTPDBTST

Chapter 10A Installing and Compiling COBOL on Windows
Copyright © 2018, Oracle and/or its affiliates. All Rights Reserved. 289
Task 10A-4-6: Distributing COBOL BinariesAfter you have compiled your COBOL, you must transfer it to the needed locations. The required action depends upon how you set up PS_HOME and PS_CUST_HOME.
• PS_HOME Setup
Copy the contents of <PS_HOME>\CBLBIN<X> (CBLBINA, CBLBINU, or CBLBINE) directory into <PS_HOME>\CBLBIN<X> (CBLBINA, CBLBINU, or CBLBINE) on your batch and application server machines.
• PS_CUST_HOME Setup
If you have customized files in PS_CUST_HOME:
1. Copy the contents of <PS_HOME>\CBLBIN<X> (CBLBINA, CBLBINU, or CBLBINE) directory into <PS_HOME>\CBLBIN<X> (CBLBINA, CBLBINU, or CBLBINE) on your batch and application servermachines.
2. Copy the contents of <PS_CUST_HOME>\CBLBIN<X> (CBLBINA, CBLBINU, or CBLBINE) directory into <PS_CUST_HOME>\CBLBIN<X> (CBLBINA, CBLBINU, or CBLBINE) on your batch and application server machines.


Copyright © 2018, Oracle and/or its affiliates. All Rights Reserved. 291
Chapter 10B
Installing and Compiling COBOL on UNIX
This chapter discusses:
• Understanding COBOL
• Prerequisites
• Preparing COBOL for a PeopleTools-only Upgrade
• Installing Micro Focus Server Express for UNIX
• Using the Micro Focus COBOL Compiler on UNIX
• Installing IBM COBOL on IBM AIX
• Using the IBM COBOL Compiler on IBM AIX
Understanding COBOL
This chapter describes how to compile and link PeopleSoft COBOL batch programs, if necessary.COBOL is not needed for PeopleSoft PeopleTools because the Process Scheduler is written in C++. In addition, COBOL is not required for PeopleSoft applications that contain no COBOL programs. See My Oracle Support forthe details on whether your application requires COBOL.The chapter includes instructions for Micro Focus Net Express COBOL compiler, sometimes referred to here as "Micro Focus COBOL", and the IBM COBOL compiler for IBM AIX, sometimes referred to here as "IBM COBOL."
Warning! If your database server is DB2 for z/OS and your CCSID is not 37, you must read the CCSID discussion under Defining DB2 for z/OS Subsystem Configuration in the chapter "Preparing for Installation."
For information on %BINARYSORT, see the product documentation on sorting in PeopleTools: Global Technology.
For information on PeopleTools options and PSOPTIONS, see the product documentation on PeopleTools utilities in PeopleTools: System and Server Administration.
See Also
"Preparing for Installation," Installing Supporting ApplicationsPeopleSoft Enterprise Frequently Asked Questions About PeopleSoft and COBOL Compilers, My Oracle Support, (search for the article name)PeopleSoft Enterprise Frequently Asked Questions About PeopleSoft and the IBM COBOL Compiler, My Oracle Support, (search for the article name)

Installing and Compiling COBOL on UNIX Chapter 10B
292 Copyright © 2018, Oracle and/or its affiliates. All Rights Reserved.
PeopleTools Certifications - Suggested Fixes COBOL, My Oracle Support, (search for the article name and selectthe current release)PeopleTools: Global Technology, "Understanding COBOL in a Unicode Environment"PeopleTools: Global Technology, "Understanding Running COBOL in a z/OS Unicode Environment"
Prerequisites
Before you attempt to run COBOL from the command line you should make sure the variable PS_SERVER_CFGpoints to a valid psprcs.cfg file.
Task 10B-1: Preparing COBOL for a PeopleTools-only Upgrade
When performing a PeopleTools-only upgrade, if you have COBOL modules, you must recompile all COBOL. For Micro Focus Server Express COBOL, recompile and relink all COBOL programs for PeopleSoft PeopleToolsand PeopleSoft applications, as described in a later section.See Using the Micro Focus COBOL Compiler on UNIX.
Task 10B-2: Installing Micro Focus Server Express for UNIX
This section discusses:
• Understanding Micro Focus Server Express
• Prerequisites
• Obtaining the Installation Files for Micro Focus Server Express from Oracle Software Delivery Cloud
• Installing Micro Focus Server Express
Understanding Micro Focus Server ExpressMicro Focus® Server Express™ 5.1 Wrap Pack 14 is the supported COBOL compiler on UNIX operating systemplatforms for the current PeopleSoft PeopleTools release. This section provides installation instructions for Micro Focus Server Express 5.1 Wrap Pack 14 COBOL compiler and the License Management Facility used to manage product licenses. These instructions are specifically for installing the Server Express COBOL compiler to use with PeopleSoft software. For more general installation instructions or other supporting documentation concerning Server Express, consult the documentation that comes with the installation software.
Note. Oracle supports a number of versions of UNIX and Linux in addition to Microsoft Windows for the PeopleSoft installation. Throughout this book, there are references to operating systems. Where necessary, this book refers to specific operating systems by name (for example, Oracle Solaris, IBM AIX, or Linux); however, for simplicity the word UNIX is sometimes used to refer to all UNIX-like operating systems, including IBM AIX,Linux, HP-UX, and Oracle Solaris for SPARC. For the most up-to-date information on operating system support for your database platform, see the Certification information on My Oracle Support.
Note that Oracle is the exclusive reseller of the Micro Focus COBOL compiler for use with PeopleSoft applications.

Chapter 10B Installing and Compiling COBOL on UNIX
Copyright © 2018, Oracle and/or its affiliates. All Rights Reserved. 293
See Also
PeopleSoft Enterprise Frequently Asked Questions About PeopleSoft and COBOL Compilers, My Oracle Support, Doc ID 747059.1Micro Focus web site: http://supportline.microfocus.com/Server Express DocumentationUsing the Micro Focus COBOL Compiler on UNIX
PrerequisitesYou must install the Micro Focus Server Express COBOL compiler on any machine that will compile, execute, orrun COBOL programs. The Micro Focus Server Express COBOL compiler includes an embedded runtime system. You can compile COBOL programs on those servers for which you have licenses, and copy the compiled programs to other servers, but to run the compiled programs, you must also install the compiler with the runtime system.In addition, in order to execute COBOL programs that are created using a Server Express product and deployed ina UNIX environment, the Server Express compiler with the embedded runtime system, must be installed on the target runtime system, and the "Micro Focus Application Server runtime license" must also be installed on the target runtime system.For information on obtaining licenses for Micro Focus COBOL compilers, see:
• The documentation included with the software on Oracle Software Delivery Cloud.
• The Micro Focus Server Express Extras Install Documentation for PeopleSoft and Runtime Licenses, includes information on how to add development, Application Server, and unlimited license patch (ULP) licenses
• The Micro Focus COBOL for PeopleSoft Quick Reference Guide summarizes the delivered software and licensing requirements.
• PeopleSoft Enterprise Frequently Asked Questions About PeopleSoft and COBOL Compilers, My Oracle Support, Doc ID 747059.1.
If you have a previous Micro Focus COBOL product installed we recommend that you make a backup of any COBOL systems files that you have changed. Examples include cobkeymp, ADISCTRL, cobopt and cobconfig. After you have installed Server Express you might want to apply to the new COBOL product the changes previously applied to these files.If you want to maintain more than one COBOL installation, Oracle recommends that you do not install one version over another. Instead, use one of these suggested methods:
• Remove (uninstall) the existing version before installing the new version
• Leave the existing version in its current directory (do not move it) and install the new version in its own, different directory.
If you have installed, or plan to install, Micro Focus Application Server or any other Micro Focus product on the same machine as this product, you must install them in different directories.This Micro Focus product is managed by a License Management Facility (LMF). This facility helps you keep track of the number of licenses you have for the product. In order to use this product it is necessary for you to install the License Management Facility (which is provided with the Server Express software). This software should not be installed in the same directory as Server Express. The default directory depends upon the operating system; for example:
• /opt/lib/mflmf for HP-UX Itanium

Installing and Compiling COBOL on UNIX Chapter 10B
294 Copyright © 2018, Oracle and/or its affiliates. All Rights Reserved.
• /usr/lib/mflmf for RS/6000 and PowerPC systems running AIX
• /opt/lib/mflmf on other systems
If /opt/lib does not exist, use /usr/lib/mflmf instead.
Task 10B-2-1: Obtaining the Installation Files for Micro Focus Server Express from Oracle Software Delivery CloudThe Micro Focus Server Express installation files are available on Oracle Software Delivery Cloud. At this point you should have already downloaded the necessary files. This section includes additional information on finding and using the files for Micro Focus Server Express if necessary.See "Preparing for Installation," Using Oracle Software Delivery Cloud to Obtain Installation Files.To obtain the files for the Micro Focus Server Express installation:1. Log in to Oracle Software Delivery Cloud at https://edelivery.oracle.com.
2. Enter Micro Focus in the type-ahead Product field, and select Micro Focus International Ltd. Server Express COBOL for UNIX from the drop-down list.
3. Click Select Platform, select the operating system you are running on, and then click Select.
4. Click Continue.
5. Click Continue.
6. Read the license agreement, select the check box to acknowledge that you accept the terms, and then click Continue.
7. Click one of the file names to download an individual zip file, or click Download All to obtain all of the files listed.
The files include software, wrap packs, and documentation. Save the zip files to a temporary directory on yourlocal system. You must extract (unzip) the file on the platform for which it is intended. For example, if you download the zip file for Oracle Solaris, you must unzip it on Oracle Solaris to avoid problems. If you unzip the file to a staging directory on a Microsoft Windows computer and copy the staging directory to an Oracle Solaris computer, the stage area files may be corrupt.
Task 10B-2-2: Installing Micro Focus Server ExpressThe following section is provided as an example installation and illustrates a typical Micro Focus Server Express 5.1 Wrap Pack 14 installation for PeopleSoft application, as outlined in the overview section above.The answers to the prompts provided in the following example are recommended by Oracle for PeopleSoft installations, with the exception of the installation directory for the Micro Focus License Management Facility. For this step, you can use the default directory names or choose directory names based on your site's naming conventions.It is recommended by Micro Focus and Oracle to install LMF in its own directory, instead of in a sub-directory of the Server Express install.
Important! Make sure to specify the correct bit mode for your UNIX platform. Enter 64 for all UNIX platforms.
The following example was done on a Red Hat Linux x86-64 operating system platform. Installation prompts willvary slightly with respect to specifics of the different UNIX platforms.1. Log in as root.
2. Create a directory (if it does not exist) where you want to install the Micro Focus Server Express 5.1 Wrap Pack 14. For example:

Chapter 10B Installing and Compiling COBOL on UNIX
Copyright © 2018, Oracle and/or its affiliates. All Rights Reserved. 295
$ mkdir -p /products/mf/svrexp-5.1_wp14-64bit
3. Change directory to the one you created in the previous step.
$ cd /products/mf/svrexp-5.1_wp14-64bit
4. Copy or ftp the Micro Focus Server Express 5.1 Wrap Pack 14 tar file that you obtained from Oracle SoftwareDelivery Cloud to this directory.
In this example, the file name is sx51_wp14_redhat_x86_64_dev.tar.
5. List the items in the directory with the following command:
$ ls -l /products/mf/svrexp-5.1_wp14-64bittotal 409600-rwxr-xr-x 1 root root 209295360 Feb 03 19:23 sx51_wp14_redhat_⇒x86_64_dev.tar
6. Extract the tar file:
$ tar -xvf sx51_wp14_redhat_x86_64_dev.tar
7. List the items in the directory with the following command:
$ lsADISCTRL bin demo dialog dynload es etc ⇒ install lib snmp sx51_ws6_redhat_x86_64_dev.tar xdb aslmf ⇒ cpylib deploy docs dynload64 eslmf-mess include lang lmf ⇒ src terminfo
8. To begin the installation, type:
$sh ./install
9. Read the text and follow the instructions to review the readme.txt file:
This script will install Micro Focus Server Express 5.1 on this⇒ computer.
The readme.txt file included in this delivery contains details of new⇒ features, enhancements and any restrictions of which you should be⇒ aware. This file is located in :
/products/mf/svrexp-5.1_wp14-64bit/docs
We strongly recommend you read this file once the installation is⇒ complete.
Do you wish to continue (y/n): y
10. Read the following License Agreement and type y (yes) to accept it:
Before installing and using this software product you must agree to be⇒ bound by the terms and conditions of the end user license agreement ⇒("License Agreement") which accompanies this product. Please take⇒ this time to read the License Agreement. If you are not in agreement⇒ with the terms and conditions of the License Agreement, please return⇒

Installing and Compiling COBOL on UNIX Chapter 10B
296 Copyright © 2018, Oracle and/or its affiliates. All Rights Reserved.
the product to your Account Representative and your money will be⇒ refunded. If you require a replacement copy of the License Agreement,⇒ please contact your Account Representative before proceeding with the⇒ install process.Do you agree to the terms of the License Agreement? (y/n): y
11. If you are installing on an operating system platform that Micro Focus has not built the product on, you see the following message. Type y (yes) at the prompt:
Micro Focus Install
This product was not built or tested on this version of the Operating⇒ System. This product was built on Operating System: RedHatEnterpriseServer 2.6.18-348.el5 x86_64 Red Hat Enterprise Linux Server release 5.9 (Tikanga) and you are installing it on Operating System: Linux 3.8.13-16.2.1.el6uek.x86_64 Any product issues you report will only be corrected if they can be⇒ reproduced on one of our systems running: RedHatEnterpriseServer 2.6.18-348.el5 x86_64Red Hat Enterprise Linux Server release 5.9 (Tikanga)OracleServer 3.8.13-35.3.5.el6uek.x86_64 x86_64Red Hat Enterprise Linux Server release 6.5 (Santiago)RedHatEnterpriseServer 2.6.18-398.el5 x86_64Red Hat Enterprise Linux Server release 5.11 (Tikanga)RedHatEnterpriseServer 2.6.32-504.el6.x86_64 x86_64Red Hat Enterprise Linux Server release 6.6 (Santiago)
Please confirm that you want to continue with this installation (y/n): y
12. After reading the following information press ENTER to continue:
When you press return you will be shown details of the reference⇒ environment (and any compatibility environments).
Please press return when you are ready:
13. Type y (yes) to continue after reading the listing of the reference environment. For the sake of brevity, the texthas been truncated, as indicated by [...].
This product is certified on the following reference environment: The command(s) used to gather the information is given following each⇒ entry. Operating System ---------------- RedHatEnterpriseServer 2.6.18-348.el5 x86_64Red Hat Enterprise Linux Server release 5.9 (Tikanga)
lsb_release -siuname -runame -mcat /etc/redhat-release

Chapter 10B Installing and Compiling COBOL on UNIX
Copyright © 2018, Oracle and/or its affiliates. All Rights Reserved. 297
C Compiler----------cc gcc version 4.1.2 20080704 (Red Hat 4.1.2-54)
gcc -v 2>&1 | tail -1
C++ Compiler------------/usr/bin/g++ gcc version 4.1.2 20080704 (Red Hat 4.1.2-54)
g++ -v 2>&1 | tail -1
Assembler---------as GNU assembler version 2.17.50.0.6-20.el5_8.3 (x86_64-redhat-linux)⇒ using BFD version 2.17.50.0.6-20.el5_8.3 20061020
as -v 2>&1 < /dev/null
Linker------ld GNU ld version 2.17.50.0.6-20.el5_8.3 20061020
ld -V 2>&1 | head -1
Supported versions of Java--------------------------Java version = 1.6.0_15Java vendor = Sun Microsystems Inc.Java OS name = LinuxJava OS arch = amd64Java OS version = 2.6.18-348.el5
Java version = 1.6.0_15Java vendor = Sun Microsystems Inc.
Java OS name = LinuxJava OS arch = amd64Java OS version = 2.6.18-348.el5
Java version = 1.7.0_05Java vendor = Oracle CorporationJava OS name = LinuxJava OS arch = i386Java OS version = 2.6.18-348.el5
Java version = 1.7.0_05Java vendor = Oracle CorporationJava OS name = LinuxJava OS arch = amd64Java OS version = 2.6.18-348.el5
$JAVA_HOME/bin/java -classpath $COBDIR/lib WhatJava

Installing and Compiling COBOL on UNIX Chapter 10B
298 Copyright © 2018, Oracle and/or its affiliates. All Rights Reserved.
Unicode-------Unicode mapping tables must be installed for J2EE and Web Services tofunction correctly. These tables are required for converting betweenany combination of UTF-16/UCS-2, UTF-8 and other installed locales.
[...]
Please confirm your understanding of the above reference environment⇒ details (y/n): yIf you require this support, you will need to install the TCP/IP⇒ Development System libraries prior to installation of your COBOL⇒ system.
14. Answer n (no) to the following prompt:
Do you want to make use of COBOL and Java working together? (y/n): n Skipping Java setupShould you want to use Java with COBOL later on as super user, run the⇒ command /products/mf/svrexp-5.1_wp14-64bit/bin/java_setup to select⇒ the version of Java you want to use.
Note. PeopleSoft COBOL implementations do not require COBOL and Java to work together.
15. Answer y (yes) to the following prompt concerning the License Management Facility:
This product is protected using the Micro Focus License Management⇒ Facility (LMF). Please refer to the Development System Licensing Guide⇒ for information relating to the installation of the licensing system⇒ and licenses.If you do not have LMF installed or want to upgrade to the latest⇒ version, we recommend that you install it now.
Would you like to install LMF now? (y/n): y
16. At the following prompt, enter the directory name where you want to install License Manager.
Note. Micro Focus and Oracle recommend that you install LMF in its own directory, instead of a sub-directory of the Server Express installation.
Enter the directory name where you wish to install License Manager.(Press Enter for default directory /opt/microfocus/mflmf)
/products/mf/mflmf-svrexp-5.1_wp14-64bit
17. Enter y (yes) to restrict access to the License Admin System to the superuser account:
Do you want only superuser to be able to access the License Admin⇒ System? (y/n) y
18. Enter y (yes) to start license manager automatically at boot time:
It is recommended that you let license manager autostart at boot time. Do you want license manager to be automatically started at boot time? ⇒

Chapter 10B Installing and Compiling COBOL on UNIX
Copyright © 2018, Oracle and/or its affiliates. All Rights Reserved. 299
(y/n) y LMF installation complete.
19. If you want to consult the documentation on how to install licenses, follow the instructions in this prompt:
Please consult the Development Licensing Guide for detailed information⇒ on how to install licenses.
This may be done by running the mflicense tool.--------------------------------------------------------To run your applications you need a deployment license installed using⇒ Apptrack.See your Deployment Licensing Guide for details.Installing Apptrack...
Access permissions on directory /var/mfaslmf have changed on this⇒ releaseWrite access permission has been removed except for superuser useApptrack installation complete
20. Enter 64 for the system default bit mode:
This product can be used in either 32-bit or 64-bit modes. Please enter either 32 or 64 to set the system default mode: 64 System default COBMODE has been set to 64.
21. Wait for the documentation to be installed:
Installing documentation. Please wait...
22. Enter n (no) at the following prompt:
Enterprise Server provides a scalable, managed, and high-performance⇒ transactional environment for the deployment of COBOL applications and⇒ services, COBOL/J2EE applications and direct COBOL Web Services.
Your Enterprise Server requires configuration. You can either do it now⇒ or later. To do it now, you need to know the alphanumeric user ID of⇒ the Enterprise Server System Administrator.To do it later, enter the following commands whilst logged in as root:
/products/mf/svrexp-5.1_wp14-64bit/bin/eslminstall/products/mf/svrexp-5.1_wp14-64bit/bin/casperm
Do you wish to configure Enterprise Server now? (y/n): n
23. Review the information concerning setting the COBDIR, LD_LIBRARY_PATH, and PATH environment variables in the concluding prompt:
(Remember to set COBDIR to /products/mf/svrexp-5.1_wp14-64bit, include ⇒/products/mf/svrexp-5.1_wp14-64bit/lib in LD_LIBRARY_PATH, and include ⇒/products/mf/svrexp-5.1_wp14-64bit/bin on your PATH.)
WARNING: Any executables (whether a Run-Time System or an application)⇒ must be relinked using this new release. Otherwise, the results of⇒

Installing and Compiling COBOL on UNIX Chapter 10B
300 Copyright © 2018, Oracle and/or its affiliates. All Rights Reserved.
running the older executables with this new release are undefined.
Installation completed successfully.
The COBOL system is ready to use.
Task 10B-3: Using the Micro Focus COBOL Compiler on UNIX
This section discusses:
• Understanding COBOL Compilation
• Modifying the Liblist64 File (IBM AIX)
• Compiling COBOL on UNIX with a PS_HOME Setup
• Compiling COBOL on UNIX with a PS_CUST_HOME Setup
• Linking COBOL
• Recompiling COBOL on UNIX
Understanding COBOL CompilationOn UNIX operating systems platforms, you always need to compile your COBOL programs at installation time. After you set up your application or batch server, perform the steps discussed in this section.The Micro Focus Server Express COBOL compiler includes an embedded runtime system, so the compiler must be installed on machines that will compile the COBOL programs and also on any machine where COBOL programs are to be executed or run.You have two options for compiling:
• You can treat one application or batch server as your compile server, compile all your COBOL programs there, and then distribute cblbin from there to all other relevant servers. In this case, you would copy any patches and customizations from your file server to this designated server before carrying out the compile. You would also need to install the Server Express compiler on all servers, in order to have the embedded runtime system present.
• The second option is to compile on all servers. In this situation, all servers would need a COBOL compiler, and you would need to copy any patches and customizations from the file server to all of these servers before carrying out the compile.
Note. You should have read/write access to the directory PS_HOME/cblbin to be able to compile the COBOL programs.
Note. To copy a compiled COBOL program from one UNIX server to another, they must be on the same operating system that the compile took place on. For example, if you compile on Oracle Solaris for the Application Server, and the Process Scheduler is on AIX, you cannot copy the compiled program (you will also need to compile on the AIX machine).
The way that you set up your installation environment determines how you compile COBOL. This section includes different procedures for the different installation environments, as follows:
• PS_HOME Setup
If you installed the PeopleSoft PeopleTools and PeopleSoft Application software to a PS_HOME location, follow the instructions in the section Compiling COBOL on UNIX with a PS_HOME Setup.
Chapter 10B Installing and Compiling COBOL on UNIX
Copyright © 2018, Oracle and/or its affiliates. All Rights Reserved. 301
• PS_CUST_HOME Setup
For PeopleSoft PeopleTools 8.53 and later, you have the option to place customized COBOL baseline sources into a location referenced by the environment variable PS_CUST_HOME.
The PS_CUST_HOME directory structure must replicate that of PS_HOME, that is, any COBOL source file that is customized should be placed in the same relative path as was present in the original location. If your environment includes customized files in a PS_CUST_HOME directory, follow the instructions in the section Compiling COBOL on UNIX with a PS_CUST_HOME Setup.
See Also
"Preparing for Installation," Defining Installation Locations.
Task 10B-3-1: Modifying the Liblist64 File (IBM AIX)
Understanding Liblist Modifications
If you are compiling COBOL on AIX, modify the liblist64 file as described here. Check My Oracle Support for additional information about modifications that need to be made in the liblist64 file for COBOL. See My Oracle Support, Certifications.
Modifying the Liblist64 File for AIX
To modify the liblist64 file for AIX:1. cd to $COBDIR/lib.
2. Add the following line to the liblist file:
x:*:s!t:-lC
The following listing shows where to make the changes (in bold font):# More emulation of cc (MUST be after MF/user libraries):x:*:st:-L/usr/lib/threadsx:*:st:-lpthreadsx:*:s!t:-lC <=== Add this linex:*:s:-lc
Task 10B-3-2: Compiling COBOL on UNIX with a PS_HOME SetupThis section assumes that you installed the PeopleSoft PeopleTools and PeopleSoft Application software to a PS_HOME directory. It also assumes that there is no separate PS_CUST_HOME directory with customized COBOL source files.To compile COBOL on UNIX:1. If you haven't already done so, download all required patches to your file server, and from there FTP the
contents of src\cbl\base and src\cbl\unix over to src/cbl on the relevant application or batch server.
Note. When you copy patches over from the file server, the files need to have a lowercase cbl extension and an uppercase program name, as in PATCH.cbl.

Installing and Compiling COBOL on UNIX Chapter 10B
302 Copyright © 2018, Oracle and/or its affiliates. All Rights Reserved.
2. Source the script psconfig.sh from PS_HOME to set up environment variables correctly on your application orbatch server.
. ./psconfig.sh
3. Change to the PS_HOME/setup directory:
cd $PS_HOME/setup
4. To compile all the COBOL source dynamically, issue the command:
./pscbl.mak
The dynamic compile creates INT, LST, and GNT files, which are copied to these locations:
File Location
INT PS_HOME/src/cbl/int
LST PS_HOME/src/cbl/lst
GNT PS_HOME/cblbin
Warning! Proposed ISO 2000 COBOL features are enabled. Please refer to documentation for details, and do not rely on these features being supported in future products from Micro Focus due to changes in the proposedCOBOL standard.
Note. For Server Express, PeopleSoft sets the COBOL directive INTLEVEL to 4. Setting this directive to this value enables you to raise the significant digits of numeric fields from 18 to 31. This is in accordance with the ISO 2000 COBOL standard. During the compilation of each program, the vendor of Server Express will display a warning. This should not be considered a compilation error.
Task 10B-3-3: Compiling COBOL on UNIX with a PS_CUST_HOME SetupThis section assumes that you have set up a PS_CUST_HOME environment variable for customized COBOL source files.To compile COBOL programs on UNIX:1. Set PS_HOME environment variable in the UNIX shell prompt from which you want to run the COBOL
compile.
You can run PS_HOME/psconfig.sh with the following command to set the PS_HOME environment variable in the shell:
cd <PS_HOME> . ./psconfig.sh
Verify if the PS_HOME environment variable is set with this command:
$ echo $PS_HOME $ /home/<user>/PTcompile
2. Set the PS_CUST_HOME environment variable with this command:
PS_CUST_HOME=/home/<user>/CUSTcompile; export PS_CUST_HOME
3. To compile all the COBOL source under PS_CUST_HOME dynamically, issue the command:

Chapter 10B Installing and Compiling COBOL on UNIX
Copyright © 2018, Oracle and/or its affiliates. All Rights Reserved. 303
./pscbl.mak PS_CUST_HOME
PeopleSoft PeopleTools compiled COBOL programs and PeopleSoft Application compiled COBOL programs will be placed under the PS_CUST_HOME\cblbin directory.
Task 10B-3-4: Linking COBOLThis section discusses:
• Understanding COBOL Linking
• Linking COBOL Components on UNIX
Understanding COBOL Linking
PSRUN is the PeopleSoft procedure that connects the COBOL batch programs with the RDBMS API. PSRUNRMT is the PeopleSoft procedure that connects the remote COBOL programs with the RDBMS API.Both PSRUN and PSRUNRMT are compiled uniquely for each platform and consist of modules provided with PeopleSoft software, the RDBMS platform, and the operating system.You need to create the PSRUN and PSRUNRMT programs in the following situations:
• You are installing PeopleSoft software for the first time.
• Any COBOL programs have changed.
• The version of the RDBMS running the PeopleSoft system has changed.
• The COBOL compiler has changed.
• One of the C programs supplied with the PeopleSoft system has changed.
Note. The PeopleSoft system only supports dynamic linking of COBOL. Static linking is not an option.
Linking COBOL Components on UNIX
To link COBOL components on UNIX:1. Change to the PS_HOME/setup directory:
cd $PS_HOME/setup
2. For dynamic linking, run:
./psrun.mak
The PSRUN.MAK script should return the UNIX prompt when done. If the compile completes without errors,the files PSRUN and PSRUNRMT will now exist in the PS_HOME/bin directory. If you encounter errors, check PS_HOME/setup/psrun.err and PS_HOME/setup/psrunrmt.err
If you are running on an Oracle 11.2.0.4 database platform, you may see the following error when you attempt to compile:"Undefined symbol nzosSCSP_SetCertSelectionParams referenced in file /products/oracle/11.2.0.4.0-64bit/lib/libclntsh.so.11.1"To resolve this problem:1. Edit the LD_LIBRARY_PATH environment variable so that $ORACLE_HOME/lib comes before
$TUXDIR/lib.

Installing and Compiling COBOL on UNIX Chapter 10B
304 Copyright © 2018, Oracle and/or its affiliates. All Rights Reserved.
2. Execute psrun.mak again.
3. Reverse the change you made in step 1.
Task 10B-3-5: Recompiling COBOL on UNIXYou always need to compile at installation, so you will only need to recompile COBOL in the following situations:
• You are installing PeopleSoft software for the first time.
• The supported COBOL compiler changes.
• You change the version of your RDBMS.
• You change the version of your operating system.
• You apply a PeopleSoft PeopleTools upgrade, patch, or fix.
Note. Remember, you must always use your file server as the source repository for your COBOL. You should download any patches and apply any customizations to the file server, and disseminate them from there.
You can compile a single COBOL program dynamically by using this command syntax:./pscbl.mak <PROGRAM NAME WITHOUT "cbl" EXTENSION>
For example, the following command compiles the lone file PTPDBTST../pscbl.mak PTPDBTST
Note. If you want to recompile all your COBOL, you can follow the appropriate procedure as described earlier.
See Compiling COBOL on UNIX with a PS_HOME Setup or Compiling COBOL on UNIX with a PS_CUST_HOME Setup.
The compile should run without errors until it completes. After the script is complete, check the destination directories for the newly created files. They should have a length greater than zero as well as a current date and time stamp. You can find the files in the following locations:
• For PS_HOME Setup: PS_HOME/src/cbl/int, PS_HOME/src/cbl/lst, and PS_HOME/cblbin
• For PS_CUST_HOME Setup: PS_CUST_HOME/src/cbl/int, PS_CUST_HOME/src/cbl/lst, and PS_CUST_HOME/cblbin
Note. You can also use pscbl.mak PTP*** to compile all source files that start with PTP.
Task 10B-4: Installing IBM COBOL on IBM AIX
This section discusses:
• Understanding the IBM COBOL for AIX Installation
• Prerequisites
• Installing IBM COBOL for AIX v4.1.1.1

Chapter 10B Installing and Compiling COBOL on UNIX
Copyright © 2018, Oracle and/or its affiliates. All Rights Reserved. 305
Understanding the IBM COBOL for AIX InstallationThe IBM COBOL for AIX compiler version 4.1.1.1 is supported for the current PeopleSoft PeopleTools release. This section includes the installation of the IBM COBOL Compiler on IBM AIX.
PrerequisitesTo install and use IBM COBOL for AIX 4.1.1.1, you must have the following:
• PeopleSoft PeopleTools
We recommend that you take the latest available PeopleSoft PeopleTools patch level. You should install PeopleSoft PeopleTools and your PeopleSoft application software before you compile the IBM COBOL for AIX source files.
• IBM COBOL for AIX version 4.1.1.1.
You must obtain IBM COBOL for AIX compiler from your IBM vendor. Obtain the installation documentation and review the information on system prerequisites and installation methods. The following installation instructions assume that you have the IBM installation files and installation documentation. Review the information on planning your installation, but use the instructions in this document to carry out theinstallation. Contact your IBM representative to obtain the software.
See http://www-01.ibm.com/software/awdtools/cobol/aix/
See http://www-01.ibm.com/software/awdtools/cobol/aix/library/
• The IBM COBOL compiler uses the system temporary space for some steps. Be sure the space is not full before beginning the compilation.
See Using the IBM COBOL Compiler on IBM AIX, Troubleshooting the IBM COBOL Compiler.
• Documentation for IBM System Prerequisites
Refer to the "System Prerequisites" section in the IBM Installation guide for COBOL for AIX 4.1, before installing and running the software.
Task 10B-4-1: Installing IBM COBOL for AIX v4.1.1.1This procedure assumes that you obtained the installation file from your IBM vendor and saved the compressed installation file in a local directory, referred to here as CBL_INSTALL. The compressed installation file includes several filesets. All of the filesets listed must be installed. This table lists the filesets for IBM COBOL for AIX compiler v4.1.1.1, and the locations where they will be installed:
Fileset Name Fileset Description Installation Locations* Required Fileset Level
cobol.cmp IBM COBOL for AIX compiler
/usr/lpp/cobol/
/usr/lpp/cobol/bin/
/usr/lpp/cobol/samples/
/usr/lpp/cobol/include/
/usr/bin/
4.1.1.1
cobol.dbg IBM COBOL for AIX debugger
/usr/lpp/cobol/lib
/usr/lib/
4.1.1.1

Installing and Compiling COBOL on UNIX Chapter 10B
306 Copyright © 2018, Oracle and/or its affiliates. All Rights Reserved.
Fileset Name Fileset Description Installation Locations* Required Fileset Level
cobol.lic IBM COBOL for AIX license files
/usr/lpp/cobol/lib/ 4.1.1.0
cobol.license IBM COBOL for AIX license
NONE 4.1.1.0
cobol.man IBM COBOL for AIX compiler manual pages
/usr/share/man/
/usr/lpp/cobol/man/
4.1.1.1
cobol.msg.LANG IBM COBOL for AIX compiler messages
/usr/lpp/cobol/lib/nls/msg/LANG/
LANG = [en_US, ja_JP, Ja_JP]
4.1.1.0
cobol.rte IBM COBOL for AIX Runtime
/usr/lpp/cobol/
/usr/lpp/cobol/lib/
/usr/lib/
/etc/
4.1.1.0
cobol.rte.msg.LANG IBM COBOL for AIX runtime messages
/usr/lpp/cobol/
/usr/lpp/cobol/lib/
/usr/lib/
/etc/
4.1.1.0
cobol.tools IBM COBOL for AIX tools /usr/lpp/cobol/ 4.1.1.1
* If more than one location is listed, the fileset is copied into all the locations. To extract and install:1. Go to the location where you saved the compressed installation file:
cd CBL_INSTALL
2. Uncompress and unpack the downloaded file with this command:
zcat cobol.411.aix.GM.tar.Z | tar -xvfNote: The name of the compressed file you downloaded may be different⇒ than what is mentioned above.
3. Change directory to CBL_INSTALL/usr/sys/inst.images, and use the inutoc command to generate a list of the files in this directory:
cd usr/sys/inst.imagesinutoc .
4. Use the AIX command installp to install.
For information on using the options for installp, see the IBM COBOL for AIX documentation. For example:
• To install all available filesets to the locations specified in the table at the beginning of this procedure, and

Chapter 10B Installing and Compiling COBOL on UNIX
Copyright © 2018, Oracle and/or its affiliates. All Rights Reserved. 307
write an installation log, use this command:
installp -aXYgd <CBL_INSTALL>/usr/sys/inst.images -e <LOG_DIR/logfile_⇒name> all
• To install a specific fileset, and write an installation log, use this command:
installp -aXYgd <CBL_INSTALL>/usr/sys/inst.images -e <LOG_DIR/logfile_⇒name> <fileset_name>
5. Download the required maintenance packs for IBM COBOL 4.1.1.1 from the IBM web site:
a. Go the IBM Support Fix Central web site: http://www-933.ibm.com/support/fixcentral/
b. Select the Product Group as Rational, Product as COBOL for AIX, Installed Version as 4.1.1.0 and Platform as AIX. Click Continue.
c. Select the Browse for fixes radio button. Click Continue.
d. Select the fix pack 4.1.1.1 or higher. Click Continue.
e. Download the fix pack using one of the download options available.
6. Install the filesets included in the fix pack using the installp command as described above.
• You must install all the available filesets for 4.1.1.1.
• For the fileset cobol.msg.LANG (where LANG = [en_US, ja_JP, Ja_JP] ), choose to install only the filesetsrelevant to your desired language and location.
Note. The LANG environment variable determines which message catalogs are used. The en_US (English) message catalogs are installed by default. If LANG is not defined or is assigned an unsupported locale, en_US message catalogs are used.
7. Use the lslpp command to check the status of the installed COBOL filesets:
lslpp -L cobol*
Task 10B-5: Using the IBM COBOL Compiler on IBM AIX
This section discusses:
• Setting Environment Variables for IBM COBOL
• Compiling COBOL on AIX with a PS_HOME Setup
• Troubleshooting the IBM COBOL Compiler
• Setting Up the IBM COBOL Runtime
• Removing the IBM COBOL Installation
Setting Environment Variables for IBM COBOLBefore compiling the IBM COBOL for AIX, or before installing the files on machines where the COBOL will be run, you must specify environment variables as described in this section. This procedure assumes that the installation directory for PeopleSoft PeopleTools is PS_HOME.To set the environment variables for IBM COBOL for AIX, go to the PeopleSoft PeopleTools installation directory and source the psconfig.sh script:

Installing and Compiling COBOL on UNIX Chapter 10B
308 Copyright © 2018, Oracle and/or its affiliates. All Rights Reserved.
cd <PS_HOME>. ./psconfig.sh
This section includes different procedures depending upon how you set up your installation environment.
• PS_HOME Setup
If you installed the PeopleSoft PeopleTools and PeopleSoft Application software to PS_HOME, follow the instructions in the section Compiling COBOL on AIX with a PS_HOME Setup.
• PS_CUST_HOME Setup
For PeopleSoft PeopleTools 8.53 and later, you have the option to place customized COBOL baseline sources into a location referenced by the environment variable PS_CUST_HOME.
The PS_CUST_HOME directory structure must replicate that of PS_HOME; that is, any COBOL source file that is customized should be placed in the same relative path as was present in the original location. If you set up a PS_CUST_HOME directory for your customized COBOL source files, follow the instructions in the section Compiling COBOL on AIX with a PS_CUST_HOME Setup.
See Also
"Preparing for Installation," Defining Installation Locations.
Task 10B-5-1: Compiling COBOL on AIX with a PS_HOME SetupThis section assumes that you have installed the PeopleSoft PeopleTools and PeopleSoft Application software to the PS_HOME directory, and that you do not have customized COBOL source files in a PS_CUST_HOME directory. In addition, this procedure assumes that you have set the environment variables as described in the previous section.This section is only required for those who need to compile the COBOL sources, not for those who only need to run the compiled COBOL.To compile the COBOL source files:1. Change the directory to PS_HOME/setup; for example:
cd $PS_HOME/setup

Chapter 10B Installing and Compiling COBOL on UNIX
Copyright © 2018, Oracle and/or its affiliates. All Rights Reserved. 309
2. Depending on the character encoding type that your installation uses, set the environment variable PS_ENCODING, as specified in this table:
Database Encoding Command
ANSI export PS_ENCODING=ansi
EBCDIC (DB2 z/OS only) export PS_ENCODING=ansi
Unicode export PS_ENCODING=unicode
Make sure that you are giving the correct value of this environment variable. You will receive errors if the wrong value of this environment variable is specified.
• If your setup includes the file $PS_HOME/setup/unicode.cfg, indicating that the character encoding for your installation is Unicode, but you set the value of PS_ENCODING to ansi with the commands above, you will get the following error
pscblibm.mak : ERROR : <PS_HOME>/unicode.cfg EXISTs, but INCOMPATIBLE⇒ encoding of $PS_ENCODING was specified, EXITING!!!
• If your setup does not have the file $PS_HOME/setup/unicode.cfg, indicating that the character encoding for your installation is non-Unicode, but you set the value of PS_ENCODING to unicode, you will get the following error
pscblibm.mak : ERROR : <PS_HOME>/setup/unicode.cfg does not EXIST,⇒ but INCOMPATIBLE encoding of $PS_ENCODING was specified, EXITING!!!
3. Use this command to compile:
./pscblibm.mak apps
The optional parameter apps determines the location of the work area where the compilation takes place. The allowed values and compilation location for PeopleSoft product lines are listed in this table:
Product Line Apps Parameter Location
PeopleSoft PeopleTools pt (default) PS_HOME/sdk/cobol/pscblpt/src
Human Capital Management hcm PS_HOME/sdk/cobol/pscblhrms/src
Financials/Supply Chain Management fscm PS_HOME/sdk/cobol/pscblfscm/src
The compiled COBOL programs will be placed under <PS_HOME>/CBLBIN_IBM<X>.<X> is A for ANSI or U for Unicode.
Note. If you see the following output during the compilation, you can ignore it:
Preprocessing COBOL files ls: 0653-341 The file *.cfg does not exist. Preprocessing the file PSPBASCH.cbl Can't open input file
Task 10B-5-2: Troubleshooting the IBM COBOL CompilerThis section discusses:

Installing and Compiling COBOL on UNIX Chapter 10B
310 Copyright © 2018, Oracle and/or its affiliates. All Rights Reserved.
• Understanding Troubleshooting for the IBM COBOL Compiler
• Reviewing Screen Output from pscblibm.mak
• Reviewing erroribm.lst
• Reviewing the LISTOUT.LST file
• Reviewing COBOL_PROGRAM.LST files
• Reviewing temporary space errors
Understanding Troubleshooting for the IBM COBOL Compiler
You can find the error and list files discussed in this section in the following locations, depending upon your installation setup:
• If PS_CUST_HOME is the same as PS_HOME, or PS_CUST_HOME is undefined, all error and list files mentioned here are placed in directories under PS_HOME.
• If PS_CUST_HOME is different from PS_HOME, and you compile PeopleSoft Application COBOL source files, the error and list files mentioned here are placed in directories under PS_CUST_HOME.
When compiling COBOL programs on AIX using the IBM COBOL compiler, compiler and linker informational messages are reported in the following locations:
• screen output from pscblibm.mak
• erroribm.lst
PS_HOME/setup/erroribm.lst
• LISTOUT.lst file
<PS_HOME>/sdk/cobol/pscbl<APPS>/src/LISTOUT.lst
<APPS> is the PeopleSoft product family, such as hcm.
See Compiling COBOL on AIX with a PS_HOME Setup
• COBOL_PROGRAM.lst
<PS_HOME>/sdk/cobol/pscbl<APPS>/lst/<COBOL_PROGRAM>.lst
Initially, either review the screen output or the erroribm.lst file in PS_HOME/setup. The erroribm.lst file will contain the names of the programs that failed to compile. You can examine the file LISTOUT.lst to find the COBOL program names listed in erroribm.lst to review the cause of the failures. Then review the COBOL_PROGRAM.lst file to analyze the COBOL error in context of the COBOL source code. After you have corrected the compile or linker errors, you can simply start a complete re-compile. Depending on the relevancy of the failing compiled modules to your project mission, you can decide to resolve allcompile and linker errors or continue without the failed modules. The programs PTPPSRUN and PTPPSRMT must be compiled correctly. If these programs do not compile correctly, none of the COBOL programs will run. These programs are located at PS_HOME/src/cbl/ibm/unix. If these programs fail to compile, you will get the following errors:./pscblibm.mak : Error : Critical program PTPPSRUN did not compile./pscblibm.mak : Error : This error must be fixed prior to running any⇒ cobol programs...
./pscblibm.mak : Error : Critical program PTPPSRMT did not compile
./pscblibm.mak : Error : This error must be fixed prior to running any⇒ cobol programs via RemoteCall

Chapter 10B Installing and Compiling COBOL on UNIX
Copyright © 2018, Oracle and/or its affiliates. All Rights Reserved. 311
Be sure to resolve the errors for these programs before proceeding.
Reviewing Screen Output from pscblibm.mak
The screen output is the first place you should look to determine if there is a compilation or linking error. Errors including the phrase "fail to compile/link" will be displayed at the end of the screen output. For example:./pscblibm.mak: Error : The list of file(s) failed to compile/link.CEPCROLL fail to compile/linkENPBTRNS fail to compile/linkENPMMAIN fail to compile/linkGLPJEDT2 fail to compile/linkSFPCRELS fail to compile/linkSFPREVAL fail to compile/link./pscblibm.mak : The list of file(s) that failed to compile/link can be⇒ found at /data1/home/easa/pt854/setup/erroribm.lst./pscblibm.mak : The compilation log is generated at /data1/home/easa⇒/pt854/sdk/cobol/pscblpt/src/LISTOUT.lst./pscblibm.mak : The compile listing of the COBOL programs can be seen at ⇒/data1/home/easa/pt854/sdk/cobol/pscblpt/lst
Reviewing erroribm.lst
The erroribm.lst file is located in the PS_HOME/setup directory, and contains a list of the programs that failed to compile. For example:CEPCROLL fail to compile/linkENPBTRNS fail to compile/linkENPMMAIN fail to compile/linkGLPJEDT2 fail to compile/linkSFPCRELS fail to compile/linkSFPREVAL fail to compile/link
Reviewing the LISTOUT.LST file
The LISTOUT.lst file is located in the <PS_HOME>/sdk/cobol/pscbl<APPS>/src directory and contains compiler and linker informational, warning and error messages. For example, the following error is related to program PTPDBTST:
exec: /usr/bin/ld -b64 -bpT:0x100000000 -bpD:0x110000000 -bhalt:5 /lib⇒/crt0_64.o -lg -bexport:/usr/lib/libg.exp -o PTPCURND PTPCURND.o -brtl -bE:⇒symlist.exp -lpthreads -ldl -lnsl -L/home/sphilli2/852-803-I1-AIX-ORAU-DEBUG/bin -⇒lpscompat_ansi -lpssqlapi_ansi -lpsuser_ansi -lpspetssl -lpsora_ansi -⇒lpscobnet_ansi -L/usr/lpp/cobol/lib -L/usr/lpp/SdU/vsam/lib -L/usr/lpp/Sd⇒U/sfs/lib -lcob2s -lsmrtlite -lC128 -lC -lcunlink: PTPCURND.oexec: /usr/lpp/cobol/bin/IGYCCOB2 -qtest -qdynam -qaddr(64),flag(w),trunc⇒(bin),arith(extend) -qADDR(64) PTPDBTST.cblPP 5724-V62 IBM COBOL for AIX 3.1.0 in progress ...

Installing and Compiling COBOL on UNIX Chapter 10B
312 Copyright © 2018, Oracle and/or its affiliates. All Rights Reserved.
LineID Message code Library phase message text IGYLI0090-W 4 sequence errors were found in this program.Messages Total Informational Warning Error Severe ⇒ TerminatingPrinted: 1 1LineID Message code Message text IGYSC0205-W Warning message(s) were issued during library phase⇒ processing. Refer to the beginning of the listing. 588 IGYPA3007-S "ZZ000-SQL-ERROR-ROUTINE" was not defined as a procedure-name. The statement was discarded.Messages Total Informational Warning Error Severe ⇒ TerminatingPrinted: 2 1 1Suppressed: 6 6End of compilation 1, program PTPDBTST, highest severity: Severe.Return code 12PTPDBTST fail to compile/link
Reviewing COBOL_PROGRAM.LST files
The COBOL_PROGRAM.lst files are located in <PS_HOME>/sdk/cobol/pscbl<APPS>/lst directory and containthe compiler output for a specific program. For example, a portion of the PTPDBTST.lst file contains this compilation error found for program PTPDBTST, where the ZZ000-SQL-ERROR-ROUTINE was not defined:
588 IGYPA3007-S "ZZ000-SQL-ERROR-ROUTINE" was not defined as a⇒ procedure-name. The statement was discarded.-Messages Total Informational Warning Error Severe ⇒ Terminating0Printed: 2 1 10Suppressed: 6 6-* Statistics for COBOL program PTPDBTST: * Source records = 805 * Data Division statements = 213 * Procedure Division statements = 52
Reviewing temporary space errors
IBM COBOL compiler uses the system temporary space to do some steps of the compilation. Like other UNIX processes, the compiler may give errors when the system temporary space is full. To avoid or correct this problem, clean up the system temporary space on your machine. Here is a sample of errors seen during compilation, when the system temporary space (/tmp) was full in a development AIX machine: pscblibm.mak : Compiling EGPPRCTL.cbl ... IGYDS5247-U An error occurred while attempting to write a compiler work⇒ file, "SYSUT7". Compiler aborted with code 1247IGYSI5258-U Error removing WCode file.: A file or directory in the path⇒

Chapter 10B Installing and Compiling COBOL on UNIX
Copyright © 2018, Oracle and/or its affiliates. All Rights Reserved. 313
name does not exist. IGYSI5258-U Error removing WCode file.: A file or directory in the path⇒ name does not exist. IGYSI5259-U Error closing WCode file.: A file descriptor does not refer⇒ to an open file.IGYSI5258-U Error removing WCode file.: A file or directory in the path⇒ name does not exist. IGYSI5259-U Error closing WCode file.: A file descriptor does not refer⇒ to an open file. IGYSI5258-U Error removing WCode file.: A file or directory in the path⇒ name does not exist. IGYSI5259-U Error closing WCode file.: A file descriptor does not refer⇒ to an open file. IGYSI5258-U Error removing WCode file.: A file or directory in the path⇒ name does not exist. IGYSI5259-U Error closing WCode file.: A file descriptor does not refer⇒ to an open file.
Task 10B-5-3: Setting Up the IBM COBOL RuntimeThis section discusses:
• Installing the IBM COBOL for AIX Runtime Files
• Setting Environment Variables for a PS_CUST_HOME Setup
• Configuring the Application Server Domain
• Configuring the Process Scheduler Domain
Installing the IBM COBOL for AIX Runtime Files
For those machines that only need to run the compiled COBOL files, you must install the runtime filesets for IBMCOBOL for AIX. You do not need to install the compiler. You must also configure the PeopleSoft Application Server and Process Scheduler domains.This procedure assumes that you have downloaded the runtime filesets to CBL_INSTALL, and have set the environment variables as described earlier.See Setting Environment Variables for IBM COBOL.The runtime filesets will be installed into the locations as specified in this table:
Fileset Name Fileset Description Installation Locations Fileset Level Required
cobol.rte IBM COBOL for AIX runtime libraries
/usr/lpp/cobol/
/usr/lpp/cobol/lib/
/usr/lib/
/etc/
4.1.1.0

Installing and Compiling COBOL on UNIX Chapter 10B
314 Copyright © 2018, Oracle and/or its affiliates. All Rights Reserved.
Fileset Name Fileset Description Installation Locations Fileset Level Required
cobol.msg.LANG IBM COBOL for AIX runtime messages
LANG = [en_US, ja_JP, Ja_JP]
/usr/lib/nls/msg/LANG 4.1.1.0
To install the runtime filesets:1. Use the AIX command installp to install these filesets. For example:
installp -aYg -d CBL_INSTALL/usr/sys/inst.images cobol.rte cobol.msg.en_⇒US
2. Download the required maintenance packs for IBM COBOL 4.1.1.1 from the IBM support web site.
http://www-933.ibm.com/support/fixcentral/
3. Install the filesets included in the maintenance packs using the installp command as described above.
Setting Environment Variables for a PS_CUST_HOME Setup
This section applies to those installations in which:
• You have several Application Server or Process Scheduler domains.
• Each of those domains is going to be associated with a particular PS_CUST_HOME directory.
In this case it is a good idea to define PS_CUST_HOME in PS_HOME/psconfig.sh. For example, edit psconfig.sh to add this lines:PS_CUST_HOME="/home/psft/CUSTcompile"; export PS_CUST_HOME
After making this change, you must source the PS_HOME/psconfig.sh file again.This way you would not need to add the PS_CUST_HOME environment variable through the "Edit environment variable" Application Server and Process Scheduler administration menus in PSADMIN each time you create a new domain.
Configuring the Application Server Domain
This section assumes that you have created an Application Server domain, as described in the chapter "Configuring the Application Server on UNIX." The configuration and log files for application server domains reside in a directory referred to as PS_CFG_HOME.See the information on working with PS_CFG_HOME in the PeopleTools: System and Server Administration product documentation.
Note. You must create a new domain to configure the environment for running IBM COBOLs. You will not be able to reuse an existing domain for the same.
To create and configure the Application Server domain:1. Go to the PS_HOME/appserv directory and run psadmin.
2. When the menu appears, specify 1 for Application Server and press ENTER.
3. Enter 2 for Create a Domain, and press ENTER.
4. Specify the domain name. For example:

Chapter 10B Installing and Compiling COBOL on UNIX
Copyright © 2018, Oracle and/or its affiliates. All Rights Reserved. 315
Please enter name of domain to create : HCM92
Note. If you have already set the environment variable PS_CUST_HOME, as explained in the section Setting Environment Variables for a PS_CUST_HOME Setup, you can skip the steps 5 through 10.
5. On the Quick-configure menu, select 16, Edit environment settings.
6. If your PS_CUST_HOME is defined and is different from PS_HOME, carry out the following two steps:
Note. If PS_CUST_HOME is the same as PS_HOME, skip these two steps and continue with step 8.
a. On the PeopleSoft Domain Environment Settings, select 2 to add environment variable.
b. Enter PS_CUST_HOME as the name of the environment variable, and the installation directory where youinstalled the customized COBOL files as the value of the environment variable.
For example:
Enter name of environment variable: PS_CUST_HOMEEnter value: /home/psft/CUSTcompile
You will see an asterisk in front of the PS_CUST_HOME environment variables, indicating that these variables have not been saved.
7. Specify 6 to save the environment variables.
8. Press ENTER to continue at the following message:
Your changes have been saved.Please be aware these changes will not take effect until you complete⇒ the domain configuration process.Press Enter to continue...
9. Enter q for return to the previous menu.
10. On the Quick-configure menu, enter 15, for Custom configuration.
11. Answer n (no) when asked if you want to change the values, until you see the section Remote Call.
Values for config section - RemoteCallCOBOL Platform=RCCBL Redirect=0RCCBL PRDBIN=%PS_HOME%\cblbin%PS_COBOLTYPE%Do you want to change any values (y/n/q)? [n]: y
Enter y (yes) to make a change, as shown in this example.
12. Enter IBM as the COBOL platform and ignore the remaining options.
COBOL Platform [] : IBM
13. Answer n (no) when asked if you want to change any of the remaining sections.
14. Enter 1 to boot the domain.
15. Enter 1 for Boot (Serial Boot), or 2 for Parallel Boot.
Configuring the Process Scheduler Domain
To create and configure the Process Scheduler domain:

Installing and Compiling COBOL on UNIX Chapter 10B
316 Copyright © 2018, Oracle and/or its affiliates. All Rights Reserved.
Note. You must create a new domain to configure the environment for running IBM COBOLs. You will not be able to reuse an existing domain for the same.
1. Go to the PS_HOME/appserv directory and run psadmin.
2. When the menu appears, specify 2 for Process Scheduler and press ENTER.
3. Enter 2 for Create a Domain.
4. Specify the domain name. For example:
Please enter name of domain to create : HCM92
Note. Domain names are case-sensitive and must be eight characters or less.
Note. If you have already set the environment variable PS_CUST_HOME, as explained in the section Setting Environment Variables for a PS_CUST_HOME Setup, you can skip the steps 5 through 10.
5. On the Quick-configure menu, select 7, Edit environment settings.
6. If your PS_CUST_HOME is different from PS_HOME, carry out the following two steps.
Note. If PS_CUST_HOME is the same as PS_HOME, skip these two steps and continue with step 8.
a. On the PeopleSoft Domain Environment Settings, select 2 to add an environment variable.
b. Enter PS_CUST_HOME as the name of the environment variable, and the installation directory where youinstalled your PeopleSoft Application software as the value of the environment variable.
For example:
Enter name of environment variable: PS_CUST_HOMEEnter value: /home/psft/CUSTcompile
7. Enter 6 to save the environment variables.
8. Press ENTER to continue at the following message:
Your changes have been saved.Please be aware these changes will not take effect until you complete⇒ the domain configuration process.Press Enter to continue...
9. Enter q to return to the previous menu.
10. On the Quick-configure menu, enter 6, for Custom configuration.
11. Answer n (no) when asked if you want to change the values, until you see the section Remote Call.
Values for config section - RemoteCallCOBOL Platform=RCCBL Redirect=0RCCBL PRDBIN=%PS_HOME%\cblbin%PS_COBOLTYPE%Do you want to change any values (y/n/q)? [n]: y
Enter y (yes) to make a change, as shown in this example.
12. Enter IBM as the COBOL Platform and ignore the remaining options.
COBOL Platform []:IBM
13. Answer n (no) when asked if you want to change any of the remaining sections.

Chapter 10B Installing and Compiling COBOL on UNIX
Copyright © 2018, Oracle and/or its affiliates. All Rights Reserved. 317
14. Enter 1 to boot the domain.
Task 10B-5-4: Removing the IBM COBOL InstallationKeep the following information in mind before removing the IBM COBOL compiler on IBM AIX:
• You must have root user access to uninstall this product.
• Some filesets may not be uninstalled if they are required by other installed products.
• As uninstalling dependent packages automatically may introduce problems, it is recommended that you preview uninstallation to ensure that all dependent filesets are no longer required.
See the IBM COBOL compiler documentation for more information.
To remove the IBM COBOL compiler:1. Run the following command:
installp -u cobol*
Here are typical responses:
$ installp -u cobol*+-----------------------------------------------------------------------⇒------+ Pre-deinstall Verification...+-----------------------------------------------------------------------⇒------+Verifying selections...doneVerifying requisites...doneResults...WARNINGS-------- Problems described in this section are not likely to be the source of⇒ any immediate or serious failures, but further actions may be necessary or desired. Not Installed ------------- No software could be found on the system that could be deinstalled⇒ for the following requests: cobol.msg.Ja_JP cobol.msg.ja_JP (The fileset may not be currently installed, or you may have made a typographical error.) << End of Warning Section >>SUCCESSES--------- Filesets listed in this section passed pre-deinstall verification and will be removed. Selected Filesets ----------------- cobol.cmp 4.1.1.0 # IBM COBOL for AIX⇒ Compiler

Installing and Compiling COBOL on UNIX Chapter 10B
318 Copyright © 2018, Oracle and/or its affiliates. All Rights Reserved.
cobol.dbg 4.1.1.0 # IBM COBOL for AIX⇒ Debugger cobol.lic 4.1.1.0 # COBOL for AIX Licence⇒ Files cobol.license 4.1.1.0 # COBOL for AIX License⇒ Agreem... cobol.man 4.1.1.0 # IBM COBOL Set for AIX⇒ Man Pages cobol.msg.en_US 4.1.1.0 # IBM COBOL for AIX⇒ Runtime Me... cobol.rte 4.1.1.0 # IBM COBOL for AIX⇒ Runtime << End of Success Section >>FILESET STATISTICS------------------ 9 Selected to be deinstalled, of which: 7 Passed pre-deinstall verification 2 FAILED pre-deinstall verification ---- 7 Total to be deinstalled+-----------------------------------------------------------------------⇒------+ Deinstalling Software...+-----------------------------------------------------------------------⇒------+installp: DEINSTALLING software for: cobol.lic 4.1.1.0Filesets processed: 1 of 7 (Total time: 0 secs).installp: DEINSTALLING software for: cobol.license 4.1.1.0Filesets processed: 2 of 7 (Total time: 0 secs).installp: DEINSTALLING software for: cobol.dbg 4.1.1.0Filesets processed: 3 of 7 (Total time: 1 secs).installp: DEINSTALLING software for: cobol.man 4.1.1.0Filesets processed: 4 of 7 (Total time: 1 secs).installp: DEINSTALLING software for: cobol.msg.en_US 4.1.1.0Filesets processed: 5 of 7 (Total time: 2 secs).installp: DEINSTALLING software for: cobol.cmp 4.1.1.0Filesets processed: 6 of 7 (Total time: 3 secs).installp: DEINSTALLING software for: cobol.rte 4.1.1.0Finished processing all filesets. (Total time: 5 secs).+-----------------------------------------------------------------------⇒------+ Summaries:+-----------------------------------------------------------------------⇒

Chapter 10B Installing and Compiling COBOL on UNIX
Copyright © 2018, Oracle and/or its affiliates. All Rights Reserved. 319
------+Pre-installation Failure/Warning Summary----------------------------------------Name Level Pre-installation Failure⇒/Warning------------------------------------------------------------------------⇒-------cobol.msg.Ja_JP Nothing by this name to⇒ deinstallcobol.msg.ja_JP Nothing by this name to⇒ deinstallInstallation Summary--------------------Name Level Part Event ⇒ Result------------------------------------------------------------------------⇒-------cobol.lic 4.1.1.0 USR DEINSTALL ⇒ SUCCESScobol.license 4.1.1.0 USR DEINSTALL ⇒ SUCCESScobol.dbg 4.1.1.0 USR DEINSTALL ⇒ SUCCESScobol.man 4.1.1.0 USR DEINSTALL ⇒ SUCCESScobol.msg.en_US 4.1.1.0 USR DEINSTALL ⇒ SUCCESScobol.cmp 4.1.1.0 ROOT DEINSTALL ⇒ SUCCESScobol.cmp 4.1.1.0 USR DEINSTALL ⇒ SUCCESScobol.rte 4.1.1.0 USR DEINSTALL ⇒ SUCCESS
2. To remove any currently unused modules in kernel and library memory, enter the following on the command line:
slibclean


Copyright © 2018, Oracle and/or its affiliates. All Rights Reserved. 321
Chapter 11
Installing Web Server Products
This chapter discusses:
• Installing Oracle WebLogic Server
• Installing IBM WebSphere Application Server
Task 11-1: Installing Oracle WebLogic Server
This section discusses:
• Understanding the Oracle WebLogic Installation
• Reviewing Troubleshooting Tips
• Obtaining Oracle WebLogic Installation Files from Oracle Software Delivery Cloud
• Installing JDK
• Installing Oracle WebLogic on Microsoft Windows
• Installing Oracle WebLogic on UNIX in Silent Mode
• Configuring JDK for Daylight Savings Time Change
• Removing the Oracle WebLogic Installation on Microsoft Windows
• Removing the Oracle WebLogic Installation on UNIX
Understanding the Oracle WebLogic InstallationPeopleSoft PeopleTools 8.56 supports Java 8 enabled 64-bit Oracle WebLogic Server 12.2.1. You must install an operating-system specific Java Developers Kit (JDK) before beginning the Oracle WebLogic installation.See Installing JDK for Oracle WebLogic.This section describes a traditional installation of Oracle WebLogic. If you use the PeopleSoft DPKs, for either a full-tier installation using the PeopleSoft Application Images or for a mid-tier installation using the PeopleTools DPKs, Oracle WebLogic is installed as part of the installation, and you do not need to carry out the separate installation in this section. If you choose to install Oracle WebLogic independently of the DPK installation, you can obtain installation files for Oracle WebLogic on the Oracle Software Delivery Cloud portal and use the steps in this section.See Obtaining Oracle WebLogic Installation Files from Oracle Software Delivery Cloud.To familiarize yourself with the most current support information and information about any required Oracle WebLogic service packs based on operating system platform or PeopleSoft PeopleTools versions, consult the Certifications area of My Oracle Support.
Installing Web Server Products Chapter 11
322 Copyright © 2018, Oracle and/or its affiliates. All Rights Reserved.
See Also
Oracle Software Delivery Cloud, http://edelivery.oracle.comMy Oracle Support, CertificationsClustering and High Availability for PeopleTools, My Oracle Support, (search for the article title)Operating System, RDBMS, and Additional Component Patches Required for Installation PeopleTools, My Oracle Support, (search for the article title and release number)Oracle WebLogic Server 12.2.1 documentation, http://docs.oracle.com/middleware/1221/wls/index.html
Reviewing Troubleshooting TipsIf you have trouble with the installation, review these tips:
• It can require up to 800 MB space to install Oracle WebLogic. If there is not enough space, the installer displays an error with information about the space limitation. You will need to exit the installation and create some space under your home directory before starting over.
• The Oracle WebLogic installer makes use of the default system temporary space. It will stop and display an error message if the temporary space is not sufficient. Clean up the default system temp space and try again. Ifyou do not have the privilege to clean up that directory and need to proceed, the workaround is to set aside a directory under your Home directory and use it as the temporary space. This can be achieved by setting -Djava.io.tmpdir in the command for launching the installer.
The following command is a sample Linux command for silent mode installation, which uses the "temp" directory under your Home directory. RESPONSE_DIR refers to the location of the silent mode response file, and INVENTORY_DIR refers to the location of the Oracle inventory file.
See Installing Oracle WebLogic on UNIX in Silent Mode.
$JAVA_HOME/bin/java -jar -Djava.io.tmpdir=~/temp ./fmw_12.2.1.0.0_⇒wls.jar -silent -responseFile RESPONSE_DIR/res.rsp -invPtrLoc INVENTORY_⇒DIR/oraInst.loc
Note. This workaround may not be applicable on all platforms. If you tried and the installer still errors out dueto the amount of temporary space, contact your system administrator to clean up the system temporary space before proceeding.
• If the installation fails, and the Middleware Home directory that you specified for the Oracle WebLogic 12.2.1installation is one in which other Oracle products have been installed in previous releases, (for example c:\oracle folder in Microsoft Windows), it may indicate corruption in the registry.xml file inside your existing Middleware Home. Pick a different location for the Oracle WebLogic 12.2.1 installation directory and try the installation again.
• If you are installing onto a UNIX environment, in case of installation failure, refer to the log file Wls1221Install.log under the installation logs directory to view the events that occurred.
• If you encounter the following error message while running in console mode on a Microsoft Windows operating system, it means an environment variable _JAVA_OPTIONS has been set in your system. It causes the Java process initiated by the Oracle WebLogic installer to fail.
ERROR: JVMPI, an experimental interface, is no longer supported.Please use the supported interface: the JVM Tool Interface (JVM TI).
To resolve the problem, remove the environment variable _JAVA_OPTIONS from your system and rerun the

Chapter 11 Installing Web Server Products
Copyright © 2018, Oracle and/or its affiliates. All Rights Reserved. 323
installation.
• If you encounter the following error message while installing on an Oracle Solaris operating system, it means there is a problem with access to the temporary directory:
*sys-package-mgr*: can't write cache file
This message appears because the Oracle WebLogic installer creates a temporary directory (for example, on Oracle Solaris it is /var/tmp/wlstTemp) that is shared by all users, and it is unable to differentiate between users. As a result, access to the directory is blocked when the user accessing the directory is not the one who originally created the directory. The workaround for this problem is to remove the installation and install it again after manually adjusting the temporary directory permissions. A user with superuser privileges can use the following command to adjust the permissions:
chmod -R 777 /var/tmp/wlstTemp
For more information, search the Oracle documentation for Oracle WebLogic.
Task 11-1-1: Obtaining Oracle WebLogic Installation Files from Oracle Software Delivery CloudAt this point you should have already downloaded the necessary files from Oracle Software Delivery Cloud. If not, this section includes additional information on finding and using the files for Oracle WebLogic if necessary.See "Preparing for Installation," Using Oracle Software Delivery Cloud to Obtain Installation Files.See Oracle Software Delivery Cloud, https://edelivery.oracle.com.To obtain the files for Oracle WebLogic installation:1. After logging in to Oracle Software Delivery Cloud, read the information about export restrictions, and then
click Accept.
2. Enter Oracle WebLogic in the Product field, and select Oracle WebLogic Server Enterprise Edition (FMW, WLS, WebLogic Server 12c), from the drop-down list.
Note. The Enterprise Edition includes Oracle WebLogic Server and Oracle Coherence, as well as other items.
3. Click Select Platform, select the operating system you are running on, and click Select.
The following operating systems are supported:
• IBM AIX
• HP-UX Itanium
• Linux
• Microsoft Windows
• Oracle Solaris on SPARC
4. Click Continue.
5. On the page listing the selected product, click Continue.
Note. Click the arrow to view the list of products included.
6. Read the license agreements, and select the check box to acknowledge that you accept the agreement, and thenclick Continue.
7. Click Continue on the Download Queue page.
8. On the File Download window, download the zip files for Oracle WebLogic Server and Oracle Coherence.

Installing Web Server Products Chapter 11
324 Copyright © 2018, Oracle and/or its affiliates. All Rights Reserved.
Download the files you need by clicking a file name to download an individual file, or click Download All to obtain all of the files listed.
Save the zip files to a temporary directory on your local system. The directory where you save the zip file is referred to in this documentation as WLS_INSTALL. You must extract (unzip) the file on the platform for which it is intended. For example, if you download the zip file for Oracle Solaris, you must unzip it on Oracle Solaris to avoid problems. If you unzip the file to a staging directory on a Microsoft Windows computer and copy the staging directory to an Oracle Solaris, the stage area files may be corrupt.
9. Extract the files into WLS_INSTALL.
The Oracle WebLogic installer file is fmw_12.2.1.0.0_wls.jar.
Note. If you need to FTP the downloaded file, make sure to FTP it in Binary mode.
Task 11-1-2: Installing JDKThis section discusses:
• Understanding the JDK Requirement for Oracle WebLogic
• Installing JDK for IBM AIX
• Installing JDK for HP-UX Itanium
• Installing JDK for Linux
• Installing JDK for Microsoft Windows
• Installing JDK for Oracle Solaris on SPARC
Understanding the JDK Requirement for Oracle WebLogic
Before beginning the Oracle WebLogic installation you must install the 64-bit Java 8 JDK. The specific JDK required depends upon the operating system and vendor, as described in this table:
Operating System Platforms JDK Version Supported 64-bit or Mixed Mode*
IBM AIX IBM JDK 8.0 64-bit
HP-UX Itanium Hewlett-Packard JDK 8.0 Mixed mode
Use "-d64" to run in 64-bit mode.
Linux Oracle JDK 1.8.0_65+ 64-bit
Microsoft Windows Oracle JDK 1.8.0_65+ 64-bit
Oracle Solaris on SPARC Oracle JDK 1.8.0_65+ 64-bit
* The mixed mode installer runs in 32-bit by default. The parameter -d64 is required to run them in 64-bit mode.
Installing JDK for IBM AIX
To install 64-bit IBM JDK for IBM AIX:

Chapter 11 Installing Web Server Products
Copyright © 2018, Oracle and/or its affiliates. All Rights Reserved. 325
1. Go to the IBM JDK download and service site:
http://www.ibm.com/developerworks/java/jdk/aix/service.html
Note. You need a user name and password for downloading IBM JDK. If you don't have the required credentials, your AIX support personnel should be able to help.
2. Select the link for Java 8 64-bit under Java SE Version 8.
3. Provide the required information to sign in.
4. Install the JDK on the AIX computer where you will install the Oracle WebLogic server.
The directory where you install the JDK is referred to in this documentation as JAVA_HOME.
Note. Spaces are not allowed in the JAVA_HOME name.
Installing JDK for HP-UX Itanium
To install Hewlett-Packard JDK on HP-UX Itanium:1. Go to the Hewlett-Packard Downloads and Documentation site.
See JDK/JRE 8.0.x Downloads and Documentation, https://h20392.www2.hpe.com/portal/swdepot/displayProductInfo.do?productNumber=HPUXJDKJRE80.
2. Select the link for Version 8.0.08 or higher.
3. Provide the required information to sign in.
4. Click Next and download JDK.
5. Install the JDK on the computer where you will install the Oracle WebLogic server, following the instructionsin the Hewlett-Packard documentation.
The directory where you install the JDK is referred to in this documentation as JAVA_HOME.
Note. Spaces are not allowed in the JAVA_HOME name.
Installing JDK for Linux
To install 64-bit JDK on Linux:1. Go to the Oracle Java download site:
http://www.oracle.com/technetwork/java/javase/downloads/index.html
2. Download Oracle Java 8 64-bit JDK version 1.8.0_65 or higher for Linux x86-64.
Refer to the JDK installation instructions at the following link:
http://docs.oracle.com/javase/8/docs/technotes/guides/install/linux_jdk.html#BJFGGEFG
3. Install the JDK on the computer where you will install the Oracle WebLogic server. The directory where you install the JDK is referred to in this documentation as JAVA_HOME.
Note. Spaces are not allowed in the JAVA_HOME name.

Installing Web Server Products Chapter 11
326 Copyright © 2018, Oracle and/or its affiliates. All Rights Reserved.
Installing JDK for Microsoft Windows
To install 64-bit JDK on Microsoft Windows:1. Go to the Oracle JDK download site:
http://www.oracle.com/technetwork/java/javase/downloads/index.html
2. Download Oracle Java 8 64-bit JDK version 1.8.0_65 or higher for Microsoft Windows x86-64.
Refer to the JDK installation instructions at the following link:
http://docs.oracle.com/javase/8/docs/technotes/guides/install/windows_jdk_install.html#CHDEBCCJ
3. Install the JDK on the computer where you will install the Oracle WebLogic server. The directory where you install the JDK is referred to in this documentation as JAVA_HOME.
Note. Spaces are not allowed in the JAVA_HOME name.
Installing JDK for Oracle Solaris on SPARC
To install JDK on Oracle Solaris on SPARC (64-bit):1. Go to the Oracle JDK download site:
http://www.oracle.com/technetwork/java/javase/downloads/index.html
2. Download the Oracle Java 8 64-bit JDK version 1.8.0_65 or higher for Solaris SPARC.
Refer to the installation instructions at the following link:
http://docs.oracle.com/javase/8/docs/technotes/guides/install/solaris_jdk.html#CHDBJEFD
3. Install the JDK on the computer where you will install the Oracle WebLogic server.
The directory where you install the JDK is referred to in this documentation as JAVA_HOME.
Note. Spaces are not allowed in the JAVA_HOME name.
Task 11-1-3: Installing Oracle WebLogic on Microsoft WindowsThe following procedure assumes that you saved the installation file fmw_12.2.1.0.0_wls.jar from Oracle Software Delivery Cloud in the directory WLS_INSTALL. Installation in GUI mode is normally used for Microsoft Windows operating systems. You should have installed the appropriate JDK to JAVA_HOME before beginning this installation.See Installing JDK for Oracle WebLogic.
Note. Previous releases of Oracle WebLogic Server, such as 9.2 MPX, and 10.3.X, can coexist with 12.2.1 on a single machine. The best practice is to install Oracle WebLogic 12.2.1 into an empty directory, or at least one thatdoes not contain other Oracle WebLogic (previously BEA) products.
If you choose, however, to install this version of Oracle WebLogic in an existing WLS_HOME directory (for example, c:\oracle), you must shut down all instances of Oracle WebLogic Server running in that WLS_HOME before performing this installation.
To install Oracle WebLogic Server 12.2.1:1. Open a command prompt and change directory to WLS_INSTALL.
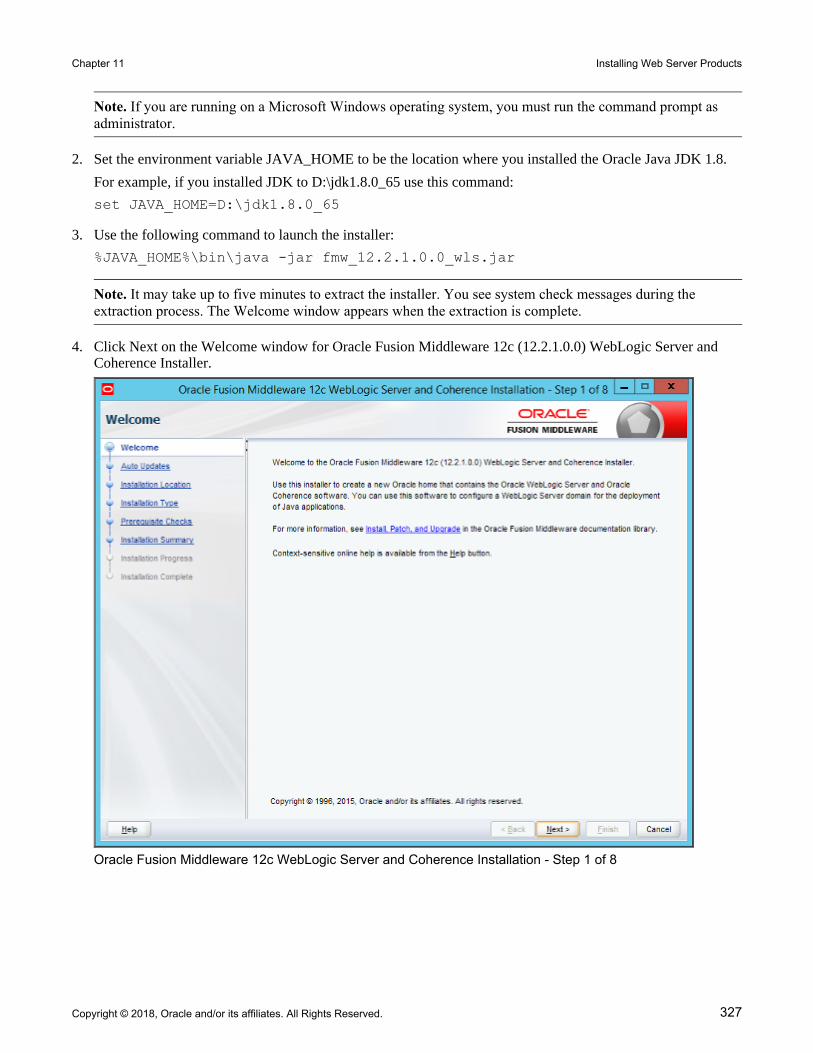
Chapter 11 Installing Web Server Products
Copyright © 2018, Oracle and/or its affiliates. All Rights Reserved. 327
Note. If you are running on a Microsoft Windows operating system, you must run the command prompt as administrator.
2. Set the environment variable JAVA_HOME to be the location where you installed the Oracle Java JDK 1.8.
For example, if you installed JDK to D:\jdk1.8.0_65 use this command:
set JAVA_HOME=D:\jdk1.8.0_65
3. Use the following command to launch the installer:
%JAVA_HOME%\bin\java -jar fmw_12.2.1.0.0_wls.jar
Note. It may take up to five minutes to extract the installer. You see system check messages during the extraction process. The Welcome window appears when the extraction is complete.
4. Click Next on the Welcome window for Oracle Fusion Middleware 12c (12.2.1.0.0) WebLogic Server and Coherence Installer.
Oracle Fusion Middleware 12c WebLogic Server and Coherence Installation - Step 1 of 8

Installing Web Server Products Chapter 11
328 Copyright © 2018, Oracle and/or its affiliates. All Rights Reserved.
5. Select the Skip Auto Updates radio button.
Oracle Fusion Middleware 12c WebLogic Server and Coherence Installation - Step 2 of 8

Chapter 11 Installing Web Server Products
Copyright © 2018, Oracle and/or its affiliates. All Rights Reserved. 329
6. On the Installation Location window, enter a location for the Oracle Home, or browse to an existing directory.
Do not choose a directory that contains an existing installation of Oracle WebLogic.
If the directory does not exist, the Oracle WebLogic installer creates it. The directory where you install OracleWebLogic is referred to as WLS_HOME in this documentation. In this example WLS_HOME is C:\WLS1221.
Click Next to continue.
Oracle Fusion Middleware 12c WebLogic Server and Coherence Installation - Step 3 of 8

Installing Web Server Products Chapter 11
330 Copyright © 2018, Oracle and/or its affiliates. All Rights Reserved.
7. Accept the default WebLogic Server installation option on the Installation Type window, for WebLogic Server Installation, and then click Next.
Oracle Fusion Middleware 12c WebLogic Server and Coherence Installation - Step 4 of 9

Chapter 11 Installing Web Server Products
Copyright © 2018, Oracle and/or its affiliates. All Rights Reserved. 331
8. Wait while the installer carries out prerequisite checks, and then click Next.
In this example the system passed the prerequisite checks.
Oracle Fusion Middleware 12c WebLogic Server and Coherence Installation - Step 5 of 9

Installing Web Server Products Chapter 11
332 Copyright © 2018, Oracle and/or its affiliates. All Rights Reserved.
9. Clear the option I wish to receive security updates via My Oracle Support on the Specify Security Updates window, as shown in this example.
Oracle Fusion Middleware 12c WebLogic Server and Coherence Installation - Step 6 of 9
10. A dialog box labelled "My Oracle Support Username/Email Address Not Specified" appears; click Yes to confirm that you wish to remain uninformed of critical security issues in your configuration:
My Oracle Support Username/Email Address Not Specified dialog box

Chapter 11 Installing Web Server Products
Copyright © 2018, Oracle and/or its affiliates. All Rights Reserved. 333
11. Verify your choices in the installation summary, such as the installation location and features to install.
If you want to save a response file to be used in silent installation, click Save Response File and provide a location.
Click Install to begin the installation.
Oracle Fusion Middleware 12c WebLogic Server and Coherence Installation - Step 7 of 9
A progress indicator appears. Click Next when the tasks are complete, as shown in this example:

Installing Web Server Products Chapter 11
334 Copyright © 2018, Oracle and/or its affiliates. All Rights Reserved.
Oracle Fusion Middleware 12c WebLogic Server and Coherence Installation - Step 8 of 9

Chapter 11 Installing Web Server Products
Copyright © 2018, Oracle and/or its affiliates. All Rights Reserved. 335
12. When the installation has completed successfully, clear the Automatically Launch the Configuration Wizard option, and click Finish.
Oracle Fusion Middleware 12c WebLogic Server and Coherence Installation - Step 9 of 9
Task 11-1-4: Installing Oracle WebLogic on UNIX in Silent ModeUse these instructions for silent mode installation for UNIX operating systems.
Note. Console mode installation is not supported for Oracle WebLogic 12.2.1.
See the information on silent installation for Oracle WebLogic in the Oracle Middleware documentation.The following procedure assumes that you saved the installation file fmw_12.2.1.0.0_wls.jar from Oracle Software Delivery Cloud in the directory WLS_INSTALL. You should have installed the appropriate JDK to JAVA_HOME before beginning this installation.
Note. If you downloaded the zip file for the Oracle WebLogic installation from Oracle Software Delivery Cloud to a Microsoft Windows computer, FTP the zip file in binary mode to your Linux or Oracle Solaris computer before unzipping it into WLS_INSTALL.
To run the Oracle WebLogic installation in silent mode:1. Change directory to WLS_INSTALL and make the installer file executable using the following command:
chmod a+x fmw_12.2.1.0.0_wls.jar

Installing Web Server Products Chapter 11
336 Copyright © 2018, Oracle and/or its affiliates. All Rights Reserved.
2. In a shell window, change directory to WLS_INSTALL:
cd WLS_INSTALL
3. Set JAVA_HOME to be the location where you installed the JDK.
For example, if the JDK is installed under "/home/jdklnk8u65", use the following command:
export JAVA_HOME=/home/jdklnk8u65
4. If it does not exist, use a text editor, such as "vi", to create the central inventory location file, named oraInst.loc, in a directory referred to in this documentation as INVENTORY_DIR.
The oraInst.loc file contains only the following two lines:
inventory_loc=/home/psftuser/oraInventoryinst_group=wlsgrp
The oraInst.loc file contains the following information:
• inventory_loc — Specify the full path to the directory where you want the installer to create the inventory directory. The location in the example is /home/psftuser/oraInventory. Use any directory other than the WLS_INSTALL directory where you placed the fmw_12.2.1.0.0_wls.jar file.
• oui_install_group — Specify the name of the group whose members have write permissions to this directory. The group name in the example is wlsgrp.
5. Copy the following content into a text editor and save it as res.rsp.
This is the silent response file. The directory where you save it is referred to here as RESPONSE_DIR.
[ENGINE]
#DO NOT CHANGE THIS.Response File Version=1.0.0.0.0
[GENERIC]
#Set this to true if you wish to skip software updatesDECLINE_AUTO_UPDATES=true
#MOS_USERNAME=
#MOS_PASSWORD=<SECURE VALUE>
#If the Software updates are already downloaded and available on your⇒ local system, then specify the path to the directory where these⇒ patches are available and set SPECIFY_DOWNLOAD_LOCATION to trueAUTO_UPDATES_LOCATION=
#SOFTWARE_UPDATES_PROXY_SERVER=
#SOFTWARE_UPDATES_PROXY_PORT=
#
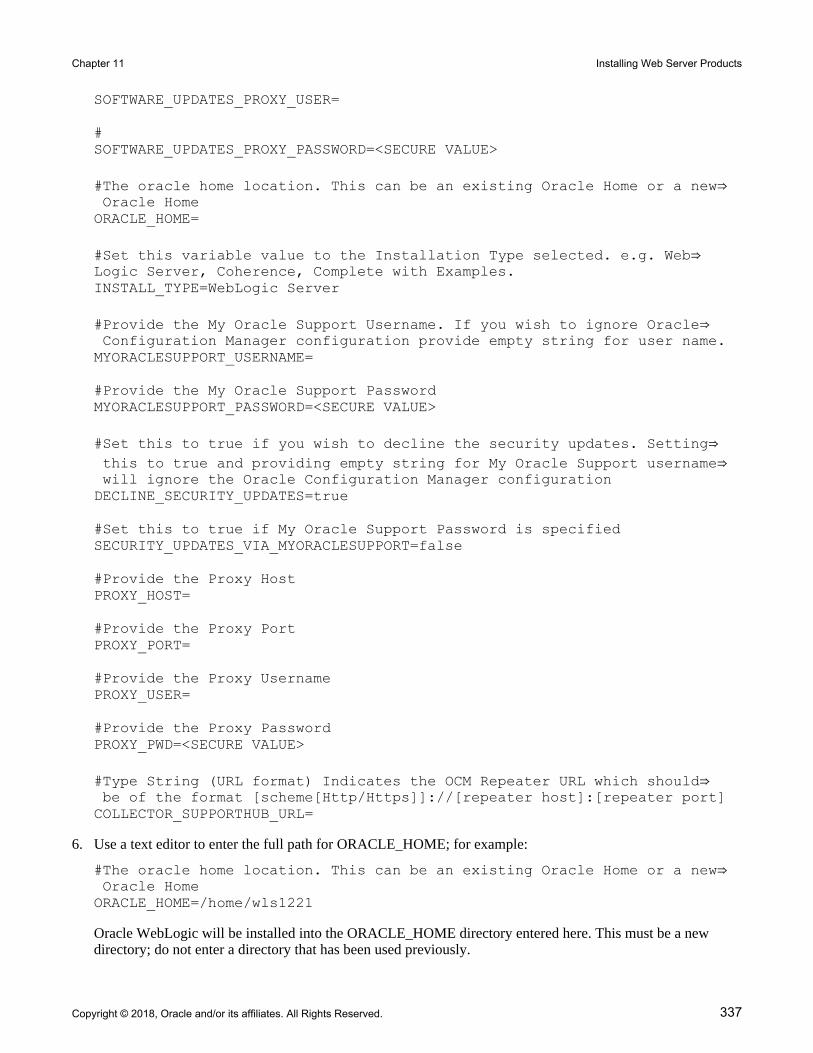
Chapter 11 Installing Web Server Products
Copyright © 2018, Oracle and/or its affiliates. All Rights Reserved. 337
SOFTWARE_UPDATES_PROXY_USER=
#SOFTWARE_UPDATES_PROXY_PASSWORD=<SECURE VALUE>
#The oracle home location. This can be an existing Oracle Home or a new⇒ Oracle HomeORACLE_HOME=
#Set this variable value to the Installation Type selected. e.g. Web⇒Logic Server, Coherence, Complete with Examples.INSTALL_TYPE=WebLogic Server
#Provide the My Oracle Support Username. If you wish to ignore Oracle⇒ Configuration Manager configuration provide empty string for user name.MYORACLESUPPORT_USERNAME=
#Provide the My Oracle Support PasswordMYORACLESUPPORT_PASSWORD=<SECURE VALUE>
#Set this to true if you wish to decline the security updates. Setting⇒ this to true and providing empty string for My Oracle Support username⇒ will ignore the Oracle Configuration Manager configurationDECLINE_SECURITY_UPDATES=true
#Set this to true if My Oracle Support Password is specifiedSECURITY_UPDATES_VIA_MYORACLESUPPORT=false
#Provide the Proxy HostPROXY_HOST=
#Provide the Proxy PortPROXY_PORT=
#Provide the Proxy UsernamePROXY_USER=
#Provide the Proxy PasswordPROXY_PWD=<SECURE VALUE>
#Type String (URL format) Indicates the OCM Repeater URL which should⇒ be of the format [scheme[Http/Https]]://[repeater host]:[repeater port]COLLECTOR_SUPPORTHUB_URL=
6. Use a text editor to enter the full path for ORACLE_HOME; for example:
#The oracle home location. This can be an existing Oracle Home or a new⇒ Oracle HomeORACLE_HOME=/home/wls1221
Oracle WebLogic will be installed into the ORACLE_HOME directory entered here. This must be a new directory; do not enter a directory that has been used previously.
Installing Web Server Products Chapter 11
338 Copyright © 2018, Oracle and/or its affiliates. All Rights Reserved.
7. If this is the first time you are installing on your system (meaning there is no pre-existing Oracle inventory location), use the following commands to perform a silent installation.
These commands use res.rsp as the name for the response file.
• For IBM AIX, Linux, or Oracle Solaris on SPARC:
$JAVA_HOME/bin/java -jar ./fmw_12.2.1.0.0_wls.jar -silent -response⇒File RESPONSE_DIR/res.rsp -invPtrLoc INVENTORY_DIR/oraInst.loc
• For HP-UX Itanium, the JVM parameter "-d64" is required:
$JAVA_HOME/bin/java -d64 -jar ./fmw_12.2.1.0.0_wls.jar -silent -⇒responseFile RESPONSE_DIR/res.rsp -invPtrLoc INVENTORY_DIR/ora⇒Inst.loc
8. If you have previously installed an Oracle product on your system and do not need to specify an Oracle inventory location, use the following commands to perform a silent installation:
• For IBM AIX, Linux, or Oracle Solaris on SPARC:
$JAVA_HOME/bin/java -jar ./fmw_12.2.1.0.0_wls.jar -silent -response⇒File RESPONSE_DIR/res.rsp
• For HP-UX Itanium, the JVM parameter "-d64" is required:
$JAVA_HOME/bin/java -d64 -jar ./fmw_12.2.1.0.0_wls.jar -silent -⇒responseFile RESPONSE_DIR/res.rsp
9. After you enter the appropriate command from the previous steps, the installer is launched in silent mode, and a progress indicator tracks the installation.
When the installation is complete, you should see a completion message such as "The installation of Oracle Fusion Middleware 12c WebLogic Server and Coherence 12.2.1.0.0 completed successfully."
Task 11-1-5: Configuring JDK for Daylight Savings Time ChangeThe version of JDK mentioned in the previous section Installing JDK for Oracle WebLogic includes the Daylight Saving Time (DST) rules available at the time of packaging. If new rules are implemented after this time, you should use the instructions in this section to update the time zone definition files.You can skip this section unless a change to the DST rules has happened near or after the general availability date of Oracle WebLogic or PeopleSoft PeopleTools. Consult the information on configuring PeopleSoft time zone definitions in the PeopleTools: Global Technology product documentation.This section provides an example of how the time zone updater utility (TZUPDATER), which is supplied by the JDK vendors, can be used to update the time zone definition files contained in the JDK used by Oracle WebLogic server.1. Identify and shut down any JVM processes that are using the JDK that you will be updating.
2. For future reference or restoration, back up the location where the targeted JDK is located.
The JDK being used for different operating systems is different. For Oracle WebLogic 12.2.1.0.0, refer to the commBaseEnv.cmd (for Microsoft Windows), or commBaseEnv.sh (for UNIX) file under WLS_HOME\oracle_common\common\bin to determine the setting for JAVA_HOME and the exact name and location for the JDK being used by your Oracle WebLogic server. WLS_HOME is the directory where Oracle WebLogic isinstalled.
3. Download the appropriate updater utility for your operating system from the JDK vendor.

Chapter 11 Installing Web Server Products
Copyright © 2018, Oracle and/or its affiliates. All Rights Reserved. 339
Each tzupdater provided by the vendor comes with instructions (typically in a readme file) describing how to:
• Locate the correct JDK.
• Apply classes using the tzupdater or provided scripts.
• Check tzupdater versions.
Read the instructions carefully as the steps and instructions are vendor-specific. Keep in mind that these instructions and versions may be updated when the vendor finds it necessary.
Note. After successfully running the TZUPDATER to update a JDK location, the changes will take effect only fornewly started Java processes from that location. In the event that you did not identify and stop all Java processes running from this location, it will be necessary to stop and restart these for the changes to take effect.
See Also
Timezone Updater Tool, Oracle Technology Network, http://www.oracle.com/technetwork/java/javase/tzupdater-readme-136440.html
Task 11-1-6: Removing the Oracle WebLogic Installation on Microsoft WindowsTo remove the Oracle WebLogic installation on Microsoft Windows (GUI mode):1. Before running the deinstaller, stop all servers and processes associated with the Oracle home you are going to
remove.
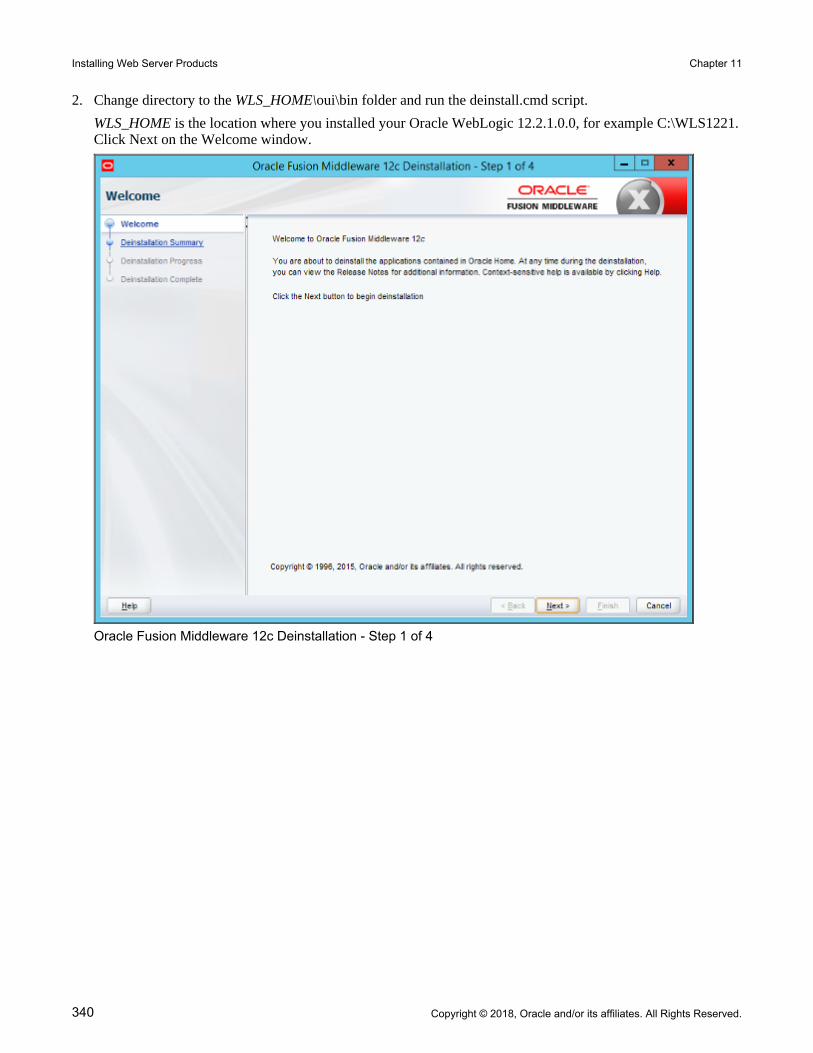
Installing Web Server Products Chapter 11
340 Copyright © 2018, Oracle and/or its affiliates. All Rights Reserved.
2. Change directory to the WLS_HOME\oui\bin folder and run the deinstall.cmd script.
WLS_HOME is the location where you installed your Oracle WebLogic 12.2.1.0.0, for example C:\WLS1221.Click Next on the Welcome window.
Oracle Fusion Middleware 12c Deinstallation - Step 1 of 4

Chapter 11 Installing Web Server Products
Copyright © 2018, Oracle and/or its affiliates. All Rights Reserved. 341
3. Verify the components that you want to uninstall on the summary page (by default all components are selectedas shown in this example).
Oracle Fusion Middleware 12c Deinstallation - Step 2 of 4

Installing Web Server Products Chapter 11
342 Copyright © 2018, Oracle and/or its affiliates. All Rights Reserved.
4. Click the Save Response File button and browse to a location to save the file, which you can use for a silent mode deinstallation.
See Removing the Oracle WebLogic Installation on UNIX.
Click Deinstall. A progress indicator appears. Click Next when the tasks are complete, as shown in this example.
Oracle Fusion Middleware 12c Deinstallation - Step 3 of 4

Chapter 11 Installing Web Server Products
Copyright © 2018, Oracle and/or its affiliates. All Rights Reserved. 343
5. Click Finish on the Deinstallation Complete window.
Oracle Fusion Middleware 12c Deinstallation - Step 4 of 4
6. Remove the WLS_HOME directory manually after the deinstallation.
Task 11-1-7: Removing the Oracle WebLogic Installation on UNIXTo remove the installation on UNIX operating systems, you run in console mode, and use a response file.
Note. The previous section, Removing the Oracle WebLogic Installation on Microsoft Windows, included a step in which you saved a response file. You can edit and use this response file for different operating system platforms.
To remove the Oracle WebLogic installation on UNIX in silent mode:1. Before running the deinstaller, stop all servers and processes associated with the Oracle home you are going to
remove.
2. If you need to create a response file, copy the following content into a text editor and save it.
This is the silent response file, referred to here as RESPONSE_DIR/response.txt.
[ENGINE]
#DO NOT CHANGE THIS.

Installing Web Server Products Chapter 11
344 Copyright © 2018, Oracle and/or its affiliates. All Rights Reserved.
Response File Version=1.0.0.0.0
[GENERIC]
#This will be blank when there is nothing to be de-installed in⇒ distribution levelSELECTED_DISTRIBUTION=WebLogic Server~12.2.1.0.0
#The oracle home location. This can be an existing Oracle Home or a new⇒ Oracle HomeORACLE_HOME=
3. Edit the ORACLE_HOME line to add the location where you installed Oracle WebLogic 12.2.1.0.0; for example:
#The oracle home location. This can be an existing Oracle Home or a new⇒ Oracle HomeORACLE_HOME=/home/wls1221
4. Change directory to WLS_HOME/oui/bin and locate the deinstall.sh script.
WLS_HOME is the location where you installed your Oracle WebLogic 12.2.1.0.0.
5. Run the following command.
For INVENTORY_DIR, specify the full directory path containing the Oracle installer inventory file, oraInst.loc.
See Installing Oracle WebLogic on UNIX in Silent Mode.
./deinstall.sh -silent -response RESPONSE_DIR/response.txt -invPtrLoc ⇒INVENTORY_DIR/oraInst.loc
6. An indicator shows the progress of the removal process, followed by a completion message such as "The uninstall of Oracle Fusion Middleware 12c WebLogic Server and Coherence 12.2.1.0.0 completed successfully."
7. Remove the WLS_HOME directory manually to complete the deinstallation.
Task 11-2: Installing IBM WebSphere Application Server
This section discusses:
• Understanding IBM WebSphere Installation
• Prerequisites
• Obtaining IBM WebSphere Installation Files
• Installing IBM WebSphere 9.0.0.0 ND
• Installing IBM HTTP Server 9.0.0.0
• Installing IBM WebSphere Plug-ins 9.0.0.0

Chapter 11 Installing Web Server Products
Copyright © 2018, Oracle and/or its affiliates. All Rights Reserved. 345
Understanding IBM WebSphere InstallationOracle supports 64-bit IBM® WebSphere® Application Server Network Deployment 9.0.0.0 (referred to as IBM WebSphere ND in this documentation) for PeopleSoft PeopleTools 8.56. The IBM WebSphere ND requires IBM Runtime Environment, Java Technology Edition 8. IBM WebSphere Application Server supports IBM HTTP server (IHS) as a HTTP Reverse Proxy server. IBM WebSphere Application Server alone cannot act as a proxy server for PeopleSoft PeopleTools REN Server. You must also install PeopleSoft Pure Internet Architecture, as well as installing the IBM HTTP server. Consult My Oracle Support for information on the versions of IHS certified for use with PeopleSoft PeopleTools.This section includes guidelines for installing IBM WebSphere ND, the Web server plug-ins for IBM WebSphere Application Server, and IHS. For detailed installation instructions, see the IBM documentation.
See Also
My Oracle Support, CertificationsClustering and High Availability for PeopleTools, My Oracle Support, (search for the article name)IBM WebSphere Application Server Information Center, http://pic.dhe.ibm.com/infocenter/wasinfo/v8r5/index.jsp
PrerequisitesIBM WebSphere ND is certified for PeopleSoft PeopleTools 8.56 on the following operating systems:
• IBM AIX
• HP-UX Itanium
• Linux
• Microsoft Windows
• Oracle Solaris
The full lists of prerequisites for IBM WebSphere Application Server Network Deployment 9.0.0.0 are available on the IBM website:See http://www-01.ibm.com/support/docview.wss?uid=swg27006921#9.0In addition, review the following prerequisites before beginning your installation:
• Both IBM WebSphere ND and PeopleSoft Pure Internet Application (PIA) need to be installed and deployed using the same user ID. Following this requirement avoids security and profile management issues.
• On Microsoft Windows operating systems, if you are not using the built-in administrator account to run the commands, you will need stronger user account privileges to carry out the installation of IBM Installation Manager.
To set the appropriate privileges, right-click the installer and select Run as administrator. Do the same thing for the installation of IBM Installation Manager.
• On UNIX platforms, the /var file system is used to store all the security logging information for the system. Therefore it is critical that you maintain free space in /var for these operations.
• When you carry out the GUI mode installation on UNIX, executing the installation wizard launches a GUI window. You must run this command from an X-Windows client window (for example, Reflection-X).
• PeopleSoft PeopleTools 8.56 supports the IBM HTTP Server (IHS) 9.0.0.0 that is bundled with the IBM
Installing Web Server Products Chapter 11
346 Copyright © 2018, Oracle and/or its affiliates. All Rights Reserved.
WebSphere 9.0.0.0 installation. Use of an external remote proxy server (RPS) is optional.
Task 11-2-1: Obtaining IBM WebSphere Installation FilesFor the current PeopleSoft PeopleTools release, the installation files for IBM WebSphere are not packaged with PeopleSoft PeopleTools on Oracle Software Delivery Cloud. To download the necessary files for the IBM WebSphere installation, contact IBM. The installation of IBM WebSphere 9.0.0.0 requires the download of the following components:
• IBM Installation Manager V1.8.5 or later
• WebSphere Application Server Network Deployment V9.0.0.0 64-bit
• Application Client for WebSphere Application Server
• IBM HTTP Server V9.0.0.0 64-bit
• Plug-ins V9.0.0.0 64-bit
• IBM SDK V8.0.3.10
The distribution is provided as operating-system-specific zip files. Download and extract the appropriate zip files for your operating system. The base binaries of IBM WebSphere 9.0.0.0, IHS 9.0.0.0, and Plug-in 9.0.0.0 have to be downloaded by providing an IBM partner ID and password.
Task 11-2-2: Installing IBM WebSphere 9.0.0.0 NDFor detailed information on installing IBM WebSphere 9.0.0.0 ND, see the documentation on the IBM web site. See the previous section, Obtaining IBM WebSphere Installation Files, for the installation file names for your operating system. The installation of IBM WebSphere Application Server Network includes the following steps:1. Install IBM Installation Manager V1.8.5 or later
2. Install IBM WebSphere 9.0.0.0 64-bit
3. Install IBM WebSphere SDK Java (TM) Technology Edition V8.0.3.10
Task 11-2-3: Installing IBM HTTP Server 9.0.0.0For detailed information on installing IHS 9.0.0.0, see the documentation on the IBM web site. See the previous section, Obtaining IBM WebSphere Installation Files, for the installation file names for your operating system. To install IHS 9.0.0.0 64-bit, use IBM Installation Manager.
Task 11-2-4: Installing IBM WebSphere Plug-ins 9.0.0.0For detailed information on installing the Web server plug-ins for IBM WebSphere Application Servers, see the documentation on the IBM web site. See the earlier section, Obtaining IBM WebSphere Installation Files, for the installation file names for your operating system. To install the IBM Plug-ins 9.0.0.0 64-bit for IBM WebSphere Application Servers, use IBM Installation Manager.
Copyright © 2018, Oracle and/or its affiliates. All Rights Reserved. 347
Chapter 12
Installing Additional Components
This chapter discusses:
• Reviewing Additional Components
• Installing Oracle Tuxedo
Reviewing Additional Components
Depending upon your PeopleSoft installation environment, you may need to install and configure software components that are not included with the PeopleSoft PeopleTools installation files, or which you acquire from vendors other than Oracle. Some of the components that are discussed in this installation guide include:
• Oracle Tuxedo
The installation of Oracle Tuxedo is required for a basic PeopleSoft PeopleTools installation, and is covered in this chapter.
• COBOL
COBOL is not needed for PeopleSoft PeopleTools or for PeopleSoft Applications that contain no COBOL programs. Check My Oracle Support for details about whether your application requires COBOL.
See "PeopleSoft Enterprise Frequently Asked Questions About PeopleSoft and COBOL Compilers," My Oracle Support, Doc ID 747059.1.
See "PeopleSoft Enterprise Frequently Asked Questions About PeopleSoft and the IBM COBOL Compiler," My Oracle Support, Doc ID 1211907.1.
The installation and configuration of Micro Focus and IBM COBOL compilers are covered in later chapters.
See "Installing and Configuring COBOL on UNIX."
See "Installing and Configuring COBOL on Windows."
• Elasticsearch
Elasticsearch is the search engine for the PeopleSoft Search Framework for the current release. Oracle provides Elasticsearch as deployment packages (DPKs) for Microsoft Windows and Linux that deliver the required Elasticsearch software version, Java-based plug-ins needed for integration with PeopleSoft environments, and customized code where required. Be sure to obtain and use the Elasticsearch DPKs provided for use with the PeopleSoft installation.
See Elasticsearch Home Page, My Oracle Support, Doc ID 2205540.2.
Note. Oracle Secure Enterprise Search (SES) and Verity are not supported for the current release.
Note. Use the My Oracle Support Certifications area to determine the latest certified versions of additional components that are supported for the PeopleSoft PeopleTools release you are installing.
Installing Additional Components Chapter 12
348 Copyright © 2018, Oracle and/or its affiliates. All Rights Reserved.
Task 12-1: Installing Oracle Tuxedo
This section discusses:
• Understanding Oracle Tuxedo
• Prerequisites
• Debugging the Oracle Tuxedo Installer
• Obtaining the Oracle Tuxedo Installation Files from Oracle Software Delivery Cloud
• Obtaining the Oracle Tuxedo Patches from My Oracle Support
• Removing Existing Oracle Tuxedo Installations from Microsoft Windows (Optional)
• Designating the Application Server Administrator on Microsoft Windows
• Installing Oracle Tuxedo on Microsoft Windows in GUI Mode
• Installing the Oracle Tuxedo Patch on Microsoft Windows
• Installing Oracle Tuxedo on Microsoft Windows in Silent Mode
• Uninstalling the Oracle Tuxedo Patch on Microsoft Windows
• Uninstalling Oracle Tuxedo in GUI Mode
• Checking the Windows Service Account
• Restricting Domain Process Privileges
• Setting Up the Windows Services for Oracle Tuxedo
• Verifying the Server Installation on Microsoft Windows
• Removing Existing Oracle Tuxedo Installations from UNIX (Optional)
• Completing the Preinstallation Checklist on UNIX
• Designating the Oracle Tuxedo Owner on UNIX
• Installing Oracle Tuxedo in Silent Mode on UNIX
• Installing the Oracle Tuxedo Patch on UNIX
• Uninstalling the Oracle Tuxedo Patch from UNIX
• Uninstalling Oracle Tuxedo from UNIX Using Silent Mode
• Verifying the Server Installation on UNIX
• Ensuring that Oracle Tuxedo Coexists with Earlier Versions
Understanding Oracle TuxedoThe PeopleSoft application server uses the Oracle® Fusion Middleware product, Oracle Tuxedo, to perform transaction management, messaging, and administration. This task guides you through the installation of Oracle Tuxedo on your server. It is essential that you install Oracle Tuxedo 64-bit, version 12c Release 2 (12.2.2.0), which is available on Oracle Software Delivery Cloud. You need to install Oracle Tuxedo before you go any further in setting up your application server and your PeopleSoft Pure Internet Architecture. After you perform theinstallation described here, you will configure the application server environment to incorporate Oracle Tuxedo with the PeopleSoft components.Oracle supports Oracle Tuxedo 12c Release 2 (64-bit) for UNIX operating systems, and Oracle Tuxedo 12c Release 2 (64-bit) with MS Visual Studios 2015 for Microsoft Windows, with PeopleSoft PeopleTools 8.56.

Chapter 12 Installing Additional Components
Copyright © 2018, Oracle and/or its affiliates. All Rights Reserved. 349
The minimum patch level certified for running Oracle Tuxedo 12c Release 2 with PeopleSoft PeopleTools 8.56 is Rolling Patch 16 (RP016). These installation instructions include the installation of the base Oracle Tuxedo 12c Release 2, followed by the patch installation.
Note. Oracle Tuxedo 12c Release 2 for Linux operating systems supports Exalogic optimizations.
For PeopleSoft customers running on Oracle Exalogic Elastic Cloud, we strongly recommend the use of the Exalogic OVM Template for PeopleSoft.
See Oracle's PeopleSoft Virtualization Products, My Oracle Support, Doc ID 1538142.1.
Note. For the sake of brevity and convenience, this documentation shortens "Oracle Tuxedo 12c Release 2 (64-bit)" to "Oracle Tuxedo 12cR2" and "Oracle Tuxedo 12c Release 2 (64-bit) with MS Visual Studios 2015" to "Oracle Tuxedo 12cR2_VS2015."
If you have a previous version of Oracle Tuxedo installed, you need to install the new version of Oracle Tuxedo, and re-create your application server domains. (You must create your domains using PSADMIN; you cannot migrate existing domains.) You can also use the PSADMIN domain import utility.You can install Oracle Tuxedo once for each release on a machine, regardless of the number of PeopleSoft applications or databases the server supports. For example, if you installed Oracle Tuxedo 10gR3 for an earlier release of your PeopleSoft application, you may install Oracle Tuxedo 12cR2 on the same machine in a separate directory. For example:On Microsoft Windows, you may install into C:\oracle\tuxedo10gR3_VS2008 and C:\oracle\tuxedo12.2.2.0.0_VS2015.On UNIX, you may install into /home/oracle/tuxedo10gR3 and /home/oracle/tuxedo12cR2.If more than one PeopleSoft application uses the same Oracle Tuxedo version (that is, the same patch level), then it is recommended that you have a single installation of Oracle Tuxedo to serve all the supported PeopleSoft applications. A single Oracle Tuxedo installation simplifies future maintenance (such as applying patches). However, if you choose to have more than one Oracle Tuxedo installation (this scenario is possible only on UNIXsystems, as Oracle Tuxedo does not allow multiple installations of the same version of Oracle Tuxedo on Microsoft Windows), you must install and maintain the same Oracle Tuxedo version more than once in different directories.
See Also
Oracle Tuxedo Documentation on Oracle Technology Network, http://www.oracle.com/technetwork/middleware/tuxedo/documentation/index.htmlPeopleTools: Portal TechnologyPeopleTools: System and Server AdministrationOperating System, RDBMS, and Additional Component Patches Required for Installation PeopleTools, My Oracle Support (search for article name and select the release)Clustering and High Availability for PeopleTools, My Oracle Support (search for title)Using OVM Templates for PeopleSoft on Exalogic, My Oracle Support (search for title)
PrerequisitesBefore you begin to install Oracle Tuxedo, make sure that you have the following resources in place:
• Before beginning the Oracle Tuxedo installation you must install 64-bit Java 8 JDK.

Installing Additional Components Chapter 12
350 Copyright © 2018, Oracle and/or its affiliates. All Rights Reserved.
The specific JDK required depends upon the operating system and vendor. Follow the instructions given earlier to install Java 8 JDK for your operating system.
See Installing JDK for Oracle WebLogic.
• TCP/IP connectivity (required for PeopleSoft PeopleTools 8.50 or higher) between the client machine and the application server
• For UNIX, you must have root access.
• Enough free disk space on the application server to install the product.
The disk space requirements vary by operating system. For free disk space requirements, see the Oracle Tuxedo documentation.
The Oracle Tuxedo installer uses the default system temporary space. If there is not enough space for installation, it will stop with an error. To specify a different temporary directory on Microsoft Windows, use the following command before starting the installer:set IATEMPDIR=Complete_Path_Temp_Dir
Replace Complete_Path_Temp_Dir with the full path to the temporary directory that you want to use for the installation.If you are sure you have enough space, but the installer still gives an error about low disk space (this usually happens on Linux), run the following command before starting the installer:unset BLOCKSIZE
Debugging the Oracle Tuxedo InstallerIf the Oracle Tuxedo installation fails with no error message, open a command prompt and enter the following command:set LAX_DEBUG=1
After entering this command, start the installer again. If you are using GUI mode on Microsoft Windows, you must start the installer using the same command prompt.
Task 12-1-1: Obtaining the Oracle Tuxedo Installation Files from Oracle Software Delivery CloudYou can obtain the files needed to install Oracle Tuxedo 12cR2 or 12cR2_VS2012 from the Oracle Software Delivery Cloud portal. At this point you should have already downloaded the necessary files. If you have not yet downloaded the files, this section includes additional information on finding and using the files for Oracle Tuxedoif necessary.See "Preparing for Installation," Using Oracle Software Delivery Cloud to Obtain Installation Files.See Oracle Software Delivery Cloud, https://edelivery.oracle.com.1. After logging in to Oracle Software Delivery Cloud, read the export restrictions, and then click Accept.
2. Enter Oracle Tuxedo in the Product field, and select Oracle Tuxedo 12.2.2.0.0 from the drop-down list.
3. Click Select Platform, select the operating system you are running on, and then click Select.
4. Click Continue.
5. Read the license agreement and select the check box to acknowledge that you accept the agreement.
6. Click Continue.

Chapter 12 Installing Additional Components
Copyright © 2018, Oracle and/or its affiliates. All Rights Reserved. 351
7. Click the filenames to download.
Save the zip file to a temporary directory on your local system, referred to in this documentation as TUX_INSTALL.
8. After you download the installation files from Oracle Software Delivery Cloud, if it is necessary, transfer the files to a UNIX computer using FTP. Unzip the file and change the permissions of the unzipped file to make itan executable, for example using the chmod +x command.
9. Extract the files into TUX_INSTALL.
After you extract, you see a Disk1 folder with two subfolders, install and stage.
Note. For the PeopleTools Client, install Oracle Tuxedo 12cR2_VS2015 for Microsoft Windows (64-bit) to run with PeopleSoft PeopleTools 8.56.
Task 12-1-2: Obtaining the Oracle Tuxedo Patches from My Oracle SupportYou can download the latest patch for Oracle Tuxedo 12cR2_VS2015 for Microsoft Windows or Oracle Tuxedo 12cR2 for UNIX operating systems from My Oracle Support.
Note. To obtain older Oracle Tuxedo patches, raise a service request through My Oracle Support.
To obtain the latest Oracle Tuxedo patch:1. Sign in to My Oracle Support with your account name and password:
https://support.oracle.com
2. Select the Patches & Updates tab.
3. Under Patch Search, select Product or Family (Advanced Search).
4. Select Oracle Tuxedo from the product drop-down list.
5. Select Oracle Tuxedo 12.2.2.0.0 from the release drop-down list.
6. Select your platform.
Note. For detailed supported platform information, see the certifications area on My Oracle Support.
The supported platforms are:
• AIX
• HP-UX Itanium
• Linux
• Microsoft Windows
• Oracle Solaris on SPARC
7. Click Search.
Download the necessary files from the list of results. For installation on Microsoft Windows operating systems, make sure your rolling patch (RP) description has "VS2015" or "Visual Studio 2015" in the description.
Note. To begin a new search, select Edit Search in the top right of the results page.
8. Download the patch file for your operating system platform to a convenient directory, referred to here as TUX_INSTALL.

Installing Additional Components Chapter 12
352 Copyright © 2018, Oracle and/or its affiliates. All Rights Reserved.
9. After you install a patch, use these steps to verify the installation:
a. In a command prompt, change directory to TUXDIR\bin (where TUXDIR is the Oracle Tuxedo installationlocation).
b. Execute the following command:
tmadmin -v
The command displays the patch level. For example:
INFO: Oracle Tuxedo, Version 12.2.2.0.0_VS2015, 64-bit, Patch Level⇒ 016
Task 12-1-3: Removing Existing Oracle Tuxedo Installations from Microsoft Windows (Optional)You may already have prior versions of Oracle Tuxedo installed on your system from an earlier version of PeopleSoft PeopleTools. If you are completely upgrading to PeopleSoft PeopleTools 8.56 from an earlier version of PeopleSoft PeopleTools, then you may uninstall the existing version and patches.
Note. It is not mandatory to uninstall the existing version of PeopleSoft PeopleTools, as Oracle Tuxedo 12cR2_VS2015 can coexist with prior versions on the same machine.
If you wish to use two versions of PeopleSoft PeopleTools that depend on different versions of Oracle Tuxedo, you should read the section "Ensuring that Oracle Tuxedo Coexists with Earlier Versions" before continuing.
You may have to uninstall Oracle Tuxedo for these reasons:
• You are having problems starting Oracle Tuxedo and decide to reinstall.
• You no longer need Oracle Tuxedo on a machine.
To uninstall Oracle Tuxedo from Microsoft Windows:1. Using PSADMIN, shut down any application server, Process Scheduler, and Search server domains that may
be running on the machine.
2. Stop the processes for the Tuxedo Monitor and the Tuxedo Administrative Web Server (wlisten and tuxwsvr), if applicable.
a. Right-click on the task bar and select Task Manager.
b. Highlight wlisten, and click the End Task button.
c. Highlight tuxwsvr and click the End Task button.
d. Exit Task Manager.
3. Stop and set the TListen VERSION service to manual, if applicable.
Replace VERSION with the version number for the existing service. For example, this would be TListen 9.1 orTListen 10gR3.
a. Select Start, Settings, Control Panel. Double-click Administrative Tools, and double-click the Services icon.
b. Select TListen VERSION and click the Stop button.
c. Choose the Startup Type and set to Manual.
4. Stop and set the ORACLE ProcMGR VERSION (or BEA ProcMGR VERSION for earlier releases) service to manual.
a. Select Start, Settings, Control Panel. Double-click Administrative Tools, and double-click the Services

Chapter 12 Installing Additional Components
Copyright © 2018, Oracle and/or its affiliates. All Rights Reserved. 353
icon.
b. Select ORACLE ProcMGR VERSION and click the Stop button.
c. Choose the Startup Type and set to Manual.
5. Reboot your machine.
6. Uninstall Oracle Tuxedo in one of the following ways:
• Using the Oracle Tuxedo VERSION installation CD provided by Oracle for PeopleSoft installations, open a Command Window, navigate to the root of the CD, and enter pstuxinstall rmall. This will remove Oracle Tuxedo VERSION plus any delivered Oracle Tuxedo patches from your system.
• Using the Add/Remove Programs dialog, in sequence remove: Oracle TuxedoVERSION RP and then Oracle Tuxedo VERSION.
7. Go to the Control Panel, double-click on the System icon, and then perform the following actions:
a. Make sure TUXDIR\bin is deleted from the PATH environment variable definition.
TUXDIR refers to the Oracle Tuxedo installation directory.
b. Delete the environment variable TUXDIR.
c. Make sure you click on Apply and OK to save your changes.
8. Using Explorer, delete the Tuxedo home directory, such as C:\bea\tuxedo8.1.
If you are unable to delete any files, reboot your machine and retry.
Task 12-1-4: Designating the Application Server Administrator on MicrosoftWindowsBefore beginning the installation, you need to designate an existing user—or create a new user such as TUXADMor some other account—to be the Application Server Administrator. The Application Server Administrator, not the Windows Administrator, will install Oracle Tuxedo.The designated user must be a local Microsoft Windows administrator and must have full system privileges. The Oracle Tuxedo installation program creates a new service for Microsoft Windows—called ORACLE ProcMGR V12.2.2.0.0_VS2015—for which you need administrator privileges. This service was developed to port Oracle Tuxedo from UNIX to Microsoft Windows. Administrator rights are required since system registry settings are updated. Once this new service is created, you must reboot to start it.When you configure your application server domain in a read-only PS_HOME environment, the user ID designated to be the Application Server Administrator must have read-only access to PS_HOME, read and write access to PS_CFG_HOME, and read-only access to the Oracle Tuxedo installation directory, TUXDIR, (for example, C:\oracle\tuxedo12.2.2.0.0_VS2015). Otherwise, in a scenario where <PS_CFG_HOME> = <PS_HOME>, the Application Server Administrator must have read and write access to PS_HOME and read-only access to TUXDIR.See "Configuring the Application Server on Windows."See "Preparing for Installation," Defining Installation Locations.To designate the Application Server Administrator:1. Add the user ID by selecting Start, Administrative Tools, Computer Management, Local Users and Groups.
Keep in mind that you can also use an existing account if you do not care to create a new one. You can set thisto the system account or an account that is a domain administrator (if there is a need to access files on the domain).
2. Expand Local Users and Groups.

Installing Additional Components Chapter 12
354 Copyright © 2018, Oracle and/or its affiliates. All Rights Reserved.
3. If the user ID does not yet exist, highlight the Users folder, and select Action, New User.
4. On the New User dialog box, specify the information for the new account.
Make sure to deselect the User must change password at next logon check box.
5. Expand the Groups folder.
6. Right-click the Administrators group, and select All Tasks, Add to Group, Add.
7. Click Locations to select the local machine or the network domain in which you created the new user.
8. Enter the new user name you created in the object names box.
9. Click OK, and click Apply and OK again to accept the changes.
Task 12-1-5: Installing Oracle Tuxedo on Microsoft Windows in GUI ModeThe following procedure assumes that you saved and extracted the installation files from Oracle Software Delivery Cloud in the directory TUX_INSTALL. Installation in GUI mode is normally used for Microsoft Windows operating systems.
Note. Oracle Tuxedo 12cR2_VS2015 can coexist on a machine with other versions of Oracle Tuxedo.
To install Oracle Tuxedo on Microsoft Windows:

Chapter 12 Installing Additional Components
Copyright © 2018, Oracle and/or its affiliates. All Rights Reserved. 355
1. Double-click TUX_INSTALL\Disk1\install\setup.bat to begin the installation process.
Click OK on the Welcome window, shown in this example:
Oracle Universal Installer: Welcome window for Oracle Tuxedo 12c Release 2

Installing Additional Components Chapter 12
356 Copyright © 2018, Oracle and/or its affiliates. All Rights Reserved.
2. Accept the default option, Full Install, on the Select Installation Type window, as shown in this example, and click Next.
Oracle Universal Installer: Select Installation Type window
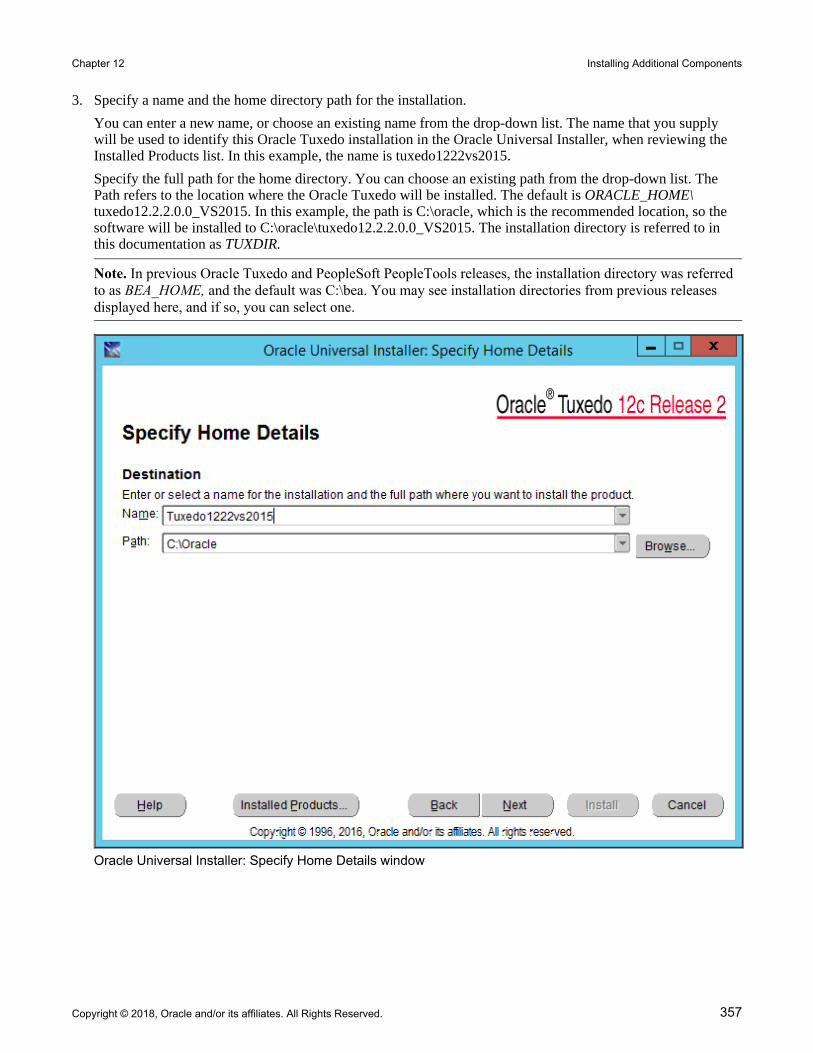
Chapter 12 Installing Additional Components
Copyright © 2018, Oracle and/or its affiliates. All Rights Reserved. 357
3. Specify a name and the home directory path for the installation.
You can enter a new name, or choose an existing name from the drop-down list. The name that you supply will be used to identify this Oracle Tuxedo installation in the Oracle Universal Installer, when reviewing the Installed Products list. In this example, the name is tuxedo1222vs2015.
Specify the full path for the home directory. You can choose an existing path from the drop-down list. The Path refers to the location where the Oracle Tuxedo will be installed. The default is ORACLE_HOME\tuxedo12.2.2.0.0_VS2015. In this example, the path is C:\oracle, which is the recommended location, so the software will be installed to C:\oracle\tuxedo12.2.2.0.0_VS2015. The installation directory is referred to in this documentation as TUXDIR.
Note. In previous Oracle Tuxedo and PeopleSoft PeopleTools releases, the installation directory was referred to as BEA_HOME, and the default was C:\bea. You may see installation directories from previous releases displayed here, and if so, you can select one.
Oracle Universal Installer: Specify Home Details window

Installing Additional Components Chapter 12
358 Copyright © 2018, Oracle and/or its affiliates. All Rights Reserved.
4. If you select an existing directory that is not empty, you may see a warning message.
The message recommends that you install to an empty directory unless the directory contains Operating System generated files or subdirectories like lost+found. Click Yes to close the message and continue.
Warning message for a non-empty directory
5. If you have other versions of Oracle Tuxedo on your system, you may get a warning that earlier versions weredetected, and with a recommendation that you exit and remove the earlier versions.
You can either quit and remove the earlier version, or install to a different directory if you want to maintain more than one version of the software. The message directs you to the earlier Installation Guide for instructions for using more than one version of the software. Click Next to continue.

Chapter 12 Installing Additional Components
Copyright © 2018, Oracle and/or its affiliates. All Rights Reserved. 359
6. Select No on the TSAM Plus agent enable choice window, as shown in this example, and then click Next.
This indicates that you do not want to enable Oracle Tuxedo System and Applications Monitor Plus (Oracle TSAM Plus) agent.
Oracle Universal Installer: TSAM Plus agent enable choice window

Installing Additional Components Chapter 12
360 Copyright © 2018, Oracle and/or its affiliates. All Rights Reserved.
7. Select No to indicate that you do not want to install Oracle Tuxedo Samples, as shown in this example, and then click Next.
Oracle Universal Installer: Oracle Tuxedo Samples Installation Choice window

Chapter 12 Installing Additional Components
Copyright © 2018, Oracle and/or its affiliates. All Rights Reserved. 361
8. Select Yes to indicate that you want to configure Oracle Tuxedo tlisten, as shown in this example, and then click Next.
Oracle Universal Installer: Oracle Tuxedo tlisten configuration Choice window

Installing Additional Components Chapter 12
362 Copyright © 2018, Oracle and/or its affiliates. All Rights Reserved.
9. Enter a password for Oracle Tuxedo tlisten.
Oracle Universal Installer: Configure tlisten password window

Chapter 12 Installing Additional Components
Copyright © 2018, Oracle and/or its affiliates. All Rights Reserved. 363
10. Accept the default tlisten port, 3050, or enter another port number.
Oracle Universal Installer: Configure tlisten Port window

Installing Additional Components Chapter 12
364 Copyright © 2018, Oracle and/or its affiliates. All Rights Reserved.
11. Select LLE as the Tlistener encryption method.
Oracle Universal Installer: Tlistener encryption method choose window

Chapter 12 Installing Additional Components
Copyright © 2018, Oracle and/or its affiliates. All Rights Reserved. 365
12. Accept the default value of 0 (zero) for the minimum encryption bits.
Oracle Universal Installer: Choose Min Encryption Bits window

Installing Additional Components Chapter 12
366 Copyright © 2018, Oracle and/or its affiliates. All Rights Reserved.
13. Accept the default value of 256 as the default value of maximum encryption bits.
Oracle Universal Installer: Choose Max Encryption Bits window

Chapter 12 Installing Additional Components
Copyright © 2018, Oracle and/or its affiliates. All Rights Reserved. 367
14. Select Yes on the SSL Support Choice window, as shown in this example, and then click Next.
Oracle Universal Installer: SSL Support Choice window

Installing Additional Components Chapter 12
368 Copyright © 2018, Oracle and/or its affiliates. All Rights Reserved.
15. Select No for the option Would you like to configure LDAP for SSL Support? and then click Next.
Oracle Universal Installer: LDAP Support Choice window

Chapter 12 Installing Additional Components
Copyright © 2018, Oracle and/or its affiliates. All Rights Reserved. 369
16. Review the summary information, and click Install to continue.
The summary information, shown in this example, includes the product name, install folder, installation type, and disk space information. If you want to change any of your choices, click Back.
Oracle Universal Installer: Summary window
A progress indicator appears during the installation.

Installing Additional Components Chapter 12
370 Copyright © 2018, Oracle and/or its affiliates. All Rights Reserved.
17. Click Exit when you see the window indicating the installation completed successfully, as shown in this example.
Oracle Universal Installer: End of Installation window
Task 12-1-6: Installing the Oracle Tuxedo Patch on Microsoft WindowsThese instructions assume that you have installed the base Oracle Tuxedo 12cR2_VS2015, and have downloaded the platform-specific version of the rolling patch to a directory referred to here as TUX_INSTALL. Carry out these steps as a user with administrative privileges.To install the patch:1. Stop all PeopleSoft PeopleTools domains that are running and using your Oracle Tuxedo installation.
2. Verify that the environment variable TUXDIR is set to the Oracle Tuxedo installation location, such as C:\oracle\tuxedo12.2.2.0.0_VS2015.
Note. The TUXDIR directory should include subdirectories bin and udataobj.
3. Verify that the environment variable ORACLE_HOME is set to the ORACLE_HOME location you specified when you installed Oracle Tuxedo, such as C:\oracle.

Chapter 12 Installing Additional Components
Copyright © 2018, Oracle and/or its affiliates. All Rights Reserved. 371
Note. This is the parent directory for the Oracle Tuxedo installation. It should include subdirectories OPatch and oui.
4. Verify that the environment variable JAVA_HOME is set to the 64-bit JDK 1.8 directory, as mentioned in the prerequisites section.
5. Run the following command to verify the opatch version:
%ORACLE_HOME%\OPatch\opatch.bat version
The version should be 12.1.0.1.1 or later. If the version is lower, you must first update opatch by installing patch 19166960.
6. Launch the Services window; for example, select Start, Administrative Tools, Services.
7. Select each of the following services, right-click, and select Stop:
• ORACLE ProcMGR V12.2.2.0.0_VS2015
• TListen 12.2.2.0.0_VS2015 (Port: 3050)
Note. The port number is variable.
8. Uninstall any existing patches.
9. Go to the directory where you downloaded the patch zip file from My Oracle Support, TUX_INSTALL, and unzip the file.
This creates a directory that includes a zip file named 25391869.zip with the patch.
10. Set the environment variable for the platform ID; for example:
set OPATCH_PLATFORM_ID=233
You can find the value for OPATCH_PLATFORM_ID in the file ORACLE_HOME/inventory/ContentsXML/oraclehomeproperties.xml.
11. Open a command prompt and go to the TUX_INSTALL/25391869 directory.
12. Run the following command:
%ORACLE_HOME%\OPatch\opatch.bat apply 25391869.zip
Note. The patch installer backs up all files being patched. The backup copy is located in the directory ORACLE_HOME\.patch_storage\. Do not delete these backup files. They will be used if you need to remove the patch installation.
You see a message similar to the following:
Oracle Home : C:\oracleCentral Inventory : C:\Program Files\Oracle\Inventory from : n/aOPatch version : 12.2.0.1.0OUI version : 12.2.0.1.0Log file location : C:\oracle\cfgtoollogs\opatch\opatch<datetime>.log
13. If OPatch cannot locate the Oracle inventory, you may see a messages such as the following:
Applying interim patch 25391869 to OH 'C:\Oracle'Verifying environment and performing prerequisite checks.OPatch system modification phase did not start

Installing Additional Components Chapter 12
372 Copyright © 2018, Oracle and/or its affiliates. All Rights Reserved.
In this case, specify the full path to the Oracle inventory file oraInst.loc, with the invPtrLoc option:
%ORACLE_HOME%\OPatch\opatch.bat apply 25391869.zip -invPtrLoc <full_⇒path_to_inventory_file>
Task 12-1-7: Installing Oracle Tuxedo on Microsoft Windows in Silent ModeThis section discusses:
• Understanding Silent Installation on Microsoft Windows
• Running the Silent Mode Installation on Microsoft Windows
Understanding Silent Installation on Microsoft Windows
You can carry out a silent installation of Oracle Tuxedo 12cR2_VS20125 by providing all the required settings in a response file. With silent installation there is little or no user interaction.See Oracle Tuxedo documentation.Use a text editor to create the response file and specify the values according to your installation requirements. Here is a sample response file:## .......... Silent Installation Properties file .........#
RESPONSEFILE_VERSION=2.2.1.0.0
ORACLE_HOME="C:\oracle"
ORACLE_HOME_NAME="tuxedo1222_VS2015"
INSTALL_TYPE="Full Install"
ENABLE_TSAM_AGENT=false
LDAP_SUPPORT_SSL=false
INSTALL_SAMPLES=false
ENCRYPT_CHOICE=0
CONFIG_TLISTEN=false
Most of the entries are similar to those seen in the GUI installation. Note the following definitions:
• ORACLE_HOME: The high level installation directory, for example C:\oracle.
The installer creates the Oracle Tuxedo installation directory, TUXDIR, as ORACLE_HOME\tuxedo12.2.2.0.0_VS2015.
• ORACLE_HOME_NAME: The name of the current Oracle installation, for example tuxedo1222_VS2015.
This identifies the Oracle Tuxedo installation in the Oracle Universal Installer, when reviewing the Installed Products list.

Chapter 12 Installing Additional Components
Copyright © 2018, Oracle and/or its affiliates. All Rights Reserved. 373
Running the Silent Mode Installation on Microsoft Windows
The following procedure assumes that you saved and extracted the installation file from Oracle Software DeliveryCloud in the directory TUX_INSTALL.See Obtaining the Oracle Tuxedo Installation Files from Oracle Software Delivery Cloud.To run the installer:1. Create a response file as described in the previous section and copy it to TUX_INSTALL.
2. Open a command prompt and change directory to TUX_INSTALL\Disk1\install.
3. Run the installer.
• If you specify an empty directory for ORACLE_HOME, use this command:
setup.exe -silent -responseFile response_file
Specify the full path to the response file. For example, if the response file name is response.rsp, and TUX_INSTALL is D:\Temp, use this command:
setup.exe -silent -responseFile D:\Temp\response.rsp
• If you specify an existing directory that is not empty for ORACLE_HOME, you must include the –forceoption.
When you use the –force option with a non-empty ORACLE_HOME, you may see a warning message recommending that you install to an empty directory or one that includes Operating System generated files. You may close the message to continue the installation.
setup.exe -silent -responseFile D:\Temp\response.rsp -force
Note. If you do not include the –force option with an ORACLE_HOME directory that is not empty, the installer will abort.
4. After you enter the commands in the previous steps, the installer is launched in silent mode, and a progress indicator tracks the installation.
When the installation is complete, you should see a completion message such as "The installation of Oracle Tuxedo was successful."
Task 12-1-8: Uninstalling the Oracle Tuxedo Patch on Microsoft WindowsTo remove an Oracle Tuxedo installation, you must first remove the rolling patch, as follows:1. Stop all PeopleSoft PeopleTools domains that are running and using your Oracle Tuxedo installation.
2. Verify that the environment variable TUXDIR is set to the Oracle Tuxedo installation location, such as C:\oracle\tuxedo12.2.2.0.0_VS2015.
3. Verify that the environment variable ORACLE_HOME is set to the ORACLE_HOME location you specified when you installed Oracle Tuxedo, such as C:\oracle.
4. Open a command prompt and run the following command:
%ORACLE_HOME%\OPatch\opatch.bat rollback -id 25391869

Installing Additional Components Chapter 12
374 Copyright © 2018, Oracle and/or its affiliates. All Rights Reserved.
Task 12-1-9: Uninstalling Oracle Tuxedo in GUI ModeTo remove the Oracle Tuxedo 12cR2_VS2015 or 12cR2 installation, use Oracle Universal Installer (OUI).1. Start Oracle Universal Installer (OUI).
The way that you access OUI may vary depending upon your environment. Use one of the following methods,for example:
• On Microsoft Windows 2012 R2, access the Apps screen, and select Oracle 12c, Oracle Installation Products, Universal Installer.
• Double-click TUX_INSTALL\Disk1\install\setup.exe.
2. Click Deinstall Products, as shown in this example:
Oracle Universal Installer: Welcome window

Chapter 12 Installing Additional Components
Copyright © 2018, Oracle and/or its affiliates. All Rights Reserved. 375
3. On the Contents page, select the name for the Oracle Tuxedo installation, which is tuxedo1222vs2015 in this example, and then click Remove.
Inventory window: Contents page
4. Open the Microsoft Windows registry, for example by selecting Start, Run, regedit.
Verify that the following key has been removed from the registry:
HKEY_LOCAL_MACHINE\SOFTWARE\ORACLE\TUXEDO\12.2.2.0.0_VS2015
Task 12-1-10: Checking the Windows Service AccountUse the information in this section to ensure that the Microsoft Windows services are properly configured. Oracle recommends installing the application server binaries locally on your C drive, for best performance. The procedure to set up the ORACLE ProcMGR V12.2.2.0.0_VS2015 service in the next section includes options for the account type. Use the following guidelines to choose between the Local System account option and the This Account option. (For the option This Account, you must specify a user ID and password.)
Note. For the sake of brevity and convenience, this documentation sometimes shortens "ORACLE ProcMGR V12.2.2.0.0_VS2015" to "Oracle ProcMGR."
• If you plan to install the PeopleSoft application server binaries (as in, psappsrv.exe and so on) on a remote file

Installing Additional Components Chapter 12
376 Copyright © 2018, Oracle and/or its affiliates. All Rights Reserved.
server, you must select the This Account option.
• If the PeopleSoft application server binaries are local, that is, they exist on your local hard drive, you can use either the Local System account or This Account option.
• If you intend to use this Microsoft Windows service to start Process Scheduler, you must always select the This Account option. Enter the name of your Domain/Windows user name—not the machine name—and yourpassword.
• If you are running on Microsoft Windows and are configuring a search index that resides on a mapped network drive, you must ensure that the user ID of the Oracle ProcMGR service has access to network drives accessed by the search engine. The search engine stores the search indexes at PS_HOME/data/search. However, this path can be changed in the application or the Process Scheduler's configuration. If this path is changed in these configurations and it points to a network drive, you must ensure that the user ID that starts the Oracle ProcMGR service has access to these network drives. The application server and the Process Scheduler are started by the Oracle ProcMGR service and therefore inherit the same permissions as the OracleProcMGR service.
See Also
"Setting Up Process Scheduler on Windows," Setting Up Process Scheduler Security
Task 12-1-11: Restricting Domain Process PrivilegesThis section discusses:
• Understanding Domain Process Privileges
• Setting TM_CPAU Environment Variable
Understanding Domain Process Privileges
For PeopleSoft systems, the Oracle ProcMGR service (tuxipc.exe) is responsible for starting Oracle Tuxedo domain processes on Microsoft Windows. By default, domain processes run as the same user ID that the service isrunning as. In a default installation, the service is configured to log on to Microsoft Windows as the Local Systemuser. Microsoft does not support assigning network privileges to the Local System user for security reasons, but the Local System user otherwise has full administrative access to the local system. In this configuration, PeopleSoft PeopleTools domain processes also run as the Local System user, which presentsseveral potential issues, including:
• PeopleSoft PeopleTools domain processes are unable to access network resources.
• PeopleSoft PeopleTools domain processes run with more privileges than are necessary. A compromised PeopleSoft PeopleTools process will have full access to the local system and could potentially be used to gain unauthorized access to the local system.
• All PeopleSoft PeopleTools domain processes on the system run as the same user ID.
These problems are not present on UNIX systems where domain processes are always started as the user that runs tmadmin (by way of PSADMIN for PeopleSoft installations) to boot the domain. UNIX systems therefore supportmultiple domains, each running under different user IDs, with only the desired local privileges, and with no undesirable restrictions to network resources.

Chapter 12 Installing Additional Components
Copyright © 2018, Oracle and/or its affiliates. All Rights Reserved. 377
For Microsoft Windows platforms, you can use the Oracle Tuxedo TM_CPAU environment variable to achieve behavior similar to UNIX systems. If TM_CPAU is set to YES before tuxipc is started, tuxipc creates an Oracle Tuxedo process that belongs to the user who initiated tmboot. If the Oracle ProcMGR service (tuxipc.exe) is started with the TM_CPAU=YES environment variable set, then domain processes will run as the user ID used to run tmadmin (PSADMIN) to boot the domain. Using the TM_CPAU environment variable enables a variety of configuration options, including:
• The Oracle ProcMGR service can be run as the Local System user, but domain processes can be run using a minimally privileged user. This reduces the chance of a compromised PeopleSoft PeopleTools process being used to gain unauthorized access to the system. Note that the option "Allow services to interact with Desktop" should not be selected.
• The Oracle ProcMGR service can be configured to log on to Microsoft Windows using a minimally privilegeduser ID and PeopleSoft PeopleTools processes can run as a user with more privileges than the Oracle Tuxedo user ID. For example, the Oracle Tuxedo user ID could have read-only access to PS_CFG_HOME, but the PeopleSoft PeopleTools user could have read-write access. The Oracle Tuxedo user ID does not actually require read access to PS_HOME. When CreateProcessAsUser runs, access to the executable to start is evaluated using the user ID that the process will run as.
• A single Microsoft Windows system can be used to host multiple PeopleSoft PeopleTools installations that areeach administered by a different user. A non-administrative user ID used to boot one domain will have no privileges to processes started with a different user ID.
• Domain processes can be identified and managed in Windows Task Manager by a non-administrative user.
See File Formats, Data Descriptions, MIBs, and System Processes Reference, Oracle Tuxedo Reference Topics, http://docs.oracle.com/cd/E35855_01/tuxedo/docs12c/rf5/rf5.html.
Setting TM_CPAU Environment Variable
This is a recommended step. Perform this step only if Local System account is used in the task Setting Up the Windows Services for Oracle Tuxedo.To set the TM_CPAU environment variable:1. Access the Control Panel, and then select System and Security, System, on Microsoft Windows 8 or 2012 R2.
2. Select Advanced system settings.
3. Select the Advanced tab.
4. Click Environment Variables.
5. In the System variables area, click New to add a new environment variable.
6. Enter TM_CPAU as the variable name, YES as the value, and click OK three times to close the dialog boxes.
7. Restart your machine.
Task 12-1-12: Setting Up the Windows Services for Oracle TuxedoTo set up the Microsoft Windows services for Oracle Tuxedo:1. Log on again as the Application Server Administrator, TUXADM, or a designated user ID.
2. Open the Control Panel and double-click Administrative Tools.
3. Select Computer Management and expand Services and Applications.
4. Select Services and locate the service labeled ORACLE ProcMGR V12.2.2.0.0_VS2015.
Double-click ORACLE ProcMGR V12.2.2.0.0_VS2015 to open the properties dialog box.

Installing Additional Components Chapter 12
378 Copyright © 2018, Oracle and/or its affiliates. All Rights Reserved.
5. On the General tab, if the Stop button is enabled, click it to stop the current ORACLE ProcMGR V12.2.2.0.0_VS2015 process.
6. Select Log On.
7. Choose either Local System account or This account.
If you select This account, as shown in this example, be sure to specify a user with the appropriate permissions, and then enter and confirm the password.
Note. The option used—Local System account or This account—must be consistent with your ODBC catalog definition, due to registry operations. For example, if you use the Local System Account option, you must alsocatalog your ODBC data source using System DSN.
See Checking the Windows Service Account.
ORACLE ProcMGR V12.2.2.0.0_VS2015 Properties dialog box: Log On tab

Chapter 12 Installing Additional Components
Copyright © 2018, Oracle and/or its affiliates. All Rights Reserved. 379
8. Select General.
Make sure that Startup Type is set to Automatic, as shown in this example.
ORACLE ProcMGR V12.2.2.0.0_VS2015 Properties dialog box: General tab
9. Click Start.
The status Started appears both on the General tab of the Oracle ProcMGR V12.2.2.0.0_VS2015 Properties dialog box and in the Services dialog box. Click OK to close the dialog box.
10. As mentioned, unless you intend to use the Tuxedo Web Monitor, you should disable the TListen 12.2.2.0.0_VS2015 (Port: PORT) service, where PORT is the port number you entered during the installation. The default is 3050.
Task 12-1-13: Verifying the Server Installation on Microsoft WindowsAt this point, you should verify that the server installation was successful.To verify the installation:1. Open a command prompt.
2. Set the TUXDIR environment variable; for example:
set TUXDIR=C:\oracle\tuxedo12.2.2.0.0_VS2015
3. Go to the directory where you installed Oracle Tuxedo, TUXDIR, and then to the bin sub-directory. For

Installing Additional Components Chapter 12
380 Copyright © 2018, Oracle and/or its affiliates. All Rights Reserved.
example:
C:\oracle\tuxedo12.2.2.0.0_VS2015\bin
4. Issue this command:
tmadmin -v
The command will return the Oracle Tuxedo version that is installed. For example:
INFO: Oracle Tuxedo, Version 12.2.2.0.0_VS2015, 64-bit, Patch Level 016
If you do not see the desired output, review your steps and reinstall Oracle Tuxedo 12cR2_VS2015.
5. Open the Microsoft Windows registry, for example by selecting Start, Run, regedit.
Verify that the following key is created in the Windows registry:
HKEY_LOCAL_MACHINE\SOFTWARE\ORACLE\TUXEDO\12.2.2.0.0_VS2015
Task 12-1-14: Removing Existing Oracle Tuxedo Installations from UNIX (Optional)You may have older versions of Oracle Tuxedo installed on your system from an earlier version of PeopleSoft PeopleTools. If you are completely upgrading to PeopleSoft PeopleTools 8.56 from an earlier version of PeopleSoft PeopleTools and you do not require the older Oracle Tuxedo anymore, then, you may uninstall it.
Note. It is not mandatory to uninstall older Oracle Tuxedo versions from the machine where you are installing Oracle Tuxedo 12cR2, as older Oracle Tuxedo versions and Oracle Tuxedo 12cR2 can exist on the same machine.
You may have to remove your Oracle Tuxedo installation on UNIX for the following reasons:
• You are having problems starting Oracle Tuxedo and decide to reinstall.
• You no longer need Oracle Tuxedo on a machine.
To remove Oracle Tuxedo from UNIX:1. Using PSADMIN, shut down any application server, Process Scheduler, and Search server domains that may
be running on the machine.
2. Use the UNIX rm command to directly remove the Oracle Tuxedo installation.
Be sure to remove the directory containing Oracle Tuxedo, referred to here as TUXDIR.
3. Remove the TUXDIR environment variable and any entries containing your platform-specific LIBRARY PATH and PATH environment variables.
Task 12-1-15: Completing the Preinstallation Checklist on UNIXWe recommend that you complete the following preinstallation checklist before you begin the Oracle Tuxedo installation. The checklist includes various parameters with descriptions and example values. Specify your values in the Real Value column. Completing this information first should save you time during your installation.
Item Description Example Value Real Value
ORACLE_HOME The high level installation directory. You specify this value in the silent installationfile.
/oracle <enter value>

Chapter 12 Installing Additional Components
Copyright © 2018, Oracle and/or its affiliates. All Rights Reserved. 381
Item Description Example Value Real Value
ORACLE_HOME_NAME The name of the current Oracle installation. This identifies the Oracle Tuxedo installation in the Oracle Universal Installer, when reviewing the Installed Products list.
tuxedo1222 <enter value>
TUXDIR The full path to the Oracle Tuxedo installation. The installer creates this as ORACLE_HOME/tuxedo12.2.2.0.0
/oracle/tuxedo12.2.2.0.0 <enter value>
Username The UNIX user name of the Application Server Administrator (Oracle Tuxedo owner). See the next section for instructions.
tuxedo <enter value>
UNIX_GROUP_NAME The UNIX group name of theOracle Tuxedo owner. See the next section for instructions.
tuxedo <enter value>
FROM_LOCATION The full path to the directory containing the products to be installed.
/home/temp/Disk1/stage/products.xml
<enter value>
Note. You can select any user name and group name you want; however, you might want to use the "tuxedo" convention for simplicity.
Task 12-1-16: Designating the Oracle Tuxedo Owner on UNIXA new or existing user must be designated as the Oracle Tuxedo owner.
Note. For Oracle Tuxedo 11gR1 and later releases, the application server can be booted only by the Oracle Tuxedo owner or the group that the owner is in. The predefined UNIX "other" group does not have read or execute permission. If it is required that members of the "other" group be able to boot and shut down an application server domain, you must manually give read and execute permissions to all files and folders under the TUXDIR/locale and TUXDIR/udataobj directories.
To designate the Oracle Tuxedo owner:1. Log in as root.
2. Create the UNIX group and the user name of the individual who will be the owner of Oracle Tuxedo.
Using the values from the preinstallation checklist, create the group and specify the group name. Then create the user who will be the Oracle Tuxedo owner, specifying the user name, group name, and home directory, denoted by TUXDIR from the checklist.

Installing Additional Components Chapter 12
382 Copyright © 2018, Oracle and/or its affiliates. All Rights Reserved.
Note. The utility that you use to create the user and group varies, depending on your operating system. For example, HP-UX Itanium uses the "sam" utility, IBM AIX uses the "smit" utility, and so on. For the exact utility, refer to your operating system documentation.
Task 12-1-17: Installing Oracle Tuxedo in Silent Mode on UNIXThis section discusses:
• Understanding the Silent Mode Installation on UNIX
• Running the Silent Mode Installation on UNIX
Understanding the Silent Mode Installation on UNIX
You can carry out a silent installation of Oracle Tuxedo 12cR2 by providing all the required settings in a responsefile. With silent installation there is little or no user interaction.
Note. Console mode installation is not supported for Oracle Tuxedo 12cR2.
Use a text editor to modify the values in the response file according to your installation requirements. Here is a sample response file:## .......... Silent Installation Properties file .........#
RESPONSEFILE_VERSION=2.2.1.0.0#Unix group to be set for the inventory directory. Valid only in Unix⇒ platforms.UNIX_GROUP_NAME="dba"
#Complete path of the Oracle Home.ORACLE_HOME="/home/psftuser/oracle"
#Oracle Home Name. Used in creating folders and services.ORACLE_HOME_NAME="tuxedo1222"DEINSTALL_LIST={"Tuxedo","12.2.2.0.0"}SELECTED_LANGUAGES={"en"}COMPONENT_LANGUAGES={"en"}INSTALL_TYPE="Full Install"ENABLE_TSAM_AGENT=falseLDAP_SUPPORT_SSL=falseTLISTEN_PORT="3050"MIN_CRYPT_BITS_CHOOSE=0MAX_CRYPT_BITS_CHOOSE=256INSTALL_SAMPLES=trueENCRYPT_CHOICE=0CONFIG_TLISTEN=trueTLISTEN_PASSWORD=password

Chapter 12 Installing Additional Components
Copyright © 2018, Oracle and/or its affiliates. All Rights Reserved. 383
Running the Silent Mode Installation on UNIX
The following procedure assumes that:
• You saved and extracted the installation files from Oracle Software Delivery Cloud in the directory TUX_INSTALL.
• You installed the supported version of Java 8.
The command requires the full path for the JRE file, such as /home/java/jre1.8.0_65.
To install Oracle Tuxedo on UNIX operating systems:1. If it does not exist, use a text editor, such as "vi", to create the central inventory location file, named
oraInst.loc, in a convenient directory.
If you have previously installed Oracle software on the system, the oraInst.loc file may already exist. The oraInst.loc file contains only the following two lines:
inventory_loc=/home/psftuser/oraInventoryinst_group=ccpt
The oraInst.loc file contains the following information:
• inventory_loc — Specify the full path to the directory where you want the installer to create the inventory directory. The location in the example is /home/psftuser/oraInventory.
• oui_install_group — Specify the name of the group whose members have write permissions to this directory. The group name in the example is ccpt.
2. Create a response file as described in the previous section and copy it to TUX_INSTALL.
3. Open a command prompt and change directory to TUX_INSTALL/Disk1/install.
4. If this is the first time you are installing on your system (that is, there is no pre-existing Oracle inventory location, and you had to create the oraInst.loc file in the first step), use the following command to perform a silent installation:
./runInstaller -responseFile <complete_filename> -silent -invPtrLoc ⇒<complete_inventory_filename> -jreLoc <JRE file location>
Specify the full path and name for the response file, the oraInst.loc file, and the JRE file. For example:
./runInstaller -responseFile /home/temp/response.rsp -silent -invPtrLoc⇒ /home/psftuser/oraInventory/oraInst.loc -jreLoc /home/java/jre1.8.0_65
5. If you have previously installed an Oracle product on your system and do not need to specify an Oracle inventory location, use the following command to perform a silent installation:
./runInstaller -responseFile <complete_filename> -silent -jreLoc <JRE⇒ file location>
Specify the full path and name for the response file and the JRE file. For example:
./runInstaller -responseFile /home/temp/response.rsp -silent -jreLoc ⇒/home/java/jre1.8.0_102
6. After you enter the commands in the previous steps, the installer is launched in silent mode, and a progress indicator tracks the installation.
The progress indicator includes the name and location of the installation log file. When the installation is complete, you should see a successful completion message.
Installing Additional Components Chapter 12
384 Copyright © 2018, Oracle and/or its affiliates. All Rights Reserved.
Task 12-1-18: Installing the Oracle Tuxedo Patch on UNIXThese instructions assume that you have installed the base Oracle Tuxedo 12cR2, and have downloaded the platform-specific version of the rolling patch to a directory referred to here as TUX_INSTALL.To install the patch:1. Stop all PeopleSoft PeopleTools domains that are running and using your Oracle Tuxedo installation.
Shut down any tlisten processes.
2. Verify that the environment variable TUXDIR is set to the Oracle Tuxedo installation location, such as /home/psftuser/oracle/tuxedo12.2.2.0.0.
Note. The TUXDIR directory should include subdirectories bin and udataobj.
3. Verify that the environment variable ORACLE_HOME is set to the ORACLE_HOME location you specified when you installed Oracle Tuxedo, such as /home/psftuser/oracle.
Note. This is the parent directory for the Oracle Tuxedo installation. It should include subdirectories OPatch and oui.
4. Verify that the environment variable JAVA_HOME is set to the 64-bit JDK 1.8 directory, as mentioned in the prerequisites section.
5. Go to the directory where you downloaded the patch zip file from My Oracle Support, TUX_INSTALL, and extract the file.
This creates a directory 25391869, which includes a zip file with the patch.
6. Open a command prompt and go to the TUX_INSTALL/25391869 directory.
7. Run the following command:
$ORACLE_HOME/OPatch/opatch apply 25391869.zip
Note. The patch installer backs up all files being patched. The backup copy is located in the directory ORACLE_HOME\.patch_storage\. Do not delete these backup files. They will be used if you need to remove the patch installation.
8. If OPatch cannot locate the Oracle inventory, you may see a messages such as the following:
Applying interim patch 25391869 to OH '/oracle'Verifying environment and performing prerequisite checks.OPatch system modification phase did not start
In this case, specify the full path to the Oracle inventory file oraInst.loc, with the invPtrLoc option:
%ORACLE_HOME%/OPatch/opatch.bat apply 25391869.zip -invPtrLoc <full_⇒path_to_inventory_file>
Task 12-1-19: Uninstalling the Oracle Tuxedo Patch from UNIXTo remove an Oracle Tuxedo installation, you must first remove the rolling patch, as follows:1. Stop all PeopleSoft PeopleTools domains that are running and using your Oracle Tuxedo installation.
2. Verify that the environment variable TUXDIR is set to the Oracle Tuxedo installation location, such as /home/psftuser/oracle/tuxedo12.2.2.0.0.

Chapter 12 Installing Additional Components
Copyright © 2018, Oracle and/or its affiliates. All Rights Reserved. 385
3. Verify that the environment variable ORACLE_HOME is set to the ORACLE_HOME location you specified when you installed Oracle Tuxedo, such as /home/psftuser/oracle.
4. Open a command prompt and run the following command:
$ORACLE_HOME/OPatch/opatch rollback -id 25391869
Task 12-1-20: Uninstalling Oracle Tuxedo from UNIX Using Silent ModeTo remove the Oracle Tuxedo 12cR2 installation from UNIX:1. Open a command prompt and change directory to TUX_INSTALL/Disk1/install.
2. Run the following command, where ORACLE_HOME refers to the high-level installation director, and REMOVE_HOMES refers to the directory to be removed:
./runInstaller -deinstall -silent ORACLE_HOME=<LOCATION_OF_ORACLE_HOME>⇒ "REMOVE_HOMES={<LOCATION_OF_ORACLE_HOME_TO_BE_REMOVED>}"
For example:
./runInstaller -deinstall -silent ORACLE_HOME="/home/psftuser/oracle"⇒ "REMOVE_HOMES={/home/psftuser/oracle}"
See Oracle Tuxedo documentation.
Task 12-1-21: Verifying the Server Installation on UNIXTo verify that the server installation was successful:1. Open a shell.
2. Change directory to TUXDIR/bin. For example:
/home/psftuser/oracle/tuxedo1222/bin
3. Issue the following command:
tmadmin -v
The command will return the Oracle Tuxedo version that is installed. For example:INFO: Oracle Tuxedo, Version 12.2.2.0.0, 64-bit, Patch Level 016
If you do not see the desired output, review your steps and reinstall Oracle Tuxedo 12cR2.
Task 12-1-22: Ensuring that Oracle Tuxedo Coexists with Earlier VersionsThis section discusses:
• Understanding the Use of Multiple Oracle Tuxedo Versions
• Checking Your Environment Variables
• Changing the TListen Port

Installing Additional Components Chapter 12
386 Copyright © 2018, Oracle and/or its affiliates. All Rights Reserved.
Understanding the Use of Multiple Oracle Tuxedo Versions
Earlier versions of PeopleSoft PeopleTools rely on earlier versions of Oracle Tuxedo—for example, PeopleSoft PeopleTools 8.49 uses Oracle Tuxedo 9.1, and releases 8.44 to 8.48 use Oracle Tuxedo 8.1. If you are installing only PeopleSoft PeopleTools 8.56, you can safely skip this section. If you need to run application servers on PeopleSoft PeopleTools 8.56 and earlier PeopleSoft PeopleTools versions on the same machine, read this section to learn about coexistence issues. Although Oracle Tuxedo 12cR2 coexists with earlier Oracle Tuxedo versions onthe same machine, you may need to take a number of manual steps to ensure that these products share the same environment gracefully.
Checking Your Environment Variables
Installing Oracle Tuxedo changes your TUXDIR and PATH environment variables. Although you do not need to change these environment variables to successfully run PeopleSoft PeopleTools 8.56 with Oracle Tuxedo 12cR2, earlier versions of PeopleSoft PeopleTools rely on these environment variables being set.To change your environment variables manually:1. Set your TUXDIR environment variable to reflect the installation directory of your earlier Oracle Tuxedo
release.
For example, Oracle Tuxedo 8.1 may be installed to C:\tux8.1. This means that TUXDIR=C:\tux8.1 is the correct setting.
2. Your PATH environment variable must contain TUXDIR\bin for the earlier Oracle Tuxedo version before any entries for TUXDIR\bin for Oracle Tuxedo 12cR2.
For example the setting PATH=C:\winnt;C:\oracle\tuxedo12.1.3.0.0_VS2012\bin;C:\tux8.1\bin will cause your pre-8.49 domains to no longer work. You would need to change this to PATH=C:\winnt;C:\tux8.1\bin;C:\oracle\tuxedo12.1.3.0.0_VS2012\bin to work with pre-PeopleSoft PeopleTools 8.49 domains.
Note. PeopleSoft PeopleTools 8.44 and later do not use environment variables to discover the installation location of Oracle Tuxedo 8.1 and later. The PSADMIN tool retrieves these values from the Microsoft Windows registry.
3. Your library path on UNIX (whichever of the environment variables LD_LIBRARY_PATH, LIBPATH, or SHLIB_PATH is appropriate for your platform) must contain TUXDIR/lib for the earlier Oracle Tuxedo version before any entries for Oracle Tuxedo 12cR2.
For example the setting LD_LIBRARY_PATH=/lib:/usr/lib:/home/user/Oracle/tuxedo12cR2/lib:/prod/tuxedo/8.1/lib, will cause your pre-8.49 domains to no longer work. You would need to change this to LD_LIBRARY_PATH=/lib:/usr/lib:/prod/tuxedo/8.1/lib:/home/user/Oracle/tuxedo12cR2/lib for your pre-8.49 domains to work.
Alternatively, you can set the environment variables for a desired release using these steps:1. Go to the TUXDIR directory for the release that you want to run and run the command ./tux.env.
This command sets the environment variables needed to run Oracle Tuxedo.
2. Verify the correct Oracle Tuxedo version by running this command:
tmadmin -v
See Verifying the Server Installation on UNIX.

Chapter 12 Installing Additional Components
Copyright © 2018, Oracle and/or its affiliates. All Rights Reserved. 387
Changing the TListen Port
Installing Oracle Tuxedo 12cR2 and earlier creates a new service known as TListen. In most cases, you can disable this service as it is not required to run PeopleSoft PeopleTools application server domains. However, if you intend to use the Tuxedo Web Monitor you may wish to ensure that there is no port clash with earlier versions. This port is determined at installation and should be changed to a port other than the default 3050 if you intend on using the TListen service for Oracle Tuxedo 12cR2 and earlier Oracle Tuxedo versions concurrently.


Copyright © 2018, Oracle and/or its affiliates. All Rights Reserved. 389
Chapter 13A
Configuring the Application Server on Windows
This chapter discusses:
• Understanding the Application Server
• Prerequisites
• Creating a Wallet for the SSL/TLS Setup
• Setting Up COBOL for Remote Call
• Verifying Database Connectivity
• Creating, Configuring, and Starting an Initial Application Server Domain
Understanding the Application Server
The information in this chapter is provided to help you configure your PeopleSoft application server.
Note. COBOL is not needed for PeopleSoft PeopleTools or for PeopleSoft Applications that contain no COBOL programs. Check the information on My Oracle Support, and your application-specific documentation, for the details on whether your application requires COBOL.
Oracle supports a Microsoft Windows application server to use with any of our supported databases for the PeopleSoft installation. For detailed information, consult the certification information on My Oracle Support. The application server support can be found on the certification pages for PeopleSoft systems.Application servers are not supported on z/OS because Oracle Tuxedo cannot run on the mainframe. For this reason, you can only install an application server in a "physical" three-tier configuration—with the application server on a machine separate from the database server machine. You cannot run a "logical" three-tier configuration—with the application server on the same machine as the database server.The configuration and log files for application server domains reside in PS_CFG_HOME. If you do not set a PS_CFG_HOME environment variable before beginning the application server configuration, the system installs it in a default location based on the current user's settings, as follows:%USERPROFILE%\psft\pt\<peopletools_version>
See "Preparing for Installation," Defining Installation Locations.
Note. You can start application servers as a Windows service, which means that administrators no longer need to manually start each application server that runs on a Windows machine.

Configuring the Application Server on Windows Chapter 13A
390 Copyright © 2018, Oracle and/or its affiliates. All Rights Reserved.
See Also
"Preparing for Installation," Understanding PeopleSoft Servers and Clients"Setting Up Process Scheduler on Windows," Starting Process Scheduler as a Windows ServicePeopleTools: System and Server Administration, "Using PSADMIN Menus"PeopleTools: Data ManagementMy Oracle Support, Certifications"Setting Up the Install Workstation""Installing and Compiling COBOL on Windows"
Prerequisites
Before beginning this procedure, you should have completed the following tasks:
• Installed your application server.
See "Using the PeopleSoft Installer," Planning Your Initial Configuration.
• Installed the supported version of Oracle Tuxedo
See "Installing Additional Components."
• Set up SSL/TLS protocol for the workstation connection.
The Secure Socket Layers/Transport Layer Security (SSL/TLS) protocol is supported for Workstation Listener and Jolt Listener ports for the current PeopleSoft PeopleTools release. The application server domain configuration requires a wallet. You can use the delivered wallet or create your own.
See PeopleTools: Integration Broker, "Installing Web Server-Based Digital Certificates."
• Granted authorization to a PeopleSoft user ID to start the application server.
The database configuration procedure includes a step for setting up the user ID with authorization to start the application server. See the application-specific installation instructions for information on the user IDs for your PeopleSoft application. See the PeopleTools: Security Administration product documentation for information on PeopleSoft PeopleTools delivered user profiles.
See "Creating a Database," Creating Data Mover Import Scripts.
• Run the following SQL statements on your database server to review and if needed, update the PSCLASSDEFN table:
SELECT CLASSID, STARTAPPSERVER FROM PSCLASSDEFNWHERE CLASSID IN (SELECT OPRCLASS FROM PSOPRCLS WHERE OPRID='<OPRID>')UPDATE PSCLASSDEFN SET STARTAPPSERVER=1 WHERE CLASSID='<CLASSID>'
Note. Installers typically use VP1 or PS to test the application server. If these users are deleted or their passwords are changed, the application server will no longer be available. To avoid this problem, you can set up a new operator (called PSADMIN or PSASID, for instance) with privileges to start the application server. If you do this, you can use the new operator for your application servers and you won't need to change the password each time VP1 or PS is changed.
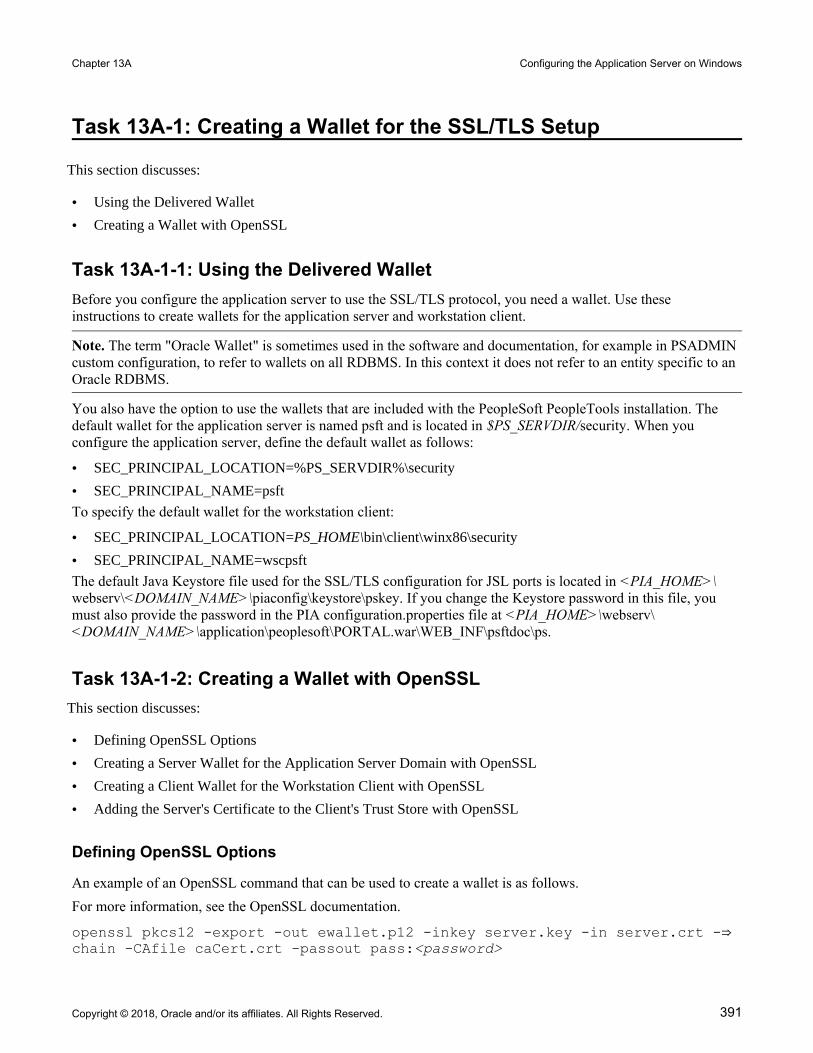
Chapter 13A Configuring the Application Server on Windows
Copyright © 2018, Oracle and/or its affiliates. All Rights Reserved. 391
Task 13A-1: Creating a Wallet for the SSL/TLS Setup
This section discusses:
• Using the Delivered Wallet
• Creating a Wallet with OpenSSL
Task 13A-1-1: Using the Delivered WalletBefore you configure the application server to use the SSL/TLS protocol, you need a wallet. Use these instructions to create wallets for the application server and workstation client.
Note. The term "Oracle Wallet" is sometimes used in the software and documentation, for example in PSADMIN custom configuration, to refer to wallets on all RDBMS. In this context it does not refer to an entity specific to an Oracle RDBMS.
You also have the option to use the wallets that are included with the PeopleSoft PeopleTools installation. The default wallet for the application server is named psft and is located in $PS_SERVDIR/security. When you configure the application server, define the default wallet as follows:
• SEC_PRINCIPAL_LOCATION=%PS_SERVDIR%\security
• SEC_PRINCIPAL_NAME=psft
To specify the default wallet for the workstation client:
• SEC_PRINCIPAL_LOCATION=PS_HOME\bin\client\winx86\security
• SEC_PRINCIPAL_NAME=wscpsft
The default Java Keystore file used for the SSL/TLS configuration for JSL ports is located in <PIA_HOME>\webserv\<DOMAIN_NAME>\piaconfig\keystore\pskey. If you change the Keystore password in this file, you must also provide the password in the PIA configuration.properties file at <PIA_HOME>\webserv\<DOMAIN_NAME>\application\peoplesoft\PORTAL.war\WEB_INF\psftdoc\ps.
Task 13A-1-2: Creating a Wallet with OpenSSLThis section discusses:
• Defining OpenSSL Options
• Creating a Server Wallet for the Application Server Domain with OpenSSL
• Creating a Client Wallet for the Workstation Client with OpenSSL
• Adding the Server's Certificate to the Client's Trust Store with OpenSSL
Defining OpenSSL Options
An example of an OpenSSL command that can be used to create a wallet is as follows.For more information, see the OpenSSL documentation.
openssl pkcs12 -export -out ewallet.p12 -inkey server.key -in server.crt -⇒chain -CAfile caCert.crt -passout pass:<password>

Configuring the Application Server on Windows Chapter 13A
392 Copyright © 2018, Oracle and/or its affiliates. All Rights Reserved.
• -export: indicates that a PKCS 12 file is being created
• -chain: specifies that an attempt is made to include the entire certificate chain of the user certificate
• -inkey: specifies the private key file
• -in: specifies the file that contains the user certificate and any other certificates in the certificate chain
• -CAfile: specifies a file containing trusted certificates
• -out: specifies the output file name, which must be ewallet.p12 for an Oracle Wallet for PeopleSoft installations.
• -passin: specifies the password for the private key file
• -passout: specifies the password for the newly created wallet
Creating a Server Wallet for the Application Server Domain with OpenSSL
This section gives an example of creating a wallet for the application server with the open-source tool OpenSSL.1. Create a directory, for example wallet.server.
For example on Microsoft Windows:
mkdir C:\wallet.server
2. Change directory to wallet.server.
cd wallet.server
3. Enter the following command:
openssl genrsa -out server.key 4096
4. Enter the following command.
openssl req -new -key server.key -out server.csr -subj <subject>
For example:
openssl req -new -key server.key -out server.csr -subj '/C=country/CN=⇒commonName'
The <subject> values in this step and step 7 are used to replace the specified data in an input request, and output a modified request. The format for <subject> is '/type0=value0/type1=value1/type2=....'. Characters must be escaped with a backslash (\), and no spaces are skipped. Use the following fields:
• /C — Country
• /CN — Common name
• /L — Location
• /O — Organization
• /OU — Organizational Unit
• /ST — State
5. Enter the following command:
openssl genrsa -out caCert.key 4096
6. Enter the following command,

Chapter 13A Configuring the Application Server on Windows
Copyright © 2018, Oracle and/or its affiliates. All Rights Reserved. 393
openssl req -new -x509 -days 1826 -key caCert.key -out caCert.crt -subj ⇒<subject>
For example:
openssl req -new -x509 -days 1826 -key caCert.key -out caCert.crt -subj⇒ '/C=US/OU=Class 2 Public Primary Certification Authority/O=My⇒Organization'
7. Enter the following command:
openssl x509 -req -days 730 -in server.csr -CA caCert.crt -CAkey ca⇒Cert.key -set_serial 01 -out server.crt
8. Enter the following command to create the wallet ewallet.p12 and specify the server password:
openssl pkcs12 -export -out ewallet.p12 -inkey server.key -in⇒ server.crt -chain -CAfile caCert.crt -passout pass:<server_password>
Creating a Client Wallet for the Workstation Client with OpenSSL
This section gives an example of creating a client wallet with the open-source tool OpenSSL.1. Create a directory, for example wallet.client, and change to that directory.
mkdir wallet.clientcd wallet.client
2. Copy the server's trust store to the client wallet.
cp wallet.server\caCert.crt wallet.clientcp wallet.server\caCert.key wallet.client
3. Enter these commands:
openssl genrsa -out client.key 4096
4. Run this command:
openssl req -new -key client.key -out client.csr -subj <subject>
For example:
openssl req -new -key client.key -out client.csr -subj '/C=country/CN=⇒commonName'
5. Run this command:
openssl x509 -req -days 730 -in client.csr -CA caCert.crt -CAkey ca⇒Cert.key -set_serial 01 -out client.crt
6. Enter the following command to create the wallet ewallet.p12 and specify the client password:
openssl pkcs12 -export -out ewallet.p12 -inkey client.key -in⇒ client.crt -chain -CAfile caCert.crt -passout pass:<client_password>
7. Remove the client wallet password:
a. Make a backup copy of the wallet, ewallet.p12:
On Microsoft Windows:

Configuring the Application Server on Windows Chapter 13A
394 Copyright © 2018, Oracle and/or its affiliates. All Rights Reserved.
xcopy ewallet.p12 oldwallet.p12
b. Run this command:
openssl pkcs12 -clcerts -nokeys -in oldwallet.p12 -out⇒ certificate.crt -password pass:<client_password> -passin pass:⇒<client_password>
c. Run this command:
openssl pkcs12 -cacerts -nokeys -in oldwallet.p12 -out ca-cert.ca -⇒password pass:C<client_password> -passin pass:<client_password>
d. Run this command:
openssl pkcs12 -nocerts -in oldwallet.p12 -out private.key -password⇒ pass:<client_password> -passin pass:<client_password> -passout pass:⇒temp
e. Run this command:
openssl rsa -in private.key -out NewKeyFile.key -passin pass:temp
f. Run the command to create the PEM.pem file.
This file is created to copy the public key and root certificates.
On Microsoft Windows:
type certificate.crt ca-cert.ca >PEM.pem
g. Run this command:
openssl pkcs12 -export -nodes -in PEM.pem -inkey NewKeyFile.key -out⇒ ewallet.p12 -passout pass:TrustedCertsOnlyNoPWNeeded
Adding the Server's Certificate to the Client's Trust Store with OpenSSL
To complete the setup, add the application server's certificate to the workstation client's trust store:1. Change directory.
cd %ORACLE_HOME%\jdk\bin
2. Add the certificate to the trust store found in the web server directory for the application server domain.
keytool -import -file <server_wallet>/<certificate> -alias srvcert -⇒keystore <PIA_HOME>\webserv\<DOMAIN_NAME>\piaconfig\keystore\pskey -⇒storepass password -noprompt
For example, on Microsoft Windows:
keytool -import -file wallet.server/caCert.crt -alias srvcert -keystore⇒ C:\user\psft\pt\8.56\webserv\ps\piaconfig\keystore\pskey -storepass⇒ password -noprompt

Chapter 13A Configuring the Application Server on Windows
Copyright © 2018, Oracle and/or its affiliates. All Rights Reserved. 395
Task 13A-2: Setting Up COBOL for Remote Call
Remote Call is a PeopleCode feature that launches a COBOL program from an application server, PeopleCode program or a batch Application Engine PeopleCode program and waits for it to complete execution before continuing. The execution of a COBOL program via Remote Call is completely independent of the Process Scheduler. You need to set up a COBOL runtime environment and COBOL executables on the application server to support Remote Call.See "Installing and Compiling COBOL on Windows."
Note. If your application does not contain COBOL programs, you do not need to purchase or compile COBOL.
Task 13A-3: Verifying Database Connectivity
Before continuing, it is critical to verify connectivity to the database that the application server domain will use. To verify connectivity, connect to the database server from the application server using the native SQL tool on theapplication server.If you are running DB2 for z/OS, you can issue this command from the UNIX prompt:db2 connect to <database name> user <z/OS ID> using <password>
If you are running DB2 for z/OS and are setting up your application server on a Microsoft Windows machine, enter the preceding command at a DB2 Connect command window, or use DB2 Connect's Command Center or Client Configuration Assistant.See "Installing and Configuring DB2 Connect."
Task 13A-4: Creating, Configuring, and Starting an Initial Application Server Domain
This section discusses:
• Creating, Configuring, and Starting the Application Server Domain
• Testing the Three-Tier Connection
• Importing an Existing Application Server Domain Configuration
• Setting Up a Custom Application Server Domain Configuration
• Troubleshooting Common Errors
Task 13A-4-1: Creating, Configuring, and Starting the Application Server DomainTo create, configure, and start the application server domain:1. Run the psadmin command.
You see the PeopleSoft Server Administration menu, as in this example:
--------------------------------

Configuring the Application Server on Windows Chapter 13A
396 Copyright © 2018, Oracle and/or its affiliates. All Rights Reserved.
PeopleSoft Server Administration--------------------------------
PS_CFG_HOME: C:\Users\JSMITH\psft\pt\8.56PS_HOME: C:\PT8.56PS_APP_HOME: C:\HR92
1) Application Server2) Process Scheduler3) Search Server4) Web (PIA) Server5) Switch Config Home6) Service Setup7) Replicate Config Home8) Refresh Config Homeq) Quit
Command to execute (1-8, q): 1
Note. Make sure you change the directory from the PS_HOME on the file server to the PS_HOME, or high-level directory, on the application server.
2. Depending on your environment, you may see a message after the initial menu, which indicates that PSADMIN has modified the PS_CFG_HOME/peopletools.properties file with the current PS_HOME location:
*********************************************************PS_CFG_HOME/peopletools.properties file has been updated. You should use the Config Home Refresh feature in PSAdmin to ensure that all of your domains are current. Alternatively, you may recreate all of your domains. Please press any key to continue...***********************************************************
This indicates that one of these situations exists:
• The PS_CFG_HOME that you are working with was used previously from a different PS_HOME. In this case, you should recreate any existing Application Server, Process Scheduler, Search, or PIA domains in this PS_CFG_HOME.
• You configured your environment such that PS_CFG_HOME is the same as PS_HOME. The first time you use PSADMIN to create a domain, it updates the PS_CFG_HOME/peopletools.properties file. Continue with the next step.
3. Specify 1 for Application Server and press ENTER.
4. Specify 2 to Create a domain and press ENTER.
--------------------------------------------PeopleSoft Application Server Administration-------------------------------------------- 1) Administer a domain 2) Create a domain 3) Delete a domain 4) Import domain configuration q) Quit

Chapter 13A Configuring the Application Server on Windows
Copyright © 2018, Oracle and/or its affiliates. All Rights Reserved. 397
Command to execute (1-4, q): 2
5. Specify the domain name.
In this example the domain name is HRDMO:
Please enter name of domain to create :HRDMO
Domain names are case sensitive and must be eight US-ASCII characters or less. The domain name is used to create a directory name under the PS_CFG_HOME\appserv directory.
See the information on PS_CFG_HOME and server domain configuration in the PeopleTools: System and Server Administration product documentation.
6. Specify 4 for small if this is your initial domain installation, press ENTER.
See PeopleTools: System and Server Administration.
7. After the system creates the domain, the PeopleSoft Application Server Administration menu appears with a Quick-configure menu similar to this:
---------------------------------------------------------Quick-configure menu -- domain: HRDMO--------------------------------------------------------- Features Settings ========== ========== 1) Pub/Sub Servers : No 17) DBNAME :[HRDMO] 2) Quick Server : No 18) DBTYPE :[DB2ODBC] 3) Query Servers : No 19) UserId :[QEDMO] 4) Jolt : Yes 20) UserPswd :[] 5) Jolt Relay : No 21) DomainID :[TESTSERV] 6) WSL : No 22) AddToPATH :[ ] 7) PC Debugger : No 23) ConnectID :[people] 8) Event Notification : Yes 24) ConnectPswd :[] 9) MCF Servers : No 25) DomainConnectPswd:[] 10) Perf Collator : No 26) WSL Port :[7000] 11) Analytic Servers : Yes 27) WSL SSL Port :[7010] 12) Domains Gateway : No 28) JSL Port :[9000] 13) Push Notifications : No 29) JSL SSL Port :[9010] 30) JRAD Port :[9100] Actions ========= 14) Load config as shown 15) Custom configuration 16) Edit environment settings h) Help for this menu q) Return to previous menu
HINT: Enter 17 to edit DBNAME, then 14 to load
Enter selection (1-28, h, or q):
Note. If your installation includes more than one application server domain on a given machine, read the troubleshooting section for more information.
See Troubleshooting Common Errors.
8. If you need to modify any of the values for these settings, enter the number next to the parameter name, press
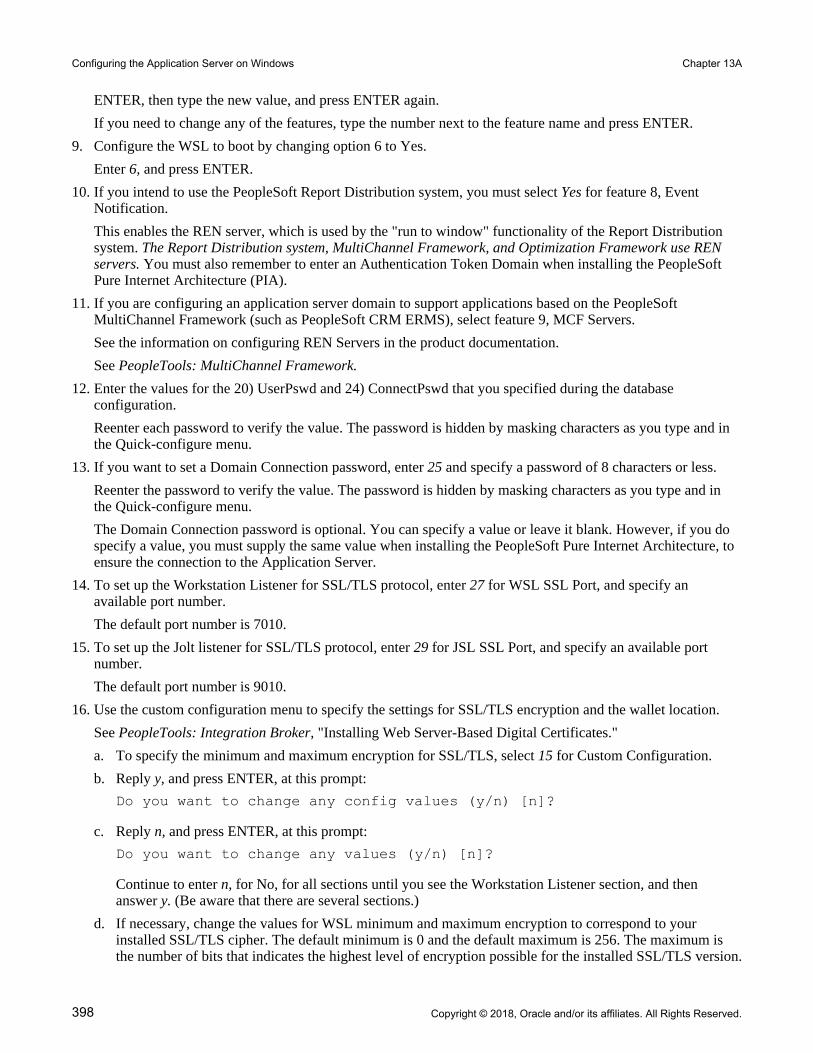
Configuring the Application Server on Windows Chapter 13A
398 Copyright © 2018, Oracle and/or its affiliates. All Rights Reserved.
ENTER, then type the new value, and press ENTER again.
If you need to change any of the features, type the number next to the feature name and press ENTER.
9. Configure the WSL to boot by changing option 6 to Yes.
Enter 6, and press ENTER.
10. If you intend to use the PeopleSoft Report Distribution system, you must select Yes for feature 8, Event Notification.
This enables the REN server, which is used by the "run to window" functionality of the Report Distribution system. The Report Distribution system, MultiChannel Framework, and Optimization Framework use REN servers. You must also remember to enter an Authentication Token Domain when installing the PeopleSoft Pure Internet Architecture (PIA).
11. If you are configuring an application server domain to support applications based on the PeopleSoft MultiChannel Framework (such as PeopleSoft CRM ERMS), select feature 9, MCF Servers.
See the information on configuring REN Servers in the product documentation.
See PeopleTools: MultiChannel Framework.
12. Enter the values for the 20) UserPswd and 24) ConnectPswd that you specified during the database configuration.
Reenter each password to verify the value. The password is hidden by masking characters as you type and in the Quick-configure menu.
13. If you want to set a Domain Connection password, enter 25 and specify a password of 8 characters or less.
Reenter the password to verify the value. The password is hidden by masking characters as you type and in the Quick-configure menu.
The Domain Connection password is optional. You can specify a value or leave it blank. However, if you do specify a value, you must supply the same value when installing the PeopleSoft Pure Internet Architecture, to ensure the connection to the Application Server.
14. To set up the Workstation Listener for SSL/TLS protocol, enter 27 for WSL SSL Port, and specify an available port number.
The default port number is 7010.
15. To set up the Jolt listener for SSL/TLS protocol, enter 29 for JSL SSL Port, and specify an available port number.
The default port number is 9010.
16. Use the custom configuration menu to specify the settings for SSL/TLS encryption and the wallet location.
See PeopleTools: Integration Broker, "Installing Web Server-Based Digital Certificates."
a. To specify the minimum and maximum encryption for SSL/TLS, select 15 for Custom Configuration.
b. Reply y, and press ENTER, at this prompt:
Do you want to change any config values (y/n) [n]?
c. Reply n, and press ENTER, at this prompt:
Do you want to change any values (y/n) [n]?
Continue to enter n, for No, for all sections until you see the Workstation Listener section, and then answer y. (Be aware that there are several sections.)
d. If necessary, change the values for WSL minimum and maximum encryption to correspond to your installed SSL/TLS cipher. The default minimum is 0 and the default maximum is 256. The maximum is the number of bits that indicates the highest level of encryption possible for the installed SSL/TLS version.

Chapter 13A Configuring the Application Server on Windows
Copyright © 2018, Oracle and/or its affiliates. All Rights Reserved. 399
Values for config section - Workstation Listener Address=%PS_MACH% Port=7000 SSL Port=7010 WSL Min Encryption=0 WSL Max Encrytion=256 Min Handlers=1 Max Handlers=2 Max Clients per Handler=40 Client Cleanup Timeout=60 Init Timeout=5 Tuxedo Compression Threshold=5000
e. Accept the defaults for the next series of questions until asked if you want Oracle Wallet configured. In this case, answer y.
f. Specify the values for the Oracle Wallet location, name, and password, or accept the defaults.
You can use an existing wallet that you created, or use the default wallet found in the security directory.
Values for config section - Oracle Wallet SEC_PRINCIPAL_LOCATION=%PS_SERVDIR%\security SEC_PRINCIPAL_NAME=psft SEC_PRINCIPAL_PASSWORD=
g. Accept the defaults for the next series of questions until asked if you want the JOLT Listener configured. In this case, answer y
h. If necessary, change the values for JSL minimum and maximum encryption to correspond to your installedSSL/TLS cipher. The default minimum is 0 and the default maximum is 256. The maximum is the numberof bits that indicates the highest level of encryption possible for the installed SSL/TLS version.
Values for config section - JOLT Listener Address=%PS_MACH% Port=9000 SSL Port=9010 JSL Min Encryption=0 JSL Max Encrytion=256 Min Handlers=1 Max Handlers=2 Max Clients per Handler=40 Client Cleanup Timeout=10 Init Timeout=5 Client Connection Mode=ANY Jolt Compression Threshold=1000000
i. Accept the default for the remaining questions; the configuration will load automatically.
17. If you are installing a REN server:
a. Enter 15 for Custom configuration.
b. Reply y, and press ENTER, at this prompt:
Do you want to change any config values (y/n) [n]?
c. Reply n, and press ENTER, at this prompt:
Do you want to change any values (y/n) [n]?

Configuring the Application Server on Windows Chapter 13A
400 Copyright © 2018, Oracle and/or its affiliates. All Rights Reserved.
Continue to enter n, for No, for all sections until you see the PSRENSRV section, and then answer y. (Be aware that there are several sections.)
d. Leave the defaults for all settings except for default_auth_token, which you should set to the domain namefor your web server.
Note. The default_auth_token setting should be identical to the Authentication Token Domain that you setduring PIA installation.
See "Setting Up the PeopleSoft Pure Internet Architecture in GUI Mode."
e. Accept the defaults for the next series of questions until asked if you want Event Notification configured. In this case, answer y.
f. Accept the default for the remaining questions; the configuration will load automatically.
18. If you are not installing a REN server, after you update the settings you can load the configuration by entering 14, for Load config as shown, from the Quick-configure menu.
19. To start the application server (whether you installed a REN server or not), select 1, Boot this domain, from the PeopleSoft Domain administration menu.
20. Select 1, Boot (Serial Boot) or 2, Parallel Boot, from the PeopleSoft Domain Boot Menu.
Note. The messages you see and the number of processes started will depend on the options you chose during configuration.
21. If you plan to continue with PIA installation and testing, do not shut down the application server at this time.
22. If you want to shut down your PeopleSoft application server domain later, follow these simple steps:
a. From the PeopleSoft Domain Administration menu, enter 2 for Domain shutdown menu.
b. From the PeopleTools Domain Shutdown Menu, enter 1 for Normal shutdown.
You see messages about the application server processes being shut down. The number of processes stopped will vary depending on the number of processes that started when you booted the domain.
c. Enter q to quit the PeopleSoft Domain Administration Menu.
Task 13A-4-2: Testing the Three-Tier ConnectionIf you get an error message when you try to sign in to the Application Server in Application Designer (that is, three-tier mode), it may be due to an incorrect server name or port number, because the database server is not running, or because the application server was not booted. To test a three-tier connection from the PeopleTools Development Environment (the Windows-based client):1. Start Configuration Manager with one of these methods:
• On Microsoft Windows 7, select Start, Programs, PeopleTools 8.56, Configuration Manager.
• On Microsoft Windows 8 or 2012 R2, access the Apps screen and navigate to PeopleTools 8.56, Configuration Manager.
• Run PS_HOME\bin\client\winx86\pscfg.exe.
2. Select the Profile Tab. Highlight Default and select Edit.
3. On the Edit Profile dialog box, select Application Server as the Connection Type.
4. Enter values for these parameters:
• Application Server Name
• Machine Name or IP Address

Chapter 13A Configuring the Application Server on Windows
Copyright © 2018, Oracle and/or its affiliates. All Rights Reserved. 401
• Port Number (WSL)
Enter the WSL port that you specified when creating the application server domain. If you want to use the SSL/TLS protocol for connection, enter the WSL SSL port number (the default is 7010). If you want to use the LLE protocol, enter the non-SSL WSL port (the default is 7000).
• Domain Connection Password and Domain Connection Password (confirm)
Specify a value for the password, and repeat your entry for confirmation. The password must be 8 characters or less.
This password is optional. If you did not set the Domain Connection Password in Configuration Manager or in the Application Server configuration, leave it blank. If you specify a password, you must supply the same password during the PeopleSoft Pure Internet Architecture installation for a successful connection between the Application Server and PeopleSoft Pure Internet Architecture.
See the PeopleTools: System and Server Administration product documentation for information on using PeopleSoft Configuration Manager and PSADMIN.
• Wallet Location
Enter the location that you specified for the client wallet. The default location is %PS_HOME%/bin/client/winx86/security.
• Wallet Name
Enter the name for the client wallet that you specified. The default name is wscpsft.
5. Select Set to add the definition to the list and select OK to close the dialog box.
6. On the Configuration Manager dialog box, select the Startup tab.
7. Select Application Server from the Database Type list. Your application server name should be displayed.
8. Enter the values for User ID, Connect ID, and password.
9. Click OK.
Note. Confirm that the application server is running by booting it from PSADMIN. Select 1, Boot this domain, from the PeopleSoft Domain administration menu. Select option 1, Boot (Serial Boot) or 2, Parallel Boot, from the PeopleSoft Domain Boot menu.
10. Start Application Designer with one of these methods:
• On Microsoft Windows 7, select Start, Programs, PeopleTools 8.56, Application Designer.
• On Microsoft Windows 8 or 2012 R2, access the Apps screen and navigate to PeopleTools 8.56, Application Designer.
• Run PS_HOME\bin\client\winx86\pside.exe.
11. In the PeopleSoft Signon dialog box:
• Select Application Server as the Connection Type.
• Confirm that the Application Server Name is correct.
• Enter values for User ID and password.
12. Select OK to open Application Designer.
If you see the following error message when you try to sign in to the Application Server in Application Designer:
Network API: "Could not connect to application server 'Application Server⇒ Name' Make sure the PeopleTools authentication server (PSAUTH) is booted."

Configuring the Application Server on Windows Chapter 13A
402 Copyright © 2018, Oracle and/or its affiliates. All Rights Reserved.
This may indicate a problem with the Domain Connection Password. For example, if the password set in the Application Server configuration file does not match the value in Configuration Manager, you may get this error message when you sign in to Application Designer in three-tier mode. Check the Application Server logs for moreinformation.
Task 13A-4-3: Importing an Existing Application Server Domain ConfigurationIf you have an existing application server configuration for a previous PeopleSoft PeopleTools release, you can import it to create a new domain. You can import an existing domain configuration by specifying a file or by specifying the path to an existing domain. To import from a file, you must use the psappsrv.cfg file found inside an existing application server domain folder (you must specify the full path to psappsrv.cfg). This file can be located anywhere in the file system, but must be named psappsrv.cfg. To import from an existing domain configuration that you created in the current PeopleSoft PeopleTools release, you must specify PS_CFG_HOME and the name of an existing application server domain. (If you are importing a domain from a release before PeopleSoft PeopleTools 8.50, note that the domains were created in PS_HOME, and that is the path that you should provide.)To import an existing application server domain configuration:1. Go to the PS_HOME\appserv directory and run the psadmin command.
You see the PeopleSoft Server Administration menu, as in this example:
--------------------------------PeopleSoft Server Administration--------------------------------
PS_CFG_HOME: C:\Users\JSMITH\psft\pt\8.56PS_HOME: C:\PT8.56PS_APP_HOME: C:\HR92
1) Application Server2) Process Scheduler3) Search Server4) Web (PIA) Server5) Switch Config Home6) Service Setup7) Replicate Config Home8) Refresh Config Homeq) Quit
Command to execute (1-8, q): 1
The PS_CONFIG_HOME location, also referred to as Config Home, corresponds to the current working directory. For information on how Config Home is set, see the PeopleTools: System and Server Administration product documentation.
Note. Make sure you change the directory from the PS_HOME on the file server to the PS_HOME on the application server.
2. Depending on your environment, you may see a message after the initial menu, which indicates that PSADMIN has modified the PS_CFG_HOME/peopletools.properties file with the current PS_HOME location:

Chapter 13A Configuring the Application Server on Windows
Copyright © 2018, Oracle and/or its affiliates. All Rights Reserved. 403
*********************************************************PS_CFG_HOME/peopletools.properties file has been updated. You should use the Config Home Refresh feature in PSAdmin to ensure that all of your domains are current. Alternatively, you may recreate all of your domains. Please press any key to continue...***********************************************************
This indicates that one of these situations exists:
• The PS_CFG_HOME that you are working with was used previously from a different PS_HOME. In this case, you should recreate any existing Application Server, Process Scheduler, Search, or PIA domains in this PS_CFG_HOME.
• You configured your environment such that PS_CFG_HOME is the same as PS_HOME. The first time you use PSADMIN to create a domain, it updates the PS_CFG_HOME/peopletools.properties file. Continue with the next step.
3. Specify 1 for Application Server.
4. Specify 4 for Import domain configuration.
--------------------------------------------PeopleSoft Application Server Administration-------------------------------------------- 1) Administer a domain 2) Create a domain 3) Delete a domain 4) Import domain configuration q) Quit
Command to execute (1-4, q): 4
5. Specify 1 for Import regular domain.
--------------------------------------------PeopleSoft Import Application Server Configuration--------------------------------------------
1) Import regular domain 2) Import IB Master Configuration q) Quit
Command to execute (1-2, q) : 1
6. Specify whether to import the domain configuration from a file (option 1) or from an existing application domain configuration (option 2).
--------------------------------------------PeopleSoft Import Application Server Configuration-------------------------------------------- 1) Import from file 2) Import from application domain q) Quit Command to execute (1-2, q) :
7. If you selected 1, provide the full path to the file psappsrv.cfg, and then specify the name of the domain you

Configuring the Application Server on Windows Chapter 13A
404 Copyright © 2018, Oracle and/or its affiliates. All Rights Reserved.
want to create. If you selected 2, go to the next step.
Enter full path to configuration file :C:\temp\oldconfig\psappsrv.cfg
Enter domain name to create :HRDMO
8. If you selected 2, to Import from application domain, provide the full path to the PS_CFG_HOME of the existing domain.
If importing from PeopleTools 8.49 or earlier, provide PS_HOME for PS_⇒CFG_HOME.
Enter PS_CFG_HOME of domain you wish to import: C:\Users\JSMITH\psft\pt⇒\8.56
If applicable, choose among the existing application server domains in the specified PS_CFG_HOME:
Tuxedo domain list: 1) HRDBA 2) HRDBB
Select domain number to import: 1
Enter a name for new domain: HRDMO
After you create the domain, continue to the next task to verify that the imported configuration parameters are appropriate for the newly created domain. You may need to change the following values:
• DBName
DBName can be the same or different, depending on which database the application server needs to point to.
• DBType
DBType depends on the database type of DBName.
• UserId and UserPswd
UserId and UserPswd are the user's choice.
• Workstation Listener Port
Workstation Listener Port will need to be modified if the old domain will be up and running in the same machine.
• Jolt Listener Port
Jolt Listener Port will also need a different number if the old domain will be up and running in the same machine.
• Jolt Relay Adapter Listener Port
Jolt Relay Adapter Listener Port will need a different number if the old domain will be up and running in the same machine, and will be using Jolt Relay Adapter.

Chapter 13A Configuring the Application Server on Windows
Copyright © 2018, Oracle and/or its affiliates. All Rights Reserved. 405
Task 13A-4-4: Setting Up a Custom Application Server Domain ConfigurationThe Quick-configure menu is initially displayed when you choose to configure your domain. This menu is intended for the commonly adjusted parameters—those most likely to change from domain to domain. However, there are additional configuration parameters that are not available through the Quick-configure menu. For such configuration parameters, you must use the Custom Configuration option, which you can access from the Quick-configure menu. Feel free to skip this procedure if you have already created and configured your Application Server using the Quick-configure menu and want to move forward.The following steps assume you will be using PSADMIN to specify parameter settings. To reconfigure an application server domain:1. Go to the PS_HOME\appserv directory and run the psadmin command.
Note. Make sure you change the directory from the PS_HOME on the file server to the PS_HOME on the application server.
2. Depending on your environment, you may see a message after the initial menu, which indicates that PSADMIN has modified the PS_CFG_HOME/peopletools.properties file with the current PS_HOME location:
*********************************************************PS_CFG_HOME/peopletools.properties file has been updated. You should use the Config Home Refresh feature in PSAdmin to ensure that all of your domains are current. Alternatively, you may recreate all of your domains. Please press any key to continue...***********************************************************
This indicates that one of these situations exists:
• The PS_CFG_HOME that you are working with was used previously from a different PS_HOME. In this case, you should recreate any existing Application Server, Process Scheduler, Search, or PIA domains in this PS_CFG_HOME.
• You configured your environment such that PS_CFG_HOME is the same as PS_HOME. The first time you use PSADMIN to create a domain, it updates the PS_CFG_HOME/peopletools.properties file. Continue with the next step.
3. Specify 1 for Application Server and press ENTER.
4. Specify 1 for Administer a domain and press ENTER.
5. Select the domain to administer and press ENTER.
6. Specify 4 for Configure this domain and press ENTER.
The option Configure this domain performs the following tasks:
• Shuts down the application server, if it is running. (Shutdown is required since the binary file PSTUXCFGmust be deleted and re-created to enable new configuration values. If there are no processes running when shutdown is attempted, an error will be displayed but the script continues on. This is normal.)
• Initiates an interactive dialog, prompting for configuration parameters.
• Updates psappsrv.cfg, generates psappsrv.ubb, and internally invokes Tuxedo's tmloadcf executable to create binary file PSTUXCFG used during the domain boot process.
7. Specify 15 for Custom Configuration and press ENTER.

Configuring the Application Server on Windows Chapter 13A
406 Copyright © 2018, Oracle and/or its affiliates. All Rights Reserved.
8. Respond to this prompt:
Do you want to change any config values (y/n):
• Specify y to start an interactive dialog to change or examine parameter values, as described in the next step.
Oracle recommends this option for more experienced users.
• Specify n if you have already edited psappsrv.cfg, skip the next step, and continue with the step to select server process options.
9. Complete the interactive dialog to specify configuration parameters.
Configuration parameters are grouped into sections. For each section, you are asked whether you want to change any parameters in that section, as in the following example:
Values for config section - Startup DBName= DBType= UserId= UserPswd= ConnectId= ConnectPswd= ServerName= StandbyDBName= StandbyDBType= StandbyUserId= StandbyUserPswd= InMemoryDBName= InMemoryDBType=Do you want to change any values (y/n)? [n]: y
• Specify y to change any parameter values for the current configuration section displayed.
You are prompted for each parameter value. Either specify a new value, or press ENTER to accept the default if applicable. After pressing ENTER, you are positioned at the next parameter in that section. When you are done with that section, you are again asked whether you want to re-edit any of the values you changed.
• Enter the user ID and user password that has security to start the application server. All application databases are delivered with one or more application server security users, usually PS or VP1.
The password you enter is hidden by masking characters.
• The parameters StandbyDBName, StandbyDBType, StandbyUserId, and StandbyUserPswd, are used for astandby database in an Oracle environment.
See PeopleTools: Data Management, "Implementing Oracle Active Data Guard."
• The parameters InMemoryDBName and InMemoryDBType are reserved for internal use.
• The WSL, JSL, and JRAD port numbers, which are found in other sections of the configuration parameters, have default values of 7000, 9000, and 9100, respectively. These values must be unique for each application server domain. You may alter the port values if necessary to ensure that they are unique
• If you do not wish to change any values, specify n and you will be prompted for the next configuration section.
Note. When setting up your application server, make a note of the values you use for Database Name, Application Server Name (the machine name), and JSL Port. You will need to use these same values wheninstalling the PeopleSoft Pure Internet Architecture.

Chapter 13A Configuring the Application Server on Windows
Copyright © 2018, Oracle and/or its affiliates. All Rights Reserved. 407
See PeopleTools: System and Server Administration.
10. Select server process options.
At this point, you will be prompted to select server process options. If this is your initial installation, we suggest you accept the defaults. A message similar to this appears:
Setting Log Directory to the default... [PS_SERVDIR\LOGS]Configuration file successfully created.Loading new configuration...
The message "Loading new configuration" indicates that PSADMIN is generating a binary file named PSTUXCFG, which is used to boot the application server. At this point, your application server should be properly configured.
Task 13A-4-5: Troubleshooting Common ErrorsFor troubleshooting help, you can access a log file through the PSADMIN PeopleSoft Domain Administration menu. The following list includes possible errors and troubleshooting tips.
• Use PSADMIN menu option 6 for Edit configuration/log files menu to check for errors in <PS_CFG_HOME>\appserv\<domain>\LOGS\APPSRV_mmdd.log and <PS_CFG_HOME>\appserv\<domain>\LOGS\TUXLOG.mmddyy.
• If a PeopleSoft server such as PSAPPSRV fails, examine your configuration parameters. The failure of the PSAPPSRV process is often signalled by the message "Assume failed"—which means the process has failed to start. Check the SIGNON section for misspelled or invalid database name, an invalid or unauthorized OprId, or ConnectId or ServerName is missing or invalid. Finally, make sure the database connectivity is set correctly.
• If a WSL (or JSL) fails to start, try specifying another port number (it may be in use already by another application server domain process).
• If you are unable to start the BBL, check that your Tuxedo is installed fully and that the directory really exists.
• If the installation includes more than one application server domain on a single machine, before booting the second domain, adjust the REN server configuration to avoid conflict in one of these ways:
• Use PSADMIN to disable Event Notification (option 8 on the Quick-configure menu) for the second and subsequent app server domains.
• Change default_http_port to a value other than 7180.
See Also
PeopleTools: System and Server AdministrationPeopleTools: MultiChannel Framework


Copyright © 2018, Oracle and/or its affiliates. All Rights Reserved. 409
Chapter 13B
Configuring the Application Server on UNIX
This chapter discusses:
• Understanding the Application Server
• Understanding the Application Server Domain Processes
• Prerequisites
• Creating a Wallet for the SSL/TLS Setup
• Setting Environment Variables
• Setting Up COBOL for Remote Call
• Verifying Database Connectivity
• Creating, Configuring, and Starting an Initial Application Server Domain
Understanding the Application Server
The information in this chapter is provided to help you configure your PeopleSoft application server.
Note. We do not support application servers on z/OS.
Note. COBOL is not needed for PeopleSoft PeopleTools or for PeopleSoft Applications that contain no COBOL programs. Check the information on My Oracle Support, and your application-specific documentation, for the details on whether your application requires COBOL.
Oracle supports application servers for the PeopleSoft installation on several UNIX operating system platforms. For detailed information, consult the certification information on My Oracle Support. The application server support can be found on the certification pages for PeopleSoft systems.
Note. Oracle supports a number of versions of UNIX and Linux in addition to Microsoft Windows for the PeopleSoft installation. Throughout this book, there are references to operating systems. Where necessary, this book refers to specific operating systems by name (for example, Oracle Solaris, IBM AIX, or Linux); however, for simplicity the word UNIX is sometimes used to refer to all UNIX-like operating systems, including IBM AIX,Linux, HP-UX, and Oracle Solaris for SPARC. For the most up-to-date information on operating system support for your database platform, see the Certification information on My Oracle Support.
Application servers are not supported on z/OS because Oracle Tuxedo cannot run on the mainframe. For this reason, you can only install an application server in a "physical" three-tier configuration—with the application server on a machine separate from the database server machine. You cannot run a "logical" three-tier configuration—with the application server on the same machine as the database server.The configuration and log files for application server domains reside in PS_CFG_HOME. If you do not set a PS_CFG_HOME environment variable before beginning the application server configuration, the system installs it in a default location based on the current user's settings, as follows:

Configuring the Application Server on UNIX Chapter 13B
410 Copyright © 2018, Oracle and/or its affiliates. All Rights Reserved.
$HOME/psft/pt/<peopletools_version>
See "Preparing for Installation," Defining Installation Locations.
See Also
"Preparing for Installation," Understanding PeopleSoft Servers and ClientsPeopleTools: System and Server Administration, "Using PSADMIN Menus"PeopleTools: Data ManagementMy Oracle Support, Certifications"Setting Up the Install Workstation""Installing and Compiling COBOL on UNIX"
Understanding the Application Server Domain Processes
On most platforms (IBM AIX, Oracle Solaris, Linux, and HP-UX Itanium) no changes are required from the system defaults, in order to allow the "small" and "development" domains that are shipped with PeopleSoft PeopleTools to boot successfully.Refer to the performance documentation for guidance in configuring your system to run larger domains. That document describes the suggested minimum kernel settings for running PeopleSoft PeopleTools in a real-world environment. See PeopleTools Performance Guidelines Red Paper on My Oracle Support (search for the article title).Permanently changing system-wide parameters generally requires root privileges, and any changes to the kernel configuration of your operating system should be done with care.
Prerequisites
Before beginning this procedure, you should have completed the following tasks:
• Installed your application server.
See "Using the PeopleSoft Installer," Planning Your Initial Configuration.
• Installed the supported version of Oracle Tuxedo
See "Installing Additional Components."
• Set up SSL/TLS protocol for the workstation connection.
The Secure Socket Layers/Transport Layer Security (SSL/TLS) protocol is supported for Workstation Listener and Jolt Listener ports for the current PeopleSoft PeopleTools release. The application server domain configuration requires a wallet. You can use the delivered wallet or create your own.
See PeopleTools: Integration Broker, "Installing Web Server-Based Digital Certificates."
• Granted authorization to a PeopleSoft user ID to start the application server.
The database configuration procedure includes a step for setting up the user ID with authorization to start the application server. See the application-specific installation instructions for information on the user IDs for your PeopleSoft application. See the PeopleTools: Security Administration product documentation for information on PeopleSoft PeopleTools delivered user profiles.

Chapter 13B Configuring the Application Server on UNIX
Copyright © 2018, Oracle and/or its affiliates. All Rights Reserved. 411
See "Creating a Database," Creating Data Mover Import Scripts.
• Run the following SQL statements on your database server to review and if needed, update the PSCLASSDEFN table:
SELECT CLASSID, STARTAPPSERVER FROM PSCLASSDEFNWHERE CLASSID IN (SELECT OPRCLASS FROM PSOPRCLS WHERE OPRID='<OPRID>')UPDATE PSCLASSDEFN SET STARTAPPSERVER=1 WHERE CLASSID='<CLASSID>'
Note. Installers typically use VP1 or PS to test the application server. If these users are deleted or their passwords are changed, the application server will no longer be available. To avoid this problem, you can set up a new operator (called PSADMIN or PSASID, for instance) with privileges to start the application server. If you do this, you can use the new operator for your application servers and you won't need to change the password each time VP1 or PS is changed.
Task 13B-1: Creating a Wallet for the SSL/TLS Setup
This section discusses:
• Using the Delivered Wallet
• Creating a Wallet with OpenSSL
Task 13B-1-1: Using the Delivered WalletBefore you configure the application server to use the SSL/TLS protocol, you need a wallet. Use these instructions to create wallets for the application server and workstation client.
Note. The term "Oracle Wallet" is sometimes used in the software and documentation, for example in PSADMIN custom configuration, to refer to wallets on all RDBMS. In this context it does not refer to an entity specific to an Oracle RDBMS.
You also have the option to use the wallets that are included with the PeopleSoft PeopleTools installation. The default wallet for the application server is named psft and is located in $PS_SERVDIR/security. When you configure the application server, define the default wallet as follows:
• SEC_PRINCIPAL_LOCATION=%PS_SERVDIR%\security
• SEC_PRINCIPAL_NAME=psft
To specify the default wallet for the workstation client:
• SEC_PRINCIPAL_LOCATION=PS_HOME\bin\client\winx86\security
• SEC_PRINCIPAL_NAME=wscpsft
The default Java Keystore file used for the SSL/TLS configuration for JSL ports is located in <PIA_HOME>\webserv\<DOMAIN_NAME>\piaconfig\keystore\pskey. If you change the Keystore password in this file, you must also provide the password in the PIA configuration.properties file at <PIA_HOME>\webserv\<DOMAIN_NAME>\application\peoplesoft\PORTAL.war\WEB_INF\psftdoc\ps.
Task 13B-1-2: Creating a Wallet with OpenSSLThis section discusses:
• Defining OpenSSL Options

Configuring the Application Server on UNIX Chapter 13B
412 Copyright © 2018, Oracle and/or its affiliates. All Rights Reserved.
• Creating a Server Wallet for the Application Server Domain with OpenSSL
• Creating a Client Wallet for the Workstation Client with OpenSSL
• Adding the Server's Certificate to the Client's Trust Store with OpenSSL
Defining OpenSSL Options
An example of an OpenSSL command that can be used to create a wallet is as follows.For more information, see the OpenSSL documentation.
openssl pkcs12 -export -out ewallet.p12 -inkey server.key -in server.crt -⇒chain -CAfile caCert.crt -passout pass:<password>
• -export: indicates that a PKCS 12 file is being created
• -chain: specifies that an attempt is made to include the entire certificate chain of the user certificate
• -inkey: specifies the private key file
• -in: specifies the file that contains the user certificate and any other certificates in the certificate chain
• -CAfile: specifies a file containing trusted certificates
• -out: specifies the output file name, which must be ewallet.p12 for an Oracle Wallet for PeopleSoft installations.
• -passin: specifies the password for the private key file
• -passout: specifies the password for the newly created wallet
Creating a Server Wallet for the Application Server Domain with OpenSSL
This section gives an example of creating a wallet for the application server with the open-source tool OpenSSL.1. Create a directory, for example wallet.server.
For example on UNIX:
mkdir /home/wallet.server
2. Change directory to wallet.server.
cd wallet.server
3. Enter the following command:
openssl genrsa -out server.key 4096
4. Enter the following command.
openssl req -new -key server.key -out server.csr -subj <subject>
For example:
openssl req -new -key server.key -out server.csr -subj '/C=country/CN=⇒commonName'
The <subject> values in this step and step 7 are used to replace the specified data in an input request, and output a modified request. The format for <subject> is '/type0=value0/type1=value1/type2=....'. Characters must be escaped with a backslash (\), and no spaces are skipped. Use the following fields:

Chapter 13B Configuring the Application Server on UNIX
Copyright © 2018, Oracle and/or its affiliates. All Rights Reserved. 413
• /C — Country
• /CN — Common name
• /L — Location
• /O — Organization
• /OU — Organizational Unit
• /ST — State
5. Enter the following command:
openssl genrsa -out caCert.key 4096
6. Enter the following command,
openssl req -new -x509 -days 1826 -key caCert.key -out caCert.crt -subj ⇒<subject>
For example:
openssl req -new -x509 -days 1826 -key caCert.key -out caCert.crt -subj⇒ '/C=US/OU=Class 2 Public Primary Certification Authority/O=My⇒Organization'
7. Enter the following command:
openssl x509 -req -days 730 -in server.csr -CA caCert.crt -CAkey ca⇒Cert.key -set_serial 01 -out server.crt
8. Enter the following command to create the wallet ewallet.p12 and specify the server password:
openssl pkcs12 -export -out ewallet.p12 -inkey server.key -in⇒ server.crt -chain -CAfile caCert.crt -passout pass:<server_password>
Creating a Client Wallet for the Workstation Client with OpenSSL
This section gives an example of creating a client wallet with the open-source tool OpenSSL.1. Create a directory, for example wallet.client, and change to that directory.
mkdir wallet.clientcd wallet.client
2. Copy the server's trust store to the client wallet.
cp wallet.server\caCert.crt wallet.clientcp wallet.server\caCert.key wallet.client
3. Enter these commands:
openssl genrsa -out client.key 4096
4. Run this command:
openssl req -new -key client.key -out client.csr -subj <subject>
For example:
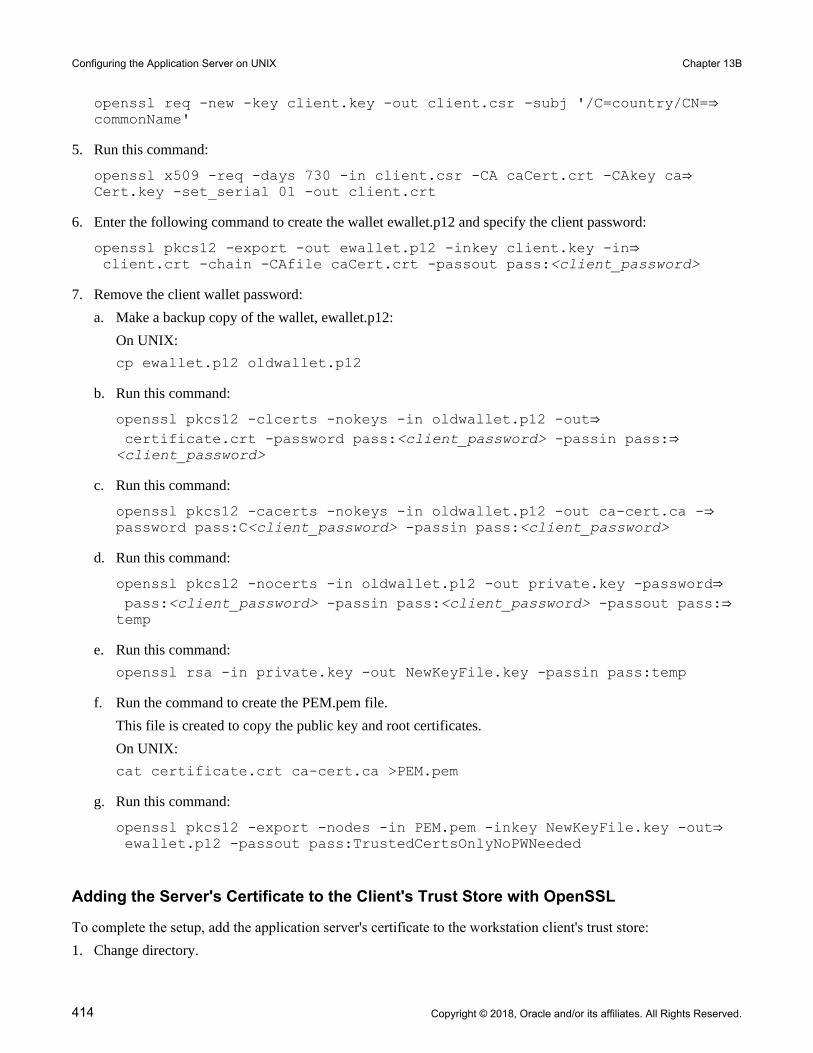
Configuring the Application Server on UNIX Chapter 13B
414 Copyright © 2018, Oracle and/or its affiliates. All Rights Reserved.
openssl req -new -key client.key -out client.csr -subj '/C=country/CN=⇒commonName'
5. Run this command:
openssl x509 -req -days 730 -in client.csr -CA caCert.crt -CAkey ca⇒Cert.key -set_serial 01 -out client.crt
6. Enter the following command to create the wallet ewallet.p12 and specify the client password:
openssl pkcs12 -export -out ewallet.p12 -inkey client.key -in⇒ client.crt -chain -CAfile caCert.crt -passout pass:<client_password>
7. Remove the client wallet password:
a. Make a backup copy of the wallet, ewallet.p12:
On UNIX:
cp ewallet.p12 oldwallet.p12
b. Run this command:
openssl pkcs12 -clcerts -nokeys -in oldwallet.p12 -out⇒ certificate.crt -password pass:<client_password> -passin pass:⇒<client_password>
c. Run this command:
openssl pkcs12 -cacerts -nokeys -in oldwallet.p12 -out ca-cert.ca -⇒password pass:C<client_password> -passin pass:<client_password>
d. Run this command:
openssl pkcs12 -nocerts -in oldwallet.p12 -out private.key -password⇒ pass:<client_password> -passin pass:<client_password> -passout pass:⇒temp
e. Run this command:
openssl rsa -in private.key -out NewKeyFile.key -passin pass:temp
f. Run the command to create the PEM.pem file.
This file is created to copy the public key and root certificates.
On UNIX:
cat certificate.crt ca-cert.ca >PEM.pem
g. Run this command:
openssl pkcs12 -export -nodes -in PEM.pem -inkey NewKeyFile.key -out⇒ ewallet.p12 -passout pass:TrustedCertsOnlyNoPWNeeded
Adding the Server's Certificate to the Client's Trust Store with OpenSSL
To complete the setup, add the application server's certificate to the workstation client's trust store:1. Change directory.

Chapter 13B Configuring the Application Server on UNIX
Copyright © 2018, Oracle and/or its affiliates. All Rights Reserved. 415
cd %ORACLE_HOME%\jdk\bin
2. Add the certificate to the trust store found in the web server directory for the application server domain.
keytool -import -file <server_wallet>/<certificate> -alias srvcert -⇒keystore <PIA_HOME>\webserv\<DOMAIN_NAME>\piaconfig\keystore\pskey -⇒storepass password -noprompt
For example, on UNIX:
keytool -import -file wallet.server/caCert.crt -alias srvcert -keystore⇒ /home/psft_user/psft/pt/8.56/webserv/ps/piaconfig/keystore/pskey -⇒storepass password -noprompt
Task 13B-2: Setting Environment Variables
Telnet to your UNIX system. Log in and ensure the following environment variables are set appropriately.
Note. The environment variables for Tuxedo must be set explicitly; they are not set by running psconfig.sh. Thesecan be also set using the .profile file in the user's home directory.
• $TUXDIR must be set to the correct Oracle Tuxedo installation directory. For example:
TUXDIR=/home/user/Oracle/tuxedo12cR1; export TUXDIR
• $TUXDIR/lib must be prepended to LD_LIBRARY_PATH, LIBPATH, or SHLIB_PATH, whichever is appropriate for your platform. For example:
LD_LIBRARY_PATH=$TUXDIR/lib:$LD_LIBRARY_PATH; export LD_LIBRARY_PATH
• $TUXDIR/bin must be prepended to PATH. For example:
PATH=$TUXDIR/bin:$PATH; export PATH
One method to ensure that the following PeopleSoft environment variables are set is to source psconfig.sh. Go to the PS_HOME directory, and enter the following command: . ./psconfig.sh
Note. After running psconfig.sh, you can invoke the psadmin utility from any location.
Task 13B-3: Setting Up COBOL for Remote Call
Remote Call is a PeopleCode feature that launches a COBOL program from an application server, PeopleCode program or a batch Application Engine PeopleCode program and waits for it to complete execution before continuing. The execution of a COBOL program via Remote Call is completely independent of the Process Scheduler. You need to set up a COBOL runtime environment and COBOL executables on the application server to support Remote Call.See "Installing and Compiling COBOL on UNIX."
Note. If your application does not contain COBOL programs, you do not need to purchase or compile COBOL.

Configuring the Application Server on UNIX Chapter 13B
416 Copyright © 2018, Oracle and/or its affiliates. All Rights Reserved.
Task 13B-4: Verifying Database Connectivity
Before continuing, it is critical to verify connectivity to the database that the application server domain will use. To verify connectivity, connect to the database server from the application server using the native SQL tool on theapplication server.If you are running DB2 for z/OS, you can issue this command from the UNIX prompt:db2 connect to <database name> user <z/OS ID> using <password>
If you are running DB2 for z/OS and are setting up your application server on a Microsoft Windows machine, enter the preceding command at a DB2 Connect command window, or use DB2 Connect's Command Center or Client Configuration Assistant.See "Installing and Configuring DB2 Connect."
Task 13B-5: Creating, Configuring, and Starting an Initial Application Server Domain
This section discusses:
• Creating, Configuring, and Starting the Application Server Domain
• Testing the Three-Tier Connection
• Importing an Existing Application Server Domain Configuration
• Setting Up a Custom Application Server Domain Configuration
• Troubleshooting Common Errors
Task 13B-5-1: Creating, Configuring, and Starting the Application Server DomainTo create, configure, and start the application server domain:1. Run the psadmin command.
You see the PeopleSoft Server Administration menu, as in this example:
--------------------------------PeopleSoft Server Administration--------------------------------PS_CFG_HOME: /home/JSMITH/peopletools/8.56PS_HOME: /home/PT856PS_APP_HOME: /home/HR92
1) Application Server2) Process Scheduler3) Search Server4) Web (PIA) Server5) Switch Config Home6) Replicate Config Home

Chapter 13B Configuring the Application Server on UNIX
Copyright © 2018, Oracle and/or its affiliates. All Rights Reserved. 417
7) Refresh Config Homeq) Quit
Command to execute (1-7, q): 1
2. Depending on your environment, you may see a message after the initial menu, which indicates that PSADMIN has modified the PS_CFG_HOME/peopletools.properties file with the current PS_HOME location:
*********************************************************PS_CFG_HOME/peopletools.properties file has been updated. You should use the Config Home Refresh feature in PSAdmin to ensure that all of your domains are current. Alternatively, you may recreate all of your domains. Please press any key to continue...***********************************************************
This indicates that one of these situations exists:
• The PS_CFG_HOME that you are working with was used previously from a different PS_HOME. In this case, you should recreate any existing Application Server, Process Scheduler, Search, or PIA domains in this PS_CFG_HOME.
• You configured your environment such that PS_CFG_HOME is the same as PS_HOME. The first time you use PSADMIN to create a domain, it updates the PS_CFG_HOME/peopletools.properties file. Continue with the next step.
3. Specify 1 for Application Server and press ENTER.
4. Specify 2 to Create a domain and press ENTER.
--------------------------------------------PeopleSoft Application Server Administration-------------------------------------------- 1) Administer a domain 2) Create a domain 3) Delete a domain 4) Import domain configuration q) Quit
Command to execute (1-4, q): 2
5. Specify the domain name.
In this example the domain name is HRDMO:
Please enter name of domain to create :HRDMO
Domain names are case sensitive and must be eight characters or less. The domain name is used to create a directory name under the PS_CFG_HOME/appserv directory.
See the information on PS_CFG_HOME and server domain configuration in the PeopleTools: System and Server Administration product documentation.
6. Specify 4 for small if this is your initial domain installation, press ENTER.
See PeopleTools: System and Server Administration.
7. After the system creates the domain, the PeopleSoft Application Server Administration menu appears with a Quick-configure menu similar to this:
---------------------------------------------------------

Configuring the Application Server on UNIX Chapter 13B
418 Copyright © 2018, Oracle and/or its affiliates. All Rights Reserved.
Quick-configure menu -- domain: HRDMO--------------------------------------------------------- Features Settings ========== ========== 1) Pub/Sub Servers : No 17) DBNAME :[HRDMO] 2) Quick Server : No 18) DBTYPE :[DB2ODBC] 3) Query Servers : No 19) UserId :[VP1] 4) Jolt : Yes 20) UserPswd :[] 5) Jolt Relay : No 21) DomainID :[TESTSERV] 6) WSL : No 22) AddToPATH :[ ] 7) PC Debugger : No 23) ConnectID :[people] 8) Event Notification : Yes 24) ConnectPswd :[] 9) MCF Servers : No 25) DomainConnectPswd:[] 10) Perf Collator : No 26) WSL Port :[7000] 11) Analytic Servers : Yes 27) WSL SSL Port :[7010] 12) Domains Gateway : No 28) JSL Port :[9000] 13) Push Notifications : No 29) JSL SSL Port :[9010] 30) JRAD Port :[9100] Actions ========= 14) Load config as shown 15) Custom configuration 16) Edit environment settings h) Help for this menu q) Return to previous menu
HINT: Enter 17 to edit DBNAME, then 14 to load
Enter selection (1-28, h, or q):
Note. If your installation includes more than one application server domain on a given machine, read the troubleshooting section for more information.
See Troubleshooting Common Errors.
8. If you need to modify any of the values for these settings, enter the number next to the parameter name, press ENTER, then type the new value, and press ENTER again.
If you need to change any of the features, type the number next to the feature name and press ENTER.
9. Configure the WSL to boot by changing option 6 to Yes.
Enter 6, and press ENTER.
10. If you intend to use the PeopleSoft Report Distribution system, you must select Yes for feature 8, Event Notification.
This enables the REN server, which is used by the "run to window" functionality of the Report Distribution system. The Report Distribution system, MultiChannel Framework, and Optimization Framework use REN servers. You must also remember to enter an Authentication Token Domain when installing the PeopleSoft Pure Internet Architecture (PIA).
11. If you are configuring an application server domain to support applications based on the PeopleSoft MultiChannel Framework (such as PeopleSoft CRM ERMS), select feature 9, MCF Servers.
See the information on configuring REN Servers in the product documentation.
See PeopleTools: MultiChannel Framework.

Chapter 13B Configuring the Application Server on UNIX
Copyright © 2018, Oracle and/or its affiliates. All Rights Reserved. 419
12. Enter the values for the 20) UserPswd and 24) ConnectPswd that you specified during the database configuration.
Reenter each password to verify the value. The password is hidden by masking characters as you type and in the Quick-configure menu.
13. If you want to set a Domain Connection password, enter 25 and specify a password of 8 characters or less.
Reenter the password to verify the value. The password is hidden by masking characters as you type and in the Quick-configure menu.
The Domain Connection password is optional. You can specify a value or leave it blank. However, if you do specify a value, you must supply the same value when installing the PeopleSoft Pure Internet Architecture, to ensure the connection to the Application Server.
14. To set up the Workstation Listener for SSL/TLS protocol, enter 27 for WSL SSL Port, and specify an available port number.
The default port number is 7010.
15. To set up the Jolt listener for SSL/TLS protocol, enter 29 for JSL SSL Port, and specify an available port number.
The default port number is 9010.
16. Use the custom configuration menu to specify the settings for SSL/TLS encryption and the wallet location.
See PeopleTools: Integration Broker, "Installing Web Server-Based Digital Certificates."
a. To specify the minimum and maximum encryption for SSL/TLS, select 15 for Custom Configuration.
b. Reply y, and press ENTER, at this prompt:
Do you want to change any config values (y/n) [n]?
c. Reply n, and press ENTER, at this prompt:
Do you want to change any values (y/n) [n]?
Continue to enter n, for No, for all sections until you see the Workstation Listener section, and then answer y. (Be aware that there are several sections.)
d. If necessary, change the values for WSL minimum and maximum encryption to correspond to your installed SSL/TLS cipher. The default minimum is 0 and the default maximum is 256. The maximum is the number of bits that indicates the highest level of encryption possible for the installed SSL/TLS version.
Values for config section - Workstation Listener Address=%PS_MACH% Port=7000 SSL Port=7010 WSL Min Encryption=0 WSL Max Encrytion=256 Min Handlers=1 Max Handlers=2 Max Clients per Handler=40 Client Cleanup Timeout=60 Init Timeout=5 Tuxedo Compression Threshold=5000
e. Accept the defaults for the next series of questions until asked if you want Oracle Wallet configured. In this case, answer y.
f. Specify the values for the Oracle Wallet location, name, and password, or accept the defaults.
You can use an existing wallet that you created, or use the default wallet found in the security directory.

Configuring the Application Server on UNIX Chapter 13B
420 Copyright © 2018, Oracle and/or its affiliates. All Rights Reserved.
Values for config section - Oracle Wallet SEC_PRINCIPAL_LOCATION=%PS_SERVDIR%\security SEC_PRINCIPAL_NAME=psft SEC_PRINCIPAL_PASSWORD=
g. Accept the defaults for the next series of questions until asked if you want the JOLT Listener configured. In this case, answer y
h. If necessary, change the values for JSL minimum and maximum encryption to correspond to your installedSSL/TLS cipher. The default minimum is 0 and the default maximum is 256. The maximum is the numberof bits that indicates the highest level of encryption possible for the installed SSL/TLS version.
Values for config section - JOLT Listener Address=%PS_MACH% Port=9000 SSL Port=9010 JSL Min Encryption=0 JSL Max Encrytion=256 Min Handlers=1 Max Handlers=2 Max Clients per Handler=40 Client Cleanup Timeout=10 Init Timeout=5 Client Connection Mode=ANY Jolt Compression Threshold=1000000
i. Accept the default for the remaining questions; the configuration will load automatically.
17. If you are installing a REN server:
a. Enter 15 for Custom configuration.
b. Reply y, and press ENTER, at this prompt:
Do you want to change any config values (y/n) [n]?
c. Reply n, and press ENTER, at this prompt:
Do you want to change any values (y/n) [n]?
Continue to enter n, for No, for all sections until you see the PSRENSRV section, and then answer y. (Be aware that there are several sections.)
d. Leave the defaults for all settings except for default_auth_token, which you should set to the domain namefor your web server.
Note. The default_auth_token setting should be identical to the Authentication Token Domain that you setduring PIA installation.
See "Setting Up the PeopleSoft Pure Internet Architecture in GUI Mode."
e. Accept the defaults for the next series of questions until asked if you want Event Notification configured. In this case, answer y.
f. Accept the default for the remaining questions; the configuration will load automatically.
18. If you are not installing a REN server, after you update the settings you can load the configuration by entering 14, for Load config as shown, from the Quick-configure menu.
19. To start the application server (whether you installed a REN server or not), select 1, Boot this domain, from the PeopleSoft Domain administration menu.

Chapter 13B Configuring the Application Server on UNIX
Copyright © 2018, Oracle and/or its affiliates. All Rights Reserved. 421
20. Select 1, Boot (Serial Boot) or 2, Parallel Boot, from the PeopleSoft Domain Boot Menu.
Note. The messages you see and the number of processes started will depend on the options you chose during configuration.
21. If you plan to continue with PIA installation and testing, do not shut down the application server at this time.
22. If you want to shut down your PeopleSoft application server domain later, follow these simple steps:
a. From the PeopleSoft Domain Administration menu, enter 2 for Domain shutdown menu.
b. From the PeopleTools Domain Shutdown Menu, enter 1 for Normal shutdown.
You see messages about the application server processes being shut down. The number of processes stopped will vary depending on the number of processes that started when you booted the domain.
c. Enter q to quit the PeopleSoft Domain Administration Menu.
Task 13B-5-2: Testing the Three-Tier ConnectionIf you get an error message when you try to sign in to the Application Server in Application Designer (that is, three-tier mode), it may be due to an incorrect server name or port number, because the database server is not running, or because the application server was not booted. To test a three-tier connection from the PeopleTools Development Environment (the Windows-based client):1. Start Configuration Manager with one of these methods:
• On Microsoft Windows 7, select Start, Programs, PeopleTools 8.56, Configuration Manager.
• On Microsoft Windows 8 or 2012 R2, access the Apps screen and navigate to PeopleTools 8.56, Configuration Manager.
• Run PS_HOME\bin\client\winx86\pscfg.exe.
2. Select the Profile Tab. Highlight Default and select Edit.
3. On the Edit Profile dialog box, select Application Server as the Connection Type.
4. Enter values for these parameters:
• Application Server Name
• Machine Name or IP Address
• Port Number (WSL)
Enter the WSL port that you specified when creating the application server domain. If you want to use the SSL/TLS protocol for connection, enter the WSL SSL port number (the default is 7010). If you want to use the LLE protocol, enter the non-SSL WSL port (the default is 7000).
• Domain Connection Password and Domain Connection Password (confirm)
Specify a value for the password, and repeat your entry for confirmation. The password must be 8 characters or less.
This password is optional. If you did not set the Domain Connection Password in Configuration Manager or in the Application Server configuration, leave it blank. If you specify a password, you must supply the same password during the PeopleSoft Pure Internet Architecture installation for a successful connection between the Application Server and PeopleSoft Pure Internet Architecture.
See the PeopleTools: System and Server Administration product documentation for information on using PeopleSoft Configuration Manager and PSADMIN.
• Wallet Location
Enter the location that you specified for the client wallet. The default location is

Configuring the Application Server on UNIX Chapter 13B
422 Copyright © 2018, Oracle and/or its affiliates. All Rights Reserved.
%PS_HOME%/bin/client/winx86/security.
• Wallet Name
Enter the name for the client wallet that you specified. The default name is wscpsft.
5. Select Set to add the definition to the list and select OK to close the dialog box.
6. On the Configuration Manager dialog box, select the Startup tab.
7. Select Application Server from the Database Type list. Your application server name should be displayed.
8. Enter the values for User ID, Connect ID, and password.
9. Click OK.
Note. Confirm that the application server is running by booting it from PSADMIN. Select 1, Boot this domain, from the PeopleSoft Domain administration menu. Select option 1, Boot (Serial Boot) or 2, Parallel Boot, from the PeopleSoft Domain Boot menu.
10. Start Application Designer with one of these methods:
• On Microsoft Windows 7, select Start, Programs, PeopleTools 8.56, Application Designer.
• On Microsoft Windows 8 or 2012 R2, access the Apps screen and navigate to PeopleTools 8.56, Application Designer.
• Run PS_HOME\bin\client\winx86\pside.exe.
11. In the PeopleSoft Signon dialog box:
• Select Application Server as the Connection Type.
• Confirm that the Application Server Name is correct.
• Enter values for User ID and password.
12. Select OK to open Application Designer.
If you see the following error message when you try to sign in to the Application Server in Application Designer:
Network API: "Could not connect to application server 'Application Server⇒ Name' Make sure the PeopleTools authentication server (PSAUTH) is booted."
This may indicate a problem with the Domain Connection Password. For example, if the password set in the Application Server configuration file does not match the value in Configuration Manager, you may get this error message when you sign in to Application Designer in three-tier mode. Check the Application Server logs for moreinformation.
Task 13B-5-3: Importing an Existing Application Server Domain ConfigurationIf you have an existing application server configuration for a previous PeopleSoft PeopleTools release, you can import it to create a new domain. You can import an existing domain configuration by specifying a file or by specifying the path to an existing domain. To import from a file, you must use the psappsrv.cfg file found inside an existing application server domain folder (you must specify the full path to psappsrv.cfg). This file can be located anywhere in the file system, but must be named psappsrv.cfg. To import from an existing domain configuration that you created in the current PeopleSoft PeopleTools release, you must specify PS_CFG_HOME and the name of an existing application server domain. (If you are importing a domain from a release before PeopleSoft PeopleTools 8.50, note that the domains were created in PS_HOME, and that is the path that you should provide.)To import an existing application server domain configuration:

Chapter 13B Configuring the Application Server on UNIX
Copyright © 2018, Oracle and/or its affiliates. All Rights Reserved. 423
1. Run the psadmin command.
You see the PeopleSoft Server Administration menu, as in this example:
--------------------------------PeopleSoft Server Administration--------------------------------PS_CFG_HOME: /home/JSMITH/peopletools/8.56PS_HOME: /home/PT856PS_APP_HOME: /home/HR92
1) Application Server2) Process Scheduler3) Search Server4) Web (PIA) Server5) Switch Config Home6) Replicate Config Home7) Refresh Config Homeq) Quit
Command to execute (1-7, q): 1
The PS_CONFIG_HOME location, also referred to as Config Home, corresponds to the current working directory. For information on how Config Home is set, see the PeopleTools: System and Server Administration product documentation.
2. Depending on your environment, you may see a message after the initial menu, which indicates that PSADMIN has modified the PS_CFG_HOME/peopletools.properties file with the current PS_HOME location:
*********************************************************PS_CFG_HOME/peopletools.properties file has been updated. You should use the Config Home Refresh feature in PSAdmin to ensure that all of your domains are current. Alternatively, you may recreate all of your domains. Please press any key to continue...***********************************************************
This indicates that one of these situations exists:
• The PS_CFG_HOME that you are working with was used previously from a different PS_HOME. In this case, you should recreate any existing Application Server, Process Scheduler, Search, or PIA domains in this PS_CFG_HOME.
• You configured your environment such that PS_CFG_HOME is the same as PS_HOME. The first time you use PSADMIN to create a domain, it updates the PS_CFG_HOME/peopletools.properties file. Continue with the next step.
3. Specify 1 for Application Server.
4. Specify 4 for Import domain configuration.
--------------------------------------------PeopleSoft Application Server Administration-------------------------------------------- 1) Administer a domain 2) Create a domain 3) Delete a domain

Configuring the Application Server on UNIX Chapter 13B
424 Copyright © 2018, Oracle and/or its affiliates. All Rights Reserved.
4) Import domain configuration q) Quit
Command to execute (1-4, q): 4
5. Specify 1 for Import regular domain.
--------------------------------------------PeopleSoft Import Application Server Configuration--------------------------------------------
1) Import regular domain 2) Import IB Master Configuration q) Quit
Command to execute (1-2, q) : 1
6. Specify whether to import the domain configuration from a file (option 1) or from an existing application domain configuration (option 2).
--------------------------------------------PeopleSoft Import Application Server Configuration-------------------------------------------- 1) Import from file 2) Import from application domain q) Quit Command to execute (1-2, q) :
7. If you selected 1, provide the full path to the file psappsrv.cfg, and then specify the name of the domain you want to create. If you selected 2, go to the next step.
Enter full path to configuration file:/home/oldconfig/psappsrv.cfg
Enter domain name to create :HRDMO
8. If you selected 2, to Import from application domain, provide the full path to the PS_CFG_HOME of the existing domain.
If importing from PeopleTools 8.49 or earlier, provide PS_HOME for PS_⇒CFG_HOME.
Enter PS_CFG_HOME of domain you wish to import: /home/JSMITH⇒/peopletools/8.56
If applicable, choose among the existing application server domains in the specified PS_CFG_HOME:
Tuxedo domain list: 1) HRDBA 2) HRDBB
Select domain number to import: 1
Enter a name for new domain: HRDMO

Chapter 13B Configuring the Application Server on UNIX
Copyright © 2018, Oracle and/or its affiliates. All Rights Reserved. 425
After you create the domain, continue to the next task to verify that the imported configuration parameters are appropriate for the newly created domain. You may need to change the following values:
• DBName
DBName can be the same or different, depending on which database the application server needs to point to.
• DBType
DBType depends on the database type of DBName.
• UserId and UserPswd
UserId and UserPswd are the user's choice.
• Workstation Listener Port
Workstation Listener Port will need to be modified if the old domain will be up and running in the same machine.
• Jolt Listener Port
Jolt Listener Port will also need a different number if the old domain will be up and running in the same machine.
• Jolt Relay Adapter Listener Port
Jolt Relay Adapter Listener Port will need a different number if the old domain will be up and running in the same machine, and will be using Jolt Relay Adapter.
Task 13B-5-4: Setting Up a Custom Application Server Domain ConfigurationThe Quick-configure menu is initially displayed when you choose to configure your domain. This menu is intended for the commonly adjusted parameters—those most likely to change from domain to domain. However, there are additional configuration parameters that are not available through the Quick-configure menu. For such configuration parameters, you must use the Custom Configuration option, which you can access from the Quick-configure menu. Feel free to skip this procedure if you have already created and configured your Application Server using the Quick-configure menu and want to move forward.The following steps assume you will be using PSADMIN to specify parameter settings. To reconfigure an application server domain:1. Run the psadmin command.
2. Depending on your environment, you may see a message after the initial menu, which indicates that PSADMIN has modified the PS_CFG_HOME/peopletools.properties file with the current PS_HOME location:
*********************************************************PS_CFG_HOME/peopletools.properties file has been updated. You should use the Config Home Refresh feature in PSAdmin to ensure that all of your domains are current. Alternatively, you may recreate all of your domains. Please press any key to continue...***********************************************************
This indicates that one of these situations exists:
• The PS_CFG_HOME that you are working with was used previously from a different PS_HOME. In this case, you should recreate any existing Application Server, Process Scheduler, Search, or PIA domains in this PS_CFG_HOME.

Configuring the Application Server on UNIX Chapter 13B
426 Copyright © 2018, Oracle and/or its affiliates. All Rights Reserved.
• You configured your environment such that PS_CFG_HOME is the same as PS_HOME. The first time you use PSADMIN to create a domain, it updates the PS_CFG_HOME/peopletools.properties file. Continue with the next step.
3. Specify 1 for Application Server and press ENTER.
4. Specify 1 for Administer a domain and press ENTER.
5. Select the domain to administer and press ENTER.
6. Specify 4 for Configure this domain and press ENTER.
The option Configure this domain performs the following tasks:
• Shuts down the application server, if it is running. (Shutdown is required since the binary file PSTUXCFGmust be deleted and re-created to enable new configuration values. If there are no processes running when shutdown is attempted, an error will be displayed but the script continues on. This is normal.)
• Initiates an interactive dialog, prompting for configuration parameters.
• Updates psappsrv.cfg, generates psappsrv.ubb, and internally invokes Tuxedo's tmloadcf executable to create binary file PSTUXCFG used during the domain boot process.
7. Specify 15 for Custom Configuration and press ENTER.
8. Respond to this prompt:
Do you want to change any config values (y/n):
• Specify y to start an interactive dialog to change or examine parameter values, as described in the next step.
Oracle recommends this option for more experienced users.
• Specify n if you have already edited psappsrv.cfg, skip the next step, and continue with the step to select server process options.
9. Complete the interactive dialog to specify configuration parameters.
Configuration parameters are grouped into sections. For each section, you are asked whether you want to change any parameters in that section, as in the following example:
Values for config section - Startup DBName= DBType= UserId= UserPswd= ConnectId= ConnectPswd= ServerName= StandbyDBName= StandbyDBType= StandbyUserId= StandbyUserPswd= InMemoryDBName= InMemoryDBType=Do you want to change any values (y/n)? [n]: y
• Specify y to change any parameter values for the current configuration section displayed.
You are prompted for each parameter value. Either specify a new value, or press ENTER to accept the default if applicable. After pressing ENTER, you are positioned at the next parameter in that section. When you are done with that section, you are again asked whether you want to re-edit any of the values you changed.

Chapter 13B Configuring the Application Server on UNIX
Copyright © 2018, Oracle and/or its affiliates. All Rights Reserved. 427
• Enter the user ID and user password that has security to start the application server. All application databases are delivered with one or more application server security users, usually PS or VP1.
The password you enter is hidden by masking characters.
• The parameters StandbyDBName, StandbyDBType, StandbyUserId, and StandbyUserPswd, are used for astandby database in an Oracle environment.
See PeopleTools: Data Management, "Implementing Oracle Active Data Guard."
• The parameters InMemoryDBName and InMemoryDBType are reserved for internal use.
• The WSL, JSL, and JRAD port numbers, which are found in other sections of the configuration parameters, have default values of 7000, 9000, and 9100, respectively. These values must be unique for each application server domain. You may alter the port values if necessary to ensure that they are unique
• If you do not wish to change any values, specify n and you will be prompted for the next configuration section.
Note. When setting up your application server, make a note of the values you use for Database Name, Application Server Name (the machine name), and JSL Port. You will need to use these same values wheninstalling the PeopleSoft Pure Internet Architecture.
See PeopleTools: System and Server Administration.
10. Select server process options.
At this point, you will be prompted to select server process options. If this is your initial installation, we suggest you accept the defaults. A message similar to this appears:
Setting Log Directory to the default... [PS_SERVDIR/LOGS]Configuration file successfully created.Loading new configuration...
The message "Loading new configuration" indicates that PSADMIN is generating a binary file named PSTUXCFG, which is used to boot the application server. At this point, your application server should be properly configured.
Task 13B-5-5: Troubleshooting Common ErrorsFor troubleshooting help, you can access a log file through the PSADMIN PeopleSoft Domain Administration menu. The following list includes possible errors and troubleshooting tips.
• Use the PSADMIN PeopleSoft Domain Administration menu option 6 for Edit configuration/log files menu tocheck for errors in <PS_CFG_HOME>/appserv/<domain>/LOGS/APPSRV_mmdd.LOG and <PS_CFG_HOME>/appserv/<domain>/LOGS/TUXLOG.mmddyy.
• If a PeopleSoft server such as PSAPPSRV fails, examine your configuration parameters. The failure of the PSAPPSRV process is often signalled by the message "Assume failed"—which means the process has failed to start. Check the SIGNON section for misspelled or invalid database name, an invalid or unauthorized OprId, or ConnectId or ServerName is missing or invalid. Finally, make sure the database connectivity is set correctly.
• If a WSL (or JSL) fails to start, try specifying another port number (it may be in use already by another application server domain process).
• If you are unable to start the BBL, check that your Tuxedo is installed fully and that the directory really exists.
• If the installation includes more than one application server domain on a single machine, before booting the second domain, adjust the REN server configuration to avoid conflict in one of these ways:
• Use PSADMIN to disable Event Notification (option 8 on the Quick-configure menu) for the second and

Configuring the Application Server on UNIX Chapter 13B
428 Copyright © 2018, Oracle and/or its affiliates. All Rights Reserved.
subsequent app server domains.
• Change default_http_port to a value other than 7180.
• Check that you do not have older Tuxedo releases prepended in your PATH or runtime library (LIBPATH, SHLIB_PATH or LD_LIBRARY_PATH, depending on the UNIX operating system).
See Also
PeopleTools: System and Server AdministrationPeopleTools: MultiChannel Framework

Copyright © 2018, Oracle and/or its affiliates. All Rights Reserved. 429
Chapter 14
Setting Up the PeopleSoft Pure Internet Architecture in Silent Mode
This chapter discusses:
• Understanding PeopleSoft Pure Internet Architecture
• Using Authentication Domains in the PeopleSoft Pure Internet Architecture Installation
• Installing the PeopleSoft Pure Internet Architecture in Silent Mode
• Configuring the SSL/TLS Port for JSL
• Testing and Administering the PeopleSoft Pure Internet Architecture Installation
• Completing Post-Installation Steps
Understanding PeopleSoft Pure Internet Architecture
This chapter explains how to install and configure the components of the PeopleSoft Pure Internet Architecture in silent mode. See "Installing Web Server Products."The setup program for the PeopleSoft Pure Internet Architecture is installed to the web server machine when you run the PeopleSoft Installer and select the PeopleSoft Web Server option.See "Using the PeopleSoft Installer."Oracle only supports customer installations that use web servers that are certified for PeopleSoft PeopleTools. You must install the web server before you install the PeopleSoft Pure Internet Architecture. Before you install the PeopleSoft Pure Internet Architecture, you must also have configured an application server, as described in the previous chapter.The location where you install the PeopleSoft Pure Internet Architecture is referred to in this documentation as PIA_HOME. You can specify different locations for PS_HOME and PIA_HOME. After you complete the PeopleSoft Pure Internet Architecture installation, you can locate the installation files in the directory PIA_HOME/webserv. For PeopleSoft PeopleTools 8.51 and later, if you are setting up the PeopleSoft Pure Internet Architecture on a Microsoft Windows platform, the directory and path that you specify for PIA_HOME may include spaces. However, parentheses in the directory name (for example, "C:\Program Files (x86)") are not allowed for PIA_HOME.See "Preparing for Installation," Defining Installation Locations.If your web server is on a different machine than your application server, you need to make sure you have JRE installed on your web server to run the PeopleSoft Pure Internet Architecture installation.

Setting Up the PeopleSoft Pure Internet Architecture in Silent Mode Chapter 14
430 Copyright © 2018, Oracle and/or its affiliates. All Rights Reserved.
The initial PeopleSoft Pure Internet Architecture setup automatically creates the default PeopleSoft site named ps.In subsequent PeopleSoft Pure Internet Architecture setups, change the site name from ps to a unique value. We recommend using the database name. This is handy for easy identification and ensures that the database web server files are installed in a unique web site.The URL that you use to invoke the PeopleSoft Pure Internet Architecture must conform to ASN.1 specifications. That is, it may contain only alphanumeric characters, dots ("."), or dashes ("-"). The URL must not begin or end with a dot or dash, or contain consecutive dots (".."). If the URL includes more than one portion, separated by dots, do not use a number to begin a segment if the other segments contain letters. For example, "mycompany.second.country.com" is correct, but "mycompany.2nd.country.com" is wrong. Review the following additional notes before beginning the PeopleSoft Pure Internet Architecture installation:
• If you want to connect between multiple application databases, you need to implement single signon.
• If the PeopleSoft Pure Internet Architecture installation encounters an error, it will indicate which log files to refer to.
See "Installing Web Server Products."
• The machine on which you run the PeopleSoft Pure Internet Architecture install must be running in 256 color mode. This is not necessary for UNIX or console mode.
The PeopleSoft Pure Internet Architecture installation includes the following products:
• PeopleSoft Pure Internet Architecture. This product is the centerpiece of the PeopleSoft architecture that enables users to work on a machine with only a supported browser installed. This option installs the servlets required for deploying PeopleSoft Applications and for the PeopleSoft portal. The portal packs and PeopleSoftPortal Solutions have their own installation instructions, which are available on My Oracle Support. For an overview of the various types of portals, consult the PeopleTools: Portal Technology product documentation.
• PeopleSoft Report Repository. This product works in conjunction with Process Scheduler to allow report distribution over the web.
• PeopleSoft Integration Gateway. This product is the entry and exit point for all messages to and from the Integration Broker. Its Java-based Connector architecture allows asynchronous and synchronous messages to be sent over a variety of standard protocols, many that are delivered at install, or through custom connectors.
Important! For PeopleSoft PeopleTools 8.50 and later, review the product documentation concerning security properties for Integration Gateway. When setting the properties in the integrationGateways.propertiesfile, the property secureFileKeystorePasswd must be encrypted, and the secureFileKeystorePath must be set.
See PeopleTools: Integration Broker Administration.
• PeopleSoft CTI Console. This product works in conjunction with CTI vendor software to enable call center agents to take advantage of browser-based teleset management and automatic population of application pages with relevant data associated with incoming calls, such as customer or case details.
See PeopleTools: MultiChannel Framework.
• Environment Management Hub. The Environment Management hub is a web application that is installed with the PeopleSoft Pure Internet Architecture and portal. It is started along with the rest of the web applications when the user boots the web server. You cannot start the Environment Management Hub on a server that is configured to run HTTPS; in other words, if you plan to run Environment Management, your PIA server needs to be configured in HTTP mode.
See PeopleTools: Change Assistant and Update Manager.
See Also
PeopleTools: Security Administration

Chapter 14 Setting Up the PeopleSoft Pure Internet Architecture in Silent Mode
Copyright © 2018, Oracle and/or its affiliates. All Rights Reserved. 431
PeopleTools: System and Server Administration
Using Authentication Domains in the PeopleSoft Pure Internet Architecture Installation
You have the option to specify an authentication domain when you install the PeopleSoft Pure Internet Architecture on Oracle WebLogic or IBM WebSphere.
Note. The authentication domain was referred to as the Authentication Token Domain in previous releases, and that term is still seen in the software.
When an authentication domain is specified during the PeopleSoft Pure Internet Architecture installation, that value gets used as the Cookie domain in the web server configuration. The main requirements when setting a cookie domain are:
• The cookie domain value being set must begin with a dot (.ps.com is valid, ps.com is NOT valid).
• The cookie domain value being set must contain at least 1 embedded dot (.ps.com is valid, .corp.ps.com is valid, .com is NOT valid).
• The cookie domain value can only be a single domain name. It cannot be a delimiter-separated list of domains.
By default, the browser only sends cookies back to the machine that set the cookie. So if web server crm.yourdomain.com sets a cookie, the browser will only send it back there. You can make the browser send the single signon cookie to all servers at yourdomain.com by typing your domain name in the Authentication Token Domain list box of web server crm.Specifying the authentication domain may be necessary in certain cases. For example, if you plan to use the PeopleSoft portal technology, be sure to read the supporting documentation on configuring the portal environment, to determine whether setting the authentication domain is required for correct operation.See PeopleTools: Portal Technology.Specify an authentication domain if you plan to run a REN Server. REN Servers are required for PeopleSoft MultiChannel Framework, Reporting, and some PeopleSoft CRM applications supported by PeopleSoft MultiChannel Framework. See PeopleTools: MultiChannel Framework.If you use the PeopleSoft Mobile Application Platform (MAP), you must specify the same authentication domain during the PeopleSoft Pure Internet Architecture installation, for MAP, and for Integration Broker and integration hubs.See PeopleTools: Mobile Application Platform.See PeopleTools: Integration Broker.
Task 14-1: Installing the PeopleSoft Pure Internet Architecture in Silent Mode
This section discusses:
• Understanding the Silent Installation and the Response File
• Editing the Response File

Setting Up the PeopleSoft Pure Internet Architecture in Silent Mode Chapter 14
432 Copyright © 2018, Oracle and/or its affiliates. All Rights Reserved.
• Running the Silent Mode Installation
Understanding the Silent Installation and the Response FileYou can carry out a silent installation of the PeopleSoft Pure Internet Architecture by providing all the required settings in a response file. With silent installation there is no user interaction. Silent mode installation of PeopleSoft Pure Internet Architecture is supported for both Microsoft Windows and UNIX operating systems platforms, and for both Oracle WebLogic and IBM WebSphere web servers.
Task 14-1-1: Editing the Response FileYou need a response file to start the installer in silent mode. The PeopleSoft Pure Internet Architecture installer comes with a response file template (resp_file.txt) that can be found under PS_HOME\setup\PsMpPIAInstall\scripts. Modify the values in the response file according to your installation requirements.
Note. When specifying paths on Microsoft Windows operating systems, use forward slashes ( / ), as shown in the examples in the response file.
The response file should contain all the input parameters that are needed for deploying PeopleSoft Pure Internet Architecture The sample response files includes the following sections:
• The location where you want to install the PeopleSoft Pure Internet Architecture.
#Following inputs are required in response file for silent installation
# Location of PIA_HOME directory. For windows path should have front⇒ slash '/' instead of back slash '\'# Set the below variable to the location where you want to install PIA. # PLEASE NOTE this variable could be ANY DIRECTORY on your machine. It⇒ includes but is definitely not limited to PeopleTools Home.PS_CFG_HOME=C:/PT8.50
• Domain name
# Name of the PIA domainDOMAIN_NAME=peoplesoft
• The Web server type and root directory for the web server installation
# Web server type. Possible values are "weblogic", "websphere"SERVER_TYPE=weblogic
# WebLogic home, the location where Oracle WebLogic is installed (for⇒ WebLogic deployment only)BEA_HOME=c:/bea
# WebSphere Home, the location where IBM WebSphere is installed (for Web⇒Sphere deployment only)WS_HOME=C:/IBM/WebSphere/AppServer
• Specify SERVER_TYPE=weblogic to deploy on Oracle WebLogic.
For Oracle WebLogic, specify the installation location for BEA_HOME.
• Specify SERVER_TYPE=websphere to deploy on IBM WebSphere.

Chapter 14 Setting Up the PeopleSoft Pure Internet Architecture in Silent Mode
Copyright © 2018, Oracle and/or its affiliates. All Rights Reserved. 433
If you installed IBM WebSphere, specify the installation location for WS_HOME.
• The administrator login ID, and the password for the web server domain.
# admin console user id/password for securing WebLogic/WebSphere admin⇒ console credentialUSER_ID=systemUSER_PWD=USER_PWD_RETYPE=
• Installation action
# Install action to specify the core task that installer should perform.# For creating new PIA domain - CREATE_NEW_DOMAIN.# For redeploying PIA - REDEPLOY_PSAPP.# For recreating PIA domain - REBUILD_DOMAIN.# For installing additional PSFT site - ADD_SITE# For installing Extensions - ADD_PSAPP_EXTINSTALL_ACTION=CREATE_NEW_DOMAIN
• CREATE_NEW_DOMAIN
Create a new PeopleSoft Pure Internet Architecture domain.
• REDEPLOY_PSAPP
If your web server is Oracle WebLogic,this option affects all of the PeopleSoft Pure Internet Architecture web applications installed to the local Oracle WebLogic domain. Select this option to redeploy all of the web components of the PeopleSoft Pure Internet Architecture. The redeployment process updates all of theweb components of the PeopleSoft Pure Internet Architecture, without modifying the configuration files orscripts that belong to the Oracle WebLogic server domain.
If your web server is IBM WebSphere, this selection affects all of the PeopleSoft Pure Internet Architecture web applications installed to the local IBM WebSphere Application Server profile. The redeployment process updates all of the web components of the PeopleSoft Pure Internet Architecture
• REBUILD_DOMAIN
This option affects Oracle WebLogic Server domain configuration and all of the PeopleSoft Pure Internet Architecture web applications installed to the local Oracle WebLogic domain. Select this option to completely remove an existing Oracle WebLogic domain and deploy the PeopleSoft Pure Internet Architecture components to create the newly specified PeopleSoft site.
Warning! Re-creating an existing domain will delete everything previously installed into that domain.
• ADD_SITE
If your web server is Oracle WebLogic: This option is relevant only to the PeopleSoft PORTAL web application, and does not modify or revert any other configuration settings. Select this option to install only the necessary files for defining an additional PeopleSoft site onto an existing Oracle WebLogic configuration. The new site will be accessed using its name in the URL. A site named "CRM" would be accessed using a URL similar to http://mywebserver_machine/CRM. To reset or re-create an existing PeopleSoft site, simply enter that site's name as the site to create. On your web server, a PeopleSoft site is comprised of the following directories within the PORTAL web application:
<WEBLOGIC_DOMAIN>\applications\peoplesoft\PORTAL\<site>\*
<WEBLOGIC_DOMAIN>\applications\peoplesoft\PORTAL\WEB-INF\psftdocs\<site>\*
If your web server is IBM WebSphere: Select this option to install only the necessary files for defining an additional PeopleSoft site onto the existing IBM WebSphere ND web server configuration .
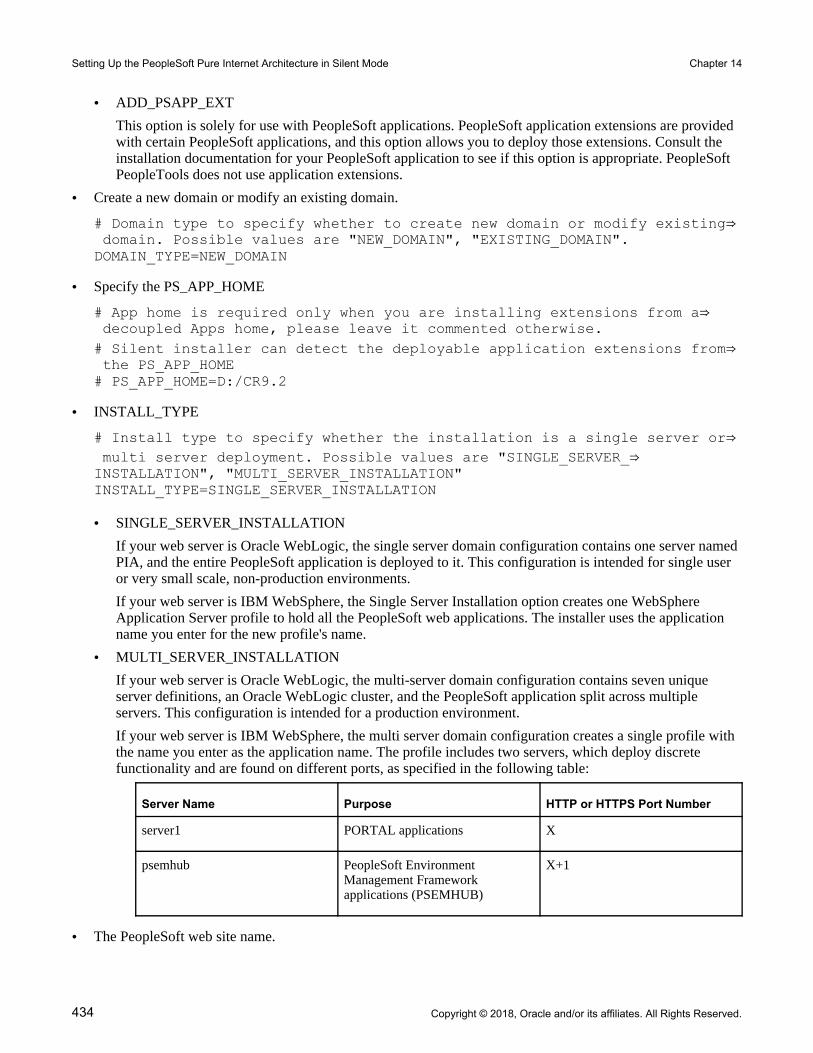
Setting Up the PeopleSoft Pure Internet Architecture in Silent Mode Chapter 14
434 Copyright © 2018, Oracle and/or its affiliates. All Rights Reserved.
• ADD_PSAPP_EXT
This option is solely for use with PeopleSoft applications. PeopleSoft application extensions are provided with certain PeopleSoft applications, and this option allows you to deploy those extensions. Consult the installation documentation for your PeopleSoft application to see if this option is appropriate. PeopleSoft PeopleTools does not use application extensions.
• Create a new domain or modify an existing domain.
# Domain type to specify whether to create new domain or modify existing⇒ domain. Possible values are "NEW_DOMAIN", "EXISTING_DOMAIN".DOMAIN_TYPE=NEW_DOMAIN
• Specify the PS_APP_HOME
# App home is required only when you are installing extensions from a⇒ decoupled Apps home, please leave it commented otherwise.# Silent installer can detect the deployable application extensions from⇒ the PS_APP_HOME# PS_APP_HOME=D:/CR9.2
• INSTALL_TYPE
# Install type to specify whether the installation is a single server or⇒ multi server deployment. Possible values are "SINGLE_SERVER_⇒INSTALLATION", "MULTI_SERVER_INSTALLATION"INSTALL_TYPE=SINGLE_SERVER_INSTALLATION
• SINGLE_SERVER_INSTALLATION
If your web server is Oracle WebLogic, the single server domain configuration contains one server named PIA, and the entire PeopleSoft application is deployed to it. This configuration is intended for single user or very small scale, non-production environments.
If your web server is IBM WebSphere, the Single Server Installation option creates one WebSphere Application Server profile to hold all the PeopleSoft web applications. The installer uses the application name you enter for the new profile's name.
• MULTI_SERVER_INSTALLATION
If your web server is Oracle WebLogic, the multi-server domain configuration contains seven unique server definitions, an Oracle WebLogic cluster, and the PeopleSoft application split across multiple servers. This configuration is intended for a production environment.
If your web server is IBM WebSphere, the multi server domain configuration creates a single profile with the name you enter as the application name. The profile includes two servers, which deploy discrete functionality and are found on different ports, as specified in the following table:
Server Name Purpose HTTP or HTTPS Port Number
server1 PORTAL applications X
psemhub PeopleSoft Environment Management Framework applications (PSEMHUB)
X+1
• The PeopleSoft web site name.
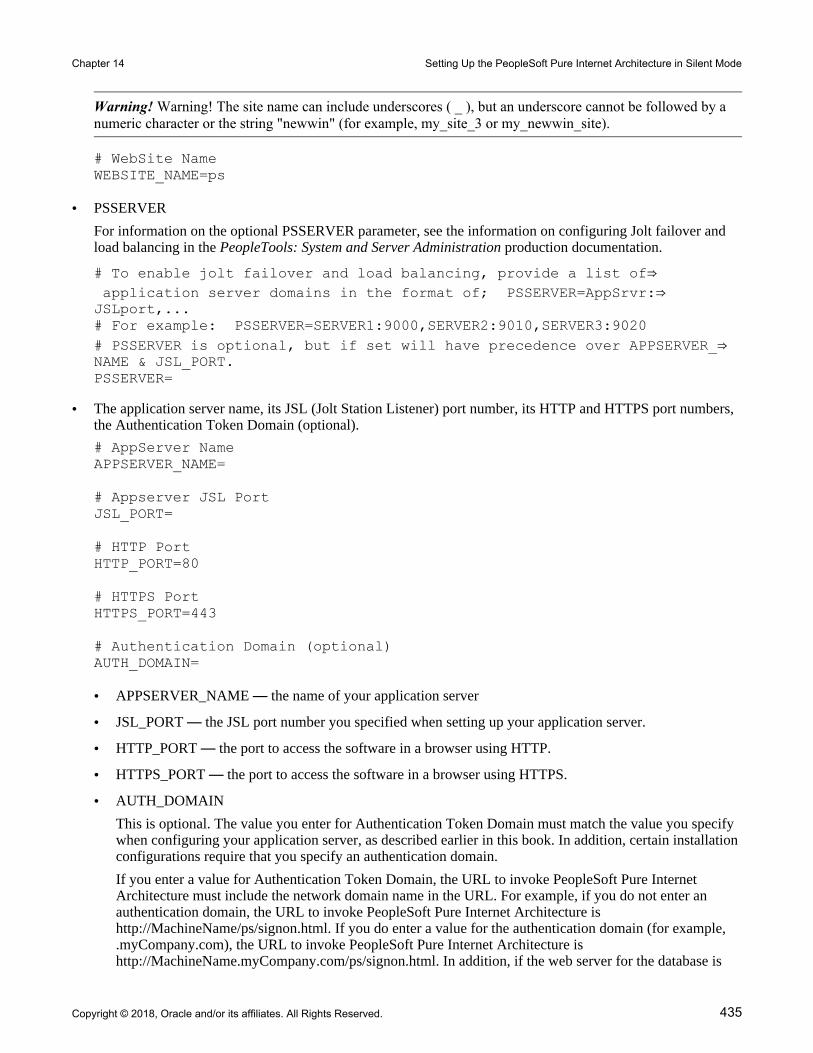
Chapter 14 Setting Up the PeopleSoft Pure Internet Architecture in Silent Mode
Copyright © 2018, Oracle and/or its affiliates. All Rights Reserved. 435
Warning! Warning! The site name can include underscores ( _ ), but an underscore cannot be followed by a numeric character or the string "newwin" (for example, my_site_3 or my_newwin_site).
# WebSite NameWEBSITE_NAME=ps
• PSSERVER
For information on the optional PSSERVER parameter, see the information on configuring Jolt failover and load balancing in the PeopleTools: System and Server Administration production documentation.
# To enable jolt failover and load balancing, provide a list of⇒ application server domains in the format of; PSSERVER=AppSrvr:⇒JSLport,...# For example: PSSERVER=SERVER1:9000,SERVER2:9010,SERVER3:9020# PSSERVER is optional, but if set will have precedence over APPSERVER_⇒NAME & JSL_PORT.PSSERVER=
• The application server name, its JSL (Jolt Station Listener) port number, its HTTP and HTTPS port numbers, the Authentication Token Domain (optional).
# AppServer NameAPPSERVER_NAME=
# Appserver JSL PortJSL_PORT=
# HTTP PortHTTP_PORT=80
# HTTPS PortHTTPS_PORT=443
# Authentication Domain (optional)AUTH_DOMAIN=
• APPSERVER_NAME — the name of your application server
• JSL_PORT — the JSL port number you specified when setting up your application server.
• HTTP_PORT — the port to access the software in a browser using HTTP.
• HTTPS_PORT — the port to access the software in a browser using HTTPS.
• AUTH_DOMAIN
This is optional. The value you enter for Authentication Token Domain must match the value you specify when configuring your application server, as described earlier in this book. In addition, certain installation configurations require that you specify an authentication domain.
If you enter a value for Authentication Token Domain, the URL to invoke PeopleSoft Pure Internet Architecture must include the network domain name in the URL. For example, if you do not enter an authentication domain, the URL to invoke PeopleSoft Pure Internet Architecture is http://MachineName/ps/signon.html. If you do enter a value for the authentication domain (for example, .myCompany.com), the URL to invoke PeopleSoft Pure Internet Architecture is http://MachineName.myCompany.com/ps/signon.html. In addition, if the web server for the database is

Setting Up the PeopleSoft Pure Internet Architecture in Silent Mode Chapter 14
436 Copyright © 2018, Oracle and/or its affiliates. All Rights Reserved.
using an http port other than the default port of 80, the URL must include the port number, for example http://MachineName:8080/ps/signon.html if there is no authentication domain, or http://MachineName.myCompany.com:8080/ps/signon.html if there is an authentication domain. The URL must also comply with the naming rules given earlier in this chapter.
See Using Authentication Domains in the PeopleSoft Pure Internet Architecture Installation.
• Web profile name and password
Enter a Web Profile Name, and enter the password two times. The example below shows the default web profile name, PROD, and default user ID, PTWEBSERVER. The web profile name will be used to configure this web site. You can specify one of the other predelivered web profiles, DEV, TEST, or KIOSK, or enter a different name. If you intend to use a Web Profile User ID other than the default, PTWEBSERVER, be sure toreview the information on web profile configuration and security in the PeopleTools: Portal Technology product documentation.
# Web Profile Name Possible Values are "DEV","TEST","PROD","KIOSK"WEB_PROF_NAME=PROD
# Web Profile password for User "PTWEBSERVER"WEB_PROF_PWD=WEB_PROF_PWD_RETYPE=
• Integration Gateway user name and password
See PeopleTools: Integration Broker Administration.
# Integration Gateway user profile.IGW_USERID=administratorIGW_PWD=IGW_PWD_RETYPE=
• AppServer Domain Connection password (optional).
If you configured your Application Server domain to require a Domain Connection password, enter it here. Otherwise, leave it blank as shown in this example. This password will be propagated to the Integration Gateway. For more information about Application Server domain configuration and setting domain parameters, see the product documentation PeopleTools: System and Server Administration.
# AppServer connection user profileAPPSRVR_CONN_PWD=APPSRVR_CONN_PWD_RETYPE=
• The root directory for the Report Repository
Make sure that the report repository directory is shared. You must have write access to the Report Repository directory.
Note. In setting up the Process Scheduler to transfer reports, if you choose the FTP transfer protocol, use the same directory for the Home Directory as you use here for the report repository.
See PeopleTools: Portal Technology.
See "Setting Up Process Scheduler on Windows," Setting Up Process Scheduler to Transfer Reports and Logs to the Report Repository.
# Directory path for reportsREPORTS_DIR=

Chapter 14 Setting Up the PeopleSoft Pure Internet Architecture in Silent Mode
Copyright © 2018, Oracle and/or its affiliates. All Rights Reserved. 437
Task 14-1-2: Running the Silent Mode InstallationUse the response file that you modified for your configuration. Substitute the location where you saved the response file for <path_to_response_file> in the following procedures:To install the PeopleSoft Pure Internet Architecture in silent mode on Microsoft Windows:1. In a command prompt, go to PS_HOME\setup\PsMpPIAInstall.
2. Run the following command, using forward slashes (/) to specify the path:
setup.bat -i silent -DRES_FILE_PATH=<path_to_response_file>
For example:
setup.bat -i silent -DRES_FILE_PATH=D:/PT8.56
To install the PeopleSoft Pure Internet Architecture in silent mode on UNIX:1. Go to PS_HOME/setup/PsMpPIAInstall.
2. Run the following command, using forward slashes (/) to specify the path:
setup.sh -i silent -DRES_FILE_PATH=<path_to_response_file>
For example:
setup.bat -i silent -DRES_FILE_PATH=/home/PT856
Task 14-2: Configuring the SSL/TLS Port for JSL
Supply the SSL/TLS port for JSL in the configuration.properties file for the web server.See PeopleTools: Integration Broker, "Installing Web Server-Based Digital Certificates."1. Using a text editor, open the configuration.properties file in the web server deployment folder located here:
<PIA_HOME>\webserv\<DOMAIN_NAME>\application\peoplesoft\PORTAL.war\WEB_INF\psftdoc\ps.
2. Locate the psserver section and enter the application server name and the SSL/TLS port.
Enter the SSL/TLS port that you specified for the JSL SSL Port when setting up the application server domain.
See Creating, Configuring, and Starting an Initial Application Server Domain.
psserver=<machine_name>:<SSL_port_for_JSL>
3. Locate the section Keystore password for ssl connection.
If you reset the SSL/TLS Java Keystore password, enter it here. Otherwise, accept the default value. The default Java Keystore file is located in <PIA_HOME>\webserv\<DOMAIN_NAME>\piaconfig\keystore\pskey.
#Keystore password for ssl connectionKeyStorePwd=={V1.1}7m4OtVwXFNyLc1j6pZG69Q==
4. Save and close the file.
If the JDK used for your web server does not support the algorithm used for SSL connection, you may see an error similar to the following when you sign in to the PeopleSoft Pure Internet Architecture through an SSL port: "Cannot support TLS_RSA_WITH_AES_256_CBC_SHA with currently installed providers"

Setting Up the PeopleSoft Pure Internet Architecture in Silent Mode Chapter 14
438 Copyright © 2018, Oracle and/or its affiliates. All Rights Reserved.
This applies to the Oracle JDK for Linux, Microsoft Windows, or Oracle Solaris for SPARC operating systems.See "Installing Web Server Products," Installing JDK.To resolve the issue, use the following steps to upgrade the JDK with Java Cryptography Extension (JCE) Unlimited Strength Jurisdiction Policy Files:1. Download the file jce_policy-8.zip from this site to a convenient directory:
http://www.oracle.com/technetwork/java/javase/downloads/jce8-download-2133166.html
2. Unzip the file jce_policy-8.zip.
3. Copy the files local_policy.jar and US_export_policy.jar from jce_policy-8\UnlimitedJCEPolicyJDK8.
4. Paste the two files into the <JAVA_HOME>\jre\lib\security folder, and replace the existing files.
Task 14-3: Testing and Administering the PeopleSoft Pure Internet Architecture Installation
This section discusses:
• Verifying the PeopleSoft Pure Internet Architecture Installation
• Starting and Stopping Oracle WebLogic
• Starting and Stopping IBM WebSphere Application Servers
• Using PSADMIN to Start and Stop Web Servers
• Accessing the PeopleSoft Signon
Verifying the PeopleSoft Pure Internet Architecture InstallationAfter installing the PeopleSoft Pure Internet Architecture, you should make sure that your configuration is functional. You can test this by signing on to PeopleSoft, navigating within the menu structure, and accessing pages. (Make sure the application server is configured and booted.) This section includes procedures to start and stop the Oracle WebLogic or IBM WebSphere web servers whenever necessary.
Task 14-3-1: Starting and Stopping Oracle WebLogicIf you are using the Oracle WebLogic web server, you need to sign on to Oracle WebLogic before using these commands. If you are using IBM WebSphere instead, go on to the next section. Use the following commands in the Oracle WebLogic domain directory.
Note. Starting from Oracle WebLogic 9.2 and later releases, all the life-cycle management scripts and other batch scripts for the PIA server on Oracle WebLogic are located in <PIA_HOME>\webserv\<domain_name>\bin folder.
• To start Oracle WebLogic Server as a foreground process on a single server, use the following commands:
On Microsoft Windows:
startPIA.cmd
On UNIX:
startPIA.sh

Chapter 14 Setting Up the PeopleSoft Pure Internet Architecture in Silent Mode
Copyright © 2018, Oracle and/or its affiliates. All Rights Reserved. 439
• To start Oracle WebLogic Server as a foreground process on multiple-servers or distributed servers, use the following commands:
1. Execute the following command:
On Microsoft Windows:
startWebLogicAdmin.cmd
On UNIX:
startWebLogicAdmin.sh
2. Then execute:
On Microsoft Windows:
startManagedWebLogic.cmd ManagedServerName
On UNIX:
startManagedWebLogic.sh ManagedServerName
• To stop the server, use the following commands:
• Single Server on Microsoft Windows:
stopPIA.cmd
Single Server on UNIX:
stopPIA.sh
• Multiple Servers or Distributed Servers on Microsoft Windows:
stopWebLogic.cmd ManagedServerName
Single Server on UNIX:
stopWebLogic.sh ManagedServerName
For more information on working with Oracle WebLogic multiple servers or distributed servers, see the PeopleTools: System and Server Administration product documentation.
Note. For more information on working with Oracle WebLogic multiple or distributed servers, search My Oracle Support.
Task 14-3-2: Starting and Stopping IBM WebSphere Application ServersThis section discusses:
• Starting and Stopping IBM WebSphere Application Servers on Windows
• Starting and Stopping IBM WebSphere Application Servers on UNIX
• Verifying the IBM WebSphere Installation
Starting and Stopping IBM WebSphere Application Servers on Windows
To start and stop the WebSphere Application Server Network Deployment 9.0.0.0 (WebSphere ND), use the WebSphere First Steps utility:

Setting Up the PeopleSoft Pure Internet Architecture in Silent Mode Chapter 14
440 Copyright © 2018, Oracle and/or its affiliates. All Rights Reserved.
1. For example, on Microsoft Windows 2012 R2, access the Apps screen and locate the First steps utility in the IBM WebSphere category.
The following example shows the First steps window for the profile peoplesoft:
WebSphere Application Server - First steps window
2. Select the link Start the server.
If the server starts properly, a verification window appears with several messages about the initialization process.

Chapter 14 Setting Up the PeopleSoft Pure Internet Architecture in Silent Mode
Copyright © 2018, Oracle and/or its affiliates. All Rights Reserved. 441
3. To verify whether the server was installed and can start properly, click the link Installation Verification on the First Step window and review the messages.
First steps output - Installation verification window
Starting and Stopping IBM WebSphere Application Servers on UNIX
To start WebSphere ND on UNIX, use the following command:<PIA_HOME>/webserv/<profile_name>/bin/startServer.sh <server_name>
For example:/home/pt856/webserver/peoplesoft/bin/startServer.sh server1
To stop WebSphere ND, use the following command:<PIA_HOME>/webserv/<profile_name>/bin/stopServer.sh <server_name>
Verifying the IBM WebSphere Installation
Use this method to verify the WebSphere ND and PIA installation for both Microsoft Windows and UNIX.To verify the WebSphere ND and PIA installation, copy the following URL into a browser address bar, substituting your machine name and the http port number:http://<machine_name>:<http_port>/ivt/ivtservlet

Setting Up the PeopleSoft Pure Internet Architecture in Silent Mode Chapter 14
442 Copyright © 2018, Oracle and/or its affiliates. All Rights Reserved.
You should see the text "IVT Servlet" in the browser, as in this example:
IVT Servlet window
You should also sign into the PeopleSoft application, as described in a later section, to verify the installation.See Accessing the PeopleSoft Signon.
Task 14-3-3: Using PSADMIN to Start and Stop Web ServersIn addition to the methods given in the previous sections for starting and stopping Oracle WebLogic and IBM WebSphere web servers, in PeopleSoft PeopleTools 8.52 and later releases you can use PSADMIN to administer a web server domain.See PeopleTools: System and Server Administration.To start and stop web servers:1. Specify 4 for Web (PIA) Server.
The location of Config Home is the current working directory. The PSADMIN utility determines the Config Home directory by checking for the PS_CFG_HOME environment variable. If that is not set, it checks for the presence of domains in the default PS_CFG_HOME location. If none exists, it uses the PS_HOME location from which it was launched.
See "Preparing for Installation," Defining Installation Locations.
2. Select 1 for Administer a domain.
The PSADMIN utility determines the PIA Home location displayed here by first checking for a PIA_HOME environment variable. If none is set, it checks for the PS_CFG_HOME environment variable. If neither is set, it uses the default PS_CFG_HOME directory.
3. Select the domain you want to administer by entering the appropriate number.
------------------------------------------------------PeopleSoft PIA Domain Administration - Choose a Domain------------------------------------------------------1) psftTST 2) peoplesoft
q) Quit

Chapter 14 Setting Up the PeopleSoft Pure Internet Architecture in Silent Mode
Copyright © 2018, Oracle and/or its affiliates. All Rights Reserved. 443
Command to execute: 2
4. To start a web server domain, enter 1, Boot this domain.
Starting the domain.....................Verifying domain status..The domain has started.
5. To stop a web server domain, select 2, Shutdown this domain.
Stopping the domain..........Verifying domain status..........The domain has stopped.
6. Select 1 to install a service, or 2 to remove it.
This command invokes the installNTservice script, and creates a service named WebLogicDomain-WebLogicServer.
---------------------Windows Service Setup---------------------
PIA Home: C:\psft_websrv PIA Domain: peoplesoft Domain status: started
1) Install Service 2) Uninstall Service
q) Quit
Command to execute:
Task 14-3-4: Accessing the PeopleSoft SignonTo access the PeopleSoft signon:1. Open your web browser.

Setting Up the PeopleSoft Pure Internet Architecture in Silent Mode Chapter 14
444 Copyright © 2018, Oracle and/or its affiliates. All Rights Reserved.
2. Enter the name of the site you want to access—for example (the default value for <site_name> is ps):
http://<machine_name>:<http_port>/<site_name>/signon.html
Note. PeopleSoft Pure Internet Architecture installed on IBM WebSphere server listens at the HTTP/HTTPS ports specified during the PeopleSoft Pure Internet Architecture install. Invoke PeopleSoft Pure Internet Architecture through a browser by using the specified HTTP or HTTPS ports—that is, http://<WebSphere_machine_name>:<server_port>/<site_name>/signon.html (if AuthTokenDomain is not specified ) or http://<WebSphere_machine_name.mycompany.com>:<server_port>/<site_name>/signon.html (if you specified .mycompany.com as the AuthTokenDomain). You can find the HTTP and HTTPS ports in the file <PIA_HOME>/webserv/<domain_name>/logs/AboutThisProfile.txt.
This will take you to the sign-in window corresponding to your browser's language preference, as shown in this example:
Oracle PeopleSoft Enterprise Sign in window
Note. If you do not see the signon screen, check that you supplied all the correct variables and that your application server and the database server are running.

Chapter 14 Setting Up the PeopleSoft Pure Internet Architecture in Silent Mode
Copyright © 2018, Oracle and/or its affiliates. All Rights Reserved. 445
3. Sign in to the PeopleSoft system by entering a valid user ID and password.
The user ID and password are case sensitive.
Note. The user ID and password were set during the database configuration and also used to boot the application server.
The PeopleSoft PeopleTools and PeopleSoft applications include various default user IDs. For information on using the user IDs delivered with your PeopleSoft application demo database, see the application-specific installation instructions. For information on using and securing PeopleSoft PeopleTools default user IDs, see the information on administering user profiles in the PeopleTools: Security Administration product documentation.
Task 14-4: Completing Post-Installation Steps
This section discusses:
• Using Fluid User Interface
• Updating the Installation Table
• Setting Options for Multilingual Databases
• Updating PeopleTools Options
• Updating Time Zone Information
• Updating Database Information
Task 14-4-1: Using Fluid User InterfaceWhen you sign in to your PeopleSoft application, you may see the PeopleSoft Fluid User Interface by default. To access the menu items, as seen in the classic user interface, from the PeopleSoft Fluid User Interface:

Setting Up the PeopleSoft Pure Internet Architecture in Silent Mode Chapter 14
446 Copyright © 2018, Oracle and/or its affiliates. All Rights Reserved.
1. On the PeopleSoft Fluid User Interface, shown in this example, select (press) the NavBar button at the top right (diamond inside a circle).
PeopleSoft Fluid User Interface home page
The Navigation bar (NavBar) side page appears.

Chapter 14 Setting Up the PeopleSoft Pure Internet Architecture in Silent Mode
Copyright © 2018, Oracle and/or its affiliates. All Rights Reserved. 447
2. Select (press) Navigator.
NavBar side page
The menu structure appears.

Setting Up the PeopleSoft Pure Internet Architecture in Silent Mode Chapter 14
448 Copyright © 2018, Oracle and/or its affiliates. All Rights Reserved.
3. Navigate to the desired item, such as Set Up HCM or PeopleTools.
Navigator side page with PeopleSoft menu items
See Also
PeopleTools: Applications User's Guide, "Working With Fluid Homepages"PeopleTools: Fluid User Interface Developer's Guide
Task 14-4-2: Updating the Installation TableAfter you complete the installation process, creating the database, installing the Application Server, and installing the PeopleSoft Pure Internet Architecture, you must complete this additional step. This postinstallation step ensures that only the products you are entitled to use are active in the installation. The location of the installation table in the PeopleSoft system varies depending upon the PeopleSoft application that you installed.
Note. For information on the products you are entitled to use, contact your Oracle Support representative.
1. Sign on to the PeopleSoft system in a browser.
2. Select Set Up Application_name (where Application_name is the PeopleSoft application you installed), Install, Installation Table.
3. Select the Products tab.

Chapter 14 Setting Up the PeopleSoft Pure Internet Architecture in Silent Mode
Copyright © 2018, Oracle and/or its affiliates. All Rights Reserved. 449
4. Clear the check boxes for the products that you are not entitled to use.
Task 14-4-3: Setting Options for Multilingual Databases
Setting the Data Field Length Checking Option
The value to specify data field length checking must be set correctly in order for PeopleSoft applications to perform correctly in a browser. Use one of these methods to set the data field length checking option:
• Select PeopleTools, Utilities, Administration, PeopleTools Options, and select the Data Field Length Checking option from the drop-down list.
• Alternatively, use the SQL tool for your database platform to modify the DBLENGTHTYPE parameter in the PSOPTIONS table.
See PeopleTools: Global Technology, "Setting Data Field Length Checking."See PeopleTools: Global Technology, "Selecting Character Sets."Use the guidelines in this table to select the correct option for your environment:
Environment PeopleTools Option Page Selection PSOPTIONS.DBLENGTHTYPE Value
Unicode-encoded database or a non-Unicode SBCS database
Others N
Japanese database on DB2 LUW DB2 MBCS D
Non-Unicode Japanese database
Note. If your installation uses the Shift-JIS character set for Japanese, you mustuse this option.
MBCS
Note. The MBCS option is not supported for DB2 z/OS.
M
Setting the Unicode Enabled Option
If you are running a Unicode database, verify that the UNICODE_ENABLED parameter in the PSSTATUS table is set correctly. For example:
• For non-Unicode databases, including those using the Shift-JIS character set for Japanese, set UNICODE_ENABLED=0.
• For Unicode databases, set UNICODE_ENABLED=1.
See the information on converting to Unicode in the PeopleTools: Global Technology product documentation.
Task 14-4-4: Updating PeopleTools OptionsYou can set the following options on the PeopleTools Options page:
• Multi-Currency — Select this check box if you plan to use currency conversion.
See PeopleTools: Global Technology, "Using System-Wide Multicurrency Settings."
• Base Time Zone — Enter a value for the base time zone for your PeopleTools database.

Setting Up the PeopleSoft Pure Internet Architecture in Silent Mode Chapter 14
450 Copyright © 2018, Oracle and/or its affiliates. All Rights Reserved.
See PeopleTools: Global Technology, "Setting the Base Time Zone."
• Sort Order Option — If you specified a non-binary sort order for your database, choose the Sort Order Option that most closely approximates your database sort order.
See PeopleTools: Global Technology, "Setting the Sort Order."
Task 14-4-5: Updating Time Zone InformationAdditional steps may be required to configure your time zone after you complete the installation.See PeopleTools: Global Technology, "Maintaining Time Zones."
Task 14-4-6: Updating Database InformationThe database information updated in this procedure is used by the PeopleSoft software update tools to identify your PeopleSoft database when searching for updates. These steps should be followed for all additional databases that you create to enable the accurate identification of your databases.1. Sign on to your PeopleSoft database.
2. Navigate to PeopleTools, Utilities, Administration, PeopleTools Options.
3. Specify long and short names for your environment. For example:
• Environment Long Name — Customer HR Demo Database
• Environment Short Name — HR Demo DB
4. Select a system type from the drop-down list. For example, Demo Database.
5. Save your changes.

Copyright © 2018, Oracle and/or its affiliates. All Rights Reserved. 451
Chapter 15A
Setting Up Process Scheduler on Windows
This chapter discusses:
• Prerequisites
• Setting Up Process Scheduler Security
• Setting Up Process Scheduler to Transfer Reports and Logs to the Report Repository
• Setting Environment Variables
• Setting Up Process Scheduler Server Agent
• Starting Process Scheduler as a Windows Service (Optional)
• Configuring the Process Scheduler for Microsoft Word (Optional)
• Configuring Setup Manager
• Installing Products for PS/nVision
Prerequisites
Before setting up your Process Scheduler, you must:
• Install Tuxedo.
See "Installing Additional Components."
• Install database connectivity to be able to communicate with your database server (Process Scheduler requires a direct connection to the database).
See "Preparing for Installation."
• Set up the web server with the PeopleSoft Pure Internet Architecture, as described in the previous chapter. This is required to set up the Process Scheduler to transfer reports or log files to the Report Repository.
• Set up your COBOL batch environment if you need to run COBOL processes through Process Scheduler. If the PeopleSoft modules purchased do not contain any COBOL modules, the COBOL run time libraries are notrequired. Also, COBOL is not required for applications that contain no COBOL programs. Consult My OracleSupport for the details on whether your application requires COBOL.
See "Preparing for Installation," Planning Your Initial Configuration.
• Install the Microsoft Office products Microsoft Word and Microsoft Excel.
• Have both your application server and the PeopleSoft Pure Internet Architecture started. In this chapter, you must modify security options of the designated PeopleSoft user ID that will be used to boot up Process Scheduler. This requires that the user ID's profile be modified through the User Security component. Please refer to earlier chapters for the details on starting the application server and the PeopleSoft Pure Internet Architecture.

Setting Up Process Scheduler on Windows Chapter 15A
452 Copyright © 2018, Oracle and/or its affiliates. All Rights Reserved.
In PeopleSoft PeopleTools 8.50 and later, the configuration and log files for Process Scheduler server domains reside in PS_CFG_HOME. If you do not set a PS_CFG_HOME environment variable before beginning the application server configuration, the system installs it in a default location based on the current user's settings, as follows:%USERPROFILE%\psft\pt\<peopletools_version>
See "Preparing for Installation," Defining Installation Locations.See the product documentation PeopleTools: System and Server Administration for more information on the PS_CFG_HOME environment variable and working with server domain configuration.
See Also
PeopleTools: Process SchedulerMy Oracle Support, Certifications
Task 15A-1: Setting Up Process Scheduler Security
This section discusses:
• Understanding Process Scheduler Security
• Changing User Account to Start ORACLE ProcMGR V12.2.2.0.0_VS2015
• Granting Process Scheduler Administrative Rights
Understanding Process Scheduler SecurityThis task—in which you set up the PeopleSoft User ID that will be used to boot Process Scheduler server so it hasadministrative rights to both Process Scheduler and Report Manager—guarantees that security is set up properly both in Microsoft Windows and within your PeopleSoft database.You must carry out this task to start Process Scheduler successfully.In the next section you set up ORACLE ProcMGR V12.2.2.0.0_VS2015 with a network user ID. When you install Oracle Tuxedo, the ORACLE ProcMGR V12.2.2.0.0_VS2015 service is set up by default to be started by local system account—a user account that does not have access to the Windows network. If the Process Schedulerserver or processes initiated through Process Scheduler will be using a network printer, accessing files from a network drive, or using Microsoft Windows utilities such as XCOPY that may access UNC paths, you need to change the user account used to start ORACLE ProcMGR V12.2.2.0.0_VS2015 with a network user account.
Task 15A-1-1: Changing User Account to Start ORACLE ProcMGR V12.2.2.0.0_VS2015To change User Account to start ORACLE ProcMGR V12.2.2.0.0_VS2015:

Chapter 15A Setting Up Process Scheduler on Windows
Copyright © 2018, Oracle and/or its affiliates. All Rights Reserved. 453
1. Launch the Services dialog box; for example, on Microsoft Windows 2012 R2, select Administrative Tools, Services.
In the Services dialog box, find the service labeled ORACLE ProcMGR V12.2.2.0.0_VS2015. This service is installed automatically when you install Tuxedo, and is highlighted in this example.
Microsoft Windows Services dialog box with ORACLE ProcMGR service highlighted
2. If the Stop button is enabled, click it to stop the current ORACLE ProcMGR V12.2.2.0.0_VS2015 process.
a. Click Yes when a message informs you of the status change.
b. Double-click ORACLE ProcMGR V12.2.2.0.0_VS2015.
The Properties dialog box appears.

Setting Up Process Scheduler on Windows Chapter 15A
454 Copyright © 2018, Oracle and/or its affiliates. All Rights Reserved.
3. Select the option This account on the Log On tab.
Enter an account name and password. In this example, the account name is CORP\USER1.
ORACLE ProcMGR V12.2.2.0.0_VS2015 Properties dialog box: Log On tab
Note. When you configure your Oracle Tuxedo server as outlined in the chapter, "Configuring the ApplicationServer on Windows," the user ID designated to be the Application Server Administrator must have read/write permissions to the PeopleSoft file directory and read permission to the %TUXDIR% directory, such as C:\oracle\tuxedo12.2.2.0.0_VS2015.

Chapter 15A Setting Up Process Scheduler on Windows
Copyright © 2018, Oracle and/or its affiliates. All Rights Reserved. 455
4. Select the General tab.
Make sure that Startup Type is set to Automatic, as shown in this example, and click OK.
ORACLE ProcMGR V12.2.2.0.0_VS2015 Properties dialog box: General tab
5. Click Start.
A message in the Properties dialog box will indicate the "Started" status. You also see the status in the Services dialog box. Click OK to close the dialog box.
Task 15A-1-2: Granting Process Scheduler Administrative RightsTo grant Process Scheduler administrative rights:1. Log onto your PeopleSoft database through the PeopleSoft Pure Internet Architecture.
2. Select PeopleTools, Security, User Profiles.
3. Select the User Profiles component. Use the Search dialog to select the PeopleSoft User ID you plan to use to boot the Process Scheduler server.

Setting Up Process Scheduler on Windows Chapter 15A
456 Copyright © 2018, Oracle and/or its affiliates. All Rights Reserved.
4. Click the Roles tab, click the plus icon to insert a new row, and there enter the ProcessSchedulerAdmin role togrant the user ID with administrative rights in the Process Scheduler components.
Process Scheduler window: Roles tab
5. Repeat the instructions in step 4 to add the role ReportDistAdmin.
This will grant the user ID administrative rights to the Report Manager component. Carry out this step only if the same user is also responsible for maintaining the content of Report Manager.
6. Click Save to save your changes.
7. Select the General tab and jot down the Permission List name assigned to the Process Profile field.
8. From the Portal menu, choose PeopleTools, Security, Permissions & Roles, Permission Lists.
9. In the Search dialog, enter the Permission List you noted in step 7.
10. Select the Can Start Application Server check box.
11. Click Save to save your changes.
Task 15A-2: Setting Up Process Scheduler to Transfer Reports and Logs to the Report Repository
This section discusses:
• Understanding Report Distribution

Chapter 15A Setting Up Process Scheduler on Windows
Copyright © 2018, Oracle and/or its affiliates. All Rights Reserved. 457
• Setting Up Single Signon to Navigate from PIA to Report Repository
• Determining the Transfer Protocol
• Starting the Distribution Agent
• Setting Up the Report Repository
• Setting Up the Distribution for Your Process Scheduler Server
• Setting Up Sending and Receiving of Report Folders in the Report Manager
Understanding Report DistributionThe PeopleSoft PeopleTools Report Distribution lets you access reports and log files generated from process requests run by a Process Scheduler Server Agent. Using the PeopleSoft Pure Internet Architecture, you can view reports and log files from the web browser through the Report Manager or Process Monitor Detail page. Report Distribution enables you to restrict access to these reports to authorized users based either on user ID or role ID.This product also includes the Distribution Agent component, which runs on the same server as the Process Scheduler Server Agent. The Distribution Agent, a process that runs concurrently with the Process Scheduler Server Agent, transfers to the Report Repository files generated by process requests initiated by the Process Scheduler Server Agent.The Distribution Agent transfers files to the Report Repository when one of these criteria is true:
• The Process Scheduler Server Agent is set up in the Server Definition to transfer all log files to the Report Repository.
• The process request output destination type is Web/Window.
In either case, the Process Scheduler Server Agent inserts a row in the Report List table (PS_CDM_LIST). The server agent then updates the distribution status for a process request to Posting upon completion of the program associated with the process request. The distribution status of Posting signals that the files for the process request are ready for transfer to the Report Repository. The Distribution Agent is notified by Process Scheduler for any process requests that are ready for transferring. As part of the process to transfer files to the Report Repository, the Distribution Agent performs the following steps:
• Transfer files to the Report Repository. All the report and log files are transferred to the Report Repository. For each process request transferred, a directory is created in the Report Repository using the following format: \<database name\<date yyyymmdd>\<report id>. All the files for a process request are stored in this directory.
• Delete the directory from the Process Scheduler Agent's Log/Output directory. When the output destination type specified for a process request is Web/Window, all the files and directory associated with the process request are deleted from the Process Scheduler Log/Output directory after the files are transferred to the Report Repository.
The following diagram illustrates the Process Scheduler and Report Repository architecture. The diagram includes the following items:
• The web browser gives access to the Process Request dialog and the Report or Log Viewer.
• The Report Repository is part of the PeopleSoft Pure Internet Architecture.
Note. The PeopleSoft Pure Internet Architecture must be installed for Process Scheduler to be able to transfer reports to the Report Repository.
• The Process Scheduler Server includes the Process Scheduler Server Agent and the Distribution Agent.
• The transfer protocol between Process Scheduler and the Report Repository may be FTP/FTPS, XCOPY, HTTP/HTTPS, or SFTP.

Setting Up Process Scheduler on Windows Chapter 15A
458 Copyright © 2018, Oracle and/or its affiliates. All Rights Reserved.
Process Scheduler and Report Repository Architecture
Before users can view a report, they are authenticated against the PeopleSoft database.You should set up single signon if you do not want users to have to log on an additional time to view reports in the Report Repository. For the details on setting up single signon, consult the security documentation.See PeopleTools: Security Administration.

Chapter 15A Setting Up Process Scheduler on Windows
Copyright © 2018, Oracle and/or its affiliates. All Rights Reserved. 459
Task 15A-2-1: Setting Up Single Signon to Navigate from PIA to Report RepositoryTo view reports (log files or system files) from Report Repository, you need to pass the authentication. Report Repository should be treated as a separate PeopleSoft application. To navigate from PeopleSoft Pure Internet Architecture (PIA) to Report Repository, you need to set up single signon to avoid getting a prompt for a second signon. This section includes some considerations for setting up single signon to navigate from PIA to Report Repository.If Report Repository resides on the same web server as PIA, make sure your Local Message Node is set up to be a"trusted" node for single signon for your system.If Report Repository resides on a different web server than PIA, do the following:
• Make sure your Local Message Node is set up to be a "trusted" node for single signon for your system.
• Use a fully qualified domain name when addressing the web server for both PIA and Report Repository. For example, enter http://<machineName>.peoplesoft.com/<site_name>/signon.html instead of http://<machineName>/<site_name>/signon.html.
• Specify the Authentication Domain for your application during installation. If you have multiple applications, and you want them to employ single signon, it is important to specify the same Authentication Domain for all applications.
See the information on implementing single signon in the PeopleTools: Security Administration product documentation.
• Set up single signon with a password, like this:
• Choose PeopleTools, Integration Broker, Integration Setup, Nodes.
• Click Search and then select the node marked as Default Local Node.
• Select Password for the Authentication Option.
• Enter a password of your choice.
• Enter the password again in the Confirm Password field.
• Enter the user ID for which you are setting up single signon in the Default User ID field.
• Save the Node Definition.
• Sign out from the PeopleSoft application.
• Reboot your application server.
See Also
PeopleTools: Security Administration
Task 15A-2-2: Determining the Transfer ProtocolWe recommend using HTTP as your transfer protocol.

Setting Up Process Scheduler on Windows Chapter 15A
460 Copyright © 2018, Oracle and/or its affiliates. All Rights Reserved.
Before transferring the files to the Report Repository, you need to determine which transfer protocol to use. If youhave a Microsoft Windows Process Scheduler and a Microsoft Windows web server, you can use either an XCOPY, FTP/FTPS, SFTP, or HTTP/HTTPS protocol. (If FTP information is not specified, Process Scheduler will perform an XCOPY.) If you have a PeopleSoft Process Scheduler on Microsoft Windows and a UNIX web server, you can use FTP/FTPS, SFTP, or HTTP/HTTPS. If the PeopleSoft Process Scheduler is on DB2 z/OS, useFTP/FTPS or HTTP/HTTPS. If you have a PeopleSoft Process Scheduler on UNIX , you can use FTP/FTPS, SFTP, or HTTP/HTTPS.
Note. If you are using FTP/FTPS or SFTP, the corresponding service must be set up in your web server.
Note. If you are on DB2 z/OS, you need to have JRE set up on your Process Scheduler server.
Task 15A-2-3: Starting the Distribution AgentThe Distribution Agent is automatically started as another Oracle Tuxedo server when a Process Scheduler Serveris booted. If a Process Scheduler Server was set up without specifying a Distribution Node in the Server Definition page, the Process Scheduler server will have a status in Process Monitor of "Running with No Report Node." After a node is defined for the Process Scheduler server, in the next cycle the Process Scheduler server checks the state of the system, and the Distribution Agent dynamically sets up its environment.
Task 15A-2-4: Setting Up the Report RepositoryThis section discusses:
• Defining ReportRepositoryPath
• Defining the Report Node to Use HTTP/HTTPS
• Defining the Report Node to Use XCOPY
• Defining the Report Node to Use FTP
• Defining the Report Node to Use FTPS
• Defining the Report Node to Use SFTP
Defining ReportRepositoryPath
The ReportRepositoryPath specifies the location of a directory for the Report Repository. You can specify the location for the Report Repository Path on the General page of the Web Profile during installation. If you do not set the location in the Web Profile, the location given by ReportRepositoryPath in the configuration.properties fileis used for the default location. Note that the value entered for Report Repository Path in the Web Profile overrides any entry in the configuration.properties file.See PeopleTools: Portal Technology, "Configuring Web Profiles."Use the following formats to enter the name for the directory that you want to use for the ReportRepositoryPath. The examples below give the default values. Note that you must use a forward slash ('/') in both cases:
• Microsoft Windows: ReportRepositoryPath=c:/psreports
• UNIX: ReportRepositoryPath=<user_home>/PeopleSoft Internet Architecture/psreports
For <user_home> substitute the home directory for the current user.

Chapter 15A Setting Up Process Scheduler on Windows
Copyright © 2018, Oracle and/or its affiliates. All Rights Reserved. 461
Defining the Report Node to Use HTTP/HTTPS
To define the report node to use HTTP/HTTPS:1. Select PeopleTools, Process Scheduler, Report Nodes.
2. Select the Add a New Value link and enter the Report node name.
3. On the Report Node Definition page, select HTTP or HTTPS from the Protocol drop-down list.
Select the HTTP option if you are not using SSL. Select the HTTPS option if you are using SSL. The pages for HTTP and HTTPS have the same fields. These examples show HTTP.
Note that if you are using SSL you need to have Client Certificates installed on your web server.
Report Node Definition page for the HTTP protocol
4. Enter the following information in the Distribution Node Details area:
• URLID: Enter the URL of the web server using the following format:
http://<machine_name>:<port_number>/psreports/<site_name>
Replace <machine_name> with the name of your machine. Use the fully qualified host name for your web server. If you are using an HTTP or HTTPS port other than the defaults, you need to specify the port number.

Setting Up Process Scheduler on Windows Chapter 15A
462 Copyright © 2018, Oracle and/or its affiliates. All Rights Reserved.
Note. If you specify the Authentication Token Domain name during the PIA installation, you must includea fully qualified domain name for the URL instead of the IP address.
• Description: Enter a description of the server (optional).
• Operating System: Select the web server operating system, Windows or UNIX.
5. Enter the following information in the Login Details area:
• Login ID: Enter the Login ID. This is not required, unless basic authentication has been set up on the web server by the Web Administrator.
• Password and Confirm Password: Enter the password, and confirm it, for the user ID specified in the Login ID field. This is not required, unless basic authentication has been set up on the web server by the Web Administrator.
Note. The setup of authentication is optional, but is recommended for security of the Report Repository when using the HTTP to transfer files. For information on setting up authentication on the web server where the Report Repository resides, refer to the PeopleTools: Security Administration product documentation.
6. Enter the following information in the URI Details area:
• URI Host: Enter the machine name for the report repository.
Note. In a basic setup, the machine name for the report repository will match the machine name of the webserver URL. However, under certain circumstances—for example, if you are using a reverse proxy server—the URL and URI Host may have different machine names.
• URI Port: Enter the port number, which must match the port number of your web server (defaults are HTTP = 80, HTTPS = 443). If you change a port number you will lose the default values for both protocols.
• URI Resource: Enter SchedulerTransfer/<site name>.
7. Click Save to save your entries.
8. Click Validate to confirm that your entries are complete and correct.
The validation confirms that the necessary parameters are present and correct, and simulates a file transfer with the entered information. You either see a message that confirms the success of the validation, or a message that displays an error for missing parameters or an unsuccessful transfer simulation.
9. To add additional report nodes, click Add to return to the Search page.
Defining the Report Node to Use XCOPY
Both the Process Scheduler machine and the Report Repository machine must be Microsoft Windows machines for XCOPY to be used.To define the report node to use XCOPY:1. Select PeopleTools, Process Scheduler, Report Nodes.
2. Select Add a New Value, enter the Report node name, and click Add.

Chapter 15A Setting Up Process Scheduler on Windows
Copyright © 2018, Oracle and/or its affiliates. All Rights Reserved. 463
3. On the Report Node Definition page, select XCOPY from the Protocol drop-down list.
Report Node Definition page for the XCOPY protocol
4. Enter the following information in the Distribution Node Details area:
• URLID: Enter the URL of the web server using this format:
http://<machine_name>:<port_number>/psreports/<site_name>
Replace <machine name> with the name of your web server. Replace <site name> with the directory where you installed the PIA files.
If you installed the web server software with the default TCP port of 80, you do not need to specify the port number in the URL path. However, if you installed the web server to some other port, you must specify the port number in the URL path.
• Description: Enter an optional description for the node.
• Network Path: Enter the path that points to your Report Repository share, using this format (where <machine_name> refers to the web server machine):
\\<machine_name>\psreports
Make sure that this directory is shared with the login accounts used to start Process Scheduler. Use UNC format instead of mapped drive format.
5. Select Save to save your entries.
6. Click Validate to confirm that your entries are correct.
The validation confirms that the necessary parameters are present and correct, and simulates a file transfer with the entered information. You either see a message that confirms the success of the validation, or a message that displays an error for missing parameters or an unsuccessful transfer simulation.
7. To add additional report nodes, select Add to return to the Search page.

Setting Up Process Scheduler on Windows Chapter 15A
464 Copyright © 2018, Oracle and/or its affiliates. All Rights Reserved.
Defining the Report Node to Use FTP
If you use the FTP report node protocol, note that:
• If your FTP server is a Microsoft Windows server, you may have to set up the FTP service.
• The Distribution Agent will perform a validation after FTP has transferred files into the Report Repository by sending a query request to the web server. For this task to be completed, it is critical that the value entered in the URL is accurate. Verify that the machine name, port number, and site number that you specify are correct.
If this setup is not completed, the process request will get a status of NOT POSTED in the Process Monitor Detail page and will log the message "Unable to verify files posted."
To define the report node to use FTP:1. Select PeopleTools, Process Scheduler, Report Nodes.
2. Select Add a New Value, enter the Report node name, and click Add.

Chapter 15A Setting Up Process Scheduler on Windows
Copyright © 2018, Oracle and/or its affiliates. All Rights Reserved. 465
3. On the Report Node Definition page, select FTP from the Protocol drop-down list.
Report Node Definition page for the FTP protocol
4. In the Distribution Node Details area, enter the following information:
• URLID: Enter the URL of the web server using this format:
http://<machine_name>:<port_number>/psreports/<site_name>
Replace <machine name> with the name of your web server. If you are using an HTTP port other than 80,you need to specify the port number. The variable <site name> refers to the directory where you installed the PIA files; this will default to ps for the first installation.

Setting Up Process Scheduler on Windows Chapter 15A
466 Copyright © 2018, Oracle and/or its affiliates. All Rights Reserved.
Note. If you specify the Authentication Token Domain name during the PIA installation, you must includea fully qualified domain name for the URL instead of the IP address.
Note. If you installed the web server software with the default TCP port of 80, you do not need to specify the port number in the URL path. However, if you installed the web server to some other port, you must specify the port number in the URL path.
• Description: Enter a description of the server (optional).
• Operating System: Select the operating system of the Report Repository, Windows or UNIX.
• Network Path: This information is not required for the FTP protocol
5. In the Login Details area, enter the following information:
• Login ID: Enter the FTP User ID.
• Password and Confirm Password: Enter the password, and enter it a second time, for the FTP User ID specified in the Login ID field.
6. In the File Transfer Details area, enter the following information:
• Home Directory: Enter the directory specified during the PIA installation as the Report Repository. The FTP User ID must have write access to this directory. Note that this is not a required field for FTP transfer, as the system uses the Report Repository directory specified at install time or the current directory assigned to ReportRepositoryPath in configuration.properties. Note that the value you enter for the Report Repository Path in the Web Profile at install time overrides any entry for ReportRepositoryPathin configuration.properties.
For Microsoft Windows operating systems, the directory needs to match the Report Repository path. Makesure that you do not include any drive information—as in c:\psreports\—because you are using the FTP protocol to interpret this parameter.
• FTP Address: Enter the machine name or the IP address of the Report Repository. If the name of the machine is used, it must be included on a DNS server.

Chapter 15A Setting Up Process Scheduler on Windows
Copyright © 2018, Oracle and/or its affiliates. All Rights Reserved. 467
7. If you need to specify additional properties, use the Connection Properties area. Specifying the Connection Properties is optional.
Click the lookup button (magnifying glass) and select one of the properties in the following table. Click the plus sign to add another connection property.
Property Name Property Value
ACTIVEMODE To enable active mode, add the ACTIVEMODE property to the URL and set it to Y.
The default FTP connection mode is extended passive mode.
ACTIVEPORTOPTION This property can be used along with ACTIVEMODE. When active mode is enabled, you can use ACTIVEPORTOPTION to specify the IP address and porton which the FTP server can be accessed. This is useful when the server is behind a firewall. By default, ACTIVEPORTOPTION uses the default IP address of your system. If you want to use a particular IP address, set the ACTIVEPORTOPTION value to either the full IP address, a host name to resolve to an IP address, or a local network interface name.
You can also specify a port range. For example: 10.176.147.111:10000-13000
ENABLEEPRT This option can be used only with Active Mode. If Active Mode is enabled and ENABLEEPRT is set to N, then the system will use a PORT (IPv4) Active Mode connection.
By default, ENABLEEPRT is Y, if Active Mode is set to Y.
EXTENDEDPASSIVEMODE • 0: Disable EPSV
• 1: Enable EPSVThis property enables you to control whether extended passive mode (EPSV) will be used by FTP.
EPSV is used by default. That is, by default, this value is considered to be 1.
If the client fails to connect to the server with EPSV, then the system will try passive mode (PASV). To use PASV only, add EXTENDEDPASSIVEMODE to the URL Properties and set it to 0.
JKSPASSWORD Specify the Java keystore (JKS) password.
JKSPATH Specify the Java keystore (JKS) path.
PASSWORD Specify the password associated with the USER property, which identifies the FTP User ID.
USER Specify the FTP User ID used for authentication when accessing the FTP site.

Setting Up Process Scheduler on Windows Chapter 15A
468 Copyright © 2018, Oracle and/or its affiliates. All Rights Reserved.
8. If you need to specify an encrypted password in any of the property fields, use the Password Encryption area to generate the encrypted password, as follows:
a. In the Password field, enter a password.
b. In the Confirm Password field, enter the password again.
c. Click Encrypt.
The encrypted password is displayed in the Encrypted Password field.
d. From the Encrypted Password field, cut the encrypted password and then copy the encrypted value to the appropriate location.
9. Select Save to save your entries.
10. Click Validate to confirm that your entries are correct.
The validation confirms that the necessary parameters are present and correct, and simulates a file transfer with the entered information. You either see a message that confirms the success of the validation, or a message that displays an error for missing parameters or an unsuccessful transfer simulation.
11. To add additional report nodes, click Add to return to the Search page.
Defining the Report Node to Use FTPS
To define the report node to use FTPS:1. Select PeopleTools, Process Scheduler, Report Nodes.
2. Select Add a New Value, enter the Report node name, and click Add.

Chapter 15A Setting Up Process Scheduler on Windows
Copyright © 2018, Oracle and/or its affiliates. All Rights Reserved. 469
3. On the Report Node Definition page, select FTPS from the Protocol drop-down list.
Report Node Definition page for the FTPS protocol
4. In the Distribution Node Details area, enter the following information:
• URLID: Enter the URL of the web server using this format:
http://<machine_name>:<port_number>/psreports/<site_name>
Replace <machine name> with the name of your web server. If you are using an HTTP port other than 80,you need to specify the port number. The variable <site name> refers to the directory where you installed the PIA files; this will default to ps for the first installation.

Setting Up Process Scheduler on Windows Chapter 15A
470 Copyright © 2018, Oracle and/or its affiliates. All Rights Reserved.
Note. If you specify the Authentication Token Domain name during the PIA installation, you must includea fully qualified domain name for the URL instead of the IP address.
Note. If you installed the web server software with the default TCP port of 80, you do not need to specify the port number in the URL path. However, if you installed the web server to some other port, you must specify the port number in the URL path.
• Description: Enter a description of the server (optional).
• Operating System: Select the operating system of the Report Repository, Windows or UNIX.
• Network Path: This information is not required for the FTPS protocol.
5. In the Login Details area, enter the following information:
• Login ID: Enter the FTP User ID.
• Password and Confirm Password: Enter the password, and enter it a second time, for the user ID specifiedin the Login ID field.
6. In the File Transfer Details area, enter the following information:
• Home Directory: Enter the directory specified during the PIA installation as the Report Repository. The FTP User ID must have write access to this directory. Note that this is not a required field for FTP transfer, as the system uses the Report Repository directory specified at install time or the current directory assigned to ReportRepositoryPath in configuration.properties. Note that the value you enter for the Report Repository Path in the Web Profile at install time overrides any entry for ReportRepositoryPathin configuration.properties.
For Microsoft Windows operating systems, the directory needs to match the Report Repository path. Makesure that you do not include any drive information—as in c:\psreports\—because you are using the FTP protocol to interpret this parameter.
• FTP Address: Enter the machine name or the IP address of the Report Repository. If the name of the machine is used, it must be included on a DNS server.
• SSL Mode: Select Explicit or Implicit from the drop-down list.
These are two separate methods developed to invoke the client security for use with FTP clients. With the explicit mode, FTPS-aware clients can invoke security with an FTPS-aware server without breaking overall FTP functionality with non-FTPS-aware clients. The implicit method requires that all clients of theFTPS server be aware that SSL is to be used on the session, and thus is incompatible with non-FTPS-aware clients.

Chapter 15A Setting Up Process Scheduler on Windows
Copyright © 2018, Oracle and/or its affiliates. All Rights Reserved. 471
7. In the Connection Properties area, click the lookup button (magnifying glass) and select one of the properties in the following table:
Click the plus sign to add another connection property.
Property Name Property Value
ACTIVEMODE To enable active mode, add the ACTIVEMODE property to the URL and set it to Y.
The default FTPS connection mode is extended passive mode.
ACTIVEPORTOPTION This property can be used along with ACTIVEMODE. When active mode is enabled, you can use ACTIVEPORTOPTION to specify the IP address and porton which the FTP server can be accessed. This is useful when the server is behind a firewall. By default, ACTIVEPORTOPTION uses the default IP address of your system. If you want to use a particular IP address, set the ACTIVEPORTOPTION value to either the full IP address, a host name to resolve to an IP address, or a local network interface name.
You can also specify a port range. For example: 10.176.147.111:10000-13000
CERTALIAS Certificate Alias: The Certificate Alias must be an alias name of a certificate stored in the database (using the PeopleSoft PeopleTools Digital Certificates page).
Note. Currently, only PEM certificates are supported for FTPS.
ENABLEEPRT This option can be used only with Active Mode. If Active Mode is enabled and ENABLEEPRT is set to N, then the system will use a PORT (IPv4) Active Mode connection.
By default, ENABLEEPRT is Y, if Active Mode is set to Y.
EXTENDEDPASSIVEMODE • 0: Disable EPSV
• 1: Enable EPSVThis property enables you to control whether extended passive mode (EPSV) will be used by FTP.
EPSV is used by default. That is, by default, this value is considered to be 1.
If the client fails to connect to the server with EPSV, then the system will try passive mode (PASV). To use PASV only, add EXTENDEDPASSIVEMODE to the URL Properties and set it to 0.
JKSPASSWORD Specify the Java keystore (JKS) password.
JKSPATH Specify the Java keystore (JKS) user.

Setting Up Process Scheduler on Windows Chapter 15A
472 Copyright © 2018, Oracle and/or its affiliates. All Rights Reserved.
Property Name Property Value
KEYSTOREPASSWORD This property is required for FTPS and HTTPS repositories. For attachments transferred from the PeopleSoft system to the FTPS or HTTPS repository, the system retrieves the key pair for the client certificate from the digital certificate store and writes the pair to a file in PKCS12 format with password protection. The value of this property will be used as the password for the PKCS12 file.
The PKCS12 file enables connection and file transfer, and it exists only temporarily in <PS_SERVDIR>\files\<CERT ALIAS NAME> for the duration of the file transfer. The system deletes the file after the file transfer transaction.
Note. If the system fails to delete the certificate alias file, a message will be written to the application server log. Themaximum number of files that can exist at any time is equal to the total number of FTPS and HTTPS URL identifiers defined in the system.
For information on setting the PS_SERVDIR environmentvariable, see the PeopleTools: Integration Broker product documentation.
PASSWORD Specify the password associated with the USER property, which identifies the FTP User ID.
SSLUAGELEVEL • 0 - No SSL: No SSL will be used.
• 1 - Try SSL: Try using SSL, but proceed as normal otherwise.
• 2 - Control: Require SSL for the control connection.
• 3 - SSL Only: (Default) Require SSL for all communication.
USER Specify the FTP User ID used for authentication when accessing the FTP site.
VERIFYHOST • 0: Do not verify the server for host name.
• 1: Check if there exists any value in the common namefield in the server certificate. This check does not verify if it matches with what the client specifies.
• 2: (Default) Check for a match with the host name in the URL with the common name or Subject Alternate field in the server certificate.
VERIFYPEER • False: Do not verify the peer.
• True: (Default) Verify the peer by authenticating the certificate sent by the server.
8. If you need to specify an encrypted password in any of the property fields, use the Password Encryption area to generate the encrypted password, as follows:

Chapter 15A Setting Up Process Scheduler on Windows
Copyright © 2018, Oracle and/or its affiliates. All Rights Reserved. 473
a. In the Password field, enter a password.
b. In the Confirm Password field, enter the password again.
c. Click Encrypt.
The encrypted password is displayed in the Encrypted Password field.
d. From the Encrypted Password field, cut the encrypted password and then copy the encrypted value to the appropriate location.
9. Select Save to save your entries.
10. Click Validate to confirm that your entries are correct.
The validation confirms that the necessary parameters are present and correct, and simulates a file transfer with the entered information. You either see a message that confirms the success of the validation, or a message that displays an error for missing parameters or an unsuccessful transfer simulation.
11. To add additional report nodes, click Add to return to the Search page.
Defining the Report Node to Use SFTP
To define the report node to use SFTP:1. Select PeopleTools, Process Scheduler, Report Nodes.
2. Select Add a New Value, enter the Report node name, and click Add.

Setting Up Process Scheduler on Windows Chapter 15A
474 Copyright © 2018, Oracle and/or its affiliates. All Rights Reserved.
3. On the Report Node Definition page, select SFTP from the Protocol drop-down list.
Report Node Definition page for the SFTP protocol
4. In the Distribution Node Details area, enter the following information:
• URLID: Enter the URL of the web server using this format:
http://<machine_name>:<port_number>/psreports/<site_name>
Replace <machine name> with the name of your web server. If you are using an HTTP port other than 80,you need to specify the port number. The variable <site name> refers to the directory where you installed the PIA files; this will default to ps for the first installation.

Chapter 15A Setting Up Process Scheduler on Windows
Copyright © 2018, Oracle and/or its affiliates. All Rights Reserved. 475
Note. If you specify the Authentication Token Domain name during the PIA installation, you must includea fully qualified domain name for the URL instead of the IP address.
Note. If you installed the web server software with the default TCP port of 80, you do not need to specify the port number in the URL path. However, if you installed the web server to some other port, you must specify the port number in the URL path.
• Description: Enter a description of the server (optional).
• Operating System: Select the operating system of the Report Repository, Windows or UNIX.
• Network Path: This information is not required for the SFTP protocol.
5. In the Login Details area, enter the following information:
• Login ID: Enter the FTP User ID.
• Password and Confirm Password: Enter the password, and enter it a second time, for the user ID specifiedin the Login ID field.
6. In the File Transfer Details area, enter the following information:
• Home Directory: Enter the directory specified during the PIA installation as the Report Repository. The FTP User ID must have write access to this directory. Note that this is not a required field for FTP transfer, as the system uses the Report Repository directory specified at install time or the current directory assigned to ReportRepositoryPath in configuration.properties. Note that the value you enter for the Report Repository Path in the Web Profile at install time overrides any entry for ReportRepositoryPathin configuration.properties.
For Microsoft Windows operating systems, the directory needs to match the Report Repository path. Makesure that you do not include any drive information—as in c:\psreports\—because you are using the FTP protocol to interpret this parameter.
• FTP Address: Enter the machine name or the IP address of the Report Repository. If the name of the machine is used, it must be included on a DNS server.

Setting Up Process Scheduler on Windows Chapter 15A
476 Copyright © 2018, Oracle and/or its affiliates. All Rights Reserved.
7. In the Connection Properties area, click the lookup button (magnifying glass) and select one of the properties in the following table.
Click the plus sign to add additional connection properties.
Property Name Property Value
AUTHTYPE Select one of the following the authentication types:
• PUBLICKEY
• PASSWORD
• ANY
PASSWORD Specify the user password. You can enter the password in the Password Encryption box, click Encrypt, and then copy the encrypted value to the Password property.
PASSWORDKEY Enter the password for the private key.
PRIVATEKEY Select the private key.
PUBLICKEY Select the public key.
SSHKEYALIAS Select the SSH certificate saved to the database using the PeopleTools Security, Digital Certificates page (select PeopleTools, Security, Security Objects, Digital Certificates). The SSH certificate added through the Digital Certificates page contains both the public and private key data, identified by the Alias column value on the Digital Certificates page.
If using the SSHKEYALIAS URL property, the Property Value prompt displays only the list of SSH certificates thathave been added to the Digital Certificates page. If you have added the SSH certificate using the Digital Certificates page, and you have assigned an SSH certificate to the SSHKEYALIAS URL property, the system ignores the PUBLICKEY and PRIVATEKEY properties, regardless of whether they refer to valid key files in the file system.
If you provided a password (or passphrase) when generating your SSH certificate, specify that value using the PASSWORDKEY URL property.
See PeopleTools: Security Administration, "Configuring Digital Certificates."
USER Specify the user ID to be authenticated.
8. If you need to specify an encrypted password in any of the property fields, use the Password Encryption area to generate the encrypted password, as follows:
a. In the Password field, enter a password.
b. In the Confirm Password field, enter the password again.
c. Click Encrypt.

Chapter 15A Setting Up Process Scheduler on Windows
Copyright © 2018, Oracle and/or its affiliates. All Rights Reserved. 477
The encrypted password is displayed in the Encrypted Password field.
d. From the Encrypted Password field, cut the encrypted password and then copy the encrypted value to the appropriate location.
9. Select Save to save your entries.
10. Click Validate to confirm that your entries are correct.
The validation confirms that the necessary parameters are present and correct, and simulates a file transfer with the entered information. You either see a message that confirms the success of the validation, or a message that displays an error for missing parameters or an unsuccessful transfer simulation.
11. To add additional report nodes, click Add to return to the Search page.
Task 15A-2-5: Setting Up the Distribution for Your Process Scheduler ServerTo set up the Distribution Settings for your Process Scheduler Server:1. Select PeopleTools, Process Scheduler, Servers.
2. Enter the Server Name (such as PSNT). The Server Definition page appears.
3. Select the Distribution tab.
Server Definition page for PSNT: Distribution tab
4. Click the lookup button for Distribution Node Name to display the report node names and select the name of the required report node.
5. Enter a number for the Maximum Transfer Retries. This is the maximum number of times the server can try tosend a report before it errors out.
6. Enter the number of seconds for the Interval for Transfer Attempt field. This is the interval between attempts to send the report.

Setting Up Process Scheduler on Windows Chapter 15A
478 Copyright © 2018, Oracle and/or its affiliates. All Rights Reserved.
7. Select the check box Transfer Log Files to Report Repository if you want to transfer all log and trace files from processes that do not generate reports.
8. Click Save to save your entries.
9. If Process Scheduler is running, you must reboot for any new settings to take effect.
To view reports (log files or system files) from Report Repository, you need to pass the authentication. Report Repository should be treated as a separate PeopleSoft application. To navigate from PIA to Report Repository, you need to set up single signon in order to avoid getting a prompt for a second signon.
Task 15A-2-6: Setting Up Sending and Receiving of Report Folders in the Report ManagerTo be able to view reports in the Report Manager Explorer and List pages, you need to set up the sending and receiving of report folders in the Report Manager by activating the domain on which a sending and receiving server resides. Consult the documentation covering the PeopleSoft Integration Broker to learn how to activate the sending and receiving server domain.See PeopleTools: Integration Broker.See PeopleTools: Integration Broker Service Operations Monitor.
Task 15A-3: Setting Environment Variables
To set the appropriate Tuxedo environment variables, carry out these steps. (If you have already set these variables on the machine you are using as your Process Scheduler Server, you can skip this task.)See "Installing Additional Components," Installing Oracle Tuxedo on Microsoft Windows.To set the variables:1. Choose Start, Settings, Control Panel.
2. Double-click the System icon.
3. Make sure that the NLSPATH environment variable is set.
NLSPATH does not need to be explicitly set since Oracle Tuxedo sets NLSPATH in its own registry tree. This value can be displayed using Control Panel, Tuxedo, on the Environment tab. However, the installation of certain products, such as IBM DB2 connectivity (DB2 for z/OS and DB2 for Linux, UNIX, and Windows) sets NLSPATH to a value that causes Oracle Tuxedo to fail. The solution is to either set NLSPATH=c:\tuxedo\locale\c, or to delete it entirely and let Oracle Tuxedo pick up the value from its registrytree. If you are running DB2 for Linux, UNIX, and Windows, the solution instead is to append the c:\tuxedo\locale\c directory in the NLSPATH directory.
Search the Oracle Tuxedo documentation for additional information on NLSPATH.
Task 15A-4: Setting Up Process Scheduler Server Agent
This section discusses:
• Understanding Process Scheduler Server Agent
• Creating and Configuring a Process Scheduler Server
• Reconfiguring a Process Scheduler Server

Chapter 15A Setting Up Process Scheduler on Windows
Copyright © 2018, Oracle and/or its affiliates. All Rights Reserved. 479
• Verifying the Process Scheduler Server Status
Understanding Process Scheduler Server AgentFor installation purposes, you can use predefined server names and other definitions. The predefined name that you might use is as follows:
Server Name Operating System
PSNT Microsoft Windows
To test this, use processes already defined in your PeopleSoft database. To set up a new server definition in your PeopleSoft database, refer to the PeopleTools: Process Scheduler product documentation.
Note. When creating multiple Process Scheduler Servers for the same database, each server must have a unique server name. For example, two Process Scheduler Servers, both named PSNT, cannot run against the same database.
Task 15A-4-1: Creating and Configuring a Process Scheduler ServerThis section describes how to create and configure a Process Scheduler server.You can set Process Scheduler configuration parameters either by using PSADMIN, which provides an interactivedialog, or by editing the configuration file psprcs.cfg located in the PS_CFG_HOME\appserv\prcs\database namedirectory. The following steps assume you are using PSADMIN to specify parameter settings.
Note. For Cube Builder users, if Essbase Server is installed on a different machine than the Process Scheduler, you must install Essbase Client 11.1.2.1 on the process scheduler server machine. You must also ensure that the %ESSBASEPATH% and %ARBORPATH% environmental variables are properly set in the Process Scheduler.
Note. If you use the configuration file psprcs.cfg, be aware that in the PeopleSoft PeopleTools 8.49 release and later, the section [Output Dest Exceptions] has been modified to trap metastring exceptions not only in the output destination but in other process parameters as well. In this section the entry OUTDEST_EXCEPT01=%ANYMETASTRING% has been changed to PARAMETER_EXCEPT01=%ANYMETASTRING%.
To create and configure a Process Scheduler Server:1. From PS_HOME\appserv on the batch server, type psadmin.
You see the PeopleSoft Server Administration menu, as in this example:
----------------------------------------------PeopleSoft Server Administration---------------------------------PS_CONFIG_HOME C:\User\JSMITH\psft\pt\8.56PS_HOME C:\PT8.56PS_APP_HOME C:\HC9.2
1) Application Server2) Process Scheduler3) Search Server4) Web (PIA) Server

Setting Up Process Scheduler on Windows Chapter 15A
480 Copyright © 2018, Oracle and/or its affiliates. All Rights Reserved.
5) Switch Config Home6) Service Setup7) Replicate Config Home8) Refresh Config Homeq) Quit
Command to execute (1-8 q):
2. Depending on your environment, you may see a message after the menu selection, which indicates that PSADMIN has modified the PS_CFG_HOME/peopletools.properties file with the current PS_HOME location:
************************************************************PS_CFG_HOME/peopletools.properties file has been updated.You should use the Config Home Refresh feature in PSAdmin to ensure that all of your domains are current.Alternatively, you may recreate all of your domains.Please press any key to continue...*************************************************************
This indicates that one of these situations exists:
• The PS_CFG_HOME that you are working with was used previously from a different PS_HOME. In this case, you should recreate any existing Application Server, Process Scheduler, Search, or PIA domains in this PS_CFG_HOME.
• You configured your environment such that PS_CFG_HOME is the same as PS_HOME. The first time you use PSADMIN to create a domain, it updates the PS_CFG_HOME/peopletools.properties file. Continue with the next step.
3. Select 2 to access the Process Scheduler submenus.
4. Select 2 for Create a domain from the PeopleSoft Process Scheduler Administration menu.
-------------------------------------------PeopleSoft Process Scheduler Administration-------------------------------------------1) Administer a domain2) Create a domain3) Delete a domain4) Import domain configuration
q) Quit
Command to execute (1-4, q) : 2
5. Enter the name of the domain at the following prompt, such as HRDMO in this example, and press ENTER:
Please enter name of domain to create : HRDMO
6. Specify 1 for nt for the configuration templates.
The nt configuration is based on the operating system Process Scheduler server will be booted from.
Process Scheduler Configuration templates:
1) nt
2) os390

Chapter 15A Setting Up Process Scheduler on Windows
Copyright © 2018, Oracle and/or its affiliates. All Rights Reserved. 481
Select config template number:
7. After the system creates the domain, the Quick-configure menu appears:
------------------------------------------------------------Quick-configure menu -- domain: HRDMO------------------------------------------------------------ Features Settings ========== ========== 1) App Engine : Yes 9) DBNAME :[HRDMO] 2) Master Scheduler : Yes 10) DBTYPE :[DB2ODBC] 3) Perf Collator : No 11) PrcsServer :[PSNT] 4) Domains Gateway : No 12) UserId :[PS] 5) Push Notifications: No 13) UserPswd :[] 14) ConnectID :[people] 15) ConnectPswd:[] 16) Log/Output Dir:[%PS_SERVDIR%\log_⇒output] 17) SQRBIN :[%PS_HOME%\bin\sqr\ODB⇒\binw] 18) AddToPATH :[%WINDIR%;%WINDIR%⇒\SYSTEM32] 19) DBBIN :[C:\<connectivity⇒ directory>] 20) DomainConnectPswd:[] Actions ========= 6) Load config as shown 7) Custom configuration 8) Edit environment settings h) Help for this menu q) Return to previous menu
HINT: Enter 9 to edit DBNAME, then 6 to load
Enter selection (1-20, h, or q):

Setting Up Process Scheduler on Windows Chapter 15A
482 Copyright © 2018, Oracle and/or its affiliates. All Rights Reserved.
8. If you need to modify any of these settings, enter the number next to the parameter name, type the new value, and press ENTER. This table lists the parameters and gives brief descriptions.
Parameter Description
Master Scheduler Select this option to enable the Master Scheduler Server (PSMSTPRC). The default is to enable the server.
See PeopleTools: Process Scheduler.
App Engine Select this option to initiate Application Engine programs through the AE Tuxedo Server (PSAESRV). The default isset to run AE using PSAESRV.
See PeopleTools: Process Scheduler.
Perf Collator Select this option to enable the PSPPMSRV server process.
See PeopleTools: Performance Monitor, "Enabling the Required Elements on the Monitoring System."
Domain Gateways Select this option to enables inter domain communication, for example between Application Server and Process Scheduler domains.
See PeopleTools: Fluid User Interface Developer's Guide,"Setting Up Push Notification Configurations."
Push Notifications Select this option to enables pushing server events from PeopleSoft PeopleTools server runtime, such as Application Server and Process Scheduler, to browser clients and other PeopleSoft PeopleTools server runtime components.
See PeopleTools: Fluid User Interface Developer's Guide,"Setting Up Push Notification Configurations."
Load config as shown Load the selections you made in the Quick Configure menu.
Custom configuration Make custom selections in PSADMIN, using options that are not available in the Quick Configure menu.
Edit environment settings Edit, add, remove, comment out, and review domain-level environment variables.
DBNAME Specify the database name that is associated with a PeopleSoft Process Scheduler Server Agent, such as HRDMO, FSDMO, SADMO, and so on.
DBTYPE Specify the database type: DB2ODBC (for DB2 for z/OS).
PrcsServer Specify the process server name. This must match the name defined in the Server Definition table, such as PSNT or PSUNX.

Chapter 15A Setting Up Process Scheduler on Windows
Copyright © 2018, Oracle and/or its affiliates. All Rights Reserved. 483
Parameter Description
UserId Enter the user ID, such as VP1 or PS.
UserPswd Enter the password for the user ID, as you specified duringthe database configuration.
The password is hidden by masking characters as you type, in the Quick-configure menu after entry.
ConnectID Enter the connect ID. This value is required.
ConnectPswd Enter the connect password, as you specified during the database configuration. This value is required.
The password is hidden by masking characters as you type, in the Quick-configure menu after entry.
Log/Output Dir Specify the directory in which files that are generated by the program are written. When PeopleSoft Process Scheduler initiates a process request, it creates a subdirectory in the format <Process Type ID>_<Program Name>_<Process Instance> that contains the generated files. For instance, the SQR program XRFWIN that ran with process instance 20 has all reports, trace, and log filesin the subdirectory SQR_XRFWIN_20. It is also the optional directory used with the Output Destination field when scheduling a request. This variable (%%OutputDirectory%%) can be used in the File/Printer field of the Process Scheduler Request dialog box.
SQRBIN Enter the path to the SQR executables.
AddToPATH (Optional for Tuxedo) Specify an additional directory that is appended to the PATH environment variable.
DBBIN Enter the path to the database drivers; that is, your connectivity software.
DomainConnectPswd If you configured your Application Server domain to require a Domain Connection password, enter it here. Otherwise, leave it blank.
The password is hidden by masking characters as you type, and in the Quick-configure menu after entry.
See the information on setting Application Server Domain Parameters in the PeopleTools: System and Server Administration product documentation.
For descriptions of the PSADMIN options that do not appear in the Quick-configure menu, see the information on using PSADMIN in the PeopleTools: Process Scheduler product documentation. For a basic installation, in most cases you can accept the defaults.
9. When you have updated the settings as needed, choose 5, Load config as shown, from the Quick-Configure menu to save your settings to the Process Scheduler configuration file, pstuxcfg.

Setting Up Process Scheduler on Windows Chapter 15A
484 Copyright © 2018, Oracle and/or its affiliates. All Rights Reserved.
10. To start Process Scheduler, choose 1, for Administer Domain.
11. On the PeopleSoft Process Scheduler Administration menu, choose 1 for Boot this domain.
--------------------------------PeopleSoft Process Scheduler Administration---------------------------------
Domain Name: HRDMO
1) Boot this domain2) Domain shutdown menu3) Domain status menu4) Configure this domain5) TUXEDO command line (tmadmin)6) Edit configuration/log files menu7) Clean IPC resources of this domainq) Quit
Command to execute (1-7, q) :
12. Choose 1, Boot (Serial Boot), or 2, Parallel Boot, from the PeopleSoft Domain Boot Menu.
Note. The messages you see and the number of processes started will depend on the options you chose during configuration.
13. If you want to stop Process Scheduler Server, from the PeopleSoft Domain Administration menu, choose 2, for Domain Shutdown menu, and then enter the number corresponding to the name of the appropriate database.
Note. If you see the following message, then the server is already down:
Command to execute (1-2, q) [q]: 1 Loading command line administration utility ... tmadmin - Copyright (c) 2007-2008, Oracle. Portions * Copyright 1986-1997 RSA Data Security, Inc. All Rights Reserved. Distributed under license by Oracle. Tuxedo is a registered trademark. Nobulletin board exists. Entering boot mode. > TMADMIN_CAT:111: ERROR: No such command.
Task 15A-4-2: Reconfiguring a Process Scheduler ServerIf you create and then immediately configure a Process Scheduler server, you can use the Quick-configure menu. Alternatively, you can use PSADMIN as described in this section. Feel free to skip this procedure if you have already created and configured your Process Scheduler Server using the Quick-configure menu and want to move forward with your installation.
Note. If you want to configure the Process Scheduler Server while it is running, you need to stop and restart the server to load the new settings.
To reconfigure a Process Scheduler Server:1. Go to PS_HOME\appserv and enter:
psadmin
2. Depending on your environment, you may see a message after the initial menu, which indicates that

Chapter 15A Setting Up Process Scheduler on Windows
Copyright © 2018, Oracle and/or its affiliates. All Rights Reserved. 485
PSADMIN has modified the PS_CFG_HOME/peopletools.properties file with the current PS_HOME location:
************************************************************PS_CFG_HOME/peopletools.properties file has been updated.You should use the Config Home Refresh feature in PSAdmin to ensure that all of your domains are current.Alternatively, you may recreate all of your domains.Please press any key to continue...*************************************************************
This indicates that one of these situations exists:
• The PS_CFG_HOME that you are working with was used previously from a different PS_HOME. In this case, you should recreate any existing Application Server, Process Scheduler, Search, or PIA domains in this PS_CFG_HOME.
• You configured your environment such that PS_CFG_HOME is the same as PS_HOME. The first time you use PSADMIN to create a domain, it updates the PS_CFG_HOME/peopletools.properties file. Continue with the next step.
3. Select 2 for Process Scheduler in the PeopleSoft Server Administration menu.
4. In the PeopleSoft Process Scheduler Administration menu, select 1 for Administer a domain.
5. Select the database for which the Process Scheduler needs to be configured.
6. You see the following prompt:
Do you want to change any config values (y/n)? [n]:
Specify y to start an interactive dialog that lets you examine or change parameter values.
7. Specify the configuration parameters one by one.
Configuration parameters are grouped into sections. At each section, you are asked whether to change any parameters—for example:
Values for config section - Startup DBName= DBType= UserId= UserPswd= ConnectId= ConnectPswd= ServerName= StandbyDBName= StandbyDBType= StandbyUserId= StandbyUserPswd= InMemoryDBName= InMemoryDBType=Do you want to change any values (y/n)? [n]:
• Specify y to change any parameter values for the current section. You are prompted for each parameter value. Either specify a new value or press ENTER to accept the default. After you press ENTER, you are positioned at the next parameter in that section. When you are done with that section, you are again asked whether you want to re-edit any of the values you changed.
• The parameters StandbyDBName, StandbyDBType, StandbyUserID, and StandbyUserPswd are used for astandby database in an Oracle database environment.

Setting Up Process Scheduler on Windows Chapter 15A
486 Copyright © 2018, Oracle and/or its affiliates. All Rights Reserved.
See the information on implementing Oracle Active Data Guard in the PeopleTools: Data Management, product documentation.
• The parameters InMemoryDBName and InMemoryDBType are reserved for internal use.
• If you do not want to change any values, specify n and you are prompted for the next configuration section.
8. After you have selected all your parameters, you see this message:
You will need to shut down and start up the server to read the new⇒ settings.
For descriptions of the Process Scheduler options in the PSADMIN, see the PeopleTools: Process Scheduler product documentation. In most cases you can accept the defaults.
Task 15A-4-3: Verifying the Process Scheduler Server StatusAt this stage it is a good idea to verify the Process Scheduler Server status.To verify the Process Scheduler Server status:1. From the PeopleSoft Process Scheduler Administration menu, choose option 3, for Domain status menu.
--------------------------------PeopleSoft Process Scheduler Administration--------------------------------
Domain Name: HRDMO
1) Boot this domain2) Domain shutdown menu3) Domain status menu4) Configure this domain5) TUXEDO command line (tmadmin)6) Edit configuration/log files menu7) Clean IPC resources of this domainq) Quit
Command to execute (1-7, q) : 3
2. To verify the status of the Process Scheduler Server for a specific database, type the number corresponding to the appropriate database.
For example:
Database list:
1) HRDMO
Select item number to start: 1
Loading command line administration utility ...tmadmin - Copyright (c) 2007-2008 Oracle.Portions * Copyright 1986-1997 RSA Data Security, Inc.All Rights Reserved.Distributed under license by Oracle.Tuxedo is a registered trademark.

Chapter 15A Setting Up Process Scheduler on Windows
Copyright © 2018, Oracle and/or its affiliates. All Rights Reserved. 487
> Prog Name Queue Name Grp Name ID RqDone Load Done Current⇒ Service--------- ---------- -------- -- ------ --------- -----------⇒----BBL.exe 46845 PSSERVER+ 0 9 450 ( IDLE )PSMONITORSRV.e MONITOR MONITOR 1 0 0 ( IDLE )PSAESRV.exe 00101.00001 AESRV 1 0 0 ( IDLE )PSAESRV.exe 00101.00002 AESRV 2 0 0 ( IDLE )PSAESRV.exe 00101.00003 AESRV 3 0 0 ( IDLE )PSPRCSRV.exe SCHEDQ BASE 101 0 0 ( IDLE )PSMSTPRC.exe MSTRSCHQ BASE 102 0 0 ( IDLE )PSDSTSRV.exe DSTQ BASE 103 0 0 ( IDLE )>
You can also verify the status of the Process Scheduler Server from Process Monitor in PeopleSoft Pure Internet Architecture. To verify the Process Scheduler Server status from the Process Monitor page, go to PeopleTools, Process Scheduler, Process Monitor, and select Server List.If the user has the process security rights to update the server status, the Refresh button can be used to refresh the screen, too.See Setting Up Process Scheduler Security.This example of the Server List page shows two Process Scheduler servers with status Down, and one with status Running.
Process Monitor page: Server List tab
Task 15A-5: Starting Process Scheduler as a Windows Service (Optional)
You can start the Process Scheduler server as a Windows service. This means that administrators do not need to manually boot each Process Scheduler server that runs on a Microsoft Windows machine. Instead, each time you boot the Microsoft Windows server where the Process Scheduler server resides, the Process Scheduler Server willboot automatically. You can also still manually boot Process Scheduler Servers on your Microsoft Windows server.
Note. If you have set up TUXDIR and TEMP as new SYSTEM variables, you need to reboot your machine before any Windows services will pick up the value of these environment variables.
Note. You can also set up application servers and search servers as a Windows service using the instructions provided here.

Setting Up Process Scheduler on Windows Chapter 15A
488 Copyright © 2018, Oracle and/or its affiliates. All Rights Reserved.
The following directions assume that the Process Scheduler is already configured on the Microsoft Windows server.To set up the Windows Service for a Process Scheduler Server:1. Open the System utility within the Control Panel, and set the variables, listed with a brief explanation in the
following table, in the System Variables section of the Environment tab.
Note. Even if the following variables are in the User Variables section, they must also be in the System Variables section because the Windows service will be started under the System Account.
Variable Value
TEMP Specify the location of the TEMP directory on the Windows server, as in C:\TEMP.
TUXDIR Specify the location of the Tuxedo directory on the Windows server, as in C:\tuxedo.
2. Reboot the Windows computer if any changes or additions were made for the system variables.
3. Run the PeopleSoft PSADMIN utility (psadmin.exe in the PS_HOME\appserv directory), and press ENTER.
4. Select 6 for Service Setup from the PeopleSoft Server Administration menu.
--------------------------------PeopleSoft Server Administration -------------------------------- PS_CFG_HOME C:\Users\JSMITH\psftuser\psft\pt\8.56 PS_HOME C:\PT8.56 PS_APP_HOME C:\HC9.2
1) Application Server 2) Process Scheduler 3) Search Server 4) Web (PIA) Server 5) Switch Config Home 6) Service Setup 7) Replicate Config Home 8) Refresh Config Home q) Quit
Command to execute (1-8, q): 6
5. Select 1 from the PeopleSoft Services Administration menu.
-------------------------------------------PeopleSoft Services Administration------------------------------------------- 1) Configure Windows Service 2) Install Windows Service 3) Delete Windows Service 4) Edit Service Configuration File q) Quit
Command to execute (1-4, q) : 1

Chapter 15A Setting Up Process Scheduler on Windows
Copyright © 2018, Oracle and/or its affiliates. All Rights Reserved. 489
When asked if you want to change configuration values, enter y.
6. Enter the name of the Process Scheduler databases that you intend to include as part of the Windows service.
Values for config section - NT Services Service Start Delay=60 Application Server Domains=HRDMO Process Scheduler Databases=HRDMO Search Server Domains=HRDMO
Do you want to change any values (y/n)? [n]:
If you specify more than one Process Scheduler database, separate each entry with a comma.
Note. You can use PSADMIN to set up Process Scheduler Servers, application servers, or search servers as a Windows service. The Windows Service psntsrv.exe automatically starts application servers, Process Scheduler servers, and search servers that reside on the same Microsoft Windows machine. Occasionally, psntsrv.exe would attempt to initiate a connection between an application server, Process Scheduler server, or search server and a database on the same machine that was not ready to receive requests. As a result the connection would fail. When you set up these servers as a Windows Service, you can specify a Service Start Delay, in seconds, that elapses before a service attempts to start any application server domains, Process Scheduler servers, or search servers. This allows the RDBMS to boot and become available to accept requests.The default setting for the Service Start Delay parameter is 60 seconds.
Note. The NT Services section of the PSADMIN modifies the psntsrv.cfg file located in the PS_CFG_HOME\appserv directory. You can edit this file manually by selecting 4, Edit Service Configuration File from the PeopleSoft Services Administration menu. If you edit it, you need to delete and then install the service again.
7. Select option 2 from the PeopleSoft Services Administration menu.
-------------------------------------------PeopleSoft Services Administration ------------------------------------------- 1) Configure Windows Service 2) Install Windows Service 3) Delete Windows Service 4) Edit Service Configuration File q) Quit
Command to execute (1-4, q) : 2
8. Return to the Control Panel, choose Administrative Tools, and launch the Services utility.
9. On the Services dialog, scroll to find the entry that adheres to the following naming convention, and select it:
PeopleSoft <PS_CFG_HOME>
For example:
PeopleSoft C:\Users\JSMITH\psftuser\psft\pt\8.56
Note. The default Startup mode is Manual.
10. Click Startup.
11. On the Service dialog in the Startup Type group, select Automatic, and in the Log On As group, select Local System Account. Then click OK.

Setting Up Process Scheduler on Windows Chapter 15A
490 Copyright © 2018, Oracle and/or its affiliates. All Rights Reserved.
Note. The Log On As setting needs to reflect that which you set for your ORACLE ProcMGR V12.2.2.0.0_VS2015 and Tlisten processes. Oracle recommends that you set these services to Local System Account when you install Tuxedo. The Log On As value only affects the application server because Process Scheduler runs independently from Tuxedo. See the chapter "Installing Additional Components" for more information on installing Tuxedo, and refer to the chapter "Configuring the Application Server on Windows" for the details on configuring the application server.
12. On the Services dialog, make sure the PeopleSoft service is selected, and click Start.
13. Use the Process Monitor to verify that the Process Scheduler Server is running. You can also use Task Manager to verify that the executables involved with the service are running.
For the Process Scheduler, make sure that the psprcsrv.exe is running. If you have customized the name of psprcsrv.exe, make sure the appropriate executable is running.
Task 15A-6: Configuring the Process Scheduler for Microsoft Word (Optional)
This section discusses:
• Configuring Process Scheduler
• Executing Winword on Mapped Drive
Task 15A-6-1: Configuring Process SchedulerSome applications process documents using Microsoft Word. Here is how to configure Microsoft Word to work with the Process Scheduler.
Note. Microsoft Word must already be installed on the server; it is not included with the PeopleSoft PeopleTools install.
To configure Process Scheduler for Microsoft Word:1. Log in to the PeopleSoft application in a browser and select PeopleTools, Process Scheduler, Processes.
2. Search for Process Type Winword and select a process.

Chapter 15A Setting Up Process Scheduler on Windows
Copyright © 2018, Oracle and/or its affiliates. All Rights Reserved. 491
3. On the Process Definition page, select Override Options, as shown in this example.
Process Definition page: Override Options
4. In the Parameter List field, enter %%PS_HOME%%\WINWORD\WORDSAMP.DOCX/mWORDSAMP andsave.
5. Locate the Process Scheduler configuration file psprcs.cfg in PS_CFG_HOME\appserv\prcs\<database_name> directory and open it for editing.
6. In the [Process Scheduler] section, edit the WINWORD entry so that it points to the directory where winword.exe is installed—for example, "WINWORD=C:\Program Files\Microsoft Office\OFFICE 12" (include the quotes in the entry).
7. If spaces exist in the WINWORD path in the Process Scheduler configuration file (psprcs.cfg), Microsoft Word reports will fail. You will need to modify the Process Type Definition and add quotes around the entry in the Command Line field, for example " %%WINWORD%%\winword.exe".
8. Change the Microsoft Word macro security to allow macros to be run.
Start Microsoft Word and select Tools, Macro, Security. Select the Low security setting and click OK.
9. If you are running on Microsoft Windows, modify your macros to include the following line:
Application.AutomationSecurity=msoAutomationSecurityLow
You can see an example by viewing the macros in PS_HOME\winword\Wordsamp.doc.
10. Make sure that all the servers (that is, Application Server and Process Scheduler servers) are running in the context of the logged-in user, as WinWord is executed in the same context.

Setting Up Process Scheduler on Windows Chapter 15A
492 Copyright © 2018, Oracle and/or its affiliates. All Rights Reserved.
Task 15A-6-2: Executing Winword on Mapped DriveIf you encounter a problem in executing the WinWord process on a mapped drive, there are a couple of solutions to try. If the first solution does not work, try the second one. Try the following workaround suggestions in the order given.To perform the first workaround:1. Copy the file WORDSAMP.dotm from PS_HOME\WINWORD\.
2. Locate the WinWord templates folder and place the file WORDSAMP.dotm there.
In general, you can find the templates folder under the logged-in user's directory. For example, for user psftuser, this would be:
C:\Users\psftuser\Microsoft\Templates
3. Open the WinWord.docx file under PS_HOME\WINWORD folder and verify macro is present.
4. Sign in to the PeopleSoft application to execute the WinWord process and verify its status in Process Monitor.
To perform the second workaround:1. In Microsoft Word, click the Microsoft Office button, and click Word Options.
2. Select Trust Center, and then click Trust Center Settings, Trusted Locations.
3. Select the check box for Allow Trusted Locations on my network, and clear the check box Disable all Trusted Locations.

Chapter 15A Setting Up Process Scheduler on Windows
Copyright © 2018, Oracle and/or its affiliates. All Rights Reserved. 493
4. Create a new trusted location with path pointing to the PS_HOME\WINWORD folder on your mapped drive.
In this example, the trusted location is \\server1\pt854\WINWORD:
Microsoft Word Trusted Locations window
Task 15A-7: Configuring Setup Manager
Before you can use Setup Manager, you must fulfill these requirements:
• To use the Excel to CI template-generation feature of Setup manager, the Process Scheduler must be PSNT.
That is, Process Scheduler must be installed on a Microsoft Windows machine.
• Process Scheduler must be running.
• Any Process Scheduler environment variables (especially %PS_FILEDIR%) must be specified.
• A supported version Microsoft Office must be present on the process scheduler server, and Microsoft Excel must be installed.
• The MSXML COM object for Microsoft Excel, msxml4.dll, must be present on the system.
For confirmation, navigate to %SystemRoot%\system32\msxml4.dll. Right-click and select Properties. On the

Setting Up Process Scheduler on Windows Chapter 15A
494 Copyright © 2018, Oracle and/or its affiliates. All Rights Reserved.
msxml4.dll Properties dialog box, select the Version tab, and then Product Version. As shown on this exampleof the msxml4.dll Properties dialog box, the version number must be 4.20 or above.
msxml4.dll Properties dialog box: Version tab
See Also
PeopleTools: Setup ManagerMicrosoft support, support.microsoft.com
Task 15A-8: Installing Products for PS/nVision
This section discusses:
• Understanding the PS/nVision Setup
• Installing Products for PS/nVision in Excel Automation Mode
• Installing Microsoft .NET Framework 4.6.1
• Installing Microsoft Open XML SDK for PS/nVision

Chapter 15A Setting Up Process Scheduler on Windows
Copyright © 2018, Oracle and/or its affiliates. All Rights Reserved. 495
Understanding the PS/nVision SetupPS/nVision can operate in the following three modes for PS/nVision:
• OpenXML mode
OpenXML is the default mode for PeopleSoft PeopleTools.
• Excel automation mode
• Cross-platform mode
Cross Platform is the only supported mode on the UNIX platforms that are certified for executing PS/nVision Reports on the web.
See "Setting Up Process Scheduler on UNIX," Using PS/nVision in Cross-Platform Mode on UNIX.
The different modes of executing PS/nVision are enabled by setting the UseExcelAutomation parameter in the Process Scheduler configuration file (psprcs.cfg) as follows:
• 0 - OpenXML mode
• 1 - Excel Automation mode
• 2 - Cross Platform mode
See Also
PeopleTools: PS/nVisionPeopleTools: Process Scheduler
Task 15A-8-1: Installing Products for PS/nVision in Excel Automation ModeTo set up PS/nVision in Excel automation mode:
• For all batch servers, install Microsoft Excel on the batch server. PeopleSoft PeopleTools supports 64-bit versions of Microsoft Excel 2010, Excel 2013, and Excel 2016.
Note. The 32-bit version of Microsoft Excel should not be installed on the machine where PS/nVision needs to run in Excel Automation Mode, as that would cause issues with running PS/nVision with 64-bit Microsoft Excel.
• If the batch server is on a 64–bit Microsoft Windows machine, create an empty "Desktop" folder with this path:
C:\Windows\System32\config\systemprofile\Desktop
Task 15A-8-2: Installing Microsoft .NET Framework 4.6.1Before setting up PS/nVision in OpenXML mode, use these instructions to install Microsoft .NET Framework. Microsoft Open XML SDK 2.0 requires Microsoft .NET Framework versions 4.6.1.
Note. Microsoft .NET Framework 4.6.1 may be included as a feature on your operating system. SEe your operating system instructions to verify whether it is installed and enabled.
To install Microsoft .NET Framework 4.6.1:1. If there is an existing installation of Microsoft .NET Framework 4.0 or 4.6 installed on your computer:

Setting Up Process Scheduler on Windows Chapter 15A
496 Copyright © 2018, Oracle and/or its affiliates. All Rights Reserved.
a. Select Start, Programs, Control Panel, Add/Remove Programs
b. Locate the existing Microsoft .NET Framework installation and remove it.
2. Go to PS_HOME\setup\dotnetredist.
3. Run the dotNetFx461_Full_x86_x64.exe.file.
4. Review the license agreement, select the option I have read and accept the license terms, and then click Install.
A progress indicator appears.
5. Click Finish when the installation is complete.
Task 15A-8-3: Installing Microsoft Open XML SDK for PS/nVisionAs described in the previous section, you must have installed Microsoft .NET Framework versions 4.6.1 before beginning this installation.To install Microsoft Open XML SDK V2.0:1. Go to PS_HOME\setup\OpenXmlSDK.
2. Run the OpenXMLSDKv2.msi file.
3. Click Next on the welcome window.
Microsoft Open XML SDK 2.0 welcome window

Chapter 15A Setting Up Process Scheduler on Windows
Copyright © 2018, Oracle and/or its affiliates. All Rights Reserved. 497
4. Review the license agreement, select the option I agree, and then click Next.
Microsoft Open XML SDK 2.0 License Agreement window

Setting Up Process Scheduler on Windows Chapter 15A
498 Copyright © 2018, Oracle and/or its affiliates. All Rights Reserved.
5. Accept the default location for the installation, C:\Program Files\Open XML SDK\V2.0, and then click Next.
Microsoft Open XML SDK 2.0 Select Installation Folder window
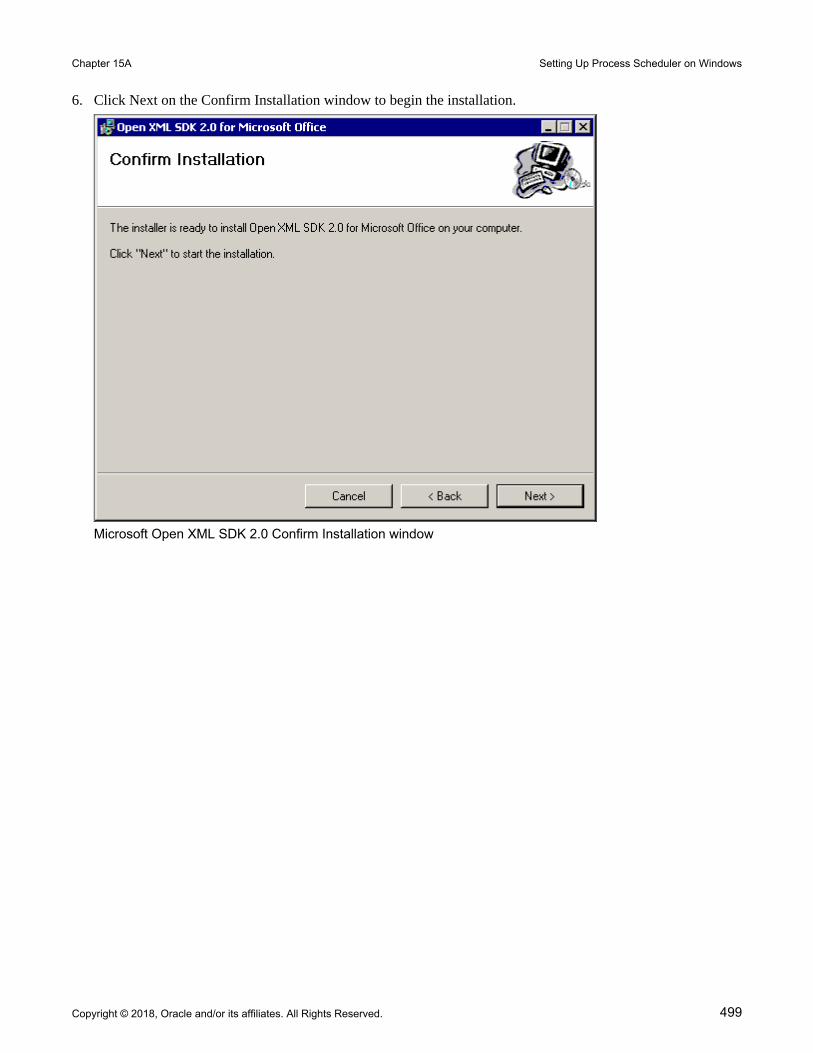
Chapter 15A Setting Up Process Scheduler on Windows
Copyright © 2018, Oracle and/or its affiliates. All Rights Reserved. 499
6. Click Next on the Confirm Installation window to begin the installation.
Microsoft Open XML SDK 2.0 Confirm Installation window

Setting Up Process Scheduler on Windows Chapter 15A
500 Copyright © 2018, Oracle and/or its affiliates. All Rights Reserved.
7. Click Close when the installation is complete.
Microsoft Open XML SDK 2.0 Installation Complete window
Copyright © 2018, Oracle and/or its affiliates. All Rights Reserved. 501
Chapter 15B
Setting Up Process Scheduler on UNIX
This chapter discusses:
• Prerequisites
• Setting Up Process Scheduler Security
• Setting Up Process Scheduler to Transfer Reports and Logs to the Report Repository
• Setting Up Process Scheduler Server Agent
Prerequisites
If your database runs on z/OS, you need to set up a Microsoft Windows batch environment on a Microsoft Windows application server or on a dedicated Microsoft Windows workstation for Microsoft Windows-specific batch processes, such as nVision reports, Cube Builder, or Microsoft Word. These processes are Microsoft Windows-specific applications that cannot be executed by the Process Scheduler on z/OS.Before setting up your Process Scheduler, you must:
• Install Tuxedo.
See "Installing Additional Components."
• Install database connectivity to be able to communicate with your database server (Process Scheduler requires a direct connection to the database).
See "Preparing for Installation."
• Set up the web server with the PeopleSoft Pure Internet Architecture, as described in the previous chapter. This is required to set up the Process Scheduler to transfer reports or log files to the Report Repository.
• Have both your application server and the PeopleSoft Pure Internet Architecture started. In this chapter, you must modify security options of the designated PeopleSoft user ID that will be used to boot up Process Scheduler. This requires that the user ID's profile be modified through the User Security component. Please refer to earlier chapters for the details on starting the application server and the PeopleSoft Pure Internet Architecture.
In PeopleSoft PeopleTools 8.50 and later, the configuration and log files for Process Scheduler server domains reside in PS_CFG_HOME. If you do not set a PS_CFG_HOME environment variable before beginning the application server configuration, the system installs it in a default location based on the current user's settings, as follows:$HOME/psft/pt/<peopletools_version>
See "Preparing for Installation," Defining Installation Locations.See the product documentation PeopleTools: System and Server Administration for more information on the PS_CFG_HOME environment variable and working with server domain configuration.

Setting Up Process Scheduler on UNIX Chapter 15B
502 Copyright © 2018, Oracle and/or its affiliates. All Rights Reserved.
See Also
PeopleTools: Process SchedulerMy Oracle Support, Certifications
Task 15B-1: Setting Up Process Scheduler Security
This section discusses:
• Understanding Process Scheduler Security
• Granting Process Scheduler Administrative Rights
Understanding Process Scheduler SecurityThis task—in which you set up the PeopleSoft User ID that will be used to boot Process Scheduler server so it hasadministrative rights to both Process Scheduler and Report Manager—guarantees that security is set up properly within your PeopleSoft database.You must carry out this task to start Process Scheduler successfully.
Task 15B-1-1: Granting Process Scheduler Administrative RightsTo grant Process Scheduler administrative rights:1. Log onto your PeopleSoft database through the PeopleSoft Pure Internet Architecture.
2. Select PeopleTools, Security, User Profiles.
3. Select the User Profiles component. Use the Search dialog to select the PeopleSoft User ID you plan to use to boot the Process Scheduler server.

Chapter 15B Setting Up Process Scheduler on UNIX
Copyright © 2018, Oracle and/or its affiliates. All Rights Reserved. 503
4. Click the Roles tab, click the plus icon to insert a new row, and there enter the ProcessSchedulerAdmin role togrant the user ID with administrative rights in the Process Scheduler components.
Process Scheduler window: Roles tab
5. Repeat the instructions in step 4 to add the role ReportDistAdmin.
This will grant the user ID administrative rights to the Report Manager component. Carry out this step only if the same user is also responsible for maintaining the content of Report Manager.
6. Click Save to save your changes.
7. Select the General tab and jot down the Permission List name assigned to the Process Profile field.
8. From the Portal menu, choose PeopleTools, Security, Permissions & Roles, Permission Lists.
9. In the Search dialog, enter the Permission List you noted in step 7.
10. Select the Can Start Application Server check box.
11. Click Save to save your changes.
Task 15B-2: Setting Up Process Scheduler to Transfer Reports and Logs to the Report Repository
This section discusses:
• Understanding Report Distribution

Setting Up Process Scheduler on UNIX Chapter 15B
504 Copyright © 2018, Oracle and/or its affiliates. All Rights Reserved.
• Setting Up Single Signon to Navigate from PIA to Report Repository
• Determining the Transfer Protocol
• Starting the Distribution Agent
• Setting Up the Report Repository
• Setting Up the Distribution for Your Process Scheduler Server
• Setting Up Sending and Receiving of Report Folders in the Report Manager
Understanding Report DistributionThe PeopleSoft PeopleTools Report Distribution lets you access reports and log files generated from process requests run by a Process Scheduler Server Agent. Using the PeopleSoft Pure Internet Architecture, you can view reports and log files from the web browser through the Report Manager or Process Monitor Detail page. Report Distribution enables you to restrict access to these reports to authorized users based either on user ID or role ID.This product also includes the Distribution Agent component, which runs on the same server as the Process Scheduler Server Agent. The Distribution Agent, a process that runs concurrently with the Process Scheduler Server Agent, transfers to the Report Repository files generated by process requests initiated by the Process Scheduler Server Agent.The Distribution Agent transfers files to the Report Repository when one of these criteria is true:
• The Process Scheduler Server Agent is set up in the Server Definition to transfer all log files to the Report Repository.
• The process request output destination type is Web/Window.
In either case, the Process Scheduler Server Agent inserts a row in the Report List table (PS_CDM_LIST). The server agent then updates the distribution status for a process request to Posting upon completion of the program associated with the process request. The distribution status of Posting signals that the files for the process request are ready for transfer to the Report Repository. The Distribution Agent is notified by Process Scheduler for any process requests that are ready for transferring. As part of the process to transfer files to the Report Repository, the Distribution Agent performs the following steps:
• Transfer files to the Report Repository. All the report and log files are transferred to the Report Repository. For each process request transferred, a directory is created in the Report Repository using the following format: \<database name\<date yyyymmdd>\<report id>. All the files for a process request are stored in this directory.
• Delete the directory from the Process Scheduler Agent's Log/Output directory. When the output destination type specified for a process request is Web/Window, all the files and directory associated with the process request are deleted from the Process Scheduler Log/Output directory after the files are transferred to the Report Repository.
The following diagram illustrates the Process Scheduler and Report Repository architecture. The diagram includes the following items:
• The web browser gives access to the Process Request dialog and the Report or Log Viewer.
• The Report Repository is part of the PeopleSoft Pure Internet Architecture.
Note. The PeopleSoft Pure Internet Architecture must be installed for Process Scheduler to be able to transfer reports to the Report Repository.
• The Process Scheduler Server includes the Process Scheduler Server Agent and the Distribution Agent.
• The transfer protocol between Process Scheduler and the Report Repository may be FTP/FTPS, HTTP/HTTPS, or SFTP.

Chapter 15B Setting Up Process Scheduler on UNIX
Copyright © 2018, Oracle and/or its affiliates. All Rights Reserved. 505
Process Scheduler and Report Repository Architecture
Before users can view a report, they are authenticated against the PeopleSoft database.You should set up single signon if you do not want users to have to log on an additional time to view reports in the Report Repository. For the details on setting up single signon, consult the security documentation.See PeopleTools: Security Administration.

Setting Up Process Scheduler on UNIX Chapter 15B
506 Copyright © 2018, Oracle and/or its affiliates. All Rights Reserved.
Task 15B-2-1: Setting Up Single Signon to Navigate from PIA to Report RepositoryTo view reports (log files or system files) from Report Repository, you need to pass the authentication. Report Repository should be treated as a separate PeopleSoft application. To navigate from PeopleSoft Pure Internet Architecture (PIA) to Report Repository, you need to set up single signon to avoid getting a prompt for a second signon. This section includes some considerations for setting up single signon to navigate from PIA to Report Repository.If Report Repository resides on the same web server as PIA, make sure your Local Message Node is set up to be a"trusted" node for single signon for your system.If Report Repository resides on a different web server than PIA, do the following:
• Make sure your Local Message Node is set up to be a "trusted" node for single signon for your system.
• Use a fully qualified domain name when addressing the web server for both PIA and Report Repository. For example, enter http://<machineName>.peoplesoft.com/<site_name>/signon.html instead of http://<machineName>/<site_name>/signon.html.
• Specify the Authentication Domain for your application during installation. If you have multiple applications, and you want them to employ single signon, it is important to specify the same Authentication Domain for all applications.
See the information on implementing single signon in the PeopleTools: Security Administration product documentation.
• Set up single signon with a password, like this:
• Choose PeopleTools, Integration Broker, Integration Setup, Nodes.
• Click Search and then select the node marked as Default Local Node.
• Select Password for the Authentication Option.
• Enter a password of your choice.
• Enter the password again in the Confirm Password field.
• Enter the user ID for which you are setting up single signon in the Default User ID field.
• Save the Node Definition.
• Sign out from the PeopleSoft application.
• Reboot your application server.
See Also
PeopleTools: Security Administration
Task 15B-2-2: Determining the Transfer ProtocolWe recommend using HTTP as your transfer protocol.

Chapter 15B Setting Up Process Scheduler on UNIX
Copyright © 2018, Oracle and/or its affiliates. All Rights Reserved. 507
Before transferring the files to the Report Repository, you need to determine which transfer protocol to use. If youhave a Microsoft Windows Process Scheduler and a Microsoft Windows web server, you can use either an XCOPY, FTP/FTPS, SFTP, or HTTP/HTTPS protocol. (If FTP information is not specified, Process Scheduler will perform an XCOPY.) If you have a PeopleSoft Process Scheduler on Microsoft Windows and a UNIX web server, you can use FTP/FTPS, SFTP, or HTTP/HTTPS. If the PeopleSoft Process Scheduler is on DB2 z/OS, useFTP/FTPS or HTTP/HTTPS. If you have a PeopleSoft Process Scheduler on UNIX , you can use FTP/FTPS, SFTP, or HTTP/HTTPS.
Note. If you are using FTP/FTPS or SFTP, the corresponding daemon must be set up in your web server.
Note. If you are on DB2 z/OS, you need to have JRE set up on your Process Scheduler server.
Task 15B-2-3: Starting the Distribution AgentThe Distribution Agent is automatically started as another Oracle Tuxedo server when a Process Scheduler Serveris booted. If a Process Scheduler Server was set up without specifying a Distribution Node in the Server Definition page, the Process Scheduler server will have a status in Process Monitor of "Running with No Report Node." After a node is defined for the Process Scheduler server, in the next cycle the Process Scheduler server checks the state of the system, and the Distribution Agent dynamically sets up its environment.
Task 15B-2-4: Setting Up the Report RepositoryThis section discusses:
• Defining ReportRepositoryPath
• Defining the Report Node to Use HTTP/HTTPS
• Defining the Report Node to Use FTP
• Defining the Report Node to Use FTPS
• Defining the Report Node to Use SFTP
Defining ReportRepositoryPath
The ReportRepositoryPath specifies the location of a directory for the Report Repository. You can specify the location for the Report Repository Path on the General page of the Web Profile during installation. If you do not set the location in the Web Profile, the location given by ReportRepositoryPath in the configuration.properties fileis used for the default location. Note that the value entered for Report Repository Path in the Web Profile overrides any entry in the configuration.properties file.See PeopleTools: Portal Technology, "Configuring Web Profiles."Use the following formats to enter the name for the directory that you want to use for the ReportRepositoryPath. The examples below give the default values. Note that you must use a forward slash ('/') in both cases:
• Microsoft Windows: ReportRepositoryPath=c:/psreports
• UNIX: ReportRepositoryPath=<user_home>/PeopleSoft Internet Architecture/psreports
For <user_home> substitute the home directory for the current user.
Defining the Report Node to Use HTTP/HTTPS
To define the report node to use HTTP/HTTPS:

Setting Up Process Scheduler on UNIX Chapter 15B
508 Copyright © 2018, Oracle and/or its affiliates. All Rights Reserved.
1. Select PeopleTools, Process Scheduler, Report Nodes.
2. Select the Add a New Value link and enter the Report node name.
3. On the Report Node Definition page, select HTTP or HTTPS from the Protocol drop-down list.
Select the HTTP option if you are not using SSL. Select the HTTPS option if you are using SSL. The pages for HTTP and HTTPS have the same fields. These examples show HTTP.
Note that if you are using SSL you need to have Client Certificates installed on your web server.
Report Node Definition page for the HTTP protocol
4. Enter the following information in the Distribution Node Details area:
• URLID: Enter the URL of the web server using the following format:
http://<machine_name>:<port_number>/psreports/<site_name>
Replace <machine_name> with the name of your machine. Use the fully qualified host name for your web server. If you are using an HTTP or HTTPS port other than the defaults, you need to specify the port number.
Note. If you specify the Authentication Token Domain name during the PIA installation, you must includea fully qualified domain name for the URL instead of the IP address.
• Description: Enter a description of the server (optional).

Chapter 15B Setting Up Process Scheduler on UNIX
Copyright © 2018, Oracle and/or its affiliates. All Rights Reserved. 509
• Operating System: Select the web server operating system, Windows or UNIX.
5. Enter the following information in the Login Details area:
• Login ID: Enter the Login ID. This is not required, unless basic authentication has been set up on the web server by the Web Administrator.
• Password and Confirm Password: Enter the password, and confirm it, for the user ID specified in the Login ID field. This is not required, unless basic authentication has been set up on the web server by the Web Administrator.
Note. The setup of authentication is optional, but is recommended for security of the Report Repository when using the HTTP to transfer files. For information on setting up authentication on the web server where the Report Repository resides, refer to the PeopleTools: Security Administration product documentation.
6. Enter the following information in the URI Details area:
• URI Host: Enter the machine name for the report repository.
Note. In a basic setup, the machine name for the report repository will match the machine name of the webserver URL. However, under certain circumstances—for example, if you are using a reverse proxy server—the URL and URI Host may have different machine names.
• URI Port: Enter the port number, which must match the port number of your web server (defaults are HTTP = 80, HTTPS = 443). If you change a port number you will lose the default values for both protocols.
• URI Resource: Enter SchedulerTransfer/<site name>.
7. Click Save to save your entries.
8. Click Validate to confirm that your entries are complete and correct.
The validation confirms that the necessary parameters are present and correct, and simulates a file transfer with the entered information. You either see a message that confirms the success of the validation, or a message that displays an error for missing parameters or an unsuccessful transfer simulation.
9. To add additional report nodes, click Add to return to the Search page.
Defining the Report Node to Use FTP
If you use the FTP report node protocol, note that:
• If your FTP server is a Microsoft Windows server, you may have to set up the FTP service.
• The Distribution Agent will perform a validation after FTP has transferred files into the Report Repository by sending a query request to the web server. For this task to be completed, it is critical that the value entered in the URL is accurate. Verify that the machine name, port number, and site number that you specify are correct.
If this setup is not completed, the process request will get a status of NOT POSTED in the Process Monitor Detail page and will log the message "Unable to verify files posted."
To define the report node to use FTP:1. Select PeopleTools, Process Scheduler, Report Nodes.
2. Select Add a New Value, enter the Report node name, and click Add.

Setting Up Process Scheduler on UNIX Chapter 15B
510 Copyright © 2018, Oracle and/or its affiliates. All Rights Reserved.
3. On the Report Node Definition page, select FTP from the Protocol drop-down list.
Report Node Definition page for the FTP protocol
4. In the Distribution Node Details area, enter the following information:
• URLID: Enter the URL of the web server using this format:
http://<machine_name>:<port_number>/psreports/<site_name>
Replace <machine name> with the name of your web server. If you are using an HTTP port other than 80,you need to specify the port number. The variable <site name> refers to the directory where you installed the PIA files; this will default to ps for the first installation.

Chapter 15B Setting Up Process Scheduler on UNIX
Copyright © 2018, Oracle and/or its affiliates. All Rights Reserved. 511
Note. If you specify the Authentication Token Domain name during the PIA installation, you must includea fully qualified domain name for the URL instead of the IP address.
Note. If you installed the web server software with the default TCP port of 80, you do not need to specify the port number in the URL path. However, if you installed the web server to some other port, you must specify the port number in the URL path.
• Description: Enter a description of the server (optional).
• Operating System: Select the operating system of the Report Repository, Windows or UNIX.
• Network Path: This information is not required for the FTP protocol
5. In the Login Details area, enter the following information:
• Login ID: Enter the FTP User ID.
• Password and Confirm Password: Enter the password, and enter it a second time, for the FTP User ID specified in the Login ID field.
6. In the File Transfer Details area, enter the following information:
• Home Directory: Enter the directory specified during the PIA installation as the Report Repository. The FTP User ID must have write access to this directory. Note that this is not a required field for FTP transfer, as the system uses the Report Repository directory specified at install time or the current directory assigned to ReportRepositoryPath in configuration.properties. Note that the value you enter for the Report Repository Path in the Web Profile at install time overrides any entry for ReportRepositoryPathin configuration.properties.
For UNIX, the default directory is <user_home>/PeopleSoft Internet Architecture/psreports/.
• FTP Address: Enter the machine name or the IP address of the Report Repository. If the name of the machine is used, it must be included on a DNS server.

Setting Up Process Scheduler on UNIX Chapter 15B
512 Copyright © 2018, Oracle and/or its affiliates. All Rights Reserved.
7. If you need to specify additional properties, use the Connection Properties area. Specifying the Connection Properties is optional.
Click the lookup button (magnifying glass) and select one of the properties in the following table. Click the plus sign to add another connection property.
Property Name Property Value
ACTIVEMODE To enable active mode, add the ACTIVEMODE property to the URL and set it to Y.
The default FTP connection mode is extended passive mode.
ACTIVEPORTOPTION This property can be used along with ACTIVEMODE. When active mode is enabled, you can use ACTIVEPORTOPTION to specify the IP address and porton which the FTP server can be accessed. This is useful when the server is behind a firewall. By default, ACTIVEPORTOPTION uses the default IP address of your system. If you want to use a particular IP address, set the ACTIVEPORTOPTION value to either the full IP address, a host name to resolve to an IP address, or a local network interface name.
You can also specify a port range. For example: 10.176.147.111:10000-13000
ENABLEEPRT This option can be used only with Active Mode. If Active Mode is enabled and ENABLEEPRT is set to N, then the system will use a PORT (IPv4) Active Mode connection.
By default, ENABLEEPRT is Y, if Active Mode is set to Y.
EXTENDEDPASSIVEMODE • 0: Disable EPSV
• 1: Enable EPSVThis property enables you to control whether extended passive mode (EPSV) will be used by FTP.
EPSV is used by default. That is, by default, this value is considered to be 1.
If the client fails to connect to the server with EPSV, then the system will try passive mode (PASV). To use PASV only, add EXTENDEDPASSIVEMODE to the URL Properties and set it to 0.
JKSPASSWORD Specify the Java keystore (JKS) password.
JKSPATH Specify the Java keystore (JKS) path.
PASSWORD Specify the password associated with the USER property, which identifies the FTP User ID.
USER Specify the FTP User ID used for authentication when accessing the FTP site.

Chapter 15B Setting Up Process Scheduler on UNIX
Copyright © 2018, Oracle and/or its affiliates. All Rights Reserved. 513
8. If you need to specify an encrypted password in any of the property fields, use the Password Encryption area to generate the encrypted password, as follows:
a. In the Password field, enter a password.
b. In the Confirm Password field, enter the password again.
c. Click Encrypt.
The encrypted password is displayed in the Encrypted Password field.
d. From the Encrypted Password field, cut the encrypted password and then copy the encrypted value to the appropriate location.
9. Select Save to save your entries.
10. Click Validate to confirm that your entries are correct.
The validation confirms that the necessary parameters are present and correct, and simulates a file transfer with the entered information. You either see a message that confirms the success of the validation, or a message that displays an error for missing parameters or an unsuccessful transfer simulation.
11. To add additional report nodes, click Add to return to the Search page.
Defining the Report Node to Use FTPS
To define the report node to use FTPS:1. Select PeopleTools, Process Scheduler, Report Nodes.
2. Select Add a New Value, enter the Report node name, and click Add.

Setting Up Process Scheduler on UNIX Chapter 15B
514 Copyright © 2018, Oracle and/or its affiliates. All Rights Reserved.
3. On the Report Node Definition page, select FTPS from the Protocol drop-down list.
Report Node Definition page for the FTPS protocol
4. In the Distribution Node Details area, enter the following information:
• URLID: Enter the URL of the web server using this format:
http://<machine_name>:<port_number>/psreports/<site_name>
Replace <machine name> with the name of your web server. If you are using an HTTP port other than 80,you need to specify the port number. The variable <site name> refers to the directory where you installed the PIA files; this will default to ps for the first installation.

Chapter 15B Setting Up Process Scheduler on UNIX
Copyright © 2018, Oracle and/or its affiliates. All Rights Reserved. 515
Note. If you specify the Authentication Token Domain name during the PIA installation, you must includea fully qualified domain name for the URL instead of the IP address.
Note. If you installed the web server software with the default TCP port of 80, you do not need to specify the port number in the URL path. However, if you installed the web server to some other port, you must specify the port number in the URL path.
• Description: Enter a description of the server (optional).
• Operating System: Select the operating system of the Report Repository, Windows or UNIX.
• Network Path: This information is not required for the FTPS protocol.
5. In the Login Details area, enter the following information:
• Login ID: Enter the FTP User ID.
• Password and Confirm Password: Enter the password, and enter it a second time, for the user ID specifiedin the Login ID field.
6. In the File Transfer Details area, enter the following information:
• Home Directory: Enter the directory specified during the PIA installation as the Report Repository. The FTP User ID must have write access to this directory. Note that this is not a required field for FTP transfer, as the system uses the Report Repository directory specified at install time or the current directory assigned to ReportRepositoryPath in configuration.properties. Note that the value you enter for the Report Repository Path in the Web Profile at install time overrides any entry for ReportRepositoryPathin configuration.properties.
For UNIX, the default directory is <user_home>/PeopleSoft Internet Architecture/psreports/.
• FTP Address: Enter the machine name or the IP address of the Report Repository. If the name of the machine is used, it must be included on a DNS server.
• SSL Mode: Select Explicit or Implicit from the drop-down list.
These are two separate methods developed to invoke the client security for use with FTP clients. With the explicit mode, FTPS-aware clients can invoke security with an FTPS-aware server without breaking overall FTP functionality with non-FTPS-aware clients. The implicit method requires that all clients of theFTPS server be aware that SSL is to be used on the session, and thus is incompatible with non-FTPS-aware clients.

Setting Up Process Scheduler on UNIX Chapter 15B
516 Copyright © 2018, Oracle and/or its affiliates. All Rights Reserved.
7. In the Connection Properties area, click the lookup button (magnifying glass) and select one of the properties in the following table:
Click the plus sign to add another connection property.
Property Name Property Value
ACTIVEMODE To enable active mode, add the ACTIVEMODE property to the URL and set it to Y.
The default FTPS connection mode is extended passive mode.
ACTIVEPORTOPTION This property can be used along with ACTIVEMODE. When active mode is enabled, you can use ACTIVEPORTOPTION to specify the IP address and porton which the FTP server can be accessed. This is useful when the server is behind a firewall. By default, ACTIVEPORTOPTION uses the default IP address of your system. If you want to use a particular IP address, set the ACTIVEPORTOPTION value to either the full IP address, a host name to resolve to an IP address, or a local network interface name.
You can also specify a port range. For example: 10.176.147.111:10000-13000
CERTALIAS Certificate Alias: The Certificate Alias must be an alias name of a certificate stored in the database (using the PeopleSoft PeopleTools Digital Certificates page).
Note. Currently, only PEM certificates are supported for FTPS.
ENABLEEPRT This option can be used only with Active Mode. If Active Mode is enabled and ENABLEEPRT is set to N, then the system will use a PORT (IPv4) Active Mode connection.
By default, ENABLEEPRT is Y, if Active Mode is set to Y.
EXTENDEDPASSIVEMODE • 0: Disable EPSV
• 1: Enable EPSVThis property enables you to control whether extended passive mode (EPSV) will be used by FTP.
EPSV is used by default. That is, by default, this value is considered to be 1.
If the client fails to connect to the server with EPSV, then the system will try passive mode (PASV). To use PASV only, add EXTENDEDPASSIVEMODE to the URL Properties and set it to 0.
JKSPASSWORD Specify the Java keystore (JKS) password.
JKSPATH Specify the Java keystore (JKS) user.

Chapter 15B Setting Up Process Scheduler on UNIX
Copyright © 2018, Oracle and/or its affiliates. All Rights Reserved. 517
Property Name Property Value
KEYSTOREPASSWORD This property is required for FTPS and HTTPS repositories. For attachments transferred from the PeopleSoft system to the FTPS or HTTPS repository, the system retrieves the key pair for the client certificate from the digital certificate store and writes the pair to a file in PKCS12 format with password protection. The value of this property will be used as the password for the PKCS12 file.
The PKCS12 file enables connection and file transfer, and it exists only temporarily in <PS_SERVDIR>\files\<CERT ALIAS NAME> for the duration of the file transfer. The system deletes the file after the file transfer transaction.
Note. If the system fails to delete the certificate alias file, a message will be written to the application server log. Themaximum number of files that can exist at any time is equal to the total number of FTPS and HTTPS URL identifiers defined in the system.
For information on setting the PS_SERVDIR environmentvariable, see the PeopleTools: Integration Broker product documentation.
PASSWORD Specify the password associated with the USER property, which identifies the FTP User ID.
SSLUAGELEVEL • 0 - No SSL: No SSL will be used.
• 1 - Try SSL: Try using SSL, but proceed as normal otherwise.
• 2 - Control: Require SSL for the control connection.
• 3 - SSL Only: (Default) Require SSL for all communication.
USER Specify the FTP User ID used for authentication when accessing the FTP site.
VERIFYHOST • 0: Do not verify the server for host name.
• 1: Check if there exists any value in the common namefield in the server certificate. This check does not verify if it matches with what the client specifies.
• 2: (Default) Check for a match with the host name in the URL with the common name or Subject Alternate field in the server certificate.
VERIFYPEER • False: Do not verify the peer.
• True: (Default) Verify the peer by authenticating the certificate sent by the server.
8. If you need to specify an encrypted password in any of the property fields, use the Password Encryption area to generate the encrypted password, as follows:

Setting Up Process Scheduler on UNIX Chapter 15B
518 Copyright © 2018, Oracle and/or its affiliates. All Rights Reserved.
a. In the Password field, enter a password.
b. In the Confirm Password field, enter the password again.
c. Click Encrypt.
The encrypted password is displayed in the Encrypted Password field.
d. From the Encrypted Password field, cut the encrypted password and then copy the encrypted value to the appropriate location.
9. Select Save to save your entries.
10. Click Validate to confirm that your entries are correct.
The validation confirms that the necessary parameters are present and correct, and simulates a file transfer with the entered information. You either see a message that confirms the success of the validation, or a message that displays an error for missing parameters or an unsuccessful transfer simulation.
11. To add additional report nodes, click Add to return to the Search page.
Defining the Report Node to Use SFTP
To define the report node to use SFTP:1. Select PeopleTools, Process Scheduler, Report Nodes.
2. Select Add a New Value, enter the Report node name, and click Add.

Chapter 15B Setting Up Process Scheduler on UNIX
Copyright © 2018, Oracle and/or its affiliates. All Rights Reserved. 519
3. On the Report Node Definition page, select SFTP from the Protocol drop-down list.
Report Node Definition page for the SFTP protocol
4. In the Distribution Node Details area, enter the following information:
• URLID: Enter the URL of the web server using this format:
http://<machine_name>:<port_number>/psreports/<site_name>
Replace <machine name> with the name of your web server. If you are using an HTTP port other than 80,you need to specify the port number. The variable <site name> refers to the directory where you installed the PIA files; this will default to ps for the first installation.

Setting Up Process Scheduler on UNIX Chapter 15B
520 Copyright © 2018, Oracle and/or its affiliates. All Rights Reserved.
Note. If you specify the Authentication Token Domain name during the PIA installation, you must includea fully qualified domain name for the URL instead of the IP address.
Note. If you installed the web server software with the default TCP port of 80, you do not need to specify the port number in the URL path. However, if you installed the web server to some other port, you must specify the port number in the URL path.
• Description: Enter a description of the server (optional).
• Operating System: Select the operating system of the Report Repository, Windows or UNIX.
• Network Path: This information is not required for the SFTP protocol.
5. In the Login Details area, enter the following information:
• Login ID: Enter the FTP User ID.
• Password and Confirm Password: Enter the password, and enter it a second time, for the user ID specifiedin the Login ID field.
6. In the File Transfer Details area, enter the following information:
• Home Directory: Enter the directory specified during the PIA installation as the Report Repository. The FTP User ID must have write access to this directory. Note that this is not a required field for FTP transfer, as the system uses the Report Repository directory specified at install time or the current directory assigned to ReportRepositoryPath in configuration.properties. Note that the value you enter for the Report Repository Path in the Web Profile at install time overrides any entry for ReportRepositoryPathin configuration.properties.
For UNIX, the default directory is <user_home>/PeopleSoft Internet Architecture/psreports/.
• FTP Address: Enter the machine name or the IP address of the Report Repository. If the name of the machine is used, it must be included on a DNS server.
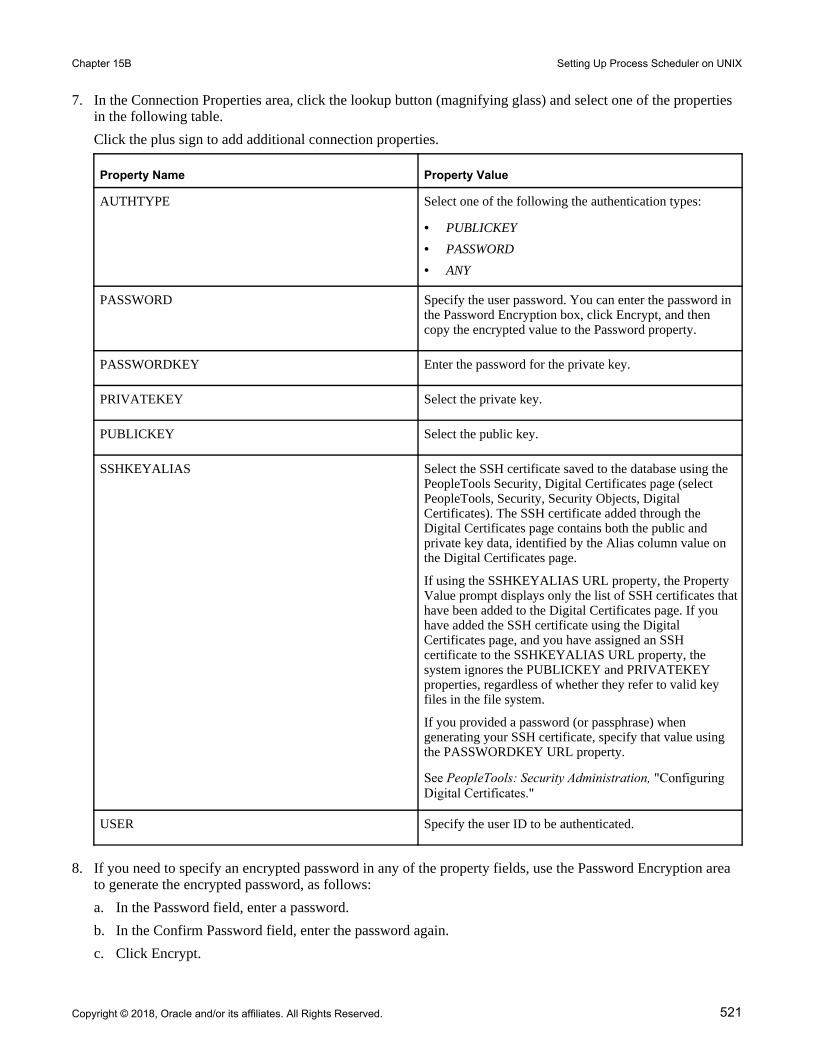
Chapter 15B Setting Up Process Scheduler on UNIX
Copyright © 2018, Oracle and/or its affiliates. All Rights Reserved. 521
7. In the Connection Properties area, click the lookup button (magnifying glass) and select one of the properties in the following table.
Click the plus sign to add additional connection properties.
Property Name Property Value
AUTHTYPE Select one of the following the authentication types:
• PUBLICKEY
• PASSWORD
• ANY
PASSWORD Specify the user password. You can enter the password in the Password Encryption box, click Encrypt, and then copy the encrypted value to the Password property.
PASSWORDKEY Enter the password for the private key.
PRIVATEKEY Select the private key.
PUBLICKEY Select the public key.
SSHKEYALIAS Select the SSH certificate saved to the database using the PeopleTools Security, Digital Certificates page (select PeopleTools, Security, Security Objects, Digital Certificates). The SSH certificate added through the Digital Certificates page contains both the public and private key data, identified by the Alias column value on the Digital Certificates page.
If using the SSHKEYALIAS URL property, the Property Value prompt displays only the list of SSH certificates thathave been added to the Digital Certificates page. If you have added the SSH certificate using the Digital Certificates page, and you have assigned an SSH certificate to the SSHKEYALIAS URL property, the system ignores the PUBLICKEY and PRIVATEKEY properties, regardless of whether they refer to valid key files in the file system.
If you provided a password (or passphrase) when generating your SSH certificate, specify that value using the PASSWORDKEY URL property.
See PeopleTools: Security Administration, "Configuring Digital Certificates."
USER Specify the user ID to be authenticated.
8. If you need to specify an encrypted password in any of the property fields, use the Password Encryption area to generate the encrypted password, as follows:
a. In the Password field, enter a password.
b. In the Confirm Password field, enter the password again.
c. Click Encrypt.

Setting Up Process Scheduler on UNIX Chapter 15B
522 Copyright © 2018, Oracle and/or its affiliates. All Rights Reserved.
The encrypted password is displayed in the Encrypted Password field.
d. From the Encrypted Password field, cut the encrypted password and then copy the encrypted value to the appropriate location.
9. Select Save to save your entries.
10. Click Validate to confirm that your entries are correct.
The validation confirms that the necessary parameters are present and correct, and simulates a file transfer with the entered information. You either see a message that confirms the success of the validation, or a message that displays an error for missing parameters or an unsuccessful transfer simulation.
11. To add additional report nodes, click Add to return to the Search page.
Task 15B-2-5: Setting Up the Distribution for Your Process Scheduler ServerTo set up the Distribution Settings for your Process Scheduler Server:1. Select PeopleTools, Process Scheduler, Servers.
2. Enter the Server Name (such as PSUNX). The Server Definition page appears.
3. Select the Distribution tab.
Server Definition page for PSUNX: Distribution tab
4. Click the lookup button for Distribution Node Name to display the report node names and select the name of the required report node.
5. Enter a number for the Maximum Transfer Retries. This is the maximum number of times the server can try tosend a report before it errors out.
6. Enter the number of seconds for the Interval for Transfer Attempt field. This is the interval between attempts to send the report.

Chapter 15B Setting Up Process Scheduler on UNIX
Copyright © 2018, Oracle and/or its affiliates. All Rights Reserved. 523
7. Select the check box Transfer Log Files to Report Repository if you want to transfer all log and trace files from processes that do not generate reports.
8. Click Save to save your entries.
9. If Process Scheduler is running, you must reboot for any new settings to take effect.
To view reports (log files or system files) from Report Repository, you need to pass the authentication. Report Repository should be treated as a separate PeopleSoft application. To navigate from PIA to Report Repository, you need to set up single signon in order to avoid getting a prompt for a second signon.
Task 15B-2-6: Setting Up Sending and Receiving of Report Folders in the Report ManagerTo be able to view reports in the Report Manager Explorer and List pages, you need to set up the sending and receiving of report folders in the Report Manager by activating the domain on which a sending and receiving server resides. Consult the documentation covering the PeopleSoft Integration Broker to learn how to activate the sending and receiving server domain.See PeopleTools: Integration Broker.See PeopleTools: Integration Broker Service Operations Monitor.
Task 15B-3: Setting Up Process Scheduler Server Agent
This section discusses:
• Understanding Process Scheduler Server Agent
• Changing the Default Operating System
• Creating and Configuring a Process Scheduler Server
• Reconfiguring a Process Scheduler Server
• Verifying the Process Scheduler Server Status
Understanding Process Scheduler Server AgentFor installation purposes, you can use predefined server names and other definitions. The predefined name that you might use is as follows:
Server Name Operating System
PSUNX UNIX
To test this, use processes already defined in your PeopleSoft database. To set up a new server definition in your PeopleSoft database, refer to the PeopleTools: Process Scheduler product documentation.
Note. When creating multiple Process Scheduler Servers for the same database, each server must have a unique server name. For example, two Process Scheduler Servers, both named PSNT, cannot run against the same database.

Setting Up Process Scheduler on UNIX Chapter 15B
524 Copyright © 2018, Oracle and/or its affiliates. All Rights Reserved.
Task 15B-3-1: Changing the Default Operating SystemBy default, Process Scheduler is set up to run a process request from a Process Scheduler Server Agent started in a Microsoft Windows server when the value of the ServerName field in the Process Request Dialog page is left blank. If you plan to run all processes other than Microsoft Windows-based programs (such as nVision) from UNIX, you must change the default operating system.
Note. If you do not change the default operating system from Windows to UNIX and you do not plan to set up a Process Scheduler Server Agent in Microsoft Windows, process requests that are created will be directed to a Microsoft Windows-based operating system and will remain in the "Queued" status.
To change the default operating system for process requests that were not assigned a Process Scheduler Server Name:1. Select PeopleTools, Process Scheduler, System Settings.
2. Under Primary Operating System, choose UNIX from the drop-down list.
3. Click on the System Purge Options tab. Enter the date for the next purge of process requests in the Next PurgeDate field.
4. Enter the time for the next purge of process requests in the Next Purge Time field. The default time is 12:00:00AM.
5. Enter a Recurrence if you want to set a regular purging basis.
6. Choose Save.
Task 15B-3-2: Creating and Configuring a Process Scheduler ServerThis section describes how to create and configure a Process Scheduler server.You can set Process Scheduler configuration parameters either by using PSADMIN, which provides an interactivedialog, or by editing the configuration file psprcs.cfg located in the PS_CFG_HOME/appserv/prcs/database namedirectory. The following steps assume you are using PSADMIN to specify parameter settings.
Note. If you use the configuration file psprcs.cfg, be aware that in the PeopleSoft PeopleTools 8.49 release and later, the section [Output Dest Exceptions] has been modified to trap metastring exceptions not only in the output destination but in other process parameters as well. In this section the entry OUTDEST_EXCEPT01=%ANYMETASTRING% has been changed to PARAMETER_EXCEPT01=%ANYMETASTRING%.
To create and configure a Process Scheduler Server:1. Run the psadmin command.
You see the PeopleSoft Server Administration menu, as in this example:
--------------------------------------------PeopleSoft Server Administration---------------------------------PS_CONFIG_HOME /home/JSMITH/psft/pt/8.56PS_HOME /home/PT856PS_APP_HOME /home/HC9.2
1) Application Server2) Process Scheduler3) Search Server

Chapter 15B Setting Up Process Scheduler on UNIX
Copyright © 2018, Oracle and/or its affiliates. All Rights Reserved. 525
4) Web (PIA) Server5) Switch Config Home6) Replicate Config Home7) Refresh Config Homeq) Quit
Command to execute (1-7 q):
2. Depending on your environment, you may see a message after the menu selection, which indicates that PSADMIN has modified the PS_CFG_HOME/peopletools.properties file with the current PS_HOME location:
************************************************************PS_CFG_HOME/peopletools.properties file has been updated.You should use the Config Home Refresh feature in PSAdmin to ensure that all of your domains are current.Alternatively, you may recreate all of your domains.Please press any key to continue...*************************************************************
This indicates that one of these situations exists:
• The PS_CFG_HOME that you are working with was used previously from a different PS_HOME. In this case, you should recreate any existing Application Server, Process Scheduler, Search, or PIA domains in this PS_CFG_HOME.
• You configured your environment such that PS_CFG_HOME is the same as PS_HOME. The first time you use PSADMIN to create a domain, it updates the PS_CFG_HOME/peopletools.properties file. Continue with the next step.
3. Select 2 to access the Process Scheduler submenus.
4. Select 2 for Create a domain from the PeopleSoft Process Scheduler Administration menu.
-------------------------------------------PeopleSoft Process Scheduler Administration-------------------------------------------1) Administer a domain2) Create a domain3) Delete a domain4) Import domain configuration
q) Quit
Command to execute (1-4, q) : 2
5. Enter the name of the domain at the following prompt, such as HRDMO in this example, and press ENTER:
Please enter name of domain to create : HRDMO
6. After the system creates the domain, the Quick-configure menu appears:
------------------------------------------------------------Quick-configure menu -- domain: HRDMO------------------------------------------------------------ Features Settings ========== ========== 1) App Engine : Yes 9) DBNAME :[HRDMO] 2) Master Scheduler : Yes 10) DBTYPE :[DB2ODBC]

Setting Up Process Scheduler on UNIX Chapter 15B
526 Copyright © 2018, Oracle and/or its affiliates. All Rights Reserved.
3) Perf Collator : No 11) PrcsServer :[PSUNX] 4) Domains Gateway : No 12) UserId :[QEDMO] 5) Push Notifications: No 13) UserPswd :[] 14) ConnectID :[people] 15) ConnectPswd:[] 16) Log/Output Dir:[%PS_SERVDIR%/log_⇒output] 17) SQRBIN :[%PS_HOME%/bin/sqr/ODB⇒/bin] 18) AddToPATH :[%PS_HOME%/cblbin] 19) DomainConnectPswd: [] Actions ========= 6) Load config as shown 7) Custom configuration 8) Edit environment settings h) Help for this menu q) Return to previous menu
HINT: Enter 9 to edit DBNAME, then 6 to load
Enter selection (1-18, h, or q):

Chapter 15B Setting Up Process Scheduler on UNIX
Copyright © 2018, Oracle and/or its affiliates. All Rights Reserved. 527
7. If you need to modify any of these settings, enter the number next to the parameter name, type the new value, and press ENTER. This table lists the parameters and gives brief descriptions.
Parameter Description
Master Scheduler Select this option to enable the Master Scheduler Server (PSMSTPRC). The default is to enable the server.
See PeopleTools: Process Scheduler.
App Engine Select this option to initiate Application Engine programs through the AE Tuxedo Server (PSAESRV). The default isset to run AE using PSAESRV.
See PeopleTools: Process Scheduler.
Perf Collator Select this option to enable the PSPPMSRV server process.
See PeopleTools: Performance Monitor, "Enabling the Required Elements on the Monitoring System."
Domain Gateways Select this option to enables inter domain communication, for example between Application Server and Process Scheduler domains.
See PeopleTools: Fluid User Interface Developer's Guide,"Setting Up Push Notification Configurations."
Push Notifications Select this option to enables pushing server events from PeopleSoft PeopleTools server runtime, such as Application Server and Process Scheduler, to browser clients and other PeopleSoft PeopleTools server runtime components.
See PeopleTools: Fluid User Interface Developer's Guide,"Setting Up Push Notification Configurations."
Load config as shown Load the selections you made in the Quick Configure menu.
Custom configuration Make custom selections in PSADMIN, using options that are not available in the Quick Configure menu.
Edit environment settings Edit, add, remove, comment out, and review domain-level environment variables.
DBNAME Specify the database name that is associated with a PeopleSoft Process Scheduler Server Agent, such as HRDMO, FSDMO, SADMO, and so on.
DBTYPE Specify the database type: DB2ODBC (for DB2 for z/OS).
PrcsServer Specify the process server name. This must match the name defined in the Server Definition table, such as PSNT or PSUNX.

Setting Up Process Scheduler on UNIX Chapter 15B
528 Copyright © 2018, Oracle and/or its affiliates. All Rights Reserved.
Parameter Description
UserId Enter the user ID, such as VP1 or PS.
UserPswd Enter the password for the user ID, as you specified duringthe database configuration.
The password is hidden by masking characters as you type, in the Quick-configure menu after entry.
ConnectID Enter the connect ID. This value is required.
ConnectPswd Enter the connect password, as you specified during the database configuration. This value is required.
The password is hidden by masking characters as you type, in the Quick-configure menu after entry.
Log/Output Dir Specify the directory in which files that are generated by the program are written. When PeopleSoft Process Scheduler initiates a process request, it creates a subdirectory in the format <Process Type ID>_<Program Name>_<Process Instance> that contains the generated files. For instance, the SQR program XRFWIN that ran with process instance 20 has all reports, trace, and log filesin the subdirectory SQR_XRFWIN_20. It is also the optional directory used with the Output Destination field when scheduling a request. This variable (%%OutputDirectory%%) can be used in the File/Printer field of the Process Scheduler Request dialog box.
SQRBIN Enter the path to the SQR executables.
AddToPATH (Optional for Tuxedo) Specify an additional directory that is appended to the PATH environment variable.
DomainConnectPswd If you configured your Application Server domain to require a Domain Connection password, enter it here. Otherwise, leave it blank.
The password is hidden by masking characters as you type, and in the Quick-configure menu after entry.
See the information on setting Application Server Domain Parameters in the PeopleTools: System and Server Administration product documentation.
For descriptions of the PSADMIN options that do not appear in the Quick-configure menu, see the information on using PSADMIN in the PeopleTools: Process Scheduler product documentation. For a basic installation, in most cases you can accept the defaults.
8. When you have updated the settings as needed, choose 5, Load config as shown, from the Quick-Configure menu to save your settings to the Process Scheduler configuration file, pstuxcfg.
9. To start Process Scheduler, choose 1, for Administer Domain.
10. On the PeopleSoft Process Scheduler Administration menu, choose 1 for Boot this domain.

Chapter 15B Setting Up Process Scheduler on UNIX
Copyright © 2018, Oracle and/or its affiliates. All Rights Reserved. 529
--------------------------------PeopleSoft Process Scheduler Administration---------------------------------
Domain Name: HRDMO
1) Boot this domain2) Domain shutdown menu3) Domain status menu4) Configure this domain5) TUXEDO command line (tmadmin)6) Edit configuration/log files menu7) Clean IPC resources of this domainq) Quit
Command to execute (1-7, q) :
11. Choose 1, Boot (Serial Boot), or 2, Parallel Boot, from the PeopleSoft Domain Boot Menu.
Note. The messages you see and the number of processes started will depend on the options you chose during configuration.
12. If you want to stop Process Scheduler Server, from the PeopleSoft Domain Administration menu, choose 2, for Domain Shutdown menu, and then enter the number corresponding to the name of the appropriate database.
Note. If you see the following message, then the server is already down:
Command to execute (1-2, q) [q]: 1 Loading command line administration utility ... tmadmin - Copyright (c) 2007-2008, Oracle. Portions * Copyright 1986-1997 RSA Data Security, Inc. All Rights Reserved. Distributed under license by Oracle. Tuxedo is a registered trademark. Nobulletin board exists. Entering boot mode. > TMADMIN_CAT:111: ERROR: No such command.
Task 15B-3-3: Reconfiguring a Process Scheduler ServerIf you create and then immediately configure a Process Scheduler server, you can use the Quick-configure menu. Alternatively, you can use PSADMIN as described in this section. Feel free to skip this procedure if you have already created and configured your Process Scheduler Server using the Quick-configure menu and want to move forward with your installation.
Note. If you want to configure the Process Scheduler Server while it is running, you need to stop and restart the server to load the new settings.
To reconfigure a Process Scheduler Server:1. Run the command:
psadmin
2. Depending on your environment, you may see a message after the initial menu, which indicates that PSADMIN has modified the PS_CFG_HOME/peopletools.properties file with the current PS_HOME location:

Setting Up Process Scheduler on UNIX Chapter 15B
530 Copyright © 2018, Oracle and/or its affiliates. All Rights Reserved.
************************************************************PS_CFG_HOME/peopletools.properties file has been updated.You should use the Config Home Refresh feature in PSAdmin to ensure that all of your domains are current.Alternatively, you may recreate all of your domains.Please press any key to continue...*************************************************************
This indicates that one of these situations exists:
• The PS_CFG_HOME that you are working with was used previously from a different PS_HOME. In this case, you should recreate any existing Application Server, Process Scheduler, Search, or PIA domains in this PS_CFG_HOME.
• You configured your environment such that PS_CFG_HOME is the same as PS_HOME. The first time you use PSADMIN to create a domain, it updates the PS_CFG_HOME/peopletools.properties file. Continue with the next step.
3. Select 2 for Process Scheduler in the PeopleSoft Server Administration menu.
4. In the PeopleSoft Process Scheduler Administration menu, select 1 for Administer a domain.
5. Select the database for which the Process Scheduler needs to be configured.
6. You see the following prompt:
Do you want to change any config values (y/n)? [n]:
Specify y to start an interactive dialog that lets you examine or change parameter values.
7. Specify the configuration parameters one by one.
Configuration parameters are grouped into sections. At each section, you are asked whether to change any parameters—for example:
Values for config section - Startup DBName= DBType= UserId= UserPswd= ConnectId= ConnectPswd= ServerName= StandbyDBName= StandbyDBType= StandbyUserId= StandbyUserPswd= InMemoryDBName= InMemoryDBType=Do you want to change any values (y/n)? [n]:
• Specify y to change any parameter values for the current section. You are prompted for each parameter value. Either specify a new value or press ENTER to accept the default. After you press ENTER, you are positioned at the next parameter in that section. When you are done with that section, you are again asked whether you want to re-edit any of the values you changed.
• The parameters StandbyDBName, StandbyDBType, StandbyUserID, and StandbyUserPswd are used for astandby database in an Oracle database environment.
See the information on implementing Oracle Active Data Guard in the PeopleTools: Data Management, product documentation.

Chapter 15B Setting Up Process Scheduler on UNIX
Copyright © 2018, Oracle and/or its affiliates. All Rights Reserved. 531
• The parameters InMemoryDBName and InMemoryDBType are reserved for internal use.
• If you do not want to change any values, specify n and you are prompted for the next configuration section.
8. After you have selected all your parameters, you see this message:
You will need to shut down and start up the server to read the new⇒ settings.
For descriptions of the Process Scheduler options in the PSADMIN, see the PeopleTools: Process Scheduler product documentation. In most cases you can accept the defaults.
Task 15B-3-4: Verifying the Process Scheduler Server StatusAt this stage it is a good idea to verify the Process Scheduler Server status.To verify the Process Scheduler Server status:1. From the PeopleSoft Process Scheduler Administration menu, choose option 3, for Domain status menu.
--------------------------------PeopleSoft Process Scheduler Administration--------------------------------
Domain Name: HRDMO
1) Boot this domain2) Domain shutdown menu3) Domain status menu4) Configure this domain5) TUXEDO command line (tmadmin)6) Edit configuration/log files menu7) Clean IPC resources of this domainq) Quit
Command to execute (1-7, q) : 3
2. To verify the status of the Process Scheduler Server for a specific database, type the number corresponding to the appropriate database.
For example:
Database list:
1) HRDMO
Select item number to start: 1
Loading command line administration utility ...tmadmin - Copyright (c) 2007-2008 Oracle.Portions * Copyright 1986-1997 RSA Data Security, Inc.All Rights Reserved.Distributed under license by Oracle.Tuxedo is a registered trademark.
> Prog Name Queue Name Grp Name ID RqDone Load Done Current⇒

Setting Up Process Scheduler on UNIX Chapter 15B
532 Copyright © 2018, Oracle and/or its affiliates. All Rights Reserved.
Service--------- ---------- -------- -- ------ --------- -----------⇒----DDL 46845 pt-ibm20 0 9 450 ( IDLE )PSMONITORSRV MONITOR MONITOR 1 0 0 ( IDLE )PSAESRV 00101.00001 AESRV 1 0 0 ( IDLE )PSAESRV 00101.00002 AESRV 2 0 0 ( IDLE )PSAESRV 00101.00003 AESRV 3 0 0 ( IDLE )PSPRCSRV SCHEDQ BASE 101 0 0 ( IDLE )PSMSTPRC MSTRSCHQ BASE 102 0 0 ( IDLE )PSDSTSRV DSTQ BASE 103 0 0 ( IDLE )>
Note. You can also do this using the following command line argument:
psadmin -p status -d <DBNAME>
Note. You can also verify the status of the Process Scheduler Server from Process Monitor in PeopleSoft Pure Internet Architecture. To verify the Process Scheduler Server status from the Process Monitor page, go to PeopleTools, Process Scheduler, Process Monitor, and select Server List.

Copyright © 2018, Oracle and/or its affiliates. All Rights Reserved. 533
Chapter 15C
Setting Up Process Scheduler on z/OS
This chapter discusses:
• Prerequisites
• Granting Required Authorization in DB2 and UNIX System Services
• Setting Up Process Scheduler Security
• Setting Up Process Scheduler to Transfer Reports and Logs to the Report Repository
• Setting Up Process Scheduler Server Agent
Prerequisites
If your database runs on z/OS, you need to set up a Microsoft Windows batch environment on a Microsoft Windows application server or on a dedicated Microsoft Windows workstation for Microsoft Windows-specific batch processes, such as nVision reports, Cube Builder, or Microsoft Word. These processes are Microsoft Windows-specific applications that cannot be executed by the Process Scheduler on z/OS.Before setting up your Process Scheduler, you must:
• Install database connectivity to be able to communicate with your database server (Process Scheduler requires a direct connection to the database).
The Process Scheduler running on z/OS USS uses the DB2 ODBC component to connect to DB2. DB2 ODBC must be installed by your DB2 systems programmer; installation details are available in the IBM DB2 Installation Guide.
• Set up the web server with the PeopleSoft Pure Internet Architecture, as described in the previous chapter. This is required to set up the Process Scheduler to transfer reports or log files to the Report Repository.
• Set up your COBOL batch environment if you need to run COBOL processes through Process Scheduler. If the PeopleSoft modules purchased do not contain any COBOL modules, the COBOL run time libraries are notrequired. Also, COBOL is not required for applications that contain no COBOL programs. Consult My OracleSupport for the details on whether your application requires COBOL.
See "Preparing for Installation," Planning Your Initial Configuration.
• Install the 31-bit version of JDK/JRE 1.8.0 on z/OS.
• Apply all the required IBM patches listed in the document "Important PTFs for the PeopleSoft on DB2 for z/OS."
See Important PTFs for the PeopleSoft on DB2 for z/OS, My Oracle Support (search for the article name).
• Set up your database connectivity to access the PeopleSoft database from UNIX System Services with ODBC for z/OS.
• Install IBM's system stored procedure DSNUTILS. This is only required if you intend to run %UPDATESTAT meta-SQL coded in Application Engine, COBOL and Process Scheduler. If you do not have DSNUTILS installed, make sure you set the DBFLAGS parameter in the Process Scheduler

Setting Up Process Scheduler on z/OS Chapter 15C
534 Copyright © 2018, Oracle and/or its affiliates. All Rights Reserved.
Configuration file to "1" to disable performing this statistics within.
See "Creating a Database," Planning Your Installation.
• Have both your application server and the PeopleSoft Pure Internet Architecture started. In this chapter, you must modify security options of the designated PeopleSoft user ID that will be used to boot up Process Scheduler. This requires that the user ID's profile be modified through the User Security component. Please refer to earlier chapters for the details on starting the application server and the PeopleSoft Pure Internet Architecture.
• PeopleSoft binaries are compiled and linked with IBM's XPLINK (Extra option Linkage) option enabled. In order for all PeopleSoft executables to successfully run from UNIX System Services (USS), it is recommended to include the IBM Language Environment Run Time library CEE.SCEERUN2 dataset concatenated into your system library using IBM's LNKLIST utility. This IBM library CEE.SCEERUN2 may have been renamed in your system. It will be the dataset containing the CELHV003 load module.
In PeopleSoft PeopleTools 8.50 and later, the configuration and log files for Process Scheduler server domains reside in PS_CFG_HOME. If you do not set a PS_CFG_HOME environment variable before beginning the application server configuration, the system installs it in a default location based on the current user's settings, as follows:%USERPROFILE%\psft\pt\<peopletools_version>
See "Preparing for Installation," Defining Installation Locations.See the product documentation PeopleTools: System and Server Administration for more information on the PS_CFG_HOME environment variable and working with server domain configuration.
See Also
PeopleTools: Process SchedulerMy Oracle Support, Certifications
Task 15C-1: Granting Required Authorization in DB2 and UNIX System Services
This section discusses:
• Setting UNIX System Services Authorization
• Setting DB2 Authorization
Task 15C-1-1: Setting UNIX System Services AuthorizationThis section discusses:
• Providing Read/Write Access to the Designated Log/Output Directory
• Providing Access to TSO and USS
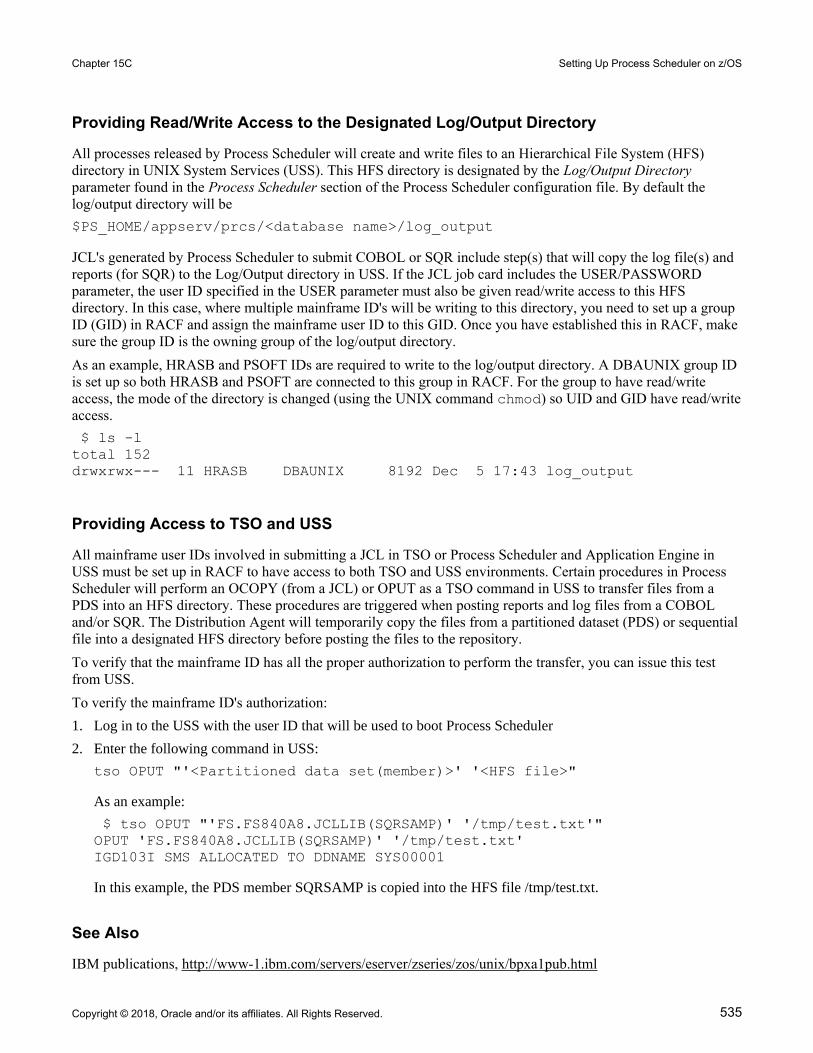
Chapter 15C Setting Up Process Scheduler on z/OS
Copyright © 2018, Oracle and/or its affiliates. All Rights Reserved. 535
Providing Read/Write Access to the Designated Log/Output Directory
All processes released by Process Scheduler will create and write files to an Hierarchical File System (HFS) directory in UNIX System Services (USS). This HFS directory is designated by the Log/Output Directory parameter found in the Process Scheduler section of the Process Scheduler configuration file. By default the log/output directory will be$PS_HOME/appserv/prcs/<database name>/log_output
JCL's generated by Process Scheduler to submit COBOL or SQR include step(s) that will copy the log file(s) and reports (for SQR) to the Log/Output directory in USS. If the JCL job card includes the USER/PASSWORD parameter, the user ID specified in the USER parameter must also be given read/write access to this HFS directory. In this case, where multiple mainframe ID's will be writing to this directory, you need to set up a group ID (GID) in RACF and assign the mainframe user ID to this GID. Once you have established this in RACF, make sure the group ID is the owning group of the log/output directory.As an example, HRASB and PSOFT IDs are required to write to the log/output directory. A DBAUNIX group ID is set up so both HRASB and PSOFT are connected to this group in RACF. For the group to have read/write access, the mode of the directory is changed (using the UNIX command chmod) so UID and GID have read/writeaccess. $ ls -ltotal 152drwxrwx--- 11 HRASB DBAUNIX 8192 Dec 5 17:43 log_output
Providing Access to TSO and USS
All mainframe user IDs involved in submitting a JCL in TSO or Process Scheduler and Application Engine in USS must be set up in RACF to have access to both TSO and USS environments. Certain procedures in Process Scheduler will perform an OCOPY (from a JCL) or OPUT as a TSO command in USS to transfer files from a PDS into an HFS directory. These procedures are triggered when posting reports and log files from a COBOL and/or SQR. The Distribution Agent will temporarily copy the files from a partitioned dataset (PDS) or sequentialfile into a designated HFS directory before posting the files to the repository.To verify that the mainframe ID has all the proper authorization to perform the transfer, you can issue this test from USS.To verify the mainframe ID's authorization:1. Log in to the USS with the user ID that will be used to boot Process Scheduler
2. Enter the following command in USS:
tso OPUT "'<Partitioned data set(member)>' '<HFS file>"
As an example:
$ tso OPUT "'FS.FS840A8.JCLLIB(SQRSAMP)' '/tmp/test.txt'"OPUT 'FS.FS840A8.JCLLIB(SQRSAMP)' '/tmp/test.txt'IGD103I SMS ALLOCATED TO DDNAME SYS00001
In this example, the PDS member SQRSAMP is copied into the HFS file /tmp/test.txt.
See Also
IBM publications, http://www-1.ibm.com/servers/eserver/zseries/zos/unix/bpxa1pub.html

Setting Up Process Scheduler on z/OS Chapter 15C
536 Copyright © 2018, Oracle and/or its affiliates. All Rights Reserved.
Systems Planning Guide (SA22-7800)User's Guide (SA22-7801)
Task 15C-1-2: Setting DB2 AuthorizationThis section discusses:
• Setting Authorization for DB2 Plan for ODBC for OS390
• Setting Authorization for DB2 Plans for COBOL
• Setting Authorization for DB2 Plan for SQR
Setting Authorization for DB2 Plan for ODBC for OS390
The privilege to execute the DB2 plan for the CLI/ODBC package DSNAOCLI must be given to the mainframe ID used to login to UNIX System Services to start Process Scheduler Server Agent. When Process Scheduler or Application Engine program connects to the DB2 database, CLI/ODBC authenticates the connection based on the user ID that initiates the program from UNIX System Services.
Grant EXECUTE on PLAN <PLAN for CLI Package DSNAOCLI> To <Unix Service⇒ Login ID>
Setting Authorization for DB2 Plans for COBOL
Enter the following command to set authorization for DB2 Plans for COBOL:
Grant EXECUTE on PLAN <SQLRT Plan PTPSQLRA and PTPSQLRE> To <Access-Id> or⇒ <Ownerid>;
The variable <SQLRT Plan PTPSQLRA and PTPSQLRE > refers to the plans created during database creation.See "Creating a Database," Binding DB2 Plans.
Setting Authorization for DB2 Plan for SQR
Enter the following command to set authorization for DB2 Plan for SQR:Grant EXECUTE on PLAN <SQR PLAN> To <Access-Id> or <Ownerid>;
The variable <SQR PLAN> refers to the plan created when installing SQR for z/OS.
Task 15C-2: Setting Up Process Scheduler Security
This section discusses:
• Understanding Process Scheduler Security
• Granting Process Scheduler Administrative Rights

Chapter 15C Setting Up Process Scheduler on z/OS
Copyright © 2018, Oracle and/or its affiliates. All Rights Reserved. 537
Understanding Process Scheduler SecurityThis task—in which you set up the PeopleSoft User ID that will be used to boot Process Scheduler server so it hasadministrative rights to both Process Scheduler and Report Manager—guarantees that security is set up properly within your PeopleSoft database.You must carry out this task to start Process Scheduler successfully.
Task 15C-2-1: Granting Process Scheduler Administrative RightsTo grant Process Scheduler administrative rights:1. Log onto your PeopleSoft database through the PeopleSoft Pure Internet Architecture.
2. Select PeopleTools, Security, User Profiles.
3. Select the User Profiles component. Use the Search dialog to select the PeopleSoft User ID you plan to use to boot the Process Scheduler server.

Setting Up Process Scheduler on z/OS Chapter 15C
538 Copyright © 2018, Oracle and/or its affiliates. All Rights Reserved.
4. Click the Roles tab, click the plus icon to insert a new row, and there enter the ProcessSchedulerAdmin role togrant the user ID with administrative rights in the Process Scheduler components.
Process Scheduler window: Roles tab
5. Repeat the instructions in step 4 to add the role ReportDistAdmin.
This will grant the user ID administrative rights to the Report Manager component. Carry out this step only if the same user is also responsible for maintaining the content of Report Manager.
Note. When setting up Process Scheduler on UNIX or Windows, you must have the right user ID to start an application server. This authorization is not required to bring up Process Scheduler in z/OS UNIX System Services because Process Scheduler is not booted through Tuxedo in this platform.
Task 15C-3: Setting Up Process Scheduler to Transfer Reports and Logs to the Report Repository
This section discusses:
• Understanding Report Distribution
• Setting Up Single Signon to Navigate from PIA to Report Repository
• Determining the Transfer Protocol

Chapter 15C Setting Up Process Scheduler on z/OS
Copyright © 2018, Oracle and/or its affiliates. All Rights Reserved. 539
• Starting the Distribution Agent
• Setting Up the Report Repository
• Setting Up the Distribution for Your Process Scheduler Server
• Setting Up Sending and Receiving of Report Folders in the Report Manager
Understanding Report DistributionThe PeopleSoft PeopleTools Report Distribution lets you access reports and log files generated from process requests run by a Process Scheduler Server Agent. Using the PeopleSoft Pure Internet Architecture, you can view reports and log files from the web browser through the Report Manager or Process Monitor Detail page. Report Distribution enables you to restrict access to these reports to authorized users based either on user ID or role ID.This product also includes the Distribution Agent component, which runs on the same server as the Process Scheduler Server Agent. The Distribution Agent, a process that runs concurrently with the Process Scheduler Server Agent, transfers to the Report Repository files generated by process requests initiated by the Process Scheduler Server Agent.The Distribution Agent transfers files to the Report Repository when one of these criteria is true:
• The Process Scheduler Server Agent is set up in the Server Definition to transfer all log files to the Report Repository.
• The process request output destination type is Web/Window.
In either case, the Process Scheduler Server Agent inserts a row in the Report List table (PS_CDM_LIST). The server agent then updates the distribution status for a process request to Posting upon completion of the program associated with the process request. The distribution status of Posting signals that the files for the process request are ready for transfer to the Report Repository. The Distribution Agent is notified by Process Scheduler for any process requests that are ready for transferring. As part of the process to transfer files to the Report Repository, the Distribution Agent performs the following steps:
• Transfer files to the Report Repository. All the report and log files are transferred to the Report Repository. For each process request transferred, a directory is created in the Report Repository using the following format: \<database name\<date yyyymmdd>\<report id>. All the files for a process request are stored in this directory.
• Delete the directory from the Process Scheduler Agent's Log/Output directory. When the output destination type specified for a process request is Web/Window, all the files and directory associated with the process request are deleted from the Process Scheduler Log/Output directory after the files are transferred to the Report Repository.
The following diagram illustrates the Process Scheduler and Report Repository architecture. The diagram includes the following items:
• The web browser gives access to the Process Request dialog and the Report or Log Viewer.
• The Report Repository is part of the PeopleSoft Pure Internet Architecture.
Note. The PeopleSoft Pure Internet Architecture must be installed for Process Scheduler to be able to transfer reports to the Report Repository.
• The Process Scheduler Server includes the Process Scheduler Server Agent and the Distribution Agent.
• The transfer protocol between Process Scheduler and the Report Repository may be FTP/FTPS, XCOPY, HTTP/HTTPS, or SFTP.

Setting Up Process Scheduler on z/OS Chapter 15C
540 Copyright © 2018, Oracle and/or its affiliates. All Rights Reserved.
Process Scheduler and Report Repository Architecture
Before users can view a report, they are authenticated against the PeopleSoft database.You should set up single signon if you do not want users to have to log on an additional time to view reports in the Report Repository. For the details on setting up single signon, consult the security documentation.See PeopleTools: Security Administration.

Chapter 15C Setting Up Process Scheduler on z/OS
Copyright © 2018, Oracle and/or its affiliates. All Rights Reserved. 541
Task 15C-3-1: Setting Up Single Signon to Navigate from PIA to Report RepositoryTo view reports (log files or system files) from Report Repository, you need to pass the authentication. Report Repository should be treated as a separate PeopleSoft application. To navigate from PeopleSoft Pure Internet Architecture (PIA) to Report Repository, you need to set up single signon to avoid getting a prompt for a second signon. This section includes some considerations for setting up single signon to navigate from PIA to Report Repository.If Report Repository resides on the same web server as PIA, make sure your Local Message Node is set up to be a"trusted" node for single signon for your system.If Report Repository resides on a different web server than PIA, do the following:
• Make sure your Local Message Node is set up to be a "trusted" node for single signon for your system.
• Use a fully qualified domain name when addressing the web server for both PIA and Report Repository. For example, enter http://<machineName>.peoplesoft.com/<site_name>/signon.html instead of http://<machineName>/<site_name>/signon.html.
• Specify the Authentication Domain for your application during installation. If you have multiple applications, and you want them to employ single signon, it is important to specify the same Authentication Domain for all applications.
See the information on implementing single signon in the PeopleTools: Security Administration product documentation.
• Set up single signon with a password, like this:
• Choose PeopleTools, Integration Broker, Integration Setup, Nodes.
• Click Search and then select the node marked as Default Local Node.
• Select Password for the Authentication Option.
• Enter a password of your choice.
• Enter the password again in the Confirm Password field.
• Enter the user ID for which you are setting up single signon in the Default User ID field.
• Save the Node Definition.
• Sign out from the PeopleSoft application.
• Reboot your application server.
See Also
PeopleTools: Security Administration
Task 15C-3-2: Determining the Transfer ProtocolWe recommend using HTTP as your transfer protocol.

Setting Up Process Scheduler on z/OS Chapter 15C
542 Copyright © 2018, Oracle and/or its affiliates. All Rights Reserved.
Before transferring the files to the Report Repository, you need to determine which transfer protocol to use. If youhave a Microsoft Windows Process Scheduler and a Microsoft Windows web server, you can use either an XCOPY, FTP/FTPS, SFTP, or HTTP/HTTPS protocol. (If FTP information is not specified, Process Scheduler will perform an XCOPY.) If you have a PeopleSoft Process Scheduler on Microsoft Windows and a UNIX web server, you can use FTP/FTPS, SFTP, or HTTP/HTTPS. If the PeopleSoft Process Scheduler is on DB2 z/OS, useFTP/FTPS or HTTP/HTTPS. If you have a PeopleSoft Process Scheduler on UNIX , you can use FTP/FTPS, SFTP, or HTTP/HTTPS.
Note. If you are on DB2 z/OS, you need to have JRE set up on your Process Scheduler server.
Task 15C-3-3: Starting the Distribution AgentThe Distribution Agent is automatically started as another Oracle Tuxedo server when a Process Scheduler Serveris booted. If a Process Scheduler Server was set up without specifying a Distribution Node in the Server Definition page, the Process Scheduler server will have a status in Process Monitor of "Running with No Report Node." After a node is defined for the Process Scheduler server, in the next cycle the Process Scheduler server checks the state of the system, and the Distribution Agent dynamically sets up its environment.
Task 15C-3-4: Setting Up the Report RepositoryThis section discusses:
• Defining ReportRepositoryPath
• Defining the Report Node to Use HTTP/HTTPS
• Defining the Report Node to Use FTP
• Defining the Report Node to Use FTPS
• Defining the Report Node to Use SFTP
Defining ReportRepositoryPath
The ReportRepositoryPath specifies the location of a directory for the Report Repository. You can specify the location for the Report Repository Path on the General page of the Web Profile during installation. If you do not set the location in the Web Profile, the location given by ReportRepositoryPath in the configuration.properties fileis used for the default location. Note that the value entered for Report Repository Path in the Web Profile overrides any entry in the configuration.properties file.See PeopleTools: Portal Technology, "Configuring Web Profiles."Use the following formats to enter the name for the directory that you want to use for the ReportRepositoryPath. The examples below give the default values. Note that you must use a forward slash ('/') in both cases:
• Microsoft Windows: ReportRepositoryPath=c:/psreports
• UNIX: ReportRepositoryPath=<user_home>/PeopleSoft Internet Architecture/psreports
For <user_home> substitute the home directory for the current user.
Defining the Report Node to Use HTTP/HTTPS
To define the report node to use HTTP/HTTPS:1. Select PeopleTools, Process Scheduler, Report Nodes.

Chapter 15C Setting Up Process Scheduler on z/OS
Copyright © 2018, Oracle and/or its affiliates. All Rights Reserved. 543
2. Select the Add a New Value link and enter the Report node name.
3. On the Report Node Definition page, select HTTP or HTTPS from the Protocol drop-down list.
Select the HTTP option if you are not using SSL. Select the HTTPS option if you are using SSL. The pages for HTTP and HTTPS have the same fields. These examples show HTTP.
Note that if you are using SSL you need to have Client Certificates installed on your web server.
4. Enter the following information in the Distribution Node Details area:
• URLID: Enter the URL of the web server using the following format:
http://<machine_name>:<port_number>/psreports/<site_name>
Replace <machine_name> with the name of your machine. Use the fully qualified host name for your web server. If you are using an HTTP or HTTPS port other than the defaults, you need to specify the port number.
Note. If you specify the Authentication Token Domain name during the PIA installation, you must includea fully qualified domain name for the URL instead of the IP address.
• Description: Enter a description of the server (optional).
• Operating System: Select the web server operating system, Windows or UNIX.
5. Enter the following information in the Login Details area:
• Login ID: Enter the Login ID. This is not required, unless basic authentication has been set up on the web server by the Web Administrator.
• Password and Confirm Password: Enter the password, and confirm it, for the user ID specified in the Login ID field. This is not required, unless basic authentication has been set up on the web server by the Web Administrator.
Note. The setup of authentication is optional, but is recommended for security of the Report Repository when using the HTTP to transfer files. For information on setting up authentication on the web server where the Report Repository resides, refer to the PeopleTools: Security Administration product documentation.
6. Enter the following information in the URI Details area:
• URI Host: Enter the machine name for the report repository.
Note. In a basic setup, the machine name for the report repository will match the machine name of the webserver URL. However, under certain circumstances—for example, if you are using a reverse proxy server—the URL and URI Host may have different machine names.
• URI Port: Enter the port number, which must match the port number of your web server (defaults are HTTP = 80, HTTPS = 443). If you change a port number you will lose the default values for both protocols.
• URI Resource: Enter SchedulerTransfer/<site name>.
7. Click Save to save your entries.
8. Click Validate to confirm that your entries are complete and correct.
The validation confirms that the necessary parameters are present and correct, and simulates a file transfer with the entered information. You either see a message that confirms the success of the validation, or a message that displays an error for missing parameters or an unsuccessful transfer simulation.
9. To add additional report nodes, click Add to return to the Search page.

Setting Up Process Scheduler on z/OS Chapter 15C
544 Copyright © 2018, Oracle and/or its affiliates. All Rights Reserved.
Defining the Report Node to Use FTP
If you use the FTP report node protocol, note that:
• If your FTP server is a Microsoft Windows server, you may have to set up the FTP service.
• The Distribution Agent will perform a validation after FTP has transferred files into the Report Repository by sending a query request to the web server. For this task to be completed, it is critical that the value entered in the URL is accurate. Verify that the machine name, port number, and site number that you specify are correct.
If this setup is not completed, the process request will get a status of NOT POSTED in the Process Monitor Detail page and will log the message "Unable to verify files posted."
To define the report node to use FTP:1. Select PeopleTools, Process Scheduler, Report Nodes.
2. Select Add a New Value, enter the Report node name, and click Add.
3. On the Report Node Definition page, select FTP from the Protocol drop-down list.
4. In the Distribution Node Details area, enter the following information:
• URLID: Enter the URL of the web server using this format:
http://<machine_name>:<port_number>/psreports/<site_name>
Replace <machine name> with the name of your web server. If you are using an HTTP port other than 80,you need to specify the port number. The variable <site name> refers to the directory where you installed the PIA files; this will default to ps for the first installation.
Note. If you specify the Authentication Token Domain name during the PIA installation, you must includea fully qualified domain name for the URL instead of the IP address.
Note. If you installed the web server software with the default TCP port of 80, you do not need to specify the port number in the URL path. However, if you installed the web server to some other port, you must specify the port number in the URL path.
• Description: Enter a description of the server (optional).
• Operating System: Select the operating system of the Report Repository, Windows or UNIX.
• Network Path: This information is not required for the FTP protocol
5. In the Login Details area, enter the following information:
• Login ID: Enter the FTP User ID.
• Password and Confirm Password: Enter the password, and enter it a second time, for the FTP User ID specified in the Login ID field.
6. In the File Transfer Details area, enter the following information:
• Home Directory: Enter the directory specified during the PIA installation as the Report Repository. The FTP User ID must have write access to this directory. Note that this is not a required field for FTP transfer, as the system uses the Report Repository directory specified at install time or the current directory assigned to ReportRepositoryPath in configuration.properties. Note that the value you enter for the Report Repository Path in the Web Profile at install time overrides any entry for ReportRepositoryPathin configuration.properties.
• FTP Address: Enter the machine name or the IP address of the Report Repository. If the name of the machine is used, it must be included on a DNS server.

Chapter 15C Setting Up Process Scheduler on z/OS
Copyright © 2018, Oracle and/or its affiliates. All Rights Reserved. 545
7. If you need to specify additional properties, use the Connection Properties area. Specifying the Connection Properties is optional.
Click the lookup button (magnifying glass) and select one of the properties in the following table. Click the plus sign to add another connection property.
Property Name Property Value
ACTIVEMODE To enable active mode, add the ACTIVEMODE property to the URL and set it to Y.
The default FTP connection mode is extended passive mode.
ACTIVEPORTOPTION This property can be used along with ACTIVEMODE. When active mode is enabled, you can use ACTIVEPORTOPTION to specify the IP address and porton which the FTP server can be accessed. This is useful when the server is behind a firewall. By default, ACTIVEPORTOPTION uses the default IP address of your system. If you want to use a particular IP address, set the ACTIVEPORTOPTION value to either the full IP address, a host name to resolve to an IP address, or a local network interface name.
You can also specify a port range. For example: 10.176.147.111:10000-13000
ENABLEEPRT This option can be used only with Active Mode. If Active Mode is enabled and ENABLEEPRT is set to N, then the system will use a PORT (IPv4) Active Mode connection.
By default, ENABLEEPRT is Y, if Active Mode is set to Y.
EXTENDEDPASSIVEMODE • 0: Disable EPSV
• 1: Enable EPSVThis property enables you to control whether extended passive mode (EPSV) will be used by FTP.
EPSV is used by default. That is, by default, this value is considered to be 1.
If the client fails to connect to the server with EPSV, then the system will try passive mode (PASV). To use PASV only, add EXTENDEDPASSIVEMODE to the URL Properties and set it to 0.
JKSPASSWORD Specify the Java keystore (JKS) password.
JKSPATH Specify the Java keystore (JKS) path.
PASSWORD Specify the password associated with the USER property, which identifies the FTP User ID.
USER Specify the FTP User ID used for authentication when accessing the FTP site.

Setting Up Process Scheduler on z/OS Chapter 15C
546 Copyright © 2018, Oracle and/or its affiliates. All Rights Reserved.
8. If you need to specify an encrypted password in any of the property fields, use the Password Encryption area to generate the encrypted password, as follows:
a. In the Password field, enter a password.
b. In the Confirm Password field, enter the password again.
c. Click Encrypt.
The encrypted password is displayed in the Encrypted Password field.
d. From the Encrypted Password field, cut the encrypted password and then copy the encrypted value to the appropriate location.
9. Select Save to save your entries.
10. Click Validate to confirm that your entries are correct.
The validation confirms that the necessary parameters are present and correct, and simulates a file transfer with the entered information. You either see a message that confirms the success of the validation, or a message that displays an error for missing parameters or an unsuccessful transfer simulation.
11. To add additional report nodes, click Add to return to the Search page.
Defining the Report Node to Use FTPS
To define the report node to use FTPS:1. Select PeopleTools, Process Scheduler, Report Nodes.
2. Select Add a New Value, enter the Report node name, and click Add.
3. On the Report Node Definition page, select FTPS from the Protocol drop-down list.
4. In the Distribution Node Details area, enter the following information:
• URLID: Enter the URL of the web server using this format:
http://<machine_name>:<port_number>/psreports/<site_name>
Replace <machine name> with the name of your web server. If you are using an HTTP port other than 80,you need to specify the port number. The variable <site name> refers to the directory where you installed the PIA files; this will default to ps for the first installation.
Note. If you specify the Authentication Token Domain name during the PIA installation, you must includea fully qualified domain name for the URL instead of the IP address.
Note. If you installed the web server software with the default TCP port of 80, you do not need to specify the port number in the URL path. However, if you installed the web server to some other port, you must specify the port number in the URL path.
• Description: Enter a description of the server (optional).
• Operating System: Select the operating system of the Report Repository, Windows or UNIX.
• Network Path: This information is not required for the FTPS protocol.
5. In the Login Details area, enter the following information:
• Login ID: Enter the FTP User ID.
• Password and Confirm Password: Enter the password, and enter it a second time, for the user ID specifiedin the Login ID field.
6. In the File Transfer Details area, enter the following information:

Chapter 15C Setting Up Process Scheduler on z/OS
Copyright © 2018, Oracle and/or its affiliates. All Rights Reserved. 547
• Home Directory: Enter the directory specified during the PIA installation as the Report Repository. The FTP User ID must have write access to this directory. Note that this is not a required field for FTP transfer, as the system uses the Report Repository directory specified at install time or the current directory assigned to ReportRepositoryPath in configuration.properties. Note that the value you enter for the Report Repository Path in the Web Profile at install time overrides any entry for ReportRepositoryPathin configuration.properties.
• FTP Address: Enter the machine name or the IP address of the Report Repository. If the name of the machine is used, it must be included on a DNS server.
• SSL Mode: Select Explicit or Implicit from the drop-down list.
These are two separate methods developed to invoke the client security for use with FTP clients. With the explicit mode, FTPS-aware clients can invoke security with an FTPS-aware server without breaking overall FTP functionality with non-FTPS-aware clients. The implicit method requires that all clients of theFTPS server be aware that SSL is to be used on the session, and thus is incompatible with non-FTPS-aware clients.

Setting Up Process Scheduler on z/OS Chapter 15C
548 Copyright © 2018, Oracle and/or its affiliates. All Rights Reserved.
7. In the Connection Properties area, click the lookup button (magnifying glass) and select one of the properties in the following table:
Click the plus sign to add another connection property.
Property Name Property Value
ACTIVEMODE To enable active mode, add the ACTIVEMODE property to the URL and set it to Y.
The default FTPS connection mode is extended passive mode.
ACTIVEPORTOPTION This property can be used along with ACTIVEMODE. When active mode is enabled, you can use ACTIVEPORTOPTION to specify the IP address and porton which the FTP server can be accessed. This is useful when the server is behind a firewall. By default, ACTIVEPORTOPTION uses the default IP address of your system. If you want to use a particular IP address, set the ACTIVEPORTOPTION value to either the full IP address, a host name to resolve to an IP address, or a local network interface name.
You can also specify a port range. For example: 10.176.147.111:10000-13000
CERTALIAS Certificate Alias: The Certificate Alias must be an alias name of a certificate stored in the database (using the PeopleSoft PeopleTools Digital Certificates page).
Note. Currently, only PEM certificates are supported for FTPS.
ENABLEEPRT This option can be used only with Active Mode. If Active Mode is enabled and ENABLEEPRT is set to N, then the system will use a PORT (IPv4) Active Mode connection.
By default, ENABLEEPRT is Y, if Active Mode is set to Y.
EXTENDEDPASSIVEMODE • 0: Disable EPSV
• 1: Enable EPSVThis property enables you to control whether extended passive mode (EPSV) will be used by FTP.
EPSV is used by default. That is, by default, this value is considered to be 1.
If the client fails to connect to the server with EPSV, then the system will try passive mode (PASV). To use PASV only, add EXTENDEDPASSIVEMODE to the URL Properties and set it to 0.
JKSPASSWORD Specify the Java keystore (JKS) password.
JKSPATH Specify the Java keystore (JKS) user.

Chapter 15C Setting Up Process Scheduler on z/OS
Copyright © 2018, Oracle and/or its affiliates. All Rights Reserved. 549
Property Name Property Value
KEYSTOREPASSWORD This property is required for FTPS and HTTPS repositories. For attachments transferred from the PeopleSoft system to the FTPS or HTTPS repository, the system retrieves the key pair for the client certificate from the digital certificate store and writes the pair to a file in PKCS12 format with password protection. The value of this property will be used as the password for the PKCS12 file.
The PKCS12 file enables connection and file transfer, and it exists only temporarily in <PS_SERVDIR>\files\<CERT ALIAS NAME> for the duration of the file transfer. The system deletes the file after the file transfer transaction.
Note. If the system fails to delete the certificate alias file, a message will be written to the application server log. Themaximum number of files that can exist at any time is equal to the total number of FTPS and HTTPS URL identifiers defined in the system.
For information on setting the PS_SERVDIR environmentvariable, see the PeopleTools: Integration Broker product documentation.
PASSWORD Specify the password associated with the USER property, which identifies the FTP User ID.
SSLUAGELEVEL • 0 - No SSL: No SSL will be used.
• 1 - Try SSL: Try using SSL, but proceed as normal otherwise.
• 2 - Control: Require SSL for the control connection.
• 3 - SSL Only: (Default) Require SSL for all communication.
USER Specify the FTP User ID used for authentication when accessing the FTP site.
VERIFYHOST • 0: Do not verify the server for host name.
• 1: Check if there exists any value in the common namefield in the server certificate. This check does not verify if it matches with what the client specifies.
• 2: (Default) Check for a match with the host name in the URL with the common name or Subject Alternate field in the server certificate.
VERIFYPEER • False: Do not verify the peer.
• True: (Default) Verify the peer by authenticating the certificate sent by the server.
8. If you need to specify an encrypted password in any of the property fields, use the Password Encryption area to generate the encrypted password, as follows:
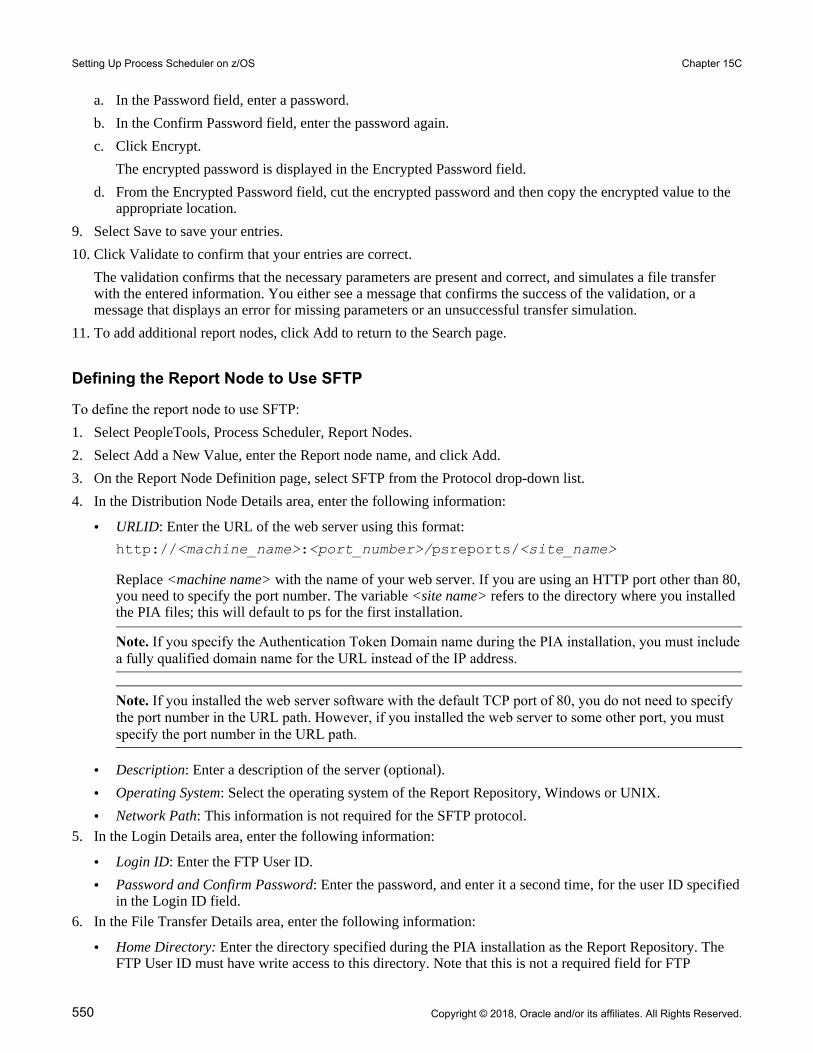
Setting Up Process Scheduler on z/OS Chapter 15C
550 Copyright © 2018, Oracle and/or its affiliates. All Rights Reserved.
a. In the Password field, enter a password.
b. In the Confirm Password field, enter the password again.
c. Click Encrypt.
The encrypted password is displayed in the Encrypted Password field.
d. From the Encrypted Password field, cut the encrypted password and then copy the encrypted value to the appropriate location.
9. Select Save to save your entries.
10. Click Validate to confirm that your entries are correct.
The validation confirms that the necessary parameters are present and correct, and simulates a file transfer with the entered information. You either see a message that confirms the success of the validation, or a message that displays an error for missing parameters or an unsuccessful transfer simulation.
11. To add additional report nodes, click Add to return to the Search page.
Defining the Report Node to Use SFTP
To define the report node to use SFTP:1. Select PeopleTools, Process Scheduler, Report Nodes.
2. Select Add a New Value, enter the Report node name, and click Add.
3. On the Report Node Definition page, select SFTP from the Protocol drop-down list.
4. In the Distribution Node Details area, enter the following information:
• URLID: Enter the URL of the web server using this format:
http://<machine_name>:<port_number>/psreports/<site_name>
Replace <machine name> with the name of your web server. If you are using an HTTP port other than 80,you need to specify the port number. The variable <site name> refers to the directory where you installed the PIA files; this will default to ps for the first installation.
Note. If you specify the Authentication Token Domain name during the PIA installation, you must includea fully qualified domain name for the URL instead of the IP address.
Note. If you installed the web server software with the default TCP port of 80, you do not need to specify the port number in the URL path. However, if you installed the web server to some other port, you must specify the port number in the URL path.
• Description: Enter a description of the server (optional).
• Operating System: Select the operating system of the Report Repository, Windows or UNIX.
• Network Path: This information is not required for the SFTP protocol.
5. In the Login Details area, enter the following information:
• Login ID: Enter the FTP User ID.
• Password and Confirm Password: Enter the password, and enter it a second time, for the user ID specifiedin the Login ID field.
6. In the File Transfer Details area, enter the following information:
• Home Directory: Enter the directory specified during the PIA installation as the Report Repository. The FTP User ID must have write access to this directory. Note that this is not a required field for FTP

Chapter 15C Setting Up Process Scheduler on z/OS
Copyright © 2018, Oracle and/or its affiliates. All Rights Reserved. 551
transfer, as the system uses the Report Repository directory specified at install time or the current directory assigned to ReportRepositoryPath in configuration.properties. Note that the value you enter for the Report Repository Path in the Web Profile at install time overrides any entry for ReportRepositoryPathin configuration.properties.
• FTP Address: Enter the machine name or the IP address of the Report Repository. If the name of the machine is used, it must be included on a DNS server.
7. In the Connection Properties area, click the lookup button (magnifying glass) and select one of the properties in the following table.
Click the plus sign to add additional connection properties.
Property Name Property Value
AUTHTYPE Select one of the following the authentication types:
• PUBLICKEY
• PASSWORD
• ANY
PASSWORD Specify the user password. You can enter the password in the Password Encryption box, click Encrypt, and then copy the encrypted value to the Password property.
PASSWORDKEY Enter the password for the private key.
PRIVATEKEY Select the private key.
PUBLICKEY Select the public key.
SSHKEYALIAS Select the SSH certificate saved to the database using the PeopleTools Security, Digital Certificates page (select PeopleTools, Security, Security Objects, Digital Certificates). The SSH certificate added through the Digital Certificates page contains both the public and private key data, identified by the Alias column value on the Digital Certificates page.
If using the SSHKEYALIAS URL property, the Property Value prompt displays only the list of SSH certificates thathave been added to the Digital Certificates page. If you have added the SSH certificate using the Digital Certificates page, and you have assigned an SSH certificate to the SSHKEYALIAS URL property, the system ignores the PUBLICKEY and PRIVATEKEY properties, regardless of whether they refer to valid key files in the file system.
If you provided a password (or passphrase) when generating your SSH certificate, specify that value using the PASSWORDKEY URL property.
See PeopleTools: Security Administration, "Configuring Digital Certificates."
USER Specify the user ID to be authenticated.

Setting Up Process Scheduler on z/OS Chapter 15C
552 Copyright © 2018, Oracle and/or its affiliates. All Rights Reserved.
8. If you need to specify an encrypted password in any of the property fields, use the Password Encryption area to generate the encrypted password, as follows:
a. In the Password field, enter a password.
b. In the Confirm Password field, enter the password again.
c. Click Encrypt.
The encrypted password is displayed in the Encrypted Password field.
d. From the Encrypted Password field, cut the encrypted password and then copy the encrypted value to the appropriate location.
9. Select Save to save your entries.
10. Click Validate to confirm that your entries are correct.
The validation confirms that the necessary parameters are present and correct, and simulates a file transfer with the entered information. You either see a message that confirms the success of the validation, or a message that displays an error for missing parameters or an unsuccessful transfer simulation.
11. To add additional report nodes, click Add to return to the Search page.
Task 15C-3-5: Setting Up the Distribution for Your Process Scheduler ServerTo set up the Distribution Settings for your Process Scheduler Server:1. Select PeopleTools, Process Scheduler, Servers.
2. Enter the Server Name (such as PSOS390). The Server Definition page appears.
3. Select the Distribution tab.
Server Definition page for PSOS390: Distribution tab
4. Click the lookup button for Distribution Node Name to display the report node names and select the name of

Chapter 15C Setting Up Process Scheduler on z/OS
Copyright © 2018, Oracle and/or its affiliates. All Rights Reserved. 553
the required report node.
5. Enter a number for the Maximum Transfer Retries. This is the maximum number of times the server can try tosend a report before it errors out.
6. Enter the number of seconds for the Interval for Transfer Attempt field. This is the interval between attempts to send the report.
7. Select the check box Transfer Log Files to Report Repository if you want to transfer all log and trace files from processes that do not generate reports.
8. Click Save to save your entries.
9. If Process Scheduler is running, you must reboot for any new settings to take effect.
To view reports (log files or system files) from Report Repository, you need to pass the authentication. Report Repository should be treated as a separate PeopleSoft application. To navigate from PIA to Report Repository, you need to set up single signon in order to avoid getting a prompt for a second signon.
Task 15C-3-6: Setting Up Sending and Receiving of Report Folders in the Report ManagerTo be able to view reports in the Report Manager Explorer and List pages, you need to set up the sending and receiving of report folders in the Report Manager by activating the domain on which a sending and receiving server resides. Consult the documentation covering the PeopleSoft Integration Broker to learn how to activate the sending and receiving server domain.See PeopleTools: Integration Broker.See PeopleTools: Integration Broker Service Operations Monitor.
Task 15C-4: Setting Up Process Scheduler Server Agent
This section discusses:
• Understanding Process Scheduler Server Agent
• Changing the Default Operating System
• Setting Up Your Environment
• Validating and Editing the ODBC Initialization File
• Creating a Process Scheduler Server
• Configuring Process Scheduler Server
• Working with Shell JCL Templates
• Starting a Process Scheduler Server
• Verifying the Process Scheduler Server Status
• Stopping the Process Scheduler Server

Setting Up Process Scheduler on z/OS Chapter 15C
554 Copyright © 2018, Oracle and/or its affiliates. All Rights Reserved.
Understanding Process Scheduler Server AgentFor installation purposes, you can use predefined server names and other definitions. The predefined name that you might use is as follows:
Server Name Operating System
PSOS390 z/OS
To test this, use processes already defined in your PeopleSoft database. To set up a new server definition in your PeopleSoft database, refer to the PeopleTools: Process Scheduler product documentation.
Note. When creating multiple Process Scheduler Servers for the same database, each server must have a unique server name. For example, two Process Scheduler Servers, both named PSNT, cannot run against the same database.
Task 15C-4-1: Changing the Default Operating SystemBy default, Process Scheduler is set up to run a process request from a Process Scheduler Server Agent started in a Microsoft Windows server when the value of the ServerName field in the Process Request Dialog page is left blank. If you plan to run all processes other than Microsoft Windows-based programs (such as nVision) from z/OS, you must change the default operating system.
Note. If you do not change the default operating system from Microsoft Windows to z/OS and you do not plan to set up a Process Scheduler Server Agent in Windows, process requests that are created will be directed to a Windows-based operating system and will remain in the "Queued" status.
To change the default operating system for process requests that were not assigned a Process Scheduler Server Name:1. Select PeopleTools, Process Scheduler, System Settings.
2. Under Primary Operating System, choose OS390 from the drop-down list.
3. Click on the System Purge Options tab. Enter the date for the next purge of process requests in the Next PurgeDate field.
4. Enter the time for the next purge of process requests in the Next Purge Time field. The default time is 12:00:00AM.
5. Enter a Recurrence if you want to set a regular purging basis.
6. Choose Save.
Task 15C-4-2: Setting Up Your EnvironmentAlternatively, make sure the following environment variables are set in the profile file in the user's home directory:Run psconfig.sh file from PS_HOME:. ./psconfig.sh

Chapter 15C Setting Up Process Scheduler on z/OS
Copyright © 2018, Oracle and/or its affiliates. All Rights Reserved. 555
Task 15C-4-3: Validating and Editing the ODBC Initialization FileThe PeopleSoft Batch Transfer program generates the ODBC initialization file based on the parameters entered in the PeopleSoft Server Transfer panel. The ODBC initialization file is written to: $PS_HOME/appserv/odbc.ini
The ODBC initialization file contains the following key information:
• DB2 subsystem name
• Plan name for the DSNAOCLI CLI package
• Method used to attach to DB2 (default is RRSAF)
Here is an example of an initialization file for a DB2 subsystem called DSNW with DB2 plan DSNACLI: [COMMON]MVSDEFAULTSSID=DSNWAPPLTRACE=0APPLTRACEFILENAME=MULTICONTEXT=1CONNECTTYPE=1
; Set up the DB2 Subsystem Definition [DSNW]MVSATTACHTYPE=RRSAFPLANNAME=DSNACLI
Verify that all the information contained in this file is accurate. If you plan to set up multiple Process Scheduler Server Agents for different instances of a PeopleSoft database and these databases reside in different DB2 subsystems, you must create a different ODBC initialization file for each DB2 subsystem.
Task 15C-4-4: Creating a Process Scheduler ServerThis section describes how to create a Process Scheduler server.
Note. You can set Process Scheduler configuration parameters either by using PSADMIN, which provides an interactive dialog, or by editing the configuration file psprcs.cfg located in the PS_CFG_HOME/appserv/prcs/database name directory. The following steps assume you are using PSADMIN to specify parameter settings.
Note. If you use the configuration file psprcs.cfg, be aware that in the PeopleSoft PeopleTools 8.49 release and later, the section [Output Dest Exceptions] has been modified to trap metastring exceptions not only in the output destination but in other process parameters as well. In this section the entry OUTDEST_EXCEPT01=%ANYMETASTRING% has been changed to PARAMETER_EXCEPT01=%ANYMETASTRING%.
To create a Process Scheduler Server:1. From PS_HOME/appserv on the batch server, type psadmin.
2. Depending on your environment, you may see a message after the initial menu, which indicates that PSADMIN has modified the PS_CFG_HOME/peopletools.properties file with the current PS_HOME location:
************************************************************PS_CFG_HOME/peopletools.properties file has been updated.

Setting Up Process Scheduler on z/OS Chapter 15C
556 Copyright © 2018, Oracle and/or its affiliates. All Rights Reserved.
You should use the Config Home Refresh feature in PSAdmin to ensure that all of your domains are current.Alternatively, you may recreate all of your domains.Please press any key to continue...*************************************************************
This indicates that one of these situations exists:
• The PS_CFG_HOME that you are working with was used previously from a different PS_HOME. In this case, you should recreate any existing Application Server, Process Scheduler, Search, or PIA domains in this PS_CFG_HOME.
• You configured your environment such that PS_CFG_HOME is the same as PS_HOME. The first time you use PSADMIN to create a domain, it updates the PS_CFG_HOME/peopletools.properties file. Continue with the next step.
3. Select 2 to access the PeopleSoft Process Scheduler Administration menu.
4. Select 2 for Create a Process Scheduler Server Configuration:
--------------------------------------------PeopleSoft Process Scheduler Administration--------------------------------------------
1) Administer a Process Scheduler Server 2) Create a Process Scheduler Server Configuration 3) Delete a Process Scheduler Server Configuration 4) Import an existing Process Scheduler Configuration q) Quit
Command to execute (1-4, q) : 2
5. When prompted for the name of the database that your server will access, enter the name of the database, suchas HRDMO in this example, and press ENTER:
Please enter name of Database that server will access :HRDMO
You see screen messages like these:
Process Scheduler Configuration templates: 1) os390Selecting the only Process Scheduler Configuration template available...Creating Process Scheduler Server for Database HRDMO...Copying Process Scheduler Server configuration file(s)...Copying Process Scheduler JCL template files...Process Scheduler Shell JCL template files copied.Process Scheduler Server configuration created.
At this point, you are returned to the PeopleSoft Process Scheduler Administration menu.
Task 15C-4-5: Configuring Process Scheduler ServerThis section discusses:
• Configuring a Process Scheduler Server
• Using [Startup]

Chapter 15C Setting Up Process Scheduler on z/OS
Copyright © 2018, Oracle and/or its affiliates. All Rights Reserved. 557
• Using [OS390]
• Using [Process Scheduler]
• Using [Application Engine]
Note. The section may not mention certain PSADMIN sections, if you do not need to change any of their defaults.For more in depth descriptions of the Process Scheduler options in the PSADMIN, consult the PeopleTools: Process Scheduler product documentation.
Configuring a Process Scheduler Server
To configure a Process Scheduler Server:1. The PeopleSoft Process Scheduler Server Administration interface should already be on your screen from the
last step, but if it is not, go to PS_HOME/appserv and enter:
psadmin
Press ENTER, and then 2 to access the PeopleSoft Process Scheduler Administration menu.
2. From the PeopleSoft Process Scheduler Administration menu, select option 1 to Administer a domain:
-------------------------------------------PeopleSoft Process Scheduler Administration ------------------------------------------- 1) Administer a domain 2) Create a domain 3) Delete a domain 4) Import domain configuration q) Quit
Command to execute (1-4, q) : 1
3. Select the database for which the Process Scheduler needs to be configured.
Database list: 1) HRDMOSelect item number to configure: 1
4. At the following prompt:
Do you want to change any config values (y/n):
Specify y to start an interactive dialog to change or examine parameter values, as described in the next step. Specify n if you have already edited psprcs.cfg.
See PeopleTools: Process Scheduler.
Using [Startup]
When using PSADMIN to configure a Process Scheduler Server Agent, you first encounter the Startup section:Values for config section - Startup
DBName= DBType=DB2ODBC UserId=

Setting Up Process Scheduler on z/OS Chapter 15C
558 Copyright © 2018, Oracle and/or its affiliates. All Rights Reserved.
UserPswd= ConnectId= ConnectPswd= ServerName StandbyDBName= StandbyDBType= StandbyUserId= StandbyUserPswd=
Do you want to change any values (y/n)? [n]: y
The following table describes each value in the Startup section:
Value Description
DBName Specify the database name associated with a particular Process Scheduler Server Agent, such as HRDMO, FSDMO,SADMO, and so on.
DBType Specify the database type. The default for DB2 for z/OS is DB2ODBC.
UserId Enter the user ID.
UserPswd Enter the user password.
The password is hidden by masking characters as you type.
ConnectId Enter the connect ID. This value is required.
ConnectPswd Enter the connect password. This value is required.
The password is hidden by masking characters as you type.
ServerName For DB2 for z/OS, ignore this item.
StandbyDBName For DB2 for z/OS, ignore this item.
StandbyDBType For DB2 for z/OS, ignore this item.
StandbyUserId For DB2 for z/OS, ignore this item.
StandbyUserPswd For DB2 for z/OS, ignore this item.
When you change the UserPswd or ConnectPswd field, you are prompted for an option to encrypt the value entered for the password field:Do you want to encrypt this password? [y]:y
Enter y if you want the password stored in encrypted form in the Process Scheduler configuration file. (The default is to encrypt the password.)

Chapter 15C Setting Up Process Scheduler on z/OS
Copyright © 2018, Oracle and/or its affiliates. All Rights Reserved. 559
Using [OS390]
The OS390 section contains OS/390-specific values:Values for config section - OS390 ODBC Initialization File=%PS_HOME%/appserv/odbc.ini Shell JCL Library=%PS_SERVDIR%/shelljcl High Level Qualifier for System Datasets= High Level Qualifier for Log Datasets= Plan name for PTPSQLRT with CAF= Plan name for PTPSQLRT with TSO= DB2 Sub-System= VIO eligible unit group=SYSDA Enable Parallel Processing=0DECIMAL=PERIODTSO Character Set=cp037
Do you want to change any values (y/n)? [n]:
The following table describes each parameter in the OS390 section.
Parameter Description
ODBC Initialization File File containing ODBC setting to connect to the DB2 subsystem where the PS database is created.
Shell JCL Library The subdirectory containing all JCL templates used for submitting COBOL or SQR in native z/OS.
High Level Qualifier for System Datasets Datasets to which PeopleSoft installations are copied during batch transfer. For example, PT.PT810TA.
High Level Qualifier for Log Datasets Datasets that represent the high level qualifier for all logs and reports generated from processes submitted through Process Scheduler.
Plan name for PTPSQLRT with CAF DB2 plan used to run COBOL called within an Application Engine program via Remote Call
Plan name for PTPSQLRT with TSO DB2 plan used to run COBOL from TSO via JCL created from the COBOL shell JCL template (SHECBL.JCT)
DB2 Sub-System DB2 subsystem name where your database resides—for example, DSND
VIO eligible unit group DASD volume group used by Remote COBOL invoked by an Application Engine program
Enable Parallel Processing A Y/N flag which sets the Parallel processing parameter in the COBOL shell JCL template (SHECBL.JCT)

Setting Up Process Scheduler on z/OS Chapter 15C
560 Copyright © 2018, Oracle and/or its affiliates. All Rights Reserved.
Parameter Description
DECIMAL The value should reflect the setting for the DECIMAL parameter found in the ZPARM of the DB2 subsystem where the database resides. Valid values are DECIMAL or COMMA.
TSO Character Set The codepage for the TSO environment. The default value isCP037 (IBM037: Latin1 code page).
Using [Process Scheduler]
After you have set your Trace values, the Process Scheduler section allows you to set all of the environment variables associated with the Process Scheduler.Values for config section - Process Scheduler
Prcs Job Name= Prcs Job Account= PrcsServerName=PSOS390 PS Configuration File=%PS_HOME%/psconfig.sh Max Reconnect Attempt=12 Reconnection Interval=300 Authentication Timeout=5 TOOLBIN=%PS_HOME%/bin Log/Output Directory=%PS_SERVDIR%/log_output LogFence=5 DEFAULTPRINTER=
Do you want to change any values (y/n)? [n]:
The following table describes the parameters you must update in the Process Scheduler section:
Parameter Description
Prcs Job Name Job name assigned to the Process Scheduler program. This isset in USS using the __BPX_JOBNAME environment variable setting.
Prcs Job Account Job Account assigned to the Process Scheduler program. This is set in USS using the __BPX_ACCT_DATA environment variable setting.
Using [Application Engine]
This section contains Application Engine values:Values for config section - Application EngineAE Job Name=%JOBNAME%%SFX%AE Job Account=%JOBACCT%

Chapter 15C Setting Up Process Scheduler on z/OS
Copyright © 2018, Oracle and/or its affiliates. All Rights Reserved. 561
Do you want to change any values (y/n)? [n]:
The following table describes each parameter in the Application Engine section:
Parameter Description
AE Job Name Job name assigned to an Application Engine program. This is set in USS using the __BPX_JOBNAME environment variable setting.
AE Job Account Account assigned to an Application Engine program. This is set in USS using the __BPX_ACCT_DATA environment variable setting.
Note. After you complete your changes in PSADMIN, you must shut down and restart the server to put the new settings into place.
Task 15C-4-6: Working with Shell JCL TemplatesThis section discusses:
• Understanding Shell JCL Templates
• Editing a Shell JCL Template
• Customizing the Process Scheduler's Shell JCL Template
Understanding Shell JCL Templates
When starting a Process Scheduler Server, shell JCL template files are read once and stored into memory as part of the initialization procedure. Process Scheduler will generate a JCL for COBOL and SQR based on the JCL stored in memory. If you have modified any of the shell JCL templates after the Process Scheduler Server was started, Process Scheduler will refresh the JCL stored in memory before submitting the next COBOL or SQR request.The PeopleSoft Server Transfer program creates a directory PS_HOME/appserv/prcs/shelljcl in UNIX Services tostore a master copy of the shell JCL templates. When you create a Process Scheduler Server Configuration, it copies this shell JCL templates into the <PS_HOME>/appserv/prcs/<database_name>/shelljcl directory. This includes all the JCLs used for running COBOL and SQR through Process Scheduler. See "Creating a Database."The following table lists the shell JCL templates used in Process Scheduler:
JCL Description
SHELCBL.JCT Invoked by Process Scheduler when user requests to run a COBOL program
SHELSQRF.JCT Invoked by Process Scheduler when user requests to run an SQR program and specifies from the Process Scheduler page to route the output to a file, web or email.

Setting Up Process Scheduler on z/OS Chapter 15C
562 Copyright © 2018, Oracle and/or its affiliates. All Rights Reserved.
JCL Description
SHELSQRP.JCT Invoked by Process Scheduler when user requests to run an SQR program and specifies from the Process Scheduler panel to route the output to a printer.
SHELSQROUTP.JCT Used in conjunction with SHELSQRP.JCT or SHELSQRF.JCT. This template contains the file definition for creating a partitioned data set for SQR report files. Process Scheduler will use this template when the SQR output format is one of the following:
• Acrobat Reader (PDF)
• Post Script (PS)
• Line Printer (HP)
• HP format
SHELSQROUTS.JCT Used in conjunction with SHELSQRP.JCT or SHELSQRF.JCT. This template contains the file definition for creating a sequential data set for SQR report files. Process Scheduler will use this template when the SQR output format is one of the following:
HTM
SPF
These shell JCL templates need to be modified to comply with your site standards.
Note. Process Scheduler does not use a JCL to submit an Application Engine program. Instead, Process Schedulerwill fork another (child) process in UNIX System Services and run Application Engine in this new process. This schema is similar to Windows or UNIX operating system.
Editing a Shell JCL Template
To edit a shell JCL template:1. Select option 1 for Administer a Process Scheduler Server from the PeopleSoft Process Scheduler
Administration menu:
--------------------------------------------PeopleSoft Process Scheduler Administration--------------------------------------------
1) Administer a Process Scheduler Server 2) Create a Process Scheduler Server Configuration 3) Delete a Process Scheduler Server Configuration 4) Import an existing Process Scheduler Configuration q) Quit
Command to execute (1-4, q): 1
2. Select 7 for Edit a Shell JCL:
-------------------------------------------PeopleSoft Process Scheduler Administration -------------------------------------------

Chapter 15C Setting Up Process Scheduler on z/OS
Copyright © 2018, Oracle and/or its affiliates. All Rights Reserved. 563
Scheduler Name: HRDMO
1) Start Process Scheduler Server 2) Stop Process Scheduler Server 3) Show Status 4) Configure Process Scheduler Server 5) Edit Process Scheduler Configuration File 6) Kill a Process Scheduler Server 7) Edit a Shell JCL q) Quit
Command to execute (1-7, q) : 7
3. Select the database for which the Process Scheduler needs to be configured.
Database list: 1) HRDMO
Select item number to edit: 1
4. Select the JCL from the list you intend to modify.
This opens the JCL in a vi editor screen.
JCL list:
1) shelcbl.jct 2) shelsqrf.jct 3) shelsqroutp.jct 4) shelsqrouts.jct 5) shelsqrp.jct
Select JCL file to edit: 1
5. Modify the JCL using vi commands
6. Save your changes by using the vi command :wq

Setting Up Process Scheduler on z/OS Chapter 15C
564 Copyright © 2018, Oracle and/or its affiliates. All Rights Reserved.
If you are not familiar with the vi editor and would prefer to edit the JCLs using ISPF editor, you can use the TSOoedit command in the TSO session. IBM's TSO oedit command allows you to modify any files residing in UNIX System Services from a TSO session. You can edit any of the shell JCL templates found in <PS_HOME>/appserv/prcs/<database_name>/shelljcl directory as shown below. Consult your z/OS system administrator for using the oedit command at your site.
Editing a shell JCL template
Customizing the Process Scheduler's Shell JCL Template
All the Process Scheduler's shell JCLs use meta-strings to pass data stored in the database or Process Scheduler configuration files. Process Scheduler takes advantage of meta-strings to generate the JCL based on one of these sources:
• User's profile who initiated the request
• Parameters defined in the Process Scheduler Configuration file.
• Parameters defined in the Process Type Definition Page or Process Definition Page
A good example of data that can be passed includes job account and job name. To enter the values of some of these variables you need to identify the Process Profile being used. Choose PeopleTools, Security, User Profiles, User Profiles. Then search on the ID used to log on to the PeopleSoft Pure Internet Architecture. Make note of theProcess Profile Name. Then choose PeopleTools, Security, Permissions & Roles, Permission Lists and select the Process Profile Name that was identified. Select Process tab, Process Profile Permissions.The shell JCL templates are tunable and should be changed according to your site-specific standards. The table below identifies all the available meta-strings you can use in a shell JCL template.If you create a new JCL template, you must be aware of the following:
• The Shell ID is restricted to three characters.

Chapter 15C Setting Up Process Scheduler on z/OS
Copyright © 2018, Oracle and/or its affiliates. All Rights Reserved. 565
• The Shell ID is associated with the Process Type Definition.
Meta-Strings Description
%JOBNAME% Specifies the value entered in z/OS Job Controls Name field of the Process Profile Permission page for the Permission Lists specified as the User ID's Process Profile.The Process Profile for a User ID can be set using the UserProfiles page in the Maintain Security component.
%JOBACCT% Specifies the value entered in z/OS Job Controls Account field of the Process Profile Permission page.
%OUTDEST% Specifies the output destination based on the value enteredin the Server Destinations File or Printer fields of the Process Profile Permission page.
%SFX% A one-character code issued by Process Scheduler. The system will randomly assign a value from A to Z.
%OPRID% The user ID used to submit the request from Process Scheduler.
%PRCSLOGFILE% The name of the log file Process Scheduler used to redirectall data written to output for Application Engine or SYSOUT in COBOL or SQR
%PRCSLOGDIR% The directory where all log files or reports are written to inUNIX System Services for a process.
%ACCESSID% The access ID assigned for a user ID defined in PSOPRDEFN.
%INSTANCE% The process instance number assigned to a process request.
%RUNID% The run control ID used to submit the process request.
%OWNERID% The owner ID for the PeopleSoft database.
%PRCSNAME% The program name as defined in the Process Definition page.
%DB2SUB% The name of the DB2 subsystem specified in the DB2 Sub-System parameter of the OS390 section found in the Process Scheduler Configuration file.
%PERFSTAT% The flag used to set the Performance Statistic option in theCOBOL shell JCL. This is set to 'Y' when the bit value of 128 is assigned to the TraceSQL parameter of the Trace section found in the Process Scheduler Configuration file.

Setting Up Process Scheduler on z/OS Chapter 15C
566 Copyright © 2018, Oracle and/or its affiliates. All Rights Reserved.
Meta-Strings Description
%DYNEXPLN% The flag used to set the Dynamic Explain option in the COBOL shell JCL. This is set to 'Y' when the bit value of 256 is assigned to the TraceSQL parameter of the Trace section found in the Process Scheduler Configuration file.
%PARALLEL% The flag used to set the Dynamic Explain option in the COBOL shell JCL. This is based on the flag set in the Enable Parallel Processing parameter of the OS390 section found in the Process Scheduler Configuration file.
"%TSOPLAN% The DB2 plan name subsystem specified in the Plan name for PTPSQLRT with TSO parameter of the OS390 section found in the Process Scheduler Configuration file.
%PSHLQ% The high level qualifier of the PeopleSoft dataset specifiedin High Level Qualifier for Datasets parameter of the OS390 section found in the Process Scheduler Configuration file.
Here is a sample job control card in one of the shell JCLs:
//%JOBNAME%%SFX% JOB %JOBACCT%,'PS-PRCS ',CLASS=E,MSGCLASS=X,// NOTIFY=%OPRID%
If you choose not to use meta-strings, you can also update the job cards to remove all these variables and replace them with actual values.
In the SHELL JCL for SQR, OUTNODE denotes either a z/OS partitioned data set (PDS) or sequential data set. The PDS is a requirement for SQR output. If the SQR report XRFPANEL were directed to file output, the following substitution would occur:
The following line in SHELSQRF.JCT
// OUTNODE='%OUTDEST%'
would be changed to:
// OUTNODE='HR.H800RAB',
If an SQR process were directed to print, the following substitutions would occur:
SQR:
// OUTNODE='DEST=U3', OPTIONAL:USER-DEF OUTPUT .. //********************************************************************* //* Main portion of JCL Shell * //********************************************************************* .. //SQROUTP DD SYSOUT=*,DEST=U3
z/OS Job Controls:
z/OS job controls specify the z/OS job name you want assigned to each process submitted. This value can be up to seven characters. Do not use lowercase letters or any quotation marks. If you included the %SFX% meta-string as part of your job name, Process Scheduler will append a one-character alphabetical suffix to this

Chapter 15C Setting Up Process Scheduler on z/OS
Copyright © 2018, Oracle and/or its affiliates. All Rights Reserved. 567
name (A through Z, chosen randomly), before job submission.
For example, if you entered USRMVS1, the assigned job name would become USRMVS1A through USRMVS1Z. After you enter the z/OS job name, enter the job account number used in your installation. Specify an account code to be inserted as the JCL accounting code.
Task 15C-4-7: Starting a Process Scheduler ServerOnce you have configured the Process Scheduler Server, you are ready to start it.To start a Process Scheduler Server:1. Select option 1 for Administer a domain.
-------------------------------------------PeopleSoft Process Scheduler Administration ------------------------------------------- 1) Administer a domain 2) Create a domain 3) Delete a domain 4) Import domain configuration q) Quit
Command to execute (1-4, q) : 1
2. Select the domain that you want to start.
Database list:1) HRDMOSelect item number to start: 1
3. On the PeopleSoft Process Scheduler Administration menu, choose 1 for Start Process Scheduler Server.
-------------------------------------------PeopleSoft Process Scheduler Administration ------------------------------------------- Scheduler Name: HRDMO
1) Start Process Scheduler Server 2) Stop Process Scheduler Server 3) Show Status 4) Configure Process Scheduler Server 5) Edit Process Scheduler Configuration File 6) Kill a Process Scheduler Server 7) Edit a Shell JCL q) Quit
Command to execute (1-7, q) : 1
This will launch the Process Scheduler program.
Starting Process Scheduler Server PSOS390 for Database HRDMO ...PeopleSoft Process Scheduler Started Normally

Setting Up Process Scheduler on z/OS Chapter 15C
568 Copyright © 2018, Oracle and/or its affiliates. All Rights Reserved.
Task 15C-4-8: Verifying the Process Scheduler Server StatusAt this stage it is a good idea to verify the Process Scheduler Server status.To verify the Process Scheduler Server status:1. From the PeopleSoft Process Scheduler Administration menu, choose 3, for Show Status:
-------------------------------------------PeopleSoft Process Scheduler Administration ------------------------------------------- Scheduler Name: HRDMO
1) Start Process Scheduler Server 2) Stop Process Scheduler Server 3) Show Status 4) Configure Process Scheduler Server 5) Edit Process Scheduler Configuration File 6) Kill a Process Scheduler Server 7) Edit a Shell JCL q) Quit
Command to execute (1-7, q) : 3
2. To verify the status of the Process Scheduler Server for a specific database, type the number corresponding to the appropriate database.
For example:
Database list:
1) HRDMO
Select item number to start: 1
Process Scheduler Server PSOS390 for Database PT84x is currently running
Process Agents PID -------------- ---- Process Scheduler 1144 Distribution Agent 35163243 Monitor 50332247
Note. You can also verify the status of the Process Scheduler Server from Process Monitor in PeopleSoft Pure Internet Architecture. To verify the Process Scheduler Server status from the Process Monitor page, go to PeopleTools, Process Scheduler, Process Monitor, and select Server List.
Note. If you have not configured z/OS with a Distribution Node, the Distribution Agent will not be started. You must execute that task before the Distribution Agent will be booted with the Process Scheduler server. See Validating and Editing the ODBC Initialization File.
Task 15C-4-9: Stopping the Process Scheduler ServerTo stop the Process Scheduler Server:

Chapter 15C Setting Up Process Scheduler on z/OS
Copyright © 2018, Oracle and/or its affiliates. All Rights Reserved. 569
1. From the PeopleSoft Process Scheduler menu, choose option 2, for Stop Process Scheduler Server.
-------------------------------------------PeopleSoft Process Scheduler Administration ------------------------------------------- Scheduler Name: HRDMO
1) Start Process Scheduler Server 2) Stop Process Scheduler Server 3) Show Status 4) Configure Process Scheduler Server 5) Edit Process Scheduler Configuration File 6) Kill a Process Scheduler Server 7) Edit a Shell JCL q) Quit
Command to execute (1-7, q) : 2
2. To stop the Process Scheduler Server for a specific database, type the number corresponding to the appropriate database.
Example (to stop Process Scheduler Server for the database HRDMO):
Database list:
1) HRDMO
Select item number to stop: 1
Command sent to stop Process Scheduler Server PSOS390 for Database⇒ HRDMO. The⇒ Server Will stop the next time that it wakes up.


Copyright © 2018, Oracle and/or its affiliates. All Rights Reserved. 571
Chapter 16
Installing and Configuring DB2 Connect
This chapter discusses:
• Understanding DB2 Connect
• Verifying Supported Versions
• Defining DB2 Connect Architecture
• Setting Up DDF on the Mainframe
• Configuring TCP/IP on the Client
• Configuring the DB2 Connect Gateway on Windows
• Binding DB2 Connect Packages for an EBCDIC Installation
• Binding DB2 Connect Packages for a Unicode Installation
• Binding DB2 Connect Packages for DB2 Connect Version 10 or later
• Setting DB2CodePage for a Unicode Database
• Setting Up the DB2 Connect Gateway on UNIX
• Confirming DB2 Connect/ODBC Settings
• Setting CLI/ODBC Trace with the Client Configuration Assistant
Understanding DB2 Connect
This chapter discusses installing and configuring DB2 Connect connectivity for z/OS. The points during the installation when you will need to perform these procedures are noted in the chapters where they apply. You will need to set up connectivity on the following locations:
• On the mainframe.
• On any application server (Microsoft Windows or UNIX).
• On any Microsoft Windows or UNIX Server acting as DB2 Connect gateway.
• On any dedicated Microsoft Windows or UNIX batch server.
• On any Microsoft Windows client that will be making a two-tier connection to the database; this is required for any clients that will be running COBOL or SQR batch processes locally, but not for clients that are connecting exclusively in three-tier and running all batch processes on the server.
This chapter describes specific environment variables and parameters that you will need to set for each DB2 Connect component so that it will work optimally with PeopleSoft software. For the complete instructions on installing DB2 Connect, refer to the DB2 Connect product documentation.

Installing and Configuring DB2 Connect Chapter 16
572 Copyright © 2018, Oracle and/or its affiliates. All Rights Reserved.
Verifying Supported Versions
To use PeopleSoft PeopleTools with DB2 Connect, verify the following release information:
• Consult the supported platform information on My Oracle Support to verify that Oracle supports the version of DB2 Connect that you intend to use with your particular release of DB2 for z/OS.
• Consult My Oracle Support also to verify that Oracle supports the particular release of UNIX or Microsoft Windows on which you plan to install DB2 Connect.
• When configuring DB2 Connect on supported releases of either Microsoft Windows or UNIX, no additional TCP/IP software is required.
• TCP/IP for z/OS is required on the mainframe.
• See My Oracle Support for the minimum required z/OS version for the current PeopleSoft PeopleTools release.
See Also
My Oracle Support, Certifications
Defining DB2 Connect Architecture
This section discusses:
• Understanding DB2 Connect Architecture
• Using DB2 Connect Enterprise Edition
• Using DB2 Connect Personal Edition
• Defining PeopleSoft Three-Tier Configuration with DB2 Connect
Understanding DB2 Connect ArchitectureDB2 Connect connects your client PeopleSoft applications to DB2's Distributed Data Facility (DDF) components on the mainframe. DB2 Connect performs the following tasks when connecting to DB2 for z/OS with DDF:
• Provides a control point for client connections.
• Performs the proper character conversions when receiving data from DB2.
• Responds to the connect requests from PeopleSoft client computers and creates corresponding TCP/IP conversations with DDF.
• Sends requests and replies between client computers and DDF.
IBM offers two different DB2 Connect products: DB2 Connect Enterprise Edition and DB2 Connect Personal Edition.

Chapter 16 Installing and Configuring DB2 Connect
Copyright © 2018, Oracle and/or its affiliates. All Rights Reserved. 573
Using DB2 Connect Enterprise EditionDB2 Connect Enterprise Edition requires a gateway machine; individual clients connect to the gateway machine using DB2 Connect CAE. The DB2 Connect gateway manages the TCP/IP conversation with the DDF on the mainframe. DB2 Connect Enterprise Edition can be used with either the PeopleSoft two-tier or three-tier architecture.The DB2 Connect CAE (Client Application Enabler) component of DB2 Connect Enterprise Edition comes with the base product and must reside on each Microsoft Windows client machine. It provides a logical connection between the PeopleSoft client and the DB2 Connect gateway machine. The router sends the PeopleSoft SQL requests by way of network protocol to the gateway, and then receives the result set in return. The following diagram shows the connections between the Microsoft Windows client machine, the DB2 Connect gateway, and the mainframe:
DB2 Connect Enterprise Edition architecture
The communication between the Microsoft Windows client machine and the DB2 Connect gateway is accomplished using the TCP/IP protocol. The physical connection between the DB2 Connect gateway and the mainframe can be made by a Token Ring attachment, a bridged Token Ring attachment, Ethernet, FDDI, Escon Channels, or a leased-line or dial-up SDLC connection. This connectivity is a critical piece for performance such that it should be configured with a high-bandwidth and located very close to the mainframe.

Installing and Configuring DB2 Connect Chapter 16
574 Copyright © 2018, Oracle and/or its affiliates. All Rights Reserved.
Using DB2 Connect Personal EditionDB2 Connect Personal Edition is installed on each client workstation and allows clients to connect directly to DB2 DDF. It does not require an intermediary DB2 Connect gateway to access your database. The following diagram illustrates the connection between DB2 Connect Personal Edition and the mainframe:
DB2 Connect Personal Edition architecture
DB2 Connect Personal Edition allows direct TCP/IP connection to the host with no gateway requirement.
Defining PeopleSoft Three-Tier Configuration with DB2 ConnectThe PeopleSoft application server processes all transactions requested by Windows clients and Web servers and sends SQL to the database server using DB2 Connect. The Oracle Tuxedo middleware product manages all these transactions in the application server. In addition to Tuxedo, the server hosting the PeopleSoft application server must be configured with DB2 Connect Enterprise Edition to establish connectivity to the database server.On DB2 for z/OS, the application server can be configured either on Microsoft Windows, IBM AIX, Oracle Solaris or HP-UX Itanium. Since all SQL is handled in the application server, it is paramount for performance reasons that the application server machine be connected to the mainframe via Fast Ethernet, Escon channel attached, FDDI, or some comparable network connection that allows maximum through-put.

Chapter 16 Installing and Configuring DB2 Connect
Copyright © 2018, Oracle and/or its affiliates. All Rights Reserved. 575
When connecting with the PeopleSoft three-tier, the individual client workstations do not require DB2 Connect CAE. No connectivity is required on the client machines for PeopleSoft three-tier connectivity; communication between client workstation and application server is handled with Oracle Tuxedo. If clients have specifics needs to connect via two-tier (for example, to run Data Mover, client COBOL, perform upgrade steps), they will need toeither install DB2 Connect Personal Edition for a direct connection to DDF on the mainframe, or install DB2 Connect CAE and connect to DDF via the DB2 Connect EE gateway. In either case, they will still be connecting via the DB2 Connect option but will not be using the PeopleSoft application server. The following diagram illustrates the difference in the interaction between the various servers when using DB2 Connection Enterprise Edition and a gateway machine, or using DB2 Connect Personal Edition.
Connecting through a gateway machine using DB2 Connection Enterprise Edition and connecting directly using DB2 Connect Personal Edition
Task 16-1: Setting Up DDF on the Mainframe
DDF is one of the DB2 address spaces which allows applications running in a remote application requestor environment that supports IBM's Distributed Relational Database Architecture (DRDA) to access data in a DB2 for OS/390 subsystem. DDF and DB2 Connect communicate with each other using the TCP/IP protocol. The services DDF provides include:
• Receiving client requests from DB2 Connect.
• Performing the proper character conversions when receiving data from DB2.
• Forwarding requests to and receiving responses from DB2 for z/OS.
• Building response messages and returning them to DB2 Connect, which in turn forwards the response messages to the client.
• Managing the communication protocol (TCP/IP) and DB2 for z/OS interaction. This includes maintaining the DB2 for z/OS SQLCA and SQLDA data structures.

Installing and Configuring DB2 Connect Chapter 16
576 Copyright © 2018, Oracle and/or its affiliates. All Rights Reserved.
• Managing and recovering from exception conditions.
See IBM's DB2 Administration GuideTo set up DDF on the mainframe:1. Use the Change Log Inventory Utility to update the BSDS. The SYSIN DD card should specify the following
values:
DDF LOCATION=<location name>LUNAME=<vtam appl id>PASSWORD=<password>
2. Start DDF (-STA DDF).
3. When DB2 is started you should see the LU Name and port number for the DB2 for z/OS Distributed Data Facility (DDF). Look at the DDF startup messages in the system log and you should see information similar tothe following:
DSNL004I %Z DDF START COMPLETELOCATION DB2DSNZLU NETA.DB2APPLZGENERICLU -NONEDOMAIN sysaoe.peoplesoft.comTCPPORT 5070RESPORT 5071
Task 16-2: Configuring TCP/IP on the Client
Use the following procedure to configure TCP/IP on the client.1. Obtain the host name or IP address of the z/OS server that you will be connecting to. You may need to contact
your network administrator to obtain the IP address. You can test the IP address by attempting to ping it using the ping hostname command.
C:\ping mvsptownPING mvsptown.peoplesoft.com: (207.135.44.20): 56 data bytes64 bytes from 207.135.44.99: icmp_seq=0 ttl=56 time=10 ms64 bytes from 207.135.44.99: icmp_seq=1 ttl=56 time=5 ms64 bytes from 207.135.44.99: icmp_seq=2 ttl=56 time=9 ms64 bytes from 207.135.44.99: icmp_seq=3 ttl=56 time=5 ms
You can also obtain the host's IP address by entering TSO NETSTAT HOME from the z/OS server.
2. Obtain the Port number to use to connect to target DB2 subsystem. The port number must be a unique value and can be obtained by looking in DB2MSTR at the DDF startup. The parameter TCPPORT identifies the port used for that DB2 subsystem. You may need to contact your database administrator for TCPPORT used by DDF at startup.
3. Catalog a TCP/IP Node.
Note. The TCPIP Node will automatically get cataloged when you create a Database Alias via the Client Configuration Assistant. In the previous release of the product, known as DDCS, the TCPIP Nodes had to be cataloged manually using the steps below. Manually cataloging the Nodes is no longer the only option. You may skip this step if using the Client Configuration Assistant. To see the Nodes that are currently cataloged, type the following line in Command Line Processor: Db2 => list node directory. You can also usethe uncatalog node command to remove a node catalog.

Chapter 16 Installing and Configuring DB2 Connect
Copyright © 2018, Oracle and/or its affiliates. All Rights Reserved. 577
You must add an entry to the client's node directory to describe the remote node. This entry specifies the node name, the hostname (or ip_address), and the port number. To catalog a TCP/IP node, perform the following steps from the Command Line Processor:
Db2 => catalog tcpip node node_name remote [hostname|ip_address] server⇒ [svcename|port_number]
For example, to catalog a remote server with the IP Name MVSPTOWN on the node called DB2DSNT, using the port number 5070, enter the following:
Db2 => catalog tcpip node DB2DSNT remote MVSPTOWN server 5070
4. Catalog the Database.
Note. The Database will automatically get cataloged when you create a Database Alias via the Client Configuration Assistant. In the previous release of the product, known as DDCS, the Database had to be cataloged manually using the steps below. Manually cataloging the database is no longer the only option. You may also skip this step if using the Client Configuration Assistant. To see the Databases that are currently cataloged, enter the following line in Command Line Processor: Db2 => list database directory.You can also use the uncatalog database command to remove a database catalog.
5. Before a client application can access a remote database, the database must be cataloged on the TCPIP Node.
DB2 => catalog database database_name as database_alias at node node_⇒nameFor example, to catalog a remote database PT800T8 so that it has the⇒ alias PT800T8, on the node DB2DSNT, enter the following commands:DB2 => catalog database PT800T8 as PT800T8 at node DB2DSNT
6. Test connection to database. You can test the connection to the database using the following command:
Db2 => connect to database_alias user userid using password
For example, to connect to database_alias PT800T8 using valid mainframe id PEOPLE1 and password PASSWRD1 then enter the following:
Db2 => connect to PT800T8 user PEOPLE1 using PASSWRD1
Authentication takes place on the DB2 server, so userid and password must be valid mainframe ids. If the connection is successful, you will get a message showing the name of the database to which you have connected. This step is synonymous to the TEST button in Client Configuration Assistant. You can now execute SQL statements against the database.
Task 16-3: Configuring the DB2 Connect Gateway on Windows
This section discusses:
• Configuring Database Connectivity on Clients with DB2 Connect Version 9.x or Earlier
• Configuring Database Connectivity on Clients with DB2 Connect Version 10.x or Later
• Configuring an ODBC Data Source for Connectivity on Microsoft Windows (Optional)
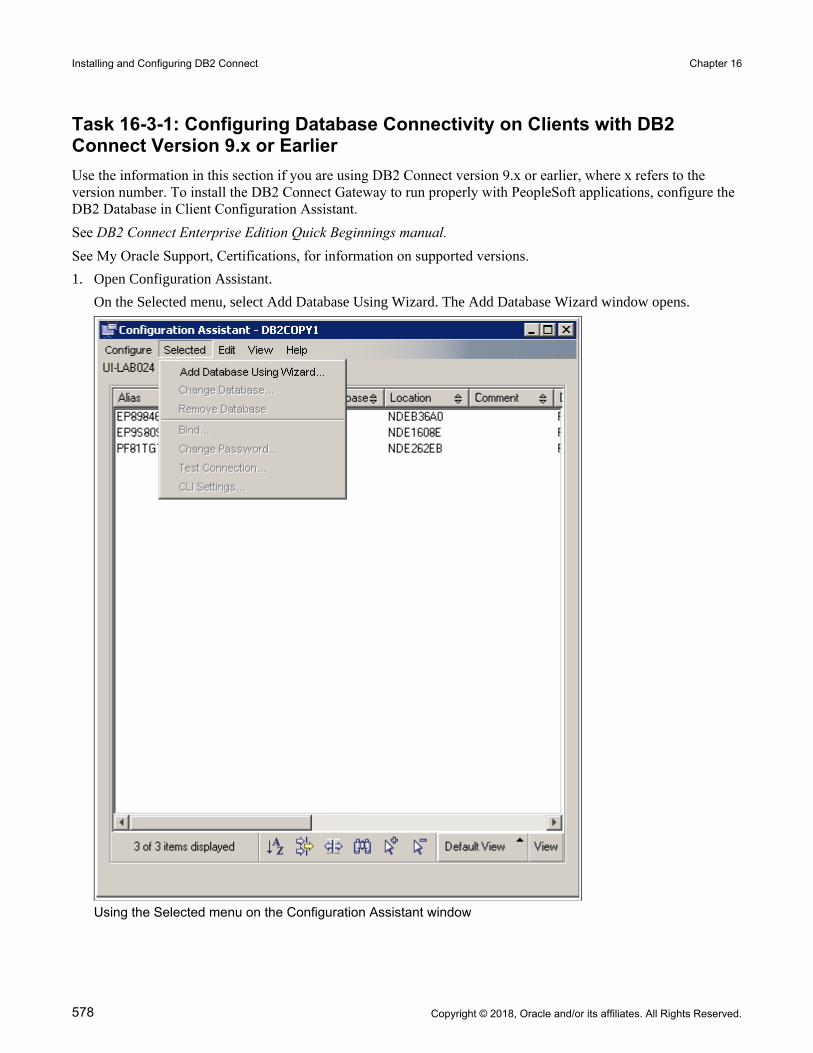
Installing and Configuring DB2 Connect Chapter 16
578 Copyright © 2018, Oracle and/or its affiliates. All Rights Reserved.
Task 16-3-1: Configuring Database Connectivity on Clients with DB2 Connect Version 9.x or EarlierUse the information in this section if you are using DB2 Connect version 9.x or earlier, where x refers to the version number. To install the DB2 Connect Gateway to run properly with PeopleSoft applications, configure the DB2 Database in Client Configuration Assistant. See DB2 Connect Enterprise Edition Quick Beginnings manual.See My Oracle Support, Certifications, for information on supported versions.1. Open Configuration Assistant.
On the Selected menu, select Add Database Using Wizard. The Add Database Wizard window opens.
Using the Selected menu on the Configuration Assistant window
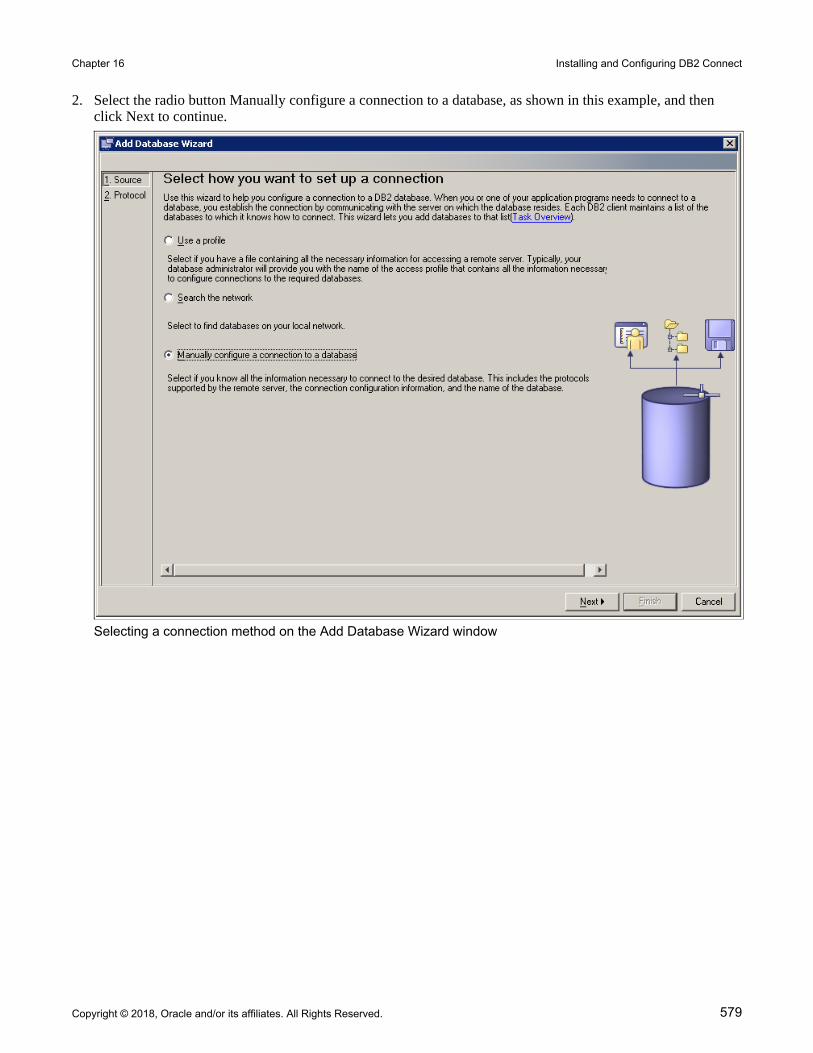
Chapter 16 Installing and Configuring DB2 Connect
Copyright © 2018, Oracle and/or its affiliates. All Rights Reserved. 579
2. Select the radio button Manually configure a connection to a database, as shown in this example, and then click Next to continue.
Selecting a connection method on the Add Database Wizard window

Installing and Configuring DB2 Connect Chapter 16
580 Copyright © 2018, Oracle and/or its affiliates. All Rights Reserved.
3. Select the radio button TCP/IP and select the check box labelled The database physically resides on a host or OS/400 system, as shown in this example.
The Connect directly to the server option is selected by default. Leave this option selected and click the Next button.
Selecting a communications protocol on the Add Database Wizard window
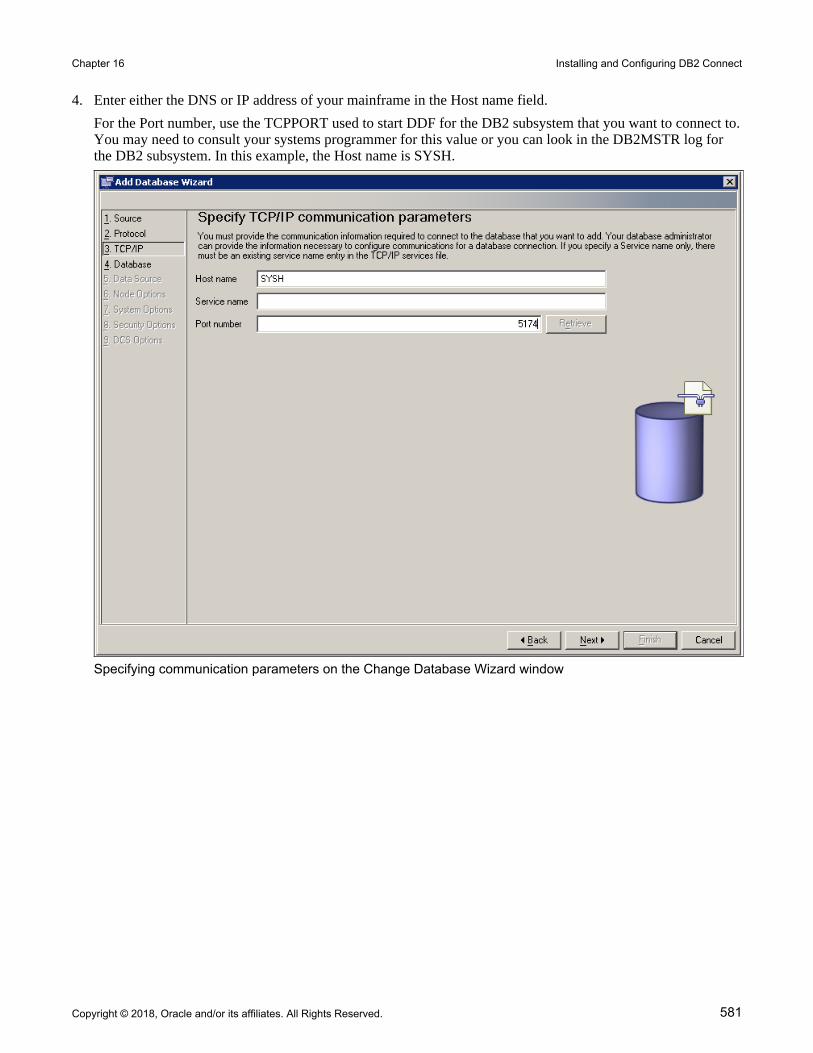
Chapter 16 Installing and Configuring DB2 Connect
Copyright © 2018, Oracle and/or its affiliates. All Rights Reserved. 581
4. Enter either the DNS or IP address of your mainframe in the Host name field.
For the Port number, use the TCPPORT used to start DDF for the DB2 subsystem that you want to connect to.You may need to consult your systems programmer for this value or you can look in the DB2MSTR log for the DB2 subsystem. In this example, the Host name is SYSH.
Specifying communication parameters on the Change Database Wizard window

Installing and Configuring DB2 Connect Chapter 16
582 Copyright © 2018, Oracle and/or its affiliates. All Rights Reserved.
5. Enter the database name defined in your LU in the Target database field in the entry box Database name, which is DB2DS3Z in this example.
For Database alias, enter the name of the database, Q850SYS in this example. Click Next.
Specifying database parameters on the Change Database Wizard window

Chapter 16 Installing and Configuring DB2 Connect
Copyright © 2018, Oracle and/or its affiliates. All Rights Reserved. 583
6. Verify that the check box Register this database for CLI/ODBC and the radio button As system data source are selected, as shown in this example.
Click Next.
Registering the database on the Change Database Wizard window
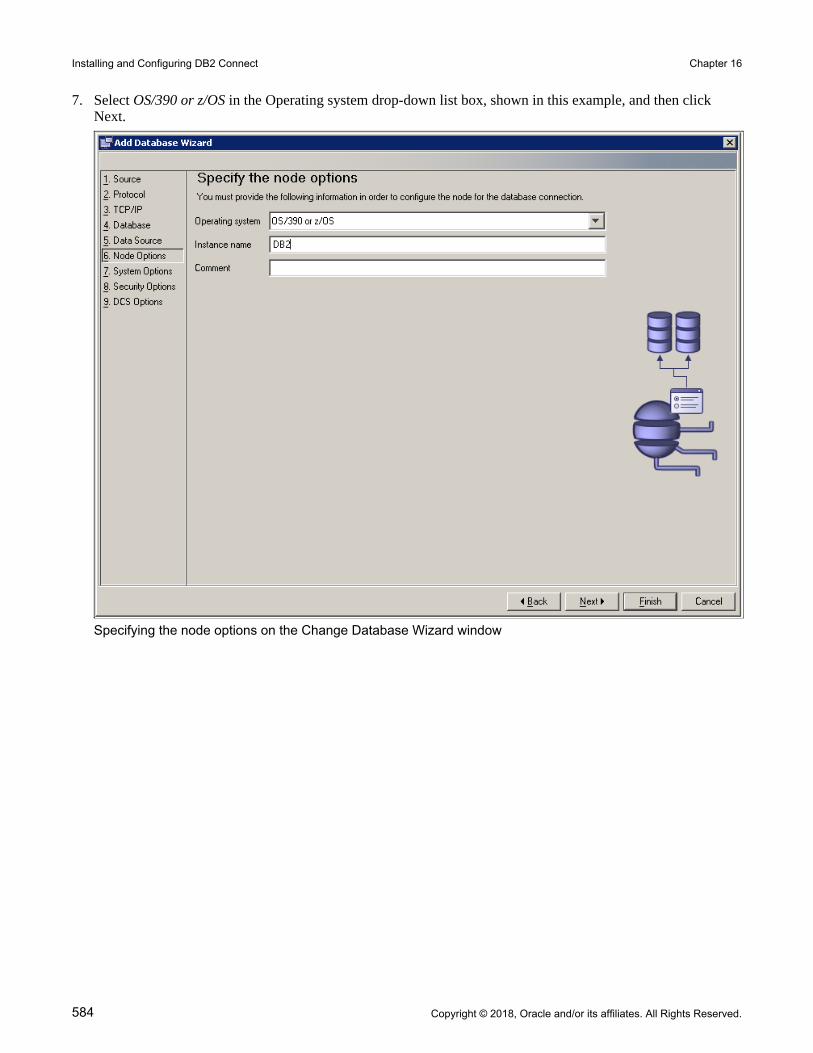
Installing and Configuring DB2 Connect Chapter 16
584 Copyright © 2018, Oracle and/or its affiliates. All Rights Reserved.
7. Select OS/390 or z/OS in the Operating system drop-down list box, shown in this example, and then click Next.
Specifying the node options on the Change Database Wizard window

Chapter 16 Installing and Configuring DB2 Connect
Copyright © 2018, Oracle and/or its affiliates. All Rights Reserved. 585
8. Verify that the information in the System name and Host name text boxes is correct, as shown in this example,and then click Next.
Verifying System name and Host name in the Change Database Wizard window

Installing and Configuring DB2 Connect Chapter 16
586 Copyright © 2018, Oracle and/or its affiliates. All Rights Reserved.
9. Make sure that the radio button Server authentication (SERVER) is selected and click Finish.
Note. No changes are required on the DCS Options page.
Specifying security options on the Change Database Wizard window

Chapter 16 Installing and Configuring DB2 Connect
Copyright © 2018, Oracle and/or its affiliates. All Rights Reserved. 587
10. Enter User ID and Password and click Test Connection on the Test Connection dialog box, as shown in this example:
Test Connection dialog box: Connections tab
Confirm that the connection test was successful by selecting the Results tab, as shown in this example. You are now ready to use your entry to create or access a PeopleSoft database.
Test Connection dialog box: Results tab
It may be necessary to bind the packages for DB2 Connect to the DRDA server for the first connection.

Installing and Configuring DB2 Connect Chapter 16
588 Copyright © 2018, Oracle and/or its affiliates. All Rights Reserved.
See Binding DB2 Connect Packages for an EBCDIC Installation or Binding DB2 Connect Packages for an Unicode Installation.
Task 16-3-2: Configuring Database Connectivity on Clients with DB2 Connect Version 10.x or Later
This section discusses:
• Understanding Database Connectivity Configuration with DB2 Connect Version 10.x or Later
• Prerequisites
• Configuring the Database Connectivity with the DB2 Command
Understanding Database Connectivity Configuration with DB2 Connect Version 10.x or Later
If you are using DB2 Connect version 10.x or later (where x refers to the version number), use these instructions to create and update the DB2 database client. Configuration Assistant has been deprecated from version 10.x DB2Connect products. Therefore configuring the database client must be done manually using the db2 command.See My Oracle Support, Certifications, for information on supported versions.The configuration of the DB2 Connect Client Directory described in this section updates the following:
• TCPIP node directory
• Database directory
• DCS directory
Prerequisites
Before beginning this configuration, be sure you have the following information:
• z/OS system host name
• DB2 subsystem name
• DB2 subsystem TCP/IP Port
• TCP/IP Node name
You must assign a TCP/IP Node name.
Configuring the Database Connectivity with the DB2 Command
This section assumes your system has the following resource names:
• ZOS-HOSTNAME = SYSD3
• SUBSYSTEM-NAME = DB2DS5B
• DATABASE-NAME = E853903
• DB-ALIAS = E853903
• DB2-TCPIP-PORT = 5230
• TCPIP-NODE = DS5BNODE
To configure database connectivity:

Chapter 16 Installing and Configuring DB2 Connect
Copyright © 2018, Oracle and/or its affiliates. All Rights Reserved. 589
1. Open a DB2 Command window.
2. Run the following command to update the TCPIP node directory:
db2 CATALOG TCPIP NODE <TCPIP-NODE> REMOTE <ZOS-HOSTNAME> SERVER <DB2-⇒TCPIP-PORT>
For example, using the resource names above:
db2 CATALOG TCPIP NODE DS5BNODE REMOTE SYSD3 SERVER 5230
3. Run the following command to update the database directory:
db2 CATALOG DATABASE <DATABASE-NAME> AS <DB-ALIAS> AT NODE <TCPIP-NODE>⇒ AUTHENTICATION SERVER
For example, using the resource names above:
db2 CATALOG DATABASE E853903 AS E853903 AT NODE DS5BNODE AUTHENTICATION⇒ SERVER
4. Run the following command to update the DCS directory:
db2 CATALOG DCS DATABASE <DATABASE-NAME> AS <DB-SUBSYSTEM-NAME>
For example, using the resource names above:
db2 CATALOG DCS DATABASE E853903 AS DB2DS5B
5. Run the following command to end the session:
db2 terminate
6. Run the following command:
db2 connect to E853903 user db2admin using db2admin
Task 16-3-3: Configuring an ODBC Data Source for Connectivity on Microsoft Windows (Optional)This task applies only to installations on Microsoft Windows operating systems. Use these instructions to configure and validate a 64-bit ODBC data source for connectivity to PeopleSoft PeopleTools components including PeopleSoft Application Server, Application Designer and Data Mover.This section assumes that you have installed a supported version of DB2 Connect. See My Oracle Support, CertificationsTo configure and validate a 64-bit data source for the Application Server, Application Designer, and Data Mover:1. Select Start, IBM DB2, instance id, Command Line Tools, Command Window.
For example, if you accepted the default, instance id would be DB2.
The Command Window opens.
2. Run the following command and confirm that the response specifies that the DB2 Connect installation is 64-bit:
db2level
3. Run the following commands, specifying your DB2 z/OS PeopleSoft database name:

Installing and Configuring DB2 Connect Chapter 16
590 Copyright © 2018, Oracle and/or its affiliates. All Rights Reserved.
db2 catalog system odbc data source <database-name>db2 terminate
4. Run the following command and confirm that your data source for your database is now registered.
db2 list system odbc data sources
5. To validate the connectivity, start your PeopleSoft Application Server, Application Designer, or Data Mover.
You should not get any connectivity errors.
If the 64-bit data source is not properly configured, you see an error. This is an example of an error when starting the PeopleSoft Application Server:
PSADMIN.3992 (0) [12/30/11 00:22:52](0) Begin boot attempt on domain⇒ Q8533I1E
PSAPPSRV.3612 (0) [12/30/11 00:23:04](0) PeopleTools Release 8.53 ⇒(Windows) starting. Tuxedo server is APPSRV(99)/2
PSAPPSRV.3612 (0) [12/30/11 00:23:04](0) Cache Directory being used: d:⇒\pshome\appserv\Q8533I1E\CACHE\PSAPPSRV_2\
PSAPPSRV.3612 (0) [12/30/11 00:23:04](3) File: SQL Access ManagerSQL⇒ error.Stmt #: 2 Error Position: 0 Return: 8600 - [Microsoft][ODBC Driver⇒ Manager]The specified DSN contains an architecture mismatch between the Driver⇒ and Application (SQLSTATE IM014) 0
PSAPPSRV.3612 (0) [12/30/11 00:23:04](1) GenMessageBox(200, 0, M): SQL⇒ Access Manager: File: SQL Access ManagerSQL error. Stmt #: 2 Error⇒ Position: 0 Return: 8600 - [Microsoft][ODBC Driver Manager] The⇒ specified DSN contains an architecture mismatch between the Driver and⇒ Application (SQLSTATE IM014) 0
PSAPPSRV.3612 (0) [12/30/11 00:23:04](1) GenMessageBox(0, 0, M):⇒ Database Signon: Could not sign on to database Q8533I1E with user⇒ QEDMO.
PSAPPSRV.3612 (0) [12/30/11 00:23:04](0) Server failed to start
PSADMIN.3992 (0) [12/30/11 00:23:11](0) End boot attempt on domain⇒ Q8533I1E
Task 16-4: Binding DB2 Connect Packages for an EBCDIC Installation
Use the instructions in this task if you have to bind the packages for DB2 Connect for a EBCDIC installation.

Chapter 16 Installing and Configuring DB2 Connect
Copyright © 2018, Oracle and/or its affiliates. All Rights Reserved. 591
1. Open the Configuration Assistant.
Highlight your database name and select Bind from the Selected menu. The Bind window appears.
Selecting Bind on the Configuration Assistant window

Installing and Configuring DB2 Connect Chapter 16
592 Copyright © 2018, Oracle and/or its affiliates. All Rights Reserved.
2. Click Select All in the Select utilities or files to bind area, and enter your User ID and password in the Enter connection information area, seen in this example:
Files tab on the Bind window

Chapter 16 Installing and Configuring DB2 Connect
Copyright © 2018, Oracle and/or its affiliates. All Rights Reserved. 593
3. Scroll through the results.
You should see "Bind Completed Successfully" at the bottom, as shown in this example:
Results tab on the Bind window
Note. You may see some warning messages in the list indicating that some bind options are not valid for all .bnd files. The Configuration Assistant may attempt to bind some Connect packages that are actually specific to the use of DB2 for Linux, UNIX, or Windows and not DB2 for z/OS. You can ignore these warning messages.

Installing and Configuring DB2 Connect Chapter 16
594 Copyright © 2018, Oracle and/or its affiliates. All Rights Reserved.
Task 16-5: Binding DB2 Connect Packages for a Unicode Installation
Use the instructions in this task if you have to bind the packages for DB2 Connect for a Unicode installation.1. Open the Configuration Assistant.
Configuration Assistant window

Chapter 16 Installing and Configuring DB2 Connect
Copyright © 2018, Oracle and/or its affiliates. All Rights Reserved. 595
2. Highlight the database and on the Selected menu, select Bind.
Selecting Bind on the Configuration Assistant

Installing and Configuring DB2 Connect Chapter 16
596 Copyright © 2018, Oracle and/or its affiliates. All Rights Reserved.
3. Enter a valid user ID and password.
In the Select utilities of files to bind area, click Select All and then click Add in the Bind options area.
Files tab on the Bind window
The Add Bind Option window appears.

Chapter 16 Installing and Configuring DB2 Connect
Copyright © 2018, Oracle and/or its affiliates. All Rights Reserved. 597
4. Highlight ENCODING in the list, and select the UNICODE radio button in the Encoding area, as shown in this example.
Click Apply.
Specifying encoding on the Add Bind Option window

Installing and Configuring DB2 Connect Chapter 16
598 Copyright © 2018, Oracle and/or its affiliates. All Rights Reserved.
5. Highlight BLOCKING in the list, and select the ALL radio button in the Row blocking area, as shown in this example.
Click Apply.
Specifying row blocking on the Add Bind Option window

Chapter 16 Installing and Configuring DB2 Connect
Copyright © 2018, Oracle and/or its affiliates. All Rights Reserved. 599
6. Highlight GRANT from the list, and select the PUBLIC radio button from the Grant EXECUTE and BIND privileges area, as shown in the example.
Click Apply.
Specifying granting privileges on the Add Bind Option window

Installing and Configuring DB2 Connect Chapter 16
600 Copyright © 2018, Oracle and/or its affiliates. All Rights Reserved.
7. Highlight SQLERROR in the list, and select the Creates a package even if errors occur (CONTINUE) radio button, as shown in this example:
Specifying SQL error handling on the Add Bind Option window
Click Apply, and then click OK to return to the Bind window.

Chapter 16 Installing and Configuring DB2 Connect
Copyright © 2018, Oracle and/or its affiliates. All Rights Reserved. 601
8. Verify that the Bind options list includes the options you added in the previous steps.
Verifying bind options on the Bind window
The Bind options area lists the following keywords and values:
Keyword Value
ENCODING UNICODE
BLOCKING ALL
GRANT PUBLIC

Installing and Configuring DB2 Connect Chapter 16
602 Copyright © 2018, Oracle and/or its affiliates. All Rights Reserved.
Keyword Value
SQLERROR CONTINUE
9. Add a user ID and password and click Bind to view the Results tab, as shown in this example:
Verifying results on the Bind window
Note. You may see some warning messages in the list indicating that some bind options are not valid for all .bnd files. The Configuration Assistant may attempt to bind some Connect packages that are actually specific to the use of DB2 for Linux, UNIX, and Windows and not DB2 for z/OS. You can ignore these warning messages.

Chapter 16 Installing and Configuring DB2 Connect
Copyright © 2018, Oracle and/or its affiliates. All Rights Reserved. 603
Task 16-6: Binding DB2 Connect Packages for DB2 Connect Version 10 or later
Use the instructions in this task if you have to bind the packages for DB2 Connect version 10.x or later. The DB2 Connect package ddcsmvs.lst must be bound using the db2 command window. The Configuration Assistant is deprecated for DB2 Connect version 10.x.1. Launch a DB2 Connect Command window.
2. Connect to the database that you want to bind to.
For example, for database E853903, use the following command:
db2 connect to E853903 user db2admin using db2admin
3. Determine the db2 installation directory by running the db2level command.
In this example, the installation directory is C:\Progra~1\IBM\SQLLIB~2.
db2levelDB21085I This instance or install (instance name, where applicable:⇒ "DB2_02")uses "64" bits and DB2 code release "SQL10050" with level identifier"0601010E".Informational tokens are "DB2 v10.5.0.420", "s130528", "NTX64105", and⇒ Fix Pack"0".Product is installed at "C:\PROGRA~1\IBM\SQLLIB~2" with DB2 Copy Name"DB2COPY3"
4. Change directory to the bnd directory within the db2 installation directory; for example:
cd C:\PROGRA~1\IBM\SQLLIB~2\bnd
5. Run the following command to bind ddcsmvs.lst:
db2 bind @ddcsmvs.lst blocking all sqlerror continue messages⇒ ddcsmvs.msg grant public
6. Run the following command:
db2 connect reset
Task 16-7: Setting DB2CodePage for a Unicode Database
Use these instructions to set DB2CodePage for a Unicode Database.1. From a command prompt issue the db2set command as follows:
c:\apps\DB\DB2ODBC8\bin db2set DB2CODEPAGE=1208
2. Issue the following command to verify that it has been set:
C:\Apps\DB\db2odbc8>db2set -all
You should see:

Installing and Configuring DB2 Connect Chapter 16
604 Copyright © 2018, Oracle and/or its affiliates. All Rights Reserved.
[i] DB2CODEPAGE=1208
Task 16-8: Setting Up the DB2 Connect Gateway on UNIX
Use this task to set up the DB2 Connect Gateway on UNIX, as required for a UNIX application server or Process Scheduler.1. The Client Configuration Assistant (CCA) helps you manage your database connections to remote servers.
This is the preferred method to set up any Windows client to communicate with a server. You can use the Command Line Processor to set up DB2 clients on any platform and this will be the method used to configure DB2 Connect on the UNIX operating system.
2. If you are using TCP/IP to connect to the z/OS server and to catalog Nodes and Databases for a TCP/IP connection, the procedure is the same.
See Configuring TCP/IP on the Client.
3. Test connection.
From the UNIX command line type the following command:
Db2 => connect to database_alias user userid using password
For example:
Db2 => connect to PT800T9 user PEOPLE1 using PASSWRD1
4. It may be necessary to bind the packages for DB2 Connect to the DRDA server for the first connection.
The following is a sample bind of the DB2 Connect packages:
Db2 => bind /usr/lpp/db2_05_00/[email protected] action replace blocking⇒ all grant public release commit sqlerror continue
Task 16-9: Confirming DB2 Connect/ODBC Settings
DB2 Connect reads the DB2CLI.INI file in the \SQLLIB directory to obtain information at connection time. This file contains any overrides that are set via the Client Configuration Assistant when cataloguing the database. In past versions of PeopleSoft software and DB2 Connect (formerly DDCS) there have been a number of DB2CLI.INI settings that have been recommended to improve performance.
Note. Use special care when you add settings to the DB2CLI.INI file. DB2 Connect will not inform you if a setting is misspelled; it just disregards the setting and uses the default.
We have made numerous changes to the PeopleSoft software to enable or disable DB2 Connect functionality at runtime that will result in improved performance. One example is the cursorhold setting. In PeopleSoft PeopleTools 8.50 and higher, we are completely controlling the cursorhold setting and we enable cursorhold for batch and disable it for PeopleSoft online activity. The following section lists the settings in the DB2CLI.INI file of special interest to PeopleSoft customers along with the Oracle recommendation:
• DEFERREDPREPARE — Defer Prepare chains together OPEN and PREPARE statements. This reduces network traffic which can have a significant impact in reducing response. DB2 Connect, by default, activates the Defer Prepare when creating new entries through Client Configuration Assistant.
For PeopleSoft software, use the default setting (DEFERREDPREPARE=1). This is the default setting. It is not necessary to add the setting to your DB2CLI.INI file.

Chapter 16 Installing and Configuring DB2 Connect
Copyright © 2018, Oracle and/or its affiliates. All Rights Reserved. 605
• CURSORHOLD — Cursor Hold determines at what point of the transaction to release a SQL cursor. Deactivating Cursor Hold releases cursors after a transaction has been committed. Programs within the PeopleSoft system control at what point a cursor needs to be released. The DB2 Connect default is Cursor Hold enabled.
For PeopleSoft software, use default setting (CURSORHOLD=1). This is the default setting. It is not necessary to add the setting to your DB2CLI.INI file.
• DISABLEKEYSETCURSOR — Support for Keyset cursors was introduced in DB2 Connect 6.1. PeopleSoft PeopleTools testing has found a very high overhead in DB2 Connect when Keyset cursors are enabled. PeopleSoft PeopleTools uses forward cursors rather than Keyset cursors, so this extra overhead is not justifiedfor PeopleSoft systems.
For PeopleSoft software, override the default setting by adding DISABLEKEYSETCURSOR=1 in DB2CLI.INI.
Note. In a Keyset Cursor, the membership and order of rows in the result set are fixed at cursor-open time. Keyset cursors are controlled by a set of unique identifiers (keys) known as the Keyset. The keys are built from a set of columns that uniquely identify the rows in the result set. Changes to data values in non-Keyset columns (made by the cursor owner or committed by other users) are visible as the user scrolls through the cursor.
Note. If a change disqualifies a row for membership or affects the order of a row, the row does not disappear or move unless the cursor is closed and reopened. Inserts to the database made outside the cursor are also not visible in the cursor unless the cursor is closed and reopened.
• DISABLEUNICODE — This is an undocumented DB2 Connect parameter. DB2 Connect will attempt to communicate with a DB2 z/OS database server via Unicode. If an Unicode conversion service has not been enabled on your mainframe, you will be unable to connect to the database. If ICONV is used for the Unicode conversion, IBM has documented cases in which data corruption has occurred. For this reason, the PeopleSoft installation requires that the DISABLEUNICODE=1 parameter be used to suppress DB2 Connect from communicating in Unicode, and use ANSI instead. The default is enabled. The PeopleSoft installation requiresadding DISABLEUNICODE=1 to the DB2CLI.INI file.
Note. For a Unicode installation, do not add DISABLEUNICODE=1 to the DB2CLI.INI file.
Note. If you are using DB2 Connect with multiple DB2 platforms (z/OS, Linux, UNIX, or Microsoft Windows), add this statement to the stanzas pertaining to each individual DB2 z/OS database configured in the DB2CLI.INI file. Do not add this parameter to any non-z/OS database configurations, and do not add it to the COMMON stanza. If you are connecting to DB2 z/OS databases exclusively, then you may add this parameter once in the DB2CLI.INI file, in the COMMON stanza.
• CLI/ODBC Trace settings — If you want to enable DB2 Connect Trace, you need to add the parameters for turning the trace On in the [Common] section only. Adding the trace information in a database-specific section will be ignored. So if you turn trace on for any database, the trace gets activated for every database that is catalogued on the workstation.
These are the recommended settings for turning Trace on:
[COMMON]TRACEFLUSH=1TRACEPATHNAME=C:\TEMP\DB2TRACE\TRACECOMM=1TRACE=1 (trace=0 turns the trace OFF)

Installing and Configuring DB2 Connect Chapter 16
606 Copyright © 2018, Oracle and/or its affiliates. All Rights Reserved.
Note. The DB2CLI.INI file contains a section for each database you configure. For example, if you catalog database PT800T1 you will see a [PT800T1] section in the DB2CLI.INI. A convenient way to set an override for all databases is to add it to the [Common] section of the DB2CLI.INI. If you add the overrides to this section, you do not need to add the override for each database because the [Common] section applies to all databases. For example:
[Common]
DISABLEKEYSETCURSOR=1
Task 16-10: Setting CLI/ODBC Trace with the Client Configuration Assistant
The DB2 CLI/ODBC trace is a valuable tool for debugging conversations between client workstations and the DB2 for z/OS database server. The trace can be set via the DB2CLI.INI file directly (see the previous section) or via the Client Configuration Assistant. You now need to alter the database settings specific for use with the PeopleSoft database.To set CLI/ODBC Trace with the Client Configuration Assistant:1. From the Client Configuration Assistant panel, highlight the database entry you just added and click on the
Properties button. This brings up the Database Properties panel.
2. Click on the Settings button. This will give you the DB2 Message box requesting you to connect to the data source.
3. Choose No. This will take you to the CLI/ODBC Settings panel.

Chapter 16 Installing and Configuring DB2 Connect
Copyright © 2018, Oracle and/or its affiliates. All Rights Reserved. 607
4. Click on the Advanced button to open the Advanced Settings page.
CLI/ODBC Settings - Advanced Settings page: Service tab
5. From the Advanced Settings page, verify that you are on the Transaction tab. Select the Service tab and enablethe trace.
Select Trace in the Parameter list, select the Enable Trace option, and enter a path and filename in the "To" area to specify where the DB2 CLI/ODBC trace information is recorded, as shown in the example above.
6. Click OK to save your changes.
7. From here on, click OK until you return to the Client Configuration Assistant panel, and then close it.

Copyright © 2018, Oracle and/or its affiliates. All Rights Reserved. 609
Chapter 17
Installing PeopleSoft Change Assistant
This chapter discusses:
• Understanding PeopleSoft Change Assistant
• Installing PeopleSoft Change Assistant in Silent Mode
• Configuring and Using PeopleSoft Change Assistant
• Validating Change Assistant Settings
Understanding PeopleSoft Change Assistant
Oracle's PeopleSoft Change Assistant is a standalone tool, provided with PeopleSoft PeopleTools, that enables you to assemble and organize the steps necessary to apply patches and fixes for maintenance updates as well as perform PeopleSoft upgrades. You use different modes of PeopleSoft Change Assistant to carry out maintenance both for PeopleSoft applications using the PeopleSoft Update Manager, and those using the classic patching method. PeopleSoft Change Assistant is a Java-based tool that runs only on Microsoft Windows-based operating systems.For the current PeopleSoft PeopleTools release, the PeopleSoft Change Assistant installation includes the following features:
• You can install multiple instances of PeopleSoft Change Assistant from the current release on one physical machine.
Note. Beginning with PeopleSoft PeopleTools 8.56, multiple instances of Change Assistant can run in parallel. However, you can not run multiple instances against the same target database.
See PeopleTools: Change Assistant and Update Manager, "Running Multiple Instances of Change Assistant."
• You must remove installations of PeopleSoft Change Assistant from PeopleSoft PeopleTools 8.55 or earlier before installing from the current release. PeopleSoft Change Assistant from PeopleSoft PeopleTools 8.56 cannot co-exist with that from earlier releases.
• You must install each PeopleSoft Change Assistant instance in a separate installation location.
• You can remove or upgrade each PeopleSoft Change Assistant instance separately.
• When you remove an installation instance, you have the option to save the existing configuration information in a group of files gathered in a zip archive. You can configure Change Assistant at a later time by importing the zip file.
For more information on using PeopleSoft Change Assistant for updates and for software upgrades, see the PeopleSoft product documentation.

Installing PeopleSoft Change Assistant Chapter 17
610 Copyright © 2018, Oracle and/or its affiliates. All Rights Reserved.
See Also
PeopleTools: Change Assistant and Update ManagerPeopleTools: Application Designer Lifecycle Management Guide"Using the PeopleSoft Installer," Verifying Necessary Files for Installation on Windows
Task 17-1: Installing PeopleSoft Change Assistant in Silent Mode
This section discusses:
• Understanding Silent Mode for PeopleSoft Change Assistant
• Using the Silent Mode Script
Understanding Silent Mode for PeopleSoft Change AssistantYou can carry out a silent installation of PeopleSoft Change Assistant by supplying command-line parameters to ascript. With silent installation there is no user interaction after you begin the installation.You can use install and upgrade PeopleSoft Change Assistant instances in silent mode for the current PeopleSoft PeopleTools release. In addition, you can use silent mode to remove installations from the current or earlier PeopleSoft PeopleTools releases. For example, running the silent mode installation from PeopleSoft PeopleTools 8.56 will remove a Change Assistant installation from PeopleSoft PeopleTools 8.54 or earlier, and also install the 8.56 version of Change Assistant.The PeopleSoft Change Assistant installer includes the following files in the directory PS_HOME\setup\PsCA:
• silentInstall.bat — Use this script to upgrade or remove an existing PeopleSoft Change Assistant instance or install a new instance.
Do not edit this file. The file includes instructions in the header portion.
See Using the Silent Mode Script.
• CA-silentInstall-ResultCodes.rtf — Review this file to interpret the results seen in the PS_HOME\setup\psCA\setup.log file after installation.
The file is in Rich Text Format (RTF), and is most easily read if you open it with word processing software such as Microsoft Word.
Task 17-1-1: Using the Silent Mode ScriptThe PeopleSoft Change Assistant silent mode script requires the following command-line parameters:
• Install Home
Specify the installation location for the PeopleSoft Change Assistant instance. If the location includes spaces, surround it with double quotes, such as "C:\Program Files\PeopleSoft\Change Assistant".
As mentioned earlier in this chapter, for PeopleSoft PeopleTools 8.56 you can install multiple instances of PeopleSoft Change Assistant. You must specify a different installation location for each instance.
• Install Type
• Specify NEW to create a new PeopleSoft Change Assistant instance.
• Specify UPGRADE to upgrade an existing instance that was installed from the current PeopleSoft

Chapter 17 Installing PeopleSoft Change Assistant
Copyright © 2018, Oracle and/or its affiliates. All Rights Reserved. 611
PeopleTools release.
• Specify UNINSTALL to remove an existing PeopleSoft Change Assistant instance.
• Backup Config
• Specify BACKUP to create a zip file containing files with configuration information. The backup file, changeassistantcfgbak.zip, is saved in the installation location.
• Specify NOBACKUP if you do not want to create a backup file with the configuration information.To use the PeopleSoft Change Assistant silent installation script:1. In a command prompt, go to PS_HOME\setup\PsCA.
Note. Do not move the file to another location.
2. Run the following command:
silentInstall.bat [Install Home] [Install Type] [Backup Config]
You must include all three parameters. For example:
• To install a new instance without retaining a configuration file
silentInstall.bat "C:\Program Files\PeopleSoft\Change Assistant" NEW⇒ NOBACKUP
• To upgrade an existing instance, and retain a configuration file:
silentInstall.bat "C:\Program Files\PeopleSoft\Change Assistant 3"⇒ UPGRADE BACKUP
• To remove an existing instance, and retain a configuration file:
silentInstall.bat D:\CA UNINSTALL BACKUP
Task 17-2: Configuring and Using PeopleSoft Change Assistant
This section discusses:
• Verifying the Path Variable
• Specifying Options
• Scanning the Workstation
• Exporting Jobs to XML, HTML, or Microsoft Excel Format
Task 17-2-1: Verifying the Path VariableAfter installing PeopleSoft Change Assistant, verify that the following values are the first entries in the PATH environment variable:
• PS_HOME\bin\client\winx86
• PS_HOME\jre\bin
See PeopleTools: Change Assistant and Update Manager, "Setting Up Change Assistant."

Installing PeopleSoft Change Assistant Chapter 17
612 Copyright © 2018, Oracle and/or its affiliates. All Rights Reserved.
Task 17-2-2: Specifying OptionsYou can configure PeopleSoft Change Assistant modes to carry out updates, upgrades, work with upgrade templates, or access PeopleSoft Update Manager. The mode selection determines which menu options you see when you use PeopleSoft Change Assistant.
See Also
PeopleTools: Change Assistant and Update ManagerPeopleSoft Update Manager Home Page, My Oracle Support, Doc ID 1641843.2
Task 17-2-3: Scanning the WorkstationThe first time you use PeopleSoft Change Assistant, it automatically scans your workstation for applications that it will use in order to automate the steps. For example, it automatically finds the SQL Query tool and uses it to runSQL commands or scripts.If you add a new application or update an existing application, PeopleSoft Change Assistant must perform a scan of the system in order to discover the changes. To perform this scan, select Tools, Scan Configuration.
Task 17-2-4: Exporting Jobs to XML, HTML, or Microsoft Excel FormatChange Assistant allows users to export jobs to XML, HTML, or Microsoft Excel file formats. Do this by selecting File, Export Job in Change Assistant. Then, enter the desired exported filename and select the desired file type format.
Task 17-3: Validating Change Assistant Settings
After you have set up and configured PeopleSoft Change Assistant and the Environment Management components, you should validate your PeopleSoft Change Assistant and environment settings. PeopleSoft Change Assistant validates settings by:
• Locating valid SQL query tools required to run SQL scripts.
• Testing the Environment Management hub and ensuring that PeopleSoft Change Assistant can communicate with it.
• Testing My Oracle Support and ensuring that PeopleSoft Change Assistant can communicate with it.
PeopleSoft Change Assistant sends a ping to My Oracle Support and then tests the connection. In order for thevalidation to succeed, the machine where you have PeopleSoft Change Assistant installed must have the ping feature enabled.
You can also print a summary of your environment, which can facilitate the diagnosis of problems by OracleSoftware Support.To validate your environment, select Tools, Options, Validate. Click Start Validation.

Chapter 17 Installing PeopleSoft Change Assistant
Copyright © 2018, Oracle and/or its affiliates. All Rights Reserved. 613
If any of the steps were unable to complete successfully, open the log file to determine the cause. This example shows a summary with both successful messages ("Done") and unsuccessful ("Failed" or "Unsuccessful completion"):
Validating Change Assistant Settings in Your Environment
Note. If you use proxy servers, the system will ping those and prompt for proxy server user ID and password. In this case, the validation step numbers would be different from the example.

Installing PeopleSoft Change Assistant Chapter 17
614 Copyright © 2018, Oracle and/or its affiliates. All Rights Reserved.
To review the log file, click the View Log button at the bottom of the screen. This example shows the first severallines of a log file:
Validation log

Copyright © 2018, Oracle and/or its affiliates. All Rights Reserved. 615
Chapter 18
Installing PeopleSoft Change Impact Analyzer
This chapter discusses:
• Prerequisites
• Installing and Removing PeopleSoft Change Impact Analyzer in Silent Mode
Prerequisites
Oracle's PeopleSoft Change Impact Analyzer is a tool you can use to evaluate the effect of changes you make on your installation. PeopleSoft Change Impact Analyzer can help you monitor the impact a Change Package has on your system, as well as monitor the impact from other changes such as customizations.Ensure that your system meets the following requirements before you begin this installation:
• PeopleSoft Change Impact Analyzer runs on Microsoft Windows platforms. For database platforms that do not run on Microsoft Windows, install PeopleSoft Change Impact Analyzer on the Windows client.
• You can install PeopleSoft Change Impact Analyzer from downloaded files as a standalone application, or as a part of your PeopleSoft PeopleTools installation. These instructions assume you have installed PeopleSoft PeopleTools on the machine on which you want to run PeopleSoft Change Impact Analyzer, and have completed the PeopleSoft Change Assistant installation.
• You must install JDBC drivers for connectivity to your database platform. PeopleSoft Change Impact Analyzer uses Type 4 JDBC drivers by default.
You can normally obtain JDBC drivers from your RDBMS vendor. Search the vendor's web site or contact thevendor for information.
See Also
PeopleTools: Change Impact Analyzer
Task 18-1: Installing and Removing PeopleSoft Change Impact Analyzer in Silent Mode
This section discusses:
• Understanding Silent Mode for PeopleSoft Change Impact Analyzer
• Installing PeopleSoft Change Impact Analyzer in Silent Mode
• Removing the PeopleSoft Change Impact Analyzer Installation in Silent Mode

Installing PeopleSoft Change Impact Analyzer Chapter 18
616 Copyright © 2018, Oracle and/or its affiliates. All Rights Reserved.
• Removing and Installing PeopleSoft Change Impact Analyzer in Silent Mode
Understanding Silent Mode for PeopleSoft Change Impact AnalyzerYou can carry out a silent installation or removal of PeopleSoft Change Impact Analyzer by editing a response file to correspond to your installation requirement. When you work in silent mode there is no user interaction afteryou begin the installation or removal.The PeopleSoft Change Impact Analyzer installer includes the following files in the directory PS_HOME\setup\PsCIA:
• CIA-silent-install-response-file.txt — Use this response file to install PeopleSoft Change Impact Analyzer.
• CIA-silent-uninstall-response-file.txt — Use this response file to remove PeopleSoft Change Impact Analyzer installations.
• silentInstall.bat — Use this script to remove an existing PeopleSoft Change Impact Analyzer installation, and install a new instance.
• silentInstall-ResultCodes.rtf — Review this file to interpret the results seen in the setup.log file after installation.
The file is in Rich Text Format (RTF), and is most easily read if you open it with an authoring tool, such as Microsoft Word.
Task 18-1-1: Installing PeopleSoft Change Impact Analyzer in Silent ModeThis section discusses:
• Editing the Response File
• Running the Silent Mode Installation
Editing the Response File
Review the header portion at the top of the response file for instructions on running the silent installation. Modify the response file according to your installation requirement. The sections labelled NOTE TO USER include items to be modified. Open the file PS_HOME\setup\PsCIA\CIA-silent-install-response-file.txt for editing, modify the following items, and then save the file:
• JDBC driver type
Enter 1 to specify your RDBMS platform, and 0 for the other selections. The options are: Oracle (default), MSS (Microsoft SQL Server), or DB2 (DB2 z/OS or DB2/LUW).
################# NOTE TO USER ################################ the following option is for DB type for JDBC driver# the default is Sel-0=1, for Oracle# set the Sel-1=1 for MSS# set the Sel-2=1 for DB2# NOTE: the options are mutually exclusiveSel-0=1Sel-1=0Sel-2=0
• Path to JDBC driver

Chapter 18 Installing PeopleSoft Change Impact Analyzer
Copyright © 2018, Oracle and/or its affiliates. All Rights Reserved. 617
Enter the full path to the JDBC driver for szPath.
################## NOTE TO USER ################################ For MSS & DB2 please enter the path to JDBC driver for "szPath" belowszPath=c:\jdbcDrivers
• Installation location
The default location is C:\Program Files\PeopleSoft\Change Impact Analyzer. If you want to install to a different location, enter the location for szDir.
################## NOTE TO USER ################################ For "szDir" enter the path where you want to install the Change Impact⇒ AnalyzerszDir=C:\Program Files\PeopleSoft\Change Impact Analyzer
Running the Silent Mode Installation
To run the silent mode installation with the modified response file:1. In a command prompt, go to PS_HOME\setup\PsCIA.
2. Run the following command, substituting your PS_HOME location for %PS_HOME% in the command:
installCIA.exe /s /f1"%PS_HOME%\setup\PsCIA\CIA-silent-install-response-⇒file.txt"
3. After the installation is complete, review the result status in the file PS_HOME\setup\PsCIA\setup.log.
Result code 0 means a successful installation. The result codes are described in the file PS_HOME\setup\PsCIA\silentInstall-ResultCodes.rtf.
Task 18-1-2: Removing the PeopleSoft Change Impact Analyzer Installation in Silent ModeReview the header portion at the top of the response file for instructions. The process will search for and remove an existing installation of PeopleSoft Change Impact Analyzer. You do not need to edit the file before running. The file must be located in PS_HOME\setup\PsCIA.1. In a command prompt, go to PS_HOME\setup\PsCIA.
2. Run the following command, substituting your PS_HOME location for %PS_HOME% in the command
installCIA.exe /s /f1"%PS_HOME%\setup\PsCIA\CIA-silent-uninstall-⇒response-file.txt"
3. After the installation is complete, review the result status in the file PS_HOME\setup\PsCIA\setup.log.
Result code 0 means a successful installation. The result codes are described in the file PS_HOME\setup\PsCIA\silentInstall-ResultCodes.rtf.
Task 18-1-3: Removing and Installing PeopleSoft Change Impact Analyzer in Silent ModeUse the silentInstall.bat script to remove an existing installation of PeopleSoft Change Impact Analyzer and install a new installation. This script runs commands using CIA-silent-uninstall-response-file.txt followed by CIA-silent-install-response-file.txt. Refer to the previous sections for information on those response files.

Installing PeopleSoft Change Impact Analyzer Chapter 18
618 Copyright © 2018, Oracle and/or its affiliates. All Rights Reserved.
To remove an existing installation and reinstall:1. In a command prompt, go to PS_HOME\setup\PsCIA.
2. Run the following command:
silentInstall.bat
3. After the installation is complete, review the result status in the file PS_HOME\setup\PsCIA\setup.log.
Result code 0 means a successful installation. The result codes are described in the file PS_HOME\setup\PsCIA\silentInstall-ResultCodes.rtf.

Copyright © 2018, Oracle and/or its affiliates. All Rights Reserved. 619
Chapter 19
Adding New Product Modules
Task 19-1: Adding New Modules to PeopleSoft Installations
This task explains how to add new application modules to an existing PeopleSoft installation. Follow this procedure if, for example, you already installed HCM Benefits Administration and now you need to install Pension Administration.When you add new application modules to an existing installation, you may overwrite files that were included as part of a patch or fixes, or customizations that you applied. For example, suppose you customize a report that is updated in a subsequent PeopleSoft release. If you install the update into your current working directory, your customized report will be overwritten with the newly installed, updated report.The PeopleSoft system does not currently provide an automated way to notify you before overwriting customized modules or patch files. You can make preparations to protect important files from being overwritten. For your customized modules, you need to maintain a backup of any customizations. It is also a good idea to make a copy of your PS_HOME directory before beginning this process, so that you can find and restore necessary patch files. Check My Oracle Support to identify any patches or fixes required for your installation.See My Oracle Support, Patches & Updates.To add new module(s) to PeopleSoft installations:1. Back up the database, file server, application server, Process Scheduler Server, and web server components of
your current system.
2. Install the PeopleSoft Application software on the file server.
3. Launch Data Mover in bootstrap mode by logging on with the access ID and password.
Data Mover is located in PS_HOME\bin\client\winx86\psdmt.exe.
See Checking the Log Files and Troubleshooting, Running Data Mover, in the chapters on creating a database.
4. Select File, Database Setup and choose your database type in the resulting dialog.
5. Select Next and select add new product.
6. Select Finish and a Data Mover script will be generated in Data Mover.
7. Select File, Run script and your database updates are complete.
8. Install software to your batch server.
See the chapters on setting up Process Scheduler in this documentation.
9. Reapply all code customizations if needed.
Note. Remember to maintain backup copies of your customizations.
10. Compile and link COBOL.
See the chapters on installing and compiling COBOL in this documentation.
Adding New Product Modules Chapter 19
620 Copyright © 2018, Oracle and/or its affiliates. All Rights Reserved.
11. Verify that the appropriate Installation Records are selected.
If they are not checked, check them and save the page. To open the page, select Set Up <apptype>, Install, Installation Options, where <apptype> is CRM, Financials/Supply Chain Management, and so on. For example, Set Up CRM, Install, Installation Options. (For HCM the navigation is Set Up HCM, Install, Installation Table.)
12. Run the dddaudit and sysaudit SQR reports.
If you are swapping the base language, also run swpaudit.sqr.
See "Completing the Database Setup," Checking the Database.
13. Shut down all application servers.
14. Install software to your application server.
See the chapters on configuring the Application Server in this documentation.
15. Restart all required application servers.
16. Shut down all web servers.
17. Install software to your web server.
See the chapters on setting up the PeopleSoft Pure Internet Architecture in this documentation.

Copyright © 2018, Oracle and/or its affiliates. All Rights Reserved. 621
Chapter 20
Installing PeopleSoft Online Help
This chapter discusses:
• Understanding PeopleSoft Online Help (PeopleBooks)
• Using the PeopleSoft Online Help Web Site for Context-Sensitive Help
• Configuring Context-Sensitive Help with Local Installations
• Installing PeopleSoft Online Help Locally
Understanding PeopleSoft Online Help (PeopleBooks)
The documentation for PeopleSoft PeopleTools and PeopleSoft software applications, formerly known as PeopleBooks, is now available in a dynamic, interactive, accessible HTML version, the hosted PeopleSoft Online Help Web site. The PeopleSoft Online Help documentation that is accessed with the Help link in the PeopleSoft navigation bar, and the Oracle's PeopleSoft Online Help Web site, are developed for advanced users, administrators, and implementers of the application. End users should utilize embedded help or licensed UPK content for more specific help assistance.PeopleSoft software applications will include translated embedded help. With the PeopleSoft 9.2 release, PeopleSoft documentation aligned with the other Oracle applications by focusing on embedded help. We offer very direct translated help at crucial spots within our application through our embedded help widgets. Additionally, we have a one-to-one mapping of application and help translations. This means that the software and embedded help translation footprint are identical, something we were never able to accomplish in the past.The PeopleSoft Online Help is delivered with PeopleSoft PeopleTools and every PeopleSoft application. You have several options for deploying PeopleSoft Online Help to benefit your organization. This chapter describes the methods for accessing, installing, and configuring PeopleSoft Online Help.
• Hosted PeopleSoft Online Help Web site: Use PeopleSoft Online Help over the Internet with the hosted content on the hosted PeopleSoft Online Help Web site.
• Context-sensitive help: Configure PeopleSoft PeopleTools to call PeopleSoft Online Help as context-sensitive help from both Internet applications and Microsoft Windows-based programs. For instance, when a user clicksthe Help link in a browser or presses F1 in Windows, the appropriate documentation appears. You can set up context-sensitive help for both local installations and to access the hosted content on the PeopleSoft Online Help Web site.
Note. The F1 button accesses PeopleSoft Online Help only for the PeopleTools Development Environment (the Windows-based client). If you press F1 while using the portal, you invoke the help for your current browser. For context-sensitive help in the portal, users need to click the Help link to call PeopleSoft Online Help.
• PDF format: You can download a PDF version of PeopleSoft Online Help, organized in the traditional PeopleBooks format, from the Oracle Technology Network (OTN).

Installing PeopleSoft Online Help Chapter 20
622 Copyright © 2018, Oracle and/or its affiliates. All Rights Reserved.
• Local installation: Install and configure PeopleSoft Online Help so you can deploy the documentation at your site.
See Also
Oracle Documentation, Oracle Technology Network, http://www.oracle.com/technetwork/documentation/index.html"Preparing for Installation," Planning Multilingual StrategyPeopleTools: Applications User's Guide, "Accessing Embedded Help"
Task 20-1: Using the PeopleSoft Online Help Web Site for Context-Sensitive Help
This section discusses:
• Understanding the PeopleSoft Online Help Web Site
• Setting Up Context-Sensitive Help with the PeopleSoft Online Help Web Site
• Setting Up F1 Help with the PeopleSoft Online Help Web Site
Understanding the PeopleSoft Online Help Web SitePeopleSoft Online Help is immediately available for use over the Internet at the PeopleSoft Online Help Web site.To configure context-sensitive help with the PeopleSoft Online Help web site, you must have an Internet connection available to your server where PeopleSoft PeopleTools is installed. See PeopleSoft Online Help, www.peoplesoftonlinehelp.com.Alternatively, you can install PeopleSoft Online Help to a file server hosting web server software, as described in the section Installing the PeopleSoft Online Help Locally.
Task 20-1-1: Setting Up Context-Sensitive Help with the PeopleSoft Online Help Web SiteYou can configure your PeopleSoft server to use the hosted documentation from the PeopleSoft Online Help Website for context-sensitive help. Each page in your PeopleSoft applications includes a Help icon that, when clicked, opens a new browser window displaying help topics that discuss that page. To enable the Help link from application pages:1. Log in to your PeopleSoft application in a browser.
2. Select PeopleTools, Web Profile, Web Profile Configuration.
3. Click Search and select the Profile Name you specified during your PeopleSoft Pure Internet Architecture installation, for example, PROD.

Chapter 20 Installing PeopleSoft Online Help
Copyright © 2018, Oracle and/or its affiliates. All Rights Reserved. 623
4. On the General page in the Help URL field, enter the URL for one or more products.
You can access the URLs from the PeopleSoft Online Help Web site. Under Setting Up Context-Sensitive Help, select the link Enabling the Help Link from the Application Pages.
See PeopleSoft Online Help, http://docs.oracle.com/cd/E17566_01/epm91pbr0/eng/psbooks/pdfs/EnablingtheHelpLinkfromApplicationPages.pdf.
The URLs have the following format, where UlinkID1, UlinkID2, ...UlinkIDn refer to universal linking product line codes:
http://www.oracle.com/pls/topic/lookup?id=%CONTEXT_ID%&ctx=UlinkID1&ctx=UlinkID2....&ctx=UlinkIDn
The URL for the PeopleTools documentation must come before the URLs for PeopleSoft application documentation, as in this example:
http://www.oracle.com/pls/topic/lookup?id=%CONTEXT_ID%&ctx=pt856pbr1&ctx=hcm92pbr14
This example shows the Web Profile Configuration page with a sample help URL for PeopleSoft PeopleTools8.56 and PeopleSoft HCM 9.2:

Installing PeopleSoft Online Help Chapter 20
624 Copyright © 2018, Oracle and/or its affiliates. All Rights Reserved.
Web Profile Configuration General page with a sample PeopleSoft Hosted Documentation URL
5. Save and exit the Web Profile Configuration page.
6. Restart the following servers:
• If your PeopleSoft Pure Internet Architecture (PIA) is running on Oracle WebLogic, restart the PIA and admin web servers.
• If your PIA is running on IBM WebSphere, restart the PIA server.
• If the Help link does not appear in the next step, it may be necessary to also stop and restart the applicationserver.
7. Test the help functionality by clicking the Help icon on a PeopleSoft application page.

Chapter 20 Installing PeopleSoft Online Help
Copyright © 2018, Oracle and/or its affiliates. All Rights Reserved. 625
Task 20-1-2: Setting Up F1 Help with the PeopleSoft Online Help Web SitePeopleTools Application Designer also has context-sensitive help available through the user's F1 key. To enable this help functionality, the PeopleTools Options must be configured to access the hosted content on the PeopleSoft Online Help Web site as follows:1. In your PeopleSoft application, select PeopleTools, Utilities, Administration, PeopleTools Options.
2. Scroll down to the Help Options group.
3. Enter the value for the F1 URL field.
Specify the URL for the PeopleSoft PeopleTools online help for your release. The URL should be similar to the following:
http://www.oracle.com/pls/topic/lookup?id=%CONTEXT_ID%&ctx=pt856pbr1
You can access the URL from the PeopleSoft Online Help Web site. Under Setting Up Context-Sensitive Help, select the link Enabling the Help Link from the Application Pages.
See PeopleSoft Online Help, http://docs.oracle.com/cd/E17566_01/epm91pbr0/eng/psbooks/pdfs/EnablingtheHelpLinkfromApplicationPages.pdf.
4. Save and exit the PeopleTools Options page.
5. Stop and restart the application server each time you update the help URL.
6. Open Application Designer. Press F1 to display the online help content.
7. For context-sensitive help, open an object, such as a panel or PeopleCode, then press F1.
Task 20-2: Configuring Context-Sensitive Help with Local Installations
This section discusses:
• Enabling the Help Link from the Application Pages with Local Installations
• Enabling F1 Help with Local Installations
• Creating the Help Index for Multi-Product Installations
Task 20-2-1: Enabling the Help Link from the Application Pages with Local InstallationsYou can configure your PeopleSoft installation so that each page in your PeopleSoft software applications includes a Help link. Clicking the Help link opens a new browser window displaying help topics that discuss that page. Use the instructions in this section to enable the Help link for locally-installed PeopleSoft Online Help only.To enable the Help link from application pages:1. In your PeopleSoft application, navigate to the PeopleTools, Web Profile, Web Profile Configuration page.
2. Click Search and select the Profile Name you specified during your PeopleSoft Pure Internet Architecture installation.
3. Specify the value for the Help URL field as follows:

Installing PeopleSoft Online Help Chapter 20
626 Copyright © 2018, Oracle and/or its affiliates. All Rights Reserved.
http://<server_name>:<port_number>/<help_folder>/help.html?ContextID=⇒%CONTEXT_ID%&LangCD=%LANG_CD%
Note. If you do not want the Help icon to display in your applications, clear the Help URL field value.
For example, if your web server is called myserver, you are using port 5080, and your help_folder is pt855pbr0, the Help URL value would be:
http://myserver:5080/pt855pbr0/help.html?ContextID=%CONTEXT_ID%&LangCD=⇒%LANG_CD%
• Enter your web server name for <server_name>.
• Enter the web server port for <port_number>.
• Enter the folder where you installed the help system files for <help_folder>.
• The system resolves %CONTEXT_ID% to the page name from which you called help. The system resolves %LANG_CD% to the signon language of the user.
4. Save and exit the Web Profile Configuration page.
5. Before testing help functionality, purge the browser cache on the client and close all web browsers.
Restart the application server and web server for PIA.
6. Test the help functionality by clicking the Help link on a PeopleSoft application page.
Task 20-2-2: Enabling F1 Help with Local InstallationsThis procedure describes how to enable F1 help for Application Designer, PeopleCode Editor, and other Microsoft Windows-based PeopleSoft programs.To enable F1 help:1. Sign on to your PeopleSoft application using your browser.
2. Select the PeopleTools, Utilities, Administration, PeopleTools Options page.
3. Enter the same URL as in the previous procedure (where <server_name>, <port_number>, and <help_folder> reflect your installation) into the F1 Help URL field:
http://<server_name>:<port_number>/<help_folder>/help.html?ContextID=⇒%CONTEXT_ID%&LangCD=%LANG_CD%
For example:
http://myserver:5080/pt855pbr0/help.html?ContextID=%CONTEXT_ID%&LangCD=⇒%LANG_CD%
4. Save the page.
Task 20-2-3: Creating the Help Index for Multi-Product InstallationsThe PeopleSoft Online Help site contains a precompiled context-sensitive help index containing all context IDs for the product family. To have the help processor deliver help pages from other product families, you need to re-create this help index to include the context IDs for all applicable product families. Note that this procedure does not support help sites for PeopleSoft 9.1 and PeopleTools 8.52 and earlier. To include help sites for those releases, select About This help in the PeopleSoft PeopleTools product documentation.

Chapter 20 Installing PeopleSoft Online Help
Copyright © 2018, Oracle and/or its affiliates. All Rights Reserved. 627
See Managing Locally Installed PeopleSoft Online Help, "Including Multiple Online Help Sites for PeopleSoft 9.1 and PeopleTools 8.52 and Earlier."To re-create the context-sensitive help index follow the instructions "Creating Index for multi-domain online help site" described in the README.txt file included with the downloaded zip files.See Managing Locally Installed PeopleSoft Online Help, "Including Multiple Online Help Sites for PeopleSoft 9.2 and PeopleTools 8.53 and Later."
Task 20-3: Installing PeopleSoft Online Help Locally
This section discusses:
• Prerequisites
• Obtaining the PeopleSoft Documentation Files from Oracle Software Delivery Cloud
• Deploying PeopleSoft Documentation Library on a WebLogic Server
• Removing the PeopleSoft Online Help Deployment
• Setting Up Help for Multiple Product Lines on the Same Machine
PrerequisitesBefore installing the PeopleSoft online help:
• Obtain the installation file for the PeopleSoft Online Help from Oracle Software Delivery Cloud, as described in the next section.
• Install a supported web server and verify that it is up and running.
This task describes the steps for Oracle WebLogic on Microsoft Windows. However, you can use other web server software, such as IBM WebSphere.
• Install the Elasticsearch search utility and verify that it is up and running.
The "Search Utility for locally installed PeopleSoft Documentation" contains a customized version of Elasticsearch for PeopleSoft Online Help that is independent of the Elasticsearch that is used for the PeopleSoft search framework. The utility is available on Oracle Software Delivery Cloud in the same deliverypackage as the PeopleSoft online help documentation. The downloaded zip file includes a text file with instructions.
Note. For the sake of brevity, this task refers to the "Search Utility for locally installed PeopleSoft Documentation" as the "search utility."
• The PeopleSoft Online Help installation requires Java 8.
Task 20-3-1: Obtaining the PeopleSoft Documentation Files from Oracle Software Delivery CloudThis section explains locating and using the installation files for PeopleSoft Online Help and the search utility, if you have not already done so. The files are included in the installation files for PeopleSoft applications and PeopleSoft PeopleTools. See Oracle Software Delivery Cloud, https://edelivery.oracle.com.To obtain files for the PeopleSoft Online Help installation from Oracle:

Installing PeopleSoft Online Help Chapter 20
628 Copyright © 2018, Oracle and/or its affiliates. All Rights Reserved.
1. After logging in to Oracle Software Delivery Cloud, read the information about export restrictions, and then click Accept.
2. Enter PeopleSoft PeopleTools in the type-ahead Product field, and select PeopleSoft PeopleTools 8.56 for PSFT Application Products from the drop-down list.
3. If you want to obtain the PeopleSoft Online Help installation files for a PeopleSoft application, enter the nameof a specific PeopleSoft application product in the type-ahead Product field.
For example, for PeopleSoft Human Capital Management, enter and select PeopleSoft Enterprise Human Resources. For PeopleSoft Financials and Supply Chain Management, enter and select PeopleSoft Enterprise Financials.
4. Click Select Platform, select the operating system you are running on, and then click Select.
Note that you must unzip the zip files on the platform for which they are intended. For example, if you download the file for Oracle Solaris, you must unzip the file on an Oracle Solaris operating system. If you unzip the file on a Microsoft Windows machine into a staging directory, and then move the directory to an Oracle Solaris machine, the staging area files may be corrupted.
5. Click Continue two times.
6. Read the license agreement, select the check box to acknowledge that you accept the agreement, and then click Continue.
7. On the File Download window, select the links for the online help zip file and the search utility.
8. Download the zip files into a convenient local directory.
Task 20-3-2: Deploying PeopleSoft Documentation Library on a WebLogic ServerThis task uses the PeopleSoft PeopleTools 8.56 documentation library as an example. 1. Create folder C:\PeopleBooks to serve as the documentation root.
2. Install and set up the search utility.
This section refers to the installation location as SRCH_UTILITY_INSTALL. Follow the instructions in the INSTALL.txt file included with the downloaded zip file to:
• Set up Elasticsearch for PeopleSoft Online Help
• Deploy Elasticsearch for PeopleSoft Online help search page
These instructions assume that you copy the psessearch folder to C:\PeopleBooks.
3. Copy the zip file containing the PeopleSoft Online Help to C:\PeopleBooks, and extract into the same folder.
4. Create a folder WEB-INF under the C:\PeopleBooks folder.
5. In the WEB-INF folder create a file named "web.xml" that has the following content:
<?xml version="1.0" encoding="UTF-8"?>
<!DOCTYPE web-app PUBLIC
"-//Sun Microsystems, Inc.//DTD Web Application 2.3//EN"
"http://java.sun.com/j2ee/dtds/web-app_2_3.dtd">
<web-app>
</web-app>

Chapter 20 Installing PeopleSoft Online Help
Copyright © 2018, Oracle and/or its affiliates. All Rights Reserved. 629
This allows Oracle WebLogic to recognize the C:\PeopleBooks folder as a valid deployment.
6. Open the Oracle WebLogic administration console by entering the following URL in a browser:
http://<hostname>:7001/console
7. Log in using Oracle WebLogic administrator credentials.
Oracle WebLogic Server Administration Console 12c

Installing PeopleSoft Online Help Chapter 20
630 Copyright © 2018, Oracle and/or its affiliates. All Rights Reserved.
8. Select Deployments from the Domain Structure section on the left side of the window:
Oracle WebLogic Administration Console Home Page

Chapter 20 Installing PeopleSoft Online Help
Copyright © 2018, Oracle and/or its affiliates. All Rights Reserved. 631
9. Click Install on the Deployments section of the Configuration tab under Summary of Deployments.
Configuration tab on the Summary of Deployments page
10. If necessary, enter C:\ for the path.
You see the computer directory structure. The entry for PeopleBooks includes a radio button indicating that this folder can be deployed as an application.

Installing PeopleSoft Online Help Chapter 20
632 Copyright © 2018, Oracle and/or its affiliates. All Rights Reserved.
11. Select PeopleBooks (open directory) and then click Next.
Locate deployment to install and prepare for deployment page

Chapter 20 Installing PeopleSoft Online Help
Copyright © 2018, Oracle and/or its affiliates. All Rights Reserved. 633
12. On the Choose installation type and scope window, select Installation type as an application and Scope Global.
Click Next.
Choose installation type and scope page

Installing PeopleSoft Online Help Chapter 20
634 Copyright © 2018, Oracle and/or its affiliates. All Rights Reserved.
13. Accept the default entries on the Optional Settings page, and click Next.
The page includes sections General, Security, Source Accessibility, and Plan Source Accessibility.
Top section of the Optional Settings page

Chapter 20 Installing PeopleSoft Online Help
Copyright © 2018, Oracle and/or its affiliates. All Rights Reserved. 635
Bottom section of the Optional Settings page

Installing PeopleSoft Online Help Chapter 20
636 Copyright © 2018, Oracle and/or its affiliates. All Rights Reserved.
14. Review the summary, select No, I will review the configuration later, and then click Finish.
Review your choices and click Finish page

Chapter 20 Installing PeopleSoft Online Help
Copyright © 2018, Oracle and/or its affiliates. All Rights Reserved. 637
15. Verify that PeopleBooks appears in the Deployments list on the Summary of Deployments page.
The page includes messages indicating that all changes have been activated and the deployment has been successfully deployed.
Summary of Deployment page
16. Log out of the Oracle WebLogic Administration console.

Installing PeopleSoft Online Help Chapter 20
638 Copyright © 2018, Oracle and/or its affiliates. All Rights Reserved.
17. Verify that you can access the PeopleSoft Online Help by entering this URL in a browser:
http://<hostname>:<weblogic port>/PeopleBooks/<library name>/eng/<product family>/index.html
Enter the fully qualified machine name for <hostname>, the Oracle WebLogic port for <weblogic port>. Enter the PeopleSoft documentation library name (that is, the name of the folder extracted from the downloaded zip file) for <library name>. The <product family> is an abbreviation for the PeopleSoft product, such as pt for PeopleSoft PeopleTools. For example, this URL displays the PeopleSoft PeopleTools 8.56 documentation home page:
http://server.example.com:7001/PeopleBooks/pt856pbr1/eng/pt/index.html
PeopleSoft PeopleTools 8.56 Online Help Home Page
18. Crawl the online help site.
See the instructions in INSTALL.txt.
a. In a command prompt, change directory to SRCH_UTILITY_INSTALL/pscrawler.
b. Run this command:
crawler.<ext> <elasticsearch host> <elasticsearch port> index ⇒<online help URL>
For example, on Microsoft Windows:
crawler.bat hostname.example.com 9260 index http:⇒//hostname.example.com:7001/PeopleBooks/pt856pbr1/eng/pt/index.html

Chapter 20 Installing PeopleSoft Online Help
Copyright © 2018, Oracle and/or its affiliates. All Rights Reserved. 639
For example, on UNIX:
./crawler.sh hostname.example.com 9260 index http:⇒//hostname.example.com:7001/PeopleBooks/pt856pbr1/eng/pt/index.html
19. To enable search capability on the PeopleSoft Online Help pages so that when you click the search icon, the PeopleSoft Online Help Search Console appears:
a. Locate the common.js file and open it for editing.
Using the folder structure used in this task as an example, the common.js file is located in C:\PeopleBooks\<library name>\js.
b. Edit the variables searchURL, searchOpt and queryTextParamName.
For example:
var searchURL = "/PeopleBooks/psessearch/index.html";var altHelpURL = "";var searchOpt = "product=PeopleSoft PeopleTools 8.56";var queryTextParamName = "query"; //q
For more information on using locally installed online help, see About This Help. From the PeopleSoft PeopleTools Online Help site, select About This Help from the Contents frame. Then select Managing Locally Installed PeopleSoft Online Help, Enabling the Search Button and Field.
Task 20-3-3: Removing the PeopleSoft Online Help DeploymentUse this procedure if you need to remove the deployed PeopleSoft Online Help to redeploy or upgrade. You must first remove the deployment from the Oracle WebLogic administration console, and then remove the index in the search crawler.1. If the PeopleSoft Online Help or the search console are open, close them.
2. Log in to the Oracle WebLogic administration console using Oracle WebLogic administrator credentials.
3. Select Deployments from the Domain Structure section on the left side of the window:

Installing PeopleSoft Online Help Chapter 20
640 Copyright © 2018, Oracle and/or its affiliates. All Rights Reserved.
4. Select the check box beside the PeopleBooks deployment, and click Delete.
Summary of Deployment page with PeopleBooks deployment selected

Chapter 20 Installing PeopleSoft Online Help
Copyright © 2018, Oracle and/or its affiliates. All Rights Reserved. 641
5. Wait until you see messages saying the deployment was removed.
Verify that PeopleBooks does not appear in the Deployments section.
Summary of Deployments page after PeopleBooks deployment was removed
6. Log out of the Oracle WebLogic administration console.
7. Open a command prompt and change directory to the location where the search utility was installed; for example:
cd SRCH_UTILITY_HOME\pscrawler
8. Run this command to remove the search index:
crawler.bat <elasticsearch host> <elasticsearch port> delete <product>
Enter the fully qualified machine name for <elasticsearch host>, the search engine port for <elasticsearch port>, and the PeopleSoft product name for <product>. For example:
crawler.bat server.example.com 9260 delete "PeopleSoft PeopleTools 8.56"
9. Wait until the process is complete, as indicated by "Deletion completed"
SUCCESS: Specified value was saved.Checking for running Elasticsearch instanceStarting deletion of product-PeopleSoft PeopleTools 8.56Deletion completed

Installing PeopleSoft Online Help Chapter 20
642 Copyright © 2018, Oracle and/or its affiliates. All Rights Reserved.
Task 20-3-4: Setting Up Help for Multiple Product Lines on the Same MachineUse these steps if you want to deploy multiple product line online help sites, such as PeopleSoft PeopleTools and Financials/Supply Chain Management (FSCM) on a single server.This section assumes that you have set up a web server and the search utility as previously mentioned.1. Extract the contents of the documentation library zip file for product line 1 (for example, pt856pbr1.zip) to the
web server folder where the psessearch folder resides, for example, C:\PeopleBooks.
2. Extract the contents of the documentation library zip file for product line 2 (for example, fscm92pbr13.zip) to the same folder where the product line 1 was extracted.
3. Repeat step 2 for other product lines as needed. The contents of the Web server folder includes these folders (plus others depending upon your web server):
C:\PeopleBooks\fscm92pbr13C:\PeopleBooks\psessearch C:\PeopleBooks\pt856pbr1
4. Open a command prompt and change directory to the location where the search utility was installed.
For example, on Microsoft Windows:
cd SRCH_UTILITY_HOME\pscrawler
For example, on UNIX:
cd SRCH_UTILITY_HOME/pscrawler
5. Run this command for each product line:
crawler.<ext> <elasticsearch host> <elasticsearch port> index <online⇒ help URL>
For example, to crawl FSCM and PT on Microsoft Windows:
crawler.bat server.example.com 9260 index http://server.example.com⇒/PeopleBooks/pt856pbr1/eng/pt/index.htmlcrawler.bat server.example.com 9260 index http://server.example.com⇒/PeopleBooks/fscm92pbr13/eng/fscm/index.html
• Use .bat for <ext> on Microsoft Windows, and .sh on UNIX.
• Enter the fully qualified machine name for the online help web server <elasticsearch host>
• Enter the search engine port for <elasticsearch port>.
• The <online help URL> is the URL used to view the documentation home page.
6. Locate the common.js file and open it for editing.
Using the folder structure used in this task as an example, the common.js file is located in C:\PeopleBooks\<library name>\js.
7. For all product lines, edit the variables searchURL, searchOpt and queryTextParamName.
For example, for product line 1, pt856pbr1:
var searchURL = "/PeopleBooks/psessearch/index.html"; //"http://host:⇒port/search/query";

Chapter 20 Installing PeopleSoft Online Help
Copyright © 2018, Oracle and/or its affiliates. All Rights Reserved. 643
var altHelpURL = "";//"http://www.oracle.com/pls/topic/lookup?id=⇒%CONTEXT_ID%&ctx=hcm92pbr6" //"http://host/path/help.html?ContextID=%CONTEXT_⇒ID%&LangCD=%Lang%var searchOpt = "product=PeopleSoft PeopleTools 8.56"; //group=⇒pt853var queryTextParamName = "query"; //q
For product line 2, fscm92pbr13:
var searchURL = "/PeopleBooks/psessearch/index.html"; //"http://host:⇒port/search/query";var altHelpURL = "";//"http://www.oracle.com/pls/topic/lookup?id=⇒%CONTEXT_ID%&ctx=hcm92pbr6" //"http://host/path/help.html?ContextID=%CONTEXT_⇒ID%&LangCD=%Lang%var searchOpt = "product=PeopleSoft Financials and Supply Chain⇒ Management 9.2"; //group=pt853var queryTextParamName = "query"; //q

Copyright © 2018, Oracle and/or its affiliates. All Rights Reserved. 645
Chapter 21
Installing Software for PS/nVision Drilldowns
This chapter discusses:
• Understanding PS/nVision DrillDown Add-ins
• Installing the DrillToPIA Add-In
• Installing the nVisionDrill Add-In
• Installing the nVisionDrill Add-Ins for Multi-Language Installations
• Setting Up PeopleSoft Integration Broker for Using Web Service Capability with nVisionDrill Add-in
Understanding PS/nVision DrillDown Add-ins
When you use PS/nVision to view reports, you can use the DrillDown feature to select a cell in your report and expand it according to criteria contained in a special DrillDown layout.See PeopleTools: PS/nVision, "Using DrillDown."To use the PS/nVision DrillDown feature with Microsoft Excel reports, you need to install one of the following add-ins, as described in this chapter:
Note. DrillToPIA and nVisionDrill VSTO add-ins do not coexist. You can use only one add-in at a time.
• DrillToPIA add-in
• nVisionDrill VSTO add-in (Visual Studio tools for Microsoft Office SE Runtime).
See PeopleTools: PS/nVision, "Understanding PS/nVision Reporting on the Web."Here is the way the two drilldown add-ins work with the supported version of Microsoft Excel:If the nVisionDrill VSTO add-in was installed, the nVisionDrill add-in runs and the nVisionDrill VSTO drilldown menu is available when Microsoft Excel opens.Optionally, you can disable the nVisionDrill VSTO add-in and run the DrillToPIA add-in.
Note. To disable the nVisionDrill VSTO add-in and use the DrillToPIA add-in, access the Add-Ins dialog box andselect the DrillToPIA check box. This selection replaces the nVisionDrill VSTO add-in with the DrillToPIA add-in, and the DrillToPIA drilldown menu appears until you reinstall the nVisionDrill VSTO add-in.
To reinstall the nVisionDrill VSTO, double-click the setup.exe file and select the Repair option.

Installing Software for PS/nVision Drilldowns Chapter 21
646 Copyright © 2018, Oracle and/or its affiliates. All Rights Reserved.
Task 21-1: Installing the DrillToPIA Add-In
This section discusses:
• Understanding Drilldown with DrillToPIA Add-in
• Installing the DrillToPIA Add-in on the Microsoft Excel Environment
Understanding Drilldown with DrillToPIA Add-inDrillDowns are run on the PS/nVision report server – like Report Requests and Report Books – and are accessiblethrough Report Manager. You can also select to run the DrillDown using the output type of Window, which automatically delivers the results to a new browser window. A copy of the results will also be accessible through Report Manager.You can drill down on individual cells within the report by selecting the cell and using Drill from the nVisionDrillmenu for a Microsoft Excel report.
Note. A drilldown result report inherits the output format of its parent report. So, if the parent instance is in Excel format, then the drilldown result is in Excel format.
DrillDown in a web browser does not include the AutoDrill, Drill-to-Query, and Drill-to-Panel options.
Task 21-1-1: Installing the DrillToPIA Add-in on the Microsoft Excel EnvironmentTo drill down on Microsoft Excel reports, the Microsoft Visual Basic Application (VBA) add-in DrillToPIA.xla file needs to be installed on the Microsoft Excel environment. This file is stored in the PS_HOME\Excel directoryon the Application Server. Your System Administrator needs to distribute a copy of this file to all users who need to drill down on Microsoft Excel reports on the Web.
Note. If a non-English version of Microsoft Excel is used, translated versions of DrillToPIA.xla can be found in the <PS_HOME>\Excel\<Language> directory on the Application Server.
In Apple Macintosh systems, PS/nVision DrillToPIA add-in launches Microsoft Internet Explorer for the drilldown page when drilling is performed on a Microsoft Excel report, regardless of the browser from which the original report is opened.To install the add-in DrillToPIA.xla file into the Microsoft Excel environment:1. Copy the PS_HOME\Excel\DrillToPIA.xla file, and paste it into the Excel add-in directory.
If Microsoft Office is installed in the directory MS_OFFICE, the Excel add-ins directory is MS_OFFICE\Office\Library.
2. Launch Microsoft Excel and select Tools, Add-ins from Excel toolbar.
3. Select the DrillToPIA option in the Add-ins dialog box.
The nVisionDrill menu appears in the Excel menu bar.
Note. To remove the add-in from the Excel menu, clear the DrillToPIA option from the Add-Ins dialog box.

Chapter 21 Installing Software for PS/nVision Drilldowns
Copyright © 2018, Oracle and/or its affiliates. All Rights Reserved. 647
Task 21-2: Installing the nVisionDrill Add-In
This section discusses:
• Understanding PS/nVision DrillDown Using Web Services
• Understanding Security for DrillDown Using nVisionDrill VSTO Add-in
• Installing the nVisionDrill Add-in for Microsoft Excel
Understanding PS/nVision DrillDown Using Web ServicesFor PeopleSoft PeopleTools 8.50 and later releases, you are able to use the web service capability when drilling from summarized to detailed PS/nVision reports using the nVisionDrill VSTO add-in. PeopleSoft PeopleTools supports 64-bit Microsoft Excel 2010 and Excel 2013 for the nVisionDrill VSTO add-in.
Note. During the installation for the nVisionDrill VSTO add-in, if there is a message that pre-requisites are not found, run PIARedist.exe and vstor_redist.exe available in the PS_HOME\setup\nVisionDrill folder.
In addition, take note of the following requirements:
• You must set up and configure Integration Broker to use the nVision Drilldown feature as a web service.
See Setting Up Integration Broker for Using Web Service Capability with nVisionDrill Add-in.
• The web servers should be SSL enabled.
This is because all the web service calls happen through secure channels.
When you create the SSL-enabled web server domain, you need to provide the optional parameter Authentication Token Domain with the appropriate domain name.
Note. The new nVisionDrill VSTO add-in is mainly designed for remote standalone file drilldown (where the enduser doesn't have access to the PeopleSoft Pure Internet Architecture system). For all other purposes and Web drilldown, the nVision users are still encouraged to use the DrillToPIA add-in.
Understanding Security for DrillDown Using nVisionDrill VSTO Add-inThe nVisionDrill VSTO Add-in allows users to perform drilldown without having to access the PeopleSoft Pure Internet Architecture pages. This necessitates that the end users of nVisionDrill must sign in to the PeopleSoft system to be able to submit the drilldown process and access the subreports. The users of nVisionDrill VSTO add-in will be prompted to enter a user ID and password for the first time. This user ID and password are validated. If the users have access, they are taken to the menu with the list of DrillDown layouts for further drilldown operation.When the users attempt another drilldown using the same parent report instance which is already open, the systemdoes not prompt for the credentials, and the credentials of the first login are re-used. But for each new report instance or new drilldown report instance, the credentials must be entered again.
Note. All web service calls between the Microsoft Excel and PeopleSoft applications are SSL-enabled.
Task 21-2-1: Installing the nVisionDrill Add-in for Microsoft ExcelTo install the nVisionDrill VSTO add-in for Microsoft Excel:

Installing Software for PS/nVision Drilldowns Chapter 21
648 Copyright © 2018, Oracle and/or its affiliates. All Rights Reserved.
1. Go to PS_HOME\setup\nVisionDrill.
2. Run the nVisionDrillSetup.msi file.
If all required software items have been installed, the nVisionDrill add-in installation will run to success.
During the installation, if you see a message that pre-requisites are not found, run PIARedist.exe and vstor_redist.exe available in the PS_HOME\setup\nVisionDrill folder.
3. Ensure that the web server domain's SSL Root certificate is installed on the machine where the nVisionDrill VSTO add-in is installed.
The Root Certificate should be installed correctly on the default browser of the machine. For example, on Microsoft Internet Explorer 8 the SSL Root Certificate should be installed under Trusted Root Certification Authorities.
Task 21-3: Installing the nVisionDrill Add-Ins for Multi-Language Installations
If you have a multi-language installation, first install NVisionDrillSetup.msi for English, as described above, and then install the NVisionDrillSetup_xxx.msi for the desired languages, where the extension xxx is the three-letter language code.See PeopleTools: Global Technology.
Task 21-4: Setting Up PeopleSoft Integration Broker for Using Web Service Capability with nVisionDrill Add-in
To set up Integration Broker for using web service capability with PS/nVision DrillDown:1. Select PeopleTools, Integration Broker, Configuration, Gateways.
2. Select the Integration Gateway ID for which the Local Gateway is enabled from the search results.
An enabled Local Gateway is marked as "Y" in the search results.

Chapter 21 Installing Software for PS/nVision Drilldowns
Copyright © 2018, Oracle and/or its affiliates. All Rights Reserved. 649
3. In the URL field, enter the following value, where <machine_name> is the Web server machine name, including the domain name, and <port> is the HTTP port number of the PeopleSoft web server:
http://<machine_name>:<port>/PSIGW/PeopleSoftListeningConnector
This example shows the Integration Broker Gateways page with the URL http://webs07.dom1.com:8000/PSIGW/PeopleSoftListeningConnector, where webs07.dom1.com is the combined machine name and domain name, and 8000 is the HTTP port:
Integration Broker Gateways page
4. Click Ping Gateway.
A message appears saying "Gateway URL has changed. Existing connector information will be cleared". Click OK on this message.
You should see a message with the status ACTIVE, indicating a successful connection. Close this message.
5. On the Gateways page, click the Load Gateway Connectors button to load the list of connectors, and then click Save.
If the ping is unsuccessful, check the Web server URL entered, and also make sure Pub/Sub servers are enabled in the Application Server configuration.
6. Select PeopleTools, Integration Broker, Service Operations Monitor, Administration, Domain Status.
7. Purge the unnecessary domains and enable the required domain.
You should be able to see at least three dispatchers under Dispatcher Status. This is required for running asynchronous requests through Integration Broker.

Installing Software for PS/nVision Drilldowns Chapter 21
650 Copyright © 2018, Oracle and/or its affiliates. All Rights Reserved.
Note. PeopleSoft Integration Broker must process all nVision web service requests that are sent from nVisionDrill VSTO add-in, so the Local PeopleSoft Node of PeopleSoft Integration Broker gateway must include at least three dispatchers.
8. Select PeopleTools, Integration Broker, Configuration, Gateways.
Select the same Integration Gateway ID that you chose in step 1.
9. On the Gateways page, select the link Gateway Setup Properties.
The Gateways Properties page appears.
10. Enter the Integration Gateway administrator user ID and password.
The default User ID is administrator, as shown in this example. Enter the password that you specified when setting up the PeopleSoft Pure Internet Architecture.
Gateway Properties sign on page

Chapter 21 Installing Software for PS/nVision Drilldowns
Copyright © 2018, Oracle and/or its affiliates. All Rights Reserved. 651
11. Add a new node in the PeopleSoft Node Configuration page.
PeopleSoft Node Configuration page
Node Name: Enter the name of the active default node.
This example uses $NODENAME.
To find the active default node, navigate to Integration Broker, Integration Setup, Nodes. Do a search, and choose the node for which the Local Node value is "1" and the Default Local Node value is "Y".
Enter the following values to complete the page:
Note. The following information can be retrieved by pressing CTRL+J on the PeopleSoft Node Configuration page.
• App Server URL: Enter the application server machine name and the Jolt port.
• User ID: Enter PeopleSoft user ID
• Password: Enter the password for the PeopleSoft user ID specified in the User ID field.
• Tools Release: Provide the exact PeopleSoft PeopleTools release that your application server is using.
12. Click Save.
13. Click Ping Node to be sure the node is accessible, and then exit.
See PeopleTools: Integration Broker Administration.

Copyright © 2018, Oracle and/or its affiliates. All Rights Reserved. 653
Chapter 22
Installing Web Application Deployment Tools
This chapter discusses:
• Prerequisites
• Installing the Web Application Deployment Tool in Silent Mode
• Testing and Troubleshooting the Web Application Deployment
Prerequisites
This chapter includes instructions for installing the Web Application Deployment tool on Oracle WebLogic and IBM WebSphere. Complete the instructions for the web server you selected when you carried out the PeopleSoft PeopleTools installation. Typically, you would choose GUI mode for Microsoft Windows platforms and console mode for UNIX platforms.
Note. Oracle supports a number of versions of UNIX and Linux in addition to Microsoft Windows for the PeopleSoft installation. Throughout this book, there are references to operating systems. Where necessary, this book refers to specific operating systems by name (for example, Oracle Solaris, IBM AIX, or Linux); however, for simplicity the word UNIX is sometimes used to refer to all UNIX-like operating systems, including IBM AIX,Linux, HP-UX, and Oracle Solaris for SPARC. For the most up-to-date information on operating system support for your database platform, see the Certification information on My Oracle Support.
When you install your PeopleSoft application, consult the product-specific installation guide to determine whetherthe Web Application Deployment tool is required. If the Web Application Deployment tool is not referenced in the product-specific installation guide, you can skip this chapter. Before you install the Web Application Deployment tool, confirm that you have completed the following requirements.If you use Oracle WebLogic as your web server, you must fulfill these requirements:
• Java 8 must be installed and working properly. Your PATH environment variable must include an entry for Java 8 (for example, <java>/bin). If you do not install Java 8 the deployment will fail due to the absence of a Java compiler.
• The PeopleSoft web server must be installed during the PeopleSoft PeopleTools installation.
• Oracle WebLogic 12.2.1 must be installed.
If you use IBM WebSphere as your web server, you must fulfill these requirements:
• Java 8 or above must be installed and working properly.
• The PeopleSoft web server must be selected for installation during the PeopleSoft PeopleTools installation.
• IBM WebSphere 9.0.0.0 must be installed. The web server must be up and running when you carry out the

Installing Web Application Deployment Tools Chapter 22
654 Copyright © 2018, Oracle and/or its affiliates. All Rights Reserved.
Web Application Deployment tool installation.
• The PeopleSoft Pure Internet Architecture must be installed on IBM WebSphere.
• If you are running on UNIX, run the Web Application Deployment installation with a user who owns IBM WebSphere, and who owns PS_HOME. Here are two examples:
• If IBM WebSphere is owned by "root" and group "system", the Web Application Deployment installation must be run with "root" and group "system."
• If WebSphere is owned by user "wsadmin" and group "wsadmin", then the Web Application Deployment installation must be run with wsadmin and wsadmin as the user and group.
See Also
"Installing Web Server Products""Setting Up the PeopleSoft Pure Internet Architecture in GUI Mode""Setting Up the PeopleSoft Pure Internet Architecture in Console Mode""Using the PeopleSoft Installer"PeopleTools: System and Server AdministrationPeopleSoft Customer Relationship Management Installation
Task 22-1: Installing the Web Application Deployment Tool in Silent Mode
This section discusses:
• Understanding the Web Application Deployment Tool Silent Mode Installation and the Response File
• Editing the Web Application Deployment Tool Response File to Deploy DES
• Running the Web Application Deployment Tool Silent Mode Installation to Deploy DES
Understanding the Web Application Deployment Tool Silent Mode Installation and the Response FileYou can carry out a silent installation of the Web Application Deployment tool by providing all the required settings in a response file. With silent installation there is no user interaction after the installation begins. Silent mode installation of the Web Application Deployment tool is supported for both Microsoft Windows and UNIX operating systems platforms, and for both Oracle WebLogic and IBM WebSphere web servers.
Task 22-1-1: Editing the Web Application Deployment Tool Response File to Deploy DESYou need a response file to start the installer in silent mode. The Web Application Deployment tool installer comes with a response file template (responsefile.txt) that can be found under PS_HOME\setup\PsMpWebAppDeployInstall. Modify the values in the response file according to your installation requirements. The response file should contain all the input parameters that are needed for deploying Web Application Deployment tool. To exclude sections that are not needed, begin the line with a pound sign (#).The sample response file template includes the following sections:

Chapter 22 Installing Web Application Deployment Tools
Copyright © 2018, Oracle and/or its affiliates. All Rights Reserved. 655
• Comments and instructions, including the command to run the silent installation, and the proper syntax for specifying paths in Microsoft Windows or UNIX.
# **************************************************************# # Response file for WebAppDeploy Installations## 1. In Windows# use "\\" as file path seperator# Open a command prompt; go to PS_HOME\setup\PsMpWebAppDeployInstall⇒ and run following commands# setup.bat -i silent -DRES_FILE_PATH=<path_to_response_file># # 2. In UNIX# use "/" as file path seperator# Go to PS_HOME/setup/PsMpWebAppDeployInstall and run following⇒ commands# setup.sh -i silent -DRES_FILE_PATH=<path_to_response_file> ###***********************************************************************
• The directory where you want to deploy the web server domain for the Web Application Deployment. The default directory is PS_CFG_HOME.
# Set the below variable to the location where you want to install DES. # PLEASE NOTE this variable could be ANY DIRECTORY on your machine. It⇒ includes but is definitely not limited to PeopleTools Home.PS_CFG_HOME=
• A name for the Web Application Deployment domain, such as PSWebApp.
Use a fully qualified domain name, and do not use an IP address.
Note. The domain that you create for the Web Application Deployment cannot be the same as any existing PeopleSoft Pure Internet Architecture domains. Be sure you do not enter a name that you used for a PeopleSoft Pure Internet Architecture domain.
# Domain NameDOMAIN_NAME=PSWebApp
• The web server type, either Oracle WebLogic or IBM WebSphere.
# Web server type. Possible values are "weblogic", "websphere"SERVER_TYPE=weblogic
• The root directory where you installed Oracle WebLogic or IBM WebSphere.
In this example, the Oracle Websphere section is excluded:
# WebLogic home, the location where Oracle WebLogic is installed (for⇒ WebLogic deployment only)BEA_HOME=C:\\oracle
# WebSphere Home, the location where IBM WebSphere is installed (for Web⇒Sphere deployment only)

Installing Web Application Deployment Tools Chapter 22
656 Copyright © 2018, Oracle and/or its affiliates. All Rights Reserved.
#WS_HOME=
• The login ID and password for the new web server domain that you are creating.
Note. The default login ID is system, as shown on this example. The password, which you specified during the PeopleSoft Pure Internet Architecture setup, must be at least 8 alphanumeric characters with at least one number or special character.
# admin console user id/password for securing WebLogic/WebSphere admin⇒ console credentialUSER_ID=systemUSER_PWD=USER_PWD_RETYPE=
• The HTTP and HTTPS port numbers.
Do not use the same values that you used for the HTTP and HTTPS ports when setting up the PeopleSoft PureInternet Architecture.
HTTP_PORT=8000HTTPS_PORT=4430
• The domain type and install action values in the sample response file are mandatory.
Do not change these parameters.
# DES support only NEW_DOMAIN , so please do not change the below⇒ variable.DOMAIN_TYPE=NEW_DOMAIN
# DES support only CREATE_NEW_DOMAIN , so please do not change the below⇒ variable.INSTALL_ACTION=CREATE_NEW_DOMAIN
• The installation configuration
# Install type to specify whether the installation is a single server or⇒ multi server deployment,# possible valuses for INSTALL_TYPE are singleserver, multiserver,⇒ distributedmanagedserverINSTALL_TYPE=singleserver
• Singleserver (Single Server Domain) — This configuration is intended for single user or very small scale, non-production environments.
• Multiserver (Multi-Server Domain) — This configuration is intended for a production environment.
• Distributedmanagedserver (Distributed Managed Server) — This option is an extension of the Multi-Server Domain selection and installs the necessary files to boot a managed server.
This option requires a Multi Server installation to be performed to some other location, which will contain the configuration for this managed server.
• The PS_APP_HOME location.
Note that the DPK installation requires that the PS_APP_HOME location be different from the PS_HOME location; that is, a decoupled PS_APP_HOME.
# If your PeopleSoft Applications install is decoupled from PS_HOME then⇒

Chapter 22 Installing Web Application Deployment Tools
Copyright © 2018, Oracle and/or its affiliates. All Rights Reserved. 657
PS_APP_HOME will be the actual path to PS_APP_HOME, else it should be⇒ the path to PS_HOME.PS_APP_HOME=
• Information about your database.
# Please enter the CRM specific DB information
# possible values for DB_TYPE are MSSQL,ORACLE,DB2UDBDB_TYPE=MSSQLDB_SERVER_NAME=DB_PORT=1433DB_SERVER_INSTANCE=DB_USER=AdminDB_PASSWORD=
• DB_TYPE — The RDBMS type
• DB_SERVER_NAME — The name of the machine that is hosting the database
• DB_PORT — Consult with your database administrator for the correct port number.
• DB_SERVER_INSTANCE — the database name.
• DB_USER — The user name for the database.
• DB_PASSWORD — The password for the database user.
Task 22-1-2: Running the Web Application Deployment Tool Silent Mode Installation to Deploy DESTo install the Web Application Deployment tool in silent mode, use the response file that you modified for your configuration. Substitute the location where you saved the response file for <path_to_response_file> in the following procedures:1. Open PS_HOME\setup\PsMpWebAppDeployInstall\responsefile.txt for editing.
2. Modify the file for your environment, and then save the file.
• If your web server is on Oracle WebLogic:
Specify SERVER_TYPE=weblogic and the installation location for the Oracle WebLogic software, such as BEA_HOME=C:\\WLS1221.
• If your web server is on IBM WebSphere:
Specify SERVER_TYPE=websphere and the installation location for the IBM WebSphere software, such as WS_HOME=C:\\IBM\\WebSphere\\AppServer. In addition, add a comment character (#, pound or hash sign) in front of the line BEA_HOME=.
• Enter values for the remaining installation parameters.
3. In a command prompt, go to PS_HOME\setup\PsMpWebAppDeployInstall.
4. On Microsoft Windows, run the following command, using "\\" as a separator in the file path:
setup.bat -i silent -DRES_FILE_PATH=<path_to_response_file>
For example:
setup.bat -i silent -DRES_FILE_PATH=C:\\pt856\\setup\\PSMpWebAppDeploy⇒

Installing Web Application Deployment Tools Chapter 22
658 Copyright © 2018, Oracle and/or its affiliates. All Rights Reserved.
Install
5. On UNIX, run the following command, using "/" as a separator in the file path:
setup.sh -i silent -DRES_FILE_PATH=<path_to_response_file>
For example:
setup.sh -i silent -DRES_FILE_PATH=/home/pt856/setup/PsMpWebAppDeploy⇒Install
Task 22-2: Testing and Troubleshooting the Web Application Deployment
Check the log file for any problems encountered during installation. The log file is saved in the following location:<WebAppDeploy_DIR>/webserv/webappinstall<domain_name>.logThe WebAppDeploy_DIR is the directory where the web server domain for the Web Application Deployment was installed. The <domain_name> is the name you specified for the Web Application Deployment web server domain, such as PSWebApp.If you need to start or stop Oracle WebLogic or IBM WebSphere, use the commands given in the chapter on installing the PeopleSoft Pure Internet Architecture.See Testing the PeopleSoft Pure Internet Architecture Installation in the chapters on setting up the PeopleSoft Pure Internet Architecture.

Copyright © 2018, Oracle and/or its affiliates. All Rights Reserved. 659
Chapter 23
Setting Up a Unicode Database
This chapter discusses:
• Prerequisites
• Defining Conversion Pages for Unicode Conversion Services
• Fulfilling Connectivity Requirements
Prerequisites
PeopleSoft PeopleTools Unicode support for the z/OS operating system requires the following:
• DB2 for z/OS in New Function Mode
See My Oracle Support, Certifications, for supported versions.
• IBM z/OS
See My Oracle Support, Certifications, for supported versions.
• Search on My Oracle Support for a list of mandatory APARs and PTFs.
See "Important PTFs for PeopleSoft on DB2 for z/OS," My Oracle Support.
• Review the hardware and software requirements and recommendations for running Unicode on DB2 z/OS.
See My Oracle Support, Certifications
Task 23-1: Defining Conversion Pages for Unicode Conversion Services
The following conversion images must be defined to successfully operate a PeopleSoft Unicode database:
• CCSID 367 (7-bit ASCII) <-> ASCII & EBCDIC System CCSID(s)
• CCSID 1208 (UTF-8) <-> ASCII & EBCDIC System CCSID(s)
• CCSID 1200 (UTF-16) <-> ASCII & EBCDIC System CCSID(s)
• Client CCSID(s) <-> Unicode CCSIDs (367, 1208, 1200)
• CCSID 367 <-> CCSID 1047
• CCSID 1200 <-> CCSID 1047
• CCSID 1208 <-> CCSID 1047

Setting Up a Unicode Database Chapter 23
660 Copyright © 2018, Oracle and/or its affiliates. All Rights Reserved.
Task 23-2: Fulfilling Connectivity Requirements
Set DB2CodePage to 1208 for Unicode databases as follows:1. From a command prompt issue the db2set command:
c:\apps\DB\DB2ODBC8\bin db2set DB2CODEPAGE=1208
2. Issue the following command to verify that it has been set:
C:\Apps\DB\db2odbc8>db2set -all
Sample output:
[e] DB2PATH=C:\Apps\DB\db2odbc8[i] DB2INSTPROF=c:\Apps\DB\db2odbc8[i] DB2CODEPAGE=1208

Copyright © 2018, Oracle and/or its affiliates. All Rights Reserved. 661
Appendix A
Using the PeopleSoft Tablespace DDL Automation Assistance Tool
This appendix discusses:
• Understanding the PeopleSoft Tablespace DDL Automation Assistance Tool
• Understanding PSTAAT Workstation Requirements
• Understanding the PSTAAT Graphical User Interface
• Understanding the Various PSTAAT Input and Output Files
• Using PSTAAT to Create TBDDL and IXDDL
• Using PSTAAT to Customize DDL
• Using PSTAAT to Reassign Temporary Tables to Additional Tablespaces
• Using PSTAAT to Isolate Other Tables to Individual Tablespaces
• Using PSTAAT to Convert EBCDIC DDL to Unicode DDL
• Using PSTAAT to Install PeopleSoft Databases
Understanding the PeopleSoft Tablespace DDL Automation Assistance Tool
The PeopleSoft Tablespace DDL Automation Assistance tool (PSTAAT) is a DDL script parsing utility intended to assist you in customizing your PeopleSoft PeopleTools and Application DDL. The utility provides greater flexibility in allowing you to override the supported PeopleSoft PeopleTools DDL parameters for DB2 for z/OS so that they more closely fit your shop standards, and to better optimize the mapping of tables among tablespaces and databases.
Note. The use of PSTAAT to customize the installation DDL is optional. You may elect not to use PSTAAT and complete the installation of your database as documented in the chapter, "Creating a Database." The next several sections describe the basic functions of this utility. Be sure to review the final section, Using PSTAAT to Install PeopleSoft Databases, before attempting to use PSTAAT for the first time.
PSTAAT serves the following functions:
• Generates the TBDDL and IXDDL scripts for the traditional installation.
PSTAAT is capable of dynamically creating the default TBDDL and IXDDL scripts. Note that the TBDDL and IXDDL scripts created by PSTAAT will be identical to those found with your installation files. You are free to optimize either set of scripts with PSTAAT.
See "Creating a Database."
• Optimizes DDL for installation.

Using the PeopleSoft Tablespace DDL Automation Assistance Tool Appendix A
662 Copyright © 2018, Oracle and/or its affiliates. All Rights Reserved.
PSTAAT may be used to parse and rewrite the default XXDDL, TBDDL, and IXDDL scripts to more optimally distribute the PeopleSoft PeopleTools and Applications objects among additional tablespaces and databases. It provides basic override capability of certain tablespace DDL parameters, and allows you to control the number of tables created per tablespace, and the number of tablespaces created per database.
• PSTAAT can be used to isolate Application Engine temporary tables intended to be used with the %UpdateStats metaSQL function to individual tablespaces.
• Converts EBCDIC DDL data types to Unicode DDL data types.
PSTAAT may be used to "convert" EBCDIC DDL data types to those data types required to create a PeopleSoft Unicode database. Note that this is simply one step in a multi-step process when converting an EBCDIC PeopleSoft environment to Unicode. Complete instructions for converting an EBCDIC PeopleSoft environment to Unicode are beyond the scope of this manual. For more details, consult the white paper titled Converting a PeopleSoft Enterprise Database from EBCDIC to Unicode Encoding Scheme on DB2 for z/OS.
See Converting a PeopleSoft Enterprise Database from EBCDIC to Unicode Encoding Scheme on DB2 for z/OS, My Oracle Support, (search for the article title).
Understanding PSTAAT Workstation Requirements
PSTAAT is a C++ Microsoft Windows application. It automatically invokes both Data Mover and Application Designer in command line mode depending on the particular functionality that is being used.
• PSTAAT must run from a PeopleSoft PeopleTools install workstation, or traditional Microsoft Windows-based development client. For more details regarding the requirements of such a workstation, consult the Certifications information on My Oracle Support.
• Both Data Mover and Application Designer require DB2 Connect, and thus it must also be installed on the client workstation from which you intend to run PSTAAT. See "Installing and Configuring DB2 Connect" for more details regarding the installation and configuration of DB2 Connect.
• The PeopleSoft PeopleTools Installer will place the PSTAAT executable file in the PS_HOME\bin\client\winx86 directory of the PeopleSoft PeopleTools install workstation, file server, or Microsoft Windows-based two-tier development client.
Understanding the PSTAAT Graphical User Interface
This section describes the tabs found on the PSTAAT graphical user interface (GUI) and the input expected for each text box.

Appendix A Using the PeopleSoft Tablespace DDL Automation Assistance Tool
Copyright © 2018, Oracle and/or its affiliates. All Rights Reserved. 663
Generate DDL tab:
Database Setup page: Generate DDL tab (1 of 2)

Using the PeopleSoft Tablespace DDL Automation Assistance Tool Appendix A
664 Copyright © 2018, Oracle and/or its affiliates. All Rights Reserved.
Database Setup page: Generate DDL tab (2 of 2)
Table and Temp Table radiobuttons
Enable the Temp Table radio button to generate a DDL script for the creation of Application Engine temporary tables and indexes. Enable the Table radio button to generate a DDL script for the creation of all other table and index types.
(1) PeopleSoft Database Name
This is the logical database name of the PeopleSoft database to be created. It must match the alias cataloged in DB2 Connect as shown in the Configuration Assistant (see figure below).
Configuration Assistant page

Appendix A Using the PeopleSoft Tablespace DDL Automation Assistance Tool
Copyright © 2018, Oracle and/or its affiliates. All Rights Reserved. 665
(2) Unicode? Indicates whether PSTAAT should create DDL with EBCDIC or Unicode data types.
(3) Database Input File Name of the database input file located in PS_HOME\data.
(4) Output Directory for Generated DDL Scripts
Specify a folder on the workstation where PSTAAT will store the generated DDL scripts.
Note. The path must already exist—PSTAAT will not create it for you.
(5) Tablespace Storage Group
Storage group to be used for tablespace data sets
(6) Index Storage Group Storage group to be used for Index data sets.
(7) Database Object Owner The name of the table owner ID as previously determined from the "Preparing for Installation" chapter. This value qualifies all tables as belonging to the logical PeopleSoft database. This value will be stored in the Creator field of SYSIBM.SYSTABLES.
(8) Output Table DDL File Name of the output file that contains DDL to create all tables. (TBDDL.SQL)
(9) Output Index DDL File Name of the output file that contains DDL to create all indexes. (IXDDL.SQL)
(10) Application Designer Project Name
Name of PeopleSoft PeopleTools project that contains the temporary table record definitions. This is only used when creating temporary table DDL.
See Using PSTAAT To Reassign Temporary Tables To Additional Tablespaces.
(11) Application Designer Output Log File
Application Designer log file. This is only used when creating Application Engine temporary table DDL.
See Using PSTAAT To Reassign Temporary Tables To Additional Tablespaces.
(12) User ID The userid specified must either be a valid mainframe ID such as the database Access ID, or a PeopleSoft user ID depending on which of the Table/Temp Table radio buttons has been enabled.
Recall from the section titled Understanding PSTAAT Workstation Requirements, that PSTAAT invokes Data Mover and Application Designer, which in turn make connections to the DB2 z/OS database server through DB2 Connect.
When creating the TBDDL.SQL and IXDDL.SQL, the Table radio button must be enabled. PSTAAT will invoke Data Mover in bootstrap mode to extract the default table and index DDL, thus this ID must be a valid mainframe ID such as the Access ID because it will be validated by your security software package (RACF, Top Secret, and so on).
When creating temporary table DDL with the Generate DDL tab, the Temp Table radio button must be enabled. In this case, PSTAAT will invoke Application Designer through a command line, thus the ID passed will be validated by PeopleSoft security. This id must be a valid PeopleSoft user id such as VP1 or PS.
(13) Password This is the password that matches the ID supplied for input parameter 12 (above).
General Parameters Tab:

Using the PeopleSoft Tablespace DDL Automation Assistance Tool Appendix A
666 Copyright © 2018, Oracle and/or its affiliates. All Rights Reserved.
PSTAAT is a text parsing and DDL generation utility. It requires input files such as the default TBDDL.SQL and IXDDL.SQL scripts to operate. PSTAAT parses the text of the original files to create new versions of each script using the input supplied for the parameters below to override default values.
Database Setup page: General Parameters tab (1 of 3)

Appendix A Using the PeopleSoft Tablespace DDL Automation Assistance Tool
Copyright © 2018, Oracle and/or its affiliates. All Rights Reserved. 667
Database Setup page: General Parameters tab (2 of 3)
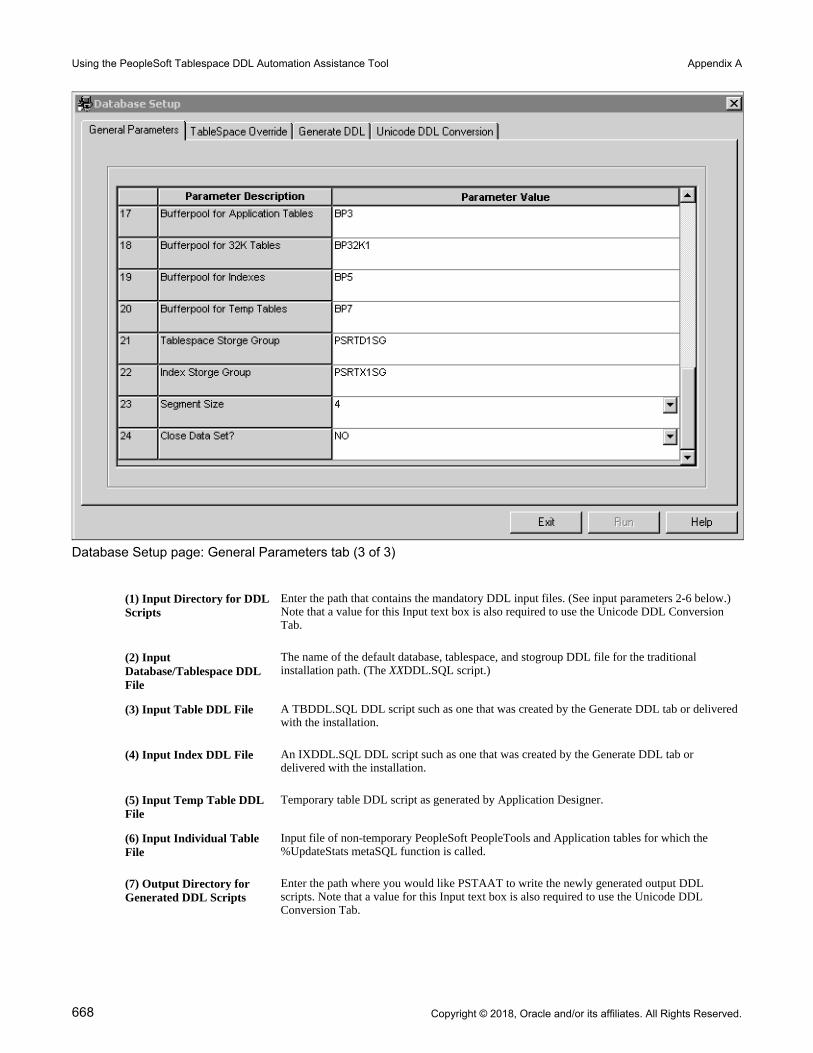
Using the PeopleSoft Tablespace DDL Automation Assistance Tool Appendix A
668 Copyright © 2018, Oracle and/or its affiliates. All Rights Reserved.
Database Setup page: General Parameters tab (3 of 3)
(1) Input Directory for DDL Scripts
Enter the path that contains the mandatory DDL input files. (See input parameters 2-6 below.) Note that a value for this Input text box is also required to use the Unicode DDL Conversion Tab.
(2) Input Database/Tablespace DDL File
The name of the default database, tablespace, and stogroup DDL file for the traditional installation path. (The XXDDL.SQL script.)
(3) Input Table DDL File A TBDDL.SQL DDL script such as one that was created by the Generate DDL tab or deliveredwith the installation.
(4) Input Index DDL File An IXDDL.SQL DDL script such as one that was created by the Generate DDL tab or delivered with the installation.
(5) Input Temp Table DDL File
Temporary table DDL script as generated by Application Designer.
(6) Input Individual Table File
Input file of non-temporary PeopleSoft PeopleTools and Application tables for which the %UpdateStats metaSQL function is called.
(7) Output Directory for Generated DDL Scripts
Enter the path where you would like PSTAAT to write the newly generated output DDL scripts. Note that a value for this Input text box is also required to use the Unicode DDL Conversion Tab.

Appendix A Using the PeopleSoft Tablespace DDL Automation Assistance Tool
Copyright © 2018, Oracle and/or its affiliates. All Rights Reserved. 669
(8) Primary Database Prefix Prefix to be used as the constant portion of the naming convention for the individual databases (DBDs) that comprise the "logical" PeopleSoft database. PSTAAT will use the prefix entered here as the first part of the database naming convention. It will generate an ascending sequence for the remainder of the eight characters to be used for the DB2 z/OS database name. We recommend a primary database prefix of five characters or less.
(9) Database Object Owner Enter the 'owner' id that will qualify each of the objects in the logical PeopleSoft database. Thisis the name previously determined from the "Preparing for Installation" chapter. It will be the value stored in the Creator field of SYSIBM.SYSTABLES.
(10) Maximum Number of Tablespaces per Database
Enter the maximum number of tablespaces that you want PSTAAT to allocate per database.
(11) Maximum Number of Tables per Tablespace (Regular)
Enter the maximum number of tables that you want PSTAAT to allocate per tablespace.
(12) Maximum Number of Tables per Tablespace (Large)
Enter the desired maximum number of tables per tablespace for those tables assigned to the XXLARGE tablespaces by default. These have been identified as high growth tables. An input value of one (1) would segregate each of the tables delivered in these tablespaces to its own tablespace.
(13) Commit Frequency An explicit commit is issued after each table and index is created in the default DDL scripts. It is possible to vary the commit frequency between tables and indexes with this input parameter. A commit frequency of 10, for example, will indicate that PSTAAT should force an explicit commit after approximately every ten DDL statements.
(14) Recalculate Tablespace Allocation
Indicates whether you want PSTAAT to recalculate the Primary and Secondary space allocations for tablespaces, or use the defaults as indicated in the XXDDL script. For more details regarding the algorithm used to recalculate PRI and SEC space allocation, see the section titled Using PSTAAT to Customize DDL; Recalculating Primary and Secondary Space Allocations and Setting a Minimum Secondary Space Allocation.
(15) Minimum PRIQTY/SECQTY Allocation
Allows you to specify a minimum Primary and Secondary space allocation for tablespaces when allowing PSTAAT to recalculate the Primary and Secondary allocations. See the section titled Recalculating Primary and Secondary Space Allocations and Setting a Minimum Secondary Space Allocation for more details regarding the manner in which PSTAAT uses thisinput parameter.
(16) Bufferpool for PeopleTools Tables
PSTAAT will allocate PeopleSoft PeopleTools tables to this bufferpool.
(17) Bufferpool for Application Tables
PSTAAT will allocate Application tables to this bufferpool.
(18) Bufferpool for 32K Tables
Indicate the particular 32K bufferpool to be used for tables automatically allocated to 32K bufferpools.
(19) Bufferpool for Indexes PSTAAT will allocate index data sets to this bufferpool.
(20) Bufferpool for Temp Tables
PSTAAT will allocate Temporary Tables to this bufferpool.
(21) Tablespace Storage Group
Stogroup to be used for tablespaces.
Note. All tablespaces will be created using this stogroup. PSTAAT is not capable of assigning multiple tablespace stogroups.

Using the PeopleSoft Tablespace DDL Automation Assistance Tool Appendix A
670 Copyright © 2018, Oracle and/or its affiliates. All Rights Reserved.
(22) Index Storage Group Stogroup to be used for indexes.
Note. All indexes will be created using this stogroup. PSTAAT is not capable of assigning multiple index stogroups.
(23) Segment Size Select a default segment size to be used for all tablespaces.
(24) Close Data Set? Default close rule for VSAM data sets.
Note. All tablespaces will use this close rule.
Note. LOCKSIZE does not appear as an override parameter on the GUI. LOCKSIZE is controlled automatically by PSTAAT. Those tables originally delivered in tablespaces set to a LOCKSIZE of ROW will be remapped to tablespaces also set to a LOCKSIZE of ROW automatically. All other tablespace DDL will be generated with a LOCKSIZE of ANY.
TableSpace Override Tab:The Tablespace Override tab works in conjunction with the General Parameters tab. After completing the GeneralParameters tab, click the TableSpace Override tab to determine the exact object mapping as delivered by the default (traditional) installation.PSTAAT determines the values in the TableSpace Override grid by parsing the following input from the General Parameters tab:
• Input Database/Tablespace DDL File, also known as the XXDDL script (General Parameters tab, parameter 2).
• Input Table DDL File, or TBDDL.SQL script (General Parameters tab, parameter 3).

Appendix A Using the PeopleSoft Tablespace DDL Automation Assistance Tool
Copyright © 2018, Oracle and/or its affiliates. All Rights Reserved. 671
Database Setup page: TableSpace Override tab
Tablespace There is one row in the grid for each tablespace found in the XXDDL script. The name of each tablespace is listed in this column.
Table Count This is the number of tables that will be assigned to the tablespace by the default installation.
PRIQTY Default Primary space allocation for the tablespace.
SECQTY Default Secondary space allocation for the tablespace.
New Name Allows you to override the default tablespace name with a custom tablespace name. Although it is possible to completely override the name of any tablespace, for documentation purposes, we recommend that you use the default PSTAAT behavior of using part of the default tablespace name as a prefix in generating new tablespace names for you. Use of the New Nameinput parameter is required in a specific circumstance that is documented later in this appendix.See Understanding How PSTAAT Assigns An Object Naming Convention later in this appendix for a more detailed explanation of how PSTAAT determines the tablespace naming convention.
Run Button Click the Run button to optimize the DDL. PSTAAT will recreate the table-tablespace-database mapping based on the input parameters supplied in the General Parameters tab.
Unicode DDL Conversion tab:

Using the PeopleSoft Tablespace DDL Automation Assistance Tool Appendix A
672 Copyright © 2018, Oracle and/or its affiliates. All Rights Reserved.
The Unicode DDL Conversion Tab is used to 'convert' EBCDIC DDL data types to those data types required to create a PeopleSoft Unicode database. Note that this is simply one step in a multi-step process when converting anEBCDIC PeopleSoft environment to Unicode. Complete instructions for converting an EBCDIC PeopleSoft environment to Unicode are beyond the scope of this guide.See Converting a PeopleSoft Enterprise Database from EBCDIC to Unicode Encoding Scheme on DB2 for z/OS, My Oracle Support (search for the article title).
Database Setup page: Unicode DDL Conversion tab

Appendix A Using the PeopleSoft Tablespace DDL Automation Assistance Tool
Copyright © 2018, Oracle and/or its affiliates. All Rights Reserved. 673
(1) Input EBCDIC/Tablespace DDL File
Enter the name of the EBCDIC Database/Tablespace DDL script (that is, XXDDL.SQL) for conversion. Note that the path where this file is located must be entered in input box 1 (Input Directory for DDL scripts) of the General Parameters tab.
(2) Input EBCDIC Table DDL File
Enter the name of the EBCDIC table DDL script to be converted to Unicode data types. This can be a DDL script created from an Application Designer project that contains PeopleSoft PeopleTools record definitions; or, a default TBDDL.SQL script. Note that this file must also be located in the folder specified by input parameter 1 (Input Directory for DDL scripts) on the General Parameters tab.
See Converting a PeopleSoft Enterprise Database from EBCDIC to Unicode Encoding Scheme on DB2 for z/OS, My Oracle Support, (search for the article title).
(3) Output Unicode Database/Tablespace DDL File
Enter the name of the newly generated DDL script for creating databases, tablespaces, and stogroups using the Unicode encoding scheme. This output file will be written to the folder identified by input parameter 7, Output Directory for Generated DDL scripts on the General Parameters tab.
(4) Output Unicode Table DDL File
Enter the name of the newly created DDL script to create tables for storing data using the Unicode encoding scheme. This output file will also be written to the folder specified by input parameter 7, Output Directory for Generated DDL scripts on the General Parameters tab.
(5) Remove 'Drop Table' DDL
DDL created by Application Designer (when building a PeopleSoft PeopleTools project) may contain Drop Table statements for tables that Application Designer has determined already exist. When YES is selected from the drop down, PSTAAT will comment the Drop Table statements in the newly generated DDL. When NO is selected, the Drop Table statements are left uncommented in the new DDL script.
Understanding the Various PSTAAT Input and Output Files
PSTAAT is completely file driven. Although PSTAAT invokes Data Mover and Application Designer, each of which require a connection to the database server, PSTAAT itself does not communicate directly with DB2 z/OS and thus it is not capable of querying DB2. PSTAAT operates entirely by parsing various types of files (primarily DDL scripts), and then rewriting those files based on the input parameters specified in the General Parameters tab.The following table describes the various input files, organized by location:
GUI Tab File Description
Generate DDL Tab Database Input File Located in PS_HOME\data.
This is the same file used by Data Mover to populate the PeopleSoft database.
General Parameters Tab Input Database/Tablespace DDL File The name of the default database, tablespace, and stogroup DDL script (i.e. XXDDL.SQL)
General Parameters Tab Input Table DDL File The TBDDL.SQL DDL script that was generated from the Generate DDL tab or delivered with the installation files.

Using the PeopleSoft Tablespace DDL Automation Assistance Tool Appendix A
674 Copyright © 2018, Oracle and/or its affiliates. All Rights Reserved.
GUI Tab File Description
General Parameters Tab Input Index DDL File The IXDDL.SQL DDL script that was generated from the Generate DDL tab or delivered with the installation files.
General Parameters Tab Input Temp Table DDL File A temporary table DDL script as generated by Application Designer.
General Parameters Tab Input Individual Table File Input file of non-temporary PeopleSoft PeopleTools and Application tables for which the %UpdateStats metaSQL function is called. This file is delivered with the installation files.
Unicode Conversion Tab EBCDIC/Tablespace DDL File An EBCDIC default database, tablespace, and stogroup DDL script (i.e. XXDDL.SQL).
Unicode Conversion Tab Input EBCDIC Table DDL File An EBCDIC table DDL script to be converted to Unicode data types. This can be a DDL script created from an Application Designer project that contains PeopleSoft PeopleTools recorddefinitions; or, a default TBDDL.SQL script.
See Converting a PeopleSoft EnterpriseDatabase from EBCDIC to Unicode Encoding Scheme on DB2 for z/OS, My Oracle Support, (search for the article title).
The following table describes the various output (new) files:
GUI Tab File Description
Generate DDL Tab
PSTAAT will write five files to the folder specified in 'Output Directory forGenerated DDL Scripts', input parameter four (4), of the Generate DDL tab.
Output Table DDL File
Log File
Default table DDL script (i.e. TBDDL.SQL).
The actual script name will depend on the value entered in Output Table DDL File, parameter eight (8), of the Generate DDL tab. To maintain consistency with previous releases of PeopleSoft PeopleTools, we recommend that you name the Table DDL script 'TBDDL.SQL' as shown in the examples in these instructions.
A file with extension ".log" is also created with a name similar to the table DDL script (.i.e. TBDDL.log). Each table name is written to this output log as Data Mover 'extracts' the table DDL from the database input file.

Appendix A Using the PeopleSoft Tablespace DDL Automation Assistance Tool
Copyright © 2018, Oracle and/or its affiliates. All Rights Reserved. 675
GUI Tab File Description
Generate DDL Tab Output Index DDL File
Log File
Default index DDL script (i.e. IXDDL.SQL).
The actual script name will depend on the value entered in Output Index DDL File, parameter nine (9), of the Generate DDL tab. To maintain consistency with previous releases of PeopleSoft PeopleTools, we recommend that you name the Index DDL script 'IXDDL.SQL' as shown in the examples in these instructions.
A file with extension ".log" is also created with a name similar to the indexDDL script (.i.e. IXDDL.log). Each index name is written to this output log as Data Mover 'extracts' the index DDLfrom the database input file.
Generate DDL Tab pstaatExtractDDL.DMS Data Mover extract script generated by PSTAAT. This is the actual script passed to Data Mover for the extractionof the default table and index DDL (TBDDL.SQL and IXDDL.SQL).
General Parameters and Tablespace Override Tabs
PSTAAT will write several new DDL scripts to the folder specified in 'Output Directory for Generated DDL Scripts', parameter seven (7), of the General Parameters tab. Each will be prefaced with a lower case 'n'. In addition to the DDL scripts, PSTAAT also produces a log file.
nXXDDL.SQL This is the new tablespace and database(DBD) DDL script. Non-temporary tables will be re-mapped among these tablespaces and databases based on the input parameters supplied to the General Parameters tab (that is, parameters 10-12; Maximum Number of Tables per Tablespace; Maximum Number of Tablespaces per Database, Bufferpool allocations, and so on).
General Parameters and Tablespace Override Tabs
nTBDDL.SQL This is the new table DDL script. Non-temporary tables will be re-mapped among the tablespaces and databases found in the new nXXDDL.SQL script. The object mapping is based on the input parameters supplied to the General Parameters tab.
General Parameters and Tablespace Override Tabs
nIXDDL.SQL This is the new index DDL script for alltables except temporary tables.

Using the PeopleSoft Tablespace DDL Automation Assistance Tool Appendix A
676 Copyright © 2018, Oracle and/or its affiliates. All Rights Reserved.
GUI Tab File Description
General Parameters and Tablespace Override Tabs
nTEMP.SQL This is the new temporary table DDL script. It contains DDL to create temporary tables and indexes. Tables will be re-mapped among the tablespaces and databases generated in the tXXDDL.SQL script (see below) The DBD mapping is based on the input parameters supplied to the General Parameters tab. Tablespace names for temporary tables only, are hard-coded with the following naming convention: TMPnnnn, where nnnn is an ascending sequence number.
Note. This file is produced only when the Input Temp Table DDL File parameter has been entered. See the task Using PSTAAT To Reassign Temporary Tables To Additional Tablespaces elsewhere in this appendix for further details.
General Parameters and Tablespace Override Tabs
tXXDDL.SQL This script contains database and tablespace DDL for temporary tables
General Parameters and Tablespace Override Tabs
PTlog.txt This log file summarizes the re-mappedobject counts by tablespace and database in the new nXXDL.SQL and nTBDDL.SQL scripts. See the sample PTlog.txt output following this table.
Note. The PTlog.txt log file contains non-temporary tables only.
Unicode Conversion Tab Output Unicode Database/Tablespace DDL File
This is the new Database/Tablespace DDL script for creating databases and tablespaces. All 'Create Database' DDL statements are appended to include 'CCSID Unicode'.
Unicode Conversion Tab Output Unicode Table DDL File This is the new table DDL script with the converted Unicode data types. Note that all character and long character fields are converted to vargraphic and long vargraphic respectively; while date, integer, small integer, decimal, timestamp, and long varchar for bit datatypes remain unchanged.
Sample PTlog.txt output:Database Summary: PeopleSoft Primary Database: PSDB

Appendix A Using the PeopleSoft Tablespace DDL Automation Assistance Tool
Copyright © 2018, Oracle and/or its affiliates. All Rights Reserved. 677
Name TableSpace Count PSDB0000 20 PSDB0001 20 PSDB0002 20 PSDB0003 20 PSDB0004 20 PSDB0005 20 PSDB0006 20 PSDB0007 20 PSDB0008 20 PSDB0009 20 PSDB000A 20 PSDB000B 20 Etc..
Tools TableSpace Summary: Name Database Table Count
PTTBL PTTBL01 PSDB0000 30 PTTBL02 PSDB0000 30 Etc..
Application TableSpace Summary: Name Database Table Count OMAPP OMAPP01 PSDB000H 30 OMAPP02 PSDB000H 30 Etc.
EXLARGE EXLARG01 PSDB002O 1 Etc.
Task A-1: Using PSTAAT to Create TBDDL and IXDDL
The Generate DDL tab of the PSTAAT interface is capable of extracting TBDDL.SQL and IXDDL.SQL scripts from the database import file located in PS_HOME\data. Note that the TBDDL and IXDDL scripts extracted fromPSTAAT will be identical to those delivered with the installation files. You are free to use either set of scriptsPerform this task on a workstation with the ability to connect to the DB2 z/OS database server. PSTAAT will invoke Data Mover to extract the default table and index DDL from the database file. Data Mover requires DB2 Connect. Recall that the User ID and Password input parameters require a valid mainframe ID (such as the database Access ID) and password because Data Mover will be invoked in bootstrap mode. Your mainframe security package (such as RACF or Top Secret) must be able to authenticate this ID.

Using the PeopleSoft Tablespace DDL Automation Assistance Tool Appendix A
678 Copyright © 2018, Oracle and/or its affiliates. All Rights Reserved.
To create the TBDDL.SQL and IXDDL.SQL scripts: 1. Start PSTAAT by double-clicking the PSTAAT executable file found in PS_HOME\bin\client\winx86.
2. Enter input values for parameters 1-9; and 12-13 of the Generate DDL tab.
Refer to Generate DDL tab Input Parameters under the section titled Understanding the PSTAAT Graphical User Interface for a detailed explanation of each input parameter. To maintain consistency with previous releases of PeopleSoft PeopleTools, we recommend that you use TBDDL and IXDDL as the DDL script file names for input parameters eight (8) and nine (9).
3. Select the Table radio button.

Appendix A Using the PeopleSoft Tablespace DDL Automation Assistance Tool
Copyright © 2018, Oracle and/or its affiliates. All Rights Reserved. 679
4. Click the Run button.
Generate DDL page (1 of 2)
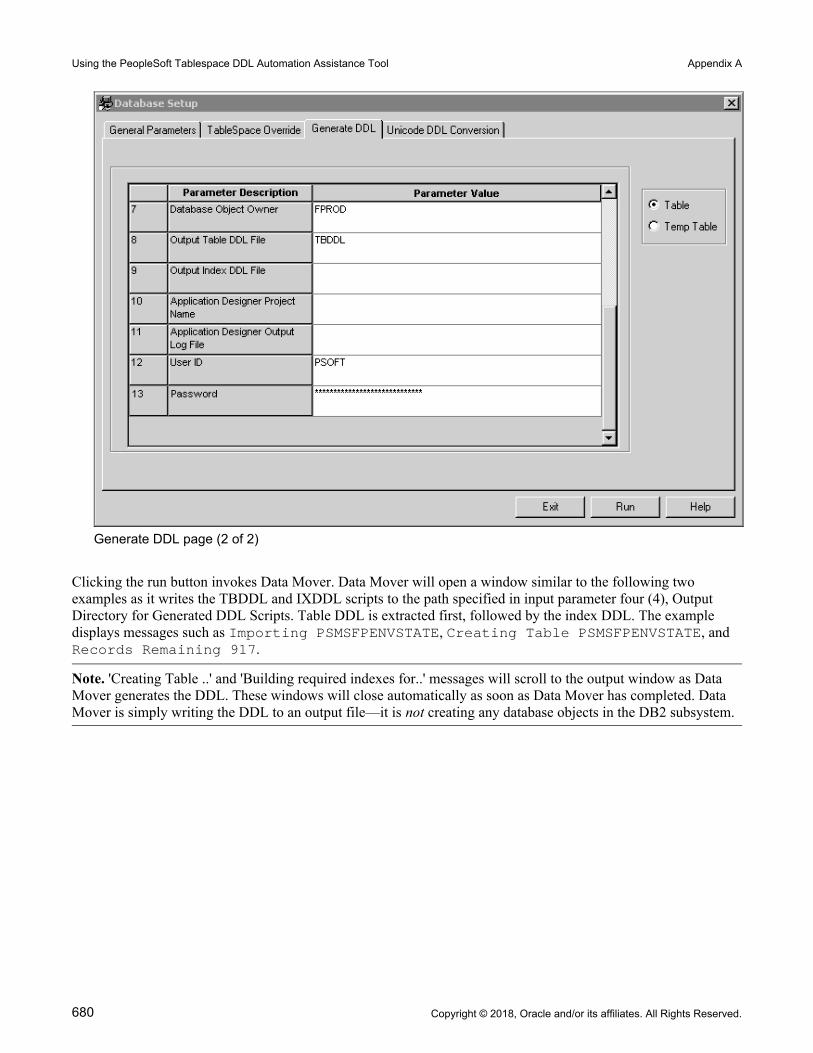
Using the PeopleSoft Tablespace DDL Automation Assistance Tool Appendix A
680 Copyright © 2018, Oracle and/or its affiliates. All Rights Reserved.
Generate DDL page (2 of 2)
Clicking the run button invokes Data Mover. Data Mover will open a window similar to the following two examples as it writes the TBDDL and IXDDL scripts to the path specified in input parameter four (4), Output Directory for Generated DDL Scripts. Table DDL is extracted first, followed by the index DDL. The example displays messages such as Importing PSMSFPENVSTATE, Creating Table PSMSFPENVSTATE, and Records Remaining 917.
Note. 'Creating Table ..' and 'Building required indexes for..' messages will scroll to the output window as Data Mover generates the DDL. These windows will close automatically as soon as Data Mover has completed. Data Mover is simply writing the DDL to an output file—it is not creating any database objects in the DB2 subsystem.

Appendix A Using the PeopleSoft Tablespace DDL Automation Assistance Tool
Copyright © 2018, Oracle and/or its affiliates. All Rights Reserved. 681
Data Mover extracting Table DDL
Data Mover extracting Index DDL
Note. At this point, you have the option of executing the default TBDDL.SQL and IXDDL.SQL scripts as directed by the "Creating a Database" chapter; or you may continue to use PSTAAT to optimize them as described in the subsequent sections of this appendix.

Using the PeopleSoft Tablespace DDL Automation Assistance Tool Appendix A
682 Copyright © 2018, Oracle and/or its affiliates. All Rights Reserved.
Task A-2: Using PSTAAT to Customize DDL
This section discusses:
• Understanding How PSTAAT Assigns an Object Naming Convention
• Choosing a Primary Database Prefix and Maximum Number of Tables per Tablespace and Tablespaces per Database
• Using the New Name Parameter to Override Tablespace Name
• Customizing DDL Scripts
• Recalculating Primary and Secondary Space Allocations and Setting a Minimum Secondary Space Allocation With PSTAAT
• Using PSTAAT to Override the Default Bufferpool Assignment
• Using PSTAAT to Override the Default Segment Size
• Validating Input
Understanding How PSTAAT Assigns an Object Naming ConventionFor databases, PSTAAT uses the Primary Database Prefix of the General Parameters tab as a constant when deriving the naming convention to be used for the individual physical databases that will comprise the logical PeopleSoft database. PSTAAT will use the prefix entered here as the first part of the database naming convention,and generate an ascending sequence for the remainder of the eight character DB2 z/OS database name.For example, entering HCMPD as the Primary Database Prefix on the General Parameters tab allows PSTAAT to use the remaining three "free" characters to generate database names with the following ascending naming convention: HCMPD000, HCMPD001, HCMPD002, HCMPD003,...HCMPD009, HCMPD00A, HCMPD00B…etc.
Choosing a Primary Database Prefix and Maximum Number of Tables per Tablespace and Tablespaces per DatabaseDatabases:
Note. Depending on the desired number of tables to be assigned per tablespace, desired number of tablespaces to be assigned per database, and the total number of tables to be created, entering a Primary Database Prefix value greater than five characters may cause PSTAAT to exhaust the possible unique values to use in generating the ascending sequence. This can result in duplicate database names, causing the DDL to fail when it is ultimately executed on the DB2 z/OS database server.
A primary database prefix of three characters, or five characters at the most, is highly recommended to prevent duplicate database names in the generated DDL script.

Appendix A Using the PeopleSoft Tablespace DDL Automation Assistance Tool
Copyright © 2018, Oracle and/or its affiliates. All Rights Reserved. 683
Note. The maximum number of databases that can be created in a DB2 subsystem is approximately 65,271 (see Appendix A of the DB2 for z/OS SQL Reference for details). Be aware that it is possible to reach this limit when using PSTAAT to install large PeopleSoft applications and in doing so, allocating very few tables per tablespace and grouping very few tablespaces per database. Hence, a complete one table per tablespace, one tablespace per database configuration may not be possible depending on the number of tables contained in the application. It is also possible to reach the internal DB2 database limit in situations where PeopleSoft applications share the subsystem with other applications.
IBM has suggested the following very general guidelines with respect to "object mapping" for DB2 z/OS:
• If possible, create no more than 50 tables per individual physical database.
• Try to limit the total number of objects created per database descriptor (DBD) to no more than 1000. Objects that constitute the DBD include, but are not limited to, all tablespaces, tables, indexes, index spaces, relationships, and so on, that reside in a single physical DB2 database.
Note that these are only general guidelines and may not be adequate for every installation.Tablespaces:The tablespace naming convention is controlled internally by PSTAAT. PSTAAT derives an ascending sequence for tablespace names similarly to the manner in which it does so for database names. Depending on the length of the default tablespace name and the number of tables to be assigned per tablespace, PSTAAT will use up to five or six characters of the default tablespace name, and then append an ascending sequence for the remainder of the eight character DB2 z/OS tablespace name. For example, the TableSpace Override tab (in the following example) indicates that there are 1,211 tables by default in tablespace PTTBL. Requesting a one table per tablespace configuration by entering one (1) in the Maximum Number of Tables per Tablespace text box of the General Parameters tab causes PSTAAT to create 1,211 tablespaces—one for each table delivered in tablespace PTTBL. The 1,211 tablespaces will be named as follows:
PTTBL01, PTTBL02, PTTBL03, PTTBL04...PTTBL0A, PTTBL0B...etc., through⇒ PTTBLXN
Reviewing Table Count on the TableSpace Override tab
Using the New Name Parameter to Override Tablespace NameAs indicated previously, the New Name input parameter, found on the TableSpace Override tab, allows you to override the default tablespace name with a custom tablespace name. Although it is possible to completely override the name of any tablespace, we do recommend that you allow PSTAAT to determine new tablespace names for you except for the circumstance described in this section.Use this information to prevent duplicate Tablespace names when the default XXDDL script contains similarly named Tablespaces.

Using the PeopleSoft Tablespace DDL Automation Assistance Tool Appendix A
684 Copyright © 2018, Oracle and/or its affiliates. All Rights Reserved.
Some of the delivered XXDDL.SQL scripts contain default tablespace names that are similar to the naming convention used by PSTAAT. The following example is from the EPDDL.SQL script:
Using the New Name parameter on the TableSpace Override tab
Because PSTAAT may use up to five or six of the original characters when determining the new tablespace name,it is possible that PSTAAT will create duplicate tablespace names when it encounters multiple tablespaces in the default XXDDL.SQL script named with as many identical, consecutive characters. For example:CULARGE, CULARG1, CULARG2, CULARG3
To prevent duplicate tablespace names in this circumstance, review the list of default tablespace names in the TableSpace Override grid before clicking the Run button in the procedure below, Customizing DDL Scripts, to generate optimized DDL. Add an override value to the New Name text box next to any series of tablespaces for which the default naming convention includes 5 or more identical consecutive characters. PSTAAT will substitutethe specified override value when it is generating tablespace names for optimized DDL.
Task A-2-1: Customizing DDL ScriptsPSTAAT can assist you in the following:
• Customizing the DDL by allowing you to override the supported PeopleSoft PeopleTools DDL parameters forDB2 z/OS so they more closely fit standards at your site.
• Creating a more optimal mapping of non-temporary tables among tablespaces and databases.
• Isolating temporary tables and certain PeopleSoft application and PeopleSoft PeopleTools tables to individual tablespaces for use with the %UpdateStats metaSQL function and to enhance concurrency.
To optimize the default XXDDL.SQL, TBDDL.SQL, and IXDDL.SQL scripts:1. If it is not already running, start PSTAAT by double-clicking on the executable file found in PS_HOME\
bin\client\winx86.
2. Select the General Parameters tab.
3. Enter the desired General Parameters input values.
For a detailed explanation of each of these input parameters, refer to the previous section titled General Parameters Tab Input under the section called Understanding the PSTAAT Graphical User Interface.
4. Select the TableSpace Override tab to view the table count per tablespace as defined by the default XXDDL.SQL and TBDDL.SQL scripts; and the default Primary and Secondary space allocations.
5. Click the Run button.
PSTAAT will parse the default XXDDL, TBDDL, IXDDL and Temp scripts, and the Individual table file tablescript (input parameters 2-6), and write the corresponding new DDL scripts.

Appendix A Using the PeopleSoft Tablespace DDL Automation Assistance Tool
Copyright © 2018, Oracle and/or its affiliates. All Rights Reserved. 685
6. View the PTlog.txt file to see the database and tablespace names generated by PSTAAT, and the new object count per tablespace and database.
If you are unsatisfied with the object mapping and want to regenerate the DDL, you may do so by repeating steps 2-6 above using new input parameters. Each of the output scripts (nTBDDL.SQL, nIXDDL.SQL, Temp, and nXXDDL.SQL and so on) will be rewritten.See the previous sections for important details to keep in mind when choosing the primary database prefix, table and tablespace counts per DBD, Bufferpool allocations, and the default Segsize.See Understanding How PSTAAT Assigns an Object Naming Convention.See Choosing a Primary Database Prefix and Maximum Number of Tables per Tablespace and Tablespaces per Database.See Using the New Name Parameter to Override Tablespace Name.
Task A-2-2: Recalculating Primary and Secondary Space Allocations and Setting a Minimum Secondary Space Allocation With PSTAATAs PSTAAT parses the Database and Tablespace DDL script (XXDDL.SQL) and writes new tablespace DDL based on the table count provided, it always applies the original primary and secondary space allocation to each new tablespace that is generated unless the Recalculate Tablespace Allocation text box (General Parameters) is setto YES. The original primary and secondary allocations as read from the XXDDL.SQL input file are always displayed in the TableSpace Override tab, as shown in this example:
Reviewing primary and secondary space allocations on the TableSpace Override tab
Once again using PTTBL as an example, and a hypothetical value of one (1) for input parameter ten (10) of the General Parameters tab, Maximum Number of Tables per Tablespace (Regular), PSTAAT will create all 1,211 individual tablespaces for each table originally assigned to PTTBL with the original Primary and Secondary spaceallocations of 100800 and 72000, respectively.
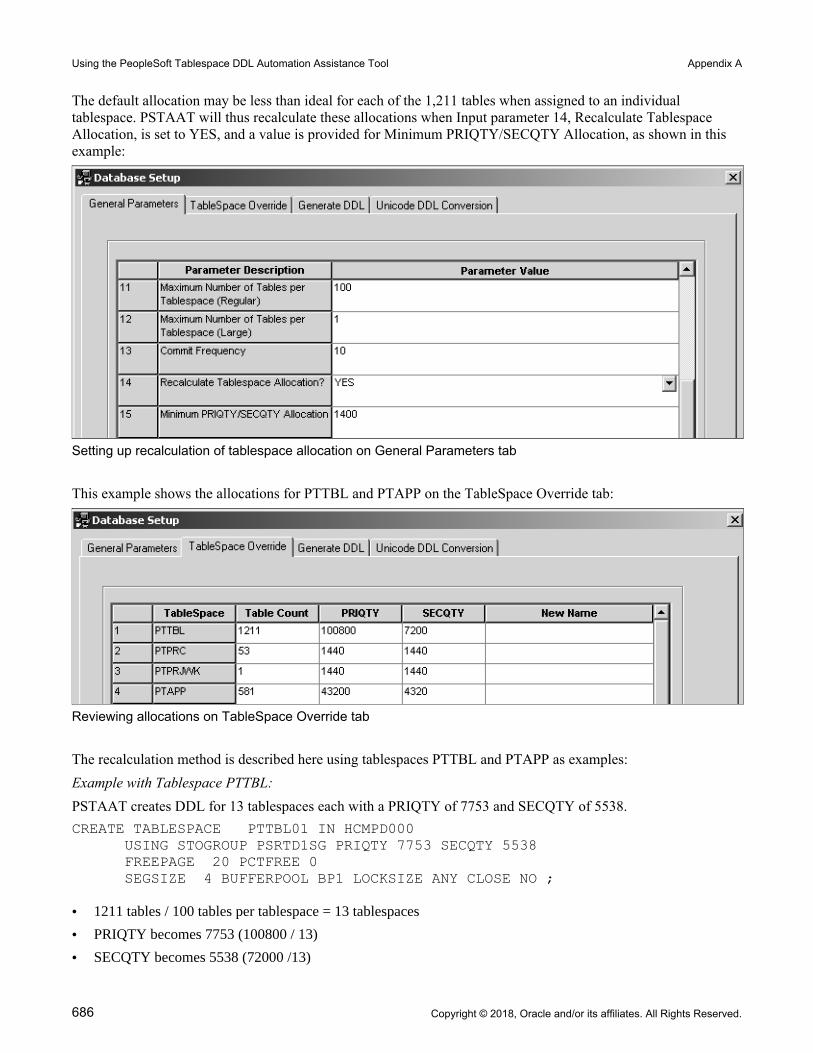
Using the PeopleSoft Tablespace DDL Automation Assistance Tool Appendix A
686 Copyright © 2018, Oracle and/or its affiliates. All Rights Reserved.
The default allocation may be less than ideal for each of the 1,211 tables when assigned to an individual tablespace. PSTAAT will thus recalculate these allocations when Input parameter 14, Recalculate Tablespace Allocation, is set to YES, and a value is provided for Minimum PRIQTY/SECQTY Allocation, as shown in this example:
Setting up recalculation of tablespace allocation on General Parameters tab
This example shows the allocations for PTTBL and PTAPP on the TableSpace Override tab:
Reviewing allocations on TableSpace Override tab
The recalculation method is described here using tablespaces PTTBL and PTAPP as examples:Example with Tablespace PTTBL:PSTAAT creates DDL for 13 tablespaces each with a PRIQTY of 7753 and SECQTY of 5538.CREATE TABLESPACE PTTBL01 IN HCMPD000 USING STOGROUP PSRTD1SG PRIQTY 7753 SECQTY 5538 FREEPAGE 20 PCTFREE 0 SEGSIZE 4 BUFFERPOOL BP1 LOCKSIZE ANY CLOSE NO ;
• 1211 tables / 100 tables per tablespace = 13 tablespaces
• PRIQTY becomes 7753 (100800 / 13)
• SECQTY becomes 5538 (72000 /13)

Appendix A Using the PeopleSoft Tablespace DDL Automation Assistance Tool
Copyright © 2018, Oracle and/or its affiliates. All Rights Reserved. 687
• The value for Input Parameter 15, Minimum PRIQTY/SECQTY Allocation (1440) was not used because it is less than the SECQTY calculated by PSTAAT.
Example with Tablespace PTAPP:PSTAAT creates DDL for six tablespaces each with a PRIQTY of 7200 and SECQTY of 1440.CREATE TABLESPACE PTAPP01 IN HCMPD001 USING STOGROUP PSRTD1SG PRIQTY 7200 SECQTY 1440 FREEPAGE 20 PCTFREE 0 SEGSIZE 4 BUFFERPOOL BP1 LOCKSIZE ANY CLOSE NO ;
• 581 tables / 100 tables per tablespace = 6 tablespaces
• PRIQTY becomes 7200 (43200 / 6)
• The value for Input Parameter 15, Minimum PRIQTY/SECQTY Allocation, is substituted (1440) in this case because it is greater than the quantity calculated by PSTAAT: (4320 /6 = 720).
Note. PSTAAT will always choose the greater value between the value that it calculates and the value specified inthe Minimum PRIQTY/SECQTY Allocation text box.
Task A-2-3: Using PSTAAT to Override the Default Bufferpool AssignmentIt is possible to override the default bufferpool assignments found in the XXDDL.SQL script with PSTAAT as follows:
Reviewing bufferpool assignments on General Parameters tab
• PeopleSoft PeopleTools tables and PeopleSoft application tables will be assigned to two separate bufferpools. On the example shown here, note that all PeopleSoft PeopleTools tables will be assigned to the bufferpool specified for General Parameters tab, Input parameter 16; and all PeopleSoft applications tables will be assigned to the bufferpool specified for Input parameter 17.
• Determine the specific 32 KB bufferpool (such as BP32K, BP32K1, and BP32K2) that you want to use for those objects that require a 32 KB bufferpool and enter it into input parameter 18. Certain PeopleSoft PeopleTools and PeopleSoft applications tables are assigned to BP32K through the default XXDDL.SQL and TBDDL.SQL scripts because their row length requires the larger page size. PSTAAT will substitute the value of input parameter 18 for each table originally assigned to BP32K in the default script.

Using the PeopleSoft Tablespace DDL Automation Assistance Tool Appendix A
688 Copyright © 2018, Oracle and/or its affiliates. All Rights Reserved.
• Indexes will be assigned to a specific bufferpool (input parameter 19).
• Temporary tables will be assigned to a specific bufferpool (input parameter 20).
The default Unicode XXDDLU.SQL script alternates bufferpool assignments between BP8K0, BP8K1, BP8K2, and BP8K3. When given an XXDDLU.SQL script as input, PSTAAT simply substitutes the values of input parameters 16-20 for the default assignments in the original Unicode script. Be careful to specify legitimate 8 KB bufferpools when optimizing a Unicode XXDDLU.SQL with PSTAAT. PSTAAT will not validate the validity of the bufferpools specified in the graphical user interface for a Unicode installation.
Note. You must enter legitimate, active bufferpools for input parameters 16-20, or the DDL generated by PSTAAT will fail. PSTAAT will not validate the syntax or legitimacy of the bufferpools entered for any of these input parameters.
The bufferpool override capability of PSTAAT is merely intended to provide a modest level of additional flexibility in making bufferpool assignments over the default assignments found in the XXDDL.SQL scripts. It is not possible for PSTAAT to determine an optimal run time configuration for production environments based on its script parsing and reformatting capabilities.
Task A-2-4: Using PSTAAT to Override the Default Segment SizeIt is possible to override the default SEGSIZE assignment for each tablespace found in the XXDDL.SQL script with PSTAAT as follows:
Reviewing segment size on General Parameters tab
• Select a valid SEGSIZE from the drop-down list box provided for input parameter 23 of the General Parameters tab, as shown in this example.
• PSTAAT will substitute the value selected from the list box of input parameter 23 for the SEGSIZE of all tablespaces.

Appendix A Using the PeopleSoft Tablespace DDL Automation Assistance Tool
Copyright © 2018, Oracle and/or its affiliates. All Rights Reserved. 689
Note. Obviously, using the same SEGSIZE value for all tablespaces leads to a less than optimal configuration for a production run-time environment. Using a particularly large SEGSIZE for a table that consumes few pages will waste excessive amounts of disk space.
Similar to the bufferpool override capability of PSTAAT, the SEGSIZE override is merely intended to provide a modest level of additional flexibility in making SEGSIZE assignments over the default assignments found in the XXDDL.SQL scripts. It is not possible for PSTAAT to provide an optimal run time configuration for a productionenvironment based on its script parsing and reformatting capabilities. For more details regarding the use of the SEGSIZE parameter, consult the DB2 for z/OS Administration Guide.
Task A-2-5: Validating InputAs previously alluded, PSTAAT is not capable of validating the legitimacy of certain input parameters that will ultimately be substituted into the reformatted nXXDDL.SQL, nTBDDL.SQL, and nIXDDL.SQL scripts.
Warning! Caution must be exercised when entering certain input parameters because PSTAAT does not validate the syntax or legitimacy of these items. Review all DDL scripts generated by PSTAAT before executing them.
Invalid input for the following parameters could lead to DDL that will fail when executed on the DB2 z/OS database server: Generate DDL Tab:
• Input Parameter 1: PeopleSoft Database Name
PSTAAT is incapable of determining whether the logical database name that you have chosen already exists in PS.PSDBOWNER, nor can it validate that it has been properly cataloged with DB2 Connect.
• Input Parameters 5 and 6: Tablespace and Index Storage Group
PSTAAT is not capable of pre-determining whether the STOGROUPs provided exist in the DB2 subsystem, nor can it validate the names for the presence of typographical errors.
• Input Parameter 7: Database Object Owner
PSTAAT is incapable of determining whether the value entered as the Database Object Owner has already been used within the DB2 zOS subsystem for a non-PeopleSoft application. Using an owner id previously used by a non-PeopleSoft application can create problems when auditing the PeopleSoft database. PSTAAT isalso incapable of determining whether the proper security setup steps have been completed with respect to the Database Object Owner. Review the section Understanding Database Creation in the first chapter of this documentation for more details regarding the specific requirements of the Owner Id.
See "Preparing for Installation," Planning Database Creation.
• Input Parameter 10: Application Designer Project Name
PSTAAT is incapable of determining whether this project exists in the PeopleSoft database. This project must already exist, as PSTAAT will pass the project name directly to Application Designer to create temporary table DDL.
Any error messages that indicate a problem with the Application Designer project are directed to the log file specified in the Logging tab of the Build Settings dialog. Here is an example of the log file error output:
PeopleSoft Project Command LineBuild ProjectProject Name: WRONGTools Release: 8.51-CT Source Database Type = DB2ODBC-CD Source Database Name = PTAAT848

Using the PeopleSoft Tablespace DDL Automation Assistance Tool Appendix A
690 Copyright © 2018, Oracle and/or its affiliates. All Rights Reserved.
-CO Source Database Operator = QEDMO
Project WRONG is not valid or does not exist in the database.Error - failure in command line build
See Using PSTAAT to Isolate Temporary Tables To Individual Tablespaces.
• Input Parameters 12 and 13: User Id and Password
PSTAAT will pass the user id and password entered in input parameters 12 and 13 directly to a command line initiated Data Mover or Application Designer task depending on the settings of the Table/Temporary Table radio buttons. Data Mover or Application Designer (not PSTAAT) will subsequently make a connection to DB2 z/OS through DB2 Connect when creating the default TBDDL.SQL and IXDDL.SQL scripts, or creatingtemporary table DDL.
PSTAAT is incapable of validating the accuracy of the user ID and password prior to passing them on to Data Mover or Application Designer. Both the Data Mover task initiated to extract default table and index DDL, and the Application Designer task initiated to create temporary tables run asynchronously to PSTAAT, and there will be no Windows message boxes sent to the workstation in the event that the user ID and password combination is invalid.
• Invalid ID and/or password passed to Data Mover:
When attempting to extract table and index DDL with an invalid ID or password, an error message is displayed temporarily as Data Mover scrolls data to its output window (see Using PSTAAT to Create TBDDL and IXDDL); and the task will end without generating DDL. In most cases, if PSTAAT runs but fails to generate the TBDDL.SQL and IXDDL.SQL, the cause will be an incorrect user ID-password combination, or a failed Data Mover connection to DB2 z/OS due to problems with the DB2 Connect configuration.
• Invalid ID and/or password passed to Application Designer:
When creating temporary table DDL, any messages issued by Application Designer due to an invalid ID and/or password will be written to the log file specified for input parameter 11, Application Designer Output Log File.
General Parameters Tab:
• Input Parameter 8: Primary Database Prefix
PSTAAT is incapable of determining whether the value supplied as the Primary Database Prefix will cause database names to be generated that already exist in the DB2 z/OS subsystem as it creates the new nXXDDL.SQL script.
• Input Parameter 9: Database Object Owner
The same restrictions apply to those for input parameter 7 of the Generate DDL tab (see above).
• Input Parameters 16-20: Bufferpool Overrides
PSTAAT cannot validate the syntax or legitimacy of the bufferpools entered for any of these input parameters.It cannot determine whether a particular bufferpool has been activated in the DB2 subsystem, or whether 32 KB or 8 KB bufferpools have been supplied when required.
See Using PSTAAT to Override the Default Bufferpool Assignment.
• Input Parameters 21-22: Tablespace and Index Storage Groups
The same restrictions apply to those for input parameters 5 and 6 of the Generate DDL tab (see above).

Appendix A Using the PeopleSoft Tablespace DDL Automation Assistance Tool
Copyright © 2018, Oracle and/or its affiliates. All Rights Reserved. 691
Task A-3: Using PSTAAT to Reassign Temporary Tables to Additional Tablespaces
PSTAAT can be used to reassign temporary table instances to additional tablespaces. Doing so can improve the performance and concurrency of Application Engine and %UpdateStats processing.Here is an overview of the process:1. Generate the temporary table and index DDL from an Application Designer project.
2. Create the project as described in the task Building the Temporary Tables and their Indexes (steps 1-8).
See "Creating a Database," Building Temporary Tables.
3. After the project has been created:
Use PSTAAT to invoke Application Designer through the command line to build the project (write the table DDL script). This procedure is described below.
OR
Build the project manually by selecting the Build Script File option on the Build Execute Options dialog box as described in the task Building the Temporary Tables and their Indexes (steps 9-18).
See "Creating a Database," Building Temporary Tables.
The result is identical whether you let PSTAAT call Application Designer to build the project, or build it yourself (by following steps 1-18 of the task Building the Temporary Tables and their Indexes)—the default temporary table and index DDL file.4. Use PSTAAT to parse the default temporary table DDL, create the additional databases, and remap the
tablespace assignments.
Instructions for obtaining the default temporary DDL script by allowing PSTAAT to invoke Application Designerto build the project follow: 1. Start PSTAAT by double-clicking on the PSTAAT.exe found in PS_HOME\bin\client\winx86.
Select the Generate DDL tab.
2. Enter the name of the database into Parameter 1, PeopleSoft Database Name on the Generate DDL tab.
Recall that a database connection is required to invoke Application Designer, so this database name must match the alias name cataloged with DB2 Connect.
3. Create an Application Designer project that contains the temporary table object definitions as described in steps 1-8 of the task Building the Temporary Tables and their Indexes.
Save the project name as TEMPTBL.
4. From Application Designer, choose Build, Project.

Using the PeopleSoft Tablespace DDL Automation Assistance Tool Appendix A
692 Copyright © 2018, Oracle and/or its affiliates. All Rights Reserved.
5. In the Build Settings dialog box, enter a log file name on the Logging tab, and select Log to File if it is not already checked.
Enter the name of this log file into Parameter 11, Application Designer Output Log File, of the Generate DDL tab of PSTAAT. In this example, the log file name is C:\temp\temp.log.
Build Settings dialog box: Logging tab
6. Select the Scripts tab of the Build Settings dialog box.

Appendix A Using the PeopleSoft Tablespace DDL Automation Assistance Tool
Copyright © 2018, Oracle and/or its affiliates. All Rights Reserved. 693
7. Select the Output to a single file radio button under Script File Options, and enter a script name for the DDL file to be created under Script File Names, which is c:\temp\temp.sql in this example. The temporary table DDL script will be written to this location.
You may close Application Designer now.
Build Settings dialog box: Scripts tab
8. Enter the name of the project (TEMPTBL) into Parameter 10, Application Designer Project Name, of the Generate DDL tab of PSTAAT
9. Enter a valid PeopleSoft user ID and password combination (for example, VP1/VP1 or PS/PS) into input Parameters 12 and 13.

Using the PeopleSoft Tablespace DDL Automation Assistance Tool Appendix A
694 Copyright © 2018, Oracle and/or its affiliates. All Rights Reserved.
10. Select the Temp Table radio button on the Generate DDL tab of PSTAAT, as shown in this example:
Selecting Temp Table option on the Generate DDL tab
11. Click the Run button.
PSTAAT will invoke Application Designer via command line to build the project, and create the default temporary table DDL. If you closed Application Designer after creating the TEMPTBL project, you will briefly see the PeopleSoft PeopleTools splash screen as PSTAAT invokes Application Designer to build the TEMPTBL project and generate the default temporary table DDL script. This will be the only visual cue that Application Designer has been invoked. Note that you will not see the splash screen if you left Application Designer running after creating the TEMPTBL project.
12. Look for the temporary table DDL script in the folder specified on the Scripts tab of the Build Settings dialog box (see step 7 above).
13. Select the General Parameters Tab of PSTAAT to reassign the temporary tables to additional tablespaces and databases.
14. Copy the default temporary table DDL script just created (TEMP.SQL in the example shown) to the location specified in Parameter 1, Input Directory for DDL scripts on the General Parameters tab.
15. Enter the name of the temporary table DDL script (TEMP.SQL) for Parameter 5, Input Temp DDL File of the General Parameters tab.
16. Fill in all of the remaining General Parameters tab inputs.
Review these sections for more details on the General Parameters tab and its input parameters: Understanding the PSTAAT Graphical User Interface, Understanding the Various PSTAAT Input and Output Files, and Using PSTAAT to Customize DDL.
17. Select the TableSpace Override tab, and then click the Run button.

Appendix A Using the PeopleSoft Tablespace DDL Automation Assistance Tool
Copyright © 2018, Oracle and/or its affiliates. All Rights Reserved. 695
PSTAAT will write the following files to the Output Directory for Generated DDL Scripts:
tXXDDL.SQLnTEMP.SQLnXXDDL.SQLnTBDDL.SQLnIXDDL.SQLPtlog.txt
See the Output Files section of Understanding the Various PSTAAT Input and Output Files.
nTEMP.SQL is the "new" temporary table DDL script. tXXDDL.SQL contains database and tablespace DDL for the temporary tables found in nTEMP.SQL. Tables will be re-mapped as follows:
• The DBD (database) mapping is based on the input parameters supplied to the General Parameters tab.
• Tablespace names within the tXXDDL.SQL script are hard-coded with the following naming convention, where nnnn is an ascending sequence number.
TMPnnnn
• PRI and SEC quantities are hard-coded (720 and 1400 respectively). You are free to customize them for your environment prior to executing the DDL.
• Bufferpool assignment, CLOSE rule, and SEGSIZE are determined by the input specified on the General Parameters tab.
Sample tablespace DDL:CREATE TABLESPACE TMP0001 IN Q848107G USING STOGROUP PSRTD1SG PRIQTY 720 SECQTY 1400 FREEPAGE 10 PCTFREE 0 SEGSIZE 4 BUFFERPOOL BP1 LOCKSIZE ANY CLOSE YES ;
Task A-4: Using PSTAAT to Isolate Other Tables to Individual Tablespaces
PSTAAT is also capable of isolating certain non-temporary PeopleSoft PeopleTools and Application tables, for which the %UpdateStats metaSQL function is called, to individual tablespaces. Beginning with PeopleSoft Enterprise 9.0 Applications, PSTAAT will replace the previously delivered "enhanced" installation scripts.A list of such tables is contained in the XXENHANCED.txt text file, where XX is the standard PeopleSoft application two-character prefix (the prefixes are listed in the section Transferring DDL Scripts to z/OS). The XXENHANCED.txt file is located in the PS_HOME\scripts directory of the installation files.See "Creating a Database," Transferring DDL Scripts to z/OS.
Note. There may not be an XXENHANCED.txt file for all PeopleSoft applications (such as PeopleSoft Portal Solutions).
To remap these tables to individual tablespaces, use the PSTAAT General Parameters tab as follows:1. Enter the name of the XXENHANCED.txt file as the input for parameter 6, Input Individual Table File, on the
General Parameters tab
2. Copy the XXENHANCED.txt file from PS_HOME\scripts to the location specified in Parameter 1, Input Directory for DDL scripts on the General Parameters tab.

Using the PeopleSoft Tablespace DDL Automation Assistance Tool Appendix A
696 Copyright © 2018, Oracle and/or its affiliates. All Rights Reserved.
3. Enter the remaining input parameters required by the General Parameters tab.
See Understanding the PSTAAT Graphical User Interface.
See Understanding the Various PSTAAT Input and Output Files.
See Using PSTAAT to Customize DDL.
4. Click the Tablespace Override tab and click the Run button.
PSTAAT will write the following files to the Output Directory for Generated DDL:
Scripts: nTEMP.SQL, nXXDDL.SQL, nTBDDL.SQL, nIXDDL.SQL, Ptlog.txt
See the output files section of Understanding the Various PSTAAT Input and Output Files for an explanation of each file.
These tables will be remapped in the nXXDDL.SQL, nTBDDL.SQL and nIXDDL.SQL files based on the input parameters supplied to the General Parameters tab. PSTAAT will derive tablespace names by using the first three to five characters of the original tablespace name, followed by an ascending sequence number.
Task A-5: Using PSTAAT to Convert EBCDIC DDL to Unicode DDL
This section discusses:
• Understanding the EBCDIC DDL to Unicode DDL Conversion
• Creating Database, Tablespace, and Table Shell DDL for an EBCDIC to Unicode Database Conversion
Understanding the EBCDIC DDL to Unicode DDL ConversionThis section can be ignored entirely if you do not intend to store data using the Unicode encoding scheme in your PeopleSoft database. Likewise, if you intend to install and import a Unicode database from scratch, ignore this section and instead follow the standard instructions for installing a Unicode database previously documented in this PeopleTools installation documentation for DB2 for z/OS. However, if you have an EBCDIC database that already exists and you wish to convert that database to the Unicode encoding scheme, continue with this section. Converting an existing EBCDIC PeopleSoft database to a Unicode database requires a multi-phase process that is documented in the white paper titled "Converting a PeopleSoft Enterprise Database from EBCDIC to Unicode Encoding Scheme on DB2 for z/OS." See this white paper for complete details on completing an EBCDIC to Unicode encoding scheme conversion. One such step of this process with which PSTAAT is able to assist, is the "conversion" of the EBCDIC data types to Unicode data types within PeopleSoft PeopleTools and PeopleSoft application DDL. Specifically, DDL produced from the Unicode DDL Conversion tab of PSTAAT offers an additional option in creating the DDL scripts required to create the Unicode shell as described in Phase One, Creating the Unicode Database Shell, of the EBCDIC to Unicode conversion white paper. See the following sections of the "Converting a PeopleSoft Enterprise Database from EBCDIC to Unicode Encoding Scheme on DB2 for z/OS" white paper for instructions on running the scripts that can be created either by the method described here with PSTAAT, or the method described in the conversion white paper:
• Phase One – Unicode Database Shell
• Creating Create Table and Create Index DDL for the Target Unicode Database
• Creating A DDL Script to Build the Target Unicode Physical Databases
• Creating A DDL Script to Build the Target Unicode Tablespaces
• Creating The Unicode Logical Database Shell

Appendix A Using the PeopleSoft Tablespace DDL Automation Assistance Tool
Copyright © 2018, Oracle and/or its affiliates. All Rights Reserved. 697
See Converting a PeopleSoft Enterprise Database from EBCDIC to Unicode Encoding Scheme on DB2 for z/OS, My Oracle Support, (search for the article title).
Task A-5-1: Creating Database, Tablespace, and Table Shell DDL for an EBCDIC to Unicode Database ConversionWhen supplied with EBCDIC Database/Tablespace (XXDDL.SQL) and table DDL scripts (TBDDL.SQL) as input, PSTAAT is capable of parsing and recreating them with the necessary data types for creating the Unicode shell database. For the table DDL script, PSTAAT converts all character and long character fields to vargraphic and long vargraphic respectively; while date, integer, small integer, decimal, timestamp, and long varchar for bit data types remain unchanged. All 'Create Database' DDL within the Database/Tablespace script will be appended with 'CCSID Unicode'.
Note. The following instructions are divided into two procedures.
To use PSTAAT to convert EBCDIC DDL to Unicode DDL, begin by inserting all of the record definitions contained in the EBCDIC database into an Application Designer project, and then create the EBCDIC DDL for alltables and indexes in the database:1. Open Application Designer.
2. Choose File, New.
In the New dialog box, select Project, and then click OK.
3. Choose Insert, Definitions into Project.
4. Set Definition Type to Records, and Type to All Records.
Note. Selecting All Records will insert views, sub-records, dynamic views and derived records in addition to table and temporary table definition types into the project. This is necessary to capture both the table and temporary table definition types in a single DDL file for PSTAAT. These are the two table types that will require the data type conversion from char to vargraphic and so on. Although these other definition types existin the project, Application Designer will write table and index DDL for the table and temporary table definition types only based on the Build options that will be selected in a subsequent step.
5. Press ENTER, or click Insert and then click the Select All button.
This selects all of the records.
6. Click Insert to insert all records into the new project.
7. Click Close to close the Insert into Project dialog box.
8. Before building the project, save it.
Choose File, Save Project As and enter a project name.
9. Choose Build, Project.
The Build dialog box appears.
10. In the Build Options group, select the Create Tables check box.
The Create Index check box is checked by default.
11. Select Build script file to direct the DDL to a file.
12. Click the Settings button.
The Build Settings dialog box appears.

Using the PeopleSoft Tablespace DDL Automation Assistance Tool Appendix A
698 Copyright © 2018, Oracle and/or its affiliates. All Rights Reserved.
13. On the Create tab, shown in this example, select the following options:
Build Settings dialog box: Create tab
• Recreate table if it already exists under Table Creation Options
• Skip view if it already exists under View Creation Options
• Recreate index if it already exists under Index Creation Options
14. Select the Scripts tab, and select Output to Separate Files under Script File Options.

Appendix A Using the PeopleSoft Tablespace DDL Automation Assistance Tool
Copyright © 2018, Oracle and/or its affiliates. All Rights Reserved. 699
15. Under Script File Names, specify the path and filename for the output files that will contain the table and index DDL.
In this example, the Table file name is c:\temp\EBCDIC.SQL, and the Index file name is c:\temp\INDEXES.SQL.
Build Settings dialog box: Scripts tab
16. Click OK to accept the build settings.
17. Click Build to create the table and index DDL script.
Disregard the subsequent warning message about "potentially destructive settings." The output is directed to a script only. Database objects will not be dropped.
18. After the script generation process has finished, click Close in the Build Progress dialog box to return to Application Designer.
After completing the previous steps:1. Start PSTAAT by double clicking on the PSTAAT.exe found in PS_HOME\bin\client\winx86.
Select the Unicode DDL Conversion tab.
2. Enter the EBCDIC Database/Tablespace DDL script (XXDDL.SQL) name into input parameter 1, Input EBCDIC Database/Tablespace DDL File, of the Unicode DDL Conversion tab.
3. Enter the name of the EBCDIC table DDL script that was just created by Application Designer in input parameter 2, Input EBCDIC Table DDL File, of the Unicode DDL Conversion tab (EBCDIC.SQL in the example shown above).

Using the PeopleSoft Tablespace DDL Automation Assistance Tool Appendix A
700 Copyright © 2018, Oracle and/or its affiliates. All Rights Reserved.
4. Enter Output file names for input parameters three (3) and four (4) of the Unicode DDL Conversion tab.
These will become the names of the new DDL scripts. In this example, the value for input parameter 3 (Output Unicode Database/Tablespace DDL File), is UNICODE_EPDDL.SQL. The value for input parameter4 (Output Unicode Table DDL File), is TBDDLU.
Specifying output files on Unicode DDL conversion tab
5. Select YES from the drop-down list box in input parameter five (5), Remove 'Drop Table' DDL.
The Recreate table if it already exists option was set earlier in the Build Settings dialog box when the project was built so that Application Designer would create DDL for all record definitions for which a table exists in the database. Application Designer thus generates 'Drop Table' DDL prior to each 'Create table' DDL statement in the script. Choosing YES from this list box instructs PSTAAT to put comment marks prior to each Drop Table statement in the new Unicode table DDL script. This will prevent the EBCDIC tables from being dropped when the new Unicode DDL scripts are executed. Again, refer to the EBCDIC to Unicode conversion white paper before executing these scripts.
See Converting a PeopleSoft Enterprise Database from EBCDIC to Unicode Encoding Scheme on DB2 for z/OS, My Oracle Support, (search for the article title).

Appendix A Using the PeopleSoft Tablespace DDL Automation Assistance Tool
Copyright © 2018, Oracle and/or its affiliates. All Rights Reserved. 701
6. Select the General Parameters tab and enter the directory location of the EBCDIC Database/Tablespace script and the EBCDIC table DDL script (to be converted) into parameter 1 (Input Directory for DDL scripts).
Enter the Output Directory for the new Unicode shell database scripts into parameter 7 (Output Directory for Generated DDL Scripts). In this example, the Output Directory is C:\PT848106R2\SCRIPTS\PSTAAT.
Specifying input and output directories on General Parameters tab
7. Click the Run button on the Unicode Conversion Tab.
The new scripts will be written to the path specified in the Output Directory for Generated DDL Scripts on theGeneral Parameters tab.
Note. All tablespaces in the converted tablespace DDL (nXXDDL.SQL) will be allocated to BP8K1 by default. The General Parameters tab can be used to further optimize the DDL and assign additional 8 KB bufferpools.
8. Continue with the rest of the process documented in the EBCDIC to Unicode conversion white paper.
See Converting a PeopleSoft Enterprise Database from EBCDIC to Unicode Encoding Scheme on DB2 for z/OS, My Oracle Support, (search for the article title).
Task A-6: Using PSTAAT to Install PeopleSoft Databases
Previous sections of this appendix describe the individual tabs of the PSTAAT graphical user interface and their various functions to either generate default DDL, or optimize default DDL. This section describes several important points to consider when using PSTAAT.We recommend that you use PSTAAT to create environments that are more production-capable after you first become thoroughly familiar with the default installation process.

Using the PeopleSoft Tablespace DDL Automation Assistance Tool Appendix A
702 Copyright © 2018, Oracle and/or its affiliates. All Rights Reserved.
PSTAAT operates independently of the PeopleSoft PeopleTools metadata, has no direct knowledge of the data model of the individual PeopleSoft applications, and no mechanism itself to communicate directly with a DB2 forz/OS database server. Its primary capability is that of parsing DDL input files, and subsequently rewriting modified versions of those files for output. Because Application Designer is required to create temporary table DDL from a project containing record definitions, you must obviously complete enough of the installation steps tosuccessfully connect Application Designer to the database. Additionally, because most customer installations will include multiple database environments, including one Demo copy of each PeopleSoft application, you may find it most convenient to use PSTAAT to create more production-worthy environments than the default installation process is capable of producing. PSTAAT can be used effectively to create such an environment as follows:See "Creating a Database," Building Temporary Tables.1. First, create and import a complete Demo environment without optimizing the DDL.
Obtain the default TBDDL.SQL and IXDDL.SQL scripts from the installation files, or use the Generate DDL tab of PSTAAT to create them.
2. Obtain a DDL script for temporary tables by building (script only) an Application Designer project (DDL script only) from the Demo environment created in step one (above) as directed in the task Building the Temporary Tables and their Indexes in this documentation.
See "Creating a Database," Building Temporary Tables.
3. Collect the following files for input to PSTAAT:
xxENHANCED.txt file for your applicationxxDDLTBDDL.SQLIXDDL.SQLTemporary table DDL script
See Using PSTAAT To Reassign Temporary Tables To Additional Tablespaces.
See Using PSTAAT to Isolate Other Tables to Individual Tablespaces.
4. Fill in all 24 text boxes of the General Parameters tab, and use the Tablespace Override tab to optimize the DDL as described in the previous sections of this appendix.
5. FTP the DDL generated from PSTAAT to the mainframe (HLQ.PPVVV.DDLIB) and make any other desired modifications.
6. Execute the DDL using DSNTEP2, or some other batch SQL processor.
7. Save a copy of the DDL scripts generated from PSTAAT in PS_HOME\scripts on the file server.
8. Continue with the rest of the process as documented in this installation guide.
Other important considerations when using PSTAAT:
• Be sure to run the SETSPACE and SETTMPIN SQRs as directed after successfully executing all DDL as documented in this installation guide.
• PeopleSoft upgrade processes may attempt to create new tables in the default tablespaces. These scripts will fail if the default tablespace does not exist. To prevent failures during an upgrade, execute the default XXDDL.SQL script so the vanilla tablespaces exist in each of your environments. You may reduce the primary space allocations on these tablespaces to avoid excessive waste of disk space.
• As indicated previously, always store a copy of all PSTAAT modified DDL in the PS_HOME\scripts folder ofthe PeopleSoft PeopleTools file server.

Copyright © 2018, Oracle and/or its affiliates. All Rights Reserved. 703
Appendix B
Describing Debugger Requirements
This appendix discusses:
• Describing Debugger Requirements for the AIX Operating System
• Describing Debugger Requirements for the HP-UX Operating System
• Describing Debugger Requirements for the Linux Operating System
• Describing Debugger Requirements for the Oracle Solaris Operating System
• Describing Debugger Requirements for the z/OS Operating System
Describing Debugger Requirements for the AIX Operating System
If you are installing on an AIX platform, download and install the latest gdb RPM from IBM's website, and installit.
Describing Debugger Requirements for the HP-UX Operating System
If you are installing on an HP-UX platform, download and install the latest wdb from http://www.hp.com/go/wdb.
Describing Debugger Requirements for the Linux Operating System
If you are installing on a Linux platform, install the "glibc-debuginfo" RPM package. There should be one "glibc-debuginfo" package for each installed "glibc" package and the version numbers must match exactly. Use the following commands to determine the packages installed:
• To see the installed "glibc" versions, run:
rpm -q --queryformat "%{NAME}-%{VERSION}-%{RELEASE}-%{ARCH}\n" glibc
For example, running this command on an Intel-based Linux system should produce output similar to this:
glibc-2.5-24-i686glibc-2.5-24-x86_64
Running this command on a zSeries Linux system should produce output similar to this:
glibc-24-31.2-s390x

Describing Debugger Requirements Appendix B
704 Copyright © 2018, Oracle and/or its affiliates. All Rights Reserved.
• To see the installed "glibc-debuginfo" packages, run:
rpm -q --queryformat "%{NAME}-%{VERSION}-%{RELEASE}-%{ARCH}\n" glibc-⇒debuginfo
Make sure that the "glibc-debuginfo" RPM version is exactly the same as the "glibc" version.
Describing Debugger Requirements for the Oracle Solaris Operating System
If you are installing on an Oracle Solaris platform, install dbx. No compiler license of any kind is needed for this. Download the latest Sun Studio, and on the Select Components page of the installer, expand the Compilers and Tools component and deselect all of the subcomponents except dbx. Also deselect the Performance Library and Third-Party Tools components. The installer will install the dbx subcomponent and the Support files subcomponent. The Support files subcomponent includes packages on which dbx depends. After you complete the installation, add the full path to dbx to your PATH environment variable.
Describing Debugger Requirements for the z/OS Operating System
If you are installing on a z/OS platform, dbx comes with z/OS UNIX. Starting with z/OS v1r5, dbx requires the Common Debug Architecture (CDA) libraries to be present. They must be accessible by dbx in order for it to run. The libraries are as follows:
Library Description
CDAEED Amode31 ELF/DWARF library
CDAEQED Amode64 ELF/DWARF library
CDAEDPI Amode31 DDPI library
CDAEQDPI Amode64 DDPI library
Note. CDAEDPI and CDAEQDPI are only present on a z/OS v1r7 and higher systems.
Depending on the size of the program you are debugging with dbx, plus how many others are also using dbx on your system, you may run out of SQA and/or CSA storage on your z/OS system, because this storage is global z/OS storage. Consult the z/OS initialization and tuning guide for information on how to modify the z/OS parameters. When diagnosing crashes, be aware that a crash is more strictly defined on z/OS as a program check that is handled by z/OS UNIX as a fatal signal (for example, SIGSEGV for PIC4; 10, 11, or SIGILL for PIC1). A crash would also occur because of a fault in the JVM, or because of a fault in native (JNI) code that is being run inside the Java process.When one of these fatal signals occurs, obtain the following documents to help you debug:
• a formatted LE dump (CEEDUMP)
The CEEDUMP shows the C-Stack (or native stack). The traceback from a CEEDUMP shows where a failure

Appendix B Describing Debugger Requirements
Copyright © 2018, Oracle and/or its affiliates. All Rights Reserved. 705
occurred for a C/C++ program
• a JVM trace snap dump
• a formatted JVM dump (javacore)
The default action of the z/OS UNIX signal handler is to produce a transaction dump (through the BCP IEATDUMP service), CEEDUMP, JVM dump javacore.


Copyright © 2018, Oracle and/or its affiliates. All Rights Reserved. 707
Appendix C
Encrypting Passwords for Customizations on Linux, AIX, or Solaris
Task C-1: Encrypting Passwords for Customization Files on Linux, AIX, or Solaris
This section describes how to produce an encrypted version of a clear text password and include it in the psft_customizations.yaml file for a customized deployment for non-default users and groups on Linux, AIX, or Solaris. This section applies to installations with the Native OS for Linux, AIX, or Solaris DPKs.In general, when you run the DPK setup script, you supply several user IDs and passwords, such as the Connect ID password and operator ID password. The script encrypts the passwords that you supply and includes them in the generated YAML files in BASE_DIR/dpk/puppet/production/data. When you create a psft_customizations.yaml file, you can copy these encrypted passwords from the generated YAML files and include them in the psft_customizations.yaml file. However, the passwords for the Linux, AIX, or Solaris users are not prompted for, and therefore the encrypted passwords are not available in any of the generated YAML files.Note that the successful use of the encrypted password depends on the presence of the public and private keys in the BASE_DIR/dpk/puppet directory referred to in the eyaml encrypt command. You cannot save an encrypted password and use it with a deployment with an installation with a different BASE_DIRThis procedure assumes that you have carried out the first portion of a customized deployment, and stopped at thequestion "Do you want to continue with the default initialization?"See "Completing the DPK Initialization with Customizations," Preparing the Customization Files for Linux, AIX, or Solaris Users and Groups.To encrypt a password:1. Open the BASE_DIR/dpk/puppet/hiera.yaml file and note the full path to the public and private keys:
:pkcs7_private_key: BASE_DIR/dpk/puppet/secure/keys/private_⇒key.pkcs7.pem:pkcs7_public_key: BASE_DIR/dpk/puppet/secure/keys/public_key.pkcs7.pem
2. Run the following command in a terminal window, supplying the paths from the previous step:
eyaml encrypt -s "<clear_password>" --pkcs7-private-key=<private_key_⇒location> --pkcs7-public-key=<public_key_location> --output=string
Note. The double-quotes around the password are required.
Example for Linux:
/opt/puppetlabs/puppet/bin/eyaml encrypt -s "password" --pkcs7-private-⇒

Encrypting Passwords for Customizations on Linux, AIX, or Solaris Appendix C
708 Copyright © 2018, Oracle and/or its affiliates. All Rights Reserved.
key=/cs1/psft/dpk/puppet/secure/keys/private_key.pkcs7.pem --pkcs7-⇒public-key=/cs1/psft/dpk/puppet/secure/keys/public_key.pkcs7.pem --⇒output=string
Example for AIX or Solaris:
/opt/oracle/puppetlabs/bin/eyaml encrypt -s "password" --pkcs7-private-⇒key=/cs1/psft/dpk/puppet/secure/keys/private_key.pkcs7.pem --pkcs7-⇒public-key=/cs1/psft/dpk/puppet/secure/keys/public_key.pkcs7.pem --⇒output=string
3. Copy the encrypted password from the output in the terminal window.
The encrypted text will be a long single line of letters and numbers. Be sure to copy the text in one unbroken line, with no spaces or line feeds. Here is a truncated representation of an encrypted password:
ENC[PKCS7,MIIBeQYJKoZIhvc...................]
4. Paste the encrypted password in the psft_customizations.yaml file, replacing the text password.
Again, the encrypted text must be a single line. Also, be sure to retain the indentation in the psft_customizations.yaml file. This is a sample psft_customizations.yaml for a new single user and existing single group:
---psft_runtime_user_name: newusr3
users: psft_user: name: newusr3 gid: 35000 home_dir: /dpk_base/home/userhome password: ENC[PKCS7,MIIBeQYJKoZIhvc...................] remove: false
5. Use the psft_customizations.yaml file for deployment with the puppet apply command.
The DPK deployment will automatically decrypt the password from the psft_customizations.yaml and use it for deployment.