
PCST33- WEB PROGRAMMING.pdf
229
1 DEPARTMENT OF COMPUTER SCIENCE P.G. M.Sc Computer Science III SEMESTER WEB PROGRAMMING SUB.CODE:PCST33 UNIT – I BASICS INTERNET PROTOCOLS, HTML5 Basic Internet Protocols - The World Wide Web - HTTP messages - Web servers and clients - Introduction to HTML5 - Editing HTML5 - W3C HTML validation service - Headings - Linking - Images - Special characters and horizontal rules - Lists - Tables - Forms - Internal linking - Meta elements - New HTML5 Form input types - Input and datalist elements and auto complete attribute - Page structure elements - Introduction to Canvas - Canvas Coordinate System - Rectangles - Drawing Arcs and Circles - Shadows UNIT – II JAVASCRIPT, JQUERY Introduction to JavaScript - Syntax - Variables and data types - JavaScript Control Statements - Operators - Literals - Functions - Objects - Arrays - Built in objects - Event handling - Fundamentals of JQuery - JQuery selectors - JQuery methods to access HTML attributes - Traversing - Manipulators - Events - Effects UNIT – III CSS3, DOM Types of CSS - Conflicting style sheets - Positioning Elements - Element Dimension - Box model and Text Flow - Media types - Media Queries - Drop-Down Menus - Text shadows - Rounded corners - Color - Box Shadows - Introduction to the Document Object Model - DOM History and Levels - Intrinsic Event Handling - Modifying Element Style - The Document Tree - Properties of window - DOM Collections - Using Timer and Dynamic Styles to Create Animated Effects - JavaScript Event Handling - Reviewing the load, mousemove, mouseover, mouseout events - Form processing with focus, blur, submit, reset - Event Bubbling - More Events UNIT – IV XML AND PHP XML documents and vocabularies - XML versions and declarations - XML namespace - Representing data types : DTD, XML schema - XSLT - XPath - XQuery - Introduction to PHP - Converting Between Data Types - Arithmetic Operators - Initializing and Manipulating Arrays - String Comparisons - String Processing with Regular Expressions - Form Processing and Business Logic - Reading from a Database - Using Cookie - Dynamic Content. UNIT – V AJAX AND WEB SERVICES
-
Upload
khangminh22 -
Category
Documents
-
view
0 -
download
0
Transcript of PCST33- WEB PROGRAMMING.pdf

1
DEPARTMENT OF COMPUTER SCIENCE
P.G. M.Sc Computer Science
III SEMESTER
WEB PROGRAMMING SUB.CODE:PCST33
UNIT – I BASICS INTERNET PROTOCOLS, HTML5
Basic Internet Protocols - The World Wide Web - HTTP messages - Web servers and clients -
Introduction to HTML5 - Editing HTML5 - W3C HTML validation service - Headings - Linking -
Images - Special characters and horizontal rules - Lists - Tables - Forms - Internal linking - Meta
elements - New HTML5 Form input types - Input and datalist elements and auto complete attribute -
Page structure elements - Introduction to Canvas - Canvas Coordinate System - Rectangles - Drawing
Arcs and Circles - Shadows
UNIT – II JAVASCRIPT, JQUERY
Introduction to JavaScript - Syntax - Variables and data types - JavaScript Control Statements
- Operators - Literals - Functions - Objects - Arrays - Built in objects - Event handling - Fundamentals
of JQuery - JQuery selectors - JQuery methods to access HTML attributes - Traversing - Manipulators -
Events - Effects
UNIT – III CSS3, DOM
Types of CSS - Conflicting style sheets - Positioning Elements - Element Dimension - Box
model and Text Flow - Media types - Media Queries - Drop-Down Menus - Text shadows - Rounded
corners - Color - Box Shadows - Introduction to the Document Object Model - DOM History and
Levels - Intrinsic Event Handling - Modifying Element Style - The Document Tree - Properties of
window - DOM Collections - Using Timer and Dynamic Styles to Create Animated Effects - JavaScript
Event Handling - Reviewing the load, mousemove, mouseover, mouseout events - Form processing
with focus, blur, submit, reset - Event Bubbling - More Events
UNIT – IV XML AND PHP
XML documents and vocabularies - XML versions and declarations - XML namespace -
Representing data types : DTD, XML schema - XSLT - XPath - XQuery - Introduction to PHP -
Converting Between Data Types - Arithmetic Operators - Initializing and Manipulating Arrays - String
Comparisons - String Processing with Regular Expressions - Form Processing and Business Logic -
Reading from a Database - Using Cookie - Dynamic Content.
UNIT – V AJAX AND WEB SERVICES

2
Ajax - Enabled rich internet applications with XML and JSON - Web Services Introduction
- WCF Services Basics - SOAP - REST - JSON - Publishing and Consuming SOAP-Based Web
Services, REST-Based XML Web Services, REST-Based JSON Web Services

3
DEPARTMENT OF COMPUTER SCIENCE
P.G. M.Sc Computer Science
Course File
UNIT – I BASICS INTERNET PROTOCOLS, HTML5 PAGE NO
Basic Internet Protocols - The World Wide Web - HTTP messages - Web
servers and clients - Introduction to HTML5 - Editing HTML5 - W3C HTML
validation service - Headings - Linking - Images - Special characters and horizontal
rules - Lists - Tables - Forms - Internal linking - Meta elements - New HTML5
Form input types - Input and datalist elements and auto complete attribute - Page
structure elements - Introduction to Canvas - Canvas Coordinate System -
Rectangles - Drawing Arcs and Circles - Shadows
5 - 60
UNIT – II JAVASCRIPT, JQUERY
Introduction to JavaScript - Syntax - Variables and data types - JavaScript
Control Statements - Operators - Literals - Functions - Objects - Arrays - Built in
objects - Event handling - Fundamentals of JQuery - JQuery selectors - JQuery
methods to access HTML attributes - Traversing - Manipulators - Events - Effects
61 - 126
UNIT – III CSS3, DOM
Types of CSS - Conflicting style sheets - Positioning Elements - Element
Dimension - Box model and Text Flow - Media types - Media Queries - Drop-Down
Menus - Text shadows - Rounded corners - Color - Box Shadows - Introduction to
the Document Object Model - DOM History and Levels - Intrinsic Event Handling -
Modifying Element Style - The Document Tree - Properties of window - DOM
Collections - Using Timer and Dynamic Styles to Create Animated Effects -
JavaScript Event Handling - Reviewing the load, mousemove, mouseover, mouseout
events - Form processing with focus, blur, submit, reset - Event Bubbling - More
Events
127 – 149
UNIT – IV XML AND PHP
XML documents and vocabularies - XML versions and declarations - XML
namespace - Representing data types : DTD, XML schema - XSLT - XPath -
XQuery - Introduction to PHP - Converting Between Data Types - Arithmetic
Operators - Initializing and Manipulating Arrays - String Comparisons - String
150 – 198

4
Processing with Regular Expressions - Form Processing and Business Logic -
Reading from a Database - Using Cookie - Dynamic Content.
UNIT – V AJAX AND WEB SERVICES
Ajax - Enabled rich internet applications with XML and JSON – Web
Services Introduction - WCF Services Basics - SOAP - REST - JSON - Publishing
and Consuming SOAP-Based Web Services, REST-Based XML Web Services,
REST-Based JSON Web Services
199 - 225

5
UNIT 1
Basic Internet Protocols
The Internet protocols are the world’s most popular open-system (nonproprietary) protocol suite
because they can be used to communicate across any set of interconnected networks and are
equally well suited for LAN and WAN communications.
Internet Protocol (IP) The Internet Protocol (IP) is a network-layer (Layer 3) protocol that contains addressing
information and some control information that enables packets to be routed. IP is documented in
RFC 791 and is the primary network-layer protocol in the Internet protocol suite. Along with the
Transmission Control Protocol (TCP), IP represents the heart of the Internet protocols. IP has
two primary responsibilities: providing connectionless, best-effort delivery of datagrams through
an internetwork; and providing fragmentation and reassembly of datagrams to support data links
with different maximum-transmission unit (MTU) sizes.
Address Resolution Protocol (ARP) For two machines on a given network to communicate, they must know the other machine’s
physical (orMAC) addresses. By broadcasting Address Resolution Protocols (ARPs), a host can
dynamically discover the MAC-layer address corresponding to a particular IP network-layer
address. After receiving aMAC-layer address, IP devices create an ARP cache to store the
recently acquired IP-to-MAC address mapping, thus avoiding having to broadcast ARPS when
they want to recontact a device. If the device does not respond within a specified time frame, the
cache entry is flushed. In addition to the Reverse Address Resolution Protocol (RARP) is used to
mapMAC-layer addresses to IP addresses. RARP, which is the logical inverse of ARP, might be
used by diskless workstations
that do not know their IP addresses when they boot. RARP relies on the presence of a RARP
server with table entries of MAC-layer-to-IP address mappings.
Internet Routing Internet routing devices traditionally have been called gateways. In today’s terminology,
however, the term gateway refers specifically to a device that performs application-layer
protocol translation between devices. Interior gateways refer to devices that perform these
protocol functions between machines or networks under the same administrative control or
authority, such as a corporation’s internal network. These are known as autonomous systems.
Exterior gateways perform protocol functions between independent networks. Routers within the
Internet are organized hierarchically. Routers used for information exchange within autonomous
systems are called interior routers, which use a variety of Interior Gateway Protocols (IGPs) to
accomplish this purpose. The Routing Information Protocol (RIP) is an example of an IGP.

6
Routers that move information between autonomous systems are called exterior routers. These
routers use an exterior gateway protocol to exchange information between autonomous systems.
The Border Gateway Protocol (BGP) is an example of an exterior gateway protocol.
Internet Control Message Protocol (ICMP) The Internet Control Message Protocol (ICMP) is a network-layer Internet protocol that
provides message packets to report errors and other information regarding IP packet processing
back to the source. ICMP is documented in RFC 792.
ICMP Router-Discovery Protocol (IDRP) IDRP uses Router-Advertisement and Router-Solicitation messages to discover the addresses of
routers on directly attached subnets. Each router periodically multicasts Router-Advertisement
messages from each of its interfaces. Hosts then discover addresses of routers on directly
attached subnets by listening for these messages. Hosts can use Router-Solicitation messages to
request immediate advertisements rather than waiting for unsolicited messages.
IRDP offers several advantages over other methods of discovering addresses of neighboring
routers.
Primarily, it does not require hosts to recognize routing protocols, nor does it require manual
configuration by an administrator. Router-Advertisement messages enable hosts to discover the
existence of neighboring routers, but
not which router is best to reach a particular destination. If a host uses a poor first-hop router to
reach a particular destination, it receives a Redirect message identifying a better choice.
Transmission Control Protocol (TCP) The TCP provides reliable transmission of data in an IP environment. TCP corresponds to the
transport layer (Layer 4) of the OSI reference model. Among the services TCP provides are
stream data transfer, reliability, efficient flow control, full-duplex operation, and multiplexing.
With stream data transfer, TCP delivers an unstructured stream of bytes identified by sequence
numbers. This service benefits applications because they do not have to chop data into blocks
before handing it off to TCP. Instead, TCP groups bytes into segments and passes them to IP for
delivery.
TCP offers reliability by providing connection-oriented, end-to-end reliable packet delivery
through an internetwork. It does this by sequencing bytes with a forwarding acknowledgment
number that indicates to the destination the next byte the source expects to receive. Bytes not
acknowledged within a specified time period are retransmitted. The reliability mechanism of
TCP allows devices to deal with lost, delayed, duplicate, or misread packets. A time-out
mechanism allows devices to detect lost packets and request retransmission.
TCP offers efficient flow control, which means that, when sending acknowledgments back to the
source, the receiving TCP process indicates the highest sequence number it can receive without
overflowing its internal buffers.
Full-duplex operation means that TCP processes can both send and receive at the same time.
Finally, TCP’s multiplexing means that numerous simultaneous upper-layer conversations can be
multiplexed over a single connection.
User Datagram Protocol (UDP)

7
The User Datagram Protocol (UDP) is a connectionless transport-layer protocol (Layer 4) that
belongs to the Internet protocol family. UDP is basically an interface between IP and upper-layer
processes. UDP protocol ports distinguish multiple applications running on a single device from
one another.
Unlike the TCP, UDP adds no reliability, flow-control, or error-recovery functions to IP.
Because of UDP’s simplicity, UDP headers contain fewer bytes and consume less network
overhead than TCP. UDP is useful in situations where the reliability mechanisms of TCP are not
necessary, such as in cases where a higher-layer protocol might provide error and flow control.
UDP is the transport protocol for several well-known application-layer protocols, including
Network File System (NFS), Simple Network Management Protocol (SNMP), Domain Name
System (DNS), and Trivial File Transfer Protocol (TFTP).
World Wide Web
World Wide Web, which is also known as a Web, is a collection of websites or web pages stored
in web servers and connected to local computers through the internet. These websites contain
text pages, digital images, audios, videos, etc. Users can access the content of these sites from
any part of the world over the internet using their devices such as computers, laptops, cell
phones, etc. The WWW, along with internet, enables the retrieval and display of text and media
to your device.
The building blocks of the Web are web pages which are formatted in HTML and connected by
links called "hypertext" or hyperlinks and accessed by HTTP. These links are electronic
connections that link related pieces of information so that users can access the desired
information quickly. Hypertext offers the advantage to select a word or phrase from text and thus
to access other pages that provide additional information related to that word or phrase.

8
A web page is given an online address called a Uniform Resource Locator (URL). A particular
collection of web pages that belong to a specific URL is called a website,
e.g., www.facebook.com, www.google.com, etc. So, the World Wide Web is like a huge
electronic book whose pages are stored on multiple servers across the world.
Small websites store all of their WebPages on a single server, but big websites or organizations
place their WebPages on different servers in different countries so that when users of a country
search their site they could get the information quickly from the nearest server.
So, the web provides a communication platform for users to retrieve and exchange information
over the internet. Unlike a book, where we move from one page to another in a sequence, on
World Wide Web we follow a web of hypertext links to visit a web page and from that web page
to move to other web pages. You need a browser, which is installed on your computer, to access
the Web.
Difference between World Wide Web and Internet:
Some people use the terms 'internet' and 'World Wide Web' interchangeably. They think they are
the same thing, but it is not so. Internet is entirely different from WWW. It is a worldwide
network of devices like computers, laptops, tablets, etc. It enables users to send emails to other
users and chat with them online. For example, when you send an email or chatting with someone
online, you are using the internet.
But, when you have opened a website like google.com for information, you are using the World
Wide Web; a network of servers over the internet. You request a webpage from your computer
using a browser, and the server renders that page to your browser. Your computer is called a
client who runs a program (web browser), and asks the other computer (server) for the
information it needs.
History:
It is a project created, by Timothy Berner’s Lee in 1989, for researchers to work together

9
effectively at CERN. is an organisation, named World Wide Web Consortium (W3C), was
developed for further development in web. This organisation is directed by Tim Berner’s Lee, aka
father of web.
SystemArchitecture: From user’s point of view, the web consists of a vast, worldwide connection of documents or web
pages. Each page may contain links to other pages anywhere in the world. The pages can be
retrieved and viewed by using browsers of which internet explorer, Netscape Navigator, Google,
Chrome, etc are the popular ones. The browser fetches the page requested interprets the text and
formatting commands on it, and displays the page, properly formatted, on the screen.
The basic model of how the web works is shown in figure below. Here the browser is displaying a
web page on the client machine. When the user clicks on a line of text that is linked to a page on
the abd.com server, the browser follows the hyperlink by sending a message to the abd.com server
asking it for the page.
Here the browser displaying web page om the client machine when the user clicks on a line of text
that is linked to a page on abd.com, the vbrowser follows the hyperlink by sending a message to
abd.com server asking it for the page.
Working of WWW: The World Wide Web is based on several different technologies : Web browsers, Hypertext
Markup Language (HTML) and Hypertext Transfer Protocol (HTTP).
An Web browser is used to access webpages. Web browsers can be defined as programs which
display text, data, pictures, animation and video on the Internet. Hyperlinked resources on the

10
World Wide Web can be accessed using software interface provided by Web browsers. Initially
Web browsers were used only for surfing the Web but now they have become more universal. Web
browsers can be used for several tasks including conducting searches, mailing, transferring files,
and much more. Some of the commonly used browsers are Internet Explorer, Opera Mini, Google
Chrome.
Features of WWW: HyperText Information System
Cross-Platform
Distributed
Open Standards and Open Source
Uses Web Browsers to provide a single interface for many services
Dynamic, Interactive and Evolving.
“Web 2.0”
Components of Web There are 3 components of web:
1. Uniform Resource Locator (URL): serves as system for resources on web.
2. HyperText Transfer Protocol (HTTP): specifies communication of browser and server.
3. Hyper Text Markup Language (HTML): defines structure, organisation and content of
webpage.
World Wide Web Works
Now, we have understood that WWW is a collection of websites connected to the internet so that
people can search and share information. Now, let us understand how it works!

11
The Web works as per the internet's basic client-server format as shown in the following image.
The servers store and transfer web pages or information to user's computers on the network when
requested by the users. A web server is a software program which serves the web pages
requested by web users using a browser. The computer of a user who requests documents from a
server is known as a client. Browser, which is installed on the user' computer, allows users to
view the retrieved documents.

12
All the websites are stored in web servers. Just as someone lives on rent in a house, a website
occupies a space in a server and remains stored in it. The server hosts the website whenever a
user requests its WebPages, and the website owner has to pay the hosting price for the same.
The moment you open the browser and type a URL in the address bar or search something on
Google, the WWW starts working. There are three main technologies involved in transferring
information (web pages) from servers to clients (computers of users). These technologies include
Hypertext Markup Language (HTML), Hypertext Transfer Protocol (HTTP) and Web browsers.
Hypertext Markup Language (HTML):

13
HTML is a standard markup language which is used for creating web pages. It describes the
structure of web pages through HTML elements or tags. These tags are used to organize the
pieces of content such as 'heading,' 'paragraph,' 'table,' 'Image,' and more. You don't see HTML
tags when you open a webpage as browsers don't display the tags and use them only to render the
content of a web page. In simple words, HTML is used to display text, images, and other
resources through a Web browser.
Hypertext Transfer Protocol (HTTP):
Hyper Text Transfer Protocol (HTTP) is an application layer protocol which enables WWW to
work smoothly and effectively. It is based on a client-server model. The client is a web browser
which communicates with the web server which hosts the website. This protocol defines how
messages are formatted and transmitted and what actions the Web Server and browser should
take in response to different commands. When you enter a URL in the browser, an HTTP
command is sent to the Web server, and it transmits the requested Web Page.
When we open a website using a browser, a connection to the web server is opened, and the
browser communicates with the server through HTTP and sends a request. HTTP is carried over
TCP/IP to communicate with the server. The server processes the browser's request and sends a
response, and then the connection is closed. Thus, the browser retrieves content from the server
for the user.
HTTP Message
HTTP Message is used to show how data is exchanged between the client and the server. It is
based on client-server architecture. An HTTP client is a program that establishes a connection to
a server to send one or more HTTP request messages. An HTTP server is a program that
accepts connections to serve HTTP requests by sending an HTTP response messages.
The HTTP Messages can be classified as follows:
Message Type
HTTP message consists of an initial request line and an initial response line.

14
Format:
1. HTTP-message = Request | Response ; HTTP/1.1 messages
1) Initial Request Line
The initial line is different for the request and for the response. A request-line consists of three
parts: a method name, requested resource's local path, and the HTTP version being used. All
these parts are separated by spaces.
Syntax:
1. GET /path/to/file/index.html HTTP/1.0
Here,
o GET is the most common HTTP method.
o The path shows the part of the URL after the host name. It is also called a request URI.
o The version of HTTP always takes the form “HTTP/x.x”, uppercase.
2) Initial Response Line
15
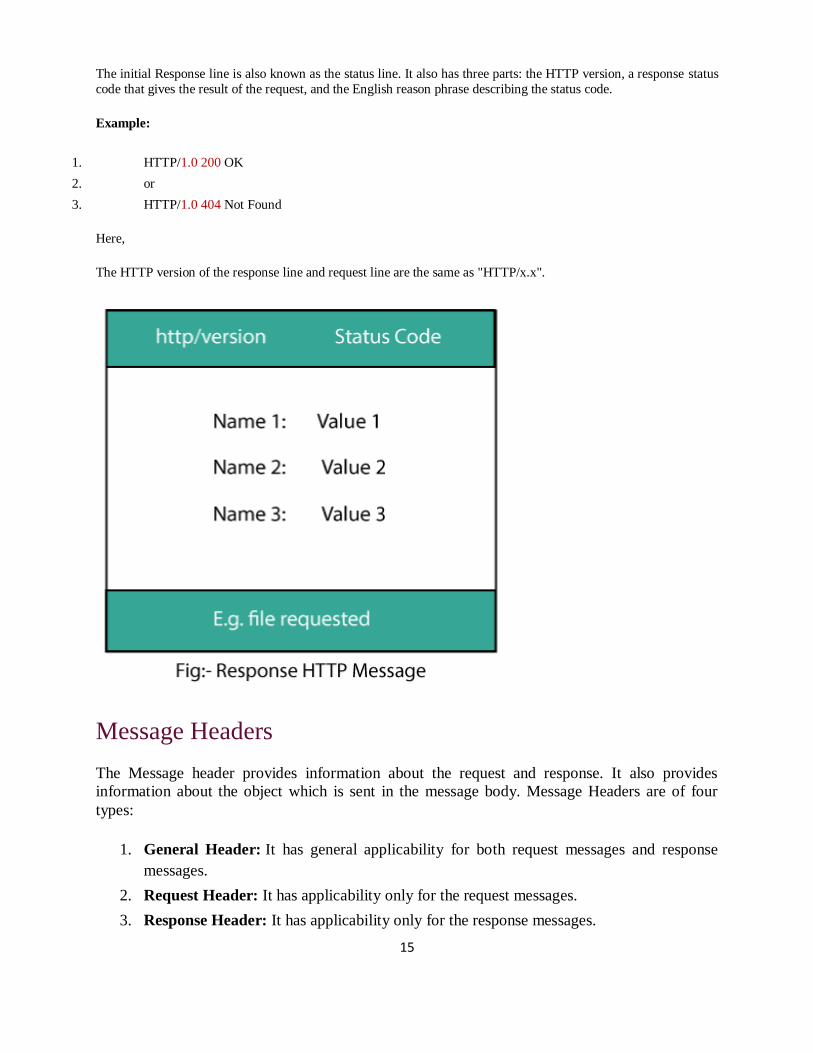
The initial Response line is also known as the status line. It also has three parts: the HTTP version, a response status
code that gives the result of the request, and the English reason phrase describing the status code.
Example:
1. HTTP/1.0 200 OK
2. or
3. HTTP/1.0 404 Not Found
Here,
The HTTP version of the response line and request line are the same as "HTTP/x.x".
Message Headers
The Message header provides information about the request and response. It also provides
information about the object which is sent in the message body. Message Headers are of four
types:
1. General Header: It has general applicability for both request messages and response
messages.
2. Request Header: It has applicability only for the request messages.
3. Response Header: It has applicability only for the response messages.

16
4. Entity Header: It defines meta-information about the entity-body, and about the resource
identified by request.
All the above headers follow the same generic format. Each of the header fields consists of a
name followed by a colon and the field values as follows:
1. message-header = field-name ":" [ field-value ]
Message Body
The message body of an HTTP message is used to carry the entire body associated with the
request and response. The message-body differs from the entire-body only when a transfer-
coding has been applied, as indicated by the Transfer-Encoding header field.
Syntax
1. message-body = entity-body
2. | <entity-body encoded as per Transfer-Encoding>
Transfer-Encoding MUST be used to indicate any transfer-codings which is applied by an
application to ensure safe and proper transfer of the message. Transfer-Encoding is a property of
the message.
Message Length
The transfer-length of a message is the length of the message-body, and it appears in the
message.
In a message, when a message body is allowed, and Content-Length is given, its field value
MUST exactly match the number of OCTETs in the message-body. When an invalid length is
received and detected, the HTTP/1.1 user agents MUST notify the user.
General Header Fields
Some header fields have the applicability for both the request and response messages. These
header fields apply only when the message is transmitted.
Syntax
1. general-header = Cache-Control
WEB SERVER AND WEB CLIENT
Web Server:

17
Web server is basically system the deals with the client’s request and provides a client with web
pages by Hyper Text Transfer Protocol (HTTP) and files via File Transfer Protocol (FTP). URL
(universal resource locator) is basically the address where you want to receive data from. When you
type a URL in the address bar of your web browser, the web server sends a request to the location
where the domain name of this URL is saved. Then the data you requested (i.e. the webpage) is
accessed and provided you by a server. This is how it works. So, we can conclude that the processing
and providing a webpage to the client is the main duty of a web server.
Web Client:
The web client can be said as an application or web browser (like Google Chrome, Internet Explorer,
Opera, Firefox, Safari) which is installed in a computer and used to interact with Web servers upon
user’s request. It is basically a consumer application which collects processed data from servers. A
Client and a Server are two parts of a connection, these are two distinct machines, web client requests
information, and the web server is basically a PC that is designed to accept requests from remote
computers and send on the information requested. Web server is responsible for storing the
information in order to be viewed by the clients and is also usually a Web Host. A Web host allows
connections to the server to view said stored info.
A Web server is a computer where the web content is stored. Basically web server is used to host the
web sites but there exists other web servers also such as gaming, storage, FTP, email etc.
It has two functions basically:
1. Connect to databases or other web server and get data
2. Get that data and pass in to the client( mostly browser or an App) which the client had
requested.

18
Web client:
The client, or user, side of the Web. It typically refers to the Web browser in the user's machine.
It may also refer to plug-ins and helper applications that enhance the browser to support special
services from the site. The term may imply the entire user machine or refer to a handheld
device that provides Web access.
HTML5 | Introduction
Introduction: HTML stands for Hyper Text Markup Language. It is used to design web pages
using markup language. HTML is the combination of Hypertext and Markup language. Hypertext
defines the link between the web pages. Markup language is used to define the text document
within tag which defines the structure of web pages. HTML 5 is the fifth and current version of
HTML. It has improved the markup available for documents and has introduced application
programming interfaces(API) and Document Object Model(DOM).
Features:
It has introduced new multimedia features which supports audio and video controls by
using <audio> and <video> tags.
There are new graphics elements including vector graphics and tags.
Enrich semantic content by including <header> <footer>, <article>, <section> and
<figure> are added.
Drag and Drop- The user can grab an object and drag it further dropping it on a new
location.
Geo-location services- It helps to locate the geographical location of a client.
Web storage facility which provides web application methods to store data on web
browser.
Uses SQL database to store data offline.
Allows to draw various shapes like triangle, rectangle, circle, etc.
Capable of handling incorrect syntax.
Easy DOCTYPE declaration i.e. <!doctype html>
Easy character encoding i.e. <meta charset=”UTF-8″>
Removed elements from HTML 5: There are many elements which are depreciated from HTML
5 are listed below:
REMOVED ELEMENTS USE INSTEAD ELEMENTS

19
REMOVED ELEMENTS USE INSTEAD ELEMENTS
<acronym> <abbr>
<applet> <object>
<basefont> CSS
<big> CSS
<center> CSS
<dir> <ul>
<font> CSS
<frame>
<frameset>
<noframes>
<isindex>
<strike> CSS, <s> or <del>
<tt> CSS
New Added Elements in HTML 5: <article>: The <article> tag is used to represent an article. More specifically, the content
within the <article> tag is independent from the other content of the site (even though it can
be related).
<aside>: The <aside> tag is used to describe the main object of the web page in a shorter
way like a highlighter. It basically identifies the content that is related to the primary
content of the web page but does not constitute the main intent of the primary page. The
<aside> tag contains mainly author information, links, related content and so on.

20
<figcaption>: The <figurecaption> tag in HTML is used to set a caption to the figure
element in a document.
<figure>: The <figure> tag in HTML is used to add self-contained content like
illustrations, diagrams, photos or codes listing in a document. It is related to main flow but
it can be used in any position of a document and the figure goes with the flow of the
document and if remove it then it should not affect the flow of the document.
<header>: It contains the section heading as well as other content, such as a navigation
links, table of contents, etc.
<footer>: The <footer> tag in HTML is used to define a footer of HTML document. This
section contains the footer information (author information, copyright information, carriers
etc). The footer tag are used within body tag. The <footer> tag is new in the HTML 5. The
footer elements require a start tag as well as an end tag.
<main>: Delineates the main content of the body of a document or web app.
<mark>: The <mark> tag in HTML is used to define the marked text. It is used to
highlight the part of the text in the paragraph.
<nav>: The <nav> tag is used to declaring the navigational section in HTML documents.
Websites typically have sections dedicated to navigational links, which enables user to
navigate the site. These links can be placed inside a nav tag.
<section>: It demarcates a thematic grouping of content.
<details>: The <details> tag is used for the content/information which is initially hidden
but could be displayed if the user wishes to see it. This tag is used to create interactive
widget which user can open or close it. The content of details tag is visible when open the
set attributes.
<summary>: The <summary> tag in HTML is used to define a summary for the
<details> element. The <summary> element is used along with the <details> element and
provides a summary visible to the user. When the summary is clicked by the user, the
content placed inside the <details> element becomes visible which was previously hidden.
The <summary> tag was added in HTMl 5. The <summary> tag requires both starting and
ending tag.
<time>: The <time> tag is used to display the human-readable data/time. It can also be
used to encode dates and times in a machine-readable form. The main advantage for users
is that they can offer to add birthday reminders or scheduled events in their calender’s and
search engines can produce smarter search results.
<bdi>: The <bdi> tag refers to the Bi-Directional Isolation. It differentiate a text from
other text that may be formatted in different direction. This tag is used when a user
generated text with an unknown directions.
<wbr>: The <wbr> tag in HTML stands for word break opportunity and is used to define
the position within the text which is treated as a line break by the browser. It is mostly used
when the used word is too long and there are chances that the browser may break lines at
the wrong place for fitting the text.
<datalist>: The <datalist> tag is used to provide autocomplete feature in the HTML files.
It can be used with input tag, so that users can easily fill the data in the forms using select
the data.
<keygen>: The <keygen> tag in HTML is used to specify a key-pair generator field in a
form. The purpose of <keygen> element is to provide a secure way to authenticate users.
When a from is submitted then two keys are generated, private key and public key. The

21
private key stored locally, and the public key is sent to the server. The public key is used to
generate client certificate to authenticate user for future.
<output>: The <output> tag in HTML is used to represent the result of a calculation
performed by the client-side script such as JavaScript.
<progress>: It is used to represent the progress of a task. It is also define that how much
work is done and how much is left to download a things. It is not used to represent the disk
space or relevant query.
<svg>: It is the Scalable Vector Graphics.
<canvas>: The <canvas> tag in HTML is used to draw graphics on web page using
JavaScript. It can be used to draw paths, boxes, texts, gradient and adding images. By
default it does not contains border and text.
<audio>: It defines the music or audio content.
<embed>: Defines containers for external applications (usually a video player).
<source>: It defines the sources for <video> and <audio>.
<track>: It defines the tracks for <video> and <audio>.
<video>: It defines the video content.
Advantages:
All browsers supported.
More device friendly.
Easy to use and implement.
HTML 5 in integration with CSS, JavaScript, etc can help build beautiful websites.
Disadvantages:
Long codes have to be written which is time consuming.
Only modern browsers support it.
HTML Heading
A HTML heading or HTML h tag can be defined as a title or a subtitle which you want to display on the webpage.
When you place the text within the heading tags <h1>.........</h1>, it is displayed on the browser in the bold format
and size of the text depends on the number of heading.
There are six different HTML headings which are defined with the <h1> to <h6> tags, from highest level h1 (main
heading) to the least level h6 (least important heading).
h1 is the largest heading tag and h6 is the smallest one. So h1 is used for most important heading and h6 is used for
least important.
Headings in HTML helps the search engine to understand and index the structure of web page.
See this example:
1. <h1>Heading no. 1</h1>
2. <h2>Heading no. 2</h2>
3. <h3>Heading no. 3</h3>
4. <h4>Heading no. 4</h4>

22
5. <h5>Heading no. 5</h5>
6. <h6>Heading no. 6</h6>
HTML Anchor
The HTML anchor tag defines a hyperlink that links one page to another page. It can create hyperlink to other web
page as well as files, location, or any URL. The "href" attribute is the most important attribute of the HTML a tag.
and which links to destination page or URL.
href attribute of HTML anchor tag
The href attribute is used to define the address of the file to be linked. In other words, it points out the destination
page.
The syntax of HTML anchor tag is given below.
<a href = "..........."> Link Text </a>
Let's see an example of HTML anchor tag.
1. <a href="second.html">Click for Second Page</a>
Specify a location for Link using target attribute
If we want to open that link to another page then we can use target attribute of <a> tag. With the help of this link
will be open in next page.
Example:
1. <!DOCTYPE html>
2. <html>
3. <head>
4. <title></title>
5. </head>
6. <body>
7. <p>Click on <a href="https://www.javatpoint.com/" target="_blank"> this-
link </a>to go on home page of JavaTpoint.</p>
8. </body>
9. </html>
HTML Image
HTML img tag is used to display image on the web page. HTML img tag is an empty tag that contains attributes
only, closing tags are not used in HTML image element.

23
Let's see an example of HTML image.
1. <h2>HTML Image Example</h2>
2. <img src="good_morning.jpg" alt="Good Morning Friends"/>
Output:
Attributes of HTML img tag
The src and alt are important attributes of HTML img tag. All attributes of HTML image tag are given below.
1) src
It is a necessary attribute that describes the source or path of the image. It instructs the browser where to look for the
image on the server.
The location of image may be on the same directory or another server.
2) alt
The alt attribute defines an alternate text for the image, if it can't be displayed. The value of the alt attribute describe
the image in words. The alt attribute is considered good for SEO prospective.
3) width
It is an optional attribute which is used to specify the width to display the image. It is not recommended now. You
should apply CSS in place of width attribute.
4) height
It h3 the height of the image. The HTML height attribute also supports iframe, image and object elements. It is not
recommended now. You should apply CSS in place of height attribute.
Use of height and width attribute with img tag

24
You have learnt about how to insert an image in your web page, now if we want to give some height and width to
display image according to our requirement, then we can set it with height and width attributes of image.
Example:
1. <img src="animal.jpg" height="180" width="300" alt="animal image">
next →← prev
HTML Table
HTML table tag is used to display data in tabular form (row * column). There can be many columns in a row.
We can create a table to display data in tabular form, using <table> element, with the help of <tr> , <td>, and
<th> elements.
In Each table, table row is defined by <tr> tag, table header is defined by <th>, and table data is defined by <td>
tags.
HTML tables are used to manage the layout of the page e.g. header section, navigation bar, body content, footer
section etc. But it is recommended to use div tag over table to manage the layout of the page .
HTML Table Tags
Tag Description
<table> It defines a table.
<tr> It defines a row in a table.
<th> It defines a header cell in a table.
<td> It defines a cell in a table.
<caption> It defines the table caption.

25
<colgroup> It specifies a group of one or more columns in a table for formatting.
<col> It is used with <colgroup> element to specify column properties for each
column.
<tbody> It is used to group the body content in a table.
<thead> It is used to group the header content in a table.
<tfooter> It is used to group the footer content in a table.
HTML Table Example
Let's see the example of HTML table tag. It output is shown above.
1. <table>
2. <tr><th>First_Name</th><th>Last_Name</th><th>Marks</th></tr>
3. <tr><td>Sonoo</td><td>Jaiswal</td><td>60</td></tr>
4. <tr><td>James</td><td>William</td><td>80</td></tr>
5. <tr><td>Swati</td><td>Sironi</td><td>82</td></tr>
6. <tr><td>Chetna</td><td>Singh</td><td>72</td></tr>
7. </table>
Test it Now
Output:
First_Name Last_Name Marks
Sonoo Jaiswal 60
James William 80
Swati Sironi 82
Chetna Singh 72

26
In the above html table, there are 5 rows and 3 columns = 5 * 3 = 15 values.
HTML Table with Border
There are two ways to specify border for HTML tables.
1. By border attribute of table in HTML
2. By border property in CSS
1) HTML Border attribute
You can use border attribute of table tag in HTML to specify border. But it is not recommended now.
1. <table border="1">
2. <tr><th>First_Name</th><th>Last_Name</th><th>Marks</th></tr>
3. <tr><td>Sonoo</td><td>Jaiswal</td><td>60</td></tr>
4. <tr><td>James</td><td>William</td><td>80</td></tr>
5. <tr><td>Swati</td><td>Sironi</td><td>82</td></tr>
6. <tr><td>Chetna</td><td>Singh</td><td>72</td></tr>
7. </table>
Test it Now
Output:
First_Name Last_Name Marks
Sonoo Jaiswal 60
James William 80
Swati Sironi 82
Chetna Singh 72

27
2) CSS Border property
It is now recommended to use border property of CSS to specify border in table.
1. <style>
2. table, th, td {
3. border: 1px solid black;
4. }
5. </style>
Test it Now
You can collapse all the borders in one border by border-collapse property. It will collapse the border into one.
1. <style>
2. table, th, td {
3. border: 2px solid black;
4. border-collapse: collapse;
5. }
6. </style>
Output:
Name Last Name Marks
Sonoo Jaiswal 60
James William 80
Swati Sironi 82
Chetna Singh 72
HTML Table with cell padding
You can specify padding for table header and table data by two ways:
1. By cellpadding attribute of table in HTML
2. By padding property in CSS

28
The cellpadding attribute of HTML table tag is obselete now. It is recommended to use CSS. So let's see the
code of CSS.
1. <style>
2. table, th, td {
3. border: 1px solid pink;
4. border-collapse: collapse;
5. }
6. th, td {
7. padding: 10px;
8. }
9. </style>
Output:
Name Last Name Marks
Sonoo Jaiswal 60
James William 80
Swati Sironi 82
Chetna Singh 72
HTML Table width:
We can specify the HTML table width using the CSS width property. It can be specify in pixels or percentage.
We can adjust our table width as per our requirement. Following is the example to display table with width.
1. table{
2. width: 100%;
3. }

29
Example:
1. <!DOCTYPE html>
2. <html>
3. <head>
4. <title>table</title>
5. <style>
6. table{
7. border-collapse: collapse;
8. width: 100%;
9. }
10. th,td{
11. border: 2px solid green;
12. padding: 15px;
13. }
14.
15. </style>
16. </head>
17. <body>
18. <table>
19. <tr>
20. <th>1 header</th>
21. <th>1 header</th>
22. <th>1 header</th>
23. </tr>
24. <tr>
25. <td>1data</td>
26. <td>1data</td>
27. <td>1data</td>
28. </tr>
29. <tr>
30. <td>2 data</td>
31. <td>2 data</td>
32. <td>2 data</td>
33. </tr>
34. <tr>
35. <td>3 data</td>
36. <td>3 data</td>
37. <td>3 data</td>
38. </tr>
39. </table>

30
40. </body>
41. </html>
Test it Now
Output:
HTML Table with colspan
If you want to make a cell span more than one column, you can use the colspan attribute.
It will divide one cell/row into multiple columns, and the number of columns depend on the value of colspan
attribute.
Let's see the example that span two columns.
CSS code:
1. <style>
2. table, th, td {
3. border: 1px solid black;
4. border-collapse: collapse;
5. }
6. th, td {
7. padding: 5px;
8. }
9. </style>

31
HTML code:
1. <table style="width:100%">
2. <tr>
3. <th>Name</th>
4. <th colspan="2">Mobile No.</th>
5. </tr>
6. <tr>
7. <td>Ajeet Maurya</td>
8. <td>7503520801</td>
9. <td>9555879135</td>
10. </tr>
11. </table>
Output:
Name Mobile No.
Ajeet Maurya 7503520801 9555879135
HTML Table with rowspan
If you want to make a cell span more than one row, you can use the rowspan attribute.
It will divide a cell into multiple rows. The number of divided rows will depend on rowspan values.
Let's see the example that span two rows.
CSS code:
1. <style>
2. table, th, td {
3. border: 1px solid black;
4. border-collapse: collapse;
5. }
6. th, td {
7. padding: 10px;
8. }
9. </style>

32
HTML code:
1. <table>
2. <tr><th>Name</th><td>Ajeet Maurya</td></tr>
3. <tr><th rowspan="2">Mobile No.</th><td>7503520801</td></tr>
4. <tr><td>9555879135</td></tr>
5. </table>
Test it Now
Output:
Name Ajeet Maurya
Mobile No.
7503520801
9555879135
HTML table with caption
HTML caption is diplayed above the table. It must be used after table tag only.
1. <table>
2. <caption>Student Records</caption>
3. <tr><th>First_Name</th><th>Last_Name</th><th>Marks</th></tr>
4. <tr><td>Vimal</td><td>Jaiswal</td><td>70</td></tr>
5. <tr><td>Mike</td><td>Warn</td><td>60</td></tr>
6. <tr><td>Shane</td><td>Warn</td><td>42</td></tr>
7. <tr><td>Jai</td><td>Malhotra</td><td>62</td></tr>
8. </table>
Test it Now
Styling HTML table even and odd cells
CSS code:

33
1. <style>
2. table, th, td {
3. border: 1px solid black;
4. border-collapse: collapse;
5. }
6. th, td {
7. padding: 10px;
8. }
9. table#alter tr:nth-child(even) {
10. background-color: #eee;
11. }
12. table#alter tr:nth-child(odd) {
13. background-color: #fff;
14. }
15. table#alter th {
16. color: white;
17. background-color: gray;
18. }
19. </style>
Test it Now
Output:
HTML Lists
HTML Lists are used to specify lists of information. All lists may contain one or more list elements. There are three
different types of HTML lists:
1. Ordered List or Numbered List (ol)

34
2. Unordered List or Bulleted List (ul)
3. Description List or Definition List (dl)
HTML Ordered List or Numbered List
In the ordered HTML lists, all the list items are marked with numbers by default. It is known as numbered list also.
The ordered list starts with <ol> tag and the list items start with <li> tag.
1. <ol>
2. <li>Aries</li>
3. <li>Bingo</li>
4. <li>Leo</li>
5. <li>Oracle</li>
6. </ol>
Test it Now
Output:
1. Aries
2. Bingo
3. Leo
4. Oracle
HTML Unordered List or Bulleted List
In HTML Unordered list, all the list items are marked with bullets. It is also known as bulleted list also. The
Unordered list starts with <ul> tag and list items start with the <li> tag.
1. <ul>
2. <li>Aries</li>
3. <li>Bingo</li>
4. <li>Leo</li>
5. <li>Oracle</li>
6. </ul>
Test it Now
Output:
o Aries
o Bingo
o Leo

35
o Oracle
Click here for full details of HTML unordered list. HTML Unordered List
HTML Description List or Definition List
HTML Description list is also a list style which is supported by HTML and XHTML. It is also known as definition
list where entries are listed like a dictionary or encyclopedia.
The definition list is very appropriate when you want to present glossary, list of terms or other name-value list.
The HTML definition list contains following three tags:
1. <dl> tag defines the start of the list.
2. <dt> tag defines a term.
3. <dd> tag defines the term definition (description).
1. <dl>
2. <dt>Aries</dt>
3. <dd>-One of the 12 horoscope sign.</dd>
4. <dt>Bingo</dt>
5. <dd>-One of my evening snacks</dd>
6. <dt>Leo</dt>
7. <dd>-It is also an one of the 12 horoscope sign.</dd>
8. <dt>Oracle</dt>
9. <dd>-It is a multinational technology corporation.</dd>
10. </dl>
Test it Now
Output:
Aries
-One of the 12 horoscope sign.
Bingo
-One of my evening snacks
Leo
-It is also an one of the 12 horoscope sign.

36
Oracle
-It is a multinational technology corporation.
Click here for full details of HTML description list. HTML Description List
HTML Nested List
A list within another list is termed as nested list. If you want a bullet list inside a numbered list then such type of list
will called as nested list.
Code:
1. <!DOCTYPE html>
2. <html>
3. <head>
4. <title>Nested list</title>
5. </head>
6. <body>
7. <p>List of Indian States with thier capital</p>
8. <ol>
9. <li>Delhi
10. <ul>
11. <li>NewDelhi</li>
12. </ul>
13. </li>
14. <li>Haryana
15. <ul>
16. <li>Chandigarh</li>
17. </ul>
18. </li>
19. <li>Gujarat
20. <ul>
21. <li>Gandhinagar</li>
22. </ul>
23. </li>
24. <li>Rajasthan
25. <ul>
26. <li>Jaipur</li>
27. </ul>

37
28. </li>
29. <li>Maharashtra
30. <ul>
31. <li>Mumbai</li>
32. </ul>
33. </li>
34. <li>Uttarpradesh
35. <ul>
36. <li>Lucknow</li></ul>
37. </li>
38. </ol>
39. </body>
40. </html>
Output:
HTML Form
An HTML form is a section of a document which contains controls such as text fields, password fields, checkboxes, radio buttons, submit button, menus etc.
An HTML form facilitates the user to enter data that is to be sent to the server for processing such as name, email address, password, phone number, etc. .
Why use HTML Form

38
HTML forms are required if you want to collect some data from of the site visitor.
For example: If a user want to purchase some items on internet, he/she must fill the form such as shipping address and credit/debit card details so that item can
be sent to the given address.
HTML Form Syntax
1. <form action="server url" method="get|post">
2. //input controls e.g. textfield, textarea, radiobutton, button
3. </form>
HTML Form Tags
Let's see the list of HTML 5 form tags.
Tag Description
<form> It defines an HTML form to enter inputs by the used side.
<input> It defines an input control.
<textarea> It defines a multi-line input control.
<label> It defines a label for an input element.
<fieldset> It groups the related element in a form.
<legend> It defines a caption for a <fieldset> element.
<select> It defines a drop-down list.

39
<optgroup> It defines a group of related options in a drop-down list.
<option> It defines an option in a drop-down list.
<button> It defines a clickable button.
HTML 5 Form Tags
Let's see the list of HTML 5 form tags.
Tag Description
<datalist> It specifies a list of pre-defined options for input control.
<keygen> It defines a key-pair generator field for forms.
<output> It defines the result of a calculation.
HTML <form> element
The HTML <form> element provide a document section to take input from user. It provides various interactive controls for submitting information to web
server such as text field, text area, password field, etc.
Syntax:
1. <form>
2. //Form elements
3. </form>
HTML <input> element
The HTML <input> element is fundamental form element. It is used to create form fields, to take input from user. We can apply different input filed to gather
different information form user. Following is the example to show the simple text input.

40
Example:
1. <body>
2. <form>
3. Enter your name <br>
4. <input type="text" name="username">
5. </form>
HTML5 HTML5 is the latest specification of the HTML language, and represented a major break with
previous markup practices. The purpose of the profound changes to the language was to
standardize the many new ways in which developers were using it, as well as to encourage a
single set of best practices with regards to web development.
Most of the individual changes are a result of larger objectives in the design of the language.
These objectives primarily include:
Encouraging semantic (meaningful) markup
Separating design from content
Promoting accessibility and design responsiveness
Reducing the overlap between HTML, CSS, and JavaScript
Supporting rich media experiences while eliminating the need for plugins such as Flash
or Java
Getting a handle on HTML5 isn’t just about learning which CSS features replace old HTML
features. If you want to get an intuitive sense of HTML5, it is best to understand how these
objectives affected the development of the language.
Encouraging Semantic Markup Semantic markup means markup which has meaning, rather than markup which simply looks a
certain way. For example, the <h1> tag implies that the content of the element is the title or
headline of the entire document. That semantic meaning would be lost if we just made the text
bold and large without using the appropriate tag.
HTML has always had a little bit of semantic markup available to it: heading tags, the link rel
attribute, and document metadata. But it wasn’t enough.
In previous versions of the language, common structural elements like page headers, navigation
menus, and main content sections were all indicated with the same HTML element, the <div>
tag. In HTML, there are a host of new semantic elements intended to indicate the basic structure
of a page:
<header>
<nav>
<main>

41
<article>
<aside>
<section>
<footer>
New text-level (inline) elements have also been introduced, such as <address> and <time>.
These help search engines and other services to easily find information on a page, for display in
other contexts. At the same time, existing inline elements which produce various effects
like bold, italic, and underline have been refined or redefined to imply specific semantic
meaning.
I Use HTML5 The most straight-forward answer to that question is simply that it is the current, “right” version
of the language.
But some people seem unconvinced by this fact. Older markup practices still work in most
browsers — if you type <img align="right" /> onto your web page, the text will flow around the
image just the way you’d expect. Why not just do that? It’s easier!
There are a number of reasons to prefer HTML5, and to avoid using any of the deprecated
features. Some are practical, while others are more philosophical. Some are altruistic, while
others are selfish.
Easier to write
Easier to maintain
Easier to redesign
Better for Search Engine Optimization
Better for the blind and visually impaired
Better for content aggregators and feed readers
Better for users on mobile devices
Better for users on slower internet connections
Fewer chances of design breaks
Easier to add media
Easier to create interactive applications
Deprecated features will likely stop being supported at some point, breaking your page
How To Use HTML5 You probably already know how to create HTML5 documents. The basics of the language are the same. There’s a just a few things that are good to keep in
mind.
The HTML <input> element is used to create interactive controls for web-based forms in order to
accept data from the user; a wide variety of types of input data and control widgets are available,
depending on the device and user agent. The <input> element is one of the most powerful and
complex in all of HTML due to the sheer number of combinations of input types and attributes.

42
<input> types
How an <input> works varies considerably depending on the value of its type attribute, hence the
different types are covered in their own separate reference pages. If this attribute is not specified,
the default type adopted is text.
The available types are as follows:
Type Description
button
A push button with no default behavior displaying the value of
the value attribute, empty by default.
checkbox A check box allowing single values to be selected/deselected.
color
A control for specifying a color; opening a color picker when active in
supporting browsers.
date
A control for entering a date (year, month, and day, with no time). Opens
a date picker or numeric wheels for year, month, day when active in
supporting browsers.
datetime-
local
A control for entering a date and time, with no time zone. Opens a date
picker or numeric wheels for date- and time-components when active in
supporting browsers.
A field for editing an email address. Looks like a text input, but has
validation parameters and relevant keyboard in supporting browsers and
devices with dynamic keyboards.
file
A control that lets the user select a file. Use the accept attribute to define
the types of files that the control can select.
hidden
A control that is not displayed but whose value is submitted to the server.
There is an example in the next column, but it's hidden!
image
A graphical submit button. Displays an image defined by the src attribute.
The alt attribute displays if the image src is missing.

43
Type Description
month A control for entering a month and year, with no time zone.
number
A control for entering a number. Displays a spinner and adds default
validation when supported. Displays a numeric keypad in some devices
with dynamic keypads.
password
A single-line text field whose value is obscured. Will alert user if site is
not secure.
radio
A radio button, allowing a single value to be selected out of multiple
choices with the same name value.
range
A control for entering a number whose exact value is not important.
Displays as a range widget defaulting to the middle value. Used in
conjunction min and max to define the range of acceptable values.
reset
A button that resets the contents of the form to default values. Not
recommended.
search
A single-line text field for entering search strings. Line-breaks are
automatically removed from the input value. May include a delete icon in
supporting browsers that can be used to clear the field. Displays a search
icon instead of enter key on some devices with dynamic keypads.
submit A button that submits the form.
tel
A control for entering a telephone number. Displays a telephone keypad
in some devices with dynamic keypads.
text
The default value. A single-line text field. Line-breaks are automatically
removed from the input value.
time A control for entering a time value with no time zone.
url
A field for entering a URL. Looks like a text input, but has validation
parameters and relevant keyboard in supporting browsers and devices

44
Type Description
with dynamic keyboards.
week
A control for entering a date consisting of a week-year number and a
week number with no time zone.
datetime
A control for entering a date and time (hour, minute, second, and
fraction of a second) based on UTC time zone.
Attributes
The <input> element is so powerful because of its attributes; the type attribute, described with
examples above, being the most important. Since every <input> element, regardless of type, is
based on the HTMLInputElement interface, they technically share the exact same set of attributes.
However, in reality, most attributes have an effect on only a specific subset of input types. In
addition, the way some attributes impact an input depends on the input type, impacting different
input types in different ways.
This section provides a table listing all the attributes with a brief description. This table is
followed by a list describing each attribute in greater detail, along with which input types they are
associated with.Those that are common to most or all input types are defined in greater detail
below. Attributes that are unique to particular input types—or attributes which are common to all
input types but have special behaviors when used on a given input type—are instead documented
on those types' pages. This element includes the global attributes. Those with extra importance as
it relates to <input> are highlighted.
Attributes for the <input> element include global HTML attributes and:
Attribute Type or Types Description
accept file Hint for expected file type in file upload controls
alt image alt attribute for the image type. Required for accessibility
autocomplete all Hint for form autofill feature
autofocus all Automatically focus the form control when the page is loaded
capture file Media capture input method in file upload controls
checked radio, checkbox Whether the command or control is checked
dirname text, search Name of form field to use for sending the element's directionality in
form submission
disabled all Whether the form control is disabled
form all Associates the control with a form element

45
formaction image, submit URL to use for form submission
formenctype image, submit Form data set encoding type to use for form submission
formmethod image, submit HTTP method to use for form submission
formnovalidate image, submit Bypass form control validation for form submission
formtarget image, submit Browsing context for form submission
height image Same as height attribute for <img>; vertical dimension
list almost all Value of the id attribute of the <datalist> of autocomplete options
max numeric types Maximum value
maxlength password, search, tel,
text, url
Maximum length (number of characters) of value
min numeric types Minimum value
minlength password, search, tel,
text, url
Minimum length (number of characters) of value
multiple email, file Boolean. Whether to allow multiple values
name all Name of the form control. Submitted with the form as part of a
name/value pair.
pattern password, text, tel Pattern the value must match to be valid
placeholder password, search, tel,
text, url
Text that appears in the form control when it has no value set
readonly almost all Boolean. The value is not editable
required almost all Boolean. A value is required or must be check for the form to be
submittable
size email, password, tel,
text
Size of the control
src image Same as src attribute for <img>; address of image resource
step numeric types Incremental values that are valid.
type all Type of form control
value all At first, the initial value if specified explicitly in HTML. More
generally, the current value of the form control. Submitted with the
form as part of a name/value pair.
width image Same as width attribute for <img>
Key HTML5 Page Structure Elements
HTML5 provides a whole new way to structure page content. The impact of this aspect of
HTML5 is less dramatic, at least on the user end. The biggest impact of new HTML5
page structuring tags is on designers. The following elements are the key HTML5
elements used to organize page content:
<header>: This element holds content at the top of a page. This content often
includes a graphical or text page banner, perhaps a search box, sometimes content

46
introducing the page, and often a navigation bar. The <header> element is not the
same as a heading tag (h1, h2, and so on).
<nav>: This element holds navigation content, and can be (but does not have to
be) embedded with other elements (like a header or footer).
<article>: This element defines a specific article within a page. And, within an
article, <section> elements enclose subtopics within that particular
article. Note: You never use a section element outside an article element.
What constitutes an “article” or a “section” of an article? This is a judgment call
for content creators. Newspaper, magazine, or blog articles are — rather obviously
— articles. In a newspaper, magazine, or blog site, each article should be inside its
own <article> element. And subheadings should demarcate sections in that article.
In other text content, deciding what constitutes an article, or sections within an
article, is an editorial call.
<aside>: This element describes sidebar content, usually within an article. Sidebar
content is content associated with an article, or an article section, but which stands
on its own. Traditionally, sidebars are run on the side of an article (usually on the
right side) in online and print publications.
<footer>: This element holds typical footer content at the bottom of a page. That
might include legal notices, and secondary navigation content (which should be
organized into a nav element within the footer).
The page layout (with placeholder text and a bit of minimalist styling added) gives a
sense of how HTML5 elements fit together on, and frame, a page.

47
CANVAS
<canvas> is an HTML element which can be used to draw graphics via scripting (usually JavaScript). This
can, for instance, be used to draw graphs, combine photos, or create simple (and not so simple)
animations.
The grid

48
Before we can start drawing, we need to talk about the canvas
grid or coordinate space. Our HTML skeleton from the previous page had a canvas element 150
pixels wide and 150 pixels high. To the right, you see this canvas with the default grid overlayed.
Normally 1 unit in the grid corresponds to 1 pixel on the canvas. The origin of this grid is
positioned in the top left corner at coordinate (0,0). All elements are placed relative to this origin.
So the position of the top left corner of the blue square becomes x pixels from the left and y pixels
from the top, at coordinate (x,y). Later in this tutorial we'll see how we can translate the origin to
a different position, rotate the grid and even scale it, but for now we'll stick to the default.
Drawing rectangles
Unlike SVG, <canvas> only supports two primitive shapes: rectangles and paths (lists of points
connected by lines). All other shapes must be created by combining one or more paths. Luckily,
we have an assortment of path drawing functions which make it possible to compose very
complex shapes.
First let's look at the rectangle. There are three functions that draw rectangles on the canvas:
fillRect(x, y, width, height)
Draws a filled rectangle.
strokeRect(x, y, width, height)
Draws a rectangular outline.
clearRect(x, y, width, height)
Clears the specified rectangular area, making it fully transparent.
Each of these three functions takes the same parameters. x and y specify the position on the canvas
(relative to the origin) of the top-left corner of the rectangle. width and height provide the
rectangle's size.

49
Below is the draw() function from the previous page, but now it is making use of these three
functions.
Rectangular shape example
function draw() {
var canvas = document.getElementById('canvas');
if (canvas.getContext) {
var ctx = canvas.getContext('2d');
ctx.fillRect(25, 25, 100, 100);
ctx.clearRect(45, 45, 60, 60);
ctx.strokeRect(50, 50, 50, 50);
}
}
This example's output is shown below.
Screenshot Live sample
The fillRect() function draws a large black square 100 pixels on each side. The clearRect() function
then erases a 60x60 pixel square from the center, and then strokeRect() is called to create a
rectangular outline 50x50 pixels within the cleared square.
In upcoming pages we'll see two alternative methods for clearRect(), and we'll also see how to
change the color and stroke style of the rendered shapes.
Unlike the path functions we'll see in the next section, all three rectangle functions draw
immediately to the canvas.
Drawing paths

50
Now let's look at paths. A path is a list of points, connected by segments of lines that can be of
different shapes, curved or not, of different width and of different color. A path, or even a
subpath, can be closed. To make shapes using paths, we take some extra steps:
1. First, you create the path.
2. Then you use drawing commands to draw into the path. 3. Once the path has been created, you can stroke or fill the path to render it.
Here are the functions used to perform these steps:
beginPath()
Creates a new path. Once created, future drawing commands are directed into the path and used to
build the path up.
Path methods
Methods to set different paths for objects.
closePath()
Adds a straight line to the path, going to the start of the current sub-path.
stroke()
Draws the shape by stroking its outline.
fill()
Draws a solid shape by filling the path's content area.
The first step to create a path is to call the beginPath(). Internally, paths are stored as a list of sub-
paths (lines, arcs, etc) which together form a shape. Every time this method is called, the list is
reset and we can start drawing new shapes. Note: When the current path is empty, such as immediately after calling beginPath(), or on a newly created
canvas, the first path construction command is always treated as a moveTo(), regardless of what it actually
is. For that reason, you will almost always want to specifically set your starting position after resetting a
path.
The second step is calling the methods that actually specify the paths to be drawn. We'll see these
shortly.
The third, and an optional step, is to call closePath(). This method tries to close the shape by
drawing a straight line from the current point to the start. If the shape has already been closed or
there's only one point in the list, this function does nothing. Note: When you call fill(), any open shapes are closed automatically, so you don't have to call closePath().
This is not the case when you call stroke().

51
Drawing a triangle
For example, the code for drawing a triangle would look something like this:
function draw() {
var canvas = document.getElementById('canvas');
if (canvas.getContext) {
var ctx = canvas.getContext('2d');
ctx.beginPath();
ctx.moveTo(75, 50);
ctx.lineTo(100, 75);
ctx.lineTo(100, 25);
ctx.fill();
}
}
The result looks like this:
Screenshot Live sample
Moving the pen
One very useful function, which doesn't actually draw anything but becomes part of the path list
described above, is the moveTo() function. You can probably best think of this as lifting a pen or
pencil from one spot on a piece of paper and placing it on the next. moveTo(x, y)
Moves the pen to the coordinates specified by x and y.
When the canvas is initialized or beginPath() is called, you typically will want to use
the moveTo() function to place the starting point somewhere else. We could also use moveTo() to
draw unconnected paths. Take a look at the smiley face below.
To try this for yourself, you can use the code snippet below. Just paste it into the draw() function
we saw earlier.

52
function draw() {
var canvas = document.getElementById('canvas');
if (canvas.getContext) {
var ctx = canvas.getContext('2d');
ctx.beginPath();
ctx.arc(75, 75, 50, 0, Math.PI * 2, true); // Outer circle
ctx.moveTo(110, 75);
ctx.arc(75, 75, 35, 0, Math.PI, false); // Mouth (clockwise)
ctx.moveTo(65, 65);
ctx.arc(60, 65, 5, 0, Math.PI * 2, true); // Left eye
ctx.moveTo(95, 65);
ctx.arc(90, 65, 5, 0, Math.PI * 2, true); // Right eye
ctx.stroke();
}
}
The result looks like this:
Screenshot Live sample
If you'd like to see the connecting lines, you can remove the lines that call moveTo().
Note: To learn more about the arc() function, see the Arcs section below.
Lines
For drawing straight lines, use the lineTo() method. lineTo(x, y)
Draws a line from the current drawing position to the position specified by x and y.
This method takes two arguments, x and y, which are the coordinates of the line's end point. The
starting point is dependent on previously drawn paths, where the end point of the previous path is

53
the starting point for the following, etc. The starting point can also be changed by using
the moveTo() method.
The example below draws two triangles, one filled and one outlined.
function draw() {
var canvas = document.getElementById('canvas');
if (canvas.getContext) {
var ctx = canvas.getContext('2d');
// Filled triangle
ctx.beginPath();
ctx.moveTo(25, 25);
ctx.lineTo(105, 25);
ctx.lineTo(25, 105);
ctx.fill();
// Stroked triangle
ctx.beginPath();
ctx.moveTo(125, 125);
ctx.lineTo(125, 45);
ctx.lineTo(45, 125);
ctx.closePath();
ctx.stroke();
}
}
This starts by calling beginPath() to start a new shape path. We then use the moveTo() method to
move the starting point to the desired position. Below this, two lines are drawn which make up
two sides of the triangle.
Screenshot Live sample
You'll notice the difference between the filled and stroked triangle. This is, as mentioned above,
because shapes are automatically closed when a path is filled, but not when they are stroked. If we

54
left out the closePath() for the stroked triangle, only two lines would have been drawn, not a
complete triangle.
Arcs
To draw arcs or circles, we use the arc() or arcTo() methods. arc(x, y, radius, startAngle, endAngle, anticlockwise)
Draws an arc which is centered at (x, y) position with radius r starting at startAngle and ending
at endAngle going in the given direction indicated by anticlockwise (defaulting to clockwise).
arcTo(x1, y1, x2, y2, radius)
Draws an arc with the given control points and radius, connected to the previous point by a straight
line.
Let's have a more detailed look at the arc method, which takes six parameters: x and y are the
coordinates of the center of the circle on which the arc should be drawn. radius is self-explanatory.
The startAngle and endAngle parameters define the start and end points of the arc in radians, along
the curve of the circle. These are measured from the x axis. The anticlockwise parameter is a
Boolean value which, when true, draws the arc anticlockwise; otherwise, the arc is drawn
clockwise.
Note: Angles in the arc function are measured in radians, not degrees. To convert degrees to
radians you can use the following JavaScript expression: radians = (Math.PI/180)*degrees.
The following example is a little more complex than the ones we've seen above. It draws 12
different arcs all with different angles and fills.
The two for loops are for looping through the rows and columns of arcs. For each arc, we start a
new path by calling beginPath(). In the code, each of the parameters for the arc is in a variable for
clarity, but you wouldn't necessarily do that in real life.
The x and y coordinates should be clear enough. radius and startAngle are fixed. The endAngle starts
at 180 degrees (half a circle) in the first column and is increased by steps of 90 degrees,
culminating in a complete circle in the last column.
The statement for the clockwise parameter results in the first and third row being drawn as
clockwise arcs and the second and fourth row as counterclockwise arcs. Finally, the if statement
makes the top half stroked arcs and the bottom half filled arcs.
Note: This example requires a slightly larger canvas than the others on this page: 150 x 200
pixels.
function draw() {
var canvas = document.getElementById('canvas');
if (canvas.getContext) {
var ctx = canvas.getContext('2d');
for (var i = 0; i < 4; i++) {
for (var j = 0; j < 3; j++) {
ctx.beginPath();

55
var x = 25 + j * 50; // x coordinate
var y = 25 + i * 50; // y coordinate
var radius = 20; // Arc radius
var startAngle = 0; // Starting point on circle
var endAngle = Math.PI + (Math.PI * j) / 2; // End point on circle
var anticlockwise = i % 2 !== 0; // clockwise or anticlockwise
ctx.arc(x, y, radius, startAngle, endAngle, anticlockwise);
if (i > 1) {
ctx.fill();
} else {
ctx.stroke();
}
}
}
}
}
Screenshot Live sample
Bezier and quadratic curves
The next type of paths available are Bézier curves, available in both cubic and quadratic varieties.
These are generally used to draw complex organic shapes. quadraticCurveTo(cp1x, cp1y, x, y)
Draws a quadratic Bézier curve from the current pen position to the end point specified by x and y,
using the control point specified by cp1x and cp1y.
bezierCurveTo(cp1x, cp1y, cp2x, cp2y, x, y)

56
Draws a cubic Bézier curve from the current pen position to the end point specified by x and y,
using the control points specified by (cp1x, cp1y) and (cp2x, cp2y).
The difference between these can best be described using the image
on the right. A quadratic Bézier curve has a start and an end point (blue dots) and just one control
point (indicated by the red dot) while a cubic Bézier curve uses two control points.
The x and y parameters in both of these methods are the coordinates of the end
point. cp1x and cp1y are the coordinates of the first control point, and cp2x and cp2y are the
coordinates of the second control point.
Using quadratic and cubic Bézier curves can be quite challenging, because unlike vector drawing
software like Adobe Illustrator, we don't have direct visual feedback as to what we're doing. This
makes it pretty hard to draw complex shapes. In the following example, we'll be drawing some
simple organic shapes, but if you have the time and, most of all, the patience, much more complex
shapes can be created.
There's nothing very difficult in these examples. In both cases we see a succession of curves being
drawn which finally result in a complete shape.
Quadratic Bezier curves
This example uses multiple quadratic Bézier curves to render a speech balloon.
function draw() {
var canvas = document.getElementById('canvas');
if (canvas.getContext) {
var ctx = canvas.getContext('2d');
// Quadratric curves example
ctx.beginPath();
ctx.moveTo(75, 25);
ctx.quadraticCurveTo(25, 25, 25, 62.5);
ctx.quadraticCurveTo(25, 100, 50, 100);
ctx.quadraticCurveTo(50, 120, 30, 125);
ctx.quadraticCurveTo(60, 120, 65, 100);
ctx.quadraticCurveTo(125, 100, 125, 62.5);

57
ctx.quadraticCurveTo(125, 25, 75, 25);
ctx.stroke();
}
}
Screenshot Live sample
Cubic Bezier curves
This example draws a heart using cubic Bézier curves.
function draw() {
var canvas = document.getElementById('canvas');
if (canvas.getContext) {
var ctx = canvas.getContext('2d');
// Cubic curves example
ctx.beginPath();
ctx.moveTo(75, 40);
ctx.bezierCurveTo(75, 37, 70, 25, 50, 25);
ctx.bezierCurveTo(20, 25, 20, 62.5, 20, 62.5);
ctx.bezierCurveTo(20, 80, 40, 102, 75, 120);
ctx.bezierCurveTo(110, 102, 130, 80, 130, 62.5);
ctx.bezierCurveTo(130, 62.5, 130, 25, 100, 25);
ctx.bezierCurveTo(85, 25, 75, 37, 75, 40);
ctx.fill();
}
}
Screenshot Live sample

58
Screenshot Live sample
Rectangles
In addition to the three methods we saw in Drawing rectangles, which draw rectangular shapes
directly to the canvas, there's also the rect() method, which adds a rectangular path to a currently
open path. rect(x, y, width, height)
Draws a rectangle whose top-left corner is specified by (x, y) with the specified width and height.
Before this method is executed, the moveTo() method is automatically called with the parameters
(x,y). In other words, the current pen position is automatically reset to the default coordinates.
HTML5 Canvas : Adding Shadows Last update on February 26 2020 08:07:07 (UTC/GMT +8 hours)
Shadows
In HTML5 canvas, you can add shadows on a shape, a line, text, or an image which can
create a sense of third dimension. To add shadows with the HTML5 Canvas, you can use
the following properties of the canvas context.
shadowOffsetX
shadowOffsetY
shadowColor
shadowBlur

59
shadowOffsetX() Property
The property is used to get or set the horizontal distance of a shadow from a shape. You
can use positive or negative values to control the position of a shadow. The default value
is zero.
Syntax:
ctx.shadowOffsetX = h_distance;
Where h_distance (type: number) is the horizontal distance of a shadow from a shape.
shadowOffsetY() Property
The property is used to get or set the vertical distance of a shadow from a shape. You can
use positive or negative values to control the position of a shadow. The default value is
zero.
Syntax:
ctx.shadowOffsetX = v_distance;
Where v_distance (type: number) is the vertical distance of a shadow from a shape.
shadowColor() Property
The property is used to get or set the color to use for shadows.
Syntax:
ctx.shadowColor
Where shadowColor (type: string) is the CSS color.
shadowBlur() Property
The property is used to get or set the current level of blur that is applied to shadows.
Syntax:

60
ctx.shadowBlur = blur_value
Where blur_value is the amount of blur (type: number) that is applied to shadows.
Example: HTML5 Canvas adding shadow
The following web document creates a series of squares that have different degrees of
shadow blur.
Output:

61
UNIT 2
JAVA SCRIPT
What is JavaScript
JavaScript (js) is a light-weight object-oriented programming language which is used by several
websites for scripting the webpages. It is an interpreted, full-fledged programming language that
enables dynamic interactivity on websites when applied to an HTML document. It was
introduced in the year 1995 for adding programs to the webpages in the Netscape Navigator
browser. Since then, it has been adopted by all other graphical web browsers. With JavaScript,
users can build modern web applications to interact directly without reloading the page every
time. The traditional website uses js to provide several forms of interactivity and simplicity.
Although, JavaScript has no connectivity with Java programming language. The name was
suggested and provided in the times when Java was gaining popularity in the market. In addition
to web browsers, databases such as CouchDB and MongoDB uses JavaScript as their scripting
and query language.
Features of JavaScript
There are following features of JavaScript:
1. All popular web browsers support JavaScript as they provide built-in execution
environments.
2. JavaScript follows the syntax and structure of the C programming language. Thus, it is a
structured programming language.
3. JavaScript is a weakly typed language, where certain types are implicitly cast (depending
on the operation).
4. JavaScript is an object-oriented programming language that uses prototypes rather than
using classes for inheritance.
5. It is a light-weighted and interpreted language.
6. It is a case-sensitive language.
7. JavaScript is supportable in several operating systems including, Windows, macOS, etc.
8. It provides good control to the users over the web browsers.
History of JavaScript
In 1993, Mosaic, the first popular web browser, came into existence. In the year
1994, Netscape was founded by Marc Andreessen. He realized that the web needed to become
more dynamic. Thus, a 'glue language' was believed to be provided to HTML to make web

62
designing easy for designers and part-time programmers. Consequently, in 1995, the company
recruited Brendan Eich intending to implement and embed Scheme programming language to
the browser. But, before Brendan could start, the company merged with Sun Microsystems for
adding Java into its Navigator so that it could compete with Microsoft over the web technologies
and platforms. Now, two languages were there: Java and the scripting language. Further,
Netscape decided to give a similar name to the scripting language as Java's. It led to 'Javascript'.
Finally, in May 1995, Marc Andreessen coined the first code of Javascript named 'Mocha'.
Later, the marketing team replaced the name with 'LiveScript'. But, due to trademark reasons
and certain other reasons, in December 1995, the language was finally renamed to 'JavaScript'.
From then, JavaScript came into existence.
Application of JavaScript
JavaScript is used to create interactive websites. It is mainly used for:
o Client-side validation,
o Dynamic drop-down menus,
o Displaying date and time,
o Displaying pop-up windows and dialog boxes (like an alert dialog box, confirm dialog
box and prompt dialog box),
o Displaying clocks etc.
JavaScript Variable
1. JavaScript variable
2. JavaScript Local variable
3. JavaScript Global variable
A JavaScript variable is simply a name of storage location. There are two types of variables in JavaScript : local
variable and global variable.
There are some rules while declaring a JavaScript variable (also known as identifiers).
1. Name must start with a letter (a to z or A to Z), underscore( _ ), or dollar( $ ) sign.
2. After first letter we can use digits (0 to 9), for example value1.
3. JavaScript variables are case sensitive, for example x and X are different variables.
Correct JavaScript variables
1. var x = 10;

63
2. var _value="sonoo";
Incorrect JavaScript variables
1. var 123=30;
2. var *aa=320;
Example of JavaScript variable
Let’s see a simple example of JavaScript variable.
1. <script>
2. var x = 10;
3. var y = 20;
4. var z=x+y;
5. document.write(z);
6. </script>
Test it Now
Output of the above example 30
JavaScript local variable
A JavaScript local variable is declared inside block or function. It is accessible within the function or block only. For
example:
1. <script>
2. function abc(){
3. var x=10;//local variable
4. }
5. </script>
Or,
1. <script>
2. If(10<13){
3. var y=20;//JavaScript local variable
4. }
5. </script>

64
JavaScript global variable
A JavaScript global variable is accessible from any function. A variable i.e. declared outside the function or
declared with window object is known as global variable. For example:
1. <script>
2. var data=200;//gloabal variable
3. function a(){
4. document.writeln(data);
5. }
6. function b(){
7. document.writeln(data);
8. }
9. a();//calling JavaScript function
10. b();
11. </script>
Javascript Data Types
JavaScript provides different data types to hold different types of values. There are two types of data types in
JavaScript.
1. Primitive data type
2. Non-primitive (reference) data type
JavaScript is a dynamic type language, means you don't need to specify type of the variable because it is
dynamically used by JavaScript engine. You need to use var here to specify the data type. It can hold any type of
values such as numbers, strings etc. For example:
1. var a=40;//holding number
2. var b="Rahul";//holding string
JavaScript primitive data types
There are five types of primitive data types in JavaScript. They are as follows:
Data Type Description

65
String represents sequence of characters e.g. "hello"
Number represents numeric values e.g. 100
Boolean represents boolean value either false or true
Undefined represents undefined value
Null represents null i.e. no value at all
JavaScript non-primitive data types
The non-primitive data types are as follows:
Data Type Description
Object represents instance through which we can access members
Array represents group of similar values
RegExp represents regular expression
JavaScript Operators
JavaScript operators are symbols that are used to perform operations on operands. For example:
1. var sum=10+20;
Here, + is the arithmetic operator and = is the assignment operator.
There are following types of operators in JavaScript.
1. Arithmetic Operators
2. Comparison (Relational) Operators
3. Bitwise Operators
4. Logical Operators
5. Assignment Operators
6. Special Operators

66
JavaScript Arithmetic Operators
Arithmetic operators are used to perform arithmetic operations on the operands. The following operators are known
as JavaScript arithmetic operators.
Operator Description Example
+ Addition 10+20 = 30
- Subtraction 20-10 = 10
* Multiplication 10*20 = 200
/ Division 20/10 = 2
% Modulus (Remainder) 20%10 = 0
++ Increment var a=10; a++; Now a = 11
-- Decrement var a=10; a--; Now a = 9
JavaScript Comparison Operators
The JavaScript comparison operator compares the two operands. The comparison operators are as follows:
Operator Description Example
== Is equal to 10==20 = false
=== Identical (equal and of same type) 10==20 = false
!= Not equal to 10!=20 = true
!== Not Identical 20!==20 = false
> Greater than 20>10 = true
>= Greater than or equal to 20>=10 = true
< Less than 20<10 = false

67
<= Less than or equal to 20<=10 = false
JavaScript Bitwise Operators
The bitwise operators perform bitwise operations on operands. The bitwise operators are as follows:
Operator Description Example
& Bitwise AND (10==20 & 20==33) = false
| Bitwise OR (10==20 | 20==33) = false
^ Bitwise XOR (10==20 ^ 20==33) = false
~ Bitwise NOT (~10) = -10
<< Bitwise Left Shift (10<<2) = 40
>> Bitwise Right Shift (10>>2) = 2
>>> Bitwise Right Shift with Zero (10>>>2) = 2
JavaScript Logical Operators
The following operators are known as JavaScript logical operators.
Operator Description Example
&& Logical AND (10==20 && 20==33) = false
|| Logical OR (10==20 || 20==33) = false
! Logical Not !(10==20) = true
JavaScript Assignment Operators
The following operators are known as JavaScript assignment operators.

68
Operator Description Example
= Assign 10+10 = 20
+= Add and assign var a=10; a+=20; Now a = 30
-= Subtract and assign var a=20; a-=10; Now a = 10
*= Multiply and assign var a=10; a*=20; Now a = 200
/= Divide and assign var a=10; a/=2; Now a = 5
%= Modulus and assign var a=10; a%=2; Now a = 0
JavaScript Special Operators
The following operators are known as JavaScript special operators.
Operator Description
(?:) Conditional Operator returns value based on the condition. It is like if-else.
, Comma Operator allows multiple expressions to be evaluated as single statement.
delete Delete Operator deletes a property from the object.
in In Operator checks if object has the given property
instanceof checks if the object is an instance of given type
new creates an instance (object)
typeof checks the type of object.
void it discards the expression's return value.
yield checks what is returned in a generator by the generator's iterator.
JavaScript If-else

69
The JavaScript if-else statement is used to execute the code whether condition is true or false. There are three
forms of if statement in JavaScript.
1. If Statement
2. If else statement
3. if else if statement
JavaScript If statement
It evaluates the content only if expression is true. The signature of JavaScript if statement is given below.
1. if(expression){
2. //content to be evaluated
3. }
Flowchart of JavaScript If statement

70
Let’s see the simple example of if statement in javascript.
1. <script>
2. var a=20;
3. if(a>10){
4. document.write("value of a is greater than 10");
5. }
6. </script>
Test it Now
Output of the above example value of a is greater than 10
JavaScript If...else Statement
It evaluates the content whether condition is true of false. The syntax of JavaScript if-else statement is given below.
1. if(expression){
2. //content to be evaluated if condition is true
3. }
4. else{
5. //content to be evaluated if condition is false
6. }
Flowchart of JavaScript If...else statement

71
Let’s see the example of if-else statement in JavaScript to find out the even or odd number.
1. <script>
2. var a=20;
3. if(a%2==0){
4. document.write("a is even number");
5. }
6. else{
7. document.write("a is odd number");
8. }
9. </script>
Test it Now
Output of the above example a is even number
JavaScript If...else if statement
It evaluates the content only if expression is true from several expressions. The signature of JavaScript if else if
statement is given below.
1. if(expression1){
2. //content to be evaluated if expression1 is true
3. }
4. else if(expression2){
5. //content to be evaluated if expression2 is true
6. }
7. else if(expression3){
8. //content to be evaluated if expression3 is true
9. }
10. else{
11. //content to be evaluated if no expression is true
12. }
Let’s see the simple example of if else if statement in javascript.
1. <script>
2. var a=20;
3. if(a==10){
4. document.write("a is equal to 10");
5. }
6. else if(a==15){

72
7. document.write("a is equal to 15");
8. }
9. else if(a==20){
10. document.write("a is equal to 20");
11. }
12. else{
13. document.write("a is not equal to 10, 15 or 20");
14. }
15. </script>
Output of the above example a is equal to 20
JavaScript Switch
The JavaScript switch statement is used to execute one code from multiple expressions. It is just like else if
statement that we have learned in previous page. But it is convenient than if..else..if because it can be used with
numbers, characters etc.
The signature of JavaScript switch statement is given below.
1. switch(expression){
2. case value1:
3. code to be executed;
4. break;
5. case value2:
6. code to be executed;
7. break;
8. ......
9.
10. default:
11. code to be executed if above values are not matched;
12. }
Let’s see the simple example of switch statement in javascript.
1. <script>
2. var grade='B';
3. var result;
4. switch(grade){
5. case 'A':
6. result="A Grade";
7. break;

73
8. case 'B':
9. result="B Grade";
10. break;
11. case 'C':
12. result="C Grade";
13. break;
14. default:
15. result="No Grade";
16. }
17. document.write(result);
18. </script>
JavaScript Loops
The JavaScript loops are used to iterate the piece of code using for, while, do while or for-in loops. It makes the
code compact. It is mostly used in array.
There are four types of loops in JavaScript.
1. for loop
2. while loop
3. do-while loop
4. for-in loop
1) JavaScript For loop
The JavaScript for loop iterates the elements for the fixed number of times. It should be used if number of iteration
is known. The syntax of for loop is given below.
1. for (initialization; condition; increment)
2. {
3. code to be executed
4. }
Let’s see the simple example of for loop in javascript.
1. <script>
2. for (i=1; i<=5; i++)
3. {
4. document.write(i + "<br/>")
5. }

74
6. </script>
Test it Now
Output:
1
2
3
4
5
2) JavaScript while loop
The JavaScript while loop iterates the elements for the infinite number of times. It should be used if number of
iteration is not known. The syntax of while loop is given below.
1. while (condition)
2. {
3. code to be executed
4. }
Let’s see the simple example of while loop in javascript.
1. <script>
2. var i=11;
3. while (i<=15)
4. {
5. document.write(i + "<br/>");
6. i++;
7. }
8. </script>
Test it Now
Output:
11
12
13
14
15
3) JavaScript do while loop
The JavaScript do while loop iterates the elements for the infinite number of times like while loop. But, code
is executed at least once whether condition is true or false. The syntax of do while loop is given below.

75
1. do{
2. code to be executed
3. }while (condition);
Let’s see the simple example of do while loop in javascript.
1. <script>
2. var i=21;
3. do{
4. document.write(i + "<br/>");
5. i++;
6. }while (i<=25);
7. </script>
Test it Now
Output:
21
22
23
24
25
JavaScript Functions
JavaScript functions are used to perform operations. We can call JavaScript function many times to reuse the code.
Advantage of JavaScript function
There are mainly two advantages of JavaScript functions.
1. Code reusability: We can call a function several times so it save coding.
2. Less coding: It makes our program compact. We don’t need to write many lines of code each time to
perform a common task.
JavaScript Function Syntax
The syntax of declaring function is given below.
1. function functionName([arg1, arg2, ...argN]){
2. //code to be executed
3. }

76
JavaScript Functions can have 0 or more arguments.
JavaScript Function Example
Let’s see the simple example of function in JavaScript that does not has arguments.
1. <script>
2. function msg(){
3. alert("hello! this is message");
4. }
5. </script>
6. <input type="button" onclick="msg()" value="call function"/>
Test it Now
Output of the above example
JavaScript Function Arguments
We can call function by passing arguments. Let’s see the example of function that has one argument.
1. <script>
2. function getcube(number){
3. alert(number*number*number);
4. }
5. </script>
6. <form>
7. <input type="button" value="click" onclick="getcube(4)"/>
8. </form>
Test it Now
Output of the above example
Function with Return Value
We can call function that returns a value and use it in our program. Let’s see the example of function that returns
value.
1. <script>
2. function getInfo(){
3. return "hello javatpoint! How r u?";
4. }
5. </script>
6. <script>

77
7. document.write(getInfo());
8. </script>
Test it Now
Output of the above example hello javatpoint! How r u?
JavaScript Function Object
In JavaScript, the purpose of Function constructor is to create a new Function object. It executes the code
globally. However, if we call the constructor directly, a function is created dynamically but in an unsecured way.
Syntax
1. new Function ([arg1[, arg2[, ....argn]],] functionBody)
Parameter
arg1, arg2, .... , argn - It represents the argument used by function.
functionBody - It represents the function definition.
JavaScript Function Methods
Let's see function methods with description.
Method Description
apply() It is used to call a function contains this value and a single array of arguments.
bind() It is used to create a new function.
call() It is used to call a function contains this value and an argument list.
toString() It returns the result in a form of a string.

78
JavaScript Function Object Examples
Example 1
Let's see an example to display the sum of given numbers.
1. <script>
2. var add=new Function("num1","num2","return num1+num2");
3. document.writeln(add(2,5));
4. </script>
Test it Now
Output:
7
Example 2
Let's see an example to display the power of provided value.
1. <script>
2. var pow=new Function("num1","num2","return Math.pow(num1,num2)");
3. document.writeln(pow(2,3));
4. </script>
Test it Now
Output:
8
JavaScript Objects
A javaScript object is an entity having state and behavior (properties and method). For example: car, pen, bike,
chair, glass, keyboard, monitor etc.
JavaScript is an object-based language. Everything is an object in JavaScript.
JavaScript is template based not class based. Here, we don't create class to get the object. But, we direct create
objects.
Creating Objects in JavaScript
There are 3 ways to create objects.

79
1. By object literal
2. By creating instance of Object directly (using new keyword)
3. By using an object constructor (using new keyword)
1) JavaScript Object by object literal
The syntax of creating object using object literal is given below:
1. object={property1:value1,property2:value2.....propertyN:valueN}
As you can see, property and value is separated by : (colon).
Let’s see the simple example of creating object in JavaScript.
1. <script>
2. emp={id:102,name:"Shyam Kumar",salary:40000}
3. document.write(emp.id+" "+emp.name+" "+emp.salary);
4. </script>
Test it Now
Output of the above example 102 Shyam Kumar 40000
2) By creating instance of Object
The syntax of creating object directly is given below:
1. var objectname=new Object();
Here, new keyword is used to create object.
Let’s see the example of creating object directly.
1. <script>
2. var emp=new Object();
3. emp.id=101;
4. emp.name="Ravi Malik";
5. emp.salary=50000;
6. document.write(emp.id+" "+emp.name+" "+emp.salary);
7. </script>

80
Test it Now
Output of the above example 101 Ravi 50000
3) By using an Object constructor
Here, you need to create function with arguments. Each argument value can be assigned in the current object by
using this keyword.
The this keyword refers to the current object.
The example of creating object by object constructor is given below.
1. <script>
2. function emp(id,name,salary){
3. this.id=id;
4. this.name=name;
5. this.salary=salary;
6. }
7. e=new emp(103,"Vimal Jaiswal",30000);
8.
9. document.write(e.id+" "+e.name+" "+e.salary);
10. </script>
Test it Now
Output of the above example 103 Vimal Jaiswal 30000
Defining method in JavaScript Object
We can define method in JavaScript object. But before defining method, we need to add property in the function
with same name as method.
The example of defining method in object is given below.
1. <script>
2. function emp(id,name,salary){
3. this.id=id;
4. this.name=name;
5. this.salary=salary;

81
6.
7. this.changeSalary=changeSalary;
8. function changeSalary(otherSalary){
9. this.salary=otherSalary;
10. }
11. }
12. e=new emp(103,"Sonoo Jaiswal",30000);
13. document.write(e.id+" "+e.name+" "+e.salary);
14. e.changeSalary(45000);
15. document.write("<br>"+e.id+" "+e.name+" "+e.salary);
16. </script>
Test it Now
Output of the above example 103 Sonoo Jaiswal 30000
103 Sonoo Jaiswal 45000
JavaScript Object Methods
The various methods of Object are as follows:
S.N
o
Methods Description
1 Object.assign() This method is used to copy enumerable and own properties from a
source object to a target object
2 Object.create() This method is used to create a new object with the specified
prototype object and properties.
3 Object.defineProperty() This method is used to describe some behavioral attributes of the
property.
4 Object.defineProperties() This method is used to create or configure multiple object properties.
5 Object.entries() This method returns an array with arrays of the key, value pairs.

82
6 Object.freeze() This method prevents existing properties from being removed.
7 Object.getOwnPropertyDescri
ptor()
This method returns a property descriptor for the specified property
of the specified object.
8 Object.getOwnPropertyDescri
ptors()
This method returns all own property descriptors of a given object.
9 Object.getOwnPropertyNames
()
This method returns an array of all properties (enumerable or not)
found.
10 Object.getOwnPropertySymb
ols()
This method returns an array of all own symbol key properties.
11 Object.getPrototypeOf() This method returns the prototype of the specified object.
12 Object.is() This method determines whether two values are the same value.
13 Object.isExtensible() This method determines if an object is extensible
14 Object.isFrozen() This method determines if an object was frozen.
15 Object.isSealed() This method determines if an object is sealed.
16 Object.keys() This method returns an array of a given object's own property names.
17 Object.preventExtensions() This method is used to prevent any extensions of an object.
18 Object.seal() This method prevents new properties from being added and marks all
existing properties as non-configurable.
19 Object.setPrototypeOf() This method sets the prototype of a specified object to another object.

83
20 Object.values() This method returns an array of values.
JavaScript Array
JavaScript array is an object that represents a collection of similar type of elements.
There are 3 ways to construct array in JavaScript
1. By array literal
2. By creating instance of Array directly (using new keyword)
3. By using an Array constructor (using new keyword)
1) JavaScript array literal
The syntax of creating array using array literal is given below:
1. var arrayname=[value1,value2.....valueN];
As you can see, values are contained inside [ ] and separated by , (comma).
Let's see the simple example of creating and using array in JavaScript.
1. <script>
2. var emp=["Sonoo","Vimal","Ratan"];
3. for (i=0;i<emp.length;i++){
4. document.write(emp[i] + "<br/>");
5. }
6. </script>
Test it Now
The .length property returns the length of an array.
Output of the above example
Sonoo
Vimal
Ratan
2) JavaScript Array directly (new keyword)
The syntax of creating array directly is given below:
1. var arrayname=new Array();

84
Here, new keyword is used to create instance of array.
Let's see the example of creating array directly.
1. <script>
2. var i;
3. var emp = new Array();
4. emp[0] = "Arun";
5. emp[1] = "Varun";
6. emp[2] = "John";
7.
8. for (i=0;i<emp.length;i++){
9. document.write(emp[i] + "<br>");
10. }
11. </script>
Test it Now
Output of the above example
Arun
Varun John
3) JavaScript array constructor (new keyword)
Here, you need to create instance of array by passing arguments in constructor so that we don't have to provide value
explicitly.
The example of creating object by array constructor is given below.
1. <script>
2. var emp=new Array("Jai","Vijay","Smith");
3. for (i=0;i<emp.length;i++){
4. document.write(emp[i] + "<br>");
5. }
6. </script>
Test it Now
Output of the above example
Jai
Vijay
Smith
JavaScript Array Methods

85
Let's see the list of JavaScript array methods with their description.
Methods Description
concat() It returns a new array object that contains two or more merged arrays.
copywithin() It copies the part of the given array with its own elements and returns the modified
array.
entries() It creates an iterator object and a loop that iterates over each key/value pair.
every() It determines whether all the elements of an array are satisfying the provided
function conditions.
flat() It creates a new array carrying sub-array elements concatenated recursively till the
specified depth.
flatMap() It maps all array elements via mapping function, then flattens the result into a new
array.
fill() It fills elements into an array with static values.
from() It creates a new array carrying the exact copy of another array element.
filter() It returns the new array containing the elements that pass the provided function
conditions.
find() It returns the value of the first element in the given array that satisfies the specified
condition.
findIndex() It returns the index value of the first element in the given array that satisfies the
specified condition.

86
forEach() It invokes the provided function once for each element of an array.
includes() It checks whether the given array contains the specified element.
indexOf() It searches the specified element in the given array and returns the index of the first
match.
isArray() It tests if the passed value ia an array.
join() It joins the elements of an array as a string.
keys() It creates an iterator object that contains only the keys of the array, then loops
through these keys.
lastIndexOf() It searches the specified element in the given array and returns the index of the last
match.
map() It calls the specified function for every array element and returns the new array
of() It creates a new array from a variable number of arguments, holding any type of
argument.
pop() It removes and returns the last element of an array.
push() It adds one or more elements to the end of an array.
reverse() It reverses the elements of given array.
reduce(function, initial) It executes a provided function for each value from left to right and reduces the
array to a single value.
reduceRight() It executes a provided function for each value from right to left and reduces the

87
array to a single value.
some() It determines if any element of the array passes the test of the implemented
function.
shift() It removes and returns the first element of an array.
slice() It returns a new array containing the copy of the part of the given array.
sort() It returns the element of the given array in a sorted order.
splice() It add/remove elements to/from the given array.
toLocaleString() It returns a string containing all the elements of a specified array.
toString() It converts the elements of a specified array into string form, without affecting the
original array.
unshift() It adds one or more elements in the beginning of the given array.
values() It creates a new iterator object carrying values for each index in the array.
JavaScript Events
The change in the state of an object is known as an Event. In html, there are various events which represents that
some activity is performed by the user or by the browser. When javascript code is included in HTML, js react over
these events and allow the execution. This process of reacting over the events is called Event Handling. Thus, js
handles the HTML events via Event Handlers.
For example, when a user clicks over the browser, add js code, which will execute the task to be performed on the
event.
Some of the HTML events and their event handlers are:
Mouse events:

88
Event Performed Event Handler Description
click onclick When mouse click on an element
mouseover onmouseover When the cursor of the mouse comes over the element
mouseout onmouseout When the cursor of the mouse leaves an element
mousedown onmousedown When the mouse button is pressed over the element
mouseup onmouseup When the mouse button is released over the element
mousemove onmousemove When the mouse movement takes place.
Keyboard events:
Event Performed Event Handler Description
Keydown & Keyup onkeydown & onkeyup When the user press and then release the key
Form events:
Event Performed Event Handler Description
focus onfocus When the user focuses on an element
submit onsubmit When the user submits the form
blur onblur When the focus is away from a form element

89
change onchange When the user modifies or changes the value of a form element
Window/Document events
Event Performed Event Handler Description
load onload When the browser finishes the loading of the page
unload onunload When the visitor leaves the current webpage, the browser unloads it
resize onresize When the visitor resizes the window of the browser
Let's discuss some examples over events and their handlers.
Click Event
1. <html>
2. <head> Javascript Events </head>
3. <body>
4. <script language="Javascript" type="text/Javascript">
5. <!--
6. function clickevent()
7. {
8. document.write("This is JavaTpoint");
9. }
10. //-->
11. </script>
12. <form>
13. <input type="button" onclick="clickevent()" value="Who's this?"/>
14. </form>
15. </body>
16. </html>
Test it Now
MouseOver Event
1. <html>

90
2. <head>
3. <h1> Javascript Events </h1>
4. </head>
5. <body>
6. <script language="Javascript" type="text/Javascript">
7. <!--
8. function mouseoverevent()
9. {
10. alert("This is JavaTpoint");
11. }
12. //-->
13. </script>
14. <p onmouseover="mouseoverevent()"> Keep cursor over me</p>
15. </body>
16. </html>
Test it Now
Focus Event
1. <html>
2. <head> Javascript Events</head>
3. <body>
4. <h2> Enter something here</h2>
5. <input type="text" id="input1" onfocus="focusevent()"/>
6. <script>
7. <!--
8. function focusevent()
9. {
10. document.getElementById("input1").style.background=" aqua";
11. }
12. //-->
13. </script>
14. </body>
15. </html>
Test it Now
Keydown Event
1. <html>
2. <head> Javascript Events</head>
3. <body>
4. <h2> Enter something here</h2>

91
5. <input type="text" id="input1" onkeydown="keydownevent()"/>
6. <script>
7. <!--
8. function keydownevent()
9. {
10. document.getElementById("input1");
11. alert("Pressed a key");
12. }
13. //-->
14. </script>
15. </body>
16. </html>
Test it Now
Load event
1. <html>
2. <head>Javascript Events</head>
3. </br>
4. <body onload="window.alert('Page successfully loaded');">
5. <script>
6. <!--
7. document.write("The page is loaded successfully");
8. //-->
9. </script>
10. </body>
11. </html>
12.
btn.style.color = "";
13. }
14. var mybtn = document.getElementById("btn");
15. mybtn.addEventListener("mouseover", fun);
16. mybtn.addEventListener("click", fun1);
17. mybtn.addEventListener("mouseout", fun2);
18. </script>
19. </body>
20. </html>
Test it Now
Output

92
When we move the cursor over the button, the output will be -
After clicking the button and leave the cursor, the output will be -
JQUERY
jQuery is a fast and concise JavaScript Library created by John Resig in 2006 with a nice
motto: Write less, do more. jQuery simplifies HTML document traversing, event handling,
animating, and Ajax interactions for rapid web development. jQuery is a JavaScript toolkit

93
designed to simplify various tasks by writing less code. Here is the list of important core
features supported by jQuery −
DOM manipulation − The jQuery made it easy to select DOM elements, negotiate them
and modifying their content by using cross-browser open source selector engine
called Sizzle.
Event handling − The jQuery offers an elegant way to capture a wide variety of events,
such as a user clicking on a link, without the need to clutter the HTML code itself with
event handlers.
AJAX Support − The jQuery helps you a lot to develop a responsive and featurerich site
using AJAX technology.
Animations − The jQuery comes with plenty of built-in animation effects which you can
use in your websites.
Lightweight − The jQuery is very lightweight library - about 19KB in size (Minified and
gzipped).
Cross Browser Support − The jQuery has cross-browser support, and works well in IE
6.0+, FF 2.0+, Safari 3.0+, Chrome and Opera 9.0+
Latest Technology − The jQuery supports CSS3 selectors and basic XPath syntax.
How to use jQuery?
There are two ways to use jQuery.
Local Installation − You can download jQuery library on your local machine and
include it in your HTML code.
CDN Based Version − You can include jQuery library into your HTML code directly
from Content Delivery Network (CDN).
Local Installation
Go to the https://jquery.com/download/ to download the latest version available.
Now put downloaded jquery-2.1.3.min.js file in a directory of your website, e.g.
/jquery.
Example
Now you can include jquery library in your HTML file as follows −
<html>
<head>
<title>The jQuery Example</title>
<script type = "text/javascript" src = "/jquery/jquery-2.1.3.min.js">
</script>

94
<script type = "text/javascript">
$(document).ready(function() {
document.write("Hello, World!");
});
</script>
</head>
<body>
<h1>Hello</h1>
</body>
</html>
This will produce following result −
CDN Based Version
You can include jQuery library into your HTML code directly from Content Delivery Network
(CDN). Google and Microsoft provides content deliver for the latest version.
We are using Google CDN version of the library throughout this tutorial.
Example
Now let us rewrite above example using jQuery library from Google CDN.
Live Demo
<html>
<head>
<title>The jQuery Example</title>
<script type = "text/javascript"
src = "https://ajax.googleapis.com/ajax/libs/jquery/2.1.3/jquery.min.js">
</script>
<script type = "text/javascript">
$(document).ready(function() {
document.write("Hello, World!");
});
</script>
</head>
<body>
<h1>Hello</h1>
</body>
</html>
This will produce following result −
How to Call a jQuery Library Functions?

95
As almost everything, we do when using jQuery reads or manipulates the document object
model (DOM), we need to make sure that we start adding events etc. as soon as the DOM is
ready.
If you want an event to work on your page, you should call it inside the $(document).ready()
function. Everything inside it will load as soon as the DOM is loaded and before the page
contents are loaded.
To do this, we register a ready event for the document as follows −
$(document).ready(function() {
// do stuff when DOM is ready
});
To call upon any jQuery library function, use HTML script tags as shown below −
Live Demo
<html>
<head>
<title>The jQuery Example</title>
<script type = "text/javascript"
src = "https://ajax.googleapis.com/ajax/libs/jquery/2.1.3/jquery.min.js">
</script>
<script type = "text/javascript" language = "javascript">
$(document).ready(function() {
$("div").click(function() {alert("Hello, world!");});
});
</script>
</head>
<body>
<div id = "mydiv">
Click on this to see a dialogue box.
</div>
</body>
</html>
This will produce following result −
How to Use Custom Scripts?
It is better to write our custom code in the custom JavaScript file : custom.js, as follows −
/* Filename: custom.js */
$(document).ready(function() {
$("div").click(function() {
alert("Hello, world!");

96
});
});
Now we can include custom.js file in our HTML file as follows −
Live Demo
<html>
<head>
<title>The jQuery Example</title>
<script type = "text/javascript"
src = "https://ajax.googleapis.com/ajax/libs/jquery/2.1.3/jquery.min.js">
</script>
<script type = "text/javascript" src = "/jquery/custom.js">
</script>
</head>
<body>
<div id = "mydiv">
Click on this to see a dialogue box.
</div>
</body>
</html>
This will produce following result −
Using Multiple Libraries
You can use multiple libraries all together without conflicting each others. For example, you
can use jQuery and MooTool javascript libraries together. You can check jQuery
noConflict Method for more detail.
jQuery - Selectors
The jQuery library harnesses the power of Cascading Style Sheets (CSS) selectors to let us
quickly and easily access elements or groups of elements in the Document Object Model
(DOM).
A jQuery Selector is a function which makes use of expressions to find out matching elements
from a DOM based on the given criteria. Simply you can say, selectors are used to select one or
more HTML elements using jQuery. Once an element is selected then we can perform various
operations on that selected element.
The $() factory function

97
jQuery selectors start with the dollar sign and parentheses − $(). The factory function $() makes
use of following three building blocks while selecting elements in a given document −
Sr.No. Selector & Description
1 Tag Name
Represents a tag name available in the DOM. For example $('p') selects all paragraphs
<p> in the document.
2 Tag ID
Represents a tag available with the given ID in the DOM. For example $('#some-
id') selects the single element in the document that has an ID of some-id.
3 Tag Class
Represents a tag available with the given class in the DOM. For example $('.some-
class') selects all elements in the document that have a class of some-class.
All the above items can be used either on their own or in combination with other selectors. All
the jQuery selectors are based on the same principle except some tweaking.
NOTE − The factory function $() is a synonym of jQuery() function. So in case you are using
any other JavaScript library where $ sign is conflicting with some thing else then you can
replace $ sign by jQuery name and you can use function jQuery() instead of $().
Example
Following is a simple example which makes use of Tag Selector. This would select all the
elements with a tag name p.
Live Demo
<html>
<head>
<title>The jQuery Example</title>
<script type = "text/javascript"
src = "https://ajax.googleapis.com/ajax/libs/jquery/2.1.3/jquery.min.js">
</script>
<script type = "text/javascript" language = "javascript">
$(document).ready(function() {
$("p").css("background-color", "yellow");
});
</script>
</head>

98
<body>
<div>
<p class = "myclass">This is a paragraph.</p>
<p id = "myid">This is second paragraph.</p>
<p>This is third paragraph.</p>
</div>
</body>
</html>
This will produce following result −
Use Selectors
The selectors are very useful and would be required at every step while using jQuery. They get
the exact element that you want from your HTML document.
Following table lists down few basic selectors and explains them with examples.
Sr.No. Selector & Description
1 Name
Selects all elements which match with the given element Name.
2 #ID
Selects a single element which matches with the given ID.
3 .Class
Selects all elements which match with the given Class.
4 Universal (*)
Selects all elements available in a DOM.
5 Multiple Elements E, F, G
Selects the combined results of all the specified selectors E, F or G.
Selectors Examples

99
Similar to above syntax and examples, following examples would give you understanding on
using different type of other useful selectors −
Here, you have different type of other useful selectors −
Sr.No. Selector & Description
1 $('*')
This selector selects all elements in the document.
2 $("p > *")
This selector selects all elements that are children of a paragraph element.
3 $("#specialID")
This selector function gets the element with id="specialID".
4 $(".specialClass")
This selector gets all the elements that have the class of specialClass.
5 $("li:not(.myclass)")
Selects all elements matched by <li> that do not have class = "myclass".
6 $("a#specialID.specialClass")
This selector matches links with an id of specialID and a class of specialClass.
7 $("p a.specialClass")
This selector matches links with a class of specialClass declared within <p> elements.
8 $("ul li:first")
This selector gets only the first <li> element of the <ul>.
9 $("#container p")
Selects all elements matched by <p> that are descendants of an element that has an id

100
of container.
10 $("li > ul")
Selects all elements matched by <ul> that are children of an element matched by <li>
11 $("strong + em")
Selects all elements matched by <em> that immediately follow a sibling element
matched by <strong>.
12 $("p ~ ul")
Selects all elements matched by <ul> that follow a sibling element matched by <p>.
13 $("code, em, strong")
Selects all elements matched by <code> or <em> or <strong>.
14 $("p strong, .myclass")
Selects all elements matched by <strong> that are descendants of an element matched by
<p> as well as all elements that have a class of myclass.
15 $(":empty")
Selects all elements that have no children.
16 $("p:empty")
Selects all elements matched by <p> that have no children.
17 $("div[p]")
Selects all elements matched by <div> that contain an element matched by <p>.
18 $("p[.myclass]")
Selects all elements matched by <p> that contain an element with a class of myclass.
19 $("a[@rel]")

101
Selects all elements matched by <a> that have a rel attribute.
20 $("input[@name = myname]")
Selects all elements matched by <input> that have a name value exactly equal
to myname.
21 $("input[@name^=myname]")
Selects all elements matched by <input> that have a name value beginning with myname.
22 $("a[@rel$=self]")
Selects all elements matched by <a> that have rel attribute value ending with self.
23 $("a[@href*=domain.com]")
Selects all elements matched by <a> that have an href value containing domain.com.
24 $("li:even")
Selects all elements matched by <li> that have an even index value.
25 $("tr:odd")
Selects all elements matched by <tr> that have an odd index value.
26 $("li:first")
Selects the first <li> element.
27 $("li:last")
Selects the last <li> element.
28 $("li:visible")
Selects all elements matched by <li> that are visible.
29 $("li:hidden")

102
Selects all elements matched by <li> that are hidden.
30 $(":radio")
Selects all radio buttons in the form.
31 $(":checked")
Selects all checked box in the form.
32 $(":input")
Selects only form elements (input, select, textarea, button).
33 $(":text")
Selects only text elements (input[type = text]).
34 $("li:eq(2)")
Selects the third <li> element.
35 $("li:eq(4)")
Selects the fifth <li> element.
36 $("li:lt(2)")
Selects all elements matched by <li> element before the third one; in other words, the
first two <li> elements.
37 $("p:lt(3)")
selects all elements matched by <p> elements before the fourth one; in other words the
first three <p> elements.
38 $("li:gt(1)")
Selects all elements matched by <li> after the second one.
39 $("p:gt(2)")

103
Selects all elements matched by <p> after the third one.
40 $("div/p")
Selects all elements matched by <p> that are children of an element matched by <div>.
41 $("div//code")
Selects all elements matched by <code>that are descendants of an element matched by
<div>.
42 $("//p//a")
Selects all elements matched by <a> that are descendants of an element matched by <p>
43 $("li:first-child")
Selects all elements matched by <li> that are the first child of their parent.
44 $("li:last-child")
Selects all elements matched by <li> that are the last child of their parent.
45 $(":parent")
Selects all elements that are the parent of another element, including text.
46 $("li:contains(second)")
Selects all elements matched by <li> that contain the text second.
jQuery - Attributes
Some of the most basic components we can manipulate when it comes to DOM elements are the
properties and attributes assigned to those elements.
Most of these attributes are available through JavaScript as DOM node properties. Some of the
more common properties are −

104
className
tagName
id
href
title
rel
src
Consider the following HTML markup for an image element −
<img id = "imageid" src = "image.gif" alt = "Image" class = "myclass"
title = "This is an image"/>
In this element's markup, the tag name is img, and the markup for id, src, alt, class, and title
represents the element's attributes, each of which consists of a name and a value.
jQuery gives us the means to easily manipulate an element's attributes and gives us access to the
element so that we can also change its properties.
Get Attribute Value
The attr() method can be used to either fetch the value of an attribute from the first element in
the matched set or set attribute values onto all matched elements.
Example
Following is a simple example which fetches title attribute of <em> tag and set <div id =
"divid"> value with the same value −
Live Demo
<html>
<head>
<title>The jQuery Example</title>
<script type = "text/javascript"
src = "https://ajax.googleapis.com/ajax/libs/jquery/2.1.3/jquery.min.js">
</script>
<script type = "text/javascript" language = "javascript">
$(document).ready(function() {
var title = $("em").attr("title");
$("#divid").text(title);
});
</script>
</head>
<body>
<div>
<em title = "Bold and Brave">This is first paragraph.</em>

105
<p id = "myid">This is second paragraph.</p>
<div id = "divid"></div>
</div>
</body>
</html>
This will produce following result −
Set Attribute Value
The attr(name, value) method can be used to set the named attribute onto all elements in the
wrapped set using the passed value.
Example
Following is a simple example which set src attribute of an image tag to a correct location −
Live Demo
<html>
<head>
<title>The jQuery Example</title>
<base href="https://www.tutorialspoint.com" />
<script type = "text/javascript"
src = "https://ajax.googleapis.com/ajax/libs/jquery/2.1.3/jquery.min.js">
</script>
<script type = "text/javascript" language = "javascript">
$(document).ready(function() {
$("#myimg").attr("src", "/jquery/images/jquery.jpg");
});
</script>
</head>
<body>
<div>
<img id = "myimg" src = "/images/jquery.jpg" alt = "Sample image" />
</div>
</body>
</html>
This will produce following result −
Applying Styles
The addClass( classes ) method can be used to apply defined style sheets onto all the matched
elements. You can specify multiple classes separated by space.

106
Example
Following is a simple example which sets class attribute of a para <p> tag −
Live Demo
<html>
<head>
<title>The jQuery Example</title>
<script type = "text/javascript"
src = "https://ajax.googleapis.com/ajax/libs/jquery/2.1.3/jquery.min.js">
</script>
<script type = "text/javascript" language = "javascript">
$(document).ready(function() {
$("em").addClass("selected");
$("#myid").addClass("highlight");
});
</script>
<style>
.selected { color:red; }
.highlight { background:yellow; }
</style>
</head>
<body>
<em title = "Bold and Brave">This is first paragraph.</em>
<p id = "myid">This is second paragraph.</p>
</body>
</html>
This will produce following result −
Attribute Methods
Following table lists down few useful methods which you can use to manipulate attributes and
properties −
Sr.No. Methods & Description
1 attr( properties )
Set a key/value object as properties to all matched elements.
2 attr( key, fn )

107
Set a single property to a computed value, on all matched elements.
3 removeAttr( name )
Remove an attribute from each of the matched elements.
4 hasClass( class )
Returns true if the specified class is present on at least one of the set of matched
elements.
5 removeClass( class )
Removes all or the specified class(es) from the set of matched elements.
6 toggleClass( class )
Adds the specified class if it is not present, removes the specified class if it is present.
7 html( )
Get the html contents (innerHTML) of the first matched element.
8 html( val )
Set the html contents of every matched element.
9 text( )
Get the combined text contents of all matched elements.
10 text( val )
Set the text contents of all matched elements.
11 val( )
Get the input value of the first matched element.
12 val( val )
Set the value attribute of every matched element if it is called on <input> but if it is
called on <select> with the passed <option> value then passed option would be selected,
if it is called on check box or radio box then all the matching check box and radiobox

108
would be checked.
jQuery - DOM Traversing
jQuery is a very powerful tool which provides a variety of DOM traversal methods to help us
select elements in a document randomly as well as in sequential method. Most of the DOM
Traversal Methods do not modify the jQuery object and they are used to filter out elements
from a document based on given conditions.
Find Elements by Index
Consider a simple document with the following HTML content −
Live Demo
<html>
<head>
<title>The JQuery Example</title>
</head>
<body>
<div>
<ul>
<li>list item 1</li>
<li>list item 2</li>
<li>list item 3</li>
<li>list item 4</li>
<li>list item 5</li>
<li>list item 6</li>
</ul>
</div>
</body>
</html>
This will produce following result −
Above every list has its own index, and can be located directly by
using eq(index) method as below example.
Every child element starts its index from zero, thus, list item 2 would be accessed by
using $("li").eq(1) and so on.
Example
Following is a simple example which adds the color to second list item.
Live Demo

109
<html>
<head>
<title>The JQuery Example</title>
<script type = "text/javascript"
src = "https://ajax.googleapis.com/ajax/libs/jquery/2.1.3/jquery.min.js">
</script>
<script type = "text/javascript" language = "javascript">
$(document).ready(function() {
$("li").eq(2).addClass("selected");
});
</script>
<style>
.selected { color:red; }
</style>
</head>
<body>
<div>
<ul>
<li>list item 1</li>
<li>list item 2</li>
<li>list item 3</li>
<li>list item 4</li>
<li>list item 5</li>
<li>list item 6</li>
</ul>
</div>
</body>
</html>
This will produce following result −
Filtering out Elements
The filter( selector ) method can be used to filter out all elements from the set of matched
elements that do not match the specified selector(s). The selector can be written using any
selector syntax.
Example
Following is a simple example which applies color to the lists associated with middle class −
Live Demo
<html>
<head>
<title>The JQuery Example</title>

110
<script type = "text/javascript"
src = "https://ajax.googleapis.com/ajax/libs/jquery/2.1.3/jquery.min.js">
</script>
<script type = "text/javascript" language = "javascript">
$(document).ready(function() {
$("li").filter(".middle").addClass("selected");
});
</script>
<style>
.selected { color:red; }
</style>
</head>
<body>
<div>
<ul>
<li class = "top">list item 1</li>
<li class = "top">list item 2</li>
<li class = "middle">list item 3</li>
<li class = "middle">list item 4</li>
<li class = "bottom">list item 5</li>
<li class = "bottom">list item 6</li>
</ul>
</div>
</body>
</html>
This will produce following result −
Locating Descendant Elements
The find( selector ) method can be used to locate all the descendant elements of a particular
type of elements. The selector can be written using any selector syntax.
Example
Following is an example which selects all the <span> elements available inside different <p>
elements −
Live Demo
<html>
<head>
<title>The JQuery Example</title>
<script type = "text/javascript"
src = "https://ajax.googleapis.com/ajax/libs/jquery/2.1.3/jquery.min.js">
</script>

111
<script type = "text/javascript" language = "javascript">
$(document).ready(function() {
$("p").find("span").addClass("selected");
});
</script>
<style>
.selected { color:red; }
</style>
</head>
<body>
<p>This is 1st paragraph and <span>THIS IS RED</span></p>
<p>This is 2nd paragraph and <span>THIS IS ALSO RED</span></p>
</body>
</html>
This will produce following result −
JQuery DOM Filter Methods
Following table lists down useful methods which you can use to filter out various elements from
a list of DOM elements −
Sr.No. Method & Description
1 eq( index )
Reduce the set of matched elements to a single element.
2 filter( selector )
Removes all elements from the set of matched elements that do not match the specified
selector(s).
3 filter( fn )
Removes all elements from the set of matched elements that do not match the specified
function.
4 is( selector )
Checks the current selection against an expression and returns true, if at least one

112
element of the selection fits the given selector.
5 map( callback )
Translate a set of elements in the jQuery object into another set of values in a jQuery
array (which may, or may not contain elements).
6 not( selector )
Removes elements matching the specified selector from the set of matched elements.
7 slice( start, [end] )
Selects a subset of the matched elements.
JQuery DOM Traversing Methods
Following table lists down other useful methods which you can use to locate various elements
in a DOM −
Sr.No. Methods & Description
1 add( selector )
Adds more elements, matched by the given selector, to the set of matched elements.
2 andSelf( )
Add the previous selection to the current selection.
3 children( [selector])
Get a set of elements containing all of the unique immediate children of each of the
matched set of elements.
4 closest( selector )
Get a set of elements containing the closest parent element that matches the specified
selector, the starting element included.
5 contents( )

113
Find all the child nodes inside the matched elements (including text nodes), or the
content document, if the element is an iframe.
6 end( )
Revert the most recent 'destructive' operation, changing the set of matched elements to its
previous state.
7 find( selector )
Searches for descendant elements that match the specified selectors.
8 next( [selector] )
Get a set of elements containing the unique next siblings of each of the given set of
elements.
9 nextAll( [selector] )
Find all sibling elements after the current element.
10 offsetParent( )
Returns a jQuery collection with the positioned parent of the first matched element.
11 parent( [selector] )
Get the direct parent of an element. If called on a set of elements, parent returns a set of
their unique direct parent elements.
12 parents( [selector] )
Get a set of elements containing the unique ancestors of the matched set of elements
(except for the root element).
13 prev( [selector] )
Get a set of elements containing the unique previous siblings of each of the matched set
of elements.
14 prevAll( [selector] )
Find all sibling elements in front of the current element.

114
15 siblings( [selector] )
Get a set of elements containing all of the unique siblings of each of the matched set of
elements.
jQuery - Events Handling
We have the ability to create dynamic web pages by using events. Events are actions that can be
detected by your Web Application.
Following are the examples events −
A mouse click
A web page loading
Taking mouse over an element
Submitting an HTML form
A keystroke on your keyboard, etc.
When these events are triggered, you can then use a custom function to do pretty much
whatever you want with the event. These custom functions call Event Handlers.
Binding Event Handlers
Using the jQuery Event Model, we can establish event handlers on DOM elements with
the bind() method as follows −
Live Demo
<html>
<head>
<title>The jQuery Example</title>
<script type = "text/javascript"
src = "https://ajax.googleapis.com/ajax/libs/jquery/2.1.3/jquery.min.js">
</script>
<script type = "text/javascript" language = "javascript">
$(document).ready(function() {
$('div').bind('click', function( event ){
alert('Hi there!');
});
});
</script>
<style>
.div{ margin:10px;padding:12px; border:2px solid #666; width:60px;}
</style>

115
</head>
<body>
<p>Click on any square below to see the result:</p>
<div class = "div" style = "background-color:blue;">ONE</div>
<div class = "div" style = "background-color:green;">TWO</div>
<div class = "div" style = "background-color:red;">THREE</div>
</body>
</html>
This code will cause the division element to respond to the click event; when a user clicks
inside this division thereafter, the alert will be shown.
This will produce following result −
The full syntax of the bind() command is as follows −
selector.bind( eventType[, eventData], handler)
Following is the description of the parameters −
eventType − A string containing a JavaScript event type, such as click or submit. Refer
to the next section for a complete list of event types.
eventData − This is optional parameter is a map of data that will be passed to the event
handler.
handler − A function to execute each time the event is triggered.
Removing Event Handlers
Typically, once an event handler is established, it remains in effect for the remainder of the life
of the page. There may be a need when you would like to remove event handler.
jQuery provides the unbind() command to remove an exiting event handler. The syntax of
unbind() is as follows −
selector.unbind(eventType, handler)
or
selector.unbind(eventType)
Following is the description of the parameters −
eventType − A string containing a JavaScript event type, such as click or submit. Refer
to the next section for a complete list of event types.
handler − If provided, identifies the specific listener that's to be removed.
Event Types

116
The following are cross platform and recommended event types which you can bind using JQuery −
Sr.No. Event Type & Description
1 blur
Occurs when the element loses focus.
2 change
Occurs when the element changes.
3 click
Occurs when a mouse click.
4 dblclick
Occurs when a mouse double-click.
5 error
Occurs when there is an error in loading or unloading etc.
6 focus
Occurs when the element gets focus.
7 keydown
Occurs when key is pressed.
8 keypress
Occurs when key is pressed and released.
9 keyup
Occurs when key is released.
10 load

117
Occurs when document is loaded.
11 mousedown
Occurs when mouse button is pressed.
12 mouseenter
Occurs when mouse enters in an element region.
13 mouseleave
Occurs when mouse leaves an element region.
14 mousemove
Occurs when mouse pointer moves.
15 mouseout
Occurs when mouse pointer moves out of an element.
16 mouseover
Occurs when mouse pointer moves over an element.
17 mouseup
Occurs when mouse button is released.
18 resize
Occurs when window is resized.
19 scroll
Occurs when window is scrolled.
20 select
Occurs when a text is selected.

118
21 submit
Occurs when form is submitted.
22 unload
Occurs when documents is unloaded.
The Event Object
The callback function takes a single parameter; when the handler is called the JavaScript event
object will be passed through it.
The event object is often unnecessary and the parameter is omitted, as sufficient context is
usually available when the handler is bound to know exactly what needs to be done when the
handler is triggered, however there are certain attributes which you would need to be accessed.
The Event Attributes
The following event properties/attributes are available and safe to access in a platform independent
manner −
Sr.No. Property & Description
1 altKey
Set to true if the Alt key was pressed when the event was triggered, false if not. The Alt
key is labeled Option on most Mac keyboards.
2 ctrlKey
Set to true if the Ctrl key was pressed when the event was triggered, false if not.
3 data
The value, if any, passed as the second parameter to the bind() command when the
handler was established.
4 keyCode
For keyup and keydown events, this returns the key that was pressed.

119
5 metaKey
Set to true if the Meta key was pressed when the event was triggered, false if not. The
Meta key is the Ctrl key on PCs and the Command key on Macs.
6 pageX
For mouse events, specifies the horizontal coordinate of the event relative from the page
origin.
7 pageY
For mouse events, specifies the vertical coordinate of the event relative from the page
origin.
8 relatedTarget
For some mouse events, identifies the element that the cursor left or entered when the
event was triggered.
9 screenX
For mouse events, specifies the horizontal coordinate of the event relative from the
screen origin.
10 screenY
For mouse events, specifies the vertical coordinate of the event relative from the screen
origin.
11 shiftKey
Set to true if the Shift key was pressed when the event was triggered, false if not.
12 target
Identifies the element for which the event was triggered.
13 timeStamp
The timestamp (in milliseconds) when the event was created.

120
14 type
For all events, specifies the type of event that was triggered (for example, click).
15 which
For keyboard events, specifies the numeric code for the key that caused the event, and
for mouse events, specifies which button was pressed (1 for left, 2 for middle, 3 for
right).
jQuery - Effects
jQuery provides a trivially simple interface for doing various kind of amazing effects. jQuery
methods allow us to quickly apply commonly used effects with a minimum configuration. This
tutorial covers all the important jQuery methods to create visual effects.
Showing and Hiding Elements
The commands for showing and hiding elements are pretty much what we would expect
− show() to show the elements in a wrapped set and hide() to hide them.
Syntax
Here is the simple syntax for show() method −
[selector].show( speed, [callback] );
Here is the description of all the parameters −
speed − A string representing one of the three predefined speeds ("slow", "normal", or
"fast") or the number of milliseconds to run the animation (e.g. 1000).
callback − This optional parameter represents a function to be executed whenever the
animation completes; executes once for each element animated against.
Following is the simple syntax for hide() method −
[selector].hide( speed, [callback] );
Here is the description of all the parameters −
speed − A string representing one of the three predefined speeds ("slow", "normal", or
"fast") or the number of milliseconds to run the animation (e.g. 1000).
callback − This optional parameter represents a function to be executed whenever the
animation completes; executes once for each element animated against.
Example
Consider the following HTML file with a small JQuery coding −

121
Live Demo
<html>
<head>
<title>The jQuery Example</title>
<script type = "text/javascript"
src = "https://ajax.googleapis.com/ajax/libs/jquery/2.1.3/jquery.min.js">
</script>
<script type = "text/javascript" language = "javascript">
$(document).ready(function() {
$("#show").click(function () {
$(".mydiv").show( 1000 );
});
$("#hide").click(function () {
$(".mydiv").hide( 1000 );
});
});
</script>
<style>
.mydiv{
margin:10px;
padding:12px;
border:2px solid #666;
width:100px;
height:100px;
}
</style>
</head>
<body>
<div class = "mydiv">
This is a SQUARE
</div>
<input id = "hide" type = "button" value = "Hide" />
<input id = "show" type = "button" value = "Show" />
</body>
</html>
This will produce following result −
Toggling the Elements

122
jQuery provides methods to toggle the display state of elements between revealed or hidden. If
the element is initially displayed, it will be hidden; if hidden, it will be shown.
Syntax
Here is the simple syntax for one of the toggle() methods −
[selector]..toggle([speed][, callback]);
Here is the description of all the parameters −
speed − A string representing one of the three predefined speeds ("slow", "normal", or
"fast") or the number of milliseconds to run the animation (e.g. 1000).
callback − This optional parameter represents a function to be executed whenever the
animation completes; executes once for each element animated against.
Example
We can animate any element, such as a simple <div> containing an image −
Live Demo
<html>
<head>
<title>The jQuery Example</title>
<script type = "text/javascript"
src = "https://ajax.googleapis.com/ajax/libs/jquery/2.1.3/jquery.min.js">
</script>
<script type = "text/javascript" language = "javascript">
$(document).ready(function() {
$(".clickme").click(function(event){
$(".target").toggle('slow', function(){
$(".log").text('Transition Complete');
});
});
});
</script>
<style>
.clickme{
margin:10px;
padding:12px;
border:2px solid #666;
width:100px;
height:50px;
}
</style>
</head>
<body>

123
<div class = "content">
<div class = "clickme">Click Me</div>
<div class = "target">
<img src = "./images/jquery.jpg" alt = "jQuery" />
</div>
<div class = "log"></div>
</div>
</body>
</html>
This will produce following result −
JQuery Effect Methods
You have seen basic concept of jQuery Effects. Following table lists down all the important
methods to create different kind of effects −
Sr.No. Methods & Description
1 animate( params, [duration, easing, callback] )
A function for making custom animations.
2 fadeIn( speed, [callback] )
Fade in all matched elements by adjusting their opacity and firing an optional callback
after completion.
3 fadeOut( speed, [callback] )
Fade out all matched elements by adjusting their opacity to 0, then setting display to
"none" and firing an optional callback after completion.
4 fadeTo( speed, opacity, callback )
Fade the opacity of all matched elements to a specified opacity and firing an optional
callback after completion.
5 hide( )
Hides each of the set of matched elements if they are shown.
6 hide( speed, [callback] )

124
Hide all matched elements using a graceful animation and firing an optional callback
after completion.
7 show( )
Displays each of the set of matched elements if they are hidden.
8 show( speed, [callback] )
Show all matched elements using a graceful animation and firing an optional callback
after completion.
9 slideDown( speed, [callback] )
Reveal all matched elements by adjusting their height and firing an optional callback
after completion.
10 slideToggle( speed, [callback] )
Toggle the visibility of all matched elements by adjusting their height and firing an
optional callback after completion.
11 slideUp( speed, [callback] )
Hide all matched elements by adjusting their height and firing an optional callback after
completion.
12 stop( [clearQueue, gotoEnd ])
Stops all the currently running animations on all the specified elements.
13 toggle( )
Toggle displaying each of the set of matched elements.
14 toggle( speed, [callback] )
Toggle displaying each of the set of matched elements using a graceful animation and
firing an optional callback after completion.
15 toggle( switch )
Toggle displaying each of the set of matched elements based upon the switch (true shows

125
all elements, false hides all elements).
16 jQuery.fx.off
Globally disable all animations.
UI Library Based Effects
To use these effects you can either download latest jQuery UI Library jquery-ui-
1.11.4.custom.zip from jQuery UI Library or use Google CDN to use it in the similar way as
we have done for jQuery.
We have used Google CDN for jQuery UI using following code snippet in the HTML page so
we can use jQuery UI −
<head>
<script src = "https://ajax.googleapis.com/ajax/libs/jqueryui/1.11.3/jquery-ui.min.js">
</script>
</head>
Sr.No. Methods & Description
1 Blind
Blinds the element away or shows it by blinding it in.
2 Bounce
Bounces the element vertically or horizontally n-times.
3 Clip
Clips the element on or off, vertically or horizontally.
4 Drop
Drops the element away or shows it by dropping it in.
5 Explode
Explodes the element into multiple pieces.

126
6 Fold
Folds the element like a piece of paper.
7 Highlight
Highlights the background with a defined color.
8 Puff
Scale and fade out animations create the puff effect.
9 Pulsate
Pulsates the opacity of the element multiple times.
10 Scale
Shrink or grow an element by a percentage factor.
11 Shake
Shakes the element vertically or horizontally n-times.
12 Size
Resize an element to a specified width and height.
13 Slide
Slides the element out of the viewport.
14 Transfer
Transfers the outline of an element to another.

127
UNIT 3
CASCADING STYLE SHEET
Cascading Style Sheets (CSS) is a markup language responsible for how your web pages will
look like. It controls the colors, fonts, and layouts of your website elements.
This style sheet language also allows you to add effects or animations to your website. You can
use it to display some CSS animations like click button effects, spinners or loaders, and animated
backgrounds.
Without CSS, your website will appear as a plain HTML page. Here’s how Twitter will look
like if we disable its CSS:
The Difference Between Inline, External and Internal CSS
Styles
There are three ways you can use to implement CSS: internal, external, and inline styles. Let’s
break them down.
Internal CSS
Internal or embedded CSS requires you to add <style> tag in the <head> section of your HTML
document.
This CSS style is an effective method of styling a single page. However, using this style for
multiple pages is time-consuming as you need to put CSS rules to every page of your website.
Here’s how you can use internal CSS:
1. Open your HTML page and locate <head> opening tag.
2. Put the following code right after the <head> tag
<style type="text/css">
1. Add CSS rules on a new line. Here’s an example:
body {
background-color: blue;
}
h1 {
color: red;
padding: 60px;
}

128
1. Type the closing tag:
</style>
Your HTML file will look like this:
<!DOCTYPE html>
<html>
<head>
<style>
body {
background-color: blue;
}
h1 {
color: red;
padding: 60px;
}
</style>
</head>
<body>
<h1>Hostinger Tutorials</h1>
<p>This is our paragraph.</p>
</body>
</html>
Advantages of Internal CSS:
You can use class and ID selectors in this style sheet. Here’s an example:
.class {
property1 : value1;
property2 : value2;
property3 : value3;
}
#id {
property1 : value1;
property2 : value2;
property3 : value3;
}
Since you’ll only add the code within the same HTML file, you don’t need to upload multiple
files.
Disadvantages of Internal CSS:
Adding the code to the HTML document can increase the page’s size and loading time.
External CSS
With external CSS, you’ll link your web pages to an external .css file, which can be created by
any text editor in your device (e.g., Notepad++).

129
This CSS type is a more efficient method, especially for styling a large website. By editing
one .css file, you can change your entire site at once.
Follow these steps to use external CSS:
1. Create a new .css file with the text editor, and add the style rules. For example:
.xleftcol {
float: left;
width: 33%;
background:#809900;
}
.xmiddlecol {
float: left;
width: 34%;
background:#eff2df;
}
1. In the <head> section of your HTML sheet, add a reference to your external .css file right
after <title> tag:
<link rel="stylesheet" type="text/css" href="style.css" />
Don’t forget to change style.css with the name of your .css file.
Advantages of External CSS:
Since the CSS code is in a separate document, your HTML files will have a cleaner structure and
are smaller in size.
You can use the same .css file for multiple pages.
Disadvantages of External CSS:
Your pages may not be rendered correctly until the external CSS is loaded.
Uploading or linking to multiple CSS files can increase your site’s download time.
Inline CSS
Inline CSS is used to style a specific HTML element. For this CSS style, you’ll only need to add
the style attribute to each HTML tag, without using selectors.
This CSS type is not really recommended, as each HTML tag needs to be styled individually.
Managing your website may become too hard if you only use inline CSS.
However, inline CSS in HTML can be useful in some situations. For example, in cases where
you don’t have access to CSS files or need to apply styles for a single element only.
Let’s take a look at an example. Here, we add an inline CSS to the <p> and <h1> tag:
<!DOCTYPE html>
<html>

130
<body style="background-color:black;">
<h1 style="color:white;padding:30px;">Hostinger Tutorials</h1>
<p style="color:white;">Something usefull here.</p>
</body>
</html>
Advantages of Inline CSS:
You can easily and quickly insert CSS rules to an HTML page. That’s why this method is useful for testing or previewing the changes, and performing quick-fixes to your website.
You don’t need to create and upload a separate document as in the external style.
Disadvantages of Inline CSS:
Adding CSS rules to every HTML element is time-consuming and makes your HTML structure
messy.
Styling multiple elements can affect your page’s size and download time.
Conclusion
In this tutorial, you’ve learned the difference between the three types of CSS: internal, external,
and inline. Here’s the recap:
Internal or embedded — add <style> tag in the <head> section of HTML document
External — link the HTML sheet to a separate .css file
Inline — apply CSS rules for specific elements.
CSS | Positioning Elements
Last Updated: 03-12-2018
The position property in CSS tells about the method of positioning for an element or an HTML
entity. There are five different types of position property available in CSS: 1. Fixed 2. Static
3. Relative
4. Absolute 5. Sticky
The positioning of an element can be done using the top, right, bottom and left property. These
specify the distance of an HTML element from the edge of the viewport. To set the position by
these four properties, we have to declare the positioning method.
Let’s talk about each of these position methods in details:
1. Fixed
Any HTML element with position: fixed property will be positioned relative to the viewport. An
element with fixed positioning allows it to remain at the same position even we scroll the page. We
can set the position of the element using the top, right, bottom, left.

131
filter_none
brightness_4 <!-->html code<-->
<body>
<div class="fixed">This div has <span>position: fixed;</span></div>
<pre>
Lorem ipsum dolor sits amet, consectetur adipiscing elit.
Nunc eget mauris at urna hendrerit iaculis sit amet et ipsum.
Maecenas nec mi eget leo malesuada vehicula.
Nam eget velit maximus, elementum ante pretium, aliquet felis.
Aliquam quis turpis laoreet, porttitor lacus at, posuere massa.
</pre>
</body>
2. Static
This method of positioning is set by default. If we don’t mention the method of positioning for any
element, the element has the position:static method by default. By defining Static, the top, right,
bottom and left will not have any control over the element. The element will be positioned with the
normal flow of the page.
3. Relative
An element with position: relative is positioned relatively with the other elements which are
sitting at top of it. If we set its top, right, bottom or left, other elements will not fill up the gap left
by this element.
4. Absolute
An element with position: absolute will be positioned with respect to its parent. Positioning of this
element does not depend upon its siblings or the elements which are at same level. 5. Sticky
Element with position: sticky and top: 0 played a role between fixed & relative based on the
position where it is placed. If the element is placed at the middle of the document then when user
scrolls the document, the sticky element starts scrolling until it touch the top. When it touches the
top, it will be fixed at that place inspite of further scrolling. We can stick the element at bottom,
with the bottom property.
CSS3 - Rounded Corners
Advertisements

132
Previous Page
Next Page
CSS3 Rounded corners are used to add special colored corner to body or text by using the
border-radius property.A simple syntax of rounded corners is as follows −
#rcorners7 {
border-radius: 60px/15px;
background: #FF0000;
padding: 20px;
width: 200px;
height: 150px;
}
The following table shows the possible values for Rounded corners as follows −
Sr.No. Value & Description
1 border-radius
Use this element for setting four boarder radius property
2 border-top-left-radius
Use this element for setting the boarder of top left corner
3 border-top-right-radius
Use this element for setting the boarder of top right corner
4 border-bottom-right-radius
Use this element for setting the boarder of bottom right corner
5 border-bottom-left-radius
Use this element for setting the boarder of bottom left corner
Example
This property can have three values. The following example uses both the values −

133
Live Demo
<html>
<head>
<style>
#rcorners1 {
border-radius: 25px;
background: #8AC007;
padding: 20px;
width: 200px;
height: 150px;
}
#rcorners2 {
border-radius: 25px;
border: 2px solid #8AC007;
padding: 20px;
width: 200px;
height: 150px;
}
#rcorners3 {
border-radius: 25px;
background: url(/css/images/logo.png);
background-position: left top;
background-repeat: repeat;
padding: 20px;
width: 200px;
height: 150px;
}
</style>
</head>
<body>
<p id = "rcorners1">Rounded corners!</p>
<p id = "rcorners2">Rounded corners!</p>
<p id = "rcorners3">Rounded corners!</p>
</body>
</html>
It will produce the following result −
CSS3 - Shadow
Advertisements
Previous Page
Next Page

134
CSS3 supported to add shadow to text or elements.Shadow property has divided as follows −
Text shadow
Box Shadow
Text shadow
CSS3 supported to add shadow effects to text. Following is the example to add shadow effects
to text −
Live Demo
<html>
<head>
<style>
h1 {
text-shadow: 2px 2px;
}
h2 {
text-shadow: 2px 2px red;
}
h3 {
text-shadow: 2px 2px 5px red;
}
h4 {
color: white;
text-shadow: 2px 2px 4px #000000;
}
h5 {
text-shadow: 0 0 3px #FF0000;
}
h6 {
text-shadow: 0 0 3px #FF0000, 0 0 5px #0000FF;
}
p {
color: white;
text-shadow: 1px 1px 2px black, 0 0 25px blue, 0 0 5px darkblue;
}
</style>
</head>
<body>
<h1>Tutorialspoint.com</h1>
<h2>Tutorialspoint.com</h2>
<h3>Tutorialspoint.com</h3>
<h4>Tutorialspoint.com</h4>
<h5>Tutorialspoint.com</h5>
<h6>Tutorialspoint.com</h6>

135
<p>Tutorialspoint.com</p>
</body>
</html>
It will produce the following result −
box shadow
Used to add shadow effects to elements, Following is the example to add shadow effects to
element.
Live Demo
<html>
<head>
<style>
div {
width: 300px;
height: 100px;
padding: 15px;
background-color: red;
box-shadow: 10px 10px;
}
</style>
</head>
<body>
<div>This is a div element with a box-shadow</div>
</body>
</html>
It will produce the following result −
CSS3 - Colors
CSS3 has Supported additional color properties as follows −
RGBA colors
HSL colors
HSLA colors
Opacity
RGBA stands for Red Green Blue Alpha.It is an extension of CSS2,Alpha specifies the
opacity of a color and parameter number is a numerical between 0.0 to 1.0. A Sample syntax of
RGBA as shown below −
#d1 {background-color: rgba(255, 0, 0, 0.5);}

136
#d2 {background-color: rgba(0, 255, 0, 0.5);}
#d3 {background-color: rgba(0, 0, 255, 0.5);}
HSL stands for hue, saturation, lightness.Here Huge is a degree on the color wheel, saturation
and lightness are percentage values between 0 to 100%. A Sample syntax of HSL as shown
below −
#g1 {background-color: hsl(120, 100%, 50%);}
#g2 {background-color: hsl(120, 100%, 75%);}
#g3 {background-color: hsl(120, 100%, 25%);}
HSLA stands for hue, saturation, lightness and alpha. Alpha value specifies the opacity as
shown RGBA. A Sample syntax of HSLA as shown below −
#g1 {background-color: hsla(120, 100%, 50%, 0.3);}
#g2 {background-color: hsla(120, 100%, 75%, 0.3);}
#g3 {background-color: hsla(120, 100%, 25%, 0.3);}
opacity is a thinner paints need black added to increase opacity. A sample syntax of opacity is
as shown below −
#g1 {background-color:rgb(255,0,0);opacity:0.6;}
#g2 {background-color:rgb(0,255,0);opacity:0.6;}
#g3 {background-color:rgb(0,0,255);opacity:0.6;}
The following example shows rgba color property.
Live Demo
<html>
<head>
<style>
#p1 {background-color:rgba(255,0,0,0.3);}
#p2 {background-color:rgba(0,255,0,0.3);}
#p3 {background-color:rgba(0,0,255,0.3);}
</style>
</head>
<body>
<p>RGBA colors:</p>
<p id = "p1">Red</p>
<p id = "p2">Green</p>
<p id = "p3">Blue</p>
</body>
</html>
It will produce the following result −
The following example shows HSL color property.
Live Demo
<html>

137
<head>
<style>
#g1 {background-color:hsl(120, 100%, 50%);}
#g2 {background-color:hsl(120,100%,75%);}
#g3 {background-color:hsl(120,100%,25%);}
</style>
</head>
<body>
<p>HSL colors:</p>
<p id = "g1">Green</p>
<p id = "g2">Normal Green</p>
<p id = "g3">Dark Green</p>
</body>
</html>
It will produce the following result −
The following example shows HSLA color property.
Live Demo
<html>
<head>
<style>
#d1 {background-color:hsla(120,100%,50%,0.3);}
#d2 {background-color:hsla(120,100%,75%,0.3);}
#d3 {background-color:hsla(120,100%,25%,0.3);}
</style>
</head>
<body>
<p>HSLA colors:</p>
<p id = "d1">Less opacity green</p>
<p id = "d2">Green</p>
<p id = "d3">Green</p>
</body>
</html>
It will produce the following result −
The following example shows Opacity property.
Live Demo
<html>
<head>
<style>
#m1 {background-color:rgb(255,0,0);opacity:0.6;}
#m2 {background-color:rgb(0,255,0);opacity:0.6;}

138
#m3 {background-color:rgb(0,0,255);opacity:0.6;}
</style>
</head>
<body>
<p>HSLA colors:</p>
<p id = "m1">Red</p>
<p id = "m2">Green</p>
<p id = "m3">Blue</p>
</body>
</html>
It will produce the following result −
CSS - Media Types
One of the most important features of style sheets is that they specify how a document is to be
presented on different media: on the screen, on paper, with a speech synthesizer, with a braille
device, etc.
We have currently two ways to specify media dependencies for style sheets −
Specify the target medium from a style sheet with the @media or @import at-rules.
Specify the target medium within the document language.
The @media rule
An @media rule specifies the target media types (separated by commas) of a set of rules.
Given below is an example −
<style tyle = "text/css">
<!--
@media print {
body { font-size: 10pt }
}
@media screen {
body { font-size: 12pt }
}
@media screen, print {
body { line-height: 1.2 }
}
-->
</style>
The Document Language

139
In HTML 4.0, the media attribute on the LINK element specifies the target media of an external
style sheet −
Following is an example −
<style tyle = "text/css">
<!--
<!doctype html public "-//w3c//dtd html 4.0//en">
<html>
<head>
<title>link to a target medium</title>
<link rel = "stylesheet" type = "text/css" media = "print,
handheld" href = "foo.css">
</head>
<body>
<p>the body...
</body>
</html>
-->
</style>
Recognized Media Types
The names chosen for CSS media types reflect target devices for which the relevant properties
make sense. They give a sense of what device the media type is meant to refer to. Given below
is a list of various media types −
Sr.No. Value & Description
1 all
Suitable for all devices.
2 aural
Intended for speech synthesizers.
3 braille
Intended for braille tactile feedback devices.
4 embossed

140
Intended for paged braille printers.
5 handheld
Intended for handheld devices (typically small screen, monochrome, limited bandwidth).
6 print
Intended for paged, opaque material and for documents viewed on screen in print preview
mode. Please consult the section on paged media.
7 projection
Intended for projected presentations, for example projectors or print to transparencies.
Please consult the section on paged media.
8 screen
Intended primarily for color computer screens.
9 tty
Intended for media using a fixed-pitch character grid, such as teletypes, terminals, or
portable devices with limited display capabilities.
10 tv
Intended for television-type devices.
NOTE − Media type names are case-insensitive.
DOM (Document Object Model)
Last Updated: 19-02-2019
In this post, we will discuss Document Object Model(DOM) along with its properties and methods
used to manipulate Document.
Introduction:
The Document Object Model (DOM) is a programming
interface for HTML and XML(Extensible markup language) documents. It defines the logical
structure of documents and the way a document is accessed and manipulated.
Note: It is called as a Logical structure because DOM doesn’t specify any relationship between
objects.

141
DOM is a way to represent the webpage in the structured hierarchical way so that it will become
easier for programmers and users to glide through the document. With DOM, we can easily access
and manipulate tags, IDs, classes, Attributes or Elements using commands or methods provided by
Document object.
Structure of DOM:
DOM can be thought of as Tree or Forest(more than one tree). The term structure model is
sometimes used to describe the tree-like representation of a document. One important property of
DOM structure models is structural isomorphism: if any two DOM implementations are used to
create a representation of the same document, they will create the same structure model, with
precisely the same objects and relationships.
Why called as Object Model ? Documents are modeled using objects, and the model includes not only the structure of a document
but also the behavior of a document and the objects of which it is composed of like tag elements
with attributes in HTML.
Properties of DOM:
Let’s see the properties of document object that can be accessed and modified by the document
object.

142
1. Window Object: Window Object is at always at top of hierarchy.
2. Document object: When HTML document is loaded into a window, it becomes a
document object.
3. Form Object: It is represented by form tags.
4. Link Objects: It is represented by link tags.
5. Anchor Objects: It is represented by a href tags.
6. Form Control Elements:: Form can have many control elements such as text fields,
buttons, radio buttons, and checkboxes, etc.
Methods of Document Object:
1. write(“string”): writes the given string on the document.
2. getElementById(): returns the element having the given id value.
3. getElementsByName(): returns all the elements having the given name value.
4. getElementsByTagName(): returns all the elements having the given tag name.
5. getElementsByClassName(): returns all the elements having the given class name.
Example:
filter_none
edit
play_arrow
brightness_4
<Table> <ROWS> <TR> <TD>Car</TD> <TD>Scooter</TD> </TR> <TR> <TD>MotorBike</TD> <TD>Bus</TD> </TR> </ROWS> </Table>

143
What DOM is not ?
1. The Document Object Model is not a binary description where it does not define any
binary source code in its interfaces.
2. The Document Object Model is not used to describe objects in XML or HTML whereas
the DOM describes XML and HTML documents as objects.
3. The Document Object Model is not represented by set of data structures; it is an
interface which specifies object representation.
4. The Document Object Model does not show criticality of objects in documents i.e it
doesn’t have information about which object in document is appropriate to the context and
which is not.
Levels of DOM:
1. Level 0: Provides low-level set of interfaces.
2. Level 1: DOM level 1 can be described in two parts: CORE and HTML.
CORE provides a low-level interfaces that can be used to represent any structured
document.
HTML provides high-level interfaces that can be used to represent HTML
document.
3. Level 2 : consists of six
specifications: CORE2, VIEWS, EVENTS, STYLE, TRAVERSAL and RANGE.
CORE2: extends functionality of CORE specified by DOM level 1.
VIEWS: views allows programs to dynamically access and manipulate content of
document.
EVENTS: Events are scripts that is either executed by browser when user reacts
to web page.
STYLE: allows programs to dynamically access and manipulate content of style
sheets.
TRAVERSAL: allows programs to dynamically traverse the document.

144
RANGE: allows programs to dynamically identify a range of content in
document.
4. Level 3: consists of five different specifications: CORE3, LOAD and
SAVE, VALIDATION, EVENTS, and XPATH.
CORE3: extends functionality of CORE specified by DOM level 2.
LOAD and SAVE: allows program to dynamically load the content of XML
document into DOM document and save the DOM Document into XML document by
serialization.
VALIDATION: allows program to dynamically update the content and structure
of document while ensuring document remains valid.
EVENTS: extends functionality of Events specified by DOM Level 2.
XPATH: XPATH is a path language that can be used to access DOM tree.
The HTMLCollection Object
The getElementsByTagName() method returns an HTMLCollection object.
An HTMLCollection object is an array-like list (collection) of HTML elements.
The following code selects all <p> elements in a document:
Example
var x = document.getElementsByTagName("p");
The elements in the collection can be accessed by an index number.
To access the second <p> element you can write:
y = x[1];
Try it Yourself »
Note: The index starts at 0.

145
HTML HTMLCollection Length
The length property defines the number of elements in an HTMLCollection:
Example
var myCollection = document.getElementsByTagName("p");
document.getElementById("demo").innerHTML = myCollection.length;
Try it Yourself »
Example explained:
1. Create a collection of all <p> elements
2. Display the length of the collection
The length property is useful when you want to loop through the elements in a collection:
Example
Change the background color of all <p> elements:
var myCollection = document.getElementsByTagName("p");
var i;
for (i = 0; i < myCollection.length; i++) {
myCollection[i].style.color = "red";
}
Try it Yourself »
JavaScript HTML DOM Events ❮ PreviousNext ❯

146
HTML DOM allows JavaScript to react to HTML events:
Mouse Over Me
Click Me
Reacting to Events
A JavaScript can be executed when an event occurs, like when a user clicks on an HTML element.
To execute code when a user clicks on an element, add JavaScript code to an HTML event attribute:
onclick=JavaScript
Examples of HTML events:
When a user clicks the mouse
When a web page has loaded
When an image has been loaded
When the mouse moves over an element
When an input field is changed
When an HTML form is submitted
When a user strokes a key
In this example, the content of the <h1> element is changed when a user clicks on it:

147
Example
<!DOCTYPE html>
<html>
<body>
<h1 onclick="this.innerHTML = 'Ooops!'">Click on this text!</h1>
</body>
</html>
Try it Yourself »
In this example, a function is called from the event handler:
Example
<!DOCTYPE html>
<html>
<body>
<h1 onclick="changeText(this)">Click on this text!</h1>
<script>
function changeText(id) {
id.innerHTML = "Ooops!";
}
</script>
</body>
</html>
Try it Yourself »

148
HTML Event Attributes
To assign events to HTML elements you can use event attributes.
Example
Assign an onclick event to a button element:
<button onclick="displayDate()">Try it</button>
Try it Yourself »
In the example above, a function named displayDate will be executed when the button is clicked.

149
Assign Events Using the HTML DOM
The HTML DOM allows you to assign events to HTML elements using JavaScript:
Example
Assign an onclick event to a button element:
<script>
document.getElementById("myBtn").onclick = displayDate;
</script>
Try it Yourself »
In the example above, a function named displayDate is assigned to an HTML element with
the id="myBtn".
The function will be executed when the button is clicked.
The onload and onunload Events
The onload and onunload events are triggered when the user enters or leaves the page.
The onload event can be used to check the visitor's browser type and browser version, and load the
proper version of the web page based on the information.

150
The onload and onunload events can be used to deal with cookies.
Example
<body onload="checkCookies()">
Try it Yourself »
The onchange Event
The onchange event is often used in combination with validation of input fields.
Below is an example of how to use the onchange. The upperCase() function will be called when a user
changes the content of an input field.
Example
<input type="text" id="fname" onchange="upperCase()">
Try it Yourself »

151
The onmouseover and onmouseout Events
The onmouseover and onmouseout events can be used to trigger a function when the user mouses over,
or out of, an HTML element:
Mouse Over Me
Try it Yourself »
The onmousedown, onmouseup and onclick
Events
The onmousedown, onmouseup, and onclick events are all parts of a mouse-click. First when a mouse-
button is clicked, the onmousedown event is triggered, then, when the mouse-button is released, the
onmouseup event is triggered, finally, when the mouse-click is completed, the onclick event is
triggered.
Click Me
Try it Yourself »

152
UNIT 4
XSLT (eXtensible Stylesheet Language Transformations) is the recommended style sheet
language for XML.
XSLT is far more sophisticated than CSS. With XSLT you can add/remove elements and
attributes to or from the output file. You can also rearrange and sort elements, perform tests and
make decisions about which elements to hide and display, and a lot more.
XSLT uses XPath to find information in an XML document.
XSLT, Extensible Stylesheet Language Transformations, provides the ability to transform XML data
from one format to another automatically.

153
Main parts of XSL Document
XSLT: It is a language for transforming XML documents into various other types of documents.
XPath: It is a language for navigating in XML documents.
XQuery: It is a language for querying XML documents.
XSL-FO: It is a language for formatting XML documents.
How XSLT Works:
An XSLT stylesheet is used to define the transformation rules to be applied on the target XML
document.
XSLT stylesheet is written in XML format.
XSLT Processor takes the XSLT stylesheet and applies the transformation rules on the target
XML document and then it generates a formatted document in the form of XML, HTML, or text
format.
This formatted document is then utilized by XSLT formatter to generate the actual output which
is to be displayed to the end-user.
XSLT SYNTAX
<?xml version = "1.0"?>
<?xml-stylesheet type = "text/xsl" href = "students.xsl"?>
<class>
...
</class>

154
<?xml version = "1.0"?>
<?xml-stylesheet type = "text/xsl" href = "students.xsl"?>
<class>
<student rollno = "393">
<firstname>Dinkar</firstname>
<lastname>Kad</lastname>
<nickname>Dinkar</nickname> <marks>85</marks> </student>
<student rollno = "493">
<firstname>Vaneet</firstname>
<lastname>Gupta</lastname>
<nickname>Vinni</nickname>
<marks>95</marks>
</student>
<student rollno = "593">
<firstname>Jasvir</firstname>
<lastname>Singh</lastname>
<nickname>Jazz</nickname>
<marks>90</marks>
</student>
</class>
output

155
Advantage:
Easy to merge XML data into a presentation
More resilient to changes in the details of the XML documents than low-level DOM and SAX
Database queries can be returned in XML
Insensitive to column order
Disadvantage:
Memory intensive and suffers a performance penalty
Difficult to implement complicated business rules
Have to learn a new language (if not already familiar)
Can't change the value of variables (require recursions)
Xpath INTRODUCATION:

156
NEED FOR XSL:
In case of HTML documents, tags are predefined such as table, div, span, etc. The
browser knows how to add style to them and display them using CSS styles.
XML documents, tags are not predefined. In order to understand and style an XML
document, World Wide Web Consortium (W3C) developed XSL which can act as an
XML-based Stylesheet Language.
An XSL document specifies how a browser should render an XML document.
MAIN PARTS OF XSL
XSLT − used to transform XML documents into various other types of document.
XPath − used to navigate XML documents.
XSL-FO − used to format XML documents.
XPATH:
XPath is an official recommendation of the World Wide Web Consortium (W3C).
It defines a language to find information in an XML file.
It is used to traverse elements and attributes of an XML document.
XPath provides various types of expressions which can be used to enquire relevant
information from the XML document.
What is xpath

157
XPATH STRUCTURE
Structure Definitions
XPath defines the parts of an XML document like element, attribute, text, namespace,
processing-instruction, comment, and document nodes.
Path Expressions
XPath provides powerful path expressions select nodes or list of nodes in XML documents.
Standard Functions
XPath provides a rich library of standard functions for manipulation of string values, numeric
values, date and time comparison, node and QName manipulation, sequence manipulation,
Boolean values etc.
W3c recommandation
W3C recommendation
XPath is an official recommendation of World Wide Web Consortium (W3C).
One should keep the following points in mind, while working with XPath −
• XPath is core component of XSLT standard.
• XSLT cannot work without XPath.
• XPath is basis of XQuery and XPointer.
Path expression:
An XPath expression generally defines a pattern in order to
select a set of nodes. These patterns are used by XSLT to
perform transformations or by Pointer for addressing
purpose.
XPath specification specifies seven types of nodes which can be the output of execution
of the xPath expression.
• Root
• Element
• Text
• Attribute

158
• Comment
• Processing Instruction
• Namespace
XPath uses a path expression to select node or a list of nodes from an XML document.
Advangaes:
Easy to do lookup with descendent, siblings, parent, child, ancestor etc.
Works with text contains and equals.
Disadvantages:
Slow compared to others.
• Too many slashes.
• Not tidy.
In this example,
we've created a sample XML document, students.xml and its stylesheet document
students.xsl which uses the XPath expressions under select attribute of various XSL
tags to get the values of roll no, firstname, lastname, nickname and marks of each
student node.
Program:Code
students.xml
<?xml version = "1.0"?>
<?xml-stylesheet type = "text/xsl" href = "students.xsl"?>
<class>
<student rollno = "393">
<firstname>Dinkar</firstname>
<lastname>Kad</lastname>
<nickname>Dinkar</nickname>
<marks>85</marks>

159
</student>
<student rollno = "493">
<firstname>Vaneet</firstname>
<lastname>Gupta</lastname>
< nickname>Vinni</nickname>
<marks>95</marks>
</student>
</class>
<?xml version = "1.0" encoding = "UTF-8"?>
<xsl:stylesheet version = "1.0"
xmlns:xsl = "http://www.w3.org/1999/XSL/Transform">
<xsl:template match = "/">
<html>
<body>
<h2>Students</h2>
<table border = "1">
<tr bgcolor = "#9acd32">
<th>Roll No</th>
<th>First Name</th>
<th>Last Name</th>
<th>Nick Name</th>
<th>Marks</th>
</tr>
<xsl:for-each select = "class/student">
<tr>

160
<td> <xsl:value-of select = "@rollno"/></td>
<td><xsl:value-of select = "firstname"/></td>
<td><xsl:value-of select = "lastname"/></td>
<td><xsl:value-of select = "nickname"/></td>
<td><xsl:value-of select = "marks"/></td>
</tr>
</xsl:for-each>
</table>
</body>
</html>
</xsl:template>
</xsl:stylesheet>
Output:

161
String processing& regular expression
JavaScript Strings:
A JavaScript string stores a series of characters like "John Doe".
A string can be any text inside double or single quotes:
var carName1 = "Volvo XC60";
var carName2 = 'Volvo XC60';
String Properties and Methods:
Primitive values, like "John Doe", cannot have properties or methods (because they are not
objects).
But with JavaScript, methods and properties are also available to primitive values,
because JavaScript treats primitive values as objects when executing methods and
properties.
Property Description
constructor Returns the string's constructor function
length Returns the length of a string
prototype Allows you to add properties and methods to an object
String Methods
Method Description
charAt() Returns the character at the specified index (position)
charCodeAt() Returns the Unicode of the character at the specified index

162
concat() Joins two or more strings, and returns a new joined strings
endsWith() Checks whether a string ends with specified string/characters
slice() Extracts a part of a string and returns a new string
split() Splits a string into an array of substrings
REGULAR EXPRESSION
A regular expression is a sequence of characters that define a search pattern.
Usually such patterns are used by string-searching algorithms for "find" or "find and
replace" operations on strings, or for input validation.
It is a technique developed in theoretical computer science and formal language theory
MODIFIER
Modifier Description
g Perform a global match (find all matches rather than stopping after
the first match)
i Perform case-insensitive matching
m Perform multiline matching
BRACKETS
Expression Description
[abc] Find any character between the brackets
[^abc] Find any character NOT between the brackets

163
[0-9] Find any character between the brackets (any digit)
[^0-9] Find any character NOT between the brackets (any non-digit)
(x|y) Find any of the alternatives specified
RegExp Object Properties:
Property Description
constructor Returns the function that created the RegExp object's prototype
global Checks whether the "g" modifier is set
ignoreCase Checks whether the "i" modifier is set
lastIndex Specifies the index at which to start the next match
multiline Checks whether the "m" modifier is set
source Returns the text of the RegExp pattern

164

165

166

167
Java string compare
We can compare string in java on the basis of content and reference.
It is used in authentication (by equals() method), sorting (by compareTo() method), reference
matching (by == operator) etc.

168
There are three ways to compare string in java:
• By equals() method
• By = = operator
• By compareTo() method
1) String compare by equals() method
The String equals() method compares the original content of the string. It compares values of
string for equality. String class provides two methods:
1. public boolean equals(Object another) compares this string to the specified object.
2. public boolean equalsIgnoreCase(String another) compares this String to another string,
ignoring case.
class Teststringcomparison1{
public static void main(String arg[]) {
String s1="Sachin";
String s2="Sachin”;
String s3=new String("Sachin");
String s4="Saurav";
System.out.println(s1.equals(s2));//true
System.out.println(s1.equals(s3));//true
System.out.println(s1.equals(s4);//false
}
}
Output:
true
true
false

169
class Teststringcomparison2{
public static void main(String args[]){
String s1="Sachin";
String s2="SACHIN";
System.out.println(s1.equals(s2));//false
System.out.println(s1.equalsIgnoreCase(s2));//true
}
}
Output:
false
true
2) String compare by == operator
The = = operator compares references not values.
class Teststringcomparison3{
public s tatic void main(String args[]){
String s1="Sachin";
String s2="Sachin";
String s3=new String("Sachin");
System.out.println(s1==s2);//true(because
both refer to same instance)
System.out.println(s1==s3);//false
(because s3 refers to instance created in

170
nonpool)
}
}
Output:
true
false
3) String compare by compareTo() method
The String compareTo() method compares values lexicographically and returns an
integer value that describes if first string is less than, equal to or greater than second
string.
Suppose s1 and s2 are two string variables. If:
s1==s2 :0
s1 > s2 :positive value
s1 < s2 :negative value
class Teststringcomparison4{
public static void main(String args[]){
String s1="Sachin";
String s2="Sachin";
String s3="Ratan";
System.out.println(s1.compareTo(s2));//0
System.out.println(s1.compareTo(s3));//1(because s1>s3)
System.out.println(s3.compareTo(s1));//-1(because s3 < s1 )
}
}

171
Output:
0
1
-1
What is XQuery?
XQuery is to XML what SQL is to databases.
XQuery is designed to query XML data.
XQuery Example
for $x in doc("books.xml")/bookstore/book
where $x/price>30
order by $x/title
return $x/title
What is XQuery?

172
XQuery is the language for querying XML data
XQuery for XML is like SQL for databases
XQuery is built on XPath expressions
XQuery is supported by all major databases
XQuery is a W3C Recommendation
XQuery is About Querying XML
XQuery is a language for finding and extracting elements and attributes from XML documents.
Here is an example of what XQuery could solve:
"Select all CD records with a price less than $10 from the CD collection stored in cd_catalog.xml"
XQuery and XPath
XQuery 1.0 and XPath 2.0 share the same data model and support the same functions and operators.
If you have already studied XPath you will have no problems with understanding XQuery.
XQuery - Examples of Use
XQuery can be used to:

173
Extract information to use in a Web Service
Generate summary reports
Transform XML data to XHTML
Search Web documents for relevant information.
The XML Example Document We will use the following XML document in the examples below.
"books.xml":
<?xml version="1.0" encoding="UTF-8"?>
<bookstore>
<book category="COOKING">
<title lang="en">Everyday Italian</title>
<author>Giada De Laurentiis</author>
<year>2005</year>
<price>30.00</price>
</book>
<book category="CHILDREN">
<title lang="en">Harry Potter</title>
<author>J K. Rowling</author>
<year>2005</year>
<price>29.99</price>
</book>
<book category="WEB">
<title lang="en">XQuery Kick Start</title>
<author>James McGovern</author>
<author>Per Bothner</author>
<author>Kurt Cagle</author>
<author>James Linn</author>
<author>Vaidyanathan Nagarajan</author>
<year>2003</year>
<price>49.99</price>
</book>
<book category="WEB">
<title lang="en">Learning XML</title>
<author>Erik T. Ray</author>
<year>2003</year>
<price>39.95</price>
</book>
</bookstore>
XQuery Basic Syntax Rules

174
Some basic syntax rules:
XQuery is case-sensitive
XQuery elements, attributes, and variables must be valid XML names
An XQuery string value can be in single or double quotes
An XQuery variable is defined with a $ followed by a name, e.g. $bookstore
XQuery comments are delimited by (: and :), e.g. (: XQuery Comment :)
The XML Example Document
We will use the "books.xml" document in the examples below (same XML file as in the previous
chapters).
XQuery Conditional Expressions
"If-Then-Else" expressions are allowed in XQuery.
Look at the following example:
for $x in doc("books.xml")/bookstore/book
return if ($x/@category="children")
then <child>{data($x/title)}</child>
else <adult>{data($x/title)}</adult>
Notes on the "if-then-else" syntax: parentheses around the if expression are required. else is
required, but it can be just else ().
The result of the example above will be:
<adult>Everyday Italian</adult>
<child>Harry Potter</child>
<adult>XQuery Kick Start</adult>
<adult>Learning XML</adult>
XQuery Functions
XQuery is built on XPath expressions. XQuery 1.0 and XPath 2.0 share the same data model and
support the same functions and operators.
XPath Operators
XPath Functions
XQuery Data Types
XQuery shares the same data types as XML Schema 1.0 (XSD).

175
XSD String
XSD Date
XSD Numeric
XSD Misc
Examples of Function Calls
A call to a function can appear where an expression may appear. Look at the examples below:
Example 1: In an element
<name>{upper-case($booktitle)}</name>
Example 2: In the predicate of a path expression
doc("books.xml")/bookstore/book[substring(title,1,5)='Harry']
Example 3: In a let clause
let $name := (substring($booktitle,1,4))
XQuery User-Defined Functions
If you cannot find the XQuery function you need, you can write your own.
User-defined functions can be defined in the query or in a separate library.
Syntax
declare function prefix:function_name($parameter as datatype)
as returnDatatype
{
...function code here...
};
Notes on user-defined functions:
Use the declare function keyword
The name of the function must be prefixed
The data type of the parameters are mostly the same as the data types defined in XML
Schema
The body of the function must be surrounded by curly braces

176
DTD
A DTD is a Document Type Definition.
A DTD defines the structure and the legal elements and attributes of an XML document.
Use a DTD
With a DTD, independent groups of people can agree on a standard DTD for interchanging data.
An application can use a DTD to verify that XML data is valid.
An Internal DTD Declaration
If the DTD is declared inside the XML file, it must be wrapped inside the <!DOCTYPE> definition:
The DTD above is interpreted like this:
!DOCTYPE note defines that the root element of this document is note
!ELEMENT note defines that the note element must contain four elements:
"to,from,heading,body"
!ELEMENT to defines the to element to be of type "#PCDATA"
!ELEMENT from defines the from element to be of type "#PCDATA"
!ELEMENT heading defines the heading element to be of type "#PCDATA"
!ELEMENT body defines the body element to be of type "#PCDATA"
An External DTD Declaration
If the DTD is declared in an external file, the <!DOCTYPE> definition must contain a reference to
the DTD file:
XML document with a reference to an external DTD
<?xml version="1.0"?>
<!DOCTYPE note SYSTEM "note.dtd">
<note>
<to>Tove</to>
<from>Jani</from>
<heading>Reminder</heading>
<body>Don't forget me this weekend!</body>
</note>
View XML file »

177
And here is the file "note.dtd", which contains the DTD:
<!ELEMENT note (to,from,heading,body)>
<!ELEMENT to (#PCDATA)>
<!ELEMENT from (#PCDATA)>
<!ELEMENT heading (#PCDATA)>
<!ELEMENT body (#PCDATA)>
Declaring Elements
In a DTD, XML elements are declared with the following syntax:
<!ELEMENT element-name category>
or
<!ELEMENT element-name (element-content)>
Empty Elements
Empty elements are declared with the category keyword EMPTY:
<!ELEMENT element-name EMPTY>
Example:
<!ELEMENT br EMPTY>
XML example:
<br />

178
Elements with Parsed Character Data
Elements with only parsed character data are declared with #PCDATA inside parentheses:
<!ELEMENT element-name (#PCDATA)>
Example:
<!ELEMENT from (#PCDATA)>
DTD Examples
❮ PreviousNext ❯
TV Schedule DTD
<!DOCTYPE TVSCHEDULE [
<!ELEMENT TVSCHEDULE (CHANNEL+)>
<!ELEMENT CHANNEL (BANNER,DAY+)>
<!ELEMENT BANNER (#PCDATA)>
<!ELEMENT DAY (DATE,(HOLIDAY|PROGRAMSLOT+)+)>
<!ELEMENT HOLIDAY (#PCDATA)>
<!ELEMENT DATE (#PCDATA)>
<!ELEMENT PROGRAMSLOT (TIME,TITLE,DESCRIPTION?)>
<!ELEMENT TIME (#PCDATA)>
<!ELEMENT TITLE (#PCDATA)>
<!ELEMENT DESCRIPTION (#PCDATA)>
<!ATTLIST TVSCHEDULE NAME CDATA #REQUIRED>
<!ATTLIST CHANNEL CHAN CDATA #REQUIRED>
<!ATTLIST PROGRAMSLOT VTR CDATA #IMPLIED>
<!ATTLIST TITLE RATING CDATA #IMPLIED>
<!ATTLIST TITLE LANGUAGE CDATA #IMPLIED>
]>

179
Newspaper Article DTD <!DOCTYPE NEWSPAPER [
<!ELEMENT NEWSPAPER (ARTICLE+)>
<!ELEMENT ARTICLE (HEADLINE,BYLINE,LEAD,BODY,NOTES)>
<!ELEMENT HEADLINE (#PCDATA)>
<!ELEMENT BYLINE (#PCDATA)>
<!ELEMENT LEAD (#PCDATA)>
<!ELEMENT BODY (#PCDATA)>
<!ELEMENT NOTES (#PCDATA)>
<!ATTLIST ARTICLE AUTHOR CDATA #REQUIRED>
<!ATTLIST ARTICLE EDITOR CDATA #IMPLIED>
<!ATTLIST ARTICLE DATE CDATA #IMPLIED>
<!ATTLIST ARTICLE EDITION CDATA #IMPLIED>
<!ENTITY NEWSPAPER "Vervet Logic Times">
<!ENTITY PUBLISHER "Vervet Logic Press">
<!ENTITY COPYRIGHT "Copyright 1998 Vervet Logic Press">
]>
XML Schema An XML Schema describes the structure of an XML document, just like a DTD.
An XML document with correct syntax is called "Well Formed".
An XML document validated against an XML Schema is both "Well Formed" and "Valid".
XML Schema
XML Schema is an XML-based alternative to DTD:
<xs:element name="note">
<xs:complexType>
<xs:sequence>
<xs:element name="to" type="xs:string"/>

180
<xs:element name="from" type="xs:string"/>
<xs:element name="heading" type="xs:string"/>
<xs:element name="body" type="xs:string"/>
</xs:sequence>
</xs:complexType>
</xs:element>
The Schema above is interpreted like this:
<xs:element name="note"> defines the element called "note"
<xs:complexType> the "note" element is a complex type
<xs:sequence> the complex type is a sequence of elements
<xs:element name="to" type="xs:string"> the element "to" is of type string (text)
<xs:element name="from" type="xs:string"> the element "from" is of type string
<xs:element name="heading" type="xs:string"> the element "heading" is of type string
<xs:element name="body" type="xs:string"> the element "body" is of type string
XML Schemas are More Powerful than DTD
XML Schemas are written in XML
XML Schemas are extensible to additions
XML Schemas support data types
XML Schemas support namespaces
Why Use an XML Schema?
With XML Schema, your XML files can carry a description of its own format.

181
With XML Schema, independent groups of people can agree on a standard for interchanging data.
With XML Schema, you can verify data.
XML Schemas Support Data Types
One of the greatest strengths of XML Schemas is the support for data types:
It is easier to describe document content
It is easier to define restrictions on data
It is easier to validate the correctness of data
It is easier to convert data between different data types
XML Schemas use XML Syntax
Another great strength about XML Schemas is that they are written in XML:
You don't have to learn a new language
You can use your XML editor to edit your Schema files
You can use your XML parser to parse your Schema files
You can manipulate your Schemas with the XML DOM
You can transform your Schemas with XSLT
XML on the Server XML files are plain text files just like HTML files.
XML can easily be stored and generated by a standard web server.

182
Storing XML Files on the Server
XML files can be stored on an Internet server exactly the same way as HTML files.
Start Windows Notepad and write the following lines:
<?xml version="1.0" encoding="UTF-8"?>
<note>
<from>Jani</from>
<to>Tove</to>
<message>Remember me this weekend</message>
</note>
Save the file on your web server with a proper name like "note.xml".
Generating XML with PHP
XML can be generated on a server without any installed XML software.
To generate an XML response from the server using PHP, use following code:
<?php
header("Content-type: text/xml");
echo "<?xml version='1.0' encoding='UTF-8'?>";
echo "<note>";

183
echo "<from>Jani</from>";
echo "<to>Tove</to>";
echo "<message>Remember me this weekend</message>";
echo "</note>";
?>
Note that the content type of the response header must be set to "text/xml".
See how the PHP file will be returned from the server.
If you want to study PHP, you will find our PHP tutorial on our homepage.
Generating XML with ASP
To generate an XML response from the server - simply write the following code and save it as an
ASP file on the web server:
<%
response.ContentType="text/xml"
response.Write("<?xml version='1.0' encoding='UTF-8'?>")
response.Write("<note>")
response.Write("<from>Jani</from>")
response.Write("<to>Tove</to>")
response.Write("<message>Remember me this weekend</message>")
response.Write("</note>")
%>
Note that the content type of the response must be set to "text/xml".
See how the ASP file will be returned from the server.
If you want to study ASP, you will find our ASP tutorial on our homepage.
Generating XML From a Database
XML can be generated from a database without any installed XML software.
To generate an XML database response from the server, simply write the following code and save it
as an ASP file on the web server:
<%
response.ContentType = "text/xml"
set conn=Server.CreateObject("ADODB.Connection")

184
conn.provider="Microsoft.Jet.OLEDB.4.0;"
conn.open server.mappath("/datafolder/database.mdb")
sql="select fname,lname from tblGuestBook"
set rs=Conn.Execute(sql)
response.write("<?xml version='1.0' encoding='UTF-8'?>")
response.write("<guestbook>")
while (not rs.EOF)
response.write("<guest>")
response.write("<fname>" & rs("fname") & "</fname>")
response.write("<lname>" & rs("lname") & "</lname>")
response.write("</guest>")
rs.MoveNext()
wend
rs.close()
conn.close()
response.write("</guestbook>")
%>
See the real life database output from the ASP file above.
The example above uses ASP with ADO.
If you want to study ASP and ADO, you will find the tutorials on our homepage.
Transforming XML with XSLT on the Server
This ASP transforms an XML file to XHTML on the server:
<%
'Load XML
set xml = Server.CreateObject("Microsoft.XMLDOM")
xml.async = false
xml.load(Server.MapPath("simple.xml"))
'Load XSL
set xsl = Server.CreateObject("Microsoft.XMLDOM")
xsl.async = false
xsl.load(Server.MapPath("simple.xsl"))
'Transform file

185
Response.Write(xml.transformNode(xsl))
%>
Example explained
The first block of code creates an instance of the Microsoft XML parser (XMLDOM), and
loads the XML file into memory.
The second block of code creates another instance of the parser and loads the XSL file into
memory.
The last line of code transforms the XML document using the XSL document, and sends the
result as XHTML to your browser. Nice!
PHP Introduction PHP code is executed on the server.
What You Should Already Know
Before you continue you should have a basic understanding of the following:
HTML
CSS
JavaScript
If you want to study these subjects first, find the tutorials on our Home page.
PHP
PHP is an acronym for "PHP: Hypertext Preprocessor"
PHP is a widely-used, open source scripting language
PHP scripts are executed on the server
PHP is free to download and use
PHP is an amazing and popular language!
It is powerful enough to be at the core of the biggest blogging system on the web (WordPress)!
It is deep enough to run the largest social network (Facebook)!
It is also easy enough to be a beginner's first server side language!
PHP File
PHP files can contain text, HTML, CSS, JavaScript, and PHP code
PHP code is executed on the server, and the result is returned to the browser as plain HTML

186
PHP files have extension ".php"
PHP Do
PHP can generate dynamic page content
PHP can create, open, read, write, delete, and close files on the server
PHP can collect form data
PHP can send and receive cookies
PHP can add, delete, modify data in your database
PHP can be used to control user-access
PHP can encrypt data
With PHP you are not limited to output HTML. You can output images, PDF files, and even Flash
movies. You can also output any text, such as XHTML and XML
PHP
PHP runs on various platforms (Windows, Linux, Unix, Mac OS X, etc.)
PHP is compatible with almost all servers used today (Apache, IIS, etc.)
PHP supports a wide range of databases
PHP is free. Download it from the official PHP resource: www.php.net
PHP is easy to learn and runs efficiently on the server side
What's new in PHP 7
PHP 7 is much faster than the previous popular stable release (PHP 5.6)
PHP 7 has improved Error Handling
PHP 7 supports stricter Type Declarations for function arguments
PHP 7 supports new operators (like the spaceship operator: <=>)
PHP Syntax A PHP script is executed on the server, and the plain HTML result is sent back to the browser.
Basic PHP Syntax
A PHP script can be placed anywhere in the document.
A PHP script starts with <?php and ends with ?>:

187
<?php
// PHP code goes here
?>
The default file extension for PHP files is ".php".
A PHP file normally contains HTML tags, and some PHP scripting code.
Below, we have an example of a simple PHP file, with a PHP script that uses a built-in PHP function
"echo" to output the text "Hello World!" on a web page:
Example
<!DOCTYPE html>
<html>
<body>
<h1>My first PHP page</h1>
<?php
echo "Hello World!";
?>
</body>
</html>
Try it Yourself »
AIRTHMETIC OPERATORS
The following table shows all the arithmetic operators supported by the C language. Assume
variable A holds 10 and variable B holds 20, then −
Operator Description Example
+ Adds two operands. A + B = 30
− Subtracts second operand from the first. A − B = -10
* Multiplies both operands. A * B = 200

188
/ Divides numerator by de-numerator. B / A = 2
% Modulus Operator and remainder of after an integer division. B % A = 0
++ Increment operator increases the integer value by one. A++ = 11
-- Decrement operator decreases the integer value by one. A-- = 9
Example
Try the following example to understand all the arithmetic operators available in C −
Live Demo
#include <stdio.h>
main() {
int a = 21;
int b = 10;
int c ;
c = a + b;
printf("Line 1 - Value of c is %d\n", c );
c = a - b;
printf("Line 2 - Value of c is %d\n", c );
c = a * b;
printf("Line 3 - Value of c is %d\n", c );
c = a / b;
printf("Line 4 - Value of c is %d\n", c );
c = a % b;
printf("Line 5 - Value of c is %d\n", c );
c = a++;
printf("Line 6 - Value of c is %d\n", c );
c = a--;
printf("Line 7 - Value of c is %d\n", c );
}

189
When you compile and execute the above program, it produces the following result −
Line 1 - Value of c is 31
Line 2 - Value of c is 11
Line 3 - Value of c is 210
Line 4 - Value of c is 2
Line 5 - Value of c is 1
Line 6 - Value of c is 21
Line 7 - Value of c is 22.
Xml versions and declarations
This chapter covers XML declaration in detail. XML declaration contains details that prepare
an XML processor to parse the XML document. It is optional, but when used, it must appear in
the first line of the XML document.
Syntax
Following syntax shows XML declaration −
<?xml
version = "version_number"
encoding = "encoding_declaration"
standalone = "standalone_status"
?>
Each parameter consists of a parameter name, an equals sign (=), and parameter value inside a
quote. Following table shows the above syntax in detail −
Parameter Parameter_value Parameter_description
Version 1.0 Specifies the version of the XML standard used.
Encoding UTF-8, UTF-16, ISO-
10646-UCS-2, ISO-10646-
UCS-4, ISO-8859-1 to ISO-
8859-9, ISO-2022-JP,
Shift_JIS, EUC-JP
It defines the character encoding used in the
document. UTF-8 is the default encoding used.
Standalone yes or no It informs the parser whether the document relies
on the information from an external source, such as
external document type definition (DTD), for its
content. The default value is set to no. Setting it
to yes tells the processor there are no external

190
declarations required for parsing the document.
Rules
An XML declaration should abide with the following rules −
If the XML declaration is present in the XML, it must be placed as the first line in the
XML document.
If the XML declaration is included, it must contain version number attribute.
The Parameter names and values are case-sensitive.
The names are always in lower case.
The order of placing the parameters is important. The correct order is: version, encoding
and standalone.
Either single or double quotes may be used.
The XML declaration has no closing tag i.e. </?xml>
XML Declaration Examples
Following are few examples of XML declarations −
XML declaration with no parameters −
<?xml >
XML declaration with version definition −
<?xml version = "1.0">
XML declaration with all parameters defined −
<?xml version = "1.0" encoding = "UTF-8" standalone = "no" ?>
XML declaration with all parameters defined in single quotes −
<?xml version = '1.0' encoding = 'iso-8859-1' standalone = 'no' ?>
XML Namespaces XML Namespaces provide a method to avoid element name conflicts.

191
Name Conflicts
In XML, element names are defined by the developer. This often results in a conflict when trying to
mix XML documents from different XML applications.
This XML carries HTML table information:
<table>
<tr>
<td>Apples</td>
<td>Bananas</td>
</tr>
</table>
This XML carries information about a table (a piece of furniture):
<table>
<name>African Coffee Table</name>
<width>80</width>
<length>120</length>
</table>
If these XML fragments were added together, there would be a name conflict. Both contain a <table>
element, but the elements have different content and meaning.
A user or an XML application will not know how to handle these differences.

192
Solving the Name Conflict Using a Prefix
Name conflicts in XML can easily be avoided using a name prefix.
This XML carries information about an HTML table, and a piece of furniture:
<h:table>
<h:tr>
<h:td>Apples</h:td>
<h:td>Bananas</h:td>
</h:tr>
</h:table>
<f:table>
<f:name>African Coffee Table</f:name>
<f:width>80</f:width>
<f:length>120</f:length>
</f:table>
In the example above, there will be no conflict because the two <table> elements have different
names.
XML Namespaces - The xmlns Attribute
When using prefixes in XML, a namespace for the prefix must be defined.
The namespace can be defined by an xmlns attribute in the start tag of an element.
The namespace declaration has the following syntax. xmlns:prefix="URI".
<root>
<h:table xmlns:h="http://www.w3.org/TR/html4/">
<h:tr>
<h:td>Apples</h:td>
<h:td>Bananas</h:td>
</h:tr>
</h:table>
<f:table xmlns:f="https://www.w3schools.com/furniture">
<f:name>African Coffee Table</f:name>
<f:width>80</f:width>

193
<f:length>120</f:length>
</f:table>
</root>
In the example above:
The xmlns attribute in the first <table> element gives the h: prefix a qualified namespace.
The xmlns attribute in the second <table> element gives the f: prefix a qualified namespace.
When a namespace is defined for an element, all child elements with the same prefix are associated
with the same namespace.
Namespaces can also be declared in the XML root element:
<root xmlns:h="http://www.w3.org/TR/html4/"
xmlns:f="https://www.w3schools.com/furniture">
<h:table>
<h:tr>
<h:td>Apples</h:td>
<h:td>Bananas</h:td>
</h:tr>
</h:table>
<f:table>
<f:name>African Coffee Table</f:name>
<f:width>80</f:width>
<f:length>120</f:length>
</f:table>
</root>
Note: The namespace URI is not used by the parser to look up information.
The purpose of using an URI is to give the namespace a unique name.
However, companies often use the namespace as a pointer to a web page containing namespace
information.
Uniform Resource Identifier (URI)

194
A Uniform Resource Identifier (URI) is a string of characters which identifies an Internet
Resource.
The most common URI is the Uniform Resource Locator (URL) which identifies an Internet
domain address. Another, not so common type of URI is the Uniform Resource Name (URN).
Default Namespaces
Defining a default namespace for an element saves us from using prefixes in all the child elements. It
has the following syntax:
xmlns="namespaceURI"
This XML carries HTML table information:
<table xmlns="http://www.w3.org/TR/html4/">
<tr>
<td>Apples</td>
<td>Bananas</td>
</tr>
</table>
This XML carries information about a piece of furniture:
<table xmlns="https://www.w3schools.com/furniture">
<name>African Coffee Table</name>
<width>80</width>
<length>120</length>
</table>
Namespaces in Real Use
XSLT is a language that can be used to transform XML documents into other formats.
The XML document below, is a document used to transform XML into HTML.
The namespace "http://www.w3.org/1999/XSL/Transform" identifies XSLT elements inside an
HTML document:
<?xml version="1.0" encoding="UTF-8"?>
<xsl:stylesheet version="1.0" xmlns:xsl="http://www.w3.org/1999/XSL/Transform">
<xsl:template match="/">

195
<html>
<body>
<h2>My CD Collection</h2>
<table border="1">
<tr>
<th style="text-align:left">Title</th>
<th style="text-align:left">Artist</th>
</tr>
<xsl:for-each select="catalog/cd">
<tr>
<td><xsl:value-of select="title"/></td>
<td><xsl:value-of select="artist"/></td>
</tr>
</xsl:for-each>
</table>
</body>
</html>
</xsl:template>
</xsl:stylesheet>
Dynamic content
Definition
Dynamic content (aka adaptive content) refers to web content that changes based on
the behavior, preferences, and interests of the user. It refers to websites as well as e-mail content
and is generated at the moment a user requests a page. Dynamic content is personalized and
adapts based on the data you have about the user and on the access time, its goal being to deliver
an engaging and satisfying online experience for the visitor.
Generally powered by applications and scripts, dynamic content works in tandem with static
content. A classical example is the HTML content of a landing page or of an e-mail that changes
to display information that is relevant for the viewer based on location or previous interactions
with the website. An e-mail where the user’s name is retrieved from the database and inserted
automatically via HTML text is another example of dynamic content.
Examples
There are countless examples of websites that use dynamic content in order to personalize their
user experience. For example, Booking.com implements this solution when displaying the

196
number of visitors that look at the same listing at the same time, in order to increase the urgency.
Here are some other similar examples:
Some common parts of the text that can be transformed into dynamic content are the user’s
location, weather & temperature, system details (browser, device type), etc. These are all pieces
of information that can immediately be used even during first-time visits on the website.
However, if the user has already been on the website and maybe has already created an account,
other more specific data can be used to personalize the content such as name, gender, products
that they visited, actions they previously made, etc.
Dynamic content vs static content
Static content has been the norm ever since the early stages of the internet. This is because
it’s much easier to implement than the dynamic text alternative. However, the downside is that
static content is not personalized and thus it reduces the performance of the website. Although a
bit more difficult to set up, dynamic content has some clear benefits:
it makes for a more user-friendly experience
it helps increase vital KPIs such as conversions, bounce rate, return visits, etc.
it’s seamless and does not mess up the page layout
once live and active, you don’t need to tend to it anymore
How to implement dynamic content
Personalize your website with dynamic content. Using it in-page, in Overlays or Widgets, dynamic
content can have different variables:
Country/region

197
Temperature/ weather conditions
Number of visitors on pageStart 30 days FREE trial
There are many solutions for the implementation of dynamic content. It can either be done in a
completely custom way, but you need to have both development and time resources, which most
companies don’t have. Or you can use a 3rd party software in order to quickly set up some
dynamic text instances on your website. One such software is Omniconvert.com
In order to create dynamic text with Omniconvert, you first need to signup for an account. Once
logged in the dashboard, simply create an A/B testing experiment and in the WYSIWYG editor
create the desired dynamic content by choosing what you want to personalize such as in the
screenshot below:
Besides implementing dynamic content directly on the page, Omniconvert also offers the option
to implement it on website overlays or on surveys, such as in the examples below
PHP Form Processing
Last Updated: 15-04-2020
In this article, we will discuss how to process form in PHP. HTML forms are used to send the user
information to the server and returns the result back to the browser. For example, if you want to get
the details of visitors to your website, and send them good thoughts, you can collect the user
information by means of form processing. Then, the information can be validated either at the
client-side or on the server-side. The final result is sent to the client through the respective web
browser. To create a HTML form, form tag should be used.
Attributes of Form Tag: ATTRIBUTE DESCRIPTION
name or id It specifies the name of the form and is used to identify individual forms.

198
action It specifies the location to which the form data has to be sent when the form is submitted.
method It specifies the HTTP method that is to be used when the form is submitted. The possible
values are get and post. If get method is used, the form data are visible to the users in the url.
Default HTTP method is get.
encType It specifies the encryption type for the form data when the form is submitted.
novalidate It implies the server not to verify the form data when the form is submitted.
Controls used in forms: Form processing contains a set of controls through which the client and
server can communicate and share information. The controls used in forms are: Textbox: Textbox allows the user to provide single-line input, which can be used for getting
values such as names, search menu and etc. Textarea: Textarea allows the user to provide multi-line input, which can be used for getting
values such as an address, message etc.
DropDown: Dropdown or combobox allows the user to provide select a value from a list of values.
Radio Buttons: Radio buttons allow the user to select only one option from the given set of
options.
CheckBox: Checkbox allows the user to select multiple options from the set of given options. Buttons: Buttons are the clickable controls that can be used to submit the form.
Creating a simple HTML Form: All the form controls given above is designed by using
the input tag based on the type attribute of the tag. In the below script, when the form is submitted,
no event handling mechanism is done. Event handling refers to the process done while the form is
submitted. These event handling mechanisms can be done by using javaScript or PHP. However,
JavaScript provides only client-side validation. Hence, we can use PHP for form processing.
HTML Code:
Form Validation: Form validation is done to ensure that the user has provided the relevant
information. Basic validation can be done using HTML elements. For example, in the above script,
the email address text box is having a type value as “email”, which prevents the user from entering
the incorrect value for an email. Every form field in the above script is followed by a required
attribute, which will intimate the user not to leave any field empty before submitting the form. PHP
methods and arrays used in form processing are: isset(): This function is used to determine whether the variable or a form control is having a value
or not. $_GET[]: It is used the retrieve the information from the form control through the parameters
sent in the URL. It takes the attribute given in the url as the parameter.
$_POST[]: It is used the retrieve the information from the form control through the HTTP POST method. IT takes name attribute of corresponding form control as the parameter.
$_REQUEST[]: It is used to retrieve an information while using a database.

199
Form Processing using PHP: Above HTML script is rewritten using the above mentioned
functions and array. The rewritten script validates all the form fields and if there are no errors, it
displays the received information in a tabular form. Output:
Note: When the PHP and HTML are coded in a single file, the file should be saved as PHP. In the
form, the value for the action parameter should be a file name.
An XML document is a basic unit of XML information composed of elements and other markup
in an orderly package. An XML document can contains wide variety of data. For example,
database of numbers, numbers representing molecular structure or a mathematical equation.
XML Document Example
A simple document is shown in the following example −
<?xml version = "1.0"?>
<contact-info>
<name>Tanmay Patil</name>
<company>TutorialsPoint</company>
<phone>(011) 123-4567</phone>
</contact-info>
The following image depicts the parts of XML document.
Document Prolog Section

200
Document Prolog comes at the top of the document, before the root element. This section
contains −
XML declaration
Document type declaration
You can learn more about XML declaration in this chapter − XML Declaration
Document Elements Section
Document Elements are the building blocks of XML. These divide the document into a
hierarchy of sections, each serving a specific purpose. You can separate a document into
multiple sections so that they can be rendered differently, or used by a search engine. The
elements can be containers, with a combination of text and other elements.
PHP Data Types
Variables can store data of different types, and different data types can do different things.
PHP supports the following data types:
String
Integer
Float (floating point numbers - also called double)
Boolean
Array
Object
NULL
Resource
PHP String
A string is a sequence of characters, like "Hello world!".
A string can be any text inside quotes. You can use single or double quotes:
Example
<?php
$x = "Hello world!";
$y = 'Hello world!';
echo $x;

201
echo "<br>";
echo $y;
?>
PHP Integer
An integer data type is a non-decimal number between -2,147,483,648 and 2,147,483,647.
Rules for integers:
An integer must have at least one digit
An integer must not have a decimal point
An integer can be either positive or negative
Integers can be specified in: decimal (base 10), hexadecimal (base 16), octal (base 8), or
binary (base 2) notation
In the following example $x is an integer. The PHP var_dump() function returns the data type and
value:
Example
<?php
$x = 5985;
var_dump($x);
?>
PHP Float
A float (floating point number) is a number with a decimal point or a number in exponential form.
In the following example $x is a float. The PHP var_dump() function returns the data type and value:
Example
<?php
$x = 10.365;
var_dump($x);
?>
PHP Boolean
A Boolean represents two possible states: TRUE or FALSE.
$x = true;
$y = false;

202
Booleans are often used in conditional testing. You will learn more about conditional testing in a
later chapter of this tutorial.
PHP Array
An array stores multiple values in one single variable.
In the following example $cars is an array. The PHP var_dump() function returns the data type and
value:
Example
<?php
$cars = array("Volvo","BMW","Toyota");
var_dump($cars);
?>
PHP Object
Classes and objects are the two main aspects of object-oriented programming.
A class is a template for objects, and an object is an instance of a class.
When the individual objects are created, they inherit all the properties and behaviors from the class,
but each object will have different values for the properties.
Let's assume we have a class named Car. A Car can have properties like model, color, etc. We can
define variables like $model, $color, and so on, to hold the values of these properties.
When the individual objects (Volvo, BMW, Toyota, etc.) are created, they inherit all the properties
and behaviors from the class, but each object will have different values for the properties.
If you create a __construct() function, PHP will automatically call this function when you create an
object from a class.
Example
<?php
class Car {
public $color;
public $model;
public function __construct($color, $model) {
$this->color = $color;
$this->model = $model;
}

203
public function message() {
return "My car is a " . $this->color . " " . $this->model . "!";
}
}
$myCar = new Car("black", "Volvo");
echo $myCar -> message();
echo "<br>";
$myCar = new Car("red", "Toyota");
echo $myCar -> message();
?>
PHP NULL Value
Null is a special data type which can have only one value: NULL.
A variable of data type NULL is a variable that has no value assigned to it.
Tip: If a variable is created without a value, it is automatically assigned a value of NULL.
Variables can also be emptied by setting the value to NULL:
Example
<?php
$x = "Hello world!";
$x = null;
var_dump($x);
?>
PHP Resource
AJAX
AJAX = Asynchronous JavaScript And XML.
AJAX is not a programming language.
AJAX just uses a combination of:
A browser built-in XMLHttpRequest object (to request data from a web server)
JavaScript and HTML DOM (to display or use the data)
AJAX is a misleading name. AJAX applications might use XML to transport data, but it is equally
common to transport data as plain text or JSON text.

204
AJAX allows web pages to be updated asynchronously by exchanging data with a web server behind
the scenes. This means that it is possible to update parts of a web page, without reloading the whole
page.
How AJAX Works
1. An event occurs in a web page (the page is loaded, a button is clicked)
2. An XMLHttpRequest object is created by JavaScript
3. The XMLHttpRequest object sends a request to a web server
4. The server processes the request
5. The server sends a response back to the web page
6. The response is read by JavaScript
7. Proper action (like page update) is performed by JavaScript

205
WCF stands for Windows Communication Foundation. The elementary feature of WCF is
interoperability. It is one of the latest technologies of Microsoft that is used to build service-
oriented applications. Based on the concept of message-based communication, in which an
HTTP request is represented uniformly, WCF makes it possible to have a unified API
irrespective of diverse transport mechanisms.
WCF was released for the first time in 2006 as a part of the .NET framework with Windows
Vista, and then got updated several times. WCF 4.5 is the most recent version that is now
widely used.
A WCF application consists of three components −
WCF service,
WCF service host, and
WCF service client.
WCF platform is also known as the Service Model.
Fundamental Concepts of WCF
Message
This is a communication unit that comprises of several parts apart from the body. Message
instances are sent as well as received for all types of communication between the client and the
service.

206
Endpoint
It defines the address where a message is to be sent or received. It also specifies the
communication mechanism to describe how the messages will be sent along with defining the
set of messages. A structure of an endpoint comprises of the following parts −
Address
Address specifies the exact location to receive the messages and is specified as a Uniform
Resource Identifier (URI). It is expressed as scheme://domain[:port]/[path]. Take a look at the
address mentioned below −
net.tcp://localhost:9000/ServiceA
Here, 'net.tcp' is the scheme for the TCP protocol. The domain is 'localhost' which can be the
name of a machine or a web domain, and the path is 'ServiceA'.
Binding
It defines the way an endpoint communicates. It comprises of some binding elements that make
the infrastructure for communication. For example, a binding states the protocols used for
transport like TCP, HTTP, etc., the format of message encoding, and the protocols related to
security as well as reliability.
Contracts
It is a collection of operations that specifies what functionality the endpoint exposes to the
client. It generally consists of an interface name.
Hosting
Hosting from the viewpoint of WCF refers to the WCF service hosting which can be done
through many available options like self-hosting, IIS hosting, and WAS hosting.
Metadata
This is a significant concept of WCF, as it facilitates easy interaction between a client
application and a WCF service. Normally, metadata for a WCF service is generated
automatically when enabled, and this is done by inspection of service and its endpoints.
WCF Client
A client application that gets created for exposing the service operations in the form of methods
is known as a WCF client. This can be hosted by any application, even the one that does service
hosting.
Channel
Channel is a medium through which a client communicates with a service. Different types of
channels get stacked and are known as Channel Stacks.
SOAP
Although termed as ‘Simple Object Access Protocol’, SOAP is not a transport protocol; instead
it is an XML document comprising of a header and body section.

207
Advantages of WCF
It is interoperable with respect to other services. This is in sharp contrast to .NET
Remoting in which both the client and the service must have .Net.
WCF services offer enhanced reliability as well as security in comparison to ASMX
(Active Server Methods) web services.
Implementing the security model and binding change in WCF do not require a major
change in coding. Just a few configuration changes is required to meet the constraints.
WCF has built-in logging mechanism whereas in other technologies, it is essential to do
the requisite coding.
WCF has integrated AJAX and support for JSON (JavaScript object notation).
It offers scalability and support for up-coming web service standards.
It has a default security mechanism which is extremely robust.
There are some major differences that exist between WCF and a Web service which are listed
below.
Attributes − WCF service is defined by ServiceContract and OperationContract
attributes, whereas a web service is defined by WebService and WebMethod attributes.
Protocols − WCF supports a range of protocols, i.e., HTTP, Named Pipes, TCP, and
MSMQ, whereas a web service only supports HTTP protocol.
Hosting Mechanisms − Various activation mechanisms are there for WCF hosting, i.e.,
IIS (Internet Information Service), WAS (Windows Activation Service), Self-hosting
and Windows Service, but a web service is hosted only by IIS.
Services − WCF supports a robust security, trustworthy messaging, transaction and
interoperability, while a web service only supports security services.
Serializer − WCF Supports DataContract serializer by employing
System.Runtime.Serialization, whereas a web service supports XML serializer by
making use of System.Xml.Serialization.
Tools − ServiceMetadata tool (svcutil.exe) is used for client generation for a WCF
service, while WSDL.EXE tool is used for generating the same for a web service.
Exception Handling − In WCF, unhandled exceptions are handled in a better way by
making use of FaultContract. They do not return to the client like in a web service as
SOAP faults.
Hash Table − It is possible to serialize a Hash Table in WCF, but this is not the case in a
web service.
Bindings − WCF supports several types of bindings like BasicHttpBinding,
WSDualHttpBinding, WSHttpBinding, etc., while a web service supports only SOAP or
XML.

208
Multithreading − WCF supports multithreading by using the ServiceBehavior Class,
whereas this is not supported in a web service.
Duplex Service Operations − WCF supports duplex service operations apart from
supporting one-way and request-response service operations, whereas a web service
does not support duplex service operations.
WCF has a layered architecture that offers ample support for developing various distributed
applications. The architecture is explained below in detail.

209
Contracts
The contracts layer is just next to the application layer and contains information similar to that
of a real-world contract that specifies the operation of a service and the kind of accessible
information it will make. Contracts are basically of four types discussed below in brief −
Service contract − This contract provides information to the client as well as to the
outer world about the offerings of the endpoint, and the protocols to be used in the
communication process.
Data contract − The data exchanged by a service is defined by a data contract. Both the
client and the service has to be in agreement with the data contract.
Message contract − A data contract is controlled by a message contract. It primarily
does the customization of the type formatting of the SOAP message parameters. Here, it
should be mentioned that WCF employs SOAP format for the purpose of
communication. SOAP stands for Simple Object Access Protocol.
Policy and Binding − There are certain pre-conditions for communication with a
service, and such conditions are defined by policy and binding contract. A client needs
to follow this contract.
Service Runtime
The service runtime layer is just below the contracts layer. It specifies the various service
behaviors that occur during runtime. There are many types of behaviors that can undergo
configuration and come under the service runtime.
Throttling Behavior − Manages the number of messages processed.
Error Behavior − Defines the result of any internal service error occurrence.
Metadata Behavior − Specifies the availability of metadata to the outside world.
Instance Behavior − Defines the number of instances that needs to be created to make
them available for the client.
Transaction Behavior − Enables a change in transaction state in case of any failure.
Dispatch Behavior − Controls the way by which a message gets processed by the
infrastructure of WCF.
Concurrency Behavior − Controls the functions that run parallel during a client-server
communication.
Parameter Filtering − Features the process of validation of parameters to a method
before it gets invoked.
Messaging

210
This layer, composed of several channels, mainly deals with the message content to be
communicated between two endpoints. A set of channels form a channel stack and the two
major types of channels that comprise the channel stack are the following ones −
Transport Channels − These channels are present at the bottom of a stack and are
accountable for sending and receiving messages using transport protocols like HTTP,
TCP, Peer-to-Peer, Named Pipes, and MSMQ.
Protocol Channels − Present at the top of a stack, these channels also known as layered
channels, implement wire-level protocols by modifying messages.
Activation and Hosting
The last layer of WCF architecture is the place where services are actually hosted or can be
executed for easy access by the client. This is done by various mechanisms discussed below in
brief.
IIS − IIS stands for Internet Information Service. It offers a myriad of advantages using
the HTTP protocol by a service. Here, it is not required to have the host code for
activating the service code; instead, the service code gets activated automatically.
Windows Activation Service − This is popularly known as WAS and comes with IIS
7.0. Both HTTP and non-HTTP based communication is possible here by using TCP or
Namedpipe protocols.
Self-hosting − This is a mechanism by which a WCF service gets self-hosted as a
console application. This mechanism offers amazing flexibility in terms of choosing the
desired protocols and setting own addressing scheme.
Windows Service − Hosting a WCF service with this mechanism is advantageous, as the
services then remain activated and accessible to the client due to no runtime activation.
SOAP is an acronym for Simple Object Access Protocol. It is an XML-based messaging
protocol for exchanging information among computers. SOAP is an application of the XML
specification.
Points to Note
SOAP is a communication protocol designed to communicate via Internet.
SOAP can extend HTTP for XML messaging.
SOAP provides data transport for Web services.
SOAP can exchange complete documents or call a remote procedure.
SOAP can be used for broadcasting a message.
SOAP is platform- and language-independent.
SOAP is the XML way of defining what information is sent and how.

211
SOAP enables client applications to easily connect to remote services and invoke remote
methods.
Although SOAP can be used in a variety of messaging systems and can be delivered via a
variety of transport protocols, the initial focus of SOAP is remote procedure calls transported
via HTTP.
Other frameworks including CORBA, DCOM, and Java RMI provide similar functionality to
SOAP, but SOAP messages are written entirely in XML and are therefore uniquely platform-
and language-independent.
What is REST
REST is acronym for REpresentational State Transfer. It is architectural style
for distributed hypermedia systems and was first presented by Roy Fielding in 2000 in
his famous dissertation.
Like any other architectural style, REST also does have it’s own 6 guiding
constraints which must be satisfied if an interface needs to be referred as RESTful. These
principles are listed below.
Guiding Principles of REST
1. Client–server – By separating the user interface concerns from the data storage
concerns, we improve the portability of the user interface across multiple platforms
and improve scalability by simplifying the server components.
2. Stateless – Each request from client to server must contain all of the information
necessary to understand the request, and cannot take advantage of any stored
context on the server. Session state is therefore kept entirely on the client.
3. Cacheable – Cache constraints require that the data within a response to a request
be implicitly or explicitly labeled as cacheable or non-cacheable. If a response is
cacheable, then a client cache is given the right to reuse that response data for later,
equivalent requests.
4. Uniform interface – By applying the software engineering principle of generality
to the component interface, the overall system architecture is simplified and the
visibility of interactions is improved. In order to obtain a uniform interface,
multiple architectural constraints are needed to guide the behavior of components.
REST is defined by four interface constraints: identification of resources;
manipulation of resources through representations; self-descriptive messages; and,
hypermedia as the engine of application state.

212
5. Layered system – The layered system style allows an architecture to be composed
of hierarchical layers by constraining component behavior such that each
component cannot “see” beyond the immediate layer with which they are
interacting.
6. Code on demand (optional) – REST allows client functionality to be extended by
downloading and executing code in the form of applets or scripts. This simplifies
clients by reducing the number of features required to be pre-implemented.
Resource
The key abstraction of information in REST is a resource. Any information that can be
named can be a resource: a document or image, a temporal service, a collection of other
resources, a non-virtual object (e.g. a person), and so on. REST uses a resource
identifier to identify the particular resource involved in an interaction between
components.
The state of the resource at any particular timestamp is known as resource
representation. A representation consists of data, metadata describing the data
and hypermedia links which can help the clients in transition to the next desired state.
The data format of a representation is known as a media type. The media type identifies
a specification that defines how a representation is to be processed. A truly RESTful
API looks like hypertext. Every addressable unit of information carries an address, either
explicitly (e.g., link and id attributes) or implicitly (e.g., derived from the media type
definition and representation structure).
According to Roy Fielding:
Hypertext (or hypermedia) means the simultaneous presentation of information
and controls such that the information becomes the affordance through which the
user (or automaton) obtains choices and selects actions. Remember that hypertext
does not need to be HTML (or XML or JSON) on a browser. Machines can follow
links when they understand the data format and relationship types.
Further, resource representations shall be self-descriptive: the client does not need to
know if a resource is employee or device. It should act on the basis of media-type

213
associated with the resource. So in practice, you will end up creating lots of custom
media-types – normally one media-type associated with one resource.
Every media type defines a default processing model. For example, HTML defines a
rendering process for hypertext and the browser behavior around each element. It has
no relation to the resource methods GET/PUT/POST/DELETE/… other than the fact
that some media type elements will define a process model that goes like “anchor
elements with an href attribute create a hypertext link that, when selected, invokes a
retrieval request (GET) on the URI corresponding to the CDATA-encoded href
attribute.”
Resource Methods
Another important thing associated with REST is resource methods to be used to
perform the desired transition. A large number of people wrongly relate resource methods
to HTTP GET/PUT/POST/DELETE methods.
Roy Fielding has never mentioned any recommendation around which method to be used
in which condition. All he emphasizes is that it should be uniform interface. If you
decide HTTP POST will be used for updating a resource – rather than most people
recommend HTTP PUT – it’s alright and application interface will be RESTful.
Ideally, everything that is needed to change the resource state shall be part of API
response for that resource – including methods and in what state they will leave the
representation.
A REST API should be entered with no prior knowledge beyond the initial URI
(bookmark) and set of standardized media types that are appropriate for the intended
audience (i.e., expected to be understood by any client that might use the API). From
that point on, all application state transitions must be driven by client selection of
server-provided choices that are present in the received representations or implied by
the user’s manipulation of those representations. The transitions may be determined
(or limited by) the client’s knowledge of media types and resource communication

214
mechanisms, both of which may be improved on-the-fly (e.g., code-on-demand).
[Failure here implies that out-of-band information is driving interaction instead of
hypertext.]
Another thing which will help you while building RESTful APIs is that query based API
results should be represented by a list of links with summary information, not by
arrays of original resource representations because the query is not a substitute for
identification of resources.
REST and HTTP are not same !!
A lot of people prefer to compare HTTP with REST. REST and HTTP are not same.
REST != HTTP
Though, because REST also intends to make the web (internet) more streamline and
standard, he advocates using REST principles more strictly. And that’s from where
people try to start comparing REST with web (HTTP). Roy fielding, in his dissertation,
nowhere mentioned any implementation directive – including any protocol preference
and HTTP. Till the time, you are honoring the 6 guiding principles of REST, you can call
your interface RESTful.
In simplest words, in the REST architectural style, data and functionality are considered
resources and are accessed using Uniform Resource Identifiers (URIs). The resources are
acted upon by using a set of simple, well-defined operations. The clients and servers
exchange representations of resources by using a standardized interface and protocol –
typically HTTP.
Resources are decoupled from their representation so that their content can be accessed in
a variety of formats, such as HTML, XML, plain text, PDF, JPEG, JSON, and others.
Metadata about the resource is available and used, for example, to control caching, detect
transmission errors, negotiate the appropriate representation format, and perform
authentication or access control. And most importantly, every interaction with a resource
is stateless.
JavaScript Object Notation (JSON) is a standard text-based format for representing structured
data based on JavaScript object syntax. It is commonly used for transmitting data in web
applications (e.g., sending some data from the server to the client, so it can be displayed on a web

215
page, or vice versa). You'll come across it quite often, so in this article we give you all you need
to work with JSON using JavaScript, including parsing JSON so you can access data within it,
and creating JSON.
Prerequisites: Basic computer literacy, a basic understanding of HTML and CSS, familiarity with
JavaScript basics (see First steps and Building blocks) and OOJS basics (see Introduction to
objects).
Objective: To understand how to work with data stored in JSON, and create your own JSON strings.
No, really, what is JSON?
JSON is a text-based data format following JavaScript object syntax, which was popularized
by Douglas Crockford. Even though it closely resembles JavaScript object literal syntax, it can be
used independently from JavaScript, and many programming environments feature the ability to
read (parse) and generate JSON.
JSON exists as a string — useful when you want to transmit data across a network. It needs to be
converted to a native JavaScript object when you want to access the data. This is not a big issue
— JavaScript provides a global JSON object that has methods available for converting between
the two.
Note: Converting a string to a native object is called deserialization, while converting a native
object to a string so it can be transmitted across the network is called serialization.
A JSON string can be stored in its own file, which is basically just a text file with an extension
of .json, and a MIME type of application/json.
JSON structure
As described above, JSON is a string whose format very much resembles JavaScript object literal
format. You can include the same basic data types inside JSON as you can in a standard
JavaScript object — strings, numbers, arrays, booleans, and other object literals. This allows you
to construct a data hierarchy, like so:
'{
"squadName": "Super hero squad",
"homeTown": "Metro City",
"formed": 2016,
"secretBase": "Super tower",
"active": true,

216
"members": [
{
"name": "Molecule Man",
"age": 29,
"secretIdentity": "Dan Jukes",
"powers": [
"Radiation resistance",
"Turning tiny",
"Radiation blast"
]
},
{
"name": "Madame Uppercut",
"age": 39,
"secretIdentity": "Jane Wilson",
"powers": [
"Million tonne punch",
"Damage resistance",
"Superhuman reflexes"
]
},
{
"name": "Eternal Flame",
"age": 1000000,
"secretIdentity": "Unknown",
"powers": [
"Immortality",
"Heat Immunity",
"Inferno",
"Teleportation",
"Interdimensional travel"
]
}
]
}'
If we loaded this string into a JavaScript program, parsed it into a variable called superHeroes for
example, we could then access the data inside it using the same dot/bracket notation we looked at
in the JavaScript object basics article. For example:
superHeroes.homeTown
superHeroes['active']
To access data further down the hierarchy, you simply have to chain the required property names
and array indexes together. For example, to access the third superpower of the second hero listed
in the members list, you'd do this:

217
superHeroes['members'][1]['powers'][2]
1. First we have the variable name — superHeroes. 2. Inside that we want to access the members property, so we use ["members"].
3. members contains an array populated by objects. We want to access the second object inside the
array, so we use [1].
4. Inside this object, we want to access the powers property, so we use ["powers"]. 5. Inside the powers property is an array containing the selected hero's superpowers. We want the
third one, so we use [2].
Note: We've made the JSON seen above available inside a variable in
our JSONTest.html example (see the source code). Try loading this up and then accessing data
inside the variable via your browser's JavaScript console.
Arrays as JSON
Above we mentioned that JSON text basically looks like a JavaScript object inside a string. We
can also convert arrays to/from JSON. Below is also valid JSON, for example:
'[
{
"name": "Molecule Man",
"age": 29,
"secretIdentity": "Dan Jukes",
"powers": [
"Radiation resistance",
"Turning tiny",
"Radiation blast"
]
},
{
"name": "Madame Uppercut",
"age": 39,
"secretIdentity": "Jane Wilson",
"powers": [
"Million tonne punch",
"Damage resistance",
"Superhuman reflexes"
]
}
]'
The above is perfectly valid JSON. You'd just have to access array items (in its parsed version) by
starting with an array index, for example [0]["powers"][0].

218
Other notes
JSON is purely a string with a specified data format — it contains only properties, no methods.
JSON requires double quotes to be used around strings and property names. Single quotes are not valid other than surrounding the entire JSON string.
Even a single misplaced comma or colon can cause a JSON file to go wrong, and not work. You
should be careful to validate any data you are attempting to use (although computer-generated JSON is less
likely to include errors, as long as the generator program is working correctly). You can validate JSON using an application like JSONLint.
JSON can actually take the form of any data type that is valid for inclusion inside JSON, not just arrays or objects. So for example, a single string or number would be valid JSON.
Unlike in JavaScript code in which object properties may be unquoted, in JSON only quoted strings may be used as properties.
Consume a SOAP Web Service 1. Last updated
Oct 19, 2020
2. Edit
3. Download
To consume a SOAP Web Service in your application, do the following:
1. In the Logic tab, open the Integrations folder.
2. Right-click the SOAP element and select Consume SOAP Web Service...
3. In the displayed dialog, specify the location of the Web Service definition (WSDL) and
click OK.

219
When providing a remote URL, type it exactly the same way as you would type it into
your web browser. To import a WSDL from your local file system, click Choose a
File and select your WSDL.
4. If the service supports more than one binding, choose the desired binding and click Next.
Otherwise, Service Studio skips this step.
5. If the service supports more than one method, choose the methods you wish to consume
and click Finish. Otherwise, Service Studio skips this step.

220
Be aware that, for all remote WSDL files, the URL address must be accessible from the machine
running Platform Server and not directly from Service Studio.

221
When you consume a SOAP Web Service, OutSystems does the following for you:
Creates the SOAP Web Service
Creates the exposed Web Service Methods with the corresponding input and output parameters
Creates the Structures and Static Entities to hold the complex types defined in the WSDL
Maps the XML data types into OutSystems data types

222
OutSystems doesn't provide direct support for Web Services Enhancements (WSE). Instead, you
can use the SOAP Extensibility API to implement the functionality provided by Web Services
Enhancements in your applications.
Use a SOAP Web Service Method in an Application
OutSystems translates the methods exposed by a SOAP Web Service into OutSystems actions,
with the same semantics as any action created by you in Service Studio.
You can now use the newly created method in your application the same way you use the
remaining Server Actions:
1. Go to the action flow where you want to use the Web Service Method.
2. In the Logic tab, open the Integrations folder and SOAP element.
3. Open the SOAP Web Service and drag the Web Service Method into your action flow.

223
WEBSERVICES; SOAP AND REST- A SIMPLE
INTRODUCTION
Author: Clement Adedeji
In general terms, web services are applications that allow for communication between devices over the internet
and are usually independent of the technology or language the devices are built on as they use standardised
eXtensible Markup Language (XML) for information exchange. A client or user is able to invoke a web
service by sending an XML message and then in turn gets back and XML response message.
There are a number of communication protocols for web services that use the XML format such as Web
Services Flow Language(WSFL), Blocks Extensible Exchange Protocol(BEEP) among others. Simple Object
Access Protocol(SOAP) and Representational State Transfer (REST) are by far the most used options for
accessing web services, however they are not directly comparable as they vary in the sense that SOAP is a
communications protocol while REST is a set of architectural principles for data transmission.
This blog post explores SOAP and REST, what they consist of and how they are used. Also it gives guidance
on what to look out for when making a decision on which to use in order to meet requirement.
SOAP SOAP is a messaging protocol for exchanging information between two computers based on XML over the
internet. SOAP messages are purely written in XML which is why they are platform and language
independent.
A SOAP message contains:
An Envelope that indicates the start and end of the message
A Header that includes attributes used to process the message and is an optional element
A Body that holds the XML data that is to be sent and it cannot be left out
A Fault which provides error messages when processing and it is an optional element.

224
Working with SOAP requests and responses could get very complex. Some languages make efficient use of
the SOAP shortcuts to reduce the level of complexity and the .Net platform for example hides the XML to a
large extent. This is made possible due to the Web Service Definition Language (WSDL). WSDL is an XML
file that defines and describes the services that are available in the web service of interest. It describes the
naming of services, the specifications and structure of the response sent back. The services in the WSDL are
described as a compilation of network ports/endpoints. With the WSDL, the .Net platform is able to auto-
generate the proxy classes and functions which can be called from the application.

225
The types describe the datatypes the web service use.
The message defines each operation’s data element
The portType describes what operations can be done and the messages involved in this operation. This
could be one of four types: One way (receives messages but no response), Request-Response (receives request
and responds), Solicit-Response (sends request and waits for response) or Notification (sends request, does not
require response
Binding tells the format of data for the type of each port and the protocol.
REST REST is a web standard architecture that achieves data communication using a standard interface such as
HTTP or other transfer protocols that use standard Uniform Resource Identifier (URI). The design is such that

226
each component in a RESTful web service is a resource that can be accessed using standard HTTP methods (if
the chosen protocol is HTTP). Resources which can be thought of as objects in the concept of Object oriented
programming (OOP) are identified by URIs and the resources are represented in several ways such as JSON,
XML, Text etc. though JSON is currently the more favoured choice.
RESTful services have the following properties: Representations, Messages, URIs, Uniform interface,
Stateless, Links between resources and caching. A quick look into these properties below using HTTP
1. Representation- resources are represented in different formats as earlier stated and should be a
complete representation of the resource.
2. Messages- This is how the client and server interact. Along with the data, messages contain metadata
bout the message. When accessing a RESTful resource using HTTP, the commonly used methods are GET
(reads a resource), PUT (creates a resource), DELETE (removes a resource) and POST (updates an existing
resource)
The figures below show the request and response message formats
The Response Header and Body hold similar information to the request, only that the information is different
as it is the server response

227
3. URIs – Each resource needs at least one URI to identify a resource(s) and the operation is determined
by the HTTP verb/action. Hence a URI can be called with different actions.
4. Stateless- Restful web services are stateless and any session state is held on the client not server. This ensures
that every client to server request has the necessary information to understand the request and handles each
request independently.
5. Links Between Resources- the representation of a resource can have links to other resources.
6. Caching- the data produced when a request is made the first time is stored and used the next time in order to
stop regenerating same information for the same request and improves performance. The HTTP headers help
to control caching such as age which tracks how long ago the data was fetched from the server, expires date
and time the resource representation expires etc.
The above gives an oversight of the six properties of REST and it is important to remember that:
REST is not coupled to HTTP and is actually protocol independent. It is simply not a mapping of
CRUD to the HTTP methods.
REST makes it relatively easy to integrate with websites and are exposed using XML (one of many
ways) for easy consumption
XML Web Service
XML Web services are the fundamental building blocks in the move to distributed computing on the
Internet. Open standards and the focus on communication and collaboration among people and
applications have created an environment where XML Web services are becoming the platform for
application integration. Applications are constructed using multiple XML Web services from various
sources that work together regardless of where they reside or how they were implemented. There are
probably as many definitions of XML Web Service as there are companies building them, but almost all
definitions have these things in common: XML Web Services expose useful functionality to Web users
through a standard Web protocol. In most cases, the protocol used is SOAP. XML Web services provide a
way to describe their interfaces in enough detail to allow a user to build a client application to talk to

228
them. This description is usually provided in an XML document called a Web Services Description
Language (WSDL) document. XML Web services are registered so that potential users can find them
easily. This is done with Universal Discovery Description and Integration (UDDI).

229