PC-DMIS 2020 R2 - Hexagon Manufacturing Intelligence
77
PC-DMIS 2020 R2 Release Notes September 27, 2021
-
Upload
khangminh22 -
Category
Documents
-
view
2 -
download
0
Transcript of PC-DMIS 2020 R2 - Hexagon Manufacturing Intelligence

PC-DMIS 2020 R2Release Notes
September 27, 2021

Copyright © 2021 Hexagon Manufacturing IntelligenceAll rights reserved

Table of ContentsRelease Notes - 2020 R2 SP9 ............................................................................. 7
Application Errors .......................................................................................... 7Auto Features ............................................................................................... 7CAD ............................................................................................................... 7CMM .............................................................................................................. 7Dual Arm ....................................................................................................... 8GD&T Dimensions ........................................................................................ 8HxGN SFx ..................................................................................................... 9Laser ............................................................................................................. 9Reporting ...................................................................................................... 9Summary Mode ............................................................................................. 9Temperature Compensation ........................................................................ 10
Release Notes - 2020 R2 SP8 ............................................................................ 11
Release Notes - 2020 R2 SP7 ........................................................................... 12Application Errors ........................................................................................ 12
Auto Features ...................................................................................... 12CAD ..................................................................................................... 13CMM .................................................................................................... 13Dual Arm .............................................................................................. 13GD&T Dimension ................................................................................. 13HxGN SFx | Asset Management .......................................................... 13Laser .................................................................................................... 13Q-DAS .................................................................................................. 13Reporting ............................................................................................. 13
Release Notes - 2020 R2 SP6 ........................................................................... 15Application Errors ........................................................................................ 15Auto Features ............................................................................................. 16CAD ............................................................................................................. 16CMM ............................................................................................................ 16GD&T .......................................................................................................... 16HxGN SFx | Asset Management ................................................................. 17Laser ........................................................................................................... 17Probe .......................................................................................................... 17Q-DAS ......................................................................................................... 17Reporting .................................................................................................... 17Temperature Compensation ........................................................................ 17
Release Notes - 2020 R2 SP5 ........................................................................... 19
Release Notes - 2020 R2 SP4 ........................................................................... 22
Release Notes - 2020 R2 SP3 ........................................................................... 24
PC-DMIS 2020 R2
3

Release Notes - 2020 R2 SP2 ........................................................................... 27
Release Notes - 2020 R2 SP1 ........................................................................... 29
Release Notes .................................................................................................... 33Featured Items ............................................................................................ 33
CAD ..................................................................................................... 33GD&T Selection From File ................................................................... 33Geometric Tolerance ............................................................................ 33HxGN SFx | Asset Management .......................................................... 33Pointcloud Select ................................................................................. 33
New Enhancements .................................................................................... 34Application Errors ................................................................................ 34Excel Form Report ............................................................................... 34Laser .................................................................................................... 35Pointclouds/Mesh ................................................................................ 36Portable ............................................................................................... 37Roughness Measurement .................................................................... 38Vision ................................................................................................... 38
..................................................................................................................... 38List of Fixes ................................................................................................. 38
Application Errors ................................................................................ 38Auto Features ...................................................................................... 39Automation ........................................................................................... 39CAD ..................................................................................................... 40CMM .................................................................................................... 40Dual Arm .............................................................................................. 40Extended Sheetmetal Features ........................................................... 40Home Page .......................................................................................... 41HTML5 Help ......................................................................................... 41Laser .................................................................................................... 42Pointcloud ............................................................................................ 42Portable ............................................................................................... 42Protect .................................................................................................. 43Reporting ............................................................................................. 43Scanning .............................................................................................. 43User Interface ...................................................................................... 43Vision ................................................................................................... 43
Information about this Release .......................................................................... 45
Recommended System Requirements .............................................................. 46Operating System ....................................................................................... 46Microsoft .NET Framework ......................................................................... 46RAM ............................................................................................................ 46CPU ............................................................................................................. 47Graphics ...................................................................................................... 47
PC-DMIS 2020 R2
4

Hard Drive ................................................................................................... 47Display ........................................................................................................ 47Connectivity ................................................................................................ 48
Firmware Distributed Controller (FDC) Connection ............................. 48LMS Licensing ..................................................................................... 48Hexagon Universal Updater ................................................................. 48CrashSender1403.exe ......................................................................... 49
Anti-Virus Software ..................................................................................... 49Solutions for CMMs Using RS-232 Communications ................................. 49
Installing the Software ........................................................................................ 50Step 1: Check System and Hardware Requirements ................................. 50Step 2: Log on as an Administrator ............................................................. 50Step 3: Back Up Existing Settings .............................................................. 50
Backing Up Machine Files for an Xcel CMM or a Sharpe Controller ... 52Backing Up Machine Files for a CMM with a DEA Controller .............. 52
Step 4: Install the Software ......................................................................... 53LMS License Setup .............................................................................. 54Administrator Privileges Explained ...................................................... 57
Step 5: Copy Files after Installation ............................................................ 58Copying Machine Files for an Xcel CMM or a Sharpe Controller ........ 58Copying Machine Files for a DEA CMM with a DEA Controller ........... 58
Step 6: Launch the Software for the First Time ........................................... 58Subsequent Startups ........................................................................... 59Note About CMMs Using RS-232 Communications ............................ 61
Command Line Installation ......................................................................... 61User Interface Parameters ................................................................... 62Installation Commands ........................................................................ 62Restart Handling .................................................................................. 62Logging ................................................................................................ 62Help ...................................................................................................... 62Additional Parameters ......................................................................... 63Unattended Installation Example ......................................................... 63
Network Connections ......................................................................................... 65Firmware Distributed Controller (FDC) Connection .................................... 65LMS Licensing ............................................................................................ 65Offline Help ................................................................................................. 65Hexagon Universal Updater ........................................................................ 65CrashSender1403.exe ................................................................................ 65Other Products ............................................................................................ 66
Updating the Software ........................................................................................ 67
Repairing or Removing an Installation ............................................................... 68
Running the Software in Another Language ...................................................... 69
PC-DMIS 2020 R2
5

Installing Non-English Offline Help Files from Language Packs ........................ 70
Troubleshooting .................................................................................................. 71Startup is Slow ............................................................................................ 71Setting Up the Network to Send Crash Reports ......................................... 71Installing on top of an Existing Version Results in Unexpected Behavior ... 71Running the Legacy DPUPDATE.EXE Does Not Work .............................. 72
Contact Hexagon Manufacturing Intelligence .................................................... 73
Appendix A ......................................................................................................... 74Providing LMS Licensing Information to the Installer from the CommandLine ............................................................................................................. 74
Descriptions ......................................................................................... 74Examples ............................................................................................. 75
Appendix B ......................................................................................................... 76Required User Access Rights ..................................................................... 76
File System .......................................................................................... 76Registry ................................................................................................ 76Notes .................................................................................................... 76
Appendix C ......................................................................................................... 77First-Time Installation with Flexible Fixturing .............................................. 77
PC-DMIS 2020 R2
6

Release Notes - 2020 R2 SP9
Application ErrorsYou no longer get an application error in these instances:
• PCD-210237 - PC-DMIS now correctly shows arrow heads in the Analysis Windowdialog box when you mark the Show arrow heads check box in the Analysis Op-tions tab of the Graphical Analysis dialog box.
• PCD-210624 - When a measurement routine contains multiple probes and you openthe Auto Insert Moves dialog box.
• PCD-211421 - When the Vision box displays error messages.• PCD-212854 - When you delete features that are referenced by the geometric toler-
ance commands.• PCD-216264 - When you open the Datum Definition dialog box and then select a
feature in the Graphic Display window.• PCD-216710 - When you open and close a measurement routine through automa-
tion.
Auto Features• PCD-194261 - You no longer get an extra move to a vision feature's focus end loca-
tion when you execute on a FDC or Leitz controller.• PCD-200282 - When you are in Command mode, PC-DMIS now displays the cor-
rect boundary offset value in the Edit window when you create an Auto Plane in inchunits.
• PCD-212548 - You no longer get an extraction error when you extract a Laser planewith the CAD Offset option in the Auto Features dialog box set to zero.
• PCD-213268 - PC-DMIS now ignores the spacer value when you measure outerAuto features with zero sample hits and a negative spacer. This allows for the avoid-ance move to occur along the feature's vector.
• PCD-215072 - You no longer get an error message when you copy and paste pa-rameters of an Auto feature that you created with a CWS probe.
CAD• PCD-218226 - PC-DMIS now draws the CAD graphic deviation vectors correctly for
geometric tolerance commands when the current alignment doesn't match the CADcoordinate system.
CMM• PCD-181755 - PC-DMIS now works correctly when you change languages while
performing AUTOCALIBRATE with ALL-TIPS-WITH-DEFAULT.
PC-DMIS 2020 R2
7

• PCD-204855 - You can now see the correct message at start-up when you minimizePC-DMIS.
• PCD-206502 - PC-DMIS no longer makes unexpected incremental moves immedi-ately after a tool change.
• PCD-212976 - PC-DMIS now shows the correct color (blue) for the ring on the HP-TM-EF probe.
• PCD-213715 - PC-DMIS no longer use an incorrect tip offset after a tool change insome configurations that involves multi-rack changes.
• PCD-214772 - PC-DMIS now allows you to set the width of a Vision RectangleGage tool in the Probe Toolbox dialog box.
Dual Arm• PCD-212233 - You can now see the Missed Probe Hit option in the Error type list
of the On Error dialog box. So, you can now insert an ONERROR command withthe Missed Probe Hit error type on Arm 2.
GD&T Dimensions• PCD-208745 - You can now reference a constructed offset line as a primary, secon-
dary or tertiary datum with the geometric tolerance command. PC-DMIS now treatsthis line as a pre-resolved line on a surface.
• PCD-210303 - PC-DMIS now allows single-point auto circles as a secondaryor terti-ary datum feature. This happens when:You reference the circle by the geometric tolerance commandYou report the concentricity (axis method) or position as the considered feature
• PCD-212449 - PC-DMIS now updates the Size command based on the settingsfrom the GD&T Standard area in the Geometric Tolerance tab of the Setup Op-tions dialog box.
• PCD-212450 - PC-DMIS now increased the maximum UZ value to 10 times the totalISO profile tolerance value for Geometric Tolerance commands.
• PCD-212900 - You can now perform a simultaneous evaluation on multiple geomet-ric tolerance commands where the considered features are a combination of width-wise and length-wise slots. PC-DMIS no longer considers the slots in the samewidth-wise or length-wise orientation.
• PCD-213127 - PC-DMIS no longer displays previous datum features when youswitch the datum for Geometric Tolerance commands.
• PCD-213575 - The Iterate and Re-pierce CAD now works for Geometric Tolerancecommands.
• PCD-213871 - You can now see the migration improvements made with theXactMeasure conversion to Geometric Tolerance commands.
• PCD-213908 - PC-DMIS now shows the nominal start point in Report, Dialog, andDimension Info for Position tolerances in Geometric Tolerances.
• PCD-213961 - PC-DMIS now appends an instance inside square brackets to theend of the Geometric Tolerance ID when you execute features or dimensions insidea loop.
PC-DMIS 2020 R2
8

• PCD-214097 - You no longer see empty position labels in the report when you re-open measurement routines.
• PCD-215274 - PC-DMIS now displays the geometric tolerance command in the re-port even if one component of the geometric tolerance command is out of tolerance.
• PCD-217317 - PC-DMIS no longer displays an error message when you switch the GD&T standard in the Geometric Tolerance dialog box from an existing Geometric Tolerance command.
• PCD-219020 - PC-DMIS now updates the measured values correctly when you tog-gle the Iterate and repierce CAD option on a Geometric Tolerance command.
HxGN SFx• PCD-214298 - PC-DMIS no longer sends dimensions to HxGN SFx when you set
the dimension output type to None in the Dimension dialog boxes. Also, PC-DMISno longer reports axes as out of tolerance for Geometric Tolerance dimension whenonly the Size is out of tolerance.
Laser• PCD-210594 - You no longer get Edge point feature calculation errors when you ex-
tract a Laser Edge Point from a small part.• PCD-211338 - PC-DMIS now updates the CWS spectrum chart correctly even after
you carry out a scan.• PCD-218763 - PC-DMIS now considers the refractive index of the measurement ob-
ject when you measure a thickness dimension with the HP-OW sensor.
Reporting• PCD-211982 - You can now see that CAD objects and leader lines remain connec-
ted after you perform the Export PDF Report command multiple times.• PCD-212475 - PC-DMIS now allows newer versions of the software to correctly
read report templates and custom reports created with the 2020 R1 version. Also,PC-DMIS now allows newer versions of the software to correctly save report tem-plates and custom reports to the 2020 R1 version when you perform a Save As op-eration.
• PCD-214380 - PC-DMIS now reports bonus B as axes for legacy true position com-mand in the Excel Form Report.
• PCD-214396 - PC-DMIS now displays text reports correctly when you print PDF orRTF reports. This means that PC-DMIS no longer positions print report text to theright edge of the page.
Summary Mode• PCD-215417 - PC-DMIS now displays the cursor in the Edit window after you close
the Auto Feature dialog box.
PC-DMIS 2020 R2
9

Temperature Compensation• PCD-202106 - You can now perform a part temperature compensation in a rotary
table coordinate system.
PC-DMIS 2020 R2
10

Release Notes - 2020 R2 SP8
• PCD-213723 - You no longer get an application error when you center the probe ona command after you delete a group that contains the depended command.
• PCD-213729 - You no longer get an application error when you delete command se-lections after you create auto features.
• PCD-213871 – PC-DMIS improved migration for the XactMeasure conversion toGeometric Tolerance command:• Updated the migration report to include 100% of errors (from the Edit window and
report) and commands converted to the legacy profile. PC-DMIS captures all mi-gration errors in the migration report. To ensure, there are no XactMeasure migra-tion errors in the measurement routine when there is no migration report.
• Expanded support for constructed points and circles for position and concentricitytolerances and as a datum.
• Constructed points (Corner, Intersection, Origin, and Pierce 3D) and Auto CornerPoint.
• Constructed circles (Projection, Cone, Cylinder, Sphere, Tangent 2 and 3 linesand 3 circles, Intersection, and Cast).
• Added support for pattern of slots as a datum.• PCD-213908 - Here are a few changes in the in the Report window, feature dialog
boxes, and Dimension Info dialog boxes:• Updated Geometric Tolerance Position to show nominal start point.• The nominal fields now always shows the Start Point (with and without sample
hits and sample features) for Cylinders, Circles, and constructed 3D Lines.• The START_PT, END_PT, and LEVEL # are now a part of the Position report.
This defines the worst end or the Level # for Cross Sections reported for Cones,Cylinders, and constructed 3D Lines.
• PC-DMIS no longer recalculates nominals during execution when feature(s) arenot orthogonal to the DRF coordinate system (with or without sample hits andsample features) for Auto Circles, Round Slots, Square Slots, and Notches.
• PCD-214558 - PC-DMIS now allows the TP tolerances to axes of features when youselect PCD-DIM from the Value from list in the Setup K-field Configuration dialogbox. You can now select whether you want to send tolerances of TP axes based onthe tolerance of TP.
PC-DMIS 2020 R2
11

Release Notes - 2020 R2 SP7
Application ErrorsYou no longer get an application error in these instances:
• PCD-203819 - When you open the Grid Scan (Insert | Scan | Grid) dialog box,clear the Select check box under the CAD controls area and then select the item onthe CAD.
• PCD-204768 - When you switch between the portable interfaces and then click theFile menu.
• PCD-209148 - When you click the Generate button on the Scan dialog box to re-generate hits after you edit a scan feature.
• PCD-212766 - When you copy and paste a true position dimension that contains alaser feature as a datum.
• PCD-213322 - When you cancel the Dimension dialog box and the status windowis visible.
• PCD-213335 - When you close a measurement routine while you edit a report thatcontains a CAD reporting object.
• PCD-213348 - When you select items from the CAD if the Edit window cursor isabove the first alignment.
• PCD-213396 - When you are in Step mode and the software steps past the lastcommand.
• PCD-213410 - When you save a label in an old format that contains an analysis ob-ject.
• PCD-213540 - After a Cut and Paste, you execute a feature.• PCD-213565 - When you print a report that contains a Geometric Tolerance label.• PCD-213578 - When you close PC-DMIS after you use the Tutor Quick Start fea-
ture.• PCD-213584 - When the paste operation fails to create a copied command.
Auto Features
• PCD-211055 - PC-DMIS now avoids probe collisions when you measure a smallcylinder feature with a probe size more than 2/3 the diameter of the hole.
• PCD-211307 - PC-DMIS no longer leaves hits in the hits buffer and "ghost" featurelabels in the Graphic Display window when you use user-defined hits from the QuickFeature widget.
• PCD-211587 - PC-DMIS no longer resets the actual values to the nominal values onsome Auto features that use scanning strategies when path lines are set to show orhide.
• PCD-211614 - PC-DMIS no longer generates an "Invalid Frequency" error for apoint measurement with the OPTIV laser.
PC-DMIS 2020 R2
12

• PCD-212277 - PC-DMIS now correctly converts the dimension units for the legacyposition of a slot when you use the LF and WF axes.
CAD
• PCD-210223 - PC-DMIS now opens measurement routines that contain ContourEvaluation commands a lot quicker.
CMM
• PCD-211352 - PC-DMIS no longer shows a probe error when you take manual hitsfor the TP200 probe on a Wenzel controller.
Dual Arm
• PCD-211667 - PC-DMIS no longer keeps the Execution dialog box open when youcalibrate a group of tips on the Arm2 contact probes.
GD&T Dimension
• PCD-213085 - PC-DMIS now returns a correct value for the GetText() function. PC-DMIS no longer returns a zero value for the MEAS_X, MEAS_Y, MEAS_Z, MEAS_I,MEAS_J, MEAS_J, MEAS_DIAM, and MEAS_ANGLE parameters.
HxGN SFx | Asset Management
• PCD-212187 - PC-DMIS now updates Edge Client data streams to add sessiontrace fields.
Laser
• PCD-202632 - You can now use animation speed for Collision Detection. Also, theTTP Circular Plane now supports circular and straight paths.
• PCD-203097 - PC-DMIS now correctly selects points on a mesh object during align-ment and feature extraction operations.
Q-DAS
• PCD-213566 - Added the K2020 field to define the material condition and that thevalue is set as required for the Q-DAS software.
Reporting
• PCD-209384 - PC-DMIS now opens reports that contain many graphical elements alot quicker.
• PCD-210256 - PC-DMIS now correctly inserts report labels in reports.• PCD-211674 - PC-DMIS now displays the custom report properly when you delete a
dimension from a measurement routine and then open an existing custom report.
PC-DMIS 2020 R2
13

• PCD-212153 - PC-DMIS now shows correct columns in the PDF report when ameasurement routine contains customized dimension formats.
PC-DMIS 2020 R2
14

Release Notes - 2020 R2 SP6
Application ErrorsYou no longer get an application error in these instances:
• PCD-208339 - When you run a Basic Script in certain cases.• PCD-208987 - When you move the cursor above all the alignment commands and
define the cross-section commands.• PCD-209148 - When you click the Generate button on the Scan dialog box to re-
generate hits after you edit a scan feature.• PCD-209155 - When you open PC-DMIS on locked down IT accounts without Inter-
net access and you didn't turn off the Internet access on the Home page settings.• PCD-209214 - When you import a .dxf file in certain cases.• PCD-209603 - When you use legacy true position D3 with no datum.• PCD-209614 - When you start execution of a measurement routine in certain cases.• PCD-210119 - When you copy true position dimensions in certain cases.• PCD-210133 - When you delete features that use the true position legacy dimen-
sions.• PCD-210361 - When you open PC-DMIS Online in certain cases.• PCD-210366 - When the Romer interface fails to initialize in certain cases.• PCD-210455 - When you switch from probe to scan in certain cases.• PCD-210456 - When you select File | Close in certain cases.• PCD-210466 - When you preview a pointcloud in certain cases.• PCD-210587 - When you select File | Exit in certain cases.• PCD-210593 - In the Probe description area of the Probe Utilities dialog box in
certain cases.• PCD-210608 - When you switch between active measurement routines in certain
cases.• PCD-210681 - When PC-DMIS displays a license failure error message immediately
after you open PC-DMIS.• PCD-210719 - When you close a measurement routine with an active clearance
plane.• PCD-210955 - When you drag and drop an item from the Summary mode to within
or outside (such as custom report) the Summary mode.• PCD-210987 - When you calibrate probes in certain cases.• PCD-211001 - At the end of the execution when you switch measurement routines.• PCD-211060 - When you calibrate tips in certain cases.• PCD-211077 - When the device manager interface generates an error message be-
fore PC-DMIS is ready.• PCD-211122 - When you close a measurement routine in certain cases.• PCD-211128 - When you perform an undo operation on an alignment.• PCD-211308 - When you carry tolerances forward.
PC-DMIS 2020 R2
15

• PCD-211353 - When you close a measurement routine and then immediately openanother measurement routine.
• PCD-212224 - When you open a measurement routine from the protected directo-ries.
Auto Features• PCD-185254 - You can now change the Row overlap value in the Auto Feature
dialog box for Auto Laser Plane features.• PCD-210189 - You can now see the improved spectrum output for the Precitec
CHRocodile S and CHRocodile SE controllers.• PCD-210200 - You can now see Re-measure works correctly when you use Rmeas
on all contact features.• PCD-211612 - You can now see that, when in Offline mode and you measure an
Auto Circle Contact with zero sample hits relative to a feature, PC-DMIS projectsthe circle onto the theoretical plane of the circle.
CAD• PCD-210145 - You can now see all the CAD entities when you import a CAD file.• PCD-210872 - You can now see an improved import of CAD STEP files.
CMM• PCD-163494 - PC-DMIS can now saves the wrist speed in the Settings Editor
whenever you have PC-DMIS read the machine defaults on startup. To do this,mark the Read machine defaults on startup check box for FDC controllers in theMachine Options dialog box.
• PCD-211016 - You can now correctly calibrate multiple arms in the INCH modewhen you use the AUTOCALIBRATE/MULTIPLEARM command.
• PCD-211376 - PC-DMIS no longer converts the external command line from lower-case to uppercase.
GD&T• PCD-205908 - You can now update DIMINFO and POINTINFO expressions when
you remove the segment from the tolerance command.• PCD-208911 - PC-DMIS now displays deviation correctly for the planar position in
the Graphic Display window.• PCD-208983 - PC-DMIS now allows 10 million hits for features in the Geometric
Tolerance dialog box.• PCD-211223 - You can now see that FCF or Tolerance indicator with ISO behaves
correctly for datums in the lower segment between Position and Line Profile or Sur-face profile.
PC-DMIS 2020 R2
16

HxGN SFx | Asset Management• PCD-196206 - PC-DMIS no longer sends incorrect error events when you enable
the Find Hole option for auto features.• PCD-212187 - PC-DMIS now updates Edge Client data streams to add session
trace fields.
Laser• PCD-208943 - You can now execute thickness scan features with the Precitec
2SHS controller.• PCD-210143 - PC-DMIS now displays an error message in the Execution dialog box
where there is no signal from the CWS or HP-OW probes.
Probe• PCD-211073 - You can now show or hide the Probe Readouts window through auto-
mation.
Q-DAS• PCD-209253 - PC-DMIS now shows the zero value for K2008 in a .dfq file when the
tolerance zone for a position dimension is only in one axis.• PCD-210022 - You can now see the material condition information of K2020 in a
part-specific Q-DAS data file.• PCD-210023 - PC-DMIS now controls K2005 for the profile characteristics with the
Q-DAS Interface Settings.• PCD-210585 - You can now see the Max/Min profile reporting in a .dfq file for the
Geometric Tolerance dimensions.
Reporting• PCD-207509 - PC-DMIS no longer causes resource consumption when you refresh
custom reports in the Report window that have snapshot images.• PCD-209996 - PC-DMIS now converts the deviation value of the point info into the
same unit of the measurement routine.• PCD-210875 - You can now see the correct ball color for leader lines drawn on the
CAD reporting object in custom reports.
Temperature Compensation• PCD-208280 - PC-DMIS Temp Comp V2 now lets you detect the mismatch in the
compensation method and apply the correct method for the actual CMM for thesetwo conditions:• H3C/FDC/CC controller
PC-DMIS 2020 R2
17

• Measurement routines created with Temp Comp V1 that use the "Read Tempera-tures" method
• PCD-212274 - PC-DMIS now correctly converts the temperature values when youswitch from Celsius to Fahrenheit in the Temperature Compensation Setup dialogbox.
PC-DMIS 2020 R2
18

Release Notes - 2020 R2 SP5
• PCD-98633 - You can now see improved computation for auto features such asEdge Point, Polygon, Notch, Round Slot, and Square Slot. This helps when you useRelative Measure to locate the position of the feature you want to measure. Thisdoesn't affect the result of the feature's computation.
• PCD-149154 - You can now see PC-DMIS correctly transforms the probe positionwhen you transform a CAD model and compute the deviation from CAD (T) in theProbe Readout window.
• PCD-151794 - You no longer see the feature remains highlighted in the Graphic Dis-play window that you selected from the Size dialog box when you click Create.
• PCD-162303 - You no longer get an application error when you edit a form reportthat contains an error in the VB script.
• PCD-171694 - You can now see that the AT960 tracker with a T-scan immediatelystarts to scan when you switch from another sensor type.
• PCD-185414 - You can now see the correct theoretical values for a constructed 3Dwidth.
• PCD-197473 - You can now see the consistent results of a Pointcloud Surface Col-ormap when you click Apply or Reset from the Pointcloud Operator dialog box.
• PCD-198413 - You can now define the A and B wrist angles in the Measure Probedialog box from the Wrist Calibration area. This allows you to put the related Offsetvalues in the controller.
• PCD-198422 - You can now see improved performance when PC-DMIS importsa .csv file that contains ESF (VWMP) features.
• PCD-199329 - You can now see no delay for evaluation of the Pointcloud SurfaceColormap after you open the measurement routine.
• PCD-199362 - You can now create pointcloud surface colormap annotations at alow zoom level in the Graphic Display window.
• PCD-199716 - You can now see points from a COP/OPER, IMPORT command in-side a loop are purged only once during the execution of a measurement routine.You need to place the COP feature outside of the loop.
• PCD-199914 - You can now correctly reset the pointcloud data when you click Re-set in the Pointcloud Operator dialog box and click Reset Pointcloud from thePointcloud toolbar.
• PCD-201537 - You no longer get an offset when you scan in inch mode with a laserscanner on Arm2 of the DEA Bravo HP/HD Dual Horizontal Arm CMM.
• PCD-201807 - You can now execute the Pointcloud to CAD Auto Alignment properlywhen you probe an exclusion plane.
• PCD-201986 - You can now see pointcloud cross-section in the Graphic Displaywindow after you execute, close, and then reopen a measurement routine.
• PCD-202475 - You can now see correct results for the Legacy Profile dimension ofa Point Colormap.
PC-DMIS 2020 R2
19

• PCD-202536 - You can now see the size tolerance in the report when you migratefrom an XactMeasure position of a pattern to the geometric tolerance command.
• PCD-204117 - You can now select CAD faces for a Thickness Colormap comparedto CAD. PC-DMIS uses both sides of the material to compute the thickness; howev-er, PC-DMIS only colors the data for the selected faces.
• PCD-204720 - You no longer get an application error when you cancel the executionduring the auto-calibration process.
• PCD-204759 - You can now update feature nominals in the Size command whenyou click Yes in the message box to update the dimension nominals. You no longerneed to press F9 on the Size command and then select the feature or type the fea-ture name in the Edit window.
• PCD-204767 - You can now see that PC-DMIS prompts you to load the Reflectorwhen you disconnect from the Tscan. Also, you can now see PC-DMIS disconnectsfrom the Tscan software before you load the Reflector during execution of a meas-urement routine.
• PCD-205345 - You can now see better plus and minus tolerance calculations whenyou convert different size features with common datums from Xact measure to Geo-metric Tolerance.
• PCD-205618 - You can now see the nominal values for the Polar Angle in any lan-guage.
• PCD-205779 - You no longer get an application error when you changed a nominalvalue in the Edit window on a constructed line.
• PCD-206249 - You can now see the unique feature identifiers in .planxml files.• PCD-206307 - You no longer get the measured values of all ESF dimensions at
0,0,0 when you open measurement routines from an automation client.• PCD-206540 - You can now see that PC-DMIS displays the original data type popup
to show the feature's theoretical X value when you position your mouse pointer onhit point X of a measured value. Also, you can now see PC-DMIS displays the :con-tent string whenever available in the data type popup.
• PCD-206584 - PC-DMIS no longer reverts back to Median Points in the GeometricTolerance dialog box when you press F9 on the geometric tolerance concentricitycommand.
• PCD-207289 - You can now add or delete segments to geometric profile tolerancesthat contain secondary or tertiary material conditions.
• PCD-207372 - You can now draw the round slot and square slot ESF (VWMP) fea-tures in the Graphic Display window.
• PCD-207477 - You can now see the fifth segment label to report the Geometric Tol-erance command.
• PCD-207984 - You can now see the correct default options for graph, text, and out-put of the Thickness Gage feature's internal 3D distance dimension.
• PCD-208067 - You no longer get an application error when you save a measure-ment routine that contains an image capture command.
• PCD-208518 - You no longer get an "illegal tip" error message when you executedual arm measurement routines on CW43.
PC-DMIS 2020 R2
20

• PCD-208631 - PC-DMIS no longer sets the Thickness Gage internal location dimen-sion options to their default values after you execute the measurement routine.
• PCD-208920 - PC-DMIS no longer removes features and datum pointers when youcopy features in the geometric tolerance command.
• PCD-209027 - PC-DMIS now allows you to migrate expressions for Xact measurecommands and use them with the new geometric tolerance commands.
• PCD-209289 - You no longer get an application error when you reset a feature inthe Datum Definition dialog box and then save the measurement routine.
PC-DMIS 2020 R2
21

Release Notes - 2020 R2 SP4
• PCD-161334 - Fixed an issue where PC-DMIS couldn't box-select a laser scannedcircle when you performed a pointcloud alignment to features.
• PCD-187399 - Fixed an issue where PC-DMIS didn't populate the updated coneheight value in the Construct Circle dialog box.
• PCD-193861 - Fixed an issue where PC-DMIS showed an incorrect message whenyou added Point of Interest (POI) in the Thickness Gage dialog box.
• PCD-194919 - Fixed an issue where PC-DMIS took a long time to compute Point-cloud Surface Colormaps when you imported an STP file.
• PCD-195720 - Fixed an issue where PC-DMIS showed incorrect color for the MeshThickness colormap when you compared with the CAD annotation.
• PCD-198318 - Fixed an issue where PC-DMIS removed the Mesh data in theGraphic Display window when you edited the MESH/OPER,SELECT command inthe Mesh Operator dialog box.
• PCD-198971 - Fixed an issue where the CWS Thickness Scan didn't work with thefeature-based measurement.
• PCD-199080 - Fixed an issue where each feature's point was drawn as a hit in theGraphic Display window when you selected a Laser Auto feature in the AlignmentUtilities dialog box.
• PCD-201881 - Updated device drivers for the Heidenhain IK5000 (Metronics) con-troller.
• PCD-201911 - Fixed an issue where the variable tolerance calculations were not mi-grated properly for the Xact measure command to the geometric tolerance com-mand.
• PCD-202401 - Fixed an issue where PC-DMIS didn't automatically clear the positiondiameter check box in the Excel Form Report when you cleared the check box inthe Geometric Tolerance dialog box.
• PCD-203000 - Fixed an issue where PC-DMIS failed to set the tolerance to a nega-tive value in the Thickness Gage command when you changed from the Edit win-dow.
• PCD-203163 - Fixed a software crash that occurred when you executed thicknessscans.
• PCD-203241 - Fixed an issue where the COP command was incorrectly removedfrom the Edit window when you opened and closed the Caliper Gage dialog boxwithout any changes.
• PCD-203663 - Fixed an issue where PC-DMIS removed the Mesh data in theGraphic Display window when you pressed Ctrl + U to execute the MESH/OPER,SELECT command.
• PCD-203865 - Fixed an issue where PC-DMIS changed the internal dimensionswhen you pressed F9 to open the Thickness Gage dialog box and closed the dia-log box without any changes.
PC-DMIS 2020 R2
22

• PCD-204558 - Fixed an issue where the CWS scan reported no points even thoughthe scan was successful.
• PCD-204562 - Fixed an issue when PC-DMIS didn't retain the tolerance values ofthe internal min/max dimensions when you edited the values in the Edit window.
• PCD-204569 - Fixed an issue where the labels for the Surface profile Dimensions ofthe geometric tolerance command were corrupted when you dragged the dimensionfrom the Edit window into the custom report.
• PCD-204861 - Fixed an issue where lines didn't join polylines properly when youcreated a thickness scan on the CAD.
• PCD-204963 - Fixed an issue where spherical surfaces didn't tessellate correctlywhen you imported some CAD models.
• PCD-205590 - Fixed an issue where PC-DMIS allowed you to edit the measuredvalue in the Edit window for the ESF (VWMP) features.
• PCD-205780 - Fixed an issue where the BD (ESF, VWMP) features were not availa-ble when you opened existing measurement routines. This issue also fixed a soft-ware crash that occurred when you clicked Create in the Extended Sheet MetalFeatures dialog box.
• PCD-205801 - Fixed a software crash that occurred when you clicked Cancel in theRing Light Migration dialog box after you clicked Yes for migration in the warningmessage.
• PCD-206045 - Fixed an issue where PC-DMIS didn't show a minus sign in the .dfqfile for the geometric tolerance command.
• PCD-206086 - Fixed an issue where PC-DMIS couldn't take the hit on the CAD un-der a feature glow when you selected Adaptive Circle Scan in the Auto Featuredialog box.
• PCD-206166 - Fixed an issue where PC-DMIS didn't configure the laser hardwareproperly in the Machine Options dialog box when you used the HSI_CMM inter-face.
• PCD-206263 - Fixed an issue where PC-DMIS showed an incorrect nominal valueof the internal distance dimension for a Point of Interest (POI) with zero gage dis-tance.
• PCD-206392 - Fixed a software crash that occurred when PC-DMIS tried to over-write the existing viewset after you clicked Yes in the warning message.
• PCD-206488 - Fixed an issue where PC-DMIS used full precision instead of themeasurement routine setting in the .dfq file.
• PCD-206597 - Fixed an issue where the positions of the Graphic Window in Y+and the Graphic Window in Y- icons were reversed in the Graphic View toolbar onthe high resolution monitors.
• PCD-207353 - Fixed an issue where PC-DMIS showed the same graphic for thelower segment and upper segment for the geometric tolerance position FCF in thereport.
• PCD-207512 - Fixed an issue where a lower segment couldn't use a feature or da-tum math type that was different than the setting in the geometric tolerance com-mand.
PC-DMIS 2020 R2
23

Release Notes - 2020 R2 SP3
• PCD-82062 - Fixed an issue where the Copy Parameters functionality didn't workproperly for the Laser Edge Point features.
• PCD-177993 - Fixed an issue where the calibration matrix for Laser probes didn'ttransform correctly and showed high standard deviation errors when the tool wasmounted off the rotary table.
• PCD-188259 - Fixed a software crash that occurred when you used the HP-C-VEcamera and the probe went to the focus position.
• PCD-190082 - Fixed an issue with the automation interface that could cause thePC-DMIS application to not properly terminate.
• PCD-194852 - Fixed an issue where PC-DMIS showed a black background in theDOF area of the Best Fit Alignment dialog box.
• PCD-194853 - Fixed an issue where the DIMINFO command didn't support ISO lo-cal Size minimum and maximum diameters when geometric tolerance was set toRFS and the Feature Math option was set to default.
• PCD-197686 - Fixed an issue where PC-DMIS didn't update the Grid Size valuewhen you selected Grid Mesh and changed the Finalize Mode options in the MeshCommand dialog box.
• PCD-198080 - Fixed an issue where a new custom laser scanning profile was add-ed when you pressed the portable arm button to close the Laser Data CollectionSettings dialog box after you measured an exclusion plane.
• PCD-199754 - Improved the performance of the Geometric Tolerance commandwith large datasets.
• PCD-200936 - Added revised rules for datums at Maximum Material Boundary(MMB) and Least Material Boundary (LMB) to reference higher precedence datumswith the same material condition modifiers.
• PCD-200965 - Fixed an issue where, instead of executing the COP/OPER, EX-PORT command from a subroutine, PC-DMIS would display an error message.
• PCD-201556 - Fixed an issue where new measurement routines couldn't send theirfile name to the HxGN SFx | Asset Management.
• PCD-201817 - Fixed an issue where the COP command size showed zero after youdeleted the COPIMPORT or COPEXPORT command.
• PCD-202400 - Fixed an issue where the ESF features were drawn with the nominalco-ordinates instead of actual co-ordinates in the Graphic Display window.
• PCD-202537 - Fixed an issue where you were not able to understand the interpreta-tion of the constructed line features for the Geometric Tolerance.
• PCD-202609 - Fixed an issue where PC-DMIS allowed you to edit the measuredvalues in the Edit window for the ESF (VWMP) features.
• PCD-202624 - Fixed an issue where PC-DMIS report showed a reduced size posi-tion graphic when an axis wasn't selected.
PC-DMIS 2020 R2
24

• PCD-202832 - Fixed an issue where the Geometric Tolerance reports showed zerovalues when you measured datum size for the preresolved datums with Regardlessof Material Boundary (RMB) selected.
• PCD-203342 - Fixed an issue where the GEOTOLPROFILE labels didn't follow theformat of the Dimension command.
• PCD-203433 - Fixed an issue where PC-DMIS showed the probe for a short timewhen you opened the Auto Features dialog box.
• PCD-203491 - Fixed an issue where PC-DMIS didn't show arrow heads in theGraphic Display window.
• PCD-203601 - Added bonus tolerance to the K0060 field for the .dfq output file in Q-DAS Configuration.
• PCD-203620 - Fixed an issue where the scanning parameters were incorrect for theEagle Eye Laser scanning probe.
• PCD-203628 - Fixed an issue where PC-DMIS would hang when you used theQuick Feature to extract an ellipse.
• PCD-203809 - Fixed a software crash that occurred when you selected a datum(pattern) and set the GD&T Standard option as ISO 1101 in the Geometric Toler-ance dialog box.
• PCD-204106 - Fixed a software crash that occurred when you created a constructfeature set from the COPCLEAN command.
• PCD-201149 - Fixed an issue where the graphical analysis didn't use the suppliedmeasured vectors when you used the Geometric Tolerance cylindricity.
• PCD-204302 - Fixed an issue where PC-DMIS didn't show an error message whendecimal symbol comma didn't convert to decimal point in the Windows regional set-tings for the number formats.
• PCD-204325 - Fixed an issue where PC-DMIS disabled the warning message whenyou selected the Use Text Mode Dimension Reporting check box in the Reportdialog box.
• PCD-204360 - Fixed an issue where an event was missing in the EventModule.xmlfile in the onStartingApplication command.
• PCD-204425 - Fixed an issue where the GeoTol Position label didn't show the fea-ture name when three or more axes were selected.
• PCD-204457 - Fixed an issue where the tabs in the Best Fit Alignment dialog boxwere not displaying properly on high resolution monitors.
• PCD-204661 - Fixed an issue where the size command was not able to calculatethe ISO limits and tolerance when the tolerance was associated with an ISO 286 tol-erance code.
• PCD-204858 - Fixed a software crash that occurred when you edited the thicknessgage dimensions from the Thickness Gage dialog box and used internal commandsuffixes in the feature names.
• PCD-204936 - Fixed a software crash that occurred when you opened a measure-ment routine with CAD GD&T elements.
• PCD-205468 - Fixed an issue with the geometric tolerance command when using aconstructed BF plane that was constructed from features such as circles or cylin-ders.
PC-DMIS 2020 R2
25

• PCD-205592 - Fixed an issue where some scanning parameters didn't work proper-ly for the Eagle Eye Laser sensor.
PC-DMIS 2020 R2
26

Release Notes - 2020 R2 SP2
• PCD-168144 - Fixed an issue where the area scan didn't consider the new align-ment when you moved the part and machine for the ATS600 tracker.
• PCD-187629 - Fixed an issue where the paste operation didn't work properly whenyou copied the measurement sequence from one measurement routine into another.
• PCD-188653 - Fixed an issue where the On Error command couldn't skip the cur-rent command when you worked with the Leica LMF interface.
• PCD-195832 - Added the new names for TesastarMP US components and supportfor the 6-way module.
• PCD-199838 - Fixed an issue where the previous scan regions were shown in theOverview Camera when you inserted a new area scan for the ATS600 Tracker.
• PCD-201313 - Added definitions for the HP-Te series of probes.• PCD-201581 - Fixed an issue where the generic features were highlighted in the
Graphic Display window after the execution of a measurement routine.• PCD-201880 - Fixed an issue where the bitmap was corrupted when you printed re-
ports to 3D PDF.• PCD-202002 - Fixed an issue where the vision features had an incorrect calibration
when you used the illumination override on a feature.• PCD-202546 - Fixed an issue where you were not able to edit the theoretical values
of constructed width features in the Construct Width dialog box.• PCD-202580 - Fixed a software crash that occurred when you calibrated the CWS
probe from the probe calibration toolbox.• PCD-202759 - Fixed a software crash that occurred when you clicked OK in the
Thickness Gage dialog box after you edited the Point of Interest value for thecommand.
• PCD-202850 - Fixed an issue where the report showed the incorrect size modifierfor the form and runout tolerances when you reported ISO straightness of a cylinder.
• PCD-203046 - Fixed an issue where PC-DMIS didn't allow selection of multiple slotswhen you selected the Datum Definition dialog box from the menu item.
• PCD-203142 - Fixed a software crash that occurred when you clicked Apply in theAnimated Probe Changer dialog box.
• PCD-203163 - Fixed a software crash that occurred when you executed thicknessscans.
• PCD-203164 - Fixed an issue where PC-DMIS showed an error message when youdid parallelism of a 2D line to an axial datum.
• PCD-203218 - Fixed an issue where PC-DMIS showed an error message when youused a mid-line whose two input lines were at different heights.
• PCD-203246 - Fixed an issue where the Vision 2D distortion compensation was notactive when the execution was started after a first magnification change.
• PCD-203293 - Fixed an issue where the Report Output check box was automati-cally deselected in the Output Configuration dialog box when you clicked the PrintFull Report button in the Marked Sets window.
PC-DMIS 2020 R2
27

• PCD-203458 - Fixed an issue where the 1D width was incorrectly allowed as a sec-ondary datum.
• PCD-203610 - Fixed an issue where PC-DMIS showed an error message for somecases of lower-precedence 2D datums when you created a 3D BF or BFRE con-structed line.
• PCD-203642 - Added the date and time stamps to the DME log file for the I++ serv-er.
• PCD-203814 - Increased UZ offset limit to 200% of the total tolerance for the ISOprofile to support the ultra-unilateral profile tolerance.
PC-DMIS 2020 R2
28

Release Notes - 2020 R2 SP1
• PCD-164339 - Fixed an issue where both perpendicularity and parallelism showedan incorrect color representation of the size deviation graphic colors.
• PCD-178003 - Fixed an issue where the Probe and Probe Trigger Options tabwere not visible in the Parameter Settings dialog box when you edited the Auto-Trigger command.
• PCD-178506 - Fixed an issue where the alignment on the slave arm was not re-stored correctly if the execution of a measurement routine on a dual arm systemwas interrupted.
• PCD-186811 - Fixed an issue where the Use datums check box in the legacy Posi-tion dialog box was turned on for all dimensions when you selected the Use da-tums check box for only a single dimension.
• PCD-190871 - Fixed an issue where the bookmarks were lost or moved to anotherlocation after the execution of a measurement routine that contained ESF (VWMP)features.
• PCD-191254 - Fixed a software crash that occurred when you opened the Con-structed Plane dialog box and selected Primary Datum from the list.
• PCD-194568 - Fixed an issue where PC-DMIS automatically deselects the last se-lected feature when you clicked in the white area of the Alignment dialog box.
• PCD-195912 - Fixed an issue where PC-DMIS created a mismatch on the math ap-plied to the inner circles and outer circles when you selected the Best Fit MathType list in the Auto Feature dialog box.
• PCD-195962 - Fixed a software crash that occurred when you worked on a laserscan in Dual Arm mode.
• PCD-196204 - Fixed an issue where the ESF (VWMP) features selection on CADdata didn't work when there was a pointcloud data over the CAD model.
• PCD-196697 - Fixed an issue where PC-DMIS didn't position a leader line correctlyfor the dimension information.
• PCD-197497 - Fixed an issue where the ESF references were lost in dimensioncommands when you opened a measurement routine through a specific automationmethod.
• PCD-197924 - Fixed an issue where the Laser extraction results were inaccuratewhen you migrated from an older version of PC-DMIS to a newer version.
• PCD-198325 - Fixed a software crash that occurred when you created a circle withthe use of a Quick Feature gesture.
• PCD-198560 - Fixed an issue where the first tip calibration didn't register when youindicated that the tool has moved and elected to use the Probe Collision Check forthe calibration process.
• PCD-198971 - Fixed an issue where the CWS Thickness Scan didn't work with thefeature-based measurement.
• PCD-199556 - Fixed an issue where PC-DMIS required two clicks to select a fea-ture when you selected a surface with a different orientation.
PC-DMIS 2020 R2
29

• PCD-199732 - Fixed an issue where the Size dialog box didn't show icons for thewidth features.
• PCD-199946 - Updated a DLL to help fix a software crash that occurred when youclosed a measurement routine.
• PCD-200143 - Fixed a software crash that occurred when you changed the hit tar-get direction in the Live View for the 2D profile.
• PCD-200174 - Fixed an issue where the section cut profiles and feature vectors forESF (VWMP) features were not drawn when you pressed F9 in the Graphic Displaywindow.
• PCD-200245 - Fixed an issue where multiple features showed the same deviation inthe graphical report.
• PCD-200319 - Fixed an issue where you were not able to change the tolerance typewhen two or more segments were already available in the Geometric Tolerancedialog box.
• PCD-202626 - Fixed an issue where PC-DMIS was not able to send the ESF(VWMP) results to the stats output file.
• PCD-200640 - Fixed the HP-TM components issue which included updating the no-menclature from HP-TM2 to HP-TMe, and ensured the compatibility with the Sa-mara rack (HP-MP).
• PCD-200643 - Fixed an issue where PC-DMIS wouldn't set the Stripe Distanceand Exposure values in the Linear Open Scan dialog box and Edit window for theEagle Eye sensor.
• PCD-200657 - Fixed an issue where PC-DMIS opened multiple Datum Definitiondialog boxes when you clicked the add button in the Feature Control Frame tab ofthe Geometric Tolerance dialog box.
• PCD-200659 - Fixed an issue where the Reorder Selected Items option in theGeometric Tolerance dialog box didn't work properly when you removed any itemsfrom the selected items list.
• PCD-200675 - Fixed a software crash that occurred when you inserted the Use Pa-rameter Set/DEFAULT command in the measurement routine.
• PCD-200682 - Fixed an issue where PC-DMIS didn't update the report label whenthe SIZE[value] text was removed from the Edit window or from the Geometric Tol-erance dialog box.
• PCD-200694 - Fixed an automation issue where PC-DMIS was not able to activatethe Use COP check box in the Linear Open Scan dialog box.
• PCD-200755 - Fixed an issue where PC-DMIS didn't show the correct translation forthe Dimension ID in the Chinese Traditional and Chinese Simplified languages aftermigration of the Geometric Tolerance command.
• PCD-200812 - Fixed a software crash that occurred when you add angles to theCMS probe and selected From CAD from the New Angles list in the Add Anglesdialog box.
• PCD-200826 - Fixed an issue where the custom probe builder connections were off-set to the edge.
• PCD-200877 - Fixed an issue where the incorrect polar axis and clocking vectorwere setup for the Geometric Tolerance position to calculate the polar angle.
PC-DMIS 2020 R2
30

• PCD-200984 - Fixed an issue where PC-DMIS would hang when you created aPOINTINFO command.
• PCD-201006 - Fixed a hardware crash that occurred when you selected the MoveFeature to Reference Plane check box and performed the calibration of an HR-MPrack.
• PCD-201077 - Fixed an issue where auto calibrate didn't work when a machine wasin Manual mode which caused PC-DMIS to report collisions that did not exist.
• PCD-201302 - Fixed an issue where PC-DMIS Home page couldn't display theNews feed on the upper-right corner of the page.
• PCD-201365 - Fixed a software crash that occurred when the HMV debug files wereclosely investigated.
• PCD-201520 - Fixed an issue with I++ interface where the CMM used the movespeed from the previous measurement routine unless you changed the tool.
• PCD-201561 - Fixed an issue where PC-DMIS would hang when you generated aPPAP report.
• PCD-201611 - Fixed a software crash that occurred during the optical calibrationwhen you selected <Current> from the Illumination list in the Calibrate Optics di-alog box.
• PCD-201649 - Fixed an issue where PC-DMIS showed an error message for theGeometric Tolerance commands when you used the printed PDF report.
• PCD-201813 - Fixed an issue where a laser scanner would disconnect automatical-ly when you changed the face and one or more scanner LEDs were covered.
• PCD-201939 - Fixed an issue where the Geometric Tolerance labels were missingfrom the Reporting folder of the installation location.
• PCD-201970 - Fixed a software crash that occurred when you imported the NX partfile from the File | Direct CAD Interfaces | NX menu item.
• PCD-201985 - Fixed an issue where the angle dimension between the two planeswas incorrectly taken as the dimension between the plane and axis.
• PCD-202073 - Fixed an issue where PC-DMIS reported the incorrect size of thesquare slot when you measured the square slot as an ESF (VWMP) feature.
• PCD-202099 - Fixed an issue where the CAD model views indicated the incorrectpresence of the GD&T features when PC-DMIS added the icons next to the viewswithout PMI.
• PCD-202105 - Fixed an issue where PC-DMIS disabled the Segment Type togglewhen there was more than one segment available in the Geometric Tolerance dia-log box.
• PCD-202191 - Fixed an issue where the geometric tolerance labels were not upda-ted in the PPAP report.
• PCD-202247 - Fixed a software crash that occurred when the Xact Measure fea-tures created in versions before 2020 R2 were not able to migrate to the new Geo-metric Tolerance.
• PCD-202461 - Added the migration option (.json file) to change the GD&T standardfrom the XactMeasure Custom to the Geometric Tolerance ASME or ISO.
• PCD-202526 - Added Primary Datum support for the two-dimensional circles, lines,and width features for geometric tolerances with a warning message.
PC-DMIS 2020 R2
31

• PCD-202626 - Fixed an issue where PC-DMIS were not able to sent the ESF(VWMP) results to the stats output file.
• PCD-202675 - Fixed an issue where the geometric tolerance command was probe-compensated incorrectly for the Auto Line feature on portable machines.
• PCD-202819 - Fixed a translation issue where you were not able to use GeometricTolerance Auto feature Adaptive scanning strategy as the considered feature forForm and Runout when you ran PC-DMIS in non-English languages.
• PCD-202892 - Fixed a software crash that occurred when you closed the ExtendedSheet Metal Features dialog box after you created the Contact feature.
PC-DMIS 2020 R2
32

Release Notes
PC-DMIS 2020 R2 is a significant development release of the software. For detailedinformation and video tutorials about this release, visit hexagonmi.com/products/soft-ware.
Featured Items
CADThis ability delivers reports that bring a new dimension to your results and collabora-tion.
See "3D PDF".
GD&T Selection From FileImproved the GD&T creation workflow. You can now only do GD&T selection from afile. PC-DMIS processes the entire file and presents the results in an interactive userinterface.
See "GD&T Selection from File".
Geometric ToleranceAdded the Geometric Tolerance command which fully supports Y14.5.1-2019. This of-fers numerous quality of life improvements over XactMeasure.
See "Geometric Tolerance".
HxGN SFx | Asset ManagementAdded the new HxGN SFx Asset Management with notifications and dashboards sothat you can keep on top of your measurement tasks for optimal productivity.
See "Smart Factory".
Pointcloud SelectWith the Pointcloud SELECT command, you can now do the following:
• Drag the boundaries of the box, circle, and sphere to change the selection size. Youcan also click and drag the control points for the polygon to change the shape.
• Click and drag the center control point to re-position your selection.• Click and drag the center end points to change the depth selection.• Use Ctrl and click to snap the selection onto the COP when you first define the
shape selection.
See "Pointcloud Select".
PC-DMIS 2020 R2
33

New EnhancementsApplication Errors
• You can now define an offset area where PC-DMIS searches and creates themoves. The maximum and minimum ranges for each axis let you define a more pre-cise space. To do this, use the Bounding box offsetarea in the Auto Insert Movesdialog box.See PCD-151151.
• You can now see the GD&T data in the Graphic Display window when you importInventor files that contain GD&T.See PCD-175925.
• Added DCI support for the NX 1899 series. See PCD-185595.• Added DCI support for Catia V5 R30. See PCD-190857.
Excel Form Report
• Removed support for the PCD2Excel Wizard (PCD2excel.exe) which will be re-moved in a future release. Please use the Excel Form Report.See PCD-121531.
• You can now use the PC-DMIS Internal Excel Viewer application to view inspectionreports that are saved as Excel and CSV file types. See PCD-152034.
• You can now do the following with the Excel Form Report:• Define line and scatter charts in a template file. Once the Excel form fills up with
the generated data, PC-DMIS displays the charts.• Select what type of dimensions you would like to see in the report. To do this, fol-
low these steps:1. From the Excel Form Report dialog box, click the Data tab.2. From the list, select the option: Report All, Report Out of Tolerance Only,
or Report In Tolerance Only.• Populate the Part information (Trace and Summary fields) for each run based on
the template layout. To fill the part information in a Multiple Run form, you need toassociate the cells with the trace and summary fields, such as date of execution,operator name, part identification, and so forth. After you associate the part data,you need to use the Set as repeatable field area option from the right-clickmenu.
• Define the cells as a NO DATA area to skip rows or columns where you don'twant any data. You might want to fill the cells with data from some other measur-ing instrument.
• Create a custom order of dimensions. To do this, you need to first click the Setcustom order icon. Then, right-click on any dimension to access the options tore-order the dimensions.
• Added a formula bar to view the formula of a selected cell.• Added an information icon for the Name lists in the Report Settings dialog box.
This provides information about the three different report modes and the file name
PC-DMIS 2020 R2
34

requirements for each of them. The three report modes are One Run Mode, Multi-ple Run Mode, and Append Mode.
• Added a TraceField option in the Name lists to enhance file name capability.• Open the Excel Form Report immediately after PC-DMIS generates the report. To
do this, select the Show Report check box in the Report Settings dialog box.See PCD-153474.
Laser
• You can now define the speed of the laser scan as a distance between the scanstripes and is an alternative to using the Scan Speed (in mm/sec) setting. If themeasurement routine contains the Scan Speed (in mm/sec), then subsequent laserscan commands in the Edit Window will use this speed. To do this, use LaserStri-peSpacing in the Parameter Settings dialog box.When the LaserStripeSpacing command is present, subsequent commands will in-stead use this spacing to determine the laser scan speed. By default, PC-DMISdoes not set the LaserStripeSpacing value and sets the registry entry to 0 (zero) inthe PC-DMIS Settings Editor.If you enter a LaserStripeSpacing value greater than the upper speed limit definedin the CMM controller (Leitz or FDC), then PC-DMIS internally uses the maximum-allowed value (without raising any errors).See PCD-110290.
• You can now insert the LASERPROFILE command into a measurement routine.This sets the real-time filter during a scan. Any pointcloud (COP) that occurs in yourmeasurement routine after the LASERPROFILE command uses those profile set-tings during a scan.See PCD-179727.
• You can now select the Area Scan measurement mode from the menu (Insert |Scan | Area Scan ) or from the Tracker Measure toolbar for the ATS600 tracker. Touse the Area Scan option, you need to select a surface probe. The AREASCANcommand stores the data.See PCD-184034.
• You can now set the scan speed at theoretical scan points for defined laser scanpaths. PC-DMIS then moves the laser probe at this speed after it crosses the theo-retical point during the scan. On a very large part, you can do the following:• Collect more points in the area where there are features such as circles and slots.
To collect more points, you can lower the scan speed where you need to extractthe features.
• Collect less points in the area where there are no features. To collect less points,you can increase the scan speed in areas where there are no features.
See PCD-190268.These speed change point settings give you more control over the scan speed andcan help reduce the scan time.
PC-DMIS 2020 R2
35

Pointclouds/Mesh• You can now show or hide the colormaps in the Graphic Display window based on
the cursor position in the Edit window. To show the colormaps, do one of the follow-ing:• Click the Activate Colormaps button in the Graphic Items toolbar.• From the Operation menu, select Graphic Display Window | Graphic Items |
Activate Colormaps.• From the Colormaps list, select a colormap.See PCD-183341 and PCD-183342.
• You can now select the data based on its orientation in the selection view. To dothis, use the Front Facing check box in the Pointcloud Operator and Mesh Oper-ator dialog boxes.• If you select the In option and the Front Facing check box, PC-DMIS includes
the points or triangles that are strictly inside the selection.• If you select the Out option and the Front Facing check box, PC-DMIS includes
the points or triangles that are strictly outside the selection.See PCD-174428.
• You can now select and delete a subset of triangles contained in the mesh data ob-ject. To do this, use the Select Mesh button. This button uses a polygon to removetriangles in the 3D view.The Select Mesh button option differs from the use of the Mesh Select operatorfrom the Mesh Operator dialog box. You can choose the Select function from theMesh Operator dialog box or type the Mesh/OPER, SELECT command in the Editwindow.• PC-DMIS includes triangles that are strictly inside the polygon selection in the
subset when you select the In option.• PC-DMIS includes the triangles that are strictly outside the polygon selection in
the subset when you select the Out option.To end the selection, double-click anywhere in the Graphic Display window, or pressthe End key.See PCD-126904 and PCD-184556.
• You can now uncheck all filters set on the Laser Data Collection Settings dialogbox, and store all the points from the Laser sensor into a COP. To do this, selectCOP - NO Filters from the Laser Data Collection Settings dialog box. This is thedefault CMM laser scan profile for new installations. You cannot edit it.See PCD-179726.
• You can now define the same size levels for a Pointcloud or Mesh Colormap. Whenyou define the Number of zones in the Levels area for a Pointcloud or Mesh Color-map, the size of each level is typically proportional to the tolerance values. Thismakes levels easier to read in the Graphic Display window and in reports. To dothis, mark the Use non-linear scale check box in the Color Scale Editor dialogbox.
PC-DMIS 2020 R2
36

See PCD-183990.
• You can now import the .nsd file type. The .nsd file contains X, Y, Z points inside abinary file. These files are typically created by the 3DReshaper Meteor application.To do this, select Import | Pointcloud | NSD or from the Pointcloud Import tool-bar, click Import Pointcloud in NSD Format.See PCD-21770.
• You can now see the real-time selection of triangles when you create the Mesh/OPER,SELECT command from the Mesh Operator dialog box. To define the colorof the selection, use the Colors tab in the CAD and Graphic Setup dialog box.See PCD-190218.
• You can now see the real-time selection of triangles when you create the COP/OPER,SELECT command from the Poincloud Operator dialog box. To define thecolor of the selection, use the Colors tab in the CAD and Graphic Setup dialogbox.See PCD-126942.
• You can now revert all Mesh SELECT operations and return the original Mesh ob-ject. To do this, insert the MESH/OPER,RESET command from the Mesh Operatordialog box or the Mesh toolbar.See PCD-190217.
• You can now update the alignment's dependent commands when you add an align-ment before a Colormap or Clean COP command in the Edit window, or if youchange an alignment above a Colormap in the Edit window.See PCD-183343.
• You can now disable the colormap when you execute a measurement routine sothat you don't see the previous scan colormap. To do this, from the Colormaps list,select None.See PCD-175151.
Portable
• You can now perform a 360-degree scan (ring or full dome) within a minimum andmaximum vertical angle setting for the ATS600 tracker. To do this, select Insert |Scan | Ring Scan or click the Ring Scan button from the Tracker Measure toolbar.You can type the Max Vertical Angle and Min Vertical Angle values. You can alsoclick the respective Read button to read the current angle from the tracker.See PCD-189785.
• You can now use the ATS600 Area Scan dialog box to facilitate a simplified work-flow.See PCD-184033.
PC-DMIS 2020 R2
37

• You can now access the Area Scan dialog box, from the Tracker Measure toolbar.To do this, click the Area Scan button. This button is only available if you select asurface probe for the ATS600 tracker interface.See PCD-171330.
• The Quality Filter on the Surface Probe tab of the Machine Options dialog box isnow renamed to Signal Filter. The Signal Filter option is now available in the AreaScan dialog box.Added the AOI Filter check box in the Area Scan dialog box. This is the angle ofincidence filter setting. The value you enter defines the maximum angle of incidencebetween the laser beam and the object's surface.Added the TrackerSignalFilterDefault and TrackerAOIFilterDefault registry entriesunder the USER_Option category in the Settings Editor application.See PCD-189790.
• You can now store the values of the Grow/Shrink setting for the ATS600 TrackerOverview Camera in the Area Scan command.See PCD-190899.
Roughness Measurement
• PC-DMIS offers a new Roughness measurement on a CMM. This option enablesyou to measure the roughness on your part (per ISO 4287 and ISO 13565 ) alongwith all other dimensions. A skid-less roughness sensor manufactured by BreitmeierMesstechnik GmbH captures the roughness profile. This sensor mounts onto an in-finite-rotating wrist about two axes. PC-DMIS offers roughness measurement with ause of a Rotary Table in combination with the infinite rotating wrist. Through the in-terface, you can create a roughness scan command in one click. The roughnessevaluation command offers a roughness profile, waviness profile, and primary pro-file evaluations with your choice of noise and form filters. The PC-DMIS report dis-plays plots of different profiles and can export roughness measurement in differentformats.See PCD-153595.
Vision
• Removed the support for the MicroVu Vision machines. See PCD-185684.
List of Fixes
Application Errors
• PCD-133290 - Fixed an application error that occurred when you calibrated a visionprobe and the machine interface settings were incorrect.
PC-DMIS 2020 R2
38

• PCD-146292 - Fixed an application error that occurred when you inserted the OleObject and selected the Microsoft Word document in the Custom Report Editorwindow.
• PCD-162303 - Fixed an application error that occurred when you tried to edit aForm Report that contained an error script.
• PCD-175692 - Fixed an application error that occurred when you edited an AnalysisView object from the main report editor.
• PCD-185384 - Fixed an application error that occurred when you pressed Cancel inthe Extended Sheet Metal Features dialog box after you minimized and then re-stored PC-DMIS.
• PCD-185750 - Fixed an application error that occurred when you clicked No in theQualification Tool Moved message box prompt during the calibration of a probe.
• PCD-186821 - Fixed an application error that occurred when the Application.Exit au-tomation command closed PC-DMIS.
• PCD-190155 - Fixed an application error that occurred when you exported visionfeatures to an .xml file through File | Export | XML.
• PCD-190622 - Fixed an application error that occurred when you typed a non-exist-ing Mesh ID for the MESH/OPER command in the Edit window.
• PCD-190730 - Fixed an application error that occurred when you tried to exit fromthe Custom Report window and clicked View Report Mode in the Reporting tool-bar.
• PCD-193937 - Fixed an application error that occurred when you selected a GB pol-ygon feature on the CAD model and clicked Create in the Extended Sheet MetalFeatures dialog box.
Auto Features
• PCD-145939 - Fixed an issue with incorrect avoidance moves when you used theself-center point strategy for auto vector points.
• PCD-183575 - Fixed an issue where Auto Feature scanning strategies didn't sup-port speed correctly when you defined it as a percentage of maximum speed.
Automation
• PCD-114827 - Fixed an issue where PC-DMIS wouldn't create a Constructed Circle(Cone) through automation.
• PCD-114828 - Fixed an issue where PC-DMIS wouldn't create a Constructed Circle(Sphere) through automation.
• PCD-114830 - Fixed an issue where PC-DMIS wouldn't create a Constructed Circle(Cylinder) through automation.
• PCD-164229 - Fixed an issue where the command inserted through automationwere incorrectly located in a measurement routine.
• PCD-186103 - Fixed an automation issue where Inspect opened an offline meas-urement routine when you closed and immediately opened a measurement routine.This also prevented PC-DMIS from sending the status messages from the point-cloud to automation.
PC-DMIS 2020 R2
39

CAD
• PCD-148194 - Fixed an issue where PC-DMIS would incorrectly read in data fromimported ASCII files.
• PCD-173512 - Updated the look of the Virtual Machine models for Global S and Op-tiv 3-2-2.
• PCD-176947 - Fixed an issue where PC-DMIS doesn't change the name of a fea-ture when you referenced the feature as a variable.
• PCD-179359 - Fixed an issue where PC-DMIS was not able to correct some surfa-ces when you clicked Fix Surface Vectors in the CAD Vectors dialog box.
• PCD-183534 - Fixed an issue where PC-DMIS generated path lines only for the lastfeature when you selected Operation | Graphic Display Window | Collision De-tection.
• PCD-185756 - Fixed an issue where PC-DMIS showed incorrect probe positionswhen displayed in the Settings window (View | Other Windows | Settings Win-dow).
• PCD-186451 - Fixed an issue where PC-DMIS failed to clear the feature list whenyou selected new Geometric Tolerance in the XactMeasure GD&T dialog box.
• PCD-188562 - Fixed an issue where the Edit window was disabled when you impor-ted the CAD model and select File | Operations | Mirror.
• PCD-188622 - Fixed an issue where PC-DMIS imported the CAD model even whenyou clicked Cancel in the merge information message box.
• PCD-190202 - Fixed an issue where path lines were drawn to an incorrect locationin the first feature when you turned on Quick Path.
CMM
• PCD-170663 - Fixed a hardware crash that occurred when an invalid tip was cre-ated for a probe.
• PCD-179600 - Fixed an issue where the Laser working area was moved off the fea-ture's center when you changed the Zoom settings in the Auto Feature dialog box.
• PCD-190141 - Fixed an issue with I++ interface where PC-DMIS doesn't filter pointswith quality tags when you performed scan.
• PCD-194939 - Fixed an issue with the I++ DME client where indexing head supportwas incorrect.
Dual Arm
• PCD-96960 - Fixed an issue where an extra empty line was added in the .Resultsfile of the Arm2 probe when PC-DMIS appends new results to the same file.
Extended Sheetmetal Features
• PCD-177908 - Fixed an issue where PC-DMIS showed incorrect results when youcalculated ESF features with and without actual thickness.
PC-DMIS 2020 R2
40

• PCD-184370 - Fixed an issue where the Edit window showed LASER commands asCONTACT commands when you created the ESF Laser features (VWMP).
• PCD-184380 - Fixed an issue where PC-DMIS showed an incorrect error messagewhen you edited the AA and BK ESF features.
• PCD-185289 - Fixed an issue where PC-DMIS created a badly formatted .xml filewhen you exported ESF laser features.
• PCD-185378 - Fixed an issue where PC-DMIS showed an error message when youtried to extract a CB (VWMP) feature.
• PCD-189504 - Fixed an issue where the list of failed features was not complete inthe output file when you executed a measurement routine with the ONEERROR/LASER,SKIP command.
Home Page
• PCD-165660 - Fixed an issue where a folder wouldn't open when you tried to openit from the Favorites section of the Home page.
• PCD-185449 - Fixed an issue where an incorrect selection of menu items occurredon the Home page when you hovered your mouse over a tile and expanded themenu items.
HTML5 Help
• PCD-159970 - Fixed an issue where the Settings Editor failed to launch the Help filewhen you clicked the Help button or pressed F1.
• PCD-171217 - Fixed an issue where the registry entries were not referenced consis-tently when you viewed the Settings Editor Help file.
• PCD-171500 - Fixed an issue where the Back to Top link was not visible in the foot-er of the Help file.
• PCD-178129 - Improved the Basic help to include information and an example onhow to use the Picture control in the Basic Script Editor.
• PCD-178130 - Added an example for the Put statement in the Basic Help.• PCD-181114 - Fixed an issue where a context mapping link dosen't show the cor-
rect topic when you pressed F1 in the Insert ActiveX Control dialog box.• PCD-184982 - Added a link to the GETTRACEVALUE() function from the "Inserting
TRACEFIELD Commands" topic.• PCD-188326 - Fixed an issue where localized release notes were not accessible
when you clicked Help | Release Notes.• PCD-192020 - Fixed an issue on the public website (https://docs.hexagonmi.com)
where IE 11 couldn't show language contents on the main page, and it couldn't dis-play the privacy policy page.
• PCD-192505 - Fixed an issue in the Settings Editor documentation where the topiclisted an incorrect default version for the Release registry entry under the Catia5section.
• PCD-193321 - Removed the duplicated registry entry topics from the DCI Help andlinked them to the existing topics in the Settings Editor Help.
PC-DMIS 2020 R2
41

Laser
• PCD-98072 - Fixed an issue where the Filter area was cropped when you openedthe Auto Features dialog box for Laser Surface point.
• PCD-169323 - Fixed an issue where the box-selection of Laser Auto Features wasnot done in the current view when you extracted or measured it without CAD.
• PCD-180953 - Fixed an issue where the MOVE/CLEARPLANE command was notinserted when you selected Insert | Scan | Section Cut.
• PCD-184500 - Fixed an issue where PC-DMIS showed an incomplete warning mes-sage when you performed a tip calibration of the HP-L 10.6 sensor.
• PCD-187791 - Fixed an issue where the surfaces were skipped. This caused incom-plete scans when you created a scan with CAD surfaces.
• PCD-190079 - Fixed an issue when you created offline laser scans with an HP-Lprobe, and then ran the program online. The scans were observed at incorrect loca-tions after you execute the scan in inch units.
• PCD-194376 - Fixed an issue where PC-DMIS didn't create a point pair alignmentwhen you clicked on points on the CAD model.
Pointcloud
• PCD-181687 - Fixed an issue where the position of the colormap min or max anno-tation points were updated when you executed a new pointcloud data. Added theColorMapKeepMinMaxLabelPosition registry entry so that the min or max label posi-tion always stays the same.
• PCD-183066 - Fixed an issue where PC-DMIS would hang when a huge size COPfeature was selected in the Construct Feature dialog box.
• PCD-185349 - Fixed an issue where the CALIPER command was not created prop-erly when you saved a measurement routine to previous versions.
• PCD-185747 - Fixed an issue where PC-DMIS took more time to export a point-cloud file than usual when you exported a psl file.
• PCD-187890 - Fixed an issue where the Colormap Gradient Scale was not shown inthe Graphic Display window when you loaded a different scale profile that wasn't thedefault one from the Profiles Manager dialog box.
• PCD-188888 - Fixed an issue where the Thickness Colormap scale values wereincorrect in the Mesh Operator dialog box when you have not marked the Com-pare to CAD check box.
• PCD-194875 - Fixed an issue where PC-DMIS didn't create annotation points to aselected CAD face for a Point Colormap when you marked the Create annotationpoints check box in the Pointcloud Operator dialog box.
Portable
• PCD-31797 - Fixed an issue where tracker commands and modes were out of syncwhen you pressed the button or selected a menu item to switch the modes.
• PCD-163802 - Fixed an issue where scan points were not visible real-time whenread into a COP during a manual scan from the Manual Freeform dialog box.
PC-DMIS 2020 R2
42

• PCD-163426 - Fixed an issue where PC-DMIS wouldn't save the IP address for thetracker in the leicalmf machine interface Setup dialog box when you clicked OKwithout clicking Apply.
• PCD-174981 - Removed the SMXLaser Faro Tracker option from the Select de-fault portable interface list in the PC-DMIS installer.
• PCD-183258 - Fixed an issue where the probe moved to a different location whenyou created a dual- arm measurement routine and looped features on arm 2 only.
Protect
• PCD-186710 - Fixed an issue where Protect Viewer logged the changes of theQuickFeature even when you cancelled the QuickFeature widget.
• PCD-193532 - Fixed an issue where PC-DMIS allowed you to certify the samemeasurement routine multiple times when no features or dimensions were availablein the measurement routine.
Reporting
• PCD-137730 - Fixed an issue with the Form Editor option in the View menu.• PCD-154348 - Fixed an issue where the labels in the custom report didn't follow the
selected Number of decimal places that were defined in the Setup Options dialogbox.
• PCD-178970 - Fixed an issue where the Excel Form Report file was empty whenthe Excel Form Report command was in a sub-routine.
• PCD-183886 - Fixed an issue where PC-DMIS showed no error message for theappend mode in the Excel Form Report when you opened the Excel Form Reportfile and continued execution.
Scanning
• PCD-149994 - Fixed an issue for both Laser and Contact probes where the Insert |Scan menu options were enabled even when the tip was not loaded.
User Interface
• PCD-177024 - Fixed an issue where the Temperature dialog box doesn't show theproper text when you used the Dark Theme.
• PCD-183814 - Fixed an issue where incorrect probe angles were shown in the AddAngles dialog box when you added new tips from CAD.
Vision
• PCD-190250 - Fixed an issue where the Optical value on the Magnification tab inthe Probe Toolbox dialog box was changed when you closed and reopened themeasurement routine.
PC-DMIS 2020 R2
43

• PCD-191441 - Fixed an issue that occurred when you didn't center the calibrationslide rectangle at the beginning of the pixel size calibration, it caused distortion cali-bration failure after PC-DMIS prompts you to retry the calibration.
• PCD-194676 - Fixed an issue where the Vision 2D profile feature showed incorrectdeviation result when you marked the Include CAD check box in the Open dialogbox.
PC-DMIS 2020 R2
44

Information about this Release
We at Hexagon Manufacturing Intelligence are proud to bring you PC-DMIS 2020 R2.PC-DMIS brings together aspects of the software for the development of a completemanufacturing process control solution. With PC-DMIS, dimensional measurement da-ta can flow through your organisation, as it is collected from coordinate measuring ma-chines (CMMs), portable measuring arms, and laser trackers.
The testing of this version has been significant. We’d like to take a moment to discussthis process and also make you aware of the various components of testing.
Testing consists of two parts. These can be described as functional testing and inte-gration testing.
• The vast majority of testing effort goes on in the functional area. This is the testingthat determines that specific functions that are core to the software, regardless ofwhat type of machine is used, are working correctly.
• The integration testing is essentially a testing of the interface with a particular typeof machine.
In the ideal scenario, Hexagon Manufacturing Intelligence would have access to atleast one of every piece of hardware running the software that is operating in the field.However, in practical terms, this is impossible. This integration test plan is then per-formed on as many types of machines as we have available.
Should you experience problems with your system after you install PC-DMIS 2020 R2,it could possibly be an integration problem. If it is a problem of this nature, it will proba-bly be evident immediately upon first use of the possibly untested configuration. To re-port any integration problems, see "Contact Hexagon Manufacturing Intelligence[73]". Should such a problem materialize on a commercial release, you will be giventhe highest priority for correcting these problems.
For existing users of the software who currently have earlier versions of the softwareinstalled, it is advised that you install PC-DMIS 2020 R2 into a new directory. This letsyou continue to use your current version if you have problems with the new version.
PC-DMIS 2020 R2
45

Recommended System Requirements
Operating SystemPC-DMIS 2020 R2 operates under 64-bit Windows 10, Windows 8.1, Windows 8, andWindows 7. No other operating systems are supported.
You can find a list of supported operating systems for most versions of PC-DMIS here:
https://support.hexagonmi.com/s/article/Windows-OS-Compatibility-Listing-for-PC-DMIS
IMPORTANTWhen you use third-party drivers, you should contact your local Hexa-gon Manufacturing Intelligence representative to ensure operating sys-tem compatibility.Running PC-DMIS inside a Virtual Machine (VM) issupported only if the VM supports OpenGL 3 or higher.
NOTEThe Matrox Framegrabber PC-DMIS Vision hardware component doesnot support a 64-bit operating system.
Microsoft .NET FrameworkMicrosoft .NET Framework 4.6.1 for Windows. If you do not have Microsoft .NETFramework 4.6.1, the PC-DMIS installer will install it for you.
RAM• 4 GB of RAM or higher
The size of the CAD data file and the tessellation multiplier value used affect theamount of memory needed. These both affect the amount of tessellated facets nee-ded to display the model. The smaller the tessellation multiplier value used, themore memory needed for the facets. For large CAD models, this could cause an"Out Of Memory" error. If this occurs, the current PC-DMIS session will be left in anunstable state and should be terminated.The default tessellation multiplier value is 1.0. Setting a tessellation multiplier of 0.1will result in a 10 to 20 percent increase in the memory required over the default val-
PC-DMIS 2020 R2
46

ue of 1.0. Decreasing the tessellation multiplier further to 0.01 will result in an addi-tional 50 to 65 percent increase of memory required.
• 1 GB of video RAM
CPU2 GHZ or higher quad core processor
GraphicsAny popular graphics card that meets or exceeds the following suggested minimums:
• GPU Memory 2 GB DDR3*• Memory Bandwidth 29.0 GB/s• CUDA Cores 384• Open GL 3.0
* For an RS4 laser sensor or later model, you need to have a GPU with at least 4 GBDDR3.
The graphics driver must support OpenGL 3.0 or higher. A warning message appearson PC-DMIS startup if the driver does not support OpenGL 3.0 or if your graphics driv-er is more than three years old.
Hard Drive• 2 GB of free hard drive space plus allocated virtual memory of eight times the larg-
est CAD file used• SSD drive, HDD 10K, or two disks in RAID 0 mode (high-performance hard disk
drive)
DisplayScreen resolution of 1280 x 1024 or higher
If you use a high resolution monitor under low-light conditions, some PC-DMSI UI ele-ments may be difficult to see. If so, you can try these options:
• From the PC-DMIS Home screen, select the theme (Light or Dark) that providesthe best UI visibility. For details on how to change the PC-DMIS theme, see "Chang-ing the Theme" in the online Help.
• Switch your monitor to a lower resolution (for example, you might try 1920 X 1080 ).• Increase the ambient lighting.
PC-DMIS 2020 R2
47

Connectivity• Two Ethernet ports. This may be required for specific installations in consideration
of local needs, including but not limited to CMM systems where one port is requiredfor controller communications and another for intranet/Internet communications.
• Two USB ports• A properly-configured LMS license or a HASP key (a physical USB portlock)
NOTEA HASP key does not act as general-purpose data storage; therefore,you cannot use a HASP key to store (download) arbitrary data from acomputer. Similarly, you cannot use a HASP key to put (upload) arbitrarydata on a computer. Also, only Hexagon Manufacturing Intelligence ap-plications can read or write to a HASP key; other applications do nothave this capability. As a result, you cannot use a HASP key to load andunload data to and from a computer.
Firmware Distributed Controller (FDC) ConnectionPC-DMIS establish connection with FDC through the following parameters:
• Controller address - 100.0.0.1• PC-DMIS computer address - 100.0.0.2• Subnet mask - 255.255.255.0• Port - 1234
Pcdlrn.exe and PC-DMIS process listens on port 1294.
Some other ports used are 138 and 1900. The port 1900 was listed as a UDP port.
LMS LicensingThe License verification server and ClmAdmin utility for node locked licenses:
https://licensing.wilcoxassoc.com/flexnet/services
The Floating License servers with Flexnet LmAdmin64.exe uses port 27000-27009 onthe server. The LocalHost server on port 8090 and older versions defaults to port8080. You can define these ports when you install license server or through the serverinterface. These are only Offline licenses when you are not connected to a machine.
Hexagon Universal UpdaterWebSocket URL - ws://webupdater.hexagonmi.com
PC-DMIS 2020 R2
48

Server - http://webupdater.hexagonmi.com/v2/db.live
Username - Null
Password - Null
Port - 80
File - updates_v4.20190702090658181.db
If you select to install Offline Help when you update the software, it opens the secondremote address on port 443. This port verifies the license.
CrashSender1403.exeThis executable is of PC-DMIS Crash Report Utility tool. You can turn off this optionbecause of Windows Event management.
C:\Program Files\Hexagon\PC-DMIS 2020 R2 64-bit\Launcher\HexagonLauncher.exe
LauncherPC-DMIS.config/nocrashdump
A few Hexagon products need to establish remote connections such as Pulse, Notifi-cation Center/Message Lights and Smart Factory.
Anti-Virus SoftwareHexagon Manufacturing Intelligence used the Sophos anti-virus tool to test PC-DMIS2020 R2. You will need to confirm the performance of any other anti-virus tool.
http://sophos.com/products/enterprise/endpoint/security-and-control/
Solutions for CMMs Using RS-232 CommunicationsIf you are installing PC-DMIS 2020 R2 on a new or existing computer, but you have anolder CMM model that uses RS-232 communications, then you will need to install oneof these solutions on your computer:
• An external RS-232 serial-to-USB adapter cable plus the serial-to-USB adapter ca-ble driver
• An internal serial adapter card with serial ports
PC-DMIS 2020 R2
49

Installing the Software
To install the software, follow these steps:
Step 1: Check System and Hardware RequirementsBefore you attempt to install a new version, ensure that you meet the system andhardware requirements discussed in "Recommended System Requirements [46]". Youmust also have a USB portlock or valid LMS license for the installation to work. Your ITspecialist can help you with this information.
• To get your computer's properties, highlight the This PC icon, right-click on it, andselect Properties.
• To check the display properties for the graphics card, go to Start and type ControlPanel, and then select Display and Settings.
Step 2: Log on as an AdministratorTo install and run your new version for the first time, you must be logged on as a userwith administrator privileges.
Step 3: Back Up Existing SettingsBack up your settings from your previous version. By default, PC-DMIS 2020 R2 at-tempts to migrate existing settings from previous installs on the same computer, evenfrom very old versions of the software where settings were stored in the pcdlrn.ini file.
• If your current version uses the pcdlrn.ini file for its settings, back up your pcdlrn.inifile. This file is in the Windows system directory. Save a copy of the file in a safeplace.
• If your current version uses the PC-DMIS Settings Editor, back up your PC-DMISSettings Editor data. To do this, follow these steps:1. Start the Settings Editor.2. Click the Backup button (or Export) to open the Backup dialog box.
PC-DMIS 2020 R2
50

Backup dialog box3. In the File box, define a safe location to save the backed-up files, and give the
file a .zip extension.4. Under the Options area, select the first three check boxes, and click OK.
If you replace your computer or transfer settings that reside on another computer, youcan use the Settings Editor's Backup and Restore buttons:
Backup and Restore buttons
For more information on the backup and restore functionality, refer to the Settings Edi-tor documentation.
PC-DMIS 2020 R2
51
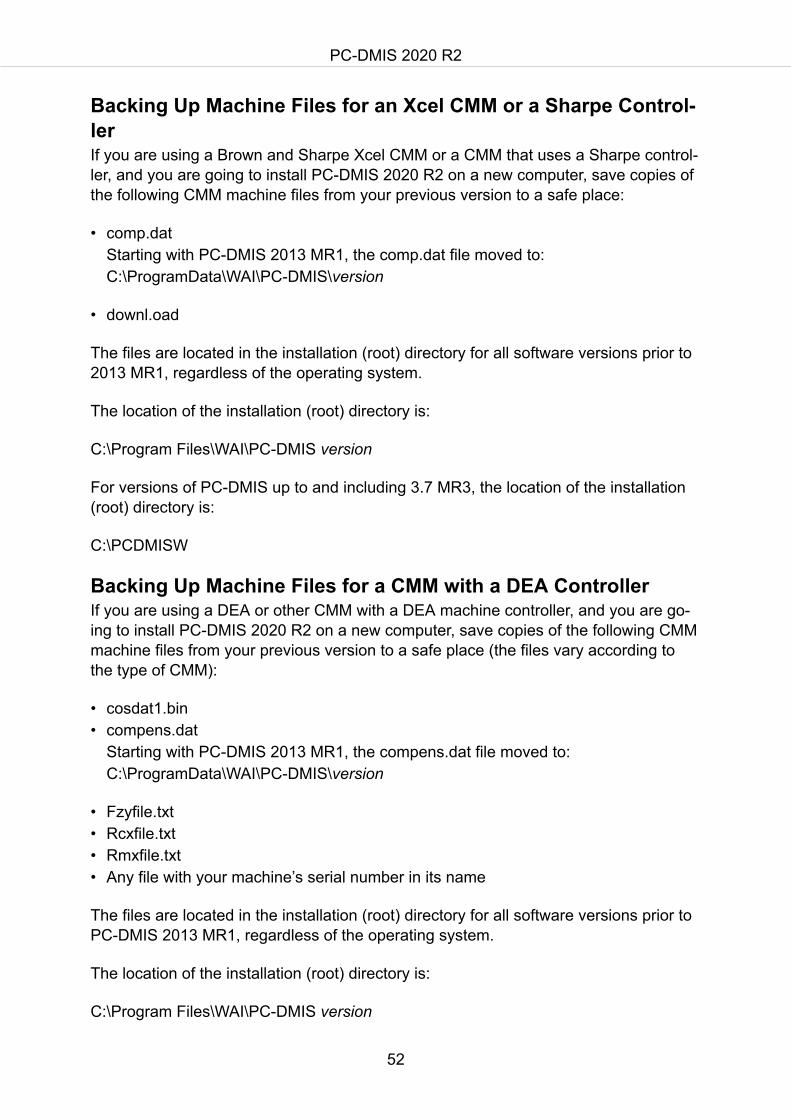
Backing Up Machine Files for an Xcel CMM or a Sharpe Control-lerIf you are using a Brown and Sharpe Xcel CMM or a CMM that uses a Sharpe control-ler, and you are going to install PC-DMIS 2020 R2 on a new computer, save copies ofthe following CMM machine files from your previous version to a safe place:
• comp.datStarting with PC-DMIS 2013 MR1, the comp.dat file moved to:C:\ProgramData\WAI\PC-DMIS\version
• downl.oad
The files are located in the installation (root) directory for all software versions prior to2013 MR1, regardless of the operating system.
The location of the installation (root) directory is:
C:\Program Files\WAI\PC-DMIS version
For versions of PC-DMIS up to and including 3.7 MR3, the location of the installation(root) directory is:
C:\PCDMISW
Backing Up Machine Files for a CMM with a DEA ControllerIf you are using a DEA or other CMM with a DEA machine controller, and you are go-ing to install PC-DMIS 2020 R2 on a new computer, save copies of the following CMMmachine files from your previous version to a safe place (the files vary according tothe type of CMM):
• cosdat1.bin• compens.dat
Starting with PC-DMIS 2013 MR1, the compens.dat file moved to:C:\ProgramData\WAI\PC-DMIS\version
• Fzyfile.txt• Rcxfile.txt• Rmxfile.txt• Any file with your machine’s serial number in its name
The files are located in the installation (root) directory for all software versions prior toPC-DMIS 2013 MR1, regardless of the operating system.
The location of the installation (root) directory is:
C:\Program Files\WAI\PC-DMIS version
PC-DMIS 2020 R2
52

For software versions up to and including 3.7 MR3, the location of the installation(root) directory is:
C:\PCDMISW
Step 4: Install the SoftwareThe following steps run you through a typical installation. Your installation screensmay differ if you are running a different version of PC-DMIS 2020 R2 or if you are in-stalling a custom build with additional options. In addition, your license may be config-ured with different options.
1. Locate the installation file on your installation media; or, if you downloaded it, openthe directory that contains the downloaded file. The name of the installation file is:Pcdmis2020_R2_release_##.#.###.#_x64.exeThe # symbols represent the version and build numbers.
2. Right-click on this executable file and click Run as administrator to open the in-stallation program.
3. If a security warning appears, click Run.4. From the initial license screen, read the license agreement, and select the I agree
with the License terms and conditions check box.5. In the box at the bottom, you can define the installation folder. By default, the file
installs to:C:\Program Files\Hexagon\PC-DMIS 2020 R2 64-bitTo change the folder, either click the browse button ( ) and choose a folder, or inthe box, type a new path.
6. Once you accept the license agreement and choose the installation folder, clickNext to open the licensing screen.
7. From the licensing screen, choose your license type:• LMS (Software) License - If you have a software license (called an Entitlement
ID), select this option. Complete the boxes beneath this option.• LMS License Server - If you have a license server to connect to, select this op-
tion and then type the server address.• HASP - If you have a portlock (a physical USB device with the licensed options),
ensure that it is connected to your computer, and then select this option.For help on how to set up an LMS license, see "LMS License Setup [54]".
8. Click Next.9. Choose to install additional software components. If you chose a custom installa-
tion path, the additional software still installs to your default measurement routinedirectory (usually C:\Program Files\Hexagon\).• PDF Converter 5.0 - This third-party tool converts PC-DMIS 2020 R2 reports to
PDF outputs.If you are a Portable user and you have the appropriate license, you can selecta Portable interface as your default. For details, see "Switchable Portable Inter-face" in the PC-DMIS Portable documentation.
PC-DMIS 2020 R2
53

• Offline English Help - This option installs the English HTML5 Help into an in-stallation folder that you define in step 14. When you access the Help, PC-DMIStries to use the Internet-based Help, but if it cannot detect an Internet connec-tion, it then attempts to access this offline fallback Help. If you mark the UseOffline Help option from the Help menu, then it also accesses this offline fall-back Help even if you are connected to the Internet. This option appears if youhave not installed the offline Help yet. Once you install the offline Help, and youlater install an update to PC-DMIS, any updates to the Help occur automaticallywithout presenting a prompt.If you need a non-English offline Help, see "Installing Non-English Offline HelpFiles from Language Packs [70]".
• Join the Hexagon Customer Experience Improvement Program - To helpimprove the product and send usage data to Hexagon Manufacturing Intelli-gence, select this check box. To opt out of sending usage data, clear the checkbox. For more information about this program, visit the Hexagon Customer Ex-perience Improvement Program website.
10. Click Install to start the installation. A progress bar shows the overall progress.11. When the installation finishes, a screen shows any warnings or errors. It also con-
tains these options:• Launch PC-DMIS 2020 R2 64-bit - To launch PC-DMIS 2020 R2 now, select
this check box. If this is your first time installing this version on this computer,you should do this to initialize registry entries. For more information, see "Ad-ministrator Privileges Explained [57]".
• Show Release Notes - To display a Readme.pdf file that shows what is new orhas changed in this release once you click Close, select this check box.
12. Click Close to close the installation program.13. If you have marked the Offline English Help check box in step 9, the Help instal-
ler program opens to install the offline Help.14. In the box at the bottom, you can define the installation folder. By default, the file
installs to:C:\Program Files\Hexagon\PC-DMIS 2020 R2 64-bit English HelpTo change the folder, either click the browse button ( ) and choose a folder, or inthe box, type a new path.
15. Click Install to start the installation. A progress bar shows the overall progress.16. When the installation finishes, a screen shows any warnings or errors. Click Close
to close the installation program.
LMS License SetupThis topic provides information if you need to:
• Set up your LMS (software) license• Connect to an LMS license server• Update your LMS license• Provide licensing information to the installer from the command line
PC-DMIS 2020 R2
54

LMS (Software) LicenseIf you chose LMS (Software) License on the licensing screen [53], and the installa-tion cannot find a valid license on your system, you need to complete these options:
LMS (Software) License option
1. Complete the options:• Entitlement ID - If you have an Entitlement ID, type or paste the ID you were
issued in the box. If you have supplied this value in a previous installation, theinstaller pulls in that value from the registry.
• URL to FNO Services - This points to the URL that verifies your license. En-sure that it has this URL:https://licensing.wilcoxassoc.com/flexnet/services
• Proxy information - If your computer is on a network where you need a proxyserver to reach the Internet, contact your IT specialist to get this information. En-ter the server host, user name, and password.
2. If you do not have an Entitlement ID and you need to activate your license offline,use the CLM Admin application. From the CLM Admin application, choose Acti-vate new licenses, and follow the on-screen instructions.
NOTEFor information on how to use the CLM Admin application, consultthe Hexagon Client License Manager (CLM) Software documenta-tion. You can find this in the subfolder for your language (such asthe en directory for English).
3. Click Next. The installation software connects to the Internet and activates your li-cense. It then installs the FLEXnet Licensing Service required to use LMS licen-ses.
LMS License Server
PC-DMIS 2020 R2
55

LMS License Server option
If you use a license server, select this item, and then type your license server name inthe License Server(s) box. The format of this line of text is port number@servername, where port number is the TCP port number for the license server, and servername is the name of the server.
The default TCP port number is 27000. If you don't identify a specific port, the licenseserver uses the default. For example, these mean the same thing:
@server1
27000@server1
IMPORTANTIf you use this option, place the "@" symbol in front of the server ad-dress. If the "@" symbol is left off, the installation process attempts tolook locally for the license. This may result in an error.
You can also specify multiple license servers. You can separate them with semicolons.For example, suppose that you have three license servers called licenseserver1, licen-seserver2, and licenseserver3, and all of them use the default TCP port. You canspecify all of them in a single line of text, like this:
@licenseserver1;@licenseserver2;@licenseserver3
Test link [55]
Updating Your LMS LicenseOnce you finish with the license setup and install PC-DMIS 2020 R2, it checks for li-cense updates when it starts and after every eight hours of running. If a license updateis available, this notification appears:
PC-DMIS
Updates are available for your PC-DMIS license. Applying them now will require PC-DMIS to restart. Would you like to apply the updates now?
To apply the update, click Yes. If you click No, PC-DMIS 2020 R2 displays the mes-sage every eight hours of running or the next time it runs.
• If an option or a feature is added, you are given the choice to apply the changes. Apop-up message displays in the system tray if you apply the changes.
PC-DMIS 2020 R2
56

• If an option or feature is removed, a message that requests you to restart PC-DMIS2020 R2 appears. A pop-up message also appears in the system tray to inform youof this.
• If an option or feature is obsolete, it is automatically removed.
NOTEAfter you apply an update, restart PC-DMIS to ensure that it functionsproperly.
Providing LMS Licensing Information to the Installer from theCommand LineYou can send LMS licensing information to the installer through command line param-eters. For more information, see "Providing LMS Licensing Information to the Installerfrom the Command Line [74]" in Appendix A.
Administrator Privileges ExplainedSoftware versions earlier than version 2012 require that you run the software as anadministrator because some system settings (such as the last probe used, wrist an-gles, and other items) were shared among all users on that computer. This requiredthat these settings were placed in the LOCAL_MACHINE section of the Windows reg-istry instead of in the CURRENT_USER section (for user-specific settings). Makingchanges to settings in the LOCAL_MACHINE section requires administrator privileges.
In PC-DMIS version 2012 and later, the settings mechanism used by PC-DMISchanged to only require administrator access the very first time it runs at the end ofthe installation. From that point forward, standard user access is sufficient.
The PC-DMIS installer has a flag that is built into the setup executable file(Pcdmis2020_R2_release_##.#.###.#_x64.exe) that requires the setup process to runwith administrator privileges. If the current user has lesser privileges, the setup pro-gram displays a prompt to provide a user name and password of an account with ad-ministrator privileges.
Once the installation finishes, the first time you run PC-DMIS 2020 R2, you mustlaunch it with administrator privileges. If you mark the Launch PC-DMIS 2020 R2 64-bit check box when the installation finishes, PC-DMIS 2020 R2 does this automaticallyby passing the original privilege level of the installer onto PC-DMIS.
Note, however, that if you do not mark this check box, you will need to explicitly right-click on the shortcut and select Run as administrator as described in step 6.
For more information on the file system and registry rights that PC-DMIS 2020 R2 re-quires, see "Required User Access Rights [76]" in Appendix B.
PC-DMIS 2020 R2
57

Step 5: Copy Files after InstallationIf these files are available, copy them from your old PC-DMIS installation directory tothe directory where you installed the newer version:
• Sysparam.dat• Downl.oad• Fzyfile.txt• Rcxfile.txt• Rmxfile.txt
Starting with PC-DMIS 2010 MR2, PC-DMIS automatically copies common systemfiles to the program data files directory when you install a newer version of PC-DMIS.
The comp.dat, compgrid.at, comp.enc, and compens.dat volcomp files used with vol-comp methods 13 (ASI) and 14 (BNS) must be in the program data files directory.When you install a newer version of PC-DMIS, these files automatically copy to theprogram data files directory for the new version. For the default path location of thisdirectory, see "Understanding File Locations" in the PC-DMIS Core documentation.
For additional information on volumetric compensation files and setup, see the Ma-chine Interface Installation Manual (MIIM).
Copying Machine Files for an Xcel CMM or a Sharpe ControllerIf you are using a Brown and Sharpe Xcel CMM or a CMM that uses a Sharpe control-ler, and you installed PC-DMIS 2020 R2 on a new computer, copy the backed-upCMM machine files to the following location on the new computer:
C:\Program Files\Hexagon\PC-DMIS version
For more information about these files, see "Backing Up Machine Files for an XcelCMM or a Sharpe Controller [52]".
Copying Machine Files for a DEA CMM with a DEA ControllerIf you are using a DEA CMM with a DEA machine controller, and you installed PC-DMIS 2020 R2 on a new computer, copy the backed-up CMM machine files to the fol-lowing location on the new computer:
C:\Program Files\Hexagon\PC-DMIS version
For more information about these files, see "Backing Up Machine Files for a DEACMM with a DEA Controller [52]".
Step 6: Launch the Software for the First Time1. When you run PC-DMIS 2020 R2 for the first time, go to Start and type PC-DMIS
2020 R2 64-bit.
PC-DMIS 2020 R2
58

2. From the list of shortcuts in the Start menu, right-click on either the Online or Off-line icon, and then select the Run as administrator option (required only if theLaunch PC-DMIS check box wasn’t checked at the end of the installation).
Run as administrator optionThe Run as administrator option allows the program to write the needed ma-chine-specific settings.
3. You can import settings from a previous version.If your previous version used the pcdlrn.ini file, PC-DMIS 2020 R2 asks if the set-tings in your PCDLRN.INI file should be used as your registry settings. Click Yesat the prompt. Otherwise, PC-DMIS 2020 R2 loads in the factory defaults.If your previous version used the Settings Editor, follow these steps to use yourprevious software settings:a. Close PC-DMIS 2020 R2.b. Launch the PC-DMIS Settings Editor from the Start menu.c. Once it opens, click Import, and open the PCDRegFile.dat file you backed up
in the "Step 3: Back Up Existing Settings" section of this document. PC-DMIS2020 R2 imports your settings.
d. Close the PC-DMIS Settings Editor.
Subsequent StartupsFor subsequent startups, click the usual Offline or Online shortcut to launch PC-DMIS 2020 R2 normally :
PC-DMIS 2020 R2 shortcuts
Once PC-DMIS 2020 R2 starts, the Software License screen displays the current li-cense agreement. Read the agreement carefully and then at the bottom, click I agreewith the License terms and conditions to proceed:
PC-DMIS 2020 R2
59

Software License screen
Once PC-DMIS 2020 R2 runs, an icon displays in your system tray. If your portlock orLMS license is programmed correctly, the icon displays a green check mark as shownbelow:
Message for valid PC-DMIS license
PC-DMIS 2020 R2
60

If your portlock is not connected or is not programmed correctly, or if you are using anLMS license and your software has not been properly licensed, the icon appears witha red exclamation point overlay. A pop-up message says that the license is disconnec-ted:
Message for disconnected PC-DMIS license
If the license is disconnected, PC-DMIS 2020 R2 functions normally, but after 5 mi-nutes, it automatically closes. Be sure to save your data immediately before this oc-curs.
Note About CMMs Using RS-232 CommunicationsBy default, PC-DMIS 2020 R2 communicates through the COM1 communicationsport. You need to change this port number to the number that Windows automaticallycreated if a serial-to-USB adapter cable or serial adapter card was installed for com-municating with an older RS-232 CMM.
To change the COM port number, follow these steps:
1. In Windows Device Manager, note the number that Windows assigned to the com-munications port on your computer. For help, refer to Windows Help.
2. Open PC-DMIS in Online mode, and then open or create a measurement routine.3. Select Edit | Preferences | Machine Interface Setup.4. In the Comm port box, enter the port number from Windows Device Manager.
Command Line InstallationYou can install PC-DMIS from the command line instead of double-clicking on the PC-DMIS installation executable. In addition, you can turn various command line argu-ments on or off to speed up the installation process.
This topic lists the supported command line arguments.
NOTECommand line arguments are case sensitive.
PC-DMIS 2020 R2
61

User Interface Parameters-q, -quiet, -s, -silent - Installs without any user interaction
-passive - Does a progress-bar-only install
Installation Commands-uninstall - Removes the application from the computer
-repair - Repairs (or installs if not installed) the application
-package, -update - Install (default)
-layout - Creates a local/admin image
HEIP - This parameter sets the Opt-in option for the Hexagon Customer ExperienceImprovement Program. This provides analytics for PC-DMIS to help us improve theapplication. By default, this option is on ( HEIP=1 ). Set this parameter to 0 (zero) toturn this option off.
USELMSLICENSING - When this parameter is turned on ( USELMSLICENSING=1 ),PC-DMIS checks for an LMS license. Set this parameter to 0 (zero) to turn this optionoff.
INSTALLPDFCONVERTER - When this parameter is turned on ( INSTALLPDF-CONVERTER=1 ), the PC-DMIS installation installs the PDF Converter. By default,this option is turned on. Set this parameter to 0 (zero) to turn this option off.
INSTALLOFFLINEHELP - When this parameter is turned on ( INSTALLOFFLINE-HELP=1 ), the PC-DMIS installation installs the offline English help system. By default,this option is turned on. Set this parameter to 0 (zero) to turn this option off.
Restart Handling-norestart - Suppresses any restarts
-promptrestart - Prompts if a restart is required (default)
Logging-l, -log - Creates an installation log to a specific file (default TempFolder)
-logtoconsole - Logs installation information to the console, if started from the con-sole
Help-? - Shows the Supported command line arguments information screen
PC-DMIS 2020 R2
62

Additional ParametersINSTALLDIR - Specifies the installation folder for the PC-DMIS application. The de-fault location is "C:\Program Files\Hexagon\PC-DMIS <version>", where <version> isthe PC-DMIS install version.
SQLCONNECTIONSTRING - Defines the connection string if required by the applica-tion
LICENSESTRING - Defines the license string if required by the application
LMSENTITLEMENTID=<EID> - This parameter specifies the LMS Entitlement ID(EID) for your LMS license. Replace "<EID>" with your actual Entitlement ID. For ex-ample: LMSENTITLEMENTID=99999-12345-67890-12345-67890
LMSURLTOFNOSERVICES=<FNO server address> - This parameter defines theURL address to the LMS FNO server. Replace "<FNO server address>" with the ac-tual URL to the LMS server. For example: LMSURLTOFNOSERVICES=https://licensing.wilcoxassoc.com/flexnet/services
LMSPROXYHOST=<\{proxyhostname}> - This parameter defines the name of theproxy host server. Replace <\{ProxyHostName}> with the name of the proxy host serv-er. For example: LMSPROXYHOST={\fnoserver}
LMSPROXYUSERNAME=<\{proxyhostusername}> - This parameter defines theuser name of the proxy server. Replace <\{proxyhostusername}> with the user nameof the proxy server. For example: LMSPROXYUSERNAME={\jrjones}
LMSPROXYPASSWORD=<\{proxyhostpassword}> - This parameter defines thepassword for the proxy server. Replace <\{proxyhostpassword}> with the password forthe proxy server. For example: LMSPROXYPASSWORD={\AS4BGxpZyu}
LMSLICENSESERVERS (@\{ipaddress}) – This parameter defines a comma-sepa-rated list of the LMS license servers.
LICENSETYPE - This parameter specifies the license type. The options are HASP,LMSEntitlement, or LMSServer. For example: LICENSETYPE=LMSEntitlement .
The correct usage for the additional parameters is:
PARAMETER=value
Unattended Installation ExampleTo perform a fully-unattended installation into a directory named C:\PCDMISW\, usethe following command line argument:
Pcdmis<installer information>.exe -q INSTALLDIR="C:\PCDMISW"
PC-DMIS 2020 R2
63

Where <installer information> is the PC-DMIS version and build numbers of the .exefile that you are installing.
PC-DMIS 2020 R2
64

Network Connections
This section describes network access details for some Hexagon products.
Firmware Distributed Controller (FDC) ConnectionPC-DMIS uses these parameters to establish its connection with FDC:
• Controller address - 100.0.0.1• PC-DMIS computer address - 100.0.0.2• Subnet mask - 255.255.255.0• Port - 1234
LMS LicensingYou can find the license verification server and the ClmAdmin utility for node-lockedlicenses here:
https://licensing.wilcoxassoc.com/flexnet/services
The Floating License server with Flexnet LmAdmin64 uses ports 27000-27009 on theserver. lmgrd and lmadmin listen on TCP port 27000 by default. Communication mustbe allowed from the client computer to the network license server on this port (or an-other port if the network license administrator has changed the default). Communica-tion is transitioned from lmgrd / lmadmin to the vendor daemon after the initial connec-tion is made. By default, this is done on a random TCP port. Unless your firewall hasbuilt-in support to recognize the randomly chosen port, you need to manually specify aport for the vendor daemon.
The LocalHost server on port 8090 and older versions defaults to port 8080. You candefine these ports when you install license server or through the server interface.These are only Offline licenses when you are not connected to a machine.
Offline HelpIf you select to install Offline Help when you update the software, it opens the secondremote address on port 443. This port verifies the license.
Hexagon Universal UpdaterServer - http://webupdater.hexagonmi.com
Port - 80 and 8089 (SignalR)
CrashSender1403.exeThis executable is for the PC-DMIS Crash Report Utility tool. If you run this executablewith the /nocrashdump switch, the Event Viewer screen takes over the crash reportfunctionality.
PC-DMIS 2020 R2
65

C:\Program Files\Hexagon\PC-DMIS 2019 R1 64-bit\Launcher\HexagonLauncher.exe
LauncherPC-DMIS.config /nocrashdump
Other ProductsA few Hexagon products need to establish remote connections which enables them tosend emails and text alerts. These products include Pulse, Notification Center/Message Lights, and SMART Factory.
PC-DMIS 2020 R2
66

Updating the Software
The Hexagon Universal Updater application automatically checks for software updatesif your computer is connected to the Internet. This application is installed with PC-DMIS and Inspect. If the updater detects that an update is available, the updater usesthe Windows notification area to the right of your clock on your taskbar to inform youof the update. You can then click on a notification to open the updater to downloadand install that update.
If the updater is running, a small icon for the updater appears in your taskbar's Notifi-cations area ( ). You can click this icon to open the updater.
If the updater is not running, you can manually run the updater to check for updates.You can also use the updater to launch software or install new software applications.To run the updater, from the Start menu, type Universal Updater, and select theshortcut for the updater.
If you need additional help with the updater, you can access the help content availablefrom within the updater itself.
IMPORTANTDuring the download and installation processes, your firewall must allowthe http://www.wilcoxassoc.com/WebUpdater Internet address. In addi-tion, you must have Administrator privileges to install the software up-date.
For information on the installation process, follow the installation steps described inthe topics above. Once the installation process finishes, you can use the latest ver-sion.
For information on evaluation versions and changing HASP to LMS, see "Updating theSoftware" in the PC-DMIS Core documentation.
PC-DMIS 2020 R2
67

Repairing or Removing an Installation
You can also repair or remove an installation once you install it. To do this, double-click the Pcdmis2020_R2_release_##.#.###.#_x64.exe file as if you were beginningthe installation process. The setup displays a screen with these options:
"Repair or uninstall application" dialog box
• Repair - This option reinstalls all of the product files as they were originally installed.This option may help resolve issues where an installation didn't properly install all ofthe files.
• Uninstall - This option removes the application from where you installed it. You canalso use the Apps and features screen or the Programs and Features controlpanel item in Control Panel to uninstall the application.
PC-DMIS 2020 R2
68

Running the Software in Another Language
The initial installation setup file for PC-DMIS 2020 R2 contains the user-interface filesfor all of the supported languages. When you install PC-DMIS 2020 R2, it installs thelanguage files based on your operating system's language.
To run PC-DMIS 2020 R2 in a language other than the operating system's language,select File | Language, and then click the desired language. PC-DMIS shows a mes-sage that says the application will be shut down and restarted. Click Yes to continue.PC-DMIS 2020 R2 immediately closes and then reopens in the selected language.
To get the help content available in a non-English language, see "Installing Non-Eng-lish Offline Help Files from Language Packs [70]".
PC-DMIS 2020 R2
69

Installing Non-English Offline Help Files fromLanguage Packs
This topic only applies to users who don't have Internet access.
• With Internet access, the online Help for PC-DMIS 2020 R2 is already availablefrom a public web server in all supported languages. The Help opens in your brows-er whenever you access it.
• Without Internet access, PC-DMIS 2020 R2 uses the Help where you installed theoffline Help for your version.
With the main installation file, you can install the offline Help in English. However, non-English offline Help files are not included in the main installation file. This means if youintent to use a non-English language, and you don't have Internet access, in order tosee any Help content, you must also install a language pack for that language.
A language pack contains all of the offline Help content for that language.
To install a language pack, follow these steps:
1. Locate the desired language pack (and .exe file) on your installation media ordownload it from the Internet here:ftp://ftp.wilcoxassoc.com/PC-DMIS-Versions/Release/2020_R2/Release/x64/Lang/
2. Run the .exe file and follow the setup instructions. You do not need to have admin-istrator access to do this step.
This procedure installs the Help content into the folder where you installed the offlineHelp for your version.
You can then switch to that language in the software and access the Help content asexpected.
PC-DMIS 2020 R2
70

Troubleshooting
This topic provides information for you to troubleshoot installation, startup, and soft-ware update problems.
Startup is SlowProblem: You use a computer with at least the recommended system requirements asdetailed in the "Recommended System Requirements [46]" topic, and it takes longerthan 30 seconds to launch the software.
Description: This happens if you try to run PC-DMIS 2020 R2 on a Windows 7 com-puter, but you didn't mark Run as administrator on the installation wizard. This re-sults in a problem loading the HASP driver. Note that this problem only occurs whenyou install with a HASP license type, as discussed in "Step 4: Install the Software[53]".
Solution: Uninstall PC-DMIS 2020 R2 and then reinstall it. To reinstall it, right-click onthe installation file and choose Run as administrator.
Setting Up the Network to Send Crash ReportsProblem: PC-DMIS 2020 R2 cannot automatically send crash reports to HexagonManufacturing Intelligence even when your software configuration does not use the /nocrashdump switch. (This switch disables crash reports in PC-DMIS 2020 R2.)
Description: A firewall on your computer may be blocking the Hexagon Universal Up-dater application from connecting to the server. If PC-DMIS 2020 R2 crashes, it uses aPHP script over HTTP to send the crash report. If this fails, it then tries to send thereport to [email protected]. It tries using the standard SMTP email proto-col. If that fails, it tries to send the email through MAPI.
Solution: The crash report system needs to be able to use port 80 to get out to theserver, http://www.wilcoxassoc.com/.
Installing on top of an Existing Version Results in Un-expected BehaviorProblem: You installed on top of an existing version of the software, and now the soft-ware does not behave normally. Potential symptoms include:
• After you start up the software, you get a "Procedure Entry Point" error.• When you select Help | About, it does not show the new build number.• Reported bug fixes do not seem to be fixed, and PCDLRN.EXE does not have a
newer date and time than the original release.
Description: Something did not install properly on top of the existing version.
PC-DMIS 2020 R2
71

Solution: Use Apps & Features or Control Panel to completely uninstall the existingversion and then reinstall the version you're trying to install.
Running the Legacy DPUPDATE.EXE Does Not WorkProblem: The legacy DPUPDATE.EXE does not run.
Description: If you run PC-DMIS 2020 R2 without administrator privileges, DPUP-DATE.EXE does not work.
Solution: Run PC-DMIS 2020 R2 with administrator privileges.
PC-DMIS 2020 R2
72

Contact Hexagon Manufacturing Intelligence
If you are participating in the technical preview of PC-DMIS 2020 R2, please post yourfeedback in the appropriate technical preview forum located at www.pcdmisfo-rum.com/forum.php. Please do not contact Hexagon Technical Support for technicalpreviews.
If you are using the commercially-released version of PC-DMIS 2020 R2 and wouldlike further information or technical support, please contact hexagonmi.com/contact-usor visit hexagonmi.com/products/software. You can also reach Hexagon TechnicalSupport at support.hexagonmi.com or by calling (1) (800) 343-7933.
PC-DMIS 2020 R2
73

Appendix A
Providing LMS Licensing Information to the Installerfrom the Command LineYou can send LMS licensing information to the installer by using the command line:
• If the installer is running in silent mode (-q) or basic silent mode (-passive), and thecorrect information is provided, everything runs without user interaction. The com-mand switch -q displays the progress bar and handles installer errors. The -passiveswitch hides the user interface.
• If the installer is not running in silent mode, the information provided is used to pop-ulate the LMS activation form and skip the license screen.
• You can provide the -? to review additional command line arguments.
Descriptions of the parameters follow, along with examples.
DescriptionsUSELMSLICENSING=1 - This flag is useful only if the system already has an LMS li-cense that the user is using. It allows silent mode to work without having to prompt theuser for a license choice. If the installer is not running in silent mode, it still allows theinstall process to skip the license type selection dialog (thus saving some time).
LMSENTITLEMENTID=entitlement id - This parameter and value are useful on anew system where no LMS license was previously installed. It indicates that you wantLMS licensing and provides an Entitlement ID to try and activate. When this value isspecified, there is no need to specify USELMSLICENSING.
LMSLICENSESERVERS="server1,server2…" - This parameter is used on systemsthat communicate with a license server. It also allows the license type selection dialogbox to be skipped and the installation to be done silently.
LMSPROXYHOST="proxyhostaddress" - This optional parameter gives the addressof a proxy host. In silent mode, it is used directly in activation. In non-silent mode, itpopulates the activation form with this value.
LMSPROXYUSERNAME="user name" - This parameter is another optional parame-ter for the proxy user name. It behaves in the same manner as LMSPROXYHOST.
LMSPROXYPASSWORD="unencrypted password" - This parameter is another op-tional parameter for the proxy password. It behaves in the same manner asLMSPROXYHOST.
LMSURLTOFNOSERVICES=URL to FNO server - This parameter is mostly for inter-nal development. The default URL is to the production server. The new value can beused to override the default value and point to the development server.
PC-DMIS 2020 R2
74

ExamplesOn a brand-new system with a node-locked Entitlement ID, the following line installsPC-DMIS 2020 R2 in silent mode:
-q LMSENTITLEMENTID=99999-88888-77777-66666-55555
On a system that already has a license, the following line installs PC-DMIS 2020 R2 insilent mode:
-passive USELMSLICENSING=1
On a brand-new system using license servers, the following line installs PC-DMIS2020 R2 in silent mode:
-passive LMSLICENSESERVERS="123.12.134.42"
On a brand-new system with no license, the following line skips the license type selec-tion dialog box and populates the activation form:
LMSENTITLEMENTID=99999-88888-77777-66666-55555 LMSPROXY-HOST="123.123.123.123" LMSPROXYUSERNAME="bob" LMSPROXYPASS-WORD="marley"
PC-DMIS 2020 R2
75

Appendix B
Required User Access RightsPC-DMIS 2020 R2 requires read, write, and create access to the locations defined be-low in the file system and registry.
File SystemWindows 10, Windows 8, Windows 7, and Windows Vista:
• C:\ProgramData\Hexagon\PC-DMIS\2020 R2• C:\Users\Public\Documents\Hexagon\PC-DMIS\2020 R2• C:\Users\UserName\AppData\Local\Hexagon\PC-DMIS\2020 R2• Any user-specified folder locations for storing measurement routines, probes, sub-
routines, and so on
RegistryAll of these versions have their own registry settings, which are stored in a version-specific registry key. The items shown below are for version 2020 R2.
• HKEY_LOCAL_MACHINE\SOFTWARE\Wow6432Node\Hexagon\PC-DMIS\2020R2 Key and all sub keys
• HKEY_CURRENT_USER\Software\Hexagon\PC-DMIS\2020 R2 and all sub keys• HKEY_USERS\.DEFAULT\Software\Hexagon\PC-DMIS\2020 R2 and all sub keys
NotesThe first time you run a new version, PC-DMIS automatically copies the settings fromthe most recent version of PC-DMIS that is installed. For this to work, PC-DMIS needsto run with administrator privileges the first time you run it. During the installation, ifyou select the Launch PC-DMIS check box in the setup wizard, it runs PC-DMIS asan administrator and completes this first step.
This initial migration automatically sets read, write, and create permissions on the reg-istry for the relevant keys.
If you are using fixturing or laser sensors, the following registry keys are stored backone level:
• HKEY_LOCAL_MACHINE\SOFTWARE\Hexagon\FxtServer• HKEY_LOCAL_MACHINE\SOFTWARE\Hexagon\PC-DMIS\NCSENSORSET-
TINGS
It may be easier to just apply create/read/write privileges to the HKEY_LOCAL_MA-CHINE\SOFTWARE\Hexagon\ key and all sub keys to cover these also.
PC-DMIS 2020 R2
76

Appendix C
First-Time Installation with Flexible FixturingTo be compliant with the permission rules for PC-DMIS products, files associated withfixturing are now located in this folder:
C:\Program Files\Hexagon\PC-DMIS 2020 R2 64-bit\Models\QuickFix
This allows access to the files without needing administrator privileges on the comput-er running PC-DMIS. To accomplish this, the following steps are required when you in-stall PC-DMIS for the first time:
1. The first time you install PC-DMIS and FxtServerInterface, run the FxtServerInter-face installation program for the first time with administrator privileges (as is re-quired for the PC-DMIS installation).
2. When you run FxtServerInterface, a message states that the system will migrateall of your data files to the "FIVEUNIQUE" Documents folder described above.• If you choose Yes, the files are moved, and the original folder is deleted.• If you choose No, the files are copied, but the original folder is kept.Once this is done, the files are moved (or copied), and you are able to run FxtSer-verInterface.exe without administrator privileges.
PC-DMIS 2020 R2
77