Norton™ 360 with LifeLock™ User Manual
83
Norton™ AntiVirus Plus Norton™ 360 Norton™ 360 with LifeLock™ Norton™ 360 for Gamers User Manual
-
Upload
khangminh22 -
Category
Documents
-
view
1 -
download
0
Transcript of Norton™ 360 with LifeLock™ User Manual

Norton™ AntiVirus PlusNorton™ 360Norton™ 360 with LifeLock™Norton™ 360 for Gamers
User Manual

Norton™ 360 with LifeLock™ User ManualThe software described in this book is furnished under a license agreement and may be used only inaccordance with the terms of the agreement.
Copyright © 2021 NortonLifeLock Inc. All rights reserved.
The product described in this document is distributed under licenses restricting its use, copying, distribution,and decompilation/reverse engineering. No part of this document may be reproduced in any form by anymeans without prior written authorization of NortonLifeLock Inc. and its licensors, if any.
THE DOCUMENTATION IS PROVIDED "AS IS" AND ALL EXPRESS OR IMPLIED CONDITIONS,REPRESENTATIONS AND WARRANTIES, INCLUDING ANY IMPLIED WARRANTY OFMERCHANTABILITY, FITNESS FOR A PARTICULAR PURPOSE OR NON-INFRINGEMENT, AREDISCLAIMED, EXCEPT TO THE EXTENT THAT SUCH DISCLAIMERS ARE HELD TO BE LEGALLYINVALID. NORTONLIFELOCK INC. SHALL NOT BE LIABLE FOR INCIDENTAL OR CONSEQUENTIALDAMAGES IN CONNECTION WITH THE FURNISHING, PERFORMANCE, OR USE OF THISDOCUMENTATION. THE INFORMATION CONTAINED IN THIS DOCUMENTATION IS SUBJECT TOCHANGE WITHOUT NOTICE.
The Licensed Software and Documentation are deemed to be commercial computer software as definedin FAR 12.212 and subject to restricted rights as defined in FAR Section 52.227-19 "Commercial ComputerSoftware - Restricted Rights" and DFARS 227.7202, et seq. "Commercial Computer Software andCommercial Computer Software Documentation," as applicable, and any successor regulations, whetherdelivered by NortonLifeLock as on premises or hosted services. Any use, modification, reproductionrelease, performance, display or disclosure of the Licensed Software and Documentation by the U.S.Government shall be solely in accordance with the terms of this Agreement.
NortonLifeLock Inc.60 East Rio Salado Parkway,Suite 1000,Tempe, AZ 85281
https://www.nortonlifelock.com

Chapter 1 Welcome to Norton LifeLock .............................................. 6
System requirements for Norton 360 .................................................. 6Access your NortonLifeLock account .................................................. 8
Chapter 2 Set up your protection ......................................................... 9
Set up Device Security .................................................................... 9Set up Norton Password Manager ................................................... 10Set up Cloud Backup .................................................................... 15Set up LifeLock Identity Theft Protection ........................................... 15
Dark Web Monitoring powered by LifeLock** ............................... 17Set up your Secure VPN ................................................................ 17Set up Parental Controls ................................................................ 18Protect your banking information using Norton Safe Web ...................... 22
Chapter 3 Manage your Device Security ........................................... 23
What to do when your device is at risk .............................................. 23Run LiveUpdate ..................................................................... 24View or fix device security risks that Norton detects ....................... 24Act on quarantined risks or threats ............................................. 25
Use Norton to optimize and improve computer performance .................. 28Run Norton scans to check for threats on your PC .............................. 31
Create your own custom Norton scans ....................................... 34Schedule Norton scans ........................................................... 35View real-time threats detected by Norton SONAR ........................ 36Exclude files and folders from Norton Auto-Protect, SONAR, and
Download Intelligence scans .............................................. 37Exclude files with low-risk signatures from Norton scans ................ 38Turn on or turn off automatic tasks ............................................. 38Run custom tasks .................................................................. 39Schedule security and performance scans .................................. 40Configure Data Protector to block malicious processes affecting
your PC ......................................................................... 41Set Norton to remove scripts that can be exploited in phishing
attempts ......................................................................... 43
Contents

Learn more about Norton Script Control ...................................... 47Protect your device from exploits, hackers, and zero-day attacks ........... 49
Turn Norton Firewall on or off ................................................... 51Customize Program Rules to change access settings for
programs ........................................................................ 51Change the order of firewall rules .............................................. 52Turn off a Traffic rule temporarily ............................................... 53Allow Internet access for a blocked program ................................ 53Turn Firewall Block Notification off ............................................. 55Learn more about Intrusion Prevention exclusion list ..................... 55Turn Browser Protection on ...................................................... 56Set Norton Firewall to stop or start notifying you when it blocks
an attack ........................................................................ 57Turn off or turn on AutoBlock .................................................... 58Unblock computers that are blocked by Norton AutoBlock .............. 58Add a device to Device Trust .................................................... 59Turn off or turn on Download Intelligence .................................... 60Turn off or turn on spam filtering ................................................ 61Define the Internet usage for Norton .......................................... 62Turn off or turn on Network Cost Awareness ................................ 63
Set Norton to monitor applications and block malicious websites fromaccessing your computer ......................................................... 63
Get started using Norton Cloud Backup ............................................ 65Add or exclude files and folders in your backup sets ...................... 67View or change the default file types or file extensions that Norton
includes in backups .......................................................... 68Restore pictures, music, or other important files from Norton
backup sets .................................................................... 68Delete backup set and files from Cloud Backup ............................ 69
Customize your Norton product settings ............................................ 71Customize Real Time Protection settings .................................... 71Learn more about Scans and Risks settings ................................ 73Learn more about Intrusion and Browser Protection settings ........... 75Set Norton to allow you to remotely manage your protected
devices .......................................................................... 76Protect Norton device security settings from unauthorized
access ........................................................................... 76Set a shortcut key to search Norton device security for
information ..................................................................... 77Optimize your computer for gaming with Game Optimizer ..................... 78
Learn more about Game Optimizer ............................................ 79Manually add games to the Optimized Games list ......................... 81
4Contents

Chapter 4 Find additional solutions ................................................... 83
Uninstall Device Security on Windows .............................................. 83Disclaimers ................................................................................. 83
5Contents

Welcome to Norton LifeLock
This chapter includes the following topics:
■ System requirements for Norton 360
■ Access your NortonLifeLock account
System requirements for Norton 360Norton Device Security entitlement only■ Norton™ AntiVirus Plus covers a single PC or Mac
Device Security and Norton Secure VPN entitlementsSupports devices running on Windows, Mac, Android, and iOS
■ Norton™ 360 Standard covers a single device
■ Norton™ 360 Deluxe covers up to 5 devices
■ Norton™ 360 with LifeLock Select covers up to 5 devices
■ Norton™ 360 with LifeLock Advantage covers up to 10 devices
■ Norton™ 360 with LifeLock Ultimate Plus covers unlimited devices (Restrictions apply*)
■ Norton™ 360 for Gamers covers up to 3 devices
Note: Not all NortonLifeLock protection offerings mentioned above are available in all regionsor for all partners.
Device Security
Note: Not all features are available on all platforms.
1Chapter

Note:Parental Controls, Cloud Backup, and SafeCam are currently not supported on Mac OS.
Windows™ Operating Systems
◆ Microsoft Windows® 10 (all versions)■
■ Microsoft Windows® 10 in S mode (32-bit or 64-bit or ARM32) version 1803 and above
■ Microsoft Windows® 8/8.1 (all versions)Some protection features are not available in Windows 8 Start screen browsers.
■ Microsoft Windows® 7 (32-bit and 64-bit) with Service Pack 1 (SP 1) or later
Note: Norton AntiVirus Plus is not supported on Windows 10 in S mode.
Mac® Operating Systems
◆ Mac OS X 10.10.x or later with Norton product version 8.0 or later.
Note: Norton Family Parental Controls and Cloud Backup are currently not support onMac OS.
Android™ Operating Systems
◆ Android 6.0 or later
Must have Google Play app installed.
Auto-scan of apps on Google Play is supported on Android 4.1 or later, except for Samsungdevices. Samsung devices running Android 4.2 or later are supported. For earlier versionsof Android, the Google Play “Share” function must be used to scan apps on Google Play.
iOS Operating Systems
◆ iPhones or iPads running the current and previous two versions of Apple iOS
System requirements for Norton™ Secure VPNAvailable for Windows™ PC, Mac®, iOS and Android™ devices:
Norton Secure VPN is compatible with PCs, Macs, Android smartphones and tablets, iPads,and iPhones. Norton Secure VPN may be used on the specified number of devices – withunlimited use during the subscription term.
Windows™ Operating Systems
◆ Microsoft Windows® 10 (all versions except Windows 10 S)■
■ Microsoft Windows® 8/8.1 (all versions)
7Welcome to Norton LifeLockSystem requirements for Norton 360

■ Microsoft Windows® 7 (32-bit and 64-bit) with Service Pack 1 (SP 1) or later
150MB of available hard disk space.
Mac® Operating Systems
◆ Current and previous two versions of Mac OS.
300MB of available hard disk space.
Android™ Operating Systems
◆ Android 6.0 or later
Must have Google Play app installed.
iOS Operating Systems
◆ iPhones or iPads running the current and previous two versions of Apple iOS
Access your NortonLifeLock accountYou manage subscription details, find your product key, activate subscription renewal, oraccess other services from your NortonLifeLock account.
Access your account
1 Go to my.Norton.com and click Sign In.
2 Type in your username/email address and password, and then click Sign In.
3 If you forgot your password, click Forgot password? and provide your email address.
If you see a message that your account is temporarily locked due to too many failed loginattempts, we recommend that you wait for one hour and try signing in again.
8Welcome to Norton LifeLockAccess your NortonLifeLock account

Set up your protection
This chapter includes the following topics:
■ Set up Device Security
■ Set up Norton Password Manager
■ Set up Cloud Backup
■ Set up LifeLock Identity Theft Protection
■ Set up your Secure VPN
■ Set up Parental Controls
■ Protect your banking information using Norton Safe Web
Set up Device SecurityTo protect your device, you must install Norton Device Security. You can install Device Securityon your Windows desktops and laptops, Mac computers, and mobile devices that run onAndroid and iOS.
Download and install your Device Security
1 From each computer, laptop, and smart phone, open your browser and type the followingURL:
https://norton.com/setup
2 Sign in to your NortonLifeLock account.
2Chapter

3 In the Norton Setup window, click Agree & Download.
4 Click on the area pointed by the on-screen arrow and follow the on-screen instructions.
Your service gets downloaded, installed, and activated automatically.
Note: If your download did not complete, or you see any error when you download yourservice, you can restart the download.
Set up Norton Password ManagerAfter you install Device Security your prompted to add browser extensions. In order for thefeatures to work, you'll need to add the extensions to Internet Explorer, FireFox, and Chromebrowsers.
You must enable the Norton browser extensions to access all the browser-specific features.The Norton browser extensions include:
A secure search experience that helps you to surf,search, and shop safely online. It analyzes websitesthat you visit and detects if there are any viruses,spyware, malware, or other threats.
Norton Safe Web
A secured search engine that uses Ask.com andYahoo! to generate the search results. Norton SafeSearch ranks the search results based upon thesite safety status and Norton rating.
Norton Safe Search
A website that uses the Norton Safe Search featureto enhance your web search experience. It providesthe site safety status and Norton rating for each ofthe search result generated.
Norton Home Page
10Set up your protectionSet up Norton Password Manager
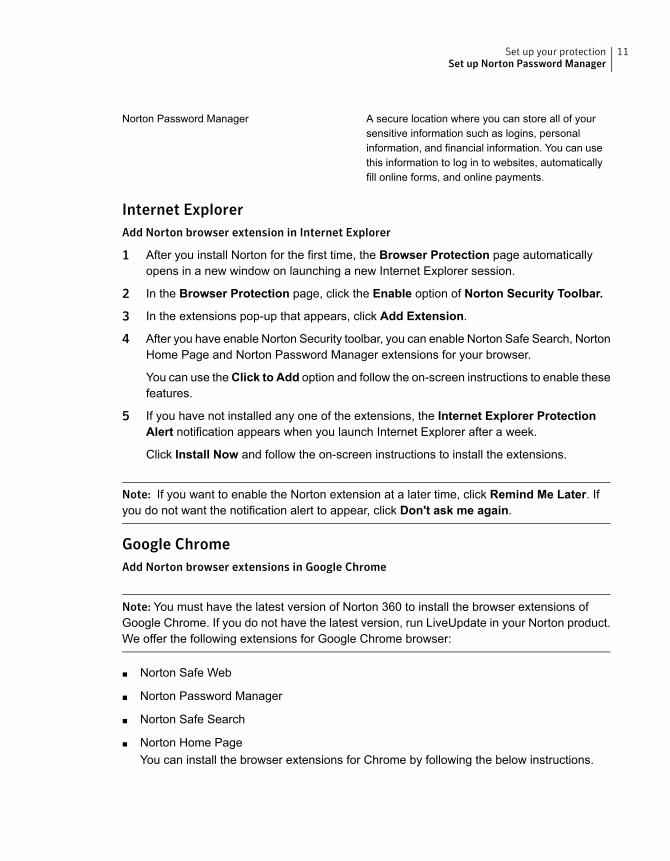
A secure location where you can store all of yoursensitive information such as logins, personalinformation, and financial information. You can usethis information to log in to websites, automaticallyfill online forms, and online payments.
Norton Password Manager
Internet ExplorerAdd Norton browser extension in Internet Explorer
1 After you install Norton for the first time, the Browser Protection page automaticallyopens in a new window on launching a new Internet Explorer session.
2 In the Browser Protection page, click the Enable option of Norton Security Toolbar.
3 In the extensions pop-up that appears, click Add Extension.
4 After you have enable Norton Security toolbar, you can enable Norton Safe Search, NortonHome Page and Norton Password Manager extensions for your browser.
You can use theClick to Add option and follow the on-screen instructions to enable thesefeatures.
5 If you have not installed any one of the extensions, the Internet Explorer ProtectionAlert notification appears when you launch Internet Explorer after a week.
Click Install Now and follow the on-screen instructions to install the extensions.
Note: If you want to enable the Norton extension at a later time, click Remind Me Later. Ifyou do not want the notification alert to appear, click Don't ask me again.
Google ChromeAdd Norton browser extensions in Google Chrome
Note: You must have the latest version of Norton 360 to install the browser extensions ofGoogle Chrome. If you do not have the latest version, run LiveUpdate in your Norton product.We offer the following extensions for Google Chrome browser:
■ Norton Safe Web
■ Norton Password Manager
■ Norton Safe Search
■ Norton Home PageYou can install the browser extensions for Chrome by following the below instructions.
11Set up your protectionSet up Norton Password Manager

1 After you install Device Security for the first time, the Browser Protection pageautomatically opens in a new window on launching a new Google Chrome session.
You can also launch the Browser Protection page by clicking the Set Up Now option inthe Internet Security pillar.
2 In the Browser Protection page, click the Click to Add option of Norton Safe Web.
3 In the extensions pop-up that appears, click Add Extension.
4 After you enable Norton Safe Web, you can enable Norton Safe Search, Norton HomePage and Norton Password Manager extensions for your browser. You can use the Clickto Add option and follow the on-screen instructions to enable these extensions.
To enable all the Norton extensions in Google Chrome, click Add All Norton Extensionsfor Free and follow the on-screen instructions.
■ If you have not installed the Norton Safe Web extension, the Chrome ProtectionRemoved alert notification appears when you launch Google Chrome after a week.
■ If you have not installed any one of the extensions, the Google Chrome ProtectionAlert notification appears when you launch Google Chrome after a week.
5 Click Install Now and follow the on-screen instructions to install the extensions.
Note: If you want to enable the Norton extension at a later time, click Remind Me Later.Click Do not ask me again if you do not want the notification alert to appear.
Mozilla FirefoxAdd Norton browser features in Mozilla Firefox
Note: You must have the latest version of Norton 360 to install the web-based standalonebrowser extensions of Mozilla Firefox. If you do not have the latest version, run LiveUpdate inyour Norton product. We offer the following extensions for Firefox browser:
■ Norton Safe Web
■ Norton Safe Search
■ Norton Home Page
■ Norton Password ManagerYou can install or upgrade the browser extensions for Firefox by following the belowinstructions.
12Set up your protectionSet up Norton Password Manager

1 After you install Device Security for the first time, the Browser Protection pageautomatically opens in a new window/tab on launching a new Mozilla Firefox session.
If you have upgraded Norton Device Security, click OK on the Browser Protection alertwindow to display the extensions page.
Note: You can also launch the Browser Protection page by clicking the Set Up Nowoption in the Internet Security pillar.
2 In the Browser Protection page, click the Enable option of Norton Safe Web.
3 In the extensions pop-up that appears, click Allow.
After you enable Norton Safe Web, you can enable Norton Safe Search, Norton HomePage and Norton Password Manager features for your browser. You can use the Enableoption and follow the on-screen instructions to enable these features.
To enable all the Norton extensions in Firefox, click Add All Norton Extensions for Freeand follow the on-screen instructions.
If you have not installed the extensions, the Firefox Protection Alert notification alertappears when you launch Firefox after a week. If you want to enable the Norton extensionat a later time, click Remind Me Later. If you do not want the notification alert to appear,clickDo not askme again. If you chooseRemindMe Later, Firefox displays a ProtectionAlert notification after a week. You can click the Install Now option in the notification andfollow the on-screen instructions to install the extensions.
Microsoft EdgeAdd Norton browser extension in Microsoft Edge
Note: Norton Password Manager is an independent extension and does not require theinstallation of a Norton product in Microsoft Edge browser. The extension is compatible onlywith computers running Windows 10 Creators Update and later versions.
1 Start the Microsoft Edge browser.
2 On the top-right corner, click the More button and select Extensions.
3 In the Extensions window, click Get extensions from the store.
4 In the Storewindow, typeNorton in the Search box and clickNorton PasswordManagerfrom the results.
5 Click Install.
After the extension is installed, click Launch.
6 In the You have a new extension pop-up window, click Turn it on.
13Set up your protectionSet up Norton Password Manager

7 To display the Norton Password Manager icon on the address bar, click the More buttonon the top-right corner of the browser and click Extensions.
8 In the Extension window, select Norton Password Manager.
9 In the Norton Password Manager window, under Show button next to the addressbar, move the slider to On.
Browser extensions for Microsoft Edge based on ChromiumMicrosoft has launched a new version of Microsoft Edge based on the Chromium open sourceproject. Norton offers the following browser extensions for this new browser version on theMicrosoft Edge store.
■ Norton Password Manager - Helps provide the tools you need to create, store, and manageyour passwords, credit card and other sensitive information online more safely and securely
■ Norton Safe Web - Provides protection from online threats while you browse the web.
The extensions are available for both Windows and Mac platforms.
Add Norton Safe Web extension in Microsoft Edge
1 Launch the Microsoft Edge browser.
2 Launch Norton Safe Web extension from the Microsoft Edge Addons page.
Note: You can click the settings icon > Extensions to check if the Norton PasswordManager extension is already installed. In the Extensions page, move the Norton SafeWeb slider to enable the extension.
3 In the Norton Safe Web Addons page, click Get.
4 Click Add extension in the Add "Norton Safe Web" to Microsoft Edge notificationpop-up to install the Norton Safe Web extension.
Add Norton Password Manager extension in Microsoft Edge
1 Launch the Microsoft Edge browser.
2 Launch Norton Password Manager extension from the Microsoft Edge Addons page.
Note: You can click the settings icon > Extensions to check if the Norton PasswordManager extension is already installed. In the Extensions page, move the NortonPassword Manager slider to enable the extension.
14Set up your protectionSet up Norton Password Manager

3 In the Norton Password Addons page, click Get.
4 Click Add extension in the Add "Norton Password Manager" to Microsoft Edgenotification to install the Norton Password Manager extension.
Set up Cloud BackupCloud Backup acts as a preventative measure to losing data due to ransomware, malware, orif you experience major hardware issues with your PC. Your subscription entitles you a specificamount of Norton Cloud Backup space. The volume of free cloud storage depends on thesubscription you purchased.
Note: Norton Cloud Backup feature is only available on Windows.
Before running your first backup, you must activate Cloud Backup.
Note:To use Cloud Backup, youmust set theNetwork Cost Awareness option in the FirewallSettings window to No Limit.
Activate Cloud Backup
1 Start Norton.
2 In the My Norton window, next to Cloud Backup, click Set Up.
3 In the window that appears, click Activate Backup.
4 When you see a sign-in prompt, type your NortonLifeLock account email address andpassword and click Sign In.
5 Click Done.
Set up LifeLock Identity Theft ProtectionWith LifeLock and Norton joining forces under one company, we now help protect your identity.
You can add the following personal information to LifeLock for monitoring†:
■ Driver’s license
■ Social security number, date of birth, mother’s maiden name
■ 5 Insurance ID’s
■ 5 addresses
■ 5 phone numbers
15Set up your protectionSet up Cloud Backup

■ 10 bank accounts
■ 10 credit cards*
You can add additional information for monitoring, such as additional phone numbers, emailaddress or accounts.
The LifeLock Identity Alert System alerts you† when your identity is being used by someone.It can be people trying to obtain a cell phone account or an auto loan in your name.
Note: LifeLock Identity Theft Protection does not cover businesses. Our technology and serviceis designed to help protect individuals with social security numbers and other personalidentifiable information, which businesses don't have.*Major credit cards, such as Visa, MasterCard, American Express and Discover, can be added. Unfortunately at this time,
other types of cards, such as retail store cards or gift cards, are not supported.
No one can prevent all identity theft or cybercrime.
†LifeLock does not monitor all transactions at all businesses.
Set up LifeLock Identity Theft Protection
1 Start Norton.
2 In the My Norton window, next to Identity Theft Protection, click Set Up.
3 In the LifeLock Member Login page, click Sign In With Norton.
4 Enter your account credentials and sign in.
5 Follow the on-screen instructions.
Install the LifeLock for Norton 360 app on Android
1 On your Android device, launch the Play Store app and search for LifeLock IdentityTheft Protection.
2 Once you have located the app page in the Play Store, tap Install, and then tap Accept.
3 Open the app once installed and sign in with your account credentials.
Install the LifeLock for Norton 360 app on iOS
1 On your iOS device, launch the App Store app and search for LifeLock Identity TheftProtection.
2 Once you have located the app page in the App Store, tap Get, and then tap Install.
3 Open the app once installed and sign in with your account credentials.
16Set up your protectionSet up LifeLock Identity Theft Protection

Dark Web Monitoring powered by LifeLock**What is Dark Web Monitoring?We monitor for use of your personal information** on hard-to-find dark websites and forums.When we detect your information on the dark web, we notify you.
Why is it important?Identity thieves can sell your personal information on hard-to-find dark web sites and forums.
What should you do?If you find any of your information in the notification, refer to the steps below.
■ Debit/Credit Card Compromise: If the card is closed no action needs to be taken. If theaccount is current, contact your credit/debit card company and request a new card. Keepa close eye on your statements.
■ Email Compromise: Change your current email password. If you have any accounts withthe same password, change those as well. If you have ongoing issues, you may want toopen a new email account. Remember that changing your passwords every 30 days willhelp keep your accounts secure.
■ Social Security Number Compromise: We recommend that you set fraud alerts with oneof the three credit bureaus to further help protect your identity.
■ Name/Address/Phone Number Compromise: Fortunately, more potentially damaginginformation such as your Social Security number hasn’t been shared in this case. However,because some of your personal information is out there, we advise to keep a close eye onyour credit report for any discrepancies.
We will continue to monitor the dark web for your personal information**. If we detect yourinformation, we will send another email.
Note: No one can prevent all identity theft.
**Dark Web Monitoring in Norton 360 plans defaults to monitor your email address only. Please login to the portal to review
if you can add additional information for monitoring purposes.
Set up your Secure VPNPublic Wi-Fi is everywhere: airports, coffee shops, malls, and hotels. Free 'hotspots' are sowidespread and convenient that people may connect to themwithout thinking twice. But readingemails, checking your bank account, or performing any activity that requires a logon can berisky when you use public Wi-Fi. If you use public Wi-Fi, your online activities can be monitored.
17Set up your protectionSet up your Secure VPN

Cybercriminals can steal personal information like your usernames, passwords, location, chats,emails, or account numbers.
Secure VPN helps secure your connection when you use a public wireless connection. Itcreates a virtual private network (VPN) that encrypts your sensitive data.
Secure VPN helps protect the data you send and receive when using public Wi-Fi in thefollowing ways:
■ Adds bank-grade encryption to protect your connection while on public Wi-Fi hotspots.
■ Lets you browse the web anonymously so your online privacy is protected.
■ Allows access to your favorite apps and content anywhere you go, as if you were at home.
■ Encrypts your data with a no-log virtual private network that doesn't track or store youractivity.
■ Offers world-class customer support from Norton LifeLock, a leader in consumer onlinesecurity.
Note: The Secure VPN feature is not available with all subscriptions.
Follow the below instructions to set up Secure VPN.
Set up Secure VPN
1 Start Norton.
2 In the My Norton window, next to Secure VPN, click Set Up.
3 In the web page that appears, click Sign In.
4 Enter your account credentials and sign in.
5 If you get a prompt to download, click Download.
6 Follow the on-screen instructions.
Join the discussion with other desktop users here Norton Community.
Set up Parental ControlsYou can now set up Parental Controls to help your kids enjoy the Internet safely. It is easyand takes only three steps.
Parental Controls provide what you need to protect your family's online activities from Internetdangers and inappropriate content. It even helps you keep your children from passing alongconfidential information online.
18Set up your protectionSet up Parental Controls

Sign in to your NortonLifeLock account
1 Start Norton.
2 In the My Norton window, next to Parental Controls, click Set Up.
3 If prompted to sign in, enter your account credentials and sign in.
4 In the page that appears, click Family tab.
5 Read the Terms of Service and click Agree & Continue to set up your family.
6 Follow the on-screen instructions.
Add a child to your accountAs you add each child, Parental Control applies pre-defined house rules based on the child’sage. You can customize the house rules at any time to better suit each child’s maturity level.
Note: You can add up to 15 children to your account. You can add or remove a child from yourNorton Family account at any time.
1 In the Child Name box, type the child’s name.
Note: The name must not contain special characters such as &, #, or $.
2 Select the child’s year of birth.
House rules are applied based on the child’s age.
3 Choose Select an Avatar or Upload Photo to set a profile picture for your child.
Note: You can add more children to your account after you complete the set up for thefirst child.
4 Click Next.
Install Norton Family on your child's deviceInstall Norton Family on each device that your child uses. If you are not on your child’s device,click No to send a download link in an email. Open this email on the device on which you wantto install Norton Family.
To install Norton Family on Windows
1 Under Does your child use this device?, click Yes and then click Next.
2 Click or run the downloaded installer file.
19Set up your protectionSet up Parental Controls

3 Norton Download Manager will automatically install Norton Family on the device.
4 Read the User License Agreement and then click Agree & Install.
The device gets automatically linked to your account.
5 Click Continue.
6 In the assign device window, click Edit next to the child to whom you want to assign thisdevice.
7 Click signs in as and choose the account that the child uses to log on to this device. Ifyour child uses multiple user accounts, choose the child on all those user accounts.
8 Click Save > OK.
To install Norton Family app on Android
1 In the INSTALL Norton Family window, tap Yes, and then tap Continue.
2 Tap Download Norton Family app.
3 If prompted, complete the action using Play Store.
4 Tap Install and follow the on screen instructions.
5 Open the Norton Family parental control app.
6 Read the Norton License Agreement and then tap Agree & Continue > Get Started.
7 Click Sign In and enter your account credentials.
8 Tap Child to get into child mode and then tap Continue.
Child mode allows you to add child and assign house rules to this device.
9 To add a child, tap Add a child, and in the PROFILE window, enter the details of yourchild.
Choose an avatar for your child profile by tapping the avatar image. You can choose animage from your gallery or take instant photo for your child’s profile.
10 Tap Continue, and then tap Save.
Norton Family has set default house rules based on your child’s year of birth. You cantap House Rules to review the rules assigned to your child.
11 Choose the child whom you want to assign this device, give a name that helps you identifythis device, and then tap Done.
12 If prompted, turn on App Usage and Accessibility options.
13 In the alert that appears, tap Activate to set Norton Family as the device administrator.
20Set up your protectionSet up Parental Controls

To install Norton Family app on iOS
1 In the INSTALL Norton Family window, tap Yes, and then tap Continue.
2 Tap Download Norton Family app.
3 Tap and install Norton Family application.
4 Tap Open.
5 Tap OK to allow Norton Family to send you the notifications.
6 Read the Norton Licence Agreement and Privacy Policy, and then tap Agree &Continue.
7 Sign in with your account credentials.
8 In the Add child screen, enter the details of your child and then tap Add.
To add another child, tapAdd a new child, and in theAdd Childwindow, enter the detailsof your child and then tap Add.
Choose an avatar for your child profile by tapping the avatar image. You can choose animage from your gallery or take instant photo for your child’s profile.
9 Choose the child whom you want to assign this device and give a name that helps youidentify this device.
10 Tap Assign.
11 Tap Install and follow the on-screen instructions to install a profile.
Profile installation is required for instant lock and other features to work on your child'sdevice.
12 Follow the on-screen instructions to set up restrictions.
Install Norton Family on a parent deviceAfter you complete the setup, you must download and install the following mobile app on yourdevice:
■ Android device: install the Norton Family parental control app
■ iOS device: install the Norton Family for Parents app
Download and install Norton Family parental control app on Android
1 Open the Play Store app and search for Norton Family parental control.
2 Select Norton Family parental control app and then tap Install.
3 Open the app once installed.
4 Read the Norton License Agreement and other policies and then tap Continue.
21Set up your protectionSet up Parental Controls

5 Sign in with your account credentials.
6 Tap Parent device. If you share the device with your child, switch to Child mode beforeyou hand over the device to your child.
Download and install Norton Family for Parents app on iOS
1 Open the App Store app and search for Norton Family for Parents.
2 Select Norton Family for parents and then tap Get.
3 Open the app once installed.
4 Read the Norton License Agreement and other policies and then tap Continue.
5 Sign in with your account credentials.
Discuss with your familyCommunication is the key to online family safety. Therefore, you can initiate a discussion withyour child explaining the importance of responsible use of the Internet.
Protect your banking information using Norton SafeWeb
Banking Protection in Norton Safe Web provides increased security when you transact withbanking websites. When you access a banking website using Google Chrome, Mozilla Firefox,or Microsoft Edge browser, you receive a notification to install or enable the Norton Safe Webextension. Click Install or Enable in the notification and follow the on-screen instructions toinstall or enable the Norton Safe Web extension.
You can turn off the Banking Protection Notification alert by clicking Don't Show Me Againin the notification or by going to the Settings window.
Turn off or turn on Banking Protection Notifications
1 Start Norton.
If you see the My Norton window, next to Device Security, click Open.
2 In the Norton product main window, click Settings.
3 In the Settings window, click Firewall.
4 Under the Intrusion and Browser Protection tab, in the Banking ProtectionNotifications row, move the On/Off slider to Off or On.
5 In the Settings window, click Apply, and then click Close.
22Set up your protectionProtect your banking information using Norton Safe Web

Manage your DeviceSecurity
This chapter includes the following topics:
■ What to do when your device is at risk
■ Use Norton to optimize and improve computer performance
■ Run Norton scans to check for threats on your PC
■ Protect your device from exploits, hackers, and zero-day attacks
■ Set Norton to monitor applications and block malicious websites from accessing yourcomputer
■ Get started using Norton Cloud Backup
■ Customize your Norton product settings
■ Optimize your computer for gaming with Game Optimizer
What to do when your device is at riskIn the Norton main window, the color of Security, Internet Security, Backup, and Performancetiles indicates the status of each category as follows:
■ Green: You have protection.
■ Orange: Your computer needs attention.
■ Red: Your computer is at risk.
3Chapter

Note: The backup category is available only with Deluxe, Premium, and Norton 360subscriptions.
Norton automatically fixes most issues that reduce your protection or system performance anddisplays the status as Protected in the main window. Norton displays issues that require yourattention as At Risk or Attention.
Respond to Attention or At Risk status indicators
1 Start Norton.
If you see the My Norton window, next to Device Security, click Open.
2 In the Norton main window, click the red or orange tile of the category that indicates AtRisk or Attention.
3 Click Fix Now and follow the on-screen instructions.
If you still have issues, click Help > Get Support to run the diagnostic tool.
You can also try using Norton Rescue Tools if you think your computer is severely infected.
Run LiveUpdateNortonLifeLock recommends that you run LiveUpdate at regular intervals in the following cases:
■ If you have turned off Automatic LiveUpdate option
■ If your computer is not connected to the Internet for a long time
Note: To run LiveUpdate, you need a valid subscription and an Internet connection.
Run LiveUpdate manually
1 Start Norton.
If you see the My Norton window, next to Device Security, click Open.
2 In the Norton product main window, double-click Security, and then click LiveUpdate.
3 In the Norton LiveUpdate window, when the LiveUpdate is completed successfully, clickOK.
View or fix device security risks that Norton detectsWhen Norton detects a security risk, it automatically removes it, unless it requires your inputto understand how you want to resolve the risk. If you do need to provide input, Norton displaysa Threats Detected alert or Security Risk alert with suggestions on how to respond to thesecurity risk.
24Manage your Device SecurityWhat to do when your device is at risk

View risks automatically resolved during a scan
1 Start Norton.
If you see the My Norton window, next to Device Security, click Open.
2 In the Norton main window, double-click Security, and then click History.
3 In the Security History window, in the Show drop-down list, select Resolved SecurityRisks.
4 Select a risk in the list, then in the Details pane, view the action that was taken.
Fix unresolved risks detected during a scanIn some cases, Norton does not automatically resolve a risk, but recommends an action foryou to take to resolve the risk.
Fix unresolved risks detected during a scan
1 Start Norton.
If you see the My Norton window, next to Device Security, click Open.
2 In the Norton main window, double-click Security, and then click History.
3 In the Security Historywindow, in the Show drop-down list, selectUnresolved SecurityRisks.
4 Select a risk in the list if there are unresolved risks displayed.
5 Follow the Recommended Action in the Details pane.
Note:Sometimes, you may need to restart your computer after Norton removes a security risk.If Norton prompts you to restart your computer, you should save any open files, and thenrestart your computer.
Note: Run Norton Power Eraser if you think your system is infected. Norton Power Eraser isa powerful malware removal tool that eliminates the security risks that are difficult to remove.For more information, See “Run Norton scans to check for threats on your PC” on page 31.
Act on quarantined risks or threatsQuarantined items are isolated from the rest of your computer so that they cannot spread orinfect your computer. If you have an item that you think is infected, but is not identified as arisk by Norton, you can manually put the item in Quarantine. You can also restore an itemfrom quarantine if you think it is a low risk. Norton does not repair the item that you restore.However, Norton can disinfect the restored items during the subsequent scans.
25Manage your Device SecurityWhat to do when your device is at risk

Restore an item from quarantine
1 Start Norton.
If you see the My Norton window, next to Device Security, click Open.
2 In the Norton main window, double-click Security, and then click History.
3 In Security History window, in the Show drop-down list, select theQuarantine category.
4 Select an item that you want to manage.
5 In the Details pane, click Options.
You can use theMore Options link to view more details about the item before you selectan action for it. The link opens the File Insight window that contains more informationabout the risk.
6 In the Threat Detected window, choose one of the following options:
■ Restore: Returns the item to the original location on your computer. This option isavailable only for manually quarantined items.
■ Restore & Exclude this file: Returns the item to its original location without repairingit and excludes the item from being detected in the future scans. This option is availablefor the detected viral and non-viral threats.
■ Remove from history: Removes the selected item from the Security History log.
7 If you choose to restore, in the Quarantine Restore window, click Yes.
8 In the Browse for Folder dialog, select the folder or drive where you want to restore thefile and then click OK.
Restore a file that was mistakenly identified as a security riskBy default, Norton removes security risks from your computer and quarantines them. If youthink a file was mistakenly removed, you can restore the file from Quarantine to its originallocation and exclude it from future scans.
Restore a file from Quarantine
Note: Exclude a program from the Norton scans only if you are confident that the program issafe. For example, if another program relies on a security risk program to function, you mightdecide to keep the program on your computer.
1 Start Norton.
If you see the My Norton window, next to Device Security, click Open.
2 In the Norton main window, click Security, and then click History.
3 In the Security History window, under Show drop-down menu, select Quarantine.
26Manage your Device SecurityWhat to do when your device is at risk
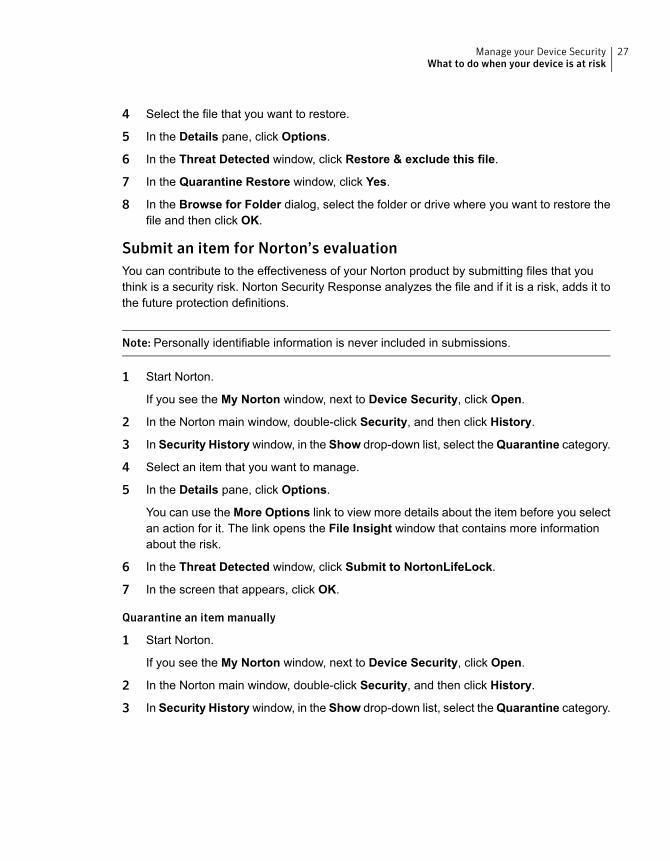
4 Select the file that you want to restore.
5 In the Details pane, click Options.
6 In the Threat Detected window, click Restore & exclude this file.
7 In the Quarantine Restore window, click Yes.
8 In the Browse for Folder dialog, select the folder or drive where you want to restore thefile and then click OK.
Submit an item for Norton’s evaluationYou can contribute to the effectiveness of your Norton product by submitting files that youthink is a security risk. Norton Security Response analyzes the file and if it is a risk, adds it tothe future protection definitions.
Note: Personally identifiable information is never included in submissions.
1 Start Norton.
If you see the My Norton window, next to Device Security, click Open.
2 In the Norton main window, double-click Security, and then click History.
3 In Security History window, in the Show drop-down list, select theQuarantine category.
4 Select an item that you want to manage.
5 In the Details pane, click Options.
You can use theMore Options link to view more details about the item before you selectan action for it. The link opens the File Insight window that contains more informationabout the risk.
6 In the Threat Detected window, click Submit to NortonLifeLock.
7 In the screen that appears, click OK.
Quarantine an item manually
1 Start Norton.
If you see the My Norton window, next to Device Security, click Open.
2 In the Norton main window, double-click Security, and then click History.
3 In Security History window, in the Show drop-down list, select theQuarantine category.
27Manage your Device SecurityWhat to do when your device is at risk

4 Click Add to Quarantine.
5 In the Manual Quarantine window, add the file that you want to quarantine and enter adescription for your reference.
Note: If you quarantine a file that is associated with any running processes, the processesget terminated. So, close all open files and running processes before adding a file toquarantine.
Use Norton to optimize and improve computerperformance
We know how frustrating it is when your computer slows down and simple tasks take forever.It is the perception of some users that their computer performance degrades after installingNorton. But the fact is that Norton is streamlined to provide a world-class protection withoutsacrificing performance.
Norton can also boost your computer speed with performance management and optimizationtools that make everyday tasks go more quickly.
Speed up my computer startup timeMany applications are configured to launch when you start your computer. These includeprograms that you never use, rarely use, or never knew that you had. The more programs thatlaunch when you start your computer, the longer it takes. Norton Startup Manager lets youdisable or delay startup programs to get you up and running faster.
Disable or delay startup items
1 Start Norton.
If you see the My Norton window, next to Device Security, click Open.
2 In the Norton main window, double-click Performance, and then click Startup Manager.
3 In the Startup Manager window, do the following:
■ In the On/Off column, uncheck programs that you don’t use to prevent them fromlaunching when your computer starts.
28Manage your Device SecurityUse Norton to optimize and improve computer performance

■ In the Delay Start column, select programs that you want to load only after startupcompletes.
4 Click Apply, and then click Close.
Improve the time it takes programs and files to loadThe Optimize Disk tool rearranges file fragments, which get dispersed over your computerwith time. It improves the computer performance so that you work more efficiently.
Run Optimize Disk
1 Start Norton.
If you see the My Norton window, next to Device Security, click Open.
2 In the Norton main window, double-click Performance, and then click Optimize Disk.
3 When it completes, click Close.
Remove temporary files and folders that make my computer run slowEvery time you browse or download files, your computer stores temporary files. Even thoughyou don’t need to keep them, they collect over time and can slow you down. The File Cleanuptool removes the clutter to make your computer run faster.
Remove temporary files and folders
1 Start Norton.
If you see the My Norton window, next to Device Security, click Open.
2 In the Norton main window, double-click Performance, and then click File Cleanup.
3 When it completes, click Close.
Optimize your boot volumeOptimization of your boot volumemaximizes the usable free space by rearranging file fragmentsinto adjacent and contiguous clusters. When the drive head of your hard disk accesses all ofthe file data in one location, the file is read into the memory faster.
Optimize your boot volume
1 Start Norton.
If you see the My Norton window, next to Device Security, click Open.
2 In the Norton main window, double-click Performance, and then click Graphs.
3 In the Graphs window, at the top of the security status graph, click Optimize.
Improve performance when I play games or watch moviesEver played a game or watched a movie when your security software started running and yourscreen froze at the worst moment? You can set the Full Screen Detection tool to sense when
29Manage your Device SecurityUse Norton to optimize and improve computer performance

you’re running a program that shouldn’t be interrupted. Norton then waits until you’re donewith the app before running background tasks that keep you protected.
Make sure that Full Screen Detection is on
1 Start Norton.
If you see the My Norton window, next to Device Security, click Open.
2 In the Norton main window, click Settings.
3 In the Settings window, click Administrative Settings.
4 Under Silent Mode Settings, in the Full Screen Detection row, move the switch to On.
5 Click Apply, and then click Close.
Stop interruptions when I use my favorite appsIf you think that Norton is slowing down your favorite programs, Quiet Mode settings stopNorton from running while you use them. Norton waits until you’re done using these programsbefore starting background tasks that keep you protected.
Run my favorite programs in Quiet Mode
1 Start Norton.
If you see the My Norton window, next to Device Security, click Open.
2 In the Norton main window, click Settings.
3 In the Settings window, click Administrative Settings.
4 Under Silent Mode Settings, in the User-Specified Programs row, click Configure.
5 In the Quiet Mode Programs window, click Add.
6 In the Add Program dialog box, navigate to your program.
7 Select the file, click Open, and then click OK.
Show me programs that consume resources and slow me downNorton monitors your computer and can alert you if a program or process seems to use anunusual amount of resources. You can shut these programs down to improve performance ifyou’re not using them.
Identify processes that consume resources
1 Start Norton.
If you see the My Norton window, next to Device Security, click Open.
2 In the Norton main window, double-click Performance, and then click Graphs.
3 In the Graphs window, on the left pane, click Usage.
4 Do one of the following:
30Manage your Device SecurityUse Norton to optimize and improve computer performance

■ To view the CPU graph, click the CPU tab.
■ To view the memory graph, click the Memory tab.
5 Click at any point on the graph to obtain a list of resource-consuming processes.
Click the name of a process to obtain additional information about the process in the FileInsight window.
Run Norton scans to check for threats on your PCNorton automatically updates virus definitions and regularly scans your PC for a range ofthreats. If you have been offline, or suspect that you have a virus, you can manually run thefollowing:
■ Quick Scan to analyze areas of your computer that are most vulnerable to threats.
■ Full System Scan to analyze your entire system including less vulnerable applications,files, and running processes than those checked during a Quick Scan.
■ Custom Scan to analyze individual files, folders, or drives if you suspect that they are atrisk.
Note: After you install Norton, the first scan may take an hour or more to analyze your entiresystem.
Run a Quick Scan, Full System Scan, or Custom Scan
1 Start Norton.
If you see the My Norton window, next to Device Security, click Open.
2 In the Norton main window, double-click Security, and then click Scans.
3 In the Scans window, next to Scans and Tasks, select one of the following:
■ Quick Scan > Go
■ Full System Scan > Go
■ Custom Scan > Go, then click Run next to Drive Scan, Folder Scan, or File Scanto navigate to the components that you want to scan.
4 In the Results Summary window, click Finish.
If there are items that require attention, review the risks in the Threats Detected window.
31Manage your Device SecurityRun Norton scans to check for threats on your PC

Full System ScanFull System Scan performs a deep scan of your computer to remove viruses and other securitythreats. It checks all boot records, files, and running processes to which the user has access.This scans your computer thoroughly and takes longer time.
Note:When you run a Full System Scan with administrator privileges, it scans more files thanwhen you run it without administrator privileges.
Run a Full System Scan
1 Start Norton.
If you see the My Norton window, next to Device Security, click Open.
2 In the Norton main window, double-click Security, and then click Scans.
3 In the Scans window, under Scans and Tasks, click Full System Scan.
4 Click Go.
Custom ScanOccasionally, you might want to scan a particular file, removable drives, any of your computer'sdrives, or any folders or files on your computer. For example, when you work with removablemedia and suspect a virus, you can scan that particular disk. Also, if you have received acompressed file in an email message and you suspect a virus, you can scan that individualelement.
Scan individual elements
1 Start Norton.
If you see the My Norton window, next to Device Security, click Open.
2 In the Norton main window, double-click Security, and then click Scans.
3 In the Scans window, under Scans and Tasks, click Custom Scan.
4 Click Go.
5 In the Scans window, do one of the following:
■ To scan specific drives, click Run next to Drive Scan, select the drives that you wantto scan, and then click Scan.
■ To scan specific folders, click Run next to Folder Scan, select the folders that youwant to scan, and then click Scan.
32Manage your Device SecurityRun Norton scans to check for threats on your PC

■ To scan specific files, click Run next to File Scan, select the files that you want toscan, and then click Add. You can also press Ctrl, and select multiple files to scan.
6 In the Results Summary window, click Finish.
If any items require attention, review them and take the recommended action.
Norton Power Eraser scanNorton Power Eraser is a powerful malware removal tool that can help you clean up the securityrisks that are difficult to remove. Norton Power Eraser uses aggressive techniques than normalscan process; sometimes there is a risk that Norton Power Eraser flags a legitimate programfor removal. Review scan results carefully before removing any files using Norton PowerEraser.
Download Norton Power Eraser and run a scan (on Windows 10/8/7)
1 Download Norton Power Eraser.
2 Press Ctrl + J key, to open the Downloads window in your browser, and double-click theNPE.exe file.
If the User Account Control window prompts, click Yes or Continue.
3 Read the license agreement and click Agree.
If you have already accepted the license agreement, you will not be prompted again.
Norton Power Eraser checks for and automatically downloads the new version if available.
4 In the Norton Power Eraser window, select Full System Scan, and click Run Now.
5 If you want to include the Rootkit scan, click Settings, and under Scan and Log Settings,toggle the option Include Rootkit scan (requires a computer restart) and click Apply.
6 When you see a prompt to restart the computer, click Restart.
Wait for the scan to complete. Follow the on-screen instructions.
Download Norton Power Eraser and run a scan (on Windows XP/Vista)
1 Download Norton Power Eraser.
2 Press Ctrl + J key, to open the Downloads window in your browser, and double-click theNPE.exe file.
If the User Account Control window prompts, click Yes or Continue.
3 Read the license agreement, and click Accept.
Norton Power Eraser checks for and prompts to download the new version if available.
4 In the Norton Power Eraser window, click the Scan for Risks icon.
33Manage your Device SecurityRun Norton scans to check for threats on your PC

5 By default, Norton Power Eraser performs a Rootkit scan and requires a system restart.When you see a prompt to restart the computer, click Restart.
If you do not want to include the Rootkit scan, go to Settings, and uncheck the optionInclude Rootkit scan (requires a computer restart).
6 Wait for the scan to complete. Follow the on-screen instructions.
Create your own custom Norton scansWhile the default Norton automated scan settings work well for most users, some users maywant to customize options to scan specific drives, folders, or files on a schedule that theychoose.
Create a custom scan
1 Start Norton.
If you see the My Norton window, next to Device Security, click Open.
2 In the Norton main window, double-click Security, and then click Scans.
3 In the Scans window, under Scans and Tasks, click Custom Scan, and then click Go.
4 In the Scans window, click Create Scan.
5 In the New Scan window, next to Scan Name, type a name for your custom scan andadd the settings as follows:
■ On the Scan Items tab, click Add Drives, Add Folders, or Add Files to navigate tothe components that you want to include in the scan.
■ On the Schedule Scan tab, underWhen do you want the scan to run, select an interval,and then select the timing options.Under Run the scan, select from the options. For most users, it’s best to keep allboxes checked. This assures that scans run only when you are not using your computeror when you are not using battery power, and it prevents your computer from going tosleep during a scan.
■ On the Scan Options tab, move the switches to customize behaviors for compressedfiles or low risk threats during the scan.
6 Click Save.
Edit or delete a Norton custom scanYou can edit a custom scan that you created to rename the scan, add or remove files, orchange the schedule. If you no longer need to run the scan, you can delete it.
34Manage your Device SecurityRun Norton scans to check for threats on your PC

Edit or delete a custom scan
1 Start Norton.
If you see the My Norton window, next to Device Security, click Open.
2 In the Norton main window, double-click Security, and then click Scans.
3 In the Scans window, under Scans and Tasks, click Custom Scan, and then click Go.
4 In the Scans window, in the Edit Scan column, next to the custom scan that you want tomodify, do one of the following:
■ Click the edit icon, and then in the Edit Scan window, move the switches to turn thescan options on or off. For most users, the default settings work well. ClickUse Defaultsto remove custom settings.
■ Click the trash icon, and then click Yes to confirm that you want to delete the customscan.
5 Click Save.
Schedule Norton scansNorton detects when you are away from your computer and automatically runs scans to assurethat your system is regularly monitored for threats. You can also schedule your own QuickScan, Full System Scan, or Custom Scan to run on times of your choosing.
Schedule a Norton Quick Scan, Full System Scan, or Custom Scan
1 Start Norton.
If you see the My Norton window, next to Device Security, click Open.
2 In the Norton main window, double-click Security, and then click Scans.
3 In the Scans window, under Scans and Tasks, click Custom Scan.
4 Click Go.
5 In the Scans window, in the Edit Scan column, click the edit icon next to Quick Scan,Full System Scan, or a Custom Scan that you previously created.
6 In the Edit Scan window, on the Scan Schedule tab:
■ UnderWhen do you want the scan to run, select an interval, and then select thetiming options.
■ Under Run the scan, select from the options. For most users, it’s best to keep allboxes checked. This assures that scans run only when you are not using your computeror when you are not using battery power, and it prevents your computer from going tosleep during a scan.
35Manage your Device SecurityRun Norton scans to check for threats on your PC
7 Click Next.
8 In the Scan Options window, click Save.
View real-time threats detected by Norton SONARSONAR provides real-time protection against threats and proactively detects unknown securityrisks. SONAR identifies emerging threats based on the behavior of applications, which isquicker than the traditional signature-based threat detection. It helps protect you againstmalicious code even before virus definitions are available through LiveUpdate.
Note: SONAR Protection should be kept turned on always. When Auto-Protect is turned off,SONAR Protection is also disabled and your computer is not protected against emergingthreats.
View risks detected by SONAR
1 Start Norton.
If you see the My Norton window, next to Device Security, click Open.
2 In the Norton main window, double-click Security, and then click History.
3 In the Security History window, in the drop-down list, select SONAR Activity.
4 Select a risk in the list if there are risks displayed.
5 Follow the Recommended Action in the Details pane.
This category also lists any activity that modifies the configuration or the settings of yourcomputer. The More Details option of this category provides details about the resourcesthat the activity affects.
Make sure that SONAR Protection is on
1 Start Norton.
If you see the My Norton window, next to Device Security, click Open.
2 In the Norton main window, click Settings.
3 In the Settings window, click Antivirus.
4 On the Automatic Protection tab, under Real Time Protection, move the SONARProtection switch to On.
5 Click Apply.
6 In the Settings window, click Close.
36Manage your Device SecurityRun Norton scans to check for threats on your PC

Exclude files and folders from Norton Auto-Protect, SONAR, andDownload Intelligence scans
You can configure Norton to exclude certain programs from the Auto-Protect scans and SONARscans. You can use Scan Exclusions window and Real Time Exclusions window to excludeviruses and other high-risk security threats from scanning. When you add a file or folder to theexclusions list, Norton ignores the file or folder when it scans for security risks.
To exclude a file from Download Intelligence, you must select a folder and download the fileto the selected folder. For example, when you download an unsafe executable file to this folder,Norton lets you download the file and does not remove it from your computer. You must createa new folder specific for Download Intelligence exclusions.
Note: Excluding a file from the Norton scans reduce the level of protection of your computerand should be used only if you have a specific need. You should only exclude items if you areconfident that they are not infected.
Exclude high-risk security threats from scanning
1 Start Norton.
If you see the My Norton window, next to Device Security, click Open.
2 In the Norton main window, click Settings.
3 In the Settings window, click Antivirus.
4 In the Antivirus settings window, click the Scans and Risks tab.
5 Under Exclusions / Low Risks, do one of the following:
■ In the Items to Exclude from Scans row, click Configure.
■ In the Items to Exclude fromAuto-Protect, Script Control, SONAR and DownloadIntelligence Detection row, click Configure.
6 In the window that appears, click Add Folders or Add Files.
You can assign exclusions to local drives, folders, groups of files, single files, or networkdrives. However, Norton does not support exclusions for files on a network. If you add anetwork drive to the exclusion list, make sure that the drive is connected to your computer.
7 In the Add Item dialog box, click the browse icon.
8 In the dialog box that appears, select the item that you want to exclude from the scan.
When you add folders, you can specify whether to include or exclude subfolders.
9 Click OK.
37Manage your Device SecurityRun Norton scans to check for threats on your PC

10 In the Add Item dialog box, click OK.
11 In the window that appears, click Apply, and then click OK.
Exclude files with low-risk signatures from Norton scansNorton Signature Exclusions let you select specific known security risks to exclude from Nortonscans. For example, if a legitimate app, like a free game, relies on another program, likeadware, to function, you might decide to keep the adware, even if it exposes you to risk. Youmight also decide not to be notified about the program in future scans.
Note: Exclusions reduce your protection and should be used only if you have a specific needand fully understand the potential risk of excluding known threats from Norton scans.
Add a low-risk signature to the Signature Exclusions
1 Start Norton.
If you see the My Norton window, next to Device Security, click Open.
2 In the Norton main window, click Settings.
3 In the Settings window, click Antivirus.
4 In the Antivirus settings window, click the Scans and Risks tab.
5 Under Exclusions / Low Risks, in the Signatures to Exclude from All Detections row,click Configure.
6 In the Signature Exclusions window, click Add.
7 In the Security Risks window, click on a security risk that you want to exclude and thenclick Add.
8 In the Signature Exclusions window, click Apply, and then click OK.
Turn on or turn off automatic tasksNorton runs automatic tasks as it quietly works to protect your computer. These automatictasks include scanning for viruses, monitoring your Internet connection, downloading protectionupdates, and other important tasks. These activities run in the background when your computeris turned on.
If any item needs your attention, Norton displays a message with the information on the currentstatus or prompts you to do something. If you do not see any messages, then your computeris protected.
You can open Norton at any time to see the status of your computer at a glance or to viewprotection details.
38Manage your Device SecurityRun Norton scans to check for threats on your PC

When a background activity is in progress, Norton notifies you with a message in the notificationarea that is located at the far-right of the task bar. You can see the results of the latest activitiesthe next time you open the Norton main window.
Turn on or turn off automatic tasks
1 Start Norton.
If you see the My Norton window, next to Device Security, click Open.
2 In the Norton main window, click Settings.
3 In the Settings window, click Tasks Scheduling.
4 In the Task Scheduling window, on the Automatic Tasks tab, do the following:
■ Check the feature that you want to run automatically.Check the Tasks check box to check all the features at once.
■ Uncheck the feature that you do not want to run automatically.Uncheck the Tasks check box to uncheck all the features at once.
5 Click Apply, and then click Close.
Run custom tasksNorton automatically checks your system and chooses the best settings to keep your systemsecure. However, you can run some specific tasks. You can choose the specific tasks thatyou want to run by using the options available in the Custom Tasks window.
You can choose your own combination of tasks for a one-time scan. You can run LiveUpdate,back up your data, clear browsing history, free disk space by cleaning up disk clutter, andoptimize your disks.
Run custom tasks
1 Start Norton.
If you see the My Norton window, next to Device Security, click Open.
2 In the Norton main window, double-click Security, and then click Scans.
3 In the Scans window, under Scans and Tasks, click Custom Task, and then click Go.
4 In the Custom Tasks window, check the tasks that you want to run.
To select all the tasks, check Tasks.
5 Click Go.
39Manage your Device SecurityRun Norton scans to check for threats on your PC

Schedule security and performance scansUse the Task Scheduling settings to have Norton examine your system automatically forsecurity and performance issues. You can specify when and how often Norton needs to performthose examinations.
You have the following options for scheduling security and performance scans:
Examine your PC for security and performanceissues whenever your PC is idle.
This setting provides the maximum protection.
Automatic (Recommended)
Examine your PC one or more times each week forsecurity and performance issues.
You can pick the days of the week and the time ofday on which the scan performs.
Weekly
Examine your PC once each month for security andperformance issues.
You can pick the day of the month and the time ofday on which the scan performs.
Monthly
Do not perform a scheduled security or performancescan of your PC.
If you choose this option, you should performmanual security and performance scans of your PCperiodically to maintain protection.
Manual Schedule
Your computer's performance is maximized if you schedule your critical operations to occurwhen your computer is idle. When you schedule your scans weekly or monthly and check theRun only at idle time option, Norton scans your computer when it is idle. NortonLifeLockrecommends that you check Run only at idle time to experience better performance of yourcomputer.
Schedule security and performance scans
1 Start Norton.
If you see the My Norton window, next to Device Security, click Open.
2 In the Norton main window, click Settings.
3 In the Settings window, click Tasks Scheduling.
40Manage your Device SecurityRun Norton scans to check for threats on your PC

4 On the Scheduling tab, under Schedule, select an option.
When you clickWeekly orMonthly, you must select the time and day to run the automatictasks. You also have the option of specifying that the automatic tasks must run only whenthe PC is idle.
5 Click Apply, and then click Close.
Configure Data Protector to block malicious processes affecting yourPC
Data Protector protects your PC from malicious processes that intend to destabilize your PC,corrupt and/or steal your data, and propagate the malicious nature to other good processes.It uses Norton reputation technology to identify a process as safe, malicious, or unknown.Depending on your situation, you can add more folders and/or extensions and can also excludeprocesses for scanning and protection.
Warning: Turning off this feature reduces your PC protection. So, we recommend you to keepthis feature turned on always. However, if you wish to turn it off, do that temporarily and ensurethat it is turned on again.
Turn off or turn on Data Protector
1 Start Norton.
If you see the My Norton window, next to Device Security, click Open.
2 In the Norton product main window, click Settings > Antivirus.
3 In the Antivirus window, click the Data Protector tab.
4 In the Data Protector row, move the On/Off switch to On or Off.
5 In the Show Notifications row, do one of the following:
■ Move the switch to On to notify you every time Data Protector blocks a threat.
■ Move the switch to Off to suppress notifications. However, you can see the details ofblocked threats in the Security History window.To access the Security History window, in the Norton main window, double-clickSecurity and then click History > Data Protector.
6 Click Apply.
7 If prompted, select the duration until when you want the Data Protector feature to be turnedoff, and click OK.
41Manage your Device SecurityRun Norton scans to check for threats on your PC

Add or edit a folder for Data Protector protection
1 Start Norton.
If you see the My Norton window, next to Device Security, click Open.
2 In the Norton product main window, click Settings > Antivirus.
3 In the Antivirus window, click the Data Protector tab.
4 In the Data Protector row, move the On/Off switch to On.
5 To add or edit a folder, do the following:
■ Next to Protected Folders, click Configure.
■ In the Protected Folders window, do the following:
■ To include a new item, click Add.
■ To change an existing item, choose the item and then click Edit to modify it.
Note: You cannot edit a preset folder.
■ In the Add Item or Edit Item window, browse and select the folder.
■ Click the check box to include the subfolders.
■ Click OK.
6 Click Apply and then click OK.
Add an extension for Data Protector protection
1 Start Norton.
If you see the My Norton window, next to Device Security, click Open.
2 In the Norton product main window, click Settings > Antivirus.
3 In the Antivirus window, click the Data Protector tab.
4 In the Data Protector row, move the On/Off switch to On.
5 To add an extension, do the following:
■ Next to Protected File Types, click Configure.
■ In the Protected File Types window, click Add.
■ In the Add Item window, type the extension that you want to protect. For example, ifyou want to protect executable files, type .exe in the box. All files with the .exeextension, anywhere on the PC, are protected.
42Manage your Device SecurityRun Norton scans to check for threats on your PC
■ Click OK.
6 Click Apply and then click OK.
Remove a folder or an extension from Data Protector
1 Start Norton.
If you see the My Norton window, next to Device Security, click Open.
2 In the Norton product main window, click Settings > Antivirus.
3 In the Antivirus window, click the Data Protector tab.
4 In the Data Protector row, move the On/Off switch to On.
5 Next to Protected Folders or Protected File Types, click Configure.
6 On the Protected Folders or Protected File Types window, choose the item that youwant to remove.
Note: You cannot remove a preset folder or extension.
7 Click Remove.
8 Click Apply and then click OK.
Add or remove a process from Data Protector exclusion
1 Start Norton.
If you see the My Norton window, next to Device Security, click Open.
2 In the Norton product main window, click Settings > Antivirus.
3 In the Antivirus window, click the Data Protector tab.
4 In the Data Protector row, move the On/Off switch to On.
5 On the Process Exclusion row, click Configure and do the following:
■ To add a process for Data Protector exclusion, clickAdd and then choose the process.
■ To remove a process from Data Protector exclusion, click the process and then clickRemove.
6 Click Apply and then click OK.
Set Norton to remove scripts that can be exploited in phishingattempts
Script Control helps protect you from malware that you download or receive as attachmentsin phishing emails. It removes uncommon scripts from files and sanitizes the files, by default**.
43Manage your Device SecurityRun Norton scans to check for threats on your PC

However, you can restore the original files with the script, and configure how you want Nortonto handle documents with embedded scripts.
Note: **For Chrome, Edge, and Internet Explorer browsers, this feature is supported fromWindows 10 RS2 and later versions.
In addition, Norton blocks programs with embedded scripts from running if it detects anyuncommon behavior with the embedded scripts. However, you can configure how you wantNorton to handle programs with embedded scripts.
Scripts are used to make documents dynamic and interactive. Although the primary objectiveof scripts is to improve the document experience, cybercriminals can use them to sneakmalware on your computer. Scripts are generally not important to the function of a documentand many software programs disable them by default.
You can set Norton to exclude specific files from Script Control if you are confident that theydo not contain malicious content. For more information, See “Exclude files and folders fromNorton Auto-Protect, SONAR, and Download Intelligence scans” on page 37. You can restorethe original files by replacing the sanitized files. You should exclude files only if you are confidentthat they do not have any malicious content.
Script Control identifies potential threats based on the behavior of files. If Norton detects anypotentially dangerous activity when you open a document or program with embedded script,it blocks the application from running the script. You can configure how you want Norton tohandle the scripts when you open documents or programs with embedded scripts.
Restore the original file1 Start Norton.
If you see the My Norton window, in the Device Security row, click Open.
2 In the Norton main window, double-click Security, and then click History.
3 In the Security History window, from the Show drop-down list, select Script Control.
4 In the Script Control view, select the item that you want to restore.
5 On the right pane, under Details, click Restore.
6 In the Script Control Restore window, click Yes.
44Manage your Device SecurityRun Norton scans to check for threats on your PC

7 In the prompt that appears, select Yes.
8 In the Security History window, click Close.
Turn on or turn off Script Control1 Start Norton.
If you see the My Norton window, in the Device Security row, click Open.
2 In the Norton main window, click Settings.
3 In the Settings window, click Antivirus.
4 In the Antivirus settings window, click the Script Control tab.
5 In the Remove scripts when downloading documents row, move the On/Off switch toOn or Off, and then click Apply.
If you turn off, do the following:
■ In the Security Request window, in the Select the duration drop-down list, selectthe amount of time that you want to turn off the option, and click OK.
6 In the Block scripts when opening documents row, move the On/Off switch to On orOff, and then click Apply.
If you turn off, do the following:
■ In the Security Request window, in the Select the duration drop-down list, selectthe amount of time that you want to turn off the option, and click OK.
7 In the Settings window, click Close.
Permanently delete all the Script Control items1 Start Norton.
If you see the My Norton window, in the Device Security row, click Open.
2 In the Norton main window, click Settings.
3 In the Security History window, from the Show drop-down list, select Script Control.
4 In the Script Control view, click Clear Entries.
5 In the Clear Entries window, click Yes.
45Manage your Device SecurityRun Norton scans to check for threats on your PC

6 In the confirmation dialog box, click Yes.
7 In the Security History window, click Close.
Configure how Norton should handle documents and programs withembedded script1 Start Norton.
If you see the My Norton window, in the Device Security row, click Open.
2 In the Norton main window, click Settings.
3 In the Settings window, click Antivirus.
4 In the Antivirus settings window, click the Script Control tab.
5 Under Block scripts when opening documents, in the Microsoft Office row, clickConfigure.
6 In the Microsoft Office Preferences window, under Actions, select the action you wantNorton to perform for each application.
Your options are:
■ Block
■ Allow
■ Ask Me
You can choose a different action for each application.
7 In the confirmation window that appears, click OK.
8 In the Microsoft Office Preferences window, click Apply and then click OK.
9 In the Adobe Document row, select the action you want Norton to perform for PDFdocuments.
10 In the Block scripts with uncommon behavior row, select the action you want Nortonto perform for programs with embedded scripts.
Your options are:
■ Block
■ Allow
46Manage your Device SecurityRun Norton scans to check for threats on your PC

■ Ask Me
11 In the Settings window, click Apply, and then click Close.
Learn more about Norton Script ControlScripts are used to make documents dynamic and interactive. They can also add functionalityby automating certain tasks. Scripts can include ActiveX controls, add-ins, data connections,macros, Linked object linking and embedded OLE files, color-theme files, etc.
Script Control helps protect you from malware that you download or receive as attachmentsin phishing emails.
It removes unsafe scripts from files and sanitizes the files, by default. However, you can restorethe original files with the script, and configure how you want Norton to handle documents withembedded scripts.
The following sections help you with configuring the Script Control settings.
Restore the original file with embedded scriptsYou can restore the original files by replacing the sanitized files. You should restore the originalfiles only if you are confident that they do not have any malicious content.
1 Start Norton.
If you see the My Norton window, in the Device Security row, click Open.
2 In the Norton main window, double-click Security, and then click History.
3 In the Security History window, from the Show drop-down list, select Script Control.
4 In the Script Control view, select the active content item that you want to restore.
5 On the right pane, under Details, click Restore.
6 In the Script Control Restore window, click Yes.
7 In the prompt that appears, select Yes.
8 In the Security History window, click Close.
Configure Norton to handle documents and programs with embeddedscript1 Start Norton.
If you see the My Norton window, in the Device Security row, click Open.
2 In the Norton main window, click Settings.
3 In the Settings window, click Antivirus.
4 In the Antivirus settings window, click the Script Control tab.
47Manage your Device SecurityRun Norton scans to check for threats on your PC

5 Under Block scripts when opening documents, in the Microsoft Office row, clickConfigure.
6 In the Microsoft Office Preferences window, under Actions, select the action you wantNorton to perform for each application.
Your options are:
■ Block
■ Allow
■ Ask Me
You can choose a different action for each application.
7 In the confirmation window that appears, click OK.
8 In the Microsoft Office Preferences window, click Apply and then click OK.
9 In the Adobe Document row, select the action you want Norton to perform for PDFdocuments.
10 In the Block scripts with uncommon behavior row, select the action you want Nortonto perform for programs with embedded scripts.
Your options are:
■ Block
■ Allow
■ Ask Me
11 In the Settings window, click Apply, and then click Close.
Turn off Script Control
Note: Turning off Script Control reduces your protection and should be done only if you havea specific need. Script Control provides an extra layer of security by removing scripts andsanitizing documents. NortonLifeLock recommends that you keep Script Control turned on atall times as it provides an extra layer of security.
1 Start Norton.
If you see the My Norton window, in the Device Security row, click Open.
2 In the Norton main window, click Settings.
3 In the Settings window, click Antivirus.
4 In the Antivirus settings window, click the Script Control tab.
48Manage your Device SecurityRun Norton scans to check for threats on your PC

5 In the Remove scripts when downloading documents row, move the On/Off switch toOff.
6 In the Block scripts when opening documents row, move the On/Off switch to Off.
7 In the Settings window, click Apply.
8 In the Security Request window, in the Select the duration drop-down list, select theamount of time that you want to turn off the feature, and then click OK.
9 In the Settings window, click Close.
Protect your device from exploits, hackers, andzero-day attacks
A zero-day exploit is a technique that hackers use to take advantage of vulnerabilities in aprogram in order to perform malicious actions on your computer. Besides slowing down yourcomputer or causing programs to fail, these exploits can expose your personal data andconfidential information to hackers.
The Exploit Prevention feature in your Norton product protects applications and files that areprone to exploit attacks. By default, Norton Exploit Prevention is turned on and blocks attacksagainst vulnerable programs by closing those programs. Norton sends an Attack Blockednotification when it shuts down a program and provides links to information about the attack.
Turn off or turn on Exploit Prevention
Note:When Exploit Prevention is turned off, your computer is vulnerable to zero-day andother exploits.
1 Start Norton.
If you see the My Norton window, next to Device Security, click Open.
2 In the Norton main window, click Settings.
3 In the Settings window, click Exploit Prevention.
4 In the Exploit Prevention row, move the On/Off switch to Off or On.
5 In the Settings window, click Apply, and then click Close.
Exploit Prevention TechniquesNorton uses proactive exploit prevention techniques to protect your computer from the latestzero-day attacks. You can turn individual techniques on or off from the Settings window. Bydefault, all techniques are turned on.
49Manage your Device SecurityProtect your device from exploits, hackers, and zero-day attacks

Note: Norton recommends that you keep all individual Exploit Prevention techniques turnedon to protect against the widest range of exploits.
Exploit Prevention techniques include:
■ Java Process ProtectionPrevents remote hackers from using malicious code through java processes and allowsonly trusted java processes to run.
■ Structured Exception Handler Overwrite ProtectionProtects against structured exception handling exploits, which compromise an applicationby overwriting the pointer of an exception handler with an attacker controlled address.
■ Stack Pivot DetectionBlock exploit attacks that changes the stack pointer with attacker’s controlled memory toexecute its Return Oriented Programming (ROP) crafted attack code.
■ Data Execution Prevention EnforcementBlocks attackers from executing malicious code from stack or heap memory of yourcomputer.
■ Memory Layout Randomization EnforcementEnforces dynamically loaded application DLLs or modules to be always loaded in randomlocations to protect them from attackers.
■ Heap Spray ProtectionProtects commonly targeted memory locations where exploits or attackers allocate theirshellcode using heap spray attack techniques.
■ Memory Layout Randomization EnhancementImproves the ASLR (Address Space Layout Randomization) behavior of the operatingsystem when allocating critical memory locations of the application. This makes thosememory locations less predictable from attackers.
■ Null Page ProtectionPre-allocates the null memory location which will help in preventing attacks on null pointerdereference vulnerabilities.
■ Remote DLL Injection DetectionPrevents remote hackers from inserting malicious executable code over external networkssuch as public IP addresses or domains.
■ Stack Execution Prevention, Suspicious API Invocation Detection, andHeap PayloadDetection techniques protect your computer against Return-Oriented Programming (ROP)
50Manage your Device SecurityProtect your device from exploits, hackers, and zero-day attacks

attacks that bypass the Address Space Layout Randomization and Data ExecutionPrevention exploit mitigation techniques.
Turn Norton Firewall on or offSmart Firewall monitors communications between your computer and the other computers onthe Internet. It also protects your computer from common security problems. When the SmartFirewall is turned off, your computer is not protected from Internet threats and security risks.
If you need to turn Smart Firewall off, you should only turn it off for a specified duration, afterwhich it is turned on again automatically.
Turn Norton Firewall on or off
1 Start Norton.
If you see the My Norton window, next to Device Security, click Open.
2 In the Norton main window, click Settings.
3 In the Settings window, click Firewall.
4 On the General Settings tab, in the Smart Firewall row, move the On/Off switch to Offor On.
5 Click Apply.
6 If prompted, select the duration until when you want the Firewall feature to be turned off,and click OK.
Disable or enable Norton Firewall from the Windows notification area
1 In the notification area on the taskbar, right-click the Norton icon, and then click DisableSmart Firewall or Enable Smart Firewall.
2 If prompted, select the duration until when you want the Firewall feature to be turned off,and click OK.
Customize Program Rules to change access settings for programsAfter you use Norton for a while, you might need to change the access settings for certainprograms.
Customize Program Rules
1 Start Norton.
If you see the My Norton window, next to Device Security, click Open.
2 In the Norton main window, click Settings.
3 In the Settings window, click Firewall.
51Manage your Device SecurityProtect your device from exploits, hackers, and zero-day attacks

4 On the Program Control tab, in the Program column, select the program that you wantto change.
5 In the drop-down list next to the program that you want to change, select the access levelthat you want this program to have. Your options are:
Allow all access attempts by this program.Allow
Deny all access attempts by this program.Block
Create the rules that control how this program accesses the Internet.Custom
6 Click Apply.
Change the order of firewall rulesEach list of firewall rules is processed from the top down. You can adjust how the firewall rulesare processed by changing their order.
Note: Do not change the order of the default Traffic rules unless you are an advanced user.Changing the order of default Traffic rules can affect firewall functionality and reduce thesecurity of your computer.
Change the order of Traffic rules
1 Start Norton.
If you see the My Norton window, next to Device Security, click Open.
2 In the Norton main window, click Settings.
3 In the Settings window, click Firewall.
4 On the Traffic Rules tab, select the rule that you want to move.
5 Do one of the following:
■ To move this rule before the rule above it, click Move Up.
■ To move this rule after the rule below it, click Move Down.
6 When you are done moving the rules, click Apply.
Change the order of Program rules
1 Start Norton.
If you see the My Norton window, next to Device Security, click Open.
2 In the Norton main window, click Settings.
52Manage your Device SecurityProtect your device from exploits, hackers, and zero-day attacks

3 In the Settings window, click Firewall.
4 On the Program Control tab, select the program that contains the rule that you want tomove.
5 Click Modify.
6 In the Rules window, select the rule that you want to move.
7 Do one of the following:
■ To move this rule before the rule above it, click Move Up.
■ To move this rule after the rule below it, click Move Down.
8 When you are done moving the rules, click OK.
9 In the Firewall settings window, click Apply.
Turn off a Traffic rule temporarilyYou can temporarily turn off a Traffic rule if you want to allow specific access to a computeror a program. You must remember to turn on the rule again when you are done working withthe program or computer that required the change.
Note: You cannot turn off some of the default firewall rules that appear in the list. You can onlyview the settings of these rules by using the View option.
Turn off a Traffic rule temporarily
1 Start Norton.
If you see the My Norton window, next to Device Security, click Open.
2 In the Norton main window, click Settings.
3 In the Settings window, click Firewall.
4 On the Traffic Rules tab, uncheck the box next to the rule that you want to turn off.
5 Click Apply.
Allow Internet access for a blocked programBy default, Smart Firewall blocks certain programs from accessing the Internet. Such programsmight include certain streaming-media programs, network games, or custom businessapplications that are provided by your employer. If you know that the program's Internet activityis not a threat to your security, you can unblock the program's Internet access.
53Manage your Device SecurityProtect your device from exploits, hackers, and zero-day attacks

Allow Internet access for a blocked program
1 Start Norton.
If you see the My Norton window, next to Device Security, click Open.
2 In the Norton main window, click Settings.
3 In the Settings window, click Firewall.
4 On the Program Control tab, select the program that you want to allow access to theInternet.
5 In the Access drop-down list for the program entry, click Allow.
6 Click Apply.
By default, Norton firewall automatically configures Internet access settings for Web-enabledprograms the first time that they run. When a program tries to access the Internet for the firsttime, Automatic Program Control creates rules for it.
However, Norton lets you canmanually configure the Internet access settings for your programs.
Configure Internet access settings for your programsTurn off Automatic Program Control
1 Start Norton.
If you see the My Norton window, next to Device Security, click Open.
2 In the Norton main window, click Settings.
3 In the Settings window, click Firewall.
4 In the Firewall settings window, click Advanced Program Control.
5 In the Automatic Program Control row, move the On/Off switch to Off.
6 In the confirmation window, click Yes.
7 In the Settings window, click Apply, and then click Close.
54Manage your Device SecurityProtect your device from exploits, hackers, and zero-day attacks

Configure the Internet access settings for a program
1 Start your program.
When the program tries to access the Internet, Norton prompts you with a firewall alert.
2 In the Firewall Alert window, in the Options drop-down list, select an action.
You can allow, block, or manually create a program rule.
3 Click OK.
Turn Firewall Block Notification offWhen Automatic Program Control is turned on, Smart Firewall automatically blocks maliciousapplications and applications with low reputation from connecting to the Internet orcommunicating with other machines on your network.
Norton notifies you when Smart Firewall blocks an application from connecting to the network.If you do not want to see the notification, you can turn this off by using Advanced ProgramControl.
Turn Firewall Block Notification off
1 Start Norton.
If you see the My Norton window, next to Device Security, click Open.
2 In the Norton main window, click Settings.
3 In the Settings window, click Firewall.
4 On the Advanced Program Control tab, move the Show Firewall Block Notificationswitch to Off.
Learn more about Intrusion Prevention exclusion listIf you are sure that a device on your network is safe, you can change the trust level of thedevice to Full Trust. You can configure the trust level of a device using the Device Trust underNetwork Settings. You can exclude these trusted devices from Intrusion Prevention scan.Excluding Full Trust devices from the Intrusion Prevention scan saves the scan time andimproves the network speed of your computer. When you exclude a device that is set to FullTrust, your Norton product does not scan any information that is received from this device.The Full Trust devices that are excluded from Intrusion Prevention scan are added to IntrusionPrevention exclusion list.
If you find that any of the devices that you excluded from the Intrusion Prevention scan isinfected, you can purge the saved exclusion list. When you purge the exclusion list, your Nortonproduct removes all the IPS excluded devices from the exclusion list.
You can purge the saved exclusion list under the following circumstances:
55Manage your Device SecurityProtect your device from exploits, hackers, and zero-day attacks

■ Any of the devices that you excluded from Intrusion Prevention scan is infected.
■ Any of the devices that you excluded from Intrusion Prevention scan attempts to infect yourcomputer.
■ Your home network is infected.
Remove all the devices from the Intrusion Prevention exclusion list
1 Start Norton.
If you see the My Norton window, next to Device Security, click Open.
2 In the Norton main window, click Settings.
3 In the Settings window, click Firewall.
4 Click the Intrusion and Browser Protection tab.
5 Under Intrusion Prevention, in the Exclusion List row, click Purge.
6 In the confirmation dialog box, click Yes.
7 In the Settings window, click Close.
Turn Browser Protection onMalicious websites detect and exploit browser vulnerabilities to download malware. When youturn on Browser Protection, Norton blocks malware before it can attack. It helps protect yoursensitive information and prevents attackers from accessing your computer.
By default, Browser Protection is turned on. Keep Browser Protection turned on to ensureprotection against malicious websites.
Note: The Browser Protection feature is available for Google Chrome, Microsoft InternetExplorer, Mozilla Firefox, and Microsoft Edge browsers.
How do I turn on Browser Protection?To protect your browser from malicious websites, the Browser Protection feature is turned onby default. However, if you had turned it off for any reason, you can turn it back on.
Turn on Browser Protection
1 Start Norton.
If you see the My Norton window, next to Device Security, click Open.
2 In the Norton product main window, click Settings.
3 In the Settings window, click Firewall or Network.
4 Click the Intrusion and Browser Protection tab.
56Manage your Device SecurityProtect your device from exploits, hackers, and zero-day attacks

5 In the Browser Protection row, move the On/Off switch to On.
6 Click Apply.
7 In the Settings window, click Close.
Set Norton Firewall to stop or start notifying you when it blocks anattack
You can choose whether you want to receive notifications when Norton Intrusion Preventionblocks suspected attacks.
If you chose not to receive notifications, you can still view attacks that Norton blocked in yoursecurity history.
Turn off or turn on Intrusion Prevention notifications
1 Start Norton.
If you see the My Norton window, next to Device Security, click Open.
2 In the Norton main window, click Settings.
3 In the Settings window, click Firewall or Network.
4 Click the Intrusion and Browser Protection tab.
5 Under Intrusion Prevention, in the Notifications row, move the On/Off switch to Off orOn.
6 In the Settings window, click Apply, and then click Close.
Turn off or turn on an individual Intrusion Prevention notification
1 Start Norton.
If you see the My Norton window, next to Device Security, click Open.
2 In the Norton main window, click Settings.
3 In the Settings window, click Firewall or Network.
4 Click the Intrusion and Browser Protection tab.
5 Under Intrusion Prevention, in the Intrusion Signatures row, click Configure.
6 In the Intrusion Signatures window, uncheck or check Notify me corresponding to theindividual signature.
7 Click OK.
8 In the Intrusion Signatures window, click Apply, and then click OK.
9 In the Settings window, click Close.
57Manage your Device SecurityProtect your device from exploits, hackers, and zero-day attacks

Turn off or turn on AutoBlockNorton AutoBlock stops all traffic between a device in your network and any other computerthat attempts to exploit that device. Since this includes traffic that may not be malicious,AutoBlock only stops the connection for a limited time after it detects a threat. You can specifythe period for which you want your Norton product to block the connections from attackingcomputers. By default, your Norton product blocks all traffic between your computer and theattacking computer for a period of 30 minutes.
If AutoBlock blocks a computer or computers that you need to access, you can turn offAutoBlock.
Turn off or turn on AutoBlock
1 Start Norton.
If you see the My Norton window, next to Device Security, click Open.
2 In the Norton main window, click Settings.
3 In the Settings window, click Firewall or Network.
4 Click the Intrusion and Browser Protection tab.
5 Under Intrusion Prevention, in the Intrusion AutoBlock row, click Configure.
6 In the Intrusion AutoBlock window, under AutoBlock, do one of the following:
■ To turn off Intrusion AutoBlock, click Off.
■ To turn on Intrusion AutoBlock, clickOn (Recommended), and then in theAutoBlockattacking computers for drop-down list, select how long you want to turn on AutoBlock.
7 In the Intrusion AutoBlock window, click OK.
8 In the Settings window, click Close.
Unblock computers that are blocked by Norton AutoBlockIf Norton Firewall stops network traffic to a computer that you know is safe, you can restoreconnections to the computer by removing it from the AutoBlock list in Norton Firewall settings.
Unblock an AutoBlocked computer
1 Start Norton.
If you see the My Norton window, next to Device Security, click Open.
2 In the Norton main window, click Settings.
3 In the Settings window, click Firewall or Network.
4 Click the Intrusion and Browser Protection tab.
5 Under Intrusion Prevention, in the Intrusion AutoBlock row, click Configure.
58Manage your Device SecurityProtect your device from exploits, hackers, and zero-day attacks

6 In the Intrusion AutoBlockwindow, underComputers currently blocked by AutoBlock,select the IP address of the computer.
7 Under the Action column, select Unblock from the drop-down list.
8 In the Intrusion AutoBlock window, click OK.
9 In the Settings window, click Close.
Add a device to Device TrustYou can manually add a device to the Device Trust. You can add a device by specifying thefollowing:
■ The name or description of the device
■ The IP address or physical address of the device
Note: If you trust a device that is not on your network, you can expose your computer to potentialsecurity risks.
Add a device to Device Trust
1 Start Norton.
If you see the My Norton window, next to Device Security, click Open.
2 In the Norton main window, click Settings.
3 In the Settings window, click Firewall.
4 On the General Settings tab, in the Device Trust row, click Configure.
5 In the Device Trust window, click Add.
6 In the Add Device window, in the Name box, type the name of the device that you wantto add to your network.
The maximum character length of the device name should not exceed 15 characters.
59Manage your Device SecurityProtect your device from exploits, hackers, and zero-day attacks

7 In the IP or Physical Address box, type the IP address or physical address of the devicethat you want to add to the Device Trust.
You can use the following formats in the IP or Physical Address box:
172.16.0.0IPv4 address
fe80::12ac:fe44:192a:14ccIPv6 address
11-22-c3-5a-fe-a4Physical address
ftp.myfiles.comResolvable host
The address that you provide is not verified until the device is physically found on thenetwork.
8 Select an option from the Trust Level drop-down menu. Your options are:
Adds a device to the Full Trust list.
Full Trust devices are monitored only for knownattacks and infections. You should select thissetting only when you are sure that the device iscompletely safe.
Full Trust
Adds a device to the Restricted list.
Restricted devices do not have access to yourcomputer.
Restricted
9 If you want the device to be excluded from Intrusion Prevention scans, check Excludefrom IPS Scanning.
10 Click Add Device.
Turn off or turn on Download IntelligenceDownload Insight protects your computer against any unsafe file that you may run or executeafter you download it using a supported browser. By default, theDownload Intelligence optionis turned on. In this case, Download Insight notifies you about the reputation levels of anyexecutable file that you download. The reputation details that Download Insight providesindicate whether the downloaded file is safe to install.
There may be times when you want to turn off Download Insight. For example, if you want todownload an unsafe file. In this case, you must turn off Download Insight so that your Nortonproduct lets you download the file and does not remove it from your computer.
You can use the Download Intelligence option to turn off or turn on Download Insight.
60Manage your Device SecurityProtect your device from exploits, hackers, and zero-day attacks
Turn off or turn on Download Intelligence
1 Start Norton.
If you see the My Norton window, next to Device Security, click Open.
2 In the Norton product main window, click Settings.
3 In the Settings window, click Firewall or Network.
4 Click the Intrusion and Browser Protection tab.
5 In the Download Intelligence row, move the On/Off switch to Off or On.
6 Click Apply.
7 If prompted, select the duration until when you want the Download Intelligence feature tobe turned off, and click OK.
8 In the Settings window, click Close.
Turn off or turn on spam filteringWith the increase in usage of email, many users receive a number of unwanted and unsolicitedcommercial email messages known as spam. Not only does spam make it difficult to identifyvalid email messages, but some spam contains offensive messages and images.
To control these spammails you can use the spam filtering. By default, spam protection remainsactive. If for any reason you want to disable it, you can turn it off from within the program itself.
Note: Turning off Norton AntiSpam increases your exposure to receive unsolicited emailmessages.
Turn off or turn on spam filtering
1 Start Norton.
If you see the My Norton window, next to Device Security, click Open.
2 In the Norton product main window, click Settings.
3 In the Settings window, click AntiSpam.
4 On the Filter tab, in the AntiSpam row, move the On/Off switch to Off or On.
5 If you turn spam filtering off, do the following:
■ In the Security Request window, in the Select the duration drop-down list, selectthe amount of time that you want to turn off spam filtering.
6 Click Apply.
61Manage your Device SecurityProtect your device from exploits, hackers, and zero-day attacks

7 Click OK.
8 In the Settings window, click Close.
Define the Internet usage for NortonNetwork Cost Awareness lets you control the bandwidth that Norton uses. By default, NetworkCost Awareness is turned on and set to Auto. In Windows 7 or earlier, the default setting isNo Limit. If you have a slow Internet connection, you can reduce the bandwidth that Nortonuses. You can also set communication policies for all network connections that your computeruses by changing Network Cost Awareness settings.
Define the Internet usage for Norton
1 Start Norton.
If you see the My Norton window, next to Device Security, click Open.
2 In the Norton main window, click Settings.
3 In the Settings window, click Firewall.
4 On the General Settings tab, in the Network Cost Awareness row, click Configure. Ifthe Configure option is disabled, move the On/Off switch to On.
5 In the Network Cost Awareness settings window, under the Policy column, click thedrop-down list next to the network connection for which you want to set up a policy.
6 Select one of the following:
■ Auto Allows Norton to receive all product and virus definition updates based on theWindows cost awareness policy.
Note: The Auto option is available only in Windows 8 or later.
■ No Limit Allows Norton to use the required network bandwidth to receive all productand virus definition updates. If you use Windows 7 or earlier, the default policy is NoLimit.
■ Economy Allows Norton to access the Internet only to receive critical product updatesand virus definitions. If you have a limited Internet connection, Economy ensures youare protected from critical security threats.
■ No Traffic Blocks Norton from connecting to the Internet. If you choose this policy,Norton cannot receive critical virus definitions and program updates, which can leadto potential dangers and virus attacks.
7 Click Apply, and then click OK.
8 In the Settings window, click Close.
62Manage your Device SecurityProtect your device from exploits, hackers, and zero-day attacks

Turn off or turn on Network Cost AwarenessYou can set up policies to restrict the Internet usage of Norton. If you do not want to restrictthe Internet usage of your Norton product, you can turn off Network Cost Awareness.
If you feel that Norton uses too much network bandwidth, you can turn on Network CostAwareness. Then, you can set up policies to restrict the Internet usage of Norton. The Nortonproduct connects to the Internet based on the policy that you set up in the Network CostAwareness settings window. By default, Network Cost Awareness is turned on.
Turn off or turn on Network Cost Awareness
1 Start Norton.
If you see the My Norton window, next to Device Security, click Open.
2 In the Norton main window, click Settings.
3 In the Settings window, click Firewall.
If you have Norton AntiVirus, click Network.
4 On the General Settings tab, in the Network Cost Awareness row, move the On/Offswitch to Off or On.
5 In the Settings window, click Apply, and then click Close.
Set Norton to monitor applications and blockmalicious websites from accessing your computer
A few malicious websites may attempt to gain unauthorized access to your device informationwhen you install and open any freeware or shareware applications. Malicious websites detectand exploit vulnerabilities to download malware such as crypto mining malware that canexpose your device information to cybercriminals.
With App URL Monitoring turned on, Norton monitors all applications that are installed onyour computer and block the malicious websites from accessing your computer. Norton alertsyou when it blocks a malicious website and you can view the information about the attackusing the Security History window.
Note: AppURLMonitoring does not monitor the browser applications. To protect your browserapplication from malicious websites, you need to add Norton browser extensions.
Turn on App URL Monitoring to block malicious websitesBy default, App URL Monitoring is turned on. Keep App URL Monitoring turned on to ensureprotection against malicious websites.
63Manage your Device SecuritySet Norton to monitor applications and block malicious websites from accessing your computer

1 Start Norton.
If you see the My Norton window, next to Device Security, click Open.
2 In the Norton main window, click Settings.
3 In the Settings window, click Firewall or Network.
4 Click the Intrusion and Browser Protection tab.
5 Under Intrusion Prevention, in the App URL Monitoring row, move the On/Off switchto On.
Exclude a URL or domain from monitoringIntrusion Prevention uses an extensive list of attack signatures to detect and block suspiciouswebsites. In some cases, benign websites may be identified as suspicious, because it has asimilar attack signature. If you receive notifications about a possible attack, and you know thatthe website or domain that triggers the notification is safe, you can exclude the signature frommonitoring.
Exclude a URL or domain from the alert notification
1 On the alert notification, click View Details.
2 In the Security History - Advanced Details window, click Unblock URL.
Exclude a URL or domain using your Norton
1 Start Norton.
If you see the My Norton window, next to Device Security, click Open.
2 In the Norton main window, click Settings.
3 In the Settings window, click Firewall or Network.
4 Click the Intrusion and Browser Protection tab.
5 Under Intrusion Prevention, in the App URL Monitoring Exclusions row, clickConfigure.
6 Click the Add button and enter the URL or the domain name that you want to excludefrom monitoring.
7 If you want to edit or remove a URL or domain, do the following:
■ Select a URL or domain from the list and click the Edit button. Modify the URL or thedomain name.
64Manage your Device SecuritySet Norton to monitor applications and block malicious websites from accessing your computer

■ Select a URL or domain that you want to remove and click the Remove button.
View information about the blocked URLView information in the alert notification
1 On the alert notification, click View Details.
2 In the Security History - Advanced Details window, you can view more details aboutthe blocked URL.
View information using the Security History window
1 Start Norton.
If you see the My Norton window, next to Device Security, click Open.
2 In the Norton product main window, double-click Security, and then click History.
3 In Security History window, in the Show drop-down list, select Intrusion Preventionfrom the list.
4 Click a row to view the details for that item.
5 Double-click a row, or clickMore Options, to open the Security History Advanced Detailsto view more details about the activity and take an action on an activity if required.
Get started using Norton Cloud BackupCloud Backup stores and protect important files and documents as a preventative measureto data loss due to hard drive failures, stolen devices and even ransomware.
Note: Norton Cloud Backup is available only on Windows.
Before running Norton Cloud Backup, create a backup set that specifies what files you wantto back up. You can also specify where you want the files to be backed up and when you wantthe backup to run. You can backup files to the cloud using Norton Cloud Backup or to yourown external drives.
Note: The first time you run a backup, Norton may take some time to examine and copy allthe files on your computer. If your Internet connection is slow, the process may take longer.
Norton does not back up your files automatically if the backup destination is Local Backup.Backing up to local storage devices needs your intervention.
65Manage your Device SecurityGet started using Norton Cloud Backup

Create a backup set
1 Start Norton.
If you see the My Norton window, next to Device Security, click Open.
2 In the Norton main window, double-click Backup, and then click Backup Sets.
3 In the Backup Settings window, click Create New Set.
4 In the window that appears, type a name for your backup set, and then click OK.
5 On theWhat tab, under File Types, turn on one or more file categories that you want toback up.
6 On theWhere tab, in the Destination column, select Secure Cloud Storage.
If you have not activated cloud backup, click the Activate for free link and follow theinstructions.
7 On theWhen tab, use the Schedule list to select the backup schedule that best suitsyour needs.
8 Click Save Settings.
Run Norton Cloud Backup
Note: Norton may prompt you to enter your account credentials for authentication when yourun backup for the first time.
1 Start Norton.
If you see the My Norton window, next to Device Security, click Open.
2 In the Norton main window, double-click Backup, and then click Run Backup.
3 In the Run Backup window, follow the on-screen instructions.
4 Click Close.
Note: If the backup does not complete, Norton suggests possible causes such asinadequate storage capacity or speed limitations. Always check that you are connectedto the Internet when running a backup and that storage devices are connected and turnedon.
66Manage your Device SecurityGet started using Norton Cloud Backup

Add or exclude files and folders in your backup setsNorton lets you back up different file types, like picture, music, or video files, to your backupsets. You can specify files or folders that contain file types normally included in your backupsets and exclude them from backups.
You can also add or remove file extensions that are normally part of the default file types. Formore information, See “View or change the default file types or file extensions that Nortonincludes in backups” on page 68.
Add or exclude files and folders in backup set
1 Start Norton.
If you see the My Norton window, next to Device Security, click Open.
2 In the Norton main window, double-click Backup, and then click Backup Sets.
3 In the Backup Settings window, in the Backup Set drop-down list, select the backup setthat you want to configure.
4 On theWhat tab, click Add or exclude files or folders.
5 In the window that appears, do the following:
■ To add a file to the backup set, click Include File and navigate to the file you want toadd.
■ To add a folder to the backup set, click Include Folder and navigate to the folder youwant to add.
■ To remove a file from the backup set, click Exclude File and navigate to the file youwant to remove.
■ To remove a folder from the backup set, click Exclude Folder and navigate to thefolder you want to remove.
6 In the Backup Settings window, click Save Settings.
67Manage your Device SecurityGet started using Norton Cloud Backup

Note: You can also right-click a file or folder and select Norton Security > Add toBackup/Exclude from Backup from the shortcut menu.
The Add to Backup and Exclude from Backup options appear in the shortcut menu onlyafter you configure your backup and when theBackup Settings and theRestore Fileswindowsare closed.
View or change the default file types or file extensions that Nortonincludes in backups
By default, Norton Backup looks for files that belong to certain file types, like pictures, music,or video, before running a backup. The default file types ensure that the data most usersconsider important gets backed up automatically once they create a backup set and run abackup. You can change the backup file type defaults, or the extensions included in each filetype, if you want to include or exclude data from your backups.
View or change default file types or file extensions included in backups
1 Start Norton.
If you see the My Norton window, next to Device Security, click Open.
2 In the Norton main window, double-click Backup, and then click Backup Sets.
3 In the Backup Settings window, in the Backup Set drop-down list, select the backup setthat you want to configure.
4 On theWhat tab, check Edit File Type to change the extensions included in file typesfor picture, music, video and other file types.
5 Under File Types, click Configure next to a file type.
6 In the window that appears, do the following, and click Save.
■ To remove a file extension, select the file extension in the list and click Remove.
■ To add additional extensions to the list, click Add New.
7 In the Backup Settings window, click Save Settings.
Restore pictures, music, or other important files from Norton backupsets
You can easily restore your Norton Backup data if you are the victim of ransomware or othermalware or if you experience unrecoverable hardware issues. You can choose to restore entirebackup sets or specific files in a backup set. You can also determine where to restore backedup files.
68Manage your Device SecurityGet started using Norton Cloud Backup

Note: Restore happens as per the configured backup set. If you restore to a new device, youcannot expect Norton to restore your files as per your desired folder structure of your olddevice.
Restore Norton backup files or entire backup sets
1 Start Norton.
If you see the My Norton window, next to Device Security, click Open.
2 In the Norton main window, double-click Backup, and then click Restore Files.
3 In the Restore Files window, under Restore From, click View All.
Click a backup set, and then click OK.
4 In the Restore Files window, under Files, click Browse for Files and Folders.
Select the files that you want to restore, and then click OK.
5 In the Restore Files window, under Restore To, click Original Location.
ClickChange and follow the instructions if you don’t want to restore to the original location.
6 Click Restore Files and then click Close.
Download files from Cloud Backup
1 Go to https://my.Norton.com.
2 Click Sign In.
3 Enter your NortonLifeLock account email address and password and click Sign In.
4 In the My Norton page, in the Cloud Backup tile, click View Backup Sets.
5 Select the backup set that has the file you want to download.
6 Navigate to the file you want to download.
If you know the file name, you can use the search functionality to search for the particularfile.
Use the Filter option to filter out the pictures and documents.
7 Move the mouse pointer over the file name and click Download.
Delete backup set and files from Cloud BackupYou can delete a backup set if it is no longer needed. You cannot delete a backup set if onlyone backup set is available. However, you can create a new backup set before you delete theold backup set.
69Manage your Device SecurityGet started using Norton Cloud Backup

Note:Sometimes, a back-end service outage or server maintenance can stop you from deletingyour backup data. In such cases, try deleting after some time. To identify if there is a serviceoutage, check the Norton Service Status page.
When a backup set is deleted, the Backup details of the files that are included in that backupset also change. For example, the icon overlays and the Backup tab in the file properties ofthe file no longer appear.
Deleting a backup set is particularly helpful if you want to free some space on your SecureCloud Storage.
Note: To delete a backup set from your cloud backup, you must set the Network CostAwareness option in the Firewall Settings window to No Limit.
For more information, See “Define the Internet usage for Norton” on page 62.
Delete a backup set
1 Start Norton.
If you see the My Norton window, next to Device Security, click Open.
2 In the Norton main window, double-click Backup, and then click Backup Sets.
3 In the Backup Settings window, in the Backup Set drop-down list, select the backup setthat you want to delete.
4 Click Delete.
5 In the Delete Backup Set window, do one of the following:
■ To delete the current backup set, select Delete backup set.
■ To delete the current backup set and purge the files already backed up, select Deletebackup set and files.
6 Click Yes.
Delete backup set from your account
1 Sign in to your account.
2 In the My Norton page, click Cloud Backup.
The existing backup sets that are in use are displayed.
3 To delete a backup set, click the trash icon of the backup set that you want to delete.
4 In the Delete Backup Set confirmation window, click Delete.
Click Cancel to display the backup page without deleting the backup set.
70Manage your Device SecurityGet started using Norton Cloud Backup

Customize your Norton product settingsIn the Settings window, you can turn on or turn off the following Quick Controls services:
■ Silent Mode
■ Backup
■ Backup Status Overlays
■ Automatic LiveUpdate
■ Smart Firewall
■ Norton Tamper Protection
You should leave all of the services turned on except Silent Mode.
Turn on or turn off Quick Controls services
1 Start Norton.
If you see the My Norton window, next to Device Security, click Open.
2 In the Norton main window, click Settings.
3 In the Settings window, under Quick Controls, do one of the following:
■ To turn on a service, check its check box.
■ To turn off a service, uncheck its check box.If an alert or a message appears, select the duration from the drop-down menu, andthen click OK.
Customize Real Time Protection settingsReal Time Protection detects unknown security risks on your computer and lets you determinewhat action to take if it finds a risk.
Note: Default settings are recommended for most users. If you want to turn off a featuretemporarily, turn it on as soon as possible. If you want low-risk items removed automatically,configure SONAR Advanced mode. Auto-Protect checks for viruses and other security risksevery time that you run programs on your computer. Always keep Auto-Protect on.
Set Auto-Protect to scan removable mediaChecks for boot viruses when you access removable media. After the removable media hasbeen scanned for boot viruses, it is not scanned again until it is reinserted or formatted. If youstill suspect that a boot virus infects your removable media, ensure that Auto-Protect is turnedon to rescan the removable media. You then insert the removable media and open it from My
71Manage your Device SecurityCustomize your Norton product settings
Computer for Auto-Protect to rescan it. You can also scan it manually to verify that theremovable media is not infected.
Customize Automatic Protection settings
1 Start Norton.
If you see the My Norton window, next to Device Security, click Open.
2 In the Norton main window, click Settings.
3 In the Settings window, click Antivirus.
4 Under Removable Media Scan, set the slider to On.
Set SONAR to remove threats automaticallySONAR provides real-time protection against threats and proactively detects unknown securityrisks on your computer. SONAR identifies emerging threats based on the behavior ofapplications. You can configure how SONAR removes a threat using SONAR Advanced Modesettings.
Set SONAR to remove threats automatically
1 Start Norton.
If you see the My Norton window, next to Device Security, click Open.
2 In the Norton main window, click Settings.
3 In the Settings window, click Antivirus.
4 Under Remove Risks Automatically, set the slider to Always.
5 Under Remove Risks if I Am Away, set the slider to Always.
6 Click Apply.
Set Auto-Protect to exclude known good files from Norton scansIf you think Norton identifies a valid application as a security risk, you can exclude the file fromNorton scans.
Exclude files from Norton scans
1 Start Norton.
If you see the My Norton window, next to Device Security, click Open.
2 In the Norton main window, click Settings.
3 In the Settings window, click Antivirus.
4 In the Antivirus settings window, click the Scans and Risks tab.
5 Under Exclusions / Low Risks, do one of the following:
72Manage your Device SecurityCustomize your Norton product settings

■ In the Items to Exclude from Scans row, click Configure.
■ In the Items to Exclude from Auto-Protect, SONAR and Download IntelligenceDetection row, click Configure.
6 In the window that appears, click Add Folders or Add Files.
7 In the Add Item dialog box, click the browse icon. In the dialog box that appears, selectthe item that you want to exclude from scans.
8 Click OK.
Learn more about Scans and Risks settingsScans and Risks settings let you customize the scans that Norton performs on your computer.You can configure a scan based on the digital signature and trust level of the files on yourcomputer. You can define how Norton should behave when it scans email messages.
You can use the following Scans and Risks settings:
Computer ScansYou can run different types of scans to detect and prevent any virus infection on your computer.The scans are Quick Scan, Full System Scan, and customized scans. You can use the variousComputer Scans options to customize the scans that Norton performs on your computer.You can also specify scanning of compressed files.
TheComputer Scans options also let you specify scans to detect rootkits, other stealth items,tracking cookies, and unknown security threats. Your options are:
■ Compressed File ScanScans and repairs the files inside compressed files.When you turn on this feature, Norton scans and detects viruses and other security risksin the files within compressed files and removes the compressed files.
■ Rootkits and Stealth Items ScanScans for rootkits and other security risks that might be hidden on your computer.
■ Network Drives ScanScans the network drives that are connected to your computer.Norton performs a Network Drives Scan during Full System Scan and Custom Scan.By default, the Network Drives Scan option is turned on. If you turn off this option, Nortondoes not scan network drives.
■ Heuristic ProtectionScans your computer to protect against unknown security threats.Norton uses heuristic technology to check suspicious characteristics of a file to categorizeit as infected. It compares the characteristics of a file to a known infected file. If the file hassufficient suspicious characteristics, then Norton identifies the file as infected with a threat.
73Manage your Device SecurityCustomize your Norton product settings

■ Tracking Cookies ScanScans for the small files that programsmight place on your computer to track your computingactivities.
■ Full System ScanA Full System Scan thoroughly examines your entire computer for viruses, spyware, anddifferent security vulnerabilities. You can use the Configure option to schedule the FullSystem Scan.
Protected PortsProtected Ports settings protect the POP3 and SMTP ports of your email program.
You can use this option to manually configure your POP3 and SMTP email ports for emailprotection. If the SMTP and POP3 port numbers that your Internet service provider (ISP) hasprovided for your email program is different from the default SMTP and POP3 port numbers,you must configure Norton to protect the ports.
Email Antivirus ScanEmail Antivirus Scan protects you from the threats that are sent or received in emailattachments.
You can use the Email Antivirus Scan options to define how Norton should behave when itscans email messages. Based on the options you choose, Norton automatically scans theemail messages that you send or receive.
Exclusions / Low RisksExclusions options specify the items such as folders, files, and drives that you exclude fromNorton scans. Scan signatures and low-risk items are some items that you can exclude fromscanning.
Exclusions options also let you choose which categories of risks you want Norton to detect.Your options are:
■ Low RisksLets you manage the low-risk items that are found in your computer.You can specify how you want Norton to respond to low-risk items.
■ Items to Exclude from ScansLets you determine which disks, folders, or files you want to exclude from risk scanning.You can add new exclusion items or edit the added items in the excluded-items list. Youcan also remove items from the excluded-items list.
■ Items to Exclude from Auto-Protect, SONAR and Download Intelligence DetectionLets you determine which disks, folders, or files you want to exclude from Auto-Protectscans and SONAR scans.
74Manage your Device SecurityCustomize your Norton product settings

You can add the new items that need to be excluded or modify the items that you alreadyexcluded. You can also remove items from the excluded-items list.
■ Signatures to Exclude from All DetectionsLets you select known risks by name and remove a risk name from the excluded-items listYou can also view the risk impact that is based on the performance, privacy, removal, andstealth impact.
■ Clear file IDs excluded during scansLets you remove the reputation information of the files that are excluded from scanning.You can use the Clear All option to clear the reputation information of the files that areexcluded from scanning.
Note:Exclusions reduce your level of protection and should be used only if you have a specificneed.
Learn more about Intrusion and Browser Protection settingsIntrusion Prevention scans all the network traffic that enters and exits your computer andcompares this information against a set of attack signatures. Attack signatures contain theinformation that identifies an attacker's attempt to exploit a known operating system or programvulnerability. Intrusion Prevention protects your computer against most common Internetattacks.
If the information matches an attack signature, Intrusion Prevention automatically discards thepacket and breaks the connection with the computer that sent the data. This action protectsyour computer from being affected in any way.
Intrusion Prevention relies on an extensive list of attack signatures to detect and blocksuspicious network activity. The Norton product runs LiveUpdate automatically to keep yourlist of attack signatures up to date. If you do not use Automatic LiveUpdate, you should runLiveUpdate once a week.
The Norton product also provides the Browser Protection feature to protect your browser frommalicious programs.
Note: The Browser Protection feature is available for Google Chrome, Microsoft InternetExplorer, Mozilla Firefox, and Microsoft Edge browsers.
With increasing Internet use, your browser is prone to attack by malicious websites. Thesewebsites detect and exploit the vulnerability of your browser to download malware programsto your system without your consent or knowledge. These malware programs are also calleddrive-by downloads. The Norton product protects your browser against drive-by downloadsfrom malicious websites.
75Manage your Device SecurityCustomize your Norton product settings

The Intrusion and Browser Protection settings also include the Download Intelligenceoption to protect your computer against any unsafe file that you download. Download Intelligenceprovides information about the reputation level of any executable file that you download usingthe browser. Download Intelligence supports only downloads using the HTTPS protocol, InternetExplorer 6.0 browser or later, Edge 40.15063 browser or later, Chrome 10.0 browser or later,and Firefox 3.6 browser or later. The reputation details that Download Intelligence providesindicate whether the downloaded file is safe to install. You can use these details to decidewhether you want to install the executable file.
Set Norton to allow you to remotely manage your protected devicesNorton Remote Management sends the health status of your device and other information toNorton Studio app for Windows. You can use this app to view, manage, or explore Nortonproducts and fix some protection issues with your device remotely. By default, RemoteManagement is turned off.
Turn on Remote Management
1 Start Norton.
If you see the My Norton window, next to Device Security, click Open.
2 In the Norton product main window, click Settings.
3 In the Settings window, click Administrative Settings.
4 In the Remote Management row, move the switch to On.
5 Click Apply, and then click Close.
Protect Norton device security settings from unauthorized accessTo prevent unauthorized changes to your Norton device security settings turn on SettingsPassword Protection and Norton Tamper Protection.
■ Settings Password Protection lets you set a password to view or change device securitysettings.
■ Norton Tamper Protection checks for modifications to your settings by unknown orsuspicious apps.
Turn on or off Settings Password Protection and Norton Tamper Protection
1 Start Norton.
If you see the My Norton window, next to Device Security, click Open.
2 In the Norton product main window, click Settings.
3 In the Settings window, click Administrative Settings.
4 Under Product Security:
76Manage your Device SecurityCustomize your Norton product settings

■ In the Settings Password Protection row, move the switch to On or Off.
■ In the Norton Tamper Protection row, move the switch to On or Off.If prompted, select how long you want the feature off, and click OK.
5 Click Apply.
6 If you see the Set Password window, type a password and confirm. You need to set apassword each time you turn this feature off and on.
7 Click OK.
8 In the Settings window, click Close.
Reset a lost or forgotten password for Norton Settings PasswordProtectionYou must reinstall your Norton to access the settings and set a new password.
Set a shortcut key to search Norton device security for informationWhen you search using the search icon in the Norton device security app, you can find Nortonfeatures and support information as well as general topics online. You can use the defaultkeyboard shortcut Ctrl + F to launch search more quickly or set a shortcut.
Set up a search shortcut key
1 Start Norton.
If you see the My Norton window, next to Device Security, click Open.
2 In the Norton product main window, click Settings.
3 In the Settings window, click Administrative Settings.
4 In the Search Shortcut Key row, move the switch to On.
5 Click the arrow and then choose a key that you want to assign for in-product search.
6 Do one of the following:
■ For the shortcut key to work only when your Norton product has focus, uncheck theGlobal option.
■ For the shortcut key to work even when your Norton product has no focus, check theGlobal option.
7 Click Apply, and then click Close.
77Manage your Device SecurityCustomize your Norton product settings

Optimize your computer for gaming with GameOptimizer
Game Optimizer1 is patented technology for multi-core CPU PCs. It provides an immersivegame experience by reducing performance interruptions while still maintaining your computer’ssecurity. By isolating non-essential apps to a single CPU core, it allows the rest of the CPUsto be allocated to game.
Note: Your computer's processor must be minimum four cores for Game Optimizer to work.
Game Optimizer helps improve your gaming experience by doing the following:
■ Optimizes CPU performance for smoother gaming
■ Isolates non-essential applications to a single CPU core so that the rest of the CPU canbe allocated to game for better performance
■ Automatically detects games2
■ Lets you add games or select games you do not want to optimize
■ Increases frames per second (FPS) and reduces latency
■ Eliminates the need to turn off antivirus protection by dedicating the CPU need for optimalgaming performance
■ By dedicating CPU cores to the game, it reduces randomCPU spikes which can slow downthe game
For more information, see See “Learn more about Game Optimizer” on page 79..
Note: All critical Norton protection features that are involved in protecting your computer fromviruses and other security threats run in the background without interrupting your gamingexperience.
Configure Norton for optimal gaming experience
1 Start Norton.
2 In the My Norton window, in the center pane, click the lightening icon.
3 In the Gaming Dashboard, click Manage Optimization.
4 In the Game Optimizer window, configure the following settings:
■ Restrict resource usage for user processes: Turn on this option to restrict CPUusage for all user-initiated processes.
78Manage your Device SecurityOptimize your computer for gaming with Game Optimizer

■ Restrict resource usage for system processes: Turn on this option to restrict CPUusage for all operating system-initiated processes.
■ Automatically set power plan to Max Performance: Turn on this option to switchto the high performance power plan setting on Windows. Game Optimizer creates acustom Windows power plan settings to maximize gaming performance. This powerplan is available only when the gaming session is in progress. After the gaming sessionends, the power plan defaults to the original setting.Norton recommends that you keep this option turned on for better gaming experience.
■ Optimized Games: Lists the games that are optimized by Game Optimizer.
Turn off Game OptimizerBy default, Game Optimizer is turned on. You can turn off Game Optimizer if you do not wantit to enhance your gaming experience. Norton recommends that you keep this feature turnedon for better gaming experience.
Turn Game Optimizer off or on
1 Start Norton.
2 In the My Norton window, on the left pane, slide the Game Optimizer switch to enableor disable the feature.
Turn Game Optimizer off or on from notification area
◆ In the notification area on the Windows taskbar, right-click the Norton icon, and do oneof the following:
■ To turn off Game Optimizer, click Turn off Game Optimizer.
■ To turn on Game Optimizer, click Turn on Game Optimizer.
1Game Optimizer is only available on Windows (excluding Windows 10 in S mode, Windowsrunning on ARM processor) with four or more core processors.2Automatically detects games based on Full-Screen Detection mode with high CPU usage,as well as use of a game launcher3, if the user adds a gamemanually, or if it has been detectedpreviously.3Game Launchers we currently monitor for as of April 2021 are: Bethesda, Blizzard, Epic, ID,Origin, Rockstar, Steam, Uplay.
Learn more about Game OptimizerGame Optimizer1 is patented technology for multi-core CPU PCs. It provides an immersivegame experience by reducing performance interruptions while still maintaining your computer’ssecurity. By isolating non-essential applications to a single CPU core, it allows the rest of theCPUs to be allocated to game.
79Manage your Device SecurityOptimize your computer for gaming with Game Optimizer

Game Optimizer helps improve your gaming experience by doing the following:
■ Optimizes CPU performance for smoother gaming
■ Isolates non-essential applications to a single CPU core so that the rest of the CPU canbe allocated to game for better performance
■ Automatically detects games2
■ Lets you add games or select games you do not want to optimize
■ Increases frames per second (FPS) and reduces latency
■ Eliminates the need to turn off antivirus protection by dedicating the CPU need for optimalgaming performance
■ By dedicating CPU cores to the game, it reduces randomCPU spikes which can slow downthe game
The minimum background activities also ensure higher performance of your computer whichis ideal for gaming. After you end your gaming session, Norton 360 for Gamers resumes allthe suspended activities to run in the background.
Note: Your computer's processor must be minimum four cores for Game Optimizer to work.
Game Optimizer starts the optimization when you start a gaming application and continuesuntil you exit the game. Optimization is paused if you exit the full screen mode when the gamingsession is active. For example, if you press Alt + Tab to access any other running program,it exits game optimization and removes the restrictions. However, when you get back to gaming,it continues the game optimization and restricted programs do not get access to CPU usage.
Note: All critical Norton protection features that are involved in protecting your computer fromviruses and other security threats run in the background without interrupting your gamingexperience.
You can verify the status of Game Optimizer in the notification area of the taskbar. The Nortonproduct icon in the notification area displays a green lightening icon when Game Optimizer isenabled. When you turn off Game Optimizer, the color changes to gray.
The Gamer Dashboard displays the status of Game Optimizer, optimization status of recentlyplayed games, and access to the Game Optimizer settings. You can use the toggle switch toenable or disable optimization for the recently-played games.
Note: The Game Optimizer feature is available only in Norton 360 for Gamers.
80Manage your Device SecurityOptimize your computer for gaming with Game Optimizer

1Game Optimizer is only available on Windows (excluding Windows 10 in S mode, Windowsrunning on ARM processor) with four or more core processors.2Automatically detects games based on Full-Screen Detection mode with high CPU usage,as well as use of a game launcher3, if the user adds a gamemanually, or if it has been detectedpreviously.3Game Launchers we currently monitor for as of April 2021 are: Bethesda, Blizzard, Epic, ID,Origin, Rockstar, Steam, Uplay.
Manually add games to the Optimized Games listGame Optimizer1 is patented technology for multi-core CPU PCs. It provides an immersivegame experience by reducing performance interruptions while still maintaining your computer’ssecurity. By isolating non-essential apps to a single CPU core, it allows the rest of the CPUsto be allocated to game. It automatically checks the internal list of known games to detectgaming applications.1,2 However, if it has not automatically detected a specific game, you canmanually add the game to the Optimized Games list.
In addition, you can also remove games from the Optimized Games list if you do not wantNorton 360 for Gamers to enhance the performance for those games.
Note:When you remove a specific game from the Optimized Games list, the game is nolonger optimized and can impact your gaming experience with that game.
Add a game to the Optimized Games list
1 Start Norton.
2 In the My Norton window, in the center pane, click the lightening icon.
3 In the Gaming Dashboard, click Manage Optimization.
4 In the Game Optimizer window, next to Optimized Games, click Add.
5 Navigate and select the gaming program you want Norton to optimize.
Remove a game from the Optimized Games list
1 Start Norton.
2 In the My Norton window, in the center pane, click the lightening icon.
3 In the Gaming Dashboard, click Manage Optimization.
4 In the Game Optimizer window, under Optimized Games, disable the switch next to thegaming program you want to remove.
1Game Optimizer is only available on Windows (excluding Windows 10 in S mode, Windowsrunning on ARM processor) with four or more core processors.
81Manage your Device SecurityOptimize your computer for gaming with Game Optimizer

2Automatically detects games based on Full-Screen Detection mode with high CPU usage,as well as use of a game launcher3, if the user adds a gamemanually, or if it has been detectedpreviously.3Game Launchers we currently monitor for as of April 2021 are: Bethesda, Blizzard, Epic, ID,Origin, Rockstar, Steam, Uplay.
82Manage your Device SecurityOptimize your computer for gaming with Game Optimizer

Find additional solutions
This chapter includes the following topics:
■ Uninstall Device Security on Windows
■ Disclaimers
Uninstall Device Security on WindowsFollow the instructions below to uninstall your Device Security app from your computer.
Uninstall Device Security from Windows
1 Press theWindows + R keys to open the Run dialog box.
2 Type appwiz.cpl and press Enter.
3 In the list of currently installed programs, select your Norton product, and then clickUninstall/Change.
4 Follow the on-screen instructions.
Device Security is not fully uninstalled until you restart your computer.
DisclaimersCopyright © 2021 NortonLifeLock Inc. All rights reserved. NortonLifeLock, the NortonLifeLock Logo, the Checkmark Logo,
Norton, LifeLock, and the LockMan Logo are trademarks or registered trademarks of NortonLifeLock Inc. or its affiliates in
the United States and other countries. Firefox is a trademark of Mozilla Foundation. Google Chrome and Android are trademarks
of Google, LLC. Mac, iPhone and iPad are trademarks of Apple Inc. Microsoft and the Windows logo are trademarks of
Microsoft Corporation in the United States and/or other countries. The Android robot is reproduced or modified from work
created and shared by Google and used according to terms described in the Creative Commons 3.0 Attribution License.
Other names may be trademarks of their respective owners.
4Chapter