Nokia TMR 880 Manual from instructionsmanuals.com
133
User Guide 9355653 Issue 3
-
Upload
khangminh22 -
Category
Documents
-
view
6 -
download
0
Transcript of Nokia TMR 880 Manual from instructionsmanuals.com
DECLARATION OF CONFORMITY We, NOKIA CORPORATION declare under our sole responsibility that the product Nokia TMR880 is in conformity with the
provisions of the following Council Directive:1999/5/EC. A copy of the Declaration of Conformity can be found at http://www.nokia.com/phones/declaration_of_conformity/.
Copyright © 2003-2005 Nokia. All rights reserved.
Reproduction, transfer, distribution or storage of part or all of the contents in this document in any form without the prior written permission of Nokia is prohibited.
Nokia and Nokia Connecting People are registered trademarks of Nokia Corporation. Other product and company names mentioned herein may be trademarks or tradenames of their respective owners.
Nokia tune is a sound mark of Nokia Corporation.
US Patent No 5818437 and other pending patents. T9 text input software Copyright (C) 1997-2005. Tegic Communications, Inc. All rights reserved.
Includes RSA BSAFE cryptographic or security protocol software from RSA Security.
Nokia operates a policy of continuous development. Nokia reserves the right to make changes and improvements to any of the products described in this document without prior notice.
Under no circumstances shall Nokia be responsible for any loss of data or income or any special, incidental, consequential or indirect damages howsoever caused.
The contents of this document are provided "as is". Except as required by applicable law, no warranties of any kind, either express or implied, including, but not limited to, the implied warranties of
merchantability and fitness for a particular purpose, are made in relation to the accuracy, reliability or contents of this document. Nokia reserves the right to revise this document or withdraw it at any time without prior notice.
The availability of particular products may vary by region. Please check with the Nokia dealer nearest to you.
El uso y el funcionamiento de este dispositivo requieren licencia. Si desea obtener información detallada, póngase en contacto con las autoridades competentes en materia de frecuencia de su país.
Denne enhed må kun betjenes, hvis der er givet tilladelse hertil. Kontakt den lokale frekvensmyndighed for at få yderligere oplysninger.
Für die Verwendung dieses Geräts ist eine Funklizenz erforderlich. Weitere Informationen erhalten Sie in Deutschland bei der für ihren Wohnort zuständigen Außenstelle der Regulierungsbehörde für Telekommunikation und Post.
The use and operation of this device is subject to permission: for details contact your local frequency authority.
L'utilisation et l'exploitation de cet appareil sont soumises à autorisation : pour plus d'informations, prenez contact avec l'autorité locale compétente en matière de fréquences.
L'utilizzo di questo dispositivo deve essere autorizzato: per informazioni contattare la locale autorità per l'assegnazione delle frequenze.

Het gebruik van dit apparaat is alleen toegestaan als u daarvoor toestemming hebt gekregen. Neem contact op met de plaatselijke instantie voor meer informatie.
A utilização e funcionamento deste aparelho estão sujeitos a autorização: para mais informações, contacte as entidades locais responsáveis pela atribuição de frequências.
Tämän tuotteen käyttö on luvanvaraista. Ota yhteys paikalliseen taajuusviranomaiseen.
Användning av denna utrustning kan kräva tillstånd. Kontakta den lokala post- och telemyndigheten.
Ãéá ôç ÷ñÞóç êáé ôç ëåéôïõñãßá áõôÞò ôçò óõóêåõÞò áðáéôåßôáé ÷ïñÞãçóç áäåßáò: ãéá ëåðôïìÝñåéåò åðéêïéíùíÞïôå ìå ôçí áñìüäéá ôïðéêÞ áñ÷Þ ãéá ôéò óõ÷íüôçôåò.
Pou¾ití a provoz tohoto zaøízení není mo¾ný bez povolení: dal¹í informace získáte u místního telekomunikaèního úøadu.
Käesoleva seadme kasutamine ja töötamine on seotud vastavate lubadega: teabe saamiseks pöörduge kohalikku ametkonda, mis tegeleb raadiosageduste haldusega.
A készülék használata és üzemeltetése engedélyhez kötött. A részletekrõl érdeklõdjön a helyi frekvenciahasználat-szabályozó hatóságnál.
Naudotis ¹iuo prietaisu galima tik gavus leidim±. I¹samesnìs informacijos teiraukitìs vietinìje ry¹iù reguliavimo tarnyboje.
©ïs ierïces lieto¹anai un ekspluatàcijai nepiecie¹ama at¶auja: lai iegþtu sïkàku informàciju, sazinieties ar vietºjo frekvenèu regulº¹anas pàrvaldi.
L-uzu u t-thaddim ta' dan l-apparat jenhtiegu permess. Ghal aktar taghrif irrikorri ghand l-Awtorità Maltija ghall-Komunikazzjonijiet.
U¿ytkowanie i obs³uga tego urz±dzenia wymaga zezwolenia. Szczegó³owe informacje na ten temat mo¿na uzyskaæ od lokalnych organów zajmuj±cych siê kontrol± czêstotliwo¶ci radiowych.
Na pou¾ívanie a prevádzku tohto zariadenia sa vy¾aduje povolenie. Podrobné informácie získate od miestneho rádiotelekomunikaèného úradu.
Za uporabo te naprave morate imeti ustrezno dovoljenje; dodatne informacije so na voljo na Agenciji za telekomunikacije in radiodifuzijo Republike Slovenije.

6Copyright © 2005 Nokia. All rights reserved.
Quick guide
These pages give you some tips for using your Nokia TMR880 radio. For more detailed information, read through this user’s guide.
� Call functionsSelecting a folder
Talk groups are divided into folders. To select a folder, press , scroll to the desired folder and press Select.
Selecting a talk groupTurn the group selector until you reach the desired group.
Making a group call to your selected groupOnce you have set your selected group and its name is displayed in standby mode, press and hold the PTT key.
Responding to a group callPress and hold the PTT key. You can start speaking when a short tone is played.
Making an express callKey in a TETRA number and press and hold the PTT key. You can start speaking when a short tone is played.
Responding to an express callPress and hold the PTT key. You can start speaking when a short tone is played.
7Copyright © 2005 Nokia. All rights reserved.
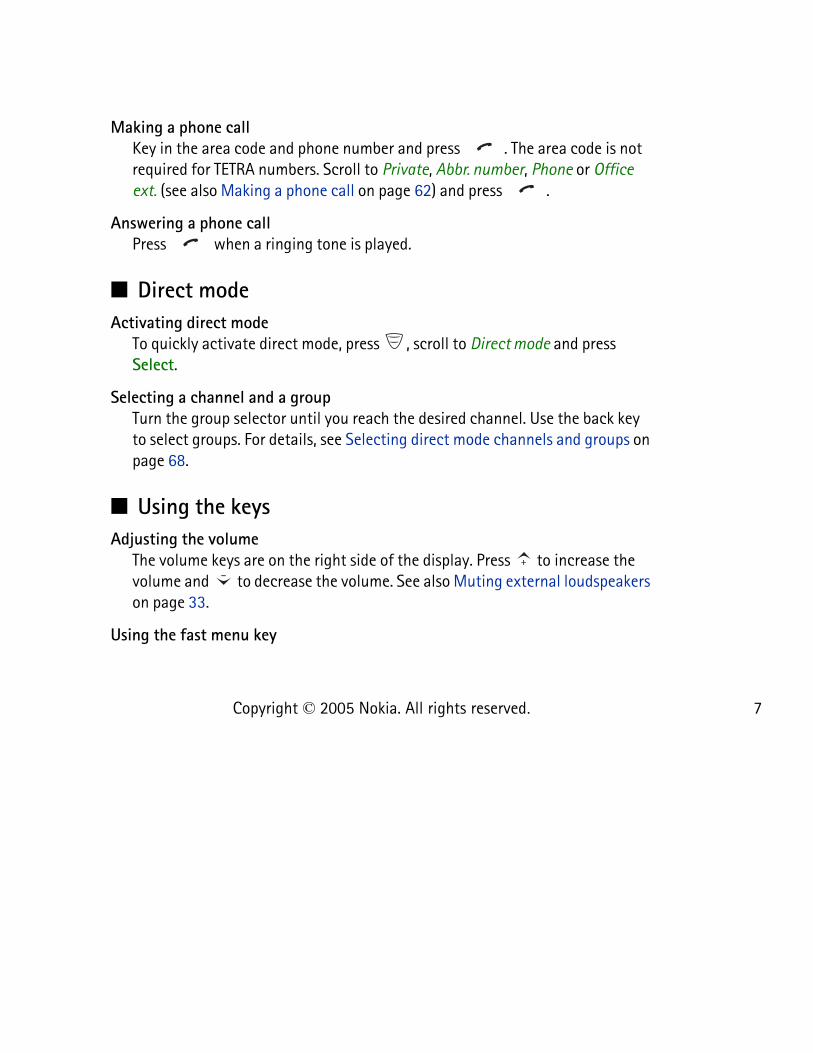
Making a phone callKey in the area code and phone number and press . The area code is not required for TETRA numbers. Scroll to Private, Abbr. number, Phone or Office ext. (see also Making a phone call on page 62) and press .
Answering a phone callPress when a ringing tone is played.
� Direct modeActivating direct mode
To quickly activate direct mode, press , scroll to Direct mode and press Select.
Selecting a channel and a groupTurn the group selector until you reach the desired channel. Use the back key to select groups. For details, see Selecting direct mode channels and groups on page 68.
� Using the keysAdjusting the volume
The volume keys are on the right side of the display. Press to increase the volume and to decrease the volume. See also Muting external loudspeakers on page 33.
Using the fast menu key
8Copyright © 2005 Nokia. All rights reserved.
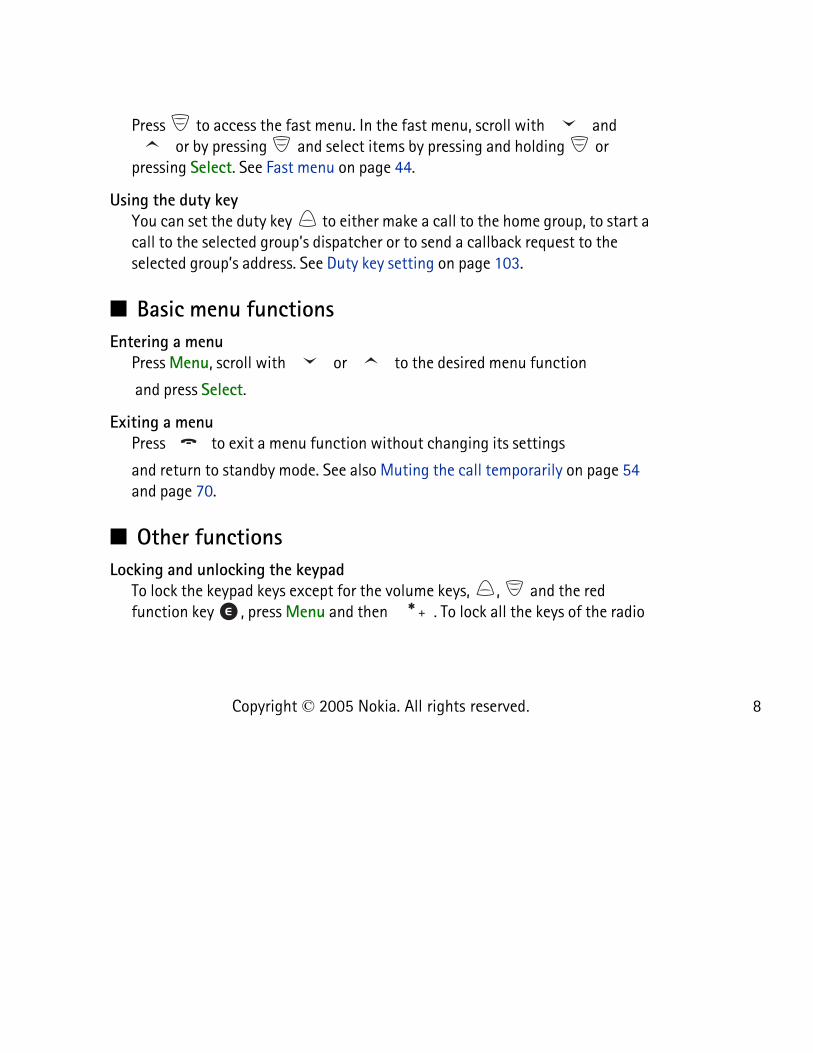
Press to access the fast menu. In the fast menu, scroll with and or by pressing and select items by pressing and holding or
pressing Select. See Fast menu on page 44.
Using the duty keyYou can set the duty key to either make a call to the home group, to start a call to the selected group’s dispatcher or to send a callback request to the selected group’s address. See Duty key setting on page 103.
� Basic menu functionsEntering a menu
Press Menu, scroll with or to the desired menu function
and press Select.
Exiting a menuPress to exit a menu function without changing its settings
and return to standby mode. See also Muting the call temporarily on page 54 and page 70.
� Other functionsLocking and unlocking the keypad
To lock the keypad keys except for the volume keys, , and the red function key , press Menu and then . To lock all the keys of the radio

9Copyright © 2005 Nokia. All rights reserved.
except the volume keys, the red function key and the back key, press Menu and then press and hold .
To unlock the keys, press Unlock and then quickly.
Searching for names in the contacts directoryTo find names, press Contacts, select Search, key in the first characters of the name, and pressSearch.

10Copyright © 2005 Nokia. All rights reserved.
Contents
Quick guide........................................................................................................... 6
Contents............................................................................................................. 10
FOR YOUR SAFETY ............................................................................................ 17
General information.......................................................................................... 20Access codes .............................................................................................................................................. 20
PIN code (4 digits) ................................................................................................................................ 20Security code (5 digits)........................................................................................................................ 20
Conventions used in this guide ............................................................................................................ 20Modes of operation.................................................................................................................................. 21Shared memory ......................................................................................................................................... 21Transmission barring................................................................................................................................ 22Network selection .................................................................................................................................... 23Special features......................................................................................................................................... 24Control unit ................................................................................................................................................ 24
1. Getting started .............................................................................................. 25Switching the radio on and off ............................................................................................................ 25Ignition sense ............................................................................................................................................ 25Locking the keys (Keyguard).................................................................................................................. 26
2. Your radio ...................................................................................................... 27Types of calls.............................................................................................................................................. 28
Red key calls ........................................................................................................................................... 29Group selector and back key ................................................................................................................. 30
11Copyright © 2005 Nokia. All rights reserved.
The PTT (Push-To-Talk) key .................................................................................................................... 30Speaker microphone ................................................................................................................................ 32Duty key and fast menu key .................................................................................................................. 33Light indicator ........................................................................................................................................... 33Muting external loudspeakers .............................................................................................................. 33Display indicators ..................................................................................................................................... 34
Standby mode ........................................................................................................................................ 34Call indicators ........................................................................................................................................ 36
Guide messages......................................................................................................................................... 37
3. Using your radio ............................................................................................ 39Accessing a menu function ................................................................................................................... 39
Accessing a menu function by scrolling......................................................................................... 39Accessing a menu function by its shortcut number ................................................................... 39
List of menu functions ............................................................................................................................ 41Fast menu ................................................................................................................................................... 44
Activating a fast menu item.............................................................................................................. 44Voice feedback .......................................................................................................................................... 45
4. Group calls ..................................................................................................... 46Group call basics....................................................................................................................................... 46
Folders ...................................................................................................................................................... 47Home group ............................................................................................................................................ 47Dynamic talk groups ............................................................................................................................ 48
Starting group communication ............................................................................................................ 49Switching group calls on and off ..................................................................................................... 49Selecting a folder .................................................................................................................................. 49Selecting a talk group.......................................................................................................................... 50Scanning settings.................................................................................................................................. 51PTT key use.............................................................................................................................................. 51

12Copyright © 2005 Nokia. All rights reserved.
Accessing the group list in standby mode ........................................................................................ 52Receiving a group call ............................................................................................................................. 52
Responding to a group call ................................................................................................................ 53Voice override......................................................................................................................................... 53Muting the call temporarily............................................................................................................... 54
Making a group call ................................................................................................................................. 54Making a call to the selected talk group ....................................................................................... 54Making a call to a scanned talk group ........................................................................................... 54Calling a talk group’s dispatcher ...................................................................................................... 55
Talk groups (Menu 4)............................................................................................................................... 55Edit folder: .............................................................................................................................................. 56View background folder ...................................................................................................................... 57Group journal ......................................................................................................................................... 58
5. Express calls ................................................................................................... 59Making an express call ........................................................................................................................... 59
Reusing a number ................................................................................................................................. 60Making an express call to an abbreviated TETRA number ........................................................ 60Last number redial ................................................................................................................................ 60Speed dialling a phone number ........................................................................................................ 61
Receiving an express call ....................................................................................................................... 61Responding to an express call........................................................................................................... 61Rejecting an express call .................................................................................................................... 61
6. Phone calls ..................................................................................................... 62Making a phone call ................................................................................................................................ 62
Making a phone call to an abbreviated TETRA number ............................................................. 63Last number redial ................................................................................................................................ 63International phone calls.................................................................................................................... 64In-call options........................................................................................................................................ 64

13Copyright © 2005 Nokia. All rights reserved.
Speed dialling a phone number............................................................................................................ 65Answering a phone call .......................................................................................................................... 65
Muting the ringing tone ..................................................................................................................... 65Rejecting a phone call ......................................................................................................................... 65
7. Direct mode ................................................................................................... 66Direct mode basics ................................................................................................................................... 66Using direct mode .................................................................................................................................... 67
Activating direct mode........................................................................................................................ 67Selecting direct mode channels and groups ................................................................................. 68Scanning the groups on a channel .................................................................................................. 68
Receiving a direct mode call ................................................................................................................. 69Responding to a direct mode call..................................................................................................... 69Voice override......................................................................................................................................... 69Muting the call temporarily............................................................................................................... 70
Making a direct mode call ..................................................................................................................... 70Duty key in direct mode...................................................................................................................... 70
Direct mode gateway and repeater ..................................................................................................... 70Red key calls and emergency calls in direct mode ......................................................................... 71
8. Writing text ................................................................................................... 73Setting predictive text input on or off ............................................................................................... 73Using predictive text input .................................................................................................................... 74
Writing compound words ................................................................................................................... 75Using traditional text input................................................................................................................... 75Tips for writing text ................................................................................................................................. 75
9. Contacts ......................................................................................................... 77Saving names and numbers................................................................................................................... 77Searching for a name .............................................................................................................................. 78
14Copyright © 2005 Nokia. All rights reserved.
Organising the contacts directory ....................................................................................................... 79Numbers and text items added to a saved name ........................................................................ 79Changing the number type ................................................................................................................ 80Changing the default number ........................................................................................................... 80
Deleting contact entries ......................................................................................................................... 80Speed dials.................................................................................................................................................. 81Caller groups.............................................................................................................................................. 81Settings for Contacts............................................................................................................................... 82
10.Menu functions............................................................................................ 84Status msgs. (Menu 1) ............................................................................................................................ 84
Unit alert messages .............................................................................................................................. 85Reading status messages.................................................................................................................... 85Sending status messages .................................................................................................................... 87Received and sent folders................................................................................................................... 89User-specified folders .......................................................................................................................... 89Clearing status message folders ....................................................................................................... 90Status settings ....................................................................................................................................... 91
Messages (Menu 2) .................................................................................................................................. 91Writing and sending text messages................................................................................................. 92Reading text messages........................................................................................................................ 94Inbox and Outbox folders ................................................................................................................... 95Templates ................................................................................................................................................ 96Archive folder and user-specified folders ...................................................................................... 96Deleting text messages ....................................................................................................................... 96Message settings................................................................................................................................... 97
Call register (Menu 3) ............................................................................................................................. 97Recent calls lists.................................................................................................................................... 98Counters and timers............................................................................................................................. 98
Talk groups (Menu 4)............................................................................................................................... 99

15Copyright © 2005 Nokia. All rights reserved.
Profiles (Menu 5) ...................................................................................................................................... 99Customising profiles.......................................................................................................................... 100
Settings (Menu 6).................................................................................................................................. 100Transmission barring ......................................................................................................................... 100Alarm clock .......................................................................................................................................... 101Clock ...................................................................................................................................................... 102Call settings ......................................................................................................................................... 102Phone settings .................................................................................................................................... 104Direct mode settings ......................................................................................................................... 106Keyguard settings .............................................................................................................................. 106Communication settings.................................................................................................................. 106Modem settings.................................................................................................................................. 107Security settings................................................................................................................................. 107Restore factory settings ................................................................................................................... 108
Calculator (Menu 7).............................................................................................................................. 108Making a currency conversion ....................................................................................................... 109
Calendar (Menu 8) ................................................................................................................................ 110Adding a calendar note .................................................................................................................... 110
To-do list (Menu 9) ............................................................................................................................... 112Services (Menu 10) ............................................................................................................................... 113
Call functions during a WAP connection.................................................................................... 113Basic steps for accessing and using WAP services................................................................... 114Setting up the radio for a WAP service ....................................................................................... 114Making a connection to a WAP service....................................................................................... 117Browsing the pages of a WAP service.......................................................................................... 118Ending a WAP connection ............................................................................................................... 120Appearance settings of WAP browser.......................................................................................... 120Download settings ............................................................................................................................. 120Bookmarks............................................................................................................................................ 121

16Copyright © 2005 Nokia. All rights reserved.
Service inbox ....................................................................................................................................... 122The cache memory............................................................................................................................. 123Authority certificates........................................................................................................................ 123
11.Data communications................................................................................ 125Call functions during a data connection ........................................................................................ 125Installing communication applications and modem drivers ..................................................... 126Connecting your radio to a PC........................................................................................................... 126
CARE AND MAINTENANCE............................................................................. 128
IMPORTANT SAFETY INFORMATION.............................................................. 129

17Copyright © 2005 Nokia. All rights reserved.
FOR YOUR SAFETY
For your safety, follow these instructions. Exceptions may be made only by trained personnel (police, firefighters and others) who determine that special use is appropriate. Further detailed information is given in this manual.
Do not switch the radio on when wireless phone use is prohibited or when it may cause interference or danger.
ROAD SAFETY COMES FIRSTDon't use a mobile radio while driving.
INTERFERENCEAll wireless phones may get interference, which could affect performance.
SWITCH OFF IN HOSPITALSFollow any regulations or rules. Switch the radio off near medical equipment.
SWITCH OFF WHEN REFUELLINGDon't use the radio at a refuelling point. Don't use near fuel or chemicals.
SWITCH OFF NEAR BLASTINGDon't use the radio where blasting is in progress. Observe restrictions, and follow any regulations or rules.
USE SENSIBLYUse only in the normal position. Don't touch the antenna unnecessarily.
18Copyright © 2005 Nokia. All rights reserved.
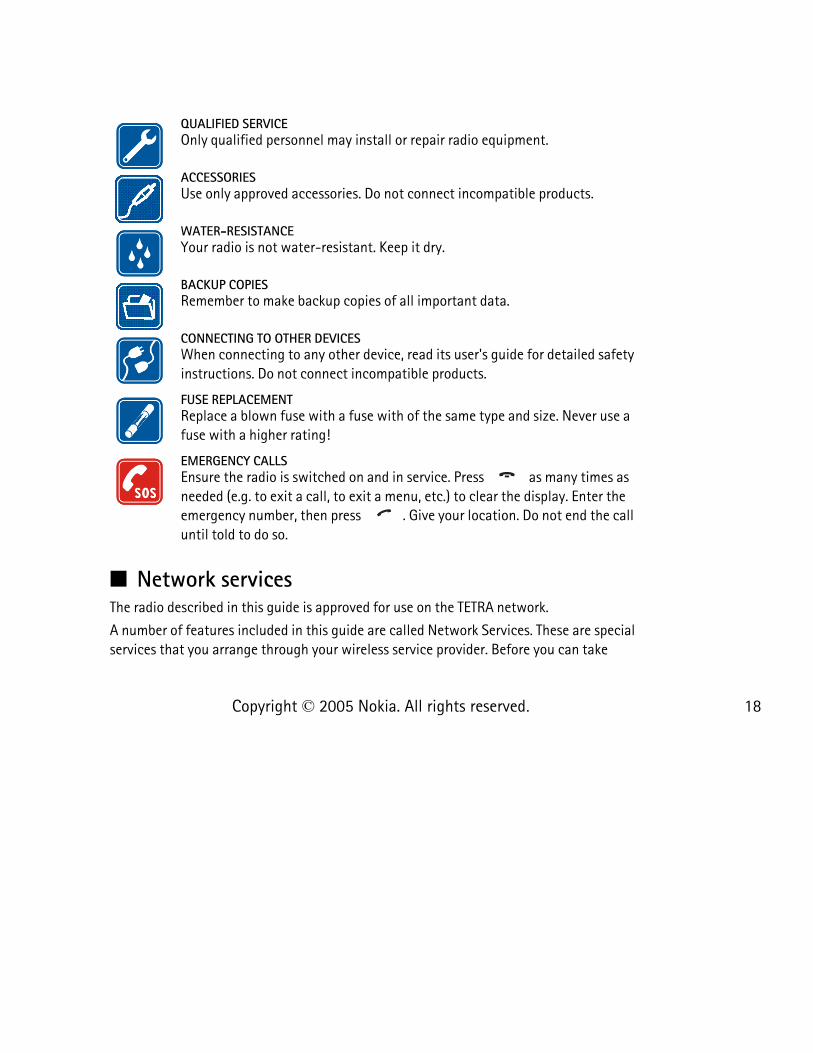
QUALIFIED SERVICEOnly qualified personnel may install or repair radio equipment.
ACCESSORIESUse only approved accessories. Do not connect incompatible products.
WATER-RESISTANCEYour radio is not water-resistant. Keep it dry.
BACKUP COPIESRemember to make backup copies of all important data.
CONNECTING TO OTHER DEVICESWhen connecting to any other device, read its user's guide for detailed safety instructions. Do not connect incompatible products.
FUSE REPLACEMENTReplace a blown fuse with a fuse with of the same type and size. Never use a fuse with a higher rating!
EMERGENCY CALLSEnsure the radio is switched on and in service. Press as many times as needed (e.g. to exit a call, to exit a menu, etc.) to clear the display. Enter the emergency number, then press . Give your location. Do not end the call until told to do so.
� Network servicesThe radio described in this guide is approved for use on the TETRA network.
A number of features included in this guide are called Network Services. These are special services that you arrange through your wireless service provider. Before you can take
19Copyright © 2005 Nokia. All rights reserved.
advantage of any of these Network Services, you must subscribe to them through your service provider and obtain instructions for their use from your service provider.
Note: Some networks may not support all language-dependent characters and/or services.
� About accessoriesWarning: Use only accessories approved by the manufacturer for use with this particular radio model. The use of any other types may invalidate any approval or warranty applying to the radio, and may be dangerous.
For availability of approved accessories, please check with your dealer.
When you disconnect the power cord of any accessory, grasp and pull the plug, not the cord.

20Copyright © 2005 Nokia. All rights reserved.
General information
� Access codes
PIN code (4 digits)The factory setting for the PIN code is 1234. To prevent unauthorised use of your radio, change the code in the Change of access codes submenu of the Settings menu. Keep the new code secret and in a safe place separate from your radio.
When the PIN code request is enabled (see Security settings on page 107), the code is requested each time the radio is switched on.
Security code (5 digits)The factory setting for the security code is 12345. To prevent unauthorised use of your radio, change the code in the Change of access codes submenu of the Settings menu, see Security settings on page 107. Keep the new code secret and in a safe place separate from your radio.
� Conventions used in this guideThe display texts next to the selection keys and are indicated in a bold typeface, for example, Menu. The other display texts which appear on the radio’s display are indicated in italics, for example, Calling. All key presses are
21Copyright © 2005 Nokia. All rights reserved.
represented by the graphic of the corresponding key, for example, by and
.
� Modes of operationYour radio has two modes of operation: network mode and direct mode. In network mode, the radio operates via the TETRA network. In direct mode, the radio operates without the network, so the radios are communicating directly with each other. In direct mode only some of the radio’s functions are available. See Direct mode on page 66 for more information about direct mode.
� Shared memoryThe following features in this radio may share memory: contacts, calendar, and to-do notes. Using any such features may reduce the memory available for any features sharing memory. This is especially true with heavy use of any of the features (although some of the features may have a certain amount of memory specially allotted to them in addition to the amount of memory shared with other features). For example, saving many names or notes may take all of the shared memory and your radio may display a message that the memory is full. In this case, delete some of the information or entries stored in the shared memory features before continuing.

22Copyright © 2005 Nokia. All rights reserved.
� Transmission barringWhen transmission barring is active, the radio does not send any signals to the network and only limited network services are available. In network mode, the radio can only receive group calls and status and text messages addressed to talk groups, providing that the radio is registered to the network. In direct mode, the radio can receive direct mode calls. Note that when transmission barring is active, the radio cannot re-register to the network, for example, if it is switched off and then on again.
Note: The limited network services in network mode are only available in the coverage area of the network cell where the radio was last registered. The radio cannot register to other network cells while transmission barring is active, and therefore the area of operation may be limited.
When transmission barring is active, in network mode the radio cannot send the necessary information to the network about changes in talk groups. When transmission barring is active, you cannot change the selected group. If you make any other changes that affect talk groups, for example, change the selected folder, home group or the scanning priority of a group, you will not be able to receive further communication from the affected groups. After transmission barring has been deactivated, the radio can attempt to negotiate the changes with the network.
If you start to make a red key call or an emergency call to the emergency number programmed into your radio when transmission barring is active, the radio will automatically deactivate transmission barring and attempt to make the call. See also Red key calls and emergency calls in direct mode on page 71.

23Copyright © 2005 Nokia. All rights reserved.
Note: If you start to make a red key call or an emergency call when transmission barring is active, transmission barring will be deactivated, and you should consider exiting the area where you wanted transmission to be barred.
See Transmission barring on page 100 for how to activate or deactivate transmission barring. Note that transmission barring should be active before you enter the area where you want transmission to be barred. The indicator or
is displayed in standby mode when transmission barring is active. Depending on predefined radio settings, the radio may send a notification message to the network about the activation. The indicator is displayed if the message does not need to be sent or message sending failed, and the indicator is displayed if the message has been sent.
� Network selectionNext to your predefined home network, you may be able to select other networks in which your radio can operate (network service), for example, if you are not in the coverage area of your home network. The network can be changed automatically or manually, see Network selection on page 104.
Note: Some services are network-dependent, so there may be changes in the availability of services when the network is changed. In addition, for example the selected folder, selected group, home group, or availability of groups may change when the network is changed.
24Copyright © 2005 Nokia. All rights reserved.
� Special featuresThe Nokia TMR880 radio offers some special features. One of the back panel connectors of the radio has programmable input/output pins, for example, for connecting external devices such as a status panel. It is also possible to connect enhancements to the system cable (SCR-14), for example, an external GPS (Global Positioning System) device. In addition to the standard AT commands, the Nokia TMR880 radio supports an extended AT command set for controlling the radio.
For details and availability, contact your service provider.
� Control unitA separate Nokia Control Unit (CUR-2) can be connected to the Nokia TMR880 radio. For example, it can be used as a second control unit or installed in places where space is limited. The Nokia Control Unit has connectors for a speaker microphone and a helmet enhancement (for example, for use with motorcycles). With the helmet enhancement, it is possible to mute all other audio enhancements that are connected to the Nokia Control Unit and the Nokia TMR880 radio.
For details and availability, contact your dealer.
25Copyright © 2005 Nokia. All rights reserved.
1. Getting started
� Switching the radio on and off1. Press and hold to switch the radio on and off.
2. If the radio asks for a PIN code, key in the four-digit PIN code (displayed as ****) and press OK.
3. If the radio asks for a security code, key in the five-digit security code (displayed as *****) and press OK.
For more information on the codes, see Access codes on page 20.
Warning: Do not switch the radio on when wireless phone use is prohibited or when it may cause interference or danger.
Caution: In order to comply with RF exposure requirements for mobile transmitting devices, a minimum distance of 20 cm must be maintained between the antenna and all persons.
Note: The radio will not work unless sufficient power is supplied through a power source, e.g., a vehicle’s battery.
� Ignition senseIf the radio is installed in a vehicle, the ignition sense feature can be installed to prevent the radio from draining the vehicle’s battery. The ignition sense enables the radio to be automatically switched on or off approximately 20 seconds after

26Copyright © 2005 Nokia. All rights reserved.
the ignition key of the vehicle has been turned on or off. However, you can switch the radio on or off at any time with the key.
When the ignition key is turned off, the text Phone will power off, if not used is displayed. If you press any number key, the radio will not be switched off.
� Locking the keys (Keyguard)Your radio has two levels of keyguard.
• Keypad locks the keypad keys except for the volume keys, , and the red function key .. To activate this keyguard, press Menu and then press within 1.5 seconds. The note Keypad locked is briefly displayed.
• All keys locks all the keys of the radio except the volume keys, the red function key and the back key. To activate this keyguard, press Menu and then press and hold within 1.5 seconds. The note All keys are locked is briefly displayed.
• To unlock either keyguard, press Unlock and then within 1.5 seconds.
You can answer a phone call and respond to a group call or an express call when either keyguard is on. When the call ends, the keys are automatically locked.
See also Keyguard settings on page 106.
Note: When Keyguard is on, calls may be possible to the emergency number programmed into your radio (e.g. 112 or other official emergency number). Key in the emergency number and press . The number is displayed only after you have keyed in its last digit.
27Copyright © 2005 Nokia. All rights reserved.
2. Your radio
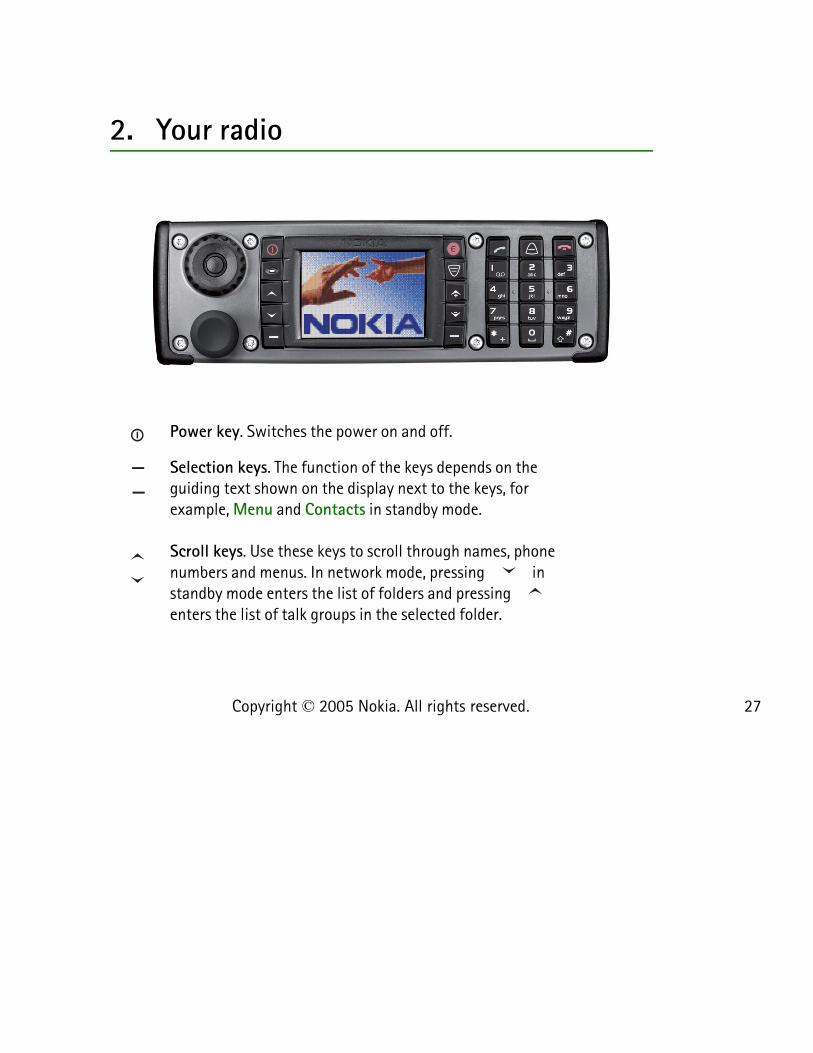
Power key. Switches the power on and off.
Selection keys. The function of the keys depends on the guiding text shown on the display next to the keys, for example, Menu and Contacts in standby mode.
Scroll keys. Use these keys to scroll through names, phone numbers and menus. In network mode, pressing in standby mode enters the list of folders and pressing enters the list of talk groups in the selected folder.

28Copyright © 2005 Nokia. All rights reserved.
� Types of calls• Group calls are immediate communication between talk group members. For
details, see Group calls on page 46.
Volume keys Pressing increases the volume and pressing decreases the volume. See also Muting external
loudspeakers on page 33.
Dials and answers a phone call. In standby mode, shows the list of the most recently dialled numbers.
Ends or rejects a phone call or an express call.
Enter numbers and characters.
Used for various purposes in different functions.
Duty key and fast menu key . See Duty key and fast menu key on page 33.
Red function key. See Red key calls on page 29.

29Copyright © 2005 Nokia. All rights reserved.
• Express calls are immediate communication between two people. For details, see Express calls on page 59.
• Phone calls are like conventional telephone calls. For details, see Phone calls on page 62.
These call types are available in network mode. Your radio also offers direct mode operation (see Direct mode on page 66).
Red key callsThe red key call in network mode is a network service. Before you can take advantage of this network service, you must subscribe to it through your service provider and obtain instructions for its use from your service provider. The red key call is made to a destination that has been defined by your organisation. In network mode, when you press and hold the red function key , the radio will attempt to make a red key call. When you press the red function key and then the back key, the radio will attempt to make a silent red key call. See also Red key calls and emergency calls in direct mode on page 71.
If you do not have a handsfree microphone installed but are using a speaker microphone (see Speaker microphone on page 32), you need to press and hold the PTT key when you start speaking.
If the radio receives a red key call ,or a call made to a destination that is predefined as an emergency number, the radio plays a tone and Priority call is displayed with the call information.
30Copyright © 2005 Nokia. All rights reserved.
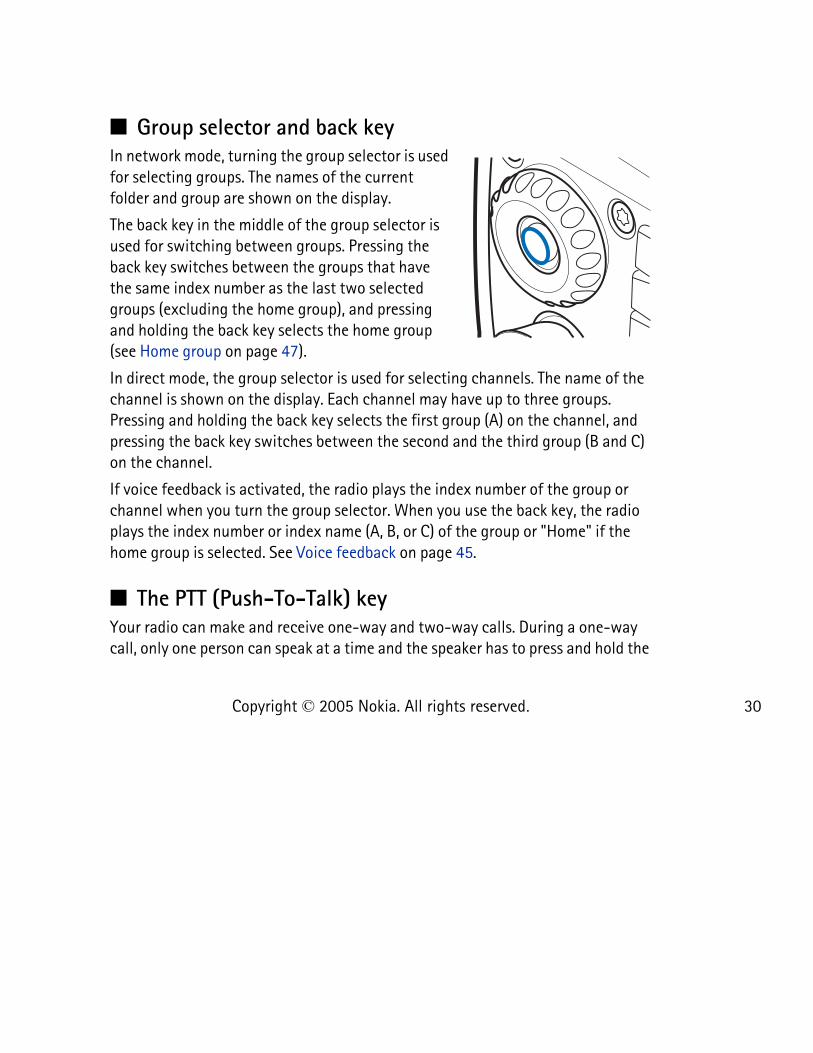
� Group selector and back keyIn network mode, turning the group selector is used for selecting groups. The names of the current folder and group are shown on the display.
The back key in the middle of the group selector is used for switching between groups. Pressing the back key switches between the groups that have the same index number as the last two selected groups (excluding the home group), and pressing and holding the back key selects the home group (see Home group on page 47).
In direct mode, the group selector is used for selecting channels. The name of the channel is shown on the display. Each channel may have up to three groups. Pressing and holding the back key selects the first group (A) on the channel, and pressing the back key switches between the second and the third group (B and C) on the channel.
If voice feedback is activated, the radio plays the index number of the group or channel when you turn the group selector. When you use the back key, the radio plays the index number or index name (A, B, or C) of the group or "Home" if the home group is selected. See Voice feedback on page 45.
� The PTT (Push-To-Talk) keyYour radio can make and receive one-way and two-way calls. During a one-way call, only one person can speak at a time and the speaker has to press and hold the

31Copyright © 2005 Nokia. All rights reserved.
PTT key. During a two-way call, the PTT key is not used and you can speak as in a conventional phone call.
To speak during a one-way call, press and hold the PTT key. You can start speaking after a short tone is played and (transmitting) appears on the display. Release the PTT key to let the other party speak. (receiving) is displayed when you receive a one-way call.
Express calls and group calls are one-way calls. Phone calls are normally two-way calls, but your radio is also capable of making and receiving one-way phone calls. The network changes the call type if needed.
For group calls in network mode, you can set the PTT key to make a call either always to your selected talk group or to the currently active scanned group (if there is no active scanned group, the call is made to the selected group). See PTT key use on page 51.

32Copyright © 2005 Nokia. All rights reserved.
� Speaker microphoneHold the speaker microphone approximately 10 cm (4 inches) away from your mouth when you speak.
Important! Do not hold the speaker microphone near your ear, because the volume may be extremely loud.
The speaker microphone can only be used for one-way calls. You may have other enhancements, such as a handsfree microphone and a loudspeaker, available for two-way calls.
If you receive a two-way call or make a phone call when only the speaker microphone is connected, the call is changed into a one-way call. Press and hold the PTT key when you speak.
The transceiver is provided with a plastic cap protecting the front panel connector. Remove the cap and then connect the speaker microphone.
Note: Keep the cap out of the reach of small children! Always remove the cap whenever you may have small children in your vehicle.
It is recommended that the front panel connector is always protected, either with the plastic cap or by having the speaker microphone connected.

33Copyright © 2005 Nokia. All rights reserved.
� Duty key and fast menu key In network mode, you can set the duty key to work in one of three ways, see Duty key setting on page 103. In direct mode, pressing and holding makes a call to the first group on the selected channel.
The fast menu key is used for accessing the fast menu. For details, see Fast menu on page 44.
� Light indicatorThere is a light indicator below the power key .A yellow light indicates that you need to wait before you can speak, a green light indicates that the radio is transmitting, and a red light indicates that the call or operation has failed.
The light indicator is not always lit when the radio is transmitting, for example, when the radio is sending information to the network.
� Muting external loudspeakersTo deactivate the external loudspeakers that have been connected to the radio (such as a speaker microphone or a handsfree loudspeaker), press and hold .

34Copyright © 2005 Nokia. All rights reserved.
The indicator is displayed in standby mode when the loudspeakers are deactivated. To activate the loudspeakers, press .
� Display indicatorsDisplay indicators inform you about the operation of your radio.
Standby modeWhen the radio is switched on and ready for use and no characters have been entered by the user, the radio is in standby mode and the following indicators appear:
xxxxxx
If group calls are switched off, indicates in which network the radio is currently used.
In network mode, when group calls are switched on and there is a selected group, the folder name, the group name and the group status are displayed. In direct mode, the channel name and the group name are displayed.
In network mode, shows the signal strength of the cellular network at your current location. The higher the bar, the stronger the signal.
If the radio is out of service, there is no bar and No service is displayed.
35Copyright © 2005 Nokia. All rights reserved.
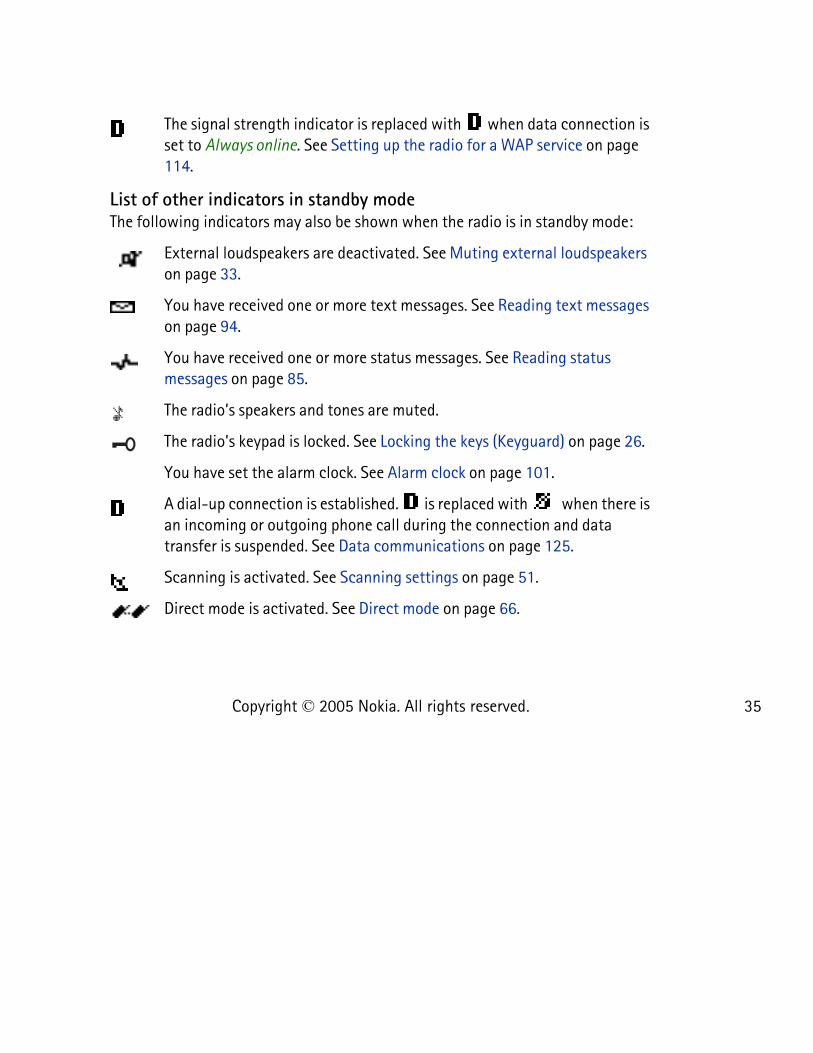
The signal strength indicator is replaced with when data connection is set to Always online. See Setting up the radio for a WAP service on page 114.
List of other indicators in standby modeThe following indicators may also be shown when the radio is in standby mode:
External loudspeakers are deactivated. See Muting external loudspeakers on page 33.
You have received one or more text messages. See Reading text messages on page 94.
You have received one or more status messages. See Reading status messages on page 85.
The radio’s speakers and tones are muted.
The radio’s keypad is locked. See Locking the keys (Keyguard) on page 26.
You have set the alarm clock. See Alarm clock on page 101.
A dial-up connection is established. is replaced with when there is an incoming or outgoing phone call during the connection and data transfer is suspended. See Data communications on page 125.
Scanning is activated. See Scanning settings on page 51.
Direct mode is activated. See Direct mode on page 66.

36Copyright © 2005 Nokia. All rights reserved.
Direct mode is activated and a compatible direct mode gateway is available. See Direct mode gateway and repeater on page 70.
Direct mode is activated and a compatible direct mode repeater is available. See Direct mode gateway and repeater on page 70.
Air interface encryption (network service) is not in use.
Transmission barring is active. See Transmission barring on page 22.
Transmission barring is active and the radio has sent a notification message about the activation to the network. See Transmission barring on page 22.
The radio is in the coverage area of a network cell that has lost the connection to the network, and only limited services are available.
Call indicatorsDisplayed during one-way calls.
Displayed during two-way calls.
Indicates that your radio is transmitting a call and that it is your turn to speak during a one-way call.
Indicates that your radio is receiving a one-way call.
Displayed during a one-way phone call when neither party is transmitting.
37Copyright © 2005 Nokia. All rights reserved.
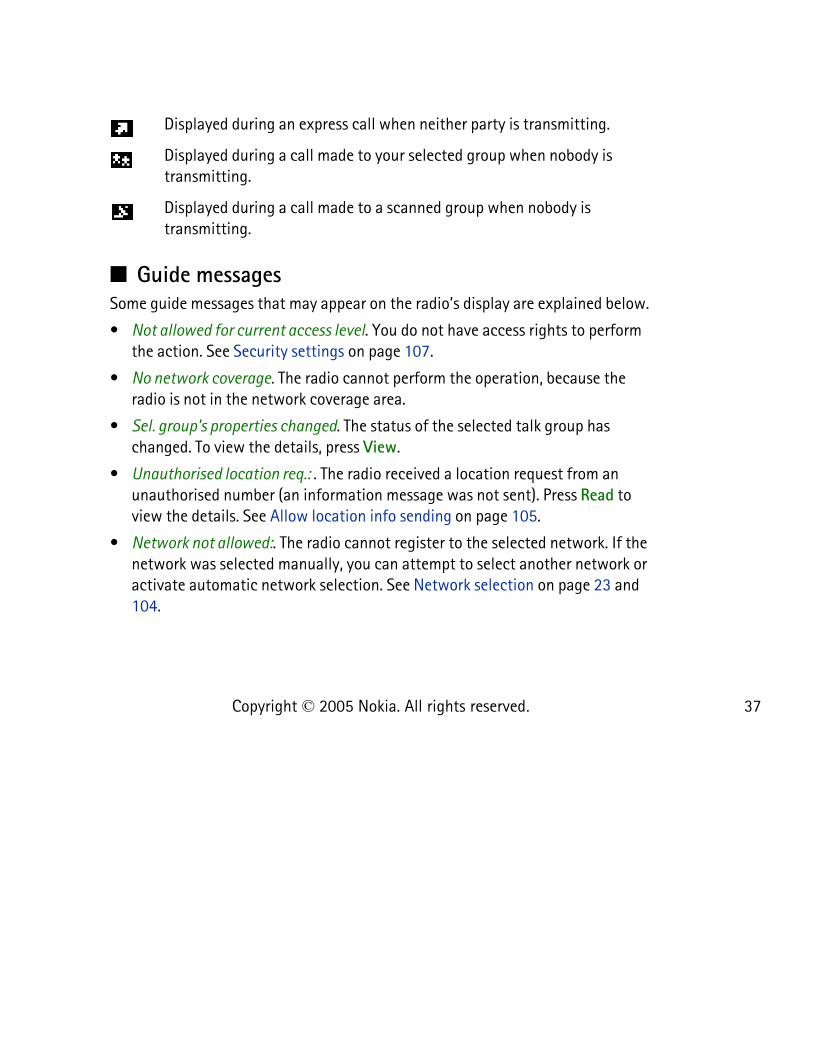
Displayed during an express call when neither party is transmitting.
Displayed during a call made to your selected group when nobody is transmitting.
Displayed during a call made to a scanned group when nobody is transmitting.
� Guide messagesSome guide messages that may appear on the radio’s display are explained below.
• Not allowed for current access level. You do not have access rights to perform the action. See Security settings on page 107.
• No network coverage. The radio cannot perform the operation, because the radio is not in the network coverage area.
• Sel. group's properties changed. The status of the selected talk group has changed. To view the details, press View.
• Unauthorised location req.: . The radio received a location request from an unauthorised number (an information message was not sent). Press Read to view the details. See Allow location info sending on page 105.
• Network not allowed:. The radio cannot register to the selected network. If the network was selected manually, you can attempt to select another network or activate automatic network selection. See Network selection on page 23 and 104.
38Copyright © 2005 Nokia. All rights reserved.
• Network changed:. Automatic network selection is on and the radio has selected a new network. Press OK to exit the message. See Network selection on page 23 and 104.
39Copyright © 2005 Nokia. All rights reserved.
3. Using your radio
� Accessing a menu functionSeveral functions can be accessed via the radio’s menu.
Accessing a menu function by scrolling1. To access the menu, press Menu.
2. Scroll to the desired menu and select, for example, Settings.
3. If the menu contains submenus, select the desired submenu, for example, Call settings.
4. If the selected submenu contains further submenus, select the next submenu, for example, Anykey answer.
5. Select the setting of your choice.
6. Press Back to return to the previous menu level, and Exit to exit the menu.
Tip: To exit the menu without changing any settings, press and hold Back or . See also Muting the call temporarily on page 54 and 70.
Accessing a menu function by its shortcut numberThe menu items are numbered. You can use these numbers as shortcuts for quick access.
1. To access the menu, press Menu.

40Copyright © 2005 Nokia. All rights reserved.
2. Key in quickly, within two seconds, the index number of the menu function you want to access. For example, to set anykey answer on, press Menu, then ,
, and .

41Copyright © 2005 Nokia. All rights reserved.
� List of menu functions1. Status msgs.
1. Send status message1. Status2. Callback3. Situation
2. Received3. Sent4. My folders5. Delete messages6. Status settings
1. Max. number of received2. Max. number of sent3. Delivery reports4. Recipient of situations
2. Messages1. Write message2. Inbox3. Outbox4. Archive5. Templates6. My folders
7. Delete messages8. Message settings
1. Delivery reports2. Message centre number1
3. Call register1. Missed calls2. Received calls3. Dialled numbers4. Delete recent call lists5. Call duration6. Data counter7. Data connection timer
4. Talk groups1. Selected folder2. Edit folder: 3. View background folder4. Group settings
1. Scanning2. Group calls3. Home group priority4. Home group
1. This menu is shown only if the network supports it.
42Copyright © 2005 Nokia. All rights reserved.
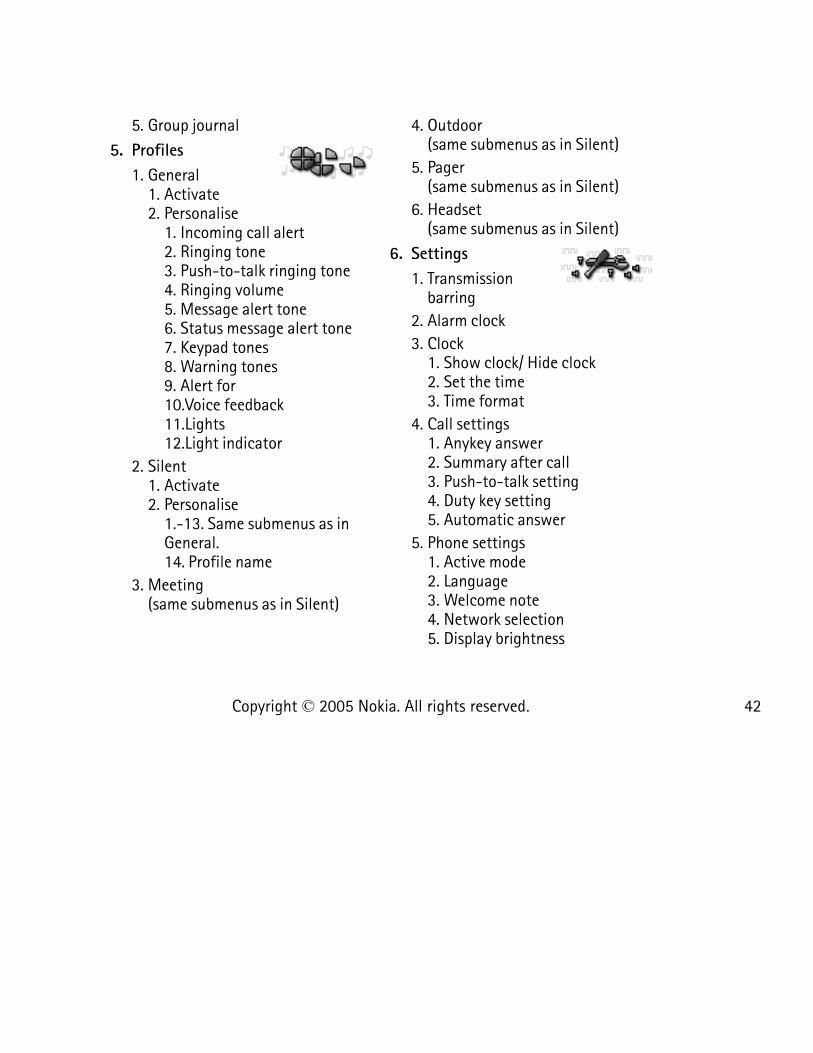
5. Group journal5. Profiles
1. General1. Activate2. Personalise
1. Incoming call alert2. Ringing tone3. Push-to-talk ringing tone4. Ringing volume5. Message alert tone6. Status message alert tone7. Keypad tones8. Warning tones9. Alert for10.Voice feedback11.Lights12.Light indicator
2. Silent1. Activate2. Personalise
1.-13. Same submenus as in General.14. Profile name
3. Meeting (same submenus as in Silent)
4. Outdoor (same submenus as in Silent)
5. Pager (same submenus as in Silent)
6. Headset (same submenus as in Silent)
6. Settings1. Transmission
barring2. Alarm clock3. Clock
1. Show clock/ Hide clock2. Set the time3. Time format
4. Call settings1. Anykey answer2. Summary after call3. Push-to-talk setting4. Duty key setting5. Automatic answer
5. Phone settings1. Active mode2. Language3. Welcome note4. Network selection5. Display brightness

43Copyright © 2005 Nokia. All rights reserved.
6. Unit alert duration7. Allow location info sending
6. Direct mode settings1. Direct mode scanning2. View active direct mode device
7. Keyguard settings8. Communication settings
1. Listen to voice messages2. Voice mailbox number
9. Modem settings 1. Active access point2. Edit active access point
10.Security settings1. PIN code request2. Configure access levels3. Access level4. Change of access codes
11.Restore factory settings
7. Calculator
8. Calendar
9. To-do list
10.Services1. Home2. Bookmarks3. Service inbox4. Settings
1. Active service settings2. Edit active service settings3. Appearance settings4. Download settings5. Authority certificates6. Service inbox settings
5. Go to address6. Clear the cache

44Copyright © 2005 Nokia. All rights reserved.
� Fast menuSome of the radio’s frequently-used menu functions have been compiled in the fast menu, which is accessed with the fast menu key . The fast menu includes the following items:
• Scanning on or Scanning off depending on the current setting. This option affects the scanning setting in the currently active mode (network mode or direct mode). If you do not have access rights to change the scanning setting, this item is not shown. See Security settings on page 107.
• Network md. or Direct mode depending on the current setting.
• Profiles General and Silent.
• The first five situation indicators if these have been predefined in your radio’s memory (see Status msgs. (Menu 1) on page 84).
Note that some fast menu functions can be successfully activated only when the radio is in network mode and in the network coverage area.
Activating a fast menu item1. In standby mode, press , and then scroll to the desired item either with
and or by pressing quickly.
If voice feedback is activated, the radio plays the pre-recorded names of the items when you scroll with in the fast menu.
2. To activate the highlighted item, press and hold or press Select.

45Copyright © 2005 Nokia. All rights reserved.
� Voice feedbackYou can get information about some of the operations in your radio as voice feedback without looking at the display. You can select whether voice feedback is on or off separately for each profile (see Profiles (Menu 5) on page 99).
When voice feedback is activated, the radio plays voice feedback in the following situations:
• When you turn the group selector, the radio plays the index number of the group (network mode) or channel (direct mode).
• When you use the back key, the radio plays the talk group index number or "Home" in network mode and the talk group index name (A, B, C) in direct mode.
• When you scroll in the fast menu with , the radio plays the pre-recorded names of the items.
Note: Do not hold the speaker microphone near your ear to hear voice feedback, because the volume may be extremely loud. The volume of voice feedback depends on the volume settings of the radio. You can adjust the volume with and .

46Copyright © 2005 Nokia. All rights reserved.
4. Group calls
� Group call basicsGroup calls are immediate one-way calls within a talk group. They are connected without the recipients answering.
You can select one talk group you primarily wish to communicate with and other talk groups whose calls you wish to scan. You may receive calls made to your selected group even when you are engaged on a call with a scanned group that has a low or medium scanning priority.
Scanning allows you to follow the calls going on in several talk groups. The scanned groups may have different scanning priorities and a group with a high scanning priority can interrupt a call you are having with another scanned group.
You can access the talk groups in the selected folder with the group selector or by pressing in the standby mode.
To communicate with a talk group, you need to have access rights to communicate with it and you must be in the group’s area (the geographical area where communication with the group is possible). See Guide messages on page 37.
Group calls and scanning are a network service. For details and availability, contact your service provider.

47Copyright © 2005 Nokia. All rights reserved.
FoldersThe talk groups in your radio are arranged in folders. There can be a maximum of 200 folders, and a folder can have up to 24 static (predefined) talk groups and up to 24 dynamic (over-the-air) talk groups. You can view or change the folders by pressing in the standby mode or entering the Selected folder submenu of the Talk groups menu.
Only one folder can be selected at a time, and you can only scan or call those talk groups that are in the selected folder (with the exception of the home group, see Home group on page 47).
In standby mode, the name of the currently selected folder is shown on the display.
Home groupYou can set one talk group as the home group. Unless the home group scanning priority is set to Off, the home group is automatically included in scanning when scanning is on, and you can receive calls from the home group even when the selected folder is not the folder of the home group.
Note: You need to be in the home group’s area and have access rights to communicate with it.
Press Menu and select Talk groups and Group settings. To view the folder and group name of the home group, select Home group. To change the priority of the home group, select Home group priority; if you do not want to scan the home group, select Off. For information on how to change the home group, see
48Copyright © 2005 Nokia. All rights reserved.
Accessing the group list in standby mode on page 52 and Options in the group list on page 56.
Making a call to the home groupYou can easily select the home group by pressing and holding the back key. If voice feedback is activated, the radio plays "Home". When the home group’s name is displayed in standby mode, press and hold the PTT key. You can start speaking after a short tone is played and (transmitting) appears on the display.
You can also set pressing and holding the duty key to make a call to the home group (see Duty key setting on page 103). When you talk, press and hold the duty key . Note that a handsfree microphone and a loudspeaker need to be connected for this function to work.
Dynamic talk groupsDynamic talk groups can be added to and removed from your radio’s memory over the air by your service provider. When groups are added or removed, an information note is displayed (e.g., Group added) and you can view the changes by pressing View. The changes are saved in the Group journal submenu, see Group journal on page 58.
The dynamic groups are included at the end of the selected folder, if the folder has been set to show dynamic groups. For details, contact your service provider.

49Copyright © 2005 Nokia. All rights reserved.
� Starting group communicationTo start group communication, group calls need to be on. Select a folder and a talk group you primarily wish to communicate with, and then set scanning to on if you wish and select the groups you wish to scan. You may also define how you want the PTT key to function.
Switching group calls on and off1. Press Menu and select Talk groups, Group settings and Group calls.
2. To switch group calls on, scroll to On and press OK. To switch group calls off, scroll to Off and press OK.
You can call or receive calls from a talk group if it is a selected or a scanned group and if it is available. These groups have their own indicators in the group list, see Edit folder: on page 56.
Selecting a folderTo select the folder whose talk groups you want to be available:
• Press to enter the list of folders, or press Menu and select Talk groups and Selected folder. Key in the first character(s) of the folder’s name or scroll to the desired folder, and then press Select.
See Edit folder: on page 56 for how to view the list of talk groups that are included in the selected folder.
When you change the folder, the new selected group will be the group that has the same index number as the latest selected group in the previous folder. If the

50Copyright © 2005 Nokia. All rights reserved.
new folder has less groups than the previous folder and the group index does not exist, the last group in the new folder will be selected. However, if the home group had been set as the selected group with the back key or the latest selected group was set by the network, the selected group does not change when you change the folder.
Selecting a talk groupTo select a group:
• Turn the group selector until you reach the desired group. Wait untilGroup selected is displayed and the radio plays a short tone.
When you turn the group selector, the group name appears on the display and if voice feedback is activated, the radio plays the index number of the current group.
Pressing the back key switches between the groups that have the same index number as the last two selected groups (excluding the home group). Pressing and holding the back key selects the home group.
Or
• Press to access the list of talk groups, scroll to the desired group, press Options and select Select. Wait untilGroup selected is displayed and the radio plays a short tone.
Note: If you change your selected group, you cannot receive calls from the group that used to be your selected group unless the group is included in scanning.
51Copyright © 2005 Nokia. All rights reserved.
Scanning settings1. Press Menu and select Talk groups, Group settings and Scanning.
2. To switch scanning on, scroll to On and press OK. To switch scanning off, scroll to Off and press OK.
You can also quickly activate and deactivate scanning in the fast menu, see Fast menu on page 44.
The indicator is displayed when scanning is on.
To set the groups you wish to scan:
• In standby mode, press to access the list of talk groups in the selected folder. Scroll to the desired group, press Options and select Include to include the group in scanning or Exclude to exclude the group from scanning.
Or
• Press Menu and select Talk groups, Edit folder: and scroll to the desired group. Press Options, select Scanning state and select Included to include a group in scanning or Excluded to exclude a group from scanning.
PTT key useYou may set the PTT key to function in either of the following ways:
• Pressing and holding the PTT key always makes a call to the selected group, even if the radio has just received a call from a scanned group and the name of the scanned group is still on the display.
Or
52Copyright © 2005 Nokia. All rights reserved.
• Pressing and holding the PTT key makes a call to the talk group whose name is on the display. If the radio has just received a call from a scanned group and the name of the scanned group is still on the display, the call is made to that scanned group. If there have been no calls from scanned groups and the name of the selected group is on the display, the call is made to the selected group.
For setting the functioning of the PTT key, see Push-to-talk setting on page 103.
� Accessing the group list in standby modeIn standby mode, press to access the list of talk groups in the selected folder. Scroll to the desired group and press Options for the following options: Select to select the talk group, Set as home to set the group as the home group, Send message to start sending a text message to the group, Send status to start sending status messages to the group, and either Include to include the group in scanning or Exclude to exclude the group from scanning.
� Receiving a group callYou can receive group calls from your selected talk group, the home group and the scanned groups in the selected folder.
When you receive a group call, the folder’s and group’s name and the caller’s name or number and (receiving) are displayed in standby mode.
When nobody is speaking during a group call, is displayed if the call comes from your selected group and is displayed if the call comes from a scanned group.

53Copyright © 2005 Nokia. All rights reserved.
Tip: You can use the menu functions and the contacts directory when you are listening to a group call.
Responding to a group callPress and hold the PTT key while the group’s name is displayed.
Note: If you have set the PTT key to always make a call to the selected group, the call is made to the selected group even if another group’s name is displayed (see PTT key use on page 51). To make a call to some other group, first set it as the selected group (see Selecting a talk group on page 50).
If the call indicator has changed to or , the call has been disconnected and pressing and holding the PTT key will start a new call to the group.
You can queue for your turn to talk during a group call by pressing and holding the PTT key (network service). A queuing tone is played and the text queued is displayed while you are in the queue. You can start speaking after a short tone is played and appears on the display. You can stop queuing by releasing the PTT key.
Tip: You can also respond to a group call when you are using the menu.
Voice overrideWith voice override (network service), you can override the communication in the talk group and avoid the need to queue for your turn to speak. If you have a right to use voice override, the text next to is Override when the radio receives group calls.

54Copyright © 2005 Nokia. All rights reserved.
To request for voice override, press Override and then press and hold the PTT key. You can start speaking after a short tone is played and appears on the display.
Muting the call temporarilyWhen the radio is receiving a group call, you can mute the call for a predefined time (0-60 seconds) by pressing .
� Making a group call
Making a call to the selected talk groupPress and hold the PTT key when your selected group’s name is displayed in standby mode. You can start speaking after a short tone is played and appears on the display.
Making a call to a scanned talk groupYou can make a call to a scanned group after the conversation has ended in it by pressing and holding the PTT key while the group’s name and are still on the display.
Note: If you have set the PTT key to always make a call to the selected group, you cannot call a scanned group in this way (see PTT key use on page 51). To call the scanned group, first set it as the selected group (see Selecting a talk group on page 50).

55Copyright © 2005 Nokia. All rights reserved.
Calling a talk group’s dispatcher1. Press to access the list of talk groups in the selected folder.
2. Scroll to the desired group, press and confirm by pressing OK.
If the group whose dispatcher you are calling is not your selected group or if you are not scanning the group, you may have to wait a few seconds before your call is connected. Note that all talk groups may not have dispatchers.
If the text Use PTT to speak is displayed, the call is changed to a one-way call and you have to press and hold the PTT key when you speak.
You can also set pressing the duty key to start a phone call to the dispatcher of the selected group (see Duty key setting on page 103). If the call is changed into a one-way phone call, press and hold the PTT key when you speak.
Dispatcher call is a network service. For details and availability, contact your service provider.
� Talk groups (Menu 4)This menu contains the folders and talk groups that have been stored in your radio’s memory. You can also view and change settings related to groups and view the group journal.
See also Home group on page 47, Switching group calls on and off on page 49, Scanning settings on page 51 and Selecting a folder on page 49.

56Copyright © 2005 Nokia. All rights reserved.
Edit folder:In this submenu, you can view and change information related to talk groups in the selected folder.
Press Menu and select Talk groups. When you scroll to the submenu Edit folder:, you can see how many groups have the scanning state Included from all the groups in the folder. Press Select to view the list of talk groups in the selected folder.
The indicators in front of group names give you more information about the group:
• Scanning priority is indicated with dots: one dot for low priority ( ), two dots for medium priority ( ), and three dots for high priority ( ).
• If the group is the selected group, the indicator is inside a box ( ).
• If a group that is included in scanning is not available, there is a backslash ( \ ) across the indicator ( ).
Tip: When the name of a group is highlighted, press and hold to view the names of the folder and group and the group’s scanning priority.
Options in the group listIn the group list, scroll to the desired group and press Options, and the following options become available:
• Scanning state. Select Included to include a group in scanning, or Excluded to exclude a group from scanning.
• Group status. Indicates the state of the group (network service):

57Copyright © 2005 Nokia. All rights reserved.
• Active. The group is the selected group, the home group or scanned and available.
• Unavailable. You are not in the group’s area.
• Not allowed. For example, you do not have access rights to communicate with the group.
• Unknown. The network does not recognise the group.
• Inactive. Scanning state is Excluded and the group is not the selected group or the home group.
• Group priority. You can change the scanning priority of the group to Low, Medium or High.
• Set as Home group. You can set the group to be the home group. See Home group on page 47.
View background folderYou can receive calls from background groups even when scanning or group calls are switched off. These calls may also interrupt any group calls in progress. You may be able to respond to calls from background groups, but you cannot start them.
To view the list of background groups, press Menu, and select Talk groups and View background folder. To view information about a group, scroll to the name, and press View. If there is a backslash ( \ ) across the indicator in front of the group name, the group is unavailable.
58Copyright © 2005 Nokia. All rights reserved.
Group journalTo view the group journal, press Menu and select Talk groups and Group journal. The group journal tracks certain actions made by the network or by the radio user:
• Adding or deleting dynamic groups over the air ( and ), groups becoming available or unavailable ( and ), groups selected by the network ( ).
• changes in group scanning priority made by the user ( ).
The examples in the list are indicators of unread events. For read events, the top right corner of the indicator is turned (for example, ).
The group journal can track 100 events, and the oldest events are automatically deleted when the journal becomes full. You can scroll through the list of events with or . To read more information about the event, press Read. To delete all events from the group journal, first select an event by pressing Read. Then press Options and select Delete all.
Tip: To select a dynamic group in the group journal, scroll to the event that indicates that the group was added and press Read, and then press Options and select Select. You can select a group if it has not been deleted yet and if it is included in the selected folder.

59Copyright © 2005 Nokia. All rights reserved.
5. Express calls
Express calls are immediate one-way calls between two people. They are connected without the recipient answering. You can make express calls to TETRA network numbers.
During a WAP or data connection, an incoming express call may be changed to a one-way phone call (network service); the radio alerts you and you need to press
to answer the call. (Receiving calls may be possible only when data transfer is not in progress.) The WAP or data connection is suspended during the call, and the radio will try to resume it after the call is ended.
Express calls are a network service. For details and availability, contact your service provider.
� Making an express call1. Key in a TETRA number.
2. Press and hold the PTT key and start speaking after a short tone is played and appears on the display.
3. Release the PTT key to let the other party speak. is displayed when you receive a call.
If the text Call type changed appears, the call is changed to a one-way phone call. You have to wait until the other party has answered it before you can start speaking. Press to end the call.

60Copyright © 2005 Nokia. All rights reserved.
For information on how to make an express call using the contacts directory, see Searching for a name on page 78.
Reusing a numberAfter an express call has ended, the other party’s name and number remain on the display for a short while and the call indicator changes to . You can make a new call to the number by pressing and holding the PTT key while is displayed. You can also make a phone call to the number by pressing .
Making an express call to an abbreviated TETRA numberTo make a call to an abbreviated TETRA number, press , key in the number and press and hold the PTT key. For details on abbreviated TETRA numbers, contact your service provider.
Last number redial1. In standby mode, press once to access the list of ten last-dialled
numbers.
2. Use or to reach the desired number or name.
3. To make an express call, press and hold the PTT key. Note that express calls can only be made to TETRA network numbers.

61Copyright © 2005 Nokia. All rights reserved.
Speed dialling a phone numberIf you have assigned a phone number to one of the speed dialling keys -
, you can make an express call to that number by pressing the desired speed dialling key and then pressing and holding the PTT key. Note that express calls can only be made to TETRA network numbers. See Speed dials on page 81.
� Receiving an express callWhen you receive an express call, the caller’s name, number or Call and are displayed.
Tip: You can use the menu and the contacts directory when you are listening to an express call.
Responding to an express callPress and hold the PTT key and start speaking after a short tone is played and appears on the display.
Rejecting an express callTo reject an express call, press .
If the radio alerts for an express call, rejecting the call sends a "line busy" tone to the caller. If the call has already been connected when you reject it, the call indicator changes to .

62Copyright © 2005 Nokia. All rights reserved.
6. Phone calls
Phone calls are like conventional telephone calls. They can be made to TETRA network and public telephone network numbers.
Phone calls are normally two-way calls, but your radio is also capable of making and receiving one-way phone calls.
The speaker microphone can only be used for one-way calls. You may have other enhancements, such as a handsfree microphone and a loudspeaker, available for two-way calls.
One-way and two-way calls have different ringing tones. You can change the tones in the Profiles menu.
Two-way phone calls are a network service. For details and availability, contact your service provider.
� Making a phone call1. Key in the area code and phone number. The area code is not required for
TETRA numbers.
2. Press .
3. Scroll to one of the following number types:
• Private if the number is a TETRA network number.
• Abbr. number if the number is an abbreviated TETRA number.

63Copyright © 2005 Nokia. All rights reserved.
• Phone if the number is a public telephone network number.
• Office ext. if the number is an office extension number.
For details on the number types, contact your service provider.
4. Press to dial the call.
5. To end the call, press .
If Use PTT to speak is displayed or only the speaker microphone is connected, the call is changed to a one-way call. Press and hold the PTT key to speak during a one-way call. You need to press to end the call.
Tip: You can make a phone call even during an express call or a group call. After you have pressed to make a call, the other call is disconnected.
For information on how to make a phone call using the phonebook, see Searching for a name on page 78.
Making a phone call to an abbreviated TETRA numberTo make a phone call to an abbreviated TETRA number, press , key in the number and press . For details on abbreviated TETRA numbers, contact your service provider.
Last number redial1. In standby mode, press once to access the list of ten last-dialled
numbers.
64Copyright © 2005 Nokia. All rights reserved.
2. Use or to reach the desired number or name.
3. Press to make a phone call.
International phone callsInternational phone calls are a network service. For details and availability, contact your service provider.
1. Press twice for the international prefix (the + character replaces the international access code).
2. Enter the country code, area code and the phone number.
3. Press .
In-call optionsWhen you press Options during a two-way call, the following options become available:
• Mute or Unmute. Mutes or unmutes the microphone.
• Send DTMF. Allows you to key in and send DTMF tones, for example, passwords or bank account numbers (network service).
• Menu. Enters the menu.
• Contacts. Allows you to access the contacts directory.
• End active call. Ends the call.
65Copyright © 2005 Nokia. All rights reserved.
� Speed dialling a phone numberIf you have assigned a phone number to one of the speed dialling keys -
, you can make a phone call to that number by pressing the desired speed dialling key and then pressing . See Speed dials on page 81.
� Answering a phone callWhen a ringing tone is played, press or .
If the call is a one-way call, you can also answer it by pressing and holding the PTT key. is displayed during a one-way call.
Press or to end the call.
Muting the ringing tonePress Silent or Options to mute the ringing tone. By pressing Options, the following options also become available: Answer and Reject.
Rejecting a phone callTo reject an incoming call and to send the caller the "line busy" tone, press .
66Copyright © 2005 Nokia. All rights reserved.
7. Direct mode
� Direct mode basicsIn direct mode, the radio operates without the network, so the radios are communicating directly with each other. Direct mode enables one-way calls both in the network coverage area and outside the network coverage area. For details and availability, contact your service provider.
Note: When direct mode is active, only those radio functions that do not require the use of the network can be used. For example, in direct mode you cannot send or receive status or text messages, make or receive network mode calls, use WAP or the data connection or activate fast menu items that require the use of the network. To use radio functions that require the use of the network, activate network mode and return to the network coverage area.
Your radio has direct mode channels and each channel can have up to three groups. To receive a direct mode call that is made to the selected or a scanned group on the selected channel, the user must be in the coverage area of the transmitting radio. The radio coverage areas of different users can vary; even if you can hear a conversation, not all those speaking can necessarily hear you. For communication to be efficient, all the users should be within each other's radio coverage areas.
67Copyright © 2005 Nokia. All rights reserved.
� Using direct mode
Activating direct modeTo activate direct mode, press Menu and select Settings, Phone settings, Active mode and Direct. To return to network mode, select Network.
You can also activate direct mode and network mode in the fast menu, see Fast menu on page 44.
When you activate direct mode, the selected channel and group will be those that were last selected in direct mode. When you return to network mode, the selected folder and group will be those that were last selected in network mode.
In standby mode, the indicator indicates that direct mode is active. The names of the selected channel and group are shown on the display. The bar above
indicates the signal strength of the radio you are receiving communication from. The higher the bar, the stronger the signal and the better you can receive the communication.
If a compatible direct mode gateway is available, is displayed in standby mode and the bar above indicates the signal strength of the gateway. If a compatible direct mode repeater is available, is displayed in standby mode and the bar above indicates the signal strength of the repeater. See Direct mode gateway and repeater on page 70.

68Copyright © 2005 Nokia. All rights reserved.
Selecting direct mode channels and groupsUp to 60 direct mode channels can be stored in your radio’s memory. Up to three groups can be stored for each channel. To select a channel, turn the group selector until the desired channel is displayed. Wait until Group selected is displayed and the radio plays a short tone. If voice feedback is activated, the radio plays the index number of the channel when you turn the group selector.
When you select a channel, the first group (A) is automatically selected. Pressing the back key switches between the second and the third group (B and C) on the same channel, and pressing and holding the back key selects the first group (A) on the channel. If voice feedback is activated, the radio plays the index name (A, B or C) of the group when you use the back key.
You can also select the channel and group with or . Press or to access the list of channels. Scroll to the desired channel, press Groups
and select the desired group.
Scanning the groups on a channelDirect mode scanning allows you to receive calls made to the other groups on the same channel. Press Menu and select Settings, Direct mode settings and Direct mode scanning and select On or Off.
You can also activate and deactivate direct mode scanning in the fast menu. Press and select Scanning on or Scanning off by pressing and holding . See also
Fast menu on page 44.
69Copyright © 2005 Nokia. All rights reserved.
� Receiving a direct mode callYou can receive calls from the selected group and the scanned groups in the selected channel. Even if scanning is not on, you can receive calls from groups that are on the same frequency and that have been defined as open groups (network service).
When you receive a direct mode call, and the speaker’s number or name and the name of the channel and group are displayed. If the speaker’s number or name is not available, Call is displayed.
If the connection to the transmitting radio is lost, the note Connection lost is displayed.
Responding to a direct mode callPress and hold the PTT key while the channel’s and group’s names are displayed.
You can queue for your turn to talk during a call by pressing and holding the PTT key. A queuing tone is played while you are in the queue. You can start speaking after a short tone is played and appears on the display. You can stop queuing by releasing the PTT key.
Voice override With voice override (network service), you can override the communication in the group and avoid the need to queue for your turn to speak. If you have a right to use voice override, the text next to is Override when the radio receives a direct mode call.
70Copyright © 2005 Nokia. All rights reserved.
To request for voice override, press Override and then press and hold the PTT key. You can start speaking after a short tone is played and appears on the display.
Muting the call temporarilyWhen the radio is receiving a direct mode call, you can mute the call for a predefined time (0-60 seconds) by pressing .
� Making a direct mode call1. First make sure that the names of the desired channel and group are displayed.
2. Press and hold the PTT key and start speaking after a short tone is played and appears on the display.
Duty key in direct modeIn direct mode, pressing and holding makes a call to the first group on the selected channel. Press and hold the duty key when you speak.
� Direct mode gateway and repeaterYour organisation may have separate direct mode gateway devices or direct mode repeater devices. The devices operate on certain frequencies, and offer an additional service to your radio when the radio is in a compatible device’s coverage area and operates in direct mode on the same frequency as the device.
When the radio is on a direct mode channel and group where a compatible direct mode gateway device is available, is displayed and in standby mode also

71Copyright © 2005 Nokia. All rights reserved.
Gateway is displayed. On such a channel and group, direct mode calls will be routed through the gateway device. Besides transmitting calls to the direct mode group, the gateway device may also transmit outgoing calls to a network mode talk group predefined by your service provider and you may also be able to receive group calls from that group. Your radio does not have support for any other services that may be offered by gateway devices.
If the connection to the gateway device is lost, Gateway connection lost is displayed and the radio will continue to operate in normal direct mode.
Note: When calls are routed through the direct mode gateway device, they are not connected as fast as normal direct mode calls.
When the radio is on a direct mode channel and group where a compatible direct mode repeater device is available, is displayed and in standby mode also Repeater is displayed. On such a channel and group, your radios’s coverage area in making and receiving direct mode calls may be extended. The calls are routed through the repeater device to those radios in its coverage area that have direct mode active on the same channel and group, and that support that type of repeater device.
If the connection to the repeater device is lost, Repeater connection lost is displayed and the radio will continue to operate in normal direct mode.
See also Direct mode settings on page 106.
� Red key calls and emergency calls in direct modeNote: If you are not within the network coverage area, you cannot make emergency calls or red key calls to network mode destinations.

72Copyright © 2005 Nokia. All rights reserved.
If you attempt to make an emergency call to an emergency number in direct mode, the radio switches to network mode, attempts to connect to the network, and attempts to make the call.
For each direct mode channel, your organisation can define whether the radio attempts to make red key calls in direct mode to a predefined direct mode group, or switches to network mode and attempts to make the call to the destination that is predefined for red key calls in network mode.
Press and hold the red function key, and the radio attempts to make a red key call. Press the red function key and then the back key, and the radio attempts to make a silent red key call. However, if the silent call is made to the predefined direct mode group, it is changed into an ordinary red key call to the group. See also Red key calls on page 29.
If a compatible direct mode gateway device is available, and a red key call is made to a predefined direct mode group, the call may also be transmitted to the network mode group that is predefined for the gateway device.
If the radio receives a red key call, or a call made to a destination that is predefined as an emergency number, the radio plays a tone and Priority call is displayed with the call information.

73Copyright © 2005 Nokia. All rights reserved.
8. Writing text
You can key in text, for example, when writing messages, in two different ways. You can use the method traditionally used in mobile phones or another method called predictive text input.
When you are writing text, predictive text input is indicated by and traditional text input is indicated by on the top left of the display. The character case is indicated by Abc, abc, or ABC next to the text input indicator, and you can change the character case by pressing . The number mode is indicated by 123, and you can change between letter and number modes by pressing and holding .
� Setting predictive text input on or offWhen writing text, press Options and select Dictionary.
• To set predictive text input to on, select a language from the dictionary options list. Predictive text input is only available for the languages on this list.
• To change back to traditional text input, select Dictionary off.
Tip: To quickly set predictive text input on or off when writing text, press twice, or press and hold Options.
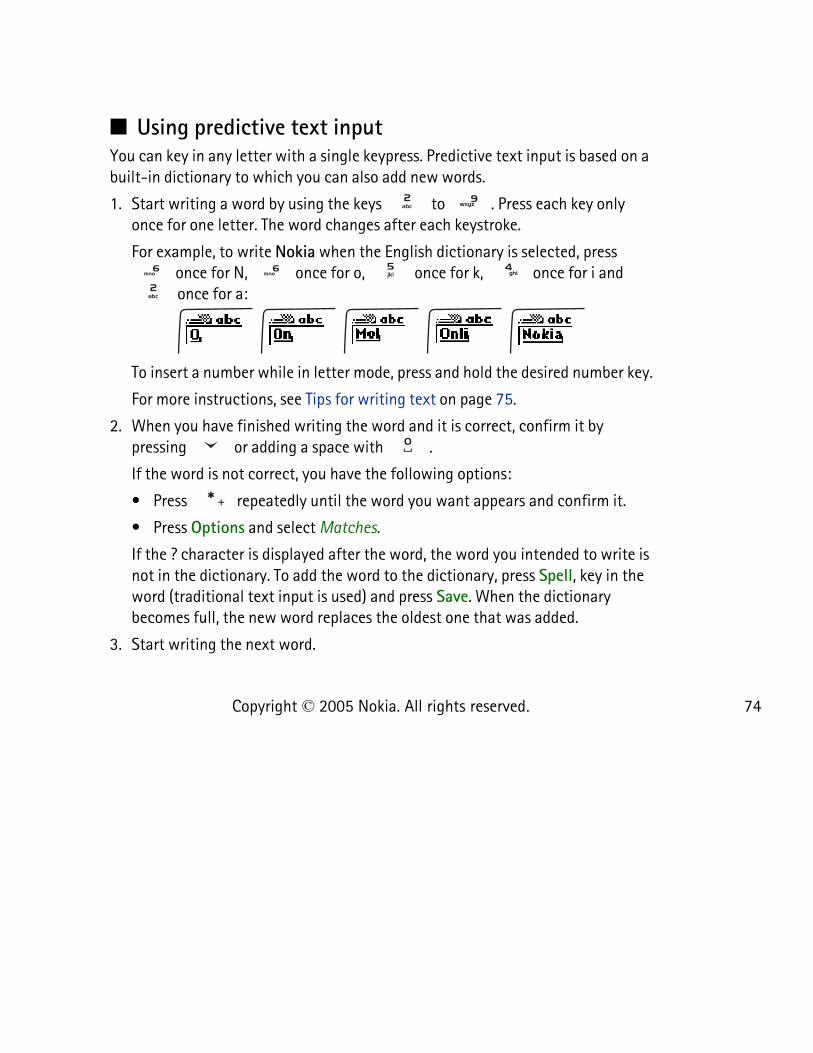
74Copyright © 2005 Nokia. All rights reserved.
� Using predictive text inputYou can key in any letter with a single keypress. Predictive text input is based on a built-in dictionary to which you can also add new words.
1. Start writing a word by using the keys to . Press each key only once for one letter. The word changes after each keystroke.
For example, to write Nokia when the English dictionary is selected, press once for N, once for o, once for k, once for i and once for a:
To insert a number while in letter mode, press and hold the desired number key.
For more instructions, see Tips for writing text on page 75.
2. When you have finished writing the word and it is correct, confirm it by pressing or adding a space with .
If the word is not correct, you have the following options:
• Press repeatedly until the word you want appears and confirm it.
• Press Options and select Matches.
If the ? character is displayed after the word, the word you intended to write is not in the dictionary. To add the word to the dictionary, press Spell, key in the word (traditional text input is used) and press Save. When the dictionary becomes full, the new word replaces the oldest one that was added.
3. Start writing the next word.
75Copyright © 2005 Nokia. All rights reserved.
Writing compound wordsKey in the first part of the word and confirm it by pressing . Write the last part of the word and confirm it by pressing or .
� Using traditional text inputPress a number key, to , repeatedly until the character you want appears. Not all characters available under a number key are printed on the key. The characters available depend on the language selected in the Language menu, see Language on page 104.
To insert a number while in letter mode, press and hold the desired number key.
• If the next letter you want is located on the same key as the present one, wait until the cursor appears, or press or , and then key in the letter.
• The most common punctuation marks and special characters are available under the number key .
For more instructions, see Tips for writing text on page 75.
� Tips for writing textYou can also use the following keys to write text:
• To insert a space, press .
• To move the cursor to the right or left, press or , respectively.
• To delete a character to the left of the cursor, press Clear. Press and hold Clear to delete the characters more quickly.
76Copyright © 2005 Nokia. All rights reserved.
• To insert a special character when using traditional text input, press or when using the predictive text input, press and hold , or press Options and select Insert symbol.
Scroll through the list of characters and press Use to select a character.
To scroll through the list more quickly, press , , or and press to select a character.
• To insert a number while in letter mode, press Options and select Insert number. Key in the numbers you want and press OK.
• To insert a name or a phone number by searching for it in Contacts, press Options and select Insert name or Insert number.
• To insert a word when using predictive text input, press Options and select Insert word. Write the word using traditional text input and press Save. The word is also added to the dictionary.

77Copyright © 2005 Nokia. All rights reserved.
9. Contacts
You can use your radio as a contact manager, because you can save multiple phone numbers as well as text, such as an E-mail address, a street address or a note under a name in the contacts directory.
You can enter the contacts directory by pressing Contacts when the radio is in standby mode.
� Saving names and numbersYou can save at least 255 names and phone numbers in Contacts and up to 5 numbers and up to 2 text notes under a name. You may be able to save more than 255 names and numbers if your radio has enough memory available for this. The amount of available memory depends on the amount of data (e.g., calendar notes) saved in the radio’s memory.
Each number has to be assigned a number type when it is saved in Contacts. The first number saved under a name is automatically set as the name’s default number.
When you select a name from Contacts, e.g. to make a call or to send a message, the default number is used unless you select another number. The default number is indicated by a box around the number type indicator (e.g. ).
Note: You can call a saved number only if it has been assigned the correct number type.

78Copyright © 2005 Nokia. All rights reserved.
To save names and numbers:
1. Press Contacts and select Add contact.
2. Key in the name and press OK. See also Writing text on page 73.
3. Key in the area code and the phone number, and press OK.
4. Select one of the following number types:
Private if the number is a TETRA number other than an abbreviated TETRA number.
Abbr. number if the number is an abbreviated TETRA number.
Phone if the number is a public telephone network number.
Office ext. if the number is an office extension number.
5. When the name and number are saved, press Done.
Tip: Quick save. In standby mode, key in the phone number, press Options and select Save. Enter the name and press OK, approve the phone number with OK and then select the correct number type.
� Searching for a name1. Press Contacts and select Search.
2. Either press List to access the list of names, or key in the first character or more of the name you are searching for and press Search.
3. Scroll to the name you want.
79Copyright © 2005 Nokia. All rights reserved.
4. When the desired name is highlighted, you can call the default number. Pressing makes a phone call and pressing and holding the PTT key makes an express call. Note that express calls can only be made to TETRA network numbers.
If multiple numbers have been saved for the name and you want to call one of the other numbers, first press Details and scroll to the number you want to call.
Tip: To search for a name during a call, press Options and select Contacts and Search.
� Organising the contacts directory
Numbers and text items added to a saved nameTo add phone numbers or text items to a name in Contacts, first enter the list of names, scroll to the name to which you want to add a new number or text item and press Details. Press Options, select Add number or Add detail and select one of the number or text types. Enter the number or enter the text and press OK to save it.
To edit a name, a number or a text item, search for the name you want to edit and press Details. Scroll to the name, number or text item you want to edit and press Options. Select Edit name, Edit number or Edit detail and edit the name, number, or text and press OK.

80Copyright © 2005 Nokia. All rights reserved.
You can also delete a phone number or a text item that has been added to a name. Scroll to the number or text item you want to delete and press Options. Select Delete number or Delete detail and press OK.
Tip: You can also edit names or add numbers by pressing Contacts and selecting Edit name or Add number.
Changing the number typeOnce you have entered the list of names, scroll to the desired name and press Details. Scroll to the number whose type you want to change, press Options and select Change type.
Changing the default numberOnce you have entered the list of names, scroll to the desired name and press Details. Scroll to the number you want to set as the default number, press Options and select Set as default.
� Deleting contact entriesTo delete a single contact entry:
• Search for the name and number you want to delete and press Details. Then press Options and select Delete.
Or
• Press Contacts and select Delete and One by one. Scroll to the name (and number) you want to delete. Press Delete and press OK to confirm.
81Copyright © 2005 Nokia. All rights reserved.
Note: The Delete option deletes the name and all the numbers and text notes stored under it.
To delete all names and numbers in the contacts directory, press Contacts, select Delete and Delete all. When the text Are you sure? is displayed, press OK and confirm with the security code.
� Speed dialsYou can set any of the number keys - to work as a speed dialling key.
1. Press Contacts and select Speed dials. Scroll to the desired speed dialling key (2 to 9), and press Assign.
2. Press Search and select the desired name and number.
After a number has been assigned for a speed dialling key, press Options and you can view, change or delete the assigned phone number.
For how to make call with speed dialling, see Speed dialling a phone number on page 61 and 65.
� Caller groupsYou can set the radio to play a specific ringing tone and show a graphic on the display when you receive a phone call from a particular name and phone number. Press Contacts, select Caller groups and select the caller group you want. Then select:
• Group title. You can rename the caller group by keying in a new name and pressing OK.

82Copyright © 2005 Nokia. All rights reserved.
• Group ringing tone. You can select the desired ringing tone for the caller group. Default is the tone selected for the currently selected profile.
• Group logo. You can set whether the radio displays the caller group graphic or not, and view the logo.
• Group members. You can view the names included in the caller group, and add or remove members. To add a new name, (press Options and) select Add name. Scroll to the name you want to add to the group and press Add. If you have more than one number saved under the name, scroll to the desired number and press OK.
Tip: You can also add a new name to a caller group by searching it from the contacts directory. At the desired number, first press Details and then Options. Select Caller groups and then select the desired caller group.
To remove a name from a caller group, scroll to the name you want to remove, press Options and select Remove name.
You can set the radio to ring only upon receiving phone calls from names and numbers that belong to a specific caller group by using the Alert for setting, see Customising profiles on page 100.
� Settings for ContactsPress Contacts and select Settings to access the following settings:

83Copyright © 2005 Nokia. All rights reserved.
• Contacts view. You can set your radio to show the stored names and numbers in two ways: Name list shows three names at a time and Name & number shows one name and phone number at a time.
• Memory status. You can check what percentage of the radio’s internal memory is in use and how much memory is still free.

84Copyright © 2005 Nokia. All rights reserved.
10. Menu functions
� Status msgs. (Menu 1)Press Menu and select Status msgs.. You can read and send status messages and save them for later use.
There are three types of status messages:
• Status messages are predefined messages with varying contents. You can send them to your selected recipient.
• Situation indicators are predefined messages with varying contents. You can send them to a predefined recipient.
• Callback requests contain the message "callback". You can send callback requests to your selected recipient.
Status and situation indicator messages are formed of numbers, but if there is a predefined text corresponding to the numerical value in the memory of the radio, the text is shown instead when you receive messages or send them with the Send status message submenu.
Status messaging is a network service. For details and availability, contact your service provider.
Note: Network settings may, for example, affect the recipient of those callback requests and situation indicators that are sent to talk group addresses (the recipient is either the talk group’s dispatcher or all talk group members).
85Copyright © 2005 Nokia. All rights reserved.
Unit alert messagesThe unit alert network service is one type of status message. It is used to alert people to the following radio traffic. If you receive a unit alert message, pay special attention to the following calls and messages.
The text of the unit alert message is predefined by your organisation. When you receive a unit alert message, the message is displayed, the radio will play an alarm tone, the lights will flash and the General profile will be activated. You can stop the alarm by pressing Stop.
A unit alert message is sent like a status message.
Reading status messagesWhen you receive a status message, the message and appear in standby mode. The type of the message is identified with either Status: (statuses addressed to an individual), Group status: (statuses addressed to a talk group), Situation: or Callback request:.
To confirm that you have read the message: Press OK. If you have received another status message, 1 status message received is displayed. To read the message, press Read.
To read the message later: press Exit.
After you have pressed OK or Exit, the message is moved to the Received folder.
Reading a status message in the received folder1. Press Menu and select Status msgs..

86Copyright © 2005 Nokia. All rights reserved.
2. Select Received to view received messages. In the case of callback messages, the sender’s name or number is shown instead of the message. The messages are identified with the following indicators:
• an unread status message
a read status message
• an unread situation indicator
a read situation indicator
• an unread callback request
a read callback request
3. Scroll to the desired message and press Read.
Press Options for the following options when you are reading a message:
• Delete to delete the message.
• Reply to reply to a status message with a status message or a callback request. Select either Status or Callback. If you selected Status, scroll to the desired message and press OK to send it.
• Save to save the status message in a folder in the My folders submenu.
• Use number to extract numbers from the current message.
• Group name to view the name of the talk group to which the message was addressed.
Easy callback
To call the sender of a status message:

87Copyright © 2005 Nokia. All rights reserved.
1. Once you are reading a status message, press .
2. To make a phone call, press . To make an express call, press and hold the PTT key.
Sending status messagesTip: To send a status message from the standby mode, enter the numerical value of the message, press Options, and select Send as status and Status or Situation.
Tip: You can set the radio to send status messages when you press the duty key . To send a callback request to the address of the selected group, press and hold the duty key in the standby mode. To send a situation indicator, enter the numerical value of the situation in the standby mode, and press and hold the duty key. See Duty key setting on page 103.
Sending a status message or a callback request1. Press Menu and select Status msgs. and Send status message.
2. To send a status message, select Status. Scroll to the desired status message and press OK. Instead of scrolling, you can also search for a message by keying in its first letter(s).
To send a callback request, select Callback.
3. To send the status message or callback request to an individual:
• Key in the number and press OK. Select one of the following number types and then press Send to send the message:
88Copyright © 2005 Nokia. All rights reserved.
Private if the number is a TETRA network number.
Abbr. number if the number is an abbreviated TETRA number.
Phone if the number is a public telephone network number.
Office ext. if the number is an office extension number.
Or
• Search the number from Contacts. Press Search, select Contacts, scroll to the desired name, press OK and then press OK again when the phone number is displayed. If multiple numbers have been stored for the name, first select the desired number and then press OK to send the message.
4. To send the status message or callback request to a talk group address, press Search and select Talk groups. Scroll to the desired group name and press Select. See also the note on page 84.
Tip: You can set pressing the duty key to send a callback request to the selected group’s address. See Duty key setting on page 103.
Sending a situation indicator1. Press Menu and select Status msgs. and Send status message.
2. Select Situation.
3. Scroll to the desired situation indicator and press Send. Instead of scrolling, you can search for a message by keying in its first letter(s).
The first five situation indicators saved in your radio’s memory are also included in the fast menu, see Fast menu on page 44.

89Copyright © 2005 Nokia. All rights reserved.
You can view the recipient of the situation indicator in the Status settings submenu (see Status settings on page 91).
Received and sent foldersAfter you have received a status message, the radio moves it to the Received folder. After you have sent a message, the radio moves the message to the Sent folder.
Once either of these folders has become full, the oldest read message in the folder is deleted when a new message is moved to the folder. You can create folders under the My folders submenu and store messages there for later use.
You can define the maximum number of messages that are kept in the Received and Sent folders (see Status settings on page 91).
Handling messages in the received and sent folders1. Press Menu, select Status msgs. and select either Received or Sent.
2. Scroll to the desired message and press Read to view the message.
3. Press Options for the following options: Delete, Reply (available only for received messages), Save, Use number and Group name (available only for group messages). For more information on the options, see Reading a status message in the received folder on page 85.
User-specified foldersYou can create folders under the My folders submenu and save received and sent messages there.

90Copyright © 2005 Nokia. All rights reserved.
1. Press Menu and select Status msgs. and My folders.
2. Scroll to the desired folder. Skip this step if you are adding a folder.
3. Press Options for the following options (if you have not yet created any folders, only Add folder is available):
• Open folder. Opens the selected folder. You can scroll to the desired message and view it by pressing Read.
In the message, press Options for the following options: Delete, Reply (available only for received messages), Move (moves the message to another folder), Use number and Group name (available only for group messages).
• Add folder. Creates a new folder in the My folders submenu. Enter the name of the new folder and press OK.
• Clear folder. Deletes all the messages in the selected folder.
• Rename folder. Renames the folder.
• Remove folder. Deletes the selected folder.
Clearing status message folders1. Press Menu and select Status msgs. and Delete messages.
2. Scroll to the folder whose contents you want to delete and press OK.
Or
Scroll to All to delete the contents of all the status message folders and press OK.

91Copyright © 2005 Nokia. All rights reserved.
Status settingsPress Menu and select Status msgs. and Status settings to view and modify the following settings:
• Max. number of received defines the maximum number of received status messages that are kept in the Received folder, and Max. number of sent defines the maximum number of sent status messages that are kept in the Sent folder. The options are 20, 50 and 100. Note that once either folder has become full and a new message is moved to it, the oldest read message is deleted.
• Delivery reports defines if the delivery reports that the network sends on your status messages are shown (network service).
• Recipient of situations displays the name or number of the recipient of situation indicators. See also the note on page 84.
� Messages (Menu 2)You can read and write text messages and send them to individuals and talk groups. You can also save them in folders for later use. You can send text messages of up to 160 characters to phone and office extension numbers and text messages of up to 140 characters to private numbers. For number types, see Making a phone call on page 62.

92Copyright © 2005 Nokia. All rights reserved.
Important: Some networks may not support the text message character counts indicated in this user's guide. In such a network, text messages that are over the allowed number of characters cannot be delivered but they may be deleted as a whole. Therefore, pay attention to the character count when you write messages to be sent in such a network. Contact your service provider for the details of your network.
Text messaging is a network service. For details and availability, contact your service provider.
Writing and sending text messages1. Press Menu and select Messages and Write message.
2. Key in a message. For details, see Writing text on page 73. You can also insert a template into the message: press Options, select Use template and then select the desired template.
The number of characters that is left for the message is shown on the top right corner of the display. If you key in more than 140 characters, which is the maximum length of messages that can be sent to private numbers, the counter starts to count characters from -1 to -20. You can send messages containing the additional 20 characters marked with a minus sign to phone and office extension numbers.
3. To send the message, press Options and select Send.
To send the message as a flash message (network service), press Options and select Send options and Send as flash after you have written the message. The receiving terminal must support the reception of flash messages. When you
93Copyright © 2005 Nokia. All rights reserved.
receive a flash message, the beginning of the message appears on the display. Flash messages are not automatically saved in the Inbox folder.
4. To send the message to an individual:
• Key in the number and press OK. Then select one of the following number types and press Send:
Private if the number is a TETRA network number.
Abbr. number if the number is an abbreviated TETRA number.
Phone if the number is a public telephone network number.
Office ext. if the number is an office extension number.
Or
• Search the number from Contacts. Press Search, select Contacts, scroll to the desired number, press OK and press OK again when the phone number is displayed. If multiple numbers have been stored for the name, first select the desired number and then press OK to send the message.
5. To send the message to a talk group, press Search and select Talk groups. Scroll to the desired group name and press Select.
Note: When sending messages via the short data service (SDS) network service, your radio may display the words "Message sent". This is an indication that the message has been sent by your radio. This is not an indication that the message has been received at the intended destination. For more details about SDS services, check with your service provider.

94Copyright © 2005 Nokia. All rights reserved.
Sending a text message to multiple recipients1. After you have written the message, press Options and select Send options and
Send to many.
2. Scroll to the desired name in the list of names which is displayed and press OK to send the message. If you have saved multiple phone numbers for the name, you also need to select the desired phone number.
3. Select the next recipient and press OK. When you do not want to send the message to any more recipients, press Done.
Reading text messagesWhen you have received a text message, the indicator and the number of new messages followed by messages received will appear on the display.
Note: The blinking indicator indicates that the message memory is full. Before you can receive new messages, delete some of your old messages.
1. Press Show to read the message or press Exit to read it later.
To read the text message later:
Press Menu and select Messages, Inbox and press Open. Select the desired message. An unread text message is indicated by the indicator in front of it.
2. While reading the message, press Options for the following options: Delete, Reply, Use number, Forward, Forw. options, Edit, Move, Rename, Copy to calend. and Font size.

95Copyright © 2005 Nokia. All rights reserved.
Easy callbackTo call the sender of the text message, proceed as follows:
1. Once you are reading a text message, press .
2. To make a phone call, press . To make an express call, press and hold the PTT key. Note that express calls can only be made to TETRA numbers.
Replying to a message1. Once in a message you want to reply to, press Options and select Reply.
2. Select one of the following reply types: Empty screen, Orig. message, Template or one of the standard answers such as Thank you.
If you selected Template, select the desired template from the displayed list.
3. Key in your reply message, press Options and select Send. Press OK to send the message to the displayed number.
If you want to send a reply message to multiple recipients, use the Send to many option under Forw. options.
Inbox and Outbox foldersReceived messages are saved in the Inbox folder. When you send a message, it is saved in the Outbox folder. When the Outbox folder is full, the oldest message is automatically deleted when a new message is moved to the folder.

96Copyright © 2005 Nokia. All rights reserved.
TemplatesThe Templates submenu includes the templates that you can use when writing or replying to messages. You can edit the templates, but the original templates will be restored when menu Restore factory settings is selected.
Archive folder and user-specified foldersYou can move some of your text messages to the Archive folder or you can add new folders under the My folders submenu and save some of your messages there.
While reading a message, press Options. Select Move, scroll to the folder where you want to move the message and press OK.
To add or delete a folder, press Menu and select Messages and My folders.
• To add a folder, press Options and select Add folder.
• To delete a folder, scroll to the folder you want to delete, press Options and select Remove folder.
Note: When you delete a folder, all the messages contained in that folder are also deleted.
Deleting text messagesPress Menu and select Messages and Delete messages. To delete all read messages in a certain folder, select the desired folder and press OK when Delete all read messages from folder? is displayed. To delete all read messages from all folders, select All read and press OK when Delete read messages from all folders? is displayed.

97Copyright © 2005 Nokia. All rights reserved.
To delete a single message, press Options when you are reading the desired message and select Delete.
Message settingsThe message settings affect the sending of messages. Press Menu, select Messages and Message settings, and select:
• Delivery reports to ask the network to send delivery reports on your text messages (network service). Delivery reports are not available for messages addressed to talk groups.
• Message centre number1 to save the phone number of the message centre (network service). Key in the number and press OK. The message centre number is needed for sending text messages. You receive the number from your service provider.
� Call register (Menu 3)You can view the phone numbers registered by the radio and view the approximate length of your two-way phone calls (network service).You can also check the amount of data you have sent and received, and the duration of a data connection.
The radio registers missed and received calls only if the network supports Calling Line Identification (CLI), and the radio is switched on and within the network’s service area.
1. This menu is shown only if the network supports it.

98Copyright © 2005 Nokia. All rights reserved.
When you press Options in the Missed calls, Received calls or Dialled numbers menus, you can view the date and time of the call, call the number, save the number in the contacts directory and view, edit or delete the number from the list.
Recent calls listsPress Menu, select Call register and then select:
• Missed calls to view the list of the last ten phone numbers from which somebody has tried to make a phone call to you (network service).
• Received calls to view the list of the last ten phone numbers from which you have most recently accepted a phone call or from which you have received an express call (network service).
• Dialled numbers to view the list of the ten phone numbers to which you made or tried to make a phone call or an express call by dialling the number.
Tip: To quickly access the list of last dialled numbers, press once when the radio is in standby mode.
•Delete recent call lists to delete the contents of recent calls lists. Select whether you want to delete all the phone numbers in the recent call lists, or only those numbers in the missed calls, dialled numbers or received calls lists. You cannot undo the operation.
Counters and timersNote: The actual time invoiced for calls by your service provider may vary, depending upon network features, rounding-off for billing, and so forth.
99Copyright © 2005 Nokia. All rights reserved.
Press Menu, select Call register and then select:
• Call duration to view the duration of your incoming and outgoing two-way phone calls in hours, minutes and seconds. Select Phone calls to view information on public telephone network calls or Private calls to view information on TETRA network calls.
• Data counter to check the amount of data you have sent or received during the last data connection or in total. The counter unit is a byte.
• Data connection timer to check the duration of the last data connection or of all data connections.
You can also clear the timers or the data counter. You need to enter the security code, see Access codes on page 20.
� Talk groups (Menu 4)See Talk groups (Menu 4) on page 55.
� Profiles (Menu 5)Your radio has various profiles for different events and environments and you can customise the settings related to the profiles. The available profiles are General, Silent, Meeting, Outdoor, Pager, and Headset.
To activate a profile:
• Press quickly in standby mode and select the desired profile.

100Copyright © 2005 Nokia. All rights reserved.
Or
• Press Menu and select Profiles. Scroll to the desired profile, press Options and select Activate.
Tip: You can also activate the profiles General and Silent in the fast menu.
Customising profiles1. Press Menu and select Profiles.
2. Scroll to the desired profile, press Options and select Personalise.
3. The following settings can be personalised: Ringing tone for two-way phone calls, Push-to-talk ringing tone for one-way phone calls, Incoming call alert, Ringing volume, Message alert tone, Status message alert tone, Keypad tones, Warning tones, Lights, Light indicator, Voice feedback, and Alert for for setting the radio to ring only for calls from phone numbers which belong to a selected caller group (see also Caller groups on page 81).
To rename the profile, select Profile name and key in the new name. The General profile cannot be renamed.
� Settings (Menu 6)
Transmission barringPress Menu and select Settings, Transmission barring and you can activate or deactivate transmission barring. Note that you should activate transmission

101Copyright © 2005 Nokia. All rights reserved.
barring before you enter the area where you want transmission to be barred. The indicator or is displayed in standby mode when transmission barring is active. See Transmission barring on page 22.
Alarm clockThe alarm clock uses the time format set for the clock. The alarm clock works even when the radio is switched off. When the alarm is on, the indicator is displayed in standby mode.
To set the alarm, press Menu and select Settings and Alarm clock. Key in the alarm time and press OK. To change the time when the alarm time has been set, select On. To switch the alarm off, select Off.
When the alarm time expires, the radio will play an alert tone, and flash Alarm! and the alarm time on the display. (If the Silent profile is in use, the alert tone is not played if the radio is switched on when the alarm time expires. However, the alert tone is played if the radio is switched off when the alarm time expires.) Press Stop to stop the alarm. If you let the radio continue to alarm for a minute or press Snooze, the alarm stops for a few minutes and then resumes.
If the alarm time is reached while the radio is switched off, the radio switches itself on and starts sounding the alarm tone. If you press Stop, the radio asks whether you want to activate the radio for calls. Press No to switch off the radio or Yes to make and receive calls.
Note: Do not press Yes to switch the radio on when wireless phone use is prohibited or when it may cause interference or danger.
102Copyright © 2005 Nokia. All rights reserved.
ClockPress Menu and select Settings and Clock. Select Show clock or Hide clock to set whether the clock is shown on the display in standby mode. Select Set the time to adjust the clock to the right time, and Time format to select the 12-hour or 24-hour time format.
The clock also serves the menus Status msgs., Messages, Call register, Alarm clock and Calendar.
You may need to set the time again if the radio does not receive power for some time (the vehicle’s battery is flat or removed, or in a desktop installation, the power supply is disconnected from an AC wall outlet).
Call settings
Anykey answerWhen this function is activated, you can answer a phone call by pressing any keypad key briefly, except , , , , and . To activate or deactivate the anykey answer function, press Menu and select Settings, Call settings, Anykey answer and then either On or Off.
Summary after callWhen this function is activated, the radio will briefly display the approximate duration and cost (network service) of the last two-way phone call. Press Menu and select Settings, Call settings, Summary after call and then either On or Off.
Note: The actual invoice for calls and services from your service provider may vary, depending upon network features, rounding-off for billing, taxes and so forth.

103Copyright © 2005 Nokia. All rights reserved.
Push-to-talk settingYou can set how you want the PTT key to function when making group calls in network mode. Press Menu and select Settings, Call settings and Push-to-talk setting. Then select:
• Selected group to set pressing and holding the PTT key to always make a call to the selected talk group.
• Default to set pressing and holding the PTT key to make a call to the talk group whose name is on the display (either the selected group or a currently active scanned group).
For details, see PTT key use on page 51.
Duty key settingPress Menu and select Settings, Call settings, and Duty key setting. Select how you want the duty key to function in network mode:
• Dispatcher call. Pressing starts to make a phone call to the dispatcher of the selected group. If the call is changed into a one-way phone call, press and hold the PTT key when you speak.
• Send status. Pressing sends status messages. To send a callback request to the selected group’s address, press and hold in the standby mode. To send a situation indicator, enter the numerical value of the situation, and press and hold .
• Home group call. Pressing and holding makes a call to the home group. Press and hold the duty key when you speak. Note that a handsfree microphone and a loudspeaker need to be connected for this option to work.
104Copyright © 2005 Nokia. All rights reserved.
Automatic answerPress Menu and select Settings, Call settings, and Automatic answer. Select On to set the radio to automatically answer an incoming call in five seconds’ time. If the Incoming call alert is set to Beep once or Off, automatic answer will not be in use.
Phone settings
Active modeWith this function you can set the mode in which your radio operates. Press Menu and select Settings, Phone settings and Active mode and select Network or Direct.
LanguagePress Menu and select Settings, Phone settings and Language to select the language in which the display texts are shown. This setting also affects the time and date formats of the menus Alarm clock and Calendar.
Welcome notePress Menu and select Settings, Phone settings and Welcome note. You can save a note that is briefly displayed when the radio is switched on. Key in the note, press Options and select Save to save the note. If you want to delete the note, select Delete.
Network selectionWith this submenu, you can select in which network the radio operates (network service). See also Network selection on page 23.

105Copyright © 2005 Nokia. All rights reserved.
Press Menu, and select Settings, Phone settings and Network selection and then select:
• Automatic. The radio automatically selects an available network from a predefined list of networks. If connection to the currently used network is lost, the phone automatically selects one of the available networks.
• Manual. Enters a predefined list of networks. Scroll to the desired network with and and select it by pressing Select. If Network not allowed: is displayed in standby mode, the radio cannot register to that network.
Display brightnessPress Menu and select Settings, Phone settings and Display brightness and you can adjust the display and backlight brightness. Use or to adjust the brightness when the bar is shown on the display.
Unit alert durationPress Menu and select Settings, Phone settings and Unit alert duration and you can set the duration of received unit alert messages to be Short, Medium, Long or Unlimited.
Allow location info sendingWith this submenu, you can set whether your radio automatically answers to location requests from numbers authorised by your organisation by sending information messages. The messages contain information with which the service provider can calculate the approximate location of the radio (network service). Press Menu and select Settings, Phone settings and Allow location info sending and select Yes or No.

106Copyright © 2005 Nokia. All rights reserved.
Direct mode settingsPress Menu and select Settings and Direct mode settings and then select:
• Direct mode scanning to activate or deactivate direct mode scanning. Direct mode scanning allows you to receive calls made to the other groups on the same channel.
• View active direct mode device to view the type and address of the active direct mode device (repeater, gateway or none).
Keyguard settingsPress Menu and select Settings, Keyguard settings and then select Keyguard code to set the radio to ask for the PIN code when you unlock the keypad. If you enter an incorrect PIN code five times in succession, the radio asks for the security code (see Access codes on page 20).
Communication settingsPress Menu and select Settingsand Communication settings.
• To listen to voice messages, press OK when Listen to voice messages is displayed. Note that the voice mailbox is a network service; it may not be available in all networks, or you may need to subscribe to it first.
Tip: To quickly call your voice mailbox, press and hold in standby mode.
•To store or edit your voice mailbox number, select Voice mailbox number. Enter your voice mailbox number and press OK

107Copyright © 2005 Nokia. All rights reserved.
Voice mailbox is a network service. For more information and for the voice mailbox number, contact your service provider.
Modem settingsYou can connect your radio via a cable to a compatible PC and use it as a modem to enable connectivity from your PC to a data network. To establish a connection to the data network, you need to activate the access point you wish to use for the connection. For details on the access point, contact your network operator or service provider.
To activate an access point and to change its settings:
1. Press Menu and select Settings and Modem settings.
2. Select Active access point, scroll to the access point you want to use and press Activate.
3. Select Edit active access pointto change the access point settings.
• Scroll to Alias for access point and press Rename. Key in the name you would like for the activated access point and press OK.
• Scroll to Access point and press Edit. Key in the Access Point Name (APN) and press OK.
Security settingsPress Menu and select Settings, Security settings and then select:
• PIN code request to set the radio to ask for your PIN code every time the radio is switched on.
108Copyright © 2005 Nokia. All rights reserved.
Note: If you enter an incorrect PIN code five times in succession, the code is blocked and you need to enter the security code to unblock the PIN code.
• Configure access levels to change what kind of access rights are required for certain functions. You need to enter the configuration code for this function.
• Access level to change your user level (Extended or Normal) which determines what kind of access rights you have. You need to enter the access level code for this function.
• Change of access codes to change the PIN code or the security code. See Access codes on page 20.
Note that you should avoid using access codes similar to the emergency numbers, such as 112, to prevent accidental dialling of the emergency number.
Restore factory settingsPress Menu, select Settings and Restore factory settings and you can reset some of the menu settings to their original values. You need to enter the security code for this function.
� Calculator (Menu 7)
Note: Your radio must be switched on to use this function. Do not switch the radio on when wireless phone use is prohibited or when it may cause interference or danger.
109Copyright © 2005 Nokia. All rights reserved.
This calculator has a limited accuracy and rounding errors may occur, especially in long divisions.
1. Press Menu and select Calculator.
2. When "0" is displayed on the display, key in the first number in the calculation.
Press for a decimal point. To change the sign, press Options and select Change sign. To delete any mistakes, press Clear.
3. Press once to add, twice to subtract, three times to multiply and four times to divide. Or, press Options and select the desired function.
4. Key in the second number.
5. For a total, press Options and select Equals. Repeat steps 3 to 5 as many times as is necessary.
6. To start a new calculation, first press and hold Clear.
Making a currency conversionFirst you need to set the exchange rate. Press Menu and select Calculator, then press Options and select Exchange rate. Select either Foreign unit expressed in domestic units or Domestic unit expressed in foreign units, key in the exchange rate (press for the decimal point) and press OK.
To make the conversion, key in the amount you want to convert, press Options and select In domestic or In foreign.

110Copyright © 2005 Nokia. All rights reserved.
� Calendar (Menu 8)The calendar helps you to keep track of reminders, meetings, birthdays and calls that you need to make.
Note: Your radio must be switched on to use this function. Do not switch the radio on when wireless phone use is prohibited or when it may cause interference or danger.
Press Menu and select Calendar. Scroll to the day you want. If you have set notes for the day, the corresponding note type indicator is shown.
Day view: The day view lists the notes made for the day. Press Options and select View day notes.
Note view: When in the Day view, scroll to the note you want to view, press Options and select View.
The other options of calendar views may include:
• Options for making a note and for sending a note as a text message.
• Options for deleting, editing, moving and repeating a note and for copying a note to another day.
• Settings to set the date, time, date format and time format. In the Auto-delete option you can set the radio to delete old notes automatically after a specified time, except for the repeat notes (for example, birthday notes).
Adding a calendar note1. Press Menu, select Calendar and scroll to the desired date.

111Copyright © 2005 Nokia. All rights reserved.
2. Press Options and select Make a note.
3. Select one of the following note types. For entering letters and numbers, see Writing text on page 73.
• Meeting ( ) Enter the note and press OK. Then enter the time and press OK.
• Call ( ) Enter the desired phone number and press OK, and then enter the desired name and press OK (or search them from the contacts directory). Then key in the time for the call and press OK.
• Birthday ( ) Enter the person’s name and press OK, then repeat the same with the date of birth and year of birth (optional).
• Memo ( ) Enter the note and press OK.
4. For meetings, calls and birthdays you can set an alarm to remind you by selecting Alarm on and setting the alarm time for the note. When you view the notes, notes that have an alarm are indicated with .
When the radio alarms for a note:
The radio plays a tone and displays the note. With a Call note on the display, you can make a phone call to the displayed number by pressing or an express call by pressing and holding the PTT key. Note that express calls can only be made to TETRA numbers.
To stop the alarm and to view the note, press View. To stop the alarm without viewing the note, press Exit.

112Copyright © 2005 Nokia. All rights reserved.
� To-do list (Menu 9)The to-do list allows you to create a list of things you must do and to prioritize them according to their importance. You can also store to-do list notes in the calendar and send them to another radio as a text message. Depending on the size of the notes, you can store up to 30 notes in the list.
Note: Your radio must be switched on to use this function. Do not switch the radio on when wireless phone use is prohibited or when it may cause interference or danger.
Press Menu and select To-do list. Press Options for the following options:
• Add. Creates a to-do list note. Key in the note, press Options and select Save. Select the note’s priority, either High (1), Medium (2) or Low (3).
• View. Displays a to-do list note.
• Delete. Deletes a to-do list note.
• Edit. Allows you to edit a to-do list note. To save the note, press Options and select Save.
• Edit priority. Allows you to change the priority of a to-do list note.
• Go to priority. Goes to the first to-do list note with a certain priority.
• Save to calend.. Saves a to-do list note in the calendar.
• Send as text. Sends a note to another radio as a text message.
113Copyright © 2005 Nokia. All rights reserved.
� Services (Menu 10)The Services menu allows you to access WAP (Wireless Application Protocol) services provided by your organisation and various commercial WAP services such as banking, news, weather reports and flight times. These services are specially designed for mobile phones and they are maintained by WAP service providers.
Check the availability of WAP services, pricing and tariffs with your network operator and/or the service provider whose service you want to use. Service providers will also give you instructions on how to use their services.
Note: Your radio must be switched on to use this function. Do not switch the radio on when wireless phone use is prohibited or when it may cause interference or danger.
You must be in network mode and in the network coverage area to use this function.
The WAP services use Wireless Mark-Up Language (WML) on their WAP pages. Web pages using the Hyper Text Mark-Up Language (HTML) cannot be viewed on your radio.
Call functions during a WAP connectionYou can receive phone calls during a WAP connection. Express calls are not possible during a WAP connection. The express calls made to you, however, may be changed to one-way phone calls, and you can receive them like phone calls.
114Copyright © 2005 Nokia. All rights reserved.
Depending on network support and predefined radio settings, it may be possible to make and receive group calls and red key calls during a WAP connection.
During a call, data transfer is suspended. After the call ends, the radio tries to resume the WAP connection.
Basic steps for accessing and using WAP services1. Save the service settings that are needed to access the WAP service that you
want to use. See Setting up the radio for a WAP service below and Appearance settings of WAP browser on page 120.
2. Make a connection to the given WAP service. See Making a connection to a WAP service on page 117.
3. Start browsing the pages of the WAP service. See Browsing the pages of a WAP service on page 118.
4. Once you are done with browsing, end the connection to the WAP service. See Ending a WAP connection on page 120.
Setting up the radio for a WAP serviceYou may receive the service settings as a text message from the network operator or service provider that offers the WAP service that you want to use. For more information, contact your network operator or service provider.
You can also key in the settings manually. For appropriate settings, contact your network operator or service provider. The WAP settings may be available, for example, on the Web site of the network operator or service provider.

115Copyright © 2005 Nokia. All rights reserved.
Saving the service settings received as a text messageWhen you receive the service settings as a text message, Service settings received is displayed.
• To save and activate the received settings, press Options and select Save.
If no settings are saved in Active service settings, the settings are saved under the first free connection set and also activated.
• To discard the received settings, press Options and select Discard.
• To view the received settings first, press Options and select View. To save the settings, press Save.
Keying in the service settings manually1. Press Menu and select Services and Settings.
2. Select Active service settings.
You need to activate the set where you want to save the service settings. A set is a collection of settings needed for making a connection to a WAP service.
3. Scroll to the set you like to activate and press Activate.
4. Select Edit active service settings.
5. Select each of the settings one by one and key in all the required settings.
• Settings name - Key in the new name for the connection set and press OK.
• Homepage - Key in the homepage address of the WAP service that you want to use, press for a period, and press OK.
• Session mode - Select Permanent or Temporary.
116Copyright © 2005 Nokia. All rights reserved.
• Connection security - Select On or Off.
When the connection security is On, the radio tries to use a secure connection with the WAP service. If a secure connection is not available, the connection will not be made. If you wish to connect anyway, with a non-secure connection, you must set the connection security to Off.
• Data connection - Select Always online or When needed.
If you select Always online, the data connection is automatically established when you switch on the radio. The indicator is shown on the display. The data connection is not closed when you end a WAP connection.
If you select When needed, the data connection is established when you connect to a WAP service and closed when you end the WAP connection.
• Access point - Key in the access point name and press OK.
Access point name is needed to establish a connection to data network. You obtain the access point name from your network operator or service provider.
• IP address - Key in the address, press for a period, and press OK.
• Authentication type - Select Secure or Normal.
• Login type - Select Manual or Automatic. If you select Manual when the Data connection is set to Always online, the Always online connection will be disabled.
• User name - Key in the user name and press OK.
• Password - Key in the password and press OK.

117Copyright © 2005 Nokia. All rights reserved.
Making a connection to a WAP serviceFirstly, make sure that the service settings of the WAP service you want to use are activated. To activate the settings:
• Press Menu and select Services and Settings. Select Active service settings and scroll to the set you want to activate and press Activate.
Secondly, make a connection to the WAP service. There are three ways to connect:
• Open the homepage of the WAP service:
Press Menu and select Services and Home.
Tip: To quickly open the homepage of a WAP service:
in standby mode, press and hold .
Or
• Select a bookmark of the WAP service:
Press Menu, select Services, Bookmarks, and select a bookmark.
If the bookmark does not work with the current active service settings, activate another set of service settings and try again.
Or
• Key in the address of the WAP service:
Press Menu and select Services and Go to address. Key in the address of the WAP service, press for special characters, and press OK.
Note that it is not necessary to add the prefix http:// in front of the address since it will be added automatically.

118Copyright © 2005 Nokia. All rights reserved.
The indicator is shown on the top left of the display when you are connected to a WAP service. If there is an incoming (or outgoing) phone call during the connection, the connection is suspended and the indicator is shown on the top right of the display.
Group calls and express calls are not possible when the indicator is shown. The express calls made to you, however, are changed to one-way phone calls and you can receive them like normal phone calls.
Browsing the pages of a WAP serviceAfter you have made a connection to the WAP service, you can start browsing its WAP pages. The function of the radio keys may vary in different WAP services. Follow the text guides on the radio display. For more information, contact your WAP service provider.
General guidelines for using the radio keys• Use the scroll keys or to browse the WAP page.
• To select a highlighted item, press .
• To enter letters and numbers, press the keys - and to enter special characters, press the key .
• Some or all of the following options are available while a WAP connection is in progress. Press Options and select the option you want.
Home - to go back to the homepage of the WAP service.
Bookmarks - the list of bookmarks is displayed. For details, see Bookmarks on page 121.

119Copyright © 2005 Nokia. All rights reserved.
Edit / Open row /Open link /Open list - to key in text or select a highlighted item on the WAP page.
Add bookmark - to add the current WAP page as a bookmark in your bookmarks list.
Go to address - to key in the address of the WAP service you want.
Service inbox - the list of service messages is displayed, see Service inbox on page 122.
Appear. sett. - for details, see Appearance settings of WAP browser on page 120.
Download settings - for details, see Download settings on page 120.
Use number - to copy a number from the current WAP page for saving or calling (and ends the WAP connection). If the WAP page contains several numbers, you may select the desired one.
Reload - to reload and update the current WAP page.
Clear the cache - for details, see The cache memory on page 123.
Security info - to view security information about the current WAP connection and the server.
Quit - to quit browsing and end call.
The WAP browser supports functions which you can access while browsing. You can make a phone call while you are on a WAP page and save in the contacts directory a name and a phone number from a WAP page.

120Copyright © 2005 Nokia. All rights reserved.
Ending a WAP connectionWhen you are using a WAP service, press Options and select Quit. When Quit browsing? is shown, press Yes. Alternatively, press .
Appearance settings of WAP browser1. When no WAP connection is in progress
• Press Menu and select Services, Settings and Appearance settings.
When a WAP connection is in progress
• Press Options and select Appear. sett..
2. Select Text wrapping or Show images.
3. Select On or Off for Text wrapping and Yes or No for Show images.
When Text wrapping is set to On, the text continues on the next line if it cannot be shown on one line.
When Show images is set to No, any pictures appearing on the WAP page are not shown. This can speed up the browsing of WAP pages that contain a lot of pictures.
Download settingsYou can set the radio to allow or prevent receiving cookies.
A cookie is data that a WAP site saves in your radio’s browser cache memory. The data can be, for example, your user information or your browsing preferences.

121Copyright © 2005 Nokia. All rights reserved.
Cookies will be saved until you clear the cache memory, see The cache memory on page 123.
1. When no WAP connection is in progress
• Press Menu and select Services, Settings and Download settings.
When a WAP connection is in progress
• Press Options and select Download settings.
2. Select Cookies and select Allow or Reject to allow or prevent the radio receiving cookies.
BookmarksYou can save up to 25 WAP page addresses as bookmarks in the radio’s memory.
1. When no WAP connection is in progress
• Press Menu and select Services and Bookmarks.
When a WAP connection is in progress
• Press Options and select Bookmarks.
2. Scroll to the bookmark you want to use and press Options.
3. Select one of the following options:
Go to to make a connection to the WAP page associated with the bookmark.
Edit or Delete to modify or delete the selected bookmark.
New bookmark to create a new bookmark without connection to a WAP service. Key in the address and the title of the WAP page and press OK.

122Copyright © 2005 Nokia. All rights reserved.
Note that your radio may have some pre-installed bookmarks for sites not affiliated with Nokia. Nokia does not warrant or endorse these sites. If you choose to access them, you should take the same precautions, for security or content, as you would with any site.
Receiving a bookmarkWhen you have received a bookmark as an Over The Air (OTA) message, press Options and select View to view the bookmark, Save to save the bookmark, or Discard to discard it.
Service inboxThe radio is able to receive service messages (pushed messages) sent by your service provider. Service messages are notifications of, for example, news headlines, and they may contain a text message or address of a WAP service.
1. To access service inbox when no WAP connection is in progress
When you have received a service message, 1 service message received will be displayed. Press View to access Service inbox.
If you press Exit the message is moved to Service inbox. To access Service inbox later, press Menu, select Services, and Service inbox.
When a WAP connection is in progress
Press Options and select Service inbox.
2. Scroll to the message you want and press Options.

123Copyright © 2005 Nokia. All rights reserved.
Select Retrieve to activate the WML browser and the retrieving of the indicated content.
Select Details to display detailed information on the service notification.
Select Delete to delete the selected service notification.
To set the radio to receive service messagesPress Menu and select Services, Settings, Service inbox settings and Service messages. To set the radio to receive service messages, select On. If you select Off, the radio will not receive service messages.
The cache memoryNote: The information or services you have accessed are stored in the cache of your radio. A cache is a buffer memory, which is used to store data temporarily. If you have tried to access or have accessed confidential information requiring passwords (for example, your bank account), empty the cache of your radio after each use.
To clear the cache memory when no WAP connection is in progress
• Press Menu and select Services and Clear the cache.
To clear the cache memory when a WAP connection is in progress
• Press Options and select Clear the cache.
Authority certificatesFor using some WAP services, such as banking services, you need an authority certificate. Using the certificate can help you to improve the security of

124Copyright © 2005 Nokia. All rights reserved.
connections between your radio and a WAP gateway or WAP server, if the Connection security is set On.
You can download the certificate from a WAP page if the WAP service supports the use of authority certificates. After the download, you can view the certificate and then save or delete it. If you save the certificate, it is added to the list of certificates in the radio.
You will see a note on the radio display if the identity of the WAP server or WAP gateway cannot be verified, if the WAP server or WAP gateway certificate is not authentic or if you do not have the right certificate in your radio.
Viewing the list of authority certificatesPress Menu and select Services and Settings. Select Authority certificates.
See also Security info in General guidelines for using the radio keys on page 118.
Security indicatorIf the security indicator is displayed during a WAP connection, the data transmission between the radio and the WAP gateway or WAP server (identified by the IP address in the Edit active service settings) is encrypted.
However, the security indicator does not indicate that the data transmission between the gateway and the content server (place where the requested resource is stored) is secure. It is up to the service provider to secure the data transmission between the gateway and the content server.
125Copyright © 2005 Nokia. All rights reserved.
11. Data communications
You can use your radio as a modem and transfer data to other devices when the radio is connected to a compatible PC via a DLR-3Tcable.
To send and receive e-mail and to connect to computers and access the Internet, you also need the appropriate data communications software installed on a compatible PC. You can use your radio with a variety of commercially available data communications applications.
To use your radio as a modem, you must first install it as a modem on your PC.
The data connection is a network service. For details and availability, contact your service provider.
� Call functions during a data connectionDepending on network support and predefined radio settings, it may be possible to make and receive phone calls, express calls, and group calls during a data connection. The express calls made to you, however, may be changed to one-way phone calls, and you can receive them like phone calls.
During a call, data transfer is suspended. After the call ends, the radio tries to resume the data connection.

126Copyright © 2005 Nokia. All rights reserved.
� Installing communication applications and modem drivers
1. Ensure that a data communication application is correctly installed on a compatible PC. For instructions, see the application’s documentation.
2. Install the necessary drivers on your PC. For instructions, see the user’s guide of your PC’s operating system.
Note that you have to define the DTE (data terminal equipment) rate when you install the drivers. The default DTE rate of your radio is 9600 bps. For example, if you use the Windows NT operating system, select a standard 9600 bps modem.
3. Activate an access point and change its settings in the Modem settings menu. See Modem settings on page 107.
� Connecting your radio to a PCYou can connect your radio to a compatible PC using the DLR-3T cable.
1. Connect the DLR-3T cable to the serial port of your PC.
2. Connect the DLR-3T cable to your radio.
3. Start using the communication application on your PC. For information on the use of the application, refer to the documentation for the application.
The indicator is displayed during a data connection. If there is an incoming or outgoing phone call, data transfer is suspended and is displayed instead.
127Copyright © 2005 Nokia. All rights reserved.
Note: Making or answering phone calls during a PC connection is not recommended as it might disrupt the operation.

128Copyright © 2005 Nokia. All rights reserved.
CARE AND MAINTENANCE
Your radio is a product of superior design and craftsmanship and should be treated with care. The suggestions below will help you to fulfil any warranty obligations and to enjoy this product for many years.
• Keep the radio and all its parts and accessories out of the reach of small children.
• Keep the radio dry. Precipitation, humidity and all types of liquids or moisture can contain minerals that will corrode electronic circuits.
• Do not use or store the radio in dusty, dirty areas. Its moving parts can be damaged.
• Do not attempt to open the radio. Non-expert handling may damage it.
• Do not drop, knock or shake the radio. Rough handling can break internal circuit boards.
• Do not use harsh chemicals, cleaning solvents, or strong detergents to clean the radio.
• Do not paint the radio. Paint can clog the moving parts and prevent proper operation.
• Use only the supplied or an approved replacement antenna. Unauthorised antennas, modifications or attachments could damage the radio and may violate regulations governing radio devices.
All of the above suggestions apply equally to your radio or any accessory. If any of them is not working properly, take it to your nearest qualified service facility. The personnel there will assist you and, if necessary, arrange for service.
129Copyright © 2005 Nokia. All rights reserved.
IMPORTANT SAFETY INFORMATION
� Traffic SafetyDo not use a mobile radio while driving a vehicle. Always secure all parts of the radio in their holders; do not place parts on the passenger seat or where they can break loose in a collision or sudden stop.
Remember road safety always comes first!
� Operating environmentRemember to follow any special regulations in force in any area and always switch off your radio whenever it is forbidden to use it, or when it may cause interference or danger.
Use the radio only in its normal operating positions.
Using two TETRA devices closeby may cause them to interfere with each other, for example when two such devices are in the same vehicle. If you experience such interference, separate the two devices until the interference stops.
� Electronic devicesMost modern electronic equipment is shielded from radio frequency (RF) signals. However, certain electronic equipment may not be shielded against the RF signals from your radio.
PacemakersPacemaker manufacturers recommend that a minimum separation of 20 cm (6 inches) be maintained between a handheld wireless phone and a pacemaker to avoid potential interference with the pacemaker. These recommendations are consistent with the

130Copyright © 2005 Nokia. All rights reserved.
independent research by and recommendations of Wireless Technology Research. Persons with pacemakers:
• Should always keep the radio more than 20 cm (6 inches) from their pacemaker when the radio is switched on;
• Should use the ear opposite the pacemaker to minimise the potential for interference.
• If you have any reason to suspect that interference is taking place, switch off your radio immediately.
Hearing aidsSome digital wireless phones may interfere with some hearing aids. In the event of such interference, you may want to consult your service provider.
Other medical devicesOperation of any radio transmitting equipment, including cellular phones, may interfere with the functionality of inadequately protected medical devices. Consult a physician or the manufacturer of the medical device to determine if they are adequately shielded from external RF energy or if you have any questions. Switch off your radio in health care facilities when any regulations posted in these areas instruct you to do so. Hospitals or health care facilities may be using equipment that could be sensitive to external RF energy.
VehiclesRF signals may affect improperly installed or inadequately shielded electronic systems in motor vehicles (e.g. electronic fuel injection systems, electronic anti-skid (anti-lock) braking systems, electronic speed control systems, air bag systems). Check with the manufacturer or its representative regarding your vehicle. You should also consult the manufacturer of any equipment that has been added to your vehicle.

131Copyright © 2005 Nokia. All rights reserved.
Posted facilitiesSwitch your radio off in any facility where posted notices so require.
� Potentially explosive atmospheresSwitch off your radio when in any area with a potentially explosive atmosphere and obey all signs and instructions. Sparks in such areas could cause an explosion or fire resulting in bodily injury or even death.
Users are advised to switch off the radio when at a refuelling point (service station). Users are reminded of the need to observe restrictions on the use of radio equipment in fuel depots (fuel storage and distribution areas), chemical plants or where blasting operations are in progress.
Areas with a potentially explosive atmosphere are often but not always clearly marked. They include below deck on boats; chemical transfer or storage facilities; vehicles using liquified petroleum gas (such as propane or butane); areas where the air contains chemicals or particles, such as grain, dust or metal powders; and any other area where you would normally be advised to turn off your vehicle engine.
� VehiclesOnly qualified personnel should service the radio, or install the radio in a vehicle. Faulty installation or service may be dangerous and may invalidate any warranty which may apply to the unit.
Check regularly that all radio equipment in your vehicle is mounted and
operating properly.
Do not store or carry flammable liquids, gases or explosive materials in the same compartment as the radio, its parts or accessories.
132Copyright © 2005 Nokia. All rights reserved.
For vehicles equipped with an air bag, remember that an air bag inflates with great force. Do not place objects, including both installed or portable wireless equipment in the area over the air bag or in the air bag deployment area. If in-vehicle wireless equipment is improperly installed and the air bag inflates, serious injury could result.
Failure to observe these instructions may lead to suspension or denial of telephone services to the offender, or legal action or both.
� Emergency callsImportant:This radio, like any wireless phone, operates using radio signals, wireless and landline networks as well as user-programmed functions. Because of this, connections in all conditions can not be guaranteed. Therefore you should never rely solely upon any wireless phone for essential communications (e.g. medical emergencies).
Emergency calls may not be possible on all wireless phone networks or when certain network services and/or radio features are in use. Check with local service providers.
To make an emergency call:1. If the radio is not on, switch it on. Check for adequate signal strength.
2. Press as many times as needed (e.g. to exit a call, to exit a menu, etc.) to clear the display and ready the radio for calls.
3. Key in the emergency number for your present location (e.g. 112 or other official emergency number). Emergency numbers vary by location.
4. Press the key.
If certain features are in use, you may first need to turn those features off before you can make an emergency call. Consult this guide and your local cellular service provider.

133Copyright © 2005 Nokia. All rights reserved.
When making an emergency call, remember to give all the necessary information as accurately as possible. Remember that your radio may be the only means of communication at the scene of an accident - do not cut off the call until given permission to do so.