Model: SHD8909 - Tgdd.vn
13
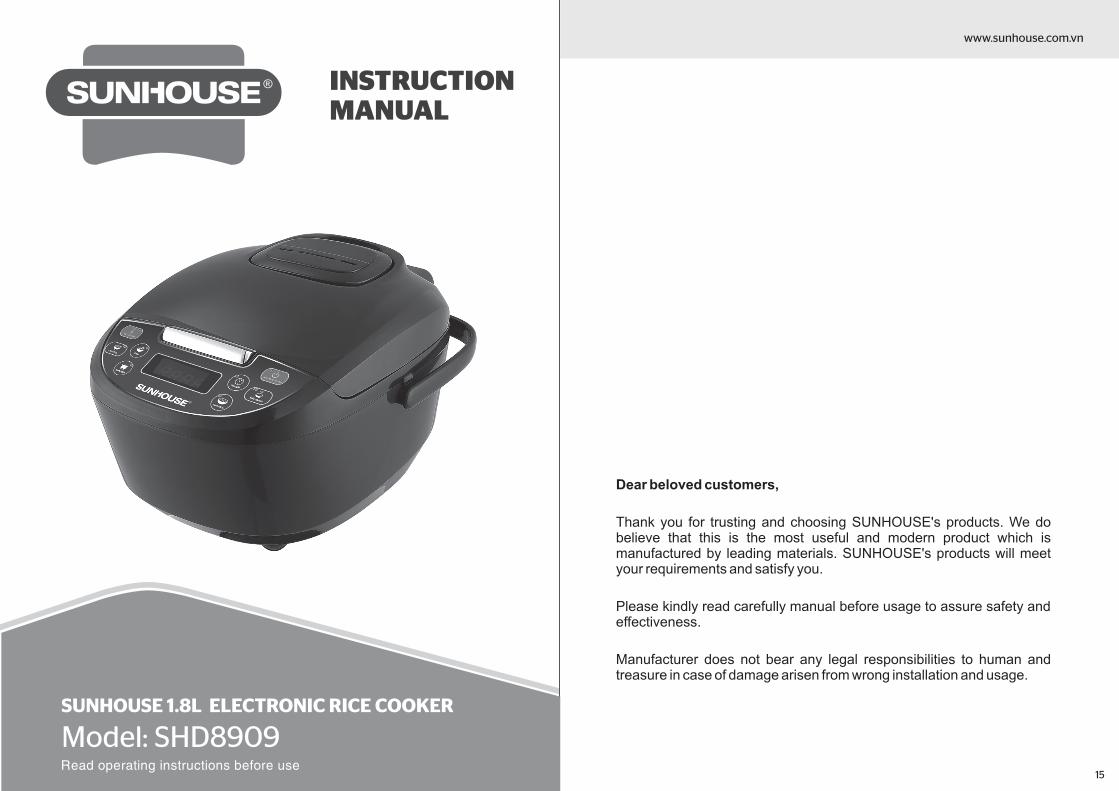
NỒI CƠM ĐIỆN TỬ 1.8L SUNHOUSE Model: SHD8909
-
Upload
khangminh22 -
Category
Documents
-
view
2 -
download
0
Transcript of Model: SHD8909 - Tgdd.vn

NỒI CƠM ĐIỆN TỬ 1.8L SUNHOUSE
Model: SHD8909

2 3
TỔNG QUAN SẢN PHẨM
1. Lòng nồi phủ chống dính cao cấp, an toàn cho sức khỏe2. Đa chức năng, có nhiều chế �ộ nấu phù hợp mục �ích khác nhau3. Dễ dàng �iều chỉnh chức năng nhờ nút bấm và màn hình �iện tử
LƯU Ý AN TOÀN
• Đọc kĩ hướng dẫn trước khi sử dụng.• Thiết bị này không thích hợp cho những người (kể cả trẻ em) có năng lực về cơ thể, giác quan hoặc tinh thần suy giảm hoặc thiếu kinh nghiệm và hiểu biết trừ khi �ược giám sát hoặc hướng dẫn sử dụng thiết bị bởi người có trách nhiệm về sự an toàn của họ. • Không �ể trẻ em chơi �ùa với thiết bị. Để thiết bị và dây �iện ngoài tầm với của trẻ em.
TUYỆT ĐỐI CẤM CẦN TUÂN THỦ CẦN CHÚ Ý
NGUY HIỂM
THẬN TRỌNG
Đặt sản phẩm tránh xa khỏi tầm tay trẻ em, nghiêm cấm trẻ em tự ý sử dụng sản phẩm �ể tránh bỏng hoặc giật �iện
Tuyệt �ối không �ược chạm những vật bằng kim loại như là thìa, �ũa,… vào những mối nối của sản phẩm �ể tránh bị giật trong quá trình sử dụng
Rút ổ cắm ra trước khi rửa, di chuyển hoặc sửa chữa sản phẩm �ể tránh bị �iện giật
Ngưng sử dụng nếu dây cắm bị hỏng, giắc cắm lỏng lẻo �ể tránh bị giật, cháy
Không �ặt nồi lên nguồn lửa trực tiếp, giữ thiết bị tránh xa lửa hoặc những nguồn nhiệt khác
Không �ặt thiết bị ở những vị trí bấp bênh, ẩm ướt, dễ cháy hoặc dễ bị cháy như mặt bông, miếng nhựa, thảm len,…
Không chạm vào bề mặt

4 5
LƯU Ý
Kết nối sản phẩm với �úng nguồn �iện 220V-50Hz. Việc kết nối sai nguồn �iện �ịnh mức có thể gây nguy hại cho sản phẩm
Vui lòng không cắm hoặc rút ổ cắm bằng tay ướt �ể tránh giật �iện
Khi rút phích cắm, cần phải dùng tay cầm vào và rút ra, không �ược giật hoặc kéo dây �ể tránh gây hư hại �ến dây
Hãy sử dụng ổ cắm 10A trong suốt quá trình sử dụng sản phẩm. Không dùng chung ổ cắm với các thiết bị năng lượng cao khác �ể tránh chập �iện
Đảm bảo phích cắm �ược cắm chắc chắn vào ổ �iện
Khi không sử dụng, vui lòng rút phích cắm khỏi ổ �iện
Sản phẩm thuộc nhóm I, do vậy cần �ảm bảo nguồn �iện cần �ược tiếp �ịa.
Nếu nguồn �iện �ột ngột bị ngắt khi nồi �ang vận hành, hãy rút ổ cắm ra rồi khởi �ộng lại sau khi có �iện
Hãy sử dụng �úng loại dây �ược cung cấp
Nếu xảy ra mất �iện trong lúc �ang vận hành, vui lòng rút phích cắm và khởi �ộng lại khi có �iện
Đảm bảo dây nguồn không tiếp xúc với những bề mặt sắc nhọn hoặc những bề mặt có thể sinh nhiệt �ể tránh rò rỉ �iện, �iện giật hoặc cháy nổ
LƯU Ý
Không tự ý cài �ặt thêm bộ �iều chỉnh thời gian hoặc �iều khiển từ xa �ể vận hành thiết bị
Sản phẩm chỉ sử dụng trong nhà, không dùng ở nơi ẩm ướt, ngoài trời �ể tránh gây giật �iện và ảnh hưởng �ến tuổi thọ của thiết bị
Vui lòng không sử dụng cho các mục �ích khác ngoài các chức năng �ược thiết lập trên sản phẩm
Không di chuyển sản phẩm trong quá trình �ang vận hành
Loại bỏ hoàn toàn các loại giấy bỏ sau khi mở sản phẩm �ể tránh trẻ em �ùa nghịch gây ngạt thở
Khi sản phẩm �ang hoạt �ộng, nhiệt �ộ sẽ tăng lên nên hạn chế chạm trực tiếp vào các phần kim loại, lỗ thoát hơi của sản phẩm
Không �ể tay gần lỗ thoát hơi nước khi nồi �ang hoạt �ộng �ể tránh bị bỏng
Thiết bị này không dành cho trẻ em hoặc người khiếm khuyết về thể xác hay tinh thần sử dụng, trừ khi họ �ược giám sát bởi người có trách nhiệm
Hạn chế �ể lòng nồi bị va �ập mạnh. Không dùng �ể �un trực tiếp trên bếp gas, bếp hồng ngoại vì sẽ làm bong tróc lớp chống dính, biến dạng lòng nồi
Không mở nắp trên của sản phẩm khi nồi �ang hoạt �ộng �ể tránh bị bỏng
Giữ ruột nồi, �áy nồi, mâm nhiệt sạch sẽ, không dính dị vật �ể �ảm bảo tiếp xúc tốt

6 7
LƯU Ý
Khi nồi �ang hoạt �ộng, không dùng khăn che lỗ thoát hơi
Không nhúng sản phẩm vào nước hoặc vệ sinh trực tiếp bằng nước.
Không �ặt các sản phẩm �óng gói, �óng chai vào nồi �ể hâm nóng vì sẽ có nguy cơ xảy ra nổ.
Không nấu thức ăn có tính axit (PH <5)
Khi lấy thực phẩm ra khỏi nồi, tránh chạm trực tiếp vào nắp trong �ể hạn chế nguy cơ bỏng
Vui lòng sử dụng muỗng cơm �i kèm với sản phẩm. Không sử dụng dụng cụ có góc nhọn hoặc bằng kim loại �ể tránh làm bong tróc lớp chống dính
Nghiêm cấm sử dụng ruột nồi khác với ruột nồi �ược cung cấp sẵn �ể tránh nguy cơ cháy nổ
Không vận hành sản phẩm khi không có ruột nồi hoặc không có thực phẩm trong ruột nồi
THÀNH PHẦN CẤU TẠO & HƯỚNG DẪN SỬ DỤNG
THÀNH PHẦN CẤU TẠO
Muôi xới cơm Cốc �ong gạo Gá �ể muôi Dây nguồn
Thân nồi
Quai xách
Khe thoát hơi
Nắp nồi
Nút ấnmở nắp
Bảng �iều khiển

8 9
1. Đảm bảo nắp bên trong và van hơi �ược lắp chính xác. Nếu van hơi không �ược lắp �úng thì rất có thể sẽ xảy ra trào nước.
2. Đong gạo bằng cốc �ong �ược cung cấp sẵn. Mỗi cốc �ong �úng tiêu chuẩn có thể chứa khoảng 180ml (50g)
3. Khi �ổ nước vào nồi, cần �ặt ruột nồi lên trên mặt phẳng �ể không làm sai lệch mực nước khi �o lường. Thang �o mực nước chỉ mang tính tham khảo, lượng nước phụ thuộc vào loại gạo, �ộ mềm và �ộ cứng theo sở thích của bạn. Lượng tối �a không �ược vượt quá vạch nước cao nhất �ược �ánh dấu trong ruột nồi.
4. Đặt ruột nồi vào trong nồi cơm �iện. Trước �ó, cần lau sạch ruột nồi, mâm nhiệt �ể loại bỏ hết dị vật, �ảm bảo ruột nồi khô ráo trước khi nấu.
5. Đóng nắp nồi. Đặc nồi trên bề mặt bằng phẳng rồi cắm �iện và chọn chế �ộ nấu mong muốn.
CHUẨN BỊ NẤU
BẢNG ĐIỀU KHIỂN
HƯỚNG DẪN SỬ DỤNG
Bước 1: Cho nguyên liệu/thực phẩm và �ổ lượng nước tương ứng vào nồi
Bước 2: Ấn chọn chế �ộ nấu mong muốn. Màn hình sẽ hiển thị thời gian nấu mặc �ịnh và nháy sáng trong 10 giây. Sau 10 giây, nồi tự �ộng vào quá trình nấu.Trong quá trình nấu, nếu muốn dừng ngang thì ấn nút HỦY, nồi sẽ ngừng nấu
Bước 3: Sau khi nấu xong, nồi sẽ kêu “beep” 3 lần rồi tự �ộng chuyển sang chế �ộ GIỮ ẤM
LỰA CHỌN CHẾ ĐỘ NẤU
• Với chế �ộ Canh/Súp, nhấn lần 1 �ể chọn nấu canh – thời gian mặc �ịnh là 60 phút), nhấn lần 2 �ể chọn nấu Súp – thời gian mặc �ịnh là 90 phút.
• Khi nấu cơm và cháo, không nên hẹn giờ trên 13 tiếng (mùa hè thì không quá 8 tiếng) vì ngâm gạo trong thời gian dài sẽ khiến gạo bị chua, gây mùi khó chịu, cơm không dẻo ngon.
• Khi nồi vừa kết thúc quá trình nấu cơm, không nên dùng muỗng �ể xới cơm luôn. Bạn nên chờ nồi giữ ấm thêm 10 -15 phút rồi mới xới cơm �ể có món cơm mềm tơi hơn.
CHÚ Ý
HỦY / GIỮ ẤM
Canh/Súp
Cháo
Ninh/Hầm
Hẹn giờ
Nấu nhanh
NẤU TIÊU CHUẨN
Cơm cháy
CHẾ ĐỘ NẤU THỜI GIAN MẶC ĐỊNH THỜI GIAN HẸN GIỜ
Nấu tiêu chuẩn 45 phút (0:45) 1- 24 giờ
Nấu nhanh 35 phút (0:35) 1- 24 giờ
Cơm cháy 60 phút (1:00) Không hẹn giờ �ược
Cháo 90 phút (1:30) 1- 24 giờ
Ninh/Hầm 60 phút (1:00) 1- 24 giờ
Canh/SúpCanh: 60 phút (1:00)Súp: 90 phút (1:30)
1- 24 giờ

10 11
THÔNG TIN SẢN PHẨM
SƠ ĐỒ MẠCH ĐIỆN
VỆ SINH VÀ BẢO TRÌ
1. Nồi cơm �iện rất dễ có mùi sau khi nấu cơm hoặc các món ăn khác, nên vệ sinh nồi ngay trong ngày sử dụng.2. Trước khi vệ sinh và bảo trì, cần rút phích cắm và �ể nguội nồi cơm �iện3. Sử dụng giẻ mềm, sạch và thấm nước �ể lau nắp, �ế nồi và các bộ phận khác �ể giữ cho nồi cơm �iện sạch sẽ. Lưu ý: Vui lòng không lau bảng �iều khiển, phích cắm và dây nguồn bằng vải ẩm.4. Không sử dụng dung dịch ăn mòn và các vật cứng �ể làm sạch bên trong và bên ngoài sản phẩm (ví dụ: nước chuối, xăng, bột khử nhiễm, bàn chải cứng, v.v.)5. Không ngâm, rửa bên trong nồi cơm �iện. 6. Không sử dụng máy rửa chén hoặc �ể làm sạch nồi, tránh nguy cơ cháy nổ.
VỆ SINH NẮP TRONG VÀ VAN XẢ THEO CÁC BƯỚC DƯỚI ĐÂY:
1 - Mở nắp giữ nồi, một tay giữ nắp trong, tay còn lại ấn khóa �ể tháo nắp trong ra.
2 - Làm sạch nắp rời và gioăng nắp nồi bằng nước và lau khô bằng giẻ mềm. Có thể thêm một lượng nhỏ nước rửa chén vào �ể làm sạch hơn. Sau khi rửa sạch, khéo léo �ặt các móc �ịnh vị của nắp trong về �úng vị trí và nhấn xuống. Khi nghe thấy âm thanh “Rắc” là cài �ặt hoàn tất.
3 - Van hơi trên nắp có thể �ược rút ra trực tiếp bằng tay và vệ sinh nhanh chóng. Sau khi �ã loại bỏ hết cặn bẩn và lau khô, hãy nhớ lắp lại vào nắp nồi.
4 - Gạo, nước hoặc các mẩu thực phẩm khác có thể dính trên mâm nhiệt. Để làm sạch, sử dụng một tấm vải khô, tuyệt �ối không �ược dùng nước.
5 - Nhấc ruột nồi ra và làm sạch bằng nước, vải ẩm. Tuyệt �ối không dùng dụng cụ sắc nhọn �ể chà xát, tránh làm bong tróc lớp chống dính. Sau khi �ã vệ sinh sạch sẽ, lau khô bằng vải mềm rồi nhẹ nhàng �ặt trở lại vào nồi.
6 - Sau khi �ã vệ sinh hết các bộ phận, nhớ �ặt lại vào nồi �ể �ảm bảo hoạt �ộng trơn tru những lần sau.
Model
Điện áp
Tần số �ịnh mức
Công suất
Dung tích
Trọng lượng (kg)
Số người sử dụng
SHD8909
220V
50Hz
700W
1.8L
3.5 (kg)
2 - 4
Điện trở Điện trở
Màn hình �iện trở
Bảng �iện
Mâm nhiệt
Cầu chì
Cầu chì

12 13
CÁC LỖI THƯỜNG GẶP VÀ CÁCH XỬ LÝ
Hiện tượng lỗi
Đèn không sáng
Đèn báo hiệu sángnhưng mâm nhiệtkhông nóng
Lỗi sống cơm
Tự �ộng chuyểnchế �ộ trướckhi hoàn thành
Ruột nồi không tiếp xúcvới mâm nhiệt
Trong nồi cạn nước
Lỗi cảm biến nhiệt
Lỗi mạch
Ruột nồi bị biến dạng
Ruột nồi khác, không tươngthích với mâm nhiệt
Ruột nồi không tiếp xúcvới mâm nhiệt
Tỷ lệ gạo với nước sai
Quá nhiều nguyên liệu
Lỗi mạch
Nổ/ hỏng cầu chì
Lỗi mạch
Lỗi dây �iện
Không kết nồi nguồn �iện
Nguyên Nhân
Xoay nồi trong nhẹ nhàng, nồi sẽ hoạt �ộng trở lại bình thường Dọn dẹp vật lạ bằng khăn mềm, không rửa bằng nước.
Tắt nguồn và �ợi cho �ến khi nồi cơm nguội
Liên hệ Bộ phận bảo hành hoặcphòng chăm sóc khách hàng
Mua phụ kiện thay thế
Liên hệ Bộ phận bảo hành hoặcphòng chăm sóc khách hàng
Xoay nồi trong nhẹ nhàng, nồi sẽ hoạt �ộng trở lại bình thường Dọn dẹp vật lạ bằng khăn mềm, không rửa bằng nước.
Cân bằng lại tỷ lệ Gạo – nước tùy theoloại gạo �ang sử dụng
Điều chỉnh tổng dung tích của gạo và nướctheo phạm vi cao nhất và thấp nhất
Liên hệ Bộ phận bảo hànhhoặc phòng chăm sóc khách hàng
Liên hệ Bộ phận bảo hành hoặccác cửa hàng sửa chữa
Kiểm tra nguồn & bật nguồn
Cách xử lý
Mâm nhiệtkhông nóng
Khi nồi cơm báo lỗi, vui lòng kiểm tra Mã cảnh báo trên màn hình hiển thị và chọn giải pháp xử lý phù hợp
*Nếu vẫn còn lỗi sau khi xử lý thông qua các phương pháp trên, vui lòng liên hệ với bộ phận bảo hành hoặcphòng Chăm sóc khách hàng
Màn hình hiển thị E1 / E2 / E3 / E4 / E5 Quá tải Điều chỉnh số lượng vừa phải
15
SUNHOUSE 1.8L ELECTRONIC RICE COOKER
Model: SHD8909

16 17
Danger
Danger
Safety Precautions
Forbidden operation itemMatters needing attention in daily operation
Operation item must be followed
1 This tip is about protecting yourself and others from danger, damage and other safety aspects.Important content must be observed.2. Ignore the labels of the table below and use the product incorrectly, which may cause casualties and material losses, please be sure to comply.
Please keep it out of reach of children. Do not allow
children to work alone to avoid electrocution or
scalding.
Do not insert metal, wire, needle or other
foreign objects into the product or gap,
otherwise it will cause electrical shock or
abnormal work.
If the power cord or plug is broken, please do
not use it when the socket is loose so as not to
cause electric shock and fire.
6.Please do not place this product on a table
that is unsteady, humid, hot, smooth, and
heat-resistant (such as plastic tablecloths,
cotton cloth, carpets, etc.) so as to avoid
electrical shock, fire, falling off, etc., resulting in
injury accidents and property losses.
In case of cleaning, moving, overhaul or product
malfunction, be sure to remove the plug in order to
prevent leakage or accidental start up.
3.Do not put this product directly on the fire or
anywhere near the heat source, fire source,
otherwise the product will be damaged or
malfunction, or even dangerous.
The following are the meanings expressed in this article:
Do not put in foreign bodies
Foreword
Rice Cooker Features
respected user
Thank you for purchasing the Rice Cooker. This manual applies to smart rice cookers with models
SHD8909. All content in the book is for user use and dimension only
Reference time guard, the actual subject matter. If you still have problems during use, please
contact your local SUNHOUSE Service Center or our customer service center.
Special Notes:
1. All contents in this instruction manual have been carefully checked. If there are any typographi
cal errors or misunderstandings on the content, please contact us.
2. Products are subject to change without prior notice.
1.Equipped with non-stick inner pot, easy to clean and healthier.
2.With a variety of rice cooking procedures, you can choose different tastes according to your
personal preferences, fully meet the individual needs
3.user-friendly operation interface, large digital tube display, personalized intelligent button design,
making operation easy and convenient.

18 19
Attention
The working power supply uses 220v~50Hz
AC, no other power supply, otherwise it will
damage the original device or cause fire,
electric shock and other accidents.
Please use the dedicated power socket of 10A
and above separately. Do not share the same
socket with other high-power appliances at
the same time to avoid the fire caused by
excessive current.
When the plug is inserted into the socket, it
must be inserted into the socket. Otherwise,
the original may be overheated and burnt due
to poor contact, which may cause a short
circuit or fire.
When not in use, please unplug the power
cord to prevent short circuit and self-ignition
caused by aging of the device.
Before use, you must ensure that the power
cord is connected to the host reliably;
otherwise the device may be damaged due to
poor contact.
This product is a Class I appliance, and the
grounding wire of the socket should be well
grounded.
This product is intended for home use only.
Any commercial use, improper use, or failure
to comply with this manual is not covered by
the warranty, and the company is not
responsible for any accident or injury caused
by such failure.
2.Do not pull the plug with wet hand; otherwise
it will cause electric shock or injury.
When removing the plug, you must hold the
plug handle and do not pull the power cord,
otherwise it will easily damage the power cord.
When the power is cut off during work, please
unplug the plug and re-operate after the
power on. When the power is cut off during
work, please unplug the plug and re-operate
after the power on.
Make sure that the power cord does not come
into contact with sharp edges, burrs, other
items that protrude sharp or hot surfaces. This
may cause electric leakage, resulting in
electric shock or fire.
Please use a dedicated power cord, such as
the power cord is damaged, please go to the
Wei jiamei after-sales service department to
buy a dedicated power cord to replace.
Attention
This appliance cannot be operated in the form
of an external timer or a separate remote
control system.
This product is for use only indoor . It should
not be used in wet places or outdoors to
prevent damage caused by electric shock.
Please do not use it for purposes other than
the function of this product, so as to avoid
damage to the machine or personal injury.
Immediately after opening the package, put
the plastic bag into the trash can to prevent
children from playing and posing a risk of
suffocation.
When the product is working, the temperature
will rise. Do not touch the metal part of the
product directly to prevent burns.
Do not open the top cover when working on
the product to prevent burns.
High temperature and steam will be
generated when the product is working. Do
not put your hands and face close to the
steam hole to prevent burns.
Do not move the product during work.
After the product fails, please send it to the
after-sales service department for repair. Do
not disassemble the product or replace the
parts yourself to avoid fire, electric shock or
injury.
The inner pot and the bottom and the edge
should be kept clean. The bottom of the inner
pot and the surface of the heating plate
should not be attached with water droplets,
rice grains and other sundries. The inner pot is
placed stably, otherwise the contact will be
bad and the components will be burned out.
The inner pot should not be bumped or directly
placed on other heat sources, such as a gas
stove, otherwise it will be easily deformed.
This product does not apply to persons who
are sensory or mentally dysfunctional and who
lack relevant experience or knowledge
(including children). Use this product unless
supervised and directed by their professionals.
Children should be looked after to ensure they
do not play with this product.

20 21
Please prevail in kind
Name Of Each Part And How To Use It
Rice Spoon Measuring Cup Spoon Tray Power Cord
Body
Handle
Steam escape
Lid
Open button
Operation panel
Attention
When working on the product, do not cover
the cover with a damp cloth to prevent the
steam from being discharged and the body
from dissipating heat and causing damage to
the device.
When taking food such as rice, please do not
touch the inner part of the inner cover such as
the inside of the lid to avoid burns.
Please use the rice spoon that comes with the
product, do not use the equipment with sharp
edges and corners, so as not to damage the
inner layer of the inner layer.
The altitude range of this product is 0~2000
meters.
When the inner pot is not placed in the main
unit or the inner pot is empty, do not start the
operation to avoid damage to the original
device.
It is strictly forbidden to use the inner pot that
is not included with this product to prevent
damage to components caused by
overheating.
Do not allow water to enter the cooker base.
Rinse and soak with water to avoid electric
shock or short circuit.
Do not put any bagged, filled, or bottled items
into the product for heating; otherwise there is
a danger of explosion.
Do not cook acidic food (PH<5)

22 23
1. Make sure inner lid and air valve are installed accurately. If the air valve is not right installation, it will lead to water spill.
2. Measure rice with available plastic cup. The standard of cup contains about 180ml (50g).
3. When pouring water, you need to put inner pot on a flat to avoid wrong water level. Water level measure-ment just for reference, the amount of water depends on type of rice, submissive, and strength that fits with your favorite. Maximum water in pot can not exceed marked level.
4. Put inner pot into rice cooker. But first, you need to clean pot and heating surface and keep them dry
5. Close the lid. Put rice cooker in flat, then plug the power socket and choose suitable mode.
PREPARE TO COOK
INSTRUCTION MANUAL
Step 1: Put the materials/ food into and pour enough water.
Step 2: Press cooking mode. Time will be displayed on screen and flickered in 10 seconds. After 10 seconds, cooking will process automatically
Step 3: After finish, rice cooker will beeping 3 times and then auto change WARM mode.
COOKING MODE
• Soup - press 1 times to cook - default time is 60 minutes, press 2 times to choose Simmer mode - default time is 90 minutes.
• When you cook rice and porridge, you should not set up time over 13 hours (not to exceed 8 hours on summer) because soak the rice for a long time will reduce rice quality such as sour, fetid, not delicious.
• When the cooker has just finished cooking, should not use spoon to dig up rice instantly. Please waiting for 10-15 minutes, the rice cooker will take to you the best meal.
NOTE
MODE DEFAULT TIME TIME SETTING
Standard mode 45 minutes (0;45) 1- 24 hours
Quickly mode 35 minutes (0:35) 1- 24 hours
Scorched rice 60 minutes (1:00) No set time
Porridge 90 minutes (1:30) 1- 24 hours
Stew 60 minutes (1:00) 1- 24 hours
Soup/SimmerSoup: 60 minutes (1:00)Simmer: 90 minutes (1:30)
1- 24 hours
Operation Panel
HỦY / GIỮ ẤM
Canh/Súp
Cháo
Ninh/Hầm
Hẹn giờ
Nấu nhanh
NẤU TIÊU CHUẨN
Cơm cháy
Timer button
Scorched rice
Porridge
Stew
Soup/Simmer
Quickly mode button
Standard mode button

24 25
Electrical Schematic
Fuse Body
Thermistor Thermistor
Power Supply Board
Heating Plate
Control Display Panel
Fuse Body
Troubleshooting and troubleshooting
Fault phenomenon
Light does not shine
The heating plate is not heated
Uncooked rice
Cooked into rice
A large amount of porridge
Sensor failure
Not placed in the inner pot
Dry burning in the inner tank
The inner pot is not
Too much cooking
Automatically enterbefore the workis completedInsulation function
Digital scintillation
display E1/E2/E3/E4/E5
If the fault persists after processing through the above methods, please contact the after-sales service department,
the company will provide you with good after-sales service.
Adjust the amount to moderate
Adjust the amount to
Turn off the power and wait until
the rice cooker cools down.
Gently turn the inner pot to return it to normal
Send the designated after-sales
service department for repair
Clean up foreign objects, but do not
wash with water Send the designated
after-sales service department for repair
The indicator light is on and the hot plate is not heated.
Circuit power is not connected Check if the power is on
Send the designated after-sales service department for repair
Send the designated after-sales service department for repair
Send the designated after-sales service department for repair
Line fault
Circuit failure
Fuse blown
Fever disk failure
Circuit failure
Fever disk failure
Too much or too little
The ratio of rice to water is wrong.
The inner pot is not placed, hanging
Between the inner pot and the hot plate
Foreign body
Turn the inner pot gently, it will return to normal
Adjust the ratio of rice to water
Between scales
Adjust the total capacity of rice and water in the highest and lowest range
Inner pot deformation
Circuit failure
Sensor failure
The inner pot is not placed, hanging
Inner pot deformation
Circuit failure
Cause Solution
Trouble and Handling If you find that the rice cooker is faulty, please check the following “Fault Alarm Code” before
commissioning the repair and dispose of it according to the following methods.