Microalgae Culture Protocol
35
t Microalgae Culture Protocol Aquaculture Division Harbor Branch Oceanographic Institution Inc.
-
Upload
khangminh22 -
Category
Documents
-
view
5 -
download
0
Transcript of Microalgae Culture Protocol
t
MicroalgaeCultureProtocol
Aquaculture DivisionHarbor Branch Oceanographic Institution Inc.

t
MICROALGAE CULTURE PROTOCOLAquaculture Division
HARBOR BRANCH OCEANOGRAPHIC INSTITUTION INC.
Juan C. JaramilloHarbor Branch Oceanographic Inst.5600 U.S. I NorthFlo Pierce, Florida 34946
Key words: Sterile techniques, microalgae, nutrients, growth.
Abstract
The protocol for culturing microalgae at the Aquaculture Division of HarborBranch Oceanographic Institution is explained in detail. The purpose of thisdocument is to serve as a step-by-step guide for technicians in themicroalgae laboratory. Sterile techniques, culture vessel cleaning andpreparation, nutrient and media preparation, inoculations, and cultureroom maintenance are described. Systems diagrams and flow chartsindicating culture techniques and paths are included. Appendices onautoclaving, filtration and chemical reagents preparation are also included.
© Copyright 1996. Harbor Branch Oceanographic Institution Inc.

•
Table of Contents
Introduction1.0 Stock Cultures (10 ml)
1.1 Clones Used at HBOI Aquaculture1.1.1 Tiso (Isochrysis galbana)1.1.2 Cg (Chaetoceros gracilis)1.1.3 Tw iTh.alassiosira weissflogiiy
1.2 Culture Vessel Preparation1.3 Media Preparation1.4 Transfers1.5 Stock Culture Table
2.0 Small-scale Cultures (500-6000 ml)2.1 Culture Vessel Preparation2.2 Culture Media Preparation2.3 Inoculation2.4 Small-scale Culture Table
3.0 Carboy Cultures (16-20 liters)3.1 Culture Vessel Preparation3.2 Culture Media Preparation3.3 Inoculations3.4 Culture Room
4.0 Cylinder Cultures in Room #2 (185- 208 liters)4.1 Culture Vessel Preparation4.2 Culture Media Preparation4.3 Inoculation4.4 Harvest4.5 Culture Room
6.0 Algae Greenhouse Cultures5.1 Culture Vessel Preparation5.2 Culture Media Preparation5.3 Inoculations5.4 Greenhouses
AppendixAutoclaving
Appendix IIFiltration and U.V. System
Appendix IIIThiosulfate and Silicates
© Copyright 1996. Harbor Branch Oceanographic Institution Inc.
Page1
2233334
67788910101 112141416171 8192020212 1222323
25
30
32

Introduction
At the Aquaculture Division only few species of microalgae are used tofeed our organisms. The most important is the small flagellate Iso chrysisg alban a which is used to feed larval as well as juvenile and adult clams.The second most important species in our lab is Chaetoceros gracilis, asmall diatom used mostly to feed juvenile and adult stages of clams andlarval stages of shrimp and other invertebrates. Also used for the samepurpose is the diatom Th alassiosira w eissflogii. In addition to these species,the lab cultures Ellipsodon sp., Tet raselmis sp., Nannocloropsis sp., andChlorella sp., to feed clams, rotifers, artemia and ornamental larval shrimp.Other clones not mentioned here are maintained in our small collection butthey are rarely used for feedings.
Of utmost importance to the operation of growing microalgae in ourlaboratory is the proper utilization of Sterile Techniques in every step ofthe process in the first stages of batch cullure (inside laboratory, rooms #1and #2). Without care taken in handling containers, media andinstruments, you are likely to get contamination soon after you order newstock cultures. Those cultures are not axenic I to begin with (axenic culturesare a myth, reall y l), but they are pretty clean, and will last for yearswithout a problem if precautions are taken. Some people prefer to movecultures fast through the laboratory to avoid "crashes">, I prefer to moveslower, let things get dense enough, and be very meticulous with thetechnique to avoid those crashes. That way you are never in a rush andyou do not have to live stressed and on "the edge" all the time.
Our operation starts with 10 ml sock cultures that are progressively scaledup to about 3000 liters. This guide takes you from the very beginning ofthe process to the stage where algae is ready to be fed to the animals inour facility.
1 Cultures with only one species of any microorganism. If a culture has bacteria, but still
survives well, it is called "monoalgal culture".
2 Term used when a culture abruptly dies due to contamination or nutrient depletion.
Generally a crash involves decoloration of the culture, the presence of clumps and sometimes afoul smell.
© Copyright 1996. Harbor Branch Oceanographic Institution Inc. 1

1.0 Stock Cultures (10 ml)
Stock cultures are those used to start new batches of cultured algae for thelaboratory. They are obtained by two different means. One is the use of atechnique, called Single Cell Isolation from water samples collected in thefield. This technique is time consuming, difficult to master and the resultsare unreliable, therefore, it is not been used at Harbor Branch. The bestway to obtain good quality stock cultures is to buy them from otherlaboratories. We use two main sources: The University of Texas (UTEX), andBigelow Laboratories (CCMP). The collection at UTEX is extensive and theclones obtained from them in the last years have been very reliable. Theyare also inexpensive ($10 per test tube). CCMP also has a good collectionbut the cultures are considerably more expensive ($40-$100 per testtube). Cultures can also be obtained from the American Type CultureCollection (see addresses below).
1.1 Clones Used at HBOI Aquaculture
The clones used at HBOI can be ordered by letter, phone, fax, or usmg theinternet at:
Culture Collection of Algae (UTEX)Department of BotanyThe University of Texas at AustinAustin, Tx 78713-7460Tel: (512) 471-4019Fax: (512) 471-3878URL: http://www .botany. utexas.edu/i nfores/utex/
National Center for Culture of Marine Phytoplankton (CCMP)Bigelow Laboratory for Ocean SciencesWest Boothbay Harbor, Maine 04575Tel: (207) 633-9600Fax: (207) 633-9641
American Type Culture Collection1230 I Parkland DriveRockville, Maryland 20852-1776Tel: (800) 638-6597Fax: (301) 231-5826
© Copyright 1996. Harbor Branch Oceanographic Institution Inc. 2

1.1.1 Tiso (Isochrysis galbana)
We have one clone of Tiso from the UTEX collection. Its code is: LB2307
Size:Doublings day-t:TO Range:
4-7 urn x 4 urn2.8916-34°C (28°C optimum)
1.1.2 Cg (Chaetoceros gracilis)
We have one clone of Cg from the UTEX collection. Its code is: LB 2375
Size:Doublings day-i:TO Range:
5-7 urn x 4 urn4.3Not determined (28-32°C optimum)
1.1.3 Tw tTh.alassiosira weissflogii)
We have one clone of Tw also, called 'Actin,' from The University of Miami.This clone can also be obtained from CCMP.
Size:Doublings day-r:TO Range:
12-24 um diameter1.39IO-30°C (25-30°C optimum)
When cultures are ordered make the people at Receiving aware of theshipment so they do not put them in the freezer or leave them exposed tothe sun. Once in the lab, place them in a rack on the culture table and waita day or two before you transfer them to new test tubes.
1.2 Culture Vessel Preparation
Stock cultures come from the providers in glass or plastic test tubes (10ml). They are transferred into borosilicate test tubes with lose caps or lids.Tubes must be washed even if they are just out of the box. To wash tubesfollow the next steps:
© Copyright 1996. Harbor Branch Oceanographic Institution Inc. 3

• submerge them in a bath of water with Alconox® detergent and leavethem soaking for 24 hrs.
• Rinse them very well with Reverse Osmosis (R.O.) water several times.The last rinse is done using distilled water or deionized water. Itis very important that all traces of soap are removed from inside thetubes.
• Pour 10 or 15 ml of D.l. or distilled water in each tube. This is doneto trap copper residues left by the autoclaving process (Theautoclave has copper plumbing) that can eventually kill themicroalgae.
• Autoclave tubes for 30 minutes at 125°C (see the "Autoclaving"appendix).
• Let tubes cool down for 24 hr and store them In a dark, cool clean placeuntil use.
1.3 Media Preparation
We buy nutrient stocks ("algae food" or f/2) rather than prepare themfrom chemical reagents in our lab, mainly to save time. They are bought in5 gallon containers and re-bottled in smaller teflon or plastic containers for(internal) indoor use. We order nutrients from:
AquacenterTel: (800) 748-8921Fax: (601) 378-2862/378-2861
There are two solutions to buy:
Solution A (trace metals / catalog # 1081 OA)Solution B (P, N and vitamins / catalog # 1081OB)
To sterilize media for the stock cultures, seawater must be passed througha series of filters ranging from 25 urn to 3 um, then through U.V., andfinally through a fine 0.2 urn filter (Nalgenew, Fig 1.)
© Copyright 1996. Harbor Branch Oceanographic Institution Inc. 4

Figure I. 0.2 urn filter
To do this make sure the filtration system is working and the U.V. lightsare turned on (see the "Filtration and U.V. System" appendix). Filter waterinto a clean 500 ml Pyrex® glass container with a screw cap (Fig 2).Autoclave with the cap loose for 30 to 40 min. Let water cool down for 24hr. Tighten the cap only when container is at room temperature, and storein dark, cool place until use.
Figure 2. 500 ml Pyrex'v glass container with a screw cap
Nutrients are re-bottled in small (500-1000 ml) dark teflon orpolypropylene containers. Do not use polyethylene bottles, they will meltin the autoclave! Apply autoclaving indicator tape (the kind with whitestripes across that become black when autoclaved) to the outside of eachbottle and autoclave for 30 to 40 minutes. Wash hands with alcohol beforehandling tubes and pipettes. Using disposable sterile Pasteurw pipetteswith cotton plugs, put 1 or 2 drops of sterile nutrient solution A andsolution B in 500 ml of sterile filtered seawater. Use only one pipetteper solution and container. Discard the D.1. water that was left in eachtube when autoclaved. Under the laminar flow hood (Fig. 3), and with thehelp of a re-pipcttor or the Dispensette" syringe (previously sterilized)distribute 10 ml of media into an empty test tube, re-cap and place it in a36-test tube rack. Repeat the procedure until you have empty the 500 mlcontainer.
© Copyright 1996. Harbor Branch Oceanographic Institution Inc. 5

Figure 3. Laminar flow hood
500 ml can roughly fill 1.5 racks (50 tubes). Make sure you add one or twodrops of silicate solution to 500 ml of sterile seawater before youdistribute media to the test tubes to be used for diatoms (see the"Thiosulfate and Silicates" appendix). Usually, one rack of tubes for diatomsis prepared for each two racks of regular, non-diatom, culture tubes. StoreIII a dark, cool, clean place until use.
1.4 Transfers
All transfers are done under the laminar flow hood (remember to turn iton before use l). Transfers have to be done every two to three weeks soalgae does not die in the tubes from nutrient depletion. To transfer, cleanyour hands with alcohol, get an empty test tube rack, a rack with testtubes with sterile media, and the culture rack (Fig. 4) .
. .
Figure 4. Culture test tube racks
Place them under the hood and using Pasteurw pipettes (previouslysterilized) get 1 ml from a culture tube that has been placed momentarilyin the vortex to mix it, and drop it in the new test tube. Discard the pipette(recycled pipettes are placed in a 1000 ml beaker with 10% Hel, but theycan also be disposed of properly in the "glass trash" container). Repeat thisoperation for each tube always using a new pipette when transferring. Ifthe pipette is dropped, or if it touches anything outside the test tubes,
© Copyright 1996. Harbor Branch Oceanographic Institution Inc. 6

discard both the pipette and the tubes to avoid any possibility of bacterialcontamination. If possible, use a mask for your nose and mouth whentransferring. Write the date on the record card of the cultures and in thelog book, and place the newly transferred cultures and the back-upcultures on the culture table (Fig. 5).
srocx CUlTURESf-<"
Figure 5. Stock culture table showing shade screen between lamps and cultures
1.5 Stock Culture Table
The culture table must always have two layers of screen between thelights and the cultures and the thermometer hanging in the middle shouldshow 22-26°C. If necessary, use a small fan to cool down the pocket of airbetween the lights and the plexiglass. Make sure to replace any bulb thatdoes not work or that is blinking.
2.0 Small-scale Cultures (500-6000 ml)
What we call Small-scale Cultures are those of no more than 8 liters thatcan be kept on the culture table. Typically we keep such cultures in clearpolycarbonate containers that can be autoclaved. We have 3 sizes: 1000 ml,4 liters and 8 liters (Fig. 6).
Figure 6. Clear polycarbonate culture huckets
© Copyright 1996. Harbor Branch Oceanographic Institution Inc. 7

2.1 Culture Vessel Preparation
Polycarbonate buckets have to be washed with Alconox® detergent and asponge to remove any organic matter and bacteria from previous cultures.Even if buckets are new, they have to be thoroughly cleaned before usingthem to culture microalgae. After the Alconox® wash, rinse the vessel withR.O. water to remove soap and leave some water in the bucket to trapcopper during the autoclaving process. Clean the lids with Alconox® soapalso, and rinse them well with R.O. water. Assemble the containers putsome autoclave indicator tape. Autoclave for 40 minutes.
2.2 Culture Media Preparation
Using the Filter-U.V. system, fill a 20 liter autoclavable Nalgene® containerwith seawater (clean it before using the same procedure you used for thebuckets). Put the lid back on, but make sure to leave it loose so that thecontainer will not explode inside the autoclave. Put autoclave indicatortape on it, and autoclave for 60 minutes. Let the water cool down for atleast 24 hours to allow CO2 levels to return to normal. Do not screw the lid
back while the water is hot or otherwise the container will implode. Once ithas cooled, tighten lid and store in a cool dark place (Fig. 7).
Figure 7. 20 liter Nalgene® container for media sterilization
Immediately before filling the buckets with sterile water from theN algene® container use an Oxford® re-pipettor with a sterile tip (they areinside the oven/incubator kept at 60°C at all times) to add 3.5 ml of eachnutrient solution. Use only one tip per solution and container, and afteruse, place them in a beaker with 10% HCl. Later they will be washed andautoclaved for re-use. Close the container and shake to mix the nutrients.Only prepare enough media to fill all your available buckets. It is notadvisable to store seawater with nutrients until the next filling because
© Copyright 1996. Harbor Branch Oceanographic Institution Inc. 8

something may grow in it, even though precautions are taken and steriletechniques are used in every step.
To fill the buckets with media take them to Culture Room # 2 and linethem up on the table (clean the table with alcohol first). Clean your handswith alcohol and empty the R.O. water present in each bucket into the sink,making sure not to touch the edges of the buckets with your fingers oranything else. When you have six 4 liter containers ready (or three 8 litercontainers) remove the lids and place them facing up on a clean surface.Clean your hands with alcohol again as well as the outside surface of theNalgene® media container. Be very careful not to spill media, pour 3 litersinto the bucket (you can see the mark in liters on the side) and movequickly to the next one until you finish all 6 (or all 3 if you are filling 8liter buckets to the 6 liter mark). Put the lids back and store the bucketsnext to the hood in Culture Room # 1. With the left over water in theN algene® containers, fill the small clear buckets to the 0.5 liter markfollowing the same procedure.
2.3 Inoculation
There are three types of inoculations with small-scale cultures: 500 ml, 3liters, and 6 liters. To inoculate a 500 ml clear bucket, get a back-up stockculture that looks dense, and using the vortex, mix it very well. Clean yourhands with alcohol and under the hood pour the test tube culture into thebucket. Close the lid and immediately label the culture remembering towrite the date. If the culture is a diatom you have to add two drops ofsterile silicate solution to it. As always, use sterile pipettes for thispurpose. Place the culture on the culture table until is used to inoculate thenext step (Fig. 8).
Figure 8. Small-scale culture table
© Copyright 1996. Harbor Branch Oceanographic Institution Inc. 9

4 liter buckets usually have about three liters of media. Before inoculationput a 0.2 urn filter on the air inlet. These filters are unidirectional, so makesure you install them correctly. The filters are always inside theovenlincubator at 60°C. That should be enough to maintain their sterility(Fig. 9).
Figure 9. 60°C incubator where air filters and pipette tips are kept
Using one of the 500 ml cultures, follow the same inoculation procedure(instead vortexing, just swirl the culture being careful not to spill it). Ifdiatoms are inoculated use 10 drops of silicate solution. 8 liter bucketsroughly have 6 liters of media. To inoculate them use also a 500 ml culturefollowing the same procedure. If diatoms are inoculated add I ml ofsilicate solution. Once cultures are inoculated put them on the table andattach the air line to the filter. Turn the air on until moderate bubbling isgoing. Too much bubbling will probably kill a fresh inoculum, and weakbubbling will not promote good growth. Until you use them to inoculatecarboys, monitor the color to see if they are getting darker.
2.4 Small-scale Culture Table
This table does not have shade screen, however, in some cases, it its goodto have some screen in the section where the 500 ml cultures are sitting.Check for bad or blinking bulbs and replace them as necessary. Clean thesurface of the table regularly with alcohol.
3.0 Carboy Cultures (16-20 liters)
This is the last stage at which sterile techniques can be used efficiently andcost effectively. Carboys are inexpensive, very resistant to impact and tothe autoclaving process. With time they will become opaque and will brakeeasily, but a $6 dollar carboy can last for over a year even if is subjected toextreme temperatures and pressure once a week.
© Copyright 1996. Harbor Branch Oceanographic Institution Inc. I 0

3.1 Culture Vessel Preparation
The culture containers at this stage consist of two elements: The carboyitself, and the air delivery system (I call it a "stem"). Although there areapproxim,ately equal number of carboys and stems, the latter aresomewhat fragile and are broken when mishandled. Use glass for thestems because it is much more cleaner than plastic, and because it can beautoclaved. The stems consists of a polypropylene, autoclavable 250 mlbeaker with a hole on the bottom, which lets through a section of thickmedical grade silicon tubing (also autoclavable). At one end, a 35 em pieceof glass tubing is attached to the silicon hose. The other end is used for anair filter. Stems should be kept submerged in a chlorine bath at all times.Once they have been used in a culture they are rinsed well and placed inthe chlorine bath. This bath is a Tupperware® container with a solution ofR.O. water and 200 ml of 10% chlorine. Every two weeks the bath shouldbe emptied and the container cleaned.
There are two types of carboys in our lab. The regular carboys and the "I"carboys (for Inocula) which are used to inoculate the regular carboys.There is no difference between them but they go through differentprocesses so I have marked "I" carboys with red tape around the neck toidentify them.
Carboys are cleaned as follows:
• As soon as the culture in the carboy has been used for inoculation of alarger container or other carboys, rinse it with a R.O. water "firehose"blasting the remaining algae attached to the bottom and the walls.
• Add approximately one liter of 10% muriatic acid (l0% HCI) to the carboyand swirl it so the acid touches the whole surface inside. Carboys areleft for a minimum of two hours with acid in them to make sure therernairung algae is killed.
• Rinse carboy with R.O. water. There are two ways to do this: One is usingthe firehose and the other the "serial washer" which is a 5 outletfirehose that saves a lot of time (Fig. 10) A piece of plywood with 5holes aligned to the water jets is placed on the sink and the carboys
© Copyright 1996. Harbor Branch Oceanographic Institution Inc. 1 1

are turned upside down to receive the blast of water. Carboys shouldbe rinsed for at least a minute to make sure all the acid is removed.
Figure 10. Serial washer
• "I" carboys are washed the same way but being extra careful to get rid ofany possible source for contamination. Once they are clean, putone of the chlorinated stems, and a glass plug on the tip of thesilicon tubing to prevent spilling during autoclaving. Also, putautoclave indicator tape.
3.2 Culture Media Preparation
Culture media preparation for the carboys follows two methods. Regularcarboys are semi-sterilized with chlorine (some spores are able to survivethis treatment), while "I" carboys are autoclaved to achieve total sterility.
• Put the regular carboy under the manifold that delivers the seawater(aka "the serial filler", Fig II) and add 10 ml of 10% chlorine.Place one of the chlorinated stems in the carboy and attach thehose from the manifold to the tip of silicon tubing,remembering to open the clamp . Make sure the filters in thefi Iter rack are not leaking and are clean. Turn the V. V.columns on and let the system run for several minutes untilonly seawater is coming out (see "Filtration and V.V. System"appendix) . You can also fill each carboy individually.
© Copyright 1996. Harbor Branch Oceanographic Institution Inc. I 2
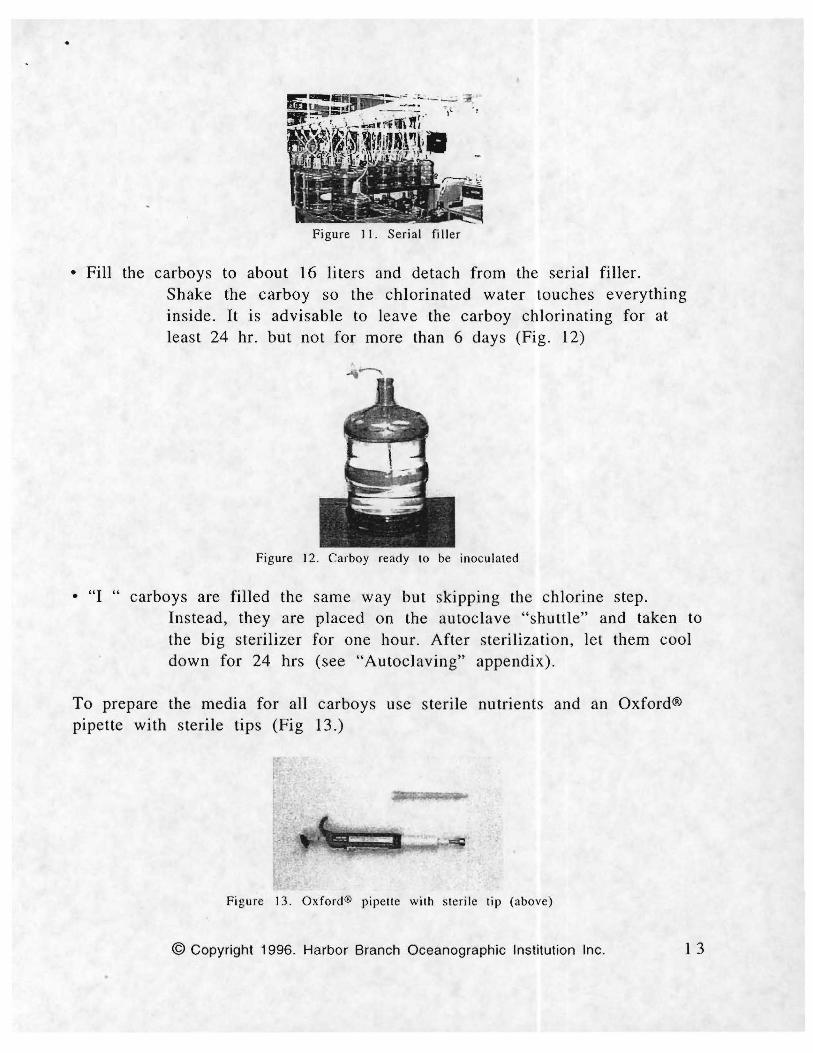
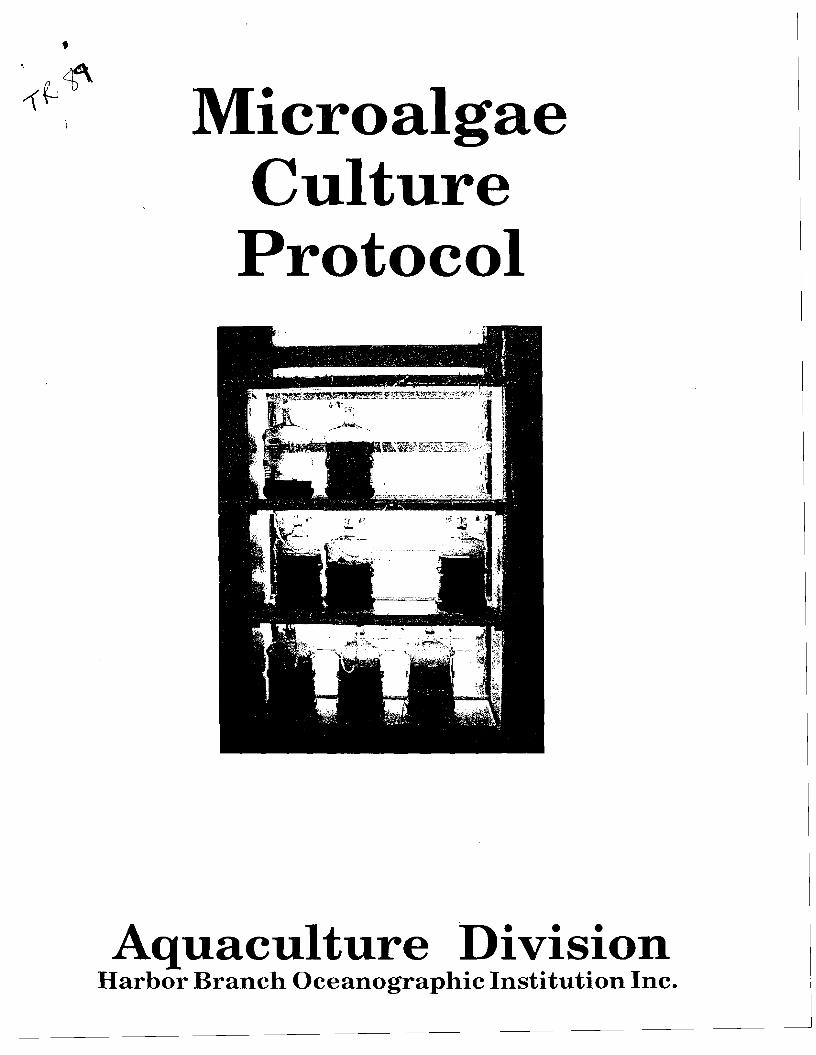
Figure 11 . Serial fi Iler
• Fill the carboys to about 16 liters and detach from the serial filler.Shake the carboy so the chlorinated water touches everythinginside. It is advisable to leave the carboy chlorinating for atleast 24 hr. but not for more than 6 days (Fig. 12)
Figure 12. Carboy ready to be inoculated
• "I " carboys are filled the same way but skipping the chlorine step.Instead, they are placed on the autoclave "shuttle" and taken tothe big sterilizer for one hour. After sterilization, let them cooldown for 24 hrs (see "Autoclaving" appendix).
To prepare the media for all carboys use sterile nutrients and an Oxford®pipette with sterile tips (Fig 13.)
Figure 13. Oxford® pipette with s te rile tip (above )
© Copyright 1996. Harbor Branch Oceanographic Institution Inc. 1 3

Add 3.0-3.5 ml of each solution (A & B) to the carboy being careful not totouch anything with the tip. Use one pipette tip per solution and place in abeaker with 10% HCI after use. To add nutrients, lift the top of the carboyfrom the upside down beaker and never touch the edges of the neck. Ifdiatoms are going to be inoculated, add 3 ml of silicate solution to thecarboy in the same fashion. Label carboys with masking tape and put aunidirectional 0.2 urn filter on the outside tip of the stem.
3.3 Inoculations
Two kinds of inoculations are performed at this stage. One is theinoculation of "I" carboys using small-scale cultures and the other theinoculation of regular carboys, using "1" carboys.
To inoculate "I" carboys, get a dense 3 or 6 liter culture and carefully pourapproximately 1 liter into the carboy. Place carboy on the "Inocula" shelf inCulture Room #1 and connect the air. To inoculate a regular carboy, get oneof the dense "I" carboys from the same shelf and split it into 6 regularcarboys. To do this lift the stems of the carboys and balance them on oneside making sure they do not fall out. In the eventual case this happens,discard that stem and replace it with a clean one. Remove the stem fromthe "I" carboy and with alcohol and a paper towel, clean the neck. Slowlypour 2.0-3.0 liters of culture into one regular carboy trying not to spillalgae, and move to the next without returning the "I" carboy to the verticalposition. This is done to prevent the culture from being spilled out of thecarboy, touch the neck and then be poured back to a new carboy. Althoughit seems a bit extreme, this is the only way to avoid contamination. Oncethe 6 carboys are inoculated put them on the illuminated shelves in rooms#1 or #2 and connect the air to them.
3.4 Culture Room
Carboys are kept on shelves with tluorescent bulbs. Culture room #1 canhave up to 77 carboys. 1 have separated the growing section from theinocula section to avoid cross-contamination and confusion. The back wallis also divided in two sections: 1) Tiso (left); 2) Diatoms (right) (Fig. 14)
© Copyright 1996. Harbor Branch Oceanographic Institution Inc. 1 4

Figure 14. Carboy arrangement in culture room # 1. The picture on the left shows the Tiso section.The center pictures show the diatom sect ion, and the left picture shows the "Inocula" section
Bulbs that are blinking or are off must be changed as soon as possible. Theair system has windows of clear PVC® where you can check for fungi ormoisture. If something starts growing inside the airlines they should bebleached. To bleach the airline turn the blower off, disconnect all thecarboys from it and close all the valves. Pour a solution of 2% chlorine(dilute 2 parts of 10% chlorine in 8 parts of water) until you see bleach In
all the windows. To make sure all air is out of the lines have a bucket atthe air line drains and keep pouring bleach solution until all the air ispushed out. Leave the airline bleaching for 4 hours (it is advisable to startthis procedure first thing in the morning). After bleaching, the chlorine hasto be removed completely from inside the pipes. Even traces of it will killall the cultures in a matter of minutes. To rinse the bleach you have toconnect drain hoses to all the airline drains (4 in total) and connect an R.O.line to one of the inlets (top) (Fig. IS).
Figure 15. The left picture shows the section of pipe used to bleach the airlines.The right picture shows one of the drains at the bottom
Leave the water running for several minutes and then switch inlets andrepeat the operation. Check for a change of color in the water, fromyellowish to clear, and taste the water to make sure there is no chlorine init. Turn the blower back on and open all the valves and leave it like thatfor three hours at least, then connect the carboys back. It would be a good
© Copyright 1996. Harbor Branch Oceanographic Institution Inc. I 5
..
idea to connect only one carboy and wait for a few minutes to make surenothing suddenly dies.
Provide CO2 to the cultures to promote growth. The CO2 tank is connecteddirectly to a mixing chamber before the air passes through a 3 urn filterand is distributed to the carboys. I have put a flowmeter to measure theamount of carbon provided to the cultures. Usually the CO2 flow should beset to 1000-1500 ml min-I, if you need to boost the growth a bit, increasethe flow to 2000 mI min-I but stop there, because too much CO 2 can lowerthe pH of the media and kill the algae (Fig 16).
Figure 16. Air/Carbon di oxide mixing chamber
Clean the culture room every Friday at the end of the day with floordisinfectant, and wipe the work tables and hood with alcohol.
4.0 Cylinder Cultures in Room #2 (185- 208 liters)
There are two types of cylinder cultures at Harbor Branch. Clean semisterile cylinders in culture room #2 and non-sterile cultures in the algaegreenhouse. The procedures for both are different and will be explainedseparately.
Culture room # 2 has 16 cylinders and space for 34 carboys. The cylindershave plexiglass lids, silicon tubing, flat bottoms and air filters. In essence,they are just big carboys and should be treated in the same fashion wherethe culture technique is concerned. The only difference is that they arefixed to a platform and share a common drain.
© Copyright 1996. Harbor Branch Oceanographic Institution Inc. 1 6

4.1 Culture Vessel Preparation
To prepare a cylinder for culture it first has to be rinsed with R.O. waterusing a pressure hose (garden hose connected to the R.O. line. If there areresiduals from the last culture, remove them using a soft sponge and rinseagain. Close the drain and harvest valves and using Alconox soap and abrush clean the inside surface of the tank. Rinse well with R.O., then usingthe acid sprayer (lO% muriatic) spray the inside of the cylinder makingsure every square em is touched by the acid. Use a mask, safety glassesand gloves when you do this (Fig 17.)
Figure 17. Acid sprayer.
Take the lid and silicon tubing (air line) to the sink and nnse them withR.O. water, remove the airstone and put it in a container with acid. Usingthe sprayer's tip introduce some acid in the tubing and spray both sides ofthe lid. Rinse them with freshwater and replace the airstone with a dryclean one. Put the lid back on the cylinder and leave the acid for 1 hourinside the cylinder. Open the drain valve and rinse the cylinder with freshwater until all traces of acid are removed. Pay special attention when youdo this because there are lights and electrical outlets close to the cylindersand it is not advisable to get them wet. Introduce the tip of the gardenhose in the harvest pipe, open the valve and rinse that part of the system.Close all valves and label the cylinder with masking tape and green tape toindicate acid has been used. Leave tank as is, until you are ready to fill itwith seawater (Fig. 18).
© Copyright 1996. Harbor Branch Oceanographic Institution Inc. 1 7
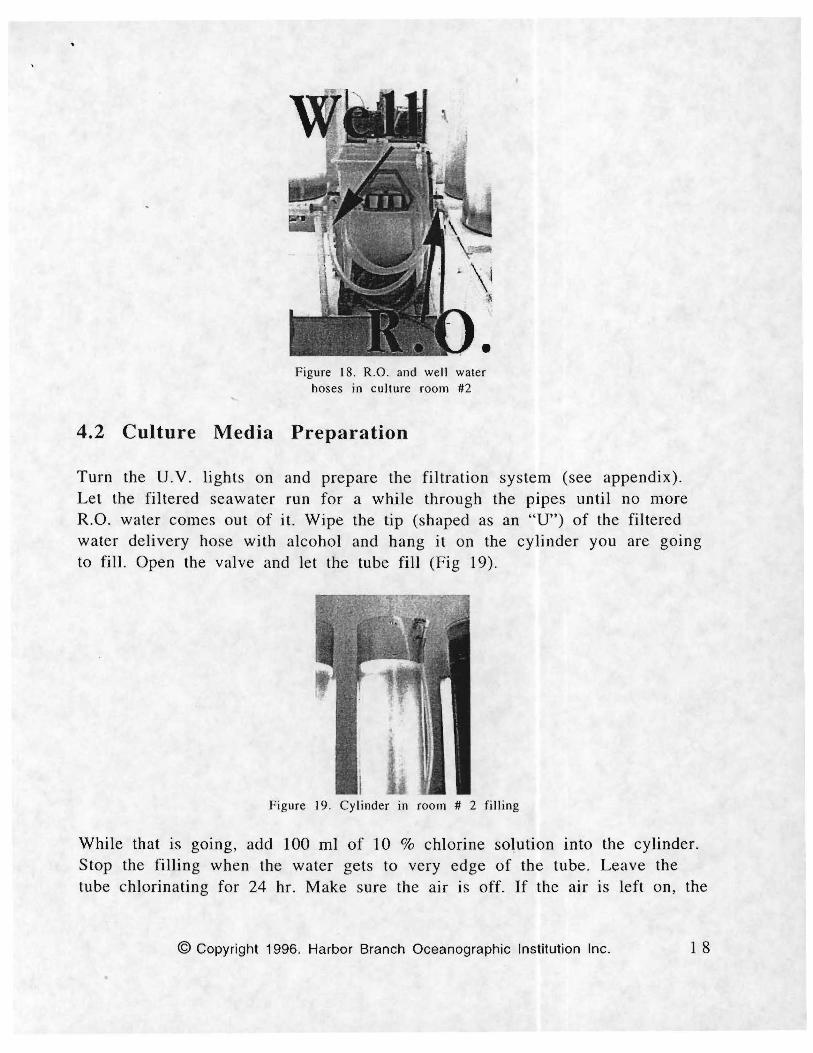
Figure 18. R.O. and well waterhoses in culture room #2
4.2 Culture Media Preparation
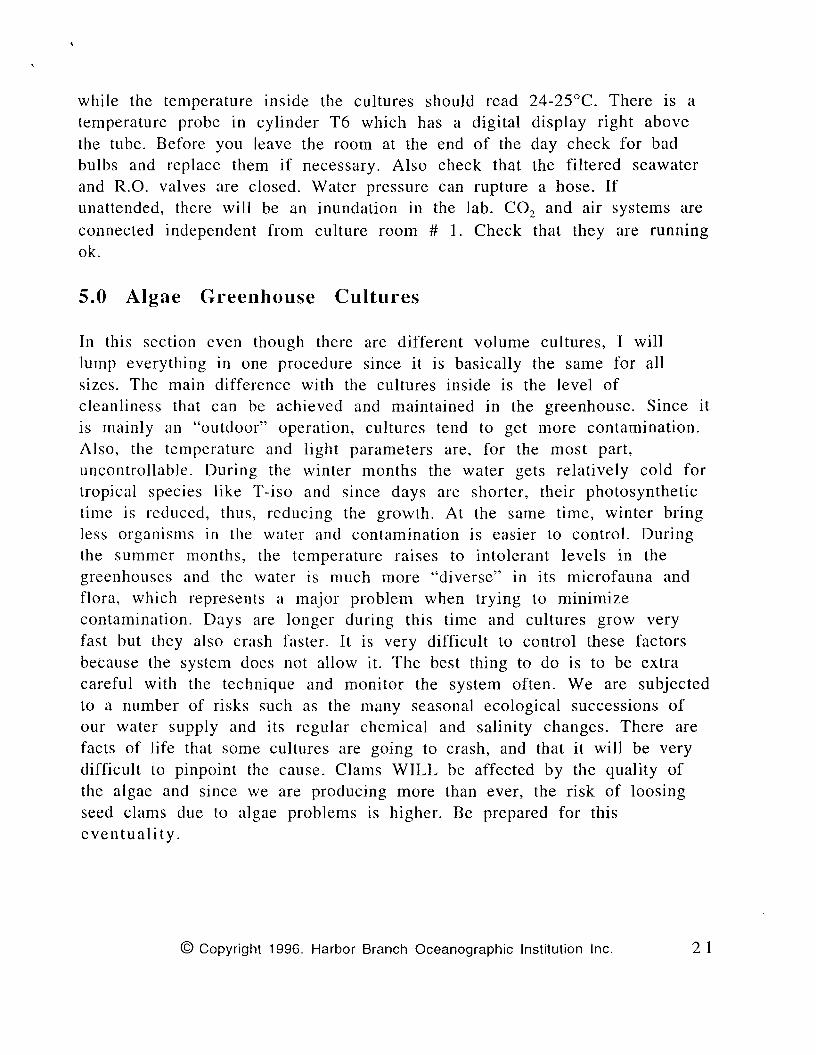
Turn the U. v. lights on and prepare the filtration system (see appendix).Let the filtered seawater run for a while through the pipes until no moreR.O. water comes out of it. Wipe the tip (shaped as an "U") of the filteredwater delivery hose with alcohol and hang it on the cylinder you are goingto fill. Open the valve and let the tube fill (Fig 19).
Figure 19. Cylinder in room # 2 filling
While that is going, add lOO ml of 10 % chlorine solution into the cylinder.Stop the filling when the water gets to very edge of the tube. Leave thetube chlorinating for 24 hr. Make sure the air is off. If the air is left on, the
© Copyright 1996. Harbor Branch Oceanographic Institution Inc. 1 8

chlorine will be blown away in a couple of hours and the cylinder will notbe sterile the next day . Label the tube with yellow tape to indicate chlorinehas been used.
4.3 Inoculation.
To dechlorinate a cylinder, use 15 ml of concentrated sodium thiosulfate(Fr i tz® Chlorine Remover, ordered from Aquacenter) . Turn the air on for afew minutes to mix the thiosulfate and dechlorinate the whole volume.Check the chlorine levels with GT.G. by taking a small sample from theharvest pipe at the bottom. This is the last place where the thiosulfate willreact with the chlorine, so if you get a clean check you are ready toinoculate. If you get color, drain 500-1000 ml from the cylinder and takeanother sample to check. If dechlorination has not taken place at this point,you may have a bad batch of thiosulfate. Use a new bottle and repeat theprocedure. Lower the level to the 200 liter mark by opening the drainvalve (Fig 20).
Figure 20. Inocula carboy underneath a ready to inoculate cylinder
Using a sterile 250 ml beaker, pour approximately 35 ml of sterile nutrientsolution A and with a 60 cc sterile syringe get the pink liquid and add it tothe cylinder. Repeat the operation with solution B (green liquid) and withsilicates if you are going to inoculate a diatom. Rinse the beaker and thesyringe and put them in the "to autoclave" shelve. Syringes are autoclavedinside an 8 liter clear bucket and beakers are sterilized inside biohazardbags.
Get a dense "I" carboy from underneath the cylinder you want to inoculate.
© Copyright 1996. Harbor Branch Oceanographic Institution Inc . 1 9

Remove the stem. Wipe the outside of the neck with alcohol. Open thecylinder by sliding the lid back a few centimeters. Slowly, trying not tosplash, pour the contents of the carboy into the cylinder only touching theedge of it with the clean neck of the carboy. When you are done, slide thelid back and open the drain valve until you return the level of the water tothe 200 liter mark . Do this before you turn the air back on, so onlyunmixed clean water is drained (the culture will be on the upper side ofthe cylinder). Turn the air on. Label the masking tape with red tape toindicate nutrients have been added, and write the name of the culture(clone) and the date.
4.4 Harvest.
Harvest is achieved by attaching a manifold of three outlets to the harvestdrain and having 3 clean carboys at each end receiving the algae. It is bestif the whole volume culture is harvested at once. Once harvesting iscompleted, immediately clean the cylinder before the algae dries on thewalls and bottom. Clean any spills you make while harvesting. If youprefer you can harvest one carboy at the time (Fig 21).
Figure 21. The picture on the left shows the common drain shared by the cylindersin room # 2. The right picture shows a cylinder being harvested to 3 carboys
4.5 Culture Room
The culture room # 2 serves a dual purpose. It houses regular cultures(cylinders) and inocula cultures (carboys). Cylinders are labeled from T I toT 16 starting on the left side of the room as you go in. Carboys are notlabeled. The ambient temperature in the room should remain at 24-26°C
© Copyright 1996. Harbor Branch Oceanographic Institution Inc. 20
while the temperature inside the cultures should read 24-25°C. There is atemperature probe in cylinder T6 which has a digital display right abovethe tube. Before you leave the room at the end of the day check for badbulbs and replace them if necessary. Also check that the filtered seawaterand R.O. valves are closed. Water pressure can rupture a hose. Ifunattended, there will be an inundation in the lab. CO 2 and air systems areconnected independent from culture room # 1. Check that they are runningok.
5.0 Algae Greenhouse Cultures
In this section even though there are different volume cultures, I willlump everything in one procedure since it is basically the same for allsizes. The main difference wi th the cultures inside is the level ofcleanliness that can be achieved and maintained in the greenhouse. Since itis mainly an "outdoor" operation, cultures tend to get more contamination.Also, the temperature and light parameters are, for the most part,uncontrollable. During the winter months the water gets relatively cold fortropical species like T-iso and since days are shorter, their photosynthetictime is reduced, thus, reducing the growth. At the same time, winter bringless organisms in the water and contamination is easier to control. Duringthe summer months, the temperature raises to intolerant levels in thegreenhouses and the water is much more "diverse" in its microfauna andflora, which represents a major problem when trying to minimizecontamination. Days are longer during this time and cultures grow veryfast but they also crash faster. It is very difficult to control these factorsbecause the system does not allow it. The best thing to do is to be extracareful with the technique and monitor the system often. We are subjectedto a number of risks such as the many seasonal ecological successions ofour water supply and its regular chemical and salinity changes. There arefacts of life that some cultures are going to crash, and that it will be verydifficult to pinpoint the cause. Clams WILL be affected by the quality ofthe algae and since we are producing more than ever, the risk of loosingseed clams due to algae problems is higher. Be prepared for thiseventuality.
© Copyright 1996. Harbor Branch Oceanographic Institution Inc. 2 1
5.1 Culture Vessel Preparation
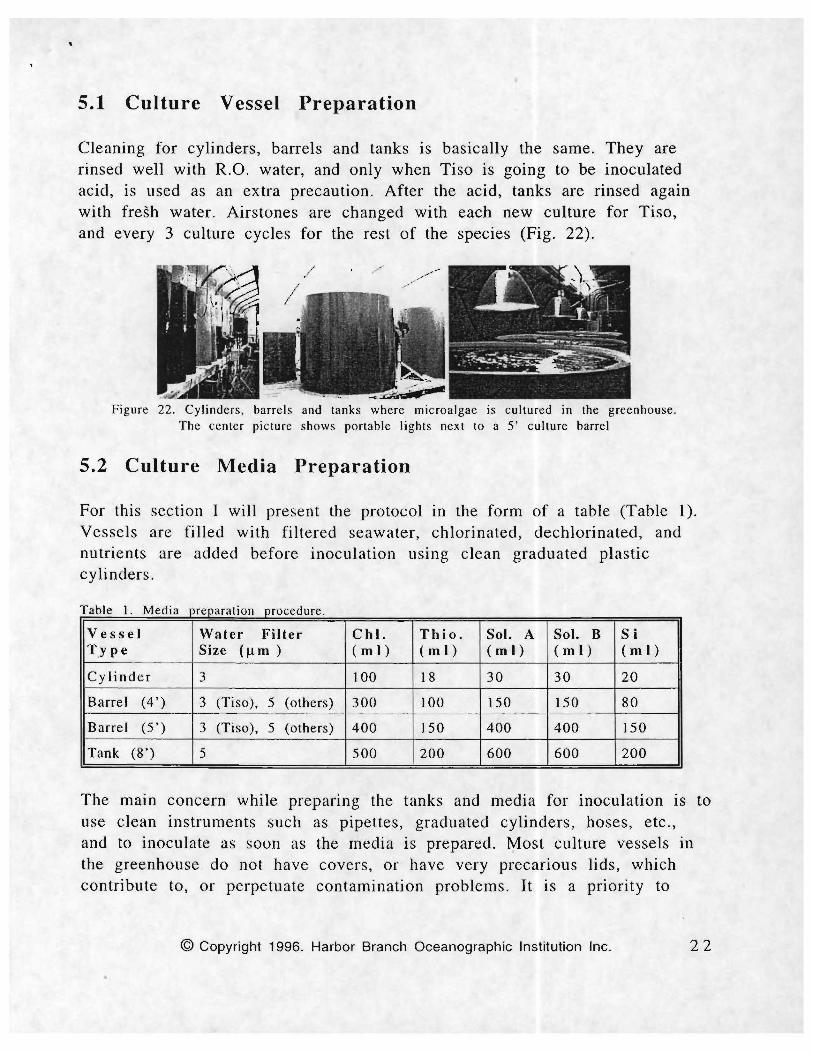
Cleaning for cylinders, barrels and tanks is basically the same. They arerinsed well with R.O. water, and only when Tiso is going to be inoculatedacid, is used as an extra precaution. After the acid, tanks are rinsed againwith fresh water. Airstones are changed with each new culture for Tiso,and every 3 culture cycles for the rest of the species (Fig. 22).
Figure barrels and tanks where mi croalgae is cultured in the greenhouse.picture shows portable lights next to a 5' culture barrel
5.2 Culture Media Preparation
For this section I will present the protocol In the form of a table (Table I).Vessels are filled with filtered seawater, chlorinated, dechlorinated, andnutrients are added before inoculation using clean graduated plasticcylinders.
da e e la prcparat ion proce ure.
Vessel Water Filter ChI. Thio. Sol. A Sol. B S iType Size (u m ) ( m I ) ( m I ) (m I) (m I) (m I)
Cy Ii nder 3 100 18 30 30 20
Barrel (4' ) 3 (Tiso), 5 (others) 300 100 150 150 80
Barrel (5' ) 3 (Tiso), 5 (others) 400 150 400 400 150
Tank (8 ') 5 500 200 600 600 200
T bl I M d·
The main concern while preparing the tanks and media for inoculation is touse clean instruments such as pipettes, graduated cylinders, hoses, etc.,and to inoculate as soon as the media is prepared. Most culture vessels inthe greenhouse do not have covers, or have very precarious lids, whichcontribute to, or perpetuate contamination problems. It is a priority to
© Copyright 1996. Harbor Branch Oceanographic Institution Inc. 22

daily check for fungi and other microorganisms growing in the air andwater lines, and if necessary, to bleach those lines on a regular basis.
5.3 Inoculations
To inoculate greenhouse cylinders, carboys from the inside lab are used.They can be regular carboys from Culture Room #1 or carboys harvestedfrom the cylinders in Culture Room #2. Barrels (4') are inoculated usingeither carboys from inside, or outside cylinders . Barrels (5') are inoculatedthe same way and tanks (8') are inoculated with barrels. Finally, clams arefed with algae from cylinders, barrels or tanks either by centrifuging (witha continuous centrifuge located outside the algae green house) andcollecting a concentrated paste that is later selectively diluted in the clamhatchery, or by pumping the algae to head tanks that will trickle to theclams.
5.4 Greenhouses
The green houses have clear tops to allow light through but there is alsoartificial illumination that has to be maintained. Check regularly for badbulbs, and during cloudy days use the portable lights to boost the growthof the cultures. CO 2 is very important at this stage and must be checked
often. Again, the key to avoid contamination problems is to be on top ofthe situation, clean everything well, constantly check for suspicious coloredspots in all the hoses, and monitor the progress of the cultures frequently.Cleaning the greenhouse on a regular basis is a must when ever timepermits (Fig 23).
Figure 23. Greenhouse
Figure 24 summarizes the technique followed at the HBOI AquacultureDi vision to culture microalgae.
© Copyright 1996. Harbor Branch Oceanographic Institution Inc. 23

E
Sea
wat
er~~.
Was
hing
,
~-
==
Ll
San
dfil
ter
(50
11m
)
D
Ste
riliz
atio
n(a
utoc
lave
)
25Jl
m
5JlI
T'
5ur
n
5ur
n
3ur
n
Alg
alcu
lture
(~~
Cul
ture
Cyl
inde
r(2
00lit
ers)
GF
=6 a, ~.'.
.,.-."
B
Cul
ture
Lab
H
Mic
roal
gae
cult
ure
pro
cess
atH
arb
or
Bra
nch
Oce
ano
gra
ph
icIn
stit
uti
on
-A
qu
acu
ltu
reD
ivis
ion
..A
4lit
ercu
lture
sI
~~
IC
Filt
erra
ck
FE
ED
ING
S
Cul
ture
Tan
ks(1
000-
3000
liter
s)
Nut
rient
s
rnC
.~
250
mili
liter
cult
ure
Sto
ckcu
ltur
e
Con
tinuo
usce
ntri
fuge
Fig
ure
24.
Mic
roal
gae
cult
ure
pro
cess
.A
)S
cali
ngup
cult
ures
;B
)N
utri
ent
prep
arat
ion
and
UV
expo
sure
;D
)S
teri
liza
tion
;E
)C
ultu
reve
ssel
was
hing
;F)
Cul
ture
inoc
ulat
ion
volu
me
expa
ntio
nH
)A
lgae
used
for
feed
ings
,
and
addi
tion
;C
)Se
aw
ater
filt
rati
onan
dm
ass
alga
lcu
ltur
es;
G)
Cul
ture

Appendix I
Autoclaving
We have two autoclaves. A small one with capacity for only a few flasks,and an industrial one which can hold up to 10 carboys at once. Theinstructions for the operation of the small autoclave are written on thefront of it. Use this autoclave when you need to sterilize small instrumentssuch as pipettes, test tubes, small tubing, and nutrients. The big autoclaveis used almost exclusively for sterilizing carboys.
To operate this autoclave follow these steps:
1- Turn the boiler on
© Copyright 1996. Harbor Branch Oceanographic Institution Inc . 25

2- Put carboys or buckets In the chamber by sliding In the top of theautoclave cart or shuttle .
3- Turn power and control switches on . You will get an error message onthe display window followed by a print out. Then a beepingsound will follow for a few seconds and then the temperatureof the chamber will be displayed. Some times, since theautoclave resides outside and the humidity has ruined someelectronic components, the temperature will not be displayedproperly .
4- Wait 30-40 minutes for the pressure In the Jacket to raise up to 30 psi.Read this off the gauge.
5- Once the jacket pressure reaches 30 psi, close the door making sure istight, and turn the water on (blue valve). Leave the two redvalves alone. Using the manual controls turn the knob to the"condition" position and wait for 1 minute until the pressure ofthe jacket decreases to 10 psi.
6- Turn the same knob to the "sterilize" position and time the cycle usingthe stopwatch. For carboys with filtered seawater or Nalgene®
© Copyright 1996. Harbor Branch Oceanographic Institution Inc. 26

20 liter containers, you should allow 60 minutes. For buckets40 minutes will be enough.
5- After the time is up, turn the knob to "fast exhaust" and close the bluevalve. Steam will rush out of the autoclave exhaust outside theroom. Make sure there is nobody standing near by.
6- Wait approximately 30 to 40 minutes for the pressure of the chamberto go all the way down. The autoclave door will not open if thepressure is above O. Nevertheless the security system may fail,so use extra care any time you try to open that door.Remember that the temperature inside is over 124 DC (250 DF).
7- Stay away from the steam that comes out when you open the door andwait a few minutes until the carboys are nor boiling. They havebeen under pressure and the temperature they supported wasabove the boiling point of seawater. Some times the water getsinto a state called "super heated water" and even though theambient pressure has return to 1 atmosphere, the temperatureof the water remains above the boiling point. The slightestmovement will suddenly make the entire carboy to boil in afew seconds. You do not want to be close if that happens. Leavethe carboys cooling inside with the door cracked for at leastone hour.
8 - Turn controls off and then turn the boiler off.
© Copyright 1996. Harbor Branch Oceanographic Institution Inc. 27
9- Using the orange autoclave gloves pull the cart out of the autoclave anddrag it back to the lab. Have a sign warning people that the cartis hot.
10 - If there were spills inside the chamber, wait until it IS cold and nnsethe inside with a hose.
If the autoclave is not working or if you notice something out of theordinary, call AMSCO (Tel: 1800-333-8828) Tell the operator that you arereferring to the HBOI Aquaculture autoclave. We have a preventive serviceand maintenance agreement with them.
© Copyright 1996. Harbor Branch Oceanographic Institution Inc. 28

Appendix II
Filtration and U.V. System
There is a rudimentary filtration system In place at the laboratory. Thewater comes out of the well and passes through a de-gaser where a myriadof micro organisms thrive. Then the water goes to a reservoir with its owndiverse ecosystem. Here also, there is an accumulation of sediment andorganic matter which provide surface area for bacteria to grow very nicely.The water is then pumped through a sand filter and then it goes to thelaboratory where a series of 5 filters and aU.V. dual column are installedto try to stop those organisms from going into our cultures. After the watergoes through these filters, it is distributed to the carboys or cylinderswhere it is chlorinated or autoclaved. The sand filter has to be backflushed every time you want to use filtered water. To back flush turn thelever to the " back flush" position and wait for 5 minutes until the watercoming out of the drain looks clear. Turn the lever to the " rinse" positionfor one minute and finally turn the lever to the "filter" position. Inside thelab, prepare the filter rack by putting a set of clean filters.
When you are ready to use the water turn the V.V. system on and open thewell water valve and the by-pass valve but keep the filter rack valveclosed. This way the pipes can be purged without clogging the filters. Oncethe water comes out clean, close the by-pass valve and open the filter rack
© Copyright 1996. Harbor Branch Oceanographic Institution Inc. 29

valve. Usually these filters are sitting In chlorinated R.O. Water so you haveto let the well water run for a few minutes. You can use this water in threeways: 1) Use the extension hose to fill carboys that are not sitting underthe serial filler, to fill Nalgene® containers for the preparation of media, orcarboys in the autoclave shuttle. 2) Use the serial filler to fill 45 carboys atonce. 3)- Use the extension hose in culture room #2 to fill the cylinders.
After any of these uses, you have to back flush the pipes with R.O. water sonothing grows in them until the next filling. For that purpose, open all thevalves in the system and connect the R.O. hose to the extension hose youused. Open the by-pass valve and turn the R.O. water on. Wait a fewminutes until only fresh water is coming out. You can then pour 60 ml ofchlorine inside the R.O. Line and turn it on again. This will take highconcentrations of chlorine to the filters. As soon as you smell the chlorinecoming out of the by-pass pipe turn to R.O. water off and close all thevalves.
© Copyright 1996. Harbor Branch Oceanographic Institution Inc. 30

•
Clean the filters with Micro® every other filling or alternate the filterseach filling with a new or clean. set. One set of filters should no be usedmore than 10 times
© Copyright 1996. Harbor Branch Oceanographic Institution Inc . 3 1

•
Appendix III
Thiosulfate and Silicates
We use two kinds of thiosulfate solutions. One we do not have to preparebecause we buy it from Aquacenter. It is called "Chlorine Remover" and itIS very concentrated. We use chlorine remover for the dechlorination ofcarboys and cylinders. The other type of thiosulfate we prepare from anindustrial powder and it is not as concentrated. We use it for barrels andtanks. To prepare this solution dissolve 250 gm of the powder into I literof water on a magnetic stir plate.
Silicates are used in the diatom cultures because diatoms build a hardsilicate shell around their cell wall. The silicate solution is prepareddissolving 200 gm of sodium metasilicate in one liter of water. You willneed a magnetic stirrer and a hot plate to help the dilution processes.
© Copyright 1996. Harbor Branch Oceanographic Institution Inc. 32