Manual of pack transportation
252
-
Upload
khangminh22 -
Category
Documents
-
view
1 -
download
0
Transcript of Manual of pack transportation


w^ ^ / o

TUFTS UNIVERSITY LIBRARIES
3 9090 014 530 063
WeDsier r aniiiy Liorary ut Veterinary Medicine
Cummings School of Veterinary Medicine at
Tufts University
200 Westboro Road
North Grafton, MA 01535


WAR DEPARTMENT
OFFICE OF THE QUARTERMASTER-GENERAL
MANUAL OF
PACK TRANSPORTATION
QUARTERMASTER CORPS
BY
Mr. H. W. DALYChief Packer
UNDER DIRECTION OF THE QUARTERMASTER-GENERALU. S. ARMY
^ -^ ,
to
WASHINGTONGOVERNMENT PRINTING OFFICE
1917

WAR DEPARTMENT,
Document No. 565.
OFFICE OF THE QUAKTERMASTER-GENERAL.

War Department,Office of the Chief of Staff,
Washington, December 21, 1916.
The following Mamial of Pack Transportion, revised 1916, is pub-lished for the information and guidance of all concerned.
By order of the Secretary of War:H. I J. Scott,
Major General, Chief of Staff.


C0]srTE:rNrTS.
Section. Page.
Preface 11
General history 15
Evolution of the aparejo 18
Evolution of the diamond hitch 25
Chapter 1.
Pack saddles, description and uses:
The aparejo 1 26
Accessories of the aparejo 1 28
Crosstree or sawbuck 2 29
Moore pack saddle 3 29
Chapter II.
Assembling and care of the aparejo:
Selection of sticks suitable for ribbing aparejos 4 33
Selection of hay suitable as padding for aparejos 5 33
Setting up the aparejo 6 33
Setting up the Daly aparejo for use 7 37
Care of the aparejo 8 40
Causes of body and belly "bunches" and sore tails, sore withers andloins or kidney sores on pack mules and directions for their preven-
tion and cure 9 "*0
Chapter III.
Instruction of the individual packer in preparation for his duties in the
pack train:
1. Securing and coiling ropes
—
How to prepare lash, sling, and lair ropes 10 44
How to do up a lash rope 1
1
How to do up a sling rope 12
How to do up a lair rope 13
2. Lairing up the packs
—
How to square ends of packs and tie before lairing up 14
How to lair up side packs 15 46
How to lair up side pack of ropes without the aid of pack coyer
or manta ^" "*'
How to lair up an aparejo and riding saddle for storage or
shipment ^' '
3. Putting the aparejo on the mule
—
How to fold an aparejo blanket 18
How to place blanket on aparejo preparatory to putting on the
aparejo ]^ ]°
How to blind a pack mule - ^ ^°
How to place corona, blanket, and aparejo on the mule j\ 4»
How to turn the-crupper -^^|How to cinch an aparejo •
j^ V:
Forming the load preparatory to loading the mule - - -i4 04
5
48

6 CONTENTS.
Instruction of the individual packer in preparation for his duties in the
pack train—Continued.4. Slinging the load— Section. Page.
How to place the sling rope on the aparejo 25 54How to lift side packs and place them on the aparejo 26 55How to sling the load and tie the square knot 27 55How to brake a side pack 28 58
How to double sling the side packs when length of packsrequires it 29 60
How to cross sling side packs when top packs are necessary 30 60How to double cross sling side packs when length of packs
requires it 31 61
5 Lashing the load
—
How to form the diamond hitch 32 61
How to form the double diamond 33 90
How to form the double hitch 34 91
How to form the diamond hitch when the cinch hook is lost or
broken 35 96
How one packer can sling the load and form the diamondhitch 36 96
How to form the pole hitch 37 97
How to form the Oregon diamond hitch 38 100
6. How to sling the load and form the crosstree hitch on crosstree or
sawbuck
—
How to sling the load on crosstree 39 100
How to form the crosstree hitch 40 105How to form the stirrup hitch 41 110
7. Taking off the load and aparejo
—
How to take off the lash rope and the load 42 110
How to uncinch an aparejo and turn the crupper 43 117
How to take off an aparejo 44 117
8. Miscellaneous
—
How to form two half hitches, the pole (clove) hitch 45 117
How to form a bowline knot 46 118
How to form a bowline and bight 47 118How to form a short splice on rope 48 118How to form a long splice on rope 49 119How to construct a travels 50 125
How to improvise a stretcher 51 125
Chapter IV.
Instruction in the service of a pack train
:
1
.
Summary of duties in loading and unloading a train 52 130
2. Loading a pack train
—
How to form cargo preparatory to loading the mules 53 130How to place the rigging 54 131
How to teach animals to come properly to rigging 55 131How to tie animals at rigging 56 132
How to do up halter shank before tying animal to his load 57 135How to tie an animal to his load 58 135
How to load a pack train for the day's march in the most ex-peditious manner 59 135
Putting on the aparejos 60 136Putting on the cargo 61 136Leaving the park or camp ground 62 137
3. Duties of packers on the march
—
In open country 63 137
On bad and "narrow trails •. 64 137Up and down a mountain 65 138In crossing streams, either fording or swimming 66 138How to catch a pack animal when his load needs attention 67 138How to tighten a load and indicate it has been tightened 68 138How to teach saddle mules to stand 69 139Signal code 70 139

CONTENTS. 7
Instruction in the service of a pack train—Continued.4. How to park (unload) a pack train
—
Section. Page.
Outline of duties 71 140How pack animals should be led to cargador for convenience
in taking off the rigging 72 140How to cover cargo and tie down 73 140How to cover rigging and tie down 74 141
How to stretch a picket line 75 141
How to clean coronas 76 142
How to fold pack covers 77 143
How to fold rigging covers 78 143
How to fold cargo covers ". 79 143
How to fold feed covers 80 143
Chapter V.
Marches and loads:
1. ^^'hat may be required of the pack mule under ordinary conditions. 81 144
Mountainous country 82 144
Forced marches 83 144
2. Gaits 84 145
3. Table showing loads and rates of travel considered practicable for a
well-organized and seasoned pack train 85 145
4. Endurance of the pack mule under proper conditions 86 146
Chapter VI.Organization
:
1. Usual organization and equipment of a pack train 87 148
2. Table showing size and quantity of rope and canvas required for onepack train 88 148
3. Articles of equipment in use in pack trains
—
Mess or kitchen boxes 89 149
Packer's field stove, with kit 90 149
Cooking outfit, without stove 91 149
Pack-train mess kit 92 149
Clothes or war bags 93 149
Packer's wardrobe 94 150
Packer's wall tent 95 150
Tool sacks 96 150
Grass or hay pads 97 150
Pack covers 98 150
Rigging covers 99 150
Cargo covers 100 151
Feed covers 101 151
Cargador's box 102 151
Cargador's kit 103 151
Blacksmith's boxes 104 152
Blacksmith's kit 105 152
4. How to organize a pack train 106 152
5. The essential conditions in the selection of the packer 107 154
The skilled packer 108 154
The novice or unskilled packer 109 155
Instructions to pack masters 110 156
6. Duties of individuals:
The chief packer HJ 156
The assistant chief packer H^ l^i
The pack master H-^ 1^'
The cargador or assistant pack master 114 158
The blacksmith 115 159
The packer 116 159
The cook 117 1^9
WTiat packers are not permitted to do 118 loO
Feeding 119 16}
Watering ^0161
Grooming JJl161
Traveling ^^ }^iCamping. 123 162
Use of bUndsV.".'.". 124 163
Kindness to animals 1^^l6o
Precautions 126 16^
Glossary 12' 1^^

8 CONTENTS.
Organization—Continued. Section. Page.
7. Specifications for pack and riding mules 128 165What to avoid in the selection of pack mules 129 166
Chapter VII.
The Daly aparejo, specifications for construction:1. The body of the aparejo 130 1672. The crupper 130 1703. The aparejo cover or sobre jalma 130 1724. The aparejo cincha 130 1725. The corona 130 1736. The pack blanket 130 1747. Halters 130 1748. Packers' blinds 130 1759. Pack covers 130 175
10. Rigging covers 130 17511. Cargo covers 130 17512. Feed covers 130 17613. Lash rope with cincha and hook 130 17614. Sling ropes 130 17615. Lair ropes 130 17616. Stamping 130 176
Ribbing for Daly aparejos 130 177
17. Saddle bars 130 177
18. Boot bars 130 17719. Hickory ribs 130 17820. Hay 130 17821. Aluminum castings for boots and saddle bars 130 17822. Hickory ribs for aluminum castings 130 1791. Riding saddles (packers) Quartermaster Corps 131 179
2. Riding saddles (teamsters) Quartermaster Corps 131 180
3. Bridles 131 181
Table showing weights of pack saddles and equipments 132 185
Chapter VIII.Special devices:
Packing device (Quartermaster Corps) 133 186Specifications for packing device 133 191
Table showing weights of packing device 133 196
Tool pouches (Engineer Corps) 134 197
Pack chests (Engineer Corps) 135 197
Pack reel (Signal Corps) 136 201
Pack chests (Signal Corps) 137 203
Litter carrier (Hospital Corps) 138 203
Specifications for the Daly litter carrier 138 208
Ammunition boxes (Ordnance Department) 139 221
Pack outfit. American model for Maxim automatic machine gun, .30
caliber 140 224
Pack outfit. American model for 2.95-inch Vickers-Maxim mountaingun 141 231

War Department,Office of the Quartermaster-General,
Washington, July 17, 1908.
Sir: I have the honor to forward herewith manuscript copy of a
manual entitled "Pack Transportation, Q. M. D.," with 93 illustra-
tions.
Under direction of this office, Mr. H. W. Daly, chief packer of the
army, has prepared this work, which was later sent to Col. H. L.
Scott, Superintendent of the Military Academy, who has had a wide
experience with pack trains, and who, at the request of the Quarter-
master-General, undertook the work of revision of this manuscript.
It is recommended that this work be published in an edition of
1,000 copies, 250 in cloth and 750 in paper binding. So far as this
office has been able to ascertain, this manual contains the most com-
plete history and detailed explanation of the art of packing that has
yet been published and is, of its kind, it is believed, unique. It is
considered that it will be of great value to the army at large and a
valuable addition to the literature heretofore published upon this
subject.
In transmitting this manuscript for publication this office desires
to record its appreciative thanks to Colonel Scott and Mr. Daly for
their efforts, which, it is confidently believed, in the form of this
publication, will be valued by the army at large.
Very respectfully,J, B. Aleshire,
Quartermaster-General, U. S. Army.
To the Secretary of War.


PREFACE.
The writer of this manual, Mr. Henry W. Daly, chief packmaster.Quartermaster's Department, U. S. Army, is the last of the old-timepackers, the last of those who grew up with the pack service underGen. George Crook, some of whom have followed "the bell" from theBritish line far down into old Mexico, and later in Alaska, Cuba,China, and the Philippines. Of them all he stands foremost as themost observant, the one who has added most to the efficiency of thepack service, and one who has placed the mounted service under last-
ing obligations to him
—
First. By discovering the causes of the various "bunches" thatarise on the mule's body.
Second. In discovering a simple remedy which reduces these"bunches" before they break down and suppurate.
Third. By his various inventions described in these pages.
Fourth. Finally, by placing the results of his experience in writtenform, so as to be preserved for the use of others.
From time to time, on account of the expense and difficulty of ap-plication, efforts have been made without success to substitute someother system of packing for the aparejo and the diamond hitch. Intesting these systems there is always one fundamental and vital ques-
tion to be asked, viz, does the substitute permit the rapid and easyalteration of the bearing surface promptly to reduce the "bunches"which arise from many causes and which, if not promptly reduced,
speedily render the animal unserviceable. If the substitute does notadequately meet this test (which so far has only been met by the
aparejo) it must be rejected. There are many other important ad-
vantages possessed by the aparejo over other systems, as will appearin the study of this book.The value of the pack train has not lessened since the days of the
Indian campaigns. Rapid and prolonged marches (impossible for
wagons) are not yet out of date. It is just as necessary now to arrive
on the field with food, ammunition, and medical supplies as it ever
was. The usefulness of the pack train in carrying ammunition to
supply the firing line where wagons can not go is not disputed byanyone. It behooves, therefore, all officers of the mobile force to
understand the management of the pack train in all its branches,
remembering that the "throwing of the diamond" is but a small part
of the art, and one that is easily and quickly learned ; that in the ad-
justment of the interior of the^ aparejo lies success or failure in the
conservation of the back of the animal ; that the train must be kept
hard, lean, muscular, and docile by constant exercise carrying loads,
and that by so doing mounted officers will be able to keep the accom-
11

12 PREFACE.
plishment of their plans and the success of their undertakings in their
own hands. I urge upon all persons in authority that they cherishthe pack train antl the packer, and see to it that proper trains arealways ready in time of need, which time will come at the very begin-ning of any war on land.
H. L. Scott,Colonel, U. S. Army,
Superintendent U. S. Military Academy.
West Point, N. Y., December 10, 1907.
In the present book it is designed to give a general history of packtransportation, its employment in European and Asiatic countries,
and its introduction into and development in the army of the UnitedStates, including a description of the various pack saddles, their com-parative usefulness, and the latest improvements.
In the school system of packing the detailed instruction of an in-
dividual packer is first considered; then the more general instruc-
tions applicable to the service of a pack train is provided for. A brief
discussion of marches and loads is included, with carefully preparedtables, showing practicable marches, loads, and rates of travel, etc.,
for a well-organized pack train.
A few notes on feeding, watering, traveling, etc., are included, as
also a glossary of terms.H. W. D.
Fort Leavenworth, Kans., June, 1907.


14

PACK TRANSPORTATION.
GENERAL HISTORY.
Primitive man in seeking; a mode of transportation other than thatof the personal burthen naturally utilized the most docile and tracta-
ble of the available animal kingdom. The elephant, camel, llama-, ox,
horse, mule, burro, reindeer, and dog, all by natural selection, havepaid tribute to assist him in his travels.
There resulted necessarily pack saddles of various designs adaptedto the conformation of the animal employed.When man in an inventive mood introduced the ''wheel" and de-
veloped this wheel transportation progressively by animal draft,
steam, and electrical power, the employment of pack animals as the
only means of rapid transportation had been relieved to a considerable
extent; yet the occasion lias and will oftentimes be necessary to cut
loose from railroad and animal draft, when time, celerity, and free-
dom of movement becomes a prime factor in the success of an under-taking, especially in the zone of active operations.
The "crosstree" orsawbuckand the'^aparejo" are used by civilized
man, and it is a question which antedates the other.
The crosstree may be said to be universal, as it has been in use in
European and Asiatic countries for centuries. It is believed that the
Romans carried it into Gaul (France) and Britain in the conq^uest of
these countries under Julius Caesar. The French and the British car-
ried it into Canada and the United States in the settlement of those
territories.
In the mountainous portions of the British Isles and Switzerland
there may be still seen the original niethod of carrying marketable
supplies in "wicker" baskets fitted over the forks of the saddle andstrapped to the donkey by the cincha and tightening strap. It is not
unusual for the baskets to be unequally loaded, and often the loads are
balanced by the addition of a billet of wood or a few stones. I haveseen a sack of wheat en route to the mill balanced by a large stone in
the opposite basket; also, en route to market, all hobbled and alive, a
pig balancing a goat and a bunch of chickens.
In Canada, United States, Mexico, and South America they use
"panniers" (Frenchfor basket) or pouches, made of canvas or leather
which fit over the forks of the saddle and are strapped to the aninial
with cincha and tightening strap. In the above-named countries
organized "burro" pack trains equipped with these panniers are em-
ployed to pack the ore from the mines to the stamp mills.
the system of "slinging and lashing" the load by means of ropes
was seldom employed in the government service because of a lack of
pad protection for the animal's body. However, the system was used
15

16 MANUAL OF PACK TRANSPORTATION.
by Gen. R. S. Mackenzie after the civil war in his Indian campaignsagainst the Kiowas and Comanches in the Southwest. The individual
trapper, miner, and prospector packed with this system his few wants,consisting of his grub stake and mining tools.
The aparejo (pronounced "ap-pa-ray-ho"), a pack saddle, is be-
lieved to be of Arabian origin, the Arabs being a nomadic and pas-
toral people, employing the camel, horse, burro and its cross descend-
ant, the mule, indigenous to Asiatic countries. The origin of the
aparejo dates back to the employment of these animals as beasts of
burden from remotest ages.
The aparejo was introduced into Spain by the Moors (see footnote)
on the conquest of that country in the eighth century, and on the
discovery of the western continent (America) the Spaniards carried
it into South America and Mexico. Irving in his Conquest of Gran-ada<^ records that Isabella of Spain, in 1486, organized, equipped, andmaintained pack trains for the conquest of Granada, aggregating
14,000 mules and burros, which carried supplies and munitions of
war for her army of 13,000 cavalry and 40,000 infantry. In the
retinue of many nobles of note (Don Inigo Lopez de Mendoza, Dukeof Infantado)^ the sumpter (pack) mules had housings similar to
those of the cavalry, of rich cloth embroidered with gold, and others
of brocade with halters of silk, while the bridles, headpieces, and all
the harnessings glittered with silver. An imitation of this feudal
custom was made in the United States Government service prior to the
Spanish-American war, 1898, when the ''arrieros" (packers) wouldspend odd hours of loving toil upon the "grupera" and "corona"(crupper and saddle cloth), working the representation of some ani-
mal, bird, insignia, or legend with silken thread of various colors; the
saddle, stock or cowboy, costing, when ''full rigged," from $75 to
$100, with its full skirting, sweaters, toe fenders fitting over the stir-
rups, from 12 to 18 inches long, and cantinas (saddle pockets) over
cantle and pommel, the pommel being provided with the customaryhorn or cap (cabeza de silla), a necessary holdfast when throwing
the lasso and various other uses known to western men. The whole
beautifully stamped or engraved by hand, was trimmed with beaten
silver dollars (Mexican), cut, and chased in various designs to suit
the " arriero;" the bridle in similar manner with bit and spurs (Span-
ish) chased and inlaid with silver and gold, the spurs having a bunchof tiny spangles which were made to tinkle in the strut of the packer,
who would till s affect the garb of his Spanish brother, wearing high-
heeled top boots, with silken banda (sash) wrapped two or three times
around the waist, embroidered shirt front, and conical sombrero(Mexican hat) with silver snake around the crown, the under side of
brim being trimmed with silver braid.
Note.—Prior to the expulsion of the Moors the Moriscos of Spain practically con-
trolled all the inland (pack) transportation. Many of their merchants became very
wealthy and contributed very largely to the revenues of the Spanish Oown. Over-
taxation, the improvidence of the Spanish princes, and the expulsion of these frugal
and industrious people may be said to have led to the decline of Spain as a world
power.
Such was the holiday costume of the packer of thirty-five or forty
years ago, when, mounted on his favorite mule, he would sing some
a Irving, Conquest of Granada, chap, lxx, p. 383,b Conquest of Granada, p. 225.

MANUAL OF PACK TRANSPORTATION. 17
Spanish ditty when visiting friends in some near-l)v liamlet; a manwho never turned his back on a foe or forsook a friend in momentsof peril, honest and honorable in all his dealings with his fellow-
men, kind to animals in his care, with a love for his calling, andthoroughly imbued with an "esprit de corps" for the pack service.
On the discovery of gold in California the adaptability of the packmule for carrying supplies into the mining camps, not accessible bywagons, was readily recognized by the Americans. The mule andaparejo w^ere in constant demand, and the employment of pack trains
became a source of profit to many individuals.
In Mexico, on the road from Vera Cruz to the City of Mexico, a
stone-paved road (Calzada), laid out by Cortez, and nearly 300 miles
long, I have seen before the advent of the railroad, in 1873, packtrains loaded with coffee, sugar, and spices. These packs were madeup to weigh from 100 to 125 pounds each, and were \\Tapped in coarse
matting made from the fiber of the agave and other indigenous plants.
Rates for freighting, ranging from 30 to 75 cents per ton per mile,
or for the service of the animal for the trip from $18 to $25, com-pared favorably wdth the rates charged after the discovery of gold
in California, wdien pack trains, controlled by Americans, dotted
the hills, carrying provisions, furniture, mining supplies, etc., to
the mining towns in Oregon, Washington, Idaho, Montana, Nevada,and California.
In the early fifties and sixties on the trail from The Dalles to
Umatilla Landing, Walla Walla, Lewiston, Kootenay, Salmon River,
Frazer River, etc., could be heard from hill to hill the tinkle of the
pack-train "bell horse." The "bell" was ordinarily a sheep bell
attached by a strap to the neck of the horse. The latter is termedthe "bellhorse," and is alluded to as the "bell," in such expressions
as "lead the bell, " "stop the bell, " etc.
The service rendered by civilian aparejo pack trains employed byGen. George Crook, after the close of the civil war, in operations
against the hostile Paiutes, Shoshones, and Bannocks in Nevada,
Oregon, and Idaho was so satisfactory that he caused the purchase
of tliree of these trains by our Government, so that General Crook
may well be called the "father" of modern pack service in the United
States Army.On the assignment of General Crook to the Department of Arizona,
these trains were transferred with him and others organized for the
campaign against the hostile Apaches, known as the "Tonto Basin
war," 1871-1875. These trains were under the supervision of ThomasMoore as chief packer and Dave Mears, assistant chief packer, and
the names of Hank and Yank, Jim O'Neil, Harry Haws, Chileno
John, Frank Monack, Sam Bo^^^nan, the two Crooks ("Long" and
"Short" Jim), Bill Knight, Nat Noble, Charley Hopkins, Bill Duklm,
Manuel Lopez, and Lem Pyatt are inseparably connected with those
campaigns.In 1875 a number of these trains were transferred to the Depart-
ment of the Platte, taking station at Camp Carlin, Cheyenne, Wyo.,
under Maj. J. V. Furey, depot quartermaster, and still others organ-
ized for the expedition of 1876, known as the "Sioux campaign."
These trains w-ere likewise under the supervision of Thomas Moore, as
chief packer, and Dave Mears, assistant chief packer; and the names of
75927°—17 2

18 MANUAL OF PACK TEANSPOETATION.
Dick Closter (better known as "Uncle Dick"), Johnny Patrick, Ed,Delaney, John Jaycox, Frank Houston, Pat Nohm, Tom McCauhf,Tom Mason, and Dave Young, packmasters, were inseparably con-
nected with the "Sioux campaigns."The success of General Crook in Being able to cut loose from his
wagon transportation, rendering his command thoroughly mobileby the aid of pack trains, led to their further employment by otherofficers of the Army, viz, Generals Mackenzie, Howard, Terry, Custer,
and Miles, in the subjugation of the hostile tribes, notably the war-like Sioux, Cheyennes, Nez Perces, and Arapahoes in the Northwest,the fleet and vindictive Kiowas and Comanches through the MiddleWest, and last, but not least, the wily, slippery, and bloodthirstyApache tribes who overran Arizona, New Mexico, and Texas.Through all the arduous field service necessitated by campaigns
against these various tribes, the pack mule has borne its part, andnow may be regarded as thoroughly identified with our Army as anessential means of transportation.
As instancing a case in which pack animals have been employed for
continuous work, the Geronimo campaign, lasting from May, 1885,
to September, 1886, may be mentioned. Several pack trains followedthe troops, taking part in the various operations. These trains werecontinuously on the move, traveling through the Territories of NewMexico and Arizona, and through the States of Sonora and Chi-
huahua in old Mexico, crossing the Sierra IMadre Mountains at their
highest and most precipitous part, from Opata in vSonora to CasasGrandes in Chihuahua. Through such a country any other form of
transportation would have been utterly impracticable.
The mules carried loads averaging 250 pounds; the average day'smarch was .30 miles, except when climbing mountains, when about15 miles per day was the rule. The mules subsisted entirely on thegrasses found in the country, and when the campaign was over werereturned to their posts in good condition.
As embodying some of the results of this experience with these
trains for years, the present book aims to provide a system of instruc-
tion in the duties of a packer and in the service of a pack train.
H. W. Dai.y,
Chief Paclcer, Quartennaster^ s Department,United States Army.
EVOLUTION OF THE APAREJO.
The aparejos used by the Mexicans " may be divided into two classes,
having special uses—the first made of matting, from the fiber of the
agave or similar fibrous plants growing in abundance in Mexico; the
second of leather, of IMexican tan and finish. The first is used exten-
sively by what we term in the United States "truck" farmers, whomay be seen in the small hours of the morning approaching the ham-let, town, or city, driving before them a few donkeys lackm with grass,
wood, live or dressed pigs, goats, chickens, and various commoditiesunder charge of a single native; the second in packing merchandise,mining material, and product of the mines; for this latter purpose the
a See Mexican prototype of the American aparejo, without sticks. The \sTiter is
indebted to Col. H. L. Scott, U. S. Army, Superintendent United States Military
Academy, West Point, N. Y., for this view.

MANUAL OF PACK TRANSPORTATION. 19
mule takes the place of the donkey. The aparejo in both cases, toprotect the animal's body, is tilled with dried tjrass. The aparejocincha was provided with wooden stiffeners at each end ; at one end thelatino is secured by means of leather thonf2;s over the stiffener; at op-posite end the wood is shaped to have a depression at center to receivethe folds of the lati<i;o in cinchinii; the aparejo. All roi)es were madeof rawhide carefully prepared and plaited, and a wooden hook wasprovided on end of lash-rope cincha. In the sprin<i; of 1S78 I sawboth of these forms of aparejos in use in the State of Coahuila,Mexico, and wooden hooks were used in our service to some extentuntil the fall of 1886.
In 1867 Pack Master Richard Closter, better kno^^^l as "UncleDick," stated his first attempt in ribbino; the aparejo was for the pur-pose only of causino; the aparejo to stand on its boots, the better toprotect the riggino; while in camp from the inclemencies of theweather, the usual method being to make as many rows of the riggingas a wagon sheet would cover, the series of rows helping as a brace tohold them on their boots; and to distinguish each aparejo, a designusually of the cactus was provided on the corona.
In the early morning the animals were brought in from the herdground, rounded up, and either caught singly or tied to a picket line,
in preparation for the day's travel.
The arrangement of the aparejos in an orderly manner (see fig. 108) bythis provision gave opportunity to feed the animals on the rigging byspreading sections of canvas thereon, the night herders keeping watch onthe animals while feeding to prevent their wasting the grain, which wasan item of considerable expense in those days (1850-1870) and notalways available. The method of feeding on the rigging taught theanimals to come up to the rigging in patient expectation of the eveningmeal. This led to teaching the animals to come up to the rigging
for grooming and in preparation for the day's travel.
At first but two sticks on each side were employed to stiffen the
aparejo, one at front and one at rear; these reached but midway be-
tween the boots and center stitch line of the aparejo. Later sticks of
full length were used for the same purpose, but not with any expecta-tion of assisting the aparejo to hold a weighty load away from the
withers and backbone of the animal.After each day's travel it was noted on taking off the aparejo that
the animal's backbone and withers were free of moisture, especially
at front and rear, showdng that the aparejo did not bear on that part
of the body. This led to inserting an additional stick in rear of the
"collar" known in those days by the term "crux," or cross, from the
fact that that portion of the aparejo fitted over the cross on the withers
of the mule and burro; later on from two to four additional sticks were
inserted on each side between the collar and carrier pieces or rear of
the aparejo, with the view only of saving the backbone and withers,
which for twenty years following the discovery of gold in California
were usually a mass of sores; the fact that the sticks su])ported the
weight of the load was considered an absurd })r()j)osition, and at the
present writing is not clearly understood ])y all ])ack masteis. Thefact is that the boots of the aparejo standing clear from contact with
the animal's body the cincha, in compressing the apai'ejo on the bodyof the mule, gives to the aparejo the form of an arch, the cincha form-
ing the base on which the boots of the aparejo rest. If the aparejo

20 MANUAL OF PACK TRANSPORTATION.
is of sufficient length, it will be noticed that in cinching, the aparejois lifted by the cincha until the proper base line is formed from thecenter of the animal's belly each way. If the aparejo is too short ortoo long, its lifting power is lost, as is also the case when there is notsufficient padding in the boots, which should not be permitted to hugthe body of the mule (a serious defect in the English pack saddle).
The weight of the load being practically what is termed a dead weight,
the lift or spring of the sticks is lost in the travel of the animal.
As pack trains were numerous in the early days (1850-1870) on the
Pacific coast and in the Territories of the Northwest, the informationspread rapidly from train to train and a system of ribbing theaparejo from front to rear became general. Each owner of a packoutfit, known as the "padrone," adopted a method of his own as his
understanding of conditions prompted.The eagerness to save the animal's backbone caused many pack
masters to rib the aparejo too stiff—that is, by using sticks of too
large diameter, giving rise to many body bunches and belly sores;
and to save the loins from what are termed "kidney sores" sticks
of too small diameter were employed, without regard to proportionfrom front to rear, causing the aparejo to flare out at front, givingopportunity for the aparejo to work forward and causing sore tails.
To relieve this condition the reverse method of ribbing was used, withno better results.
The conformation of the mule was not considered in those days in
ribbing the aparejo. The California mule being a cross between theburro and cayuse (pony), with large and deep belly, short in stature,
was a great climber and hardy packer.
This conformation of mule afforded ample cause for sore tails, the
difference in girth back of the elbow and at point of greatest swell
of the barrel or belly varying from 8 to 16 inches. As ribbing bythe mule's conformation as a guide was neither understood or at-
tempted, mules of the above description always had sore tails, devel-
oping a double lip or growth above and below the sore. The mulehaving the reverse of this conformation—that is, of greater or equalgirth back of the elbow as at center of barrel—will never have a sore
tail, but mules of this description are not suited for pack service.
The success attending the introduction of sticks of full length in
protecting the backbone led to a general application of their uses;
the "round" collar gave way to the "square" collar to give oppor-tunity to supply more ribs to protect the withers.
In trial of the square collar (6 by 6 inches) it was found that the
aparejo often pinched the withers, and an offset of 2 by 2 inches wasprovided; this provision opened the collar with satisfactory results.
(See i, fig. 1.)
In 1886 Mr. Moore supervised the construction of 100 or moreaparejos at the military prison. Fort Leavenworth, Kans., in whicha second offset was provided, and resulted in contracting the collar
in a manner similar to the action of the square collar. This led to
the return of the first offset, which has been used ever since.
The saddlery company of Messrs. Main & Winchester, 216 Batterystreet, San Francisco, Cal., furnished the Government the first regu-
lar stitched (wax end) aparejo some time during the early seventies.
The old aparejo of Mexican manufacture was of whitish tan orrawhide color of long life, a few of these being still in use during

MANUAL OF PACK TRANSPORTATION. 21

22 MANUAL OF PACK TRANSPORTATION.
tlie Spanish-American war (1898). The leather was very heavy, arequisite to hokl the hay or padding in position, and there were nofacings on back or belly piece; a strip 12 inches long and from 3 to
6 inches wide was attached to the outside along the front edge, the
inner edge provided with holes to lace the crupper; at rear a strip of
leather about 3 by 6 inches was attached as a carrier piece and pro-
vided with holes to support the crupper by means of a short lace
string, all sewing being done by whang and needle.
The crupper was made in sections termed ''panels"—hence the
name ''panel crupper"—the center panel being usually provided witha surface covering of morocco or other fancy colored leather onwhich various designs or legends were stitched with silken threads
of various colors, corresponcling figures being provided on the coronaor saddle pad.The aparejos made by Main & Winchester were of light stock and
in time became baggy. To overcome this defect, facings (reenfor-
cings) of leather were employed on the "boots," back, and belly
pieces of the aparejo, the backpiece having an additional reenforcing
at its center, termed the "center facing." With all this reenforcing,
the belly or body piece was too light and in short time became baggy,i. e., the belly piece stood away from the hay or padding, permittingthe hay to fall from its proper position, a very serious clefect.
The establishment of J. C. Johnson & Co., of San Francisco, turnedout the best aparejos ever made for the United States Government.In the eighties some very good aparejos were supplied by a firm in
Chicago. The initials stamped on the aparejos were, if I am notmistaken, "O. H. & Co." The Collins Saddlery Company, of
Omaha, Nebr., also furnished some good aparejos in the eighties.
Since that time St. Louis, Mo., controls the trade in pack equipment.During the Geronimo campaign (1885) the Cheyenne pack trains,
under charge of Mr. Thomas Aloore, chief packer, were ordered to
Fort Bowie, Ariz., and additional pack trains organized. Mr. Moore,in order to hasten the ribbing or "setting up" of the aparejos had aquantity of hickory slats or ribs made, about 1 inch wide and three-
eighths of an inch thick throughout their entire length. No taperbeing provided on any of the sticks, necessarily the sticks bearingover the swell of the body received practically all of the pressure,
causing terrible misery to the animal, and when loaded and turnedloose the animal would immediately throw itself on the ground, whenthe snapping of the ribs (breaking) could be plainly heard, with awail from the pack master of "There goes another one."
After the Geronimo campaign I was ordered to Cheyenne Depot(Camp Carlin), Cheyenne, Wyo., for station, under Capt. C. F.
Humphrey, quartermaster, afterwards Quartermaster-Genaral of theArmy. Two ]jack trains were there organized, one under PackMaster Edward Delaney and one under myself, with Mr. Moore,chief packer.
In January, 1887, while setting up the aparejos, Mr. Moore hadprovided a quantity of those hickory slats for ribbing purposes; onmy urging the necessity of their being tapered and tested beforeinsertion, Mr. Moore stated why not use two or three slats and thentwo or three willow sticks, and alternate that way, with a view to
weakening the ribbing, forgetting the fact that the slats would be

MANUAL OF PACK TRANSPORTATION. 23
hard to {oinpross, wlulo the frosli willows would readily vicld loconi])ro8sion.
1 had sot up one aparojo with hit-koiy slals, providino; a suituhlctaper on each slat from front to rear, and testinji; each slat heforeinserting it in the apar(>jo. The results obtained were satisfactory.Mr. Moore, however, abandoned the hickory slats without sufhcientreason.
It was the custom until 1880 to insert the "boot" sticks afterribbing the aparejo. This method on cinching the aparejo caused thesticks at center of boot to spread apart and override the sticks adjoin-ing, and also' forced the boot sticks upwardly by the action of thelash-rope cincha.
The insertion of the boot stick before ribbing held the boot fromgathering or crumpling and gave a guide to measure the length ofsticks between the center hne and lower edge of boot stick, and pre-vented the displacing of the sticks at center of boot, as the boot stickoffered resistance to action of the aparejo and lash-rope cincha.The method of ribbing the aparejo by providing a gradual lessening
of diameter to eacli stick from front to rear and from bottom towardtop wdth as many sticks as the boot would contain, laid side by side,
the butt ends resting on the fiat surface of the boot stick, was notpracticed until the spring of 1880. At first the custom was to alter-
nate the butt end of stick between boot and center line (bottom andtop).
I have also seen packers place a stick across the ribs close to thecenter stitch line, sometimes called the "eve," or comb, of the aparejo,and one or two midway, foi- the purpose, it was said, of keeping thesticks in position; in fixing for a bunch tlie cargador would locate
the position of the bunch by observation, take out tlie hay, teaze it
up, and replace it. This flattened or spread the bunch, which, if of
medium size, always resulted in a steadfast; instead of cutting outthe callous flesh and saving the mule further misery, it was permi.iedto spread, from a desire to hide the condition of the animal and as
was usually the case, in not properly understanding how to aiTangethe hay or padding, and so prevent the bunch resulting into asteadfast.
It ^vas about this time also (1880) that the practice of wetting the
surface of the bunch (only) so as to locate its position on the aparejowas first introduced, by placing the aparejo on the mule, withoutcorona or blanket or turning the crupper; and exactly over the posi-
tion on the animal's body, where it rests, when cinched to the animal,
and by rocking the aparejo with each hand the wet imprint wasshown on the belly or body piece of the aparejo; then all the haydown to the sticks beneath the wet surface marked by the bunch wastaken out without, in any manner, disturbing the rest of the bed of
hay; on the next day's travel the bunch disappeared.
It was in the fall of 1883, whfle pack master of Lieutenant Gate-wood's train at Fort Apache, that I discovered the cause of belly
bunches and -sore tails.
In 1884, General Crook stated that Mr. Moore, then chief packer,
had said, "Pack animals were bound to become sore and there wasno known way to avoid it."
The Geronimo campaign, lasting from May, 1885, to September,
1886, proved this statement to be a fallacy.

24 MANUAL OF PACK TEANSPOETATION.
In the days of the "panel" crupper, the division of the crupperbelow the dock was a straight cut, provided with holes on either side
for lacing. When the animal's tail became sore the lacing wastightened, with the object of drawing the dock of crupper downwardfrom the animal's tail or dock, in each case affording no relief, butinstead, causing soreness across the buttocks.The latter trouble caused many pack masters to be constantly at
work on the dock, adding more filling, some going so far as to pro-vide a wooden stick to give it stiffness, without relief. (See sec. 9.)
When the withers and loins became sore, the aparejo was said to
be "broken down;" hence the packer's objection to the use of theaparejo as a seat, an objection well taken, but not the direct cause.
(See footnote.)
It was considered that tight cinching caused "belly bunches," andthat unevenness in the fillmg or padding was alone responsible for
body bunches.For "body bunches" (a pufhng up of the skin), the hay or padding
was loosened up in the aparejo, with the expectation of giving relief,
when perhaps a fault in one or more of the "ribs" may have been thedirect cause of the "bunch." In the first instance, a loosening of thehay will not reduce a bunch; in the second instance, an improperrib or stick in the aparejo will always cause trouble. Both of theseconditions must be removed to relieve the animal of its misery.For "belly bunches" a gunny sack or other similar material was
provided and folded in several thicknesses, so as to have a surfaceabout 10 inches square, and held together by a few stitches; a holewas then cut at center, corresponding to the size of the bunch; thepad was then held over the afTected part, the cincha of the aparejoholding pad to place and expecting to afford relief or reduce thebunch. The cause of the trouble not being removed, the use of thepad did not relieve it.
\v\nen the aparejo was improperly ribbed, by being too weak in
front, the cinch of the aparejo worked forward, causing what are
termed "cinch sores," retarding the travel of the animal, as well as
throwing the load forward and eventually on the animal's neck if
not attended to, and, if ribbed too weak, at rear, throwing the loadover the animal's kidneys, preventing the animal from retaining its
aparejo in proper position and carrying its load with comfort.When the pack mule would leave the trail and lie down, endeavor-
ing to relieve itself of its burden, it was said the animal could notstand tight cinching, and was not a suitable animal for pack service.
The misery shown by the dumb animal never appealed to the sense
of the animal man.For all these evils the proper "setting up" of the aparejo must be
intelligently understood, and sore mules will be a thing of the past;
or, in other words, there must be smooth bearing on the body of theanimal covered by the aparejo and its cincha. (See sees. 4 to 7.)
Note.—The objection taken by packers to using the aparejo as a
seat when in bivouac is because the weight of the body when seatedon the aparejo compresses the ribs more than happens when theaparejo is on the animal.

MANUAL OF PA(^K TRANSPORTATION. 25
EVOLUTION OF THE DIAMOND HITCH.
This form of hitch has its origin in the crosstreo hitch. The earlytrappers of the Hudson Bay Company intnxhiced the crosstree hitchamong the Indians of the Northwest, and hater the Americans gaveto this hitch the name of the "squaw" hitch; along the Pacific coast,
in sections where sheep raising has become an industry, it is knownas the "sheepherder's" hitch, and by miners and prospectors as the"prospector's" hitch.
In the use of the aparejo, in forming the crosstree hitch (sec. 40)in bringing the loop of the running rope under the boot of theaparejo instead of around the "side" pack on each side, evolvedthe "double" hitch, and in not bringing a loop of the running ropeunder and forward of the standing rope—that is, forming the loop
in rear of the standing rope—led to the formation of the "Oregon"diamond hitch (sec. 38), so named in being first practiced in that"Territory before it became a State.
The practice of first throwing the lash rope cincha under the ani-
mal's belly to the off packer, in forming the regular diamond, in
contrast to the crosstree and Oregon hitches, in which the lash rope
is first thrown over the load and under the animal's belly by the
near packer, may be said to date with the advent of the Americansafter the discovery of gold in California, 1848-49. This I have hearddisputed by some of the old-time packers of the early fifties, whostated the regular diamond was practiced by the Mexicans of Cali-
fornia. However this may be, it may be stated the regular diamondhitch is used in the States bordering on the Rio Grande. In the
Santa Rosa mines, State of Coahuila (Mexico), I have seen the dia-
mond in use in 1878. In Mexico it has been the custom to use the
crosstree and stirrup hitches, with the employment of the donkey, andaparejo made of matting; in the case of the stirrup hitch (sec. 41) a
cmcha 2 feet long, having a ring at each end, is employed; in forming
the hitch the cincha is held under the animal's belly, using the ring
on each end instead of forming the stirrup.
The double diamond hitch (sec. 33) was used in the days of freight-
ing by civilian pack trains from The Dalles to the mining camps in
the interior when barrels of flour, vinegar^ pork, etc., had to be trans-
ported. This hitch had become a lost art m government service, due
to a lack of necessity for its use, and is known to very few packers
of the present dav, the double hitch being erroneously called the
"double diamond." (Sec. 34.)
The pole hitch has been erroneously called the "squaw" hitch; the
fact that the Indians have never used the aparejo confirms this state-
ment. It can not be used with the crosstree or riding saddle, as no
portion of the rope in the formation of the hitch encircles the body
of the animal. (Sec. 37.)

CHAPTER 1.
PACK SADDLES DESCRIPTION AND USES.
THE APARE.TO.
Section 1. The aparejo and its various accessories are called, col-
lectively, "The aparejo complete" (fig. 1).
The aparejo complete includes the following:
Aparejo complete:Aparejo proper
—
1. Body of the aparejo.
2. Aparejo cover, or sobre jalma.3. Aparejo cincha.
4. Crupper, or grupera.5. Corona, or saddle pad.
Accessories
—
6. Ijash rope with cincha and hook.7. Sling rope.
8. Lair ropes (two).
9. Pack covers, or mantas (two).
10. Pack blanket.Note.—For convenience the packer divides the aparejo complete
into two sections—the aparejo proper and the aparejo complete.The first five items of the above form what is termed the "aparejo
proper," and in the vernacular of the packer are referred to as the"rigging."To explain: When in bivouac the aparejo (proper) is held apart
from its accessories, i. e., the aparejos are arranged in an orderlymanner, and the animals are taught to approach them and standquietly, as if at attention. The accessories are employed in the make-up of commercial packages into what is termed "side" packs, andand are likewise arranged in an orderly manner adjacent to the rigging,
and termed the "cargo."The last item, the pack blanket, must be considered a part of its
complete equipment, as its use supplies additional padchng for theaparejo, the blanket being carried between the corona and aparejo,
folded in such manner as to cover the corona, and is used as bed-ding by the packer, who, it should be remembered, is not permittedto supply personal bedding which impairs the carrying capacity of
the train.
Three sizes of aparejos are provided, respectively 58, 60, and 62inches in length, and uniformly 24 inches throughout their entire
width.A brief tlescription follows of the parts included in the aparejo
complete
:
26

MANUAL OF PACK TRANSPORTATION. 27
1. The body of the aparejo (I, fig. 1).—Tlio principal loathcr partsare:
(a) Backpicco.(b) Body piece.
(c) Boots, or end pieces.
(d) Boot facings.
(e) Front facing.
(f) Center facing.
(g) Carrier pieces.
(h) The welts.
Note.—See "Specifications for aparejos," section 1.30.
2. The aparejo cover (or sobre-jalma) (II, fig. 1) is made of No. 4cotton duck. It is faced at sides and ends witli leather, so as to givesufficient width to enable it to cover the aparejo. The ends are pro-tected by wooden sticks or shoes, hehl in place by caps of leather,
sewn over either end (L, II, fig. 1). These shoes serve to stiffen theends of the aparejo cover and keep it from wrinkling and gathering.The cover is secured by thongs to the aparejo at the extremities of its
middle or center fine (o, L, fig. 1).
Note.—Sobre-Jalma, erroneously called sovereign hammer, soldier
hammer, is a compound word of Arabic and Spanish used by the
Morriscos of Spain, meaning "over cover;" sobre-jalma is a contrac-tion of sobre-en-j almas, meaning a covering for the harnessing, andapplied to the aparejo or pack saddle, now called aparejo cover, or
sobre-jalma, sobre-halma (or so-bre-hal-ma).
3. The aparejo cincha (III, fig. 1), is made of No. 4 cotton duck,
doubled so as to have a width of 10 inches, and sewn along its center
with two seams spaced 1 inch apart. At one end it is faced withleather (m. III, fig. 1) ; a ^^-inch iron rod being held in the fold of the
facing, so as to be on the edge of the cincha. (Sec. 130.)
After this facing is in place three holes are punched through it to
receive the lacing of the latigo, or cincha strap. The latigo (n, III,
fig. 1), is from 6 to 7 feet long. In its attachment to the cincha it
carries a ring, called the "rendering" ring, through which the latigo
passes in tightening (p, III, fig. 1). Fifteen inches from this end of
cincha a round piece of leather 3 inches in diameter is sewed on, andtwo holes punched through it; a leather thong is attached thereto, so
as to leave a loop of 3 inches. This is called the "finger" loop, andis used to secure the end of the latigo strap after cinching (q, III,
fig- !)•
The other end of the cincha carries a curved piece of gas pipe
(r. III, fig. 1), flattened at each end, and provicled with lioles to
receive rivets. It is secured to the canvas by a leather facing. This
curved piece of pipe takes the place of an ordinary ring in the end of
cincha.
When finished the cincha should be S inches longei- than the aparejo
with which it is to be used and ten inches longer for mountain bat-
tery service.
4. The crupper (IV, fig. 1) is made of heavy, black leather, about
78 inches long and 12 inches wide. At its middle part it is shaped
down to fit under the animal's dock. The portion which fits under
the dock is provided with a cover, called the "dock" piece. The
dock piece is filled with padding, antelope hair being considered best

28 MANUAL OF PACK TRANSPORTATTOlSr.
for the purpose, and is rounded (IV, fig. 1). The ends and upperedges are provided witli holes for lacing the crupper to the front
facings of back piece and to the carrier pieces, respectively. Leatherthongs are employed for these lacings, and by means of these thecrupper may be adjusted to the length of the animal.
5. The corona, or saddle pad (V, fig. 1), is made of three thick-
nesses of good blanket, with a center facing of similar material;
at one edge at center of its length a semicircular stitch line is pro-vided to indicate the front, or that portion fitting over the animal'swithers, and a center stitch line to indicate the middle of the corona.In the center of one-half of its length a numeral to designate thenumber of the aparejo is placed on the upper or outward side of thecorona, the under side being lined with light canvas, and the wholebound all around with suitable material.
In use the ' 'canvas " side rests on the animal's back, and the coronais cleaned from day to day, a table knife being' carried by cutting ahorizontal slit between the two lines of stitching on the front facingof the aparejo for this purpose.
ACCESSORIES OF THE APAREJO.
6. TJie lash rope with cincha and Tiook (VI, fig. 1).—The lash rope is
about 50 feet long, size nine-sixteenths or one-half inch, best hand-laidmanila. At one end it has a loop or eye to receive the lacing of its
cincha; the other end is well seized or wrapped to prevent unraveling.
The cincha (VI, s, fig. 1) is made of light canvas, folded so as to
have a width of 6 inches; at one end it has a facing of leather onboth sides and is provided with five holes to carry lacing, by means of
which it is attached to the loop or eye of the lash rope; the otherend is faced with leather in similar manner, and a strong hook (VI, t,
fig. 1) of metal or wood is supplied. When made, the cincha mustnot be more than 30 inches long.
7. The sling rope (VII, fig. 1) is about 30 feet long, size three-
eighths inch, best hand-laid manila, well seized at eacli end. It is
used for slinging the load preparatory to lashing.
8. The lair rope (VIII, fig. 1) is about 30 feet long, size three-
eighths inch, best hand-laid manila; at one end a loop or eye is pre-
pared; the other is securely seized. The free end is passed throughthe loop or eye, preparatory to "lairing up" the side packs—i. e.,
for securing the pack covers or mantas around the packs.
9. The pack cover or manta (IX, fig. 1) is made of 72-inch No. 4
cotton duck. When made, it is 6 feet square.Each pack is ordinarily wrapped in a manta. Such as are liable
to suffer damage or deterioration during transportation are always so
protected.
10. The pack blanket (X, fig. 1) is similar to the issue (bed)
blanket in use in the service ; in the center of the blanket the initial
letters, ''U. S., Q. M. C, P. T.," are provided. The two last letters
are to distinguish pack transportation blankets from others, so thatthey may be traced if lost or stolen. Each particular train has the
serial number stamped on each blanket, as an additional guide to
keep them together.

MANUAL OF PACK TRANSPORTATION. 29
CROSS-TREE OR SAWBUCK.
Sec. 2. Tlie cross-troe, as the term implies, consists of two saddleboards, shaped somewhat similar to the McClellan saddletree, con-nected at front and rear (pommel and cantle), by crosspieces shapedlike the letter "X," termed the "cruz" (cross), or forks of the saddle,siipphed with a breast strap, breechin*;, and (luarter straps, holdingcincha and latigo, or tightening strap, accompanied by a saddle pador blanket.For the carrying of supplies two methods are in use:First (or original method). By the employment of wicker baskets,
and panniers made of canvas or leather, constructed so as to fit overthe forks of the saddle, and strapped to the animal by the aid ofcincha and latigo.
Second. By the employment of ''sling and lash" rope. (See sees.
39-40.) This latter method has a more general application, due toits relative lightness and cheapness, and is used by trappers, miners,prospectors, small hunting parties, and members of the Bureau ofForestry, etc. (See sees. 39 and 40 and figs. 54 to 57.)
THE " MOORE " PACK SADDLE.
Sec. 3. Description of this saddle is copied from pamphlet pub-lished by authoritv of the War Department, Washington, Govern-ment Printing Office, 1881. (Figs. 3, 4, 5.)
The pack saddle consists of the "saddle proper," two pads, corre-
sponding with the pads of the aparejo, laced on either side of thesaddle to the skirts and at the upper edges over the top ; a cruppersimilar to the aparejo crupper, but lighter, laced to the rear edges of
the saddle skirts; a corona, or pad, used under the saddle and nextto the animal's back; a manta, or pack cover, two pieces of canvas 7
feet long and 22 inches wide, stitched together along their longedges; halter and strap; cincha of canvas 10 inches wide, and in
length according to the size of the animal; "sling rope;" best hand-laid manila whale line, one-half inch, 20 to 30 feet long; "lash rope,"
with leather cincha, same as above, five-eighths inch, 42 feet long, andone blind to each live packs. (6, fig. 3.)
Wlien the saddle is "full-rigged," as it is called, that is, supplied
with sling straps and cargo cinch, the sling and lash ropes are dis-
pensed wdth. (Fig. 4.)
After years of its use, under personal observation, the following
defects have developed
:
The crupper, being too short in length, when laced to the rear edges
of the saddle skirts, leaves a space of from 4 to 12 inches, as deter-
mined by the conformation of the animal. Necessarily the action of
the saddle and crupper are independent of each other, causing sore-
ness by friction of the lacing, due to travel action of the animal.
When a "bunch" arises (a puffing up of the skin), caused by un-
evenness in the filfing of the pads, or shape of the saddle boards
lacking conformation to fit the varying flesh conditions of the ani-
mal's back, there is no provision in the make-up of the saddle to
relieve the animal of its misery, and, necessarily, its constant use
destroys the usefulness of the animal.

30 MANUAL OF PACK TRANSPORTATION.
The *'arch" irons at front and rear, connecting the saddle boards,
occasionally spread apart, allowino^ the irons to rest on the animal's
withers and backbone by compression of weight of load.^ The arch
iron at front, being higher, prevents the employment of top loads
and I may add, all "box" loads, as the weight of load is thrown
to the rear over the animal's kidneys, causing soreness and kidney
trouble All packages of greater length than the width of the saddle
rest on the animal's hips, causing soreness, due to the low and close
fit of the saddle on the animal's body.
In the application of the "diamond" hitch the rope slips oil the
corners at ends of pads, due to lack of sufficient stiffness, as well as

MANUAL OF PACK TRANSPORTATION. 31
iillowiiii:; the cincha to work forward, intcu'lcrinij; with tho travol of
the animal, and causing a soreness at elbow or forearm, termed cinchsore.
1 \ v'
The employment of "sling straps" and cargo cinch with the saddle,
termed "fiUl-rigged," was early dispensed with as unsuited to secur-
ing commercial packages. (Fig. 4.)

32 MANUAL OF PACK TRANSPORTATION.
In the annual report of Maj. Gen. Leonard Wood, commandino; the
Department of Cuba, Habana, Cuba, June 30, 1901, "report of the
chief quartermaster of the department," page 13, says:
Under date of June 4, 1901, the department commander ordered a competitivetrial at Camp 11. S. MacKenzie, Cuba, to determine the relative merits of the aparejo
and Moore pack saddles. The conditions of this trial required a daily march of 25
miles to be made, each pack mule carrying a load of 250 pounds. In this contest, con-
ducted under the supervision of Capt. R. J. Duff, Eighth Cavalry, as referee, it was
developed that the Moore pack saddle is entirely unsuited for severe field service.
It is recommended that all pack equipment hereafter furnished for use in this
department consist of the aparejo.

CHAPTER II.
ASSEMBLING AND CARE OF THE APAREJO.
SELECTION OF STICKS SUITABLE FOR RIBBING APAREJOS.
Sec. 4. The selection of suitable sticks or withes to rib the aparejois usually governed by locahty, and as the willow is found in all theStates and Territories, it has been generally employed. While thereare five species of the willow family that may be considered suitable
—
the gray, the black, the red, the button, and desert willows—the first
named is preferred, having less pith, being tougher and more springy,straight as an arrow, and with few blemishes. Arrowwood and dog-wood are found in Texas and Arizona, but are of scrubby growth.When found suitable, however, they make a most excellent stick forribbing aparejos; it has less pith than the willow and holds Kfe orspring longer, resembhng the guayaba found in Cuba and the Phihp-pines—the best stick for ribbing aparejos that has been tested. Ash,hickory, and pecan ^'sprouts" are a superior stick to an}^ of theformer, due to longer hfe in spring; these three last woods in sproutform are not numerous, so that they may not be classed in the list of
available sticks for ribbing aparejos.
The essential requisites in determining suitable sticks for ribbingaparejos are toughness, spring, and taper, together with straightness
and freedom from knots and other blemishes.
SELECTION OF HAY SUITABLE AS PADDING FOR APAREJOS.
Sec. 5. For padding or filhng aparejos, nothing can compare withsuitable hay. For this purpose fine, soft, elastic hay that will admitof mixing similar to curled hair is best suited as padding for aparejos.
Such hay as furnished by breweries for packing bottles in barrels
answers this description, and no doubt can be procured in bale form.
This class of hay has the elasticity of curled hair, and admits of
separation, straw by straw, a condition impossible in curled hair,
black moss or lichen, sea grass, and excelsior, an essential quality
when fixing for a "bunch."To sum up, any padding that has the hfe and spring of curled
hair, that will admit of separation when fixing for a bunch, without
disturbing the rest of the bed of hay in the aparejo can be classed
as suitable padding for aparejos. Tliis class of hay is termed bypackers '
' aparej o hay. '
'
SETTING ITP THE APAREJO.
Sec. 6. First, soak the aparejo in tepid water, say from ten to
fifteen minutes (double the time if cold); take out and drain, and
place on bench or ground, and prepare two sticks, termed the "boot
sticks," of suitable hard wood 2U inches long, 24 inches wide, and
75927°—17 3 33

34 MANUAL OF PACK TRANSPORTATION.
three-quarters of an inch thick; the ends must be rounded on oneside. The rounded or tapered ends to face the inside of back piece
of the aparejo; it is 'positively forbidden to insert a ''boot stick" in
the aparejo that requires /orc<? to adjust it across the bottom of theboot, by so doing, when the aparejo dries, the ends of the boot stick
project over the sewing at ends of the aparejo, and soon wears itself
through the leather, as well as bursting the sewing at ends of theaparejo. A good substitute is the straight portion of a disusedwagon bow.
Introduce a "boot stick" through hand-hole on each panel, andadjust it across the bottom of the boot, the side of the boot stick to
be parallel with the sides of the aparejo, the flat surface of stick to
face the inside of belly piece of the aparejo.
As the aparejo will take from twenty-five to thirty sticks (willow)
on each side—that is, when laid side by side^—it is well, before com-mencing to "rib up" the aparejo, to make three divisions of thesticks to be employed, say twenty in each division, rejecting any thatare not straight or have any malformation, the largest for No. 1, themedium for No. 2, and the smallest for No. 3; commencing with thefirst that fits under the collar of the aparejo, which may have a diam-eter of three-quarters of an inch, lessening the diameter progressively
to the last at rear, the diameter of which must be three-eight lis of aninch.
Now take two sticks of division No. 1, largest size, and mate themas to size and toughness, one for each side, to fit under collar at front
of aparejo.
Before introducing the first four or five sticks it is well to providea taper of about 2 inches long on butt end of sticks, as they can thuskeep position all the better on the flat surface of the boot stick whenplacing them in position under the collar of the aparejo."
In measuring the length of stick, place the stick on the aparejo, buttend resting on lower edge of boot stick and in alignment under thecollar; mark the stick in line with the stitching of collar at its for-
ward part and cut off with pocketknife; round and smooth off thetop surface.
Introduce the stick through slit provided on each side at centerstitch line, butt end first, and press to forward corner of boot, the endof stick resting against and over ** the flattened surface of the bootstick, then bring the stick to place under the collar at the forwardedge of the aparejo.
Under no circumstances permit a stick to take position that is toolong or too short, tliroughout the operation.Having placed the first two sticks in position, one on either side of
the aparejo, under the collar, select two more in sinfilar manner as
the first two, but be careful that they are not of greater diameter or
toughness; this rule must iwsitively be adhered to in the taper andtoughness of each corresponding pair of sticks throughout the opera-tion from front to rear. Any departure from this rule will marlv
aA flat surface provided on butt end of sticks will prevent their rolling from position
at the front corner of the boot; these sticks, being of larger diameter, are apt to bepressed out of position during the process of ribbing.
tiThis occurs in the process of ribbing. The aparejo is spread out its full length,
the belly or body piece upward. When the aparejo stands on its boots, the sticks
show they are against and under the boot stick.

MANUAL OF PACK TKAKSrORTATION. 35
tho mule by "bimching;" taking out the liay, as in fixing for a bunchwill not remove the troubleHaving ribbed uj) as far as slit at center of stitch line, commence at
rear, using the smallest stick, increasing the (Uametei- of stick untilthe center is again reached, and the aparejo is properly ribbed.The aparejo having thus been "ribbed up," in order "to lill the sides
or panels with hay, proceed as follows:
Stand the aparejo up on its boots, the hand-holes facing out, andprocure a tamping stick; an old broom handle is good for the pur-pose.
Take a pocketknife or drawing knife and shave end of stick so asto leave two sides flattened, tapering toward end of stick; thicknessat end, one-quarter inch. Concave or hollow the end on flat side,
so that it may grip the hay in tamping. In tamping manipulate this
stick with the hands; do not use a hammer.Introduce the hay through the hand-hole, a little at a time, and
press into the corners of boots. It is well to commence at front cor-
ners always. Tamp down with stick. In tamping do not hold thehands well out from the aparejo, but rather lean the stick against thetop of aparejo; the point or end of stick is then not so apt to passbetween the ribs in tamping.Be careful in tamping corners that j^ou do not use too much hay at
one time, or in each course. You will thus be enabled all the better
to get the corners solid. This tamping should extend back about 6
inches from the corners on either side, and should be thoroughly done.
Be careful to get the four corners equal. Tamp lightly along center
of boot. Three or four courses of hay will fill the lengths of boots4 inches in depth and thiclaiess or nearly so.
Now, spread out the aparejo to its full length on the ground, or
place on bench, hand-hole upward, and introduce the hand to ascer-
tain if the ribs have been misplaced at top or bottom.Ribs being in place, proceed to fill along top or center. Use the
stick in pressing the hay into the corners under collar, and at the rear
of the aparejo, but only far enough back or toward you to enable the
hand to be used in filling the rest. Lay two courses through the bodyof the aparejo, spreading each course evenly. Do not allow the hayto lay in lumps, as it will "bunch" or wound the animal.
After the aparejo has been used a while, and the hay has been well
settled in its place and made compact, the thickness of the filling
through the body should be about 2 inches. The aparejo should have
a thin appearance through the body; it should not appear stufl'ed
and swollen.
The thickness of the fiilling decreases gradually from the boots to
the hand-hole of the aparejo, being about twice as great in the boots
as in the center of panel or hand-hole.
At the top or center the normal thickness extends to within about
4 inches of the center stitch line, the thickness gradually decreasing
from there to the middle seam, where it is practically nothing.
The packer now proceeds to put in additional filling, so as to adjust
the aparejo more accurately to the mule's shape, i. e., he proceeds to
"dress" or to face up the aparejo, as it is calfed.
First, dress or face each front boot, the dressing to extend inward
each way from the front corner toward the hand-hole, say 7 inches,
and must be of oval shape. In introducing the hay hold the palm

36 MANUAL OF PACK TRANSPOETATION.
of the hand upward, so as not to disturb the bed of hay underneaththe hand, increasing the width and depth of dressing as you recedefrom the front corner, and the inward edge of dressing to be of semi-circular form; for the next 4 inches decrease the thickness rapidly as
the hand-hole is approached. This will leave the filling of the front
boot obviously greater than the rear boot. The difference should beabout 1 inch for mules of ordinary girth in barrel; mules of larger
girth will necessarily rec[uire more hay in the front boot to make theaparejo sit on the animal with the boot sticks parallel.
Next, make a dressing under the collar of aparejo for the withersof the animal.For this purpose keep the palm of the hand up and carry the hay
well into the corners at front, using as little of the hay at each timeas possible, so as not to disturb the bed formed beneath the hand;carry this dressing back from the corner, increasing the width anddepth of dressing as you recede from the corners, the outer edge of
dressing to be of semicircular form.The upper point of the semicircle should not approach the center
line within a space of 4 inches. The whole line of semicircle shouldgradually decrease in thickness as the hand-hole is approached to
within 4 inches of hole. The depth of this dressing will be governedby the height of the animal's withers. The aparejo when cinched onthe mule should be level from front to rear. In similar manner theboots must be parallel and horizontal.
The front edge, between boot and collar, may now have an addi-
tional dressing 3 inches wide and about 1 inch in thickness, taperingeach way toward the center, so as to give opportunity for the aparejoto brake or conform to the body of the animal, in the act of cinching;
and the aparejo is properly "set up."Now stand the aparejo up; that is, cause it to stand on its boots.
Next, procure a crupper (standard size), and two lace thongs eachabout 7 feet long and one-half of an inch wide; at heavy end of eachlace thong, and three-fourths of an inch from each end cut a slit IJinches long, introduce the light end of each thong through the upperhole on each end of crupper and pass the end through the slit onopposite end of thong and draw down snug; next procure two lace
thongs, length of thongs, say 12 inches, and attach the crupper to
the "carrier" pieces, and tie down; this helps to hold the crupper in
the operation of lacing.
Now pass the end of crupper lacing through the second hole on front
facing (counting from the collar), from above down or, as may besaid, from outside toward inside, and draw thong snug.
Next, in similar manner, pass the thong through the second holeon crupper, then through the fourth hole on front facing, againthrough the fourth hole on crupper, and, lastly, through the bottomor end hole on front facing and crupper, and tie down. Alwaysfinish the tie on the last hole of the crupper; never on the front
facing, as action of the crupper, which should l)ind or steady theaparejo is lost by such action.
It must ])e remembered that the lacing must 'positively pass throughholes on front facing and crupper from above down, in order thatlacing may not render or slip when the aparejo is fitted to the mule.
Next, punch two holes, one-half inch apart, at each extremity of
the center line of the aparejo, and between the two outside stitch

MANUAL OF PACK TRANSPORTATION. 37
lines. Procure thongs and lit aparejo cover. Punch two lioles cor-respondingly in the cover and tie down.
Procure cinciia; ])lace the latigo along center of its length anddouble the cincha, causing the u|)|)er surface of cincha carryingfinger piece to he inside. Phice cinclia on aparejo in center, leavingthe ends on the ''off" side with ends of linger loop on top.Turn crupper and i-est dock on center of aparejo.Procure a corona; double it and place it on aparejo, its ends facing
to the front, numbered side up.The aparejo is now^ set up and ready for use.
SETTING UP THE " DALY " APAREJO FOR USE.
Sec. 7. Owing to the heavy loads necessitated by the carrying ofmountain guns (Vicker's, Maxim, etc.), the principal parts oi' whichare carried as ''top" loads, it has been found advantageous to supplyboot and saddle bars of suitable wood, each bar being shaped so as to
conform to that particular part of the aparejo coming least in con-tact with the body of the animal, i. e., that portion of the aparejo thatshould not rest on the animal's backbone, antl be clear of the mule'sbelly. Slots are provided on bars to receive the ribs and hold themsecurely in position. Nine ribs are provided on each side, serially
numbered with the corresponding number of the aparejo for whichintended, the ribs being graduated in length of taper from front to
rear, following the lines of the willow-stick method.The boot bars conform to the shape of the boots, as formed b}^ the
padding of hay, with the provision of adding a sufficiency of hay overthe upper portion of the bars where that portion of the boot comesinto contact with the body of the mule.The saddle bars, in similar manner,.with the provision of adding a
sufficiency of hay over the lower portion of the bars, where the weightof load is carried by the animal.To rib up the aparejo with boot, saddle bars, and ribs a slit 12
inches long is provided on the back piece at rear, with holes punchedon either side to receive lace thongs, and a "hand-hole" is provided,
cut around to within a space of 2 inches at top, so as not to meetthe ''hand-hole" on opposite or belly side of aparejo. A hole is
punched on lower edge of lid, with hole to correspond on back piece
for lace thong, to secure lid of back piece. The "hand-hole" is pro-
vided as a help to guide the ribs to proper position in setting up tlie
aparejo.
1. Torihup.—Unlace the slits and hand-holes; soak the aparejo
in tepid water for about fifteen minutes; drain it and lay flat, back
pieces up; insert the boot stick and the saddle bar through the slit
in rear and press them to their places at the boot and the center
stitch line, slotted sides up; insert the numbered set of nine ribs
through the slit in rear in their numerical order, and seat them in
that order from collar to rear in the slots of the boot stick and saddle
bar, butts at the boot; secure the top of each rib as it is seated byinserting the key bar at the front edge below the collar and })assing
it over the rib in place; fasten the key bar to the collar by the thong.
Note.—Aparejos are issued to the service with ribs in place. Ribs
are furnished in sets of nine. Each rib is numbered at its butt to

38 MANUAL OF PACK TRANSPORTATION.
correspond to its proper numerical position in the panel, countingfrom the collar to the rear. Each rib is also stamped with the size
of the aparejo for which it is made. The aparejos are furnished in
58, 60, and 62 inch sizes. The ribs for a 60-inch aparejo are there-fore marked 1-60, 2-60, 3-60, etc. Should repairs or alterations
make it necessary to rib up, the butt of the fifth rib is seated in its
slot, the overlaj) at its slot in the saddle bar is marked and cut away,and the other ribs are cut to the exact resultino; leno;th.
2. To fill or pad.—Turn the aparejo over, belly pieces up; procureabout 6 pounds of fine, soft, elastic hay; taking a little at a time,
tease or ''mix" it carefully; insert it through the hand-hole, andthus gradually fill the body of the aparejo with a smooth and evenlayer not more than 2 inches thick.
Note.—Other filling may be used in necessity, such as moss, ex-celsior, curled hair, sea grass, but these substitutes are difficult of
manipulation in alteration necessary to accommodate the rigging to
injuries of the mule. By teasing or "mixing" is meant the arrange-ment of the straws so that they will cross one another. The body of
the aparejo is that part which comes in contact with the body of themule. As 3 inches of the lower portion of each boot stick and 3inches of the upper portion of each saddle bar must not come into
contact with the mule, no filling should be pressed within 3 inches of
the end of the boot or within 3 inches of the center stitch line. Thebody course tapers, however, so as to overlap the boot stick and saddlebar, and also tapers toward front and rear.
3. To face or dress.—To adjust the aparejo more accurately to theshape of the mule introduce filling and press it well into the cornerof the front boot; working toward the hand-hole, continue the fa-
cing along the boot stick and front edge, gradually increasing its
thickness to about an inch at 7 inches from the corner and formingits inner edge into the arc of a circle concentric with the hand-hole,the thickness tapering to the ends of the arc; continue this for 3
inches more toward the hand-hole, rapidly decreasing the thicknessto nothing; proceed in exactly the same way at the collar; under nocircumstances should the collar facing reach \nthin 7 inches of thecenter of the hand-hole. Connect the front boot and collar facings
by a dressing along the front edge about 3 inches wide and an inchthick, decreasing in thickness toward the hand-hole and toward the
middle of the edge.
Note.—In facing up introduce the filling with the hand, palmup, so as not to disturb the body course. In case the leather will notyield enough to permit the filling to be introduced well into the cor-
ners, the tamping stick may be used to raise it. This stick, used withthe commercial aparejo, is 4 or 5 feet long, H inches in diameter,
wedge shaped for 4 inches from one end, the edge of the wedge beingabout one-fourth inch thick and grooved. The object of the bootfacing is to cause the boot stick to carry horizontally and parallel to
the center of the mule and give free action to the mule's elbow. Mulesof large barrel will require a thicker facing than described. Theobject of the collar facing is to cause the saddle bar to carry horizon-
tally and parallel with the center of the mule and to protect the
mule's withers. Mules with high withers will require a thicker fa-
cing than that described. In setting to the shape of the mule the

MANUAL OF PACK TRANSPORTATION. 39
aparejo bends at tlio middle of the front edge. It is important thatthe body course remain iin(Hstiirl)ed during dressing, and tliat theinstructions given be carefully followed to avoid sore withers andtails and body and belly bunches.
4. To attach the frwppfr.— Stand the ai)arej() on its boots in itsnormal position; secure a lace thong to the front hole on the upperfacing of the crupper on each side and fasten the crupper with shortthongs to the center holes of the carrier pieces on the rear of theaparejo; pass the crupper lace thong through the second hole fromthe top of the front facing of the aparejo, through the second holeof the crupper, through the fourth hole of the aparejo facing, throughthe fourth hole of the crupper, and so on, finishing through thebottom holes of the facing and crupper and tying to the crupper hole.Note.—In lacing the crupper to the aparejo, the thong must be
passed through the holes from the outside and must not be twisted,the lacing must not cross, and it is important that the tie be made onthe last hole of the crupper instead of the aparejo.Note.—Guayava, willow, dogw^ood, hickory or any other wood
combining the qualities of permanent elasticity and strength may beused to replace broken ribs.
When the set up aparejo is to he filled, no soaking is necessary; in-
stead make the belly pieces pHable by rubbing with a wet sponge.Mules weighing 850 to 900 pounds require a 58-inch aparejo; 1.000
pounds, 60-inch; 1,100 pounds, 62-inch; for heavier mules requisitionshould be made for larger sizes.
When the mule is loaded the cincha, in travel, should free theelbow by about 1 inch; more than this will prevent a proper gripon the belly.
If the boots ride high on the body of the mule, or if they reachunder the bell}^, even though they ride horizontally and parallel to
the center of the mule, the aparejo will be likely to turn easily. Thisfault encourages injuriously tight cinching and sore tails.
If one or both boots flare out or turn in toward the mule, cinchsores and sore tails result, or belly bunches are caused.
The width of the collar arch clearance should be at least 6 inches.
If it is too narrow or too wide, or if the saddle bars slope downwardtoward the front, there will be sores on the withers; if they slope to
the rear there will be injuries over the loins, called kidney sores.
If the lacing of the crupper is drawn too tight at the bottom the
lower edge of the crupper will rub the buttocks and cause abrasions.
The object to be attained is the uniform distribution of the weight
of a load over the portion of the mule's body anatomically suited
to carrying a burden; so that the saddle will ride with Httle motionand without friction of the bearing surface on the bod}^ The con-
tact of the bearing surface of the saddle must be close at all points.
As the mule's body swells from front to rear, the more or less cylin-
drically shaped aparejo after the body course is laid must be modified
by facing up so as to provide a concave surface to fit over a convex
surface. But, as the barrel of the properly conformed mule is nearly
cylindrical through the rear half or more of the contact surface, no
facing is necessary, as a rule, in the rear part of the aparejo, although
conformation may require it exceptionally.

40 MANUAL OF PACK TRAKSPOKTATION.
CARE OF THE APAREJO.
Sec. 8. Care of the aparejo.—Packniasters should attend to thecleanhness of the riojo;mg (aparejo proi)er) at least once a week.The followino; directions for cleanin<2: and preserving the leather
equipment should be carefull}^ followed:
To preserve the life of leather equipments they should be cleanedwhenever dirt, grit, or dust has collected on them or when they havebecome saturated with the sweat of the animal. In cleaning eachpart do not separate the crupper from the body of the aparejo,
except where attached to the carrier pieces, using a lather of castile
soap and warm water. If the equipment is cared for frequently this
method is sufficient, but if the leather has become hard and dry a
little neat's-foot oil should be applied after washing with castile soap.
When the oil is dry the equipment should be sponged lightly with soapand water, which will remove the surplus remaining on the surface.
If a polish is desired a thin coat of russet leather polish issued by the
Ordnance Department should bo applied and rubbed briskly with a
dry cloth.
Particular care should be taken not to use too much oil on the bodypiece, as the result will cause the belly piece to become baggy, as the
more firm the leather of the belly or body piece is, the better it will
hold the padding of hay to its place. In no case should leather bedipped in water or be placed in the sun to dry.
All accessories of the aparejo and other equipment of the train will
likewise be kept clean.
CAUSES OF BODY AND BELLY BUNCHES, SORE TAILS, SORE W^ITHERSAND LOINS, OR KIDNEY SORES, ON PACK MULES, AND DIRECTIONSFOR THEIR PREVENTION AND CURE.
Sec. 9. The term ''bunch" is applied to a swelling or "pulFrng up"of the skin, caused by the stopping of the circulation of the blood at
that part of the body; it shows unevenness in the ribbing, or placing
of the padding (hay), causing undue bearing or pressure on thatpart of the body.Use as little hay through the body of the aparejo as possible. When
the hay has become packed the thickness should not be greater than2 inches.
If through unevenness of the filling a'
' bunch " is caused on the bodyof the animal, mark this "bunch" by wetting it with water; w^et the
face of the "bunch" only, as its shape on the animal's body is whatmust be indicated on the aparejo. Now place the aparejo on theanimal, without corona or blanket, where it rests when cinched on;do not turn crupper. Place a hand on each side and rock the aparejoso that the wet surface on the body of the animal w^ill leave its
imprints on the aparejo. Raise the aparejo clear of the animal andextend it on the ground, inside facing up, and it will show the location
where the "bunch" has been caused.Remove the hay under the wet surface, and nowhere else, and
take it out down to the ribs. The better this can be done withoutdisturbing the bed, but only where it has been marked, the moreconfident one can be that the "bunch" will disappear on the nexttravel. If not traveling, a "bunched" animal should be loaded with

MANUAL OF PACK TRANSPORTATION. 41
pack and exercised sulliciently to reduce the "huiicli;" otherwise the"bunch" will tlevelop into a "steadfast."Do not overlook any "bunches," no matter liow small; reduce
them at once and animals can always be kept sound, and soundanimals will always carry their load and do so with comfort.Shoukl the animal be "bunched" under the belly, take out the
hay on both sides for a space of about 4 indies above the boot, clearto ribs, and across wiiltli of aparejo, leaving:: a little at both edfjes.The aparejo, when cinched on the animal, will now shape itself tothe animal's body and relieve the pressure on the belly.
The "bunch" will disappear when the animal is loaded; one ortwo hour's travel is sufficient to brino; it dow^n. Where liay hasbeen removed, replace a little from day to day, until its proper filling
is regained.
The evidence of a "belly bunch," plainly indicates there has beentoo much padding (hay) used in the boots of the aparejo, as also
from the boots to the "hand hole;" this undue filling of hay causesthe boots of the aparejo to stand or flare out from the body of themule, and prevents the shaping or bentling of the aparejo to theconformation of the mule's body, the result is too much pressurebrought on the belly in cinching the aparejo to the conformation of
the body of the animal, the circulation being stopped by the cinch,
and on its removal the skin "puffs up," and we have what is termeda "belly bunch." Therefore to prevent a "belly bunch" the causemust not be provided, and if provided, must be removed; whatis wanted is an even pressure bearing surface covered by the cinch andaparejo. As the cinch binds the aparejo to the body of the animal,the body of the aparejo and its boots or ends must bend and shapeitself without undue compression of the ribs and belly of the animal;otherwise "body" and "belly bunches" will be sure to occur.
Sore docks or tails.—This trouble is not clearly understood by theaverage packmaster and cargador; therefore, to clearly understandthe description here given, it w411 be necessary to remember themeaning of the following terms in reference to the aparejo:
First. It is said the aparejo is too long or too short. The obviousmeaning is, that in fitting the aparejo we attach the crupper anddetermine by the lacing (crupper) how far forward or rearward the
aparejo shall work. When the aparejo is too far forward, or long,
the cinch of the aparejo causes an abrasion of the elbow, and interferes
with the travel of the animal; if too far rearward, or short, the
aparejo will not hold its place; it works itself off to the rear in
mountainous country, and will do so even on level ground.
Second. It is said the aparejo is too deep or too shallow. Theobvious meaning is, that in selecting an aparejo to fit the mule, anaparejo is provided that is either too deep or too shallow to properly
fit the pack animal; right here is where packmasters and cargadors
are apt to provide conditions or the fundamental cause for sore tails.
An aparejo that is too deep laps around the belly and has not sufhcient
grip on the body of the mule to hold the aparejo in its oroper place;
that is, the aparejo not having sufficient grip on the body of the
mule, it slips forward and the dock of the crupper cuts the tail bythe impact given, due to the weight of the load in the travel of the
animal.

42 MANUAL OF PACK TRANSPORTATION.
For similar reason, the aparejo when too shallow, the boots standtoo high on the body of the animal, and consequently the aparejo,
having no grip on the body of the mule, slij^s forward and the dockof the crupper cuts the tail. Therefore the object to be attained is
to provide an aparejo that will properly lit the animal, and takesufficient grip on the body of the animal so that the aparejo will
hold its place when "set up" and cinched on the pack mule.Third. Next in importance is to "set up" the aparejo by a grad-
ual tapering in diameter of the sticks hom front to rear, and a gradualtapering in the filling of hay hom. front to rear, in such manner so that
when tiie aparejo is cinched on the animal the ends or boots of the
aparejo will carry horizontally and parallel to the center of the muleand give free action to the mule's elbows. In similar manner in form-ing the saddle on each side of the center stitch line, the center or top
of the aparejo will carry horizontally and parallel with the center of
the mule.As a further aid to avoid sore tails, all aparejos should be not less
than 24 inches wide, as the greater the width of surface of the animal's
body that is covered by the aparejo, the better retaining grip it hason the barrel of the mule.
Mules supplied with newly "set up rigging" should be loaded (250
pounds) and exercised each day until the aparejos show they haveassumed the shape, or as may be termed, a plaster cast of the animal's
body, and for this reason changing of aparejos is j^ositively forhidden.
When in such condition the aparejos are fit for satisfactory service.
Should the aparejo cause the dock of the crupper to cut the animal's
tail, it is evident there is too much filling of hay at the rear corners
of the aparejo, as well as too much filling above the boots at rear,
thus preventing a suitable grip of the aparejo over the swell of the
animal's ribs (to hold the aparejo to its place), always bearing in
mind that the aparejo is sufficiently deep to grip the body of the muleproperly. This latter feature is the fundamental cause of sore tails,
that is, the first and necessary requisite to avoid sore tails is to pro-
vide an aparejo that is deep enough to grip the body of the pack mule.A shallow rigging will always cause sore tails, from the fact that it hasno grip on the animal's body and consequently works itself ahead bytravel action of the animal, the weight of the load giving the dock of
the crupper impact against the animal's dock or tail; continued action,
or a day's travel, develops a sore tail.
First. Sore withers: There are two causes for this trouble; the first
is in setting up the aparejo too weak; that is, in providing sticks that
are too small in diameter to hold up a 250-pound load ; the second is
in not having sufficient hay or padding under or below the collar to
hold the aparejo away from the withers of the pack mule.Second. Sore loins or kidney sores: The same causes operate for
this trouble as for sore withers.
Third. It should be remembered that aparejos "set up" with sticks
of too large diameter are injurious to the pack animal; they are toohard to "break in," that is, they will not compress or shape to the
body of the pack mule. They are apt to cause chafes along the shoul-
der blades, body bunches, and belly bunches; however, such rigging,
to properly break them in, should be loaded with not less than 300or 350 pounds on the pack mule, and exercised each day for at least
ten days, average distance 10 miles per day.

MANUAL OF PACK TRANSPORTATION. 43
Steadfasts.—There is but one cause for steadfasts, that is in no<z:lert-
ino; to fix for'
' bunches," a ne<2;lect of twenty-four hours niter the l)uii('h
has been caused and the bunch will becoju(^ didicult (o reduce; a ne<(-
lect of thirty-six hours and the bunch will n^sult in tlu^ flesh l)econiln<^
hard and callous, and assume the condition and a|)i)ear:ince of driedbeef; this condition is termed a "steadfast." To remove the stead-fast the knife has to be used and all appearance of the steadfast mustbe cut out; the animal experiences no pain until the sound flesh is
touched. Apply a slice of fat bacon after the steadfast has been re-
moved and the sore will heal in a few days; this will not interfere withthe working of the pack animal.
If packmasters will exercise care as above outlined when settin<^
up and fittino; the aparejo, they can follow^ a troo]) of cavalry at anygait desired, or climb any mountain wdiere an animal can find footing,
without the least danger of losing load or aparejo.
In the case of aparejos ribbed with willow or other sticks, the mainsecret is "ribbing" properly, that is, the gradual lessening in the diam-eter of each stick from front to rear.
To keep animals sound requires the time and experience of expertsat the business.

CHAPTER III.
INSTRUCTION OF THE INDIVIDUAL PACKER IN PREPARATIONFOR HIS DUTIES IN THE PACK TRAIN.
SECURING AND COILING ROPES.
Sec 10. How to prepare lash, sling, and lair ropes for use.—Takea rope, standard size and length (see table of sizes of rope and can-vas, sec. 88), and form an eye or loop on one end and wrap or seize
the opposite end in this manner:To form the eye unravel about 6 or 7 inches of end selected and
double this portion back so as to form a loop about 4 inches long;
divide the strands in the order of their twist, placing the second or
middle strand against the strand on rope selected. For this purposedo not keep the rope at a twist as held by the left hand, as the loopor eye when formed will be at a twist, i. e., not in proper alignment.Now untwist the strand selected sufficiently to pass the end of secondor middle strand through opening thus made and draw snug. (See
fig. 100.) Next untwist the strand at the left and pass the first strandthrough opening thus made and draw snug. (Fig. 101.) Now turnthe rope over and untwist the remaining strand of rope and pass this
third or last strand through opening thus made from rigM to left anddraw snug. (Fig. 102.) By this operation each raveled strand passes
between its mates on the twist of rope.
Now draw the strands more snugly against the free end or twist of
rope, and commencing with either one of the three strands pass eachone from right to left between its mates, following the twist of ropeuntil the operation is performed twice ; cut off the remaining portion
of each strand, allowing about one-half inch extending. Now place
the rope on something solid;place the foot over the splice thus made
and roll rope under foot to smooth splice and the eye or loop is
properly formed. (Fig. 103.)
On tiie opposite end a wrapping of canvas twine ma}^ be formedabout three-fourths of an inch long; use a needle to pass the end of
cord between each strand of rope, embracing the wrapping in doing so
and draw snug each time. The cord may be waxed—beeswax is goodfor the purpose—or when a cord is not available untwist the strandsfor about 7 inches and hold the rope in the left hand close to strands.
Now take a single cord of each strand and untwist close to the fingers
of the left hand, bringing each cord to the front in the order of the
strands.
Now hold the strands between the first and second fingers of the
left hand, and with the right hand take the first cord and loop it
over toward the second or middle cord, and place this second cord
44

MANUAL OF PACK TRANSPORTATION. 45
over the iirst, hokliii*]: the ciul of this cord between the points of thesecond and third linp;ers; next take the third or last cord and })rin<^
it under the first, if not alread}^ there, then over tlie secontl andaround the strands from riojht to left, its end passin<>; into the eyeor loop of first cord, and draw each cord down separately until thestrands are firmly eno;a.o;ed by the coids.
This operation leaves the strands standing upward and tlie cordsdownward, the strands thus being held in the center; now pass eachcord from right to left as before, as in the operation of finishing thesplice for eye of lash rope.
This latter method is preferred by packers as more durable, as it
will not become undone, and in similar manner is emi)loye(l for thefree ends of the sling rope.
The operation of preparing the lair rope is entirely similar tothat of the lash rope.
Sec. 11. How to do iip a lash rope.—Take hold of rope in the left
hand near the cincha or by the lacings; coil with right, receivingcoils in left hand; length of coils 24 inches. This operation is bestperformed by keeping the left hand extended downward (this per-mits of the cincha resting partly on the ground); now allow the righthand to slip down the running rope at arm's length from left to right.
This operation will gauge the size or length of each coil (length of
coil 24 inches) and permit of rapid formation in coiling the rope as
well as a guide in giving an exact resulting length to each coil. Theaction of the right hand in this operation is similar to that of a pen-dulum of a clock, the left hand receiving the coils and the groundpartly supporting the cinch and coils as rendered.Take cincha in right hand, make one turn with it around the
coils, and pass the hook through the loop formed by the coils. Drawthe hook well up, causing the cincha to tighten snugly on the coils
(^,fig. 1).
Sec. 12. How to do wp a sling rope.—Take a sling rope and bring
the ends together, grasp both parts in left hand about 20 inches fromends; coil as in the case of lash rope.
Take three turns of the loop around coils and pass the loop throughthe coils, as in case of cincha hook; draw coils up snugly against
end. This should leave the loop out, not exceeding 4 inches; length
of coils 24 inches {vii, fig. 1).
Sec. 13. How to do up a lair rope.—Take a lair rope by its eye, in
left hand; pass the end through the eye and draw through until a
coil of 24 mches is formed; hold and coil as in case of lash r()])e,
taking three turns of the end around coils. Pass the end through, as
in the case of cincha hook; draw coils snugly up, leaving not morethan 6 inches of end out {viii, fig. 1).
LAIRING IP THE PACKS.
Sec. 14. How to square ends of pacJcs and tie before lairing up.—By "lairing up" a pack, we mean wrapping it up in a manta, or j)ack
cover, to prevent damage to the pack during transportation. (See
fig. 6, etc.)
When cargo is composed of sacks of flour, coffee, beans, rice, corn,
or oats, etc., it is necessary that the ends of packs be squared and
tied before "lairing up."

46 MANUAL OF PACK TEANSPOKTATION.
The more compact the packs and the better the ends are keptsquare, the better the load will ride and the less danger there will
be of the sacks bursting when dropped on the ground, through acci-
dent or negligence.
For this purpose old or unserviceable sling, lair, or lash ropes maybe used. Cut a length, say, 20 inches and untwist; take one of thestrands and form a bowline knot at one of its ends. (Sec. 46, fig. 79.)
Always commence at bottom or seamless end of sack.
Procure a marline spike; cause pack to rest on its end; face one of
the narrower sides; squeeze the sack about 4 inches below the farther
corner with both hands, so as to bring the hands toward one another.Through the portion of the sack thus included pass the spike, andform hole large enough for strand to pass through.
Pass the end of strand through hole formed, and draw it throughuntil bowline knot meets hole; hold strand taut; tap lightly on knotwith heel of right foot, drawing slack as rendered by tapping. Shouldnot sufficient slack be gained, tap lower down, 4 or 5 inches from knot,
gradually raising until knot is reached.Hold the rope taut; move around so as to face the other end of the
sack; make a hole with the marline spike as before, and pass the free
end of the strand through; tap with the heel, as described in theformer case, and draw taut.
Now introduce end of strand through loop or eye of bowline knot,(see fig. 80), draw down snug, and secure. Turn up the other end anddo likewise, and pack is in condition to "lair up." Sacks needingit should be doubly sacked.
HOW TO LAIR UP SIDE PACKS,
Sec. 15. Secure a lair rope and spread out manta; place pack diag-
onally in center of manta; i. e., with ends facing opposite corners.
Face a side of the pack; pick up the near corner of manta andbring it tightly over pack, lapping corner under sufficiently to makeit just cover the pack. Place knees on this part; grasp the oppositecorner and, turning it under also, bring it tightly over pack, its edgeflush with near edge of pack. Place right knee to hold this part in
place and face one end; smooth canvas squarely down, and turn in
corners; reach out and grasp the end, and bring it tightly over pack,spreading canvas out, if necessary, to cover corners.
Place left knee thereon, face opposite end, and do likewise. Inbringing this last corner across length of pack turn corner underwhen necessary to square with end of pack.
Place left knee on pack and reach for lair rope; bring the ropelengthwise under pack, leaving the eye near the upper edge. Placeend of rope through eye, if not already there, and draw it through;grasp the running rope in both hands; place both knees on end of
pack, and draw well taut. This should bring the eye about 6
inches over end.Hold slack with left hand; grasp the rope with right about 2 feet
in advance of the left; form a loop outward and inward, so that theright hand will come under the left, and the running part of the ropewill ride under the standing part. Pass this loop under the packabout 6 inches from the end and draw taut. Face the other end,placing the knee on the intersection of the ropes; form a similar loop,

MANUAL OF PACK TRANSPORTATION, 47
and place it around this end; holding taut with left hand, turn thepack over, passing rope over middle of end. Place foot on pack anddraw taut.
Now pass the end of rope over and under the middle of cross ropeat nearer end of pack; then over and un(hn- cross rope at fartliei- endand draw taut.
Pass rope over middle of end of pack, turning the pack over, andsecuring the rope to the cross part at the intersection of the ropes.
If length of rope permits, take a turn around the center also.
The parts of the lair rope are designated as I, figs. 13 and 14.
In making up side packs keep the sides and ends scjuare. Nevermake up a side pack in ball shape, or get it any longer than the widthof the aparejo, when possible to avoid doing so.
HOW TO LAIR UP A SIDE PACK OF ROPES WITHOUT THE AID OF PACKCOVER OR MANTA.
Sec. 16. Take a lair or sling rope, hold an end in each hand, andspread out the loop. Place the end held in left hand on the ground
;
draw sufRciently on the end in right hand, so that when this end is
folded to the front the rope will lie in three equal lengths. This leaves
an end of the rope and a loop at either extremity. Make the three
ropes equally distant from one another at the center. Place length-
wise across the center as many coiled ropes as it is determined to forminto a side pack.When ready, another packer will assist to "lair." The two packers
face one another on opposite sides of the pack, each draws on his endof the rope until opposite loop is close to side of pack; then passes
his end of rope through opposite loop and draws slack. Each thenplaces both knees on side of pack and draws taut, causing the loops
to come near center of pack.Each packer holding rope taut with left hand, with right hand
passes rope over middle of end of pack to his left; assisting one an-
other, they turn the pack over. Each now passes his rope to the
other; then causing the ropes to cross at the center of the pack, eachbrings his rope to the middle of his side of the pack.
Resting their knees on the pack, the packers now draw the rope
taut; then holding the slack, they turn the pack over and fasten the
ropes together by a square knot on top of the pack.
HOW TO LAIR UP AN APAREJO AND RIDING SADDLE FOR STORAGE 0]i
SHIPMENT.
Sec. 17. Without turning the crupper, extend the aparejo on the
ground, inside facing up. Place the corona on it, full length, sweat-
cloth facing up. Now procure a lair rope; bring the loop over one
end of aparejo and place so as to lie along center of corona and
aparejo. C'ause the aparejo to stand on its boots; draw slack on rope
so as to leave eye or bight of rope on top and in center of aparejo.
Proceed and finish as in lairing side pack and secure dock of crup-
per at top.
Ropes, canvas, and blankets should be made into ])acks of con-
venient size and laired; each pack to have a tag indicating its con-
tents.

48 MANUAL OF PACK TEANSPORTATION.
Each riding saddle should have its blanket folded; the bridle andblind are placed therein and rolled up and the roll tied to cantle of
saddle.
The stirrups should be wrapped around saddle in convenient man-ner and the whole placed in a "gunny" sack, secured at top, andtagged to show its contents.
PUTTING THE APAREJO ON THE MULE—HOW TO FOLD AN APAREJOBLANKET.
Sec. 18. Hold the blanket by the corners, the short way up anddown; fold across the longer edges, right hand holding corners, left
holding folded edge at corner. Shake the blanket and spread it out
on the ground, the hands still holding up the corners. Carry the
upper edge to the front, so as to leave a portion of the blanket, 22
inches wide, on the ground. Then fold back, so as to leave the blanket
in three equal folds, 22 inches wide and 42 inches long. Fold oncemore, bringing the ends together. It is now in condition to be placed
on the aparejo before putting the aparejo on the mule.
HOW TO PLACE BLANKET ON APAREJO PREPARATORY TO PUTTING ONTHE APAREJO.
Sec. 19. Place so that the ends will rest on front of aparejo. Its
proper place, before putting the aparejo on the mule, is under the
corona.
HOW TO BLIND A PACK MULE.
Sec. 20. Take hold of one of the sides of blind near end; hold
animal by halter or halter shank; bring blind fully over animal's
neck to "off side," allowing half of blind with tail to hang down;bring the crown of blind well to front and pass it over animal's ears
with right hand, from right to left. Do not raise the hand in passing
over, as the animal may duck from it.
HOW TO PLACE CORONA, BLANKET, AND APAREJO ON THE MULE.
Sec. 21. It is assumed that two packers, called, respectively, the
"near" and "off" packers, work together in placing the aparejo onthe animal and see that the aparejo is properly equipped—i. e., that
the cincha is folded and placed on top of it; that the crupper is
turned so as to rest on top of the cincha, and that the blanket andcorona are on top of the aparejo.
A corona is placed in position on aparejo, as explained for the
blanket (sec. 18), numeral or design on top.
With right hand take hold of the upper half of corona at the
middle of the nearest side, lingers resting on top, thumb under;
raise, and with the left hand grasp lower half in similar manner;raise, extend corona, and pass it over animal's body with right hand,
the left guiding, to come in line over cross or birthmark on animal's
withers, center of corona along center of back.
A blanket is handled and ])l:iced on corona in similar manner.The "off" packer, in botli cases, receives the "off" end of the
corona and blanket as each comes over, and assists in adjusting
them in place.

MANUAL OF PACK TRANSPORTATION. 49
75927°—17 1

50 MANUAL OF PACK TRANSPORTATION.
MANUAL OF PACK TRANSPORTATION. 51
To place the aparejo on tlie animal, stand in front of aparejo andtake hold near its center, in rear, with right hand
;place the palm of
the left hand against the front of the belly piece of the "on" side
of aparejo, fingers dowTiward and near to the boot of aparejo.
Now lean the aparejo well toward the body, thus raising the "off"side of the aparejo well off the ground, then, both hands assisting,
raise and swing the aparejo over animal. Allow it to rest on animal'sback slightly in rear of its proper position.
In the operation do not slap the aparejo on the animal's back, as
the animal may jump from under.
HOW TO TURN THE CRUPPER.
Sec. 22. The ''near" packer takes hold with left hand on loweredge of crupper, fingers under, the right palm down, near the dock;the "off" packer takes hold similarly, hands reversed; both raise
crupper well up, press forward with palms, bringing edge of cruppertoward them with the hand, and crupper is turned.
The quicker the action the easier turned.
HOW TO cinch AN APAREJO.
Sec. 23. When crupper is turned, the "off" packer, with right
hand, holds the upper edge of crupper w^ell up and out from theanimal's buttocks, and with left hancl passes the tail up between thecrupper and the mule's hips, and receives it with right hand; holds
tail well up on animal's hips; presses crupper down under dock withleft hand, and lets go of tail; raises tail partly with left hand andplaces dock of crupper well under animal's tail.
He then places his left breast against crupper to hold it in place;
frees the animal's tail, observing that no hair rests on clock; places
the palm of left hand on center of aparejo, the right hand on corner
of boot, and pushes the aparejo forward to its place; steps to animal's
shoulder, faces to rear, and places right hand on collar of aparejo.
While the "off" packer is thus engaged, the "near" packer drawsthe upper fold of cincha quickly toward him; allows the other end to
pass over to "off" packer, guiding it to center of aparejo at top w4thleft hand; retaining the leather facing of cincha on the near side
of the aparejo; grasps latigo well clown with right hand and calls
out "Cinch!"At the word "cinch" the "off" packer passes the end of cincha
well under with palm of left hand, holding it in position until hefeels it has been received by the near packer; he observes that cinchais over the center of boot of aparejo, places left hand on rear cornerof boot and holds the aparejo forward to its place. Do not raise the
aparejo in front.
The "near" packer takes hold of cincha with left hand on corner
(never at its center or eye, as the hand will thus interfere), passes
the double of latigo through eye of cincha from above, brings it upin front and passes it through rendering ring from above, grasps
the double of latigo with left hand w^ell under, and with the right
hand passes the end through eye of cincha in rear of the other part,
places the palm of left hand against the front corner of boot as a

52 MANUAL OF PACK TRANSPORTATION.

MANUAL OF PACK TRANSPORTATION. 53

54 MANUAL OF PACK TEANSPORTATION.
brace and pulls taut with right hand. (This is termed a ''primary
cinch.")
Holding latigo in right hand, he takes hold of rear corner of boot,
the left holding front, brings aparejo well forward to place, and calls
out ''Cinch!"At this signal the "off" packer passing in rear observes that the
aparejo is straight on the animal, takes hold of latigo in between the
near packer and the mule, the palm of right hand up and of the left
down, and places right knee on boot of aparejo.
The near packer holds latigo far enough back to permit him to
raise his left loot to boot of aparejo, his left hand in front of his right,
both palms up. The two packers then pull together, reach forward,
taking a second and similar pull, and, if necessary, an additional pull
to bring the eye or hole of cincha to edge of boot.
The cincha must be in center both at top and at boots of aparejo.
The "off" packer, holding slack of latigo with right hand, takes
hold with the left below the right, palm down, the thumb grasping
latigo underneath. He brings the latigo up, resting the butt of palmof left hand near top of aparejo, the fingers gripping the top thereof;
with the right hand passes the end of latigo from above throughfinger loop and receives it with the two first fingers of the left hantl
;
holds slack below left with right hand and pulls the end with left,
taking slack well in. The latigo being drawn taut by this action,
the end is engaged between the standing part of the latigo and the
top of the aparejo and is thus caught in place. (See figs. 10, 11.)
FORMING THE LOAD PREPARATORY TO LOADING THE MULE.
Sec. 24. Take a coiled lash rope and unwrap cincha (sec. 11);
hold coils and cincha at point of lacing in left hand; release as manycoils of rope as will leave, say, from 10 to 15 feet extended. Swingthe coils held in left hand toward the right and place on the ground,cincha underneath.Now take the side packs, which make up a load, and pla^e them
lengthwise on lash rope, the heavier pack underneath. Take a coiled
sling rope, unwrap and place crosswise on load. Then pick up the
end of lash rope, extended on ground, coil and place on load.
In preparation for loading the mules the cargo is thus formed in
separate loads according to the number of mules available, (See
fig. 109.)
SLINGING THE LOAD HOW TO PLACE THE SLING ROPE ON THE APAREJO.
Sec. 25. Take hold of the sling rope, about 5 feet from one end,
with the left hand, the two last fingers gripping the rope; with the
right form as many coils as may be necessary, according to the size
of the load, and receive the coils between the thumb an<l two first
fingers of the left hand, at the same time retaining the grip on the
rope beyond the Coils with the two last fingers of the right hand.Now receive the coils from the left hantl, between the thumb and twofirst fingers of the right hand, and, retaining the grip on the free
ends of the rope by the two last fingers of each hand, throw the coils
over the aparejo to the off side, separating the ropes at the sametime, as the length of the packs may determine. A loop of the rope

MANUAL OF PACK TRANSPORTATION. 55
is tluis made t(^ haiif? down on the "off" side of the aparejo, whilethe two ends oalh^d, respectively, the "front" and "rear" ropes,
han<^ down on the near side. (See fig. 11.)
If, due to the size of the load, it is necessary to lengthen or shortenthe loop on the "off" side, do so by taking or giving slack on the rear
rope, never on the front rope; the latter should be allowed to hangnearly to the ground.
IIOW^ TO LIFT SIDE PACKS AND PLACE THEM ON THE APARE.TO.
Sec. 26. The "off" packer stands facing the sides of the packs;
takes hold of the uppermost pack at each end, hands well under, andraises it to his knees; raises it from knees quickly to breast and car-
ries it to "off" side. If heavy, incline the body forward and raise
quickly, throwing the head and shoulders back. Rest lower edge of
pack on aparejo and allow flat side of pack to come down on aparejo.
The upper edge should ride flush wath the center or top of aparejo.
The "near" packer lifts in similar manner and })laces his pack so
as to lap about four inches on top of "off" pack. Weight of packsbein^ equal, this will permit the "near" pack, after "braking," to
ride level with the "off" pack.
HOW TO SLING THE LOAD AND TIE THE SQUARE KNOT.
Sec. 27. The "off" packer, standing somewhat away from the mule,as a brace, supports his pack in i)lace with left hand, palm against the
center of the pack and slighth^ underneath it, so as to balance the
weight of the pack.With the right he picks up the front and then the rear pai'ts of the
loop of the sling rope and brings them up to center, the left hand re-
ceiving them between thumb and forefinger and holding them taut
against the pack.He then passes the loop of the rope over his right shoulder, and
when "near" packer calls out "Rope," he throws the looj) lightly
over with his right hand. If thro\\^l hard it will bound back.
Should there not be sufficient rope to pass to "near" packer, he pulls
on the rear rope sufficiently to do so.
The "near" packer takes a similar position to that above described
for the "off" packer and supports his pack with the left hand in the
same manner. With the right hand he picks up the front rope andbrings it to the center of the pack, the left receiving it between the
thumb and forefinger and holds it taut against the pack.Now take the end of this rope in the right hand, call out "Rope,"
to "off" packer, and quickly ])lace the rope on top of the loop as it
comes over. Pass the end through the loop from above and drawdown taut, letting the right hand slip down on rope to near the edgeof pack.The load is now held in place by the rope as though caught in a
bight. The loop of the sling rope should never be placed above or
below the swell of the pack, as the rope then loses its retaining hold
on load. This does not apply to box loads.
Now place the left-hand edge of palm resting on top of rope belowits engagement on the swell of pack, raise the rope with the right
hand so as to give opportunity for the last two fingers of the left

MANUAL OF PACK TRANSPOETATIOlSr.

MANUAL OF PACK TRANSPORTATION. 57

58 MANUAL OF PACK TRANSPORTATION.
hand to grip it, and keep the rope compressed against the palm, thefree end hanging down.Now reach down with right hand and pick up tlie lear rope, bring-
ing it lip snug against ])ack in rear of the front rope. Receive it
between the points of thumb and first two fingers of the left hand,allowing the free end, or portion, to hang to rear
—
never allow this
portion to cross over the front rope, to avoid confusing them. Youwill learn this.
The fingers of the left hand now hold the front and rear ropes, the
free ends of each rope hanging dow^n.
Now take the front rope in the right hand, pass it over and underthe rear rope from right to left, and pull taut, allow^ing the last twofingers of the left hand to escape from under the rope as it comesdown taut, and allow them to fall in front of the rear rope (not in
rear or behind it).
Now, again, bring the "front" rope over the outer or free end of
"rear" rope from right to left and up toward the thumb of the left
hand, receive the rope by allowing the thumb of the left hand to fall
down on the crown or loop of the front rope formed by this operation,
and bring the thumb-holding rope toward the palm of the hand, andhold it there.
Now take or grip the "rear" rope, and pull down taut, and the
square knot is tied. (K, fig. 14; see also fig. 63.)
Coil up the extra rope, pass the coils from rear to front between the
rope and the top of the pack, and draw snug.
(The parts of the sling rope are designated as "s" in figs. 13 and 14).
Note.—In forming a granny knot in distinction from the squareknot the loop at top and bottom divides the running ropes. In the
thief knot in distinction from the square knot one end of the rope is
on the left and the opposite end on the right, whereas in the squareknot both ends are on the right. (See figs. 63, 64, 65.)
HOW TO "brake" A SIDE PACK.
Sec. 28. The "off" packer does not "brake" his pack; if put upf)roperly it is already in position. The "near" packer "brakes" theoad.
The "near" packer, the square knot being tied, calls "Hold,"indicating that tne "of!" packer must hold his pack in position. Todo so, he will place a hand on each corner of pack, stand well out, andbrace against load.
The "near" packer places a hand on each lower corner of pack,raises the lower edge well out and up, causing the front edge to workdown and in, even with the off pack. If found difficult, when thepack is well up alternate the hands down and up until the pack is
flush with off j)ack; then allow or cause it to settle on aparejo.
"Near" pack having been lapijed four inches, packs of equalweight should "brake" flush. Wrien the weight of the two packsvaries, lap accordingly, and brake until rope becomes taut, and settle.
Do not try to brake a box load, as it will stand out from aparejo;
"hold" and settle.
Always remember the more equal the weights of the two packs the
less trouble they are when traveling, and the closer they are slungtogether the better they will ride.

MANUAL OF PACK TRANSPORTATION. 59

60 MANUAL OF PACK TEANSPOKTATION.
HOW TO DOUBLE SLING SIDE PACKS WHEN LENGTH OF PACKSREQUIRES IT.
Sec. 29. Place the sling rope on the aparejo, with the loop on the
"off" side, leaving only enough of the ends on the "near' side to
tie with. The packs being in place, the off packer proceeds andpasses loop to near packer, as in single slinging, separating ropes as
much as possible.
The "near" packer supports his pack with left arm, and graspsthe rear part of the loop on top of pack with left hand, with right
reaches down, picks up the rear rope on aparejo, and ties the two ropestogether by a square knot, getting the packs well together in doing so;
then throws the front of pack well up, to come even with rear end,
picks up ropes in similar manner as at rear, and ties square knot.
"Brake" and settle packs in usual manner.
HOW TO CROSS SLING SIDE PACKS WHEN TOP PACKS ARE NECESSARY.
Sec. 30. The "near" packer takes a sling rope by its middle andpasses the ends over to "off" side, retaining sufficient of the loop so
that when "off" pack is in place the loop can be passed up to its
upper edge.
The "off" packer then puts his pack in position and supports thepack with liis left hand, at center of pack. With the right hand hepicks up theiront and rear rope and brings them up to center of pack;receives them in left between thumb and forefinger, ropes pressed
taut against side of pack.With right hand he coils the ropes hanging down, coiling on left
thumb, and throws coils over center of pack to " near " side. He thenseparates the front and rear ropes. The right hand now supports the
pack, and the left receives the loop when j^assed up by "near" packer.The "near" packer, after the off pack is in position and the ends of
ropes have been thrown over, passes the loop to the "off" packer;he then separates the ropes on "near" side. Placing "near" packon, he calls out "Rope,' and proceeds to tie as in single slinging.
(Sec. 27.)
The top pack is now put in place between the two side packs andabove the sling rope."
Just before tying the sling rope it is sometimes found necessaryto get packs closer together. In such a case the "off" packer takeshold of the rear rope and pulls toward him from below, the "near"packer giving slack on front rope, as held in ])iglit of sling, and })ulling
down on rear rope to take in the slack as rendered by the "off" packei'.
When enough has been taken the "near" packer calls out "Good."If the "near" packer desires more rope to enable him to tie, the
"off" packer will pull on the rear rope from above with the left handuntil the "near" packer takes slack by drawing on the front rope,
thus pulling the bight or loop of the sling farther over to his side.
If packs are high the "off" packer ])asses sling to rear with left
hand, the "near" packer reaching from behind to receive it.
In passing loop to "near" packer over load, or from behind, it is
well for the "off" packer to hold the loop with the thumb, the fingers
extended, as he can thus more readily indicate position of rope to
o In the operation the side packa should be carried high enough to support theweight of the top pack to l)ind the h)ad.

MANUAL OF PACK TRANSPOETATION. 61
"near" packer. Always place the packs lengthwise. Top packsshould never be carried when possible to avoid them. They causedelay and are troublesome.
HOW TO DOUBLE CROSS SLING SIDE PACKS WHEN LENGTH OF PACKSREQUIRES IT.
Sec. 31. The near packer takes a sling rope l)y its middle andpasses the ends over to the "off" side in similar manner as in singlecross sling wdth the exception that the rope is evenly divided—that is,
by retaining as much of the loop on the near side as the ends indicateon the "off" side; proceeds and ties as in double slinging, i. e., atrear and front.
LASHING THE LOAD HOW TO FORM THE DIAMOND HITCH.
Sec. 32. In the formation of the diamond hitch and tightening of
the load, two packers are employed. One, termed the "near" packer,
Fig. 13.
stands on the "near" side of the animal, looking toward rear; his
mate, termed the "off" packer, stands on the "off" side, facing towardthe front. The side packs being slung on the animal (sees. 26-27-28)the "near" packer throws the end of the lash rope in rear of animal,and the cincha portion under the animal's belly, convenient to the"off" packer, who picks them up and holds them in the left hand,as indicated in fig. 19, and stands erect.
(1) The near packer now picks up the rope, about 5 or 6 feet fromcincha, and holding about 2 feet of rope between the hands, standsclose to the animal's neck; now with both hands extended downward,he draws the right hand backward, to give impetus to the motion,and with one motion he swings the rope fore and aft between the side
Eacks, clearing the animal's haunch in the action, allowing the ropeeld by the left hand to drop. (See fig. 13.)

62 MANUAL OF PACK TRANSPOKTATION.
Now, holding on to the rope held in the right hand, he draws on therunning portion between the packs, bringing the right hand down bythe side, arm's length, and reaches up with the left hand and grips
the rope, so as to have the back of the hand upward. This brings thethumb under the rope (do not get the fingers under). He then drawson the running portion between the packs, in similar manner as doneby the right hand, bringing the left hand down by the side, arm'slength; do not let go of the rope held in each hand.Now, with an outward and circular motion, bring the left hand
holding the rope to the elbow of the right arm—this leaves the rope,
or loop, on the outside of the right arm—and raise both hands to
the position as seen in fig. 14.
Next bring the right hand to the center of the pack, and with onemotion, both hands assisting, throw the ''standing" rope, held in the
Fig. 14.
right hand, over the center of the load, to the "off" packer; the "run-ning" rope, held in the left hand, over the mvde's neck.'* (In this action
the back of the left hand rests on the mule's neck as seen in fig. 15.)
Now, draw sufficient slack on the "running" portion between the
packs, al)out 6 or more feet, to form the rear half of the diamond,and throw this rope to the rear of the "near'' pack, allowing the
rope to go free from the hands. (This rope now l^ecomes the "rear"rope.) Next take hold of the running rope on the mule's neck, the
left hand forward of the right, and with the assistance of the "off"packer, bring this gunning rope to the center of the load (fig. 16), by
"The separating of the standing from the running rope is done purposely, to avoidconfusing the "off" packer; both ropes shouhl never be thrown together. Further,
when throwing the standing rope over the load, do not give the rope a wild outwardand circular swing, ehe the standing portion below the hand will become engagedaround the rear corner of the aparejo and cause delay, with perhaps a strenuous
expression from the "off" packer.

MANUAL OF PACK TRANSPORTATION. 63

64 MANUAL, OF PACK TRANSPORTATION.

MANUAL OF PACK TRANSPORTATION. 65
75927°—17 5

66 MANUAL OF PACK TRANSPORTATION.
the side of the standing rope; both packers should perform this
action together, never singly; it causes confusion and delay.
The right hand now slips down the rope to a point about midwaybetween the pack and the "boot;'' reach for this rope by passing
the left hand between the standing rope and the aparejo, and grip the
rope above the right hand; now, both hands assisting, slip downthe rope and parting from each other, on each side of the standing
rope, hold the rope in a horizontal position, with a space of about10 inches between each hand; jam this portion down between the twocinchas under the aparejo, and the hitch is "formed^' on the "nearside," ready to tighten. (See figs. 17 and 18.)
Fig. 18.
To avoid confusion, I have explained the formation of the hitch by"near" packer, in the first instance, as is customary in the practice
of instruction. Now, we will take up that portion in the formationof the hitch devolving on the "off" packer.
(2) The off' packer, having picked up tlie end of the rope andcincha, holds them in left hand, mouth of hook to the front, standserect and waits for the standing rope to be thrown over the center of
the load. (Fig. 19.) As tlie rope comes over he grips it as high as
the arm will conveniently reach (fig. 20) and immediately places thecincha hook in position under the aparejo, about 6 or 8 inches, anddraws down the slack on the standing rope, by one or two quick pulls,
and lowering the hook for (;pjivenience, he engages the standing rope

MANUAL OF PACK TKANSPORTATION. 67

68 MANUAL OF PACK TRANSPOETATION.

MANUAL OF PACK TRANSPORTATION, 69
on the hook from in, out; or from above, down. This leaves thestandinj^: ro})e next to the aparejo and the rimnini:; rope on the outsideof the hook. (Fij?. 21.)
(After en«2;a<;in^ the rope, do not hohl the roj)e taut on hook.)Now, phxce the left hand, holding the end of the r<){)e on top of the
running rope, between the right hand antl hook, and grip both ropes,the thumb under the running rope; now allow the right hand to slip
upward on the running rope, and with the assistance of the "nearpacker, bring this rope to the center of the load. (Fig, 22.) In thisoperation the left hand w^ill immediately follow the right to the centerof the load; this will bring both hands together. (Fig. 23.)
Now, with the right hand draw^ the end of the rope forward, heldby the left hand, so that about 12 inches will fall on the "near" sideof the animal's neck and the hitch is formed on the "off" side, readyto tighten the load. (Fig. 18 for the "near" side and fig. 24 for the"off" side.)
It W'ill be seen that the hitch is now laid ready to tighten. Thistightening is a progressive action, beginning on the near side andgoing by the rear all around the animal, assisted greatly by the takingof the ropes out of their line of direction.
(3) The near packer, to tighten the load, places the left hand, palmdown, on the side and center of pack; with the right hand he gripsthe running rope in the rear of the standing rope on the side of thepack (fig. 25) and brings it between the thumb and index finger of theleft hand; now bearing against the pack w^ith the left hand as a brace,
he holds the running rope taut and calls out "Go!" indicating he is
ready to receive the slack from the "off" packer.
(4) The q^ packer, at the word "Go," takes hold of the runningrope as near the hook as possible, and placing the left knee againstthe end of boot of the aparejo as a brace, he pulls all the slack pos-sible by bending the body well over, as seen in fig. 26, and gives this
slack to the "near" packer quickly, in such manner as if trying to
hit the aparejo with both fists; do not let go of the rope. Now takea second and similar pull and call "Tie," indicating no more slackcan be taken on the standing rope; then step quickly to the rear andthrow the "end" rope forward of the pack (this rope now becomesthe "front rope") and grasp the rear rope between the packs, readyto receive the slack from the near packer.
(5) The near packer, at the call "Tie," brings the right handholding the slack down tow^ard the aparejo in the rear of the stand-ing rope; the left hand receives this rope and slack by bringing thehand under the standing rope, gripping the rope above the right
hand, so as not to loosen the slack, antl brings it forward. Now, withboth hands, jam the rope upward, between the standing rope andpack; the running rope is thus held firmly, as if caught in a bight.
In this operation pull the rope quickly toward the breast. (Fig. 27.)
Now bring the free portion of the running rope below the bight,
around the front boot of aparejo with the left hand, and step to rear
of aparejo and with the right hand grasp the rope in rear of thecincha and receive the slack froni the left hand ; now bring this ropeup in the rear of the boot and place the left hand below the right,
both hands bringing the rope up quickly to the upper comer of side
pack, and hold the slack taut, the palm of the left liand compressedagainst the pack, the right hand indicating how much slack has to be

70 MANUAL, OF PACK TRANSPORTATION.

MANUAL OF PACK TRANSPOETATION. 71
r'^W;^
"H-'1 ii.''V

72 MANUAL OF PACK TEANSPOETATTOX.

MANUAL OF PACK TRANSPORTATION; IS
taken in by the "off" packer (fig. 2S) who tlien receives it, hand overhanil, qiickly, and prepares to ])ull on tlie ro])e. To do so take liold
of this rope, termed the "rear" rope, with both hands, and ])ull therope taut (fig. 2!)); do not let go of this rope until you see tlie bodyof the "off" packer "setting" on the ro])e, then let go of the ropequickly; learn to turn the rope loose at the proper time; the differencewill be noted. Now step forward of the load and face to the rear,and grasp the end of rope, and wait for slack from the "off" packer.(Fig. 30.)
(6) The off packer having taken in the slack from the "near"packer, hand over hand, takes a wrap of the rope around either hand,and leans the body forwartl, toward the animal's haunch, takes aforwartl stej) with the right foot and in line with the animal's body,
Fig. 24.
never outward, and sets back on the rope with all his weight. (Figs.31-32.) He now holds the slack with the left hand, and witli theright brings the free or running portion under and around the bootof the aparejo to the front ; steps forward and faces toward rear; nowgrips the ro})e with the left hand below the right, and brings bothhands quickly to the upper corner of pack, the left holding the ropecompressed against the pack, the right indicating how much slackhas to be taken by the "near" packer. (Figs. 33-34.) This is
termed the "front" rope.
(7) The near packer having gripped the end of the rope (fig. 30)proceeds to take in slack, hand over hand, until he has about 6 or 8leet; this portion, or end of rope is thrown over the center of theload to the "off" packer; he then continues to take in the remainder

74 MANUAL OF PACK TRANSPORTATION.
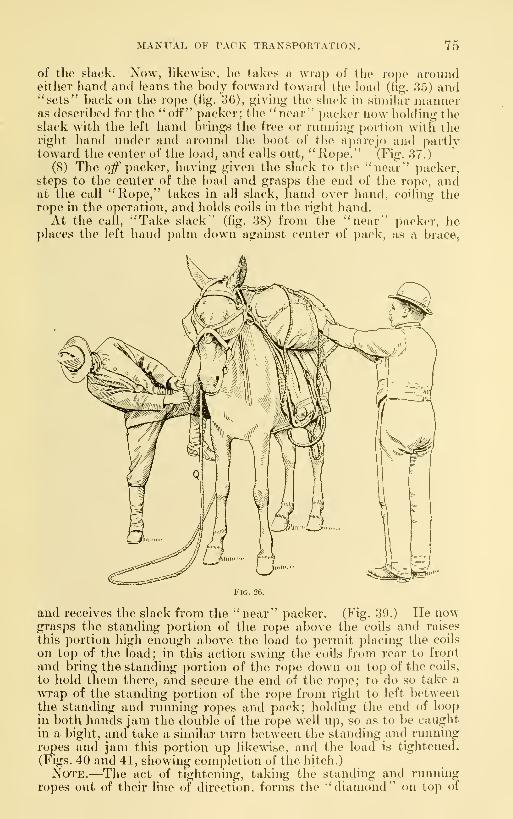
MANUAL OF PACK TRANSPORTATION. 75
of the slack. Now, likewise, he takes a wrap of the rope aroundeither hand and leans the body forward toward the load (fij^. 35) and''sets" back on the rope (fig. 36), giving the slack in similar manneras described for the "ofT" packer; the "near" })acker now holding theslack with the left hand brings the free or running ])()rtion with theright hand under and around the boot of the aj)arejo and partlytoward the center of the load, and calls out, "Rope." (Fig. 37.)
(8) The q^ packer, having given the slack to the "near" packer,steps to the center of the load and grasps the end of the rope, andat the call "Rope," takes in all slack, hand over hand, coiling therope in the operation, and holds coils in the right hand.At the call, "Take slack" (fig. 38) from the "near" packer, he
places the left hand palm down against center of pack, as a brace.
Fig. 26.
and receives the slack from the "near" packer. (Fig. 39.) He nowgrasps the standing portion of the rope above the coils and raises
this portion high enough above the load to permit placing the coils
on top of the load; in this action swing the coils from rear to front
and bring the standing portion of the rope down on top of the coils,
to hold them there, and secure the end of the rope; to do so take a
wrap of the standing portion of the rope from right to left betweenthe standing and running ropes and pack; holding the end of loop
in both hands jam the double of the rope well up, so as to be caughtin a bight, and take a similar turn between the standing and runnmgropes and jam this portion up likewise, and the load is tightened.
(Figs. 40 and 41, showing completion of the hitch.)
Note.—The act of tightening, taking the standing and runningropes out of their line of direction, forms the "diamond" on top of

76 MANUAL OF PACK TRANSPORTATION.

MANUAL OF PACK TRANSPORTATION. 77

78 MANUAL OF PACK TRANSPORTATION.
'W%^^-

MANUAL OF PACK TRANSPORTATION. 79

80 MANUAL OF PACK TRANSPORTATION.

MANUAL OF PACK TRANSPORTATION. 81
75927°—17 6

82 MANUAL OF PACK TRANSPORTATION.

MANUAL OF PACK TRANSPORTATION. 83

84 MANUAL OF PACK TKANSPOETATION.

MANUAL OF PACK TRANSPORTATION. 85

86 MANUAL OF PACK TRANSPORTATION".

MANUAL OF PACK TRANSPORTATION. 87

88 MANUAL OP PACK TEANSPOETATION.

MANUAL OF PACK TRANSPORTATION. 89
the load; lioiice the name given tliis form of hitch. In its formationa single knot is made, and wlien undoing tlic hitch tlic end, or toprope, when freed, is pulled or drawn from hetween the standing andrunning ropes; this leaves the lash rope free of knot.
In the fornuition of the ''dianumd" the rope has six designatednames:On the ''near" side we have the standing, running, and marking
ropes, and the front, rear, and top ropes.
On the "off" side we have the standing, running, fnmt, rear, andtop, or end ropes.
The standing rope is that portion encircHng the mule and load topoint of engagement on hook. (Figs. 40 and 41.)
The running rope, from hook going back over center of load tocenter of pack on the "near" side. (Fig. 40, to R, fig. 41 .)
Fig. 40.
The marking rope, from the center of side pack on the "near"side, from point were jammed under the standing rope and frontcorner of boot of aparejo. (Fig. 41, R and M.)The front rope passes over the front corners of the load; the rear
rope, in similar manner, over the rear corners; in both cases, on eachside, the rope passes under and around the boot. These ropes are
sometimes referred to as the quarter ropes. (F and D, fig. 40, andDandF, fig. 41.)
The top rope, from the rear corner of the boot on the "near" side,
running up toward and across the center of the load (fig. 41) to
the center and side of the "off" pack, where the wrapping of ropeindicates completion of the hitch. (Fig. 40.)
It may be added, there are various methods of finishing the hitch,
as conditions of loading may suggest to the experienced packer.

90 MANUAL OF PACK TRANSPORTATION.
The 'Hop" rope may be used as a marking rope by bringing the
rope to rear of the near pack instead of to the center, to indicate
that the load has been tightened, in lieu of the marking rope, andby many packers is preferred as a better method of marking the
load.
The formation of the "diamond" hitch and tightening of the load
is performed in from twenty-five to thirty seconds.
The operation of loading a pack mule (this includes putting on the
aparejo) is performed by experts in from forty-five to sixty seconds.
"
HOW TO FORM THE DOUBLE DIAMOND.
Sec. 33. This hitch is sometimes used when employing top packsor top loads, kegs and barrels excepted; for these latter the "doublehitch" is employed.The near packer takes a lash rope and uncoils about 15 feet of
the free end, and passes it over the animal's haunch to the ''off"
packer, who in turn passes the rope between the top and side packand allows the end to fall over the animal's neck to around.
o As an aid to learn how to form the diamond and other hitches, a wooden horse,
such as used by "carpenters" may be provided.It should stand 4 feet high, the center or ridge pole to be 6 feet long, the legs to be
spaced 9 inches on each side, from center of ridgepole, so as to have 18 inches spread
on each side. Bevel the upper ends of legs adjoining ridgepole so that their extremi-
ties will stand on the ground about 2 feet apart. As a reenforce supply a small cleat
of wood on the upper and outer ends of legs underneath the ridgepole.
Now place the corona, blanket, and aparejo on this wooden horse, turn the crupperand cinch the aparejo in the customary manner; place the sling rope on the aparejo
and proceed to put on the side packs, forming the load as described in sections 25
to 38.

MANUAL OF PACK TRANSPORTATION. 91
The near packer, in similar manner, brino;s the rope between the
top and side pack; in both cases the top corners of eacli "side" packretain the rope in position (kirinj^; the formation of tlie liitch.
The near packer will then hold the cincha witli the ri<ilit liand, andallow the coils held in left hand to drop to i^ronnd.
Now throw or pass the cincha to the "olT" ])acker, under the ani-
mal's belly, and form a loop, and pass the standing rope over the
load; the running rope over the animal's neck, as in forming thesingle "diamond," and, after the "off" packer engages the standingrope on the hook, the near packer throws, or passes, all rope onground to rear; this forms the rear half of the "diamond."
Next, with the assistance of the "off" packer, bring the rumiingrope up to center of load, and pass the running rope from rear to
front, between the standing rope and cincha, as in forming the single
"diamond."Now bring the end of rope between the standing and running ropes
from in, out, and draw 3 or 4 feet of the end forward and a ' 'diamond "
is formed on the near side. (Fig. 42.)
The o/f packer, to form a "diamond" on the "off" side, takes the
end rope, as resting between the "top and side" pack, doubles a por-
tion, forming a loop, and brings this loop between the standing andrunning ropes from in, out, and allows the loop to fall down; the
loop comes under the boot in the tightening of the hitch, separating
the rear and front ropes, thus forming a "diamond" on the "off"side. (Fig. 43.
j
The hitch is now formed, ready to tighten the load.
In tightening the hitch, proceed in similar manner as in the single
"diamond," wdth the exception that the rear and front rope, in tight-
ening, passes along the face of each end of top pack, to retain the toppack in position. This formation gives a "diamond" on each side
of the load; hence the name, "double diamond." (Fig. 44 for nearside and fig. 45 for off side.)
HOW TO FORM THE DOUBLE HITCH.
Sec. 34. This form of hitch should never be used, except whenpacks are so narrow that the " diamond" will slip over them, as in the
case of kegs, a single barrel, coils of rope, etc.
The double hitch is made as described for the single diamond hitch,
with the two following exceptions:
(1) The "near" packer, before passing the running rope to rear
of pack, brings the running rope up, from the animal's neck, and lays
it on the center of the load, in front of the standing rope. He thentakes sufficient slack on the running rope between the packs, and lays
or throws it to rear of load, thus causing it to ride over both the run-
ning and the standing ropes; he then takes the rope in front of the
standing rope and brings it do^\Ti from right to left between the
standing rope and pack and under the boot of the aparejo in the cus-
tomary manner.(2) The "off" packer, instead of placing the end of rope between
the standing and running ropes, places it under both, then raises to
center of load, and drops about 12 inches of end on "near" side of
animal's neck, and hitch is formed ready to tighten.
The hitch is tightened in the usual manner as in the operation of
the "diamond."

92 MANUAL OF PACK TRANSPOETATION.

MANUAL OF PACK TRANSPORTATION. 93

94 MANUAL OF PACK TKANSPORTATION.

MANUAL OF PACK TRANSPORTATION. 95

96 MANUAL. OF PACK TEANSPORTATION.
HOW TO FORM THE DIAMOND HITCH WHEN THE CINCH HOOK IS LOSTOR BROKEN.
vSec. 35. First, the near packer will remove cincha from lash ropeand place it on top of load; then throw the lash rope as usual.
The ojf packer picks up the end of lash rope, and, as the standingrope is passed to him by the "near" packer, he brings the end of the
rope from rear to front around the standing rope; holding standingrope in loop he forms a bowline knot on end of rope; this leaves thestanding rope in loop of bowline knot. (See fig. 80.) Then proceedwith the diamond hitch in the usual manner.To take the lash rope off undo the bowline knot.
HOW ONE PACKER CAN SLING THE LOAD AND FORM THE DIAMOND HITCH.
Sec. 36. Take the lash rope and grasp it with both hands, about3 feet apart, anywhere near the middle of rope; bring the portion
of rope between the hands under the boot of the aparejo, and bring
the hands together above the boot of the aparejo and grasp bothropes with left hand.Now, grasping the rear rope with right hand forward of the left,
pass a loop of it over the aparejo, of size proportionate to the size of
the pack. Lay the standing part as close to the rear edge of the
aparejo as length of pack admits and rest the running part on the
animal's hips. Drop the rear rope from left hand; then grasp the
front rope with right hand below the left and with the left hand passthe rope over to "off'" side in similar manner as described for therear rope, resting the outer or running part on the animal's neck.
Now place the sling rope in position in the usual way (sec. 25). It
should lie between the front and rear parts of the lash rope.
Take up the "off" pack and, from the "near" side, place it well
up toward center of aparejo. Place the left hand at center and loweredge of pack to hold it in place. Take the rope resting on the ani-
mal's hips and bring the loop over the rear end of pack, letting the
right hand relieve the left at center of pack and with the left bring
the front loop over the front end of pack.
Now place the left arm with elbow supporting the pack; grasp the
rear rope of lash rope with left hand, as explained in double slinging
side packs (sec. 29). Grasp the front rope with the right hand,bring it under the boot of the aparejo, from front to rear, and up to
the left hand. Tie the two ropes by a square knot, as before de-
scribed (sec. 27). Then work the pack so as to settle it to off side,
giving slack at square knot, if necessary to get it settled to place.
Pass to off side and bring the sling rope over the center of pack,
resting the loop on rear corner of pack. Return to near side andplace the near pack in position.
Reach for the loop of the sling rope from l)ehind, bring it overcenter of packs^ and tie the square knot in the usual manner (sec.
27) ; then brake or settle pack to place.
Untie the lash rope from under the packs and proceed with the dia-
mond hitch in the usual manner, passing from near to off side, as re-
quired, until the hitch is in position to take in slack.
Then take in all slack possible on the "off" side, and to hold it
hring a hight of the running roye between the standing roye and the
jMclc, so as to make it bind.

MANUAL OK PACK TKANSrOKTATION. 97
Proceed to take in slack in the usual manner. After pullino- taut,as shown in %. 26, bring the hands toward the aparejo (juicklyand grasp both ropes, i. e., the standing as well as the running rope,and, holding both ropes with left hand, receive the slack above thebight, as caught under the standing rope. Take a second and sim-ilar pull and receive the slack above the bight as before and pass tothe near side. Note.—Bringing the running rope between the stand-ing rope and the pack forms a holdfast and retains the slack as takenabove the bight.
Take the running rope from under the standing rope on "near"side, shoukl it be there, and draw in all slack. Then bring the run-ning rope under the standing rope as before. (Fig. 27.)The taking of slack should be repeated until all is rendered. In
the completion of the hitch, pass from near to off side, as necessary,taking up all the slack until the hitch is completed.
HOW TO FORM THE POLE HITCH.
Sec. 37. For this purpose a lash rope without cincha, or two sling
or lair ropes joined together, may be used for the purpose.The near packer takes a lash rope and removes cincha antl passes
one-half of rope over the load to the ''off" packer. Each packertakes hold of rope with the right hand, with the arm extendeddownward, raises the rope, causing it to rest on the left arm, andreaches for the standing rope at pack with left hand. Now bringthe right hand, holding rope, to and above the left hand, allow-ing the free end to drop dow^nward, and part the hands, bringing eachrope over the upper corners of side packs and the loop portion underthe boots of the aparejo.
Pass each end over the load to the opposite side, the "off" packerbringing his end under the standing rope at center of pack, waitsfor the word "Go," and the hitch is formed, read}^ to tighten. (Figs.
46-47.) Also figs. 72, 73, 74.
The near packer, to tighten the load, holds the end of rope passedby the "off" packer over the load, and placing the left hand as abrace against the pack, calls out "Go."The ojf packer will pull the slack on the running rope in the usual
manner and call out "Tie."The near packer brings the rope under the bight of the standing
rope, immediately takes hold of the running rope at center of boot,
and waits for the call of "Go" from the "off" packer, who frees
the end of rope from under the jight and proceeds to take in slack
in similar manner, each packer securing the end of rope as in comple-tion of the "diamond" hitch or as convenience may dictate. (Figs.
48-49.)
The pole hitch is the formation of a half hitch over each side pack
;
no portion of the rope passes under the belly of the animal, distin-
guishing it from all other forms of hitches. While it compressesthe load to extreme tightness, it affords no tightening of the aparejo
to the body of the animal, a necessary qualification when climbing amountain, or, in other words, the load may be compressetl, while the
aparejo may be loose on the animal. It should never be used when alash rope is available. It may be used for packing odds and endsafter cargo is loaded and a loose animal is available, and when pressed
75927°—17^—
7

98 MANUAL OF PACK TEANSPORTATION.

MANUAL OF PACK TRANSPORTATION. 99

100 MANUAL OF PACK TRANSPORTATION.
for time. It is also used to secure travois to aparejo and improvised"litters." (See figs. 71 and 74.)
HOW TO FORM THE OREGON DIAMOND HITCH.
Sec. 38. This form of hitch is performed by one packer, and is
closely related to the crosstree or sawbuck hitch.
Standing; on the near side of the animal, take a coiled lash rope andfree the coils, hold the cincha and allow the coils to drop to ground;now take sufficient slack on rope and pass the cincha over the load in
such manner that the cincha will come under the animal's belly withineasy reach; pick up cincha and engage the standing portion on hookfrom in out, bringing a portion of the running rope upward, andengage it under the standing rope from right to left, to hold it there;
now take the free or running portion of rope and form a half hitch,
or single loop, keeping the free end under, and draw sufficient slack
to engage over the off pack and boot of aparejo.
Pass to the ''off" side and pass the running rope from right to
left, between the pack and standing rope, and press to place underboot of aparejo, as performed on the near side in the regular "dia-mond."Now pass to the "near" side and take the end of the rope and
pass it over and under the standing rope at front, draw sufficient slack
and drop the end of rope over the animal's haunch to ground, andthe hitch is formed, ready to tighten the load.* (Figs. 50-51.)
To tighten the load, pull on the running rope close to cinch hookin the usual manner, but be careful that the rope is not drawn fromunder the bight of standing rope, as its purpose is to retain the slack
as given.
In giving slack, bring the hands quickly to standing rope and grip
both ropes with the left hand, so as to hold the slack, then receive
this slack above the bight on standing rope, and repeat the operation
until all slack has been taken; pass to the "off" side and receive this
slack in the usual manner. Now pass from the "off" to the "near"side until hitch is tightened, finishing the hitch in the usual manner,or as conditions may indicate. (Figs. 52-53.)
HOW TO SLING THE LOAD AND FORM THE CROSSTREE HITCH ON CROSS-TREE OR SAWBUCK HOW TO SLING THE LOAD ON CROSSTREE.
Sec. 39. It is assumed that the animal is equipped with crosstree
and ready to receive load.
The near packer takes the sling rope and forms two half hitches
on the ''forks" at the front of saddle, and allows each half to drop to
ground, on each side of the animal. See Figs. 71, 72, 73, and 74.
Each packer will tlien form a half hitch on the free end over the
forks at rear, allowing sufficient loop on rope to receive side packs.
The "off" side is entirely similar; in this operation the free end of
rope should come under the loop thus formed. (Fig. 54.)
The o/f" packer places the side pack well up toward forks and, hold-
ing it there with the right hand, palm down, against center of pack,
proceeds to pass the rope along the lower side of pack, taking slack
aThe running rope maybe kept to front of the standing rope in the formation; the
end of the rope will then be over the apipial 's neck on the off side instead of over the
haunch.

MANUAL OF PACK TRANSPORTATION. 101

102 MANUAL, OP PACK TRANSPORTATION.

MANUAL OF PACK TRANSPORTATION. 103
:^ ^r- .•^ A"-. :•
1

104 MANUAL OP PACK TEANSPORTATION.

MANUAL OF PACK TRANSPORTATION. 105
on free end of rope at rear and l)rin.<!;.s this portion under the pack to
center, then with the end of the rope take a turn around the ropealong the side of the pack at center and draw snug. This will holdthe pack or support it, and forms a bowline knot on end of rope; henow brings tlie rope upward at ("CMiter of pack and waits for the call,
"Rope!" from the "near" })!ick(>r.
The "near" packer proceeds in similar manner (without formingbowline knot), and when reatly calls out "Rope!" lie will then passthe end of rope over and under through the eye of bowline knot anddraw the packs well together, each packer holding packs well up, toassist in doing so, and secure the end of rope at bowline knot, or at
center of side pack at turn of sling rope, as it is always within easyreach. (Fig. 55; same on "off" side.)
This operation may be performed by one packer.
Another method in common use is, the near packer forms two half
hitches on the "forks" at front of saddle and allows each half to dropto ground on each side of the animal.
The near packer places the side pack well up toward forks and,holding it there with the right hand, with the left he brings the ropeupward and over the side pack, ancl then forming a loop or half hitch,
he brings this loop over the forks of the saddle; in forming the loopkeep the free end under and draw the pack well up, or as may bedetermined, if carrying one or more top packs, change position of
hands and with the right hand bring the fore or running rope to rear
and form a similar loop or half hitch on the forks at rear and draw all
slack taut; now bring the fore or running portion under and overthe pack at rear and form a similar half hitch over the forks and tie
at intersection of ropes below the forks; the operation for the ojf
side is entirely similar. This operation may be performed by onepacker.
HOW TO FORM THE CROSSTREE HITCH.
Sec. 40. For this purpose take a lash rope with cincha, about 35feet long, and stand on the near side of the animal, facing the load;
take the cincha and throw or pass it over the load in such mannerthat the cincha will pass under the animal's belly, convenient to
packer; pick up the cincha and, taking in all slack, engage rope onhook; now bring a portion of the running rope up to side of pack,
double this portion, and pass it under the standing rope from rear
to front, so as to be caught in a bight between standing rope and pack;
this will hold the rope.
Now bring the running rope upward, double the rope and bring
it under and forward of the standing rope, and take slack on double
of rope, then form a loop or half hitch on this portion, keeping the
free end under and turn loop over, drawing sufhcient slack on rope to
pass over the "off" side pack, from front to rear; step to "oif ' side
to place rope over upper corners and along the lower side of pack;
nov/ come to "near" side, and bring the running rope around the
lower side of pack, and pass the end over and under the standing,
running, and rear ropes at center or top of load, from above down,and take in all slack, in similar manner as performed on the "off"
side, and the hitch is formed, ready to tighten the load.
Or, in forming the hitch, after engaging the rope onto hook, bring
the running rope upward and then pass the rope to rear without

106 MANUAL OF PACK TRANSPORTATION.

MANUAL OF PACK TRANSPORTATION. 107

108 MANUAL OF PACK TRANSPORTATION.

MANUAL OF PACK TRANSPORTATION. 109

110 MANUAL OF PACK TKANSPOETATION.
forming a loop, and then under and around tlie pack to front; nowbring the end of the rope over and under the standing and runningrope and draw sufficient shick on rope to pass under and around thepack on the rear side to the rear; now bring the end of the rope overand under the intersection of the standing, running and front rope,
and drop the end of the rope over the animal's haunch on the off side
of the animal, and the hitch is formed ready to tighten the load.
To tighten the load, bring the running rope under the standing ropeso as to be caught in a bight, now, take hold of the running rope,
close the cinch hook and take all slack possible, allowing the hands to
come quickly to standing rope, and grasp both ropes with the left
hand; receive this slack from above the bight, pass to the "off" side
and take in all slack from front to rear, keeping the rope against thelower edge of pack; pass to ''near" side, and take in all slack bypulling tlie end of rope and place the rope in similar manner as for
the ''off" side and secure the end of rope on the near or off side oron top of load. (Figs. 56, 57.)
The forks of the saddle act as a holdfast in keeping the packs frommoving fore and aft, the lash rope tightening the load at the center of
side packs.Note.—This form of hitch is the parent of all other hitches used
in pack-train service. The change in not bringing the loop under thestanding rope forms the "Oregon diamond," the latter leading to the"diamond," "double diamond," etc. This hitch is used by pros-
pectors, miners, hunting parties, the Bureau of Forestry, and is
known and practiced in many countries.
HOW TO FORM THE STIRRUP HITCH.
Sec. 41. This form of hitch is used principally by cattlemen ("cowpunchers") on the "round-up" or trail, the ordinary riding saddlebeing sometimes employed for the purpose.Assuming that the load is properly slung on the crosstree, take a
rope about 30 feet long, without cincha, and pass the rope over theload, so as to have an equal division on each side; now form a loopon top and center of load. Each packer will now take the end of
rope and pass it from above, down into the loop at top, taking suffi-
cient slack so as to leave a loop long enough to place the foot therein.
Each packer will then pass the loop held by the foot to each otherunder the belly of the animal, and receive it by passing the end of
the rope into the opposite loop and release the foot. (Fig. 58.)
Before taking slack it is well to spread the rope at top of side
packs, so as to grip them more securely. At the call "Ready," eachpacker will place his foot against the animal's body and draw ropetaut, and secure end of rope to loop on center of load; or a bowlineknot may be formed on end of rope on the "off" side, sec. 46, fig. 79,
the "near" packer passing his end through loop; the "off" packeigiving slack in the usual manner, and secure rope at bowline knot.
(Figs. 58, 59, and '60.)
TAKING OFF THE LOAD AND APAREJO HOW TO TAKE OFF THE LASHROPE AND THE LOAD.
Sec 42. (1) Ojf' packer.—The "off" packer releases the end of thelash rope, as secured on the "off" side (fig, 40) and passes it quicklyover the animal's neck to near side. This sliould be done quickly,

MANUAL OF PACK TKAN SPORTATION. Ill

112 MANUAL OF PACK TRANSPORTATION.

MANUAL OF PACK TEANSPORTATION. 113
75927°—17 8

114 MANUAL OF PACK TRANSPORTATION.

MANUAL. OF PACK TRANSPORTATION. 115
1

116 MANUAL OF PACK TRANSPORTATION.
SO as to cause any coils of the end that have been phiced under thetop rope to fall to the ground.Grasp the front rope, draw on the slack sufFiciently to bring it over
and to rear of packs, stepping to rear as you do so. Then draw in
the slack, hand over hand, coiling the rope in the operation, andreceive the coils in the left hand, until the end of the rope has beenfreed from between the standing and running ropes. (This is thereverse of the process illustrated in figs. 22 and 24.)
Now step to center of aparejo, and when slack is rendered on run-ning rope at bight of standing rope (R, fig. 41) by "near" packer,free the cincha hook from the rope.
(2) Near pacJcer.—The "near" packer grasps the rear rope (D,
fig. 41) with right hand, and Mdien slack is rendered by " off" packer,he draws enough slack on the "marking" rope (M, fig. 41) to free therunning rope from under the standing rope at center of pack (R, fig.
41). He allows sufficient slack to the "off" packer to enable him to
free the rope from the hook.The hook being freed he grasps with tlie left hand the running and
rear ropes and the standing rope near the lacings of the cincha, andcalls to "off" packer, "To rear."
(3) Of pacJcer.—The "off" packer, at the call "To rear," graspsthe running, standing, and rear ropes in right hand, passes them backover the aninuil's haunches, and swings or throws the coils held in
left hand to the rear, in line with the "near" packer.
(4) Near pacTcer.—The "near" packer, holding ropes in left hand,coils them with right, receiving coils with left hand, leaving from 10
to 15 feet of the end extended.He then steps forward and partly in front of the animal swings
the coils toward the rear and places the lash rope on the ground,cinch underneath. (See footnote.)
(5) Oif packer.—The "off" packer, having passed the ropes to
the rear, steps to center of load and with left hand frees whateverportior. of the sling rope that may have been placed between thepacks and allows it to drop to ground on near side of the animal. Henow places a hand on each end of pack as a support and waits for theknot to be untied by the "near" packer.
(6) Near pacJcer.—The "near" packer, having ])laced the lash
rope on the ground, steps to center of load, places left hand, palmdown, on center of pack, and calls out "Ready!"He then frees the knot with the right hand and, changing the posi-
tion of the hands, he frees the front rope from the bight of the sling
and allows it to drop to the ground.Grasping the pack at ends he allows the pack to come down against
his breast, carries and places it lengthwise on the coiled lash rope.
(7) Off packer.—The ])ack being freed, the "ofl'" packer receives
it against the breast, allowing the sling r()})e to be caught betweenthe pack and breast; carries ])ack and ])laces it on top of tlie "near"pack, coils the sling r()[)e, and places it crosswise on the packs; thentakes the end of the lash rope where extended on the ground, coils
and places it on top of pack. The load is now formed as describedin section 24.
Note.—When occasion requires in forming cargo, the lash ropesmay be passed to the fi-ont instead of to the rear, i. e., over the ani-
mal's head instead of the haunches. This is effected in a mannerentirely similar to that described above.

MANUAL OF PACK TRANSPOKTATION. 117
HOW TO UNCINCH AN APAREJO AND TURN THE CRUPPER.
Sec. 43. With the left hand hiosen the end of the hitigo or ciricha
strap aiul with the rijijht liaiul draw the hitigo down. Loosen andrelease the hitigo from tlie rendering:: lino;; then pass the hitigo overto the "od"" side, causing it to He along the middle of cincha.
Grasp the lacings of the cincha with the right hand, the left armresting on toj) of the aparejo as asui)})ort, the thumb engaged underthe latigo as a guide to keep the latigo in the middle of the cinchaand draw the cincha downward so as to have about four feet. Now,place the left hand, fingers extended, on cincha, and fold the end overwith the right hand. This should leave the cincha doubled on top of
the aparejo, equally divided.
Step to the front, place left hand on collar, right on corner of boot,and push the aparejo slightly to the rear; if necessary, alternate eachhand. Step squarely behind animal, with the right hand grasp theend of the animal's tail, raise it to the right and upward, resting
it on the animal's haunch, and hold it there with the left hand. Withthe right raise the crupper so as to free the tail and allow the tail
to drop.
Take hold of the upper edges of the crupper with both hands,about 10 inches from the dock on either side. Raise and bring thehands together. Take both edges in the left hand; place the right
palm under the lower edge of crupper, and while the left hand is
pressing downward, press upward with the palm of the right, thusturning the crupper upside down. Allow the dock of crupper to
rest on the center of aparejo.
The animal should be held throughout the operation by retaining
the end of the halter shank in the left hand.
HOW TO TAKE OFF AN APAREJO.
Sec. 44. Take hold with right hand, near the center of the aparejo
on the near side and at rear, the left at front corner of boot; press in
quickly with left, and pull toward body with right. This gets the
aparejo quartering on the animal's back. Pass left hand over to off
side, palm against inside of belly piece of aparejo; raise the aparejo
with left hand, to clear animal's back, and place it on the ground.
It will be observed that the position of hands is the same as whenputting on the aparejo.
Note.—In taking off the aparejo ])ackers tnust not place the aparejo
on the ground with force.
MISCELLANEOUS.
how to form two half hitches—the pole (clove) hitch.
Sec. 45. Take a rope at point determined to form hitch, and hold
in left hand, the last two fingers pressing rope against palm, the
thumb and first two fingers ready to receive the hitches as formed.
Grasp the rope in the right hand in front of the left and at a dis-
tance from the left determined by the size of the loops or hitches it
is desired to form.By an outward and inward motion of the right hand make a loop
in the rope, the part held in the right hand passing under that held
in left. Allow the first finger of left hand to receive this looj).

118 MANUAL OF PACK TEANSPORTATIOK.
Make a second and similar loop and place it on top of the loop first
formed, receiving it between the thumb and loop already formed.Render slack either way, to permit of hitches being of similar size.
Place hitches over object and draw taut. (See Figs. 71, 72, 73, 74.)
HOW TO FORM A BOWLINE KNOT.
Sec. 46. With the left hand, palm up, grasp the rope, say, about 12
inches from the end, the standing part of the rope extended outfrom you.With the right lay the end or running portion over the standing
part, in front of the left hand, and grip both ropes with the thumband first two fingers.
Now bring the left hand, holding rope forward, passing over theend of the rope as held by the right hand, and lay this loop or eye ontop of the standing rope and grip both ropes between the thumb andfirst two fingers of the left hand. This operation leaves the end of
the rope standing upward in the eye of rope as thus formed.Now take the end of the rope in the right hand and bring it for-
ward, then under and over the standing rope and back again into theeye of bowline, grip the end between the two first fingers of the left
hand and pull taut on the standing rope. See Fig. 79. The rope dforms the loop or eye ; the rope c is that portion first engaged in theloop, as seen in the eye adjoining; d, the rope; a, in first position,
adjoins d, as seen in the eye; now follow this rope around, as seen at
c and a, and the bowline knot is formed.
HOW TO FORM THE BOWLINE AND BIGHT,
Sec. 47. Take a rope and double it at any point determined to formthe bight; now grasp the double or loop at end with the right hand,and with left reach forward and grasp both ropes as far as the size of
the loop may be determined; bring the loop end of the rope overand under both ropes and into the "eye" thus formed.Now with the right hand grasp the loop or double and draw suffi-
cient slack to pass the right hand, palm up, from above down throughthe loop end only. Now grasp the double of the rope in the centerof the eye and hold it there. Next bring the loop end forwardagainst the standing part, and turn the rope over, as seen at a. Fig.
81, and pull taut on the double of the rope held by the right handuntil the loop end compresses on the standing part, and the bowlineand bight are formed.Note.—In the first instance, the end of rope held in the right hand
and brought into the eye'is, in the second instance, brought underand back to the standing part extending forward, the double of therope enclosed in the eye is drawn toward the body, this forms theloop as seen on the right of d; the loop at d forms the eye or bight.
This form of knot is used in stretching a picket line, etc.
HOW TO FORM A SHORT SPLICE ON ROPE.
Sec. 48. Take two sections of rope of same size diameter andunravel the strands of each section about 6 or 8 inches long; nowplace the hack of one section on the/ro?i^ of the other section so thatthe strands of one section will pass between the strands of its mate.

MA.KrUAL OF PACK TRANSPORTATION. 119
bring each section snug ii}) and tie down with cord across the inter-
section or middle, to hold the strands to place during the operation.Note.—Tliere is a back and a front in the I'orniation (or twist) of
all ropes, and also in the formation (or })laiting) of all ropes, whips,etc. The back is tliat j)()rtion facing toward tlie body; the front is
that portion facing from the body and is the under or bottom sideof the twist in the formation of the rope; therefore, in short splicingplace the back of one section on the front of the other section so asto follow the twist in splicing the rope; now pass each strand fromright to left over and under its mate on the twist or section of rope;then take two more turns, drawing each strand down snugly duringthe operation; turn end for end and proceed in similar manner; cutoff all remaining portions of the strands extending from the splice
or rope; roll the splice under foot or something smooth and solid andthe splice is formetl. Neatness or handiness in the packer is every-thing in forming all splices, knots, and hitches. See Figs. 95 to 98.
HOW TO FORM A LONG SPLICE ON ROPE.
Sec. 49. Take two sections of rope of same size diameter andunravel one strand of each section about 12 inches long, or as longas may be determined; now place the rope held in the right handon top of the rope held in the left hand, so as to have the unraveledstrand of top section adjoining the unraveled strand of bottom sec-
tion (in the operation of the splice it may be well to tie the sections
of rope with a cord at point of intersection of the unraveled portions)
;
now, holding each section in the left hand, unravel the forward orbottom section of rope, same strand, one or two more turns andfollow this unraveling by the unraveled strand of top section; con-tinue the operation until about 4 inches of the top strand is reached;now take the strand of the top section and pass it over and underthe strand of the forward or bottom section and draw down snug,so that the tie or slip knot will lay smooth; now turn the rope end for
end, and hold the rope in the left hand as before, and unravel theremaining strands of each section until the last one or two turns are
reached. In unraveling the last one or two turns be careful to havethe strand of the top section meet the strand of the bottom section,
so that the strand of the top section will follow up the vacant turnof the bottom strand until about 4 inches of the top strand is reached,
and form a slip knot as before; if carefulness is used this will leave
the remaining strand of top and bottom section in alignment, onewith the other, showing there is no interference in the lay of thetwist of the rope; now take the strand of the top section, which will
be the strand adjoining the left hand, and pass this strand over andunder the strand of the forward section and draw down snug; this
operation leaves all the strands engaged, each strand having occu-
pied the place made vacant by its mate. To finish the splice, unraveleach strand until the slip knot is reached, divide the cords of onestrand, and pass one division, or half the cords, from right to left overand under the adjoining strand of rope and draw down snug; proceedin similar manner with the remaining five strands, using one-half of
the cords of each strand as before; now cut off all remaining portions
extending on rope and roll the rope under foot on board or somethingsmooth and the splice is formed ; the operation when neatly done will
show the rope of same diameter all through the splice. See Fig. 99.

120 MANUAL OF PACK TRANSPOETATION.

MANUAL OF PACK TRANSPORTATION. 121
Fig-78. Hawser Bend.

122 MANUAL OF PACK TRANSPORTATION.
Fig. 82. Sling for barrel horizontal, Fig. 83. Sling for barrel vertical.
Fig. 87. Rolling Hitch. Fig. 86. Sheepshank. Fig. 85. Cat's Paw. 6.

MANUAL OF PACK TRANSPORTATION. 123
Fig 88. Blackwall Hitch.Fig. 89. Mooting Knot.
Fig. 90.
Cairick Bead*
Fig. 93. Fig. 94.
Crown on Wall.

124 MANUAL OF PACK TRANSPOETATION.
Fig. 95. Short Splice.Fig. 96. S>iort Splice.
Fig. 99. Long Splice.
Fig.100. Fig 101. Fig.102. Fig.103.

MxVNUAL Oi<^ PACK TKANSPOiriATlUN. 125
HOW TO CONSTRUCT A TRAVOIS,
Sec. ^. Secure two poles from 14 to 16 feet long, as light as can-be had,l^lie diameter at the smaller ends being not greater than 2
inches. V? ---.
Six inches from the butt end of each pole cut a notch deep enough:to receive a sling or lair rope. j
Take a manta and place poles thereon at opposite edges, leaving'ahout 6 feet of the butt end of the poles extended beyond the manta.Roll the poles toward one another, leaving a space of 2 or 3 feet
between the poles. Lace the poles to the manta by means of lace
strings or small rope, or secure with horseshoe nails, always available.
Take a sling or lair rope and near middle of rope secure the buttend of each pole where the notches were cut. Use half hitches (see
figs. 72, 73, 74) and allow about 18 inches of rope between the twopoles.
Raise the poles and so place them that the center of the ropebetween the poles will rest on the center of the aparejo on the mule.Secure the poles to the aparejo with pole hitch. (Sec. 37.)
The construction should be strengthened by a distance pole lashedto poles below the manta.One packer should lead the animal, and two should be in rear to
hold up ends of travois in bad places or in crossing streams.
To enable them to hold the ends up, a rope should be attached to
end of each pole.
HOW TO IMPROVISE A STRETCHER.
Sec. 51. Cut two poles 3 feet long; double sling them (sec. 29),
and tie down to boot of aparejo. Cut two poles 2 feet long; place onein front and one in rear of aparejo, crosswise; mark and notch andsecure to side poles. This should bring the cross poles 2 inches clear
of the aparejo.
Cut two poles 6 feet long to form frame for stretcher. Take a
manta and place the poles on the opposite edges of manta. Roll
toward center, leaving a width of 20 inches between the outer edgesof the poles. Lace manta to poles, or secure with horseshoe nails,
which are always convenient. Place a distance pole at each end,
notch, and secure. The plane of the canvas should ride on top.
Secure body to stretcher by a lacing over body, clearing the stomach.
Secure poles of stretcher at front and rear to each crosspiece and lash
stretcher to aparejo. (Figs. 104, 105, 106, 107.)
Fig. 104 shows adjustment of bamboo frame to the aparejo prior to
lashing litter thereto.
Fig. 105 shows method of attaching litter to bamboo frame, the
crosspieces passing through legs of litter at front and rear as a hold-
fast and lashed to aparejo—near-side view.
Fig. 106 shows position of wounded on litter, fig. 107 showing off-
side view. Jolo pack train carrying wounded soldiers to the sea fromthe interior.
Note.—The writer is indebted to Maj. Gen. H. L. Scott, Chief of
Staff, United States Army, for the above views.

126 MANUAL OF PACK TRANSPORTATION.

MANUAL OF PACK TKANSPORTATION. 127

128 MANUAL OF PACK TEANSPOETATION.

MANUAL OF PACK TRANSPORTATION. 129
75027°—17—
9

CHAPTER IV.
INSTRUCTION IN THE SERVICE OF A PACK TRAIN.
1. SUMMARY OF DUTIES IN LOADING AND UNLOADING A TRAIN.
Sec. 52. The operation of loading a train, or of unparking, in pre-
paring for a march, may be summarized as follows:
(1) The mules follow the bell horse and take their places at therigging. They are tied together by means of their halter shanks as
they stand facing the rigging.
(2) The packers then put on the aparejos. Each animal, after
receiving his aparejo, is tied to the lash rope under the load he is to
carry. (Sec. 58.)
(3) The aparejos being on, the packers begin at once to load theanimals. As each animal receives its load it is turned loose, and cer-
tain men are detailed to keep the animals in the neighborhood of the
"bell."
In the operation of unloading a pack train, or of parking, after amarch, the elements of a pack train are arranged as follows:
(4) The cargo is formed by the cargador. (Sec. 53.)
(5) The rigging is placed in an orderly manner, convenient to thecargo. (Sec. 54.)
(6) The animals, if not on herd, are tied to a picket line, placedconveniently in rear of rigging. (Sec. 75.)
(7) The kitchen is placed convenient to water and nearest to cargo.
In this order a pack train is parked in camp or bivouac.
These various operations are described in detail in the succeedingsections.
2. LOADING A PACK TRAIN.
HOW TO FORM CARGO PREPARATORY TO LOADING THE MULES.
Sec. 53. In selecting ground for the cargo always choose the highestavailable, so that water will drain from it.
In first forming a cargo at the place where the stores to be trans-
ported are received, the coiled lash ropes are all placed on the groundin order before the loads are laid on them.Take the middle of the ground selected for the first rope. Undo a
lash rope (sec. 11) and place it on the ground, the cincha underneaththe coils, the end of the rope extended 10 feet. Get a sling rope andplace it on top of end of lash rope about 2 feet from coil. Takeanother lash and sling rope and place them similarly near thosealready in position, the heads of the coils adjoining and about 6 inchesapart, the ends of the lash ropes extended out in opposite directions.
The remaining ropes are then placed in a similar manner in posi-
tion on either side of these two, thus leaving them in two lines, with
130

MANUAL OF PACK TRANSPORTATION. 131
a space of G inches between the lines and an interval of about 2 feet
from center to center of lash ropes in the same line.
Now place the loads on top of their respective lash ropes.
In selecting ])acks to form a load, cargadors should oe careful toget both side packs of as nearly the same weight as })ossil)le, always,however, i)lacmg the heavier pack on the bottom. Form loads ac-cording to their kind as much as possible, as a mixed load is alwaystroublesome.
Place the j)acks lengthw^ise on the ropes, but with the flatter sideof the packs down.When cargo is in place on lash ropes, commence at ends and place
the sling ropes on top of loads crosswise; then coil the ends or thelash ropes and place them on top of the sling ro))es.
In parking a pack train the cargo is formed as here described, ex-cept that the lash ropes are ])laced only as the loads are removed.See Fig. 109.
HOW TO PLACE THE RIGGING.
Sec. 54. Preparatory to loading, the rigging is ])laced together,either in line or in some other formation, as an L, a half circle, ahorseshoe, etc., as convenience or the nature of the ground may dic-
tate.
If to be arranged in a straight line, the aparejos are placed so thateach will have its boots abutting s({uarely against those next adjoin-ing. The line is parallel to the line of the cargo and about 10 pacesfrom it.
If an L, place the first rigging in prolongation of the line of thecargo and 10 paces from the end of the cargo. Then run ten riggingin line perpendicular to the line of the cai-go; turn at right anglesand run the rest parallel to the line of the cargo. The cargo is thusincluded in the angle of the L.
If a double L, start as in the case of a single L, and run ten riggingin line perpendicular to the line of the cargo; turn and run thirtyparallel to the line of the cargo; then turn again and run the last tenperpendicular to the line of cargo.
Ir half circle is desired, incline boot of each aparejo toward theboot of the next aparejo, already in place.
In each of these last two cases, the cargo is included between theextremities of the line of rigging.
In placing, always watch the front corners of the boots of theaparejo; for as they are inclined or squared, so will the line run.As one stands in rear of the line of rigging, facing the front, the
"head rigging" is on the right, the "end rigging" on the left. SeeFigs. 108, 109.
HOW TO TEACH ANIMALS TO COME PROPERLY TO RIGGING.
Sec. 55. Pack animals should be early taught to "come to therigging." The first and necessary requisite is to teach them to comein from the herd ground properly. That is, they should string outbehind the "bell" animal, and should not bunch together like a flockof sheep. A thoroughly organized train, if brought up in a bunch,may take their places at the rigging without trouble; but a "shave-tail," or unorganized train, never w^ill.

132 MANUAL OF PACK TRANSPOKTATION.
The object of the instruction is to teach the animals to approachthe rigging quietly and take their places in line in rear of it, facing
toward the rigging.
As the animals approach the rigging from the rear, in single file,
packers should take station on either side of the column.One packer holds the bell animal, facing the third rigging from the
head rigging. By the time all the animals are in place, the "bell"will have been crowded down, opposite the first or head rigging. Themules are then guided, so as to form in line, facing the rigging, onthe flank of the "beh" animal. (Figs. 108, 109.)
To do this, one packer, in rear of the "bell" animal, guides thefirst mule to the proper flank of the "bell" animal; while one packer,immediately in rear of the rigging, crowds the mule up toward the"bell" animal. As the mules come in these two men gradually workdown the line, guiding each successive mule to his position. Threepackers are stationed on each side of the column of approaching ani-
mals to assist in guiding them in place. Should any animals breakaway, the herders must be prompt to round them up and get themback in place.
The pack master and the cargador should stand in front of the rig-
ging to prevent the animals from jumping over.
To more readily teach them to come to rigging, the animals maybe fed there, the feed covers being spread on rigging for that purpose.This, however, should be discontinued as early as possible.
HOW TO TIE ANIMALS AT RIGGING.
Sec. 56. The animals having taken their places as described in
section 52, they are next tied together by means of their halter shanks.(Figs. 108, 109.)
The packers station themselves in rear of the animals and keepthem well up to the rigging. The pack master and cargador are in
front. The cargador places a blind on the last animal.The mules, as they come in from herd, have the halters on, the
halter shanks detached. These shanks are piled conveniently, one-half at the head, one-half at the the end of the rigging.
The pack master beginning at one end and the cargador at theother now work toward the center, attaching the halter shanks to thehalters.
This is done by means of the "snap" at one end of the shank.Then working from the center to the ends they tie the animals
together. Additional packers will be detailed to assist when neces-
sary.
This is done as follows: Take the case of the man who is workingfrom the center toward his right or toward the "end rigging;" hetakes the halter shank of the first mule, i. e., the one nearest the cen-
ter, about 9 inches from the snap, and forms a bight or loop in it 6
inches long. Holding this in the left hand he grasps the halter shankof the second mule about 2 feet from snap and brings it from front
to rear over the loop held in left hand, retaining it in place on the
loop by the pressure of the forefinger of the left hand. Then, withthe right hand, he grasps the free or running part, passes a bight of
it under the loop and under and over the stantling part; then downthrough the loop held in left hand. Holding the original loop in the

MANUAL, OF PACK TRANSPORTATION. 133

134 MANUAL OF PACK TEANSPOETATION.

MANUAL OF PACK TRANSPORTATION. 135
left hand he grasps this bight of the running part in the right liandand pulls taut.
This knot is inunediately unfastened by pulling on the running orfree end of the shank.
In tying the third animal form the loop in the halter shank of thesecond anijnal between the snap and the knot just tied. Then takethe halter shank of the third animal and proceed as before. So con-tinue to the flank until all are tied.
In the case of working from center to left (or toward head rigging)
along the line of niules the knot is formed similarly. Note, however,that in this case the first loop is formed each time in a free haltershank, and that the runnino; or free part of the halter shank on theright is used in making the knot.
HOW TO "do up" the HALTER SHANK BEFORE TYING ANIMAL TO HISLOAD.
Sec. 57. To keep the halter shank out of the way and prevent it
from dragging it is secured in the following manner:With the left hand hold the animal by the cheek piece of halter on
near side, and with the right pass the shank over the animal's neckto the off side.
Grasp the shank over the animal's neck and pass it between theears so that it will lie between the crown and ear on near side andalong in front between the ear and eye on off side, keeping the armwell over the animal's neck in doing so.
Now bring right hand to near side, reach for the shank under ani-
mal's neck and, bringing it up snug, pass it up from rear to front
under the buckle piece of the halter at point below brow band. Drawsufficient of this loop through to permit its being passed from rear to
front under crown piece above brow band. Then pass the loop downbetween the halter and the shank; draw snug; take the end of theshank and pass it through the loop. (Figs. 40-41.)
HOW TO TIE AN ANIMAL TO HIS LOAD.
Sec. 58. Lead animal to load selected and take the end of the lash
rope. Pass this end (or bight of it) into chin piece of halter fromabove, with left hand, and receive it in the right hand. Then withthis end form a single slipknot on the standing part and draw up snug.
HOW TO LOAD A PACK TRAIN FOR THE DAY's MARCH IN THE MOSTEXPEDITIOUS MANNER.
Sec. 59. The following is the routine in the service of a pack train
in preparation for the day's march:It is assumed that the train has been properly parked, the animals
being on herd or at the picket line.
First, the cook must be awakened one-half hour before the train-
men. He folds his blankets, places them in front of the head rigging,
and immediately proceeds to get breakfast.
The moment the trainmen are awakened they must promptly arise
and dress; then fold their blankets and canvas and place them in front
of the rigging; the one first ready placing his blankets next in order
after the cook's blankets; then so on with the other blankets until all
are placed.

136 MANUAL OP PACK TRANSPORTATION.
(It may be noted that the pack blankets are used for sleeping pur-poses b_y the men of the pack train while in camp or bivouac.)
The first two packers ready will remove the rigging covers (sec,
74) and fold them, placing them lengthwise, in front of such aparejos
as the cargador may direct. Other packers will assist as soon as
ready.Commencing at head of rigging and working toward end, packers
not engaged will place blankets on aparejos. (Sec. 19). Then two or
three packers will step in rear of rigging and place the blankets undercoronas.
Those packers not thus engaged remove the cargo covers (see sec.
73), fold and place them in front of rigging as directed. In the
meantime the herd guard has brought in the aninials, if on herd, andthe animals are tied up at the rigging. (Sec. 56.) Packers then sad-
dle their riding animals.
Breakfast should now be ready. Each packer should endeavor to
be first at breakfast and first to put on an aparejo after breakfast.
PUTTING ON THE APAREJOS.
Sec. 60. The animals are either at the rigging or at the picket line.
If at rigging, remove the blind from the last animal and place it
on the next to the last. Untie the last animal and lead him around in
front of rigging until his number or design is reached.
For convenience the packers should work in pairs. The mateassists in getting the animals up to the aparejo.
While one packer is blinding the animal the other puts on the
corona. After blinding the animal, the first packer steps to off side to
receive blanket and assist in adjusting it in place; or, if before the
mate can get into position, he is quick enough to himself put the
corona on, then his mate steps to "off" side to receive the blanket.
One packer must not wait for the other to do what he can do first.
The aparejo having been properly cinched on the animal, the halter
shank is tied up (sec. 57), and the animal is led to the cargo and tied
to the load assigned him (sec. 58).
If animals are tied to picket line, to put the aparejos on, commenceat end, unt}^ng the animals and leading them to their aparejos as
before, and work toward the "bell."
When ''bell" animal is removed and tied, the blacksmith takes uppicket line and places it on load indicated by cargador.
Packers should not count how many aparejos they are getting onin excess of another set. The pack master is taking notice and will
give due credit.
When an animal is tied to his load, do not stand waiting for themate to bring the next animal around to his rigging. Time is notto be wasted in such a manner. Move and assist him.
PUTTING ON THE CARGO.
«
Sec. 61. The mules, having received their aparejos, and havingbeen tied to their respective loads, the packers begin at once to puton the loads.
Two sets of packers work at each end of cargo, working towardcenter. First ready, first choice of sides. Packers will soon learn
o- For cargo, see Glossary.

MANUAL OF PACK TRANSPORTATION. 137
which is the choice side. Do not unnecessarily move an animalaround, causino^ loss of time.
BHnd the animal, the mate in the meantime putting on the sling
rope. Pick up pack and place it in position on "off" side, mateputting up the near" pack and tying the sling. The "off" packersteps quickly around and grasps the end of lash rope. Swing it
away back, as in so doing time is saved and labor with it. Get in
position and wait for near packer to pass the loop of the rope over.Work quick and true, and above all things keep the mouth shut, for
no packer has time to listen.
As each mule is loaded he is turned loose.
When cargo is nearly loaded, or before, if opportunity offers, thepack master will detail a packer to assist the cook to load, the kitchenmules being tied conveniently for the purpose.
Before loading, but after the rigging is on, the pack master causesthe "bell" animal to be tied in some convenient place in as openground as possible, so that the mules, as they are loaded and turnedloose, will remain in the vicinity.
The blacksmith will keep loaded animals from straying away, andthe cook, when ready, will assist. Each keeps count of the animalsas they are turned loose, prevents them from lying down or strayingaway, and reports any accident to the pack master.
LEAVING THE PARK OR CAMP GROUND.
Sec. 62. Loads being on, the pack master calls out "Bell!" Thecook, riding quickly, unties the "bell" animal and leads out in direc-
tion indicated by pack master.Cargador and blacksmith count the animals as they string out,
cargador reporting quickly if any are missing.Time allowed.—Twenty minutes for getting blankets and canvas
and riding animals saddled, fifteen minutes for breakfast, twentyminutes for rigging, and twenty minutes for cargo. Total, one hourand fifteen minutes. It can be done in less time with a well-organizedcrew.
3. DUTIES OF PACKERS ON THE MARCH.
Sec. 63. In open country.—On leaving camp packers must string
out so as to take in five packs, one packer riding opposite every fifth
animal, and about 30 yards from near side of train, dust or conditionsof country permitting. Each packer should not only watch the five
packs in front, but also those in rear, as far back as his eyes candetect whether a pack is riding straight or not. Circumstances per-mitting, packers should ride in the order of mate following mate.
Sec. 64. On had and narrow trails.—Packers must ride on trail onebehind each fifth animal. If a pack needs attention, the packer in
rear calls out to packer ahead, who will assist him in catching animaland straightening its load.
While the two packers are thus engaged, those in rear ride foi'ward
and take their places in the train.
When the two packers have straightened load and turned animalloose, they will immediately fall in, in places made vacant by thosewho have gone ahead.

138 MANUAL OF PACK TRANSPORTATION.
Sec. 65. Uj) and down a mountain.—In traveling up or down amountain a pack master should have one or two packers with him at
the head of train. He will ride far enough in advance, when nature of
country indicates danger, to enable him to station either one or bothpackers, as emergency requires, to keep animals in trail and guardagainst accidents.
The same rules apply as in the case of bad or narrow trails, thoughwhen possible packers will work on side of train.
Be especially vigilant in watching the condition of packs, giving
prompt attention thereto when needed.Sec. 66. In crossing streams, either fording or swimming.—Packers
must always be stationed on the downstream side and at the mostdangerous points of crossing, keeping the animals well up and clear
of obstacles that may endanger their footing.
If ford is such that animals have to swim, packers should remainon lower side, likewise keeping animals well up and riding close upto the weakest swimmers.
HOW TO CATCH A PACK ANIMAL WHEN HIS LOAD NEEDS ATTENTION.
Sec. 67. A packer, noticing a pack that needs attention, will call
out to his mate the name of the animal. Both packers will then ride
far enough in advance of the pack animal to gain time to tie their
riding animals before the pack animal comes up.
Let one packer cross the trail and the other remain on the near side.
They should keep far enough away from trail to keep therein anythat show a disposition to break out. When the pack animalapproaches they will close in; one will stand squarely in front of the
animal—never on the side—reach out and take him b}^ the halter, andlead him out on near side of train.
Blind the animal, loosen the lash rope, and straighten the load as
quickly as possible. Do not detain him a moment longer than is
necessary. The animal knows how far he has to travel to catch upand work back to place in the train. Packers should bear this in
mind
.
Eager to get back into place in the train, the animal will becomeunmanageable and be apt to throw his load. Should the animal breakaway before his load is straightened he is certain to throw it, andthen, running through the train, dragging the lash rope after him, hewill scare others in the train and perhaps cause other packs to fall off.
The animal will stand a reasonable length of time, but no longer.
The animal having once broken away, the "bell" animal has to bestopped, the animal caught, led back, and its load ])ut on; three pack-ers are needed, one to hold him, while the others put on the load.
Certainly no good packer will cause such trouble and delay.
Packers can not be termed first class if loads fall oft' while traveling;
attention must constantly be given to animals and their packs.
HOW TO TIGHTEN A LOAD AND INDICATE IT HAS BEEN TIGHTENED.
Sec. 68. The "off" packer releases the '/top" rope (fig. 40) andpasses it over the animal's neck to near side; loosens the "front"rope, drawing the slack toward him, and steps to center of aparejo.
The "near" packer steps to rear and pulls on ''rear" rope so as
to loosen it, then steps to center of aparejo and loosens the "marking"

MANUAL OF PACK TRANSPOKTATTON. 139
rope (M, fig. 41)—that is, pulls froju rear to front on rope at frontcorner of boot and draws it frojn under the standing rope (R, fig. 41).
The "ofi"" })acker pulls on the running rope so as to slacken thetension at the cincha hook.The hitch is now loosened throughout.The ''near" packer adjusts the load in its proper place, and the
two packers then begin and tighten the hitch, taking up slack as pre-scribed in paragraphs 4 to 8, section 32.
To indicate that the load has been tightened, ho W' ever, the follow-ing variation is made in the hitch:
The "near" packer passes the bight of the running or markingrope under the standing rope, as usual (R, fig. 41), but does not bringit around front corner of boot. He allows the marking rope to dropdowai to center of boot; then wdth the right hand he receives the slackas usual, in rear of cincha. The hitch is then finished as usual; or thetop rope may be passed to rear of near pack in finishing the hitch;this latter method is preferred by some pack masters.
HOW TO TEACH SADDLE MULES TO STAND.
Sec. 69. For this purpose, when in bivouac and using a picket line,
the riding mules should aways be tied at the opposite end of the
line from the bell horse; this rule should be followed when stables
are provided. In preparation for the day's march after "saddlingup," tie the animals as far away from the bell horse as opportunityoners. On the trail do not endeavor to be always rear the "bell;"and when necessary to catch a pack mule, when his load needs balanc-ing, tie the riding mule with the shank of the bridle rein, when otheropportunities are not convenient, to either hind leg above the hock; in
doing so bring the mule's head well around so that should he endeavorto travel he wull "mill," or travel in a circle. Should the animal get
loose and endeavor to overtake the "bell," do not maltreat him whencaught as he will become more difficult to catch on the next occasion;instead, pet the animal—that is, treat him kindly. A crust of breador a little sugar is a great aid to teach the mule to become attachedto its rider. In time the animal will show a disposition to wait for
its master, who, in turn, should show appreciation by patting theanimal's neck or other kind attention. Kindness will teach the riding
mule to w^ait for its niaster or approach him when called for.
SIGNAL CODE.
Sec. 70. When desiring to slacken gait of pack train the pack masterraises either hand above the shoulder, fingers extended.To increase the gait he raises the hat vertically.
Requiring the assistance of two packers at head of train he weaves
the liat in front of hijn froni side to side in such manner as to bedistinctly seen.
Requiring the assistance of all packers but one, driving in rear, at
head of train he waves the hat in circular niotion over his head.When a halt is necessary he will extend both amis sideways; or,
"bell" animal will be led to one side of trail and brought to a halt;
packers then ride quickly to head of train and give attention to packs,
the packer in rear riding quickly forward keeping tiie animals well
rounded up.

140 MANUAL OF PACK TEANSPOETATION.
4. HOW TO PARK (UNLOAD) A PACK TRAIN
OUTLINE OF DUTIES.
Sec. 71. A pack master in parking his train will give the highest
ground to cargo; next to the cargo comes the rigging, and then the
picket line.
The camp is arranged so that the kitchen is near the cargo andconvenient to water. The cargo is formed in a double line as de-
scribed in section 53.
The ground being selected for cargo, the cargador should place thefirst lash rope. Placing it in the middle of the ground selected its
position indicates how the cargo should run.
As the loads are removed by the packers the animals are turnedloose, being kept in the vicinity by the herders.
If the animals are to be at once tied to picket line, the latter is
now stretched. The loads being removed, the animals are caught in
succession and the aparejos taken off, as described in section 72. Theaparejos are placed by the cargador, as described in section 54.
If the animals are to be herded at once for grazing, they are thensent out under charge of the herd guard. Ordinarily two packersare detailed daily on this duty. The cargador then has certain pack-ers detailed to assist in cleaning the coronas. (Sec. 76.) The cargo is
covered as described in section 73; the rigging as in section 74. Thepicket line is stretched as in section 75.
HOW PACK ANIMALS SHOULD BE LED TO CARGADOR, FOR CONVENIENCEIN TAKING OFF THE RIGGING.
Sec. 72. Packers catch the animals, undo the halter shanks (see
sec. 57), and lead the animals in single file to the cargador, who re-
moves all the aparejos and places them in the order desired.
Just before reaching the cargador with an animal, the packeruncinches the aparejo, and, removing any canvas which may be underthe cincha, places it on the ground lengthwise, in front of an aparejo
already in place.
The aparejo being uncinched (sec. 43), the mule's halter shank is
passed to the cargador, and the packer passes to rear of the animal.
Each mule in turn is then brought to the cargador, those in rear
closing up as the line of rigging advances. No ])acker should be per-
mitted to lead in ahead of the animals in his front; he should close
up and await his turn.
If the animals are to be sent out on herd at once, the cargador,
after removing an aparejo, unsnaps the mule's halter shank and turns
him loose. Halter shank should never be thrown on ground in front
of rigging, but on top or in rear of rigging. If not herded, the mulesare tied at once to the picket line.
HOW TO cover cargo AND TIE DOWN.
Sec. 73. Before placing covers on cargo, coil up ends of lash ropes,
and place the coils on top of their respective loads. (Sec. 53.) Theropes of the two packs at each end, however, should be left entirely
uncoiled, the load resting merely on the lash rope cincha. Theseropes are used for securing the covers on top of the cargo.

MANUAL OF PACK TRANSPORTATION. 141
Unfold the covers (see sec. 79) and brinfj; them lengthwise overcargo, lapping them over one another, and allowing ends of covers to
come over ends of cargo, do^^^l to the ground. In doing this, noticethe direction of wind, and lap covers so that end may not be raised
by the wind.In covering cargo four packers are needed, in order to work to the
best advantage. Two work at each end, facing one another on oppo-site sides of the cargo. Each coils one of the corner lash ropes,
and passes or throws the same down along the center of the cargo,lengthwise; working from ends toward center; each pair of packerswill then exchange ropes, pass them into cincha hooks at the sides
and bottom of the cargo, and repeat until center is reached. Thensecure the ropes at the top, or at the last hook, as the length of therope determines. The ropes thus form a lacing over the cargo.
HOW TO COVER RIGGING AND TIE DOWN.
Sec. 74. Two packers at each end of rigging, working toward cen-ter, unfold covers (sec. 78) and place them lengthwise along the line
of rigging. In doing so overlap the cover adjoining, so that its endmay be engaged in t^^ing down on top of aparejo selected.
For securing covers in place sling or lair ropes are used when theanimals are tied to picket line, halter shanks when the animals are
on herd.
In the first case, take a sling or lair rope and pass an end of it fromrear to front under the last aparejo on the line. This may readily
be done by "whipping" the rope over and under the aparejo.
Then on top of the aparejo fasten the end by a slipknot to therunning part of the rope and draw snug, so that the knot will be at
the collar of the aparejo.
Proceeding to the third aparejo, pass the other end of the ropeunder it from rear to front as before; then bring the end up and,passing it under and over the standing part, draw taut, so that theintersection of the ropes will be at the collar of the aparejo. Take a
similar turn of the rope around the sixth aparejo, and so on.
Lengthen the rope as needed b}" additional lair or sling ropes.
One rigging cover extends over ten aparejos. At every tenthaparejo the rope must consequently be made fast, so as to catch the
covers where they lap. Thus the rope is made fast at the third, sixth,
tenth, thirteenth, etc., aparejo. (Fig. 108.)
In the second case, when the animals are on herd the covers are
secured by means of halter shanks. Pass the snap end under the
aparejo from rear to front and tie the ends together by a square knotat the collar. As in the first instance "whip" the shank to morereadily get it over and under the aparejo.
HOW TO STRETCH A PICKET LINE.
Sec. 75. For securing the ends of picket line, if other conveniences
are not available, sink what is termed a "dead man" for each endand, if necessary, one also at the middle.
To do this cut two or three pieces of wood about 18 inches long.
At the ends and middle of the picket line dig holes about 18 inches
long, 12 inches wide, and 18 inches deep, or as deep as the nature of

142 MANUAL OF PACK TEANSPORTATION.
the ground may require, the length of the holes being perpendicularto the direction of the picket line.
For each "dead man" take a sling rope, tie its ends together, andgive a single twist on rope and bring the loop ends together; this
causes the folds to lie evenly. Twist again and bring the loop endstogether as before.
Now hold the folds of rope in the left hand at opposite point, orpart where ends of rope had been tied; at opposite part grasp thefolds wuth the right hand and bring the folds to the middle finger of
the left hand and receive them.Now introduce the "dead man" through the folds of rope made by
this formation, and allow the folds of rope held in the palm of theleft hand to fall over the folds of rope held by the middle finger, anddraw taut on "dead man," and tlie "dead man" is thus caught in ashpknot. As in the case, as seen in fig. 82.
Place the "dead man" in the hole dug for it, and keeping the endof the sling rope out, fill the hole and tamp.The picket line is then stretched by being attachetl to these sling
ropes.
As facilitating the tightening of the rope, the following is a con-venient method of stretching the picket line:
If the picket line consists of a single rope, fasten one end to thesling rope of one of the " dead men;" bring the other end through theloop at the center "dead man." About 10 or 15 feet from this endform a bowline knot on the rope; then pass the end through the loopof the sling rope at the last "dead man;" bring it back and pass it
through the loop of the bowline.
By drawing on the end all slack is now readily taken in, and theend is then secured.
If the picket line consists of two ropes, fasten each to one of theextreme " dead men;" take an end of one, pass it through the loop at
center "dead man," and form a bowhne knot in the end. Then passthe free end of the other rope through the loop of this bowline, drawtaut, and secure as before.
Obviously the same method may be employed when the ends of thepicket line are attached to other forms of holdfasts than the one hereconsidered.
HOW TO CLEAN CORONAS.
Sec. 76. For this purpose a table knife is ordinarily employed, andfor convenience a provision is supplied on selected aparejo. This is
done by cutting a slit between tlie two inside lines of stitching on the"near" side of "front" facing, just wide enough to permit the bladeof knife to pass downwardly; the handle of knife will hokl it in posi-
tion. Two or more knives may thus be provided for cleaning pur-poses.
Immediately after the aparejos have been taken off the packmasteror cargador details certain packers to assist in cleaning coronas.
Commencing at each end, spread corona, canvas side up, and allowit to fall on either side of aparejo, and with knife clean the canvasthoroughly. Before cleaning corona place corona on top of aparejoadjoining, and clean the canvas and dock of crupper thoroughly; thenreplace corona and proceed and clean, as explained.

MANUAL OF PACK TKANSPORTATION. 143
Should the corona l)c wot, leave the canvas side exposed t(j dry; in
due time fold coronas, cover, and tie down. (See sec. 74.)
HOW TO FOLD PACK COVERS.
Sec. 77. The operation of foldino; a pack cover is similar to thatprovided for the folding of a pack blanket, with this exception, that
the pack cover is square. (Sec. 18.)
HOW TO FOLD RIGGING COVERS.
Sec. 78. For this purpose two packers are ordinarily employed;each packer takes hold of one end at corners, folds and brings thecorners together, and holds corners with one hand; the packer at
one end holds the corners with the right hand, while packer at oppo-site end holds corners wdth the left hand.Now, with the free hand, each packer takes hold of the folded
corner, and bracing from each other they draw taut on cover, to causethe folds to lay evenly. Then one packer lays his end on the ground,while his mate gives a quick swing backward, so as to cause the oppo-site end to come quickly toward him, and places end on top of oppo-site end.
Now fold one end, and fold opposite end on top of fold thus formedso as to have folds of equal length; or each end may be broughttogether and folded as may be determined.
HOW TO FOLD CARGO COVERS.
Sec. 79. For this purpose two packers are employed; each packertakes hold of one corner on the same side of cover and folds withinthe last section or strip ; now fold this odd section or strip on top of
fold already formed, then fold once more and draw taut. Now fold
one end to near center of its length, and fold opposite end on top of
fold thus formed, or as conditions may require.
HOW TO FOLD FEED COVERS.
Sec. 80. The operation of folding feed covers is entirely similar to
that prescribed for rigging covers.
In preparation for the day's march, pack, rigging, cargo, and feedcovers so folded are placed lengthwise m front of rigging selected.
In the operation all canvas should be well shaken m order that dustand other matter may fall therefrom. In no case must folded covers,
when placed on the aparejo, reach within six inches of the boots or
ends of the aparejo, or must the folds be wider than the width of theaparejo.

CHAPTER V.
MARCHES AND LOADS.
1. WHAT MAY BE REQUIRED OF THE PACK MULE.
Sec. 81. Under ordinary conditions, the pack mule carrying a loadof 250 pounds will travel from 20 to 25 miles per day, and maintaina rate of speed of 4^ to 5 miles per hour.With occasional days of rest lie may be expected to perform this
amount of work steadily; and this, too, without the aid of grain or
hay.It must be remembered, however, that except on extraordinary
occasions pack mules should never be tied to a picket line, but shouldbe herded as much as possible. In bivouac they should be taken to
graze at night as well as day, packers being detailed as herd guard.The "bell" horse being hobbled or picketed in the vicinity, there is
no danger of the mules stampeding, as they will not leave the "bell."
If allowed to graze, mules will always keep in average condition,
and on nutritious grasses will stand a twelve months' campaign andkeep fat.
Sec. 82. Mountainous country.—In rough and mountainous coun-try, the pack mule will carry the same load (250 pounds), and travel
from 10 to 15 miles per day. He should not, however, be forced
when traveling up or down a mountain, unless the occasion is veryurgent. Uphill work is hard on man and beast.
Sec. 83. Forced inarches.—In forced marches the pack animalsshould not be loaded in excess of 200 pounds.
If travehng with cavalry, the pack mule may not be able to spurtoff at a 10-mile gait, but he will be pushing the horse before 30 miles
are covered, and he has the horse at his mercy in a march of 75 to 100miles in twenty-four hours.The following instances, out of a great many, may be briefly men-
tioned:
In the campaign of 1881, under Colonel Buell, Fifteenth Infantry,
against Chiefs Victoria and Nana, of the Warm Spring tribe of
Apaches, a company of Indian scouts and one pack train made a
march of 85 miles in twelve hours, loaded 200 pounds to the packanimal.
Later, in pursuing Indians of the same tribe, a company of Indianscouts and one pack train marched from old Fort Cummings to FortSeldon, on the Rio Grande, about 60 miles, from sunrise to sunset ; thenwent by rail to Fort Craig, N. Mex., loaded 250 pounds to the mule;marched across the valley, some 30 miles, to the San Mateo Range;struck the trail of Chief Nana and party; and, without making anall-night camp, followed the hostiles into old Mexico, south of the
Hatchet Mountains.This was a running fight the entire way. A distance of about 300
miles was covered in about four days.During the "Loco" outbreak from San Carlos Agency, Ariz., in
1882, one company of scouts and one pack train, loaded 200 poundsto the mule, made a forced march of 280 miles in three days.
144

MANUAL OF PACK TRANSPORTATION. 145
Durino; the Garza campaign on the Rio Grande frontier, in Texas,
in LS91 and 1<S92, a troop of the Tliird Cavahy and a part of onepack train marched 108 miles in sixteen hours; the mules were loaded
250 pounds to the mule.In the same campaign another troop, with part of a pack train,
marched 104 miles in a night and part of the following day.
In another instance, in the same campaign, a pack train made 90miles in less than twenty-four hours, the animals carrying loads of
250 pounds. After such marches the mules were given twelve to
twenty-four hours' rest to regain their normal condition.
It should be remembered that pack animals should be kept in con-
dition by constant exercise, for if fat such marches will quickly kill
them.2. GAITS.
Sec. 84. When moving at a slow rate of speed the walk is the ordi-
nary gait of the pack mule.As the rate of travel is increased, however, a trained pack mule,
instead of quickening the walk, falls into an amble or "fox" trot.
This is for the reason that an extended walk or a "jogging" trot
would transmit motion to the load, which wx^uld greatly inconvenience
the animal. He has, accordingly, learned to acquire the gait whichenables him to move to the best advantage without rocking his load.*^
At this ambling gait he is able to cover from 5 to 6 miles an hourwithout undue fatigue.
Sec. 85.—
3. Table showing loads and rates of travel considered practicable for a well-organized
and seasoned pack train.
Weight of load.

146 MANUAL OF PACK TKANSPOETATION.
4. THE ENDURANCE OF THE PACK MULE UNDER PROPERCONDITIONS.
Sec. 86. As a prerequisite he must not be less than 14.1 and notover 15.1 hands high, of blocky build, weighing from 950 to 1,100pounds, sound in bgdy and hmbs, age from 4 to 6.
Head well formed and intelligent looking, broad between the eyes,
eyes clear, large, and full; ears flexible; teeth and tongue free fromblemishes; neck full and inclined to arch; withers low and broad;back short and straight; belly large and deep; dock low and stiff;
legs straight, standing well apart at front and rear, the former indi-
cating good lung power, the latter full in buttocks; the hoofs sound,broad, and full.
The mule should have a pack saddle that will protect the bodyfrom all manner of loading—that is, capable of being adjusted so as
to support heavy loading when necessary without injury to thewithers and with a proper bearing surface on either side of the ani-
mal's backbone. For such a purpose there is no form of pack saddlethat has ever been devised comparable to the aparejo.
As an instance of the adaptability of the aparejo to carry heavyand unwieldly loading, reference to figure 110 will show what can beaccomplished by the aid of the aparejo and expert packer. This cagemount of naval rapid-fire gun, weighing 540 pounds, was taken fromthe gunboat Quiros (Captain Walker, U. S. Navy) and carried 3
miles inland, island of Jolo, P. I., and back again on the same muleby order of Col. H. L. Scott.
To accomplish this feat Assistant Chief Packer Mora E. Smithmade a wooden frame to fit over the aparejo as a base on which to
rest the cage and lashed the frame to the aparejo. The cage wasthen lifted onto the mule and secured with lash rope. Such a feat
could not be accomplished by the use of the crosstree or Moore packsaddle.

MANUAL OF PACK TKANSPOKTATION. 147
Fig. 110.

CHAPTER VI.
ORGANIZATION.
Sec. 87.—
Usual organization and equipment of a pack train.
PERSONNEL.
Pack masterCargador. . .
Blacksmith.
.
CookPackers
ANIMALS.
Bell horse 1
Pack mules 50
Riding mules 14
EQUIPMENT.
Aparejos, proper 50
Head halters and shanks 65
Blankets, pack 50
Lash ropes with cincha and hook 50
Sling ropes 50
Lair ropes 100
Pack covers 100
Rigging covers 5
Cargo covers 5
Feed covers 5
Packers' blinds 11
Packers' saddles 14
Packers' bridles 14
EQUIPMENT—continued.
Blankets, saddle 14
Clothes or war bags 14
Hay pads 14
....... 1
2
1
1
1
Bell (sheep) with strap
Pair hobblesMess or kitchen boxes.Field stove with kit..
Package matchesPack train mess kit.
Wall tent with jointed poles 1
Tool sack 1
Cargador's box 1Cargador's kit 1
Blacksmith's kit 1
Blacksmith's boxes 2
Mule shoes, Nos. 1 and 2 (fitted). . . . 256
Horseshoes (fitted) 8
Box horseshoe nails. No. 6 1
Ax 1
Spade 1Pick 1
Currycombs — 10
Horse brushes 10
Feet of picket line, % inch 150
Linen shipping tags 200
Sec. 88.—
2. Table showing size and quantity of rope and canvas required for one pack train.
ROPE.
Article.
Lash rope.Sling rope.Lair rope..
Made of-
One-half inchThree-eighths inch
.
do
Length.
Feet.
Number.I
required,j
Totalfeet.
5050100
2.5001,500
3,000
Note.—The size of the above rope is measured by the diameter.•
, o. i i,
A coil of half-inch best hand-laid manila contains 1,200 feet, weighs 85 pounds, and will furnish 24 lash
'^°A^coil ofTliree-eighths inch best hand-laid manila contains 1,200 feet, weighs 55 pounds, and will furnish
40 sling or lair ropes. (Sec. 10.)
148

MANUAL OF PACK TRANSPORTATION. 149
f. Table showing size and quantity of rope and canvas required for one pack train—Con.
CANVAS.
Article.

150 MANUAL OF PACK TEANSPOKTATION.
As a flap for the bag, take a piece of duck 12 inches long and 3
inches wider than the bag when flattened out. Cut one of the shorteredges in semicircular shape and hem this edge. Attach the straight
edge to the upper edge of the bag, lapping 1 inch. Then for securingthe flap over the bag, fasten a lace string at the center of the semi-circular edge of the flap and attach a corresponding loop 6 inches
from the bottom of the bag.
packer's WARDROBE.
Sec. 94. Packers are ordinarily permitted to carry 3 changes of
underclothing; 3 overshirts; 6 pairs of socks, wool preferred;- 2 over-afls; 1 canvas coat; 1 overcoat; 1 sUcker, or rain coat; 1 extra pair
of boots or shoes ; 1 pair of overshoes.
packer's wall tent.
Sec. 95. The tent is a wall tent, regulation size. For conveniencethe upright poles are cut diagonally in two at the center; length of
cut, 4 inches. For use the two parts of an upright are united by a
collar or sleeve. This is made of stiff tin or iron, shaped to the pole
and riveted to the lower joint, so that it will fit well over the diagonalcut.
The ridgepole is hinged on the flat side at the center of its length.
The hinge is screwed on and the ])ole is then sawed in two at thecenter.
TOOL sacks.
vSec. 96, Same as clothes or war bags, but instead of a flap at openend, use a double lace string, and secure as in drawing or closing up atobacco sack. The sack is used for extra lace strings and for curry-combs and brushes.
GRASS OR HAY PADS.
Sec. 97. Take a piece of 28-inch No. 10 cotton duck, 7 feet long;double across the long edges and sew the edges together all aroundwith a flat seam. Cut a slit 10 inches long in center of one side andbind the edges of the slit all around with sheepskin. Attach a string
for lacing.
These pads are used for carrying extra grass or hay, for readjustingthe filling of the aparejos.
pack COVERS.
Sec. 98. Made of 72-inch No. 4 cotton duck; cut 6 feet long; allow1 inch at each end for hennning, to be sewed with 3-cord flax thread,
machine stitch, six stitches to the inch. Two (2) for each aparejo.
RIGGING COVERS.
Sec. 99. Made of 22-inch No. 2 cotton duck; cut two lengths 24feet long, to be sewed with 6-cord yellow machine thread, machinestitch, six stitches to the inch; ends to be hemmed in customarymanner. Five (5) for each organized pack train.

IVIANUAL OF PACK TRANSPORTATION. 151
CARGO COVERS.
Sec. 100. Made of 28-inch No. 10 cotton duck; cut five widths 12feet long; hipped on border hne and hemmed at ends; to be sowedwith 3-C()rd flax thread, machine stitch, six stitches to the im^h;ends to be hemmed in customary manner. Five (5) for each organ-ized pack train.
FEED COVERS.
Sec. 101. Made of 44-inch No. 10 cotton duck; to be 24 feet long,hemmed at ends; to be sewed with 3-cord flax thread, machine stitch,
six stitches to the inch. Five (5) for each organized pack train.
cargador's box.
vSec. 102. This is made, preferably of leather, 18 inches long, 9
inches wide, and (> inches higli, with lid.
It is reenforced on the inside by iron bands, 1 inch wide and one-eiglith inch thick, riveted around the edges at top and l)ottom. Halfof the upper iron band is left exposed al)ove the edges of the box,serving as a support for the lid, when in place.
Thimbles for tools are sewed to the sides of the box on the inside.
A slide handle of leather may be attached to the lid.
For a hinge, take a piece of leather the length of the box and about2 inches wide, and sew it to the back of the lid and the back of thebox.
For fastening, a strap may be used across each end, provided withbuckle and held in place l)y means of leatlier keepers, and an attach-ment provided for a small Yale or other lock.
cargador's kit.
Sec. 103. To consist of—Half-round knife 1
Gauge knife 1
Riveting hammer 1
Rivet cutter 1
Rivet set 1
Spring punch 1
Hand punches, size |, \, and I inch 3
Edge tool 1
Awl handles 3
Awl blades or points, assorted sizes 12
Saddler's needles, Nos. 2 and 4 papers.
.
2
Sailniaker's needles, assorted sizes 6
Palm 1
Sailing twine, No. "0" ball.. 1
Shoe thread, "Barbour's" No. 10 balls.. 6
Beeswax pound .
.
\Black wax do ^Halter rings, regulation size 12
Halter snaps, "trigger," size IJ inches 12
Common japanned buckles, size 1^ inches 12
Side of latigo leather 1
Side of bridle leather, "fair" 1
Oilstone,'
' small " 1
Tailor's shears, G-inch blade 1
The leather is carried on one of the aparejos, between the aparejo
and the aparejo cover.
Note.—One stitching horse, when stationed at post.

152 manual of pack transportation.
blacksmith's boxes.
Sec. 104. Made of seven-eighths inch white pine, 24 inches long, 12
inches wide, and 9 inches high, outside measurements; to be dove-tailed; inside tin lined; no lid or cover.
blacksmith's kit.
Sec. 105. To consist of
—
Horseshoe knives, blades Sj inches 2
Rasps, length 16 inches 2
Shoeing hammer 1
Hand hammer 1
Pritchel 1
Pincers 1
Cutting nippers 1
Clinch iron 1
Packer's field anvil 1
Blacksmith's apron (sheepskin) 1
To make the field anvil, take a piece of flat iron about IS inches
long, 3 inches wide, and one-half inch thick; shape this into a triangle
about 5 inches on the side and weld together.
4. HOW TO ORGANIZE A PACK TRAIN.
Sec. 106. As an aid to more readily teach the animals in their
duties a corral should be provided in which to arrange the rigging
and cargo and to keep them off the ground. Procure some two byfours; space them 18 inches apart and hold them by crosspieces, onwhich to place the aparejos; for the cargo procure some boards to
rest on the two by fours and form a platform 8 by 65 feet (it is notexpected to provide these conditions in the field). Now, to teach
the animals to come to rigging and prevent crowding and pushingthe aparejos out of position drive five stakes in rear of the rigging
and connect them by two by fours or suitable poles placed on top of
the stakes and nail down; the height of stakes should not exceed6 inches above the rigging. Next cover the rigging, tie down andspread the "feed covers" thereon. Along the line of covers poursufficient grain to encourage the animals to approach the rigging in
rear of the line of stakes or guard rail ; for this purpose the gatewayto enter the corral should be placed facing the line and end of the
rigging, the first aparejo placed being considered the head, the last
in line the end of rigging.
Before the train is brought into corral to "line up'' the pack masterand cargador should take position in front of the rigging to preventthe animals jumping over the guard rail. Six packers take station
in rear of the guard rail facing the line of approaching animals,
while one packer leads the "bell" horse, and tlie other packers remainon the outside of corral to keep the animals together.
The bell horse is tied to guard rail with halter shank at end of rig-
ging, the packer taking station in rear of the animal and causing
the other animals as they approach to fall in on the flank of the
bell horse, the packers in rear of the guard rail causing the animalsto fall in line in the flank of each animal following. As the line
fills up the packers in rear of guard rail take station behind the ani-

MANUAL OF PACK TRANSPOKTATION. 153
mals until all are lined up. The pack master and cargador with theassistance of the packers that were guarding the mules on the outsideof corral assist in tying the animals to guard rail; this should bedone as promptly as possil)le, and under no circumstances shouldthe animals be permitted to leave their positions first taken. Whilethe animals are tied up at rigging, care should be exercised to preventtheir wasting the grain and kicking each other. A small switch oraparejo stick in the hands of each packer will cause the animals to
give attention—this should be used for correction, not for abuse,"which must not be permitted under any circumstances, rememberingthe more abuse the animal is given the more unruly or ugly it be-comes, until it is classed as an outlaw; the animal is dumb—thepacker is presumed to be intelligent and human.
In due time "turn loose," that is, unsnap the halter shank fromhalter. For this purpose always commence with the bell horse andthen successively each animal in turn until all are freed; lead the"bell" toward opposite end of corral and cause each animal to fol-
low the "bell" as turned loose. Packers should now go among themand approach as many as will permit, stroke the animals on the neckand back and call them by given name; animals like to be petted.The results will be astonishing in the short time in which a train of
gentle mules can be loaded for the day's march.A young train should be accustomed to line up at rigging twice per
day at regular intervals, on each occasion placing a little grain onthe feed cover, as they soon become accustomed to look forward in
patient expectation for the morning and evening meal.In due time as they learn to line up properly, the feeding at the
rigging should be discontinued.During the process of teaching the animals to line up at rigging,
they should be loaded and taken out of camp a distance of 2 or 3miles and the pack master should then round up the train and notethe condition and fit of each aparejo in memorandum book, correct-ing those needing immediate attention; continue this practice eachday until each aparejo is properly fitted and adjusted, when longermarches should be taken, to get the animals in good muscular condi-tion and harden their backs.
After a period of four weeks practice marches should be reduced tofour times each week, one day to the practice of lairing-up side packs,the last day of the week, Saturday, to cleaning up the rigging andother duties.
From four to six weeks, as noted above, should get the train in serv-ice for active duty.Chapter IV, "B. Instruction in the service of a pack train," should
be thoroughly understood and complied with; also Chapter VI,"Duties of individuals."
To maintain an organization and efficiency both men and animalsmust be taught their duties, and regular practice marches be had,together with stated inspections of both men and animals and equip-ments.As pack trains are organized on the basis of one pack master, one
cargador, one blacksmith, one cook, and one packer to every five
oCare should be taken to have the animals come quietly to the rigging; they shouldnever be hurried unless the occasion is urgent.

154 MANUAL OF PACK TKANSPOETATION.
pack mules in the train, it sometimes becomes necessary to divide thetrain into ''sections" when travehng with a command of cavalry.For this purpose ten pack mules are usually assigned to a "troop"
with their proper complement of equipment. The pack master will
see to it that the necessary cargador tools, mule shoes, nails, etc., aresupplied, and packers will mess with the troop to which assigned.
The pack master should therefore school the packers in the require-ments exacted of the "skilled" packer (sec. 108).
In case of the distribution of the five sections of the train thepack master will retain the bell horse, blacksmith, and cook with thefirst section, and will be considered headquarters of the pack train.
The cargador will be assigned with the fifth section, or the one far-
thest away from the first or headquarter section of the train. It
must then be the duty of the pack master and cargador to visit theintermediate sections, at stated or suitable intervals, to overlook thecondition of the animals and equipments so as to maintain efficiency.
It should be remembered by commanding officers that pack mules(sections) should be reassembled as early as possible to maintainorganization.
5. THE ESSENTIAL CONDITIONS IN THE SELECTION OF THE PACKER.
wSec. 107. He must know how to read and write; be sound in body,of athletic build, and not atldicted to the excessive use of intoxicants
or display of bad or ugly temper, and thoroughly imbued with an"esprit de corps" for the pack service.
Age, from 21 to 35 years. Height, from 5 feet 7 inches to 6 feet 2
inches. Weight, from 165 to 210 pounds. Honorably dischargedsoldiers will be given the preference.
THE SKILLED PACKER.
Sec. 108. Ordinarily one versed in the usages and customs of pack-train service.
As instancing the requirements necessary for the proper dischargeof his duties, the following may be enumerated:He must understand
—
(1) The principles of "ribbing up " the aparejo, to keep the animal'sback sound.
(2) The relative toughness in different classes of wood suital)le for
the "ribbing" of aparejos.
(3) The gradual tapering to give " ribs" necessary for conformationto the body of the mule.
(4) How to select grasses (hay) suitable for filling or padding for
aparejos.
(5) Where and how much filling is necessary in the aparejo to give
perfect conformation to the body of the animal, and the relative
thickness necessary for the holding up of diiTerent weighty loads
bearing on the proper surface on either side of the backbone andwithers.
(6) The cause oi "bunches," or wounds, on any part of the animal'sbody covered by the aparejo and cincha, and the proper adjustmentto correct the same. (See Evolution of the aparejo, and sec. 9.)
(7) The cause for the animal's "dock" becoming sore, and theproper remedy to correct the same. (See sec. 9.)

MANUAL OF PACK TRANSPORTATION. 155
(8) How to lace, fit, and cinch the aparejo to tlie mule, with dueregard to the proper size of aparejo necessary.
(9) How many sections, giving the proper name, in the make of
the aparejo, what comprises the aparejo proper and the aparejo com-plete, and how to make repairs to rigging (aparejos) and sew oncanvas.
(10) The conformation of the hoofs and how the animal should beproperly shod for warm and cold seasons.
(11) How to select "pack" and riding animals, with due regardto endurance, strength, and docile qualities.
(12) What remedies to apply in case of cutting of blood vessels,
(lo) What remedies to apply in case of snake bite and how toprepare the wound for same.
(14) How to prepare, "form," and cover cargo, and tie downproperly.
(15) How to arrange aparejos in an orderly manner, cover and tie
down when in bivouac, as the nature of the ground will permit.
(16) All hitches, knots, and splices customary in pack-train service.
(17) How to construct a travois to carry wounded, and how to
improvise a stretcher for similar purpose.
(18) How to put on a load in the most expeditious and satisfactorymanner, requiring not over one minute for ordinary loading.
(19) How to catch a pack mule when his load needs attention.
(20) How to quickly readjust a load in less than one minute.(Experience will teach by sight and sense of touch how load is riding.)
(21) When traveling up or down a mountain how to cut or takeas many turns as necessary to conserve the strength of the animals.
(22) How to guard against accidents when crossing a stream, either
fording or swimming.(23) He must be attentive to animals and loads, that none of the
latter may fall ofl", impeding the progress of the train.
(24) Be quick to note weakness in animals during travel and re-
lieve the same.(25) Be quick to note conditions of country that may endanger
the life of the animal and guard against accidents.
(26) Be watchful, both day and night, during travel that none maygo astray.
(27) Be kind in his treatment of animals.
(28) Have a knowledge of the component })arts of a ration andthe allowance for thirty days; also tlie allowance of grain, hay, andbedding for horse and mule.
(29) Have a fair knowledge of cookery, especially the art of mak-ing good bread.
(30) Be prompt to obey all proper orders emanating from the jiack
master or other proper authority.
(31) Always be ready for duty in all conditions of country andclimate.
(32) Be honest and honorable in all his dealings with his fellow-
men.
THE NOVICE, OR UNSKILLED PACKER.
Sec. 109. One not versed in the usages and customs of the pack-train service, but otherwise qualified as called for in section 107.

156 MANUAL OF PACK TKANSPORTATION.
INSTRUCTIONS TO PACK MASTERS.
Sec. 110. It should be the ambition of pack masters to keep the ani-
mals sound, equipments in good order, and maintain efficiency anddiscipline in the train.
Attend personally to the proper watering of the animals when in
bivouac and during travel when opportunity offers.
Obey all orders promptly coming from proper authority. In like
manner exact prompt obedience from memlDers of the train and main-tain perfect organization by schooling of men and animals in their
duties.
6. DUTIES OF INDIVIDUALS.
Sec. 111. Tlie chief i)acker.—He will
—
(1) At post, whereat stationed, report every morning to the quar-termaster for instructions, unless otherwise instructed.
(2) On expeditions, report every evening to the quartermaster or
commanding officer for instructions, unless otherwise instructed.
(3) When practicable, equip all pack trains, giving receipt therefor
to quartermaster, and in like manner obtain receipts from packmasters; supervise the distribution of cargo according to the numberof pack animals in each train and the strength thereof.
(4) Keep a roster of names of packers of each pack train, and posi-
tions occupied, when employed, when discharged, with cause therefor;
their height, age, color of hair and eyes, weight; how long they haveserved and in what capacity, giving names of pack masters they haveserved under, and how long and in what States, Territories, or foreign
possessions.
(5) Keep a descriptive list of pubhc animals of each train, giving
age, sex, color, height, marks and blemishes, and weight, as near as
can be judged when scales are not convenient.
(6) When practicable select pack masters that are eligible, havingdue regard to length of service, experience, and the proper requisites
in the control of men; and cargadors upon the recommendation of
pack masters.
(7) In the employment of inen as packers, give preference to
honorably discharged soldiers filling the necessary requisites. (Sec.
107.)
(8) When directed by quartermaster, receive reports from packmasters every evening or morning, as the exigencies of the service
may require, of the number of public animals, condition of train,
amount of cargo on hand, and of what composed ; also of any accidentshappening to men or to public animals, making note thereof andreport same to quartermaster.
(9) On expeditions form a pioneer corps, instructing pack mastersto detail as many packers as may be necessary, who will providethemselves with ax, spade, or pick, as directed, looking to theclearance of all obstacles that may impede travel or endanger trains.
(10) When practicable, park all pack trains as directed by the
quartermaster.
(11) Detail, as directed by the quartermaster, as many pack trains,
or parts thereof, to commands, as the exigencies of the service mayrequire.

MANUAL OF PACK TRANSPORTATION. 157
(12) Have all trains in readiness at time specified by quartermasteror commandins; ollicer.
(13) Exact from pack masters a constant adherence to the rules ofpacking, schooling of themselves and their men, and teaching of ani-
mals, looking to the perfect organization of the trains.
(14) Exact a prompt obedience from all pack masters to orders con-cerning their duties.
(15) Exert a watchful care over trains, that efTicient and effective
service may be rendered.
(16) Keep a memorandum book, giving a general description of
country and climate, how country is watered and grassed, and inci-
dents of note that may be of service.
(17) Hold pack masters strictly responsible for the perfect work-ing, management, and condition of trains in their charge.
(18) Make stated inspections of pack trains, as may be directed bythe Quartermaster-General, United States Army, looking to the main-tenance and perfect organization of pack trains.
(19) Perform all other duties as the exigencies of the service mayrequire and as directed by the Quartermaster-General, United StatesArmy.
Sec. 112. Tlie assistant chief imcker.—He will
—
(1) Assist the chief packer in the performance of his duties.
(2) On detached service, in the absence of the chief packer, or whenin foreign service, he will assume the duties prescribed for the chief
packer, as directed by the chief quartermaster.Sec. 113. The pack master.—He will
—
(1) At post whereat stationed, in the absence of the chief packer orassistant chief packer, report every morning to the quartermasterunless otherwise instructed.
(2) In memorandum book provided for that purpose, keep a list of
property and descriptive list of public animals in his charge, number,age, sex, color, height, marks antl l^lemishes, and weight as near as canbe judged when scales are not convenient.
(3) Keep a roster of names of packers, when employed, when dis-
charged, and cause therefor; their rank, date of rank in pack train,
when first employed, lenght of service as packmaster, as cargador, as
blacksmith, as cook, as packer, as instructor, organization assignedto, place of birth, age, height, weight, color of eyes, color of hair,
complexion, giving names of pack masters they have served under,and how long, ancl in what States, Territories, or foreign possessions,
efficiency and conduct.
(4) Keep a memorandum of number of days' rations drawn, howmany men drawn for, the amount antl description of cargo, how dis-
posed of, and when and to whom issued.
(5) Report any accident, sickness, or death happening to men orpublic animals, to chief packer or his assistant, and in their absence, to
quartermaster.
(6) Station men at bad or dangerous places, for the safety of theanimals; likewise before crossing streams find out bad or dangerouspoints.
(7) In mountainous country he must know how to cut or make as
many turns as the strength of the animals may indicate, giving oppor-tunity when space will permit to rest animals and secure loading.

158 MANUAL OF PACK TRANSPORTATION.
(8) Be ever watchful and quick to detect weakness in any animalapproaching bad or dangerous places, lightening or relieving its loadaccordingly.
(9) Be just and fair with the men and exact prompt obedience toall orders.
(10) When opportunity offers, school the men in the system of
packing, exacting a strict compliance therewith.
(11) Assist the cargador in "setting up" rigging and attend to theanimals' bodies, keeping them sound.
(12) Keep equipment in proper order and repair.
(13) Keep a diary of the distance traveled, condition of country,how wooded and watered and grassed, and other incidents of notethat may be of service.
(14) Compute the carrying capacity of train at 250 pounds to thepack animal; aparejo and accessories not included.
Sec. 114. Tlie cargador or assistant pack master.—He will
—
(1) With the assistance of the pack master, set up the rigging.
(2) Fix aparejo for all bunches or wounds, as their position in-
dicates, being careful not to overlook any, no matter how small, re-
membering that a small one is more easily fixed than a large one.
(3) Attend to all needed repairs to aparejos and equipments, sup-plying himself with cargador's kit for that purpose.
(4) Make up all cargoes, mating packages according to kind, andequalizing all packs to the best advantage, loading animals accordingto their strength and condition.
(5) Keep a watch on animals and packs wliile traveling, and onpackers, that they attend to their duties, reporting any inattentionor disobedience to orders promptly to pack master, as they are neces-sarily under his immediate charge.
(6) Place cargo, rigging, and picket line as indicated by packmaster.
(7) Assume charge of the ])ack train in the temj)orary absence of
the pack master.
(8) Keep a memorandum of all cargo received, and to whom is-
sued, with date, marking or tagging when necessary, and attend to
the cleanliness of the coronas and crujipers.
(9) Keep two or three table knives for the purpose of cleaningcoronas; for convenience, select certain aparejos on which to secure
them. (Sec. 76.)
(10) See that rigging and cargo are covered and securely tied
down; all halter stems gathered and placed half and half on headand end rigging, all blinds likewise placed between the two last rig-
ging.
(11) See that all saddles, bridles, and blankets are j)laced on cargobefore covering up; pack master's and cargador's at each i^\u\.
(12) Have all canvas and blankets s])read out to dry, if found wet,
and all canvas gathered uj) and placed in front of rigging.
(13) Count all rigging when taken off, halter stems and blinds, to
see that none are missing.
(14) Name all animals according to sex, that they may be knownand remembered, marking each aparejo fitted to the animal with thename and number of corona of that animal.
(15) Never abuse or maltreat the animals or permit others to doso, impairing their gentleness and usefulness; it tends toward dis-

MANUAL OF PACK TRANSrOKTATION. 159
organization. With sound and gentle animals it is ])ossiMe to goanywhoi'e they can find footing.
(16) Keep all animals' manes properly "roached," i. e., trimmedup.
Sec. 115. The Uacksmith.—He will
—
(1) Provide himself with blacksmith's field kit and shoe boxes,
the necessary number of shoes, of the size numbers wanted; amountof nails and size numbers wanted; fit them up, shoe and keep thetrain properly shod. Remember that sound feet are as necessary as
sound backs to the efficiency of the train.
(2) In addition, obtain and fit up 200 shoes, with sufficient nails,
reatly for field service.
(3) Wliile train is being loaded keep the animals close to "bell,"
keeping correct count as turned loose, reporting any accident to
pack master or cargador promptly.
(4) On leaving bivouac, with assistance of cargador, take countof animals, see that none are missing, taking station on each side of
train when possible, and see that tally is correct, reporting any that
may be missing to pack master.
(5) Take station at rear of train while traveling, keeping a watchon the animal's feet, so that he may know how many shoes haveslipped during the travel, and call attention of packers to any loads
that may need readjusting.
(6) At any and all halts, opportunity offering, come quickly to the
head of train and keep animals rounded up, so that animals may notstray off, and in order that packers can give attention quickly to
packs.
(7) On arrival at camp, when opportunity offers, call on packmaster for all animals that need shoeing and necessary assistance.
If animal is unruly tie up his foot. Do not abuse him; rememberthe animal is dumb and you are intelligent and human.
(S) Assist in putting on rigging and loading when necessary, andperform all other duties required as the exigencies of the pack service
demand.Sec. 116. Tlie paclcer.—He will
—
(1) Properly fit liimself for his duties, study and perfect himself
in the system of packing. For this purpose the pack master will
obtain from the quartermaster the necessary number of books onPack Transportation.
(2) Obey all orders emanating from the pack master, and in his
absence, the cargador.
(3) Be gentle in his treatment of animals; never throw rocks,
blinds, or in any way abuse them. The gentleness of animals, espe-
cially the quiclviiess with which a train can be gotten out of camp,indicates the understanding of packers of their duties and is the test
of organization and discipline of a train.
(4) Be watchful of loads when traveling, that none may fall off.
(5) Do not wait for others to do what he himself sees should bedone.
(6) Work for the interest and good name of the train and be jealous
of its reputation.
Sec. 117. T/^e roo^.—He will—(1) As a necessary requisite, be a good bread baker, careful and
saving with rations.

160 MANUAL OF PACK TRANSPORTATION.
(2) Distribute short rations (one or two days' supply) in messboxes, evenly, so as not to make one end of box heavier than the other
or top heavy.
(3) When called, be quick to get up, and fold blankets and canvasand place in front of head rigging.
(4) Be cpiick in serving breakfast and dinner, especially during
field service.
(5) Give variety of food as often as rations and extras will permit.
(6) Be clean, and keep utensils and surroundings clean.
(7) On arrival at camp, dinner being over, prepare for breakfast
and dinner next day, and keep ready bread sufficient for two meals.
(8) As beans are a main staple in packers' fare and easily gotten
ready, cook them before retiring for the breakfast and dinner meals.
(9) Always carry a little wood and kindling, so that a fire may be
started quickly on arrival at camp.(10) Get as near ready as possible everything designed for break-
fast and dinner after supper and before retiring.
(11) Pack boxes, or as much as can conveniently be done, andsecure them, and secure all packs opened before retiring.
(12) Keep kitchen ropes m a dry place.
(13) Have sufficient water for cooking, and wood and kindling to
start lire quickly in the morning.
(14) Be called one-half hour before the trainmen, and call packers
to breakfast promptly when ready.
(15) Secure riding animal and have him tied conveniently near.
(16) Time permitting, saddle up before breakfast; if not, while
packers are eating; the kitchen animals will be tied conveniently close
to kitchen.
(17) With the assistance of a packer, have the kitchen loads readyand loaded on the kitchen animals, so as not to cause unnecessary
delay when the train has been loaded.
(18) Assist in keeping the animals rounded up, and at the call
"Bell" be quick to untie the ''bell" animal and lead out in the direc-
tion indicated, gaiting the animal as directed by pack master.
(19) Look back occasionally, should the pack master not be in the
lead, and notice how the animals are coming, and whether the gait
is too fast or too slow; if any accident happens, halt and wait for
orders.
(20) Watch for and obey the signals of pack master.
(21) Look to pack master for all orders pertaining to kitchen.
(22) Look to pack master or cargador for orders on trail while
traveling.
Note.—There is nothing that will add more to the comfort andgood will among a crew of packers than a good, clean, and fast cook.
WHAT PACKERS ARE NOT PERMITTED TO DO.
Sec. 118. Packers must not
—
(1) Throw rocks, blinds, or in any manner abuse the animals of
the train.
(2; Tie riding or pack mules in front of saloons.
(3) Indulge in the use of intoxicants to the prejudice of goodorder and discipline in the pack train.
(4) Be absent from the train without permission from the packmaster, and in his absence the cargador.

MANUAL OF PACK TRANSPORTATION. 161
(5) Be insubordinate to the proper orders of the pack master, andin his absence the cargador.
(6) Read papers, books, etc., while on herd duty, or neglect to
keep proper supervision over the animals that none may stray off or
be stolen.
(7) Neglect to keep watch on pack mules on the march, night as
well as day, that none may stray off during travel.
(8) Be inattentive to pack animals when their load needs balan-
cing.
(9) Use coronas for bedding.
(10) Use the aparejo as a seat when in bivouac or permit others to
do so.
FEEDING.
Sec. 119. In case grain is to be fed to pack animals, let it be givento them after the day's work is done—not before. In the latter case
the grain is liable to sour on the mule's stomach; thirst, and possibly
colic, results.
When grain is available it is fed at the picket line or on the herdground. In the latter case, put it in separate piles, one for each mule,about 20 feet apart, the various piles being placed on the circumfer-
ence of a circle.
When the mules are on herd do not picket the ''bell" horse unless
the urgency of the occasion requires it; "hobble" it instead. Morefreedom is thus given him in the selection of grasses.
If the "bell" horse is picketed during night herding, one of the
herders should remain in its immediate vicinity in order to be promptto render aid in case of accident.
If grain is not available for the train, but enough may be obtained
for the "bell" horse, feed it separately, since it has not the sameopportunities for grazing as the other animals.
If animals are fed at the picket line, the grain is placed on feed
covers (sec. 80). These covers should be promptly removed after
feeding. Two or more packers are detailed to be present to prevent
animals from kicking one another and wasting the grain.
WATERING.
Sec. 120. It is very essential that animals should be watered at
least once a day. Deprive them of water and they immediately growthin.
Pack masters should personally supervise the watering of animals
on arrival at bivouac.Some animals are fastidious as to the quality of water they drink.
Do not overlook them; see that they are properly watered.
Before fording streams, when there is reason to believe that animals
are thirsty, always give them an opportunity to drink. Accident
and delay may thus be avoided; especially in case the ford is boggyand dangerous.
GROOMING.
Sec. 121. Pack animals should b<^ groomed daily. It is done while
they are at the rigging.
In grooming, stroke with the hair, not against it ; under the belly,
stroke to the rear.
75927°—17 11

162 MANUAL OF PACK TEANSPORTATION,
In a country where grass burs occur, see that none are on the
animal's back or belly before putting on the aparejo,
TRAVELING.
Sec. 122. In warm climates, avoid traveling during the heat of the
day. On the other hand, avoid making two marches in one day. It
is better to do the day's work, if possible, and then go into camp.In ordinary flat or undulating country, hourly halts are not neces-
sary for pack trains. It is better to complete the day's march quickly,
and get the loads and aparejos off the animals.
In mountainous country, however, halts should be made as oppor-tunity offers, to rest the animals and secure the loads.
If the animals show the inclination, allow them to drink whenopportunity occurs. They travel better in consequence.On dark nights, when following a command, trust to the sense
of smell of the riding animals. They will rarely leave the trail,
the sense of smell guiding them more truly than sight. The animals,
too, are more solicitous of keeping the trail at night than in the
Never adjust an animal's load while his head is uphill; alwaysface him downhill.
During night travel, keep the animals within hearing distance of
the bell.
Desiring to surprise an enemy, muffle the bell with a handkerchief,allowing a faint sound, if necessary.
In fording streams, do not permit the animals either to bunch upor to straggle out. After the bell horse has crossed the ford, rattle
the bell, to encourage timid animals.
If in fording a stream a laden mule falls, cut the "standing rope"of the lashing, so as to free the load in case this becomes necessary in
order to save the life of the animal.A similar course may be pursued when an animal loses his foot-
ing on a mountain side.
Pack masters should always be provided with a heavy huntingknife for the purpose.
In traveling through dry and desert countries, two 10-gallon casksof water should be carried in a pack train. It will be found, how-ever, that if available, canned tomatoes are a good substitute andquench the thirst better than a small allowance of water.When expecting a dry march, do not eat beans or salted meats for
the morning meal.The "bell" horse should not be ridden.
CAMPING.
Sec. 123. In camping avoid low and swampy ground.Always camp on the farther side of a stream in the direction of
travel.
Do not camp in a "box" canyon, i. e., one which has but one prac-tical outlet.
On getting into camp it is not necessary, as sometimes held, to
loosen the aparejos and allow them to remain for half an hour or so

MANUAL OF PACK TRANSPORTATION. 163
on the animals." It will do (hem nion^ f2;()(>(l to be relieved of the apa-rejos and allowed to roll.
USE OF BLINDS.
Sec. 124. A i)ack mule is always l)linde(l when putting on the apa-rejo and the load; also, when the load needs tightening; on the road.
He is not l)linded when taking ofl' the load and the aparejo.
Blintls should always he carried on the left arm when traveling.
When putting on the a])arejos the packer whose blind is not beingused lays it on the ground in front of the mule. After an aparejo is
on, the near packer removes the ])lind, places it on the collar of theaparejo and proceeds to tie up the halter shank. (Sec. 57, figs. 40-41.)The off packer, after securing latigo, takes this bhnd off the apa-
rejo and hastens to get another mule. The packer tying up the halter
shank picks up the l)lintl on the ground.JMules should be taught not to move when the blind is on. Conse-
quently, if necessary to change the position of a mule always lift theblind before causing him to stir.
KINDNESS TO ANIMALS.
vSec. 125. A mule remembers kindness and will recognize by sight
and sense of smell the individual who has shown it to him. Be brutal
in treatment of him and he will shy from you and avoid you.Kindness will conciliate the most vicious animal and cause him to
become docile.
If vicious, provide means to prevent his injuring any person.
In doing so do not maltreat the animal. Treat him Kindly, butfirmly, and he will soon learn to recognize you as his master, and obey.
Maltreat him and he w^ill never forget you.
PRECAUTIONS.
Sec. 126. In malarial districts or hot climates wear a woolen band-age 12 inches wide wrapped from two to three times around the
stomach.Avoid fruit and nuts; lemons, however, in form of lemonade, may
be taken j but not to excess.
Avoid spirituous liquors of all descriptions.
While traveling, sleep under canvas of some description to avoid
the dew.Procure twigs or brush, never green grasses, on which to spread
blankets.
If possible, procure a hammock and always use it, especially duringthe rainy season. Above all things, do not sleep on the bare ground.
Boiled fresh milk is good for a weak stomach; condensed milk is a
good substitute.
Keep a supply of quinine, but use it sparingly and only when neces-
sity requires.
Keep the head cool, the feet warm, and the bowels in order, andfear no danger from sickness in any climate,
a Twenty-five or thirty years ago it was the custom to loosen the aparejos and allow
them to remain on the animals for half an hour with the belief that if any bunchesoccur during travel this method would reduce them. This, however, is an error andaffords no relief.

164 MANUAL OF PACK TRANSPORTATION.
Keep on hand a small supply of needles, silk thread, and bandagesin case of wounds.Keep a small supply of ammonia for animals, in case of snake bite.
Puncture the flesh freely around the bitten part and rub ammoniawell in with fingers. Be careful, however, that the fingers have noabrasion.
For screw worms, keep a supply of chloroform, or crysilic ointment.
GLOSSARY.Sec. 127.—
Aparejo (pronounced " ap-pa-ray-ho " ) : A pack saddle.
^og', war: A clothes sack. (Sec. 93.)
Bell: Ordinarily a sheep bell, attached by a strap to the neck of the horse.
Bell horse: A horse with a bell strapped about its neck and used to lead a pack train
of mules; sometimes alluded to as the "bell " in such expressions as "get the bell,"
"lead the bell, " "stop the bell, " "call the bell."
Bell sharp: Applied to mules that become especially attached to the "bell" horse.
Blind: A hood of leather, made to cover the eyes of a pack mule when loading theanimal or tightening the load. (Figs. 40^1.)
Boot: Term applied to the end pieces of aparejo.
Boot bar: A section of wood representing the finished product, when the boot of theaparejo is properly filled with hay by the skilled packer, and provided withslots to receive ribs of wood. (In connection with the saddle bar, the boot barholds the ribs in place, thus stiffening the aparejo.)
Brake: To brake a pack; to brake a load—signifying the act of working the packs close
together and into their proper relative positions after they have been tied togetherby a sling rope. (Sec. 28.)
Bunch: A puffing up of the skin.
Cargo: The loads carried by a pack train, when spoken of collectively. To "formcargo," i. e., to arrange in an orderly and convenient manner an aggregation of
loads. (Sec. 53.)
Cargador: An individual who, in the organization of a pack train, is next in importanceafter the pack master. He has to do with making up and forming the cargo, equal-izing the packs, caring for mules, repairing aparejos, etc. (Sec. 114.)
Carrier piece: A fold of leather sewed in between the back and belly pieces of aparejoat rear, to which, by means of lacing, the crupper is attached, and which thusserves to support the crupper and prevent it from hanging too low on the mule'sbuttocks, (g, fig. 1.)
Center stitch line: The stitch line which divides the aparejo into two equal parts.
ij, fig. 1.)
Cinch (cincha): A broad canvas band, by means of which the aparejo is secured on themule's back. (Ill, fig. 1.)
Collar: That portion of the aparejo which lies over the mule's withers. It is so shapedas to relieve the mule of all pressure on the withers. (1, i, fig. 1.)
Corona: A saddle pad, which is placed on the mule's back before the blanket andaparejo are put on. A numeral is placed on one of its sides to distinguish it.
(V,fig. 1.)
Cover, aparejo {or sobre-jalma): A canvas covering attached to the aparejo to protect
the leather from wear and tear. Called by packers a "sovereian hammer, soldier
hammer." (11, fig. 1.)
Cover, pack: A section of heavy canvas employed to wrap therein, by means of rope,
certain packages that may deteriorate by exposure to rain or dampness.Cover, rigging: Covers used to protect the aparejos in camp or bivouac. (Sec. 78.)
Cover, cargo: Canvas used to protect aggregation of loads, termed the "cargo," in
camp or bivouac. (Sec. 79.)Cover, feed: Canvas laid on the ground at the picket line, on which grain is placed
for feeding the animals. (Sec. 80.)
Crupper: A leather band attached to the front facing and carrier pieces of the aparejo,
and fitting under the mule's tail, its purpose being to steady the aparejo, and to
prevent it from slipping to the front. (IV, fig. 1.)
Deadman: A holdfast, sunk in the ground, to which the picket line is attached.Diamond hitch: Name applied to the lashing, by means of which the load is secured to
the aparejo, the two ropes forming a diamond or lozenge on top of the load.
Dock piece: That portion of the crupper that fits under the animal's tail; also appliedto that portion of the animal's tail under which the dock of the crupper rests.

MANUAL OF PACK TRANSPORTATION. 165
Drag tails: Term applied to mules that are farthest away from the "bell " when travel-ing; also applied to a lazy packer.
Facings: Additional pieces or strips of leather, applied to certain ])arts of the aparejoto strengthen them, (d, e,f, etc., fig. 1.)
'
' Go: " Term used by the '
' near " to the " off " packer, when hitch is formed and readyto be tightened.
Hand-hole: Hole made in the belly piece of the aparejo in the center of each side, toenable the packer to insert the hay or grass that forms the padding.
"Hold:" Signal by the "near" to the "off" packer to hold his pack in position, whilethe "near" packer brakes the load.
Lair: Term applied to the rope used in securing pack covers around pack. Hence,to "lair;" "to lair up;" meaning to secure the pack cover to the pack by meansof the lair rope. (Sec. 15.)
Line up: Meaning to cause the pack mules to take position at rear of the rigging on theproper flank of the "bell " horse.
Load: A pack or packs forming the burden for one pack mule. Hence, "to load up, "
meaning to place the loads, as formed in cargo, on the pack mules.Pack: In the ordinary case, that portion of the load carried on one side of the mule's
back. A load, however, may consist of a single pack or of several packs, dependingon the nature of the articles to be packed, or the exigencies of the service.
Pack up: Meaning to load up; to place the loads, as formed in cargo, on the pack mules.Packer, first-clas?: One skilled in the art of preparing cargo; loading a pack mule; adjust-
ing a load so that it will balance evenly on the mule's back, etc.; one familiar
with the "diamond" and other hitches used in securing loads, and versed in theusages and customs of the pack service.
Packer, second-class: A novice in the art of packing.Pack master: A master in the art of packing; one who has charge of a pack train.
Ribbing up: Placing in an aparejo the sticks, or whatever may be used to give stiffness
to the sides of the aparejo.
Rigging: Term applied to the aparejos in a pack train; particularly when it is desiredto refer to them in a collective sense.
Saddle bar: A section of wood representing the finished product when the saddle of
the aparejo is properly filled with hay or similar material, by the skilled packer,and provided with slots to receive ribs of wood. In connection with the boot bar,
the saddle bar holds the ribs in place, by means of which the aparejo is stiffened.
Set up: To set up an aparejo, meaning to prepare it for use by inserting the ribs, andthen padding it with hay, so as to adjust it properly to the shape of the mule'sback. (Sees. 6 and 7.)
Settle: To adjust packs to their places on the aparejo, as in the case of simple box loads.
Here it is not necessary to brake the load, i. e., to work the near pack up and down,until it is in place, as the two packs may readily be settled on the aparejo so as to
ride evenly.Shoe: Term applied to the protecting sticks of the aparejo cover. (1. II, fig. 1.)
Sling: Term applied to the rope used in tying the packs together on the mule's backprior to being lashed. Hence, "to sling" the load; "to cross sling;" "to doublesling;" and "to double cross sling." (Sees. 27 to 31.)
Snap up: To tie animals together by their halter shanks, while standing at the rig-
ging. (Sec. 56.)
Stem or snap: Names sometimes applied to halter shanks.Sticks, protecting: Used on the aparejo cover to stiffen the ends. Sometimes called
shoes. (1. II, fig. 1.)
Sticks, tamping: Used in tamping hay, etc., in the corners of the aparejo.
Tie: Signal from the "off" to the "near" packer that all slack has been rendered onthe running rope. Also signal from the "near" to the "off" packer for the latter
to secure the end of the rope, on completion of the hitch." Tied:" Signal from the "near" to the "off" packer, in slinging the load, that the
"square" knot has been tied.
Trail: A path, usually narrow; hence incumbent upon animals of a train to move in
single file. "To trail " means to follow in single file after the "bell " horse.
Train, pack: A pack train is an organization comprising fifty pack animals, a propercomplement of men, and a complete equipment. (Sec. 87.)
7. SPECIFICATIONS FOR PACK AND RIDING MULES.
Sec. 128. The mule must be sound in body and limbs, of blockybuild, of kind and gentle disposition, with free and springy action
at the walk or trot, and to conform to the following description:

166 MANUAL OF PACK TRANSPORTATION.
The pack mule must be in fair condition, from 4 to 6 years old;
weight, depending upon height, to be as follows:
Pack mules should weigh from 950 to 1,025 j)ounds, and be from14.1 hands to 15 hands high.
Head of medium size, well formed, intelligent looking, broad be-tween the eyes; eyes clear, large, and full; ears long and flexible; teeth
and tongue free of blemishes; muzzle well rounded and firm.
Neck, stocky, broad and full at crest, and inclined to arch.
Withers, low and broad, indicating strengtii in shoulders.
Chest, low and broad, with division well defined, holding the fore
legs well apart, showing gootl lung power.Knees, wide in front and free of blemishes.
Back, short and straight, indicating strength in back over region of
the kidneys.
Barrel, deep and large, indicating a good feeder—not hard to j)lease
in either food or water—a most essential requisite in the selection of
pack mules.Hips, broad and well rounded.Dock, low and stiff, offering resistance, showing endurance.
Hocks, standing well apart and strongly made, showing well devel-
oped buttocks.
Pasterns, muscled, short, and strongly shaped.
Hoofs, sound, broad, and full, with frog well developed, elastic,
and healthy.
Riding mules will conform to the above conditions, with the excep-
tion, they may be deeper from point of withers to brisket.
WHAT TO AVOID IN THE SELECTION OF PACK MULES.
Sec. 129. Head: Avoid a long and large head, dish face and
Roman nose, narrow between the eyes, eyes small, round, and sunk
well under eyebrow, the eye inchned to snap and show the white; ears
erect and stiff, indicating advanced age; teeth long, pointed and flat
on upper surface, with bean well worn; tongue cut or other blemish;
mouth cut at inner corners, and under lip hanging downi.
Neck, long and thin, inclined to be ewe-necked.
Withers, high and narrow.
Chest, high at center or chicken-breasted, lacking vitality.
Knees, small and out of line.
Back, long or sway-backed, indicating weakness over kidneys.
Barrel, small and round, drawn in the flank.
Hips, prominent and angular.
Dock, high and weak.Hocks, standing close together, throwing the feet well out.
Limbs, knees, and hocks showing wind galls.
Pasterns, with scratches, cuts, or bruises.
Hoofs, "pigeontoed," high and narrow, and drawn at the frog,
indicatincr the latter has lost vitalitv.

CHAPTER VII.
THE DALY APAREJO—SPECIFICATIONS FOR CONSTRUCTION.
Sec. 130. There are in general use the 62, 60, and 58 inch aparejos,
i. e., measuring from end to end 62, 60, and 58 inches, respectively.
THE BODY OF THE APAREJO.
(1) The back piece, (2) the belly or body piece, (3) the boots, (4)
the boot facings, (5) the front facing, (6) the center facing, (7) the
carrier pieces, (8) the welts.
Note.—^The first two items of the above are sometimes referred to
as the "body pieces."
DETAILED SPECIFICATIONS.
Take a 60-inch aparejo as a standard—60 inches long and 24 inches
wide throughout its entire length.
THE BODY.
(1) To be made of solid, black harness leather, tallow finish; sides
to be of good spread, weighing for back piece, center facing, bootfacings, and carriage pieces not less than 10 ounces to the square foot,
and for the body piece, boot pieces, front facing, and welt to weighnot less than 12 ounces to the square foot. All leather must be free
from cuts and other blemishes.
BACK PIECES.
To be cut 43 inches long and 24 inches wide.
BODY PIECES.
To be cut 45 inches long and 24 inches wide.
BOOT PIECES (two).
To be cut 24 inches long and 18 inches wide.
BOOT FACINGS (fOUR).
To be cut 18J inches long and 12 inches wide; one side of eachfacing to have a semicircle cut on a radius of 6f inches to 7f inchesof opposite side; now commence on this opposite side and measureupward on each end 7f inches and describe a semicircle whose radiuswiU be 2f inches, both semicircles meeting, the larger outward andthe smaller inward. This provision leaves a straight edge of 5 incheson each end.Now place two facings on each boot, semicircles meeting at center
of boot and the outer ends on Une of body pieces, facings to be sewed
167

168 MANUAL OF PACK TT^ANSPOETATION.
down with three seams, the first on the inner edge all around to top of
boot, the second 3 inches from the outer and upper ends of bootscircling to opposite ends, spaced 11 inches from outer edge of semi-circles, the third to be spaced 5 inches from outer edge and 3 inches
from the inner edge of semicircle.
FRONT FACING.
To be cut 43 inches long and 6^ inches wide, outer edge of facing
to be flush "\^dth edge of back piece and sewed down with two seamsmeasuring for the first 2| inches from the outer edge and 4 inches
for the second. Now provide six f-inch holes, to be punched 1 inchfrom inner edge, three holes on each side of center of facing, measuring8^ inches for the first, 13 inches for the second, and 17^ inches for the
third.
In placing the front facing on back piece place the heaviest side
inward, as the holes receive the lacings of crupper. This facing formsthe front of the aparejo.
CENTER PACING.
To be cut 24 inches long and 8 inches wide, placed at center of backpiece, extending from front to rear; that is, 4 inches on each side of
center of back piece, and to be sewed down with two seams one-half
inch apart on each side, measuring one-fourth inch from the outeredges for the first and three-fourths inch from the outer edge for the
second.ASSEMBLING THE APAREJO.
Lap the boots on to back and body pieces 1 inch on outside; in
lapping, the "fleshy" side of the body piece must face outward; to besewed down with two seams spaced one-half inch apart, the first
one-fourth inch from edge and the second three-fourths of an inchfrom the outer edge.
In closing up the body, care should be taken to have the boots or
ends doubled exactly alike, so that the top of the boot of body piece
will just meet the end of back piece. The center scam to be seweddown to body and back pieces, and must positively be in the center
of the aparejo.
The body piece will have a "handhole" 5^ inches long and 5 incheswide, cut out in center of body piece 15 inches from center seam to
center of hole.
Back piece to have a handhole of similar dimensions cut in centerof back piece, 10 inches from center seam to center of hole, this
handhole to be cut around to within 1 inch from either side of
center at top. This forms a lid and is provided \^^th one hole at center
of lower end, one-fourth of an inch from edge, large enough to receive
thong for lacing. A similar hole is provided on the body in line withthis, one-fourth of an inch from edge; both holes facing up and down.On back piece at rear a sUt 12 inches long is provided; to be 2
inches from the outward or rear edge; commencing with 1 inchabove the boot, running upward toward the center facing, and pro-
vided with 5 holes on either side of slit, spaced equally distant to
receive lacings. These slits are for the purpose of introducing theinside frame or ribbing for aparejo.
The " handhole " on back piece is provided for guiding ribs to
position in boot and saddle bars.

MANUAL OF PACK TRANSPORTATION. 169
In front there must be a welt of good, solid leather, 1 inch wide,laid in between the body and back pieces, extending from end toend, to be sewed down with two seams, one-half an inch apart andone-fom*th inch from edge.
In sewing along edge at front, a space of tliree-fourths of an inchmust be omitted, counting 3^ inches from center seam each way.This to permit "key bar" to pass through in locking ribs of inside
frame.Now pmich two holes, three-fourths of an inch apart; the first at
center of space corresponding to hole provided in brass "key bar, " thesecond on the lower side, and provide thong 10 inches long to secure"key bar" to aparejo, both holes to be "up and down."The rear has a similar welt 1 inch wide and 14 mches long, ex-
tending 7 inches each way from center seam.Below this welt the "carrier" pieces are placed for the purpose of
carrying the crupper, and is arranged by taking a piece of leather 4by 8 inches, of half the thickness of the welt, foldecf the narrow way,slipped in exactly three-fourths of an inch, leaving the folded part out.
The extending part of the "carrier" pieces will have three sets of
holes five-sixteenths of an inch in diameter, two holes at the upper endand tliree-fourths of an inch apart, the first hole to be 1 inch fromend; two holes will be provided in similar manner at opposite end,
and two holes at center in similar manner; the holes to be parallel withthe length of "carrier" pieces.
Thong-s for each "carrier" piece wiU be provided; and to be of
latigo leather, 12 inches long and five-sixteenths of an inch wide.From the "carriers" to the end of the aparejo there must be a welt
similar to that described for the front; the whole to be sewed downwith two seams in similar manner as described for the front.
The collar that shapes the aparejo for the withers must be 6 incheswide and 6 inches deep; that is to say, 6 inches along the front seamat center and 6 inches back toward rear, shaped in this manner:Three inches on each side of center stitch line of the aparejo, runback 4 inches parallel with center stitch Hue, then run 2 inches towardcenter stitch line, then back 2 inches parallel with center stitch hne,then up to center stitch line.
The center seam, like center of collar, must positively be in thecenter of the aparejo and exactly straight across the body.
It is understood the coUar is placed on the front as indicated bythe front facing of the aparejo, and, like center seam, is sewed to backand body pieces.
Now punch two holes, one on each side of the center stitch Hne andto be three-fourths of an inch apart at front and rear, spaced equallydistant from center stitch line. These holes to be provided betweenthe two outward seams with thong 10 inches long for lacing, to secureaparejo cover to aparejo.
If usingwiUow or other sticks, cut two slits 2 inches long, one on eachside of center stitch line, running downward from center stitch Hne,slits to be in center of aparejo. In cutting sHts be careful not to cutthrough center stitch line.
In the case of mountain batteries and machine gun troops, providea chock plate and staple, to be placed at the center of the front andrear end of the aparejo. These to be positioned so as to correspondwith sHts of frame that carry the gun (parts) and ammunition.

170 MANUAL OF PACK TRANSPORTATION.
Note.—For 62-inch aparejo the body pieces are cut 2 inches longerthan that for a 60-inch aparejo.
For 58-inch aparejo the body pieces are cut the same length as thatprovided for the 60-inch, the boots being cut 24 inches long and 16inches wide.
Of 50 aparejos, make twenty-five 60 inches long and 24 inches wdde,tliirteen, 62 inches long and 24 inches wide, and twelve, 58 inches longand 24 inches wide.Note.—In ordering 50 aparejos, the proportion of sizes should be
as noted above.In width they must be uniformly 24 inches throughout their entire
length; and coUar with center seam must positively be in the center ofthe aparejo.
In a requisition for 56, 54, and 52 inch aparejo, a uniform width of
22 inches wiU be provided. For 56-inch aparejo, the back and bodypieces are cut 41 and 43 inches long and 22 inches wide, respectively.
Boot pieces (two) are cut 22 inches long and 16 inches wide.Boot lacings (four) are cut 16 inches long and 11 inches wide.Front facing, 41 inches long and 6i inches wide.Center facing 22 inches long and 8 inches wide.
In assembhng the aparejo, the same provision will be observed as
provided for larger sizes, having due regard to width of 22 inches, thesize of coUar being the same for all aparejos. The front facing will
have six f-inch holes punched in similar manner as provided for a
60-inch aparejo, measuring for the first 7 inches on each side of center
of facing, 11 inches for the second, and 15 inches for the tliird.
For 54-inch aparejo, the back and body pieces, the front and center
facings are cut the same length as that for a 56-inch aparejo; the bootpieces being cut 22 inches long and 14 inches wide, and boot facings
14 inches long and 11 inches wide. For a 52-inch aparejo, the backand body pieces are cut 39 and 41 inches long and 22 inches wide, the
boot pieces, boot facings, and center facing are cut the same as for
54-inch aparejo; the front facing being cut 39 inches long and 65inches wide.The handholes on the body pieces for the 56, 54, and 52 inch aparejo
are cut the same as provided for larger sizes measuring 13 inches fromcenter seam to center of hole.
If using wiUow or other sticks, a sht on each side of center line is
provided. If using the Daly ribbing, the back piece is provided withhandholes and slits in similar manner as provided for a 60-inch
aparejo; the saddle and boot bars are 2 inches less in width than for
standard sizes of aparejos 24 inches wide.
In ordering a complete equipment for one pack train, section 87,
page 148, will be followed. In an order for the aparejo "proper"and parts thereof, the number and size of the respective aparejo mustbe stated.
THE CRUPPER.
(2) To be of good sohd black harness leather, in weight to be as
provided for the body pieces of the aparejo. Standard size for
crupper for 62, 60, and 58 inch aparejos, to be 78 inches long and 12
inches wide. Standard size for cruppers for 56, 54, and 52 inch
aparejos to be 72 inches long and 10 inches wide. To form crupperfor 62, 60, and 58 inch aparejo, cut two sections 39 inches long and12 inches wide, shaped in this manner: On right-hand section on left

MANUAL OF PACK TRANSPORTATION. l7l
end, measure downward from corner 2| inches and cut in 4 inches, toform the upix'r ])()rtion of dock; in doing so describe the segment ofa circle, whose radius will be five-eighths of an inch; now measure 12inches from upper and lower corners along sides, and on upper sidedescribe the segment of a circle on a radius of 12 inches, commencingat inner and upper corner of dock; now measure downward 8 incheson same end and cut in 4 inches to form this lower ])ortion anddescribe a half circle on a radius of 2 inches; now measure 8 inchesfrom corner on lower side and 4 inches upward at right angle, anddescribe the segment of a circle on a radius of 4 inches, commencingat inner and lower corner of dock.
Half the crup])er is thus shaped. Cut a corresponding one and lapboth, allowing 4 inches for upper surface of dock, lap to be seweddown in center with two seams one-half of an inch apart; lengthof seams 4 inches; before lapping ends shave down the under surfaceat ends.
For top facing provide a strip of good, solid leather 30 inches longand 3 inches wdde, shaped to extend around dock to witliin 24 inchesof each end ; cut two more strips same width 26 inches long, lap 2 inchesand sew down with two seams one-fourth of an inch from each edge.For bottom facing provide two strips of good, sohd leather 37
inches long, conforming to the shape of lower edge of crupper; com-mencing at one end there must be a uniform width of 3 inches, ex-tending 15 inches toward opposite end, then describe a cut, circHngtoward center of dock, greatest width to be 6 inches; to be seweddown three seams, outer seams to be one-fourth of an inch from outeredges, the tliird or center seam, to extend from dock to witliin 24inches of opposite end.
To form cover for dock, take a piece of good, solid leather 10 incheslong and 7 inches wide doubled in center the long way and at centerof ends cut in 3 inches, at end of cut and in center, use a f-inch handpunch so that it will fit down into the dock, soak well, draw snugand sew down ; shave off the under edges so as to leave it smooth onthe animal's hips.
Leave If inches for dock and leave one or both ends open to
introduce the stuffing. Deer or antelope hair is best for the purpose.Stuff and form the dock wliile the leather is soft.
In shaping the dock rub it on top as the stuffing is introduced, atthe same time bringing the ends of the crupper together and bendingthe ends of the dock upward so as to shape the dock to the animal'stail, and the butt of the crupper to the animal's hips.
Lining for crupper to be of 28-inch No. 10 cotton duck, extend-ing from dock to within 19 inches of end each way; in cutting allowfor lap of 1 inch all around; to be sewed down mth slanting stitch
spaced one-half inch on upper and under sides. When lining is in
position the upper edge of the crupper on either side of dock, extend-ing 10 inches each way, to be bound down with sheepskin.
In sewing the upper edge of top facing a space of 10 inches shouldbe omitted to receive tliis binding, binding to be then sewed downin regular manner.At each end of crupper four f-inch holes are punched, the first and
fourth to be in center of top and bottom facings, the rest spacedequally distant between the first and fourth and 1 inch from ends.

172 MANUAL OF PACK TBANSPORTATION.
On top facing and in center four |-incli holes are punched, measuringfor the first 24 inches from center of dock, and spaced equally distant
to last hole on end of top facing.
Lacing for crupper to be of best latigo leather one-half inch wideand 7 feet long.
Lacings to have a sHt at heavy end 1| inches long in center andthree-fourths of an inch from end. These to be fastened at hole
provided on end of top facing of crupper.
THE APAREJO COVER OR SOBRE-JALMA.
(3) To be made of No. 4, 22-inch cotton duck. The canvas is cut4 inches shorter than the length of the body of the aparejo. It is
faced on both sides with leather 4 inches wide from end to end and 5
inches wide across ends. These facings when put on must be allowedto extend over the sides and ends of canvas so as to make the coverthree-eighths inch wider and longer than the aparejo; to be sewedwith seam at each edge. The sewuig on end or bottom facmgs mustextend to ends of facing.
The protecting sticks or shoes to be 21 inches long, 2h inches wide,and three-fourths of an inch thick, taper the ends on one side to half
the thickness at ends, extending 5h inches toward center from eachend, and taper on ed^es from center to a width of 1 inch at ends; to
be placed in center of facings across ends.
In tapering sticks do not allow a ridge in center. The protecting
sticks or shoes to be faced at each end, facing to be placed so as to
leave an exposed surface of 10 inches wide in center; to be seweddown with two soams one-half inch apart.
Now punch two holes three-fourths of an inch from edge of center,
in front and rear, and three-fourths of an inch apart. This to secureaparejo cover to aparejo.
In the case of mountain batteries and machine gun troops, providea sht in center at front and rear, these to receive the staples thathold the gmi frame ; now cut two strips of leatlier, one for each staple,
to be 6 inches long and | inch mde. Those to be sewed down in
customary manner convenient to sht, so as to permit the opposite endof strip to pass through eye of staple.
THE APAREJO CIXCHA.
(4) To be made of No. 4, 22-inch cotton duck. The canvas to be 8inches longer than the aparejo for which intended, and folded so as to
make two tliicknesses 10 inches wide; the lap to be sewed togetherwith two seams and to be considered the surface side. For mountainbattery service the canvas wiU be cut 10 inches longer than thoaparejo for which intended.
One end of the cincha to be supphed with a section of f-inch gaspipe, llattened at ends and curved so as to take the place of a ring, to
pass the latigo or tightening strap around; when shaped must be 1
inch less than the width of the cincha. Flattened ends to be pro-
vided with holes punched 1 J inches from ends, to receive No. 8 copperrivets to hold it in place. This iron is fastened to cincha by twopieces of good, solid leather, 11 inches long and 5^ inches wide andriveted to iron. Place one end of canvas between the folds of leather
facing and sew down with three seams, two seams one-half inch apart
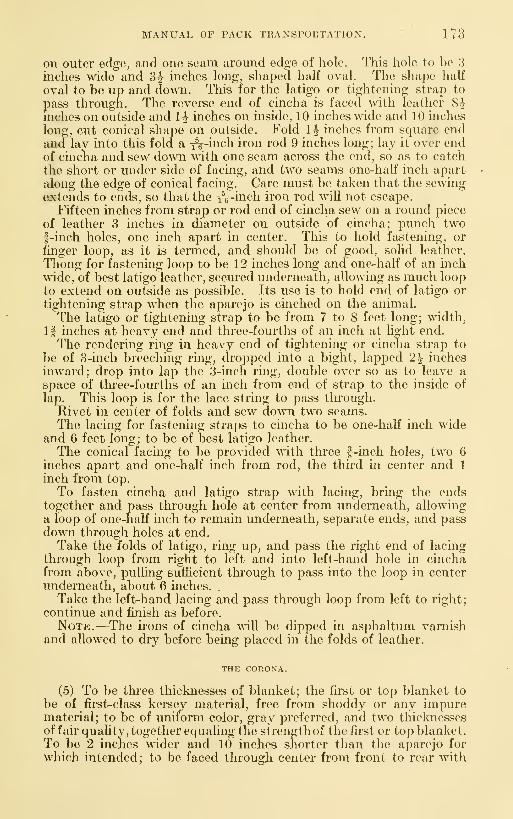
MANUAL OF TACK TRANSPORTATION. 173
on outer edge, and one seam around edge of hole. This hole to be 3
inches wide and 3| inches long, shaped half oval. The shape half
oval to be up and down. This for the latigo or tightening strap to
pass through. The reverse end of cincha is faced mth leather 8Jmches on outside and 1^ inches on inside, 10 inches "v\ade and 10 inches
long, cut conical shape on outside. Fold 1^ inches from sc^uare endand lay into this fold a ^e-inch iron rod 9 inches long; lay it over endof cincha and sew do"s\Ti with one seam across the end, so as to catch
the short or under side of facing, and two seams one-half inch apartalong the edge of conical facing. Care must be taken that the sewingextends to ends, so that the -re-inch iron rod wiU not escape.
Fifteen inches from strap or rod end of cincha sew on a round piece
of leather 3 inches in diameter on outside of cincha; punch twof-inch holes, one inch apart in center. This to hold fastening, orfinger loop, as it is termed, and should be of good, solid leather.
Thong for fastening loop to be 12 inches long and one-half of an inchwide, of best latigo leather, secured underneath, allowing as much loopto extend on outside as possible. Its use is to hold end of latigo or
tightening strap when the aparejo is cinched on the animal.
The latigo or tightening strap to be from 7 to 8 feet long; width,1 f inches at heavy end and three-fourths of an inch at hght end.
The rendering ring in heavy end of tightening or cinclia strap to
be of 3-mch breeching ring, dropped into a bight, lapped 2^ inchesinward; drop into lap the 3-inch ring, double over so as to leave aspace of three-fourths of an inch from end of strap to the inside of
lap. This loop is for the lace string to pass through.
Rivet in center of folds and sew down two seams.The lacing for fastening straps to cincha to be one-half inch wdde
and 6 feet long; to be of best latigo leather.
The conical facing to be provided with three f-inch holes, two 6
inches apart and one-half inch from rod, the third in center and 1
inch from top.
To fasten cincha and latigo strap with lacing, bring the endstogether and pass through hole at center from underneath, allowinga loop of one-half inch to remain underneath, separate ends, and passdown through holes at end.Take the folds of latigo, ring up, and pass the right end of lacing
through loop from right to left and into left-hand hole in cinchafrom above, pulling sufficient through to pass into the loop in centerunderneath, about 6 inches.
Take the left-hand lacing and pass through loop from left to right
;
continue and finish as before.
Note.—^The irons of cincha will be dipped in asphaltum varnishand allowed to dry before being placed in the folds of leather.
THE CORONA.
(5) To be three thicknesses of blanket; the first or top blanket to
be of first-class kersey material, free from shoddy or any impurematerial; to be of uniform color, gray preferred, and two thicknessesof fair quality, together equahng the strength of the first or top blanket.To be 2 inches wider and 10 inches shorter than the aparejo for
which intended; to be faced through center from front to rear with

174 MANUAL OF PACK TRANSPORTATION.
kersey material contrasting in color with body 14 inches wide; to besewed down with one seam on edges and one seam through center to
first thickness or top blanket.
Center of one side of top blanket is provided with a numeral, 8inches high, numbei-s running from 1 to 50, sewed down to first thick-
ness or top blanket. Good tamied sheepskin is required for the pur-pose. The two thicknesses of underpinning to be basted down to
first thickness or top blanket.
Sweat cloth to be of No. 10, 32-inch, cotton duck, 3 inches wideron sides and ends, lapped over corona, 2 inches from the edge all
around, to be sewed down (ov(^r all) with two seams, machine stitch,
three-cord flax thread, six stitches to the inch, measuring three-
sixteenths of an inch from the inner edge for the first and 1^ inchesfor the second. In folding corners bring the overlap at right angles
and sew down in customary manner.
THE PACK BLANKET.
(6) Size.—To be not less than 8 feet long nor more than 6 feet
wide finished.
Weight.—To weigh not less tJian 5 pounds.Wool.—^To be of pure long, staple wool, free from shoddy, re-
worked wool, cotton, or any impure material.
Strength.—To be capable of sustaining a tensile strength withoutbreaking of 35 pounds to the inch w^arp ways and 40 pounds withoutbreaking to the inch filling ways. To insure an even strain on threads,
care must be taken that the material is placed in the jaws of the dyna-mometer at exactly right angles to the opposite system of threads.
Color.—-To be a mixture of an olive drab shade as required bystandard issue blanket, or may be gray in color.
Border.—An olive-brown border about 3 inches wide to extendacross the blanket about 8 inches from each end ; the woolen borderto be of the same grade as the body of the blanket; to conform in
shape to the border of standard issue blanket, and to withstand theofficial tests for permanency of color.
Brand.—Each blanket to have the letters "U. S., Q. M. C, P. T."not less than 4f inches high; the lettering to be worked through theblanket either by hand or machine, using a yarn composed of thesame material, shade, and permanency of dye as that of the border, or
the letters may be dyed with the best cochineals. Place lengthwise in
center of blanket.Each blanket to be manufactured in a thorough and workmanlike
manner, the ends to be secured from raveling by gimp and elastic
overlook stitch, as provided for standard-issue blanket.
(7) To be made of solid black harness leather, regulation size,
six ring halters^ and provided with brow band and nalter shankwith swivel snap, size of eyebolt 1 inch, to be provided with a sectionof one-half inch rope, cut 8 feet long; lap 4 inches on eye and plait
down in customary manner, the opposite end to be well wrapped or
seized.

MANUAL OF PACK TRANSPORTATION. 175
One head halter with shank and snap will be providctl for eachaparejo.
One head halter with shank and snap will be ])rovided for eachriding mule.One head halter with shank and snap will be provided for each bell
horse.packers' blinds.
(8) To make a cup blind take a piece of good, solid leather, 26inches long and Qh inches wide; cut and shape to leave it 3 inches wideat ends and center and 6| inches midway oetween ends and center.Now leave a space of five-eighths of an inch at center of cup and cutout a piece on each side, V shape, 1^ inches at edges; on the under sidechannel cut and sew together to form cup.Face edges with strap three-fourths of an inch wide and long
enough to come within 2 inches of ends; shave ends to slope and sewdown with two seams.Punch two holes three-fourths of an inch apart and three-fourths
of an inch from ends; cut out between for tail thongs to pass through.For thongs cut a strip of best latigo leather five-eighths of an inchwide and 5 feet long; shave ends to slope and pass through slit at ends.
For end facings take a piece of leather 6^ inches square, double andshape to end; punch two noles in center of double three-fourths of aninch apart and cut out between; soak well and slip thongs throughslit; draw up smig and sew down with one seam on edges. Thongsto be sewed down through center 9 inches from each end of bUnd,thongs to be lapped and riveted at end of sewing.For thumb piece take a piece of leather 12 inches long and 3^ inches
wide; punch and slit in 1 inch from edge and 3 inches from ends oneach side. Lap the sides inward, so as to catch edges, and sew dow^nwith one seam. Draw it well together and cut ends, so as to shape inbetween straps; place in center of crown and sew down with one seamon edge, and rivet on each side of crown.For every five aparejos one packer's blind will be provided.For each organized pack train of 50 pack mules, 14 packer's bhnds
will be provided.
PACK COVERS.
(9) Made of 72-inch No. 4 cotton duck, cut 6 feet long; allow 1 inchat either end for hemming, to be sewed down at ends with three-cordflax thread, machine stitch, six stitches to the inch. Two for eachaparejo.
RIGGING COVERS.
(10) Made of 22-inch No. 2 cotton duck, cut two lengths 24 feetlong; to be lapped and sewed along one side with three-cord flaxthread, machine stitch, six stitches to the inch, ends to be hemmed.Five for each organized pack train.
CARGO COVERS.
(11) Made of 28-inch No. 10 cotton duck, cut five widths 12 feetlong; lapped on border line and hemmed at ends; to be sewed downwith flat seam, mth six-cord yellow machine thread, machine stitch,six stitches to the inch. Five for each organized pack train.

176 MANUAL OF PACK TRANSPOKTATION,
FEED COVERS.
(12) Made of 44-inch No. 10 cotton duck; to be 24 feet long,
hemmed at ends, to be sewed down with three-cord flax thread, ma-chine stitch, six stitches to the inch. Five for each organized packtrain.
LASH ROPE WITH CINCHA AND HOOK.
(13) Lash rope, standard size to be nine-sixteenths or one-half
inch best hand-laid manila, 50 feet long, provided with an eye at oneend to receive lacing of cincha, the opposite end to be well wrappedor seized.
For cincha provide a section of 28-mch No. 10 cotton duck 18 inches
wide; fold so as to have a width of 6 inches sewed down with oneseam one-fom"th of an inch from each edge.
On each end provide a semichcular lacing of leather, the sameunder as well as over, length of facing to be 5 inches; the straight
edge of facing to be parallel or flush with end of cincha, one end to
be provided with five holes three-eighths of an mch in diameter. Thefirst two to be spaced equally distant three-fom'ths of an inch fromend of cincha and 3| inches apart; the second two to be spaced in
similar manner 2| inches from end of cincha and 4| inches apart;
the third or center hole to be placed at center at top and tliree-
fourths of an inch from center of semicircle. These to receive lacings
of cincha; facings to be sewed down all around with two seams one-half of an inch apart and one-fourth of an inch from edge.
Lacings to be secured to eye on lash rope in customary manner.Facmgs on opposite end to be sewed down on semicircle with two
seams one-half of an inch apart and one-fourth of an inch from edge
;
on open end provide four holes to correspond with holes provided oncincha hook, introduce the hook between the folds of cincha, place in
center, and rivet down with No. 8 copper rivets.
Cincha hook to be as per sample and model furnished Quarter-master General's Office, and to be 16 parts aluminum and 1 partcopper. (Designed by H. W. Daly. Adopted December, 1909.) Onelash rope will be provided for each aparejo.
SLING ROPES.
(14) To be made of f-inch best hand-laid manUa, wrapped or seized
at each end, and to be 30 feet long. One for each aparejo.
LAIR ROPES.
(15) To be made of f-inch best hand-laid manUa; to be providedwith an eye at one end, the opposite end to be weU wrapped or seized,
and to be 30 feet long. Two for each aparejo.
STAMPING.
(16) The body of the aparejo and crupper should have their lengthand maker's name stamped on them. The aparejo cover, cincha,
and corona should have the length of the aparejo stenciled on them,so that it may be readily known what parts belong together withoutmeasuring. Care must be taken to stencil corona on sweat cloth.

MANUAL OF PACK TRANSPORTATION. 177
RIBBING FOR DALY APAREJOS.
(17) The ribbing consists of the following:
Two saddle bare (wood), right and left.
Two boot bars (wood), right and left.
Ei.cjhteen hickory ribs, consistmg of two half sets of nine each,
equally alike, with 6 pounds of suitable soft hay for padding or filling
for each aparejo.
Two locking bars for saddle bars 19| inches long. If inches wide,
gauge 16.
Key bars for lockmg bars to be 23 mches long, five-eighths of anmch wide, and three thirty-seconds of an inch thick.
Locking bar for boot bar to be 19f mches long and 1 inch wide,gauge 16.
Sixty flathead brass screws three-fourths of an mch. No. 6.
Saddle bars.—Take two pieces of clear basswood, free of blemishes,
21 mches long, 7 inches wide, and 2 inches thick.
Saddle bars, right and left, to be cut m at one end with two offsets.
First offset to be cut at right angles, 3} inches at one end, one way,by 2 1 inches from upper edge.
Second offset to be cut at right angles at same upper and front end5 1 inches, one way, by 1 inch from upper edge.
These offsets are cut and shaped to fit under the collar of the apare-jos and are considered the forward or front end of saddle bars.
Now space off ''gains" of nine equal parts, commencmg at bothends to center of ''gain," which must be 2f^ mches; width of gamsto be IJ inches; length of gains, 3f inches; depth of gains to bethree-fourths of an inch.
Now gain for brass key bar, three-fourths of an inch wide andthree-sixteenths of an inch deep. Position of gain for key bar to be
3f mches from upper edge to center of gain, extending from front to
rear.
Next gain for "locking bar," If mches wide and one-sixteenth of aninch deep, 19| inches long, spaced equally distant from each end, cen-ter of locking bar over center of key bar.
Locking har for saddle bar.—^To be of sheet brass 19 inches long,
If mches wide, and one-sixteenth of an mch thick (gauge 16).
Locking bar is spaced off into nine equal parts, allowmg three-
fourths of an inch to fit into gams. This portion will be turned atright angles so as to fit snugly agamst the w^all of gain, and providedwith 20 holes to receive flathead brass screws three-fourths of aninch. No. 6, and screwed down to saddle bar.
Key har.—Key bar to be of spring brass 23 inches long, five-eighthsof an inch wide, and three thirty-seconds of an inch thick, roundedand slightly tapered at one end; the reverse or opposite end to berounded and provided with a hole three-eighths of an inch from end,this to receive leather thong; diameter of hole, three-sixteenths of aninch.
Saddle bars, right and left, to be shaped on both sides as per samplefurnished.
(18) Boot bars.—^Take two pieces of clear basswood free of blem-ishes 21 inches long, 6 inches wide, and 3 inches thick.
Now space off "gains" of nme equal parts exactly similar to thoseprovided in saddle bars. Length of gains, 4f inches.
75927°—17—12

178 MANUAL OF PACK TEANSPOETATION.
Now gain for 'locking" bar, 1 inch wide and one-sixtecntli of aninch deep, 19| inches long, spaced equally distant from each end,exactly similar as that provided in locking bar for saddle bar.
LocMng har for hoot bar.—To be of sheet brass 19 inches long, 1|inches wide, and one-sixteenth of an inch thick (gauge 16).
Locking bar for boot is spaced off in similar manner as that pro-vided in locking bar for saddle bar and turned at right angles so as to
fit snugly against the wall of gain. It will be noted that while theportion fitting into gains in saddle bar faces downward, that suppliedin boot bar faces upward. This leaves a space or portion of tlu-ee-
fourths of an inch extending over gains the length of locking bar.
Now supply one hole at center of each space to receive flatheadbrass screws three-fourths of an inch. No. 6, and screw down to bootbar.
All holes on brassing must be countersunk to receive screws.Boot bars to be shaped on both sides, right and left, as per sample
furnished. (Designed by H. W. Daly.)
HICKORY RIBS.
(19) To be of sound second growth straight-grained hickory, free of
knots or other blemishes; 23 inches long, 1 inch wide, and tliree-
eighths of an inch thick for 60-inch aparejos; 24 mches long for
62-inch aparejos, and 22 inches long for 58-inch aparejos.
In a half set of nine ribs, the third has a taper of 8 inches at its
upper end, thickness at end to be three-sixteenths of an inch; for thefourth, fifth, sixth, seventh, eighth, and ninth, successively, a gain of
2 inches in the taper is provided.On one side at bottom and 2 inches therefrom, numerals indicating
the size of the aparejo, with number of rib, will bo stamped thereon,
a hyphen or dash to be used in separatmg the number of ribs from thenumber of aparejo.
In numbering the set of nine ribs, commence with the two that are
not tapered; these to be numbered 1 and 2 each.
Two half sets of nine ribs each comprise a complete set for oneaparejo.
In lots of 50 sets, 25 to be 23 inches long; 13 to be 24 inches long,
and 12 to be 22 inches long, respectively.
All work to be done in a first-class and accurate manner.
(20) Hay to be free of joints, or what is known as "swamp" hay;that is, fine, soft, elastic hay, and for each aparejo 6 pounds wiU beconsidered sufficient.
ALUMINUM CASTINGS FOR BOOTS AND SADDLE BARS.
(21) In lieu of the spaces (wood) between gains on boot and saddle
bars, the spaces or separators, wood may be removed, the gain ex-
tending from front to rear between shoulders on boots and saddle bars,
depth of gain to be 1 inch, depth of gain on shoulders, for key barof saddle bars to be three-fourths of an inch wide and one-fourthof an inch deep; this for the key bar to pass between slots as pro-
vided on aluminum castings for saddle bars; aluminum castings for
boot and saddle bars are provided with nine spaces for ribs of frame.

MANUAL OF PACK TRANSPORTATION. 179
To strengthen the aparejo an additional rib cut 1 inch shorter maybe employed between the first and second ribs under the collar of the
aparejo as provided on the boots and saddle bars, of castings, as per
sample at tfeffersonville Depot, Indiana. For aparejos cut 22 inches
wide, the frame and castings are 2 inches less in width, and carry onerib less than for aparejos cut 24 inches wide.
HICKORY RIBS FOR ALUMINUM CASTINGS.
(22) To be made of second-growth hickory, free from knots andblemishes. Ribs for 62-inch aparejos to be 20; to be cut 25 inches
long, 1 inch wide and three-eighths inch thick; composed of two half
sets of 10 ribs, each half set to be equally alike, and to be numberedserially from 1 to 10; numbers to be stamped parallel with length of
stick placed 6 inches from butt end of stick. Each half set of 10 ribs
to be tapered in the following manner: Nos. 1, 2, and 3 are for the
collar of the aparejo and are not provided with taper; No. 2, however,
is cut 1 inch shorter than Nos. 1 and 3. No, 4 will be provided with a
taper on one side, commencing 15 inches from butt to opposite endat top of stick, thickness at top end to be three-sixteenths of an inch.
This provides a taper of 10 inches for No. 4. Each successive rib
will have an increase in taper of IJ inches. Thus, No. 4 has 10
inches and No. 10 has 19 inches in length of taper; that is, 6 inches
from butt end to top of rib.
No. 2, however, will have a taper on right edge of one-fourth of aninch, commencing 5 inches from top end of rib, holding numberedside up. This is to permit No. 2 to be placed in position in space be-
tween slots Nos. 1 and 2 of saddle bar, and slot 2, as provided in bootbar. For each complete set of ribs from a 62-inch to a 52-inch aparejo
a successive decrease of 1 inch in length will be provided.
That is, from 25 inches in length for a 62-inch aparejo, to 20 inches
in length for a 52-inch aparejo. However, for 56, 54, and 52 inch
aparejo, a uniform width of 22 inches is provided. This provision
fives a complete set of 18 ribs composed of two half sets of 9 ribs, to
e tapered in similar manner as provided for a 62-inch aparejo fromNo. 4 to No. 9; that is, a successive gain of 10 inches for No. 4 to 17Jinches for No. 9. Aluminum castings for saddle and boot bars andkey bars (brass), to be 2 inches shorter for aparejos 22 inches widethan for aparejos 24 inches wide, as per sample furnished. All workto be done in a first-class and accurate manner.
RIDING SADDLES (PACKERS'), QUARTERMASTER'S (sTOCK) CORPS.
Specifications for full-rigged riding saddle.
(Figs. Ill, 112, 113.)
(1) Sec. 131. This saddle is furnished only for use of the personnel
of pack trains and pack-train sections, wagon masters, and assistant
wagon masters. (Design modified by H. W. Daly.)
1. Tree.—To be No. 1013, modified "Wild West" tree, from 15 to
16 inch seat, 5-inch fork, 2f-inch oval head, steel fork, grooved bars,
beef-hide cover.
2. Rigging.—Saddle to be full rigged, with two girths (cotton pre-
ferred) of 18 strands for the front and 24 strands for the rear girth,
and to be of two bar girths, with connecting straps and buckle.

180 MANUAL OF PACK TRANSPOETATION.
3. Stirrups.—Stirrup to be 2-inch wooden stirrup, 5-incli tread,
3-inch neck, 1-bolt stirrup, reenforced with galvanized iron or brassbinding.
4 . Leather.—^To be of hemlock or best oak tan leather, firm and sohdin texture, and capable of withstanding a strain of 100 pounds whena section 6 inches long and one-fourth of an inch wide is cut into onthe side, and not tear apart under strain of 100 pounds pressure.
5. Tan.—To be russet or fair in color and fast in grain,
6. Skirting.—To be full size and sheepskin wool lined, and to benot less than 30 inches long, 15J inches wide at rear, and 14 incheswide at front end.
7. Quarter straps.—To extend around cantle and pommel, 3 incheswide for the pommel and 2 inches wide for the cantle, with connectingstrap Ih inches wide, and long enough so that when doubled the dis-
tance from end to end will be not less than 9 inches long, the doubleof strap to meet at center of its length and to be secured with lacing,
holes of suitable size, two at each end of strap, and securely tied.
8. Stirrup leather.—To be of good solid leather 3 inches wide andlong enough to permit of adjustment for 34-inch leg, as in customarymanner.
9. Stirrup fender.—To be 18 J inches long and lOf inches wide.Fender stays 19 inches long and 3 inches wide.
10. Girth straps.—To be 19 inches long and If inches wide.11. Tie straps.—To be 5 feet 7 inches long and If inches wide.12. Seat.—The reenforcings in forming the seat of the saddle when
finished to be well rounded and bound on the front edge, and weUglued down to seat with best ''Days" dry paste; the seat and jockeysto be of one piece.
13. Cantle.—The cantle of saddle on rounded edge to be bound aUaround with similar leather in a neat and accurate manner, and pro-vided with small leather pocket in rear of cantle, and provided withbeUows 1 inch wide; the upper strings over cantle must pass tlirough
the center of quarter strap; care must be taken in passing stringthrough sheepskin wool lining that the string is properly beddedin the wool, the space between holes to be not less than three-fourths
of an inch.
14. Housings.—To be of full size at front and rear, and to receive
the strings of saddle as in customary manner, all exposed leather to
be creased with two-bar crease on edges, and light, but not elaborate,
stamping on exposed leather is permitted.15. Nails, tacks, and rivets are not permitted in rigging the saddle,
except in the '' gullet" where small round-head brass nails may beemployed in the customary manner.
16. Saddletree.—To be as modified, on the under surface of the bars,
as shown in sample saddle now at the general depot of the Quar-termaster's Department, Jeffersonville, Ind., made January 23, 1909.
17. All work to be done in a first-class and accurate manner.
SpeciUcations for skeleton-rigged riding saddle.
(Figs n2, us.)
(2) This saddle is furnished for teamsters and mounted messengersand for all other persons in the military service requiring riding

MANUAL OF PACK TRANSPORTATION. 181
saddles which under the existing regulations are not supplied by theOrdnance Department, nor provided with the full-rigged ridingsaddle.
1. Tree.—To be No. 1013, modified "Wild West" tree, from 15 to16 inch seat, 5-inch fork, 2f-inch oval head, steel horn, beef-hidecover. Tree to be covered with No. 1 "Fair" collar leather,
2. Rigging.—Saddle to be "skeleton" ringed in a similar manner asprovided for the full-rigged saddle, with the exception that theskirting and housings are omitted.
3. In sewing the cover down to saddletree sufficient space mustbe omitted at top and bottom of grooves that receive the stirrupleathers, the top surface of saddle bars to be reenforced on each sideof stirrup leathers, to permit of rounding up the seat; at beginningand ending of all stitching three full back stitches to be made.
4. Stirrup leathers.—To be provided with stirrup fenders as in full-
rigged saddle.
5. Stirrup.—To be of similar make and finish as provided for full-
rigged saddle.
6. Leather. To be hemlock or oak, tan finish, best quaUty, andsubjected to similar test as provided for in the full-rigged saddle.
7. All work to be done in a first-class and accurate manner.(Approved by the Quartermaster General of the Army, November
11, 1909.)BRIDLES.
(3) Bridles.—Regulation size and make and provided with bitsshort in branch and of strong make.

182 MANUAL OF PACK TRANSPORTATION.
Fig. 111.

MANUAL OV PACK TRANSPORTATION. 183
Fig. 112.

184 MANUAL OF PACK TRANSPORTATION.
Fig. 113.

Manual of pack transportatiok. 18;
Sec. 132.—
Table showing weights of pack saddles and equipments.
THE APAREJO PROPER.
Weight.
Total.
Oldmethod.
Newmethod.
Body....Crupper.Cover. .
.
Cincha .
.
Corona .
.
Accessories:Lash rope with cincha and hook.Sling ropeLair ropes (2)
Pack covers (2)Pack blanketHead halterBlind
Set-up:Boot sticks (2)Sticks, willow (56).Hay
Total, old method
Daly aparejo set-up:Saddle bars (2)...Boot bars (2)
Ribs, hickory (18).Hay
Total, new method
.
Lbs. oz.
187
7
55
11
52 81 8
27
8 4
Lbs. oz.
42
29 8
88 12
6
6
46
Lbs. oz.
42
22
93
THE CROSSTREE OR SAWBUCK.
SaddleBreeching. .
.
Breast strap.Corona
Accessories, same as aparejo.
Total
9
51429 8
THE MOORE PACK SADDLE.
Saddle

CHAPTER VTTI.
SPECIAL DEVICES.
PACKING DEVICE (QUARTERMASTER CORPS).
(Figs. 114, 115, lie, 117.)
Sec. 133. This device consists of three parts—the frame, the plat-forms (2), the lashing. (Figs. 114, 115, 116, 117).
The packing device was designed to meet the requirements of mennot skilled in the use of the diamond and other hitches to secure a loadon the pack mule.
To assemhle the pad- device.—Place the frame on the aparejo so thatits staple holes fit over the staples on the latter; and pass the straps onthe sobre-jalma througli the staples; pass the cincha (n^er the sidebars, finger loop up, and cincha strap to the left; double the cinchaover the frame, strap inside; double or turn the crupper forward sothat the dock piece rests on the cincha.To place the aparejo on the mule, see Chapter III, sections 18 to 23,
inclusive. The "frame" of the packing device being attached to theaparejo, two packers should assist in placing the aparejo on the mule,from rear to front, in proper position, and cinching in customary man-ner. The platforms are now placed in position, one on each side ofthe frame, the top and bottom rods resting on the hook ])lates or rests,
s])aced apart as may be required by the conditions of loading, as eachplatform is independent of the other, the ''near" side platform maybe carried higher on the hook plates, as the greater weight of the nearside ])ack may require, so as to balance the load evenly on the packmule; the locks or holdfasts are then adjusted, the hooks of the locksbeing pressed into the under oj)enings of the hook plates or rests, thusholding the platforms rigidly in position; the side ])acks or top load,
as conditions may be, are placed on the platforms and the load se-
cured by its lashing. To place the '' lashing" on the load, each ])ackerwill hold one-half of lashing, embracing three latigos, so as to keep thelash rods toward the body, then from rear to front elevate or swing thelashing so as to rest on top and center of load; the center latigo oneach side is then made fast to the drop link at center of distance rod,
observing the square of lashing is kept on center and top of load ; this
leaves a latigo fore and aft on each side of the load; now attach theropes for lashing, one on each side, to the forward latigo, then bringthe rope section under the boot of the aparejo, and attach the latigo
at rear to the ring on end of section of rope, taking slack on latigos
fore and aft, to securely tighten the load, always observing the section
of rope is kept evenly divided fore and aft. It will be noticed that droplinks are provided on the platforms fore and aft. The latigos maypass through these drop links before attaching to the rings on each end
186

.MANUAL OF PACK TRANSPORTATION. 187

188 MANUAL OF PACK TRANSPORTATION.

MANUAL OF PACK TEANSPORTATION. 189

190 MANUAL OF PACK TRANSPORTATION.

MANUAL OF PACK TRANSPORTATION. 191
of sections of rope, as may be required by the size of loading, usuallyto packages of small dimensions.
It is also important that the latigos engage over the upper cornersof each side pack fore and aft, as is customary when securing the loadwith the diamond hitch method.The platforms take the place of the "sling rope," the lashing takes
the place of the diamond hitch. The hook plates of the frame are
arrangetl so that the load may be balanced by raising or lowering theplatforms as may be determined—as near an application of the dia-
mond hitch method, the oldest and best, as may be provided.
THE DALY PACKING DEVICE.
SPECIFICATIONS.
Standard size to be 54f inches from end to end and 19 inches widethroughout its entire length.
CONSTRUCTION.
The device consists of three
forms, (3) the lashing.
(1) The frame.
Hinges 2
Side plates 4
Hook plates 4
Distance plates 2
Distance shoes (wooden) 2
Reenforcing plates for shoes 2
Bolts for hinges 4
Rivets, iron 16
Rivets, copper 6
(2) The pintforms.
Distance rodsCenter plates for distance rods
SupportsLegsLocks or holdfasts
Drop links
parts— (1) the frame, (2) the plat-
(2) The platforms—Continued.
Staples for links
Distance boards for platforms.
Reenforcing plates for boards.
.
Rivets, iron
Rivets, copper
6
62418
(3) The lashing.
Lash rods 2
D rings 10
Squares 2
Rings 4
Canvas 10 by 14
Facings for lashing (leather) 2
Straps for lashing (leather) 7
Latigos for lashing (leather) 6
Rojjes for lashing 2
DETAILED SPECIFICATIONS.
(1) Tlie frame.
To be made of best spring steel 1 h inclies wide and one-eighth of aninch thick.
For hinges (2), cut a section 13 inches long 2\ inches from each end,
cut out a slot If inches long and three-fourths of an inch wide; this
to form eye for bolts. Circle section and weld both ends; then com-press circle to a radius of seven-eighths of an inch diameter, leaving a
space between the folds of hinge one-fourth of an inch diameter. Atemplet is good for the purpose; in shaping templet round each endand introduce between the folds of hinge when cold.
In introducing templets care must be taken that the ends of tem-plet meet the center of slots, forming eye to receive side plates for
hinge.
Side plates (4).—For side plates cut a section 32^ inches long.
At one end an opening is formed to carry the distance board of frame,

192 MANUAL OF PACK TRANSPORTATION.
opening for distance board to be 2 i inches long by three-fourths of aninch wide. In forming opening an extension is allowed on this end to
form a hook on the outward face of opening, and is arranged in this
manner
:
Commence at end selected and measure off three-fourths of an inchand mark with punch on each edge; in similar manner mark off one-half of an inch, then 2^ inches, 3h inches, and three-fourths of aninch. This gives 8 inches marked off on end, to form opening andhook on end of side plate, and will be considered the lower end of side
plate.
In forming hook, it is well to commence at end. To do so, com-mence at the second line of markings 1\ inches from end; turn this
portion at right angles, and three-fourths of an inch from end turnagain at right angles.
Now, on the space marked 2^ inches form a hook, depth of hook to
be 1 inch; mouth of hook to be five-eighths of an inch wide. Nowbend or compress sufficient of the space marked 3^ inches, so as to beflush with under and forward surface of hook; and at markings turnat right angles, and at last markings turn again at right angles. Thisforms the opening for the distance board, whose inside dimensions will
be 2^ by three-fourths inches. This should leave the extension of
side plate 24 J inches long.
It will be noted, in the formation of opening for distance board,
there is an angular opening on the under surface in the formation of
the hook; the base of this opening should be not less than three-fourths
of an inch.
In the formation of hooks on the hook plates, these openings are
utilized by the locks or holdfasts provided on legs of platforms, to
hold platforms securely.
Hoolc platesfor side plates (4) •—Hook plates to be 44 inches long andin their formation 7 hooks will be provided, arranged in the following
manner
:
Commencing at one end, space and mark off with punch on eachedge, the following distances:
Three inches from end selected mark and punch; then If inches
further in similar manner; then 1| inches; and then 6 spaces of 5|inches each; this leaves 3f inches at opposite end for the outward por-
tion of last hook on hook plate.
Now commence at first, or top end of hook plate, and at spacewhose distance is If inches, cut out a section on each side of three-
eighths of an inch wide; this leaves three-fourths of an inch at center.
Now lap the end over at center of this space to form eye for bolt of
hinge, cfiameter of eye to be one-fourth of an inch.
The 3-inch laps will be considered the under side of hook plate, andare to receive the distance plates of frame.Now on the space of 1^ inches, form a hook whose depth will be
three-fourths of an inch, mouth of hook to be five-eighths of an inch
wide.On the remaining six sections xiiarked off, form hooks, whose depth
will be 1 incli; mouth of hooks to be five-eighths of an inch wide. Inthe accurate formation of the hooks a templet is good for the purpose;hook plates to be as per sample furnished.
In assembling hook plates to side plates, the free end of side plates
engages into the fold of hook plates, and to meet the shoulders of

MANUAL OF PACK TRANSPORTATION. 193
hin^c; the opposite end of side plates engages into the free end of
hook phitcs, this operation gives 8 hooks on the upper or face side ofside plates; at the lower end of engagement one hole will he providedat center through hook plate and side plate, diameter of hole three-sixteenths of an inch, and riveted dow^n. At the upper end hetweenfirst and second hooks, two holes will be provided, in a diagonal line
in similar manner; these holes to receive side plates of frame.Both side plates and hook plates assembled must 'positively be in
straight alignment, one wnth the other.
Distance plates.—To be 23 inches long, 3 inches wide, and one-eighthof an inch thick; at each end of distance plate provide a slot 1^ incheslong and five-sixteenths of an inch wide. Slot to be in center of dis-
tance plate and one-half of an inch from each end and to be parallel
with length of distance plate. These slots or openings are to receivestaples of chock plates that hold frame to aparejo. ,
In adjusting distance plates to side plates, measure 9^ inches eachway from center of distance plate for side plates, from out to out.
This leaves 2 inches at each end of distance plate, extending from side
plate. The lower edge of distance plates to be flush with the loweredge of the 3-inch lap as provided on hook plates. Two holes w411
be provided at front and rear to correspond with those provided onhook and side plates, distance plates to be placed on the under side of
3-incli lap and riveted down.Distance boards or shoes, wooden (^).—To be of good, sound hickory,
free of knots and blemishes, and to be 19 inches long, 2^ inches wade,and eleven-sixteenths of an inch thick.
One and one-half inches from each end saw dowai to a depth of five-
sixteenths of an iiich on one side, portion between cuts to be "gained"out in a smooth and accurate manner, the upper and lower edges of
''gained" surface to be rounded off.
Reenforced platesfor sJioes {2).—To be of band steel, gauge 14, andof dimensions similar to distance shoes. These to be placed on theunder side of distance shoes. The flat surface of shoes will be con-sidered the under side.
Reenforce plates to be secured to distance shoes by copper rivets,
holes being provided on gained surface of distance shoes spacedequally distant, one at center and one at each end and 2 inches there-from, holes will be provided on reenforce plates to correspond withdistance shoe, diameter of holes to be three-sixteenths of an inch.
In assembling side plates and distance shoes it is well to introducedistance shoes first, care being taken to square the side plates whenapplying distance plates.
Now connect side plates with hinges, using l|-inch bolts, oval head,and rivet down over nut.At ends of side plates provide one hole at center three-fourths of
an inch from end, hole to pass through metal and wood, secure rivets
and rivet down on the uncler side.
(2) The platforms.
Platforms (2).—To be made of best Norw^ay iron.
For distance rods cut three sections of ^-inch round iron.
The first section to be 22 1 inches long; the second or outward section
to be 21 i inches long; the third section to be 20| inches long.
75927°—17 13

194 MANUAL OF PACK TRANSPORTATION.
On the first and third distance rods provide an offset of three-fourths
of an incli deep, lengtli of offset to be 10 inches.
The second distance rod to be straight along its length.
SuiyportS'iJ}.).—Cut a section of Norw^ay flat iron 13f inches long,
three-fourths of an inch wide and one-fourth of an inch thick.
Provide an eye on each end of supports large enough to take one-half
inch iron rod.
Legs {Jf).—To be of similar material, 15^ inches long, provided witheye on each end in similar manner.
In assembling legs to second distance rod leave a space of 15finches from outside to outside, measuring distance from center of rod
each way ; now provide a three-sixteenths of an inch hole through legs
and rod, and rivet down.In assembhng supports to second distance rod, engage the eyes of
supports over each end of rod and leave a (Ustance of 19 J inches frominside to inside between supports, counting from center of rod eachway. Now form a head on each end of rod one-fourth of an inchwide outside of head to be flush with eye of support.
In assembling the first distance rod to opposite end of supportsintroduce through eyes of supports, leaving a distance of 19 j inches
from inside to inside between supports, counting from center of rodboth ways, and weld the eye of supports to (Ustance rods. Now cutoff whatever portion may remain on the outside and smooth down.
In assembling the third distance rod to the eye on opposite end of
legs introduce rod through eye on legs and leave a distance of 19 J inches
from inside to inside between legs, counting from center of rod bothways, and rivet down in simihir manner as at opposite end of legs.
Now form a head on each end of rod one-fourth of an inch wide, out-side of head to be flush witli eye of support.
Center plates for distance rods (2).—To be of similar material as
provided for side phites and to be 11 inches long. Form an eye oneach end of ])late, (Uameter of eye to be one-half of an inch; center
plate to be engaged on first and second distance rods and centerthereof.
Locks or holdfasts (4).—To be made of similar material as thatprovided for sujjports and legs, to be cut 1 1 inches long.
At one end and one-half of an inch therefrom provide a slot or
opening whose length will be 1 ^ inches long and five-sixteenths of aninch wide; this to receive bolt for securing lock to legs of platform.
Now measure 6 inches from this end, turning section to an angle of45°. Three inches from base of angle turn the remaining portionat right angles; diameter or distance from the under side of the right
angled portion to base line of lock held horizontally to be 2^ inches.
The portion tui'ned at right angles or end of lock to be rounded;Jengtn to be not more than It inches.
For each lock a 1-inch bolt, holding a wing nut, will be provided.On each leg, counting 2^ inches from eye of leg on second distance
rod a J-inch hole will be provided at center of leg; punch this holesquare by metal punch.
Introduce a 1-inch bolt from outside of leg, and lay on to bolt thelock or holdfast as provided by slot or opening, and screw down withwing nut.
Locks to be right and left.
These locks or holdfasts engage into opening as provided on hookplates, as formed by the lapping of hook plates on side j^lates.

MANUAL OF PACK TRANSPORTATION. 11)5
Drojp links (6).—To be of |-inch round iron, cut 10 inches long; oneach end of one section form an eye whose diameter will be three-
eighths of an inch. Now, 1 inch from center of section both waysturn at right angles to form drop links.
Staples for links (8)
.
—Cut a section of similar material 3 inches
long; at center of section form semicircle oyer templet, templet to beof ^-inch round iron ; diameter at base of semicircle to be 1 inch. One-half of an inch of each end to be flattened to a thickness of one-eighthof an inch ; length of flattened surface to be not more than fiye-eighths
of an inch and punch one hole at center of each end; diameter of hole
to be three-sixteenths of an inch.
Now introduce a staple into each eye of drop link and place on theunder surface of supports in such manner so that one riyet will engagethe second and third distance boards and supports; the opposite endof staple will be riyeted down to supports.
Distance boards for jjlatforms (6).—To be of good, sound hickory,
free of knots and blemishes. To be 20f inches long, 1^ inches wide,
and one-half of an inch thick.
Reenforcing plates for distance boajxls (6).—To be of band steel, 1§inches wide, gauge 18, length corresponding with length of distance
boards.In applying distance boards to supports space equally distant in
such manner as to carry one riyet on the second and third distance
boards at each end and center, this for the purpose of receiying oneeye of staple holding drop link, the eye at opposite end of staple will
be riyeted down to support; at center of distance boards riyet downto center plates; in similar manner in center of space between endsand center plates, riyet reenforcing plates to distance boards.
The reenforcing plates will be considered the under side when apply-
ing distance boards to supports. All riyets between supports to be
copper riyets; all riyets on supports to be iron riyets.
The remaining two drop links to be applied at center of second dis-
tance rod, engaging center plates between the eyes of drop links. AUwork to be done in a first-class and accurate manner.
(3) The lashing.
Rods for lashing (2).—To be of round iron -^ of an inch diameter,
to be cut IS inches long; form eye on each end of rod, diameter of eye
to be one-half of an inch.
Each eye of lash rods to carry a *'D" ring. "D" rings to be of No.326 X. C. D's.
For each lash rod a metal square will be provided, No. 1 155 japannedsquare. These to be carried on fold of center strap of lashing.
Canvas for lashing.—To be of brown or khaki color, No. 4 cotton
duck; to be cut 14 inches long and 10 inches wide.
On each end of canyas, the short way, lay a lash rod and fold oyer
so as to leaye a distance of 10 inches, and sew down with basting
stitch.
Facings for lashing (2).—To be of good, solid, fair leather. Cut twosections 10 inches long and 7 inches wide; semicircle each section the
long way, lay each section oyer distance rods in similar manner as

196 MANUAL OF PACK TRANSPORTATION.
described for canvas section, facings to meet in center of canvas ; thesemicircular portion to be considered the upper or outer side of hish-
ing. Sew down semicircles with one seam one-fourth of an inchfrom edge.
Straps for lashing (7).—Cut one section 15 inches long and 2 incheswide; this strap to be applied over semicircular facings at center,
carrying at each end a metal square as provided; the fold of leather
holding metal square to be lapped under and the whole sewed downwith one seam one-fourth of an inch from each edge.
Now cut six straps 22 inches long and 2 inches wide, double so as
to have a length of 10 inches; on one end of each strap drop a 2-inch''D" ring; on opposite end lap strap over *'D" portion of ring as pro-vided on lash rods and sew down with one seam on each edge andone-fourth of an inch therefrom.The remaining two straps will be lapped over square, held by cen-
ter strap of lashing, the opposite end of strap holding "D" ring in
similar manner, and sew down as before.
Latigos for lashing (6).—For each "D" ring on end of straps cut astrap of latigo leather 6 feet long and 1 1 inches wide ; taper the lightest
end of latigos.
Lap the heaviest end of latigos over "D" rings 3 inches and pro-
vide 3 holes for lacing. No. 8 punch. Two holes to be spaced equally
distant apart in a horizontal line, the third to be at center of latigo
and three-fourths of an inch therefrom.Provide a lace string for each latigo wide enough to pass through
holes provided thereon ; finish lacing on hole at center.
Ropes for lashing (2).—Cut two sections of rope, best hand-laidmanila, one-half inch diameter and 4 feet long; form an eye on eachend of rope, each eye of rope to carry a 2-inch ring.
In assembling ring on each end of ropes connect the front and rear
of first and third latigos with rings on ropes in such manner as in cinch-
ing a saddle.
In the application of the lashing, the lash rods or "form" of lashing
rest on top and center of load, the latigos running downward over cor-
ners of side packs, and the rope sections under the boots of the aparejo
at front and rear; the center latigo is secured to metal square at cen-
ter of platforms, and the whole tied down as in cinching a saddle in
customary manner. (Designed by H. W. Daly.)
Table showing iveighls of packing device.

MANUAL OF PACK TKANSPOUTATION. 197
TOOL POUCHES (ENGINEER CORPS).
(Figs. US, 119.)
Sec. 134, The necessity for tool pouches has been the cause of the
various troubles which tlie ])acker has had, from time to time, to ])ro-
vide suitable means to transport with safety the different tools em-ployed by the Engineer Corps and afford proper protection for the
body of the animal.The assembly of the various tools, etc., so as to give ready access
when needed, without the necessity of taking off the load, has beenconsidered of vital im|)ortance to the rapid movements of detach-ments of the Engineer Corps under certain conditions.
To meet this contingency the tool pouches were designed.The pouches are made of good, solitl leather, about 60 inches long,
55 inches wide at ends, and 24 inches wide at center or middle, andcarry two pockets on either side; the larger, at bottom, for such tools
as short-handled shovels, axes, etc.; the smaller, at top or middle, for
picks, augers, nails, sledge hammers, etc.
These pouches are secured to the aparejo by straps at front andrear, at the top, or middle, buckles being provided on the aparejofor this purpose, and at bottom of pouches by straps passing underthe boots of the aparejo.
The pouches are further provided with a metallic device for carry-
ing such tools as crowbars or implements of greater length than thelower pockets.The device is attached to the pouches at top or middle by means
of hinges with suitable provisions to retain crowbars in position.
PACK CHESTS (ENGINEER CORPS).
(Fig. 120.)
Sec. 135. These chests or boxes, like the tool pouches, were designedto be carried on the aparejo and may be used for carrying a smallsupply of prepared rations, or the interior of chests may be arrangedfor safely carrying explosive material or other supplies.
They are supplied on their exterior with metallic fasteners for se-
curing chests on the aparejo so that the contents may be extractedwithout taking the boxes off the pack mule.The following list of articles of engineer equipment and methods
of packing them for the allowance of such equipments assigned to
each scjuadron of cavalry and each troop of cavalry in the field hasbeen approved by the vSecretary of War:Box No. 1. Outside dimensions 2 feet 8 inches by 12 by 12 inches,
containing 1 box, match; 100 caps, detonating; 200 feet Bickfordfuse; 200 feet instantaneous fuse; 50 pounds explosive. Weight, whenpacked, 85 pounds.Box No. 2. Outside dimensions 4 feet 6 inches by 8 by 6J inches,
containing 2 crowbars, 2 drills, double bitted; 2 hammers, drilling; 1
hammer, engineer; 1 pliers, 1 chisel, cold; 1 wrench, monkey; 1 spoon,drilling; 1 shoe, mule, set. Weight, when packed, 103 pounds.
For each troop outfit, 2 bundles, 5 shovels each, 60 pounds; 1 bun-dle, 5 shovels and 1 crowbar, 42 pounds.Box No. 1. Outside dimensions 3 feet 7 inches by 11 by 8^ inches,
containing 6 pliers, wire cutting; 5 pick mattocks, 1 auger, 2 rules.
Weight, when packed, 80 pounds.

lys MANUAL OF PACK TEANSPOKTATION.

MANUAL OF PACK TRANSPORTATION. ]\)\)

200 MANUAL OF PACK TRANSPORTATION.
Box No. 2. Outside dimensions 3 feet 8 inches by 11 by 7 inches,
containing 4 hatchets, 4 axes, 1 saw, 5 pounds nails. Weight, whenpacked, 78 pounds.Boxes to be made of |-inch dressed pine himber, with lids screwed
down when shipped, and to be hinged and provided with hasps andflat padlocks; cleats and partitions to be so placed in the boxes as to
Fic. IL'll.
prevent contents' from being disarranged and injured by rough
handhng.A list of the articles packed in each box should be fastened on the
inside of the lid, and each box sliould be numbered and marked to
show it contains engineer equipment for a troop or for a squadron.
The word "explosive" should be plainly printed on all faces of
Squadron Box No. 1.

MANUAL OF TACK TKANSPOKTATION. 201
PACK REEL (signal CORPs).
(Figs. 121, 122.)
Sec. 13G. The reel consists of the following;: Tlie platform, tlie
turntable, the cagmji:, and the saddle.
The platform consists of two side rails, two end rails for center
boards for holding the gearing, and two brace rails connecting center
boards and end rails. The platform rests on four strap-iron legs,
braced at each end.
To the bottom of center boards is attached a metal plate, holding a
vertical shaft and a provision for ball bearings; a horizontal shaft is
supplied at the center of one side rail, holding a miter wheel at inner
end.
At the outer end of shaft a crank is supplied, by means of whichthe miter wheel may be turned.
On each side rail at ends a handle is supplied for lifting the packreel tp position on the saddle, as provided on the aparejo.
The turntable is composed of wooden crosspieces, holding at center
and on under side a horizontal miter wheel. On its upper side a
metallic cap is supplied with a hole through center of cap and cross-
pieces for the purpose of being engaged over the vertical shaft, as
provided on platform. By this arrangement the miter wheel onturntable engages over its mate on platform and is rotated by meansof the horizontal shaft, supplied with a crank or by engagement of
the "pay-out" end of the coil of wire around a holdfast, the travel

202 MANUAL OF PACK TRANSPORTATION.
of the animal causing the turntable to rotate. On outer ends of
crosspieces a circular metal band is supplied to hold the crosspieces
rigid. On these crosspieces holes are provided to receive metalstandards, around which is engaged the coil of wire.
At one end of platform a brake is supplied, carrying a section of
light rope, by means of which the "unit " may apply the brake on thecircular band, thus regulating the "pay out" of wire as may bedetermined. The brake as supplied on end rail is considered the front
or forward end of pack reel.
For the purpose of holding the coil of wire within bounds whenengaged around the standards a "caging" is supplied, composed of
metallic cross arms that enga2:e into slots near each end of side rails
Fig. 122.
of platform. At the center of the cross arms a metallic cap is pro-vicled at intersection of cross arms, a hole being provided at center of
cap, which engages over the vertical shaft, holding the cross armsto place.
Two circular bands are provided, spaced about 12 inches apartby means of distance rods, the upper band being riveted to the hori-
zontal portion of cross arms; the lower band is connected to the ver-
tical portions of cross arms by means of short-distance plates. Thesehorizontal (hstance ])lates connect with the vertical rods near point of
engagement of the extremities of cross arms that engage on slots, as
provided on platform, metal keys being supplied to hold extremities
of cross arms rigidly in position to side rails of platform.

MANUAL OF PACK TRANSPORTATION. 203
A third circular metal band of diameter e(iual to the outer holes,
as })rovided on crosspieces, is })roviiled, holes being spaced equally
distant thereon, as })rovided on wooden crosspieces of turntable.
This band is further supported at its extremity by sections of metal,shaped like the letter "L," attached to the horizontal portions of
cross arms. When cage is in position the upper ends of standards onturntable engage into holes, as provided in metal crosspieces of this
smaller circular band.The connection of this smaller circular band, fitting over standards,
causes them to be held rigidly in position, the turntable thus con-
trolhng rotation of this band, or, as may be said, in unison with it, the
caging thus keeping the wire within due bounds when ''paying out."
For "paying out" at rear two semicircular iron rods, holding twovertical rods, which travel from side to side, are supplied. These are
attached to the vertical sections of cross arms at rear. Engaged be-
tween the vertical rods is supplied a device which travels up anddown these vertical rods, a hole being provided at center of device
through which the wire passes in "paying out" at rear. By this
action the wire has liberty to keep in alignment in the "payingout," the vertical standards moving from side to side, and the device
up or dowm, as may be controlled by the action of the w4re, to relieve
all possibility of a holdfast in the "pay out" of the wire.
For the purpose of carrying the pack reel a saddle is provided, fit-
ting over the aparejo to which it is attached, at front and rear, andwith suitable provisions to secure the legs of ])ack reel, and hold it
securely in position. (Designed by H. W. Daly.)
PACK CHESTS (siGNAL CORPS).
(Fig. 123.)
Sec. 137. These chests are constructed so as to hold the necessary
apparatus for telephonic communication, as with the provisional field
artillery.
The exterior of chests are supplied with metallic fasteners, latigos,
and sections of rope, for securing the chests on the aparejo, in similar
manner as provided for engineer-corps chests.
LITTER carrier (HOSPITAL CORPs).
(Figs 124, 12.5, 126.)
Sec. 138. The carrier.— It consists of two hinges, four side plates
—
two at top and two at bottom or ends, reenforced by wooden shoes to
strengthen same—four staples, two attached to each end, each staple
carrying two tug loops.
Each tug loop is supplied with a side strap and c^uarter strap. Theside strap holds a swivel clamp at opposite end and engages over theouter rail or bar of litter; the quarter strap is supplied with a distance
strap at end, holding a ring on each end ; these rings engage over thehamlles of litter at front and rear.
On each end of side plates swivel clamps are likewise provided thathold the inside rail or bar of litter. The swivel clamps on each endof side plates carry a strap, by means of which the litter, before using,
is strapped to carrier.

204 MANUAL, OF PACK TRANSPOETATION.

MANUAL OF PACK TRANSPORTATION. 205

206 MANUAL OF PACK TEANSPOETATION.

MANUAL OF PACK TRANSPOKTATION. 207
The side .straps and ([uaiter straps are adjustable, so tliat the httermay l)e carried at any desired incline when traveling; u]) or down amountain.The swivel clamps carry set screws, by means of which the side rails
or bars of litter are rigidly engaged.Two leather bags or pockets are provided; these are attached
between the top and bottom distance plates of carrier, and are used
for carrying bands to secure the wounded, when necessary, bandages,antl medical supplies. Additional rings are supplied, to which maybe attached canteens of water, etc.
A protection from sun and rain may be provided by the use of twoshelter halves, always available.
Col. John Van K. Hoff, Medical Department United States Army,indorses the above, with the following report to the Surgeon-General,United States Army
:

208 MANUAL OF PACK TKANSPOKTATION.
[First indorsement.]
Fort Leavenworth, Kans., March 15, 1905.
Respectfully forwarded to the Surgeon-General, United States Army, Washington,D. C, recommending that the "Daly"' litter frame be subjected to trial with view to
its adoption by our service.
One mule with this appliance and 3 men could each day easilv make 5 round tri])s
of 3 miles each from battlefield to an aid station, carrying altogether 10 wounded.Assuming that 3 men alone could make 3 round trips, which would certainly be thelimit, they would remove but 3 wounded; in other words, 3 men and a mule would doas much work, and do it better, than 10 men without a mule.
I have used the litter frame somewhat about the post and Ijelieve it to be a practical
and valuable military appliance.
If it is desired to subject it to a trial in Washington, I have no doubt Mr. Daly, whois stationed here, would be glad to forward it or take the litter frame to Washington.
John Van R. Hoff,Colonel, Assistant Surgeon-General, United States Army, Surgeon.
Note.—The litter carrier was designed to meet the necessity of
the quick removal of the wounded from near the firing line to first-aid
station in time of war. For this purpose gentle and easy-gaited mulesshould be used to carry the wounded.While pack service is maintained in the Army there will always
be a supply of suitable pack animals to draw from to carry the
wounded, and much safer and better than by hand or ambulance; thepossibility of jar as transmitted by the ambulance over ugly condi-
tions of country is absolutely eliminated by the use of this device.
For single litter construction, see figs. 127, 128, 129, 130, 131.
SPECIFICATIONS FOR THE UALY LITTER CARRIER.
INDEX TO CONSTRUCTION.
1. Hinges 2
2. Staples for hinges 4
3. Tug loops (triangular cockeyes). 8
4
.
Coupling plates '. 4
5. Wooden stiffeners for couplingplates 4
6. Side plates 4
, 7. Staples for side plates 4
8. Swivel clamps 8
9. Bolts for swivel clamps 4
10. Links or loop, for swivel clamp?. 4
11. Staples for swivel clamps 4
12. Set screws for swivel clamps 8
13. Box rod nuts for set screws 8
14
.
Wing nuts for set screws 8
15. Side straps 4
16. Quarter straps 4
17. Guy straps for quarter straps 4
18. Litter straps for swivel clamps . . 4
19. Litter straps for hinges 4
20. Buckles, 2-inch . . .
.'
4
21. Buckles, 1-inch 14
22. Buckles, f-inch 12
23. Rings, Ifinch 8
24. Rings, 1^-inch 4
25. Rings, 1^-inch 8
26. Rings, 1-inch 8
27. Rings, |-inch • 8
28. Snaps, double 4
29. Snaps, single, "Trigger" 4
30. Leather pockets or pouches 2
DALY LITTER CARRIER FOR APAREJO CONSTRUCTION.
DETAILED SPECIFICATION.
"Dal)/'" Titterframe.
1. Hingesforframe {2)
.
—To be made of soft steel, when shaped to
be 6f inches long, from center of bolt at center of hinge to center of
bolt at ends, each way, measuring horizontally.
Take a piece of soft steel 16 inches long, 2h inches wide, and one-
eighth of an inch thick (gauge 11), bevel each end, circle piece andweld.

MANUAL OF PACK TKANSPOKTATIOISI. 209
75927°—17 14

210 MANUAL OF PACK TEANSPOETATION.

MANUAL OF PACK TKANSPOKTATION. 211
Now ])rovide a "tem])lot'' 7^ inches \ow^, 2h inches wide, and five-sixteenths of an inch tliick, rounded at each end.Compress circled piece sufficient so as to introduce templet between
its folds, and fit snug; keeping templet between folds, shape one-halfof section, to form segment or portion of circle, whose diameter willmeasure If inches (applied by square); remove "tem])let" and one-half of hinge is thus shaped, and provide a similar section. To doso, straighten "templet" and continue as before.
To connect sections, commence at circled ends to form hinge, forfirst section cut or saw out inward five-eighths of an inch on eachedge and end to receive five-sixteenths of an inch bolt or rivet.
For second section, cut or saw out IJ inches at center of end, so asto receive first section and bolt described therefor. In cutting allowfor filing so as to fit snug, bolt to be riveted on. The curved portionwill be considered the center of hinge.

212 MANUAL OF PACK TEANSPOKTATION.

MANUAL OF PACK TRANSPORTATION. 213

214 MANUAL OF PACK TRANSPORTATION.
At each end of hinge, cut or saw out in entirely similar manner asthat described for second section of hinge, simihir l)olts will be pro-
vided therefor. The ends of hinge to receive "side" plates of frame.In cutting out for bolt, the aid of templet may be employed.2. Staplesfor hinge {2).—Take a section of soft steel, 4 inches long,
one-half of an inch wide, and one-fourth of an inch thick; allow abase of 1 inch at each end to rest on hinge, and form semicircle,
distance between bases to be 1 inch; provide a ^-inch hole at centerof each base to receive rivets. The circled portion of staple will berounded on under surface. These to receive two tug loops,
3. Tug loops {triangular codceges) for hinge {A).—Take a section of
Norway round iron 7 inches long and five-sixteenths of an inch diam-eter, shaped in this manner: Two and one-half inches from each endturn at right angles so as to leave inside of base 2 inches wide; nowIf inches from ends turn at right angles parallel with bases, this
leaves a perpendicular wall of three-fourths of an inch; now 1 inchfrom each end turn upward and form circle, and weld. Two tugloops will be provided for each staple. In applying staples to hinge,
measure 2^- inches from end of hinge to center of staple, the base of
staple conforming to shape of hinge, placed exactly in center of hinge,
the long way up and down. Now provide holes on hinge correspond-ing with those on staple and coimtersunk holes on under side of
hinge.
In riveting staples to hinge, provide one nut for each rivet, thick-
ness of nut to be five-sixteenths of an inch, diameter of hole in nut to
be three-sixteenths of an inch. Place nut between the folds or plates
of hinge so as to carry rivet; provide two tug loops for each staple,
and rivet staples securely to hinge; rivet will be flush with undersurface of hinge when riveted.
Staples holding tug loops on hinge will be considered the outwardface thereof.
4. Coupling or distance plates for hinges {2).—To be of sheet steel.
22 inches long, 3 inches wide, and one-sixteenth of an inch thick
(gauge 16), edges to be smoothed off. Now provide four holes at
each end three-sixteenths of an inch diameter, spaced in this manner:At each end and one-half of an inch therefrom and one-half of an inch
from the upper and the lower edge provide one hole; now 2 inches
from ends provide two simihir holes; these holes to be coimtersunk
on one side of coupling plate.
In applying coupling plates to hinges, place plate on the under side
of hinge and one- half of an inch from end, end of coupling plate to be
flush with the outward edge of hinge, holes as countersunk on coup-
ling phite will be considei-ed the downward side.
Now provide corresponding holes on the lower plate only of hinge,
and rivet down securely.
Now provide 10 similar holes on coupling plate, between hinges, 5
holes on the upper side and 5 holes on the lower side of plate, spaced
in this manner: Four inches from each end of coupling plate, and
three-fourths of an inch from the upper and the lower edge jirovide
1 hole, and between these, on the upper and lower side, provide 3
holes, spaced equally distant, these holes to be countersunk on the
under side, in similar manner. These to receive rivets and screws for
wooden stiffeners.

MANUAL OF PACK TRANSPORTATION. 215
5. Metal squares for coupling plxites of hinges (4).—For squares pro-
vide four |-incli brown japanned buckles, and remove the t<)n(]i;ues;
now su])})ly four sections of sheet steel same ji:au<;e as cou])lin(::; ])late,
2 inches loni^ and three-fourths of an inch wide; fold each section so
that ends will meet, and lay into fold the metal scpiare; provide onehole in the center of each section, and three-fourths of an inch frombar of square held in fold of section, diameter of hole, three-sixteenths
of an inch; now introduce the folds of section on the downward edgeof coupling plate, flush w4th the bar of square, and 1 inch from theinward edge of hinge to center of square, provide a correspondinghole on coupling plate and rivet down securely.
These to receive straps of leather bags of frame.6. Wooden stiffeners for coupling plates of hinges (2).—To be of
sound hickory, free from knots or other blemishes, 17 inches long, 3
inches wide, and seven-eighths of an inch thick, shaped in this man-ner: Three and three-eighths inches from each end saw down on oneside three-eighths of an inch, and "gain" out this portion, betweencuts. This leaves one-half of an inch in thickness on the bottomside of stiffener, the gained surface to be smoothed off, and the upperand the lower edges to be well rounded. This to receive cincha of
aparejo (pack saddle).
Now place stiffener on the upper side of coupling plate, betweenhinges, keeping their edges flush, and provide two holes, throughstift'ener, at each end, corresponding with those on coupling plate,
and secure rivets and burrs (malleable iron). Introduce rivet andburr from upper side of stiffener and rivet down on under side of
coupling plate.
Now provide 6 screws, one-half of an inch. No. 6, and screw downto stift'ener as provided.
Stiftener holding plate to be covered with fair leather, and seweddown w4th one seam, 6 stitches to the inch, seam to be flush, with,
lower edge of coupling plate.
7. Side plates for hinges (4).—To be made of sheet steel, 30 incheslong, 2^ inches wide, and three thirty-seconds of an inch thick (gauge14), shaped in this manner: At one end, and 1^ inches therefrom,fold this portion back, so as to take a ^^-inch bolt, and secure withtwo rivets; for rivets provide two holes iihree-sixteenths of an inchdiameter, one-half of an inch from each edge, and three-fourths of aninch from end of folded portion, countersink holes on under side of
plate, and rivet down. Now cut or saw out in entirely similar manneras that described for first section of hinge, provide bolt, and rivet
down to end of hinge. Now measure 20 inches on the free end of
side plate, counting from center of bolt on end of hinge, and turn atright angles. Next provide a "templet," shaped in this manner:Take a section of flat iron 3 inches long, 2h inches wide, and 1^ inchesthick. On one side at end bevel or taper to a thickness of five-eighthsof an inch, the beveled end will be considered the bottom, and thetapered side the outer face of templet.Now place templet on the angle formed on the free end of side
plate, and secure templet to side plate, and fold the free end aroundtemplet, lapping the remaining portion upward on side plate. Nextprovide two holes, three-sixteenths of an inch diameter, one-half ofan inch from each edge, and free end of side plate, holes to be counter-

216 MANUAL OF PACK TRANSPORTATION.
sunk on under side of side plate. These holes to receive staples for
side plates.
8. Staples for side plates (4).—To be made of Norway flat iron 6
inches long, one-half inch wide, and three-sixteenths of an inch thick,
shaped in this manner: One and five-eighths inches from each endturn at right angles; this will leave the outward or front side of
staple 2^ inches from out to out. Now three-fourths of an inch fromeach end turn inwardly at right angles, parallel with outward or front
side of staple. Now provide two holes on basis of staple corre-
sponding with those on end of side plate. Two 1-inch rings will beprovided for each staple and rivet down securely. Its use is to
receive litter straps attached to "swivel clamp" of side plate.
9. Coupling plates for side plates {2).—To be similar as those
described for coupling plates for hinges. In attaching coupling
plates to side plates, they will fit flush with ends and outward edge of
side plates ; corresponding holes will be provided on the bottom por-
tion of side plate and countersunk on its upper side. When riveted
down, rivets will be flush with upper and under surface of plates.
The loop so formed on end of side plate by "templet" is to receive
wooden stifi^ener.
10. ^^ooden stiffenersfor coupling plates ofside plates {2).—To be of
sound liickory, free from knots or other blemishes, 22 inches long,
3 inches wide, and 1} inches thick, shaped in this manner: Five andseven-eighths inches from each end saw down on one side three-
fourths of an inch deep, and "gain" out portion between cuts. This
leaves one-half of an inch tliickness on bottom or under side of
stiffener; now 2 J inches from each end on same side saw down one-
half of an inch and "gain" out between cuts. Tliis leaves an offset
3 1 inches long and three-fourths of an inch thick. Next each out-
w^ard portion of 2h inches will be beveled or tapered on same side to a
tliickness of five-eighths of an inch on one end, antl will be considered
the downward side of stiffener. This portion will fit exactly in formshaped by "templet" on the end of side plates and stiffener will ride
flush with the upper and lower edges of couphng plate. Stiffener
will be provided with bolts and screws in similar manner as that
described for stiffener on coupling plate of hinges.
11. Swivel clamps for side plates (4).—To be made of soft steel, 7
inches long, 2\ inches wide, and one-eighth of an inch thick (gauge
11), shaped in this manner: Bevel one end and form circle or turnas close as can be had, so as to form a rounded surface on end. Nowmeasure 1| inches from this end and turn at right angles, the end of
circle outward; now 1^ inches from inside of angle, turn again at
right angles parallel with first portion, the base formed betweenparallel sides to be level and fully H inches in the clear, the angles
or corners of free end to be rounded. In shaping base the angles or
corners should be shghtly rounded ; the aid of a templet should be em-ployed for this purpose. This to receive the pole or side bar of
"fitter." Now provide two holes whose diameter shall be one-half
of an inch; the first on free end of clamp, whose center shall be e([ually
distant from each edge and 1 inch from free end of clamp; the
second on outward side or portion first formed, likewise equally dis-
tant from each edge and 1 inch from rounded end.
The first hole on free end to receive swivel bolt for clamp, the
second hole on outward side of first portion to receive box-rocl nutwith set screw and to be considered the front of swivel clamp.

MANUAL OF PACK TRANSPORTATION, 21
7
12. Swivel holts for clamps (4).—To be of malleable iron, lenejth 2
inches, diameter one-half of an inch, head of bolt or rivet to be three-
fourths of an inch diameter, sha{)ed in this manner: One and thirteen-
sixteenths inches from end of bolt turn down to three-eighths of aninch diameter, head of bolt to be reduced in thickness to three-
sixteenths of an inch diameter, rim of head to be beveled on its upperor outer surface. Head of bolt to be inclined at such slope so as to
fit fiat against the face of clamp when clamp is apphed to end of side
plate on form as made by ''templet." In applying clamps on end of
side plate the free end of clamp will ride flush with upper end of form,the edges of clamp flush with the edges of side plate.
Now provide three-eighths of an inch hole horizontally throughform and stift'ener, whose center is indicated by center of half-inch
hole on clamp. This to secure clamp to side plate by means of bolt
as provided.13. Box-rod nuts for swivel clamps (4).—To be 2\ inches long,
diameter of hole three-eighths of an inch, and provided with threadfor set screw; now provide one hole at each end of box-rod nut,
diameter of hole to be three-sixteenths of an inch, hole to be one-half of an inch from each end and in center. These to secure box-rod nut to the outward face of clamp,
14. Set ticrewsfor swivel clamps (4) —To be 1 inch long and three-
eighths of an inch diameter, thread on screw to correspond with thaton box-rod nut, and provided with wing nut on one end; this end will
be squared to receive wing nut hole in center of wing nut, to corre-
spond with the squared end of set screw, so as to fit snug, and to becountersunk on the outward side and rivet down securely. Now in-
troduce set screw through box-rod nut from the front side, and bevelend of set screw oval shape, giving sufficient head on end of set screwto prevent extraction.
Now place box-rod nut on the outw^ard face of clamp, set screw in
center of half-inch hole, ends of box-rod nut to be equally distant fromthe upper end of clamp, provide corresponding holes in clamp, holesin clamp to be countersunk on the inner side, and rivet down se-
curely; rivets on the inner side of clamp will be smoothed oft' flush
with the inner side.
15. Staples for swivel clamps (4).—To be made of "Norway" flat
iron 3 7 inches long, one-half of an inch wide, and three-sixteenths of
an inch thick, shaped in this manner: One and one-fourth inchesfrom each end turn at right angles so as to leave the portion betweensides 1 inch in the clear. Now five-eighths of an inch from each endturn outwardly at right angles, parallel with first portion; this for
base of staple. In center of each base each way provide a y\-inchhole for rivets. Now place staple on the under side of swivel clampat base, the long way, with the width of clamp, the ends equally dis-
tant on base; provide corresponding holes on clamp; holes to becountersunk on the inner side on base of clamp, and rivet down se-
curely; rivets will be smoothed off on the inner side of swivel clamp,so as to be flush with base.
Staple on swivel clamp to receive fitter strap, these to attach closedlitter to "frame" by means of staple on side plate as provided. Insecuring swivel clamp to end of side plate, on form as provided, theshorter side of clamp will be outward, and provide washer for swivelbolt, diameter of hole to be one-half of an inch; introduce bolt through

218 MANUAL OF PACK TEANSPORTATION.
half-inch hole on free end of clamp and apply washer over bolt ; thick-
ness of washer must not exceed what is not covered for swivel portion,
so as to permit clamp to swing freely when riveted on the clampswivels on the shoulder formed on bolt, the washer acting as an aid
to clamp to swing or swivel freely. Now introduce bolt through holeon form on end of side plate, and rivet down securely on under side
of side plate.
16. Swivel clam])sfor side straps (4)-—To be made in similar manneras that described for swivel clamps for side plates of frame, w4th thefollowing exception: The free end of clamp to be rolled outwardlyto receive link or loop, wdiose diameter will be five-sixteenths of aninch.
17. Linksfor sioivel clampsfor side straps (4).—To be of '* Norway"round iron, 6^ inches long and five-sixteenths of an inch diameter,shaped in this manner: Two inches from each end turn at right angles;
this leaves a base of 2 J inches to be engaged by roll on free end of
clamp. Now 1 inch from each end turn again at right angles andweld ; this leaves a base of 2 inches wide to receive side strap ; diameterof link to be three-fourths of an inch between bases. In engagingthe lower base in roll provided on clamp, allow sufficient play in roll
for link to work freely, roll on free end of clamp to be turned out-wardly and link engaged securely; the upper base or portion of link
to receive side strap of frame, width of side strap to be 2 inches.
18. Side straps for litter frame (4).—To be made of good solid
harness leather, one-eighth of an inch thick. Cut two straps 5 feet
long and 2 inches wide, shave each end of straps, and fold, keepingthe "grained" side of each strap outward; this gives a doubledthickness for side strap. In folding allow an extension of 3 inches onone strap; this gives a similar extension at opposite end. Nowprovide two sections, each 6 inches long and 2 inches wide, and shaveends. Lay the first section on one end between the folds of strap, so
as to extend to end. Now fold over extension and section, so as to
receive the ends of section between the folds of strap, and lap the free
end of strap on outer side of folds; this gives a doubled thicknessat center of fold. Next punch opening at center of end to receive a2-inch japanned buckle. Introduce buckle receiving section andextension and fold back ends as indicated. Now provide keeper for
strap, to be placed on the upper side and 2 inches from buckle, widthof section for keeper to be 2 inches. Sew down both sections of side
strap to within 4 inches of opposite end and one-fourth of an inchfrom edges. Provide six holes, spaced 2 inches apart, large enough to
freely admit tongue of buckle, first hole to be 9 inches from buckleend of strap. Now provide a swivel clamp for side strap and intro-
duce the free end of strap through the link of clamp and throughkeeper and buckle ; engage buckle on free end of strap so as to leave aloop of about 9 inches long. The back of clamp will correspond withback of buckle.
Now place the "second" section on the free end of side strap andpass this end through both tug loops or cockeyes, on one side of hingeas provided, from underneath, and engage around first or upper tugloop on opposite side of hinge; the section and extension of strap onfree end to be folded in similar manner as described for opposite endand sewed down.

MANUAL OF PACK TRANSPORTATION. 219
In applying side strap with swivel clamp for opposite side of hinge,pass the free end of strap through the lower tug loop from under-neath, and engage around the first or upper tug loop on oppositeside in similar manner and sew down.
It will be noted the side straps overlap or cross over each otlier,
causing tension on strap to come from opposite side of hinge.
Proceed in similar manner in applying side straps for second hinge.19. Quarter straps for litter frame (4).—To be made of good solid
harness leather, one-eighth of an inch thick. The first two to beknown as the "front" quarter straps, the second two the "rear"quarter straps. Each quarter strap to have three sections, to bedesignated as the first or upper, the second or lower, and the third theguy or distance strap.
First section.—For the front quarter straps cut two sections 30inches long and 1 inch wide, shave one end of each strap, and fold
2^ inches and ])unch for buckle; provide a 1-inch japanned buckleand engage onto strap. Next provide two keepers, width of keeperto be 1 inch, the first or upper to be 1 inch from buckle, the secondor lower to be 2 inches therefrom and sewed down one-eighth of aninch from each edge, the opposite end of strap to be rounded or ta-
pered on edges. Now provide 15 holes punched No. 8 punch, counting3 inches on the free end of strap for the first, and spaced 1 inch apart.Now provide one 1^-inch japanned ring and one double snap;engage ring on the buckle end of sti'aj) and the double snap ontoring. The opposite end of snap will be engaged onto the lower tugloop on side of hinge, and to be known as the front hinge or front of
frame. The free end of strap will be provided with similar ring andengaged thereon, this to receive second section of quarter strap.
Second section.—For second section provide two similar straps; onthe buckle end engage a H-inch japanned ring; on the free or oppositeend engage a single snap (trigger snap preferred).
The single snap on second section will be engaged onto ring onfirst section. The ring on opposite end of second section to receivethe "guy" or distance strap (or third section).
Third section.—For third section provide two straps, cut 30 incheslong and 1 inch wide; shave each end of strap and fold each end soas to leave a length of 24 inches; provide two If-inch japannedrings; drop one ring into the fold of straps at one end and sew down.Now pass tlie free end of guy strap through the ring on second sec-tion, and drop the second ring into fold on free end and sew down insimilar manner as described for first section.
For the rear quarter straps, first section, cut two straps 48 inches-long and 1 inch wide, and provide in similar manner as that describedfor first section of "front" quarter straps, each strap to have a run-ning or free keeper engaged about center of strap. First sectionwill be engaged onto lower tug loop on hinge at rear, as described for
the front.
For the second section provide two similar straps as that de-scribed for second section of front quarter straps, to be engaged insimilar manner.
For thirtl section provide in similar manner as that described forthe front quarter straps. It will be noted the ring on end of secondsections at front and rear hooks freely on the "guy" straps, being

220 MANUAL OF PACK TKANSPORTATION.
engaged on strap between rings at each end. The rings at each endof guy strap engage over handles of litter.
20. Litter straps for swivel clamps (4).—To be 36 inches long and 1
inch wide, provided with japanned buckle and two keepers. Straps
to be engaged on sta])les on the bottom or under side of swivel clampson side plates. These to secure closed litter when traveling to the
firing line.
21. Litter straps for hinges (4).—To be made in two sections, anddesignated as the buckle piece and tongue piece.
First section.—For buckle piece cut a strap of leather 12 inches
long and 1 inch wide, shave each end, and supply a 1-inch japannedbuckle for one end, lap 2^ inches, drop buckle into lap in the usual
manner, provide keeper on upper side, and sew down. The opposite
end to be engaged on lower tug loop on one side of hinge, lap{)ed 2^inches and sewed down.
Second section.—For tongue piece cut a strap 18 inches long and 1
inch wide, shave one end, and lap 2h inches, and point the opposite
end. The shaved end will be engaged on lower tug loop on opposite
side of hinge, lap 2^ inches, and sew down. Tongue piece to be pro-
vided with 9 holes punched No. 8 punch, spaced 1 inch apart, com-mencing for the first 3 inches from pointed end.
The second hinge will be provided in similar manner. The tonguepiece on each hinge will not be on the same side.
22. Leather hags for frame {2).—To be made of good solid bagleather, fair preferred, shaped in this manner: Cut one piece 15
inches long and 15 inches wide, allow 9 inches for ba:k, and 6 inches
turn over for lid, for front piece; cut a section 15 inches long and 9
inches wide or deep. For bellows cut one piece 33 inches long and4^ inches wide, round the four corners of back piece and two corners
of front piece to correspond w4th the bottom portion of back piece,
hemstitch bellows to back and front piece and provide binding
same material cut 1^ inches wide, two pieces; first piece to be long
enough to extend around the back piece, the second piece long
enough to extend around the front piece; shave binding sufficient to
lap over edges freely, and sew down, six stitches to the inch, four
cord, Barbour's No. 12 waxed with best fair wax. Now cut twoj)ieces 12 inches long and three-fourths of an inch wide for backpiece, shave ends and supply four |-inch rings, lap H inches at eachend, drop rings into lap, and sew down.
In applying ring pieces to back ])iece, measure 2h inches from eachend to center of strap, and sew down to back piece, the long way of
strap to be up and down.BucMe piece for ring pieces of hade piece (4).—Cut two straps for
upper rings, 10 inches long and three-fourths of an inch wide, supplybuckle and two keepers for each piece, and sew down in usual manner.
These to be engaged onto ui)per rings on back piece and stra})i)ed
down to squares as supplied on the lower edge of coupling ])late.
For the lower rings of back piece cut two straps 20 inclies long andthree-fourths of an inch wide, provide in similar manner as that
described for the iipper straps, and engage onto lower rings on backpiece, these to be strapped down to rings as provided on staple of
side plates.
For lid provide two tongue pieces cut 8 inches long and three-
fourths of an inch wide shave one end of each strap and point

MANUAL OP PACK TRANSPORTATION. 221
opposite end, space tongue pieces on lid as provided for ring pieceson back piece, and sew down 1^ inches from end of lid. Now pro-vide two buckle ])ieces for tongue pieces on face of front pieces, to
be spaced in similar manner as provided for tongue pieces. Supplybuckle and keeper in usual manner and sew down on face piece,
buckle piece when finished not to exceed 3 inches long, the end of
buckle piece on end of face piece, tongue pieces to have holes spacedone-half of an inch apart the length of tongue piece, commencing for
the first 1 inch from end of tongue piece.
These to receive flexible band (webbing) to secure wounded to
litter, medicine supplies, etc. [Designed by H. W. Daly.]
AMMUNITION BOXES ORDNANCE DEPARTMENT.
Sec. 139. During the Spanish-American war (1898) the necessityfor a rapid ammunition supply, by the aid of suitable ammunitionboxes, without the necessity of removing the boxes from the packanimal, forced itself upon the writer, from the fact that many ropeswere lost or left at point of delivery when exposed in the zone of fire;
also owing to the fact that ammunition deteriorated by exposure to
dampness, a hermetically-sealed tin case was provided, inclosed in thewooden box. (Figs. 132, 133.)
For the purpose of rapid delivery, two wooden boxes of equal di-
mensions were provided, the inside dimensions having a greater depthand length than the metallic case. A lid was provided on one side,
acting on hinges; a band of iron passed along the front of the lid
lengthwise and running upwardly on each end of box at an acuteangle with the lid of box, the ends of bands being secured by a bolt
passing through from inside of box and secured over band on outside.
This arrangement allowed the band to be raised over top of box andthe lid to open out and down; to retain the band when in position
over lid, a spring was supplied at center that engaged the band,holding band firmly in place.
On the inside of box, against the top at rear, a cleat was supplied,taking up the extra space between the tin case and top of box, ornearly so.
On the front side and bottom of box an iron roller, about one-fourth of an inch in diameter was attached, and in front of roller awooden cleat was supplied as a guard for roller in introducing the tin
case. To add to the easy introduction of the tin case, strips of tin
were supplied, adjusted along the bottom and ends of box, and for
the easy action of the roller, a strip was supplied under roller andproperly secured.
This arrangement left a space of about 1| inches between the tin
case and lid of box; to take up this play or space and hold the tin
case in position behind its roller, a short wooden cleat is attachedat the center of lid, so that when lid was closed it abutted against theside of tin case, holding it in place.
On the outside of box metallic fasteners, fitting over the cornersat rear and bottom of box, were supplied. The device or fasteneron right-hand corner of each box held a hook, working on a hingeand pivot; the left-hand corner of each box being provided with anangle iron holding five buttons, over which the hook engaged whenthe boxes were in position on the aparejo, the number of buttons per-

222 MANUAL OF PACK TEANSPOETATION.

MANUAL OF PACK TRANSPORTATION. 228

224 MANUAL OF PACK TRANSPORTATION.
mitting the raising or lowering of either box to equahze the loadshould the contents of one box be lighter than its mate.Each box l)y this arrangement has a right-hand hook and a left-
hand angle iron, holding buttons, thus making boxes interchangeable.Each box is then supplied with a "D" ring on each end of box to
receive the "lashing."For lashing two sections of rope about 4 feet long, standard size,
holding a ring on each end, and attached to each ring a latigo of
suitable length is attached; the rope portion is held under the bootof the aparejo and latigos engage on to ''D" rings on ends of box,and secured as in cinching a saddle.
For the purpose of delivering ammunition at or near the firing
line, as may be desired, the metal band on front of each box is re-
leased and passed over the top of box. Both hands then grip thewooden box, the thumbs raising the metallic case inside of box soas to free the roller at bottom; this action causes the tin box to fall onroller, forcing the case out instantly, the angle at which the boxes areheld on the pack mule giving impetus to the delivery of metalliccases by their weight when raised above the roller.
The lid is then closed and the band, by quick action, takes positionover spring, retaining the band securely, and the animal is ready to
return to the supply depot for another load of ammunition and de-liver as before.
By the aid of these wooden boxes and metallic cases, a rapid andsystematic ammunition supply can be maintained along the extentof firing line by pack mules; on the basis of 1,000 rounds to themetallic case, 100,000 rounds of ammunition can be delivered at anypoint on the firing line in from two to three minutes, with properassistance on reaching the firing line, with a train of 50 pack mules.(Designed by H. W. Daly.)
PACK OUTFIT, AMERICAN MODEL, FOR MAXIM AUTOMATIC MACHINE GUN,CALIBER 30, MODEL OF 1904.
(Figs. 134-13.5.)
Sec. 140. A complete outfit for one gun comprises five packs—onefor the gun and tripod, one for carrying six boxes of ammunitionloatHng machine, and box of tools and accessories, and three eachcarrying six boxes of ammunition and two water boxes.The following is a list of the parts common to all the packs: (1)
Halter bridle, (2) blinders, (3) corona, (4) aparejo, (5) crupper, (G)
sobre-jalma, (7) pack frame, (8) aparejo cinclia, (9) belly cincha, (10)
load cincha.
To complete the ammunition and belt-filling machine pack, a(hl to
the above ammunition hangers six ammunition boxes, one belt-filling
machine and box, and one box of tools and accessories. To completethe ammunition and water box packs, add to the above: The ammuni-tion hangers, six boxes of ammunition, and two water boxes. Onone of these ])acj<s is carried (1) the filhng cup with its straps.
To complete the gun pack, add: (1) Gun hanger and gun, (2) tripodhanger and tripod, (3) barrel case and spare barrel, (4) ammunitionboxes.

MANUAL OF PACK TRANSPORTATION. 225
The packs are practically identical in all details, except the design
of the hangers, these being especially adapted to the loads they are
to carry.APAREJO, PROPER.
The aparejo, proper, includes the body, crupper, sobre-jalma, cincha,
and corona.
THE PACK FRAME.
The frame is identical for all packs. It consists of two bronzearches connected longitudinally by steel angles. To the projecting
ends of the arches are riveted four steel hoops or ribs, which hangdownward and partly embrace the body of the animal. The frame-
work thus formed is strengthened by four steel plates riveted fore and
75927°—17 15

226 MANUAL OF PACK TEANSPOETATION.
aft, two to the under side of the ends of the arches and two to thefloating ends of the ribs. Strips of wood are attached to these steel
plates, which serve to stiffen them. The upper strips of wood are
gained to form a seat for the aparejo cincha. These, and also thelower strips, serve to distribute the pressure of the cincha and theload. To the ends of the bronze arches hooks are attached for hold-ins; the han2;ers.
THE HANGERS.
There are three different designs, viz, the gun hanger, the tripod
hanger, and the ammunition hanger.
The ammunition hanger consists of a rear frame made of angle
steel, to the lower side of which is riveted tlie bottom frame, made also
of angle steel, but with the webbing cut away from the ends of the
frame. The top of the rear frame"and of the outer corners of the

MANUAL OF PACK TRANSPORTATION. 227
bottom frame are connected by side braces. The rear frame has a
rear top brace riveted to its upper ends; also two inclined braces
riveted each with one end to the middle of the lower bar of the frame,
the other end to the rear top brace near its ends. To these latter
braces are riveted tlie hanger eyes. To the back of the rear frameand about 3 inches from its lower edge is riveted the rear bottom
brace. This brace rests against the ribs hanging from the packframe.The hangers for gun and tripod consist of two hooks bent to suit
the load, and are made of steel. They are provided with eyes for
attachment to the hooks on the arch frame, and are fitted with dis-
tance pieces, which rest on the ribs hanging from the pack frame,thus keeping the load away from the sides of the animal.

228 MANUAL OF PACK TKANSPOKTATION.
- THE GUN COVER, SPARE BARREL, AND FILLING CUP.
The gun cover is made of heavy oHve-drab duck and protects thegun from dust and rain.
The spare barrel is carried in a russet-leather case strapped to thepack franie under the hanger on the gun side of the pack.The filling cup for filling water jacket is carried strapped to the
pack frame of one of the ammunition and water paclvs.

MANUAL OF PACK TRANSPORTATION. 229
The various parts of the pack are shown separately in Figs. 134and 135.
The weights of the loads are as follows:
Gun and tripod pack.Pounds.
Blinder 1
Halter bridle 5Aparejo proper 53. 75Belly cincha 2. 2Load cincha 5Gun with water jacket filled 74. 5Pouch for rear sight carriage 18Tripod 77. 5Hanger of gun, with cover 10Hanger of tripod 9Spare barrel and case "
, 7. 5Pack frame 29Pack cover, 78^^ x 36^^5 3. 25
Total 278. 35
Ammunition and belt fillinq machine pack.Pounds.
Blinder 1
Halter bridle 5Aparejo, proper 53. 75Belt-filling machine and box 23. 38Ammunition hangers (2) 22Ammunition boxes, empty (G ) 30. 96Belly cincha 2. 2Load cincha 51,500 rounds of ammunition 96Box with tools and accessories 20Pack frame 29Pack cover, 78^' x 36^^.5 3. 25
Total •. 29L 54
Ammunition and voter box pack.
Blinder 1
Halter bridle 5Aparejo, proper 53. 75Ammunition hangers (2) 22Ammunition boxes, empty (6) 31Belly cincha 2. 2Load cincha 5Water boxes, filled (2) 37. 251,500 rounds of ammunition 96Filling cup and straps o 1. 75Pack frame 29Pack cover, 78'^ x 36^^5 3. 25
Total 287. 20
The top of the pack frame is so constructed that it may in emer-gencies be used as a seat, on which to pack from one to three standard-sized boxes of ammunition or otlier contents. For ordinary service,
however, these packs are sufficiently heavy without such a top load.
o- On one jiack only.

230 MANUAL OF PACK TRAXSPOETATION.
TO PREPARE AND LOAD THE PACKS.
The animal being bridled and blinded, the pack is placed in posi-tion as follows
:
The corona is first put on, the canvas side next the animal and theedge with circular stitching just over the withers.
The crupper, sobre-jalma, and pack frame are all bound to theaparejo body. The crupper is first attached by the leather thongsprovided for the purpose. The sobre-jalma is then placed in position
over the aparejo body, the slits near its center being passed over thestaples projecting from the aparejo body. Next comes the packframe, which is placed over all, the staples mentioned above passingthrough slots in the projecting ends of the flat steel pieces riveted to
the bronze arches. The whole is fastened together by leather billets
sewed to the sobre-jalma, the ends of which pass through the eyes of
the staples.
The parts thus assembled are placed on the animal over the coronaand bound in place by the aparejo cincha. The cincha is placed in
position by passing the gas pipe end (seam side up) through thepack frame from the near side and bringing it up under the animal'sbelly. It is bound by simply passing the cincha strap several timesthrough its seat in the entl of the cincha and a ring fastened to thecincha strap near its fast end.The pressure of the folds one upon another prevents slipping of
the cincha strap. The loose end of the cincha strap is passed througha loop sewed to the cincha.
The hangers, gun, and tripod, or ammunition, are next placed in
position and secured to the belly cinchas. The loads are then placedin position and fastened by straps attached to the various hangers.
The load cincha is now put on and lashed in place by the straps in
the ends of the belly cincha. These straps also pass through D rings
attached to the hangers, thus binding the various parts of the loadfirmly together.
CARE AND PRESERVATION OF LEATHER EQUIPMENTS.
These equipments are made of russet leather containing enoughoil to materially improve the quality and increase the life of theleather, but not enough to soil the clothing if the equipment is prop-erly cared for.
The leather is pure oak tanned, of No. 1 tannage and finish, handstuffed, with a light dubbing made of pure tallow and cod liver oil
to preserve the leather, the dubbing being so sparingly used that theoil will not exude.The following directions for cleaning and preserving the leather
equipment should be carefully followed:
To ])reserve the life of russet leather equij)ments they should becleaned whenever dirt, grit, or dust has collected on them or whenthey have becom'e saturated with the sweat of a horse. In cleaning
them the parts should first be separated and each part sponged, using
a lather of castile soap and warm water. When nearly dry a lather
of Crown soap and warm water should be used. If the equipment is
cared for frequently this method is sufficient; but if the leather hasbecome hard and dry a little neat's-foot oil should be applied after

MANUAL OF PACK TRANSPOKTATION. 231
\vasliin<^ with castile soap. When the oil is chy the equipmentsshould be spon<i;ecl lightly with Crown soap and water, which will
remove the sur})lus remaining on the surface. If a polish is desired
a thin coat of russet-leather polish issued by the Ordnance Depart-ment should be ap])lied ami rubbed briskly with a dry cloth.
Particular care should be taken not to use too much Crown soap or
water, as the result will be detrimental to the life of the leather. Inno case should leather he dipped in water or he placed in the sun to
dry.Weights.
Weight of gun, water jacket empty pounds.
.
Gl. 5Weight of gun, water jacket filled do 74. 5Capacity of water jacket pints.
.
13
Weight of tripod, complete, with cleaning rod pounds.
.
78Weight of wheeled mount, without equipment do 235Weight of one ammunition box, with belt containing 250 cartridges do. ... 21. 16Weight of tool box, filled do 20Weight of water box do 18. 62Weight of belt-filling machine box, filled do 21
This short description or portion is taken from No. 1770, Hand-book of the Maxim automatic machine gun, caliber 30. RevisedJanuary 7, 1908.
Note.—For improved method of carrying the Maxim automaticmachine gun, caliber 30, see figs. 138 to 142. (Designed by H. W.Daly.)
PACK OUTFIT, AMERICAN MODEL, FOR 2.95-INCH VICKERS-MAXIMMOUNTAIN GUN.
(Figs. 143 to 149).
Sec 141. Experience in the Philippines demonstrated that theEnglish outfit is not entirely satisfactory, and a new pack, based onAmerican practice, has been designed. The component parts perunit (one gun) of the American outfit are as follows: (See footnote.)
13 halter bridles.
13 aparejos—three 58-inch, seven 60-
inch, and three 62-inch.13 coronas—three 48-inch, seven 50-
inch, and three 52-inch.13 sobre-jalmas—three 59-inch, seven 61-
inch, and three 63-inch.13 aparejo cinchas.10 belly cinchas.13 cruppers 12 by 8 by 78 inches.2 drag ropes.
2 wheel hangers.1 pad for trail.
1 tool case, with inside pockets.1 tool case, with inside straps.
4 lifting rods.
3 load cinchas.
9 ammunition cinchas.
13 blinders.
1 sponge brush and sponge rod.
1 cleaning brush.2 tubular oil cans.
1 tubular oil-can carrier, with straps.
2 piston-rod protectors.
1 cradle cleaner.
1 set of tompions for cradle.
1 front-sight cover.
1 breech cover.
1 tangent-sight cover.1 muzzle cover.
1 gunner's pouch.6 lash ropes.
3 implement straps.
13 pack frames.
12 combined packing cases and ammu-nition hangers (12i-pound shell).
6 combined packing cases and ammuni-tion hangers (18-pound shell).
Notes.— (1) The above provides necessary equipment for onemule for gun, one mule for trail, one mule for cradle, one mule forwheels and accessories, and nine mides for ammunition. (2) A com-plete outfit for a four-gun battery would be obtainetl by multiplyingthe number of each of the articles above enumerated by four.

232 MANUAL OF PACK TEANSPOKTATION.

INIANUAL OF PACK TRANSPORTATION. 233
The pack frame placed on the aparejo is identical for all packs,
and consists of two cast-bronze arches connected by bronze side bars,
the frame thus formed is riveted to two steel hoops or ribs, whichare connected fore and aft by four steel plates stiffened by flat pieces
of wood, the lower ones supporting and distributing the effects of
side loads when hang-ers are used.
The arrangement of the packs remains the same as in the Englishsystem, and wdiile the weights of the loads w4th packs are greater
they are closer to the mule's back, lessening the tendency to shift, are
more securely lashed, and the weight is better distributed by the
greater bearing surface of the aparejo. The method of lashing is
shown in figs. 143 to 149, inclusive.

234 MANUAL OF PACK TKANSPOETATION.

MANUAL OF PACK TRANSPORTATION". 235

236 MANUAL OF PACK TEANSPOETATIOJSr. ,. .-^i..^.,

MANUAL OF PACK TRANSPORTATION. 237

238 MANUAL OF PACK TKAXSPOKTATIOlSr.

MANUAL OF PACK TRANSPORTATION. 289

240 MANUAL OF PACK TRANSPORTATION.
^'/W

MANUAL OF PACK TRANSPORTATION. 24]
75927°—17 IG

242 MANUAL OF PACK TRANSPORTATION.

MANUAL OF PACK TRANSPORTATION". 243

244 MANUAL OF PACK TEANSPOETATION.
No. of
mule.Description of load. Weight.
Gun, complete, with mechanismBreech and muzzle coversLoad cinchaLash ropesGunner's pouchPack, complete—bridle, aparejo, crupper, cinchas, coronas, sobre-jalma, and frame.
Pounds.236
2421
90
Total.
Cradle, with buffers filled with oil.
Load cincha and lash loopsCradle cleaner and tompionsTool boxes, with tools
Pack, complete
Total.
[Trail with elevating gearTrail pad, lash loops, and load cincha.Pack, complete
Total.
Wheels (2)
One axle, with linchpin and washersHangersDragropes (2), brake ropes (2)
Handspike, lifting bars, sponge brush and rod.
Implement straps and belly cinchaPack, complete
Total.
Ammunition-box hangers (2) . .
.
Rounds, complete (12)
Ammunition and belly cinchas.
Tubular oil can (filled)
Pack, complete
Total.
Ammunition-box hangersRounds, complete (10, double common shells).
CinchasPack, complete
Total
.
335
1946
412
90
306
238890
336
13148201825590
337
44180
7
12
333
344 ;..
ADDITIONAL COPIESOF THIS PUBLICATION MAY BE PROCURED FROM
THE SUPERINTENDENT OF DOCUMENTSGOVERNMENT PRINTING OFFICE
"WASHINGTON, D. C.
AT
50 CENTS PER COPY
V k


Webster Family Library of Veterinary Medicine
Cummings School of Veterinary Medicine at
Tufts University
200 Westboro Road