KG245 Turkey 060523 - GSCS CDN B2C Service. - LG
159
KG245 Kullan\c\ K\lavuzu KG245 KG245 Kullan\c\ K\lavuzu Kullan\c\ K\lavuzu Bu k\lavuzdaki bilgilerden baz\lar\, telefonunuzdaki yaz\l\ma ya da servis sa©lay\c\n\za ba©l\ olarak telefonunuzda farkl\ olabilir. P/N : MMBB0187602 ( 1.0 ) TÜRKÇE ENGLISH H
-
Upload
khangminh22 -
Category
Documents
-
view
1 -
download
0
Transcript of KG245 Turkey 060523 - GSCS CDN B2C Service. - LG

KG
24
5Kullan\c\ K\lavuzu
K G 2 4 5
K G 2 4 5
Kullan\c\ K\lavuzu
Kullan\c\ K\lavuzuBu k\lavuzdaki bilgilerden baz\lar\, telefonunuzdakiyaz\l\ma ya da servis sa©lay\c\n\za ba©l\ olaraktelefonunuzda farkl\ olabilir.P/N : MMBB0187602 (1.0)
TÜRKÇE
ENGLISH
H
KG245 Kullan\c\ K\lavuzu
TÜRKÇE
Bu k\lavuzdaki bilgilerden baz\lar\, telefonunuzdakiyaz\l\ma ya da servis sa©lay\c\n\za ba©l\ olaraktelefonunuzda farkl\ olabilir.

|çindekiler
2
|çindekiler
Giriß 6
Güvenli©iniz |çin 7
Güvenli ve etkili kullanma
kurallar\ 8
KG245’ün özellikleri 12 Telefonun Parçalar\
Ekran Bilgileri 16
Baßlang\ç 18SIM kart\n ve telefonun pilinin
tak\lmas\
Pilin ßarj edilmesi 19
Adaptörün ç\kart\lmas\ 20
Erißim kodlar\ 22
Genel ißlevler 24Arama yapma ve cevaplama
Ses seviyesinin ayarlanmas\
Aramalar\n yan\tlanmas\ 25
Metin girme
Rehber 28
Arama içi menüsü 29
Çok kißili ya da konferans
görüßmeler 30
Menü a©ac\ 32
|ßlevleri ve seçenekleri
belirleme 34
Rehber 35Ara
Yeni ekle
Arama grupları 36
Hızlı ara
Kendi numara listem 37
Ìmza
Ayarlar
Ça©rı kaydı 39Cevapsız aramalar
Gelen aramalar
Yap\lan aramalar
Bütün ça©r\lar
Son aramalar\ sil
Arama Ücretleri 40
Arama süresi
Arama ücretleri
Ayarlar
GPRS info 41
Arama süresi
Veri miktarı

3
|çindekiler
Araçlar 42Favoriler
Çalar Saat
Bluetooth
Eßleßmiß cihazlar
Handsfree cihazlar 43
Ayarlar
Oyunlarım ve di©erleri
Oyunlarım ve di©erleri
Profiller 44
Hesap mak. 45
Birim dönüß.
Ülke Saat.
Ses kaydedici
Kaydet 46
Listeye bak
SIM Servisi
Ajanda 47Takvim
Yeni ekle
Göster
Hepsini göster
Geçmißi sil 48
Tümünü Sil
Kısa not
Mesajlar 49Yeni mesaj
SMS yaz
MMS yaz 50
Gelen kutusu 51
Taslaklar 52
Giden kutusu 53
Sesli mesaj dinle
Bilgi mesaj\ 53
Oku 54
Konular
Kal\plar
Metin Íablonlar\
Multimedya Íablonlar\
Ayarlar 55
Metin Mesaj\
MMS
Sesli mesaj merkezi 56
Bilgi mesaj\
Push mesajlar\
Kamera 57

|çindekiler
4
Ayarlar 59Profiller
Aktif
Kißiselleßtir
Yeni ad ver 60
Tarih & Saat
Tarih
Saat
Telefon
Ekran Ayarlar\
Diller 61
Ça©r\ Ayar\
Ça©r\ Yönlendirme
Cevap modu 62
Numaram\ gönder
Ça©r\ Bekletme 63
Dakika uyarıcı
Oto. yeni. ara
Güvenlik 63
PIN kodu iste©i
Telefon kilidi 64
Ça©r\ Engelleme
Sabit aranan numara
PIN de©ißtir 65
Íebeke
Íebeke seçimi
Bant seçimi 66
GPRS'e ba©lan
Açılıken
Gerekti©inde
Haf\za durumu
Ayarlar\ S\f\rla
Tarayıcı 67Giriß sayfas\
S\k Kullan\lanlar 68
URL’ye git
Ayarlar
Profiller
Ön bellek 70
Çerezler
Önbelle©i sil
Çerezleri sil
Güvenlik
|çindekiler
5
Ö©elerim 71Foto©raflar
Tüm resimler
Genel resimler
Rehber resim.
Tümünü sil
Resimler 72
Melodiler
Varsayılan sesler
Ses kay\tlar\
MP3 zil sesi
|ndirilen
Oyunlar ve Uygulamalar 73
Di©erleri
Aksesuarlar 74
Teknik Veriler 75
|çindekiler

En son dijital mobil iletißim teknolojisiyle çal\ßmaküzere tasarlanm\ß gelißmiß ve kompakt KG245 mobiltelefonu sat\n ald\©\n\z için tebrik ederiz.
Kullan\c\ k\lavuzunda, bu telefonun kullan\lmas\ veçal\ßt\r\lmas\yla ilgili önemli bilgiler bulunmaktad\r.En iyi performans\ elde etmek ve telefonagelebilecek hasarlar\ ya da telefonun yanl\ßkullan\lmas\n\ önlemek için burada verilen tümbilgileri dikkatlice okuyun. Bu kullan\c\ k\lavuzundaaç\kça onaylanmayan de©ißiklikler, cihaz\ngarantisini geçersiz k\labilir.
Giriß
6
Giriß
Güvenli©iniz |çin
7
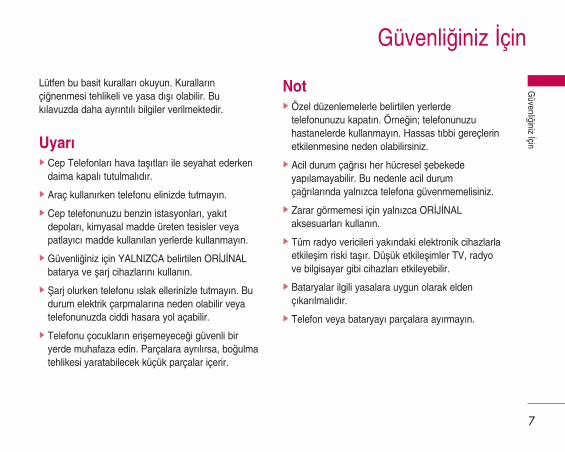
Güvenli©iniz |çin
Lütfen bu basit kurallar\ okuyun. Kurallar\nçi©nenmesi tehlikeli ve yasa d\ß\ olabilir. Buk\lavuzda daha ayr\nt\l\ bilgiler verilmektedir.
Uyar\] Cep Telefonlar\ hava taß\tlar\ ile seyahat ederken
daima kapal\ tutulmal\d\r.
] Araç kullan\rken telefonu elinizde tutmay\n.
] Cep telefonunuzu benzin istasyonlar\, yak\tdepolar\, kimyasal madde üreten tesisler veyapatlay\c\ madde kullan\lan yerlerde kullanmay\n.
] Güvenli©iniz için YALNIZCA belirtilen OR|J|NALbatarya ve ßarj cihazlar\n\ kullan\n.
] Íarj olurken telefonu \slak ellerinizle tutmay\n. Budurum elektrik çarpmalar\na neden olabilir veyatelefonunuzda ciddi hasara yol açabilir.
] Telefonu çocuklar\n erißemeyece©i güvenli biryerde muhafaza edin. Parçalara ayr\l\rsa, bo©ulmatehlikesi yaratabilecek küçük parçalar içerir.
Not] Özel düzenlemelerle belirtilen yerlerde
telefonunuzu kapat\n. Örne©in; telefonunuzuhastanelerde kullanmay\n. Hassas t\bbi gereçlerinetkilenmesine neden olabilirsiniz.
] Acil durum ça©r\s\ her hücresel ßebekedeyap\lamayabilir. Bu nedenle acil durumça©r\lar\nda yaln\zca telefona güvenmemelisiniz.
] Zarar görmemesi için yaln\zca OR|J|NALaksesuarlar\ kullan\n.
] Tüm radyo vericileri yak\ndaki elektronik cihazlarlaetkileßim riski taß\r. Düßük etkileßimler TV, radyove bilgisayar gibi cihazlar\ etkileyebilir.
] Bataryalar ilgili yasalara uygun olarak eldenç\kar\lmal\d\r.
] Telefon veya bataryay\ parçalara ay\rmay\n.
Güvenli ve etkili kullanma kurallar\
8
Lütfen bu basit kurallar\ okuyun. Kurallar\nçi©nenmesi tehlikeli ve yasa d\ß\ olabilir. Buk\lavuzda daha ayr\nt\l\ bilgiler verilmektedir.
Radyo frekans\ enerjisine maruzkalma
Radya dalgas\na maruz kalma ve Özel Emilim
H\z\ (SAR – Specific Absorption Rate) bilgileri
KG245 modeli mobil telefon, radyo dalgalar\namaruz kalmayla ilgili güvenlik gereksinimlerineuyumlu olacak ßekilde tasarlanm\ßt\r. Bu gereksinim,yaßa ve sa©l\k durumuna ba©l\ olmaks\z\n tümkißilerin güvenli©ini garanti alt\na almak içintasarlanm\ß güvenlik s\n\rlar\n\ içeren bilimselkurallar\ temel almaktad\r.
] Radyo dalgalar\na maruz kalma kurallar\nda, ÖzelEmilim H\z\ ya da SAR olarak bilinen bir ölçümbirimi kullan\lmaktad\r. SAR testleri, telefonunkullan\lan tüm frekans bantlar\nda onayl\ enyüksek güç seviyesinde iletim yapt\©\ standart biryöntem kullan\larak gerçekleßtirilmektedir.
] Çeßitli LG telefonu modellerinin SAR seviyeleriaras\nda farkl\l\klar olmas\na karß\n, tüm modellerradyo dalgalar\na maruz kalmayla ilgili kurallar\ngereklerini yerine getirecek ßekilde tasarlanm\ßt\r.
] Uluslararas\ |yonize Olmayan RadyasyonKorumas\ Komisyonu (ICNIRP), önerilen SARs\n\r\n\ on (10) gram doku üzerinde 2W/kg olarakbelirlemißtir.
] Kulakta kullan\m için DASY4 ile test edilen butelefon modelinin en yüksek SAR de©eri, 0.122W/kg’dir (10g).
Ürüne özen ve bak\m
Uyar\! Yaln\zca bu telefon modelinde kullan\lmas\onaylanm\ß pilleri, ßarj aletlerini ve aksesuarlar\kullan\n. Di©er türlerde ürünlerin kullan\lmas\,telefonun onaylar\n\ ya da garantisini geçersiz k\labilirve tehlikeli olabilir.
] Bu cihaz\ sökmeyin. Onar\m gerekti©inde yetkili birservis teknisyenine götürün.
] TV, radyo ya da kißisel bilgisayar gibi elektriklialetlerden uzak tutun.
Güvenli ve etkili kullanm
a kurallar\

9
Güvenli ve etkili kullanm
a kurallar\
] Bu ürün, radyatör ve f\r\n gibi \s\ kaynaklar\ndanuzak tutulmal\d\r.
] Telefonunuzu asla mikrodalga f\r\na koymay\n,bataryan\n patlamas\na neden olur.
] Düßürmeyin.
] Bu ürünü mekanik titreßim ya da darbelere maruzb\rakmay\n.
] Bu telefonun kaplamas\, ambalaj malzemeleri yada vinil sarma malzemeleriyle sar\ld\©\ndabozulabilir.
] Cihaz\n d\ß yüzeyini temizlemek için kuru bir bezkullan\n. (Benzin, tiner ya da alkol gibi solventlerkullanmay\n.)
] Bu ürünü aß\r\ duman ya da toza maruzb\rakmay\n.
] Telefonu kredi kartlar\ ya da seyahat biletlerininyan\na koymay\n; manyetik ßeritlerin üzerindebulunan verileri etkileyebilmektedir.
] Ekrana keskin bir nesneyle vurmay\n; aksi takdirdetelefona hasar verebilir.
] Telefonun s\v\ya ya da neme maruz kalmas\n\önleyin.
] Kulakl\k ve mikrofon gibi aksesuarlar\ dikkatlekullan\n\z. Kablolar\n güvenli bir yerekald\r\ld\©\ndan emin olunuz ve gereksiz yereantene dokunmay\n\z.
Elektronik cihazlar
Tüm mobil telefonlar, performans\n\ etkileyen
girißimlere neden olabilir.
] Mobil telefonu, izin almadan t\bbi cihazlar\nyan\nda kullanmay\n. Telefonu, kalp pillerine yak\nyerlere, örne©in gö©sünüzün üzerindeki ceplereyerleßtirmeyin.
] Mobil telefonlar baz\ ißitme cihazlar\nda girißimeneden olabilir.
] Küçük çapl\ girißimler TV’leri, radyolar\, PC’leri vs.etkileyebilir.
Yol güvenli©i
Araç kulland\©\n\z yerlerde sürüß s\ras\nda mobil
telefon kullan\m\yla ilgili yasalar\ ve
yönetmelikleri kontrol edin.
] Sürüß s\ras\nda telefonu elde tutarak konußmay\n.
] Sürüß s\ras\nda dikkatinizi tamamen yola verin.
] Mümkünse telefonla uzaktan konußma (handsfree)kitlerini kullan\n.
] Sürüß koßullar\ gerektiriyorsa arama yapmadan yada gelen aramay\ yan\tlamadan önce kenara çekinve park edin.
] RF enerjisi, araba teybi, güvenlik cihazlar\ gibiarac\n\z\n baz\ elektronik sistemlerini etkileyebilir.
] Araç kullan\rken hava yast\©\n\n yak\n\natelefonunuzu koymay\n ya da hands-free kitinizi butür yerlere yerleßtirmeyin. E©er kablosuz cihazyanl\ß tak\l\rsa ve hava yast\©\ devreye girerse,ciddi biçimde yaralanabilirsiniz.
E©er müzik dinliyorsan\z, çevrenizden haberdarolabilmeniz için ses seviyesini makul bir düzeyeayarlay\n\z.Bu, özellikle caddede karß\dan karß\yageçerken zorunludur.
|ßitme Sisteminizi ZararlardanKorumaE©er uzun süre yüksek sese maruz kal\rsan\z, ißitmesisteminiz zarar görebilir. Telefonunuzu kula©\n\z\nyan\nda aç\p kapatmaman\z\, ayr\ca müzik ve gelenarama seslerini makul bir seviyeye ayarlaman\z\tavsiye ederiz.
Patlatma ißlemlerinin yap\ld\©\alanlarPatlatma ißlemlerinin yap\ld\©\ yerlerde telefonukullanmay\n. Yasaklara, düzenlemelere ve kurallarauyun.
Patlama riski olan ortamlar] Telefonu yak\t istasyonlar\nda kullanmay\n. Yak\t
ya da kimyasal maddelerin yak\n\nda kullanmay\n.
] |çinde mobil telefonunuz varken patlay\c\ gaz, s\v\ya da di©er patlay\c\lar\ arac\n\z\n içinde taß\may\nya da saklamay\n.
Güvenli ve etkili kullanma kurallar\
10
Güvenli ve etkili kullanm
a kurallar\

Güvenli ve etkili kullanm
a kurallar\
11
Uçakta
Kablosuz cihazlar uçakta girißime neden
olabilmektedir.
] Uçaklara binmeden önce mobil telefonunuzukapat\n.
] Uçak yerdeyken, mürettebattan izin almadankullanmay\n.
ÇocuklarTelefonu, çocuklar\n ulaßamayaca©\ güvenli biryerde saklay\n. Üründen söküldü©ünde çocuklardanefes borusunun t\kanmas\na neden olabilecekküçük parçalar bulunmaktad\r.
Acil aramalarAcil aramalar\, her hücresel ßebekedeyapamayabilirsiniz. Bu nedenle, acil arama yapmakiçin asla yaln\zca telefona güvenmemelisiniz.Bölgenizdeki servis sa©lay\c\yla görüßerek bilgi al\n.
Pil bilgisi ve bak\m\] Yeniden ßarj etmeden önce pilin tam bitmesi
gerekli de©ildir. Di©er pil sistemlerinin aksine, pilinperformans\n\ etkileyebilecek haf\za etkisi olmayanpiller kullan\lmaktad\r.
] Yaln\zca LG pilleri ve ßarj aletleri kullan\n. LG ßarjaletleri, pilinizin en uzun ömürlü olmas\n\sa©layacak ßekilde tasarlanm\ßt\r.
] Pili sökmeyin ya da k\sa devre yapt\rmay\n.
] Pilin metal temas yüzeylerini temiz tutun.
] Pil art\k yeterli performans sa©layamad\©\ndade©ißtirin. Pil, de©ißme zaman\ gelene kadaryüzlerce kez ßarj edilebilir.
] En uzun ömre sahip olmas\ için uzun sürekullan\lmad\©\nda pili ßarj edin.
] Pil ßarj aletini do©rudan güneß \ß\©\na maruzb\rakmay\n ya da banyo gibi yüksek nem oran\nasahip yerlerde kullanmay\n.
] Pili so©uk ya da s\cak yerlerde b\rakmay\n. Budurum pilin performans\n\ etkileyebilir.
KG245’ün özellikleri
12
KG245’ün özellikleri
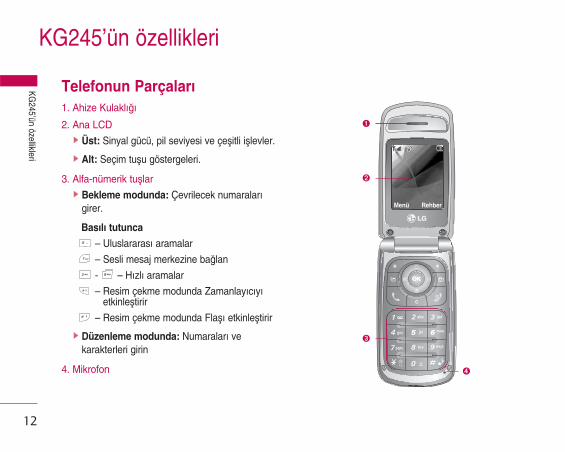
Telefonun Parçalar\
1. Ahize Kulakl\©\
2. Ana LCD] Üst: Sinyal gücü, pil seviyesi ve çeßitli ißlevler.
] Alt: Seçim tußu göstergeleri.
3. Alfa-nümerik tußlar] Bekleme modunda: Çevrilecek numaralar\
girer.
Bas\l\ tutunca
– Uluslararas\ aramalar
– Sesli mesaj merkezine ba©lan
- – H\zl\ aramalar
– Resim çekme modunda Zamanlay\c\y\etkinleßtirir
– Resim çekme modunda Flaß\ etkinleßtirir
] Düzenleme modunda: Numaralar\ vekarakterleri girin
4. Mikrofon
Menü Rehber
➊
➋
➍
➌
KG245’ün özellikleri
13
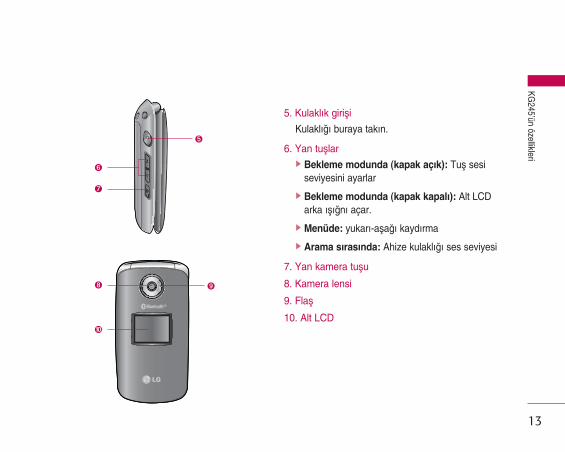
5. Kulakl\k girißi
Kulakl\©\ buraya tak\n.
6. Yan tußlar] Bekleme modunda (kapak açık): Tuß sesi
seviyesini ayarlar
] Bekleme modunda (kapak kapalı): Alt LCDarka ıßı©nı açar.
] Menüde: yukar\-aßa©\ kayd\rma
] Arama s\ras\nda: Ahize kulakl\©\ ses seviyesi
7. Yan kamera tußu
8. Kamera lensi
9. Flaß
10. Alt LCD
➑
➓
➐
➏
➒
➎
KG245’ün özellikleri
14
KG245’ün özellikleri
Rearview
!
$
^
*
@
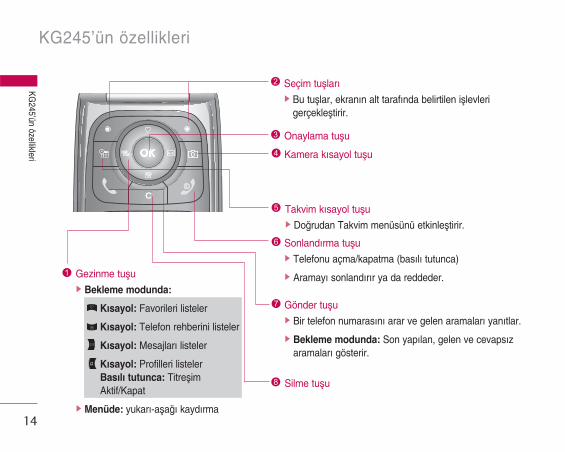
Onaylama tußu
Sonland\rma tußu] Telefonu açma/kapatma (bas\l\ tutunca)
] Aramay\ sonland\r\r ya da reddeder.
Gönder tußu] Bir telefon numaras\n\ arar ve gelen aramalar\ yan\tlar.
] Bekleme modunda: Son yap\lan, gelen ve cevaps\zaramalar\ gösterir.
Silme tußu
#
&
Gezinme tußu] Bekleme modunda:
Kısayol: Favorileri listeler
Kısayol: Telefon rehberini listeler
Kısayol: Mesajlar\ listeler
Kısayol: Profilleri listelerBas\l\ tutunca: Titreßim Aktif/Kapat
] Menüde: yukar\-aßa©\ kayd\rma
Takvim k\sayol tußu] Do©rudan Takvim menüsünü etkinleßtirir.
%
Seçim tußlar\] Bu tußlar, ekran\n alt taraf\nda belirtilen ißlevleri
gerçekleßtirir.
Kamera k\sayol tußu

15
KG245’ün özellikleri
Taß\ma kay\ß\ için delikler
SIM Kart Yuvas\
Batarya Uçlar\
Pil mandal\SIM kart terminalleri
Pil
Pil kapa©\
Íarj ba©lant\s\/ Kablo Konnektörü
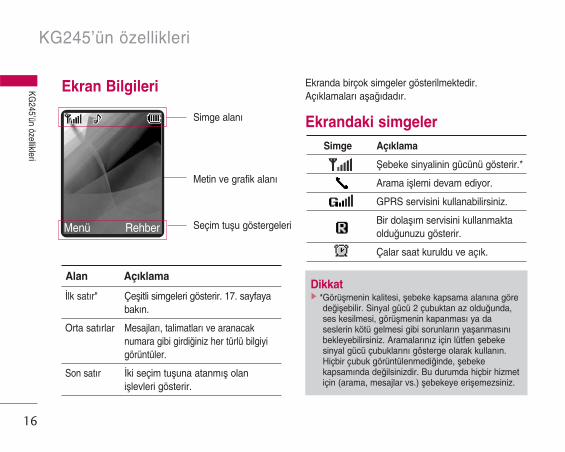
Ekran Bilgileri Ekranda birçok simgeler gösterilmektedir.Açıklamaları aßa©ıdadır.
Ekrandaki simgeler
KG245’ün özellikleri
16
KG245’ün özellikleri
Dikkat] *Görüßmenin kalitesi, ßebeke kapsama alan\na göre
de©ißebilir. Sinyal gücü 2 çubuktan az oldu©unda,ses kesilmesi, görüßmenin kapanmas\ ya daseslerin kötü gelmesi gibi sorunlar\n yaßanmas\n\bekleyebilirsiniz. Aramalar\n\z için lütfen ßebekesinyal gücü çubuklar\n\ gösterge olarak kullan\n.Hiçbir çubuk görüntülenmedi©inde, ßebekekapsam\nda de©ilsinizdir. Bu durumda hiçbir hizmetiçin (arama, mesajlar vs.) ßebekeye erißemezsiniz.
Simge alan\
Metin ve grafik alan\
Seçim tußu göstergeleri
Simge Açıklama
Íebeke sinyalinin gücünü gösterir.*
Arama ißlemi devam ediyor.
GPRS servisini kullanabilirsiniz.
Bir dolaß\m servisini kullanmaktaoldu©unuzu gösterir.
Çalar saat kuruldu ve aç\k.
Alan Aç\klama
|lk satır" Çeßitli simgeleri gösterir. 17. sayfayabak\n.
Orta satırlar Mesajlar\, talimatlar\ ve aranacaknumara gibi girdi©iniz her türlü bilgiyigörüntüler.
Son satır |ki seçim tußuna atanm\ß olanißlevleri gösterir.
Menü Rehber
17
KG245’ün özellikleri
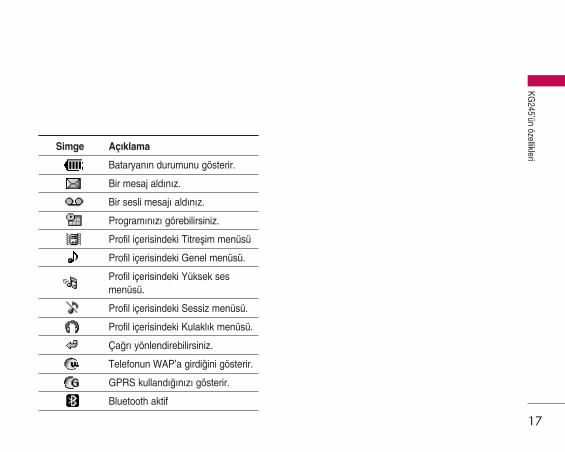
Simge Açıklama
Bataryanın durumunu gösterir.
Bir mesaj aldınız.
Bir sesli mesaj\ ald\n\z.
Program\n\z\ görebilirsiniz.
Profil içerisindeki Titreßim menüsü
Profil içerisindeki Genel menüsü.
Profil içerisindeki Yüksek sesmenüsü.
Profil içerisindeki Sessiz menüsü.
Profil içerisindeki Kulakl\k menüsü.
Ça©rı yönlendirebilirsiniz.
Telefonun WAP’a girdi©ini gösterir.
GPRS kulland\©\n\z\ gösterir.
Bluetooth aktif

SIM kart\n ve telefonun pilinintak\lmas\Pili ç\kartmadan önce telefonu kapatt\©\n\zdan eminolun.
1. Pil kapa©\n\ ç\kart\n.
Pil açma mandal\na bas\n ve pil kapa©\n\,telefonun alt\na do©ru kayd\r\n. Ve pil kapa©\n\ç\kart\n.
2. Pili ç\kart\n.
Pilin üst kenar\n\ tutuna ve kald\rarak pilbölmesinden ç\kart\n.
3. SIM kart\ tak\n.
SIM kart\, yuvas\na yerleßtirin. SIM kart\, SIM kartyuvas\na kayd\r\n. SIM kart\n do©ru tak\ld\©\ndanve kart\n üzerindeki alt\n kontaklar\n bulundu©ualan\n aßa©\ya dönük oldu©undan emin olun. SIMkart\ ç\kartmak için hafifçe aßa©\ya do©ru bast\r\nve ters yönde çekin.
Baßlang\ç
18
Baßlang\ç
Dikkat] Telefon aç\kken pilin ç\kart\lmas\, telefonun
bozulmas\na neden olabilir.
SIM kart\n tak\lmas\ SIM kart\n ç\kart\lmas\

19
Baßlang\ç
4. Pili tak\n.
Önce pilin alt k\sm\n\, pil bölmesinin alt k\sm\natakın". Yerine tam oturana kadar pilin üst k\sm\n\
aßa©\ya do©ru bas\n.
5. Pil kapa©ını takın.
Pil kapa©\n\ telefondaki yerine yerleßtirin vemandaldan t\klama sesi gelene kadar kayd\r\n.
Pilin ßarj edilmesiSeyahat adaptörünü telefona takabilmeniz içinbataryay\ takm\ß olman\z gerekmektedir.
Not] SIM kart\n metal yüzeyleri, çizilerek kolayca zarar
görebilir. SIM kart\ tak\p ç\kart\rken dikkatli olun.SIM kartla birlikte verilen talimatlar\ uygulay\n.

Baßlang\ç
20
1. Íarj cihazının fißini, ßemada da gösterildi©i gibi oksize bakacak ßekilde, tam olarak yerine oturanadek telefonun alt taraf\ndaki yuvan\n içerisine itin.
2. Íarj cihazının di©er ucunu elektrik prizine tak\n.Yaln\zca kutuyla birlikte verilen ßarj cihaz\n\kullan\n.
3. Íarj ißlemi tamamland\ktan sonra bataryasimgesindeki hareket eden ßeritler duracakt\r.
Íarj cihazının ç\kart\lmas\1. Íarj ißlemi tamamland\©\nda, pil simgesinin
hareket eden çubuklar\ durur ve ekranda ‘Dolu’mesaj\ görüntülenir.
2. Adaptörü elektrik prizinden ç\kart\n. Konektörünher iki yan\nda bulunan gri ç\k\nt\lara bas\pkonektörü d\ßar\ do©ru çekerek adaptörütelefondan ç\kart\n.
Baßlang\ç
Not] Konnektörü yuvaya oturtmak için zorlamay\n; bu,
telefona ve/veya seyahat adaptörüne zarar verebilir.] Íarj cihaz\n\, dikey olarak elektrik prizine tak\n.] Kendi ülkeniz için belirlenen d\ß\nda bir ßarj cihaz\
kullan\yorsan\z, düzgün takmak için bir ek fißadaptörü kullan\n.
] Íarj s\ras\nda bataryan\z\ veya SIM kart\n\z\ç\kartmay\n.
Uyar\] Elektrik çarpmalar\ ya da yang\n\ önlemek için
y\ld\r\mlar\n düßtü©ü f\rt\nal\ havalarda elektrikkordonunu ve ßarj cihaz\n\ prizden ç\kart\n.
] Pil ile hayvan dißi, t\rna©\ gibi keskin kenarl\nesnelerin temas etmedi©inden emin olun. Bu türdurumlarda yang\n ç\kma riski bulunmaktad\r.
] Telefonda k\sa devre yapabilece©inden ve yang\naya da elektrik çarpmalar\na neden olabilece©indentelefon ßarj olurken aramalar\ cevaplamay\n ya daarama yapmay\n.

21
Baßlang\ç
Dikkat] Telefonu ilk kullan\m\n\zda pilin tam ßarj
edildi©inden emin olun.] Íarj ederken pili ya da SIM kart\n\z\ ç\kartmay\n.] Pil düzgün biçimde ßarj edilmediyse, lütfen açma-
kapama tußunu kullanarak telefonu kapat\n, aç\n veard\ndan pili yeniden ßarj edin. Lütfen pili ç\kart\pyeniden takt\ktan sonra ßarj edin.

Baßlang\ç
22
Erißim kodlar\Telefonunuzun izinsiz kullan\lmas\n\ önlemek için bubölümde aç\klanan erißim kodlar\n\ kullanabilirsiniz.Erißim kodlar\ (PUK ve PUK2 kodlar\ d\ß\nda)Kodlar\ de©ißtir ißleviyle [Menü 7-5-5] de©ißtirilebilir.65. sayfaya bak\n.
PIN kodu (4 - 8 basamak)PIN (Kißisel Kimlik Numaras\) kodu, SIM kart\n\z\,izinsiz kullan\ma karß\ korur. PIN kod genellikle SIMkart\n\zla birlikte verilir. PIN kodu iste©i, Açık
de©erine ayarl\ oldu©unda, telefonunuz heraç\ld\©\nda PIN kod sorulacakt\r. PIN kodu iste©i,Kapalı de©erine ayarl\ oldu©unda, telefonunuz PINkod sorulmadan do©rudan ßebekeye ba©lan\r.
PIN2 kodu (4 - 8 basamak)Baz\ SIM kartlarla birlikte verilen PIN2 kodu, Arama
Ücreti Bilgisi ve Sabit arama numaras\ gibiißlevlerin kullan\lmas\ için gereklidir. Bu ißlevleryaln\zca SIM kart\n\z destekledi©inde kullan\labilir.Daha fazla bilgi için ßebeke servis sa©lay\c\n\zlagörüßün.
PUK kodu (4 - 8 basamak)PUK (PIN Bloke Açma Anahtar\) kodu, bloke olmußPIN kodlar\n\ de©ißtirmek için kullan\l\r. PUK koduSIM kart\n\zla birlikte verilebilir. Verilmediyse, koduö©renmek için ßebeke operatörünüzle görüßün. Kodukaybetti©inizde de ßebeke operatörünüzlegörüßebilirsiniz.
PUK2 kodu (4 - 8 basamak)Baz\ SIM kartlarla birlikte verilen PUK2 kodu, blokeolmuß PIN2 kodunun de©ißtirilmesi için kullan\l\r.Kodu kaybetti©inizde ßebeke operatörünüzlegörüßebilirsiniz.
Güvenlik kodu (4 - 8 basamak)Güvenlik kodu, telefonu, izinsiz kullan\mlara karß\korur. Varsay\lan güvenlik kodu ‘0000’ d\r. Güvenlikkodu tüm telefon kay\tlar\n\n silinmesinde ve Fabrikaayarlar\ menüsünü etkinleßtirmek için kullan\l\r. Ayn\zamanda telefonun izinsiz kullan\lmas\n\ önlemekiçin kullan\lan telefon kilidi ißlevini etkinleßtirmek vekapatmak için de güvenlik kodu gerekir. Güvenlikkodu varsay\lan ayar\, Güvenlik ayarlar\
menülerinde de©ißtirilebilir.
Baßlang\ç

23
Íebeke ÍifresiÇa©r\ engelleme ißlevini kullan\rken engellemeßifresinin girilmesi gerekir. Íifreyi, bu ißleve aboneoldu©unuzda ßebeke operatörünüzden alabilirsiniz.Daha fazla bilgi için 67. sayfaya bak\n.
Baßlang\ç
Genel ißlevler
24
Genel ißlevler
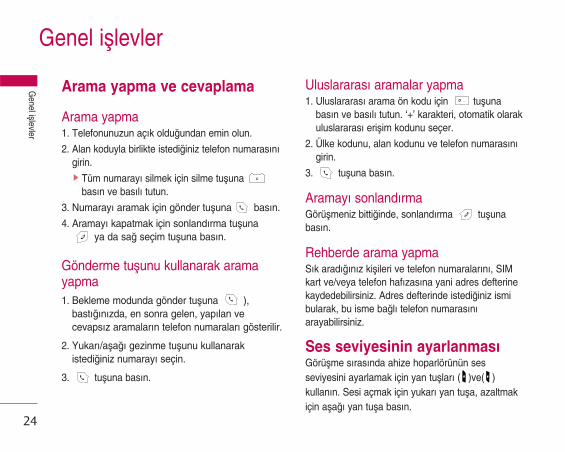
Arama yapma ve cevaplama
Arama yapma1. Telefonunuzun aç\k oldu©undan emin olun.
2. Alan koduyla birlikte istedi©iniz telefon numaras\n\girin.] Tüm numaray\ silmek için silme tußuna
bas\n ve bas\l\ tutun.
3. Numaray\ aramak için gönder tußuna bas\n.
4. Aramay\ kapatmak için sonland\rma tußunaya da sa© seçim tußuna bas\n.
Gönderme tußunu kullanarak aramayapma1. Bekleme modunda gönder tußuna ),
bast\©\n\zda, en sonra gelen, yap\lan vecevaps\z aramalar\n telefon numaralar\ gösterilir.
2. Yukar\/aßa©\ gezinme tußunu kullanarakistedi©iniz numaray\ seçin.
3. tußuna bas\n.
Uluslararas\ aramalar yapma1. Uluslararas\ arama ön kodu için tußuna
bas\n ve bas\l\ tutun. ‘+’ karakteri, otomatik olarakuluslararas\ erißim kodunu seçer.
2. Ülke kodunu, alan kodunu ve telefon numaras\n\girin.
3. tußuna bas\n.
Aramay\ sonland\rmaGörüßmeniz bitti©inde, sonland\rma tußunabas\n.
Rehberde arama yapmaS\k arad\©\n\z kißileri ve telefon numaralar\n\, SIMkart ve/veya telefon haf\zas\na yani adres defterinekaydedebilirsiniz. Adres defterinde istedi©iniz ismibularak, bu isme ba©l\ telefon numaras\n\arayabilirsiniz.
Ses seviyesinin ayarlanmas\Görüßme s\ras\nda ahize hoparlörünün sesseviyesini ayarlamak için yan tußlar\ ( )ve( )kullan\n. Sesi açmak için yukar\ yan tußa, azaltmakiçin aßa©\ yan tußa bas\n.
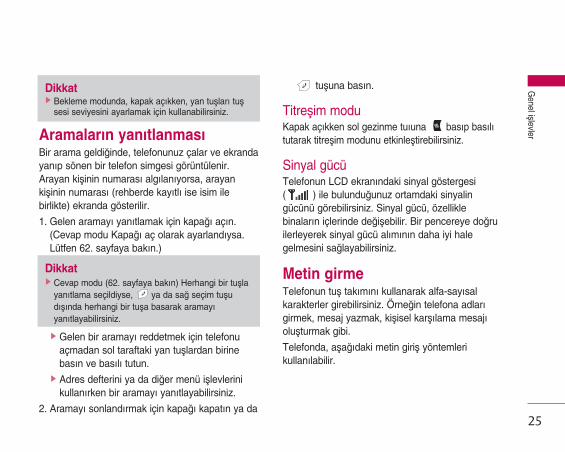
Aramalar\n yan\tlanmas\Bir arama geldi©inde, telefonunuz çalar ve ekrandayan\p sönen bir telefon simgesi görüntülenir.Arayan kißinin numaras\ algılanıyorsa, arayankißinin numarası (rehberde kayıtlı ise isim ilebirlikte) ekranda gösterilir.
1. Gelen aramay\ yan\tlamak için kapa©ı açın.(Cevap modu Kapa©ı aç olarak ayarlandıysa.Lütfen 62. sayfaya bakın.)
] Gelen bir aramay\ reddetmek için telefonuaçmadan sol taraftaki yan tußlardan birinebas\n ve bas\l\ tutun.
] Adres defterini ya da di©er menü ißlevlerinikullan\rken bir aramay\ yan\tlayabilirsiniz.
2. Aramay\ sonland\rmak için kapa©\ kapat\n ya da
tußuna bas\n.
Titreßim moduKapak açıkken sol gezinme tuıuna bas\p bas\l\tutarak titreßim modunu etkinleßtirebilirsiniz.
Sinyal gücüTelefonun LCD ekran\ndaki sinyal göstergesi( ) ile bulundu©unuz ortamdaki sinyalingücünü görebilirsiniz. Sinyal gücü, özelliklebinalar\n içlerinde de©ißebilir. Bir pencereye do©ruilerleyerek sinyal gücü al\m\n\n daha iyi halegelmesini sa©layabilirsiniz.
Metin girmeTelefonun tuß tak\m\n\ kullanarak alfa-say\salkarakterler girebilirsiniz. Örne©in telefona adlar\girmek, mesaj yazmak, kißisel karß\lama mesaj\olußturmak gibi.
Telefonda, aßa©\daki metin giriß yöntemlerikullan\labilir.
Genel ißlevler
25
Dikkat] Bekleme modunda, kapak açıkken, yan tußlar\ tuß
sesi seviyesini ayarlamak için kullanabilirsiniz.
Dikkat] Cevap modu (62. sayfaya bak\n) Herhangi bir tußla
yan\tlama seçildiyse, ya da sa© seçim tußud\ß\nda herhangi bir tußa basarak aramay\yan\tlayabilirsiniz.

Genel ißlevler
26
Genel ißlevler
T9 moduBu mod, her harf için ilgili tußa bir kez basaraksözcükleri girmenize olanak sa©lar. Tußtak\m\ndaki her tußa birden fazla harf atanm\ßt\r.T9 modu, bast\©\n\z tußlar\ otomatik olarak birdahili sözlükle k\yaslayarak do©ru sözcü©ü arar.Dolay\s\yla geleneksel ABC moduna göre çokdaha az say\da tußa basarak sözcüklerigirebilirsiniz. Bu ißleve bazen ak\ll\ metin girißi dedenmektedir.
ABC moduBu modda, harfleri, ilgili tußa harf gösterilene kadarbir, iki, üç ya da dört kez basarak girebilirsiniz.
123 (Rakam) ModuHer numara için ilgili tußa bir kez basman\zyeterlidir. Metin girißi alan\nda 123 modunageçmek için, 123 modu gösterilene kadar tußuna bas\n.
Metin girißi modunu de©ißtirme1. Karakterlerin girilmesine olanak sa©layan bir
alanda oldu©unuzda, LCD ekran\n sa© altkößesinde metin girißi modu göstergesini
göreceksiniz.
2. tußuna basarak metingirißi modunude©ißtirebilirsiniz. Kullan\lanmetin girißi modunu, LCDekran\n sa© üst kößesindegörebilirsiniz.
T9 modunun kullan\lmas\T9 ak\ll\ metin girißi modu, tußlara mümkünoldu©unca az say\da basarak sözcükleri kolaybiçimde girmenizi sa©lar. Her tußa bast\©\n\zda,telefon, dahili sözlü©üyle k\yaslayarak girmeyeçal\ßt\©\n\z\ düßündü©ü karakterleri göstermeyebaßlar. Sözlü©e yeni sözcükler ekleyebilirsiniz. Yenisözcükler eklendikçe, sözcük, sözlükteki en benzerkayd\ gösterecek ßekilde de©ißir.
1. T9 ak\ll\ metin girißi modundayken - .Press one key per letter. aras\ tußlara basarak birsözcük girmeye baßlayabilirsiniz. Her harf için ilgilitußa bir kez bas\n.
Seçenekler Ekle
metin girißi modu
27
Genel ißlevler
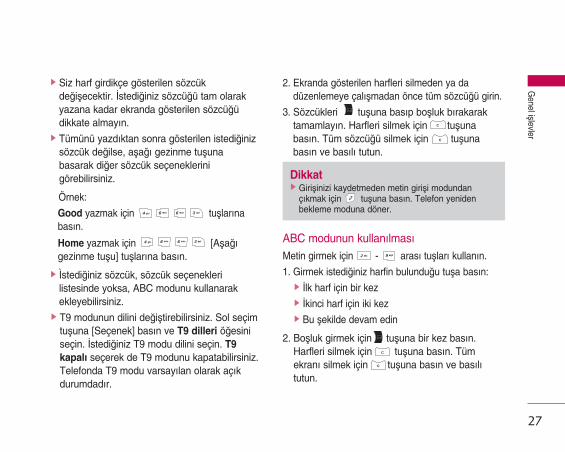
] Siz harf girdikçe gösterilen sözcükde©ißecektir. |stedi©iniz sözcü©ü tam olarakyazana kadar ekranda gösterilen sözcü©üdikkate almay\n.
] Tümünü yazd\ktan sonra gösterilen istedi©inizsözcük de©ilse, aßa©\ gezinme tußunabasarak di©er sözcük seçeneklerinigörebilirsiniz.
Örnek:
Good yazmak için tußlar\nabas\n.
Home yazmak için [Aßa©\gezinme tußu] tußlar\na bas\n.
] Ìstedi©iniz sözcük, sözcük seçeneklerilistesinde yoksa, ABC modunu kullanarakekleyebilirsiniz.
] T9 modunun dilini de©ißtirebilirsiniz. Sol seçimtußuna [Seçenek] bas\n ve T9 dilleri ö©esiniseçin. |stedi©iniz T9 modu dilini seçin. T9
kapal\ seçerek de T9 modunu kapatabilirsiniz.Telefonda T9 modu varsay\lan olarak aç\kdurumdad\r.
2. Ekranda gösterilen harfleri silmeden ya dadüzenlemeye çal\ßmadan önce tüm sözcü©ü girin.
3. Sözcükleri tußuna bas\p boßluk b\rakaraktamamlay\n. Harfleri silmek için tußunabas\n. Tüm sözcü©ü silmek için tußunabas\n ve bas\l\ tutun.
ABC modunun kullan\lmas\Metin girmek için - aras\ tußlar\ kullan\n.
1. Girmek istedi©iniz harfin bulundu©u tußa bas\n:] |lk harf için bir kez] |kinci harf için iki kez] Bu ßekilde devam edin
2. Boßluk girmek için tußuna bir kez bas\n.Harfleri silmek için tußuna bas\n. Tümekran\ silmek için tußuna bas\n ve bas\l\tutun.
Dikkat] Girißinizi kaydetmeden metin girißi modundan
ç\kmak için tußuna bas\n. Telefon yenidenbekleme moduna döner.
Genel ißlevler
28
Genel ißlevler
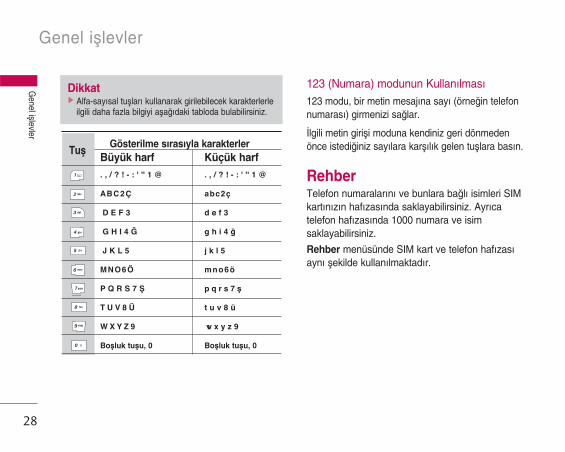
123 (Numara) modunun Kullan\lmas\123 modu, bir metin mesaj\na say\ (örne©in telefonnumaras\) girmenizi sa©lar.
|lgili metin girißi moduna kendiniz geri dönmedenönce istedi©iniz say\lara karß\l\k gelen tußlara bas\n.
RehberTelefon numaralar\n\ ve bunlara ba©l\ isimleri SIMkart\n\z\n haf\zas\nda saklayabilirsiniz. Ayr\catelefon haf\zas\nda 1000 numara ve isimsaklayabilirsiniz.
Rehber menüsünde SIM kart ve telefon haf\zas\ayn\ ßekilde kullan\lmaktad\r.
TußBüyük harf Küçük harf
. , / ? ! - : ' '' 1 @ . , / ? ! - : ' '' 1 @
AB C 2 Ç a b c 2 ç
D E F 3 d e f 3
G H I 4 ˝ g h i 4 ©
J K L 5 j k l 5
M N O 6 Ö m n o 6 ö
P Q R S 7 Í p q r s 7 ß
T U V 8 Ü t u v 8 ü
W X Y Z 9 w x y z 9
Boßluk tußu, 0 Boßluk tußu, 0
Gösterilme s\ras\yla karakterler
Dikkat] Alfa-say\sal tußlar\ kullanarak girilebilecek karakterlerle
ilgili daha fazla bilgiyi aßa©\daki tabloda bulabilirsiniz.
29
Genel ißlevler
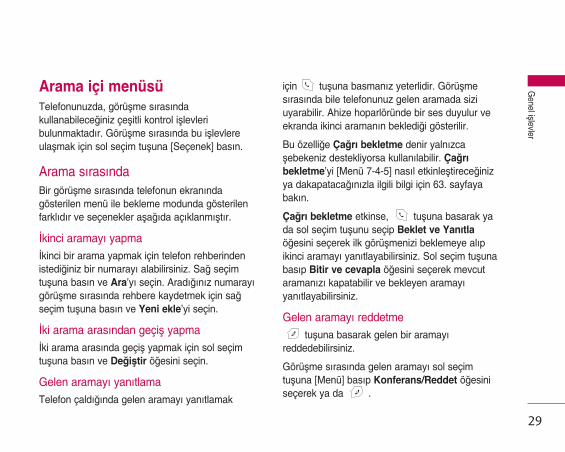
Arama içi menüsüTelefonunuzda, görüßme s\ras\ndakullanabilece©iniz çeßitli kontrol ißlevleribulunmaktad\r. Görüßme s\ras\nda bu ißlevlereulaßmak için sol seçim tußuna [Seçenek] bas\n.
Arama s\ras\ndaBir görüßme s\ras\nda telefonun ekran\ndagösterilen menü ile bekleme modunda gösterilenfarkl\d\r ve seçenekler aßa©\da aç\klanm\ßt\r.
|kinci aramay\ yapma|kinci bir arama yapmak için telefon rehberindenistedi©iniz bir numaray\ alabilirsiniz. Sa© seçimtußuna bas\n ve Ara’y\ seçin. Arad\©\n\z numaray\görüßme s\ras\nda rehbere kaydetmek için sa©seçim tußuna bas\n ve Yeni ekle’yi seçin.
|ki arama aras\ndan geçiß yapma|ki arama aras\nda geçiß yapmak için sol seçimtußuna bas\n ve De©ißtir ö©esini seçin.
Gelen aramay\ yan\tlamaTelefon çald\©\nda gelen aramay\ yan\tlamak
için tußuna basman\z yeterlidir. Görüßmes\ras\nda bile telefonunuz gelen aramada siziuyarabilir. Ahize hoparlöründe bir ses duyulur veekranda ikinci araman\n bekledi©i gösterilir.
Bu özelli©e Ça©r\ bekletme denir yaln\zcaßebekeniz destekliyorsa kullan\labilir. Ça©r\
bekletme’yi [Menü 7-4-5] nas\l etkinleßtirece©inizya dakapataca©\n\zla ilgili bilgi için 63. sayfayabak\n.
Ça©r\ bekletme etkinse, tußuna basarak yada sol seçim tußunu seçip Beklet ve Yan\tla
ö©esini seçerek ilk görüßmenizi beklemeye al\pikinci aramay\ yan\tlayabilirsiniz. Sol seçim tußunabas\p Bitir ve cevapla ö©esini seçerek mevcutaraman\z\ kapatabilir ve bekleyen aramay\yan\tlayabilirsiniz.
Gelen aramay\ reddetmetußuna basarak gelen bir aramay\
reddedebilirsiniz.
Görüßme s\ras\nda gelen aramay\ sol seçimtußuna [Menü] bas\p Konferans/Reddet ö©esiniseçerek ya da .

Genel ißlevler
30
Genel ißlevler
Mikrofonu kapatma[Menü] tußuna bas\p Sessiz seçerek mikrofonukapatabilirsiniz. Telefon, Sesli ö©esi seçilerektekrar sesi iletecek hale getirilebilir. Telefon sessizoldu©unda, görüßtü©ünüz kißi sizi duyamaz amasiz onu duymaya devam edersiniz.
Görüßme s\ras\nda DTMF tonlar\na geçmeGörüßme s\ras\nda DTMF tonlar\n\ açmak için solseçim tußuna bas\n ve DTMF aç\k ö©esini seçin.DTMF tonlar\ ayn\ ßekilde kapat\labilir. DTMFtonlar\, telefonunuzun otomatik santral ißlevlerinikullanabilmesini sa©lar.
Çok kißili ya da konferansgörüßmelerÇok kißili ya da konferans hizmeti, ßebekeoperatörünüz destekliyorsa birden fazla kißiyle ayn\anda görüßme yapabilmenize olanak sa©lar. Çokkißili görüßme yaln\zca her ikisi de yan\tlanm\ß biretkin bir de beklemede olan arama oldu©undaayarlanabilir. Çok kißili arama kuruldu©unda,aramay\ kuran kißi taraf\ndan baßka aramalareklenebilir, mevcut aramalar kapat\labilir ya da
ayr\labilir (yani çok kißili görüßmeden ç\kart\l\r amasizinle görüßmeye devam eder). Bu seçeneklerintümüne Arama içi menüsünden ulaß\labilir. Çokkißili görüßmede olabilecek maksimum kißi say\s\beßtir. Çok kißili görüßme baßlad\©\nda tüm kontrolsizde olur ve görüßmeye yaln\zca siz yeni kißilerekleyebilirsiniz.
|kinci aramay\ yapmaBir görüßme yaparken ikinci bir arama yapabilirsiniz.|kinci numaray\ girin ve tußuna bas\n. |kincigörüßmeye ba©lan\ld\©\nda birinci görüßme otomatikolarak beklemeye al\n\r. Sol seçim tußuna bas\pDe©ißtir seçerek görüßmeler aras\nda geçißyapabilirsiniz.
Konferans arama kurmaBir görüßmeyi beklemeye al\n ve etkin aramaaç\kken sol seçim tußuna bas\n veKonferans/Tümüne katıl ö©esini seçin.
31
Genel ißlevler
Konferans aramas\n\ beklemeye almaSol seçim tußuna bas\n ve Konferans/Tümüne
katıl ö©esini seçin.
Beklemedeki konferans aramas\n\etkinleßtirmeSol seçim tußuna bas\n ve Konferans/Tümüne
katıl ö©esini seçin.
Konferans aramaya kißiler eklemeMevcut konferans aramaya yeni bir kißi eklemekiçin sol seçim tußuna bas\n ve Konferans/
Tümüne katıl ö©esini seçin.
Konferans aramadaki kißilerigörüntülemeTelefonun ekran\nda, konferans aramas\ndakikißilerin numaralar\ aras\nda hareket etmek içinyukar\/aßa©\ gezinme tußlar\n\ kullan\n.
Konferans arama s\ras\nda özel birarama almaKonferans aramadaki bir kißiyle özel bir görüßmeyapmak için, görüßme yapmak istedi©iniz kißininnumaras\n\ ekranda bulun ve sol seçim tußunabas\n. Tüm di©er arayanlar\ beklemeye almak içinKonferans/Özel ö©esini seçin.
Konferans aramay\ sonland\rmaKonferans aramadaki o s\rada gösterilen kißi,tußuna bas\larak görüßmeden ç\kart\labilir.Konferans aramay\ sonland\rmak için sol seçimtußuna bas\n ve Konferans/Konf. Bitir ö©esiniseçin. Sol seçim tußuna bas\p Konferans/Tümünübitir ö©esini seçti©inizde, tüm etkin ve beklemedekiaramalar kapat\lacakt\r.
Menü a©ac\
32
Menü a©ac\
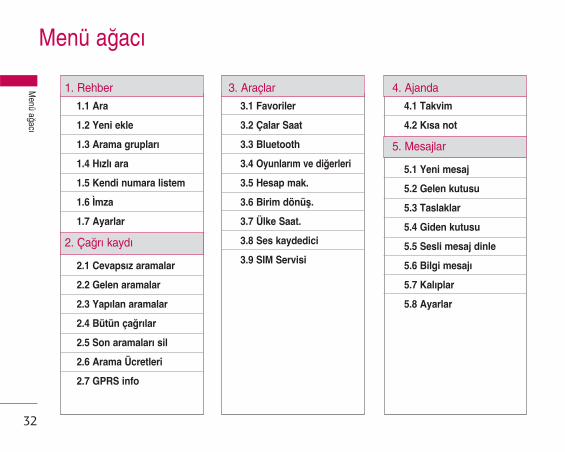
1. Rehber
1.1 Ara
1.2 Yeni ekle
1.3 Arama grupları
1.4 Hızlı ara
1.5 Kendi numara listem
1.6 Ìmza
1.7 Ayarlar
2. Ça©rı kaydı
2.1 Cevapsız aramalar
2.2 Gelen aramalar
2.3 Yap\lan aramalar
2.4 Bütün ça©r\lar
2.5 Son aramalar\ sil
2.6 Arama Ücretleri
2.7 GPRS info
3. Araçlar
3.1 Favoriler
3.2 Çalar Saat
3.3 Bluetooth
3.4 Oyunlarım ve di©erleri
3.5 Hesap mak.
3.6 Birim dönüß.
3.7 Ülke Saat.
3.8 Ses kaydedici
3.9 SIM Servisi
4. Ajanda
4.1 Takvim
4.2 Kısa not
5. Mesajlar
5.1 Yeni mesaj
5.2 Gelen kutusu
5.3 Taslaklar
5.4 Giden kutusu
5.5 Sesli mesaj dinle
5.6 Bilgi mesaj\
5.7 Kal\plar
5.8 Ayarlar

33
Menü a©ac\
6. Kamera
7. Ayarlar
7.1 Profiller
7.2 Tarih & Saat
7.3 Telefon
7.4 Ça©r\ Ayar\
7.5 Güvenlik
7.6 Íebeke
7.7 GPRS'e ba©lan
7.8 Haf\za durumu
7.9 Ayarlar\ S\f\rla
8. Tarayıcı
8.1 Giriß sayfas\
8.2 S\k Kullan\lanlar
8.3 URL’ye git
8.4 Ayarlar
9. Ö©elerim
9.1 Foto©raflar
9.2 Resimler
9.3 Melodiler
9.4 Oyunlar\m ve di©erleri
9.5 Di©er
34
|ßlevleri ve seçenekleri belirleme
|ßlevleri ve seçenekleri belirleme
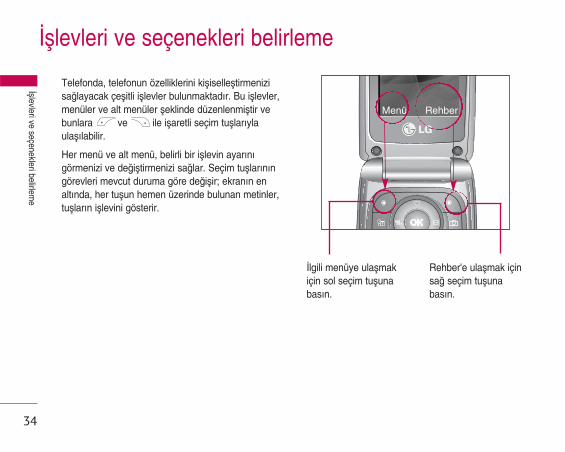
Telefonda, telefonun özelliklerini kißiselleßtirmenizisa©layacak çeßitli ißlevler bulunmaktad\r. Bu ißlevler,menüler ve alt menüler ßeklinde düzenlenmißtir vebunlara ve ile ißaretli seçim tußlar\ylaulaß\labilir.
Her menü ve alt menü, belirli bir ißlevin ayar\n\görmenizi ve de©ißtirmenizi sa©lar. Seçim tußlar\n\ngörevleri mevcut duruma göre de©ißir; ekran\n enalt\nda, her tußun hemen üzerinde bulunan metinler,tußlar\n ißlevini gösterir.
|lgili menüye ulaßmakiçin sol seçim tußunabas\n.
Rehber'e ulaßmak içinsa© seçim tußunabas\n.
Menü Rehber

Rehber
35
Rehber
Ara Menü 1.1
1. Sol seçim tußu [Seç] ya da [Tamam] basarakAra seçin.
2. Giriß düzenlemek, silmek veya kopyalamak ya dasesli etiket eklemek isterseniz [Seçenekler]tußuna bas\n. Aßa©\daki menü görüntülenir.
] Detaylı göster: Kißinin ad\n\ ve numaras\n\görebilirsiniz.
] Sil: Girißi silebilirsiniz.] Mesaj yaz: |stedi©iniz numaray\ bulduktan sonra,
seçilen numara ve adreslere SMS/MMSgönderebilirsiniz.
] Bluetooth ile Gönder: Telefon rehberi bilgilerinizi,Bluetooth üzerinden, bu teknoloji ile uyumlucihazlara gönderebilirsiniz.
] Düzelt: Gezinme tußunu kullanarak adı, numarayı,grubu, karakteri ve resmi düzenleyebilirsiniz.
] Telefona kopyala: Kaydı SIM'den telefona ya datelefondan SIM'e taßıyabilirsiniz.
] Hızlı aramaya ata: Kaydı, bir hızlı arama olarakatayabilirsiniz. Cep, ev, ofis numaralarından, sıkkullandı©ınız birini seçebilirsiniz. Bunu ayarladıktansonra, rehberde arama yaparken önce ana numaragösterilir.
] Arayan gruplarını göster: Daha fazla bilgi içinMenü [1-3]'e bak\n.
Yeni ekle Menü 1.2
Bu ißlevi kullanarak telefon defterine girißekleyebilirsiniz.Telefon belle©i kapasitesi 1000 girißtir.SIM kart belle©inin kapasitesi hücresel servissa©lay\c\ya ba©l\d\r.Telefon belle©ine 20 karakterdenolußan ad kaydedebilir ve karakterleri SIM kartakaydedebilirsiniz. Karakter say\s\ SIM kart\na ba©l\ birözelliktir.
1. Sol seçim tußu [Tamam] basarak Yeni.
2. Girißi saklamak istedi©iniz belle©i seçin: SIM veyaTelefon.
a. Bir ad girdikten sonra, gezinme tußunukullanarak bir numara, bir E-posta adresi vedi©er bilgileri girebilirsiniz.
b. [Tamam] tußuna bas\n.
Dikkat] Aramak istedi©iniz kißinin veya numaran\n ilk
harflerini girerek h\zl\ arama yap\labilir.
Rehber
36
Rehber
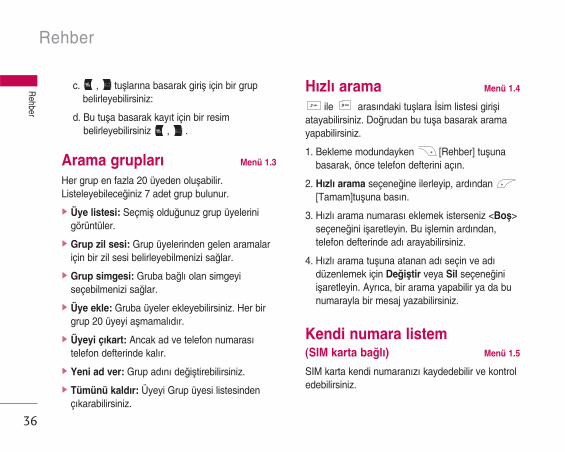
c. , tußlar\na basarak giriß için bir grupbelirleyebilirsiniz:
d. Bu tußa basarak kay\t için bir resimbelirleyebilirsiniz , .
Arama grupları Menü 1.3
Her grup en fazla 20 üyeden olußabilir.Listeleyebilece©iniz 7 adet grup bulunur.
] Üye listesi: Seçmiß oldu©unuz grup üyelerinigörüntüler.
] Grup zil sesi: Grup üyelerinden gelen aramalariçin bir zil sesi belirleyebilmenizi sa©lar.
] Grup simgesi: Gruba ba©l\ olan simgeyiseçebilmenizi sa©lar.
] Üye ekle: Gruba üyeler ekleyebilirsiniz. Her birgrup 20 üyeyi aßmamal\d\r.
] Üyeyi ç\kart: Ancak ad ve telefon numaras\telefon defterinde kal\r.
] Yeni ad ver: Grup ad\n\ de©ißtirebilirsiniz.
] Tümünü kaldır: Üyeyi Grup üyesi listesindenç\karabilirsiniz.
Hızlı arama Menü 1.4
ile aras\ndaki tußlara |sim listesi girißiatayabilirsiniz. Do©rudan bu tußa basarak aramayapabilirsiniz.
1. Bekleme modundayken [Rehber] tußunabasarak, önce telefon defterini aç\n.
2. Hızlı arama seçene©ine ilerleyip, ard\ndan [Tamam]tußuna bas\n.
3. H\zl\ arama numaras\ eklemek isterseniz <Boß>seçene©ini ißaretleyin. Bu ißlemin ard\ndan,telefon defterinde ad\ arayabilirsiniz.
4. H\zl\ arama tußuna atanan ad\ seçin ve ad\düzenlemek için De©ißtir veya Sil seçene©iniißaretleyin. Ayr\ca, bir arama yapabilir ya da bunumarayla bir mesaj yazabilirsiniz.
Kendi numara listem (SIM karta ba©l\) Menü 1.5
SIM karta kendi numaran\z\ kaydedebilir ve kontroledebilirsiniz.

Rehber
37
Ìmza Menü 1.6
Bu seçenek, ad\n\z\ ve bir mobil telefon numaras\n\içeren kendi kartvizitinizi olußturman\z\ sa©lar. Yenibir kartvizit olußturmak için sol seçim tußuna [Seçenekler] bas\n ve alanlara gerekli bilgileri girin.
Ayarlar Menü 1.7
1. Bekleme modunda sa© seçim tußuna [Rehber] bas\n.
2. Ayarlar'a ilerleyin ve sol seçim tußuna [Tamam] basın.
] Bellek belirle
|lerleyerek Varsayılan bellek'i seçili duruma getirinve sol seçim tußuna [Tamam] basın.
- E©er SIM ya da Telefon, seçerseniz, telefonkaydı SIM'e ya da telefona kaydedecektir.
] Seçen. göster
|lerleyerek Seçenekleri göster'i seçili durumagetirin ve sol seçim tußuna basın [Tamam].
- Yalnızca isim: Telefon defteri listesini yaln\zcaadlar\ görüntüleyecek ßekilde ayarlay\n.
- |sim ve numara: Rehber listesinin, isim venumara gösterecek ßekilde olmas\n\ sa©lar.
- Resimler ile: Telefon defteri listesini karakterbilgisi ve foto©raf görüntüleyecek ßekildeayarlay\n.
] Hepsini Kopyala/Tümünü taßı
SIM kart belle©inden Telefon belle©ine veya bununtam tersi girißleri kopyalayabilir veyataß\yabilirsiniz.
1. Bekleme modundayken [Rehber] tußunabasarak, önce Telefon defterini aç\n.
2. Hepsini Kopyala/Tümünü taß\ seçene©ininüzerine gelin ve bu menüye girmek için [Tamam] tußuna bas\n.
] Hafıza durumu
Bu özellik telefon defterinizde ne kadar boß vekullan\lan alan oldu©unu görebilmenizi sa©lar.
] Rehberi sil
SIM kart, Telefon belle©i girißlerinin tümünüsilebilirsiniz. Sesli etiketler d\ß\nda, bu ißlevinkullan\labilmesi için Güvenlik kodu gerekir.

Rehber
38
Rehber
1. |lerleyerek Rehberi sil'i seçili duruma getirin vesol seçim tußuna [Tamam] bas\n.
2. Silmek istedi©iniz haf\zay\ vurgulay\n ard\ndansol seçim tußuna [Tamam] bas\n.
3. Güvenlik kodunuzu girin ve sol seçim tußuna[Tamam] ya da sa© seçim tußuna
[Geri] basın.
] Serv. arama no.
Íebeke operatörünüz taraf\ndan sa©lanan belirliservisler listesine erißmek için, bu ißlevi kullan\n(SIM kart taraf\ndan destekleniyorsa).

Ça©rı kaydı
39
Ça©rı kaydı
Íebekeniz, servis alan\ içinde Arayan Hatt\ Kimli©i(CLI) özelli©ini destekliyorsa cevaps\z, gelen ya dayap\lan aramalar\n kay\tlar\n\ görebilirsiniz.
Numara ve isimle (varsa) birlikte, araman\ngerçekleßti©i saat ve tarih de gösterilir. Ayn\zamanda ça©r\ sürelerini de görebilirsiniz.
Cevapsız aramalar Menü 2.1
Bu seçenek en son 10 cevaps\z aramay\ görmenizisa©lar. Ayn\ zamanda:] Varsa numaray\ görebilir, arayabilir ya da
rehbere kaydedebilirsiniz.] Numara için yeni bir isim girebilir ve her ikisini
rehbere kaydedebilirsiniz.] Bu numarayla mesaj gönderebilirsiniz.] Aramay\ listeden silebilirsiniz.
Gelen aramalar Menü 2.2
Bu seçenek en son 10 gelen aramay\ görmenizisa©lar. Ayn\ zamanda:] Varsa numaray\ görebilir, arayabilir ya da
rehbere kaydedebilirsiniz.
] Numara için yeni bir isim girebilir ve her ikisinirehbere kaydedebilirsiniz.
] Bu numarayla mesaj gönderebilirsiniz.] Aramay\ listeden silebilirsiniz.
Yapılan aramalar Menü 2.3
Bu seçenek en son yap\lan 10 aramay\ görmenizisa©lar. Ayn\ zamanda:] Varsa numaray\ görebilir, arayabilir ya da
rehbere kaydedebilirsiniz.] Numara için yeni bir isim girebilir ve her ikisini
rehbere kaydedebilirsiniz.] Bu numarayla mesaj gönderebilirsiniz.] Aramay\ listeden silebilirsiniz.
Bütün ça©r\lar Menü 2.4
Yap\lan ve gelen aramalar\n tüm listesini görebilirsiniz.
Son aramalar\ sil Menü 2.5
Cevaps\z ve gelen aramalar listelerini silmenizisa©lar. Yap\lan ve bütün ça©r\ listelerini tek seferdesilebilirsiniz.
Ça©rı kaydı
40
Ça©rı kaydı
Arama Ücretleri Menü 2.6
Arama süresi (Menü 2.6.1)
Gelen ve yap\lan aramalar\n süresini görmenizisa©lar. Ayn\ zamanda ça©r\ sürelerinis\f\rlayabilirsiniz. Aßa©\daki sayaçlar\kullanabilirsiniz:
] Son ça©rı: Son araman\n süresi.
] Bütün ça©rılar: Sayac\n son s\f\rlanmas\ndan buyana yap\lan ya da gelen tüm aramalar\n toplamsüresi.
] Gelen aramalar: Gelen aramalar\n süresi.
] Yapılan aramalar: Yap\lan aramalar\n süresi
] S\f\rla: Sol seçim tußuna [Evet] bast\©\n\zda,tüm aramalar\n uzunlu©unu silmenizi sa©lar.
Arama ücretleri (Menü 2.6.2)
Bu ißlev son arama, tüm aramalar ve kalan ücretbilgilerini görüntülemenizi ve ücret bilgilerinis\f\rlaman\z\ sa©lar. Ücret bilgilerini s\f\rlamak için,PIN2 kodu gereklidir.
Ayarlar (Menü 2.6.3)
] Tarife Ayarla: Döviz türünü ve birim fiyat\n\ayarlayabilirsiniz. Uygulanan birim fiyatlar\n\edinmek için servis sa©lay\c\lar\n\za baßvurun. Bumenüdeki para birimi veya birimi seçebilmek için,PIN2 kodu gereklidir.
] Kredi ayarla: Bu ßebeke servisi, kontör ücretleriniseçerek, arama ücretlerinizi s\n\rland\rabilmenizisa©lar. Oku seçene©ini ißaretlerseniz, kalan kontörsay\s\ görüntülenir. De©ißtir seçene©iniißaretlerseniz, ücret s\n\r\n\ de©ißtirebilirsiniz.
] Otomatik ekran: Bu ßebeke hizmeti otomatikolarak son aramalar\n\z\n ücretinigörüntüleyebilmenizi sa©lar. Aç\k seçene©iißaretlenirse, arama sona erdi©inde son araman\nücretini görebilirsiniz.
GPRS info Menü 2.7
GPRS arac\l\©\yla ßebeke üzerinden aktar\lan verimiktar\n\ denetleyebilirsiniz. Buna ek olarak, nekadar süre çevrimiçi kald\©\n\z\ dagörüntüleyebilirsiniz.
Ça©rı kaydı
41
Arama süresi (Menü 2.7.1)
Son ça©rı ve Bütün ça©rıların sürelerinidenetleyebilirsiniz. Ayrıca, Sıfırla menüsü ile busayaçları
Veri miktarı (Menü 2.7.2)
Gönderilen, Alınan veya Hepsi ile s\f\rla
seçeneklerini denetleyebilirsiniz.

Araçlar
42
Araçlar
Favoriler Menü 3.1
Bu seçenek, kendi favorilerinizi zaten sa©lanan listeyeeklemenizi sa©lar. Kendi menünüzü olußturduktansonra, yukar\ gezinme tußuna basarak beklemeekran\nda istedi©iniz ißleve h\zla ulaßabilirsiniz.
Çalar Saat Menü 3.2
Belirtilen zamanda çalmas\ için en fazla 5 alarmkurabilirsiniz.
1. Aç\k seçene©ini ißaretleyip, alarm\n çalmas\n\istedi©iniz saati girin.
2. Tekrar süresini seçin: 1 Kez, Pzt~Cum, Pzt~Cts,Her gün.
3. |stedi©iniz alarm uyar\ sesini seçip [Tamam]tußuna bas\n.
Bluetooth Menü 3.3
Bluetooth, birbirlerine yak\n uyumlu cep telefonu,çevre birimi ve bilgisayarlar\n, herhangi bir kabloya
gereksinim duyulmadan do©rudan iletißimkurmalar\n\ sa©lar. Bu telefon, dahili Bluetoothba©lant\ özelli©ine sahiptir.
Eßleßmiß cihazlar (Menü 3.3.1)
Bluetooth telefonuyla uyumlu tüm cihazlar\görüntüleyebilirsiniz.
Dikkat] Telefon rehberindeki verileri yaln\zca Bluetooth ile
karß\l\kl\ de©ißebilirsiniz.] Baßka bir Bluetooth cihazından veri alırken, telefon
sizden bir onay ister.Transferi onayladıktan sonradosya telefonunuza kopyalanır.
] Desteklenen Bluetooth yazılımı (Bluetooth yı©ın)DUN: WIDCOMM Windows için Bluetooth 1.4 ve 3.0
] Telefon normalde WIDCOMM sürücüsüyle (sürüm1.4.3.4) ya da WIDCOMM sürücüsüyle (sürüm1.4.2.10) çal\ßmaktad\r. Bluetooth ile LG ContentsBank'i desteklememektedir.
Dikkat] Yeni mesaj menüsü, Favoriler'de yer almaktad\r.
Lütfen Yeni mesajlar için [Menü 5.1] bak\n.
Dikkat] Uyum sorunları nedeniyle bazı cihazlar bu ißlevi
desteklemiyor olabilir.
43
Araçlar
Handsfree cihazlar (Menü 3.3.2)
Bluetooth telefonla uyumlu handsfree (eller serbest)cihazlar\n bir listesini görebilirsiniz.
Cihazlar\m ya da Handsfree cihazlar menüsünegirerseniz, aßa©\daki seçeneklere girebilirsiniz.] Ba©lan/Ba©lant\y\ kes: Di©er Bluetooth
cihazlar\na ba©lant\ sa©lar.] Yeni ekle: Yeni Bluetooth cihaz\ araman\z\ sa©lar.] Ìsim ver: Bluetooth'un ad\n\ de©ißtirmenizi sa©lar.] |zinli olarak ayarla/|zinsiz olarak ata: Her
Bluetooth cihaz\ aras\nda yetkili ba©lant\y\ayarlaman\z\ sa©lar.
] Bütün servisler: Bluetooth cihaz\ taraf\ndandesteklenen tüm hizmetleri görmenizi sa©lar.
] Sil: Bluetooth cihaz\n\z\ silmenizi sa©lar.] Tümünü Sil: Tüm Bluetooth cihazlar\n\ silmenizi
sa©lar.
Ayarlar (Menü 3.3.3)
Bluetooth ile uyumlu yeni bir cihaz kaydedebilirsiniz.Zaten yeni bir cihaz eklediyseniz, bunu bir parolagirdikten sonra arayabilirsiniz.
] Bluetooth ayarla
Bluetooth ißlevini etkinleßtirebilir ya da iptaledebilirsiniz.
] Telefonun görünürlü©ü
Telefonunuzun di©er Bluetooth cihazlardagösterilmesiyle ilgili ißlevi ayarlayabilirsiniz.
] Telefonun ad\
Bluetooth cihaz\n\n ad\n\ belirleyebilirsiniz.Varsay\lan ad [LG]KG245'dur.
Oyunlarım ve di©erleri Menü 3.4
Bu menüde, duvar ka©\d\ ya da zil sesi olarakayarlanmak üzere WAP'tan indirdi©iniz görüntüler yada sesleri bulabilirsiniz. Ayr\ca bu menüde tüm Javauygulamalar\ bulunmaktad\r.
Oyunlar\m ve Uygulamalar (Menü 3.4.1)
• Oyunlar\m ve Uygulamalar
Bu menüde, telefonunuzda yüklü Javauygulamalar\n\ yönetebilirsiniz. |ndirilenuygulamalar\ çal\ßt\rabilir ya da silebilir veyaba©lant\ seçene©ini ayarlayabilirsiniz. |ndirilen
Araçlar
44
Araçlar
uygulamalar, klasörler halinde düzenlenir. Solseçim tußuna [Tamam] basarak, seçilenklasörü açabilir ya da seçilen midlet'içal\ßt\rabilirsiniz. Sol seçim tußunu [Seçenekler] kullanarak aßa©\daki menülereulaßabilirsiniz.
] Açık: Seçilen uygulamay\ baßlat.
] Yeni klasör: Yeni klasör olußturur.
Profiller (Menü 3.4.2)
Bu menü, Internet menüsüyle ayn\ ayarlar\ içerir.Asl\nda yeni uygulamalar indirmek için bir WAPba©lant\s\ gerekmektedir.
Dikkat] Önceden yüklenmiß bir klasörü ya da klasördeki bir
oyunu kald\ramaz ya da yeniden adland\ramazs\n\z.
Dikkat] JAR dosyas\, Java program\n\n s\k\ßt\r\lm\ß biçimidir
ve JAD dosyalar\, tüm ayr\nt\l\ bilgileri içeren birtan\mlama dosyas\d\r. |ndirmeden önce ßebekededosyayla ilgili tüm ayr\nt\l\ bilgileri JAD dosyas\ndagörebilirsiniz.
] Standart bir dili (J2ME) temel al\yor olsalar da,telefon modeline göre farkl\ kütüphaneler kullan\l\yorolabilece©inden tüm Java uygulamalar\ her telefonlauyumlu de©ildir. Telefon için özel olarakgelißtirilmemiß Java uygulamalar\ indirildi©inde,yaz\l\m kilitlenebilir ya da kendini açabilir. Busorunlar\n, üründeki bir hatadan de©il uyumsuzuygulamalardan kaynakland\©\n\ hat\rlatmak isteriz.
Dikkat] Telefon ortam\nda yaln\zca J2ME (Java 2 Micro
Edition) tabanl\ programlar çal\ß\r. J2SE (Java 2Standard Edition) tabanl\ programlar yaln\zca PCortam\nda çal\ß\r.
JavaTM, Sun Microsystems taraf\ndangelißtirilmiß bir teknolojidir. Netscape ya da MSInternet Explorer taray\c\lar\n\ kullanarak JavaApplet’i indirebilmeniz gibi WAP kullanan telefonlaJava MIDlet’leri indirilebilmektedir. Servissa©lay\c\ya ba©l\ olarak Java oyunlar\ gibi tümJava tabanl\ programlar indirilebilir ve telefondaçal\ßt\r\labilir. |ndirilen Java programlar\, seçim,çal\ßt\rma ya da silme yapabilece©iniz Oyunlar\mve di©erleri menüsünde görülebilir. Telefonakaydedilen Java program\ dosyalar\ .JAD ve .JARbiçimlerindedir.
45
Araçlar
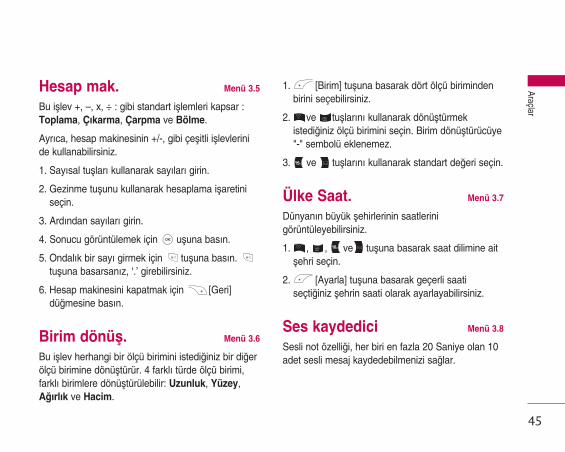
Hesap mak. Menü 3.5
Bu ißlev +, –, x, ÷ : gibi standart ißlemleri kapsar :Toplama, Ç\karma, Çarpma ve Bölme.
Ayr\ca, hesap makinesinin +/-, gibi çeßitli ißlevlerinide kullanabilirsiniz.
1. Say\sal tußlar\ kullanarak say\lar\ girin.
2. Gezinme tußunu kullanarak hesaplama ißaretiniseçin.
3. Ard\ndan say\lar\ girin.
4. Sonucu görüntülemek için ußuna bas\n.
5. Ondal\k bir say\ girmek için tußuna bas\n. tußuna basarsan\z, ‘.’ girebilirsiniz.
6. Hesap makinesini kapatmak için [Geri]dü©mesine bas\n.
Birim dönüß. Menü 3.6
Bu ißlev herhangi bir ölçü birimini istedi©iniz bir di©erölçü birimine dönüßtürür. 4 farkl\ türde ölçü birimi,farkl\ birimlere dönüßtürülebilir: Uzunluk, Yüzey,A©\rl\k ve Hacim.
1. [Birim] tußuna basarak dört ölçü birimindenbirini seçebilirsiniz.
2. ve tußlar\n\ kullanarak dönüßtürmekistedi©iniz ölçü birimini seçin. Birim dönüßtürücüye"-" sembolü eklenemez.
3. ve tußlar\n\ kullanarak standart de©eri seçin.
Ülke Saat. Menü 3.7
Dünyan\n büyük ßehirlerinin saatlerinigörüntüleyebilirsiniz.
1. , , ve tußuna basarak saat dilimine aitßehri seçin.
2. [Ayarla] tußuna basarak geçerli saatiseçti©iniz ßehrin saati olarak ayarlayabilirsiniz.
Ses kaydedici Menü 3.8
Sesli not özelli©i, her biri en fazla 20 Saniye olan 10adet sesli mesaj kaydedebilmenizi sa©lar.
Araçlar
46
Araçlar
Kaydet (Menü 3.8.1)
Ses kaydedici menüsünden sesli notkaydedebilirsiniz.
1. Kay\t baßlad\ktan sonra, kaydediyor mesaj\ ilekalan süre görüntülenir.
2. Kayd\ bitirmek isterseniz [Kaydet] tußunabas\n.
3. Sesli notun baßl\©\n\ girip [Tamam] tußunabas\n.
Listeye bak (Menü 3.8.2)
Telefon, sesli not listesini görüntüler. Kaydedilensesli notlar\ Çalabilir ve Silebilirsiniz. Ayr\ca, bir multimedya mesaj da gönderebilirsiniz.
SIM Servisi Menü 3.9
Bu menü, SIM'e ve ßebeke hizmetlerine ba©l\d\r.
AjandaAjanda
47
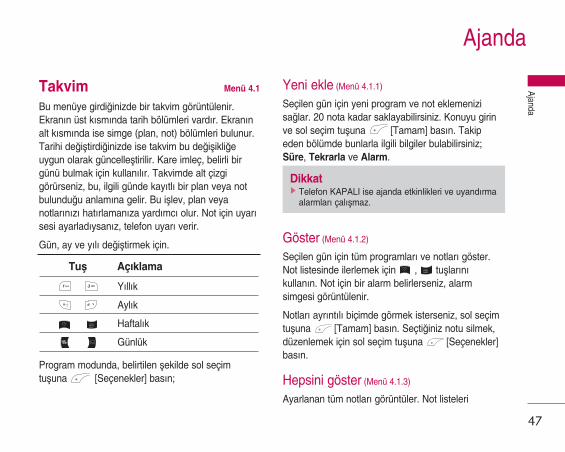
Takvim Menü 4.1
Bu menüye girdi©inizde bir takvim görüntülenir.Ekran\n üst k\sm\nda tarih bölümleri vard\r. Ekran\nalt k\sm\nda ise simge (plan, not) bölümleri bulunur.Tarihi de©ißtirdi©inizde ise takvim bu de©ißikli©euygun olarak güncelleßtirilir. Kare imleç, belirli birgünü bulmak için kullan\l\r. Takvimde alt çizgigörürseniz, bu, ilgili günde kay\tl\ bir plan veya notbulundu©u anlam\na gelir. Bu ißlev, plan veyanotlar\n\z\ hat\rlaman\za yard\mc\ olur. Not için uyar\sesi ayarlad\ysan\z, telefon uyar\ verir.
Gün, ay ve y\l\ de©ißtirmek için.
Program modunda, belirtilen ßekilde sol seçimtußuna [Seçenekler] basın;
Yeni ekle (Menü 4.1.1)
Seçilen gün için yeni program ve not eklemenizisa©lar. 20 nota kadar saklayabilirsiniz. Konuyu girinve sol seçim tußuna [Tamam] basın. Takipeden bölümde bunlarla ilgili bilgiler bulabilirsiniz;Süre, Tekrarla ve Alarm.
Göster (Menü 4.1.2)
Seçilen gün için tüm programları ve notları göster.Not listesinde ilerlemek için , tußlarınıkullanın. Not için bir alarm belirlerseniz, alarmsimgesi görüntülenir.
Notları ayrıntılı biçimde görmek isterseniz, sol seçimtußuna [Tamam] basın. Seçti©iniz notu silmek,düzenlemek için sol seçim tußuna [Seçenekler]basın.
Hepsini göster (Menü 4.1.3)
Ayarlanan tüm notlar\ görüntüler. Not listeleri
Tuß Aç\klama
Y\ll\k
Ayl\k
Haftal\k
Günlük
Dikkat] Telefon KAPALI ise ajanda etkinlikleri ve uyand\rma
alarmlar\ çal\ßmaz.

Ajanda
48
Ajanda
aras\nda gezinmek için ve tußlar\n\ kullan\n.Notlar\ ayr\nt\l\ biçimde görmek isterseniz, sol seçimtußuna [Tamam] bas\n.
Geçmißi sil (Menü 4.1.4)
Size daha önce bildirilmiß olan geçmiß planlar\silebilirsiniz.
Tümünü Sil (Menü 4.1.5)
Tüm notaları silebilirsiniz.
Kısa not Menü 4.2
Not ißlevi, istedi©iniz gibi notlar alman\z\ sa©lar(maks. 39 karakter).
Ajanda etkinliklerinden farkl\ olarak Notlar için alarmyoktur.
1. Sol seçim tußuna [Tamam] basarak Notö©esini seçin.
2. E©er boß ise, sol seçim tußuna basarak Yeniekle'yi seçin.
3. Notu girip [Tamam] tußuna bas\n.
Dikkat] Metin girißi modunu de©ißtirmek istiyorsanız,
tußuna sırasıyla basın.
Mesajlar
49
Mesajlar
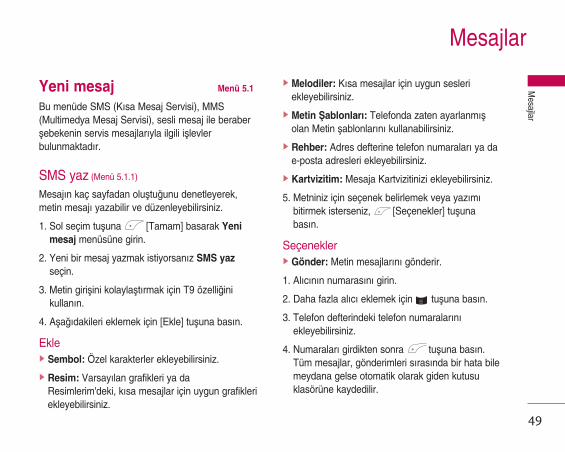
Yeni mesaj Menü 5.1
Bu menüde SMS (K\sa Mesaj Servisi), MMS(Multimedya Mesaj Servisi), sesli mesaj ile beraberßebekenin servis mesajlar\yla ilgili ißlevlerbulunmaktad\r.
SMS yaz (Menü 5.1.1)
Mesaj\n kaç sayfadan olußtu©unu denetleyerek,metin mesaj\ yazabilir ve düzenleyebilirsiniz.
1. Sol seçim tußuna [Tamam] basarak Yeni
mesaj menüsüne girin.
2. Yeni bir mesaj yazmak istiyorsan\z SMS yaz
seçin.
3. Metin girißini kolaylaßt\rmak için T9 özelli©inikullan\n.
4. Aßa©\dakileri eklemek için [Ekle] tußuna bas\n.
Ekle] Sembol: Özel karakterler ekleyebilirsiniz.
] Resim: Varsayılan grafikleri ya daResimlerim'deki, kısa mesajlar için uygun grafikleriekleyebilirsiniz.
] Melodiler: Kısa mesajlar için uygun sesleriekleyebilirsiniz.
] Metin Íablonlar\: Telefonda zaten ayarlanmıßolan Metin ßablonlarını kullanabilirsiniz.
] Rehber: Adres defterine telefon numaraları ya dae-posta adresleri ekleyebilirsiniz.
] Kartvizitim: Mesaja Kartvizitinizi ekleyebilirsiniz.
5. Metniniz için seçenek belirlemek veya yaz\m\bitirmek isterseniz, [Seçenekler] tußunabas\n.
Seçenekler] Gönder: Metin mesajlar\n\ gönderir.
1. Al\c\n\n numaras\n\ girin.
2. Daha fazla al\c\ eklemek için tußuna bas\n.
3. Telefon defterindeki telefon numaralar\n\ekleyebilirsiniz.
4. Numaralar\ girdikten sonra tußuna bas\n.Tüm mesajlar, gönderimleri s\ras\nda bir hata bilemeydana gelse otomatik olarak giden kutusuklasörüne kaydedilir.

Mesajlar
50
Mesajlar
] Kaydet: Mesajlar\ Giden kutusuna kaydeder.
] Yaz\ tipi: Metin yaz\ tipinin Boyutunu ve Stiliniseçebilirsiniz.
] Renk: Ön plan ve arka plan rengi seçebilirsiniz.
] Hizalama: Metin hizalamas\n\ seçebilirsiniz.
] T9 sözlü©üne ekle: Kendi kelimeniziekleyebilirsiniz. Bu menü yaln\zca düzenlememodu Ak\ll\ (T9Abc/T9abc/T9ABC) olarakbelirlenmißse görüntülenir.
] T9 dilleri: T9 giriß modu için T9 dilleri seçin. 'T9kapal\' seçerek T9 giriß modunu da kapatabilirsiniz.
] Ç\k: Mesaj yazarken Ç\k tußuna basarsan\z,mesaj yaz\m\n\ bitirebilir ve bir üst mesajmenüsüne dönebilirsiniz. Yazm\ß oldu©unuz mesajkaydedilmez.
MMS yaz (Menü 5.1.2)
Multimedya mesajlar, metin, görüntü ve/veya sesklipleri içerebilir. Bu özellik, yaln\zca ßebekeoperatörü ya da servis sa©lay\c\ taraf\ndandestekleniyorsa kullan\labilir. Yaln\zca uyumlumultimedya mesaj ya da e-posta özelliklerine sahipcihazlar multimedya mesaj gönderebilir ve alabilir.
1. Sol seçim tußuna [Tamam] basarak Yeni
mesaj menüsüne girin.
2. Yeni bir mesaj yazmak istiyorsan\z MMS yaz
seçin.
3. Yeni bir mesaj yaratabilir veya telefonunuzdaönceden haz\rlanm\ß multimedya mesajßablonlar\ndan birini seçebilirsiniz.
4. Resim, Ses, Rehber, Sembol, Yeni foto©raf, YeniSes, Metin ßablonları, Kartvizitim eklemek içinEkle'yi seçin.
Bir MMS mesaj\na eklenebilecek maksimum dosyaboyutu, 100 kb'dir.
Seçenekler] Gönder: Multimedya mesajlar\n\ birden fazla
Dikkat] EMS sürüm 5'i destekleyen telefon, renkli resimleri,
sesler, metin stilleri, vs. gönderebilir. Karßı tarafıntelefonu bu tür seçenekleri desteklemiyorsagönderdi©iniz resimler, sesler ya da metin stilleridüzgün biçimde alınamayabilir.
Mesajlar
51
al\c\ya gönderebilir, mesaj\n\za öncelik atayabilirve daha sonra gönderilmek üzereayarlayabilirsiniz.
] Önizle: Yazd\©\n\z multimedya mesajlar\n\göndermeden önce görüntüleyebilirsiniz.
] Konu düzenle: Her mesajın konusunudüzenleyebilirsiniz.
] Slayt ekle: Mevcut slayttan önce bir slaytekleyebilirsiniz.
] Slayta Taß\: Önceki veya sonraki slaytagidebilirsiniz.
] Slayt\ sil: Mevcut slaytlar\ silebilirsiniz.
] Slayt biçimini belirle
- Zamanlay\c\y\ ayarla: Slayt, metin, resim vesesler için zamanlay\c\y\ ayarlayabilirsiniz.
- Metin ve resim de©ißtir: Mesajdaki resim vemetnin konumunu de©ißtirebilirsiniz.
] Ortam\ kald\r: Slayttaki resim veya seslerikald\rabilirsiniz. Bu seçenek yaln\zca ortammevcutsa görüntülenir.
] T9 sözlü©üne ekle: Kendi kelimeniziekleyebilirsiniz. Bu menü yaln\zca düzenlememodu Ak\ll\ (T9Abc/T9abc/T9ABC) olarakbelirlenmißse görüntülenir.
] T9 dilleri: T9 giriß modu için dili seçin. 'T9 kapal\'seçerek T9 giriß modunu da kapatabilirsiniz.
] Ç\k: Mesaj menüsüne geri dönebilirsiniz.
Gelen kutusu Menü 5.2
Mesaj ald\©\n\z zaman telefon sizi uyaracakt\r.Al\nan mesajlar Gelen kutusuna kaydedilir. Gelenkutusundaki mesajlar\ simgelerine göre ay\rtedebilirsiniz. Ayr\nt\l\ bilgi için, bkz: simgeyönergeleri.
Dikkat] Tüm mesajlar, gönderimleri s\ras\nda bir hata bile
meydana gelse otomatik olarak giden kutusuklasörüne kaydedilir.
Dikkat] Örne©in 50K’l\k bir resimli multimedya mesaj\ yazmak
istedi©inizde, yükleme süresi en az 10 saniyesürecektir. Bu durumda yükleme süresince di©ertußlar aktif olmayacakt\r. Ancak 10 saniye sonramultimedya mesaj\n\z\ yazabilirsiniz.
Mesajlar
52
Mesajlar
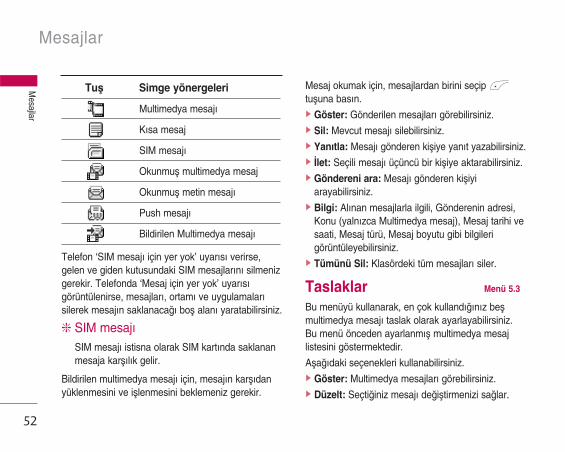
Telefon ‘SIM mesaj\ için yer yok’ uyar\s\ verirse,gelen ve giden kutusundaki SIM mesajlar\n\ silmenizgerekir. Telefonda ‘Mesaj için yer yok’ uyar\s\görüntülenirse, mesajlar\, ortam\ ve uygulamalar\silerek mesaj\n saklanaca©\ boß alan\ yaratabilirsiniz.
❇ SIM mesaj\SIM mesaj\ istisna olarak SIM kart\nda saklananmesaja karß\l\k gelir.
Bildirilen multimedya mesaj\ için, mesaj\n karß\danyüklenmesini ve ißlenmesini beklemeniz gerekir.
Mesaj okumak için, mesajlardan birini seçip tußuna bas\n.] Göster: Gönderilen mesajlar\ görebilirsiniz.] Sil: Mevcut mesaj\ silebilirsiniz.] Yan\tla: Mesaj\ gönderen kißiye yan\t yazabilirsiniz.] |let: Seçili mesaj\ üçüncü bir kißiye aktarabilirsiniz.] Göndereni ara: Mesaj\ gönderen kißiyi
arayabilirsiniz.] Bilgi: Alınan mesajlarla ilgili, Gönderenin adresi,
Konu (yalnızca Multimedya mesaj), Mesaj tarihi vesaati, Mesaj türü, Mesaj boyutu gibi bilgilerigörüntüleyebilirsiniz.
] Tümünü Sil: Klasördeki tüm mesajlar\ siler.
Taslaklar Menü 5.3
Bu menüyü kullanarak, en çok kulland\©\n\z beßmultimedya mesaj\ taslak olarak ayarlayabilirsiniz.Bu menü önceden ayarlanm\ß multimedya mesajlistesini göstermektedir.
Aßa©\daki seçenekleri kullanabilirsiniz.] Göster: Multimedya mesajları görebilirsiniz.] Düzelt: Seçti©iniz mesaj\ de©ißtirmenizi sa©lar.
Tuß Simge yönergeleri
Multimedya mesaj\
K\sa mesaj
SIM mesaj\
Okunmuß multimedya mesaj
Okunmuß metin mesaj\
Push mesaj\
Bildirilen Multimedya mesaj\
Mesajlar
53
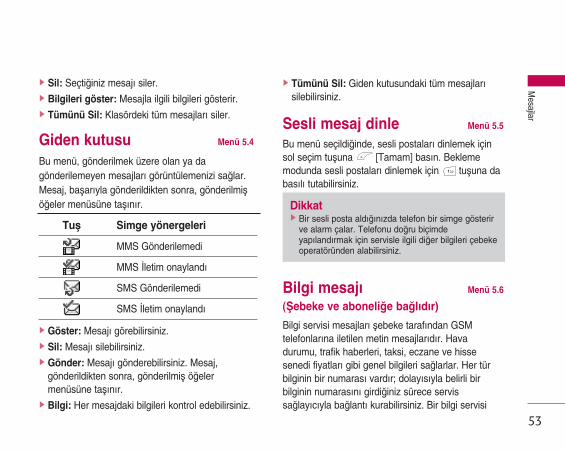
] Sil: Seçti©iniz mesaj\ siler.] Bilgileri göster: Mesajla ilgili bilgileri gösterir.] Tümünü Sil: Klasördeki tüm mesajları siler.
Giden kutusu Menü 5.4
Bu menü, gönderilmek üzere olan ya dagönderilemeyen mesajları görüntülemenizi sa©lar.Mesaj, baßarıyla gönderildikten sonra, gönderilmißö©eler menüsüne taßınır.
] Göster: Mesajı görebilirsiniz.] Sil: Mesajı silebilirsiniz.] Gönder: Mesajı gönderebilirsiniz. Mesaj,
gönderildikten sonra, gönderilmiß ö©elermenüsüne taßınır.
] Bilgi: Her mesajdaki bilgileri kontrol edebilirsiniz.
] Tümünü Sil: Giden kutusundaki tüm mesajlarısilebilirsiniz.
Sesli mesaj dinle Menü 5.5
Bu menü seçildi©inde, sesli postaları dinlemek içinsol seçim tußuna [Tamam] basın. Beklememodunda sesli postaları dinlemek için tußuna dabasılı tutabilirsiniz.
Bilgi mesaj\ Menü 5.6
(Íebeke ve aboneli©e ba©l\d\r)
Bilgi servisi mesajlar\ ßebeke taraf\ndan GSMtelefonlar\na iletilen metin mesajlar\d\r. Havadurumu, trafik haberleri, taksi, eczane ve hissesenedi fiyatlar\ gibi genel bilgileri sa©larlar. Her türbilginin bir numaras\ vard\r; dolay\s\yla belirli birbilginin numaras\n\ girdi©iniz sürece servissa©lay\c\yla ba©lant\ kurabilirsiniz. Bir bilgi servisi
Tuß Simge yönergeleri
MMS Gönderilemedi
MMS |letim onayland\
SMS Gönderilemedi
SMS |letim onayland\
Dikkat] Bir sesli posta aldı©ınızda telefon bir simge gösterir
ve alarm çalar. Telefonu do©ru biçimdeyapılandırmak için servisle ilgili di©er bilgileri çebekeoperatöründen alabilirsiniz.
Mesajlar
54
Mesajlar
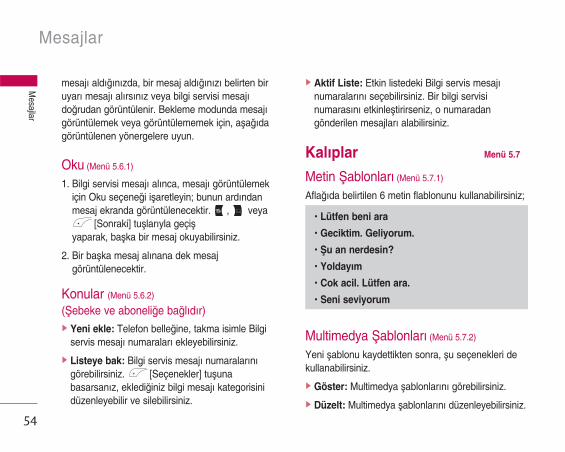
mesaj\ ald\©\n\zda, bir mesaj ald\©\n\z\ belirten biruyar\ mesaj\ al\rs\n\z veya bilgi servisi mesaj\do©rudan görüntülenir. Bekleme modunda mesaj\görüntülemek veya görüntülememek için, aßa©\dagörüntülenen yönergelere uyun.
Oku (Menü 5.6.1)
1. Bilgi servisi mesaj\ al\nca, mesaj\ görüntülemekiçin Oku seçene©i ißaretleyin; bunun ard\ndanmesaj ekranda görüntülenecektir. , veya
[Sonraki] tußlar\yla geçißyaparak, baßka bir mesaj okuyabilirsiniz.
2. Bir baßka mesaj al\nana dek mesajgörüntülenecektir.
Konular (Menü 5.6.2)
(Íebeke ve aboneli©e ba©l\d\r)] Yeni ekle: Telefon belle©ine, takma isimle Bilgi
servis mesaj\ numaralar\ ekleyebilirsiniz.
] Listeye bak: Bilgi servis mesaj\ numaralar\n\görebilirsiniz. [Seçenekler] tußunabasarsan\z, ekledi©iniz bilgi mesaj\ kategorisinidüzenleyebilir ve silebilirsiniz.
] Aktif Liste: Etkin listedeki Bilgi servis mesaj\numaralar\n\ seçebilirsiniz. Bir bilgi servisinumaras\n\ etkinleßtirirseniz, o numaradangönderilen mesajlar\ alabilirsiniz.
Kal\plar Menü 5.7
Metin Íablonlar\ (Menü 5.7.1)
Afla©ıda belirtilen 6 metin flablonunu kullanabilirsiniz;
Multimedya Íablonlar\ (Menü 5.7.2)
Yeni ßablonu kaydettikten sonra, ßu seçenekleri dekullanabilirsiniz.
] Göster: Multimedya ßablonlar\n\ görebilirsiniz.
] Düzelt: Multimedya ßablonlar\n\ düzenleyebilirsiniz.
• Lütfen beni ara
• Geciktim. Geliyorum.
• Íu an nerdesin?
• Yoldayım
• Cok acil. Lütfen ara.
• Seni seviyorum

55
Mesajlar
] Yeni ekle: Yeni multimedya ßablonlar\ ekleminizisa©lar.
] Mesaj yaz: Multimedya mesajlar yazabilir vegönderebilirsiniz.
] Sil: Multimedya ßablonlar\n\ silebilirsiniz.] Tümünü sil: Tüm multimedya mesajları silmenizi
sa©lar.
Ayarlar Menü 5.8
Metin Mesaj\ (Menü 5.8.1)
] Mesaj türleri:
Metin, Ses, Faks, Protokol, X.400, E-posta,
ERMES Mesaj türü genellikle Metin olarakayarlan\r. Metninizi alternatif biçimleredönüßtürebilirsiniz. Bu ißlevin kullan\labilirli©ihakk\nda servis sa©lay\c\n\za baßvurun.
] Geçerlilik süresi: Íebeke servisi metinmesajlar\n\z\n mesaj merkezinde ne kadar süresaklanaca©\n\ belirleyebilmenizi sa©lar.
] |letim raporu: Evet seçene©ini ißaretlerseniz,mesaj\n\z\n baßar\yla gönderilip, gönderilmedi©inidenetleyebilirsiniz.
] Yanıt ücreti: Bir mesaj gönderildi©inde, bu al\c\yayan\tlama ve yan\tlama masraf\n\n size ait telefonfaturas\nda ücretlendirme olana©\ sa©lar.
] SMS Merkezi: Metin mesaj\ göndermekistedi©inizde, bu menü arac\l\©\yla SMSmerkezinin adresini alabilirsiniz.
MMS (Menü 5.8.2)
] Öncelik: Seçti©iniz mesaj\n önceli©iniayarlayabilirsiniz.
] Geçerlilik süresi: Íebeke servisi metinmesajlar\n\z\n mesaj merkezinde ne kadar süresaklanaca©\n\ belirleyebilmenizi sa©lar.
] |letim raporu: Bu menüde Evet seçene©iniißaretlerseniz, mesaj\n\z\n baßar\yla gönderilip,gönderilmedi©ini denetleyebilirsiniz.
] Oto. indir: Aç\k seçene©ini ißaretlerseniz,multimedya mesajlar\n\ otomatik olarak al\rs\n\z.Kapal\ seçene©ini ißaretlerseniz, yaln\zca gelenkutusundaki uyar\ mesaj\n\ alabilir ve ard\ndan buuyar\y\ inceleyebilirsiniz. Yaln\zca Ana Íebekeseçerseniz, ana ßebekeye ba©l\ multimedyamesajlar\ alabilirsiniz.
Mesajlar
56
Mesajlar
] Íebeke ayar\: Multimedya mesaj sunucususeçene©ini ißaretlerseniz, multimedya mesajsunucusunun URL’sini ayarlayabilirsiniz.
] |zinli tip
Kißisel: Kißisel mesajlar.
Reklam: Ticari mesaj.
Bilgi: Gerekli bilgiler.
Sesli mesaj numarası (Menü 5.8.3)
Bu özellik ßebeke servisi sa©lay\c\s\ taraf\ndandestekleniyorsa, sesli mesaj alabilirsiniz. Yeni birsesli mesaj al\nd\©\nda, ekranda sembolgörüntülenecektir. Telefonunuzu uygun ßekildeyap\land\rmak için lütfen ßebeke servisisa©lay\c\n\zla servisin ayr\nt\lar\ hakk\nda ba©lant\kurun.] Giriß sayfas\: Giriß sayfas\ seçene©ini
ißaretleyerek sesli mesajlar\n\z\ dinleyebilirsiniz.] Dolaß\mda: Yurtd\ß\ndayken dahi, dolaß\m servisi
taraf\ndan destekleniyorsa sesli mesajlar\n\z\dinleyebilirsiniz.
Bilgi mesaj\ (Menü 5.8.4)
] Al
Evet: Bu menüyü seçerseniz, telefonunuzBilgi servisi mesajlar\n\ alacakt\r.Hay\r: Bu menüyü seçerseniz, telefonunuzbundan sonra Bilgi servisi mesajlar\n\almayacakt\r.
] Uyar\
Evet: Bilgi servisi mesaj numaras\ald\©\n\zda, telefonunuz uyar\ sesi verecektir.Hay\r: Bilgi servis mesaj\ alsan\z dahitelefonunuz uyar\ sesi vermeyecektir.
] Diller
|stedi©iniz dili [Açık/Kapalı] tußuna basarakseçebilirsiniz. Bu ißlemin ard\ndan, bilgi servismesaj\ seçti©iniz dilde görüntülenecektir.
Push mesajlar\ (Menü 5.8.5)
Mesajı alıp almayaca©ınızı belirleyecek seçene©iayarlayabilirsiniz.
Kamera
57
Kamera
Kamera Moduna H\zl\ ErißimMultimedya telefonunuz, kolayca foto©rafçekebilece©iniz, foto©raflar\ görüntüleyebilece©inizve aileniz ya da dostlar\n\zla paylaßabilece©iniz birkolay kullan\ml\ dahili kameraya sahiptir.
Kapak aç\kken resim çekmek için
1. Kamera menüsüne bast\©\n\zda ekran vizör olarakkullan\lmaya baßlar. Bu menüye do©rudanulaßmak istiyorsan\z yan kamera tußuna bas\n.
2. Sa© seçim tußuna bast\©\n\zda,telefonunuzda kay\tl\ resimleri görebilirsiniz."Seçenekler"de, çeßitli ißlevleri kullanabilirsiniz.Seçenekler'in ayr\nt\lar\n\ görmek istiyorsan\zlütfen [Menü 9-1]'e bak\n.
] Mod: Çoklu çekim yapmanıza imkan sa©lar.
• çoklu çekim: 128x160, 320x240
• Stil çekim: 48x48, 128x160, 320x240,640x480
• çerçeveli çekim: 128x160
] Kullan\labilir boyut ayarlar\:
• Stil çekim: 48x48, 128x160, 320x240,640x480
• çoklu çekim: 128x160, 320x240
• çerçeveli çekim: 128x160
] Kalite: Normal, Ìyi, Çok iyi arasından bir görüntükalitesi ayarlamanızı sa©lar.
] Otomatik kaydet: Bunu Aç\k yaparsan\z,çekti©iniz foto©raflar otomatik olarak kaydedilir.
] Albüm: Telefonunuzda kayıtlı foto©raflarıgörmenizi sa©lar.
] Çık: Foto©raf çekmek için ekran moduna geridöner.
] Zoom: Çözünürlü©e ba©lı olarak zoom de©erini x1- x2, x3, x4 arasında ayarlamanızı sa©lar.
] Efekt: 3 ayar bulunmaktadır: Renkli, Kahverengi,Siyah & Beyaz.
Dikkat] ya da tußlar\na basarak görüntü boyutunu,
parlakl\©\, rengi ve yak\nlaßt\rma oran\n\ kontroledebilirsiniz.
Dikkat] Albümüm'de, yaln\zca telefonun kameras\yla çekilen
resimleri görebilirsiniz.

Kamera
58
Kamera
] Parlakl\k: Aydınlatmayı ayarlamak için sa©/solgezinme tußlarını kullanın. 5 aydınlatma seviyesibulunmaktadır: -2, -1, 0, 1, 2.
] Zamanlay\c\: Gecikme süresini seçmenizi sa©lar(Yok, 3 Saniye, 5 Saniye, 10 Saniye). Telefon,belirtilen süre sonrasında foto©raf çeker.
] Flash: Karanlık bir yerde foto©raf çekti©inizde,flaßı ayarlamanızı sa©lar.
Kapak kapal\yken resim çekmek için
1. Uzun süre [ ] tußuna bas\n.
2. |ç LCD'de bir liste görüntülenir.
] Resim çek: Resim çekme modunu etkinleßtirir.
] Fener: Flaß ıßı©ını etkinleßtirir.
] Geri: Bir önceki menüye geri döner.
- Foto©raf çekmek için kamera dü©mesine bas\n.
AyarlarAyarlar
59
Kißisel rahatl\©\n\z ve tercihlerinize ba©l\ olarak,aßa©\daki menüleri ayarlayabilirsiniz.
1. Bekleme modunda [Menü] tußuna bas\n.
2. Ayarlar menüsüne girmek üzere do©rudan erißimiçin tußuna bas\n.
Profiller Menü 7.1
Profillerde, farkl\ ißlemler, ortamlar ya da arayangruplar\ için telefonun seslerini ayarlayabilir vekißiselleßtirebilirsiniz.
Önceden ayarlanm\ß alt\ profil bulunmaktad\r: Genel,Titreßim, Sessiz, Yüksek ve Kulakl\k. Her profil,kißiselleßtirilebilir. Sol seçim tußuna [Menü] bas\n veyukar\/aßa©\ gezinme tußlar\n\ kullanarak Profiller'iseçin.
Aktif (Menü 7.1.1)
1. Profil listesi görüntülenir.
2. Profil listesinde etkinleßtirmek istedi©iniz profileilerleyin ve sol seçim tußuna [Tamam] ya daTamam tußuna bas\n.
3. Ard\ndan Etkinleßtir'i seçin.
Kißiselleßtir (Menü 7.1.2)
Profil listesinde istedi©iniz profile ilerleyin. Sol seçimtußuna ya da Tamam tußuna bast\ktan sonraKißiselleßtir'i seçin. Profil ayar\ seçene©i aç\l\r.] Arama uyar\ türü: Gelen aramalar için uyarı
türünü belirleyin.] Zil Tonu: Listeden istedi©iniz zil tonunu seçin.] Zil Sesi: Zil sesinin yüksekli©ini ayarlayın.] Mesaj uyarı tipi: Mesajlar için uyarı türünü
belirleyin.] Mesaj sesi: Mesajlar için uyar\ türünü belirleyin.] Tuß sesi: Ìstedi©iniz tuß sesini seçin.] Tuß ses seviyesi: Tuß sesinin seviyesini belirleyin.] Kapak sesi: Kapak sesini, istedi©iniz gibi
ayarlaman\z\ sa©lar.] Efekt ses seviyesi: Efekt sesinin seviyesini
belirleyin.] Aç/kapa ses sev.: Açma/kapatma ses seviyesini
belirleyin.] Otomatik Yanıtla: Bu ißlev, yaln\zca telefonunuz
bir handsfree (eller serbest) kitine ba©l\ oldu©undaetkinleßtirilir.
Ayarlar
60
Ayarlar
• Kapalı: Telefon, otomatik olarak yan\t vermez.
• 5 sn sonra: 5 saniye sonra telefon otomatikolarak yan\t verir.
• 10 sn sonra: 10 saniye sonra telefon otomatikolarak yan\t verir.
Yeni ad ver (Menü 7.1.3)
Profile istedi©iniz bir ismi verebilirsiniz.
1. Bir profilin ad\n\ de©ißtirmek için profil listesindeistedi©ini profile ilerleyin ve sol seçim tußu yada Tamam tußuna bast\ktan sonra Yeni ad ver'iseçin.
2. |stedi©iniz ismi girin ve Tamam tußuna ya da solseçim tußuna [Tamam] bas\n.
Tarih & Saat Menü 7.2
Tarih ve saatle ilgili ißlevleri ayarlayabilirsiniz.
Tarih (Menü 7.2.1)
]] Tarih Ayarla
Günün tarihini girebilirsiniz.
] Tarih formatı
Tarih biçimini GG/AA/YYYY, AA/GG/YYYY veyaYYYY/AA/GG olarak ayarlayabilirsiniz. (G: Gün /A: Ay / Y: Y\l)
Saat (Menü 7.2.2)
]] Zaman Ayarla
Geçerli saati girebilirsiniz.
] Zaman formatı
Saat biçimini 24 ve 12 saatlik biçimlerden biriniseçerek ayarlayabilirsiniz.
Telefon Menü 7.3
Telefonla ilgili ißlevleri ayarlayabilirsiniz.
Ekran Ayarlar\ (Menü 7.3.1)
] Duvar ka©\d\: Bekleme modunda görüntülenecek
Dikkat] Ttreßim, Sessiz ve Kulakl\k profillerine yeni ad
verilemez.
61
Ayarlar
arka plan resimlerini seçebilirsiniz.- Ana LCD
- Alt LCD
Varsay\lan
, , veya tußuna basarak duvar ka©\d\animasyonu veya resmi seçebilirsiniz.
Klasörüm
Duvar ka©\d\ olarak bir resim veya animasyonseçebilirsiniz.
]] Menü stili: Temiz, |peksi, Renkli ve Sakin olmaküzere 4 renk düzeni türü seçebilirsiniz.
]] Selam mesajı: Aç\k seçene©ini ißaretlerseniz,bekleme modunda görüntülenen metnidüzenleyebilirsiniz.
]] Zemin aydınlatma: Dahili ekrandaki \ß\©\n yanmasüresini ayarlayabilirsiniz.
]] Bilgi penceresi: Seçili menüyü açmadanmenünün mevcut durumunu görüntüleyebilirsiniz.Durum ekran\n alt taraf\nda görüntülenir.
]] Network ad\: AÇIK seçerseniz, Íebeke ad\(servis sa©lay\c\ ad\) |ç LCD’de görüntülenir.
Diller (Menü 7.3.2)
Telefonunuzun ekran\nda görüntülenen metinlerindilini de©ißtirebilirsiniz. Bu de©ißiklik, Dil Girißmodunu da etkiler.
Ça©r\ Ayar\ Menü 7.4
Ayarlar menüsündeyken [Tamam] tußunabasarak, aramayla ilgili menüyü ayarlayabilirsiniz.
Ça©r\ Yönlendirme (Menü 7.4.1)
Arama yönlendirme servisi, gelen sesli aramalar\,faks aramalar\n\ ve veri aramalar\n\ baßka birnumaraya yönlendirebilmenizi sa©lar. Ayr\nt\l\ bilgiiçin, servis sa©lay\c\n\za baßvurun.
]] Tüm sesli ara.: Sesli aramalar\ koßulsuz olarakyönlendirir.
]] Meßgulse: Telefon kullan\mdaysa sesli aramalar\yönlendirir.
]] Cevap yoksa: Yan\tlamad\©\n\z sesli aramalar\yönlendirir.
]] Ulaß\lam\yorsa: Telefon kapal\ veya kapsamaalan\ d\ß\ndaysa sesli aramalar\ yönlendirir.

Ayarlar
62
Ayarlar
]] Bütün veri ça©r\lar\: Bilgisayar ba©lant\s\na sahipbir numaraya koßulsuz olarak yönlendirir.
]] Bütün fax ça©r\lar\: Faks ba©lant\s\na sahip birnumaraya koßulsuz olarak yönlendirir.
]] Hepsini iptal et: Tüm arama yönlendirmehizmetlerini iptal eder.
Alt menülerArama yönlendirme menülerinde aßa©\daki altmenüler bulunur.
] Aktif: |lgili servisi etkinleßtirir.
- Telesekreter merkezi: Mesaj merkezine aktar\r.Bu ißlev Tüm veri aramalar\ ve Tüm faksaramalar\ menülerinde görüntülenmez.
- Di©er numaraya: Yönlendirmenin yap\laca©\numaray\ girer.
- Favori numaraya: En son yönlendirilen 5numaray\ görüntüleyebilirsiniz.
] |ptal Et: |lgili servisi devre d\ß\ b\rak\r.
] Durum Kontr.: |lgili servisin durumunu görüntüler.
Cevap modu (Menü 7.4.2)
] Kapak aç: Bu menüyü seçerseniz, gelen aramay\kapa©\ açarak yan\tlayabilirsiniz.
] Herhangi bir tuß: Bu menüyü seçerseniz, gelenaramay\ [Bitir] tußu d\ß\ndaki tüm tußlarlayan\tlayabilirsiniz.
] Sadece gönder: Bu menüyü seçerseniz, gelenaramay\ yaln\zca [Gönder] tußuylayan\tlayabilirsiniz.
Numaram\ gönder (Menü 7.4.3)
(Íebeke ve aboneli©e ba©lıdır.)
] Aç\k: Telefon numaran\z\ üçüncü ßah\slaragönderebilirsiniz. Numaran\z al\c\n\n telefonundagörüntülenir.
] Kapal\: Telefon numaran\z görüntülenmez.
] Íebekeye göre belirle: Bu seçene©iißaretlerseniz, telefon numaran\z\ hat 1 veya hat 2gibi iki hat servisine ba©l\ olarak gönderebilirsiniz.
63
Ayarlar
Ça©r\ Bekletme (Menü 7.4.4)
(ßebekeye ba©l\d\r)
] Aktif: Etkinleßtir seçene©ini ißaretlerseniz,bekleyen (gelen) aramay\ kabul edebilirsiniz.
] |ptal Et: |ptal seçene©ini ißaretlerseniz, bekleyen(gelen) aramay\ kabul edip onaylayamazs\n\z.
] Durum Kontr.: Bekleyen arama durumunugörüntüler.
Dakika uyarıcı (Menü 7.4.5)
Aç\k seçene©ini ißaretlerseniz, görüßme süresinceher dakikada bir verilen uyar\ sesiyle arama süresinidenetleyebilirsiniz.
Oto. yeni. ara (Menü 7.4.6)
] Aç\k: Bu ißlev etkinleßtirildi©inde, araman\nbaßar\s\z olmas\ durumunda telefon otomatikolarak yeniden aramay\ dener.
] Kapal\: |lk araman\n baßar\s\z olmas\ durumundatelefonunuz yeniden aramay\ denemez.
Güvenlik Menü 7.5
PIN kodu iste©i (Menü 7.5.1)
Bu menüde, telefon, aç\ld\©\nda SIM kart\n\z\n PINkodunu soracak ßekilde ayarlayabilirsiniz. Bu ißlevetkinleßtirilirse, PIN kodunu girmeniz istenir.
1. Güvenlik ayarlar\ menüsünde PIN kodu iste©i
seçene©ini ißaretleyip, ard\ndan [Tamam]dü©mesine bas\n.
2. Açık/Kapalı olarak seçebilirsiniz.
3. Ayar\ de©ißtirmek isterseniz, telefonu açt\©\n\zdaPIN kodunu girmeniz gerekir.
4. PIN kodunu üç defadan fazla hatal\ girerseniz,telefon kilitlenir. PIN bloke edilirse, PUK kodunugirmeniz gerekir.
5. PUK kodunuzu en fazla 10 defa girebilirsiniz. PUKkodunu 10 defadan fazla hatal\ girerseniz,telefonunuzun kilidini açamazs\n\z. Servissa©lay\c\n\za baßvurman\z gerekir.

Ayarlar
64
Ayarlar
Telefon kilidi (Menü 7.5.2)
Telefonun yetkisiz kißilerce kullan\lmas\n\ önlemekiçin, güvenlik kodunu kullanabilirsiniz. Telefonuaçt\©\n\zda, telefon kilidini Aç\ld\©\nda'yaayarlad\©\n\zda telefon güvenlik kodu ister. Telefonkilidini SIM de©ißti©inde'ye ayarlarsan\z, telefonyaln\zca SIM kart\n\z\ de©ißtirdi©inizde güvenlikkodunu ister.
Ça©r\ Engelleme (Menü 7.5.3)
Arama engelleme servisi, telefonunuzun belirlikategorilerdeki aramalar\ yapmas\n\ veya almas\n\engeller. Bu ißlev, arama engelleme ßifresini sorar.Aßa©\daki alt menüleri görebilirsiniz.] Tüm yap\lan: Tüm giden aramalar\ engelleme
servisi.] Uluslararası: Tüm giden uluslararas\ aramalar\
engelleme servisi.] Dolaß\mda uluslararas\: Kendi ülkemdeki ßebeke
hariç tüm giden uluslararas\ aramalar\ engellemeservisi.
] Tüm alınan: Tüm gelen aramalar\ engellemeservisi.
] Dolaß\mda gelen arama: Yurtd\ß\ndayken gelentüm aramalar\ engelleme servisi.
] Hepsini iptal et: Tüm arama engellemeservislerini iptal edebilirsiniz.
] Íifre de©iß.: Arama Engelleme Servisi ßifresinide©ißtirebilirsiniz.
Alt menüler
• Aktif
Íebekeden arama s\n\rland\rma servisininetkinleßtirilmesi iste©inde bulunulmas\n\ sa©lar.
• |ptal Et
Seçili arama s\n\rland\rma servisini devre d\ß\b\rak\r.
• Durum Kontr.
Aramalar\n engellenip engellenmedi©ini denetler.
Sabit aranan numara (Menü 7.5.4)
(SIM karta ba©l\d\r)
Giden aramalar\ seçili telefon numaralar\ iles\n\rland\rabilirsiniz. Numaralar PIN2 kodunuztaraf\ndan korunur.
65
Ayarlar
] Aktif: Giden aramalar\ seçili telefon numaralar\ iles\n\rland\rabilirsiniz.
] |ptal Et: Sabit arama ißlevini devre d\ß\b\rakabilirsiniz.
] Numara listesi: Sabit numara olarak kaydedilennumaralar\n listesini görüntüleyebilirsiniz.
PIN de©ißtir (Menü 7.5.5)
PIN, telefonun yetkisiz kißilerce kullan\lmas\n\önlemek için kullan\lan Personal IdentificationNumber’\n (Kißisel Kimlik Numaras\) k\saltmas\d\r.
Aßa©\daki erißim kodlar\n\ de©ißtirebilirsiniz: PIN
Kodu, PIN2 Kodu, Güvenlik kodu.
1. Güvenlik kodu/PIN2 kodlar\n\ de©ißtirmekisterseniz, orijinal kodunuzu girip [Tamam]tußuna bas\n.
2. Yeni Güvenlik kodu/PIN2 kodunu girip, do©rulay\n.
Íebeke Menü 7.6
Otomatik veya manuel kaydedilecek bir ßebekeseçebilirsiniz. Íebeke seçimi genellikle Otomatikolarak ayarlan\r.
Íebeke seçimi (Menü 7.6.1)
Bir ßebeke türü seçebilirsiniz.
OtomatikOtomatik modu seçerseniz, telefon sizin yerinizeßebekeyi otomatik olarak arar ve seçer. Otomatikmodu bir kez seçtikten sonra, güç aç\l\p kapat\lsadahi telefon “Otomatik” olarak ayarlanacakt\r.
ManuelTelefon kullan\labilir ßebekelerin listesini bulup, sizegösterir. Bunun ard\ndan kullanmak istedi©inizßebekeyi, kendi ülkenizdeki ßebeke operatörüyledolaß\m anlaßmas\ varsa, seçebilirsiniz. Telefonseçili ßebekeye erißemezse, size baßka bir ßebekeseçme olana©\ sunar. Telefonu kapatt\©\n\zda,telefon ßebeke ayar\n\ Otomatik olacak ßekildes\f\rlar.
Tercih edil.Tercih edilen ßebekelerin listesini ayarlayabilirsiniz;telefon, di©er ßebekelere kaydetmeye çal\ßmadanönce listedeki ilk ßebekeye kaydetmeye çal\ß\r. Buliste, telefonda bulunan önceden tan\mlanm\ß,bilinen ßebekeler listesinden ayarlan\r.
Ayarlar
66
Ayarlar
Bant seçimi (Menü 7.6.2)
Bir ßebeke türünü seçebilirsiniz.
EGSM/DCSÍebeke durumuna ba©l\ olarak EGSM/PCSseçebilirsiniz.
Yalnız PCS Íebeke durumuna ba©l\ olarak Yalnız PCSseçebilirsiniz.
GPRS'e ba©lan Menü 7.7
Çeßitli durumlara ba©l\ olarak GPRS servisiniayarlayabilirsiniz.
Açılırken (Menü 7.6.1)
Bu menüyü seçerseniz, telefonu açt\©\n\zda otomatikolarak GPRS ßebekesine kaydolunur. Olußturulmußbir WAP ya da PC çevirmeli a© uygulamas\n\baßlatarak, telefon ve ßebeke aras\nda ba©lant\sa©lanabilir ve veri transferi yap\labilir. Uygulamay\sona erdirdi©inizde, GPRS ba©lant\s\ sona ererancak GPRS ßebekesi kayd\ devam eder.
Gerekti©inde (Menü 7.6.2)
Bu menüyü seçerseniz, bir WAP servisineba©land\©\n\zda GPRS ba©lant\s\ kurulur, WAPba©lant\s\n\ sona erdirdi©inizde kapan\r.
Haf\za durumu Menü 7.8
Her haf\za birimindeki, SIM haf\zas\ndaki boß alan\ve haf\za kullan\m\n\ kontrol edebilirsiniz. Her haf\zamenüsüne gidebilirsiniz.
Ayarlar\ S\f\rla Menü 7.9
Telefonun baßlang\çtaki fabrika ayarlar\na dönmesinisa©layabilirsiniz. Bu ißlevi etkinleßtirmek içinGüvenlik kodu gereklidir.

Tarayıcı
Bankac\l\k, haberler, hava durumu raporlar\ veuçuß bilgileri gibi birçok WAP (Kablosuz UygulamaProtokolü) hizmetlerine ulaßabilirsininiz. Buhizmetler özel olarak mobil telefonlar içintasarlanm\ßt\r ve WAP servis sa©lay\c\lar\taraf\ndan sa©lan\r.
Hangi WAP hizmetlerinin sunuldu©unu, fiyatlar\ vetarifeleri ßebeke operatörünüzden ve/veyaservislerini kullanmak istedi©iniz servissa©lay\c\lardan ö©renebilirsiniz. Servis sa©lay\c\lar,kendi servislerini nas\l kullanabilece©inizle ilgilibilgiler de sa©layacakt\r.
Ba©lan\ld\©\nda ana sayfa görüntülenecektir.Sayfan\n içeri©i servis sa©lay\c\ya ba©l\d\r. URLadresini girerek istedi©iniz web sitesi sayfas\naulaßabilirsiniz. Taray\c\dan istedi©iniz zamanç\kmak için ( )tußuna bas\n. Telefon beklememenüsüne geri döner.
WAP taray\c\yla gezinmeTelefon tußlar\ ya da WAP taray\c\ menüsünükullanarak internette gezebilirsiniz.
Telefon tußlar\n\ kullanma
Internette gezinirken telefon tußlar\, telefon
modunda oldu©undan farkl\ çal\ß\r.
WAP taray\c\ menüsünün kullan\lmas\
Mobil Web'de gezerken kullan\labilecek çeßitlimenü seçenekleri bulunmaktad\r.
Giriß sayfas\ Menü 8.1
Ana sayfaya ba©lan\r. Ana sayfa, etkinleßtirilmißprofilde tan\mlanan site olabilir. Siz etkinleßtirilmißprofilde tan\mlamazsan\z, Servis Sa©lay\c\s\taraf\ndan tan\mlanacakt\r.
Tuß Simge yönergeleri
|çerikte sat\rlar aras\nda hareketetmenizi sa©lar
Bir önceki sayfaya dönmenizisa©lar
Seçenekleri seçer ve ißlemlerionaylar
Dikkat] WAP taray\c\ menüsü, taray\c\ sürümüne göre
farkl\l\k gösterebilir.
Tarayıcı
67

Tarayıcı
68
Tarayıcı
S\k Kullan\lanlar Menü 8.2
Bu menü, daha sonra kolay ulaßabilmeniz içinistedi©iniz web sayfalar\n\n URL adreslerinikaydetmenizi sa©lar. Telefonunuzda çok say\daönceden yüklenmiß yer imi bulunmaktad\r. Buönceden yüklenmiß yer imleri silinemez.
Yeni bir yer imi eklemek için,
1. Sol seçim tußuna [Seçenekler] bas\n.
2. Yeni ekle seçin ve Tamam tußuna bas\n.
3. |stedi©iniz URL'yi ve baßl\©\ girdikten sonraTamam tußuna bas\n.
✽ Ipucu: Sembol girmek için “ ” ve “ ”tußlarını kullanın. "." için “ ” tußunabasın.
Yer imlerini olußturduktan sonra aßa©\dakiseçenekleri kullanabilirsiniz.
] Ba©lan: Seçin yer imine ba©lan\r.
] Yeni ekle: Yeni bir yer imi olußturmak için bunuseçin.
] Düzenle: Seçilen yer iminin URL’sini ve/veya
baßl\©\n\ düzenleyebilirsiniz.
] Sil: Seçilen yer imini siler.
] Tümünü sil: Tüm yer imlerini siler.
URL’ye git Menü 8.3
|stedi©iniz siteye do©rudan ba©lanabilirsiniz. Belirlibir URL girdikten sonra, Tamam tußuna bas\n.
Ayarlar Menü 8.4
|nternet servisiyle ilgili profil, önbellek, çerez vegüvenlik ö©elerini ayarlayabilirsiniz.
Profiller (Menü 8.4.1)
Profil, |nternet'e ba©lanmak için kullan\lan ßebekebilgileridir.
Her profilde aßa©\daki alt menüler bulunur:
] Aktif: Seçilen profili etkinleßtirir.
] Ayarlar: Seçilen profildeki WAP ayarlar\n\düzenlemek ve de©ißtirmek için bunu kullan\n.
- Giriß sayfas\: Bu ayar, ana sayfa olarak

69
Tarayıcı
kullanmak istedi©iniz sitenin adresini (URL)girebilmenizi sa©lar. URL’nin baß\nahttp://yazman\za gerek yoktur; çünkü WAPtaray\c\s\ bunu otomatik olarak ekler.
- Taß\y\c\: Taß\y\c\ veri servisiniayarlayabilirsiniz.
1 Veri
2 GPRS
- Veri ayarlar\: Yaln\zca Taß\y\c\ servisi olarakVeri ayarlar\n\ seçerseniz, görüntülenir.
Numara çevir: WAP a© geçidine erißmek içinaranacak telefon numaras\n\ girin.
Kull. adı: Çevirmeli sunucunuz için kullan\c\kimli©i (WAP a© geçidi için DE˝|L).
Íifre: Çevirmeli sunucunuzun sizitan\mlayabilmesi için gereken ßifre (WAP a©geçidi için DE˝|L).
Ça©r\ türü seç: Veri arama türünü seçin:Analog veya Dijital (ISDN).
|ßlemsiz süre: Zaman aß\m\ süresi girmenizgerekir. Bu süreyi girdikten sonra, veri girilseveya aktar\lsa bile WAP gezinme servisikullan\lamaz.
- GPRS Ayarlar\: Servis ayarlar\ yaln\zca taß\y\c\servisi olarak GPRS seçilirse kullan\labilir.
APN: GPRS’in APN’sini girin.
Kull. adı: APN sunucunuz için tan\mlanankullan\c\lar.
Íifre: APN sunucunuzun istedi©i ßifre.
- Yetkili sunucu ayarlar\
Yetkili sunucu: Yetkili sunucular\ etkinleßtirirya da iptal eder.
IP adresi: Kulland\©\n\z Yetkili sunucunun IPadresini girin.
Port: Yetkili sunucu portunu girin.
- DNS ayarları
Birincil sunucu: Kulland\©\n\z birincil DNS'ninIP adresini girin.
|kincil sunucu: Kulland\©\n\z ikincil DNS'nin IPadresini girin.
] Yeni ad ver: Profil ad\n\ de©ißtirebilirsiniz.
] Yeni ekle: Yeni bir profil ekleyebilirsiniz.

Tarayıcı
70
Tarayıcı
Ön bellek (Menü 8.4.2)
Erißti©iniz bilgiler ve servisler telefonun önbelle©inekaydedilir.
Çerezler (Menü 8.4.3)
Erißti©iniz bilgiler ve servisler telefonun önbelle©inekaydedilir.
Önbelle©i sil (Menü 8.4.4)
Önbellekte kay\tl\ tüm içeri©i siler.
Çerezleri sil (Menü 8.4.5)
Çerezlerde kay\tl\ tüm içeri©i siler.
Güvenlik (Menü 8.4.6)
Mevcut sertifikalar\n listesi görüntülenir.
] Yetki: Telefonunuzda kay\tl\ yetki sertifikalar\n\nbir listesini görebilirsiniz.
] Kißisel: Telefonunuzda kay\tl\ kißisel sertifikalar\nbir listesini görebilirsiniz.
Dikkat] Önbellek, verilerin geçici olarak kaydedilmesi için
kullan\lan bir ara bellektir.
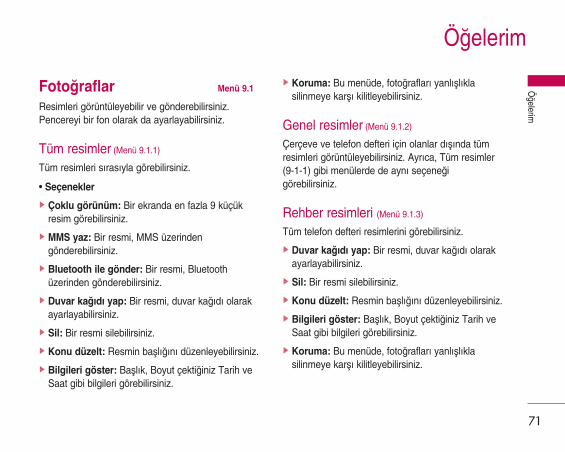
Ö©elerim
71
Ö©elerim
Foto©raflar Menü 9.1
Resimleri görüntüleyebilir ve gönderebilirsiniz.Pencereyi bir fon olarak da ayarlayabilirsiniz.
Tüm resimler (Menü 9.1.1)
Tüm resimleri s\ras\yla görebilirsiniz.
• Seçenekler
] Çoklu görünüm: Bir ekranda en fazla 9 küçükresim görebilirsiniz.
] MMS yaz: Bir resmi, MMS üzerindengönderebilirsiniz.
] Bluetooth ile gönder: Bir resmi, Bluetoothüzerinden gönderebilirsiniz.
] Duvar ka©\d\ yap: Bir resmi, duvar ka©\d\ olarakayarlayabilirsiniz.
] Sil: Bir resmi silebilirsiniz.
] Konu düzelt: Resmin baßl\©\n\ düzenleyebilirsiniz.
] Bilgileri göster: Baßl\k, Boyut çekti©iniz Tarih veSaat gibi bilgileri görebilirsiniz.
] Koruma: Bu menüde, foto©raflar\ yanl\ßl\klasilinmeye karß\ kilitleyebilirsiniz.
Genel resimler (Menü 9.1.2)
Çerçeve ve telefon defteri için olanlar d\ß\nda tümresimleri görüntüleyebilirsiniz. Ayr\ca, Tüm resimler(9-1-1) gibi menülerde de ayn\ seçene©igörebilirsiniz.
Rehber resimleri (Menü 9.1.3)
Tüm telefon defteri resimlerini görebilirsiniz.
] Duvar ka©\d\ yap: Bir resmi, duvar ka©\d\ olarakayarlayabilirsiniz.
] Sil: Bir resmi silebilirsiniz.
] Konu düzelt: Resmin baßl\©\n\ düzenleyebilirsiniz.
] Bilgileri göster: Baßl\k, Boyut çekti©iniz Tarih veSaat gibi bilgileri görebilirsiniz.
] Koruma: Bu menüde, foto©raflar\ yanl\ßl\klasilinmeye karß\ kilitleyebilirsiniz.

Ö©elerim
72
Ö©elerim
Tümünü sil (Menü 9.1.4)
Listedeki tüm dosyalar\ siler.
Resimler Menü 9.2
Medya albümüne, k\sa mesajlar için kullan\labilecek,varsay\lan ya da indirilen resimleri ekleyebilirsiniz.
• Seçenekler
] Mesaj yaz: Íebekeden indirilen görüntüler, SMSile gönderilebilir.
Melodiler Menü 9.3
Medya albümüne, k\sa mesajlar için kullan\labilecek,varsay\lan ya da indirilen sesleri ekleyebilirsiniz.
Varsay\lan sesler (Menü 9.3.1)
• Seçenekler
] Zil tonu yap: O s\rada seçilen ses, zil sesiyap\labilir.
] Metin/multimedya mesaj : Íebekeden indirilensesler, SMS, MMS hizmetiyle gönderilebilir.
] Bluetooth ile gönder: Íebekeden indirilen ses,Bluetooth ile gönderilebilir.
Ses kay\tlar\ (Menü 9.3.2)
Ses kay\tlar\n\ seçerseniz, aßa©\daki seçeneklerikullanabilirsiniz:
] Metin/multimedya mesaj yaz: Ses kaydedicidekay\tl\ sesler, MMS ile gönderilebilir.
] Bluetooth ile gönder: Kaydedilen seslerBluetooth ile gönderilebilir.
] Sil: Bir sesi silmenizi sa©lar.
] Yeni ad ver: Seçti©iniz bir ses yeni ad vermenizisa©lar.
MP3 zil sesi (Menü 9.3.3)
MP3'leri zil sesi olarak kullanabilirsiniz.
• Seçenekler
] Zil sesi yap: O s\rada seçili olan MP3 sesi, zilsesi olarak ayarlanabilir.
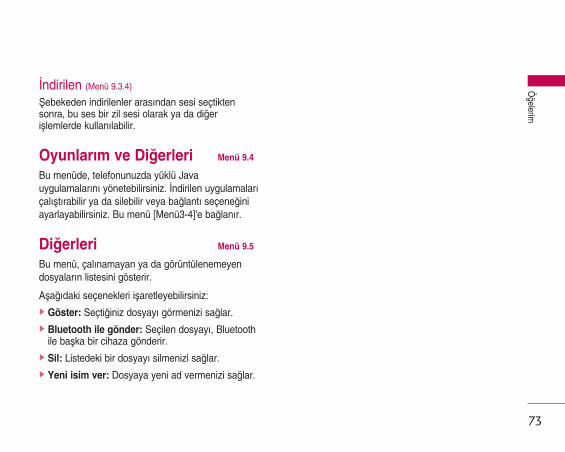
73
|ndirilen (Menü 9.3.4)
Íebekeden indirilenler aras\ndan sesi seçtiktensonra, bu ses bir zil sesi olarak ya da di©erißlemlerde kullan\labilir.
Oyunlarım ve Di©erleri Menü 9.4
Bu menüde, telefonunuzda yüklü Javauygulamalar\n\ yönetebilirsiniz. |ndirilen uygulamalar\çal\ßt\rabilir ya da silebilir veya ba©lant\ seçene©iniayarlayabilirsiniz. Bu menü [Menü3-4]'e ba©lan\r.
Di©erleri Menü 9.5
Bu menü, çal\namayan ya da görüntülenemeyendosyalar\n listesini gösterir.
Aßa©\daki seçenekleri ißaretleyebilirsiniz:] Göster: Seçti©iniz dosyay\ görmenizi sa©lar.] Bluetooth ile gönder: Seçilen dosyay\, Bluetooth
ile baßka bir cihaza gönderir.] Sil: Listedeki bir dosyay\ silmenizi sa©lar.] Yeni isim ver: Dosyaya yeni ad vermenizi sa©lar.
Ö©elerim
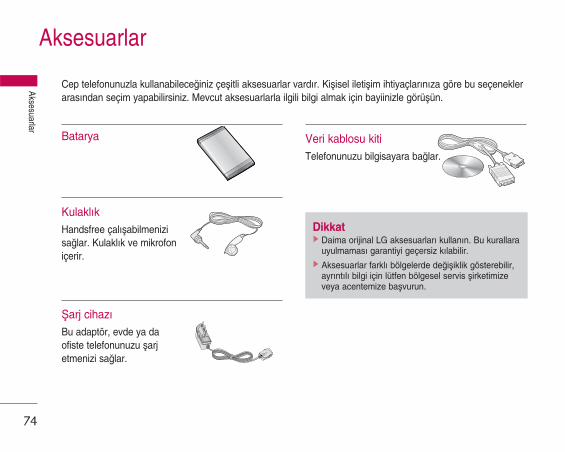
Batarya
Kulakl\kHandsfree çal\ßabilmenizi sa©lar. Kulakl\k ve mikrofoniçerir.
Íarj cihaz\Bu adaptör, evde ya da ofiste telefonunuzu ßarj etmenizi sa©lar.
Veri kablosu kitiTelefonunuzu bilgisayara ba©lar.
Cep telefonunuzla kullanabilece©iniz çeßitli aksesuarlar vard\r. Kißisel iletißim ihtiyaçlar\n\za göre bu seçenekleraras\ndan seçim yapabilirsiniz. Mevcut aksesuarlarla ilgili bilgi almak için bayiinizle görüßün.
Dikkat] Daima orijinal LG aksesuarlar\ kullan\n. Bu kurallara
uyulmamas\ garantiyi geçersiz k\labilir.] Aksesuarlar farkl\ bölgelerde de©ißiklik gösterebilir,
ayr\nt\l\ bilgi için lütfen bölgesel servis ßirketimizeveya acentemize baßvurun.
Aksesuarlar
74
Aksesuarlar

Teknik VerilerTeknik Veriler
75
GenelÜrün ad\ : KG245
Sistem : GSM 900 / DCS 1800 / PCS 1900
Ortam \s\s\Maksimum : +55°C
Minimum : -10°C


K G 245 U S E R G U I D ESome of contents in this manual may differ from yourphone depending on the software of the phone or yourservice provider.
ENGLISH

Table of Contents
2
Table of Contents
Introduction 6For Your Safety 7Guidelines for safe andefficient use 8
KG245 features 12 Parts of the phoneDisplay information 16
Getting started 18Installing the SIM card andthe handset batteryCharging the Battery 19Disconnecting the adapter 20Access Codes 22
General Functions 24Making and answering callsAdjusting the volume Answering a call 25Entering textContacts 28In-call menu
Multiparty or conference calls 30
Menu Tree 32Selecting functions andoptions 34Contacts 35SearchAdd newCaller groups 36Speed dialsOwn numberMy Business card 37Settings
Call register 39Missed callsReceived callsDialled callsAll callsDelete recent calls 40Call chargesCall duration
Call costs
Settings
GPRS information 41Call duration
Data volumes
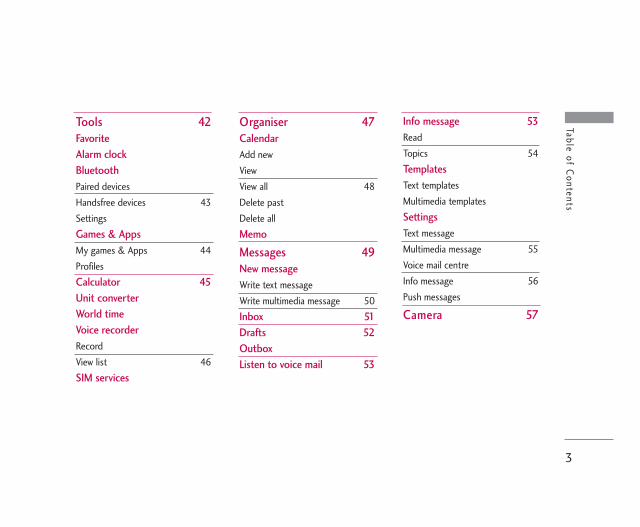
3
Table of Contents
Tools 42FavoriteAlarm clockBluetoothPaired devices
Handsfree devices 43
Settings
Games & AppsMy games & Apps 44
Profiles
Calculator 45Unit converterWorld timeVoice recorderRecord
View list 46
SIM services
Organiser 47CalendarAdd new
View
View all 48
Delete past
Delete all
Memo
Messages 49New messageWrite text message
Write multimedia message 50
Inbox 51Drafts 52 OutboxListen to voice mail 53
Info message 53Read
Topics 54
TemplatesText templates
Multimedia templates
SettingsText message
Multimedia message 55
Voice mail centre
Info message 56
Push messages
Camera 57

Table of Contents
4
Settings 59ProfilesActivate
Personalise
Rename
Date & Time 60Date
Time
HandsetDisplay settings
Language 61
Call settingCall divert
Answer mode 62
Send my number
Call waiting
Minute minder
Auto redial
Security 63PIN code request
Handset lock
Call barring
Fixed dial number 64
Change codes
NetworkNetwork select
Band select 65
GPRS attachSwitch on
When needed 66
Memory statusReset settings
Browser 67HomeBookmarks 68Go to URLSettingsProfiles
Cache 69
Cookie 70
Clear cache
Clear cookie
Security
Table of Contents

5
My stuff 71PhotosAll pictures
General pictures
Phonebook pictures
Delete all
Images 72SoundsDefault sounds
Voice records
MP3 ringtones
Downloaded
Games & Apps 73Others
Accessories 74Technical data 75
Table of Contents
Congratulations on your purchase of the advanced andcompact KG245 mobile phone, designed to operatewith the latest digital mobile communicationtechnology.
This user’s guide contains important information onthe use and operation of this phone. Please read all theinformation carefully for optimal performance and toprevent any damage to or misuse of the phone. Anychanges or modifications not expressly approved inthis user’s guide could void your warranty for thisequipment.
Introduction
6
Introduction

For Your Safety
7
For Your Safety
Please read these simple guidelines. Not followingthese guidelines may be dangerous or illegal. Furtherdetailed information is given in this manual.
Warning] Mobile Phones must be switched off at all times in
aircrafts.] Do not hold the phone in your hand while driving.] Do not use your phone near petrol stations, fuel
depots, chemical plants or blasting operations.] For your safety, use ONLY specified ORIGINAL
batteries and chargers.] Do not handle the phone with wet hands while it is
being charged. It may cause an electric shock orseriously damage your phone.
] Keep the phone in a safe place out of small children’sreach. It includes small parts which, if detached, maycause a choking hazard.
Caution] Switch off the phone in any area where required by
special regulations. For example, do not use yourphone in hospitals or it may affect sensitive medicalequipment.
] Emergency calls may not be available under allmobile networks. Therefore, you should neverdepend solely on your mobile phone for emergencycalls.
] Only use ORIGINAL accessories to avoid damage toyour phone.
] All radio transmitters carry risks of interference withelectronics in close proximity. Minor interference mayaffect TVs, radios, PCs, etc.
] Batteries should be disposed off in accordance withrelevant legislation.
] Do not dismantle the phone or battery.

Guidelines for safe and efficient use
8
Please read these simple guidelines. Not followingthese guidelines may be dangerous or illegal. Furtherdetailed information is given in this manual.
Exposure to radio frequency energyRadio wave exposure and Specific AbsorptionRate (SAR) information
This mobile phone model KG245 has been designed tocomply with applicable safety requirements forexposure to radio waves. This requirement is based onscientific guidelines that include safety marginsdesigned to assure the safety of all persons, regardlessof age and health.] The radio wave exposure guidelines employ a unit of
measurement known as the Specific Absorption Rate,or SAR. Tests for SAR are conducted usingstandardised methods with the phone transmitting atits highest certified power level in all used frequencybands.
] While there may be differences between the SARlevels of various LG phone models, they are alldesigned to meet the relevant guidelines forexposure to radio waves.
] The SAR limit recommended by the InternationalCommission on Non-Ionizing Radiation Protection(ICNIRP) is 2W/kg averaged over ten (10) gram oftissue.
] The highest SAR value for this model phone testedby DASY4 for use at the ear is 0.122 W/kg (10g).
] SAR data information for residents incountries/regions that have adopted the SAR limitrecommended by the Institute of Electrical andElectronics Engineers (IEEE) is 1.6 W/kg averagedover one (1) gram of tissue (for example USA,Canada, Australia and Taiwan).
Product care and maintenanceWARNING! Only use batteries, chargers andaccessories approved for use with this particular phonemodel. The use of any other types may invalidate anyapproval or warranty applying to the phone, and may bedangerous.
] Do not disassemble this unit. Take it to a qualifiedservice technician when repair work is required.
] Keep away from electrical appliances such as a TV's,radios or personal computers.
Guidelines for safe and efficient use
9
Guidelines for safe and efficient use
] The unit should be kept away from heat sources suchas radiators or cookers.
] Never place your phone in a microwave oven as it willcause the battery to explode. Only authorizedpersonnel should service the phone and itsaccessories. Faulty installation or service may result inaccidents and consequently invalidate the warranty.
] Do not drop.] Do not subject this unit to mechanical vibration or
shock.] The coating of the phone may be damaged if
covered with wrap or vinyl wrapper.] Do not use harsh chemicals (such as alcohol,
benzene, thinners, etc.) or detergents to clean yourphone. There is a risk of this causing a fire.
] Do not subject this unit to excessive smoke or dust.] Do not keep the phone next to credit cards or
transport tickets; it can affect the information on themagnetic strips.
] Do not tap the screen with a sharp object as it maydamage the phone.
] Do not expose the phone to liquid or moisture.
] Use accessories, such as earphones and headsets,with caution. Ensure that cables are tucked awaysafely.
] Please remove the data cable before powering onthe handset.
Electronics devicesAll mobile phones may get interference, whichcould affect performance.
] Do not use your mobile phone near medicalequipment without requesting permission. Avoidplacing the phone over pacemakers (i.e. in yourbreast pocket.)
] Some hearing aids might be disturbed by mobilephones.
] Minor interference may affect TVs, radios, PCs, etc.
Road safetyCheck the laws and regulations on the use ofmobile phones in the areas when you drive.
] Do not use a hand-held phone while driving.

] Give full attention to driving.] Use a hands-free kit, if available.] Pull off the road and park before making or
answering a call if driving conditions so require.] RF energy may affect some electronic systems in
your motor vehicle such as a car stereo or safetyequipment.
] If your vehicle is equipped with an air bag, do notobstruct it with installed or portable wirelessequipment. It can cause serious injury due toimproper performance.
If you are listening to music whilst out and about, pleaseensure that the volume is at a reasonable level so thatyou are aware of your surroundings. This is particularlyimperative when attempting to cross the street.
Avoid damage to your hearingDamage to your hearing can occur if you are exposedto loud sound for long periods of time. We thereforerecommend that you do not turn on or off the handsetclose to your ear. We also recommend that music andcall volumes are set to a reasonable level.
Blasting areaDo not use the phone where blasting is in progress.Observe restrictions, and follow any regulations orrules.
Potentially explosive atmospheres] Do not use the phone at a refueIling point. Don't
use near fuel or chemicals.] Do not transport or store flammable gas, liquid, or
explosives in the compartment of your vehicle, whichcontains your mobile phone and accessories.
In aircraftWireless devices can cause interference in aircraft.
] Turn off your mobile phone before boarding anyaircraft.
] Do not use it on the ground without crewpermission.
Guidelines for safe and efficient use
10
Guidelines for safe and efficient use

Guidelines for safe and efficient use
11
ChildrenKeep the phone in a safe place out of small children'sreach. It includes small parts which if detached maycause a choking hazard.
Emergency callsEmergency calls may not be available under all mobilenetworks. Therefore, you should never depend solelyon your mobile phone for emergency calls. Check withyour local service provider.
Battery information and care] You do not need to completely discharge the battery
before recharging. Unlike other battery systems,there is no memory effect that could compromisethe battery's performance.
] Use only LG batteries and chargers. LG chargers aredesigned to maximize the battery life.
] Do not disassemble or short-circuit the battery pack.] Keep the metal contacts of the battery pack clean.
] Replace the battery when it no longer providesacceptable performance. The battery pack may berecharged hundreds of times until it needs replacing.
] Recharge the battery if it has not been used for along time to maximize usability.
] Do not expose the battery charger to direct sunlightor use it in high humidity, such as the bathroom.
] Do not leave the battery in hot or cold places, thismay deteriorate the battery performance.

KG245 features
12
KG245
features
Parts of the phone1. Earpiece
2. Main LCD] Top: Signal strength, battery level and various
function] Bottom: Soft key indications
3. Alpha numeric keys] In standby mode: Input numbers to dial
Hold down– International calls– Activate Voice mail
centre menuto – Speed dials– Activate Timer in Takepicture mode– Activate Flash on Takepicture mode
] In editing mode: Enter numbers & characters
4. Microphone
Menu Names
➊
➋
➍
➌
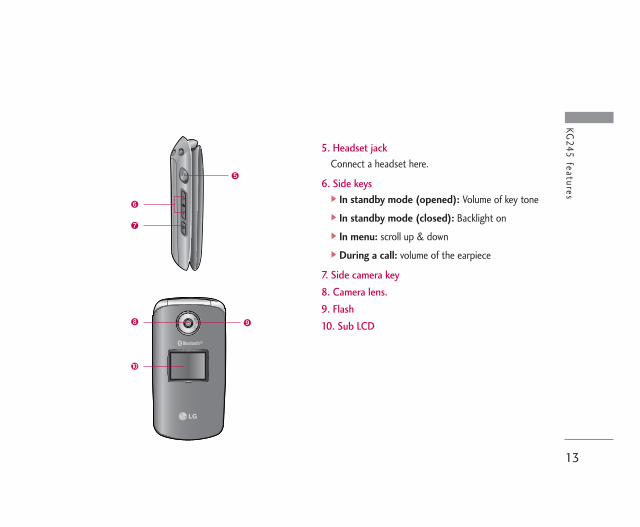
KG245
features
13
5. Headset jackConnect a headset here.
6. Side keys] In standby mode (opened): Volume of key tone] In standby mode (closed): Backlight on ] In menu: scroll up & down] During a call: volume of the earpiece
7. Side camera key
8. Camera lens.
9. Flash
10. Sub LCD➑
➓
➐
➏
➒
➎
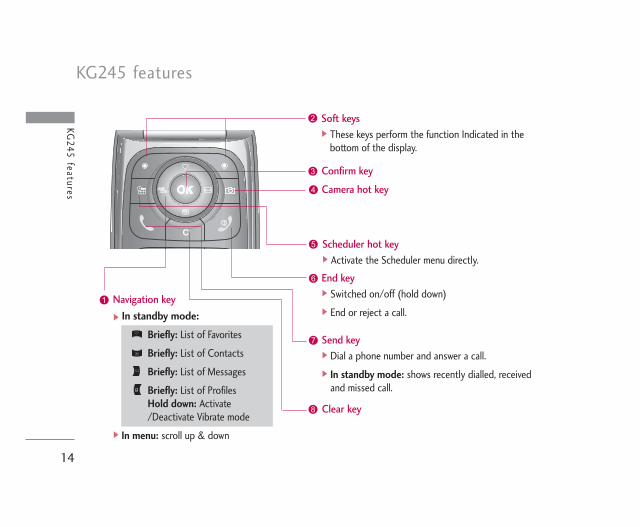
KG245 features
14
KG245
features
Rear view
!
$
^
*
@
Confirm key
End key] Switched on/off (hold down)] End or reject a call.
Send key] Dial a phone number and answer a call.] In standby mode: shows recently dialled, received
and missed call.
Clear key
#
&
Navigation key
] In standby mode:
Briefly: List of Favorites
Briefly: List of Contacts
Briefly: List of Messages
Briefly: List of ProfilesHold down: Activate/Deactivate Vibrate mode
] In menu: scroll up & down
Scheduler hot key] Activate the Scheduler menu directly.
%
Soft keys] These keys perform the function Indicated in the
bottom of the display.
Camera hot key

15
KG245
featuresHoles for acarrying strap
SIM cardsocket
Battery terminals
Battery latchSIM card terminals
Battery pack
Battery cover
Charger connector/Cable connector
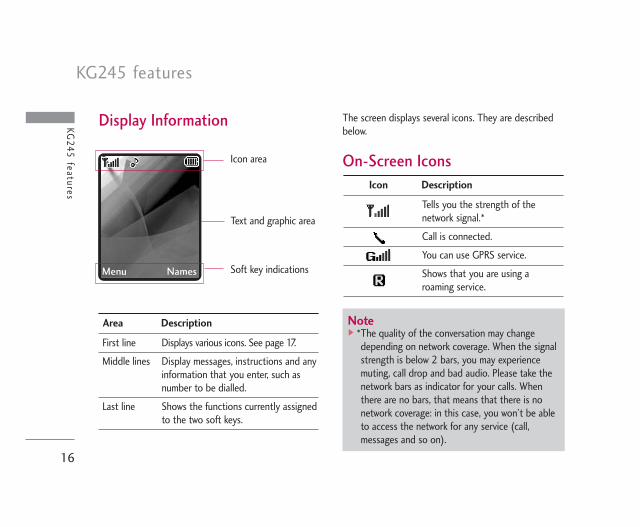
Display Information The screen displays several icons. They are describedbelow.
On-Screen Icons
KG245 features
16
KG245
features
Note] *The quality of the conversation may change
depending on network coverage. When the signalstrength is below 2 bars, you may experiencemuting, call drop and bad audio. Please take thenetwork bars as indicator for your calls. Whenthere are no bars, that means that there is nonetwork coverage: in this case, you won’t be ableto access the network for any service (call,messages and so on).
Icon area
Text and graphic area
Soft key indications
Icon Description
Tells you the strength of thenetwork signal.*
Call is connected.
You can use GPRS service.
Shows that you are using a roaming service.
Area Description
First line Displays various icons. See page 17.
Middle lines Display messages, instructions and anyinformation that you enter, such asnumber to be dialled.
Last line Shows the functions currently assignedto the two soft keys.
Menu Names
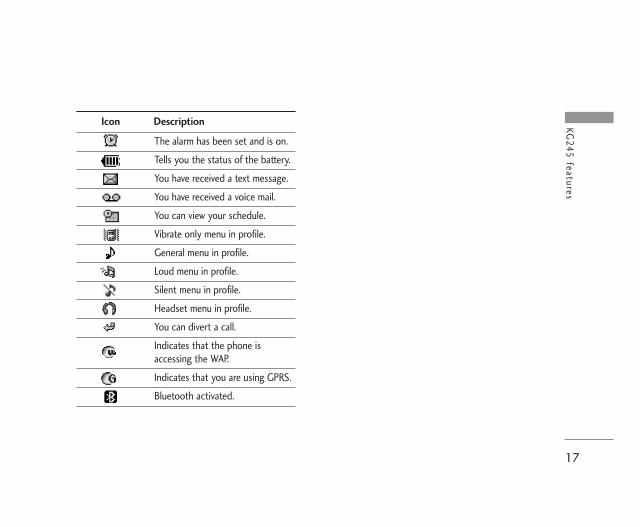
17
KG245
features
Icon Description
The alarm has been set and is on.
Tells you the status of the battery.
You have received a text message.
You have received a voice mail.
You can view your schedule.
Vibrate only menu in profile.
General menu in profile.
Loud menu in profile.
Silent menu in profile.
Headset menu in profile.
You can divert a call.
Indicates that the phone isaccessing the WAP.
Indicates that you are using GPRS.
Bluetooth activated.
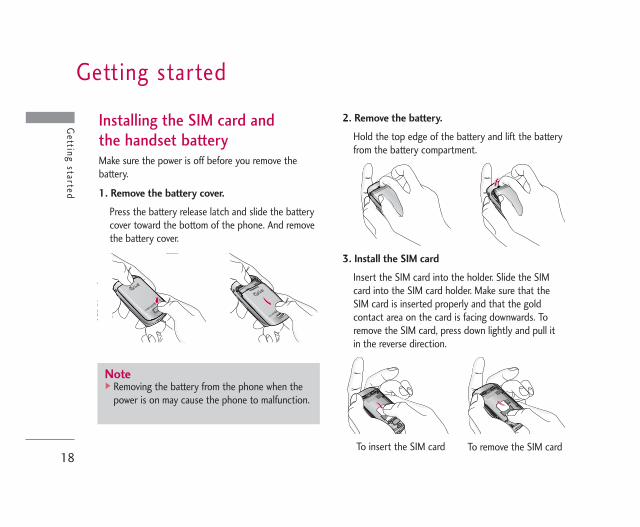
Installing the SIM card and the handset batteryMake sure the power is off before you remove thebattery.
1. Remove the battery cover.
Press the battery release latch and slide the batterycover toward the bottom of the phone. And removethe battery cover.
2. Remove the battery.
Hold the top edge of the battery and lift the batteryfrom the battery compartment.
3. Install the SIM card
Insert the SIM card into the holder. Slide the SIMcard into the SIM card holder. Make sure that theSIM card is inserted properly and that the goldcontact area on the card is facing downwards. Toremove the SIM card, press down lightly and pull itin the reverse direction.
Getting started
18
Getting started
Note] Removing the battery from the phone when the
power is on may cause the phone to malfunction.
To insert the SIM card To remove the SIM card

19
Getting started
4. Install the battery.
Insert the bottom of the battery first into thebottom edge of the battery compartment. Pushdown the top of the battery until it snaps intospace.
5. Replace the battery cover.
Lay the battery cover in place of the phone andslide it until the latch clicks.
Charging the BatteryTo connect the mains adapter to the phone, you musthave installed the battery.
Caution] The metal contact of the SIM card can be easily
damaged by scratches. Pay special attention tothe SIM card while handling. Follow the instructions supplied with the SIMcard.

Getting started
20
1. With the arrow facing you as shown in the diagrampush the plug of the battery adapter into the socketon the bottom of the phone until it clicks into place.
2. Connect the other end of the mains adapter to themains socket. Use only the included packing charger.
3. The moving bars of battery icon will stop aftercharging is complete.
Disconnecting the adapter1. When charging is finished, the moving bars of the
battery icon stop and ‘Battery Full’ is displayed onthe screen.
2. Unplug the adapter from the power outlet.Disconnect the adapter from the phone by pressingthe grey tabs on both sides of the connector andpull the connector out.
Getting started
Caution!] Do not force the connector as this may damage
the phone and/or the travel adapter.] Insert the battery pack charger vertically to wall
power outlet.] If you use the battery pack charger out of your
own country, use an attachment plug adapter forthe proper configuration.
] Do not remove your battery or the SIM card whilecharging.
Warning!] Unplug the power cord and charger during
lightning storms to avoid electric shock or fire.] Make sure that no sharp-edged items such as
animal teeth, nails, come into contact with thebattery. There is a risk of this causing a fire.
] Do not place or answer calls while charging thephone as it may short-circuit the phone and/orcause electric shock or fire.

21
Getting started
Note] Ensure the battery is fully charged before first
using the phone.] Do not remove the battery or SIM card while
charging.] In the case the battery is not properly charged,
please turn the phone off and on using the powerkey, then recharge the battery. After detachingand reattaching the battery, please recharge thebattery.

Getting started
22
Access Codes You can use the access codes described in this sectionto avoid unauthorised use of your phone. The accesscodes (except PUK and PUK2 codes) can be changedby using the Change codes feature [Menu 7-5-5]. See page 64.
PIN code (4 to 8 digits)The PIN (Personal Identification Number) codeprotects your SIM card against unauthorised use. ThePIN code is usually supplied with the SIM card. Whenthe PIN code request is set to Enable, your phonewill request the PIN code every time the phone isswitched on. When the PIN code request is set toDisable, your phone connects to the network directlywithout the PIN code.
PIN2 code (4 to 8 digits)The PIN2 code, supplied with some SIM cards, isrequired to access functions such as Advice of CallCharge and Fixed dial number. These functions areonly available if supported by your SIM card. Checkwith your network for further information.
PUK code (4 to 8 digits)The PUK (PIN Unblocking Key) code is required tochange a blocked PIN code. The PUK code may besupplied with the SIM card. If not, contact yournetwork operator for the code. If you lose the code,also contact your network operator.
PUK2 code (4 to 8 digits)The PUK2 code, supplied with some SIM cards, isrequired to change a blocked PIN2 code. If you losethe code, also contact your network operator.
Security code (4 to 8 digits)The security code protects the unauthorised use ofyour phone. The default security code is set to ‘0000’and the security code is required to delete all phoneentries and to activate the Reset settings menu. Also,the security code is required to enable or disable thephone lock function to prevent unauthorised use ofthe phone. The security code default setting can bemodified from the Security menu.
Getting started
23
Network PasswordThe netwok password is required when you use Callbarring [Menu 7-5-3] function. You obtain thepassword from your network operator when yousubscribe to this function. See page 63 for furtherdetails.
Getting started
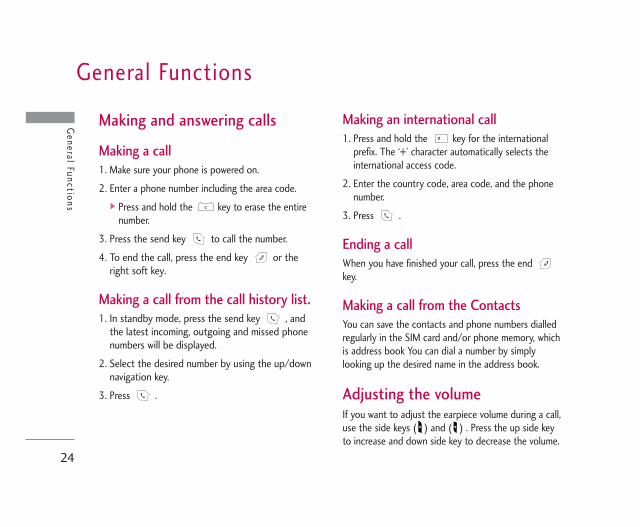
General Functions
24
General Functions
Making and answering calls
Making a call1. Make sure your phone is powered on.
2. Enter a phone number including the area code.] Press and hold the key to erase the entire
number.
3. Press the send key to call the number.
4. To end the call, press the end key or theright soft key.
Making a call from the call history list.1. In standby mode, press the send key , and
the latest incoming, outgoing and missed phonenumbers will be displayed.
2. Select the desired number by using the up/downnavigation key.
3. Press .
Making an international call1. Press and hold the key for the international
prefix. The ‘+’ character automatically selects theinternational access code.
2. Enter the country code, area code, and the phonenumber.
3. Press .
Ending a callWhen you have finished your call, press the end key.
Making a call from the ContactsYou can save the contacts and phone numbers dialledregularly in the SIM card and/or phone memory, whichis address book You can dial a number by simplylooking up the desired name in the address book.
Adjusting the volumeIf you want to adjust the earpiece volume during a call,use the side keys ( ) and ( ) . Press the up side keyto increase and down side key to decrease the volume.

Answering a callWhen you receive a call, the phone rings and theflashing phone icon appears on the screen. If thecaller can be identified, the caller’s phone number (orname if saved in the phonebook) is displayed.
1. To answer an incoming call, open the phone.(When Flip open has been set as the answermode. See page 62 [Menu 7-4-2].)
] To reject an incoming call, press and hold one ofthe side keys on the left side of the phonewithout opening the phone.
] You can answer a call while using the addressbook or other menu features.
2. To end the call, close the phone or press the key.
Vibrate only modeYou can activate the manner mode by pressing andholding down the key after opening the phone.
Signal strengthYou can check the strength of your signal by thesignal indicator ( ) on the LCD screen of yourphone. Signal strength can vary, particularly insidebuildings. Moving near to a window may improvereception.
Entering textYou can enter alphanumeric characters by using thephone’s keypad. For example, storing contacts in thephonebook, writing a message, creating a personalgreeting. The following text input methods areavailable in the phone.
General Functions
25
Note] In standby mode with the phone open, pressing
the side keys adjusts the key tone volume.
Note] If Press any key has been set as the answer
mode (see page 62), any key press will answer acall except for the or the right soft key.
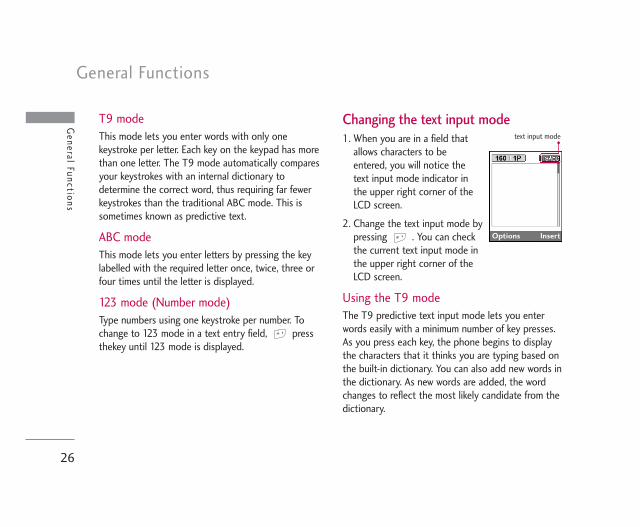
General Functions
26
General Functions
T9 modeThis mode lets you enter words with only onekeystroke per letter. Each key on the keypad has morethan one letter. The T9 mode automatically comparesyour keystrokes with an internal dictionary todetermine the correct word, thus requiring far fewerkeystrokes than the traditional ABC mode. This issometimes known as predictive text.
ABC modeThis mode lets you enter letters by pressing the keylabelled with the required letter once, twice, three orfour times until the letter is displayed.
123 mode (Number mode)Type numbers using one keystroke per number. Tochange to 123 mode in a text entry field, pressthekey until 123 mode is displayed.
Changing the text input mode1. When you are in a field that
allows characters to beentered, you will notice thetext input mode indicator inthe upper right corner of theLCD screen.
2. Change the text input mode bypressing . You can checkthe current text input mode inthe upper right corner of theLCD screen.
Using the T9 modeThe T9 predictive text input mode lets you enterwords easily with a minimum number of key presses.As you press each key, the phone begins to displaythe characters that it thinks you are typing based onthe built-in dictionary. You can also add new words inthe dictionary. As new words are added, the wordchanges to reflect the most likely candidate from thedictionary.
Options Insert
text input mode

27
General Functions
1. When you are in the T9 predictive text inputmode, start entering a word by pressing keysto . Press one key per letter.] The word changes as letters are typed. Ignore
what’s on the screen until the word is typedcompletely.
] If the word is still incorrect after typingcompletely, press the down navigation key onceor more to cycle through the other wordoptions.
Example: Press to type Good
Press [Downnavigation key] to type Home
] If the desired word is missing from the wordchoice list, add it using the ABC mode.
] You can select the language of the T9 mode.Press the left soft key [Option], then select T9languages. Select the desired language of T9mode. You can also turn off the T9 mode byselecting T9 off. The default setting on thephone is T9 enabled mode.
2. Enter the whole word before editing or deleting any
keystrokes.
3. Complete each word with a space by pressing thekey. To delete letters, press . Press and
hold down to erase entire words.
Using the ABC modeUse the to keys to enter your text.
1. Press the key labelled with the required letter:] Once for the first letter] Twice for the second letter] And so on
2. To insert a space, press the key once. To delete letters, press the key. Press and hold down the key to clear thewhole display.
Note] To exit from the text input mode without saving
your input, press . The phone goes back tostandby mode.
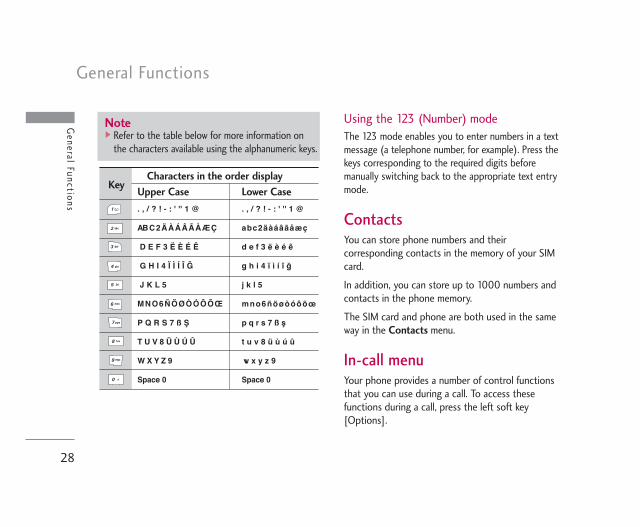
General Functions
28
General Functions
Using the 123 (Number) modeThe 123 mode enables you to enter numbers in a textmessage (a telephone number, for example). Press thekeys corresponding to the required digits beforemanually switching back to the appropriate text entrymode.
ContactsYou can store phone numbers and theircorresponding contacts in the memory of your SIMcard.
In addition, you can store up to 1000 numbers andcontacts in the phone memory.
The SIM card and phone are both used in the sameway in the Contacts menu.
In-call menuYour phone provides a number of control functionsthat you can use during a call. To access thesefunctions during a call, press the left soft key[Options].
KeyUpper Case Lower Case. , / ? ! - : ' '' 1 @ . , / ? ! - : ' '' 1 @
AB C 2 Ä À Á Â Ã Å Æ Ç a b c 2 ä à á â ã å æ ç
D E F 3 Ë È É Ê d e f 3 ë è é ê
G H I 4 Ï Ì Í Î ˝ g h i 4 ï ì í î ©
J K L 5 j k l 5
M N O 6 Ñ Ö Ø Ò Ó Ô Õ Œ m n o 6 ñ ö ø ò ó ô õ œ
P Q R S 7 ß Í p q r s 7 ß ß
T U V 8 Ü Ù Ú Û t u v 8 ü ù ú û
W X Y Z 9 w x y z 9
Space 0 Space 0
Characters in the order display
Note] Refer to the table below for more information on
the characters available using the alphanumeric keys.
29
General Functions
During a callThe menu displayed on the handset screen during acall is different to the default main menu displayedwhen in standby mode, and the options aredescribed below.
Making a second callYou can get a number you wish to dial from thephonebook to make a second call. Press the rightsoft key then select Search. To save the diallednumber into the phonebook during a call, press theright soft key then select Add new.
Switching between two callsTo switch between two calls, press the left soft keythen select Swap.
Answering an incoming callTo answer an incoming call when the handset isringing, simply press the key. The handset is alsoable to warn you of an incoming call while you arealready on a call. A tone sounds in the earpiece, andthe display will show that a second call is waiting.
This feature, known as Call waiting, is only available
if your network supports it. For details of how toactivate and deactivate it see Call waiting [Menu 7-4-4] on page 62.
If Call waiting is activated, you can put the first callon hold and answer the second, by pressing orby selecting left soft key, then select Multiparty, thenHold & Answer. You can end the current call andanswer the waiting call by selecting left soft key andthen End & Answer.
Rejecting an incoming callYou can reject an incoming call without answering bysimply pressing the key.
During a call, you can reject an incoming call bypressing the left soft key [Options] key and selectingthe Multiparty/Reject or by pressing the .
Muting the microphoneYou can mute the microphone during a call bypressing the [Options] key then selecting Mute. Thehandset can be unmuted by selecting Unmute. Whenthe handset is muted, the caller cannot hear you, butyou can still hear them.

General Functions
30
General Functions
Switching DTMF tones on during a callTo turn DTMF tones on during a call, press the leftsoft key, and then select DTMF on. DTMF tones canbe turned off the same way. DTMF tones allow yourphone to make use of an automated switchboard.
Multiparty or conference callsThe multiparty or conference service provides youwith the ability to have a simultaneous conversationwith more than one caller, if your network operatorsupports this feature. A multiparty call can only beset up when you have one active call and one call onhold, both calls having been answered. Once amultiparty call is set up, calls can be added,disconnected or separated (that is, removed from themultiparty call but still connected to you) by theperson who set up the multiparty call. These optionsare all available from the In-Call menu. The maximumcallers in a multiparty call are five. Once started, youare in control of the multiparty call, and only you canadd callers to the multiparty call.
Making a second callYou can make a second call while currently on a call.Enter the second number and press the key.
When the second call is connected, the first call isautomatically placed on hold. You can swap betweencalls by pressing the left soft key then selecting Swap.
Setting up a conference callPlace one call on hold and while the active call is on,press the left soft key and then select theMultiparty/Join all.
Putting a conference call on holdPress the left soft key, then select theMultiparty/Hold all calls.
Activate the conference call on holdPress the left soft key, then select theMultiparty/Join all.
31
General Functions
Adding calls to the conference callTo add a call to an existing conference call, press theleft soft key, then select the Multiparty/Join all.
Displaying callers in a conference callTo scroll through the numbers of the callers whomake up a conference call on the handset screen, usethe up/down navigation keys.
Taking a private call during aconference callTo have a private call with one caller from aconference call, display the number of the caller youwish to talk to on the screen, then press the left softkey. Select the Multiparty/Private to put all theother callers on hold.
Ending a conference callThe currently displayed caller from a conference callcan be disconnected by pressing the key . Toend a conference call, press the left soft key, thenselect the Multiparty/End multiparty. After
pressing the left soft key, selecting Multiparty/Endall calls will end all the active and on-hold calls..
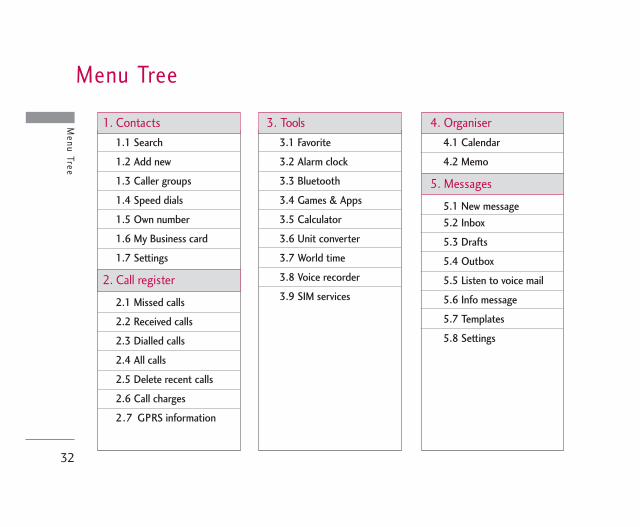
32
Menu Tree
1. Contacts 1.1 Search
1.2 Add new
1.3 Caller groups
1.4 Speed dials
1.5 Own number
1.6 My Business card
1.7 Settings
2. Call register
2.1 Missed calls
2.2 Received calls
2.3 Dialled calls
2.4 All calls
2.5 Delete recent calls
2.6 Call charges
2.7 GPRS information
3. Tools3.1 Favorite
3.2 Alarm clock
3.3 Bluetooth
3.4 Games & Apps
3.5 Calculator
3.6 Unit converter
3.7 World time
3.8 Voice recorder
3.9 SIM services
4. Organiser4.1 Calendar
4.2 Memo
5. Messages
5.1 New message5.2 Inbox
5.3 Drafts
5.4 Outbox
5.5 Listen to voice mail
5.6 Info message
5.7 Templates
5.8 Settings
Menu Tree

33
Menu Tree
6. Camera
Quick Access to CameraMode
7. Settings
7.1 Profiles
7.2 Date & Time
7.3 Handset
7.4 Call setting7.5 Security
7.6 Network
7.7 GPRS attach
7.8 Memory status
7.9 Reset settings
8. Browser8.1 Home
8.2 Bookmarks
8.3 Go to URL
8.4 Settings
9. My stuff9.1 Photos
9.2 Images
9.3 Sounds
9.4 Games & Apps
9.5 Others
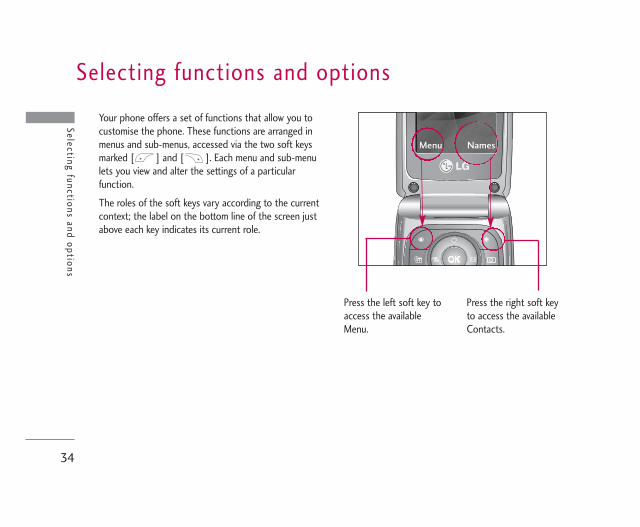
Selecting functions and options
34
Selecting functions and options
Your phone offers a set of functions that allow you tocustomise the phone. These functions are arranged inmenus and sub-menus, accessed via the two soft keysmarked [ ] and [ ]. Each menu and sub-menulets you view and alter the settings of a particularfunction.
The roles of the soft keys vary according to the currentcontext; the label on the bottom line of the screen justabove each key indicates its current role.
Press the left soft key toaccess the availableMenu.
Press the right soft keyto access the availableContacts.
Menu Names

ContactsC
ontacts
35
Search Menu 1.1
1. Select Search by press the left soft key [Select] or [OK].
2. If you want to edit, delete, copy an entry, select leftsoft key [Options]. The following menu will bedisplayed.
] View detail: You can view the name and number ofcharacter.
] Delete: You can delete an entry.] Write messages: After you have found the number
you want, you can send a SMS/MMS to the selectednumber and address.
] Send via Bluetooth: You can send the data ofphone book to devices which is compatible withbluetooth through bluetooth.
] Edit: You can edit the name, number, group,character and picture by using the navigation key.
] Copy to handset: You can copy an entry from SIMto phone or from phone to SIM.
] Assign speed dial: You can assign the entry as aspeed dial.
] Main number: You can select the one out ofmobile, home, office that you often use. After youset this, the main number will be displayed first,when you search.
] View caller groups: For further details see [Menu1.3]
Add new Menu 1.2
You can add phonebook entry by using this function.Phone memory capacity is 1000 entries. SIM cardmemory capacity depends on the cellular serviceprovider. You can also save 40 characters of name inThe Phone memory, and save 14 characters in the SIMcard. The number of character is SIM dependentfeature.
1. Select Add new by press left soft key [OK].
2. Select the memory you want to save: SIM orHandset.
Note] Instant searching is available by inputting the
initial letter of the name or number you want tosearch.
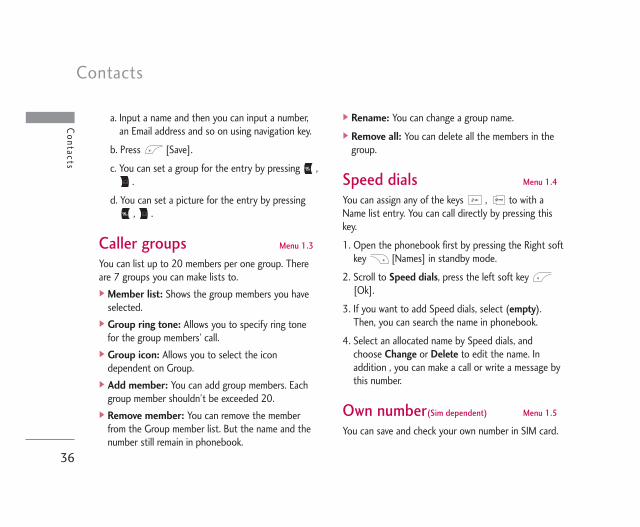
a. Input a name and then you can input a number,an Email address and so on using navigation key.
b. Press [Save].
c. You can set a group for the entry by pressing ,.
d. You can set a picture for the entry by pressing, .
Caller groups Menu 1.3
You can list up to 20 members per one group. Thereare 7 groups you can make lists to.] Member list: Shows the group members you have
selected.] Group ring tone: Allows you to specify ring tone
for the group members’ call.] Group icon: Allows you to select the icon
dependent on Group.] Add member: You can add group members. Each
group member shouldn’t be exceeded 20.] Remove member: You can remove the member
from the Group member list. But the name and thenumber still remain in phonebook.
] Rename: You can change a group name.] Remove all: You can delete all the members in the
group.
Speed dials Menu 1.4
You can assign any of the keys , to with aName list entry. You can call directly by pressing thiskey.
1. Open the phonebook first by pressing the Right softkey [Names] in standby mode.
2. Scroll to Speed dials, press the left soft key [Ok].
3. If you want to add Speed dials, select (empty).Then, you can search the name in phonebook.
4. Select an allocated name by Speed dials, andchoose Change or Delete to edit the name. Inaddition , you can make a call or write a message bythis number.
Own number(Sim dependent) Menu 1.5
You can save and check your own number in SIM card.
Contacts
36
Contacts

37
Contacts
My Business card Menu 1.6
This option allows you to create your own businesscard featuring Name and an mobile phone number. Tocreate a new business card, press the left soft key
[Options] and enter the information into thefields.
Settings Menu 1.7
1. Press the right soft [Names] in standby mode.2. Scroll to Settings, then press the left soft key
[OK]. ] Default memory
Scroll to highlight Default memory, and then pressthe left soft key [OK]. - If you select SIM or Handset, the phone will store
an entry to SIM or Handset.] View options
Scroll to highlight View options, and then press theleft soft key [OK].
- Name only: Set the phonebook list with displayingonly name.
- Name & number: Set the phonebook list withdisplaying name and number.
- With pictures: Set the phonebook list with theinformation of character and picture.
] Copy/Move all
You can copy/move entries from SIM card memoryto Handset memory and vice versa.
1. Open the Phonebook first by pressing the rightsoft key [Names] in standby mode.
2. Scroll to Copy/Move all, and then press the leftsoft key [OK] enter this menu.
] Memory in use
This feature allows you to see how many entries arein use, or free in your phonebook.
] Clear contacts
You can delete all the entries in the SIM andHandset. This function requires the Security code.
1. Scroll to highlight Clear contacts, and then pressthe left soft key [OK].
2. Highlight the memory you wish to erase, andthen press the left soft key [OK].
3. Enter security code and Press the left soft key[OK] or the right soft key [Back].
] Service dial number
Use this function to access a particular list ofservices provided by your network operator (ifsupported by the SIM card).
Contacts
38
Contacts
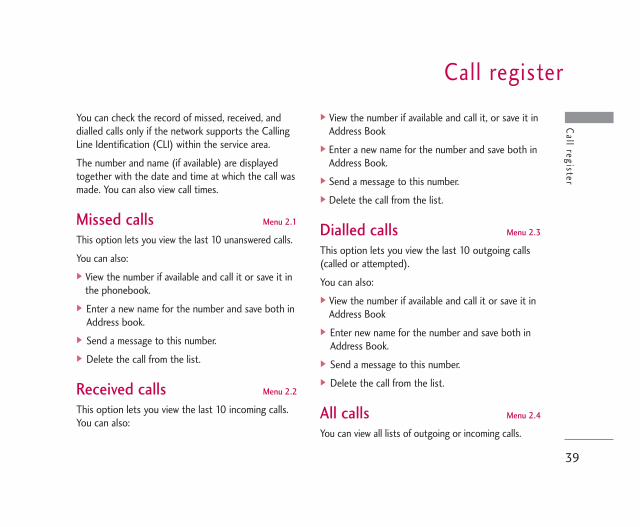
Call register
Call register
39
You can check the record of missed, received, anddialled calls only if the network supports the CallingLine Identification (CLI) within the service area.
The number and name (if available) are displayedtogether with the date and time at which the call wasmade. You can also view call times.
Missed calls Menu 2.1
This option lets you view the last 10 unanswered calls.
You can also:] View the number if available and call it or save it in
the phonebook.] Enter a new name for the number and save both in
Address book.] Send a message to this number.] Delete the call from the list.
Received calls Menu 2.2
This option lets you view the last 10 incoming calls.You can also:
] View the number if available and call it, or save it inAddress Book
] Enter a new name for the number and save both inAddress Book.
] Send a message to this number.] Delete the call from the list.
Dialled calls Menu 2.3
This option lets you view the last 10 outgoing calls(called or attempted).
You can also:] View the number if available and call it or save it in
Address Book] Enter new name for the number and save both in
Address Book.] Send a message to this number.] Delete the call from the list.
All calls Menu 2.4
You can view all lists of outgoing or incoming calls.
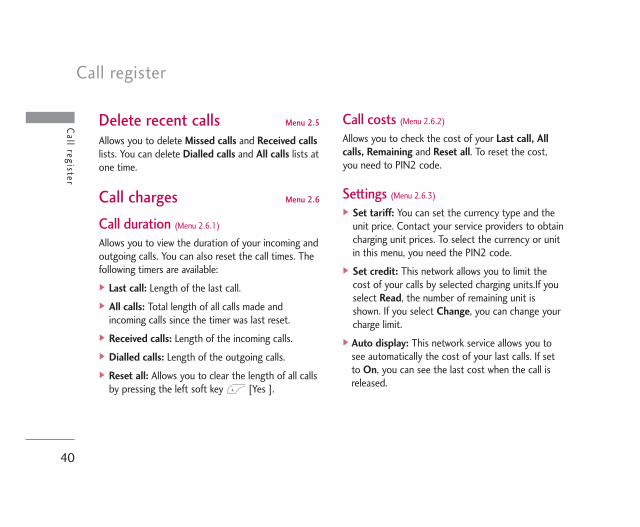
Call register
40
Delete recent calls Menu 2.5
Allows you to delete Missed calls and Received callslists. You can delete Dialled calls and All calls lists atone time.
Call charges Menu 2.6
Call duration (Menu 2.6.1)
Allows you to view the duration of your incoming andoutgoing calls. You can also reset the call times. Thefollowing timers are available:] Last call: Length of the last call.] All calls: Total length of all calls made and
incoming calls since the timer was last reset.] Received calls: Length of the incoming calls.] Dialled calls: Length of the outgoing calls.] Reset all: Allows you to clear the length of all calls
by pressing the left soft key [Yes ].
Call costs (Menu 2.6.2)
Allows you to check the cost of your Last call, Allcalls, Remaining and Reset all. To reset the cost,you need to PIN2 code.
Settings (Menu 2.6.3)
] Set tariff: You can set the currency type and theunit price. Contact your service providers to obtaincharging unit prices. To select the currency or unitin this menu, you need the PIN2 code.
] Set credit: This network allows you to limit thecost of your calls by selected charging units.If youselect Read, the number of remaining unit isshown. If you select Change, you can change yourcharge limit.
] Auto display: This network service allows you tosee automatically the cost of your last calls. If setto On, you can see the last cost when the call isreleased.
Call register

41
Call register
GPRS information Menu 2.7
You can check the amount of data transferred overthe network through the GPRS information option. Inaddition, you can also view how much time you wereonline.
Call duration (Menu 2.7.1)
You can check the duration of Last call and All calls.You can also Reset all the call timers.
Data volumes (Menu 2.7.2)
You can check the Sent, Received or All datavolumes and Reset all.
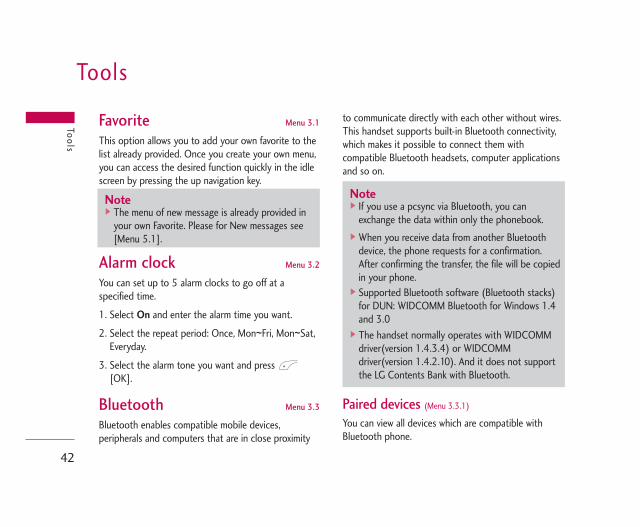
Tools
42
Favorite Menu 3.1
This option allows you to add your own favorite to thelist already provided. Once you create your own menu,you can access the desired function quickly in the idlescreen by pressing the up navigation key.
Alarm clock Menu 3.2
You can set up to 5 alarm clocks to go off at aspecified time.
1. Select On and enter the alarm time you want.
2. Select the repeat period: Once, Mon~Fri, Mon~Sat,Everyday.
3. Select the alarm tone you want and press [OK].
Bluetooth Menu 3.3
Bluetooth enables compatible mobile devices,peripherals and computers that are in close proximity
to communicate directly with each other without wires.This handset supports built-in Bluetooth connectivity,which makes it possible to connect them withcompatible Bluetooth headsets, computer applicationsand so on.
Paired devices (Menu 3.3.1)
You can view all devices which are compatible withBluetooth phone.
Tools
Note] If you use a pcsync via Bluetooth, you can
exchange the data within only the phonebook.] When you receive data from another Bluetooth
device, the phone requests for a confirmation.After confirming the transfer, the file will be copiedin your phone.
] Supported Bluetooth software (Bluetooth stacks)for DUN: WIDCOMM Bluetooth for Windows 1.4and 3.0
] The handset normally operates with WIDCOMMdriver(version 1.4.3.4) or WIDCOMMdriver(version 1.4.2.10). And it does not supportthe LG Contents Bank with Bluetooth.
Note] The menu of new message is already provided in
your own Favorite. Please for New messages see[Menu 5.1].
43
Tools
Handsfree devices (Menu 3.3.2)
You can view the list of handsfree devices which arecompatible with bluetooth phone.
If you have entered Paired devices or Handsfreedevices, you will see the following options in boththose menus.] Connect/Disconnect: Allows you to connect to
other Bluetooth devices.] Add new: Allows you to search for new Bluetooth
device.] Assign name: Allows you to change the name of
Bluetooth device and how its displayed on thehandset.
] Set as authorised/Set as unauthorised: Allows youto set the authorised connection between eachBluetooth devices.
] All service: Allows you to view all services which aresupported by a Bluetooth device.
] Delete: Allows you to delete the Bluetooth device.] Delete all: Allows you to delete all Bluetooth
devices.
Settings (Menu 3.3.3)
You can register a new device which is compatible withBluetooth. If you already have added the device, youcan search it after entering a password.] Set Bluetooth
You can activate or cancel bluetooth function.] Handset's visibility
You can set the function that your phone is visibleon the other Bluetooth devices.
] Handset's name
You can set the name of bluetooth device. Thedefault name is [LG]KG245.
Games & Apps Menu 3.4
This menu contains all the Java applications.
Note] Due to a compatibility problem, some devices
may not support this function.
My games & Apps (Menu 3.4.1)
• My games & AppsIn this menu, you can manage the Java applicationsinstalled in your phone. You can play or deletedownloaded applications, or set the connect option.The downloaded applications are organised infolders. Press the left soft key [OK] to open theselected folder or launch the selected midlet. Usingthe left soft key [Options], the following menusare available.
] Open: Start the selected application.] New folder: Create a new folder.
Profiles (Menu 3.4.2)
This menu contains the same settings of the Internetmenu. In fact, in order to download new applications, aWAP connection is needed.
Tools
44
Tools
Note] You cannot remove or rename the preinstalled
folder or a game in the folder.
execute, or delete. The Java program files saved inthephone are in .JAD or .JAR format.
Note] The JAR file is a compressed format of the Java program and
the JAD file is a description file that includes all detailedinformation. From the network, prior to download, you canview all detailed file descriptions from the JAD file.
] While being based on a standard language (J2ME), not allJava applications are compatible with all handsets on sale sofar as specific libraries may be used for a telephone model.The software may be blocked or switch itself on when Javaapplications not specifically developed for the phone thismanual refers to are downloaded, making it necessary to“restart” the handset. We would like to point out that theseproblems are caused by incompatible applications and arenot a product fault.
Caution] Only J2ME (Java 2 Micro Edition) based programs will run in
a phone environment. The J2SE (Java 2 Standard Edition)based programs will only run in a PC environment.
JavaTM, is a technology developed by Sun Microsystems.Similar to the way you would download the Java Appletusing the standard MS Internet Explorer browsers, JavaMIDlet can be downloaded using the WAP enabledphone.Depending on the service provider, all Javabased programssuch as Java games can be downloaded and run on aphone. Once downloaded, the Java program can be viewedin the My games & Apps menu where you can select,
Tools
45
Calculator Menu 3.5
This contains the standard functions such as +, –, x, ÷: Addition, Subtraction, Multiplication, and Division.
Furthermore, you can use the various function ofcalculator such as +/- .
1. Input the numbers by pressing numeric keys.
2. Use a navigation key to select a sign for calculation.
3. Then input the numbers.
4. Press key to view the result.
5. To input the decimal number, press key. If youpress key, you can enter ‘.’ .
6. To end Calculator, press the right soft key [Back].
Unit converter Menu 3.6
This converts any measurement into a unit you want.There are 4 types that can be converted into units:Length, Area, Weight and Volume.
1. You can select one of four unit types by pressing[Unit] key.
2. Select the unit you want to convert by pressing and . It's impossible to input "-" symbol inunit converter.
3. Select the standard value by using , .
World time Menu 3.7
You can view clocks of the world’s major cities.
1. Select the city belonged to the time zone bypressing , , , key.
2. You can set the current time to the city time youselect by pressing the left soft key [Set].
Voice recorder Menu 3.8
The voice memo feature you to record up to 10 voicemessages and each memo is up to 20 Seconds.
Record (Menu 3.8.1)
You can record voice memo in Voice recorder menu.
1. Once recording is started, the message Recordingand the remaining time is displayed.

Tools
46
2. If you want to finish recording, press the left softkey [Save].
3. Key in Voice memo title, press the left soft key [OK].
View list (Menu 3.8.2)
The phone shows voice memo list. You can Playbackand Delete the recorded voice memo. In addition, youcan send a multimedia message .
SIM services Menu 3.9
This menu depends on SIM and the network services.
Tools

Organiser
47
Organiser
Calendar Menu 4.1
When you enter this menu a Calendar will show up. On top of the screen there are sections for date.Whenever you change the date, the calendar will beupdated according to the date. And square cursor willbe used to locate the certain day. If you see under baron the calendar, it means that there is a schedule ormemo that day. This function helps to remind you ofyour schedule and memo. The phone will sound analarm tone if you set this for the note.
To change the day, month, and year.
In the scheduler mode, press left soft key [Options] as follows;
Add new (Menu 4.1.1)
Allows you to add new schedule and memo for thechosen day. You can store up to 20 notes.
Input the subject and then press left soft key [OK]. You enter the appropriate information in thefollowing section; Time, Repeat and Alarm.
View (Menu 4.1.2)
View all schedules and memo for the chosen day. Use, to browse through the note lists. If you set
alarm for the note, the alarm icon is displayed.
If you want to view the note in detail, press left softkey [OK]. Press left soft key [Options] to delete,edit the note you selected.
Key Description
Yearly
Monthly
Weekly
Daily
Note] Agenda events and wake up alarms won't work if
the phone is OFF.

View all (Menu 4.1.3)
Shows the notes that are set for all days. Use , to browse through the note lists. If you want to viewthe note in detail, press left soft key [OK].
Delete past (Menu 4.1.4)
You can delete the past schedule that has been alreadynotified you.
Delete all (Menu 4.1.5)
You can delete for the all notes.
Memo Menu 4.2
Memo function allow to freely write memos (max 39characters). Differently from the Agenda events, thereare no alarms for Memo.
1. Select the Memo by pressing the left soft key [OK].
2. If being empty, Add new by pressing the left soft key[Add].
3. Input the memo and then press left soft key [Ok].
Note] If you want to change the text input mode, press
the in order.
Organiser
48
Organiser

Messages
Messages
49
New message Menu 5.1
This menu includes functions related to SMS (ShortMessage Service), MMS (Multimedia Message Service),voice mail, as well as the network’s service messages.
Write text message (Menu 5.1.1)
You can write and edit text message, checking thenumber of message pages.
1. Enter the New messages menu by pressing the leftsoft key [OK].
2. If you want to write a new message, select Write textmessage.
3. To make text input easier, use T9.
4. Press [Insert] to attach the following :
Insert] Symbol: You can add special characters.] Picture: You can insert the Default graphics or
graphics in My Folder that are available for shortmessages.
] Sound: You can insert sounds that are available forshort messages.
] Text templates: You can use Text templates alreadyset in the phone.
] Contacts: You can add phone numbers or e-mailaddresses in the address book.
] Business card: You can add your Signature to themessage.
5. After you complete the message, to select therequired option, press the left soft key [Options].
Options] Send: Sends text messages.1. Enter numbers of recipient.2. Press key to add more recipients.3. You can add phone numbers in the address book.4. Once the numbers have been entered, press the left
soft key to send the message.All messages will automatically be saved in theoutbox folder, even after a sending failure.
] Save: Stores messages in the Drafts folder.] Font: You can select the Size and Style of font of
text.] Colour: You can also set the Colour of the text
(foreground) and the background.

Messages
50
Messages
] Alignment: You can select the alignment fo text.] Add T9 dictionary: You can add your own words.
This menu will only be shown when the edit modehas been set to T9ABC/T9Abc/T9abc.
] T9 languages: Select the desired language for T9input mode. You can also deactivate the T9 inputmode by selecting ‘T9 off ’.
] Exit: If you press Exit whilst writing a message, youwill be taken back to the message menu. Also thewritten message will not have been saved.
Write multimedia message (Menu 5.1.2)
A multimedia message can contain text, images, and/orsound clips. This feature can be used only if it issupported by your network operator or serviceprovider. Only devices that offer compatible multimedia
message or e-mail features can receive and sendmultimedia messages.
1. Enter the New message menu by pressing the leftsoft key [OK].
2. If you want to write a new message, select Writemultimedia message.
3. You can create a new message or choose one of themultimedia message templates already made.
4. Press Insert to add Symbol, Photo, Take photo,Picture, Sound, Voice memo, Text templates,Contacts, Business card.
Maximum available file size, that can be inserted toMMS-message, is 100 kb.
Options] Send: You can send multimedia messages to multiple
recipients, as well as save it to send at a later time.
] Preview: You can preview multimedia messages youhave created.
Note] This phone supports EMS release 5, so is
available to send colour pictures, sounds, textstyles, etc.. If the other parties handsets do notsupport such options, the pictures, sounds ortexts sent may not be displayed correctly on theirphones.
Note] All messages will be automatically saved in the
outbox folder, even after a sending failure.
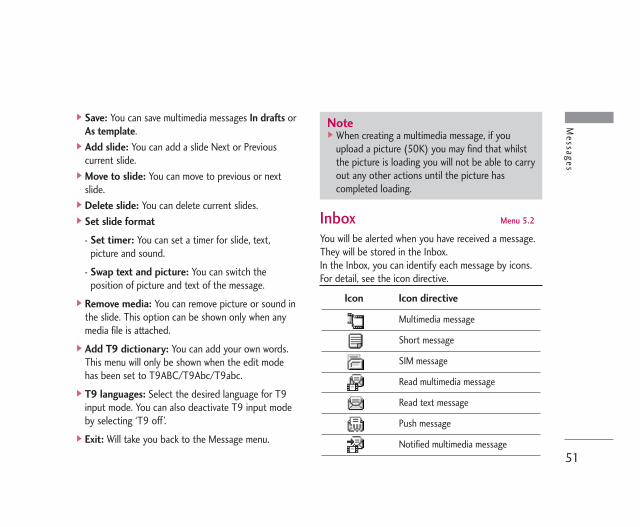
Messages
51
] Save: You can save multimedia messages In drafts orAs template.
] Add slide: You can add a slide Next or Previouscurrent slide.
] Move to slide: You can move to previous or nextslide.
] Delete slide: You can delete current slides.] Set slide format
- Set timer: You can set a timer for slide, text,picture and sound.
- Swap text and picture: You can switch theposition of picture and text of the message.
] Remove media: You can remove picture or sound inthe slide. This option can be shown only when anymedia file is attached.
] Add T9 dictionary: You can add your own words.This menu will only be shown when the edit modehas been set to T9ABC/T9Abc/T9abc.
] T9 languages: Select the desired language for T9input mode. You can also deactivate T9 input modeby selecting ‘T9 off ’.
] Exit: Will take you back to the Message menu.
Inbox Menu 5.2
You will be alerted when you have received a message.They will be stored in the Inbox.In the Inbox, you can identify each message by icons.For detail, see the icon directive.
Note] When creating a multimedia message, if you
upload a picture (50K) you may find that whilstthe picture is loading you will not be able to carryout any other actions until the picture hascompleted loading.
Icon Icon directive
Multimedia message
Short message
SIM message
Read multimedia message
Read text message
Push message
Notified multimedia message

Messages
52
Messages
If the phone shows ‘No space for SIM message’, youonly have to delete the SIM messages from the Inbox.If the phone displays ‘No space for SMS’, you will thenneed to delete messages, media or applications to freeup space.
❇ SIM messageSIM message means that the message isexceptionally stored in the SIM card.
When you are notified that you have received amultimedia message, you have to wait for the messageto be downloaded before you can view it.
To read a message, select one of the messages bypressing the left soft key .] View: You can view the received messages.] Reply: You can reply to the sender.] Forward: You can forward the selected message to
another party.] Return call: You can call back the sender.] Delete: You can delete the current message.] View information: You can view information about
received messages; Sender’s address, Subject (only
for Multimedia message), Message date & time,Message type, Message size.
] Delete all: You can delete all messages.
Drafts Menu 5.3
Using this menu, you can preset up to five multimediamessages that you use most frequently. This menushows the preset multimedia message list.
The following options are available.] View: You can see the multimedia messages.] Edit: Allows you to modify the chosen message.] Delete: Deletes the message you choose.] View information: To view the information of the
message.] Delete all: Deletes all of the messages in the folder.
Outbox Menu 5.4
This menu allows you to view the messages which youhave sent, those that are currently sending ormessages that have failed sending previously.
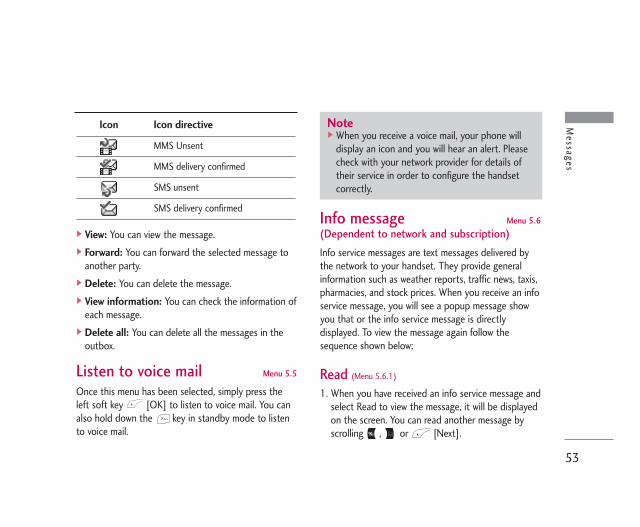
53
Messages
] View: You can view the message.] Forward: You can forward the selected message to
another party.] Delete: You can delete the message.] View information: You can check the information of
each message.] Delete all: You can delete all the messages in the
outbox.
Listen to voice mail Menu 5.5
Once this menu has been selected, simply press theleft soft key [OK] to listen to voice mail. You canalso hold down the key in standby mode to listento voice mail.
Info message Menu 5.6
(Dependent to network and subscription)
Info service messages are text messages delivered bythe network to your handset. They provide generalinformation such as weather reports, traffic news, taxis,pharmacies, and stock prices. When you receive an infoservice message, you will see a popup message showyou that or the info service message is directlydisplayed. To view the message again follow thesequence shown below;
Read (Menu 5.6.1)
1. When you have received an info service message andselect Read to view the message, it will be displayedon the screen. You can read another message byscrolling , or [Next].
Note] When you receive a voice mail, your phone will
display an icon and you will hear an alert. Pleasecheck with your network provider for details oftheir service in order to configure the handsetcorrectly.
Icon Icon directive
MMS Unsent
MMS delivery confirmed
SMS unsent
SMS delivery confirmed

Messages
54
Messages
2. The message will be shown until another message isselected.
Topics (Menu 5.6.2)
(Dependent to network and subscription)] Add new: You can add Info service message numbers
in the Phone memory with its nickname.] View list: You can see Info service message numbers
which you have added. If you press [Options],you can edit and delete Info message categorieswhich you have added.
] Active list: You can select info service messagenumbers in the active list. if you activate an infoservice number, you can receive messages sent fromthe number.
Templates Menu 5.7
Text templates (Menu 5.7.1)
You have 6 text templates as below;
Multimedia templates (Menu 5.7.2)
After you have saved a new template, you can use thefollowing options.] View: You can see multimedia templates.] Edit: You can edit multimedia templates.] Add new: Allows you to add new multimedia
templates.] Write messages: You can write and send multimedia
messages.] Delete: You can delete multimedia templates.] Delete all: Allows you to delete all multimedia
messages.
Settings Menu 5.8
Text message (Menu 5.8.1)
] Message types:
Text, Voice, Fax, Natl. paging, X.400, E-mail,ERMES
• Please call me back.• I’m late. I will be there at• Where are you now?
• I am on the way.• Top urgent. Please contact.• I love you.

55
Messages
Usually, the type of message is set to Text. You canconvert your text into alternative formats. Contactyour service provider for the availability of thisfunction.
] Validity period: This network service allows you toset how long your text messages will be stored at themessage centre.
] Delivery report: If you set to Yes, you can checkwhether your message is sent successfully.
] Reply via same service centre: When a message issent, it allows the recipients to reply and charge thecost of the reply to your telephone bill.
] SMS centre: If you want to send the text message,you can receive the address of SMS centre throughthis menu.
Mulitimedia message (Menu 5.8.2)
] Priority: You can set the priority of the messageyou choose.
] Validity period: This network service allows you toset how long your text messages will be stored at themessage centre.
] Delivery report: If it is set to Yes in this menu, youcan check whether your message is sent successfully.
] Auto download: If you select On, you receivemultimedia messages automatically. If you select Off,you receive only notification message in the inboxand then you can check this notification. If youselect Home network only, you receive multimediamessages depends on Homenetwork.
] Network settings: If you select multimedia messageserver, you can set URL for multimedia messageserver.
] Permitted message typesPersonal: Personal message.Advertisements: Commercial message.Information: Necessary information.
Voice mail centre (Menu 5.8.3)
You can receive the voicemail if your network serviceprovider supports this feature. When a new voicemailhas arrived, the symbol will be displayed on the screen.Please check with your network service provider fordetails of their service in order to configure the phoneaccordingly.
Messages
56
Messages
] Home: You can listen to voice mails by selectingHome.
] Roaming: Even when you are in abroad, you canlisten to voice mails if roaming service is supported.
Info message (Menu 5.8.4)
] ReceiveYes: If you select this menu, your phone will receiveInfo service messages.No: If you select this menu, your phone will notreceive Info service messages any more.
] AlertYes: Your phone will beep when you have receivedInfo service message numbers.No: Your phone will not beep even though you havereceived info service messages.
] LanguagesYou can select the language you want by pressing[On/Off]. Then, the info service message will beshown in the language that you selected.
Push messages (Menu 5.8.5)
You can set the option whether you will receive themessage or not.
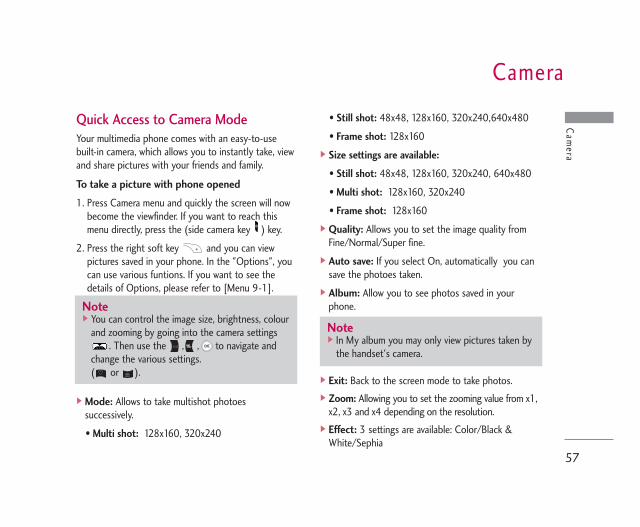
Camera
57
Cam
era
Quick Access to Camera ModeYour multimedia phone comes with an easy-to-usebuilt-in camera, which allows you to instantly take, viewand share pictures with your friends and family.
To take a picture with phone opened
1. Press Camera menu and quickly the screen will nowbecome the viewfinder. If you want to reach thismenu directly, press the (side camera key ) key.
2. Press the right soft key and you can viewpictures saved in your phone. In the "Options", youcan use various funtions. If you want to see thedetails of Options, please refer to [Menu 9-1].
] Mode: Allows to take multishot photoessuccessively.
• Multi shot: 128x160, 320x240
• Still shot: 48x48, 128x160, 320x240,640x480
• Frame shot: 128x160] Size settings are available:
• Still shot: 48x48, 128x160, 320x240, 640x480
• Multi shot: 128x160, 320x240
• Frame shot: 128x160] Quality: Allows you to set the image quality from
Fine/Normal/Super fine.] Auto save: If you select On, automatically you can
save the photoes taken.] Album: Allow you to see photos saved in your
phone.
] Exit: Back to the screen mode to take photos.] Zoom: Allowing you to set the zooming value from x1,
x2, x3 and x4 depending on the resolution.] Effect: 3 settings are available: Color/Black &
White/Sephia
Note] You can control the image size, brightness, colour
and zooming by going into the camera settings. Then use the , , to navigate and
change the various settings. ( or ).
Note] In My album you may only view pictures taken by
the handset's camera.
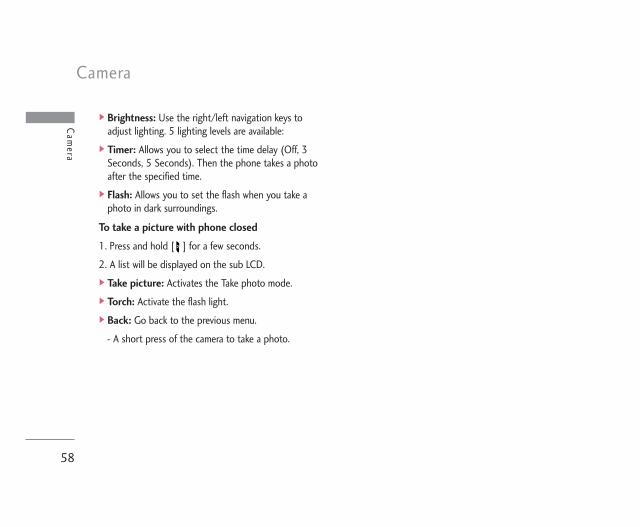
Camera
58
Cam
era
] Brightness: Use the right/left navigation keys toadjust lighting. 5 lighting levels are available:
] Timer: Allows you to select the time delay (Off, 3Seconds, 5 Seconds). Then the phone takes a photoafter the specified time.
] Flash: Allows you to set the flash when you take aphoto in dark surroundings.
To take a picture with phone closed
1. Press and hold [ ] for a few seconds.
2. A list will be displayed on the sub LCD.] Take picture: Activates the Take photo mode.] Torch: Activate the flash light.] Back: Go back to the previous menu.
- A short press of the camera to take a photo.
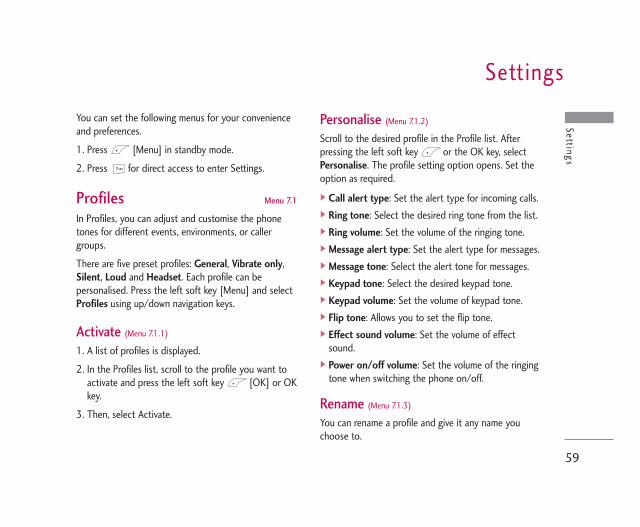
SettingsSettings
59
You can set the following menus for your convenienceand preferences.
1. Press [Menu] in standby mode.
2. Press for direct access to enter Settings.
Profiles Menu 7.1
In Profiles, you can adjust and customise the phonetones for different events, environments, or callergroups.
There are five preset profiles: General, Vibrate only,Silent, Loud and Headset. Each profile can bepersonalised. Press the left soft key [Menu] and selectProfiles using up/down navigation keys.
Activate (Menu 7.1.1)
1. A list of profiles is displayed.
2. In the Profiles list, scroll to the profile you want toactivate and press the left soft key [OK] or OKkey.
3. Then, select Activate.
Personalise (Menu 7.1.2)
Scroll to the desired profile in the Profile list. Afterpressing the left soft key or the OK key, selectPersonalise. The profile setting option opens. Set theoption as required.
] Call alert type: Set the alert type for incoming calls.] Ring tone: Select the desired ring tone from the list.] Ring volume: Set the volume of the ringing tone.] Message alert type: Set the alert type for messages.] Message tone: Select the alert tone for messages.] Keypad tone: Select the desired keypad tone.] Keypad volume: Set the volume of keypad tone.] Flip tone: Allows you to set the flip tone.] Effect sound volume: Set the volume of effect
sound.] Power on/off volume: Set the volume of the ringing
tone when switching the phone on/off.
Rename (Menu 7.1.3)
You can rename a profile and give it any name youchoose to.
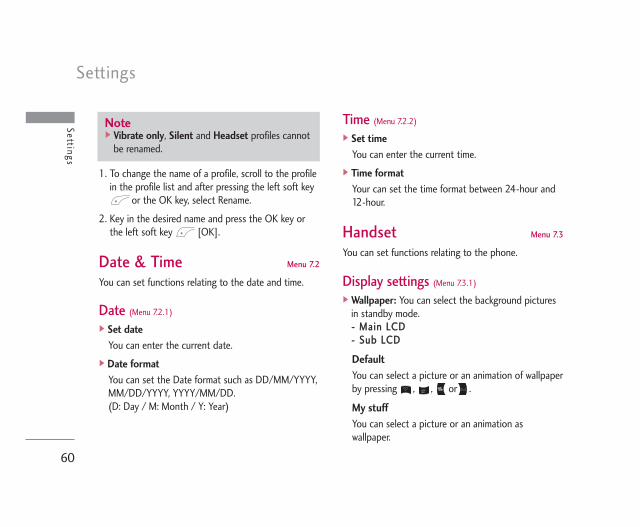
Settings
60
Settings
1. To change the name of a profile, scroll to the profilein the profile list and after pressing the left soft key
or the OK key, select Rename.
2. Key in the desired name and press the OK key orthe left soft key [OK].
Date & Time Menu 7.2
You can set functions relating to the date and time.
Date (Menu 7.2.1)
] Set dateYou can enter the current date.
] Date formatYou can set the Date format such as DD/MM/YYYY,MM/DD/YYYY, YYYY/MM/DD.(D: Day / M: Month / Y: Year)
Time (Menu 7.2.2)
] Set timeYou can enter the current time.
] Time formatYour can set the time format between 24-hour and12-hour.
Handset Menu 7.3
You can set functions relating to the phone.
Display settings (Menu 7.3.1)
] Wallpaper: You can select the background picturesin standby mode.-- MMaaiinn LLCCDD-- SSuubb LLCCDD
Default
You can select a picture or an animation of wallpaperby pressing , , or .
My stuff
You can select a picture or an animation aswallpaper.
Note] Vibrate only, Silent and Headset profiles cannot
be renamed.
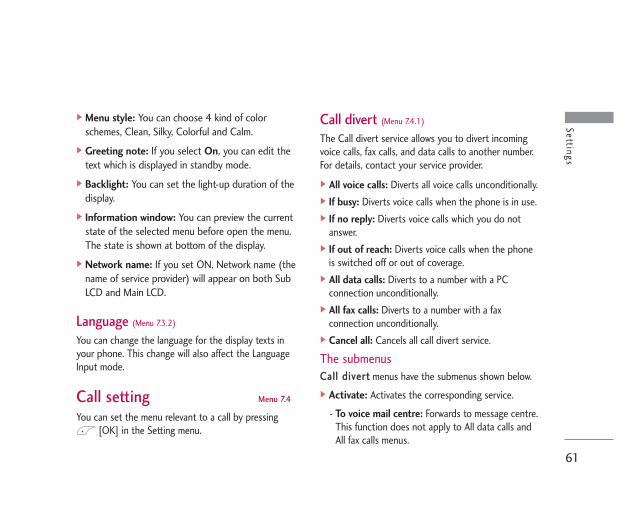
61
Settings
] Menu style: You can choose 4 kind of colorschemes, Clean, Silky, Colorful and Calm.
] Greeting note: If you select On, you can edit thetext which is displayed in standby mode.
] Backlight: You can set the light-up duration of thedisplay.
] Information window: You can preview the currentstate of the selected menu before open the menu.The state is shown at bottom of the display.
] Network name: If you set ON, Network name (thename of service provider) will appear on both SubLCD and Main LCD.
Language (Menu 7.3.2)
You can change the language for the display texts inyour phone. This change will also affect the LanguageInput mode.
Call setting Menu 7.4
You can set the menu relevant to a call by pressing[OK] in the Setting menu.
Call divert (Menu 7.4.1)
The Call divert service allows you to divert incomingvoice calls, fax calls, and data calls to another number.For details, contact your service provider.
] All voice calls: Diverts all voice calls unconditionally.] If busy: Diverts voice calls when the phone is in use.] If no reply: Diverts voice calls which you do not
answer.] If out of reach: Diverts voice calls when the phone
is switched off or out of coverage.] All data calls: Diverts to a number with a PC
connection unconditionally.] All fax calls: Diverts to a number with a fax
connection unconditionally.] Cancel all: Cancels all call divert service.
The submenusCCaallll ddiivveerrtt menus have the submenus shown below.] Activate: Activates the corresponding service.
- To voice mail centre: Forwards to message centre.This function does not apply to All data calls andAll fax calls menus.

Settings
62
Settings
- To other number: Input the number for calldiverting.
- To favourite number: You can check recent fivediverted numbers.
] Cancel: Deactivate the corresponding service.] View status: View the status of the corresponding
service.
Answer mode (Menu 7.4.2)
] Flip open: If you select this menu, you can receivean incoming call when only opening flip.
] Any key: If you select this menu, you can receive acall by pressing any key except [End] key.
] Send key only: If you select this menu, you canreceive a call by only pressing [Send] key.
Send my number (Menu 7.4.3)
(network and subscription dependent)] On: You can send your phone number to another
party. Your phone number will be shown on thereceiver’s phone.
] Off: Your phone number will not be shown.] Set by network: If you select this, you can send
your phone number depending on two line servicesuch as line 1 or line 2.
Call waiting (Network Service)(Menu 7.4.4)
] Activate: If you select Activate, you can accept awaiting (receiving) call.
] Cancel: If you select Cancel, you cannot recognizethe waiting (receiving) call.
] View status: Shows the status of Call waiting.
Minute minder (Menu 7.4.5)
If you select On, you can check the call duration bybeep sound every minute during a call.
Auto redial (Menu 7.4.6)
] On: When this function is activated, the phone willautomatically try to redial in the case of failure toconnect a call.
] Off: Your phone will not make any attempts to redialwhen the original call has not connected.

63
Settings
Security Menu 7.5
PIN code request (Menu 7.5.1)
In this menu, you can set the phone to ask for the PINcode of your SIM card when the phone is switched on.If this function is activated, you’ll be requested to enterthe PIN code.
1. Select PIN code request in the Security menu, andthen press [OK].
2. Set On/Off.
3. If you want to change the setting, you need to enterPIN code when you switch on the phone.
4. If you enter wrong PIN code more than 3 times, thephone will lock out. If the PIN is blocked, you willneed to key in PUK code.
5. You can enter your PUK code up to 10 times. If youput wrong PUK code more than 10 times, you cannot unlock your phone. You will need to contactyour service provider.
Handset lock (Menu 7.5.2)
You can use security code to avoid unauthorized use of
the phone. Whenever you switch on the phone, thephone will request security code if you set phone lockto when swith on. If you set phone lock to when SIMchanged your phone will request security code onlywhen you change your SIM card.
Call barring (Menu 7.5.3)
The Call barring service prevents your phone frommaking or receiving certain category of calls. Thisfunction requires the call Network password. You canview the following submenus.] All outgoing: The barring service for all outgoing
calls.] International: The barring service for all outgoing
international calls.] International when roaming: The barring service
for all international outgoing calls except homenetwork.
] All incoming: The barring service for all incomingcalls.
] Incoming when roaming: The barring service for allincoming calls when roaming.
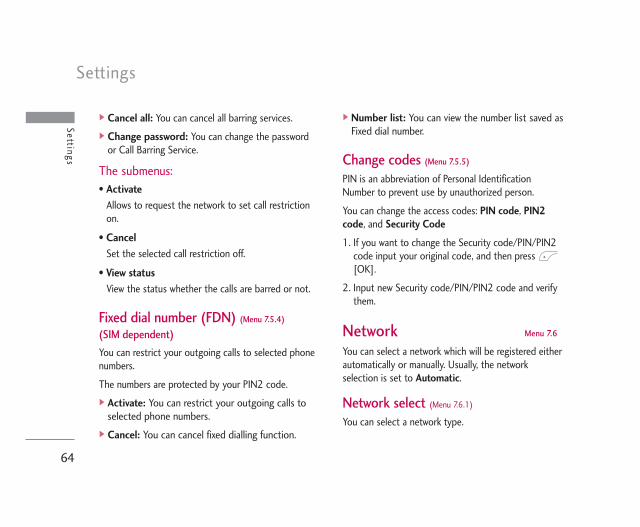
Settings
64
Settings
] Cancel all: You can cancel all barring services.] Change password: You can change the password
or Call Barring Service.
The submenus:• Activate
Allows to request the network to set call restrictionon.
• Cancel
Set the selected call restriction off.
• View status
View the status whether the calls are barred or not.
Fixed dial number (FDN) (Menu 7.5.4)
(SIM dependent)
You can restrict your outgoing calls to selected phonenumbers.
The numbers are protected by your PIN2 code.] Activate: You can restrict your outgoing calls to
selected phone numbers.] Cancel: You can cancel fixed dialling function.
] Number list: You can view the number list saved asFixed dial number.
Change codes (Menu 7.5.5)
PIN is an abbreviation of Personal IdentificationNumber to prevent use by unauthorized person.
You can change the access codes: PIN code, PIN2code, and Security Code
1. If you want to change the Security code/PIN/PIN2code input your original code, and then press [OK].
2. Input new Security code/PIN/PIN2 code and verifythem.
Network Menu 7.6
You can select a network which will be registered eitherautomatically or manually. Usually, the networkselection is set to Automatic.
Network select (Menu 7.6.1)
You can select a network type.
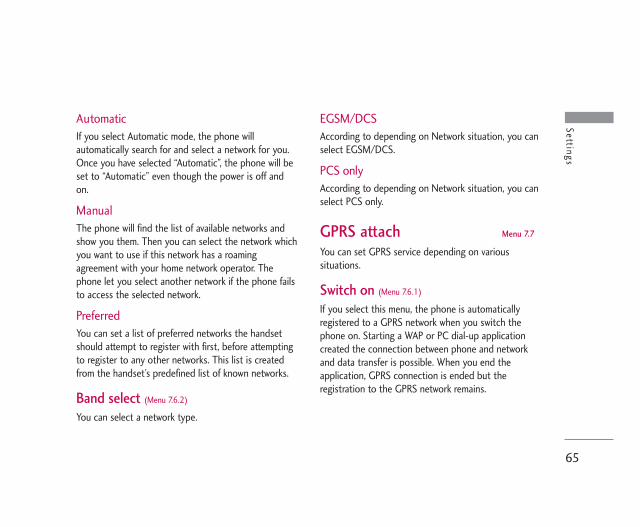
65
Settings
AutomaticIf you select Automatic mode, the phone willautomatically search for and select a network for you.Once you have selected “Automatic”, the phone will beset to “Automatic” even though the power is off andon.
ManualThe phone will find the list of available networks andshow you them. Then you can select the network whichyou want to use if this network has a roamingagreement with your home network operator. Thephone let you select another network if the phone failsto access the selected network.
PreferredYou can set a list of preferred networks the handsetshould attempt to register with first, before attemptingto register to any other networks. This list is createdfrom the handset’s predefined list of known networks.
Band select (Menu 7.6.2)
You can select a network type.
EGSM/DCSAccording to depending on Network situation, you canselect EGSM/DCS.
PCS only According to depending on Network situation, you canselect PCS only.
GPRS attach Menu 7.7
You can set GPRS service depending on varioussituations.
Switch on (Menu 7.6.1)
If you select this menu, the phone is automaticallyregistered to a GPRS network when you switch thephone on. Starting a WAP or PC dial-up applicationcreated the connection between phone and networkand data transfer is possible. When you end theapplication, GPRS connection is ended but theregistration to the GPRS network remains.
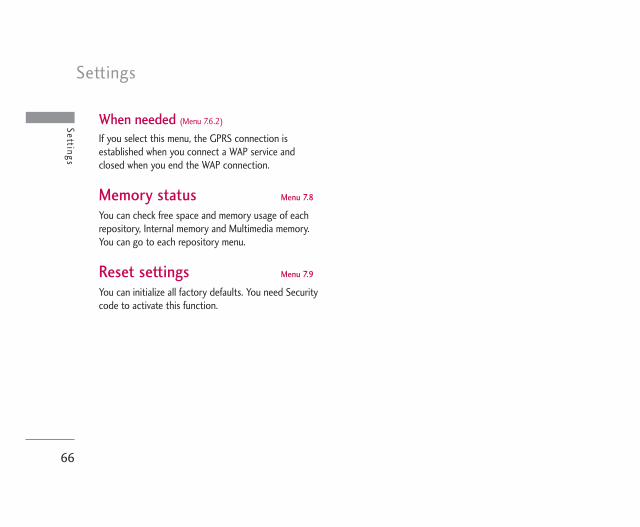
Settings
66
Settings
When needed (Menu 7.6.2)
If you select this menu, the GPRS connection isestablished when you connect a WAP service andclosed when you end the WAP connection.
Memory status Menu 7.8
You can check free space and memory usage of eachrepository, Internal memory and Multimedia memory.You can go to each repository menu.
Reset settings Menu 7.9
You can initialize all factory defaults. You need Securitycode to activate this function.

Browser
You can access various WAP (Wireless ApplicationProtocol) services such as banking, news, weatherreports and flight information. These services arespecially designed for mobile phones and they aremaintained by WAP service providers.
Check the availability of WAP services, pricing andtariffs with your network operator and/or the serviceprovider whose service you wish to use. Serviceproviders will also give you instructions on how touse their services.
Once connected, the homepage is displayed. Thecontent depends on the service provider. To exit thebrowser at any time, press the ( ) key. The phonewill return to the previous menu.
Navigating with the WAP browserYou can surf the Internet using either the phone keysor the WAP browser menu.
Using the phone keysWhen surfing the Internet, the phone keys functiondifferently to phone mode.
Using the WAP browser menuThere are various menu options available whensurfing the Mobile Web.
Home Menu 8.1
Connects to a homepage. The homepage will be thesite which is defined in the activated profile. It will bedefined by the service provider if you have notdefined it in the activated profile.
Key Description
Scrolls each line of the contentarea
Returns to the previous page
Selects options and confirmsactions
Note] The WAP browser menus may vary, depending
on your browser version.
Browser
67
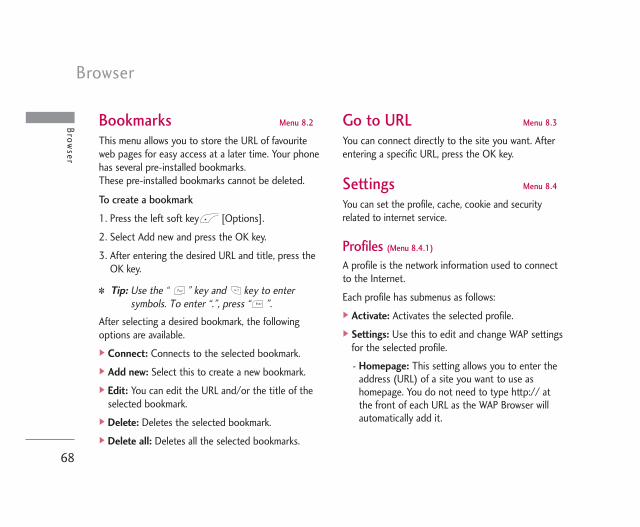
Browser
68
Browser
Bookmarks Menu 8.2
This menu allows you to store the URL of favouriteweb pages for easy access at a later time. Your phonehas several pre-installed bookmarks. These pre-installed bookmarks cannot be deleted.
To create a bookmark
1. Press the left soft key [Options].
2. Select Add new and press the OK key.
3. After entering the desired URL and title, press theOK key.
✽ Tip: Use the “ ” key and key to entersymbols. To enter “.”, press “ ”.
After selecting a desired bookmark, the followingoptions are available.] Connect: Connects to the selected bookmark.] Add new: Select this to create a new bookmark.] Edit: You can edit the URL and/or the title of the
selected bookmark.] Delete: Deletes the selected bookmark.] Delete all: Deletes all the selected bookmarks.
Go to URL Menu 8.3
You can connect directly to the site you want. Afterentering a specific URL, press the OK key.
Settings Menu 8.4
You can set the profile, cache, cookie and securityrelated to internet service.
Profiles (Menu 8.4.1)
A profile is the network information used to connectto the Internet.
Each profile has submenus as follows:] Activate: Activates the selected profile.] Settings: Use this to edit and change WAP settings
for the selected profile.
- Homepage: This setting allows you to enter theaddress (URL) of a site you want to use ashomepage. You do not need to type http:// atthe front of each URL as the WAP Browser willautomatically add it.

69
Browser
- Bearer: You can set the bearer data service.1 Data2 GPRS
- Data settings: Appears only if you select DataSettings as a Bearer / service.
Dial number: Enter the telephone number todial to access your WAP gateway.
User ID: The users identity for your dial-upserver (and NOT the WAP gateway).
Password: The password required by your dial-up server (and NOT the WAP gateway) toidentify you.
Call type: Select the type of data call : Analogueor Digital (ISDN)
Linger time: You need to enter timeout period.After entering that, the WAP navigation servicewill be unavailable if any data is not input ortransferred.
- GPRS settings: The service settings are onlyavailable when GPRS is chosen as a bearerservice.
APN: Input the APN of the GPRS.
User ID: The users identify for your APN server.
Password: The password required by your APNserver.
- Proxy settings
Proxy: Activates or cancels proxy.
IP address: Input the IP address of the Proxyserver you access.
Port number: Input the Proxy Port
- DNS settings
Primary server: Input the IP address of theprimary DNS server you access
Secondary server: Input the IP address of thesecondary DNS server you access
] Rename: You can change the profile name.] Add new: You can add a new profile.
Cache (Menu 8.4.2)
The information or services you have accessed aresaved in the cache memory of the phone.

Browser
70
Browser
Cookie (Menu 8.4.3)
The information or services you have accessed aresaved in the cache memory of the phone.
Clear cache (Menu 8.4.4)
Removes all context saved in cache.
Clear cookie (Menu 8.4.5)
Removes all context saved in cookie.
Security (Menu 8.4.6)
A list of the available certification is shown.] Authority: You can see the list of authority
certificates that have been stored in your phone.] Personal: You can see the list of personal
certificates that have been stored in your phone.
Note] A cache is a buffer memory, which is used to
save data temporarily.

My stuff
71
My stuff
Photos Menu 9.1
You can view and send a picture. In addition, you canset the window as a background.
All pictures (Menu 9.1.1)
You can view all pictures in order.
• Options
] Multi view: You can view the maximum of 9thumbnails in a screen.
] Write multimedia message: You can send a picturethrough MMS.
] Send via Bluetooth: You can send a picture byBluetooth.
] Set as wallpaper: You can set a picture as awallpaper.
] Delete: You can delete a picture.] Edit title: You can edit the title of picture.] View information: You can view the information
about Title, Size, Date and Time you’ve taken.] Protection: You can lock the picture for deleting by
mistake in this menu.
General pictures (Menu 9.1.2)
You can view all pictures except of frame and phonebook ones. In addition, you can see the same optionmenus like All pictures(9-1-1).
Phonebook pictures (Menu 9.1.3)
You can view all phonebook pictures.] Set as wallpaper: You can set a picture as a
wallpaper.] Delete: You can delete a picture.] Edit title: You can edit the title of picture.] View information: You can view the information
about Title, Size, Date and Time you’ve taken.] Protection: You can lock the picture for deleting in
mistakes in this menu.
Delete all (Menu 9.1.4)
Delete all files in the list.
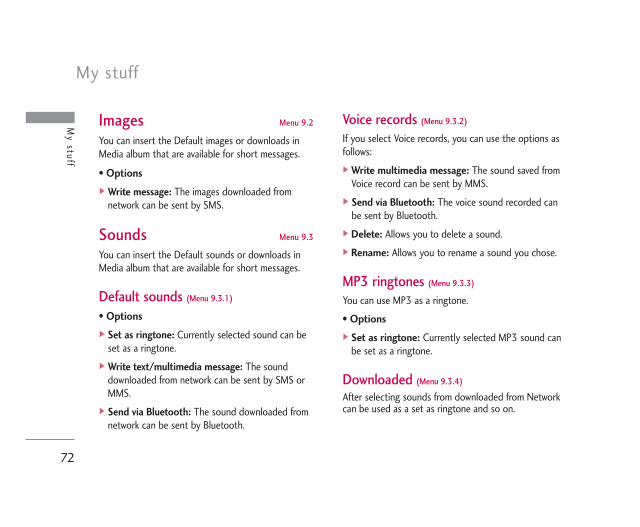
My stuff
72
My stuff
Images Menu 9.2
You can insert the Default images or downloads inMedia album that are available for short messages.
• Options
] Write message: The images downloaded fromnetwork can be sent by SMS.
Sounds Menu 9.3
You can insert the Default sounds or downloads inMedia album that are available for short messages.
Default sounds (Menu 9.3.1)
• Options
] Set as ringtone: Currently selected sound can beset as a ringtone.
] Write text/multimedia message: The sounddownloaded from network can be sent by SMS orMMS.
] Send via Bluetooth: The sound downloaded fromnetwork can be sent by Bluetooth.
Voice records (Menu 9.3.2)
If you select Voice records, you can use the options asfollows:] Write multimedia message: The sound saved from
Voice record can be sent by MMS.] Send via Bluetooth: The voice sound recorded can
be sent by Bluetooth.] Delete: Allows you to delete a sound.] Rename: Allows you to rename a sound you chose.
MP3 ringtones (Menu 9.3.3)
You can use MP3 as a ringtone.
• Options
] Set as ringtone: Currently selected MP3 sound canbe set as a ringtone.
Downloaded (Menu 9.3.4)
After selecting sounds from downloaded from Networkcan be used as a set as ringtone and so on.

73
Games & Apps Menu 9.4
In this menu, you can manage the Java applicationsinstalled on your phone. You can play or deletedownloaded applications, or set the connect option.This menu will connect to the [Menu 3-4].
Others Menu 9.5
This menu shows the list of files which can not playand view. You can check the options as follows:] View: Allow you to see the file chosen.] Send via Bluetooth: Send the selected file to
another device via Bluetooth.] Delete: Allows you to delete a file in the list.] Rename: Allows you to rename the file.
My stuff

Battery
HeadsetAllows hands-free operation. Includes earpiece andmicrophone.
Supplied adapterThis adapter lets you chargewhile at home or in theoffice.
Data cable kitConnects your phone to a PC.
There are a variety of accessories available for your mobile phone. You can select these according to your personalcommunication requirements. Consult your local dealer for availability.
Note] Always use genuine LG accessories. Failure to do
this may invalidate your warranty.] Accessories may be different in different regions;
please check with our regional service companyor agent for further enquiries.
Accessories
74
Accessories

Technical dataTechnical data
75
GeneralProduct name : KG245
System : GSM 900 / DCS 1800 / PCS 1900
Ambient TemperaturesMax : +55°C
Min : -10°C


MEMO

MEMO