JD Edwards EnterpriseOne Applications Human Capital ...
362
[1]JD Edwards EnterpriseOne Applications Human Capital Management Self-Service Implementation Guide Release 9.1 E15118-12 November 2019
-
Upload
khangminh22 -
Category
Documents
-
view
0 -
download
0
Transcript of JD Edwards EnterpriseOne Applications Human Capital ...

[1] JD Edwards EnterpriseOne ApplicationsHuman Capital Management Self-Service Implementation Guide
Release 9.1
E15118-12
November 2019

JD Edwards EnterpriseOne Applications Human Capital Management Self-Service Implementation Guide, Release 9.1
E15118-12
Copyright © 2016, 2019, Oracle and/or its affiliates. All rights reserved.
This software and related documentation are provided under a license agreement containing restrictions on use and disclosure and are protected by intellectual property laws. Except as expressly permitted in your license agreement or allowed by law, you may not use, copy, reproduce, translate, broadcast, modify, license, transmit, distribute, exhibit, perform, publish, or display any part, in any form, or by any means. Reverse engineering, disassembly, or decompilation of this software, unless required by law for interoperability, is prohibited.
The information contained herein is subject to change without notice and is not warranted to be error-free. If you find any errors, please report them to us in writing.
If this is software or related documentation that is delivered to the U.S. Government or anyone licensing it on behalf of the U.S. Government, then the following notice is applicable:
U.S. GOVERNMENT END USERS: Oracle programs, including any operating system, integrated software, any programs installed on the hardware, and/or documentation, delivered to U.S. Government end users are "commercial computer software" pursuant to the applicable Federal Acquisition Regulation and agency-specific supplemental regulations. As such, use, duplication, disclosure, modification, and adaptation of the programs, including any operating system, integrated software, any programs installed on the hardware, and/or documentation, shall be subject to license terms and license restrictions applicable to the programs. No other rights are granted to the U.S. Government.
This software or hardware is developed for general use in a variety of information management applications. It is not developed or intended for use in any inherently dangerous applications, including applications that may create a risk of personal injury. If you use this software or hardware in dangerous applications, then you shall be responsible to take all appropriate fail-safe, backup, redundancy, and other measures to ensure its safe use. Oracle Corporation and its affiliates disclaim any liability for any damages caused by use of this software or hardware in dangerous applications.
Oracle and Java are registered trademarks of Oracle and/or its affiliates. Other names may be trademarks of their respective owners.
Intel and Intel Xeon are trademarks or registered trademarks of Intel Corporation. All SPARC trademarks are used under license and are trademarks or registered trademarks of SPARC International, Inc. AMD, Opteron, the AMD logo, and the AMD Opteron logo are trademarks or registered trademarks of Advanced Micro Devices. UNIX is a registered trademark of The Open Group.
This software or hardware and documentation may provide access to or information about content, products, and services from third parties. Oracle Corporation and its affiliates are not responsible for and expressly disclaim all warranties of any kind with respect to third-party content, products, and services unless otherwise set forth in an applicable agreement between you and Oracle. Oracle Corporation and its affiliates will not be responsible for any loss, costs, or damages incurred due to your access to or use of third-party content, products, or services, except as set forth in an applicable agreement between you and Oracle.

iii
Contents
Preface ............................................................................................................................................................... xix
Audience..................................................................................................................................................... xixJD Edwards EnterpriseOne Products ..................................................................................................... xixJD Edwards EnterpriseOne Application Fundamentals ..................................................................... xixDocumentation Accessibility ................................................................................................................... xixRelated Documents ................................................................................................................................... xxConventions ............................................................................................................................................... xx
1 Introduction to JD Edwards EnterpriseOne Human Capital Management Self-Service
1.1 JD Edwards EnterpriseOne HCM Self-Service Overview .................................................... 1-11.1.1 eRecruit.................................................................................................................................. 1-41.2 JD Edwards EnterpriseOne HCM Self-Service Implementation ......................................... 1-61.2.1 Installation Steps for the JD Edwards EnterpriseOne Collaborative Portal................ 1-71.2.2 Global Implementation Steps for JD Edwards EnterpriseOne HCM Self-Service ..... 1-91.2.3 Implementation Steps for the JD Edwards HCM Self-Service System ..................... 1-10
2 Setting Up Common Settings for Self-Service
2.1 Understanding Self-Service Web Pages................................................................................... 2-12.1.1 HR - Employee Career ........................................................................................................ 2-22.1.2 HR - Manager Career .......................................................................................................... 2-22.1.3 HR - Delegates...................................................................................................................... 2-32.1.4 HR - Enhanced Employee Self Service ............................................................................. 2-32.1.5 HR - New Employee............................................................................................................ 2-42.1.6 HR - Employee Performance Management ..................................................................... 2-52.1.7 HR - My Workforce ............................................................................................................. 2-52.1.8 HR - My Profile .................................................................................................................... 2-62.1.9 HR - Paid Time Off .............................................................................................................. 2-72.1.10 HR - Payment Review......................................................................................................... 2-72.1.11 HR - Global Leave Administration ................................................................................... 2-82.1.12 HR - Time Entry ................................................................................................................... 2-82.1.13 HR - Global Leave Approvals............................................................................................ 2-82.1.14 HR - Payroll .......................................................................................................................... 2-92.1.15 HR - eRecruit ........................................................................................................................ 2-92.2 Understanding Common Settings for Self-Service Setup .................................................. 2-10

iv
2.3 Entering the Common Settings for Self-Service .................................................................. 2-112.3.1 Forms Used to Set Up Common Settings for Self-Service .......................................... 2-112.3.2 Entering the Common Settings....................................................................................... 2-11
3 Setting Up Employee Self-Service
3.1 Understanding Employee Self-Service Setup ......................................................................... 3-13.2 Setting Up Verification of Employment .................................................................................. 3-13.2.1 Understanding Verification of Employment Setup........................................................ 3-13.2.2 Prerequisites ......................................................................................................................... 3-23.2.3 Forms Used to Set Up Verification of Employment ....................................................... 3-23.2.4 Setting Up Verification of Employment ........................................................................... 3-33.3 Setting Up Name and Address Change................................................................................... 3-33.3.1 Understanding Name and Address Change Setup ........................................................ 3-33.4 Setting Up Emergency Contacts and Phones.......................................................................... 3-43.4.1 Understanding Emergency Contacts Setup..................................................................... 3-43.4.2 Prerequisite ........................................................................................................................... 3-43.5 Setting Up Paid Time-Off Inquiry ............................................................................................ 3-43.5.1 Prerequisite ........................................................................................................................... 3-4
4 (USA) Setting Up IRS Form W-4
4.1 Understanding IRS Form W-4 Setup ....................................................................................... 4-14.2 Prerequisite .................................................................................................................................. 4-24.3 Creating Director Form Rules for IRS Form W-4 ................................................................... 4-24.3.1 Understanding Director Form Rules for IRS Form W-4 ................................................ 4-24.4 Setting Up the Self-Service Form for IRS Form W-4.............................................................. 4-24.4.1 Understanding the Self-Service Form for IRS Form W-4.............................................. 4-34.4.2 Setting Processing Options for IRS Form W-4, Employee's Withholding Allowance for
ESS (P085303A) .................................................................................................................... 4-34.4.2.1 Year................................................................................................................................. 4-34.4.2.2 SSA Phone...................................................................................................................... 4-34.4.2.3 Process............................................................................................................................ 4-34.5 Creating a Self-Service Process Flow Script for IRS Form W-4 ............................................ 4-44.5.1 Understanding a Self-Service Process Flow Script for IRS Form W-4 ......................... 4-44.6 Revising the IRS W-4 Form Workfile ....................................................................................... 4-44.6.1 Understanding the IRS W-4 Form Workfile .................................................................... 4-44.6.2 Forms Used to Review or Update the IRS W-4 Form Workfile .................................... 4-54.6.3 Reviewing and Updating the IRS W-4 Form Workfile .................................................. 4-54.7 Setting Up URLs for IRS Form W-4.......................................................................................... 4-74.7.1 Understanding URLs for IRS Form W-4 Setup ............................................................... 4-74.8 Printing Employee W-4 Form ................................................................................................... 4-84.9 Saving Employee W-4 Information .......................................................................................... 4-84.9.1 Understanding the Update Employee W-4 Information to Live Tables report.......... 4-84.9.2 Running the Update Employee W-4 Information to Live Tables report ..................... 4-94.9.3 Setting Processing Options for Update Employee W-4 Form Information to Live Tables
(R0855303) ............................................................................................................................. 4-94.9.3.1 Process............................................................................................................................ 4-94.9.4 Setting Back Office Application for IRS Form W-4:..................................................... 4-10

v
5 (Release 9.1 Update) (USA) Setting Up OFCCP Forms to Disclose Disability and Veteran Status
5.1 Understanding OFCCP Forms Setup....................................................................................... 5-15.2 Running Director Form Rules for OFCCP Forms .................................................................. 5-15.2.1 Understanding Director Form Rules for OFCCP Forms................................................ 5-15.2.2 Running the Populate Director Form Rules/Edits Report for OFCCP Forms ........... 5-25.3 Creating a Self-Service Process Flow Script for OFCCP Forms ........................................... 5-25.3.1 Understanding the Self-Service Process Flow Script for OFCCP Forms ..................... 5-2
6 Setting Up Manager Self Service
6.1 Understanding Manager Self-Service Setup ........................................................................... 6-16.2 Setting Up Upcoming Reviews by Supervisor ....................................................................... 6-16.2.1 Understanding Upcoming Reviews by Supervisor Setup............................................. 6-16.2.2 Prerequisite ........................................................................................................................... 6-26.2.3 Setting Processing Options for Upcoming Reviews by Supervisor (P052200) ........... 6-26.2.3.1 Process............................................................................................................................ 6-26.2.3.2 Defaults .......................................................................................................................... 6-36.2.3.3 Version ........................................................................................................................... 6-36.3 Setting Up the Employee Setup Process.................................................................................. 6-36.3.1 Understanding the Employee Setup Process................................................................... 6-36.3.2 Prerequisites ......................................................................................................................... 6-56.3.3 Forms Used to Set Up the Employee Setup Process....................................................... 6-56.3.4 Setting Up Default Tasks .................................................................................................... 6-66.3.5 Setting Up Tasks by Location............................................................................................. 6-66.4 Setting Up Employee Status Change ....................................................................................... 6-96.4.1 Understanding Employee Status Change Setup ............................................................. 6-96.4.2 Prerequisite ........................................................................................................................ 6-106.4.3 Form Used to Set Up the Employee Status Change Program.................................... 6-106.4.4 Setting Processing Options for Employee Status Change Setup (P08730) ............... 6-116.4.4.1 Defaults ....................................................................................................................... 6-116.4.5 Setting Up the Employee Status Change Program ...................................................... 6-116.5 Setting Up Manager Reports .................................................................................................. 6-126.5.1 Understanding Manager Reports setup ........................................................................ 6-126.5.2 Prerequisites ...................................................................................................................... 6-126.5.3 Forms Required to Set Up Manager Reports................................................................ 6-136.5.4 Setting Up Manager Reports........................................................................................... 6-136.6 Setting Up Organizational Charts for the Web.................................................................... 6-146.6.1 Understanding Organizational Charts for the Web .................................................... 6-146.6.2 Forms Used to Set Up Organizational Charts for the Web ........................................ 6-146.6.3 Setting Processing Options for Generate Graphic Organizational Chart (P08713W)........
6-146.6.3.1 Default......................................................................................................................... 6-146.6.4 Organizational Charts Setup........................................................................................... 6-146.7 Setting Up Delegates for Managers Workbench ................................................................. 6-166.7.1 Understanding Delegates Setup for Managers Workbench....................................... 6-166.7.2 Form Used to Set Up Delegates for Managers Workbench........................................ 6-16

vi
6.7.3 Setting Processing Options for Manager Delegates Setup (P08750) ......................... 6-176.7.3.1 Defaults ....................................................................................................................... 6-176.8 Setting Up Manager Delegates for Time Entry.................................................................... 6-176.8.1 Understanding Manager Delegates Setup for Time Entry ......................................... 6-176.8.2 Form Used to Set Up Manager Delegates for Time Entry .......................................... 6-176.8.3 Setting Processing Options for Manager Delegates Setup (P051126) ....................... 6-186.8.3.1 Defaults ....................................................................................................................... 6-186.8.4 Setting Up Manager Delegates for Time Entry ............................................................ 6-18
7 Setting Up Self-Service Time Entry
7.1 Understanding Self-Service Time Entry Setup ....................................................................... 7-17.1.1 Mobile Enterprise Applications for Field Progress Entry (Release 9.1 Update)......... 7-27.2 Setting Up the Time Entry Director Form ............................................................................... 7-37.2.1 Understanding the Time Entry Director Form................................................................ 7-37.2.1.1 Example 1....................................................................................................................... 7-37.2.1.2 Example 2....................................................................................................................... 7-37.2.2 Forms Used to Set Up the Time Entry Director Form.................................................... 7-47.2.3 Setting Processing Options for Time Entry Self Service Director (P051125)............... 7-47.2.3.1 Date/Pay Cycle Code .................................................................................................. 7-47.2.3.2 Pay Type ........................................................................................................................ 7-57.2.3.3 Leave Entry.................................................................................................................... 7-57.2.3.4 Account Number .......................................................................................................... 7-67.2.3.5 Multicurrency................................................................................................................ 7-77.2.3.6 Manager ......................................................................................................................... 7-77.2.3.7 Administrator................................................................................................................ 7-87.2.3.8 Resource Assignment................................................................................................... 7-97.2.3.9 Future Entry .................................................................................................................. 7-97.2.3.10 Timecard Changes........................................................................................................ 7-97.2.3.11 Daily Time Entry .......................................................................................................... 7-97.2.4 Setting Up Director Text .................................................................................................. 7-107.3 Creating the Time Entry Interface for Employee Self-Service........................................... 7-107.3.1 Understanding the Time Entry Interface for Employee Self-Service ........................ 7-107.3.2 Forms Used to Create the Time Entry Interface for Employee Self-Service ............ 7-127.3.3 Setting Up the Time Entry Interface for Employee Self-Service ................................ 7-127.4 Assigning Pay Types to Employee Groups.......................................................................... 7-207.4.1 Understanding Pay Types Assignment......................................................................... 7-207.4.2 Forms Used to Assign Pay Types to Employee Groups ............................................. 7-217.4.3 Setting Up Pay Type Assignment for Employee Groups ........................................... 7-217.5 Working with Labor Distribution Periods ........................................................................... 7-227.5.1 Understanding Labor Distribution Periods ................................................................. 7-237.5.2 Forms Used to Work with Labor Distribution Periods............................................... 7-237.5.3 Adding Labor Distribution Period for an Employee................................................... 7-237.5.4 Overriding Standard Hours with Labor Distribution Period .................................... 7-24
8 Understanding the eRecruit System
8.1 The eRecruit System ................................................................................................................... 8-18.2 eRecruit Tables ............................................................................................................................ 8-2

vii
8.3 User Defined Codes for eRecruit .............................................................................................. 8-38.3.1 Ascending Descending (08R/AD) .................................................................................... 8-38.3.2 eRecruit Status (08R/AS).................................................................................................... 8-38.3.3 Disable Applicant Activities (08R/AA)............................................................................ 8-48.3.4 Element ID (08R/EI)............................................................................................................ 8-48.3.5 Internal/External/Both (08R/IE)...................................................................................... 8-48.3.6 Job Posting Location (08R/JL) ........................................................................................... 8-58.3.7 Letter Component (08R/LC).............................................................................................. 8-58.3.8 Mandatory/Hide/Disable (08R/MH).............................................................................. 8-58.3.9 Phrase Category (08R/PH)................................................................................................. 8-68.3.10 Posting Category (08R/PC)................................................................................................ 8-68.3.11 Posting Status (08R/PS)...................................................................................................... 8-68.3.12 Job Posting (08R/WS) ......................................................................................................... 8-68.3.13 Resume Flag (08R/RF)........................................................................................................ 8-78.3.14 Sort Fields (08R/SF) ............................................................................................................ 8-78.3.15 Travel Percentage (08R/TP)............................................................................................... 8-7
9 eRecruit System Setup
9.1 Understanding eRecruit System Setup.................................................................................... 9-19.1.1 Prerequisite ........................................................................................................................... 9-19.2 Setting Up the Encryption Key ................................................................................................. 9-19.2.1 Understanding the Encryption Key Setup....................................................................... 9-19.2.2 Form Used to Set Up the Encryption Key........................................................................ 9-29.2.3 Set Up the Encryption Key ................................................................................................. 9-29.3 Setting Processing Options for Recruitment Self Service Menu (P08400) .......................... 9-29.3.1 Email Type ............................................................................................................................ 9-29.4 Setting Processing Options for Applicant Login (P08405).................................................... 9-39.4.1 User ID and Password ........................................................................................................ 9-39.5 Example: Applying for a Job Using eRecruit.......................................................................... 9-3
10 eRecruit Applications Setup
10.1 Understanding eRecruit Setup............................................................................................... 10-110.2 Defining Posting Categories................................................................................................... 10-110.2.1 Understanding Posting Category Definitions .............................................................. 10-110.2.2 Form Used to Define Posting Categories ...................................................................... 10-210.2.3 Posting Category Information ........................................................................................ 10-210.3 Defining Settings by Posting Category................................................................................. 10-210.3.1 Understanding Settings by Posting Category .............................................................. 10-310.3.2 Forms Used to Define Settings by Posting Category................................................... 10-310.3.3 Settings by Posting Category .......................................................................................... 10-310.3.3.1 Field Preferences........................................................................................................ 10-410.3.3.2 Posting Display .......................................................................................................... 10-510.3.3.3 Disable Activities ....................................................................................................... 10-610.3.3.4 Confirmation Email................................................................................................... 10-710.3.3.5 Web Addresses tab.................................................................................................... 10-710.4 Defining Standard Phrase Categories ................................................................................... 10-8

viii
10.4.1 Understanding Standard Phrase Categories ................................................................ 10-810.4.2 Form Used to Define Standard Phrase Categories ...................................................... 10-810.4.3 Standard Phrase Categories ............................................................................................ 10-810.5 Defining Standard Phrases ..................................................................................................... 10-910.5.1 Understanding Standard Phrases................................................................................... 10-910.5.2 Form Used to Define Standard Phrases....................................................................... 10-1010.5.3 Standard Phrases ............................................................................................................ 10-10
11 Managing Job Postings
11.1 Understanding Job Posting Management ............................................................................ 11-111.2 Prerequisite ............................................................................................................................... 11-111.3 Creating and Editing a Job Posting ....................................................................................... 11-211.3.1 Understanding Job Posting ............................................................................................. 11-211.3.2 Forms Used to Create and Edit a Job Posting............................................................... 11-311.3.3 Setting Processing Options for Manage Job Postings (P08470).................................. 11-411.3.3.1 Competencies ............................................................................................................. 11-411.3.4 Create a Job Posting.......................................................................................................... 11-511.3.4.1 Job Postings Form, Job Titles ................................................................................... 11-711.3.4.2 Standard Phrase Search & Select Form .................................................................. 11-811.3.4.3 Add Job Postings Form, Competencies.................................................................. 11-811.3.5 Edit a Job Posting.............................................................................................................. 11-911.4 Building Job Posting Records............................................................................................... 11-1011.4.1 Understanding Job Posting Records ............................................................................ 11-1011.4.2 Running the Job Posting Records Program (R08473) ................................................ 11-10
12 Processing eRecruit Applicants
12.1 Understanding eRecruit Applicant Processing ................................................................... 12-112.2 Prerequisite ............................................................................................................................... 12-112.3 Setting Up HR Self-Service Programs (Release 9.1 Update).............................................. 12-112.4 Reviewing Submitted Applications ...................................................................................... 12-212.4.1 Understanding Submitted Applications Review ......................................................... 12-212.4.2 Forms Used to Review Submitted Applications .......................................................... 12-312.4.3 Setting Processing Options for Review Applicants (P08498) ..................................... 12-312.4.3.1 Process......................................................................................................................... 12-312.4.4 Review Submitted Applications..................................................................................... 12-312.5 Performing eRecruit Searches ................................................................................................ 12-512.5.1 Understanding eRecruit Searches .................................................................................. 12-512.5.1.1 Example: Keyword Search Options ....................................................................... 12-512.5.1.2 Example: Keyword Search Complex Query ......................................................... 12-512.5.1.3 Keyword Search Text Entry .................................................................................... 12-612.5.1.4 eRecruit Data Field Filters ....................................................................................... 12-612.5.2 Forms Used to Perform eRecruit Searches.................................................................... 12-712.5.3 Setting Processing Options for Search eRecruit Applicants and Resumes (P08488) .........
12-712.5.3.1 Action .......................................................................................................................... 12-712.5.3.2 Defaults ....................................................................................................................... 12-712.5.3.3 Versions....................................................................................................................... 12-7

ix
12.5.4 Searching for eRecruit Applicants.................................................................................. 12-812.6 eRecruit SES Index Build ...................................................................................................... 12-1012.6.1 Understanding Building Indexes for Performing Searches...................................... 12-1112.6.2 Running the eRecruit SES Index Build Program........................................................ 12-1112.7 Processing Recruitment Records (R08470) ......................................................................... 12-1112.7.1 Understanding Recruitment Records Processing ...................................................... 12-1112.7.2 Running the Processing Recruitment Records Program........................................... 12-1112.7.3 Setting Processing Options for Process Recruitment Records (R08470)................. 12-1112.7.3.1 Process....................................................................................................................... 12-1112.8 Updating Applicant Personal Information (R08490) ........................................................ 12-1212.8.1 Understanding the Updating Applicant Personal Information Report.................. 12-1212.8.2 Running the Updating Applicant Personal Information Report ............................. 12-1212.8.3 Setting Processing Options for Update Applicant Info (R08490) ............................ 12-1212.8.3.1 Process....................................................................................................................... 12-1312.8.3.2 Defaults ..................................................................................................................... 12-1312.8.3.3 Notifications ............................................................................................................. 12-13
13 Employee Self-Service Benefits Setup
13.1 Understanding Employee Self-Service Benefits Setup ....................................................... 13-113.2 Implementing Employee Benefits Setup .............................................................................. 13-213.2.1 Understanding Employee Benefits Setup Implementation ........................................ 13-213.2.2 Forms Used to Implement Self-Service Benefits Setup ............................................... 13-313.2.3 Implement Self-Service Benefits Setup .......................................................................... 13-4
14 Setting Up Common Settings for Benefits Self Service
14.1 Understanding Common Settings for Benefits Self Service............................................... 14-114.2 Implementing the Settings...................................................................................................... 14-114.2.1 Forms Used to Set Up Common Settings for Benefits Self Service............................ 14-114.2.2 Entering the Common Settings....................................................................................... 14-1
15 Defining Benefit Category Rules for Self Service
15.1 Understanding Benefit Category Rules for Self Service..................................................... 15-115.2 Linking Categories to Benefit Groups................................................................................... 15-215.2.1 Forms Used to Link Categories to Benefit Groups ...................................................... 15-215.2.2 Link Categories to Benefit Groups ................................................................................. 15-3
16 Setting Up URLs for Self-Service Benefits
16.1 Understanding URLs for Self-Service Benefits .................................................................... 16-116.2 Prerequisites ............................................................................................................................. 16-216.3 Setting Up URLs for Benefit Plan Options ........................................................................... 16-216.3.1 Understanding URLs for Benefit Plan Options............................................................ 16-216.3.2 Forms Used to Set Up URLs for Benefit Plan Options ................................................ 16-216.3.3 Set Up URLs for Benefit Plan Options........................................................................... 16-216.4 Setting Up URLs for Benefit Plans......................................................................................... 16-316.4.1 Understanding URLs for Benefit Plans ......................................................................... 16-3

x
16.4.2 Forms Used to Set Up URLs for Benefit Plans.............................................................. 16-416.4.3 Set Up URLs for Benefit Plans ........................................................................................ 16-416.5 Setting Up URLs for Benefit Categories ............................................................................... 16-416.5.1 Understanding URLs for Benefit Categories ................................................................ 16-516.5.2 Forms Used to Set Up URLs for Benefit Categories .................................................... 16-516.5.3 Set Up URLs for Benefit Categories ............................................................................... 16-516.6 Setting Up URLs for Benefit Groups..................................................................................... 16-616.6.1 Understanding URLs for Benefit Groups...................................................................... 16-616.6.2 Forms Used to Set Up URLs for Benefit Groups.......................................................... 16-616.6.3 Set Up URLs for Benefit Groups..................................................................................... 16-6
17 Setting Up Benefit Enrollment Events for Self Service
17.1 Understanding Benefit Enrollment Events for Self Service ............................................... 17-117.2 Implementing Benefit Enrollment Events ............................................................................ 17-117.2.1 Forms Used to Implement Benefit Enrollment Events................................................ 17-117.2.2 Benefit Enrollment Event Set Up.................................................................................... 17-2
18 Setting Up Benefit Categories by Enrollment Event
18.1 Understanding Benefit Categories by Enrollment Event................................................... 18-118.2 Implementing the Settings...................................................................................................... 18-118.2.1 Forms Used to Set Up Benefit Categories by Enrollment Event................................ 18-118.2.2 Set Up Benefit Categories by Enrollment Event........................................................... 18-2
19 Setting Up Allowed Dependent Relationships by Plan
19.1 Understanding Allowed Dependent Relationships by Plan ............................................. 19-119.2 Implementing the Settings...................................................................................................... 19-219.2.1 Forms Used to Implement Allowed Dependent Relationships by Plan................... 19-219.2.2 Implement Allowed Dependent Relationships by Plan ............................................. 19-2
20 Setting Up Workfiles for Benefits Self Service
20.1 Understanding Workfiles for Benefits Self Service ............................................................. 20-120.2 Setting Up Dependent Selection Automatically.................................................................. 20-120.2.1 Understanding Automatic Dependent Selection ......................................................... 20-120.2.2 Running the Automatically Setup SS Dependent Selection (R085505)..................... 20-220.2.3 Setting Processing Options for Automatically Setup SS Dependent Selection (R085505)
20-220.2.3.1 Defaults ....................................................................................................................... 20-220.3 Building the Current Coverage Workfile for Self Service.................................................. 20-320.3.1 Understanding the Current Coverage Workfile for Self Service ............................... 20-320.3.2 Running the Current Enrollment Work File Build program...................................... 20-420.3.3 Setting Processing Options for Current Enrollment Work File Build (R085530) .... 20-420.3.3.1 Version ........................................................................................................................ 20-420.4 Setting Up a Current Dependent and Beneficiary Workfile.............................................. 20-420.4.1 Understanding the Current Dependent and Beneficiary Workfile ........................... 20-420.4.2 Running the Build Current Dependent/Beneficiary Work File Program................ 20-5

xi
20.4.3 Setting Processing Options for Build Current Dependent/Beneficiary Work File (R085537) ............................................................................................................................ 20-5
20.4.3.1 Process......................................................................................................................... 20-520.5 Building the Available Plans Workfile for Self Service ...................................................... 20-520.5.1 Understanding the Available Plans Workfile for Self Service ................................... 20-520.5.2 Prerequisites ...................................................................................................................... 20-620.5.3 Running the Available Plans Work File Build program ............................................. 20-620.5.4 Setting the Processing Options for Available Plans Work File Build (R085520) ..... 20-720.5.4.1 Date.............................................................................................................................. 20-720.5.4.2 Event Type.................................................................................................................. 20-720.6 Excluding Benefit Plans or Categories From a Work File Build ....................................... 20-720.6.1 Understanding Benefit Plan or Category Exclusion from a Work File Build .......... 20-720.6.2 Forms Used to Exclude a Benefit Plan or Category..................................................... 20-820.6.3 Exclude a Benefit Plan or Category................................................................................ 20-820.7 Building the Personal Information Workfile ....................................................................... 20-920.7.1 Understanding the Personal Information Workfile..................................................... 20-920.7.2 Running the Personal Employee Information Workfile Build Report...................... 20-920.7.3 Setting Processing Options for Personal Employee Information Workfile Build
(R054101) ............................................................................................................................ 20-920.7.3.1 Process......................................................................................................................... 20-920.8 Setting Up Steps and Rules for Director Process Flows ................................................... 20-1020.8.1 Understanding Steps and Rules for Director Process Flows.................................... 20-1020.8.2 Running the Populate Director Form Rules/Edits Program ................................... 20-10
21 Setting Up Self-Service Benefit Plan Guidelines
21.1 Understanding Self-Service Benefit Plan Guidelines ......................................................... 21-121.2 Setting Up Benefit Contribution Limits ................................................................................ 21-121.2.1 Understanding Benefit Contribution Limits................................................................. 21-121.2.2 Forms Used to Set Up Benefit Contribution Limits..................................................... 21-221.2.3 Set Up Benefit Contribution Limits................................................................................ 21-221.3 Setting Up Maximum Coverage Increase Limits ................................................................ 21-421.3.1 Understanding Maximum Coverage Increase Limits ................................................. 21-421.3.2 Forms Used to Set Up Maximum Coverage Increase Limits ..................................... 21-421.3.3 Set Up Limits ..................................................................................................................... 21-5
22 Setting Up Self-Service Process Flows
22.1 Understanding Self-Service Process Flows .......................................................................... 22-122.2 Running the Populate Director Form Rules/Edits Report ................................................ 22-122.2.1 Understanding the Populate Director Form Rules/Edits Report.............................. 22-122.2.2 Running the Populate Director Form Rules/Edits Report ......................................... 22-222.3 Defining Process Flow Scripts................................................................................................ 22-222.3.1 Understanding Process Flow Scripts ............................................................................. 22-222.3.1.1 Self-Service Process Flow Rules and Program Relationships ............................. 22-222.3.2 Forms Used to Define Process Flow Scripts ................................................................. 22-422.3.3 Define Scripts .................................................................................................................... 22-422.3.3.1 Define a Process Flow Step ...................................................................................... 22-5

xii
22.3.3.2 Define Director Text .................................................................................................. 22-622.3.3.3 Process Flow Detail ................................................................................................... 22-722.4 Setting Up Translated Director Text ..................................................................................... 22-722.4.1 Understanding Translated Director Text ...................................................................... 22-722.4.2 Forms Used to Set Up Translated Director Text .......................................................... 22-722.4.3 Setting Up Translated Text.............................................................................................. 22-8
23 Setting Up Form Options and Workflow Approval
23.1 Understanding Form Options and Workflow Approval Setup........................................ 23-123.2 Setting Up Form Options........................................................................................................ 23-123.2.1 Understanding Form Options......................................................................................... 23-223.2.2 Forms Used to Set Up Form Options............................................................................. 23-223.2.3 Setting Processing Options for Self-Service Director (P05410) .................................. 23-223.2.3.1 Process......................................................................................................................... 23-223.2.3.2 Display ........................................................................................................................ 23-223.2.4 Setting Processing Options for Employee Information - Telephone Numbers (P054215)
23-323.2.4.1 Display ........................................................................................................................ 23-323.2.5 Setting Processing Options for Dependent Enrollment (P085570) ............................ 23-323.2.5.1 Default......................................................................................................................... 23-323.2.6 Set the Form Options........................................................................................................ 23-423.3 Setting Up Benefit Confirmation Statement Options ......................................................... 23-523.3.1 Understanding Benefit Confirmation Statement Options .......................................... 23-523.3.2 Forms Used to Set Up Benefit Confirmation Statement Options .............................. 23-523.4 Setting Processing Options for Enrollment Statement (P085568) ..................................... 23-523.4.1 Options ............................................................................................................................... 23-523.4.2 Default ................................................................................................................................ 23-623.4.3 Date ..................................................................................................................................... 23-723.4.4 Email ................................................................................................................................... 23-723.4.5 Set Up Statement Options................................................................................................ 23-723.5 Setting Up Self-Service Benefits Workflow Approval........................................................ 23-923.5.1 Understanding Self-Service Benefits Workflow Approval......................................... 23-923.5.2 Forms Used to Set Up Self-Service Benefits Workflow Approval............................. 23-923.5.3 Set Up Workflow Approval .......................................................................................... 23-10
24 Saving Self-Service Employee Information
24.1 Understanding Saving Employee Information ................................................................... 24-124.2 Saving Employee Personal Information ............................................................................... 24-124.2.1 Understanding Employee Personal Information Storage........................................... 24-124.2.2 Running the Update Employee Personal Information to Live Tables Program...... 24-224.2.3 Setting Processing Options for Update Employee Personal Information to Live Tables
(R054104) 24-224.2.3.1 Process......................................................................................................................... 24-324.3 Saving Self-Service Benefits Information ............................................................................. 24-324.3.1 Understanding Benefits Information Storage............................................................... 24-324.3.2 Setting Processing Options for Update Benefits Information to Live Tables (R085524) ...
24-4

xiii
24.3.2.1 Process......................................................................................................................... 24-424.3.2.2 Defaults ....................................................................................................................... 24-4
25 Reviewing History and Revising Self-Service Workfiles
25.1 Understanding Self-Service History and Workfiles............................................................ 25-125.2 Reviewing Employee Self-Service History........................................................................... 25-225.2.1 Understanding Employee Self-Service History............................................................ 25-225.2.2 Forms Used to Review Employee Self-Service History .............................................. 25-325.3 Setting Processing Options for Work With Employee Self Service History (P085585) . 25-325.3.1 Default ................................................................................................................................ 25-325.3.2 Display................................................................................................................................ 25-325.3.3 Review History.................................................................................................................. 25-425.4 Revising the Current Coverage Workfile ............................................................................. 25-425.4.1 Understanding the Current Coverage Workfile .......................................................... 25-425.4.2 Forms Used to Revise the Current Coverage Workfile............................................... 25-525.4.3 Revise the Workfile........................................................................................................... 25-525.5 Revising the Available Plans Workfile ................................................................................. 25-725.5.1 Understanding the Available Plans Workfile............................................................... 25-725.5.2 Forms Used to Revise the Available Plans Workfile ................................................... 25-825.5.3 Revise the Available Plans Workfile .............................................................................. 25-825.6 Reviewing Dependent and Beneficiary Current Coverage Revisions ........................... 25-1125.6.1 Understanding Dependent and Beneficiary Current Coverage Revisions Review...........
25-1125.6.2 Forms Used to Review Dependent and Beneficiary Current Coverage Revisions 25-1225.6.3 Review the Revisions ..................................................................................................... 25-1225.7 Revising the Dependent and Beneficiary Updated Revisions Workfile ........................ 25-1225.7.1 Understanding the Dependent and Beneficiary Updated Revisions Workfile ..... 25-1325.7.2 Forms Used to Revise the Dependent and Beneficiary Updated Revisions Workfile.......
25-1325.7.3 Revising the Workfile..................................................................................................... 25-1325.8 Revising the Personal Profile Workfile ............................................................................... 25-1525.8.1 Understanding Personal Profile Workfile Revisions................................................. 25-1525.8.2 Forms Used to Revise the Personal Profile Workfile................................................. 25-1625.8.3 Revise the Workfile......................................................................................................... 25-16
26 Setting Up New DBA Plan Rates
26.1 Understanding DBA Plan Rates ............................................................................................ 26-126.2 Prerequisite ............................................................................................................................... 26-126.3 Implementing New DBA Plan Rates..................................................................................... 26-126.3.1 Forms Used to Set Up New DBA Plan Rates................................................................ 26-126.3.2 Implement New DBA Plan Rates ................................................................................... 26-2
27 Managing Benefits Self-Service Work Files
27.1 Understanding Benefits Self-Service Work Files................................................................. 27-127.2 Purging the Employee Current and Pending Elections Work Table................................ 27-127.2.1 Understanding the Employee Current and Pending Elections Work Table............ 27-1

xiv
27.2.2 Running the Purge Employee Current/Pending Elections Work Table Program.. 27-127.3 Purging the Dependent and Beneficiary Cross-Reference Work Table ........................... 27-227.3.1 Understanding Dependent and Beneficiary Cross-Reference Work Table Maintenance.
27-227.3.2 Running the Purge Dependent/Beneficiary X-Reference Table Program ............... 27-227.3.3 Setting Processing Options for Purge Dependent/Beneficiary X-Reference Table
(R085542) ............................................................................................................................ 27-227.3.3.1 Delete........................................................................................................................... 27-227.4 Purging the Current Dependent and Beneficiary Cross-Reference Work Table ............ 27-327.4.1 Understanding Current Dependent and Beneficiary Cross-Reference Work Table
Maintenance ...................................................................................................................... 27-327.4.2 Running the Purge Current Dep/Ben X-Reference Work Table Program............... 27-327.5 Purging the Employee Personal Information, Contacts, and Phone Work Tables ........ 27-327.5.1 Understanding Employee Personal Information, Contacts, and Phone Work Tables
Maintenance ...................................................................................................................... 27-327.5.2 Running the Purge Employee Personal, Contact, Phone Work Tables Program.... 27-327.5.3 Setting Processing Options for Purge Employee Personal/Contact/Phone (R054040) ....
27-327.5.3.1 Delete........................................................................................................................... 27-427.6 Purging the Available Plans and Plan Options Work Table ............................................. 27-427.6.1 Understanding Available Plans and Plan Options Work Table Maintenance ........ 27-427.6.2 Running the Purge Available Plans/Plan Options Program ..................................... 27-427.6.3 Setting Processing Options for Purge Available Plans/Plan Options (R085541).... 27-427.6.3.1 Delete........................................................................................................................... 27-4
28 Employee Self Service
28.1 Understanding Employee Self Service.................................................................................. 28-128.2 Requesting a Verification-of-Employment Letter ............................................................... 28-128.2.1 Understanding Verification-of-Employment Letters .................................................. 28-128.2.2 Forms Used to Request a Verification-of-Employment Letter................................... 28-228.2.3 Setting Processing Options for Review Requests for Verification of Employment
(P05003) .............................................................................................................................. 28-228.2.3.1 User Level ................................................................................................................... 28-228.2.3.2 Workflow Setup......................................................................................................... 28-228.2.4 Requesting a Verification-of-Employment Letter ........................................................ 28-328.3 Reviewing Personal Information Using Self Service .......................................................... 28-628.3.1 Understanding Employee Personal Information ......................................................... 28-728.3.2 Prerequisites ...................................................................................................................... 28-728.3.3 Form Used to Review Personal Information Using Self-Service ............................... 28-828.3.4 Setting Processing Options for Employee Profile (P060116) ...................................... 28-828.3.4.1 Enrollment .................................................................................................................. 28-828.3.4.2 Human Resource ....................................................................................................... 28-828.3.4.3 Versions....................................................................................................................... 28-928.3.5 Reviewing Personal Information.................................................................................... 28-928.4 Reviewing Pay Stubs Using Employee Self Service.......................................................... 28-1028.4.1 Understanding Pay Stubs Review................................................................................ 28-1028.4.2 Forms Used to Review Pay Stubs................................................................................. 28-1028.4.3 Reviewing Pay Stub Information ................................................................................. 28-10

xv
28.5 Entering Automatic Deposit Information .......................................................................... 28-1128.5.1 Understanding Automatic Deposit Information........................................................ 28-1128.5.2 Form Used to Enter Automatic Deposit Information................................................ 28-1228.5.3 Entering Automatic Deposit Information ................................................................... 28-1228.6 Entering Competency Information Using Self Service..................................................... 28-1428.6.1 Understanding Self-Service Competency Information ............................................. 28-1428.6.2 Prerequisite ...................................................................................................................... 28-1528.6.3 Forms Used to Enter Competency Information Using Self Service ........................ 28-1528.6.4 Setting Processing Options for Competency Self Service (P05130) ......................... 28-1628.6.4.1 Display ...................................................................................................................... 28-1628.6.5 Entering a Training Competency ................................................................................. 28-1628.6.6 Entering a Skills Competency ....................................................................................... 28-1828.6.7 Entering an Accomplishment Competency ................................................................ 28-1928.6.8 Entering a Certification Competency........................................................................... 28-2028.6.9 Entering an Education Competency ............................................................................ 28-2128.6.10 Entering a Language Competency ............................................................................... 28-2328.6.11 Revising Competency Information .............................................................................. 28-2328.7 Entering Timecards Using Self Service............................................................................... 28-2428.7.1 Understanding Self-Service Time Entry...................................................................... 28-2428.7.2 Prerequisite ...................................................................................................................... 28-2728.7.3 Forms Used to Enter Timecards Using Self Service................................................... 28-2728.7.4 Entering Timecards Using Self Service........................................................................ 28-2728.7.5 Delete or Modify Self-Service Timecards .................................................................... 28-2828.8 (Release 9.1 Update) Disclosing Disability Status............................................................. 28-2828.8.1 Understanding Disability Status Disclosure............................................................... 28-2828.8.2 Prerequisite ...................................................................................................................... 28-2928.8.3 Form Used to Disclose Disability Status ..................................................................... 28-2928.8.4 Disclosing Disability Status........................................................................................... 28-2928.9 (Release 9.1 Update) Disclosing Protected Veteran Status .............................................. 28-2928.9.1 Understanding Protected Veteran Status Disclosure ................................................ 28-2928.9.2 Prerequisite ...................................................................................................................... 28-3028.9.3 Form Used to Disclose Veteran Status......................................................................... 28-3028.9.4 Disclosing Protected Veteran Status ............................................................................ 28-3028.10 Managing Self-Service Timecards Using Summary Time Entry .................................... 28-3128.10.1 Understanding Self-Service Timecards Using Summary Time Entry .................... 28-3128.10.2 Forms Used to Manage Self-Service Timecards Using Summary Time Entry ...... 28-3228.10.3 Managing Self-Service Timecards ................................................................................ 28-3228.10.4 Delete or Modify Self-Service Timecards .................................................................... 28-33
29 Manager Self Service
29.1 Understanding Manager Self Service.................................................................................... 29-129.1.1 Compensation Management Self-Service Considerations.......................................... 29-229.2 Using the Managers Workbench Program........................................................................... 29-229.2.1 Understanding Managers Workbench .......................................................................... 29-229.2.2 Form Used for Using the Managers Workbench Program......................................... 29-629.3 Setting Processing Options for Managers Workbench (P08712)....................................... 29-629.3.1 User Level .......................................................................................................................... 29-6
xvi
29.3.2 Version................................................................................................................................ 29-629.4 Changing an Employee Status ............................................................................................... 29-729.4.1 Understanding Employee Status Change ..................................................................... 29-729.4.2 Forms Used to Change an Employee Status................................................................. 29-829.4.3 Setting Processing Options for Employee Status Change (P08720) .......................... 29-829.4.3.1 Process......................................................................................................................... 29-929.4.3.2 User Level ................................................................................................................... 29-929.4.3.3 Defaults ....................................................................................................................... 29-929.4.4 Requesting an Employee Status Change..................................................................... 29-1029.5 Reviewing an Employee Status Change............................................................................. 29-1129.5.1 Understanding an Employee Status Change Review................................................ 29-1129.5.2 Forms Used to Review an Employee Status Change................................................. 29-1229.5.3 Setting Processing Options for Status Change Review (P087201)........................... 29-1229.5.3.1 Processing ................................................................................................................. 29-1229.5.3.2 User Level ................................................................................................................. 29-1329.6 Assigning a Delegate ............................................................................................................. 29-1429.6.1 Understanding Delegate Assignment.......................................................................... 29-1429.6.2 Prerequisite ...................................................................................................................... 29-1429.6.3 Forms Used to Assign Delegates .................................................................................. 29-1429.6.4 Setting Processing Options for Managers Delegates (P08750)................................. 29-1429.6.4.1 Defaults ..................................................................................................................... 29-1429.6.5 Assigning a Delegate...................................................................................................... 29-1529.7 Reviewing Upcoming Employee Reviews by Supervisor ............................................... 29-1629.7.1 Understanding Upcoming Employee Reviews.......................................................... 29-1629.7.2 Prerequisite ...................................................................................................................... 29-1629.7.3 Form Used to Review Upcoming Employee Reviews by Supervisor..................... 29-1729.7.4 Reviewing Upcoming Employee Review Information ............................................. 29-1729.8 Entering Data for Verification-of-Employment Letters.................................................... 29-1829.8.1 Understanding Data for Verification-of-Employment Letters................................. 29-1829.8.2 Prerequisite ...................................................................................................................... 29-1929.8.3 Forms Used to Enter Data for Verification-of-Employment Letters ....................... 29-1929.8.4 Setting Processing Options for Review Requests for Verification of Employment
(P05003) ............................................................................................................................ 29-1929.8.4.1 User Level ................................................................................................................. 29-1929.8.4.2 Workflow Setup....................................................................................................... 29-2029.8.5 Entering Data for Verification-of-Employment Letters ............................................ 29-2029.9 Using Managers Reports....................................................................................................... 29-2329.9.1 Understanding Managers Reports ............................................................................... 29-2329.9.2 Forms Used to Run Managers Reports........................................................................ 29-2429.9.3 Using Managers Reports ............................................................................................... 29-2429.10 Setting Up Information for New Employees ..................................................................... 29-2629.10.1 Understanding New Employee Setup......................................................................... 29-2629.10.1.1 Add an Employee Record Using Employee Setup............................................. 29-2729.10.1.2 Initiate the Employee Setup Process..................................................................... 29-2729.10.1.3 Approve a Setup Process or Task.......................................................................... 29-2729.10.1.4 Review and Revise the Setup Process .................................................................. 29-2929.10.2 Prerequisites .................................................................................................................... 29-2929.10.3 Forms Used to Set Up Information for New Employees .......................................... 29-29

xvii
29.10.4 Setting Processing Options for Employee Setup Workbench (P08710) .................. 29-3029.10.4.1 Processing ................................................................................................................. 29-3029.10.4.2 User Level ................................................................................................................. 29-3129.10.4.3 Defaults ..................................................................................................................... 29-3129.10.4.4 Work Orders............................................................................................................. 29-3129.10.5 Initiate Employee Setup................................................................................................. 29-3229.10.6 Approve a Setup Process or Task................................................................................. 29-3429.10.7 Review and Revise the Status ....................................................................................... 29-3629.11 Approving Automatic Deposit Information ...................................................................... 29-3729.11.1 Understanding Automatic Deposit Information Approval ..................................... 29-3729.11.2 Forms Used to Approve Automatic Deposit Information........................................ 29-3829.11.3 Entering Automatic Deposit Approvals...................................................................... 29-3829.12 Approving Bank Transit Information ................................................................................. 29-3829.12.1 Understanding Bank Transit Information Approval ................................................ 29-3829.12.2 Form Used to Approve Bank Information for Automatic Deposits........................ 29-3929.12.3 Approving Bank Transit Information.......................................................................... 29-3929.13 Approving Competency Information ................................................................................. 29-3929.13.1 Understanding Competency Information Approval................................................. 29-4029.13.2 Forms Used to Approve Competency Information................................................... 29-4029.13.3 Approving Self-Service Competency Entries ............................................................. 29-4029.14 (Release 9.1 Update) Approving Disability Status Information ..................................... 29-4129.14.1 Understanding Disability Information Approval...................................................... 29-4129.14.2 Forms Used to Approve Disability Information ........................................................ 29-4129.14.3 Approving Disability Information ............................................................................... 29-4129.15 (Release 9.1 Update) Approving Protected Veteran Status Information....................... 29-4229.15.1 Understanding Protected Veteran Status Information Approval ........................... 29-4229.15.2 Forms Used to Approve Protected Veteran Status Information.............................. 29-4229.15.3 Approving Protected Veteran Status Information..................................................... 29-4229.16 Creating Organizational Charts for the Web ..................................................................... 29-4329.16.1 Understanding Organizational Charts for the Web .................................................. 29-4329.16.2 Forms Used to Create Organizational Charts for the Web....................................... 29-4329.16.3 Creating Organizational Charts for the Web.............................................................. 29-4329.17 Approving Self-Service Timecards...................................................................................... 29-4329.17.1 Understanding Self-Service Timecard Review and Approval................................. 29-4329.17.2 Forms Used to Approve Self-Service Timecards ....................................................... 29-4529.17.3 Approving Timecards .................................................................................................... 29-45
A JD Edwards EnterpriseOne Human Capital Management Self-Service Reports
A.1 Human Capital Management Self-Service Reports .............................................................. A-1A.2 Human Capital Management Self-Service Reports: A to Z ................................................. A-1A.3 Human Capital Management Self-Service Reports: Selected Report................................. A-1A.3.1 R08471 - Job Postings.......................................................................................................... A-1A.3.2 Data Sequence for Job Postings ........................................................................................ A-2A.3.3 Setting Processing Options for Job Postings (R08471)................................................... A-2A.3.3.1 Detail ............................................................................................................................. A-2
Index

xviii

xix
Preface
Welcome to the JD Edwards EnterpriseOne Applications Human Capital Management Self-Service Implementation Guide.
AudienceThis guide is intended for implementers and end users of the JD Edwards EnterpriseOne Human Capital Management Self-Service system.
JD Edwards EnterpriseOne ProductsThis implementation guide refers to these JD Edwards EnterpriseOne products from Oracle:
■ JD Edwards EnterpriseOne Work Orders.
■ JD Edwards EnterpriseOne Benefits.
■ JD Edwards EnterpriseOne Address Book.
■ JD Edwards EnterpriseOne Time and Labor.
■ JD Edwards EnterpriseOne Human Resources.
JD Edwards EnterpriseOne Application FundamentalsAdditional, essential information describing the setup and design of your system appears in a companion volume of documentation called JD Edwards EnterpriseOne Financial Management Application Fundamentals 9.0 Implementation Guide.
Customers must conform to the supported platforms for the release as detailed in the JD Edwards EnterpriseOne minimum technical requirements. In addition, JD Edwards EnterpriseOne may integrate, interface, or work in conjunction with other Oracle products. Refer to the cross-reference material in the Program Documentation at http://oracle.com/contracts/index.html for Program prerequisites and version cross-reference documents to assure compatibility of various Oracle products.
See Also:
■ JD Edwards EnterpriseOne Applications Financial Management Fundamentals Implementation Guide.

xx
Documentation AccessibilityFor information about Oracle's commitment to accessibility, visit the Oracle Accessibility Program website at http://www.oracle.com/pls/topic/lookup?ctx=acc&id=docacc.
Access to Oracle SupportOracle customers that have purchased support have access to electronic support through My Oracle Support. For information, visit http://www.oracle.com/pls/topic/lookup?ctx=acc&id=info or visit http://www.oracle.com/pls/topic/lookup?ctx=acc&id=trs if you are hearing impaired.
Related DocumentsYou can access related documents from the JD Edwards EnterpriseOne Release Documentation Overview pages on My Oracle Support. Access the main documentation overview page by searching for the document ID, which is 1308615.1, or by using this link:
https://support.oracle.com/CSP/main/article?cmd=show&type=NOT&id=1308615.1
To navigate to this page from the My Oracle Support home page, click the Knowledge tab, and then click the Tools and Training menu, JD Edwards EnterpriseOne, Welcome Center, Release Information Overview.
ConventionsThe following text conventions are used in this document:
Convention Meaning
Bold Indicates field values.
Italics Indicates emphasis and JD Edwards EnterpriseOne or other book-length publication titles.
Monospace Indicates a JD Edwards EnterpriseOne program, other code example, or URL.

1
Introduction to JD Edwards EnterpriseOne Human Capital Management Self-Service 1-1
1Introduction to JD Edwards EnterpriseOne Human Capital Management Self-Service
This chapter contains the following topics:
■ Section 1.1, "JD Edwards EnterpriseOne HCM Self-Service Overview"
■ Section 1.2, "JD Edwards EnterpriseOne HCM Self-Service Implementation"
1.1 JD Edwards EnterpriseOne HCM Self-Service OverviewThe JD Edwards EnterpriseOne Human Capital Management (HCM) Self-Service system from Oracle allows employees to complete tasks online through a company intranet site. Self-service reduces the handling of documents between employees and the human resources department by allowing employees to access information, forms, and services through desktop computers. For example, employees can use self-service to review and update personal data and enroll in benefits online. When employees update information through self-service, the changes made by the employee can be posted to a temporary workfile, where a company representative can review the changes before posting them to the employee database.
The type of information that is available on your self-service website is defined by your company. For example, your company might allow employees to make address changes but not benefits changes.
Employee and manager self-service are applications that you can purchase in addition to the human capital management products. To use employee or manager self-service, you must have purchased some or all of the human capital management products.
This is a table of the employee and manager applications that you can use based on the human capital management modules that you have purchased:
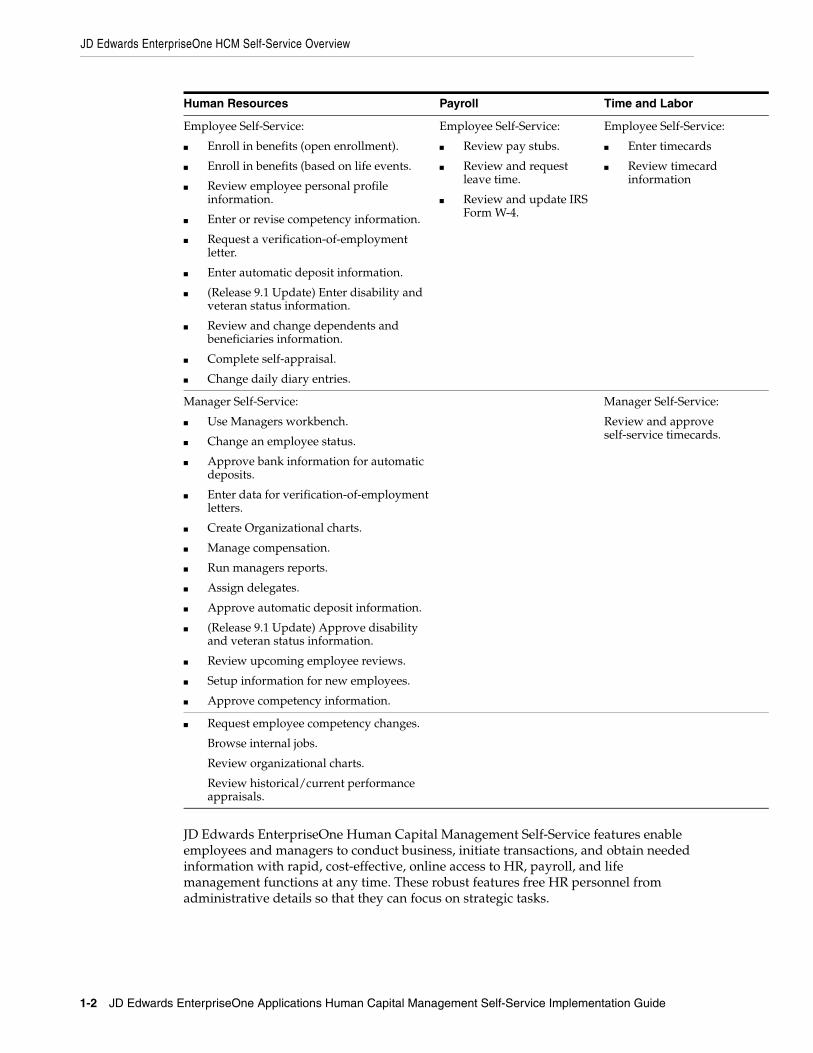
Human Resources Payroll Time and Labor
Employee Self-Service:
■ Enroll in benefits (open enrollment).
■ Enroll in benefits (based on life events.
■ Review employee personal profile information.
■ Enter or revise competency information.
■ Request a verification-of-employment letter.
■ Enter automatic deposit information.
■ (Release 9.1 Update) Enter disability and veteran status information.
■ Review and change dependents and beneficiaries information.
■ Complete self-appraisal.
■ Change daily diary entries.
Employee Self-Service:
■ Review pay stubs.
■ Review and request leave time.
■ Review and update IRS Form W-4.
Employee Self-Service:
■ Enter timecards
■ Review timecard information
Manager Self-Service:
■ Use Managers workbench.
■ Change an employee status.
■ Approve bank information for automatic deposits.
■ Enter data for verification-of-employment letters.
■ Create Organizational charts.
■ Manage compensation.
■ Run managers reports.
■ Assign delegates.
■ Approve automatic deposit information.
■ (Release 9.1 Update) Approve disability and veteran status information.
■ Review upcoming employee reviews.
■ Setup information for new employees.
■ Approve competency information.
Manager Self-Service:
Review and approve self-service timecards.
■ Request employee competency changes.
Browse internal jobs.
Review organizational charts.
Review historical/current performance appraisals.
JD Edwards EnterpriseOne HCM Self-Service Overview
1-2 JD Edwards EnterpriseOne Applications Human Capital Management Self-Service Implementation Guide
JD Edwards EnterpriseOne Human Capital Management Self-Service features enable employees and managers to conduct business, initiate transactions, and obtain needed information with rapid, cost-effective, online access to HR, payroll, and life management functions at any time. These robust features free HR personnel from administrative details so that they can focus on strategic tasks.

JD Edwards EnterpriseOne HCM Self-Service Implementation
Introduction to JD Edwards EnterpriseOne Human Capital Management Self-Service 1-3
1.1.1 eRecruitThis is a table of the eRecruit features that you can use based on the human capital management modules that you have purchased:
User Features
Applicant Self-Service Create Log in Name and Password
Change Password
Browse and Search Job Postings
View Job Posting/Description
Add to Job Basket
View Job Basket
Apply Online
Email Job Posting to other interested individuals
View/Edit Personal Information
View Submitted Applications
Recruiter Self-Service Define Standard Phrases
Define Job Categories and Associated Tasks
Add Job Postings (in one or more languages)
Preview Job Postings
Manage/Edit Job Postings
■ Attach Competencies.
■ Add Multiple Languages to a Posting.
Delete Job Postings
Review Applicants
■ Review References.
■ Review Cover Letter.
■ Review Resume.
■ Review Job Specific Qualifications.
■ Flag Applicants for Further Processing.
Manage Applicant Data
1.2 JD Edwards EnterpriseOne HCM Self-Service ImplementationThis section provides an overview of the steps that are required to implement the JD Edwards EnterpriseOne HCM Self-Service system.
In the planning phase of your implementation, take advantage of all JD Edwards EnterpriseOne sources of information, including the installation guides and troubleshooting information.
When determining which electronic software updates (ESUs) to install for JD Edwards EnterpriseOne Tax Processing, use the EnterpriseOne and World Change Assistant. EnterpriseOne and World Change Assistant, a Java-based tool, reduces the time required to search and download ESUs by 75 percent or more and enables you to install multiple ESUs at one time.
See JD Edwards EnterpriseOne Tools Software Updates Guide.

JD Edwards EnterpriseOne HCM Self-Service Implementation
1-4 JD Edwards EnterpriseOne Applications Human Capital Management Self-Service Implementation Guide
1.2.1 Installation Steps for the JD Edwards EnterpriseOne Collaborative PortalYou can use the JD Edwards EnterpriseOne Collaborative Portal to implement JD Edwards EnterpriseOne HCM Self-Service. This guide does not describe in detail how to install and configure the Collaborative Portal. However, this section provides an overview of the general steps involved in installing and configuring the Collaborative Portal.
Use these steps as a guide to the installation and configuration process for the Collaborative Portal and the JD Edwards EnterpriseOne portlets. You should perform these steps in the order listed.
1. Verify that you meet the minimum technical requirements (MTRs) to implement the JD Edwards EnterpriseOne Collaborative Portal.
JD Edwards EnterpriseOne Tools 8.98 Hardware and Software Requirements Guide
2. Install and configure the JD Edwards EnterpriseOne system.
Apply the updates, service packs, or Electronic Software Updates (ESUs) specified in the MTRs.
See your JD Edwards EnterpriseOne installation documentation.
3. Install and configure the IBM WebSphere Portal.
Use one of these guides:
■ JD Edwards EnterpriseOne Tools IBM WebSphere Portal for Unix Guide
■ JD Edwards EnterpriseOne Tools IBM WebSphere Portal for Microsoft Windows Guide
■ JD Edwards EnterpriseOne Tools IBM WebSphere Portal for IBM i for Power Systems Guide
4. Install and configure the Oracle WebCenter Portal:
See "Chapter 3, Oracle WebCenter Spaces" JD Edwards EnterpriseOne WebCenter Spaces Configuration for Related Information Application Framework Guide.
5. Install and configure the JD Edwards EnterpriseOne Collaborative Portal.
JD Edwards EnterpriseOne Tools 8.98 Collaborative Portal Installation
6. Generate JD Edwards EnterpriseOne portlets in the WebClient_Portal.war file.
Use both of these guides:
■ "Understanding Portlet Forms" in the JD Edwards EnterpriseOne Tools Form Design Aid Guide
■ "Generating Portlets" in the JD Edwards EnterpriseOne Tools Form Design Aid Guide
■ JD Edwards EnterpriseOne Tools 8.98 HTML Web Server Installation, Appendix A: Generating JD Edwards EnterpriseOne Serialized Objects, Generating an FDA-Created Portlet
7. Install the WebClient_Portal.war file in the Collaborative Portal.
WebSphere Portal for Multiplatforms:
See http://publib.boulder.ibm.com/infocenter/wpdoc/v510/index.jsp?topic=/com.ibm.wp.ent.doc/wpf/welcome.html

JD Edwards EnterpriseOne HCM Self-Service Implementation
Introduction to JD Edwards EnterpriseOne Human Capital Management Self-Service 1-5
8. Create pages and add portlets to pages in the Collaborative Portal.
WebSphere Portal for Multiplatforms:
See http://publib.boulder.ibm.com/infocenter/wpdoc/v510/index.jsp?topic=/com.ibm.wp.ent.doc/wpf/welcome.html
1.2.2 Global Implementation Steps for JD Edwards EnterpriseOne HCM Self-ServiceThe suggested global implementation steps for JD Edwards EnterpriseOne HCM Self-Service are:
1. Set up companies, fiscal date patterns, and business units.
See "Setting Up Organizations" in the JD Edwards EnterpriseOne Applications Financial Management Fundamentals Implementation Guide.
2. Set up accounts, and the chart of accounts.
See "Creating the Chart of Accounts" in the JD Edwards EnterpriseOne Applications Financial Management Fundamentals Implementation Guide.
3. Set up the General Accounting constants.
See "Setting Up the General Accounting System" in the JD Edwards EnterpriseOne Applications General Accounting Implementation Guide.
4. Set up multicurrency processing, including currency codes and exchange rates.
See "Setting Up General Accounting for Multicurrency Processing" in the JD Edwards EnterpriseOne Applications Multicurrency Processing Implementation Guide.
See "Setting Up Exchange Rates" in the JD Edwards EnterpriseOne Applications Multicurrency Processing Implementation Guide.
5. Set up ledger type rules.
See "Setting Up Ledger Type Rules for General Accounting" in the JD Edwards EnterpriseOne Applications General Accounting Implementation Guide.
6. Enter address book records.
See "Entering Address Book Records" in the JD Edwards EnterpriseOne Applications Address Book Implementation Guide.
1.2.3 Implementation Steps for the JD Edwards HCM Self-Service SystemThe implementation steps for the JD Edwards EnterpriseOne HCM Self-Service system are.
1. Enter the common settings for self-service.
See Setting Up Common Settings for Self-Service.
2. Set up verification of employment, name and address change, emergency contacts and phones, and paid time-off inquiry.
See Setting Up Employee Self-Service.
3. Create director form rules, review setup tables and instructions, set up the self-service form, and create a self-service process flow script for IRS For W-4. Also revise the IRS W-4 Form Workfile, set up URLs, and save employee W-4 information.
See (USA) Setting Up IRS Form W-4.

JD Edwards EnterpriseOne HCM Self-Service Implementation
1-6 JD Edwards EnterpriseOne Applications Human Capital Management Self-Service Implementation Guide
4. Set up upcoming reviews by supervisor, the employee setup process, employee status change, manager reports, organization charts for the Web, and manager delegates.
See Setting Up Manager Self Service.
5. Set up the time entry director form, create the employee self-service time entry interface, and assign pay types to employee groups.
See Setting Up Self-Service Time Entry.
6. Set processing options for Recruitment Self Service Menu (P08400) and Applicant Login (P08405)
See eRecruit System Setup.
7. Set up posting categories, settings by posting category, standard phrase categories, and standard phrases.
See eRecruit Applications Setup.
8. Implement employee benefits setup.
See Employee Self-Service Benefits Setup.
9. Set up common settings for benefits self-service.
See Setting Up Common Settings for Benefits Self Service.
10. Link categories to benefit groups
See Defining Benefit Category Rules for Self Service.
11. Set up URLs for:
Benefit plan options
Benefit plans
Benefit categories
Benefit groups
See Setting Up URLs for Self-Service Benefits.
12. Implement benefit enrollment events
See Setting Up Benefit Enrollment Events for Self Service.
13. Set up benefit categories by enrollment event.
See Setting Up Benefit Categories by Enrollment Event.
14. Set up allowed dependent relationships by plan.
See Setting Up Allowed Dependent Relationships by Plan.
15. Set up dependent selection automatically and build the current coverage workfile. Set up a current dependent and beneficiary workfile, build the available plans workfile, exclude benefit plans or categories from a work file build, and build the personal information workfile. Also set up steps and rules for director process flows.
See Setting Up Workfiles for Benefits Self Service.
16. Set up benefit contribution limits and maximum coverage increase limits.
See Setting Up Self-Service Benefit Plan Guidelines.

JD Edwards EnterpriseOne HCM Self-Service Implementation
Introduction to JD Edwards EnterpriseOne Human Capital Management Self-Service 1-7
17. Run the Populate Director Form Rules/Edits report, define process flow scripts, and set up translated director text.
See Setting Up Self-Service Process Flows.
18. Set up form options, benefit confirmation statement options, processing options for the enrollment statement, and self-service benefits workflow approval.
See Setting Up Form Options and Workflow Approval.
19. Set processing options and run these programs:
Update Employee Personal Information to Live Tables (R054104)
Update Benefits Information to Live Tables (R085524)
See Saving Self-Service Employee Information.
20. Review self-service history, set processing options for Work With Employee Self Service History (P085585), and revise the current coverage workfile. Revise the available plans workfile, and review dependent and beneficiary current coverage revisions. Revise the dependent and beneficiary updated revisions workfile, and revise the personal profile workfile.
See Reviewing History and Revising Self-Service Workfiles.
21. Implement new DBA plan rates.
See Setting Up New DBA Plan Rates.
22. Purge these tables:
Employee Current and Pending Elections Work Table
Dependent and Beneficiary Cross-Reference Work Table
Current Dependent and Beneficiary Cross-Reference work Table
Employee Personal Information, Contacts, and Phone Work Tables
Available Plans and Plan Options Work Table
See Managing Benefits Self-Service Work Files.

JD Edwards EnterpriseOne HCM Self-Service Implementation
1-8 JD Edwards EnterpriseOne Applications Human Capital Management Self-Service Implementation Guide

2
Setting Up Common Settings for Self-Service 2-1
2Setting Up Common Settings for Self-Service
This chapter contains the following topics:
■ Section 2.1, "Understanding Self-Service Web Pages"
■ Section 2.2, "Understanding Common Settings for Self-Service Setup"
■ Section 2.3, "Entering the Common Settings for Self-Service"
2.1 Understanding Self-Service Web PagesEmployees access self-service through a series of web pages on your company intranet site that enable them to complete such tasks as requesting a verification-of-employment letter or changing name, address, and emergency contact information. In addition to employee functions, managers can also use the Manager's Workbench program (P08712) as a centralized location from which they can perform such tasks as changing employee status, personal self-service functions for managers, creation of delegates, and various reviews. These web pages correspond to self-service programs in your software.
JD Edwards EnterpriseOne software provides web pages for some self-service programs. These pages are fully functional and you can use them without modification. You can also create customized self-service web pages. For example, if you want to put your own company's logo on the web pages, you need to create customized web pages.
JD Edwards EnterpriseOne software provides these portlets to enable you to access self-service programs via web pages:
■ HR - Employee Career
■ HR - Manager Career
■ HR - Delegates
■ HR - Enhanced Employee Self Service
■ HR - New Employee
■ HR - Employee Performance Management
■ HR - My Workforce
■ HR - My Profile
■ HR - Paid Time Off
■ HR - Payment Review
■ HR - Global Leave Administration

Understanding Self-Service Web Pages
2-2 JD Edwards EnterpriseOne Applications Human Capital Management Self-Service Implementation Guide
■ HR - Time Entry
■ HR - Global Leave Approvals
■ HR - Payroll
These portlets are specialized forms that were created in Form Design Aid (FDA). You must use the eGenerator to generate these portlets in the WebClient_Portal.war file.
See "Generating JD Edwards EnterpriseOne Serialized Objects" in the JD Edwards EnterpriseOne Tools 8.98 HTML Server Installation.
See "Generating Other Selected Objects Using JD Edwards EnterpriseOne" in the JD Edwards EnterpriseOne Tools 8.98 HTML Server Installation.
See "Generating an FDA-Created Portlet" in the JD Edwards EnterpriseOne Tools 8.98 HTML Server Installation.
After you generate the portlets, you can install the WebClient_Portal.war file in the JD Edwards EnterpriseOne Collaborative Portal and then add the portlets to pages in the Collaborative Portal.
2.1.1 HR - Employee CareerThis table lists the links that are included on the HR - Employee Career portlet and detail about the JD Edwards EnterpriseOne applications that are associated with each link:
Link Associated Application Associated Form Application Version
My skills and competencies
Competency Self Service (P05130)
Competency Self Service (W05130A)
ZJDE0001
Match my skills and competencies with what is required for my job or any other job
Competencies Gap Analysis (P08008)
Work with Employee Competency Gap Analysis (W08008A)
ZJDE0001
See all jobs in the organization
Jobs In An Organization (P08007)
Work With Jobs In An Organization (W08007A)
ZJDE0001
See the general skills and competencies expected from everyone and those specific to certain departments
Job Competencies In An Organization (P08006)
Work With Job Competencies In An Organization (W08006A)
ZJDE0001
This is an illustration of the HR - Employee Career portlet:
Figure 2–1 HR - Employee Career portlet

Understanding Self-Service Web Pages
Setting Up Common Settings for Self-Service 2-3
2.1.2 HR - Manager CareerThis table lists the links that are included on the HR - Manager Career portlet and detail about the JD Edwards EnterpriseOne applications that are associated with each link:
Link Associated Application Associated Form Application Version
My skills and competencies
Competency Self Service (P05130)
Competency Self Service (W05130A)
ZJDE0001
Match my skills and competencies with requirements
Competencies Gap Analysis (P08008)
Work with Employee Competency Gap Analysis (W08008A)
ZJDE0001
See all jobs in the organization
Jobs In An Organization (P08007)
Work With Jobs In An Organization (W08007A)
ZJDE0001
skills and competencies expected from everyone and those specific to certain departments
Job Competencies In An Organization (P08006)
Work With Job Competencies In An Organization (W08006A)
ZJDE0001
This is an illustration of the HR - Manager Career portlet:
Figure 2–2 HR - Manager Career portlet
2.1.3 HR - DelegatesThis table lists the link that is included on the HR - Delegates portlet and detail about the JD Edwards EnterpriseOne application that is associated with the link:
Link Associated Application Associated Form Application Version
Are you going on vacation or will you be unavailable for a period of time? Review and assign delegates in your absence here.
Managers Delegates (P08750)
Work With Delegates (W08750A)
ZJDE0001
This is an illustration of the HR - Delegates portlet:
Figure 2–3 HR - Delegates portlet

Understanding Self-Service Web Pages
2-4 JD Edwards EnterpriseOne Applications Human Capital Management Self-Service Implementation Guide
2.1.4 HR - Enhanced Employee Self ServiceYou can use the HR - Enhanced Employee Self Service to conduct benefits enrollment.
This table lists the links that are included on the HR - Enhanced Employee Self Service portlet and detail about the JD Edwards EnterpriseOne applications that are associated with each link:
Link Associated Application Associated Form Application Version
View Your Current Enrollment
Self-Service Director (P05410)
Navigator (W05410C) ZJDE0010
New Employee Enrollment
Self-Service Director (P05410)
Navigator (W05410C) ZJDE0001
Just Married Self-Service Director (P05410)
Navigator (W05410C) ZJDE0002
Birth and Adoption Self-Service Director (P05410)
Navigator (W05410C) ZJDE0004
Open Enrollment Self-Service Director (P05410)
Navigator (W05410C) ZJDE0005
Moving Self-Service Director (P05410)
Navigator (W05410C) ZJDE0009
Change Your Beneficiaries
Self-Service Director (P05410)
Navigator (W05410C) ZJDE0007
401(k) Enrollment Self-Service Director (P05410)
Navigator (W05410C) ZJDE0006
Employee Divorce Self-Service Director (P05410)
Navigator (W05410C) ZJDE0003
Dependent Death Self-Service Director (P05410)
Navigator (W05410C) ZJDE0008
This is an illustration of the HR - Enhanced Employee Self Service portlet:
Figure 2–4 HR - Enhanced Employee Self Service portlet
2.1.5 HR - New EmployeeThis table lists the link that is included on the HR - New Employee portlet and detail about the JD Edwards EnterpriseOne application that is associated with the link:
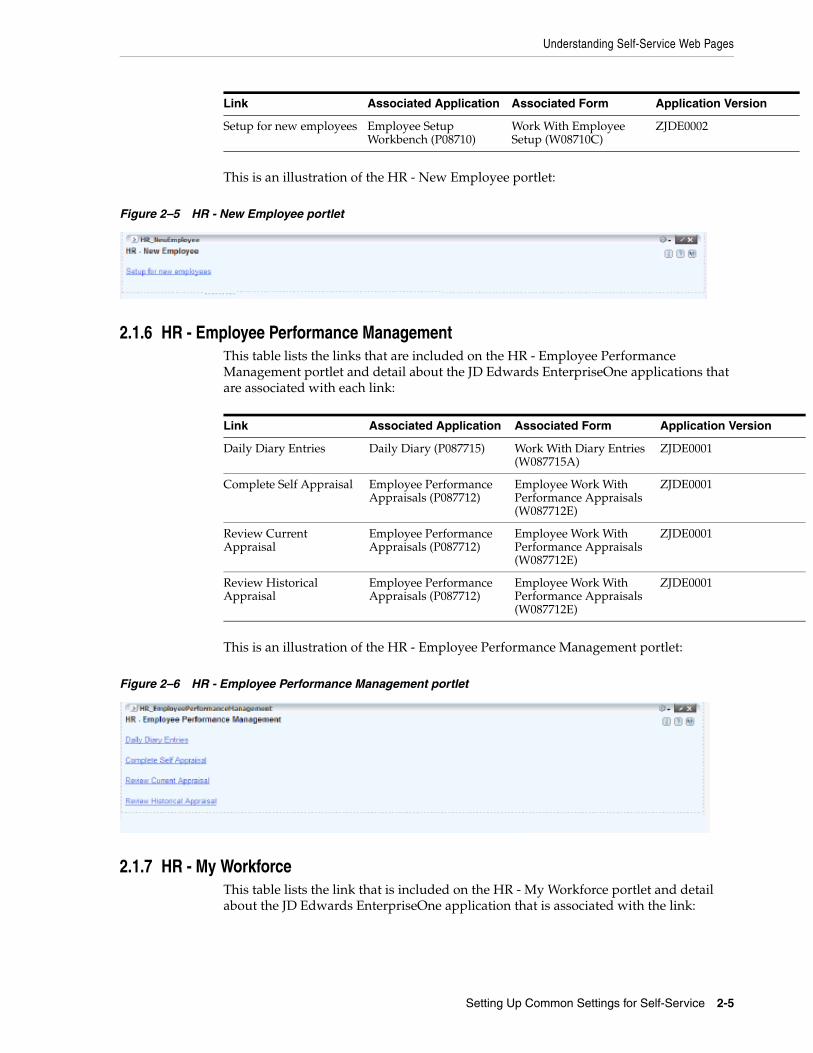
Link Associated Application Associated Form Application Version
Setup for new employees Employee Setup Workbench (P08710)
Work With Employee Setup (W08710C)
ZJDE0002
Understanding Self-Service Web Pages
Setting Up Common Settings for Self-Service 2-5
This is an illustration of the HR - New Employee portlet:
Figure 2–5 HR - New Employee portlet
2.1.6 HR - Employee Performance ManagementThis table lists the links that are included on the HR - Employee Performance Management portlet and detail about the JD Edwards EnterpriseOne applications that are associated with each link:
Link Associated Application Associated Form Application Version
Daily Diary Entries Daily Diary (P087715) Work With Diary Entries (W087715A)
ZJDE0001
Complete Self Appraisal Employee Performance Appraisals (P087712)
Employee Work With Performance Appraisals (W087712E)
ZJDE0001
Review Current Appraisal
Employee Performance Appraisals (P087712)
Employee Work With Performance Appraisals (W087712E)
ZJDE0001
Review Historical Appraisal
Employee Performance Appraisals (P087712)
Employee Work With Performance Appraisals (W087712E)
ZJDE0001
This is an illustration of the HR - Employee Performance Management portlet:
Figure 2–6 HR - Employee Performance Management portlet
2.1.7 HR - My WorkforceThis table lists the link that is included on the HR - My Workforce portlet and detail about the JD Edwards EnterpriseOne application that is associated with the link:

Link Associated Application Associated Form Application Version
You can review information on your workforce here. Look at employee available vacation, time entry, or emergency contacts. See the organization structure. Print reports on gap analysis, headcount, or turnover. Modify your own personal data, review your time entry, or competencies.
Manager's Workbench (P08712)
Work With Managers Employees (W08712A)
ZJDE0001
Understanding Self-Service Web Pages
2-6 JD Edwards EnterpriseOne Applications Human Capital Management Self-Service Implementation Guide
This is an illustration of the HR - My Workforce portlet:
Figure 2–7 HR - My Workforce portlet
2.1.8 HR - My ProfileThe HR - My Profile portlet displays personal information about the employee who is logged on to the portal. The system retrieves the employee's name and address from the JD Edwards EnterpriseOne Address Book system. The system retrieves the job, department, and manager from the Employee Master Information table (F060116).
You set the processing options on the ZJDE0001 version of the Employee Self Service Portlets program (P05PTLET) to control which information appears on the portlet as well as which of the links appear.
This table lists the links that are included on the HR - My Profile portlet and detail about the JD Edwards EnterpriseOne applications that are associated with each link:
Link Associated Application Associated Form Application Version
Change Name and Address
Self-Service Director (P05410)
Navigator (W05410C) ZJDE0009
View Personal Profile Employee Profile (P060116)
Employee Profile and Job Information (W060116C)
ZJDE0001
This is an illustration of the HR - My Profile portlet:
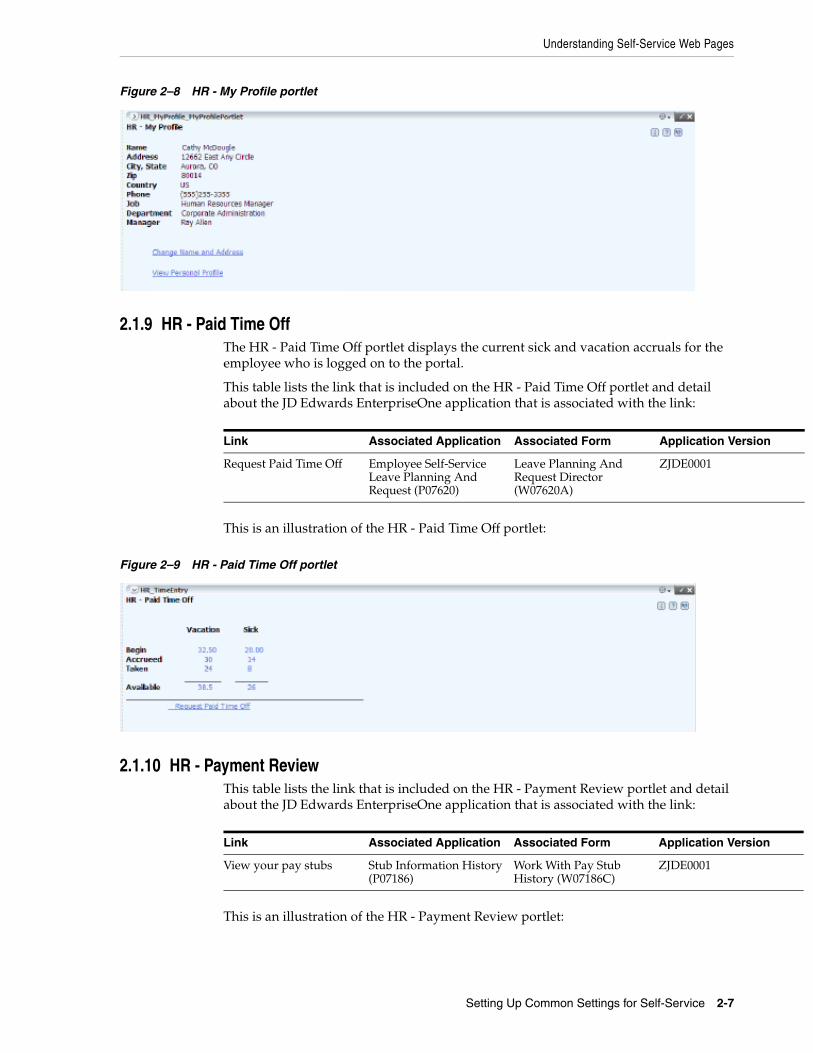
Understanding Self-Service Web Pages
Setting Up Common Settings for Self-Service 2-7
Figure 2–8 HR - My Profile portlet
2.1.9 HR - Paid Time OffThe HR - Paid Time Off portlet displays the current sick and vacation accruals for the employee who is logged on to the portal.
This table lists the link that is included on the HR - Paid Time Off portlet and detail about the JD Edwards EnterpriseOne application that is associated with the link:
Link Associated Application Associated Form Application Version
Request Paid Time Off Employee Self-Service Leave Planning And Request (P07620)
Leave Planning And Request Director (W07620A)
ZJDE0001
This is an illustration of the HR - Paid Time Off portlet:
Figure 2–9 HR - Paid Time Off portlet
2.1.10 HR - Payment ReviewThis table lists the link that is included on the HR - Payment Review portlet and detail about the JD Edwards EnterpriseOne application that is associated with the link:
Link Associated Application Associated Form Application Version
View your pay stubs Stub Information History (P07186)
Work With Pay Stub History (W07186C)
ZJDE0001
This is an illustration of the HR - Payment Review portlet:

Understanding Self-Service Web Pages
2-8 JD Edwards EnterpriseOne Applications Human Capital Management Self-Service Implementation Guide
Figure 2–10 HR - Payment Review portlet
2.1.11 HR - Global Leave AdministrationThis table lists the link that is included on the HR - Global Leave Administration portlet and detail about the JD Edwards EnterpriseOne application that is associated with the link:
Link Associated Application Associated Form Application Version
Enter or Review your Leave
Employee Self-Service Leave Planning And Request (P07620)
Leave Planning And Request Director (W07620A)
ZJDE0001
This is an illustration of the HR - Payment Review portlet:
Figure 2–11 HR - Global Leave Administration portlet
2.1.12 HR - Time EntryThis table lists the link that is included on the HR - Time Entry portlet and detail about the JD Edwards EnterpriseOne application that is associated with the link:
Link Associated Application Associated Form Application Version
Enter your Time Time Entry Self Service Director (P051125)
Time Entry Self Service Director (W051125C)
ZJDE0001
This is an illustration of the HR - Time Entry portlet:
Figure 2–12 HR - Time Entry portlet
2.1.13 HR - Global Leave ApprovalsThis table lists the link that is included on the HR - Global Leave Approvals portlet and detail about the JD Edwards EnterpriseOne application that is associated with the link:

Link Associated Application Associated Form Application Version
Review and Approve Leave Requests
Manager Self Service Leave Review (P076311)
Manager Self Service Leave Review (W076311D)
ZJDE0001
Understanding Self-Service Web Pages
Setting Up Common Settings for Self-Service 2-9
This is an illustration of the HR - Global Leave Approvals portlet:
Figure 2–13 HR - Global Leave Approvals portlet
2.1.14 HR - PayrollThis table lists the links that are included on the HR - Payroll portlet and detail about the JD Edwards EnterpriseOne applications that are associated with each link:
Link Associated Application Associated Form Application Version
View/Change auto deposit instructions
Auto Deposit Instructions (P055011)
Revise Automatic Deposit Instructions (W055011A)
ZJDE0001
Verification of Employment
Review Requests for Verification Of Employment (P05003)
Work With Verification Of Employment Requests (W05003A)
ZJDE0001
W-4 Changes IRS Form W-4, Employee's Withholding Allowance Certificate (P053030)
Work With Form W-4 (W053030A)
ZJDE0001
This is an illustration of the HR - Payroll portlet:
Figure 2–14 HR - Payroll portlet
2.1.15 HR - eRecruitThe HR - eRecruit portlet, when initially displayed, provides a link to the eRecruit menu. When you click on this link, the portlet displays the eRecruit menu.
This table lists the links that are included on the eRecruit menu and detail about the JD Edwards EnterpriseOne applications that are associated with each link:
Link Associated Application Associated Form Application Version
Browse Jobs Browse Jobs (P08480) Browse Jobs (W08480A) ZJDE0001
View Job Basket Job Basket (P08481) Job Basket (W08481A) ZJDE0001

Understanding Common Settings for Self-Service Setup
2-10 JD Edwards EnterpriseOne Applications Human Capital Management Self-Service Implementation Guide
This is an illustration of the HR - eRecruit portlet upon initial display:
Figure 2–15 HR -e Recruit portlet when initially displayed
This is an illustration of the HR - eRecruit portlet after the eRecruit Menu link has been clicked:
Figure 2–16 HR - eRecruit portlet displaying the eRecruit Self-Service Menu
2.2 Understanding Common Settings for Self-Service SetupYou use the common settings for human resources to control specific features of multiple human resources processes, such as benefits enrollment, compensation management, and self-service programs.
Setting up the common settings updates the Common Settings for HR Employee Self Service Programs table (F05004).
This table describes the common settings for data items in the Common Settings for HR Employee Self Service program (P05004). You can also use the P05004 program to activate system-level settings to activate the employee self-service software.
View/Edit Personal Information
Recruitment Information (P08490)
Personal Information (W08490A)
ZJDE0001
View Submitted Applications
Submitted Applications (P08482)
Submitted Applications (W08482A)
ZJDE0001
Common Setting Description
Using Self-Service Recruitment? Specifies whether the eRecruit module is activated.
Date of Birth Required for Dep/Ben? Specifies whether a dependent or beneficiaries date of birth is required.
Tax ID Required for Dep/Ben? Specifies whether a dependent or beneficiaries Tax ID is required.
Link Associated Application Associated Form Application Version

Entering the Common Settings for Self-Service
Setting Up Common Settings for Self-Service 2-11
2.3 Entering the Common Settings for Self-ServiceThis section discusses how to enter common settings for self-service.
2.3.1 Forms Used to Set Up Common Settings for Self-Service
Form Name FormID Navigation Usage
Work With HRM Common Display Settings
W05004A Self Service Setup (G05BESS4), Common Settings for EE Self Service Application.
Compensation Management System Setup (G08CM14), HRM Common Settings
Select the row containing the data item for which you want to change the current setting and then click Select.
System Control Revisions W05004B On Work With HRM Common Display Settings, click Add.
On System Control - Revisions, click the Yes or No option.
Add and specify current settings on Data Items
2.3.2 Entering the Common SettingsAccess the System Control Revisions form.
Dependents Specifies if the specific dependent is tracked with a benefit plan or if just the number of dependents covered by a plan is needed.
Using Employee Self-Service? Specifies whether the Benefits Employee Self-Service module is activated.
Can EE Enter Course Provider? Specifies whether an employee can enter a user-defined course provider.
Can Others See Course Provider? Specifies whether employees have the ability to see unconfirmed courses.
Can EE Enter Institution? Specifies whether an employee can enter a user-defined educational institution.
Can Others See Institution? Specifies whether employees have the ability to see unconfirmed institutions.
Common Setting Description

Entering the Common Settings for Self-Service
2-12 JD Edwards EnterpriseOne Applications Human Capital Management Self-Service Implementation Guide

3
Setting Up Employee Self-Service 3-1
3Setting Up Employee Self-Service
This chapter contains the following topics:
■ Section 3.1, "Understanding Employee Self-Service Setup"
■ Section 3.2, "Setting Up Verification of Employment"
■ Section 3.3, "Setting Up Name and Address Change"
■ Section 3.4, "Setting Up Emergency Contacts and Phones"
■ Section 3.5, "Setting Up Paid Time-Off Inquiry"
3.1 Understanding Employee Self-Service SetupYou can set up and customize employee self-service programs that you are running in an intranet environment so that employees can perform many functions without involving HR representatives and keep their own information current. In addition to setting up various programs so that employees can just click a link on your organization's web portal, you can also use the Employee Self Service Form Options program (P085550). You can specify many appearance options and offer employees self-service options that are tailored to meet organizational requirements.
3.2 Setting Up Verification of EmploymentThis section provides an overview of setting up Verification of Employment and discusses how to enter those settings.
3.2.1 Understanding Verification of Employment SetupEmployees can use the Review Requests for Verification of Employment program (P05003) to request that a verification of employment letter be sent to a specific individual or company, such as a creditor or a loan officer.
The Review Requests for Verification of Employment program uses a review form and an entry form. The review form is the entry point to Verification of Employment. The entry form has two tabs, Request Information and Employment Data. On the Employment Data tab, a Human Resources administrator or system administrator can enter information pertaining to the employee, such as the date that employment began. The system calculates and supplies the employee's earnings based on the Pay Type by Category table (F05002). Only the system administrator can change the employee earnings fields. The fields on the Employment Data tab are active only when an administrator is logged on to the self-service system.

Setting Up Verification of Employment
3-2 JD Edwards EnterpriseOne Applications Human Capital Management Self-Service Implementation Guide
When employees access the Review Requests for Verification of Employment program, information on the Employment Data tab is displayed. However, the employee cannot change the information.
Information entered on the Review Requests for Verification of Employment program updates the Verification of Employment Data table (F05003).
For the system to accurately report pay information on verification-of-employment letters, you must add certain pay types to the pay categories that you define in user defined code list 05/V1. For example, you might link a holiday bonus pay type and an annual bonus pay type to the bonus category.
When you set up verification of employment, you update the Pay Type By Category table.
Note: The task for requesting a verification of employment letter can include the Enterprise Workflow Management system. If your processing options are set up appropriately, Workflow notifies the individual responsible for processing the request after the request information is entered.
3.2.2 PrerequisitesBefore you complete the tasks in this section:
■ Verify that your verification-of-employment letter is complete. Select and review the VOEREQUEST in the Maintain MailMerge Documents program (P980014). You must also hard code a company signature and phone number on the letter.
See "Setting Up Web Mail Merge" in the JD Edwards EnterpriseOne Applications Human Capital Management Fundamentals Implementation Guide.
■ Review information about user defined codes.
See "Understanding User-Defined Information Setup" in the JD Edwards EnterpriseOne Applications Human Capital Management Fundamentals Implementation Guide.
■ Set up verification of employment categories for pay information in user defined code list 05/V1.
See "Setting Up User-Defined Information" in the JD Edwards EnterpriseOne Applications Human Capital Management Fundamentals Implementation Guide.
■ Set up the common settings for self-service.
See "Setting Up System Options" in the JD Edwards EnterpriseOne Applications Human Capital Management Fundamentals Implementation Guide.
■ Set up the processing options for verification of employment.
See Entering Data for Verification-of-Employment Letters.

Setting Up Name and Address Change
Setting Up Employee Self-Service 3-3
3.2.3 Forms Used to Set Up Verification of Employment
Form Name FormID Navigation Usage
Work With Verification of Employment Categories
W05002A Self Service Setup (G05BESS4), VOE Pay Types by Category
Click Add.
Review existing Employment Categories.
VOE Pay Types W05002C Enter required values, including effective dates. Click OK.
VEO Category. This field is used to categorize pay types, such as those for base, overtime, commission, bonus, and other pay.
DBA Code (PDBA) A code that defines the type of pay, deduction, benefit, or accrual.
3.2.4 Setting Up Verification of EmploymentAccess the VOE Pay Types form.
Figure 3–1 VOE Pay Types form
Description Glossary
VOE Category This field is used to categorize pay types, such as those for base, overtime, commission, bonus, and other pay.
PDBA Code A code that defines the type of pay, deduction, benefit, or accrual. Pay types are numbered from 1 to 999. Deductions and benefits are numbered from 1000 to 9999.
Eff From The calendar date on which a function, process, pay type, deduction, benefit, or accrual begins. When you enter the date, you must use the date format DD/MM/YYY.
3.3 Setting Up Name and Address ChangeThis section provides an overview of setting up Name and Address Change and discusses how to enter those settings.
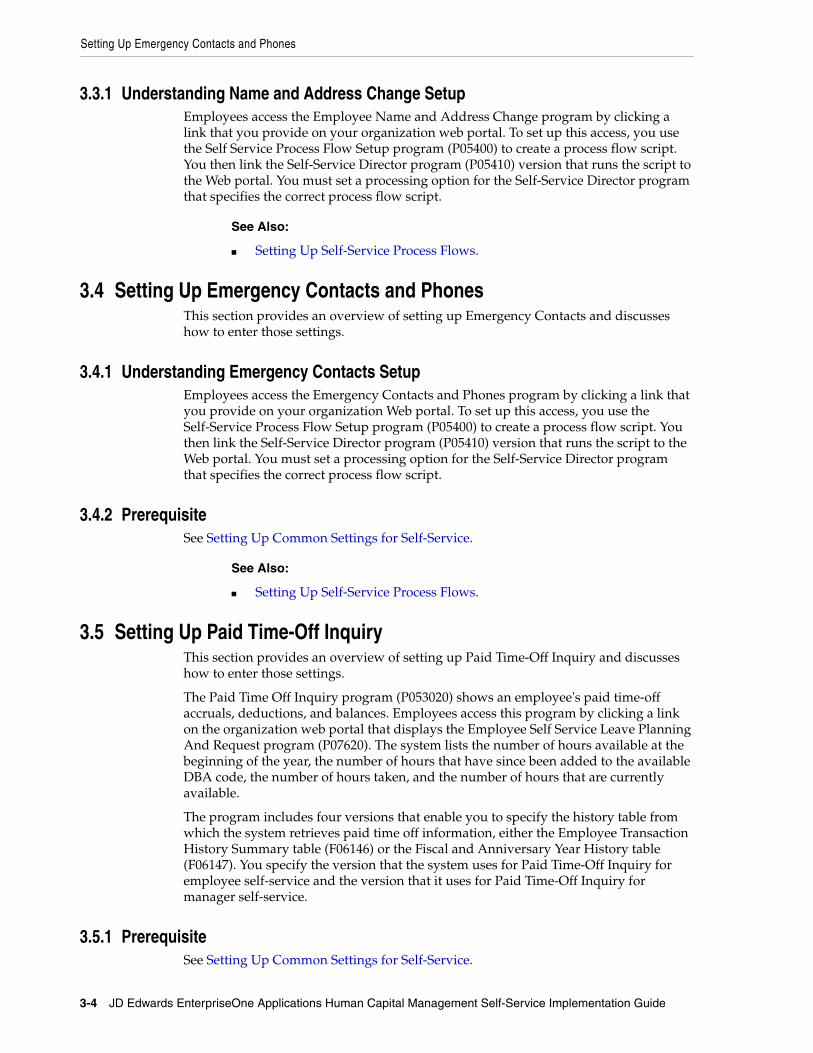
Setting Up Emergency Contacts and Phones
3-4 JD Edwards EnterpriseOne Applications Human Capital Management Self-Service Implementation Guide
3.3.1 Understanding Name and Address Change SetupEmployees access the Employee Name and Address Change program by clicking a link that you provide on your organization web portal. To set up this access, you use the Self Service Process Flow Setup program (P05400) to create a process flow script. You then link the Self-Service Director program (P05410) version that runs the script to the Web portal. You must set a processing option for the Self-Service Director program that specifies the correct process flow script.
See Also:
■ Setting Up Self-Service Process Flows.
3.4 Setting Up Emergency Contacts and PhonesThis section provides an overview of setting up Emergency Contacts and discusses how to enter those settings.
3.4.1 Understanding Emergency Contacts SetupEmployees access the Emergency Contacts and Phones program by clicking a link that you provide on your organization Web portal. To set up this access, you use the Self-Service Process Flow Setup program (P05400) to create a process flow script. You then link the Self-Service Director program (P05410) version that runs the script to the Web portal. You must set a processing option for the Self-Service Director program that specifies the correct process flow script.
3.4.2 PrerequisiteSee Setting Up Common Settings for Self-Service.
See Also:
■ Setting Up Self-Service Process Flows.
3.5 Setting Up Paid Time-Off InquiryThis section provides an overview of setting up Paid Time-Off Inquiry and discusses how to enter those settings.
The Paid Time Off Inquiry program (P053020) shows an employee's paid time-off accruals, deductions, and balances. Employees access this program by clicking a link on the organization web portal that displays the Employee Self Service Leave Planning And Request program (P07620). The system lists the number of hours available at the beginning of the year, the number of hours that have since been added to the available DBA code, the number of hours taken, and the number of hours that are currently available.
The program includes four versions that enable you to specify the history table from which the system retrieves paid time off information, either the Employee Transaction History Summary table (F06146) or the Fiscal and Anniversary Year History table (F06147). You specify the version that the system uses for Paid Time-Off Inquiry for employee self-service and the version that it uses for Paid Time-Off Inquiry for manager self-service.
3.5.1 PrerequisiteSee Setting Up Common Settings for Self-Service.

See Also:
■ Entering Timecards Using Self Service.
Setting Up Paid Time-Off Inquiry
Setting Up Employee Self-Service 3-5

Setting Up Paid Time-Off Inquiry
3-6 JD Edwards EnterpriseOne Applications Human Capital Management Self-Service Implementation Guide

4
(USA) Setting Up IRS Form W-4 4-1
4(USA) Setting Up IRS Form W-4
This chapter contains the following topics:
■ Section 4.1, "Understanding IRS Form W-4 Setup"
■ Section 4.2, "Prerequisite"
■ Section 4.3, "Creating Director Form Rules for IRS Form W-4"
■ Section 4.4, "Setting Up the Self-Service Form for IRS Form W-4"
■ Section 4.5, "Creating a Self-Service Process Flow Script for IRS Form W-4"
■ Section 4.6, "Revising the IRS W-4 Form Workfile"
■ Section 4.7, "Setting Up URLs for IRS Form W-4"
■ Section 4.8, "Printing Employee W-4 Form"
■ Section 4.9, "Saving Employee W-4 Information"
4.1 Understanding IRS Form W-4 SetupEmployees can use self-service to enter, review, and revise W-4 forms. (Release 9.1 Update) The IRS Form W-4, Employee's Withholding Allowance for ESS program (P085303A) provides tabs for Name and Address and the IRS Withholding Calculator.
Note: (Release 9.1 Update) To comply with the changes to IRS Form W-4 with the Tax Cuts and Jobs Act of 2017, the P085303A program points directly to the new version of IRS withholding calculator that will help employees to review withholding allowances. You need to specify the link to the Withholding Calculator on the IRS website in the processing options of the P085303A program.
Employees access the IRS Form W-4, Employee's Withholding Allowance for ESS program by clicking a link on the organization intranet portal. To set up this access, you use the Self-Service Process Flow Setup program (P05400) to create a process flow script. You then link the Self-Service Director program (P05410) version that runs the script to the Web portal. You must set a processing option for the Self-Service Director program that specifies the correct process flow script.
The employee can update name and address information. If the system administrator sets up a link on this form, employees can click the link to display I.R.S. Instructions for the W-4 form. (Release 9.1 Update) The Next and Previous options take the user to the previous or next step that is defined in the Director script. After completing the W-4 form, an employee can print the form.

Prerequisite
4-2 JD Edwards EnterpriseOne Applications Human Capital Management Self-Service Implementation Guide
After changes are made and the employee completes the acceptance form, the system saves the information in the IRS W-4 Form Work File table (F085303W).
(Release9.1 Update) You can also specify a processing option for the telephone number that an employee can use to contact the Social Security Administration to request a name change form.
Note: JD Edwards EnterpriseOne Human Capital Management Employee Self Service 9.1 system no longer uses P053030 (Work with W-4 form). P085303A (Form W-4 Employee withholding Allowance Certificate) is enhanced Employee Self-Service and only W-4 form used in the Self-Service application.
4.2 PrerequisiteWe recommend that you retrieve a copy of the appropriate W-4 form from the I.R.S. The current W-4 form can be obtained from the I.R.S. Web site athttp://www.irs.gov/.
See Also: ■.Setting Up Self-Service Process Flows
4.3 Creating Director Form Rules for IRS Form W-4This section provides an overview of the Populate Director Form Rules/Edits report for IRS Form W-4 and discusses how to run the report.
4.3.1 Understanding Director Form Rules for IRS Form W-4The Populate Director Form Rules/Edits report (R8985500) creates and stores information in the Self-Service Step/Application Cross-Reference (F05402) and Self-Service Script Position Rules (F05403) tables. The Self-Service Process Flow Setup program (P05400) uses these tables to create new process flow scripts. You need to run this report before creating process flow scripts. If your self-service applications were set up before the IRS Form W-4 was available, you need to run this report again. You normally need to run this report only once unless you are setting up access to additional self-service programs after your initial setup.
If you are setting up self-service access to the IRS Form W-4 Employee's Withholding Allowance for ESS program (P085303A) after your initial self-service setup, then you need to run this report again.
To set up the Employee Self-service process for 2020 W-4 changes, from the Self-Service Process Flow Setup program (P05400), navigate to the Process Flow Detail form (W05400D), and select 250 in the Self Service Action Step column.
See Also:
■ Understanding Self-Service Process Flows.
4.4 Setting Up the Self-Service Form for IRS Form W-4This section provides an overview of the self-service form for IRS Form W-4 and discusses how to set up the processing options.

Setting Up the Self-Service Form for IRS Form W-4
(USA) Setting Up IRS Form W-4 4-3
4.4.1 Understanding the Self-Service Form for IRS Form W-4(Release 9.1 Update) The IRS Form W-4, Employee's Withholding Allowance for ESS program (P085303A) is the program that employees use to enter information needed for the IRS W-4 form. The system saves the values that an employee enters for the W-4 form.
The system administrator needs to create a new version of the IRS Form W-4, Employee's Withholding Allowance for ESS program for each tax year. Processing options that define a range of parameters for W-4 information also need to be set for this program. You must use the Application Versions Interactive program (P983051) to create a new version and to set the processing options.
You can set processing options to automatically notify an administrator when employees change Form W-4 information.
See Also:
■ JD Edwards EnterpriseOne Tools Foundation Guide.
4.4.2 Setting Processing Options for IRS Form W-4, Employee's Withholding Allowance for ESS (P085303A)
Processing options enable you to specify the default processing for programs and reports.
4.4.2.1 YearUse this processing option to specify date and pay period information.
1. Enter the calendar year for the W-4 Specify the calendar year for which the W-4 information is effective. Enter a four digit number for the year.
2. Enter the number of pay periods per year Specify the number of pay periods that exist for your company in one calendar year.
4.4.2.2 SSA PhoneUse this processing option to display the contact telephone number for the Social Security Administration.
1. Phone number to contact the Social Security Administration to request a name change formSpecify the number without the prefix or special characters, such as hyphens or periods, that makes up the telephone number for an entity. You can use any applicable telephone number format for a country. This field is used in conjunction with the Prefix field, where you enter the first segment of the telephone number, which is called the area code in the United States.
When you search for an address using a phone number, you must enter the number exactly as it is set up in the Address Book system, including any special characters.
Enter a phone number with area code.
4.4.2.3 ProcessUse these processing options to specify default processes for printing and notification.
1. Notify the administrator that the employee has made changes to his/her W-4

Creating a Self-Service Process Flow Script for IRS Form W-4
4-4 JD Edwards EnterpriseOne Applications Human Capital Management Self-Service Implementation Guide
Withholding Information Specify whether an administrator receives notification. Values are:
0: Do not send notification.
1: Send notification.
2. Enter the address book number of the administrator to be notifiedSpecify the address book number of the administrator who should be notified when employees make changes to their W-4 information.
3. IRS Withholding Calculator URL Link (Release 9.1 Update)Specify the URL for the IRS Withholding Calculator in order to complete the W-4 form. Enter the URL as https://www.irs.gov/individuals/irs-withholding-calculator. The results from this calculator help you complete the Form W-4 that is applicable from the year 2018.
4.5 Creating a Self-Service Process Flow Script for IRS Form W-4This section provides an overview of a self-service process flow script for IRS Form W-4 and discusses how to set up the form.
4.5.1 Understanding a Self-Service Process Flow Script for IRS Form W-4You use the Self Service Process Flow Setup program (P05400) to create a script that includes the IRS Form W-4, Employee's Withholding Allowance for ESS program(P085303A). You need to observe this requirement regarding the placement of this program in the script: the IRS Form W-4, Employee's Withholding Allowance for ESS program must appear in the script prior to the Acceptance Form program (P085564). This requirement corresponds to one of the rules that you generated by running the Populate Director Form Rules/Edits report (R8985500): P085564 - Self Service Action Step 170. To include the IRS Form W-4, Employee's Withholding Allowance for ESS program, add step 250 in the desired script.
See Also:
■ Setting Up Self-Service Process Flows.
4.6 Revising the IRS W-4 Form WorkfileThis section provides an overview of revising the IRS W-4 Form Workfile and discusses how to input revisions.
4.6.1 Understanding the IRS W-4 Form WorkfileAfter you have run the Personal Employee Information Workfile Build program (R054101) and created the IRS W-4 Form Work File table (F085303W), a system administrator can use the IRS W-4 Form Work File Revisions program (P085303W) to review or change updated employee information. The IRS W-4 Form Work File is the live (permanent) table that stores the temporary information from the IRS Form W-4, Employee's Withholding Certificate table (F053030).
When reviewing employee information, the system administrator can perform any of these actions:
■ Approve the records
■ Reject the records

Revising the IRS W-4 Form Workfile
(USA) Setting Up IRS Form W-4 4-5
■ Reset the records to a pending status
4.6.2 Forms Used to Review or Update the IRS W-4 Form Workfile
Form Name FormID Navigation Usage
IRS W-4 Form Work File Revisions
W085303WA Use the Fast Path and enter P085303W.
Select a record to review.
When finished with review and input, complete the update tracking fields.
4.6.3 Reviewing and Updating the IRS W-4 Form WorkfileAccess the IRS W-4 Form Work file Revisions form.
To revise the IRS W-4 Form workfile:
1. On I.R.S. W-4 Form Work File Revisions, select one of these options and then click Find:
– Approved Records
– Pending Records
– Needing W-4 to be Printed
– All Records
2. Review these fields and enter corrections as necessary:
– Address Number
– Date Employee Updated
– Time Employee Updated
– Calendar Year
– No. Allow
– Exempt Flag
– Mar Stat
– Name Chg
– Additional Federal Withholding
– Multiple Job Flag
– Claim Dependent 1
– Claim Dependent 2
– Total Claim Dependent
– Other Income
– Deductions
– Action Flag
3. Review these fields that cannot be changed:
– Status
– Appr By
Revising the IRS W-4 Form Workfile
4-6 JD Edwards EnterpriseOne Applications Human Capital Management Self-Service Implementation Guide
– Date Approved
– Electronic Signature ID
– User ID
– Program ID
– Work Stn ID
– Updated By
– Date Updated
– Time Updated
4. When the review is complete and you are ready to complete the action, complete the Address Number field.
5. Select the desired records.
6. Select an appropriate action from the Row menu.
7. Click OK.
■ Approved Records
Enter an option that specifies the type of processing for an event.
■ Pending Records
Enter an option that specifies the type of processing for an event.
■ Needing W-4 to be Printed
Enter an option that specifies the type of processing for an event.
■ All Records
Select an option (radio button) that specifies the type of processing for an event.
■ Date Employee Updated
No entry required. Date that the object was updated.
■ Time Employee Updated
No entry required. Time that object was updated.
■ No. Allow
Enter the total number of allowances claimed on IRS Form W-4
■ Exempt Flag
Select a flag to indicate that an employee is claiming exemption from withholding of taxes on IRS Form W-4. To claim exemption, an employee has to meet all conditions listed on Form W-4.
■ Mar Stat
Enter a code that represents the marital status of an employee. This code is required by IRS Form W-4.
■ Name Chg
Select a flag, when set, that indicates the last name is different from that on the social security card. Values are:
Blank: Name is same

Setting Up URLs for IRS Form W-4
(USA) Setting Up IRS Form W-4 4-7
1: Name is same
■ Additional Federal Withholding
Enter an additional amount to be withheld from each paycheck. This value may be calculated using the worksheets in IRS Form W-4.
■ Multiple Job Flag
The flag when set indicates that only two jobs exist for the employee.
This option is applicable for jobs with similar pay. If the option is not set, and is populated with the default value 1, excess tax may be withheld than necessary.
■ Claim Dependent 1
Enter the amount generated by multiplying the number of qualifying children under the age of 17 by $2,000.
■ Claim Dependent 2
Enter the amount generated by multiplying the number of dependents who are not qualifying children under the age of 17 by $500.
■ Total Claim Dependent
Enter the total amount in the Claim Dependents section.
■ Other Income
Enter the other income. This amount is entered for a year for which an employee does not expect any withholding on income.
■ Deductions
Enter the deductions. Deductions an employee expects other than the standard deduction in a year.
■ Action Flag
Enter a value that defines the type of change that will be made to a record. This flag is used by the system in subsequent record processing.
■ Status
Enter a user defined name or remark. To enter information, you must use the Accepted or Mistaken Appr options from the Row menu.
■ Appr By
Enter the initials of the person approving the spending account claim. To enter information, you must use the Accepted or Mistaken Appr options from the Row menu.
■ Date Approved
Enter a date for which a change was approved. To enter information, you must use the Accepted or Mistaken Appr options from the Row menu.
4.7 Setting Up URLs for IRS Form W-4This section provides an overview of Setting Up URLs for IRS Form W-4 and discusses how to create web links for this form.

Printing Employee W-4 Form
4-8 JD Edwards EnterpriseOne Applications Human Capital Management Self-Service Implementation Guide
4.7.1 Understanding URLs for IRS Form W-4 SetupWithin the employee self-service benefit programs, including the IRS Form W-4, Employee's Withholding Allowance for ESS program (P0855303), employees can click an optional link to get information directly from the IRS. You can provide separate links to desired resource Web sites. The current values for these links are as follows:
■ http://www.irs.gov/
■ http://www.irs.gov/formspubs/index.html
If UDC codes do not already exist for the URL descriptions, they can be added to UDC 08/UT. These values are suggested:
New Y/N Value Description Description 2Hard Coded Y/N
Special Handling Code
Y IRS I.R.S. Homepage Blank Y Blank
Y IRF I.R.S. Forms Blank Y Blank
Y IRP I.R.S. Publications
Blank Y Blank
You use the Benefits Enrollment Plan/Option URL Address program (P085540) to assign the URL addresses. Although the URL specifications can potentially be implemented from more than one of the benefits setup programs, we recommend that you use the Categories By Benefit Group program (P08350) to assign URL addresses for the IRS website.
See Also:
■ Setting Up URLs for Self-Service Benefits.
4.8 Printing Employee W-4 FormTo set up the template for the 2020 W-4 in the Work With Web Mail Merge Templates (P05WMMWB), set the Template Name as 2020W4 and Data Structure as D0500170A.
To print the employee W-4 form:
On the IRS W-4 Form Work File Revisions Form (P085303W), select the row that needs to be printed. Click Row Exit and select "Print Form W-4" for printing 2020 W-4 and select "Print Pre 2020 W4" for printing W4 forms prior to 2020.
The employee W-4 form is generated with the employee details.
4.9 Saving Employee W-4 InformationThis section provides an overview of the Budget Worksheet report and discusses how to:
■ Run the Update Employee W-4 Information to Live Tables report
■ Set processing options for the Update Employee W-4 Information to Live Tables report

Saving Employee W-4 Information
(USA) Setting Up IRS Form W-4 4-9
4.9.1 Understanding the Update Employee W-4 Information to Live Tables reportYou use the Update Employee W-4 Form Information to Live Tables program (R0855303) to transfer the W-4 information from the F085303W into the F053030 and F06017 tables for the selected employees.
A processing option allows you to run the batch program in proof mode to see any potential problems or in final mode to actually update the tables. You can use a second processing option to select whether you want to update only the F053030 table or the F053030 and F06017 tables. The system administrator can select whether to approve records while they are in the IRS W-4 Form Work File or wait until records are moved to the F053030 table.
If the Files to Update processing option is set to 0, the system moves both approved and unapproved records to the IRS Form W-4, Employee's Withholding Certificate table. The system administrator can then approve or reject the unprocessed records. If the Files to Update processing option is set to 1, and a tax year is set in the Tax Year processing option, then the system moves only approved records into the F053030 and F06017 tables.
4.9.2 Running the Update Employee W-4 Information to Live Tables reportEnter BV or P98305W in the Fast Path so you can access the processing options.
4.9.3 Setting Processing Options for Update Employee W-4 Form Information to Live Tables (R0855303)
Processing options enable you to specify the default processing for programs and reports.
4.9.3.1 Process
1. Mode:Specify the mode in which the report is run.
0: Proof
1: Final
2. Files to update:Specify the tables in which the system stores information.
0: Add records only to F053030.
1: Add approved records to F06017 and F053030.
Only approved records are added to the F06017.
3. Tax Year:Specify a four-digit calendar year.
4. Employee Master UpdatesSpecify the fields that the batch program updates in the Employee Master table (F060116). Values are:
0 or Blank: Do not update the F060116 table.
1: Update only the Tax Method field for tax exempt status.
2: Update only the Federal Marital Status field.

Saving Employee W-4 Information
4-10 JD Edwards EnterpriseOne Applications Human Capital Management Self-Service Implementation Guide
3: Update both the Federal Marital Status and the Tax Method fields in the F060116 table.
To ensure that the system updates the Employee Master table, set the Files to update processing option to 1.
If you select options 1 or 3 and the employee selects the tax exempt check boxes, the system updates the value in the Tax Method field of the employee master record to 2. If the employee leaves the tax exempt check boxes blank to indicate no exemptions, the system clears the Tax Method field if the previous value was 2. The report displays a message specifying the updated value in the Tax Method field.
If the marital status changes, this program updates only the federal marital status, not the fields for state and local marital status. To change the state and local marital status, employees must contact their human resources department or submit the appropriate state and local withholding certificate.
4.9.4 Setting Back Office Application for IRS Form W-4:The back office application can be used to enter, review, and revise employee W-4 Forms.
The back office application has been updated as part of the W-4 changes for the year 2020. After changes are made in the W-4 Form, the system saves the information in the IRS Form W-4 Employee's Withholding Certificate (F053030).
Note: For 2020 and later years, enter the revision year as 2020 in the Tax Overrides Application (P060120).
Use the program Work With Form W-4 (P053030A) to create or update the employee W-4 form. After creating the W-4 Form for the employee, the HR administrator needs to access the employee master program (P0801), select the Tax Overrides application (P060120), and enter the required details.
For more information
See Also: ■"Understanding Tax Withholding and Override Information Entry" in the JD Edwards EnterpriseOne Applications Human Capital Management Fundamentals Implementation Guide.
For information about the federal marital status for 2020 w-4
See Also: ■ " Entering Country-Specific Information for U.S. Employees " in the JD Edwards EnterpriseOne Applications Human Capital Management Fundamentals Implementation Guide.

5
(Release 9.1 Update) (USA) Setting Up OFCCP Forms to Disclose Disability and Veteran Status 5-1
5(Release 9.1 Update) (USA) Setting Up OFCCP Forms to Disclose Disability and Veteran
Status
This chapter contains the following topics:
■ Section 5.1, "Understanding OFCCP Forms Setup"
■ Section 5.2, "Running Director Form Rules for OFCCP Forms"
■ Section 5.3, "Creating a Self-Service Process Flow Script for OFCCP Forms"
5.1 Understanding OFCCP Forms SetupEmployees can use the JD Edwards EnterpriseOne employee self-service programs to enter, review, and update the Voluntary Self-Identification of Disability Form CC-305 that is published by the U.S. Department of Labor’s Office of Federal Contract Compliance Programs (OFCCP). Employees can also use the self-service programs to self-identify themselves as protected veterans, as required under the amended regulations implementing the Vietnam Era Veterans’ Readjustment Assistance Act (VEVRAA).
Employees can access the Disability Status Disclose Form program (P085590) and the Veteran Status Disclose Form program (P085605) by clicking a link on their organization’s intranet portal. To set up this access, use the Self-Service Process Flow Setup program (P05400) to create a process flow script. After creating the process flow script, link the Self-Service Director program (P05410) version that runs the script to the Web portal.
Employees can use the P085590 program to provide their disability status on the Voluntary Self-Identification of Disability Status form, and the P085605 program to self-identify themselves as protected veterans on the Voluntary Self-Identification of Protected Veteran Status form. The employees can use the Previous and Next buttons to navigate to the previous or next step that is defined in the process flow script.
5.2 Running Director Form Rules for OFCCP FormsThis section provides an overview of the Populate Director Form Rules/Edits report (R8985500) for OFCCP forms to disclose disability and veteran information, and describes how to run the report.

Creating a Self-Service Process Flow Script for OFCCP Forms
5-2 JD Edwards EnterpriseOne Applications Human Capital Management Self-Service Implementation Guide
5.2.1 Understanding Director Form Rules for OFCCP FormsBefore creating the process flow script for the OFCCP forms to disclose the disability status and veteran information, you must run the Populate Director Form Rules/Edits report (R8985500). This report creates and stores information in the Self-Service Step/Application Cross-Reference (F05402) and Self-Service Script Position Rules (F05403) tables. The Self-Service Process Flow Setup program (P05400) uses these tables to create the new process flow script for the OFCCP form.
See Also:
■ Section 22.2, "Running the Populate Director Form Rules/Edits Report"
5.2.2 Running the Populate Director Form Rules/Edits Report for OFCCP FormsFrom the Employee Self Service General Management menu (G08BESS327), select Populate Director Form Rules/Edits.
5.3 Creating a Self-Service Process Flow Script for OFCCP FormsThis section provides an overview of the self-service process flow script for OFCCP forms that are used to disclose disability and protected veteran status information.
5.3.1 Understanding the Self-Service Process Flow Script for OFCCP FormsYou can use the Self Service Process Flow Setup program (P05400) to create a self-service process flow script that includes the P085590 and P085605 programs.
To include the P085590 program in the process flow script, add Self-Service Action Step 230 in the script. To include the P085605 program in the process flow script, add Self-Service Action Step 240 in the script.
See Also:
■ Section 22.3, "Defining Process Flow Scripts"

6
Setting Up Manager Self Service 6-1
6Setting Up Manager Self Service
This chapter contains the following topics:
■ Section 6.1, "Understanding Manager Self-Service Setup"
■ Section 6.2, "Setting Up Upcoming Reviews by Supervisor"
■ Section 6.3, "Setting Up the Employee Setup Process"
■ Section 6.4, "Setting Up Employee Status Change"
■ Section 6.5, "Setting Up Manager Reports"
■ Section 6.6, "Setting Up Organizational Charts for the Web"
■ Section 6.7, "Setting Up Delegates for Managers Workbench"
■ Section 6.8, "Setting Up Manager Delegates for Time Entry"
6.1 Understanding Manager Self-Service SetupYou can set up self-service programs that assist supervisors in managing the hiring and reviews of employees. Managers can access each of the programs in the Managers Workbench program (P08712).
6.2 Setting Up Upcoming Reviews by SupervisorThis section provides an overview of setting up the Upcoming Reviews by Supervisor program and discusses how to set the processing options.
6.2.1 Understanding Upcoming Reviews by Supervisor SetupEmployees in a managerial or supervisory position can use the Upcoming Reviews by Supervisor program (P052200). Supervisors can log onto the self-service site to see all employees whom they are responsible to review soon.
The Upcoming Reviews By Supervisor program can be run to report employees with upcoming reviews by supervisor and to add Enterprise Workflow Management functionality to the process. If the processing options for this report are set up correctly, the system automatically reports employees with upcoming reviews, reminds each supervisor of upcoming reviews by sending an email, and automatically updates the Upcoming Reviews By Supervisor program.
When a supervisor logs into the program, the system recognizes the employee number and displays the records for employees who have upcoming reviews. You can set processing options so that supervisors can select options from the row menu to view employee information on these forms: Work With Organizational Assignments,
Setting Up Upcoming Reviews by Supervisor
6-2 JD Edwards EnterpriseOne Applications Human Capital Management Self-Service Implementation Guide
Personal, and Work With Basic Compensation (Employee Master program P0801), and Supplemental Data Inquiry (Supplemental DB Inquiry program (P050200). You can select whether you want to set up security to permit access to these forms by certain individuals only.
This program updates supervisors and eliminates the time that they would spend researching upcoming reviews for their employees.
You can also set a processing option to have the report run automatically on a certain date.
Processing options are also available to run versions that report past due reviews and reviews for all employees without specified dates. Neither of these versions include Workflow.
Upcoming Reviews By Supervisor (P052200) is an inquiry-only program. The information presented by the program is from the F060116 table.
See Also:
■ JD Edwards EnterpriseOne Tools Foundation Guide.
■ JD Edwards EnterpriseOne Tools System Administration Guide.
6.2.2 PrerequisiteSet up the common settings for self service.
See Also:
■ "Setting Up System Options" in the JD Edwards EnterpriseOne Applications Human Capital Management Fundamentals Implementation Guide".
6.2.3 Setting Processing Options for Upcoming Reviews by Supervisor (P052200)Processing options enable you to specify the default processing for programs and reports.
6.2.3.1 ProcessUse these processing options to define the defaults that will determine the options available when using this program.
1. Enable Select Button To Basic Compensation Values are:
Blank: Disable row exit.
1: Enable row exit.
2. Enable Organizational Assignment Row Exit Values are:
Blank: Disable row exit.
1: Enable row exit.
3. Enable Employment Information Row Exit Values are:
Blank: Disable row exit.

Setting Up the Employee Setup Process
Setting Up Manager Self Service 6-3
1: Enable row exit.
4. Enable Employee Profile Row Exit Values are:
Blank: Disable row exit.
1: Enable row exit.
5. Enable Supplemental Data Row Exit Values are:
Blank: Disable row exit.
1: Enable row exit.
6. Enable Create Performance Appraisal Values are:
0 or Blank: Disable Row Exit
1: Enable Row Exit
6.2.3.2 DefaultsUse this processing option to define whether the program will provide the opportunity to enter a supervisor data item.
1. Enable Supervisor Number Entry Values are:
1: Enable supervisor data item to be entered.
0: Disable data item. The supervisor data item will be either passed to the application or supplied from the user address book number.
6.2.3.3 VersionUse this processing option to define the defaults that will determine the options available when using this program.
1. Employee Compensation Specify the version for Employee Compensation. The default version is ZJDE0001.
2. Employee Organizational Assignment Specify the version for Organizational Assignment. The default version is ZJDE0001.
3. Create Performance Appraisal Specify which version of the Create Performance Appraisal program to run. If this option is left Blank, the system uses the default version, ZJDE0001.
6.3 Setting Up the Employee Setup ProcessThis section provides an overview of setting up the Employee Setup Process and discusses how to set the processing options.
6.3.1 Understanding the Employee Setup ProcessAfter hiring an employee, a manager can use self service to add an employee record and initiate an employee setup process. Workflow then sends task approval messages and reminders about equipment setup to certain people.

Setting Up the Employee Setup Process
6-4 JD Edwards EnterpriseOne Applications Human Capital Management Self-Service Implementation Guide
You can define default setup tasks that can be automatically implemented each time a new employee is hired. Default tasks can be tasks that every new employee needs. For example, if your company provides a phone and a computer for most employees, you might want to set up default tasks for installing a phone, computer, and a network connection. Managers can add to or change these tasks unless you enter a lock code for tasks when you set them up. When you set up a default task, always associate it with a job type and step. Information entered as a default task updates the F087101 table.
You also set up a task list by location. You enter every possible setup task for every location. For every task in the task list, you can specify an approver, a task recipient, and other task details. Managers can select tasks from the task list and assign them to a new employee's setup record.
You can set up each task to do one or more of these activities: run a report, send an email message, create a work order, or start a Workflow process. You must first customize a report, set up a work order, or set up an additional Workflow process if you are planning to attach these activities to a task.
You can also require an approval for each task that you set up. If you require an approval, Workflow sends an email approval form to the address book number of the person that you designated in the Approver field. You must also set your processing options to determine whether Workflow should obtain a process approval for the entire employee setup process for every new employee record.
The system determines the date to begin the approval process from the values that you enter in these three fields on the Work With Setup Tasks Details form:
■ Based On Date
■ Duration
■ Offset Days
To determine the date to begin each task, the system performs this sequence of actions:
1. Retrieves the date from the Based On Date field (for instance, the arrival date of the employee)
2. Adds the number of days from the Duration field (the number of days needed to complete the task)
3. Adds the number of days from the Offset Days field (the number of days, when added to the Duration values, that determine the day by which the task must be completed)
The information that you enter in the header area of the setup forms updates the F087102 table. The information that you enter in the detail area of the setup forms updates the F087103 table.
To process employee setup tasks, two workflow processes must be functioning. You can use the Object Management Workbench (OMW) to ensure that these workflow processes are activated.
Workflow Process Explanation
EESETUP01-Employee Setup Approval The workflow process that sends an approval form for the entire employee setup process to the address book number of the approver. After workflow obtains an approval, it sends approval forms for each setup task that requires an approval. If you want your system to obtain an approval for this process, you must set a processing option.

Setting Up the Employee Setup Process
Setting Up Manager Self Service 6-5
6.3.2 PrerequisitesBefore you complete the tasks in this section:
■ You must set up numerous user defined codes for the employee setup process, including location codes 08/L1 through 08/L0.
See "Setting Up User-Defined Information" in the JD Edwards EnterpriseOne Applications Human Capital Management Fundamentals Implementation Guide.
■ Set up the common settings for self service.
See "Setting Up System Options" in the JD Edwards EnterpriseOne Applications Human Capital Management Fundamentals Implementation Guide.
■ Set up your processing options to require a process approval and to specify an ending status for the process approval.
■ Verify that the workflow processes are activated.
6.3.3 Forms Used to Set Up the Employee Setup Process
EESUTSK01-Employee Task Setup This workflow process is started for each setup task assigned to the employee. This process will first check to see if there is sufficient location information to process the setup task. If not it will notify the originator and wait for the information to be entered. If the activation date has not yet arrived the process will sit in waiting state until that time. When the previous two conditions are met the process activates the task. by setting the status of the F08711 record to A and then depending on how the task is setup will: send an email message to the task recipient, run a report, create a work order, or start a new workflow process.
See Also:
■ JD Edwards EnterpriseOne Applications Work Orders Implementation Guide.
Form Name FormID Navigation Usage
Work With Default Setup Tasks
W087101B Manager's Employee Setup Options (G05BMSS4), Default Setup Tasks
Click Add.
Review existing tasks.
Edit Default Setup Tasks W087101C Click OK. Create a list of setup tasks for a particular job.
Work With Setup Tasks W087102B Manager's Employee Setup Options (G05BMSS4), Setup Task List
Click Add.
Review existing tasks.
Workflow Process Explanation

Setting Up the Employee Setup Process
6-6 JD Edwards EnterpriseOne Applications Human Capital Management Self-Service Implementation Guide
6.3.4 Setting Up Default TasksAccess the Work With Default Setup Tasks form.
To set up default tasks:
1. On Work With Default Setup Tasks, click Add.
2. On Edit Default Setup Tasks, complete these fields:
– Job Type
– Job Step
– Task Type
3. Complete these optional Sub Class and Lock Code fields and then click OK.
■ Lock Code
Enter a code that specifies whether the hiring manager can change the selected default setup task. When Y is placed in this column you are not allowed to assign a task with the same task type but different sub class if that task has a hire ranking. For example if a computer desktop task has a ranking of 5 and computer laptop has a ranking of 8. If you lock the computer desktop task (by placing Y in the column) then employees with this job type/step will not be allowed to receive a computer laptop. Ranking of tasks is set on the Employee Setup Tasks application P087102).
6.3.5 Setting Up Tasks by LocationAccess the Work With Setup Tasks Details form.
Figure 6–1 Work With Setup Tasks Details form
To set up tasks by location:
1. On Work With Setup Tasks, click Add.
2. On Work With Setup Tasks Details, complete these fields in the header area:
Work With Setup Tasks Details
W087102F Click OK. Set up all of the details for each task in an employee setup list of tasks.
Form Name FormID Navigation Usage

Setting Up the Employee Setup Process
Setting Up Manager Self Service 6-7
■ Task Type
Enter a code that represents the primary category or classification of an employee setup task. Define the valid values in user defined code list 08/T1.
■ Sub Class
Enter a code that represents the classification of the current task. The system uses this code to further define the task.
■ Description
Enter an alphanumeric description of the employee setup task.
■ Required Location Fields
Enter a value that represents the number of location category codes that you need to know to accomplish the current setup task. For example, to install a telephone you might need to know the first four location codes (state, city, building, and office number). To set up a computer account, you might need to know only the first two location codes (state and city).
■ Ranking
Enter a code that specifies the rank of tasks within a task type. You rank tasks to restrict users from changing the subclass of a task to a subclass with a higher rank.
See Setting Up Default Tasks.
■ Final Task Status
Enter a code that represents the status that the task will be set to when it is completed. Numeric status codes are reserved for competed tasks.
3. Select the Approval Required option in the header area, if applicable:
■ Approval Required
Enter a code that specifies whether an approval is required for this task. Values are:
Y: An approval is required for this task.
N: An approval is not required for this task.
4. Enter your address book number or the address book number of the person responsible for monitoring this task in the Task Owner field. This field is information only this person will not receive any messages or approvals.
■ Task Owner
Enter the address book number of the owner of the setup task. This person is responsible for the task and will receive approval messages in the event that a task approver has not been entered on a task that requires an approval or the task approver has not responded to an approval request.
This is an optional field.
5. Complete the optional Application Form Name field if you have an additional form set up to enter additional task information.
Note: This application is accessed from the approval application or the Employee Setup Entry form. However it will only work on a Windows client and not on the web.

Setting Up the Employee Setup Process
6-8 JD Edwards EnterpriseOne Applications Human Capital Management Self-Service Implementation Guide
■ Application Form Name
Enter the name of the application associated with a task. This application will provide a place for the user to enter specific information necessary to complete the setup task.
This is an optional field.
6. Complete the Task Recipient field in the detail area.
The task recipient receives any email, work order, or report that you attach to this task.
■ Task Recipient
Enter the address book number of the person who is assigned to the current employee setup task.
This is an optional field.
7. To identify the employee work space, complete as many of the Location Code fields that are required.
■ Location Code 1–10
Enter a user defined category code that defines the location of an employee. You set up this code to meet the needs of your organization. For example, you can set up a category code to represent country, city, state, campus, building, office, or other location.
The Human Resources system provides this code to enable you to define a custom setup process for new employees based on the location where the employee will work.
8. To define the number of required fields, you can set the required value in the Required Location Fields field.
The system displays an error if fewer than the required number of fields are completed.
■ Required Location Fields
Enter a value that represents the number of location category codes you need to know to accomplish the current setup task. For example, to install a telephone you might need to know the first four location codes (state, city, building, and office number). To set up a computer account, you might need to know only the first two location codes (state and city).
9. If you select the Approval Required option, complete the Approver field.
■ Approval Required
Enter a code that specifies whether an approval is required for this task. Values are:
Y: An approval is required for this task.
N: An approval is not required for this task.
■ Approver
Enter the address book number of the person who approves any given work. The system verifies this number against the F0101 table.
10. If you set up a customized report for this task, complete the Report Name and Version fields:

Setting Up the Employee Setup Process
Setting Up Manager Self Service 6-9
■ Report Name
Enter the name that identifies an Enterprise One report that will be sent to the task recipient when the task is processed.
– Report Name
– Version
11. If you set up an additional workflow process for this task, complete the Process ID field.
■ Process ID
Enter the process name of the workflow process you want to assign to this task. This process will get started when the task is processed.
12. To send an email message to the task recipient, complete the Send Email field. The text of the email message comes from media object attached to this task. The hiring manager is given the opportunity to update the contents of this media object on the Employee Setup Task Entry form. This is a way to send task specific information to the person assigned to work on the task.
If your organizational procedures are set up for work orders, you might want to create a work order for this task.
13. If you create a work order, complete the Order Number field.
14. Complete these fields so that the system can determine the start date of the task:
■ Offset Days
Enter the number of days, plus or minus, to adjust the actual start date (or the date work will begin on the task). The start date is calculated by taking the Base on Date and subtracting the number of days in the Duration field and then adding the days in the Offset Days field. For example, if you want the phone installation to be completed one day prior to the employee arriving at his or her desk and it takes 3 days to install a phone, then you would enter the these values:
Arrival Date: Based on Date
3: Duration
–1: Offset
These settings cause the phone installation process to start four days prior to the arrival date.
■ Duration
Enter a value that specifies how long the setup task will take. The system also uses this value to calculate the task start date.
■ Based on Date
Enter a user defined code (08/BO) that will specify which date you use to calculate the completion date of the setup task. Predefined values are Arrival Date, Creation Date or Start Date. Arrival Date is entered by the hiring manager when creating the setup process. Creation Date is the date the setup process was created and the Start Date is the DateEmployementStart (DST) in the Employee Master record (F060116)
15. Repeat these steps to enter different locations for the task.
16. When you are finished, click OK.

Setting Up Employee Status Change
6-10 JD Edwards EnterpriseOne Applications Human Capital Management Self-Service Implementation Guide
6.4 Setting Up Employee Status ChangeThis section provides an overview of setting up the Employee Status Change program and discusses how to:
■ Set up the processing options for Employee Status Change Setup program.
■ Set up employee status change.
6.4.1 Understanding Employee Status Change SetupEmployee Status Change Setup (P08730) is one of the suite of programs that a manager can use from Manager's Workbench (P08712). Managers can use Employee Status Change Setup to perform any of these changes:
■ Promotion
■ Job status
■ Location
■ Leave of absence
■ Department or supervisor
Managers can save time and effort by using the five default tasks to perform the most frequent types of employee changes. For example, when an employee changes jobs, the supervisor can initiate the change using the Manager's Workbench. Workflow can route the status change to human resources for the appropriate approvals. Once the change request has been approved, the change will automatically be updated in the system.
Your software has been supplied with a default version that contains options, approval requirements, and data items that are common to a large cross-section of organizations. As a result, little or no change might be required for this application to meet your needs. If you want to add data items to any of the existing change forms, you will find that the majority of the fields from the F060116 table are currently available.
If you want to change the default workflow process, the best approach is to make a copy of the existing version, rename the new version appropriately, and make changes only to the new version. Because any new version must maintain the same data structure (input parameters), this approach will result in less effort and fewer errors. You use the Employee Status Change Setup program to customize the setup of the Employee Status Change program (P08720).
The Select Employee Status Change Request form contains an option to select a user defined status change. To add user defined change types, you must first create a corresponding UDC record in the 08/S4 UDC table.
Normally, you will use the existing processing option settings for Employee Status Change Setup. These settings are:
■ Business Function Name
■ Hide Status Change Initialization Function Name
The Business Function Name refers to the function that will be used to initiate the workflow process. If you have a business need to change this function make sure that the new function has the same data structure as the default function. If you don't intended to change this function, then put a 1 in the Hide Status Change Initialization Function Name processing option and this field will be hidden on the setup form.

Setting Up Employee Status Change
Setting Up Manager Self Service 6-11
6.4.2 PrerequisiteVerify that workflow process EESTSCHG-Employee Status Change is activated in the Object Management Workbench (OMW).
6.4.3 Form Used to Set Up the Employee Status Change Program
Form Name FormID Navigation Usage
Employee Status Change Setup
W08730A Self Service Setup (G05BESS4), Status Change Setup
Click OK.
Enter a Change Type and review currently selected data items.
6.4.4 Setting Processing Options for Employee Status Change Setup (P08730)Processing options enable you to specify the default processing for programs and reports.
6.4.4.1 DefaultsUse this processing option to specify the defaults that the system will apply when you initiate the status change process.
1. Business Function Name Specify the business function you want to use to initiate the status change workflow process. This business function must also handle the other workflow processes such as aborting, escalating, restarting, and approving.
The default function is Initiate Status Change. The source module is N0800206.
2. Hide Status Change Initialization Business Function Specify whether you want to allow the user to see the Status Change business function driver used to initiate the Status Change process. It is recommended that you set this value to 1. Values are:
0: No
1: Yes
6.4.5 Setting Up the Employee Status Change ProgramAccess the Employee Status Change Setup form.
To set up employee status change:
From the Self Service Setup menu (G05BESS4), select Status Change Setup.
1. On Employee Status Change Setup, complete the Change Type field and click Find.
A check mark in the row header indicates that the data item is selected and appears as an available choice in the Employee Status Change program (P08720). If a lightening bolt symbol appears in the row header, the field is a required field and is marked with an asterisk in Employee Status Change.
2. To change the status of a selected field to a required field, double-click the row-header (the field with the check mark) so that the lightening bolt symbol appears. Alternatively, you can highlight the row and press the Select button.

Setting Up Manager Reports
6-12 JD Edwards EnterpriseOne Applications Human Capital Management Self-Service Implementation Guide
3. To completely deselect a field, double-click the row-header again so that no symbol appears.
4. To add a new field, click the All display option:
■ All
Display all possible data items from which to select. The All option displays all of the enabled data items from the F060116 table from which you can select.
5. Double-click the row-header of the data item(s) that you want to add and click OK.
■ Change Type
Enter a code that specifies the type of status change. The status change type is validated against UDC 08/S4.
An example of a status change type is PROMO for Promotion. To define a new type of status change, you must first add the change type to the UDC table.
■ Approval Type
Enter a value form the UDC table 05/AP. The approval type selected will determine who will receive an approval message. The approval types are setup using the Approval Hierarchy application (P05844).
6.5 Setting Up Manager ReportsThis section provides an overview of setting up manager reports and discusses how to set up the Manager's Report Setup form.
6.5.1 Understanding Manager Reports setupManagers and their delegates can use the Managers Reports program (P08740), to automate required reporting procedures and save time. System administrators use the Managers Reports Setup program (P08741) to set up the reports that are run in the Managers Reports program.
The Managers Reports Setup program includes a list of categories that are defined in UDC 08/RP. You can modify this list to meet organizational needs and then attach reports to each category as desired. To automatically run a category of reports from the Managers Reports program, managers can create a user defined list that contains all or some of the reports in a particular category. The list can even contains reports from multiple categories. Once the list is created, the manager can submit the entire list. Managers retain the option of changing the sequence in which the system runs a list of reports and can also run individual reports instead of an entire list.
You can also set up report versions in the Managers Reports Setup program. Creating report versions allows you to set up lists of reports to meet a wide range of needs. You could create a different version for each category.
The Manage Reports process has been designed to take advantage or reports that can be run for a particular employee and have the employee's Address Number in the report data structure. When adding reports that fit this criteria to a report category, press the Map Report Data Structure row exit. This enables you to map a data item from the Employee Master to the data items in the report data structure. To run a report for a specific employee you would want to map AN8 from F060116 to the Address Number field in the report data structure.

See Also:
■ Using Managers Reports.
Setting Up Manager Reports
Setting Up Manager Self Service 6-13
6.5.2 PrerequisitesBefore you complete the tasks in this section:
■ To set up new category codes to which you can assign a new selection of reports.
■ To create a new category for human resources reports, use 08 in the Product Code field and RP in the User Defined Codes field.
See Also:
■ "Setting Up User-Defined Information" in the JD Edwards EnterpriseOne Applications Human Capital Management Fundamentals Implementation Guide.
6.5.3 Forms Required to Set Up Manager Reports
Form Name FormID Navigation Usage
Manager's Report Setup
W08741A Self Service Setup menu (G05BESS4), Managers Reports Setup
Review existing report names that might be currently assigned to categories.
Assign desired reports to individual categories.
6.5.4 Setting Up Manager ReportsAccess the Manager's Report Setup form.
Figure 6–2 Manager's Report Setup form
To set up manager reports:
1. On Manager's Report Setup, complete the Category field and click Find to display the report names that are currently assigned.
■ Category
Enter the name of a report category. Each report is associated with a category to make creating and maintaining lists of reports easier and to enable you to view or submit just the reports that belong to a particular category.

Setting Up Organizational Charts for the Web
6-14 JD Edwards EnterpriseOne Applications Human Capital Management Self-Service Implementation Guide
2. To assign a report to a category, complete the Report ID field and enter the version.
■ Report ID
Enter the name that identifies a system object. JD Edwards EnterpriseOne architecture is object-based. Discrete software objects are the building blocks for all applications, and developers can reuse the objects in multiple applications. The Object Librarian tracks each object. Examples of system objects include:
Batch Applications (such as reports)Interactive ApplicationsBusiness ViewsBusiness FunctionsBusiness Functions Data StructuresEvent RulesMedia Object Data Structure
3. After you have added the necessary reports, click OK.
■ DS Template
Display only. Specifies whether the report has a data structure for passing in runtime parameters. When a report has a data structure the Map Report Data Structure row exit will be enabled. Pressing this button will display the Work With Data Structure Mapping form (P08770). This form will enable you to setup a mapping between items in the Employee Master (F060116) and items in the data structure. This mapping enables you to run reports for a specific employee.
6.6 Setting Up Organizational Charts for the WebThis section provides an overview of setting up organizational charts for the web and discusses how to set up the Generate Graphic Organization program.
6.6.1 Understanding Organizational Charts for the WebYou can use the Generate Graphic Organization Chart program (P08713W) to customize the appearance of your organizational charts. If you choose to complete none of the setup options, managers can still enter an employee ID and then click the Display Chart option to produce a chart.
You can use the Profile option on the Form menu to review Address Book and Employee Master Information for the person who is listed in the Employee field.
6.6.2 Forms Used to Set Up Organizational Charts for the Web
Form Name FormID Navigation Usage
Generate Graphic Organizational Chart
W08713WB Manager Self Service (G05BMSS1), Generate Graphic Organizational Chart
Select Display Options on the Form menu.
Use search and select form to move to the Organization Chart Display Options form.

Setting Up Organizational Charts for the Web
Setting Up Manager Self Service 6-15
6.6.3 Setting Processing Options for Generate Graphic Organizational Chart (P08713W)Processing options enable you to specify the default processing for programs and reports.
6.6.3.1 Default
1. Location of Employee ImagesSpecify a fully qualified path to a directory where the employee.jpg images are stored. This path must be available over the internet. An example of a fully qualified path is:
http://ServerName:83/jde/owportal/images/
6.6.4 Organizational Charts SetupAccess the Organization Chart program.
To set up organizational charts for the Web:
From the Manager Self Service menu (G05BMSS1), select Generate Graphic Organizational Chart.
1. On Organization Chart, select Display Options from the Form menu.
2. On Organization Chart Display Options, select these optional options to display on a chart:
■ Address Number
Place a check in this field if you want the employee's address number to appear on the chart.
■ Job Title
Place a check in this field if you want the employee's job title to appear on the chart.
3. Enter a color value for each of these chart options:
■ Level 1–3, Background
Enter an RGB color or valid HTML named color or use the visual assist to pick a color from list.
4. To define chart layout options, complete these fields:
■ Cell Height
Enter a value for the height of each node.
■ Cell Width
Enter a value for the width of each node.
■ Font Size
Enter a number for the font size.
■ Columns/Page
Organization Chart Display Options
W08713WC Click OK. Set up options for identification, color, chart layout, and pictures.
Form Name FormID Navigation Usage

Setting Up Delegates for Managers Workbench
6-16 JD Edwards EnterpriseOne Applications Human Capital Management Self-Service Implementation Guide
Enter the number of columns to print on each page. This is only used if the Page Layout box is check on the Organization Chart form. If the chart is too wide to fit on a page then this option enables the chart to be split on to multiple pages for printing.
■ Rows/Page
Enter the number of rows to appear on each page. This is only used if the Page Layout box is check on the Organization Chart form. If the chart contains more rows than can fit on a page then this option enables the chart to be split on to multiple pages for printing.
■ Chart Height
Enter a value that changes the height of the frame that displays the chart.
■ Chart Width
Enter a value that changes the width of the frame that displays the chart.
■ Line Wrap
Check this box to enable text within each node to wrap on to multiple lines.
■ Show Page Number
Check this box if you want to display the page number on each page of the chart.
■ Repeat top level manager on each page
Check this box if you want to redisplay the top level employee on each page of the chart.
■ Show Terminated
Check this box if you would like to display terminated employees on the chart. Terminate employees will be displayed with a red background and strike through font.
5. To display employee pictures on charts, enter a fully qualified directory path where the .jpg files are stored in the Image Location field:
■ Image Location
Enter the file location on the Web server where employee pictures are stored. To display a picture of the employee on the Profile form the name of the image must be the employees address book number followed by .jpg. For example the picture of Cathy McDougle would be 7500.jpg.
6. To save your choices, click OK.
6.7 Setting Up Delegates for Managers WorkbenchThis section provides an overview of setting up manager delegates for Managers Workbench and discusses how to perform the setup function.
6.7.1 Understanding Delegates Setup for Managers WorkbenchManagers can set up subordinates to perform functions on their behalf in the Managers Workbench program (P08712). You can use the Manager Delegates program (P08750) to set up delegates to perform review and approval functions for:
■ Accessing the Managers Workbench program.

Setting Up Manager Delegates for Time Entry
Setting Up Manager Self Service 6-17
■ Viewing records of a manager's subordinates.
■ Processing employee status changes.
■ Processing performance appraisals.
■ Running managers reports.
When you set up manager delegates, you can assign an authorization level to each delegate. The authorization level specifies how many organizational levels below the manager that the delegate can view. For example, if the level is set to 1, then the delegate can view only records for employees who report directly to the manager. At level 2, the delegate can view records for employees who report to the manager and for employees who report to the manager's direct reports.
You can also assign effective dates to delegate records. For example, if a manager is on vacation for two weeks, you might set up a delegate that has review and approval authority during the time that the manager is unavailable. After the ending date that is assigned to the delegate record is reached, the delegate no longer has authorization to review and approve employee timecards.
6.7.2 Form Used to Set Up Delegates for Managers Workbench
Form Name FormID Navigation Usage
Work With Delegates W08750A Manager Self Service (G05BMSS1), Managers Delegates
Set up manager delegates.
6.7.3 Setting Processing Options for Manager Delegates Setup (P08750)Processing options enable you to specify the default processing for programs and reports.
6.7.3.1 DefaultsUse these processing options to specify whether the Manager field is accessible and the address book value can be changed. When the value is set to the default value of1 or is blank, the system automatically detects the address book number of the employee who is currently signed onto the system, disables the field, and displays only delegates who are subordinate to the displayed manager. When the value is set to 2, the system activates the Manager field, does not automatically detect an address book number, and displays the subordinate delegates for any manager whose address book number is entered.
1. User Level Specify whether to display delegates for different managers or to display the delegates for only one manager. Values are:
1:Manager field is disabled. (default value)
2:Manager field is enabled.
6.8 Setting Up Manager Delegates for Time EntryThis section provides an overview of setting up manager delegates for time entry and discusses how to perform the setup function.

Setting Up Manager Delegates for Time Entry
6-18 JD Edwards EnterpriseOne Applications Human Capital Management Self-Service Implementation Guide
6.8.1 Understanding Manager Delegates Setup for Time EntryAfter employees enter timecards in the system, managers can review and approve, change, or reject those timecards. Occasionally, managers are not available to review and approve timecards. In these circumstances, you can use the Manager Delegates Setup program (P051126) to set up delegates to perform certain review and approval functions on behalf of the manager.
When you set up manager delegates, you can assign an authorization level to each delegate. The authorization level specifies how much authority the delegate has during the timecard review and approval process. Delegates with an authorization level of 2 are only able to approve or reject timecards, and delegates with an authorization level of 1 are able to approve, change, delete, and reject timecards on behalf of the manager.
You can also assign effective dates to delegate records. For example, if a manager is on vacation for two weeks, you might set up a delegate that has review and approval authority during the time that the manager is unavailable. After the ending date that is assigned to the delegate record is reached, the delegate no longer has authorization to review and approve employee timecards (Release 9.1 Update).
6.8.2 Form Used to Set Up Manager Delegates for Time Entry
Form Name FormID Navigation Usage
Work With Manager Delegates Setup
W051126B Time Entry Self Service Setup (G05BESS41), Manager Delegate Setup
Review existing information and enter new values to set up desired delegates for a manager.
6.8.3 Setting Processing Options for Manager Delegates Setup (P051126)Processing options enable you to specify the default processing for programs and reports.
6.8.3.1 DefaultsUse this processing option to specify whether the Manager field is accessible and the address book value can be changed. When the value is set to the default value 0, the system automatically detects the address book number of the manager who is currently signed onto the system, disables the field, and displays only delegates who are subordinate to the displayed manager. When the value is set to 1, the system activates the Manager field, does not automatically detect an address book number, and displays the subordinate delegates for any manager whose address book number is entered.
1. User Level Specify whether to display delegates for different managers or to display the delegates for only one manager. Values are:
0: Display only one manager's delegates. (default value)
1: Display delegates for a selected manager.
6.8.4 Setting Up Manager Delegates for Time EntryAccess the Work With Manager Delegates Setup form.

Setting Up Manager Delegates for Time Entry
Setting Up Manager Self Service 6-19
Delegate NumberEnter a number that identifies an entry in the JD Edwards EnterpriseOne Address Book system, such as employee, applicant, participant, customer, supplier, tenant, or location.
Authorization TypeEnter a code that specifies the type of authorization that a manager can specify for a delegate. Values are:
1: Change/delete/approve/reject
2: Only approve/reject

Setting Up Manager Delegates for Time Entry
6-20 JD Edwards EnterpriseOne Applications Human Capital Management Self-Service Implementation Guide

7
Setting Up Self-Service Time Entry 7-1
7Setting Up Self-Service Time Entry
This chapter contains the following topics:
■ Section 7.1, "Understanding Self-Service Time Entry Setup"
■ Section 7.2, "Setting Up the Time Entry Director Form"
■ Section 7.3, "Creating the Time Entry Interface for Employee Self-Service"
■ Section 7.4, "Assigning Pay Types to Employee Groups"
■ Section 7.5, "Working with Labor Distribution Periods"
7.1 Understanding Self-Service Time Entry SetupBefore employees can enter timecard information using the self-service time entry applications, you must create the text that appears on the time entry forms, set up user interfaces, assign manager delegates for managers who review and approve timecards, and specify the available pay types that can be used for each employee group.
First, you must set up the director form. The director form is the first form that the system displays when you access the self-service time entry system. You can enter text that will appear on this form. This text is called director text. You use director text to provide user instructions for employees or to provide pay-period or labor distribution period specific information that might be needed for employees to enter timecards correctly.
In addition to director text, the Time Entry Self Service Director form also contains links to the actual time entry interfaces. You can activate the links to the Employee Summary Time Entry program (P051128), the Employee Daily Time Entry program (P051127), or to both programs. Though the system displays all of the links on the Time Entry Self Service Director form, the active links are determined by the processing option settings for the Time Entry Self Service Director program (P051125).
After you set up the director, you must set up user interfaces for the time entry applications. You can create multiple interfaces to accommodate the business requirements of different companies or business units within your organization. To set up a user interface for self-service time entry, you select the fields that you want to appear on the time entry forms. These fields are set as default fields that the system automatically displays on Employee Daily Time Entry and Employee Summary Time Entry:
■ Pay Type
■ Hours
■ Work Date

Understanding Self-Service Time Entry Setup
7-2 JD Edwards EnterpriseOne Applications Human Capital Management Self-Service Implementation Guide
■ Subledger
■ Subledger Type
■ Charge To
■ Shift Code
■ Equipment Worked
■ Equipment Hours
The system also provides you with over 50 additional predefined fields to choose from. These fields enable you to quickly and easily configure your user interfaces to meet the business needs of your organization.
You can specify which pay types are available to employees within different employee groups. For example, employees in business unit 100 might need to use different pay types than employees in business unit 200, or employees with Job Type A-200 might use different pay types than employees with Job Type B-55. You can use the Classification/Pay Cross Reference program (P05932) to specify the available pay types for each employee group. When you set up this information, employees can enter timecards for only the pay types that are assigned to their employee group. If you do not set up this information, employees will receive a hard error message on this field and will not be able to complete time entry.
You can define employee groups according to this criteria:
■ Job type only.
■ Job type and job step only.
■ Business unit only.
■ Union code only.
■ Shift code only.
■ Job type, job step, business unit, union code, and shift code.
You can select the fields that you use to define employee groups for pay type assignment in the processing options for the Time Entry Self Service Director program.
To set up delegates who can assist managers with timecard approvals, you can use the Manager Delegates Setup program (P051126) to designate one or more subordinate employees as delegates for each manager. You also assign an authority level for each delegate. Manager delegates are employees who are given permission to perform duties on behalf of a manager. For example, if a manager is not available to review and approve timecards before the timecard approval deadline, a manager delegate could review and approve the timecards for that manager.
7.1.1 Mobile Enterprise Applications for Field Progress Entry (Release 9.1 Update)The following mobile applications are available, and can be used to manage field progress entry on a mobile device:
■ Mobile Field Progress Entry (Tablet)
■ Mobile Field Progress Labor Entry (Smartphone)
■ Mobile Field Progress Equipment Entry (Smartphone)
■ Mobile Account Progress Entry (Smartphone)

Setting Up the Time Entry Director Form
Setting Up Self-Service Time Entry 7-3
These applications require system administrator configuration before they are available to individual users. Contact your system administrator to determine whether these applications are available for use.
Additionally, see the following topic in the JD Edwards EnterpriseOne Applications Mobile Enterprise Applications Implementation Guide:
Field Progress Entry Mobile Applications
7.2 Setting Up the Time Entry Director FormThis section provides an overview of the Time Entry Director form and discusses how to:
■ Set processing options for Time Entry Self Service Director (P051125).
■ Set up director text.
7.2.1 Understanding the Time Entry Director FormThe Time Entry Self Service Director program displays the first form that employees see when they access self-service time entry. You define the text that appears on this form. This text is called director text. You use director text to provide user instructions for employees or to provide pay-period specific or labor distribution period specific information that employees might need to enter timecards correctly. The Time Entry Self Service Director form displays labor distribution period specific information for the labor distribution period employees. For the other employees, the Time Entry Self Service Director form displays the default pay period end date based on the processing option. If you choose to include pay-period specific information in director text, you must revise the text for each pay period.
The Historical Correction Periods option on the Time Entry Self Service Director form displays for labor distribution employees and is hidden for pay period employees. If you select the Historical Correction Periods option, the system enables the Timecard Corrections link. You can access historical corrections through this link. You can set a processing option to display or hide the Timecard Corrections link.
These examples illustrate the types of information that you might want to include in director text.
7.2.1.1 Example 1July 1–15 time entry reports are due by noon July 16: 80 total hours.
Overtime reminder: All employees who are eligible for overtime are responsible for coding all overtime hours that are worked to pay code 300. If you have any questions about overtime eligibility, please speak with your manager or a human resources representative.
7.2.1.2 Example 2To enter timecards using this self-service form, verify that the date in the Pay Period Ending Date field is correct, and then click the Summary Time Entry link to access the time entry screen. On the time entry screen, complete all of the fields, and then click Save. Your manager will review your timecards and you will receive an email response regarding the approval status of your timecards. If you have questions regarding the time entry process or the review and approval process, please speak with your manager or a human resources representative.

Setting Up the Time Entry Director Form
7-4 JD Edwards EnterpriseOne Applications Human Capital Management Self-Service Implementation Guide
In addition to director text, the director form also contains these links to employee or manager programs (interfaces):
■ Daily Time Entry
■ Summary Time Entry
■ Manager Review and Approval
You use the processing options for the Time Entry Self Service Director program to specify which of these links are active.
The director form also automatically displays the last day of the pay period, based on information that you enter in the processing options.
7.2.2 Forms Used to Set Up the Time Entry Director Form
Form Name FormID Navigation Usage
Work With Director Text
W051124A Time Entry Self service Setup (G05BESS41), Director Text Setup
Click Add.
Set up director text.
Define Director Text W051124B Click OK. In the text pane, enter text for the self-service time entry form.
7.2.3 Setting Processing Options for Time Entry Self Service Director (P051125)
Processing options enable you to specify the default processing for programs and reports.
7.2.3.1 Date/Pay Cycle CodeUse these processing options to specify the pay-period ending dates that are displayed on the Time Entry Self Service Director form. The system displays the date that is linked to the employee pay cycle code. To ensure that the correct date is displayed on time entry forms, you must update these processing options each pay period.
1. Pay Period Ending Date - Weekly Specify the last day of the workweek for weekly processing periods.
Weekly Pay Cycle Code Specify the master pay cycle that the system uses to determine pay period dates.
2. Pay Period Ending Date - Biweekly Specify the last day of biweekly processing periods.
Biweekly Pay Cycle Code Specify the master pay cycle that the system uses to determine pay period dates.
3. Pay Period Ending Date - Semi-Monthly Specify the last day of semimonthly processing periods.
Semi-Monthly Pay Cycle Code Specify the master pay cycle that the system uses to determine pay period dates.

Setting Up the Time Entry Director Form
Setting Up Self-Service Time Entry 7-5
4. Pay Period Ending Date - Monthly Specify the last day of monthly processing periods.
Monthly Pay Cycle Code Specify the master pay cycle that the system uses to determine pay period dates.
7.2.3.2 Pay TypeUse these processing options to specify the pay types that the system uses to create timecards for lump sum entries in the Quick Entry section of the summary time-entry forms.
1. Pay Type - Regular Specify the pay type that the system assigns to timecard information that is entered for regular pay in the self-service time entry program.
2. Pay Type - Sick Leave Specify the pay type that the system assigns to timecard information that is entered for sick pay in the self-service time entry programs.
3. Pay Type - Vacation Specify the pay type that the system assigns to timecard information that is entered for vacation pay in the self-service time entry programs.
4. Pay Type - Holiday Specify the pay type that the system assigns to timecard information that is entered for holiday pay in the self-service time entry programs.
5. Pay Type - Overtime Specify the pay type that the system assigns to timecard information that is entered for overtime pay in the self-service time entry programs.
6. Cross Reference Search Specify the criteria that are used to set up a pay type cross-reference table for employee self-service time entry. You use the pay type cross-reference table to define pay types that various employee groups can use for time entry.
For example, if you want to assign pay types to employees by job type and job step, enter 2. If you enter 2, you should define pay types for all employee groups that use job type and job step.
To assign pay types to employee groups by business unit, enter 3.
To assign pay type cross-references that use different criteria for each employee group, enter 0. When you enter 0, you enable pay types to be assigned to specific employee groups. You also enable a default set of pay types to be set up by leaving all of the options blank. This also allows any or none of the options to be used to define pay type cross-references. Values are:
1: Job type.
2: Job type and job step.
3: Business unit.
4: Union code.
5: Shift code.
0 or Blank (default): Any or all cross reference options.

Setting Up the Time Entry Director Form
7-6 JD Edwards EnterpriseOne Applications Human Capital Management Self-Service Implementation Guide
7.2.3.3 Leave EntryUse these processing options to specify how the system processes information for global leave administration.
1. Leave Verification SetSpecify a code that identifies a group of leave verification rules that are grouped together for processing on any given application that will validate entry of leave time. You set up this code in the Leave Verification rules program (P07602).
2. Leave History Source Specify the table from which the system retrieves history information. Values are:
0 or Blank: Calendar Month DBA Summary History table (F06145) or Employee Transaction History Summary table (F06146).
1: Fiscal and Anniversary Year History table (F06147).
3. Enable/Disable Quick Entry Fields for the Summary Time EntrySpecify whether to enable or disable quick entry for Sick, Vacation, and Holiday fields for the Summary Time Entry program (P051128). Values are:
0 or Blank: enable Sick, Vacation, and Holiday fields.
1: disable Sick, Vacation, and Holiday fields. (default value)
4. Sick Leave TypeSpecify a user-defined code (07/LV) that describes the leave time that an employee takes or requests. This information can be used to report leave trends. Values might include:
C: Comp time
S: Sick time
M: Maternity leave time
5. Vacation Leave TypeSpecify a user-defined code (07/LV) that describes the leave time that an employee takes or requests. This information can be used to report leave trends.
6. Holiday Leave TypeSpecify a user-defined code (07/LV) that describes the leave time that an employee takes or requests. This information can be used to report leave trends.
7.2.3.4 Account NumberUse these processing options to specify how the system validates account numbers that are included on employee timecards.
1. Validate # sign Specify whether the system allows employees to enter a pound sign (#) in place of a valid account number. If this is not allowed, the system verifies the validity of the account numbers that are associated with each timecard. Values are:
0: Allow a pound sign entry.
1: Do not allow a pound sign entry.
2. Posting Account Only Specify whether the system verifies that the account number that is entered for timecards can be posted. Values are:

Setting Up the Time Entry Director Form
Setting Up Self-Service Time Entry 7-7
0: The system does not verify that the account number can be posted.
1: The system verifies that the account number can be posted.
3. Dynamic Account Creation Specify whether the system uses dynamic account creation when an account number that does not exist in the Account Master table (F0901) is entered on a timecard. You should set this option to 0 if dynamic account creation is not included in your accounting process. Values are:
0: Do not create accounts dynamically.
1: Create accounts dynamically.
4. Validate Account Specify whether the system automatically verifies and retrieves the correct account number from the Employee Master Information table (F060116). When this processing option is set to 1, the system first compares the account number that is entered on the timecard to existing account information in the Employee Master Information table. If the employee enters no account number, then the system uses data that is linked to the account number, such as the job location, cost code, pay type, and union, to retrieve the correct account number. Values are:
0: The system does not verify and retrieve the account number.
1: The system verifies and retrieves the account number.
2: The system verifies non-blank account numbers.
7.2.3.5 MulticurrencyUse these processing options to enable the multicurrency feature for employee self-service time entry and to specify the currency that the system uses. This feature must also be enabled in the Enable Multi-Currency Functionality processing option on the Recharge tab of the Time Entry MBF Processing Options program (P050002A). Also on the Recharge tab, you should enter appropriate values for the remaining processing options.
1. Multicurrency Specify whether to enable multicurrency time accounting. When multicurrency time accounting is enabled and a timecard is saved, the system retrieves the currency code and then saves it in the Employee Transactions - Batch File table (F06116Z1). Values are:
1: Enable multicurrency time accounting.
0: Do not enable multicurrency time accounting.
2. Currency Mode Specify the currency that the system uses for the transaction. Values are:
D: Domestic Currency
F: Foreign Currency
7.2.3.6 ManagerUse this processing option to specify whether the missing timecard feature can be used.

Setting Up the Time Entry Director Form
7-8 JD Edwards EnterpriseOne Applications Human Capital Management Self-Service Implementation Guide
1. Timecard Select OptionSpecify whether managers can view records for employees who have not entered timecards for the specified period. Values are:
0: Enable the missing timecard option.
1: Disable the missing timecard option.
2. Time Entry Review Specify the program to use to review Employee Timecards from the Manager Workbench program (P051129). Values are:
0: The Summary Time Entry program.
1: The Daily Time Entry program.
3. Require Approval through Detail ViewSpecify whether manager approval of timecards can only be done through the Self Service Manager Review and Approval detail timecard view. The approve, reject, and paid not approved actions will be disabled in the Self Service Manager Review and Approval program. Values are:
0: Allow manager approval in summary and detail view.
1: Allow manager approval only in details view.
7.2.3.7 AdministratorUse these processing options to specify whether the system displays each of the available time entry links on the self-service time entry forms. You can also specify the text that the system displays for each link.
1. Show Daily Time Entry Link Specify whether the system displays a link to the Employee Daily Time Entry program (P051127). If you do not display the Daily Time Entry link, the employee cannot access the program. Values are:
0: The system displays the link.
1: The system does not display the link.
Daily Time Entry Override Name Override the text for the link to the Daily Time Entry program. If you enter text in this processing option, you must set the Show Daily Time Entry Link processing option to display the link.
2. Show Summary Time Entry Link Specify whether the system displays a link to the Summary Time Entry program. If you do not display the Summary Time Entry link, the employee cannot access the program. Values are:
0: Display the link.
1: Do not display the link.
Summary Time Entry Override Name Override the text for the link to the Summary Time Entry program. You must display the Summary Time Entry link for the system to display the text that you enter in this processing option.

Setting Up the Time Entry Director Form
Setting Up Self-Service Time Entry 7-9
3. Show Manager Approval Time Entry Link Enable employee self-service time entry users to approve timecards using the Manager Approval program. If you do not display the Manager Approval link, employees cannot access Manager Approval. Values are:
0: Display Manager Approval Link.
1: Do not display Manager Approval Link.
Manager Approval Time Entry Override Name Override the text for the Manager Approval link. To display the text that you enter in this processing option, you must also set the processing option for the Show Management Approval Time Entry Link to display.
4. Show Request Pay In Advance Time Entry LinkSpecify whether the system displays a link to Request Pay In Advance in self-service time entry applications. If you do not show the Request Pay In Advance link, employees cannot see the link and cannot access this option. Values are:
0: Show the Request Pay In Advance link.
1: Do not show the Request Pay In Advance link.
Request Pay In Advance Time Entry Override NameOverride the text for the Request Pay In Advance link. To display the text that you enter in this processing option, you must choose to display the Request Pay In Advance link.
5. Show Time Entry Corrections LinkSpecify whether to display or hide the Timecard Corrections link. Values are:
0: Show the Time Entry Corrections link.
1:Do not show the Time Entry Corrections link.
Time Entry Corrections Override NamesOverride the text for the Time Entry Corrections link. To display the text that you enter in this processing option, you must choose to display the Time Entry Corrections link.
6. Submit Button Override TextSpecify the text that overrides the default text on the Submit button during the submission of timecards to managers.
7.2.3.8 Resource AssignmentUse this processing option to specify whether the system displays estimated hours from the Resource Assignment.
1. Default estimated hours from the Resource AssignmentSpecify whether to display estimated hours from the Resource assignment work order. Values are:
Blank: Do not display default hours.
1: Display default hours.
7.2.3.9 Future EntryUse this processing option to specify whether the system allows future entry of timecards.

Setting Up the Time Entry Director Form
7-10 JD Edwards EnterpriseOne Applications Human Capital Management Self-Service Implementation Guide
1. Restrict future entry of timecards by pay typeSpecify whether to allow or restrict future entry of timecards based on pay type. Values are:
0: Allow future entry of timecards.
1: Restrict future entry of timecards.
7.2.3.10 Timecard ChangesUse this processing option to specify whether a change reason code is required for timecard changes.
1. Timecard Changes Require Change Reason Code Specify whether a change reason is required for the timecard changes. Values are:
0: Do not require a timecard change reason.
1: Require a timecard change reason.
7.2.3.11 Daily Time EntryUse this processing option to specify the pay type category.
1. Regular Pay Type Category Specify a user–defined code (06/PC) that specifies the summarized hours for regular pay types in the Daily Time Entry program (P051127).
2. Sick Pay Type CategorySpecify a user–defined code (06/PC) that specifies the summarized hours for sick pay types in the Daily Time Entry program (P051127).
3. Vacation Pay Type CategorySpecify a user–defined code (06/PC) that specifies the summarized hours for vacation pay types in the Daily Time Entry program (P051127).
4. Holiday Pay Type CategorySpecify a user–defined code (06/PC) that specifies the summarized hours for holiday pay types in the Daily Time Entry program (P051127).
7.2.4 Setting Up Director TextAccess the Work With Director Text form.
To set up director text for self-service time entry:
1. Click Add.
2. On Define Director Text, complete these fields:
– Company
– Business Unit
3. In the text pane, enter the text that you want to appear on the form.
Note: You can enter only text in the text pane. Do not enter OLE objects or images into the text pane. Also, when you enter text into the text pane, you must enter the HTML code {BR} when you want a line break. Using the Enter key will not simulate a line break when the text appears on the director form.

Creating the Time Entry Interface for Employee Self-Service
Setting Up Self-Service Time Entry 7-11
4. Click OK.
5. To enter different director text for different groups within your organization, complete steps 1 through 4 for each company and business unit combination for which you want to create director text.
6. To use the same director text for all employees in your organization, complete these steps once and enter 0 in the Company field and leave the Business Unit field blank.
7.3 Creating the Time Entry Interface for Employee Self-ServiceThis section provides an overview of the time entry interface for employee self-service and discusses how to set up the time entry interface for employee self-service.
7.3.1 Understanding the Time Entry Interface for Employee Self-ServiceBefore employees can enter timecard information into the system, you must define the information that appears on the interface that employees use. These fields are set up to appear by default on all self-service time entry forms; however, you can choose to display additional fields:
■ Pay Type
■ Hours
■ Work Date
■ Subledger
■ Subledger Type
■ Charge To
■ Shift Code
■ Equipment Worked
■ Equipment Hours
You can use the ESS Time Entry Setup program (P051123) to select from over 50 additional predefined fields to appear on the employee time entry interface. These fields enable you to quickly and easily create time entry forms that meet the requirements of your organization. Depending on your business needs, you can create different time entry interfaces for each home company and home business unit combination within your organization. One of the predefined fields is used for government contracting.
See "JD Edwards EnterpriseOne Human Capital Management for PGCA" in the JD Edwards EnterpriseOne Applications Project and Government Contract Accounting Implementation Guide
For example, if you want employees in Company A to enter simple time entry records that do not require a large amount of data entry, you can choose to display only the default fields for Company A employees.
Conversely, you might want employees in Company B to enter detailed time entry information. In this case, you might select a large number of additional fields to appear on the employee time entry interface for Company B. Examples of additional fields that you might want to display are:
■ Company - Home

Creating the Time Entry Interface for Employee Self-Service
7-12 JD Edwards EnterpriseOne Applications Human Capital Management Self-Service Implementation Guide
■ Object Account
■ Subsidiary
■ Item Number
■ Unites - Pieces
■ Amount - Sales
■ Union Code
■ Work State
■ Billing Rate
All time entry applications support the global leave administration module and include this information:
■ Leave begin date
■ Leave end date
■ Leave comments
■ Leave type
■ Leave hours per day
The system saves all forms of leave entries in the Leave Transactions table (F07620). The system gathers leave information that is entered in any of the time entry applications and saves it in the F07620 table. Employees can use the leave begin date and leave end date for ease of entry of multiple dates within a date range. The system creates leave transaction and timecards for each date in the date range.
The system saves leave comments in the Leave Messaging and Audit table (F07630). These records are connected to the leave by leave number. The system can store many instances of leave comments separately in the table based on the person who enters the comments and the time entry program. The Form menu enables users to quickly access Time Entry (P051131) and Speed Time Entry (P051121). The Row menu enables quick access to the Paid Time Off Inquiry program (P053020). You can click a link on the time entry forms to gain access to the Leave Status and Messaging Summary program (P07630) that displays existing comments for the current leave request.
7.3.2 Forms Used to Create the Time Entry Interface for Employee Self-Service
Form Name FormID Navigation Usage
Work With ESS Time Entry Setup
W051123A Time Entry Self service Setup (G05BESS41), Self Service Screen Setup.
Click Add.
Use the search and select form to access Work With ESS Time Entry Setup.
ESS Time Entry Setup Revisions
W051123B Click OK. Click each tab and enter appropriate values.
7.3.3 Setting Up the Time Entry Interface for Employee Self-ServiceAccess the Work With ESS Time Entry Setup form.
To set up the time entry interface for employee self-service:
1. Click Add.
2. On ESS Time Entry Setup Revisions, complete these fields:

Creating the Time Entry Interface for Employee Self-Service
Setting Up Self-Service Time Entry 7-13
– Company
– Business Unit
3. To specify which time entry programs you want employees to use, click one of these options:
– Summary Time Entry
– Daily Time Entry
– Both
4. On the Fields 1–21 tab, click the options for the fields that you want to appear:
– Account Number
– Job Type
– Job Step
– LS Amnt
– Opt Sequence
– Equip Worked On
– Union
– Batch
– Uprate Amount
– Shift Differential
– Amount or Percent
– Billing Rate
– Home Company
– Cost Code
5. Click the Fields 22–40 tab, and then click any of these options that you want to appear on the time entry interface:
– Home Business Unit
– Tax Area
– Item
– Piece Rate
– Pieces
– Phase
– Record Type
– WCI Code (Workers Compensation Insurance)
– SC/WC (Sub-Class/Workers Compensation)
– Check Route
– Cat 001 (Category)
– Cat 002
– Cat 003
– Cat 004

Creating the Time Entry Interface for Employee Self-Service
7-14 JD Edwards EnterpriseOne Applications Human Capital Management Self-Service Implementation Guide
– Bill RtCd (Rate Code)
– Equipment Object
– Equipment Blrt (Bill Rate)
6. Click the Fields 41–63 tab, and then click any of these options that you want to appear on the time entry interface:
– Cost Type 1
– Cost Object 1
– Cost Type 2
– Cost Object 2
– Cost Type 3
– Cost Object 3
– Cost Type 4
– Cost Object 4
– Activity Code
– Task Number
– Currency From
– Currency To
– Leave Type
– Leave ID Number
– Leave Begin Date
– Leave End Date
– Leave Hours Per Day
– Leave Comments
– Pay In Advance
– Timecard From and Timecard Thru
– Hours Per Day
– Contract Labor Category
See "Processing Timecards Using Contract-Specific Labor Categories, Adding the Contract Labor Category Field to Self-Service Time Entry" in the JD Edwards EnterpriseOne Applications Project and Government Contract Accounting Implementation Guide.
– Change Reason
– Change Comments
– Business Unit Description
7. Click OK.
8. Complete steps 2–7 for each company and business unit combination for which you want to create a separate user interface.

Creating the Time Entry Interface for Employee Self-Service
Setting Up Self-Service Time Entry 7-15
If you want to use the same user interface for all of the employees in your organization, you can create one interface by entering 0 in the Company field and leaving the Business Unit field blank.
■ Summary Time Entry
Click to specify which type of time entry (summary or detail) uses the currently selected fields.
■ Daily Time Entry
Enter the option that specifies which type of time entry (summary or detail) uses the currently selected fields.
■ Both
Enter the option that specifies which type of time entry (summary or detail) uses the currently selected fields.
■ Account Number
Specify whether the system displays the Account Number - Input field on employee self-service time entry forms. This code identifies the general ledger account that is associated with the time entry record. Values are:
1: Display this field.
Blank: Do not display this field. This is the default value.
■ Job Type
Enter a code that specifies whether the system displays the Job Type (Craft) field on employee self-service time entry forms. This user-define code (07/G) defines the job in which the employee works. Values are:
1: Display this field.
Blank: Do not display this field. This is the default value.
■ Job Step
Enter a code that specifies whether the system displays the Job Step field on employee self-service time entry forms. This user-defined code (07/GS) represents a subcategory of a job type. Values are:
1: Display this field.
Blank: Do not display this field. This is the default value.
■ LS Amnt
Enter a code that specifies whether the system displays the Amount Entered Gross Pay field on employee self-service time entry forms. This value represents the amount of pay that an employee receives before taxes and deductions. Values are:
1: Display this field.
Blank: Do not display this field. This is the default value.
■ Opt Sequence
Enter a code that specifies whether the system displays the Sequence Number field on employee self-service time entry forms. This code is used to indicate an order of succession. Values are:
1: Display this field.

Creating the Time Entry Interface for Employee Self-Service
7-16 JD Edwards EnterpriseOne Applications Human Capital Management Self-Service Implementation Guide
Blank: Do not display this field. This is the default value.
■ Equip Worked On
Enter a code that specifies whether the system displays the Equipment Worked On field on employee self-service time entry forms. This code is the identification number for the equipment that an employee maintained, repaired, or worked on. Values are:
1: Display this field.
Blank: Do not display this field. This is the default value.
■ Batch
Enter a code that specifies whether the system displays the Batch Number field on employee self-service time entry forms. This code is used to identify a group of time entry records that the system processes and balances as a unit. Values are:
1: Display this field.
Blank: Do not display this field. This is the default value.
■ Uprate Amount
Enter a code that specifies whether the system displays the Amount Uprate field on employee self-service time entry forms. This value is added to the employee's base hourly rate. Values are:
1: Display this field.
Blank: Do not display this field. This is the default value.
■ Amount or Percent
Enter a code that specifies whether the system displays the Amount or Percent field on employee self-service time entry forms. This value is used to determine whether a shift differential is a percentage or a flat amount. Values are:
1: Display this field.
Blank: Do not display this field. This is the default value.
■ Billing Rate
Enter a code that specifies whether the system displays the Rate Distribution (Billing) field on employee self-service time entry forms. This value is the rate that is used for billing or recharge purposes. Values are:
1: Display this field.
Blank: Do not display this field. This is the default value.
■ Cost Code
Enter a code that specifies whether the system displays the Subsidiary field on employee self-service time entry forms. The subsidiary represents a subdivision of an object account. Values are:
1: Display this field.
Blank: Do not display this field. This is the default value.
■ Home Business Unit

Creating the Time Entry Interface for Employee Self-Service
Setting Up Self-Service Time Entry 7-17
Enter a code that specifies whether the system displays the Home Business Unit field on employee self-service time entry forms. This value identifies the business unit where the employee generally works. Values are:
1: Display this field.
Blank: Do not display this field. This is default value.
■ Tax Area
Enter a code that specifies whether the system displays the Tax Area field on employee self-service time entry forms. This code is the Vertex GeoCode that identifies the employee's geographical location for taxation purposes. Values are:
1: Display this field.
Blank: Do not display this field. This is the default value.
■ Item
Enter a code that specifies whether the system displays the Item Number - Short field on employee self-service time entry forms. This code is used as an inventory code to identify items. Values are:
1: Display this field.
Blank: Do not display this field. This is the default value.
■ Piece Rate
Enter a code that specifies whether the system displays the Rate - Piecework field on employee self-service time entry forms. This rate represents the amount of pay that an employee receives for each item or piece that is produced. Values are:
1: Display this field.
Blank: Do not display this field. This is the default value.
■ Pieces
Enter a code that specifies whether the system displays the Units - Pieces field on employee self-service time entry forms. This value represents the number of pieces or items that were completed for piecework employees. Values are:
1: Display this field.
Blank: Do not display this field. This is the default value.
■ Phase
Enter a code that specifies whether the system displays the Categories Work Order 1 field on employee self-service time entry forms. This code is used to indicate the current stage or phase of a work order. Values are:
1: Display this field.
Blank: Do not display this field. This is the default value.
■ Record Type
Enter a code that specifies whether the system displays the Record Type field on employee self-service time entry forms. Record Type is a code that identifies whether the employee is a payroll employee, a recharge employee, or both. Values are:
1: Display this field.

Creating the Time Entry Interface for Employee Self-Service
7-18 JD Edwards EnterpriseOne Applications Human Capital Management Self-Service Implementation Guide
Blank: Do not display this field. This is default value.
■ WCI Code (Workers Compensation Insurance)
Enter a code that specifies whether the system displays the Worker's Compensation field on employee self-service time entry forms. This code represents the Worker's Compensation Insurance code under which the employee is insured. Values are:
1: Display this field.
Blank: Do not display this field. This is the default value.
■ SC/WC Sub-Class/Workers Compensation)
Enter a code that specifies whether the system displays the Sub Class - Worker's Comp field on employee self-service time entry forms. This code is used to define any special circumstances that would result in multiple rates for a single Worker's Compensation Insurance code. Values are:
1: Display this field.
Blank: Do not display this field. This is the default value.
■ Check Route
Enter a code that specifies whether the system displays the Routing Code - Check field on employee self-service time entry forms. This code is used to specify the check routing or mail stop code that is associated with an employee's payment, and it is used in sorting payments to facilitate their handling and delivery. Values are:
1: Display this field.
Blank: Do not display this field. This is the default value.
■ Cat 001 (Category)
Enter a code that specifies whether the system displays the Category Code - Payroll 1 field on employee self-service time entry forms. You can use this code to track information that is specific to your organization. Values are:
1: Display this field.
Blank: Do not display this field. This is the default value.
■ Bill RtCd (Rate Code)
Enter a code that specifies whether the system displays the Equipment Rate Code field on employee self-service time entry forms. This user-defined code (00/RC) is used to identify the billing method that is used for a piece of equipment. For example, code DY refers to daily billing and MO refers to monthly billing. Values are:
1: Display this field.
Blank: Do not display this field. This is the default value.
■ Equipment Object
Enter a code that specifies whether the system displays the Equipment Object Account field on employee self-service time entry forms. This code represents the account to which amounts that are associated with equipment utilization are charged. Values are:
1: Display this field.

Creating the Time Entry Interface for Employee Self-Service
Setting Up Self-Service Time Entry 7-19
Blank: Do not display this field. This is the default value.
■ Equipment Blrt (Billing Rate)
Enter a code that specifies whether the system displays the Billing Rate - Equipment field on employee self-service time entry forms. This value represents the monetary amount that is billed for the use of equipment. Values are:
1: Display this field.
Blank: Do not display this field. This is the default value.
■ Cost Type 1
Enter a code that specifies whether the system displays the Managerial Analysis Type field on employee self-service time entry forms. This field should be displayed if the Managerial Analysis Code field is displayed. Values are:
1: Display this field.
Blank: Do not display this field. This is the default value.
■ Cost Object 1
Enter a code that specifies whether the system displays the Managerial Analysis Code field on employee self-service time entry forms. The Managerial Analysis code works the same as the subledger code; however, the system does not post this code to the Account Balances table (F0902). Values are:
1: Display this field.
Blank: Do not display this field. This is the default value.
■ Activity Code
Enter a code that specifies whether the system displays the Activity Based Costing Code field on employee self-service time entry forms. Values are:
1: Display this field.
Blank: Do not display this field. This is the default value.
■ Task Number
Enter a code that specifies whether the system displays the Task Unique Key field on employee self-service time entry forms. This code is used to identify a task or assignment for resource scheduling purposes. Values are:
1: Display this field.
0: or Blank: Do not display this field. This is the default value.
■ Currency From
A code that specifies whether the system displays the Currency Code field on employee self-service time entry forms. This code identifies the currency of a customer's or a supplier's transactions. Values are:
1: Display this field.
0: or Blank: Do not display this field. This is the default value.
■ Currency To

Creating the Time Entry Interface for Employee Self-Service
7-20 JD Edwards EnterpriseOne Applications Human Capital Management Self-Service Implementation Guide
A code that specifies whether the system displays the Currency Code To field on employee self-service time entry forms. This code is used to identify the currency for which the system must retrieve the exchange rate. Values are:
1: Display this field.
0: or Blank: Do not display this field. This is the default value.
■ Leave Type
Enter a code that specifies whether the system displays the Leave Type field on employee self-service time entry forms. This code is used to identify the type of time that an employee codes to a leave pay type. Values are:
I: Display this field.
Blank: Do not display this field. This is the default value.
■ Leave ID Number
Enter a code that specifies whether the system displays the Leave Request Number field on employee self-service time entry forms. This code is the unique identification number of the leave request that is associated with a time entry record. Values are:
1: Display this field.
Blank: Do not display this field. This is the default value.
■ Leave Begin Date
A code that specifies whether the system displays the Leave Begin Date field on employee self-service time entry forms. This date field is used to enter the start date for a single occurrence of leave. Values are:
1: Display this field.
0: or Blank: Do not display this field. This is the default value.
■ Leave End Date
Enter a code that specifies whether the system displays the Leave End Date field on employee self-service time entry forms. This date field is used to enter the start date for a single occurrence of leave. Values are:
1: Display this field.
0: or Blank: Do not display this field. This is the default value.
■ Leave Hours Per Day
Enter a code that specifies whether the system displays the Hours Per Day field on employee self-service time entry forms. This field is used for employees to specify the number of hours per day when a leave begin and end date are entered. Values are:
1: Display this field.
0: or Blank: Do not display this field. This is the default value.
■ Leave Comments
Enter a code that specifies whether the system displays the Leave Comments field on employee self-service time entry forms. This field is used for employees to enter details about the leave they've entered. Values are:
1: Display this field.

Assigning Pay Types to Employee Groups
Setting Up Self-Service Time Entry 7-21
0: or Blank: Do not display this field. This is the default value.
■ Pay In Advance
Enter a code that specifies whether the system displays the Pay In Advance field on employee self-service time entry forms. This field is used for employees to specify the pay in advance timecard. Values are:
0 or blank: Do not display this field (default).
1: Display this field.
■ Change Reason
Enter a code that specifies whether the system displays the Change Reason field on employee self-service time entry forms. This field is used for employees to specify the Change Reason. Values are:
Blank: Do not display the Change Reason field.
1: display the Change Reason field.
■ Change Comments
Enter a code that specifies whether the system displays the Change Comments field on employee self-service time entry forms. This field is used for employees to enter comments regarding the timecard change. Values are:
Blank: Do not display the Change Comments field.
1: display the Change Comments field.
7.4 Assigning Pay Types to Employee GroupsThis section provides an overview of pay types assignment and discusses how to set up pay type assignment for employee groups.
7.4.1 Understanding Pay Types AssignmentTo simplify the time entry process and to ensure that employees enter timecards using the correct pay types, you can use the Classification/Pay Cross Reference program (P05932) to specify the available pay types for specified employee groups within your organization. Linking pay types with employee groups is also necessary for the self-service time entry programs to function properly. You can define groups based on job types, job steps, business units, shift codes, union codes, or any combination of these fields. You can use the processing options for the Time Entry Self Service Director program (P051125) to specify which of these fields you want to use to create employee groups for pay type classification purposes.
When you assign pay types to specific employee groups, employees can use only the pay types that have search criteria that match the information in the Employee Master Information table (F060116). For example, if you assign a pay type to business unit 100 and job type A-50, only employees who are listed in the Employee Master Information table with business unit 100 and job type A-50 can enter timecards using that pay type. Additionally, only the pay types that are associated with an employee group are displayed with the search function for the pay type field during the time entry process.
You can also set up a set of default pay types for employees who are listed in the Employee Master Information table with business unit and job type values that do not meet specified search criteria. You might want to do this to identify employee groups for which you have not set up pay type information. For example, if you set up pay type information for each employee group within your organization, you can set up

Assigning Pay Types to Employee Groups
7-22 JD Edwards EnterpriseOne Applications Human Capital Management Self-Service Implementation Guide
default information and include only one pay type in the default set. If an employee does not meet the search criteria for any of the other employee groups, that employee can enter time using only the pay type that you have set up in the default set. You can then review time entry records to find employees who have entered timecards using that pay type. By identifying those employees, you can identify employee groups for which you need to set up pay type information.
You might also want to use a default set of pay types if you have a large number of employees in different employee groups who can use the same pay types. For example, if only three of the business units within your organization require unique pay types, you might set up pay types for each of the three business units. However, if the rest of the employees within your organization use the same pay types, you can set up a default set of pay types for those employees rather than setting up the same pay type information for each business unit.
Note: Assigning pay types to employee groups is required in order for self-service time entry programs to function properly. You must set up pay type information so that employees in your organization can use the pay types that you set up. If no pay types are set up, then employees will receive a hard error message on the pay type field and will not be able to enter a self-service timecard.
7.4.2 Forms Used to Assign Pay Types to Employee Groups
Form Name FormID Navigation Usage
Work with Classification Pay/Cross Reference
W05932A Rate Derivation Setup (G05BRD4), Classification Pay/X-Ref
Click Add.
Access the Classification/Pay Cross Reference Revisions form
Classification/Pay Cross Reference Revisions
W05932C Click OK. Enter appropriate values to assign pay types to existing employee groups.
7.4.3 Setting Up Pay Type Assignment for Employee GroupsAccess the Classification/Pay Cross Reference Revisions form.
To assign pay types to business units:
1. Click Add.
2. On Classification/Pay Cross Reference Revisions, complete any of these fields to define the employee group to which you want to assign pay types:
– Job Type
– Job Step
– Union Code
– Business Unit
– Shift Code
Note: To create a default set of pay types, leave all of these fields blank.

Working with Labor Distribution Periods
Setting Up Self-Service Time Entry 7-23
3. In the detail area of the form, enter the beginning pay type code in a range of pay types in the From Trans field.
4. Enter the ending pay type code in a range of pay types in the Thru Trans field.
Note: When you are entering a range of pay types to assign to an employee group, both the pay type in the From Trans field and the pay type in the Thru Trans field are included in the range and assigned to the specified group. If you do not want to enter a pay type range, you can enter the same pay type code in the From Trans and Thru Trans fields.
5. Select a blank row in the detail area and repeat steps 3 and 4 until you have assigned all of the pay types for the specified business unit.
6. Click OK.
■ Shift Code
Enter a user-defined code (00/SH) that identifies daily work shifts.
In payroll systems, you can use a shift code to add a percentage or amount to the hourly rate on a timecard.
For payroll and time entry, if an employee always works a shift for which a shift rate differential is applicable, enter that shift code on the employee's master record. When you enter the shift code on the employee's master record, you do not need to enter the code on the timecard when you enter time. If an employee occasionally works a different shift, you enter the shift code on each applicable timecard to override the default value.
■ From Transaction (Trans)
Enter the number and description of the PDBA that you want the system to use to calculate the corresponding PDBA. This number is the beginning number in the range that is the basis of the calculation.
■ Thru Transaction (Trans)
Enter the number and description of the PDBA that you want the system to use to calculate the corresponding PDBA. This number is the ending number in the range that is the basis of the calculation.
7.5 Working with Labor Distribution PeriodsThis section provides an overview of labor distribution periods and discusses how to:
■ Add a labor distribution period for an employee.
■ Override standard hours with labor distribution period.
7.5.1 Understanding Labor Distribution Periods You use the Labor Distribution Periods program (P059062) to add or update a labor distribution period for a date range. You must use the Override Employee Labor Period Standard Hours program (P059063) to change the standard hours for an employee for whom a labor distribution period with a different number of standard hours has been assigned. The standard hours defined in the P059063 program are used instead of the standard hours defined in the labor distribution period for the employee.

Working with Labor Distribution Periods
7-24 JD Edwards EnterpriseOne Applications Human Capital Management Self-Service Implementation Guide
7.5.2 Forms Used to Work with Labor Distribution Periods
Form Name FormID Navigation Usage
Work with Labor Distribution Periods
W059062F HRM Setup (G05B4), Labor Distribution Periods
Review and revise existing labor distribution periods or access the Flat File Cross-Reference form.
Revise Labor Distribution Periods
W059062G Click Add on the Work with Labor Distribution Periods form.
Add a new labor distribution period.
Override Employee Labor Period Standard Hours
W059063A Select Employee Hours from the Form menu on the Revise Labor Distribution Periods form.
Enter employees and labor period hours to override the standard hours of the labor distribution period ID for that employee.
7.5.3 Adding Labor Distribution Period for an EmployeeAccess the Revise Labor Distribution Periods form.
Figure 7–1 Revise Labor Distribution Periods form
Labor Distribution Period IDEnter a value from UDC table 05T/LD that identifies the labor distribution period.
Labor Period Standard HoursEnter the standard number of work hours for employees assigned to the labor distribution period.
Labor Distribution Period StatusEnter a value from UDC table 05T/LS that indicates the status of the labor distribution period ID. Values are:
■ C: This indicates that the status is closed.
■ F: This indicates that the status is open for future entry.
■ O: This indicates that the status is open.
■ X: This indicates that the status is open only for historical correction.
Labor Period Beginning DateEnter the beginning date for the labor distribution period ID.

Working with Labor Distribution Periods
Setting Up Self-Service Time Entry 7-25
Labor Period Ending DateEnter the ending date for the labor distribution period ID.
7.5.4 Overriding Standard Hours with Labor Distribution PeriodAccess the Override Employee Labor Period Standard Hours form.
Figure 7–2 Overriding Employee Labor Period Standard Hours form
Employee NumberEnter the number of the employee for whom you are changing the standard number of hours for a labor period.
Employee NameThe address book name of the employee corresponding to the employee number.

Working with Labor Distribution Periods
7-26 JD Edwards EnterpriseOne Applications Human Capital Management Self-Service Implementation Guide

8
Understanding the eRecruit System 8-1
8Understanding the eRecruit System
This chapter contains the following topics:
■ Section 8.1, "The eRecruit System"
■ Section 8.2, "eRecruit Tables"
■ Section 8.3, "User Defined Codes for eRecruit"
8.1 The eRecruit SystemTraditionally, the process of recruiting new employees has been one of the least efficient human resource processes. The manual steps typically associated with recruitment are time-consuming and inefficient. Organizations can increase efficiency and reduce costs by using their corporate websites to attract candidates for job openings. Automating the recruitment process through the use of technology effectively controls costs and reduces the amount of time needed to fill an open requisition.
The use of the internet for recruiting purposes has increased dramatically. Recent surveys indicate that the majority of the world's largest companies use their corporate websites as a recruiting tool to attract potential employees. Posting jobs on your corporate Website allows you to publicize your staffing needs at no additional cost. Electronic recruitment allows you to collect, store, and retrieve information about potential candidates for job openings, reducing the time-to-hire and effectively removing the most desirable candidates from the job market before your competitors can hire them.
The JD Edwards EnterpriseOne eRecruit system includes these business processes:
■ Creating job postings
■ Applying online
■ Integrating eRecruit applicants into the applicant and requisition systems
The self-service transactions provided in the eRecruit system are targeted to both external applicants and internal applicants (employees). External applicants and employees can use eRecruit to perform these tasks:
■ Review information about current job openings in the organization
■ Apply for a position within the organization
■ Search for a job posting that matches the desired criteria
■ Email a job posting to a third party who might be interested in the position
■ Review the jobs for which the applicant has submitted applications

eRecruit Tables
8-2 JD Edwards EnterpriseOne Applications Human Capital Management Self-Service Implementation Guide
When applying for a job using the eRecruit system, external and internal applicants can choose to enter or paste in a resume, cover letter, or job qualifications. Alternatively, as an update to Release 9.1, the applicants can upload the resume, cover letter, or job qualifications.
Note: Documents uploaded to the application through the upload feature available as of Tools 9.1.3 are not available for searching using the eRecruit SES search functionality. If SES searching is required, customers should continue to use the copy or paste method for capturing applicant resumes, cover letters, or job qualifications.
Note: To use the upload feature, you must use JD Edwards EnterpriseOne Tools Release 9.1.3 or higher.
See "Attach Media Objects Directly from Applications" in the JD Edwards EnterpriseOne Tools 9.1.x Foundation Guide.
The JD Edwards EnterpriseOne eRecruit system shares information with Applicant Information (P08401) and Requisition Information (P08102) programs and receives information from the Competency Information (P05104) program.
8.2 eRecruit TablesThe eRecruit system uses these tables:
Table Description
Extended Applicant Information (F08403) Stores applicant information, such as the address number, recruitment number, and percentage of time the applicant is willing to travel for a job.
Applicant Login Information (F08405) Stores applicant sign on information for all users, such as user ID and the last date on which the applicant signed on to the system.
eRecruit Encryption Key (F08406) Stores the encryption key for eRecruit external applicant passwords and email addresses.
Job Posting Tab Settings (F08460) Stores the preference to hide or display job posting fields and the competencies tab in the Manage Job Postings program (P08470)
Standard Phrases (F08461) Stores details about a standard phrase, such as phrase ID, phrase category, language preference, and the wording of the phrase.
Disable Applicant Activities (F08462) Stores activities that you can set up to be enabled or disabled for the applicant, or disabled internally, externally, or both.
Posting Element Display Settings (F08463) Stores the display options for a job posting.
Job Posting Fields by Tabs (F08464) Stores all of the fields that can be customized and that are associated with a job posting tab in the Manage Job Postings program (P08470).
Job Posting Field Preferences (F08465) Stores the settings for fields in each tab of the Manage Job Postings program (P08470), such as whether the field is hidden when the user creates a job posting.

User Defined Codes for eRecruit
Understanding the eRecruit System 8-3
8.3 User Defined Codes for eRecruitThese user defined codes apply specifically to the JD Edwards EnterpriseOne eRecruit system.
8.3.1 Ascending Descending (08R/AD)You use ascending and descending codes to organize a search of job postings. The system allows you to sort by any combination of job location, job category, and date job posted in ascending or descending order for each criteria.
Ascending and descending codes are hard-coded and should not be changed. You can select from these codes:
■ 0: Ascending
■ 1: Descending
8.3.2 eRecruit Status (08R/AS)You use eRecruit status codes to specify the applicant's current status in the application process for a particular job. In the first step, the applicant has not completed the job submission. In the second step, the applicant has submitted information that has not yet been reviewed by the recruiter. In the third step, the recruiter has reviewed the applicant's submission and indicated that the applicant is
eRecruit General Constants (F08466) Stores general email and Website information, as well as the language that is associated with the Website and email address.
Job Postings (F08470) Stores basic header information for each job posting, such as the posting number and category, related requisition number, salary range, and dates for the posting.
Job Posting Competencies (F08471) Stores the competencies that are related to job postings.
Job Posting Text (F08472) Stores related details for each job posting description, such as the posting ID, language information, and descriptive text about the job posting.
Job Posting Sort Workfile (F08473) Stores job posting information by language that the applicant uses when searching the postings, such as the category and description of the posting, internal and external posting dates, and location.
Job Basket (F08474) Stores job posting information for the jobs that an applicant is considering.
Recruitment Information (F08490) Stores applicant personal information details, such as name, address, phone, asking salary, and hours available to work.
EEO Survey (F08492) Stores high-level information about the applicants who complete the optional EEO survey, such as recruitment number, minority identification, and gender.
References (F08496) Stores contact information for the references that the applicant provides.
Recruit Apply Posting (F08498) Stores details about the applicants who apply for a job posting, such as recruitment number, eRecruit status, and the date of the application submission.
Table Description
User Defined Codes for eRecruit
8-4 JD Edwards EnterpriseOne Applications Human Capital Management Self-Service Implementation Guide
an actual candidate for the position. Therefore, the applicant's information will be transferred to the Applicant Master table (F08401). In the final step, the Applicant Master table has been updated.
eRecruit status codes are hard-coded and should not be changed. You can select from these codes:
■ 0: Entered but not submitted
■ 1: Submitted
■ 2: Marked for update to table F08401
■ 3: Updated to the Applicant Master
8.3.3 Disable Applicant Activities (08R/AA)You use disable applicant activities codes to specify the information that an applicant can review when browsing job postings. For example, you can disable Paste Cover Letter so that the applicant does not see this form.
Disable applicant activities codes are hard-coded and should not be changed. You can select from these codes:
■ 0: Paste Resume
■ 1: Paste Cover Letter
■ 2: Enter References
■ 3: Send Confirmation to Applicant
■ 4: Personal Info/EEO
■ 5: Job Basket
■ 6: EEO Survey
■ 7: Apply to Posting
■ 8: View Submitted Applications
■ 9: Enter Job Specific Qualifications
8.3.4 Element ID (08R/EI)You use element ID codes to specify the list of elements that the system can display when an applicant reviews job details. For example, you might display the job title, job location, and job category for the applicant. You specify the elements to display in the eRecruit Setup program (P08460).
Element ID codes are hard-coded and should not be changed. You can select from these codes:
■ 1: Job Title
■ 2: Job Location
■ 3: Job Posting ID
■ 4: Job Category
■ 5: Posting Date
■ 6: Position Openings
■ 7: Salary Range
User Defined Codes for eRecruit
Understanding the eRecruit System 8-5
■ 8: Posting Description
■ 9: Job Qualifications
8.3.5 Internal/External/Both (08R/IE)You assign internal, external, and both codes to an applicant activity to denote whether the activity is used internally, externally, or both. Examples of applicant activities include:
■ Paste resume
■ Paste cover letter
■ Enter references
■ EEO survey
You might request references from your external applicants, but not from internal applicants (employees). You can assign an external code to this activity so that employees will not be asked to provide references.
These internal, external, and both codes are hard-coded and should not be changed:
■ 0: Internal
■ 1: External
■ 2: Both
8.3.6 Job Posting Location (08R/JL)You use job posting location codes to indicate the city or location within a city where the job opportunity exists. Applicants can search for job postings by location.
Except for the asterisk code that indicates all locations, job posting location codes are not hard-coded; you can add, revise, and remove codes to correspond to your business needs.
8.3.7 Letter Component (08R/LC)You use letter component codes to format the subject and message of the email messages sent when an applicant applies to a job posting. For example, the email typically contains information such as the job posting, posting number, posting description, and applicant name.
These letter component codes are hard-coded and should not be changed:
■ 0: Subject:
■ 1: Job Posting
■ 2: Posting Number
■ 3: Posting Description
■ 4: Application Date
■ 5: Date
■ 6: Dear
■ 7: Applicant Name
■ 8: Custom Text
User Defined Codes for eRecruit
8-6 JD Edwards EnterpriseOne Applications Human Capital Management Self-Service Implementation Guide
8.3.8 Mandatory/Hide/Disable (08R/MH)You assign mandatory, hide, and disable codes to a field in the Manage Job Postings program (P08470) in order to specify display options for the field. These codes are hard-coded and should not be changed:
■ Blank: Optional
■ 0: Mandatory
■ 1: Hide
■ 2: Disable
8.3.9 Phrase Category (08R/PH)You use phrase category codes to group standard phrases according to type. For example, you might create a number of standard phrases that your marketing department frequently uses, and assign them to a MKTG category.
Important: You should not edit phrase category codes in the UDC tables; instead, use the eRecruit Setup program (P08460).
Phrase category codes are not hard-coded, so you can add, revise, and remove codes to correspond to your business needs. Examples of phrase category codes might include:
■ 0: Marketing
■ 1: Technical
■ 2: Performance
8.3.10 Posting Category (08R/PC)You use posting category codes to group job postings according to type. For example, you might create an EXEC category that contains all of the settings that apply to executive job postings. The asterisk category is hard-coded and applies to all categories. You can add and revise posting categories that correspond to your business needs, but you cannot remove a posting category if you have attached postings to that category.
Important: You should not edit phrase category codes in the UDC tables; instead, use the eRecruit Setup program (P08460).
Examples of posting categories might include:
■ 0: Marketing
■ 1: Technical
■ 2: Performance
8.3.11 Posting Status (08R/PS)You use posting status codes to indicate the status of a job posting. The system uses the active status in conjunction with the posting dates to determine whether or not a

User Defined Codes for eRecruit
Understanding the eRecruit System 8-7
posting should display, either internally or externally. The special handling code 1 specifies that the posting status is active. Special handling code 2 specifies that the posting status is pending.
An applicant who browses job postings sees only active postings. Postings displayed in the job basket as closed are at an inactive status. The inactive status indicates the posting has passed the expiration date or the posting has been marked as inactive.
8.3.12 Job Posting (08R/WS)The system uses job posting tab codes to identify the tab in the Manage Job Postings program (P08470) that contains the data item. The system uses these values when the user selects a setting for that data item (such as Mandatory, Hide, or Disable).
These job posting tab codes are hard-coded and should not be changed:
■ 0: General Info
■ 1: Job Title
■ 2: Competencies
8.3.13 Resume Flag (08R/RF)The system uses resume flag codes to indicate the type of attachments the applicant can submit to a particular job posting.
These resume flag codes are hard-coded and should not be changed:
■ 0: No resume or cover letter
■ 1: Resume attached
■ 2: Cover letter attached
■ 3: Both resume and cover letter
8.3.14 Sort Fields (08R/SF)You use sort fields codes to specify the sort parameters for search results when an applicant is browsing jobs. The applicant can sort by these hard-coded sort field codes:
■ 0: Job Location
■ 1: Job Category
■ 2: Posting Date
8.3.15 Travel Percentage (08R/TP)You use travel percentage codes to specify the percentage of time the applicant is willing to travel for a particular job. Travel percentage codes are not hard-coded, so you can add, revise, and remove codes to correspond to your business needs.

User Defined Codes for eRecruit
8-8 JD Edwards EnterpriseOne Applications Human Capital Management Self-Service Implementation Guide

9
eRecruit System Setup 9-1
9eRecruit System Setup
This chapter contains the following topics:
■ Section 9.1, "Understanding eRecruit System Setup"
■ Section 9.2, "Setting Up the Encryption Key"
■ Section 9.3, "Setting Processing Options for Recruitment Self Service Menu (P08400)"
■ Section 9.4, "Setting Processing Options for Applicant Login (P08405)"
9.1 Understanding eRecruit System SetupYou must complete a few general system setup steps before you begin to set up the eRecruit process. System setup includes:
■ Enabling the eRecruit system in the Common Settings for HR Employee Self Service Programs program (P05004)
■ Setting up the encryption key.
■ Completing the processing options for the Recruitment Self Service Menu program (P08400)
■ Completing the processing options for Applicant Login program (P08405)
9.1.1 PrerequisiteSet the common setting Using Self-Service Recruitment? to Yes - Enable Self-Service Recruitment in the Common Settings for HR Employee Self Service Programs (P05004).
See Setting Up Common Settings for Self-Service.
9.2 Setting Up the Encryption KeyThis section provides an overview of setting up the encryption key.
9.2.1 Understanding the Encryption Key SetupThe encryption key is used to protect passwords that users create in the eRecruit system. The system uses this key to convert password data into incomprehensible code that unauthorized users cannot decipher.

Setting Processing Options for Recruitment Self Service Menu (P08400)
9-2 JD Edwards EnterpriseOne Applications Human Capital Management Self-Service Implementation Guide
Typically this setup step is completed only once. If the encryption key is reset after the initial setup, the system re-encrypts all of the existing passwords. You might want to reset the encryption key if the possibility exists that security has been compromised.
9.2.2 Form Used to Set Up the Encryption Key
Form Name FormID Navigation Usage
eRecruit Security W08460A Recruitment Management Setup, (G08BRM4), eRecruit Setup
ClickeRecruit Security.
Enter the encryption key to encrypt passwords and e-mail addresses for applicants and click OK.
9.2.3 Set Up the Encryption KeyAccess the eRecruit Security form.
Figure 9–1 eRecruit Security form
To set up the encryption key:
1. On the eRecruit Setup form, click eRecruit Security.
2. On the eRecruit Security form, complete the Encryption Keyfield.
When you reset the encryption key, the system checks for records in the Applicant Login Information table (F08405) that need to be converted to the new key. If such records exist, the system displays a message indicating that you must submit a batch process to re-encrypt the existing records.
3. Click OK.
4. Click Submit to initiate the batch process.
5. On eRecruit Setup, click Submitted Jobs to view the report.
6. On Submitted Job Search, select the report and select View PDF from the Row menu.
Exception reports indicate errors in the re-encryption process.
9.3 Setting Processing Options for Recruitment Self Service Menu (P08400)
Processing options enable you to specify the default processing for programs and reports.

Example: Applying for a Job Using eRecruit
eRecruit System Setup 9-3
9.3.1 Email TypeUse this processing option to specify the email address type that was previously defined in the system.
1. Electronic Address Type Specify the email address type that is associated with the employee as defined in the Electronic Address table (F01151). The employee can override this value.
9.4 Setting Processing Options for Applicant Login (P08405)Processing options enable you to specify the default processing for programs and reports.
9.4.1 User ID and PasswordUse these processing options to specify the minimum length for the user ID and password that the applicant uses to sign on to eRecruit.
1. Minimum User ID Length Specify the minimum length for the User ID. The length can be from 1 to 70 characters. If left blank or zero, the system assigns a default value of 8 characters.
If you modify this processing option, you must also modify the help text item for New Applicant Registration (S08405B) so that the minimum User ID length matches.
2. Minimum Password Length Specify the minimum length for the Password. The length can be from 1 to 70 characters. If left blank or zero, the system assigns a default value of 8 characters.
If you modify this processing option, you must also modify the help text item New Applicant Registration (S08405B) so that the minimum password length matches.
9.5 Example: Applying for a Job Using eRecruitExternal applicants and internal applicants (employees) can use the JD Edwards EnterpriseOne eRecruit system to apply for a position within the organization.

Example: Applying for a Job Using eRecruit
9-4 JD Edwards EnterpriseOne Applications Human Capital Management Self-Service Implementation Guide

10
eRecruit Applications Setup 10-1
10eRecruit Applications Setup
This chapter contains the following topics:
■ Section 10.1, "Understanding eRecruit Setup"
■ Section 10.2, "Defining Posting Categories"
■ Section 10.3, "Defining Settings by Posting Category"
■ Section 10.4, "Defining Standard Phrase Categories"
■ Section 10.5, "Defining Standard Phrases"
10.1 Understanding eRecruit SetupThe eRecruit Setup program (P08460) allows you to set preferences for many of the recruiter activities, such as display options for the Manage Job Postings program (P08470), display options for job postings, and information about how the applicants will apply for job postings.
The eRecruit Setup program includes one power form that you can use to perform all of the setup steps that you need to set up the eRecruit system. From this form, you can update all tables related to the setup for eRecruit. Each section of the form represents a separate table.
Important: Because each section of the power form represents a separate table, you must be sure to save the information that you add in each section before you proceed to the next section. For this reason, a Save button appears in each section. The system prompts you to save your work if you attempt to access another tab without first saving your work.
10.2 Defining Posting CategoriesThis section provides an overview of posting categories and discusses how to enter the definitions.
10.2.1 Understanding Posting Category DefinitionsYou create posting categories to classify the types of job postings that your company uses. Typically, you group the job postings according to your organization's business practices. Commonly used posting categories might include: Executive, Administrative, Financial, and Technical. When you group your job postings within

Defining Posting Categories
10-2 JD Edwards EnterpriseOne Applications Human Capital Management Self-Service Implementation Guide
these categories, applicants can easily search for the postings that best match their qualifications.
Grouping postings by category also allows you to define settings for each posting category, as discussed in a later setup step.
You can delete a posting category if you have not attached a job posting to it. When you delete the posting category, you also delete all of the settings for that posting category.
See Also:
■ Defining Settings by Posting Category.
10.2.2 Form Used to Define Posting Categories
Form Name FormID Navigation Usage
eRecruit Setup W08460A Recruitment Management Setup (G08BRM4), eRecruit Setup.
Click Save.
Complete appropriate information.
10.2.3 Posting Category InformationAccess the eRecruit Setup form.
Caution: All additions, edits, and deletions to the Job Posting Category should be done on this form. If not, information that is connected to the posting category can become corrupted.
Figure 10–1 eRecruit Setup form
Posting CodeEnter a list of valid codes for a specific user defined code list.
Job Posting CategoryEnter a user defined name or remark.

Defining Settings by Posting Category
eRecruit Applications Setup 10-3
10.3 Defining Settings by Posting CategoryThis section provides an overview of settings by posting category and discusses how to enter the values.
10.3.1 Understanding Settings by Posting CategoryYou define settings for each posting category in the eRecruit Setup program (P08460). This table describes the settings that you define on each tab in the Define Settings By Posting Category section:
Tab Name Settings
Field Preferences You define field preferences to specify the fields that appear in the Manage Job Postings program (P08470) when the recruiter creates a job posting. Posting Tab selections are included in UDC (08R/WS). You can also specify whether the system hides or shows competencies for each posting category.
Posting Display You define posting display settings to select portions of the posting that are visible to the applicant, as well as the order of appearance. You can select to define the settings differently for each posting category. Thus, an EXEC posting type might display different elements in a different order than an ADMIN posting type. Posting display elements are included in UDC (08R/EI).
Disable Activities You can disable the applicant activities in UDC (08R/AA). If you include an activity here, the applicant can not perform the activity when browsing job postings or applying for a job posting. You can disable the activity for internal applicants, external applicants, or both.
Confirmation Email You can define by posting category the email that the system sends to applicants when they apply for jobs.
Web Addresses You can define settings for system level email and Website addresses for all eRecruit correspondence. You can set up the addresses by posting category and language. Emails that the system sends to the recruiter or applicant contain the email address that you specify here. The Website URL is included in emails the system sends to the applicant.
10.3.2 Forms Used to Define Settings by Posting Category
Form Name FormID Navigation Usage
Define Settings By Posting Category
W08460A, Sub-form Recruitment Management Setup (G08BRM4), eRecruit Setup
Use the form, with multiple tabs, to find existing values and enter new information.
10.3.3 Settings by Posting CategoryAccess the Define Settings By Posting Category form.

Defining Settings by Posting Category
10-4 JD Edwards EnterpriseOne Applications Human Capital Management Self-Service Implementation Guide
Figure 10–2 Define Settings By Posting Category form
To define settings by posting category:
In the Define Settings by Posting Category section, complete the Posting Category field to specify the category for which you will define settings.
10.3.3.1 Field PreferencesAccess the Field Preferences tab.
1. On the Field Preferences Tab enter 0 in the Job Posting Tab field to define field preferences for the General Info tab in the Manage Job Postings program (P08470), and then click Find.
2. Click Add New, and then complete these fields as needed to specify the fields that will appear in the Manage Job Postings program (P08470) when the recruiter creates a job posting:
– Data Item
– Mandatory Hide/Disable
3. To edit field preferences, select the record that you want to edit, click Edit, and then change the Mandatory Hide/Disable field, as needed.
4. Enter 1 in the Job Posting Tab field to define field preferences for the Job Title tab in the Manage Job Postings program (P08470), and then click Find.
5. Repeat steps 3 and 4, as needed.
6. Enter a 2 in the Job Posting Tab field to define field preferences for the Competencies tab in the Manage Job Postings program (P08470), and then click Find.
7. To hide the Competencies tab for a posting category, click the Hide Competencies Tab field to add a check mark. Click the Hide Competencies Tab field again to remove the check mark to display the Competencies tab for a posting category.
Posting CategoryEnter a user defined code (08R/PC) that assigns a job posting to a specific group.
Mandatory Hide/DisableEnter a user defined code (08R/MH) that is used within the Manage Job Postings program (P08470) to specify the display options for a field.

Defining Settings by Posting Category
eRecruit Applications Setup 10-5
Hide Competencies Enter a value that specifies whether you want to hide or display an item. Values are:
0: Do not hide.
1: Hide.
10.3.3.2 Posting DisplayAccess the Posting Display tab form.
Figure 10–3 Posting Display tab form
1. Select the Posting Display tab.
2. Complete these fields to define how the job postings appear to the applicant:
– Element ID
– External Hide
– Internal Hide
– Sequence
Note: You define posting display settings according to the posting category. For example, the elements that you display for an executive posting category and the order in which you display them might differ from the elements and order that you would display for an administrative posting category.
The detail area displays all of the available posting elements. You can hide the element or select the order in which it appears, but you cannot delete the element.
Element IDEnter a user defined code (08R/EI) that identifies an element of a job posting. You specify the elements the system displays to the applicant in the eRecruit Setup

Defining Settings by Posting Category
10-6 JD Edwards EnterpriseOne Applications Human Capital Management Self-Service Implementation Guide
program (P08460). Examples of element ID's include Job Title, Job Location, and Job Category.
External HideEnter a value that specifies whether you want to hide or display an item. Values are:
0: Do not hide.
1: Hide.
Internal HideEnter an option that specifies whether a posting element is hidden internally. Values are:
0: Do not hide.
1: Hide.
SequenceEnter a value that is assigned to a posting element (UDC 08R/EI) to specify the sequence in which that element appears in the job posting display.
10.3.3.3 Disable ActivitiesAccess the Disable Activities tab form.
Figure 10–4 Disable Activities tab form
1. Select the Disable Activities tab.
2. Complete these fields to define the applicant activities that you want to disable for a particular posting type, and to indicate whether you want to disable the activity for internal applicants, external applicants, or both:
– Activity To Disable
– Internal External Both
Note: You must add the activity to the detail area in order to disable it. All activities listed in the Disable Applicant Activities UDC table (08R/AA) are enabled unless you add them to the detail area.

Defining Settings by Posting Category
eRecruit Applications Setup 10-7
Activity To DisableEnter a user defined code (08R/AA) that is assigned to an activity which is used by an applicant. You can set up each activity to be disabled on the Disable Activities tab of the eRecruit Setup application (P08460).
Internal External BothEnter a user defined code (08R/IE) assigned to an applicant activity that denotes whether the activity is disabled internally, externally, or both.
10.3.3.4 Confirmation EmailAccess the Confirmation Email tab.
1. Select the Confirmation Email tab and enter the text of the email that you want to send to applicants when they apply for a job.
You can create confirmation email text in multiple languages.
Important: You must use HTML tags to attach formatting to the text. Commonly used HTML formatting tags include:
{BR} (line break)
{P} (paragraph)
{B} (bold)
{/B} (end bold)
{U} (underline)
{/U} (end underline)
Tags are not case-sensitive.
2. To review the confirmation email as the applicant will see it, click the Preview button.
10.3.3.5 Web Addresses tabAccess the Web Addresses tab.
1. Select the Web Addresses tab.
2. Complete these required fields to specify the general system-level email address and Web site that the system uses in email to applicants and recruiters:
The email address is the From address used in email sent by the system. Applicants receive email when they register to use the eRecruit system, forget their password and when they apply for a job posting. Recruiters receive system email when an applicant applies for a job posting and when an applicant changes their personal information.
– Language Code
– Electronic Address
– Website URL
Electronic AddressEnter the email address or Uniform Resource Locator (URL) for either an individual or an entity.
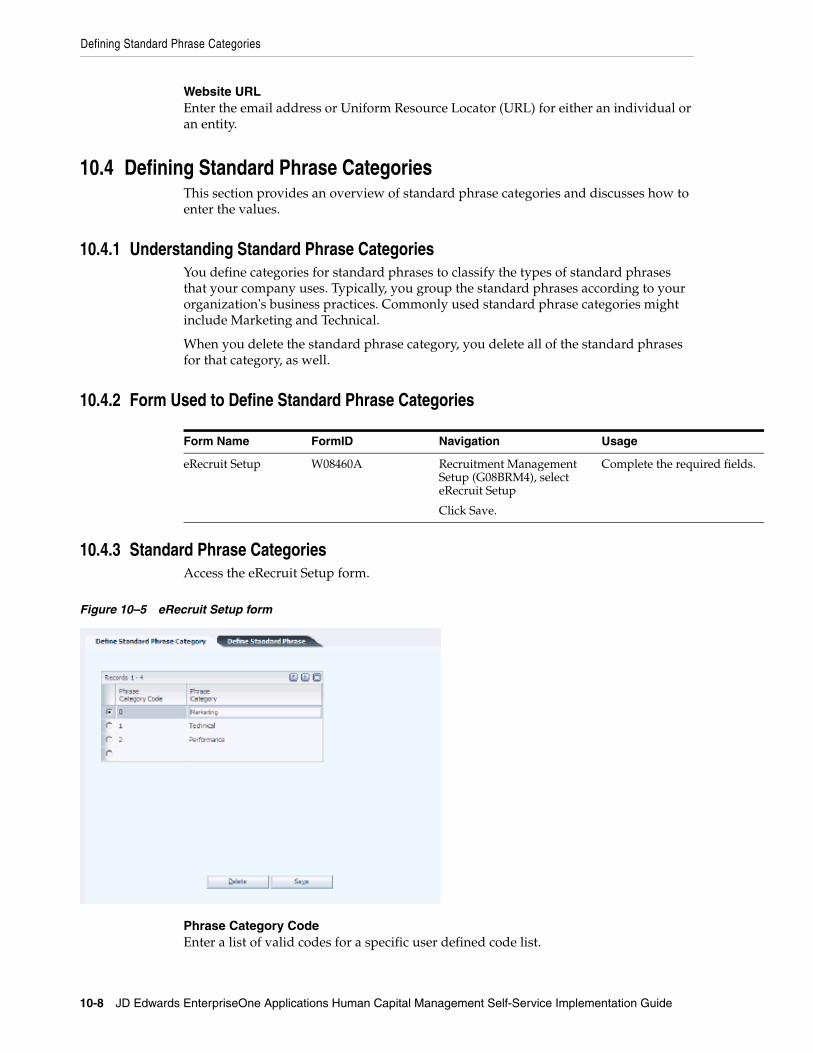
Defining Standard Phrase Categories
10-8 JD Edwards EnterpriseOne Applications Human Capital Management Self-Service Implementation Guide
Website URLEnter the email address or Uniform Resource Locator (URL) for either an individual or an entity.
10.4 Defining Standard Phrase CategoriesThis section provides an overview of standard phrase categories and discusses how to enter the values.
10.4.1 Understanding Standard Phrase CategoriesYou define categories for standard phrases to classify the types of standard phrases that your company uses. Typically, you group the standard phrases according to your organization's business practices. Commonly used standard phrase categories might include Marketing and Technical.
When you delete the standard phrase category, you delete all of the standard phrases for that category, as well.
10.4.2 Form Used to Define Standard Phrase Categories
Form Name FormID Navigation Usage
eRecruit Setup W08460A Recruitment Management Setup (G08BRM4), select eRecruit Setup
Click Save.
Complete the required fields.
10.4.3 Standard Phrase CategoriesAccess the eRecruit Setup form.
Figure 10–5 eRecruit Setup form
Phrase Category CodeEnter a list of valid codes for a specific user defined code list.

Defining Standard Phrases
eRecruit Applications Setup 10-9
Phrase CategoryEnter a user defined name or remark.
10.5 Defining Standard PhrasesThis section provides an overview of standard phrases and discusses how to enter the values.
10.5.1 Understanding Standard PhrasesCompanies typically use basic phrases repeatedly when creating job postings. You can save time by creating standard phrases that you use frequently and storing them by category to use over and over again. The user who creates the job postings can choose to add a selected standard phrase to the posting.
This table illustrates examples of commonly used standard phrases:
Standard Phrase Category Standard Phrase
Legal We are an Equal Opportunity Employer.
Marketing XYZ Travel is a leader in the retail travel industry, with over 500 locations worldwide. Visit us on the Web at http://www.xyztravel.com.
Benefits We provide excellent benefits and compensation packages including medical, dental, vision, 401(k), employee stock purchase plan, health club, and quarterly bonus program.
Salary Salary commensurate with experience.
Skills ■ BA/BS degree plus 5 years industry experience
■ Excellent communication skills
■ Ability to work independently
■ Proficiency in Spanish a plus
Technical ■ BS degree in Computer Science
■ 3 years experience
■ Working knowledge of C++, Java, HTML
■ Public sector industry knowledge
Important: You must use HTML tags to attach formatting to the text. Commonly used HTML formatting tags include:
{BR} (line break)
{P} (paragraph)
{B} (bold)
{/B} (end bold)
{U} (underline)
{/U} (end underline)
Tags are not case-sensitive.

Defining Standard Phrases
10-10 JD Edwards EnterpriseOne Applications Human Capital Management Self-Service Implementation Guide
10.5.2 Form Used to Define Standard Phrases
Form Name FormID Navigation Usage
eRecruit Setup W08460A Recruitment Management Setup (G08BRM4), eRecruit Setup
Define Standard Phrase tab:
Enter new values for standard phrases.
When you leave the Language field blank, the system uses the Domestic Language that you specified in UDC (01/LP).
10.5.3 Standard PhrasesAccess the eRecruit Setup form.
Figure 10–6 eRecruit Setup form
To define standard phrases:
1. On eRecruit Setup, complete these required fields in the Define Standard Phrase section:
– Phrase ID
– Phrase Category
2. Complete the Language Code field, as needed:
3. Enter the desired text for your standard phrase in the Define Standard Phrase Text box, and then click Save. To add or edit the text for a standard phrase, you must first select the phrase in the detail area.
■ Phrase ID
Enter a unique identification value that is assigned to a standard phrase.
■ Phrase Category
Defining Standard Phrases
eRecruit Applications Setup 10-11
Enter a user defined code (08R/PH) that assigns a standard phrase to a specific group.

Defining Standard Phrases
10-12 JD Edwards EnterpriseOne Applications Human Capital Management Self-Service Implementation Guide

11
Managing Job Postings 11-1
11Managing Job Postings
This chapter contains the following topics:
■ Section 11.1, "Understanding Job Posting Management"
■ Section 11.2, "Prerequisite"
■ Section 11.3, "Creating and Editing a Job Posting"
■ Section 11.4, "Building Job Posting Records"
11.1 Understanding Job Posting ManagementThe Manage Job Postings program (P08470) is a power form that combines on separate tabs all of the process steps needed to create job postings. From this form you can add, edit, review, copy, and delete job postings.
Recruiters can search job postings using these filter fields:
■ Created by User
■ Business Unit
■ Posting Category
Alternatively, you can enter search criteria in the Query By Example (QBE) fields.
Manage Job Postings integrates with the Requisition Information program (P08102). For example:
■ From the Row menu of the Work with Requisitions form (W08102I), you can access Manage Job Postings.
■ From the Form menu on the Requisition Information form (W08102E), you can access Manage Job Postings.
When you delete a requisition, the system displays a message indicating that the associated job posting will be deleted as well. Conversely, when you delete a job posting, you can choose to delete or retain the associated requisition. You can have a requisition with no job posting, but you cannot have a job posting with no requisition.
11.2 PrerequisiteBefore you can create job postings, you must complete the setup steps in the eRecruit Setup program (P08460).
See Also:
■ eRecruit Applications Setup.

Creating and Editing a Job Posting
11-2 JD Edwards EnterpriseOne Applications Human Capital Management Self-Service Implementation Guide
11.3 Creating and Editing a Job PostingThis section provides an overview of job posting creation and discusses how to:
■ Set processing options.
■ Create a job posting.
■ Edit a job posting.
■ Run the job posting records program.
11.3.1 Understanding Job PostingYou create job postings in the Manage Job Postings program (P08470), which is a power form that combines on separate tabs all of the process steps for creating the posting.
When you create a job posting, you use the Job Description to provide specific information about the job. When you set up a job posting for an opening for which the applicants will not apply online, include in this text the details about how to apply for the job. For example, your company might want to host a job fair to interview applicants for many openings. In this section, you can include details about the job fair and any associated contact information.
You might need to publish a job posting in more than one language. You can customize the job posting text by language using the Use Multiple Languages option.
You can attach to the job posting text standard phrases that you defined in the eRecruit Setup program (P08460) by accessing the Add Standard Phrase link to the Standard Phrase Search and Select program (P08461S).
If you are using the JD Edwards EnterpriseOne Competency Management system, you can also attach selected competencies to the job posting.
After you create the job posting, the Copy function allows you to duplicate the posting easily.
After job postings are published by running the Build Job Posting Records for Language report (R08473), applicants can review the job postings that meet this criteria:
■ The posting has an active status.
■ The system date is within the date ranges for the posting.
From the Form and Row menus of the Manage Job Postings program, you can access the programs that you use to complete these business processes:
■ Enter position information.
■ Enter requisition information.
■ Enter requisition activity information.
■ Review job entry and evaluation information.
■ Enter applicant information.
■ Work with job competency information.

Creating and Editing a Job Posting
Managing Job Postings 11-3
11.3.2 Forms Used to Create and Edit a Job Posting
Form Name FormID Navigation Usage
Manage Job Postings W08470A eRecruit (G08BE1), Manage Job Postings
Manager Self-Service (G05BMSS1), Manage Job Postings
Click Add.
Advance to Category Selection form.
Category Selection W08470E Click OK. Complete required fields.
Add Job Postings W08740B Select Add Standard Phrase. Complete required fields.
If you leave the field blank, the system enters the next number when you exit from the field.
Standard Phrase Search and Select
W08461SA Click Select. Select a phrase and then click Select.
The standard phrase that you selected will be appended to the end of the job description text. Repeat this step for each standard phrase that you want to include.
Add Job Posting W08470B Click Preview. Add key words.
Do not use any special characters in the Keywords field. Separate the keywords with spaces only.
When you click Preview, the system saves the job posting.
Job Titles/Descriptions - Multiple Languages
W08470B Select Use Multiple Languages.
Create title and descriptions in another language.
The system allows you to create only one Job Title and Description per language. Repeat step 16 for as many languages as you require for this posting.

Creating and Editing a Job Posting
11-4 JD Edwards EnterpriseOne Applications Human Capital Management Self-Service Implementation Guide
11.3.3 Setting Processing Options for Manage Job Postings (P08470)This processing option specifies the competency description view that the system uses for the competencies that are related to job postings.
11.3.3.1 Competencies
1) Job Competency Description View Specify the competency description view that the system uses for all of the competencies that are associated with job postings. Values are:
EE: Employee View (default value)
COA: Manager Coaching View
HR: Human Resource View
Job Titles/Descriptions - Multiple Languages
W08470B Select Competencies tab. Attach competencies to the job positing.
When you click Find, the system saves the posting and finds the appropriate competencies for the job.
The competencies in bold are job competencies, a more general competency category. The remaining competencies are competency options, which are more specific competencies that are related to the general category. You must include the job competencies if you want to include any of the subordinate competency options. Conversely, when you select a competency option, the system selects the job competency as well. When you deselect a job competency so that it is not included in the job posting, the system deselects all of the subordinate competency options.
Manage Job Postings W08470A eRecruit (G08BE1), Manage Job Postings
Click Select.
Select a job posting.
You can edit the job description using HTML codes to control formatting. When you select a job title and then click Delete, you delete the information in the detail area and the associated job description and keywords.
Work with Batch Versions, Available Versions
W98305WA eRecruit (G08BE1), Build Job Posting Records (R08473), Available Versions
Run the report.
Form Name FormID Navigation Usage

Creating and Editing a Job Posting
Managing Job Postings 11-5
MGR: Manager View
11.3.4 Create a Job PostingAccess the Manage Job Postings form.
Figure 11–1 Add Job Postings form: General Information tab
To create a job posting:
1. On Manage Job Postings, click Add.
2. On Category Selection, complete the Posting Category field, and then click OK.
3. On Add Job Posting, you can either complete the Posting Number field or leave it blank and enable the system to complete the field using next numbers.
4. On Add Job Posting, select the General Info tab and complete these fields:
– Requisition Number
– Posting Location
– Lower Salary Range
– Upper Salary Range
5. Complete these fields to specify the date ranges for the internal and external posting:
– Posting Date - Internal
– Expiration Date - Internal
– Posting Date - External
– Expiration Date - External
6. Enter your email address in the Recruiter Notification Email field.
7. If you want to receive an email notification for each applicant submission to the job posting, click the Receive Posting Submissions by Email option.
8. Select the Job Titles tab and complete these fields:

Creating and Editing a Job Posting
11-6 JD Edwards EnterpriseOne Applications Human Capital Management Self-Service Implementation Guide
– Job Title
– Language Code
9. In the Job Description field, enter the information that you want the applicant to see regarding the job.
10. To include a standard phrase in the posting text, click the Add Standard Phrase link.
11. On Standard Phrase Search and Select, select the phrase that you want to include in the job description, and then click Select.
12. On Add Job Postings, complete the Keywords field with the keywords that the applicant will use to search for this job posting:
13. Click the Preview button to review the job posting as the applicant will see it.
14. Click OK to save the posting.
15. To create job titles and descriptions in multiple languages, click the Use Multiple Languages link.
16. To create a new Job Title and Description in another language, on Job Titles/Descriptions - Multiple Languages, click Add New, and then complete these fields:
– Job Title
– Language
– Job Description
– Keywords
17. To attach competencies to the job posting, select the Competencies tab, complete these required fields, and then click Find:
– Competency Structure Type
– Organizational Business Unit
– Job Type
– Job Step
18. In the Include column, select the competencies to include in your job posting.
19. Click OK.
■ Posting Category
Enter a user defined code (08R/PC) that assigns a job posting to a specific group.
■ Posting Number
Enter a unique number that identifies a job posting. You can enter a posting number or enable the system to generate the posting number using next numbers.
■ Requisition Number
Enter a number that identifies the position requisition. This number must be unique. The next number program assigns this number if no other number is provided when the requisition is initially entered.
■ Posting Location
Creating and Editing a Job Posting
Managing Job Postings 11-7
Enter a user defined code (08R/JL) that indicates the location of a job posting.
■ Lower Range Salary
Enter a low range salary amount for a job posting.
■ Upper Range Salary
Enter a high range salary amount for a job posting.
■ Posting Date - Internal
Enter a date on which a job posting becomes active internally.
■ Expiration Date - Internal
Enter a date on which a job posting becomes inactive internally.
■ Posting Date - External
Enter a date on which a job posting becomes active externally.
■ Expiration Date - External
Enter a date on which a job posting becomes inactive externally.
■ Recruiter Notification Email
Enter an email address or Uniform Resource Locator (URL) for either an individual or an entity.
■ Receive Posting Submissions by Email
Enter an option that specifies whether the user who created the job posting will receive an email notification for each submission by an applicant to that posting.
11.3.4.1 Job Postings Form, Job TitlesAccess the Job Postings form, Job Titles tab.
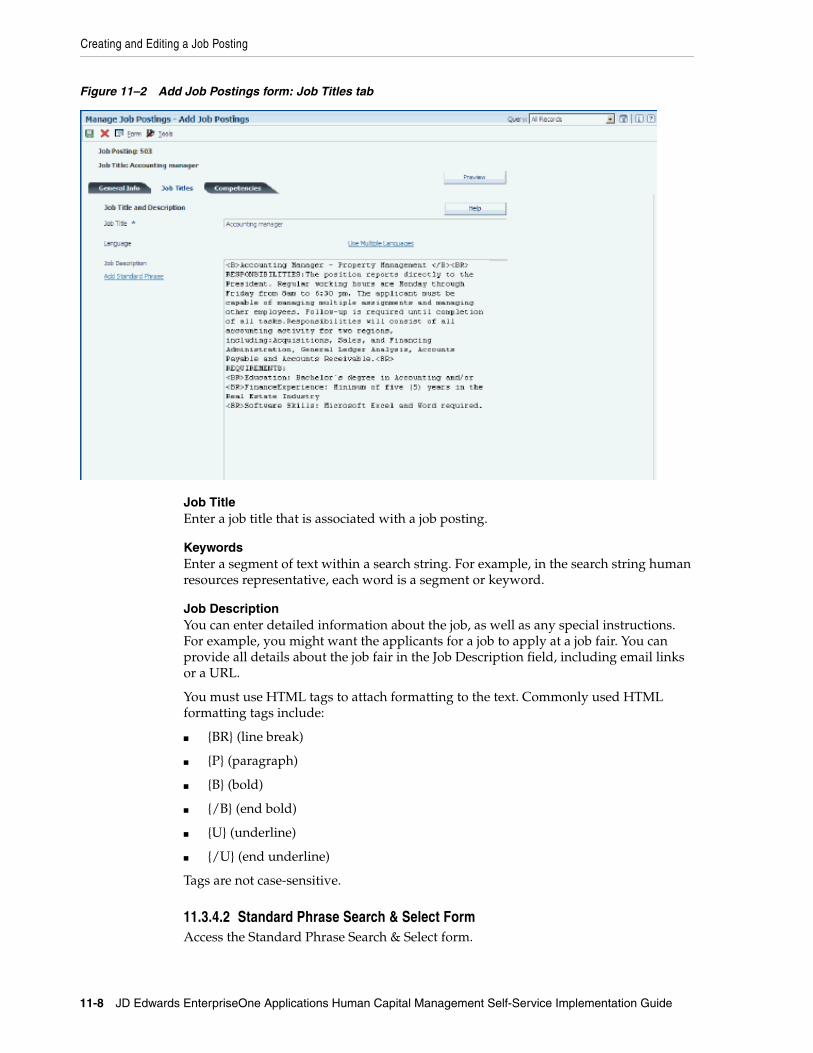
Creating and Editing a Job Posting
11-8 JD Edwards EnterpriseOne Applications Human Capital Management Self-Service Implementation Guide
Figure 11–2 Add Job Postings form: Job Titles tab
Job TitleEnter a job title that is associated with a job posting.
KeywordsEnter a segment of text within a search string. For example, in the search string human resources representative, each word is a segment or keyword.
Job DescriptionYou can enter detailed information about the job, as well as any special instructions. For example, you might want the applicants for a job to apply at a job fair. You can provide all details about the job fair in the Job Description field, including email links or a URL.
You must use HTML tags to attach formatting to the text. Commonly used HTML formatting tags include:
■ {BR} (line break)
■ {P} (paragraph)
■ {B} (bold)
■ {/B} (end bold)
■ {U} (underline)
■ {/U} (end underline)
Tags are not case-sensitive.
11.3.4.2 Standard Phrase Search & Select FormAccess the Standard Phrase Search & Select form.

Creating and Editing a Job Posting
Managing Job Postings 11-9
Figure 11–3 Standard Phrase Search & Select form
11.3.4.3 Add Job Postings Form, CompetenciesAccess the Add Job Postings form, Competencies tab.
Figure 11–4 Add Job Postings form: Competencies tab
Competency Structure TypeEnter a user-defined code (00/TS) that identifies the type of organization structure, such as financial or responsibility. Each type of organization structure can have a separate hierarchy.

Building Job Posting Records
11-10 JD Edwards EnterpriseOne Applications Human Capital Management Self-Service Implementation Guide
Organizational Business UnitEnter a business unit that is included in the organizational structure for job competencies. You use organizational business units to assign job competency information to levels within your organizational structure. This business unit is independent of an employee's home business unit and security business unit.
11.3.5 Edit a Job PostingAccess the Update Job Posting form.
Figure 11–5 Update Job Posting form
To edit a job posting:
1. On Manage Job Postings, complete any of these fields, and then click Find:
– Created By User
– Business Unit
– Posting Category
2. Select the job posting that you want to edit, and then click Edit.
3. On Update Job Posting, edit the posting, as necessary, and then click OK.
11.4 Building Job Posting RecordsThis section provides an overview of job posting records and discusses how to run the program.

Building Job Posting Records
Managing Job Postings 11-11
11.4.1 Understanding Job Posting RecordsYou run the Build Job Posting Records program to enable the system to display the job postings to applicants. This program deletes all records from the Job Posting Sort Workfile table (F08473) for the languages that you process and creates new language-specific records based on the information in these tables:
■ Job Postings (F08470)
■ Job Posting Text (F08472)
Applicants see the new language records when they browse job postings.
11.4.2 Running the Job Posting Records Program (R08473)From the eRecruit menu (G08BE1), select Build Job Posting Records (R08473).

Building Job Posting Records
11-12 JD Edwards EnterpriseOne Applications Human Capital Management Self-Service Implementation Guide

12
Processing eRecruit Applicants 12-1
12Processing eRecruit Applicants
This chapter contains the following topics:
■ Section 12.1, "Understanding eRecruit Applicant Processing"
■ Section 12.2, "Prerequisite"
■ Section 12.3, "Setting Up HR Self-Service Programs (Release 9.1 Update)"
■ Section 12.4, "Reviewing Submitted Applications"
■ Section 12.5, "Performing eRecruit Searches"
■ Section 12.6, "eRecruit SES Index Build"
■ Section 12.7, "Processing Recruitment Records (R08470)"
■ Section 12.8, "Updating Applicant Personal Information (R08490)"
12.1 Understanding eRecruit Applicant ProcessingAfter applicants submit applications, you can review the submissions and select applicants that are viable candidates for the position. You can select single or multiple records for immediate processing, or you can mark records to be processed later through a batch process.
12.2 PrerequisiteSet the common setting for Using Self-Service Recruitment? to Yes - Enable Self-Service Recruitment in the Common Settings for HR Employee Self Service Programs (P05004).
See Also:
■ Setting Up Common Settings for Self-Service.
12.3 Setting Up HR Self-Service Programs (Release 9.1 Update)There are two settings provided in the Work With HRM Common Display Settings program (P05004) for eRecruit.
1. SSREC – Using Self-Service Recruitment?
You use the SSREC common settings to activate system-level settings for HR Self-Service. Setting SSREC to Yes indicates to the system that you are using eRecruit.
2. ERMQ – Using Media Object Display?

Reviewing Submitted Applications
12-2 JD Edwards EnterpriseOne Applications Human Capital Management Self-Service Implementation Guide
When applicants browse and apply for jobs in the P08400 program, they can choose to upload or enter/paste in a resume, cover letter, or job qualifications. You use ERMQ to set display options for entering resumes, cover letters, and job-specific qualification details in eRecruit Self-Service. Set the value to ERMQ to Yes to display Media Object Display or to No to use the Multi-Line Edit Control.
The Media Object Display (Yes) uses ActiveX technology which is only available in Internet Explorer browser. With this option, the system prompts the users to install the ActiveX control in their browser to enter information. This option allows for rich text formatting.
The Multi-line Edit Control (No) does not use ActiveX. You can enter information using any browser. This option does not allow for text formatting.
12.4 Reviewing Submitted ApplicationsThis section provides an overview of submitted applications review and discusses how to review submitted applications.
12.4.1 Understanding Submitted Applications ReviewThe Review Applicants program (P08498) allows the recruiter to review the records of all applicants who have applied online to a job posting. The recruiter can search the records by any of these:
■ Applicant name
■ Posting number
■ Requisition number
■ Requisition number ranges
■ Date received
■ Date received ranges
■ Status
■ Creator of job posting
The recruiter can select a record and review the associated cover letter, resume, references, or job qualifications, if the system has been enabled for these processes. After reviewing the information, the recruiter updates the status of the applicant only if the applicant is being considered for the position. The system then adds the applicants' records to the Applicant Master table (F08401), the Requisition Information table (F08102) and JD Edwards EnterpriseOne Address Book.
The recruiter can choose to mark individual records for immediate update, or select a group of records to update through a batch process.
The recruiter can also attach an employee to more than one requisition.

Reviewing Submitted Applications
Processing eRecruit Applicants 12-3
12.4.2 Forms Used to Review Submitted Applications
Form Name FormID Navigation Usage
eRecruit Applicant Review
W08498A Process eRecruit Applicants (G08BE2), Review Applicants
Manager Self-Service (G05BMSS1), Review Applicants
On eRecruit Applicant Review, click Select.
Use the search and select form to select an applicant record.
eRecruit Applicant Information
W08498B On Applicant Information, select Job Qualifications from the Row menu.
The system must be enabled for cover letters, resumés, and job qualifications in order for the applicant to include them.
On Applicant Information, select Process Now from the Row menu.
Confirm Process Applicant
W08498C On the eRecruit Applicant Review form, select a record and then select Attach to Requisition form the Row menu.
To attach the selected employee to another requisition.
12.4.3 Setting Processing Options for Review Applicants (P08498)Processing options enable you to specify the default processing for programs and reports.
12.4.3.1 ProcessUse these processing options to specify the statuses that the system assigns to the applicant during the eRecruit process.
1. Default Applicant Status: Specify the applicant status that the system assigns to new applicants that originate from the eRecruit process.
2. Default Candidate Requisition Status: Specify the requisition status that the system assigns to new applicants that originate from the eRecruit process when a record is created for the Requisition Activity program (P08102). The default Candidate Requisition Status value is CAN. If you change this value, make sure that the status you use does not have a special handling code attached to it. Special handling codes have repercussions in the Requisition Activity program (P08102).
12.4.4 Review Submitted ApplicationsAccess the Applicant Review form.
To review submitted applications:
1. On Applicant Review, complete any of these filter fields to locate applicants for a particular job posting, and then click Find:
– Given Name
Reviewing Submitted Applications
12-4 JD Edwards EnterpriseOne Applications Human Capital Management Self-Service Implementation Guide
– Surname
– Posting Number
– eRecruit Status
– Created By
– Submit Date
– Req No.
2. Select the applicant record that you want to review, and then click Select.
3. On Applicant Information, review the applicant's general information.
4. To review a cover letter or resumé, select Cover Letter/Resume from the Form menu.
5. To review job qualifications, select Job Qualifications from the Form menu.
6. To select this applicant for immediate processing, select Process Now from the Form menu.
7. To select this applicant for processing through the batch process, select Mark for Batch from the Form menu.
8. If you previously selected this applicant for batch processing and now want to remove the applicant from the batch, select Unmark for Batch from the Form menu.
9. Alternatively, you can select all available applicants for batch processing by selecting the Select all Fetched Records option.
10. Click OK.
■ Given Name
Enter the first name of an individual. This field is informational only.
■ Surname
Enter the last name of an individual. This field is informational only.
■ Posting Number
Enter a unique number that identifies a job posting. Posting numbers are already assigned, so next numbers does not create a new posting number.
■ eRecruit Status
Enter a user defined code (08R/AS) that indicates to the recruiter the status of an eRecruit applicant's submission to a job posting.
■ Created By
Enter a number that identifies an entry in the JD Edwards EnterpriseOne Address Book system, such as employee, applicant, participant, customer, supplier, tenant, or location.
■ Submit Date
Enter the date on which an applicant submitted his or her resume, cover letter, or both.
■ Req No. (Requisition)
Enter the number that identifies the position requisition. This field is available only for searching.

Performing eRecruit Searches
Processing eRecruit Applicants 12-5
■ eRecruit Status
Enter a user defined code (08R/AS) that indicates to the recruiter the status of an eRecruit applicant's submission to a job posting.
12.5 Performing eRecruit SearchesThis section provides an overview of eRecruit searches and discusses how to:
■ Set processing options for Search eRecruit Applicants and Resumes (P08488)
■ Search for eRecruit applicants.
12.5.1 Understanding eRecruit SearchesJD Edwards EnterpriseOne uses a search engine to enable you to perform advanced searches over eRecruit data. You can search resumes, cover letters, and other eRecruit personal information that has been entered into the eRecruit system, to identify potential job candidates. You can then take the result set of applicants and process them to Applicant Master and Requisition Activity. The search options include:
■ Keyword search options to match all, any, or exact words.
■ Keyword search complex query options (Boolean Logic).
■ Keyword search text entry.
■ eRecruit data field filters.
Note: Documents uploaded to the application through the upload feature available as of Tools 9.1.3 are not available for searching, using the eRecruit SES search functionality. If SES searching is required, customers should continue to use the copy or paste method for capturing applicant resumes, cover letters, or job qualifications.
12.5.1.1 Example: Keyword Search Options This table provides examples of search results using the keyword search options to match all, any, or exact words:
Query Indicator Keywords Explanation
Match All project management Includes only records with both the words project and management.
Match All manage* ject Includes only records with words that begin with the characters manage and end with the characters ject. Basic wildcard search.
Match Any project management Includes records with either the word project or management.
Match Any manage* ject Includes records with words that begin with the characters manage or end with the characters ject. Basic wildcard search.
Match Exact project management Includes only records with the words project management in sequential order.

Performing eRecruit Searches
12-6 JD Edwards EnterpriseOne Applications Human Capital Management Self-Service Implementation Guide
12.5.1.2 Example: Keyword Search Complex Query This table provides examples of search results using the keyword search complex query (Boolean Logic) option, which searches for logical groupings of & (AND),| (OR), and - (NOT) to obtain the desired search string:
Query Indicator Keywords Explanation
Complex Query project & management Includes records with both the words project and management
Complex Query project & management -software
Includes only records with both the words project and management, but not the word software.
Complex Query project | management & training
Includes records with both the words project and training or both management and training.
Note: A processing option for Search eRecruit Applicants and Resumes SES (P08488) is available to enable or disable the Complex Query search feature.
12.5.1.3 Keyword Search Text Entry In the text box on the Search eRecruit Applicants and Resumes form, you can enter one or more words or a string of words to perform a search against the data. Separate multiple words with a space.
12.5.1.4 eRecruit Data Field Filters A series of field filters can be used in conjunction with the keyword search text entry to refine the search for eRecruit applicants. Searches that use field filters are performed on eRecruit applicant data fields only. These fields can be filtered:
■ Applicant City, State, and Country.
■ Posting and Requisition Numbers.
■ Submit Date.
■ eRecruit Status.
■ Recruiter.
The keyword search is available for all text areas on the Search eRecruit Applicants and Resumes SES form, as well as eRecruit Applicant Data fields in the online application. The text areas are for the resume, which is pasted to the form, the cover letter, and qualifications. The filter fields all work as AND items. For example, if you select filter criteria for three fields, the system filters the applicants against filter one, AND filter two, AND filter three. With multiple filter values, the system adds an AND between each filter value.
The system calculates the results of the keyword search. Then it further refines the results by using the values in the filter fields The values from the keyword search and filter fields are combined to yield the final search results: (match against keyword search results) AND (match on every filter selected) = overall search results.

Performing eRecruit Searches
Processing eRecruit Applicants 12-7
12.5.2 Forms Used to Perform eRecruit Searches
Form Name FormID Navigation Usage
Search eRecruit Applicants and Resumes SES
W08488D Process eRecruit Applicants (G08BE2), Search eRecruit Applicants and Resumes SES
On Search eRecruit Applicants and Resumes SES, complete the Keyword field and any of the filter fields, and click Search.
Use the Search eRecruit Applicants and Resumes SES form to view applicants.
On Search eRecruit Applicants and Resumes SES, select Process Now from the Row menu.
12.5.3 Setting Processing Options for Search eRecruit Applicants and Resumes (P08488)
Processing options enable you to specify the default processing for programs and reports.
12.5.3.1 Action
1. Allow Complex QuerySpecify whether the complex query option is available when you use keywords to search eRecruit applicants. Values are:
1:Available.
0 or Blank: Not available.
2. Process Now – Default Applicant StatusSpecify the applicant status the system assigns to new applicants added from the eRecruit process.
3. Process Now – Default Candidate Requisition StatusSpecify the requisition status that the system assigns to new applicants that are added from the eRecruit process, when you create a record using the Requisition Activity program (P08102). The default value for candidate requisition status is CAN (Candidate). If you change the defaults value, ensure that the status that you use does not have a special handling code attached to it. Special handling codes have create issues in the Requisition Activity program (P08102).
12.5.3.2 Defaults
1. Default eRecruit StatusSpecify a default value for the eRecruit Status filter field. Blank specifies no default value (wildcard).
2. Submit Days from Today – Default Submit DateSpecify a default value for the Submit Date field. The system populates this field based on the number of days from today. The runtime select option is set to greater than or equal to. Blank specifies no default value (wildcard).

Performing eRecruit Searches
12-8 JD Edwards EnterpriseOne Applications Human Capital Management Self-Service Implementation Guide
12.5.3.3 Versions
1. eRecruit Applicant Information VersionSpecify the version of the Review Applicants program (P08498) that the system uses when you review applicant detail information.
2. Applicant Master VersionSpecify the version of the Applicant Master program (P08401) that the system runs when you select the Row exit for Applicant Master.
3. Requisition Activity VersionSpecify the version of the Requisition Activity program (P08102) that the system runs when you select the Row exit for Requisition Activity.
12.5.4 Searching for eRecruit ApplicantsYou use the Search for eRecruit Applicants form to search for applicants and resumes using a keyword text search. This search functionality is now based on Secured Enterprise Search (SES).
Access the Search eRecruit Applicants and Resumes SES form.
Figure 12–1 Search eRecruit Applicants and Resumes SES form
1. To locate applicants for a job posting, complete any of these filter fields, and then click Find:
– Keyword(s)
– Shift
– Referred By
– Regular/Temp
– Will Relocate

Performing eRecruit Searches
Processing eRecruit Applicants 12-9
– Sponsor Required
– Hours Available
– Asking Salary
– Will Travel
– Travel Percentage
– Submit Date
– eRecruit Status
– Posting Number
– Recruiter
– City
– State
– Country
2. Click Search and review the number of applicants.
3. To review various types of information entered through eRecruit, select any of the following from the Row menu:
– Applicant Information
– Cover Letter/Resume
– Job Qualifications
– Applicant Master
4. To select this applicant for immediate processing, select Process Now from the Row menu.
5. To attach this applicant to a requisition, select Attach to Requisition from the Row menu.
6. To select this applicant for processing through the batch process, select Match for Batch from the Row menu.
7. If you previously selected this applicant for batch processing and now want to remove the applicant from the batch, select Unmark for Batch from the Row menu.
Alternatively, you can select all available applicants for batch processing by selecting the Select All Fetched Records option.
8. Click OK.
Keywords(s)Enter the type of search to run. Values are:
Complex Query: Search for a simple key phrase with SES specific qualifiers.
Match All: Place an AND between the words entered.
Match Any: Place an OR between the words entered.
Match Exact: Runs a query that includes only the combination of words in a particular sequential order.
ShiftSelect a value that identifies daily work shifts, such as graveyard or weekend. The shifts are identified by a code in the user-defined code (UDC) table 00/SH.

Performing eRecruit Searches
12-10 JD Edwards EnterpriseOne Applications Human Capital Management Self-Service Implementation Guide
Referred BySelect a value from the UDC table 08/N7 to describe how an applicant was referred to the position or the company.
Regular/TempSelect a value to indicate the status of an employee. Values are:
Regular Employee
Temporary Employee
Will RelocateSelect a value to indicate whether the applicant is willing to relocate. Values are:
No
Yes
Sponsor RequiredSelect a value to indicate whether a job applicant requires a sponsor. Values are:
No
Yes.
Hours AvailableEnter the number of hours an applicant is available to work, if hired.
Asking SalaryEnter the amount an applicant has requested for salary.
Submit DateEnter the date on which an applicant submitted a resume, cover letter, or both.
eRecruit StatusSelect a value that identifies the eRecruit status from the UDC table 08R/AS that indicates to the recruiter the status of an eRecruit applicant's submission to a job posting. Values are:
Entered but not submitted.
Marked for Update to the F0840.
Submitted.
Updated to Applicant Master.
Posting NumberEnter the number that identifies a job posting or use wildcard (*) to select all posting numbers. If you enter a posting number, the system displays the associated Requisition Number.
RecruiterEnter the address number of the employee who entered the requisition.
CityEnter the city in which you are searching for an applicant. You can enter a city name, or a wildcard (*) to select all cities.
StateSelect a value from the UDC table 00/S that identifies the state in which you are searching for an applicant.

Processing Recruitment Records (R08470)
Processing eRecruit Applicants 12-11
CountrySelect a value from the UDC table 00/CN that identifies the country in which you are searching for an applicant.
12.6 eRecruit SES Index BuildThis section provides an overview of building indexes for performing searches and discusses how to run the report.
12.6.1 Understanding Building Indexes for Performing SearchesUse the eRecruit SES Index Build program (R958001A) to build the search indexes. This program should be run on a periodic basis.
12.6.2 Running the eRecruit SES Index Build ProgramFrom the Advanced and Technical Operations menu (G08BE21), select eRecruit SES Index Build (R958001A).
12.7 Processing Recruitment Records (R08470)This section provides an overview of the Processing Recruitment Records report and discusses how to:
■ Run the report.
■ Set processing options for the Processing Recruitment Records report.
12.7.1 Understanding Recruitment Records ProcessingUse this program to process recruitment records based on data selection and the records that you selected as Mark for Update. The report displays exceptions only, unless you set processing option 3 to 1, in which case it displays information for all records.
The system updates the status of the applicant only if the applicant is being considered for the position. The system then adds the applicants' records to the Applicant Master table (F08401), the Requisition Information table (F08102) and JD Edwards EnterpriseOne Address Book
12.7.2 Running the Processing Recruitment Records ProgramFrom the Process eRecruit Applicants menu (G08BE2), select Process Recruitment Records.
12.7.3 Setting Processing Options for Process Recruitment Records (R08470)Processing options enable you to specify the default processing for programs and reports.
12.7.3.1 ProcessUse these processing options to specify the mode in which the system processes the records, as well as which records to process and the amount of detail information to display on the report.

Updating Applicant Personal Information (R08490)
12-12 JD Edwards EnterpriseOne Applications Human Capital Management Self-Service Implementation Guide
1. Mode:Specify the mode in which the process will run. Values are:
0: Do not run the process in final mode. Do not update any information.
1: Run the process in final mode and update the appropriate files.
2. Selected Records Only: Specify which records the UBE will process. Values are:
0: Process all of the records with an Applicant Status of 1 or 2.
1: Process only records with an Applicant Status of 2.
3. Show Detail: Specify whether information for successfully processed records will be displayed. Records that were not processed successfully are always displayed as exceptions. Values are:
0: Do not display information for successfully processed records.
1: Display information for all records.
4. Default Applicant Status:
Specify the applicant status that the system assigns to new applicants that originate from the eRecruit process.
5. Default Candidate Requisition Status: Specify the requisition status that the system assigns to new applicants that originate from the eRecruit process when a record is created for the Requisition Activity program (P08102). The default Candidate Requisition Status value is CAN. If you change this value, make sure that the status you use does not have a special handling code attached to it. Special handling codes have repercussions in the Requisition Activity program (P08102).
12.8 Updating Applicant Personal Information (R08490)This section provides an overview of the Updating Applicant Personal Information report and discusses how to:
■ Run the report.
■ Set processing options for the Updating Applicant Personal Information report.
12.8.1 Understanding the Updating Applicant Personal Information ReportFrom the Process eRecruit Applicants menu (G08BE2), select Update Applicant Info.
Run the Update Applicant Personal Information batch program to update address book entries or applicant information for applicants with address book numbers. For applicants who have an address book search type of A, the system updates information in the address book tables, as well as the applicant information in the Applicant Master table (F08401) and the Extended Applicant Information table (F08403). When the search type is not equal to A, the system updates only the applicant information.
The system updates these address book tables:
■ Address By Date (F0116)

Updating Applicant Personal Information (R08490)
Processing eRecruit Applicants 12-13
■ Address Book - Who's Who (F0111)
■ Address Book - Contact Phone Numbers (F0115)
When the applicant's personal information changes and the associated processing option is enabled, the system sends an email notification to the recruiter who is associated with each posting to which the applicant has submitted an application.
12.8.2 Running the Updating Applicant Personal Information ReportFrom the Process eRecruit Applicants menu (G08BE2), select Update Applicant Info.
12.8.3 Setting Processing Options for Update Applicant Info (R08490)Processing options enable you to specify the default processing for programs and reports.
12.8.3.1 ProcessUse this processing option to specify the mode the system uses to update the records.
1. Process ModeSpecify the mode to use when processing Update Applicant Personal Info (R08490). Values are:
0: Pending Mode
1: Final Mode
In pending mode, the system does not update any database tables.
If you use final mode, the system prints the report, and updates the Address Book tables (F0116, F0111, F0115, F08401) and the Extended Applicant Information table (F08403) for an external applicant. The system updates only the Extended Applicant Information table for internal applicants.
12.8.3.2 DefaultsUse this processing option to specify the mode the system used to update the records.
1. Electronic Address Type (required) Indicate the type of address that is assigned to an electronic address. Address types are stored in UDC table 01/ET. Values are:
E: Email address
I: Uniform Resource Locator (URL)
12.8.3.3 NotificationsUse this processing option to specify email notification options.
1. Send Change Notification Email Specify whether the system sends an email notification to the posting owner when an applicant's information has changed and the applicant has responded to the posting. The system sends an email notification when the Receive Resume Submissions via email option is enabled in the Manage Job Postings program (P08470). Values are:
Blank, N: Email is not be sent.
Y: Email is sent.

Updating Applicant Personal Information (R08490)
12-14 JD Edwards EnterpriseOne Applications Human Capital Management Self-Service Implementation Guide

13
Employee Self-Service Benefits Setup 13-1
13Employee Self-Service Benefits Setup
This chapter contains the following topics:
■ Section 13.1, "Understanding Employee Self-Service Benefits Setup"
■ Section 13.2, "Implementing Employee Benefits Setup"
13.1 Understanding Employee Self-Service Benefits SetupSetting up self-service benefits is a task that should be performed by the system administrator. The administrator can set up the desired features for employee self-service benefit selections. The administrator can also enable security functions to limit employees from viewing or changing other employees' confidential records.
Employees access self-service benefits through a series of web pages on your company's intranet site that enables them to complete such tasks as changing benefit options or changing name, address, and emergency contact information.
Your software provides web pages for all self-service programs, as well as a logon page and a menu page. These pages are fully functional and you can use them without modification. You can also create customized self-service web pages. For example, if you want to put your own company's logo on the web pages, you need to create customized web pages. You can organize your web-based benefits enrollment program under a menu structure based on employment events such as new hire and rehire, and life events such as children or marriage. You might create a menu from which the employee selects the event or reason for changing enrollment. If the employee selects marriage, for example, the version of the web page that allows changes associated with marriage is used.
You can use processing options to set up different versions of the Self-Service Director program (P05410). For example, you might set up custom versions for enrollment event codes that are similar to these versions that are included in your software:
Program Version Event Version Code
New Hire Enrollment NHR (New Hire)
Rehire Enrollment RHR (Rehire)
Marriage MAR (Marriage)
Divorce DIV (Divorce)
Children CHD (Children)
Open Enrollment OPN (Open Enrollment)

Implementing Employee Benefits Setup
13-2 JD Edwards EnterpriseOne Applications Human Capital Management Self-Service Implementation Guide
Employee self-service benefits setup includes only those instructions that are required to set up employee self-service benefits. These instructions assume that the setup procedures for employee benefits are complete. In some cases, such as setting up benefit plans and plan options, you need to review the existing setup to ensure that self-service considerations are included.
To set up benefit plans that employees can use in self-service, you need to define:
■ The minimum and maximum number of persons who can be included in benefit plans that cover dependents
■ Whether to track the primary care physician
■ Nonparticipating benefit plans
After setting up the Plan Master (P08320), depending on your company setup, you might need to define the benefit plan options that employees can select during each enrollment event. For employee self-service benefits, the benefit plan options might already be set up appropriately. You also need to specify the minimum and maximum number of dependents that are allowable for each health and welfare benefit plan option. You can use this procedure to set up new plan options or change existing options.
If the available options for a plan category include non-participation, you need to set up a nonparticipating plan option. For example, a dental benefit plan might include these plan options:
■ Dental Coverage - Employee Only
■ Dental Coverage - Employee and Family
■ Dental Coverage - Employee and One Dependent
■ Dental Coverage - No Coverage
See Also:
■ " Setting Up Benefit Plans" in the JD Edwards EnterpriseOne Applications Benefits Implementation Guide.
■ "Setting Up Plan Options" in the JD Edwards EnterpriseOne Applications Benefits Implementation Guide.
■ "Setting Up Benefit Group Information" in the JD Edwards EnterpriseOne Applications Benefits Implementation Guide.
13.2 Implementing Employee Benefits SetupThis section provides an overview of implementing employee benefits setup and discusses how to complete the setup process.
13.2.1 Understanding Employee Benefits Setup ImplementationYou can use the ESS Setup Director program (P05410) to organize and implement the setup procedures for benefits self-service. This program introduces a director approach to the benefits setup task that simplifies and expedites setting up your software for a benefits enrollment offering. The program includes a list of links to the programs that you use, including program versions and processing options. After you complete this setup process, to activate employee access to self-service offerings, you must also implement a link to benefits enrollment on your organization's intranet Web portal.

Implementing Employee Benefits Setup
Employee Self-Service Benefits Setup 13-3
Consider the list of setup programs in the ESS Setup Director program as the starting point for your setup process. Implementing this list results in a sample benefits enrollment that might suit your organizational requirements. When you enter the ESS Setup Director program, the system displays setup overview information in the Extended Description window. When you click any of the program links, the program automatically displays related documentation for the topic that is selected. Before you start building a list of program links to set up benefits enrollment, it is recommended that you click each program in the list and review the linked documentation. Some topics include additional links that can help you move to another area within the current topic. As you perform this review, you can mark the options that apply to your organization's requirements.
When you use the ESS Setup Director program to set up self-service benefits enrollment, you implement two processes: you specify setup program options and then you perform the setup tasks. This program includes two options, each of which displays a list of setup programs. ESS Versions/Processing Options displays a list of the setup programs for which you need to define processing option values and, where necessary, create program versions. ESS Setup Applications displays a list of programs that you subsequently use to perform each of the setup tasks.
To create a customized list, you can select individual programs that appear in the Available Items pane and move them to the Selected Items pane. To select the entire list, just click the double, right arrow. Many of the programs, such as Common Setting for HR ESS Programs, Self Service Process Flow Setup, and others, must be included in all benefit enrollments. Depending on your organization's benefits offerings, some setup steps might not apply. Because some of the setup programs must be used in a specific order, the ESS Setup Director program maintains the correct order even if you move links out of order from one list to the other.
When you move one or more links to the Selected Items list and then select Continue, the system displays a full screen of related documentation and links that you can use to start the setup program or move to the next item that is on your list of selected links.
See Also:
■ Setting Up Employee Self-Service.
■ Understanding Common Settings for Self-Service Setup.
■ "Setting Up Benefits Administration" in the JD Edwards EnterpriseOne Applications Benefits Implementation Guide.

Implementing Employee Benefits Setup
13-4 JD Edwards EnterpriseOne Applications Human Capital Management Self-Service Implementation Guide
13.2.2 Forms Used to Implement Self-Service Benefits Setup
Form Name FormID Navigation Usage
ESS Setup Director W054100B Employee Self Service General Setup (G08BB413), Self-Service Director
Click Continue.
Note the programs that you want to include in your setup process.
Note the programs that require a new version or processing option settings.
Click the arrows to move items from the Available Items list to the Selected Items list.
When finished, click Continue to begin the first task, the system displays the first program on the list of selected items.
ESS Instructions W054100A Click Continue.
Click Next.
To refresh the screen, select Refresh from the Tools menu.
When you complete the last selected item and click Next, this action completes the process of setting up program versions and specifying appropriate processing options.
The system automatically displays the ESS Setup Director form so that you can select the setup programs that are required to complete the setup process.
13.2.3 Implement Self-Service Benefits SetupAccess the ESS Setup Director form.

Implementing Employee Benefits Setup
Employee Self-Service Benefits Setup 13-5
Figure 13–1 ESS Setup Director form
To implement employee benefits setup:
1. On ESS Setup Director, click the ESS Setup Applications option and then review the resulting list of links in the Available Items pane.
2. In the Available Items pane, click each link and review the documentation that the system automatically displays.
3. To review the programs for which you need to create a new version or set processing options, click ESS Versions/Processing Options and review the list of links.
4. To create a Selected Items list of links, click a version or processing option link on the Available Items list and then click the single, right arrow between the Available Items and Selected Items lists.
5. Repeat the previous step for each version or processing option link that you want to move into the Selected Items list.
6. When the Selected Items list is complete, to begin the first task, click Continue.
7. On ESS Instructions, review data that might exist.
8. To access the program and add or change data, select Edit Setup.
9. After you complete the task for the selected program, select Cancel or Close.
10. On ESS Instructions, to move to the next selected item on your list, select Next.
11. Repeat steps 7 through 10 until you complete all of the selected items on your list.
12. To review a previous program or documentation in the Selected Items list, click Previous.
13. When you complete the last selected item, click Next.

Implementing Employee Benefits Setup
13-6 JD Edwards EnterpriseOne Applications Human Capital Management Self-Service Implementation Guide
14. On ESS Director, select the ESS Setup Applications option.
15. Repeat steps 4 through 11 until all of the tasks on your Selected Items list is complete.
■ ESS Setup Applications
Enter a code that specifies an indicator setting. Values are:
0: No
1: Yes
■ ESS Versions/Processing Options
Enter a code that specifies an indicator setting. Values are:
0: No
1: Yes

14
Setting Up Common Settings for Benefits Self Service 14-1
14Setting Up Common Settings for Benefits Self Service
This chapter contains the following topics:
■ Section 14.1, "Understanding Common Settings for Benefits Self Service"
■ Section 14.2, "Implementing the Settings"
14.1 Understanding Common Settings for Benefits Self ServiceThe setup process to provide employees with the opportunity to define and control their benefit selections begins with enabling your enhanced employee self-service software. By setting this control appropriately, you can access the necessary programs to define your self-service offerings. You can also define the primary care physician setting.
See Also:
■ "Setting Up Common Settings for Benefits Enrollment" in the JD Edwards EnterpriseOne Applications Benefits Implementation Guide.
14.2 Implementing the SettingsThis section discusses how to enter common settings.
14.2.1 Forms Used to Set Up Common Settings for Benefits Self Service
Form Name FormID Navigation Usage
Work With HRM Common Display Settings
W05004A Self Service Setup (G05BESS4), Common Settings for EE Self Service Appl
Enter appropriate common settings.
14.2.2 Entering the Common SettingsAccess the System Control Revisions form.
To set up common settings for self-service benefits:
1. On Work With HRM Common Display Settings, review these data items:
– PCPN
– PCPV

Implementing the Settings
14-2 JD Edwards EnterpriseOne Applications Human Capital Management Self-Service Implementation Guide
– USEESS
2. To change the current setting for an item, select the data item and click Select.
3. On System Control - Revisions, select either the Yes or No option, and then click OK.
4. On Work With HRM Common Display Settings, click Add to add data items.
5. On System Control - Revisions, complete the Data Item field.
6. Select either the Yes or No option and click OK.
7. On Work With HRM Common Display Settings, click Find to display the new data item and verify the setting.
■ PCPN
Enter an option that determines whether the system requires a primary care physician number for self-service health and welfare benefit plans or benefit plan options that are set up to track primary care physician information.
■ PCPV
Enter an option that determines whether the system tracks an employee visit with a primary care physician.
■ USEESS
Enter an option that determines whether enhanced employee self-service software is being used instead of standard employee self service in the Xe release of JD Edwards EnterpriseOne software.
15
Defining Benefit Category Rules for Self Service 15-1
15Defining Benefit Category Rules for Self Service
This chapter contains the following topics:
■ Section 15.1, "Understanding Benefit Category Rules for Self Service"
■ Section 15.2, "Linking Categories to Benefit Groups"
15.1 Understanding Benefit Category Rules for Self ServiceBenefit category rules and specifications need to be set up before the new benefit self-service features are available to employees. To ensure that employees make benefit selections that are consistent with your organizational and provider policies, you use the Categories by Benefit Group program (P08350) to specify a classification for each benefit category and to specify that changes in employee elections must remain within a current group of benefit plans.
For self service, benefit categories must be defined as belonging to one of these classifications:
■ Health and Welfare
■ Indemnity
■ Retirement Savings
■ Other
For example, medical, dental, and vision categories are in the health and welfare classification. Life insurance and tax-deferred savings categories are in the retirement savings classification. Employees might be allowed to decline inclusion in some categories, but not in others. For example, inclusion in a retirement savings plan might be optional. However, medical coverage might be required unless employees are included in spousal coverage with another employer. You can specify whether the Human Capital Management administrator is notified when employees elect to decline coverage.
Note: When setting up a benefit category as a Health and Welfare category, you should include only benefit plans that do not require a beneficiary.
A benefit category should not allow more than one benefit plan election. A benefit category should also specify whether benefit plans within the category are optional. For example, values for the benefit category rule are Optional (O) or Required (R).

Linking Categories to Benefit Groups
15-2 JD Edwards EnterpriseOne Applications Human Capital Management Self-Service Implementation Guide
Most insurance providers allow employees to change their coverage when they experience a qualifying life event. For example, a married employee who gives birth to, or adopts, a child can usually change their medical insurance from employee plus spouse to employee plus family within 31 days of the birth of the child. The employee cannot ordinarily change from the current provider to an alternate provider until the commencement of an open enrollment period.
The Categories by Benefit Group program is normally used in the initial setup of benefits information. You use this program to link benefit categories to benefit groups when you set up the benefits administration software. The entire task is included as part of employee self-service benefits setup to ensure that the requirements to set up self service are reviewed and completed.
Note: Oracle does not recommend setting up a benefit category to allow the selection of multiple plans in a health and welfare benefit category. If you allow the selection of multiple plans within a category, then your benefits self-service software cannot automatically select appropriate plans for an employee based on employee dependents and beneficiaries.
After you set up benefit groups and benefit categories, you can link categories to each benefit group. For example, you can link the benefit categories for medical, dental, and life to the management benefit group. When you link a category to a benefit group, all of the employees in that group are eligible for all of the benefit plans in that category.
When you link categories to groups, you can also include this information:
■ Whether the benefit group has flex plans
■ The sequence in which the benefit categories appear on the enrollment form
■ The election criteria for a benefit category
■ The benefit category type for special flex plans
■ The benefit category classification
■ An employee option to print a form for declining benefit coverage
■ Whether employees must stay within the current benefit group options or within a current group of benefit plans
If a benefit group has flex plans, you must set up a benefit category for employee flex deductions (category type 2). This benefit category is the mechanism for deducting a negative flex balance from employee pay. If the employer awards members of the benefit group a lump sum of flex credits, you must set up a benefit category for those lump sum credits (category type 1).
15.2 Linking Categories to Benefit GroupsThis section provides an overview of linking categories to benefit groups and discusses how to link categories to benefit groups.

Linking Categories to Benefit Groups
Defining Benefit Category Rules for Self Service 15-3
15.2.1 Forms Used to Link Categories to Benefit Groups
Form Name FormID Navigation Usage
Work With Benefit Groups
W08350A Benefits Administration Setup (G08BB4), Categories by Benefit Group
Find a benefit group record.
Categories By Benefit Group
W08350B Click OK. To link categories to benefit groups, enter appropriate values.
15.2.2 Link Categories to Benefit GroupsAccess the Categories By Benefit Group form.
Figure 15–1 Categories By Benefit Group form
To link categories to benefit groups:
1. On Work With Benefit Groups, complete the Benefit Group field and then click Find.
2. Select the benefit group record and then click Select.
3. On Categories By Benefit Group, click one of these options in the Benefit Group Rule group box to indicate whether the benefit group offers flex plans, and if so, how it treats positive remaining credits:
– Flex plans not offered
– Flex plans offered, positive remaining credits allowed
– Flex plans offered, positive remaining credits not allowed
4. Complete these fields and click OK:
– Group Category
– Seq. Num.
– C R
– Category Type
Flex plans not offered

Linking Categories to Benefit Groups
15-4 JD Edwards EnterpriseOne Applications Human Capital Management Self-Service Implementation Guide
Enter a rule assigned to the benefit group that determines whether the benefit group contains flex plans and whether you want to keep track of flex credits that remain after an employee has enrolled in benefit plans. Select one of these options:
Flex plans are not offered.Flex plans are offered. Positive remaining credits are allowedFlex plans are offered. Positive remaining credits are not allowed.Flex plans offered, positive remaining credits allowed
Enter a rule assigned to the benefit group that determines whether the benefit group contains flex plans and whether you want to keep track of flex credits that remain after an employee has enrolled in benefit plans. Select one of these options:
Flex plans are not offered.Flex plans are offered. Positive remaining credits are allowedFlex plans are offered. Positive remaining credits are not allowed.Flex plans offered, positive remaining credits not allowed
Enter a rule assigned to the benefit group that determines whether the benefit group contains flex plans and whether you want to keep track of flex credits that remain after an employee has enrolled in benefit plans. Select one of these options:
Flex plans are not offered.Flex plans are offered. Positive remaining credits are allowedFlex plans are offered. Positive remaining credits are not allowed.C R
Enter a rule that defines the election criteria for a benefit category. Values are:
O: Optional. The enrollee may select one.
R: Required. The enrollee must select one.
Blank: No rule applies. The enrollee may select any item or items.

16
Setting Up URLs for Self-Service Benefits 16-1
16Setting Up URLs for Self-Service Benefits
This chapter contains the following topics:
■ Section 16.1, "Understanding URLs for Self-Service Benefits"
■ Section 16.2, "Prerequisites"
■ Section 16.4, "Setting Up URLs for Benefit Plans"
■ Section 16.4, "Setting Up URLs for Benefit Plans"
■ Section 16.5, "Setting Up URLs for Benefit Categories"
■ Section 16.6, "Setting Up URLs for Benefit Groups"
16.1 Understanding URLs for Self-Service BenefitsWithin the employee self-service benefit programs, employees can click a link to get more information about benefits. You define uniform resource locator addresses (URLs) that link users to resources about plan options, plans, categories, and groups. Depending on the links that might be defined, employees can learn information about the enrollment process, organizational policy, provider options, a specific benefit plan, or details about a plan option. These resources might also include direct access to the provider so that employees can implement changes. For example, an employee might use a link to access a provider website that lists primary care physicians.
To set up all URL specifications for benefit resources from one location, you can use the Plans Within Categories program (P08351). After choosing a benefit group, category, plan, or plan option, you access the Benefits Enrollment Plan/Option URL Address program (P085540) from a Row menu option where you can record URL addresses. The URL might be a location on an organization's intranet or an internet provider resource. The system stores the URL address information in the Benefits Enrollment Plan/Option URL Address table (F085540).
You can organize reference information by using URLs to access information for:
■ All benefit plan options that are linked to a benefit plan
■ All benefit plans that are linked to a benefit category
■ All benefit categories that are linked to a benefit group
■ All benefit groups
When employees click links in benefit self-service programs, the system searches for the most specific resource using a hierarchal approach. For example, if an employee clicks on a link for information about a benefit plan option, the system looks first at the benefit plan option level. If no information is found, the system looks sequentially at the benefit plan, category, and group levels.

Prerequisites
16-2 JD Edwards EnterpriseOne Applications Human Capital Management Self-Service Implementation Guide
It is recommended that you set up at least one URL for every benefit group. Because all benefit plans and benefit plan options appear as links, an employee might click the link to get additional information. A URL is required for the function to work appropriately.
16.2 PrerequisitesBefore setting up URLs for benefits self-service programs, review these topics in the Benefits Guide:
■ Setting Up Benefit Groups.
■ Setting Up Benefit Categories.
■ Linking Categories to Benefit Groups.
■ Setting Up Benefit Plans.
■ Linking Plans to Benefit Categories.
■ Setting Up Plan Options.
16.3 Setting Up URLs for Benefit Plan OptionsThis section provides an overview of setting up URLs for benefit plan options and discusses how to set up the link addresses.
16.3.1 Understanding URLs for Benefit Plan OptionsWithin the employee self-service benefit programs, employees can click a benefit plan option link to get information. Depending on the links that might be defined, employees might also have links to resources for benefit plans, benefit categories, and benefit groups. You can provide separate links for employees to learn information about the enrollment process, organizational policy, provider options, a specific benefit plan, or details about a plan option.
See Also:
■ Setting Up URLs for Self-Service Benefits.
16.3.2 Forms Used to Set Up URLs for Benefit Plan Options
Form Name FormID Navigation Usage
Work with Categories within Groups
W08351C Benefits Administration Setup (G08BB4), Plans Within Categories
Select a benefit category.
Plans Within Categories
W08351B Select Associated URLs from the Row menu.
Select a benefit plan.
Benefits Enrollment Plan/Option URL Address
W085540A Click OK. Do not change the user defined code PCP, that is defined for the URL type. Employee self-service software recognizes only PCP and Blank as valid values.

Setting Up URLs for Benefit Plans
Setting Up URLs for Self-Service Benefits 16-3
16.3.3 Set Up URLs for Benefit Plan OptionsAccess the Benefits Enrollment Plan/Option URL Address form.
Figure 16–1 Benefits Enrollment Plan/Option URL Address form
The system displays the Plan Option and Add Optional Description columns only when a plan option exists.
To set up URLs for benefit plan options:
1. On Work with Categories within Groups, complete the Benefit Group field and click Find to display the benefit categories that are linked to the benefit group.
2. Select a benefit category and click Select to display the benefit plans that are linked to the benefit category.
3. On Plans Within Categories, select a benefit plan and then select Associated URLs from the Row menu.
An example of the format for a sample URL might appear as follows: http://www.benefitsprovider.com
4. On Benefits Enrollment Plan/Option URL Address, complete these fields:
– Plan Option
– Language
– URL Type
– Portal URL Links
5. Click OK.
■ Plan Option
Enter a code that identifies any additional options available for a benefit plan that have been defined in the Plan Additional Options table (F083202).
Note: Additional options must have the same provider, policy number, and enrollment and eligibility rules as the benefit plan to which they are associated.
16.4 Setting Up URLs for Benefit PlansThis section provides an overview of setting up URLs for benefit plans and discusses how to set up the link addresses.
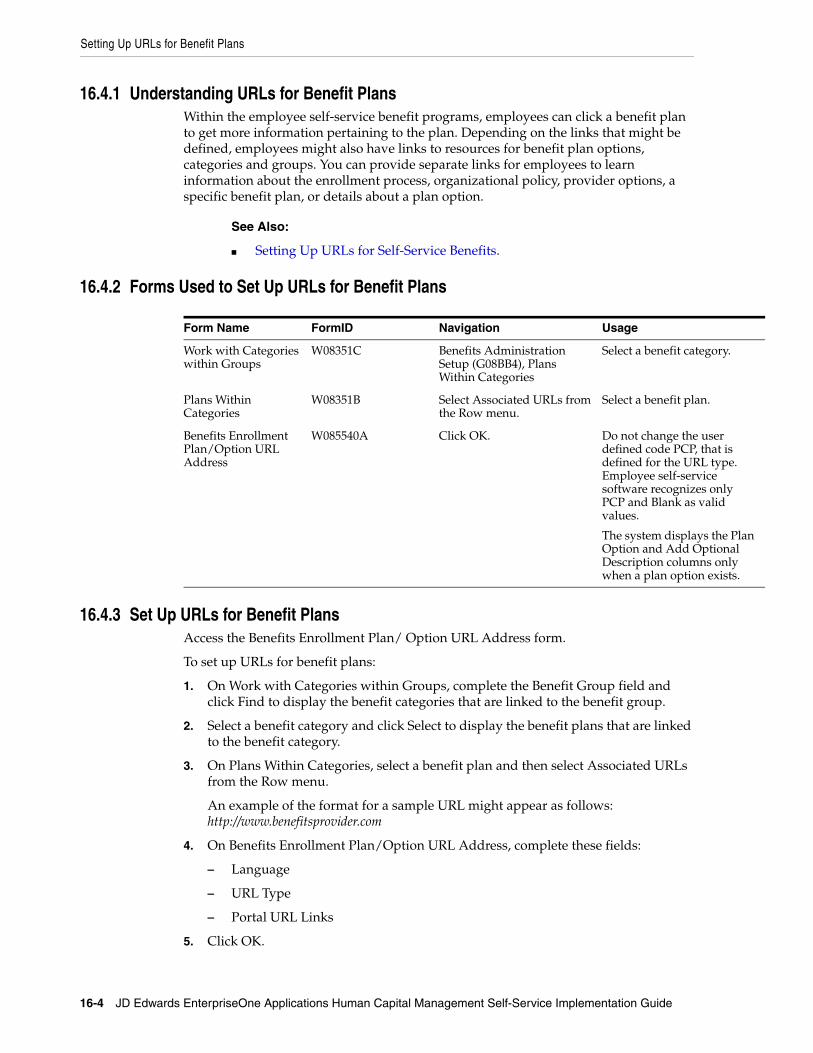
Setting Up URLs for Benefit Plans
16-4 JD Edwards EnterpriseOne Applications Human Capital Management Self-Service Implementation Guide
16.4.1 Understanding URLs for Benefit PlansWithin the employee self-service benefit programs, employees can click a benefit plan to get more information pertaining to the plan. Depending on the links that might be defined, employees might also have links to resources for benefit plan options, categories and groups. You can provide separate links for employees to learn information about the enrollment process, organizational policy, provider options, a specific benefit plan, or details about a plan option.
See Also:
■ Setting Up URLs for Self-Service Benefits.
16.4.2 Forms Used to Set Up URLs for Benefit Plans
Form Name FormID Navigation Usage
Work with Categories within Groups
W08351C Benefits Administration Setup (G08BB4), Plans Within Categories
Select a benefit category.
Plans Within Categories
W08351B Select Associated URLs from the Row menu.
Select a benefit plan.
Benefits Enrollment Plan/Option URL Address
W085540A Click OK. Do not change the user defined code PCP, that is defined for the URL type. Employee self-service software recognizes only PCP and Blank as valid values.
The system displays the Plan Option and Add Optional Description columns only when a plan option exists.
16.4.3 Set Up URLs for Benefit PlansAccess the Benefits Enrollment Plan/ Option URL Address form.
To set up URLs for benefit plans:
1. On Work with Categories within Groups, complete the Benefit Group field and click Find to display the benefit categories that are linked to the benefit group.
2. Select a benefit category and click Select to display the benefit plans that are linked to the benefit category.
3. On Plans Within Categories, select a benefit plan and then select Associated URLs from the Row menu.
An example of the format for a sample URL might appear as follows: http://www.benefitsprovider.com
4. On Benefits Enrollment Plan/Option URL Address, complete these fields:
– Language
– URL Type
– Portal URL Links
5. Click OK.

Setting Up URLs for Benefit Categories
Setting Up URLs for Self-Service Benefits 16-5
16.5 Setting Up URLs for Benefit CategoriesThis section provides an overview of setting up URLs for benefit categories and discusses how to set up the link addresses.
16.5.1 Understanding URLs for Benefit CategoriesWithin the employee self-service benefit programs, employees can click a benefit category to get additional information. Depending on the links that might be defined, employees might also have links to resources for benefit plan options, benefit plans, and benefit groups. You can provide separate links for employees to learn information about the enrollment process, organizational policy, provider options, a specific benefit plan, or details about a plan option.
See Also:
■ Setting Up URLs for Self-Service Benefits.
16.5.2 Forms Used to Set Up URLs for Benefit Categories
Form Name FormID Navigation Usage
Work With Benefit Groups
W08350A Benefits Administration Setup (G08BB4), Categories by Benefit Group
Select a benefit group.
Categories By Benefit Group
W08350B Select Associated URLs from the Row menu.
Select a benefit plan.
Benefits Enrollment Plan/Option URL Address
W085540A Click OK. Do not change the user defined code PCP, that is defined for the URL type. Employee self-service software recognizes only PCP and Blank as valid values.
The system displays the Plan Option and Add Optional Description columns only when a plan option exists.
16.5.3 Set Up URLs for Benefit CategoriesAccess the Benefits Enrollment Plan/Option URL Address form.
To set up URLs for benefit categories:
1. On Work With Benefit Groups, complete the Benefit Group field and click Find:
2. Select the benefit group and click Select to display the benefit categories that are linked to the benefit group.
3. On Categories By Benefit Group, select a benefit category and then select Associated URLs from the Row menu.
An example of the format for a sample URL might appear as follows: http://www.benefitsprovider.com
4. On Benefits Enrollment Plan/Option URL Address, complete these fields:
– Language

Setting Up URLs for Benefit Groups
16-6 JD Edwards EnterpriseOne Applications Human Capital Management Self-Service Implementation Guide
– URL Type
– Portal URL Links
5. Click OK.
16.6 Setting Up URLs for Benefit GroupsThis section provides an overview of setting up URLs for benefit groups and discusses how to set up the link addresses.
16.6.1 Understanding URLs for Benefit GroupsWithin the employee self-service benefit programs, employees can click a benefit group link to get information. Depending on the links that might be defined, employees might also have links to resources for benefit plan options, benefit plans, and benefit categories. You can provide separate links for employees to learn information about the enrollment process, organizational policy, provider options, a specific benefit plan, or details about a plan option.
See Also:
■ Setting Up URLs for Self-Service Benefits.
16.6.2 Forms Used to Set Up URLs for Benefit Groups
Form Name FormID Navigation Usage
Work With Benefit Groups
W08350A Benefits Administration Setup (G08BB4), Categories by Benefit Group
Select Associated URLs from the Row menu.
Select a benefit group.
Benefits enrollment Plan/Option URL Address
W085540A Click OK. Enter a URL.
16.6.3 Set Up URLs for Benefit GroupsAccess the Benefits Enrollment Plan/Option URL Address form.
To set up URLs for benefit groups:
1. On Work With Benefit Groups, complete the Benefit Group field and click Find.
2. Select Associated URLs from the Row menu.
The format of a sample URL might appear as: http://www.benefitsprovider.com.
3. On Benefits Enrollment Plan/Option URL Address, complete these fields:
– Language
– URL Type
– Portal URL Links
4. Click OK.

17
Setting Up Benefit Enrollment Events for Self Service 17-1
17Setting Up Benefit Enrollment Events for Self Service
This chapter contains the following topics:
■ Section 17.1, "Understanding Benefit Enrollment Events for Self Service"
■ Section 17.2, "Implementing Benefit Enrollment Events"
17.1 Understanding Benefit Enrollment Events for Self ServiceAlthough you normally set up benefit enrollment events when your benefits administration software is installed, you need to review these specifications when you add benefits self service functionality to your system. When you set up benefit enrollment events, you can use the Benefits Enrollment Setup program (P08500) to define the time period during which an event is open for online changes or enrollments. For example, open enrollment events enable changes from a specific date until another specific date. Other types of events, such as new hire enrollment events, enable changes starting on a variable date, such as the date of hire, and extending for a certain number of days following that date.
When you specify the Event Date value, the system uses the date of a qualifying event as the basis for the opening date for benefits enrollment. For example, if an employee has a new child, the open enrollment period for changing health insurance enrollment can be based on the life event of Children. Typically, an employee might have up to 31 days after the Children event date to change benefits. When you use Event Date as the basis for opening enrollment, you must also specify the number of calendar days that enrollment remains open. You can set up different time periods for the same enrollment event for different benefit groups. For example, open enrollment for salaried employees might be at a different time than open enrollment for executives.
17.2 Implementing Benefit Enrollment EventsThis section discusses how to implement benefit enrollment events.
17.2.1 Forms Used to Implement Benefit Enrollment Events
Form Name FormID Navigation Usage
Benefits Enrollment Event Setup
W08500A Self Service Setup (G05BESS4), Benefit Enrollment Event Setup
Search for desired values.

Implementing Benefit Enrollment Events
17-2 JD Edwards EnterpriseOne Applications Human Capital Management Self-Service Implementation Guide
17.2.2 Benefit Enrollment Event Set UpAccess the Benefits Enrollment Event Setup form.
Figure 17–1 Benefits Enrollment Event Setup form
To set up benefit enrollment events:
1. On Benefits Enrollment Event Setup, click Find.
2. If the event is not listed, enter values in the empty grid row and click Find.
The system first searches for an exact benefit group match and then for the generic * character. You can indicate that an event is open for all benefit groups by typing * in the Benefit Group field. For example, an employee in the EXEC benefit group is in open enrollment from 9/1/05 through 9/30/05. An employee in MGMT is in open enrollment from 11/1/05 through 11/30/05.
– Benefit Group (* for all groups)
– Enrollment Event Code
3. If the enrollment event enables changes between specific dates, complete these fields:
– Open From Date
– Open Through Date
4. If the enrollment event allows changes for a certain number of days following a specific or variable date, complete these fields:
– Open Based From Date
– Number of Calendar Days Elapsed
5. Complete the Enrollment Effective Date field.
If you do not define a time period for an enrollment event, the system assumes that the event is open all year.
6. Repeat steps 1 through 4 for every enrollment event, and then click OK to save your changes.
■ Open From Date

Implementing Benefit Enrollment Events
Setting Up Benefit Enrollment Events for Self Service 17-3
Enter the date that identifies when a date is first valid. The effective date is used generically. It can be a lease effective date, a price or cost effective date, a currency effective date, a tax rate effective date, or whatever is appropriate.
■ Open Through Date
Enter the date on which the item, transaction, or table becomes inactive, or through which you want transactions to appear. This field is used generically throughout the system. It could be a lease effective date, a price or cost effective date, a currency effective date, a tax rate effective date, or whatever is appropriate.
■ Open Based From Date
Enter a code that identifies and defines a unit of information. It is an alphanumeric code up to 8 characters long that does not allow blanks or special characters such as %, &, or +. You create new data items using system codes 55-59. You cannot change the alias.
■ Number of Calendar Days Elapsed (Release 9.1 Update)
Enter the number of days from an employee's start date before the employee can enroll in the plan.
■ Enrollment Effective Date
Enter the date on which an enrollment in a plan takes effect.

Implementing Benefit Enrollment Events
17-4 JD Edwards EnterpriseOne Applications Human Capital Management Self-Service Implementation Guide

18
Setting Up Benefit Categories by Enrollment Event 18-1
18Setting Up Benefit Categories by Enrollment Event
This chapter contains the following topics:
■ Section 18.1, "Understanding Benefit Categories by Enrollment Event"
■ Section 18.2, "Implementing the Settings"
18.1 Understanding Benefit Categories by Enrollment EventAfter you have set up the enrollment event codes, you need to use the Benefit Categories by Enrollment Events program (P085510) to define which benefit categories can be changed or enrolled in during each enrollment event. For example, you might allow all benefit categories (medical, dental, disability, life, and so on) to be changed during open enrollment, but only selected categories (such as medical, dental, and vision) to be changed for an event such as marriage.
In addition to defining benefit categories, you can control whether employees can change beneficiary information only, or can also change their benefit plan enrollment.
If you do not set up categories for a specific enrollment event, the system assumes that no changes or enrollments are allowed for that event.
18.2 Implementing the SettingsThis section discusses how to enter settings to set up benefit categories by enrollment event.
18.2.1 Forms Used to Set Up Benefit Categories by Enrollment Event
Form Name FormID Navigation Usage
Benefits Enrollment Event Setup
W08500A Self Service Setup (G05BESS4), Benefit Enrollment Events
Select Categories By Event from the Form menu.
Access the Benefit Categories by Enrollment Events form.

Implementing the Settings
18-2 JD Edwards EnterpriseOne Applications Human Capital Management Self-Service Implementation Guide
18.2.2 Set Up Benefit Categories by Enrollment EventAccess the Benefit Categories by Enrollment Events form.
Figure 18–1 Benefit Categories by Enrollment Events form
To set up benefit categories by enrollment event:
1. On Benefits Enrollment Event Setup, select Categories By Event from the Form menu.
2. On Benefit Categories by Enrollment Events, complete these fields in the detail area:
– Enrollment Event Code
– Group Category
– Category Description
– Only Allow Changes to Beneficiary
– Automatic Default of Current Enrollment
3. Repeat step 1 for every available benefit category for each enrollment event, and then click OK to save your changes.
■ Category Description
Benefit Categories by Enrollment Events
W085510A Click OK. If the benefit plans are the same, and a processing option is set appropriately in the Current Enrollment Work File Build program (R085530), the system supplies the current enrollment as the default enrollment. However, if a current plan is no longer available (for example, if you are changing insurance carriers), you should not accept the default value.
Form Name FormID Navigation Usage

Implementing the Settings
Setting Up Benefit Categories by Enrollment Event 18-3
Enter a descriptive statement of up to 50 characters in length.
■ Only Allow Changes to Beneficiary
Enter a code that designates whether the only changes that you can make to plans within a benefit category are changes to the beneficiary information.
■ Automatic Default of Current Enrollment
Specify whether the system should automatically use the current enrollment. Values are:
0: Do not allow the system to use previous coverage as the new coverage.
1: Allow the system to use previous coverage as the new coverage.

Implementing the Settings
18-4 JD Edwards EnterpriseOne Applications Human Capital Management Self-Service Implementation Guide

19
Setting Up Allowed Dependent Relationships by Plan 19-1
19Setting Up Allowed Dependent Relationships by Plan
This chapter contains the following topics:
■ Section 19.1, "Understanding Allowed Dependent Relationships by Plan"
■ Section 19.2, "Implementing the Settings"
19.1 Understanding Allowed Dependent Relationships by PlanYou can use the Allowed Dependent Relationship by Plan program (P085500) to define dependent relationship information for employee dependents that can be covered under a dependent benefit plan or benefit plan option. If you add only a single record, by entering a * in the Relation field for a benefit plan, then any dependent relationship is valid. If only a certain subset of relationships is valid, then you must define each of those valid relationships.
If all employee benefit plans are set up, and any dependent relationship is valid, then you can run the Automatically Setup SS Dependent Selection program (R085505) without defining allowed dependent relationships for each plan.
You might use this program to define allowed dependent relationships for benefit plans in an organization that covers domestic partners. Certain tax advantages that could apply to employee benefits do not apply to benefit plans that cover domestic partners. To track the DBAs for benefit plans that include a spouse and benefit plans that include a domestic partner, you might set up separate benefit plans that specify allowed dependent relationships by plan. For example, if an organization offers employee benefit plans that cover domestic partners, then the human capital management administrator might create a benefit plan with these benefit plan options and allowed dependent relationships:
Benefit Plan Option Dependent Relationship
Benefit Plan Option Valid Dependent Relationship
Employee Only (not a dependent plan) Not applicable
Employee + Spouse Spouse
Employee + Domestic Partner Domestic partner
Employee + Spouse + Family Spouse, child, step/foster child
Employee + Domestic Partner + Family Domestic partner, child, step/foster child
No Coverage (not a dependent plan) Not applicable

Implementing the Settings
19-2 JD Edwards EnterpriseOne Applications Human Capital Management Self-Service Implementation Guide
Your employee self-service software includes automatic selection of benefit plans that makes enrolling in benefits easier and faster for employees. The system automatically displays benefit plans and benefit plan options based on the number of dependents and their relationship to the employee.
See Also:
■ Setting Up Dependent Selection Automatically.
■ JD Edwards EnterpriseOne Tools Foundation Guide.
19.2 Implementing the SettingsThis section discusses how to implement allowed dependent relationships by plan.
19.2.1 Forms Used to Implement Allowed Dependent Relationships by Plan
Form Name FormID Navigation Usage
Work with Allowed Dependent Relationships
W085500A Employee Self Service General Setup (G08BB413), Allowed Dependent Relationships by Plan
Implement allowed dependent relationships.
19.2.2 Implement Allowed Dependent Relationships by PlanAccess the Allowed Dependent Relationships by Plan form.
To set up allowed dependent relationships by plan:
1. On Work With Allowed Dependent Relationships, complete the Plan ID field and then click Find:
2. Select the Plan ID and Add Option that you would like to setup for dependent relationships.
3. Specify the allowed dependent relationships for the plan by completing the Relation field.
You can add values to the list of allowed relationships in UDC 08/RL. Review the entries in this table to ensure that the correct special handling codes exist. A value of *, allowing all relationships, is an allowed value, even though this character does not display in the UDC table. A UDC for dependent relationships must contain either a D or A in the Special Handling field. If the UDC contains a B in the Special Handling field, then the relationship is automatically excluded from being covered as a dependent.
4. When all relationships are specified for the plan, click OK.
■ Additional Option
Enter a code that identifies any additional options available for a benefit plan that have been defined in the Plan Additional Options table (F083202).
Note: Additional options must have the same provider, policy number, and enrollment and eligibility rules as the benefit plan to which they are associated.
■ Relation

Implementing the Settings
Setting Up Allowed Dependent Relationships by Plan 19-3
Enter a user defined code (system 08/type RL) that defines the relationship of the dependent or beneficiary to the employee.

Implementing the Settings
19-4 JD Edwards EnterpriseOne Applications Human Capital Management Self-Service Implementation Guide

20
Setting Up Workfiles for Benefits Self Service 20-1
20Setting Up Workfiles for Benefits Self Service
This chapter contains the following topics:
■ Section 20.1, "Understanding Workfiles for Benefits Self Service"
■ Section 20.2, "Setting Up Dependent Selection Automatically"
■ Section 20.3, "Building the Current Coverage Workfile for Self Service"
■ Section 20.4, "Setting Up a Current Dependent and Beneficiary Workfile"
■ Section 20.5, "Building the Available Plans Workfile for Self Service"
■ Section 20.6, "Excluding Benefit Plans or Categories From a Work File Build"
■ Section 20.7, "Building the Personal Information Workfile"
■ Section 20.8, "Setting Up Steps and Rules for Director Process Flows"
20.1 Understanding Workfiles for Benefits Self ServiceYour software uses workfiles to process employee self-service enrollments. The workfiles contain values for current enrollments and available employee benefit plans. Each of the workfiles must be set up before employees can use the benefits self-service programs.
20.2 Setting Up Dependent Selection AutomaticallyThis section provides an overview of setting up dependent selection automatically and discusses how to:
■ Run the Automatically Setup SS Dependent Selection (R085505)
■ Set processing options for the Run the Automatically Set Up Dependent Min/Max program
20.2.1 Understanding Automatic Dependent SelectionThe Automatically Set Up Dependent Min/Max program (R085505) builds tables that the system uses to automatically determine the minimum number of dependents that are appropriate for each benefit plan or plan option. This program also adds a value for allowed relationships in the Allowed Dependent Relations Per Plan table (F085500). A * is added to each benefit plan or benefit plan option record that does not already contain a specified value. Self-service benefits programs use these tables to select benefit plans based on covered dependents. The system uses these factors in determining the plans that are displayed as choices from which employees can choose:

Setting Up Dependent Selection Automatically
20-2 JD Edwards EnterpriseOne Applications Human Capital Management Self-Service Implementation Guide
■ Minimum number of dependents
■ Maximum number of dependents
■ Valid relationships per plan or plan option
Before running this program, ensure that benefit plans options are defined for each benefit plan or that benefit plans are set up with plan grouping. Also review your benefit plan setup to ensure that a maximum number of dependents has been defined for all benefit plans and benefit plan options.
When you run the program, you define plans or plan options to include. You normally run this program after adding a new set of benefit plans to the software and before building the benefit workfiles that use the new plans.
Include all benefit plan options within a benefit plan when you run the Automatically Set Up Dependent Min/Max program. Do not include only one benefit plan option. If you are using benefit plan grouping, then include all benefit plans within a benefit plan group when you run the program.
The system determination of the minimum number of dependents for each benefit plan option is an estimate that is based on the maximum number of dependents listed in the prior plan option and the number of dependents that are defined for a certain plan. For example, the minimum number of dependents for the EE + 1 benefit plan in the list below is 2. The estimate of 2 is based on the maximum number of dependents defined for the previous EE Only benefit plan and the plan maximum of 2 dependents that are defined for the EE +1 benefit plan.
The system calculates the minimum number of dependents as follows:
Medical Plan Options
Number of Dependents Before Running the Program Maximum
Number of Dependents After Running the Program Maximum
Medical Plan Options
Minimum Maximum Minimum Maximum
EE + 1 1 2 2 2
EE + 3 1 4 3 4
EE + Family 1 99 5 99
Review the results to ensure that the dependent numbers reflect the needs of the organization.
See Also:
■ Setting Up Allowed Dependent Relationships by Plan.
20.2.2 Running the Automatically Setup SS Dependent Selection (R085505)From the Employee Self Service General Management (G08BESS327), Automatically Set Up Dependent Min/Max.
20.2.3 Setting Processing Options for Automatically Setup SS Dependent Selection (R085505)
Processing options enable you to specify the default processing for programs and reports.

Building the Current Coverage Workfile for Self Service
Setting Up Workfiles for Benefits Self Service 20-3
20.2.3.1 Defaults
Default the number of dependentsPrompt the system to automatically supply the minimum number of dependents. Values are:
1: Yes
0: No
Default the relationship if one is not foundPrompt the system to write a default value for allowed relationships if a value is not found. Values are:
1: Yes
0: No
20.3 Building the Current Coverage Workfile for Self ServiceThis section provides an overview of setting up dependent selection automatically and discusses how to:
■ Run the Current Enrollment Work File Build program.
■ Set Processing Options for Current Enrollment Work File Build (R085530).
20.3.1 Understanding the Current Coverage Workfile for Self ServiceThe Current Coverage Work File Build program (R085530) should be run prior to running these reports:
■ Available Plans Work File Build (R085520)
■ Build Current Dependent/Beneficiary Work File (R085537)
■ Personal Employee Information Workfile Build (R054101)
The Current Coverage Work File Build program creates the Employee Current/Pending Elections Work Table (F085530W) that contains current employee enrollment information. The system uses this workfile to display the benefits in which an employee is currently enrolled. When you build the Employee Current/Pending Elections Work Table, the system uses information from these tables:
■ Employee Master Information (F060116)
■ Employee Enrollment (F08330)
■ Categories Within Benefit Groups (F08350)
■ Plans Within Benefit Categories (F08351)
■ Benefits Plan Master (F08320)
■ Plan Additional Options (F083202)
You should run this report at these times:
■ Before employees use the benefits self-service programs to enter changes and new information
■ Before each open enrollment
■ Periodically, after employees enter benefit changes
Setting Up a Current Dependent and Beneficiary Workfile
20-4 JD Edwards EnterpriseOne Applications Human Capital Management Self-Service Implementation Guide
When employees re-enter self service after entering changes, they can view their updated information only after this report is run.
If the version number has been created for the Build Current Dependent/Beneficiary Work File program (R085537), and a processing option is set appropriately, the Current Coverage Work File Build program automatically launches the Build Current Dependent/Beneficiary Work File program.
20.3.2 Running the Current Enrollment Work File Build programFrom the Current Coverage Work File Management (G08BESS321), Current Coverage Work File Build.
20.3.3 Setting Processing Options for Current Enrollment Work File Build (R085530)Processing options enable you to specify the default processing for programs and reports.
20.3.3.1 VersionUse this processing option to specify a version of the Build Current Dependent/Beneficiary Work File program (R085537) and build the Current Dep/Ben X-Reference Work Table (F085537W)
1. R085537 Version: Enter the version of the Build Current Dependent/Beneficiaries Work File UBE (R085537) to be run. If the field is left blank, the dependent/beneficiary enrollment information will not be generated. Verify that the data selection for R085537 is set up for the selected version before running. XJDE0001 is the standard version used. The Build Current Dependent/Beneficiary Work File program supplies current dependent and beneficiary enrollment data for the Current Dep/Ben X-Reference Work Table (F085537W)
20.4 Setting Up a Current Dependent and Beneficiary WorkfileThis section provides an overview of the Current Dependent/Beneficiary Work File program and discusses how to:
■ Run the Build Current Dependent/Beneficiary Work File program.
■ Set processing options for the Build Current Dependent/Beneficiary Work File program.
20.4.1 Understanding the Current Dependent and Beneficiary WorkfileWhen you build the Current Dep/Ben X-Reference Work Table (F085537W), the system searches these tables:
■ Employee Master Information (F060116)
■ Employee Enrollment (F08330)
■ Dep/Ben to Employee Plan X-Reference (F08336)
■ Participant File (F08901)
■ Primary Care Physician Table (F08338)
■ Dep/Ben X-Reference Tag Table (F08336B)
■ Plan/Plan Option Tag Table (F08320B)

Building the Available Plans Workfile for Self Service
Setting Up Workfiles for Benefits Self Service 20-5
The system obtains employee dependent and beneficiary records that are associated with plans, and records that are not associated with plans. The system then saves this information in the Current Dep/Ben X-Reference Work Table. When employees use self service to change their benefits or update information, the system uses information from this file to display their current dependents and beneficiaries. You should run this program before employees use benefit self service features.
You can build the workfile for open enrollment or for a current enrollment event type. The workfile stores the records for both types of events. The program maintains the dependent and beneficiary records separately for each event type.
Running this program checks for active and inactive dependents and beneficiaries and saves the information in the workfile. All dependent and beneficiary information is saved in the workfile even if the dependent or beneficiary is not currently covered by employee benefit plans or benefit plan options so that an employee can re-enroll an inactive dependent.
Before building the workfile, if the system finds unprocessed dependent or beneficiary records for an employee, the system prints the record on an exception report without processing the employee and proceeds to the next employee. The system does not include participants who are deceased.
20.4.2 Running the Build Current Dependent/Beneficiary Work File ProgramFrom the Dependent/Beneficiary Work File Management (G08BESS323), Dependent/Beneficiary Work File Build.
20.4.3 Setting Processing Options for Build Current Dependent/Beneficiary Work File (R085537)
Processing options enable you to specify the default processing for programs and reports.
20.4.3.1 ProcessUse this processing option to specify the type of enrollment that you are preparing to offer.
1. Enrollment Event Type: Specify the event type that the system uses when saving data in the Current Dep/Ben X-Reference Work Table (F085537W). Open enrollment indicates an event that occurs during a set date range, normally only once, during the year. Current enrollment indicates life events that can happen at any time during the year. Examples of current enrollment events are marriage, divorce, or the birth of a child. Values are:
1: Open enrollment
2: Current enrollment
20.5 Building the Available Plans Workfile for Self ServiceThis section provides an overview of the available plans workfile for self service and discusses how to:
■ Run the Available Plans Work File Build program.
■ Set processing options for the Available Plans Work File Build.

Building the Available Plans Workfile for Self Service
20-6 JD Edwards EnterpriseOne Applications Human Capital Management Self-Service Implementation Guide
20.5.1 Understanding the Available Plans Workfile for Self ServiceWhen you use the Available Plans Work File Build program (R085520) to build the Available Plans and Plan Options by Employee Work Table (F085520W), the system searches each employee benefit group for all active benefit plans and benefit plan options that are offered. It also calculates the new cost, as of the effective date, for each plan and plan option. The system obtains age and salary from the Benefit Self Service Constant table (F08505) and uses this information as of the point-in-time date to determine the cost for applicable annuity benefit plans. If the plan requires the employee to enter an amount or rate, the system calculates the costs or credits dynamically after the employee enters the amount and requests the calculation.
If the workfile contains unprocessed records, these instances are printed to an exception report.
To determine whether the current employee enrollment elections can be reused for open enrollment, the Available Plans/Plan Options by Emp Work Table Report (R08320) tracks whether the current elections are different from the available benefit plans and benefit plan options. For the system to reuse current enrollment information, these conditions must exist:
■ All current benefit plans and benefit plan options must be valid for the upcoming enrollment year.
■ All current benefit plans and benefit plan options must be set to enable reuse (defaulting).
If the employee's current enrollment is available for open enrollment, and a processing option is set appropriately in the Available Plans Work File Build program (R085520), the system supplies the current enrollment as the default enrollment. However, if a current plan is no longer available (for example, if you are changing insurance carriers), defaulting of all enrollment plans is not allowed.
You can build the Available Plans and Plan Options by Employee Work Table (F085520W) for either open enrollment or current enrollment. In open enrollment, available plans and plan options, as well as their costs, might change. In current enrollment, which is typically associated with new hire, rehire, life event, or special enrollment, the available plans and plan options remain the same. The effective date processing option is used to obtain the active plans and plan options, with their associated costs and credits, for the event type. If you do not set up an effective date in the processing options, the system date will be used.
You can build the workfile twice; once for open enrollment and once for current enrollment. The workfile stores the records for both types of enrollment at the same time.
You can set processing options to specify:
■ The effective date of the active benefit plans and benefit plan options
■ The event type (open enrollment or current enrollment)
■ Whether the system allows prior enrollment information to be automatically defaulted as the chosen benefit plans or benefit plan options
20.5.2 PrerequisitesBefore you complete the tasks in this section:
■ Run the Current Coverage Work File Build first to determine whether the previous year plans can be used without changes for the upcoming open enrollment.

Building the Available Plans Workfile for Self Service
Setting Up Workfiles for Benefits Self Service 20-7
See Building the Current Coverage Workfile for Self Service.
■ If your plan rates are changing during the open enrollment period, cross-reference the current year's DBAs to new rate DBAs.
See Setting Up New DBA Plan Rates.
See Also:
■ Defining Benefit Category Rules for Self Service.
20.5.3 Running the Available Plans Work File Build programFrom the Available Plans Work File Management (G08BESS322), Available Plans Work File Build.
20.5.4 Setting the Processing Options for Available Plans Work File Build (R085520)Processing options enable you to specify the default processing for programs and reports.
20.5.4.1 DateUse this processing option to specify an effective date for active benefit plans and plan options.
1. Effective Date: Specify the effective date that the system uses to determine active benefit plans and plan options. The system also uses this date to calculate costs and credits that are linked with benefit plans and plan options.
If the effective date is left blank, the system date is used.
20.5.4.2 Event TypeUse these processing options to specify the type of enrollment event that you are setting up.
1. Event Type: Specify the event type that the system uses when saving data in the Available Plans and Plan Options by Employee Work Table (F085520W). Open enrollment indicates an event that occurs during a set date range, normally only once, during the year. Current enrollment indicates life events that can happen at any time during the year. Examples of current enrollment events are marriage, divorce, or the birth of a child. Values are:
1: Build available plans and plan options for open enrollment.
2: Build available plans and plan options for current enrollment.
2. Process Defaulting: Specify whether the system checks to see if the current employee's enrollment can be defaulted during an open enrollment. This option is valid only when saving data in the Available Plans and Plan Options by Employee Work Table (F085520W) for an open enrollment event. Values are:
Blank: Do not save information for automatic defaulting. This is the default value.
During open enrollment, employees need to elect
each benefit plan or plan option.
1: Save information for automatic defaulting.

Excluding Benefit Plans or Categories From a Work File Build
20-8 JD Edwards EnterpriseOne Applications Human Capital Management Self-Service Implementation Guide
During open enrollment, the system displays the benefit plans and plan options in which each employee is currently enrolled and marks them as elected. Employees can normally change the current elections.
20.6 Excluding Benefit Plans or Categories From a Work File BuildThis section provides an overview of the excluding benefit plans or categories from a work file build and discusses how to implement exclusions.
20.6.1 Understanding Benefit Plan or Category Exclusion from a Work File BuildYou can use the Plans/Categories to Exclude From Work File program (P085501) to select either benefit plans or benefit group categories that you want to exclude when you are building the work files for benefits self service. If your organization has DBAs that use special-use benefit plans or benefit group categories that are set up for purposes other than regular employee benefits, then you might want to use this approach to exclude these plans or categories when you are preparing for benefits open enrollment or a benefits enrollment that is based on a life event. If you do not exclude these special-use benefit plans or benefit group categories, then the system displays them as employee self-service benefit options.
The Plans/Categories to Exclude From Work File program allows you to select an existing program version for either the Available Plans Work File Build (R085520) or the Current Enrollment Work File Build (R085530) and then specify a benefit plan or benefit group category identification to exclude from the work file build. To view exclusions that might exist, you can select Exclusions from the Form menu.
20.6.2 Forms Used to Exclude a Benefit Plan or Category
Form Name FormID Navigation Usage
Excluded Benefits W085501A Employee Self Service General Management (G08BESS327), Plans/Categories to Exclude From Work File
Add a benefit plan or category that you want to exclude from the workfile build.
To view existing versions, select Version from the Form menu.
You normally select either a benefit plan or a benefit group category, but not both.
20.6.3 Exclude a Benefit Plan or CategoryAccess the Excluded Benefits form.
To exclude benefit plans or categories from a work file build:
1. On Excluded Benefits, select one of these options:
– R085520
– R085530
2. Enter an existing version identification in the Version field.
3. To exclude a benefit plan, enter a plan identification in the Plan ID field.
4. Click the adjacent Add button to add the benefit plan to the grid.

Building the Personal Information Workfile
Setting Up Workfiles for Benefits Self Service 20-9
5. To exclude a benefit group category, enter a benefit group category identification in the Benefit Group Category field.
6. To save the exclusions to the current version, click OK.
■ R085520
Select an option that allows you to select either the Available Plans Work File Build program (R085520) or the Current Enrollment Work File Build program (R085530). When you associate one of these choices with an existing version identification, you can specify benefit plans that you want to exclude from the work file build for self service.
■ R085530
Select an option that allows you to select either the Available Plans Work File Build program (R085520) or the Current Enrollment Work File Build program (R085530). When you associate one of these choices with an existing version identification, you can specify benefit plans that you want to exclude from the work file build for self service.
20.7 Building the Personal Information WorkfileThis section provides an overview of the Budget Worksheet report and discusses how to:
■ Run the Personal Employee Information Workfile Build report.
■ Set processing options for the Personal Employee Information Workfile Build report.
20.7.1 Understanding the Personal Information WorkfileYou use the Personal Employee Information Workfile Build program (R054101) to create tables that contain employee, dependent, and beneficiary personal information. The report obtains information from these tables:
■ Employee Master Information (F060116)
■ Address Book - Contact Phone Number (F0115)
■ Address Book - Who's Who (F0111)
■ (Release 9.1 Update) Disability and Veteran Status History (F085590)
The benefits self service programs use this information to display an employee’s personal information. These tables provide a temporary location that the system uses to store data before writing it back to the originating tables.
The tables that this program updates are:
■ Employee Personal Profile Information Work Table (F054101W)
■ Employee Phone Number Work Table (F054115W)
■ Employee Emergency Contact Work Table (F054111W)
■ (Release 9.1 Update) Disability Status Work Table (F085590W)
■ (Release 9.1 Update) Veteran Status Work Table (F085605W)

Setting Up Steps and Rules for Director Process Flows
20-10 JD Edwards EnterpriseOne Applications Human Capital Management Self-Service Implementation Guide
20.7.2 Running the Personal Employee Information Workfile Build ReportFrom the Personal Information Work File Management (G08BESS324), Personal Information Work File Build.
20.7.3 Setting Processing Options for Personal Employee Information Workfile Build (R054101)
Processing options enable you to specify the default processing for programs and reports.
20.7.3.1 ProcessUse these processing options to specify who is included in the work file-build and whether the system saves IRS Form W-4 information in a work file.
1. Write Personal Information for Employee, Dependent/Beneficiary, or Both: Specify information that the Personal Employee Information Workfile Build program (R054101) saves in employee self-service work files. Values are:
1 or Blank: Employee only. This is the default value.
2: Dependents and beneficiaries (R085537) must be run first).
3: Employee, dependents, and beneficiaries (R085537) must be run first).
Note: To create records for dependents and beneficiaries, you must run the Build Current Dependent/Beneficiary Work File program (R085537) before you run this program.
2. Build the I.R.S. W-4 Tax Form work table (F085303W) Specify whether the system saves information in the IRS W-4 Form Work File table (F085303W). This table stores self-service information that employees can review or change. Values are:
0 or Blank: Do not build the IRS W-4 Form Work File table.
1: Build the IRS W-4 Form Work File.
20.8 Setting Up Steps and Rules for Director Process FlowsThis section provides an overview of the Populate the F05402 and F05403 Files UBE and discusses how to Run the Populate Director Form Rules/Edits program.
20.8.1 Understanding Steps and Rules for Director Process FlowsWhen you run the Populate Director Form Rules/Edits program (R8985500), the system builds these files:
■ F05402 table
■ F05403 table
The system saves information about objects and applications that can be specified in a process flow in the F05402 table. The Self-Service Process Flow Setup program (P05400) uses information from this file to define process flows.
The system saves rules and functional parameters for self-service process flows in the F05403 table.

Setting Up Steps and Rules for Director Process Flows
Setting Up Workfiles for Benefits Self Service 20-11
20.8.2 Running the Populate Director Form Rules/Edits ProgramFrom the Employee Self Service General Management (G08BESS327), Populate Director Form Rules/Edits.

Setting Up Steps and Rules for Director Process Flows
20-12 JD Edwards EnterpriseOne Applications Human Capital Management Self-Service Implementation Guide
21
Setting Up Self-Service Benefit Plan Guidelines 21-1
21Setting Up Self-Service Benefit Plan Guidelines
This chapter contains the following topics:
■ Section 21.1, "Understanding Self-Service Benefit Plan Guidelines"
■ Section 21.2, "Setting Up Benefit Contribution Limits"
■ Section 21.3, "Setting Up Maximum Coverage Increase Limits"
21.1 Understanding Self-Service Benefit Plan GuidelinesMany organizations include contribution and coverage change limits in their benefit plans and benefit plan options. For example, to participate in plans that enable employee contributions, such as a retirement savings benefit plan, employees might have to contribute a minimum amount. In addition, organizations normally impose a maximum amount that employees can contribute. You can use the Benefit Amount Rate Edits program (P085573) to create these rules.
For other indemnity benefit plans such as life insurance, organizations often limit the amount of coverage increase that employees can choose during enrollment events. Even if employees are permitted to enroll for higher coverage when they are hired, companies often limit annual increases. For example, if an employee is enrolled in a life insurance plan that provides 10,000 USD of coverage, a rule might exist that the employee can elect to change to another plan that provides an increase of no more than 5,000 USD. Thus an employee with 10,000 USD coverage cannot elect a life insurance benefit plan with more than 15,000 USD coverage. You can use the Maximum Insurance Coverage Increase program (P085574) to set this limit.
21.2 Setting Up Benefit Contribution LimitsThis section provides an overview of benefit contribution limits and discusses how to set up the limits.
21.2.1 Understanding Benefit Contribution LimitsOrganizations often offer employee benefit plans or benefit plan options to which employees can voluntarily contribute an amount or percentage of their salary. For example, an organization might offer a 401(k) plan that allows employees to contribute up to eight percent of their salary. The organization might also stipulate that if employees choose to participate, they must contribute a minimum of one percent. You can use the Benefit Amount Rate Edits program (P085573) to define the minimum and maximum limits for deductions, benefits, and accruals (DBAs).

Setting Up Benefit Contribution Limits
21-2 JD Edwards EnterpriseOne Applications Human Capital Management Self-Service Implementation Guide
To set minimum and maximum limits for a DBA, you can use the Plan Master program (P08320) to select a benefit plan. You need to review current DBAs that might be currently attached to the benefit plan and then use a Form menu option to select the Benefit Rates. When you specify the minimum and maximum amounts that the organization allows for a specific DBA, you also need to specify the frequency type. The frequency type determines how the system distributes the amount deducted from salary over a period of one year.
The system stores information that you enter in the Benefit Amount Rate Edits program in the Entered Benefit Amount/Rate Edits table (F085573W).
21.2.2 Forms Used to Set Up Benefit Contribution Limits
Form Name FormID Navigation Usage
Work With Plan Master
W08320B Benefits Administration Setup (G08BB4), Plan Master
Select a benefit plan record.
Plan Master W08320A Calc./Eligibility tab
Select Benefit Rates from the Form menu
The system uses EE Payroll Deduction or EE Flex Cost, but not both. If a value exists for EE Payroll Deduction and EE Flex Cost, the system uses EE Payroll Deduction and ignores EE Flex Cost.
The Benefit Rates menu option is available only when you first perform one:
■ Select EE Payroll Deduction.
■ Select EE Flex Cost and EE Payroll Deduction is blank.
Work With Benefit Amount/Rate Edits
W085573A Click Add. Find and display existing records
Benefit Amount/Rate Edit Revisions
W085573B Click OK. Add minimum and maximum limits.
You can enter minimum and maximum amounts for additional DBAs before canceling this form.
21.2.3 Set Up Benefit Contribution LimitsAccess the Benefit Amount/Rate Edit Revisions form.
Figure 21–1 Benefit Amount/Rate Edit Revisions form

Setting Up Benefit Contribution Limits
Setting Up Self-Service Benefit Plan Guidelines 21-3
To set up benefit contribution limits:
1. On Work With Plan Master, click Find to display existing benefit plans.
2. Select a benefit plan, and then click Select.
3. On Plan Master, click the Calc./Eligibility tab and review these fields:
– EE Payroll Deduction
– EE Flex Cost
4. Select one of these fields, and then select Benefit Rates from the Form menu:
– EE Payroll Deduction
– EE Flex Cost
5. On Work With Benefit Amount/Rate Edits, complete these fields and then click Find to display existing records:
– Enrollment Event Type
– DBA Code
6. To add minimum and maximum limits to a DBA, click Add.
7. On Benefit Amount/Rate Edit Revisions, complete these fields:
– DBA Code
– Minimum Amount
– Maximum Amount
– Frequency Type
8. Click OK.
■ EE Payroll Deduction
Enter the DBA defined in the Payroll Transactions Constants table (F069116) that is used to calculate the dollar amount that the employee contributes by enrolling in the plan. In most cases, this DBA is defined to deduct pay from the enrolled employee's check.
■ DBA Code
Enter a code that defines the type of pay, deduction, benefit, or accrual.
Pay types are numbered from 1 to 999. Deductions and benefits are numbered from 1000 to 9999.
■ Minimum Amount
Enter the minimum amount per pay period that an employee can enter for this benefit plan.
■ Maximum Amount
Enter the maximum amount per pay period that an employee can enter for this benefit plan.
■ Frequency Type
Enter the period of time for which the minimum and maximum amounts apply. When an employee enters an amount or rate for a flat amount DBA during self-service enrollment, the system translates this amount to a pay period amount. For example, if the maximum is 1200 per year, and an employee is paid monthly, the system allows him or her to enter amounts up

Setting Up Maximum Coverage Increase Limits
21-4 JD Edwards EnterpriseOne Applications Human Capital Management Self-Service Implementation Guide
to 100 (the annual amount of 1200 divided by 12 months). The system allows an employee who is paid bimonthly to enter amounts up to 50. Values are:
1: Per Pay Period
2: Per Month
3: Per Quarter
4: Per Year
21.3 Setting Up Maximum Coverage Increase LimitsThis section provides an overview of maximum coverage increase limits and discusses how to set up the limits.
21.3.1 Understanding Maximum Coverage Increase LimitsMany organizations offer life insurance benefit plans and benefit plan options to employees. Employees can normally choose to enroll in one or more of the plans or decline enrollment. Companies often allow employees to enroll in any available insurance benefit plan when they are hired, but limit annual increases after the initial enrollment. To qualify for an exception to the annual increase rule, an organization might require a physical examination.
You can use the Maximum Insurance Coverage Increase program (P085574) to create a coverage increase limit rule. You can create this rule for any of these:
■ Benefit plans
■ Benefit categories
■ Benefit plans within benefit categories
Before creating a new coverage increase limit rule, you need to review the premium and coverage information on the Premium/Coverage tab on the Plan Master form. After reviewing this information, you can select a benefit plan and then use the Allowed Increment option on the Row menu of the Plan Master program (P08320) to access the Maximum Insurance Coverage Increase program. Alternatively, you can select the Categories by Benefit Group program (P08350) and implement the same procedure.
If you create a coverage increase limit rule for a benefit plan, the rule then applies to everyone in the company who is covered by the benefit plan. If you create a rule for a benefit category, then only employees within the benefit category are affected by the rule. If you create a rule for a benefit plan within a benefit category, then only employees within the category who elect the benefit plan are affected by the rule.
The system stores information that you enter in the Maximum Insurance Coverage Increase Amounts table (F085574).
21.3.2 Forms Used to Set Up Maximum Coverage Increase Limits
Form Name FormID Navigation Usage
Work With Plan Master
W08320B Benefits Administration Setup (G08BB4), Plan Master
Click Select.
Select an indemnity benefit plan.
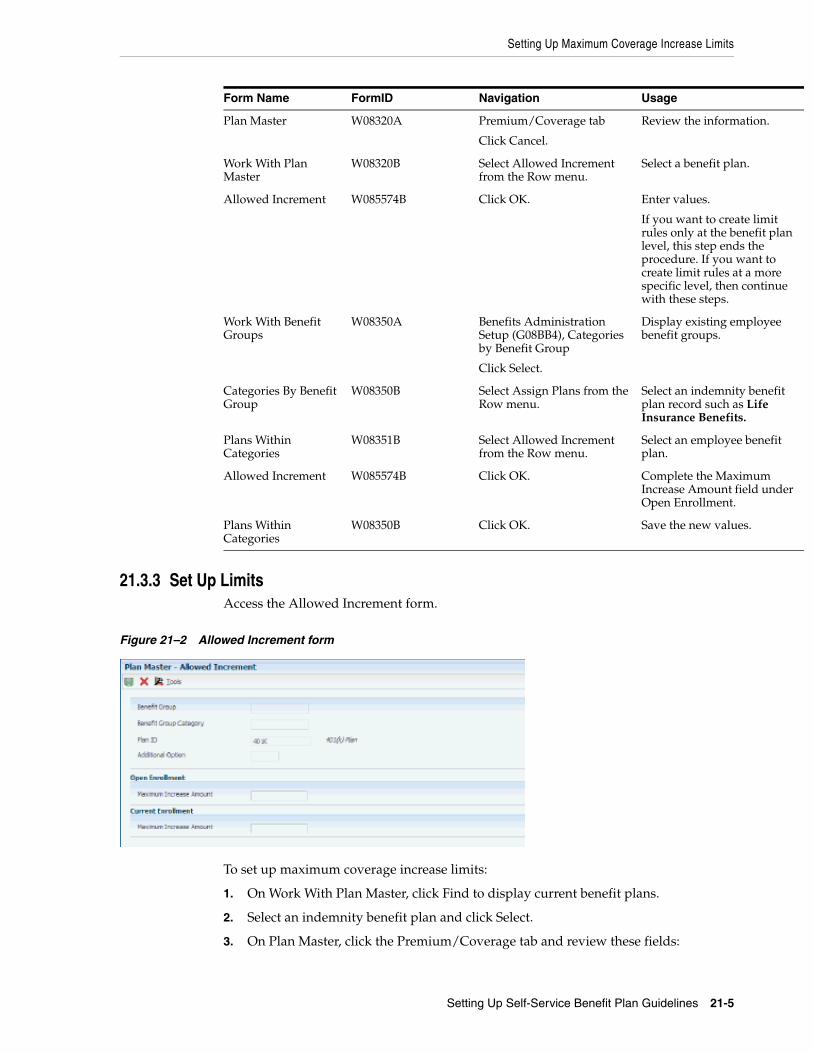
Setting Up Maximum Coverage Increase Limits
Setting Up Self-Service Benefit Plan Guidelines 21-5
21.3.3 Set Up LimitsAccess the Allowed Increment form.
Figure 21–2 Allowed Increment form
To set up maximum coverage increase limits:
1. On Work With Plan Master, click Find to display current benefit plans.
2. Select an indemnity benefit plan and click Select.
3. On Plan Master, click the Premium/Coverage tab and review these fields:
Plan Master W08320A Premium/Coverage tab
Click Cancel.
Review the information.
Work With Plan Master
W08320B Select Allowed Increment from the Row menu.
Select a benefit plan.
Allowed Increment W085574B Click OK. Enter values.
If you want to create limit rules only at the benefit plan level, this step ends the procedure. If you want to create limit rules at a more specific level, then continue with these steps.
Work With Benefit Groups
W08350A Benefits Administration Setup (G08BB4), Categories by Benefit Group
Click Select.
Display existing employee benefit groups.
Categories By Benefit Group
W08350B Select Assign Plans from the Row menu.
Select an indemnity benefit plan record such as Life Insurance Benefits.
Plans Within Categories
W08351B Select Allowed Increment from the Row menu.
Select an employee benefit plan.
Allowed Increment W085574B Click OK. Complete the Maximum Increase Amount field under Open Enrollment.
Plans Within Categories
W08350B Click OK. Save the new values.
Form Name FormID Navigation Usage

Setting Up Maximum Coverage Increase Limits
21-6 JD Edwards EnterpriseOne Applications Human Capital Management Self-Service Implementation Guide
– Premium Payment
– Age Rate Table
– Per Coverage Dollars
– Maximum Premium Amount
– Amount - Coverage
– Salary Factor
– Rounding Amount
4. Click Cancel to return to Work With Plan Master.
5. Select a benefit plan, and then select Allowed Increment from the Row menu.
6. On Allowed Increment, complete the Maximum Increase Amount field under Open Enrollment.
7. Complete the Maximum Increase Amount field under Current Enrollment.
8. Click OK.
9. Exit to the menu and select Categories by Benefit Group.
10. On Work With Benefit Groups, click Find to display existing employee benefit groups.
11. Select a benefit group and click Select.
12. On Categories By Benefit Group, select an indemnity benefit plan record such as Life Insurance Benefits, and then select Assign Plans from the Row menu.
13. On Plans Within Categories, select an employee benefit plan and then select Allowed Increment from the Row menu.
14. On Allowed Increment, complete the Maximum Increase Amount field under Open Enrollment.
15. Complete the Maximum Increase Amount field under Current Enrollment.
16. Click OK.
17. On Plans Within Categories, click OK.
■ Premium Payment
Enter the premium payment amount that applies to this plan.
■ Age Rate Table
Enter the table used if the calculation requires table values.
■ Per Coverage Dollars
Enter the amount of coverage that is paid for by the amount in the Monthly Premium field (data item PREP). For example, a premium charge can be defined as thirty dollars for every thousand dollars of coverage. In this case, the monthly premium is 30, and the number in the Per Coverage Dollars field is 1000.
■ Maximum Premium Amount
Enter the maximum premium amount permitted.
■ Amount - Coverage

Setting Up Maximum Coverage Increase Limits
Setting Up Self-Service Benefit Plan Guidelines 21-7
Enter the dollar amount of coverage that this plan provides to every employee enrolled in the plan.
■ Salary Factor
Enter a multiplier (factor) that the system uses to calculate the amount of coverage provided to an employee, based on the employee's salary.
For example, a salary factor of 2.0 indicates coverage for an employee in the amount of twice the employee's salary.
■ Rounding Amount
Enter the amount that the system uses to round the coverage dollars to the nearest whole number. For example, if the coverage dollars are 15,250 and you enter 1,000 in this field, the system rounds the coverage dollars to 16,000.
■ Maximum Increase Amount
Enter the maximum increase of coverage that an employee can elect.

Setting Up Maximum Coverage Increase Limits
21-8 JD Edwards EnterpriseOne Applications Human Capital Management Self-Service Implementation Guide

22
Setting Up Self-Service Process Flows 22-1
22Setting Up Self-Service Process Flows
This chapter contains the following topics:
■ Section 22.1, "Understanding Self-Service Process Flows"
■ Section 22.2, "Running the Populate Director Form Rules/Edits Report"
■ Section 22.3, "Defining Process Flow Scripts"
■ Section 22.4, "Setting Up Translated Director Text"
22.1 Understanding Self-Service Process FlowsBenefits self-service software includes the opportunity for human capital management administrators to extensively tailor the enrollment process to meet organizational requirements. Accessing this software through an internet web portal, you can change the appearance of the interface and the processes that employees use to manage their benefits.
You need to run the Populate Director Form Rules/Edits program (R8985500) prior to creating or changing self-service process flows.
You can use the Self-Service Process Flow Setup program (P05400) to define the process flow for your self-service programs. The process flow includes the steps that are necessary to complete a full life event or open enrollment change. These steps might include a variety of interactive programs, or director forms. You can create company or country-specific processes for each life or open enrollment event, including translated text to meet the needs of specific employee audiences.
Setting up process flows is required before employees, managers, or candidates can use self-service functions that require more than one program to complete.
22.2 Running the Populate Director Form Rules/Edits ReportThis section provides an overview of the Populate Director Form Rules/Edits report and discusses how to run the report.
22.2.1 Understanding the Populate Director Form Rules/Edits ReportThe Populate Director Form Rules/Edits program (R8985500) creates and stores information that is used by the Self-Service Process Flow Setup program (P05400) to create new process flow scripts. You need to run this report before creating or changing process flow scripts. You normally need to run this report only once unless you are setting up access to additional self-service programs after your initial setup. This report populates these tables:

Defining Process Flow Scripts
22-2 JD Edwards EnterpriseOne Applications Human Capital Management Self-Service Implementation Guide
■ F05402 table
■ F05403 table
The F05402 table saves a list of all the programs that you might need when you create process flow scripts.
The F05403 table saves all of the rules that govern the setup of self-service process scripts.
22.2.2 Running the Populate Director Form Rules/Edits ReportFrom the Employee Self Service General Management (G08BESS327), Populate Director Form Rules/Edits.
22.3 Defining Process Flow ScriptsThis section provides an overview of process flow scripts and discusses how to define scripts.
22.3.1 Understanding Process Flow ScriptsA human capital management administrator can use the Self-Service Process Flow Setup program (P05400) to define the action steps for new self-service process flows, copy and edit existing process flows, or delete process flows that are no longer applicable to organizational requirements. These process flows define the procedure that an employee uses to enroll in or change benefits or personal information.
For a new process flow, the user initially defines general information about the script, including the company and country to which the process flow applies. Next, the administrator defines each action step of the process flow. If the action step requires a program, the user specifies the program, including the version number. You can select only self-service programs. If the action step specifies a director form, the system uses the Self-Service Director Text program (P05401) to provide a form where the administrator defines the director text.
When you set up a process flow for an enrollment event, you should first create a default process flow for company 00000. In the default process flow, you should leave the country value blank so that the system always finds at least one script for each event. If you experience difficulty with running a process flow, the default process flow provides a shortcut to creating a new process flow.
To plan a self-service process flow and implement the procedure with minimum effort, you need to be aware of the rules and program relationships that govern process flows. You generated these rules by running the Populate Director Form Rules/Edits program (R8985500). When you specify action steps in a process flow that violates any of the rules, the system produces an error and an explanation of the problem.
22.3.1.1 Self-Service Process Flow Rules and Program RelationshipsThese are examples of the rules that govern the creation of a self-service process flow:
■ A director must be included between each application in the flow. Each script must follow this order: director, program, director, program, and so on.
■ The first director in a script must be enabled.
■ If an action step is required in a flow, then you must also enable that step in the flow. Although a setup option exists for disabling an action step, required action steps must always be enabled.

Defining Process Flow Scripts
Setting Up Self-Service Process Flows 22-3
■ If you specify Self Service Action Step 70 Dependent List (P085551 - ZJDE001) in the process flow, then you must include Step 160 Preview Benefit Changes (P085568 - ZJDE0002). Step 70 must precede Step 160.
■ If you specify Self Service Action Step 80 Beneficiary List (P085551 - ZJDE0002) in the process flow, then you must place it after Step 70 Dependent List (P085551 - ZJDE001).
■ If you specify Self Service Action Step 80 Beneficiary List (P085551 - ZJDE0002) in the process flow, then you must include Step 160 Preview Benefit Changes (P0855568 - ZJDE0002). Step 80 must precede Step 160.
■ If you specify Self Service Action Step 100 Number of Dependents to Cover (P085560) in the process flow, then you cannot include Step 120 Health & Welfare' Enrollment (P085570). If you specify Step 120 Health & Welfare' Enrollment (P085570) in the process flow, then you cannot include Step 100 Number of Dependents to Cover (P085560). If you specify Step 100 or Step 120 in the process flow, then you must include Step 160 Preview Benefit Changes (P085568). Step 100 or 120 must precede Step 160.
■ If you specify Self Service Action Step 150 COBRA Notification (P085580) in the process flow, then this step must follow any of these steps if they are in the process flow:
Self Service Action Step Program Number Program Version (if required)
70 P08551 ZJDE0001
80 P08551 ZJDE0002
100 P085560 Not Required
120 P085570 Not Required
160 P085568 ZJDE0002
170 P085564 Not Required
180 P085568 ZJDE0003
190 P085563 ZJDE0001
200 P085563 ZJDE0002
210 P085563 ZJDE0003
220 P085563 ZJDE0004
230 P085590
240 P085605
250 P085303A ZJDE0001
■ You must specify all or none of these Self Service Action Steps: 160 Preview Benefit Changes (P085568 - ZJDE0002), 170 Accept Benefit Changes (P085564), and 180 Final Benefit Confirmation Statement (P085568 - ZJDE0003). If you specify all three steps, you must define them in sequence after Steps 60 (P085562), 70 (P085551 - ZJDE0001), 100 (P085560), and 120 (P085570).
■ When you specify these Self Service Action Steps, you must define them in this sequence: 160 (P085568 - ZJDE0002), 170 (P085564), and 180 (P085568 - ZJDE0003).
■ If you specify any of these Self Service Action Steps, then you must include Step 160 (P085568 - ZJDE0002): 190 'Indemnity' Plans to Change (P085563 - ZJDE0001), 200 'Retirement' Plans to Change (P085563 - ZJDE0002), 210 'Other' Plans to Change

Defining Process Flow Scripts
22-4 JD Edwards EnterpriseOne Applications Human Capital Management Self-Service Implementation Guide
(P085563 - ZJDE0003), or 220 Change All Remaining Categories (P085563 - ZJDE0004). Step 160 must follow any of these steps in the process flow.
■ If you specify Self Service Action Steps 190 ’Indemnity' Plans to Change (P085563 - ZJDE0001), 200 'Retirement' Plans to Change (P085562 - ZJDE0002), and 210 'Other' Plans to Change (P085563 - ZJDE0003) in the process flow, then do not include Step 220 Change All Remaining Categories(P085563 - ZJDE0004). Step 220 causes redundancies in the script because the first three steps include the benefit plans that are defined in Step 220.
You can define any of the optional Self Service Category Codes, and use them for process identification and sorting at a later time.
The process of creating a self-service process flow includes multiple forms that the system displays in sequence. After completing a form, select Next.
Because all self-service process flows must begin with a director form, the system automatically selects the Display Director Form option and disables the Call An Application option.
22.3.2 Forms Used to Define Process Flow Scripts
Form Name FormID Navigation Usage
Work With Self-Service Process Flow Scripts
W05400A Employee Self Service Director Setup (G08BB411), Employee Self Service Process Flow Setup
Click Add.
Use the search and select form to access the Define Process Flow form.
Define Process Flow W05400B Click OK. Enter appropriate values.
You enter the Enrollment Event Code in a processing option for the director when running a script.
Define a Process Flow Step
W05400C Click OK.
Select Director Text from the Form menu.
Enter optional values.
On subsequent steps of the process flow, use the Version field only when you need to specify a specific program version.
Define Director Text W05401B Click OK. Enter text that informs and directs employees in using the forms.
Design a Process Flow Step
W05400C Action heading.
Action Definition heading.
Click Next.
The system automatically selects one of these options based on the process sequence. For example, after you define a director process step, the system automatically chooses the Call An Application option.
The system automatically provides the next number in sequence. You can change this number to alter the order in which the forms are displayed to employees.

Defining Process Flow Scripts
Setting Up Self-Service Process Flows 22-5
22.3.3 Define ScriptsAccess the Define Process Flow form.
To define a process flow script:
1. On Work With Self-Service Process Flow Scripts, click Add.
2. On Define Process Flow, complete these fields:
– Enrollment Event Code
– Company
3. Complete these optional fields and then click OK.
– Country Code
– Address Number for E-Mail Recipient
Country CodeEnter a user defined code list 00/CN that indicates the country in which the employee resides.
Address Number for E-Mail RecipientEnter a number that identifies an entry in the JD Edwards EnterpriseOne Address Book system. Use this number to designate the recipient of the email message an employee would send when they select "Contact HR" during the ESS process.
22.3.3.1 Define a Process Flow StepAccess the Define a Process Flow Step form.
Figure 22–1 Define a Process Flow Step form
1. On Define a Process Flow Step, review the Sequence Number field and click Next.
2. On Define Director Text, add employee instructions, comments, or feedback that assist an employee in the enrollment process step.
3. On Define Director Text, click OK.
4. On Design a Process Flow Step, review these options under the Action heading:

Defining Process Flow Scripts
22-6 JD Edwards EnterpriseOne Applications Human Capital Management Self-Service Implementation Guide
– Call An Application
– Display Director Form
5. Complete these fields under the Action Definition heading and click Next:
– Self-Service Step
– Sequence Number
6. Repeat steps 2 - 7 until all steps of the process flow are complete.
7. When all process flow steps are defined, click Finish on the final appearance of the Design a Process Flow Step form.
8. On Process Flow Detail, review the process flow, make changes or additions, and then click OK.
Sequence NumberEnter a number that specifies the sequence of information.
22.3.3.2 Define Director TextAccess the Define Director Text form.
Figure 22–2 Define Director Text form
The HTML image tag for the help button is as follows: {IMG SRC =/jde/owjava/images/res/QuestBook.jpg}. Depending on your setup procedures, the path for this image might be different in your system.
To display a welcome message in the first director form, or describe the previous step for subsequent director forms, enter text in the field in the Where You've Been tab.

Setting Up Translated Director Text
Setting Up Self-Service Process Flows 22-7
Do not use the Enter keyboard command to begin a new line of text. To format text in these fields, use HTML tags.
To display text below the list of enrollment process steps on the director form, use the second tab, Where You're Going Next. The system also displays this text when an employee chooses online help.
To provide additional help for this process step, enter information in the Next Step Help Text tab. For example, you might provide a sample of a correct entry, an explanation of possible warning messages, or instructions to resolve data entry problems. The system displays information from the third tab only when an employee clicks Help on this step in the process flow.
In the example, if an employee clicks Help in the Enter Event Date program (P085562), the system displays the help text that you enter into the third text field on the Define Director Text form.
22.3.3.3 Process Flow DetailAccess the Process Flow Detail form.
Figure 22–3 Process Flow Detail form
22.4 Setting Up Translated Director TextThis section provides an overview of translated director text and discusses how to set up the text.
22.4.1 Understanding Translated Director TextEach organization defines self-service process flows that employees use to enroll in benefits. Each of the director forms within a process flow contains user defined text in the domestic language that assists employees with the task. When self-service process flows are defined for additional companies and countries, the director form text entries might require translation.
To set up translated director text, you use the Self-Service Director Text program (P05401) to enter translated text.

Setting Up Translated Director Text
22-8 JD Edwards EnterpriseOne Applications Human Capital Management Self-Service Implementation Guide
22.4.2 Forms Used to Set Up Translated Director Text
Form Name FormID Navigation Usage
Work With Director Text
W05401A Employee Self Service Director Setup (G08BB411), Employee Self Service Director Setup
Click Select.
Find and select a record.
The domestic text from the record appears in each of the windows.
Define Director Text W05401B Select Translate from the Form menu.
Click OK.
Enter translated text.
22.4.3 Setting Up Translated TextAccess the Define Director Text form.
To set up translated director text:
1. On Work With Director Text, complete these fields and then click Find:
– Enrollment Event Code
– Company
– Country Code
– Sequence Number
2. Select a self-service process flow record and click Select.
3. On Define Director Text, select Translate from the Form menu.
4. Complete the Language field.
5. Enter translated text into each of the text areas.
6. When finished entering translated text, click OK.

23
Setting Up Form Options and Workflow Approval 23-1
23Setting Up Form Options and Workflow Approval
This chapter contains the following topics:
■ Section 23.1, "Understanding Form Options and Workflow Approval Setup"
■ Section 23.2, "Setting Up Form Options"
■ Section 23.3, "Setting Up Benefit Confirmation Statement Options"
■ Section 23.4, "Setting Processing Options for Enrollment Statement (P085568)"
■ Section 23.5, "Setting Up Self-Service Benefits Workflow Approval"
23.1 Understanding Form Options and Workflow Approval SetupAlthough self-service forms are designed to display personal information that many organizations find appropriate and useful, in the context of self service, some human capital management administrators might need to change these choices. You can use the Employee Self Service Form Options program (P085550) to hide certain fields on a form or to disable certain fields so that the system displays information, but employees cannot enter changes.
You can use the Benefit Confirmation Statement Options program (P085518) to define the text on certain buttons in benefit enrollment statements. You normally define these statement forms at various intervals of the process flows for benefits enrollment.
You can design and use workflow processes to notify specific employees when an employee enters self-service changes. The system allows workflow processes to be created for these workfiles:
■ Benefits information
■ Personal information
■ Emergency contact information
You can use the ESS Workfile Approval Setup program (P085515) to specify workflow processes that the system starts when changes are made to certain workfiles. You can have different versions of the same workflow process but which ever one is active at the time will be the version executed when a benefit change is made. If there are no active versions, the benefit change will be automatically approved in the F05420 record.
23.2 Setting Up Form OptionsThis section provides an overview of setting up form options and discusses how to:

Setting Up Form Options
23-2 JD Edwards EnterpriseOne Applications Human Capital Management Self-Service Implementation Guide
■ Set processing options for the Self-Service Director.
■ Set processing options for Employee Information - Telephone Numbers.
■ Set processing options for Dependent Enrollment.
■ Set the form options.
23.2.1 Understanding Form OptionsThe system default setting for the Employee Self Service Form Options program is to display all fields and enable input. Only overrides to this default need to be specified. If no overrides are entered, employees have full access to each of the features. The Grouping Code field is connected to UDC 08/EG. This UDC contains a record for each program that has controls that can be hidden. The predefined Grouping Codes are as follows:
Grouping Code Program Name
CON Employee emergency contacts
DAB Dependent and beneficiary personal information
PER Employee personal information
You can also set up processing options that specify display options on these forms:
■ Self-Service Director (P05410)
■ Employee Information - Telephone Numbers (P054215)
■ Enrollment Statement (P085568)
■ Dependent Enrollment (P085570)
To set up these processing options, you use the Interactive Versions program (P983051) to find the processing options template and then select Processing Options from the Row menu.
23.2.2 Forms Used to Set Up Form Options
Form Name FormID Navigation Usage
Employee Self Service Form Options
W085550A Employee Self Service General Setup (G08BB413), Employee Self Service Form Options
Click OK.
Hide or display desired fields.
23.2.3 Setting Processing Options for Self-Service Director (P05410)Processing options enable you to specify the default processing for programs and reports.
23.2.3.1 ProcessUse this processing option to specify the label for an enrollment event.
1. Process Flow EventSpecify the type of processing event.

Setting Up Form Options
Setting Up Form Options and Workflow Approval 23-3
23.2.3.2 DisplayUse these processing options to specify whether the system displays or hides certain elements.
1. Display Marital Status on the Director Form?Specify whether the system displays the employee's marital status on the Director form. Values are:
0: No
1: Yes
2. Display Salary on the Director Form?Specify whether the system displays the employee's salary information on the Director form. Values are:
0: No
1: Yes
3. Display Birth Date on the Director Form?Specify whether the system displays the employee's birth date on the Director form. Values are:
0: No
1: Yes
4. Display User Defined Text?Specify whether the system displays user defined text that explains the next process step after completing information on Work With Self-Service Process Flow Scripts (P05400). Values are:
0: No
1: Yes
23.2.4 Setting Processing Options for Employee Information - Telephone Numbers (P054215)
Processing options enable you to specify the default processing for programs and reports.
23.2.4.1 Display
Display Phone PrefixSpecify whether the phone prefix is displayed. Values are:
0: No, do not display prefix
1: Yes, display prefix
23.2.5 Setting Processing Options for Dependent Enrollment (P085570)Processing options enable you to specify the default processing for programs and reports.

Setting Up Form Options
23-4 JD Edwards EnterpriseOne Applications Human Capital Management Self-Service Implementation Guide
23.2.5.1 Default
Hide Benefit CalculationsSpecify whether the system displays benefit calculations. Value are:
0: Do Not Hide
1: Hide Calculation Button
2: Hide Calculation Button and Totals
23.2.6 Set the Form OptionsAccess the Employee Self Service Form Options form.
Figure 23–1 Employee Self Service Form Options form
To set up form options:
1. On Employee Self-Service Form Options, complete these fields and then click Find:
■ Grouping Code
Enter a code that associates related data dictionary objects so that actions, such as hiding and showing, can be performed on the entire group instead of on each of the individual items.
■ Enrollment Event Code
Enter a user defined code (08/BE) that denotes an enrollment event such as marriage.
■ Data Item
Enter a code that the system uses to determine which fields are hidden in the Employee Personal Information forms.
2. To hide or disable the display of a data item, complete these fields for each item:
■ Grouping Code

Setting Up Benefit Confirmation Statement Options
Setting Up Form Options and Workflow Approval 23-5
Enter a code that associates related data dictionary objects so that actions, such as hiding and showing, can be performed on the entire group instead of on each of the individual items.
■ Enrollment Event Code
Enter a user defined code (08/BE) that denotes an enrollment event such as marriage.
■ Data Item
Enter a code that the system uses to determine which fields are hidden in the Employee Personal Information forms.
■ Display Option
Select a value to display the records for a particular operation or all the records. Values are:
0: No, do not display data item.
1: Yes, display data item.
■ Disable Input
Enter a code that lets the system revise the records using new information.
Values are:
0: Yes, allow updating.
1: No, do not allow updating.
3. Click OK.
23.3 Setting Up Benefit Confirmation Statement OptionsThis section provides an overview of setting up benefit confirmation statement options and discusses how to:
■ Set processing options for enrollment statement
■ Set up benefit confirmation statement options.
23.3.1 Understanding Benefit Confirmation Statement OptionsYou can change text on the buttons to suit individual events, versions, languages, countries, and organizations. You can change the text on each button or you can hide the text. If you leave the text field blank, the system uses the default text that is currently displayed in the software.
On some forms, certain buttons are always hidden, regardless of the settings that you might input in this program. For example, the Next button is valid only on the Current Statement and Final Statement. The Back button is valid only on the Current Statement and the Pending Statement. The Submit Your Changes button exists on the Pending Statement.

Setting Processing Options for Enrollment Statement (P085568)
23-6 JD Edwards EnterpriseOne Applications Human Capital Management Self-Service Implementation Guide
23.3.2 Forms Used to Set Up Benefit Confirmation Statement Options
Form Name FormID Navigation Usage
Benefit Statement Options
W085518A Employee Self Service General Setup (G08BB413), Benefit Confirmation Statement Options
Click OK.
Configure the options.
Statement Text W085518D Select Statement Text from the Row menu.
Click OK.
Review and update only the confirmation statement text.
23.4 Setting Processing Options for Enrollment Statement (P085568)Processing options enable you to specify the default processing for programs and reports.
23.4.1 OptionsUse these processing options to set default values.
1. Confirmation Statement OptionsSpecify the type of statement. Values are:
C: Current Statement
P: Pending Statement
F: Final Statement
2. Employer CostSpecify display settings. Values are:
0: Hide
1: Show
3. Final StatementSpecify display settings. Values are:
0: Show summary of benefits
1: Show transaction number only
4. Previous Employee CostSpecify display settings. Values are:
0: Hide
1: Show
5. Categories To DisplaySpecify display settings. Values are:
0: Show all categories
1: Show only categories in F085510
6. Categories In Final StatementSpecify display settings. Values are:

Setting Processing Options for Enrollment Statement (P085568)
Setting Up Form Options and Workflow Approval 23-7
0: Show all categories
1: Show only enrolled categories
23.4.2 DefaultUse these processing options to specify mailing address information for declined coverage statements.
1. Enter the Company NameSpecify the company name.
2. Enter the Company AddressSpecify the company address.
3. Enter the CitySpecify the city.
4. Enter the StateSpecify the state.
5. Enter the Postal CodeSpecify the postal code.
6. Enter the Persons Name For, Attention Of:Specify the display setting. Values are:
For: (person's name)
Attention Of:
23.4.3 DateUse these processing options to specify calendar date information for the current enrollment form. Enter a valid date to override the options. Values are:
1. Current Enrollment Form Date to DisplayEnter a value that specifies the date information that the system displays on the form. Values are:
0: No date displayed
1: Latest plan enrollment date
2: System date
2. Current Enrollment Form Date to DisplayEnter an override date to be displayed on the enrollment statement.
23.4.4 EmailUse this processing option to specify a valid email address. Values are:
1. From E-Mail AddressValid email address
Blank: Same as To Address

Setting Processing Options for Enrollment Statement (P085568)
23-8 JD Edwards EnterpriseOne Applications Human Capital Management Self-Service Implementation Guide
23.4.5 Set Up Statement OptionsAccess the Benefit Statement Options form.
Figure 23–2 Benefit Statement Options form
To set up benefit confirmation statement options:
1. On Benefit Statement Options, complete these fields:
■ Enrollment Event Code
Enter the user defined code (08/BE) that you use to denote an enrollment event such as marriage.
■ Confirmation Options
Enter a value that identifies the version of the Employee Self Service Confirmation Form that the system uses. You can use the current, pending, or final versions.
■ Language
Enter a user defined code (01/LP) that specifies the language that the system uses on forms and printed reports. Before you specify a language, a code for that language must exist at either the system level or in the user preferences.
■ Version Title
Enter a user defined version name or remark.
2. To configure the Next, Back, Print, Mail, and Submit buttons on the benefit confirmation form, complete these fields for each event:
■ Enrollment Event Code
Enter the user defined code (08/BE) that you use to denote an enrollment event such as marriage.
■ Version Title
Enter a user defined version name or remark.
■ Language

Setting Up Self-Service Benefits Workflow Approval
Setting Up Form Options and Workflow Approval 23-9
Enter a user defined code (01/LP) that specifies the language that the system uses on forms and printed reports. Before you specify a language, a code for that language must exist at either the system level or in the user preferences.
■ Confirmation Options
Enter a value that identifies the version of the Employee Self Service Confirmation Form that the system uses. You can use the current, pending, or final versions.
■ Print Button Text
Enter the text that the system displays on the Print button on employee self-service forms.
■ Mail Button Text
Enter the text that the system displays on the Mail button on employee self-service forms.
■ Send E-Mail to HR Text
Enter the text that the system displays on the Send E-Mail to HR text block on employee self-service forms.
■ Hide Mail
Enter an option that determines whether a user can choose to have a copy of the benefit confirmation statement mailed to their home address using the employee self-service forms. Values are:
0: Display and enable the option
1: Hide and disable the option
■ Hide Print
Enter an option that determines whether a user can print a copy of the benefit confirmation statement using the employee self-service forms. Values are:
0: Display and enable the print option
1: Hide and disable the print option
■ Statement Text
Enter a user defined name or remark to be displayed on the confirmation statement.
3. When all enrollment event changes are complete, click OK.
4. To review and update only the confirmation statement text, you can select an enrollment record and then select Statement Text from the Row menu.
5. When changes are complete, click OK.
23.5 Setting Up Self-Service Benefits Workflow ApprovalThis section provides an overview and discusses how to set up self-service benefits workflow approval.
23.5.1 Understanding Self-Service Benefits Workflow ApprovalEmployee self-service benefits software includes the BENAPPRV default process. This process sends an email message and includes an acceptance form. Although the

Setting Up Self-Service Benefits Workflow Approval
23-10 JD Edwards EnterpriseOne Applications Human Capital Management Self-Service Implementation Guide
system uses only the BENAPPRV workflow process, you can create and use additional workflow processes, modified to meet organizational requirements, with each enrollment event code and work file combination. The system requirement for each workflow process is that the data structures cannot be changed.
In an open enrollment event, employee benefit changes start the workflow process. If an employee enters additional changes through self service, the system terminates any related, active workflow processes and removes pending approvals from the email system. If the workflow process cannot start, possibly because the version number is unavailable, the system sends the process recipient a notification message regarding the process failure and then accepts the benefit changes. If workflow processes are enabled in your software, you cannot update employee changes to the live tables until all workflow processes are approved.
To create a new workflow process, from OMW create a copy of BENAPPRV.
You can modify a workflow process until the new process is run the first time. When you run the workflow process, the system creates an instance record and saves the record in the Process Instance table (F98860). You must delete all instance records created by running a workflow process before you can enter changes to the process.
23.5.2 Forms Used to Set Up Self-Service Benefits Workflow Approval
Form Name FormID Navigation Usage
Benefits Workflow Approval Setup
W085515C Employee Self Service Workflow Setup (G08BB412), Self Service Benefits Workflow Approval
Enter values to set up the workflow approval.
The value in the Process Status column will display a Y if any of the versions for the selected workflow process are active.
23.5.3 Set Up Workflow ApprovalAccess the Benefits Workflow Approval Setup form.
To set up a self-service benefits workflow approval:
1. On Benefits Workflow Approval Setup, complete one or both of these fields and click Find:
■ Enrollment Event Code
Enter the user defined code (08/BE) that you use to denote an enrollment event such as marriage.
■ Work File Object Name
Enter the name of the work file object to be used in workflow processes.
2. To ensure that the workflow process includes appropriate specifications, review these fields:
■ Event Code
Enter the user defined code (08/BE) that you use to denote an enrollment event such as marriage.
■ Work File Object Name
Enter the name of the work file object to be used in workflow processes.

Setting Up Self-Service Benefits Workflow Approval
Setting Up Form Options and Workflow Approval 23-11
■ Workflow Process
Enter the unique identifier for a process. If no value is entered, a next number is assigned. Once assigned, the value cannot be changed.
■ Process Status
Indicates if there is an active version of the process. Only one active version can exist of a workflow process. Values are:
Y: Active
N: Not active
E: In use
■ MB DS
Enter a field that determines the mailbox associated with the queue that should be used on delivery of the message.

Setting Up Self-Service Benefits Workflow Approval
23-12 JD Edwards EnterpriseOne Applications Human Capital Management Self-Service Implementation Guide

24
Saving Self-Service Employee Information 24-1
24Saving Self-Service Employee Information
This chapter contains the following topics:
■ Section 24.1, "Understanding Saving Employee Information"
■ Section 24.2, "Saving Employee Personal Information"
■ Section 24.3, "Saving Self-Service Benefits Information"
24.1 Understanding Saving Employee InformationWhen employees enter changes to their benefits, personal information, or dependent and beneficiary information, the system saves the changes in workfiles. This information needs to be periodically saved to system live files. After you set up benefits self-service, including the required workfiles, you need to schedule reports to run that periodically save this information.
Other programs such as Address Book Constants (P0000) can also cause the system to save information that can be subsequently saved in the live tables that contain self-service information. For example, when a value in Address Book Constants is set to record address information with an effective date, the Update Employee Personal Information to Live Tables program (R054104) includes the date effective address information when you save self-service changes. When you set up your system to include date effectiveness, you also need to run the Effective Address Update program (R01840) to mark the latest address as the current address.
See Also:
■ "Setting Up Constants" in the JD Edwards EnterpriseOne Applications Address Book Implementation Guide.
24.2 Saving Employee Personal InformationThis section provides an overview of saving employee personal information and discusses how to:
■ Run the Update Employee Personal Information to Live Tables program.
■ Set processing options for the Update Employee Personal Information to Live Tables program.
24.2.1 Understanding Employee Personal Information StorageYou can use the Update Personal Info to Live Tables program (R054104) to save self-service changes to live system tables. This program also saves new date effective

Saving Employee Personal Information
24-2 JD Edwards EnterpriseOne Applications Human Capital Management Self-Service Implementation Guide
address information if the appropriate option is set in the Address Book Constants program (use P0000). Processing options specify the types of changes that are saved:
■ Employee personal information
■ Dependent and beneficiary information
■ Employee personal information, and dependent and beneficiary information
You should run this program after employees use self-service to change any of their personal information. Since you might not be aware of when changes are entered, you should schedule this program to run periodically so that the system saves new information to the live tables at least once each week. You should also run this program at the conclusion of each open enrollment period. After the system updates the live tables, employees can review the new changes on self-service forms.
The Update Personal Info to Live Tables program includes a review of the self-service workflow. This program verifies that required workflow approvals are complete before the system processes employee benefit changes. The final step of this programs process saves information to history tables so that employees can look up changes by transaction number.
The system references these tables for this program:
■ Employee Personal Profile Information Work (F054101W)
■ Employee Phone Number Work (F054115W)
■ Employee Emergency Contact Work (F054111W)
■ (Release 9.1 Update) Disability Status Work Table (F085590W)
■ (Release 9.1 Update) Veteran Status Work Table (F085605W)
■ Employee Master Information (F060116)
Note: If the GeoCoder for Human Resource Management applications is active, the Update Personal Info to Live Tables program automatically updates employee tax area information if the changes that are made using self service include a change to the employee's city, state, county, province, or postal code. If there are multiple valid GeoCodes for the employee's new address information, the system produces an exception report and does not update the employee's GeoCode. In these instances, you must select the correct GeoCode from the exception report and manually update the employee's tax area information.
See Also:
■ "Assigning Tax Area Information Using the GeoCoder" in the JD Edwards EnterpriseOne Applications Human Capital Management Fundamentals Implementation Guide.
24.2.2 Running the Update Employee Personal Information to Live Tables ProgramFrom the Update Work File Data to Live Tables menu (G08BESS325), select Update Personal Info to Live Tables.

Saving Self-Service Benefits Information
Saving Self-Service Employee Information 24-3
24.2.3 Setting Processing Options for Update Employee Personal Information to Live Tables (R054104)
Processing options enable you to specify the default processing for programs and reports.
24.2.3.1 ProcessUse these processing options to specify the group of individuals whose records are processed and the mode in which the report is run.
1. Write Personal Information for Employee, Dependent/Beneficiary or Both: Specify the group of individuals whose employee self-service records are processed. Values are:
1: Employee records from the employee self-service work files
When you use this value, you should run the program in proof mode
2: Dependent and beneficiary records from the employee self-service work files
When you use this value, you should run the program in proof mode.
3: Employee, dependent, and beneficiary records from the employee self-service work files
When you use this value, you can run the program in either proof or final mode.
2. Mode: Specify the mode in which the system runs the process.
0: Run the process in proof mode. Do not update the tables.
1 or Blank: Run the process in final mode and update all appropriate tables.
(Release 9.1 Update) 3. Update Disability and Veteran Response to Employee Master:Specify whether the system should update the Employee Master Information table (F060116) with disability and veteran status responses. Values are:
1: Update.
0: Do not update.
Note: If both the Mode and the Update Disability and Veteran Response to Employee Master processing options are set to 1, the system updates the disability and veteran fields in both the Employee Master Information table (F060116) and the Disability and Veteran Status History table (F085590) when you run the Update Employee Personal Information to Live Tables program (R054104). If the Mode processing option is set to 1 and the Update Disability and Veteran Response to Employee Master processing option is set to 0, the system updates only the Disability and Veteran Status History table (F085590).
24.3 Saving Self-Service Benefits InformationThis section provides an overview of saving self-service benefits information and discusses how to:
■ Run the Update Benefits Information to Live Tables program.
■ Set processing options for the Update Benefits Information to Live Tables program.

Saving Self-Service Benefits Information
24-4 JD Edwards EnterpriseOne Applications Human Capital Management Self-Service Implementation Guide
24.3.1 Understanding Benefits Information StorageFrom the Update Work File Data to Live Tables menu (G08BESS325), select Update Benefits Info to Live Tables.
You can use the Update Benefits Information to Live Tables program (R085524) to save self-service benefit changes. This program ensures that any eligibility rules are met and then saves changes from benefit workfiles to system live tables. If changes are made during open enrollment, you should run this program after the open enrollment period is closed. If changes are made because of life events, then you should run this program before each payroll is processed, so the system can save new DBA information to the appropriate files.
The Update Benefits Info to Live Tables program includes a review of self-service workflow. This program verifies that required workflow approvals are complete before the system processes employee benefit changes. The final step of this programs process saves information to history tables so that employees can look up changes by transaction number.
The system references these tables for this program:
■ Employee Master Information (F060116)
■ Available Plans and Plan Options by Employee Work Table (F085520W)
■ Dependent/Beneficiary X-Reference Work Table (F085536W)
24.3.2 Setting Processing Options for Update Benefits Information to Live Tables (R085524)
Processing options enable you to specify the default processing for programs and reports.
24.3.2.1 Process
1. Enrollment Event Type:Values are:
1: Open Enrollment
2: Current Enrollment
2. Mode:Values are:
0: Proof
1: Final
24.3.2.2 Defaults
1. End Enrollment Status:Specify the desired ending enrollment status.
2. End Enrollment Status based on Plan End Date(s):Specify the desired ending enrolment status based on plan end dates.

25
Reviewing History and Revising Self-Service Workfiles 25-1
25Reviewing History and Revising Self-Service Workfiles
This chapter contains the following topics:
■ Section 25.1, "Understanding Self-Service History and Workfiles"
■ Section 25.2, "Reviewing Employee Self-Service History"
■ Section 25.3, "Setting Processing Options for Work With Employee Self Service History (P085585)"
■ Section 25.4, "Revising the Current Coverage Workfile"
■ Section 25.5, "Revising the Available Plans Workfile"
■ Section 25.6, "Reviewing Dependent and Beneficiary Current Coverage Revisions"
■ Section 25.7, "Revising the Dependent and Beneficiary Updated Revisions Workfile"
■ Section 25.8, "Revising the Personal Profile Workfile"
25.1 Understanding Self-Service History and WorkfilesEmployees can use the Work With Employee Self Service History program (P085585) to review changes to their company benefits. When an employee enters changes to benefits, either as the result of a qualifying life event or during open enrollment, the system tracks all changes and saves them in history files. An employee might use this program to review current benefits to see if they need to be updated or to check the records for errors.
A system administrator can use workfile maintenance programs to enter changes to the benefits self-service workfiles. Although entering changes directly to a workfile should be an unusual event, you can directly change the data in the workfiles to correct errors or enter changes that occur outside of normal parameters. You might use this approach for any of these tasks:
■ Review files for data errors
■ Correct errors
■ Enter changes to data outside of open enrollment
Important: Access to this program should have the highest possible level of system security because when you revise self-service benefits information manually:
The system does not validate data entry.
Changes entered in this program can create unintentional detrimental effects in other programs.
Data can be removed or changed that negatively affects payroll processing and employee benefits.
Only an expert software user should enter changes to benefits self-service workfiles. The user should be aware of all of the benefits self-service tables and understand the interactions of the enhanced self-service software. No data integrity checking is performed by any of the maintenance programs. For example, if a system administrator changes an employee enrollment from family coverage to employee only, errors result unless associated dependent records for the family enrollment are also changed.
A system administrator can remove data from the workfiles without replacing the data with valid values. For example, if an administrator mistakenly removes a benefit plan option, all employees enrolled in the benefit plan option are affected. The self-service workfiles might require rebuilding as the result of potential errors.
If you find it necessary to enter manual changes to self-service benefits history tables, back up your history workfiles and contact Oracle for technical support.
Reviewing Employee Self-Service History
25-2 JD Edwards EnterpriseOne Applications Human Capital Management Self-Service Implementation Guide
25.2 Reviewing Employee Self-Service HistoryThis section provides an overview of employee self-service history review and discusses how to:
■ Set processing options for the Work With Employee Self Service History program.
■ Review employee self-service history.
25.2.1 Understanding Employee Self-Service HistoryThe Work With Employee Self Service History program displays historical information in these categories:
■ Personal information
■ Telephone information
■ Emergency contact information
■ Dependent and beneficiary information
■ Benefit plan and benefit plan option information
The Work With Employee Self Service History program uses these tables:
■ Employee Personal Profile Information History (F054101)
■ Employee Emergency Contact History (F054111)
■ Employee Phone Number History (F054115)

Setting Processing Options for Work With Employee Self Service History (P085585)
Reviewing History and Revising Self-Service Workfiles 25-3
■ Available Plans and Plan Options by Employee History (F085520)
■ ESS History Table Cross Reference (F085528)
If changes to benefit information are required, and the open enrollment period is open, you can enter changes until open enrollment closes. If the open enrollment period is closed, you should contact the human capital management administrator.
If changes to benefit information are entered as the result of a qualifying life event, and the allowed period of time for entering benefit changes has not expired, you can enter changes. If the allowed period of time for entering benefit changes has expired, you should contact the human capital management administrator.
25.2.2 Forms Used to Review Employee Self-Service History
Form Name FormID Navigation Usage
Employee Self-Service History Reference
W085585A Intranet Portal, Employee Self-Service History Reference
Select Next.
The underlined reference number is a link to historical information.
When you view the Personal Profile History, Emergency Contacts History, or Plan/Plan Option History forms, a Next button appears only if changes exist.
25.3 Setting Processing Options for Work With Employee Self Service History (P085585)
Processing options enable you to specify the default processing for programs and reports.
25.3.1 Default
1. Address Number of HR E-Mail RecipientSpecify whether the system displays an option to enter the address number of an HR representative who is designated to receive email notification. Values are:
0: No
1: Yes
25.3.2 Display
1. Display Employer Cost column on Plan and Plan Option History Form.Specify whether the system displays the Employer Cost column on the Plan and Plan Options History form.
2. Display text and buttons to resemble the Enrollment Statement.Specify whether the system displays text and buttons for each of these enrollment statements. Values are:
C: Current Enrollment Statement (Default)
P: Pending Enrollment Statement

Revising the Current Coverage Workfile
25-4 JD Edwards EnterpriseOne Applications Human Capital Management Self-Service Implementation Guide
F: Final Enrollment Statement
25.3.3 Review HistoryAccess the Employee Self-Service History Reference form.
To review employee self-service history:
1. On Employee Self-Service History Reference, select an underlined reference number. Depending on the link that you select, one or more of these history forms appears:
– Employee Personal Profile History
– Emergency Contacts History
– Dependent/Beneficiary History
– Plan/Plan Option History
2. To view the financial summary for benefit plan or benefit plan options, select the Plan/Plan Option History link, then select Next. The plan/plan option history form displays the same data that appears on the final benefits enrollment confirmation form during the open enrollment process. Depending on how the self-service benefits programs are set up, these items might not appear:
– Flex cost column
– Employer cost column
– Cost per pay period row
– Send Email to HR button
25.4 Revising the Current Coverage WorkfileThis section provides an overview and discusses how to revise the Current Coverage Workfile.
25.4.1 Understanding the Current Coverage WorkfileAn expert system administrator can use the Employee Enrollment Work File Revisions program (P085530W) to enter changes to data in the Employee Current/Pending Elections Work Table (F085530W) before the system saves the temporary information from this table in the live tables. For example, if data errors are discovered in current employee coverage information, the system administrator can change, remove, and add data to the workfile.
After you build the Employee Current/Pending Elections Work Table, this table provides a picture of all the current employee enrollment information. Because enrollment changes that employees enter do not affect this file, you can use this file as a reference point when working in the Available Plans and Plan Options by Employee program (P085520W).
The system administrator should be aware that many changes that are possible in this program might include interdependent considerations in other tables. All changes to data using the benefits maintenance programs must be entered and tracked manually. The system does not review, track, or implement related changes to this or other tables.
See Also:
■ Saving Self-Service Employee Information.

Revising the Current Coverage Workfile
Reviewing History and Revising Self-Service Workfiles 25-5
25.4.2 Forms Used to Revise the Current Coverage Workfile
Form Name FormID Navigation Usage
Employee Enrollment Work File Revision
W085530WA Current Coverage Work File Management (G08BESS321), Current Coverage Work File Revision
The values in step 3 cannot be changed. These values are used for history tracking purposes and display information about the last change to the employee benefit record.
25.4.3 Revise the WorkfileAccess the Employee Enrollment Work File Revision form.
Figure 25–1 Employee Enrollment Work File Revision form
To revise the current coverage workfile:
1. On Employee Enrollment Work File Revision, complete one or both of these fields, and then click Find:
– Address Number
– Benefit Group Category
2. Review the values in these fields, making changes if appropriate:
– Address Number
– Group Category
– Plan Seq. Number
– Plan ID
– Add Opt
– Effective Date
– Benefit Category Classification
Revising the Current Coverage Workfile
25-6 JD Edwards EnterpriseOne Applications Human Capital Management Self-Service Implementation Guide
– Plan Grouping
– Plan Cost
– Plan Credit
– Flex Cost
– D B
– Additional Amount
– Amount or Rate
– Amount or Rate
– PCP Flg
– PCP Visited
– PCP Number
– Category Seq. Number
– Category Type
– Ending Date
– Stay In Group
– Non-Participating Plan
3. Review the values in these fields:
– User ID
– Program ID
– Work Stn ID
– Date Updated
– Time Updated
4. Click OK to save the changes in the workfile.
■ Plan Seq. Number (Sequence)
Enter a number used to organize the table into a logical group for online viewing and reporting.
■ Benefit Category Classification
Enter a code that designates benefit categories that are grouped together.
■ Additional Amount
Enter an additional amount that the employer contributes toward the cost of a benefit option. For example, an employer might pay 100.00 toward the cost of the option for family medical coverage.
■ Amount or Rate (Benefit)
Enter a value in this field as a percentage, a dollar amount or an hourly rate depending upon where it is being used.
When used in conjunction with a Deduction, Benefit or Accrual Type this field may represent many of these values depending upon the value of the D/B/A method code (DEDM).
■ Amount or Rate (Deduction)

Revising the Available Plans Workfile
Reviewing History and Revising Self-Service Workfiles 25-7
Enter a value in this field as a percentage, a dollar amount or an hourly rate depending upon where it is being used.
When used in conjunction with a Deduction, Benefit or Accrual Type this field may represent many of these values depending upon the value of the D/B/A method code (DEDM).
■ Category Seq. Number (Sequence)
Enter a number used to sequence information for review purposes only.
■ Non-Participating Plan
Enter a code that specifies whether an employee can elect to decline participation in the benefit plan.
25.5 Revising the Available Plans WorkfileThis section provides an overview and discusses how to revise the Available Plans Workfile.
25.5.1 Understanding the Available Plans WorkfileAn expert system administrator can use the Available Plans and Plan Options by Employee program (P085520W) to enter changes to the data in the Available Plans and Plan Options by Employee Work Table (F085520W) before the system stores the temporary information from this table in the live tables.
After you build the Available Plans and Plan Options by Employee Work Table, this table provides a current picture of all the available benefit plans and benefit plan options from which an employee can choose. As employees enter changes, this file records the changes that are active for the upcoming benefit plan year.
A system administrator might enter changes to this table to correct data errors or to change information that is not accessible to an employee. For example, an employee is unable to update benefits choices during open enrollment and open enrollment is now closed. During open enrollment, the system automatically assigned the current benefit choices as the choices for the upcoming benefit year. The records in the Available Plans and Plan Options by Employee Work Table confirm that the employee is enrolled in a Preferred Provider Option benefit plan (PPO) for the upcoming benefit year. The employee wants to change medical coverage from a PPO plan to an HMO plan. The system administrator can use the Available Plans and Plan Options by Employee program to remove the employee enrollment in the PPO plan and record an enrollment in an HMO plan. The system administrator must be aware that if dependents are affected by the benefit plan change, all issues that might be related to the change must be manually addressed. The system does not review, track, or implement related changes to this or other tables.
See Also:
■ Saving Self-Service Employee Information.
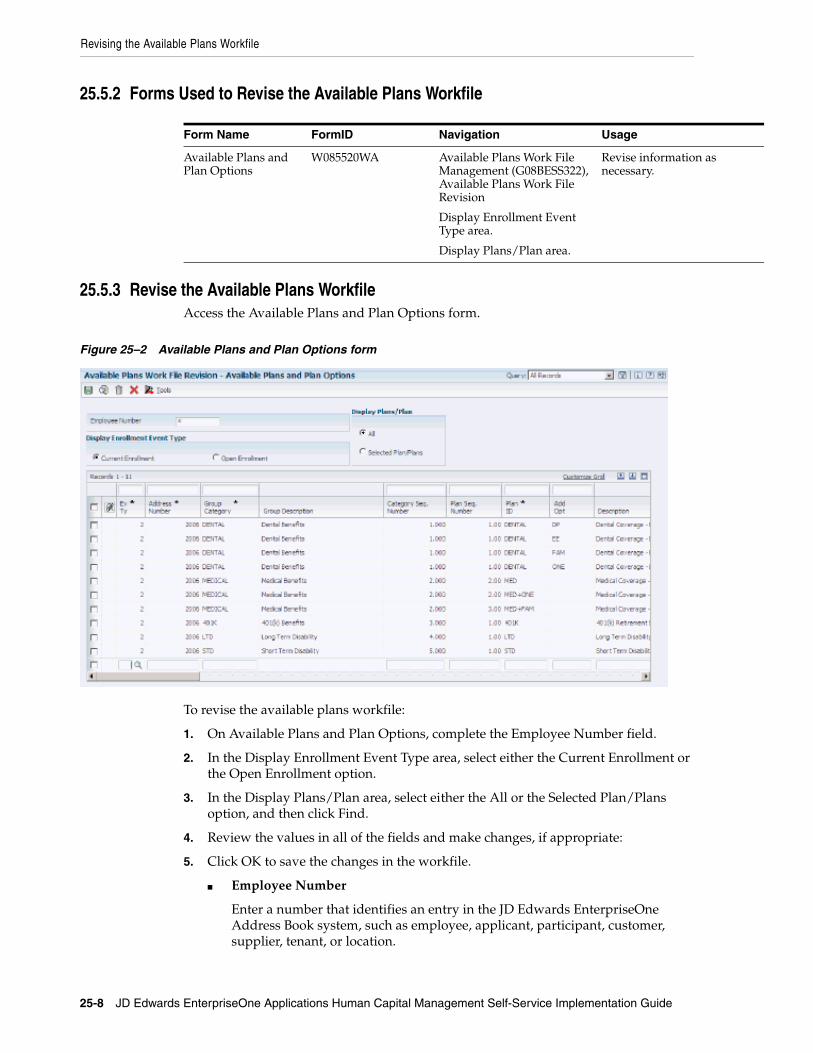
Revising the Available Plans Workfile
25-8 JD Edwards EnterpriseOne Applications Human Capital Management Self-Service Implementation Guide
25.5.2 Forms Used to Revise the Available Plans Workfile
Form Name FormID Navigation Usage
Available Plans and Plan Options
W085520WA Available Plans Work File Management (G08BESS322), Available Plans Work File Revision
Display Enrollment Event Type area.
Display Plans/Plan area.
Revise information as necessary.
25.5.3 Revise the Available Plans WorkfileAccess the Available Plans and Plan Options form.
Figure 25–2 Available Plans and Plan Options form
To revise the available plans workfile:
1. On Available Plans and Plan Options, complete the Employee Number field.
2. In the Display Enrollment Event Type area, select either the Current Enrollment or the Open Enrollment option.
3. In the Display Plans/Plan area, select either the All or the Selected Plan/Plans option, and then click Find.
4. Review the values in all of the fields and make changes, if appropriate:
5. Click OK to save the changes in the workfile.
■ Employee Number
Enter a number that identifies an entry in the JD Edwards EnterpriseOne Address Book system, such as employee, applicant, participant, customer, supplier, tenant, or location.

Revising the Available Plans Workfile
Reviewing History and Revising Self-Service Workfiles 25-9
■ Ev Ty
Enter a value in the field that indicates the event during which the enrollment occurs. Values include:
1: Open Enrollment
2: Enrollment for current plan year
■ Sequence Number
Enter a number used to organize the table into a logical group for online viewing and reporting.
■ Amt Rte
Enter a code that indicates whether you can enter an amount or rate when you enroll an employee in a benefit plan. Typically, you enter Y (yes) when the employee determines the amount of a deduction or a benefit. Examples include 401(k) percentages, dependent care, and health care reimbursements.
■ Employee DBA ID
Enter the DBA defined in the Payroll Transactions Constants table (F069116) that is used to calculate the dollar amount that the employee contributes by enrolling in the plan. In most cases, this DBA is defined to deduct pay from the enrolled employee's check.
■ Employer DBA ID
Enter the DBA defined in the Payroll Transactions Constants table (F069116) that the system uses to calculate the dollar amount that the employer contributes to the employee enrolled in the plan. In most cases, this DBA is defined as a benefit to add pay to the enrolled employee's check.
■ Additional Amount
Enter an additional amount that the employer contributes toward the cost of a benefit option. For example, an employer might pay 100.00 toward the cost of the option for family medical coverage.
■ Non-Participating Plan
Enter a code that specifies whether an employee can elect to decline participation in the benefit plan.
■ Ded Pnts
Enter the DBA defined in the Payroll Transactions Constants file (F069116) that is used to calculate the points amount that the employee contributes by enrolling in the plan in a flexible spending environment.
DBAs used for points in a benefit plan or option must meet two requirements:
The DBA must have blanks in the specification for Gross Effect and Net Effect (data items PAYG and PAYN) so that the use of non-dollar points does not add or subtract dollars from employee pay.The DBA must have an M in the specification for Journal Entry (Y/N/M) (see data item NMTH) so that the use of (non-dollar) points does not affect the G/L system.
■ Cred Pnts
Enter the DBA defined in the Payroll Transactions Constants table (F069116) that will be used to calculate the points amount that the employer contributes to an employee enrolled in a flexible spending environment.

Revising the Available Plans Workfile
25-10 JD Edwards EnterpriseOne Applications Human Capital Management Self-Service Implementation Guide
DBAs used for points in a benefit plan or option must meet two requirements:
The DBA must have blanks in the specification for gross effect and net effect (data items PAYG and PAYN) so that the use of non-dollar points does not add or subtract dollars from employee pay.The DBA must have an M in the specification for Journal Entry (Y/N/M) (data item NMTH) so that the use of non-dollar points does not affect the G/L system.
■ Amount or Rate
Enter a value in this field as a percentage, a dollar amount or an hourly rate depending upon where it is being used.
When used in conjunction with a Deduction, Benefit or Accrual Type this field may represent many of these values depending upon the value of the D/B/A method code (DEDM).
■ Amount or Rate
Enter a value in this field as a percentage, a dollar amount or an hourly rate depending upon where it is being used;
When used in conjunction with a Deduction, Benefit or Accrual Type this field may represent many of these values depending upon the value of the D/B/A method code (DEDM).
■ M P
Enter a code that indicates whether the plan is required for all employees. Valid codes are:
Y: Yes, all employees must participate in this plan. You should not use this code unless all employees are required to participate in the plan.
N: No, all employees are not required to participate in this plan. It is optional.
■ Dft Pln
Enter a code that specifies if the plan is a default plan in the category. An employee is automatically enrolled in this plan if no other plans within the category are selected. Valid codes are:
Y: Yes, this is a default plan.
N: No, this is not a default plan.
■ Selc 01
Enter a code used to prompt detail selection from a list of items. Typically, the legitimate selection codes are explained at the bottom of the screen of the video display. If not, see the program help instructions.
This code indicates that the employee is enrolled in a benefit plan or a benefit plan option. When benefit plans are changed during an enrollment, whether the employee enrolls or withdraws from the plan, the system enters an event code in the Enrollment Event Code field. The system also enters 1 in the SELC 01 field when the employee enrolls in a benefit plan. Values are:
0 or Blank: The benefit plan changed, but the employee is not enrolled in the plan.
1: The employee is enrolled in the benefit plan.
■ Benefit Category Classification
Enter a code that designates benefit categories that are grouped together.

Reviewing Dependent and Beneficiary Current Coverage Revisions
Reviewing History and Revising Self-Service Workfiles 25-11
■ Decline Coverage Notification
Enter a code that the system uses to indicate that the benefit administrator needs to be notified when an employee elects to decline benefit coverage.
■ Defaulting Allowed
Enter a code that specifies whether the system automatically displays a benefit plan or benefit plan option as the chosen plan, based on prior enrollment.
■ Max DP
Enter a variable that denotes the maximum number of dependents that may be enrolled in a benefit plan.
■ Minimum Dependents
Enter the minimum number of people that can be covered under a specific plan or plan option. This number includes the employee. For example, if the plan allows an employee plus one dependent, then the minimum number is 2.
■ Number Partic
Enter a value that specifies the number of participants that have elected coverage for a specific plan.
■ Sequence Number
Enter a number used to sequence information for review purposes only.
■ Short Category Description
Enter a short description (up to 15 characters) of the benefit category.
■ Short Plan/Option Description
Enter a short description (up to 15 characters) of the benefit plan or benefit plan option.
25.6 Reviewing Dependent and Beneficiary Current Coverage RevisionsThis section provides an overview and discusses how to review dependent and beneficiary current coverage revisions.
25.6.1 Understanding Dependent and Beneficiary Current Coverage Revisions ReviewA Human Capital Management administrator can use the Current Dep/Ben X-Reference Work Table program (P085537W) to review current dependent and beneficiary information that is contained in the Current Dep/Ben X-Reference Work Table (F085537W). This table provides a picture of current dependent and beneficiary enrollment information that is updated each time that you build a new Employee Current/Pending Elections Work Table (F085530W).
If information in this table is incorrect, you should not enter corrections to this table. Because the system does not save information from this table in the live tables, any changes that you enter in this table are lost. An expert system administrator can use the Dependent/Beneficiary Coverage Revisions program (P085536W) to enter changes to the Dependent/Beneficiary X-Reference Work Table (F085536W). After you save changes to the workfile and then build new workfiles, your changes are included in the new Current Dep/Ben X-Reference Work Table.

See Also:
■ Managing Benefits Self-Service Work Files.
Revising the Dependent and Beneficiary Updated Revisions Workfile
25-12 JD Edwards EnterpriseOne Applications Human Capital Management Self-Service Implementation Guide
25.6.2 Forms Used to Review Dependent and Beneficiary Current Coverage Revisions
Form Name FormID Navigation Usage
Current Dep/Ben Coverage Revisions
W085537WA Dependent/Beneficiary Work File Mgmt (G08BESS323), Dependent/Beneficiary Work File Revision
Review pertinent information.
25.6.3 Review the RevisionsAccess the Current Dep/Ben Coverage Revisions form.
Figure 25–3 Current Dep/Ben Coverage Revisions form
To review dependent and beneficiary current coverage revisions:
1. On Current Dep/Ben Coverage Revisions, complete the Employee ID field and then click Find.
2. Review the values in the fields, but do not enter changes.
25.7 Revising the Dependent and Beneficiary Updated Revisions WorkfileThis section provides an overview and discusses how to revise the Dependent and Beneficiary Updated Revisions Workfile
25.7.1 Understanding the Dependent and Beneficiary Updated Revisions WorkfileAn expert Human Capital Management administrator can use the Dependent/Beneficiary Coverage Revisions program (P085536W) to review updated dependent and beneficiary information that is contained in the Dependent/Beneficiary X-Reference Work Table (F085536W). This table displays updated dependent and
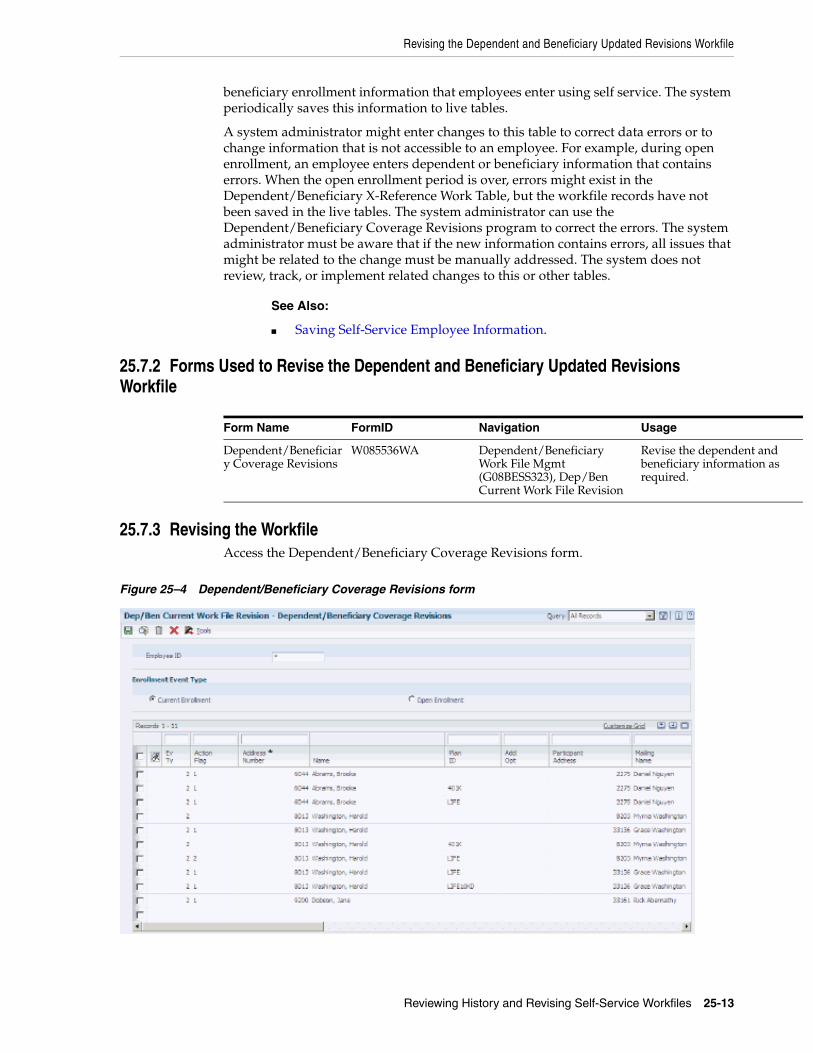
Revising the Dependent and Beneficiary Updated Revisions Workfile
Reviewing History and Revising Self-Service Workfiles 25-13
beneficiary enrollment information that employees enter using self service. The system periodically saves this information to live tables.
A system administrator might enter changes to this table to correct data errors or to change information that is not accessible to an employee. For example, during open enrollment, an employee enters dependent or beneficiary information that contains errors. When the open enrollment period is over, errors might exist in the Dependent/Beneficiary X-Reference Work Table, but the workfile records have not been saved in the live tables. The system administrator can use the Dependent/Beneficiary Coverage Revisions program to correct the errors. The system administrator must be aware that if the new information contains errors, all issues that might be related to the change must be manually addressed. The system does not review, track, or implement related changes to this or other tables.
See Also:
■ Saving Self-Service Employee Information.
25.7.2 Forms Used to Revise the Dependent and Beneficiary Updated Revisions Workfile
Form Name FormID Navigation Usage
Dependent/Beneficiary Coverage Revisions
W085536WA Dependent/Beneficiary Work File Mgmt (G08BESS323), Dep/Ben Current Work File Revision
Revise the dependent and beneficiary information as required.
25.7.3 Revising the WorkfileAccess the Dependent/Beneficiary Coverage Revisions form.
Figure 25–4 Dependent/Beneficiary Coverage Revisions form

Revising the Dependent and Beneficiary Updated Revisions Workfile
25-14 JD Edwards EnterpriseOne Applications Human Capital Management Self-Service Implementation Guide
Employee IDEnter a number that identifies an entry in the JD Edwards EnterpriseOne Address Book system, such as employee, applicant, participant, customer, supplier, tenant, or location.
Current EnrollmentEnter a value that indicates the event during which the enrollment occurs. Values include:
1: Open Enrollment
2: Enrollment for current plan year
Open EnrollmentEnter a value that indicates the event during which the enrollment occurs. Values include:
1: Open Enrollment
2: Enrollment for current plan year
Ev TyEnter a value that indicates the event during which the enrollment occurs. Values include:
1: Open Enrollment
2: Enrollment for current plan year
Action FlagEnter a value that defines the type of change that will be made to a record. This flag is used by the system in subsequent record processing.
Participant AddressEnter the address number of the participant as defined in the Participant file table (F08901).
Mailing NameEnter the company or person to whom billing or correspondence is addressed.
R LEnter a code (UDC 08/RL) that defines the relationship of the dependent or beneficiary to the employee.
Ben % (beneficiary percentage)Enter the percentage of any proceeds from the benefit that goes to the participant. For example, you can designate that as the primary beneficiary, the participant is to receive 90% of the proceeds from a life insurance policy.
This figure must have a value between zero and 100.
If you do not type a value in this field, the system inserts 100%.
Secondary Ben % (second beneficiary percentage)Enter the percentage of any proceeds from the benefit that will go to the secondary beneficiary if the primary beneficiaries are no longer eligible.
For example, the secondary beneficiary might be designated to receive 90 per cent of the proceeds from a life insurance policy. If the participant wants to change this percentage, enter the new percentage.
Enter the percentage as a whole number between zero and 100.

Revising the Personal Profile Workfile
Reviewing History and Revising Self-Service Workfiles 25-15
New Ben % (new beneficiary percentage)Enter the new percentage of any proceeds from the benefit that will go to the primary beneficiary.
For example, the primary beneficiary might be designated to receive 90% of the proceeds from a life insurance policy. If the participant wants to change this percentage, you enter the new percentage.
Enter the percentage as a whole number between zero and 100.
New Second Ben % (new second beneficiary percentage)Enter the new percentage of any proceeds from the benefit that will go to the secondary beneficiary if the primary beneficiaries are no longer eligible.
For example, the secondary beneficiary might be designated to receive 90 per cent of the proceeds from a life insurance policy. If the participant wants to change this percentage, you enter the new percentage.
Enter the percentage as a whole number between zero and 100.
Event DateEnter the date on which a work order event took place.
A/IEnter a value that specifies whether a currency relationship is active A or inactive I. The system calculates active currency relationships only. The default value is A.
25.8 Revising the Personal Profile WorkfileThis section provides an overview and discusses how to revise the Personal Profile Workfile.
25.8.1 Understanding Personal Profile Workfile RevisionsAn expert Human Capital Management administrator can use the Employee Personal Profile Information Table Revision program (P054101W) to review updated dependent and beneficiary information that is contained in the Employee Personal Profile Information Work Table (F054101W). This table displays current employee, dependent, and beneficiary personal profile information that employees enter using self service. The system periodically saves this information to live tables.
A system administrator can enter changes to this table to correct data errors or to change information that is not accessible to an employee. For example, during open enrollment, an employee might enter personal profile information that contains errors. When open enrollment closes, a system administrator might need to enter corrections to the temporary workfile records before saving the new data in the live tables. The system administrator can use the Employee Personal Profile Information Table Revision program to correct the errors.
The system administrator must be aware that if the new information contains errors, all issues that might be related to the change must be manually addressed. This program allows changes to all data in the table except the fields that track the individuals entering changes and when changes are entered. The program even allows changes to data that is not entered by an employee. The system does not review, track, or implement related changes that might be required in other tables.
See Also:
■ Building the Personal Information Workfile.

Revising the Personal Profile Workfile
25-16 JD Edwards EnterpriseOne Applications Human Capital Management Self-Service Implementation Guide
25.8.2 Forms Used to Revise the Personal Profile Workfile
Form Name FormID Navigation Usage
Work With Employee Personal Profile Information Table
W054101WB Personal Information Work File Mgmt (G08BESS324), Personal Profile Work File Revision
Select Profile Revisions from the Row menu.
Determine whether inaccurate information exists.
Employee Personal Profile Information Table Revisions
W054101WA Click OK. Enter changes as appropriate.
25.8.3 Revise the WorkfileAccess the Employee Personal Profile Information Table Revisions form.
To revise the personal profile workfile:
1. On Work With Employee Personal Profile Information Table, complete one of these fields and click Find:
– Address Number
– Participant Address
2. Review the values in each field to determine whether inaccurate information exists.
3. To enter personal profile changes, select a record and then select Profile Revisions from the Row menu.
4. On Employee Personal Profile Information Table Revisions, review all of the fields, making changes if appropriate:
5. Review the fields that the system provides only to track changes to this table:
– Electronic Signature ID
– Date Updated
– Time Update
– Updated By
– Program ID
– User ID
– Work Stn ID
– Date Updated
– Time Updated
6. When you are finished making changes, click OK to save the new data.
7. To change telephone number information, select a record and then select Phone Number from the Row menu.
8. On Employee Phone Number Table Revisions, review these fields and make changes, if appropriate:
– Prefix

Revising the Personal Profile Workfile
Reviewing History and Revising Self-Service Workfiles 25-17
– Phone Number
– Phone Type
– Action Flag
– Line Number
9. Review these fields that the system provides to track changes to this table.
10. When changes are complete, click OK.
11. To change emergency contact information, select a record and then select Emergency Contact from the Row menu.
12. On Employee Emergency Contact Table Revisions, review the fields and make changes, if appropriate.
13. Review the fields that the system provides to track changes to this table.
14. When changes are complete, click OK.
When you click OK, the system immediately saves your changes in the workfile. The system saves your changes in the live tables only when the next workfile build is run.
■ Participant Address
Enter the address number of the participant as defined in the Participant file table (F08901).
■ Preferred Name
Enter the preferred name of the employee. For instance, an employee might have the legal name of Catherine but might be known as Cathy.
■ Middle Name
Enter the middle name or initial of an individual. This field is informational only. The name
does not appear on any reports.
■ M I
Enter the first letter of the individual's middle name. This is primarily used to facilitate certain statutory reporting requirements.
■ Mailing Name
Enter the company or person to whom billing or correspondence is addressed.
■ Given Name
Enter the first name of an individual. This field is informational only.
■ Surname
Enter the last name of an individual. This field is informational only.
■ Job Desc
Enter a title associated with an employee's job.
■ Supervisor Name
Enter the address book name of the supervisor.
■ Business Card Title
Enter the title that a person uses on his or her business card.
Revising the Personal Profile Workfile
25-18 JD Edwards EnterpriseOne Applications Human Capital Management Self-Service Implementation Guide
■ Tax ID
Enter the identification code required by various tax authorities. This can be a social security number, federal or state corporate tax ID, sales tax number, and so on. The system verifies the number and prints the separators in their correct format, according to the value of TAXC (Person/Corporation Code). If no value exists for TAXC, the system uses the Corporate Entity.
Attention Accounts Payable users: The Supplier Master record supplies the default value for the tax ID for 1099 processing.
■ Address Line 1–4
Enter the first line of a mailing address for an employee, customer, or supplier in the JD Edwards EnterpriseOne Address Book system. The U.S. Internal Revenue Service (IRS) restricts the size of the address that prints on an employee's year-end tax return. To comply with IRS regulations, the system has these restrictions:
On W-2 returns, the system prints only the last three non-blank address lines plus the city, state, and postal code.On 1099 returns, the system prints only the last non-blank address line plus the city, state, and postal code.On other U.S. federal magnetic media, the system prints only the last non-blank address line plus the city, state, and postal code.
■ City
Enter a name that indicates the city associated with the address.
■ ST (State)
Enter a user defined code (00/S) that specifies the state or province. This code is usually a postal service abbreviation.
■ Postal Code
Enter the United States ZIP code or the postal code that specifies where a letter is to be routed. Attach this code to the address for delivery in other countries. This code is used as the low end value when doing Postal Code Transaction range processing.
■ Ctry (Country)
Enter a user defined code (00/CN) that identifies a country. The country code has no effect on currency conversion.
The JD Edwards EnterpriseOne Address Book system uses the country code for data selection and address formatting.
■ County
Enter the name of a county, parish, or other political district that is necessary for the address or for tax purposes.
■ Birth Date
Enter the employee's date of birth.
■ Gender
Enter a value that represents the gender of the individual. Valid codes are:
M: Male
F: Female
Revising the Personal Profile Workfile
Reviewing History and Revising Self-Service Workfiles 25-19
■ Dep/Ben Tax ID (Dependent/Beneficiary Tax Identification
Enter an identification code that various tax authorities require. This code can be a social security number, federal or state corporate tax ID, sales tax number, and so on. Do not enter separator characters. The system verifies the number and prints the separators in their correct format according to the value of the Person/Corporation Code (TAXC). If there is no value for TAXC, the system uses the Corporate Entity.
■ H.S. Grad (High School Graduate)
Enter a code that indicates whether the participant is a high school graduate. Valid codes are:
Y: Yes, the participant is a graduate.
N: No, the participant is not a graduate.
■ Emp (Employed)
Enter a code that indicates whether the participant is employed (anywhere). Valid codes are:
Y: Yes, the participant is employed.
N: No, the participant is not employed.
■ F.T. Student (Full Time)
Enter a code that indicates whether the participant is a full time student. Valid codes are:
Y: Yes, the participant is a full time student. The SCA (School Attending) field must contain the name of the school.
N: No, the participant is not a full time student. The SCA (School Attending) field cannot contain an entry.
■ School Attending
Enter the name of the school the participant is attending, if any. This field is used in conjunction with the FTS field. If the FTS field contains a Y (Yes), you must enter the name of the school in this field.
■ D F (Disability Date Field)
Enter a code that indicates whether the participant is currently disabled. Valid codes are:
Y: Yes, the participant is disabled.
N: No, the participant is not disabled.
If the participant is currently disabled, you must type a date in the Date of Disability field.
■ Disb. Date (Disabled)
Enter the date on which the participant became disabled, if applicable. If the code in the Disability Flag field is Y (Yes), you must type a date in this field.
■ Death Date
Enter the date on which the participant died.
■ Medicare Date
Revising the Personal Profile Workfile
25-20 JD Edwards EnterpriseOne Applications Human Capital Management Self-Service Implementation Guide
Enter the date on which the participant elected to receive Medicare Hospital Insurance versus any health insurance supplied by the company, if applicable.
■ Electronic Address
Enter the email address or Uniform Resource Locator (URL) for either an individual or an entity.
■ Action Flag
Enter a value that defines the type of change that will be made to a record. This flag is used by the system in subsequent record processing.
■ Time Update
No entry required. The time that the object was updated.
■ Prefix
Enter the first segment of a telephone number. In the United States, the prefix is the three-digit area code.
■ Phone Number
Enter a number without the prefix or special characters, such as hyphens or periods, that makes up the telephone number for an entity. You can use any applicable telephone number format for a country. This field is used in conjunction with the Prefix field (AR1), where you enter the first segment of the telephone number, which is called the area code in the United States.
When you search for an address using a phone number, you must enter the number exactly as it is set up in the JD Edwards EnterpriseOne Address Book system, including any special characters.
■ Phone Type
Enter a user defined code (01/PH) that indicates either the location or use of a telephone number. Values include:
Blank: Business telephone number
FAX: Fax telephone number
HOM: Home telephone number
■ Line Number
Enter a value that is used to create a unique key within a file. If you are using a program which will enable you to resequence the records, we recommend you use one of these data dictionary items: DSS5, DSS7, or DSS9.
■ Salutation Name
Enter the name that you would use to address an individual in written correspondence. Examples include Ms. Green, Dr. Strasheim, Herr Obermeyer, Mr. Pitt. The software does not use the value in this field in any reports. It is informational only.
■ Address
Enter the first line of a mailing address for an employee, customer, or supplier in the JD Edwards EnterpriseOne Address Book system. The U.S. Internal Revenue Service (IRS) restricts the size of the address that prints on an employee's year-end tax return. To comply with IRS regulations, the system has these restrictions:
On W-2 returns, the system prints only the last three non-blank address lines plus the city, state,

Revising the Personal Profile Workfile
Reviewing History and Revising Self-Service Workfiles 25-21
and postal code.On 1099 returns, the system prints only the last non-blank address line plus the city, state, and postal code.On other U.S. federal magnetic media, the system prints only the last non-blank address line plus the city, state, and postal code.
■ Type Code
A user defined code (01/W0) that identifies the Who's Who entry. Examples include:
A: Attention name
B: Billing
C: Contact name
E: Emergency Contact
O: Other
T: 1099 legal name
■ Professional Title
Enter the professional title of a Who's Who person.
■ Line ID
Enter a value that is used to identify the line ID number for a Who's Who record.
■ Display Sequence
Enter a number that specifies the order of a group of records on the form.
■ Remark
Enter up to 40 characters of text into this field.

Revising the Personal Profile Workfile
25-22 JD Edwards EnterpriseOne Applications Human Capital Management Self-Service Implementation Guide

26
Setting Up New DBA Plan Rates 26-1
26Setting Up New DBA Plan Rates
This chapter contains the following topics:
■ Section 26.1, "Understanding DBA Plan Rates"
■ Section 26.2, "Prerequisite"
■ Section 26.3, "Implementing New DBA Plan Rates"
26.1 Understanding DBA Plan RatesIf any of your benefit plans are changing rates during the open enrollment period, you can cross-reference the current year's DBAs (deductions, benefits, and accruals) with the current rates to the DBAs that reference the new rates. This cross-reference lets you effectively change the rates that appear for the enrollment period without changing the rates for the current DBAs.
You need to cross-reference DBAs only for benefit calculations that are table based or if the DBA is changing radically (for example, from a flat dollar amount to a percentage). If you do not set up a cross-reference, the system retrieves new rates from the Plan Master Rates table (F083203). If you set up both the Plan Master Rates table and the DBA cross-reference, the system uses the DBA cross-reference.
You need to set up the DBA cross-reference before you build the workfiles for open enrollment.
26.2 PrerequisiteSet up the DBAs for the new rates.
See "Setting Up Deductions, Benefits, and Accruals" in the JD Edwards EnterpriseOne Applications Human Capital Management Fundamentals Implementation Guide.
26.3 Implementing New DBA Plan RatesThis section discusses how to implement new DBA plan rates.

Implementing New DBA Plan Rates
26-2 JD Edwards EnterpriseOne Applications Human Capital Management Self-Service Implementation Guide
26.3.1 Forms Used to Set Up New DBA Plan Rates
Form Name FormID Navigation Usage
Plan DBA/Enrollment DBA Cross Reference
W08515A Self Service Setup (G05BESS4), Current to Future DBA X-Ref
Change your enrollment plan's DBA amounts to the new rates prior to the period in which they will be effective.
26.3.2 Implement New DBA Plan RatesAccess the Plan DBA/Enrollment DBA Cross Reference form.
Figure 26–1 Plan DBA/Enrollment DBA Cross Reference form
To cross-reference new DBA plan rates:
1. On Plan DBA/Enrollment DBA Cross Reference, enter the current year's DBA in the Plan / Option PDBA Code field.
■ Plan / Option PDBA Code
Enter a code that defines the type of pay, deduction, benefit, or accrual.
Pay types are numbered from 1 to 999. Deductions and benefits are numbered from 1000 to 9999.
2. Enter the corresponding DBA for the new rate in the Enrollment PDBA Code field.
■ Enrollment PDBA Code
Enter a code that is associated with a deduction, benefit, or accrual (DBA) that was used to calculate the employee's net payment. This code prints on the right side of the payment stub.
3. Repeat steps 1 and 2 for all the rates that are changing, and then click OK to save your changes.

27
Managing Benefits Self-Service Work Files 27-1
27Managing Benefits Self-Service Work Files
This chapter contains the following topics:
■ Section 27.1, "Understanding Benefits Self-Service Work Files"
■ Section 27.2, "Purging the Employee Current and Pending Elections Work Table"
■ Section 27.3, "Purging the Dependent and Beneficiary Cross-Reference Work Table"
■ Section 27.4, "Purging the Current Dependent and Beneficiary Cross-Reference Work Table"
■ Section 27.5, "Purging the Employee Personal Information, Contacts, and Phone Work Tables"
■ Section 27.6, "Purging the Available Plans and Plan Options Work Table"
27.1 Understanding Benefits Self-Service Work FilesBefore each annual open benefits enrollment, you should remove old data from your self-service work files. By removing old data, you reduce the possibility that the system could save old data that is no longer applicable to the current work force in the live tables.
27.2 Purging the Employee Current and Pending Elections Work TableThis section provides an overview and discusses how to run the Purge Employee Current/Pending Elections Work Table.
27.2.1 Understanding the Employee Current and Pending Elections Work TableYou can use the Purge Employee Current/Pending Elections Work Table program (R085540) to remove existing data from the Employee Current/Pending Elections Work Table (F085530W). This program also uses data in the Employee Master Information table (F060116).
27.2.2 Running the Purge Employee Current/Pending Elections Work Table ProgramFrom the Employee Self Service General Mgmt (G08BESS327), Purge Employee Current/Pending Work Table.
27.3 Purging the Dependent and Beneficiary Cross-Reference Work TableThis section provides an overview of the Purge Dependent/Beneficiary X-Reference Table program and discusses how to:

Purging the Dependent and Beneficiary Cross-Reference Work Table
27-2 JD Edwards EnterpriseOne Applications Human Capital Management Self-Service Implementation Guide
■ Run the Purge Dependent/Beneficiary X-Reference Table program.
■ Set processing options for the Purge Dependent/Beneficiary X-Reference Table program.
27.3.1 Understanding Dependent and Beneficiary Cross-Reference Work Table Maintenance
You can use the Purge Dependent/Beneficiary X-Reference Table program (R085542) to remove existing data from the Dependent/Beneficiary X-Reference Work Table (F085536W). This program also uses data in the Employee Master Information table (F060116).
You can set a processing option to specify whether this program deletes records that have not been saved to live files. You can also set a processing option to specify the type of enrollment.
You might want to set up an additional version of this UBE so that you can run one version prior to open enrollment and another version for benefit enrollments that are based on life events.
27.3.2 Running the Purge Dependent/Beneficiary X-Reference Table ProgramFrom the Employee Self Service General Mgmt (G08BESS327), Purge Dependent/Beneficiary X-Reference Table.
27.3.3 Setting Processing Options for Purge Dependent/Beneficiary X-Reference Table (R085542)
Processing options enable you to specify the default processing for programs and reports.
27.3.3.1 DeleteUse these processing options to specify whether the program removes data that the system has not saved in live tables. You can also designate the type of enrollment records that the system removes.
1. Delete Unprocessed Records in F05536WSpecify whether the system removes unprocessed records from the Dependent/Beneficiary X-Reference Work Table (F085536W) that have not been saved in live tables. Values are:
Blank: Keep (do not delete) unprocessed records.
1: Delete unprocessed records.
2. Enrollment Event Type Specify the type of records that the system removes from the Dependent/Beneficiary X-Reference Work Table (F085536W). Values are:
1: Open Enrollment
2: Current Enrollment

Purging the Employee Personal Information, Contacts, and Phone Work Tables
Managing Benefits Self-Service Work Files 27-3
27.4 Purging the Current Dependent and Beneficiary Cross-Reference Work Table
This section provides an overview and discusses how to run the Purge Current Dep/Ben X-Reference Work Table program.
27.4.1 Understanding Current Dependent and Beneficiary Cross-Reference Work Table Maintenance
You can use the Purge Current Dependent/Beneficiary X-Reference program (R085543) to remove existing data from the Current Dep/Ben X-Reference Work Table (F085537W). This program also uses data in the Employee Master Information table (F060116).
27.4.2 Running the Purge Current Dep/Ben X-Reference Work Table ProgramFrom the Employee Self Service General Mgmt (G08BESS327), Purge Current Dependent/Beneficiary X-Reference.
27.5 Purging the Employee Personal Information, Contacts, and Phone Work Tables
This section provides an overview of the Purge Employee Personal, Contact, Phone Work Tables program and discusses how to:
■ Run the Purge Employee Personal, Contact, Phone Work Tables program.
■ Set processing options for the Purge Employee Personal, Contact, Phone Work Tables program.
27.5.1 Understanding Employee Personal Information, Contacts, and Phone Work Tables Maintenance
You can use the Purge Employee Personal/Contact/Phone program (R054040) to remove existing data from these tables:
■ Employee Personal Profile Information Work (F054101W)
■ Employee Emergency Contact Work (F054111W)
■ Employee Phone Number Work (F054115W)
This program also uses data in the Employee Master Information table (F060116).
You can set processing options to specify whether you want the system to remove records that have not been previously saved in live tables.
27.5.2 Running the Purge Employee Personal, Contact, Phone Work Tables ProgramFrom the Employee Self Service General Mgmt (G08BESS327), Purge Employee Personal/Contact/Phone.
27.5.3 Setting Processing Options for Purge Employee Personal/Contact/Phone (R054040)
Processing options enable you to specify the default processing for programs and reports.

Purging the Available Plans and Plan Options Work Table
27-4 JD Edwards EnterpriseOne Applications Human Capital Management Self-Service Implementation Guide
27.5.3.1 DeleteUse this processing option to specify whether you want the system to remove data that has not been saved in live tables.
1. Delete Unprocessed Records in F054101W, F054111W, and F054115W.Specify whether the system removes records that have not been saved in live tables. The system removes records from these tables:
■ Employee Personal Profile Information Work Table (F054101W).
■ Employee Emergency Contact Work Table (F054111W).
■ Employee Phone Number Work Table (F054115W).
Values are:
Blank: The system keeps unprocessed records (does not delete).
1: The system removes unprocessed records.
27.6 Purging the Available Plans and Plan Options Work TableThis section provides an overview of the Purge Available Plans/Plan Options program and discusses how to:
■ Run the Purge Available Plans/Plan Options program.
■ Set processing options for the Purge Available Plans/Plan Options program.
27.6.1 Understanding Available Plans and Plan Options Work Table MaintenanceYou can use the Purge Available Plans and Plan Options by Employee Table to remove existing data from the Available Plans and Plan Options by Employee Work Table (F085520W).
You can set a processing option to specify whether you want the system to remove records that have not been saved to live tables. You might also want to set up a second version of this program. You can set a processing option so that one version removes open enrollment records and the second version removes life event enrollment records.
27.6.2 Running the Purge Available Plans/Plan Options ProgramFrom the Employee Self Service General Mgmt (G08BESS327), Purge Available Plans/Plan Options.
27.6.3 Setting Processing Options for Purge Available Plans/Plan Options (R085541)Processing options enable you to specify the default processing for programs and reports.
27.6.3.1 DeleteUse these processing options to specify whether you want the system to remove records that have not been saved in the live tables. You can also specify the type of enrollment event records that you want removed.

Purging the Available Plans and Plan Options Work Table
Managing Benefits Self-Service Work Files 27-5
1. Delete Unprocessed Records in F085520W.Specify whether unprocessed records that have not been updated to live tables should be deleted from the Available Plans and Plan Options by Employee Work Table file (F085520W). Values are:
Blank: The system keeps (does not remove) records that have not been saved in live tables.
1: The system removes records that have not been saved in live tables.
2. Enrollment Event Type Specify the type of records that the system removes from the Available Plans and Plan Options by Employee Work Table (F085520W). Values are:
1: Open enrollment
2: Current enrollment

Purging the Available Plans and Plan Options Work Table
27-6 JD Edwards EnterpriseOne Applications Human Capital Management Self-Service Implementation Guide

28
Employee Self Service 28-1
28Employee Self Service
This chapter contains the following topics:
■ Section 28.1, "Understanding Employee Self Service"
■ Section 28.2, "Requesting a Verification-of-Employment Letter"
■ Section 28.3, "Reviewing Personal Information Using Self Service"
■ Section 28.4, "Reviewing Pay Stubs Using Employee Self Service"
■ Section 28.5, "Entering Automatic Deposit Information"
■ Section 28.6, "Entering Competency Information Using Self Service"
■ Section 28.7, "Entering Timecards Using Self Service"
■ Section 28.8, "(Release 9.1 Update) Disclosing Disability Status"
■ Section 28.9, "(Release 9.1 Update) Disclosing Protected Veteran Status"
■ Section 28.10, "Managing Self-Service Timecards Using Summary Time Entry"
28.1 Understanding Employee Self ServiceSelf service enables employees to review and enter information using a company intranet portal. One of the most common self-service functions that companies offer is open enrollment for benefits. Another common self-service offering is access to employee personal information.
28.2 Requesting a Verification-of-Employment LetterThis section provides an overview of verification-of-employment letters and discusses how to:
■ Set processing options for Review Requests for Verification of Employment (P05003).
■ Request a verification-of-employment letter.
28.2.1 Understanding Verification-of-Employment LettersThe Review Requests for Verification of Employment program (P05003) enables employees to submit requests online to verify salary and employment information. Concurrently, they can review the salary and employment information that is associated with their employee records.

Requesting a Verification-of-Employment Letter
28-2 JD Edwards EnterpriseOne Applications Human Capital Management Self-Service Implementation Guide
Using processing options, the employer controls the user level. An employee can review information at the employee user level and make changes that are allowed for employees. An HR person can review information at the HR user level and perform functions that are allowed only at an administrative level.
After an employee has submitted a request for employment verification, a workflow process is started. The workflow process forwards the request to a designated HR administrator. The HR administrator then reviews the employment and salary information that the system has generated, makes any necessary revisions, and forwards the information directly to the party previously specified by the employee.
Employees can use self service to request that a verification-of-employment letter be sent to a creditor or loan officer. After requesting the letter, employees can review the progress of the request. The HR administrator can print or send the completed letter by email.
28.2.2 Forms Used to Request a Verification-of-Employment Letter
Form Name FormID Navigation Usage
Work With Verification Of Employment Requests
W05003A Employee Self Service (G05BESS1), Verification of Employment
On Work With Verification Of Employment Requests, click Select.
Request a Verification-of-Employment letter.
Verification of Employment Data
W05003B On Verification Of Employment Data, select the Request Information tab.
Enter required data.
Verification of Employment Data
W05003B Employment Data tab
Click OK.
Update employment information, if required.
The Work With Verification Of Employment Requests form appears. Your letter is pending review.
28.2.3 Setting Processing Options for Review Requests for Verification of Employment (P05003)
Processing options enable you to specify the default processing for programs and reports.
28.2.3.1 User Level
1. User Level: Values are:
Blank: Employee
1: Employee.
2: HR clerk.
3: HR Administrator (This option does not send a request through Workflow.)

Note: If this program is used by an employee or an HR clerk, the approval process will be routed through workflow, where the Workflow Setup tab must be set up.
Requesting a Verification-of-Employment Letter
Employee Self Service 28-3
28.2.3.2 Workflow SetupUse this processing option to specify which address number the system uses.
1. Address Number of VOE request processor (HRM):Specify the address number of the HR person (Human Resources) or who processes VOE (Verification of Employment) requests. This entity can also be a distribution list.
28.2.4 Requesting a Verification-of-Employment LetterAccess the Verification Of Employment Data form.
Figure 28–1 Verification Of Employment Data form
To request a verification-of-employment letter:
1. On Work With Verification Of Employment Requests, complete the Employee No field and click Add.
2. On Verification Of Employment Data, complete the Contact Name field on the Request Information tab.
3. Complete any of these optional fields:
– Company
– Title
– Phone Area / Number
– Comment

Requesting a Verification-of-Employment Letter
28-4 JD Edwards EnterpriseOne Applications Human Capital Management Self-Service Implementation Guide
4. Select one or more of these contact method options:
– Facsimile
5. Complete any of these fields that apply to the contact method option that you have chosen:
■ E-Mail Address
Enter a value that indicates whether the verification-of-employment letter can be sent by email. Values are:
1: Yes, the letter can be sent by email.
0: No, the letter cannot be sent by email. This is the default value.
Enter a valid email address.
■ Fax Prefix / Phone No.
Enter the prefix for telephone number 2. The default format for the Phone Prefix data dictionary item is set to the United States prefix (area code). This format is three characters enclosed in parentheses, for example, (303). If you require an alternate format to accommodate a non-United States prefix, you must change the data display rules in the data dictionary.
■ Address Line 1
Enter the first line of a mailing address for an employee, customer, or supplier in the JD Edwards EnterpriseOne Address Book system. The U.S. Internal Revenue Service (IRS) restricts the size of the address that prints on an employee's year-end tax return. To comply with IRS regulations, the system has these restrictions:
On W-2 returns, the system prints only the last three non-blank address lines plus the city, state, and postal code.On 1099 returns, the system prints only the last non-blank address line plus the city, state, and postal code.On other U.S. federal magnetic media, the system prints only the last non-blank address line plus the city, state, and postal code.
■ Address Line 2
Enter the second line of the mailing address for an employee, customer, or supplier in the JD Edwards EnterpriseOne Address Book system.
Payroll users: The IRS restricts the size of the address that prints on employee year-end forms. To comply with IRS regulations, the system has these restrictions:
On W-2 returns, the system prints only the last three non-blank address lines plus the city, state, and postal code.On 1099 returns, the system prints only the last non-blank address line plus the city, state, and postal code.On other U.S. federal magnetic media, the system prints only the last non-blank address line plus the city, state, and postal code.
■ City

Requesting a Verification-of-Employment Letter
Employee Self Service 28-5
Enter a name that indicates the city that is associated with the address.
■ State
Enter a user-defined code (00/S) that specifies the state or province. This code is usually a postal service abbreviation.
■ Postal Code
Enter the United States ZIP code or the postal code that specifies where a letter is to be routed. Attach this code to the address for delivery in other countries. This code is used as the low end value when you are doing Postal Code Transaction range processing.
■ Country
Enter a user-defined code (00/CN) that identifies a country. The country code has no effect on currency conversion.
The JD Edwards EnterpriseOne Address Book system uses the country code for data selection and address formatting.
6. Click the Employment Data tab.
7. Review these pay information fields:
■ Date Started
Enter the date on which the employee actually reported to work for the most recent period of hire. When an employee initially begins working, the default value is the original hire date. If no original hire date exists, the system uses the current date. This field can be updated multiple times if, for example, an employee is a seasonal worker.
For the calculation tables in the Payroll system and the eligibility tables and date codes in the Human Resources system, the system also uses this date as a start date when it calculates deductions, benefits, and accruals.
■ Job Type/Step Description
Enter the description that is associated with the job type and job step. This description is stored in the Job Information table.
■ Continued Employment
Enter a value that indicates the employee's potential for continuing employment with the organization. Values are stored in the user-defined code table email.
■ Date Of Last Raise
Enter the date of the employee's last raise. For the email HR system, this is the date when you update salary and wages. If you also have the Payroll system, this date is automatically updated when a payroll is run. You define pay-effective dates using the Pay Rate Information form.
■ Amount Of Increase
Enter an amount. Amount of increase is the difference between two values. A negative value indicates a decrease.
A monetary increase as a result of a raise occurring on the date of last raise.
■ Date of Next Raise
Requesting a Verification-of-Employment Letter
28-6 JD Edwards EnterpriseOne Applications Human Capital Management Self-Service Implementation Guide
Enter the date that the hourly or annual pay rate for the employee increases. The new rate goes into effect after a payroll cycle finishes with a pay period end date on or after the date of the next raise.
■ Pay Period Salary
Enter a valid amount. Pay Period Salary is calculated by dividing the annual salary by the number of pay periods.
8. Review these pay information fields for the current year, one year prior, and two years prior:
■ Base
Enter an amount paid from all pay types that are considered to be base salary for the current year.
■ Overtime
Enter an amount that is paid from all pay types that are considered to be overtime pay for the current year.
■ Commission
Enter an amount that is paid from all pay types that are considered to be commission pay for the current year.
■ Bonus
Enter the amount of bonus pay that the employee earned, year-to-date in the current year. The system calculates this amount by searching the employee's timecards for pay types that represent bonus pay. It then calculates the amount of the employee's earnings during the year that were attributed to the bonus pay types.
Note: When you set up a pay type, you use the Pay Type Category field (PACT) to identify it as part of a related group of pay types, such as regular pay, bonus pay, commissions, and so on. You define pay type categories in user-defined code list (UDC) PC.
■ Other
Enter an amount that is paid from all pay types that are considered to be other pay for the current year. Other pay is anything other than base salary, overtime, commission, and bonus.
9. Click OK.
10. To review the status of your request, click Find.
11. Review this field for the request:
■ Revd Flag (revised flag)
Enter a UDC (05/V2) that indicates the progress of your verification of employment letter. Values are:
0: Pending.
The administrator has not yet reviewed your request. You can change your request information if you need to.
1: Reviewed.

Reviewing Personal Information Using Self Service
Employee Self Service 28-7
The administrator has reviewed your request. Changing your request information is not advisable.
2: Processed.
The administrator has processed your verification of employment letter.
28.3 Reviewing Personal Information Using Self ServiceThis section provides an overview of employee personal information, lists a prerequisite, and discusses how to:
■ Set processing options for Employee Profile (P060116).
■ Review personal information.
28.3.1 Understanding Employee Personal InformationYou can use employee self service for review. As personal circumstances change, use this approach to review the current status of personal information, obtain documentation regarding employment, or review paid time off. To use employee self service, each employee must have password-protected access to your software.
Use the Employee Profile program (P060116) to review information that currently exists in your company's records. The information that you can review is in these categories:
■ Personal
■ Company (self service)
■ Job (self service)
The information in this location is for review only; you cannot change any of the fields.
With proper administrative authority, you can also select an employee record and then select one of these menu options:
■ EE Profile (Employee)
When you select the EE Profile option, the system displays Employee Profile and Job Information (P060116).
■ Address Book
When you select the Address Book option, the system displays Address Book Revision (P01012) and provides an opportunity to enter changes.
■ Benefits Enrollment
When you select the Benefits Enrollment option, the system displays Enrollment Overrides (P08330). You can also set a processing option to select Enrollment With Eligibility (P08334).
■ Employee DBA (Deduction, Benefit, Accrual) Instructions
When you select Employee DBA Instructions, the system displays Employee DBA Instructions (P050181).
Managers can review this information from the Manager's Workbench (P08712). The HR administrator can review this information by accessing Employee Profile from the Employee Management menu (G05BE1), selecting an employee record, and then selecting EE Profile from the Row menu. On Employee Profile and Job Information, your personal information is always displayed. You can click tabs for Company or Job

Reviewing Personal Information Using Self Service
28-8 JD Edwards EnterpriseOne Applications Human Capital Management Self-Service Implementation Guide
information. Managers and HR representatives can also expedite their review of information by selecting multiple employee records on the Work With Employees form and then selecting Next on Employee Profile and Job Information to step through the employee records. The task in this section represents forms as they are viewed by an employee.
28.3.2 PrerequisitesBefore you complete the tasks in this section:
■ Set the Address Number processing option for the Employee Profile program (P060116) to the HR administrator’s address number. The Enrollment tab of the processing options is not functional for this application. Do not enter or change the value for this tab.
■ (Release 91. Update) To access the Voluntary Self-Identification of Disability Status form from the Employee Profile program (P060116), leave the Disclose Disability Status Button processing option blank.
■ (Release 91. Update) To access the Voluntary Self-Identification of Protected Veteran Status form from the Employee Profile program, leave the Disclose Veteran Status Button processing option blank.
■ (Release 91. Update) To disclose disability and veteran status information, you must run the Personal Employee Information Workfile Build (R054101) report.
28.3.3 Form Used to Review Personal Information Using Self-Service
Form Name FormID Navigation Usage
Employee Profile and Job Information
W060116C Employee Self Service (G05BESS1), Employee Personal Profile
Review personal information on each of the form tabs.
If necessary, an employee can use the text area of the form to communicate detailed information that you want to provide to HR and then click OK.
28.3.4 Setting Processing Options for Employee Profile (P060116)Processing options enable you to specify the default processing for programs and reports.
28.3.4.1 EnrollmentUse this processing option to specify the program that the system opens when the user chooses the benefits enrollment menu option.
Benefits Enrollment Specify whether to enroll an employee with eligibility for benefits or with overrides. Values are:
0: Enroll with overrides. This is the default value.
E: Enroll with eligibility.

Reviewing Personal Information Using Self Service
Employee Self Service 28-9
28.3.4.2 Human ResourceUse these processing options to specify the default address number, which the system uses to send an email message to the appropriate human capital management representative, and whether to display the Disclose Disability Status button.
1. Address Number Specify the address book number that the system uses to retrieve the email address from the Remark field on the Who's Who Address Book form.
(Release 9.1 Update) 2. Disclose Disability Status ButtonSpecify whether to display the Disclose Disability Status button on the Employee Profile and Job Information form. Values are:
Blank: Show button
1: Hide button
(Release 9.1 Update) 3. Disclose Veteran Status ButtonSpecify whether to display the Disclose Veteran Status button on the Employee Profile and Job Information form. Values are:
Blank: Show button
1: Hide button
(Release 9.1 Update) 4. Veteran, Disabled Veteran FieldsSpecify whether to display the Veteran and Disabled Veteran fields on the Employee Profile and Job Information form. Values are:
Blank: Show
1: Hide
28.3.4.3 VersionsUse these processing options to specify the program version that the system uses for each program.
1. Address Book Version Specify the Address Book version. If you leave this processing option blank, the system uses ZJDE0001.
2. Enrollment with Eligibility Version Specify the Enrollment with Eligibility version. If you leave this processing option blank, the system uses ZJDE0001.
3. Enrollment with Overrides Version Specify the Enrollment with Overrides version. If you leave this processing option blank, the system uses ZJDE0001.
4. Employee DBA Instructions Version Specify the Employee DBA Instructions version. If you leave this processing option blank, the system uses ZJDE0001.
28.3.5 Reviewing Personal InformationAccess the Employee Profile and Job Information form.
To review employee personal profile information:
1. On Employee Profile and Job Information, review the data in the Personal section.

Reviewing Pay Stubs Using Employee Self Service
28-10 JD Edwards EnterpriseOne Applications Human Capital Management Self-Service Implementation Guide
2. Click Disclose Disability Status to access the Voluntary Self-Identification of Disability Status form to review or enter disability status information.
See Disclosing Disability Status.
3. Click Disclose Veteran Status to access the Voluntary Self-Identification of Protected Veteran Status form to review or enter veteran status information.
See Disclosing Protected Veteran Status.
4. Review the information on the Company and Job tabs.
5. If you find information that requires correction or you desire to have new information added, click Contact HR.
6. On Send Internal Work Item, complete these fields:
■ Subject
Enter a short description or subject of the message.
■ Phone Number
Enter the phone number of the individual who is sending the message.
The system provides the default address number of the HR administrator in the Send To field, as specified by the processing option. The system provides your name as the default in the Call From field, which is not available for change.
7. Use the text area of the form to communicate detailed information that you want to provide to HR. When finished, click OK.
Workflow sends your message to the HR administrator for action on your request.
28.4 Reviewing Pay Stubs Using Employee Self ServiceThis section provides an overview of pay stubs review and discusses how to review pay stub information.
28.4.1 Understanding Pay Stubs ReviewEmployees can use employee self service to review the accuracy of their pay stubs and ensure that they are complete. If the portal component for the Stub Information History program (P07186) exists on your organization intranet portal, employees can click the link to review their personal pay stub history. An HR administrator can access the same program from a menu and enter an employee identification number to review pay stub history for various employees.

Reviewing Pay Stubs Using Employee Self Service
Employee Self Service 28-11
28.4.2 Forms Used to Review Pay Stubs
Form Name FormID Navigation Usage
Work With Pay Stub History
W07186C HR access: U.S. History Inquiries (G07BUSP14), Pay Stub History
On Work With Pay Stub History, click Select.
Enter identification information and click Find.
When you access this program from an organization portal, the system reads the employee sign-in identification, disables this field, and displays pay stub records for the current user.
Select a pay stub record.
Pay Stub History Information
W07186A Select Piecework Stub from the Row menu
Review information.
Work With Employee Piece Work Stub Detail
W071861A Click Cancel. Review piecework detail.
28.4.3 Reviewing Pay Stub InformationAccess the Pay Stub History Information form.
Figure 28–2 Pay Stub History Information form
To review pay stubs using employee self service:
1. On Work With Pay Stub History, to display entries for previous pay periods, complete these fields and then click Find:
– Employee Identification
– From Check Date
– Through Check Date
2. Select a pay stub record, and click Select.
3. On Work With Pay Stub History, review the copy of the pay stub.

Entering Automatic Deposit Information
28-12 JD Edwards EnterpriseOne Applications Human Capital Management Self-Service Implementation Guide
4. To print the information, select Print from the Form menu.
28.5 Entering Automatic Deposit InformationThis section provides an overview of automatic deposit information and discusses how to enter automatic deposit information.
28.5.1 Understanding Automatic Deposit InformationEmployees use the Auto Deposit Instructions program (P055011) to enter automatic deposit information when they want all or part of their payment each pay period to be deposited directly into their bank account. Employees can choose to receive part of their payment in check form and the rest in automatic deposit form. They also can divide their payment among multiple accounts. Typically, the automatic deposit information that employees enter is reviewed and approved by a payroll representative before the information takes effect. An employee receives a message from the payroll representative that indicates whether the information that he or she entered has been approved.
Employees can also revise any existing automatic deposit information that they or a payroll representative entered previously.
When employees use self service to enter or update automatic deposit information, the new deposit information is processed in the next payroll cycle, and the prenote test is eliminated.
28.5.2 Form Used to Enter Automatic Deposit Information
Form Name FormID Navigation Usage
Revise Automatic Deposit Instructions
W055011A Employee Self Service (G05BESS1), Auto Deposit Instructions
On Revise Automatic Deposit Instructions, click OK.
Review existing data and enter new information as necessary.
The system displays a message that indicates that the information that employees entered has been submitted to a payroll representative for approval.
28.5.3 Entering Automatic Deposit InformationAccess the Revise Automatic Deposit Instructions form.

Entering Automatic Deposit Information
Employee Self Service 28-13
Figure 28–3 Revise Automatic Deposit Instructions form
To enter automatic deposit information:
1. On Revise Automatic Deposit Instructions, select one of these options:
■ Dollar1
Enter a value that specifies the type of processing for an event.
■ Percent1
Enter a value that specifies the type of processing for an event.
2. Complete these fields:
■ Amount or Percent
Enter the actual gross pay amount for an employee. This amount is different than the distributed gross pay amount that is used for labor distribution. See data item DPAY.
When you are using Work Order Time Entry, this field is used to record miscellaneous pay for an employee, (for example, piece rate bonus).
■ Bank Trnst No. (bank transit number)
Enter the bank transit number for the employee's financial institution. Banks might refer to this number as the ABA (American Bank Association) or payment routing number. This number can be obtained from the employee's check or deposit slip. It is located between the colons (:) at the bottom of the check.
For U.S. banks, this number contains nine digits. If this number does not contain nine digits, you must contact the employee's financial institution to obtain the correct number.
For Canadian banks, this number contains eight digits. Therefore, Canadian clients must enter the bank transit number with a leading zero.
If you change this number for an employee, the system creates a prenote for the employee's next auto deposit.
■ Bank Account

Entering Automatic Deposit Information
28-14 JD Edwards EnterpriseOne Applications Human Capital Management Self-Service Implementation Guide
Enter the employee's unique account number at the financial institution. The number is obtained from the bottom line of a voided check or a deposit slip from the employee's account. You must include dash cue symbols in the field.
Account numbers can also be obtained from other sources, such as passbooks or debit cards. When transcribing information, left justify and enter only numbers (0 through 9), alphabetic characters (A through Z), and hyphens (-). If fewer than 17 characters are required, leave the unused spaces blank. Spaces that are left within the depositor's account number will be ignored when the paperless entry is prepared. For example, 0123 4 56789 will appear as 0123456789 in the entry record, and 0123-4 56789 will appear as 0123-456789.
If you change this number, the system automatically prenotes the employee's auto deposit record again.
Note: The Financial Organization Account Number (FOA#) is used as the company's unique bank account number rather than the employee's unique bank account number in these files:
F06560 - Bank Reconciliation - Issue Table
F06561 - Bank Reconciliation - Paid Table
3. To indicate the type of account, select one of these options:
■ Checking1
No entry required. This is a generic field that is used for video constants display.
■ Savings1
No entry required. This is a generic field that is used for video constants display.
4. Repeat steps 1–3 for as many accounts as you want to have a portion of your payment deposited.
5. If, after completing steps 1–4, any additional portion of your payment is unallocated, select one option:
■ Remainder Auto Deposit
Enter a value that specifies the type of processing for an event.
■ Remainder Check
Enter a value that specifies the type of processing for an event.
6. Complete the Routing Number and Account Number fields.
7. Select one of these options in the Remainder Amount group box:
■ RemChecking (remainder checking)
Enter a value that specifies the type of processing for an event.
■ RemSavings (remainder savings)
Enter a value that specifies the type of processing for an event.
8. Click OK.
Entering Competency Information Using Self Service
Employee Self Service 28-15
28.6 Entering Competency Information Using Self ServiceThis section provides an overview of self-service competency information and discusses how to:
■ Set processing options for Competency Self Service (P05130).
■ Enter a training competency.
■ Enter a skills competency.
■ Enter an accomplishment competency.
■ Enter a certification competency.
■ Enter an education competency.
■ Enter a language competency.
■ Revise competency information.
28.6.1 Understanding Self-Service Competency InformationCompetency management is a method of categorizing and tracking the qualifications that employees have that make them competent to perform their job duties. These qualifications, such as C programming skills, professional license, or fluency in French, are called competencies.
An organization uses competency management to track the competencies that their employees possess and to compare these competencies with those that are required for their job. Tracking competencies helps managers and human resources representatives determine the competencies that employees need in order to satisfy the requirements of their current job, as well as a job they might hope to obtain in the future. Competency management also helps employees and managers create clear career goals and performance objectives.
To simplify the process of maintaining competency information for employees, employees can use self service to enter and revise their own competency information.
Because employees typically know their own professional background more thoroughly than that of anyone else in your organization, they can enter their own competency information, and the system submits it to someone else, such as their manager or a member of the human resources department, for approval. For example, others might not be aware that an employee is working on an advanced degree or a professional certification that is not directly related to their current job. Self service enables the employee to update his or her competency information as each competency is acquired. Employees can also revise their existing competency information.
After the employee enters competency information, the appropriate person receives a Workflow message that indicates that competency information is waiting for approval. That person must then review the information and enter a level of proficiency for each competency.
After employees enter competency information, they can review it to verify that it is correct. If they find an error or omission, they can revise the information to correct it. After they revise competency information, the appropriate person, such as their manager or a member of the human resources department, receives a Workflow message that indicates that the information is waiting for approval.
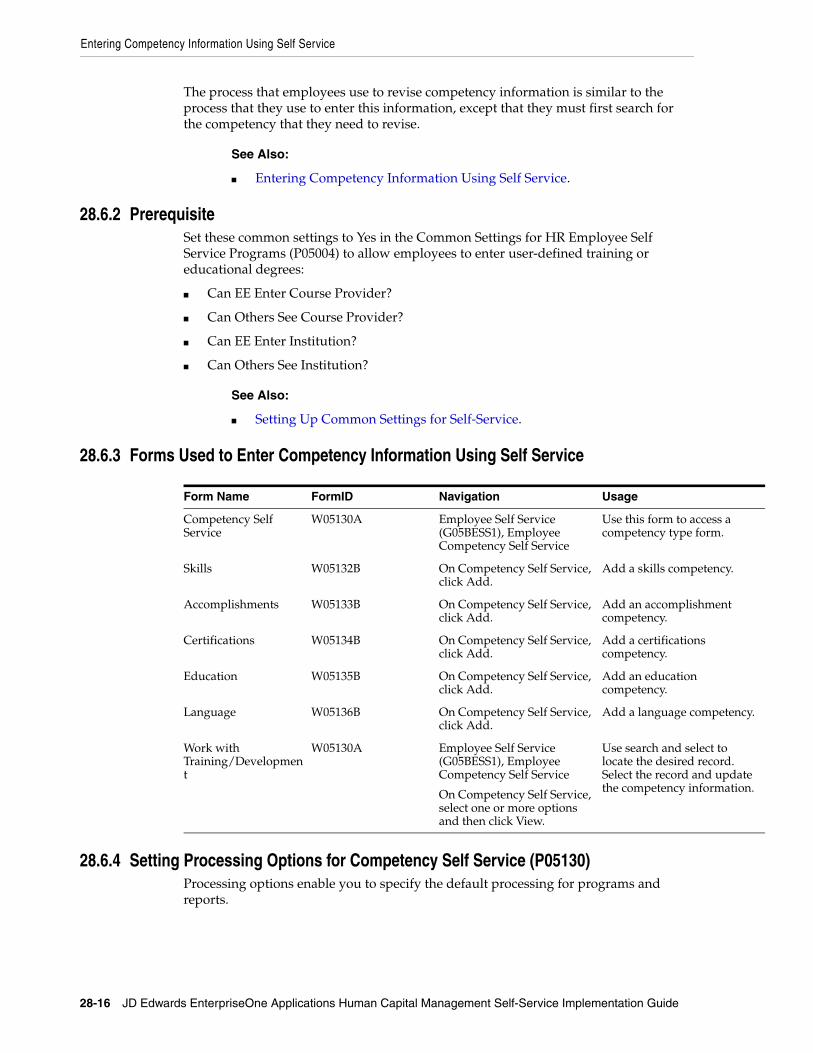
Entering Competency Information Using Self Service
28-16 JD Edwards EnterpriseOne Applications Human Capital Management Self-Service Implementation Guide
The process that employees use to revise competency information is similar to the process that they use to enter this information, except that they must first search for the competency that they need to revise.
See Also:
■ Entering Competency Information Using Self Service.
28.6.2 PrerequisiteSet these common settings to Yes in the Common Settings for HR Employee Self Service Programs (P05004) to allow employees to enter user-defined training or educational degrees:
■ Can EE Enter Course Provider?
■ Can Others See Course Provider?
■ Can EE Enter Institution?
■ Can Others See Institution?
See Also:
■ Setting Up Common Settings for Self-Service.
28.6.3 Forms Used to Enter Competency Information Using Self Service
Form Name FormID Navigation Usage
Competency Self Service
W05130A Employee Self Service (G05BESS1), Employee Competency Self Service
Use this form to access a competency type form.
Skills W05132B On Competency Self Service, click Add.
Add a skills competency.
Accomplishments W05133B On Competency Self Service, click Add.
Add an accomplishment competency.
Certifications W05134B On Competency Self Service, click Add.
Add a certifications competency.
Education W05135B On Competency Self Service, click Add.
Add an education competency.
Language W05136B On Competency Self Service, click Add.
Add a language competency.
Work with Training/Development
W05130A Employee Self Service (G05BESS1), Employee Competency Self Service
On Competency Self Service, select one or more options and then click View.
Use search and select to locate the desired record. Select the record and update the competency information.
28.6.4 Setting Processing Options for Competency Self Service (P05130)Processing options enable you to specify the default processing for programs and reports.

Entering Competency Information Using Self Service
Employee Self Service 28-17
28.6.4.1 Display
Display Manager Information Specify whether the system displays the status, verification information, and competency level on the forms. Values are:
Blank: Do not display the information.
1: Display the information.
28.6.5 Entering a Training CompetencyAccess the Training/Development form.
If a specific training course or provider does not exist in the predefined list when an employee enters a training competency, the employee must add a code for the course or provider. After an employee adds a new code, the administrator can change, approve, or reject the code.
See "Approving Employee-Entered Codes for External Learning" in the JD Edwards EnterpriseOne Applications Human Resources Implementation Guide.
Figure 28–4 Training/Development form
To enter a training competency:
1. On Training/Development, complete these fields:
– Competency Code
– Course Code
– Provider
– Training Reason
2. To add a new course or provider if one does not exist, click the Add New Course button.

Note: For this button to appear, the Can EE Enter Course Provider setting must be Yes in the Common Settings for HR Employee Self Service Programs (P05004).
Entering Competency Information Using Self Service
28-18 JD Edwards EnterpriseOne Applications Human Capital Management Self-Service Implementation Guide
See Setting Up Common Settings for Self-Service.
3. Complete any of these optional fields, and click OK:
– Start Date
– End Date
– Grade
– Deliver Type
– Units
– Location / Room
4. Repeat steps 2 and 3 for each training competency that you want to enter.
■ Training/Development
Enter a code that identifies a competency table or category for which you can track employee competencies. Values are:
01: Training
02: Skill
03: Accomplishment
04: Certification
05: Degree
06: Language
This is a UDC (05/CY), but the values are hard-coded and cannot be changed. Therefore, each of the competencies that you track must pertain to one of these competency types. Adding additional values to this list requires system configurations.
■ Competency Code
Enter a code that specifies a competency within a competency type. For example, a competency for the competency type Skill might be C programming or Driving a forklift.
■ Course Code
Enter a code that represents a training course.
If the Can Others See Course Provider setting is Yes in the Common Settings for HR Employee SelfService Program (P05004), the Search for Course Visual Assist form will display unconfirmed courses.
■ Add New Course
For this button to appear, the Can EE Enter Course Provider setting in the Common Settings for HR Employee Self Service Programs (P05004) must be Yes.
If a training course does not exist, click the Add New Course button. Enter a course description and the system will add a record for the new course with a

Entering Competency Information Using Self Service
Employee Self Service 28-19
course code, to the Course Master table (F05101). This record is flagged until approved by an HR administrator. A record will also be added to the Unconfirmed Training Additional Information table (F05108) with information about the person who added the record and when.
■ Provider
Enter a UDC (05/PR) that identifies a person or institution who provides training.
If a provider does not exist, click the Add New Course button to add a new course and provider.
See Add New Course.
■ Training Reason
Enter a UDC (05/TN) that indicates the reason for the training.
■ Start Date
Enter the date on which the training course started.
■ End Date
Enter the date on which the training course ended.
■ Grade
Enter the grade that the employee received for the course.
■ Deliver Type
Enter a code that specifies the way in which a course is delivered or presented.
Examples of delivery type include classroom training and computer-based training.
■ Units
Enter a unit of measure for calculating student credits for training courses.
■ Location / Room
Enter the classroom or location where the training course is held.
28.6.6 Entering a Skills CompetencyAccess the Skills form.
To enter a skill competency:
1. On Skills, complete the Competency Code field.
2. Complete any of these optional fields, and click OK:
– Skill Description
– Date Acquired
– Status
3. Repeat steps 2 and 3 for each skill competency that you want to enter.
■ Skills
Enter a code that identifies a competency table or category for which you can track employee competencies. Values are:
01: Training

Entering Competency Information Using Self Service
28-20 JD Edwards EnterpriseOne Applications Human Capital Management Self-Service Implementation Guide
02: Skill
03: Accomplishment
04: Certification
05: Degree
06: Language
This is a UDC (05/CY), but the values are hard-coded and cannot be changed. Therefore, each of the competencies that you track must pertain to one of these competency types. Adding additional values to this list requires system configurations.
■ Competency Code
Enter a code that specifies a competency within a competency type. For example, a competency for the competency type Skill might be C programming or Driving a forklift.
■ Skill Description
Enter a user-defined name or remark.
■ Date Acquired
Enter the date on which the employee acquired the skill.
■ Status
Enter a UDC (05/CR) that indicates the progress that the employee has made toward a level of proficiency in a particular competency. For example, for certification competencies, you might define a status, Pending, to indicate that the employee has completed a certification test but has not yet received his or her test scores.
28.6.7 Entering an Accomplishment CompetencyAccess the Accomplishments form.
To enter an accomplishment competency:
1. On Accomplishments, complete these required fields:
– Competency Code
– Accomplishment Type
2. Complete any of these optional fields, and click OK:
– Date Achieved
– Awarding Organization
– Date Awarded
– Status
3. Repeat steps 2 and 3 for each accomplishment competency that you want to enter.
■ Accomplishments
Enter a code that identifies a competency table or category for which you can track employee competencies. Values are:
01: Training
02: Skill

Entering Competency Information Using Self Service
Employee Self Service 28-21
03: Accomplishment
04: Certification
05: Degree
06: Language
This is a UDC (05/CY), but the values are hard-coded and cannot be changed. Therefore, each of the competencies that you track must pertain to one of these competency types. Adding additional values to this list requires system configurations.
■ Accomplishment Type
Enter a code that indicates an accomplishment. For example, you could define an accomplishment for Network Administration Certification. The system saves this information in UDC 05/AT.
■ Date Achieved
Enter the date on which the employee achieved the accomplishment.
■ Awarding Organization
Enter the name of the organization that awards the certification or other documentation for the competency.
■ Date Awarded
Enter the date on which an accomplishment was formally recognized by the awarding organization.
28.6.8 Entering a Certification CompetencyAccess the Certifications form.
To enter a certification competency:
1. On Certifications, complete these required fields:
– Competency Code
– Licensing Body
– Renewal Code
– Expiration Date
2. Complete any of these optional fields, and click OK:
– Licensing Number
– Score Rating
– Status
– Issue Date
3. Repeat step 2 and 3 for each certification competency that you want to enter.
■ Certification
Enter a code that identifies a competency table or category for which you can track employee competencies. Values are:
01: Training
02: Skill

Entering Competency Information Using Self Service
28-22 JD Edwards EnterpriseOne Applications Human Capital Management Self-Service Implementation Guide
03: Accomplishment
04: Certification
05: Degree
06: Language
This is a UDC (05/CY), but the values are hard-coded and cannot be changed. Therefore, each of the competencies that you track must pertain to one of these competency types. Adding additional values to this list requires system configurations.
■ Licensing Body
Enter a UDC (05/LB) that represents the name of the organization that grants the professional license or certification.
■ Renewal Code
Enter a UDC (05/RC) that indicates the requirements that the employee must complete to renew the license.
■ Expiration Date
Enter the date on which the employee's professional license expires.
■ Licensing Number
Enter the identification number of the employee's professional license.
■ Score Rating
Enter the score that the employee receives when attaining a professional license or certification.
■ Issue Date
Enter the date on which the professional license was issued to the employee.
28.6.9 Entering an Education CompetencyAccess the Education form.
If a specific educational institution does not exist in the predefined list when an employee enters an education competency, the employee must add a code for the institution. After an employee adds a new code, the administrator can change, approve, or reject the code.
See "Approving Employee-Entered Codes for External Learning" in the JD Edwards EnterpriseOne Applications Human Resources Implementation Guide.
To enter an education competency:
1. On Education, complete these required fields:
– Competency Code
– Institution Code
2. To add an institution if one does not exist in the predefined list, click the Add New Institution button
Note: For this button to appear, the Can EE Enter Institution setting must be Yes in the Common Settings for HR Employee Self Service Programs (P05004).

Entering Competency Information Using Self Service
Employee Self Service 28-23
See Setting Up Common Settings for Self-Service.
3. Complete any of these optional fields, and click OK:
– Location
– Degree Date
– GPA Rating (Grade Point Average)
– GradeBase
– Honorary
4. Repeat steps 2 and 3 for each education competency that you want to enter.
■ Education
Enter a code that identifies a competency table or category for which you can track employee competencies. Values are:
01: Training
02: Skill
03: Accomplishment
04: Certification
05: Degree
06: Language
This is a UDC (05/CY), but the values are hard-coded and cannot be changed. Therefore, each of the competencies that you track must pertain to one of these competency types. Adding additional values to this list requires system configurations.
■ Institution Code
Enter a UDC (05/IC) that represents the educational institution from which you obtained your degree.
If the Can Others See Institution setting is Yes in the Common Settings for HR Employee SelfService Program (P05004), the Search for Institution Visual Assist form will display unconfirmed institutions.
■ Add New Institution
For this button to appear, the setting Can EE Enter Institution must be Yes in the Common Settings for HR Employee Self Service Programs (P05004).
See Setting Up Common Settings for Self-Service.
If an educational institution code does not exist, click the Add New Institution button. Enter an institution description and the system will add a record for the new institution with an institution code to UDC (05/IC), with a special handling code of 1. A record will also be added to the Unconfirmed External Training Additional Information table (F05108) with additional information about who added the record and when.
Note: If a UDC record for an institution contains a special handling code of 1, an employee entered the institution and should not be deleted.

Entering Competency Information Using Self Service
28-24 JD Edwards EnterpriseOne Applications Human Capital Management Self-Service Implementation Guide
■ Location
Enter the city or region where the educational institution is located.
■ Degree Date
Enter the date on which the employee graduated and earned a degree.
■ GPA Rating
Enter the overall grade or scale on which a student's grade point average is based.
■ GradeBase
Enter the mathematical average of all of the grades that a student earns in a class.
■ Honorary
Enter a value that indicates whether the student graduated with honors.
28.6.10 Entering a Language CompetencyAccess the Language form.
To enter a language competency:
1. On Language, complete the Competency Code required field.
2. Complete any of these optional fields, and click OK:
– Status Date
– Status
3. Repeat steps 2 and 3 for each language competency that you want to enter.
■ Language
A code that identifies a competency table or category for which you can track employee competencies. Values are:
01: Training
02: Skill
03: Accomplishment
04: Certification
05: Degree
06: Language
This is a UDC (05/CY), but the values are hard-coded and cannot be changed. Therefore, each of the competencies that you track must pertain to one of these competency types. Adding additional values to this list requires system configurations.
■ Status Date
Enter the effective date of the status.
28.6.11 Revising Competency InformationAccess the Competency Self Service form.
To revise competency information:

Entering Timecards Using Self Service
Employee Self Service 28-25
1. On Competency Self Service, select one or more of these options that correspond to the type of competency that you need to revise, and then click View:
– Training/Development
– Skills
– Accomplishments
– Certification
– Education
– Language
2. On Work With Training/Development, Work With Skills, Work With Accomplishments, Work With Certifications, Work With Education, or Work With Language, complete the Competency Code field.
3. To narrow your search, complete any of the other fields, and then click Find.
4. Select a record in the detail area, and then click Select.
5. On Training/Development, Skills, Accomplishments, Certifications, Education, or Language, make the necessary changes, and then click OK.
28.7 Entering Timecards Using Self ServiceThis section provides an overview of self-service time entry, lists a prerequisite, and discusses how to:
■ Enter timecards using self service.
■ Delete or modify self-service timecards.
28.7.1 Understanding Self-Service Time EntryYou can streamline and simplify the process of entering and reviewing employee timecard information by using self-service features. You can use the self-service approach for time entry to eliminate, or greatly reduce, the need for paper time sheets. You can also increase the accuracy and efficiency of your data entry by eliminating the need for a time entry administrator to manually transfer data from paper timecards into the system.
Self-service time entry applications enable you to configure the user interfaces that employees use to enter timecards. You can create multiple interfaces to accommodate the different business requirements of employee groups within your organization.
When employees use self-service time entry, the system displays a welcome form called a director. You can configure this form to include user instructions for the time entry process, or to include information that employees need in order to complete their timecards for the specified pay period. The director form also includes links to the Employee Daily Time Entry (P051127) and Employee Summary Time Entry (P051128) programs, and a link to the Manager Review and Approval program (P051129) that managers or delegates can use to review and approve employee timecards.
When employees click the appropriate link from the director form, the system displays a time entry form where they can enter their timecard information. You can configure this form to include only the fields that you want employees to complete. Using the ESS Time Entry Setup program (P051123), you can select from over 50 predefined fields to appear on the employee time entry form. This program enables you to quickly

Entering Timecards Using Self Service
28-26 JD Edwards EnterpriseOne Applications Human Capital Management Self-Service Implementation Guide
and easily create custom time entry forms to meet your business requirements. You can also define the pay types that each employee can use to enter timecards, which helps to ensure the accuracy of the timecard data.
Note: Employees can enter timecards only for themselves using self-service time entry programs. Similarly, employees who are not managers are able to review only their own timecards. Managers can review their own timecards and those of their employees. If an employee needs to enter timecards for another employee, these timecards must be entered using standard time entry programs.
See "Entering Timecards for Employees" in the JD Edwards EnterpriseOne Applications Time and Labor Implementation Guide.
After an employee enters timecards into the system, those timecards can be reviewed and then approved, changed, deleted, or rejected by the employee's manager. You can also set up manager delegates to perform the review and approval process in the event that an employee's manager is unavailable. Manager delegates are employees that are assigned permission to review and approve timecards on behalf of a manager. In addition, you can generate email messages directly from the Manager Review and Approval program, which enables managers to automatically notify employees about the status of their timecards during the approval process.
When employees enter timecards using self-service applications, the system stores the timecards in the Employee Transactions - Batch File table (F06116Z1), which is a temporary workfile. After the timecards have been reviewed and approved, you can run the Time Entry Batch Processor program (R05116Z1I) to transfer the timecards from the workfile into the Employee Transaction Detail File table (F06116). When the timecards are in the Employee Transaction Detail File table, they can be included in payroll cycle processing.
Note: Because the system stores self-service timecard information in the Employee Transactions - Batch File table (F06116Z1), you can enter timecards while the system is processing a payroll cycle without affecting that payroll cycle. Only timecards that are saved in the Employee Transaction Detail File table (F06116) are included in the payroll cycle.
The Time Entry Self Service Director program (P051125) serves as the entry point for employees and managers to access self-service time entry applications. You can adapt the text that appears on this form and enter time entry in two formats. It can be based on pay period dates or labor period dates. If you enter the time entry based on pay period dates, the system will automatically populate the pay period end date. However, for the time entries based on labor period dates, the labor distribution period tables will control the valid labor period date selections.
Employees access the time entry applications by clicking links that appear on the Time Entry Self Service Director. Employees can click the Summary Time Entry link or the Daily Time Entry link. In addition to the time entry application links, a link to the timecard review and approval application is provided for managers who must review and approve timecards.

Note: The Summary Time Entry, Daily Time Entry, and Manager Review/Approval links always appear on Time Entry Self Service Director. The Summary Time Entry and Daily Time Entry links are always active for all employees; however, the Manager Review and Approval link is active only for managers and their active delegates who can review employee timecards.
Entering Timecards Using Self Service
Employee Self Service 28-27
When you click the Daily Time Entry link from the Time Entry Self Service Director, the system displays Employee Daily Time Entry (P051127) with all timecards for the specified pay period or labor distribution period. The user will be able to modify only those timecards that have a status other than 'Approved' or 'Waiting for Approval'. The fields that employees must complete are determined during the setup process. The format of the form is determined by the pay frequency of the employee who accesses the program. For example, when an employee who is paid weekly or has a weekly labor distribution period entry accesses Employee Daily Time Entry, the system displays summarized information for the seven days for which the employee can enter timecards. Similarly, when an employee who is paid biweekly or has a biweekly labor distribution period frequency accesses the form, the system displays summarized information for the 14 days for which the employee can enter timecards.
To enter timecard information, you use a time entry grid that contains a column for each day in the pay period. You can enter all timecards for the same pay type on one line in the grid for the entire pay period. A separate line in the grid must be used for each pay type that is used during the pay period. For example, if you work eight hours of regular time each day and also work two hours of overtime each day, enter two lines of time entry to track the time for the pay period. You should enter one line and designate the pay type as regular pay. You then enter normal hours that you worked for each day of the pay period on the same line. You should also enter a second line and designate the pay type as overtime pay. You then enter overtime hours that you worked for each day of the pay period on the same line.
Note: Only employees who are paid weekly, biweekly, or semimonthly can enter self-service timecards using Employee Daily Time Entry. Employees who are paid monthly must use Employee Summary Time Entry to enter self-service timecards.
When processing options for the Time Entry MBF Processing Options program are set appropriately, administrators can designate timecards as public or private. When public timecards exist for employees, the system displays them for review. Employees can click a link on the director form that displays the public timecard. Employees cannot modify a public timecard, but can enter an additional timecard for the same work date.
Self-service time entry works together with global leave administration so that employees can view available leave balances when they are entering timecards. To access leave balances, employees can select the Leave Balances Review option. After reviewing balances, they can continue entering their time.
Administrators can set up a time entry option to pay for certain types of leave in advance of actually taking the time off. When this option is enabled, the Time Entry Self Service Director program displays a Request Pay In Advance link. Employees can select this link and can then enter time in advance. For example, an employee who is planning to take vacation time could enter the time in advance. In a payroll prior to the scheduled vacation, the employee would receive payment for the vacation time.

Entering Timecards Using Self Service
28-28 JD Edwards EnterpriseOne Applications Human Capital Management Self-Service Implementation Guide
When the organization sets up rules for taking sick leave that include certification of sick events, the timecard applications display this requirement, including a field where you can specify that you have submitted a certification.
When an employee enters or updates timecards and clicks Submit, the system displays a Submit Confirmation window. If the employee clicks the OK button, the system stores the timecards in a temporary workfile called the Employee Transactions - Batch File table (F06116Z1). The system automatically assigns a status of 0 - Waiting for Approval to these timecard records. This enables managers to easily identify timecards that must be reviewed and approved. The employee cannot modify these timecards:
■ Timecards that have a status 0 and are waiting for manager's approval.
■ Timecards that have been approved by the manager.
However, when an employee enters or updates timecards and clicks Save, the system assigns a status of 5 to the timecard. The user can still modify these timecards.
After the timecards are approved, the Time Entry Batch Processor program (R05116Z1I) is used to move timecards from the Employee Transactions - Batch File table into the Employee Transaction Detail File table (F06116). After timecards from the workfile are stored in the Employee Transaction Detail File table, they can be processed in a payroll cycle.
28.7.2 PrerequisiteSet up the self-service time entry features.
See Setting Up Self-Service Time Entry.
See Also:
■ "Entering Daily Timecards for Employees" in the JD Edwards EnterpriseOne Applications Time and Labor Implementation Guide.
28.7.3 Forms Used to Enter Timecards Using Self Service
Form Name FormID Navigation Usage
Time Entry Self Service Director
W051125C Client portal: Time Entry Self Service Director
On Time Entry Self Service Director, click the Daily Time Entry link.
Use the search and select form to access the time entry form.
Employee Daily Time Entry
W051127A On Employee Daily Time Entry, click Save.
Complete time entry information.
The fields that the system displays in the detail area are determined during self-service time entry setup.
Time Entry Self Service Director
W051125C Client portal: Time Entry Self Service Director
Use the search and select form to access the time entry form.

Entering Timecards Using Self Service
Employee Self Service 28-29
28.7.4 Entering Timecards Using Self ServiceAccess the Employee Daily Time Entry form.
If you have selected the Project and Gov Contract Accounting Used check box in the Service Billing Constants program (P48091), the system displays the Contract Labor Category field on the Employee Daily Time Entry form.
See "JD Edwards EnterpriseOne Human Capital Management for PGCA" in the JD Edwards EnterpriseOne Applications Project and Government Contract Accounting Implementation Guide.
To enter self-service timecards using daily time entry:
1. On Employee Daily Time Entry, click a blank line in the time entry area at the bottom of the form.
If you need to review leave balance amounts before entering time, click Leave Balance Review.
2. Enter a value in the Pay Type field.
3. Enter the number of hours that are associated with the pay type that you entered in step 3 for each day of the pay period.
4. Complete any additional fields in the detail area.
5. Click Save to save the record and to display a new line in the time entry area.
When you click Save, the system updates the totals in the review sections of the form.
6. Complete steps 2 through 6 until you have entered all timecard information. You must enter a separate line for each pay type.
7. Click Back to return to Time Entry Self Service Director.
■ Pay Period Ending Date
Enter the pay period end date that you entered in the Time Entry Self Service Director program. Alternately, the system can retrieve it from the processing option.
The system saves this value to the F06116Z1 table.
■ Pay Type
Enter a code that defines the type of pay, deduction, benefit, or accrual.
Pay types are numbered from 1 to 999. Deductions and benefits are numbered from 1000 to 9999.
Employee Daily Time Entry
W051127A On Employee Daily Time Entry, click Save.
Click the Select option next to the records that you want to delete.
To modify records, change any of the fields in the detail area of the form.
When a manager approves a timecard, you can no longer delete or modify the information.
Form Name FormID Navigation Usage

(Release 9.1 Update) Disclosing Disability Status
28-30 JD Edwards EnterpriseOne Applications Human Capital Management Self-Service Implementation Guide
■ Change Reason
Enter a code from UDC table 05T/CR to define the reason for the change in the timecard record.
■ Change Comments
Enter the comments associated with a timecard change.
28.7.5 Delete or Modify Self-Service TimecardsAccess the Employee Daily Time Entry form.
To delete or modify self-service timecards using daily time entry:
1. On Employee Daily Time Entry, to delete timecards, click the Select option next to the records that you want to delete, and then click Delete.
2. To modify timecards, change any of the fields in the detail area of the form, and then click Save.
3. Click Back to return to the Time Entry Self Service Director.
28.8 (Release 9.1 Update) Disclosing Disability StatusThis section provides an overview of disability status disclosure, and discusses how to disclose disability status.
28.8.1 Understanding Disability Status DisclosureUnder U.S. law, employees are required to disclose their disability status on the Voluntary Self-Identification of Disability Form CC-305 that is published by the U.S. Department of Labor’s Office of Federal Contract Compliance Programs (OFCCP). Employees can use the Disability Status Disclose Form program (P085591) to enter information about any disabilities that they may have.
When employees enter data in the P085591 program, the system updates the data directly to the self-service workfiles. After you run the Update Employee Personal Information to Live Tables report (R054104), the system updates the data to the Disability and Veteran Status History table (F085590).
Note: When employees enter their disability status using the P085591 program and click Submit, the form is self-approved by the employee and the system does not trigger the workflow process.
If you want to include the workflow approval process to approve disability status responses submitted by an employee, use the self-service programs to enable employees to provide their disability status. If you use the self-service applications, you must create a process flow script by using the Self-Service Process Flow Setup program (P05400).
See Creating a Self-Service Process Flow Script for OFCCP Forms.
28.8.2 PrerequisiteBefore you complete the tasks in this section, you must run the Personal Employee Information Workfile Build (R054101) report.

(Release 9.1 Update) Disclosing Protected Veteran Status
Employee Self Service 28-31
28.8.3 Form Used to Disclose Disability Status
Form Name Form ID Navigation Usage
Voluntary Self-Identification of Disability Status
W085591A Employee Self Service (G05BESS1), Disability Status Disclosure
Disclose disability status.
28.8.4 Disclosing Disability StatusAccess the Voluntary Self-Identification of Disability Status form.
To disclose disability status:
1. On Voluntary Self-Identification of Disability Status, select one of these options:
■ YES, I HAVE A DISABILITY (or previously had a disability)
■ NO, I DON’T HAVE A DISABILITY
■ I DON’T WISH TO ANSWER
2. Click Submit.
28.9 (Release 9.1 Update) Disclosing Protected Veteran StatusThis section provides an overview of protected veteran status disclosure, and discusses how to disclose the protected veteran status information.
28.9.1 Understanding Protected Veteran Status DisclosureUnder U.S. regulations, employees are required to self-identify themselves as protected veterans on the veteran self-identification form that is published by the U.S. Department of Labor’s Office of Federal Contract Compliance Programs. Employees can use the Veteran Status Disclose Form program (P085610) to enter information about their protected veteran status.
When employees enter data in the P085610 program, the system updates the data directly to the self-service workfiles. After you run the Update Employee Personal Information to Live Tables report (R054104), the system updates the data to the Disability and Veteran Status History table (F085590).
Note: When employees enter their protected veteran status using the P085610 program and click Submit, the form is self-approved by the employee and the system does not trigger the workflow process.
If you want to include the workflow approval process to approve veteran status responses submitted by an employee, use the self-service programs to enable employees to provide their protected veteran status. If you use the self-service applications, you must create a process flow script by using the Self-Service Process Flow Setup program (P05400).
See Creating a Self-Service Process Flow Script for OFCCP Forms.
28.9.2 PrerequisiteBefore you complete the tasks in this section, you must run the Personal Employee Information Workfile Build (R054101) report.

Managing Self-Service Timecards Using Summary Time Entry
28-32 JD Edwards EnterpriseOne Applications Human Capital Management Self-Service Implementation Guide
28.9.3 Form Used to Disclose Veteran Status
Form Name Form ID Navigation Usage
Voluntary Self-Identification of Protected Veteran Status
W085610A Employee Self Service (G05BESS1), Veteran Status Disclosure
Disclose protected veteran status.
28.9.4 Disclosing Protected Veteran StatusAccess the Voluntary Self-Identification of Protected Veteran Status form.
To disclose protected veteran status:
1. In the Self Identification section, select one of these options:
■ I BELONG TO THE FOLLOWING CLASSIFICATIONS OF PROTECTED VETERANS (CHOOSE ALL THAT APPLY):
– DISABLED VETERAN
– RECENTLY SEPARATED VETERAN
– ACTIVE WARTIME OR CAMPAIGN BADGE VETERAN
– ARMED FORCES SERVICE MEDAL VETERAN
– Military Discharge Date (MM/DD/YY)
Enter the date on which the employee was discharged from military duties.
Note: When an employee enters a date in the Military Discharge Date field, the system does not update this information in the Supplemental Data table (F00092).
■ I am a protected veteran, but I choose not to self-identify the classifications to which I belong.
■ I am NOT a protected veteran.
2. Click Submit.
28.10 Managing Self-Service Timecards Using Summary Time EntryThis section provides an overview of managing self-service timecards using summary time entry, and discusses how to:
■ Manage self-service timecards.
■ Delete or modify self-service timecards.
28.10.1 Understanding Self-Service Timecards Using Summary Time EntryWhen you click the Summary Time Entry link on the Time Entry Self Service Director, the system displays two sections on Employee Summary Time Entry where employees can enter timecard information. In the Quick Entry section of the form, employees can enter lump sum amounts for regular, sick, vacation, and holiday hours that they worked during the pay period.

Managing Self-Service Timecards Using Summary Time Entry
Employee Self Service 28-33
For example, if an employee uses 40 hours of vacation time during the pay period, he or she can enter the total vacation time in the Quick Entry section of the form. The pay types that are included in the Quick Entry section are specified in a processing option for the Time Entry Self Service Director program.
Additionally, employees can enter timecard records in the time entry grid at the bottom of the form. The fields that appear in the time entry grid are determined during the self-service time entry setup process.
Note: Employees whose pay frequency is monthly must use Employee Summary Time Entry to enter self-service timecards. Only employees whose pay frequency is weekly, biweekly, or semimonthly can enter self-service timecards using either Employee Daily Time Entry or Employee Summary Time Entry.
When an employee enters or updates timecards and clicks Submit, the system stores them in a temporary workfile called the Employee Transaction - Batch File table (F06116Z1). These timecard records are assigned a status of 0 - Waiting for Approval, which enables managers to easily identify timecards that must be reviewed and approved. Users can enter or update their own timecard records using this form. However, if a manager has already approved a timecard or if the timecard has the status 'Waiting for Approval', the user cannot update the timecard.
After the timecards are approved, the Time Entry Batch Processor program (R05116Z1I) is used to move the timecards into the Employee Transaction Detail File table (F06116). After the system moves the timecards from the workfile into the Employee Transaction Detail File table, they can be processed in a payroll cycle.
When processing options for the Time Entry MBF Processing Options program are set appropriately, administrators can designate timecards as public or private. When public timecards exist for employees, the system displays them for review. Employees can click a link on the director form that displays the public timecard. Employees cannot modify a public timecard, but can enter an additional timecard for the same work date.
See Also:
■ "Entering Timecards for Employees" in the JD Edwards EnterpriseOne Applications Time and Labor Implementation Guide.
28.10.2 Forms Used to Manage Self-Service Timecards Using Summary Time Entry
Form Name FormID Navigation Usage
Time Entry Self Service Director
W051125C Client portal: Time Entry Self Service Director
On the Time Entry Self Service form, click the Summary Time Entry link.
Use the search and select form to reach the summary time entry form.
Summary Time Entry W051128A Click Save. Enter time entry information.
Time Entry Self Service Director
W051125C Client portal: Time Entry Self Service Director
Use the search and select form to reach the summary time entry form.

Managing Self-Service Timecards Using Summary Time Entry
28-34 JD Edwards EnterpriseOne Applications Human Capital Management Self-Service Implementation Guide
28.10.3 Managing Self-Service TimecardsAccess the Summary Time Entry form.
If you have selected the Project and Gov Contract Accounting Used check box in the Service Billing Constants program (P48091), the system displays the Contract Labor Category field on the Employee Daily Time Entry form.
See "JD Edwards EnterpriseOne Human Capital Management for PGCA" in the JD Edwards EnterpriseOne Applications Project and Government Contract Accounting Implementation Guide.
To enter self-service timecards using summary time entry:
1. On Summary Time Entry, complete these fields in the Quick Entry (Totals Only) section of the form to enter lump sum amounts:
■ Reg.
Enter the number of hours that are associated with each transaction.
■ Vac
Enter the number of hours that are associated with each transaction.
■ Sick
Enter the number of hours that are associated with each transaction.
■ Holiday
Enter the number of hours that are associated with each transaction.
2. To enter timecards in the detail area of the form, click a grid line and enter a pay type in the Pay Type field.
The fields that appear in the detail area are determined during self-service time entry setup.
If you click Close without first saving the timecard, the system displays a Save Any Unsaved Records? dialog box so you that can choose to save any unsaved changes or cancel the Close request.
If you need to review leave balance amounts before entering time, click Leave Balance Review.
3. Complete any additional fields in the detail area.
4. Click Save to save the record and display a new line in the time entry area.
5. Complete steps 2 through 5 until you have entered all timecard information.
6. Click Back to return to the Time Entry Self Service Director.
28.10.4 Delete or Modify Self-Service TimecardsAccess the Employee Summary Time Entry form.
To delete or modify self-service timecards using summary time entry:
Employee Summary Time Entry
W051128A On Time Entry Self Service Director, click the Employee Summary Time Entry link.
Enter changes as required.
Form Name FormID Navigation Usage

Managing Self-Service Timecards Using Summary Time Entry
Employee Self Service 28-35
1. On Employee Summary Time Entry, to delete timecards, click the Select button next to the records that you want to delete, and then click Delete.
2. To modify timecards, change any of the fields in the detail area of the form, and then click Save.
You cannot delete or modify a timecard if a manager has already approved it.
To select or remove a selected status for all of the timecard records that are displayed, you can use the Select All or Clear All options.
The system displays a confirmation dialog box that you must use to confirm the delete action. The dialog indicates the number of records that are selected and provides Yes and No options so that you can proceed with the delete action or stop the delete action and return to Employee Summary Time Entry.
3. Click Back to return to the Time Entry Self Service Director.

Managing Self-Service Timecards Using Summary Time Entry
28-36 JD Edwards EnterpriseOne Applications Human Capital Management Self-Service Implementation Guide

29
Manager Self Service 29-1
29Manager Self Service
This chapter contains the following topics:
■ Section 29.1, "Understanding Manager Self Service"
■ Section 29.2, "Using the Managers Workbench Program"
■ Section 29.3, "Setting Processing Options for Managers Workbench (P08712)"
■ Section 29.4, "Changing an Employee Status"
■ Section 29.5, "Reviewing an Employee Status Change"
■ Section 29.6, "Assigning a Delegate"
■ Section 29.7, "Reviewing Upcoming Employee Reviews by Supervisor"
■ Section 29.8, "Entering Data for Verification-of-Employment Letters"
■ Section 29.9, "Using Managers Reports"
■ Section 29.10, "Setting Up Information for New Employees"
■ Section 29.11, "Approving Automatic Deposit Information"
■ Section 29.12, "Approving Bank Transit Information"
■ Section 29.13, "Approving Competency Information"
■ Section 29.14, "(Release 9.1 Update) Approving Disability Status Information"
■ Section 29.15, "(Release 9.1 Update) Approving Protected Veteran Status Information"
■ Section 29.16, "Creating Organizational Charts for the Web"
■ Section 29.17, "Approving Self-Service Timecards"
29.1 Understanding Manager Self ServiceManagers can accomplish many tasks with less effort and time by using self-service procedures. These procedures might be available through a company intranet site or from your software menus for employees and managers. This approach reduces document handling between employees and the human resources department by enabling employees to access information, forms, and services using desktop computers.
Managers can use self-service and Managers Workbench (P08712) programs to perform a wide range of tasks for which they are responsible. These tasks include:
■ Requesting employee status changes.

Using the Managers Workbench Program
29-2 JD Edwards EnterpriseOne Applications Human Capital Management Self-Service Implementation Guide
■ Running managerial reports.
■ Assigning delegates.
■ Generating a graphic organizational chart and reviewing the hierarchical structure of the jobs within an organization.
■ Reviewing jobs and job competencies in an organization.
■ Performing a gap analysis of employee and job competencies.
■ Entering employee competency information.
■ Reviewing employee profiles.
■ Reviewing employee information, such as name and address, time entry, emergency contacts, paid time off balances, and skill competencies.
Additional self-service programs are available for managers to use that are not included in the Managers Workbench. These programs, accessible from the Employee and Manager self service menus, are:
■ Upcoming Reviews by Supervisor (P052200).
■ Employee Setup Workbench (P08710).
■ Auto Deposit Instructions (P055011).
■ Competency Self Service (P05130).
The type of information that is available on your self-service website is defined by your company. For example, your company might allow employees to make address changes but not benefits changes. Only selected applications can be enabled on an intranet site.
Many of the manager self-service programs employ Workflow. Workflow is an email based system that automates tasks by using email to reduce the processing time that it normally takes to complete a task. For example, managers can initiate an employee's promotion using Status Change from Managers Workbench. When the process is initiated, a series of messages within Workflow are sent to each manager who must be informed about the change and who must approve the change.
29.1.1 Compensation Management Self-Service ConsiderationsYour organization might have set up the Compensation Management system as a self-service application that enables you to manage the salary reviews of the employees who report to you. If you access the Compensation Management system from a self-service program, such as the Manager's Workbench (P08712), you can make salary recommendations within your own management hierarchy only. The supervisor field is disabled.
See Also:
■ Setting Up Manager Self Service.
29.2 Using the Managers Workbench ProgramThis section provides an overview of using the Managers Workbench program, lists the forms used with the Managers Workbench program, and discusses how to set processing options for Managers Workbench (P08712).

Using the Managers Workbench Program
Manager Self Service 29-3
29.2.1 Understanding Managers WorkbenchYou can perform many common supervisory tasks from a centralized location using Managers Workbench (P08712). From this location, your employee information is easily accessible, enabling you to analyze job and employee information, initiate changes, and save time when you need reports that can be processed as a list or on an individual basis. Your own personal employee information is also available from within this application.
Using the Managers Workbench, you have quick, easy access to information that you can review and use for budgeting, planning, decision making, and approving. This application uses workflow to save time when you are communicating changes and obtaining required authorizations.
Note: The Managers Workbench separates access to your personal information from access to your employees' information by the use of form and row menus. For example, when you select options from a form menu, you can access your own personal information and make a variety of changes. When you select options from a row menu, the system displays your employees' information. A manager can view an employee's information, but generally cannot make changes directly to an employee's record.
These options are available in the Managers Workbench:
Manager Function Options
Self Service You can select My Self Service Ap from the Form menu, and then perform these tasks:
■ Review or change your name and address information.
■ Review your time entry.
■ Review your paid time off.
■ Review or update your emergency contacts.
■ Review and enter your competency information.
When you first select one of your employees and then select Self Service Apps. from the Row menu, you can perform these tasks:
■ Review employee name and address information.
■ Review and revise employee time entry.
■ Review employee paid time off.
■ Review employee emergency contacts.
■ Review and revise employee competency information.
You can also review employee data, analyze employee skills, and prepare for employee coaching sessions with these self-service options.

Using the Managers Workbench Program
29-4 JD Edwards EnterpriseOne Applications Human Capital Management Self-Service Implementation Guide
Status Change Status Change includes options for performing these tasks:
■ Requesting a promotion.
■ Changing an employee's assigned location.
■ Changing an employee's department or supervisor.
■ Changing an employee's job status.
■ Requesting a leave of absence.
This centralized approach to managing employee changes enables you to initiate, review, and approve changes for your employees. The User Defined status change category enables your Human Capital Management department to set up an additional employee change category. For example, you might want to create a new category for compensation review.
Reports These reports are available from the Managers Workbench (P08712):
■ Managers Reports (P08740).
■ Headcount (R081021).
■ Organization Chart (P08713 or P08713W).
■ Turnover Reports (R080430).
■ Phone List (R080115).
■ Time Entry (R053001).
Managers Reports (P08740) is a preset list of reports, defined by your human capital management department, that you can use to meet frequent reporting requirements. Your human capital management administrator can create one or more versions that include reports that you commonly use.
Use these reports to help meet your needs for organizational reporting, planning, review, and management of your employees. You can generate reports for the employee group below your job level, or you can select a subordinate management level and generate reports with that level at the top of the hierarchy.
You can use the Submitted Reports option on the Form menu to review the status of reports that you have previously submitted.
Supplemental Data Depending on what kinds of supplemental data you maintain, your human capital management administrator can set up databases for each system. You can use supplemental data to track information that is not included in the standard master tables. For example, you might want to track information such as products purchased, sales information, delivery methods, internal ratings, or work history. Supplemental-database code information is stored in the Supplemental Database Setup table (F00090).
Gap Analysis Use Gap Analysis to help you compare the skill competencies that are required for a job and the current competencies of an employee. Often used in conjunction with Job Competencies In An Organization, these functions are useful for organizational planning and in preparation for employee performance reviews.
Manager Function Options

Using the Managers Workbench Program
Manager Self Service 29-5
Performance Use Employee Performance to create new appraisals, review and change current appraisals, and review historical appraisal information. You can review your personal performance appraisal by choosing Performance from the Form menu.
When you are using the performance options, you can also access supplemental data from the Performance menu to record additional information that you want to track.
Employee Profile Use Employee Profile to review employee data that is obtained from the Employee Master Information table (F060116). You can also use this function to contact your Human Capital Management department about updates to an employee record.
Attachments Attachments can be added as part of the setup function to provide information for all managers who use any of the Managers Workbench applications. These can include instructions, reminders, or miscellaneous information.
You can also add attachments while using Managers Workbench applications. For example, you might want to remind yourself about information that will help you plan for reviews or record action steps that you want to remember regarding specific employees. You can also attach graphic files. The attached files are linked to your address number and an employee address number so that if either position changes, another manager cannot view the notes that you attach.
Jobs In An Organization Use Jobs In An Organization to review how each job fits into the hierarchical levels of the organizational structure. You can use this information to plan for new jobs and to determine the competencies that are associated with each job. When you access this program from Managers Workbench, you can review information, but you cannot change it.
Compensation Review Use this program to review compensation data for any of your employees. The program provides you with a workbench that provides access to programs for:
■ Viewing and changing salary recommendations.
■ Viewing the salary budget allocation, budget spent, and budget remaining by increase types.
■ Submitting salary recommendations up to the next level supervisor for approval
■ Returning salary recommendations down to the previous level supervisor for salary rework.
■ Providing access for a human capital management administrator to view or change salary recommendations of a specified supervisor with the use of a processing option
Employee Letters When you need to send written information to employees, you can use the mail merge features of your software to efficiently produce letters that you mail to all of your employees. For example, you can quickly generate a letter to a group of your employees who are included in a new marketing campaign. Or you can generate a mass mailing to all of your employees to explain a new benefit option. This option runs the Web Mail Merge application, which enables you to work with the letters that you have generated.
Manager Function Options

Using the Managers Workbench Program
29-6 JD Edwards EnterpriseOne Applications Human Capital Management Self-Service Implementation Guide
29.2.2 Form Used for Using the Managers Workbench Program
Form Name FormID Navigation Usage
Work With Managers Employees
W08712A Manager Self-Service menu (G05BMSS1), Managers Workbench
Review the information displayed and then select an option. When a processing option is set appropriately, the system reads the address book number of the manager who is signed in to the system, automatically displays that information, and then displays the list of employees who report to this manager.
You can access your personal information and follow up on previous tasks that you initiate by selecting an option from the Form menu. You can initiate and follow up on employee tasks by selecting options from the Row menu.
Job Competencies In An Organization Use Job Competencies In An Organization to see how job competencies are assigned to the hierarchical levels of the organizational structure. You can use this information to determine the competencies that apply to you and the employees who report to you.
Approvals Use Approvals to expedite the workflow process for your employees. Use this form menu option to review all Status Change approval requests, add comments, and take appropriate action.
Delegates Use My Delegates, on the Form menu, to set up subordinates who are authorized to use Managers Workbench in your absence or to enable others to perform managerial functions. After the initial setup, the delegates that you select can access Managers Workbench at your organizational level and then perform functions at an authority level that you specify to help you review, change, and approve employee information.
Attachments Attachments can be added as part of the setup function to provide information for all managers who use any of the Managers Workbench applications. These can include instructions, reminders, or miscellaneous information.
You can also add attachments while using Managers Workbench applications. For example, you might want to remind yourself about information that will help you plan for reviews or record action steps that you want to remember regarding specific employees. You can also attach graphic files. The attached files are linked to your address number and an employee address number so that if either position changes, another manager cannot view the notes that you attach.
Manager Function Options

Setting Processing Options for Managers Workbench (P08712)
Manager Self Service 29-7
29.3 Setting Processing Options for Managers Workbench (P08712)Processing options enable you to specify the default processing for programs and reports.
29.3.1 User Level
1. User Level Specify whether management, employees, or HR personnel will use the application. Values are:
Blank: Management
1: Employees and management
2: HR personnel
29.3.2 VersionThe instructions for processing options 1–10 are identical.
Managers Workbench Programs (P08810, P08720, P087201, P08006, P08007, P08008, P08740, P08750, P05100, P087711) Specify a program version. If you leave this processing option blank, the system uses the default version (ZJDE0001).
11. Current Performance Appraisals (P087712) Specify a program version. If you leave this processing option blank, the system uses a default version:
■ If user level is set to 1, the system uses version ZJDE0004.
■ If user level is set to 2, the system uses version ZJDE0006.
12. Historical Performance Appraisals (P087712) Specify a program version. If you leave this processing option blank, the system uses a default version:
■ If user level is set to 1, the system uses version ZJDE0005.
■ If user level is set to 2, the system uses version ZJDE0006.
13. Paid Time Off Inq (P053020)Specify the version for Paid Time Off Inquiry. If left Blank, the default version ZJDE0001 will be used.
14. Name/Address (P05101) Specify the version for Name/Address. If left Blank, the default version ZJDE0001 will be used.
15. Review Time Entry (P051125) Specify the version for Review Time Entry. If left Blank, the default version ZJDE0001 will be used.
16. Supplemental Data (P00092)Specify the version for Supplemental Data. If left Blank, the default version ZJDE0001 will be used.

Changing an Employee Status
29-8 JD Edwards EnterpriseOne Applications Human Capital Management Self-Service Implementation Guide
17. Submitted Reports (P986116)Specify the version for Submitted Reports. If left Blank the default version ZJDE0001 will be used.
18. HTML Org Chart (P08713W)Specify the version for HTML Organizational Charts. If left Blank the default version ZJDE0001 will be used.
29.4 Changing an Employee StatusThis section provides an overview of employee status change and discusses how to set processing options for Employee Status Change (P08720).
29.4.1 Understanding Employee Status ChangeChanging an Employee's Status, one of the applications within Manager's Workbench (P08712), provides a centralized approach to implementing common changes for employees who report to you or to one of your subordinate managers. Using this approach, you can manage some of the most common types of employee changes with a minimum of time and effort.
Using this approach, when you select the type of change desired for a specified employee and implement a change, the system automatically notifies your HR department and any other managers who must approve the change. You will also be able to review the status of the approvals to stay current with the changes that you have initiated.
You can perform any of these preset tasks:
■ Promote an employee.
■ Change an employee's job status.
■ Relocate an employee.
■ Change an employee department or supervisor.
■ Review a leave of absence.
In addition to the five preset tasks listed previously, two additional options exist that you can define in user-defined code (UDC) 08/S4 to meet your specific requirements. For example, you might define this option to change an employee's salary. Working with your HR administrator, you can set up similar tasks or change any of the existing, preset tasks to use any combination of the data in the Employee Master Information table (F060116).
To initiate an employee change, you can use the Employee Status Change program (P08720). You normally access this program through the Manager's Workbench program (P08712). The system automatically displays tabs and fields on the change request form that are required to complete the change that you request.

Changing an Employee Status
Manager Self Service 29-9
29.4.2 Forms Used to Change an Employee Status
Form Name FormID Navigation Usage
Work With Managers Employees
W08712A Manager Self-Service (G05BMSS1), Managers Workbench
On the Managers Workbench, click Find.
Display employee records.
Select Employee Status Change Request
W08720A On Work With Managers Employees, select Status Change Req. and then Status Change from the Row menu.
On Select Employee Status Change Request, click Add.
Select a change type. To display notes about the change type, click the button next to the change type.
Create Employee Status Change Request
W08720B On Select Employee Status Change Request, select a status change and then click Add.
On the Instructions tab, review the information.
Review all other tabs.
To save, but not submit the request, click OK. To save and submit a request for approval, click Submit.
29.4.3 Setting Processing Options for Employee Status Change (P08720)Processing options enable you to specify the default processing for programs and reports.
29.4.3.1 Process
1. Mail Box Designator Specify the name of the mail box in the Employee Work Center where your workflow notifications and approval messages are sent. If you leave this processing option blank, the system uses 01, personal in-basket.
To create a new mail box, add a new record to the 02/MB UDC.
2. Final Status Specify the final status for the Employee Status Change records (F08720) when the process has been successfully completed. The final status should be a numeric status code. Status Change status codes are found in the 08/S5 UDC table.
3. Allow Delegates Specify whether you want to allow the use of delegates. If a manager defines a delegate, this employee can perform certain tasks on behalf of the manager. Values are:
0: No
1: Yes
4. Perform Employee Master Field Edits Specify whether you want the system to perform the same validation on the data as is done with the employee master applications. Values are:
0: No
1:Yes

Changing an Employee Status
29-10 JD Edwards EnterpriseOne Applications Human Capital Management Self-Service Implementation Guide
29.4.3.2 User Level
1. User Level Specify whether the application is used by a manager or by HR personnel. HR personnel can add a status change for any employee, not just subordinates. Values are:
Blank: Manager
1: Manager or manager's delegate
2: HR personnel.
29.4.3.3 Defaults
Status Change Type 1–5Specify a status change type that the system uses as one of five default settings. The system displays the five default status-change types on the Select Employee Status Change Request form.
6. Job Information Change Specify whether the system automatically displays job information from the employee record when you change a job type for an existing employee. The system automatically includes pay frequency, union code, pay class, pay grade, overtime exempt, pay grade step, and benefit group. Values are:
0: Do not use default data.
1: Use default data.
7. Business Unit/Job ID Information Change Specify whether the system automatically includes business unit and job cross-reference information from the employee record when you change a job type for an existing employee. The system automatically uses the union code, workers compensation, and benefit group from the Business Unit/Job ID. X-Ref table (F08005). Values are:
0: Do not use default data.
1: Use default data.
29.4.4 Requesting an Employee Status ChangeAccess the Create Employee Status Change Request form

Changing an Employee Status
Manager Self Service 29-11
Figure 29–1 Create Employee Status Change Request form
To request an employee status change:
1. On Work With Managers Employees, click one of these buttons and click Find to display your subordinates.
– Active Employees
– All Employees
2. Select the subordinate's record that you want from the detail area.
3. From the Row menu, select Status Change Req and then Status Change.
4. On Select Employee Status Change Request, select an option.
Review change type notes and initiate an employee status change.
Values can be defined for the change type fields to meet the needs of the organization.
– Change1
– Change2
– Change3
– Change4
– Change5
– User Defined
5. To display notes or instructions about the change process, click the button next to the option.
6. Click Add.
7. On Create Employee Status Change Request, complete these fields:
– Change Reason
– Effective On

Reviewing an Employee Status Change
29-12 JD Edwards EnterpriseOne Applications Human Capital Management Self-Service Implementation Guide
8. Read the comments on the Instructions tab, and then select the next tab to enter appropriate changes to the active fields.
Fields that are not applicable to the type of change that is selected are not available for changes.
9. Select each of the remaining tabs and enter changes as appropriate.
Because a limited number of fields can be placed on a form at one time, the eligibility code, user-defined dates, and category code fields are on a different form. When you select the Category Codes/User Dates tab, this form is automatically displayed.
10. After you review information for all tabs and complete the changes, perform one of these actions:
– Click OK to save, but not submit, the request.
This option enables you to review the request at a later date and then submit it for approval.
– Click Submit to save and submit the request for approval.
After you submit a request, you cannot revise it except to enter a new change reason or to change the effective on date.
The system automatically generates workflow messages in the Employee Work Center for the appropriate managers. The system updates the Employee Master Information table (F060116) when the required approvals are complete.
If you need to change a request after you have submitted it, but before it has been approved, cancel the request and create a new one.
29.5 Reviewing an Employee Status ChangeThis section provides an overview of an employee status change review and discusses how to:
■ Set processing options for Status Change Review (P087201).
■ Review an employee status change request.
29.5.1 Understanding an Employee Status Change ReviewYou can use the Status Change Review program (P087201) to examine a request that you have previously submitted, review notes that relate to a request, or follow up on a request that has not been approved within a reasonable amount of time.
If a request has not been approved, you can use the escalation monitor to determine possible reasons for the delay and restart the process. Use one of these options, depending on the apparent cause of the delay:
■ Escalation monitor. Provides a report of all halted workflow processes and moves the requests to the next stage.
■ Restart. Restarts a specific status change process, terminating any active process instances.
If you need to make additional changes to a request after you have submitted it, but before it has been approved, cancel the request and create a new one.
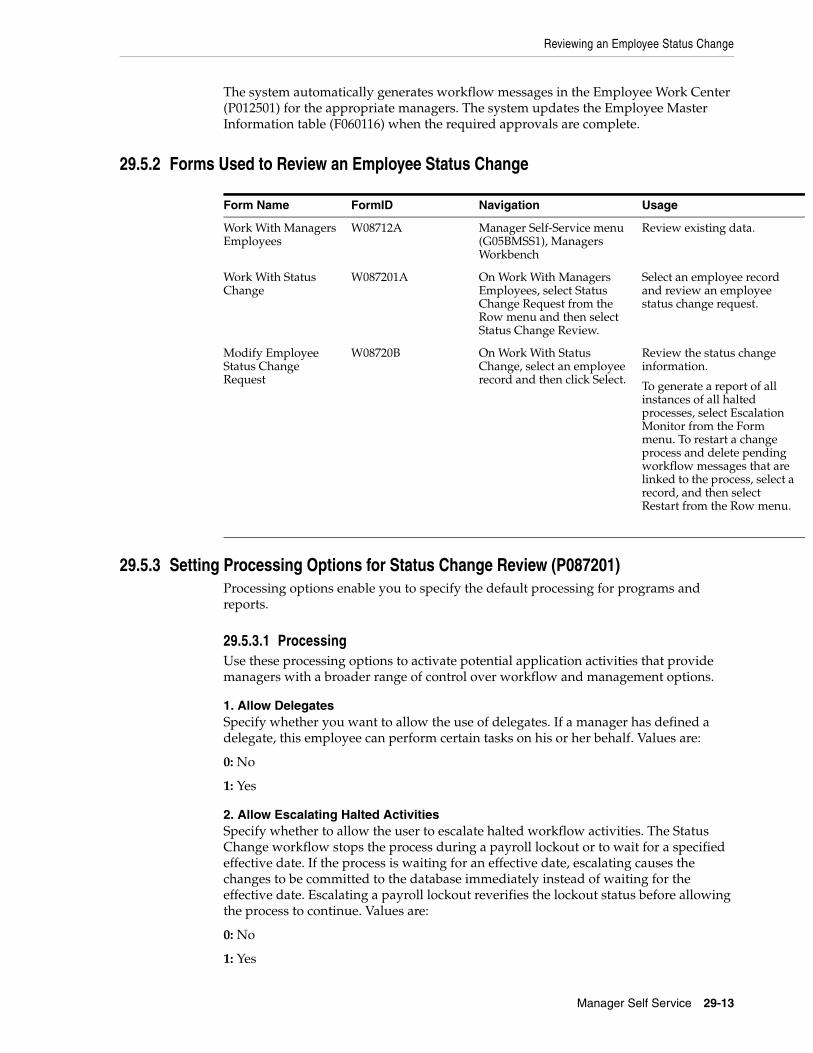
Reviewing an Employee Status Change
Manager Self Service 29-13
The system automatically generates workflow messages in the Employee Work Center (P012501) for the appropriate managers. The system updates the Employee Master Information table (F060116) when the required approvals are complete.
29.5.2 Forms Used to Review an Employee Status Change
Form Name FormID Navigation Usage
Work With Managers Employees
W08712A Manager Self-Service menu (G05BMSS1), Managers Workbench
Review existing data.
Work With Status Change
W087201A On Work With Managers Employees, select Status Change Request from the Row menu and then select Status Change Review.
Select an employee record and review an employee status change request.
Modify Employee Status Change Request
W08720B On Work With Status Change, select an employee record and then click Select.
Review the status change information.
To generate a report of all instances of all halted processes, select Escalation Monitor from the Form menu. To restart a change process and delete pending workflow messages that are linked to the process, select a record, and then select Restart from the Row menu.
29.5.3 Setting Processing Options for Status Change Review (P087201)Processing options enable you to specify the default processing for programs and reports.
29.5.3.1 ProcessingUse these processing options to activate potential application activities that provide managers with a broader range of control over workflow and management options.
1. Allow Delegates Specify whether you want to allow the use of delegates. If a manager has defined a delegate, this employee can perform certain tasks on his or her behalf. Values are:
0: No
1: Yes
2. Allow Escalating Halted ActivitiesSpecify whether to allow the user to escalate halted workflow activities. The Status Change workflow stops the process during a payroll lockout or to wait for a specified effective date. If the process is waiting for an effective date, escalating causes the changes to be committed to the database immediately instead of waiting for the effective date. Escalating a payroll lockout reverifies the lockout status before allowing the process to continue. Values are:
0: No
1: Yes

Assigning a Delegate
29-14 JD Edwards EnterpriseOne Applications Human Capital Management Self-Service Implementation Guide
3. Allow Restarting Active Processes
Specify whether to allow the user to restart an active Status Change process. The Status Change workflow process might stop for any of these reasons:
■ Payroll lockout
■ Effective date
■ Delay of management approval
When the workflow has stopped for any of these reasons, performing a restart completes the active workflow activity and deletes the records in the Approval History table. The status of the Status Change record changes to pending. The workflow process is completed but not deleted. Values are:
0: No
1: Yes
4. Allow Aborting Active Processes Specify whether to allow the user to terminate an active Status Change process. When the Status Change workflow process stops for a payroll lockout, an effective date, or a management approval, terminating will update the status of the Status Change record to 07 (canceled by user) and complete the active workflow. Values are:
0: No
1: Yes
5. Employee Status Change Version (P08720) Specify which version of the Employee Status Change application (P08720) you want to use. The version controls the workflow process, retrieving the correct processing options for mail box and the final status.
If no value is entered, the system uses version ZJDE0001.
29.5.3.2 User LevelUse this processing option to specify the type of user who will be accessing the application.
1. User Level Specify whether the application will be used by management, employees, or HR personnel. Values are:
Blank: Management
1: Employees and management
2: HR personnel
29.6 Assigning a DelegateThis section provides an overview of delegate assignment, lists a prerequisite, and discusses how to:
■ Set processing options for Managers Delegates (P08750).
■ Assign a delegate.

Assigning a Delegate
Manager Self Service 29-15
29.6.1 Understanding Delegate AssignmentYou can use the Managers Delegates program (P08750) to designate other employees as delegates. You can also define the level of authority that is assigned to each delegate so that the delegate can assist you with tasks and projects when you are away from your office or when you just need additional assistance. When work that you assign to others requires system access with an authority level comparable to a management level, you can assign delegate status to them up to your own level. When you designate an employee as a delegate for you, that employee can assist with routine tasks or projects from a predefined set of applications that will enable the use of delegates. For example, you might want a delegate to run a list of weekly reports or conduct a job analysis project. You can also delegate an employee to perform your supervisory functions for periods of time that you will be absent from work.
Assigning delegates permits you to designate another employee to access your software with system authorization at a level that you assign. You can assign an authority level up to, and including, your own. For example, you can designate an employee to perform many of the same functions that you would ordinarily perform by assigning appropriate authorization types. The system includes five preset authorization types and enables you to add configured authorization types.
29.6.2 PrerequisiteSet up additional authorization types, if needed, in UDC 08/AY.
29.6.3 Forms Used to Assign Delegates
Form Name FormID Navigation Usage
Work With Managers Employees
W08712A Manager Self-Service menu (G05BMSS1), Managers Workbench
My Delegates, Form menu.
Select an employee record.
Work With Delegates W08750A Click OK. Enter delegate information. You can enter information for the same employee as many times as needed, assigning an additional authorization type for each entry.
29.6.4 Setting Processing Options for Managers Delegates (P08750)Processing options enable you to specify the default processing for programs and reports.
29.6.4.1 DefaultsUse this processing option to specify whether the Manager field is accessible and the address book value can be changed. When the value is set to the default value of1 or blank, the system automatically detects the address book number of the manager who is currently signed onto the system, disables the field, and displays only delegates who are subordinate to the displayed manager. When the value is set to 2, the system activates the Manager field, does not automatically detect an address book number, and displays the subordinate delegates for any manager whose address book number is entered.

Assigning a Delegate
29-16 JD Edwards EnterpriseOne Applications Human Capital Management Self-Service Implementation Guide
1. User Level Specify whether to display delegates for different managers or to display the delegates for only one manager. Values are:
1:Manager field is disabled. This is the default value.
2:Manager field is enabled.
29.6.5 Assigning a DelegateAccess the Work With Delegates form.
Figure 29–2 Work With Delegates form
To assign a delegate:
1. On Work With Managers Employees, click Find to display your organizational hierarchy and your employees' records.
2. Select My Delegates from the Form menu.
3. On Work With Delegates, complete these fields:
■ Delegate Number
Enter a number that identifies an entry in the JD Edwards EnterpriseOne Address Book system, such as employee, applicant, participant, customer, supplier, tenant, or location.
■ Authorization Type
Enter a code that specifies the type of authorization that is given to a delegate.
■ Effective On
Enter a future date when all changes will take effect or the date when the changes went into effect. If you do not enter a date in this field, the system uses the current date as the effective date.
■ Ending Date
Enter a future date on which the authorization expires.
■ Authorization Level
Enter the number of levels in the organizational structure below the delegate's manager that the delegate can review and make changes to employee records. For example, a value of 0 allows the delegate to access only employees that report directly to the delegate's manager. A value of 1 allows the delegate to access the records of employees that report to the manager's immediate subordinates.
Reviewing Upcoming Employee Reviews by Supervisor
Manager Self Service 29-17
4. Repeat step 3 for the same employee as many times as needed, assigning an additional authorization type for each entry.
5. When you are finished assigning delegates, click OK.
29.7 Reviewing Upcoming Employee Reviews by SupervisorThis section provides an overview of upcoming employee reviews, lists a prerequisite, and discusses how to review upcoming employee review information.
29.7.1 Understanding Upcoming Employee ReviewsManagers can sign in to the self-service intranet site to search for all upcoming employee reviews. This process can occur in one of these ways:
■ You can sign in to the self-service intranet site and search for upcoming employee reviews using the Upcoming Reviews by Supervisor program (P052200).
You can search for employees based on these fields: Business Unit, Pay Class, Type of Review, and all review dates and payroll status fields. The system automatically displays employees that report directly to you by your supervisor number.
■ You can sign in to the self-service intranet site and access the Upcoming Reviews By Supervisor program after receiving an electronic message about your upcoming employee reviews.
Instead of having to search for specific employees, the system automatically completes the grid with the employees that you are responsible for reviewing soon.
The electronic notification process occurs after the system administrator runs the Upcoming Reviews program (R052202). If the processing options for Upcoming Reviews are set up correctly, the program initiates Enterprise Workflow Management, which notifies all supervisors about their upcoming reviews by email. The system administrator can run the program automatically on a certain date by setting a processing option appropriately and setting up the program to run in the Scheduler Workbench.
Different versions of the report can be run to report overdue reviews and reviews for all employees. In these cases, you would not receive email messages. However, the system would still supply the Work With Upcoming Reviews by Supervisor form that displays the employees that you are responsible for reviewing.
After the system displays your employees with upcoming reviews, you can select an employee record and select an option from the Row menu to review profile, supplemental, employment, or organizational data for the employee. You can access this information if your JD Edwards EnterpriseOne security system is set up to provide this access.
29.7.2 PrerequisiteIf the Upcoming Reviews program (R052202) has been run, you need to review only the information on the report that appears when you sign in to your self-service site.
See "Working With Performance Appraisals, Creating Batch Performance Appraisals (R087722), Running the Upcoming Reviews Report (R052202)" in the JD Edwards EnterpriseOne Applications Human Resources Implementation Guide.

Reviewing Upcoming Employee Reviews by Supervisor
29-18 JD Edwards EnterpriseOne Applications Human Capital Management Self-Service Implementation Guide
29.7.3 Form Used to Review Upcoming Employee Reviews by Supervisor
Form Name FormID Navigation Usage
Work With Upcoming Reviews By Supervisor
W052200A Manager Self-Service (G05BMSS1), Upcoming Reviews by Supervisor
Review upcoming employee review information.
29.7.4 Reviewing Upcoming Employee Review InformationAccess the Work With Upcoming Reviews By Supervisor form.
Figure 29–3 Work With Upcoming Reviews By Supervisor form
To review upcoming employee reviews by supervisor:
1. On Work With Upcoming Reviews By Supervisor, complete any of these fields:
– Home Business Unit
– Pay Class (H/S/P)
– Type Review
Type ReviewEnter a UDC (06/RV) that specifies the type of performance review to be completed for the next review period.
2. Complete these fields if you want to review employees who have upcoming reviews during a specific period of time:
■ From Review Date
Enter the date on which the employee is scheduled for the next performance or salary review. This field is for information only. It is not used by any programs or processes in the system.
■ Thru Review Date

Entering Data for Verification-of-Employment Letters
Manager Self Service 29-19
Enter the date on which the employee is scheduled for the next performance or salary review. This field is for information only. It is not used by any programs or processes in the system.
If you complete the From Review Date field, but leave the Thru Review Date field blank, the system displays all employees with reviews on or after the from review date. If you complete only the Thru Review Date field, the system displays employees with no specific next review date and employees with a next review date that is equal to or prior to the through review date.
3. Select one of these options, and then click Find to display your subordinates.
■ Active Payroll Status
Enter an option that specifies the type of processing for an event.
■ All
Enter an option that specifies the type of processing for an event.
The Active Payroll Status option displays only employees with an active payroll status, including employees who are on a leave of absence.
The All option displays all employees, including those with a terminated status and employees on a leave of absence.
4. Review the displayed information.
29.8 Entering Data for Verification-of-Employment LettersThis section provides an overview of data for verification-of-employment letters, lists a prerequisite, and discusses how to:
■ Set processing options for Review Requests for Verification of Employment (P05003).
■ Enter data for verification-of-employment letters.
29.8.1 Understanding Data for Verification-of-Employment LettersThe Review Requests for Verification of Employment program (P05003) allows only human resource administrators or system administrators to enter employment data for verification-of-employment letters.
Entering the employment data is the second part of a two-step process for processing a verification-of-employment letter. The employee must first request a letter by entering personal information on the Request Information tab of the Verification of Employment Data form. When an employee enters a request, the system copies the employee's job and compensation information from the Job Information table (F08001) to the Employment Data tab.
If Enterprise Workflow Management is enabled through your processing options, after receiving an email that a verification-of-employment request is pending, you can inquire on the request, change the employee's employment data if necessary, and process the letter. You can also email the completed letter to the contact person whom the employee has requested.
See Also:
■ Requesting a Verification-of-Employment Letter.

Entering Data for Verification-of-Employment Letters
29-20 JD Edwards EnterpriseOne Applications Human Capital Management Self-Service Implementation Guide
29.8.2 PrerequisiteHave your human capital management system administrator set the processing option for Verification of Employment to 3. This processing option enables you to change the job information fields on the Verification of Employment Data form, if necessary.
29.8.3 Forms Used to Enter Data for Verification-of-Employment Letters
Form Name FormID Navigation Usage
Work With Verification Of Employment Requests
W05003A Employee Self Service (G05BESS1), Verification of Employment
On Work With Verification Of Employment Requests, click Select.
Locate an employee record.
Verification Of Employment Data
W05003B On Verification Of Employment Data, select the Employment Data tab.
Click OK.
Review and change information as required.
If you clicked the Save Document button, the system saves the letter to the C:\TEMP\ directory.
You can print the Verification of Employment letter that automatically appears. You can also email the letter.
29.8.4 Setting Processing Options for Review Requests for Verification of Employment (P05003)
Processing options enable you to specify the default processing for programs and reports.
29.8.4.1 User LevelUse this processing option to specify the organizational level of the user who will perform verification of employment functions.
This list describes consequences and additional setup issues that you should be aware of when you select one of the three processing options:
Typical User Setup Issues
1: Employee Entering 1 instructs Workflow to notify the recipient of the pending request after the employe enters the request information. The recipient completes the verification-of-employment letter and can print the letter or send it by email to the requested contact person. This value starts the process with the employee and finishes it with the Workflow recipient. If you enter this value, you must set up your recipient in the processing option on the Workflow Setup tab.

Entering Data for Verification-of-Employment Letters
Manager Self Service 29-21
1. User Level:Specify whether this program will be used by an employee, an HR clerk, or an HR administrator. Values are:
Blank: Employee
1: Employee.
2: HR clerk.
3: HR Administrator (This option will not send a request through Workflow.)
Note: If this program is used by an employee or an HR clerk, the approval process is routed through workflow, where the Workflow Setup tab must be set up.
29.8.4.2 Workflow SetupUse this processing option to specify the user or users who will process verification of employment requests.
1. Address Number of VOE request processor (HRM): Specify the address number of the HR person (or a distribution list) who processes requests for verification of employment.
29.8.5 Entering Data for Verification-of-Employment LettersAccess the Work With Verification Of Employment Data form.
2: HRM clerk Entering 2 instructs Workflow to notify the recipient of the completed letter after the human resource management clerk enters the request information. The recipient approves the letter and can print the letter or send it by email directly to the contact person that the employee requested. This value assumes that the process has already started with the employee. The HR clerk does not receive a Workflow message but sends the completed letter through Workflow to a recipient for approval. If you select this value, you must set up your recipient in the processing option on the Workflow Setup tab.
3: HRM administrator Entering 3 deactivates Workflow in the Verification of Employment program. Because the human resources administrator starts and completes all requests, no need for Workflow exists. The HR administrator can delete a request and also print the letter or send it by email directly to the contact person that the employee requested.
Typical User Setup Issues

Entering Data for Verification-of-Employment Letters
29-22 JD Edwards EnterpriseOne Applications Human Capital Management Self-Service Implementation Guide
Figure 29–4 Work With Verification Of Employment Data form
To enter employment data for verification-of-employment letters:
1. On Work With Verification Of Employment Requests, complete these fields and click Find to locate an employee's request:
– Employee ID
– Request Date
Enter the date that an item is scheduled to arrive or that an action is scheduled for completion. If you are adding a request for a verification of employment letter, enter today's date. If you are reviewing a request, enter the date when you initially added the request.
2. If you need to delete a record, select the record and click Delete.
3. Select the employee's record and click Select.
4. On Verification Of Employment Data, select the Employment Data tab.
5. If your processing option is set to 3, select one or more of these options, depending on the contact method that the employee has selected.
■ Print VOE Letter
Select an option to print the verification of employment letter.
The system prints the verification of employment letter when you click OK.
■ Delete Document
Select an option that specifies whether you want the system to save the letter when you print it. If you select this option, the letter is deleted when the you click OK.
■ E-Mail VOE Letter
Select an option that specifies whether the system sends the verification of employment letter to the requested email address.

Entering Data for Verification-of-Employment Letters
Manager Self Service 29-23
The system sends the verification-of-employment letter when you click OK.
This option is enabled only when you activate the Print Verification-of-Employment Letter option also. You must also have the E-Mail box on the Requisition Information tab checked and a value in the E-Mail Address field.
6. Review and change these fields if necessary:
■ Date Started
Enter the date on which the employee actually reported to work for the most recent period of hire. When an employee initially begins working, the default value is the original hire date. If no original hire date exists, the system uses the current date. This field can be updated multiple times if, for example, an employee is a seasonal worker.
For the calculation tables in the Payroll system and the eligibility tables and date codes in the Human Resources system, the system also uses this date as a start date when it calculates deductions, benefits, and accruals.
■ Job Type/Step Description
Enter the description that is associated with the job type and job step. This description is stored in the Job Information table (F08001).
■ Continued Employment
Enter a value that indicates the employee's potential for continuing employment with the organization. Values are stored in UDC 05/V3.
■ Date Of Last Raise
Enter the date of the employee's last raise. For the standalone HR system, this is the date when you update salary and wages. If you also have the Payroll system, this date is automatically updated when a payroll is run. You define pay effective dates using the Pay Rate Information form.
■ Amount Of Increase
Enter an amount of increase that is the difference between two values. A negative value indicates a decrease.
A monetary increase a result of a raise occurring on the date of last raise.
■ Date of Next Raise
Enter the date that the hourly or annual pay rate for the employee increases. The new rate goes into effect after a payroll cycle finishes with a pay period end date on or after the date of the next raise.
■ Pay Period Salary
Enter a value that represents the pay period salary. Pay period salary is calculated by dividing the annual salary by the number of pay periods.
■ Comment
Enter a comment, description, or remark. This entry can be up to 40 characters in length.
– Pay Frequency
– Pay Class (H/S/P)
7. Review and change these compensation fields for the Current Year, One Year Prior, and Two Years Prior fields if necessary:

Using Managers Reports
29-24 JD Edwards EnterpriseOne Applications Human Capital Management Self-Service Implementation Guide
■ Base
Enter an amount that is paid from all pay types considered to be base salary for the current year.
■ Overtime
Enter an amount that is paid from all pay types considered to be overtime pay for the current year.
■ Commission
Enter an amount that is paid from all pay types considered to be commission pay for the current year.
■ Bonus
Enter an amount of bonus pay that the employee earned, year-to-date in the current year. The system calculates this amount by searching the employee's timecards for pay types that represent bonus pay. It then calculates the amount of the employee's earnings during the year that were attributed to the bonus pay types.
Note: When you set up a pay type, you use the Pay Type Category field (PTCT) to identify it as part of a related group of pay types, such as regular pay, bonus pay, commissions, and so on. You define pay type categories in UDC 06/PC.
■ Other
Enter an amount to be paid from all pay types that are considered to be other pay for the current year. Other pay is anything other than base salary, overtime, commission, and bonus.
8. Click OK.
9. Select Print from the Form menu.
10. If you have selected the option to send the letter, select Send or Cancel on the prompt on the E-Mail Confirmation form asking whether you want to send the request by email.
11. If you have selected the option to email the letter, click Send or Cancel on the prompt on the E-Mail Confirmation form asking whether you want to send the request by email.
29.9 Using Managers ReportsThis section provides an overview of managers reports and discusses how to run predetermined reports.
29.9.1 Understanding Managers ReportsManagers and their delegates can use the Managers Reports program (P08740), to automate required reporting procedures and save time. Managers can select reports from a preset list to meet frequent reporting requirements. Two reporting approaches are available:
■ Reports by category
■ Individual reports
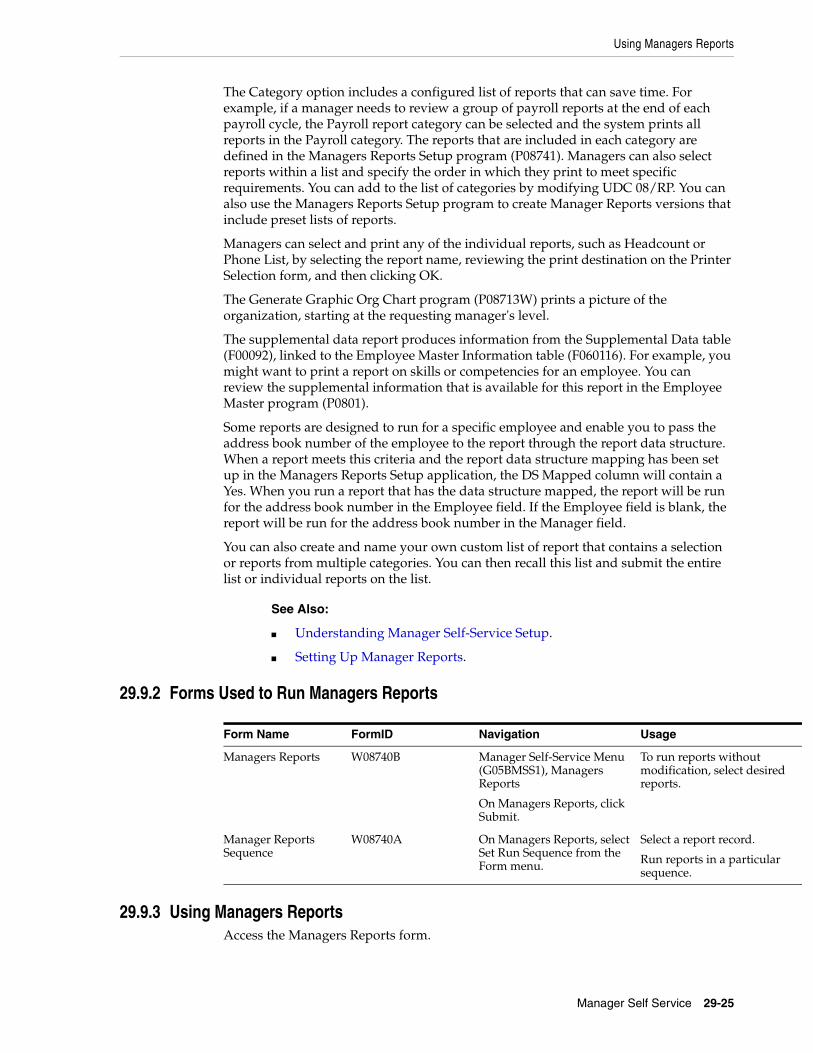
Using Managers Reports
Manager Self Service 29-25
The Category option includes a configured list of reports that can save time. For example, if a manager needs to review a group of payroll reports at the end of each payroll cycle, the Payroll report category can be selected and the system prints all reports in the Payroll category. The reports that are included in each category are defined in the Managers Reports Setup program (P08741). Managers can also select reports within a list and specify the order in which they print to meet specific requirements. You can add to the list of categories by modifying UDC 08/RP. You can also use the Managers Reports Setup program to create Manager Reports versions that include preset lists of reports.
Managers can select and print any of the individual reports, such as Headcount or Phone List, by selecting the report name, reviewing the print destination on the Printer Selection form, and then clicking OK.
The Generate Graphic Org Chart program (P08713W) prints a picture of the organization, starting at the requesting manager's level.
The supplemental data report produces information from the Supplemental Data table (F00092), linked to the Employee Master Information table (F060116). For example, you might want to print a report on skills or competencies for an employee. You can review the supplemental information that is available for this report in the Employee Master program (P0801).
Some reports are designed to run for a specific employee and enable you to pass the address book number of the employee to the report through the report data structure. When a report meets this criteria and the report data structure mapping has been set up in the Managers Reports Setup application, the DS Mapped column will contain a Yes. When you run a report that has the data structure mapped, the report will be run for the address book number in the Employee field. If the Employee field is blank, the report will be run for the address book number in the Manager field.
You can also create and name your own custom list of report that contains a selection or reports from multiple categories. You can then recall this list and submit the entire list or individual reports on the list.
See Also:
■ Understanding Manager Self-Service Setup.
■ Setting Up Manager Reports.
29.9.2 Forms Used to Run Managers Reports
Form Name FormID Navigation Usage
Managers Reports W08740B Manager Self-Service Menu (G05BMSS1), Managers Reports
On Managers Reports, click Submit.
To run reports without modification, select desired reports.
Manager Reports Sequence
W08740A On Managers Reports, select Set Run Sequence from the Form menu.
Select a report record.
Run reports in a particular sequence.
29.9.3 Using Managers ReportsAccess the Managers Reports form.

Using Managers Reports
29-26 JD Edwards EnterpriseOne Applications Human Capital Management Self-Service Implementation Guide
Figure 29–5 Managers Reports form
To run manager reports:
1. On Managers Reports, complete the Category field and then click Find.
To list reports in all categories leave this field blank and click Find.
■ List Name
Enter the name of a report list. You can create multiple report lists, each with a unique name. To copy an existing list, display the list to copy, change the name in the List Name field, and click Save.
■ Category
Enter the name of a report category. Each report is associated with a category to make creating and maintaining lists of reports easier and to enable you to view or submit just the reports that belong to a particular category.
2. To run the list of reports without modification, click Submit.
3. To run the list of reports in a particular order, select Set Run Sequence from the Form menu.
4. On Manager Reports Sequence, select each row in the order in which you want the reports to run.
5. If you need to restart the sequence numbering, click Find and then select each row in the order in which you want the reports to run.
6. Click OK.

Setting Up Information for New Employees
Manager Self Service 29-27
7. To run the reports in the new sequence, on Managers Reports, click
8. To run an individual report from the list, select the report and click the Select button.
9. To select multiple reports or to add reports to your custom list, double-click the button in the first column (or the row header) for the desired report, and then click Submit. This will run all reports with a check mark in the row header column.
10. To run a report for one employee, complete the Employee field:
11. Click Submit.
12. To apply a name to your list of reports, enter a value in the List Name field, and then select Save from the Form menu.
29.10 Setting Up Information for New EmployeesThis section provides an overview of new employee setup, lists prerequisites, and discusses how to:
■ Set processing options for Employee Setup Workbench (P08710).
■ Add an employee record using employee setup.
■ Initiate employee setup
■ Approve a setup process or task.
■ Review and revise the setup status
29.10.1 Understanding New Employee SetupWhen you hire an individual, many administrative tasks must be completed before the employee starts working. The process of setting up a new employee can involve many different people, paper forms, and approvals, and equipment must be set up for the new employee. Delays in the paperwork or approvals sometimes impede preparation for the employee and contribute to lost productivity.
You can use Managers Employee Setup to automate most communication that is associated with preparation for a new employee's arrival. Using this automated approach enables you to set up and distribute tasks and route approvals efficiently. You can track each process to spot potential problems and avoid delays. Workflow enhances the setup processes. Workflow routes approval and notification messages to required people about tasks that they need to complete by a specific date. This process tracks critical dates and notifies the originator when delays occur.
Using Workflow to help complete the setup process for new employees reduces the risk of misplacing paper forms, informs appropriate personnel of tasks that should be completed by a certain date, and decreases time spent preparing for a new employee.
You can avoid lost productivity by reviewing each setup process to resolve possible delays and ensure that all preparation will be completed on time. When you need to reduce the setup interval, you don't have to wait until all the hiring processes are complete to start preparing for the new employee. As soon as the address book number has been entered into the system, you can create setup tasks to ensure that the new employee can start work on the first day of employment.
When you initiate the process, Workflow sends a series of approvals according to the setup tasks that you entered. Each setup task can do one or more of these activities: run a report, send an email message, create a work order, or start a Workflow process.

Setting Up Information for New Employees
29-28 JD Edwards EnterpriseOne Applications Human Capital Management Self-Service Implementation Guide
29.10.1.1 Add an Employee Record Using Employee SetupYou must add an employee record to the database before you can initiate the employee setup process. If you have already added an employee record, proceed to the step to initiate employee setup.
When you add an employee record using the Employee Quick Hire program (P060116Q), the system automatically adds an employee record to the Address Book Master table (F0101) and an employee setup record to the Employee Setup Master table (F08710). If you are adding an employee record using any of these programs, see the referenced information for adding an employee record, and then proceed to the step to initiate employee setup.
■ Employee Master (P0801).
■ Applicant Entry (P08401).
■ Personic or any third-party software that updates the Unedited Quick Hire Transaction File table (F060116Z).
Note: When you use one of these programs, the system does not automatically add an employee setup record to the Employee Setup Master table. An F08710 record is added only if the employee is added through Quick Hire. To add a setup record after you add an employee record, you must access the Employee Setup Workbench program and initiate the process for employee setup.
29.10.1.2 Initiate the Employee Setup ProcessAfter you add an employee record, you can assign setup tasks to the employee's setup record and then initiate the setup process.
Depending on how one of the processing options has been set, the entire employee setup process might require approval. Workflow will deliver an approval form for the process and wait for confirmation before it starts individual tasks that you have assigned to the employee record.
Most setup tasks are specific to the location where the employee will be working. You can select tasks from a default task list that displays setup tasks for every employee by job type and job step. You can also select tasks from a setup task list that includes all defined tasks. You can change tasks to configure the employee's setup. However, this could reinstate the process approval depending on the task specifications.
Each setup task can do one or more of these activities, depending on how the tasks have been set up:
■ Run a report.
■ Send an email message.
■ Create a work order.
■ Start a Workflow process.
Information that you enter in the tabbed area of the Employee Setup Entry form updates the Employee Setup Master table (F08710). Information that you enter in the detail area of the form updates the Employee Setup Tasks table (F08711).
29.10.1.3 Approve a Setup Process or TaskAfter you initiate employee setup, Workflow completes one or both of these procedures depending on how the processing options are set:
Setting Up Information for New Employees
Manager Self Service 29-29
■ Obtains a process approval.
■ Obtains a task approval for each employee setup task that includes an approval requirement.
If the system requires a process approval, Workflow begins for each employee setup task, but waits until it obtains the process approval before continuing.
Workflow can complete any or all of these processes for each setup task:
■ Create a work order.
■ Create a report.
■ Send an email.
■ Start an additional Workflow process.
When specified in the processing option, the system requires a process approval for the entire setup process. When the system requires a process approval, it sets the task status to Pending (as defined in Setup Task Status list 08/S1) until the designated manager approves the process. When the designated manager approves the setup process, the system resets the process status to Approved (this is the status in the F08710 record) and restarts each task within the process. If a task has a future start date, the task workflow process halts and waits for the schedule activation date. The Escalation Monitor restarts halted tasks with a future start date on the appropriate date.
Individual tasks and changes to tasks might also require approval. For example, if the task for installing an employee telephone does not require an approval, Workflow does not send an email approval form. However, you can set up this task to require an approval if a manager changes the task to install a phone with multiple features.
When a task requires approval, Workflow first verifies that the manager who entered the employee setup record also entered data in the required fields that identify the location of the new employee's work space. If values are missing, Workflow delays the process and sends an email message to the manager. When the manager enters the required data, the workflow process is restarted and sends an email approval form to the approver who has been specified for the task. The system then sets the task status to WA or Waiting for Approval (defined in Setup Task Status list 08/S2) until it is approved. When the designated manager approves the task, the system sets the task status to Approved and starts processing the task.
When the task is approved, the activation date is reached, and the required location information is entered, workflow resumes and activates the task. This action changes the status of the task record (F08711) to A or Activated and carries out the predefined task activities:
■ Sends an email message.
■ Runs a configured report.
■ Creates a work order.
■ Starts an additional Workflow process.
An email message can contain the employee's name and location information, the description of the task, a requested completion date, and the manager's comments about the task. When a report is one of the task activities, an email is sent to the task recipient that contains an active link that, when selected, submits the report. You can also link a work order to the setup task.

Setting Up Information for New Employees
29-30 JD Edwards EnterpriseOne Applications Human Capital Management Self-Service Implementation Guide
A task remains in the Activated status until the task recipient finishes working on the task, returns to the Managers Employee Setup application, and selects Completed from the Row menu.
29.10.1.4 Review and Revise the Setup ProcessYou can review and revise the task status for the entire setup process and for individual tasks. You can delete a task if it is in the Pending status. You can cancel a task if it is in the Waiting, Approved, or Active status. If you do not activate the employee setup process when you add an employee setup record, you can activate the process after your review.
Managers who are responsible for approving the process for new employee setup or the individual tasks within the process should complete these procedures.
29.10.2 PrerequisitesBefore you complete the tasks in this section:
■ Set the processing options for Employee Setup Workbench (P08710).
■ Complete the setup tasks for the employee setup process.
See Setting Up the Employee Setup Process.
■ Set the processing options for Employee Quick Hire (P060116Q) to activate the new hire process, which includes Employee Setup Workbench.
You must also set these processing options to specify whether the system automatically updates the Employee Master Information table (F060116) or the Unedited Quick Hire Transaction File table (F060116Z) when you add a record.
See "Adding Employee Records Using Employee Quick Hire" in the JD Edwards EnterpriseOne Applications Human Capital Management Fundamentals Implementation Guide.
■ Review the status codes from UDCs 08/S1 and 08/S2.
See Also:
■ JD Edwards EnterpriseOne Tools Foundation Guide.
■ "Adding Employee Records One at a Time" in the JD Edwards EnterpriseOne Applications Human Capital Management Fundamentals Implementation Guide.
■ "Tracking Applicants, Entering Applicant Information" in the JD Edwards EnterpriseOne Applications Human Resources Implementation Guide.

Setting Up Information for New Employees
Manager Self Service 29-31
29.10.3 Forms Used to Set Up Information for New Employees
Form Name FormID Navigation Usage
Work With Employee Setup
W08710C Manager Self-Service (G05BMSS1), Managers Employee Setup
Employee Management (G05BE1), HRM Employee Setup
On Work with Employee Setup, click Add.
If you added an employee record using a program other than the Employee Setup Workbench program, use the first navigation.
Locate and select an employee record for the setup tasks are required.
Employee Setup Entry W08710G On Employee Setup Entry, select Add Default Tasks from the Form menu.
Review default tasks.
Employee Setup Entry W08710G On Work With Employee Setup, select an employee record and then click Select.
Select an employee record.
Employee Setup Search and Select
W08710E On Employee Setup Entry, select an employee, click Select, and then select Copy Employee from the Form menu.
Click OK.
The system supplies the detail area with tasks from the specified employee. You can copy tasks only from employees who have the same Setup Action value as the employee that you are setting up.
Activation Confirmation
W08710K On Activation Confirmation, click Yes.
The Activation Confirmation form appears asking whether you want to activate the employee setup process.
Work With Employee Setup
W08710C On Work With Employee Setup, click OK.
Review pending status.
Work Center W012503F Workflow Management (G02), Employee Work Center
View all queues to view all employee setup messages.
Media Object Viewer W012503G On Media Object Viewer, click Drag.
Check the box for a pending approval message, click Drag, and then view the message in the right-hand pane.
To Approve, or Reject a Request
Not Applicable Click the button in the left-hand queue.
To approve or reject a request, select an option and then quit the Work Center program.
Work With Employee Setup
W08710C Manager Self-Service (G05BMSS1), Managers Employee Setup
Employment Management, (G05BE1), HRM Employee Setup
Select a pending process record. To activate the process, select Process Tasks from the Row menu. Or, to review the status, click Select.
Tasks with a Y in the Pending Tasks column are pending. Although you previously submitted tasks with an N, you can also review them to track their progress.
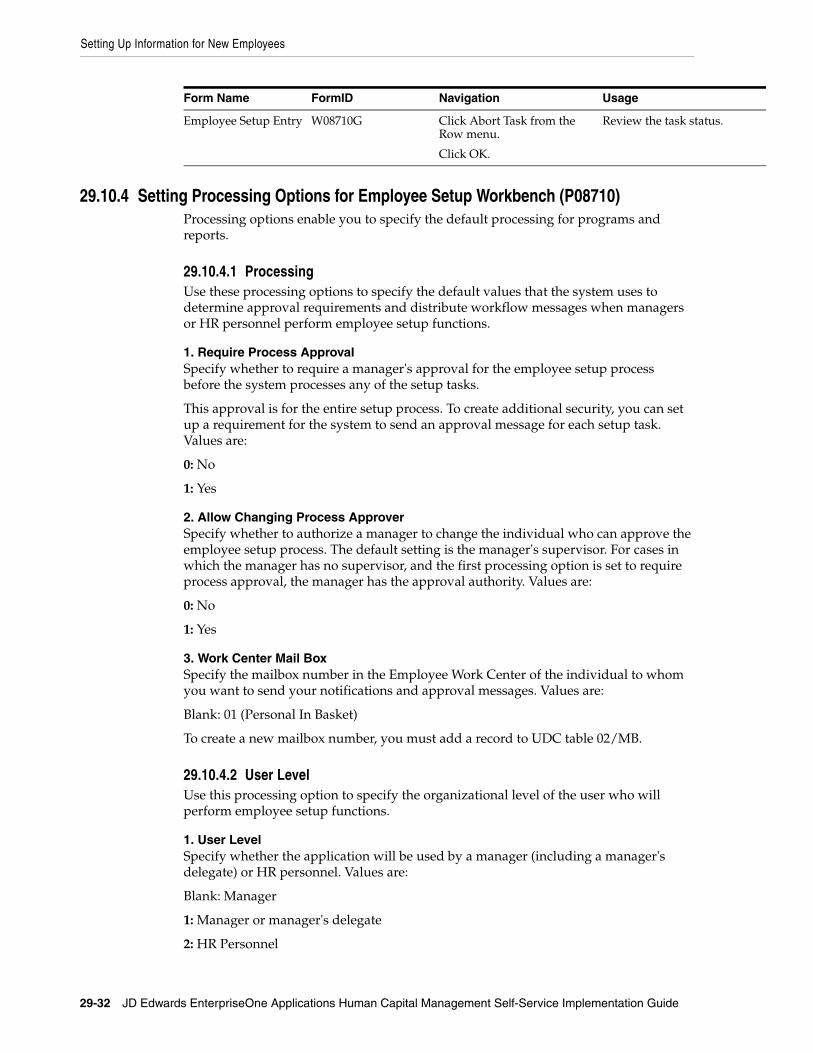
Setting Up Information for New Employees
29-32 JD Edwards EnterpriseOne Applications Human Capital Management Self-Service Implementation Guide
29.10.4 Setting Processing Options for Employee Setup Workbench (P08710)Processing options enable you to specify the default processing for programs and reports.
29.10.4.1 ProcessingUse these processing options to specify the default values that the system uses to determine approval requirements and distribute workflow messages when managers or HR personnel perform employee setup functions.
1. Require Process Approval Specify whether to require a manager's approval for the employee setup process before the system processes any of the setup tasks.
This approval is for the entire setup process. To create additional security, you can set up a requirement for the system to send an approval message for each setup task. Values are:
0: No
1: Yes
2. Allow Changing Process Approver Specify whether to authorize a manager to change the individual who can approve the employee setup process. The default setting is the manager's supervisor. For cases in which the manager has no supervisor, and the first processing option is set to require process approval, the manager has the approval authority. Values are:
0: No
1: Yes
3. Work Center Mail Box Specify the mailbox number in the Employee Work Center of the individual to whom you want to send your notifications and approval messages. Values are:
Blank: 01 (Personal In Basket)
To create a new mailbox number, you must add a record to UDC table 02/MB.
29.10.4.2 User LevelUse this processing option to specify the organizational level of the user who will perform employee setup functions.
1. User LevelSpecify whether the application will be used by a manager (including a manager's delegate) or HR personnel. Values are:
Blank: Manager
1: Manager or manager's delegate
2: HR Personnel
Employee Setup Entry W08710G Click Abort Task from the Row menu.
Click OK.
Review the task status.
Form Name FormID Navigation Usage

Setting Up Information for New Employees
Manager Self Service 29-33
29.10.4.3 DefaultsUse this processing option to specify the end status of the employee setup process when you successfully complete it.
1. Ending Setup StatusSpecify the status to which you want the employee setup process changed when the process finishes successfully. The status codes are listed in UDC table 08/S1. Values are:
1: Completed
7: Archive
8: Purge
29.10.4.4 Work OrdersUse these processing options to specify the statuses that the system uses to identify pending, active, and canceled work orders, the record type to use for writing instructions for a work order, and whether the system automatically supplies the description of the employee setup task when you create a new work order.
1. Pending W.O. Status Code (Required) Specify the status that the system will use to identify pending work orders. The system places a work order in pending status when the setup task has been initiated but is waiting for the user to enter an effective date or location information.
2. Active W.O. Status Code (Required) Specify the status that the system will use to identify active work orders. The system places a work order in active status when the setup task has been initiated, the effective date has been reached, and the user has entered the location information.
3. Cancelled W.O. Status (Required) Specify the status that the system will use to identify canceled work orders. The system places a work order in canceled status when the user ends the setup task.
4. Record Type used when creating Work Order instructionsSpecify the record type that you want to use when you are writing instructions for a work order. The default value is A.
5. Copy Task Description to Work OrderSpecify whether the system will copy the description of the employee setup task that is contained in the F087102 table into the description field of the work order when you create a new work order. Values are:
1: Copy the description from the setup task record.
0: Use the description from the work order template.
29.10.5 Initiate Employee SetupAccess the Employee Setup Entry form.

Setting Up Information for New Employees
29-34 JD Edwards EnterpriseOne Applications Human Capital Management Self-Service Implementation Guide
Figure 29–6 Employee Setup Entry form
To initiate employee setup:
If you just added an employee record using the Employee Setup Workbench program (P08710), continue with the task.
1. On Work With Employee Setup, if you used a program other than Quick Hire to add the employee master record (F06116), click the Add button and go to step 4; otherwise, perform step 2.
2. Complete any of these fields and click Find:
■ Supervisor
Enter the address book number of the supervisor.
■ Employee Number
Enter the address book number of the employee who is being hired or set up.
■ Process Status
Enter a code that represents the status of the entire setup process.
3. Select the employee setup record and click Select.
4. If you added an employee record with a program other than Employee Setup Workbench, on Employee Setup Entry, complete the Address Number and Setup Action fields on the Employee tab:
■ Setup Action
Enter a code that represents the setup action to perform.
5. To add default tasks, select Add Default Tasks from the Form menu.
If default tasks are set up for the new employee's job type and step, the system supplies the default tasks on the Employee Setup Entry form.
If a value is in the Lock Code field, you can change the subclass only to a level that is equal to or less than the value in the Ranking field.
Your new employee record appears on Work With Employee Setup and shows Pending in the Process Status field in the detail area.
6. To add or change the subclass for a task, review these fields:
■ Ranking

Setting Up Information for New Employees
Manager Self Service 29-35
Enter a code that specifies the rank of tasks within a task type. You rank tasks to restrict users from changing the subclass of a task to a subclass with a higher rank.
■ Lock Code
Enter a code that specifies whether the hiring manager can change the selected default setup task.
7. Complete the Sub Class field.
If the task is locked, the subclass that you select must have a ranking that is equal to or less than the value in the Ranking field.
8. Complete the UM optional field.
9. If the task is an equipment-setup task and you need more than one unit, complete the Units field.
10. Review the system-supplied information in the Order Number field and in these fields:
■ Task Recipient
Enter the address book number of the person who is assigned to the current employee setup task.
■ Approved By
Enter the address book number of the person who approves any given work. The system verifies this number against the Address Book Master table (F0101).
■ Req. Flds (Required Fields)
Enter a value that represents the number of location category codes you need to know to accomplish the current setup task.
For example, to install a telephone, you might need to know the first four location codes (state, city, building, and office number). To set up a computer account, you might need to know only the first two location codes (state and city).
11. Select the Location tab and review the value for Required Fields to determine the number of location code fields that you need to complete for this task.
12. Complete as many of these Location Code fields as are required.
For example, if four fields are required, then complete Location Code 001 through 004.
■ Location Code 001
Enter a user-defined category code that defines the location of an employee. You set up this code to meet the needs of your organization. For example, you can set up a category code to represent country, city, state, campus, building, office, or other location.
The Human Resources system provides this code to enable you to define a custom setup process for new employees based on the location where the employee will work.
13. Complete the Office Number optional field.
■ Office Number

Setting Up Information for New Employees
29-36 JD Edwards EnterpriseOne Applications Human Capital Management Self-Service Implementation Guide
Enter a field that uniquely identifies the physical location where an employee works. The system does not verify this information. You can enter any alphanumeric string.
14. To assign an additional task, complete the Task Type field and repeat steps 6–13.
15. To copy tasks from another employee, select Copy Employee from the Form menu. On the Employee Setup Search and Select form, inquire on the setup process for the desired employee to copy from and click the Select button.
16. When you finish entering all tasks for the employee's setup, click OK.
17. On Activation Confirmation, click Yes to begin the process.
If you click No, the system leaves the status of the process as pending. You will need to activate the process from the Work With Employee Setup form by selecting the Process Tasks from the Row menu.
29.10.6 Approve a Setup Process or TaskAccess the Work Center form.
Figure 29–7 Work Center form
To approve the process or task for employee setup:
1. On Work Center, verify that the information in these fields is correct and then click Find:
■ Address Number / User / Role
Select a value that filters which queues and users appear in the Work Center. Values are:
Address Number: All queues and users who are associated with the address number will appear. Address Number is the default value.
User: All queues for the user's associated address number will appear.
Role: All queues for the role's associated address number will appear.

Setting Up Information for New Employees
Manager Self Service 29-37
All the Work Center's logic will run off of the associated address number. Therefore, all users and roles must have an associated address number.
■ Associated Address Number
Enter a number that identifies an entry in the JD Edwards EnterpriseOne Address Book system, such as employee, applicant, participant, customer, supplier, tenant, or location.
■ Tickler Date
Enter the date on which an activity was performed or, for promise activities, the reminder date.
2. To view all queues, select the All Queues option.
■ All Queues
Select this check box to specify that all of the mailboxes that exist on the system will display whether mail is in them for the address number that is entered. If this check box is not selected, only those mailboxes that have mail in them for the address number that is entered will appear.
3. Review your messages in the left-hand pane.
4. Click the (+) button adjacent to the queue that receives employee setup messages.
5. To view a message, select the check box that is adjacent to a pending approval entry, and then click Drag.
6. On Media Object Viewer, if the message allows you to approve a task, click the button in the left-hand pane.
A Workflow message might provide only change notification or change notification and approval. On Media Object Viewer, if an approval is requested, a button exists in the left-hand pane that you can click. The system then displays a form that you can use to approve or reject the request.
7. Click the button in the left-hand queue.
8. On To Approve or Reject a Request, select one of these options in the Actions area, and click OK.
■ Approve
Enter a value that specifies the type of processing for an event.
■ Reject
Enter a value that specifies the type of processing for an event.
9. On Work Center, click Close.
29.10.7 Review and Revise the StatusAccess the Employee Setup Entry form.

Setting Up Information for New Employees
29-38 JD Edwards EnterpriseOne Applications Human Capital Management Self-Service Implementation Guide
Figure 29–8 Employee Setup Entry form
To review and revise the status:
1. On Work With Employee Setup, complete these fields and click Find:
– Supervisor
– Employee Number
– Process Status
2. If you want to cancel a process, select a pending process record, and then select Cancel Process from the Row menu.
3. To delete the process, click Delete.
You can delete only a process that is in Pending status. After any of the tasks have been processed, you will no longer be able to delete an entire setup process.
4. To activate the process, select Process Tasks from the Row menu.
5. Click Select to review the status for individual setup tasks.
6. On Employee Setup Entry, review the Task Status field for each task in the detail area.
The Task Status field displays the status for an individual setup task. You can delete the task if the status is Pending. A task is pending only if you have not submitted it for processing. You can abort the task if the status is Waiting, Approved, or Active.
To cancel a task, select a task, Abort Task, Row menu, OK.
When you cancel a task, the system sets the task status to Cancelled by User. When you cancel a process, the task record remains in the system.
When you delete a process, the task record is removed from the system.
When you complete a task, the system sets the task status to the value that you specified in the final Task Status field on the Work With Setup Task Details form.
7. To cancel a task, on Work With Employee Setup, select Recipient Tasks from the Row menu. On Work With Recipient tasks, select the task to cancel, and then select Cancel from the Row menu.
8. To complete a task in the system after the task recipient finishes the work, on Work With Employee Setup, select Recipient Tasks from the Row menu. On Work With

Approving Automatic Deposit Information
Manager Self Service 29-39
Recipient tasks, select the task to complete, and select Complete from the Row menu.
29.11 Approving Automatic Deposit InformationThis section provides an overview of automatic deposit information approval and discusses how to enter automatic deposit approvals.
29.11.1 Understanding Automatic Deposit Information ApprovalEmployees can use self-service to enter and update some of their personal information, such as name and address, emergency contact, and so on. Some types of information that employees enter, such as automatic deposit and competency, must be reviewed and approved by someone else before the database is updated.
If you are a representative of your organization's payroll department, you might be responsible for approving the automatic deposit information that employees add or change. In some cases, the routing number for an employee's bank might not exist in the user-defined code list for routing numbers (06/BC). You can use self service to approve automatic deposit information and the addition of new routing numbers.
If you are a representative of the payroll department, you might be responsible for approving the automatic deposit information that employees enter through self service. If Enterprise Workflow Management is enabled, you receive a message in the Employee Work Center when automatic deposit information is awaiting your approval. You must verify that the employee correctly completed all of the necessary information, and then approve or disapprove the request. If necessary, you can enter a response to the employee. Workflow includes your response in the email message that notifies the employee of the status of the request.
29.11.2 Forms Used to Approve Automatic Deposit Information
Form Name FormID Navigation Usage
Work Center W012503F Workflow Management(G02), Employee Work Center
On Work Center, locate an automatic deposit message.
Review/Validate Automatic Deposit Instructions
W055011B On Review/Validate Automatic Deposit Instructions, click the Review/Validate Automatic Deposit Instructions.jde link.
Click OK.
Review and then approve or disapprove.
If the employee entered the incorrect routing number for the bank, you can enter a correction.
29.11.3 Entering Automatic Deposit ApprovalsAccess the Work Center form.
To approve automatic deposit information:
1. On Work Item Manager, open a message queue that displays a message awaiting your review.
2. To review the message, select the check box next to the message that you want to review, and then click Drag.
3. Review the message in the adjacent pane and, if you want to submit an approval, click the magnifying glass button.

Approving Bank Transit Information
29-40 JD Edwards EnterpriseOne Applications Human Capital Management Self-Service Implementation Guide
4. Click Review/Validate Automatic Deposit Instructions.jde.
5. Click the Review/Validate Automatic Deposit Instructions.jde link.
6. On Review/Validate Automatic Deposit Instructions, review all changes.
7. To approve or disapprove, click one of these buttons, and then click OK.
– Approve
– Disapprove
29.12 Approving Bank Transit InformationThis section provides an overview of bank transit information approval and discusses how to approve bank transit information.
29.12.1 Understanding Bank Transit Information ApprovalOccasionally, when an employee enters automatic deposit information using self service, the employee might discover that the routing number for the bank where the account resides is not one of the valid values in the Routing Number field. In this case, the employee can submit a request to have the bank's routing number added to the list of values. If you are a representative of the payroll department, you might be responsible for approving the employee's request before the system adds the new bank number to UDC 06/BC.
If Enterprise Workflow Management is enabled, you receive a message in the Employee Message Center when bank information is awaiting your approval. You must verify that the employee correctly completed all of the necessary information, and then approve or disapprove the request. If necessary, you can enter a response to the employee. Workflow includes your response in the email message that notifies the employee of the status of the request.
When you approve the employee's request, the system updates UDC 06/BC.
29.12.2 Form Used to Approve Bank Information for Automatic Deposits
Form Name FormID Navigation Usage
Work Center W012503F Workflow Management menu (G02), Employee Work Center
On Work Center, click OK.
Approve bank transit information.
29.12.3 Approving Bank Transit InformationAccess the Work Center form.
To approve bank information for automatic deposits:
1. On Work Item Manager, select the message that you need to view.
2. Click the light bulb button in the exit bar in the middle of the form.
3. Click the light bulb button that appears on the right side of the form.
4. On Add Bank Transit Number, review the information in these fields and correct it, if necessary:
■ Bank Name

Approving Competency Information
Manager Self Service 29-41
Enter a user-defined name or remark.
■ Bank Routing Number
Enter the bank transit number for the employee's financial institution. Banks might refer to this number as the ABA or payment routing number. This number can be obtained from the employee's check or deposit slip. It is located between the MICR colons (:) at the bottom of the check.
For U.S. banks, this number contains nine digits. If this number does not contain nine digits, you must contact the employee's financial institution to obtain the correct number.
For Canadian banks, this number contains eight digits. Therefore, Canadian clients must enter the bank transit number with a leading zero.
If you change this number for an employee, the system creates a prenote for the employee's next auto deposit.
5. Add optional information to the Payroll Clerk's Response text area.
6. Select one of these options, and click OK:
■ Bank Added
Enter a value that specifies the type of processing for an event.
■ Bank Not Added
Enter a value that specifies the type of processing for an event.
29.13 Approving Competency InformationThis section provides an overview of competency information approval and discusses how to approve self-service competency entries.
29.13.1 Understanding Competency Information ApprovalCompetency management is a method of categorizing and tracking the qualifications that employees have that make them competent to perform their job duties. These qualifications, such as knowledge, skills, and training, are called competencies.
As a manager, you can use self service to review competency information for your subordinates. You can also enter the level of proficiency that each employee demonstrates in these competencies.
Your organization uses competency management to track the competencies that each employee possesses and to compare these competencies with those that are required for the employee's job. Tracking employee competencies helps you create clear career goals and performance objectives for the employees who work for you.
To simplify the process of maintaining competency information, employees can use self service to enter and revise their own competency information. You might be responsible for approving the information that employees enter and entering the employee's level of proficiency in certain competencies. In this case, you receive a message in the Employee Message Center after an employee enters competency information. You must then review the information and enter a level of proficiency for each competency.

Note: The self service employee cannot add competencies. This functionality is not open to the self service employees. You can maintain your own competency information which includes courses taken and the course provider but does not include the competencies themselves. The courses and providers must be maintained within an existing competency.
See Also:
■ JD Edwards EnterpriseOne Tools Foundation Guide.
(Release 9.1 Update) Approving Disability Status Information
29-42 JD Edwards EnterpriseOne Applications Human Capital Management Self-Service Implementation Guide
29.13.2 Forms Used to Approve Competency Information
Form Name FormID Navigation Usage
Work Center W012503F Workflow Management menu (G02), Employee Work Center
On Work Center, select a message and review the information.
29.13.3 Approving Self-Service Competency EntriesAccess the Work Center form
To approve competency information:
1. On Work Center, select the message that you need to view.
2. Click the light bulb button in the exit bar in the middle of the form.
3. Click the light bulb button that appears on the right side of the form.
4. On Training/Development, Skills, Accomplishments, Certifications, Education, or Language, complete all of these fields that apply, and then click OK:
■ Competency Level
Enter a code that refers to the level of proficiency that a person or asset has demonstrated for a specific competency type and competency code.
■ Verified By
Enter the name or address book number of the person who verified that the employee is certified in the competency.
■ Verification Method
Enter a UDC (05/VM) that defines the methods that you use to verify employee competency levels.
29.14 (Release 9.1 Update) Approving Disability Status InformationThis section provides an overview of disability information approval, and discusses how to approve disability information.

(Release 9.1 Update) Approving Protected Veteran Status Information
Manager Self Service 29-43
29.14.1 Understanding Disability Information ApprovalEmployees can use JD Edwards EnterpriseOne self-service applications to enter and update their disability status. When employees enter or update their disability status, it may be required that an authorized approver reviews and approves the updated information.
You can use JD Edwards EnterpriseOne Workflow Management to facilitate the process of obtaining approval for the disability status response submitted by an employee. After an employee submits the Voluntary Self-Identification of Disability Form CC-305, the system updates the F085590W work table with the data and triggers the workflow process. As part of the workflow process, the following events occur after the employee submits the employee self-service form:
1. The system notifies the HR administrator, who is authorized to approve the disability status response submitted by the employee, that the response is pending approval.
2. After the HR administrator approves or rejects the disability status response, the system updates the F085590W work table.
29.14.2 Forms Used to Approve Disability Information
Form Name Form ID Navigation Usage
Work Center W012503F Workflow Management (G02), Employee Work Center
Review disability status response messages.
Disability Status Disclosure Approval
W085595AB On Work Center, select a disability status response message and click the Disability Status Disclosure Approval.jde link.
Review an employee’s disability status and then approve or reject the approval request.
29.14.3 Approving Disability InformationAccess the Disability Status Disclosure Approval form.
To approve disability information:
1. In the Action area, select one of these options:
■ Approve
■ Reject
2. In the Comments area, enter text to add a brief note. Additionally, you can click the media object button to attach a media object.
3. Click OK.
29.15 (Release 9.1 Update) Approving Protected Veteran Status Information
This section provides an overview of protected veteran status information approval, and discusses how to approve protected veteran status information.

Creating Organizational Charts for the Web
29-44 JD Edwards EnterpriseOne Applications Human Capital Management Self-Service Implementation Guide
29.15.1 Understanding Protected Veteran Status Information ApprovalEmployees can use JD Edwards EnterpriseOne self-service applications to enter and update their protected veteran status. When employees enter or update their protected veteran status, it may be required that an authorized approver reviews and approves the updated information.
You can use JD Edwards EnterpriseOne Workflow Management to facilitate the process of obtaining approval for the protected veteran status response submitted by an employee. After an employee submits the protected veteran status self-identification form, the system updates the F085605W work table with the data and triggers the workflow process. As part of the workflow process, the following events occur after the employee submits the employee self-service form:
1. The system notifies the HR administrator, who is authorized to approve the veteran status response submitted by the employee, that the response is pending approval.
2. After the HR administrator approves or rejects the disability status response, the system updates the F085605W work table.
29.15.2 Forms Used to Approve Protected Veteran Status Information
Form Name Form ID Navigation Usage
Work Center W012503F Workflow Management (G02), Employee Work Center
Review protected veteran status response messages.
Veteran Status Disclosure Approval
W085605WA On Work Center, select a protected veteran status response message and click the Veteran Status Disclosure Approval.jde link.
Review an employee’s protected veteran status information and then approve or reject the approval request.
29.15.3 Approving Protected Veteran Status InformationAccess the Veteran Status Disclosure Approval form.
To approve protected veteran status information:
1. In the Action area, select one of these options:
■ Approve
■ Reject
2. In the Comments area, enter text to add a brief note. Additionally, you can click the media object button to attach a media object.
3. Click OK.
29.16 Creating Organizational Charts for the WebThis section provides an overview of organizational charts and discusses how to:
■ Set processing options for Generate Graphic Organization Chart (P08713).
■ Create organizational charts for the web.

Approving Self-Service Timecards
Manager Self Service 29-45
29.16.1 Understanding Organizational Charts for the WebYou can use the Generate Graphic Organization Chart program (P08713W) to create graphical organization charts that illustrate and document your organizational structure.
When you use the Generate Graphic Organization Chart program (P08713W) in a web-enabled environment, you can select an employee, and then click a single option to generate a chart that displays up to three levels of your organization.
In the web-enabled version, you can also select options from the Form menu to display employee profile information and to specify custom setup options for your charts. On the Organization Chart Display Options form, you can select employee information that you want to display, colors for the nodes that represent each of the organization levels, and a range of layout options.
29.16.2 Forms Used to Create Organizational Charts for the Web
Form Name FormID Navigation Usage
Organization Chart W08713WB Manager Self-Service (G05BMSS1), Generate Graphic Organization Chart
On Organization Chart, click Display Chart or Printable View.
Organization Chart Display Options
W08713WC On Organization Chart, select Display Options from the Form menu.
Enter appropriate values and generate an organizational chart.
29.16.3 Creating Organizational Charts for the WebAccess the Organization Chart form.
To create organizational charts for the web:
1. On Organization Chart, complete the Address Number field, and then click Display Chart.
2. To change the top level of the chart to one level higher in the organization, click the left arrow.
3. To display the chart in a page layout format so that you can print the chart on multiple pages, select the Page Layout option, and then click Display Chart.
4. To print the chart, click the Printable View button.
29.17 Approving Self-Service TimecardsThis section provides an overview of self-service timecard review and approval and discusses how to approve timecards.
29.17.1 Understanding Self-Service Timecard Review and ApprovalAfter employees enter self-service timecards into the system, managers must review those timecards. Using the Manager Review and Approval program (P051129), managers can review, change, reject, and approve employee timecards. Along with reviewing and approving timecards, managers can use this program to view a list of employees who are missing timecards for the specified period. You can also set up the review and approval process to be completed by manager delegates.

Approving Self-Service Timecards
29-46 JD Edwards EnterpriseOne Applications Human Capital Management Self-Service Implementation Guide
Managers or their delegates can review the timecards for a group of employees and approve or reject all of the timecards at once, or timecards can be approved, changed, or rejected individually. Managers can also select multiple timecards or employees to approve or reject at one time.
In addition to approving and rejecting timecards, managers also can assign the Paid - Not Approved status to timecards. This status is used for informational purposes, and the timecards that are assigned this status are processed in the same way that approved timecards are processed. Managers might use this status if a timecard is incorrect, but the approval deadline does not allow for the timecard to be changed and re-entered by the employee. Assigning the Paid - Not Approved status allows the system to pay the employee for the timecard. The manager would then need to follow up with the employee to ensure that the timecard information is corrected during a future pay period.
Managers also can enter comments and send email messages to employees in the review process. To add comments, a manager enters text into the Comments field. The system saves comments in the Leave Messaging and Audit table (F07630). You can review the comments by clicking a link in the Leave Comments Review field. A manager can use the Send E-Mail to Employee link on Self Service Manager Review and Approval to send a message to an employee. Managers might use this function to notify employees of the reason that a timecard was changed or rejected, or to remind employees who have not entered timecards for the period to enter their timecards before the deadline.
The system stores timecards that employees enter into the system in a temporary workfile called the Employee Transactions - Batch File table (F06116Z1). After the timecards are reviewed and approved or rejected, the Time Entry Batch Processor program (R05116Z1I) moves all of the timecards with an Approved or Paid Not Approved status into the Employee Transaction Detail File table (F06116). When timecards are in the Employee Transaction Detail File table, they can be processed in a payroll cycle.
Note: To use the missing timecards option during the review and approval process, you must set the processing options for the Time Entry Self Service Director program (P051125) to enable that feature. To display a list of employees who have not entered timecards for the pay period, the system must search through the entire employee database to find all of the employees that report to the specified manager; therefore, this process might take a significant amount of processing time.
When processing options for the Time Entry MBF Processing Options program are set appropriately, administrators can designate timecards as public or private. When public timecards exist for employees, the system displays them for review. Managers and employees can click a link on the director form that displays the public timecard. Neither managers nor employees can modify a public timecard. Because the system supports multiple timecards for a work date, employees can enter an additional timecard for the same work date.
See Also:
■ "Working with Timecards for Timecard Automation, Working with Timecard Batches" in the JD Edwards EnterpriseOne Applications Time and Labor Implementation Guide.

Approving Self-Service Timecards
Manager Self Service 29-47
29.17.2 Forms Used to Approve Self-Service Timecards
Form Name FormID Navigation Usage
Time Entry Self Service Director
W051125C Client portal, Time Entry Self Service Director
On Time Entry Self Service Director, click the Manager Review/Approval link.
Verify the pay period ending date.
Self Service Manager Review and Approval
W051129A On Self Service Manager Review and Approval, click an appropriate response option.
Review and approve self-service timecards. Then assign an appropriate status.
29.17.3 Approving TimecardsIf you have selected the Project and Gov Contract Accounting Used check box in the Service Billing Constants program (P48091), the system displays the Contract Labor Category field on the Self Service Manager Review and Approval form.
See "JD Edwards EnterpriseOne Human Capital Management for PGCA" in the JD Edwards EnterpriseOne Applications Project and Government Contract Accounting Implementation Guide.
Access the Self Service Manager Review and Approval form.
To review and approve self-service timecards:
1. On Time Entry Self Service Director, verify that the date in the Pay Period Ending Date or Labor Distribution End Date field is correct, and then click the Manager Review/Approval link.
If the employee entered timecards using daily time entry, the system displays Employee Daily Time Entry when you review timecard detail. Similarly, if the employee used summary time entry, the system displays Employee Summary Time Entry. If the employee entered timecards using both applications during the same pay period, the system displays all of the employee's timecards on Employee Summary Time Entry.
2. On Self Service Manager Review and Approval, verify the values in these fields:
– Manager
If you are a delegate who is reviewing and approving timecards for a manager, enter the address book number of the approving manager, and then click Refresh to display subordinate employees.
– Pay Period Ending Date or Labor Distribution End Date.
3. To specify which timecards to review, click one of these buttons, and then click Find Timecards.
The values that you can enter are the same for each selection:
■ Waiting Approval, Saved, Approved, Rejected, Paid Not Approved, Missing Timecard
Enter a code that indicates the current status of time entry records. Values are:
0: Waiting for approval.
1: Approved.

Approving Self-Service Timecards
29-48 JD Edwards EnterpriseOne Applications Human Capital Management Self-Service Implementation Guide
2: Rejected.
3: Not approved but paid.
5: Saved, but not submitted for approval.
Note: You can click the Show All button to review all timecards.
4. To review missing timecards, specify dates in the Begin Date and End Date fields and click Find Employee With Missing Timecards. The system displays all employees with missing timecards for the specified period.
5. To approve all of the timecards for multiple employees, click the Select button next to each employee for whom you want to approve timecards, and then click Approve.
6. To reject all of the timecards for multiple employees, click the Select button next to each employee for whom you want to reject timecards, and then click Reject.
7. To reject all of the timecards for multiple employees, but enable them to be processed in a payroll cycle, click the Select button next to each employee for whom you want to assign the Paid - Not Approved status, and then click Paid Not Approved.
8. To review the timecard detail for an individual employee, click the Select button next to the employee's record in the detail area of the form, and then click Detail.
9. To approve selected timecards for the employee, click the Select button next to each timecard that you want to approve, and then click Approve.
10. To reject selected timecards for the employee, click the Select button next to each timecard that you want to reject, and then click Reject.
11. To assign the Paid - Not Approved status to selected timecards for the employee, click the Select option next to each timecard for which you want to assign this status, and then click Paid Not Approved.
12. When you have finished reviewing all of the employee's timecards, click OK to return to Self Service Manager Review and Approval.
13. To send an email message to an employee, click the Select option next to the employee, and then click the Send E-Mail to Employee link.
14. On Self-Service E-Mail Message, complete the Subject field.
15. Type your message in the text box, and then click Send.
16. On Manager Self-Service Review and Approval, click Previous to return to Time Entry Self Service Director.
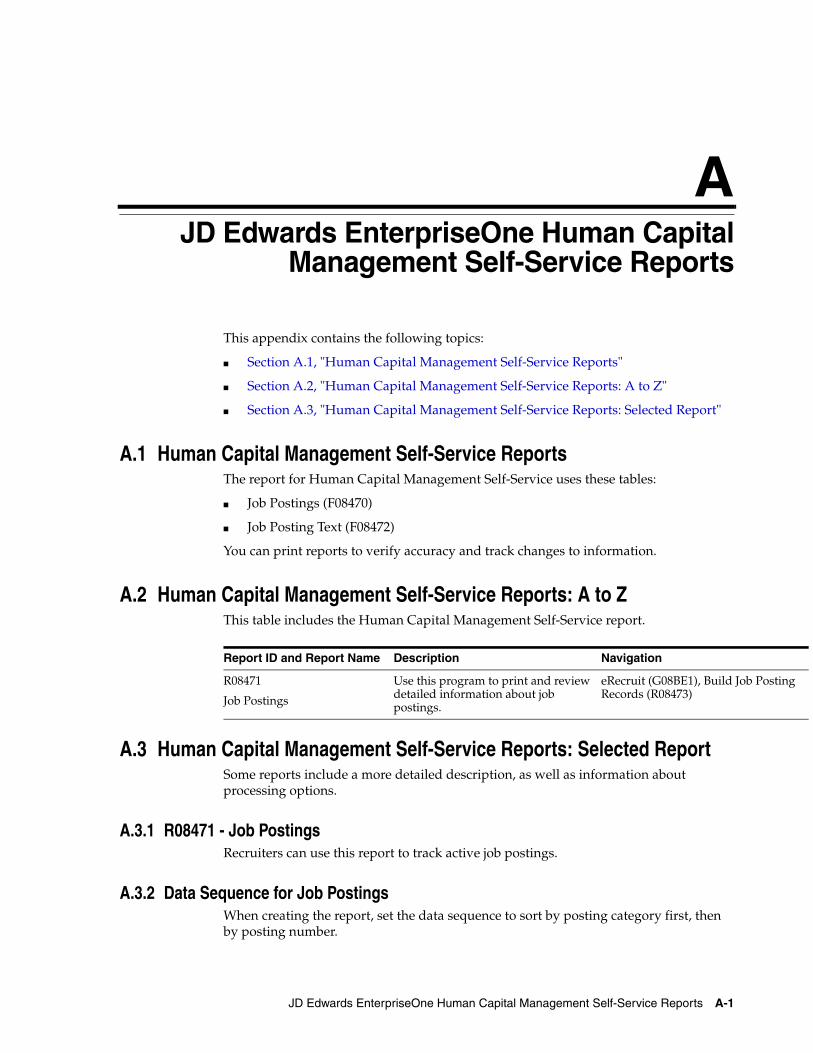
A
JD Edwards EnterpriseOne Human Capital Management Self-Service Reports A-1
AJD Edwards EnterpriseOne Human Capital Management Self-Service Reports
This appendix contains the following topics:
■ Section A.1, "Human Capital Management Self-Service Reports"
■ Section A.2, "Human Capital Management Self-Service Reports: A to Z"
■ Section A.3, "Human Capital Management Self-Service Reports: Selected Report"
A.1 Human Capital Management Self-Service ReportsThe report for Human Capital Management Self-Service uses these tables:
■ Job Postings (F08470)
■ Job Posting Text (F08472)
You can print reports to verify accuracy and track changes to information.
A.2 Human Capital Management Self-Service Reports: A to ZThis table includes the Human Capital Management Self-Service report.
Report ID and Report Name Description Navigation
R08471
Job Postings
Use this program to print and review detailed information about job postings.
eRecruit (G08BE1), Build Job Posting Records (R08473)
A.3 Human Capital Management Self-Service Reports: Selected ReportSome reports include a more detailed description, as well as information about processing options.
A.3.1 R08471 - Job PostingsRecruiters can use this report to track active job postings.
A.3.2 Data Sequence for Job PostingsWhen creating the report, set the data sequence to sort by posting category first, then by posting number.

Human Capital Management Self-Service Reports: Selected Report
A-2 JD Edwards EnterpriseOne Applications Human Capital Management Self-Service Implementation Guide
A.3.3 Setting Processing Options for Job Postings (R08471)Processing options enable you to specify the default processing for programs and reports.
A.3.3.1 DetailUse this processing option to specify the level of detail that appears on the report.
Print Job Description DetailSpecify whether the report includes the text of the job posting description. Values are:
Blank or 0: Do not print detail
1: Print detail

Glossary-1
Glossary
Add Opt
Enter a code that identifies any additional options available for a benefit plan that have been defined in the Plan Additional Options table (F083202).
Note: Additional options must have the same provider, policy number, and enrollment and eligibility rules as the benefit plan to which they are associated.
Address Number
Enter a number that identifies an entry in the JD Edwards EnterpriseOne Address Book system, such as employee, applicant, participant, customer, supplier, tenant, or location.
Benefit Group
Enter the benefit group to which the employee is assigned. Benefit groups facilitate employee enrollment by categorizing benefit plans and allowing enrollment rules for those categories. For example, assigning an employee to an executive (EXEC) benefit group automatically links the employee to the benefits available to executives in your organization.
Business Unit
Enter an alphanumeric code that identifies a separate entity within a business for which you want to track costs. For example, a business unit might be a warehouse location, job, project, work center, branch, or plant.
You can assign a business unit to a document, entity, or person for purposes of responsibility reporting. For example, the system provides reports of open accounts payable and accounts receivable by business unit to track equipment by responsible department.
Business unit security might prevent you from viewing information about business units for which you have no authority.
Calendar Year
Enter the four-digit calendar year.
Category Type
Enter a code that identifies categories for DBAs that use special flex calculation plans, such as lump sum employer flex credits and employee flex deductions when remaining flex credits are negative.

Change Reason
Glossary-2
Change Reason
Enter a code that indicates the reason for the action or change. For example, if a manager changes an active employee's record, terminates an employee, or recommends a change in salary or rate, the system displays a form on which a reason is indicated.
This is a UDC (06/T). If you are reactivating an employee, the code must be numeric. The code for new hires is the default reason code.
Company
Enter the company to which the employee is assigned. This code is used to store historical payroll information and to determine accounts for some journal entries.
A code that identifies a specific organization, fund, or other reporting entity. The company code must already exist in the Company Constants table (F0010) and must identify a reporting entity that has a complete balance sheet. At this level, you can have intercompany transactions.
Note: You can use company 00000 for default values such as dates and automatic accounting instructions. You cannot use company 00000 for transaction entries.
D B
Enter a code that indicates whether the person is a dependent or a beneficiary of the employee. Valid codes are:
D: The person is a dependent.
B: The person is a beneficiary.
Blank: The system automatically designates the person as a beneficiary or dependent, depending on the benefit plan type.
Data Item
Enter a code that the system uses to determine which fields in the Employee Personal Information forms are hidden or displayed.
Date Updated
Enter the date that specifies the last update to the file record.
Effective Date
Enter a date when all changes will take effect or the date when the changes went into effect. The effective date is used generically. It can be a lease effective date, a price or cost effective date, a currency effective date, a tax rate effective date, a benefit enrollment effective date, or whatever is appropriate.
Effective On
Enter a date on which all changes take effect or the date on which the changes went into effect.
Electronic Signature ID
No action required. A code that identifies an electronic signature that the system assigns when an employee approves of an action in a self-service process.
Ending Date
Enter the date on which the item, transaction, or table becomes inactive, or through which you want transactions to appear. This field is used generically throughout the
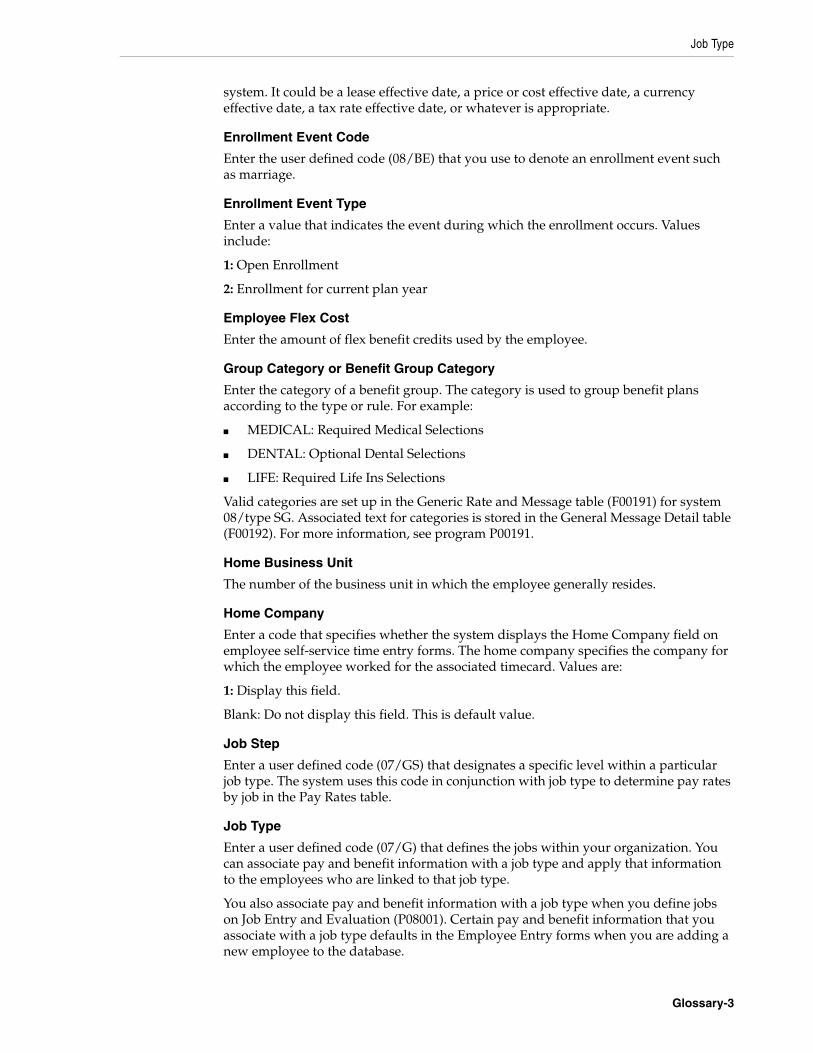
Job Type
Glossary-3
system. It could be a lease effective date, a price or cost effective date, a currency effective date, a tax rate effective date, or whatever is appropriate.
Enrollment Event Code
Enter the user defined code (08/BE) that you use to denote an enrollment event such as marriage.
Enrollment Event Type
Enter a value that indicates the event during which the enrollment occurs. Values include:
1: Open Enrollment
2: Enrollment for current plan year
Employee Flex Cost
Enter the amount of flex benefit credits used by the employee.
Group Category or Benefit Group Category
Enter the category of a benefit group. The category is used to group benefit plans according to the type or rule. For example:
■ MEDICAL: Required Medical Selections
■ DENTAL: Optional Dental Selections
■ LIFE: Required Life Ins Selections
Valid categories are set up in the Generic Rate and Message table (F00191) for system 08/type SG. Associated text for categories is stored in the General Message Detail table (F00192). For more information, see program P00191.
Home Business Unit
The number of the business unit in which the employee generally resides.
Home Company
Enter a code that specifies whether the system displays the Home Company field on employee self-service time entry forms. The home company specifies the company for which the employee worked for the associated timecard. Values are:
1: Display this field.
Blank: Do not display this field. This is default value.
Job Step
Enter a user defined code (07/GS) that designates a specific level within a particular job type. The system uses this code in conjunction with job type to determine pay rates by job in the Pay Rates table.
Job Type
Enter a user defined code (07/G) that defines the jobs within your organization. You can associate pay and benefit information with a job type and apply that information to the employees who are linked to that job type.
You also associate pay and benefit information with a job type when you define jobs on Job Entry and Evaluation (P08001). Certain pay and benefit information that you associate with a job type defaults in the Employee Entry forms when you are adding a new employee to the database.

Language or Language Code
Glossary-4
Language or Language Code
Enter a user defined code (01/LP) that specifies the language to use on forms and printed reports. Before you specify a language, a code for that language must exist at either the system level or in your user preferences.
Order Number
A number that identifies an original document. This document can be a voucher, a sales order, an invoice, unapplied cash, a journal entry, and so on.
Pay Class (H/S/P)
Enter a code that specifies how an employee is paid. Valid codes are:
H: Hourly
S: Salaried
P: Piecework
Pay Frequency
Enter a user defined code (07/PF) that indicates how often an employee is paid. Valid codes are:
B: Biweekly
W: Weekly
S: Semimonthly
M: Monthly
A: Annually
C: European Annualized
The system uses the value in the Description field on user defined codes to calculate the amount per pay period for a salaried employee.
Track PCP Flag
Enter an option that specifies whether the benefit plan or benefit plan option tracks primary care physician numbers. If you select this option, then the system displays a form during the enrollment process for an employee to enter the number for a primary care physician.
PCP Number
Enter a code that identifies the employee's or dependent's Primary Care Physician (PCP).
PCP Visited
Enter an option that indicates whether an employee has previously visited the primary care physician. Values are:
0: No
1: Yes
Plan Cost
Enter the cost that the system calculates for a plan or plan option.
Plan Credit
Enter the credit that the system calculates for a plan or plan option.

Send Email
Glossary-5
Plan Grouping Code
Enter an option that allows the user to designate which benefit plans or benefit plan options are related, based on a provider or other criteria.
Plan ID
Enter an abbreviation or number that identifies a specific employee benefit. Examples are:
■ Employee Health Insurance
■ Accidental Death and Dismemberment
■ Health Club Expense Reimbursement
■ Employee Stock Appreciation Rights
A benefit plan typically is associated with a deduction, benefit, or accrual. For example, a medical plan is a benefit that might also require a deduction to withhold premiums from an employee's pay.
Portal URL Links
Enter text that defines a portal URL link. This field displays the URL or code to use when the user executes the associated function.
Program ID
No entry required. The number that identifies the batch or interactive program (batch or interactive object). For example, the number of the Sales Order Entry interactive program is P4210, and the number of the Print Invoices batch process report is R42565.
The program ID is a variable length value. It is assigned according to a structured syntax in the form TSSXXX, where:
T: The first character of the number is alphabetic and identifies the type, such as P for Program, R for Report, and so on. For example, the value P in the number P4210 indicates that the object is a program.
SS: The second and third characters of the number are numeric and identify the system code. For example, the value 42 in the number P4210 indicates that this program belongs to system 42, which is the Sales Order Processing system.
The remaining characters of the number are numeric and identify a unique program or report. For example, the value 10 in the number P4210 indicates that this is the Sales Order Entry program.
Required Location Fields
Enter a value that represents the number of location category codes you need to know to accomplish the current setup task.
For example, to install a telephone you might need to know the first four location codes (state, city, building, and office number). To set up a computer account, you might need to know only the first two location codes (state and city).
Send Email
Enter a code that specifies whether the workflow process sends an email message when processing the task. The workflow process creates the email message by combining the media object associated with the setup task and the comments associated with the employee's actual task. Values are:
T: True. Send an email message.

Seq. Num.
Glossary-6
F: False. Do not send an email message.
Seq. Num.
Enter a number used to sequence information for review purposes only.
Use this field to specify the order in which categories appear on the Enrollment with Eligibility form and Benefits Employee Self-Service forms.
Shift Differential
Enter a code that specifies whether the system displays the Amount - Shift Differential field on employee self-service time entry forms. This value represents any additional earnings that are applied to an employee's rate of pay due to the shift the employee works. Values are:
1: Display this field.
Blank: Do not display this field. This is the default value.
Stay In Group
Enter a code that identifies what plans an employee can elect during a life event change. Values are:
0: An employee can enroll in any other valid benefit plan or benefit plan option in the same benefit category.
1: An employee can enroll in a valid benefit plan and benefit plan option within the same plan grouping code (PLNGRP) as the benefit plan in which he or she is currently enrolled.
Sub Class
Enter a code that represents the classification of the current task. The system uses this code to further define the task.
Task Type
Enter a code that represents the primary category or classification of an employee setup task. Define the valid values in user defined code list 08/T1.
Time Updated
No entry required. The time that specifies when the program executed the last update to this record.
Union or Union Code
Enter a code that specifies whether the system displays the Union Code field on employee self-service time entry forms. This user defined code (06/UN) represents the plan or union in which an employee works or participates. Values are:
1: Display this field.
Blank: Do not display this field. This is the default value.
Update Time
No entry required. Time that object was updated.
Updated By
No entry required. This field is updated with the user ID of the person who last updated the field.

Work Stn ID
Glossary-7
URL Type
Enter a code that forms a part of the index keys to identify the URL that is associated with the record.
User ID
No entry required. A code that identifies a user profile.
Version
Enter a user-defined set of specifications that control how applications and reports run. You use versions to group and save a set of user-defined processing option values and data selection and sequencing options. Interactive versions are associated with applications (usually as a menu selection). Batch versions are associated with batch jobs or reports. To run a batch process, you must select a version.
Work Stn ID
No entry required. The code that identifies the work station ID that executed a particular job.

Work Stn ID
Glossary-8

Index-1
Index
AAccomplishments form, 28-19Add Bank Transit Number form, 29-38Add Job Postings form, 11-7
Competencies tab, 11-9Address Book Master table (F0101), 29-26Allowed Dependent Relationships by Plan
form, 19-2Allowed Dependent Relationships by Plan program
(P085500), 19-1, 19-2Allowed Increment form, 21-5Applicant Entry program (P08401), 29-27Applicant Login Information table (F08405), 8-2Applicant Login program (P08405)
processing options, 9-3Ascending Descending (08R/AD), 8-3Auto Deposit Instructions program (P055011), 28-11,
29-37, 29-38automatic deposit information, 28-11
approval, 29-37approving bank transit information, 29-38entering, 28-11program information, 29-37self service, 28-11
Automatically Setup SS Dependent Selection report (R085505)
processing options, 20-2Available Plans and Plan Options by Employee
program (P085520W), 25-8Available Plans and Plan Options form, 25-8Available Plans Work File Build program (R085520)
processing options, 20-7Available Plans Workfile Build program
(R085520), 20-5
Bbank transit codes (07/BC), 29-38Benefit Amount Rate Edits program (P085573), 21-1Benefit Amount/Rate Edit Revisions, 21-2Benefit Amount/Rate Edit Revisions form, 21-2Benefit Categories by Enrollment Events form, 18-2benefit category
excluding from a work file build, 20-7linking to benefit groups, 15-1
selecting for self-service enrollment, 18-1Benefit Confirmation Statement Options program
(P085518), 23-5Benefit Enrollment Events program (P08500), 17-2benefit groups
assigning benefit categories to, 15-1setting up URLs for self service, 16-6
benefit planexcluding from a work file build, 20-7setting up URLs for self service, 16-1setting up URLs for self-service categories, 16-5setting up URLs for self-service plan
options, 16-2setting up URLs for self-service plans, 16-4
Benefit Statement Options form, 23-7Benefits Enrollment Event Setup form, 17-2benefits enrollment events, setting up, 17-1Benefits Enrollment Plan/Option URL Address
form, 16-3benefits self service
available plans workfile setup, 25-7cross-referencing new plan rates, 26-1current coverage workfile setup, 25-4defining process flow scripts, 22-2employee information storage setup, 24-1enrollment event setup, 17-1managing work files, 27-1purge the Dependent/Beneficiary X-Reference
Table, 27-2purging the Employee Current/Pending Elections
Work Table, 27-1revising dependent and beneficiary updated
coverage, 25-13revising the Current Coverage Work File, 25-4revising the personal profile workfile, 25-16running the Populate Director Form Rules/Edits
report, 22-1setting up benefits workflow approval, 23-9setting up maximum coverage increase
limits, 21-4setting up process flows, 22-1setting up translated director text, 22-7setting up URLs for plans, 16-4
benefits self service setupavailable plans workfile, 25-7current coverage workfile, 20-3

Index-2
dependent and beneficiary workfile, 20-4enrollment events, 17-1personal information workfile, 20-9process flows, 22-1URLs for categories, 16-5URLs for plan options, 16-2URLs for plans, 16-4workfiles, 20-1
benefits self-servicesaving benefits information, 24-3setup, 13-1
benefits self-service setupallowed dependent relationships by plan, 19-1benefit confirmation statement options, 23-5benefit plan guidelines, 21-1benefits information storage, 24-3categories by enrollment event, 18-1contribution limits, 21-1cross-referencing new plan rates, 26-1current coverage workfile, 25-4defining process flow scripts, 22-2dependent and beneficiary updated
coverage, 25-13dependent selection, automatic, 20-1employee information storage, 24-1form options, 23-2managing work files, 27-1maximum coverage increase limits, 21-4personal profile workfile, 25-16purge the Dependent/Beneficiary X-Reference
Table, 27-2purging the Available Plans and Plan Options by
Employee Work Table, 27-4purging the Current Dep/Ben X-Reference Work
Table, 27-3purging the Employee Current/Pending Elections
Work Table, 27-1purging the employee personal, contact, phone
work tables, 27-3saving employee personal information, 24-1steps and rules for director process flows, 20-10translated director text, 22-7URLs, 16-1URLs for groups, 16-6workflow approval, 23-9
Build Current Dependent/Beneficiary Work File report (R085537)
processing options, 20-5
CCategories By Benefit Group form, 15-3, 21-5Categories by Benefit Group program
(P08350), 15-1, 15-3, 21-4Categories by Enrollment Event program
(P085510), 18-2categories by enrollment event, setting up, 18-1categories to benefit groups, linking, 15-1Certifications form, 28-20Classification/Pay Cross Reference program
(P05932), 7-20Common Setting for HR Employee Self Service
program (P05004), 14-1Common Setting for HR Employee Self Service
Programs table (F05004), 2-10common settings
benefits enrollment, 2-10compensation management, 2-10human resources, 2-10self-service applications, 2-10setting up, 2-10
compensation management, 29-2competency information
Education form, 28-21entering using self service, 28-14revising with self service, 28-15
competency information using self service, revising, 28-15
competency information using self service, working with, 28-14
Competency Self Service program (P05130)processing options, 28-16program information, 28-14
Current Dep/Ben Coverage Revisions form, 25-12Current Dep/Ben X-Reference Work Table program
(P085537W), 25-12Current Enrollment Work File Build report (R085530)
processing options, 20-4program information, 20-4
Current to Future DBA X-Ref program (P08515), 26-2
DDefault Setup Tasks table (F087101), 6-4Define a Process Flow Step form, 22-5Define Director Text form, 22-8Define Setting by Posting Category form, 10-4delegates
assigning, 29-14setting up delegates for Managers
Workbench, 6-16setting up manager delegates for time entry self
service, 6-17dependent and beneficiary workfile, building, 20-4Dependent Enrollment program (P085570)
processing options, 23-3Dependent/Beneficiary Coverage Revisions
form, 25-14Dependent/Beneficiary Coverage Revisions program
(P085536W), 25-13Dependent/Beneficiary Workfile Build program
(R085537), 20-4dependents and beneficiaries
setting up a current personal information workfile, 20-4
setting up steps and rules for director process flows, 20-10
Disable Activities tab form, 10-6Disable Applicant Activities

Index-3
F08462 table, 8-2UDC 08R/AA, 8-4
EEEO Survey table (F08492), 8-2Element ID (UDC 08R/EI), 8-4employee competency information
approve information, 29-40entering with self service, 28-14revising with self service, 28-15
Employee Daily Time Entry program (P051127), 28-24
Employee Enrollment Work File Revision form, 25-5Employee Enrollment Work File Revisions program
(P085530W), 25-5Employee Information - Telephone Numbers
program (P054215)processing options, 23-3program setup, 23-3
Employee Information program (P0801), 29-27Employee Profile program (P060116)
processing options, 28-8reviewing, using self service, 28-7
Employee Self Service Director Setup program (P05401), 22-8
Employee Self Service Form Options form, 23-4Employee Self Service Form Options program
(P085550), 23-2, 23-4Employee Self Service Process Flow Setup program
(P05400), 22-4employee self-service, 3-1employee self-service history, reviewing, 25-1employee setup default tasks, 6-3Employee Setup Entry, 29-36Employee Setup Entry form, 29-32Employee Setup Master table (F08710), 29-26employee setup process, setting up, 6-3employee setup using workflow, completing, 29-27Employee Setup Workbench program (P08710), 6-3
processing options, 29-30program information, 6-3
employee setup, initiating, 29-27Employee Status Change program (P08720)
processing options, 29-8program information, 29-7
Employee Status Change Setup form, 6-11Employee Status Change Setup program
(P08730), 6-9processing options, 6-11program information, 6-11
employee status change, setting up, 6-9Employee Summary Time Entry for Self Service
program (P051128), 28-31, 28-32employment data for verification-of-employment
letters, entering, 29-18employment requests, verification, 29-18encryption key
eRecruit Security form, 9-2Enrollment Statement program (P085568)
processing options, 23-5program setup, 23-5
Entered Benefit Amount/Rate Edits table (F085573W), 21-1
Enterprise Workflow ManagementEmployee Setup, 29-27Employee Setup Workbench program
(P08710), 6-4Managers Employee Setup program
(P08710), 29-26Name and Address Change program
(P05101), 3-4Upcoming Reviews by Supervisor program
(P052200), 6-1Verification of Employment program
(P05003), 3-2eRecruit
creating a job posting, 11-5creating job postings, 11-2defining posting categories, 10-1editing a job posting, 11-9features, 8-1managing job postings, 11-1overview, 8-1system, 8-1
eRecruit security, 9-1eRecruit Security form, 9-2eRecruit setup
define standard phrase categories, 10-8defining posting categories, 10-2defining settings by posting category, 10-3, 10-4defining standard phrase categories, 10-8defining standard phrases, 10-9, 10-10encryption key, 9-1General Constants table (F08466), 8-2system level, 9-1
eRecruit Setup form, 10-2, 10-8, 10-10eRecruit Setup program (P08460), 10-1, 10-2, 10-3,
10-4, 10-8, 10-9, 10-10eRecruit Status (08R/AS), 8-3ESS Setup Director, 13-4ESS Setup Director program (P05410), 13-2ESS Setup Director program (P054100), 13-4ESS Time Entry Setup program (P051123), 7-10ESS Workfile Approval Setup program
(P085515), 23-9Extended Applicant Information table (F08403), 8-2
FF0101 table, 29-26F05002 table, 3-1F05003 table, 3-2F05004 table, 2-10F060116Z table, 29-26F085573W table, 21-1F085574 table, 21-4F08710 table, 29-26F087101 table, 6-4F087102 table, 6-4

Index-4
F087103 table, 6-4
GGenerate Graphic Organizational Chart program
(P08713W), 29-43processing options, 6-14program information, 6-14
Iinformation for new employees, setting up, 29-26Internal/External/Both (08R/IE), 8-4intranet
setting up self-service, 2-10setting up self-service benefits, 13-1
IRS Form W-4, Employee's Withholding Allowance for ESS program (P0855303)
processing options, 4-3URLs, 4-7
IRS W-4 Form Work File Revisions program, 4-5
JJob Basket table (F08474), 8-2job posting, 11-5Job Posting (08R/WS), 8-6Job Posting Competencies table (F08471), 8-2Job Posting Field Preferences table (F08465), 8-2Job Posting Fields by Tab table (F08464), 8-2Job Posting Location (08R/JL), 8-5Job Posting report (R08471)
processing options, A-2Job Posting Settings table (F08460), 8-2Job Posting Sort Workfile table (F08473), 8-2Job Posting Tab Settings table (F08460), 8-2Job Posting Text table (F08471), 8-2Job Posting Text table (F08472), 8-2job postings
creating, 11-2edits, 11-9eRecruit, 11-1
Job Postings table (F08470), 8-2
LLabor Distribution Periods program (P059062), 7-23Language form, 28-23Letter Component (08R/LC), 8-5
MManage Job Postings form, 11-5Manage Job Postings program (P08470), 11-1, 11-5,
11-9processing options, 11-4program information, 11-2
manage self-service workfiles, 27-1Manager Delegates program (P08750)
processing options, 6-17program information, 6-16
Manager Delegates Setup program (P051126)processing options, 6-18program information, 6-17
Manager Review and Approval program (P051129), 29-43
manager self service, 29-1approving information, 29-37Managers Employee Setup program
(P08710), 29-26managers reports, 29-23setting up organizational charts for the web, 6-14setting up the employee setup process, 6-3setup, 6-16
Manager's Report Setup form, 6-13manager's reports, setting up, 29-23Managers Delegates program (P08750)
processing options, 29-14program information, 29-14
Managers Employee Setup program (P08710)completing the process with Workflow, 29-27employee records, adding, 29-27initiating the process for Employee Setup, 29-27program information, 29-26
Managers Reports form, 29-25Managers Reports program (P08740), 29-23Managers Reports Setup program (P08741)
program information, 6-12setup, 6-12
Managers Workbench program (P08712)processing options, 29-6program information, 29-2
managing self service workfilespurge the Available Plans and Plan Options by
Employee Work Table, 27-4purge the Employee Current/Pending Elections
Work Table, 27-1managing self-service workfiles
purge the Current Dep/Ben X-Reference Work Table, 27-3
purge the Dependent/Beneficiary X-Reference Table, 27-2
purge the employee personal, contact, phone work tables, 27-3
Mandatory/Hide/Disable (08R/MH), 8-5Maximum Insurance Coverage Increase Amounts
table (F085574), 21-4Maximum Insurance Coverage Increase program
(P085574), 21-4
NName and Address Change program (P05101)
program information, 3-3setup, 3-3
new DBA plan ratescross-reference, 26-1setting up, 26-1

Index-5
Oorganizational charts
program information, 29-43web-based, 29-43
Override Employee Labor Period Standard Hours form, 7-24
Override Employee Labor Period Standard Hours program (P059063), 7-23
PP012501 program, 29-37, 29-38, 29-40P05003 program, 28-2, 28-3, 29-18, 29-19P05004 program, 14-1P051125 program, 7-4P051126 program, 6-18P051127 program, 28-24P051128 program, 28-31, 28-32P051129 program, 29-43, 29-45P05130 program, 28-14, 28-16P052200 program, 6-2, 29-16P053020 program, 3-4P05400 program, 22-1, 22-2, 22-4P05401 program, 22-1, 22-7, 22-8P05410 program, 13-2, 23-2P054100 program, 13-4P054101 program, 25-16P054215 program, 23-3P055011 program, 28-11, 29-37, 29-38P059062 program, 7-23P059063 program, 7-23P05932 program, 7-20P060116 program, 28-7, 28-8P07186 program, 28-10P0801 program, 29-27P08320 program, 21-1, 21-2, 21-4, 21-5, 25-4P08350 program, 15-1, 15-3, 21-4P08400 program, 9-2P08401 program, 29-27P08405 program, 9-3P08460 program, 10-1, 10-2, 10-3, 10-4, 10-8, 10-9,
10-10P08470 program, 11-1, 11-2, 11-4, 11-5, 11-9P08488 program, 12-5, 12-7P08498 program, 12-3P08500 program, 17-2P08515 program, 26-2P085303W program, 4-5P08550 program, 23-4P085500 program, 19-1, 19-2P085501 program, 20-7P085510 program, 18-2P085515 program, 23-9P085518 program, 23-5P085520W program, 25-8P0855303 program, 4-3P085530W program, 25-5P085536W program, 25-13P085537W program, 25-12P085550 program, 23-2
P085568 program, 23-5P085570 program, 23-3P085573 program, 21-1P085574 program, 21-4P085585 program, 25-3P08710 program, 29-26, 29-27, 29-30P08712 program, 29-6P08713W program, 6-14, 29-43P08720 program, 29-8P087201 program, 29-12P08730 program, 6-9, 6-11P08740 program, 29-23P08750 program, 6-17, 29-14Paid Time Off Inquiry program (P053020), 3-4paid time-off inquiry, setting up, 3-4Pay Stub History Information form, 28-10pay stub review, 28-10pay stubs, reviewing, 28-10Pay Type by Category table (F05002), 3-1Personal Employee Information Workfile Build report
(R054101)processing options, 20-9setup information, 20-9
personal information, working with, 28-7Personal Profile Work File Revision program
(P054101), 25-16phrase categories, defining, 10-8Phrase Category (08R/PH), 8-6Plan DBA/Enrollment DBA Cross Reference
form, 26-2Plan Master form, 21-5Plan Master program (P08320), 21-1, 21-2, 21-4, 21-5,
25-4plan options, setting up, 25-4Plans Within Categories form, 21-5Plans/Categories To Exclude From Work File Build
program (P085501), 20-7Populate F05402 and F05403 Files report
(R8985500), 4-2, 20-10, 22-1posting category
Confirmation Email tab, 10-3, 10-4define settings, 10-3defining, 10-2Disable Activities tab, 10-3, 10-4eRecruit, 10-1, 10-3, 10-4Field Preferences tab, 10-3, 10-4Posting Display tab, 10-3, 10-4setup, 10-2Web Addresses tab, 10-3, 10-4
Posting Category (08R/PC), 8-6Posting Display tab form, 10-5Posting Element Display Settings table (F08463), 8-2Posting Status (08R/PS), 8-6Process Flow Detail form, 22-7process flow script, 22-2Process Recruitment Records program (R08470)
setup information, 12-11Process Recruitment Records report (R08470)
processing options, 12-11Purge Available Plans/Plan Options program

Index-6
(R084451), 27-4Purge Available Plans/Plan Options report (R085541)
processing options, 27-4setup information, 27-4
Purge Current Dep/Ben X-Reference Work Table program (R085543), 27-3
Purge Dependent/Beneficiary X-Reference Table program (R085542), 27-2
Purge Dependent/Beneficiary X-Reference Table report (R085542)
processing options, 27-2setup information, 27-2
Purge Employee Current/Pending Elections Work Table program (R085540), 27-1
Purge Employee Personal, Contact, Phone Work Tables program (R054040), 27-3
Purge Employee Personal/Contact/Phone report (R054040)
processing options, 27-3setup information, 27-3
RR054040 program, 27-3R054101 program, 20-9R054104 program, 24-1, 24-2R084451 program, 27-4R08470 program, 12-11R08471 report, A-2R08490 report, 12-12R085503 report, 4-8R085505 report, 20-2R085520 program, 20-5, 20-7R085524 program, 24-3R085524 report, 24-4R085530 report, 20-4R0855303 report, 4-8R085537 program, 20-4R085537 report, 20-5R085540 program, 27-1R085541 report, 27-4R085542 program, 27-2R085542 report, 27-2R085543 program, 27-3R8985500 program, 20-10, 22-1R8985500 report, 4-2Recruit Apply Posting table (F08498), 8-2Recruitment Information table (F08490), 8-2Recruitment Self Service Menu program (P08400)
processing options, 9-2setup information, 9-2
References table (F08496), 8-2Resum Flag (08R/RF), 8-7Review Applicants program (P08498)
processing options, 12-3setup information, 12-3
Review Requests for Verification of Employment program (P05003), 3-1, 28-3, 29-18
processing options, 28-2, 29-19setup information, 28-2
Review/Validate Automatic Deposit Instructions form, 29-37
Revise Automatic Deposit Instructions form, 28-11Revise Labor Distribution Periods form, 7-23
SSearch eRecruit Applicants and Resumes form, 12-8Search eRecruit Applicants and Resumes P08488
processing options, 12-7setup information, 12-7
Search eRecruit Applicants and Resumes program P08488, 12-5
self serviceapproving automatic deposit information, 29-37approving bank transit information, 29-38approving competency information, 29-40approving information, 29-37automatically setting up dependent
selection, 20-1building the current coverage workfile, 20-3building the personal information workfile, 20-9defining process flow scripts, 22-2delegate setup, 6-16employee daily time entry, 28-24Employee Profile (P060116), 28-7entering automatic deposit information, 28-11entering competency information, 28-14manager delegates, 6-16manager delegates for self service, 6-17managers, 29-16organizational charts for the web, 29-43overview, 28-1review employee self-service history, 25-1Review Requests for Verification of Employment
(P05003), 28-3reviewing and approving timecards, 29-43, 29-45reviewing employee personal profile, 28-7revising competency information, 28-15saving employee personal information, 24-1setting up form options, 23-2setting up process flows, 22-1setting up workfiles, 20-1setup, 6-1, 6-3, 6-14summary time entry, 28-31, 28-32time entry, 28-24time entry setup, 6-17verification of employment letter, 28-1
self service considerations, 29-2self-service, 7-10
director text for time entry, 7-3emergency contacts and phones, 3-4employee, 3-1IRS Form W-4, Employee's Withholding
Allowance for ESS, 4-3IRS Form W-4, Employee's Withholding
Allowance for ESS program, 4-7IRS W-4 Form Work File Revisions program, 4-5process flow script for IRS Form W-4, 4-4setting up an intranet site, 2-10, 13-1

Index-7
setting up Form W-4, 4-1setting up IRS Form W-4, 4-1setup, 3-4, 13-1setup director, 13-2time entry director text, 7-3time entry setup, 7-1, 7-3, 7-10, 7-20
self-service benefitsautomatically setting up dependent
selection, 20-1building the available plans workfile for self
service, 20-5building the current coverage workfile, 20-3building the personal information workfile, 20-9changing benefit plans for self-service, 13-1cross-referencing new plan rates, 26-1defining benefit category rules, 15-1defining process flow scripts, 22-2excluding plans and categories from work files for
self service, 20-7revising dependent and beneficiary updated
coverage revisions, 25-13revising the Available Plans Workfile, 25-7revising the personal profile workfile, 25-16revising workfiles, 25-1saving employee information, 24-1setup, 13-1
self-service benefits setup, 13-1changing plan options, 13-1reviewing dependent and beneficiary current
coverage revisions, 25-11running the Populate Director Form Rules/Edits
report, 22-1setting up a current dependent and beneficiary
personal information workfile, 20-4setting up allowed dependent relationships by
plan, 19-1setting up categories by enrollment event, 18-1setting up contribution limits, 21-1setting up enrollment events, 17-1setting up maximum coverage increase
limits, 21-4setting up plan guidelines, 21-1setting up process flows, 22-1setting up steps and rules for director process
flows, 20-10setting up translated director text, 22-7setting up URLs, 16-1setting up URLs for benefit groups, 16-6setting up URLs for plan options, 16-2setting up workfiles, 20-1
self-service benefits workflow approval, setting up, 23-10
Self-Service Director program (P05410)processing options, 23-2
Self-Service Director Text program (P05401), 22-1, 22-7
self-service directors, setting up, 22-1self-service employee information, saving, 24-1Self-Service Manager Review and Approval -
Timecards program (P051129), 29-45
Self-Service Process Flow Setup program (P05400), 22-1, 22-2
self-service process flows, setting up, 22-1self-service setup
IRS Form W-4, 4-2, 4-8IRS Form W-4, Employee's Withholding
Allowance for ESS, 4-3IRS Form W-4, Employee's Withholding
Allowance for ESS program, 4-7IRS W-4 Form Work File Revisions program, 4-5overview, 2-10process flow script for IRS Form W-4, 4-4purge the Available Plans and Plan Options by
Employee Work Table, 27-4purge the Current Dep/Ben X-Reference Work
Table, 27-3purge the employee personal, contact, phone work
tables, 27-3purging the Employee Current/Pending Elections
Work Table, 27-1verification of employment, 3-1work files, 27-1
settings for self service, 14-1settings for self-service benefits, 14-1setup
benefits director, 13-2Common Settings (P05004), 2-10
Setup Task Details table (F087103), 6-4Setup Task List table (F087102), 6-4Skills form, 28-18Sort Fields (08R/SF), 8-7standard phrase categories, defining, 10-8Standard Phrase Search & Select form, 11-8Standard Phrases table (F08461), 8-2standard phrases, defining
eRecruit, 10-9, 10-10status change request, 29-7status change request, reviewing, 29-7Status Change Review program (P087201)
processing options, 29-12setup information, 29-12
steps and rules for director process flows, 20-10Stub Information History program (P07186), 28-10System Control - Revisions form, 14-1
Ttime accounting
self-service time entry, 28-24time entry
employee daily time entry, 28-24self service, 28-24self-service setup, 6-17self-service summary time entry, 28-31, 28-32setting up self-service, 7-1, 7-3setting up self-service pay types, 7-20setting up the self-service director, 7-3setting up the self-service interface, 7-10
Time Entry Self Service Director program (P051125), 7-3

Index-8
processing options, 7-4Training/Development form, 28-14, 28-16translated director text, setting up, 22-7Travel Percentage (08R/TP), 8-7
UUnedited Quick Hire Transaction File table
(F060116Z), 29-26upcoming employee reviews by supervisor
reviewing, 29-16setup, 6-1
Upcoming Reveiws by Supervisor program (P052200), 29-16
Upcoming Reviews by Supervisor program (P052200)processing options, 6-2setup information, 6-2
Upcoming Reviews by Supervisor program (P052202), 6-1
Upcoming Reviews by Supervisor report (R052202), 6-1
Update Applicant Info report (R08490)processing options, 12-12setup information, 12-12
Update Benefits Info to Live Tables program (R085524), 24-3
Update Benefits Information to Live Tables report (R085524)
processing options, 24-4setup information, 24-4
Update Employee Personal Information to Live Tables report (R054104)
processing options, 24-2setup information, 24-2
Update Employee W-4 Form Information to Live Tables report (R0855303)
processing options, 4-8setup information, 4-8
Update Employee W-4 Information to Live Tables report, 4-8
Update Job Posting form, 11-10Update Personal Info to Live Tables program
(R054104), 24-1URLs for benefit categories, 16-5URLs for benefit groups, 16-6URLs for benefit plan options, 16-2URLs for benefit plans, 16-4user defined codes, 8-3
disable applicant activities (08R/AA), 8-4element ID (08R/EI), 8-4eRecruit status (08R/AS), 8-3internal/external/both (08R/IE), 8-4job posting (08R/WS), 8-6job posting location (08R/JL), 8-5letter component (08RLC), 8-5mandatory/hide/disable (08R/MH), 8-5phrase category (08R/PH), 8-6posting category (08R/PC), 8-6posting status, 8-6resum flag (08R/RF), 8-7
sort fields (08R/SF), 8-7travel percentage (08R/TP), 8-7
Vverification of employment
F05003 table, 3-2requesting a letter, 28-1setting up, 3-1
Verification Of Employment Data form, 28-3Verification of Employment Data table (F05003), 3-2VOE Pay Types by Category form, 3-3
WW-4 form
IRS Form W-4, Employee's Withholding Allowance for ESS program, 4-3, 4-7
IRS W-4 Form Work File Revisions program, 4-5process flow script for IRS Form W-4, 4-4setup, 4-1
Work Center, 29-35Work Center form, 29-38, 29-40Work Center program (P012501), 29-38, 29-40Work Item Manager form, 29-37Work Item Manager program (P012501), 29-37Work With Delegates, 29-15Work With Employee Self Service History program
(P085585)processing options, 25-3setup information, 25-3
Work With HRM Common Display Settings form, 14-1
Work With Setup Tasks Details form, 6-6Work With Setup Tasks form, 6-6Work With Upcoming Reviews By Supervisor
form, 29-17Work With Verification of Employment Categories
form, 3-3Work With Verification Of Employment Data
form, 29-21Work with Verification of Employment Requests
form, 28-3workfiles
setting up current dependent and beneficiary personal information, 20-4
setting up steps and rules for director process flows, 20-10
workflowcompleting the process for Employee Setup using
Workflow, 29-27Employee Setup Workbench program
(P08710), 6-4Managers Employee Setup program
(P08710), 29-26Name and Address Change program
(P05101), 3-4process explanations, 6-4Upcoming Reviews by Supervisor program
(P052200), 6-1

Index-9
Verification of Employment program (P05003), 3-2

Index-10