
Java™ SE Programming
134
Java™ SE Programming
-
Upload
khangminh22 -
Category
Documents
-
view
0 -
download
0
Transcript of Java™ SE Programming

Java™ SE Programming

1. Getting Stared
2. Object-Oriented Programming
3. Identifiers, Keywords, and Data Types
4. Expressions and Flow Control
5. Array
6. Inheritance
7. Advanced Class Features
8. Exceptions
9. Collection API
10. AWT
Module Overview

Module Overview
11. GUI Event Handling
12. Threads
13. Advanced I/O Streams
14. Networking

1. Getting Stared
미국 Sun Microsystems사에서 개발한 객체지향 프로그래밍 언어
▷ 1995년 5월, Sun World에서 공식발표
▷ 1996년 1월, JDK1.0 발표
객체지향언어(Object Oriented Language)
▷ 60년 말 Simula 언어에서 발전
▷ 처음엔 oak 라는 언어로 불림 :가전제품의 소형 칩개발을 위해서 만들어진 언어.
C++를 문법을 기본으로 개발
▷ Java 이전에 객체지향언어로 가장 범용적인 언어
▷ 1983년 경, AT&T연구소의 Bjarne Stroustrup이 개발
▷ 언어에 객체지향 특성 확장

1. Getting Stared : 자바 프로그램의 동작 방식
“자바 프로그래밍 은 컴파일 과정과 인터프리터과정 둘 다 거쳐야 한다 “
. .java
.java
Javac.exe
Java.exe
1.컴파일 단계 :
~.java ~.class
2. 실행단계:
Class File Loader -> Vreifier -> Interpreter
-> Runtime

1. Getting Stared : 자바 가상 머신(JVM)
. -JVM은 바이트코드만 인식할수 있다
- OS별로 각각 다운로드 해야한다
- 컴퓨터의 OS위에 탑재되고 컴파일된 클래스 파일들은 이 위에서 실행된다
자바 프로그램
자바 가상 머신
다양한 하드웨어 플랫폼
자바 API
자바 언어
자바 플랫폼

1. Getting Stared : 플랫폼 독립성
.
”Write Once Run Anywhere!!”

1. Getting Stared : 기본적인 세팅 작업
1. www.oracle.com 에 가서 JDK6.0 버전을 다운로드 한다
2. JDK를 디폴트로 설치한다
3. 편집 툴 설치- 우선 Edit Plus 3.0버전을 설치해서 설정까지 잡아준다- 추후에 Eclipse 파일을 다운받는다.
4. JDK6.0 이 설치되었다면 자바홈과 패스를 환경변수에서 잡아준다
5. 설치가 잘 되었는지 간단한 소스 돌려서 확인: 이때 콘솔창으로도 확인!
.

1. Getting Stared : # 첫번 째 실습 : HelloJAVA
.
class HelloJAVA{
public static void
main(String[]args){
System.out.println(“HelloJAVA!”
);
}
}
<HelloJAVA.java 소스코드 작성>
1. Editor를 사용하되 Copy 하지 말고,
오른쪽 상단의 소스코드를 작성하여
“HelloJAVA.java”로 저장.
2. 컴파일 :
명령 프롬프트를 실행하여 소스코드가
저장된 디렉토리로 이동 > javac
HelloJAVA.java
3. 실행 :
소스가 저장된 디렉토리 > java HelloJAVA

1. Getting Stared : # HelloJAVA 소스에 대한 설명
.class HelloJAVA{
public static void main(String[] args)
{
System.out.println(“Hello JAVA!”);
}
}
Class라는 키워드 뒤에 클래스이름을 지정
클래스 이름은 대문자로 시작하는 것이 관례
일반적으로 소스코드 파일의 이름과 클래스이름이 동일하게 함
Main함수를 기점으로 모든 프로그램이 실행됨
System.out.println 메쏘드는 표준 출력으로명시된 문자열을 화면에 출력하는 역할을 함

2. Object-Oriented Programming : merit
▶ 코드의 재사용성이 높다.
- 새로운 코드를 작성할 때 기존의 코드를 이용해서 쉽게 작성할 수 있다.
▶ 코드의 관리가 쉬워졌다.
- 코드간의 관계를 맺어줌으로써 보다 적은 노력으로 코드변경이 가능하다.
▶ 신뢰성이 높은 프로그램의 개발을 가능하게 한다.
- 제어자와 메서드를 이용해서 데이터를 보호하고, 코드의 중복을 제거하여 코드의불일치로 인한 오류를 방지할 수 있다.

2. Object-Oriented Programming: 클래스와 객체
▶ 클래스 – 객체를 만들어내기 위한 하나의 설계도.
클래스는 객체를 생성하는데 사용되는 일종의 틀이다.
속성과 행위로 구성되어진 틀.
▶ 객체 – 실제로 존재하는 것. 사물 또는 개념. 일반적인 클래스의 틀에서 실질적인 값을
넣을수 있다. 메모리에 올라가서 사용되는 것.
클래스 객체
제품 설계도 제품
TV설계도 TV
붕어빵기계 붕어빵

2. Object-Oriented Programming: 클래스와 객체
▶ 객체는 속성과 기능으로 이루어져 있다.
- 객체는 속성과 기능의 집합이며, 속성과 기능을 객체의 멤버(member, 구성요소)라고한다.
▶ 속성은 변수로, 기능은 메서드로 정의한다.
- 클래스를 정의할 때 객체의 속성은 변수로, 기능은 메서드로 정의한다.
속성크기, 길이, 높이, 색상,
볼륨, 채널 등
기능켜기, 끄기, 볼륨 높이기,
볼륨 낮추기, 채널 높이기 등
class Tv {
}
String color; // 색깔
boolean power; // 전원상태(on/off)
int channel; // 채널
void power() { power = !power; } // 전원on/off
void channelUp( channel++;) // 채널 높이기
void channelDown {channel--;} // 채널 낮추기
변수
메서드

2. Object-Oriented Programming: 클래스와 객체
클래스 선언하기
• Syntext:
<modifier> class <클래스이름> {
변수 선언 ;
메소드 정의 부분{ }
} • 예 :
public class Person{
int age;
public void setAge{ int a){
age = a;
}
}

2. Object-Oriented Programming: 클래스와 객체
멤버변수 선언하기
• Syntax of an attribute:
[Access Modifier] 데이터 타입 + 변수명 ;
• Examples:
public class Foo {
public int x;
private float y = 10.0 ;
String name = “홍길동";
}

2. Object-Oriented Programming: 변수종류
“선언위치에 따라 변수의 종류는 달라진다”
변수의 선언위치가 변수의 종류와 범위(scope)을 결정한다
변수의 종류 선언위치 생성시기
클래스변수클래스 영역
클래스가 메모리에 올라갈 때
인스턴스변수 인스턴스 생성시
지역변수 메서드 영역 변수 선언문 수행시

2. Object-Oriented Programming: 변수종류
▶ 멤버변수
- 각 인스턴스의 개별적인 저장공간. 인스턴스마다 다른 값 저장가능
- 인스턴스 생성 후, „참조변수.인스턴스변수명’으로 접근
- 인스턴스를 생성할 때 생성되고, 참조변수가 없을 때 가비지컬렉터에의해자동제거됨
▶ 로컬변수
- 메서드 내에 선언되며, 메서드의 종료와 함께 소멸
- 조건문, 반복문의 블럭{} 내에 선언된 지역변수는 블럭을 벗어나면 소멸

2. Object-Oriented Programming: 클래스와 객체
메소드 선언하기
• Syntax of a method:
<modifier> 리턴타입 + 메소드 이름 (<인자값>*) {
//코드 블락
}
• 예 :
public class Thing {
private int x;
public int getX() {
return x;
}
}

2. Object-Oriented Programming: 클래스와 객체
Accessing Object Members
1. New 라는 키워드를 사용해서 객체를 생성
2. 레퍼런스변수를 이용해서 멤버에 접근 : <레퍼런스변수>.<member>
• Examples:
Person p = new Person();
p.age = 33;
p.Name = “홍길동”;
p.getInfo();

2. Object-Oriented Programming: 클래스와 객체
The Default Constructor
-모든 클래스에 반드시 하나 이상의 생성자는 있게 마련이다.
-만약에 어떤 생성자도 개발자가 넣어주지 않았다면 컴파일러가 디폴트생성자를 자동적으로 넣어준다
-new 라는 키워드를 통해서 객체를 생성할때마다 생성자는 호츨된다
-생성자는 디폴트 생성자와 / 명시적 생성자가 있다
- 명시적 생성자가 하는 일은 객체변수 초기화이다!!

2. Object-Oriented Programming: 클래스와 객체
In Java, classes support three key features of OOP:
-Encapsulation
- inheritance
- polymorphism

2. Object-Oriented Programming: 클래스와 객체
Information Hiding
The Problem:
MyDate
+day : int
+month : int
+year : int
MyDate d = new MyDate()
d.day = 32;
// invalid day
d.month = 2; d.day = 30;
// plausible but wrong
d.day = d.day + 1;
// no check for wrap around

2. Object-Oriented Programming: 클래스와 객체
The Solution:
MyDate
-day : int
-month : int
-year : int
+getDay() : int
+getMonth() : int
+getYear() : int
+setDay(int day) : void
+setMonth(int month) : void
+setYear(int year) : void
MyDate d = new MyDate()
d.setDay(32);
// invalid day, returns false
d.setMonth(2);
d.setDay(30);
// plausible but wrong, setDay returns false
d.setDay(d.getDay() + 1);
// this will return false if wrap around

2. Object-Oriented Programming: 클래스와 객체
Encapsulation Pattern
• 멤버변수는 private
• 메소드(setXxx() / getXxx())는 public
• setXxx(){ 안에서 조건을 달아서 검증괸 데이터만 멤버에 세팅되도록한다

2. Object-Oriented Programming: 클래스와 객체
package와 import
1 패키지(package)
- 서로 관련된 클래스와 인터페이스의 묶음.
- 패키지는 물리적으로 폴더,디렉토리 개념이다.
- 패키지는 서브패키지를 가질 수 있으며, „.‟으로 구분한다.(계층구조)
- 클래스의 실제 이름(full name)은 패키지명이 포함된 것이다
- rt.jar는 Java API의 기본 클래스들을 압축한 파일
(JDK설치경로\jre\lib에 위치)
-자바에서 제공되는가장 기본적인 클래스들은 java.lang 패키지에 속해있으며
디폴트로 인식되어 import 하지 않고 써도 된다
- 패키지는 소스파일에 첫 번째 문장(주석 제외)으로 단 한번 선언한다

2. Object-Oriented Programming: 클래스와 객체
package와 import
2. import문
- 특정 패키지에 들어있는 클래스를 가져올떄 사용하는 키워드
- java.lang패키지의 클래스는 import하지 않고도 사용할 수 있다.
- import문을 사용하면 클래스를 사용할 때 패키지명을 생략할 수 있다.
3. Identifiers, Keywords, and Data Types
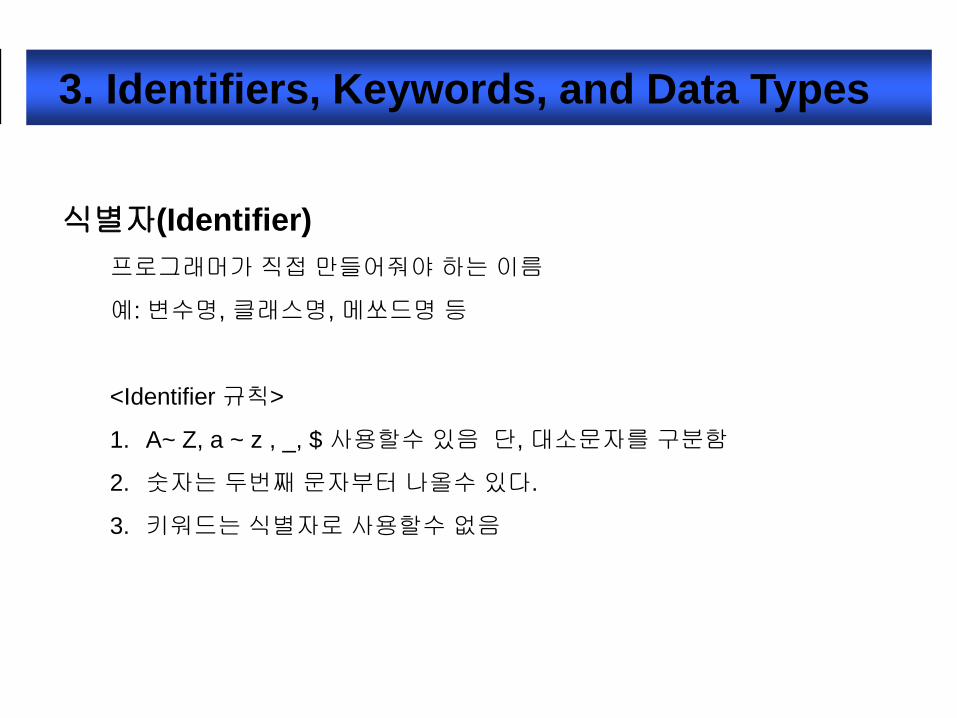
식별자(Identifier)
프로그래머가 직접 만들어줘야 하는 이름
예: 변수명, 클래스명, 메쏘드명 등
<Identifier 규칙>
1. A~ Z, a ~ z , _, $ 사용할수 있음 단, 대소문자를 구분함
2. 숫자는 두번째 문자부터 나올수 있다.
3. 키워드는 식별자로 사용할수 없음

3. Identifiers, Keywords, and Data Types
예약어(Keyword)
프로그래밍 언어에 미리 정의된 의미있는 단어
예약어는 식별자로 사용하지 않음

3. Identifiers, Keywords, and Data Types
Data types
▶ 기본형(Primitive type)
- 8개 (boolean, char, byte, short, int, long , float, double )
- 실제 값을 저장
▶ 참조형(Reference type)
- 기본형을 제외한 나머지(String, System 등)
- 객체의 주소를 저장(4 byte, 0x00000000~0xffffffff)

3. Identifiers, Keywords, and Data Types
기본형(Primitive type)
▶ 정수형 – 정수 값을 저장하는데 사용된다.
byte, short, in,t long
▶ 논리형 – true와 false중 하나를 값으로 갖으며, 조건식과 논리적계산에 사용된다.
▶ 문자형 –char (변수 당 하나의 문자만을 저장할 수 있다. Ex) ‘A’)
▶ 실수형 –float와 double이 있다. 소수점을 가지는 값을 저장할떄사용

Identifiers, Keywords, and Data Types
자료형 키워드 크기 표현 범위 사용 예
논리형 boolean 1bit true OR false(0과 1이 아니다) boolean isFun = true;
문자형 char 2byte 0~65,535 char c = „f‟;
정수형
byte 1byte -128 ~ 127 byte b = 89;
short 2byte -32,768 ~ 32,767 short s = 32760;
int 4byte -2147483648:2147483647int x = 59;
int z = x;
long 8byte … long big = 3456789;
실수형
float 4byte -3.4E38 ~ 3.4E38 float f = 32.5f
double 8byte -1.7E308 ~ 1.7E308 double d = 23.34

int myInt = 19;
myInt 19
String myStr = new myString();
myStr
①
①
②
②
③
Data Type: 기본형 / 참조형(클래스타입)
기본 자료형 참조 자료형
변수값 실제값 Object 참조값
정의방식 Java 내부에 이미 정의됨 클래스 정의
생성방식 “19", "3.14", "true" "new“*

3. Identifiers, Keywords, and Data Types
변수 : 항상 변하는 값이 저장되는 공간 , 값이 아닌 공간
1) 멤바변수 : int I;
String s; 선언만 하고 초기화 하지 않아도 됨
기본값이 있다.
클래스 아래, 메소드 바깥에서 선언
2) 로컬변수 : int j=10;
String str = null; 선언과 동시에 초기화 필수
기본값이 없기 때문이다
메소드 블록 안에서 사용됨
3)상수 : 변하지 않는 값
final 키워드를 붙이며 변수명은 전부다 대문자로 하는것이 관례
HEAD_COUNT
MAXIMUM_SIZE

3. Identifiers, Keywords, and Data Types
Promotion | Demotion
byte short int long float double
Promotion
Demotion(Casting)
long bigValue = 99L;
int squashed = bigValue; // Wrong, needs a cast
int squashed = (int) bigValue; // OK
int squashed = 99L; // Wrong, needs a cast
int squashed = (int) 99L; // OK, but...
int squashed = 99; // default integer literal

3. Identifiers, Keywords, and Data Types
Promotion | Demotion
long bigval = 6; // 6 is an int type, OK
int smallval = 99L; // 99L is a long, illegal
double z = 12.414F; // 12.414F is float, OK
float z1 = 12.414; // 12.414 is double, illegal

4. Expressions and Flow Control : if ~ else if ~ else
if (조건문)1 {
statement or block; //조건문이 true일때 수행
}
if (조건문2) {
statement or block;
} else if (조건문3) {
statement or block;
} else { //이것도 저것도 아닐때 이리로 내려옴…조건이 없다
statement or block;
}
4. Flow Control : if ~ else if ~ else
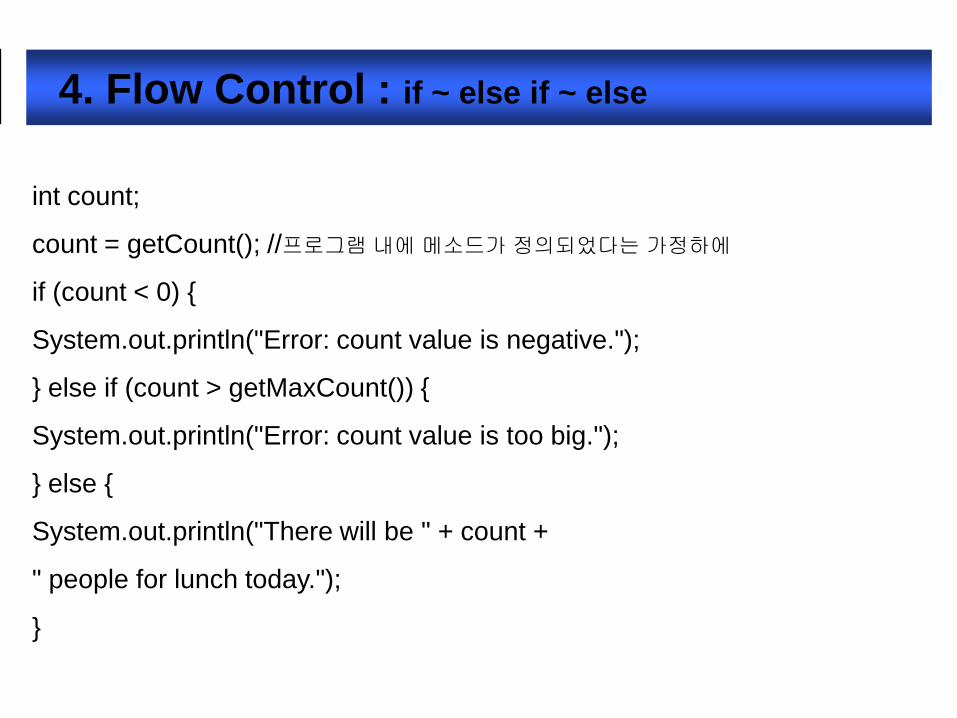
int count;
count = getCount(); //프로그램 내에 메소드가 정의되었다는 가정하에
if (count < 0) {
System.out.println("Error: count value is negative.");
} else if (count > getMaxCount()) {
System.out.println("Error: count value is too big.");
} else {
System.out.println("There will be " + count +
" people for lunch today.");
}

4. Flow Control : switch
switch (변수) { //이때 byte,short,int char 데이터 타입중 하나가 가능
case constant2 :
statements
break;
case constant3:
statements;
break;
default: //else와 똑같은 효력
statements;
break;
}

4. Flow Control : switch
switch ( carModel ) {
case DELUXE:
addAirConditioning();
addRadio();
addWheels();
addEngine();
break;
case STANDARD:
addRadio();
addWheels();
addEngine();
break;
}

4. Flow Control : for 문
for (초기화; 조건문;증감문) {
Code block;
}
Example:
for (int i = 0; i < 10; i++) {
System.out.println("Are you finished yet?");
}
System.out.println("Finally!");

4. Flow Control : while문
while (조건식) {
statement or block;
}
Example:
int i = 0;
while (i < 10) {
System.out.println("Are you finished yet?");
i++;
}
System.out.println("Done");

4. Flow Control : do ~ while 문
do {
statement or block;
} while (boolean test);
Example:
int i = 0;
do {
System.out.println("Are you finished yet?");
i++;
} while (i < 10);
System.out.println("Done");

5. Array
“Array 는 같은 데이타 타입을 가지는 여러 개의 값들이
하나의 변수를 통해서 한번에 묶여질수 있는 것 ”
• 기본형 Array / 참조형 Array
• Array도 객체이다 그래서 new 키워드를 통해서 생성한다
• Re-Sizing이 안된다
• Array의 사이즈를 알수있는 변수로는 length 가 있다.
• 주로 for문과 같이 쓰인다.

5. Array : 배열의 3단계
1. 선언………… 메모리상에 참조변수를 위한 공간이 잡힌다
int [ ] i;
int i [ ];
String[ ] str;
String str [ ];
Person[ ] p;
Person p [ ];

5. Array : 배열의 3단계
2. 배열 생성 …………. New 라는 키워드를 사용 / 사이즈를 명시
i = new int [ 5 ] ;
str = new String [ 3 ] ;
p = new Person [ 2 ] ;
■ Array도 new 라는 키워드를 통해서 생성된 객체이기에 메모리 영역중
Heap에 저장됨

5. Array : 배열의 3단계
3. 초기화……..배열의 각각의 인덱스에 해당하는 값을 세팅함
i[ 0 ] = 11; i[ 1 ] = 22; i[ 2 ] = 33;
str[ 0 ] = “일등” ; str [ 1 ] = “이등” ; str[ 2 ] = “삼등” ;
p[ 0 ] = new Person();
p[ 2 ] = new Person();
■ Primitive Type Array와 Reference Type Array는 메모리상 저장되는 구조다름

5. Array : 배열의 3단계
■ 1 + 2+ 3 : 선언과 생성돠 초기화를 동시에
int [ ] i = { 11, 22, 33 };
String[ ] str ={ “일등”, ”이등”, ”삼등”, ”사등”, ”오등” };

5. Array
Copying Array
The System.arraycopy() method:
1 //original array
2 int elements[] = { 1, 2, 3, 4, 5, 6 };
3
4 // new larger array
5 int hold[] = { 10, 9, 8, 7, 6, 5, 4, 3, 2, 1 };
6
7 // copy all of the elements array to the hold
8 // array, starting with the 0th index
9 System.arraycopy(elements, 0, hold, 0, elements.length);

6. Inheritance : The is a Relationship
The Employee class:
Employee
+name : String = ""
+salary : double
+birthDate : Date
+getDetails() : String
public class Employee {
public String name = "";
public double salary;
public Date birthDate;
public String getDetails() {...}
}

6. Inheritance : The isa Relationship
The Manager class:
Manager
+name : String = ""
+salary : double
+birthDate : Date
+department : String
+getDetails() : String
public class Manager {
public String name = "";
public double salary;
public Date birthDate;
public String department;
public String getDetails() {...}
}

6. Inheritance : The is a Relationship
Employee
Manager
+name : String = ""
+salary : double
+birthDate : Date
+getDetails() : String
+department : String = ""
public class Employee {
public String name = "";
public double salary;
public Date birthDate;
public String getDetails() {...}
}
public class Manager extends Employee
{
public String department = "";
}
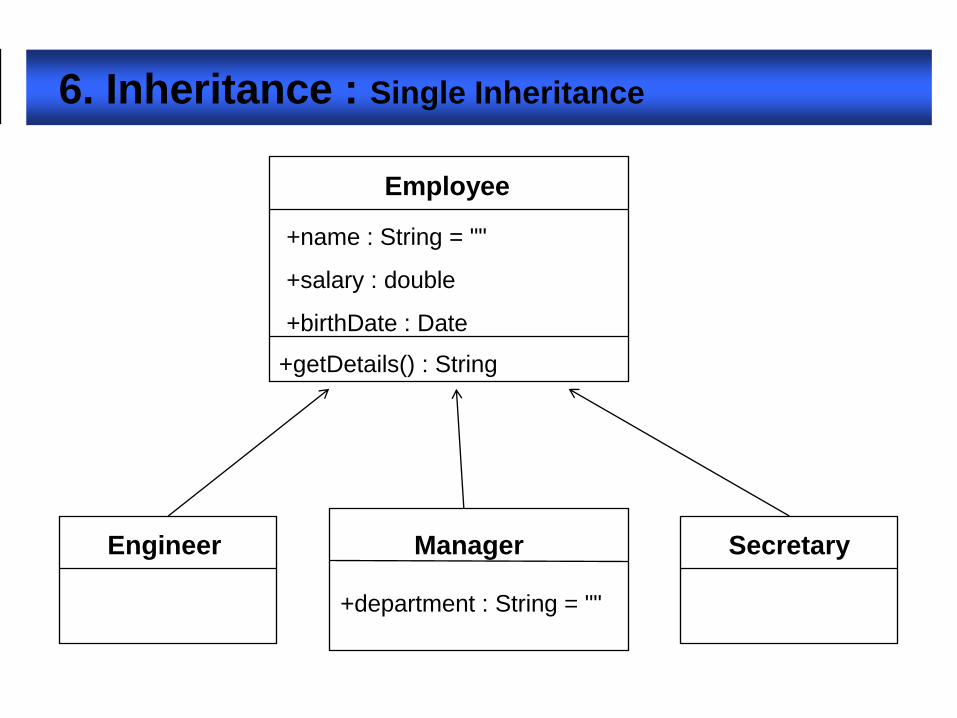
6. Inheritance : Single Inheritance
Employee
Engineer Manager Secretary
+name : String = ""
+salary : double
+birthDate : Date
+department : String = ""
+getDetails() : String

6. Inheritance : Single Inheritance
“ 상속은 부모가 가진 모든 성질이 자식에게 물려지는 것 + 자식은 자식에 맞는성질을 추가하는 것 + 부모로부터 물려받은 기능을 변형시켜 자신에 맞는 기능으로변형해서 쓰는 것
• 코드의 안정성을 고려해서 자바는 단일상속만을 허용한다
• 단일상속으로 인한 제약사항의 극복 대안은 인터페이스가 있다
• 인터페이스는 멀티플한 상속을 가능케한다.
• Syntax of a Java class:
<modifier> class 자식클래스이름 extends 부모 클래스이름 {
}

6. Inheritance : 상속일 경우 생성자 측면
• 상속이 되면 부모가 가진 모든 성질(멤버변수 / 메소드)은 자식에게 물려지지만,
생성자는 상속되지 않는다
• 단 자식 생성자 Manager(){ // …이부분…. } 첫라인에서 부모 디폴트 생성자호출이 일어난다
• 생성자는 2가지 종류로 나뉠수 있다
디폴트생성자 : 인자값없고, { } 안에서 아무런 일도 하지 않는 생성자
명시적 생성자: 인자값이 있고 { } 안에서 객체변수 초기화가 일어난다

6. Inheritance : Polymorphism
“Polymorphism이란 하나의 객체변수가 여러가지 모습과 모양을 갖는 능력”
Polymorphism is the ability to have many different forms;
for example, the Manager class has access to methods from Employee class
Employee employee = new Manager() //legal
Emplyee employee1 = new Engineer() //legal
Employee employee2 = new Seceratary() //lagal
employee.department = "Sales"; // illegal Casting 필요!!

6. Inheritance : Heterogeneous Collections
• 같은 데이터 타입의 값들로 묶인 집합 : Homogenous collections.
MyDate[] dates = new MyDate[2];
dates[0] = new MyDate(22, 12, 1964);
dates[1] = new MyDate(22, 7, 1964);
• 다른 데이터(클래스) 타입의 값들로 묶인 집합 : Heterogeneous collections.
Employee [] staff = new Employee[1024];
staff[0] = new Manager();
staff[1] = new Employee();
staff[2] = new Engineer();

6. Inheritance : The instanceof Operator
public class Employee {
public class Manager extends Employee {
public class Engineer extends Employee {
----------------------------------------
public void doSomething(Employee e) {
if (e instanceof Manager) {
// Process a Manager
} else if (e instanceof Engineer) {
// Process an Engineer
} else {
// Process any other type of Employee
}
}

6. Inheritance : Access Modifier
private, default, protected, public 모두 4개로 클래스, 멤버변수, 메서드... 생성자에 사용될 수 있다.

6. Inheritance : Overloading Method Names
• It can be used as follows:
public void println(int i)
public void println(float f)
public void println(String s)
• 상속과 관련없고 하나의 클래스에서 발생되는 원리
• 메소드의 인자값은 반드시 달라야 한다(순서, 개수, 타입중 하나라도)
• 메소드 이름은 반드시 같아야 한다
• 메소드의 리턴타입은 상관없다.
“하는 일은 같으나 처리하는 데이터를 달리할때 쓰는 기법이 바로 오버로딩”

6. Inheritance : Overloading Constructors
• 메소드와 마찬가지로 생성자로 오버로딩 기법을 쓴다
• Example:
public Employee(String name, double salary, Date DoB)
public Employee(String name, double salary)
public Employee(String name, Date DoB)
• 생성자의 인자값은 반드시 달라야 한다(순서, 개수, 타입중 하나라도)
• 생성자 오버로딩에서는 this, super 키워드의 사용법을 반드시 알아야 함.!!

6. Inheritance : Overloading Constructors
1 public class Employee {
2 private static final double BASE_SALARY = 15000.00;
3 private String name;
4 private double salary;
5 private Date birthDate;
6
7 public Employee(String name, double salary, Date DoB) {
8 this.name = name;
9 this.salary = salary;
10 this.birthDate = DoB;
11 }

6. Inheritance : Overloading Constructors
12 public Employee(String name, double salary) {
13 this(name, salary, null);
14 }
15 public Employee(String name, Date DoB) {
16 this(name, BASE_SALARY, DoB);
17 }
18 public Employee(String name) {
19 this(name, BASE_SALARY);
20 }
21 }

6. Inheritance : Overriding Methods
• 상속 관계에 있는 두 클래스에서 발생
• 자식이 부모 클래스의 메소드를 물려받아서 / 자신에 맞는 기능으로 바꿔쓰는것
• 메소드 선언부(이름, 리턴타입, 인자값)는 반드시 같아야 한다
• 메소드의 구현부는 반드시 달라야 한다.
“ 메소드의 이름은 같지는 구현부가 달라졌기에 다른일을 하는 다른 메소드이다”

6. Inheritance : Overriding Methods
public class Employee {
protected String name;
protected double salary;
protected Date birthDate;
public String getDetails() {
return “Name: “ + name + “\n” +“Salary: “ + salary; }
}
public class Manager extends Employee {
protected String department;
public String getDetails() {
return “Name: “ + name + “\n” +“Salary: “ + salary + "\n" +“Manager of:
“ + department;
}
}

6. Inheritance : Overriding Methods
• Virtual method invocation:
Employee e = new Manager();
e.getDetails();
• Compile-time type and runtime type

7. Advanced Class Features : static
• The static keyword 는 변수, 메소드 앞에 붙여서 쓸수있다.
• static 멤버는 특정한 어떤 객체의 구성원으로서가 아니라 클래스 차원에서쓰이는 멤버로 간주된다
• Thus static 멤버는 클래스 멤버 혹은 전역변수라 칭해진다.
• static 이 붙으면 객체 생성과 관련이 없다. 즉, 객체생성의 과정 없이도메모리에 자동으로 올라간다( 객체 생성되기 이전에)
• static 멤버에 접근할때는 객체 생성 과정을 거치지 않고 접근 가능하며
클래스이름. Static 멤버 혹은 바로 static 멤버를 호출할 수 있다.
• static 한 멤버는 생성된 객체들이 다 공유해서 사용할수 있다.
• static 블록 안에서는 this를 사용할수 없다

7. Advanced Class Features : static
Count
+counter : int = 0
-serialNumber : int
c2 : Countc1 : Count
serialNumber=1 serialNumber=2
1 public class Count {
2 private int serialNumber;
3 public static int counter = 0;
4
5 public Count() {
6 counter++;
7 serialNumber = counter;
8 }
9 }
“클래스변수는 생성된 객체들이 모두 공유해서 사용한다”

7. Advanced Class Features : The Singleton Design Pattern
ClientClass
Singleton
<<Uses>>-instance : Singleton
+getInstance() : Singleton
-Singleton()
< Singleton 패턴으로 작성하는 방법>
1 . 자기 자신의 클래스에서 클래스 객체를 생성 private static 으로
2 . 생성된 객체를 리턴해오는 getInstance() 를 public 으로 구현해 놓음
3. 생성자는 private 으로 막아놓음

7. Advanced Class Features : The Singleton Design Pattern
<The Singleton code>
1 package shipping.domain;
2
3 public class Company {
4 private static Company instance = new Company();
5 private String name;
6 private Vehicle[] fleet;
7 public static Company getCompany() {
8 return instance;
9 }
10 private Company() {...}
11
12 }

7. Advanced Class Features : The Singleton Design Pattern
<Usage code> :
1 package shipping.reports;
2
3 import shipping.domain.*;
4
5 public class FuelNeedsReport {
6 public void generateText(PrintStream output) {
7 Company c = Company.getCompany();
8 // use Company object to retrieve the fleet vehicles
9 }
10 }

7. Advanced Class Features : final
“ 내가 마지막 ~~ 야 ”
• 클래스 앞의 final : 내가 마지막 클래스야상속 금지
• 메소드 앞의 final : 내가 마지막 메소드야오버라이딩 금지
• 변수 앞의 final : 냐가 마지막 변수야상수임을 의미
예 ) static final int MAX_SIZE = 100;
• final 키워드는 주로 static 키워드와 함께 자주 쓰인다

7. Advanced Class Features : interface
Flyer
<<interface>>
+takeOff();
+land();
+fly();
Airplane Bird Superman
+takeOff(){ }
+land() { }
+fly() { }
+takeOff() { }
+land() { }
+fly() { }
+buildNest() { }
+layEggs() { }
+takeOff() { }
+land() { }
+fly() { }
+stopBullet() { }

7. Advanced Class Features : interface
public interface Flyer {
void takeOff();
public void land();
public void fly();
}
public class Airplane implements Flyer {
public void takeOff() {
// accelerate until lift-off
// raise landing gear
}
Flyer
<<interface>>
+takeOff()
+land()
+fly()
Airplane
+takeOff()
+land()
+fly()

7. Advanced Class Features : interface
public class Bird extends Animal implements Flyer {
public void takeOff() { } // take-off()오버라이딩
public void land() { } // land( )
public void fly() { } // fly( )
public void buildNest() { / / buildNest()
public void layEggs() { } // layEggs()
public void eat() { } //Animal 클래스의 메소드 상속받음…
받아서 오버라이딩
}

7. Advanced Class Features : interface
• 인터페이스는 클라이언트 코드와 해당 인터페이스를 구현해놓은 클래스 사의의규약이다
• 인터페이스는 서로 관련없는 여러 클래스들 사이에서 기능의 공통점을 추출하여
만든 상위 클래스이다.
• 특정 인터페이스를 상속받은 클래스는 그 인터페이스가 가지고 있는 모든추상메소드를 모두 구현해야하는 책임이 따른다.
• 단일 상속과는 달리 인터페이스는 멀티플한 상속이 가능하다
• 인터페이스의 가장 대표적인 예는 JDBC 의 java.sql 패키지이다

7. Advanced Class Features : interface
• 인터페이스는 클라이언트 코드와 해당 인터페이스를 구현해놓은 클래스 사의의규약이다
• 인터페이스는 서로 관련없는 여러 클래스들 사이에서 기능의 공통점을 추출하여
만든 상위 클래스이다.
• 특정 인터페이스를 상속받은 클래스는 그 인터페이스가 가지고 있는 모든추상메소드를 모두 구현해야하는 책임이 따른다.
• 단일 상속과는 달리 인터페이스는 멀티플한 상속이 가능하다
• 인터페이스의 가장 대표적인 예는 JDBC 의 java.sql 패키지이다

7. Advanced Class Features : Abstract Classes
Vehicle
Truck RiverBarge
+calcFuelEfficiency() : double
+calcTripDistance() : double
+calcFuelEfficiency() : double
+calcTripDistance() : double
+calcFuelEfficiency() : double
+calcTripDistance() : double

7. Advanced Class Features : Abstract Classes
1 public abstract class Vehicle {
2 public abstract double calcFuelEfficiency();
3 public abstract double calcTripDistance();
4 }
1 public class Truck extends Vehicle {
2 public Truck(double max_load) {...}
3
4 public double calcFuelEfficiency() {
5 /* calculate the fuel consumption of a truck at a given load */
6 }
7 public double calcTripDistrance() {
8 /* calculate the distance of this trip on highway */
9 }
10 }

8. Exception : Exception Categories
Throwable
Error Exception
RuntimeException IOException
StackOverflowError
OutOfMemoryError
ArithmeticException
NullPointerException
IndexOutOfBoundsException
: 컴파일러가 인식 X
컴파일은 됨
EOFException
FileNotFoundException
: 컴파일러가 인식 O
컴파일 안됨

8. Exception : Exception Example
1 public class HelloWorld {
2 public static void main (String args[]) {
3 int i = 0;
4
5 String greetings [ ] = {
6 "Hello world!“, "No, I mean it!", "HELLO WORLD!! };
7
8 while (i < 4) {
9 System.out.println (greetings[i]);
10 i++;
11 }
12 }
13 }

8. Exception : tryand catch Statements
try {
// 예외 발생 가능 코드가 들어온다
} catch (MyException myException) {
// 예외 잡혔을때의 코드가 들어온다
} catch (Exception otherExcept) {
// catch구문은 여러 번 올 수 있다. 즉, 여러가지 예외 종류별로 잡을수 있다
} finally{
// 예외 상관없이 수행되어야 하는 코드 블락
}

8. Exception :Exception Example Revisited
public class HelloWorld2 {
public static void main (String args[]) {
int i = 0;
String greetings [] = { "Hello world!", "No, I mean it!", 8 "HELLO WORLD!!“ };
while (i < 4) {
try {
System.out.println (greetings[i]);
} catch (ArrayIndexOutOfBoundsException e){
System.out.println(“i값을 다시 조정");
i = -1;
} finally {
System.out.println(“이 부분은 항상 수행됩니다");
}
i++; } } }

8. Exception : UserException
class A{
int x = 10; int y = 0;
public void go(){
if( y==0) throw new ZeroException(); //이부분에서 예외가 발생!!!
System.out.println(“Uer Exception……”);
}
}
class Atest{
public static void main(String[ ]args){
A a = new A();
a.go();
}
}

8. Exception : User Exception solution
class A{
int x = 10; int y = 0;
public void go() throws ZeroException {
if( y==0) throw new ZeroException(); //이부분에서 예외가 발생!!!
System.out.println(“Uer Exception……”);
}
}
class Atest{
public static void main(String[ ]args){
A a = new A();
try{
a.go(); //예외가 이곳으로 날라오니 여기서 처리해줘야 한다!!
}catch(ZeroException e){ }
}
}

8. Exception : User Exception Creating
class ZeroException extends Exception{
ZeroException(String message){
super(message);
}
ZeroException(){
this(“This is UserException…..”);
}
}

9. Collection API : 핵심 인터페이스

9. Collection API
Collection
Set List
HashSet
ArrayList LinkedList
+add(index : int, element : Object)
+get(index : int) : Object
+remove(index : int) : Object
+set(index : int, element Object)
Map
HashMap
Properties
Vector
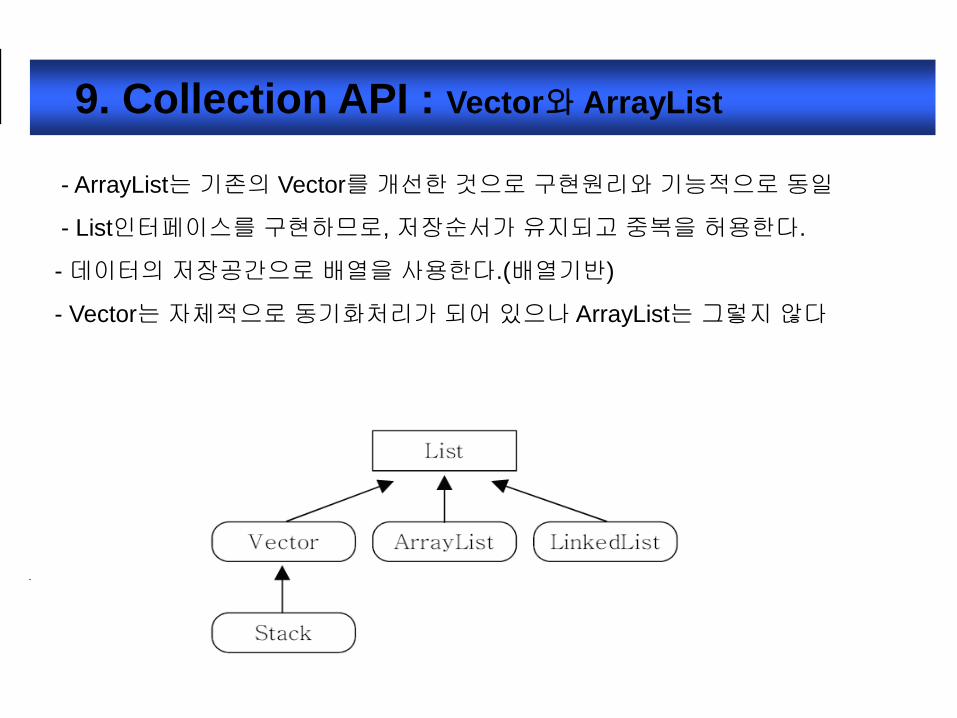
9. Collection API : Vector와 ArrayList
- ArrayList는 기존의 Vector를 개선한 것으로 구현원리와 기능적으로 동일
- List인터페이스를 구현하므로, 저장순서가 유지되고 중복을 허용한다.
- 데이터의 저장공간으로 배열을 사용한다.(배열기반)
- Vector는 자체적으로 동기화처리가 되어 있으나 ArrayList는 그렇지 않다

9. Collection API : ArrayList vs. LinkedList
-순차적으로 데이터를 추가/삭제하는 경우, ArrayList가 빠르다
- 비순차적으로 데이터를 추가/삭제하는 경우, LinkedList가 빠르다.
- 접근시간(access time)은 ArrayList가 빠르다.

9. Collection API : Set Example 1 import java.util.*
2 public class SetExample {
3 public static void main(String[] args) {
4 Set set = new HashSet();
5 set.add("one");
6 set.add("second");
7 set.add("3rd");
8 set.add(new Integer(4));
9 set.add(new Float(5.0F));
10 set.add("second"); // duplicate, not added
11 set.add(new Integer(4)); // duplicate, not added
12 System.out.println(set);
13 }
14 }
출력 : [one, second, 5.0, 3rd, 4] …… 중복을 허용하지 않는다.
[one, second, 5.0, 3rd, 4]

9. Collection API : List Example
1 import java.util.*
2 public class ListExample {
3 public static void main(String[] args) {
4 List list = new ArrayList();
5 list.add("one");
6 list.add("second");
7 list.add("3rd");
8 list.add(new Integer(4));
9 list.add(new Float(5.0F));
10 list.add("second"); // duplicate, is added
11 list.add(new Integer(4)); // duplicate, is added
12 System.out.println(list);
13 }
14 } 출력 : [one, second, 3rd, 4, 5.0, second, 4] …… 순서가 있다

9. Collection API : Maps
• Map은 자료를 key – value 값을 쌍으로 저장하는 특징을 가지고 있다
Map
+put(key : Object, value : Object) : Object
+get(key : Object) : Object
+containsKey(key : Object) : boolean
+isEmpty() : boolean
+size() : int
+remove(key : Object) : Object
HashMap Properties

9. Collection API : Properties 클래스
import java.util.Properties;
import java.util.Enumeration;
public class TestProperties {
public static void main(String[] args) {
Properties props = System.getProperties();
Enumeration prop_names = props.propertyNames();
while ( prop_names.hasMoreElements() ) {
String prop_name = (String) prop_names.nextElement();
String property = props.getProperty(prop_name);
System.out.println("property ‟" + prop_name + "‟ is ‟" + property + "‟");
}
}
}

9. Collection API : Properties 클래스
• Properties 클래스는 OS 위에 탑재되어 있는 시스템 환경변수값들을 불러올수있는 클래스 이다.
• Properties 클래스는 Map 의 자식으로 자료를 key – value 를 쌍으로 저장하는특징이 있다.
• 주요한 메소드로는 PropertyNames() , getProperty() 등이 있다
• PropertyNames() 는 리턴 타입이 Enumeration 이다
• Enumeration 객체에 저장된 자료를 sorting 하는 패턴을 익혀두자

9. Collection API : Iterator
Iterator
ListIterator
+hasNext() : boolean
+next() : Object
+remove()
+hasPrevious() : boolean
+previous() : Object
+add(element : Object)
+set(element : Object)

9. Collection API : Enumeration, Iterator, ListIterator
- 컬렉션 클래스에 저장된 데이터를 접근하는데 사용되는 인터페이스이다
- Enumeration는 Iterator의 구버젼이다.
- Iterator의 접근성을 향상시킨 것이 ListIterator이다.(단방향 →양방향)

10. AWT:AWT(Abstract Window Toolkit)란?
▶ AWT
- GUI프로그래밍(윈도우 프로그래밍)을 위한 도구
- GUI프로그래밍에 필요한 다양한 컴포넌트를 제공한다.
- Java로 구현하지 않고, OS의 컴포넌트를 그대로 사용한다.
▶ Swing
- AWT를 확장한 GUI프로그래밍 도구
- AWT보다 더 많은 종류의 컴포넌트를 제공한다.
- OS의 컴포넌트를 사용하지 않고, 순수한 Java로 구현하였다.

10. AWT :
- 모든 AWT컴포넌트의 최고 조상은 java.awt.Component클래스이다.

10. AWT : 컨테이너(Container)
1. 독립적인 컨테이너 – 독립적으로 사용될 수 있으며, 다른 컴포넌트나 종속적인컨테이너를 포함할 수 있다.
2. 종속적인 컨테이너 – 독립적으로 사용될 수 없으며, 다른 컨테이너에 포함되어야 함

10. AWT : 주요 컴포넌트….. Frame

10. AWT : 주요 컴포넌트….. Button

10. AWT : 주요 컴포넌트….. Choice
- 여러 item 중에서 하나를 선택할 수 있게 해주는 컴포넌트

10. AWT : 주요 컴포넌트….. Label
- 화면에 텍스트를 표시하는데 사용되는 컴포넌트

10. AWT : 주요 컴포넌트….. TextFiel

10. AWT : 주요 컴포넌트….. TextArea

10. AWT : Layout Manager
-레이아웃 매니저는 컨테이너에 포함된 컴포넌트의 배치를 자동관리한다
-AWT에서는 아래와 같이 5개의 레이아웃 매니저를 제공한다.
BorderLayout, FlowLayout, GridLayout, CardLayout, GridbagLayout

10. Swing Hierachy

10. Swing
private static void createAndShowGUI(){
//Create and set up the window.
JFrame frame = new JFrame("Hi.."); frame.setDefaultCloseOperation(JFrame.EXIT_ON_CLOSE);
//Add a label.
JLabel label = new JLabel("Hello World");
frame.getContentPane().add(label);
//Display the window.
frame.pack();
frame.setVisible(true);
}

11. Event Handling

11. Event Handling

11. Event Handling
Category Interface Name Methods
Action ActionListener actionPerformed(ActionEvent)
Item ItemListener itemStateChanged(ItemEvent)
Mouse MouseListener mousePressed(MouseEvent)
mouseReleased(MouseEvent)
mouseEntered(MouseEvent)
mouseExited(MouseEvent)
mouseClicked(MouseEvent)
MouseMotion MouseMotionListener mouseDragged(MouseEvent)
mouseMoved(MouseEvent)

12. Thread : Process | Thread
▶ 프로그램 : 실행 가능한 파일(HDD) ▶ 프로세스 : 실행 중인 프로그램(메모리)

12. Thread : Process | Thread
▶ 프로세스 : 실행 중인 프로그램, 자원(resources)과 쓰레드로 구성
▶ 쓰레드 : 프로세스 내에서 진행되는 세부적인 작업단위
모든 프로세스는 하나 이상의 쓰레드를 가지고 있다.
프로세스 : 쓰레드 = 공장 : 일꾼
▶ 싱글 쓰레드 프로세스
= 자원+쓰레드
쓰레드(일꾼)
프로세스(공장)
▶ 멀티 쓰레드 프로세스
= 자원+쓰레드+쓰레드+…+쓰레드
…

12. Thread : Process | Thread
“하나의 새로운 프로세스를 생성하는 것보다
하나의 새로운 쓰레드를 생성하는 것이 더 적은 비용이 든다.”
- 2 프로세스 1 쓰레드 vs. 1 프로세스 2 쓰레드
vs.

12. Thread : 단일쓰레드 | 다중 쓰레드
main() main()
단일쓰레드
작업1() 작업1 수행
작업2()
작업3()
작업2 수행
작업3 수행
다중쓰레드
작업1 수행
작업2 수행
작업3 수행

12. Thread : 단일쓰레드 | 다중 쓰레드
▶단일쓰레드 : 하나의 작업을 수행한 후, 다음 작업을 수행
쓰레드의 ‘Process화’ 즉, 한 개의 프로세스를 사용하는 것과 같음
▶다중쓰레드 : 여러 작업이 거의 동시에 수행
프로그램의 수행속도가 행상되므로 단일쓰레드보다 성능이 좋다
c.f main() : 다른 쓰레드를 서비스해주는 쓰레드를 데몬쓰레드라고 한다.
우리가 지금까지 작성해온 자바프로그램은 모두 단일쓰레드 방식.
즉, jvm이 작동하면서 main()가 수행돠는데 이 main()자체가 하나의
쓰레드…데몬쓰레드다.다른 모든 메소드의 호출은 결국 main()의서비스에 의해서 호출되는 것이다.

12. Thread : 멀티쓰레드의 장단점
“많은 프로그램들이 멀티쓰레드로 작성되어 있다.
그러나, 멀티쓰레드 프로그래밍이 장점만 있는 것은 아니다.”
장점
- 자원을 보다 효율적으로 사용할 수 있다.
- 사용자에 대한 응답성(responseness)이 향상된다.
- 작업이 분리되어 코드가 간결해 진다.
“여러 모로 좋다.”
단점
- 동기화(synchronization)에 주의해야 한다.
- 교착상태(dead-lock)가 발생하지 않도록 주의해야 한다.
- 각 쓰레드가 효율적으로 고르게 실행될 수 있게 해야 한다.
“프로그래밍할 때 고려해야 할 사항들이 많다.”

12. Thread : 쓰레드의 구현과 실행

12. Thread : 쓰레드의 상태(state of thread)

12. Thread : 쓰레드의 상태(state of thread)
New Thread Destroy Thread
Runnable Running
Blocking
start()
run ()
sleep ()
yield()

12. Thread : sleep()
public class Runner implements Runnable {
public void run() {
while (true) {
try {
Thread.sleep(10);
} catch (InterruptedException e) {
}
}
}
}

12. Thread : Basic Control of Threads
• Testing threads:
▶ isAlive()
• Thread priority:
▶ getPriority()
▶ setPriority()
• Putting threads on hold:
▶ Thread.sleep()
▶ join()
▶ Thread.yield()

12. Thread : synchronized Keyword
public class MyStack {
int idx = 0;
char [] data = new char[6];
public void push(char c) {
data[idx] = c;
idx++;
}
public char pop() {
idx--;
return data[idx];
}
}

12. Thread : The Object Lock Flag
public void push(char c) {
synchronized (this) {
data[idx] = c;
idx++;
}
}public char pop() {
synchronized (this) {
idx--;
return data[idx];
}
}

12. Thread : The Object Lock Flag
public void push(char c) {
synchronized(this) {
:
:
}
}
public synchronized void push(char c)
{
:
:
}

12. Thread : wait(), notify(), notifyAll()
- 동기화의 효율을 높이기 위해 wait(), notify()를 사용.
- Object클래스에 정의되어 있으며, 동기화 블록 내에서만 사용할 수 있다.
▶wait() – 객체의 lock을 풀고 해당 객체의 쓰레드를 waiting pool에 넣는다
▶notify() – waiting pool에서 대기중인 쓰레드 중의 하나를 깨운다.
▶notifyAll() – waiting pool에서 대기중인 모든 쓰레드를 깨운다.

13. I/O : 스트림 (Stream)
Stream : -데이터를 소스에서 전달하거나 목적지로 수신하는 길, 데이터의 흐름
- 스트림은 단방향이다.
- FIFO 구조이다.
programSource
read write
Input Stream Output Stream
Stream
Destination

13. I/O :입력, 출력 스트림
입력 출력
Byte Stream InputStream OutputStream
Character Stream Reader Writer
▶ InputStream의 메서드 : int read(), int read(byte[ ] b)
▶ OutputStream의 메서드 : void write( ), void write(byte[ ] b)
▶ Reader의 메서드 : int read( ), int read( char[ ] ch)
▶ Writer의 메서드 : void write( ), void write( char [ ] ch)

13. I/O : 키보드 입력 읽기
System.in을 통해 Stream 으로 들어옴
입력을 문자 스트림으로 읽어 들임
한 줄 전체를 읽어 들임
InputStream
InputStreamReader
BufferedReader
< 소스 코드의 패턴 >
1. 스트림 생성 : InputStreamReader is = new
InputStreamReader(System.in);
BufferedReader br = new BufferdReader(is);
2. 읽어들임 : String line = br.readLine();
3. 계속 읽어들여서 콘솔창으로 출력 : while(line != null){
System.out.println(line);
line = br.readLine(); }

13. I/O : Scanner
Java 5.0부터 java.util.Scanner 제공
BufferedReader와 FileReader, StringTokenizer의 조합대신 사용
키보드 입력 사용
Scanner skb = new Scanner(System.in)
System.out.print("Enter name: ");
String name = skb.nextLine();
System.out.print("Enter age: ");
int age = skb.nextInt();
File에서 사용
Scanner sf = new Scanner(“inputFile.txt”)

13. I/Oimport java.io.*;
import java.util.*;
public class ScannerTest {
public static void main(String[] args) {
Scanner sf = new Scanner("c:\\temp\\phone.txt");
String name;
int number1; // 전화번호 첫번째 자리
int number2; // 전화번호 두번째 자리
int number3; // 전화번호 세번째 자리
while (sf.hasNextLine()) {
name = sf.next();
number1 = sf.nextInt();
number2 = sf.nextInt();
number3 = sf.nextInt();
System.out.println(name + number1 + number2 + number3);
}

14. Networking : TCP와 UDP
▶ 소켓 프로그래밍이란?
- 소켓을 이용한 통신 프로그래밍을 뜻한다.
- 소켓(socket)이란, 프로세스간의 통신에 사용되는 양쪽 끝단(end point)
- 전화할 때 양쪽에 전화기가 필요한 것처럼, 프로세스간의 통신에서도 양쪽에 소켓이필요하다.

14. Networking : TCP소켓 프로그래밍
1. 서버는 서버소켓을 사용해서 서버의 특정포트에서 클라이언트의 연결요청을 처리할준비를 한다.
2. 클라이언트는 접속할 서버의 IP주소와 포트정보로 소켓을 생성해서 서버에 연결을요청한다.
3. 서버소켓은 클라이언트의 연결요청을 받으면 서버에 새로운 소켓을 생성해서클라이언트의 소켓과 연결되도록 한다.
4. 이제 클라이언트의 소켓과 새로 생성된 서버의 소켓은 서버소켓과 관계없이 1:1통신을한다.

14. Networking : TCP소켓 프로그래밍
<Server 측 코드>
1. 서버소켓을 생성 : ServerSocket server = new ServerSocket(port);
2. 클라이언트가 접속하면 소켓을 리턴 : Socket s = server.accept();
3. 소켓으로부터 스트림 생성 :InputStream in= s.getInputStream();
<Client 측 코드>
1. 소켓을 생성 : Socket s = new Socket(ip, port);
2. 소켓으로부터 스트림 생성 : OutputStream os = s.getOutputStream();
3. 서버측으로 데이터를 전송함 : os.println(data);