The Portable Guide to Leading Organizations a brief introduction to theory
Upload
khangminh22Category
view
4download
0
U S A r m y C a d e t C o m m a n d - F T . M o n r o e , V i r g i n i a
HEADQUARTERS , DEPARTMENT OF THE ARMYDISTRIBUTION RESTRICTION: APPROVED FOR PUBLIC RELEASE; DISTRIBUTION IS UNLIMITED.
LE A D E R S H I P E D U C A T I O N & T R A I N I N G
Introduction to JROTC,A Character and Leadership Development Program
&Leadership Theory
and Application

Unit 1:Introduction to JROTC,
A Character and LeadershipDevelopment Program

Unit 1: Introduction to JROTC, A Character and Leadership Development Program
Unit 1 Table of Contents
Chapter 1: Foundations of Army JROTC and Getting Involved Lesson 1: Army JROTC — The Making of a Better Citizen…………………………..………………………. 1 Lesson 2: The Past and Purpose of Army JROTC…………………………………………………………….. 4 Lesson 3: Moving Up in Army JROTC (Rank and Structure)………………………………………….……… 6 Lesson 4: Signs of Success……………………………………………………………………………………. 21 Lesson 5: Your Personal Appearance and Uniform………………………………………………………….. 28 Lesson 7: The Stars and Stripes…………………………...…………………………………………………...41 Lesson 8: Proudly We Sing — The National Anthem…………………………….…………………………..48 Lesson 9: American Military Traditions, Customs, and Courtesies……………………………….…………..51
Chapter 2: The Nation’s Defense Forces
Lesson 1: The Department of Defense………………………………………………………………………... 57 Lesson 2: The U.S. Army Part 1 — The Active Army…………………………………………………….…. 61 Lesson 3: The U.S. Army Part 2 — The Reserve Components………………………………………….…… 68 Lesson 4: The U.S. Navy………………………………………………………………………………………74 Lesson 5: The U.S. Air Force…………………………………………………………………………………. 80 Lesson 6: The U.S. Marine Corps…………………………………………………………………………….. 86 Lesson 7: The U.S. Coast Guard and U.S. Merchant Marine………………………………………………… 92
Glossary……………………………………………………………………………………………………………… 105

Chapter 1: Foundations of Army JROTC and Getting Involved Lesson 1: Army JROTC — The Making of a Better Citizen
Unit 1: Introduction to JROTC, A Character and Leadership Development Program 1
FOUNDATIONS OF ARMY JROTC AND GETTING INVOLVED LESSON 1: ARMY JROTC — THE MAKING OF A BETTER CITIZEN
INTRODUCTION
This lesson introduces you to the U.S.
Army Junior Reserve Officers� Training Corps (JROTC) Program, its mission, and the Lead-ership Education and Training (LET) curricu-lum for this first level of your instruction. Completing the material in this course will require discipline and hard work, but the reward is well worth your effort. Through Army JROTC, you are building a foundation that will last a lifetime. If this is your first adventure into the Army JROTC Program � welcome to the team! You are among a special group of high school students headed for success! Your participation as a student or cadet in this program shows your willingness to make the most of your high school education. Whatever your reason for taking this course, every mem-ber of Army JROTC is special and brings a dif-ferent cultural dimension to the program. We are proud that you elected to be a part of a unique team � a team of winners!
MISSION OF ARMY JROTC
The mission of JROTC is to motivate young people to be better citizens.
You are the focus of Army JROTC�s mission. In fact, you are the whole point of Army JROTC � it is devoted to your growth, both as a student and as a person. This program will give you an opportunity to develop and improve yourself in many ways: it uses military skills to teach self-discipline, confidence, and pride in a job well done and it offers you chal-lenges and opportunities to: ◊ Sharpen your communication skills ◊ Promote and encourage citizenship through
participation in community service projects ◊ Develop your leadership potential ◊ Strengthen your self-esteem ◊ Improve your physical fitness ◊ Provide incentives to live drug-free ◊ Promote your graduation from high school
and develop a solid foundation for career development
Some employers spend millions of dol-lars training their employees to excel in many of these same skills and attitudes. COURSE DESCRIPTIONS Unit 1: Foundations of JROTC, A Character and Leadership Development Pro-gram helps develop new skills you can use in
cadet challenges JROTC mission motivate opportunities unique
cadet challenges JROTC mission motivate opportunities unique
Chapter 1: Foundations of Army JROTC and Getting Involved Lesson 1: Army JROTC — The Making of a Better Citizen
Unit 1: Introduction to JROTC, A Character and Leadership Development Program
2
school and throughout life. This introductory unit gives you a greater appreciation of Ameri-can symbols, customs, and traditions and the history and purpose of Army JROTC. An intro-duction to the Department of Defense and other services presents the differences and similari-ties of each service and their unique roles in the defense of the nation. Unit 2: Leadership Theory and Applica-tion teaches you about leadership: How to BE a leader; what you need to KNOW when you are influencing others; and what things you DO when you are leading. You will learn about character and values, leadership theories and principles, and human behavior. You will have the opportunity to take the leadership lessons learned in the classroom to the drill field. Most important, this unit will help you build your relationships in your community service proj-ects and your daily participation in school, work, and community. Unit 3: Foundations for Success is de-signed to provide young cadets with hands-on experiential learning activities that will build self-awareness, essential life skills, and the ability to set and achieve goals. Content areas include communication, diversity, study skills, conflict resolution, decision-making, and ser-vice learning. These lessons expose cadets to complex content, such as the structure and function of the human brain, personality, and learning theory in a simple, easy to understand manner, with ample opportunity for application and practice. This unit focuses on the life skills necessary to build better citizens for tomorrow. Unit 4: Wellness, Fitness, and First Aid provides training on getting started on total fit-ness, split second emergencies, handling com-mon emergencies, and lifesaving measures. There is also training on substance abuse awareness, intervention, and prevention. By teaching the value of physical exercise and
conditioning, personal hygiene, and proper diet through the Cadet Challenge program, you�ll feel good about yourself � both physically and mentally. Unit 5: Geography and Earth Science helps cadets develop a global perspective and awareness of environmental issues by engaging them in interactive activities that explore the use of maps, map reading, and orienteering (an outdoor sport using maps to find one�s way). Beginning lessons provide cadets with a basic overview of the globe and the continents. Each continent is further explored based on its physi-cal and human characteristics. Subsequent les-sons on maps and map reading provide instruc-tion on the use of the compass and orienteering basics to lay the foundation for participating in orienteering activities or competitions. The unit is concluded with instruction that assists cadets in enhancing their own awareness of environ-ment issues. Unit 6: Citizenship and American History in-troduces you to the You the People process and its Citizenship Skills. Using these skills and various activities your class will explore American history from 1776 through the pres-ent day. Each history lesson is focused around the development of citizenship and the You the People process. The chapter also includes ad-vanced history lessons for juniors and seniors as well as appropriate service learning projects.
Unit 7: Air Rifle Safety and Marksman-ship teaches elements of air rifle safety and marksmanship. The focus is on history, safety, and operation, taking aim, firing techniques, positions, scoring, and firing for record. CONCLUSION Army JROTC can work for you. It can prepare you for life by providing a framework for the qualities (skills, knowledge, and positive

Chapter 1: Foundations of Army JROTC and Getting Involved Lesson 1: Army JROTC — The Making of a Better Citizen
Unit 1: Introduction to JROTC, A Character and Leadership Development Program 3
attitudes) that will help you to succeed � qualities such as courage, candor, competence, commitment, confidence, and character. Speak-ing of character, the JROTC Program has it � JROTC offers many opportunities for team-work, advancement, and self-enrichment that are not available in other high school courses. The effort you put into mastering this program
and developing your personal skills can pay off in a big way. By enrolling in Army JROTC and join-ing the ranks of millions of other cadets who know the meaning of success, you have taken the first step toward a promising future.
Chapter 1: Foundations of Army JROTC and Getting Involved Lesson 2: The Past and Purpose of Army JROTC
Unit 1: Introduction to JROTC, A Character and Leadership Development Program 4
LESSON 2: THE PAST AND PURPOSE OF ARMY JROTC
MILITARY AND EDUCATION: HISTORICAL CONNECTIONS Junior ROTC’s mission to motivate young people to be better citizens has changed very little since 1916 when Congress passed the National Defense Act. However, the tradition of combining formal education with military studies goes back as far as the ancient Greeks. Centuries before JROTC existed, the Greeks, Romans, feudal Europeans, and Japanese had their own versions. In the United States, JROTC had its beginnings in Norwich, Vermont. In 1819, Captain Alden Partridge, a former Superintendent of the U.S. Military Academy at West Point, founded the American Literary, Scientific, and Military Academy in Norwich, Vermont. This academy is now known as Norwich University. Military studies were a major part of the academy’s course work. Captain Partridge felt that if his cadets were not prepared to defend their country’s rights, their education was incomplete. In addition to extensive drill practice and physical training (including marches of up to 50 miles per day), the cadets studied Latin, Greek, Hebrew, French, English, 10 types of mathematics, five types of law, and military history dating back to biblical times.
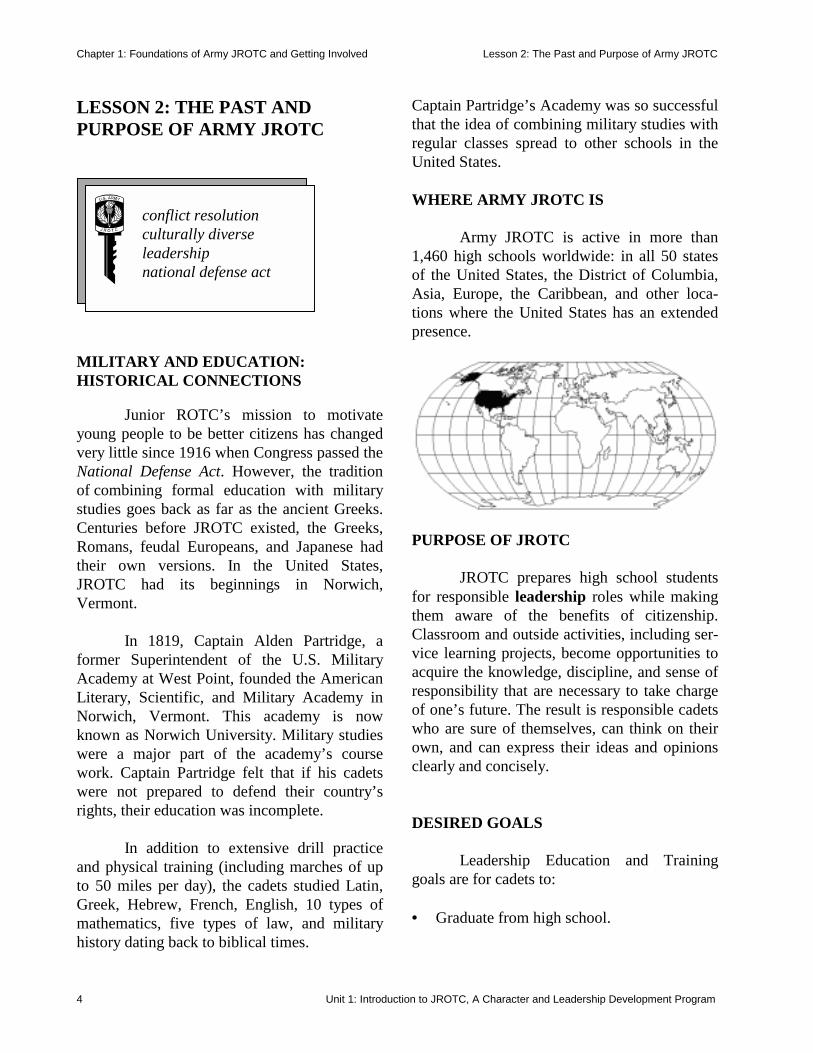
Captain Partridge’s Academy was so successful that the idea of combining military studies with regular classes spread to other schools in the United States. WHERE ARMY JROTC IS Army JROTC is active in more than 1,460 high schools worldwide: in all 50 states of the United States, the District of Columbia, Asia, Europe, the Caribbean, and other loca-tions where the United States has an extended presence.
PURPOSE OF JROTC JROTC prepares high school students for responsible leadership roles while making them aware of the benefits of citizenship. Classroom and outside activities, including ser-vice learning projects, become opportunities to acquire the knowledge, discipline, and sense of responsibility that are necessary to take charge of one’s future. The result is responsible cadets who are sure of themselves, can think on their own, and can express their ideas and opinions clearly and concisely. DESIRED GOALS Leadership Education and Training goals are for cadets to: • Graduate from high school.
conflict resolution culturally diverse leadership national defense act
conflict resolution culturally diverse leadership national defense act
Chapter 1: Foundations of Army JROTC and Getting Involved Lesson 2: The Past and Purpose of Army JROTC
Unit 1: Introduction to JROTC, A Character and Leadership Development Program 5
• Be good citizens by knowing and exercising the rights, responsibilities, privileges, and freedoms of good citizenship.
• Gain leadership potential and the ability to
live and work cooperatively with others; demonstrate leadership in situations involv-ing conflict resolution.
• Achieve positive self-esteem and winning
behavioral concepts in a culturally diverse society.
• Learn the ability to think logically and to
communicate effectively, with emphasis on effective oral communication.
• Learn the importance of diet and of physi-
cal fitness in maintaining good health and appearance.
• Gain an understanding of the history, pur-
pose, and structure of Army JROTC. • Acquire proficiency in basic military skills
(such as drill and ceremonies, first aid, and map reading) that are necessary for working effectively as a member of a team.
• Learn the importance of citizenship through
American history as it relates to America’s culture and future from the Revolutionary period to the present.
• Learn about the dangers of substance abuse
and the importance of mental management, including goal setting and positive self-talk.
CONCLUSION Junior ROTC cadets are part of a proud tradition. Like their predecessors at Captain Partridge’s American Literary, Scientific, and Military Academy, today’s cadets are learning
to lead and to motivate others while preparing to take part in today’s competitive world.
Chapter 1: Foundations of Army JROTC and Getting Involved Lesson 3: Moving Up in Army JROTC (Rank and Structure)
Unit 1: Introduction to JROTC, A Character and Leadership Development Program 6
LESSON 3: MOVING UP IN ARMY JROTC (RANK AND STRUCTURE)
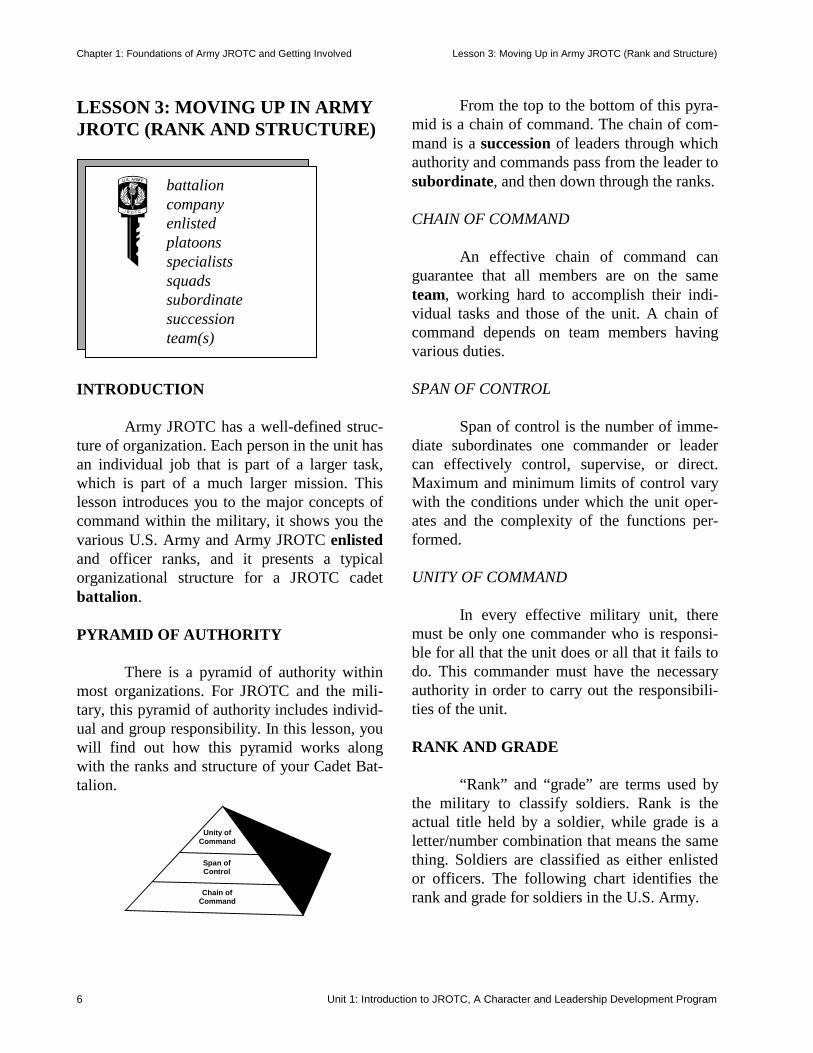
INTRODUCTION Army JROTC has a well-defined struc-ture of organization. Each person in the unit has an individual job that is part of a larger task, which is part of a much larger mission. This lesson introduces you to the major concepts of command within the military, it shows you the various U.S. Army and Army JROTC enlisted and officer ranks, and it presents a typical organizational structure for a JROTC cadet battalion. PYRAMID OF AUTHORITY There is a pyramid of authority within most organizations. For JROTC and the mili-tary, this pyramid of authority includes individ-ual and group responsibility. In this lesson, you will find out how this pyramid works along with the ranks and structure of your Cadet Bat-talion.
Unity ofCommand
Span ofControl
Chain ofCommand
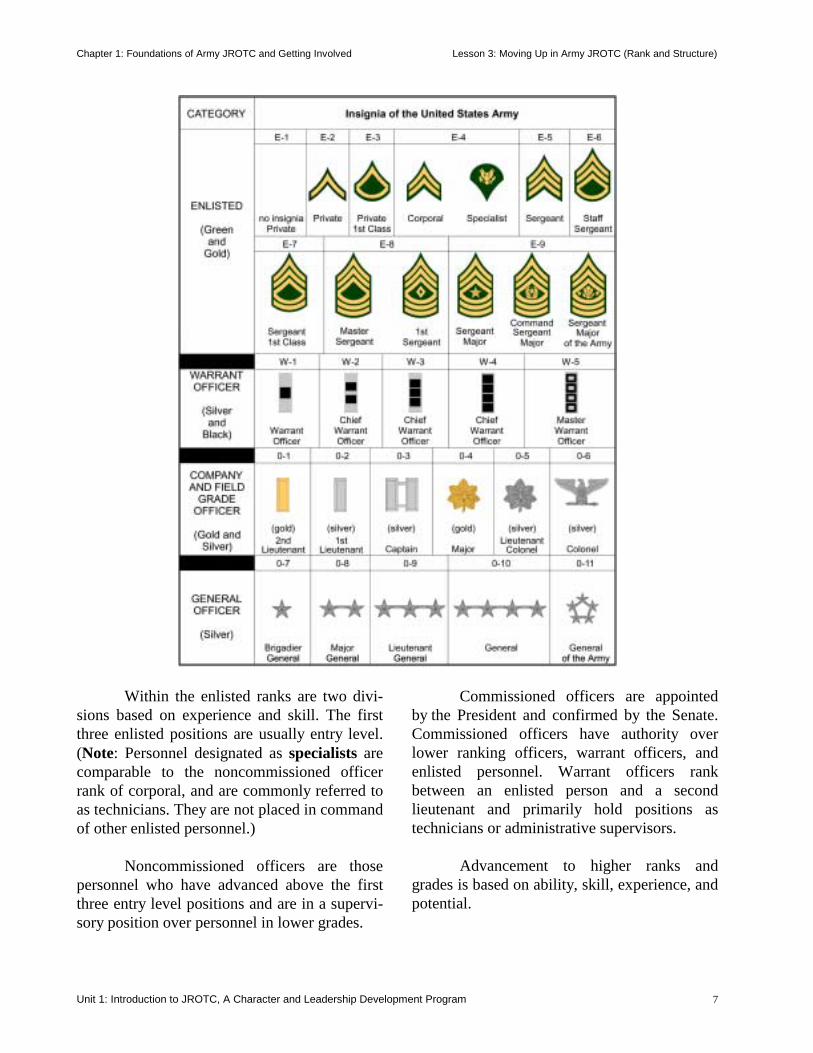
From the top to the bottom of this pyra-mid is a chain of command. The chain of com-mand is a succession of leaders through which authority and commands pass from the leader to subordinate, and then down through the ranks. CHAIN OF COMMAND An effective chain of command can guarantee that all members are on the same team, working hard to accomplish their indi-vidual tasks and those of the unit. A chain of command depends on team members having various duties. SPAN OF CONTROL Span of control is the number of imme-diate subordinates one commander or leader can effectively control, supervise, or direct. Maximum and minimum limits of control vary with the conditions under which the unit oper-ates and the complexity of the functions per-formed. UNITY OF COMMAND In every effective military unit, there must be only one commander who is responsi-ble for all that the unit does or all that it fails to do. This commander must have the necessary authority in order to carry out the responsibili-ties of the unit. RANK AND GRADE “Rank” and “grade” are terms used by the military to classify soldiers. Rank is the actual title held by a soldier, while grade is a letter/number combination that means the same thing. Soldiers are classified as either enlisted or officers. The following chart identifies the rank and grade for soldiers in the U.S. Army.
battalioncompanyenlistedplatoonsspecialistssquadssubordinatesuccessionteam(s)
battalioncompanyenlistedplatoonsspecialistssquadssubordinatesuccessionteam(s)
Chapter 1: Foundations of Army JROTC and Getting Involved Lesson 3: Moving Up in Army JROTC (Rank and Structure)
Unit 1: Introduction to JROTC, A Character and Leadership Development Program 7
Within the enlisted ranks are two divi-sions based on experience and skill. The first three enlisted positions are usually entry level. (Note: Personnel designated as specialists are comparable to the noncommissioned officer rank of corporal, and are commonly referred to as technicians. They are not placed in command of other enlisted personnel.) Noncommissioned officers are those personnel who have advanced above the first three entry level positions and are in a supervi-sory position over personnel in lower grades.
Commissioned officers are appointed by the President and confirmed by the Senate. Commissioned officers have authority over lower ranking officers, warrant officers, and enlisted personnel. Warrant officers rank between an enlisted person and a second lieutenant and primarily hold positions as technicians or administrative supervisors. Advancement to higher ranks and grades is based on ability, skill, experience, and potential.
Chapter 1: Foundations of Army JROTC and Getting Involved Lesson 3: Moving Up in Army JROTC (Rank and Structure)
Unit 1: Introduction to JROTC, A Character and Leadership Development Program 8
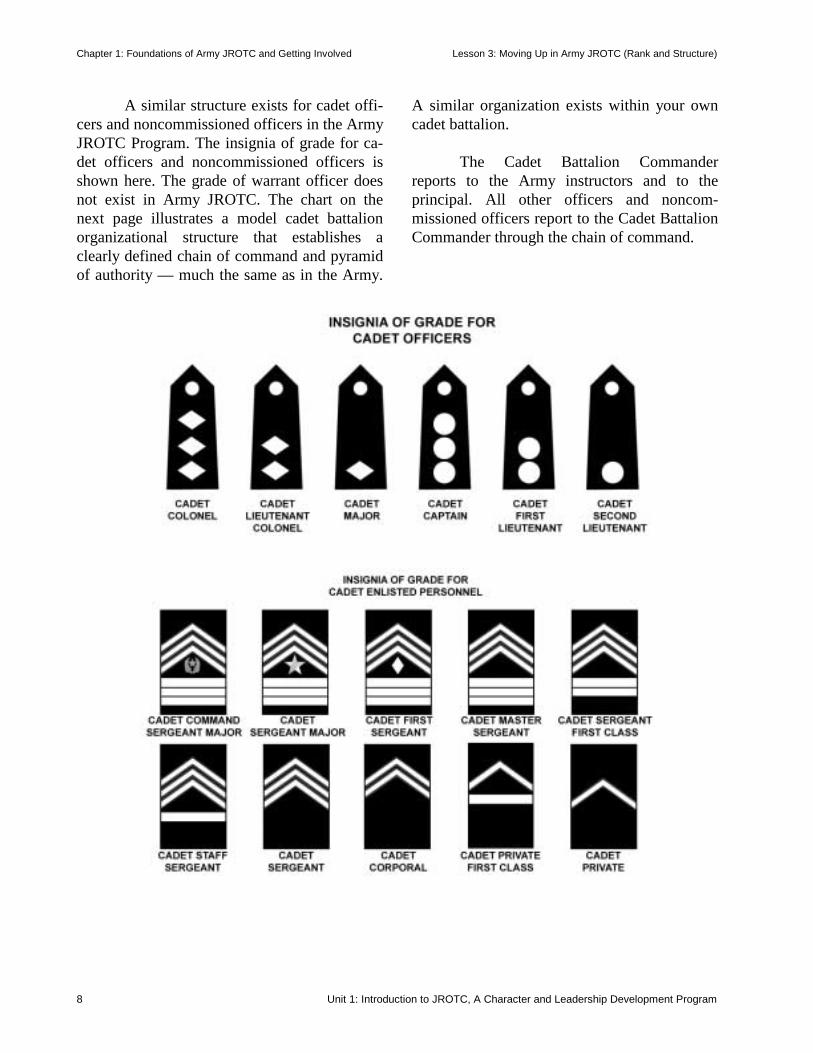
A similar structure exists for cadet offi-cers and noncommissioned officers in the Army JROTC Program. The insignia of grade for ca-det officers and noncommissioned officers is shown here. The grade of warrant officer does not exist in Army JROTC. The chart on the next page illustrates a model cadet battalion organizational structure that establishes a clearly defined chain of command and pyramid of authority — much the same as in the Army.
A similar organization exists within your own cadet battalion. The Cadet Battalion Commander reports to the Army instructors and to the principal. All other officers and noncom-missioned officers report to the Cadet Battalion Commander through the chain of command.
Chapter 1: Foundations of Army JROTC and Getting Involved Lesson 3: Moving Up in Army JROTC (Rank and Structure)
Unit 1: Introduction to JROTC, A Character and Leadership Development Program 9
Battalion Organization
BattalionCommander
BattalionExecutive
Officer
BattalionCommand
Sergeant Major
S-1Adjutant
S-2Information/
SecurityS-3
OperationsS-4
LogisticsS-5
SpecialProjects
Assistants Assistants Assistants Assistants Assistants
A Company OtherCompanies
1st Platoon 2nd Platoon 1st Platoon 2nd Platoon
Squad Squad Squad Squad
ColorGuard
B Company
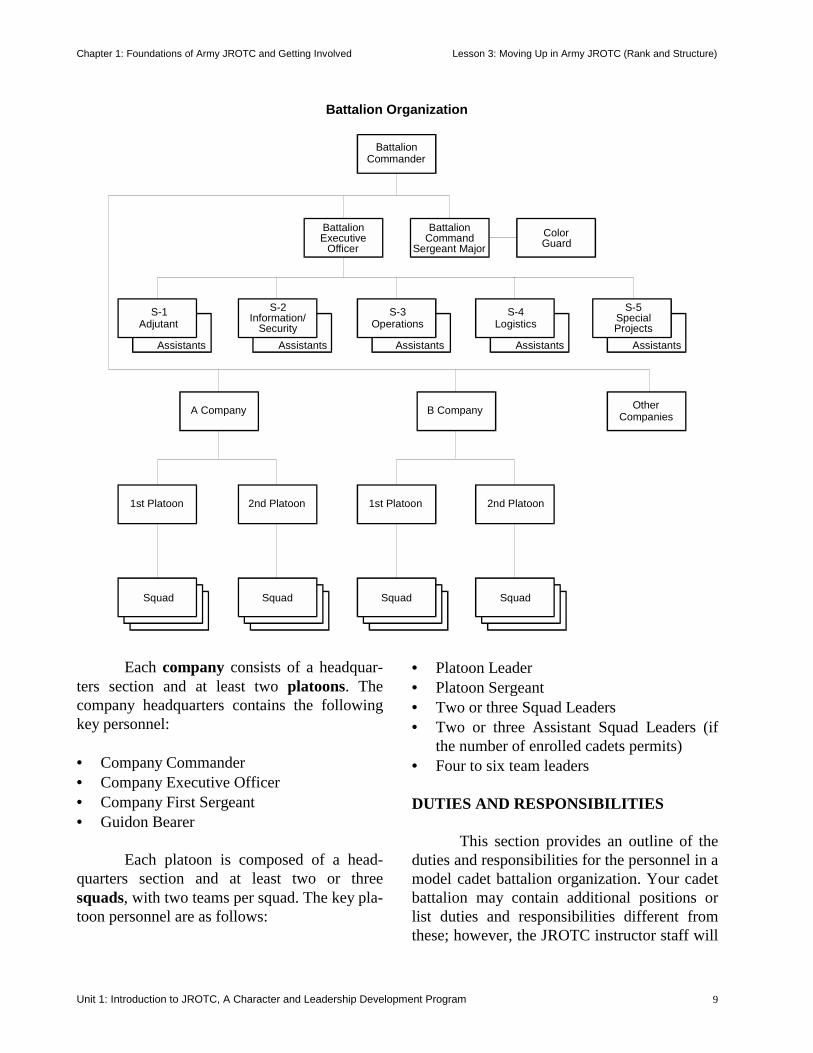
Each company consists of a headquar-ters section and at least two platoons. The company headquarters contains the following key personnel: • Company Commander • Company Executive Officer • Company First Sergeant • Guidon Bearer Each platoon is composed of a head-quarters section and at least two or three squads, with two teams per squad. The key pla-toon personnel are as follows:
• Platoon Leader • Platoon Sergeant • Two or three Squad Leaders • Two or three Assistant Squad Leaders (if
the number of enrolled cadets permits) • Four to six team leaders DUTIES AND RESPONSIBILITIES This section provides an outline of the duties and responsibilities for the personnel in a model cadet battalion organization. Your cadet battalion may contain additional positions or list duties and responsibilities different from these; however, the JROTC instructor staff will
Chapter 1: Foundations of Army JROTC and Getting Involved Lesson 3: Moving Up in Army JROTC (Rank and Structure)
Unit 1: Introduction to JROTC, A Character and Leadership Development Program 10
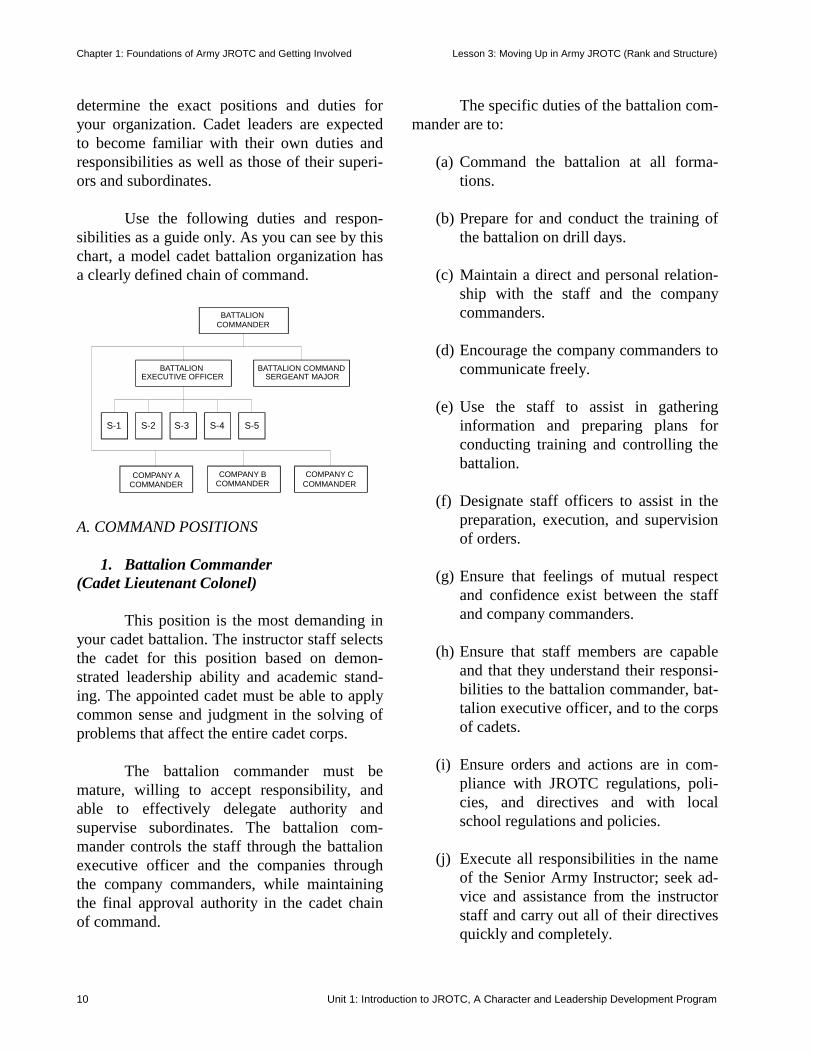
determine the exact positions and duties for your organization. Cadet leaders are expected to become familiar with their own duties and responsibilities as well as those of their superi-ors and subordinates. Use the following duties and respon-sibilities as a guide only. As you can see by this chart, a model cadet battalion organization has a clearly defined chain of command.
BATTALIONCOMMANDER
BATTALION COMMANDSERGEANT MAJOR
BATTALIONEXECUTIVE OFFICER
S-1 S-2 S-3 S-4 S-5
COMPANY ACOMMANDER
COMPANY BCOMMANDER
COMPANY CCOMMANDER
A. COMMAND POSITIONS
1. Battalion Commander (Cadet Lieutenant Colonel) This position is the most demanding in your cadet battalion. The instructor staff selects the cadet for this position based on demon-strated leadership ability and academic stand-ing. The appointed cadet must be able to apply common sense and judgment in the solving of problems that affect the entire cadet corps. The battalion commander must be mature, willing to accept responsibility, and able to effectively delegate authority and supervise subordinates. The battalion com-mander controls the staff through the battalion executive officer and the companies through the company commanders, while maintaining the final approval authority in the cadet chain of command.
The specific duties of the battalion com-mander are to:
(a) Command the battalion at all forma-tions.
(b) Prepare for and conduct the training of
the battalion on drill days.
(c) Maintain a direct and personal relation-ship with the staff and the company commanders.
(d) Encourage the company commanders to
communicate freely.
(e) Use the staff to assist in gathering information and preparing plans for conducting training and controlling the battalion.
(f) Designate staff officers to assist in the
preparation, execution, and supervision of orders.
(g) Ensure that feelings of mutual respect
and confidence exist between the staff and company commanders.
(h) Ensure that staff members are capable
and that they understand their responsi-bilities to the battalion commander, bat-talion executive officer, and to the corps of cadets.
(i) Ensure orders and actions are in com-
pliance with JROTC regulations, poli-cies, and directives and with local school regulations and policies.
(j) Execute all responsibilities in the name
of the Senior Army Instructor; seek ad-vice and assistance from the instructor staff and carry out all of their directives quickly and completely.
Chapter 1: Foundations of Army JROTC and Getting Involved Lesson 3: Moving Up in Army JROTC (Rank and Structure)
Unit 1: Introduction to JROTC, A Character and Leadership Development Program 11
(k) Arrange the required meetings and assemble the required command or staff personnel to determine any actions that may be necessary in fulfilling the obli-gations of the cadet battalion.
(l) Be prepared to evaluate any member
of the battalion, but specifically the bat-talion headquarters personnel and the company commanders.
(m)Make operational decisions for the cadet
battalion.
(n) Preside over officer calls.
(o) Work with school authorities in coordi-nating activities of the cadet battalion with the organizations of the school, ensuring that battalion activities are in accordance with school policy.
(p) In coordination with the Senior Army
Instructor, assign missions to all extra-curricular team captains (e.g., drill, rifle, color guard, etc.).
(q) Be responsible for all the battalion does
or fails to do.
2. Company Commanders (Cadet Captains) A good company commander is an out-standing leader with lots of initiative. If you are a company commander, you get things done. Until orders reach you, they are just plans, something that someone would like to have accomplished. Rather than waiting to be told what to do, you think and plan ahead what seems best for the company. You use common sense action and try not to worry about making mistakes, knowing that the greatest mistake is to do nothing when action is required. You use all available help to accomplish company duties
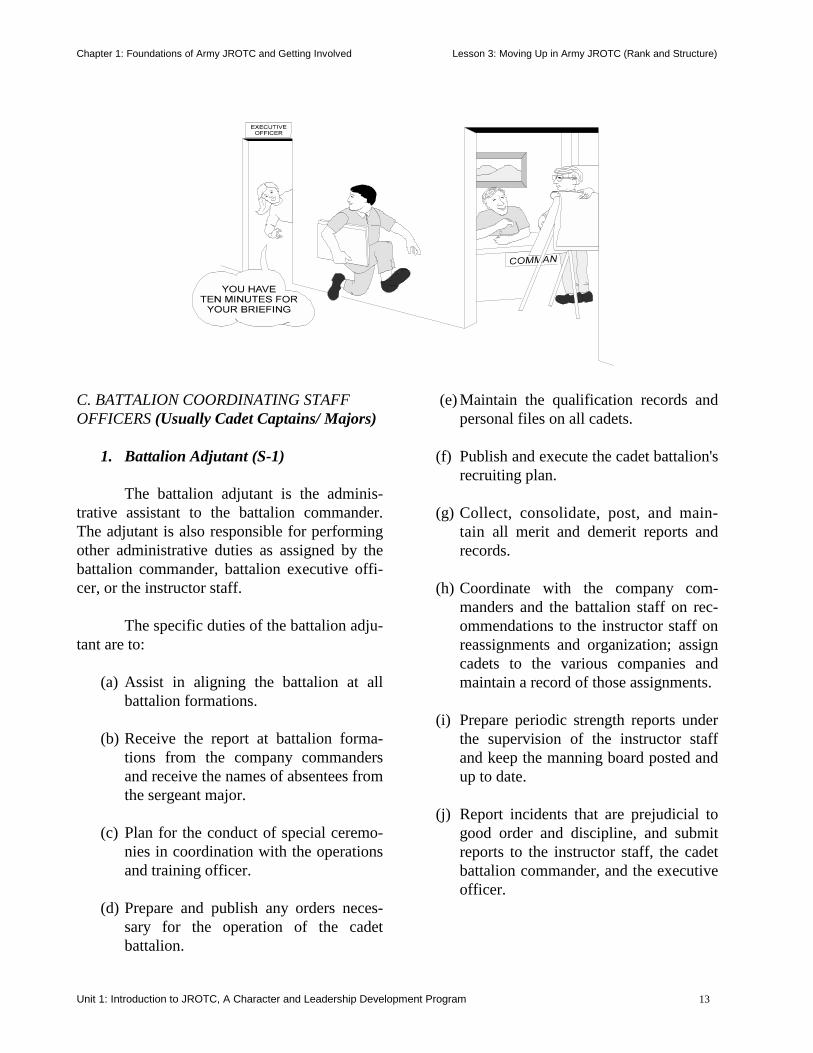
and to keep subordinates informed, at the same time ensuring that the goals of the mission remain in focus. You provide the why and how to accomplish the assigned mission. Then, you must check and inspect to ensure that what you wanted done is being accomplished. You must be an outstanding leader with plenty of initia-tive. Do not wait for someone to tell you what to do — think ahead and plan what you believe is best for the company. (Note: In some organ-izations where actions go from the battalion staff to class leaders, the company commander has the duties of a special assignment officer.) The company commander: • Is responsible for all the company does or
fails to do. • Keeps the battalion commander apprised of
the status of the company at all times. • Ensures the company is prepared to accom-
plish its assigned mission in a satisfactory manner.
• Is an expert in drill. The principal duties of the company commander are to:
(a) Command the company at all forma-tions.
(b) Ensure that all members of the company
know and use the chain of command.
(c) Consult the training schedule, study the drill references, and ensure that you and your subordinates are prepared to instruct.
Chapter 1: Foundations of Army JROTC and Getting Involved Lesson 3: Moving Up in Army JROTC (Rank and Structure)
Unit 1: Introduction to JROTC, A Character and Leadership Development Program 12
(d) Check with the instructor staff daily prior to formation to obtain any changes or other information they may want announced.
(e) Seek advice from the battalion com-
mander or the instructor staff when encountering a problem to which you do not know the answer.
(f) Execute the orders of the battalion com-
mander as if they were your orders, even though you may personally dis-agree with them.
(g) Conduct short inspections at every for-
mation, making on-the-spot corrections as necessary; follow-up to ensure that deficiencies from earlier inspections are corrected.
(h) Make each cadet an effective member
of the team; take an interest in them and their problems; offer advice and help them to solve their problems.
(i) Make on-the-spot corrections at any
time to ensure that all members of the company understand and comply with cadet regulations.
(j) Keep the company executive officer in-
formed in case of your absence. B. BATTALION EXECUTIVE OFFICER (Cadet Major) The cadet battalion executive officer (XO) supervises, directs, and coordinates the cadet battalion staff to prevent overlapping efforts and to ensure that the commander’s desires are understood and achieved. The cadet battalion XO keeps the staff informed of the commander’s policies and keeps the cadet bat-talion commander informed of the status of
projects assigned to the staff. The cadet bat-talion XO assumes command of the cadet bat-talion in the absence of the cadet battalion commander. The primary duties of the cadet battal-ion XO are to:
(a) Organize the cadet battalion staff prop-erly and ensure that it works as a team.
(b) Inspect the work of the cadet battalion
staff and make other inspections as directed by the cadet battalion commander.
(c) Ensure that the battalion staff officers
prepare and submit reports on time and that they are engaged in future planning.
(d) Act as the commander of troops during
ceremonies.
(e) Ensure that instructions and orders issued to the cadet battalion are in accordance with the established policies of the cadet battalion commander; report all violations of orders to the cadet battalion commander.
(f) Perform other duties as assigned by
the cadet battalion commander or the instructor staff.
Chapter 1: Foundations of Army JROTC and Getting Involved Lesson 3: Moving Up in Army JROTC (Rank and Structure)
Unit 1: Introduction to JROTC, A Character and Leadership Development Program 13
C. BATTALION COORDINATING STAFF OFFICERS (Usually Cadet Captains/ Majors)
1. Battalion Adjutant (S-1) The battalion adjutant is the adminis-trative assistant to the battalion commander. The adjutant is also responsible for performing other administrative duties as assigned by the battalion commander, battalion executive offi-cer, or the instructor staff. The specific duties of the battalion adju-tant are to:
(a) Assist in aligning the battalion at all battalion formations.
(b) Receive the report at battalion forma-
tions from the company commanders and receive the names of absentees from the sergeant major.
(c) Plan for the conduct of special ceremo-
nies in coordination with the operations and training officer.
(d) Prepare and publish any orders neces-
sary for the operation of the cadet battalion.
(e) Maintain the qualification records and personal files on all cadets.
(f) Publish and execute the cadet battalion's
recruiting plan.
(g) Collect, consolidate, post, and main-tain all merit and demerit reports and records.
(h) Coordinate with the company com-
manders and the battalion staff on rec-ommendations to the instructor staff on reassignments and organization; assign cadets to the various companies and maintain a record of those assignments.
(i) Prepare periodic strength reports under
the supervision of the instructor staff and keep the manning board posted and up to date.
(j) Report incidents that are prejudicial to
good order and discipline, and submit reports to the instructor staff, the cadet battalion commander, and the executive officer.

Chapter 1: Foundations of Army JROTC and Getting Involved Lesson 3: Moving Up in Army JROTC (Rank and Structure)
Unit 1: Introduction to JROTC, A Character and Leadership Development Program 14
(k) In coordination with the S-2, make rec-ommendations to improve morale and welfare of the cadet battalion.
(l) Perform other duties as assigned by the
battalion commander, battalion execu-tive officer, or the instructor staff.
2. Battalion Intelligence or Security Officer (S-2)
The battalion S-2 assists the battalion commander and the instructor staff in matters pertaining to unit security and enforces the provisions of the security requirements for the battalion. The specific duties of the S-2 are to:
(a) Assist in making periodic inspections of the security of weapons (if available within the unit).
(b) Make periodic inspections of the secu-
rity of the supply room and equipment storage areas.
(c) Make necessary on-the-spot corrections
resulting from security inspections and keep the battalion commander and instructor staff informed.
(d) In coordination with the S-1, report
incidents that are prejudicial to good order and discipline, and submit reports to the instructor staff, the cadet battalion commander, and the executive officer.
(e) Perform other duties as assigned by the
battalion commander, battalion execu-tive officer, or the instructor staff. (For example, in some JROTC units, the S-2 may also be responsible for the infor-mation center and the duties of a public affairs officer if one is not assigned or
for the duties of an ordnance officer if one is not assigned.)
3. Battalion Operations and Training Officer (S-3)
The battalion S-3 assists the battalion commander in the preparation, conduct, and supervision of all training activities of the cadet battalion. Additionally, the S-3 keeps the com-mander advised on the progress of training within the battalion. Specifically, the principal duties of the S-3 are to:
(a) Prepare the weekly training schedules.
(b) Select and designate cadet instructors in coordination with the instructor staff; post the weekly training schedules not later than one week in advance of train-ing on all bulletin boards.
(c) Assign areas for outdoor training and
ensure classrooms are available and prepared for instruction.
(d) Inspect the drill field prior to use by the
battalion and prepare it for ceremonies.
(e) Coordinate the training of the rifle team(s), drill team(s), Color Guard, and the honor guard; also, coordinate train-ing for guidon bearers and manual of the saber for cadet officers.
(f) Organize events such as reviews,
parades, and extracurricular activities.
(g) Plan and supervise field events.
(h) Inspect cadet training for compliance.
(i) Maintain the unit reference library.
Chapter 1: Foundations of Army JROTC and Getting Involved Lesson 3: Moving Up in Army JROTC (Rank and Structure)
Unit 1: Introduction to JROTC, A Character and Leadership Development Program 15
(j) Maintain the training portion of cadet records.
(k) Assume command of the battalion in
the absence of both the battalion com-mander and XO.
(l) Supervise the activities of the battalion
communications officer.
(m) Perform other duties as assigned by the battalion commander, battalion execu-tive officer, or the instructor staff.
4. Battalion Logistics or Supply Officer (S-4)
The battalion logistics or supply officer is responsible for the maintenance, security, record keeping, issue, and turn-in of all U.S. government property (except ordnance). The S-4 coordinates the securing of property with the S-2. Some of the duties of the S-4 are to:
(a) Create a JROTC Clothing and Equip-ment Record for each cadet. Maintain all cadet supply records in proper order.
(b) Maintain accountability of all equip-
ment and supplies used by the unit.
(c) Conduct periodic inventories of the on-hand supplies and equipment; submit weekly reports to the instructor staff on the availability of supplies and on the condition of equipment.
(d) Ensure that adequate cleaning materials
are available for use during assigned maintenance activities.
(e) In coordination with the battalion ser-
geant major, make periodic inspections of the national, state, and organizational Colors for serviceability.
(f) Maintain security of all items of cloth-ing and equipment in the supply room and training aids storage area.
(g) Maintain the supply room in a neat and
orderly fashion at all times.
(h) Maintain a running inventory of all supplies/property; determine supply requirements; and prepare requisitions for equipment and supplies required for the cadet battalion.
(i) Issue clothing, insignia, and other sup-
ply items as directed by the battalion commander, battalion executive officer, or the instructor staff.
(j) Collect and dispose of excess salvage
equipment and clothing.
(k) Supervise the activities of the battalion ordnance officer (if assigned).
(l) Perform other duties as assigned by the
battalion commander, battalion execu-tive officer, or the instructor staff.
5. Special Projects Officer (S-5) (Optional)
The duties of the cadet battalion special projects officer, if assigned, are to:
(a) Plan and coordinate special projects as outlined by the cadet battalion com-mander, cadet battalion XO, or the instructor staff.
(b) Maintain records on all activities and
coordination as they pertain to each project.
(c) Keep the cadet battalion commander,
cadet battalion XO, and the instructor staff informed as to the progress of, or
Chapter 1: Foundations of Army JROTC and Getting Involved Lesson 3: Moving Up in Army JROTC (Rank and Structure)
Unit 1: Introduction to JROTC, A Character and Leadership Development Program 16
any problems encountered with, the projects.
D. BATTALION SPECIAL STAFF OFFICERS
1. Battalion Communications (Signal) Officer
The communications officer is respon-sible for setting up and maintaining all signal or public address/projection/sound equipment issued to the cadet battalion. Additionally, this officer ensures that all equipment is operational and that spare parts are on hand at all times.
2. Battalion Ordnance Officer The ordnance officer advises the S-4, battalion commander, and instructor staff on the condition of all weapons. This officer supervises the issue, maintenance, and turn-in of all weapons; maintains the weapons roster; and prepares and issues weapons cards to cadets.
3. Battalion Public Affairs (Information) Officer
This officer acts as the contact between the corps of cadets and all news media and stu-dent publications. This officer publicizes as many of the activities of the Army JROTC pro-gram as possible to create an outstanding image of the cadet battalion and to reinforce the image of the school. Some of the specific duties of the public affairs/information officer are to:
(a) Maintain the cadet information board in the correct state showing news events of local, national, and international interest.
(b) Keep abreast of newsworthy events in
the cadet battalion; prepare and dis-
tribute news releases, articles, or announcements on events of the JROTC program to appropriate news agencies. Submit all articles to the instructor staff for approval prior to their release.
(c) Act as the battalion’s point of contact
with the school newspaper and year-book committees. Ensure at least one item of JROTC interest makes every publication of the school newspaper.
(d) Maintain the cadet battalion scrapbook.
(e) Make recommendations to improve
morale and welfare of the cadet battalion.
E. BATTALION PERSONAL STAFF OFFICER
Battalion Command Sergeant Major The battalion command sergeant major is the principal cadet enlisted assistant to the battalion commander. As the senior enlisted member of the cadet corps, the command ser-geant major supervises the other noncommis-sioned officers (NCOs) of the battalion and companies. Specific duties of the command sergeant major are to:
(a) Assist subordinate NCOs, the battalion XO, and the adjutant with administra-tive duties/details.
Chapter 1: Foundations of Army JROTC and Getting Involved Lesson 3: Moving Up in Army JROTC (Rank and Structure)
Unit 1: Introduction to JROTC, A Character and Leadership Development Program 17
(b) Advise and assist the battalion com-mander in all matters pertaining to the enlisted members of the cadet battalion.
(c) Assist the adjutant in the formation and
alignment of the battalion at all battal-ion formations.
(d) Receive lists of absentees from the
companies and submit them to the adjutant.
(e) Supervise the color guard and all flag
details. Ensure that company first ser-geants submit their weekly flag details on time, post those rosters, and ensure that members selected for detail receive their notification slips prior to the assignment.
(f) Ensure the flag details are properly
trained.
(g) Ensure that the battalion area, including the drill field, is maintained in a high state of police at all times and that JROTC offices and classrooms are kept neat and orderly.
(h) Preside over all noncommissioned offi-
cer promotion boards.
(i) Assume command of the battalion in the absence of all officers.
(j) Perform other duties as assigned by the
battalion commander, battalion execu-tive officer, or the instructor staff.
F. OTHER STAFF ASSISTANTS (OPTIONAL)
1. Rifle Team Captain
Primary duties are to:
(a) Organize the training schedule for the Rifle Marksmanship Team.
(b) Schedule matches/competitions for the
Rifle Marksmanship Team; coordinate these activities with the S-3 and the cadet battalion training schedule.
(c) Supervise maintenance and care of the
JROTC rifle range.
(d) Develop the rifle marksmanship pro-gram for the cadet battalion.
(e) Coordinate weapon requirements with
the S-4.
2. Drill Team Captain Primary duties are to:
(a) Recruit members and organize the cadet Drill Team.
(b) Schedule the Drill Team training
program. (c) Coordinate uniform and weapon
requirements with the S-4.
(d) Schedule drill programs, parades, and competitions for the Drill Team; coor-dinate these activities with the S-3 and the cadet battalion training schedule.
3. Color Guard Commander
Primary duties are to:
(a) Train members of the Color Guard.
(b) Represent the cadet battalion at activi-ties as directed by the cadet battalion commander, cadet battalion XO, or the instructor staff.
Chapter 1: Foundations of Army JROTC and Getting Involved Lesson 3: Moving Up in Army JROTC (Rank and Structure)
Unit 1: Introduction to JROTC, A Character and Leadership Development Program 18
(c) Coordinate uniform, flag, and weapon requirements with the S-4.
(d) Schedule competitions for the Color
Guard; coordinate these activities with the S-3 and the cadet battalion training schedule.
(e) Inspect uniform and personal appear-
ance of Color Guard members.
(f) Be thoroughly familiar with FM 22-5. G. OTHER COMPANY, PLATOON, AND SQUAD PERSONNEL
1. Company Executive Officers (Cadet 1st Lieutenant)
The company executive officer (XO) assists the company commander in the training of the company and performs such administra-tive duties as designated by the commander. The company XO should be well versed in all functions of the company and prepared to assume command of the company in the absence of the company commander.
2. Company First Sergeants
The company first sergeant is respons-ible to the company XO (if assigned) or to the company commander for administrative mat-ters. The company first sergeant is responsible for company formations, submits absentee reports to the battalion sergeant major, checks all merits and demerits with the company com-mander before submitting them to the S-1, and keeps the company commander informed on all matters pertaining to health and welfare of the unit. The first sergeant assumes command of the company in the absence of all officers.
3. Platoon Leaders (Cadet 2nd Lieutenant) The platoon leader is a very desirable position. If you are a platoon leader, you have a platoon of cadets for whom you are directly responsible. Primarily, your job is one of leadership, training, and discipline. You also have the opportunity and privilege to be a role model, coach, and counselor. The duties and responsibilities of a platoon leader are to:
(a) Keep the company commander apprised of the status of the platoon at all times.
(b) Organize and maintain an effective
chain of command. Learn the name of every one in your platoon and use their names when addressing them.
(c) Conduct an inspection of the platoon at
formations.
(d) Use the chain of command to accom-plish tasks; work mainly with the pla-toon sergeant and the squad leaders.
(e) Know all cadet regulations and ensure
that all members of the platoon also know and follow them.
(f) Enforce orders from superiors whether
you agree with them or not; however, if you think an order is wrong, discuss it with the chain of command or the instructors, as necessary. Develop a spirit of teamwork so as to instill respect, obedience, and cooperation in the unit.
(g) Know all phases of drill; be able to
supervise/conduct platoon drill and, if you are the senior officer present in a formation, be able to conduct company drill.
(h) Set high standards of personal appear-
ance and conduct for yourself. Remem-
Chapter 1: Foundations of Army JROTC and Getting Involved Lesson 3: Moving Up in Army JROTC (Rank and Structure)
Unit 1: Introduction to JROTC, A Character and Leadership Development Program 19
ber, the platoon leader sets the example for the platoon to follow.
(i) Make an effort to resolve all leadership,
training, and disciplinary problems at your level; if you cannot solve a prob-lem, seek the advice and assistance of the company commander, company XO, or first sergeant.
(j) Provide assistance/counseling to per-
sonnel in the platoon, especially when requested by a squad leader or the pla-toon sergeant, and/or when necessary for performance or disciplinary reasons.
4. Platoon Sergeants (Cadet Staff Sergeant)
Platoon sergeants set the example at all times; assist in the supervision of the squad leaders; develop a spirit of teamwork in the pla-toon; submit absentee reports to the company first sergeant; assist the platoon leader in train-ing the platoon; counsel personnel at a squad leader’s request; and assume control of the pla-toon in the absence of the platoon leader.
5. Squad Leaders (other Cadet NCOs) Squad leaders are responsible to their platoon leader/sergeant for the appearance, conduct, training, and discipline of their squad. They ensure that each squad member learns and does what is expected, and maintains high stan-dards of behavior. Squad leaders must:
(a) Set the example at all times. (b) Know the number, names, and personal
information on all assigned personnel. (c) Counsel/assist squad members with
JROTC matters or help them find solu-tions to other issues when possible;
refer to the platoon sergeant/leader if you are unable to handle/resolve an issue.
(d) Form the squad correctly. Make an
accurate report by name of those per-sons present and absent during common hour activities, company platoon/ formations, and other cadet battalion activities.
(e) Be thoroughly familiar with individual,
squad, and platoon drill. When conduct-ing drill, instruct/demonstrate the movement, allow time for individual performance, then supervise team lead-ers and squad members to ensure they perform properly. Conduct inspections to ensure personnel are prepared for training.
(f) Develop responsibility and leadership in
team leaders and be the first person they turn to for assistance and advice.
6. Team Leaders
Team leaders are responsible for the formation, appearance, training, and discipline of their team members. Team Leader A must be ready to assume control of the squad in the absence of the squad leader. Team leaders assist their squad leaders as directed and must:
(a) Set the example at all times.
(b) Know the number, names, and personal information on all assigned personnel.
(c) Assist team members with JROTC mat-
ters when possible; refer them to the squad leader for assistance if you are unable to handle/resolve an issue.
(d) Be thoroughly familiar with individual
and squad drill; inspect team members
Chapter 1: Foundations of Army JROTC and Getting Involved Lesson 3: Moving Up in Army JROTC (Rank and Structure)
Unit 1: Introduction to JROTC, A Character and Leadership Development Program 20
during formations, ensuring they know what is required of them.
7. Team Members
Your duties and responsibilities are to:
(a) Maintain and wear the entire uniform immaculately when prescribed.
(b) Properly safeguard and care for all
equipment and materials issued to you and for which you are responsible.
(c) Ensure you are on time for all official
formations requiring your presence.
(d) Conduct yourself in a manner that brings credit to yourself, the cadet bat-talion, and your school.
CONCLUSION The cadet battalion structure is set up to ensure a quick and clear flow of commands. Each individual cadet has a job to do, which is part of a squad task, that then proceeds up the chain of command until that individual task is a part of the battalion’s overall mission. What this means is an effective JROTC organization. Each cadet knows what he or she is responsible for and what added responsibili-ties come from advancement in rank. How far you climb in rank is up to you. Each cadet battalion, depending on unit requirements, has opportunities for advance-ment. You will receive the necessary training and have the opportunity to demonstrate excellence in what skills and knowledge you have learned. Your actions and abilities ultimately will let your battalion leaders know if you are ready to move up.
Taking on added responsibility in a leadership position is part of what JROTC is all about. Moving up in JROTC takes three things — desire, time, and work. JROTC will give you the time, but you must have the desire and be willing to put in the work.
Chapter 1: Foundations of Army JROTC and Getting Involved Lesson 4: Signs of Success
Unit 1: Introduction to JROTC, A Character and Leadership Development Program 21
LESSON 4: THE SIGNS OF SUCCESS
INTRODUCTION The awards program is for any JROTC cadet who excels. It recognizes high levels of performance, excellence, and achievement. Since the JROTC program recognizes that not all cadets have the same abilities and skills, the Army designed its awards program to rec-ognize as many personal traits as possible in cadets. There are two kinds of awards: unit awards, which recognize unit excellence, and individual awards, which recognize personal achievement. The Army rewards cadets for extracur-ricular activities, excellence in competition, contributions to unit goals, and outstanding service. Also, you may receive national rec-ognition from patriotic and civic organiza-tions for outstanding academic and military achievements. UNIT AWARDS When you are in JROTC, you are part of a team. Team efforts can lead to unit awards. The JROTC Awards Program offers three types of unit decorations: Merit Unit, Honor Unit and Honor Unit with Distinction. The Merit Unit, Honor Unit, and the Honor
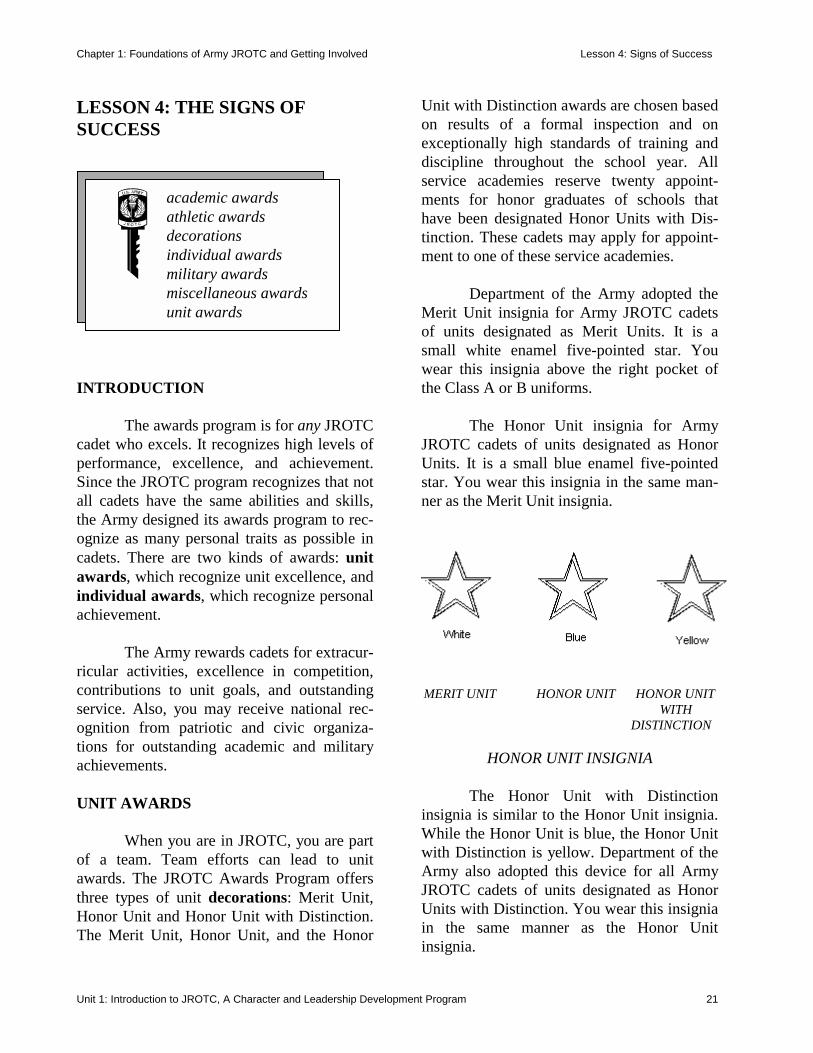
Unit with Distinction awards are chosen based on results of a formal inspection and on exceptionally high standards of training and discipline throughout the school year. All service academies reserve twenty appoint-ments for honor graduates of schools that have been designated Honor Units with Dis-tinction. These cadets may apply for appoint-ment to one of these service academies. Department of the Army adopted the Merit Unit insignia for Army JROTC cadets of units designated as Merit Units. It is a small white enamel five-pointed star. You wear this insignia above the right pocket of the Class A or B uniforms.
The Honor Unit insignia for Army JROTC cadets of units designated as Honor Units. It is a small blue enamel five-pointed star. You wear this insignia in the same man-ner as the Merit Unit insignia.
MERIT UNIT HONOR UNIT HONOR UNIT
WITH DISTINCTION
HONOR UNIT INSIGNIA
The Honor Unit with Distinction insignia is similar to the Honor Unit insignia. While the Honor Unit is blue, the Honor Unit with Distinction is yellow. Department of the Army also adopted this device for all Army JROTC cadets of units designated as Honor Units with Distinction. You wear this insignia in the same manner as the Honor Unit insignia.
academic awardsathletic awardsdecorationsindividual awardsmilitary awardsmiscellaneous awardsunit awards
academic awardsathletic awardsdecorationsindividual awardsmilitary awardsmiscellaneous awardsunit awards
Chapter 1: Foundations of Army JROTC and Getting Involved Lesson 4: Signs of Success
Unit 1: Introduction to JROTC, A Character and Leadership Development Program 22
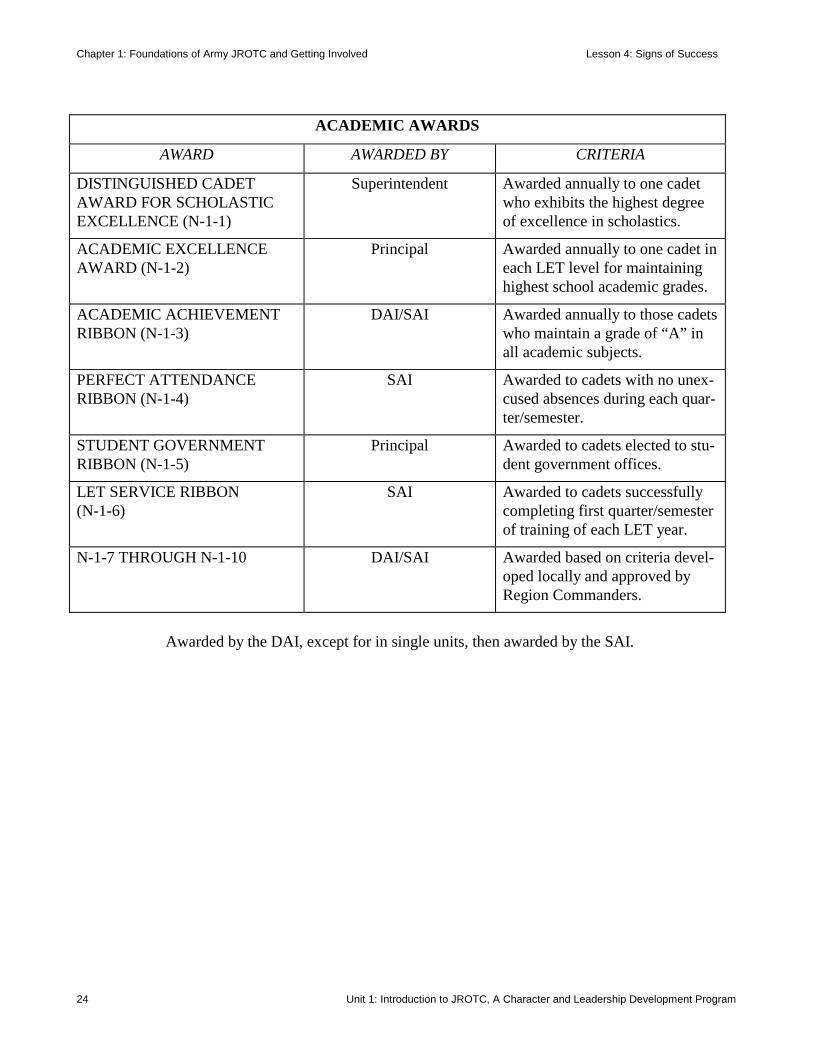
INDIVIDUAL AWARDS Each Army JROTC unit can award various types of individual awards to its cadets for recognition of excellence, out-standing achievement, or superior perfor-mance. There are two main categories of individual awards: institutional and national awards. INSTITUTIONAL AWARDS Superintendents, principals, and Army instructors can present institutional awards to individual JROTC cadets for reasons of academic excellence; military and athletic achievement or performance; participation in community parades; excelling in recruiting programs; and/or other reasons that are deter-mined by your instructors. You have the opportunity to earn as many of these awards as you possibly can. Indicated below is the order of merit (or importance) for these awards along with the number of ribbons for each type. Within each category, you wear these awards (or rib-bons) in their numerical order.
1. Academic Awards — 10 ribbons 2. Military Awards — 15 ribbons 3. Athletic Awards — 5 ribbons 4. Miscellaneous Awards — 5 ribbons
NATIONAL AWARDS National awards recognize individual JROTC cadets for heroic, distinguished, meri-torious, and other commendable acts and achievements.
CONCLUSION The JROTC Awards Program has much to offer. It can give you the chance to be recognized either individually or as a member of a unit for your accomplishments and excel-lence. To earn these awards, you must be as competitive as your abilities and skills will allow. You can find a listing of all awards and the criteria for earning them at the end of this section. Often, you must put forth an extra effort to even be in competition for them. The result, however, is self-satisfaction and some-times, public recognition for your accom-plishments.

Chapter 1: Foundations of Army JROTC and Getting Involved Lesson 4: Signs of Success
Unit 1: Introduction to JROTC, A Character and Leadership Development Program 23
ARMY JROTC AWARDS
Chapter 1: Foundations of Army JROTC and Getting Involved Lesson 4: Signs of Success
Unit 1: Introduction to JROTC, A Character and Leadership Development Program 24
ACADEMIC AWARDS
AWARD AWARDED BY CRITERIA
DISTINGUISHED CADET AWARD FOR SCHOLASTIC EXCELLENCE (N-1-1)
Superintendent Awarded annually to one cadet who exhibits the highest degree of excellence in scholastics.
ACADEMIC EXCELLENCE AWARD (N-1-2)
Principal Awarded annually to one cadet in each LET level for maintaining highest school academic grades.
ACADEMIC ACHIEVEMENT RIBBON (N-1-3)
DAI/SAI Awarded annually to those cadets who maintain a grade of “A” in all academic subjects.
PERFECT ATTENDANCE RIBBON (N-1-4)
SAI Awarded to cadets with no unex-cused absences during each quar-ter/semester.
STUDENT GOVERNMENT RIBBON (N-1-5)
Principal Awarded to cadets elected to stu-dent government offices.
LET SERVICE RIBBON (N-1-6)
SAI Awarded to cadets successfully completing first quarter/semester of training of each LET year.
N-1-7 THROUGH N-1-10 DAI/SAI Awarded based on criteria devel-oped locally and approved by Region Commanders.
Awarded by the DAI, except for in single units, then awarded by the SAI.
Chapter 1: Foundations of Army JROTC and Getting Involved Lesson 4: The Signs of Success
Unit 1: Introduction to JROTC, A Character and Leadership Development Program 25
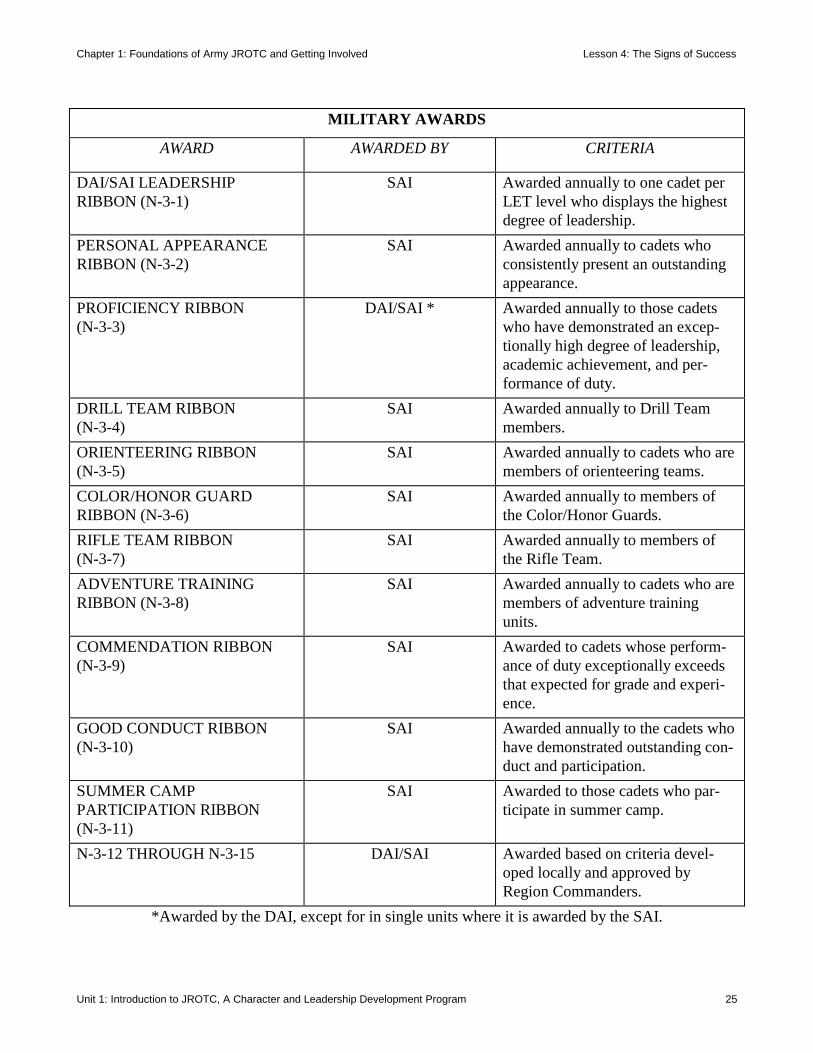
MILITARY AWARDS
AWARD AWARDED BY CRITERIA
DAI/SAI LEADERSHIP RIBBON (N-3-1)
SAI Awarded annually to one cadet per LET level who displays the highest degree of leadership.
PERSONAL APPEARANCE RIBBON (N-3-2)
SAI Awarded annually to cadets who consistently present an outstanding appearance.
PROFICIENCY RIBBON (N-3-3)
DAI/SAI * Awarded annually to those cadets who have demonstrated an excep-tionally high degree of leadership, academic achievement, and per-formance of duty.
DRILL TEAM RIBBON (N-3-4)
SAI Awarded annually to Drill Team members.
ORIENTEERING RIBBON (N-3-5)
SAI Awarded annually to cadets who are members of orienteering teams.
COLOR/HONOR GUARD RIBBON (N-3-6)
SAI Awarded annually to members of the Color/Honor Guards.
RIFLE TEAM RIBBON (N-3-7)
SAI Awarded annually to members of the Rifle Team.
ADVENTURE TRAINING RIBBON (N-3-8)
SAI Awarded annually to cadets who are members of adventure training units.
COMMENDATION RIBBON (N-3-9)
SAI Awarded to cadets whose perform-ance of duty exceptionally exceeds that expected for grade and experi-ence.
GOOD CONDUCT RIBBON (N-3-10)
SAI Awarded annually to the cadets who have demonstrated outstanding con-duct and participation.
SUMMER CAMP PARTICIPATION RIBBON (N-3-11)
SAI Awarded to those cadets who par-ticipate in summer camp.
N-3-12 THROUGH N-3-15 DAI/SAI Awarded based on criteria devel-oped locally and approved by Region Commanders.
*Awarded by the DAI, except for in single units where it is awarded by the SAI.
Chapter 1: Foundations of Army JROTC and Getting Involved Lesson 4: Signs of Success
Unit 1: Introduction to JROTC, A Character and Leadership Development Program 26
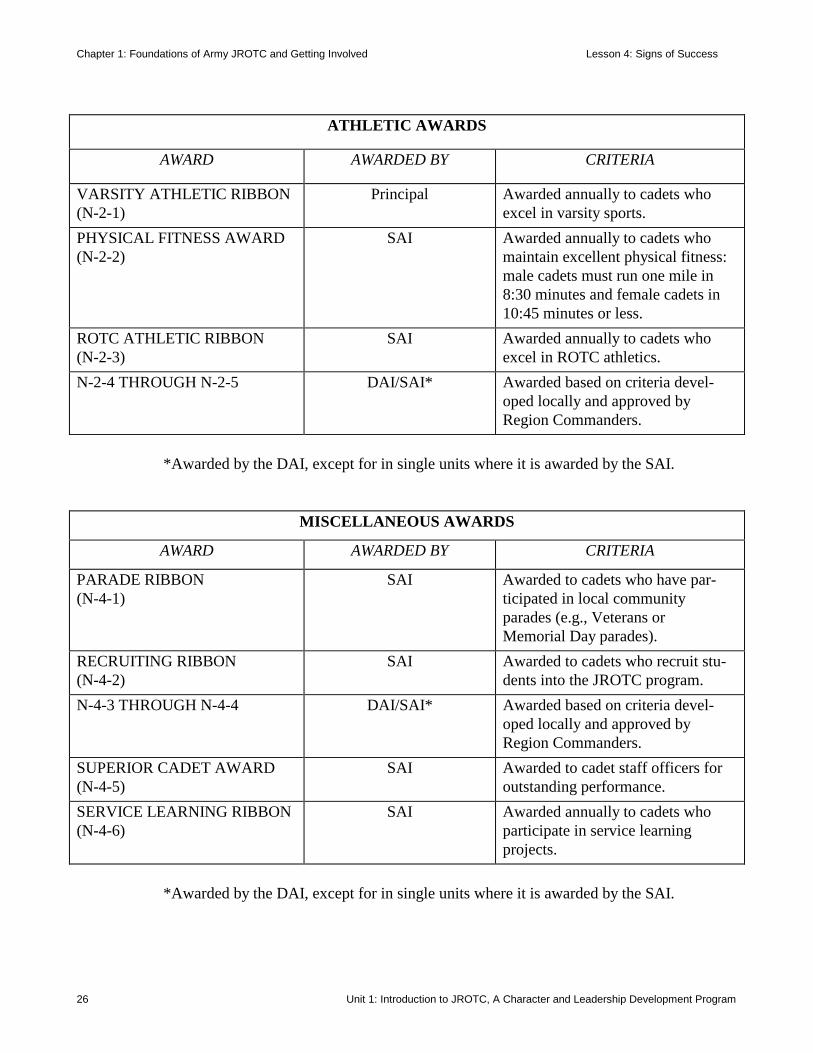
ATHLETIC AWARDS
AWARD AWARDED BY CRITERIA
VARSITY ATHLETIC RIBBON (N-2-1)
Principal Awarded annually to cadets who excel in varsity sports.
PHYSICAL FITNESS AWARD (N-2-2)
SAI Awarded annually to cadets who maintain excellent physical fitness: male cadets must run one mile in 8:30 minutes and female cadets in 10:45 minutes or less.
ROTC ATHLETIC RIBBON (N-2-3)
SAI Awarded annually to cadets who excel in ROTC athletics.
N-2-4 THROUGH N-2-5 DAI/SAI* Awarded based on criteria devel-oped locally and approved by Region Commanders.
*Awarded by the DAI, except for in single units where it is awarded by the SAI.
MISCELLANEOUS AWARDS
AWARD AWARDED BY CRITERIA
PARADE RIBBON (N-4-1)
SAI Awarded to cadets who have par-ticipated in local community parades (e.g., Veterans or Memorial Day parades).
RECRUITING RIBBON (N-4-2)
SAI Awarded to cadets who recruit stu-dents into the JROTC program.
N-4-3 THROUGH N-4-4 DAI/SAI* Awarded based on criteria devel-oped locally and approved by Region Commanders.
SUPERIOR CADET AWARD (N-4-5)
SAI Awarded to cadet staff officers for outstanding performance.
SERVICE LEARNING RIBBON (N-4-6)
SAI Awarded annually to cadets who participate in service learning projects.
*Awarded by the DAI, except for in single units where it is awarded by the SAI.
Chapter 1: Foundations of Army JROTC and Getting Involved Lesson 4: The Signs of Success
Unit 1: Introduction to JROTC, A Character and Leadership Development Program 27
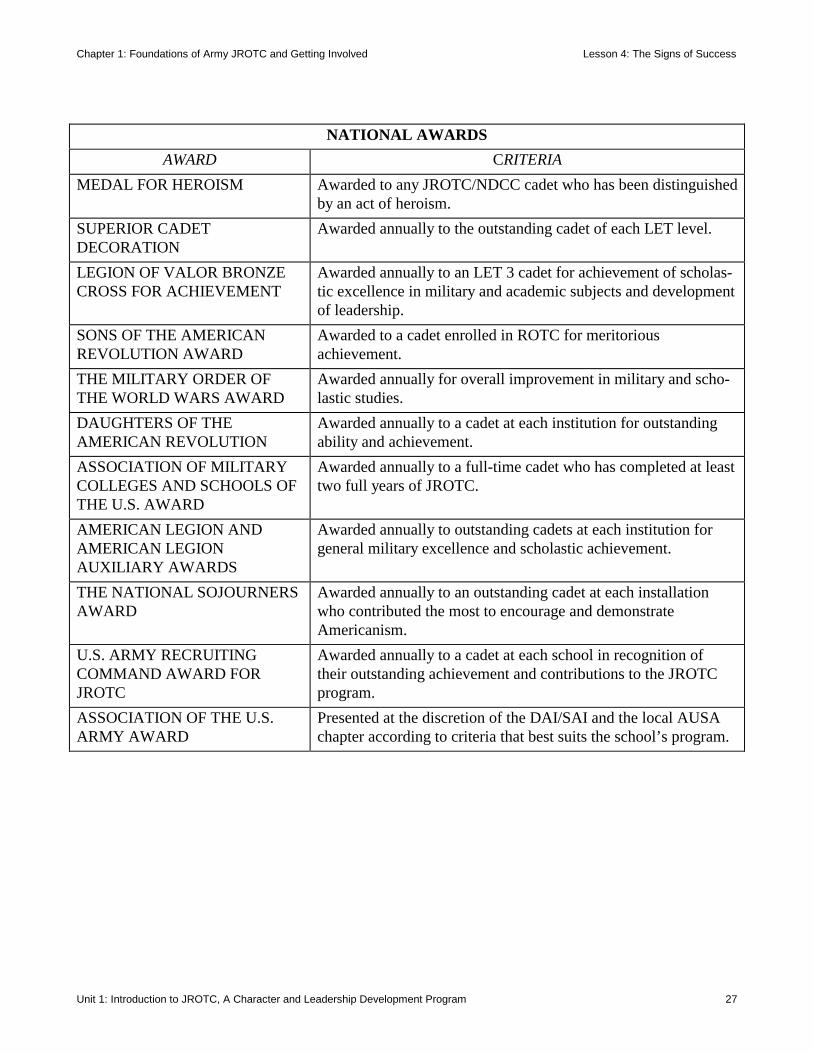
NATIONAL AWARDS AWARD CRITERIA
MEDAL FOR HEROISM Awarded to any JROTC/NDCC cadet who has been distinguished by an act of heroism.
SUPERIOR CADET DECORATION
Awarded annually to the outstanding cadet of each LET level.
LEGION OF VALOR BRONZE CROSS FOR ACHIEVEMENT
Awarded annually to an LET 3 cadet for achievement of scholas-tic excellence in military and academic subjects and development of leadership.
SONS OF THE AMERICAN REVOLUTION AWARD
Awarded to a cadet enrolled in ROTC for meritorious achievement.
THE MILITARY ORDER OF THE WORLD WARS AWARD
Awarded annually for overall improvement in military and scho-lastic studies.
DAUGHTERS OF THE AMERICAN REVOLUTION
Awarded annually to a cadet at each institution for outstanding ability and achievement.
ASSOCIATION OF MILITARY COLLEGES AND SCHOOLS OF THE U.S. AWARD
Awarded annually to a full-time cadet who has completed at least two full years of JROTC.
AMERICAN LEGION AND AMERICAN LEGION AUXILIARY AWARDS
Awarded annually to outstanding cadets at each institution for general military excellence and scholastic achievement.
THE NATIONAL SOJOURNERS AWARD
Awarded annually to an outstanding cadet at each installation who contributed the most to encourage and demonstrate Americanism.
U.S. ARMY RECRUITING COMMAND AWARD FOR JROTC
Awarded annually to a cadet at each school in recognition of their outstanding achievement and contributions to the JROTC program.
ASSOCIATION OF THE U.S. ARMY AWARD
Presented at the discretion of the DAI/SAI and the local AUSA chapter according to criteria that best suits the school’s program.
Chapter 1: Foundations of Army JROTC and Getting Involved Lesson 5: Your Personal Appearance and Uniform
Unit 1: Introduction to JROTC, A Character and Leadership Development Program 28
LESSON 5: YOUR PERSONAL APPEARANCE AND UNIFORM
INTRODUCTION We often form opinions of others based on their personal appearance. A good personal appearance complements the wear-ing of your uniform. A neatly pressed and clean uniform, with properly placed ribbons, awards, and insignia, shows that JROTC cadets have pride in themselves as well as in their unit, and they use self-discipline to get things done. To assist you in this effort, the following text graphically portrays the proper placement for the awards, decorations, and insignia you will be required to wear on your uniform. This lesson also presents four factors you can use to assess your personal appear-
ance; reinforces the importance of a neat and clean appearance; and explains how those fac-tors relate to your appearance in uniform.
ARMY JROTC UNIFORMS
The word uniform comes from two Latin words, unus and forma, which mean “one form.” Your JROTC uniform sets you apart from others. It tells others who and what you are. Uniforms date back to ancient times, such as when the Romans wore togas. Today, society has uniforms to identify jobs and groups. Policemen, firefighters, athletic teams, and school bands all have uniforms. Wear the JROTC uniform with pride! Every part of the uniform has a place and a reason. Later in this lesson, you will learn how to place insignias, awards, rank, and decorations on your uniform. First, however, let us take a look at the different types of JROTC uniforms.
align battle dress uniforms ( BDUs ) bisecting chevron class a uniform class b uniform fads ferrule fitted formal inspections garrisons cap gigline hemmed insignia nap neck tab nonsubdued precedence pre - inspection shoulder marks sized tarnished
align battle dress uniforms ( BDUs ) bisecting chevron class A uniform class B uniform fads ferrule fitted formal inspections garrisons cap gigline hemmed insignia nap neck tab nonsubdued precedence pre - inspection shoulder marks sized tarnished
Chapter 1: Foundations of Army JROTC and Getting Involved Lesson 5: Your Personal Appearance and Uniform
Unit 1: Introduction to JROTC, A Character and Leadership Development Program 29
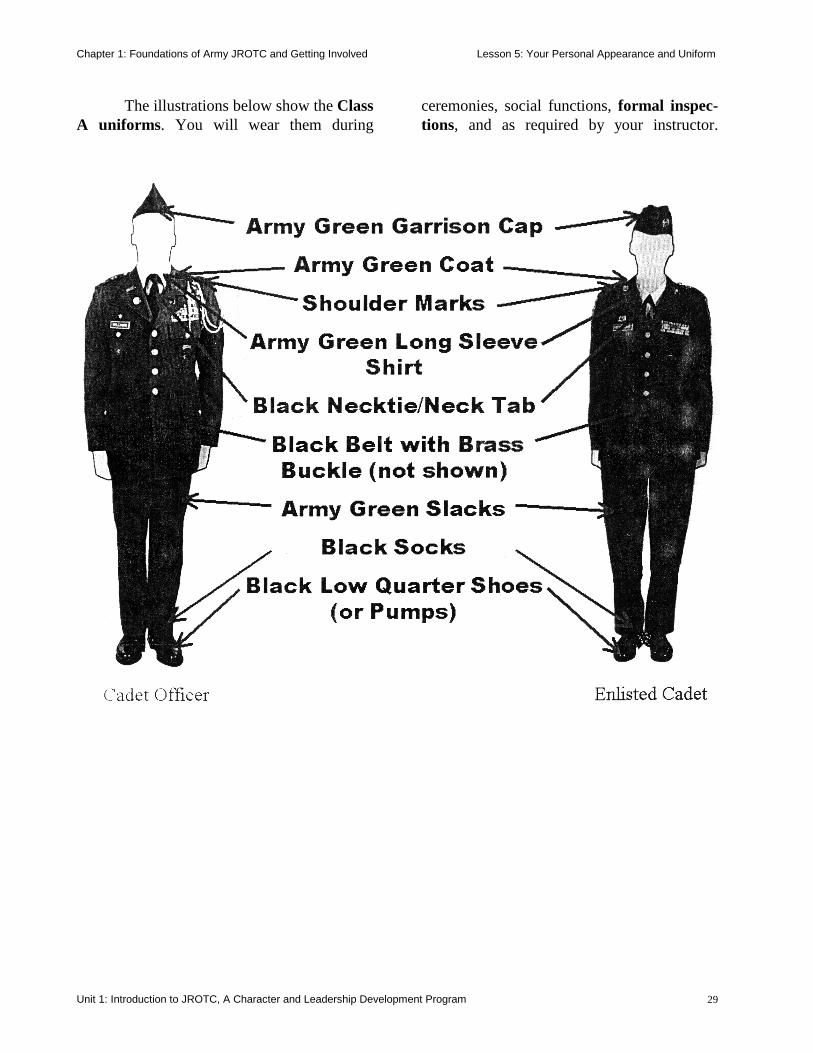
The illustrations below show the Class A uniforms. You will wear them during
ceremonies, social functions, formal inspec-tions, and as required by your instructor.
Chapter 1: Foundations of Army JROTC and Getting Involved Lesson 5: Your Personal Appearance and Uniform
Unit 1: Introduction to JROTC, A Character and Leadership Development Program 30
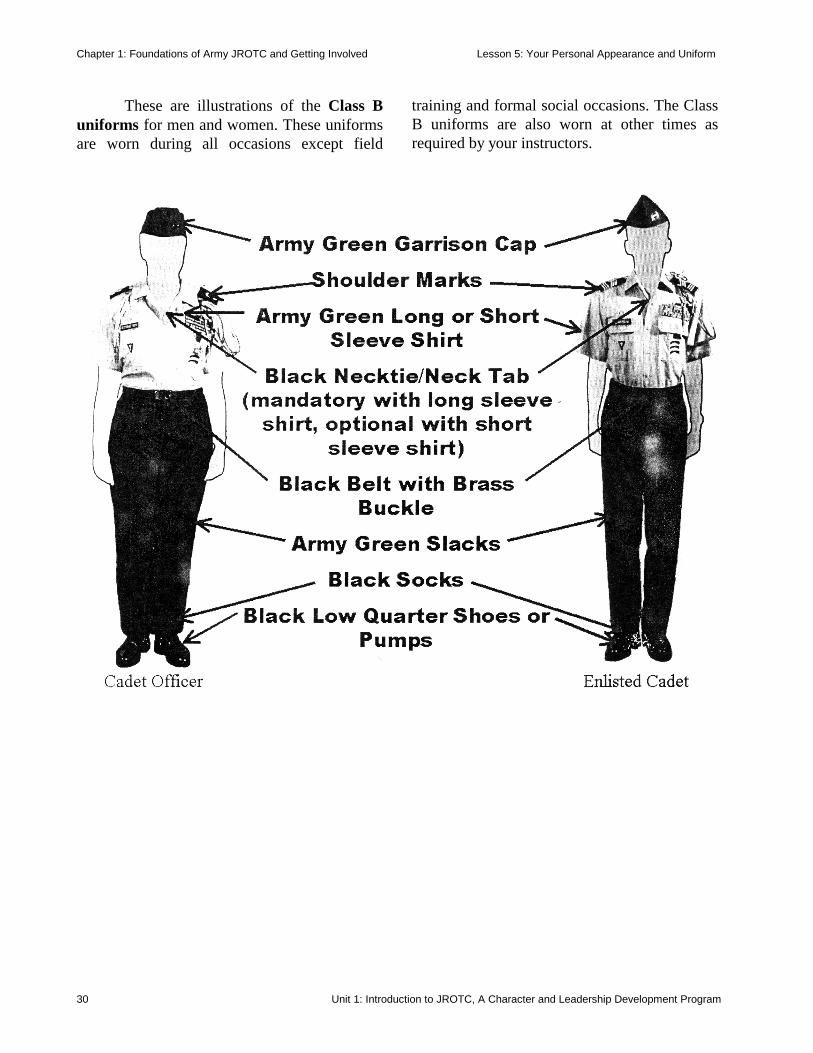
These are illustrations of the Class B uniforms for men and women. These uniforms are worn during all occasions except field
training and formal social occasions. The Class B uniforms are also worn at other times as required by your instructors.
Chapter 1: Foundations of Army JROTC and Getting Involved Lesson 5: Your Personal Appearance and Uniform
Unit 1: Introduction to JROTC, A Character and Leadership Development Program 31
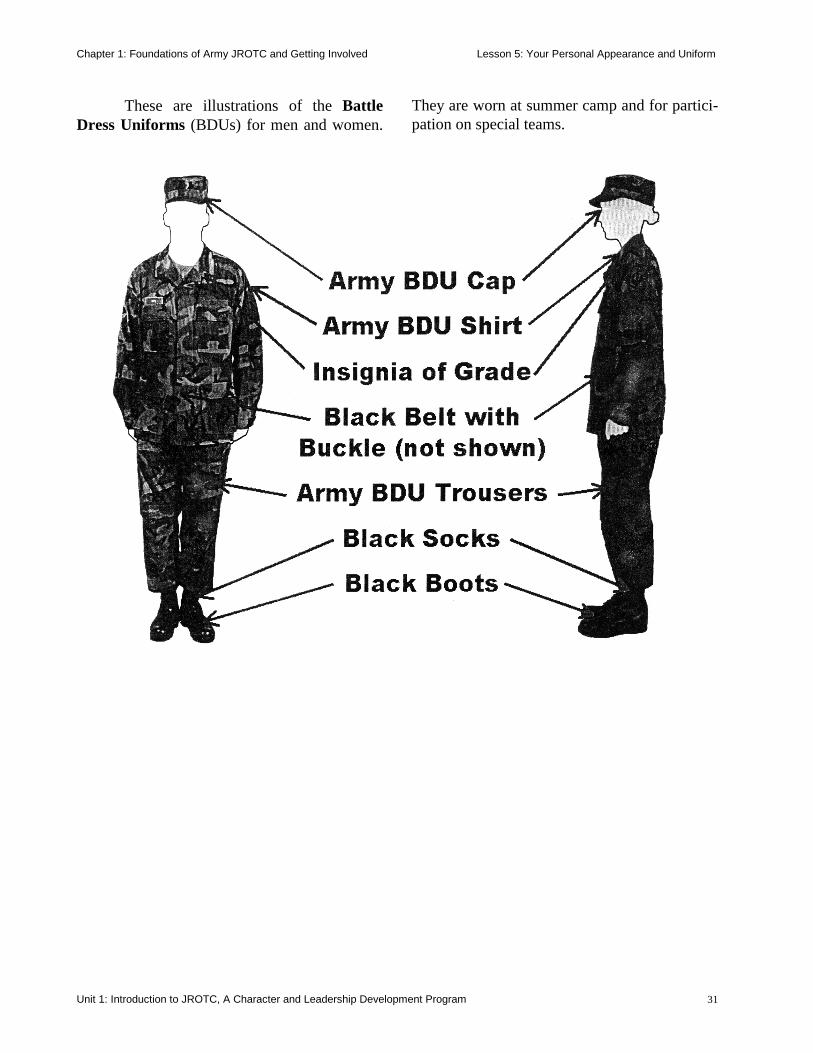
These are illustrations of the Battle Dress Uniforms (BDUs) for men and women.
They are worn at summer camp and for partici-pation on special teams.
Chapter 1: Foundations of Army JROTC and Getting Involved Lesson 5: Your Personal Appearance and Uniform
Unit 1: Introduction to JROTC, A Character and Leadership Development Program 32
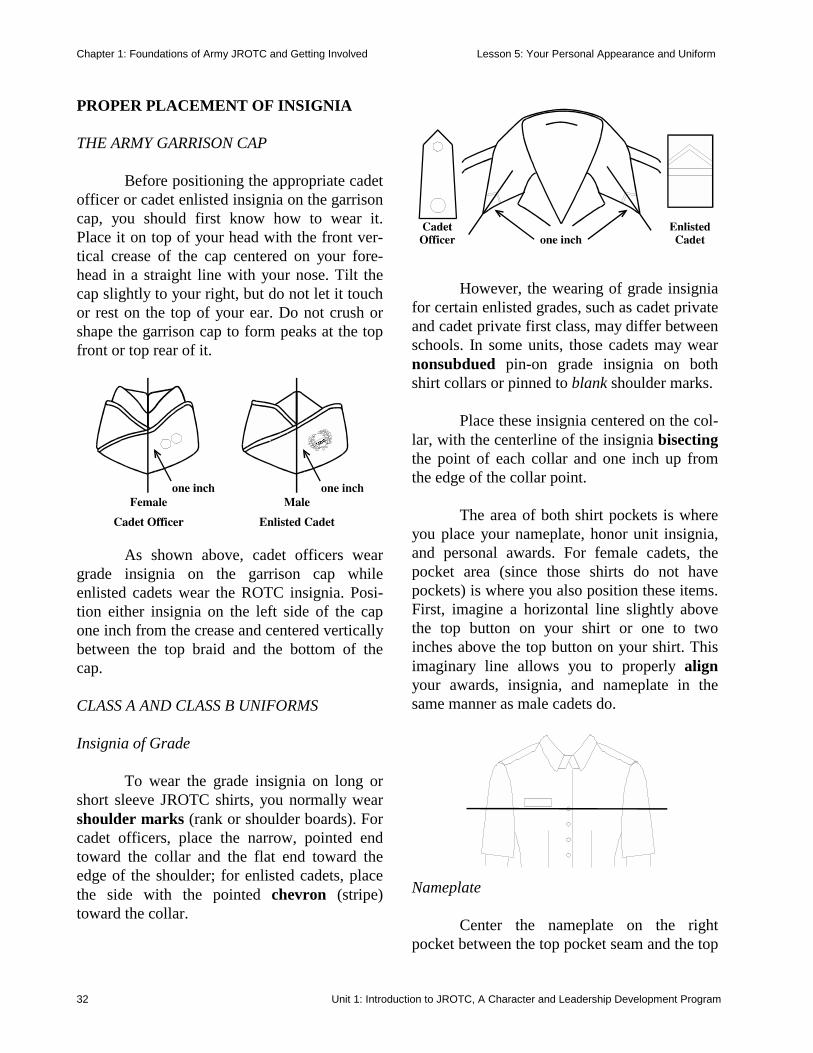
PROPER PLACEMENT OF INSIGNIA THE ARMY GARRISON CAP Before positioning the appropriate cadet officer or cadet enlisted insignia on the garrison cap, you should first know how to wear it. Place it on top of your head with the front ver-tical crease of the cap centered on your fore-head in a straight line with your nose. Tilt the cap slightly to your right, but do not let it touch or rest on the top of your ear. Do not crush or shape the garrison cap to form peaks at the top front or top rear of it.
ROTC
As shown above, cadet officers wear grade insignia on the garrison cap while enlisted cadets wear the ROTC insignia. Posi-tion either insignia on the left side of the cap one inch from the crease and centered vertically between the top braid and the bottom of the cap. CLASS A AND CLASS B UNIFORMS Insignia of Grade To wear the grade insignia on long or short sleeve JROTC shirts, you normally wear shoulder marks (rank or shoulder boards). For cadet officers, place the narrow, pointed end toward the collar and the flat end toward the edge of the shoulder; for enlisted cadets, place the side with the pointed chevron (stripe) toward the collar.
However, the wearing of grade insignia for certain enlisted grades, such as cadet private and cadet private first class, may differ between schools. In some units, those cadets may wear nonsubdued pin-on grade insignia on both shirt collars or pinned to blank shoulder marks. Place these insignia centered on the col-lar, with the centerline of the insignia bisecting the point of each collar and one inch up from the edge of the collar point. The area of both shirt pockets is where you place your nameplate, honor unit insignia, and personal awards. For female cadets, the pocket area (since those shirts do not have pockets) is where you also position these items. First, imagine a horizontal line slightly above the top button on your shirt or one to two inches above the top button on your shirt. This imaginary line allows you to properly align your awards, insignia, and nameplate in the same manner as male cadets do.
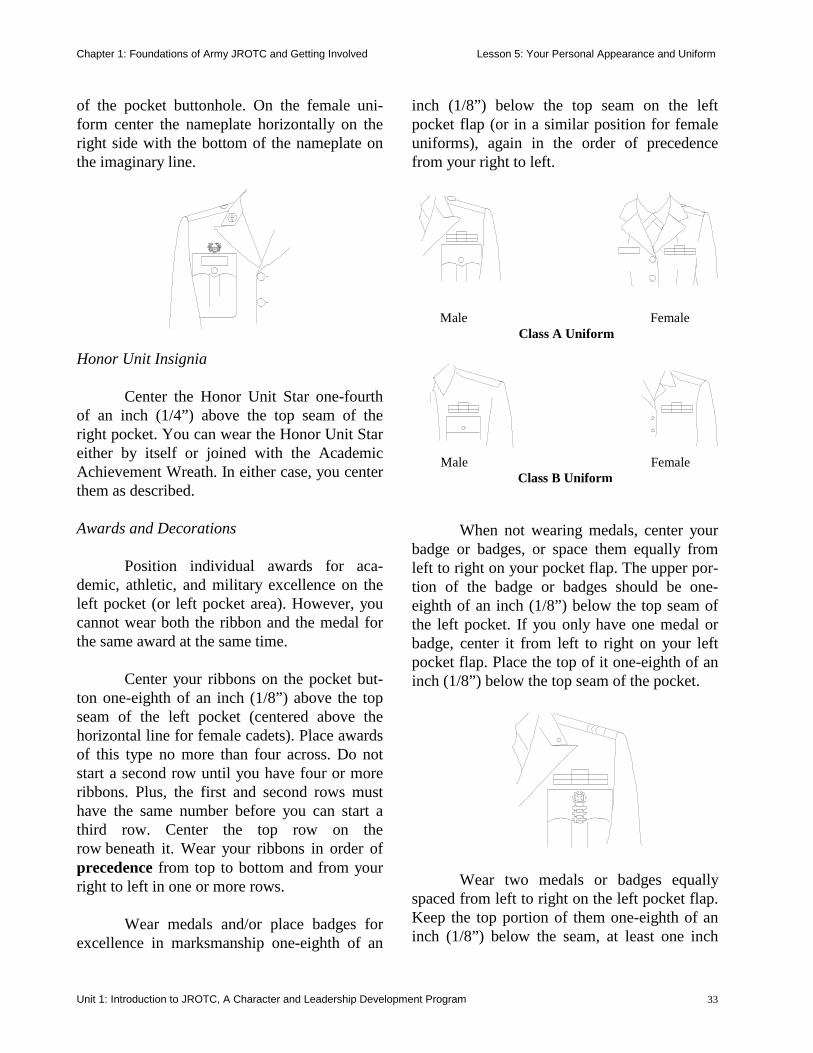
Nameplate Center the nameplate on the right pocket between the top pocket seam and the top
Chapter 1: Foundations of Army JROTC and Getting Involved Lesson 5: Your Personal Appearance and Uniform
Unit 1: Introduction to JROTC, A Character and Leadership Development Program 33
of the pocket buttonhole. On the female uni-form center the nameplate horizontally on the right side with the bottom of the nameplate on the imaginary line.
ROTC
Honor Unit Insignia Center the Honor Unit Star one-fourth of an inch (1/4”) above the top seam of the right pocket. You can wear the Honor Unit Star either by itself or joined with the Academic Achievement Wreath. In either case, you center them as described. Awards and Decorations Position individual awards for aca-demic, athletic, and military excellence on the left pocket (or left pocket area). However, you cannot wear both the ribbon and the medal for the same award at the same time. Center your ribbons on the pocket but-ton one-eighth of an inch (1/8”) above the top seam of the left pocket (centered above the horizontal line for female cadets). Place awards of this type no more than four across. Do not start a second row until you have four or more ribbons. Plus, the first and second rows must have the same number before you can start a third row. Center the top row on the row beneath it. Wear your ribbons in order of precedence from top to bottom and from your right to left in one or more rows. Wear medals and/or place badges for excellence in marksmanship one-eighth of an
inch (1/8”) below the top seam on the left pocket flap (or in a similar position for female uniforms), again in the order of precedence from your right to left.
Male
Male
Female
Female
Class A Uniform
Class B Uniform
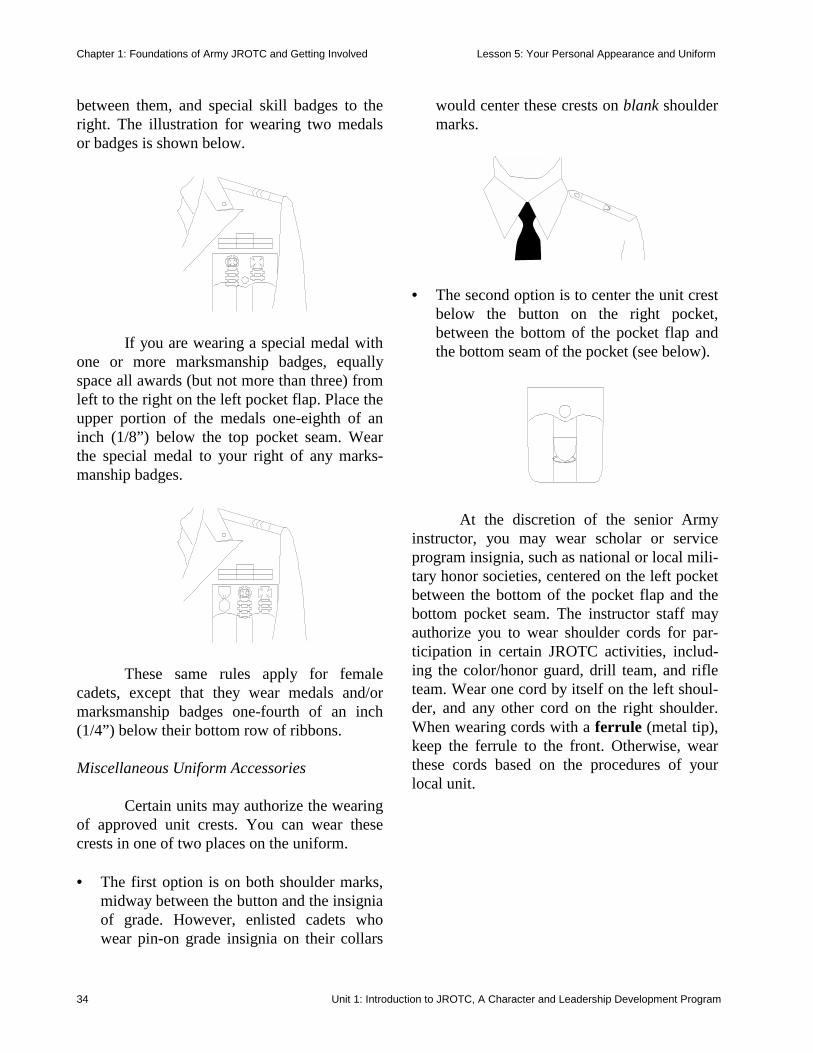
When not wearing medals, center your badge or badges, or space them equally from left to right on your pocket flap. The upper por-tion of the badge or badges should be one-eighth of an inch (1/8”) below the top seam of the left pocket. If you only have one medal or badge, center it from left to right on your left pocket flap. Place the top of it one-eighth of an inch (1/8”) below the top seam of the pocket.
Wear two medals or badges equally spaced from left to right on the left pocket flap. Keep the top portion of them one-eighth of an inch (1/8”) below the seam, at least one inch
Chapter 1: Foundations of Army JROTC and Getting Involved Lesson 5: Your Personal Appearance and Uniform
Unit 1: Introduction to JROTC, A Character and Leadership Development Program 34
between them, and special skill badges to the right. The illustration for wearing two medals or badges is shown below.
If you are wearing a special medal with one or more marksmanship badges, equally space all awards (but not more than three) from left to the right on the left pocket flap. Place the upper portion of the medals one-eighth of an inch (1/8”) below the top pocket seam. Wear the special medal to your right of any marks-manship badges.
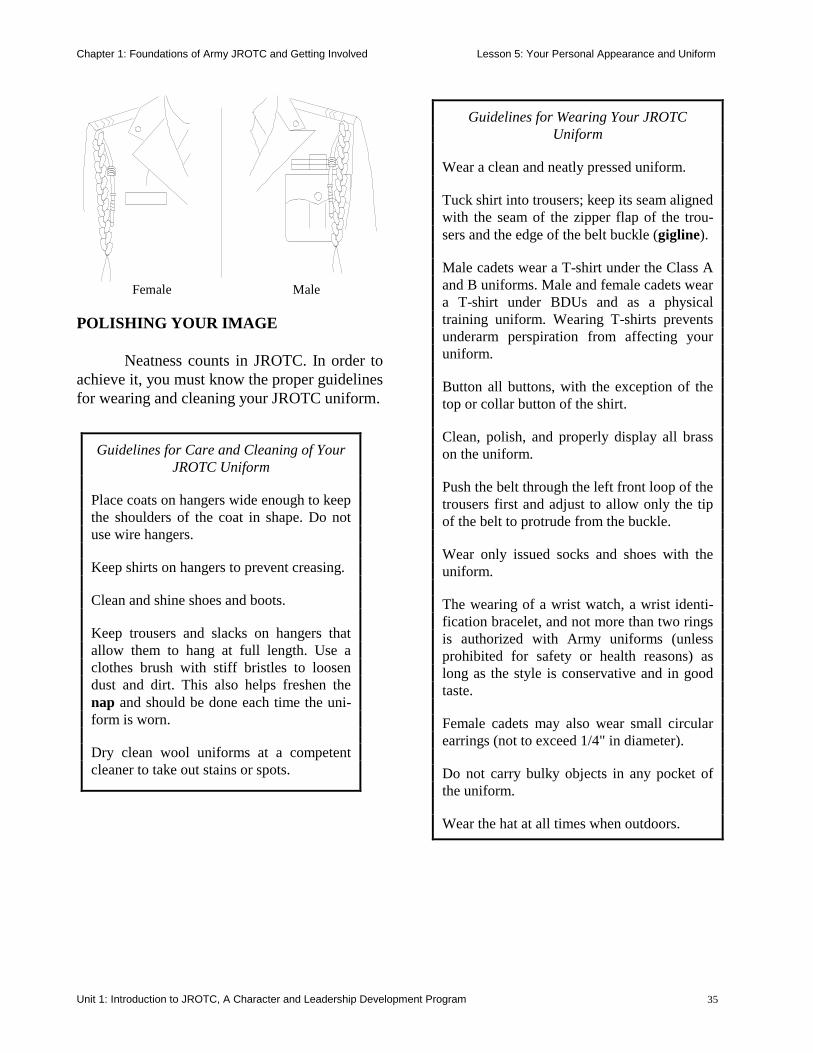
These same rules apply for female cadets, except that they wear medals and/or marksmanship badges one-fourth of an inch (1/4”) below their bottom row of ribbons. Miscellaneous Uniform Accessories Certain units may authorize the wearing of approved unit crests. You can wear these crests in one of two places on the uniform. • The first option is on both shoulder marks,
midway between the button and the insignia of grade. However, enlisted cadets who wear pin-on grade insignia on their collars
would center these crests on blank shoulder marks.
• The second option is to center the unit crest below the button on the right pocket, between the bottom of the pocket flap and the bottom seam of the pocket (see below).
At the discretion of the senior Army instructor, you may wear scholar or service program insignia, such as national or local mili-tary honor societies, centered on the left pocket between the bottom of the pocket flap and the bottom pocket seam. The instructor staff may authorize you to wear shoulder cords for par-ticipation in certain JROTC activities, includ-ing the color/honor guard, drill team, and rifle team. Wear one cord by itself on the left shoul-der, and any other cord on the right shoulder. When wearing cords with a ferrule (metal tip), keep the ferrule to the front. Otherwise, wear these cords based on the procedures of your local unit.
Chapter 1: Foundations of Army JROTC and Getting Involved Lesson 5: Your Personal Appearance and Uniform
Unit 1: Introduction to JROTC, A Character and Leadership Development Program 35
Female Male
POLISHING YOUR IMAGE Neatness counts in JROTC. In order to achieve it, you must know the proper guidelines for wearing and cleaning your JROTC uniform.
Guidelines for Wearing Your JROTC Uniform
Wear a clean and neatly pressed uniform. Tuck shirt into trousers; keep its seam aligned with the seam of the zipper flap of the trou-sers and the edge of the belt buckle (gigline). Male cadets wear a T-shirt under the Class A and B uniforms. Male and female cadets wear a T-shirt under BDUs and as a physical training uniform. Wearing T-shirts prevents underarm perspiration from affecting your uniform. Button all buttons, with the exception of the top or collar button of the shirt. Clean, polish, and properly display all brass on the uniform. Push the belt through the left front loop of the trousers first and adjust to allow only the tip of the belt to protrude from the buckle. Wear only issued socks and shoes with the uniform. The wearing of a wrist watch, a wrist identi-fication bracelet, and not more than two rings is authorized with Army uniforms (unless prohibited for safety or health reasons) as long as the style is conservative and in good taste. Female cadets may also wear small circular earrings (not to exceed 1/4" in diameter). Do not carry bulky objects in any pocket of the uniform. Wear the hat at all times when outdoors.
Guidelines for Care and Cleaning of Your JROTC Uniform
Place coats on hangers wide enough to keep the shoulders of the coat in shape. Do not use wire hangers. Keep shirts on hangers to prevent creasing. Clean and shine shoes and boots. Keep trousers and slacks on hangers that allow them to hang at full length. Use a clothes brush with stiff bristles to loosen dust and dirt. This also helps freshen the nap and should be done each time the uni-form is worn. Dry clean wool uniforms at a competent cleaner to take out stains or spots.
Chapter 1: Foundations of Army JROTC and Getting Involved Lesson 5: Your Personal Appearance and Uniform
Unit 1: Introduction to JROTC, A Character and Leadership Development Program 36
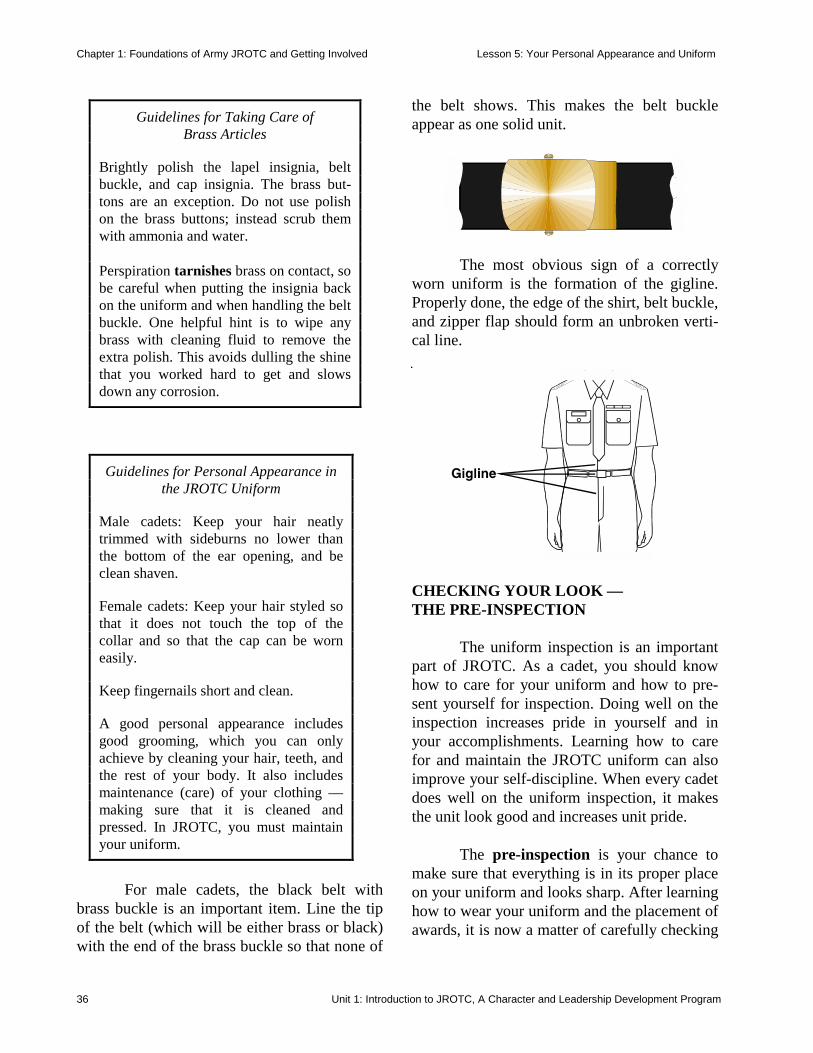
For male cadets, the black belt with brass buckle is an important item. Line the tip of the belt (which will be either brass or black) with the end of the brass buckle so that none of
the belt shows. This makes the belt buckle appear as one solid unit.
The most obvious sign of a correctly worn uniform is the formation of the gigline. Properly done, the edge of the shirt, belt buckle, and zipper flap should form an unbroken verti-cal line.
CHECKING YOUR LOOK — THE PRE-INSPECTION The uniform inspection is an important part of JROTC. As a cadet, you should know how to care for your uniform and how to pre-sent yourself for inspection. Doing well on the inspection increases pride in yourself and in your accomplishments. Learning how to care for and maintain the JROTC uniform can also improve your self-discipline. When every cadet does well on the uniform inspection, it makes the unit look good and increases unit pride. The pre-inspection is your chance to make sure that everything is in its proper place on your uniform and looks sharp. After learning how to wear your uniform and the placement of awards, it is now a matter of carefully checking
Guidelines for Taking Care of Brass Articles
Brightly polish the lapel insignia, belt buckle, and cap insignia. The brass but-tons are an exception. Do not use polish on the brass buttons; instead scrub them with ammonia and water. Perspiration tarnishes brass on contact, so be careful when putting the insignia back on the uniform and when handling the belt buckle. One helpful hint is to wipe any brass with cleaning fluid to remove the extra polish. This avoids dulling the shine that you worked hard to get and slows down any corrosion.
Guidelines for Personal Appearance in the JROTC Uniform
Male cadets: Keep your hair neatly trimmed with sideburns no lower than the bottom of the ear opening, and be clean shaven. Female cadets: Keep your hair styled so that it does not touch the top of the collar and so that the cap can be worn easily. Keep fingernails short and clean. A good personal appearance includes good grooming, which you can only achieve by cleaning your hair, teeth, and the rest of your body. It also includes maintenance (care) of your clothing — making sure that it is cleaned and pressed. In JROTC, you must maintain your uniform.
Chapter 1: Foundations of Army JROTC and Getting Involved Lesson 5: Your Personal Appearance and Uniform
Unit 1: Introduction to JROTC, A Character and Leadership Development Program 37
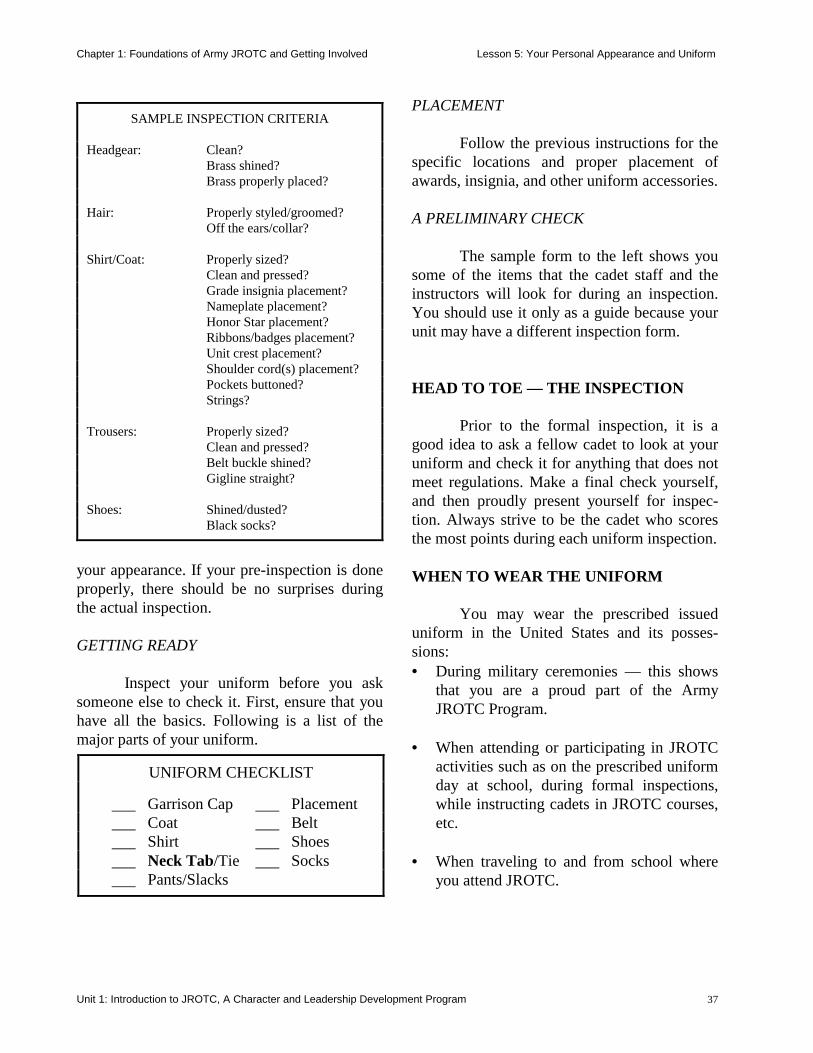
your appearance. If your pre-inspection is done properly, there should be no surprises during the actual inspection. GETTING READY Inspect your uniform before you ask someone else to check it. First, ensure that you have all the basics. Following is a list of the major parts of your uniform.
PLACEMENT Follow the previous instructions for the specific locations and proper placement of awards, insignia, and other uniform accessories. A PRELIMINARY CHECK The sample form to the left shows you some of the items that the cadet staff and the instructors will look for during an inspection. You should use it only as a guide because your unit may have a different inspection form. HEAD TO TOE — THE INSPECTION Prior to the formal inspection, it is a good idea to ask a fellow cadet to look at your uniform and check it for anything that does not meet regulations. Make a final check yourself, and then proudly present yourself for inspec-tion. Always strive to be the cadet who scores the most points during each uniform inspection. WHEN TO WEAR THE UNIFORM You may wear the prescribed issued uniform in the United States and its posses-sions: • During military ceremonies — this shows
that you are a proud part of the Army JROTC Program.
• When attending or participating in JROTC
activities such as on the prescribed uniform day at school, during formal inspections, while instructing cadets in JROTC courses, etc.
• When traveling to and from school where
you attend JROTC.
UNIFORM CHECKLIST Garrison Cap Placement Coat Belt Shirt Shoes Neck Tab/Tie Socks Pants/Slacks
SAMPLE INSPECTION CRITERIA Headgear: Clean? Brass shined? Brass properly placed? Hair: Properly styled/groomed? Off the ears/collar? Shirt/Coat: Properly sized? Clean and pressed? Grade insignia placement? Nameplate placement? Honor Star placement? Ribbons/badges placement? Unit crest placement? Shoulder cord(s) placement? Pockets buttoned? Strings? Trousers: Properly sized? Clean and pressed? Belt buckle shined? Gigline straight? Shoes: Shined/dusted? Black socks?
Chapter 1: Foundations of Army JROTC and Getting Involved Lesson 5: Your Personal Appearance and Uniform
Unit 1: Introduction to JROTC, A Character and Leadership Development Program 38
• When visiting a military installation if you are taking part in drills, exercises, and/or summer camp.
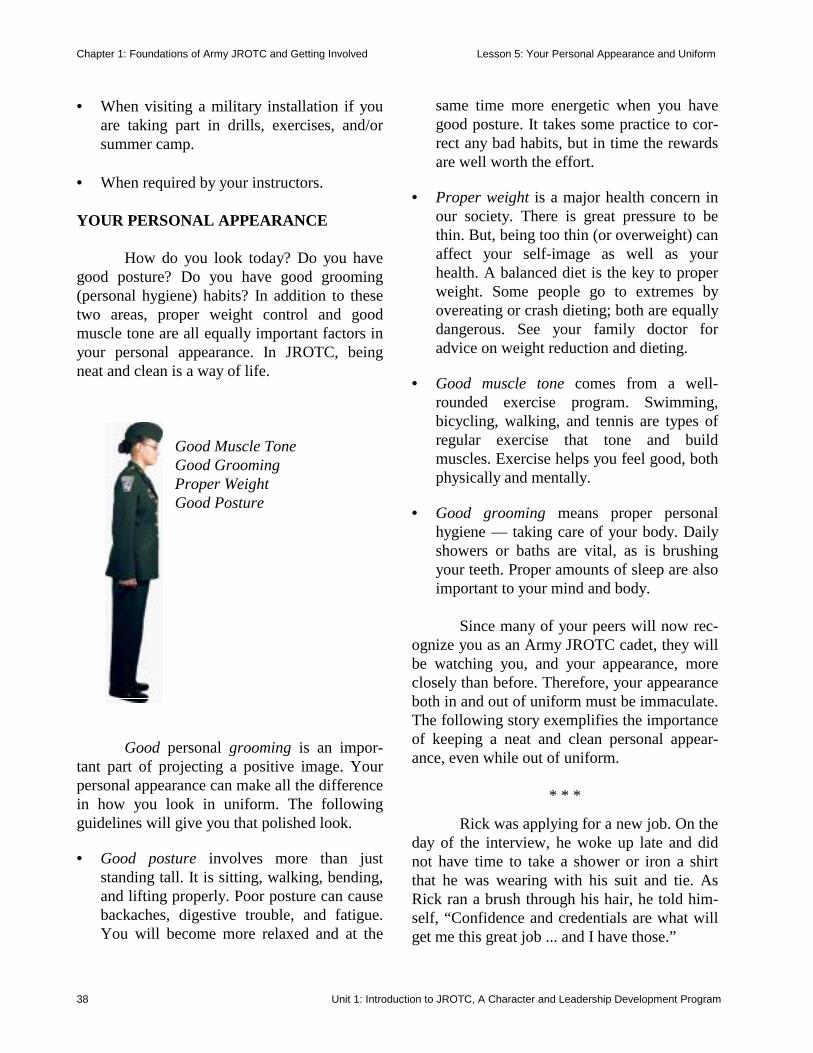
• When required by your instructors. YOUR PERSONAL APPEARANCE How do you look today? Do you have good posture? Do you have good grooming (personal hygiene) habits? In addition to these two areas, proper weight control and good muscle tone are all equally important factors in your personal appearance. In JROTC, being neat and clean is a way of life.
Good Muscle Tone Good Grooming Proper Weight Good Posture
Good personal grooming is an impor-tant part of projecting a positive image. Your personal appearance can make all the difference in how you look in uniform. The following guidelines will give you that polished look. • Good posture involves more than just
standing tall. It is sitting, walking, bending, and lifting properly. Poor posture can cause backaches, digestive trouble, and fatigue. You will become more relaxed and at the
same time more energetic when you have good posture. It takes some practice to cor-rect any bad habits, but in time the rewards are well worth the effort.
• Proper weight is a major health concern in
our society. There is great pressure to be thin. But, being too thin (or overweight) can affect your self-image as well as your health. A balanced diet is the key to proper weight. Some people go to extremes by overeating or crash dieting; both are equally dangerous. See your family doctor for advice on weight reduction and dieting.
• Good muscle tone comes from a well-
rounded exercise program. Swimming, bicycling, walking, and tennis are types of regular exercise that tone and build muscles. Exercise helps you feel good, both physically and mentally.
• Good grooming means proper personal
hygiene — taking care of your body. Daily showers or baths are vital, as is brushing your teeth. Proper amounts of sleep are also important to your mind and body.
Since many of your peers will now rec-ognize you as an Army JROTC cadet, they will be watching you, and your appearance, more closely than before. Therefore, your appearance both in and out of uniform must be immaculate. The following story exemplifies the importance of keeping a neat and clean personal appear-ance, even while out of uniform.
* * *
Rick was applying for a new job. On the day of the interview, he woke up late and did not have time to take a shower or iron a shirt that he was wearing with his suit and tie. As Rick ran a brush through his hair, he told him-self, “Confidence and credentials are what will get me this great job ... and I have those.”
Chapter 1: Foundations of Army JROTC and Getting Involved Lesson 5: Your Personal Appearance and Uniform
Unit 1: Introduction to JROTC, A Character and Leadership Development Program 39
When Rick arrived at the office, he told the secretary, “I have an appointment with Mr. Bender at one o’clock.” As Rick was leaving the receptionist’s area for the interview, dirt fell from one of his shoes. He meant to clean and polish them before the interview, but he did not have time. He apologized and told the secretary that he would clean up the dirt after the inter-view. She told him not to worry about it. During the interview, Mr. Bender asked Rick several tough questions, which Rick felt he answered very well. Then, at the close of the interview, Rick expected to be offered the job. Instead, Mr. Bender thanked him for coming and told him that he would be in touch. After a few days, Rick received a letter from Mr. Bender. It stated in part, “I appreci-ated your enthusiasm, and your qualifications were excellent, but the company has hired someone else for the position.” Did Rick present himself to Mr. Bender in the best possible way? Even though Rick thought that he was mentally alert, confident, and ready for the interview, was he really pre-pared for it? Although Rick thought that his qualifications would get him the job, should he have taken more time and care with his per-sonal appearance?
* * * A PROPERLY FITTING JROTC UNIFORM According to Army regulations on the wearing and appearance of uniforms, “all per-sonnel will maintain a high standard of dress and appearance.” This regulation means that your personal appearance in uniform should project the image to others that you are a part of one of the finest groups in the world. Learning how to look your best in uni-form takes time and effort. Your uniform must
be sized and fitted to give you comfort and a good appearance. There is nothing worse than pants, shirts, or coats that do not fit. Your pants should be hemmed to the required length and your shirt and coat, issued by size, should also fit well. FACTORS THAT AFFECT APPEARANCE Once you have a perfect fitting uniform, there are still other guidelines to follow so that you can maintain an outstanding appearance: • Having good personal grooming habits,
such as caring for your hair and fingernails. • Knowing how to wear the uniform properly. • Knowing how to care and clean the uniform
— a proper appearance requires a pressed and cleaned uniform.
These factors, and the guidelines given earlier in this lesson, are the basic keys to a good overall appearance in your JROTC uni-form. By following these guidelines, you can ensure that your uniform and your personal appearance are in accordance with regulations. Some of the aspects of overall appearance, cov-ered in this lesson, are repeated as follows: Hair Acceptable hairstyles for JROTC cadets do not include any extremes or fads. The JROTC instructor staff will make all decisions on questionable hairstyles. Basically, the stan-dards are: • Male cadets: Keep your hair neatly trimmed
with your sideburns no lower than the bot-tom of the ear opening.
• Female cadets: Keep your hair styled or
worn so that it does not touch the bottom of your collar and so that you can wear the garrison cap correctly.
Chapter 1: Foundations of Army JROTC and Getting Involved Lesson 5: Your Personal Appearance and Uniform
Unit 1: Introduction to JROTC, A Character and Leadership Development Program 40
Brass/Shoes You must clean, polish, and properly display all brass items on your uniform (includ-ing the cap and lapel insignia and the belt buckle). Remember to remove all brass items from the uniform before you clean them. How-ever, if the buttons on your coat require clean-ing, see the instructor staff for assistance. Polish your shoes after each wearing to maintain their shine. Inspect them for any signs of wear, especially on the heel and sole, and have them repaired as necessary. Grooming Maintain good personal hygiene, and practice good posture. Proper weight and good muscle tone, achieved through regular exercise and good eating habits, will add to your overall appearance. Uniform Your uniform must fit you properly, and be worn in accordance with regulations. Learn the proper placement of insignia, awards, and decorations. Know how to clean and care for your uniform, so you will always look your best. CONCLUSION Your personal appearance affects what others think about you. How you look can also influence your own self-confidence. Take some time to study yourself. Are you neat and pre-sentable in and out of uniform? It is not hard to look your best. A clean uniform, good personal appearance (posture, weight, and muscle tone), and good grooming are keys to success.
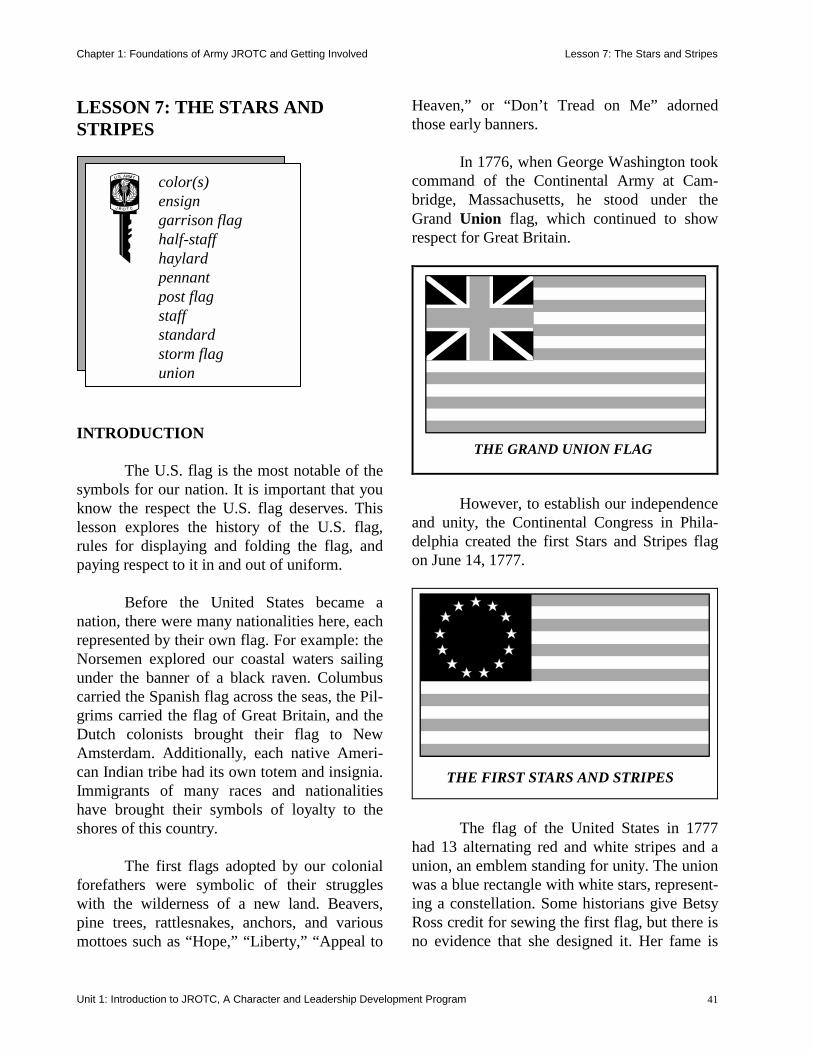
Chapter 1: Foundations of Army JROTC and Getting Involved Lesson 7: The Stars and Stripes
Unit 1: Introduction to JROTC, A Character and Leadership Development Program 41
LESSON 7: THE STARS AND STRIPES
INTRODUCTION The U.S. flag is the most notable of the symbols for our nation. It is important that you know the respect the U.S. flag deserves. This lesson explores the history of the U.S. flag, rules for displaying and folding the flag, and paying respect to it in and out of uniform. Before the United States became a nation, there were many nationalities here, each represented by their own flag. For example: the Norsemen explored our coastal waters sailing under the banner of a black raven. Columbus carried the Spanish flag across the seas, the Pil-grims carried the flag of Great Britain, and the Dutch colonists brought their flag to New Amsterdam. Additionally, each native Ameri-can Indian tribe had its own totem and insignia. Immigrants of many races and nationalities have brought their symbols of loyalty to the shores of this country. The first flags adopted by our colonial forefathers were symbolic of their struggles with the wilderness of a new land. Beavers, pine trees, rattlesnakes, anchors, and various mottoes such as “Hope,” “Liberty,” “Appeal to
Heaven,” or “Don’t Tread on Me” adorned those early banners. In 1776, when George Washington took command of the Continental Army at Cam-bridge, Massachusetts, he stood under the Grand Union flag, which continued to show respect for Great Britain.
However, to establish our independence and unity, the Continental Congress in Phila-delphia created the first Stars and Stripes flag on June 14, 1777.
THE FIRST STARS AND STRIPES
The flag of the United States in 1777 had 13 alternating red and white stripes and a union, an emblem standing for unity. The union was a blue rectangle with white stars, represent-ing a constellation. Some historians give Betsy Ross credit for sewing the first flag, but there is no evidence that she designed it. Her fame is
color(s)ensigngarrison flaghalf-staffhaylardpennantpost flagstaffstandardstorm flagunion
color(s)ensigngarrison flaghalf-staffhaylardpennantpost flagstaffstandardstorm flagunion
THE GRAND UNION FLAG
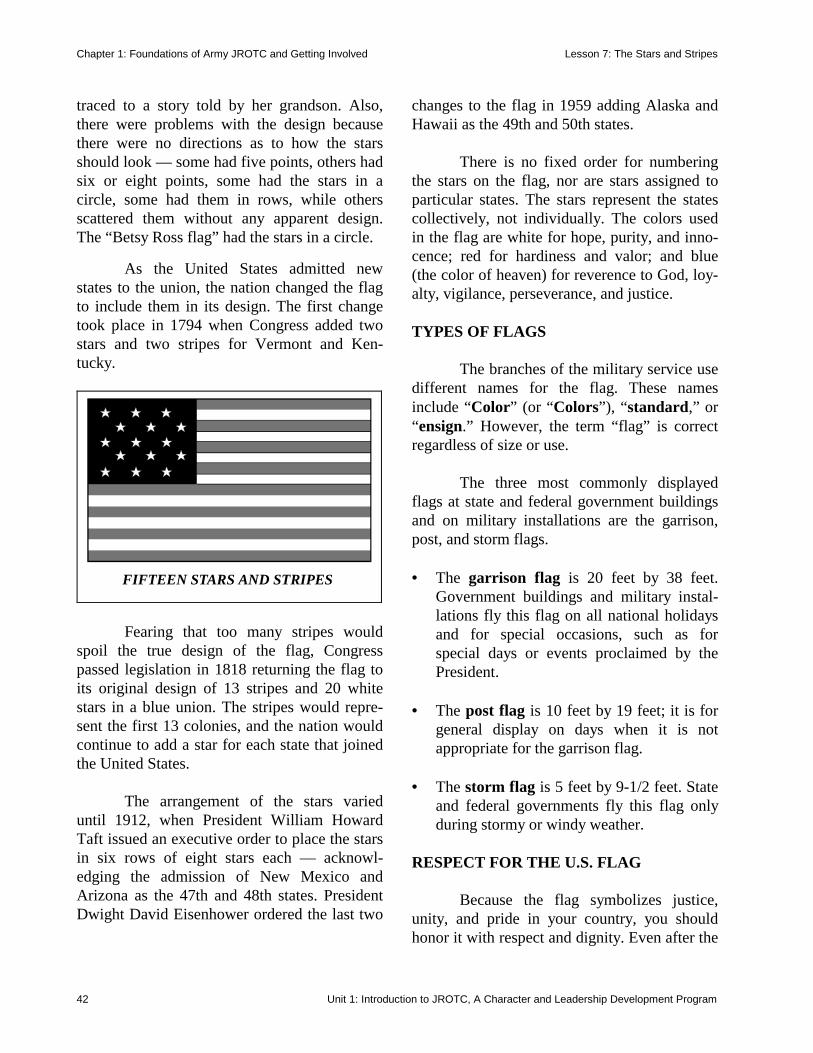
Chapter 1: Foundations of Army JROTC and Getting Involved Lesson 7: The Stars and Stripes
Unit 1: Introduction to JROTC, A Character and Leadership Development Program 42
traced to a story told by her grandson. Also, there were problems with the design because there were no directions as to how the stars should look — some had five points, others had six or eight points, some had the stars in a circle, some had them in rows, while others scattered them without any apparent design. The “Betsy Ross flag” had the stars in a circle. As the United States admitted new states to the union, the nation changed the flag to include them in its design. The first change took place in 1794 when Congress added two stars and two stripes for Vermont and Ken-tucky.
FIFTEEN STARS AND STRIPES
Fearing that too many stripes would
spoil the true design of the flag, Congress passed legislation in 1818 returning the flag to its original design of 13 stripes and 20 white stars in a blue union. The stripes would repre-sent the first 13 colonies, and the nation would continue to add a star for each state that joined the United States. The arrangement of the stars varied until 1912, when President William Howard Taft issued an executive order to place the stars in six rows of eight stars each — acknowl-edging the admission of New Mexico and Arizona as the 47th and 48th states. President Dwight David Eisenhower ordered the last two
changes to the flag in 1959 adding Alaska and Hawaii as the 49th and 50th states. There is no fixed order for numbering the stars on the flag, nor are stars assigned to particular states. The stars represent the states collectively, not individually. The colors used in the flag are white for hope, purity, and inno-cence; red for hardiness and valor; and blue (the color of heaven) for reverence to God, loy-alty, vigilance, perseverance, and justice. TYPES OF FLAGS The branches of the military service use different names for the flag. These names include “Color” (or “Colors”), “standard,” or “ensign.” However, the term “flag” is correct regardless of size or use. The three most commonly displayed flags at state and federal government buildings and on military installations are the garrison, post, and storm flags. • The garrison flag is 20 feet by 38 feet.
Government buildings and military instal-lations fly this flag on all national holidays and for special occasions, such as for special days or events proclaimed by the President.
• The post flag is 10 feet by 19 feet; it is for
general display on days when it is not appropriate for the garrison flag.
• The storm flag is 5 feet by 9-1/2 feet. State
and federal governments fly this flag only during stormy or windy weather.
RESPECT FOR THE U.S. FLAG Because the flag symbolizes justice, unity, and pride in your country, you should honor it with respect and dignity. Even after the
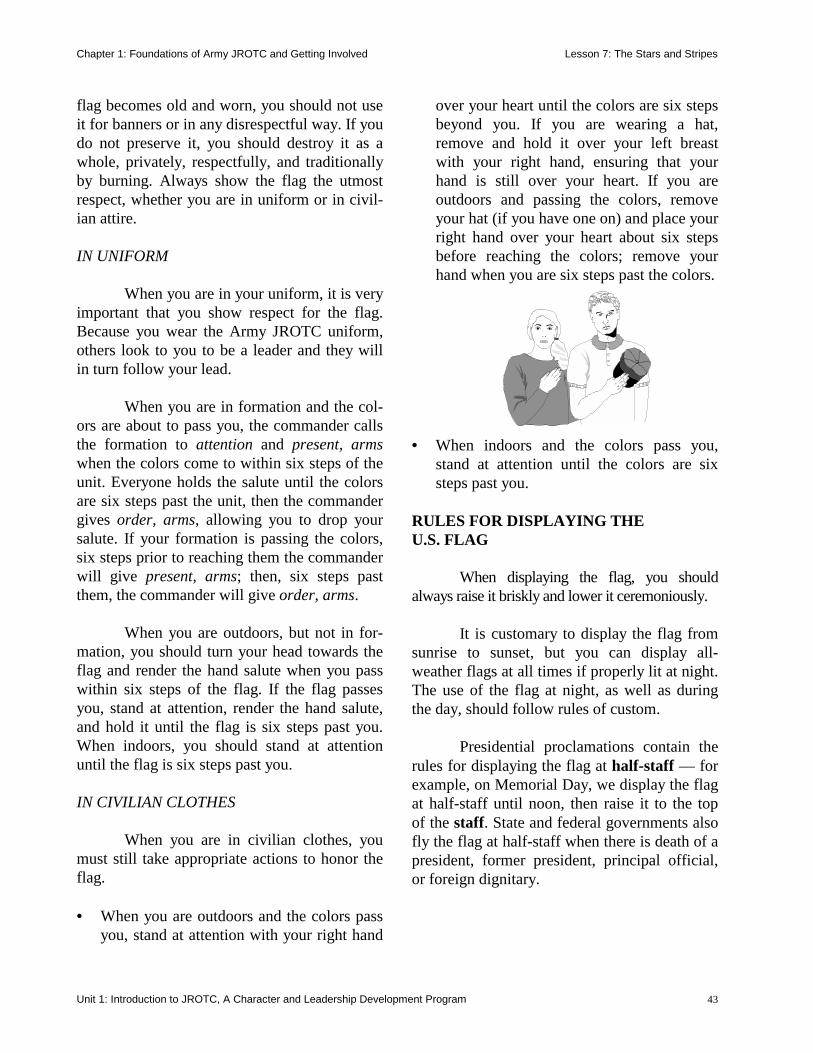
Chapter 1: Foundations of Army JROTC and Getting Involved Lesson 7: The Stars and Stripes
Unit 1: Introduction to JROTC, A Character and Leadership Development Program 43
flag becomes old and worn, you should not use it for banners or in any disrespectful way. If you do not preserve it, you should destroy it as a whole, privately, respectfully, and traditionally by burning. Always show the flag the utmost respect, whether you are in uniform or in civil-ian attire. IN UNIFORM When you are in your uniform, it is very important that you show respect for the flag. Because you wear the Army JROTC uniform, others look to you to be a leader and they will in turn follow your lead. When you are in formation and the col-ors are about to pass you, the commander calls the formation to attention and present, arms when the colors come to within six steps of the unit. Everyone holds the salute until the colors are six steps past the unit, then the commander gives order, arms, allowing you to drop your salute. If your formation is passing the colors, six steps prior to reaching them the commander will give present, arms; then, six steps past them, the commander will give order, arms. When you are outdoors, but not in for-mation, you should turn your head towards the flag and render the hand salute when you pass within six steps of the flag. If the flag passes you, stand at attention, render the hand salute, and hold it until the flag is six steps past you. When indoors, you should stand at attention until the flag is six steps past you. IN CIVILIAN CLOTHES When you are in civilian clothes, you must still take appropriate actions to honor the flag. • When you are outdoors and the colors pass
you, stand at attention with your right hand
over your heart until the colors are six steps beyond you. If you are wearing a hat, remove and hold it over your left breast with your right hand, ensuring that your hand is still over your heart. If you are outdoors and passing the colors, remove your hat (if you have one on) and place your right hand over your heart about six steps before reaching the colors; remove your hand when you are six steps past the colors.
• When indoors and the colors pass you,
stand at attention until the colors are six steps past you.
RULES FOR DISPLAYING THE U.S. FLAG When displaying the flag, you should always raise it briskly and lower it ceremoniously. It is customary to display the flag from sunrise to sunset, but you can display all-weather flags at all times if properly lit at night. The use of the flag at night, as well as during the day, should follow rules of custom. Presidential proclamations contain the rules for displaying the flag at half-staff — for example, on Memorial Day, we display the flag at half-staff until noon, then raise it to the top of the staff. State and federal governments also fly the flag at half-staff when there is death of a president, former president, principal official, or foreign dignitary.
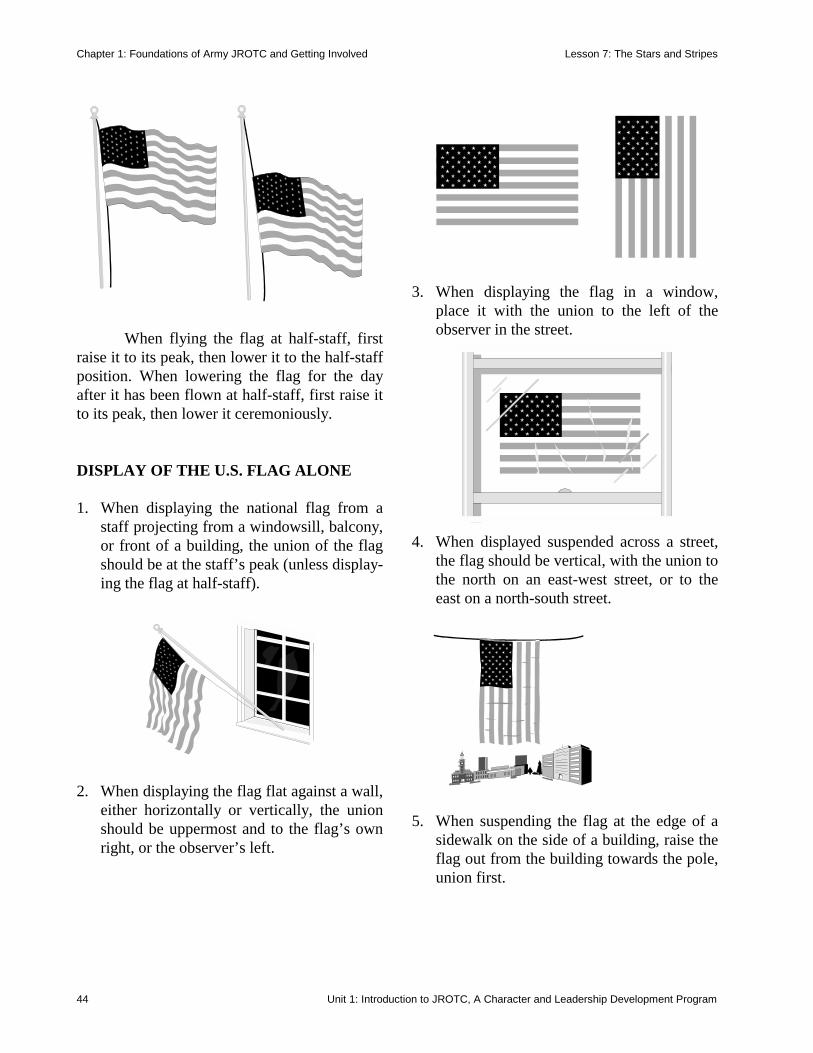
Chapter 1: Foundations of Army JROTC and Getting Involved Lesson 7: The Stars and Stripes
Unit 1: Introduction to JROTC, A Character and Leadership Development Program 44
When flying the flag at half-staff, first raise it to its peak, then lower it to the half-staff position. When lowering the flag for the day after it has been flown at half-staff, first raise it to its peak, then lower it ceremoniously. DISPLAY OF THE U.S. FLAG ALONE 1. When displaying the national flag from a
staff projecting from a windowsill, balcony, or front of a building, the union of the flag should be at the staff’s peak (unless display-ing the flag at half-staff).
2. When displaying the flag flat against a wall,
either horizontally or vertically, the union should be uppermost and to the flag’s own right, or the observer’s left.
3. When displaying the flag in a window,
place it with the union to the left of the observer in the street.
4. When displayed suspended across a street,
the flag should be vertical, with the union to the north on an east-west street, or to the east on a north-south street.
5. When suspending the flag at the edge of a
sidewalk on the side of a building, raise the flag out from the building towards the pole, union first.
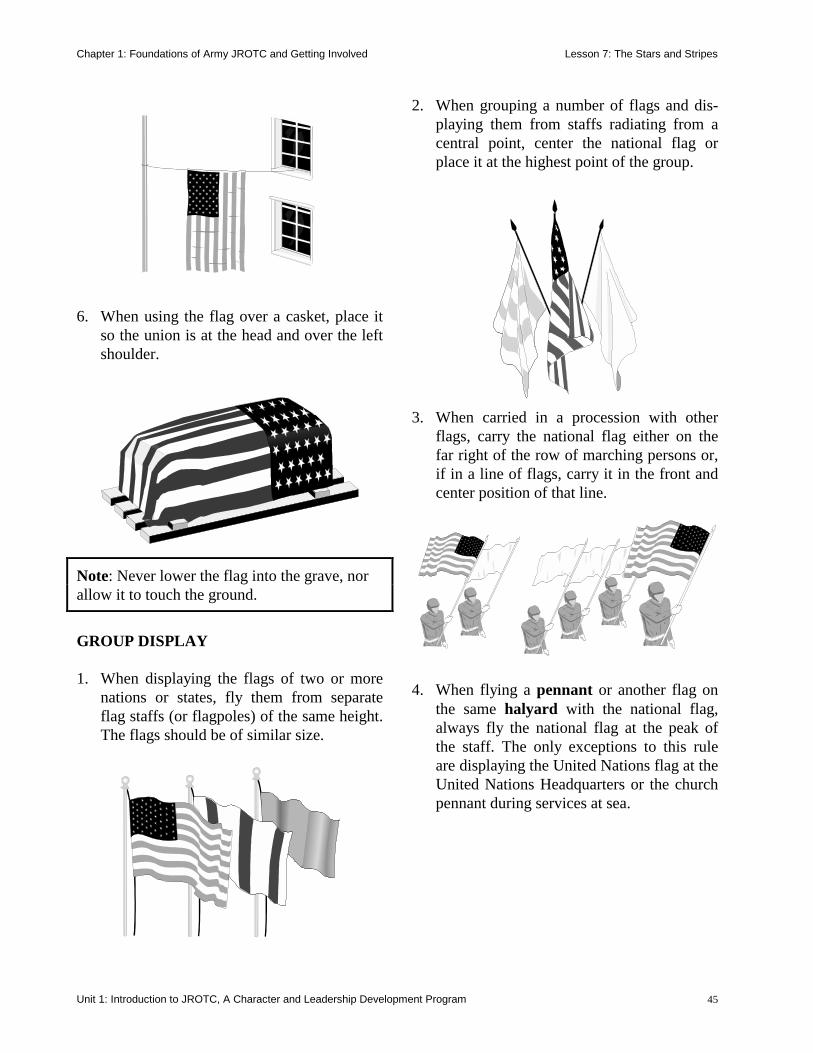
Chapter 1: Foundations of Army JROTC and Getting Involved Lesson 7: The Stars and Stripes
Unit 1: Introduction to JROTC, A Character and Leadership Development Program 45
6. When using the flag over a casket, place it
so the union is at the head and over the left shoulder.
Note: Never lower the flag into the grave, nor allow it to touch the ground.
GROUP DISPLAY 1. When displaying the flags of two or more
nations or states, fly them from separate flag staffs (or flagpoles) of the same height. The flags should be of similar size.
2. When grouping a number of flags and dis-playing them from staffs radiating from a central point, center the national flag or place it at the highest point of the group.
3. When carried in a procession with other
flags, carry the national flag either on the far right of the row of marching persons or, if in a line of flags, carry it in the front and center position of that line.
4. When flying a pennant or another flag on the same halyard with the national flag, always fly the national flag at the peak of the staff. The only exceptions to this rule are displaying the United Nations flag at the United Nations Headquarters or the church pennant during services at sea.
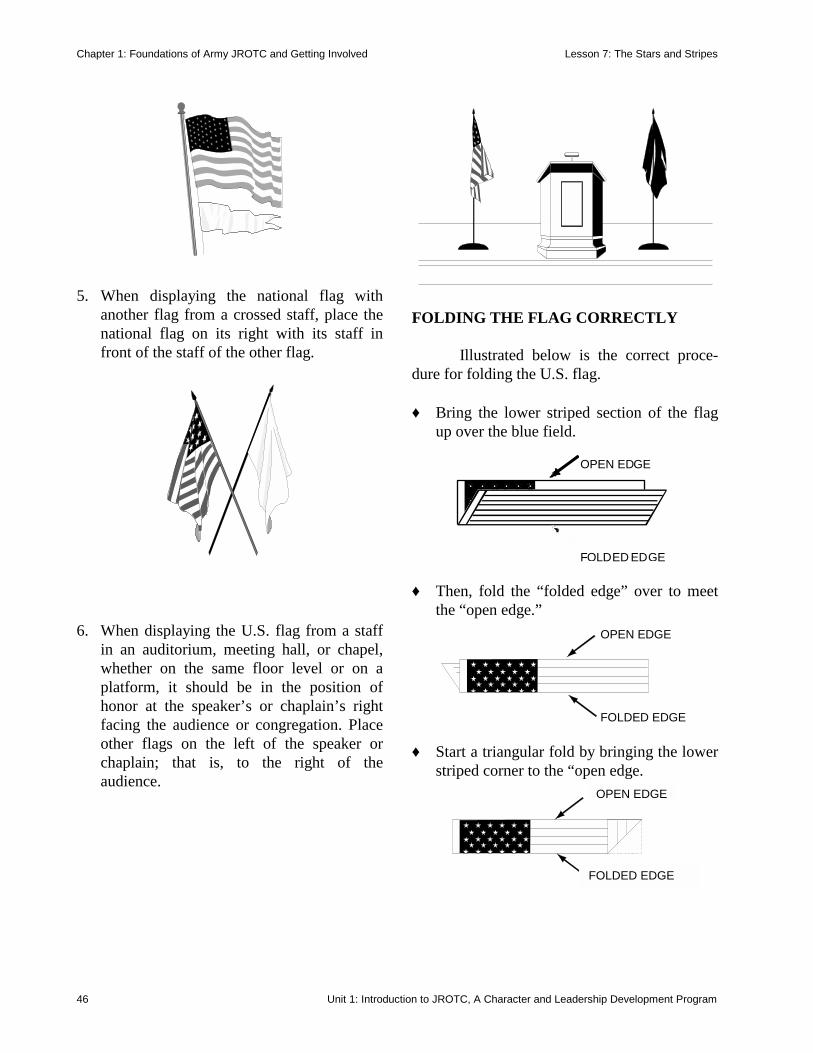
Chapter 1: Foundations of Army JROTC and Getting Involved Lesson 7: The Stars and Stripes
Unit 1: Introduction to JROTC, A Character and Leade46
5. When displaying the national flag with another flag from a crossed staff, place the national flag on its right with its staff in front of the staff of the other flag.
6. When displaying the U.S. flag from a staff in an auditorium, meeting hall, or chapel, whether on the same floor level or on a platform, it should be in the position of honor at the speaker’s or chaplain’s right facing the audience or congregation. Place other flags on the left of the speaker or chaplain; that is, to the right of the audience.
FOLDING THE FLAG CORRECTLY Illustrated below is the correct proce-dure for folding the U.S. flag. ♦ Bring the lower striped section of the flag
up over the blue field.
OPEN EDGE
FOLDED EDGE ♦ Then, fold the “folded edge” over to meet
the “open edge.” OPEN EDGE
FOLDED EDGE
♦ Start a triangular fold by bringing the lower striped corner to the “open edge.
rship Development Program
OPEN EDGE
FOLDED EDGE
OPEN EDGE
FOLDED EDGE
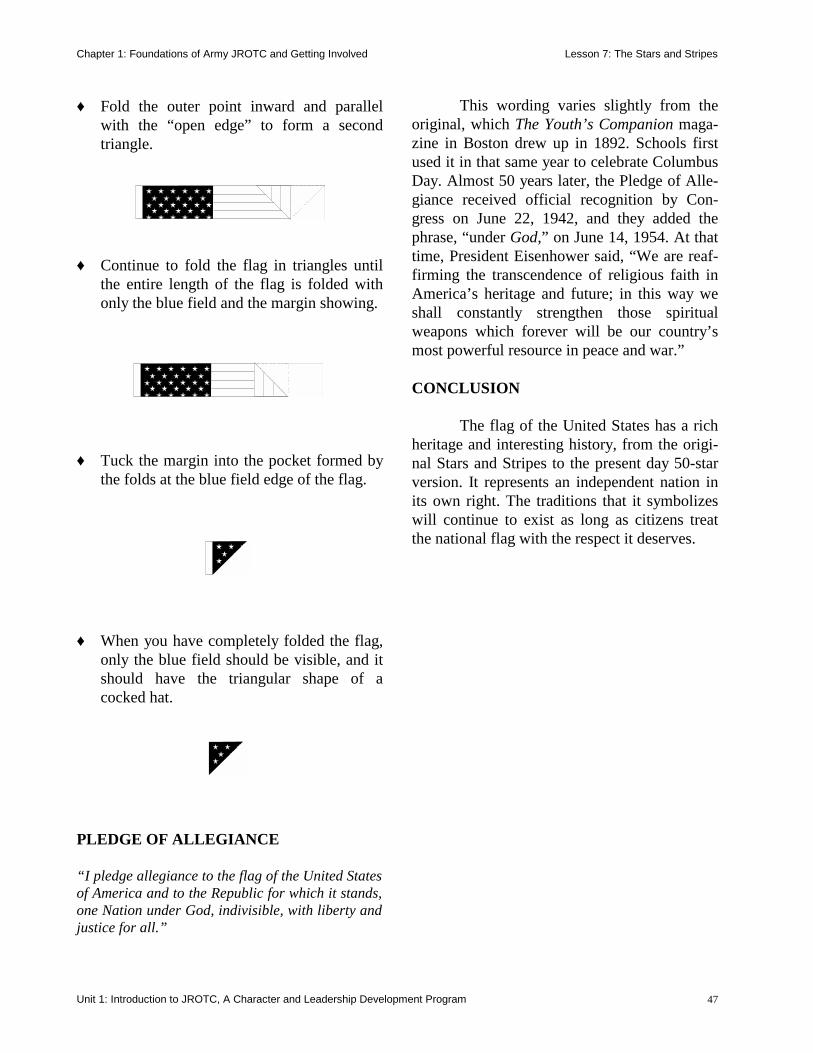
Chapter 1: Foundations of Army JROTC and Getting Involved Lesson 7: The Stars and Stripes
Unit 1: Introduction to JROTC, A Character and Leadership Development Program 47
♦ Fold the outer point inward and parallel with the “open edge” to form a second triangle.
♦ Continue to fold the flag in triangles until the entire length of the flag is folded with only the blue field and the margin showing.
♦ Tuck the margin into the pocket formed by the folds at the blue field edge of the flag.
♦ When you have completely folded the flag, only the blue field should be visible, and it should have the triangular shape of a cocked hat.
PLEDGE OF ALLEGIANCE “I pledge allegiance to the flag of the United States of America and to the Republic for which it stands, one Nation under God, indivisible, with liberty and justice for all.”
This wording varies slightly from the original, which The Youth’s Companion maga-zine in Boston drew up in 1892. Schools first used it in that same year to celebrate Columbus Day. Almost 50 years later, the Pledge of Alle-giance received official recognition by Con-gress on June 22, 1942, and they added the phrase, “under God,” on June 14, 1954. At that time, President Eisenhower said, “We are reaf-firming the transcendence of religious faith in America’s heritage and future; in this way we shall constantly strengthen those spiritual weapons which forever will be our country’s most powerful resource in peace and war.” CONCLUSION The flag of the United States has a rich heritage and interesting history, from the origi-nal Stars and Stripes to the present day 50-star version. It represents an independent nation in its own right. The traditions that it symbolizes will continue to exist as long as citizens treat the national flag with the respect it deserves.
Chapter 1: Foundations of Army JROTC and Getting Involved Lesson 8: Proudly We Sing - The National Anthem
Unit 1: Introduction to JROTC, A Character and Leadership Development Program 48
LESSON 8: PROUDLY WE SING THE NATIONAL ANTHEM
INTRODUCTION When you hear the National Anthem, do you know what to do? National anthems are usually songs already in a culture that become so popular that the people claim them as a sym-bol for themselves and their nation. The United States adopted “The Star-Spangled Banner” this way. In fact, it took Congress 117 years to rat-ify what the American people had decided on in 1814. In addition to presenting the history of “The Star-Spangled Banner,” this lesson explains how you should pay your respect to it, indoors or outdoors. HISTORY OF OUR NATIONAL ANTHEM Francis Scott Key wrote “The Star-Spangled Banner” as a result of a mission he was on during the War of 1812. Key was one of two people chosen to deliver official release papers for an American prisoner of war being held on a British ship in the harbor of Balti-more, Maryland. The British agreed to release their pris-oner only if the Americans did not immediately return to shore. The British were preparing to attack Fort McHenry and they did not want Key and his companions to warn the American troops. The two Americans complied and returned to their boat to wait. At dusk, when the bombardment began, the British told the wait-
ing Americans to take one last look at their flag because by morning it would be gone. The bombardment continued throughout the night. At dawn, fog on shore hid Fort McHenry from view. Finally, the fog cleared and the American flag could be seen.
The next day, the commander of Fort
McHenry printed and distributed the poem Key had written throughout Baltimore. That night, an actor sang the poem to the tune of a British drinking song. A few days later, the Baltimore newspaper printed the poem with directions that it be sung. In less than one week “The Star-
anthemsbombardmentnational marchsymbolsthe star-spangled bannerunder arms
anthemsbombardmentnational marchsymbolsthe star-spangled bannerunder arms
“THE STAR-SPANGLED BANNER” O say, can you see, by the dawn’s early light, What so proudly we hailed at the twilight’s last gleaming, Whose broad stripes and bright stars, through the perilous fight, O’er the ramparts we watched were so gallantly streaming? And the rockets’ red glare, the bombs bursting in air Gave proof through the night that our flag was still there, O say, does that Star-Spangled Banner yet wave O’er the land of the free and the home of the brave? On the shore dimly seen through the mist of the deep, Where the foe’s haughty host in dread silence reposes, What is that which the breeze, o’er the towering steep As it fitfully blows, half conceals, half discloses? Now it catches the gleam of the morning’s first beam, In full glory reflected now shines on the stream; ‘Til the Star-Spangled Banner--O long may it wave O’er the land of the free and the home of the brave. O thus be it ever when free men shall stand Between their loved homes and the war’s desolation; Blest with victory and peace, may the heaven rescued land Praise the Power that has made and preserved us a nation. Then conquer we must, when our cause it is just, And this be our motto, “In God is our trust;” And the Star-Spangled Banner in triumph shall wave O’er the land of the free and the home of the brave.
Chapter 1: Foundations of Army JROTC and Getting Involved Lesson 8: Proudly We Sing - The National Anthem
Unit 1: Introduction to JROTC, A Character and Leadership Development Program 49
Spangled Banner” had spread as far as New Orleans. Soon the whole country had taken it to heart. However, it was not until 117 years later, in 1931, that Congress passed an act making “The Star-Spangled Banner” the national anthem of the United States (36 USC Chap 10, Sec 170).
COURTESIES TO THE NATIONAL ANTHEM A national anthem is a symbol of the people, their land, and their institutions. When we salute during the playing of “The Star-Spangled Banner,” we are saluting the nation. Servicemen and women follow specific pro-cedures in showing their respect to the U.S. anthem and to the anthems of friendly foreign nations. Additionally, the armed forces give this same respect to the bugle call “To the Colors.” The military uses “To the Colors” when a band is not available or during bad weather. WHEN OUTDOORS IN UNIFORM When you are outdoors in uniform and you hear the national anthem or “To the Col-ors,” face the flag (if the flag is not visible, face the source of the music), stand at attention, and render the hand salute. Begin your salute on the first note of the music and hold the salute until the last note. WHEN OUTDOORS IN CIVILIAN CLOTHES When you are outdoors in civilian clothes and you hear the national anthem or “To the Colors,” face the flag (if the flag is not visible, again face the source of the music), stand at attention, and place your right hand over your heart. A male must remove his hat and hold it in his right hand over his heart. A
woman does not remove her hat, but she must place her right hand over her heart. DURING INDOOR CEREMONIES If you are attending an indoor ceremony and you hear the national anthem or “To the Colors,” stand, face the flag, and assume the position of attention. If the flag is not visible, face the source of the music or to the front and assume the position of attention. Do not salute unless you are under arms. WHEN IN A PRIVATE VEHICLE On a military base at the first note of the national anthem, all vehicles must come to a complete stop. If the driver is in uniform, that person must step out of the vehicle and take the appropriate actions for being outdoors and in uniform. If the driver is a civilian or is a service member who is not in uniform, that person must step out of the vehicle and take the appro-priate actions for being outdoors and in civilian clothes. All other occupants sit quietly inside the vehicle until the last note of music is played. THE NATIONAL MARCH, “THE STARS AND STRIPES FOREVER” The composition by John Philip Sousa entitled “The Stars and Stripes Forever” is the national march. In late 1896, Sousa and his wife took a much-deserved vacation to Europe. While there, Sousa received word that the manager of the Sousa Band, David Blakely, had died suddenly. The band was scheduled to begin another cross-country tour soon, and Sousa knew he must return to America at once to take over the band’s business affairs. Sousa tells the rest of the story in his autobiography “Marching Along: Recollections of Men, Women and

Chapter 1: Foundations of Army JROTC and Getting Involved Lesson 8: Proudly We Sing - The National Anthem
Unit 1: Introduction to JROTC, A Character and Leadership Development Program 50
Music” (Westerville, Ohio: Integrity Press, 1994): “Here came one of the most vivid incidents of my career. As the vessel (the Teutonic) steamed out of the harbor I was pacing on the deck, absorbed in thoughts of my manager’s death and the many duties and decisions which awaited me in New York. Suddenly, I began to sense a rhythmic beat of a band playing within my brain. Throughout the whole tense voyage, that imaginary band continued to unfold the same themes, echoing and re-echoing the most distinct melody. I did not transfer a note of that music to paper while I was on the steamer, but when we reached shore, I set down the measures that my brain-band had been playing for me, and not a note of it has ever changed.” The march was an immediate success, and Sousa’s Band played it at almost every concert until his death over 25 years later. (http://www.dws.org/sousa/starsstripes.htm) “The composition by John Philip Sousa entitled ‘The Stars and Stripes Forever’ is hereby des-ignated as the national march of the United States of America.” (36 USC Chap 10 Sec. 188) CONCLUSION “The Star-Spangled Banner,” the national anthem of the United States, is sym-bolic of the struggles and successes of this country. It is still as inspirational today as when it first swept throughout the country in 1814. Either as a JROTC cadet in uniform or as a private citizen out of uniform, render “The Star-Spangled Banner” the courtesies and respect it deserves. Remember, “To the Colors” receives the same respect as the national anthem. “The Stars and Stripes Forever” demonstrates the strength and the power of patriotic music in the development of a national spirit.
Chapter 1: Foundations of Army JROTC and Getting Involved Lesson 9: American Military Traditions, Customs, and Courtesies
Unit 1: Introduction to JROTC, A Character and Leadership Development Program 51
LESSON 9: AMERICAN MILITARY TRADITIONS, CUSTOMS, AND COURTESIES
INTRODUCTION The purpose of military traditions, customs, and courtesies is to develop pride in the military service and to establish strong bonds of professional and personal friend-ships — patterns of behavior that enhance the military way of life. TRADITIONS AND CUSTOMS Listed below are two of the more common military traditions and customs: dress and ceremonies. DRESS Dress sets the branches of the armed forces (the Army, Air Force, Navy, Marines, and Coast Guard) apart. Each branch has for-mal, semi-formal, black tie, white tie, infor-mal, and casual dress codes appropriate for various occasions and settings. All branches
have a standard of dress, which they require their members to follow. CEREMONIES Throughout history, military ceremo-nies represent the pride, discipline, and team-work of the armed forces. Some of the more common ceremonies include parades, reviews, inspections, occasions that honor and recog-nize individuals with awards for outstanding service, and formal dining. Ceremonies help preserve tradition and to build esprit de corps. Personal Salutes Personal salutes are honors given to dignitaries, civil officials, and military offi-cials. They include cannon salutes, ruffles and flourishes, and a march or anthem, depending on the official. Cannon Salutes A cannon salute honors civil or mili-tary officials from the United States or foreign countries. A commissioned officer directs the firing of the cannons, whether they are towed, self-propelled, or tank mounted. The time interval between rounds is three seconds. Usually, the U.S. armed forces does not fire a cannon salute on Sunday, between retreat and reveille, or on national holidays. Indepen-dence Day and Memorial Day are exceptions to this rule and have special cannon salutes. The number of guns fired depends on the position of the official. For example, the military fires a 21-gun salute for the president, members of a reigning royal family, and chiefs of state of foreign countries. The vice president receives a 19-gun salute, as do ambassadors and the Speaker of the House of Representatives. Secretaries of the Army,
cannon salutescourtesiescustomsdressesprit de corpsmessposition of honorreportingruffles and flourishessaluteself-propelledtraditionsuncasinguncovered
cannon salutescourtesiescustomsdressesprit de corpsmessposition of honorreportingruffles and flourishessaluteself-propelledtraditionsuncasinguncovered
Chapter 1: Foundations of Army JROTC and Getting Involved Lesson 9: American Military Traditions, Customs, and Courtesies
Unit 1: Introduction to JROTC, A Character and Leadership Development Program 52
Navy, and Air Force, and generals of the Army and Air Force also receive a 19-gun salute. When you are in the audience on such an occasion and in uniform, you should render the hand salute as the official party does. When in civilian clothing, you should remove any head covering to salute. Ruffles and Flourishes The armed forces plays ruffles and flourishes together — ruffles on drums and flourishes on bugles. The number of ruffles and flourishes also depends on the position of the official. The president, vice president, sec-retaries and assistant secretaries of the Army, Navy, and Air Force, cabinet members, and ambassadors all receive four ruffles and flour-ishes. Additionally, a military band may play a march or anthem following the ruffles and flourishes as an honor to special officials. For example, the band may play: the national anthem or “Hail to the Chief” for the president, ex-presidents, or president-elect; a march for the vice president; the national anthem of the United States or the anthem of another country for ambassadors; and, a march for generals, admirals, and most other armed services officials.
COURTESIES Courtesies honor people with actions or words to show respect, authority, and achievement. The use of titles and salutes are two courtesies that honor members of the military. TITLES One military courtesy is the use of titles to show respect for superiors. When you are talking to someone in the military, address that person by his or her rank. This form of a courtesy is not only a standard greeting in the military, but it shows respect for the responsi-bility that person has earned. Displayed below are the correct titles by which you should address most individuals in the U.S. Army. Title How to Address All Generals “General” Colonels and Lieutenant Colonels “Colonel” Majors “Major” Captains “Captain” Lieutenants “Lieutenant” Chaplains “Chaplain” Cadets “Mister,” “Miss,” or “Cadet” Officer Candidate “Candidate” Warrant Officers “Mister” or
“Miss” Sergeant Major “Sergeant Major” First Sergeants “First Sergeant” All other Sergeants “Sergeant” Corporals “Corporal” All Specialists “Specialist” Privates and Privates First Class “Private”
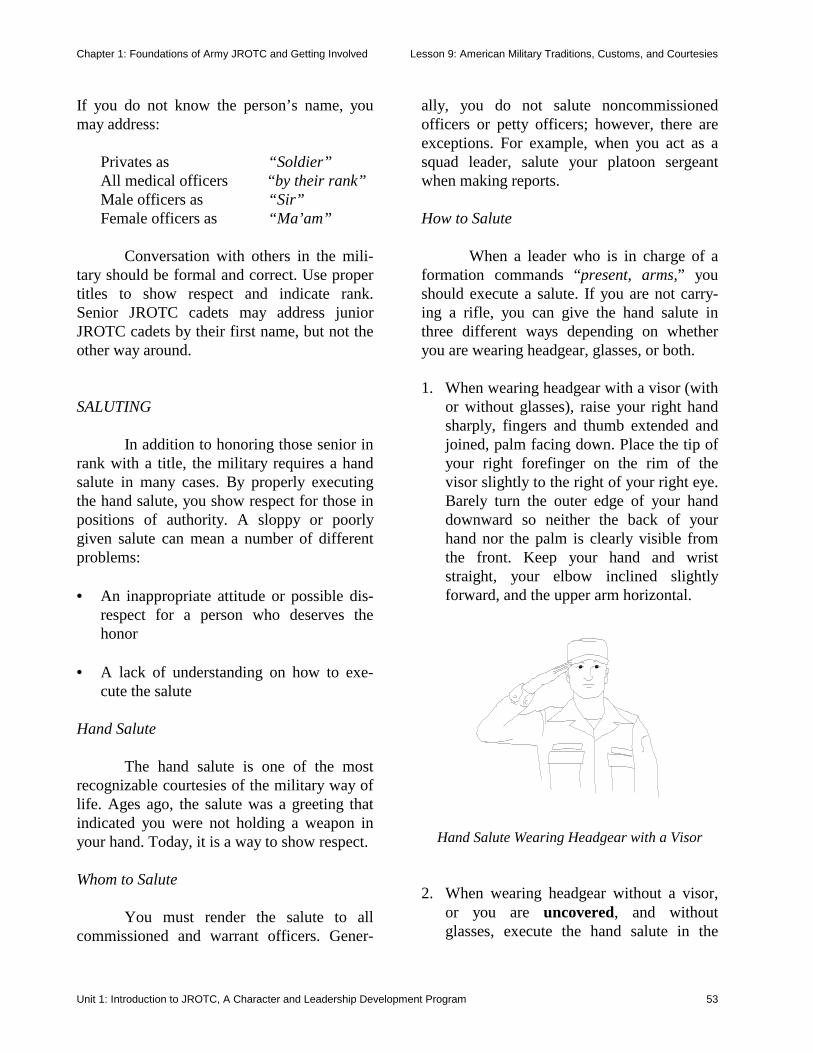
Chapter 1: Foundations of Army JROTC and Getting Involved Lesson 9: American Military Traditions, Customs, and Courtesies
Unit 1: Introduction to JROTC, A Character and Leadership Development Program 53
If you do not know the person’s name, you may address:
Privates as “Soldier” All medical officers “by their rank” Male officers as “Sir” Female officers as “Ma’am”
Conversation with others in the mili-tary should be formal and correct. Use proper titles to show respect and indicate rank. Senior JROTC cadets may address junior JROTC cadets by their first name, but not the other way around. SALUTING In addition to honoring those senior in rank with a title, the military requires a hand salute in many cases. By properly executing the hand salute, you show respect for those in positions of authority. A sloppy or poorly given salute can mean a number of different problems: • An inappropriate attitude or possible dis-
respect for a person who deserves the honor
• A lack of understanding on how to exe-
cute the salute Hand Salute The hand salute is one of the most recognizable courtesies of the military way of life. Ages ago, the salute was a greeting that indicated you were not holding a weapon in your hand. Today, it is a way to show respect. Whom to Salute You must render the salute to all commissioned and warrant officers. Gener-
ally, you do not salute noncommissioned officers or petty officers; however, there are exceptions. For example, when you act as a squad leader, salute your platoon sergeant when making reports. How to Salute When a leader who is in charge of a formation commands “present, arms,” you should execute a salute. If you are not carry-ing a rifle, you can give the hand salute in three different ways depending on whether you are wearing headgear, glasses, or both. 1. When wearing headgear with a visor (with
or without glasses), raise your right hand sharply, fingers and thumb extended and joined, palm facing down. Place the tip of your right forefinger on the rim of the visor slightly to the right of your right eye. Barely turn the outer edge of your hand downward so neither the back of your hand nor the palm is clearly visible from the front. Keep your hand and wrist straight, your elbow inclined slightly forward, and the upper arm horizontal.
Hand Salute Wearing Headgear with a Visor
2. When wearing headgear without a visor, or you are uncovered, and without glasses, execute the hand salute in the
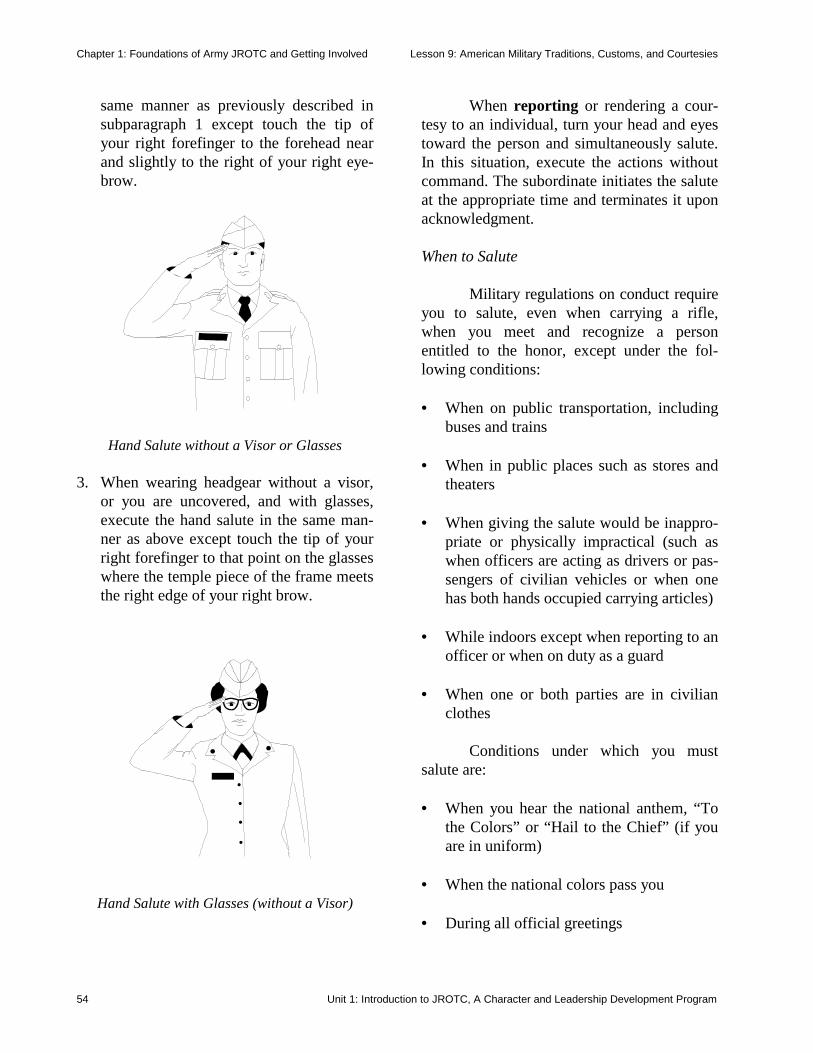
Chapter 1: Foundations of Army JROTC and Getting Involved Lesson 9: American Military Traditions, Customs, and Courtesies
Unit 1: Introduction to JROTC, A Character and Leadership Development Program 54
same manner as previously described in subparagraph 1 except touch the tip of your right forefinger to the forehead near and slightly to the right of your right eye-brow.
Hand Salute without a Visor or Glasses 3. When wearing headgear without a visor,
or you are uncovered, and with glasses, execute the hand salute in the same man-ner as above except touch the tip of your right forefinger to that point on the glasses where the temple piece of the frame meets the right edge of your right brow.
Hand Salute with Glasses (without a Visor)
When reporting or rendering a cour-tesy to an individual, turn your head and eyes toward the person and simultaneously salute. In this situation, execute the actions without command. The subordinate initiates the salute at the appropriate time and terminates it upon acknowledgment. When to Salute Military regulations on conduct require you to salute, even when carrying a rifle, when you meet and recognize a person entitled to the honor, except under the fol-lowing conditions: • When on public transportation, including
buses and trains • When in public places such as stores and
theaters • When giving the salute would be inappro-
priate or physically impractical (such as when officers are acting as drivers or pas-sengers of civilian vehicles or when one has both hands occupied carrying articles)
• While indoors except when reporting to an
officer or when on duty as a guard • When one or both parties are in civilian
clothes Conditions under which you must salute are: • When you hear the national anthem, “To
the Colors” or “Hail to the Chief” (if you are in uniform)
• When the national colors pass you • During all official greetings
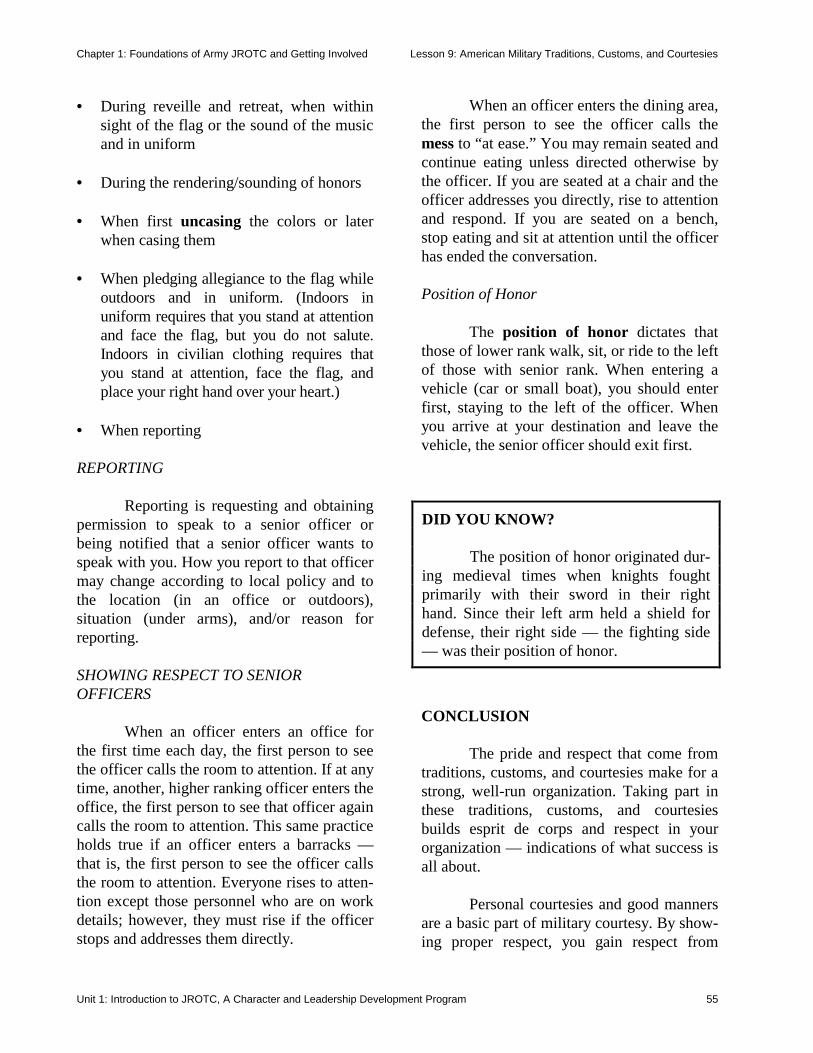
Chapter 1: Foundations of Army JROTC and Getting Involved Lesson 9: American Military Traditions, Customs, and Courtesies
Unit 1: Introduction to JROTC, A Character and Leadership Development Program 55
• During reveille and retreat, when within sight of the flag or the sound of the music and in uniform
• During the rendering/sounding of honors • When first uncasing the colors or later
when casing them • When pledging allegiance to the flag while
outdoors and in uniform. (Indoors in uniform requires that you stand at attention and face the flag, but you do not salute. Indoors in civilian clothing requires that you stand at attention, face the flag, and place your right hand over your heart.)
• When reporting REPORTING Reporting is requesting and obtaining permission to speak to a senior officer or being notified that a senior officer wants to speak with you. How you report to that officer may change according to local policy and to the location (in an office or outdoors), situation (under arms), and/or reason for reporting. SHOWING RESPECT TO SENIOR OFFICERS When an officer enters an office for the first time each day, the first person to see the officer calls the room to attention. If at any time, another, higher ranking officer enters the office, the first person to see that officer again calls the room to attention. This same practice holds true if an officer enters a barracks — that is, the first person to see the officer calls the room to attention. Everyone rises to atten-tion except those personnel who are on work details; however, they must rise if the officer stops and addresses them directly.
When an officer enters the dining area, the first person to see the officer calls the mess to “at ease.” You may remain seated and continue eating unless directed otherwise by the officer. If you are seated at a chair and the officer addresses you directly, rise to attention and respond. If you are seated on a bench, stop eating and sit at attention until the officer has ended the conversation. Position of Honor The position of honor dictates that those of lower rank walk, sit, or ride to the left of those with senior rank. When entering a vehicle (car or small boat), you should enter first, staying to the left of the officer. When you arrive at your destination and leave the vehicle, the senior officer should exit first.
CONCLUSION The pride and respect that come from traditions, customs, and courtesies make for a strong, well-run organization. Taking part in these traditions, customs, and courtesies builds esprit de corps and respect in your organization — indications of what success is all about. Personal courtesies and good manners are a basic part of military courtesy. By show-ing proper respect, you gain respect from
DID YOU KNOW? The position of honor originated dur-ing medieval times when knights fought primarily with their sword in their right hand. Since their left arm held a shield for defense, their right side — the fighting side — was their position of honor.
Chapter 1: Foundations of Army JROTC and Getting Involved Lesson 9: American Military Traditions, Customs, and Courtesies
Unit 1: Introduction to JROTC, A Character and Leadership Development Program 56
others and a sense of pride within yourself. Using the proper salutes and actions shows that you are proud of yourself, your unit, and Army JROTC.
Chapter 2: The Nation’s Defense Forces Lesson 1: The Department of Defense
Unit 1: Introduction to JROTC, A Character and Leadership Development Program
57
THE NATION’S DEFENSE FORCES LESSON 1: THE DEPARTMENT OF DEFENSE
INTRODUCTION The executive department responsible for the nation’s defense forces is the Depart-ment of Defense. It was created in 1947, when Congress combined the former Navy and War departments into a National Military Estab-lishment, an executive department headed by a secretary of defense. BACKGROUND In 1789, Congress created the Depart-ment of War to administer and conduct military affairs. Then, in 1798, Congress separated the naval forces from the land forces, creating the Department of the Navy. The Departments of War and Navy remained for almost 150 years as the only two military departments. However, the National Security Act of 1947 created the Department of the Air Force and replaced the Department of War with the Department of the Army. This act also created the National Military Establishment to oversee the three Military Departments (Army, Navy, and Air Force — the Marine Corps was included under the Navy). In 1949, Congress renamed the National Military Establishment the Depart-ment of Defense.
MISSIONS The mission of the Department of Defense is to provide the military forces needed to deter war and protect the security of the United States. Inherent in this mission is the responsibility for planning military strategy, maintaining the armed forces, operating the military bases throughout the world, and defending the country from foreign threats. The Department of Defense assigns these duties to the Military Departments. SECRETARY OF DEFENSE ORGANIZATION The Department of Defense is the organization through which the President exercises civilian control over the military. The Secretary of Defense, a civilian appointed by the President but subject to Senate approval, is the principal defense policy adviser to the President. Although the President has final authority and responsibility on all defense matters, the Secretary of Defense is responsible for formulating general defense policy, execut-ing approved policy, and exercising authority, direction, and control over the DoD. The major elements of DoD are shown below.
operational commands specified strategic tactical theater unified commands
operational commands specified strategic tactical theater unified commands
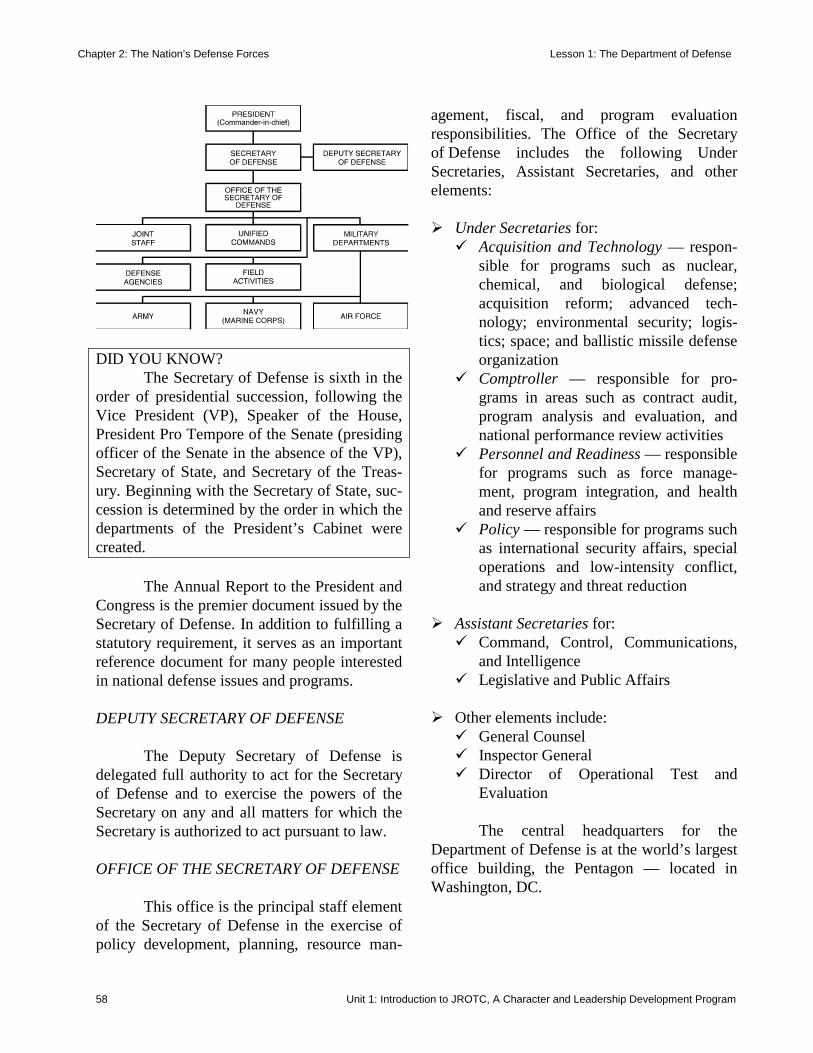
Chapter 2: The Nation’s Defense Forces Lesson 1: The Department of Defense
Unit 1: Introduction to JROTC, A Character and Leadership Development Program 58
DID YOU KNOW? The Secretary of Defense is sixth in the order of presidential succession, following the Vice President (VP), Speaker of the House, President Pro Tempore of the Senate (presiding officer of the Senate in the absence of the VP), Secretary of State, and Secretary of the Treas-ury. Beginning with the Secretary of State, suc-cession is determined by the order in which the departments of the President’s Cabinet were created. The Annual Report to the President and Congress is the premier document issued by the Secretary of Defense. In addition to fulfilling a statutory requirement, it serves as an important reference document for many people interested in national defense issues and programs. DEPUTY SECRETARY OF DEFENSE The Deputy Secretary of Defense is delegated full authority to act for the Secretary of Defense and to exercise the powers of the Secretary on any and all matters for which the Secretary is authorized to act pursuant to law. OFFICE OF THE SECRETARY OF DEFENSE This office is the principal staff element of the Secretary of Defense in the exercise of policy development, planning, resource man-
agement, fiscal, and program evaluation responsibilities. The Office of the Secretary of Defense includes the following Under Secretaries, Assistant Secretaries, and other elements: ! Under Secretaries for: # Acquisition and Technology — respon-
sible for programs such as nuclear, chemical, and biological defense; acquisition reform; advanced tech-nology; environmental security; logis-tics; space; and ballistic missile defense organization
# Comptroller — responsible for pro-grams in areas such as contract audit, program analysis and evaluation, and national performance review activities
# Personnel and Readiness — responsible for programs such as force manage-ment, program integration, and health and reserve affairs
# Policy — responsible for programs such as international security affairs, special operations and low-intensity conflict, and strategy and threat reduction
! Assistant Secretaries for: # Command, Control, Communications,
and Intelligence # Legislative and Public Affairs
! Other elements include: # General Counsel # Inspector General # Director of Operational Test and
Evaluation
The central headquarters for the Department of Defense is at the world’s largest office building, the Pentagon — located in Washington, DC.

Chapter 2: The Nation’s Defense Forces Lesson 1: The Department of Defense
Unit 1: Introduction to JROTC, A Character and Leadership Development Program
59
JOINT STAFF Organization The Joint Chiefs of Staff (JCS) consti-tute the immediate military staff of the Secre-tary of Defense and consist of the following general officers (4-star rank) from the Armed Forces: $ Chairman (appointed by the President but
subject to Senate approval) $ Vice Chairman $ Chief of Staff of the Army $ Chief of Naval Operations $ Chief of Staff of the Air Force $ Commandant of the Marine Corps
The collective body of the JCS is headed by the Chairman, who sets the agenda and presides over JCS meetings. Additionally, the Chairman is the principal adviser to the President, Secretary of Defense, and the National Security Council.
However, all JCS members are by law military advisers and they may respond to a request or voluntarily submit, through the Chairman, advice or opinions to the President, Secretary of Defense, or the National Security Council. Although responsibilities as members of the JCS take precedence over the duties as the Chiefs of the Military Services, these per-sonnel are the senior military officers of their respective Services. As such, they are also responsible for keeping the Secretaries of the Military Departments fully informed on matters considered or acted upon by the JCS.
Mission The main responsibilities of the Joint Chiefs of Staff, in conjunction with the Military Departments, include: # The strategic and tactical direction of the
combatant forces # The operation of the combatant forces under
unified commands # The integration of combatant forces into an
efficient team of land, naval, and air forces # Research and development Executive Authority During World War II, the Joint Chiefs of Staff acted as executive agents in dealing with theater and area commanders, but the original National Security Act of 1947 saw the Joint Chiefs as planners and advisers, not as commanders of combatant commands. In spite of this, the 1948 Key West Agreement allowed members of the Joint Chiefs to serve as execu-tive agents for unified commands, a responsi-bility that allowed them to originate direct communication with the combatant command. However, Congress abolished this authority in a 1953 amendment to the National Security Act. Today, the Joint Chiefs have no executive authority to command combatant forces. The issue of executive authority was clearly resolved by the Goldwater-Nichols DoD Reorganization Act of 1986: “The Secretaries of the Military Departments shall assign all forces under their jurisdiction to unified and specified combatant commands to perform missions assigned to those commands …;” the chain of command “runs from the President to the Secretary of Defense; and from the Secre-tary of Defense to the commander of the combatant command.” The world is divided into nine geographical areas, each with a Commander-in-Chief (CINC) assigned. To
Chapter 2: The Nation’s Defense Forces Lesson 1: The Department of Defense
Unit 1: Introduction to JROTC, A Character and Leadership Development Program 60
facilitate mission accomplishment, these com-manders have full operational command and control over all forces assigned to them. MILITARY DEPARTMENTS The Military Departments of the Army, Navy, and Air Force are each headed by a Sec-retary who does not have cabinet rank and is a civilian. These Departments are responsible for maintaining the readiness of their assigned forces to ensure the security of the U.S. and to support the nation’s policies and interests. The basic objectives of the Military Departments and the U.S. Armed Forces are to: • Prevent military actions that threaten the
safety of the United States or its allies. • Defend the United States’ territories, waters,
and airspace. • Engage in all necessary military operations
and other assigned duties. • End hostilities on terms favorable to the
United States.
CONCLUSION This lesson introduced you to the organization, background, and missions of the Department of Defense (DoD). You saw a specific example of the constitutional require-ment for civilian control of the military with the President, Secretary of Defense, and the Secre-taries of the Military Departments all being civilians. The highest military officers in the DoD are the Joint Chiefs of Staff. The missions and responsibilities of this Department make it
a vital part of the federal government and critical to the nation’s defense.
DID YOU KNOW? The Department of Defense main-tains the academies for each of these De-partments. Can you name these academies?
Chapter 2: The Nation’s Defense Forces Lesson 2: The U.S. Army Part 1 - The Active Army
Unit 1: Introduction to JROTC, A Character and Leadership Development Program 61
LESSON 2: THE U.S. ARMY PART 1 - THE ACTIVE ARMY
INTRODUCTION The U.S. Army dates back to June 1775. On June 14, 1775, the Continental Congress adopted the Continental Army when it appointed a committee to “draft the rules and regulations for the government of the Army.” This authorization marks the birthday of the U.S. Army, the oldest branch of the U.S. Armed Forces. The Army is a major part of the U.S. Armed Forces, which collectively are responsible for defending American interests by: • Supporting and defending the Constitution
of the United States against all enemies, foreign and domestic.
• Ensuring, by timely and effective military
action, the security of the United States, its possessions, and areas vital to its interests.
• Upholding and advancing the national
policies and interests of the United States. • Safeguarding the internal security of the
United States.
Within that framework, the fundamen-tal mission of the U.S. Army is to deter war and to win in combat. However, there is much more to the Army than accomplishing that mission. In fact, the Army spends most of its time involved in peacetime activities. ORIGINS OF THE U.S. ARMY As you learned earlier, the legal basis for the establishment of the Army, as well as for the other branches of the armed forces, is set forth in the Constitution. The Constitution stipulates that the U.S. Armed Forces must answer to and be responsible for the needs and desires of the American people as expressed by their elected representatives. To achieve that, the Framers established the principle of civilian control over the military — that is, the President serves as Commander-in-Chief of the U.S. Armed Forces and Congress alone has the power to raise and support armies and to declare war. Although the Constitution established the need for a system to “provide for the common defense,” it did not define the organization of that system. Therefore, in the course of our nation’s history, the national defense structure has taken many forms. After the ratification of the Constitution, the newly formed Congress and President George Washington established the Department of War in 1789 as an executive department. The Secretary of War became its director and his powers were entrusted to him by the president. Congress established our present military structure with the passage of two post-World War II legislations: the National Security Act of 1947 and its Amendments of 1949. The 1947 Act:
counterintelligencedepartment of defensedoctrinenon-accessionsecretary of defenseunconventional
counterintelligencedepartment of defensedoctrinenon-accessionsecretary of defenseunconventional
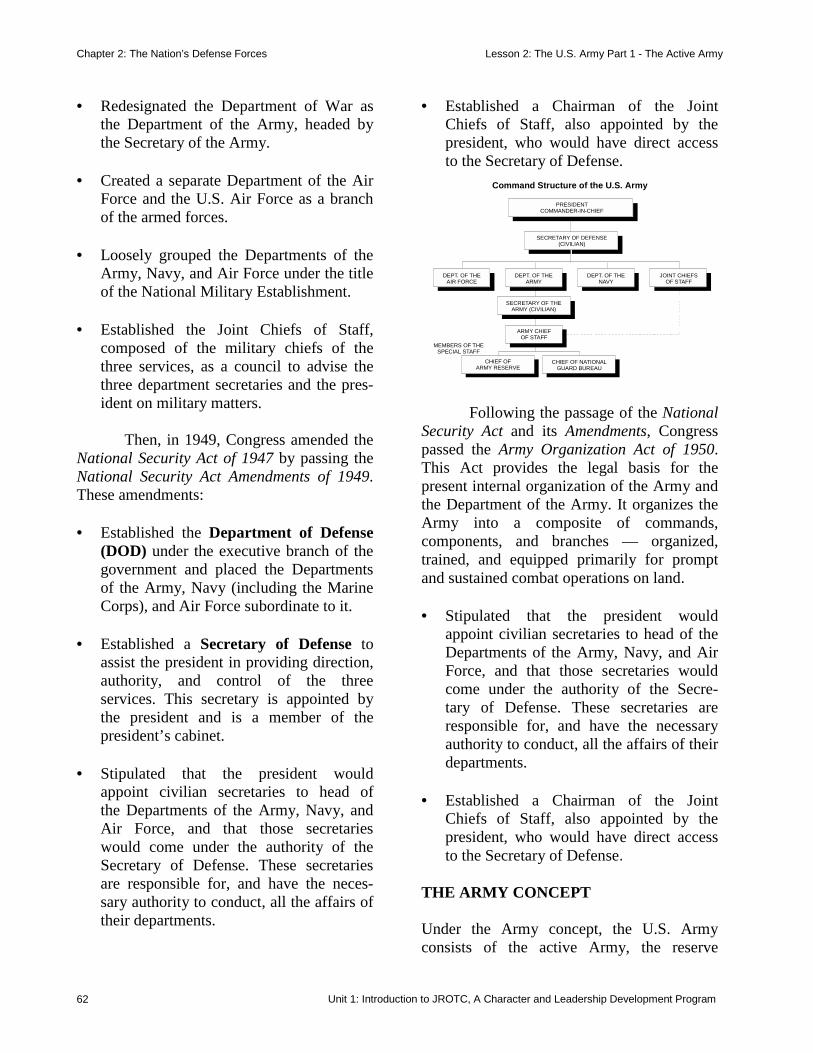
Chapter 2: The Nation’s Defense Forces Lesson 2: The U.S. Army Part 1 - The Active Army
Unit 1: Introduction to JROTC, A Character and Leadership Development Program 62
• Redesignated the Department of War as the Department of the Army, headed by the Secretary of the Army.
• Created a separate Department of the Air
Force and the U.S. Air Force as a branch of the armed forces.
• Loosely grouped the Departments of the
Army, Navy, and Air Force under the title of the National Military Establishment.
• Established the Joint Chiefs of Staff,
composed of the military chiefs of the three services, as a council to advise the three department secretaries and the pres-ident on military matters.
Then, in 1949, Congress amended the National Security Act of 1947 by passing the National Security Act Amendments of 1949. These amendments: • Established the Department of Defense
(DOD) under the executive branch of the government and placed the Departments of the Army, Navy (including the Marine Corps), and Air Force subordinate to it.
• Established a Secretary of Defense to
assist the president in providing direction, authority, and control of the three services. This secretary is appointed by the president and is a member of the president’s cabinet.
• Stipulated that the president would
appoint civilian secretaries to head of the Departments of the Army, Navy, and Air Force, and that those secretaries would come under the authority of the Secretary of Defense. These secretaries are responsible for, and have the neces-sary authority to conduct, all the affairs of their departments.
• Established a Chairman of the Joint Chiefs of Staff, also appointed by the president, who would have direct access to the Secretary of Defense.
Command Structure of the U.S. Army
PRESIDENTCOMMANDER-IN-CHIEF
SECRETARY OF DEFENSE(CIVILIAN)
DEPT. OF THEAIR FORCE
DEPT. OF THEARMY
DEPT. OF THENAVY
JOINT CHIEFSOF STAFF
SECRETARY OF THEARMY (CIVILIAN)
ARMY CHIEFOF STAFF
MEMBERS OF THESPECIAL STAFF
CHIEF OFARMY RESERVE
CHIEF OF NATIONALGUARD BUREAU
Following the passage of the National Security Act and its Amendments, Congress passed the Army Organization Act of 1950. This Act provides the legal basis for the present internal organization of the Army and the Department of the Army. It organizes the Army into a composite of commands, components, and branches — organized, trained, and equipped primarily for prompt and sustained combat operations on land. • Stipulated that the president would
appoint civilian secretaries to head of the Departments of the Army, Navy, and Air Force, and that those secretaries would come under the authority of the Secre- tary of Defense. These secretaries are responsible for, and have the necessary authority to conduct, all the affairs of their departments.
• Established a Chairman of the Joint
Chiefs of Staff, also appointed by the president, who would have direct access to the Secretary of Defense.
THE ARMY CONCEPT Under the Army concept, the U.S. Army consists of the active Army, the reserve
Chapter 2: The Nation’s Defense Forces Lesson 2: The U.S. Army Part 1 - The Active Army
Unit 1: Introduction to JROTC, A Character and Leadership Development Program 63
components, and the Department of the Army civilian work force. The reserve components consist of the Army National Guard and the U.S. Army Reserve. The purpose of these components is to provide trained units and qualified personnel to be available for active duty in time of war, national emergency, or at other times as dictated by national security requirements. (Note: We will discuss the reserve components in detail later in this chapter.) A bond of mutual agreement exists among the active Army, the reserve components, and the Department of the Army civilian work force to ensure the operational effectiveness of the total Army. This bond promotes: ⇒ A balanced force structure. ⇒ Programs and projects designed to ensure
modern equipment for both the active and reserve components.
There is cooperation and affiliation (team-work) between active and reserve units, thus enhancing the mobilization potential of the reserve components and ensuring their timely availability to satisfy wartime reinforcement objectives. MAJOR ROLES OF THE TOTAL ARMY In addition to its main mission — to deter war and to win in combat — the Army’s major roles in executing U.S. military policies are: • To maintain the ability to respond to any
level of aggression. • To be well-trained and equipped to
prevent conflict. • If land forces are committed in combat, to
be employed at a level of strength
necessary to ensure a swift and decisive end of the conflict.
• To bring about an end to the conflict in
terms favorable to the United States. • To fulfill a peacetime role by being able
to contribute personnel and resources to domestic programs that support the gen-eral welfare of the people.
THE ACTIVE ARMY The active (or regular) Army is a component of the U.S. Army maintained by the federal government in peace and in war. Congress authorizes its strength yearly under the provisions of Article 1 of the Constitution. At the same time, Congress appropriates money for its sustainment, modernization, and pay. MISSIONS OF THE ACTIVE ARMY The Army must be able to respond to threats that occur anywhere in the world. In addition, the Army supports security assistance programs conducted by the Depart-ments of the State and Defense to friendly countries seeking economic and military assistance to maintain their stability and security. The Army makes an important contribution to those programs by providing military advisers, equipment, and other support. The results are positive because the Army’s efforts are instrumental in implement-
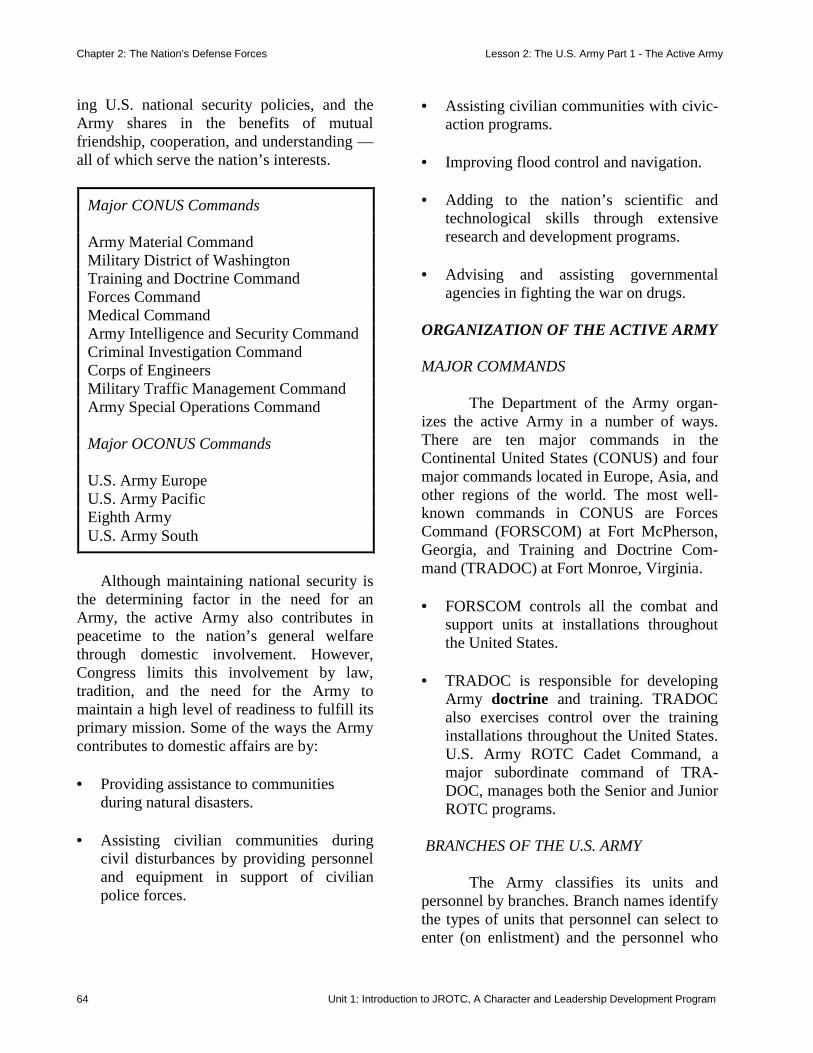
Chapter 2: The Nation’s Defense Forces Lesson 2: The U.S. Army Part 1 - The Active Army
Unit 1: Introduction to JROTC, A Character and Leadership Development Program 64
ing U.S. national security policies, and the Army shares in the benefits of mutual friendship, cooperation, and understanding — all of which serve the nation’s interests.
Although maintaining national security is
the determining factor in the need for an Army, the active Army also contributes in peacetime to the nation’s general welfare through domestic involvement. However, Congress limits this involvement by law, tradition, and the need for the Army to maintain a high level of readiness to fulfill its primary mission. Some of the ways the Army contributes to domestic affairs are by: • Providing assistance to communities
during natural disasters.
• Assisting civilian communities during civil disturbances by providing personnel and equipment in support of civilian police forces.
• Assisting civilian communities with civic-action programs.
• Improving flood control and navigation. • Adding to the nation’s scientific and
technological skills through extensive research and development programs.
• Advising and assisting governmental
agencies in fighting the war on drugs. ORGANIZATION OF THE ACTIVE ARMY MAJOR COMMANDS The Department of the Army organ-izes the active Army in a number of ways. There are ten major commands in the Continental United States (CONUS) and four major commands located in Europe, Asia, and other regions of the world. The most well-known commands in CONUS are Forces Command (FORSCOM) at Fort McPherson, Georgia, and Training and Doctrine Com-mand (TRADOC) at Fort Monroe, Virginia. • FORSCOM controls all the combat and
support units at installations throughout the United States.
• TRADOC is responsible for developing
Army doctrine and training. TRADOC also exercises control over the training installations throughout the United States. U.S. Army ROTC Cadet Command, a major subordinate command of TRA-DOC, manages both the Senior and Junior ROTC programs.
BRANCHES OF THE U.S. ARMY The Army classifies its units and personnel by branches. Branch names identify the types of units that personnel can select to enter (on enlistment) and the personnel who
Major CONUS Commands Army Material Command Military District of Washington Training and Doctrine Command Forces Command Medical Command Army Intelligence and Security Command Criminal Investigation Command Corps of Engineers Military Traffic Management Command Army Special Operations Command Major OCONUS Commands U.S. Army Europe U.S. Army Pacific Eighth Army U.S. Army South

Chapter 2: The Nation’s Defense Forces Lesson 2: The U.S. Army Part 1 - The Active Army
Unit 1: Introduction to JROTC, A Character and Leadership Development Program 65
are trained in the primary functions of that branch. There are 17 basic and eight special branches. The Army classifies 15 of the basic branches into the categories of combat arms, combat support, and combat service support. The remaining two, Special Forces and Civil Affairs, are non-accession branches. The eight special branches are all combat service support units. ♦ Special Forces: Accomplishes missions
of unconventional warfare, foreign internal defense, direct action, strategic reconnaissance, and counterterrorism.
♦ Civil Affairs: Is only in the Army Reserve
and it accomplishes missions of com-mand, control, and coordination of civil-military operations.
COMBAT ARMS
The combat arms branches are directly involved in the conduct of actual fighting. (Note: Depending on their mission, Engineer units can be a combat arms, combat support, or a combat service support branch.) The combat arms branches are as follows: ♦ Infantry: Closes with the enemy by means
of fire and maneuver, on foot or in armored vehicles, in order to destroy or capture the enemy or repel their assault by fire, close combat, or counterattack. Infantry is the nucleus around which the Army groups the other branches in combat operations.
♦ Armor: Conducts mobile land and cavalry
warfare; the tank is the nucleus of its forces.
♦ Field Artillery: Provides indirect fire
support for the Infantry and Armor. Field Artillery uses cannons, missiles, and
rockets and is capable of providing both nuclear and non-nuclear firepower.
♦ Air Defense Artillery: Provides air and
missile defense on the battlefield by destroying enemy aircraft and missiles with automatic weapons or missiles.
♦ Aviation: Provides prompt and sustained
combat air operations. Aviation units participate in a variety of combat and support roles including attack, assault helicopter, aerial observation, transport-ation, lift, supply, and troop transport duties.
♦ Corps of Engineers: Combat Engineer
units are part of the combined arms team in combat operations. Corps of Engineers units provide combat support including construction, demolition, amphibious oper-ations, defensive barriers, camouflage/ topographic activities, and minefield employment.
COMBAT SUPPORT The combat support branches provide operational assistance to the combat arms, and they participate in combat operations as part of the combined arms team. (Note: The Signal Corps, Chemical Corps, and Military Police Corps can either be a combat support or a combat service support branch.) The combat support branches are as follows. ♦ Corps of Engineers: See description under
combat arms. ♦ Chemical Corps: Provides the Army with
highly trained people in nuclear, biolog-ical, and chemical (NBC) warfare defense programs. These programs include employment, logistical support, defensive procedures, equipment, training, scientific
Chapter 2: The Nation’s Defense Forces Lesson 2: The U.S. Army Part 1 - The Active Army
Unit 1: Introduction to JROTC, A Character and Leadership Development Program 66
development, and management of NBC materials.
♦ Signal Corps: Provides command and
control communications for Army forces. Signal units install, operate, and maintain communication-electronic equipment.
♦ Military Police Corps: Performs missions
such as enforcing laws and regulations, conducting criminal investigative opera-tions, securing U.S. government property, discharging of correctional functions, con-trolling traffic and movements, and securing critical areas and lines of com-munication.
♦ Military Intelligence: Plans, conducts, and
supervises collection, analysis, product-ion, and dissemination of intelligence, such as combat intelligence, and counter-intelligence information pertaining to the enemy, weather, or terrain.
COMBAT SERVICE SUPPORT
The combat service support branches perform combat service support activities or administrative functions for the Army. These branches may also provide specialized ser-vices to other departments of the federal government and to the people of the United States. (Note: The eight special branches of the Army are all combat service support units; they are: the Judge Advocate General’s Corps, Medical Corps, Dental Corps, Veterinary Corps, Army Nurse Corps, Army Medical Specialist Corps, Medical Service Corps, and the Chaplains.)
The combat service support branches are as follows: ♦ Adjutant General Corps: Formulates pol-
icy and manages the Army’s admin-istrative and personnel systems.
♦ Corps of Engineers: See description under combat arms.
♦ Finance Corps: Is responsible for the
management of the Army’s financial resources, which includes paying U.S. Army personnel.
♦ Quartermaster Corps: Plans and directs
the acquisition, receipt, storage, pres-ervation, and issue of equipment, repair parts, fortification/construction material, subsistence, petroleum products, water, and other general supplies.
♦ Signal Corps: See description under
combat support. ♦ Chemical Corps: See description under
combat support. ♦ Military Police Corps: See description
under combat support. ♦ Ordnance Corps: Is responsible for the
maintenance and management of arm-ament, tracked, wheeled, and general purpose vehicles, conventional and special munitions, test equipment, management of air defense and land combat missile systems, and construction material.
♦ Transportation Corps: Is responsible for
the movement of personnel and equipment for the Army and for the Navy, Air Force, and government agencies as assigned.
♦ Judge Advocate General’s Corps: Pro-
vides professional legal service and assistance in the fields of both military and civil law and supervises the Army’s system of military justice.
♦ Army Medical Department (includes
Medical Corps, Dental Corps, Veterinary Corps, Army Nurse Corps, Army Medical
Chapter 2: The Nation’s Defense Forces Lesson 2: The U.S. Army Part 1 - The Active Army
Unit 1: Introduction to JROTC, A Character and Leadership Development Program 67
Specialist Corps, and Medical Service Corps): Provides medical, dental, and veterinary care. The chief functions of the Medical Department are: care of the sick and wounded, physical examinations, prevention of disease, and the operation of hospitals and dispensaries.
♦ Chaplains: The duties of the Army
chaplains are similar to those performed
by their civilian counterparts. They are clergymen from recognized denom-inational groups who have volunteered to perform their ministry in the Army. The mission of the Chaplains branch is to promote religion and morality in the Army by providing religious services, education, and counseling.

Chapter 2: The Nation’s Defense Forces Lesson 3: The U.S. Army Part 2 — The Reserve Components
Unit 1: Introduction to JROTC, A Character and Leadership Development Program 68
LESSON 3: THE U.S. ARMY PART 2 — THE RESERVE COMPONENTS
Recall that the reserve components of the U.S. Army consist of the Army National Guard and the Army Reserve. The main pur-pose of these components is to provide trained units and qualified personnel to be available for active duty in time of war, national emer-gency, or at other times as dictated by national security requirements. THE ARMY NATIONAL GUARD
Origin of The Army National Guard The Army National Guard was founded on October 7, 1683, in the Massa-chusetts Bay Colony. The Massachusetts Bay Colony organized two units (one infantry regiment and one engineer battalion) as part of their local militia. These units also became part of the Continental Army during the Revo-lutionary War (1775-1783).
In August 1824, the New York State Militia was the first state to apply the term “National Guard.” New York took the title as a compliment to the famous French hero, Marquis de Lafayette, who had commanded the French National Guard in Paris in 1789 and who had made great contributions in America’s war for independence. Gradually, other states adopted the popular term for their units, and by 1896, only three states retained the word “militia” in their official designation.
The National Defense Act of 1916 had a more profound impact on the Army National Guard than any other legislation of the past century. That Act and its amendments: • Officially designated state organized mili-
tias as the National Guard. • Changed the organizational structure of
the various National Guard units to con-form to the structure of the active Army.
• Provided increased assistance from the
federal government to the National Guard. Although the National Guard would still be under the control of state authorities, this legislation meant that when Guard units reached established Army standards, they became eligible for federal support.
Another law passed by Congress in 1933 organized all Guard units into the National Guard of the United States. Thus, Congress made it possible for the Commander-in-Chief to give the National Guard an Army mission (or order) without having to wait for state governors to “call” those forces to duty. In the late 1940s, Department of the Army established the Air National Guard, which was first used in the Korean War (1951-1953).
citizen-soldierscombatantmilitiamobilizereserve corps
citizen-soldierscombatantmilitiamobilizereserve corps
Chapter 2: The Nation’s Defense Forces Lesson 3: The U.S. Army Part 2 — The Reserve Components
Unit 1: Introduction to JROTC, A Character and Leadership Development Program 69
Contribution to The Total Army Force and Its Missions The Army National Guard is a state or territorial organization that is under the con-trol of each state or territorial governor during peacetime. At the end of 1993, the Army National Guard had 409,919 personnel located in over 2,500 communities in the 50 states, Puerto Rico, the Virgin Islands, Guam, and the District of Columbia. This strength represents: ⇒ Half of the Army’s combat units. ⇒ One-third of the Army’s combat support. ⇒ One-third of the Army’s combat service
support units. This wide variety of locations allows many Americans to serve their country while pursing civilian careers, and it also provides for a quick response to emergencies occurring in any area of the nation. The Army National Guard has three main missions: 1. As part of the total Army, to be prepared
to deploy and fight anywhere in the world where U.S. national security interests dic-tate.
2. To save lives and protect property in times
of natural disaster or civil disturbances, when summoned to active duty by the state governor.
3. To assist in times of national emergency
or domestic problems when ordered to active duty by the President of the United States.
Organization of the Army National Guard As part of the total Army, the Army National Guard has to comply with Depart-ment of Defense and Department of the Army orders and regulations. Therefore, the Guard needs some way to gain access to the Secre-tary of the Army and the military chain of command (i.e., Army Chief of Staff). The organization that accomplishes this is the National Guard Bureau. The Chief of the National Guard Bureau is a lieutenant general who has direct access to the Army and Air Force Chiefs of Staff. The Chief of the National Guard Bureau is assisted by the Director of the Army National Guard, a major general who advises the Chief on Army National Guard matters.
The men and women in the National Guard represent nearly every skill and unit found in the active Army. However, they must sustain their individual and unit military skills on a part-time basis. The typical Army National Guard training site is called an armory and can be found in over 2,500 towns and cities across the United States and its territories. Most armories contain anywhere from 50 to 200 soldiers of various military specialties. The average Guard battalion is spread over a radius of 150 miles, with most units having to travel over 40 miles to the nearest field training area. Most members of the National Guard are part-time soldiers (referred to as citizen-soldiers). These men and women normally attend one drill assembly each month and a 15-day annual training period. Each drill assembly normally lasts two days and takes place one weekend per month. National Guard personnel receive two days of “active duty” pay for each full day of drill. As a result, since Guard units train only 39 days per year
Chapter 2: The Nation’s Defense Forces Lesson 3: The U.S. Army Part 2 — The Reserve Components
Unit 1: Introduction to JROTC, A Character and Leadership Development Program 70
(2 days per month times 12 months plus 15 days annual training) and considering the distance factors mentioned above, it is a major challenge to train those units to accomplish their missions. Accomplishments of the Army National Guard Since its founding in the 1600s, the National Guard has participated in every American conflict to the Persian Gulf War in 1991. In this century alone, Army National Guard units have fought and distinguished themselves in both World Wars, the Korean War, Vietnam War, and the Persian Gulf War. In fact, individual Guardsmen received 14 Medals of Honor during World War II. Today, since the National Guard plays a vital role in the total Army, it must be ready to mobilize and deploy on very short notice. For example, in 1996 and 1997, National Guard personnel deployed overseas to support combatant commands and U.N. peacekeep-ing forces, and soldiers from 46 states and ter-ritories participated in a record 460 state emergency call-ups and local civil authority missions. Befitting the dual federal and state mission of the National Guard and its com-munity-based heritage, the Guard provided security requirements for the Atlanta Summer Olympic Games. More than 11,000 Army and Air National Guard personnel from 43 states and territories provided support for a three-month period. The National Guard is better trained and equipped to respond to any state or national emergency than at any time in its history. In peacetime, National Guard units train alongside active Army commands or units for which the Army has associated them through partnership agreements. In the event of mobilization, these Guard units would then deploy and serve with their active Army units
during wartime. The total Army simply can-not enter into a major conventional war without the support of the Army National Guard. THE U.S. ARMY RESERVE (USAR)
Origin/Reorganization of the Army Reserve Public attitude and economics played an important role in the origins of the Army Reserve. In our country’s early days, citizens were suspicious of a large active Army, and they knew it would be difficult to financially support such a large standing army. Therefore, a reserve military structure became attractive because it provided a capability to mobilize military forces when the situation arose. The U.S. Army Reserve system had its formal beginning in April 1908, with the establishment of the Medical Corps Reserve. In 1912, legislation set up an enlisted Army Reserve for persons discharged after four years of active duty on a seven-year enlistment, and for honorably discharged soldiers who wished to voluntarily remain in the reserve. The National Defense Act of 1916 formally established the Reserve Corps. It also established the Junior Reserve Officers’ Training Corps (JROTC), provided for an Officers’ Reserve Corps through direct commissioning up to the grade of major, and formulated a Reserve Officers’ Training Program at civilian colleges and universities.
Chapter 2: The Nation’s Defense Forces Lesson 3: The U.S. Army Part 2 — The Reserve Components
Unit 1: Introduction to JROTC, A Character and Leadership Development Program 71
The Reserve Forces Act of 1955 reor-ganized the Army Reserve. It was important legislation because, while federal budget cuts forced the active Army to cut its strength, that act increased the size of the Army Reserve (despite eliminating 15 Army Reserve divi-sions) and stipulated that Reserve units would receive more modern equipment over a 15-year period. As a result of downsizing in the mili-tary (during the 1990s), the Army Reserve has had to reduce its strength, take on new mis-sions, adjust to smaller budgets, reorganize its internal command and control structure, and find more efficient ways to train and mobilize its units. • The new structure replaced the 20 stateside
Army Reserve Commands (ARCOMs) with 10 Regional Support Commands (RSCs) in California, New York, Alabama, Minnesota, Kansas, Arkansas, Massachu-setts, Utah, Pennsylvania, and Washington and three Regional Support Groups (RSGs) in South Carolina, Indiana, and Texas. Three Army Reserve Commands are still located outside the Continental United States in Hawaii, Puerto Rico, and Germany.
• The U.S. Army Reserve Personnel Center
(ARPERCEN) in St. Louis, Missouri, which handles the personnel function of reservists, will consolidate its functions with the Full-Time Support Management Center in October 1997, thus forming the Army Reserve Personnel Command in St. Louis.
Contribution to the Total Army Force and its Missions The Army Reserve is an entrusted, committed force of citizen-soldiers who sup-
port and share the nation’s and the Army’s vision of world peace and domestic strength. In 1991, during the Persian Gulf War — the largest reserve component mobilization since World War II, there were 319,000 Army reservists. Although the programmed strength for the Army Reserves in 1998 is projected to be only 208,000 personnel, it presently accounts for: ⇒ 30 percent of the Army’s combat support. ⇒ 45 percent of the Army’s combat service
support units. ⇒ 100 percent of the Army’s training and
exercise divisions, railway units, and pris-oner of war brigades.
⇒ 97 percent of the Army’s civil affairs units.
⇒ 70 percent of the Army’s medical and chemical capability.
The Army Reserve has two major missions: 1. To organize, train, equip, and provide
units to help defend our nation with little or no advance notice in the event that Congress or the president mobilizes the armed forces.
2. To provide trained individual reinforce-
ments, officer and enlisted, as prescribed by Department of the Army mobilization plans. These soldiers would replace initial battlefield casualties, reinforce active Army units, and provide reinforcement for reserve component units that are mobi-lized.
Organization of the Army Reserve Unlike the National Guard, the Army Reserve is under federal control during peace-time. As a part of the total Army, it fulfills the Army’s need for units to meet its mission

Chapter 2: The Nation’s Defense Forces Lesson 3: The U.S. Army Part 2 — The Reserve Components
Unit 1: Introduction to JROTC, A Character and Leadership Development Program 72
requirements in times of changing national priorities and limited resources. Recently, an Army Chief of Staff remarked that the active Army could not be successfully committed to a major conflict in Europe without the Army Reserve. The Chief of the Army Reserves is an adviser to the Army Chief of Staff on Army Reserve matters. Therefore, U.S. Army Reserve Command (USARC) channels begin at Department of the Army and flow through Forces Command (FORSCOM) to the 10 Regional Support Commands (RSCs), the three Regional Support Groups (RSGs), and to the three Army Reserve Commands (ARCOMs) located outside the Continental United States. Department of the Army divides the Army Reserve into three major categories: Ready Reserve, Standby Reserve, and Retired Reserve. The Ready Reserve includes troop program units and the Individual Ready Reserve that are liable for active duty as pre-scribed by law. The highest priority elements are the members of the troop program units who are in a paid drill status. More than 3,200 units of company or detachment size are located throughout the 50 states, Puerto Rico, Guam, and Europe. The Individual Ready Reserve consists of members not assigned to a unit, but they can be mobilized by order of the president in response to a national emergency. Each troop program unit is required to conduct 48 training assemblies (or drills) annually. For every four-hour drill, the unit member receives one day’s pay and one retirement point. Drills are usually conducted as four training assemblies one weekend per month at the unit’s reserve center or at a train-
ing site. In addition, each unit performs at least 14 days of annual training. The Standby Reserve are those units and members of the reserve components (other than those in the Ready Reserve or the Retired Reserve) who are liable for active duty only in time of declared war or national emergency. Members of the standby reserve can be in an active or an inactive status. • Active status refers to reservists who: (1)
are completing their statutory military ser-vice obligation, (2) were screened from the Ready Reserve as being key personnel, or (3) may be temporarily assigned to the Standby Reserve for hardship reasons.
• Inactive status refers to individuals who
are not required by law or regulation to remain members of an active status pro-gram but who: (1) desire to retain their Reserve affiliation in a non-participating status, or (2) have skills that may be of possible future use to the Army.
The Retired Reserve consists of those individuals whom the Army placed on a Reserve Retired list. The Army may involun-tarily order any of those people, if qualified, to active duty in time of declared war or national emergency when the Secretary of the Army determines that adequate numbers of qualified individuals are not available in the Ready or Standby Reserves. Accomplishments of the Army Reserve Since its establishment in 1916, reservists have served in both World Wars, the Korean War, the Berlin Crisis, the Vietnam War, and in the Persian Gulf War. In fact, of the personnel mobilized for the Korean War over one-half were reservists. Additionally, during the U.S. Postal Service
Chapter 2: The Nation’s Defense Forces Lesson 3: The U.S. Army Part 2 — The Reserve Components
Unit 1: Introduction to JROTC, A Character and Leadership Development Program 73
strike in 1970, the U.S. government called 8,000 reservists to active duty to help deliver the mail. CONCLUSION In this chapter, we presented an over-view of the components of the total Army, their origins, missions, and organizations. We also briefly discussed the 17 basic and eight special branches of the Army and how the Army groups them into the categories of combat arms, combat support, and combat service support. If you are considering a career in the active Army or one of the reserve components of the U.S. Army, you should now have a bet-ter understanding of their roles and structure. More important, you now should have an idea of the role that the total Army plays in our American society.
Chapter 2: The Nation’s Defense Forces Lesson 4: The U.S. Navy
Unit 1: Introduction to JROTC, A Character and Leadership Development Program 74
LESSON 4: THE U.S. NAVY
INTRODUCTION The U.S. Navy is the branch of the U.S. Armed Forces that maintains command of the seas. The Navy is able to seek out and destroy enemies on, under, or above the sea. If attacked, it can return the blow almost any-where on earth from its warships. Navy task forces can carry naval aircraft to any danger point, powerful naval amphibious forces can support troop landings against heavy enemy resistance, and nuclear-powered submarines can fire missiles at targets thousands of miles away. Any enemy that might attack the United States must expect counterblows from these forces, whose exact locations cannot be pin-pointed in advance.
The Navy also serves as an instrument of international relations in times of peace. It is possible that the presence of naval vessels may be helpful in keeping a crisis from developing into war. Additionally, the Navy
engages in actions such as carrying food and medical supplies to disaster areas and in assisting merchant and passenger ships in emergencies. BACKGROUND The Continental Congress founded the U.S. Navy on October 13, 1775, when it passed legislation to purchase and arm two ships. Congress set up a naval committee to administer naval affairs and to build and equip warships. This was the creation of the Continental Navy. The date of October 13 is now regarded as the official birthday of the U.S. Navy.
When the Founding Fathers created the U.S. Constitution, they also provided for the establishment of the Navy in Article I, Section 8, which states that “The Congress shall have the power to provide and maintain a Navy.” Congress then authorized the estab-lishment of the Navy and directed that a set of regulations be developed to run it. During the American Revolutionary War (1775 – 1783), about 50 vessels served in
DID YOU KNOW?
The Confederate coastline, broken by numerous inlets and 189 rivers, stretched from the Potomac River to the Rio Grande — 3,500 miles.
The Union commissioned the Monitor on February 25, 1862. Its design included as many as 40 new patents, its deck was armor plated, it was steam powered, and the 14-ton turret could revolve 360 degrees. Its major battle was against the Confederate’s Merrimack on March 9, 1862. The Monitor won.
amphibiousaweighcommercefrigatesmobilizationoperationalsea powerstrategic
amphibiousaweighcommercefrigatesmobilizationoperationalsea powerstrategic
Chapter 2: The Nation’s Defense Forces Lesson 4: The U.S. Navy
Unit 1: Introduction to JROTC, A Character and Leadership Development Program 75
the Continental Navy. The Navy discontinued operations after that war and, in 1785, the last warship was sold. However, Congress soon realized the need for another fleet. In 1794, Congress voted to build six frigates to fight the Barbary pirates off North Africa who preyed on American merchant ships. This seagoing force operated under the Secretary of War. The launching of the United States in 1797 marked the rebirth of the U.S. Navy. The Civil War (1861 – 1865) had a tremendous impact on the growth of the Navy. When the war began in 1861, the Union had just 41 vessels in commission — half of which were officially obsolete, and the Con-federacy did not even have a navy. Although the South tried to build innovative naval units for its harbor and coastal defense, it was never able to match the North’s sea power. During the Civil War, the Union Navy grew to more than 600 ships, including 60 armored ironclads and monitors. Nearly 60,000 officers and men served in the Union Navy, which had numbered only about 9,000 at the start of the war. It is indisputable that the Navy played a vital role in the outcome of that war for the Union. After the Civil War, the Department of War reduced the size of the Navy to a number of ships that was not adequate for the United States to defend itself. This condition persisted until 1889, when the German Kaiser tried to gain control of the Samoan Islands. The Kaiser had a strong, well-equipped navy, but a hurricane and tidal wave destroyed some of his ships and prevented a battle. As a result of this threatened conflict, U.S. military lead-ers realized they needed to strengthen the nation’s sea power. A shipbuilding and training program was started to upgrade the readiness of the Navy, which ultimately resulted in the Navy’s success in defeating the
Spanish fleet during the Spanish-American War in 1898. MISSIONS The Navy’s overall mission is to main-tain, train, and equip combat-ready naval forces capable of winning wars, deterring aggression, and maintaining freedom of the seas. Under the direction of the President and Secretary of Defense, the Navy has four primary missions during times of war; they are to: ! Seek out and destroy enemy forces at sea. ! Destroy or reduce enemy sea commerce. ! Maintain control of the seas. ! Conduct land, sea or air operations as
needed to achieve these goals. In simple terms, the Navy will attempt to stop any ocean threat by destroying enemy aircraft, surface ships, and submarines. Every day, naval forces stress U.S. commitments and interests around the world. Their presence is a physical demonstration of the country’s will to keep peace and to honor its treaties. In that regard, the Navy has three main roles: strategic nuclear deterrence, overseas naval deployment, and sea-lines-of-communication security. The Navy must carry out national policies and support our forces and our allies wherever they may be. It must protect the right of our maritime ships to move about freely on the oceans. It must provide a first line of defense in protecting our country against aggressors. It is the role of each person in the Navy to assist in the implementation of our nation’s foreign policy. A foreign policy is an expression of a nation’s attitude or pos-ture toward other nations. All nations have some sort of foreign policy.
Chapter 2: The Nation’s Defense Forces Lesson 4: The U.S. Navy
Unit 1: Introduction to JROTC, A Character and Leadership Development Program 76
ORGANIZATION The U.S. Navy operates under the Department of the Navy — a Military Depart-ment of the Department of Defense. The Secretary of the Navy, a civilian appointed by the President but subject to Senate approval, heads the entire naval establishment and is responsible to the President and the Secretary of Defense. The Chief of Naval Operations is the Navy’s highest-ranking officer, who serves as the Secretary of the Navy’s principal naval adviser and represents the Navy on the Joint Chiefs of Staff. The Department of the Navy has two principal subordinate compon-ents. They are: • The Operating Forces — include the U.S.
Marine Corps (headed by a Commandant who reports directly to the Secretary of the Navy), reserve components, and, in time of war, the U.S. Coast Guard (in peace, a component of the Department of Trans-portation)
• The Shore Establishment Other special commands under the Chief of Naval of Operations include the Operational Test and Evaluation Forces, Naval Special Warfare Command, and Mili-tary Sealift Command. OPERATING FORCES (“FLEET FORCES”) World War II left the Navy with enough ships to maintain a two-ocean capabil-ity. Although the Navy’s force structure and force deployment change as a result of con-flicts around the globe, the chart in the next column shows the deployment of forces as of January 1999. As naval units enter into a particular area of responsibility, the Navy operationally assigns them to the appropriate fleet. These
fleets are then divided into task forces that perform specific tasks and meet the changing needs of the Navy. All Navy units also have an administrative chain of command with the various ships reporting to the appropriate commander.
TYPES OF SHIPS Based on the Navy’s two principal weapon systems, conventional and nuclear, its operating forces and types of ships can also be divided into those same categories. For example, conventional operating forces include combat and support ships, the major vessels of which include aircraft carriers, attack submarines, cruisers, destroyers, frig-ates, amphibious ships, and mobile logistics support ships. Combat ships of the U.S. Navy include warships, amphibious warfare ships, and mine warfare ships. Smaller vessels — called combatant crafts — patrol coastlines, land troops, and operate on rivers and shallow waterways. Auxiliary ships give additional help and provide maintenance, fuel, supplies,
# The Third and Seventh Fleets are under the Pacific Fleet Command (with its headquarters at Pearl Harbor, HI). *
# The Second Fleet is under the Atlantic
Fleet Command (with its headquarters at the Norfolk Naval Base, VA). *
# The Sixth Fleet (located in the Med-
iterranean and Black Seas and adjacent areas) is under U.S. Naval Forces Europe.
# The Fifth Fleet is under the U.S. Naval
Forces Central Command. *Include(s) Fleet Marine forces
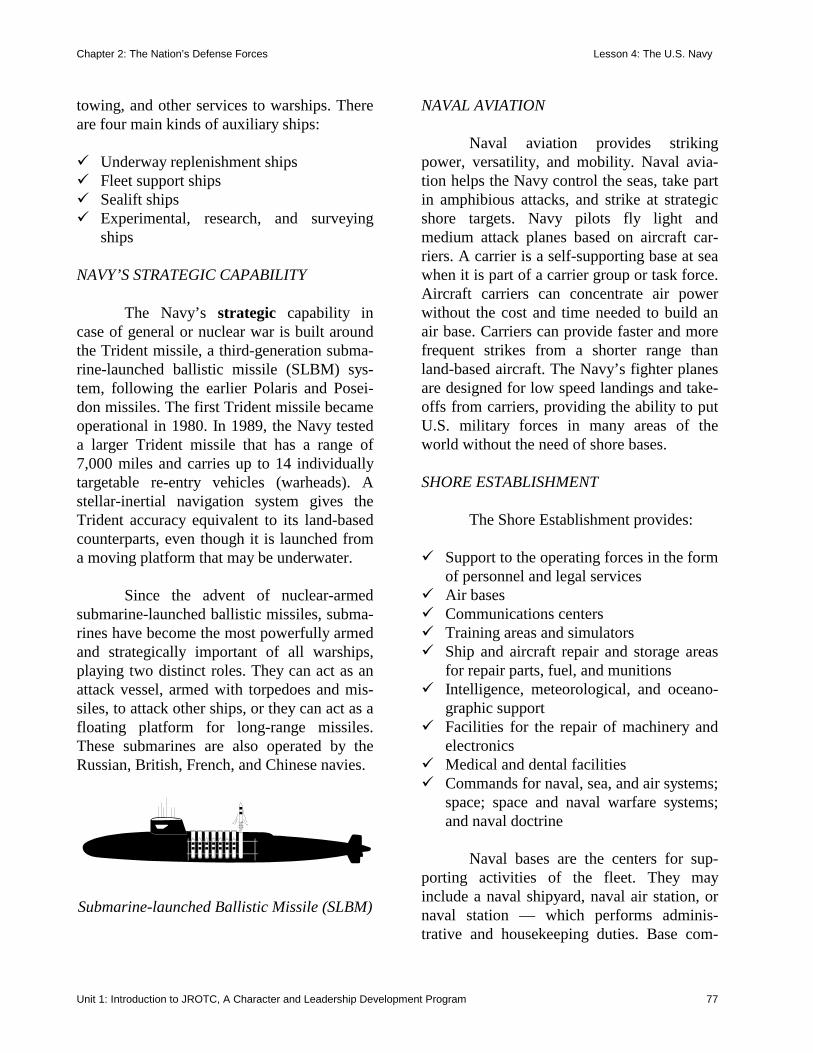
Chapter 2: The Nation’s Defense Forces Lesson 4: The U.S. Navy
Unit 1: Introduction to JROTC, A Character and Leadership Development Program 77
towing, and other services to warships. There are four main kinds of auxiliary ships: # Underway replenishment ships # Fleet support ships # Sealift ships # Experimental, research, and surveying
ships NAVY’S STRATEGIC CAPABILITY The Navy’s strategic capability in case of general or nuclear war is built around the Trident missile, a third-generation subma-rine-launched ballistic missile (SLBM) sys-tem, following the earlier Polaris and Posei-don missiles. The first Trident missile became operational in 1980. In 1989, the Navy tested a larger Trident missile that has a range of 7,000 miles and carries up to 14 individually targetable re-entry vehicles (warheads). A stellar-inertial navigation system gives the Trident accuracy equivalent to its land-based counterparts, even though it is launched from a moving platform that may be underwater. Since the advent of nuclear-armed submarine-launched ballistic missiles, subma-rines have become the most powerfully armed and strategically important of all warships, playing two distinct roles. They can act as an attack vessel, armed with torpedoes and mis-siles, to attack other ships, or they can act as a floating platform for long-range missiles. These submarines are also operated by the Russian, British, French, and Chinese navies.
Submarine-launched Ballistic Missile (SLBM)
NAVAL AVIATION Naval aviation provides striking power, versatility, and mobility. Naval avia-tion helps the Navy control the seas, take part in amphibious attacks, and strike at strategic shore targets. Navy pilots fly light and medium attack planes based on aircraft car-riers. A carrier is a self-supporting base at sea when it is part of a carrier group or task force. Aircraft carriers can concentrate air power without the cost and time needed to build an air base. Carriers can provide faster and more frequent strikes from a shorter range than land-based aircraft. The Navy’s fighter planes are designed for low speed landings and take-offs from carriers, providing the ability to put U.S. military forces in many areas of the world without the need of shore bases. SHORE ESTABLISHMENT The Shore Establishment provides: # Support to the operating forces in the form
of personnel and legal services # Air bases # Communications centers # Training areas and simulators # Ship and aircraft repair and storage areas
for repair parts, fuel, and munitions # Intelligence, meteorological, and oceano-
graphic support # Facilities for the repair of machinery and
electronics # Medical and dental facilities # Commands for naval, sea, and air systems;
space; space and naval warfare systems; and naval doctrine
Naval bases are the centers for sup-porting activities of the fleet. They may include a naval shipyard, naval air station, or naval station — which performs adminis-trative and housekeeping duties. Base com-
Chapter 2: The Nation’s Defense Forces Lesson 4: The U.S. Navy
Unit 1: Introduction to JROTC, A Character and Leadership Development Program 78
manders also coordinate naval activities in their geographic areas. NAVAL RESERVES NAVAL RESERVE FORCE The mission of the U.S. Naval Reserve Force is to provide mission-capable units and individuals to the Navy/Marine Corps Team throughout the full range of operations from peace to war. In today’s setting, this mission takes on added meaning and responsibilities as the Naval Reserve Force is called upon to play an increasingly active role in the day-to-day planning and operational requirements of the active Navy. The Naval Reserve Force represents 20 percent of the Navy’s total assets and is a significant force multiplier the Navy must have to meet its growing global commitments. Operations “Desert Shield” and “Des-ert Storm” (1990-91) gave dramatic evidence that the Naval Reserve Force is an effective and vital part of the operational capabilities of the Navy during an emergency. Over 20,000 Naval Reservists were called for active duty ranging from medical to fleet intelligence support personnel. These “civilian” sailors responded and exceeded expectations in accomplishing their tasks.
The Naval Reserve Force consists of
the Ready Reserve, Standby Reserve, and Retired Reserve — numbering over 690,000 people. The Ready Reserve is made up of the Selected Reserve and the Individual Ready Reserve. The Selected Reserve is the Navy’s primary source of immediate mobilization manpower, and represents those reservists who are paid either as weekend “drillers” or in full-time support on active duty status in the training and administration of the Naval Reserve Force program.
The Naval Reserve Force is headquar-tered in New Orleans. The Commander of Naval Reserve Force functions as a director on the staff of the Chief of Naval Operations and as an adviser on naval reserve matters to Congress. NAVAL SURFACE RESERVE FORCE The Navy Department in 1887 prepared a plan where the Secretary of the Navy was given authority to lend each state having a naval militia one of the Navy’s older ships, as well as equipment, to promote drills and instruction. In 1915, Congress formally created a Federal Naval Reserve, the ances-tor organization of today’s Naval Surface Reserve Force.
The Surface Reserve Force comprises men and women who serve at home and abroad, on shore and at sea, on active duty and on the drill deck. They are not just “weekend warriors” anymore. They can be found on station around the world 24 hours a day, augmenting the fleet as an active part of the Navy. The Surface Reserve Force main-tains assigned personnel and equipment in a state of readiness and availability that permits rapid augmentation into the fleet upon partial or full mobilization. NAVAL AIR RESERVE FORCE In 1916, Congress passed the Naval Reserve Appropriations Act that established the Naval Reserve Flying Corps. About seven months later, 12 students from Yale led by F. Trubee Davison volunteered for the first Naval Air Reserve flying squadron. From that beginning, Naval Air Reservists have served in every crisis that has confronted the nation, including World Wars I and II, Korea, the Berlin Airlift, Vietnam, and Operation Desert Storm.
Chapter 2: The Nation’s Defense Forces Lesson 4: The U.S. Navy
Unit 1: Introduction to JROTC, A Character and Leadership Development Program 79
In 1983, the Naval Air Reserve Force was created as a separate command within the Naval Reserve Force structure. The Naval Air Reserve Force has 39 squadrons equipped with the most modern aircraft, including the F/A-18 Hornet and the F-14 Tomcat, among others. TRADITION Naval history tells of John Paul Jones, whose battle cry, “I have not yet begun to fight,” helped to establish the Navy’s fighting traditions. Common to the Navy are the names of famous ships, such as the Nautilus, the world’s first nuclear-powered warship. The Navy emblem was adopted in 1957. “Anchors Aweigh” is the Navy’s marching song. Blue and gold are its colors.
Chapter 2: The Nation’s Defense Forces Lesson 5: The U.S. Air Force
Unit 1: Introduction to JROTC, A Character and Leadership Development Program 80
LESSON 5: THE U.S. AIR FORCE
INTRODUCTION The U.S. Air Force exemplifies the dominant role of air and space power in meet-ing this nation’s security needs across the entire spectrum of peace and conflict — such as building U.S. influence globally through its presence and strengthening national capabilities to conduct decisive combat operations world-wide on short notice. Therefore, a major com-mitment of the Air Force over the past decade has been to remain the world’s premier air and space force. BACKGROUND The U.S. military first started using bal-loons for aerial reconnaissance of the battlefield during the Civil War (1861 – 1865). Following that war, air operations remained a responsibil-ity of the Army until the turn of the century, when, in 1907, the Air Branch was established as a part of an Aeronautical Division of the Army Signal Corps. The Army ordered its first military plane from the Wright brothers in
1908. Until 1911, the Army had only one pilot and one plane. In that year, Congress appropri-ated the first funds for aviation — $135,000. In 1926, the Army’s Air Branch was renamed the Army Air Corps. However, air operations continued to become increasingly independent and the Army formed the Army Air Force in 1941. By the time Japan attacked Pearl Harbor on December 7, 1941, the air arm was a vital member of the defense team. After World War II, Congress estab-lished the U.S. Air Force as a part of the National Military Establishment with the passage of the National Security Act of 1947. Then, on September 18, 1947, the Air Force was assigned its missions and objectives in the nation’s defense structure and it officially came into being. Today, the Air Force has many different kinds of aircraft — some are still powered by propellers, most are powered by jet engines, many of them require only one pilot, others require a full crew, and some are guided only by electronic devices. The Air Force has air-craft and missiles all over the world that are ready for a surprise air or missile attack. To dis-courage such an attack, the Air Force maintains the power to strike back immediately with con-ventional or nuclear weapons. The Air Force also supports ground troops in battle and pro-tects them from air attack. MISSIONS As an essential contributor to America’s security, the mission of the Air Force is to defend the United States through control and exploration of air and space. Teamed with the other Services, the Air Force is prepared to fight and win any war if deterrence fails. To meet this challenge, the Air Force brings six core competencies to the fight and five pillars
avionicsparitypayloadproliferationstealth
avionicsparitypayloadproliferationstealth
Chapter 2: The Nation’s Defense Forces Lesson 5: The U.S. Air Force
Unit 1: Introduction to JROTC, A Character and Leadership Development Program 81
in support of the nation’s interests. The core competencies are: ! Air and space superiority ! Global attack ! Rapid global mobility ! Precision engagement ! Information superiority ! Agile combat support
The five pillars are: ! Building U.S. influence around the world ! Controlling the high ground of space ! Supplying rapid global mobility ! Providing versatile combat forces ! Sustaining nuclear deterrence
These tasks have assumed heightened significance in the post-Cold War era. Air and space power can help to shape the international environment through global presence, and in a world defined by contingencies, the Air Force focuses on three objectives to guide it through these turbulent times. These objectives are to maintain combat readiness, shape tomorrow’s force, and support its people. Moreover, with the rise in instability and unrest throughout much of the world in the 1990s, America’s security depends on a stra-tegy to control or limit this instability by remaining engaged — but without the benefit of a large permanent presence of military forces overseas. In short, the United States must increasingly depend on forces that can project power rapidly and globally from this continent to influence events abroad. The Air Force, with its global presence, is fully employed in support of this strategy by: # Preparing to deter or defeat aggression # Providing stability for the growth of new
democracies and peaceful resolution of conflicts
# Conducting humanitarian operations
Therefore, the Air Force remains organ-ized, trained, and equipped for prompt and con-tinuous operations that include: • Defending the United States against any
aircraft or missile attacks and pursuing development of space-based infrared sys-tems to provide accurate tactical warning of a missile attack against deployed troops.
• Pursuing technologies to improve the ability
of the United States to neutralize ballistic and cruise missiles and weapons of mass destruction before launch or very early in flight.
• Keeping enemy aircraft out of U.S. air
space. • Providing close air support to deployed
troops. • Providing combat support, such as enemy
surveys or weather information, to U.S. military forces.
• Supporting research and development of
aerospace programs. • Dominating the information environment. • Supporting defense space programs, such as
the strategic defense initiative or outer space defense.
• Supporting National Aeronautics and Space
Administration (NASA) programs, such as the space shuttle missions.
Chapter 2: The Nation’s Defense Forces Lesson 5: The U.S. Air Force
Unit 1: Introduction to JROTC, A Character and Leadership Development Program 82
ORGANIZATION The U.S. Air Force operates under the Department of the Air Force — a Military Department of the Defense Department. The Secretary of the Air Force, a civilian appointed by the president but subject to Senate approval, heads the entire Air Force establishment and is responsible to the president and the Secretary of Defense. The Chief of Staff of the Air Force is the highest-ranking officer, who serves as the Secretary of the Air Force’s principal adviser and represents the Service on the Joint Chiefs of Staff. An Air Staff directs the operational forces of the Air Force.
The Air Force is organized in nine major commands throughout the world that provide combat aircraft, airlift, refueling, reconnaissance, and other support to the Unified Combatant Commands. Additionally, the Air Force has more than three dozen Field Operating Agencies and Direct Reporting Units which directly support the mission by providing unique services. The major commands are: • Air Combat Command • Air Education and Training Command • Air Force Reserve Command • Air Force Material Command • Air Force Space Command • Air Mobility Command • Pacific Air Forces • U.S. Air Forces in Europe • Air Force Special Operations Command FORCE STRUCTURE During the mid-1990s, the Air Force reorganized its resources to maintain a combat ready force that is smaller but more powerful than ever before. The resulting force structure enables the Air Force to support joint force commanders in accomplishing their missions and to meet its current national security require-ments as defined by the President, the Secretary of Defense, and the Secretary of the Air Force. The careful management of these resources ensures that Air Force units are supportable and sustainable, and its personnel are adequately trained to execute all assigned tasks.
This force structure enables the Air Force to fight on two nearly-simultaneous major regional conflicts as explained below. Of the 13 active duty fighter wing equivalents, five and two-thirds are permanently assigned to Europe and the Pacific, leaving seven and one-third available to the Air Combat Command to immediately commit to a theater in the event of
FORCE STRUCTURE # 13 active and 7 reserve component Fighter
Wing Equivalents (FEWs) # 100 deployable bombers (B-1, B-2, B-52) # 450 to 500 single-warhead Intercontinen-
tal Ballistic Missiles (ICBMs)

Chapter 2: The Nation’s Defense Forces Lesson 5: The U.S. Air Force
Unit 1: Introduction to JROTC, A Character and Leadership Development Program 83
a contingency. Under this scenario, the reserve components are critical and they would be mobilized after the active duty forces. More wings could be injected within the first several weeks if required. The bombers would deploy with the other forces and conduct combat operations immediately upon the onset of hostilities — operating from the United States initially, then deploying into the theater to maximize operating tempos. Acting together, these forces are key to seizing the initiative from the enemy, destroying its ability to project power, and helping to create conditions for a peaceful settlement favorable to the United States. This force structure also provides for a sufficient reserve to deter or respond to a sec-ond aggressor should another conflict erupt. The Air Force is also organized to participate in the nation’s space programs. For example, the Air Force provides officers to serve as astronauts, uses Air Force scientists to launch satellites and space probes, tracks hur-ricanes, conducts research into weather fore-casting, and carries out hazardous search and rescue missions in emergencies. MODERN-DAY and FUTURE AIRCRAFT THE F-16 FIGHTING FALCON Ever since the mid-1970s, the F-16 Fighting Falcon has been one of the Air Force’s premier air superiority fighters. The F-16 is a highly maneuverable aircraft that can fly at twice the speed of sound. It can carry a variety of weapons such as heat-seeking and laser-guided missiles.
STEALTH TECHNOLOGY FIGHTERS The present F-117A stealth fighter (pic-tured below) has a surface that is principally aluminum coated with radar-absorbent materi-als and serrated edges to suppress radar reflec-tion. It counters radar by absorbing incoming waves and directing echoes away from the radar trying to detect the aircraft. Radar that hits the aircraft directly ahead is its most serious threat. The stealth is a slow aircraft, but speed is not that important since it cannot be detected by radar. Its maximum speed is 740 mph, although at combat weight, that speed drops to 190 mph.
The stealth fighter of the future, the F-22, “epitomizes what any adversary respects most about American military power — it is sophis-ticated, responsive, flexible, and extremely dif-ficult to defend against. It will ensure that the United States maintains its record of air super-iority into the twenty-first century. With the proliferation of launch and leave air-to-air missiles, many foreign fighters are now at par-ity with the F-15, which is highly vulnerable to advanced surface-to-air missiles. The F-22 will provide the qualities required to fight out-numbered against opponents and win using supersonic cruise, high maneuverability, and advanced avionics. Once the F-22 wins the contest for air superiority, it can quickly swing to surface attack operations — penetrating
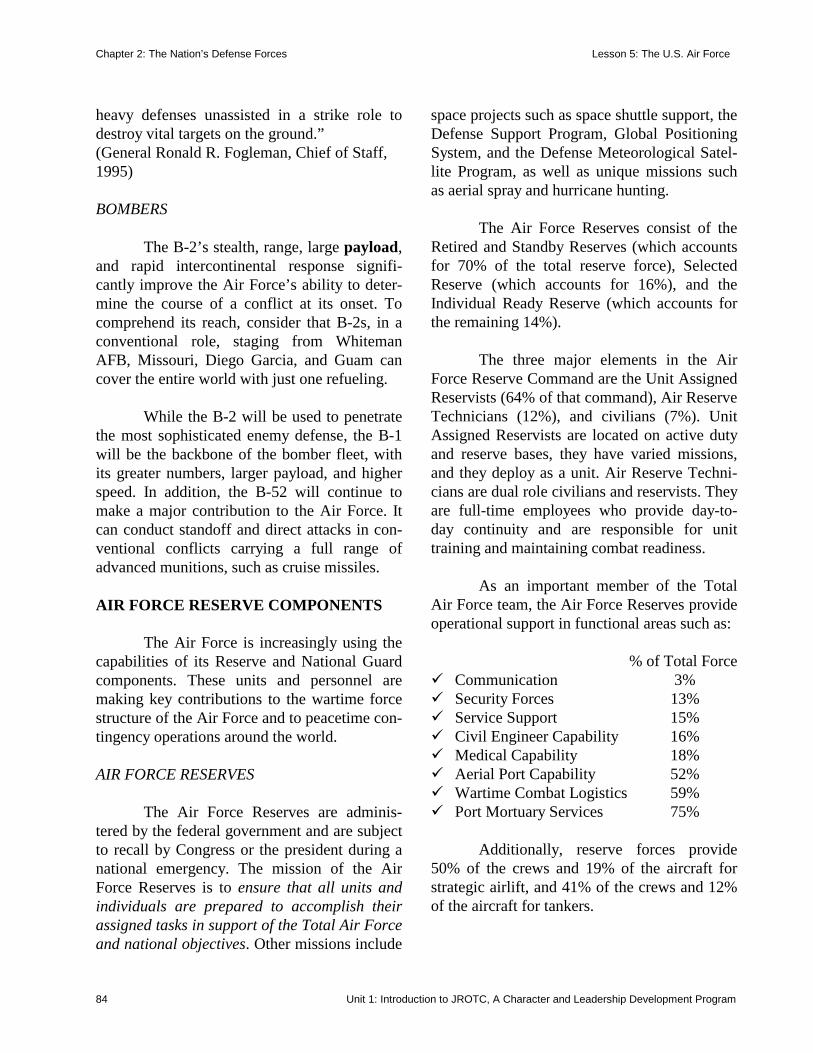
Chapter 2: The Nation’s Defense Forces Lesson 5: The U.S. Air Force
Unit 1: Introduction to JROTC, A Character and Leadership Development Program 84
heavy defenses unassisted in a strike role to destroy vital targets on the ground.” (General Ronald R. Fogleman, Chief of Staff, 1995) BOMBERS The B-2’s stealth, range, large payload, and rapid intercontinental response signifi-cantly improve the Air Force’s ability to deter-mine the course of a conflict at its onset. To comprehend its reach, consider that B-2s, in a conventional role, staging from Whiteman AFB, Missouri, Diego Garcia, and Guam can cover the entire world with just one refueling. While the B-2 will be used to penetrate the most sophisticated enemy defense, the B-1 will be the backbone of the bomber fleet, with its greater numbers, larger payload, and higher speed. In addition, the B-52 will continue to make a major contribution to the Air Force. It can conduct standoff and direct attacks in con-ventional conflicts carrying a full range of advanced munitions, such as cruise missiles. AIR FORCE RESERVE COMPONENTS The Air Force is increasingly using the capabilities of its Reserve and National Guard components. These units and personnel are making key contributions to the wartime force structure of the Air Force and to peacetime con-tingency operations around the world. AIR FORCE RESERVES The Air Force Reserves are adminis-tered by the federal government and are subject to recall by Congress or the president during a national emergency. The mission of the Air Force Reserves is to ensure that all units and individuals are prepared to accomplish their assigned tasks in support of the Total Air Force and national objectives. Other missions include
space projects such as space shuttle support, the Defense Support Program, Global Positioning System, and the Defense Meteorological Satel-lite Program, as well as unique missions such as aerial spray and hurricane hunting.
The Air Force Reserves consist of the Retired and Standby Reserves (which accounts for 70% of the total reserve force), Selected Reserve (which accounts for 16%), and the Individual Ready Reserve (which accounts for the remaining 14%). The three major elements in the Air Force Reserve Command are the Unit Assigned Reservists (64% of that command), Air Reserve Technicians (12%), and civilians (7%). Unit Assigned Reservists are located on active duty and reserve bases, they have varied missions, and they deploy as a unit. Air Reserve Techni-cians are dual role civilians and reservists. They are full-time employees who provide day-to-day continuity and are responsible for unit training and maintaining combat readiness. As an important member of the Total Air Force team, the Air Force Reserves provide operational support in functional areas such as:
% of Total Force # Communication 3% # Security Forces 13% # Service Support 15% # Civil Engineer Capability 16% # Medical Capability 18% # Aerial Port Capability 52% # Wartime Combat Logistics 59% # Port Mortuary Services 75%
Additionally, reserve forces provide 50% of the crews and 19% of the aircraft for strategic airlift, and 41% of the crews and 12% of the aircraft for tankers.
Chapter 2: The Nation’s Defense Forces Lesson 5: The U.S. Air Force
Unit 1: Introduction to JROTC, A Character and Leadership Development Program 85
AIR NATIONAL GUARD
The Air National Guard is administered by the states, but the president can call Air National Guard units to active duty during national emergencies. The mission of the Air National Guard is to provide ready units to the state and nation in three roles: ♦ Federal Role — to support national security
objectives. ♦ State Role — to protect life and property,
and to preserve peace, order, and safety. ♦ Community Role — to participate in local,
state, and national programs that add value to America.
Although the Air National Guard was
not established as a separate reserve component of the U.S. Air Force until September 1947, National Guard aviators have played significant roles in all of America’s wars and most of its major contingencies since the First World War. The history of the Air National Guard dates back to November 1915 when Captain Raynal Bolling organized and took command of a unit that became the 1st Aero Company of the New York National Guard. In 1916, the 1st Aero Company mobilized during the border crisis with Mexico. During World War I, the War Department decided not to mobilize the air guard units. Instead, individual guard members volunteered to enter the service — providing a major pool of aviators from which the Army could draw. These volunteers had to leave the Guard and enter the Army Signal Corps. One such volunteer was Eddie Rickenbacker — who became the leading U.S. air ace in World War I because he shot down 22 enemy planes. After World War I, the War Department formed 29 National Guard observation squad-rons. These squadrons supported ground forces training and participated in state missions such
as carrying supplies and relief workers during the 1927 flood. One of the most famous Guard pilots of that time was Charles A. Lindbergh — the first person to make a solo nonstop trans-atlantic flight in 1927.
During Desert Storm in the early 1990s, the contributions of the Air National Guard included a wide range of support missions: Its aerial tankers pumped over 250 million pounds of fuel into more than 18,000 aircraft, and its airlifters flew some 40,000 hours, transporting 55,000 people, and 115,000 tons of cargo. Today, programs of Air National Guard units extend beyond the boundaries of their home states and the nation. For example, 13 states have formed partnerships with other nations as a result of the Air National Guard’s “Building Bridges to America” program. TRADITION
The core values of the Air Force are “integrity first, service before self, and excel-lence in all things we do.” These core values serve as the standard of behavior for all its per-sonnel — serving to remind its members of the importance of the profession they have chosen, the oath they took, and the demands placed upon them as members of the profession at arms. The official colors of the Air Force are ultramarine blue and golden yellow.
Chapter 2: The Nation’s Defense Forces Lesson 6: The U.S. Marine Corps
Unit 1: Introduction to JROTC, A Character and Leadership Development Program 86
LESSON 6: THE U.S. MARINE CORPS
INTRODUCTION The U.S. Marine Corps is a component of the Department of the Navy and, as such, is under the operational control of the Secretary of the Navy. However, since the Marine Corps is responsible for its own administration, disci-pline, and training, it is in actuality an inde-pendent branch of the U.S. Armed Forces. A commandant, appointed by the president, heads the Marine Corps. The commandant usually serves four years and holds the rank of General. The Marine Corps has been an impor-tant part of America’s defense since its found-ing in 1775. Although usually associated with the missions of “the fleet,” it is often assigned missions unrelated to naval operations such as in the Korean and Vietnam conflicts. BACKGROUND On November 10, 1775, the Continental Congress passed a resolution stating, “two bat-
talions of Marines be raised” for service as landing forces with the fleet. This resolution, sponsored by John Adams, established the Con-tinental Marines and marked the official birth-day of the Marine Corps. Serving on land and at sea, these first Marines distinguished them-selves in a number of operations, including their first amphibious raid in New Providence, Bahamas, on March 3, 1776.
Throughout the American Revolution-ary War, the need arose for a regularly organ-ized corps of specially trained sharpshooters, and the Continental Marines answered that call. When the Treaty of Paris in April 1783 brought an end to the Revolutionary War and as the last of the Navy’s ships were sold, the Continental Navy and Marines went out of existence. Con-gress did not formally reestablish the Marine Corps until July 11, 1798. In the years following its reestablish-hment, a small force of Marines participated in the war with the Barbary pirates and, in 1805, took part in the capture of an “Old World” fortress at Derne, Tripoli. As a result of this action, the inscription “To the Shores of Tripoli” was added to the Colors of the Corps.
Following Tripoli, a small detachment of Marines numbering 10 officers and 483 enlisted men took part in the War of 1812, America’s first major conflict with Britain since the Revolutionary War. Since then, the Marine Corps has participated in all of the actions of the Navy and with the Army in times of war. A well-known military saying is “the marines have landed, and the situation is well in hand.” Marines have been the first to fight in almost every major war of the United States and they have made more than 300 landings on foreign shores.
ethosexpeditionaryinextricably
ethosexpeditionaryinextricably
Chapter 2: The Nation’s Defense Forces Lesson 6: The U.S. Marine Corps
Unit 1: Introduction to JROTC, A Character and Leadership Development Program 87
MISSIONS Since the creation of the Marine Corps over 200 years ago, the duties and missions of the Marines have changed. The original duties of the Marines involved firing their weapons from the tops of masts, manning the guns, keeping order on board ships, and providing personnel for landing parties. As seen in these examples, the mission of the Marine Corps was of an amphibious nature. It was not until the Second Seminole War in 1835 that the Marines saw their first duty as an expeditionary force. The present-day mission of the Marine Corps is to “Make Marines and Win Battles.” Having a well-defined strategic concept is vital to accomplishing this mission and to ensuring that the Corps properly organizes, equips, and trains its forces. In addition to this enduring concept, the Marine Corps also performs one other function: “such other duties as the Presi-dent may direct.” This task has historically kept the Corps the busiest and requires that Marines be ready for commitment across the full spec-trum of operations. STRATEGIC CONCEPT
Influenced by early U.S. defeats in the Korean War, the U.S. Congress in 1952 pro-vided a clear and strategic concept for the Marine Corps that is as relevant today as it was then. This strategic concept states that the Marine Corps must be: ! A versatile, expeditionary force in readiness. ! A balanced force for a naval campaign and
a ground and air striking force. ! Always at a high state of readiness. ! Ready to suppress or contain international
disturbances short of war. ! Most ready when the nation is least ready.
TASKS IN SUPPORT OF THE NAVY The Marine Corps is at all times subject to the laws and regulations established for the Department of the Navy, except when attached to another branch of the Service by order of the president. Since the responsibilities of the Marine Corps include the seizure or defense of advanced naval bases and the conduct of land operations associated with naval campaigns or other operations, the Marines have four distinct tasks in support of the U.S. Navy: • To maintain a mobile force in immediate
readiness as a part of the fleet for use in operations involving shore objectives.
• To maintain Marine detachments as a part
of the ship’s crew on cruisers, aircraft carri-ers, and battleships.
• To provide garrisons that safeguard Navy
yards and naval stations at home and in out-lying possessions of the United States.
• To provide forces for the protection of
American lives and property abroad (for example, at U.S. embassies).
ATTRIBUTES From these missions, concepts, and tasks emerge an institutional ethos marked by four unique attributes that distinguish the Marine Corps from the other Services. These four attributes are: # Combined Arms in Three Dimensions. The
Marine Corps is the only Service tasked by Congress to be able to operate combined arms in three dimensions: air, land, and sea. The requirement for mutually supporting multi-dimensional operations demands a self-contained — and self-sustained — air-ground fighting force.
Chapter 2: The Nation’s Defense Forces Lesson 6: The U.S. Marine Corps
Unit 1: Introduction to JROTC, A Character and Leadership Development Program 88
# Every Marine a Rifleman. Although the Marine Corps is a multi-dimensional force, Marines share this attribute as a common operational philosophy. In other words, every Marine, regardless of specialty, is fundamentally the same. All are forged from a common experience, share a com-mon set of values, and are trained as a cohesive air-ground team from the moment they join the Corps.
# Task Organized. The Marine Corps
employs a versatile and flexible organiz-ational approach by task, organizing air-ground task forces in order to tailor them to the problem at hand. In this way, the Corps can emphasize whatever capability it needs to accomplish the task at hand — combat or support, land or air, light or heavy.
# Soldiers of the Sea. Marine Corps operations
are inextricably linked with those of the U.S. Navy. For most of our country’s history, integrated Navy-Marine expeditionary forces have been routinely forward deployed around the world. As a result, the Corps possesses extraordinary strategic reach and its daily operations touch the majority of the world’s populations.
ORGANIZATION The Commandant of the Marine Corps is an executive assistant to the Secretary of the Navy, serves as the Navy Secretary’s principal adviser on Marine matters, and represents the Marine Corps on the Joint Chiefs of Staff. The Commandant of the Marine Corps is responsi-ble for the discipline and general efficiency of the Corps. Since the Marine Corps is normally the first U.S. military force to land on enemy soil, the National Security Act of 1947 required that the Corps have no less than three combat divisions and three air wings, plus service and support units as needed.
OPERATING FORCES Operating Forces account for almost two-thirds of the entire Marine Corps. They consist of the Fleet Marine Forces, marines aboard ships, and security forces. The Fleet Marine Forces make up the Corps’ combat units and form parts of the Atlantic and Pacific Fleets. These combat units operate as air-ground teams.
One division and wing team is based on the East Coast of the United States, another is on the West Coast, and the third is in the Far East and Hawaii. The teams are kept combat ready at all times. A fourth division and wing team, composed of elements of the Marine Corps Reserve, is prepared to reinforce the active forces when needed. Marines are also used for security forces onboard ships and in naval stations and bases. These tasks and func-tions contribute to the successful development of an efficient fighting force. Fleet Marine Forces The main operating units of the U.S. Marine Corps are the two Fleet Marine Forces: the Fleet Marine Force Atlantic and the Fleet Marine Force Pacific. These forces are a part of the Operating Forces of the U.S. Navy. They are used in the seizure and defense of advanced naval bases. These Fleet Marine Forces may also be used in other land operations necessary for the successful completion of a naval cam-paign. A Fleet Marine Force consists of head-quarters, service and support units, one or more Marine divisions or brigades, and one or more Marine aircraft wings. Marine Expeditionary Forces The Marine Expeditionary Force is used in the majority of situations involving sustained combat. The basic parts of a Marine Expedi-
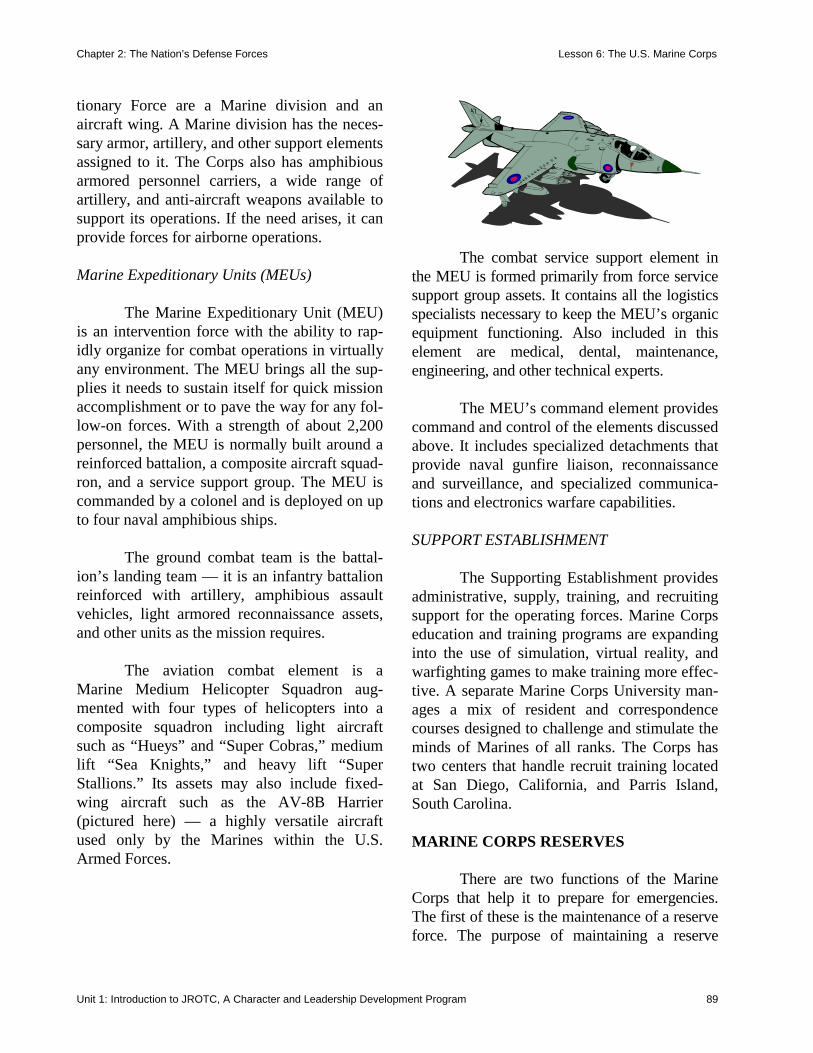
Chapter 2: The Nation’s Defense Forces Lesson 6: The U.S. Marine Corps
Unit 1: Introduction to JROTC, A Character and Leadership Development Program 89
tionary Force are a Marine division and an aircraft wing. A Marine division has the neces-sary armor, artillery, and other support elements assigned to it. The Corps also has amphibious armored personnel carriers, a wide range of artillery, and anti-aircraft weapons available to support its operations. If the need arises, it can provide forces for airborne operations. Marine Expeditionary Units (MEUs) The Marine Expeditionary Unit (MEU) is an intervention force with the ability to rap-idly organize for combat operations in virtually any environment. The MEU brings all the sup-plies it needs to sustain itself for quick mission accomplishment or to pave the way for any fol-low-on forces. With a strength of about 2,200 personnel, the MEU is normally built around a reinforced battalion, a composite aircraft squad-ron, and a service support group. The MEU is commanded by a colonel and is deployed on up to four naval amphibious ships.
The ground combat team is the battal-ion’s landing team — it is an infantry battalion reinforced with artillery, amphibious assault vehicles, light armored reconnaissance assets, and other units as the mission requires.
The aviation combat element is a Marine Medium Helicopter Squadron aug-mented with four types of helicopters into a composite squadron including light aircraft such as “Hueys” and “Super Cobras,” medium lift “Sea Knights,” and heavy lift “Super Stallions.” Its assets may also include fixed-wing aircraft such as the AV-8B Harrier (pictured here) — a highly versatile aircraft used only by the Marines within the U.S. Armed Forces.
The combat service support element in the MEU is formed primarily from force service support group assets. It contains all the logistics specialists necessary to keep the MEU’s organic equipment functioning. Also included in this element are medical, dental, maintenance, engineering, and other technical experts. The MEU’s command element provides command and control of the elements discussed above. It includes specialized detachments that provide naval gunfire liaison, reconnaissance and surveillance, and specialized communica-tions and electronics warfare capabilities. SUPPORT ESTABLISHMENT The Supporting Establishment provides administrative, supply, training, and recruiting support for the operating forces. Marine Corps education and training programs are expanding into the use of simulation, virtual reality, and warfighting games to make training more effec-tive. A separate Marine Corps University man-ages a mix of resident and correspondence courses designed to challenge and stimulate the minds of Marines of all ranks. The Corps has two centers that handle recruit training located at San Diego, California, and Parris Island, South Carolina. MARINE CORPS RESERVES There are two functions of the Marine Corps that help it to prepare for emergencies. The first of these is the maintenance of a reserve force. The purpose of maintaining a reserve

Chapter 2: The Nation’s Defense Forces Lesson 6: The U.S. Marine Corps
Unit 1: Introduction to JROTC, A Character and Leadership Development Program 90
force is to provide and train units and qualified individuals to be available for active duty in the Marine Corps in a time of war or national emergency. The second function is that the Marine Corps must be ready to expand and mobilize at a moment’s notice. To become mobilized means to become assembled or organized, as for war in this case. The Marine Corps is able to respond quickly because it can be carried to any coastal area in the world by Navy ships. The reserves insure that in the event of an emergency, mobilization and expansion can take place quickly and efficiently. The Marine Corps Reserve was author-ized by Congress as a reserve force to be trained in time of peace, and to be called into active service only when the nation is at war, or when there exists a national emergency as declared by the president. The Marine Corps Reserve consists of the Standby Marine Corps Reserve and the Individual Ready Reserve. TRADITION The Marine Corps adopted its emblem in 1868. Its design — credited to Jacob Zeilin, the Commandant of the Marine Corps — has remained nearly unchanged over the years. The emblem consists of the eagle, globe, and anchor, symbolizing the air, land, and sea aspects of the Marine Corps operational envir-onment. In that same year, the Marine Corps’ Hymn was first heard, but no author is credited. The first line of the Hymn contains the stirring words, “From the Halls of Montezuma to the Shores of Tripoli.”
In 1883, the Marine Corps adopted its motto that still exists today, “Semper Fidelis” (or “always faithful”), replacing other well-known motto’s such as “Fortitudine” (used in the early 1800s) and “By Sea and By Land” (adopted in 1876). In 1888, John Phillip Sousa composed the Corps’ march, “Semper Fidelis,”
while serving as leader of the Marine Corps band. Today, this band is called “The Presi-dent’s Own” because it plays for state affairs in the White House. The official colors of the Marine Corps are scarlet and gold.
The core values of the Marine Corps are Honor, Courage, and Commitment. These val-ues are at the very soul of the Marine Corps institution and they frame the way that Marines live and act. INNOVATIONS The Marine Corps has a rich tradition of experimenting with new concepts and tech-nologies, which include the following: $ 1920s and 1930s — Developed amphibious
doctrine that was key to winning the war in the Pacific and in Western Europe.
$ 1930s and 1940s — Perfected close air
support. $ 1950s — Pioneered the use of the heli-
copter, revolutionizing battlefield tactical mobility and operations.
$ 1970s — Pioneered the use of Vertical/
Short Takeoff and Landing Aircraft, provid-ing quick response close air support to front-line troops.
$ 1980s and 1990s — Introduced global pre-
positioning of equipment on ships, allowing for more rapid response to crises around the world.
$ 1990s — Formed the Chemical/Biological
Incident Response Force, providing the United States with a better ability to respond to consequences of chemical-biological terrorism.

Chapter 2: The Nation’s Defense Forces Lesson 6: The U.S. Marine Corps
Unit 1: Introduction to JROTC, A Character and Leadership Development Program 91
$ 1990s — Established Sea Dragon, a new Warfighting Laboratory that is responsible for developing and field-testing future oper-ational and technological concepts.
Chapter 2: The Nation’s Defense Forces Lesson 7: The U.S. Coast Guard and U.S. Merchant Marine
Unit 1: Introduction to JROTC, A Character and Leadership Development Program 92
LESSON 7: THE U.S. COAST GUARD AND U.S. MERCHANT MARINE
INTRODUCTION The U.S. Coast Guard is the nation’s oldest and premier maritime agency. The his-tory of the Service is very complicated because it is the amalgamation of five federal agencies: ! U.S. Lighthouse Service ! Revenue Cutter Service ! Steamboat Inspection Service ! U.S. Lifesaving Service ! Bureau of Navigation
These agencies were originally inde-pendent; however, because they had overlap-ping responsibilities, the government moved them around until Congress finally united them under the umbrella of the Coast Guard (see the chronology below). The multiple missions and responsibilities of the modern Coast Guard are directly tied to this diverse heritage. Members of the Coast Guard have fought in every war of the United States. The present active duty com-plement is slightly over 37,000 personnel, mak-ing the Coast Guard the smallest armed force. The New York City police force is larger than the active duty United States Coast Guard. BACKGROUND Several acts of America’s young gov-ernment in 1789 were to provide for aids to navigation, ensure that tariffs were not avoided, protect shipping from pirates, and intercept contraband (or stop smuggling). On August 7, 1789, the First Congress of the United States federalized the existing lighthouses built by the colonies and appropriated funds for the build-ing of more lighthouses, beacons, and buoys. CHRONOLOGY
August 1790
On August 4, 1790 (now the official birth-day of the Coast Guard), Congress created a service under the Treasury Department to enforce customs laws. This service was alternately known as the system of cutters, Revenue Service, and Revenue-Marine. It was officially named the Revenue Cutter Service in 1863.
amalgamationbarrage balloonsbeaconsbuoyscutterensigngross tonnageletters of marqueeliberty shipspilotageprivateersscuttlingsubsidiessurfboatstenders
amalgamationbarrage balloonsbeaconsbuoyscutterensigngross tonnageletters of marqueeliberty shipspilotageprivateersscuttlingsubsidiessurfboatstenders
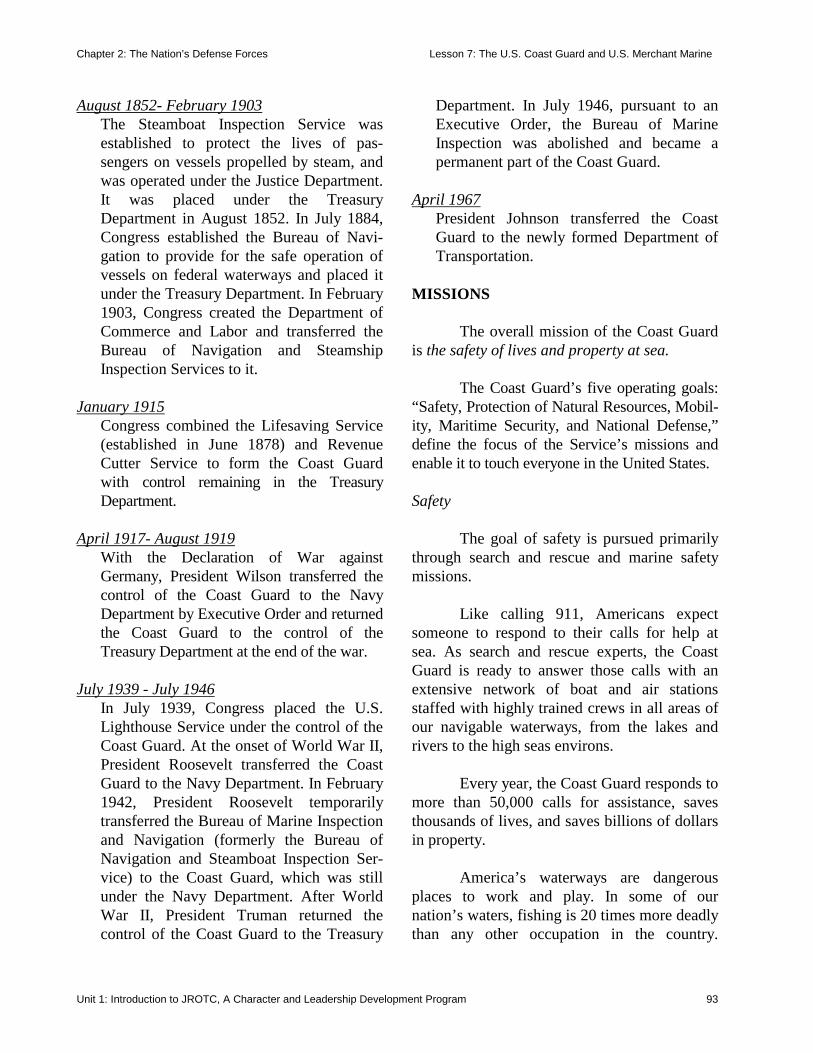
Chapter 2: The Nation’s Defense Forces Lesson 7: The U.S. Coast Guard and U.S. Merchant Marine
Unit 1: Introduction to JROTC, A Character and Leadership Development Program 93
August 1852- February 1903 The Steamboat Inspection Service was established to protect the lives of pas-sengers on vessels propelled by steam, and was operated under the Justice Department. It was placed under the Treasury Department in August 1852. In July 1884, Congress established the Bureau of Navi-gation to provide for the safe operation of vessels on federal waterways and placed it under the Treasury Department. In February 1903, Congress created the Department of Commerce and Labor and transferred the Bureau of Navigation and Steamship Inspection Services to it.
January 1915
Congress combined the Lifesaving Service (established in June 1878) and Revenue Cutter Service to form the Coast Guard with control remaining in the Treasury Department.
April 1917- August 1919
With the Declaration of War against Germany, President Wilson transferred the control of the Coast Guard to the Navy Department by Executive Order and returned the Coast Guard to the control of the Treasury Department at the end of the war.
July 1939 - July 1946
In July 1939, Congress placed the U.S. Lighthouse Service under the control of the Coast Guard. At the onset of World War II, President Roosevelt transferred the Coast Guard to the Navy Department. In February 1942, President Roosevelt temporarily transferred the Bureau of Marine Inspection and Navigation (formerly the Bureau of Navigation and Steamboat Inspection Ser-vice) to the Coast Guard, which was still under the Navy Department. After World War II, President Truman returned the control of the Coast Guard to the Treasury
Department. In July 1946, pursuant to an Executive Order, the Bureau of Marine Inspection was abolished and became a permanent part of the Coast Guard.
April 1967
President Johnson transferred the Coast Guard to the newly formed Department of Transportation.
MISSIONS The overall mission of the Coast Guard is the safety of lives and property at sea.
The Coast Guard’s five operating goals: “Safety, Protection of Natural Resources, Mobil-ity, Maritime Security, and National Defense,” define the focus of the Service’s missions and enable it to touch everyone in the United States.
Safety
The goal of safety is pursued primarily through search and rescue and marine safety missions.
Like calling 911, Americans expect
someone to respond to their calls for help at sea. As search and rescue experts, the Coast Guard is ready to answer those calls with an extensive network of boat and air stations staffed with highly trained crews in all areas of our navigable waterways, from the lakes and rivers to the high seas environs.
Every year, the Coast Guard responds to
more than 50,000 calls for assistance, saves thousands of lives, and saves billions of dollars in property.
America’s waterways are dangerous
places to work and play. In some of our nation’s waters, fishing is 20 times more deadly than any other occupation in the country.
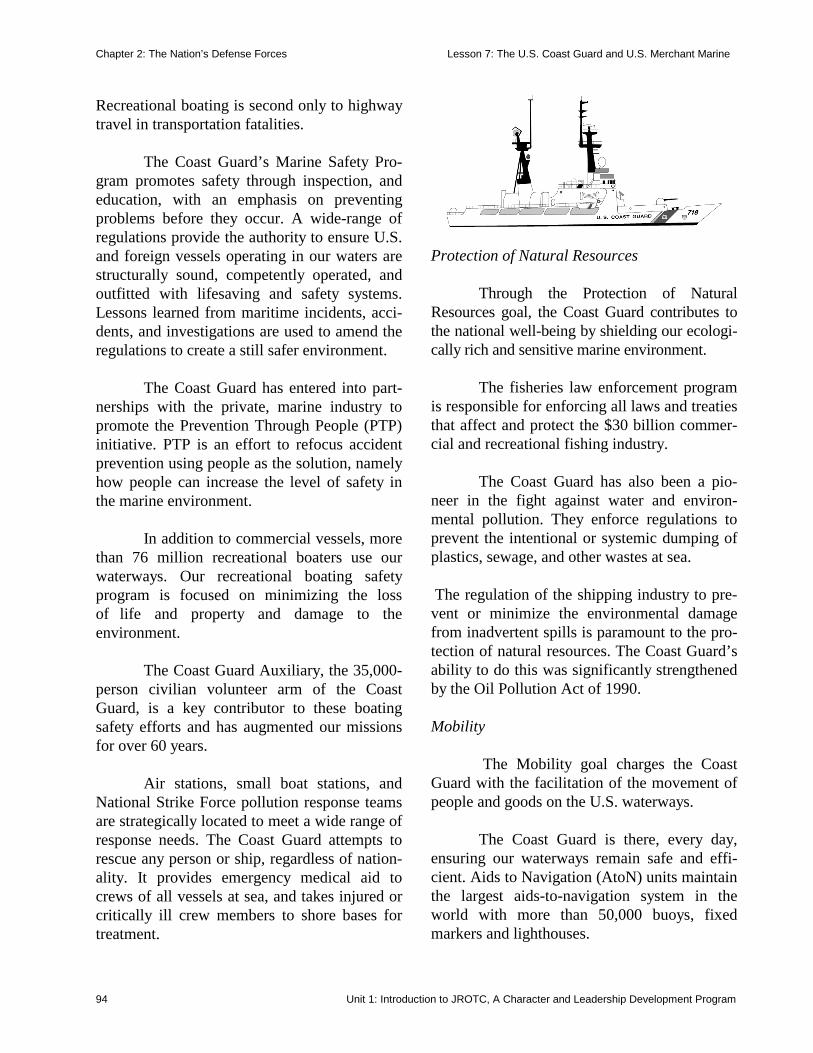
Chapter 2: The Nation’s Defense Forces Lesson 7: The U.S. Coast Guard and U.S. Merchant Marine
Unit 1: Introduction to JROTC, A Character and Leadership Development Program 94
Recreational boating is second only to highway travel in transportation fatalities.
The Coast Guard’s Marine Safety Pro-
gram promotes safety through inspection, and education, with an emphasis on preventing problems before they occur. A wide-range of regulations provide the authority to ensure U.S. and foreign vessels operating in our waters are structurally sound, competently operated, and outfitted with lifesaving and safety systems. Lessons learned from maritime incidents, acci-dents, and investigations are used to amend the regulations to create a still safer environment.
The Coast Guard has entered into part-
nerships with the private, marine industry to promote the Prevention Through People (PTP) initiative. PTP is an effort to refocus accident prevention using people as the solution, namely how people can increase the level of safety in the marine environment.
In addition to commercial vessels, more
than 76 million recreational boaters use our waterways. Our recreational boating safety program is focused on minimizing the loss of life and property and damage to the environment.
The Coast Guard Auxiliary, the 35,000-
person civilian volunteer arm of the Coast Guard, is a key contributor to these boating safety efforts and has augmented our missions for over 60 years.
Air stations, small boat stations, and
National Strike Force pollution response teams are strategically located to meet a wide range of response needs. The Coast Guard attempts to rescue any person or ship, regardless of nation-ality. It provides emergency medical aid to crews of all vessels at sea, and takes injured or critically ill crew members to shore bases for treatment.
Protection of Natural Resources Through the Protection of Natural Resources goal, the Coast Guard contributes to the national well-being by shielding our ecologi-cally rich and sensitive marine environment.
The fisheries law enforcement program is responsible for enforcing all laws and treaties that affect and protect the $30 billion commer-cial and recreational fishing industry.
The Coast Guard has also been a pio-
neer in the fight against water and environ-mental pollution. They enforce regulations to prevent the intentional or systemic dumping of plastics, sewage, and other wastes at sea.
The regulation of the shipping industry to pre-vent or minimize the environmental damage from inadvertent spills is paramount to the pro-tection of natural resources. The Coast Guard’s ability to do this was significantly strengthened by the Oil Pollution Act of 1990. Mobility
The Mobility goal charges the Coast Guard with the facilitation of the movement of people and goods on the U.S. waterways.
The Coast Guard is there, every day,
ensuring our waterways remain safe and effi-cient. Aids to Navigation (AtoN) units maintain the largest aids-to-navigation system in the world with more than 50,000 buoys, fixed markers and lighthouses.
Chapter 2: The Nation’s Defense Forces Lesson 7: The U.S. Coast Guard and U.S. Merchant Marine
Unit 1: Introduction to JROTC, A Character and Leadership Development Program 95
Coast Guard personnel operate preci-sion electronic navigation systems that provide accurate positions in our harbors, waterways and coastal approaches. In our more congested waterways, they also operate Vessel Traffic Services to reduce the risk of collision.
Additionally operational units are
tasked with keeping vital domestic shipping lanes open during the winter. On the Great Lakes and rivers, our domestic icebreakers and buoy tenders ensure that ships and supplies are able to move to and from our communities. Maritime Security
As Guardians of the Sea, the Maritime Security goals outline the Coast Guard’s responsibilities as America’s principal maritime law enforcement agency. The types of federal laws enforced by the Coast Guard on the high seas and in U.S. waters include criminal laws, revenue and navigation laws, and nautical rules. At-sea enforcement efforts focus on two major mission areas: drug interdiction and illegal alien interdiction.
As a key element in the president’s
National Drug Control Strategy, the primary goal of the Coast Guard drug interdiction program is to deny drug traffickers maritime routes. To stop the flow of illegal drugs the Coast Guard works closely with domestic law enforcement agencies and foreign governments.
Illegal migrant interdiction is an impor-
tant and growing law-enforcement and national security concern.
Transit over maritime routes poses grave
safety risks to the illegal migrants involved. Economic conditions drive most illegal migration, and organized alien smuggling, especially from Cuba, Haiti, the Dominican Republic and the Peoples Republic of China, has
increased dramatically. During the past five years more than 84,000 illegal migrants have been interdicted.
National Defense
The National Defense functions begin in America’s ports and extend to distant parts of the world.
Coast Guard National Security roles are
based on the president’s National Security Stra-tegy and go beyond military operations to include activities that sustain the economic, social, and environmental health of the nation. These missions truly make the Coast Guard a unique instrument of national security.
As one of the five armed services of the
United States, the Coast Guard is a full partner with its DoD counterparts. By statute, it oper-ates in the joint arena and function as a special-ized service with the Navy in time of conflict.
“Specialized” because its wartime roles
are logical extensions of its peacetime missions and provide non-redundant and complementary resources. The Coast Guard performs a wide range of naval warfare functions agreed to in a 1995 Memorandum of Agreement between the Secretaries of Defense and Transportation. Those roles include, but are not limited to, Deployed Port Operations, Security and Defense, Maritime Interception Operations, Environ-mental Response Operations, and Peacetime Military Engagement. ORGANIZATION The Coast Guard is under the jurisdic-tion of the Department of Transportation in peacetime, but it is under the control of the U.S. Navy in wartime. Its headquarters is in Wash-ington, DC. A four-star admiral is assigned to head the Coast Guard as Commandant and is
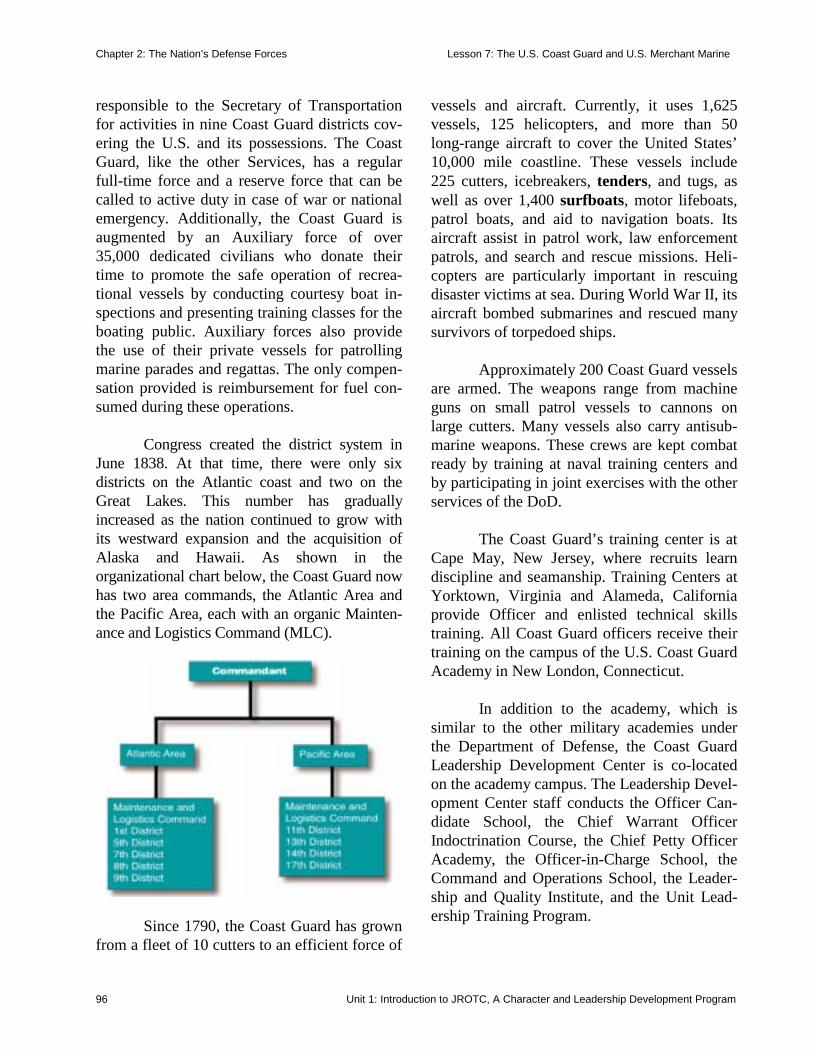
Chapter 2: The Nation’s Defense Forces Lesson 7: The U.S. Coast Guard and U.S. Merchant Marine
Unit 1: Introduction to JROTC, A Character and Leadership Development Program 96
responsible to the Secretary of Transportation for activities in nine Coast Guard districts cov-ering the U.S. and its possessions. The Coast Guard, like the other Services, has a regular full-time force and a reserve force that can be called to active duty in case of war or national emergency. Additionally, the Coast Guard is augmented by an Auxiliary force of over 35,000 dedicated civilians who donate their time to promote the safe operation of recrea-tional vessels by conducting courtesy boat in-spections and presenting training classes for the boating public. Auxiliary forces also provide the use of their private vessels for patrolling marine parades and regattas. The only compen-sation provided is reimbursement for fuel con-sumed during these operations. Congress created the district system in June 1838. At that time, there were only six districts on the Atlantic coast and two on the Great Lakes. This number has gradually increased as the nation continued to grow with its westward expansion and the acquisition of Alaska and Hawaii. As shown in the organizational chart below, the Coast Guard now has two area commands, the Atlantic Area and the Pacific Area, each with an organic Mainten-ance and Logistics Command (MLC).
Since 1790, the Coast Guard has grown from a fleet of 10 cutters to an efficient force of
vessels and aircraft. Currently, it uses 1,625 vessels, 125 helicopters, and more than 50 long-range aircraft to cover the United States’ 10,000 mile coastline. These vessels include 225 cutters, icebreakers, tenders, and tugs, as well as over 1,400 surfboats, motor lifeboats, patrol boats, and aid to navigation boats. Its aircraft assist in patrol work, law enforcement patrols, and search and rescue missions. Heli-copters are particularly important in rescuing disaster victims at sea. During World War II, its aircraft bombed submarines and rescued many survivors of torpedoed ships. Approximately 200 Coast Guard vessels are armed. The weapons range from machine guns on small patrol vessels to cannons on large cutters. Many vessels also carry antisub-marine weapons. These crews are kept combat ready by training at naval training centers and by participating in joint exercises with the other services of the DoD. The Coast Guard’s training center is at Cape May, New Jersey, where recruits learn discipline and seamanship. Training Centers at Yorktown, Virginia and Alameda, California provide Officer and enlisted technical skills training. All Coast Guard officers receive their training on the campus of the U.S. Coast Guard Academy in New London, Connecticut.
In addition to the academy, which is similar to the other military academies under the Department of Defense, the Coast Guard Leadership Development Center is co-located on the academy campus. The Leadership Devel-opment Center staff conducts the Officer Can-didate School, the Chief Warrant Officer Indoctrination Course, the Chief Petty Officer Academy, the Officer-in-Charge School, the Command and Operations School, the Leader-ship and Quality Institute, and the Unit Lead-ership Training Program.
Chapter 2: The Nation’s Defense Forces Lesson 7: The U.S. Coast Guard and U.S. Merchant Marine
Unit 1: Introduction to JROTC, A Character and Leadership Development Program 97
U.S. COAST GUARD ACADEMY The U.S. Coast Guard Academy (main-tained by the Department of Transportation since 1967) is located on the Thames River in New London, Connecticut. It moved to that location in 1932. The academy began with the School of Instruction for the Revenue Marine Service in 1876 when nine cadets started their training aboard the schooner Dobbin. Today, it annually commissions approximately 175 ensigns.
The Coast Guard Academy accepts applications from within the Service’s enlisted ranks. Acceptance is based on an annual nationwide competition. Additionally, this academy does not accept Congressional appoint-ments, state quotas, or special categories.
COAST GUARD RESERVES The Coast Guard Reserve is a military organization that is organized, trained, adminis-tered, and supplied under the direction of the command of the Coast Guard. The purpose of the Coast Guard Reserve is to provide trained and qualified personnel available for active duty in time of war or national emergency and at other times as the national security requires.
Congress created the Coast Guard Reserve in 1939. This service was composed primarily of boat owners and its mission was to promote boating safety and assist the Coast Guard with the protection of lives and property on navigable waters. In 1941, Congress changed this organization’s name to the Coast Guard Auxiliary and established the present Coast Guard Reserve as a military service. Congress then formed the Coast Guard Women’s Reserve as a branch of the Coast Guard Reserve in 1942, but abolished it in 1973. From that point on, all female reservists became members of the Coast Guard Reserve.
Today, Coast Guard Reservists serve in virtually all Coast Guard mission areas through augmentation training. Such training is tailored to meet mobilization requirements and repre-sents 65 percent of the total reserve training time. Reservists who perform augmentation training work side-by-side with active duty personnel during drills and periods of annual training. These reservists have proven their ability to extend and expand the capability of the Coast Guard. They are a valuable part of the Total Force, being available to respond to domestic emergencies as well as wartime situations. RESERVE CATEGORIES The Coast Guard Reserve has three major reserve categories: Ready Reserve, Standby Reserve, and Retired Reserve. Ready Reserve The Ready Reserve consists of the Selected Reserve and Individual Ready Reserve. • The Selected Reserve consists of individual
reservists serving on paid inactive duty training (IDT). Members are in a drill status, that is, they must attend 48 IDT drills and 14 days of active duty training per year. These reservists are assigned to active duty commands, and they have the highest priority among reservists for mobilization. This priority necessitates training through-out the year to ensure the highest individual readiness.
• The Individual Ready Reserve consists of
unpaid reservists who, for the most part, have completed their required active duty obligation. They remain on reserve rolls to complete their military obligation, and they are obligated to maintain physical stan-
Chapter 2: The Nation’s Defense Forces Lesson 7: The U.S. Coast Guard and U.S. Merchant Marine
Unit 1: Introduction to JROTC, A Character and Leadership Development Program 98
dards. They may also voluntarily participate in reserve training programs without pay.
Standby Reserve The Standby Reserve consists of reserv-ists who are liable for mobilization only in time of war or national emergency declared by Con-gress. The Commandant may order these reservists to active duty if the Ready Reserve force is insufficient to meet mobilization requirements. The Standby Reserve has two sub-categories, Active Status and Inactive Status. • Standby Reserve (Active Status). In this
category, reservists may earn retirement points and compete for promotion, but may not receive pay. The Coast Guard may assign officers or enlisted personnel to this category if they still have a military obliga-tion to fulfill.
• Standby Reserve (Inactive Status). In this
category, members may not earn retirement points, compete for promotion, or receive pay. Reservists are placed in this category for a number of reasons, including:
# Officers who have been twice non-
selected for promotion. # Officers who have failed to earn the
minimum retirement points for a year. # Officers or enlisted reservists who have
exceeded their maximum allowable weight standard at the end of a proba-tionary period.
Retired Reserve The Retired Reserve consists of reserv-ists who meet satisfactory service requirements, age criteria, and who request transfer to retired status. In this status, members may not perform
training or earn retirement points, but the Commandant may order them to active duty in the event of war or a national emergency if the Ready Reserve force is insufficient to meet mobilization requirements. TRADITION For probably as long as anyone can remember, “Semper Paratus” has been a Rev-enue Cutter Service and Coast Guard watch-word. The words themselves, “always ready” or “ever ready,” date back to ancient times. How-ever, no official recognition was given to this motto until it appeared in 1910 on the ensign of the Revenue cutters. Captain Francis Van Boskerck — who wrote the words and music to the march, “Semper Paratus” — hoped to give it as much recognition as “Semper Fideles” of the Marine Corps and “Anchors Aweigh” of the Navy.
The Coast Guard emblem was adopted
in 1927, at which time, the seal and emblem were one in the same. A civilian Coast Guard draftsman, Oscar H. Kee, designed this seal/ emblem. This emblem now stands as a visual identifier for the Coast Guard. Not only is it on the Coast Guard ensign, it also appears inside the distinctive slash on its cutters, craft, aircraft, and on medals and plaques. Blue and white are the Coast Guard’s official colors.

Chapter 2: The Nation’s Defense Forces Lesson 7: The U.S. Coast Guard and U.S. Merchant Marine
Unit 1: Introduction to JROTC, A Character and Leadership Development Program 99
DID YOU KNOW? The Coast Guard, during an average day, will:
• board 90 large vessels for port safety checks
• process 120 seaman's documents • seize 209 pounds of marijuana and
170 pounds of cocaine worth $9.2 million
• conduct 120 law enforcement boardings
• investigate 17 marine accidents • inspect 64 commercial vessels • save 14 lives • assist 328 people in distress • save $2,490,000 in property • service 150 aids to navigation • interdict 176 illegal migrants
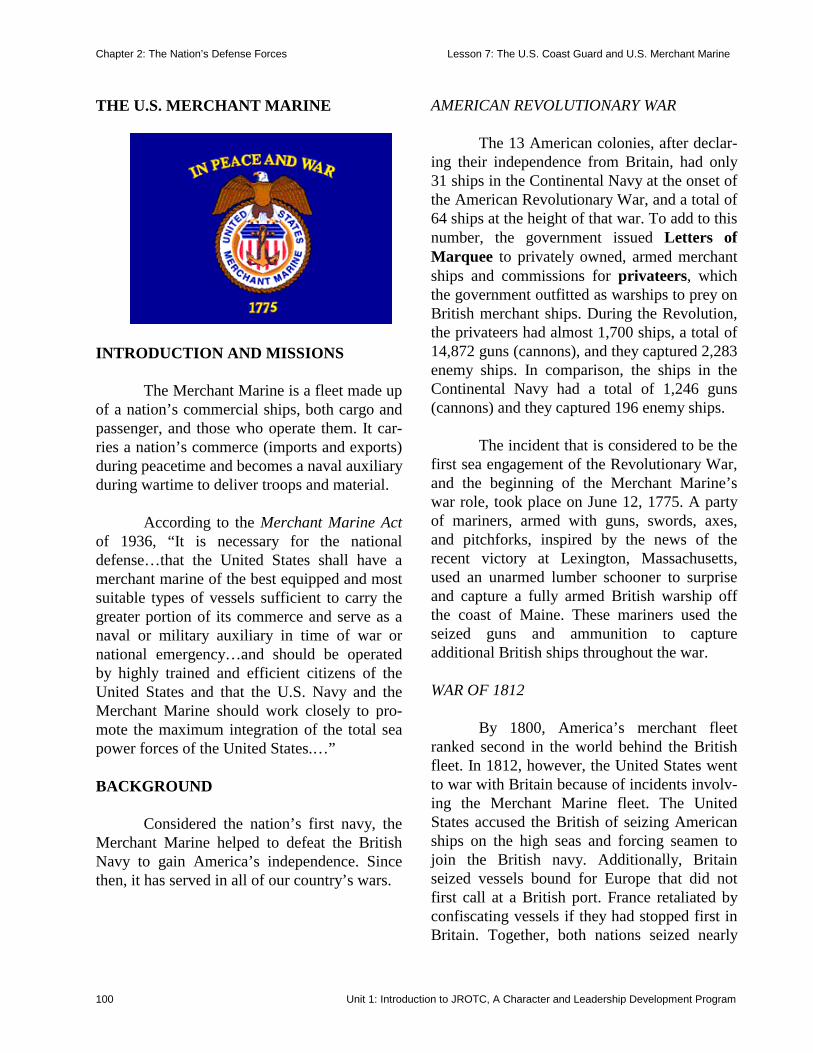
Chapter 2: The Nation’s Defense Forces Lesson 7: The U.S. Coast Guard and U.S. Merchant Marine
Unit 1: Introduction to JROTC, A Character and Leadership Development Program 100
THE U.S. MERCHANT MARINE
INTRODUCTION AND MISSIONS The Merchant Marine is a fleet made up of a nation’s commercial ships, both cargo and passenger, and those who operate them. It car-ries a nation’s commerce (imports and exports) during peacetime and becomes a naval auxiliary during wartime to deliver troops and material. According to the Merchant Marine Act of 1936, “It is necessary for the national defense…that the United States shall have a merchant marine of the best equipped and most suitable types of vessels sufficient to carry the greater portion of its commerce and serve as a naval or military auxiliary in time of war or national emergency…and should be operated by highly trained and efficient citizens of the United States and that the U.S. Navy and the Merchant Marine should work closely to pro-mote the maximum integration of the total sea power forces of the United States.…” BACKGROUND Considered the nation’s first navy, the Merchant Marine helped to defeat the British Navy to gain America’s independence. Since then, it has served in all of our country’s wars.
AMERICAN REVOLUTIONARY WAR The 13 American colonies, after declar-ing their independence from Britain, had only 31 ships in the Continental Navy at the onset of the American Revolutionary War, and a total of 64 ships at the height of that war. To add to this number, the government issued Letters of Marquee to privately owned, armed merchant ships and commissions for privateers, which the government outfitted as warships to prey on British merchant ships. During the Revolution, the privateers had almost 1,700 ships, a total of 14,872 guns (cannons), and they captured 2,283 enemy ships. In comparison, the ships in the Continental Navy had a total of 1,246 guns (cannons) and they captured 196 enemy ships. The incident that is considered to be the first sea engagement of the Revolutionary War, and the beginning of the Merchant Marine’s war role, took place on June 12, 1775. A party of mariners, armed with guns, swords, axes, and pitchforks, inspired by the news of the recent victory at Lexington, Massachusetts, used an unarmed lumber schooner to surprise and capture a fully armed British warship off the coast of Maine. These mariners used the seized guns and ammunition to capture additional British ships throughout the war. WAR OF 1812
By 1800, America’s merchant fleet ranked second in the world behind the British fleet. In 1812, however, the United States went to war with Britain because of incidents involv-ing the Merchant Marine fleet. The United States accused the British of seizing American ships on the high seas and forcing seamen to join the British navy. Additionally, Britain seized vessels bound for Europe that did not first call at a British port. France retaliated by confiscating vessels if they had stopped first in Britain. Together, both nations seized nearly
Chapter 2: The Nation’s Defense Forces Lesson 7: The U.S. Coast Guard and U.S. Merchant Marine
Unit 1: Introduction to JROTC, A Character and Leadership Development Program 101
1,500 American vessels between 1803 and 1812. Since America had almost no navy, it had to fight the War of 1812 using mainly mer-chant ships — as it did in the Revolutionary War. (Recall that the Continental Navy discon-tinued operations after the Revolutionary War and sold its last warship in 1785. It remained disbanded until the launching of the United States in 1797, which marked the rebirth of the U.S. Navy.)
With the battle cry of “free trade and sailors’ rights” in the War of 1812, the priva-teers had 517 ships, a total of 2,893 guns, and they captured 1,300 enemy ships. In contrast, the 23 ships in the U.S. Navy had a total of 556 guns and they captured 254 enemy ships. During the Revolutionary War and War of 1812, the privateer had to be bold and daring in order to survive and to realize financial rewards. For example, the Paul Jones left New York in 1812 with 120 men but only three guns, although she was pierced for 17. Before she met the British merchant ship Hassan, which carried 14 guns and a crew of 20, her master had short lengths of timber painted black, mounted them on buckets, and filled her rigging with his men. Intimidated, the Hassan immediately surrendered and the Paul Jones was able to fill her gun mounts with real guns. THE WORLD WARS Prior to America’s entry into World War I, Congress created the United States Shipping Board in 1916. In support of the war effort, the United States took steps to build a “bridge of ships” across the Atlantic. In so doing, the United States allowed American ships flying under foreign flags to reregister under the American flag. By 1917, the U.S. Shipping Board had 162 shipyards, most of
them new, building 3,370 ships at a contract price of $3 billion. In 1938, when a second World War was imminent, President Roosevelt realized that winning the war would require many ships to carry war supplies to the fronts. He ordered mass-production of Liberty Ships and estab-lished the U.S. Maritime Service to train the men needed to operate these ships.
According to the Merchant Marine Act of 1936, “The Secretary may establish and maintain a voluntary organization for the train-ing of U.S. citizens to serve on Merchant Marine vessels of the U.S. and to be known as the U.S. Maritime Service...and to prescribe the uniform of such service and the rules governing the wearing and furnishing of such uniform....The ranks, grades, and ratings for personnel of the U.S. Maritime Service shall be the same as…for the personnel of the U.S. Coast Guard.”
During World War II, the government
nationalized the Merchant Marine fleet, that is, the government controlled the cargo and the destinations, contracted with private companies to operate the ships, and put guns and Navy personnel (Armed Guards) on board. The gov-ernment trained the men to operate these ships through the U.S. Maritime Service. To prevent low-level attacks by enemy aircraft, the vessels under the Maritime Service used barrage balloons (or “Bulging Berthas”)
DID YOU KNOW?
Joseph P. Kennedy (father of President John F. Kennedy) was appointed as the first chairman of the Federal Maritime Com-mission in 1937 during which he laid the groundwork for the U.S. Merchant Marine.
Chapter 2: The Nation’s Defense Forces Lesson 7: The U.S. Coast Guard and U.S. Merchant Marine
Unit 1: Introduction to JROTC, A Character and Leadership Development Program 102
that were attached on deck and floated above the ships. These inflatable shiny silver-painted balloons, which were made of rubber-coated fabric, were filled with hydrogen gas and flown at 500 feet when the ship traveled in dangerous waters, but were raised to 2000 feet when under attack. At that height, the 15 gauge flying wire could clip the wings off a plane. However, in winds greater than 25 miles per hour, the ship used kites. Unfortunately, the Merchant Marine suffered more casualties (as a percent or ratio of the number killed to the number who served) than any other branch of Service. With 215,000 officially serving and 6,795 killed in action, the result is a ratio of one Merchant Marine killed to every 32 who served (or 1 in 32). In contrast, the Marine Corps had a ratio of 1 in 34, the Army had 1 in 48, the Navy had 1 in 114, and the Coast Guard had a ratio of 1 in 421.
On the other hand, the enemy never cap-tured any U.S. merchant ships as a prize during World War II. Navy instructions to American shipmasters were: “It is the policy of the U.S. government that no U.S. flag merchant ship be permitted to fall into enemy hands. The ship shall be defended by her armament, by maneu-ver, and by every available means as long as possible. When in the judgment of the Master that capture is inevitable, provision should be made to open sea valves and to flood holds and
compartments adjacent to machinery spaces, start numerous fires, and employ any additional measures available to insure certain scuttling of the vessel.” WORLD WAR II TO PRESENT
Since 1950, the Maritime Administrat-ion (an agency of the Department of Com-merce) has promoted a strong and efficient U.S. Merchant Marine. This agency administers pro-grams to assure that the Merchant Marine is capable of meeting the nation’s shipping demands in times of peace and of providing support to the armed forces in times of national emergencies.
For example, it awards subsidies to U.S. firms to help build and operate merchant ships used in foreign trade. These payments help companies to compete with foreign firms that have lower costs. The agency also insures mortgages and loans made by private lending institutions for the building or reconstructing of ships. However, increased foreign competition in this industry has hurt our merchant marine. Because of corporate income taxes, insurance rates, shipbuilding costs, and labor costs, U.S. flagships move only about seven percent of our total ocean commerce; we use foreign-flag ves-sels to handle the remainder. The Department of Defense actively supports programs to update the U.S. Merchant Marine. The Navy and the Department of Commerce have cooperated in the development of the world’s fastest cargo firefighters. They are conducting research on a cargo-carrying surface-effect vessel and a cargo submarine. The Military Sealift Command and the mari-time industry work together to ensure that U.S. merchant ships are available to the Department of Defense when needed. Such ships carried 97
DID YOU KNOW? The size of a nation’s merchant marine is measured by its gross tonnage, rather than by the number of ships. Gross tonnage is the total space within the hull and enclosed deck space on a ship. Each 100 cubic feet of ship space equals one gross ton.
Chapter 2: The Nation’s Defense Forces Lesson 7: The U.S. Coast Guard and U.S. Merchant Marine
Unit 1: Introduction to JROTC, A Character and Leadership Development Program 103
percent of the logistic support required by our military forces in Vietnam.
U.S. MERCHANT MARINE ACADEMY The U.S. Merchant Marine Academy was established in 1938 as a result of the Mer-chant Marine Act of 1936. It operates under the U.S. Maritime Administration, an agency that since 1967 has been under the Department of Transportation.
In 1949, the academy became fully
accredited. The academy occupies 65 acres on the north shore of Long Island at Kings Point, NY. It became a permanent, government-sponsored school in 1956 and received equal status with the other Service academies of the U.S. Armed Forces.
RESERVES The U.S. Merchant Marine Reserve is a component of the U.S. Naval Research com-munity and is made up of licensed deck and engineering officers. Congress created this Reserve to ensure that the Merchant Marine
can operate efficiently with the U.S. Navy in times of national emergency. The Department of Naval Science at the California Maritime Academy is responsible for providing students the training to become offi-cers in the Reserve. The Department of Naval Science can provide partial tuition assistance each year and a commission as an officer in the active or inactive U.S. Naval Reserve.
There are specific eligibility require-ments that students must meet before the California Maritime Academy can accept their enrollment into this program (such as U.S. citi-zenship, age, physical ability, aptitude for Naval service, and concurrent acceptance in the Naval Reserve). In addition, the student incurs several post graduate obligations depending on the student’s receipt of an inactive duty com-mission as an ensign in the Merchant Marine Reserve or an active duty commission in one of three U.S. Navy Warfare areas (surface warfare, aviation, or nuclear power). TRADITION In 1943, a Maritime Hymn was com-posed by Buddy Clarke and Rudy Melnik, but the official song of the U.S. Merchant Marine is “Heave Ho, My Lad!”
DID YOU KNOW? “Since I became Chairman of the Joint Chiefs of Staff, I have come to appre-ciate firsthand why our Merchant Marine has long been called our nation’s ‘fourth arm of defense.’ The American seafarer provides an essential service to the well-being of the nation as was demonstrated so clearly during Operation Desert Shield and Desert Storm .… We are a maritime nation. We must be able to project power across the seas. This means that not only do we need a strong Navy, but a strong maritime industry as well.” General Colin Powell
DID YOU KNOW?
“[The Merchant Marine] has written one of its most brilliant chapters. It has delivered goods when and where needed in every theater of operations and across every ocean in the biggest, most difficult and dangerous job ever undertaken. As time goes on, there will be greater public understanding of our merchant’s fleet record during this war [WWII].” President Roosevelt
Chapter 2: The Nation’s Defense Forces Lesson 7: The U.S. Coast Guard and U.S. Merchant Marine
Unit 1: Introduction to JROTC, A Character and Leadership Development Program 104
Although a part of their name, people serving in the Merchant Marine are never called marines; they are called mariners, seaman, sea-farers, or sailors.
When a mariner dies, he or she is said to
have “crossed the bar.” This phrase has its ori-gin in the fact that most rivers and bays develop a sandbar across their entrances, and “crossing the bar” meant leaving the safety of the harbor for the unknown. “Crossing The Bar” is also a poem written by Alfred Lord Tennyson. Upon request, and the availability of a Coast Guard unit, the ashes of a mariner veteran may be spread at sea. CONCLUSION This chapter introduced you to the history, mis-sions, and organization — including the reserve forces or components — of the Department of Defense, Army, Navy, Marine Corps, Air Force, Coast Guard, and Merchant Marine. Each of these play an important yet distinct role in our nation’s defense capabilities. The U.S. Armed Forces as a combined arms force must be trained and maintained at high standards to ensure they are capable — individually and col-lectively — of preserving the peace and the security of the United States.
Glossary
Unit 1: Introduction to JROTC, A Character and Leadership Development Program 105
GLOSSARY A academic award. Recognition given to an individual cadet for scholastic achievement or excellence. align. To arrange in a line. (alignment. The arrangement of several elements on the same line.) amalgamation. A combination or consolid-ation, as of several corporations. amphibious. Able to operate both on land and in water: amphibious tanks. Relating to or organized for a military landing by means of combined naval and land forces. anthem. A song of gladness, praise, devo-tion, or patriotism. athletic award. Recognition given to an individual for athletic participation or excellence. avionics. [Short for avi(ation) (electr)onics.] The science and technology of electronics applied to aeronautics (aircraft navigation) and astronautics (space flight). aweigh. Hanging clear of the bottom. B barrage balloon. [Also called a “Bulging Bertha.”] An inflatable, shiny, silver-painted balloon, made of rubber-coated fabric and filled with hydrogen gas, that is attached to the deck of a merchant ship and floated above it (at 500 feet when traveling in dangerous waters and 2,000 feet when under attack); it is used in preventing low-level attacks by enemy aircraft in that the 15 gauge flying
wire can clip the wings off the attacking planes. battalion. A military unit made up of two or more companies or batteries and a head-quarters that is commanded by a lieutenant colonel, is the smallest unit to have a staff, and is administratively self-sufficient. battle dress uniform. A camouflage uniform worn by members of the U.S. Army, Army National Guard, Army Reserve, and Army ROTC. beacon. Anything that warns or guides along a coast, such as a lighthouse or other signaling/ guiding device. bisect (-ing). To cut or divide into two equal parts. bombardment. To attack with bombs, explosive shells, or missiles; to attack persistently. buoy. A float moored in water as a warning of danger under the surface or as a marker for a channel. C cadet. A high school student enrolled in the leadership and citizenship activities through Junior Reserve Officers Training Corps. cannon salute. The firing of a salute by a battery of guns or cannons to honor a person of military, national, or civic importance or to honor a significant national event. challenge. (1) To arouse the interest of one’s actions or efforts; to stimulate; the quality of requiring full use of one’s abilities, energy, and resources; (2) To demand identification from someone before they are allowed to enter or pass.
Glossary
Unit 1: Introduction to JROTC, A Character and Leadership Development Program 106
chevron. Insignia consisting of stripes meeting at an angle to indicate (enlisted) grade or rank. Citizen-soldiers. A member of the National Guard or Reserve Corps. class A uniform. A service uniform that con-sists of an Army green coat, trousers or slacks; a long or short sleeve shirt; a black four-in-hand tie or black neck tab; and other authorized accessories. class B uniform. A service uniform that is the same as the Class A uniform except the service coat is not worn. The black tie and black neck tab are required when wearing the long sleeve shirt; both tie and tab are optional with the short sleeve shirt. Color. The U.S. national flag. (Colors. The U.S. national flag and any organizational or positional flags.) combatant. Engaged in combat. commerce. The exchange or buying and sell-ing of goods on a large scale (as between nations) involving transportation from place to place. company. A subdivision of a military regi-ment or battalion that constitutes the lowest administrative unit. It is usually under the command of a captain and is made up of at least two platoons. conflict resolution. The solutions utilized by a society to settle disputes in a cohesive manner. constituted authority. People or groups of people who have an appointed power or authority by virtue of their position to make decisions and rules.
counterintelligence. Actions taken by intelligence personnel or units to prevent an enemy from gathering information about friendly forces, to deceive the enemy, to prevent sabotage, or to gather political and military information. courtesy (plur. -ies). An act of politeness or gracious manners; the use of polite gestures or remarks. cultural diversity. The presence of multiple and different cultural groups and their behav-iors within an organization or institution. custom. A long-established practice followed as a matter of course among people, oftentimes considered an unwritten law or repeated practice. cutter. A small, lightly armed motorboat used by the U.S. Coast Guard. D decoration. An indication of honor, such as a badge, medal, or ribbon. Department of Defense (DoD). A depart-ment of the executive branch of the federal government created by amendments to the National Security Act of 1949. It includes the departments of the Army, Navy, and Air Force, the Joint Chiefs of Staff, and other staff officers responsible for directing the manpower and resources in defense of the nation. doctrine. (1) A principle (or creed of principles) relating to a specific belief, subject, theory, or branch of knowledge; (2) The fundamental policy or standard for a principle or set of principles on a specific subject, theory, or branch of knowledge; (3) Something that is taught.
Glossary
Unit 1: Introduction to JROTC, A Character and Leadership Development Program 107
dress. (1) To arrange or align in a straight, lateral line at proper intervals; (2) To attire with a certain degree of uniformity; (3) An appearance appropriate or peculiar to a particular time. E enlisted. Relating to or constituting the part of the military force below officers. ensign. (1) In the U.S. Navy, Coast Guard, or Merchant Marine, the lowest ranking commissioned officer; (2) A flag that is displayed or flown from an aircraft, ship, or boat as the symbol of nationality. esprit de corps. The common spirit or feeling of pride found in the members of a group and inspiring enthusiasm, devotion, and strong regard for the honor of the group. ethos. Fundamental values of a group; the character or attitude peculiar to a specific culture or group that distinguishes it from others. expeditionary. A battalion-sized intervention force (normally composed of organic infantry, armor, and artillery) that contains a composite aircraft squadron and its own service support element; it may also include special operational elements such as amphibious and aviation units. F fad. A popular fashion followed for a short time. ferrule. (1) A decorative metal cap attached to the end of a shoulder cord to prevent fraying; (2) A metal ring or cap attached to the end of a staff or handle to give strength or to protect it against splitting.
fitted. To adapt to the proper size or shape. formal inspection. An official examination of JROTC units that takes place on a prescribed schedule. frigate. A high-speed, medium-sized sailing war vessel of the 17th, 18th, and 19th centuries. Today, a U.S. warship of approximately 5,000 to 7,000 tons, intermediate between a cruiser and destroyer, used primarily for escort duty. G garrison cap. Headgear that may be worn with the Class A or B uniforms. For JROTC, the braid (piping used for identification purposes) will have a cord edge of the same material as the cap (or Army green shade 344). (NOTE: garrison refers to a military post or to station soldiers in a town or post.) garrison flag. Type of flag, 20 by 38 feet, flown on holidays and important occasions. gigline. Line formed by the seam of the shirt aligned with the zipper flap and the edge of the belt buckle on certain JROTC uniforms. gross tonnage. (1) The total space or capacity within the hull and enclosed deck of a merchant ship measured in units of 100 cubic feet; (2) The total shipping (carrying capacity) of a country or port figured in tons. H half-staff. The position of the flag about half-way down from the top of the pole or staff, used to honor and pay respect to military and nationally important deceased persons; or as a distress signal. halyard. A rope or tackle used for hoisting or lowering.
Glossary
Unit 1: Introduction to JROTC, A Character and Leadership Development Program 108
hemmed. To fold back and stitch down the edge of a garment. I individual award. Recognition given to an individual for outstanding academic, athletic, or military achievement, or for excellence in competition, contribution to unit goals or outstanding service. inextricably. Incapable of being separated. insignia. (1) An emblem, badge, medal or other distinguishing mark of office, honor, or position; (2) Denotes grade and branch; may also indicate capacity and duty assignment in the U.S. Army. J JROTC (Junior Reserve Officers’ Training Corps). A program that teaches high school students the values of good citizenship while giving them an introduction to the U.S. Army. L leadership. The ability to influence, lead, or guide others so as to accomplish a mission in the manner desired. Letter of Marquee. A document issued by a nation allowing a private citizen to: (1) equip a ship with arms in order to attack enemy ships, or (2) seize citizens or goods of another nation. liberty ship. A type of large American cargo ship produced in large numbers during World War II.
M mess. (1) A group of persons, usually in the military, who regularly eat meals together; (2) The place where such meals are served. military award. Recognition given to an individual for participation in JROTC-sponsored activities or for leadership excellence. military training. A system of progressive education that occurs both in the classroom (or a field location) and on the job to prepare students or military personnel for future jobs or schooling. militia. A citizen army — as distinct from a regular army or a body of full-time, pro-fessional soldiers — that is usually controlled by the individual states and subject to call during an emergency by the government of a country. miscellaneous award. Recognition given to an individual for participation in school or community activities or in activities that enhance the JROTC program. mission. A specific job given to a person or group of persons to accomplish. mobilize (-ation). To assemble, prepare, or put into operation (personnel, units, equipment, etc.) for war or a similar emergency. motivate. Provide a need or a purpose which causes a person to want to do something. N nap. A soft, fuzzy finish or cloth formed by short fibers raised on the surface. National Defense Act. Enacted in 1916, this act officially created the Reserve Officers’
Glossary
Unit 1: Introduction to JROTC, A Character and Leadership Development Program 109
Training Corps (ROTC) of which Junior ROTC is a part. National march. “The Stars and Stripes Forever” as recognized in the United States Code of Federal Regulations. neck tab. A narrow length of black material worn about the neck under the collar of the female Army green long sleeve shirt, or short sleeve blouse. nonaccession. The policy or practice of not accepting personnel directly from traditional officer or enlisted entrance sources. nonsubdued. Bright and shining, not dull or flat (such as polished brass pin-on insignia). O operational. Connected with the execution of military operations. operational commands. Commands per-forming the primary mission of the service as distinguished from support commands. opportunities. A favorable or advantageous circumstance or combination of circum-stances. P parity. The quality or state of being equal. payload. (1) The total amount of armament and munitions carried on an aircraft; (2) The warhead of a missile. pennant. A long, narrow flag tapering to a point or a swallowtail at the end. pilotage. The technique or act of coastal navigation by reference to landmarks, buoys, soundings, and the like.
platoon. A subdivision of a company-size military unit normally consisting of two or more squads or sections; the leader is usually a first lieutenant. position of honor. A military courtesy of usually keeping seniors to your right while walking or sitting. post flag. Type of flag used for everyday occasions; 10’ x 19’. precedence. The act or right of preceding or placing in order according to rank or importance; priority. pre-inspection. An informal examination before an official or formal inspection. privateer. A ship privately owned and manned but authorized by a government during wartime to attack and capture enemy vessels; the commander or one of the crew of such a ship. proliferate (-ion). To increase at a rapid rate. Q R reporting. Presenting oneself to a senior. reserve corps. Trained military members available to augment active duty forces in times when activated. ruffles and flourishes. A drum and bugle salute, usually to honor military or civil officials. S salute. A sign or form of exchange used to greet or to show respect and recognition.
Glossary
Unit 1: Introduction to JROTC, A Character and Leadership Development Program 110
scuttle (-ing). To sink a ship by opening a hatch (or hatches) in the deck, side, wall, or roof, or to cut a hole (or holes) in a ship’s hull. sea power. A nation’s naval strength. secretary of defense. The head of the Department of Defense, one of the president’s appointed Cabinet members. self-propel (-led). To have the ability within itself to move. shoulder marks. A pair of broad pieces of stiffened cloth worn on the shoulders of the Class A or B uniforms to display the insignia of grade. (Blank shoulder marks do not display an insignia of grade so that pin-on insignia may be used instead.) sized. The physical dimensions, proportions, magnitude, or extent of an object. Any of a series of graduated categories of dimension whereby manufactured articles, such as shoes and clothing, are classified. specialist. (1) A person who devotes himself to a particular occupation or field of study; (2) The enlisted rank in the Army corresponding to a corporal. specified. To state explicitly or in detail. squad. The smallest unit in the Army organ-ization composed of a varying number of personnel, depending on the type of element, and led by a noncommissioned officer. staff. (1) Officers and noncommissioned officers who assist a commander in carrying out the unit’s mission; (2) Another word for flagpole used to carry unit guidons or colors. standard. A term now interchangeable with “colors,” although formerly it was used for
flags of mounted, motorized, and mechanized organizations. “Star-Spangled Banner, The.” The national anthem of the United States, written by Francis Scott Key. stealth. An aircraft coated with radar-absor-bent material making it almost invisible to radar. strategic. Of or relating to the large scale or global planning and conduct of military strategy, movements, and/or operations essen-tial to the effective conduct of war. storm flag. Type of flag flown in bad weath-er; five by nine and one-half feet. subordinate. A person lower in rank or grade. subsidy (-ies). Monetary assistance granted by a government to a person or a private commercial enterprise; financial assistance given by one person or government to another. succession. The order of persons next in line for an office or rank that is held by another. surfboat. A strong seaworthy boat that can be launched or landed in a heavy surf. symbols. Something that represents some-thing else by association, resemblance, or convention, especially a material object used to represent something invisible T tactile. Something perceptible by touch; of, pertaining to, or proceeding from the sense of touch. tarnishes. To dull the luster of; discolor.
Glossary
Unit 1: Introduction to JROTC, A Character and Leadership Development Program 111
team. A group of persons approximating one-half of a squad and normally led by a junior noncommissioned officer. tender. A vessel employed to attend to other ships, such as a smaller vessel used for communication or ferrying supplies between shore and/or larger ships; a warship that provides logistics support. theater. A large geographic area (including its land, sea, and air) in which active military operations are coordinated and conducted. tradition. The passing down of elements of a culture (such as knowledge, beliefs, or customs) from one generation to another. U uncasing. Removing the case from Colors that are attached to a staff. unconventional. (1) Not bound by or in accordance with international agreements dealing with a specific subject, such as the rules or laws of warfare; (2) The use of nuclear, biological, or chemical weapons or energy. uncover. To remove a hat or other headgear; to be bareheaded or without a cover. under arms. To carry or be furnished with, or to have attached to the person, a weapon or the equipment pertaining directly to a weapon, such as a pistol belt or pistol holster. Union. (1) The emblem on a flag sym-bolizing unity, such as the blue rectangle and stars on the United States flag; (2) Those states that remained loyal to the government of the United States during the Civil War; (3) Of or pertaining to the North (or those who supported the federal government) during the Civil War (such as “Union” soldiers).
unit award. Recognition given to a JROTC program for being an honor unit or an honor unit with distinction. unique. Being the only one of its kind.

Unit 2:Leadership Theory
and Application

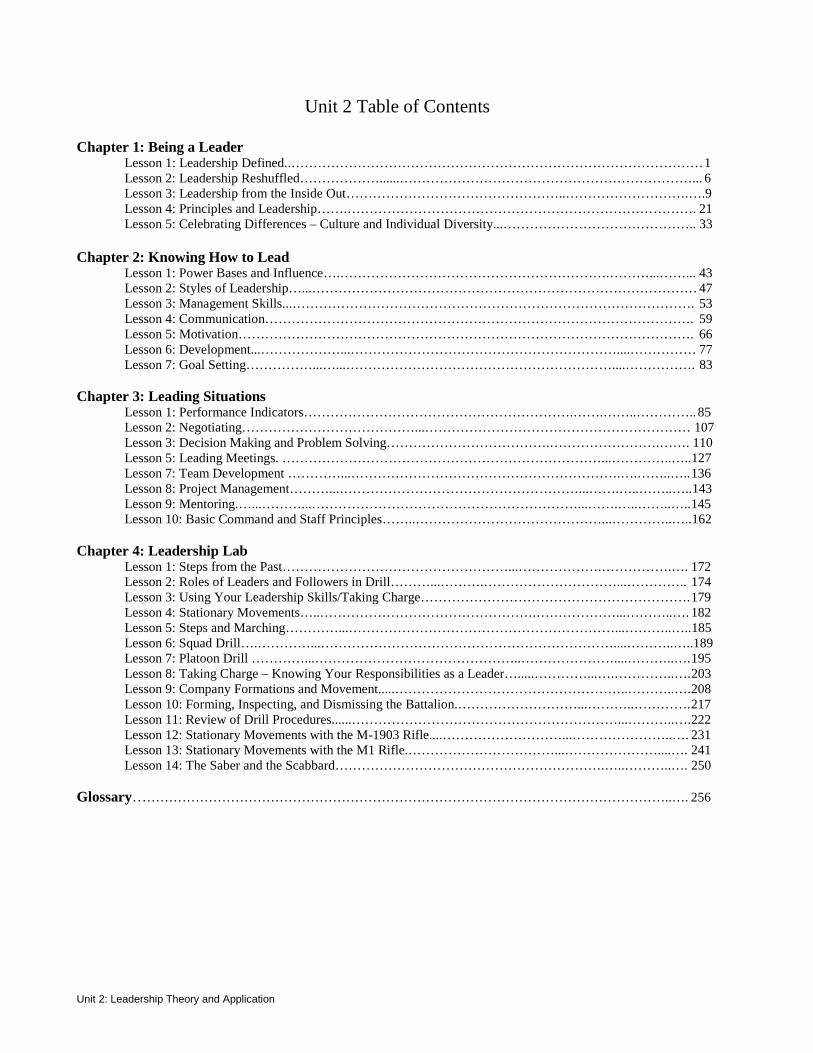
Unit 2: Leadership Theory and Application
Unit 2 Table of Contents
Chapter 1: Being a Leader Lesson 1: Leadership Defined..………………………………………………………………………………… 1 Lesson 2: Leadership Reshuffled………………......…………………………………………………………... 6 Lesson 3: Leadership from the Inside Out…………………………………………..……………………….….9 Lesson 4: Principles and Leadership…….……………………………………………………………………. 21 Lesson 5: Celebrating Differences – Culture and Individual Diversity...…………………………………….. 33
Chapter 2: Knowing How to Lead
Lesson 1: Power Bases and Influence….…………………………………………………….………...……... 43 Lesson 2: Styles of Leadership…...…………………………………………………………………………… 47 Lesson 3: Management Skills...………………………………………………………………………………. 53 Lesson 4: Communication……………………………………………………………………………………. 59 Lesson 5: Motivation…………………………………………………………………………………………. 66 Lesson 6: Development...………………...……………………………………………………....…………… 77 Lesson 7: Goal Setting……………...…...……………………………………………………....……………. 83
Chapter 3: Leading Situations Lesson 1: Performance Indicators…………………………………………………….…….……..………….. 85 Lesson 2: Negotiating…………………………………...…………………………………………………… 107 Lesson 3: Decision Making and Problem Solving……………………………….…………………….……. 110 Lesson 5: Leading Meetings. ………………………………………………………………...…………..…..127 Lesson 7: Team Development …………...…………………………………………………….….……..….. 136 Lesson 8: Project Management………...………………………………………………...…….…..……..…..143 Lesson 9: Mentoring.…...………...……………………………………………………...…….…..……..….. 145 Lesson 10: Basic Command and Staff Principles……..……………………………………...…………..…..162
Chapter 4: Leadership Lab Lesson 1: Steps from the Past……………………………………………...……………….…………….…. 172 Lesson 2: Roles of Leaders and Followers in Drill………...……….…………………………...………….. 174 Lesson 3: Using Your Leadership Skills/Taking Charge……………………………………………………. 179 Lesson 4: Stationary Movements…..………………………………………….………………...………..…. 182 Lesson 5: Steps and Marching…………...……………………………………………………...………..…..185 Lesson 6: Squad Drill….…………...…………………………………………………………....………..…..189 Lesson 7: Platoon Drill …………...………………………………………..…………………....………..…. 195 Lesson 8: Taking Charge – Knowing Your Responsibilities as a Leader….....…………...….…………..…. 203 Lesson 9: Company Formations and Movement.....……………………………………………..………..…. 208 Lesson 10: Forming, Inspecting, and Dismissing the Battalion.………………………...………..…………. 217 Lesson 11: Review of Drill Procedures......……………………………………………………...………..….222 Lesson 12: Stationary Movements with the M-1903 Rifle....………………………...…………………..…. 231 Lesson 13: Stationary Movements with the M1 Rifle.……………………………...…………………....…. 241 Lesson 14: The Saber and the Scabbard…………………………………………………….…..………..…. 250
Glossary…………………………………………………………………………………………………………..…. 256

Chapter 1: Being a Leader Lesson 1: Leadership Defined
Unit 2: Leadership Theory and Application 1
BEING A LEADER
LESSON 1: LEADERSHIP DEFINED
INTRODUCTION Let’s take a look at one definition of leadership. Leadership is the ability (or process) to influence, lead, or guide others so as to accomplish a mission in the manner desired by providing purpose, direction and motivation. Purpose gives others a reason for why they should do something.
Direction gives others the “knowledge” to complete the task. Motivation gives others the will to do what they are capable of doing. Organizationally speaking, there are positions to which leaders are assigned. They usually have others reporting to them. This structure is similar in team sports, scouts, church, schools, and government. It is a “chain of command” that is respected and followed. We will be discussing the growth of leadership and management in Lesson 2. However, for now, let’s look at “leadership” behaviors and you — a high school student. Do you think of yourself as a leader? Let’s return to the definition. The ability to influence others. Influence is defined as the power to control or affect others by authority, persuasion, or example. Do you influence your parents? Your brothers or sisters? Do you influence members of a team in your school? Do you influence others in your church? Scouts? JROTC? Sure you do! You lead others every day in so many ways. And most often it is NOT because you have the authority. You lead by your behavior and by setting the example for your brothers and sisters. You persuade your friends to do something they had not thought possible. You even lead yourself. In fact, that is where leadership begins — WITHIN YOU! More on leading from the inside out in Lesson 3. Let’s take a look at some case studies and pick out some of the behaviors that help influence others.
academic awards athletic awards decorations individual awards military awards miscellaneous awards unit awards
leadership behavior purpose direction motivation
PURPOSE
This chapter defines leadership.Learning good leadership skills andbecoming a successful leader are noteasy tasks. With this basic introductionof leadership, you can begin toappreciate the responsibilities thatsuccessful leaders have to themselves,their subordinates, their supervisors,and their organization.
Chapter 1: Being a Leader Lesson 1: Leadership Defined
2 Unit 2: Leadership Theory and Application
Case Studies Which leader behaviors do you possess right now? Which behaviors do you need to improve upon to become a good leader? Think about these two questions as you read the following case studies. They will give you the opportunity to see how three very different people effectively used some leadership behaviors, failed to use others effectively, or did not apply some of them at all. Read each case study carefully.
Case #1 Jon is normally an average student. However, when he takes charge of a group to complete a project, his work and the finished effort of the group are always outstanding.
When asked about his group’s results, his teammates proudly answered, “Jon makes it easy for us to complete our tasks. He helps us and makes suggestions when we need help, but he lets us do the work. If we have a problem, he always listens to our ideas on how to fix it.
“Because he is always excited about what he is doing, we get excited, too. He seems to know all he can about a task before we get started on it. While we are doing the task, he respects our views about how to complete it. He effectively uses the talents of everyone on
the team, and he makes smart decisions. He is always there for us if we need him and, some-how, he still finds the time to do his share of the project. Because of his effective work habits, he instills good works habits in us also.
“He accepts responsibility for the outcome of our tasks, whether good or bad. None of us wants a project to be done poorly, but he does not blame others for any mistakes that he or the team may have made. After finishing one task, we are always glad to begin the next project under his direction.” Would you like to be a member of Jon’s team? What are his desirable char-acteristics? What are his undesirable characteristics?
* * * Case #2 Maria knows exactly what her position is all about. She gets excited whenever an instruc-tor assigns her a project because she knows that she can get it done. Sometimes, she even suggests projects to her instructor. Based on her ideas, the instructor usually assigns them to her and her team.
Maria is highly motivated and has very structured work habits. She likes to map out a project in which everything is her decision. She then tells her team members how to do each step of their tasks according to her direction. She watches everything that her team members do, and if they appear to be
Chapter 1: Being a Leader Lesson 1: Leadership Defined
Unit 2: Leadership Theory and Application 3
doing a task differently from her plan, she criticizes them.
Maria got upset once when a teammate was caught cheating. At first, she was afraid to talk to that person about the incident, and she did not know what to say to her peers who had also heard about it. Finally, after asking herself how she would like to be treated if she were the one involved, she called a team meeting.
At the meeting, Maria informed everyone that all team members make mistakes, not only as a team but also as individuals. She hoped that if they ever had any problems, they would turn to her and/or to another team member for help. They agreed. Would you like to be a member of Maria’s team? What are her desirable char-acteristics? What are her undesirable characteristics?
* * *
Case #3 Brian is an easy-going person. He wants to complete projects with plenty of time left so that he and his friends on the team can relax. After he assigns tasks to each of his team members, he lets them figure out the best way to complete the tasks—without giving them any help, direction, or supervision. Plus, he rarely makes any decisions.
Then, when the time comes to complete the project, he still turns it in even though parts of it are not finished. When the final grade comes back, his group makes the lowest mark in the class, prompting an instructor to ask, “Why wasn’t your project done?”
Brian passes the blame on to his team members by saying, “They didn’t complete their parts like they should have. I don’t believe that I should have to be responsible for or to receive a bad grade because of their sloppy efforts.”
When the other team members find out their grades, they approach Brian, “Why didn’t you tell us everything that we were supposed to do? We could have worked harder and did it better if we had just known.”
Would you like to be a member of Brian’s team? What are his desirable char-acteristics? What are his undesirable characteristics? Reflection Questions: These case studies illustrate the positive and negative application of leader behaviors. Do you possess any of them? What do you appreciate most about your leader behaviors? Can you identify which behaviors you need to work on to become an effective leader? Would you like to change or add any of them? Can you identify any positive behaviors in other people that you would like to adopt? In the next case study, see if you can pick up ways to add new leadership behaviors to your character.
* * *
Chapter 1: Being a Leader Lesson 1: Leadership Defined
4 Unit 2: Leadership Theory and Application
Case #4 Jason North had an opportunity one day to visit his father at work. He noticed that his dad’s employees worked very hard for him. However, Peter, a mechanic who had worked on the assembly line for many years, seemed to resist all friendliness or help from the others. He also avoided speaking to Mr. North most of the time.
That afternoon, while the other employees and Jason were present, Mr. North approached Peter. He asked him, “What do you think of us purchasing the MXR-78 to help increase the production of the assembly line?”
Peter answered, “Why are you asking me? I really don’t know much about it.”
Mr. North responded, “You have a lot of experience here and I would like you to find out if the MXR-78 would make the line run more efficiently. So, will you do this for me?” With urging from the others, Peter accepted.
Later that evening, Jason asked his dad, “Why did you ask Peter to do that job?” Mr. North replied, “Peter is a reliable and experienced employee. He just needed some individual recognition. So, I gave him that assignment to make him feel more a part of this team.”
NOTE: Although the previous story is just one example that pertains to only several leadership behaviors, Jason can definitely
learn from his father’s approach in dealing with Peter. A positive role model like Mr. North can be a powerful influence in one’s desire to adopt another person’s positive leadership behaviors.
Making the Change:
Once you identify the behaviors that you wish to have, then what? Think of ways to fit the behavior into your personality and into the way you want to lead. Use that skill whenever it is appropriate — practice will make it a part of your style.
On the other hand, changing a negative behavior into a positive one is not easy. It may be like breaking an old habit. Use the following steps to change a negative behavior:
• Realize the need for change • Have a positive attitude toward the
change • Follow through
Change is never easy, so keep trying. Just like other tasks, change requires dedication and perseverance. If you can perform a task a certain way and can see it through to com-pletion, this positive behavior can become a lifetime habit.
Reflection Questions: What did you learn about how you influence others? How effective do you think you are in influencing others? Are there some leadership characteristics you would like to adopt? Why?

Chapter 1: Being a Leader Lesson 1: Leadership Defined
Unit 2: Leadership Theory and Application 5
CONCLUSION Now is the time to begin identifying the leadership behaviors that you would like to possess. By adding new behaviors and/or changing negative ones, you can have a major influence on the development of your leader-ship potential.
* * *
Chapter 1: Being a Leader Lesson 2: Leadership Reshuffled
Unit 2: Leadership Theory and Application 6
LESSON 2: LEADERSHIP RESHUFFLED
INTRODUCTION For a long time, there has been a great interest in determining what makes a good leader. In fact, we can trace studies back as far as the end of the nineteenth century during the industrial revolution. As a result, leadership studies have been categorized into three general eras:
1. Traits – 1800s to 1940s
2. Behaviors – 1940s to 1970s
3. Contingency – 1960s to present TRAITS APPROACH During the late nineteenth century and early twentieth century, it was believed that leaders were born. It was a man’s heritage that provided this innate ability to lead. One was born with special characteristics or traits to enable him to lead others effectively.
In order to prove this philosophy, spanning some 40 years, researchers studied existing political, industrial, and religious leaders. They expected to find that these leaders would possess certain characteristics that would distinguish them from their followers.
The researchers were unable to provide evidence to support their belief that leaders
are born. Their findings identified a number of traits that were common to those in leadership positions. Traits such as intel-ligence, dependability, sociability, aggressive-ness, originality, popularity, and humor. However, they also found different situations required the use of different traits. Others concluded there was no evidence to support that just having those traits would help one become a leader, much less an effective leader.
These inconsistent findings led others to continue the search for predictions and understanding of how effective leaders lead. There was an accepted belief that a combination of traits was one element of the equation. However, personality alone was not proven to be the only or even the dominant factor in leading others.
BEHAVIOR APPROACH At the advent of World War II, researchers began to expand their search for the source of leader effectiveness. They began to look at and categorize the “behaviors” of effective leaders. They felt this was a more posit-ive research approach because behaviors can be observed much more objectively, they can be measured more precisely, and they can be taught.
A researcher by the name of Kurt Lewin (1938) provided the foundation for the behavior approach of leadership. He identified
academic awards athletic awards decorations individual awards military awards miscellaneous awards unit awards
approach behavior leadership

Chapter 1: Being a Leader Lesson 2: Leadership Reshuffled
Unit 2: Leadership Theory and Application 7
a continuum of leadership behaviors that included the:
• Democratic style of consulting with their followers and allowing them to participate in decision-making.
• Autocratic style of making the decisions alone.
• Laissez-faire style of providing no direction at all.
Although very different behaviors were identified, there was no evidence as to which style was most effective and which style to use in what situation. Additionally, each style created different reactions from different followers. Therefore, the researchers could not clearly articulate the BEST way to lead effectively.
The Ohio State Leadership Studies continued the search for leader behaviors. Almost 2,000 behaviors were identified and subsequently reduced to a more manageable number. However, two primary leadership behaviors stood out among the many: relationship and structure. Relationship behaviors dealt with the concern for people and included behaviors such as treating team members as equals, being friendly and approachable, making work pleasant, listening to other’s ideas, and looking out for the personal well-being of others.
Structure behaviors dealt with the concern for task and included such behaviors as setting and communicating expectations, establishing work schedules, sharing work procedures, and making work assignments.
There was some evidence coming forth that people-oriented leaders were linked with follower satisfaction levels and that effective leadership required both task and relationship behaviors. However, a few questions remained. Does effective leadership come from just the traits and behaviors of the
leader? How are traits and behaviors influenced by the type of task and the type of work group?
CONTINGENCY APPROACH Even though there was the desire to include situational factors in leadership effectiveness studies, this inclusion did not happen until the 1960s. This approach assumes that the effectiveness of the leader’s personality, style and behavior is contingent upon the require-ments of the situation and further supports the belief that:
• There is no one best way to lead.
• The situational factors will determine the most effective style and behaviors.
• You can teach leadership behaviors.
• The leader does have an impact on group or organization effectiveness.
• Leadership effectiveness is affected by the interaction between situational factors and personal characteristics.
Modern approaches to leadership effective-ness have a somewhat integrated view of Traits, Behavioral, and Contingency Approaches. Historically, researchers have studied leader behaviors by observing execu-tives in a variety of organizations. However, if we agree with the definition of leadership as “the ability to influence, lead, or guide others so as to accomplish a mission in the manner desired by providing purpose, direc-tion and motivation,” then should we not be looking at the behaviors of anyone who influ-ences others? Are we not ALL leaders in our families, schools, communities, and life?
As a result of these historical perspectives, several approaches to “leadership style” have been identified. Those most common are the “trait approach,” the “situational approach,”
Chapter 1: Being a Leader Lesson 2: Leadership Reshuffled
Unit 2: Leadership Theory and Application 8
the “follower approach” and the “contingency model.”
1. The trait approach maintains that a person either does or does not possess the specific traits that are considered to be the essentials of leadership.
2. The situational approach assumes that certain situations call for specific types of leadership behaviors and that leaders will be those who best fit the requirements of the situation.
3. The follower approach holds that the needs of group members determine who will lead. Leadership, then, is a coincidence between the needs of the group and the abilities a person happens to have.
4. The contingency model maintains that personal styles and situational characteristics combine to determine leadership. A proper match between styles and situations is essential.
What does all this mean to you? To answer that let us return to the definition leadership.
Leadership is the ability (or process) to influence, lead, or guide others so as to accomplish a mission in the manner desired by providing purpose, direction, and motivation. There have been studies over a number of years directed at gaining more understanding about effective leadership. The desire to assist people in the behaviors that effectively influ-ence, lead, and guide others remains a highly regarded search. The more you understand the behaviors that create the desire to follow, the more you will be able to determine the leader-ship behaviors that will work best for you. And even more important, the ones that do not.
Have you ever wondered how some leaders influence, excite, stimulate, energize others? When you were influenced, excited, stimu-
lated, or energized by someone else to do something you thought impossible, did you reflect on those times so you could copy the behaviors you liked? Think of those teachers you remember most. What was it they did that made you remember them?
As researchers continue to study the characteristics of leaders and as the world we live in continues to change through technology and human growth, we are finding that one key ingredient to leading others successfully, is the ability to successfully lead oneself. Leading from the inside out is the foundation to building successful relationships in your family, church, community, and school. Your relationships with others are the foundation of trust! Trust is the foundation to empowerment and alignment of the mission you are leading others to accomplish.
In the next lesson, we will look at leading from the inside out through values, ethics, character, and attributes.
* * *
Chapter 1: Being a Leader Lesson 3: Leadership from the Inside Out
Unit 2: Leadership Theory and Application 9
LESSON 3: LEADERSHIP FROM THE INSIDE OUT
INTRODUCTION Values are the driving force behind an action. When a leader gives his or her unit a particular mission, it is usually based on what that leader believes to be right. Both the lead-er’s decisions and actions as well as the followers’ actions must be motivated by their inherent values — strong feelings of right vs. wrong, ethical vs. unethical, or important for the majority vs. important just for personal gain. America needs leaders who possess character and competence. They must be will-ing and able to live up to a defined set of values, possess the required attributes, and develop the required skills.
DEFINING VALUES
Values are ideas about the worth or importance of things, concepts, and people. They come from your beliefs or attitudes, and they influence your behavior because you use them to decide between alternatives. You may, for instance, place value on such things as truth, money, friendship, justice, or selflessness.
Your values can influence your priorities. Because they are the basis for beliefs and attitudes, you may become emotional regarding certain issues. These values begin early in life and develop throughout your adulthood. You develop, process, evaluate, and prioritize beliefs or values in an order of importance that helps guide your daily existence in society. Strong values are what you put first, what you will defend most, and what you want to give up least. There are seven individual values that all leaders and followers possess: loyalty, duty, respect, selfless service, honor, integrity, and personal courage. By listing these values in this order, note that they spell out the acronym: LDRSHIP — pronounced leadership. When used correctly, these values are the basis for building trust in relationships. They should be at the core of your character. The more you develop these values in yourself, the more successful you will be in life. However, values sometimes conflict. Suppose your value of loyalty conflicts with your value of integrity. For example, if your supervisor wants you to write up a report on an incident in a manner that does not reflect the truth, you still have the moral responsi-bility to prepare it honestly. Whatever you decide in this example, the quality that you value most will guide your actions. LOYALTY — to bear true faith and allegiance to the U.S. Constitution...your peers Loyalty establishes the correct ordering of your obligations and commit-ments, starting with the U.S. Constitution; then organizations such as your Army JROTC program, your high school, your employer; then your family and friends; and finally yourself. Being unswerving in your allegiance
beliefs prejudices bribery selfless service coercion tenets dilemma tunnel vision ethics (ethical) unethical favoritism values norms
Chapter 1: Being a Leader Lesson 3: Leadership from the Inside Out
10 Unit 2: Leadership Theory and Application
to the Constitution and faithful to the laws of our government will prevent you from mis-placing your loyalties. To exhibit the value of loyalty, you must: ◊ Respect the U.S. Constitution and its laws ◊ Demonstrate devotion to the organiza-
tion(s) for which you are a member ◊ Show faithfulness to your family, friends,
and peers DUTY — to fulfill your obligations Duty is the sum total of all laws, rules, etc., that make up your organizational, civic, and moral obligations. Your values originate with duty because society and organizations or institutions such as your JROTC program, your high school, etc., expect you to fulfill your obligations. Often, society or these organizations expect individuals to exceed their duty, especially in ethical matters. For example, the Army’s highest award, the Medal of Honor, imparts the notion of an individual acting “above and beyond the call of duty.” To exhibit the value of duty, you must: ◊ Carry out the requirements of your job ◊ Meet professional standards ◊ Fulfill your legal, civic, and moral
obligations RESPECT — to treat people as they should be treated Respect denotes the regard and recognition of the absolute dignity that every human being possesses. Specifically, it is indicative of your compassion, fairness, and consideration of others, which includes a sensitivity to and regard for their feelings and needs. Moreover, it is an awareness of the effect of your own behavior on them.
To exhibit this value, you must: ◊ Recognize the dignity of all ◊ Demonstrate consideration for others ◊ Create a climate of fairness The following story captures all of these aspects of respect. When Colonel Chamberlain assumed command of the 20th Maine Regiment, it badly needed replacements. Illness and fighting had drained the combat power of the regiment to a dangerously low level. However, one month before the Battle of Gettysburg, 120 mutineers (soldiers who had taken part in a mutiny) from the 2nd Maine Regiment were brought to Cham-berlain’s unit by guards with fixed bayonets. General Meade, the Corps Commander, ordered them to be attached to the 20th Maine Regiment as replacements and ordered Chamberlain to shoot them if they did not do their duty. Chamberlain decided to find out why they were mutineers. When they enlisted at the outbreak of the war, the 2nd Maine Regiment had been formed to serve for three months. During those three months, the Maine Legislature authorized raising 10 regiments to serve for two years; it included the 2nd Maine as one of those 10 regiments.
Somehow, a foul-up occurred in the enlistment papers for the soldiers of the 2nd Maine. Two-thirds of the members signed up for two years; the other one-third signed up for three years. After two years passed, the men who enlisted for two years had com-pleted their obligation and departed for home. The other one-third (the 120 mutineers) was ordered to remain on duty. Believing that the order was a gross injustice, they refused duty.
Chapter 1: Being a Leader Lesson 3: Leadership from the Inside Out
Unit 2: Leadership Theory and Application 11
Chamberlain believed that if these stubborn men were willing to face death because of their convictions of being treated unfairly, he recognized their value — he des-perately needed their help and knew that executing them was not the correct course of action. If these strong-willed soldiers would not be pushed around, it was likely that the enemy would not push them around either. He asked for and received permission from Gen-eral Meade to handle them in his own way. Chamberlain returned to his unit and met with the angry soldiers, who were still under guard. Upon learning that they had not eaten in three days, he made sure that they were fed. Then, he broke their group spirit by splitting them up and assigning them to different companies. He told them that he would treat them as soldiers with all the rights of soldiers. He also assured them that he would look into their case and do what he could to help them. In the meantime, he indicated that he would appreciate it if they would do duty with the 20th Maine Regiment. All but six went along with Chamberlain’s suggestion. The six who refused were held for courts-martial. Chamberlain’s actions and honesty turned away the anger of these soldiers and showed how the right word, spoken quietly and firmly at the right time, can persuade subordinates to perform. By treating these rebellious soldiers with fairness and respect, he rekindled their motivation to fight. Without their help, the 20th Maine Regiment would probably have been defeated in their battle at Little Round Top, which might have resulted in a Union loss at the Battle of Gettysburg — and even the loss of the war. As you can see by this example, respect builds trust and it is an essential part of being an effective leader.
* * * SELFLESS SERVICE — to put the welfare of the nation...before your own Selfless service, or service before self, signifies a proper ordering of your priorities. For example, the welfare of the nation (or your community) and the organization or institution to which you are a member come before you, the individual. While the focus is on service to your community or to the nation, this value also suggests that you properly take care of and support the needs of your family and yourself. To exhibit the value of selfless service, you must: ◊ Focus your priorities on service to your
community or to the nation ◊ Place the needs of the organization above
personal gain HONOR — to live up to all values Honor represents the set of all values (courage, duty, integrity, loyalty, respect, and selfless service) that make up the public code for the Army JROTC, or for any organization. Honor and moral identity stand together because individuals identify with group values and norms. Significantly, the value of honor provides the motive for action. Honor demands adherence to a public moral code, not the protection of an individual’s reputation. To exhibit the value of honor, you must: ◊ Adhere to and identify with a public code
of professional values ◊ Employ honor as your motive for action INTEGRITY — to do what is right, legally and morally
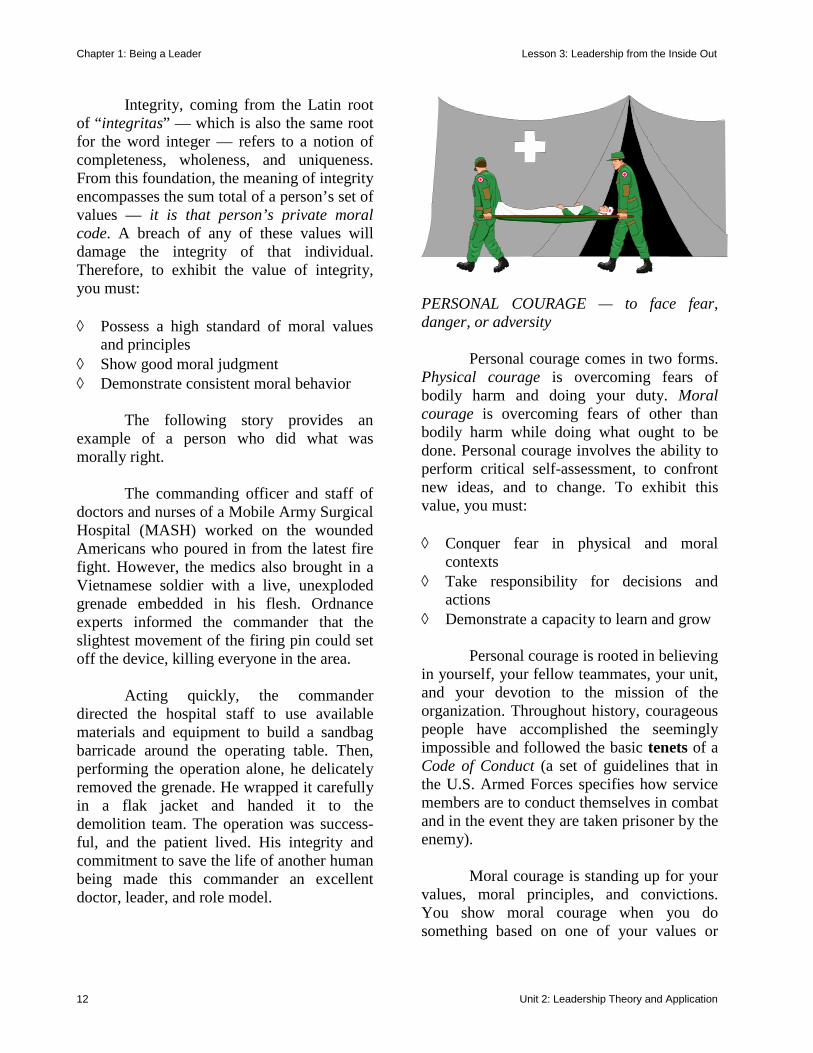
Chapter 1: Being a Leader Lesson 3: Leadership from the Inside Out
12 Unit 2: Leadership Theory and Application
Integrity, coming from the Latin root of “integritas” — which is also the same root for the word integer — refers to a notion of completeness, wholeness, and uniqueness. From this foundation, the meaning of integrity encompasses the sum total of a person’s set of values — it is that person’s private moral code. A breach of any of these values will damage the integrity of that individual. Therefore, to exhibit the value of integrity, you must: ◊ Possess a high standard of moral values
and principles ◊ Show good moral judgment ◊ Demonstrate consistent moral behavior The following story provides an example of a person who did what was morally right. The commanding officer and staff of doctors and nurses of a Mobile Army Surgical Hospital (MASH) worked on the wounded Americans who poured in from the latest fire fight. However, the medics also brought in a Vietnamese soldier with a live, unexploded grenade embedded in his flesh. Ordnance experts informed the commander that the slightest movement of the firing pin could set off the device, killing everyone in the area. Acting quickly, the commander directed the hospital staff to use available materials and equipment to build a sandbag barricade around the operating table. Then, performing the operation alone, he delicately removed the grenade. He wrapped it carefully in a flak jacket and handed it to the demolition team. The operation was success-ful, and the patient lived. His integrity and commitment to save the life of another human being made this commander an excellent doctor, leader, and role model.
PERSONAL COURAGE — to face fear, danger, or adversity Personal courage comes in two forms. Physical courage is overcoming fears of bodily harm and doing your duty. Moral courage is overcoming fears of other than bodily harm while doing what ought to be done. Personal courage involves the ability to perform critical self-assessment, to confront new ideas, and to change. To exhibit this value, you must: ◊ Conquer fear in physical and moral
contexts ◊ Take responsibility for decisions and
actions ◊ Demonstrate a capacity to learn and grow Personal courage is rooted in believing in yourself, your fellow teammates, your unit, and your devotion to the mission of the organization. Throughout history, courageous people have accomplished the seemingly impossible and followed the basic tenets of a Code of Conduct (a set of guidelines that in the U.S. Armed Forces specifies how service members are to conduct themselves in combat and in the event they are taken prisoner by the enemy). Moral courage is standing up for your values, moral principles, and convictions. You show moral courage when you do something based on one of your values or
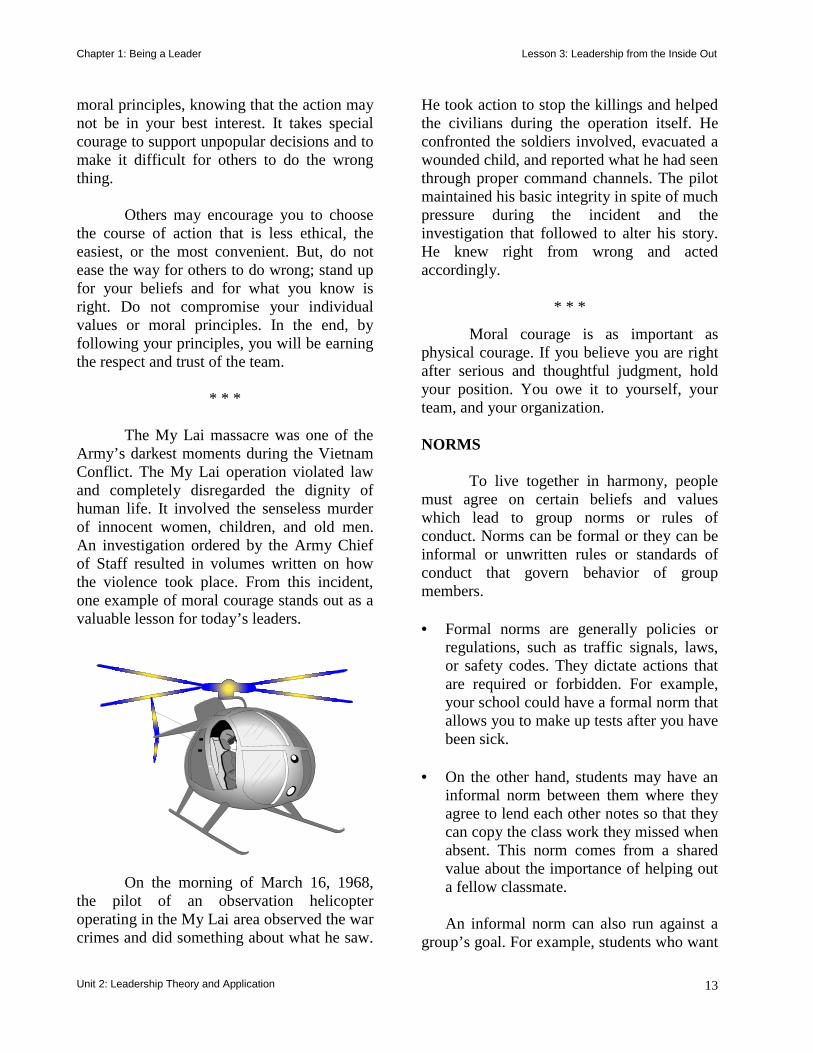
Chapter 1: Being a Leader Lesson 3: Leadership from the Inside Out
Unit 2: Leadership Theory and Application 13
moral principles, knowing that the action may not be in your best interest. It takes special courage to support unpopular decisions and to make it difficult for others to do the wrong thing. Others may encourage you to choose the course of action that is less ethical, the easiest, or the most convenient. But, do not ease the way for others to do wrong; stand up for your beliefs and for what you know is right. Do not compromise your individual values or moral principles. In the end, by following your principles, you will be earning the respect and trust of the team.
* * * The My Lai massacre was one of the Army’s darkest moments during the Vietnam Conflict. The My Lai operation violated law and completely disregarded the dignity of human life. It involved the senseless murder of innocent women, children, and old men. An investigation ordered by the Army Chief of Staff resulted in volumes written on how the violence took place. From this incident, one example of moral courage stands out as a valuable lesson for today’s leaders.
On the morning of March 16, 1968, the pilot of an observation helicopter operating in the My Lai area observed the war crimes and did something about what he saw.
He took action to stop the killings and helped the civilians during the operation itself. He confronted the soldiers involved, evacuated a wounded child, and reported what he had seen through proper command channels. The pilot maintained his basic integrity in spite of much pressure during the incident and the investigation that followed to alter his story. He knew right from wrong and acted accordingly.
* * *
Moral courage is as important as physical courage. If you believe you are right after serious and thoughtful judgment, hold your position. You owe it to yourself, your team, and your organization. NORMS To live together in harmony, people must agree on certain beliefs and values which lead to group norms or rules of conduct. Norms can be formal or they can be informal or unwritten rules or standards of conduct that govern behavior of group members. • Formal norms are generally policies or
regulations, such as traffic signals, laws, or safety codes. They dictate actions that are required or forbidden. For example, your school could have a formal norm that allows you to make up tests after you have been sick.
• On the other hand, students may have an
informal norm between them where they agree to lend each other notes so that they can copy the class work they missed when absent. This norm comes from a shared value about the importance of helping out a fellow classmate.
An informal norm can also run against a
group’s goal. For example, students who want
Chapter 1: Being a Leader Lesson 3: Leadership from the Inside Out
14 Unit 2: Leadership Theory and Application
to be accepted by their peers may feel pressure to follow destructive informal norms, such as using drugs or cutting classes. IMPORTANCE OF BELIEFS, VALUES, AND NORMS Beliefs, values, and norms guide the actions of individuals and groups. They are like a traffic control system; they are signals giving direction, meaning, and purpose to our lives. They are powerful. Past experiences involving such things as family, school, church, work, and social relationships shape your individual values, beliefs, and attitudes. Understand the importance of nurturing and shaping these qualities in your followers because they are fundamental motivating factors. Mutual respect between you and your team members motivates them to follow your orders. So, make it a general rule to think through situations and choose the course of action that will gain you the long-term respect of your followers, seniors, and peers. By earning their respect, you will be exerting your influence on their beliefs, values, and norms. CHARACTER Character is a person’s inner strength; it is not only a major factor that determines how a person behaves, it is also the link (or interaction) between values and behaviors. For example, a person of character does what he or she believes is right, regardless of the dangers or circumstances involved, whereas a person’s behavior shows his or her character. The three interacting parts that make up a person’s character and competence are values, attributes, and skills. Each one of these parts must interact to have a complete and well-balanced character.
There is no simple formula for success in the situations that you may face, either as a leader or in life. The key is to remain flexible and attempt to gather as many facts as the circumstances will allow before you must make a decision. When dealing with others, every situation has two sides; listen to both. The way you handle challenges depends on how you interact with the factors of leadership (followers, the leader, the situation, and communications). Character can be strong or weak. People with strong character recognize what they want and have the drive, energy, self-discipline, willpower, and courage to get it, whereas people with weak character do not know what is needed and they lack purpose, willpower, self-discipline, and courage. Furthermore, people who can admit when they are wrong are exhibiting strong character, but people who place blame on someone or something else are indicating a weak character, which their followers will readily recognize. People want to be led by leaders who provide strength, inspiration, and guidance and will help them to become winners. How much they are willing to trust a leader depends on their assessment of that leader’s courage, competence, and commitment. CHARACTER BUILDING You build strong and honorable character over time by hard work, study, and challenging experiences. You must also under-stand yourself — your strengths and weak-nesses. Be open to feedback and advice from others; however, you must take the responsi-bility for continually building and strengthen-ing your character. Others can help, but they cannot do it for you. To build strong and honorable character, you should:
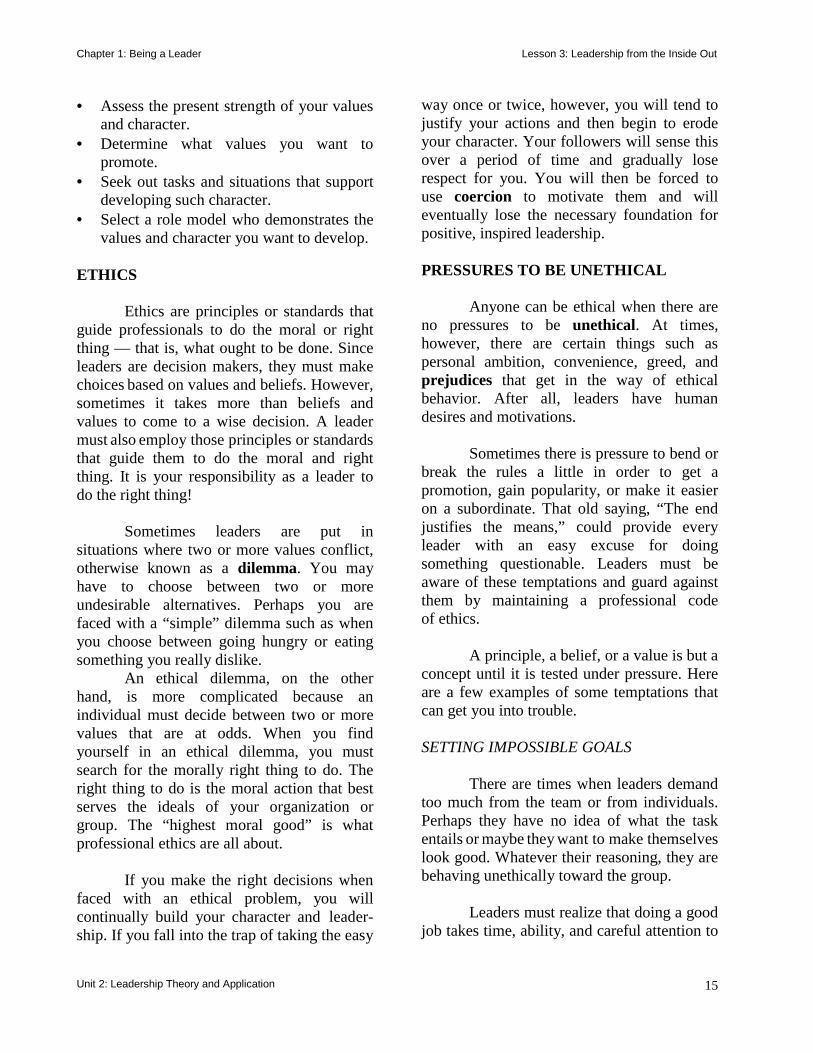
Chapter 1: Being a Leader Lesson 3: Leadership from the Inside Out
Unit 2: Leadership Theory and Application 15
• Assess the present strength of your values and character.
• Determine what values you want to promote.
• Seek out tasks and situations that support developing such character.
• Select a role model who demonstrates the values and character you want to develop.
ETHICS Ethics are principles or standards that guide professionals to do the moral or right thing — that is, what ought to be done. Since leaders are decision makers, they must make choices based on values and beliefs. However, sometimes it takes more than beliefs and values to come to a wise decision. A leader must also employ those principles or standards that guide them to do the moral and right thing. It is your responsibility as a leader to do the right thing! Sometimes leaders are put in situations where two or more values conflict, otherwise known as a dilemma. You may have to choose between two or more undesirable alternatives. Perhaps you are faced with a “simple” dilemma such as when you choose between going hungry or eating something you really dislike. An ethical dilemma, on the other hand, is more complicated because an individual must decide between two or more values that are at odds. When you find yourself in an ethical dilemma, you must search for the morally right thing to do. The right thing to do is the moral action that best serves the ideals of your organization or group. The “highest moral good” is what professional ethics are all about. If you make the right decisions when faced with an ethical problem, you will continually build your character and leader-ship. If you fall into the trap of taking the easy
way once or twice, however, you will tend to justify your actions and then begin to erode your character. Your followers will sense this over a period of time and gradually lose respect for you. You will then be forced to use coercion to motivate them and will eventually lose the necessary foundation for positive, inspired leadership. PRESSURES TO BE UNETHICAL Anyone can be ethical when there are no pressures to be unethical. At times, however, there are certain things such as personal ambition, convenience, greed, and prejudices that get in the way of ethical behavior. After all, leaders have human desires and motivations. Sometimes there is pressure to bend or break the rules a little in order to get a promotion, gain popularity, or make it easier on a subordinate. That old saying, “The end justifies the means,” could provide every leader with an easy excuse for doing something questionable. Leaders must be aware of these temptations and guard against them by maintaining a professional code of ethics. A principle, a belief, or a value is but a concept until it is tested under pressure. Here are a few examples of some temptations that can get you into trouble. SETTING IMPOSSIBLE GOALS There are times when leaders demand too much from the team or from individuals. Perhaps they have no idea of what the task entails or maybe they want to make themselves look good. Whatever their reasoning, they are behaving unethically toward the group. Leaders must realize that doing a good job takes time, ability, and careful attention to
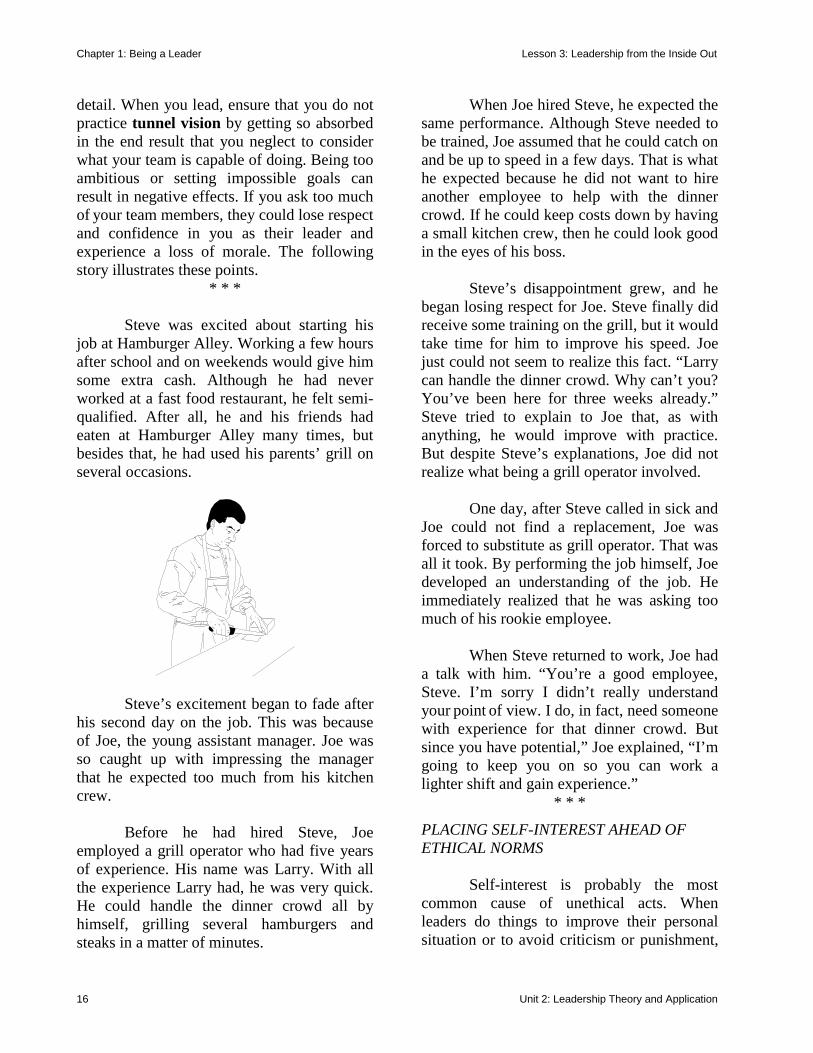
Chapter 1: Being a Leader Lesson 3: Leadership from the Inside Out
16 Unit 2: Leadership Theory and Application
detail. When you lead, ensure that you do not practice tunnel vision by getting so absorbed in the end result that you neglect to consider what your team is capable of doing. Being too ambitious or setting impossible goals can result in negative effects. If you ask too much of your team members, they could lose respect and confidence in you as their leader and experience a loss of morale. The following story illustrates these points.
* * * Steve was excited about starting his job at Hamburger Alley. Working a few hours after school and on weekends would give him some extra cash. Although he had never worked at a fast food restaurant, he felt semi-qualified. After all, he and his friends had eaten at Hamburger Alley many times, but besides that, he had used his parents’ grill on several occasions.
Steve’s excitement began to fade after his second day on the job. This was because of Joe, the young assistant manager. Joe was so caught up with impressing the manager that he expected too much from his kitchen crew. Before he had hired Steve, Joe employed a grill operator who had five years of experience. His name was Larry. With all the experience Larry had, he was very quick. He could handle the dinner crowd all by himself, grilling several hamburgers and steaks in a matter of minutes.
When Joe hired Steve, he expected the same performance. Although Steve needed to be trained, Joe assumed that he could catch on and be up to speed in a few days. That is what he expected because he did not want to hire another employee to help with the dinner crowd. If he could keep costs down by having a small kitchen crew, then he could look good in the eyes of his boss. Steve’s disappointment grew, and he began losing respect for Joe. Steve finally did receive some training on the grill, but it would take time for him to improve his speed. Joe just could not seem to realize this fact. “Larry can handle the dinner crowd. Why can’t you? You’ve been here for three weeks already.” Steve tried to explain to Joe that, as with anything, he would improve with practice. But despite Steve’s explanations, Joe did not realize what being a grill operator involved. One day, after Steve called in sick and Joe could not find a replacement, Joe was forced to substitute as grill operator. That was all it took. By performing the job himself, Joe developed an understanding of the job. He immediately realized that he was asking too much of his rookie employee. When Steve returned to work, Joe had a talk with him. “You’re a good employee, Steve. I’m sorry I didn’t really understand your point of view. I do, in fact, need someone with experience for that dinner crowd. But since you have potential,” Joe explained, “I’m going to keep you on so you can work a lighter shift and gain experience.”
* * *
PLACING SELF-INTEREST AHEAD OF ETHICAL NORMS Self-interest is probably the most common cause of unethical acts. When leaders do things to improve their personal situation or to avoid criticism or punishment,
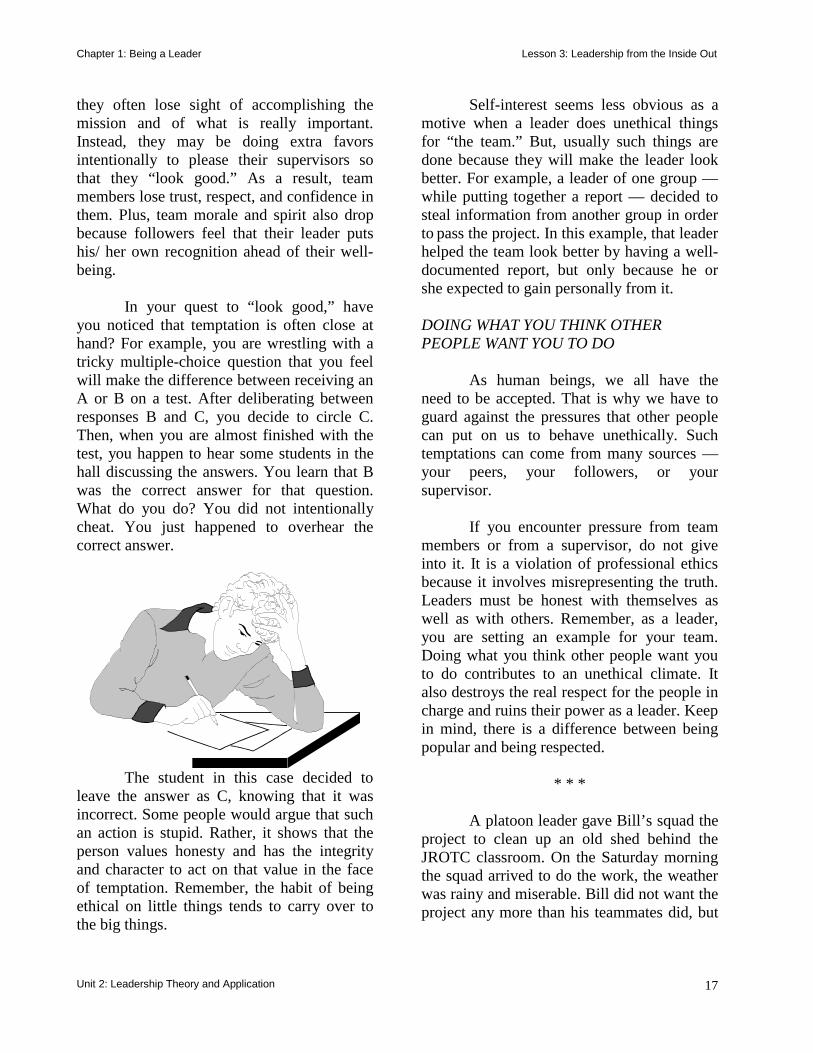
Chapter 1: Being a Leader Lesson 3: Leadership from the Inside Out
Unit 2: Leadership Theory and Application 17
they often lose sight of accomplishing the mission and of what is really important. Instead, they may be doing extra favors intentionally to please their supervisors so that they “look good.” As a result, team members lose trust, respect, and confidence in them. Plus, team morale and spirit also drop because followers feel that their leader puts his/ her own recognition ahead of their well-being. In your quest to “look good,” have you noticed that temptation is often close at hand? For example, you are wrestling with a tricky multiple-choice question that you feel will make the difference between receiving an A or B on a test. After deliberating between responses B and C, you decide to circle C. Then, when you are almost finished with the test, you happen to hear some students in the hall discussing the answers. You learn that B was the correct answer for that question. What do you do? You did not intentionally cheat. You just happened to overhear the correct answer.
The student in this case decided to leave the answer as C, knowing that it was incorrect. Some people would argue that such an action is stupid. Rather, it shows that the person values honesty and has the integrity and character to act on that value in the face of temptation. Remember, the habit of being ethical on little things tends to carry over to the big things.
Self-interest seems less obvious as a motive when a leader does unethical things for “the team.” But, usually such things are done because they will make the leader look better. For example, a leader of one group — while putting together a report — decided to steal information from another group in order to pass the project. In this example, that leader helped the team look better by having a well-documented report, but only because he or she expected to gain personally from it. DOING WHAT YOU THINK OTHER PEOPLE WANT YOU TO DO As human beings, we all have the need to be accepted. That is why we have to guard against the pressures that other people can put on us to behave unethically. Such temptations can come from many sources — your peers, your followers, or your supervisor. If you encounter pressure from team members or from a supervisor, do not give into it. It is a violation of professional ethics because it involves misrepresenting the truth. Leaders must be honest with themselves as well as with others. Remember, as a leader, you are setting an example for your team. Doing what you think other people want you to do contributes to an unethical climate. It also destroys the real respect for the people in charge and ruins their power as a leader. Keep in mind, there is a difference between being popular and being respected.
* * * A platoon leader gave Bill’s squad the project to clean up an old shed behind the JROTC classroom. On the Saturday morning the squad arrived to do the work, the weather was rainy and miserable. Bill did not want the project any more than his teammates did, but
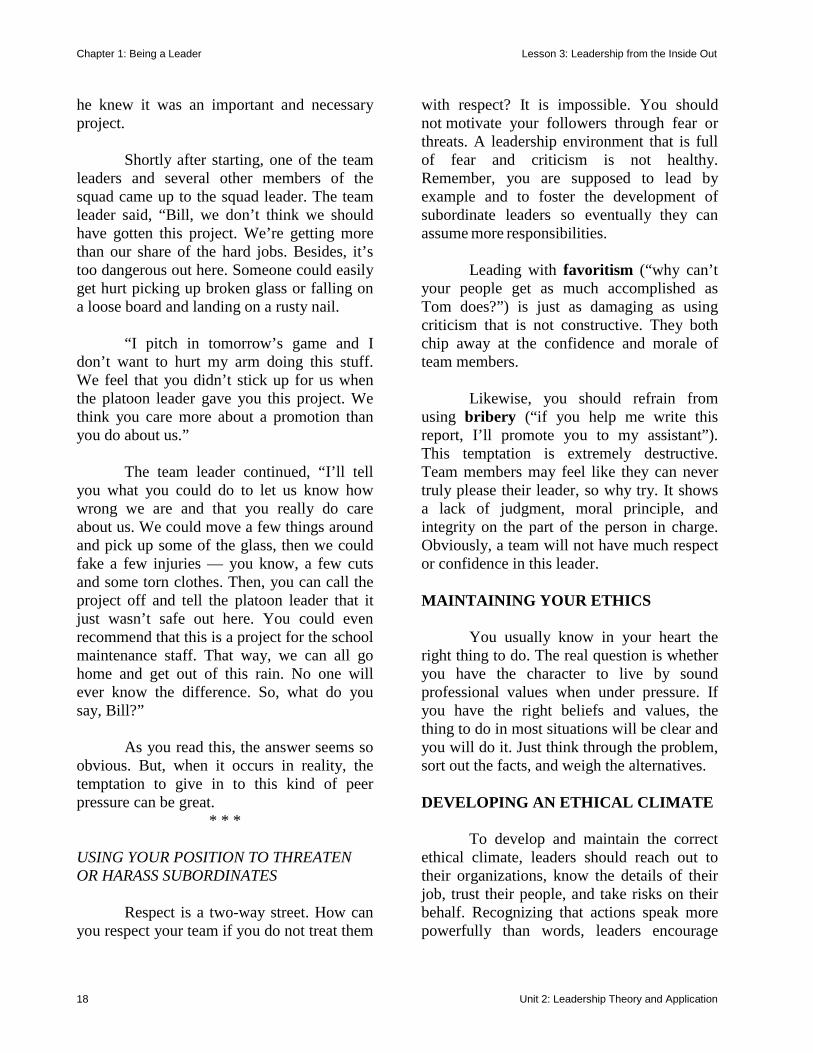
Chapter 1: Being a Leader Lesson 3: Leadership from the Inside Out
18 Unit 2: Leadership Theory and Application
he knew it was an important and necessary project. Shortly after starting, one of the team leaders and several other members of the squad came up to the squad leader. The team leader said, “Bill, we don’t think we should have gotten this project. We’re getting more than our share of the hard jobs. Besides, it’s too dangerous out here. Someone could easily get hurt picking up broken glass or falling on a loose board and landing on a rusty nail. “I pitch in tomorrow’s game and I don’t want to hurt my arm doing this stuff. We feel that you didn’t stick up for us when the platoon leader gave you this project. We think you care more about a promotion than you do about us.” The team leader continued, “I’ll tell you what you could do to let us know how wrong we are and that you really do care about us. We could move a few things around and pick up some of the glass, then we could fake a few injuries — you know, a few cuts and some torn clothes. Then, you can call the project off and tell the platoon leader that it just wasn’t safe out here. You could even recommend that this is a project for the school maintenance staff. That way, we can all go home and get out of this rain. No one will ever know the difference. So, what do you say, Bill?” As you read this, the answer seems so obvious. But, when it occurs in reality, the temptation to give in to this kind of peer pressure can be great.
* * * USING YOUR POSITION TO THREATEN OR HARASS SUBORDINATES Respect is a two-way street. How can you respect your team if you do not treat them
with respect? It is impossible. You should not motivate your followers through fear or threats. A leadership environment that is full of fear and criticism is not healthy. Remember, you are supposed to lead by example and to foster the development of subordinate leaders so eventually they can assume more responsibilities. Leading with favoritism (“why can’t your people get as much accomplished as Tom does?”) is just as damaging as using criticism that is not constructive. They both chip away at the confidence and morale of team members. Likewise, you should refrain from using bribery (“if you help me write this report, I’ll promote you to my assistant”). This temptation is extremely destructive. Team members may feel like they can never truly please their leader, so why try. It shows a lack of judgment, moral principle, and integrity on the part of the person in charge. Obviously, a team will not have much respect or confidence in this leader. MAINTAINING YOUR ETHICS You usually know in your heart the right thing to do. The real question is whether you have the character to live by sound professional values when under pressure. If you have the right beliefs and values, the thing to do in most situations will be clear and you will do it. Just think through the problem, sort out the facts, and weigh the alternatives. DEVELOPING AN ETHICAL CLIMATE To develop and maintain the correct ethical climate, leaders should reach out to their organizations, know the details of their job, trust their people, and take risks on their behalf. Recognizing that actions speak more powerfully than words, leaders encourage
Chapter 1: Being a Leader Lesson 3: Leadership from the Inside Out
Unit 2: Leadership Theory and Application 19
openness and even criticism, they listen and support followers who show initiative, and they forgive honest mistakes made in the process of learning. Leaders have three ethi-cal responsibilities that promote a healthy environment: • Be a good role model. • Develop followers ethically. • Lead in such a way that you avoid putting
your teammates into ethical dilemmas. What is your self-image? Leading from the inside out means to set examples and model the behavior that you want others to do. By knowing what is important to you so you can make sure your actions are supporting the things you value most. You need to lead yourself before you can lead others.
Self-image is how you see yourself. It is what you think about your characteristics, your physical body, your morals and values, your needs and goals, and your dreams. Having a good self-image is being satisfied with and accepting what you see in yourself.
When you become a leader, you need to constantly be aware of how you see yourself. Be honest with yourself and try not to have illusions about what you are or what you would like to be. If you believe that you cannot do a task, or if you are not consistent with the values that you think you have, then you may begin to have doubts about yourself. Leaders who openly display doubt, hesitation, or uncertainty in their own abilities will likely cause their followers to also have doubt in them and in their leadership.
If what you see is not what you want to be, you can make changes. You can become the
person you want to be. The change will require you to practice those mental, physical and emotional attributes we discussed earlier. You will need to determine what is important to you and what you value most. If you begin to think positively about yourself, others will see your confidence and will want to follow you. Here are some things to remember as you begin to develop your self-image.
Focus on the Positive One way to improve your self-image is to identify all of the positive qualities that you possess. A certain amount of emphasizing the positive is necessary to boost your own self-image. What do you like MOST about your-self? How can you do MORE of what you like most?
Self-disclosure Self-disclosure is talking to others about yourself. As you talk to others, you will realize that your problems and shortcomings are no different from theirs. What do they like MOST about you? How can you do MORE of what they like most about you?
Reflection Think back over the choices you made and the things you did during the day. What were these behaviors saying about you? Were they displaying the values that you want to incorporate into your life? Did you practice the mental, physical, and emotional attributes you want to possess? Did they change your self-image? Would you do things differently if you had another chance to? CONCLUSION As a leader, you are responsible for making decisions, but do not decide on a course of action without thinking over the

Chapter 1: Being a Leader Lesson 3: Leadership from the Inside Out
20 Unit 2: Leadership Theory and Application
consequences — the choice you make should be based on your values. Then, apply these values to every leadership situation in order to build the trust and confidence of your followers. Finally, beware of temptations and pressures that can affect a leadership situation. Remember, anyone can make a decision, but effective leaders base their decisions on the highest moral good. Let your personal and professional codes of ethics guide you to do what is morally right.
Chapter 1: Being a Leader Lesson 4: Principles and Leadership
Unit 2: Leadership Theory and Application 21
LESSON 4: PRINCIPLES AND LEADERSHIP
INTRODUCTION Leadership is the process of influencing others to accomplish a mission. The leadership skills that you use to accomplish a mission are the same whether you are in a classroom, your neighborhood, church, home, or JROTC. To be a good leader, you must provide teammates with purpose, direction, and motivation. Purpose helps them to understand why they are performing a project; direction shows what they must do; and motivation gives them the desire or initiative to do everything they are capable of doing to accomplish their mission.
ORIGINS OF PRINCIPLES The 11 principles of leadership have long been the foundation of military leadership doctrine. They have stood the test of time and have guided the conduct and action of successful leaders of both past and present. The U.S. Army tested their validity in 1970 when the Army War College and the Continental Army Command Leadership Board did a study on leadership effectiveness. The results dramatically demonstrated that these guidelines are appropriate today and for the future by leaders and followers at every level. The findings of these studies also indicated that most leadership mistakes resulted simply from the failure to apply these principles properly. A knowledge of these principles, and of basic human nature, will help you to be an effective leader in any situation. While you study them over the next several pages, keep in mind your strengths and weaknesses. Think about how you can best apply these principles to improve your leadership ability. THE PRINCIPLES OF LEADERSHIP
To know yourself, you must understand who you are. Where do your interests lie? Do you have a special talent? What are your weak-nesses? Do you have a least favorite subject? What are some of your faults? Answering these questions is part of self-evaluation. Through the process of self-evaluation, leaders determine their capabilities and limitations.
attributes introspection censure philosophy convictions recrimination diversified self-evaluationdoctrine
KNOW YOURSELF AND SEEK SELF-IMPROVEMENT
PURPOSE
When we think of a leader, wethink of someone who is in charge orsomeone with authority. To be an effec-tive leader, one must possess certaintraits, abide by certain principles, andhave an appropriate style. In thislesson, we will introduce the 11principles of leadership. Being aneffective leader requires more thanpossessing certain traits, you must alsofollow these principles, which are basictools of a successful leader. Use themto evaluate yourself, then to develop aplan to improve your ability to lead.
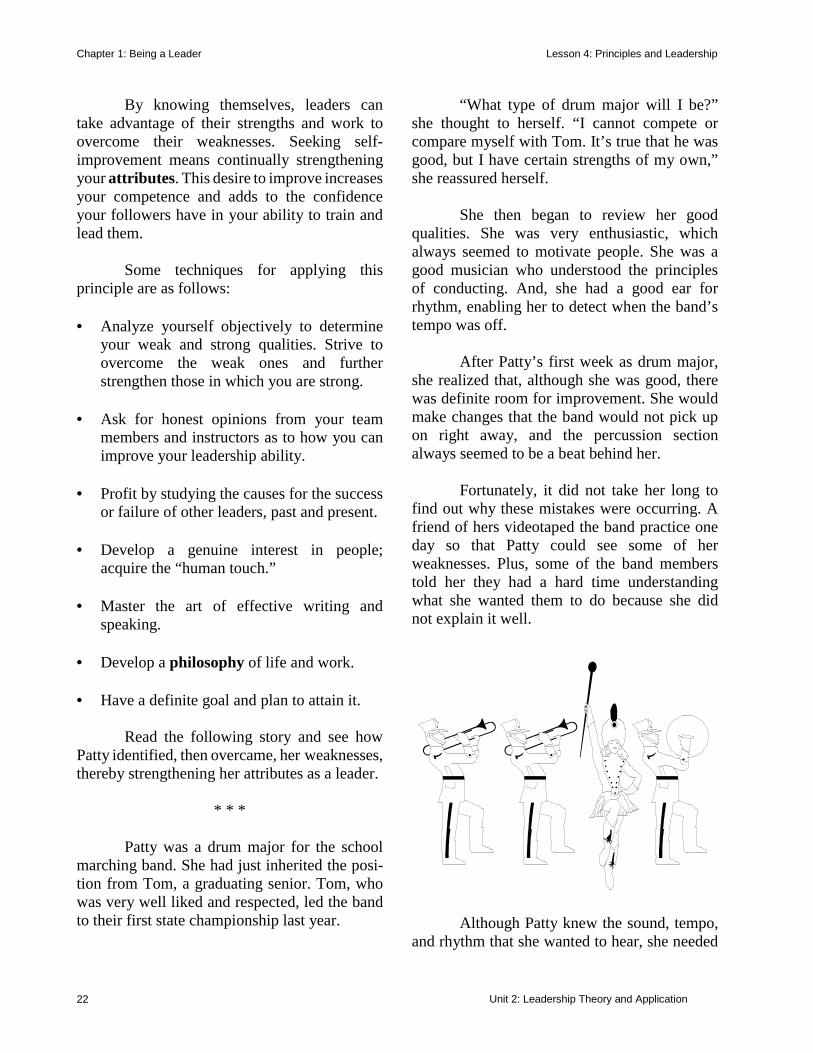
Chapter 1: Being a Leader Lesson 4: Principles and Leadership
Unit 2: Leadership Theory and Application 22
By knowing themselves, leaders can take advantage of their strengths and work to overcome their weaknesses. Seeking self-improvement means continually strengthening your attributes. This desire to improve increases your competence and adds to the confidence your followers have in your ability to train and lead them. Some techniques for applying this principle are as follows: • Analyze yourself objectively to determine
your weak and strong qualities. Strive to overcome the weak ones and further strengthen those in which you are strong.
• Ask for honest opinions from your team
members and instructors as to how you can improve your leadership ability.
• Profit by studying the causes for the success
or failure of other leaders, past and present. • Develop a genuine interest in people;
acquire the “human touch.” • Master the art of effective writing and
speaking. • Develop a philosophy of life and work. • Have a definite goal and plan to attain it. Read the following story and see how Patty identified, then overcame, her weaknesses, thereby strengthening her attributes as a leader.
* * * Patty was a drum major for the school marching band. She had just inherited the posi-tion from Tom, a graduating senior. Tom, who was very well liked and respected, led the band to their first state championship last year.
“What type of drum major will I be?” she thought to herself. “I cannot compete or compare myself with Tom. It’s true that he was good, but I have certain strengths of my own,” she reassured herself. She then began to review her good qualities. She was very enthusiastic, which always seemed to motivate people. She was a good musician who understood the principles of conducting. And, she had a good ear for rhythm, enabling her to detect when the band’s tempo was off. After Patty’s first week as drum major, she realized that, although she was good, there was definite room for improvement. She would make changes that the band would not pick up on right away, and the percussion section always seemed to be a beat behind her. Fortunately, it did not take her long to find out why these mistakes were occurring. A friend of hers videotaped the band practice one day so that Patty could see some of her weaknesses. Plus, some of the band members told her they had a hard time understanding what she wanted them to do because she did not explain it well.
Although Patty knew the sound, tempo, and rhythm that she wanted to hear, she needed
Chapter 1: Being a Leader Lesson 4: Principles and Leadership
Unit 2: Leadership Theory and Application 23
to explain it better to the band members so that they knew exactly what she expected. Addi-tionally, she realized that she needed to point out their mistakes and to give them an example of how she wanted them to play the new songs. The percussion section’s problem was that they had a hard time seeing her. They were at the very back of the field and she was at the front. To correct this problem, she decided to stand on a platform. Once Patty discovered what her weak-nesses were, she tried to improve them. She thanked the band members for their suggestions and, letting her excitement show, she told them she wanted it to be another great year — maybe another state championship year. Patty immediately knew her strengths, but she did not actually become aware of her weaknesses until she was in a leadership position. This is not uncommon. The important thing is that once she knew what qualities she needed to change, she made an effort to do so.
* * *
Your team members expect you to be proficient at your job. Therefore, leaders must demonstrate to their teammates that they are qualified to lead. Technical competence requires a leader to be able to perform all tasks associated with the job or assignment as well as to train team members to do their jobs. Use the following techniques to enhance your application of this principle: • Seek a well-rounded education. Supplement
school with independent reading, research, and study.
• Seek out and foster associations with capable leaders or mentors. Observe and study their actions.
• Broaden your knowledge in other areas
whenever possible; keep abreast of current events.
• Seek opportunities to apply knowledge
through the exercise of authority. You ac-quire good leadership only through practice.
• Familiarize yourself with the capabilities
and limitations of all elements of your authority.
• Always prepare yourself for the job of a
leader at the next higher level. • Learn and apply sound leadership and
management techniques. By seeking Army JROTC education and training and taking advantage of the leadership opportunities it has to offer, you have already started developing your technical proficiency.
Leading always involves responsibility. With the knowledge you gained from an honest self-evaluation and with a sound technical foundation required to do your job, you must take the initiative to accomplish your mission. You also want people on your team who can handle responsibility and who will help you to perform the mission. By seeking responsibility, you develop professionally and increase your leadership ability. Accepting responsibility for all that a unit does or fails to do is part of a leader’s job.
BE TECHNICALLY PROFICIENT SEEK RESPONSIBILITY AND TAKE RESPONSIBILITY FOR YOUR ACTIONS
Chapter 1: Being a Leader Lesson 4: Principles and Leadership
Unit 2: Leadership Theory and Application 24
Use these techniques to assist you in applying this principle: • Seek diversified leadership positions that
will give you experience in accepting responsibility.
• Take every opportunity that offers increased
responsibility. • Perform every act, large or small, to the
best of your ability. • Accept just criticism. • Admit mistakes when you make them and
take corrective action; avoid evading responsibility by placing the blame on someone else; ensure that any mistakes by team members are not due to an error on your part.
• Adhere to what you think is right; have the
courage of your convictions. • Possess the competence necessary to make
sound and timely decisions. • In the absence of orders or guidance, seize
the initiative and take the necessary action based on personal judgment, training, and experience.
Leaders must be able to reason under the most critical conditions and decide quickly what action to take. If they delay or avoid making a decision, their indecisiveness may create hesitancy, loss of confidence, and con-fusion within the unit, and it may cause the project to fail. Since leaders are frequently faced with unexpected circumstances, it is important to be flexible — leaders must be able to react promptly to each situation. Then, when
circumstances dictate a change in plans, prompt reaction builds confidence in them. The following techniques will help you apply this principle: • Develop (through constant practice) a
logical and orderly thought process. • Consider the effects of your decisions. • Ensure that team members are familiar with
your policies and plans. • When you have time, plan for every
possible unforeseen event that may arise. • Encourage team members to participate in
the planning process; consider their advice and suggestions before making decisions.
• Give team members sufficient time to make
necessary plans.
A leader must be a good example. This is a heavy responsibility, but you, as a leader, have no choice. No aspect of leadership is more powerful. If you expect honor, integrity, courage, loyalty, respect, selfless service, and duty from your followers, you must demonstrate them. Since your followers will imitate your behavior, you must set high, but attainable standards, be willing to do what you require of your followers, and share their hardships. Your personal example affects people more than any amount of instruction or form of discipline. You are their role model! Some techniques for applying this principle are listed below. Also, try to identify how Sylvia set an example for her team in the story following these techniques.
MAKE SOUND AND TIMELY DECISIONS
SET THE EXAMPLE
Chapter 1: Being a Leader Lesson 4: Principles and Leadership
Unit 2: Leadership Theory and Application 25
• Be physically fit, well groomed, and correctly dressed.
• Master your emotions. The leader who is
subject to uncontrolled bursts of anger or to periods of depression will be less effective as a leader.
• Maintain an optimistic outlook and a will to
succeed. The more difficult the situation, the more you must display an attitude of calmness and confidence.
• Conduct yourself so that your personal
habits are not open to censure. • Exercise initiative and promote the spirit of
initiative in your followers. • Be loyal; support the policies of superiors. • Avoid being partial to any follower. • Be morally courageous. Establish principles
and stand by them. • Develop conviction within your followers
that you are the best person for the position you hold.
• Delegate responsibility and authority and
avoid oversupervision in order to develop leadership among your teammates.
• Strive for professional competence.
* * * Bob Peters was proud of his mother, Sylvia. Her sales company just promoted her to regional product manager from district super-visor. She was definitely good at what she did. Since Bob was studying leadership in JROTC, he wanted to analyze the reasons for his mother’s success. So, one day while he
waited at her office after school, he had an opportunity to talk with members of her sales team. Mike, who had worked for Sylvia for two years, said that she was really an inspiration to the team. “Selling a product can be tough, but Sylvia guides us in a way that makes the job easier. She sets realistic goals and gives us our own territories. But, the main reason that we respect her so much is because she does so much more than just plan and organize. She’s right there beside us selling, too. And, if we run into a problem with a client, we know that we can go to her for advice. “I guess that you could say your mom is a great salesperson who’s really committed to the success of the company. That shows in what she does and in the way she does it. She is a good role model for our sales team.”
* * *
Leaders must know and understand the members of their unit. It is not enough just to know a team member’s name. As a leader, you need to understand them as individuals — their interests, values, and attitudes. In short, you must know why they act the way they do. Commit time and effort to listen to and learn about them. Try to observe, become personally acquainted with, and recognize them as individuals with different backgrounds and different personalities. To be successful in this principle, you must have a knowledge of individual and group behavior — without this knowledge, you cannot understand the “why” of your follower’s actions. The behavior of team members is often driven by their desire to satisfy certain physical
KNOW YOUR PERSONNEL AND LOOK OUT FOR THEIR WELFARE
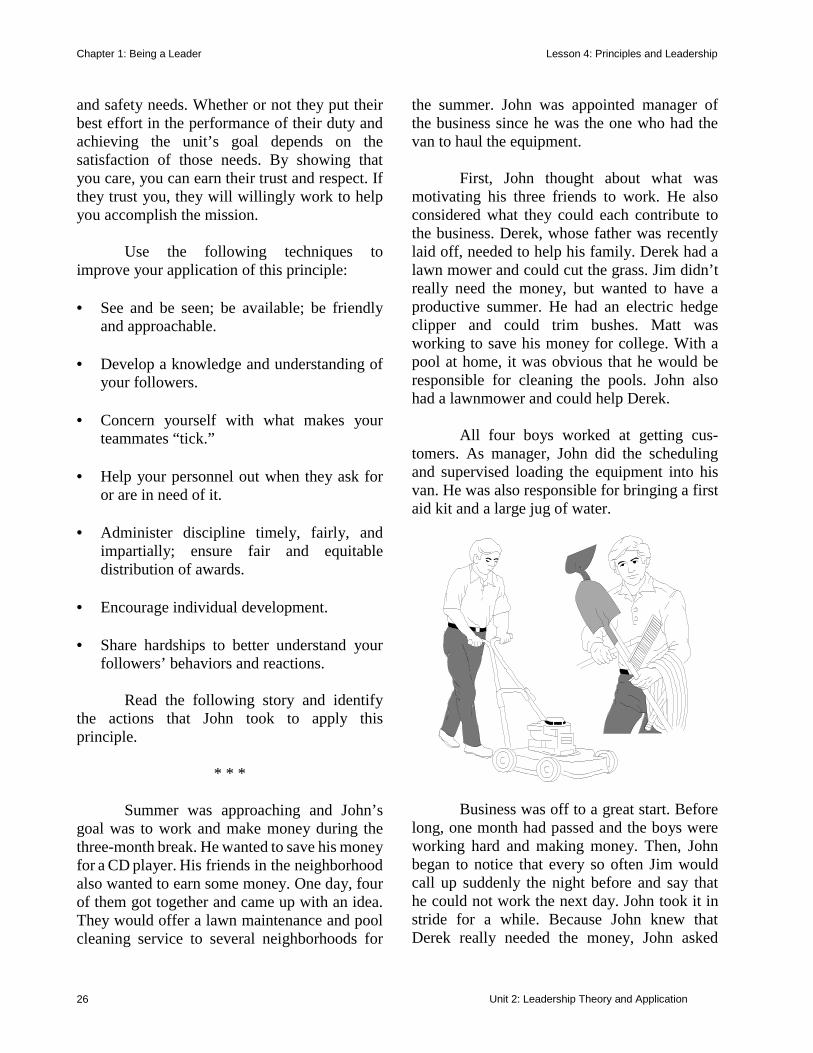
Chapter 1: Being a Leader Lesson 4: Principles and Leadership
Unit 2: Leadership Theory and Application 26
and safety needs. Whether or not they put their best effort in the performance of their duty and achieving the unit’s goal depends on the satisfaction of those needs. By showing that you care, you can earn their trust and respect. If they trust you, they will willingly work to help you accomplish the mission. Use the following techniques to improve your application of this principle: • See and be seen; be available; be friendly
and approachable. • Develop a knowledge and understanding of
your followers. • Concern yourself with what makes your
teammates “tick.” • Help your personnel out when they ask for
or are in need of it. • Administer discipline timely, fairly, and
impartially; ensure fair and equitable distribution of awards.
• Encourage individual development. • Share hardships to better understand your
followers’ behaviors and reactions. Read the following story and identify the actions that John took to apply this principle.
* * * Summer was approaching and John’s goal was to work and make money during the three-month break. He wanted to save his money for a CD player. His friends in the neighborhood also wanted to earn some money. One day, four of them got together and came up with an idea. They would offer a lawn maintenance and pool cleaning service to several neighborhoods for
the summer. John was appointed manager of the business since he was the one who had the van to haul the equipment. First, John thought about what was motivating his three friends to work. He also considered what they could each contribute to the business. Derek, whose father was recently laid off, needed to help his family. Derek had a lawn mower and could cut the grass. Jim didn’t really need the money, but wanted to have a productive summer. He had an electric hedge clipper and could trim bushes. Matt was working to save his money for college. With a pool at home, it was obvious that he would be responsible for cleaning the pools. John also had a lawnmower and could help Derek. All four boys worked at getting cus-tomers. As manager, John did the scheduling and supervised loading the equipment into his van. He was also responsible for bringing a first aid kit and a large jug of water.
Business was off to a great start. Before long, one month had passed and the boys were working hard and making money. Then, John began to notice that every so often Jim would call up suddenly the night before and say that he could not work the next day. John took it in stride for a while. Because John knew that Derek really needed the money, John asked
Chapter 1: Being a Leader Lesson 4: Principles and Leadership
Unit 2: Leadership Theory and Application 27
him if he would also trim the bushes. Derek did not object. He was glad to have the opportunity to earn the extra money and did not mind taking over Jim’s work when asked to do so. However, after Jim missed three days in one week, John decided to speak to him. “I know that you’re not in this for the money, but this is a business and we all depend on each other,” John explained. Jim apologized, saying that he just wanted to have some time to enjoy the summer. The two of them talked until they came to an agreement. Jim would work four days a week, allowing Derek to substitute for him for one day. Jim was happy with his day off, Derek was happy to earn a little extra money, and John was pleased that he could help meet the needs of his friends and still keep the business going.
* * *
We live in a society where mass media constantly keeps us informed of what goes on around us. We are taught in school to look for the logic in things, to think for ourselves, and to question things which do not make sense to us. So, it is only natural that followers look for logic in the orders of a leader. They expect their leaders to keep them informed and, whenever possible, to explain the reasons behind each requirement. People do their best when they know why they are doing something. Keeping follow-ers informed not only helps them to execute orders, it encourages initiative, improves teamwork, and enhances morale. Although it is natural for people to fear the unknown, keeping them informed also reduces fear and rumors. Techniques to apply this principle are as follows:
• Use the chain of command. • When explaining why tasks must be done,
inform team members of your intent. • Be alert to detect the spread of rumors. • Build morale by informing team members
of their successes; be quick to recognize their accomplishments.
• Let team members know that you will
accept honest errors without recrimination; be prompt and fair in backing them.
• Keep your team informed about current
rules and regulations. • Give advice and assistance freely when
your followers request it.
The members of your team will feel a sense of pride and responsibility when they successfully accomplish a new task you have given them. When you delegate responsibility to followers, you are indicating that you trust them. This trust that you place in them will make them want even more responsibility. As a leader, you are a teacher and are responsible for developing your followers. Help them meet their potential by giving them challenges and opportunities that you feel they can handle. Give them more responsibility when they show that they are ready. Encourage them to take the initiative and work toward completing a task. Some techniques for applying this prin-ciple are:
KEEP YOUR FOLLOWERS INFORMED DEVELOP A SENSE OF RESPONSIBILITY IN YOUR FOLLOWERS
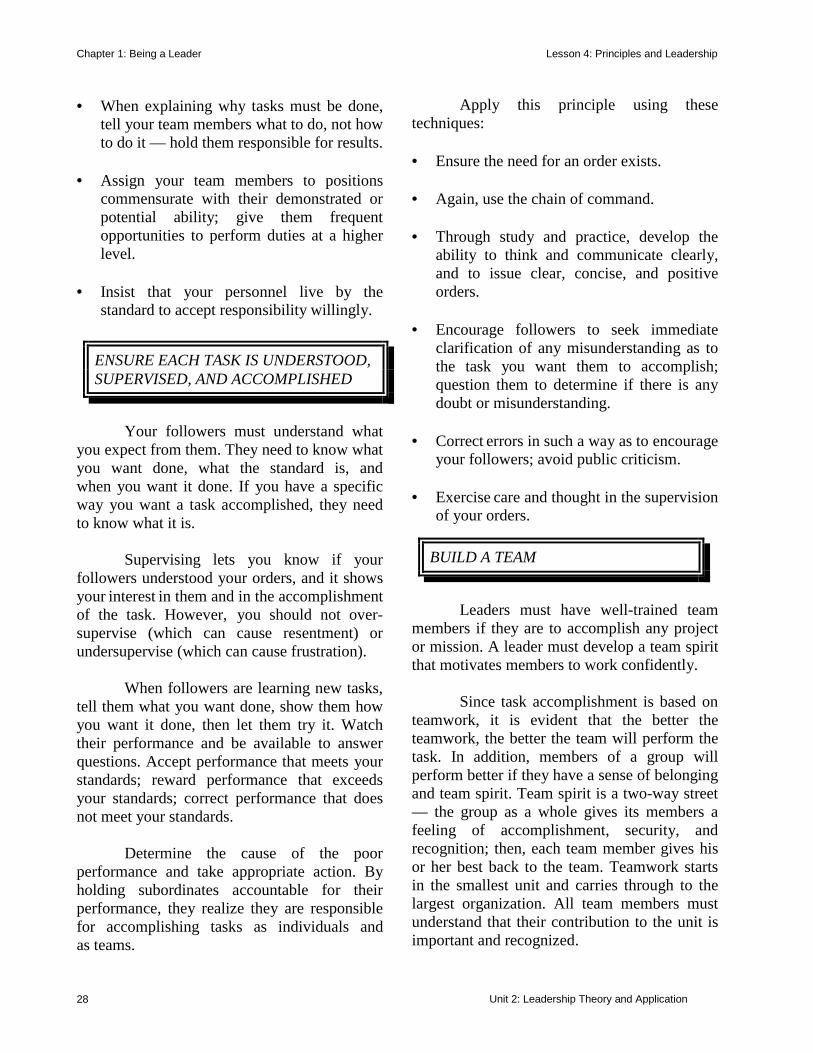
Chapter 1: Being a Leader Lesson 4: Principles and Leadership
Unit 2: Leadership Theory and Application 28
• When explaining why tasks must be done, tell your team members what to do, not how to do it — hold them responsible for results.
• Assign your team members to positions
commensurate with their demonstrated or potential ability; give them frequent opportunities to perform duties at a higher level.
• Insist that your personnel live by the
standard to accept responsibility willingly.
Your followers must understand what you expect from them. They need to know what you want done, what the standard is, and when you want it done. If you have a specific way you want a task accomplished, they need to know what it is. Supervising lets you know if your followers understood your orders, and it shows your interest in them and in the accomplishment of the task. However, you should not over-supervise (which can cause resentment) or undersupervise (which can cause frustration). When followers are learning new tasks, tell them what you want done, show them how you want it done, then let them try it. Watch their performance and be available to answer questions. Accept performance that meets your standards; reward performance that exceeds your standards; correct performance that does not meet your standards. Determine the cause of the poor performance and take appropriate action. By holding subordinates accountable for their performance, they realize they are responsible for accomplishing tasks as individuals and as teams.
Apply this principle using these techniques: • Ensure the need for an order exists. • Again, use the chain of command. • Through study and practice, develop the
ability to think and communicate clearly, and to issue clear, concise, and positive orders.
• Encourage followers to seek immediate
clarification of any misunderstanding as to the task you want them to accomplish; question them to determine if there is any doubt or misunderstanding.
• Correct errors in such a way as to encourage
your followers; avoid public criticism. • Exercise care and thought in the supervision
of your orders.
Leaders must have well-trained team members if they are to accomplish any project or mission. A leader must develop a team spirit that motivates members to work confidently. Since task accomplishment is based on teamwork, it is evident that the better the teamwork, the better the team will perform the task. In addition, members of a group will perform better if they have a sense of belonging and team spirit. Team spirit is a two-way street — the group as a whole gives its members a feeling of accomplishment, security, and recognition; then, each team member gives his or her best back to the team. Teamwork starts in the smallest unit and carries through to the largest organization. All team members must understand that their contribution to the unit is important and recognized.
ENSURE EACH TASK IS UNDERSTOOD, SUPERVISED, AND ACCOMPLISHED
BUILD A TEAM
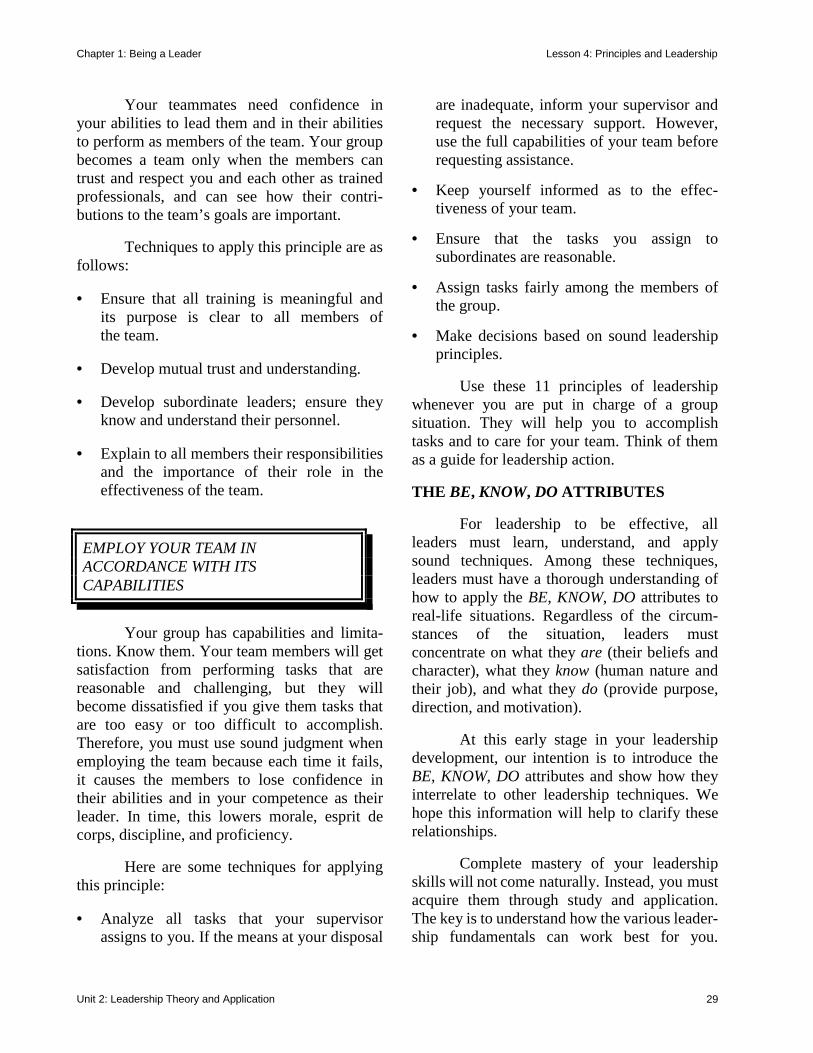
Chapter 1: Being a Leader Lesson 4: Principles and Leadership
Unit 2: Leadership Theory and Application 29
Your teammates need confidence in your abilities to lead them and in their abilities to perform as members of the team. Your group becomes a team only when the members can trust and respect you and each other as trained professionals, and can see how their contri-butions to the team’s goals are important. Techniques to apply this principle are as follows: • Ensure that all training is meaningful and
its purpose is clear to all members of the team.
• Develop mutual trust and understanding. • Develop subordinate leaders; ensure they
know and understand their personnel. • Explain to all members their responsibilities
and the importance of their role in the effectiveness of the team.
Your group has capabilities and limita-tions. Know them. Your team members will get satisfaction from performing tasks that are reasonable and challenging, but they will become dissatisfied if you give them tasks that are too easy or too difficult to accomplish. Therefore, you must use sound judgment when employing the team because each time it fails, it causes the members to lose confidence in their abilities and in your competence as their leader. In time, this lowers morale, esprit de corps, discipline, and proficiency. Here are some techniques for applying this principle: • Analyze all tasks that your supervisor
assigns to you. If the means at your disposal
are inadequate, inform your supervisor and request the necessary support. However, use the full capabilities of your team before requesting assistance.
• Keep yourself informed as to the effec-tiveness of your team.
• Ensure that the tasks you assign to subordinates are reasonable.
• Assign tasks fairly among the members of the group.
• Make decisions based on sound leadership principles.
Use these 11 principles of leadership whenever you are put in charge of a group situation. They will help you to accomplish tasks and to care for your team. Think of them as a guide for leadership action. THE BE, KNOW, DO ATTRIBUTES For leadership to be effective, all leaders must learn, understand, and apply sound techniques. Among these techniques, leaders must have a thorough understanding of how to apply the BE, KNOW, DO attributes to real-life situations. Regardless of the circum-stances of the situation, leaders must concentrate on what they are (their beliefs and character), what they know (human nature and their job), and what they do (provide purpose, direction, and motivation). At this early stage in your leadership development, our intention is to introduce the BE, KNOW, DO attributes and show how they interrelate to other leadership techniques. We hope this information will help to clarify these relationships. Complete mastery of your leadership skills will not come naturally. Instead, you must acquire them through study and application. The key is to understand how the various leader-ship fundamentals can work best for you.
EMPLOY YOUR TEAM IN ACCORDANCE WITH ITS CAPABILITIES
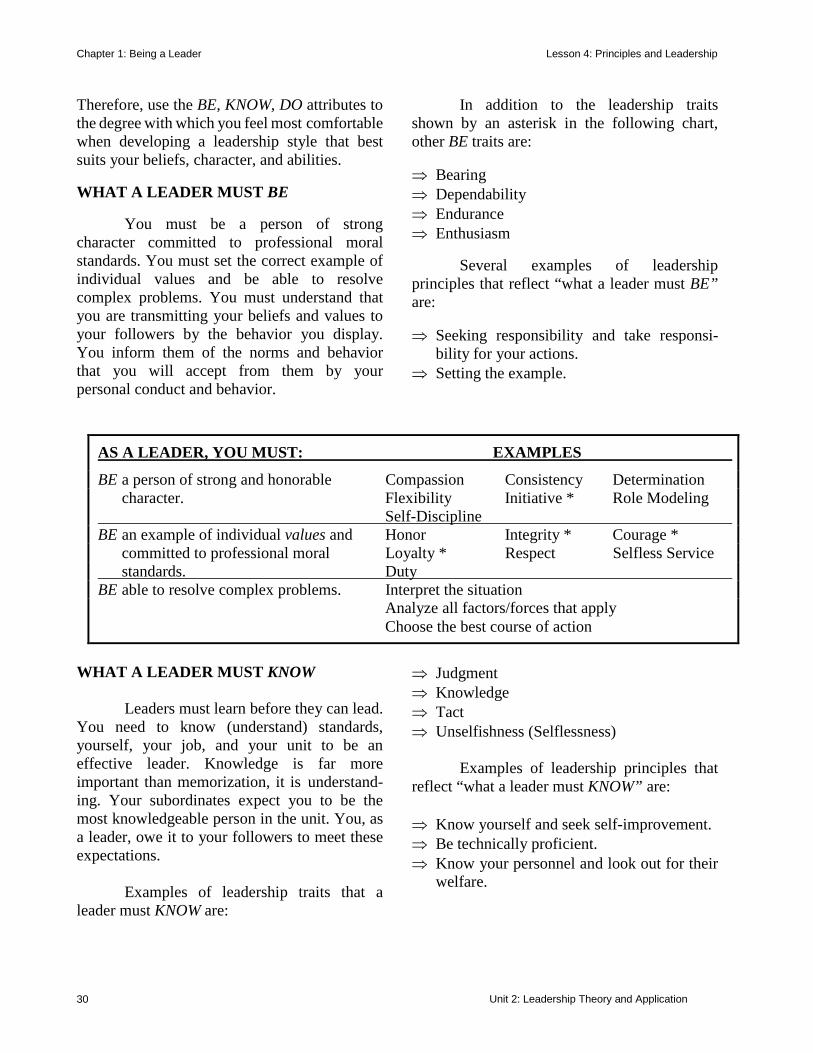
Chapter 1: Being a Leader Lesson 4: Principles and Leadership
Unit 2: Leadership Theory and Application 30
Therefore, use the BE, KNOW, DO attributes to the degree with which you feel most comfortable when developing a leadership style that best suits your beliefs, character, and abilities. WHAT A LEADER MUST BE You must be a person of strong character committed to professional moral standards. You must set the correct example of individual values and be able to resolve complex problems. You must understand that you are transmitting your beliefs and values to your followers by the behavior you display. You inform them of the norms and behavior that you will accept from them by your personal conduct and behavior.
In addition to the leadership traits shown by an asterisk in the following chart, other BE traits are: ⇒ Bearing ⇒ Dependability ⇒ Endurance ⇒ Enthusiasm Several examples of leadership principles that reflect “what a leader must BE” are: ⇒ Seeking responsibility and take responsi-
bility for your actions. ⇒ Setting the example.
WHAT A LEADER MUST KNOW Leaders must learn before they can lead. You need to know (understand) standards, yourself, your job, and your unit to be an effective leader. Knowledge is far more important than memorization, it is understand-ing. Your subordinates expect you to be the most knowledgeable person in the unit. You, as a leader, owe it to your followers to meet these expectations. Examples of leadership traits that a leader must KNOW are:
⇒ Judgment ⇒ Knowledge ⇒ Tact ⇒ Unselfishness (Selflessness) Examples of leadership principles that reflect “what a leader must KNOW” are: ⇒ Know yourself and seek self-improvement. ⇒ Be technically proficient. ⇒ Know your personnel and look out for their
welfare.
AS A LEADER, YOU MUST: EXAMPLES
BE a person of strong and honorable Compassion Consistency Determination character. Flexibility Initiative * Role Modeling Self-Discipline BE an example of individual values and Honor Integrity * Courage * committed to professional moral Loyalty * Respect Selfless Service standards. Duty BE able to resolve complex problems. Interpret the situation Analyze all factors/forces that apply Choose the best course of action
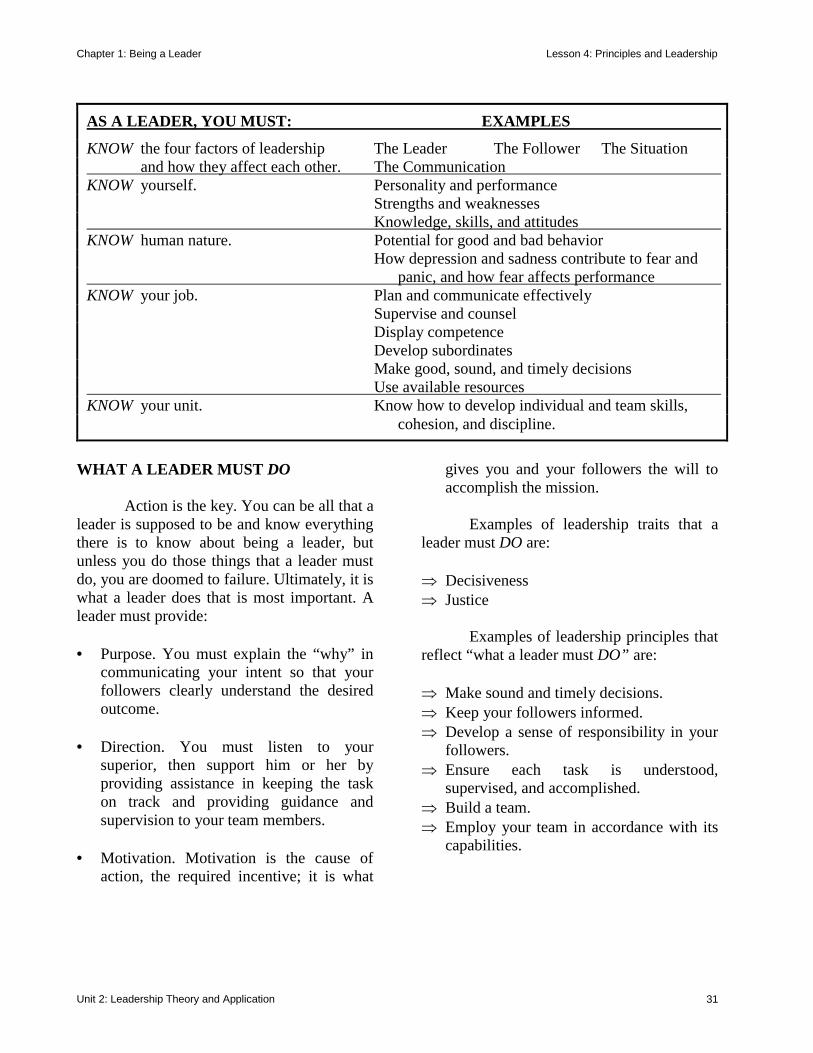
Chapter 1: Being a Leader Lesson 4: Principles and Leadership
Unit 2: Leadership Theory and Application 31
WHAT A LEADER MUST DO Action is the key. You can be all that a leader is supposed to be and know everything there is to know about being a leader, but unless you do those things that a leader must do, you are doomed to failure. Ultimately, it is what a leader does that is most important. A leader must provide: • Purpose. You must explain the “why” in
communicating your intent so that your followers clearly understand the desired outcome.
• Direction. You must listen to your
superior, then support him or her by providing assistance in keeping the task on track and providing guidance and supervision to your team members.
• Motivation. Motivation is the cause of
action, the required incentive; it is what
gives you and your followers the will to accomplish the mission.
Examples of leadership traits that a leader must DO are: ⇒ Decisiveness ⇒ Justice Examples of leadership principles that reflect “what a leader must DO” are: ⇒ Make sound and timely decisions. ⇒ Keep your followers informed. ⇒ Develop a sense of responsibility in your
followers. ⇒ Ensure each task is understood,
supervised, and accomplished. ⇒ Build a team. ⇒ Employ your team in accordance with its
capabilities.
AS A LEADER, YOU MUST: EXAMPLES
KNOW the four factors of leadership The Leader The Follower The Situation and how they affect each other. The Communication KNOW yourself. Personality and performance Strengths and weaknesses Knowledge, skills, and attitudes KNOW human nature. Potential for good and bad behavior How depression and sadness contribute to fear and panic, and how fear affects performance KNOW your job. Plan and communicate effectively Supervise and counsel Display competence Develop subordinates Make good, sound, and timely decisions Use available resources KNOW your unit. Know how to develop individual and team skills, cohesion, and discipline.
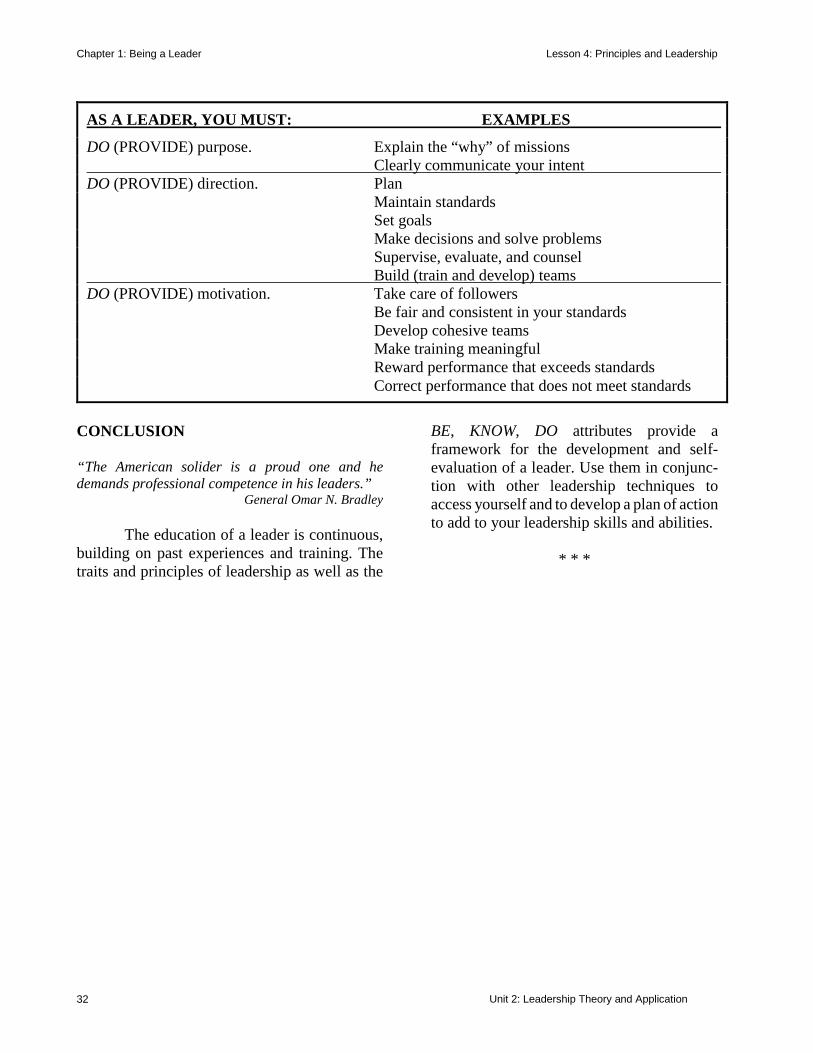
Chapter 1: Being a Leader Lesson 4: Principles and Leadership
Unit 2: Leadership Theory and Application 32
CONCLUSION “The American solider is a proud one and he demands professional competence in his leaders.”
General Omar N. Bradley The education of a leader is continuous, building on past experiences and training. The traits and principles of leadership as well as the
BE, KNOW, DO attributes provide a framework for the development and self-evaluation of a leader. Use them in conjunc-tion with other leadership techniques to access yourself and to develop a plan of action to add to your leadership skills and abilities.
* * *
AS A LEADER, YOU MUST: EXAMPLES
DO (PROVIDE) purpose. Explain the “why” of missions Clearly communicate your intent DO (PROVIDE) direction. Plan Maintain standards Set goals Make decisions and solve problems Supervise, evaluate, and counsel Build (train and develop) teams DO (PROVIDE) motivation. Take care of followers Be fair and consistent in your standards Develop cohesive teams Make training meaningful Reward performance that exceeds standards Correct performance that does not meet standards
Chapter 1: Being a Leader Lesson 5: Celebrating Differences — Culture and Individual Diversity
Unit 2: Leadership Theory and Application 33
LESSON 5: CELEBRATING DIFFERENCES — CULTURE AND INDIVIDUAL DIVERSITY
INTRODUCTION
Captain Kirk, Lieutenant Uhura, Lieutenant Sulu, Ensign Chekhov, Mr. Spock, Worf, Data, and Geordi La Forge. What a cast of characters. The crew members were international, interplanetary, half-human and half-vulcan, and humanoid and blind with a visor for seeing. Yes, “Star Trek” and “Star Trek: The Next Generation” raised some issues about diversity.
Synergy is when you and your team members cooperate together and create better results than they could get working alone. Each individual is unique and you must value that uniqueness, just like Captain Kirk and his crew did. Real synergy is celebrating differences, teamwork, open-mindedness and finding new and better ways of doing things.
HISTORICAL INFORMATION On July 26, 1948, President Harry S. Truman signed Executive Order 9981. This order called for the integration of the armed forces and an end to discrimination against soldiers because of race, color, or creed. Although the Army completed its desegregation in the 1950s, the assignment of whites and members of minority groups to the same units did not ensure total equality, racial harmony, or
a fully integrated Army. The Army, like society at large, began to address the questions and challenges of the race issue seriously in the 1960s. Today, every Army element is expected to have an active race relations and equal opportunity program. Laws and regulations provide guidelines to ensure the execution of these programs. Employees of private organizations as well as members of the military come from all walks of life, different geographical areas, and numerous racial and ethnic backgrounds. They bring with them their own challenges and prejudices. The leader’s challenge is to direct members of these diverse groups in a way that will cause them to work together as a team. It is not an easy task, but is one that can be accomplished through informed, fair, and impartial leadership and educational awareness. UNDERSTANDING THE ISSUES VALUES AND ATTITUDES Values and attitudes are very important to the daily functioning of our lives. They help to form the basis of how we see ourselves as individuals, how we see others, and how we interpret the world in general. As a leader, you will often be involved with individuals who have different values and attitudes from your own — you have probably already experienced many of these differences. Some may have been due to religious or cultural backgrounds; others may have stemmed from racial or ethic backgrounds. In your role as a leader, you will also be a counselor and a helper. In order to communicate well with others, it will be necessary for you to understand the dynamics involved with the value and attitude differ-ences that occur within us, and that can come between us.
culture discrimination ethnic impartial inclusionary intimacy minority stereotype
Chapter 1: Being a Leader Lesson 5: Celebrating Differences — Culture and Individual Diversity
34 Unit 2: Leadership Theory and Application
• Values affect daily interaction of individuals. A clear understanding of one’s own value system will help in understanding others.
There are cultural differences and simi-larities in assigning levels of importance to values. In a study that evaluated the levels of importance in five cultures, of 29 values, none of them were shared by all five cultures as primary values (values that are most important to an individual and worth dying for — such as, one’s country, patri-otism, freedom, religion, etc.) or secondary values (values that are important but not worth dying for — such as money). Other values evaluated by the study were respect for youth, human dignity, hierarchy, authori-tarianism, education, and frankness.
• As a society, we are daily involved with
attitudes and behavior and we must understand how one affects the other. As you can see in the following illustration, there is a continuous chain relationship between them:
Attitudes can have positive or negative implications. Although they can help people to make sense out of their life experiences, we, as individuals, cannot change them easily. Furthermore, we may not always be aware of the extensive influences that our attitudes have on other people, jobs, things, and situations, or how they can affect a person’s learning, personality, prejudices, and productivity.
SELF-IMAGE/SELF-CONCEPT As a leader, you will constantly be dealing with people. It will make your job a lot easier if you know and have an idea of who you are and how you relate to others. You need to know “how you come off.” The most important single factor affecting people’s communication with others is their self-concept — how they see themselves and their situations. While situations may change moment-to-moment or place-to-place, people’s beliefs about themselves are always determining factors in their communicative behavior. Everybody has literally thousands of concepts about themselves: who they are, what they stand for, where they live, what they do and do not do, what they value, and what they believe. Self-concept is the picture we have of ourselves as seen through our own thoughts, development, perceptions, and feelings. ♦ Development is the way we feel about
ourselves, which has a direct relationship to our upbringing; it includes values and attitudes.
♦ Perception refers to the interpretation and the amount of “emotional charge” attributed to past events and present situations.
♦ Feelings refer to the positive or negative, good or bad, indifference or intensity, of emotions or interpretation of oneself.
Contrary to what you would like, we cannot buy self-concept/personality attributes from a store. Your personality is a combination of heredity and life experiences. In order to gain a better understanding of self-concept, where it comes from and how it develops, we must look at several main ingredients: heritage and needs fulfillment/emotional development.
My attitudes affect my behavior. My behavior affects your attitudes. Your attitudes affect your behavior. Your behavior affects my attitudes.
Chapter 1: Being a Leader Lesson 5: Celebrating Differences — Culture and Individual Diversity
Unit 2: Leadership Theory and Application 35
◊ Heritage. As soon as you came into this world, society classified you in terms of:
◊ Needs Fulfillment/Emotional Development.
Your personal, psychological, emotional, and physical needs define your self-concept. As you grow older, you define your own needs (what is important to you). How you feel about yourself has a direct relationship on others around you. Look at the two lists in the next column. If you do not have a positive self-image, how will you project yourself, especially if you are a leader?
Remember, how we view ourselves impacts not only on how we view others, but how they view us. Some of our differences exist because each person places different importance on different needs. We all would like to be better than we are. You can change if you want. The most important thing to consider is that no one else can make you change. You have the right to fight to remove inappropriate or incorrect perceptions, prejudices, and dis-criminatory attitudes and behavior. PREJUDICE AND DISCRIMINATION We live in America — the most democratic (and free) country in the world! Why, then, is there still prejudice and discrimination in this land of opportunity?
You might ask yourself, “Am I prejudiced?” It has often been said that everyone is prejudiced to a certain degree. We all operate on prejudgments and make discrim-inating distinctions every day. For example, if we had good luck with one type of car, we can be expected to be prejudiced in favor of that model; when voting, we discriminate between Republican, Democratic, or another party’s candidates. Although these examples are not of the nature that leaders must be concerned about or have to deal with, they do illustrate the frequency in everyday life that people make decisions based on their prejudices or discriminatory practices. Instead, it is the negative forms of prejudice and discrimination
Positive Self-Image Negative Self-Image
Love of self/others Hate self and others
Be excited about Hide from life and reaching out for the its miseries adventure of life
Experience serenity, Experience anxiety, joy, hope, and trust despair, distrust, and anger
Develop your Be blind to your intelligence potential
Decisive, assertive Indecisive, defensive, aggressive
Enjoy your physical Deny or exaggerate abilities physical abilities
Create Destroy
Be tolerant, accepting Bigoted, prejudiced
Self-actualize Suicidal/homicidal
Open Closed
Trusting Hidden agendas
Assertive Defensive
Category Examples
Gender Male, female Race White, Black, etc. Nationality American, German, etc. Religion Catholic, Jewish, etc. Family status Lower, Middle Class, etc. Legal status Legitimate, illegitimate Environment From country, ghetto, etc. Physical status Cute/ugly baby Parentage Married, single, divorced
Chapter 1: Being a Leader Lesson 5: Celebrating Differences — Culture and Individual Diversity
36 Unit 2: Leadership Theory and Application
that can have adverse impacts on leadership and unit cohesion. Prejudice Prejudice is defined as a feeling — favorable or unfavorable — toward a person, thing, or group that may or may not be based on actual experience(s). It is generally agreed that a racial prejudice is a negative attitude toward a racial or ethnic group that is maintained through stereotypes. In looking at the norms, values, beliefs, and attitudes developed through socialization, you may have said to yourself that each of those concepts may impact positively or negatively on how you view the world around us. Indeed, these concepts are the sources of bias or prejudice that unquestionably can distort how we make “sense” of reality. If we agree with the idea that norms, values, beliefs, and attitudes do exist within each of us (and that they do influence our ability to perceive, and that influence can also be called prejudice), it would seem then that all humans are capable of being prejudiced. Another factor that is closely related, if not interwoven, with the norms, values, beliefs, and attitudes is one’s culture. A culture is the total of the learned behaviors of a group of people that are generally considered to be the tradition of that people and are transmitted from generation to generation. These learned behaviors include language, nonverbal norms — body language and facial expressions, and color consciousness. Many people confuse color with culture. We can share aspects of a culture, but not color. Color is genetic; culture is learned. In many cultures, skin color differences take on a measure of importance, status, or value. The color of one’s skin in certain cultures may dictate how
that individual is treated within that culture. Color has a tremendous impact on perceptions in the United States because most Americans respond to color by making assumptions and treating people based on skin color. Not convinced? Here is a question to ask yourself. Do you behave differently around people who are of a different color? You may not want to behave differently, but you may recognize that you do from time to time. It largely depends on the environment that you are in. If you are in control, or think you are, your behavior is pretty constant. Once you become the minority, so to speak, you may become suspicious, feel threatened, distrust may set in, and/or your behavior changes. The following list highlights some of the explanations for prejudice. • A dominant group avoids the feelings of
sympathy for “dominated people” through over-exaggerations of negative qualities. A dominant group is the one in control of the major positions in a society and that sets the standards for the whole society.
• The belief that one’s own family and
society are unique and correct. We feel that our group is the natural one and we judge others based on this standard. (Note: Every human group seems to do this, serving as a positive reinforcement within each society.)
• Prejudice is a natural outgrowth of the
“we-they” contrast. Once an opponent is present, prejudice can be expected. Loosely scattered members of a group then come together to face a common opponent.
• The transfer of internal personal problems
to external objects. People who have a
Chapter 1: Being a Leader Lesson 5: Celebrating Differences — Culture and Individual Diversity
Unit 2: Leadership Theory and Application 37
distorted need to feel superior to others use scapegoats in this way.
• A particularly negative experience with a
member of a racial or ethnic minority in the past might bring up memories that can cloud our judgment in the present. We may also tend to judge the whole society by our own experiences. If we have not been victims of prejudice, we may not see it in others.
• The “earned reputation” approach means
that members of society shift the justification for prejudice to a target group — “if only they would mend their ways, prejudice would go away.”
Unfortunately, people with negative attitudes generally tend to express themselves with action, and they act out their prejudices in various way. The most common ways are: ♦ Openly talking about their prejudices with
like-minded friends and expressing their dislikes freely.
♦ Avoiding members of the disliked group,
even at the cost of considerable inconven-ience.
♦ Actively making detrimental distinctions about a group, to the extent of excluding all members of that group from certain types of employment, educational oppor-tunities, politics, etc.
♦ Committing acts of violence, especially
when under conditions of heightened emotions.
Now that we have explored prejudice and have cited explanations for its existence, we will turn our attention to discrimination. Discrimination Discrimination is defined as the actions or practices carried out by members of dominant groups, or their representatives, that have a differential and harmful impact on members of subordinate groups. The actions may be open or hidden, direct or indirect, intentional or unintentional. The actors in these events may be individuals, groups, or organizations. It is crucial to understand that there is a direct link between discrimination and power. Without power, discrimination is pas-sive and ineffective. With power, discrimi-nation maintains the dominance of one group over another. When we use the term power in this context, we mean the expenditure of energy to get things done. The groups in power are those that can effectively discriminate: They can pass laws, make rules, and decide who belongs in and who remains on the outside. Causes for discrimination include: ◊ Group Size. This may be the simplest
explanation for discriminatory behavior among dominant group members. They fear they will be overwhelmed by the sheer

Chapter 1: Being a Leader Lesson 5: Celebrating Differences — Culture and Individual Diversity
38 Unit 2: Leadership Theory and Application
number of the subordinated “masses.” Racial groups that continually increase in size have always been the targets for some form of control. On the other hand, the smaller the ethnic minority group, the less threatening it is.
◊ Social Distance. The attempt by a dominate
group to keep a distance between it and a subordinate group by limiting access and intimacy. (Example: You cannot join this club unless you earn $250,000 a year.)
◊ Competition. It always serves the dominant
group’s best interests to limit competition with a subordinate group, from competing for scarce economic resources to other forms such as athletic competition.
◊ Status Consciousness. Minority groups
occupy a generally low status in American society. (Example: Status conscious whites avoid lower-status people due to their prej-udicial perceptions.)
STEREOTYPING Stereotyping is related to just about all of the factors discussed above. A stereotype, whether favorable or unfavorable, is an exaggerated belief associated with a category. Its function is to justify (or rationalize) our conduct in relation to that category. People naturally seek to understand or make sense of their environment. Since we cannot possibly analyze or respond to all of the information that we receive, we tend to narrow our focus on subsets of that information. We will usually select the subset that we believe to be most important. People then categorize (stereotype) this information to serve a useful function, depending on their group (religious, racial, ethnic, cultural, etc.) affiliation.
• Categorization simplifies our environ-ment. It enables us to generate expec-tations and guides our behavior toward a person or an object based on those expectations.
• When we categorize a person as a member
of a group, we may assume that he or she has a variety of characteristics that we believe members of that category have. We then look at persons as a group based on a variety of factors (such as age, religion, gender, race, etc.) and whether they are part of the in-group (most like me) or the out-group (most different from me). The people that we tend to categorize (stereotype) most are the out-group.
• Stereotypes are fixed, rigid ideas
associated with a category. They are not identical with the category, but are overgeneralizations or oversimplifications about a category.
• Since stereotypes can be either favorable
or unfavorable, they can lead to love-prejudice or hate-prejudice relationships.
• Stereotypes are the rationalizers that allow
us to justify behavior to categorically accept or reject a group and to selectively maintain our perception and thinking about a group.
• There may be examples of behavior by
members of a group that support the belief offered in an expressed stereotype of a given group. (Example: One can find a few people in groups who are dishonest, but those examples do not warrant that all within the group are dishonest.)
There are also a number of sources that not only develop, but support and sustain stereotypes. In fact, there is very little chance
Chapter 1: Being a Leader Lesson 5: Celebrating Differences — Culture and Individual Diversity
Unit 2: Leadership Theory and Application 39
of anyone not being exposed to at least one of these sources of stereotypes. ⇒ The very socialization process discussed
earlier is a powerful source in the development of stereotypes.
⇒ Hearing and/or telling ethnic, racist, or
sexist jokes. ⇒ Reading the literature of a culture or
society, whether fact or fiction, has a powerful influence on our thinking and behaving processes.
⇒ The coverage of news on radio and
television, and movies all carry power-ful messages that create and support stereotyping.
⇒ A male-oriented society only serves to
create and sustain stereotypes. Even the pronouns we use when we speak sometimes have effects that are profound.
RACIAL TENSION Racial tension within an organization is often the result of poor leadership; the following items are major reasons for racial tension: • Insensitive leadership. Leaders must realize
the effect that their actions and comments have on subordinates and on their attitudes, behaviors, and perceptions.
• Racial prejudice and discrimination. • Unfair administration of rewards and
punishment, promotions, and duties. • Limited recognition and awareness of
minorities. Up to this point, we have looked at some of the factors that impact on perceptions
and attitudes, and their relation to prejudicial and discriminatory behavior. We saw that when we judge a person’s worth based on a perception or an attitude, our effectiveness as a leader is degraded. We will not communicate as well and trust will not be nourished to its fullest potential within an organization. We can change. We must change. STRATEGIES FOR CREATING CHANGE So, now that you have some awareness about factors and causes that impact negatively on race relations and equal opportunity, what can we do about it? How can we remove or change some of the negative attitudes, behaviors, perceptions, or stereo-types? This section offers some strategies for change that will require lots of work and some risk on your part. Let us see what these strategies look like. HOW LEADERS CAN CREATE CHANGE As leaders, we need to be aware of discrimination and prejudices before they can begin to impact on minority groups, and more important, on people’s feelings within those groups. Failure to take these strategies for change to heart can severely hamper a unit’s mission accomplishment, cohesion, and trust. ♦ Overcome prejudices by learning the facts
and applying sound reasoning processes. ♦ Be prepared to detect and evaluate
warning signs of possible unrest that may stem from racial issues in units and take immediate action to eliminate the causes.
♦ Know all you can about your subordinates
— their values, attitudes, how they came to be the way they are, and what they want to be. This means knowing more about subordinates than just their names.
Chapter 1: Being a Leader Lesson 5: Celebrating Differences — Culture and Individual Diversity
40 Unit 2: Leadership Theory and Application
Do not base this knowledge on unfounded opinions about the race or ethnic origin of a subordinate, but on the facts about each individual.
♦ Promote mutual understanding through
effective communication. Realize that there will always be difficulties in the com-munication process and deal with the filters, barriers, and breakdowns as they occur. Although the difficulties may be com-plicated, when minorities lose trust in their leaders, the situation is out of control. Make communication effective by fostering an understanding that reduces racial tensions.
♦ Give fair and impartial treatment to all. HOW TO LESSEN PREJUDICE, ADVERSE PERCEPTIONS, AND STEREOTYPING How to Lessen Prejudices It has been suggested that if members of society can accomplish the following con-ditions, we can lessen the causes and effects of prejudice. ◊ Make contacts with people on an equal
status and under a spirit of cooperation. ◊ Share goals. ◊ Have people work on common problems. ◊ Create appropriate educational activities. ◊ Sanction contacts by law. How to Lessen Adverse Perceptions and Stereotypes ◊ Accept differences. Disagreement is okay,
but rather than using statements such as “you are wrong” or “that’s your opinion,” do not deny others their experiences. Be willing to explore other’s experiences as you explore your own thoughts, feelings,
and experiences that brought you to your conclusion.
◊ Listen actively. Listen for understanding
instead of agreement. Paraphrase back to the speaker the message you received. Listen with the same intensity to everyone.
◊ Provide feedback. Be behavior specific.
Let others know what impact they have on you. Learn to separate intent and effect. Avoid using labels.
◊ Share behaviors/feelings. Honestly share
with the group where you stand on sub-jects, and be willing to explore how you got there.
◊ Encourage feedback. Do not defend or
rationalize your behavior; accept what others have to say. This is where active listening is imperative. Remember, agree-ment is not necessary.
◊ Use inclusionary language. Use terms
such as “we” and “us;” do not use “they,” “he,” or “she.” Plus, avoid using “isms.”
◊ Avoid stereotypes. Learn to distinguish
between characteristics based on factual evidence and characteristics based on overgeneralizations.
Chapter 1: Being a Leader Lesson 5: Celebrating Differences — Culture and Individual Diversity
Unit 2: Leadership Theory and Application 41
Recognize that thinking in terms of categories is a normal human function, and when you are doing it. Recognize also that people consciously and unconsciously hold stereotypes as a result of their social condi-tioning. Since people distinguish by recognizing their existence and by gathering factual information about different individuals, learn to look at people as individuals — not groups. Interacting with people who are different than yourself can help you to see people as they really are. HOW YOU CAN HELP TO CREATE CHANGE FROM A PERSONAL LEVEL There are three ways that you personally can create change. The most readily available and mildest tactic for change is dialogue. This tactic is particularly effective to change people who are on the fence, who need support for new thought, or who are seriously trying to make sense out of their deepest commitments. It is less effective for those whose minds are strongly made up in an opposite direction. Dialogue has available to it various meth-ods for effectively presenting information — conversation, debates, and panel discussions are all common. A second tactic designed to be stronger than dialogue is confrontation. This involves
using the skills of effective feedback and active listening in a non-threatening way. For example, consider the following response to a statement “you” made to a group of people:
When you made that statement, we perceived it as being racist and it made me feel uncomfortable because we sense a feeling of superiority on your part.
At this point, re-negotiation is in order. Confrontation involves no longer being silent. The silent majority of Americans — those who have never committed themselves either to overt racism or to active involvement in the cause of civil rights — will now have to stand up and be counted. The third tactic is education and understanding. Educate other people. Do not close your ears when you hear bigoted remarks. Racism becomes more respectable when it goes unchallenged. Most people are simply ignorant of the facts. • The education necessary to change
existing perceptions will never work if it consists mainly of the same people lecturing to others. It must involve active participation by all types of people at all levels. Advice from well-informed mem-bers of other groups also helps.
• Finally, everyone must work to perform
— or at least process information — on three levels at once (if need be).
1. Understand your own self and how
you see the situation around you.
2. Understand others, because they will not be like you in many cases. Use intercultural communication.
3. Understand your environment —
where it is coming from and the direction it is headed.
Chapter 1: Being a Leader Lesson 5: Celebrating Differences — Culture and Individual Diversity
42 Unit 2: Leadership Theory and Application
CONCLUSION Although all minorities and other groups are interwoven throughout every fiber of our society, racist, prejudiced, and discriminatory attitudes and behaviors still exist. Unless we have a firm grip on some of the “whys” behind these challenges, we may be prone to repeat them. Society has a choice. It can die clinging to its bigotry or it can breathe freely in an atmosphere free of racism, prejudice, and discrimination. The choice really is one of survival, and everyone of us has a respon-sibility to ourselves — and to our children — to keep this society alive by changing it. NOTEBOOK ENTRY Examples of adverse stereotyping, prejudicial behavior, and discrimination occur daily. Some of these examples are real and they can affect our everyday lives; others are fictitious and they are acted out on television shows or in plays. Your task is to select one example (real or fictitious) and describe it in your journal. As a minimum, indicate the following items: ⇒ What was the nature of the incident (an
adverse stereotyping, a prejudicial remark, an act of discrimination, etc.)?
⇒ Was it real or fictitious? If fictitious, indicate the show or play.
⇒ What exactly was the cause of the incident? ⇒ How was the incident handled between the
parties involved? ⇒ How did it turn out? ⇒ Were any of the strategies for creating
change (especially the three personal strategies) described in the text used to control and/or end the incident?
* * *
Chapter 2: Knowing How to Lead Lesson 1: Power Bases and Influence
Unit 2: Leadership Theory and Application 43
KNOWING HOW TO LEAD LESSON 1: POWER BASES AND INFLUENCE
INTRODUCTION
Power is the capacity to which you can influence someone else to behave in accordance with what or how you want them to. The amount of power you have is contingent on the level of dependency that person has on you. The greater the dependency, the greater the power. You only have power if you have something that the other person wants. As a high school student living at home, you are highly dependent on your parents for financial support. Once you graduate and get a job, the level of dependence significantly decreases.
The two concepts of leadership and
power are closely intertwined yet have important differences. Leadership focuses on the attainment of a goal. Power does not need to have a goal, just dependence. Leadership most often refers to a downward influence and power does not. Power is focused on gaining compliance. SOURCE OF POWER
A leader can experience confusion and frustration when trying to gauge how and when to exert power. Leaders used to draw their power from the fact that they were the “boss.” The followers were dependent on the leader for distribution of rewards and punishments. However, it has been learned that leading from the position of boss with these controls can yield average performance. In order to energize followers, leaders must grasp a broader understanding of and relationship to power. Here are five power bases from which power is yielded: coercive, reward, legitimate, expert and referent.
Coercive Power is defined as a power that is yielded by fear — fear that negative results might occur if one does not comply. Fear is generated from the belief that someone might inflict pain, restrict movement or withhold basic needs.
Reward Power is seen when people comply with the wishes of another because they may be given something of value in return — that there is a positive benefit for doing so.
Legitimate Power is given to the person in the position within the hierarchy. Positions of authority can use both coercive and reward power. Most often, because of the
coercive power referent powerdefensive relinquishing developmental reward powerexpert power legitimate power
PURPOSE
Leaders can often experiencetremendous confusion as they exercisepower and influence. If they providetoo little influence their followers willdrift aimlessly. If they exert too much power the follower will shut down. Inthis lesson you will learn about thebases of power available to leadersand how to use them effectively. Youwill also learn about four differentapproaches to influencing.
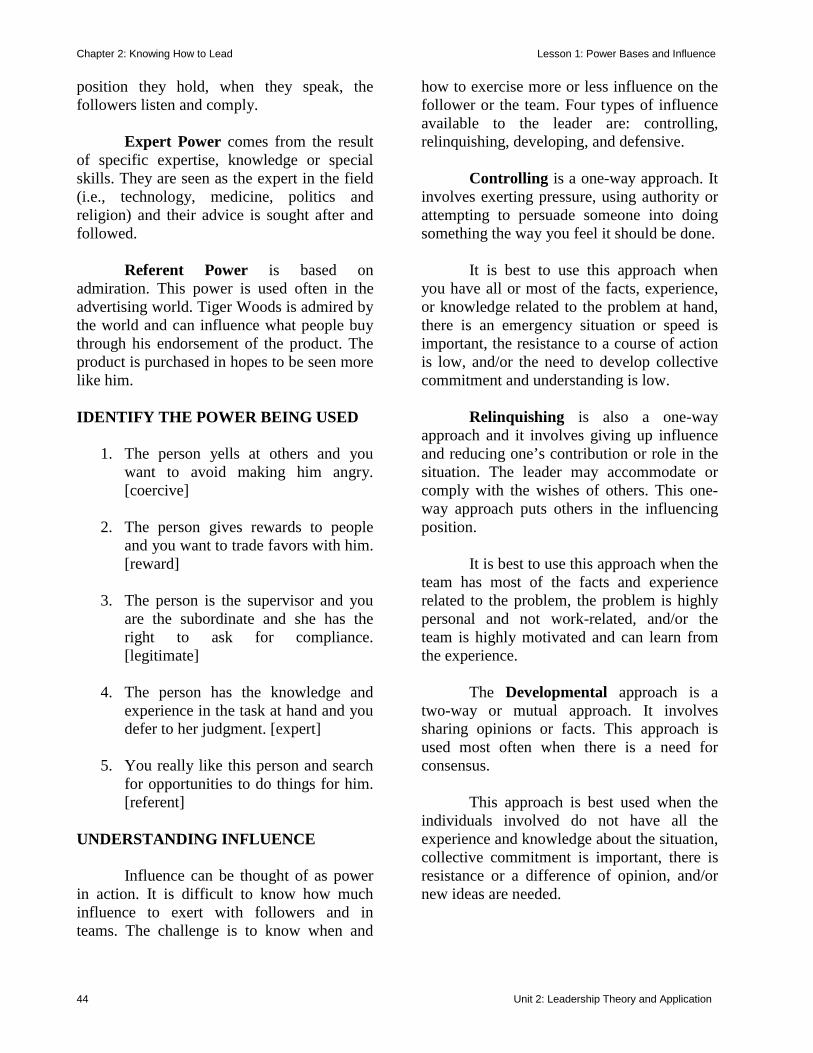
Chapter 2: Knowing How to Lead Lesson 1: Power Bases and Influence
44 Unit 2: Leadership Theory and Application
position they hold, when they speak, the followers listen and comply.
Expert Power comes from the result
of specific expertise, knowledge or special skills. They are seen as the expert in the field (i.e., technology, medicine, politics and religion) and their advice is sought after and followed.
Referent Power is based on admiration. This power is used often in the advertising world. Tiger Woods is admired by the world and can influence what people buy through his endorsement of the product. The product is purchased in hopes to be seen more like him. IDENTIFY THE POWER BEING USED
1. The person yells at others and you want to avoid making him angry. [coercive]
2. The person gives rewards to people
and you want to trade favors with him. [reward]
3. The person is the supervisor and you
are the subordinate and she has the right to ask for compliance. [legitimate]
4. The person has the knowledge and
experience in the task at hand and you defer to her judgment. [expert]
5. You really like this person and search
for opportunities to do things for him. [referent]
UNDERSTANDING INFLUENCE
Influence can be thought of as power in action. It is difficult to know how much influence to exert with followers and in teams. The challenge is to know when and
how to exercise more or less influence on the follower or the team. Four types of influence available to the leader are: controlling, relinquishing, developing, and defensive.
Controlling is a one-way approach. It involves exerting pressure, using authority or attempting to persuade someone into doing something the way you feel it should be done.
It is best to use this approach when
you have all or most of the facts, experience, or knowledge related to the problem at hand, there is an emergency situation or speed is important, the resistance to a course of action is low, and/or the need to develop collective commitment and understanding is low.
Relinquishing is also a one-way approach and it involves giving up influence and reducing one’s contribution or role in the situation. The leader may accommodate or comply with the wishes of others. This one-way approach puts others in the influencing position.
It is best to use this approach when the team has most of the facts and experience related to the problem, the problem is highly personal and not work-related, and/or the team is highly motivated and can learn from the experience.
The Developmental approach is a two-way or mutual approach. It involves sharing opinions or facts. This approach is used most often when there is a need for consensus.
This approach is best used when the individuals involved do not have all the experience and knowledge about the situation, collective commitment is important, there is resistance or a difference of opinion, and/or new ideas are needed.
Chapter 2: Knowing How to Lead Lesson 1: Power Bases and Influence
Unit 2: Leadership Theory and Application 45
The Defensive approach occurs when the person withdraws from the situation. This withdrawal can be seen visible by someone leaving the room, or invisibly, by tuning people out. The person in this behavior cannot be influenced or influence others.
This approach is best used when there is insufficient information to explore the issue any further, and/or there is a legal, moral, or ethical consideration that prevents discussion of the issue.
These approaches can be either a positive approach to influencing others or a dysfunctional approach if used incorrectly. With each there can be warnings.
Controlling: Even if you have all the facts, unless others recognize your expertise (expert power), they will resist this approach. There are a few situations where any one person has all the facts or knowledge related to the problem. No one of us is as smart as all of us. And finally, this method is less effective whent here are expectations of employee involvement.
Relinquishing: Be careful that you are not using this approach to avoid “rocking the boat.” Sometimes discussions are hard and people are not always happy. Don’t use this approach to avoid dealing with the issue. If you have been controlling and feel the need for change, don’t run all the way to this point to compensate from previous behavior.
Developmental: Just a word of caution here. This approach takes more time and energy on the part of everyone. Some may feel this is a rather soft approach and may be uncomfortable with it. It is important that you have strong communication and listening skills.
Defensive: Patience is important here. Don’t continue to push and if withdrawal
occurs, be willing to come back at another time to better understanding of the situation.
Different situations require your selecting the appropriate approach to use and used appropriately each approach can be effective. Effective two-way communications and a win/win attitude about conflict are key ingredients to the developmental approach and most often the benefits of the develop-mental approach out weigh the others. When in the developmental approach process there is a great amount of give-and-take of informa-tion, ideas, and opinions between the leader and the follower or the team. If disagreement exists, instead of saying you don’t agree, explore the reasons behind the idea. You could ask “Why do you think that is important? What would happen if we did that? The assumption that one person is right or wrong is set aside and all ideas are considered. There is a desire to hear what is being said. Clearly this is not the type of influence we are familiar with. We are used to the controlling (being told what to do) or the relinquishing (withdrawing from the dis-cussion). We are also used to how those two approaches feel to us and once we experience the developmental approach, as either the leader or the follower, we will want to lead or follow that path again.
As a leader in an organization you will often feel caught between the needs of your organization and the needs of your team for they are not always the same. At the beginning of this lesson we defined power as “the capacity to influence people” and we learned about where power comes from and different approaches to influencing others. Let’s broaden this definition and its application. An expanded definition of power can be “the capacity to influence the larger system to survive and adapt.” It is important that you know how to use the power and influence you have in your organizational role as well as the role of team/unit leader. You will have infor-
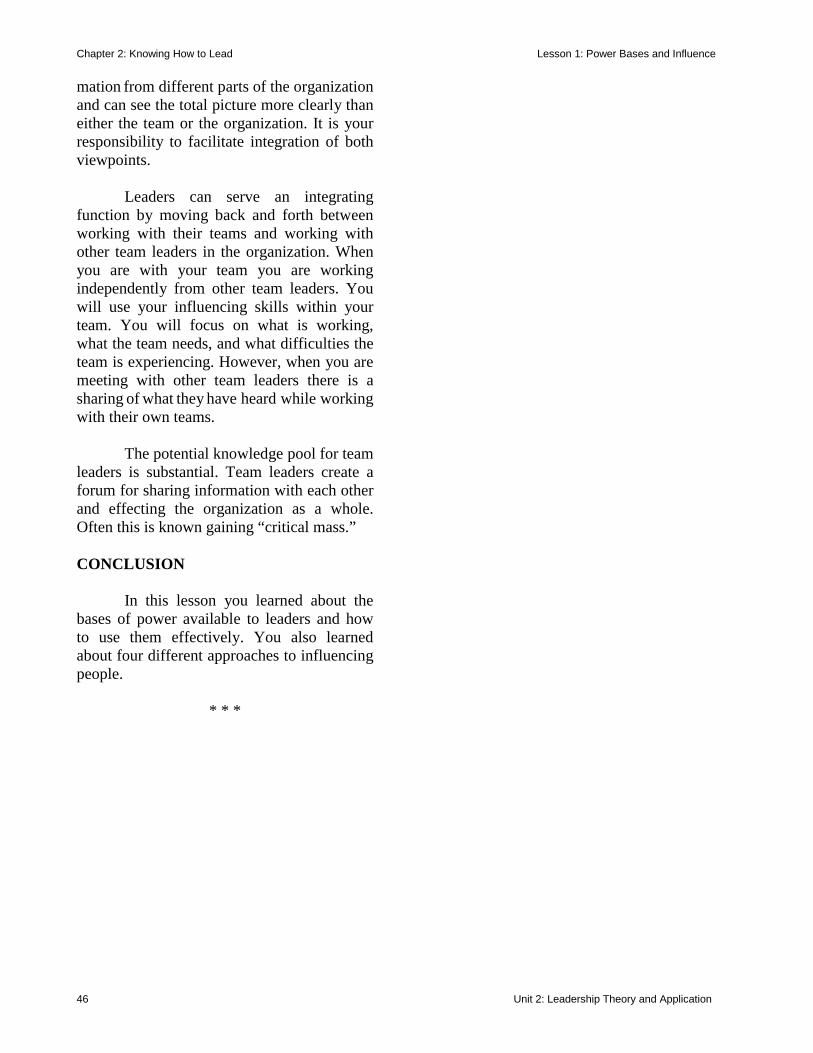
Chapter 2: Knowing How to Lead Lesson 1: Power Bases and Influence
46 Unit 2: Leadership Theory and Application
mation from different parts of the organization and can see the total picture more clearly than either the team or the organization. It is your responsibility to facilitate integration of both viewpoints.
Leaders can serve an integrating function by moving back and forth between working with their teams and working with other team leaders in the organization. When you are with your team you are working independently from other team leaders. You will use your influencing skills within your team. You will focus on what is working, what the team needs, and what difficulties the team is experiencing. However, when you are meeting with other team leaders there is a sharing of what they have heard while working with their own teams.
The potential knowledge pool for team
leaders is substantial. Team leaders create a forum for sharing information with each other and effecting the organization as a whole. Often this is known gaining “critical mass.”
CONCLUSION
In this lesson you learned about the
bases of power available to leaders and how to use them effectively. You also learned about four different approaches to influencing people.
* * *
Chapter 2: Knowing How to Lead Lesson 2: Styles of Leadership
Unit 2: Leadership Theory and Application 47
LESSON 2: STYLES OF LEADERSHIP
INTRODUCTION
Leadership styles are the pattern of behaviors that one uses to influence others. You can influence others in many different ways. Those patterns will be perceived by others as your leadership style. Earlier we discussed autocratic and democratic styles of leadership and sources of leadership behavior. Autocratic leaders used positional power and direct authority to influence others and democratic leaders used personal power and involved their followers in the decision-
making and problem solving processes. These two styles were described using a continuum with autocratic on one end and democratic on the other. This implied your style was either one or the other.
When we discussed the historical perspective of leadership in Leadership Reshuffled, we learned that leadership styles did not have to be an either/or set of behaviors. In fact we learned that the situation the leader was faced with affected his/her choice of behaviors.
Think of your classmates who are leaders: the student body president, the cadet battalion commander, and group project leaders. These individuals have certain responsibilities in order to accomplish their goals. The manner in which they carry out those responsibilities and the way they interact with others is their style of leadership. The three basic leadership styles are directing, participating, and delegating. DIRECTING STYLE Leaders use the directing leadership style when they tell their team members what they want done and how, when, and where they want it done, without getting others’ advice or ideas. Then, they supervise closely to ensure team members follow their directions precisely. This style is clearly appropriate when: • Time to complete the mission is short and
only you know what needs to be done and how to do it.
• You must lead people who lack
experience at a certain task and you must direct their behavior.
directing delegating participating leadership style
PURPOSE
In order to command respectand obedience as a leader, you must beprepared to lead. Since your actionsand attitudes set the example for othersto follow, you must also be ready forany type of situation that may occur.Therefore, how you lead — or yourstyle of leadership — can mean thedifference between success or failureof a mission. In this lesson, we willintroduce you to three basic leadershipstyles: directing, participating, and delegating. You will have the oppor-tunity to develop a style that works foryou as you progress in rank in ArmyJROTC.
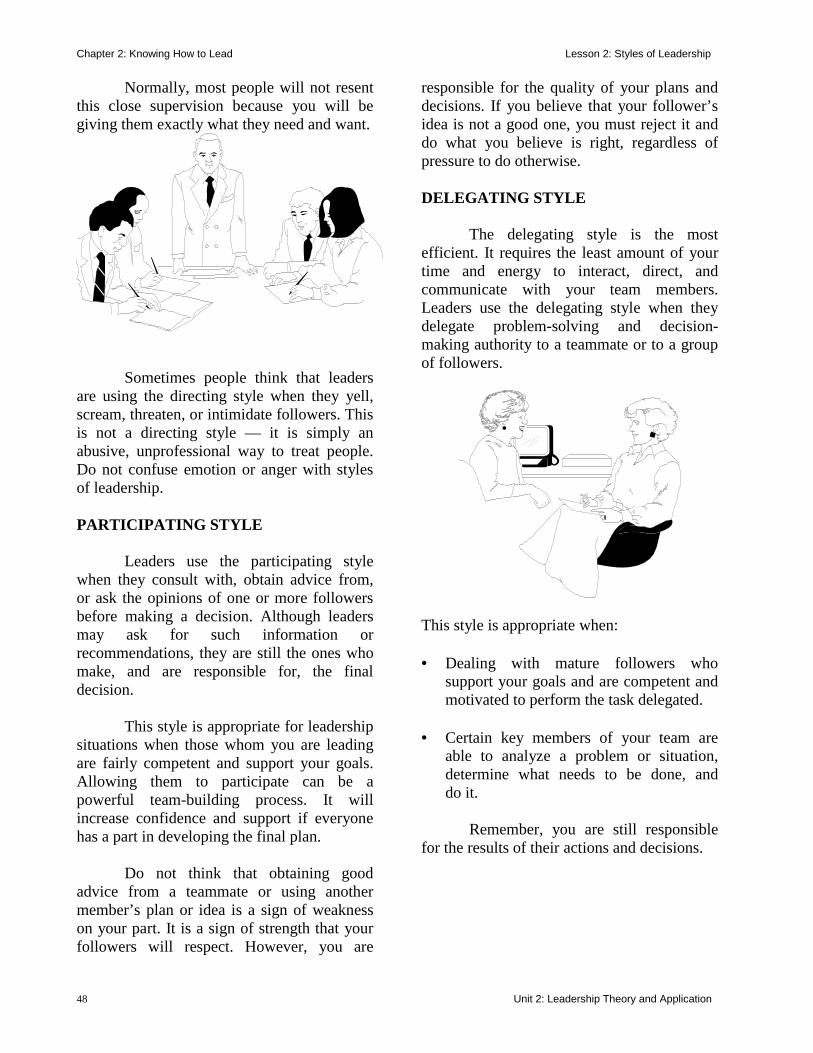
Chapter 2: Knowing How to Lead Lesson 2: Styles of Leadership
48 Unit 2: Leadership Theory and Application
Normally, most people will not resent this close supervision because you will be giving them exactly what they need and want.
Sometimes people think that leaders are using the directing style when they yell, scream, threaten, or intimidate followers. This is not a directing style — it is simply an abusive, unprofessional way to treat people. Do not confuse emotion or anger with styles of leadership. PARTICIPATING STYLE Leaders use the participating style when they consult with, obtain advice from, or ask the opinions of one or more followers before making a decision. Although leaders may ask for such information or recommendations, they are still the ones who make, and are responsible for, the final decision. This style is appropriate for leadership situations when those whom you are leading are fairly competent and support your goals. Allowing them to participate can be a powerful team-building process. It will increase confidence and support if everyone has a part in developing the final plan. Do not think that obtaining good advice from a teammate or using another member’s plan or idea is a sign of weakness on your part. It is a sign of strength that your followers will respect. However, you are
responsible for the quality of your plans and decisions. If you believe that your follower’s idea is not a good one, you must reject it and do what you believe is right, regardless of pressure to do otherwise. DELEGATING STYLE The delegating style is the most efficient. It requires the least amount of your time and energy to interact, direct, and communicate with your team members. Leaders use the delegating style when they delegate problem-solving and decision-making authority to a teammate or to a group of followers.
This style is appropriate when: • Dealing with mature followers who
support your goals and are competent and motivated to perform the task delegated.
• Certain key members of your team are
able to analyze a problem or situation, determine what needs to be done, and do it.
Remember, you are still responsible for the results of their actions and decisions.
Chapter 2: Knowing How to Lead Lesson 2: Styles of Leadership
Unit 2: Leadership Theory and Application 49
Keep in mind that no one style is superior to another one. What works in one situation may not work in another. You must develop the flexibility to use all three styles and the judgment to choose the style that best meets the situation and the needs of your team. In fact, you may want to use all three styles or different styles: • With different followers or in different
situations. • When you receive a new project, you
receive new personnel, or your supervisor changes
• If the competence, motivation, or commit-
ment of your team changes. You may recall the following three case studies from your LET 1 Leadership instruction. In LET 1, we had you determine which leadership traits Jon, Marla, and Brian used effectively and which ones they applied incorrectly. Now, reread each case study carefully. Identify what style or styles of leadership Jon, Marla, and Brian have, which principles of leadership they applied prop-erly, and which principles they applied inappropriately.
Case 1 Jon is normally an average student;
however, when he takes charge of a group to complete a project, his work and the finished effort of the group are always outstanding. When asked about his group’s results, his teammates proudly answer, “Jon makes it easy for us to complete our tasks. He helps us and makes suggestions when we need help, but he lets us do the work. If we have a problem, he always listens to our ideas on how to fix it. “Because he is always excited about what he is doing, we get excited, too. He seems to know all he can about a task before we get started on it. While we are doing the task, he respects our views about how to complete it, he effectively uses the talents of everyone on the team, and he makes smart decisions. He is always there for us if we need him and, somehow, he still finds the time to do his share of the project. Because of his effective work habits, he instills good work habits in us also. “He accepts responsibility for the outcome of our tasks, whether good or bad. None of us want a project to be done poorly, but he does not blame others for any mistakes that he or the team may have made. After finishing one task, we are always glad to begin the next project under his direction.”
Case 2
Marla knows exactly what her position is all about. She gets excited whenever an instructor assigns her a project because she knows that she can get it done. Sometimes, she even suggests projects to her instructor. Based on her ideas, the instructor usually assigns them to her and her team. Marla is highly motivated and has very structured work habits. She likes to map
Chapter 2: Knowing How to Lead Lesson 2: Styles of Leadership
50 Unit 2: Leadership Theory and Application
out a project in which everything is her decision. She then tells her team members how to do each step of their tasks according to her direction. She watches everything that her team members do, and if they appear to be doing a task differently from her plan, she criticizes them. Marla got upset once when a teammate was caught stealing. At first, she was afraid to talk to that person about the incident, and she did not know what to say to her peers who had also heard about it. Finally, after asking herself how she would like to be treated if she were the one involved, she called a team meeting. At the meeting, Marla informed every-one that all team members make mistakes, not only as a team but also as individuals. She hoped that if they ever had any problems, they would turn to her and/or to another team member for help. They agreed. Case 3
Brian is an easy-going person. He wants to complete projects with plenty of time left so that he and his friends on the team can relax. After he assigns tasks to each of his team members, he lets them figure out the best way to complete the tasks — without giving them any help, direction, or supervision. Plus, he rarely makes any decisions. Then, when the time comes to complete the project, he still turns it in even though parts of it are not finished. When the final grade comes back, his group makes the lowest mark in the class, prompting an instructor to ask, “Why wasn’t your project done?” Brian passes the blame on to his team members by saying, “They didn’t complete their parts as they should have. I don’t believe that I should have to be responsible for or receive a bad grade because of their sloppy efforts.”
When the other team members find out their grades, they approach Brian, “Why didn’t you tell us everything that we were supposed to do? We could have worked harder and done it better if we had just known.” Do not fall into the trap of believing that there are some leadership techniques that must always work. You must evaluate every situation carefully when choosing the right style. Keep in mind that the best strategy in one situation may be inappropriate in another. SITUATIONAL LEADERSHIP MODEL
Ken Blanchard and his colleagues built upon existing research and continued discussions with successful leaders on how the follower affected leadership behaviors. They developed the Situational Leadership Model from their research. This model identi-fies four leadership styles (sets of behaviors) and four developmental levels of the followers and the relationship between the two.
The leadership styles in this model are based on the leader providing either directive or supportive behaviors.
Directive behavior is defined as how much structure, control and supervision the leader provides to the follower.
Supportive behavior is defined as how much praise, listening and facilitating the leader provides the follower.
These styles also vary in three ways: 1) the amount of direction given; 2) the amount of encouragement and support provided, and; 3) the amount of involvement the follower has in decision-making.

Chapter 2: Knowing How to Lead Lesson 2: Styles of Leadership
Unit 2: Leadership Theory and Application 51
The four styles are known as: Style 1 Directing Style 2 Coaching Style 3 Supporting Style 4 Delegating
They are very similar to the three styles discussed earlier.
The behaviors that are present when using Style 1 will be more directive and less supportive. The follower will be told what, how, when, and where to do the task. There is little to no involvement from the follower in decision-making. Communication is one-way.
The behaviors present when using Style 2 will be providing equal amounts of directive and supportive behaviors. Here the leader will provide lots of direction, but will ask the follower for ideas and suggestions. A more two-way communication style exists. However, the leader is still in control of the decisions.
Style 3 behaviors are high supportive and low directive. While using this style the leader allows the follower to take control of the day to day decisions. The leader’s job is to listen and facilitate the problem-solving process. The decision-making process begins to shift from the leader to the follower.
Style 4 requires low supportive and directive behaviors. Here the leader behaviors change to allowing the follower to make the decisions on how to solve an agreed upon situation or task.
Earlier we discussed there is no ONE best way to lead. The most effective leader matches his/her behaviors to the situation and the follower. The amount of decision making and involvement the leader allows the follower depends on the situation or the task (have they ever been in this situation before
or done this task before) and the level of confidence and competence (how sure of and how skilled in performing the task) the follower possesses.
Now that we know the four leadership styles and the pattern of behaviors in each, let’s turn to the four developmental levels of the followers. These levels are based on the competence (the level of knowledge to do the task) and commitment (a combination of confidence and motivation).
The development level of the follower is based on his/her level of competence and confidence. There are four developmental levels:
1) low 2) low to moderate 3) moderate to high 4) high
Level one exists when the follower
has a high level of commitment (very motivated and confident) with a low level of competence (knowledge of how the task is to be done). An example of this situation can be your first day of drill in the leadership lab. You were probably most excited and motivated to perform as a platoon leader or sergeant. You did not know how to perform this task, but you were committed to making it happen. It required your leader to give you exact directions on how to do the task. You listened and did what you were told so you could learn the routines. The leader matched his style of leadership to your development level.
The second developmental level happens after you have been given direction and you have practiced enough to feel competent to perform the task. Your level of commitment to practice begins to drop. You are getting somewhat bored with the repetition of drill. This level is described with having
Chapter 2: Knowing How to Lead Lesson 2: Styles of Leadership
52 Unit 2: Leadership Theory and Application
low commitment and some competence. The leadership style now needs to change from directing to coaching. Letting you get involved in the process and asking for ideas, suggestions or shared leadership will be more effective at this time. The focus here is to keep your confidence on the rise while recharging your commitment. You are not ready to take charge yet and the leader recognizes you still need direction and practice to be able to perform outstandingly.
The third developmental level is when you have high competence (the ability to perform well) but your commitment level is not consistent. The supporting leadership style is more appropriate now. It is time to get you involved in making the task happen and shifting the responsibility from the leader to the follower. Again, the follower can perform the task, but for some reason is not highly committed to making it happen. The focus is to keep the performance high AND consistent.
The fourth developmental level is when the follower is highly committed and highly competent in performing the task. The follower not only knows how to perform the task well, but WANTS to perform the task well. The leader will focus on recognizing the perfor-mance.
As you progress through the JROTC program, you will be asked to take a leadership role in the leadership lab where you can practice the directing, coaching, supporting and delegating role with new cadets. You will also be involved in service community projects that will allow you to practice the leadership styles. These assignments will be made based on your performance and developmental level. You will be very competent at drilling tasks, however, this may be the first time you will experience a leadership role. You will be energetic and motivated because you know how to drill. However, the task of leading
others in drill is new to you and you will need direction from your instructor so you can build your competence and commitment through the process. As you become better skilled in matching leadership style to devel-opmental level, your instructor will begin to coach, support and finally, delegate the role of leadership to you.
When in a leadership position, you must assess your team’s capability to perform its mission, and then develop a plan that accomplishes it. You should use the style that your experience tells you is most appropriate after you have assessed the team’s level of competence, motivation, and commitment to accomplish its mission. A good rule of thumb to follow is to be flexible in your thinking. Approach each leadership situation as an opportunity to improve your leadership potential, ability, and style. CONCLUSION As you have learned, leadership styles are the pattern of behaviors that one uses to influence others. You now know that you can influence others in many different ways. Those patterns are perceived by others as your leadership style.
* * *
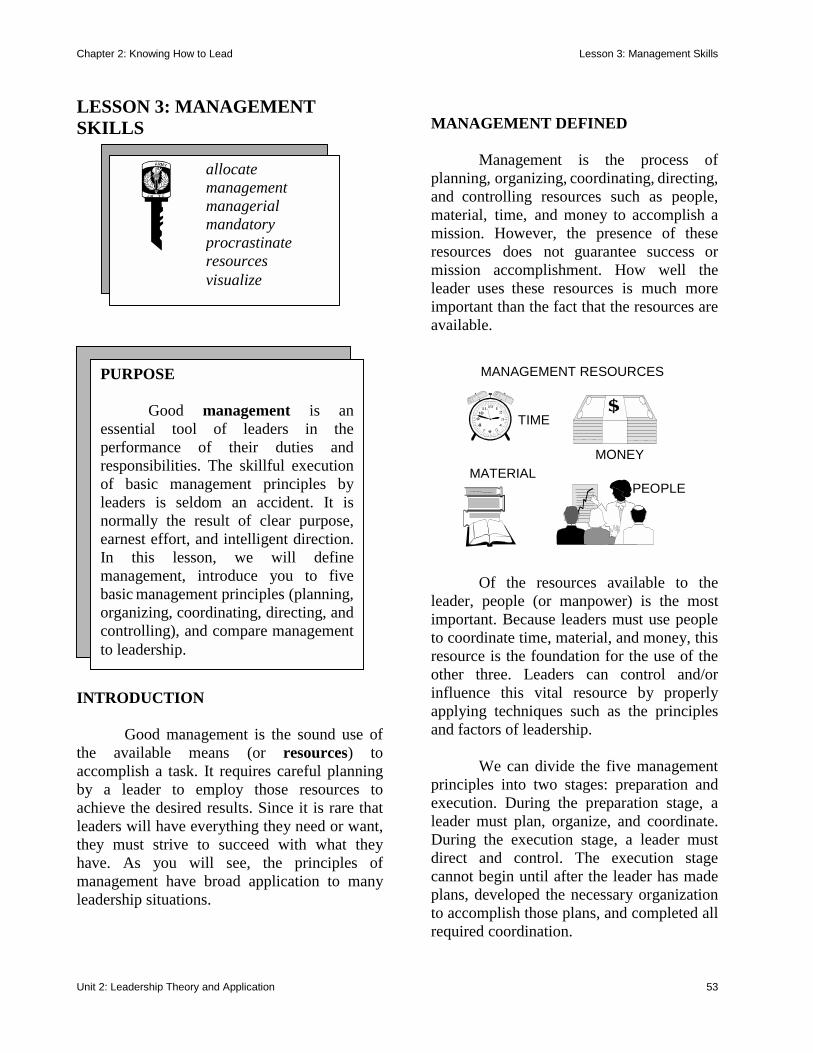
Chapter 2: Knowing How to Lead Lesson 3: Management Skills
Unit 2: Leadership Theory and Application
53
LESSON 3: MANAGEMENT SKILLS
INTRODUCTION Good management is the sound use of the available means (or resources) to accomplish a task. It requires careful planning by a leader to employ those resources to achieve the desired results. Since it is rare that leaders will have everything they need or want, they must strive to succeed with what they have. As you will see, the principles of management have broad application to many leadership situations.
MANAGEMENT DEFINED Management is the process of planning, organizing, coordinating, directing, and controlling resources such as people, material, time, and money to accomplish a mission. However, the presence of these resources does not guarantee success or mission accomplishment. How well the leader uses these resources is much more important than the fact that the resources are available.
MANAGEMENT RESOURCES
TIME
MONEY MATERIAL
PEOPLE
Of the resources available to the leader, people (or manpower) is the most important. Because leaders must use people to coordinate time, material, and money, this resource is the foundation for the use of the other three. Leaders can control and/or influence this vital resource by properly applying techniques such as the principles and factors of leadership. We can divide the five management principles into two stages: preparation and execution. During the preparation stage, a leader must plan, organize, and coordinate. During the execution stage, a leader must direct and control. The execution stage cannot begin until after the leader has made plans, developed the necessary organization to accomplish those plans, and completed all required coordination.
allocate management managerial mandatory procrastinate resources visualize
PURPOSE
Good management is anessential tool of leaders in theperformance of their duties andresponsibilities. The skillful executionof basic management principles byleaders is seldom an accident. It isnormally the result of clear purpose,earnest effort, and intelligent direction.In this lesson, we will define management, introduce you to fivebasic management principles (planning,organizing, coordinating, directing, andcontrolling), and compare managementto leadership.
Chapter 2: Knowing How to Lead Lesson 3: Management Skills
Unit 2: Leadership Theory and Application 54
PLANNING Planning is the basis for the problem-solving and decision-making processes — what goes on in planning affects what is done in those two processes. Leaders spend many hours in planning the activities of their organization. They must consider what the objectives are and how they are going to accomplish them. When planning, leaders must visualize, examine, consider, realize, and reflect on the factors involved in accomplishing the mission. Planning is not an easy process and it requires a lot of work. To help, there are four basic steps to planning. They are: ⇒ Define the objective. In this step, leaders
begin to determine the tasks and conditions that are necessary to complete the objective. Timing is very important. Leaders must ensure that their team members can do all tasks within the specified time frame.
⇒ Study the situation. ⇒ List and examine possible courses of action
the leader could take. ⇒ Select the course of action that will achieve
the objective. Additionally, there are four factors that leaders must consider when using the planning process to make and implement plans. • Time. Leaders must consider time as they
plan events, meet deadlines, and set goals. Then, they make plans and execute tasks according to an established time schedule. Effective leaders will schedule their time and the activities of their team to meet these events, deadlines, and goals.
• Effort. Leaders must exert effort to get
things done. You cannot expect results if you do not work at putting your plan into action. Successful leaders are energetic.
They work hard to accomplish goals — you should exercise that same type of effort.
• Patience. Patience is an ingredient that
all leaders must possess. It is hard to be patient when challenges occur. To solve a difficult situation, you should reex-amine the facts, coordinate with people who may be helpful, and readjust the plan (if necessary). Most important, do not give up. Exercise patience and maturity while the designated people carry out the plan.
• Objective Attitude. An objective attitude
is the ability to see and consider the different sides of an issue or situation. It involves being flexible, listening to opposing points of view, making compromises, or making changes when necessary. Your objective attitude deter-mines how much time, effort, and patience you are willing to exert to ensure mission accomplishment.
Finally, leaders must plan or estimate approximately how many people (or man hours) they will need to accomplish the objective. Before selecting these people or defining specific tasks (done under organizing), leaders must consider the requirements of the objective against the capabilities of their team members. ORGANIZING Organizing is the process of creating the conditions necessary to effectively exe-cute your plans. It involves systematically defining the tasks and arranging the resources with respect to the achievement of your objective. There are five factors involved in organizing. They are:
Chapter 2: Knowing How to Lead Lesson 3: Management Skills
Unit 2: Leadership Theory and Application
55
• Determine/fine-tune each task. Identify all the tasks and subtasks that the team must do to accomplish the objective. Be specific. Develop detailed lists to record them and set measurable standards for each task/subtask.
• Select personnel. Once you have a detailed
list of tasks and subtasks, assign people to them. You should base your assignments on what each task/subtask requires versus the capabilities of your team members.
• Develop a working structure. With a
detailed list of tasks completed and people assigned to do them, you are ready to organize the list sequentially. Determine which tasks your team must do first, second, and so on until you have included everything necessary to carry out the plan. The next step, setting priorities, goes hand-in-hand with this step. You and your teammates cannot do everything at once.
• Set priorities. Since some tasks are more
important than others or you must start them before others because of their degree of difficulty, organize a to-do list in terms of priority for every task and subtask you have identified. Establish priorities in cate-gories such as priority A, priority B, priority C, etc., for each item on the to-do list. Do the A priorities first, then the Bs, the Cs, etc.
Allow sufficient time for each team member to do the job well. Not planning sufficient time for each task could result in the work being half-done or done “slipshod.” Finally, you should develop a system for checking each other and ensuring that team members accomplish their tasks according to set standards and on time.
A common fault among many people is that of spending too much time on tasks that are unimportant. Another fault is the tendency to procrastinate, or to put off those things that need to be done. When studying for an exam or doing a project, do you find yourself putting it off until the last minute? Then, you have to rush just to get the material studied or the project finished. Know what is mandatory and what is not when setting priorities and organizing your time.
• Allocate resources. In the final step of
your organizing process, you must ensure that you have identified all required resources necessary for com-pleting the objective, set aside all avail-able resources, and planned for obtaining those that are not available.
COORDINATING Coordination is the active process of establishing contact, then keeping in constant touch with everyone involved to ensure the successful accomplishment of the objective. Coordination is an essential part of the planning process. Plans that are not properly coordinated cannot be properly executed, directed, or controlled. A good rule of thumb to follow is to coordinate with everyone you think might be involved somehow or at some point in completing the objective. Through coordi-nation, leaders secure the cooperation of people not under their direct control. A key to effective coordination is the use of friendly persuasion and mutual cooperation.
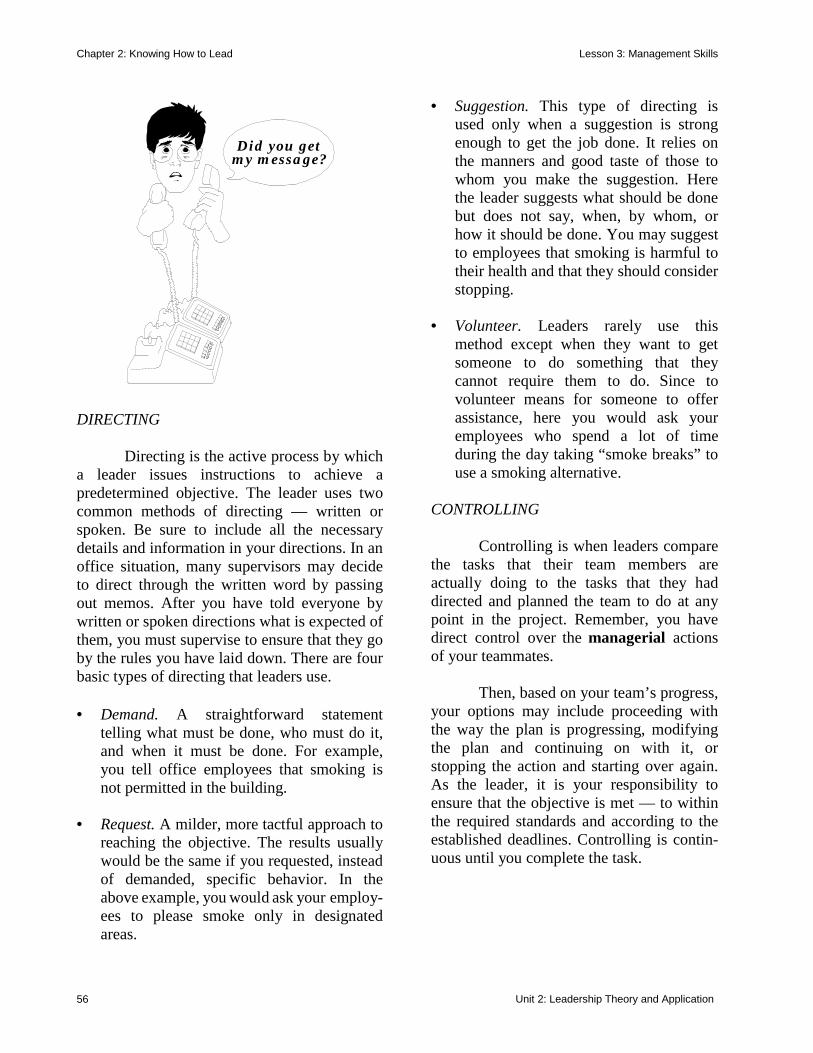
Chapter 2: Knowing How to Lead Lesson 3: Management Skills
Unit 2: Leadership Theory and Application 56
Did you getmy message?
DIRECTING Directing is the active process by which a leader issues instructions to achieve a predetermined objective. The leader uses two common methods of directing — written or spoken. Be sure to include all the necessary details and information in your directions. In an office situation, many supervisors may decide to direct through the written word by passing out memos. After you have told everyone by written or spoken directions what is expected of them, you must supervise to ensure that they go by the rules you have laid down. There are four basic types of directing that leaders use. • Demand. A straightforward statement
telling what must be done, who must do it, and when it must be done. For example, you tell office employees that smoking is not permitted in the building.
• Request. A milder, more tactful approach to
reaching the objective. The results usually would be the same if you requested, instead of demanded, specific behavior. In the above example, you would ask your employ-ees to please smoke only in designated areas.
• Suggestion. This type of directing is used only when a suggestion is strong enough to get the job done. It relies on the manners and good taste of those to whom you make the suggestion. Here the leader suggests what should be done but does not say, when, by whom, or how it should be done. You may suggest to employees that smoking is harmful to their health and that they should consider stopping.
• Volunteer. Leaders rarely use this
method except when they want to get someone to do something that they cannot require them to do. Since to volunteer means for someone to offer assistance, here you would ask your employees who spend a lot of time during the day taking “smoke breaks” to use a smoking alternative.
CONTROLLING Controlling is when leaders compare the tasks that their team members are actually doing to the tasks that they had directed and planned the team to do at any point in the project. Remember, you have direct control over the managerial actions of your teammates. Then, based on your team’s progress, your options may include proceeding with the way the plan is progressing, modifying the plan and continuing on with it, or stopping the action and starting over again. As the leader, it is your responsibility to ensure that the objective is met — to within the required standards and according to the established deadlines. Controlling is contin-uous until you complete the task.
Chapter 2: Knowing How to Lead Lesson 3: Management Skills
Unit 2: Leadership Theory and Application
57
MANAGEMENT VS. LEADERSHIP Leadership deals with the personal relationship of one person to another. It is the way a leader influences subordinates to accomplish the mission. Management, then, is a set of activities or behaviors performed by those in senior positions to obtain, direct, or allocate resources to accomplish goals and tasks. A good leader will think and plan in a rational manner in order to efficiently utilize the talent and skills of the individuals that make up the team. How do leadership and management relate? You must realize that although they are separate processes, you will almost never use them separately. At lower levels, you lead through face-to-face dealings with your people. You are still a manager, but higher levels of authority in the chain of command control most of the physical resources. For example, squad leaders devote most of their efforts toward managing materials and time. As leaders move up the chain of command, the size of their unit increases but their direct influence on the actions of the unit lessens. For example, it is difficult for battalion commanders to personally influence all of the men and women in their units. However, by working through staff and subordinate leaders, they can influence their units to accomplish the mission. They use leadership in dealing with and influencing subordinate leaders. In this way, battalion commanders will get things done through the actions of subordinate leaders. As leaders get promotions, they control more resources. Instead of just leading a group, they may now be responsible for the overall operation of the organization. For example, if you were the assistant manager at a fast food restaurant, you would be behind the counter with your kitchen crew making sure they were performing their jobs correctly and in a
responsible manner. If you were promoted to manager, you would not have as much face-to-face contact with the kitchen crew. Instead, you would be more concerned with putting together work schedules, hiring, and ordering food supplies and equipment. You would then check with your assistant manager to make sure that the employees were doing their jobs. TIME MANAGEMENT In the reality of life, time will be one of your most valuable resources. As a leader, you must learn to use time wisely and to your best advantage. We can all benefit from timesaving techniques that will make us a more efficient manager of time. The following list addresses various timesaving techniques. Keep these techniques in mind and try to incorporate as many of them as you can in your everyday life. By following these tips, you will become a more effective time manager and a better leader. • First and foremost, goal setting is the
key to success. We covered the key points and the importance of goal setting earlier. Try posting notes around your area that will remind you of your goals.
• Learn to set priorities. Once you set your
goals, determine your priorities. Learn to do first things first.
• Identify your attention span and
schedule/do work accordingly. • Thoroughly plan your work. In planning,
learn to delegate authority. This will help so that you do not waste time and effort.
• Make use of your spare time.
Chapter 2: Knowing How to Lead Lesson 3: Management Skills
Unit 2: Leadership Theory and Application 58
• Learn to say no to yourself and others. • Examine old habits that may prevent
efficiency. • Do not strive for absolute perfection. • Learn to outline. • Use a desktop or pocket diary. • Use a file system. • Set time limits on meetings. Also, as a leader, you need to be aware of “time wasters.” Create an effective time management environment within your team — both you and your team members should learn to avoid these pitfalls. The most common time wasters include:
These management tips will help you to become a leader who is more efficient in managing your time as well as your team. CONCLUSION Becoming a leader means learning to manage your resources — people, money, material, and time — to their fullest extent.
You must also continue to search for more effective ways of improving your manage-ment techniques. Whether you use the principles of management in your everyday life or as a member of the JROTC program, you must use them to your best advantage. People with authority have the responsibility of leading and managing. In order to succeed, they must exercise leadership when dealing with subordinates while at the same time properly managing the resources of their organization.
* * *
TIME WASTERS ⇒ Lack of organization ⇒ Lack of priorities ⇒ Lack of delegation ⇒ Unclear objectives ⇒ No plan available and no,
or little, time spent planning ⇒ No coordination ⇒ No teamwork ⇒ Procrastination ⇒ Lack of self-discipline ⇒ Lack of feedback ⇒ Interruptions
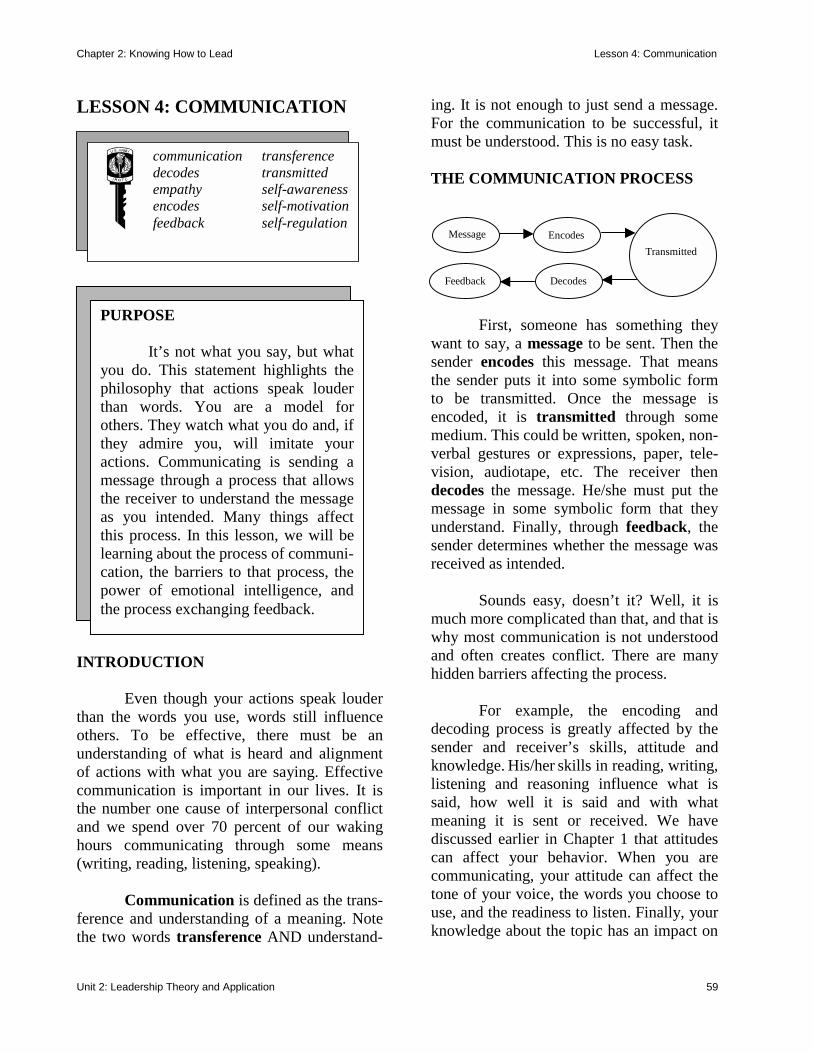
Chapter 2: Knowing How to Lead Lesson 4: Communication
Unit 2: Leadership Theory and Application
59
LESSON 4: COMMUNICATION
INTRODUCTION
Even though your actions speak louder than the words you use, words still influence others. To be effective, there must be an understanding of what is heard and alignment of actions with what you are saying. Effective communication is important in our lives. It is the number one cause of interpersonal conflict and we spend over 70 percent of our waking hours communicating through some means (writing, reading, listening, speaking).
Communication is defined as the trans-ference and understanding of a meaning. Note the two words transference AND understand-
ing. It is not enough to just send a message. For the communication to be successful, it must be understood. This is no easy task.
THE COMMUNICATION PROCESS
First, someone has something they want to say, a message to be sent. Then the sender encodes this message. That means the sender puts it into some symbolic form to be transmitted. Once the message is encoded, it is transmitted through some medium. This could be written, spoken, non-verbal gestures or expressions, paper, tele-vision, audiotape, etc. The receiver then decodes the message. He/she must put the message in some symbolic form that they understand. Finally, through feedback, the sender determines whether the message was received as intended.
Sounds easy, doesn’t it? Well, it is much more complicated than that, and that is why most communication is not understood and often creates conflict. There are many hidden barriers affecting the process.
For example, the encoding and decoding process is greatly affected by the sender and receiver’s skills, attitude and knowledge. His/her skills in reading, writing, listening and reasoning influence what is said, how well it is said and with what meaning it is sent or received. We have discussed earlier in Chapter 1 that attitudes can affect your behavior. When you are communicating, your attitude can affect the tone of your voice, the words you choose to use, and the readiness to listen. Finally, your knowledge about the topic has an impact on
Message Encodes Transmitted
Decodes Feedback
PURPOSE
It’s not what you say, but whatyou do. This statement highlights thephilosophy that actions speak louderthan words. You are a model forothers. They watch what you do and, ifthey admire you, will imitate youractions. Communicating is sending amessage through a process that allowsthe receiver to understand the messageas you intended. Many things affectthis process. In this lesson, we will belearning about the process of communi-cation, the barriers to that process, thepower of emotional intelligence, andthe process exchanging feedback.
communication transference decodes transmitted empathy self-awareness encodes self-motivation feedback self-regulation

Chapter 2: Knowing How to Lead Lesson 4: Communication
Unit 2: Leadership Theory and Application 60
how well you can communicate about the message.
Additional barriers exist. We often filter what we say. Meaning, we drop things out of the message based on what we think the listener needs to know or wants to know. We choose what to say. We listen selectively. Meaning, we listen for what we want to hear. We are overloaded with information to the point of not knowing how to organize or use all this information. We might be defensive or apprehensive about the message and not want to hear what is being said. Languages, accents, and jargon affect what we hear and what we think it means. Is it any wonder we have difficulty being understood?
You will be building your skills around communication in speaking and writing tech-niques in other lessons. One barrier we want to discuss now is one’s emotions and how they interfere in the communication process. We are going to explore Emotional Intelligence. Emo-tional Intelligence is the ability for one to monitor their emotions, and use information about those emotions to guide one’s thinking and actions. EMOTIONAL INTELLIGENCE
Our emotions are real. They create a need to “react” in a situation that faces us. When faced with a dangerous situation it is the brain quickly telling the rest of your body that something is not right and it is time to either run away or stand and fight. Emotions cannot be checked at the door and forgotten until the day is over. If you have a disagreement with your parents before school, the emotions around that disagreement are influencing your behavior the rest of the day, possibly the week. They will influence what you hear, what you say, and how you behave. They will become barriers to understanding or sending a message.
People who have a high degree of emotional intelligence have a greater degree of influence. Their behaviors reflect they are aware of what the emotion is that is present, understand why that emotion is there and are able to separate the emotion and the reaction so they can manage the emotion rather than the emotion managing them.
There are five competencies or skills to managing your emotions: self-awareness; self-regulation; self-motivation; empathy; and effective relationships.
Self-awareness is the ability to “feel” the emotion and understand where it is coming from. Read the list below. What would you be feeling if you were in the following situations?
• A slow line at the video store. • Making a presentation in class. • A surprise birthday party. • Being told on Friday that you cannot
go to the ballgame on Saturday. • A phone call from an old friend.
Different emotions can happen in similar
situations. The slow line may not be a problem if you are not in a hurry. However, add to that situation that you have only a few minutes to get home on time or your parent will be grounding you for a week.
Now that you have identified the “feeling” that is going on inside you in those situations, think about the consequences those feelings might bring. For example, the slow line and your need to be home on time, could bring about your making comments to the people in front of you if they are not ready to ring up their purchase. Or it might make you moody and be abrupt with your friends who are waiting in the car for you.
Chapter 2: Knowing How to Lead Lesson 4: Communication
Unit 2: Leadership Theory and Application
61
The emotion will drive different “actions” or consequences. You need to know what the emotion is (fear, frustration, anger, disappoint-ment) and why it exists (what consequences the situation might bring, therefore how you might react to the emotion).
Self-regulation is the ability to control that emotion. Do not ignore or push aside the emotion, but to recognize it and deal with it effectively. Taking a pause between the emotion and your reaction to it. And more important, identifying what you are telling yourself at that time — self-talk.
What you tell yourself goes immediately to your subconscious where it increases or decreases your anger or other emotions. Repeated negative self-talk leads to exagger-ated and irrational thinking. Have you ever said these things to yourself?
• They always take me for granted. • I’m always late. • No one ever helps me. • No one ever listens to me. • It will always be this way. • Everything I do is wrong. • I never get a passing grade.
Now think about why you say those things
to yourself. For example, if you are always late, why are you late? Are you only late at certain times? Be more specific about your being late. Once you have identified why you say those things to yourself, you can begin to identify the emotions around the reasons you are late which is driving the behavior to be late. It could be that you are not getting to bed early enough to get a good night sleep. It could be that you are not prepared for that class. It could be that you don’t like that particular teacher. Whatever the reason, once you have identified it, you can change the self-talk from “I’m always late” to “I am late because I do not get enough sleep.” The next question would be why don’t I get
enough sleep? Because I don’t start my home-work until after dinner. What can I do to start my homework earlier so I can get a good night sleep. You see it is a series of questions getting to the root of the problem, which is creating in you an emotion that is driving negative self-talk and negative behaviors.
Self-motivation is the ability to change the way you think about things in order to get them done. There are things about our lives, school, family, and community that we don’t enjoy doing. But they must be done. Learning to connect to those things in a positive way is a big part of emotional intelligence. Can you identify a few things about school that make you feel uncomfortable or bored? Now answer the next two questions. Why are these things important? How might you think about these things differently so that you can take greater satisfaction in them?
Empathy is the ability to share your feelings with others more openly so they will open up and trust you, improving communication overall. Think of someone you are close to. Someone you tell everything to. Do you trust that person? Do they trust you? Then think of someone you tell very little to. What is your trust level with them? Each relationship will build a different trust level. However, it begins with you. The greater the trust, the more open the communi-cation. The more open the communication the greater the trust. Kind of like the story, which came first the chicken or the egg?
There are four levels of communication: • Superficial (“hi” “how you doing”) • Fact (“It is raining”) • Thought (“I think you are good at
that”) • Feeling (“I feel you don’t care about
your homework”)
Chapter 2: Knowing How to Lead Lesson 4: Communication
Unit 2: Leadership Theory and Application 62
With some people, you never get past the first two levels. To open the trust and communication you will want to reach the fourth level.
Finally, effective relationships are about what occurs from your ability to be self-aware, to self-regulate and self-motivate and to create empathy with others. It creates an enthusiasm, which is contagious. It is about finding those things you love about what you are doing and creating such an energy level around those things that dealing with those things you don’t like can be easier. Earlier we thought about things you did not like about school. Now think about things you like best in school. What makes those things so appealing?
The communication process of sending and receiving a message is successful when the message is understood. Many barriers exist that get in the way of our message being understood. Our behaviors speak louder than our words. Our overall communication is increased by our ability to engage in our emotions, rather than keeping them at bay. Emotional Intelligence allows us to become aware of the emotions, regulate their consequences, find ways to motivate ourselves to complete tasks we may not like to do, feel empathy with others and build effective relationships — increasing the likelihood that the message sent is the message received. EXCHANGING FEEDBACK
The next topic for this lesson is feedback. Although it is seen as the final loop back to the sender, it is present throughout the process. How and when to give feedback is important to the process. Having a high degree of emotional intelligence increases the effective-ness of providing and receiving feedback.
Feedback is something we give as well as receive. Whether the gift is welcome or not
depends on knowing when and how to share our reflections so that others accept, value, and seek out our point of view. When we give feedback in a caring and skillful way, we open a window on the world.
In the give and take of effective feedback, you need the skills to create a zone of safety in which honest and constructive information can be exchanged. Those who are people smart are adept at inviting others to give them constructive feedback. They are also talented at getting invited by others to give them feedback. They are able to give feedback that is constructive and enlightening.
Many of us have had bad experiences with feedback. Perhaps we were on the receiving end of too much criticism from people in authority (parents, teachers, supervisors), or felt put down by peers when we were most vulnerable. However, we can structure the feedback process in ways that create a sense of safety for ourselves and for others.
In order to receive feedback we need to let others know that we want it; that we are receptive to hearing both the positive and negative story. To avoid being over-burdened by too much feedback we need to be specific in our request for feedback. Specify why you want the feedback, what areas you want feedback in, and how much feedback you want. Read the following example of how to ask for feedback.
“Sarah, the more I’m learning about leadership, the more I’m coming to understand that receiving feedback is important to making me a better leader specifically, listening to others ideas. I really want to make a difference in our unit and I want to understand how my behavior affects the team. I’d like you to help me with this
Chapter 2: Knowing How to Lead Lesson 4: Communication
Unit 2: Leadership Theory and Application
63
by sharing your honest opinions with me. Would you be willing to do that?
“You can help me today by answering two questions. What are some things I do that make it easier for you to convey your ideas, and what is one thing I could do differently?” Compare the previous request for feedback to this one:
“Sarah, the team leader told me I needed to get some feedback from others about my listening skills. I listen to others don’t I?”
Getting feedback from only one source could lead you down the wrong corrective road. Getting the feedback and agreeing with it are two separate things. That is why you want to broaden your circle of feedback sources. Your Success Profiler is a good tool to use to receive feedback from any sources around the same questions. Also posing the same questions to a number of people can validate what you are told. If most of the people you ask have similar input, you can assume there is some validity in their comments. Even if you are uncomfortable with it.
If you are not ready to receive feedback (or if someone else is not ready to receive your feedback) you will most likely deny, discount, or defend yourself instead of listening to it. To be invited to give feedback entails four key behaviors: You need to ask for permission, share rather than insist, time your input, and check others’ perceptions.
By asking permission to share feedback, you can set the stage for your input and assess the recipient’s readiness to listen. Some ways to seek permission might be:
• Is this a good time for you to hear some feedback about…
• Would you be open to hearing some input about…
• I have some input on how you handled… Would you like to hear them?
• May I share some reactions with you about…
Finding the right time and the right level
of receptivity will enhance the likelihood the feedback will be heard. That is the same for you as the receiver. If it is not a good time for you to receive feedback, let them know that and agree to a better time and place.
Share your feedback in a form of a hypothesis rather than to insist that it is a fact. There might be a reason behind the behavior you were not aware of. By not insisting you are right, you help your recipient trust you and feel safe. Here is an example:
Sarah has accepted your offer to share some feedback about her presentation to the class. You had noticed that Sarah was speaking very fast and seemed to be cramming in too much information into the presentation. You ask: “I was wondering if you felt pressured to cover every aspect of the topic in your presentation?” When Sarah agrees that this was the case, you ask: “If you could only address three main points, what would they be and why?”
The timing of the feedback is essential to it being heard. Feedback is most effective when it is immediate. Old stuff is not relevant. Memories fade quickly. Whenever possible go for an instant replay while the behavior in question is fresh. However, being sensitive to the circumstances is important as well. Providing feedback in public can be embarrassing. Think through the impact that the time and setting will have so you can
Chapter 2: Knowing How to Lead Lesson 4: Communication
Unit 2: Leadership Theory and Application 64
reduce distractions and increase the usefulness of your input.
Checking the recipient’s perceptions about your feedback is a final closing point to the feedback process. Ask them how they felt about what you said, was there agreement or disagreement, was your input helpful or confusing, and/or does the person need more information? It helps to use effective listening skills like paying attention to people’s words and body language and clarifying the meaning of their reactions. If there has been miscommunication or feelings have been hurt, often clarification can help the situation.
Feedback is most useful if it is constructive, concise, and specific. People are more open to positive feedback than negative. If you can tell them what they are doing right, they will most likely listen and repeat the behavior in the future. Informative feedback includes specific behaviors, is limited, and provides suggestions. Global statements are not correctable. Specific behaviors are. Compare these two statements: Global: You have an attitude problem. Specific: You sounded rather impatient at the team meeting today.
Behaviors lead us to some conclusions about personal values that can be misinterpreted. Be sure you avoid being personal and dig deep to find the behavior that needs to be challenged. Look at the following examples: Personal: You are sloppy and disorganized. Behavior: There is a lot of clutter in your locker. How do you find what you need? Personal: You are lazy.
Behavior: You often procrastinate, don’t finish the task, and return late from breaks. Why do you think you do this? Personal: You are well organized. Behavior: You are consistent in your prioritizing of assignments, setting deadlines and keeping materials readily available.
In each of these examples, the specific behaviors convey more information than the personal statements. People can hear the message more easily, can see the behaviors you are speaking about and are not confronted with labels that provide no direction — either good or bad.
Have you ever been confronted with a list of things you do wrong? You might start off with a high degree of listening, but after a while, it gets difficult. Keep your feedback focused on the main point.
Show your concern for the recipient’s growth by suggesting ways they can build on their strengths and overcome deficits. Your suggestions should be specific, realistic, positive, and tactful.
Example: “You often interrupt when others are speaking. When you do that to me, it makes me feel you do not value what I have to say. I think you would be a more effective team member if you practiced better listening skills. Would you be willing to work on this during the next team meeting? When you feel yourself ready to speak before the other person is finished, could you take a deep breath and hear them out? If you would like, I can sit next to you and if you begin to interrupt someone, I can gently tap your arm so you are aware of your behavior.”
Chapter 2: Knowing How to Lead Lesson 4: Communication
Unit 2: Leadership Theory and Application
65
When you follow-up on your feedback, the recipient feels you care. In the example you just read you could continue the feedback process after the team meeting by asking:
“I saw you really working at this today. You caught yourself the first time and stopped, apologized and took a deep breath. When I tapped your arm, you were able to sit back in your seat and let the team talk through the problem. By the end of the meeting you seemed much more comfortable in waiting your turn to speak. You also did a great job summarizing what others had said. How did it feel to you when you were able to stop yourself and let the others finish? Was it helpful to have me tap your arm? What would you like to do next?”
If you were not at the meeting you could follow up by asking them:
“How did the meeting go? Were you able to practice your deep breathing? How did that work for you? What do you think you need to do next?”
Feedback is an important part of the communication process. Emotional intelligence is an important part of feedback. Being able to manage your emotions and to give and receive informative feedback reduces many of the barriers to effective communications.
* * *
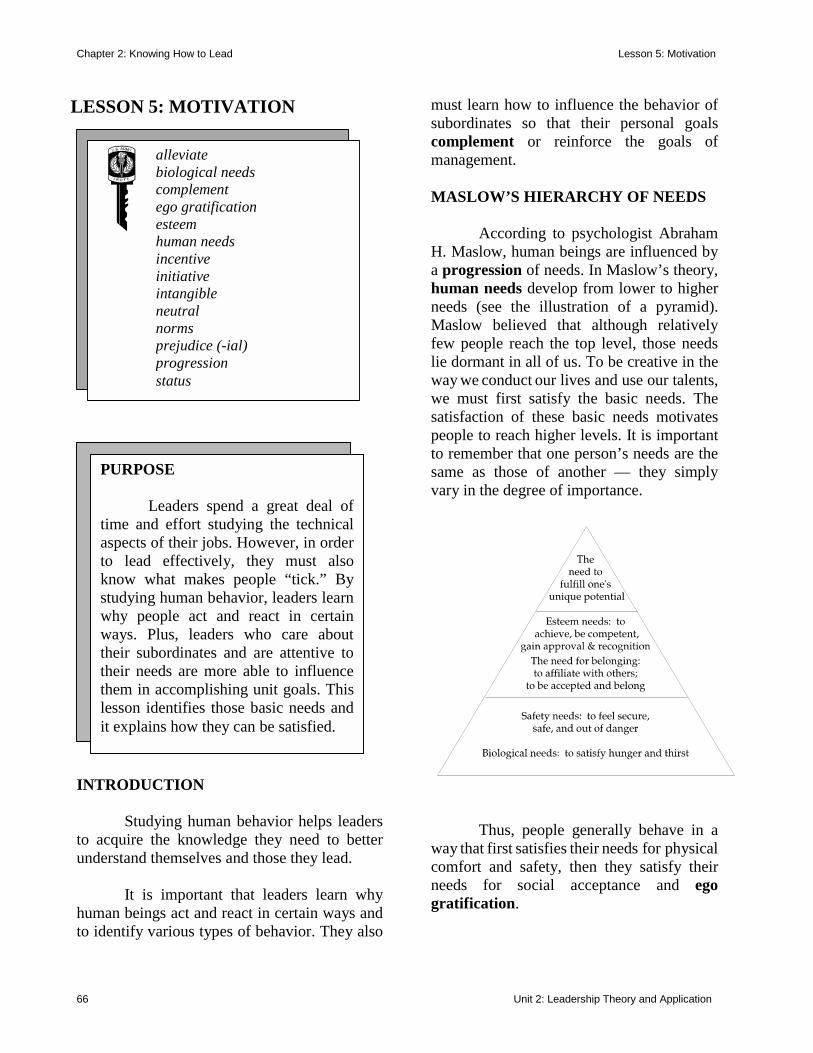
Chapter 2: Knowing How to Lead Lesson 5: Motivation
66 Unit 2: Leadership Theory and Application
LESSON 5: MOTIVATION
INTRODUCTION Studying human behavior helps leaders to acquire the knowledge they need to better understand themselves and those they lead. It is important that leaders learn why human beings act and react in certain ways and to identify various types of behavior. They also
must learn how to influence the behavior of subordinates so that their personal goals complement or reinforce the goals of management. MASLOW’S HIERARCHY OF NEEDS According to psychologist Abraham H. Maslow, human beings are influenced by a progression of needs. In Maslow’s theory, human needs develop from lower to higher needs (see the illustration of a pyramid). Maslow believed that although relatively few people reach the top level, those needs lie dormant in all of us. To be creative in the way we conduct our lives and use our talents, we must first satisfy the basic needs. The satisfaction of these basic needs motivates people to reach higher levels. It is important to remember that one person’s needs are the same as those of another — they simply vary in the degree of importance.
Thus, people generally behave in a way that first satisfies their needs for physical comfort and safety, then they satisfy their needs for social acceptance and ego gratification.
alleviate biological needs complement ego gratification esteem human needs incentive initiative intangible neutral norms prejudice (-ial) progression status
PURPOSE
Leaders spend a great deal oftime and effort studying the technicalaspects of their jobs. However, in order to lead effectively, they must alsoknow what makes people “tick.” Bystudying human behavior, leaders learnwhy people act and react in certainways. Plus, leaders who care abouttheir subordinates and are attentive totheir needs are more able to influencethem in accomplishing unit goals. Thislesson identifies those basic needs andit explains how they can be satisfied.
Chapter 2: Knowing How to Lead Lesson 5: Motivation
Unit 2: Leadership Theory and Application 67
LEADERSHIP DEMANDS THE STUDY OF HUMAN NATURE AND BEHAVIOR In order for leaders to motivate, they must satisfy both the personal needs of their subordinates as well as their work-related goals. Therefore, to lead effectively, leaders must demonstrate that they value and support their subordinates. Simple acts of kindness or an indication that they care about their sub-ordinates can often change a poor attitude to a better one. The leadership principle, “know your subordinates and look out for their welfare (or well-being)” goes hand-in-hand with this discussion of motivation and human needs.
Leaders must know and understand the members of their unit. It is not enough just to know a team member’s name. As a leader, you need to understand them as individuals — their interests, values, and attitudes. In short, you must know why they act the way they do. Commit time and effort to listen to and learn about them. Try to observe, become personally acquainted with, and recognize them as individuals with different backgrounds and different personalities. To be successful in this principle, you must have a knowledge of individual and group behavior — without this knowledge, you cannot understand the “why” of your followers’ actions. The behavior of team members is often driven by their desire to satisfy certain physical and safety needs. Whether or not they put their best effort in the performance of their duty and achieving the unit’s goal depends on the satisfaction of those needs. By showing that you care, you can earn their trust and respect. If they trust you, they will willingly work to help you accomplish the mission.
Leaders need the support of fol-lowers in order to accomplish their goals. If leaders understand subordinates’ needs and either satisfy them or help to satisfy them, leaders can influence behavior to some degree. Human nature is the common set of qualities shared by all human beings. Some of these qualities are beliefs, values, and character traits. Other aspects of human nature are the potential for good and bad behavior, stress factors, and human needs. In this chapter, we will concentrate on the human needs. HUMAN NEEDS For years, scholars have studied human behavior and have offered hundreds of explanations of human nature and instinct and how they affect actions. There are certain factors, elements, or needs that cause people to behave in certain ways and do certain things. The most basic of these factors is human needs. Human needs are those necessary for a person’s existence and for mental and emotional stability. The human needs required for existence are physical or biological needs; in addition to food and water, they include the need for safety and security.
Safety needs are one of the most basic of the biological needs and include the desire for security and for law and order. People need to feel secure. A leader quickly loses respect if he does not show genuine concern for the safety needs of subordinates. A leader’s lack of concern for this need is quickly evident to perceptive people and affects their motivation to follow the leader into dangerous situations.

Chapter 2: Knowing How to Lead Lesson 5: Motivation
68 Unit 2: Leadership Theory and Application
The psychological needs provide for mental and emotional stability: belonging or social acceptance, esteem, and self-fulfillment. Maslow suggested that psychological needs: ⇒ Function in much the same way as
biological needs do. ⇒ Can only be filled by an outside source. ⇒ Are based on and developed through human
beings’ relationships with each other and society in general.
The following is a brief description of the three psychological needs. • The needs for belonging and for social
acceptance rest on the person’s desire to be an accepted member of the group and to have good personal relationships with all members. Social needs are important motivators, but they are less obvious than physical needs. In addition to wanting to belong to a group and to be respected by others in that group, social acceptance includes the need for self-respect, status, comradeship, love, and affection.
• According to Maslow, esteem needs are just
as important for human life as food and water. A lack of esteem can make people anxious and tense. To ease these tensions, people might engage in random or desperate activities.
The esteem needs are those that stem from the person’s desire for achievement, recog-nition, respect, and appreciation. The leader can directly recognize subordinates for their performance and show appreciation by intangible rewards such as a simple “well done” or a pat on the back. Tangible rewards might be time off, recommendations for awards, and promotions, and favorable evaluations.
Most people want distinction. They want logical rules and regulations, hard but meaningful work, and a sense of belonging to the group. By respecting subordinates, recognizing them as indi-viduals, and treating them as important contributing members of the team, lead-ers help satisfy the need for esteem.
• Self-fulfillment needs occupy the top of
the hierarchy. These may include the pursuit of knowledge and beauty, or whatever else is required for the fulfill-ment of one’s potential. Many corporate vice presidents desire to be presidents and many movie extras desire to be major stars, but these desires are realized in only a few cases. Although only a few people ever reach their ultimate dreams, everyone can attain their intermediate goals and achieve lifelong satisfaction. Complete self-fulfillment is possible, but it takes hard work and determination.
Maslow added to the motivation theory the idea that some of these needs take precedence over others and the suggestion that achieving one level of satisfaction releases new needs and motivations.

Chapter 2: Knowing How to Lead Lesson 5: Motivation
Unit 2: Leadership Theory and Application 69
GROUP NEEDS In addition to individual human needs, there are group norms that are established to meet the needs of the group. Group norms are a collection of the needs of the individuals in the group. These needs may require group mem-bers to change or adjust their needs to fit the group’s norm. Groups have common goals and established leadership. In groups, personal rela-tionships between the members cause them to conform to certain standards set by the group. When such groups want to achieve a goal, they will work hard and do their best in order to maintain acceptance by the other members of the group. In other words, they do not want to let their team members down or lose their respect. They all want to do their part.
This camaraderie is due to the need for social acceptance and status within the group — a force that is stronger in leaders because they need the respect of their subordinates for their own self-esteem. The group will have confidence and faith in their leaders as long as they meet the group’s needs and expectations. However, if leaders do not live up to those needs or expectations, group members will seek individual satisfaction instead of group satisfaction.
LEADERS’ CONCERN FOR GROUP NEEDS Leaders must provide purpose and goals for the group. By selecting the best course of action to reach a goal, they provide purpose. By explaining the reason-ing behind decisions and demonstrating their own enthusiasm for the task, they provide direction and assistance in accomplishing the goal. This direction should also include information on the required standards of performance.
Leaders must realize that, although they are recognized as leaders because of their position, they will not be accepted until they earn the respect and confidence of the group by satisfying its needs. Therefore, successful leaders must be more concerned with the well-being of their people than they are with themselves. They must go out of their way to give time, energy, and counsel to help their subordinates live up to their potential. By constantly showing this level of concern to their subordinates, these leaders receive a high degree of respect and loyalty from their subordinates along with their desire to accomplish team goals. Unselfish leaders avoid providing for their own comfort and personal advancement at the
Chapter 2: Knowing How to Lead Lesson 5: Motivation
70 Unit 2: Leadership Theory and Application
expense of others. Leaders should place the comfort, pleasure, and recreation of subordinates before that of their own. It is difficult to respect leaders who seek their own comfort over that of their subordinates or who hoard credit for achievement made possible by subordinates. True leaders place themselves last in priority and share the dangers and hardships with their subordinates. MOTIVATING BY SATISFYING NEEDS Needs form the basis for actions. They motivate people to behave in certain ways and to do certain things. Consequently, motivation is a total process that is determined by the interaction of human needs, the situation, and the combination of personal and group needs. The leader’s part within this interaction is to: ⇒ Thoroughly understand human needs and
stay directed toward satisfying them. Keep a broad point of view on human nature and motivation. Do not hold to a narrow view that people are motivated only by fear, or believe the opposite — that people are all good and will always be motivated to do the right thing. Instead, a complex array of forces can motivate people, and leaders must be open to every situation.
⇒ Satisfy individual and group needs by
establishing goals or tasks for individuals and groups to reach, leading to goal/task accomplishment.
⇒ Understand how to motivate in order to
obtain the behavior and conduct (confi-dence, competence, professionalism, etc.) needed from subordinates.
⇒ Establish and maintain loyalty and
teamwork within the unit. ⇒ Create a caring climate within the unit —
one that promotes trust and respect as well as an understanding and acceptance of the “why” of subordinates’ actions.
⇒ Create self-motivation in subordinates — this is the most powerful and lasting form of motivation. Most people can become self-motivated if taught lead-ership attributes.
14 PRINCIPLES OF MOTIVATION Although there is no simple formula for motivation, we can provide a basic view of what motivates people. Keep in mind that this view is a simplification for you to use as a guide. It assumes that needs motivate people and that a person’s motivation to reach a goal depends on whether the person perceives that the goal will satisfy any of those needs. Realizing that different people react to varying needs will allow you to arrive at appropriate decisions and actions in a particular situation. People are motivated by many forces — values, self-interest, kindness, worthy causes, and other forces. Some of these forces are internal — such as fears and beliefs; and some are external — such as danger, the environment, a chance for pro-motion, or pressures from a senior, sub-ordinates, or one’s family. Forces combine to determine what a person is motivated to do in a given situation. Remember, since needs form the basis for actions and leaders must motivate by understanding these needs, leaders must understand how needs drive individuals, people, or groups to action. The following is a discussion of 14 practical principles (guidelines) that flow from this basic view of motivation. (Note: Do not confuse these principles with the 11 leadership principles.)
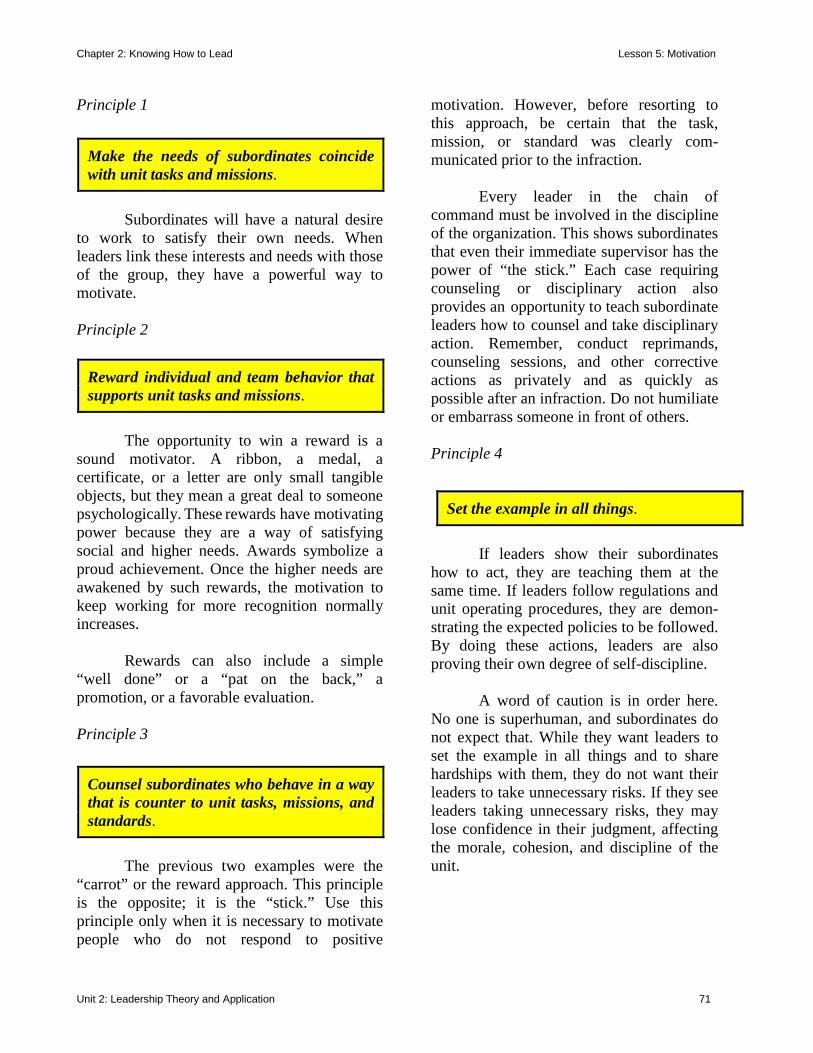
Chapter 2: Knowing How to Lead Lesson 5: Motivation
Unit 2: Leadership Theory and Application 71
Principle 1
Subordinates will have a natural desire to work to satisfy their own needs. When leaders link these interests and needs with those of the group, they have a powerful way to motivate. Principle 2
The opportunity to win a reward is a sound motivator. A ribbon, a medal, a certificate, or a letter are only small tangible objects, but they mean a great deal to someone psychologically. These rewards have motivating power because they are a way of satisfying social and higher needs. Awards symbolize a proud achievement. Once the higher needs are awakened by such rewards, the motivation to keep working for more recognition normally increases. Rewards can also include a simple “well done” or a “pat on the back,” a promotion, or a favorable evaluation. Principle 3
The previous two examples were the “carrot” or the reward approach. This principle is the opposite; it is the “stick.” Use this principle only when it is necessary to motivate people who do not respond to positive
motivation. However, before resorting to this approach, be certain that the task, mission, or standard was clearly com-municated prior to the infraction. Every leader in the chain of command must be involved in the discipline of the organization. This shows subordinates that even their immediate supervisor has the power of “the stick.” Each case requiring counseling or disciplinary action also provides an opportunity to teach subordinate leaders how to counsel and take disciplinary action. Remember, conduct reprimands, counseling sessions, and other corrective actions as privately and as quickly as possible after an infraction. Do not humiliate or embarrass someone in front of others. Principle 4
If leaders show their subordinates how to act, they are teaching them at the same time. If leaders follow regulations and unit operating procedures, they are demon-strating the expected policies to be followed. By doing these actions, leaders are also proving their own degree of self-discipline. A word of caution is in order here. No one is superhuman, and subordinates do not expect that. While they want leaders to set the example in all things and to share hardships with them, they do not want their leaders to take unnecessary risks. If they see leaders taking unnecessary risks, they may lose confidence in their judgment, affecting the morale, cohesion, and discipline of the unit.
Make the needs of subordinates coincide with unit tasks and missions.
Reward individual and team behavior that supports unit tasks and missions.
Counsel subordinates who behave in a way that is counter to unit tasks, missions, and standards.
Set the example in all things.
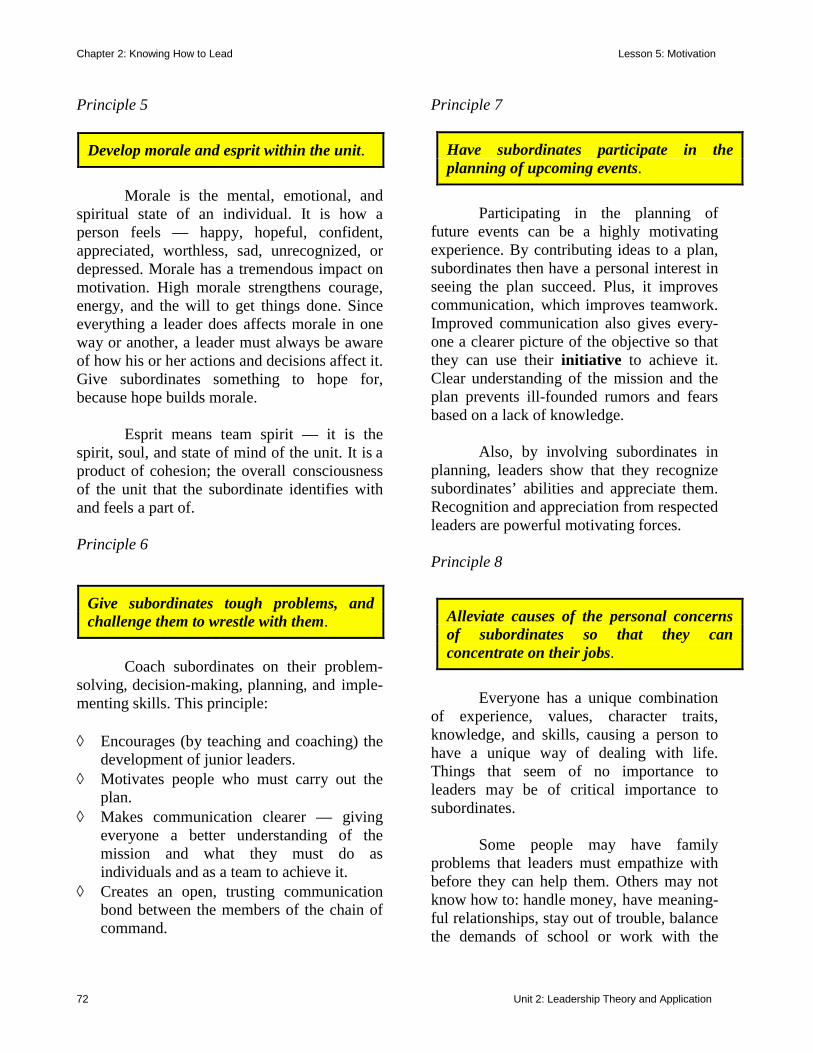
Chapter 2: Knowing How to Lead Lesson 5: Motivation
72 Unit 2: Leadership Theory and Application
Principle 5
Morale is the mental, emotional, and spiritual state of an individual. It is how a person feels — happy, hopeful, confident, appreciated, worthless, sad, unrecognized, or depressed. Morale has a tremendous impact on motivation. High morale strengthens courage, energy, and the will to get things done. Since everything a leader does affects morale in one way or another, a leader must always be aware of how his or her actions and decisions affect it. Give subordinates something to hope for, because hope builds morale. Esprit means team spirit — it is the spirit, soul, and state of mind of the unit. It is a product of cohesion; the overall consciousness of the unit that the subordinate identifies with and feels a part of. Principle 6
Coach subordinates on their problem-solving, decision-making, planning, and imple-menting skills. This principle: ◊ Encourages (by teaching and coaching) the
development of junior leaders. ◊ Motivates people who must carry out the
plan. ◊ Makes communication clearer — giving
everyone a better understanding of the mission and what they must do as individuals and as a team to achieve it.
◊ Creates an open, trusting communication bond between the members of the chain of command.
Principle 7
Participating in the planning of future events can be a highly motivating experience. By contributing ideas to a plan, subordinates then have a personal interest in seeing the plan succeed. Plus, it improves communication, which improves teamwork. Improved communication also gives every-one a clearer picture of the objective so that they can use their initiative to achieve it. Clear understanding of the mission and the plan prevents ill-founded rumors and fears based on a lack of knowledge. Also, by involving subordinates in planning, leaders show that they recognize subordinates’ abilities and appreciate them. Recognition and appreciation from respected leaders are powerful motivating forces. Principle 8
Everyone has a unique combination of experience, values, character traits, knowledge, and skills, causing a person to have a unique way of dealing with life. Things that seem of no importance to leaders may be of critical importance to subordinates. Some people may have family problems that leaders must empathize with before they can help them. Others may not know how to: handle money, have meaning-ful relationships, stay out of trouble, balance the demands of school or work with the
Develop morale and esprit within the unit.
Give subordinates tough problems, and challenge them to wrestle with them.
Have subordinates participate in the planning of upcoming events.
Alleviate causes of the personal concerns of subordinates so that they can concentrate on their jobs.
Chapter 2: Knowing How to Lead Lesson 5: Motivation
Unit 2: Leadership Theory and Application 73
needs of the family, or grow professionally and personally. Leaders should strive to help their subordinates as much as they can by keeping them informed of situations and decisions, encouraging feedback, and through counseling — when necessary. For those people who are having real or perceived challenges, these difficulties will cause them to worry, consume their energy, and prevent them from being productive. In order to help alleviate these causes of personal concerns, leaders should teach subordinates how to handle their lives in a healthy, constructive way. Principle 9
Simply put, this principle means caring for subordinates. Leaders at all levels of the chain of command must do all they can to help subordinates meet their physical, safety, social, esteem, and self-fulfillment needs. Teach them all you know. You want them to have the right values, character traits, knowledge, and skills because these are the tools that will allow them to grow, and to live happy, productive lives. Principle 10
Keep clear, open communications with subordinates so that they can accomplish their mission as a team and use initiative in the absence of orders.
Principle 11
Peer pressure can be a powerful motivating force, but leaders must be careful how they apply it. If not used properly, it can backfire with serious consequences. On the other hand, positive peer pressure that is based on professional norms and values is healthy. Principle 12
Statistics in themselves are not necessarily bad or good. Leaders should use them sparingly and carefully because they are only the “mask” of a unit and they may present a false image. They are surface indicators or symptoms that leaders need to check into further. Perhaps, they indicate a serious problem, perhaps not. Leaders simply do not know until they look into the true causes of the symptoms. Improper use of statistics has a devastating effect on trust, morale, and motivation. Valid evaluation systems and effective leaders require much more than statistics. They require ways to get beneath the “image” to the real substance — the true strengths and weaknesses that influence effectiveness and the real leadership causes of those strengths and weaknesses. Good leaders make the time to get out and to see the real substance of a unit.
Ensure that subordinates are properly cared for and have the tools they need to succeed.
Keep subordinates informed about missions and standards.
Use positive peer pressure to work for you, the leader, and the unit.
Avoid using statistics as a major method of evaluating units and motivating subordinates.
Chapter 2: Knowing How to Lead Lesson 5: Motivation
74 Unit 2: Leadership Theory and Application
Principle 13
Make each subordinate feel special. Experience and study have proven that people need meaningful work. They need to believe that what they are doing, even if it is tiring and unpleasant, is necessary and important. When people feel that their jobs are important and that they have responsibility, they feel needed and motivated. This principle:
Encourages the delegation of authority. This “power down” approach helps leaders get the best out of their subordinates. Lead-ers give responsibility to subordinates who have the skill and will to handle it, and they strive to make subordinates feel that they are as responsible as them for achieving unit standards and goals.
Principle 14
Racial, sexual, or other prejudicial talk and behavior are contrary to the principles on which America was founded. If a person feels that he or she is the object of prejudice, that person’s motivation can be seriously damaged. Prejudice can also destroy teamwork, cohesion, and discipline within a unit.
Although these 14 principles of motivation are different from the 11 leadership principles, there are similarities. Did you recognize any?
BUILDING MOTIVATION People will have little motivation to do something if they believe they cannot succeed. Likewise, if they are not convinced that good performance is the best way to satisfy their needs, their motivation will be low and they will have little or no interest in doing their best. However, when subordinates are convinced that their chances for success are good enough to warrant the effort, this belief will help them to achieve their own goals (or needs) as well as those of the group. Therefore, leaders must know their subordinates’ capabilities, establish challenging goals within those capabilities, and employ them in accordance with those capabilities (one of the leadership principles). Leaders can also build confid-ence by offering support, encouragement, and assistance. Creating assurance that good perfor-mance will be rewarded is based on three factors: • The leader has a consistent record of
checking and evaluating performance. • The leader has an equally consistent
record of using rewards in respect to improving performance.
• The leader knows that some team
players feel that completion of the task itself is sufficient reward.
TANGIBLE AND INTANGIBLE REWARDS People work for the opportunity to receive tangible (a plaque) or intangible (a “pat on the back”) rewards, and the need to believe that their work is necessary and important. However, if supervisors never compliment them on a job well done, it is easy for subordinates to feel that they never
Make the jobs of subordinates as challeng-ing, exciting, and meaningful as possible.
Do not tolerate any form of prejudicial talk or behavior.
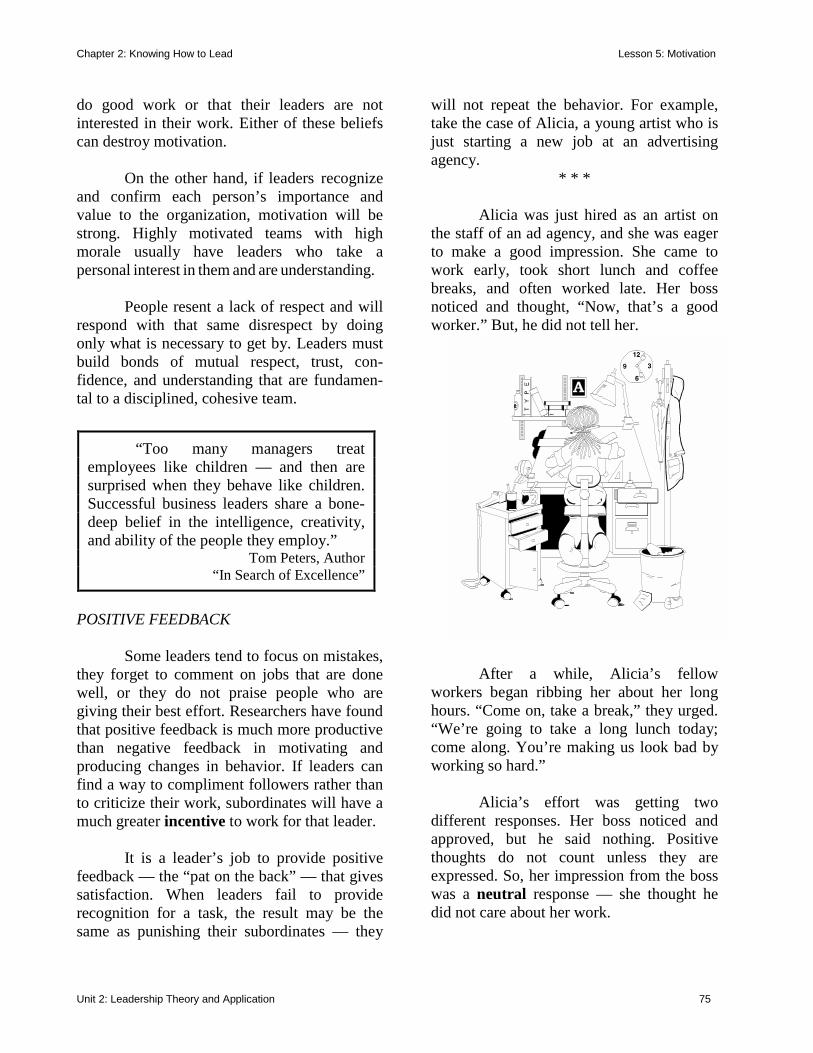
Chapter 2: Knowing How to Lead Lesson 5: Motivation
Unit 2: Leadership Theory and Application 75
do good work or that their leaders are not interested in their work. Either of these beliefs can destroy motivation. On the other hand, if leaders recognize and confirm each person’s importance and value to the organization, motivation will be strong. Highly motivated teams with high morale usually have leaders who take a personal interest in them and are understanding. People resent a lack of respect and will respond with that same disrespect by doing only what is necessary to get by. Leaders must build bonds of mutual respect, trust, con-fidence, and understanding that are fundamen-tal to a disciplined, cohesive team.
POSITIVE FEEDBACK Some leaders tend to focus on mistakes, they forget to comment on jobs that are done well, or they do not praise people who are giving their best effort. Researchers have found that positive feedback is much more productive than negative feedback in motivating and producing changes in behavior. If leaders can find a way to compliment followers rather than to criticize their work, subordinates will have a much greater incentive to work for that leader. It is a leader’s job to provide positive feedback — the “pat on the back” — that gives satisfaction. When leaders fail to provide recognition for a task, the result may be the same as punishing their subordinates — they
will not repeat the behavior. For example, take the case of Alicia, a young artist who is just starting a new job at an advertising agency.
* * * Alicia was just hired as an artist on the staff of an ad agency, and she was eager to make a good impression. She came to work early, took short lunch and coffee breaks, and often worked late. Her boss noticed and thought, “Now, that’s a good worker.” But, he did not tell her.
After a while, Alicia’s fellow workers began ribbing her about her long hours. “Come on, take a break,” they urged. “We’re going to take a long lunch today; come along. You’re making us look bad by working so hard.” Alicia’s effort was getting two different responses. Her boss noticed and approved, but he said nothing. Positive thoughts do not count unless they are expressed. So, her impression from the boss was a neutral response — she thought he did not care about her work.
“Too many managers treat employees like children — and then are surprised when they behave like children. Successful business leaders share a bone-deep belief in the intelligence, creativity, and ability of the people they employ.”
Tom Peters, Author “In Search of Excellence”

Chapter 2: Knowing How to Lead Lesson 5: Motivation
76 Unit 2: Leadership Theory and Application
Meanwhile, she was getting a negative response from her coworkers. She wanted to fit in, but they thought she was making them look bad. Since the negative response outweighed the neutral response, Alicia began coming in late, taking long lunches, and leaving early. Her boss noticed the change and called her aside. “I’ve noticed that lately you’ve been goofing off. I expect a full day’s work from you. If you keep coming back late from lunch or leaving early, we may decide to let you go.” Now, Alicia is caught in a no-win situation. If she works hard, her coworkers are displeased; if she does not, her boss is displeased. This is a situation where poor leadership ruined things for everyone. Alicia’s boss failed to communicate positive feedback, and his resulting neutral response turned her enthusiasm into disillusionment. However, the story could have ended this way if the boss had used proper leadership techniques: The head of the art department noticed that the new artist was putting in long hours. This impressed the boss, who told her: “Alicia, I’m glad to see you putting so much effort into learning your new job. We both know that most of the other artists don’t work as hard as you do, but I just wanted you to know that your hard work is noticed and appreciated. I’m sure you’ll have a bright future with this company.” Alicia’s coworkers still gave her a hard time about working so much, but she just tried to be pleasant without letting her work slide. She remembered the boss’s words and kept reminding herself that her career meant more to her than becoming “one of the gang.” In the second scenario, Alicia’s boss provided the positive response that she needed to overcome the negative response of her
coworkers. Simply telling her that her work was appreciated made the difference between productivity and resentment. In the process, the boss rewarded hard work and dedication.
* * * CONCLUSION This lesson explained one of the most important aspects that you, as a leader, must know in order to do your job properly — the understanding of human nature and how that understanding impacts on what you must know about yourself, your job, your subordinates, and your unit. This knowledge will give you a stronger foundation for what you must be and what you must do. Then, what you do as a leader — the application of these skills — flows from this “being” and “knowing” foundation. Invisible threads weave together many of the techniques and attributes of leadership. Throughout this lesson, we tried to illustrate how understanding needs is intertwined with a leader’s values, ethics, and character and with various leadership traits and principles. Your knowledge and proper application of human nature is essential — it is the bedrock of a your character as a leader.
* * *
Chapter 2: Knowing How to Lead Lesson 6: Development
Unit 2: Leadership Theory and Application 77
LESSON 6: DEVELOPMENT
INTRODUCTION Having an assessment and development process of some kind is a fundamental component of teaching and learning. The study of leadership is no different. Such a process lets those who teach and those who study leadership know when and to what degree they have been successful. LEADER DEVELOPMENT PROCESS The Leadership Development Program (LDP) is based on the principle that cadets be “trained to standards.” This training is a cycle of activity (train, evaluate, counsel, retrain, and reevaluate) that ends only when you achieve established standards. Evaluation is a fundamental part of training — it lets both you
and your instructors know when and to what degree they have been successful.
An indispensable feature of evalu-ation is the process of assessing growth and development, and the fundamental assess-ment tools are counseling opportunities and feedback. You will be counseled, developed, and your progress assessed throughout the remainder of your cadet experiences in JROTC. You will be involved in instruction that will provide you with progressive experiences that will challenge you mentally and physically. As you progress, and the expectation of your performance increases, the instructor staff will assess and counsel your growth and development. LEADERSHIP ASSESSMENT PROCESS With the focus of the Leadership Development Program being to assess your leadership ability and potential, its aim is to develop you to the maximum extent possible. The instructors will carefully assess you each time they place you in a leadership position. When you are not leading, they will assess you as a follower.
Leadership opportunities provide practical applications in the exercise of leading and caring. It is under these condi-tions that your growth and development are maximized. The instructor staff will docu-ment and measure your growth and develop-ment against established standards, and not in terms of cadet against peer. You will also receive timely feedback and have the oppor-tunity to write self-assessments. FEEDBACK One key to your growth in technical and leadership skills and abilities is in receiving positive feedback. Each time
assessing conceptual skills executing interpersonal skills technical skills
PURPOSE
This lesson introduces you toand explains Cadet Command’sLeadership Development Program as itapplies to JROTC and to you! The focus of this program is to assess yourleadership ability and potential; there-fore, the effort that you put into it willdirectly benefit you and will help theinstructors and others involved in yourgrowth and development to better pre-dict your success and potential to be acadet leader.
Chapter 2: Knowing How to Lead Lesson 6: Development
78 Unit 2: Leadership Theory and Application
instructors assess your performance, they will address notable strengths and weaknesses as well as specific means for making improvement. Common means of providing feedback may include written test scores, performance results, counseling sessions, and coaching. LEADERSHIP OPPORTUNITIES Leadership opportunities in the assess-ment process are intended to: ! Build in you the skill and confidence to
influence others to get things done. ! Develop your character by reinforcing the
values, attributes, and skills desired in a leader.
! Develop your ability to accomplish
missions while caring for people and building capabilities for the future.
The instructor staff will plan for a
variety of leadership opportunities to meet the quantity and variety of objectives you will encounter in JROTC. Over time, these different assignments will provide a wide variety of long- and short-term opportunities. Some typical opportunities are: ⇒ A senior position in the cadet chain of
command other than what you currently hold for a designated period of time
⇒ Leader during a ceremony, inspection, etc. ⇒ Trainer or coach during a Leadership Lab
class ⇒ Assistant instructor for a First Aid or Map
Reading class ⇒ Team leader for a Color Guard performance
⇒ Team leader for a drill event ⇒ Community service project leader ⇒ Class trainer or instructor for a specific
task or presentation GOAL OF LEADERSHIP ASSESSMENT The goal of leadership assessment is to develop competent and confident leaders. It should be a positive and useful experience. To do an assessment, the instructors will make judgments about how well you act and cause others to act in terms of certain dimensions or criteria. Therefore, they will make judgments regarding: • Your values. • The attributes and skills that you appear
to have, based on how well you reflect them in your actions and behavior. In this case, skills refers to abilities or competencies and behavior refers to performance, or the application of those skills consistent with or influenced by your character.
To cause development of an individual, instructors will counsel and coach you on how to improve your values, attributes, skills, and/or actions. A fundamental belief is that a person can learn and develop all of these qualities. The goal, then, is to develop better cadet leaders now so they will continue to use their leadership skills and abilities throughout the rest of their life. Instructors can influence this goal by the success of their leadership assessment and development efforts.
DID YOU KNOW? Good individual character is a pre-requisite for good leadership.
Chapter 2: Knowing How to Lead Lesson 6: Development
Unit 2: Leadership Theory and Application 79
LEADERSHIP DIMENSIONS In the Leadership Development Pro-gram, the foundation for assessment of your leadership potential and development are the seven leadership values and the 15 dimensions. The aspects of character and competence of leaders and their actions to achieve excellence are the basis for these leadership dimensions. Do you recall the BE, KNOW, DO attributes? Character describes what leaders must BE, competence refers to what they must KNOW, and actions are what leaders must DO.
Along these same lines, the 15 dimensions are broken down into the three categories of attributes (BE), skills (KNOW), and actions (DO). (Note: As you study these 15 dimensions, notice the similarities between them and other leadership concepts that we have been presented.) With all seven values and each dimension, there are performance indicators and standards that help the instructors to define what your minimum acceptable performance should be. Essentially, these indicators guide their judgment process and aid in the overall consistency in making assessments about your growth and development. CHARACTER AND COMPETENCE The aspects required for leaders to have character and competence are the seven leadership values. Understanding these values is only the first step. As a leader, you must not only understand them, you must believe in them, model them in your own actions, and teach others to accept and live by them. They are listed in order to form the acronym LDRSHIP. # Loyalty: Bear true faith and allegiance to
the U.S. Constitution, your unit, and friends.
# Duty: Fulfill your obligations. # Respect: Promote dignity, consideration,
fairness, and equal opportunity; treat people as they should be treated.
# Selfless Service: Place the welfare of the
nation, your community, your unit, and your subordinates before your own.
# Honor: Adhere to the code of values. # Integrity: Exhibit high personal moral
standards. # Personal Courage: Face physical and
moral adversity. THE 15 DIMENSIONS Attributes (What Leaders Must BE) Values tell us part of what the leader must BE; the other side of what a leader must BE are the leader attributes. Leader attributes influence leader actions; leader actions in turn always influence the unit. Attributes are a person’s fundamental qualities and characteristics. They are more or less permanent, yet you can develop them over time through correct and habitual practices. They are: 1. Mental: Possess will, initiative, and dis-
cipline, self-judgment, self-confidence, intelligence, and cultural awareness.
2. Physical: Maintain appropriate level of physical fitness and professional bearing.
3. Emotional: Display self-control, balance, and stability; be calm under pressure.
Chapter 2: Knowing How to Lead Lesson 6: Development
80 Unit 2: Leadership Theory and Application
Skills (What Leaders Must KNOW) Skill development is a part of self-development and is a prerequisite to action. Values and leader attributes form the foundation of character, which in turn serves as the basis of knowing (competence) and doing (leadership). The self-discipline that leads to teamwork is rooted in character. Teamwork depends on the actions of competent leaders of proven character who know their profession and act to improve their units. The best leaders constantly strive to improve and to get better at what they do. Their self-discipline focuses on learning more about their profession and continually getting the team to perform better. They build competence in themselves and in their subordinates. Leaders develop competence by developing at least three types of skills. 4. Conceptual skills — skills with ideas:
Demonstrate sound judgment, problem-solving, critical/creative thinking, and moral reasoning.
5. Interpersonal skills — people skills: Coach, teach, counsel, motivate, and develop subordinate leaders.
6. Technical skills — job skills: Possess the necessary expertise to accomplish all tasks.
Actions (What Leaders Must DO) Leaders act. They bring together every-thing they are, everything they believe, and everything they know how to do to provide purpose, direction, and motivation. Leaders work to influence people, operate to accomplish the mission, and act to improve their unit. Developing the right values, attributes, and skills is only preparation to lead. Leadership does not begin until you act. Leaders who live up to values, who display attributes, who are competent, who act at all times as they would have their subordinates act, will succeed. Leaders who talk a good game,
but cannot back their words will fail in the long run. Leader actions fall into the three categories of influencing, operating, and improving.
Influencing is the method of reaching goals while operating and improving. It consists of the following dimensions: 7. Communicating: Display good oral,
written, and listening skills. 8. Decision-making: Employ sound
judgment and logical reasoning; use resources wisely.
9. Motivating: Inspire, motivate, and guide others toward mission accomplishment.
Operating is what you do to accomplish the mission in the short-term, to get the job done on time and to standard. It consists of the following dimensions: 10. Planning and preparing: Develop
detailed executable plans that are feasible, acceptable, and executable.
11. Executing: Meet mission standards, take care of subordinates, and efficiently manage resources (time, people, and material).
12. Assessing: Efficiently and effectively evaluate plans in terms of their purpose and mission to facilitate consistent improvement.
Improving is ensuring the long-term improvement in the organization and its members. It consists of the following dimensions: 13. Developing: Invest adequate time and
effort to develop individual subordinates as leaders; this includes mentoring.
Chapter 2: Knowing How to Lead Lesson 6: Development
Unit 2: Leadership Theory and Application 81
14. Building: Spend time to improve individuals, teams, groups, and the unit; this includes fostering an ethical climate.
15. Learning: Seek self-improvement/growth; envision and adapt to change.
Since people act based on their values,
attributes, and skills, supervisors can effec-tively make assessments of those character qualities. Ultimately, however, whether an individual improves in leadership ability (and self-confidence) is up to that person. ADVANTAGES OF AN ASSESSMENT PROCESS An assessment/development process is an aid both to the organization and to the individual. Because of the similarity between test exercises and job requirements, processes like LDP are a valuable tool in making better hiring and promoting decisions. It also serves as a powerful development test since the applicants, following an in-depth feedback session, learn more about their own leadership strengths and weaknesses. Presented below are four of the reasons for the growing interest in these techniques in industry, government, and the military. ACCURACY OF THE TECHNIQUE Many companies have conducted studies to determine if an assessment/development process can more accurately and reliably predict a job applicant’s potential to do a job than that applicants actual job performance. The majority of those studies proved the accuracy of such a process in predicting job performance. Plus, employees hired and promoted by an assessment/development method are more likely to be successful at higher levels than those promoted on the basis of a supervisor’s judgment.
VALUABLE DIAGNOSTIC TOOL Applicants who go through an assessment/development process receive detailed feedback on their performance. This feedback serves as a stimulus for their career growth by outlining areas where they need improvement and identifying requirements for further training or experience. ACCEPTANCE BY LEADERS Top-level supervisors are impressed by the logical format of an assessment/ development process. The dimensions are logical in that they simulate the challenges employees may face as they move up in an organization. By using this process as a basis for promoting employees, companies and employers make fewer mistakes while saving time and money. FAIRNESS OF THE PROCESS In the late 1960s and 1970s, the federal government passed stricter laws regarding employment practices. These laws required businesses to look for fair and effective ways to make hiring and promotion decisions. As a result of successes with assessment/development techniques, more companies began using them. CONCLUSION The Leadership Development Pro-gram can help you to learn more about your own leadership strengths, weaknesses, and potential; predict your success as a cadet leader; and evaluate how well you can handle certain leadership situations and responsibilities. Your ability to further develop these skills and your leadership potential is up to you. Your growth does not end with this lesson. You must continue to self-develop these skills by applying them to

Chapter 2: Knowing How to Lead Lesson 6: Development
82 Unit 2: Leadership Theory and Application
all types of situations — in school, at work, and throughout your life. Knowing yourself and making self-assessments are important elements of being a leader. Since the instructors will be evaluating you on the seven leadership values and the 15 dimensions, do a self-assessment to determine what you believe are your strongest and weakest values and dimensions. Identify at least one strategy that you plan to take to improve upon your weak values and dimensions.
* * *
Chapter 2: Knowing How to Lead Lesson 7: Goal Setting
Unit 2: Leadership Theory and Application 83
LESSON 7: GOAL SETTING
INTRODUCTION
It has been proven that specific and difficult goals, with feedback, lead to higher performance. So often we are told to “do your best.” That can be in the accomplishment of a cross-country race, a basketball game, an English test or anything we want to accomplish. But what is “your best”? What if the cross-country coach said he wanted you to prepare yourself to increase your speed so you could take two minutes off your best time? How about striving for 85 percent or higher on the English test? When someone has been given goals that are specific and challenging and they are given continuous feedback the impact on the accomplishment is impressive.
Goals tell you what needs to be done. Difficult goals are an internal stimulus to push hard to accomplish them. And feedback tells you how you are doing. It points out the gap between what you have done and what you want to do. Additionally, self-generated feedback is a stronger motivator than external feedback. That means if you can establish a feedback process for yourself, you will be more motivated than if someone else provides the feedback.
It has also been proven that if the person involved has the opportunity to participate in the goal setting process, they will try harder.
Important to the goal setting process is that the individual or team is committed to the goal and will not lower or abandon it, they feel capable of attaining the goal, the goal has been made public and it has been self-set rather than assigned. SETTING GOALS Setting clear and specific goals offers purpose and direction for both leaders and followers. When you are in a leadership position, you and your followers should ensure that you have a set of clearly written and defined goals and priorities. Then, everyone must understand and support them. There are several key points or guidelines that you should consider when setting goals for your team. These guidelines include: • Make goals realistic and attainable. • Ensure that goals lead to improved
individual and team performance.
goal setting tangible achieving goals
PURPOSE
Goal setting is the first step inmanaging your and your team’s per-formance. Just setting clear, measur-able goals can increase performance upto 20 percent. Goals are critical tomotivation. In this lesson we willreview the guidelines for goal setting,learn how to set your own performancegoals and establish a mechanism fortracking and evaluating progress.
Chapter 2: Knowing How to Lead Lesson 7: Goal Setting
84 Unit 2: Leadership Theory and Application
• Involve team members in the goal setting process.
• Establish as a minimum goals for training,
maintenance (of appearance and personal property), discipline, morale, cohesion, and development of followers.
• Develop a program or set of policies to
achieve each goal. DEVELOPING PLANS TO ACHIEVE GOALS Once you have analyzed a situation, you can begin setting goals based on what you want the team to accomplish. For each goal you set, you need a well-defined plan that explains how you intend to achieve it. Develop plans by identifying the task or tasks that your team must accomplish, putting them in priority, and establishing all the conditions necessary to carry out each task. Remember to consider the capabilities of your team members when assigning tasks. Next, write the plan down on paper. This helps you to organize the details of how to reach the goal. By having something tangible — such as a written version of the plan — you can see exactly what you want to accomplish, when, how, and with what resources. A properly written plan can help you to remain focused on the results. It is also important to have a method to monitor and evaluate your team’s progress. This helps you and the other team members to stay on schedule and it gives you a basis to make changes to your plan, as necessary. Use a checklist or some other document that spells out exactly what the standards are that you must accomplish. Post those standards for everyone to see. Another good method of evaluation is to seek feedback from instructors or others.
Remember, as a leader, you influence your teammates by what you say, write, and most importantly, do. Every leadership situation is unique; therefore, every goal you set and every plan you develop must be flexible and adapted to each situation. You must be able to look at every situation, analyze it, and then determine exactly what actions you should take to accomplish the mission. CONCLUSION
As you have learned, goals are
critical to motivation. In this lesson we reviewed the guidelines for goal setting, learned how to set your own performance goals and established a mechanism for tracking and evaluating progress.
* * *
Chapter 3: Leading Situations Lesson 1: Performance Indicators
Unit 2: Leadership Theory and Application 85
LEADING SITUATIONS LESSON 1: PERFORMANCE INDICATORS
PERFORMANCE INDICATORS (adapted from Army Regulation FM 22-100)
This section is organized around the leadership dimensions (refer to chart at the end of this lesson). This lesson lists indicators for you to use to assess the leadership of yourself and others based on these leadership dimensions. Use it as an assessment and counseling tool, not as a source of phrases for evaluation reports. When you prepare an evaluation, make comments that apply specifically to the individual you are evaluating. Do not limit yourself to the general indicators listed here. Be specific; be precise; be objective; be fair.
VALUES LOYALTY
Leaders who demonstrate loyalty: • Bear true faith and allegiance in the correct
order to the Constitution, the Army, and the organization.
• Observe higher headquarters� priorities. • Work within the system without manipu-
lating it for personal gain. DUTY Leaders who demonstrate devotion to duty: • Fulfill obligations � professional, legal,
and moral. • Carry out mission requirements. • Meet professional standards. • Set the example. • Comply with policies and directives. • Continually pursue excellence. RESPECT Leaders who demonstrate respect: • Treat people as they should be treated. • Create a climate of fairness and equal
opportunity. • Are discreet and tactful when correcting
or questioning others. • Show concern for and make an effort to
check on the safety and well being of others.
• Are courteous. • Don�t take advantage of positions of
authority. SELFLESS SERVICE Leaders who demonstrate selfless service: • Put the welfare of the nation, the Army,
and subordinates before their own.
communication counseling development evaluation flexibility purpose support
PURPOSE
This lesson focuses on theperformance indicators for you to useto assess the leadership of yourself andothers based on the leadershipdimensions.
Chapter 3: Leading Situations Lesson 1: Performance Indicators
Unit 2: Leadership Theory and Application 86
• Sustain team morale. • Share subordinates� hardships. • Give credit for success to others and accept
responsibility for failure themselves. HONOR Leaders who demonstrate honor: • Live up to Army values. • Don�t lie, cheat, steal, or tolerate those
actions by others. INTEGRITY Leaders who demonstrate integrity: • Do what is right legally and morally. • Possess high personal moral standards. • Are honest in word and deed. • Show consistently good moral judgment
and behavior. • Put being right ahead of being popular. PERSONAL COURAGE Leaders who demonstrate personal courage: • Show physical and moral bravery. • Take responsibility for decisions and
actions. • Accept responsibility for mistakes and
shortcomings. ATTRIBUTES MENTAL ATTRIBUTES Leaders who demonstrate desirable mental attributes: • Possess and display will, self-discipline,
initiative, judgment, self-confidence, intelligence, common sense, and cultural awareness.
• Think and act quickly and logically, even when there are no clear instructions or the plan falls apart.
• Analyze situations. • Combine complex ideas to generate
feasible courses of action. • Balance resolve and flexibility. • Show a desire to succeed; do not quit in
the face of adversity. • Do their fair share. • Balance competing demands. • Embrace and use the talents of all
members to build team cohesion. PHYSICAL ATTRIBUTES Leaders who demonstrate desirable physical attributes: • Maintain an appropriate level of physical
fitness and military bearing. • Present a neat and professional appearance. • Meet established norms of personal
hygiene, grooming, and cleanliness. • Maintain Army height and weight stan-
dards (not applicable to DA civilians). • Render appropriate military and civilian
courtesies. • Demonstrate nonverbal expressions and
gestures appropriate to the situation. • Are personally energetic. • Cope with hardship. • Complete physically demanding endeavors. • Continue to function under adverse
conditions. • Lead by example in performance, fitness,
and appearance. EMOTIONAL ATTRIBUTES Leaders who demonstrate appropriate emo-tional attributes: • Show self-confidence. • Remain calm during conditions of stress,
chaos, and rapid change. • Exercise self-control, balance, and stability. • Maintain a positive attitude.
Chapter 3: Leading Situations Lesson 1: Performance Indicators
Unit 2: Leadership Theory and Application 87
• Demonstrate mature, responsible behavior that inspires trust and earns respect.
SKILLS INTERPERSONAL SKILLS Leaders who demonstrate interpersonal skills: • Coach, teach, counsel, motivate, and
empower subordinates. • Readily interact with others. • Earn trust and respect. • Actively contribute to problem solving
and decision-making. • Are sought out by peers for expertise and
counsel. CONCEPTUAL SKILLS Leaders who demonstrate conceptual skills: • Reason critically and ethically. • Think creatively. • Anticipate requirements and contingencies. • Improvise within the commander�s intent. • Use appropriate reference materials. • Pay attention to details. TECHNICAL SKILLS Leaders who demonstrate technical skills: • Possess or develop the expertise necessary
to accomplish all assigned tasks and functions.
• Know standards for task accomplishment. • Know the small unit tactics, techniques,
and procedures that support the organiza-tion�s mission.
• Know the drills that support the organi-zation�s mission.
• Prepare clear, concise operation orders. • Understand how to apply the factors of
mission, enemy, terrain and weather, troops, time available, and civil consider-ations (METT-TC) to mission analysis.
• Master basic soldier skills.
• Know how to use and maintain equipment.
• Know how and what to inspect or check. • Use technology, especially information
technology, to enhance communication. TACTICAL SKILLS Leaders who demonstrate tactical skills: • Know how to apply war fighting doctrine
within the commander�s intent. • Apply their professional knowledge,
judgment, and war fighting skill at the appropriate leadership level.
• Combine and apply skill with people, ideas, and things to accomplish short-term missions.
• Apply skill with people, ideas, and things to train for, plan, prepare, execute and assess offensive, defensive, stability, and support actions.
ACTIONS INFLUENCING Leaders who influence: • Use appropriate methods to reach goals
while operating and improving. • Motivate subordinates to accomplish tasks
and missions. • Set the example by demonstrating enthusi-
asm for � and, if necessary, methods of � accomplishing assigned tasks.
• Make themselves available to assist peers and subordinates.
• Share information with subordinates. • Encourage subordinates and peers to
express candid opinions. • Actively listen to feedback and act
appropriately based on it. • Mediate peer conflicts and disagreements. • Tactfully confront and correct others
when necessary.
Chapter 3: Leading Situations Lesson 1: Performance Indicators
Unit 2: Leadership Theory and Application 88
• Earn respect and obtain willing coop-eration of peers, subordinates, and superiors.
• Challenge others to match their example. • Take care of subordinates and their fami-
lies, providing for their health, welfare, morale, and training.
• Are persuasive in peer discussions and prudently rally peer pressure against peers when required.
• Provide a team vision for the future. • Shape the organizational climate by set-
ting, sustaining, and ensuring a values-based environment.
COMMUNICATING Leaders who communicate effectively: • Display good oral, written, and listening
skills. • Persuade others. • Express thoughts and ideas clearly to
individuals and groups. ORAL COMMUNICATION Leaders who effectively communicate orally: • Speak clearly and concisely. • Speak enthusiastically and maintain lis-
teners� interest and involvement. • Make appropriate eye contact when
speaking. • Use gestures that are appropriate but not
distracting. • Convey ideas, feelings, sincerity, and
conviction. • Express well-thought-out and well-
organized ideas. • Use grammatically and doctrinally correct
terms and phrases. • Use appropriate visual aids. • Act to determine, recognize and resolve
misunderstandings. • Listen and watch attentively; make
appropriate notes; convey the essence of what was said or done to others.
• React appropriately to verbal and non-verbal feedback.
• Keep conversations on track. WRITTEN COMMUNICATION Leaders who effectively communicate in writing: • Are understood in a single rapid reading
by the intended audience. • Use correct grammar, spelling, and
punctuation. • Have legible handwriting. • Put the �bottom line up front.� • Use the active voice. • Use an appropriate format, a clear organi-
zation, and a reasonably simple style. • Use only essential acronyms and spell out
those used. • Stay on topic. • Correctly use facts and data. (DA Pam 600-67 discusses techniques for writing effectively.) DECISION MAKING Leaders who make effective, timely decisions: • Employ sound judgment and logical
reasoning. • Gather and analyze relevant information
about changing situations to recognize and define emerging problems.
• Make logical assumptions in the absence of acts.
• Uncover critical issues to use as a guide in both making decisions and taking advan-tage of opportunities.
• Keep informed about developments and policy changes inside and outside the organization.
• Recognize and generate innovative solutions.
• Develop alternative courses of action and choose the best course of action
Chapter 3: Leading Situations Lesson 1: Performance Indicators
Unit 2: Leadership Theory and Application 89
based on analysis of their relative costs and benefits.
• Anticipate needs for action. • Relate and compare information from
different sources to identify possible cause-and-effect relationships.
• Consider the impact and implications of decisions on others and on situations.
• Involve others in decisions and keep them informed of consequences that affect them.
• Take charge when in charge. • Define intent. • Consider contingencies and their
consequences. • Remain decisive after discovering a
mistake. • Act in the absence of guidance. • Improvise within commander�s intent;
handle a fluid environment. MOTIVATING Leaders who effectively motivate: • Inspire, encourage, and guide others
toward mission accomplishment. • Don�t show discouragement when facing
setbacks. • Attempt to satisfy subordinates� needs. • Give subordinates the reason for tasks. • Provide accurate, timely, and (where
appropriate) positive feedback. • Actively listen for feedback from
subordinates. • Use feedback to modify duties, tasks,
requirements, and goals when appropriate. • Recognize individual and team
accomplishments and reward them appropriately.
• Recognize poor performance and address it appropriately.
• Justly apply disciplinary measures. • Keep subordinates informed. • Clearly articulate expectations.
• Consider duty positions, capabilities, and developmental needs when assigning tasks.
• Provide early warning to subordinate leaders of tasks they will be responsible for.
• Define requirements by issuing clear and concise orders or guidance.
• Allocate as much time as possible for task completion.
• Accept responsibility for organizational performance.
• Credit subordinates for good performance. • Take responsibility for and correct poor
performance. OPERATING Leaders who effectively operate: • Accomplish short-term missions. • Demonstrate tactical and technical com-
petency appropriate to their rank and position.
• Complete individual and unit tasks to standard, on time, and within the com-mander�s intent.
PLANNING AND PREPARING Leaders who effectively plan: • Develop feasible and acceptable plans for
themselves and others that accomplish the mission while expending minimum resources and posturing the organization for future missions.
• Use forward planning to ensure each course of action achieves the desired outcome.
• Use reverse planning to ensure that all tasks can be executed in the time available and that tasks depending on other tasks are executed in the correct sequence.
• Determine specified and implied tasks and restate the higher headquarters� mission in terms appropriate to the organization.
Chapter 3: Leading Situations Lesson 1: Performance Indicators
Unit 2: Leadership Theory and Application 90
• Incorporate adequate controls such as time phasing; ensure others understand when actions should begin or end.
• Adhere to the �1/3 � 2/3 Rule�; give subordinates time to plan.
• Allocate time to prepare and conduct rehearsals.
• Ensure all courses of action accomplish the mission within the commander�s intent.
• Allocate available resources to competing demands by setting task priorities based on the relative importance of each task.
• Address likely contingencies. • Remain flexible • Consider SOPs, the factors of METT-TC,
and the military aspects of terrain (OCOKA).
• Coordinate plans with higher, lower, adja-cent, and affected organizations.
• Personally arrive on time and meet deadlines; require subordinates and their organizations to accomplish tasks on time.
• Delegate all tasks except those they are required to do personally.
• Schedule activities so the organization meets all commitments in critical perfor-mance areas.
• Recognize and resolve scheduling conflicts. • Notify peers and subordinates, as far in
advance as possible when their support is required.
• Use some form of a personal planning calendar to organize requirements.
EXECUTING Leaders who effectively execute: • Use technical and tactical skills to meet
mission standards, take care of people, and accomplish the mission with available resources.
• Perform individual and collective tasks to standard.
• Execute plans, adjusting when necessary, to accomplish the mission.
• Encourage initiative. • Keep higher and lower headquarters,
superiors, and subordinates informed. • Keep track of people and equipment. • Make necessary on-the-spot corrections. • Adapt to and handle fluid environments. • Fight through obstacles, difficulties, and
hardships to accomplish the mission. • Keep track of task assignments and sus-
pense�s; adjust assignments, if necessary; follow up.
ASSESSING Leaders who effectively assess: • Use assessment techniques and evaluation
tools (especially AARs) to identify les-sons learned and facilitate consistent improvement.
• Establish and employ procedures for monitoring, coordinating, and regulating subordinates� actions and activities.
• Conduct initial assessments when beginning a new task or assuming a new position.
• Conduct IPRs. • Analyze activities to determine how
desired end states are achieved or affected.
• Seek sustainment in areas when the organization meets the standard.
• Observe and assess actions in progress without over supervising.
• Judge results based on standards. • Sort out important actual and potential
problems. • Conduct and facilitate AARs; identify
lessons. • Determine causes, effects, and contribut-
ing factors for problems. • Analyze activities to determine how
desired end states can be achieved ethically.
Chapter 3: Leading Situations Lesson 1: Performance Indicators
Unit 2: Leadership Theory and Application 91
IMPROVING Leaders who effectively improve the organization: • Sustain skills and actions that benefit
themselves and each of their people for the future.
• Sustain and renew the organization for the future by managing change and exploiting individual and institutional learning capabilities.
• Create and sustain an environment where all leaders, subordinates, and organiza-tions can reach their full potential.
DEVELOPING Leaders who effectively develop: • Strive to improve themselves, subordin-
ates, and the organization. • Mentor by investing adequate time and
effort in counseling, coaching, and teaching their individual subordinates and sub-ordinate leaders.
• Set the example by displaying high stand-ards of duty performance, personal appearance, military and professional bearing, and ethics.
• Create a climate that expects good performance, recognizes superior per-formance, and doesn�t accept poor performance.
• Design tasks to provide practice in areas of subordinate leaders� weaknesses.
• Clearly articulate tasks and expectations and set realistic standards.
• Guide subordinate leaders in thinking through problems for themselves.
• Anticipate mistakes and freely offer assistance without being overbearing.
• Observe, assess, counsel, coach, and eval-uate subordinate leaders.
• Motivate subordinates to develop themselves.
• Arrange training opportunities that help subordinates achieve insight, self-aware-ness, self-esteem, and effectiveness.
• Balance the organization�s tasks, goals, and objectives with subordinates� personal and professional needs.
• Develop subordinate leaders who demon-strate respect for natural resources and the environment.
• Act to expand and enhance subordinates� competence and self-confidence.
• Encourage initiative. • Create and contribute to a positive orga-
nizational climate. • Build on successes. • Improve weaknesses. BUILDING Leaders who effectively build: • Spend time and resources improving the
organization. • Foster a healthy ethical climate. • Act to improve the organization�s collec-
tive performance. • Comply with and support organizational
goals. • Encourage people to work effectively with
each other. • Promote teamwork and team achievement. • Are examples of team players. • Offer suggestions, but properly execute
decisions of the chain of command and NCO support channel � even unpopular ones � as if they were their own.
• Accept and act on assigned tasks. • Volunteer in useful ways. • Remain positive when the situation
becomes confused or changes. • Use the chain of command and NCO sup-
port channel to solve problems. • Support equal opportunity. • Prevent sexual harassment. • Participate in organizational activities and
functions. • Participate in team tasks and missions
without being requested to do so.
Chapter 3: Leading Situations Lesson 1: Performance Indicators
Unit 2: Leadership Theory and Application 92
• Establish an organizational climate that demonstrates respect for the environment and stewards natural resources.
LEARNING Leaders who effectively learn: • Seek self-improvement in weak areas. • Encourage organizational growth. • Envision, adapt, and lead change. • Act to expand and enhance personal and
organizational knowledge and capabilities. • Apply lessons learned. • Ask incisive questions. • Envision ways to improve. • Design ways to practice. • Endeavor to broaden their understanding. • Transform experience into knowledge and
use it to improve future performance. • Make knowledge accessible to the entire
organization. • Exhibit reasonable self-awareness. • Take time off to grow and recreate. • Embrace and manage change; adopt a
future orientation. • Use experience to improve themselves
and the organization DEVELOPMENTAL COUNSELING
Leadership development is one of the most important responsibilities. Developing your leadership abilities should be one of your highest priorities.
Leadership development reviews are a means to focus leadership growth. Think of them as AARs with a focus of making leaders more effective. These important reviews are not necessarily limited to internal counseling sessions; leadership feedback mechanisms also apply in operational settings such as the CTCs.
Just as training includes AARs and training strategies to fix shortcomings,
leadership development includes performance reviews. These reviews result in agreements between leader and subordinate on a devel-opment strategy or plan of action that builds on the subordinate�s strengths and establishes goals to improve on weaknesses. Leaders conduct performance reviews and create plans of action during developmental counseling.
Leadership development reviews are a component of the broader concept of develop-mental counseling. Developmental counseling is subordinate-centered communication that produces a plan outlining actions that subordinates must take to achieve individual and organizational goals. During develop-mental counseling, subordinates are not merely passive listeners; they�re actively involved in the process. The Developmental Counseling Form (DA Form 4856-E, which is discussed at the end of this section) provides a useful framework to prepare for almost any type of counseling. Use it to help you mentally organize issues and isolate impor-tant, relevant items to cover during counseling sessions. Developmental counseling is a shared effort. As a leader, you assist your sub-ordinates in identifying strengths and weaknesses and creating plans of action. Then you support them throughout the plan implementation and assessment. However, to achieve success, your subordinates must be forthright in their commitment to improve and candid in their own assessment and goal setting. THE LEADER’S RESPONSIBILITIES
Organizational readiness and mission accomplishment depend on every member�s ability to perform to established standards. Supervisors must mentor their subordinates through teaching, coaching, and counseling. Leaders coach subordinates the same way sports coaches improve their teams: by
Chapter 3: Leading Situations Lesson 1: Performance Indicators
Unit 2: Leadership Theory and Application 93
identifying weaknesses, setting goals, developing and implementing plans of action, and providing oversight and motivation throughout the process. To be effective coaches, leaders must thoroughly understand the strengths, weaknesses, and professional goals of their subordinates.
Army leaders evaluate DA civilians using procedures prescribed under the Total Army Performance Evaluation System (TAPES). Although TAPES doesn�t address developmental counseling, you can use DA Form 4856-E to counsel DA civilians concerning professional growth and career goals. DA Form 4856-E is not appropriate for documenting counseling concerning DA civilian misconduct or poor performance. The servicing civilian personnel office can provide guidance for such situations.
Soldiers and DA civilians often perceive counseling as an adverse action. Effective leaders Army Leadership who counsel properly can change that perception. Army leaders conduct counseling to help subordinates become better members of the team, maintain or improve performance, and prepare for the future. Just as no easy answers exist for exactly what to do in all leadership situations, no easy answers exist for exactly what to do in all counseling situations. However, to conduct effective counseling, you should develop a counseling style with the characteristics as follows: Purpose: Clearly define the purpose of the counseling. Flexibility: Fit the counseling style to the character of each subordinate and to the relation-ship desired. Respect: View subordinates as unique, complex individuals, each with a distinct set of values, beliefs, and attitudes. Communication: Establish open, two-way communication with subordinates using spoken
language, nonverbal actions, gestures, and body language. Effective counselors listen more than they speak. Support: Encourage subordinates through actions while guiding them through their problems. THE LEADER AS A COUNSELOR
Army leaders must demonstrate cer-tain qualities to be effective counselors. These qualities include respect for subordinates, self-awareness and cultural awareness, empathy, and credibility. RESPECT FOR SUBORDINATES
As an Army leader, you show respect for subordinates when you allow them to take responsibility for their own ideas and actions. Respecting subordinates helps create mutual respect in the leader-subordinate relationship. Mutual respect improves the chances of changing (or maintaining) behavior and achieving goals. SELF-AWARENESS AND CULTURAL AWARENESS
As an Army leader, you must be fully aware of your own values, needs, and biases prior to counseling subordinates. Self-aware leaders are less likely to project their biases onto subordinates. Also, aware leaders are more likely to act consistently with their own values and actions. Cultural awareness is a mental attribute. As an Army leader, you need to be aware of the similarities and differences between individuals of different cultural backgrounds and how these factors may influence values, perspectives, and actions. Don�t let unfamiliarity with cultural back-grounds hinder you in addressing cultural issues, especially if they generate concerns within the organization or hinder team-
Chapter 3: Leading Situations Lesson 1: Performance Indicators
Unit 2: Leadership Theory and Application 94
building. Cultural awareness enhances your ability to display empathy. EMPATHY
Empathy is the action of being understanding of and sensitive to the feelings, thoughts, and experiences of another person to the point that you can almost feel or experience them yourself. Leaders with empathy can put themselves in their subordinate�s shoes; they can see a situation from the other person�s perspective.
By understanding the subordinate�s position, you can help a subordinate develop a plan of action that fits the subordinate�s personality and needs, one that works for the subordinate. If you don�t fully comprehend a situation from your subordinate�s point of view, you have less credibility and influence and your subordinate is less likely to commit to the agreed upon plan of action. CREDIBILITY
Leaders achieve credibility by being honest and consistent in their statements and actions. To be credible, use a straightforward style with your subordinates. Behave in a manner that your subordinates respect and trust. You can earn credibility by repeatedly demonstrating your willingness to assist a subordinate and being consistent in what you say and do. If you lack credibility with your subordinates you�ll find it difficult to influence them. LEADER COUNSELING SKILLS
One challenging aspect of counseling is selecting the proper approach to a specific situation. To counsel effectively, the tech-nique you use must fit the situation, your capabilities, and your subordinate�s expecta-tions. In some cases, you may only need to give information or listen. A subordinate�s
improvement may call for just a brief word of praise. Other situations may require structured counseling followed by definite actions.
All leaders should seek to develop and improve their own counseling abilities. You can improve your counseling techniques by studying human behavior, learning the kinds of problems that affect your subordinates, and developing your interpersonal skills. The techniques needed to provide effective counseling will vary from person to person and session to session. However, general skills that you�ll need in almost every situation include active listening, responding, and questioning. ACTIVE LISTENING
During counseling, you must actively listen to your subordinate. When you�re actively listening, you communicate verbally and non-verbally that you�ve received the subordinate�s message. To fully understand a subordinate�s message, you must listen to the words and observe the subordinate�s manners. Elements of active listening you should use include: • Eye contact. Maintaining eye contact
without staring helps show sincere interest. Occasional breaks of contact are normal and acceptable. Subordinates may perceive excessive breaks of eye contact, paper shuffling, and clock-watching as a lack of interest or concern. These are guidelines only. Based on cultural background, participants in a particular counseling session may have different ideas about what proper eye contact is.
• Body posture. Being relaxed and
comfortable will help put the subordinate at ease. However, a too-relaxed position or slouching may be interpreted as a lack of interest.
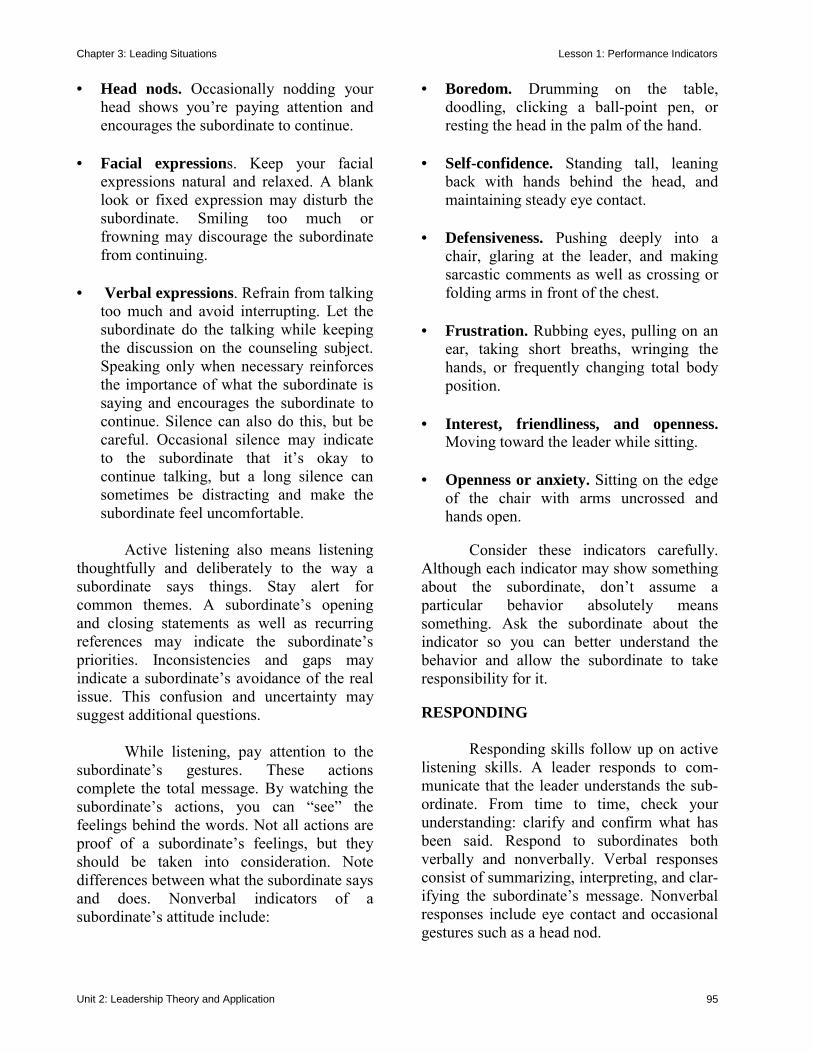
Chapter 3: Leading Situations Lesson 1: Performance Indicators
Unit 2: Leadership Theory and Application 95
• Head nods. Occasionally nodding your head shows you�re paying attention and encourages the subordinate to continue.
• Facial expressions. Keep your facial
expressions natural and relaxed. A blank look or fixed expression may disturb the subordinate. Smiling too much or frowning may discourage the subordinate from continuing.
• Verbal expressions. Refrain from talking
too much and avoid interrupting. Let the subordinate do the talking while keeping the discussion on the counseling subject. Speaking only when necessary reinforces the importance of what the subordinate is saying and encourages the subordinate to continue. Silence can also do this, but be careful. Occasional silence may indicate to the subordinate that it�s okay to continue talking, but a long silence can sometimes be distracting and make the subordinate feel uncomfortable.
Active listening also means listening
thoughtfully and deliberately to the way a subordinate says things. Stay alert for common themes. A subordinate�s opening and closing statements as well as recurring references may indicate the subordinate�s priorities. Inconsistencies and gaps may indicate a subordinate�s avoidance of the real issue. This confusion and uncertainty may suggest additional questions.
While listening, pay attention to the subordinate�s gestures. These actions complete the total message. By watching the subordinate�s actions, you can �see� the feelings behind the words. Not all actions are proof of a subordinate�s feelings, but they should be taken into consideration. Note differences between what the subordinate says and does. Nonverbal indicators of a subordinate�s attitude include:
• Boredom. Drumming on the table, doodling, clicking a ball-point pen, or resting the head in the palm of the hand.
• Self-confidence. Standing tall, leaning
back with hands behind the head, and maintaining steady eye contact.
• Defensiveness. Pushing deeply into a
chair, glaring at the leader, and making sarcastic comments as well as crossing or folding arms in front of the chest.
• Frustration. Rubbing eyes, pulling on an
ear, taking short breaths, wringing the hands, or frequently changing total body position.
• Interest, friendliness, and openness.
Moving toward the leader while sitting. • Openness or anxiety. Sitting on the edge
of the chair with arms uncrossed and hands open.
Consider these indicators carefully.
Although each indicator may show something about the subordinate, don�t assume a particular behavior absolutely means something. Ask the subordinate about the indicator so you can better understand the behavior and allow the subordinate to take responsibility for it. RESPONDING
Responding skills follow up on active listening skills. A leader responds to com-municate that the leader understands the sub-ordinate. From time to time, check your understanding: clarify and confirm what has been said. Respond to subordinates both verbally and nonverbally. Verbal responses consist of summarizing, interpreting, and clar-ifying the subordinate�s message. Nonverbal responses include eye contact and occasional gestures such as a head nod.
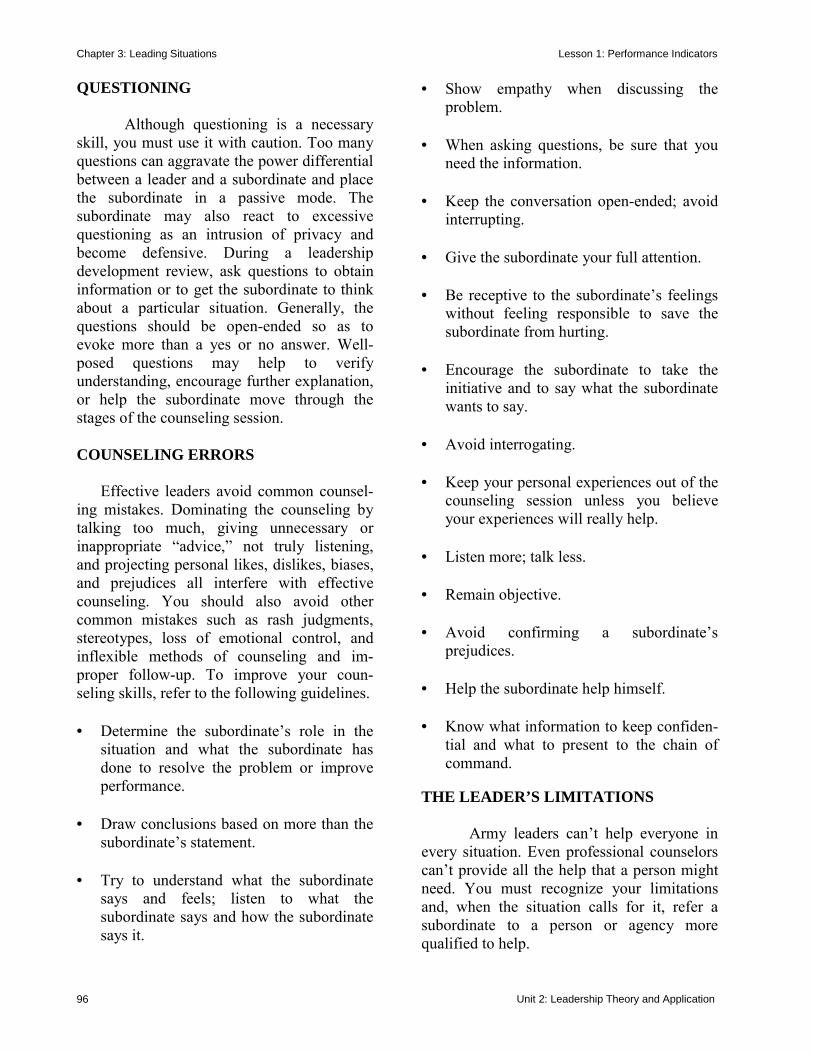
Chapter 3: Leading Situations Lesson 1: Performance Indicators
Unit 2: Leadership Theory and Application 96
QUESTIONING
Although questioning is a necessary skill, you must use it with caution. Too many questions can aggravate the power differential between a leader and a subordinate and place the subordinate in a passive mode. The subordinate may also react to excessive questioning as an intrusion of privacy and become defensive. During a leadership development review, ask questions to obtain information or to get the subordinate to think about a particular situation. Generally, the questions should be open-ended so as to evoke more than a yes or no answer. Well-posed questions may help to verify understanding, encourage further explanation, or help the subordinate move through the stages of the counseling session. COUNSELING ERRORS
Effective leaders avoid common counsel-ing mistakes. Dominating the counseling by talking too much, giving unnecessary or inappropriate �advice,� not truly listening, and projecting personal likes, dislikes, biases, and prejudices all interfere with effective counseling. You should also avoid other common mistakes such as rash judgments, stereotypes, loss of emotional control, and inflexible methods of counseling and im-proper follow-up. To improve your coun-seling skills, refer to the following guidelines. • Determine the subordinate�s role in the
situation and what the subordinate has done to resolve the problem or improve performance.
• Draw conclusions based on more than the
subordinate�s statement. • Try to understand what the subordinate
says and feels; listen to what the subordinate says and how the subordinate says it.
• Show empathy when discussing the problem.
• When asking questions, be sure that you
need the information. • Keep the conversation open-ended; avoid
interrupting. • Give the subordinate your full attention. • Be receptive to the subordinate�s feelings
without feeling responsible to save the subordinate from hurting.
• Encourage the subordinate to take the
initiative and to say what the subordinate wants to say.
• Avoid interrogating. • Keep your personal experiences out of the
counseling session unless you believe your experiences will really help.
• Listen more; talk less. • Remain objective. • Avoid confirming a subordinate�s
prejudices. • Help the subordinate help himself. • Know what information to keep confiden-
tial and what to present to the chain of command.
THE LEADER’S LIMITATIONS
Army leaders can�t help everyone in every situation. Even professional counselors can�t provide all the help that a person might need. You must recognize your limitations and, when the situation calls for it, refer a subordinate to a person or agency more qualified to help.
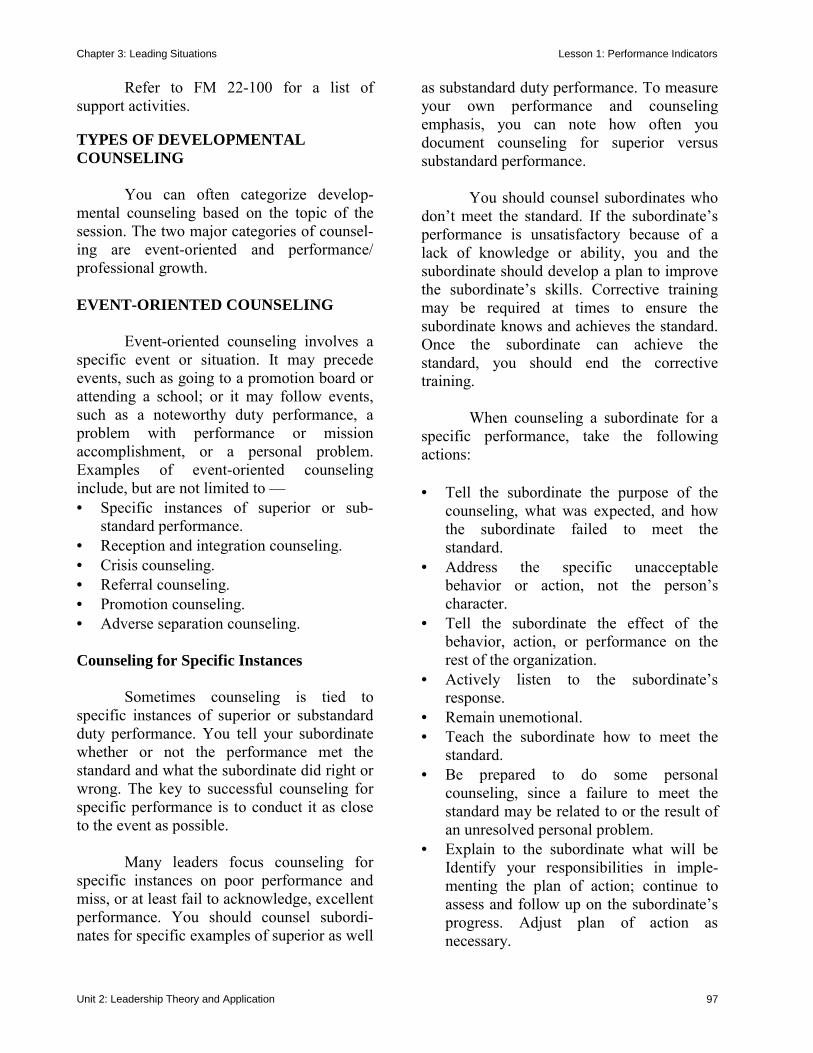
Chapter 3: Leading Situations Lesson 1: Performance Indicators
Unit 2: Leadership Theory and Application 97
Refer to FM 22-100 for a list of support activities. TYPES OF DEVELOPMENTAL COUNSELING
You can often categorize develop-mental counseling based on the topic of the session. The two major categories of counsel-ing are event-oriented and performance/ professional growth. EVENT-ORIENTED COUNSELING
Event-oriented counseling involves a specific event or situation. It may precede events, such as going to a promotion board or attending a school; or it may follow events, such as a noteworthy duty performance, a problem with performance or mission accomplishment, or a personal problem. Examples of event-oriented counseling include, but are not limited to � • Specific instances of superior or sub-
standard performance. • Reception and integration counseling. • Crisis counseling. • Referral counseling. • Promotion counseling. • Adverse separation counseling. Counseling for Specific Instances
Sometimes counseling is tied to specific instances of superior or substandard duty performance. You tell your subordinate whether or not the performance met the standard and what the subordinate did right or wrong. The key to successful counseling for specific performance is to conduct it as close to the event as possible. Many leaders focus counseling for specific instances on poor performance and miss, or at least fail to acknowledge, excellent performance. You should counsel subordi-nates for specific examples of superior as well
as substandard duty performance. To measure your own performance and counseling emphasis, you can note how often you document counseling for superior versus substandard performance.
You should counsel subordinates who don�t meet the standard. If the subordinate�s performance is unsatisfactory because of a lack of knowledge or ability, you and the subordinate should develop a plan to improve the subordinate�s skills. Corrective training may be required at times to ensure the subordinate knows and achieves the standard. Once the subordinate can achieve the standard, you should end the corrective training.
When counseling a subordinate for a specific performance, take the following actions: • Tell the subordinate the purpose of the
counseling, what was expected, and how the subordinate failed to meet the standard.
• Address the specific unacceptable behavior or action, not the person�s character.
• Tell the subordinate the effect of the behavior, action, or performance on the rest of the organization.
• Actively listen to the subordinate�s response.
• Remain unemotional. • Teach the subordinate how to meet the
standard. • Be prepared to do some personal
counseling, since a failure to meet the standard may be related to or the result of an unresolved personal problem.
• Explain to the subordinate what will be Identify your responsibilities in imple-menting the plan of action; continue to assess and follow up on the subordinate�s progress. Adjust plan of action as necessary.
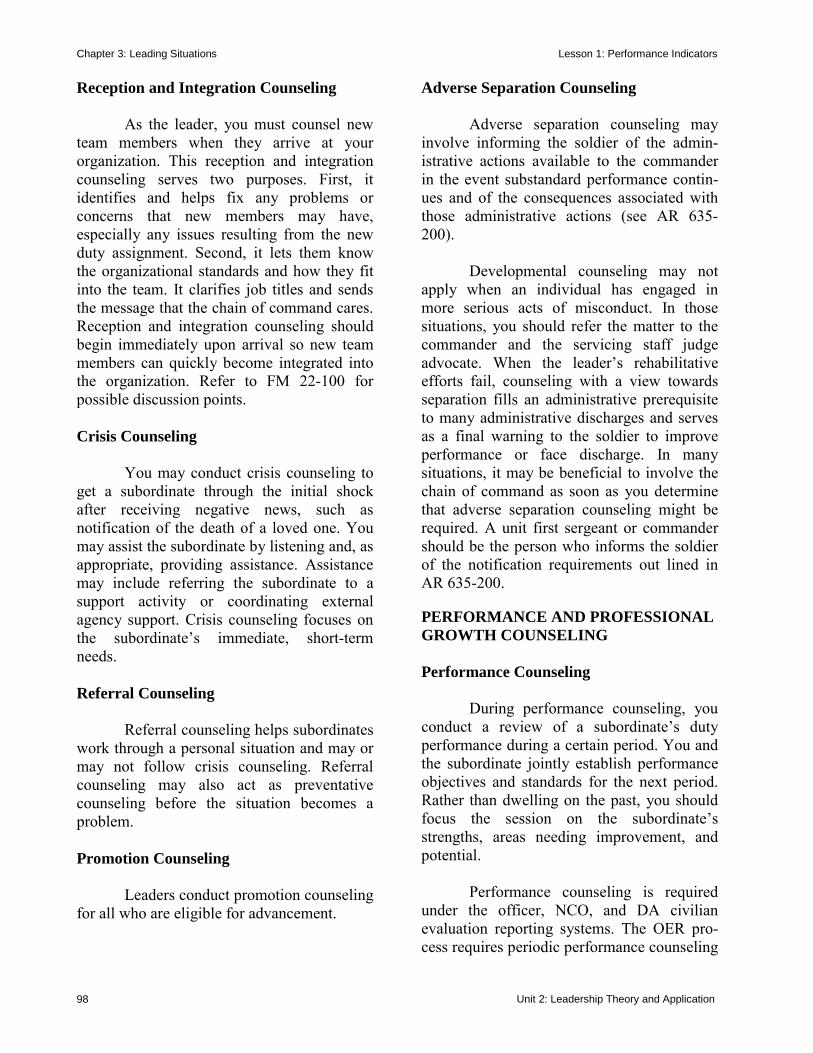
Chapter 3: Leading Situations Lesson 1: Performance Indicators
Unit 2: Leadership Theory and Application 98
Reception and Integration Counseling As the leader, you must counsel new team members when they arrive at your organization. This reception and integration counseling serves two purposes. First, it identifies and helps fix any problems or concerns that new members may have, especially any issues resulting from the new duty assignment. Second, it lets them know the organizational standards and how they fit into the team. It clarifies job titles and sends the message that the chain of command cares. Reception and integration counseling should begin immediately upon arrival so new team members can quickly become integrated into the organization. Refer to FM 22-100 for possible discussion points. Crisis Counseling
You may conduct crisis counseling to get a subordinate through the initial shock after receiving negative news, such as notification of the death of a loved one. You may assist the subordinate by listening and, as appropriate, providing assistance. Assistance may include referring the subordinate to a support activity or coordinating external agency support. Crisis counseling focuses on the subordinate�s immediate, short-term needs. Referral Counseling
Referral counseling helps subordinates work through a personal situation and may or may not follow crisis counseling. Referral counseling may also act as preventative counseling before the situation becomes a problem. Promotion Counseling
Leaders conduct promotion counseling
for all who are eligible for advancement.
Adverse Separation Counseling Adverse separation counseling may involve informing the soldier of the admin-istrative actions available to the commander in the event substandard performance contin-ues and of the consequences associated with those administrative actions (see AR 635-200). Developmental counseling may not apply when an individual has engaged in more serious acts of misconduct. In those situations, you should refer the matter to the commander and the servicing staff judge advocate. When the leader�s rehabilitative efforts fail, counseling with a view towards separation fills an administrative prerequisite to many administrative discharges and serves as a final warning to the soldier to improve performance or face discharge. In many situations, it may be beneficial to involve the chain of command as soon as you determine that adverse separation counseling might be required. A unit first sergeant or commander should be the person who informs the soldier of the notification requirements out lined in AR 635-200. PERFORMANCE AND PROFESSIONAL GROWTH COUNSELING Performance Counseling
During performance counseling, you conduct a review of a subordinate�s duty performance during a certain period. You and the subordinate jointly establish performance objectives and standards for the next period. Rather than dwelling on the past, you should focus the session on the subordinate�s strengths, areas needing improvement, and potential.
Performance counseling is required under the officer, NCO, and DA civilian evaluation reporting systems. The OER pro-cess requires periodic performance counseling

Chapter 3: Leading Situations Lesson 1: Performance Indicators
Unit 2: Leadership Theory and Application 99
as part of the OER Support Form require-ments. Mandatory, face-to-face performance counseling between the rater and the rated NCO is required under the NCOERS. TAPES includes a combination of both of these requirements.
Counseling at the beginning of and during the evaluation period facilitates a subordinate�s involvement in the evaluation process. Performance counseling communi-cates standards and is an opportunity for leaders to establish and clarify the expected values, attributes, skills, and actions. Part IVb (Leader Attributes/Skills/Actions) of the OER Support Form (DA Form 67-9-1) serves as an excellent tool for leaders doing performance counseling. For lieutenants and warrant officers one, the major performance objectives on the OER Support Form are used as the basis for determining the develop-mental tasks on the Junior Officer Devel-opmental Support Form (DA Form 67-9-1a). Quarterly face-to-face performance and devel-opmental counseling is required for these junior officers as outlined in AR 623-105. As an Army leader, you must ensure you�ve tied your expectations to performance objectives and appropriate standards. You must establish standards that your subordi-nates can work towards and must teach them how to achieve the standards if they are to develop. Professional Growth Counseling
Professional growth counseling includes planning for the accomplishment of individual and professional goals. You con-duct this counseling to assist subordinates in achieving organizational and individual goals. During the counseling, you and your subor-dinate conduct a review to identify and discuss the subordinate�s strengths and weaknesses and create a plan of action to build upon strengths and overcome
weaknesses. This counseling isn�t normally event-driven.
As part of professional growth counseling, you may choose to discuss and develop a �pathway to success� with the subordinate. This future-oriented counseling establishes short- and long-term goals and objectives. The discussion may include opportunities for civilian or military school-ing, future duty assignments, special pro-grams, and reenlistment options. Every person�s needs are different, and leaders must apply specific courses of action tailored to each individual.
Career field counseling is required for considered for promotion to major. Raters and senior raters, in conjunction with the rated officer, need to determine where the officer�s skills best fit the needs of the Army. During career field counseling, consideration must be given to the rated officer�s preference and his abilities (both performance and academic). The rater and senior rater should discuss career field designation with the officer prior to making a recommendation on the rated officer�s OER.
While these categories can help you organize and focus counseling sessions, they should not be viewed as separate, distinct, or exhaustive. For example, a counseling session that focuses on resolving a problem may also address improving duty performance. A session focused on performance may also include a discussion on opportunities for professional the counseling session, leaders should follow the same basic format to prepare for and conduct it. APPROACHES TO COUNSELING
An effective leader approaches each sub-ordinate as an individual. Different people and different situations require different counseling approaches. Three
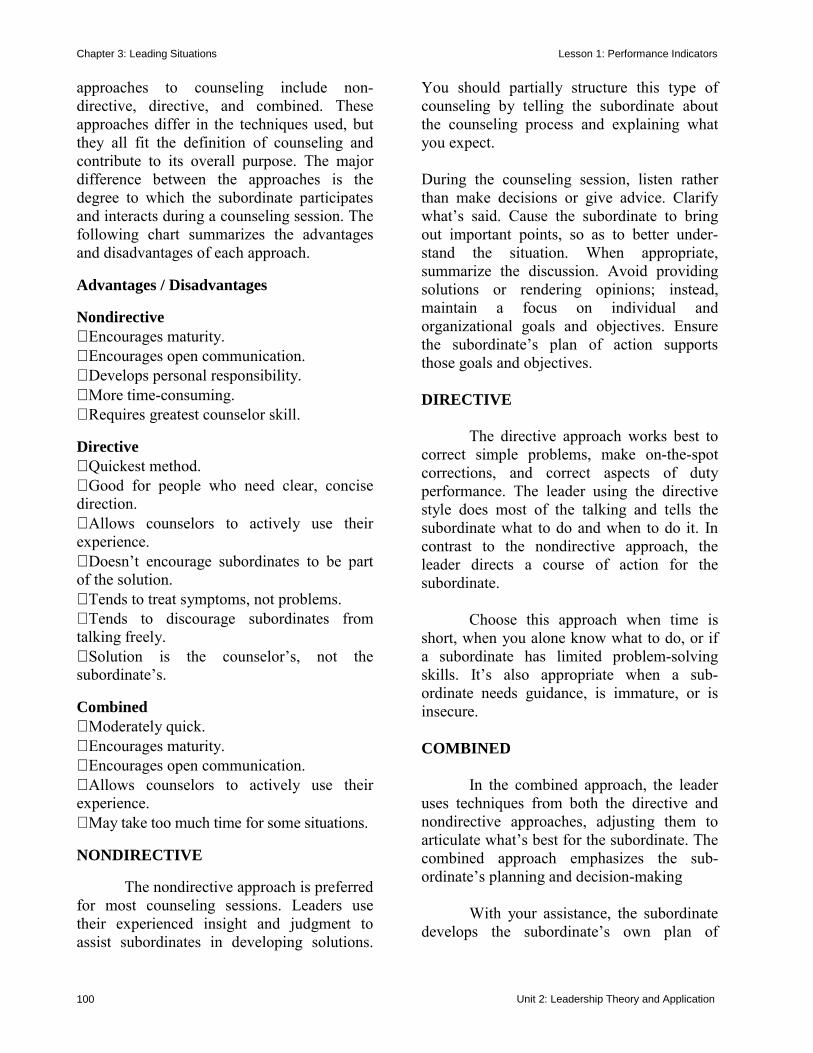
Chapter 3: Leading Situations Lesson 1: Performance Indicators
Unit 2: Leadership Theory and Application 100
approaches to counseling include non-directive, directive, and combined. These approaches differ in the techniques used, but they all fit the definition of counseling and contribute to its overall purpose. The major difference between the approaches is the degree to which the subordinate participates and interacts during a counseling session. The following chart summarizes the advantages and disadvantages of each approach. Advantages / Disadvantages Nondirective ⋅ Encourages maturity. ⋅ Encourages open communication. ⋅ Develops personal responsibility. ⋅ More time-consuming. ⋅ Requires greatest counselor skill. Directive ⋅ Quickest method. ⋅ Good for people who need clear, concise direction. ⋅ Allows counselors to actively use their experience. ⋅ Doesn�t encourage subordinates to be part of the solution. ⋅ Tends to treat symptoms, not problems. ⋅ Tends to discourage subordinates from talking freely. ⋅ Solution is the counselor�s, not the subordinate�s. Combined ⋅ Moderately quick. ⋅ Encourages maturity. ⋅ Encourages open communication. ⋅ Allows counselors to actively use their experience. ⋅ May take too much time for some situations. NONDIRECTIVE
The nondirective approach is preferred for most counseling sessions. Leaders use their experienced insight and judgment to assist subordinates in developing solutions.
You should partially structure this type of counseling by telling the subordinate about the counseling process and explaining what you expect. During the counseling session, listen rather than make decisions or give advice. Clarify what�s said. Cause the subordinate to bring out important points, so as to better under-stand the situation. When appropriate, summarize the discussion. Avoid providing solutions or rendering opinions; instead, maintain a focus on individual and organizational goals and objectives. Ensure the subordinate�s plan of action supports those goals and objectives. DIRECTIVE
The directive approach works best to correct simple problems, make on-the-spot corrections, and correct aspects of duty performance. The leader using the directive style does most of the talking and tells the subordinate what to do and when to do it. In contrast to the nondirective approach, the leader directs a course of action for the subordinate.
Choose this approach when time is
short, when you alone know what to do, or if a subordinate has limited problem-solving skills. It�s also appropriate when a sub-ordinate needs guidance, is immature, or is insecure. COMBINED
In the combined approach, the leader uses techniques from both the directive and nondirective approaches, adjusting them to articulate what�s best for the subordinate. The combined approach emphasizes the sub-ordinate�s planning and decision-making
With your assistance, the subordinate develops the subordinate�s own plan of
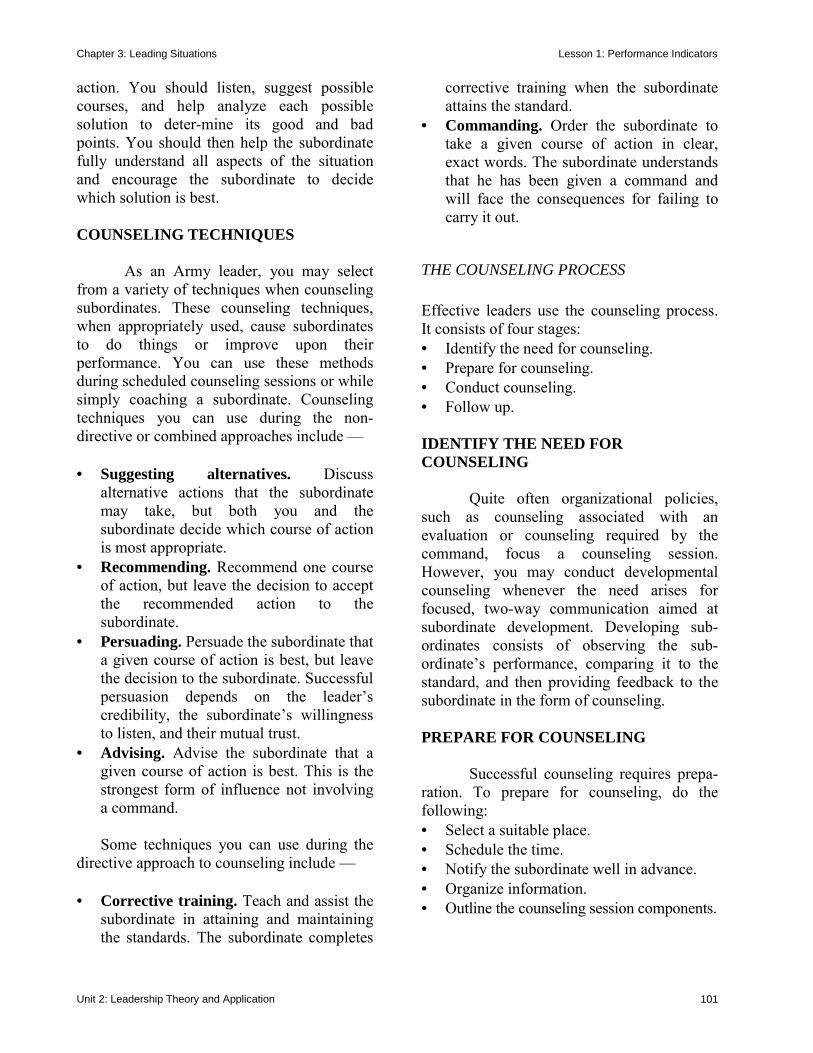
Chapter 3: Leading Situations Lesson 1: Performance Indicators
Unit 2: Leadership Theory and Application 101
action. You should listen, suggest possible courses, and help analyze each possible solution to deter-mine its good and bad points. You should then help the subordinate fully understand all aspects of the situation and encourage the subordinate to decide which solution is best. COUNSELING TECHNIQUES
As an Army leader, you may select from a variety of techniques when counseling subordinates. These counseling techniques, when appropriately used, cause subordinates to do things or improve upon their performance. You can use these methods during scheduled counseling sessions or while simply coaching a subordinate. Counseling techniques you can use during the non-directive or combined approaches include � • Suggesting alternatives. Discuss
alternative actions that the subordinate may take, but both you and the subordinate decide which course of action is most appropriate.
• Recommending. Recommend one course of action, but leave the decision to accept the recommended action to the subordinate.
• Persuading. Persuade the subordinate that a given course of action is best, but leave the decision to the subordinate. Successful persuasion depends on the leader�s credibility, the subordinate�s willingness to listen, and their mutual trust.
• Advising. Advise the subordinate that a given course of action is best. This is the strongest form of influence not involving a command.
Some techniques you can use during the
directive approach to counseling include �
• Corrective training. Teach and assist the subordinate in attaining and maintaining the standards. The subordinate completes
corrective training when the subordinate attains the standard.
• Commanding. Order the subordinate to take a given course of action in clear, exact words. The subordinate understands that he has been given a command and will face the consequences for failing to carry it out.
THE COUNSELING PROCESS Effective leaders use the counseling process. It consists of four stages: • Identify the need for counseling. • Prepare for counseling. • Conduct counseling. • Follow up. IDENTIFY THE NEED FOR COUNSELING
Quite often organizational policies, such as counseling associated with an evaluation or counseling required by the command, focus a counseling session. However, you may conduct developmental counseling whenever the need arises for focused, two-way communication aimed at subordinate development. Developing sub-ordinates consists of observing the sub-ordinate�s performance, comparing it to the standard, and then providing feedback to the subordinate in the form of counseling. PREPARE FOR COUNSELING
Successful counseling requires prepa-ration. To prepare for counseling, do the following: • Select a suitable place. • Schedule the time. • Notify the subordinate well in advance. • Organize information. • Outline the counseling session components.
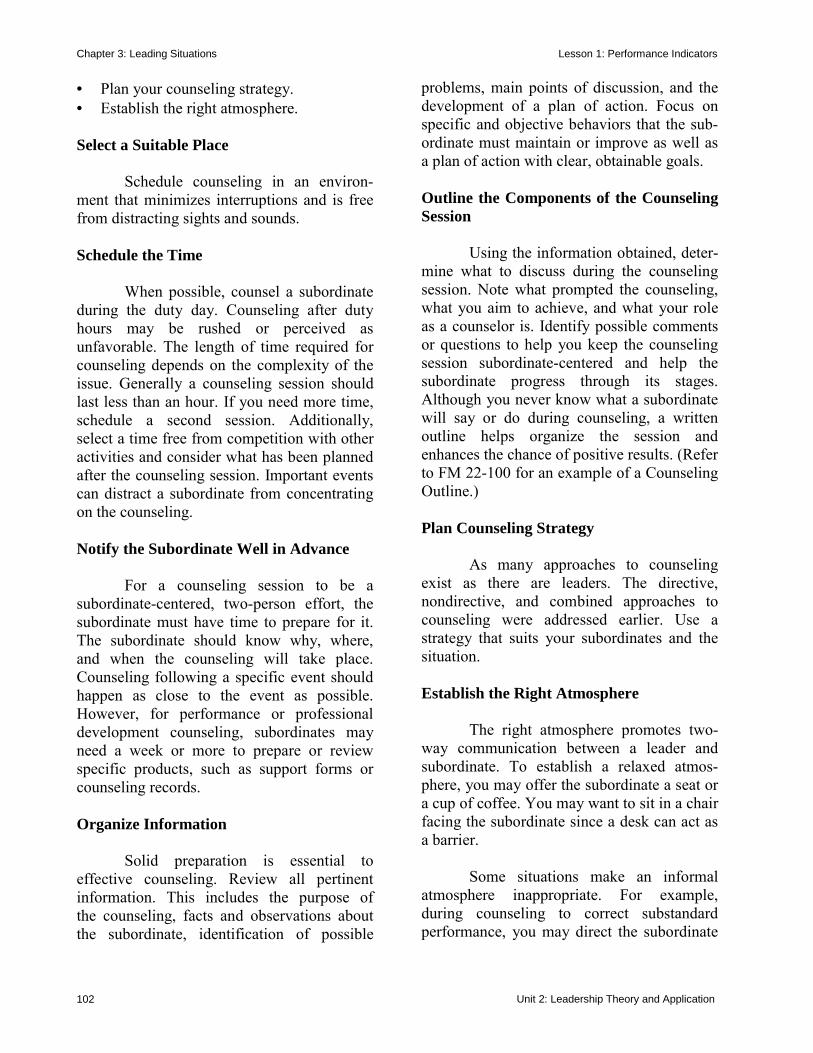
Chapter 3: Leading Situations Lesson 1: Performance Indicators
Unit 2: Leadership Theory and Application 102
• Plan your counseling strategy. • Establish the right atmosphere. Select a Suitable Place
Schedule counseling in an environ-ment that minimizes interruptions and is free from distracting sights and sounds. Schedule the Time
When possible, counsel a subordinate during the duty day. Counseling after duty hours may be rushed or perceived as unfavorable. The length of time required for counseling depends on the complexity of the issue. Generally a counseling session should last less than an hour. If you need more time, schedule a second session. Additionally, select a time free from competition with other activities and consider what has been planned after the counseling session. Important events can distract a subordinate from concentrating on the counseling. Notify the Subordinate Well in Advance
For a counseling session to be a subordinate-centered, two-person effort, the subordinate must have time to prepare for it. The subordinate should know why, where, and when the counseling will take place. Counseling following a specific event should happen as close to the event as possible. However, for performance or professional development counseling, subordinates may need a week or more to prepare or review specific products, such as support forms or counseling records. Organize Information
Solid preparation is essential to effective counseling. Review all pertinent information. This includes the purpose of the counseling, facts and observations about the subordinate, identification of possible
problems, main points of discussion, and the development of a plan of action. Focus on specific and objective behaviors that the sub-ordinate must maintain or improve as well as a plan of action with clear, obtainable goals. Outline the Components of the Counseling Session
Using the information obtained, deter-mine what to discuss during the counseling session. Note what prompted the counseling, what you aim to achieve, and what your role as a counselor is. Identify possible comments or questions to help you keep the counseling session subordinate-centered and help the subordinate progress through its stages. Although you never know what a subordinate will say or do during counseling, a written outline helps organize the session and enhances the chance of positive results. (Refer to FM 22-100 for an example of a Counseling Outline.)
Plan Counseling Strategy
As many approaches to counseling exist as there are leaders. The directive, nondirective, and combined approaches to counseling were addressed earlier. Use a strategy that suits your subordinates and the situation. Establish the Right Atmosphere
The right atmosphere promotes two-way communication between a leader and subordinate. To establish a relaxed atmos-phere, you may offer the subordinate a seat or a cup of coffee. You may want to sit in a chair facing the subordinate since a desk can act as a barrier.
Some situations make an informal atmosphere inappropriate. For example, during counseling to correct substandard performance, you may direct the subordinate
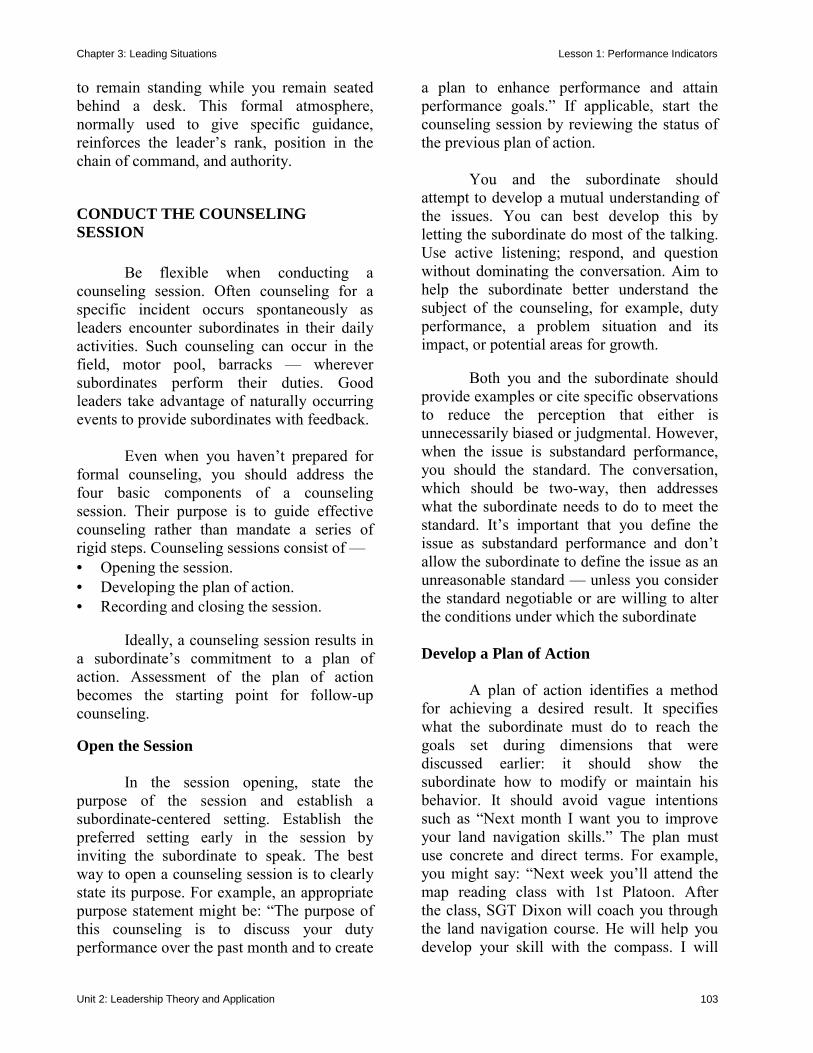
Chapter 3: Leading Situations Lesson 1: Performance Indicators
Unit 2: Leadership Theory and Application 103
to remain standing while you remain seated behind a desk. This formal atmosphere, normally used to give specific guidance, reinforces the leader�s rank, position in the chain of command, and authority.
CONDUCT THE COUNSELING SESSION
Be flexible when conducting a counseling session. Often counseling for a specific incident occurs spontaneously as leaders encounter subordinates in their daily activities. Such counseling can occur in the field, motor pool, barracks � wherever subordinates perform their duties. Good leaders take advantage of naturally occurring events to provide subordinates with feedback.
Even when you haven�t prepared for formal counseling, you should address the four basic components of a counseling session. Their purpose is to guide effective counseling rather than mandate a series of rigid steps. Counseling sessions consist of � • Opening the session. • Developing the plan of action. • Recording and closing the session.
Ideally, a counseling session results in a subordinate�s commitment to a plan of action. Assessment of the plan of action becomes the starting point for follow-up counseling. Open the Session In the session opening, state the purpose of the session and establish a subordinate-centered setting. Establish the preferred setting early in the session by inviting the subordinate to speak. The best way to open a counseling session is to clearly state its purpose. For example, an appropriate purpose statement might be: �The purpose of this counseling is to discuss your duty performance over the past month and to create
a plan to enhance performance and attain performance goals.� If applicable, start the counseling session by reviewing the status of the previous plan of action.
You and the subordinate should attempt to develop a mutual understanding of the issues. You can best develop this by letting the subordinate do most of the talking. Use active listening; respond, and question without dominating the conversation. Aim to help the subordinate better understand the subject of the counseling, for example, duty performance, a problem situation and its impact, or potential areas for growth.
Both you and the subordinate should provide examples or cite specific observations to reduce the perception that either is unnecessarily biased or judgmental. However, when the issue is substandard performance, you should the standard. The conversation, which should be two-way, then addresses what the subordinate needs to do to meet the standard. It�s important that you define the issue as substandard performance and don�t allow the subordinate to define the issue as an unreasonable standard � unless you consider the standard negotiable or are willing to alter the conditions under which the subordinate Develop a Plan of Action
A plan of action identifies a method for achieving a desired result. It specifies what the subordinate must do to reach the goals set during dimensions that were discussed earlier: it should show the subordinate how to modify or maintain his behavior. It should avoid vague intentions such as �Next month I want you to improve your land navigation skills.� The plan must use concrete and direct terms. For example, you might say: �Next week you�ll attend the map reading class with 1st Platoon. After the class, SGT Dixon will coach you through the land navigation course. He will help you develop your skill with the compass. I will
Chapter 3: Leading Situations Lesson 1: Performance Indicators
Unit 2: Leadership Theory and Application 104
observe you going through the course with SGT Dixon, and then I will talk to you again and determine where and if you still plan of action sets the stage for successful development. Record and Close the Session
Although requirements to record counseling sessions vary, a leader always benefits by documenting the main points of a counseling session. Documentation serves as a reference to the agreed upon plan of action and the subordinate�s accomplishments, improvements, personal preferences, or prob-lems. A complete record of counseling aids in making recommendations for professional development, schools, promotions, and evaluation reports.
Additionally, Army regulations require written records of counseling for certain personnel actions, such as a barring a soldier from reenlisting, processing a soldier for administrative separation, or placing a soldier in the overweight program. When a soldier faces involuntary separation, the leader must take special care to maintain accurate counseling conveys a strong cor-rective message to subordinates.
To close the session, summarize its key points and ask if the subordinate understands he plan of action. Invite the subordinate to review he plan of action and what�s expected of you, the leader. With the subordinate, establish any follow-up measures necessary to support the successful imple-mentation of the plan of action. These may include providing the subordinate with resources and time, periodically assessing the plan, and following through on referrals. Schedule any future meetings, at least tentatively, before dismissing the subordinate.
FOLLOW UP Leader’s Responsibilities
The counseling process doesn�t end with the counseling session. It continues through implementation of the plan of action and evaluation of results. After counseling, you must support subordinates as they implement their plans of action. Support may include teaching, coaching, or providing time and resources. You must observe and assess this process and possibly modify the plan to meet its goals. Appropriate measures after counseling include follow-up counseling, making referrals, informing the chain of command, and taking corrective measures. Assess the Plan of Action
The purpose of counseling is to develop subordinates who are better able to achieve personal, professional, and organ-izational goals. During the assessment, review the plan of action with the subordinate to determine if the desired results were achieved. You and the subordinate should determine the date for this assessment during the initial counseling session. The assessment of the plan of action provides useful information for future follow-up counseling sessions. SUMMARY
This section has discussed develop-mental counseling. Developmental counseling is subordinate-centered communication that outlines actions necessary for subordinates to achieve individual and organizational goals and objectives. It can be either event-oriented or focused on personal and professional development. The Summary of Develop-mental Counseling Form summarizes the major aspects of developmental counseling and the counseling process.
Chapter 3: Leading Situations Lesson 1: Performance Indicators
Unit 2: Leadership Theory and Application 105
THE DEVELOPMENTAL COUNSELING FORM
The Developmental Counseling Form (DA Form 4856-E) is designed to help Army leaders conduct and record counseling sessions. Leaders must demonstrate these qualities to counsel effectively:
• Respect for subordinates. • Self and cultural awareness. • Credibility • Empathy.
Leaders must possess these counseling skills:
• Active listening. • Responding. • Questioning.
Effective leaders avoid common counsel-ing mistakes. Leaders should avoid the influence of — Personal bias. Rash judgments. Stereotyping. Losing emotional control. Inflexible counseling methods. Improper follow up. The Counseling Process 1. Identify the need for counseling. 2. Prepare for counseling.
• Select a suitable place. • Schedule the time. • Notify the subordinate well in
advance. • Organize information. • Outline the components of the • counseling session. • Plan counseling strategy. • Establish the right atmosphere.
3. Conduct the counseling session. • Open the session.
• Discuss the issue. • Develop a plan of action (to include • the leader�s responsibilities). • Record and close the session.
4. Follow up. • Support plan of action implementation • Assess the plan of action.
(Refer to FM 22-100 for more details.)
.
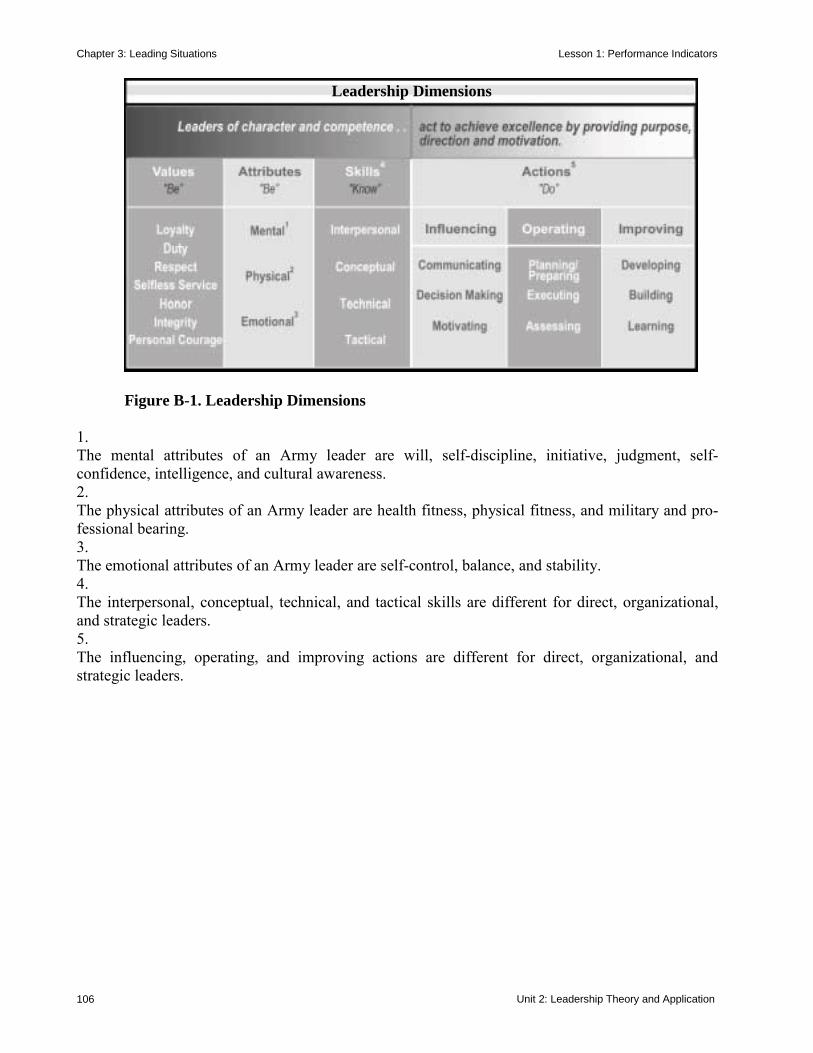
Chapter 3: Leading Situations Lesson 1: Performance Indicators
Unit 2: Leadership Theory and Application 106
Figure B-1. Leadership Dimensions
1. The mental attributes of an Army leader are will, self-discipline, initiative, judgment, self-confidence, intelligence, and cultural awareness. 2. The physical attributes of an Army leader are health fitness, physical fitness, and military and pro-fessional bearing. 3. The emotional attributes of an Army leader are self-control, balance, and stability. 4. The interpersonal, conceptual, technical, and tactical skills are different for direct, organizational, and strategic leaders. 5. The influencing, operating, and improving actions are different for direct, organizational, and strategic leaders.
Leadership Dimensions

Chapter 3: Leading Situations Lesson 2: Negotiating
Unit 2: Leadership Theory and Application 107
LESSON 2: NEGOTIATING
POSITIONAL BARGAINING
Most often as two people begin to discuss their differences they begin with their position. What they believe in and what they want from the discussion. Once you have determined what your position is, you go about arguing for it — even demand it. It is from that point you begin to compromise and barter away at your demands and walk away unsatisfied, angry, and feeling like a loser. On the other side, if you yelled loud enough and
long enough and you were able to beat down your opponent, you might walk away with all your demands and feeling successful in the process. However, you notice your rela-tionship with this person has degenerated and you feel sad about having lost a friend or classmate.
When you negotiate you want to be fair. There are three criteria for fair nego-tiations: Produce a wise agreement, be efficient; and improve or at least not damage the relationship.
When you argue over positions you have not taken the time to explore other alternatives. Therefore the decision you come up with may not be the best available solution. When you argue over positions you are not being efficient because you are not listening to each other and most likely repeating your position over and over. You are not moving forward to solutions. When you argue over positions the relationship can be damaged. Anger sets in and words are said and often not forgotten. You might win this battle, but you also might lose the war.
Principled negotiation is neither soft (giving in) or hard (controlling). It is based on the criteria for fair negotiations and focused on a win/win for all parties. If a win/win is not possible at the time of negotiations, you can agree to have a win/win or no deal, set aside the negotiations and return at a time that the parties can search for the third alternative.
When using soft negotiations the participants are friends, seeking agreement, making concessions, trusting others, changing positions easily, accepting giving things up to reach an agreement, and yielding to pressure. When using hard negotiations the participants are adversaries, maintain the goal of victory, demand concessions from others, distrust
case study negotiation positional bargaining
PURPOSE
Negotiation is a way of life.We are involved in it every day. Whenwe negotiate with our parents on howlate we can stay out, with our teachersfor a make up test, with our boss for araise, or with our friends whendeciding which movie to go to. Earlierin your JROTC classes we discussedcommunication and working outconflict. They are important elementsto the negotiating process. What wewill address during this lesson is aneffective way to negotiate to a win/winsolution.
Chapter 3: Leading Situations Lesson 2: Negotiating
108 Unit 2: Leadership Theory and Application
others, try to win a contest of will and apply pressure.
Principled centered negotiations are neither soft nor hard. They are the third alternative to negotiations and are focused on win/win situations.
Principled centered negotiations have four basic points: • People — separate the people from the
problem. • Interests — focus on interests, not
positions. • Options — generate as many as you can. • Criteria — results are based on an agreed
upon set of objectives or standards.
Some ways to keep focused on win/win principled center negotiations are:
1. Have clear goals, understood and agreed upon. Use the goals to test whether issues are relevant or not.
2. Be on the lookout for win/lose. It can develop subtly. If you feel under attack, or feel yourself lining up support, you are likely in a win/lose contest.
3. Listen empathetically to others. Stop yourself from working on counter arguments while another person is speaking. Take the risk of being persuaded. Try the other person’s reasoning on for size.
4. Avoid absolute statements that leave no room for modification. “I think this is the way . . .” is better than “This is THE ONLY way . . .”
5. If you are planning for others, provide some means for their involvement. The doers should feel that they can have influence on decisions that affect them.
6. Try to make decisions by consensus rather than by victory of the majority.
7. Test to see that trade-offs and compromises are truly accepted by all.
8. Draw a continuum line and have members place themselves on it regarding the issue. It often occurs that the different “sides” are not far apart.
9. Be alert to selling or winning strategies in others and avoid using them yourself. “Any intelligent person can see the advantages . . .” would be a danger signal.
When the parties involved in the
negotiation first identify the outcome, then discuss interests, begin to generate possibilities to reach the outcome and ensure the interests of each party are met, then the relationships will either be maintained or increased, there will be a wise agreement and the parties would have used their time efficiently. CASE STUDY
You and your friends are planning for the weekend. There has been discussion around going to the movies, renting a movie and watching it at someone’s home with popcorn and soda, going ice-skating or attending the football teams practice game. You and your friends have been discussing these options all week. It is now Friday and time to decide what you will do. You really
Chapter 3: Leading Situations Lesson 2: Negotiating
Unit 2: Leadership Theory and Application 109
want to go to the practice game because your younger brother is on the team and you want to support him. Your best friend wants to watch a movie at someone’s home because he does not have enough money to go out to a movie or ice skate. There is a long awaited movie on at the theater that your other friend has been waiting to see. Although everyone likes to ice skate, none of your friends are pushing hard for that.
How would you negotiate a win/win situation with your friends? CONCLUSION
As we have learned in this lesson, negotiation is a way of life. We are involved in it every day. As discussed earlier in your JROTC classes, communication and working out conflict are important elements to the negotiating process. The key concepts to put into practice from this lesson are the effective ways to negotiate to a win/win solution.
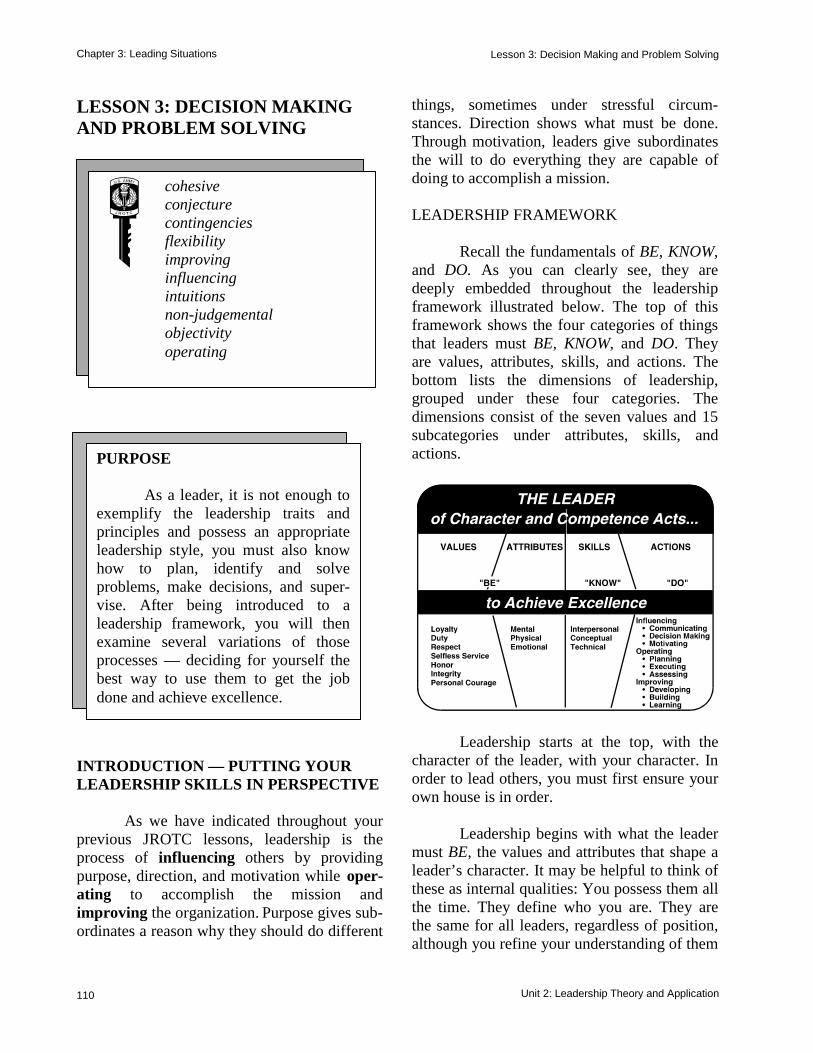
Chapter 3: Leading Situations
110
Lesson 3: Decision Making and Problem Solving
Unit 2: Leadership Theory and Application
LESSON 3: DECISION MAKING AND PROBLEM SOLVING
INTRODUCTION — PUTTING YOUR LEADERSHIP SKILLS IN PERSPECTIVE As we have indicated throughout your previous JROTC lessons, leadership is the process of influencing others by providing purpose, direction, and motivation while oper-ating to accomplish the mission and improving the organization. Purpose gives sub-ordinates a reason why they should do different
things, sometimes under stressful circum-stances. Direction shows what must be done. Through motivation, leaders give subordinates the will to do everything they are capable of doing to accomplish a mission. LEADERSHIP FRAMEWORK Recall the fundamentals of BE, KNOW, and DO. As you can clearly see, they are deeply embedded throughout the leadership framework illustrated below. The top of this framework shows the four categories of things that leaders must BE, KNOW, and DO. They are values, attributes, skills, and actions. The bottom lists the dimensions of leadership, grouped under these four categories. The dimensions consist of the seven values and 15 subcategories under attributes, skills, and actions.
Leadership starts at the top, with the character of the leader, with your character. In order to lead others, you must first ensure your own house is in order. Leadership begins with what the leader must BE, the values and attributes that shape a leader’s character. It may be helpful to think of these as internal qualities: You possess them all the time. They define who you are. They are the same for all leaders, regardless of position, although you refine your understanding of them
cohesive conjecture contingencies flexibility improving influencing intuitions non-judgemental objectivity operating
PURPOSE
As a leader, it is not enough toexemplify the leadership traits andprinciples and possess an appropriateleadership style, you must also knowhow to plan, identify and solve problems, make decisions, and super-vise. After being introduced to aleadership framework, you will thenexamine several variations of thoseprocesses — deciding for yourself thebest way to use them to get the jobdone and achieve excellence.
Chapter 3: Leading Situations
Unit 2: Leadership Theory and Application 111
Lesson 3: Decision Making and Problem Solving
as you become more experienced and assume positions of greater responsibility.
Your skills are those things you KNOW how to do — your competence in everything from the technical side of your job to the people skills a leader requires. The skill categories apply to all leaders; however, as you assume positions of greater responsibility, you must master additional skills in each category. But, character and knowledge — while absolutely necessary — are not enough. You cannot be an effective leader until you apply what you know — that is, until you act and DO what you must. As with skills, you will learn more leadership actions as you serve in different leadership positions or opportunities. The leadership framework is a tool that will allow you to think about leadership as a whole. The dimensions each contain com-ponents that are all interrelated — none stands alone. This framework will help you to put your job, your followers, and your unit into perspective. Think about it in this manner:
APPROACHES TO DECISION-MAKING AND PROBLEM-SOLVING A leader is expected to get the job done. To do so, he or she must learn to plan, analyze situations, identify and solve problems (or potential problems), make decisions, and set realistic and attainable goals for the unit. These are the thinking or creative requirements of leadership and they set direction. These actions provide vision, purpose, and goal definition.
They are your eyes to the future, and they are crucial to developing a disciplined, cohesive, and effective organization.
Decision-making and problem-solving are basic ingredients of leadership. More than anything else, the ability to make sound, timely decisions separates a leader from a non-leader. It is the responsibility of leaders to make high-quality decisions that are accepted and executed in a timely fashion.
Leaders must be able to reason under the most critical conditions and decide quickly what action to take. If they delay or avoid making a decision, this indecisiveness may create hesitancy, loss of confidence, and con-fusion within the unit, and may cause the task to fail. Since leaders are frequently faced with unexpected circumstances, it is impor-tant to be flexible — leaders must be able to react promptly to each situation. Then, when circumstances dictate a change in plans, prompt reaction builds confidence in them.
As a leader, you will make decisions involving not only yourself, but the morale and welfare of others. Some decisions, such as when to take a break or where to hold a meeting, are simple decisions which have little effect on others. Other decisions are often more complex and may have a significant impact on many people. Therefore, having a decision-making, problem-solving process can be a helpful tool. Such a process can help you to solve these different types of situations. Within business and the military today, leaders at all levels use some form of a decision-making, problem-solving process. There are at least several different approaches (or models) for decision-making and problem-solving. We will present three such approaches: The first, and most common, is the seven-step problem-solving, decision-making process; the second is a more complex problem-solving
BE a leader of character. Embrace the values and demonstrate the leader attri-butes. Study and practice so that you will have the skills to KNOW your job. Then act — DO what is right to achieve excellence.
Chapter 3: Leading Situations
112
Lesson 3: Decision Making and Problem Solving
Unit 2: Leadership Theory and Application
model; and the third is a simplified decision-making process. SEVEN-STEP PROBLEM-SOLVING, DECISION-MAKING PROCESS Having a logical thought process helps ensure that you will not neglect key factors that could influence the problem, and ultimately your decision. In fact, you should always apply a clear, logical thought process to all leadership situations that you encounter. The seven-step process is an excellent tool that can guide you in solving problems and making those sound and timely decisions. The seven steps are: 1. Identify (recognize/define) the problem. 2. Gather information (facts/assumptions). 3. Develop courses of action (solutions). 4. Analyze and compare courses of action
(alternatives/solutions). 5. Make a decision; select the best course of
action (solution). 6. Make a plan. 7. Implement the plan (assess the results). Identify the Problem Being able to accurately identify the nature of a problem is a crucial undertaking. All leadership problems, whether they involve a work-related situation or a counseling session, are exploratory in nature — that is, leaders do not always identify the right cause of a problem or develop the best plan. In fact, two of the most common errors of leaders are identifying the wrong problem and identifying the wrong causes of a problem. Plus, the tendency for leaders to make mental errors increases as their levels of stress increase. We all make mistakes. If leaders are given false information, it may lead them to incorrect problem identification and to incorrect assumptions about the causes of a problem. Then, if leaders fail to determine the true
source of a problem, they may develop an inadequate plan. Learn to identify the real problems. Consider all angles. Learn to seek only accurate information that leads to the real causes of a problem. To ensure that information is accurate, question its validity. In other words, leaders must take what accurate information they have, use their best judgment, and make educated assumptions about the causes of a problem. Then, they must consider the courses of action that will be most likely to succeed. Even though leaders may use the right problem-solving process, incorrect problem identification can lead to the wrong decision. It is a fallacy to think that using a correct formula or set of steps will lead you to the real problem and to a successful course of action. Your values, character, knowledge, and way of thinking have a direct and vital impact on the problems you identify as important. These inner qualities affect how you view, gather, and analyze information bearing on the identified problem. Gather Information In this step, leaders must gather all available information that pertains to or can influence the situation (identified problem) from sources such as higher, lateral, and subordinate levels of command as well as from applicable outside agencies. Although some of the information may not bear on the problem at hand, it must be available for leaders to consider when developing and analyzing courses of action. The amount of available time in a leadership situation can be a limiting factor on how much time a leader spends performing the various steps of the problem-solving, decision-making process. If time is extremely limited, this is the only step that leaders may omit so
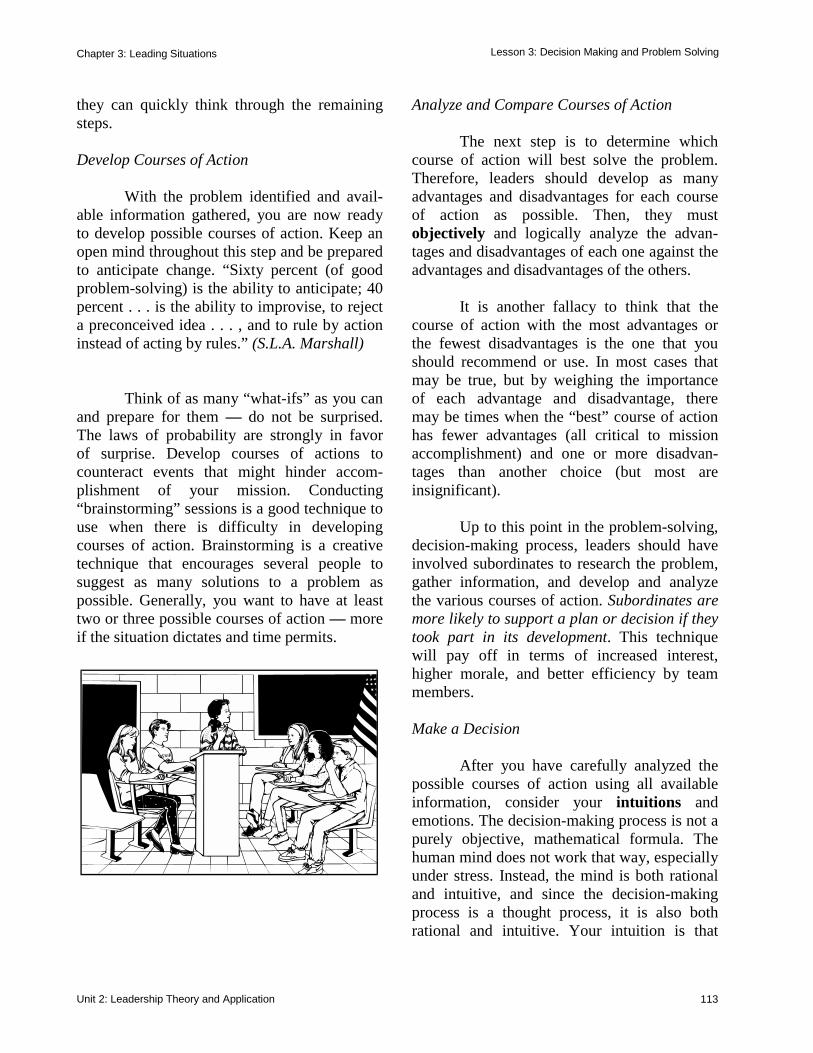
Chapter 3: Leading Situations
Unit 2: Leadership Theory and Application 113
Lesson 3: Decision Making and Problem Solving
they can quickly think through the remaining steps. Develop Courses of Action With the problem identified and avail-able information gathered, you are now ready to develop possible courses of action. Keep an open mind throughout this step and be prepared to anticipate change. “Sixty percent (of good problem-solving) is the ability to anticipate; 40 percent . . . is the ability to improvise, to reject a preconceived idea . . . , and to rule by action instead of acting by rules.” (S.L.A. Marshall) Think of as many “what-ifs” as you can and prepare for them — do not be surprised. The laws of probability are strongly in favor of surprise. Develop courses of actions to counteract events that might hinder accom-plishment of your mission. Conducting “brainstorming” sessions is a good technique to use when there is difficulty in developing courses of action. Brainstorming is a creative technique that encourages several people to suggest as many solutions to a problem as possible. Generally, you want to have at least two or three possible courses of action — more if the situation dictates and time permits.
Analyze and Compare Courses of Action The next step is to determine which course of action will best solve the problem. Therefore, leaders should develop as many advantages and disadvantages for each course of action as possible. Then, they must objectively and logically analyze the advan-tages and disadvantages of each one against the advantages and disadvantages of the others. It is another fallacy to think that the course of action with the most advantages or the fewest disadvantages is the one that you should recommend or use. In most cases that may be true, but by weighing the importance of each advantage and disadvantage, there may be times when the “best” course of action has fewer advantages (all critical to mission accomplishment) and one or more disadvan-tages than another choice (but most are insignificant). Up to this point in the problem-solving, decision-making process, leaders should have involved subordinates to research the problem, gather information, and develop and analyze the various courses of action. Subordinates are more likely to support a plan or decision if they took part in its development. This technique will pay off in terms of increased interest, higher morale, and better efficiency by team members. Make a Decision After you have carefully analyzed the possible courses of action using all available information, consider your intuitions and emotions. The decision-making process is not a purely objective, mathematical formula. The human mind does not work that way, especially under stress. Instead, the mind is both rational and intuitive, and since the decision-making process is a thought process, it is also both rational and intuitive. Your intuition is that
Chapter 3: Leading Situations
114
Lesson 3: Decision Making and Problem Solving
Unit 2: Leadership Theory and Application
aspect of your mind that tells you what “feels” right or wrong. Your intuition flows from your instincts and experience. However, never make the mistake of making decisions guided totally by emotions or intuitions and immediately doing what “feels” right. This is a prescription for disaster. Follow the problem-solving process as rationally and objectively as possible. Gather information; then develop, analyze, and compare courses of action. Consider your intuition or hunches, emotions, and values. Try to identify a “best” course of action that is logical and likely to succeed and that also “feels” right in terms of your intuition, values, and character. Finally, make your decision, make a plan, and take action. Make a Plan Make a plan that includes who would do what, when, where, how, and why. Be as specific as time permits, but do not leave out vital information that could prevent mission accomplishment. Plus, ensure that you specify the what, when, where, how and why for all personnel or elements under your authority. Finally, include contingencies in your plan that address possible unexpected situations or actions. Develop these contingencies based on the assumptions made when you identified the problem and gathered available information. As you did when developing the courses of action, be prepared to anticipate change. The ability to make appropriate changes in decisions and plans requires a certain flexibility of mind — a crucial trait of a good problem-solver, decision-maker, and planner. Implement the Plan Once the decision and plan are made, it is time to act. In this final step, you must put
the plan into action, then evaluate it to ensure that the desired results are being achieved. Evaluation is often a neglected step in the decision-making process The key to evaluation is to seek feedback constantly on how your plan is doing. Get feedback from subordinates. Go to the point of the action and determine first hand if the plan is working or not. If not, determine why not and take immediate action to correct the plan. Mental flexibility is vital. SAMPLE DECISION-MAKING MODEL Leaders often look for the simple deci-sion, perhaps because they are easier to act on and explain. However, you must be extremely careful about making decisions too fast or too simplistically. Since you want to foster individual growth and/or improve the per-formance of your unit, do not automatically choose the first approach to solving a difficult situation. Leaders must evaluate each decision for its contribution toward the accomplishment of the task at hand and for future missions. If appropriate, a shared problem-solving, decision-making process with professionals, such as your instructors, will often help you to make wise decisions. The decision-making model described in this lesson is a quick and easy approach that leaders can use in many situations. First, briefly state the problem: For example, Connie has a drill practice on Friday night, but she forgot to cancel work for that night. Next, identify at least three options or courses of action. Concerning Connie’s situation, she could:
⇒ Speak to her drill leader about missing drill practice and working that night (Option 1).
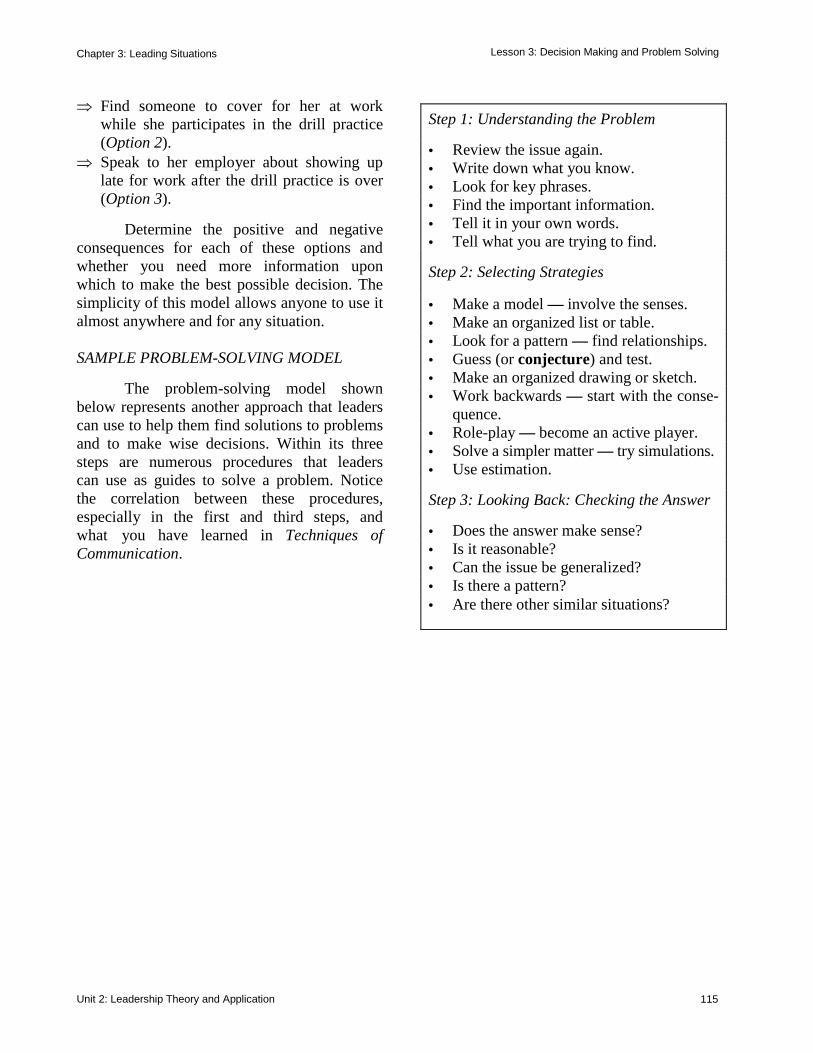
Chapter 3: Leading Situations
Unit 2: Leadership Theory and Application 115
Lesson 3: Decision Making and Problem Solving
⇒ Find someone to cover for her at work while she participates in the drill practice (Option 2).
⇒ Speak to her employer about showing up late for work after the drill practice is over (Option 3).
Determine the positive and negative consequences for each of these options and whether you need more information upon which to make the best possible decision. The simplicity of this model allows anyone to use it almost anywhere and for any situation. SAMPLE PROBLEM-SOLVING MODEL The problem-solving model shown below represents another approach that leaders can use to help them find solutions to problems and to make wise decisions. Within its three steps are numerous procedures that leaders can use as guides to solve a problem. Notice the correlation between these procedures, especially in the first and third steps, and what you have learned in Techniques of Communication.
Step 1: Understanding the Problem • Review the issue again. • Write down what you know. • Look for key phrases. • Find the important information. • Tell it in your own words. • Tell what you are trying to find. Step 2: Selecting Strategies • Make a model — involve the senses. • Make an organized list or table. • Look for a pattern — find relationships. • Guess (or conjecture) and test. • Make an organized drawing or sketch. • Work backwards — start with the conse-
quence. • Role-play — become an active player. • Solve a simpler matter — try simulations. • Use estimation. Step 3: Looking Back: Checking the Answer • Does the answer make sense? • Is it reasonable? • Can the issue be generalized? • Is there a pattern? • Are there other similar situations?
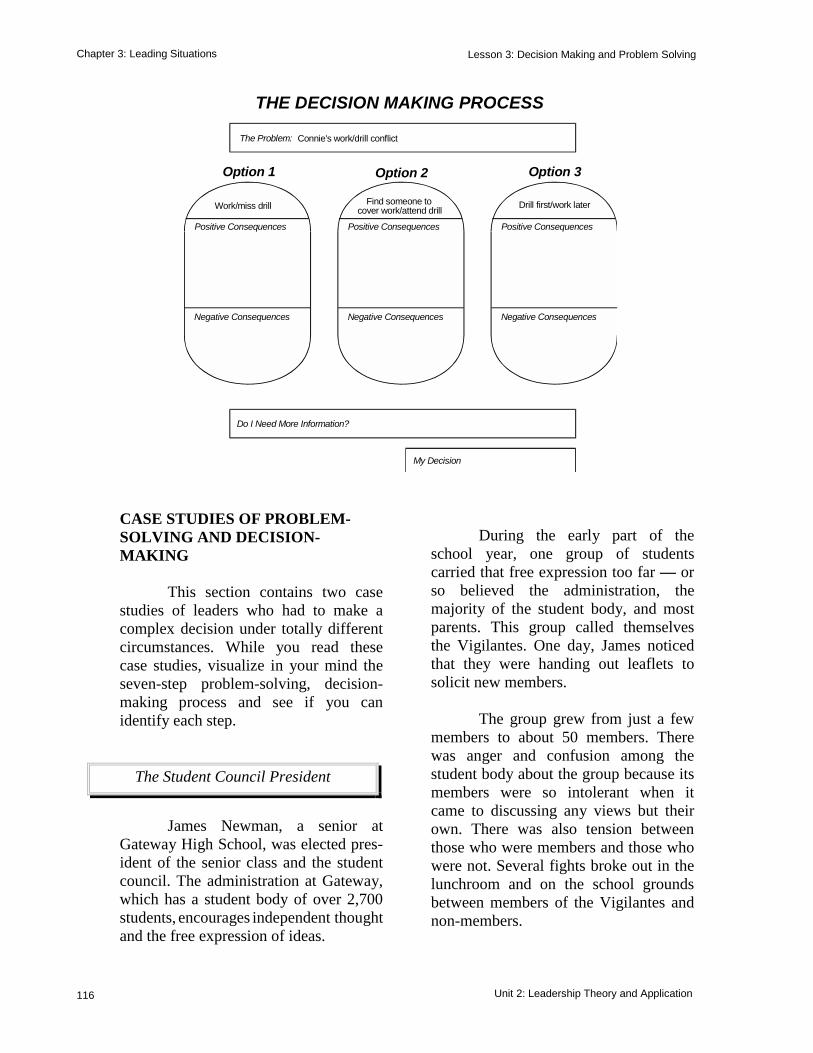
Chapter 3: Leading Situations
116 Unit 2: Leadership Theory and Application
Lesson 3: Decision Making and Problem Solving
O p t i o n 1
P o s i t i v e C o ns e q u e n c e s
N e g a t i v e C o n s e q u e n c e s
W o r k / m i s s d r i l l
Option 2
Positive Consequences
Negative Consequences
Find someone tocover work/attend drill
Option 3
Positive Conseque n c e s
Negative Consequ e n c e s
Drill first/work l a t e r
D o I N e e d M o r e I n f o r m ation?
My Decision
T h e P r o b l e m : C o n n i e 's work/drill conflict
T H E D E C I S I O N M A K I N G P R O C E S S
CASE STUDIES OF PROBLEM-SOLVING AND DECISION-MAKING This section contains two case studies of leaders who had to make a complex decision under totally different circumstances. While you read these case studies, visualize in your mind the seven-step problem-solving, decision-making process and see if you can identify each step.
James Newman, a senior at Gateway High School, was elected pres-ident of the senior class and the student council. The administration at Gateway, which has a student body of over 2,700 students, encourages independent thought and the free expression of ideas.
During the early part of the school year, one group of students carried that free expression too far — or so believed the administration, the majority of the student body, and most parents. This group called themselves the Vigilantes. One day, James noticed that they were handing out leaflets to solicit new members. The group grew from just a few members to about 50 members. There was anger and confusion among the student body about the group because its members were so intolerant when it came to discussing any views but their own. There was also tension between those who were members and those who were not. Several fights broke out in the lunchroom and on the school grounds between members of the Vigilantes and non-members.
The Student Council President
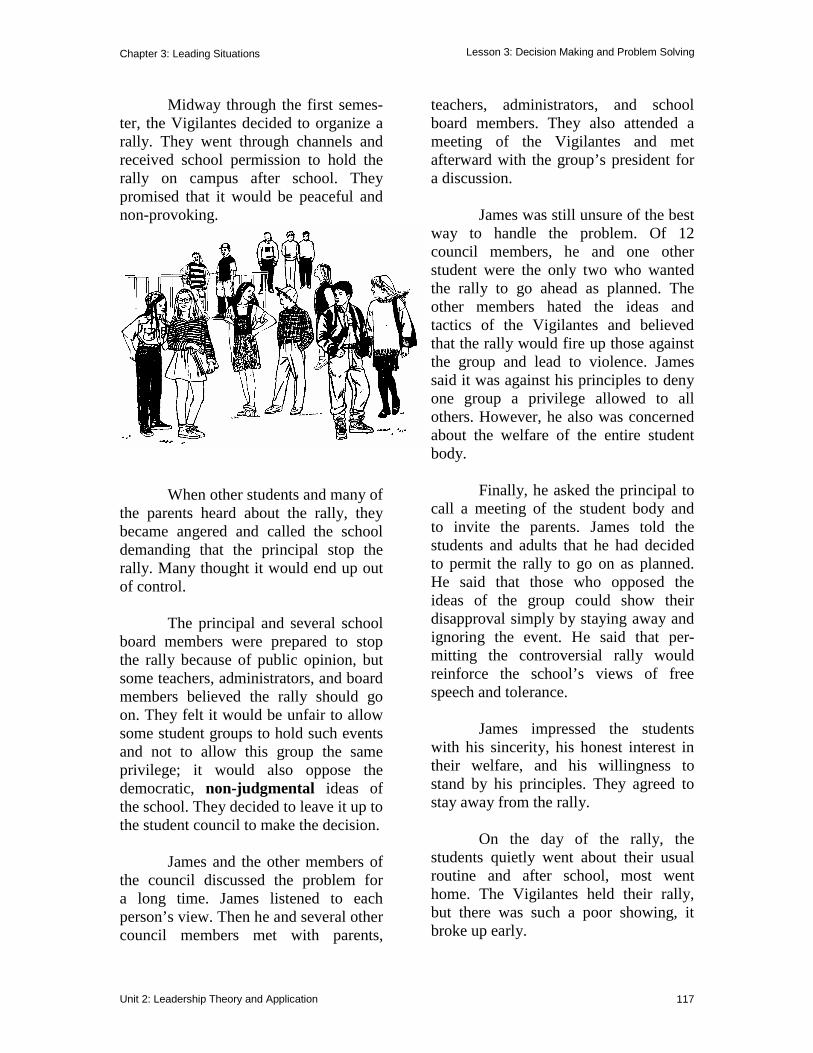
Chapter 3: Leading Situations
Unit 2: Leadership Theory and Application 117
Lesson 3: Decision Making and Problem Solving
Midway through the first semes-ter, the Vigilantes decided to organize a rally. They went through channels and received school permission to hold the rally on campus after school. They promised that it would be peaceful and non-provoking.
When other students and many of the parents heard about the rally, they became angered and called the school demanding that the principal stop the rally. Many thought it would end up out of control. The principal and several school board members were prepared to stop the rally because of public opinion, but some teachers, administrators, and board members believed the rally should go on. They felt it would be unfair to allow some student groups to hold such events and not to allow this group the same privilege; it would also oppose the democratic, non-judgmental ideas of the school. They decided to leave it up to the student council to make the decision. James and the other members of the council discussed the problem for a long time. James listened to each person’s view. Then he and several other council members met with parents,
teachers, administrators, and school board members. They also attended a meeting of the Vigilantes and met afterward with the group’s president for a discussion. James was still unsure of the best way to handle the problem. Of 12 council members, he and one other student were the only two who wanted the rally to go ahead as planned. The other members hated the ideas and tactics of the Vigilantes and believed that the rally would fire up those against the group and lead to violence. James said it was against his principles to deny one group a privilege allowed to all others. However, he also was concerned about the welfare of the entire student body. Finally, he asked the principal to call a meeting of the student body and to invite the parents. James told the students and adults that he had decided to permit the rally to go on as planned. He said that those who opposed the ideas of the group could show their disapproval simply by staying away and ignoring the event. He said that per-mitting the controversial rally would reinforce the school’s views of free speech and tolerance. James impressed the students with his sincerity, his honest interest in their welfare, and his willingness to stand by his principles. They agreed to stay away from the rally. On the day of the rally, the students quietly went about their usual routine and after school, most went home. The Vigilantes held their rally, but there was such a poor showing, it broke up early.
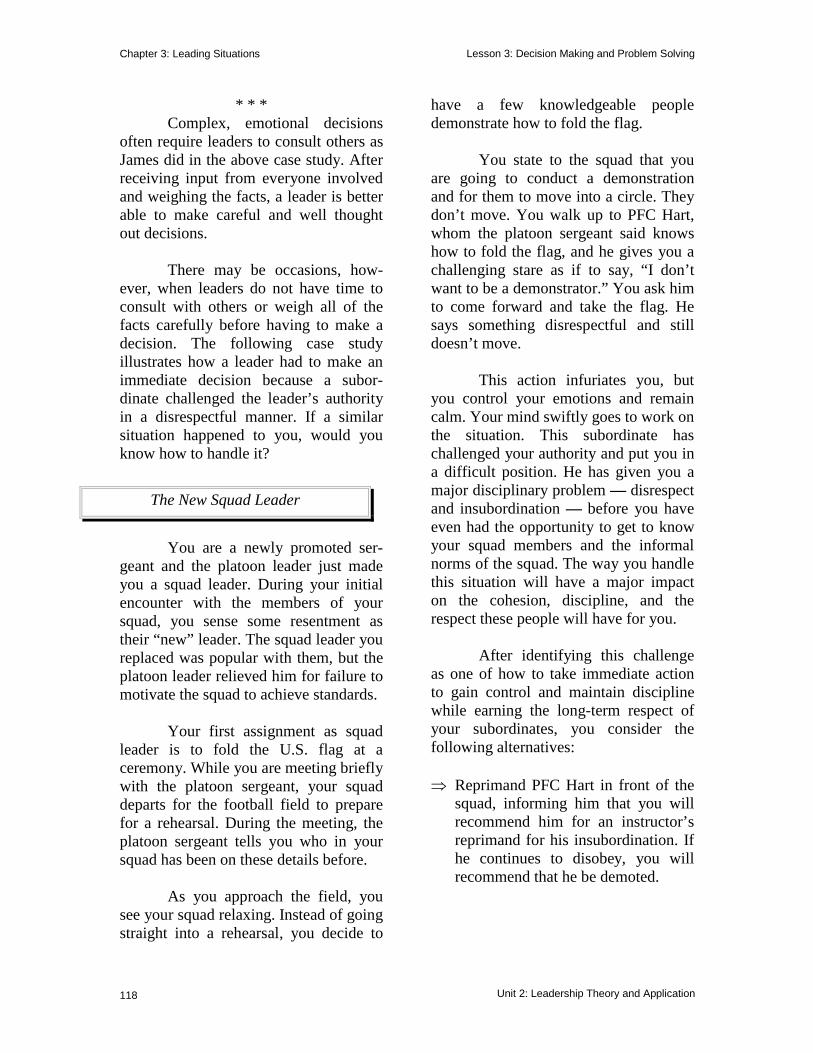
Chapter 3: Leading Situations
118
Lesson 3: Decision Making and Problem Solving
Unit 2: Leadership Theory and Application
* * * Complex, emotional decisions often require leaders to consult others as James did in the above case study. After receiving input from everyone involved and weighing the facts, a leader is better able to make careful and well thought out decisions. There may be occasions, how-ever, when leaders do not have time to consult with others or weigh all of the facts carefully before having to make a decision. The following case study illustrates how a leader had to make an immediate decision because a subor-dinate challenged the leader’s authority in a disrespectful manner. If a similar situation happened to you, would you know how to handle it?
You are a newly promoted ser-geant and the platoon leader just made you a squad leader. During your initial encounter with the members of your squad, you sense some resentment as their “new” leader. The squad leader you replaced was popular with them, but the platoon leader relieved him for failure to motivate the squad to achieve standards. Your first assignment as squad leader is to fold the U.S. flag at a ceremony. While you are meeting briefly with the platoon sergeant, your squad departs for the football field to prepare for a rehearsal. During the meeting, the platoon sergeant tells you who in your squad has been on these details before. As you approach the field, you see your squad relaxing. Instead of going straight into a rehearsal, you decide to
have a few knowledgeable people demonstrate how to fold the flag. You state to the squad that you are going to conduct a demonstration and for them to move into a circle. They don’t move. You walk up to PFC Hart, whom the platoon sergeant said knows how to fold the flag, and he gives you a challenging stare as if to say, “I don’t want to be a demonstrator.” You ask him to come forward and take the flag. He says something disrespectful and still doesn’t move. This action infuriates you, but you control your emotions and remain calm. Your mind swiftly goes to work on the situation. This subordinate has challenged your authority and put you in a difficult position. He has given you a major disciplinary problem — disrespect and insubordination — before you have even had the opportunity to get to know your squad members and the informal norms of the squad. The way you handle this situation will have a major impact on the cohesion, discipline, and the respect these people will have for you. After identifying this challenge as one of how to take immediate action to gain control and maintain discipline while earning the long-term respect of your subordinates, you consider the following alternatives: ⇒ Reprimand PFC Hart in front of the
squad, informing him that you will recommend him for an instructor’s reprimand for his insubordination. If he continues to disobey, you will recommend that he be demoted.
The New Squad Leader
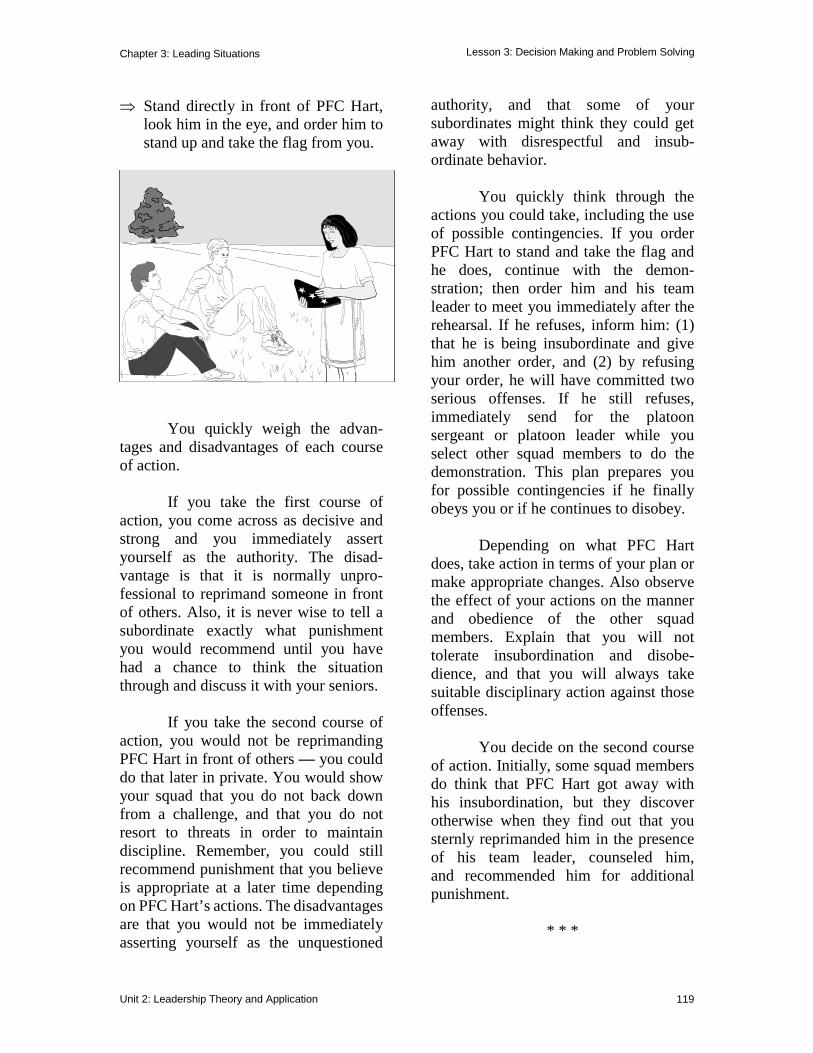
Chapter 3: Leading Situations
Unit 2: Leadership Theory and Application 119
Lesson 3: Decision Making and Problem Solving
⇒ Stand directly in front of PFC Hart, look him in the eye, and order him to stand up and take the flag from you.
You quickly weigh the advan-tages and disadvantages of each course of action. If you take the first course of action, you come across as decisive and strong and you immediately assert yourself as the authority. The disad-vantage is that it is normally unpro-fessional to reprimand someone in front of others. Also, it is never wise to tell a subordinate exactly what punishment you would recommend until you have had a chance to think the situation through and discuss it with your seniors. If you take the second course of action, you would not be reprimanding PFC Hart in front of others — you could do that later in private. You would show your squad that you do not back down from a challenge, and that you do not resort to threats in order to maintain discipline. Remember, you could still recommend punishment that you believe is appropriate at a later time depending on PFC Hart’s actions. The disadvantages are that you would not be immediately asserting yourself as the unquestioned
authority, and that some of your subordinates might think they could get away with disrespectful and insub-ordinate behavior. You quickly think through the actions you could take, including the use of possible contingencies. If you order PFC Hart to stand and take the flag and he does, continue with the demon-stration; then order him and his team leader to meet you immediately after the rehearsal. If he refuses, inform him: (1) that he is being insubordinate and give him another order, and (2) by refusing your order, he will have committed two serious offenses. If he still refuses, immediately send for the platoon sergeant or platoon leader while you select other squad members to do the demonstration. This plan prepares you for possible contingencies if he finally obeys you or if he continues to disobey. Depending on what PFC Hart does, take action in terms of your plan or make appropriate changes. Also observe the effect of your actions on the manner and obedience of the other squad members. Explain that you will not tolerate insubordination and disobe-dience, and that you will always take suitable disciplinary action against those offenses. You decide on the second course of action. Initially, some squad members do think that PFC Hart got away with his insubordination, but they discover otherwise when they find out that you sternly reprimanded him in the presence of his team leader, counseled him, and recommended him for additional punishment.
* * *
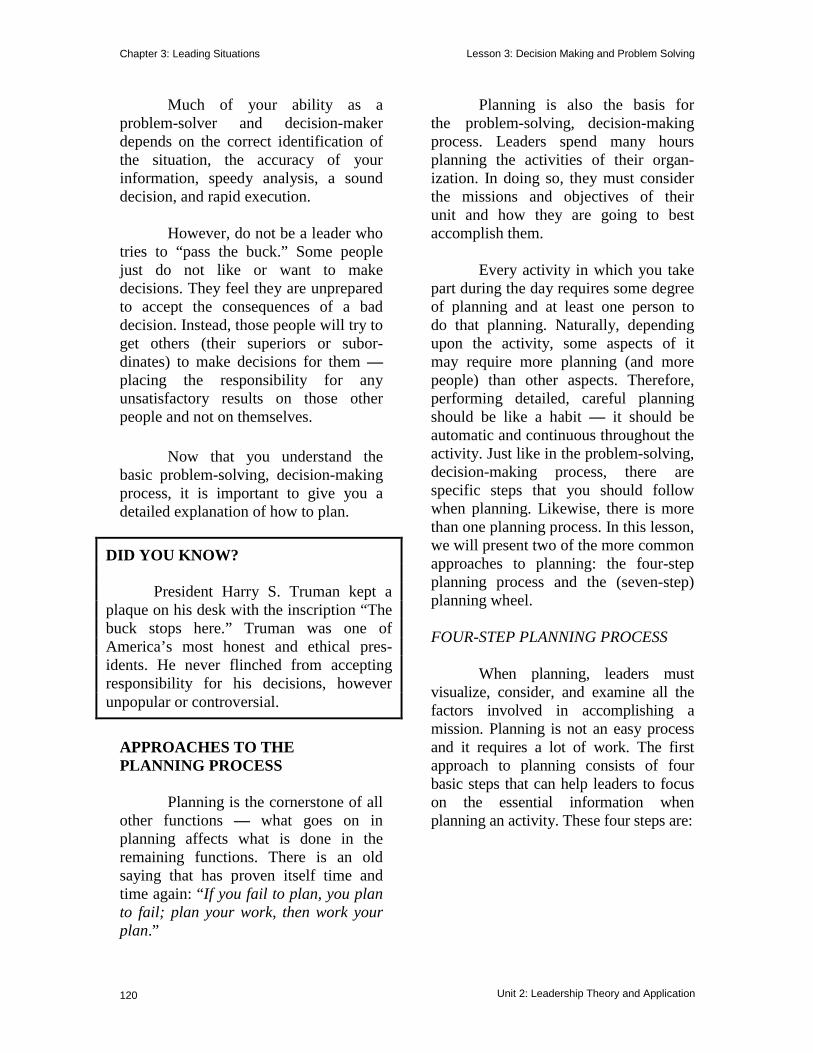
Chapter 3: Leading Situations
120
Lesson 3: Decision Making and Problem Solving
Unit 2: Leadership Theory and Application
Much of your ability as a problem-solver and decision-maker depends on the correct identification of the situation, the accuracy of your information, speedy analysis, a sound decision, and rapid execution. However, do not be a leader who tries to “pass the buck.” Some people just do not like or want to make decisions. They feel they are unprepared to accept the consequences of a bad decision. Instead, those people will try to get others (their superiors or subor-dinates) to make decisions for them — placing the responsibility for any unsatisfactory results on those other people and not on themselves. Now that you understand the basic problem-solving, decision-making process, it is important to give you a detailed explanation of how to plan.
APPROACHES TO THE PLANNING PROCESS Planning is the cornerstone of all other functions — what goes on in planning affects what is done in the remaining functions. There is an old saying that has proven itself time and time again: “If you fail to plan, you plan to fail; plan your work, then work your plan.”
Planning is also the basis for the problem-solving, decision-making process. Leaders spend many hours planning the activities of their organ-ization. In doing so, they must consider the missions and objectives of their unit and how they are going to best accomplish them. Every activity in which you take part during the day requires some degree of planning and at least one person to do that planning. Naturally, depending upon the activity, some aspects of it may require more planning (and more people) than other aspects. Therefore, performing detailed, careful planning should be like a habit — it should be automatic and continuous throughout the activity. Just like in the problem-solving, decision-making process, there are specific steps that you should follow when planning. Likewise, there is more than one planning process. In this lesson, we will present two of the more common approaches to planning: the four-step planning process and the (seven-step) planning wheel. FOUR-STEP PLANNING PROCESS When planning, leaders must visualize, consider, and examine all the factors involved in accomplishing a mission. Planning is not an easy process and it requires a lot of work. The first approach to planning consists of four basic steps that can help leaders to focus on the essential information when planning an activity. These four steps are:
DID YOU KNOW? President Harry S. Truman kept a plaque on his desk with the inscription “The buck stops here.” Truman was one of America’s most honest and ethical pres-idents. He never flinched from accepting responsibility for his decisions, however unpopular or controversial.
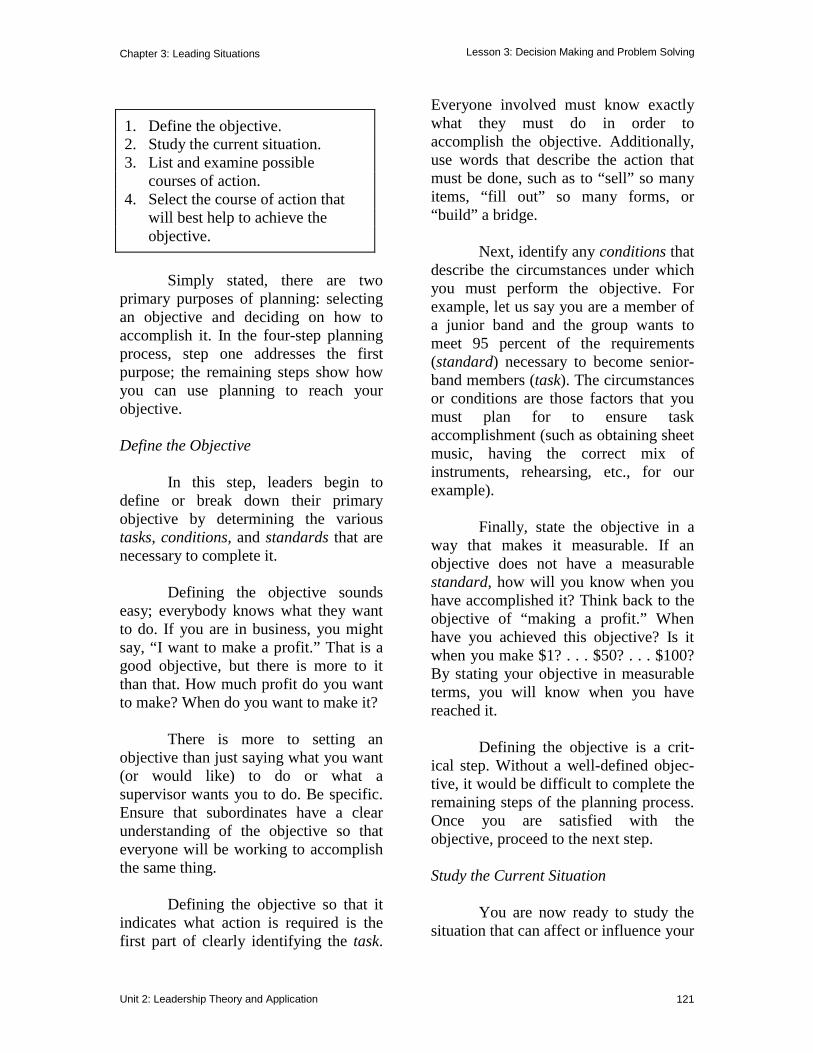
Chapter 3: Leading Situations
Unit 2: Leadership Theory and Application 121
Lesson 3: Decision Making and Problem Solving
Simply stated, there are two primary purposes of planning: selecting an objective and deciding on how to accomplish it. In the four-step planning process, step one addresses the first purpose; the remaining steps show how you can use planning to reach your objective. Define the Objective In this step, leaders begin to define or break down their primary objective by determining the various tasks, conditions, and standards that are necessary to complete it. Defining the objective sounds easy; everybody knows what they want to do. If you are in business, you might say, “I want to make a profit.” That is a good objective, but there is more to it than that. How much profit do you want to make? When do you want to make it? There is more to setting an objective than just saying what you want (or would like) to do or what a supervisor wants you to do. Be specific. Ensure that subordinates have a clear understanding of the objective so that everyone will be working to accomplish the same thing. Defining the objective so that it indicates what action is required is the first part of clearly identifying the task.
Everyone involved must know exactly what they must do in order to accomplish the objective. Additionally, use words that describe the action that must be done, such as to “sell” so many items, “fill out” so many forms, or “build” a bridge. Next, identify any conditions that describe the circumstances under which you must perform the objective. For example, let us say you are a member of a junior band and the group wants to meet 95 percent of the requirements (standard) necessary to become senior-band members (task). The circumstances or conditions are those factors that you must plan for to ensure task accomplishment (such as obtaining sheet music, having the correct mix of instruments, rehearsing, etc., for our example). Finally, state the objective in a way that makes it measurable. If an objective does not have a measurable standard, how will you know when you have accomplished it? Think back to the objective of “making a profit.” When have you achieved this objective? Is it when you make $1? . . . $50? . . . $100? By stating your objective in measurable terms, you will know when you have reached it. Defining the objective is a crit-ical step. Without a well-defined objec-tive, it would be difficult to complete the remaining steps of the planning process. Once you are satisfied with the objective, proceed to the next step. Study the Current Situation You are now ready to study the situation that can affect or influence your
1. Define the objective. 2. Study the current situation. 3. List and examine possible
courses of action. 4. Select the course of action that
will best help to achieve the objective.
Chapter 3: Leading Situations
122
Lesson 3: Decision Making and Problem Solving
Unit 2: Leadership Theory and Application
ability to accomplish the objective. First, stop and look at what you have to work with: How much time do you have? How many people will help you? What kind of supplies do you have? What other resources are available to help you? Then, identify any barriers or obstacles that may stand between you and your goal. Some of these barriers may be a lack of time, people, supplies, and/or other resources. As you can see, studying the current situation involves a systematic process of defining tasks and arranging resources with respect to mission accomplishment. You should consider five factors when performing this step: effective use of time; identification of subtasks, people, and resources; and setting priorities. Time. Time is a very important factor. You must consider time when you plan events, meet deadlines, and set goals; then, you must make plans and execute tasks according to an established time schedule. Effective leaders will schedule their time and the activities of their team to meet these events, deadlines, and goals. You must also ensure that your team members can do all of the tasks within the specified time frame. Tasks. Identify all the tasks and sub-tasks that your team must do to accomplish the objective. Be specific. Develop detailed lists to record them and, just as you did in defining the objective, set measurable standards for each task and subtask. People. Once you have a detailed list of tasks/subtasks, determine if you
have enough people to do the job. Tentatively match someone to each task/subtask. Base your selection on what each task/subtask requires versus the capabilities of your team members and on how many people (man hours) you will need to accomplish the objective. Set Priorities. You will always have some tasks that are more important than others or you must start them before others because of how difficult they are. In these situations, plan a to-do list in terms of priority for every task and subtask you have identified. Determine which ones your team must do first, second, and so on until you have included everything necessary to carry out the plan. Establish priorities in categories such as priority A, priority B, priority C, etc., for each item on the to-do list. Do the A priorities first, then the Bs, the Cs, etc. Resources. Identify all resources that are necessary to complete the objective. First, determine what is and what is not available. Then, before you begin work, set aside what is on hand for later use and make arrangements to obtain the items that you do not have, but need. While completing the task, periodically check the status of your resources and follow up on the availability of those items that you are still trying to obtain. Courses of Action and Selecting the Best Action You must now list all of the different ways you can think of to accomplish the objective and to decide on the best course of action. Depending upon the objective, these two planning
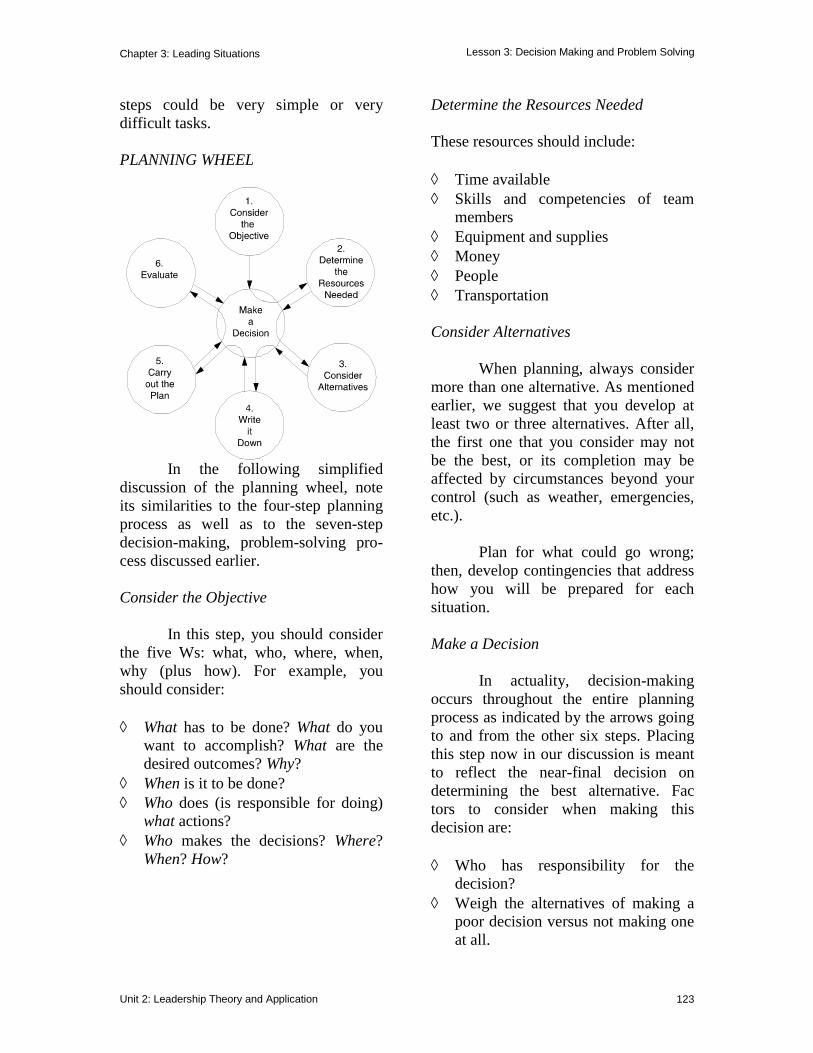
Chapter 3: Leading Situations
Unit 2: Leadership Theory and Application 123
Lesson 3: Decision Making and Problem Solving
steps could be very simple or very difficult tasks. PLANNING WHEEL
In the following simplified discussion of the planning wheel, note its similarities to the four-step planning process as well as to the seven-step decision-making, problem-solving pro-cess discussed earlier. Consider the Objective In this step, you should consider the five Ws: what, who, where, when, why (plus how). For example, you should consider: ◊ What has to be done? What do you
want to accomplish? What are the desired outcomes? Why?
◊ When is it to be done? ◊ Who does (is responsible for doing)
what actions? ◊ Who makes the decisions? Where?
When? How?
Determine the Resources Needed These resources should include: ◊ Time available ◊ Skills and competencies of team
members ◊ Equipment and supplies ◊ Money ◊ People ◊ Transportation Consider Alternatives When planning, always consider more than one alternative. As mentioned earlier, we suggest that you develop at least two or three alternatives. After all, the first one that you consider may not be the best, or its completion may be affected by circumstances beyond your control (such as weather, emergencies, etc.). Plan for what could go wrong; then, develop contingencies that address how you will be prepared for each situation. Make a Decision In actuality, decision-making occurs throughout the entire planning process as indicated by the arrows going to and from the other six steps. Placing this step now in our discussion is meant to reflect the near-final decision on determining the best alternative. Fac tors to consider when making this decision are: ◊ Who has responsibility for the
decision? ◊ Weigh the alternatives of making a
poor decision versus not making one at all.
Chapter 3: Leading Situations
124
Lesson 3: Decision Making and Problem Solving
Unit 2: Leadership Theory and Application
◊ Is no decision a decision? ◊ Is a group decision best? Why? ◊ When does the leader involve the
group in planning and decision-making?
Write it Down Once the leader reaches a decision on an alternative, write it down; then, discuss it with the group. Writing it down: ◊ Ensures accuracy. ◊ Avoids mistakes due to miscom-
munication or memory lapses. ◊ Assists in executing the plan and
delegating responsibilities. ◊ Preserves a record for later use. Carry Out the Plan As stated earlier, this is the time to act. It is where you put your plan into action. If everything up to this point in the planning process was done correctly, everyone knows what to do, where, when, how, and why. They also know what the standards are for their indi-vidual performance and for completing the objective. Ensure that people have sufficient time to do their job well. Not planning enough time for each task could result in the work being half-done. Plus, do not let people spend too much time on tasks that are unimportant. People have a tendency to put off those “really important” jobs until later. Know what must be done according to the priorities that you set. Remember, plan your work, then work your plan. Planning never stops. As you carry out the desired alternative,
unexpected situations may affect its execution, requiring you to modify your plans. When change occurs, it is wise to be patient and to keep an objective attitude. Patience is an ingredient that all leaders must possess. Although it is sometimes very hard to be patient, especially when changes occur, you should reexamine the facts, coordinate with people who may be helpful, and readjust the plan (as necessary). Most importantly, do not give up. Exercise patience and maturity while the designated people carry out the plan. Keeping an objective attitude is the ability to see and consider the different sides of an issue or situation. It involves being flexible, listening to opposing points of view, making com-promises, or making changes when necessary. Your objective attitude deter-mines how much time, effort, and patience you are willing to exert to ensure mission accomplishment. Evaluate Finally, you should develop a system for ensuring that subordinates accomplish their tasks according to set standards and on time. Like planning and decision-making, evaluation takes place all the time. Learn to evaluate every time you make a decision. Use evaluation to: ◊ Measure and improve results. ◊ Determine progress. ◊ Determine levels of knowledge. Evaluation improves the plan-ning and decision-making processes if it incorporates feedback into action.
Chapter 3: Leading Situations
Unit 2: Leadership Theory and Application 125
Lesson 3: Decision Making and Problem Solving
Evaluation will only be reliable, however, if there is a climate of honesty and trust in the unit. Leaders must create a climate where their subordinates feel they can give an honest answer or participate in a constructive way, with-out being degraded or threatened. SUPERVISING TO ACHIEVE DESIRED RESULTS Supervision is a vital aspect of communication. It means keeping a grasp on the situation by ensuring that subordinates properly perform their duties and implement unit plans and policies. Supervision includes: ◊ Setting the example. ◊ Specifying the goal, objective, or
standard. ◊ Delegating authority/fixing
responsibilities. ◊ Coordinating efforts and activities. ◊ Resolving conflicts with
peers/subordinates. ◊ Inspecting and evaluating. ◊ Providing feedback. OVERSUPERVISION VS. UNDER- SUPERVISION There is a narrow line that determines the levels of adequate super-vision. On one side of the line is oversupervision; on the other side is undersupervision. Oversupervision can stifle initia-tive, make subordinates resentful, under-mine trust, or undermine delegation of authority. On the other hand, under-supervision can lead to mission failure, especially in cases where the leader’s intent was not fully understood, or where there was disorganization or a lack of
coordination between units. Under-supervision can also make leaders look as though they do not care. Both extremes can lead to resentment and low morale. EVALUATING Evaluating is a part of super-vising that means judging the worth, quality, value, or significance of people, ideas, or things. Evaluation includes: • Looking at the way subordinates
accomplish a task. • Performing all types of firsthand
checks and inspections. • Assessing, gathering information,
and asking subordinates questions. • Obtaining feedback on how well
something is being done. • Interpreting feedback by asking:
“Does the feedback indicate the plan will succeed?” or “Does it indicate the need for a modification or a major change in plans or policies?”
ACCOMPLISHING SUPERVISION Leaders should have a routine system for checking and double checking the actions that are important to cohesion, discipline, morale, and mission accomplishment. They must check, but human nature can cause them to fail to check the most simple things that can lead to big disasters. You will hear some people say, “Worry about the little things and the big things will take care of themselves.” You will also hear others say, “Worry about the big, important things and don’t sweat the small stuff.” However, do not go by either expression — they are both poor guides.
Chapter 3: Leading Situations
126
Lesson 3: Decision Making and Problem Solving
Unit 2: Leadership Theory and Application
Concern yourself with all of the matters that require attention — big or small, short-term or long-term. Then, plan, develop courses of action, analyze them, establish priorities, set goals, and make sound and timely decisions that are the best ones for your subordinates and the unit. Finally, supervise, evaluate, and obtain feedback that your decisions are getting the job done. CONCLUSION Successful leaders are energetic. They exert a great deal of effort in order to communicate effectively, solve problems, make decisions, set goals, plan, execute plans, and supervise/ evaluate. These are a leader’s directional (or thinking) and implementing skills. As a leader, you cannot expect positive results from your subordinates unless you work equally hard at solving problems, making plans, and putting plans and decisions into action. Suc-cessful leaders also work hard at accomplishing their missions and objec-tives while maintaining only the highest possible standards of performance. In your professional and leadership development, you should strive to exercise the same degree of effort and excellence.
* * *
Chapter 3: Leading Situations Lesson 5: Leading Meetings
Unit 2: Leadership Theory and Application 127
LESSON 5: LEADING MEETINGS
INTRODUCTION
Many people dislike meetings. They are typically unorganized with no focus on the purpose for the meeting. Attendees are unaware of their roles, their responsibilities. It does not need to be like that. You will also be given some sample tools that you can use when you are leading a project and expect to lead regular meetings with your project team. FIVE KEYS TO LEADING MEETINGS
The five keys to leading meetings are — planning, starting, focusing, facilitating, concluding.
In this busy world today, people just don’t have time to sit in meetings that are unpro-ductive and ineffective. It is important that the leader does not just call a meeting and then see what happens. He or she must do some
preparation to determine the purpose and the outcome for the meeting. Listed below are the key elements of leading meetings. Each one of these elements is critical to the success of a meeting. 1. Planning is all of the things that must be
done to prepare for a meeting. 2. Starting is how you set the tone and
create the climate for the meeting. 3. Focusing refers to how you keep the
meeting on track. 4. Facilitating is about the many things a
leader can do to involve participants, be supportive, resolve conflict, and manage differences.
5. Concluding is the way in which the
leader ends the meeting and assures the participants are satisfied with the outcome and they understand what is expected of them for follow-up actions.
How do you typically plan for a
meeting? Thorough planning is critical to leading a successful meeting. There are nine steps that will help you plan effectively. They are: 1. Clarify the task of the meeting. This is a
short statement describing the primary purpose of the meeting. It should start with a verb (to decide, to solve, to view, to hear, to inform, to negotiate, to listen, to review).
2. Define the desired outcomes. The
desired outcome describes the expected results of the meeting — the product that participants will take away with them when the meeting is over. It can be a written plan or a new knowledge. It may include both task and process outcomes.
agenda attendee conclude facilitate
PURPOSE
This lesson will look at the fivekeys to leading meetings, the nine stepsto planning a meeting, the generalrules of leading effective meetings andthe skills to facilitate the processefficiently and effectively.
Chapter 3: Leading Situations Lesson 5: Leading Meetings
Unit 2: Leadership Theory and Application 128
It is written with nouns and phrases, not verbs (an action plan, a solution, a decision, clarity, an informed staff are task outcomes; a cooperative attitude, commitment, motivated team members are process outcomes).
3. Design the sequence of meeting activities.
Always plan an introduction and a summary to the meetings. Sequence the topics in order of priority, in logical sequence where information is needed to come to conclusions, alternate high-energy and low energy topics whenever possible, allow sufficient time for closing.
4. Determine who should attend, roles and
ground rules. Essential attendees are those with relevant information or expertise, will make the final decision, people who are affected by the decision, and anyone who might be a barrier to implementation. Group roles are those tasks that can be shared by several people at the meeting. Some suggested roles are designated leader responsible for managing the meeting; timekeeper for keeping track of time and reminding group of planned start and stop times. Recorder keeps minutes of the proceedings. Process observer to observe behavior and make comments about how the meeting is proceeding and staying true to the ground rules. Facilitator who may simultaneously fill the roles of timekeeper, chart person, and process observer. Ground rules are guidelines for desired behavior that will enhance to process of the meeting. Examples are one person at a time talks, listen to the person who is talking, no side conversations, communicate directly and honestly, limit contributions to five minutes.
5. Decide when to meet, when to end. Decide
what time the meeting is to begin and what time it is to end. Set meeting length
according to the agenda items, energy needed, time, and logistical constraints. Energy usually drops after two hours. Schedule in ten-minute breaks every two hours.
6. Determine logistics, equipment, and
administrative matters, and notify participants. This would include meeting location, room layout, equipment and supplies, refreshments, and notification.
7. Complete the agenda. 8. Communicate the agenda to participants. 9. Set up the meeting room.
Initially these steps might seem like a lot of work and somewhat tedious. However, when you become comfortable with the steps you will find they will become automatic. When you see the positive results of your efforts by leading effective meetings and reaching your desired outcomes, you will be admired by others because you will be showing you respect them by not wasting their time.
How you start the meeting can set the tone for success. These are activities that should be included in starting the meeting:
• Welcome and introductions. • Statement of the task. • Statement and display of the desired
outcomes. • Provide background. • Review or develop the agenda and
display it. • Clarify expectations. • List or set ground rules and display
them. • Clarify roles.
Chapter 3: Leading Situations Lesson 5: Leading Meetings
Unit 2: Leadership Theory and Application 129
One of the major problems in leading a meeting is keeping the meeting focused on the task. There are many ways to assure that the meeting adheres to the agenda and to deal with interruptions. Here are some guidelines you can use to keep the meeting on task.
• Lead the meeting through the agenda. Take charge. Use a style of leadership appropriate to the task, the situation, and the willingness and ability of the participants.
• Introduce each agenda item. Cover time and desired results.
• Keep the discussion on track by referring to the following structures:
o Task o Desired Outcomes o Agenda Items o Ground rules o Roles o Time Limit
• Focus attention by using a chart pad and easel or other visual aid.
• Maintain a “parking lot” of important items not relevant to the present discussion.
• At the end of the agenda item, briefly summarize what was accomplished and/or decided; identify unfinished bus-iness and what to do; and check for clarity and agreement.
A meeting leader is responsible to
facilitate participant involvement, deal with conflict, manage difference, make sure that everyone is heard, and keep communication open. The following are tips on how to encourage participation:
• Get input from lower level people first. • Ask open-ended questions. • Use active listening, paraphrasing and
be attentive. • Acknowledge positive participation.
• Allow opportunities for everyone to speak.
• Be supportive of new ideas and minority views — seek first to understand before agreement or disagreement.
• Distinguish the differences between assumptions and facts.
When the agenda has been com-pleted it is time to put closure to the meeting. Conclude by first summarizing what has been accomplished during the meeting; the compare the accomplishments with the desired outcomes; identify unfinished business and suggest ways to address those issues; complete the action plan for agreed upon actions; evaluate the meeting for things you can do better at the next meeting. GENERAL RULES
Conducting meetings is a process. A process of setting an agenda that will lead to a specific outcome. Like any process it can be improved through understanding the skills and rules of conducting an effective meeting. The best way to lead orderly productive meetings is to follow these guidelines.
Use Agendas: Each meeting must have an agenda. It would be helpful if it was drafted at the previous meeting with one or two members then putting the detail on it prior to the actual meeting and, if possible, sent to the participants in advance. However, at an initial meeting or a onetime meeting, this would not occur. If the agenda was not developed before a meeting, spend the first five or ten minutes to do so with the attendees.
Chapter 3: Leading Situations Lesson 5: Leading Meetings
Unit 2: Leadership Theory and Application 130
Agendas should have the following information (following the what, where, when, who, and how method):
• Agenda topics (include a sentence that would define each item and why it is being discussed).
• Presenters for each topic. • Time allocation for each topic. • Type of action required (discussion,
decision, announcement).
The flow of the agenda will typically be as follows:
• Warm-ups: short activities used to free the attendees minds of the things they left behind to attend this meeting.
• Review of agenda so the team can add, delete, modify as needed.
• Schedule breaks if longer than one hour. • Meeting evaluation so the team can
discuss their feelings about the topics covered and if a follow-up meeting is to occur, draft the next agenda.
Each meeting should have a facilitator
who is responsible for keeping the meeting focused on its purpose and moving in accordance to the time allocations. The team laders normally takes this role, however, it can be assigned to any team member and rotated when several meetings are expected. The chief responsibilities of the facilitator are:
• Keep the discussion on the topic and on the time allocations. When the time allocation is drawing near, inform the group so they can either adjust the time allocation at the expense of other items, postpone the discussion and have it as an item for another meeting, or move on as scheduled.
• Intervene if there are sidebars or when there are multiple discussions going on at the same time.
• Ensure everyone is heard and no one person dominates the discussions.
• Bring discussion to a close with summary statements.
• Act as a scribe to record key subjects, decisions made, potential agenda items for subsequent meet-ings and action items with who has agreed to do what and by when.
• At the end of the meeting the facilitator will draft the agenda for the next meeting with the assist of the team.
• Ensure the meeting evaluation takes place. This should include decisions on what will be done to improve the meeting next time.
• Keep the attendees in the “here and now.” Once the meeting begins everyone is expected to give their full attention. Often meetings are held away from the everyday work place to ensure members are not called away. That is not always possible, so the “100-mile rule” is established meaning each member is to behave as if they were 100 miles away from their daily routine. If members continue to disrupt the meeting by receiving message, making phone calls, and/or not returning on time from breaks the facilitator may need to remind them of this rule.
So, now your meeting has an agenda
and a facilitator and the meeting is underway. Another part of effective meetings is to facilitate effective dis-cussions. Every meeting should include mechanisms that allow for open discussion. The following techniques are provided and can be used in meetings or whenever an effective discussion is desired.
Chapter 3: Leading Situations Lesson 5: Leading Meetings
Unit 2: Leadership Theory and Application 131
• If you are unclear about a topic, the comments said by a participant, or the argument provided from another team member, ask for clarification. Ask them to say it again using examples, pictures, diagrams, data, or just other words.
• Don’t let the dominators take over the
discussions. Make sure you ask those who have not had the opportunity to speak for their input. Be a gatekeeper and make opportunities for everyone to be heard.
• Before debating or defending each idea
that is discussed, actively explore the idea and search for understanding before agreement or disagreement. Listening is not an easy thing to do.
• While listening, compile what has been
said and then summarize and restate it to the group and ask if what was said was captured correctly.
• If the time allocation given to a topic
seems to be taking longer, remind the team of the deadlines and either accelerate or postpone the time allocations.
• Learn to listen for when the topic has
been “talked out.” If there is silence, it could be just an opportunity for thinking about what was said. If someone repeats their point more than once, it could be that they felt they were not heard. Do not assume the discussion is over, but do not assume it is not. Intervene with questions like, do we have anything else to add to this topic or are we ready to move on.
• Periodically check to how the team is
feeling about the decision making process. Check to see if the team agrees
with the position, decision or summary of discussions.
• Throughout the meeting check the
“pulse” for the outcome. Ask: “Are we getting what we want from this discussion? What can we do differently?”
The next step in the meeting process
is to establish the record-keeping system for your meetings. This is important so you can refer back to decisions and agreements that resulted from the meetings. It can prevent the rehashing of issues previously discussed. Agendas, minutes, and the actions are included in your record keeping system.
The following is a sample agenda for your use if you are leading a project and expect to have regular meetings with the project team. It is a good tool to use when you lead a service project. The agenda incorporates several elements useful in documenting the purpose for the meetings and action and future lists.
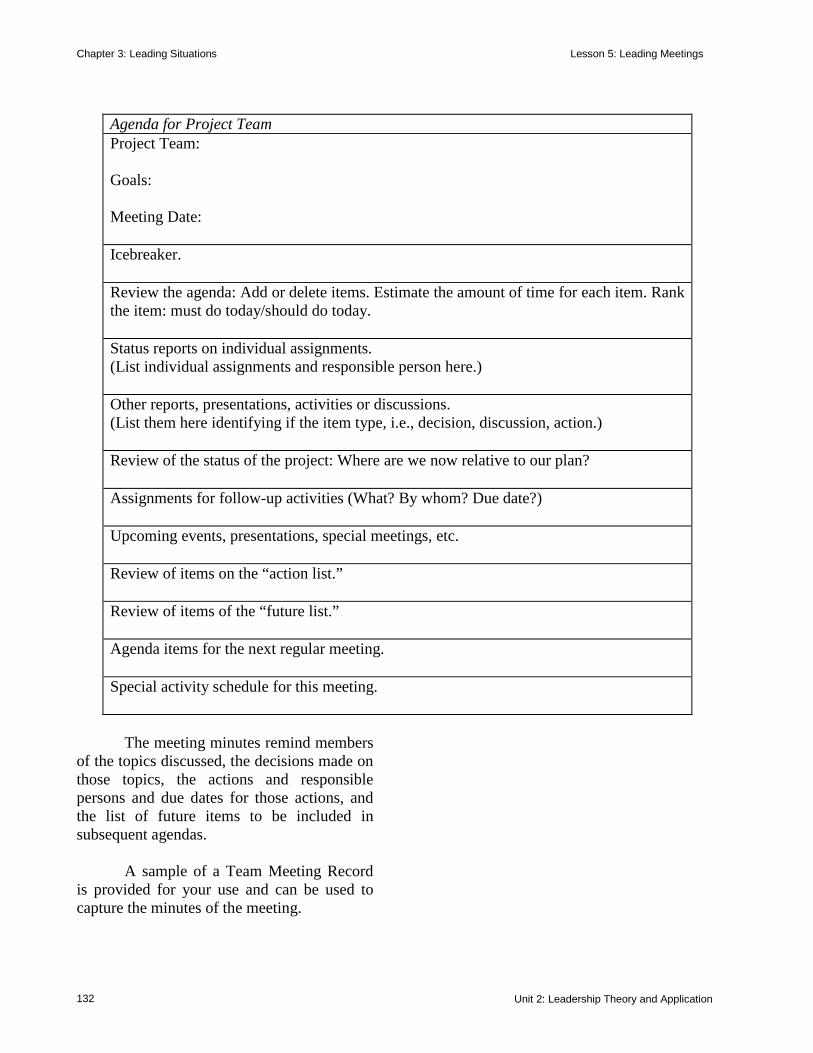
Chapter 3: Leading Situations Lesson 5: Leading Meetings
Unit 2: Leadership Theory and Application 132
Agenda for Project Team Project Team: Goals: Meeting Date: Icebreaker. Review the agenda: Add or delete items. Estimate the amount of time for each item. Rank the item: must do today/should do today. Status reports on individual assignments. (List individual assignments and responsible person here.) Other reports, presentations, activities or discussions. (List them here identifying if the item type, i.e., decision, discussion, action.) Review of the status of the project: Where are we now relative to our plan? Assignments for follow-up activities (What? By whom? Due date?) Upcoming events, presentations, special meetings, etc. Review of items on the “action list.” Review of items of the “future list.” Agenda items for the next regular meeting. Special activity schedule for this meeting.
The meeting minutes remind members
of the topics discussed, the decisions made on those topics, the actions and responsible persons and due dates for those actions, and the list of future items to be included in subsequent agendas.
A sample of a Team Meeting Record is provided for your use and can be used to capture the minutes of the meeting.
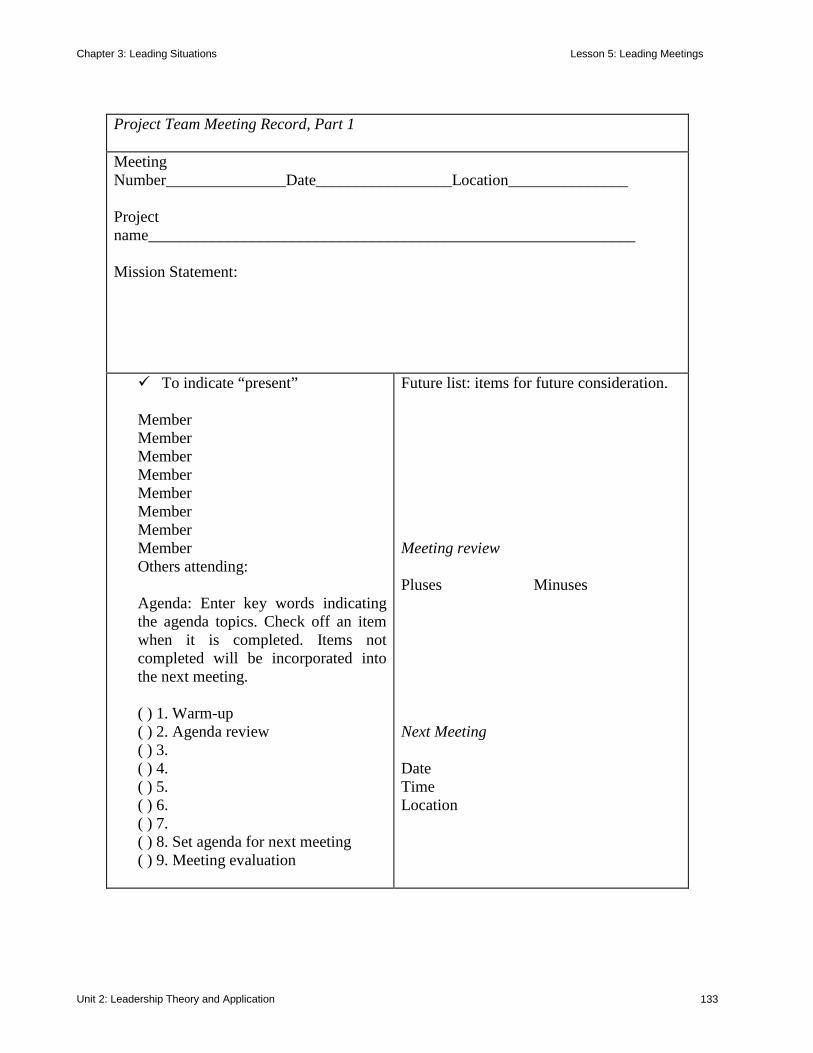
Chapter 3: Leading Situations Lesson 5: Leading Meetings
Unit 2: Leadership Theory and Application 133
Project Team Meeting Record, Part 1 Meeting Number_______________Date_________________Location_______________ Project name_____________________________________________________________ Mission Statement: ! To indicate “present” Member Member Member Member Member Member Member Member Others attending: Agenda: Enter key words indicating the agenda topics. Check off an item when it is completed. Items not completed will be incorporated into the next meeting. ( ) 1. Warm-up ( ) 2. Agenda review ( ) 3. ( ) 4. ( ) 5. ( ) 6. ( ) 7. ( ) 8. Set agenda for next meeting ( ) 9. Meeting evaluation
Future list: items for future consideration. Meeting review Pluses Minuses Next Meeting Date Time Location
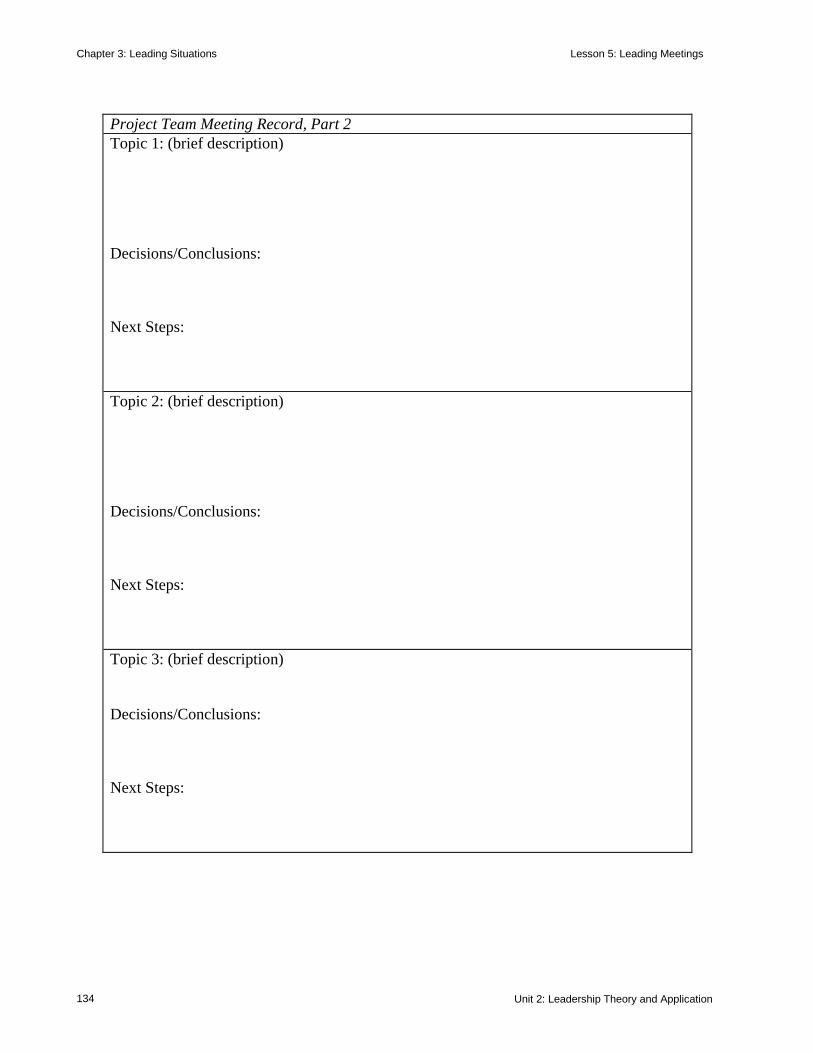
Chapter 3: Leading Situations Lesson 5: Leading Meetings
Unit 2: Leadership Theory and Application 134
Project Team Meeting Record, Part 2 Topic 1: (brief description) Decisions/Conclusions: Next Steps: Topic 2: (brief description) Decisions/Conclusions: Next Steps: Topic 3: (brief description) Decisions/Conclusions: Next Steps:
Chapter 3: Leading Situations Lesson 5: Leading Meetings
Unit 2: Leadership Theory and Application 135
CONCLUSION In this lesson, you have learned, the five keys to leading meetings, the nine steps to planning a meeting, the general rules of leading effective meetings and the skills to facilitate the process efficiently and effectively.
* * *
Chapter 3: Leading Situations Lesson 7: Team Development
Unit 2: Leadership Theory and Application 136
LESSON 7: TEAM DEVELOPMENT
INTRODUCTION Do you believe you are a good follower or team member? Being a good follower is one of the first steps to becoming a good leader. To be successful at both, know your individual responsibilities, then cultivate your self-reliance and self-image. Know how to apply the traits of followership, and the role that you play in a team will be more rewarding and challenging. You will have many opportunities throughout JROTC to develop your leadership skills and abilities, be
a follower and a team member, and lead a team, squad, and higher. INDIVIDUAL RESPONSIBILITY Your individual responsibilities include respecting yourself, being honest with yourself, and developing confidence and a winning attitude. By respecting yourself, you will know how to respect others. Treating others as you wish to be treated is an important quality to good human relations. If you always strive to do your best, you will become a better follower and a better leader. A part of being honest with yourself and treating others as you wish to be treated is learning to accept criticism. Accepting criticism is not easy to do, but receiving constructive criticism can help you to improve yourself. How do you think Brian would react if you told him that he should change his leadership style? As you continue to develop your desirable personality traits and leadership skills and abilities, you will become more confident of yourself and of your ideas. Additionally, by showing respect, honesty, fairness, and responsibility to others, you are being a good follower and a good leader. Make these qualities, and the ones discussed above, a part of your own personal leadership style. When you do, the changes you see in others will be a reflection of the changes in you. SELF-RELIANCE Self-reliance means being able to depend upon your own efforts and abilities; it is also having confidence in and exercising your own powers of judgment. In order to improve your self-reliance, you must be honest in acknowledging areas where you need change.
actions beliefs constructive criticism cooperate cultivate dedication followership professionalism self-discipline self-reliance staff study teamwork
PURPOSE
This lesson covers the funda-mental leadership concepts: individualresponsibility to yourself and to otherson a team, the benefits of self-reliance, the traits of good followership, and theimportance of a team and teamwork. All of these concepts are part ofbecoming a leader and all are equallyimportant to the successful completionof a mission.
Chapter 3: Leading Situations Lesson 7: Team Development
Unit 2: Leadership Theory and Application 137
When you are a member of a team and you are self-reliant, your entire team benefits. By doing your part of a task to the best of your abilities (the leadership trait of dependability), your team members do not have to pick up the slack. Then, if every member of the team does their part, the team is more apt to finish its task on schedule and to meet or exceed the expected standards. Self-reliance can also benefit you. When you can rely upon yourself to do something, it gives you a feeling of pride. Self-reliance demonstrates your competence and commitment to other team members. Remember Jon? His team members knew how competent and committed he was and, as a result of his actions, he instilled confidence in them to do their jobs better. FOLLOWERSHIP Followership is knowing how to act as a member of a team. Good followership is essential to good team performance. There are certain qualities or traits of followership that all team members must display to ensure their team is capable of accomplishing its missions. They include competence, dedication, professionalism, and self-discipline. Additionally, followership requires every member of a team to conscientiously apply their beliefs and knowledge about a task or situation before they act. Then, the direction of their actions should be governed by: • Established standards and priorities.
• Rules of conduct.
• The best interests of the team. By using a common sense approach and taking only the actions that are
appropriate and necessary for each situation, the team and all its members will be able to successfully accomplish any assigned task. THE TEAM AND TEAMWORK Like all leaders, team leaders have responsibilities to their subordinates and to their superiors. Striving to keep their team productive is one of the team leader’s most important goals. A team that can work well together can effectively accomplish its assigned missions. RESPONSIBILITIES OF A TEAM LEADER TO TEAM MEMBERS Leaders at all levels of the chain of command must set the example for their subordinates to follow. Team members need and expect from their leaders guidance, trust, loyalty, respect, and understanding. To accomplish this, the team leader must: • Be a decisive leader. Make accurate and
timely decisions to prevent subordinates from wasting their time waiting for instructions, making the decisions themselves, or losing their respect in the unit’s leadership.
• Be an appreciative leader. Respect and value the ideas, positive work efforts, skills, and abilities of subordinates. Reward and/or recognize them appropriately.
• Develop initiative in subordinates. Give them responsibilities that are commen-surate with their skills and abilities.
• Be a caring, sensitive, and compassionate
leader. Sensitive leaders are not weak, nor do they back down. They listen well. They avoid rejecting ideas and work toward compromise. Caring and compassionate
Chapter 3: Leading Situations Lesson 7: Team Development
Unit 2: Leadership Theory and Application 138
leaders sympathize with the problems of their team members and they help to solve them.
• Communicate effectively with subordi-nates. Make all communications (written and oral) clear and concise. Do not expect them to read your mind. This leads to frustration and disappointment, and the assigned task may not be completed to standards.
RESPONSIBILITIES OF A TEAM LEADER TO THE CHAIN OF COMMAND Team leaders are at the level where most decisions are made above them, yet they are responsible for accomplishing the tasks resulting from those decisions. Therefore, team leaders must be responsible (by showing loyalty, dependability, and integrity — just to name a few of the leadership traits) to authorities as well as to their teammates. Team leaders owe their superiors a completed task: finished on time, to the best of their ability, and at the least expense possible. They are in a leadership position because superiors believe they can do the job — team leaders must prove it to them that they can! HOW EFFECTIVE LEADERSHIP AFFECTS THE TEAM Two of the most important affects that can come from effective leadership are the
successful completion of a task and a sense of pride for a job well done. To obtain these results, team leaders must motivate their team members to produce high quality work — for starters, this means that assigned tasks are completed to the supervisor’s satisfaction and on time. Team leaders can be effective, responsible leaders by: • Applying as many of the leadership traits
as possible. Leaders who possess many positive leadership traits can by their actions create an environment where team members work harder, accomplish more, enjoy the task, and act as a cohesive unit.
• Pitching in and getting their hands dirty. The team will realize you are there to help them.
• Listening to, understanding, and sup-porting their teammates. Although team members realize that leaders have respon-sibilities to their chain of command, they also want assurances that their immediate supervisor is there to support them and not to take advantage of them. If subordinates know that personal gain and recognition are not their leader’s goal, but that doing the job is, they will show the degree of respect and trust that produces high quality work.
TEAMWORK Teamwork is the effort of a group to complete a task or mission. Successful teamwork requires each team member to cooperate with other members of the group in order to complete the effort as directed. IMPORTANCE OF TEAMWORK Learning about teamwork is an important part of JROTC. It is a team spirit where all members work together to achieve
Chapter 3: Leading Situations Lesson 7: Team Development
Unit 2: Leadership Theory and Application 139
the same goals. It is a willingness to give other team members a friendly push when they need it or a pat on the back when they deserve it. In teamwork, each member of the team expects the same degree of effort from the other. Then, when one teammate does it right, the whole team wins and when cooperation coexists with teamwork, the mission moves more quickly. If a situation should ever arise where someone calls upon you to complete a job, task, or mission that is too involved for you to do alone, teamwork usually provides the answer. In teamwork, a group of people, or fellow cadets, is there to help you complete it. As you will soon discover in the following case studies, distributing food to the needy can be a huge mission. However, with good leadership and effective teamwork, the task can be accomplished. Find out if that is what actually happened. Teamwork also gives you the opportunity to interact with other cadets. In most organizations that you will encounter, the members of a team or group will probably come from different backgrounds and will have different interests. But, by working together as a cohesive unit, everyone tries harder to get along with each other in a productive and professional manner. By working cooperatively with your teammates, you can improve your individual leadership, followership, and communication skills and abilities. Another very important aspect of teamwork is that it builds friendships and fosters esprit de corps, or feelings of unity and pride for the team. When people feel united, everyone works together to complete the mission.
YOUR ROLE IN TEAMWORK A chain is only as strong as its weakest link. The links in the chain are you and your teammates. Without you and your team members, the chain would break. In much the same way, your role (and the roles of everyone else) keeps the team strong. Your main role in teamwork is that of being a good follower. As you learned in the section on followership, even leaders have responsibilities to someone and that makes them followers, too. A good follower takes instruction and authority well. The following story illustrates the responsibilities of leaders to their subordi-nates and how teamwork affects the outcome of a mission. As you read it, think about how the squad leader applied these responsibilities; then, answer the following questions. Was the squad leader: • Decisive?
• Appreciative of his subordinates’ efforts?
• Developing initiative in his subordinates?
• Caring, sensitive, and compassionate?
• Communicating effectively with his
subordinates?
* * * The Senior Army Instructor (SAI), Major Mason, wanted his cadet battalion to distribute food to the needy at Thanksgiving. He asked for a volunteer to research, plan, and present a report to him and the cadet battalion staff on the best way to accomplish this mission.
Chapter 3: Leading Situations Lesson 7: Team Development
Unit 2: Leadership Theory and Application 140
Although several leaders expressed an interest, the SAI selected Jim, a junior and fairly recent enrollee into JROTC, but whose leadership potential was very impressive. Major Mason gave Jim the order on the first of October and told him he had until the first of November to complete the project. Although Jim’s squad was a group of 12 cadets with very different and independent ideas and backgrounds, they could be counted on to work well together and to complete their tasks. Jim was their squad leader because he consistently displayed outstanding leadership — not only in JROTC but in student government and extracurricular activities as well — and he knew how to motivate people to get things done. The same day Jim received the order, he called a meeting of his squad and told them about the project. Everyone began to speak excitedly and all at once. “What about calling the Salvation Army?” “Yea, that’s right. They know a lot about that stuff.” “My mom can get dry goods from the store where she works.” Jim waited until everyone quieted down before continuing. “Those are all great ideas. I think we can put together an excellent report, but we need to get organized. I have broken the mission down into parts and would like to know what you each think you can do. Some of the jobs are big enough for two or three of you to work together. If you have any other suggestions, please mention them.” At the end of the meeting, Jim gave out the tasks. He charged Tony and Michelle with finding a place from which to distribute the food. Roger and Orlando were to find out how and where to get community support and donations. Mark was to prepare sample announcements for the school newspaper and for the public address given at school each
morning, informing the other students about their efforts. Jim had Tina and Larry work out a plan on how to collect food donated by students and where to store the food products. Joe was to keep an inventory of the collected foods. Based on Joe’s inventory, Margo was to divide the food into packages for the families who came to collect a donation. Sandy and Leigh Ann were to devise a parking plan and lay out the area for the lines to form on the day of the distribution. Gail was to obtain the addresses of homeless shelters and other areas letting the needy know when and where to come when the plan was set. Once everyone did their part of the planning and gave the information back to Jim, he would prepare a staff study for the SAI and cadet battalion staff. Each team member or pair within the squad worked hard to develop their section of the overall plan. In some instances, they came up with several alternatives for doing their jobs. After discussing those alternatives as a group and obtaining Jim’s decision on the best way to do them, they completed the parts of the project. They knew that on the day of execution, they would be responsible for executing the portion of the plan that they helped to develop. With still a few days remaining before the first of November, Jim collected the results of the squad’s hard work and thanked them for their outstanding effort. He wrote up a draft report concluding the research, verified each part with the squad member or members who researched it, then finalized the report.

Chapter 3: Leading Situations Lesson 7: Team Development
Unit 2: Leadership Theory and Application 141
MILK
After reading the report, Major Mason said, “You and your squad did a commendable job. A lot of planning went into this report; it is very complete and it includes some very sound information. I’ll put your squad in charge of making the formal arrangements for carrying out the project and I’ll have the cadet battalion commander assign other cadets to your squad to assist in the areas that you’ve identified. As a result of your efforts, I’m certain that this will be a very successful community project.”
If you cannot or do not take the responsibility to do your part of a task, you may fail in your endeavor to complete it. If a team cannot or does not work together as a cohesive, cooperative unit, it may fail. However, if every member of a team used their beliefs, knowledge, and actions, and did their part as a follower or as a leader, most likely the team would accomplish its task and successfully complete its mission. Individual responsibility, self-reliance, followership, and teamwork are all important measurements of success. STAGES OF GROUP DEVELOPMENT
In order to make your team more effective, you also need to be aware of the stages of development each group experiences. They are referred to as the forming, storming, norming and performing stages.
The first stage, forming, is characterized by a great deal of uncertainty about the group’s purpose (why are we here), structure (why am I here) and leadership (why is he/she in charge). Members are not sure how they are to behave. You know when you have moved on the second stage when the members of the team stop thinking of themselves as individuals and begin to think of themselves as part of a group.
The storming stage is one of intragroup conflict. Members accept the existence of the group, but there is resistance to the rules that are imposed on individuality. There is also conflict over who will control the group.
Different bases of power begin to show themselves through alliances, absen-teeism, disagreements and little focus on the completion of task. You will be aware of moving through this stage when there is a relatively clear hierarchy of leadership within the group.
The third stage in one in which close relationships are established and the group begins to develop a strong cohesiveness. You are aware when the group has successfully moved through this stage when the mem- bers have assimilated a common set of expectations of what defines member behavior.
The fourth stage is performing. The group at this point is fully functioning and accepted. Group energy has moved from getting to know and understand each other to performing the task at hand.
Each group moves at its own speed through each of these stages. The more skilled in interpersonal skills each team member is, the easier it is to move to the performing
Chapter 3: Leading Situations Lesson 7: Team Development
Unit 2: Leadership Theory and Application 142
stage. You cannot, however, be efficient in this process by directing the team members to jump from the forming stage to the performing stage. There are, however, interventions that the leader may use to help the group progress through these stages.
While in the forming stage it is important to ensure the purpose of the group is clearly stated and what role each member plays towards the accomplishment of that purpose. The group will need to discuss what behaviors will be acceptable to the group (timeliness, decision-making process, inter-ruptions, voting procedures, etc.). When the group enters the storming stage it will be important for the leader to revisit the purpose of the group and each member’s role. The leader will need to be an effective listener to make sure the root cause of the conflict in clearly stated. He/she will need to address the issues and provide effective informative feedback to help the group through this storming stage and into the norming stage. Continual coaching and supportive behavior is needed during the norming stage until the group has agreed to accept willingly those norms. Then the leader needs to know when to step back and let the group lead the way to performing the task.
CONCLUSION
In this lesson you covered the fundamental leadership concepts of individual responsibility to yourself and to others on a team, the benefits of self-reliance, the traits of good followership, and the importance of a team and teamwork. All of these concepts are part of becoming a leader and all are equally important to the successful completion of a mission.
* * *
Chapter 3: Leading Situations Lesson 8: Project Management
Unit 2: Leadership Theory and Application 143
LESSON 8: PROJECT MANAGEMENT
INTRODUCTION
Projects have definite beginnings and endings. That makes them somewhat different from ongoing work and requires special management skills. Your project team may be comprised of people outside those you supervise. However, you will be responsible for supervising their work on the team. Therefore, all the knowledge and skills you have learned thus far in your JROTC program will come to play when given the opportunity to become a project team leader.
FOUR STAGE MODEL
The four-stage model for project
management includes the definition stage; planning stage; implementation stage and follow-up stage. In the definition stage, you will organize the data, sort complex inform-ation and clarify the goals in consideration of
the organization’s goals. In the Planning Stage, you will think ahead, seek expert advice, maintain objectivity, and identify subdivisions of the project. The implementation Stage is where you will monitor the performance, establish contingencies, and plan for prevention. Finally, the follow-stage requires you evaluate the results and make recommendations.
It is important for you to set objectives
and establish a basic strategy for achieving the objectives with regard to issues like time, cost, etc. It is also important for you to break the project down into subunits or steps once the extent of the project goals are determined. You will need to develop a project schedule and identify the sequence in which actions should take place.
One way of displaying the time relationship of the steps in the project is by using a Gantt Chart. Henry Gantt, an industrial engineer, introduced this procedure in the early 1900s. The chart shows the flow of activities in sequence. In order to create a Gantt chart you must list the steps required to complete the project and the estimated time for each step. The steps are listed down the left side with time intervals given along the bottom. When the cart is finished, once can see the minimum total time for the project, the sequence of steps, and the possible overlapping of steps. You will need to watch for overuse of resources.
Another useful tool in project management is PERT — Program Evaluation and Review Technique. The CPM — Critical Path Method is another variation of PERT. Either way, this planning method will assist the project team to be mutually aware of the process and sub-goals, to contribute to and share in the decision made about how, when, by whom activities are done, make more efficient use of resources by concentrating
Gantt Chart implementation project management
PURPOSE
This lesson will help youidentify critical issues associated withproject management stages, under-stand how to use appropriate toolsin managing a project and learnand practice a variety of techniquesrequired to manage projects success-fully.
Chapter 3: Leading Situations Lesson 8: Project Management
144 Unit 2: Leadership Theory and Application
effort and time on critical tasks rather than devoting time to subtasks while tasks of greater priority lack hands, re-evaluate the project while it is underway, and reallocate resources to cope with unexpected blocks to task accomplishment or to take advantage of unanticipated success in meeting some sub-goal.
PERT is a group analysis flow-chart procedure that begins with identifying the sequences of dependent activities. You begin at the end.
Before we can arrive at the picnic grounds, we must travel there in the car. Before we can travel in the car, we must fill up the gas and check the oil. Before we do that, we must have traveled to the service station. Before we can start out for the service station, we must have loaded all the supplies in the car —except ice, which we can get at the gas station. So we draw a network of activities, each of which ends in an event, in this manner:
Another example of this is your getting up each morning to “get to school.” Suppose you need to be at school no later than 8 a.m. You would list all the events that need to take place from the time you wake up to the time you arrive — AND the length of time it takes you to do each event. You would then back out from 8 a.m. to determine what time you would need to set your alarm clock.
Putting all this together is your responsibility as project team leader. You will need a working knowledge of these tools, your communication skills, your skills for setting expectations and provide continual evaluation and follow-up using the appropriate leadership style. Your leading meeting knowledge will also come in hand here. You see, it is time to put it all together so you can lead your project team and manage the project.
CONCLUSION
In this lesson, you learned to identify critical issues associated with project management stages, understand how to use appropriate tools in managing a project and learn and practice a variety of techniques required to manage projects successfully.
* * *
Chapter 3: Leading Situations Lesson 9: Mentoring
Unit 2: Leadership Theory and Application 145
LESSON 9: MENTORING
As an old man walked the beach at dawn, he noticed a young man ahead picking
up starfish and flinging them into the sea. Finally catching up to the youth, he asked the young man why he was doing this. The answer was that the stranded starfish would die if left until the morning sun. “But the beach goes on for miles and there are millions of starfish,” countered the old man. “How can your effort make a difference?” The young man looked at the starfish in his hand and then threw it to safety in the waves. “It makes a difference to that one,” he said.
*** INTRODUCTION Mentoring is a “sustained one-to-one relationship which promotes human develop-ment by regular, joint participation in structured activities.” A dynamic mentoring program in your cadet battalion or school is one that encourages the development of caring partnerships. Every mentoring program requires the presence of positive role models to support high school mentors as they build positive interpersonal relations both in and out of school-based experiences. In this lesson, we will briefly look at how mentoring identifies with Army JROTC and your position as a cadet leader and mentor. Then, we will examine in detail how mentoring pertains to your development as a high school student entrusted with the responsibility to help others. MENTORING IN RELATIONSHIP TO ARMY JROTC LEADERSHIP The concept of mentoring includes the roles of the teacher, role model, coach, and counselor. However, mentors are more than teachers and coaches; they are trusted guides and counselors — although as a mentor, you
bias (-es) colloquialisms cultural diversity dysfunctions ethnicity humanistic mentee multicultural (ism) socioeconomic stereotypes
PURPOSE
This lesson presents amentoring program designed to helpyou explore new interests in helpingothers, further develop your personalskills, and stay excited about school.Mentoring activities will center aroundbuilding trust and developing positive self-esteem through sharing and work-ing together with your subordinates,peers, or other teenagers and childrenin one-to-one relationships. The men-toring role is a major commitment onyour part. In addition to com-prehending the concept of self-identity,you must also understand the skillsnecessary in a mentoring relationshipand work to acquire those skills.Finally, you must have an awareness ofculturally diverse issues which canaffect you, your mentoring program, and your community.

Chapter 3: Leading Situations Lesson 9: Mentoring
146 Unit 2: Leadership Theory and Application
are not a trained counselor. Leaders as mentors are responsible for molding and developing individuals into proficient, cohesive teams. Genuine respect is a key element in any mentoring program. Subordinates must be able to respect their leaders if they want to trust them as their guides and counselors. To obtain this trust and respect, leaders as mentors must: ♦ Set a good example. Role modeling and
setting examples for subordinates to follow are extremely important.
♦ Commit themselves to their subordinates
and be fully committed to the complete development of those who are in need of some form of structured guidance in their lives.
♦ Possess the commitment of guardians and
the duty of tutors. ♦ Have a personal stake in the positive and
long-term development of those they are trying to help.
♦ Be sensitive to the feelings of their
subordinates, yet be responsible for training them intensively.
♦ Develop the capacity to delegate authority
in order to watch subordinates learn hard, valuable lessons through trial and error.
♦ Provide adequate and timely feedback to
ensure the success of their subordinates’ development process.
MENTORING: WHAT’S IT ALL ABOUT? Entering into a mentoring relationship can be rewarding and exciting. It even can be a little scary. There are responsibilities involved that require maturity, compassion, and sometimes tough decisions. In this new adventure you are about to begin as a mentor, use your head, trust your instincts, listen to your heart, and it will be the experience of a lifetime.
The Reward is Worth the Risk
Helping Others
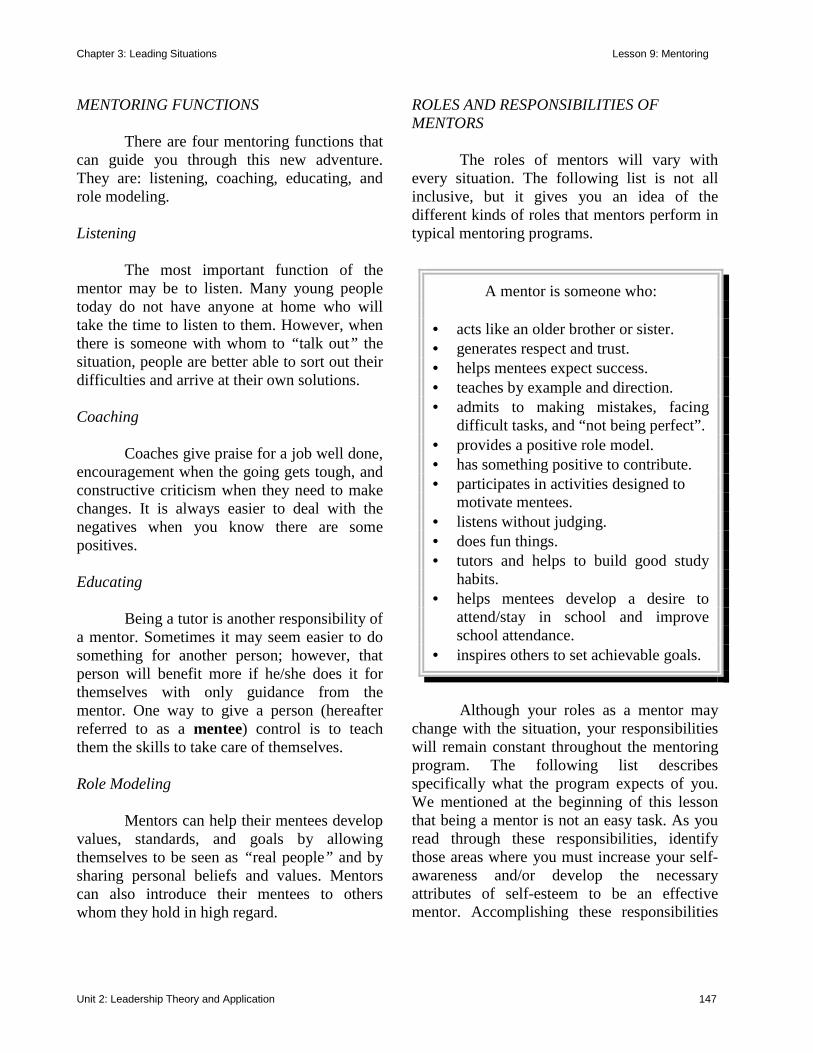
Chapter 3: Leading Situations Lesson 9: Mentoring
Unit 2: Leadership Theory and Application 147
MENTORING FUNCTIONS There are four mentoring functions that can guide you through this new adventure. They are: listening, coaching, educating, and role modeling. Listening The most important function of the mentor may be to listen. Many young people today do not have anyone at home who will take the time to listen to them. However, when there is someone with whom to “talk out” the situation, people are better able to sort out their difficulties and arrive at their own solutions. Coaching Coaches give praise for a job well done, encouragement when the going gets tough, and constructive criticism when they need to make changes. It is always easier to deal with the negatives when you know there are some positives. Educating Being a tutor is another responsibility of a mentor. Sometimes it may seem easier to do something for another person; however, that person will benefit more if he/she does it for themselves with only guidance from the mentor. One way to give a person (hereafter referred to as a mentee) control is to teach them the skills to take care of themselves. Role Modeling Mentors can help their mentees develop values, standards, and goals by allowing themselves to be seen as “real people” and by sharing personal beliefs and values. Mentors can also introduce their mentees to others whom they hold in high regard.
ROLES AND RESPONSIBILITIES OF MENTORS The roles of mentors will vary with every situation. The following list is not all inclusive, but it gives you an idea of the different kinds of roles that mentors perform in typical mentoring programs.
Although your roles as a mentor may change with the situation, your responsibilities will remain constant throughout the mentoring program. The following list describes specifically what the program expects of you. We mentioned at the beginning of this lesson that being a mentor is not an easy task. As you read through these responsibilities, identify those areas where you must increase your self-awareness and/or develop the necessary attributes of self-esteem to be an effective mentor. Accomplishing these responsibilities
A mentor is someone who: • acts like an older brother or sister. • generates respect and trust. • helps mentees expect success. • teaches by example and direction. • admits to making mistakes, facing
difficult tasks, and “not being perfect”. • provides a positive role model. • has something positive to contribute. • participates in activities designed to
motivate mentees. • listens without judging. • does fun things. • tutors and helps to build good study
habits. • helps mentees develop a desire to
attend/stay in school and improve school attendance.
• inspires others to set achievable goals.
Chapter 3: Leading Situations Lesson 9: Mentoring
148 Unit 2: Leadership Theory and Application
will require a high degree of self-identity and maturity. 1. Be aware of the impact that culture,
socioeconomic status, experiences, etc., have on how the mentee sees and processes information. Become comfortable with the fact that the mentee may be different from you and may approach evaluating, perceiving, acting, and behaving differently than you do.
2. Be careful to respect the mentee’s
orientation and not to impose your values, assumptions, perceptions, and biases on the mentee. Be aware of your own attitudes, beliefs, and feelings and how these filters may bias your judgment.
3. Help your mentee to accomplish tasks, but
be careful not to hold preconceived limitations about what that person can or cannot do. Recognize these limitations, but do not attempt to replace the mentee’s personal efforts. Always remember that you are there to assist, not to do the task.
4. Acquire specific knowledge about the
mentee with whom you work. If you find out that he/she has major challenges at home, school, and/or place of employment, be careful not to ask too many questions about any uncomfortable situations. If you encounter a situation that you do not feel comfortable handling, seek help or guidance from your instructors.
5. Teach the mentee to respond to verbal
rewards. Do not give gifts as a means of positive recognition and do not become emotionally attached. If the relationship becomes personal to the degree you are not able to be objective, withdraw and refer the mentee to another mentor. If a mentee makes a habit of bringing you gifts, discourage that habit. Always read any
notes given to you by the mentee. Sometimes because of their learning style, mentees may not be able to vocalize their challenge but they are able to put it in writing. Never respond back in writing. If the notes are of a personal nature, discourage that habit. One or two positive words like “Congratulations!” or “Well done!” may be appropriate.
6. Help your mentee to make assessments
about behavior, thoughts, and actions as that individual tries new activities. Help the mentee see the benefits of trying and taking risks with new behaviors. Give support when necessary.
7. Be clear, concise, direct, and consistent with feedback.
8. Help the mentee generate a variety of
responses or alternatives to situations. 9. Do not make promises you cannot keep. Do
not use the word promise to your mentee as you will be taking responsibility. Make “I” statements to your mentee of what you are willing to do. For example, “I will help you find out the easiest and most effective way for you to study.”
10. Coordinate all planned activities with your
instructors, the cooperating agency, other mentors, and the mentee.
11. Prepare for and complete the tasks you
agreed to do. 12. Follow the rules of your battalion and
school while working with the mentee. 13. Make arrangements to contact the mentee’s
guardians, parents, teachers, etc., for permission to take that person on special activities.
Chapter 3: Leading Situations Lesson 9: Mentoring
Unit 2: Leadership Theory and Application 149
14. If you cannot perform a task that you agreed to do at the prescribed time, reschedule it for another time.
15. Do not break confidentiality by sharing the
mentee’s concerns with others. However, confidentially should always be overridden if the situation calls for it. A competent mentor maintains confidences and does not discuss personal interviews with other cadets or people. If the challenge is beyond your scope, contact a qualified person. It is critical that you use concrete procedures in serious cases. If a life-threatening situation arises:
♦ Inform your mentee that you will notify a
competent adviser because you care. ♦ Encourage the mentee to go with you to the
adviser to explain the situation. If the men-tee refuses, insist that he or she go. Explain that you are not only concerned, but that the seriousness of the situation requires the mentee to seek counsel. If the mentee still refuses, clearly state, “I will seek advice alone from (state the name of the adviser).”
KNOWING YOURSELF, YOUR STRENGTHS AND YOUR ABILITIES To be an effective mentor, you must first be able to see yourself in that role. You should have an appreciation for the kind of mentor you would like to be and the qualities that you believe are important. Essentially, you must: ♦ Be aware of your strengths and abilities. ♦ Know the impact that you have on others. ♦ Know what qualities you need to develop to
become a better mentor.
♦ Be able to see and learn about yourself through the mirror of others.
♦ Understand individual and group values and
norms. ♦ Enhance your leadership development,
competence, self-awareness, and self-esteem.
To a large extent, your attitude affects your personality. An individual’s personality is the unique mixture of physical and mental traits found in a person. Before becoming a mentor, you should identify how you perceive yourself. The key to self-evaluation (or self-identity) is honesty. Know whether your strengths lie in handling physical abilities, mental activities, or a combination of both.
Your attitudes can also affect how you perceive things and make decisions. By possessing a positive attitude, your outlook on life would most likely favor: ♦ Creative activities rather than boredom; ♦ Joy over sadness; hope over futility; and ♦ Bouncing back over giving up. All people have different attitudes, perceptions, and experiences. Therefore, compromise is sometimes a must and communication is extremely important when working together as a team toward a common goal. Although you may initially have a different opinion than those around you, when you recognize that other differences exist, you will begin to see some of those similarities as well.
POSITIVE SELF-ESTEEM BRINGS ABOUT
POSITIVE IMAGES AND ACTIONS
Chapter 3: Leading Situations Lesson 9: Mentoring
150 Unit 2: Leadership Theory and Application
USING EFFECTIVE COMMUNICATION SKILLS Participating in a mentoring relationship is not the time to misunderstand the use of a word, a gesture, or an emotion. Mentors must thoroughly understand the importance of using effective communication. The proper appli-cation of listening, non-verbal communication (such as body language), and verbal commu-nication skills — as well as “I” messages — are critical to a successful mentoring program. Any relationship must begin with communication in one form or another. The quality of that relationship often depends on the quality of the communication. Much of the communication we use in our daily lives involves some negative habits. Imagine how you feel when someone nags, reminds, criticizes, threatens, lectures, advises, or ridicules you. Many times the person doing this to you is not aware of the feelings these actions cause. Whether we are aware of these habits or not, they promise to lessen the quality of our relationships. Study the following communication jam-mers and identify the ones you use most often. Then, try to determine why they are not helpful in maintaining satisfying relationships. 1. Ordering, commanding. The phrases “You
must,” “You will,” or “You have to” are a great way to create a power struggle, implying that you are superior. They are usually successful in producing anger and resistance. A favorite counter to these phrases is “Make me.” Therefore, you will find it is more helpful to ask for cooperation with your mentee and to give choices, such as: “I would appreciate . . .,” “It’s your choice; you can either . . . or . . .,” or “Would you rather . . . or . . .?”
2. Warning, threatening. The phrases “If you do that, you’ll be sorry” or “You’d better not do that if you know what’s good for you” invite testing, threats, and hostility. Do not use them unless you want to fight with your mentee. The consequences and action methods are more effective. Simply state what you plan to do and then do it. There are no further reminders: just act — don’t talk.
3. Moralizing, preaching. When you use the
“shoulds,” “oughts,” or “musts,” the mentee may hear only the control part and may resist without considering the reasons or consequences. It is much more effective to listen and to problem-solve; for example, “Have you thought what might happen . . .?” or “What do you think might happen if . . .?”
4. Proposing alternatives, giving solutions.
Use “Now, if it were up to me . . .” or “What you should do is . . .” when you propose alternatives and help the mentee to find solutions — both important elements of mentoring responsibilities. However, in circumstances similar to counseling some-one using the directive approach there are several mentee behaviors for which you should be on the lookout. They are:
o Often, the person resists your proposals. o You do not want the mentee dependent
on you. Instead, you want the individual to think for herself/himself.
o If the mentee takes your suggestion and
it does not work, that person may hold you responsible.
5. Lecturing, giving logical arguments.
When trying to prove your point with the facts, such as “You’re wrong here” or “Yes, but . . .,” people are often well aware of the facts and resent being told
Chapter 3: Leading Situations Lesson 9: Mentoring
Unit 2: Leadership Theory and Application 151
them again and again. Trying to persuade with facts is usually not effective. Instead, helping your mentee to explore the goals, alternatives, and consequences of a proposed action gives you much more influence in guiding the person.
6. The put-downs — judging, ridiculing,
blaming, name-calling, sarcasm, shaming. Some people use phrases like “How stupid,” “You’re just lazy,” “It’s all your fault,” “That’s an immature point of view,” or “Okay, big shot” to motivate others by making them feel inadequate or inferior. However, these phrases normally succeed only in putting people on the defensive as they try to protect their self-image. The common responses are to return criticism, seal off feeling, or shut down communications and cooperation. It is important to separate the behavior you disagree with from the person’s character and worth. It is harder to be specific about what you want without dragging the person’s dignity through the mud, but far more effective.
7. Playing psychologist, analyzing and
diagnosing. When using the phrases “The problem with you is . . .” or “You’re just jealous,” you can embarrass, frustrate, or threaten people because you are indicating that you know what their motives are or have figured them out. This technique is another way to shut off communications and guarantee the person will not share difficult matters with you. Besides, if your interpretation is wrong, the person will most likely become angry.
8. Consoling. “It’s not really that bad,”
“You’ll feel better in the morning,” or “Don’t worry, it’ll all work out” are phrases a consoling person uses when trying to keep from getting involved. These
phrases treat the other person’s feelings lightly. Helping the person to explore alternatives and listening are more helpful. Sometimes, people are not looking to solve a problem; instead, they are complaining just to let off steam. Then, when you offer a solution, you could complicate the issue, anger them, or make the situation larger than what it really is.
LISTENING SKILLS As mentors, you must understand the value of listening. Listen carefully for “feeling words” such as sad, happy, embarrassed, frustrated, alone, hurt, angry, bored, jealous, confused, etc. Realize that everyone has feelings and they need to have ways in which to express them. To ensure proper and effective communications with your mentee, you must first be able to identify what and how you feel while listening to your mentee. Then, learn what the mentee actually felt. These feelings may be the same or they may be different. For example, the mentee may be feeling depression, but you may feel frustration when hearing these words because you do not know how to help. Additionally, understand some of the stereotypes related to listening. It is only natural for people to form different opinions about something. Oftentimes, these individual opinions will disagree with the opinions of others. It is your job as a mentor to know how feelings, stereotypes, and opinions reflect upon your mentee’s values, attitudes, and behavior. Be able to identify these characteristics in a mentoring relationship and determine how you can use them to become a better mentor.
Chapter 3: Leading Situations Lesson 9: Mentoring
152 Unit 2: Leadership Theory and Application
NON-VERBAL COMMUNICATION SKILLS Know the importance of non-verbal communications and the impact it has on others. Observe how your mentee listens; then, uses body language and eye contact. Remember, how your mentee says something is frequently more important than what he or she says. The behavior that this person displays sometimes expresses more meaning than words. “I” MESSAGES “I” messages are statements, beginning with “I,” that tell how you feel about a certain situation. They are the most appropriate way to express your feelings whenever a conflict arises. They show concern in a calm and respectful way. Plus, they focus the communication on your feelings and expectations rather than those of the other person — your mentee. Whenever we focus attention on the other person’s feelings and expectations, whether by accident or on purpose, the communication often takes on a blaming and accusatory tone. “I” messages express what the conflict is to the other person and how this conflict affects you. Think about the last time you were in an argument. Did you use “I” messages? It sounds easy, but it takes a lot of practice. A typical “I” message has three parts, shown in parentheses, which can come in any order.
“I feel (state feeling) when you (describe specific behavior) because (state how it affects you).”
To reinforce your understanding of “I” messages, review both examples below. The “you” messages are first, followed by the appropriate “I” messages.
⇒ Example #1: “You promised you’d never tell anyone. I knew I shouldn’t have told you. You can’t ever keep a secret.” “I feel hurt when you tell something I told you in secret because I didn’t want anyone else to know.” ⇒ Example #2: “You’re never organized or dependable. You can’t be counted on.” “I get really upset whenever you back out on something, especially at the last minute because it leaves me stuck holding the bag.” EXPLORING ALTERNATIVES What would you do if your mentee came to you with a difficult situation and wanted you to help? In most situations, your job is not to find the solution for the mentee, but to help that person develop solutions to handle the issue. When you assist someone in exploring alternatives, it is always helpful to follow a pattern similar to the one below. The key words in this exploring alternatives model are: brainstorm, assist, choose, commitment, and follow-up. ◊ What is the difficulty and what are the
alternatives? The mentor and mentee should brainstorm as many ways of handling the situation as possible.
◊ What are the consequences of each
alternative? The mentor should assist the mentee in evaluating the pros and cons for each alternative.
◊ What is the best alternative? The mentee
must choose what he/she thinks is best.
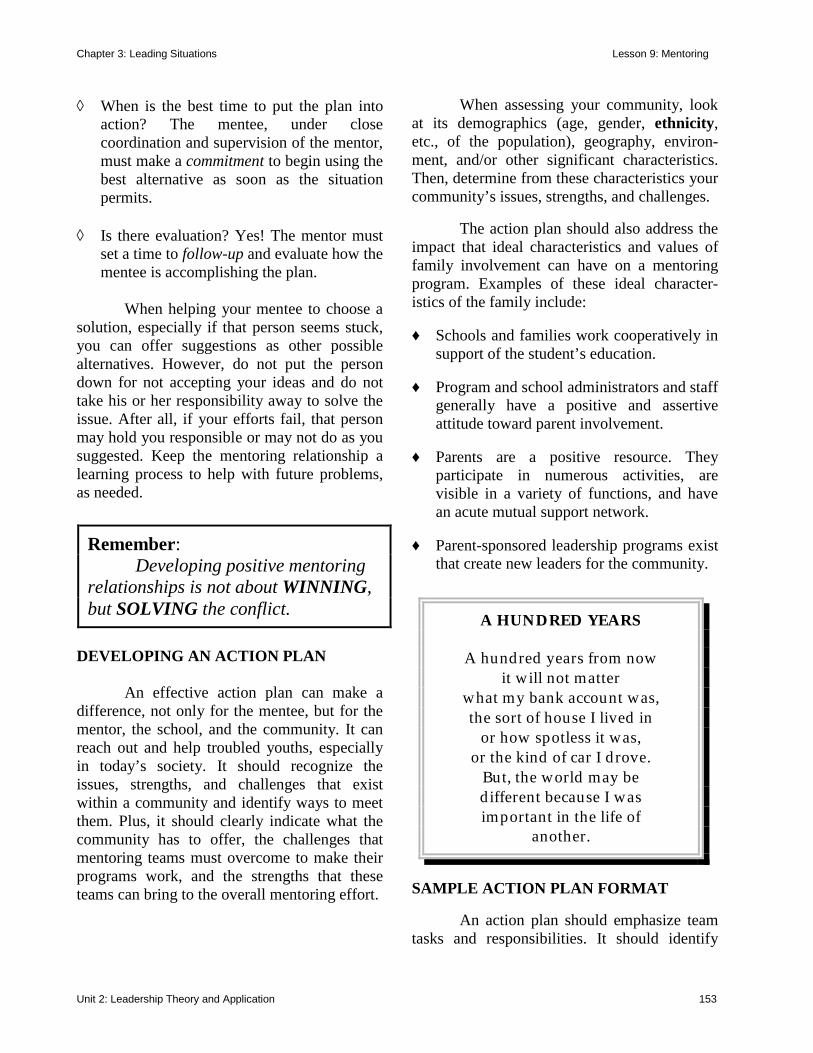
Chapter 3: Leading Situations Lesson 9: Mentoring
Unit 2: Leadership Theory and Application 153
◊ When is the best time to put the plan into action? The mentee, under close coordination and supervision of the mentor, must make a commitment to begin using the best alternative as soon as the situation permits.
◊ Is there evaluation? Yes! The mentor must
set a time to follow-up and evaluate how the mentee is accomplishing the plan.
When helping your mentee to choose a solution, especially if that person seems stuck, you can offer suggestions as other possible alternatives. However, do not put the person down for not accepting your ideas and do not take his or her responsibility away to solve the issue. After all, if your efforts fail, that person may hold you responsible or may not do as you suggested. Keep the mentoring relationship a learning process to help with future problems, as needed.
DEVELOPING AN ACTION PLAN An effective action plan can make a difference, not only for the mentee, but for the mentor, the school, and the community. It can reach out and help troubled youths, especially in today’s society. It should recognize the issues, strengths, and challenges that exist within a community and identify ways to meet them. Plus, it should clearly indicate what the community has to offer, the challenges that mentoring teams must overcome to make their programs work, and the strengths that these teams can bring to the overall mentoring effort.
When assessing your community, look at its demographics (age, gender, ethnicity, etc., of the population), geography, environ-ment, and/or other significant characteristics. Then, determine from these characteristics your community’s issues, strengths, and challenges. The action plan should also address the impact that ideal characteristics and values of family involvement can have on a mentoring program. Examples of these ideal character-istics of the family include: ♦ Schools and families work cooperatively in
support of the student’s education. ♦ Program and school administrators and staff
generally have a positive and assertive attitude toward parent involvement.
♦ Parents are a positive resource. They
participate in numerous activities, are visible in a variety of functions, and have an acute mutual support network.
♦ Parent-sponsored leadership programs exist
that create new leaders for the community.
SAMPLE ACTION PLAN FORMAT An action plan should emphasize team tasks and responsibilities. It should identify
Remember: Developing positive mentoring relationships is not about WINNING, but SOLVING the conflict. A HUNDRED YEARS
A hundred years from now
it will not matter what my bank account was, the sort of house I lived in
or how spotless it was, or the kind of car I drove.
But, the world may be different because I was important in the life of
another.
Chapter 3: Leading Situations Lesson 9: Mentoring
154 Unit 2: Leadership Theory and Application
who has overall responsibility, who prepares the tasks, and community/family involvement. A thoroughly prepared plan adds credibility to the effort and ensures a smooth and efficient running program. The parts of an action plan are: ◊ Mentor recruitment and selection ◊ Mentee selection ◊ Mentor training (what type and how
much?) ◊ Matching mentors with mentees ◊ Maintaining monthly activity calendars ◊ Coordination between schools and agencies ◊ Planned activities/projects ◊ Supervision of mentors/mentees ◊ Family involvement ◊ Community involvement/resources (such as
financial, support services, transportation, public relations, etc.)
A MENTOR’S JOURNAL Establishing a journal is an excellent method for keeping track of your mentor visits. Your journal entries will help you to recall the topics you discussed and the activities you conducted with your mentee on previous occasions, how you prepared for those activities, and your mood (how you felt) before and after the visit. Remember, information recorded in your journal must be kept confidential. Store it in a locked place; do not leave it in your locker or on a desk where others can read it. Your instructors will help you to find a secure place, if necessary. Additionally, do not record information in your journal that is of a life-threatening or serious matter to the mentee; instead, discuss that content with a competent adviser. The standard entries for a mentor’s journal include: ◊ Contact time and date
◊ Your name and the mentee’s name ◊ Location of contact ◊ Type of activity performed with mentee ◊ An explanation of what you did to prepare
for this activity ◊ An explanation of what you wanted to gain
from this activity ◊ Explanations of how you felt before the
beginning of this activity . . . and after it ◊ A rating scale that indicates the tone (de-
pressed, moderate, or excited) of the visit and measures three areas: the mentoring relationship, the mentor’s mood, and the mentee’s mood
◊ A list of possible discussion topics:
Personal issues Family issues Substance abuse Legal concerns School issues Tutoring Friendships Hobbies Emotional issues Relationships Actual/other concerns
COMPREHENDING CULTURAL DIVERSITY Before anyone can begin to understand other people, he or she must first understand themselves. Mainly, that we are all part of a culture of some sort, we all belong to a race, and we all have some kind of ethnic heritage. What is the first thought that comes to your mind when you hear the word . . . culture? How about race? Racism? Do you belong to a culture? What kind is it and does it affect your everyday life? Presented below are definitions for these terms to help you answer these questions. CULTURE A society’s culture is the learned, shared, and transmitted social activities of a group — the part of the environment that satisfies all the basic needs for survival and adaptation to the environment. In short, it is
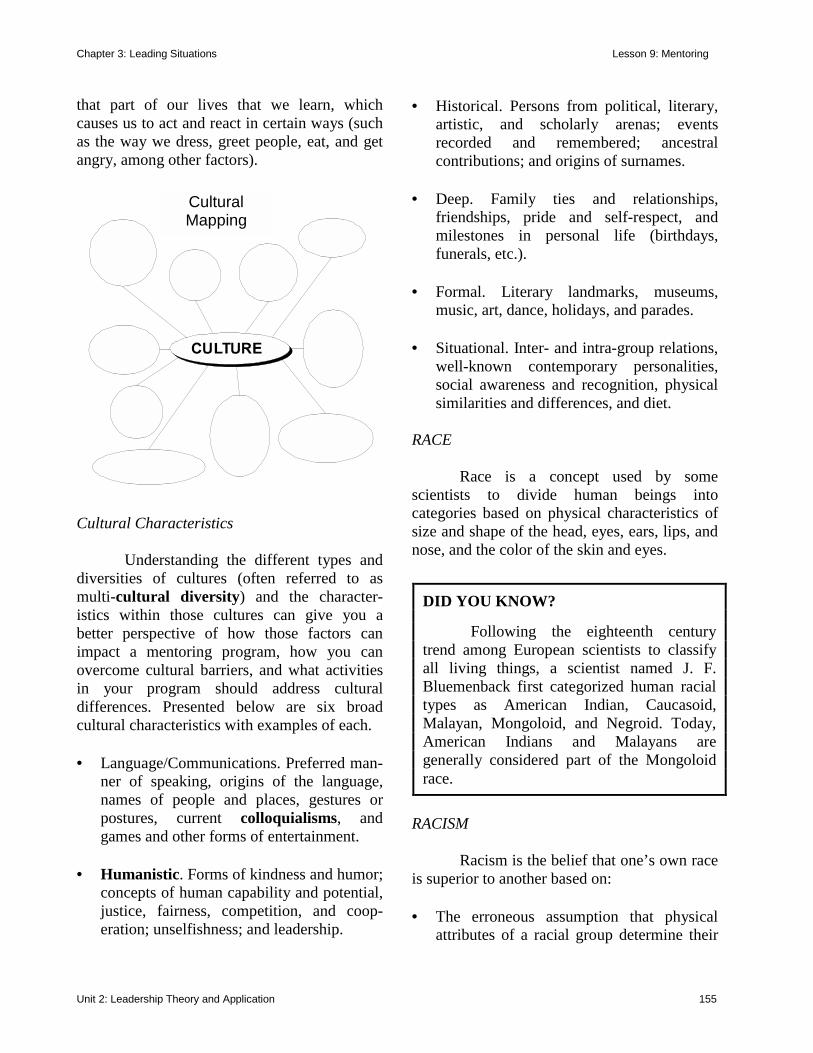
Chapter 3: Leading Situations Lesson 9: Mentoring
Unit 2: Leadership Theory and Application 155
that part of our lives that we learn, which causes us to act and react in certain ways (such as the way we dress, greet people, eat, and get angry, among other factors).
Cultural Characteristics Understanding the different types and diversities of cultures (often referred to as multi-cultural diversity) and the character-istics within those cultures can give you a better perspective of how those factors can impact a mentoring program, how you can overcome cultural barriers, and what activities in your program should address cultural differences. Presented below are six broad cultural characteristics with examples of each. • Language/Communications. Preferred man-
ner of speaking, origins of the language, names of people and places, gestures or postures, current colloquialisms, and games and other forms of entertainment.
• Humanistic. Forms of kindness and humor;
concepts of human capability and potential, justice, fairness, competition, and coop-eration; unselfishness; and leadership.
• Historical. Persons from political, literary, artistic, and scholarly arenas; events recorded and remembered; ancestral contributions; and origins of surnames.
• Deep. Family ties and relationships,
friendships, pride and self-respect, and milestones in personal life (birthdays, funerals, etc.).
• Formal. Literary landmarks, museums,
music, art, dance, holidays, and parades. • Situational. Inter- and intra-group relations,
well-known contemporary personalities, social awareness and recognition, physical similarities and differences, and diet.
RACE Race is a concept used by some scientists to divide human beings into categories based on physical characteristics of size and shape of the head, eyes, ears, lips, and nose, and the color of the skin and eyes.
RACISM Racism is the belief that one’s own race is superior to another based on: • The erroneous assumption that physical
attributes of a racial group determine their
DID YOU KNOW? Following the eighteenth century trend among European scientists to classify all living things, a scientist named J. F. Bluemenback first categorized human racial types as American Indian, Caucasoid, Malayan, Mongoloid, and Negroid. Today, American Indians and Malayans are generally considered part of the Mongoloid race.
Cultural Mapping
Chapter 3: Leading Situations Lesson 9: Mentoring
156 Unit 2: Leadership Theory and Application
social behavior as well as their psychological and intellectual char-acteristics.
• The wrong ideal that all people of one race
act and react the same way, in an inferior way, and that people of a superior race should treat them poorly.
ETHNICITY Ethnicity is not the same as race or culture, but may contain parts of each. We define an ethnic group as a group of people within a larger society that distinguishes or sets itself apart from others based on race and cultural characteristics such as religion, language, and traditions. Have you ever felt different than other people? Have other people treated you dif-ferently? Do you wish sometimes that you could be invisible? Have people laughed at you for something you cannot control? And you laughed back, but inside it really hurt? Do people make you feel dumb? Have you been in a situation when you were afraid because you felt you did not belong? Do you wish that people would just give you a chance? What came to mind when you read the these questions? Did you think of prejudices? PREJUDICES Prejudice goes far beyond color and gender. It is about religion, money, and many other things as diverse as the part of the country from where someone comes. Have you ever been in another part of the country and someone commented about the way you spoke? Did they make fun of you? If so, that is prejudice. Prejudice is something we all learn. However, many times we are not aware of its existence in our lives or the fact that we may be prejudiced ourselves in one way or another.
As mentors, you must guard against treating people differently than others or making prejudiced remarks. In order to be effective in a culturally diverse community, you will need the following basic skills and attitudes: • A positive attitude. • An ability to communicate effectively
(written, verbal, and non-verbal). • An ability to challenge and stimulate others,
especially children, to learn. • An ability to think critically and creatively. • A sensitivity to individual differences. • A willingness to build and strengthen
bridges between your home, school, and community.
• A willingness to integrate a multicultural
perspective into your mentoring relationships. • A self-awareness (of attitudes on
multiculturalism; and of strengths and weaknesses in working with people from different cultural backgrounds).
CONTEMPORARY ISSUES IN MENTORING This section gives you an appreciation of the different matters that you will most likely encounter during your mentoring relationships and how to cope with them. They include how to help mentees get a handle on stress, cope with the loss of a family member or friend, or better understand the issues of troubled families. These topics are not easily talked about, but they are vitally important to your job. They are becoming increasingly common in the life histories of mentees.
Chapter 3: Leading Situations Lesson 9: Mentoring
Unit 2: Leadership Theory and Application 157
Read the following issues carefully; then, openly discuss any questions or comments you may have on them. HANDLING STRESS Death of a family member or friend, parents getting divorced or separated, relocation resulting in new schools and friends, the birth of a sibling, a change in the amount of television viewing are all forms of stress, called stressors. Stress can be a physical, chemical, or emotional factor that causes bodily or mental tensions and may be a factor in causing certain diseases. Within any given year, a person can experience enough events (stressors) in their lives to have a better than average chance of showing symptoms of stress or even causing a serious change in their health and/or behavior. Mentors must be aware of these stressors, and be able to assess the effect they have on their mentee as well as how he/she is handling the stress. One of your cadet activities is learning how to estimate stress. This activity offers a list of stressors and a point scale for adding up the potential stress during a year. Mentors should use this exercise as a point of reference in their mentee’s lives and not to diagnose problems. This checklist is intended primarily to assist you in evaluating a mentee’s potential level of stress. Resolving stress can take a long time — it is a continuous process. As soon as a person overcomes one or more of the stressors, others may become a factor. If your mentee appears to have a stress-related difficulty, help that person to start getting a handle on it. Review the following 11 stress handlers with the individual to determine which ones they have tried, are doing now, and are willing to try. Once you can get your mentee’s stress under control, you can begin to effectively deal with other issues affecting that person.
1. Work off stress. If you are angry or upset, try to blow off steam physically by activities such as running or sports. Even taking a walk can help.
2. Talk out your worries. It helps to share
worries with someone you trust and respect. This may be a friend, family member, teacher, or counselor. Sometimes another person can point out a new side to a difficult situation and thus, a new solution.
3. Learn to accept what one cannot change. If
the matter is beyond your control at this time, try your best to accept it until you can change it. It beats spinning your wheels and getting nowhere.
4. Get plenty of sleep and rest. Lack of sleep
can lessen your ability to deal with stress by making you more irritable.
5. Balance work and recreation. All work and
no play can make for a nervous wreck. Set time for recreation and relax your mind.
6. Do something for others. Sometimes when
you are depressed, you concentrate too much on yourself and your situation. When this happens, it is often wise to do something for someone else and get your mind off yourself. There is an extra bonus in this technique: it helps you to make friends.
7. Take one thing at a time. Many times we
set ourselves up for failure by trying to do too much. It is defeating to tackle all your tasks at once. Instead, set some tasks aside and work on the most urgent ones first.
8. Give in once in a while. If you find the
source of your stress is other people, try giving in instead of fighting and insisting you are always right. You may find that others will begin to give in, too.
Chapter 3: Leading Situations Lesson 9: Mentoring
158 Unit 2: Leadership Theory and Application
9. Know your abilities and limitations. This is not easy. It takes a lot of self-study. Many times you can cause stress by asking yourself to do something you are not able to do. Before agreeing to do something that you do not have to do, ask yourself if it is within your ability to accomplish.
10. Organize yourself and your time. Learn
ways to help yourself keep up with what you have to do. Plan how you will accomplish the necessary work. Organ-ization can help you avoid wasting time and energy.
11. Avoid being a perfectionist. No one person
can be perfect at everything. Do your best first, but do not be afraid of making a mistake. Everyone makes mistakes, and many times we learn by our mistakes.
COPING WITH LOSS As we just mentioned in the preceding section, the death of a family member is a form of stress. In fact, on the point scale for determining potential stress, the death of a parent is the most stressful event and the death of a close family member is the fifth most stressful. Helping someone to cope with the loss of a loved one is an extremely difficult task. Emotions are very high, not just for the mentee, but for the entire family. Because of the tenseness of this situation, your actions must be caring, supportive, and sincere. In these situations you should: ◊ Listen. ◊ Be available. ◊ Face your own feelings of loss and grief
and share them if you like.
◊ Encourage expressions of grief through talking, writing, etc.
◊ Acknowledge that grief hurts. ◊ Realize that grief causes difficulty in
concentrating. ◊ Understand that other circumstances (such
as a change in school, friends, etc.) often accompany the initial loss.
◊ Become part of a caring team. ◊ Know that grief lasts longer than anyone
expects. ◊ Continue to be available. TROUBLED FAMILIES: KNOWING THE ISSUES By being aware of the following issues, mentors can help to provide safe environments for mentees. The intention of this section is not to teach mentors how to do family therapy — that is not the role of the mentor. However, mentors do play a crucial role in helping to: • Identify these situations. • Refer mentees to appropriate professionals. • Be supportive. There are three general categories of serious family dysfunctions: addictions, abuse, and neglect. Mentors must realize that these situations occur in every neighborhood. People affected are those with money or no money; they live in the city, country, or suburb; they are all races and ethnic groups; they are of every religion or no religion; and they are the old, the middle-aged, or the young.
Chapter 3: Leading Situations Lesson 9: Mentoring
Unit 2: Leadership Theory and Application 159
Addictions Alcohol and drug abuse can originate and affect an entire family. Additionally, other family or community members with a serious substance abuse problem can also influence the whole family, including the mentee and mentor. When just one parent has an addiction, children often develop a dysfunctional reaction and/or relationship to that parent. As mentors, be alert to:
Abuse There are three kinds of abuse: physical, sexual, and mental/emotional. Each state has its own legal definition of physical and sexual abuse. Know what your state’s statutes and reporting requirements are before performing any mentoring activities. The following paragraphs offer a definition for and some of the more common signs and symptoms associated with specific kinds of abuse. Identifying abusive situations is a difficult task for trained professionals; however, as mentors, you may be in a unique position to notice when something looks wrong.
Physical Abuse Definition. For this instruction, we will define physical abuse as any form of contact ranging from severe pinching, hard slaps, to hitting with a closed fist or some other object. Burning, mutilation of any part of the body, or an internal injury may also be forms of physical abuse. Signs and Symptoms. Physical abuse is perhaps the easiest to detect. Its victims normally show signs of serious injuries or of long-lasting marks, bruises, or scars. Additionally, physically abused children are often unusually fearful of or nervous around the abusive parent. You may suspect physical abuse if the mentee has frequent unexplained injuries or questionable explanations for those injuries. Sexual Abuse Definition. Sexual abuse normally includes incest (abuse within a family) or non-family sexual abuse. Incest can be one of the most difficult challenges to deal with and to overcome. It oftentimes is “the biggest family secret.” Incest can range from inappropriate touching and kissing to intercourse. While touching and kissing can be good and an appropriate expression of love, children tend to know intuitively the difference between good touching and bad touching. Signs and Symptoms. Sexually abused victims often have an unusual and extreme dislike for being touched. On the other hand, some sexually-abused children try to please adults by being physically affectionate in ways which may have sexual overtones. If you believe that your mentee shows one of the following signs, it can be an indication of sexual abuse. Trust your intuitions and talk to your instructors about your beliefs.
o “People pleasing” behaviors (such as the mentee making excuses for the parents) with the addiction, doing excess work around the house, and/or feeling responsible for the parent’s addiction)
o Anger o Depression o Lack of trust o Running away o Signs of abuse o Injuries
Chapter 3: Leading Situations Lesson 9: Mentoring
160 Unit 2: Leadership Theory and Application
• The way the mentee displays affection is inappropriate for his/her age.
• The mentee shows high levels of anxiety or
fear if left alone with a particular family member.
Mental/Emotional Abuse Definition. Mental/emotional abuse includes withholding love, making love conditional, communicating severe and constant “put-downs,” or shaming someone with the intention of making that person feel bad or worthless. It is probably the hardest to detect, and it has long-lasting impacts on the self-esteem of the mentee. Signs and Symptoms. Emotionally abused children tend to put themselves down or criticize themselves a lot. What Should You Do When Dealing with Matters of Troubled Families? If your mentee discloses abuse to you, it will most likely be a shocking and difficult experience to handle. However, you have the responsibility to commit yourself and your efforts to supporting the individual and to his/her needs. Listen. Be honest. Do not make assumptions on how that person should feel. Emphasize that he/she is not alone. Oftentimes, the most helpful thing to do is just to be someone the mentee can count on and/or be with — without feeling pressured. Finally, do not normalize or downplay the abusive situation. If you know of or suspect abuse, the first thing to do is to contact your instructors. The following list identifies other signs and symptoms to watch for, regardless of the type of abuse. Note, however, that non-abused individuals may also exhibit some of these
signs or symptoms from time to time in order to gain attention, because of low self-esteem, etc. ⇒ Persistent and unexpected depression or
withdrawal. ⇒ Excessive anger or emotions. ⇒ Self-mutilation. ⇒ Constant running away. ⇒ Inability to trust. ⇒ Difficulty in developing healthy, long-term
relationships. ⇒ Suicidal/homicidal thoughts. By reporting potentially harmful or abusive activities to your instructor, you are not breaching your mentee’s trust. Your willingness to take a risk to discuss your observations comes from your concern for the mentee and is always the right thing to do. Your instructor will determine what additional steps are necessary and appropriate for the situation.
CONCLUSION As a mentor, there are many difficult situations that you may encounter in mentoring relationships: prejudices, handling stress, coping with loss, and understanding the issues of troubled families. These topics are vitally important to your job because they are becoming increasingly commonplace in today’s
Commitment is easy during the good times; it is during the rough times when mentors are truly tested. *** Sometimes, the best thing a mentor can do for a mentee is just be there.
Chapter 3: Leading Situations Lesson 9: Mentoring
Unit 2: Leadership Theory and Application 161
lifestyles. If you have questions regarding any of these issues, discuss them with your instructors. Summarized below are the qualities of a successful mentor. Follow these qualities carefully, display maturity, show compassion, use your head, trust your instincts, listen to your heart, and you will make your mentoring opportunity the experience of a lifetime. ◊ Know yourself, your strengths, and your
weaknesses. ◊ Know your job — be flexible and open-
minded. ◊ Know and use communication skills
effectively, such as the:
o Ability to listen and accept different points of view. o Ability to empathize with another person’s struggle.
◊ Apply effective leadership skills such as decision-making, problem-solving, and goal-setting; possess the ability to see solutions, opportunities and barriers.
◊ Understand how cultural diversity can affect a mentoring relationship.
◊ Be personally committed to working with
people — be available and supportive. ◊ Show respect for individuals — display
honesty, patience, trust, and a warm and caring attitude.
* * * There are many important things to accomplish in life — helping someone to help themselves is one of them. Remember, it sometimes takes a while to get something done right. What is important, however, is to keep trying — never give up.
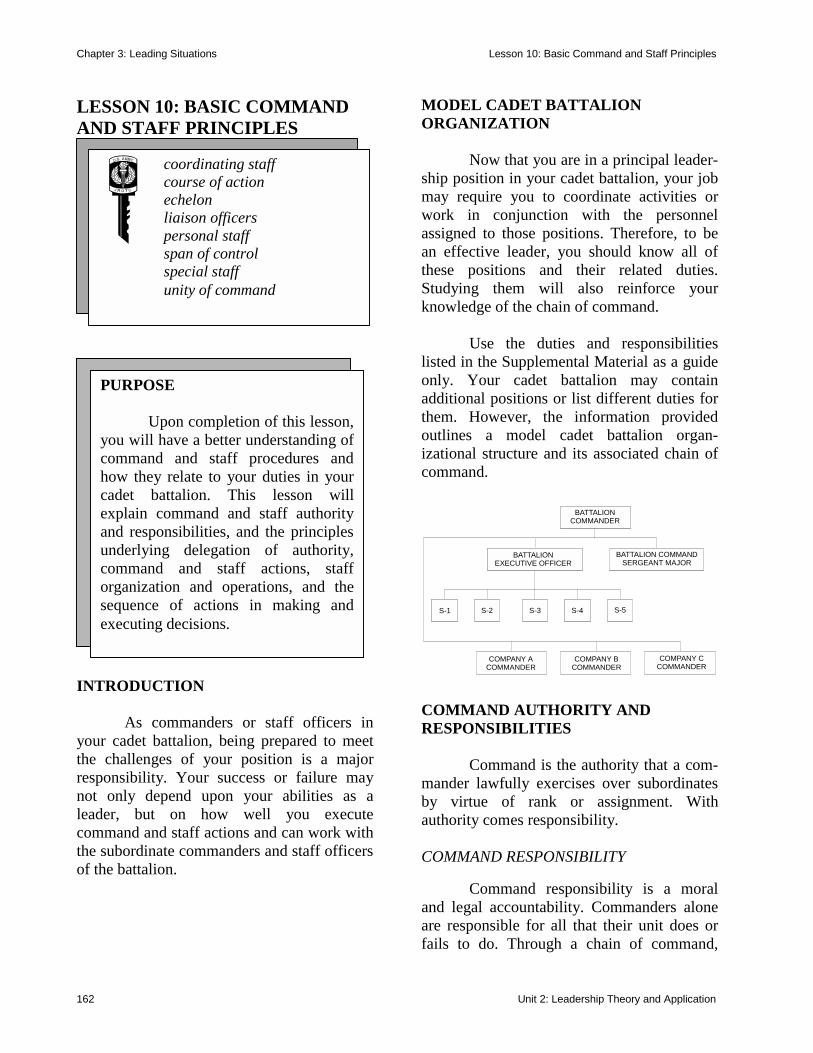
Chapter 3: Leading Situations Lesson 10: Basic Command and Staff Principles
162 Unit 2: Leadership Theory and Application
LESSON 10: BASIC COMMAND AND STAFF PRINCIPLES
INTRODUCTION As commanders or staff officers in your cadet battalion, being prepared to meet the challenges of your position is a major responsibility. Your success or failure may not only depend upon your abilities as a leader, but on how well you execute command and staff actions and can work with the subordinate commanders and staff officers of the battalion.
MODEL CADET BATTALION ORGANIZATION Now that you are in a principal leader-ship position in your cadet battalion, your job may require you to coordinate activities or work in conjunction with the personnel assigned to those positions. Therefore, to be an effective leader, you should know all of these positions and their related duties. Studying them will also reinforce your knowledge of the chain of command. Use the duties and responsibilities listed in the Supplemental Material as a guide only. Your cadet battalion may contain additional positions or list different duties for them. However, the information provided outlines a model cadet battalion organ-izational structure and its associated chain of command.
BATTALIONCOMMANDER
BATTALION COMMANDSERGEANT MAJOR
BATTALIONEXECUTIVE OFFICER
S-1 S-2 S-3 S-4 S-5
COMPANY ACOMMANDER
COMPANY BCOMMANDER
COMPANY CCOMMANDER
COMMAND AUTHORITY AND RESPONSIBILITIES Command is the authority that a com-mander lawfully exercises over subordinates by virtue of rank or assignment. With authority comes responsibility. COMMAND RESPONSIBILITY Command responsibility is a moral and legal accountability. Commanders alone are responsible for all that their unit does or fails to do. Through a chain of command,
coordinating staff course of action echelon liaison officers personal staff span of control special staff unity of command
PURPOSE
Upon completion of this lesson,you will have a better understanding ofcommand and staff procedures andhow they relate to your duties in yourcadet battalion. This lesson willexplain command and staff authorityand responsibilities, and the principlesunderlying delegation of authority,command and staff actions, stafforganization and operations, and thesequence of actions in making andexecuting decisions.
Chapter 3: Leading Situations Lesson 10: Basic Command and Staff Principles
Unit 2: Leadership Theory and Application 163
commanders hold each subordinate commander and staff officer responsible for all that their unit or section does or fails to do. If it becomes necessary to bypass the normal chain of command, both the commander issuing and the one receiving the order must notify any intermediate supervisors of the situation as soon as possible.
IMPORTANCE OF A STAFF Commanders must effectively use available resources for planning, organizing, directing, coordinating, and controlling people and units to accomplish their missions. No one individual can personally direct, coordinate, and supervise the operation of a battalion-size unit or larger. Regardless of how capable, educated, experienced, or energetic commanders may be, they must have assistance. A group of officers and senior noncommissioned officers provide this assistance. They reduce their commander’s burden by assuming responsibility for and accomplishing as many of the routine matters of command as possible. This leaves commanders to serve in leadership roles as intended. DELEGATION OF AUTHORITY To be totally effective, commanders and their staffs must work as a cohesive team. Staffs achieve this by having a thorough understanding of the policies of their commander. Staff authority varies with the degree of authority delegated to it by the commander. Commanders can delegate as much authority to subordinates as considered necessary, but under no circumstances can they delegate any part of their responsibility.
Additionally, the following command func-tions should remain with commanders. • Developing concepts for estimates and
plans • Processing and disseminating their
guidance and concepts • Ensuring coordination of the effort of the
command • Supervising the execution of decisions The normal delegation is for staffs to take final action on matters of command policy within their section’s jurisdiction. This frees commanders to focus their attention on the essential aspects of command. Authority delegated to staff officers varies with the mission(s) of the unit, the immediacy of the task(s), and the relationship of the staff section’s area of interest to the unit’s primary mission. COMMAND AND STAFF ACTIONS Command and staff actions must be accurate and timely. That is, the staff must identify promptly and define accurately the decisive elements of each problem. To this end, commanders organize their staffs to: • be immediately responsive to the needs of
the command. • remain abreast of the situation and to
ensure that they consider all pertinent factors.
• reduce the time needed for control,
integration, and coordination of tasks. • minimize the possibilities of error. • minimize their requirements for detailed
supervision of routine matters.
DID YOU KNOW? Battalions are the lowest level at which the U.S. Army authorizes a staff.
Chapter 3: Leading Situations Lesson 10: Basic Command and Staff Principles
164 Unit 2: Leadership Theory and Application
STAFF AUTHORITY AND RESPONSIBILITIES Staffs do not have command authority and are not in the chain of command. The only authority they exercise is over the members of their own section and what their commander delegates to them. Commanders assign staff officers certain specific functional areas of responsibility. To carry out these command responsibilities effectively, commanders then give each staff section specific duties. When commanders have chosen a course of action, it is the duty of the staffs to prepare and issue the necessary orders and to supervise their execution. Staff officers should always issue orders for, or in the name of, their commander; however, responsibility for those orders still remains with the commander. Other staff responsibilities include: ♦ securing information and furnishing
advice as the commander may require. Staff officers also provide information to other staffs and to other agencies and units.
♦ analyzing information as a basis for
making recommendations to the com-mander and other agencies.
♦ preparing the details of the commander’s
plans and orders. Each staff section prepares its appropriate part of the plan or order.
♦ translating decisions and plans into orders
and transmitting the orders to each com-mand element.
♦ supervising (to the extent authorized by
the commander) the execution of the plans and/or orders. Staff officers accomplish
supervision by way of conducting visits or inspections and preparing reports.
♦ taking other actions as necessary to carry
out the commander’s intentions. The effectiveness of a staff depends on the professional qualifications of its members. Staff officers must possess the qualities of leadership and the ability to apply them in a staff role. They must have a thorough understanding of the organization, capabilities, limitations, and operating techniques of the command. As a rule, experience in a position that is of equal or lesser responsibility to the current or proposed staff position is a prerequisite to the assignment of a staff officer. STAFF ORGANIZATION Good staff organization assists a com-mander by decreasing the number of routine items requiring decision. Through effective staff procedures, staffs can speed up the proc-essing of information into material useful to the commander and can improve the quality of the product that they develop. Efficient staff techniques minimize possible delays in preparing and transmitting plans and instructions to subordinates.
Regardless of its organization, a staff must apply the principles of unity of command and direction, span of control, delegation of authority, and the grouping of compatible and related activities. Con-sequently, staff organization depends upon the following factors.
DID YOU KNOW? The U.S. Army General Staff estab-lished in 1903 forms the basis for the Army’s present staff system.
Chapter 3: Leading Situations Lesson 10: Basic Command and Staff Principles
Unit 2: Leadership Theory and Application 165
• The unit’s mission(s). This is the primary consideration for everything that the com-mander does and for the operation of the unit.
• Activities conducted by the unit. The
unit’s mission(s) and its activities go hand-in-hand. For example, all of the duties and responsibilities that make up the unit’s activities — especially those required to accomplish the unit’s mission(s) — are fundamental to the organization and functioning of a staff.
• Emphasis on broad fields of interest.
Regardless of the mission, we can divide command interests into five broad fields: personnel (S-1), intelligence (S-2), operations and training (S-3), logistics (S-4), and civil-military operations (S-5). The emphasis placed on each of these broad fields of interest, and the specialized activities required for each, vary according to the mission and the activities required to accomplish the mission. For example, within your JROTC battalion, the S-2 may also handle public affairs matters while the S-5 could be assigned as the special project’s officer. Although military staffs may vary in organization and specific titles of its staff members, they do possess certain com-mon characteristics. Functional respon-sibilities are the basis for all military staff organizations.
• Laws and regulations. Army regulations,
the Uniform Code of Military Justice, and other directives require special relation-ships between certain staff officers and the commander.
To be successful, the staff must work together. No staff officer can work alone and expect to get the job done. Each staff officer must actively pursue every scrap of
information that will help the commander operate. Staff officers continually exchange information with staff officers from higher headquarters, subordinate unit leaders, and among themselves. TYPES OF STAFFS Each type of staff consists of three groups of staff officers plus liaison officers. These three groups are the coordinating staff officers, special staff officers, and the com-mander’s personal staff officers. Coordinating staff officers are the principal staff assistants to the commander. Each staff officer specializes in one (or a combination) of the broad fields of interest mentioned above for S-1 through S-5. Special staff officers assist the com-mander in professional, technical, and other functional areas of interest in the command. The specific number and duties of special staff officers vary at each level of command, and they may also be unit commanders. Special staffs may include the following personnel: • Signal Officer • Maintenance Officer • Logistics Readiness Officer • Aviation Officer • Chemical Officer • Provost Marshal • Public Affairs Officer • Chaplain • Surgeon
Chapter 3: Leading Situations Lesson 10: Basic Command and Staff Principles
166 Unit 2: Leadership Theory and Application
Personal staff officers work under the immediate control of the commander. Typical personal staff members include the command sergeant major and, at higher levels, the inspector general and staff judge advocate. EXECUTIVE OFFICER An executive officer (XO) directs, coordinates, and supervises the efforts of the coordinating and special staffs. The XO’s other duties include: • formulating, recommending, and announc-
ing staff operating policies. • keeping the commander informed. • assuming command in the absence of the
commander. • reviewing plans, orders, and staff actions. • approving staff actions. • supervising the execution of orders. COMMON STAFF PROCEDURES Staff officers use certain common pro-cedures to coordinate staff action. In addition to staff coordination, these include visits and inspections, conferences, briefings, and reports. Staff coordination is the process of making certain that all pieces of a staff action fit together. The responsible, or action, officer and all other interested staff officers examine and make adjustments to any sub-actions of the project. Staff officers then determine the proper action within their section’s area of interest. Finally, the action officer has the added responsibility to complete the coor-dination with other commanders and staff sections, as appropriate.
Staff officers make staff visits to obtain information for the commander, observe the execution of orders, and assist subordinate unit commanders. Concerning the first two points, the information that staff officers obtain can indicate to their commander how effectively or efficiently subordinate units are executing command decisions. Concerning the last item, a vital part of the staff officer’s job is to discover and help subordinate elements to resolve internal problems. On occasion, staffs may combine staff visits with command-directed inspections. Commanders and/or staffs conduct inspections to ascertain the condition of the command. Using checklists prepared by the various staff sections, commanders and staffs conduct inspections to collect positive and negative information from which the com-mander can determine the readiness of the unit to accomplish its mission(s). Commanders and staff officers frequently participate in conferences. Conferences often replace the need for staff visits and certain types of correspondence. Commanders and staffs call conferences to accomplish the following objectives. • Determine and evaluate facts by
exchanging information and ideas • Solve problems (particularly new ones) • Coordinate actions, including arriving at
the best possible decision or reaching agreement in a particular area
• Formulate policy • Instruct, counsel, or advise Staff briefings ensure a coordinated or unified effort by the entire staff. The exec-utive officer usually presides over these
Chapter 3: Leading Situations Lesson 10: Basic Command and Staff Principles
Unit 2: Leadership Theory and Application 167
briefings. The XO calls upon each staff section representative to exchange infor-mation or guidance, present matters of interest to the command, or present matters that require staff coordination and decision. Two of the channels through which orders, instructions, and information flow within a command are the command and staff channels. Command channels transmit all orders and instructions to subordinate units. These channels are commander-to-commander, and all orders transmitted are in the name of the commander. Staff channels coordinate and transmit information and operating instructions to comparable staff elements and to subordinate commanders. Both in planning and con-ducting operations, staff officers of a higher headquarters frequently need to contact comparable staff elements of subordinate headquarters. However, a staff officer of a higher headquarters has no authority over the staff of the subordinate headquarters. SEQUENCE OF COMMAND AND STAFF ACTIONS Commanders and their staffs often initiate planning an action before they receive a mission. Then, after receipt of the mission, they continue to plan for contingencies that require a command decision. The tools used to assist commanders and staffs in making these decisions are the problem-solving/decision-making processes. Complet-ing actions in a uniform sequence assures commanders that they are making decisions based on all available information and are using staff assistance to the maximum. Additionally, a uniform sequence makes it possible for staff officers to
anticipate the needs of each step. This results in faster and better prepared staff actions. Making and executing decisions involve a series of separate actions. Listed below are the nine steps used by commanders and their staffs in arriving at decisions.
Step 1: Mission Command and staff actions begin upon the receipt of a mission from a higher headquarters and/or the development of a mission by the unit commander. Then, the commander analyzes the mission to identify the specific tasks the unit must accomplish.
The staff provides any available infor-mation to the commander, who also attempts to obtain additional information from the next higher commander as early as possible. After analyzing the mission and reviewing the available information, the commander issues the planning guidance (Step 3).
The planning guidance is the commander’s assistance to a staff in preparing or revising their estimates. This guidance spans more than one step. The amount of planning guidance varies with each mission, the volume and validity of the information available, the situation, and the experience of the commander and staff. The commander does not select a course of action at this time because doing so would prevent objective and unbiased staff estimates.
Step 3: Planning guidance
Step 2: Information available
Chapter 3: Leading Situations Lesson 10: Basic Command and Staff Principles
168 Unit 2: Leadership Theory and Application
Based on the mission and planning guidance, the coordinating staff sections prepare their staff estimates. The special staff, who may also prepare their own estimates, assists them. Coordinated staff estimates result in recommendations as to what specific actions the commander may take to accomplish the mission.
In this step, the commander considers the recommendations of the staff, completes his or her own estimate, and announces a decision. Following the decision (the last step of the estimate), the commander provides the staff with an overall concept of how the commander wants the operation conducted (known as the commander’s concept, which is the basis for the preparation of orders).
Once staff members completely understand the mission, they carefully analyze the decision and commander’s concept to determine what actions the unit must take to conduct a successful operation. From this analysis comes the development of plans or orders.
Staffs normally submit the plans or orders to the commander for approval before submitting them for publication. However, the staff may omit this step based on the urgency of the situation and/or if the commander previously delegated that authority.
See Step 7.
Supervision of the orders must be con-tinuous if the mission is to be successful. This could well be the most important step. Without proper supervision, the best plan may fail. Proper supervision also allows the commander and staff to be constantly abreast of the situation and able to make changes as necessary. THE ESTIMATE OF THE SITUATION IN THE SEQUENCE OF COMMAND AND STAFF ACTIONS The estimate of the situation is a vital part of the decision-making process. Estimates have been an integral part of military procedures ever since man fought his first war. The intellectual and perceptive reasoning that must go into the estimate form the basis for sound recommendations by staff officers and sound decisions by commanders. History tells us that great military leaders invariably adopted a logical sequence of thought in their planning processes — similar to those used in the modern estimate of the situation. • Frederick the Great, in secret instructions
to his generals, wrote: “It is sometimes unquestionably necessary to take chances in war, but you avoid these hazards all that you can by prudence . . . so exper-ience and history of all wars tell us. It is a stupendous game of chance wherein he who estimates best wins in the end.”
• Napoleon always made careful estimates
and usually reduced them to writing.
Step 4: Staff estimates
Step 5: Commander’s estimate and decision
Step 6: Preparation of plans or orders
Step 7: Approval
Step 8: Publication of plans or orders
Step 9: Command and staff supervision
Chapter 3: Leading Situations Lesson 10: Basic Command and Staff Principles
Unit 2: Leadership Theory and Application 169
“Military science consists of estimating all eventualities first, then estimating exactly, almost mathematically, the degree of chance. I work constantly, I estimate con-tinually . . . if I appear to be always ready to respond to anything, prepared to face anything, it is because before undertaking anything, I have meditated a long time. I have foreseen all that could happen.”
Commanders develop the ability to make sound decisions by habitually applying logic to each of the many problems that con-front them during their careers. If this were not so, eventually commanders would become the victims of their own emotional decisions. PURPOSE OF THE ESTIMATE The estimate of the situation is an analysis of all factors affecting accom-plishment of the mission. It helps com-manders to determine the most suitable course of action. Commanders and staffs need only to develop courses of action in sufficient detail to be readily distinguishable for analysis and comparison purposes with other courses of action. SCOPE AND NATURE OF THE ESTIMATE The estimate of the situation is a logical and orderly examination of all factors affecting the accomplishment of the mission in order to reach a sound decision. The amount and nature of detail considered in the estimate varies with the level and type of command, the functions of the preparing agency, and other circumstances. The basic approach used in the estimate of the situation is applicable to any situation, echelon, or type of command. Any individual may use it to arrive at a decision. Commanders use it to choose the course of action they want their command to follow.
Staffs use it to determine the influence of factors within their particular field of interest on the courses of action under consideration. They also use it to arrive at recommendations for their commander. The estimate of the situation is a con-tinuing mental process. With each change in the situation, commanders and staffs must revise the estimate and modify the course of action as appropriate. The estimate is as thorough as time and circumstances will permit. It may vary from a short, almost instantaneous process when the requirement for a decision is urgent to a long, complex, and complete process requiring the effort of the entire staff. CONDUCTING A MEETING When members of an organization, such as the student government at your school, assemble to transact business, they are conducting a meeting. Within JROTC, your instructors or the chain of command may call on you to organize and conduct a meeting using the proper rules of order. The two types of meetings that you will conduct most often are the regular and special meetings. Hold regular meetings at set time intervals, such as weekly, monthly, or quarterly to discuss matters of routine business. However, convene a special meeting when important matters arise between the regular meetings that urgently require action before the next regular meeting. The minimum essential officers for the conduct of business are a presiding officer (chairperson or president) and a secretary. The presiding officer conducts the meeting and sees that members observe the rules. The secretary makes a written record of the proceedings — called the minutes.
Chapter 3: Leading Situations Lesson 10: Basic Command and Staff Principles
170 Unit 2: Leadership Theory and Application
THE PROCEDURES OF ORDER When the time for the meeting arrives and sufficient members are present, the presiding officer opens it. An organization may adopt its own order of business (known as a program or agenda) or it may follow one addressed in its bylaws. Most organizations consider the following order as standard for their meetings:
• Reading and approval of the minutes. • Reports of officers and special committees. • Unfinished business. • New business. Normally, any member can introduce a legitimate issue at any time when there is no other business for consideration. Members do this through the use of motions. Once a mem-ber makes a motion and another member sec-onds it, the presiding officer places it before the assembly for debate. Every member has the right to speak to every debatable motion before the membership votes on it. In most situations, the basic requirement for approval of an action is a majority vote. All members in good standing (not under a disciplinary suspension) have the right to vote. The regular methods of voting are by:
An organization may use other methods of voting when prescribed by the bylaws. They are voting by ballot (used when there is a need for secrecy of each member’s vote) and roll call vote (which has the opposite effect of a ballot vote because it places on record how each member votes). To close a meeting, either a member can motion for adjournment or, under certain
conditions, the presiding officer can declare the meeting adjourned. FRAMEWORK Every organization should specify in its bylaws what officers it requires, how they will be elected or appointed, their terms of office, and any qualifications for holding those offices. The officers that most organizations require for a smooth running assembly are the presiding officer (chairperson or president), vice president, secretary, and treasurer. Other key, non-elected personnel are the sergeant-at arms and the historian/librarian. Refer to the book Robert’s Rules of Order for an explanation of the duties and responsibilities of these officers and for other key personnel not listed. The basic reports essential for and during the conduct of a meeting are the minutes (or the report of the proceedings) and the reports by the various officers. CONCLUSION From past military history, the relationship between command and staff actions; staff organization, duties, and responsibilities; and the manner in which a unit successfully accomplishes its missions are very apparent. If you pursued this lesson with the intention of learning the “how” of command and staff procedures, you should have become better qualified to assume the top leadership positions in your cadet battalion. NOTEBOOK ENTRY Identify a major project in which you participated where a sequence of actions (such as the command and staff actions) were used. Consider a major project to be one that required an extensive amount of planning, coordinating, and supervision to ensure that it
Voice: Normal method of voting on a motion. Rising: Verifies a non-conclusive voice vote. Show of hands: Alternative to the rising vote.

Chapter 3: Leading Situations Lesson 10: Basic Command and Staff Principles
Unit 2: Leadership Theory and Application 171
was executed successfully. Examples of a major project might include conducting a service learning project, preparing for the command inspection, conducting a drill event at a school function, etc. Then, based on your position within the cadet battalion, answer the following questions concerning that project. • What was the nature of the project? Be
specific. • What was your position in the cadet
battalion at that time? • What was your title, if any, and your
primary roles/functions in the project? • Based on your role in the project, which
of the sequence of actions used by the project leadership to plan for, conduct, and supervise it resembled the nine command and staff actions described in this lesson? List each step used and give a specific example that relates to the project indicating how it was used and by whom (the project leader, assistants who were in charge of specific areas, individuals, etc.). Complete as much of this paragraph as possible.
• Was the project a success? Can you
speculate if the use of a sequence of actions helped to achieve that success?
Try to answer as much of this exercise as you can based on your level of participation in the project you selected.
* * *
Chapter 4: Leadership Lab Lesson 1: Steps from the Past
Unit 2: Leadership Theory and Application 172
LEADERSHIP LAB LESSON 1: STEPS FROM THE PAST
INTRODUCTION In 1775, when this country was striving for independence and existence, the nation’s leaders were confronted with the problem of not only establishing a government, but also organizing an army that was already engaged in war. From the “shot heard around the world” on 19 April 1775, until Valley Forge in 1778, revolutionary forces were little more than a group of civilians fighting Indian-style against well-trained, highly disciplined British forces.
For three years, General Washington’s troops endured many hardships — lack of funds, rations, clothing, and equipment. Additionally, they suffered loss after loss to the superior British troops. These hardships and losses mostly stemmed from the lack of a military atmosphere in this country. Recognizing the crisis, General Washington (through Benjamin Franklin, the American Ambassador to France) enlisted the aid of a Prussian officer, Baron Friedrich von Steuben. Upon his arrival at Valley Forge on 23 February 1778, Baron von Steuben, a former staff officer with Frederick the Great, met an army of several thousand half-starved, wretched men in rags. His first comment was, “No European army could be kept together in such a state.” To correct these conditions, he set to work immediately, writing drill movements and regulations at night and teaching a model company of 120 men during the day. Discipline became a part of military life for these selected individuals, and they learned to respond to commands without hesitation. This new discipline instilled in these soldiers a sense of alertness, urgency, and attention to detail. Confidence in themselves and in their weapons grew as each man perfected the movements. As they mastered the art of drill, they began to work as a team, and they developed a sense of pride in their unit. Observers were amazed to see how quickly and orderly von Steuben could form and maneuver the troops into different battle formations. Officers observed that organ-ization, chain of command, and control were improved as each man had a specific place and task within the formation.
discipline drill maneuver precision unison
PURPOSE
This lesson introduces you tothe importance of drill and cere-monies, their history and purpose. Theprecision and timing of drill promotes skill, teamwork, and discipline. In laterlessons, you will see how you canpolish your image and personal appear-ance with the right look, prepareyourself for inspections, understandthe roles of leaders and followers indrill, and practice individual drillmovements.
Chapter 4: Leadership Lab Lesson 1: Steps from the Past
Unit 2: Leadership Theory and Application 173
Later, General Washington dispersed the members of the model company throughout the Army to teach drill. From this drill instruction, they improved the overall effectiveness and efficiency of the Army. To ensure this uniformity and overall effectiveness continued, von Steuben wrote the first field manual for the U.S. Army in 1779: The Regulations for the Order and Discipline of the Troops of the United States (commonly referred to as the Blue Book). The Army did not change the drill procedures initiated at Valley Forge for 85 years, until the American Civil War. In fact, many of those original drill terms and procedures still remain in effect today. PURPOSES/OBJECTIVES OF DRILL Throughout history, armies have practiced drill. In times of war, leaders used drill to move troops and equipment quickly from one location to another in an orderly manner. Drills also show how many can move as one in a flawlessly-timed effort. These unison movements are still important on the battlefield where mistakes can cost lives. In peacetime, drill provides a means of enhanc- ing morale, developing a spirit of cohesion, and presenting traditional and well-executed ceremonies. When individuals react to commands rather than thought, the result is more than just a good-looking ceremony or parade — it is discipline! Drill has been and will continue to be the backbone of military discipline. In addition to discipline, military drill teaches and develops:
CONCLUSION Through hard work and discipline, you can learn and develop the leadership skills and abilities necessary to become an effective leader in drill as well as in many other situations. An individual with pride and discipline will respond on command to produce the finest drill maneuvers in all of JROTC. Make your first step a good one and follow it through with others of which you can be equally proud of yourself and of your achievements.
* * *
• Self-confidence • Personal pride • Esprit de corps • Teamwork • Attention to detail • Unit pride

Chapter 4: Leadership Lab Lesson 2: Roles of Leaders and Followers in Drill
174 Unit 2: Leadership Theory and Application
LESSON 2: ROLES OF LEADERS AND FOLLOWERS IN DRILL
INTRODUCTION
One of the fundamental purposes of Leadership Lab is to reinforce and let you practice the leadership style and skills that you are trying to develop. In Leadership Lab, you will have the opportunity to demonstrate the traits of leadership, concepts of teamwork, pride in your unit, and the chain of command. The remainder of this unit is an explanation and practical application of drill — designed to strengthen your character, knowledge, and skills as an Army JROTC cadet. Drill and the application of basic leadership techniques will help you to develop in these areas.
RESPONSIBILITIES OF A FOLLOWER The role you play and your responsibilities as a follower in drill are of great importance to the unit. By your obedience to unit leaders, your appearance, and your willingness to contribute to the unit’s mission, you are showing the team spirit of a follower, helping to make the unit what it is, and contributing to its success. As a follower, you share the same responsibilities of your leaders to uphold the basic values of loyalty to your unit, personal responsibility, and selfless service. It is your duty to complete your job to the best of your ability and to put the needs and goals of the unit before your own. RESPONSIBILITIES OF A LEADER In your role of a leader, your responsibilities include setting a good example, knowing your job, and being concerned about the welfare of your followers. Further, you must show your obedience to your leaders and, at the same time, demonstrate the initiative of a follower. Finally, you must show ability and willingness to contribute to the success of your unit’s missions. You must show your leaders and followers that you uphold the same basic values of unit loyalty, personal responsibility, and selfless service. If you rise to the challenge of these responsibilities, you can make your followers feel confident in you, in themselves, and in the unit. COMMANDS AND THE COMMAND VOICE The responsibilities of a leader include the proper use of command voice. When leaders give commands properly and with a good command voice, they are helping to
cadence column command of execution inflection interval preparatory command rhythmic selfless snap supplementary command
PURPOSE
This lesson introduces you tothe roles of leaders and followers indrill, it discusses the different types ofcommands and the importance ofcommand voice, and it prepares youfor the practical application of drill byexplaining the responsibilities of asmall unit (team or squad) drill leader.
Chapter 4: Leadership Lab Lesson 2: Roles of Leaders and Followers in Drill
Unit 2: Leadership Theory and Application 175
ensure that subordinates carry out their orders immediately and correctly. How often have you heard a command given that demands immediate action? Your Mom or Dad may have given you that command about something as simple as mowing the lawn or cleaning up your room. Their authority came through loud and clear; the voice said, “Do what I say, NOW!” The same thing happens in Leadership Lab except the commands come from drill leaders. If you are a leader, learn to give commands so that your followers clearly understand you and respond with immediate action. COMMANDS A drill command is an oral order of a commander or leader. The precision with which personnel execute a movement is affected by the manner in which the commander or leader gives the command. Most drills have two parts: the preparatory command and the command of execution. Neither part is a command by itself. The preparatory command states the movement that the leader wants subordinates to perform and it mentally prepares them for its execution. The command of execution signals when subordinates are to execute the movement. For example, in the command “forward, march,” “forward” is the preparatory command and “march” is the command of execution. (Note: The command “ready, aim, fire” is an example of a two-part command that contains two preparatory commands.) Once leaders give a preparatory command, they may command “as you were” to revoke that command. However, once they give the command of execution, any revocation
is improper, and personnel should execute the movement in the best possible manner. Some commands require the use of a supplementary command to reinforce other commands and to ensure proper understanding and execution of a movement. Supplementary commands, given by subordinate leaders, may be a preparatory command, a part of a preparatory command, or a two-part command. These commands extend to the lowest subordinate leader who has control over another element of the command within the same formation. The leader giving the initial preparatory command must allow sufficient time for subordinate leaders to give the supplementary commands before giving the command of execution. Use the following basic rules to help you when giving commands. These rules and accompanying examples may seem very difficult now to understand, but they show the complexity of commands in drill. • Give all commands from the position of
attention. • While at the halt, face the unit when giving
commands. • For marching commands, move simul-
taneously with the unit to maintain correct position.
• When marching, give commands in the
direction of the troops. • Subordinate leaders normally give sup-
plementary commands over their right shoulder. However, you will learn several exceptions to this rule in later drill instruction.
• If a company is in formation, platoon
leaders give supplementary commands
Chapter 4: Leadership Lab Lesson 2: Roles of Leaders and Followers in Drill
176 Unit 2: Leadership Theory and Application
following all preparatory commands of the commander. For example, when the preparatory command is “company,” platoon leaders immediately come to attention and command “platoon.” The company commander then commands “attention.” Squad leaders do not participate in these commands. Also, if the company commander gives the preparatory command “parade,” platoon leaders repeat it, but the squad leaders do not. The company commander then gives the command of execution “rest.”
• To change the direction of a unit when
marching, leaders give the preparatory command and the command of execution for each movement so they begin and end on the same foot in the direction of the turn. For example, give the preparatory command “column right” and the command of execution “march” as the right foot strikes the ground. The interval between the preparatory command and command of execution is normally one count or one step.
• When a command requires the execution of
a movement different from the other elements within the same formation, or at a different time, subordinate leaders give their supplementary commands at the time set by the procedures covering the movement. For example, your platoon is in a column formation. After the platoon leader commands “column of twos from the left,” the first and second squad leaders command “forward” and the third and fourth squad leaders command “stand fast.” On the command of execution “march,” the first and second squads execute the move-ment. At the appropriate time, the third squad leader commands, “column half left, march” for both the third and the fourth squads.
• The only commands that use unit designations such as company or platoon are “attention” and “halt.”
• Combined commands, such as “fall in,”
“fall out,” “rest,” and “at ease” combine preparatory and execution commands, and do not require a supplementary command. Leaders give these commands with inflection and at a uniformly high pitch and loudness comparable to that of a normal command of execution.
DIRECTIVES In contrast to commands, directives are oral orders given by commanders to direct or cause subordinate leaders or a lead element to take action. Commanders give directives rather than commands when it is more appropriate for subordinate elements to execute a movement or to perform a task as independent elements of the same formation. Commanders give directives in sentence form, normally prefixed by the phrases: “have your units” or “bring your units.” For example, “have your units open ranks and stack arms” or “bring your units to present arms.” “Take charge of your units” is the only directive on which a commander relinquishes a command and salutes are exchanged. COMMAND VOICE A properly given command should be understood by everyone in the unit. Correct commands have three important elements: tone, cadence, and snap, and they demand a willing, accurate, and immediate response by everyone in the unit. The Proper Tone of Command Voice
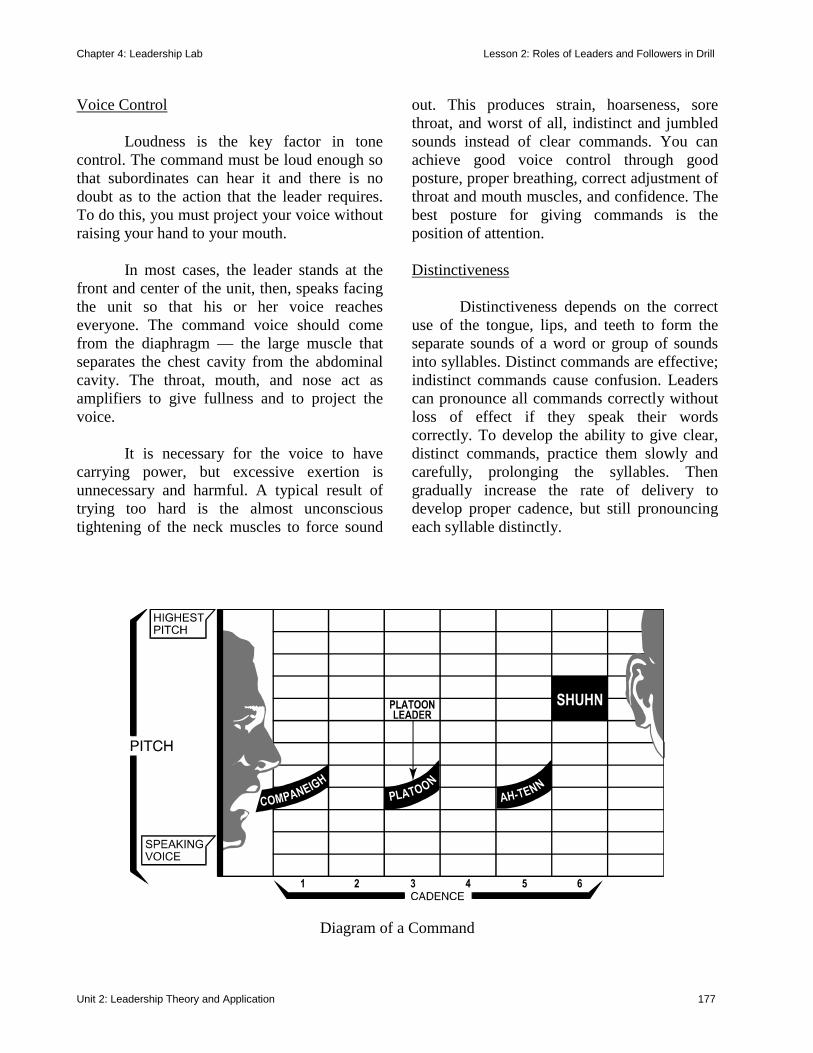
Chapter 4: Leadership Lab Lesson 2: Roles of Leaders and Followers in Drill
Unit 2: Leadership Theory and Application 177
Voice Control Loudness is the key factor in tone control. The command must be loud enough so that subordinates can hear it and there is no doubt as to the action that the leader requires. To do this, you must project your voice without raising your hand to your mouth. In most cases, the leader stands at the front and center of the unit, then, speaks facing the unit so that his or her voice reaches everyone. The command voice should come from the diaphragm — the large muscle that separates the chest cavity from the abdominal cavity. The throat, mouth, and nose act as amplifiers to give fullness and to project the voice. It is necessary for the voice to have carrying power, but excessive exertion is unnecessary and harmful. A typical result of trying too hard is the almost unconscious tightening of the neck muscles to force sound
out. This produces strain, hoarseness, sore throat, and worst of all, indistinct and jumbled sounds instead of clear commands. You can achieve good voice control through good posture, proper breathing, correct adjustment of throat and mouth muscles, and confidence. The best posture for giving commands is the position of attention. Distinctiveness Distinctiveness depends on the correct use of the tongue, lips, and teeth to form the separate sounds of a word or group of sounds into syllables. Distinct commands are effective; indistinct commands cause confusion. Leaders can pronounce all commands correctly without loss of effect if they speak their words correctly. To develop the ability to give clear, distinct commands, practice them slowly and carefully, prolonging the syllables. Then gradually increase the rate of delivery to develop proper cadence, but still pronouncing each syllable distinctly.
Diagram of a Command
Chapter 4: Leadership Lab Lesson 2: Roles of Leaders and Followers in Drill
178 Unit 2: Leadership Theory and Application
Inflection Inflection is the rise and fall in pitch and the tone changes of the voice. Pronounce each preparatory command with a rising inflection. As shown on the preceding page, the most desirable pitch when beginning a preparatory command is near the level of the natural speaking voice. A common fault with beginners is to start the preparatory command in a pitch so high that, after employing a rising inflection, it is impossible to give the command of execution with clarity or without strain. When giving the command of execution, use a sharper tone and a slightly higher pitch than the last syllable of the preparatory command. Remember, the best way to develop a command voice is to practice. In combined commands such as “fall in” or “fall out,” give them without inflection and with the uniform high pitch and loudness of a normal command of execution.
The Proper Cadence of Command Voice When giving commands, cadence is the uniform and rhythmic flow of words. Intervals between the words make the preparatory command understandable and signal when to expect the command of execution. These intervals also allow time for subordinate leaders to give any supplementary commands — as illustrated by the platoon leader in the preceding illustration. When supplementary commands are necessary, the commander or leader should allow one count between the preparatory command and the supplementary command. The leader should also leave a count between
the supplementary command and the command of execution. The Snap of Command Voice and Movement After the leader gives a command, there is a brief time between the end of the command of execution and the time when subordinates actually execute the move. The inflection of the command voice at the end of the command of execution should draw an immediate, sharp, and precise movement (or snap) to this command. If done properly, everyone in the unit moves at the same time — creating an impressive, well-drilled, and uniform appearance. Remember, effective leaders depend on the command voice to show confidence in their ability to command. CONCLUSION Proper execution of commands and command voice takes practice. But, when leaders know their responsibilities and prepare for drill, they will discover that being a drill leader is a lot easier.
* * *
Distinct commands inspire cadets; unclear commands confuse them.
Chapter 4: Leadership Lab Lesson 3: Using Your Leadership Skills/Taking Charge
Unit 2: Leadership Theory and Application 179
LESSON 3: USING YOUR LEADERSHIP SKILLS/TAKING CHARGE
INTRODUCTION In order for leaders to command respect and obedience from their subordinates, they must be prepared to lead and ready for any situation. Their attitude and appearance must set a good example for others to follow. Taking charge is not as easy as it sounds. It is not just having a neat and correct appearance, knowing drill commands, or using proper command voice; it is being a good follower, a good leader, and knowing how and when to use proven leadership techniques (such as the traits and principles of leadership). Read the following story and see if you can personally identify with any of the mistakes that Mark made after he took charge of a squad as its new drill leader.
* * *
Mark usually arrives late to his JROTC class. As he joins the formation, he always greets several of his buddies. He hardly ever has a straight gigline or a pressed uniform, his hair is usually uncombed, and his shoes look like he never polishes them. Day after day, he goes through the process of trying to call his squad to attention. They barely listen to him, continuing to talk and laugh. He finally gets their attention and begins drilling them. During the drill, he consistently gives a few wrong commands and makes several timing errors, but his squad members usually execute the drills correctly anyway. Seeing them get ahead of him frustrates Mark, but by that time, the class is over and he does nothing about it. One day, Mark finally asks a senior cadet, “Why is my squad so hard to keep in line? I can’t get them to shape up. I don’t get angry, I ask them nicely, and I still can’t get any discipline or respect.” The senior cadet replies, “If you really want an honest answer . . . I think they don’t see you as a leader. You give them the wrong commands; you don’t know correct timing or cadence; and your appearance . . . well, it needs a lot of work. Learn the drills and look like a leader. You can’t inspire respect if you don’t have any for yourself. By the way, when was the last time you polished those shoes?” In the next few weeks, Mark’s leadership skills and appearance improve. Soon, the squad sees a difference — Mark is becoming a better leader. He knows the drills, looks the part of a leader, and does not tolerate any slacking off once the class period begins.
command of execution command voice preparation procedure
PURPOSE
This lesson introduces you tohow leaders use their leadership skillsto prepare themselves for taking chargeduring drill.
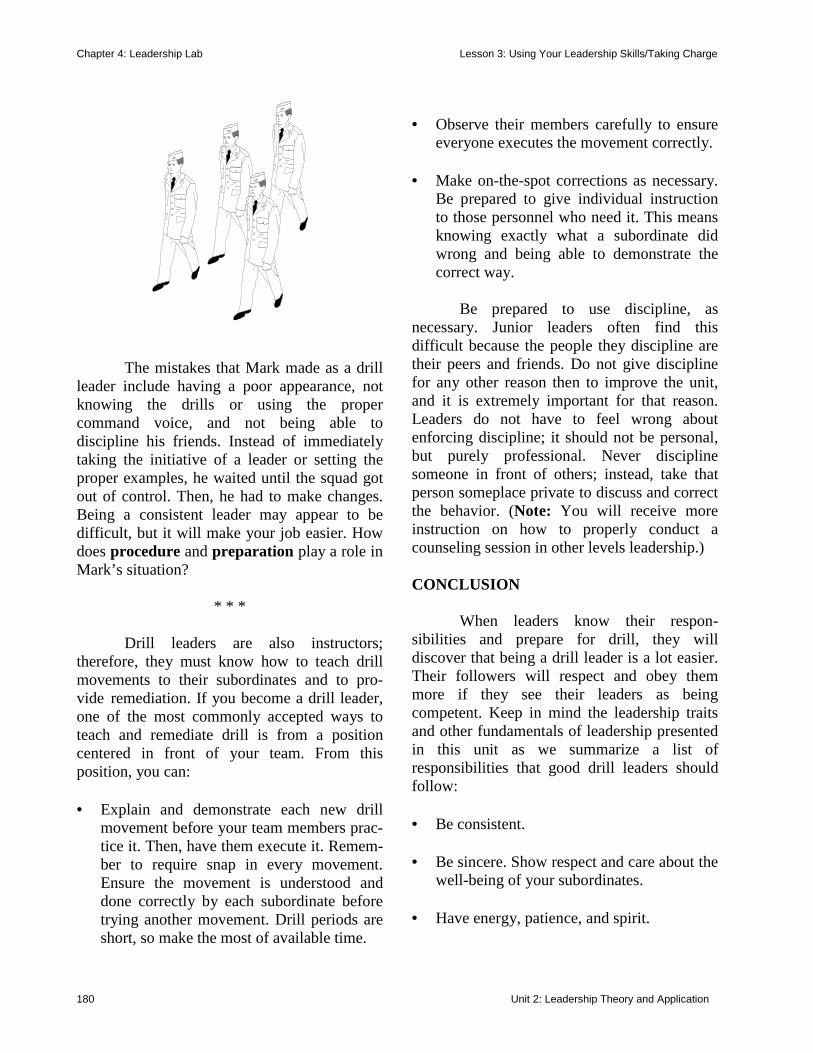
Chapter 4: Leadership Lab Lesson 3: Using Your Leadership Skills/Taking Charge
180 Unit 2: Leadership Theory and Application
The mistakes that Mark made as a drill leader include having a poor appearance, not knowing the drills or using the proper command voice, and not being able to discipline his friends. Instead of immediately taking the initiative of a leader or setting the proper examples, he waited until the squad got out of control. Then, he had to make changes. Being a consistent leader may appear to be difficult, but it will make your job easier. How does procedure and preparation play a role in Mark’s situation?
* * * Drill leaders are also instructors; therefore, they must know how to teach drill movements to their subordinates and to pro-vide remediation. If you become a drill leader, one of the most commonly accepted ways to teach and remediate drill is from a position centered in front of your team. From this position, you can: • Explain and demonstrate each new drill
movement before your team members prac-tice it. Then, have them execute it. Remem-ber to require snap in every movement. Ensure the movement is understood and done correctly by each subordinate before trying another movement. Drill periods are short, so make the most of available time.
• Observe their members carefully to ensure
everyone executes the movement correctly.
• Make on-the-spot corrections as necessary. Be prepared to give individual instruction to those personnel who need it. This means knowing exactly what a subordinate did wrong and being able to demonstrate the correct way.
Be prepared to use discipline, as necessary. Junior leaders often find this difficult because the people they discipline are their peers and friends. Do not give discipline for any other reason then to improve the unit, and it is extremely important for that reason. Leaders do not have to feel wrong about enforcing discipline; it should not be personal, but purely professional. Never discipline someone in front of others; instead, take that person someplace private to discuss and correct the behavior. (Note: You will receive more instruction on how to properly conduct a counseling session in other levels leadership.) CONCLUSION When leaders know their respon-sibilities and prepare for drill, they will discover that being a drill leader is a lot easier. Their followers will respect and obey them more if they see their leaders as being competent. Keep in mind the leadership traits and other fundamentals of leadership presented in this unit as we summarize a list of responsibilities that good drill leaders should follow: • Be consistent. • Be sincere. Show respect and care about the
well-being of your subordinates. • Have energy, patience, and spirit.
Chapter 4: Leadership Lab Lesson 3: Using Your Leadership Skills/Taking Charge
Unit 2: Leadership Theory and Application 181
• Have military neatness and bearing.
• Follow regulations precisely, as an example for others to follow.
• Be knowledgeable of drill procedures and commands. (ie., command of execution)
• Provide feedback or on-the-spot corrections when mistakes are noted.
• Be fair and use judgment when applying discipline.
The above list is not all inclusive. The Leadership instruction in subsequent years will expand upon this list as your understanding of leadership and your leadership potential grow and develop. For now, however, remember that when leaders know and apply drill commands and leadership techniques properly, their confidence and motivation build confidence and motivation in their followers. NOTEBOOK ENTRY Now that you have studied more about leadership and hopefully have refined some of your leadership skills, indicate in your notebook how your expectations may have changed with regard to your desired leadership progression and the positions that you would like to achieve in JROTC? Indicate in your notebook any new expectations that you have about this course and why they changed. Also, explain what you believe are your strengths and weaknesses in leadership and your feelings about becoming a team and/or drill leader.
* * *
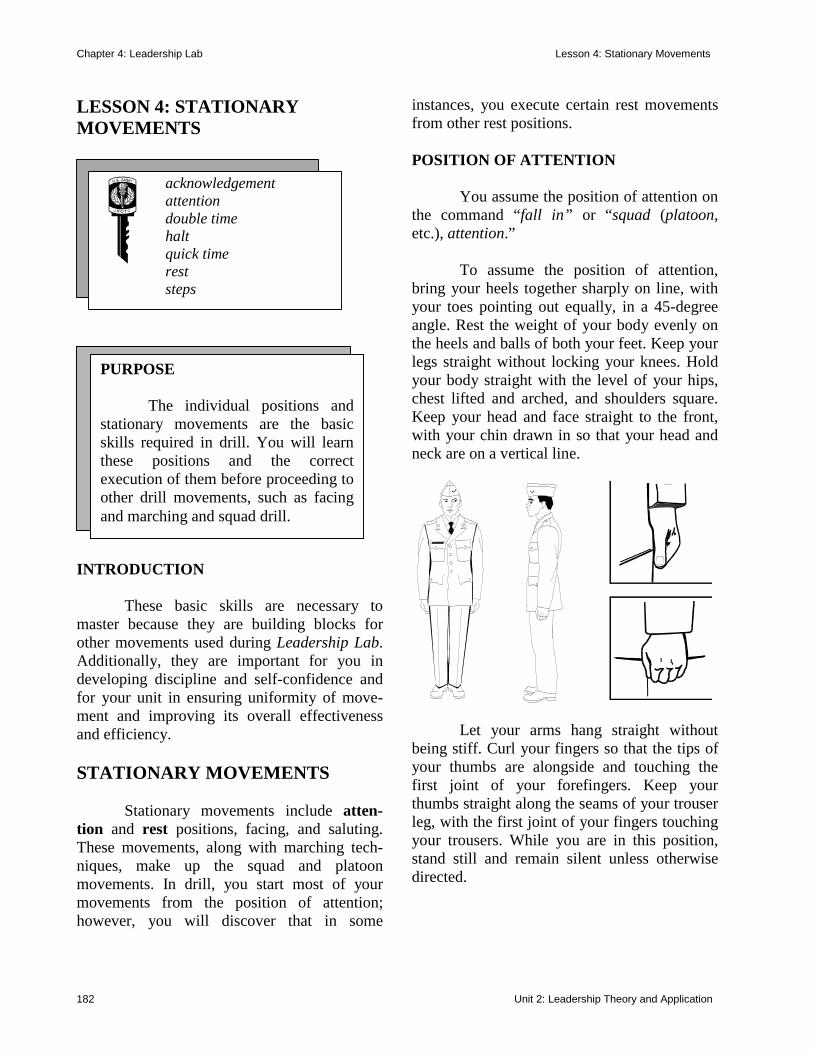
Chapter 4: Leadership Lab Lesson 4: Stationary Movements
182 Unit 2: Leadership Theory and Application
LESSON 4: STATIONARY MOVEMENTS
INTRODUCTION These basic skills are necessary to master because they are building blocks for other movements used during Leadership Lab. Additionally, they are important for you in developing discipline and self-confidence and for your unit in ensuring uniformity of move-ment and improving its overall effectiveness and efficiency. STATIONARY MOVEMENTS Stationary movements include atten-tion and rest positions, facing, and saluting. These movements, along with marching tech-niques, make up the squad and platoon movements. In drill, you start most of your movements from the position of attention; however, you will discover that in some
instances, you execute certain rest movements from other rest positions. POSITION OF ATTENTION You assume the position of attention on the command “fall in” or “squad (platoon, etc.), attention.” To assume the position of attention, bring your heels together sharply on line, with your toes pointing out equally, in a 45-degree angle. Rest the weight of your body evenly on the heels and balls of both your feet. Keep your legs straight without locking your knees. Hold your body straight with the level of your hips, chest lifted and arched, and shoulders square. Keep your head and face straight to the front, with your chin drawn in so that your head and neck are on a vertical line.
Let your arms hang straight without being stiff. Curl your fingers so that the tips of your thumbs are alongside and touching the first joint of your forefingers. Keep your thumbs straight along the seams of your trouser leg, with the first joint of your fingers touching your trousers. While you are in this position, stand still and remain silent unless otherwise directed.
acknowledgement attention double time halt quick time rest steps
PURPOSE
The individual positions andstationary movements are the basicskills required in drill. You will learnthese positions and the correctexecution of them before proceeding toother drill movements, such as facingand marching and squad drill.
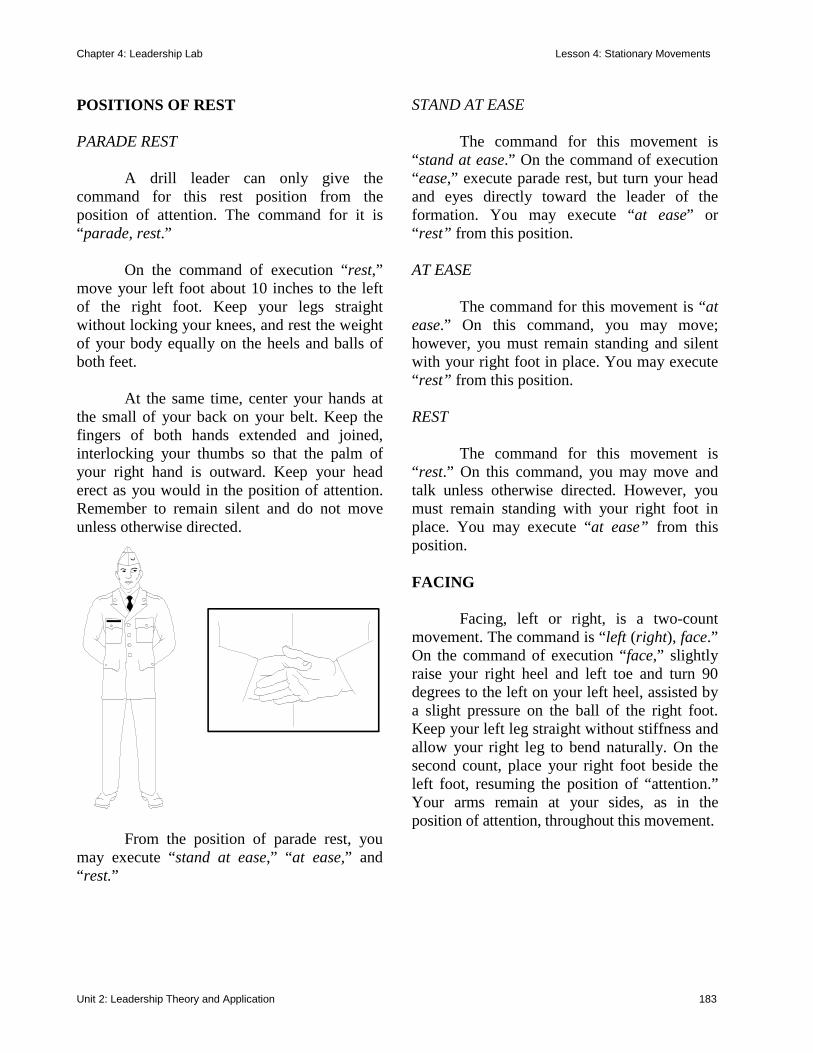
Chapter 4: Leadership Lab Lesson 4: Stationary Movements
Unit 2: Leadership Theory and Application 183
POSITIONS OF REST PARADE REST A drill leader can only give the command for this rest position from the position of attention. The command for it is “parade, rest.” On the command of execution “rest,” move your left foot about 10 inches to the left of the right foot. Keep your legs straight without locking your knees, and rest the weight of your body equally on the heels and balls of both feet. At the same time, center your hands at the small of your back on your belt. Keep the fingers of both hands extended and joined, interlocking your thumbs so that the palm of your right hand is outward. Keep your head erect as you would in the position of attention. Remember to remain silent and do not move unless otherwise directed. From the position of parade rest, you may execute “stand at ease,” “at ease,” and “rest.”
STAND AT EASE The command for this movement is “stand at ease.” On the command of execution “ease,” execute parade rest, but turn your head and eyes directly toward the leader of the formation. You may execute “at ease” or “rest” from this position. AT EASE The command for this movement is “at ease.” On this command, you may move; however, you must remain standing and silent with your right foot in place. You may execute “rest” from this position. REST The command for this movement is “rest.” On this command, you may move and talk unless otherwise directed. However, you must remain standing with your right foot in place. You may execute “at ease” from this position. FACING Facing, left or right, is a two-count movement. The command is “left (right), face.” On the command of execution “face,” slightly raise your right heel and left toe and turn 90 degrees to the left on your left heel, assisted by a slight pressure on the ball of the right foot. Keep your left leg straight without stiffness and allow your right leg to bend naturally. On the second count, place your right foot beside the left foot, resuming the position of “attention.” Your arms remain at your sides, as in the position of attention, throughout this movement.
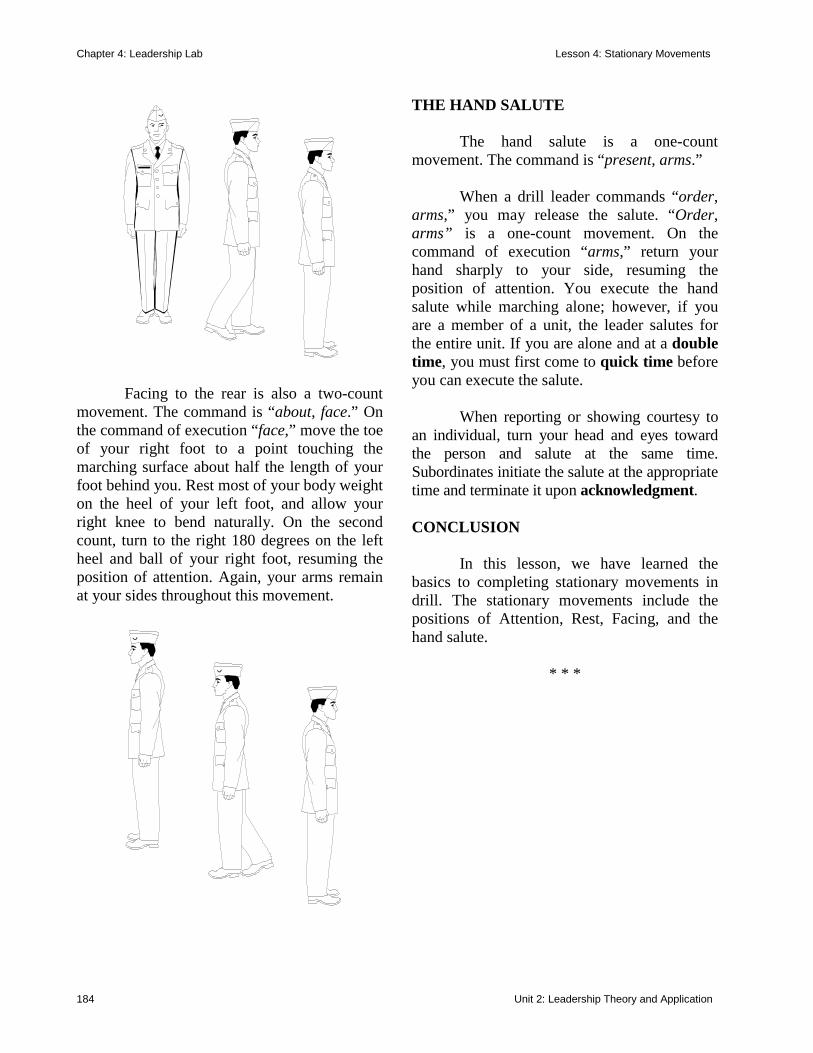
Chapter 4: Leadership Lab Lesson 4: Stationary Movements
184 Unit 2: Leadership Theory and Application
Facing to the rear is also a two-count movement. The command is “about, face.” On the command of execution “face,” move the toe of your right foot to a point touching the marching surface about half the length of your foot behind you. Rest most of your body weight on the heel of your left foot, and allow your right knee to bend naturally. On the second count, turn to the right 180 degrees on the left heel and ball of your right foot, resuming the position of attention. Again, your arms remain at your sides throughout this movement.
THE HAND SALUTE The hand salute is a one-count movement. The command is “present, arms.” When a drill leader commands “order, arms,” you may release the salute. “Order, arms” is a one-count movement. On the command of execution “arms,” return your hand sharply to your side, resuming the position of attention. You execute the hand salute while marching alone; however, if you are a member of a unit, the leader salutes for the entire unit. If you are alone and at a double time, you must first come to quick time before you can execute the salute. When reporting or showing courtesy to an individual, turn your head and eyes toward the person and salute at the same time. Subordinates initiate the salute at the appropriate time and terminate it upon acknowledgment. CONCLUSION In this lesson, we have learned the basics to completing stationary movements in drill. The stationary movements include the positions of Attention, Rest, Facing, and the hand salute.
* * *
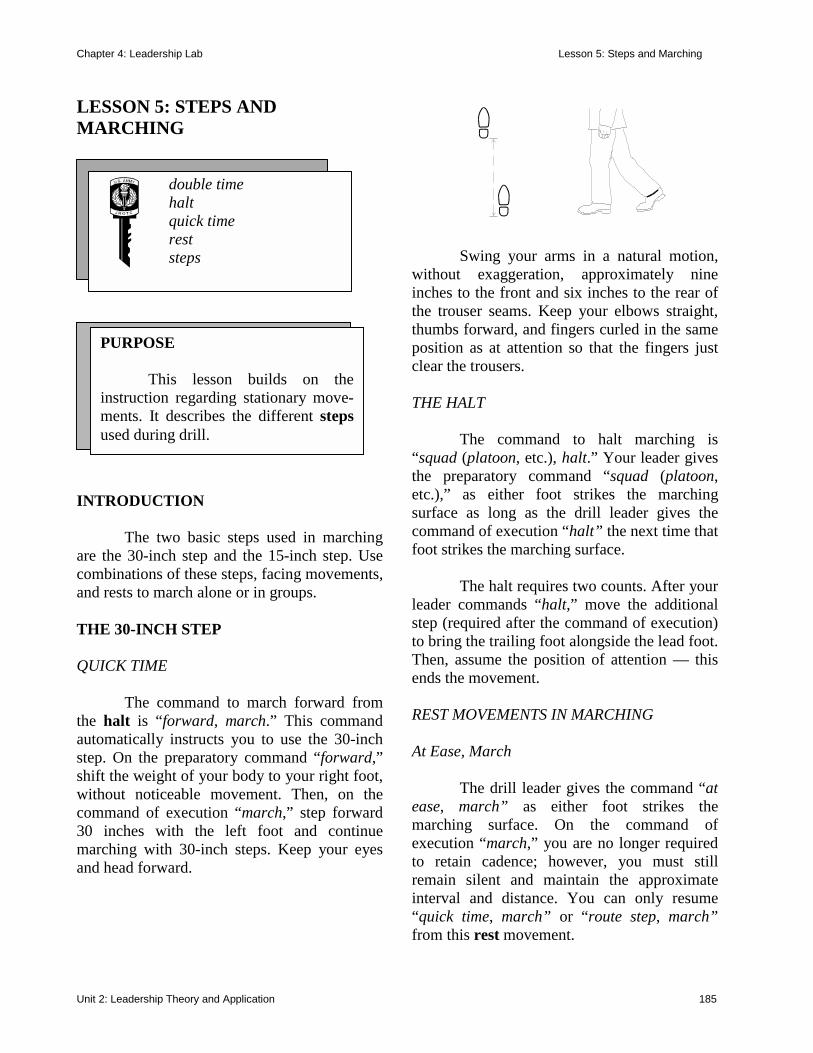
Chapter 4: Leadership Lab Lesson 5: Steps and Marching
Unit 2: Leadership Theory and Application 185
LESSON 5: STEPS AND MARCHING
INTRODUCTION The two basic steps used in marching are the 30-inch step and the 15-inch step. Use combinations of these steps, facing movements, and rests to march alone or in groups. THE 30-INCH STEP QUICK TIME The command to march forward from the halt is “forward, march.” This command automatically instructs you to use the 30-inch step. On the preparatory command “forward,” shift the weight of your body to your right foot, without noticeable movement. Then, on the command of execution “march,” step forward 30 inches with the left foot and continue marching with 30-inch steps. Keep your eyes and head forward.
Swing your arms in a natural motion, without exaggeration, approximately nine inches to the front and six inches to the rear of the trouser seams. Keep your elbows straight, thumbs forward, and fingers curled in the same position as at attention so that the fingers just clear the trousers. THE HALT The command to halt marching is “squad (platoon, etc.), halt.” Your leader gives the preparatory command “squad (platoon, etc.),” as either foot strikes the marching surface as long as the drill leader gives the command of execution “halt” the next time that foot strikes the marching surface. The halt requires two counts. After your leader commands “halt,” move the additional step (required after the command of execution) to bring the trailing foot alongside the lead foot. Then, assume the position of attention — this ends the movement. REST MOVEMENTS IN MARCHING At Ease, March The drill leader gives the command “at ease, march” as either foot strikes the marching surface. On the command of execution “march,” you are no longer required to retain cadence; however, you must still remain silent and maintain the approximate interval and distance. You can only resume “quick time, march” or “route step, march” from this rest movement.
double time halt quick time rest steps
PURPOSE
This lesson builds on theinstruction regarding stationary move-ments. It describes the different stepsused during drill.
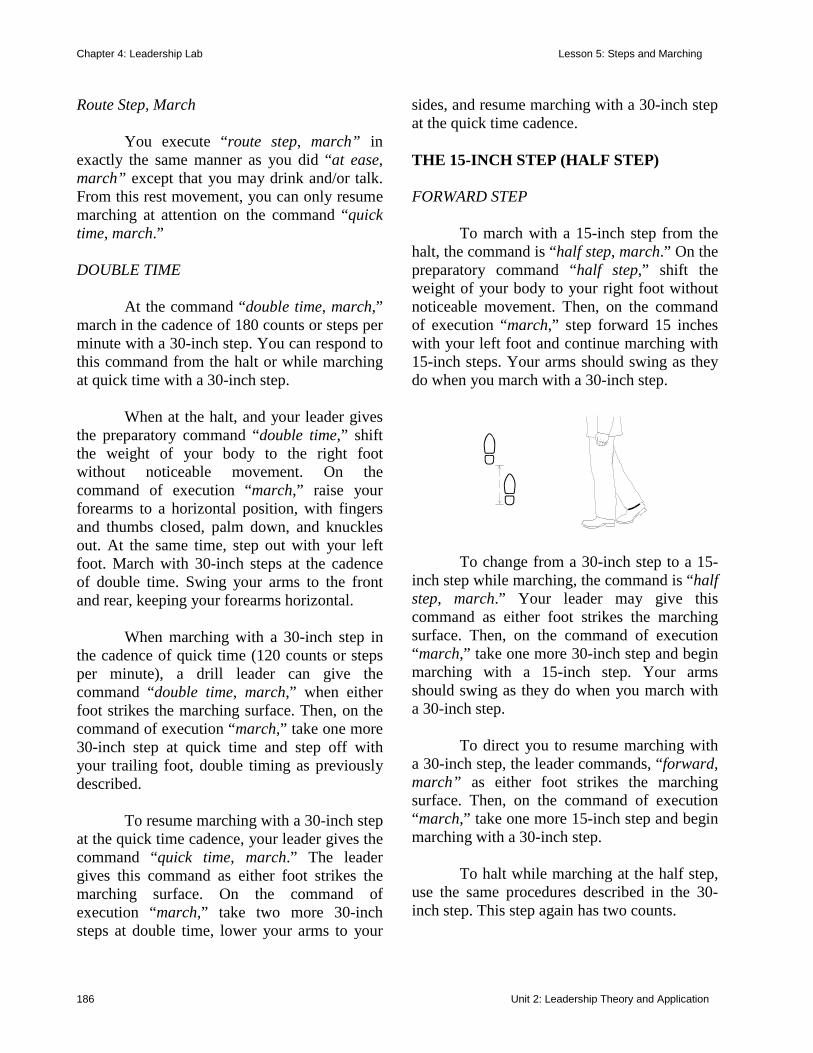
Chapter 4: Leadership Lab Lesson 5: Steps and Marching
186 Unit 2: Leadership Theory and Application
Route Step, March You execute “route step, march” in exactly the same manner as you did “at ease, march” except that you may drink and/or talk. From this rest movement, you can only resume marching at attention on the command “quick time, march.” DOUBLE TIME At the command “double time, march,” march in the cadence of 180 counts or steps per minute with a 30-inch step. You can respond to this command from the halt or while marching at quick time with a 30-inch step. When at the halt, and your leader gives the preparatory command “double time,” shift the weight of your body to the right foot without noticeable movement. On the command of execution “march,” raise your forearms to a horizontal position, with fingers and thumbs closed, palm down, and knuckles out. At the same time, step out with your left foot. March with 30-inch steps at the cadence of double time. Swing your arms to the front and rear, keeping your forearms horizontal. When marching with a 30-inch step in the cadence of quick time (120 counts or steps per minute), a drill leader can give the command “double time, march,” when either foot strikes the marching surface. Then, on the command of execution “march,” take one more 30-inch step at quick time and step off with your trailing foot, double timing as previously described. To resume marching with a 30-inch step at the quick time cadence, your leader gives the command “quick time, march.” The leader gives this command as either foot strikes the marching surface. On the command of execution “march,” take two more 30-inch steps at double time, lower your arms to your
sides, and resume marching with a 30-inch step at the quick time cadence. THE 15-INCH STEP (HALF STEP) FORWARD STEP To march with a 15-inch step from the halt, the command is “half step, march.” On the preparatory command “half step,” shift the weight of your body to your right foot without noticeable movement. Then, on the command of execution “march,” step forward 15 inches with your left foot and continue marching with 15-inch steps. Your arms should swing as they do when you march with a 30-inch step.
To change from a 30-inch step to a 15-inch step while marching, the command is “half step, march.” Your leader may give this command as either foot strikes the marching surface. Then, on the command of execution “march,” take one more 30-inch step and begin marching with a 15-inch step. Your arms should swing as they do when you march with a 30-inch step. To direct you to resume marching with a 30-inch step, the leader commands, “forward, march” as either foot strikes the marching surface. Then, on the command of execution “march,” take one more 15-inch step and begin marching with a 30-inch step. To halt while marching at the half step, use the same procedures described in the 30-inch step. This step again has two counts.
Chapter 4: Leadership Lab Lesson 5: Steps and Marching
Unit 2: Leadership Theory and Application 187
It is important to note that while marching forward using the half step, the basic commands that your leader can give are “mark time, march,” “forward, march,” and “halt.” RIGHT/LEFT STEP To march to the right or left with a 15-inch step, the command is “right (left) step, march.” You perform the command only while at the halt. On the preparatory command “right (left) step,” shift the weight of your body, without noticeable movement, onto the left (right) foot. To execute right-step march, on the command of execution “march,” bend your right knee slightly and raise your right foot only high enough to allow freedom of movement. Place your right foot 15 inches to the right of your left foot, and then move your left foot (keeping the left leg straight) alongside your right foot as in the position of attention. Continue this movement, keeping your arms as they are in the position of attention. Reverse this procedure to perform left-step march. To halt when executing right- or left-step march, your leader commands “squad (platoon, etc.), halt.” This movement has two counts. The leader gives the preparatory command when both heels are together. On the command of execution “halt,” take one more step with your lead foot, then place the trailing foot alongside it, resuming the position of attention. BACKWARD STEP To direct you to march backward with a 15-inch step, your leader gives the command “backward, march.” You perform the command only while you are at the halt. On the preparatory command “backward,” shift the weight of your body, without noticeable movement, onto your right foot. Then, on the
command of execution “march,” take a 15-inch step backward with your left foot and continue marching backward with 15-inch steps. Let your arms swing naturally. To halt from backward march is a two count movement. This halt is basically the same as from the 30-inch step. CHANGING STEP IN MARCHING Your drill leader may command “change step, march” when the right foot strikes the marching surface. On the command of execution “march,” take one more step with the left foot, then in one count place the right toe near the heel of the left foot and step off with the left foot. Let your arms swing naturally. If you are marching in a formation and you notice that you are not leading with the correct foot, you should change step on your own automatically. MARCHING IN PLACE The command for marching in place is “mark time, march.” Your leader gives this command as either foot strikes the marching surface, from a 30-inch or 15-inch forward marching step. On the command of execution “march,” take one more step, bring the trailing foot alongside the lead foot, and begin to march in place. To begin marching in a 30-inch step from marching in place, your leader commands “forward, march.” On the command of execution “march,” take one more step in place then step off with a 30-inch step. Follow these same procedures if your leader commands “half step, march” except step off with a 15-inch step. The following chart shows helpful drill tips for this lesson on Steps and Marching.
Chapter 4: Leadership Lab Lesson 5: Steps and Marching
188 Unit 2: Leadership Theory and Application
CONCLUSION In this lesson we have learned the basics steps and marching. We discussed the 30-inch step, the 15-inch step, changing step in marching, and marching in place.
* * *
DRILL TIPS • When at a halt, start all marching
movements from the position of attention.
• Except for “route step, march” and “at ease, march,” execute all marching movements while “marching at attention.” Marching at attention is the combination of the position of attention and the procedures for the prescribed step executed simul-taneously.
• When executed from the halt, all steps except “close interval, march,” “right step, march,” and “about, face” begin with your left foot.
• Unless otherwise specified, use 30-inch steps for marching forward.
• Execute all marching movements in the quick time cadence except for the command “double time, march.”
• Marching is a five step process: (1) preparatory command step, (2) intermediate or thinking step, (3) command of execution step, (4) additional step after the com-mand of execution, and (5) execution of movement.
• Execute all 15-inch step movements for a short distance only.
Chapter 4: Leadership Lab Lesson 6: Squad Drill
Unit 2: Leadership Theory and Application 189
LESSON 6: SQUAD DRILL
INTRODUCTION To execute squad drill, you must first know how a squad forms and what your responsibilities are when it forms, such as knowing how to fall in, line up, and align yourself. Once you have mastered these techniques, learning how to march in uniformity with others is important in being part of a sharp drill squad. The following drill tips will help you to better understand some general information about squad drill.
close interval double interval file flank formations line normal interval pivot rank
DRILL TIPS • Perform individual drill movements as
described in the last lesson while executing drill as a squad member.
• The squad has two prescribed
formations: line (or rank) and column (or file); however, your squad leader may form the squad in a column of twos from a column formation. (The right column has illustrations of these formations.)
• When a squad forms in a line, its
members are numbered from right to left; when in a column, from front to rear.
• When the squad drills as a separate unit
and is in a line formation, the squad leader takes a position three steps in front of and centered on the squad.
• When it drills as a separate unit and is
in a column or column of twos, the squad leader’s position is three steps to the left and centered on the squad.
• When the squad drills as part of a larger
formation, the squad leader occupies the number one (base) position of the squad.
PURPOSE
This lesson introduces you tothe basics of practicing squad drill. Itcovers squad formations and teachesyou how to march the squad, with tipsfor conducting a proper drill.

Chapter 4: Leadership Lab Lesson 6: Squad Drill
190 Unit 2: Leadership Theory and Application
SQUAD FORMATIONS
NOTES: o An arrow indicates the direction the squad is facing
and/or moving. o A boxed “X” is the squad leader; boxed slashes are
team leaders. • Squad sizes may vary with each unit. FALLING IN In squad drill, falling in is the process of forming up in a line formation. However, it may re-form in a column formation when each member can identify his or her exact position. When the squad leader comes to the position of attention and commands “fall in,” the squad normally forms at normal interval. On the command of “fall in,” the following actions occur simultaneously by all members of the squad: 1. Double time to your position in the
formation. 2. If you are the cadet on the right flank,
position yourself so that when the squad
forms, it is centered and three steps in front of the leader.
3. If you are the cadet on the right flank,
come to attention and raise your left arm sideways to shoulder level, keeping it in line with your body. Keep your elbow locked, fingers and thumb extended and together, and palm facing down.
4. Cadets to the immediate left of the right-
flank cadet come to attention, turn their heads and eyes to the right, and raise their left arms in the same manner as the right-flank cadet — except the cadet on the left flank does not raise the left arm. Cadets align themselves by stepping forward or backward until they are in line with the right-flank cadet. Cadets then obtain exact interval by taking short steps left or right, ensuring their fingertips touch the shoulder of the person to their right. As soon as each cadet is at normal interval, lower your arms to your sides, sharply turn your heads to the front, and assume the position of attention.
5. The right-flank cadet then sharply
returns to the position of attention. INTERVALS Normal Interval When the leader commands “dress right, dress” and “ready, front,” the right-flank cadet stands fast. On the command of execution “dress,” all cadets except the right-flank cadet turn their heads and eyes to the right and align themselves on the cadet to their right. Cadets, except the left-flank cadet, extend their left arms out to the side at shoulder level with elbows locked, fingers
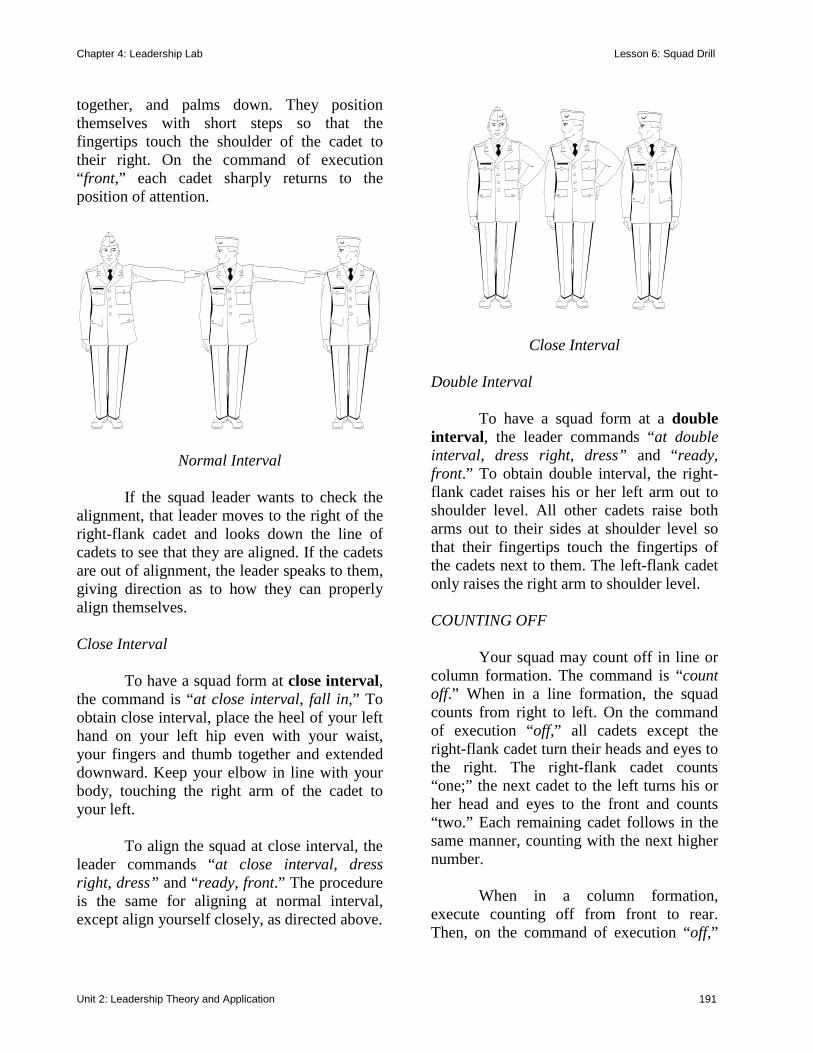
Chapter 4: Leadership Lab Lesson 6: Squad Drill
Unit 2: Leadership Theory and Application 191
together, and palms down. They position themselves with short steps so that the fingertips touch the shoulder of the cadet to their right. On the command of execution “front,” each cadet sharply returns to the position of attention.
Normal Interval If the squad leader wants to check the alignment, that leader moves to the right of the right-flank cadet and looks down the line of cadets to see that they are aligned. If the cadets are out of alignment, the leader speaks to them, giving direction as to how they can properly align themselves. Close Interval To have a squad form at close interval, the command is “at close interval, fall in,” To obtain close interval, place the heel of your left hand on your left hip even with your waist, your fingers and thumb together and extended downward. Keep your elbow in line with your body, touching the right arm of the cadet to your left. To align the squad at close interval, the leader commands “at close interval, dress right, dress” and “ready, front.” The procedure is the same for aligning at normal interval, except align yourself closely, as directed above.
Close Interval Double Interval To have a squad form at a double interval, the leader commands “at double interval, dress right, dress” and “ready, front.” To obtain double interval, the right-flank cadet raises his or her left arm out to shoulder level. All other cadets raise both arms out to their sides at shoulder level so that their fingertips touch the fingertips of the cadets next to them. The left-flank cadet only raises the right arm to shoulder level. COUNTING OFF Your squad may count off in line or column formation. The command is “count off.” When in a line formation, the squad counts from right to left. On the command of execution “off,” all cadets except the right-flank cadet turn their heads and eyes to the right. The right-flank cadet counts “one;” the next cadet to the left turns his or her head and eyes to the front and counts “two.” Each remaining cadet follows in the same manner, counting with the next higher number. When in a column formation, execute counting off from front to rear. Then, on the command of execution “off,”
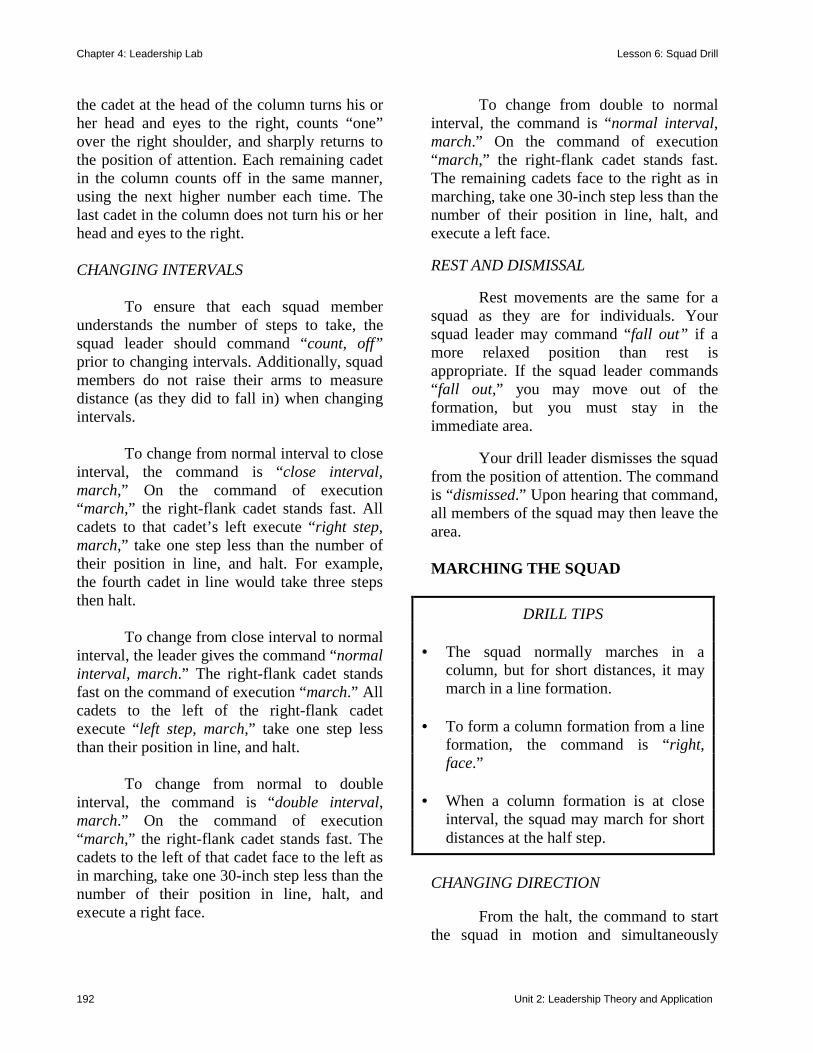
Chapter 4: Leadership Lab Lesson 6: Squad Drill
192 Unit 2: Leadership Theory and Application
the cadet at the head of the column turns his or her head and eyes to the right, counts “one” over the right shoulder, and sharply returns to the position of attention. Each remaining cadet in the column counts off in the same manner, using the next higher number each time. The last cadet in the column does not turn his or her head and eyes to the right. CHANGING INTERVALS To ensure that each squad member understands the number of steps to take, the squad leader should command “count, off” prior to changing intervals. Additionally, squad members do not raise their arms to measure distance (as they did to fall in) when changing intervals. To change from normal interval to close interval, the command is “close interval, march,” On the command of execution “march,” the right-flank cadet stands fast. All cadets to that cadet’s left execute “right step, march,” take one step less than the number of their position in line, and halt. For example, the fourth cadet in line would take three steps then halt. To change from close interval to normal interval, the leader gives the command “normal interval, march.” The right-flank cadet stands fast on the command of execution “march.” All cadets to the left of the right-flank cadet execute “left step, march,” take one step less than their position in line, and halt. To change from normal to double interval, the command is “double interval, march.” On the command of execution “march,” the right-flank cadet stands fast. The cadets to the left of that cadet face to the left as in marching, take one 30-inch step less than the number of their position in line, halt, and execute a right face.
To change from double to normal interval, the command is “normal interval, march.” On the command of execution “march,” the right-flank cadet stands fast. The remaining cadets face to the right as in marching, take one 30-inch step less than the number of their position in line, halt, and execute a left face. REST AND DISMISSAL Rest movements are the same for a squad as they are for individuals. Your squad leader may command “fall out” if a more relaxed position than rest is appropriate. If the squad leader commands “fall out,” you may move out of the formation, but you must stay in the immediate area. Your drill leader dismisses the squad from the position of attention. The command is “dismissed.” Upon hearing that command, all members of the squad may then leave the area. MARCHING THE SQUAD
CHANGING DIRECTION From the halt, the command to start the squad in motion and simultaneously
DRILL TIPS • The squad normally marches in a
column, but for short distances, it may march in a line formation.
• To form a column formation from a line
formation, the command is “right, face.”
• When a column formation is at close
interval, the squad may march for short distances at the half step.
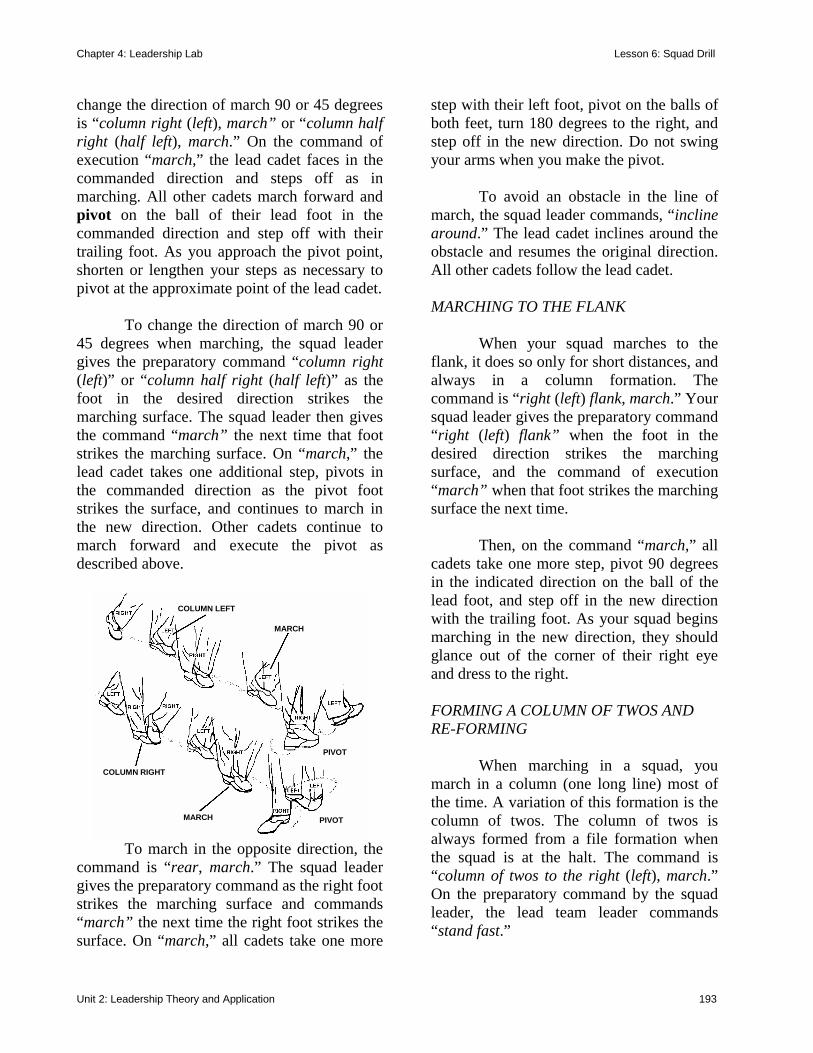
Chapter 4: Leadership Lab Lesson 6: Squad Drill
Unit 2: Leadership Theory and Application 193
change the direction of march 90 or 45 degrees is “column right (left), march” or “column half right (half left), march.” On the command of execution “march,” the lead cadet faces in the commanded direction and steps off as in marching. All other cadets march forward and pivot on the ball of their lead foot in the commanded direction and step off with their trailing foot. As you approach the pivot point, shorten or lengthen your steps as necessary to pivot at the approximate point of the lead cadet. To change the direction of march 90 or 45 degrees when marching, the squad leader gives the preparatory command “column right (left)” or “column half right (half left)” as the foot in the desired direction strikes the marching surface. The squad leader then gives the command “march” the next time that foot strikes the marching surface. On “march,” the lead cadet takes one additional step, pivots in the commanded direction as the pivot foot strikes the surface, and continues to march in the new direction. Other cadets continue to march forward and execute the pivot as described above.
MARCH
MARCH
COLUMN RIGHT
PIVOT
PIVOT
COLUMN LEFT
To march in the opposite direction, the command is “rear, march.” The squad leader gives the preparatory command as the right foot strikes the marching surface and commands “march” the next time the right foot strikes the surface. On “march,” all cadets take one more
step with their left foot, pivot on the balls of both feet, turn 180 degrees to the right, and step off in the new direction. Do not swing your arms when you make the pivot. To avoid an obstacle in the line of march, the squad leader commands, “incline around.” The lead cadet inclines around the obstacle and resumes the original direction. All other cadets follow the lead cadet. MARCHING TO THE FLANK When your squad marches to the flank, it does so only for short distances, and always in a column formation. The command is “right (left) flank, march.” Your squad leader gives the preparatory command “right (left) flank” when the foot in the desired direction strikes the marching surface, and the command of execution “march” when that foot strikes the marching surface the next time. Then, on the command “march,” all cadets take one more step, pivot 90 degrees in the indicated direction on the ball of the lead foot, and step off in the new direction with the trailing foot. As your squad begins marching in the new direction, they should glance out of the corner of their right eye and dress to the right. FORMING A COLUMN OF TWOS AND RE-FORMING When marching in a squad, you march in a column (one long line) most of the time. A variation of this formation is the column of twos. The column of twos is always formed from a file formation when the squad is at the halt. The command is “column of twos to the right (left), march.” On the preparatory command by the squad leader, the lead team leader commands “stand fast.”
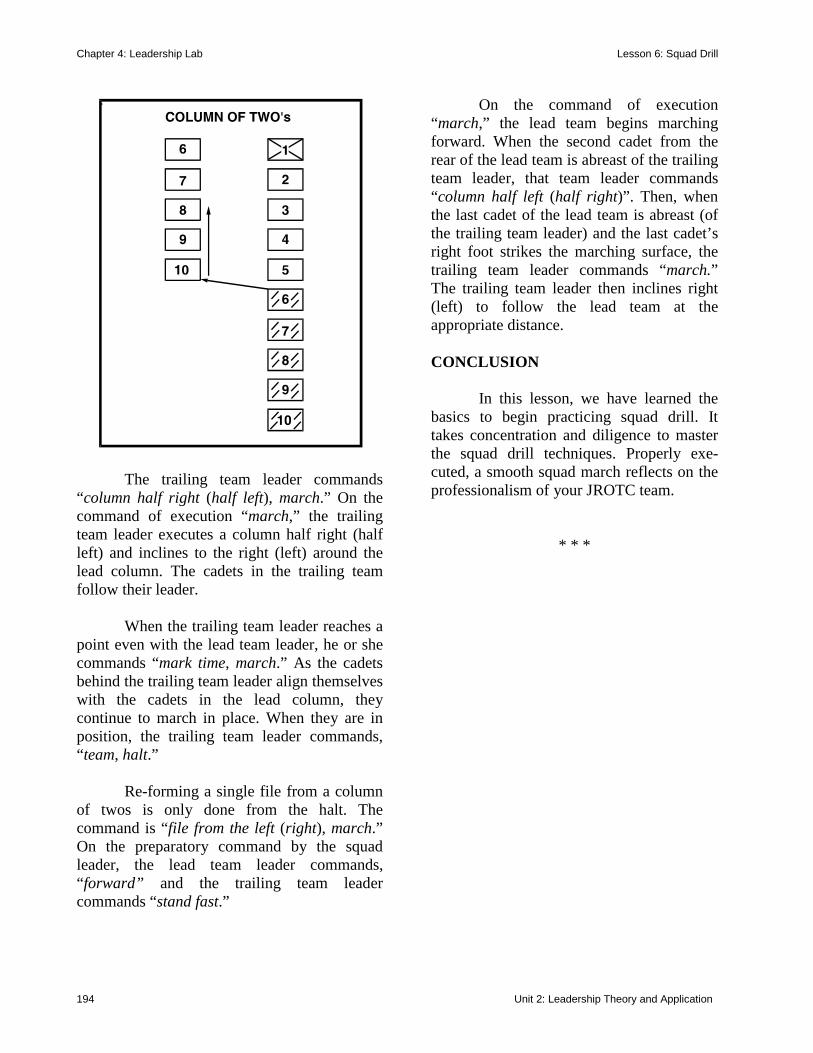
Chapter 4: Leadership Lab Lesson 6: Squad Drill
194 Unit 2: Leadership Theory and Application
The trailing team leader commands “column half right (half left), march.” On the command of execution “march,” the trailing team leader executes a column half right (half left) and inclines to the right (left) around the lead column. The cadets in the trailing team follow their leader. When the trailing team leader reaches a point even with the lead team leader, he or she commands “mark time, march.” As the cadets behind the trailing team leader align themselves with the cadets in the lead column, they continue to march in place. When they are in position, the trailing team leader commands, “team, halt.” Re-forming a single file from a column of twos is only done from the halt. The command is “file from the left (right), march.” On the preparatory command by the squad leader, the lead team leader commands, “forward” and the trailing team leader commands “stand fast.”
On the command of execution “march,” the lead team begins marching forward. When the second cadet from the rear of the lead team is abreast of the trailing team leader, that team leader commands “column half left (half right)”. Then, when the last cadet of the lead team is abreast (of the trailing team leader) and the last cadet’s right foot strikes the marching surface, the trailing team leader commands “march.” The trailing team leader then inclines right (left) to follow the lead team at the appropriate distance. CONCLUSION In this lesson, we have learned the basics to begin practicing squad drill. It takes concentration and diligence to master the squad drill techniques. Properly exe-cuted, a smooth squad march reflects on the professionalism of your JROTC team.
* * *
Chapter 4: Leadership Lab Lesson 7: Platoon Drill
Unit 2: Leadership Theory and Application 195
LESSON 7: PLATOON DRILL
INTRODUCTION By now you should be familiar with stationary movements, basic steps, marching techniques, and squad drill. The introduction of platoon drill is designed to give you a better understanding of the discipline and coor-dination that is required of a large group to perform well in drill. Platoons execute certain drills in the same way that squads do. These drills include: Inclining Around, Resting, Changing intervals in lines, Dismissing, Marching to the flanks, Counting Off, and Marching in the opposite direction. The following drill tips will help you to better understand some general information about platoon drill.
DRILL TIPS
• Execute individual drill movements as
previously described while performing as a squad member during the conduct of platoon drill.
• For the most part, platoon drill merely
provides the procedures for executing movements in conjunction with other squads formed in the same formation.
• The platoon has two prescribed
formations: line and column; how-ever, your platoon leader may form the platoon in a column of twos from a column.
• When a platoon forms in a line, its
squads are numbered from front to rear; in a column, from left to right.
• When the platoon drills as a separate
unit and is in a line formation, the platoon leader takes a position six steps in front of and centered on the platoon. The platoon sergeant’s position is centered on the platoon and one step to the rear of the last rank.
• When it drills as a separate unit and is
in a column formation, the platoon leader’s position is six steps on the left flank and centered on the platoon. The platoon sergeant’s position is one step behind and centered between the second and third squads.
cover double interval file flank formations interval line normal pivot
PURPOSE
This lesson describes the platoonmovements that are unique to eachformation. It teaches you the correctmethod of marching the platoon.
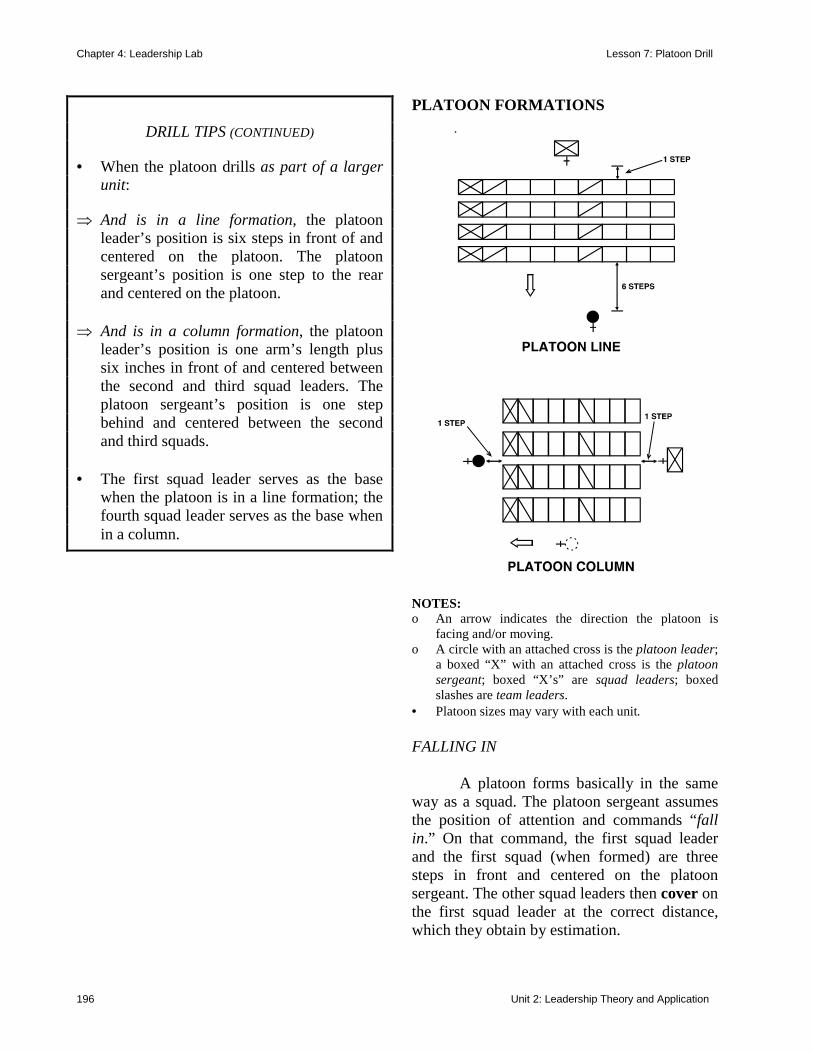
Chapter 4: Leadership Lab Lesson 7: Platoon Drill
196 Unit 2: Leadership Theory and Application
DRILL TIPS (CONTINUED)
• When the platoon drills as part of a larger
unit:
⇒ And is in a line formation, the platoon leader’s position is six steps in front of and centered on the platoon. The platoon sergeant’s position is one step to the rear and centered on the platoon.
⇒ And is in a column formation, the platoon
leader’s position is one arm’s length plus six inches in front of and centered between the second and third squad leaders. The platoon sergeant’s position is one step behind and centered between the second and third squads.
• The first squad leader serves as the base
when the platoon is in a line formation; the fourth squad leader serves as the base when in a column.
PLATOON FORMATIONS
NOTES: o An arrow indicates the direction the platoon is
facing and/or moving. o A circle with an attached cross is the platoon leader;
a boxed “X” with an attached cross is the platoon sergeant; boxed “X’s” are squad leaders; boxed slashes are team leaders.
• Platoon sizes may vary with each unit. FALLING IN A platoon forms basically in the same way as a squad. The platoon sergeant assumes the position of attention and commands “fall in.” On that command, the first squad leader and the first squad (when formed) are three steps in front and centered on the platoon sergeant. The other squad leaders then cover on the first squad leader at the correct distance, which they obtain by estimation.
Chapter 4: Leadership Lab Lesson 7: Platoon Drill
Unit 2: Leadership Theory and Application 197
Members of the first squad fall in on their squad leader as they would in squad drill. However, members of the other squads fall in on their squad leader, assume the position of attention, and turn their heads and eyes to the right. They obtain correct interval by taking short steps forward or backward, align themselves on the cadet to their right, sharply turn their heads and eyes to the front as in the position of attention, and obtain proper interval by taking short steps left or right to cover on the cadet in front of them. Members of these other squads do not raise their left arms unless the cadet to their immediate left has no one on which to cover. When appropriate, the platoon leader may form the platoon. The procedures are the same as described above except that the first squad forms six steps in front of and centered on the platoon leader. The platoon sergeant forms at his or her position to the rear of the platoon. If the platoon leader is not present for the formation, the platoon sergeant steps forward three steps (making a total of six steps in front of the platoon) and assumes the duties of the platoon leader from that position. BREAKING RANKS When the situation requires one or more individuals to leave a platoon formation or to obtain specific instructions from the platoon leader, the platoon leader directs “Cadet Private __________, front and center” or “the following personnel front and center: Cadet Private , Cadet Private , etc.” If you hear the leader call your name, come to the position of attention, reply “here, sir (ser-geant),” take one 15-inch step backward, halt, face to the right (left) in marching, and exit the formation by marching to the nearest flank. Once you clear the formation, double time to and halt two steps in front and centered on the platoon leader.
COUNTING OFF The platoon counts off in the same manner as a squad while in a line or column formation, except that members of all squads in that formation count in unison. CHANGING INTERVALS The platoon changes interval in a line formation in the same manner as the squad. To change interval when the platoon is in a column formation at the halt, the right file stands fast and serves as the base. All other cadets execute the movement as previously described. To obtain close interval from normal interval, the third squad takes one step right, the second squad takes two steps right, and the first squad takes three steps right. To obtain normal interval, the procedures are the same except that the squads take the same number of steps to the left. To change interval when the platoon is marching in a column, the leader gives the preparatory command “close interval” when the right foot strikes the marching surface and the command of execution “march” the next time the right foot strikes the marching surface. On “march,” the base squad (right file) takes one more 30-inch step and then executes a half step. All other cadets take one more step, simultaneously execute a column half right, and march until they obtain close interval. They execute a column half left and assume the half step when abreast of the corresponding cadet of the base squad. On the command “forward, march,” all cadets resume marching with a 30-inch step. The platoon leader could also give the commands “mark time, march” and “pla-toon, halt.”
Chapter 4: Leadership Lab Lesson 7: Platoon Drill
198 Unit 2: Leadership Theory and Application
To resume marching at normal interval, the platoon leader gives the preparatory command “normal interval” as the left foot strikes the marching surface and the command of execution “march” the next time the left foot strikes the marching surface. Then, on the command “march,” the platoon members obtain normal interval in the same manner prescribed for close interval except that they each execute column half left then column half right. To obtain double interval from normal interval, the procedures are the same as from close interval to normal interval. To obtain normal interval from double interval, the procedures are the same as obtaining close interval from normal interval. ALIGNING THE PLATOON This process is similar to aligning a squad. The command for alignment is “dress right, dress.” On the command of execution “dress,” the first squad leader stands fast and serves as the base. Other squad leaders estimate correct distance between their units and the squad in front of them. The cadets in the first squad obtain exact interval as they did in squad drill. All other squads execute as the first squad except that each cadet raises the left arm only for uniformity and covers on the cadet in front of them by glancing out of the corner of the left eye. To obtain exact alignment, the platoon leader marches (on the command of execution “dress”) by the most direct route to a position on line with the first squad, halts one step from the squad leader, and faces down that line. The platoon leader then verifies the alignment of the first squad and instructs cadets (calling them by name or number) to move forward or back as necessary to form an even line.
After aligning the first squad, the platoon leader faces to the left (right) in marching, takes two (or three) short steps to the second squad, halts, faces down that line, and aligns that squad in the same manner as the first squad. The platoon leader follows this same procedure for the remaining squads. When finished with the last squad, the platoon leader returns to the position centered on the platoon, halts perpendicular to the formation, faces to the left (right), and commands “ready, front.” COVERING AND RECOVERING To align the platoon in a column formation, the commands are “cover” and “recover.” On the command “cover,” the fourth squad leader stands fast and serves as the base. The squad leaders, with the exception of the left flank squad leader, raise their arms laterally and turn their heads and eyes to the right. The members of the fourth squad raise their arms horizontally (as in squad drill) to the front and cover on the cadet to their front at the correct distance. Cadets of the third, second, and first squads raise their left arms horizontally to the front (for uniformity only), cover on the person to their front, and, at the same time, glance out of the corner of their right eyes to align on the cadet to their right. To resume the position of attention, the platoon leader gives the command “recover.” On this command, cadets return sharply to the position of attention. OPENING AND CLOSING RANKS A platoon opens ranks from a line formation while at the halt. The command is “open ranks, march,” and the platoon may execute it from any of the prescribed intervals.
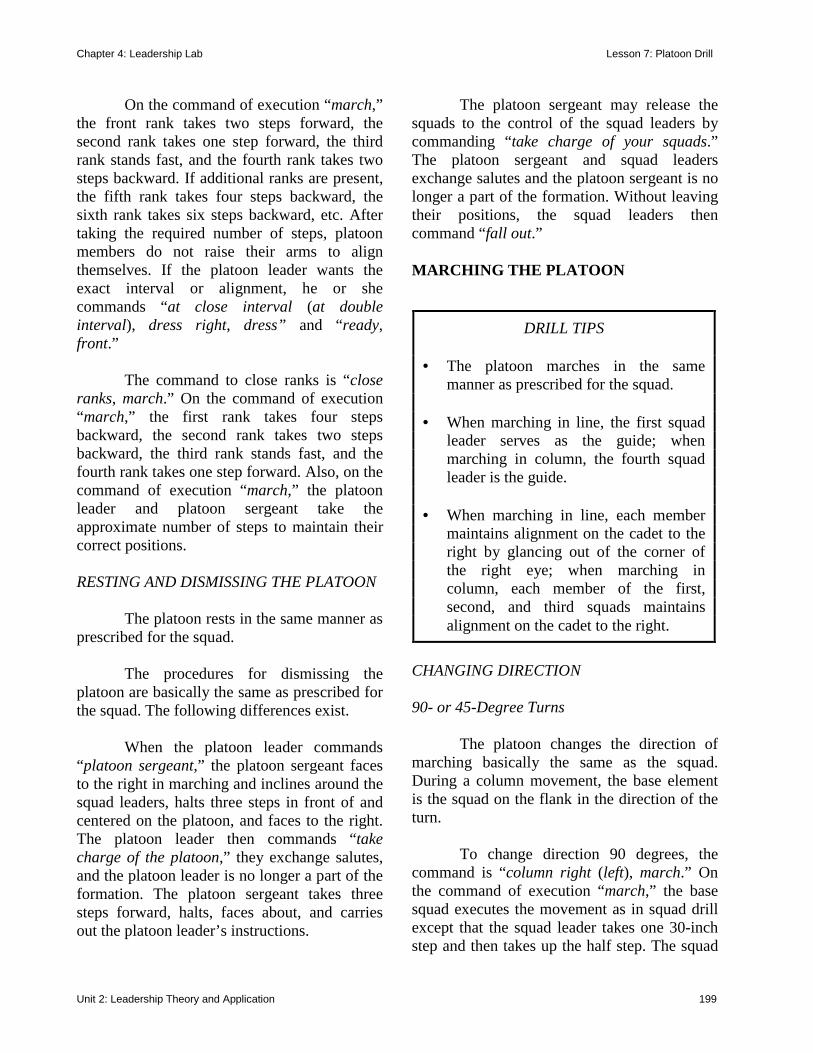
Chapter 4: Leadership Lab Lesson 7: Platoon Drill
Unit 2: Leadership Theory and Application 199
On the command of execution “march,” the front rank takes two steps forward, the second rank takes one step forward, the third rank stands fast, and the fourth rank takes two steps backward. If additional ranks are present, the fifth rank takes four steps backward, the sixth rank takes six steps backward, etc. After taking the required number of steps, platoon members do not raise their arms to align themselves. If the platoon leader wants the exact interval or alignment, he or she commands “at close interval (at double interval), dress right, dress” and “ready, front.” The command to close ranks is “close ranks, march.” On the command of execution “march,” the first rank takes four steps backward, the second rank takes two steps backward, the third rank stands fast, and the fourth rank takes one step forward. Also, on the command of execution “march,” the platoon leader and platoon sergeant take the approximate number of steps to maintain their correct positions. RESTING AND DISMISSING THE PLATOON The platoon rests in the same manner as prescribed for the squad. The procedures for dismissing the platoon are basically the same as prescribed for the squad. The following differences exist. When the platoon leader commands “platoon sergeant,” the platoon sergeant faces to the right in marching and inclines around the squad leaders, halts three steps in front of and centered on the platoon, and faces to the right. The platoon leader then commands “take charge of the platoon,” they exchange salutes, and the platoon leader is no longer a part of the formation. The platoon sergeant takes three steps forward, halts, faces about, and carries out the platoon leader’s instructions.
The platoon sergeant may release the squads to the control of the squad leaders by commanding “take charge of your squads.” The platoon sergeant and squad leaders exchange salutes and the platoon sergeant is no longer a part of the formation. Without leaving their positions, the squad leaders then command “fall out.” MARCHING THE PLATOON
CHANGING DIRECTION 90- or 45-Degree Turns The platoon changes the direction of marching basically the same as the squad. During a column movement, the base element is the squad on the flank in the direction of the turn. To change direction 90 degrees, the command is “column right (left), march.” On the command of execution “march,” the base squad executes the movement as in squad drill except that the squad leader takes one 30-inch step and then takes up the half step. The squad
DRILL TIPS • The platoon marches in the same
manner as prescribed for the squad. • When marching in line, the first squad
leader serves as the guide; when marching in column, the fourth squad leader is the guide.
• When marching in line, each member
maintains alignment on the cadet to the right by glancing out of the corner of the right eye; when marching in column, each member of the first, second, and third squads maintains alignment on the cadet to the right.
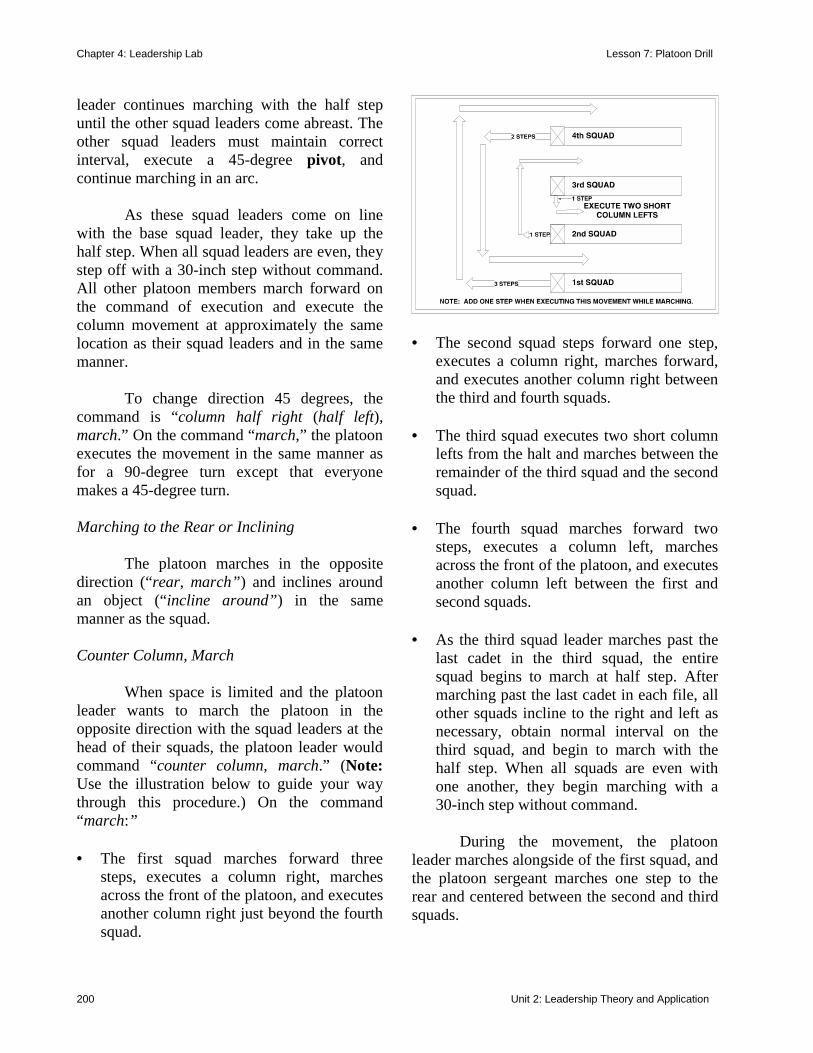
Chapter 4: Leadership Lab Lesson 7: Platoon Drill
200 Unit 2: Leadership Theory and Application
leader continues marching with the half step until the other squad leaders come abreast. The other squad leaders must maintain correct interval, execute a 45-degree pivot, and continue marching in an arc. As these squad leaders come on line with the base squad leader, they take up the half step. When all squad leaders are even, they step off with a 30-inch step without command. All other platoon members march forward on the command of execution and execute the column movement at approximately the same location as their squad leaders and in the same manner. To change direction 45 degrees, the command is “column half right (half left), march.” On the command “march,” the platoon executes the movement in the same manner as for a 90-degree turn except that everyone makes a 45-degree turn. Marching to the Rear or Inclining The platoon marches in the opposite direction (“rear, march”) and inclines around an object (“incline around”) in the same manner as the squad. Counter Column, March When space is limited and the platoon leader wants to march the platoon in the opposite direction with the squad leaders at the head of their squads, the platoon leader would command “counter column, march.” (Note: Use the illustration below to guide your way through this procedure.) On the command “march:” • The first squad marches forward three
steps, executes a column right, marches across the front of the platoon, and executes another column right just beyond the fourth squad.
• The second squad steps forward one step,
executes a column right, marches forward, and executes another column right between the third and fourth squads.
• The third squad executes two short column lefts from the halt and marches between the remainder of the third squad and the second squad.
• The fourth squad marches forward two steps, executes a column left, marches across the front of the platoon, and executes another column left between the first and second squads.
• As the third squad leader marches past the last cadet in the third squad, the entire squad begins to march at half step. After marching past the last cadet in each file, all other squads incline to the right and left as necessary, obtain normal interval on the third squad, and begin to march with the half step. When all squads are even with one another, they begin marching with a 30-inch step without command.
During the movement, the platoon leader marches alongside of the first squad, and the platoon sergeant marches one step to the rear and centered between the second and third squads.

Chapter 4: Leadership Lab Lesson 7: Platoon Drill
Unit 2: Leadership Theory and Application 201
When marching, the platoon leader gives the preparatory command “counter column” as the left foot strikes the marching surface. On the command of execution “march,” the platoon executes the movement basically the same as from the halt, except that the squad takes one additional step to ensure that the pivot foot is in the correct place to execute the movement. MARCHING TO THE FLANK The platoon marches to the flank in the same manner as the squad. FORMING A FILE AND RE-FORMING A platoon forms a single file from the left, right, or as designated, and only from the column formation and the halt. The command is “file from the left (right), march” (or “file in sequence 3-2-4-1, march”). On the preparatory command, the squad leader of the designated (or lead) squad gives the supplementary command “forward.” The other squad leaders command “stand fast.” Then, on the command of execution “march,” the lead squad marches forward. The stationary squad leader next to the lead squad looks over the shoulder nearest the moving element. When the second from the last cadet in the lead squad is abreast, that stationary squad leader commands “column half left (half right).” Then, when the last cadet in the lead squad is abreast and his or her right foot strikes the marching surface, the stationary squad leader commands “march.” On the command of execution, the squad leader next to the lead squad executes the column half left (half right), inclines to the right without command, and follows the last cadet of the lead squad at the correct distance. The other squad members march forward and
execute the same movements as their squad leader. The remaining squads form the file in the same manner, one after another. A platoon may also form a file and execute a column movement at the same time from a column formation. The execution is similar to that described above, except the command is “file from the left (right), column left (right), march.” After the platoon leader’s preparatory command, the lead squad leader commands “column left (right)” instead of “forward.” The other squad leaders also command “column left (right), march” at the appropriate time. The platoon re-forms to the original column formation only from the halt. The command is “column of fours to the right (left), march.” On the preparatory command, the squad leader of the base squad commands “stand fast.” All other squad leaders command “column half right (half left).” On the command of execution “march,” the base squad stands fast; all other squads execute the column half right (half left) at the same time. As each of the moving squad leaders reach a point that ensures correct interval on the element to their left (right), they automatically incline to the left (right) and command “mark time, march” and “squad, halt” so that their squad is abreast of the base squad when halted. FORMING/RE-FORMING A COLUMN OF TWOS A platoon forms a column of twos from the right or left when in a column of fours at the halt. The command is, “column of twos from the left (right), march.” The basic elements of the movement are similar to forming a column of twos in a squad formation. On the preparatory command, the squad leaders of the two lead squads command “for-ward.” The other two squad leaders command
Chapter 4: Leadership Lab Lesson 7: Platoon Drill
202 Unit 2: Leadership Theory and Application
“stand fast.” On the platoon leader’s command “march,” the two lead squads march forward. The squad leader who is next to the lead element gives the command to start both remaining squads in motion. Looking over the shoulder nearest the moving elements, the squad leader gives the preparatory command “column half left (half right)” when the second from the last cadet is next to him or her and gives the command “march” when the right foot of the last cadet strikes the marching surface. On the platoon leader’s command of execution, both squad leaders execute the column half left (half right), incline to the right (left) without command, and follow the last cadets of the lead squads at the correct distance. Other members of the remaining squads march forward and execute the same movements as their squad leaders. The platoon may also form a column of twos and execute a column movement at the same time from a column formation. The command is “column of twos from the left (right), column left (right), march.” The squad leaders of the lead squads command “column left (right)” instead of “forward.” The squad leader of the next squad gives the command “column left (right);” however, that leader then executes a column half left (half right). The remaining two squad leaders stand fast. On the platoon leader’s command “march,” the lead squads execute the column left (right). The squad leader next to the lead squad gives the command to start the remaining squads in motion. Looking over the shoulder nearest the moving elements, the squad leader gives the preparatory command “column left (right)” when the second from the last cadet is next to him or her, and gives the command of execution “march” as the right foot of the last cadet strikes the marching surface (at the pivot for column left or the first time the last cadet’s right foot strikes the marching surface after the
pivot for column right). Although the command is “column left (right),” the outside squads execute a column half left (half right). To re-form the original column formation, the platoon must be at the halt. The command is “column of fours to the right (left), march.” On the preparatory command, the squad leaders of the lead squads command “stand fast.” The trailing squad leaders command “column half right (half left).” On the platoon leader’s command “march,” the lead squads stand fast. The trailing squad leaders execute slightly more than the column half right (half left) at the same time. As the trailing squad leaders reach a point that ensures correct interval on the element to their left (right), they incline to the left (right) without command. The squad leader nearest the stationary lead squads commands “mark time, march” and “squads, halt.” CONCLUSION
Your cadet battalion will spend many hours practicing the individual, squad, and platoon drill movements. Being able to execute them correctly will build confidence and teamwork as well as ensure that your unit looks as good as it can in ceremonies. To excel in Leadership Lab requires dedication in learning the steps and drills, the proper use of commands and the command voice, and thorough preparation on the part of the drill leader.
* * *

Chapter 4: Leadership Lab Lesson 8: Taking Charge — Knowing Your Responsibilities as a Leader
Unit 2: Leadership Theory and Application 203
LESSON 8: TAKING CHARGE — KNOWING YOUR RESPONSIBILITIES AS A LEADER
INTRODUCTION Soon you will be taking charge of a unit and facing the difficult task of leading people. There are certain techniques and steps that will help you to adjust to your new assignment. Since first impressions are usually lasting ones, these steps will help you to make a better first impression. Regardless of the level of development of your followers, especially in
drill, your actions and behavior must be consistent with appropriate leader behavior. After all, your actions and behavior are the main factors that will determine the morale of your team members and the degree they are willing to work as a team to accomplish your goals. Taking charge of a group and turning them into a synchronized drill unit is no easy task. To guide you in assuming a new leadership position and in building a cohesive team, follow the four steps that leaders use to ensure a smooth and successful beginning. They are:
* * *
In the middle of the school year, George moved out of town. The Senior Army Instructor gave his platoon leader’s position to Michelle, the platoon sergeant. Michelle felt confident that she could handle the position because she had done very well as platoon sergeant. Although she knew what was required of a platoon leader, she was nervous about taking George’s place because everyone in the platoon liked him very much. As platoon sergeant, Michelle had closely observed how George led the platoon. One of the reasons for his popularity was that he would personally correct a squad or an individual if a drill movement was not performed well. The platoon members considered George to be a very good coach because he made them feel special to receive his attention. He had been an excellent squad leader, and he missed the direct contact with the other cadets.
assessment evaluation implementation observation planning responsibilities
Observe/Assess Plan
Implement Follow-up/Evaluate
PURPOSE
Leadership Lab is where youhave the opportunity to apply theleadership skills that you have alreadylearned in order to develop your ownstyle of leadership. This lesson willhelp you to develop that style bydescribing the basic responsibilities ofteam leaders, squad leaders, theplatoon sergeant, and the platoonleader. By applying the traits,principles, factors, and values ofleadership to your responsibilities as arole model, coach, and counselor, youwill be able to obtain the best possibleresults from your team.
Chapter 4: Leadership Lab Lesson 8: Taking Charge — Knowing Your Responsibilities as a Leader
204 Unit 2: Leadership Theory and Application
However, Michelle knew that George’s relationship with the platoon often caused resentment with the squad leaders, who interpreted George’s actions as indications that they were not doing — or could not do — their jobs. Therefore, the squad leaders did not like his interference. They knew what they were responsible for and how to do it — if given the chance.
Michelle often had to smooth things out between George and the squad leaders. She would explain to the squad leaders that his actions were not meant as criticism while suggesting to George that he should let the squad leaders do their jobs and stop stepping on their toes. From her observations, Michelle decided to make a plan to change the situation when she became platoon leader. After all, every leader has an individual style and she wanted more harmony within the platoon. She would use her chain of command more than George had and would let the squad leaders correct any problems she saw in platoon drill. But, she also wanted the cadets to work as hard for her as they did for George. After some thinking, she came up with a great idea. Her father managed one of the local movie theaters and she worked for him on the weekends. What if she exchanged a few hours of work for discounted tickets and food? After discussing her plan with the squad leaders, who enthusiastically approved it,
Michelle told the platoon her idea on her first day of drill. “I realize that it’s hard switching leaders in the middle of the year and that we’re all going to miss George, but I’m going to do my best to take over where he left off. One area where I believe we can still improve is squad drill. So, I’ve decided to hold a contest to reward the squad that consistently performs the best each month. Each member of that squad will receive one discounted movie pass and reduced prices on food at the Park Six Cinema. Our SAI, the platoon sergeant, and I will be the judges. Now let’s get down to practice.” After just one month, Michelle was pleased to see that her transition to platoon leader had been successful. She did not have as many problems with the squad leaders as George had, and the new platoon sergeant confirmed that they were happier with her style of not interfering. The JROTC instructors even thought the squads per-formed a little better as a result of the contest and her leadership.
* * * KNOWING YOUR RESPONSIBILITIES AS A LEADER An effective organization is essential for mission accomplishment. A prerequisite for a unit to function with maximum efficiency is that individuals within the unit function together effectively. The solution is to develop and maintain teamwork. To achieve this, it is partially a product of one’s duties, responsibility, and authority. The other element is one’s relationships with peers, supervisors, and followers. To achieve the goal of every team member working side by side effectively and efficiently, leaders must have a
Chapter 4: Leadership Lab Lesson 8: Taking Charge — Knowing Your Responsibilities as a Leader
Unit 2: Leadership Theory and Application 205
complete understanding of their duties and responsibilities. Described below are the responsibilities for team leaders, squad leaders, the platoon sergeant, and the platoon leader. At some point during your JROTC experience, your instructors will assign you to one or more of these positions. Specific duties in your cadet battalion (as outlined in the Cadet Handbook) may be different from these; however, they present you with guidelines illustrating what you can expect from your immediate chain of command. RESPONSIBILITIES OF TEAM LEADERS Team leaders are the first in the chain of command. There are generally two team leaders to a squad, referred to as Team Leader A and Team Leader B. Both team leaders are responsible for the formation, appearance, and training of their team members. Team Leader A must also be ready to assume control of the squad in the absence of the squad leader. They assist their squad leaders as directed and must: • Set the example at all times. • Know the number, names, and personal
information on all assigned personnel. • Assist team members with matters related
to JROTC activities (when possible) and refer them to the squad leader for assistance if they are unable to handle/resolve an issue.
• Be thoroughly familiar with individual and
squad drill; inspect team members during formations and class assemblies to ensure they know what is required of them.
RESPONSIBILITIES OF SQUAD LEADERS Squad leaders are responsible to their platoon leader and platoon sergeant for the appearance, conduct, training, and discipline of
their squad. They ensure that each squad member learns and does what is expected, and maintains high standards of behavior. Squad leaders must: • Set the example at all times. • Know the number, names, and personal
information on all assigned personnel. • Counsel/assist squad members with
matters related to JROTC activities and help them to find solutions to other matters (when possible); refer them to the platoon sergeant or platoon leader for assistance if they are unable to handle/resolve an issue.
• Develop responsibility and leadership in
team leaders and be the first person that they turn to for assistance and advice.
• Form the squad correctly. Make an
accurate report by name of those persons present and absent during common hour activities, company platoon/formations, and other cadet battalion activities.
• Be thoroughly familiar with individual,
squad, and platoon drill. When con-ducting drill, instruct/demonstrate the movement, allow time for individual performance, then supervise team leaders and squad members to ensure they perform properly.
• Inspect their team leaders and squad
members at all times, ensuring they know what is required of them.
RESPONSIBILITIES OF A PLATOON SERGEANT The platoon sergeant functions as the platoon executive and administrator. Therefore, the platoon sergeant must:
Chapter 4: Leadership Lab Lesson 8: Taking Charge — Knowing Your Responsibilities as a Leader
206 Unit 2: Leadership Theory and Application
• Set the example at all times. • Form the platoon when prescribed by the
platoon leader; submit absentee reports to the company first sergeant.
• Assist the platoon leader in supervising the
squad leaders while maintaining a close relationship with them.
• Develop a spirit of teamwork within the
platoon. • Learn the names of everyone in the platoon
and use their names when addressing them. • Provide assistance/counseling to personnel
in the platoon, especially when requested by the platoon leader or a squad leader.
• Assist the platoon leader in training the
platoon. • Be completely informed of all platoon
matters in order to assume control of the platoon in the absence of the platoon leader.
RESPONSIBILITIES OF A PLATOON LEADER The platoon leader is a very desirable position in the cadet battalion. If you are a platoon leader, you have a platoon of cadets for whom you are directly responsible. Primarily, your job is one of leadership, training, and discipline. You also have the opportunity and privilege to be a role model, coach, and counselor. You must: • Keep the company commander apprised of
the status of the platoon at all times. • Establish and maintain command and
control of the platoon at all times. Organize and maintain an effective chain of command.
• Provide assistance/counseling to per-sonnel in the platoon, especially when requested by a squad leader or the platoon sergeant, and/or when necessary for performance or disciplinary reasons.
• Conduct an inspection of the platoon at
formations. • Use the chain of command to accom-
plish tasks; work mainly with the platoon sergeant and the squad leaders.
• Know all cadet regulations and ensure
that all members of the platoon also know and follow them.
• Enforce the orders from superiors
whether you agree with them or not; however, if you think an order is morally or ethically wrong, discuss it with your chain of command and, if necessary, your instructor staff. Do not complain or gripe in the presence of subordinates. Develop a spirit of teamwork so as to instill respect, obedience, and cooper-ation in the platoon.
• Know all phases of drill and ceremonies;
be able to supervise and conduct platoon drill and, if you are the senior officer present in a formation, be able to conduct company drill.
• Set high standards of personal appear-
ance and conduct for yourself. Remem-ber, the platoon leader sets the example for the platoon to follow.
• Make an effort to resolve all leadership,
training, and disciplinary problems at your level; however, if you cannot solve a problem, seek the advice and/or assistance of the company commander, company executive officer, or first sergeant.
Chapter 4: Leadership Lab Lesson 8: Taking Charge — Knowing Your Responsibilities as a Leader
Unit 2: Leadership Theory and Application 207
CONCLUSION In order for a platoon to function effectively and efficiently, team members, team leaders, squad leaders, the platoon sergeant, and the platoon leader must: ⇒ Clearly understand their duties and
responsibilities. ⇒ Know exactly what is expected of them. Only when those things occur to the extent that leaders and platoon members are comfortable can teamwork, productivity, and mission accomplishment take place. At that point, the energy of everyone in the platoon is now available for work. Remember, however, that followers will always observe the actions and behavior of their leaders very closely. Therefore, successful leaders must be able to put that energy to work to build cohesive teams, establish high levels of morale, and create a climate where followers are willing to accomplish missions. Plus, when taking charge of a unit, successful leaders must know how to make a lasting impression — they must observe, plan, implement, and follow up.
* * *
Chapter 4: Leadership Lab Lesson 9: Company Formations and Movement
208 Unit 2: Leadership Theory and Application
LESSON 9: COMPANY FORMATIONS AND MOVEMENT
INTRODUCTION In this lesson, you will build upon your knowledge of individual drill movements, squad drills and platoon drills in order to conduct company drill. Company drill provides the procedures for executing platoon drill in conjunction with other platoons in the same formation. For drill purposes, a company consists of a company headquarters and two or more platoons.
arc base double time guide mark time mass formation post (2 different meanings)
DRILL TIPS • The company has four prescribed
formations: company in line with platoons in line, company in column with platoons in column, company in column with platoons in line (used primarily for ceremonies), and a company mass formation. However, the company may form into a column of twos in the same manner as the platoon. (Graphics of these formations are with their corresponding text.)
• The company normally forms in a line
formation; however, it may re-form in column when all personnel can identify their exact position in the formation.
• The company forms basically the same
as the platoon. On the command “fall-in,” platoons form in line, centered on and facing the person forming the unit, with five-step intervals between platoons.
• When in a line or a mass formation, the
right platoon serves as the base; when in a column formation, the lead platoon serves as the base.
• The first sergeant assumes the position
of the company commander if there are no officers present.
• Members of a company break ranks in
the same manner as in platoon drill except that the individuals called from the formation form on the company commander rather than on the platoon leader.
• The company marches, rests, and
executes eyes right in the same manner as the platoon.
PURPOSE
This lesson covers companydrill formations and movements “with-out arms.” Your knowledge and recallof squad and platoon drill from pre-vious lessons will be vitally importantin understanding this information. Payspecial attention to the differencesbetween platoon and company drill andto the roles of key personnel in com-pany drill.
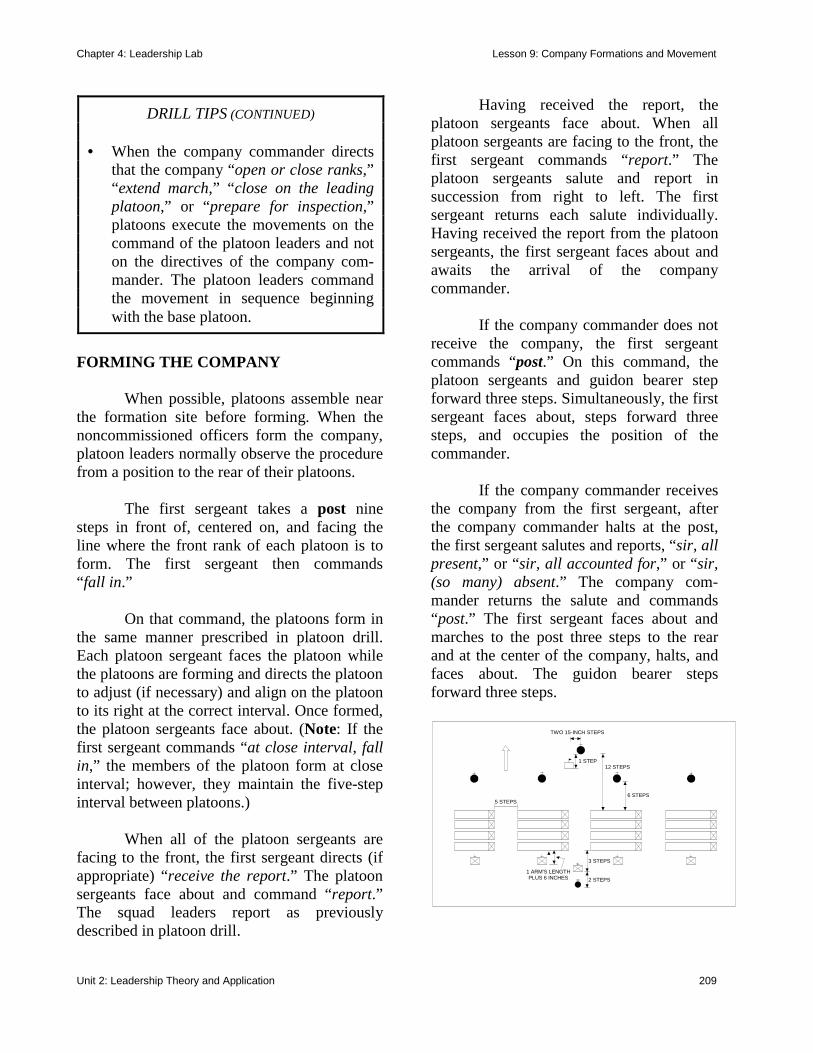
Chapter 4: Leadership Lab Lesson 9: Company Formations and Movement
Unit 2: Leadership Theory and Application 209
FORMING THE COMPANY When possible, platoons assemble near the formation site before forming. When the noncommissioned officers form the company, platoon leaders normally observe the procedure from a position to the rear of their platoons. The first sergeant takes a post nine steps in front of, centered on, and facing the line where the front rank of each platoon is to form. The first sergeant then commands “fall in.” On that command, the platoons form in the same manner prescribed in platoon drill. Each platoon sergeant faces the platoon while the platoons are forming and directs the platoon to adjust (if necessary) and align on the platoon to its right at the correct interval. Once formed, the platoon sergeants face about. (Note: If the first sergeant commands “at close interval, fall in,” the members of the platoon form at close interval; however, they maintain the five-step interval between platoons.) When all of the platoon sergeants are facing to the front, the first sergeant directs (if appropriate) “receive the report.” The platoon sergeants face about and command “report.” The squad leaders report as previously described in platoon drill.
Having received the report, the platoon sergeants face about. When all platoon sergeants are facing to the front, the first sergeant commands “report.” The platoon sergeants salute and report in succession from right to left. The first sergeant returns each salute individually. Having received the report from the platoon sergeants, the first sergeant faces about and awaits the arrival of the company commander. If the company commander does not receive the company, the first sergeant commands “post.” On this command, the platoon sergeants and guidon bearer step forward three steps. Simultaneously, the first sergeant faces about, steps forward three steps, and occupies the position of the commander. If the company commander receives the company from the first sergeant, after the company commander halts at the post, the first sergeant salutes and reports, “sir, all present,” or “sir, all accounted for,” or “sir, (so many) absent.” The company com-mander returns the salute and commands “post.” The first sergeant faces about and marches to the post three steps to the rear and at the center of the company, halts, and faces about. The guidon bearer steps forward three steps.
5 STEPS
1 ARM'S LENGTHPLUS 6 INCHES
3 STEPS
2 STEPS
6 STEPS
12 STEPS1 STEP
TWO 15-INCH STEPS
DRILL TIPS (CONTINUED) • When the company commander directs
that the company “open or close ranks,” “extend march,” “close on the leading platoon,” or “prepare for inspection,” platoons execute the movements on the command of the platoon leaders and not on the directives of the company com-mander. The platoon leaders command the movement in sequence beginning with the base platoon.
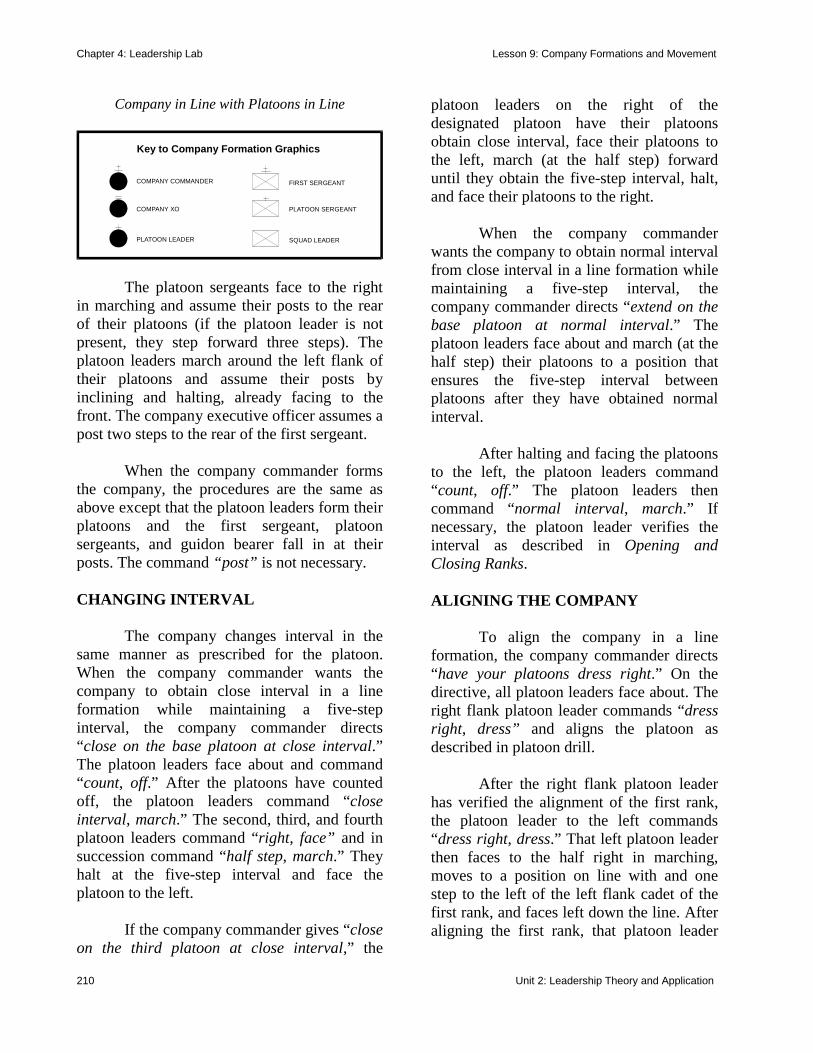
Chapter 4: Leadership Lab Lesson 9: Company Formations and Movement
210 Unit 2: Leadership Theory and Application
Company in Line with Platoons in Line
Key to Company Formation Graphics
COMPANY COMMANDER FIRST SERGEANT
PLATOON SERGEANT
SQUAD LEADER
COMPANY XO
PLATOON LEADER
The platoon sergeants face to the right in marching and assume their posts to the rear of their platoons (if the platoon leader is not present, they step forward three steps). The platoon leaders march around the left flank of their platoons and assume their posts by inclining and halting, already facing to the front. The company executive officer assumes a post two steps to the rear of the first sergeant. When the company commander forms the company, the procedures are the same as above except that the platoon leaders form their platoons and the first sergeant, platoon sergeants, and guidon bearer fall in at their posts. The command “post” is not necessary. CHANGING INTERVAL The company changes interval in the same manner as prescribed for the platoon. When the company commander wants the company to obtain close interval in a line formation while maintaining a five-step interval, the company commander directs “close on the base platoon at close interval.” The platoon leaders face about and command “count, off.” After the platoons have counted off, the platoon leaders command “close interval, march.” The second, third, and fourth platoon leaders command “right, face” and in succession command “half step, march.” They halt at the five-step interval and face the platoon to the left. If the company commander gives “close on the third platoon at close interval,” the
platoon leaders on the right of the designated platoon have their platoons obtain close interval, face their platoons to the left, march (at the half step) forward until they obtain the five-step interval, halt, and face their platoons to the right. When the company commander wants the company to obtain normal interval from close interval in a line formation while maintaining a five-step interval, the company commander directs “extend on the base platoon at normal interval.” The platoon leaders face about and march (at the half step) their platoons to a position that ensures the five-step interval between platoons after they have obtained normal interval. After halting and facing the platoons to the left, the platoon leaders command “count, off.” The platoon leaders then command “normal interval, march.” If necessary, the platoon leader verifies the interval as described in Opening and Closing Ranks. ALIGNING THE COMPANY To align the company in a line formation, the company commander directs “have your platoons dress right.” On the directive, all platoon leaders face about. The right flank platoon leader commands “dress right, dress” and aligns the platoon as described in platoon drill. After the right flank platoon leader has verified the alignment of the first rank, the platoon leader to the left commands “dress right, dress.” That left platoon leader then faces to the half right in marching, moves to a position on line with and one step to the left of the left flank cadet of the first rank, and faces left down the line. After aligning the first rank, that platoon leader
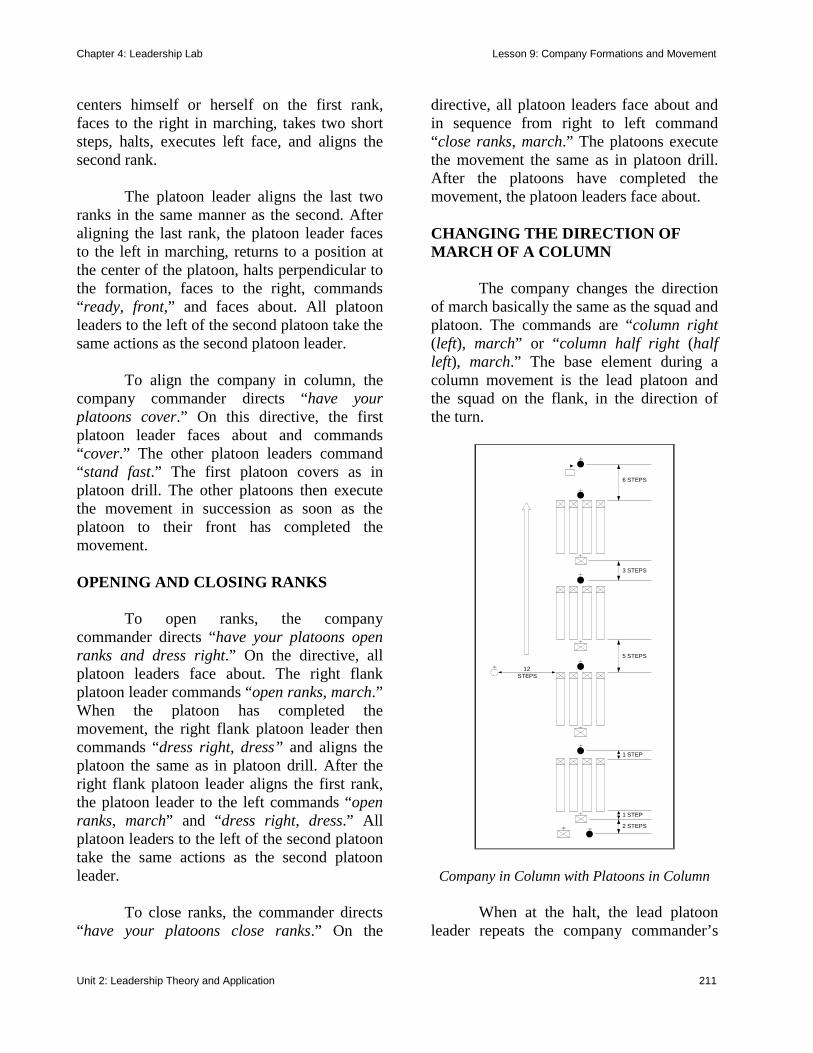
Chapter 4: Leadership Lab Lesson 9: Company Formations and Movement
Unit 2: Leadership Theory and Application 211
centers himself or herself on the first rank, faces to the right in marching, takes two short steps, halts, executes left face, and aligns the second rank.
The platoon leader aligns the last two ranks in the same manner as the second. After aligning the last rank, the platoon leader faces to the left in marching, returns to a position at the center of the platoon, halts perpendicular to the formation, faces to the right, commands “ready, front,” and faces about. All platoon leaders to the left of the second platoon take the same actions as the second platoon leader. To align the company in column, the company commander directs “have your platoons cover.” On this directive, the first platoon leader faces about and commands “cover.” The other platoon leaders command “stand fast.” The first platoon covers as in platoon drill. The other platoons then execute the movement in succession as soon as the platoon to their front has completed the movement. OPENING AND CLOSING RANKS To open ranks, the company commander directs “have your platoons open ranks and dress right.” On the directive, all platoon leaders face about. The right flank platoon leader commands “open ranks, march.” When the platoon has completed the movement, the right flank platoon leader then commands “dress right, dress” and aligns the platoon the same as in platoon drill. After the right flank platoon leader aligns the first rank, the platoon leader to the left commands “open ranks, march” and “dress right, dress.” All platoon leaders to the left of the second platoon take the same actions as the second platoon leader. To close ranks, the commander directs “have your platoons close ranks.” On the
directive, all platoon leaders face about and in sequence from right to left command “close ranks, march.” The platoons execute the movement the same as in platoon drill. After the platoons have completed the movement, the platoon leaders face about. CHANGING THE DIRECTION OF MARCH OF A COLUMN The company changes the direction of march basically the same as the squad and platoon. The commands are “column right (left), march” or “column half right (half left), march.” The base element during a column movement is the lead platoon and the squad on the flank, in the direction of the turn.
6 STEPS
3 STEPS
5 STEPS
1 STEP
1 STEP
2 STEPS
12STEPS
Company in Column with Platoons in Column When at the halt, the lead platoon leader repeats the company commander’s
Chapter 4: Leadership Lab Lesson 9: Company Formations and Movement
212 Unit 2: Leadership Theory and Application
preparatory command. Succeeding platoon leaders give the supplementary command “forward.” On the command of execution “march,” the lead platoon executes the movement as described in platoon drill; succeeding platoons execute the movement on their platoon leader’s command at approxi-mately the same location. While marching, units execute the movement as described from the halt except that the succeeding platoon leaders give the supplementary command “continue to march” rather than “forward.” The company executes rear march and inclines in the same manner as the platoon. When executing counter column march from the halt, the lead platoon leader repeats the preparatory command. Succeeding platoon leaders give the supplementary command “forward.” On the command of execution “march,” the lead platoon executes the movement as described in platoon drill, and marches through the other platoons. Succeed-ing platoons execute the movement on the platoon leader’s command at approximately the same location. When units execute the movement while marching, the leader gives the command of execution as the left foot strikes the marching surface. Platoons execute the movement basically the same as from the halt except that the succeeding platoon leaders give the supplementary command “continue to march” rather than “forward.” The guidon bearer faces to the left in marching from the halt or executes a column left in marching, marches by the most direct route outside of the formation, and moves to a position in front of the lead platoon as it clears the rear of the company.
CORRECTING DISTANCE BETWEEN PLATOONS To obtain correct distance when the company is marching in column or is in a column at the halt, the company commander directs “close on leading platoon.” When at the halt and on the directive “close on leading platoon,” the platoon leader of the lead platoon commands (over the right shoulder) “stand fast.” The succeeding platoon leaders command (over the right shoulder) “forward, march,” “mark time, march,” and “platoon, halt” when they obtain correct distance. While marching and on the directive “close on leading platoon,” the platoon leader of the lead platoon commands (over the right shoulder) “half step, march.” The succeeding platoon leaders command (over the right shoulder) “continue to march” and “half step, march” as soon as they obtain the correct distance. The company commander commands “forward, march (halt)” as soon as all platoons have obtained the correct distance and are marching at the half step. FORMING A COLUMN OF TWOS AND RE-FORMING The company forms a column of twos basically the same as the platoon. The company commander must allow sufficient time for the platoon leaders and the squad leaders of the lead platoon to give supplementary commands before giving the command of execution. The command for this movement is “column of twos from the right (left), march.” The lead platoon leader repeats the preparatory command. Other platoon leaders give the supplementary command “stand fast.” On the company commander’s

Chapter 4: Leadership Lab Lesson 9: Company Formations and Movement
Unit 2: Leadership Theory and Application 213
command of execution “march,” the lead platoon executes the movement as in platoon drill. Other platoons execute the movement on their leader’s command. Succeeding platoon leaders give their commands in order to follow with the prescribed five-step distance between platoons. Re-forming into a column of fours is executed only at the halt. The command for this movement is “column of fours to the left (right), march.” On the company commander’s command of execution, all platoons execute the movement simultaneously as described in platoon drill. As soon as the platoons are re-formed, the platoon leaders march the platoons forward and obtain the five-step distance between platoons. FORMING A COMPANY MASS The company may form in mass from a company in column (platoons in column) when halted or while marching. The company must be at close interval (“close interval, march”) before the commander can give “company mass left, march.”
6 STEPS
Company in a Mass Formation On the preparatory command “company mass left,” given at the halt, the lead platoon
leader commands “stand fast.” The platoon leaders of the succeeding platoons command “column half left.” On the command of execution “march,” the lead platoon stands fast. The other platoons execute the column half left and then execute a column half right on the command of the platoon leaders to a point (line) that ensures the platoons will be at close interval alongside the platoon to their right when halted. As the platoons come abreast of the base platoon, the platoon leaders command “mark time, march.” While the platoon marks time, the members adjust their positions to ensure alignment on the cadet to their right. The platoon leaders allow their platoons to mark time for about eight counts and then command “platoon, halt.” On the command of execution “march,” the company commander and guidon bearer face to the right (left) in marching and reposition themselves centered on the company. ALIGNING A COMPANY MASS As soon as the company commander forms the company in mass, he or she gives the command “at close interval, dress right, dress.” On the command of execution “dress:” (1) the platoon leader of the right platoon marches by the most direct route to the right flank and verifies the alignment of as many ranks as necessary to ensure proper alignment in the same manner as aligning the platoon; when finished, the right platoon leader returns to a position one step in front of and centered on the third squad, halts and faces to the right; and (2) the platoon leaders and platoon sergeants position themselves in line with the third squad of their platoon by executing one 15-inch step to the right.
Chapter 4: Leadership Lab Lesson 9: Company Formations and Movement
214 Unit 2: Leadership Theory and Application
When the right platoon leader has returned to that position, the company commander commands “ready, front.” CHANGING THE DIRECTION OF MARCH OF A MASS FORMATION The company changes the direction of march in mass basically the same as a platoon column movement. When executed from the halt, the commander faces in the desired direction of march, looks toward the formation, and commands “right (left) turn, march.” On the command of execution “march,” the platoon leaders face to the half right (left) in marching and continue to march in an arc until parallel to the new direction of march. Then they begin marching with the half step, dressing on the right (left) flank platoon leader until the leader commands “forward, march.” The right (left) guide (the base squad leader in the direction of turn) faces to the right (left) in marching and immediately takes up the half step. All other squad leaders (front rank) face to the half right (left) in marching and continue to march in an arc until they come on line with the guide. At this time, they begin marching with the half step and dress (glancing out of the corner of the eye) in the direction of the turn until the leader commands “forward, march.” On that command, the dress is automatically to the right. All other members march forward and execute the movement in the same manner as their squad leaders. When executed while marching, the movement is in the same manner as from the halt except that the company commander faces about (marching backward) to give the command “right (left) turn, march.” The commander then faces about and completes the turning movement. After the company has completed the turn, the company commander
faces about, commands “forward, march,” and again faces about. FORMING A COLUMN FROM A COMPANY MASS To form a company in column from a company mass at the halt, the command is “column of platoons, right platoon, column right (column half right), march.” The right platoon leader gives the supplementary command of “forward (column right or column half right),” and the other platoon leaders command “stand fast.” On the command of execution “march,” the right platoon marches in the direction indicated. All other platoons follow (in sequence) in column, executing column half right and column half left on the commands of the platoon leaders. To execute the movement when marching, the company commander com-mands “column of platoons, right platoon, double time, march.” On the preparatory command, the right platoon leader gives the supplementary command “double time,” and the other platoon leaders give the sup-plementary command “continue to march.” On the command of execution “march,” the right platoon marches in double time. Other platoon leaders (in sequence) command “column half right, double time, march” and “column half left, march” to bring the suc-ceeding platoons in columns with the lead platoon. The platoon leader and the platoon sergeant reposition themselves after the supplementary command, but before the command of execution.
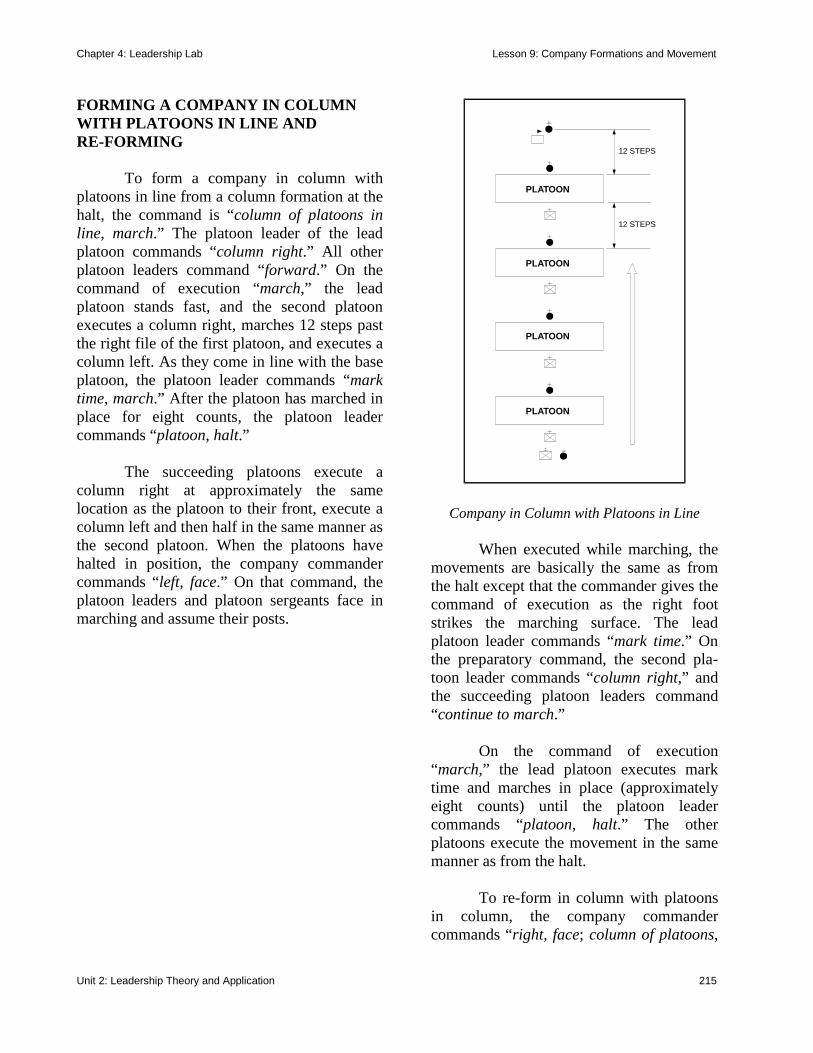
Chapter 4: Leadership Lab Lesson 9: Company Formations and Movement
Unit 2: Leadership Theory and Application 215
FORMING A COMPANY IN COLUMN WITH PLATOONS IN LINE AND RE-FORMING To form a company in column with platoons in line from a column formation at the halt, the command is “column of platoons in line, march.” The platoon leader of the lead platoon commands “column right.” All other platoon leaders command “forward.” On the command of execution “march,” the lead platoon stands fast, and the second platoon executes a column right, marches 12 steps past the right file of the first platoon, and executes a column left. As they come in line with the base platoon, the platoon leader commands “mark time, march.” After the platoon has marched in place for eight counts, the platoon leader commands “platoon, halt.” The succeeding platoons execute a column right at approximately the same location as the platoon to their front, execute a column left and then half in the same manner as the second platoon. When the platoons have halted in position, the company commander commands “left, face.” On that command, the platoon leaders and platoon sergeants face in marching and assume their posts.
PLATOON
PLATOON
PLATOON
PLATOON
12 STEPS
12 STEPS
Company in Column with Platoons in Line When executed while marching, the movements are basically the same as from the halt except that the commander gives the command of execution as the right foot strikes the marching surface. The lead platoon leader commands “mark time.” On the preparatory command, the second pla-toon leader commands “column right,” and the succeeding platoon leaders command “continue to march.” On the command of execution “march,” the lead platoon executes mark time and marches in place (approximately eight counts) until the platoon leader commands “platoon, halt.” The other platoons execute the movement in the same manner as from the halt. To re-form in column with platoons in column, the company commander commands “right, face; column of platoons,
Chapter 4: Leadership Lab Lesson 9: Company Formations and Movement
216 Unit 2: Leadership Theory and Application
left platoon, march.” On the command “right, face,” the platoon leaders and platoon sergeants face in marching and resume their posts in column. On the preparatory command “column of platoons, left platoon,” the left platoon leader commands “forward, (column left [half left]).” All other platoon leaders command “column half left.”
On the command of execution “march,” the left platoon executes the movement. The other platoon leaders give the appropriate com-mands for following the lead platoon at the correct distance. If necessary, the platoons following the second platoon automatically adjust the length of their step to ensure correct distance from the platoon to their front.
DISMISSING THE COMPANY
Dismiss the company only at attention. Either the first sergeant or the company commander may dismiss the company.
When the first sergeant dismisses the company, the company commander commands “first sergeant.” The first sergeant marches by the most direct route to a position three steps from and directly in front of the company commander. After the first sergeant halts, the company commander commands “take charge of the company” and they exchange salutes.
Upon termination of the salutes, the platoon leaders and executive officer leave the formation. The platoon sergeants face to the right in marching and take their posts (platoon leader’s position) six steps in front of and centered on the platoon by marching around the right flank of the platoon, inclining, and halting already facing to the front. The first sergeant steps forward three steps and faces about.
When all platoon sergeants are at their posts, the first sergeant commands “take charge of your platoons.” The platoon sergeants salute. The first sergeant returns all salutes with one salute. After they exchange salutes, the first sergeant and guidon bearer leave the formation.
The platoon sergeants then dismiss their platoons as in platoon drill. When the company commander dismisses the company, he or she commands “take charge of your platoons.” The platoon leaders salute. The company commander returns all salutes with one salute. After they exchange salutes, the company commander, guidon bearer, first sergeant, and executive officer leave the formation. Each platoon leader faces about and commands “platoon sergeant.” The platoon sergeants face to the right in marching, incline around the squad leader(s), halt three steps in front of and centered on the platoon leader, and face to the right. Each platoon leader then directs “take charge of the platoon.” They exchange salutes and the platoon leaders leave the formation. The platoon sergeants step forward three steps, face about, and dismiss the platoons as in platoon drill. CONCLUSION Company drill is yet another link in the chain of drill movements of Leadership Lab. A weak link can break a chain, so make certain that you have reviewed this information well. It is important that you are familiar with all of the positions and formations of company drill before you can move up to the next links in the chain — leadership responsibilities at the company and battalion level and battalion drill. “The fundamentals of drill are established daily . . . If these maneuvers are all accurately observed and practiced every day, the army will remain virtually undefeatable and always awe inspiring . . .” Frederick the Great, 1789
* * *
Chapter 4: Leadership Lab Lesson 10: Forming, Inspecting, and Dismissing the Battalion
Unit 2: Leadership Theory and Application 217
LESSON 10: FORMING, INSPECTING, AND DISMISSING THE BATTALION
INTRODUCTION This lesson teaches you the formations and inspection procedures for battalion drill. Battalion drill provides the procedures for executing company drill in conjunction with other companies in the same formation. For drill purposes, a battalion consists of a headquarters section (or the battalion staff), Colors, and two or more companies.
en route facilitate respective
DRILL TIPS • The battalion has two basic formations:
a line and a column. There are several ways the battalion commander or staff can arrange the separate elements within either formation.
• The right flank unit serves as base when
in a line formation; the lead element is the base when in column.
• To facilitate the forming of a larger unit,
the commander normally alerts the sub-ordinate units of the desired formation, time, place, route, uniform, and the sequence in which the units will form.
• Unless the S-3 has previously marked
the position of the right guides at the formation site, the right guards report to the site and receive instructions prior to the arrival of the cadets.
• The commissioned staff forms in one
rank at normal interval and centered on the commander. The commander-of-troops normally arranges the staff mem-bers in numerical order (S-1, S-2, S-3, S-4, etc.) from right to left as he or she faces the battalion.
• When enlisted staff personnel form as
part of the officer staff, they form two steps to the rear of their respective staff officer.
• The command sergeant major forms one
step to the rear of the commissioned staff and centered on the commander, or one step to the rear and centered on the Colors when in a battalion mass formation.
PURPOSE
This lesson covers battaliondrill formations “without arms” andinspections. Your knowledge and recallof company drill from previous lessonswill be vitally important in understand-ing this lesson. Pay special attention tothe differences between the roles ofkey personnel (at the platoon, com-pany, and battalion levels) in battaliondrill.
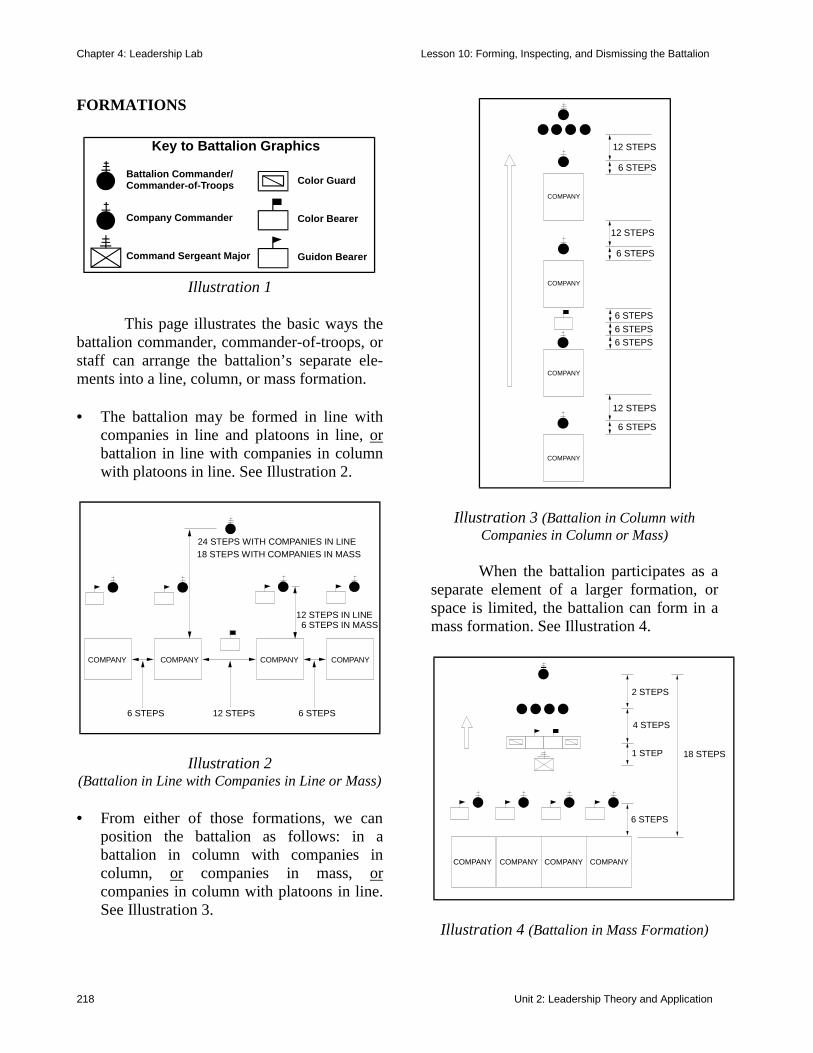
Chapter 4: Leadership Lab Lesson 10: Forming, Inspecting, and Dismissing the Battalion
218 Unit 2: Leadership Theory and Application
FORMATIONS
Key to Battalion Graphics
Battalion Commander/Commander-of-Troops
Company Commander
Command Sergeant Major
Color Guard
Color Bearer
Guidon Bearer
Illustration 1 This page illustrates the basic ways the battalion commander, commander-of-troops, or staff can arrange the battalion’s separate ele-ments into a line, column, or mass formation. • The battalion may be formed in line with
companies in line and platoons in line, or battalion in line with companies in column with platoons in line. See Illustration 2.
24 STEPS WITH COMPANIES IN LINE18 STEPS WITH COMPANIES IN MASS
12 STEPS IN LINE6 STEPS IN MASS
COMPANYCOMPANYCOMPANYCOMPANY
6 STEPS 12 STEPS 6 STEPS
Illustration 2 (Battalion in Line with Companies in Line or Mass) • From either of those formations, we can
position the battalion as follows: in a battalion in column with companies in column, or companies in mass, or companies in column with platoons in line. See Illustration 3.
12 STEPS
6 STEPS
COMPANY
COMPANY
COMPANY
COMPANY
12 STEPS
6 STEPS
6 STEPS6 STEPS
6 STEPS
6 STEPS
12 STEPS
Illustration 3 (Battalion in Column with Companies in Column or Mass)
When the battalion participates as a separate element of a larger formation, or space is limited, the battalion can form in a mass formation. See Illustration 4.
18 STEPS
2 STEPS
4 STEPS
1 STEP
6 STEPS
COMPANY COMPANY COMPANY COMPANY
Illustration 4 (Battalion in Mass Formation)

Chapter 4: Leadership Lab Lesson 10: Forming, Inspecting, and Dismissing the Battalion
Unit 2: Leadership Theory and Application 219
FORMING AND DISMISSING THE BATTALION FORMING THE BATTALION The adjutant is responsible for the formation of cadets. To do this, the adjutant takes a position at the right flank of the line on which the units are to form and faces down the line. The adjutant remains facing down the line until all units are formed and then marches to a post midway between the line of cadets and the proposed position of the battalion commander. If guides are used, the adjutant moves to a post as soon as the guides are in position and aligned. As the battalion commander and staff approach, the adjutant commands the units to attention, faces the commander, salutes, and reports, “Sir, the battalion is formed.” The battalion commander returns the salute and commands “post.” The adjutant marches forward, passes to the battalion commander’s right, and takes a post as the right flank staff officer. The battalion commander then commands actions as desired. Normally, the Colors are positioned at the center of the battalion when formed in line or column, and four steps to the rear of the staff when formed in mass. DISMISSING THE BATTALION To dismiss the battalion, the battalion commander directs “take charge of your units.” The company commanders and battalion com-mander exchange salutes. The battalion com-mander returns all salutes with one salute and then dismisses the staff. In a battalion mass formation, the platoon leaders form as the first rank of cadets. The right flank platoon leader serves as the guide.
INSPECTING THE BATTALION When inspecting the battalion, the adjutant forms the battalion in line with companies in line and platoons in line. The adjutant forms the cadets, reports, and takes a position with the staff as previously described. After the adjutant joins the staff, the battalion commander directs “prepare for inspection.” Unit commanders face about and give the same directive. The platoon leaders prepare their platoons for inspection in the same manner as in company drill. When all platoons in each company have completed open ranks and dress right, the company commanders face the battalion commander. When all company commanders are again facing the battalion commander, the battalion commander commands “at ease.” Because of the time involved in inspecting a battalion, the battalion com-mander normally directs the staff to inspect the companies while he or she inspects the Colors and makes a general inspection of the battalion. As the battalion commander (or the designated staff officer) approaches a com-pany, the company commander faces about, salutes, and reports “Sir, ___ Company is prepared for inspection.” The inspecting officer then proceeds to the first platoon to be inspected. The company commander takes a position to the left of the inspecting officer. CONDUCTING THE INSPECTION Conducting an in-ranks inspection of units in battalion drill uses the same procedures as in company drill. However,
Chapter 4: Leadership Lab Lesson 10: Forming, Inspecting, and Dismissing the Battalion
220 Unit 2: Leadership Theory and Application
since we did not cover those procedures previously, the following information applies.) Forming for Inspection The formation for inspecting personnel and equipment in ranks is company in line with platoons in line. With the company in a line formation, the company commander directs “prepare for inspection.” Platoon leaders then face about, open ranks, and align the company. When all platoon leaders are facing the front, the company commander commands “at ease.” The company commander may direct the first sergeant and executive officer to accompany him or her during the inspection. If they do so, they take a position at normal interval (close interval if the company is at close interval) to the left of the company commander. Inspecting the Cadets During the inspection, the guidon bearer, officers, and noncommissioned officers who are not in ranks assume the position of attention as the inspecting officer approaches their positions. They resume the at ease position after being inspected (if armed, they do not execute inspection arms). The company commander begins the inspection by stepping forward and inspecting the guidon bearer. The company commander then faces to the half left in marching and pro-ceeds to the right of the line. While approaching the right flank platoon, the platoon leader com-mands over the right shoulder “platoon, atten-tion.” After the company commander halts directly in front of the platoon leader, the platoon leader salutes and reports, “Sir, the platoon is prepared for inspection.” The company commander returns the salute and inspects the platoon leader.
The company commander then directs the platoon leader to lead him or her through the inspection, faces to the half left in marching, and halts directly in front of the squad leader of the first squad. As the company commander faces to the half left in marching, the platoon leader faces to the right in marching, inclines, and halts directly in front of the second cadet in the first squad and on line with and at normal interval (close interval) to the right of the company commander. The other platoon leaders execute the same actions as the company commander approaches their platoons. As soon as the platoon leader and company commander have halted in front of the first two cadets, the platoon leader com-mands “second, third, and fourth squads, at ease.” When moving from cadet to cadet during the inspection, the company com-mander and platoon leader (as well as the executive officer and first sergeant) simul-taneously face to the right in marching, take two short steps (one step if the company is at close interval), halt, and face to the left. After the company commander has inspected the last cadet in the front rank, the platoon leader hesitates momentarily and allows the company commander to walk in front while inspecting the front rank from the rear. As the company commander inspects the rear of each rank, the platoon leader commands the next squad to attention. Then, as they begin to inspect the next rank, the platoon leader commands the last rank inspected to stand at ease. Normally, when inspecting the rear of each rank, the company commander con-ducts a walking inspection. As the com-mander inspects the rear of the last cadet in each rank, he or she turns and halts directly in front of the squad leader of the next rank. The platoon leader turns and halts directly in
Chapter 4: Leadership Lab Lesson 10: Forming, Inspecting, and Dismissing the Battalion
Unit 2: Leadership Theory and Application 221
front of the second cadet. The executive officer and first sergeant march past (behind) the company commander and assume their positions to the left. Inspection with Arms As the company commander halts directly in front of and facing the individual being inspected, the individual executes inspection arms. If the company commander wants to inspect the individual’s weapon, he or she will inspect it first, then the individual’s uniform and appearance. As soon as the com-pany commander grasps the weapon, the indi-vidual releases it and resumes the position of attention. When the company commander finishes inspecting the weapon, he or she returns it in the same manner as receiving it. In the event the company commander does not inspect the weapon, the cadet remains at inspection arms until the company commander moves to and is facing the next cadet. Then, the previously inspected cadet executes ready, port arms, and order arms. Completing the Company/Platoon Inspections When the company commander finishes inspecting the platoon sergeant, the platoon leader commands the platoon to attention and overtakes the company commander en route back to the front of the platoon. The platoon leader halts facing to the front (six steps in front and centered on the platoon) and exchanges salutes with the company commander. The company commander (executive officer and first sergeant) faces to the right in marching and moves to the next platoon. As soon as the company commander clears the first platoon, the platoon leader faces about, commands “close ranks, march” and “at ease,” then faces about and executes at ease. After the company commander completes the
inspection of the last platoon, he or she returns to the post at the center of the company and commands the company to attention. (Note: In the event a platoon has already been inspected, or it is still waiting to be inspected, and the battalion commander arrives, invite him or her to inspect the platoon.) Completing the Battalion Inspection When the battalion commander and staff officers have completed their inspec-tions and are en route back to their posts, the company commanders bring their units to attention, close ranks, and at ease. When the battalion commander and staff reach the front of the formation, the inspection is complete. CONCLUSION Now that you have reviewed battalion formations and inspections, you can see how each echelon continues to build upon previously learned skills. These new skills will enable you to perform drill in larger units. Study and practice will make your drill performance outstanding. Remem-ber, knowledge is one of the most important elements of effective leadership.
* * *
Chapter 4: Leadership Lab Lesson 11: Review of Drill Procedures
222 Unit 2: Leadership Theory and Application
LESSON 11: REVIEW OF DRILL PROCEDURES
INTRODUCTION Using drill tips, formations, locations of key personnel, and lists of drill positions and/or movements, this lesson highlights some of the key elements of drill techniques and formations from previous lessons. Specifically, it reviews: ⇒ Stationary Movements ⇒ Steps and Marching ⇒ Squad and Platoon Drill
⇒ Company Drill ⇒ Battalion Drill and Inspections If you identify any movements in this lesson for which you are uncertain of the correct procedures on how to execute them, you should refer to the appropriate textbook, your cadet handbook, and/or Field Manual 22-5 for those procedures. Remember, depending upon your position in the cadet battalion, one of your responsibilities, as a senior cadet is to know — and possibly teach — drill. As a leader, you must set that example. STATIONARY MOVEMENTS The individual positions and stationary movements (see Review Notes) are the basic skills required in drill. You learn these positions and their correct execution before proceeding to other drill movements. These basic skills are necessary to master because they are the building blocks for other movements used during Leadership Lab. Additionally, they are important because they help to develop discipline and self-confidence in individuals and the unit as a whole by ensuring uniformity of movement and overall effectiveness and efficiency. STEPS AND MARCHING The two basic steps used in marching (see review notes) are the 30-inch step and the 15-inch step. Use combinations of these steps, movements, and halts alone or in groups.
REVIEW NOTES The stationary movements are:
◊ Position of attention ◊ Rest positions: parade rest, stand at ease, at
ease, and rest ◊ Facing movements: left (right), face and
about, face ◊ Saluting
The basic steps and marching movements are:
◊ Halt ◊ Quick and double time (30-in. step) ◊ Rest movements in marching (30-in. step) ◊ Forward and backward step (15-in. step) ◊ Right (left) step (15-in. step) ◊ Changing step and marching in place
stationary movements squad drill platoon drill company inspections
PURPOSE
This lesson reviews the drillprocedures and formations you learnedin previous lessons. The informationpresented is designed to reinforce yourknowledge of individual through battal-ion drill and to assist you in identifyingthe areas that you may need to reviewmore thoroughly.
Chapter 4: Leadership Lab Lesson 11: Review of Drill Procedures
Unit 2: Leadership Theory and Application 223
The following list provides helpful drill tips for Steps and Marching. • When at a halt, start all marching movements
from the position of attention. • Except for “route step, march” and “at ease,
march,” execute all marching movements while “marching at attention.”
• Marching at attention is the combination of
the position of attention and the procedures for the prescribed step executed simul-taneously.
• When executed from the halt, all steps
except “close interval, march,” “right step, march,” and “about, face” begin with your left foot.
• Unless otherwise specified, use 30-inch
steps for marching forward. • Execute all marching movements in the
quick time cadence except for the command “double time, march.”
• Marching is a five-step process: (1)
preparatory command step, (2) intermediate or thinking step, (3) command of execution step, (4) another step after the command of execution, and (5) execution of movement.
• Execute all 15-inch step movements for a
short distance only.
SQUAD DRILL To execute squad drill (see review notes), you must first know how a squad forms and what your responsibilities are when it forms. Once you have mastered these tech-niques, learning how to march in uniformity (and precisely) with other cadets is important in being part of a sharp drill squad. The following drill tips will help you to better understand some general information about squad drill. • While executing drill as a squad member,
perform individual drill and stationary movements as described in those lessons.
• When a squad forms in a line, its members
are numbered from right to left; when in a column, from front to rear.
• When the squad drills as a separate unit
and is in a line formation, the squad leader takes a position three steps in front of and centered on the squad.
• When it drills as a separate unit and is in a
column or column of twos, the squad leader’s position is three steps to the left and centered on the squad.
• When the squad drills as part of a larger
formation, the squad leader occupies the number one (base) position of the squad.
REVIEW NOTES
The basic stationary drill movements in squad drill are:
◊ Falling in ◊ Obtaining intervals: normal, close, and
double ◊ Changing intervals ◊ Counting off ◊ Rest and dismissal
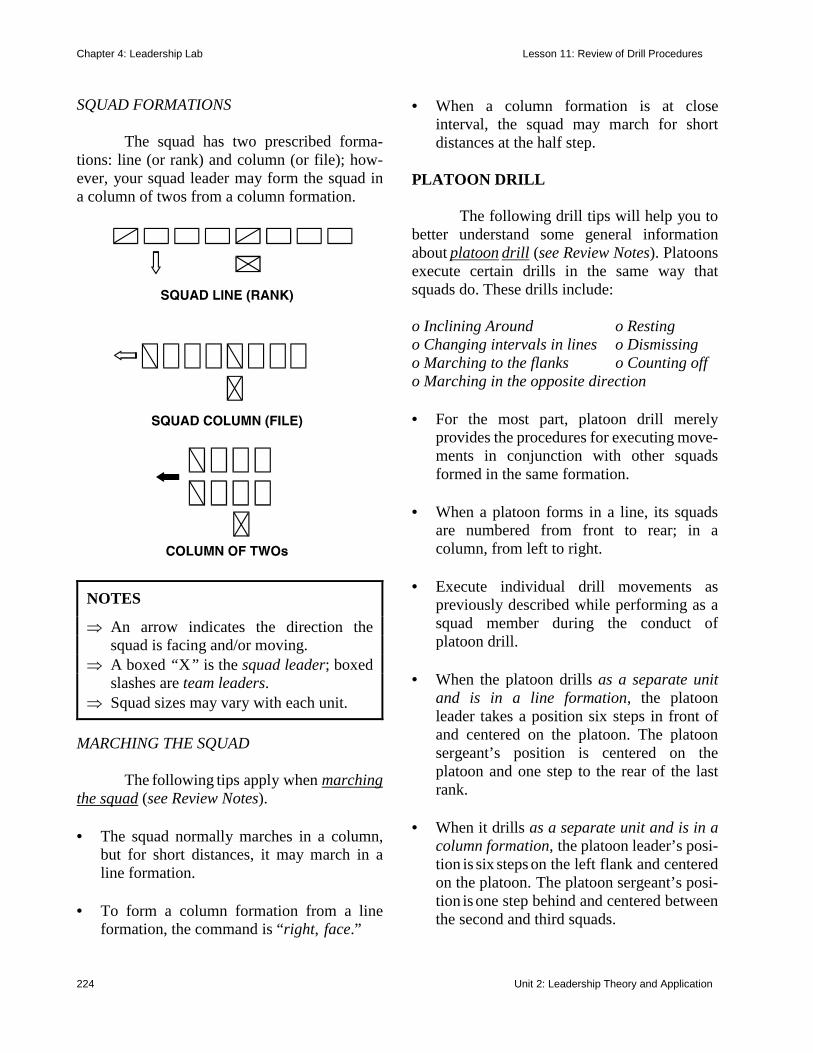
Chapter 4: Leadership Lab Lesson 11: Review of Drill Procedures
224 Unit 2: Leadership Theory and Application
SQUAD FORMATIONS The squad has two prescribed forma-tions: line (or rank) and column (or file); how-ever, your squad leader may form the squad in a column of twos from a column formation.
MARCHING THE SQUAD The following tips apply when marching the squad (see Review Notes). • The squad normally marches in a column,
but for short distances, it may march in a line formation.
• To form a column formation from a line
formation, the command is “right, face.”
• When a column formation is at close interval, the squad may march for short distances at the half step.
PLATOON DRILL The following drill tips will help you to better understand some general information about platoon drill (see Review Notes). Platoons execute certain drills in the same way that squads do. These drills include: o Inclining Around o Resting o Changing intervals in lines o Dismissing o Marching to the flanks o Counting off o Marching in the opposite direction • For the most part, platoon drill merely
provides the procedures for executing move-ments in conjunction with other squads formed in the same formation.
• When a platoon forms in a line, its squads
are numbered from front to rear; in a column, from left to right.
• Execute individual drill movements as
previously described while performing as a squad member during the conduct of platoon drill.
• When the platoon drills as a separate unit
and is in a line formation, the platoon leader takes a position six steps in front of and centered on the platoon. The platoon sergeant’s position is centered on the platoon and one step to the rear of the last rank.
• When it drills as a separate unit and is in a
column formation, the platoon leader’s posi-tion is six steps on the left flank and centered on the platoon. The platoon sergeant’s posi-tion is one step behind and centered between the second and third squads.
NOTES
⇒ An arrow indicates the direction the squad is facing and/or moving.
⇒ A boxed “X” is the squad leader; boxed slashes are team leaders.
⇒ Squad sizes may vary with each unit.
Chapter 4: Leadership Lab Lesson 11: Review of Drill Procedures
Unit 2: Leadership Theory and Application 225
• When the platoon drills as part of a larger unit:
⇒ And is in a line formation, the platoon
leader’s position is six steps in front of and centered on the platoon. The platoon sergeant’s position is one step to the rear and centered on the platoon.
⇒ And is in a column formation, the
platoon leader’s position is one arm’s length plus six inches in front of and centered between the second and third squad leaders. The platoon sergeant’s position is one step behind and centered between the second and third squads.
• The first squad leader serves as the base when the platoon is in a line formation; the fourth squad leader serves as the base when in a column.
PLATOON FORMATIONS The platoon has two prescribed forma-tions: line and column; however, your platoon leader may form the platoon in a column of twos from a column. Use the following notes to interpret the symbols used in those formations.
REVIEW NOTES The basic drill movements in marching the squad are: ◊ Changing direction: column left (right),
march; column half left (right), march; rear, march; and incline around
◊ Marching to the flank ◊ Forming a column of twos and re-forming The movements in platoon drill are: ◊ Falling in ◊ Breaking ranks ◊ Counting off ◊ Changing intervals ◊ Aligning the platoon ◊ Covering and recovering ◊ Opening and closing ranks ◊ Rest and dismissal
The basic movements in marching the platoon are: ◊ Changing direction ◊ Marching to the flank ◊ Forming a file and re-forming ◊ Forming a column of twos and re-forming Movements in company drill include: ◊ Forming and aligning the company ◊ Changing interval ◊ Opening and closing ranks ◊ Changing direction of march of a column ◊ Correcting distance between platoons ◊ Forming a column of twos and re-forming ◊ Forming and aligning a company mass ◊ Forming a column with platoons in line ◊ Dismissing the company
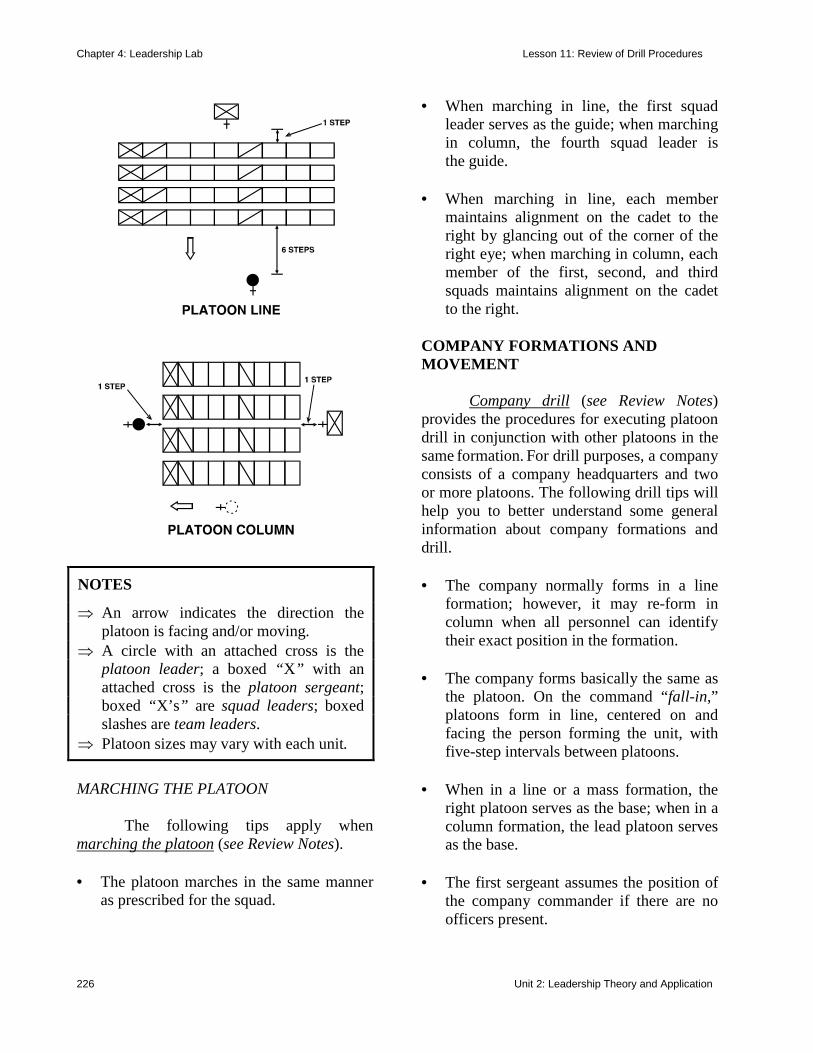
Chapter 4: Leadership Lab Lesson 11: Review of Drill Procedures
226 Unit 2: Leadership Theory and Application
MARCHING THE PLATOON The following tips apply when marching the platoon (see Review Notes). • The platoon marches in the same manner
as prescribed for the squad.
• When marching in line, the first squad leader serves as the guide; when marching in column, the fourth squad leader is the guide.
• When marching in line, each member
maintains alignment on the cadet to the right by glancing out of the corner of the right eye; when marching in column, each member of the first, second, and third squads maintains alignment on the cadet to the right.
COMPANY FORMATIONS AND MOVEMENT Company drill (see Review Notes) provides the procedures for executing platoon drill in conjunction with other platoons in the same formation. For drill purposes, a company consists of a company headquarters and two or more platoons. The following drill tips will help you to better understand some general information about company formations and drill. • The company normally forms in a line
formation; however, it may re-form in column when all personnel can identify their exact position in the formation.
• The company forms basically the same as
the platoon. On the command “fall-in,” platoons form in line, centered on and facing the person forming the unit, with five-step intervals between platoons.
• When in a line or a mass formation, the
right platoon serves as the base; when in a column formation, the lead platoon serves as the base.
• The first sergeant assumes the position of
the company commander if there are no officers present.
NOTES
⇒ An arrow indicates the direction the platoon is facing and/or moving.
⇒ A circle with an attached cross is the platoon leader; a boxed “X” with an attached cross is the platoon sergeant; boxed “X’s” are squad leaders; boxed slashes are team leaders.
⇒ Platoon sizes may vary with each unit.
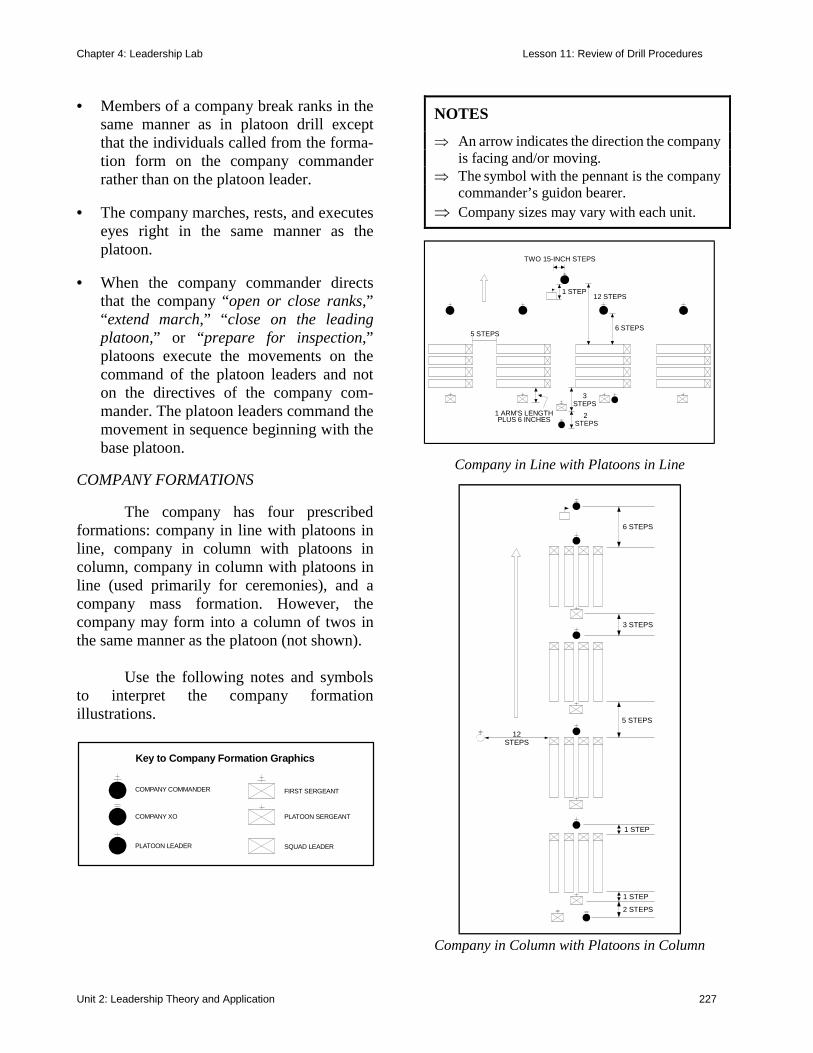
Chapter 4: Leadership Lab Lesson 11: Review of Drill Procedures
Unit 2: Leadership Theory and Application 227
• Members of a company break ranks in the same manner as in platoon drill except that the individuals called from the forma-tion form on the company commander rather than on the platoon leader.
• The company marches, rests, and executes
eyes right in the same manner as the platoon.
• When the company commander directs
that the company “open or close ranks,” “extend march,” “close on the leading platoon,” or “prepare for inspection,” platoons execute the movements on the command of the platoon leaders and not on the directives of the company com-mander. The platoon leaders command the movement in sequence beginning with the base platoon.
COMPANY FORMATIONS The company has four prescribed formations: company in line with platoons in line, company in column with platoons in column, company in column with platoons in line (used primarily for ceremonies), and a company mass formation. However, the company may form into a column of twos in the same manner as the platoon (not shown). Use the following notes and symbols to interpret the company formation illustrations.
K e y t o C o m p a n y F o r m a t i o n G r a p h i c s
C O M P A N Y C O M M A N D E R F I R S T S E R G E ANT
P L A T O O N S E RGEANT
S Q U A D L E A D ER
C O M P A N Y X O
P L A T O O N L E A D E R
5 STEPS
1 ARM'S LENGTHPLUS 6 INCHES
3STEPS
2STEPS
6 STEPS
12 STEPS1 STEP
TWO 15-INCH STEPS
Company in Line with Platoons in Line
6 STEPS
3 STEPS
5 STEPS
1 STEP
1 STEP
2 STEPS
12STEPS
Company in Column with Platoons in Column
NOTES
⇒ An arrow indicates the direction the company is facing and/or moving.
⇒ The symbol with the pennant is the company commander’s guidon bearer.
⇒ Company sizes may vary with each unit.
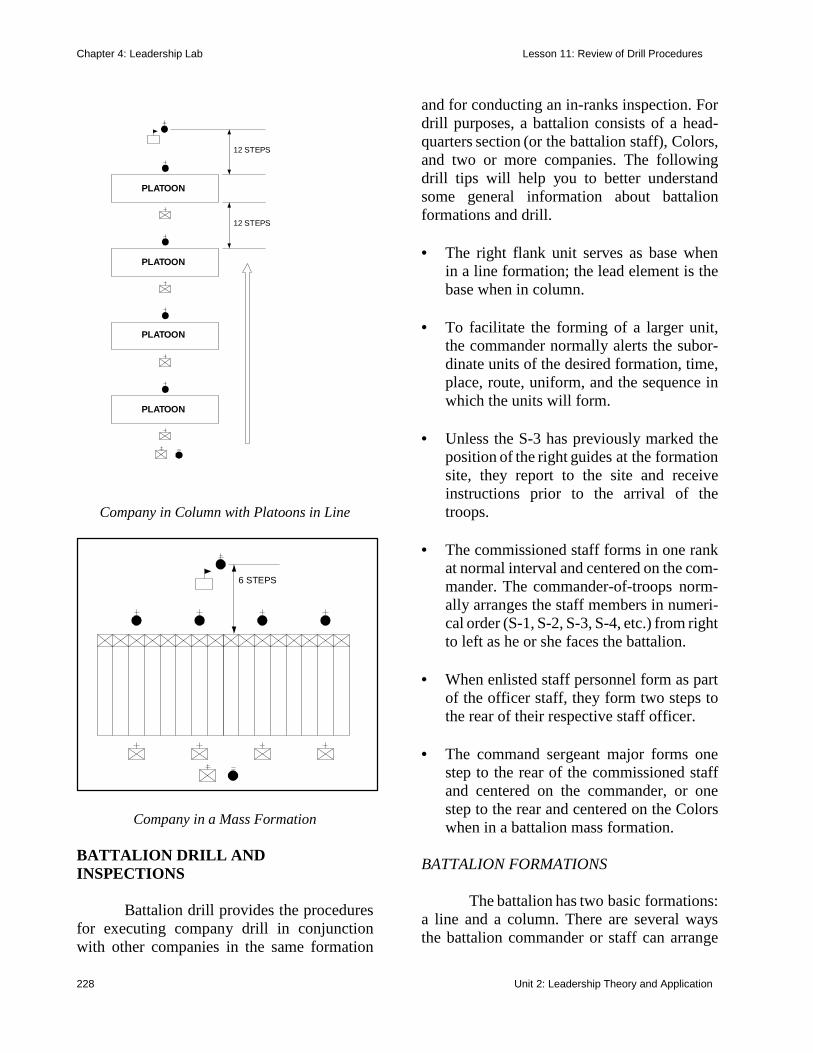
Chapter 4: Leadership Lab Lesson 11: Review of Drill Procedures
228 Unit 2: Leadership Theory and Application
PLATOON
PLATOON
PLATOON
PLATOON
12 STEPS
12 STEPS
Company in Column with Platoons in Line
6 STEPS
Company in a Mass Formation
BATTALION DRILL AND INSPECTIONS Battalion drill provides the procedures for executing company drill in conjunction with other companies in the same formation
and for conducting an in-ranks inspection. For drill purposes, a battalion consists of a head-quarters section (or the battalion staff), Colors, and two or more companies. The following drill tips will help you to better understand some general information about battalion formations and drill. • The right flank unit serves as base when
in a line formation; the lead element is the base when in column.
• To facilitate the forming of a larger unit,
the commander normally alerts the subor-dinate units of the desired formation, time, place, route, uniform, and the sequence in which the units will form.
• Unless the S-3 has previously marked the
position of the right guides at the formation site, they report to the site and receive instructions prior to the arrival of the troops.
• The commissioned staff forms in one rank
at normal interval and centered on the com-mander. The commander-of-troops norm-ally arranges the staff members in numeri-cal order (S-1, S-2, S-3, S-4, etc.) from right to left as he or she faces the battalion.
• When enlisted staff personnel form as part
of the officer staff, they form two steps to the rear of their respective staff officer.
• The command sergeant major forms one
step to the rear of the commissioned staff and centered on the commander, or one step to the rear and centered on the Colors when in a battalion mass formation.
BATTALION FORMATIONS The battalion has two basic formations: a line and a column. There are several ways the battalion commander or staff can arrange
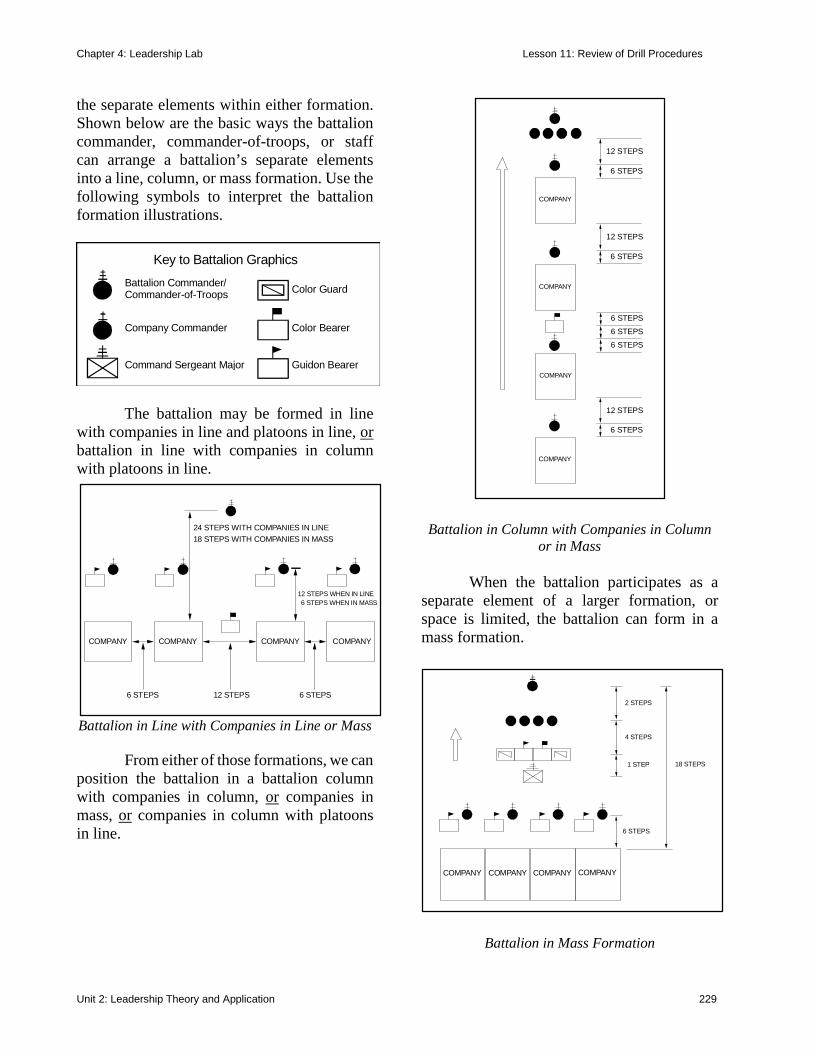
Chapter 4: Leadership Lab Lesson 11: Review of Drill Procedures
Unit 2: Leadership Theory and Application 229
the separate elements within either formation. Shown below are the basic ways the battalion commander, commander-of-troops, or staff can arrange a battalion’s separate elements into a line, column, or mass formation. Use the following symbols to interpret the battalion formation illustrations.
Key to Battalion GraphicsBattalion Commander/Commander-of-Troops Color Guard
Color BearerCompany Commander
Guidon BearerCommand Sergeant Major
The battalion may be formed in line
with companies in line and platoons in line, or battalion in line with companies in column with platoons in line.
24 STEPS WITH COMPANIES IN LINE18 STEPS WITH COMPANIES IN MASS
COMPANY COMPANY COMPANY COMPANY
12 STEPS WHEN IN LINE6 STEPS WHEN IN MASS
6 STEPS12 STEPS6 STEPS
Battalion in Line with Companies in Line or Mass
From either of those formations, we can position the battalion in a battalion column with companies in column, or companies in mass, or companies in column with platoons in line.
COMPANY
COMPANY
COMPANY
COMPANY
12 STEPS
6 STEPS
12 STEPS
6 STEPS
12 STEPS
6 STEPS
6 STEPS6 STEPS6 STEPS
Battalion in Column with Companies in Column or in Mass
When the battalion participates as a separate element of a larger formation, or space is limited, the battalion can form in a mass formation.
COMPANY COMPANY COMPANY COMPANY
2 STEPS
4 STEPS
6 STEPS
18 STEPS1 STEP
Battalion in Mass Formation
Chapter 4: Leadership Lab Lesson 11: Review of Drill Procedures
230 Unit 2: Leadership Theory and Application
CONCLUSION In this lesson, you had the opportunity to review some of the key concepts of drill, beginning with individual stationary move-ments and progressing up to battalion drill and inspections. As you make this progression, you can see how each echelon — squad to platoon, platoon to company, and company to battalion — builds upon previously learned skills. To perfect drill, it takes many hours of practice and lots of discipline. Therefore, you must study and practice the tips and formations presented in this lesson as well as the detailed procedures for executing the various drills and commands. Only through study and practice will you be ready to teach and set the example for your subordinates in proper drill procedures.
* * *
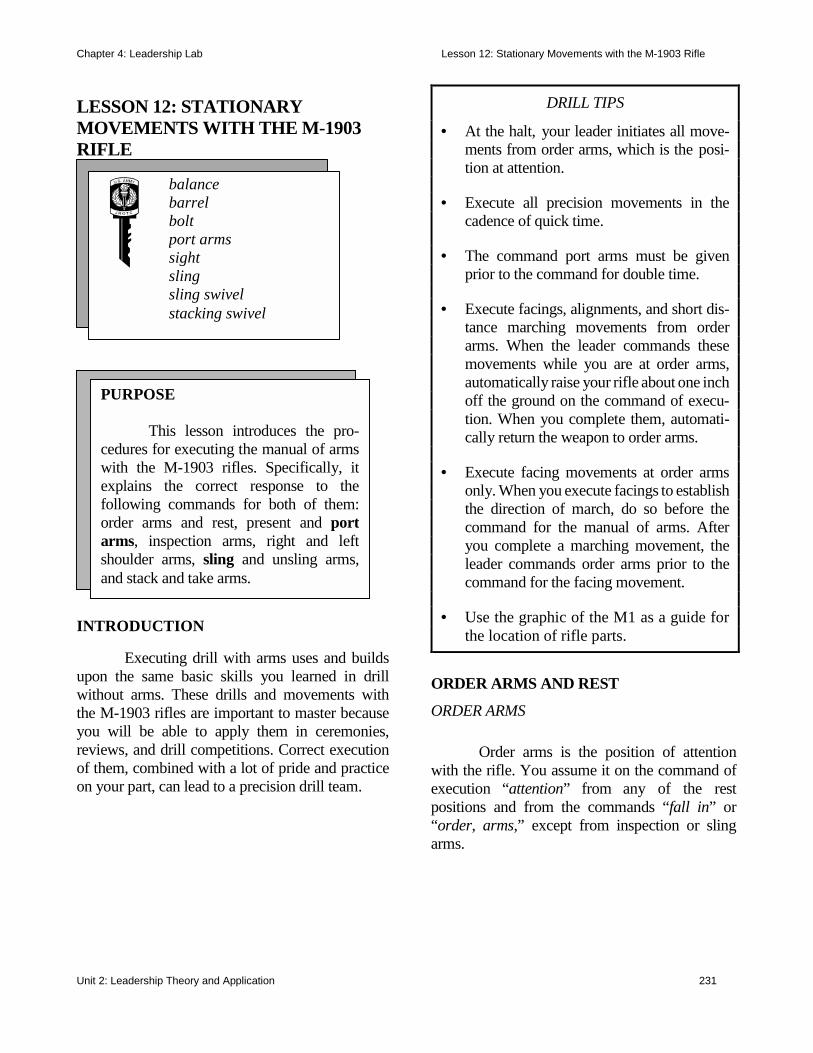
Chapter 4: Leadership Lab Lesson 12: Stationary Movements with the M-1903 Rifle
Unit 2: Leadership Theory and Application 231
LESSON 12: STATIONARY MOVEMENTS WITH THE M-1903 RIFLE
INTRODUCTION Executing drill with arms uses and builds upon the same basic skills you learned in drill without arms. These drills and movements with the M-1903 rifles are important to master because you will be able to apply them in ceremonies, reviews, and drill competitions. Correct execution of them, combined with a lot of pride and practice on your part, can lead to a precision drill team.
ORDER ARMS AND REST
ORDER ARMS Order arms is the position of attention with the rifle. You assume it on the command of execution “attention” from any of the rest positions and from the commands “fall in” or “order, arms,” except from inspection or sling arms.
DRILL TIPS
• At the halt, your leader initiates all move-ments from order arms, which is the posi-tion at attention.
• Execute all precision movements in the
cadence of quick time. • The command port arms must be given
prior to the command for double time. • Execute facings, alignments, and short dis-
tance marching movements from order arms. When the leader commands these movements while you are at order arms, automatically raise your rifle about one inch off the ground on the command of execu-tion. When you complete them, automati-cally return the weapon to order arms.
• Execute facing movements at order arms
only. When you execute facings to establish the direction of march, do so before the command for the manual of arms. After you complete a marching movement, the leader commands order arms prior to the command for the facing movement.
• Use the graphic of the M1 as a guide for
the location of rifle parts.
balance barrel bolt port arms sight sling sling swivel stacking swivel
PURPOSE
This lesson introduces the pro-cedures for executing the manual of armswith the M-1903 rifles. Specifically, itexplains the correct response to thefollowing commands for both of them:order arms and rest, present and portarms, inspection arms, right and leftshoulder arms, sling and unsling arms,and stack and take arms.
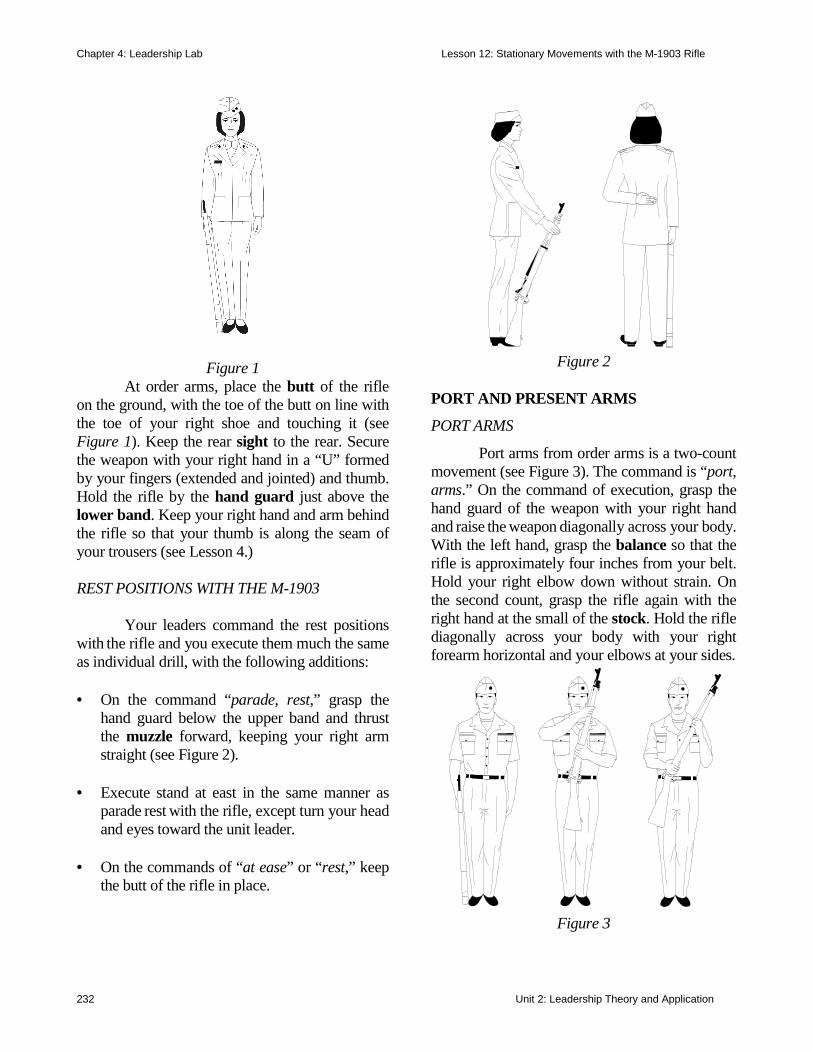
Chapter 4: Leadership Lab Lesson 12: Stationary Movements with the M-1903 Rifle
232 Unit 2: Leadership Theory and Application
Figure 1
At order arms, place the butt of the rifle on the ground, with the toe of the butt on line with the toe of your right shoe and touching it (see Figure 1). Keep the rear sight to the rear. Secure the weapon with your right hand in a “U” formed by your fingers (extended and jointed) and thumb. Hold the rifle by the hand guard just above the lower band. Keep your right hand and arm behind the rifle so that your thumb is along the seam of your trousers (see Lesson 4.) REST POSITIONS WITH THE M-1903 Your leaders command the rest positions with the rifle and you execute them much the same as individual drill, with the following additions: • On the command “parade, rest,” grasp the
hand guard below the upper band and thrust the muzzle forward, keeping your right arm straight (see Figure 2).
• Execute stand at east in the same manner as
parade rest with the rifle, except turn your head and eyes toward the unit leader.
• On the commands of “at ease” or “rest,” keep
the butt of the rifle in place.
Figure 2
PORT AND PRESENT ARMS
PORT ARMS
Port arms from order arms is a two-count movement (see Figure 3). The command is “port, arms.” On the command of execution, grasp the hand guard of the weapon with your right hand and raise the weapon diagonally across your body. With the left hand, grasp the balance so that the rifle is approximately four inches from your belt. Hold your right elbow down without strain. On the second count, grasp the rifle again with the right hand at the small of the stock. Hold the rifle diagonally across your body with your right forearm horizontal and your elbows at your sides.
Figure 3
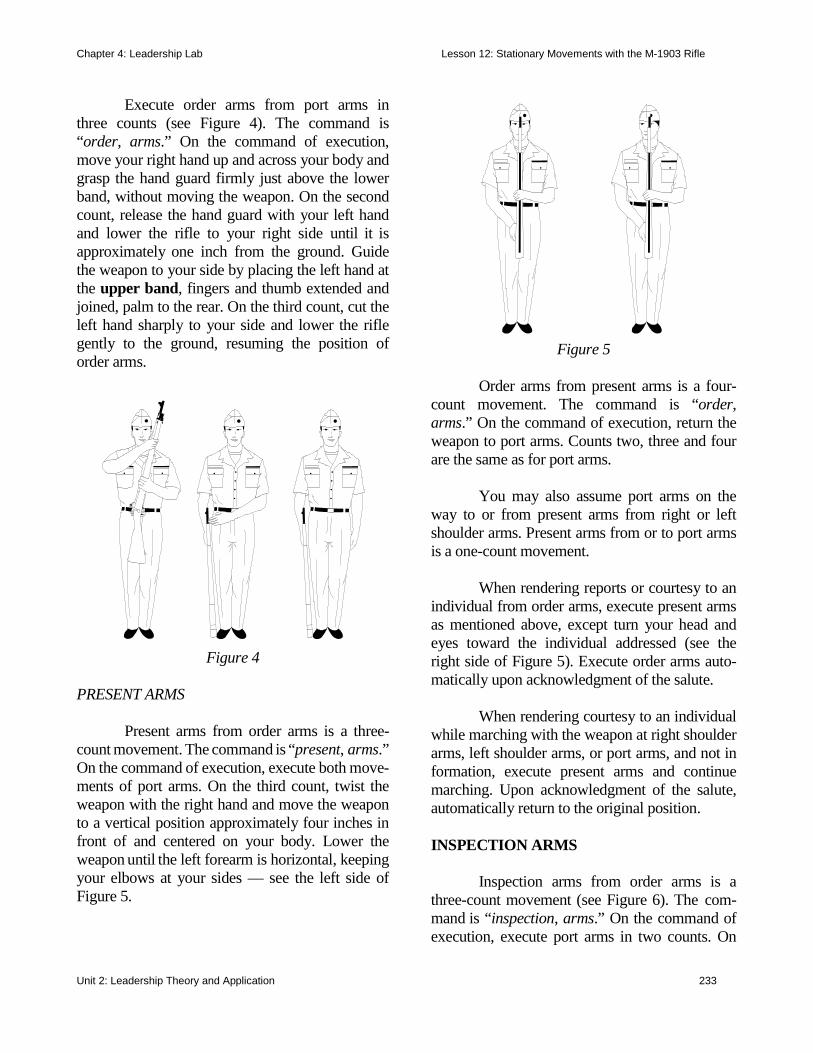
Chapter 4: Leadership Lab Lesson 12: Stationary Movements with the M-1903 Rifle
Unit 2: Leadership Theory and Application 233
Execute order arms from port arms in three counts (see Figure 4). The command is “order, arms.” On the command of execution, move your right hand up and across your body and grasp the hand guard firmly just above the lower band, without moving the weapon. On the second count, release the hand guard with your left hand and lower the rifle to your right side until it is approximately one inch from the ground. Guide the weapon to your side by placing the left hand at the upper band, fingers and thumb extended and joined, palm to the rear. On the third count, cut the left hand sharply to your side and lower the rifle gently to the ground, resuming the position of order arms.
Figure 4
PRESENT ARMS Present arms from order arms is a three-count movement. The command is “present, arms.” On the command of execution, execute both move-ments of port arms. On the third count, twist the weapon with the right hand and move the weapon to a vertical position approximately four inches in front of and centered on your body. Lower the weapon until the left forearm is horizontal, keeping your elbows at your sides — see the left side of Figure 5.
Figure 5
Order arms from present arms is a four-count movement. The command is “order, arms.” On the command of execution, return the weapon to port arms. Counts two, three and four are the same as for port arms. You may also assume port arms on the way to or from present arms from right or left shoulder arms. Present arms from or to port arms is a one-count movement. When rendering reports or courtesy to an individual from order arms, execute present arms as mentioned above, except turn your head and eyes toward the individual addressed (see the right side of Figure 5). Execute order arms auto-matically upon acknowledgment of the salute. When rendering courtesy to an individual while marching with the weapon at right shoulder arms, left shoulder arms, or port arms, and not in formation, execute present arms and continue marching. Upon acknowledgment of the salute, automatically return to the original position. INSPECTION ARMS Inspection arms from order arms is a three-count movement (see Figure 6). The com-mand is “inspection, arms.” On the command of execution, execute port arms in two counts. On
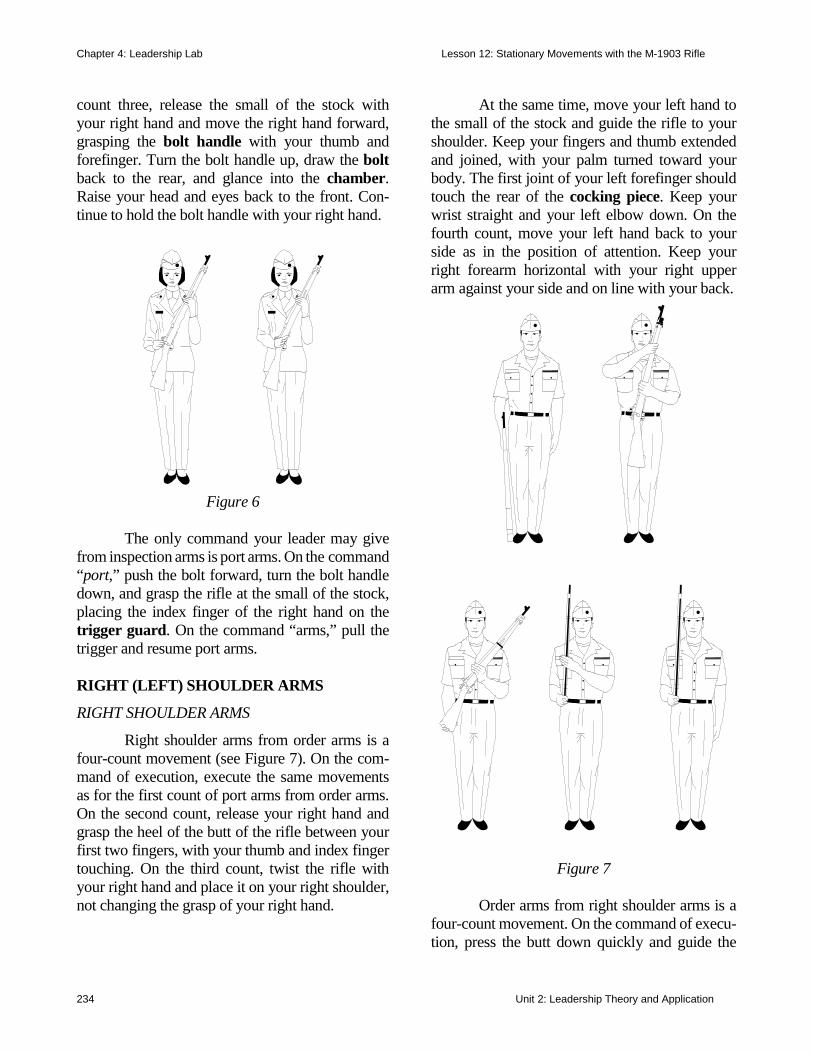
Chapter 4: Leadership Lab Lesson 12: Stationary Movements with the M-1903 Rifle
234 Unit 2: Leadership Theory and Application
count three, release the small of the stock with your right hand and move the right hand forward, grasping the bolt handle with your thumb and forefinger. Turn the bolt handle up, draw the bolt back to the rear, and glance into the chamber. Raise your head and eyes back to the front. Con-tinue to hold the bolt handle with your right hand.
Figure 6
The only command your leader may give from inspection arms is port arms. On the command “port,” push the bolt forward, turn the bolt handle down, and grasp the rifle at the small of the stock, placing the index finger of the right hand on the trigger guard. On the command “arms,” pull the trigger and resume port arms. RIGHT (LEFT) SHOULDER ARMS
RIGHT SHOULDER ARMS
Right shoulder arms from order arms is a four-count movement (see Figure 7). On the com-mand of execution, execute the same movements as for the first count of port arms from order arms. On the second count, release your right hand and grasp the heel of the butt of the rifle between your first two fingers, with your thumb and index finger touching. On the third count, twist the rifle with your right hand and place it on your right shoulder, not changing the grasp of your right hand.
At the same time, move your left hand to the small of the stock and guide the rifle to your shoulder. Keep your fingers and thumb extended and joined, with your palm turned toward your body. The first joint of your left forefinger should touch the rear of the cocking piece. Keep your wrist straight and your left elbow down. On the fourth count, move your left hand back to your side as in the position of attention. Keep your right forearm horizontal with your right upper arm against your side and on line with your back.
Figure 7
Order arms from right shoulder arms is a four-count movement. On the command of execu-tion, press the butt down quickly and guide the
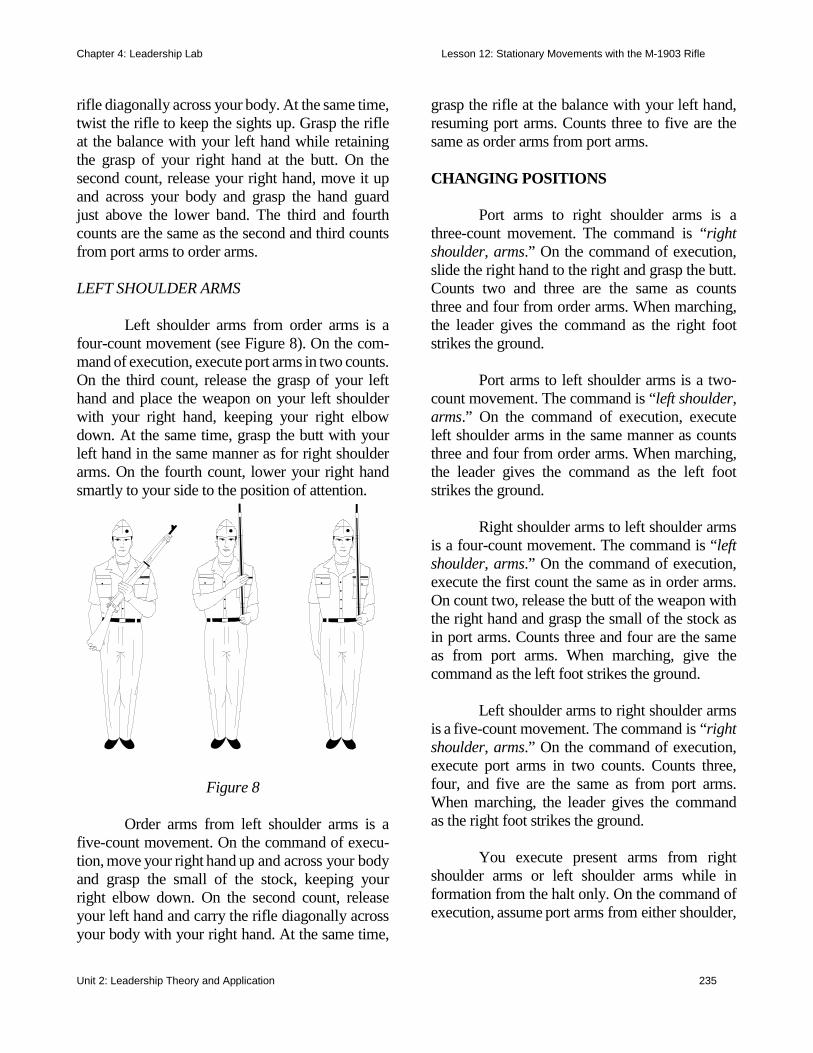
Chapter 4: Leadership Lab Lesson 12: Stationary Movements with the M-1903 Rifle
Unit 2: Leadership Theory and Application 235
rifle diagonally across your body. At the same time, twist the rifle to keep the sights up. Grasp the rifle at the balance with your left hand while retaining the grasp of your right hand at the butt. On the second count, release your right hand, move it up and across your body and grasp the hand guard just above the lower band. The third and fourth counts are the same as the second and third counts from port arms to order arms. LEFT SHOULDER ARMS Left shoulder arms from order arms is a four-count movement (see Figure 8). On the com-mand of execution, execute port arms in two counts. On the third count, release the grasp of your left hand and place the weapon on your left shoulder with your right hand, keeping your right elbow down. At the same time, grasp the butt with your left hand in the same manner as for right shoulder arms. On the fourth count, lower your right hand smartly to your side to the position of attention.
Figure 8 Order arms from left shoulder arms is a five-count movement. On the command of execu-tion, move your right hand up and across your body and grasp the small of the stock, keeping your right elbow down. On the second count, release your left hand and carry the rifle diagonally across your body with your right hand. At the same time,
grasp the rifle at the balance with your left hand, resuming port arms. Counts three to five are the same as order arms from port arms. CHANGING POSITIONS Port arms to right shoulder arms is a three-count movement. The command is “right shoulder, arms.” On the command of execution, slide the right hand to the right and grasp the butt. Counts two and three are the same as counts three and four from order arms. When marching, the leader gives the command as the right foot strikes the ground. Port arms to left shoulder arms is a two-count movement. The command is “left shoulder, arms.” On the command of execution, execute left shoulder arms in the same manner as counts three and four from order arms. When marching, the leader gives the command as the left foot strikes the ground. Right shoulder arms to left shoulder arms is a four-count movement. The command is “left shoulder, arms.” On the command of execution, execute the first count the same as in order arms. On count two, release the butt of the weapon with the right hand and grasp the small of the stock as in port arms. Counts three and four are the same as from port arms. When marching, give the command as the left foot strikes the ground. Left shoulder arms to right shoulder arms is a five-count movement. The command is “right shoulder, arms.” On the command of execution, execute port arms in two counts. Counts three, four, and five are the same as from port arms. When marching, the leader gives the command as the right foot strikes the ground. You execute present arms from right shoulder arms or left shoulder arms while in formation from the halt only. On the command of execution, assume port arms from either shoulder,
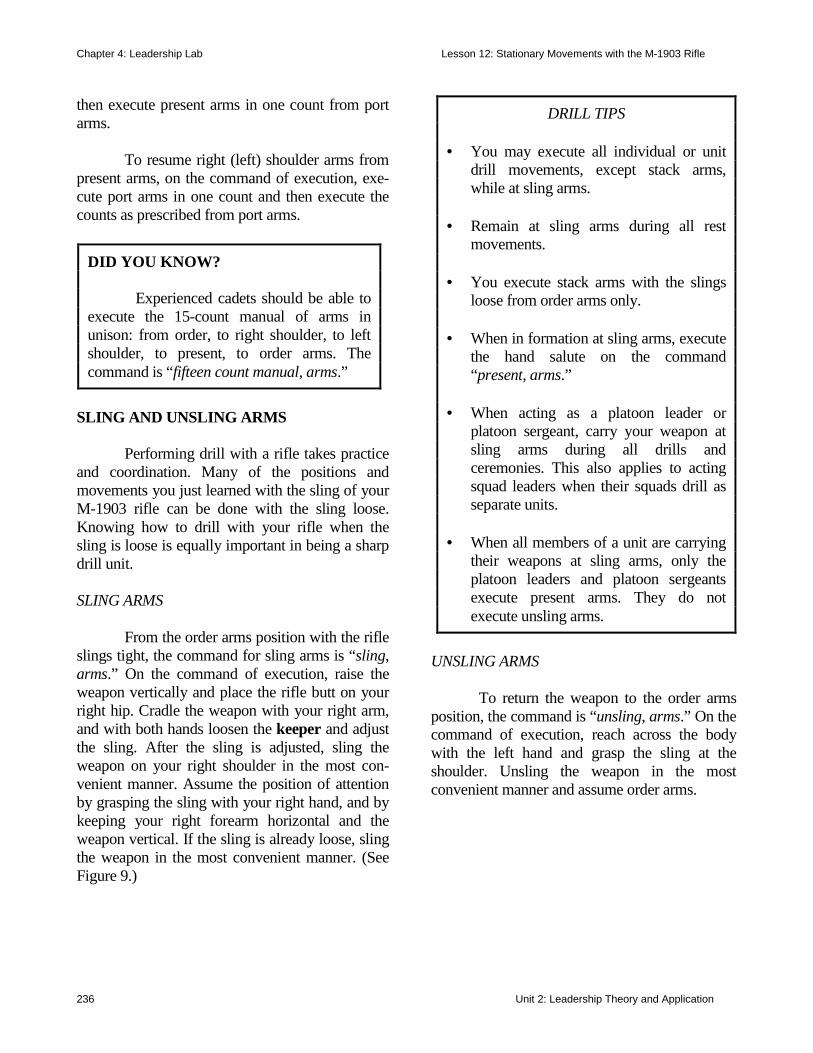
Chapter 4: Leadership Lab Lesson 12: Stationary Movements with the M-1903 Rifle
236 Unit 2: Leadership Theory and Application
then execute present arms in one count from port arms. To resume right (left) shoulder arms from present arms, on the command of execution, exe-cute port arms in one count and then execute the counts as prescribed from port arms.
SLING AND UNSLING ARMS Performing drill with a rifle takes practice and coordination. Many of the positions and movements you just learned with the sling of your M-1903 rifle can be done with the sling loose. Knowing how to drill with your rifle when the sling is loose is equally important in being a sharp drill unit. SLING ARMS From the order arms position with the rifle slings tight, the command for sling arms is “sling, arms.” On the command of execution, raise the weapon vertically and place the rifle butt on your right hip. Cradle the weapon with your right arm, and with both hands loosen the keeper and adjust the sling. After the sling is adjusted, sling the weapon on your right shoulder in the most con-venient manner. Assume the position of attention by grasping the sling with your right hand, and by keeping your right forearm horizontal and the weapon vertical. If the sling is already loose, sling the weapon in the most convenient manner. (See Figure 9.)
UNSLING ARMS To return the weapon to the order arms position, the command is “unsling, arms.” On the command of execution, reach across the body with the left hand and grasp the sling at the shoulder. Unsling the weapon in the most convenient manner and assume order arms.
DID YOU KNOW? Experienced cadets should be able to execute the 15-count manual of arms in unison: from order, to right shoulder, to left shoulder, to present, to order arms. The command is “fifteen count manual, arms.”
DRILL TIPS • You may execute all individual or unit
drill movements, except stack arms, while at sling arms.
• Remain at sling arms during all rest
movements. • You execute stack arms with the slings
loose from order arms only. • When in formation at sling arms, execute
the hand salute on the command “present, arms.”
• When acting as a platoon leader or
platoon sergeant, carry your weapon at sling arms during all drills and ceremonies. This also applies to acting squad leaders when their squads drill as separate units.
• When all members of a unit are carrying
their weapons at sling arms, only the platoon leaders and platoon sergeants execute present arms. They do not execute unsling arms.
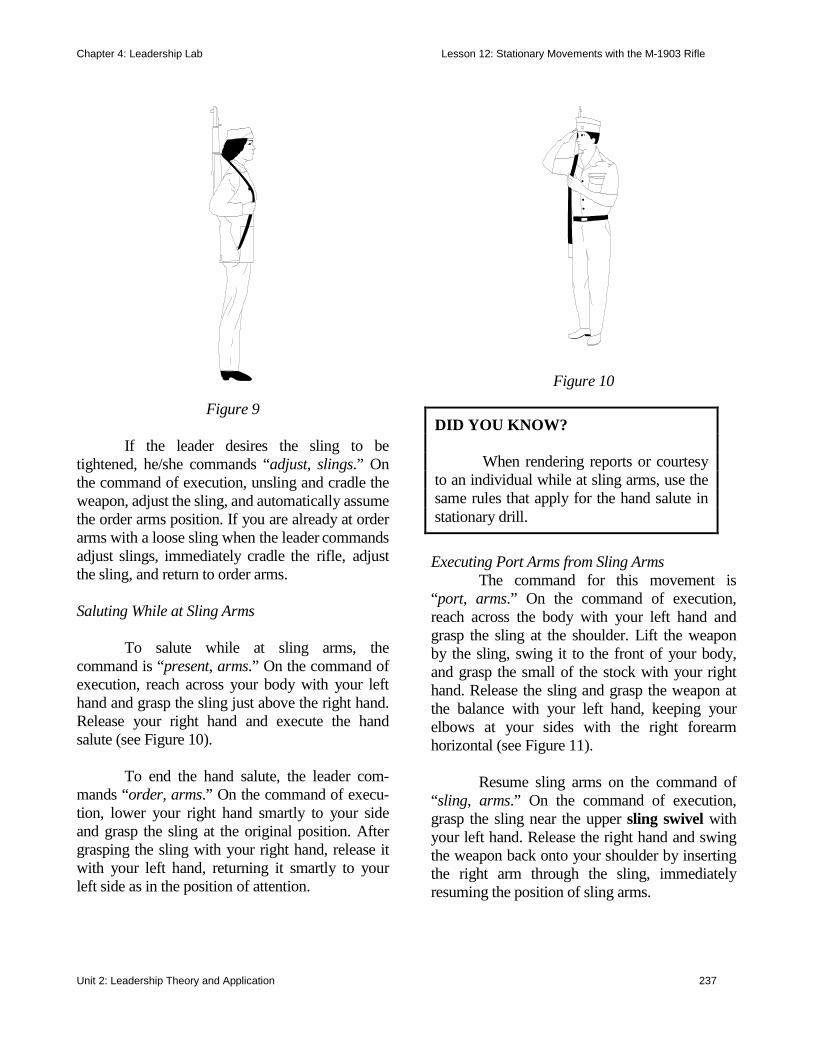
Chapter 4: Leadership Lab Lesson 12: Stationary Movements with the M-1903 Rifle
Unit 2: Leadership Theory and Application 237
Figure 9
If the leader desires the sling to be tightened, he/she commands “adjust, slings.” On the command of execution, unsling and cradle the weapon, adjust the sling, and automatically assume the order arms position. If you are already at order arms with a loose sling when the leader commands adjust slings, immediately cradle the rifle, adjust the sling, and return to order arms. Saluting While at Sling Arms To salute while at sling arms, the command is “present, arms.” On the command of execution, reach across your body with your left hand and grasp the sling just above the right hand. Release your right hand and execute the hand salute (see Figure 10). To end the hand salute, the leader com-mands “order, arms.” On the command of execu-tion, lower your right hand smartly to your side and grasp the sling at the original position. After grasping the sling with your right hand, release it with your left hand, returning it smartly to your left side as in the position of attention.
Figure 10
Executing Port Arms from Sling Arms The command for this movement is “port, arms.” On the command of execution, reach across the body with your left hand and grasp the sling at the shoulder. Lift the weapon by the sling, swing it to the front of your body, and grasp the small of the stock with your right hand. Release the sling and grasp the weapon at the balance with your left hand, keeping your elbows at your sides with the right forearm horizontal (see Figure 11). Resume sling arms on the command of “sling, arms.” On the command of execution, grasp the sling near the upper sling swivel with your left hand. Release the right hand and swing the weapon back onto your shoulder by inserting the right arm through the sling, immediately resuming the position of sling arms.
DID YOU KNOW? When rendering reports or courtesy to an individual while at sling arms, use the same rules that apply for the hand salute in stationary drill.
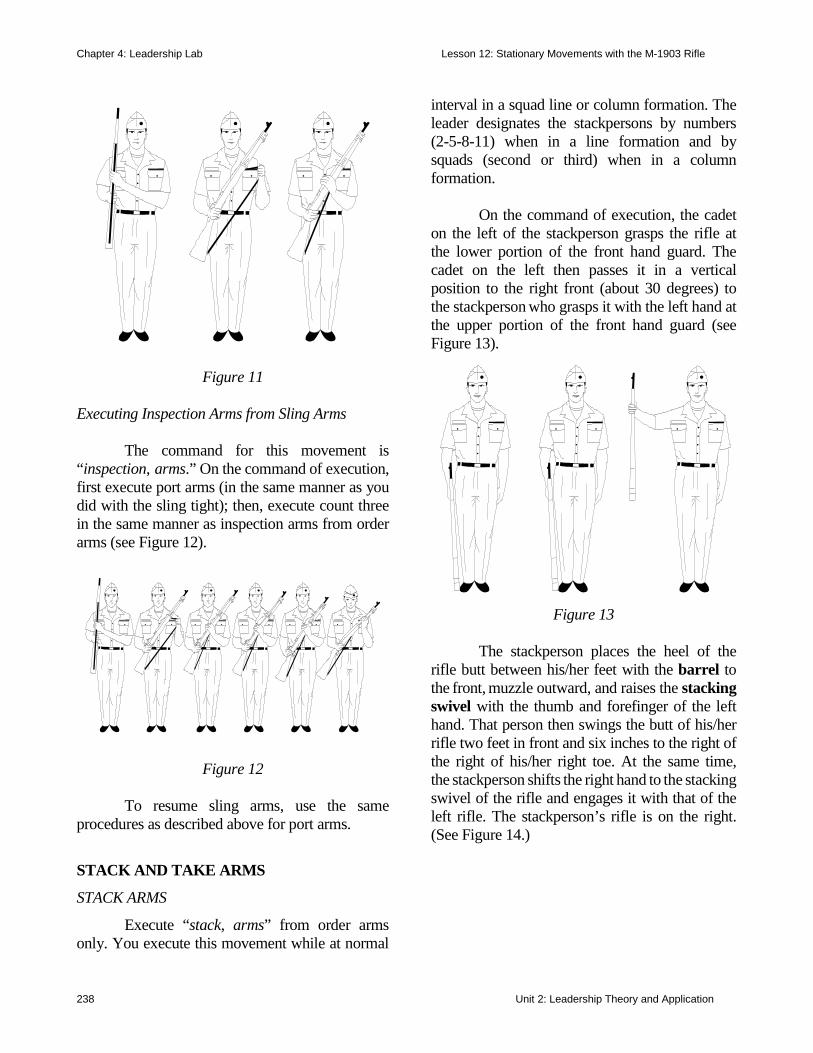
Chapter 4: Leadership Lab Lesson 12: Stationary Movements with the M-1903 Rifle
238 Unit 2: Leadership Theory and Application
Figure 11 Executing Inspection Arms from Sling Arms The command for this movement is “inspection, arms.” On the command of execution, first execute port arms (in the same manner as you did with the sling tight); then, execute count three in the same manner as inspection arms from order arms (see Figure 12).
Figure 12 To resume sling arms, use the same procedures as described above for port arms.
STACK AND TAKE ARMS
STACK ARMS
Execute “stack, arms” from order arms only. You execute this movement while at normal
interval in a squad line or column formation. The leader designates the stackpersons by numbers (2-5-8-11) when in a line formation and by squads (second or third) when in a column formation. On the command of execution, the cadet on the left of the stackperson grasps the rifle at the lower portion of the front hand guard. The cadet on the left then passes it in a vertical position to the right front (about 30 degrees) to the stackperson who grasps it with the left hand at the upper portion of the front hand guard (see Figure 13).
Figure 13
The stackperson places the heel of the rifle butt between his/her feet with the barrel to the front, muzzle outward, and raises the stacking swivel with the thumb and forefinger of the left hand. That person then swings the butt of his/her rifle two feet in front and six inches to the right of the right of his/her right toe. At the same time, the stackperson shifts the right hand to the stacking swivel of the rifle and engages it with that of the left rifle. The stackperson’s rifle is on the right. (See Figure 14.)
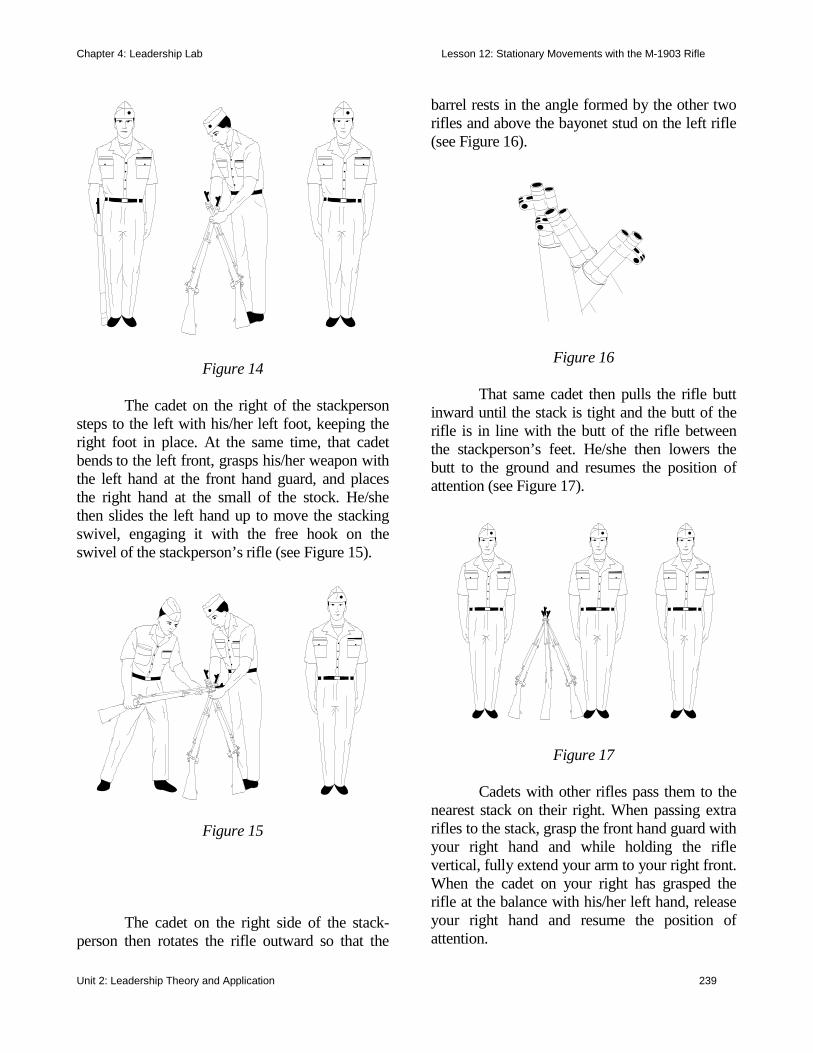
Chapter 4: Leadership Lab Lesson 12: Stationary Movements with the M-1903 Rifle
Unit 2: Leadership Theory and Application 239
Figure 14 The cadet on the right of the stackperson steps to the left with his/her left foot, keeping the right foot in place. At the same time, that cadet bends to the left front, grasps his/her weapon with the left hand at the front hand guard, and places the right hand at the small of the stock. He/she then slides the left hand up to move the stacking swivel, engaging it with the free hook on the swivel of the stackperson’s rifle (see Figure 15).
Figure 15
The cadet on the right side of the stack-person then rotates the rifle outward so that the
barrel rests in the angle formed by the other two rifles and above the bayonet stud on the left rifle (see Figure 16).
Figure 16 That same cadet then pulls the rifle butt inward until the stack is tight and the butt of the rifle is in line with the butt of the rifle between the stackperson’s feet. He/she then lowers the butt to the ground and resumes the position of attention (see Figure 17).
Figure 17 Cadets with other rifles pass them to the nearest stack on their right. When passing extra rifles to the stack, grasp the front hand guard with your right hand and while holding the rifle vertical, fully extend your arm to your right front. When the cadet on your right has grasped the rifle at the balance with his/her left hand, release your right hand and resume the position of attention.
Chapter 4: Leadership Lab Lesson 12: Stationary Movements with the M-1903 Rifle
240 Unit 2: Leadership Theory and Application
When you have received a rifle from the cadet on the left, keep it vertical and move it in front of you, with your left hand at the balance. Grasp the front hand guard with your right hand as described above. If you are the stackperson, place the rifle on the stack, trigger guard outward, at a sufficient angle from the vertical to keep it in place. If the second squad is the stack squad, extra rifles are passed to the left. TAKE ARMS To take arms, the command is “take, arms.” On the command of execution, the stack-person passes each extra rifle toward its bearer. (Note: Each person holds the rifles passed in the same manner described for passing them to the stack — left hand at the balance followed by right hand at the front hand guard). When you receive your weapon, resume the position of order arms by guiding and steadying the weapon with your left hand as in the next to last count of order arms. After the extra rifles have been passed, the stackperson grasps his/her rifle and the rifle of the cadet on his/her left. The cadet on the right of the stackperson steps to the left as in stacking, secures his/her rifle and resumes the position of order arms. The stackperson then disengages the two remaining rifles, grasps the left rifle at the lower part of the front hand guard, and passes it to the left front. The cadet to the left grasps the rifle at the front hand guard with his/her right hand and lowers it to the ground, resuming order arms. The stackperson resumes order arms after the cadet on the left has received his/her rifle. CONCLUSION This lesson covered the procedures for executing the manual of arms with the M-1903 rifle while at sling arms and when carrying it with the sling tight. Precise drill movements with a weapon require a lot of practice and hard work,
but the outcome may be rewarding for you and your cadet battalion: winning local, state, and/or national drill competitions. Take a moment to look at a video of the national drill competitions held at Daytona Beach, a news video of the Old Guard as members from that unit guard the Tomb of the Unknown Soldier, or the opening of the movie A Few Good Men to see firsthand examples of just how good precision drill can be.
* * *
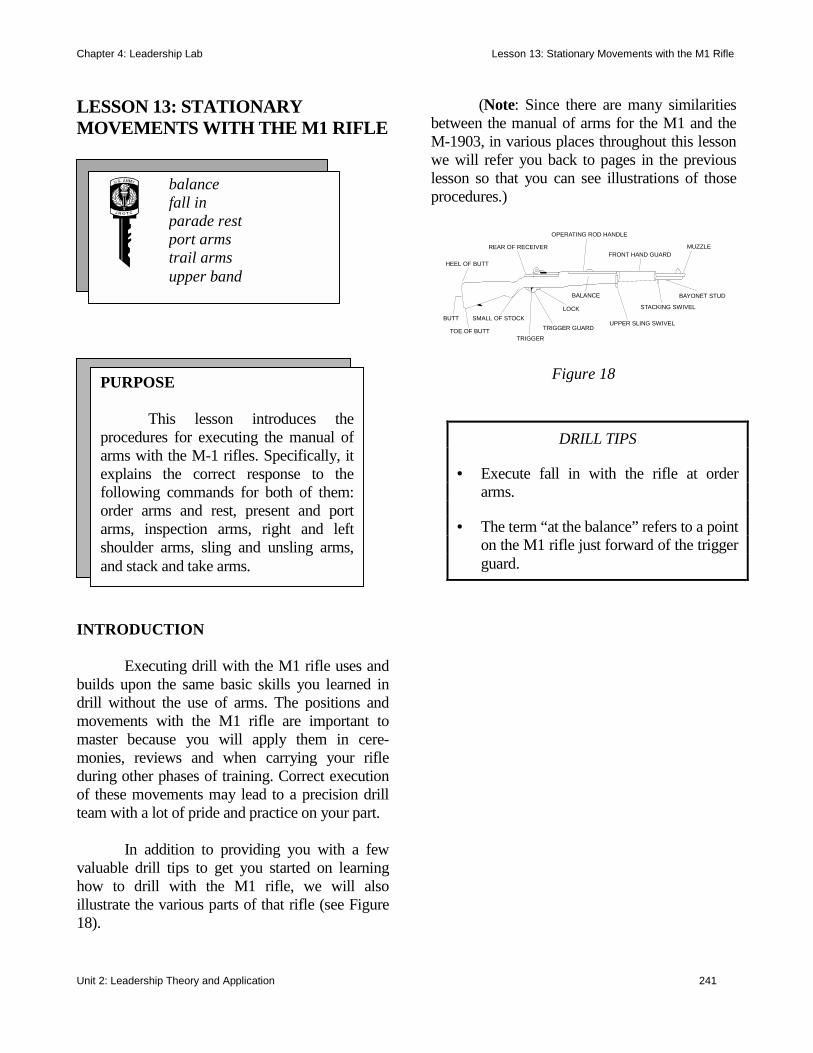
Chapter 4: Leadership Lab Lesson 13: Stationary Movements with the M1 Rifle
Unit 2: Leadership Theory and Application 241
LESSON 13: STATIONARY MOVEMENTS WITH THE M1 RIFLE
INTRODUCTION Executing drill with the M1 rifle uses and builds upon the same basic skills you learned in drill without the use of arms. The positions and movements with the M1 rifle are important to master because you will apply them in cere-monies, reviews and when carrying your rifle during other phases of training. Correct execution of these movements may lead to a precision drill team with a lot of pride and practice on your part. In addition to providing you with a few valuable drill tips to get you started on learning how to drill with the M1 rifle, we will also illustrate the various parts of that rifle (see Figure 18).
(Note: Since there are many similarities between the manual of arms for the M1 and the M-1903, in various places throughout this lesson we will refer you back to pages in the previous lesson so that you can see illustrations of those procedures.)
HEEL OF BUTT
REAR OF RECEIVER
OPERATING ROD HANDLE
FRONT HAND GUARDMUZZLE
BUTT
TOE OF BUTT
SMALL OF STOCK
TRIGGER
TRIGGER GUARD
LOCK
BALANCE
UPPER SLING SWIVEL
STACKING SWIVEL
BAYONET STUD
Figure 18
balance fall in parade rest port arms trail arms upper band
DRILL TIPS • Execute fall in with the rifle at order
arms. • The term “at the balance” refers to a point
on the M1 rifle just forward of the trigger guard.
PURPOSE
This lesson introduces theprocedures for executing the manual ofarms with the M-1 rifles. Specifically, itexplains the correct response to thefollowing commands for both of them:order arms and rest, present and portarms, inspection arms, right and leftshoulder arms, sling and unsling arms,and stack and take arms.
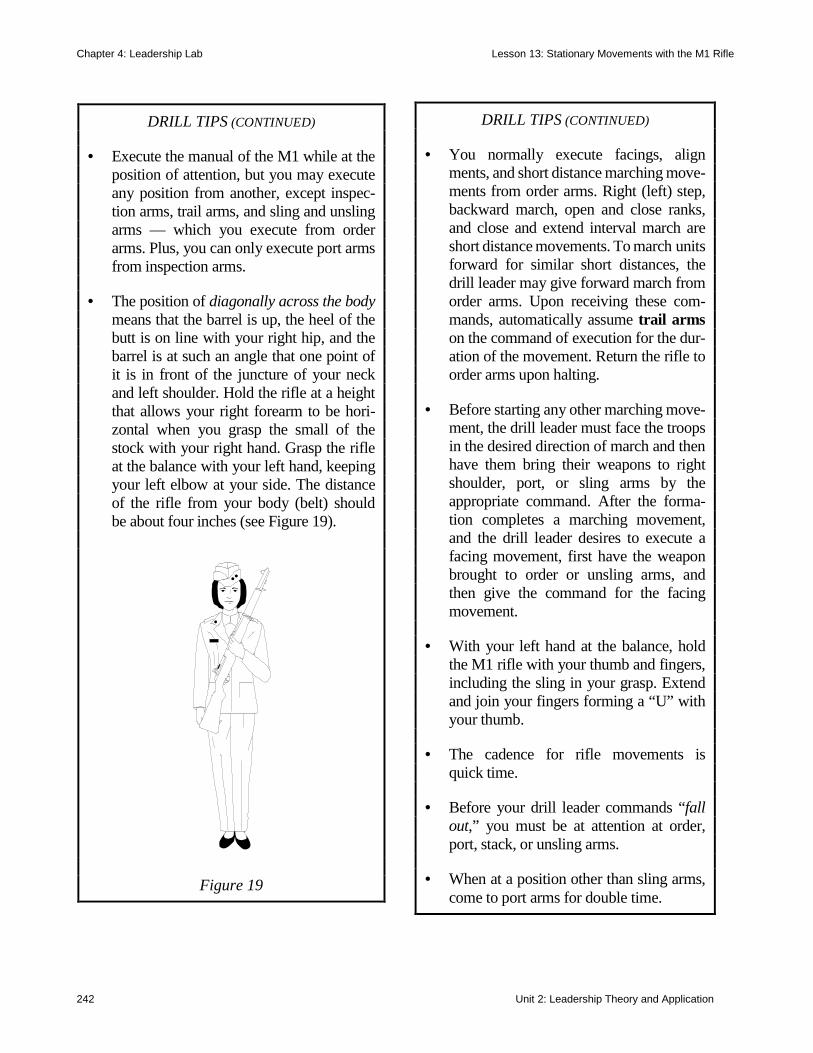
Chapter 4: Leadership Lab Lesson 13: Stationary Movements with the M1 Rifle
242 Unit 2: Leadership Theory and Application
DRILL TIPS (CONTINUED) • You normally execute facings, align
ments, and short distance marching move-ments from order arms. Right (left) step, backward march, open and close ranks, and close and extend interval march are short distance movements. To march units forward for similar short distances, the drill leader may give forward march from order arms. Upon receiving these com-mands, automatically assume trail arms on the command of execution for the dur-ation of the movement. Return the rifle to order arms upon halting.
• Before starting any other marching move-
ment, the drill leader must face the troops in the desired direction of march and then have them bring their weapons to right shoulder, port, or sling arms by the appropriate command. After the forma-tion completes a marching movement, and the drill leader desires to execute a facing movement, first have the weapon brought to order or unsling arms, and then give the command for the facing movement.
• With your left hand at the balance, hold
the M1 rifle with your thumb and fingers, including the sling in your grasp. Extend and join your fingers forming a “U” with your thumb.
• The cadence for rifle movements is
quick time. • Before your drill leader commands “fall
out,” you must be at attention at order, port, stack, or unsling arms.
• When at a position other than sling arms,
come to port arms for double time.
DRILL TIPS (CONTINUED) • Execute the manual of the M1 while at the
position of attention, but you may execute any position from another, except inspec-tion arms, trail arms, and sling and unsling arms — which you execute from order arms. Plus, you can only execute port arms from inspection arms.
• The position of diagonally across the body
means that the barrel is up, the heel of the butt is on line with your right hip, and the barrel is at such an angle that one point of it is in front of the juncture of your neck and left shoulder. Hold the rifle at a height that allows your right forearm to be hori-zontal when you grasp the small of the stock with your right hand. Grasp the rifle at the balance with your left hand, keeping your left elbow at your side. The distance of the rifle from your body (belt) should be about four inches (see Figure 19).
Figure 19
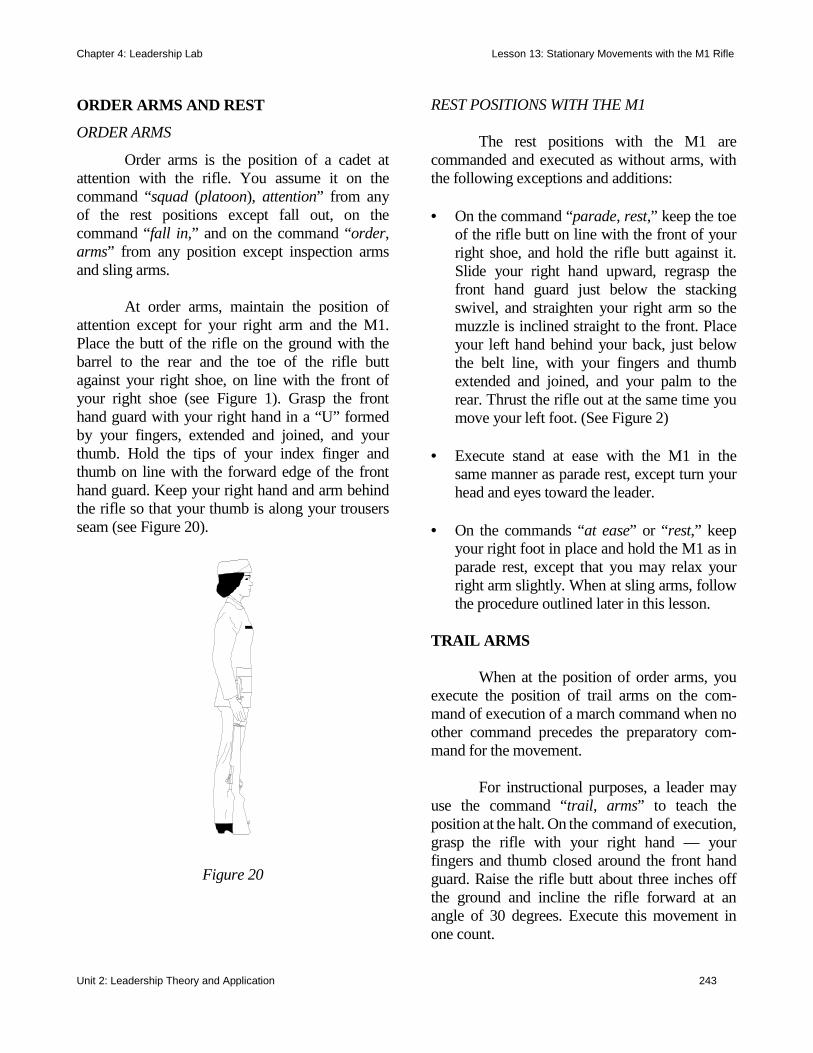
Chapter 4: Leadership Lab Lesson 13: Stationary Movements with the M1 Rifle
Unit 2: Leadership Theory and Application 243
ORDER ARMS AND REST
ORDER ARMS
Order arms is the position of a cadet at attention with the rifle. You assume it on the command “squad (platoon), attention” from any of the rest positions except fall out, on the command “fall in,” and on the command “order, arms” from any position except inspection arms and sling arms. At order arms, maintain the position of attention except for your right arm and the M1. Place the butt of the rifle on the ground with the barrel to the rear and the toe of the rifle butt against your right shoe, on line with the front of your right shoe (see Figure 1). Grasp the front hand guard with your right hand in a “U” formed by your fingers, extended and joined, and your thumb. Hold the tips of your index finger and thumb on line with the forward edge of the front hand guard. Keep your right hand and arm behind the rifle so that your thumb is along your trousers seam (see Figure 20).
Figure 20
REST POSITIONS WITH THE M1 The rest positions with the M1 are commanded and executed as without arms, with the following exceptions and additions: • On the command “parade, rest,” keep the toe
of the rifle butt on line with the front of your right shoe, and hold the rifle butt against it. Slide your right hand upward, regrasp the front hand guard just below the stacking swivel, and straighten your right arm so the muzzle is inclined straight to the front. Place your left hand behind your back, just below the belt line, with your fingers and thumb extended and joined, and your palm to the rear. Thrust the rifle out at the same time you move your left foot. (See Figure 2)
• Execute stand at ease with the M1 in the
same manner as parade rest, except turn your head and eyes toward the leader.
• On the commands “at ease” or “rest,” keep
your right foot in place and hold the M1 as in parade rest, except that you may relax your right arm slightly. When at sling arms, follow the procedure outlined later in this lesson.
TRAIL ARMS When at the position of order arms, you execute the position of trail arms on the com-mand of execution of a march command when no other command precedes the preparatory com-mand for the movement. For instructional purposes, a leader may use the command “trail, arms” to teach the position at the halt. On the command of execution, grasp the rifle with your right hand — your fingers and thumb closed around the front hand guard. Raise the rifle butt about three inches off the ground and incline the rifle forward at an angle of 30 degrees. Execute this movement in one count.
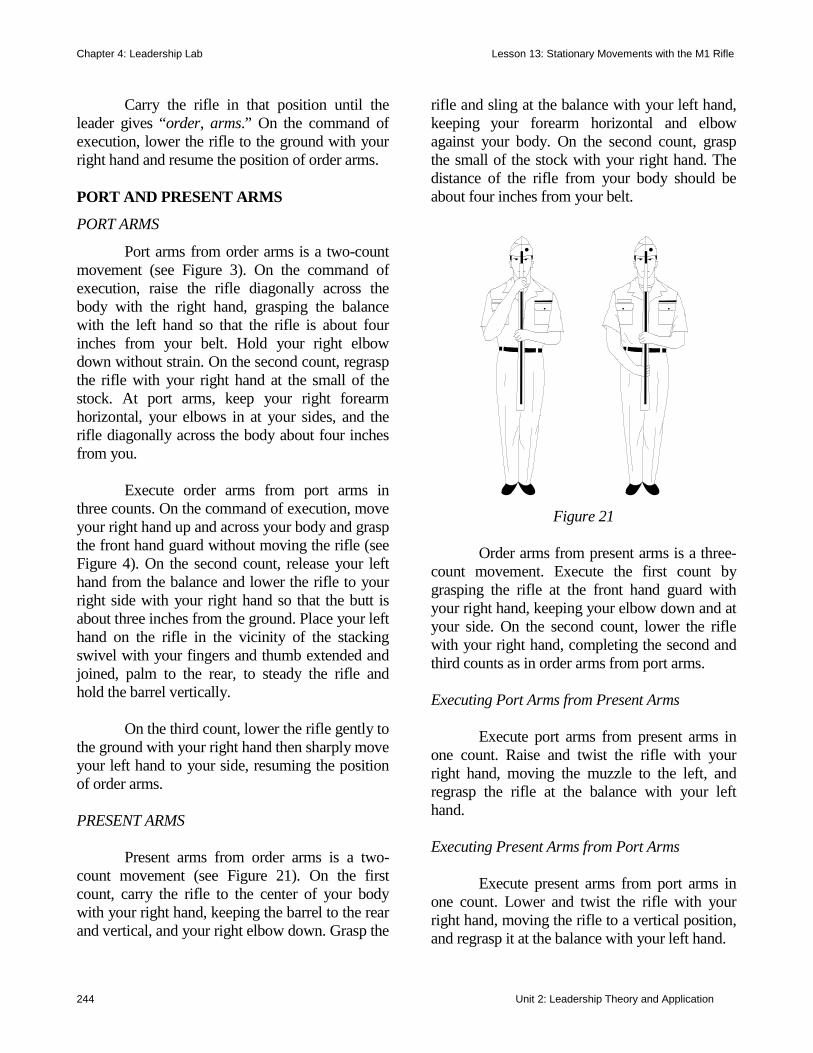
Chapter 4: Leadership Lab Lesson 13: Stationary Movements with the M1 Rifle
244 Unit 2: Leadership Theory and Application
Carry the rifle in that position until the leader gives “order, arms.” On the command of execution, lower the rifle to the ground with your right hand and resume the position of order arms. PORT AND PRESENT ARMS
PORT ARMS
Port arms from order arms is a two-count movement (see Figure 3). On the command of execution, raise the rifle diagonally across the body with the right hand, grasping the balance with the left hand so that the rifle is about four inches from your belt. Hold your right elbow down without strain. On the second count, regrasp the rifle with your right hand at the small of the stock. At port arms, keep your right forearm horizontal, your elbows in at your sides, and the rifle diagonally across the body about four inches from you. Execute order arms from port arms in three counts. On the command of execution, move your right hand up and across your body and grasp the front hand guard without moving the rifle (see Figure 4). On the second count, release your left hand from the balance and lower the rifle to your right side with your right hand so that the butt is about three inches from the ground. Place your left hand on the rifle in the vicinity of the stacking swivel with your fingers and thumb extended and joined, palm to the rear, to steady the rifle and hold the barrel vertically. On the third count, lower the rifle gently to the ground with your right hand then sharply move your left hand to your side, resuming the position of order arms. PRESENT ARMS
Present arms from order arms is a two-count movement (see Figure 21). On the first count, carry the rifle to the center of your body with your right hand, keeping the barrel to the rear and vertical, and your right elbow down. Grasp the
rifle and sling at the balance with your left hand, keeping your forearm horizontal and elbow against your body. On the second count, grasp the small of the stock with your right hand. The distance of the rifle from your body should be about four inches from your belt.
Figure 21
Order arms from present arms is a three-count movement. Execute the first count by grasping the rifle at the front hand guard with your right hand, keeping your elbow down and at your side. On the second count, lower the rifle with your right hand, completing the second and third counts as in order arms from port arms. Executing Port Arms from Present Arms Execute port arms from present arms in one count. Raise and twist the rifle with your right hand, moving the muzzle to the left, and regrasp the rifle at the balance with your left hand. Executing Present Arms from Port Arms Execute present arms from port arms in one count. Lower and twist the rifle with your right hand, moving the rifle to a vertical position, and regrasp it at the balance with your left hand.
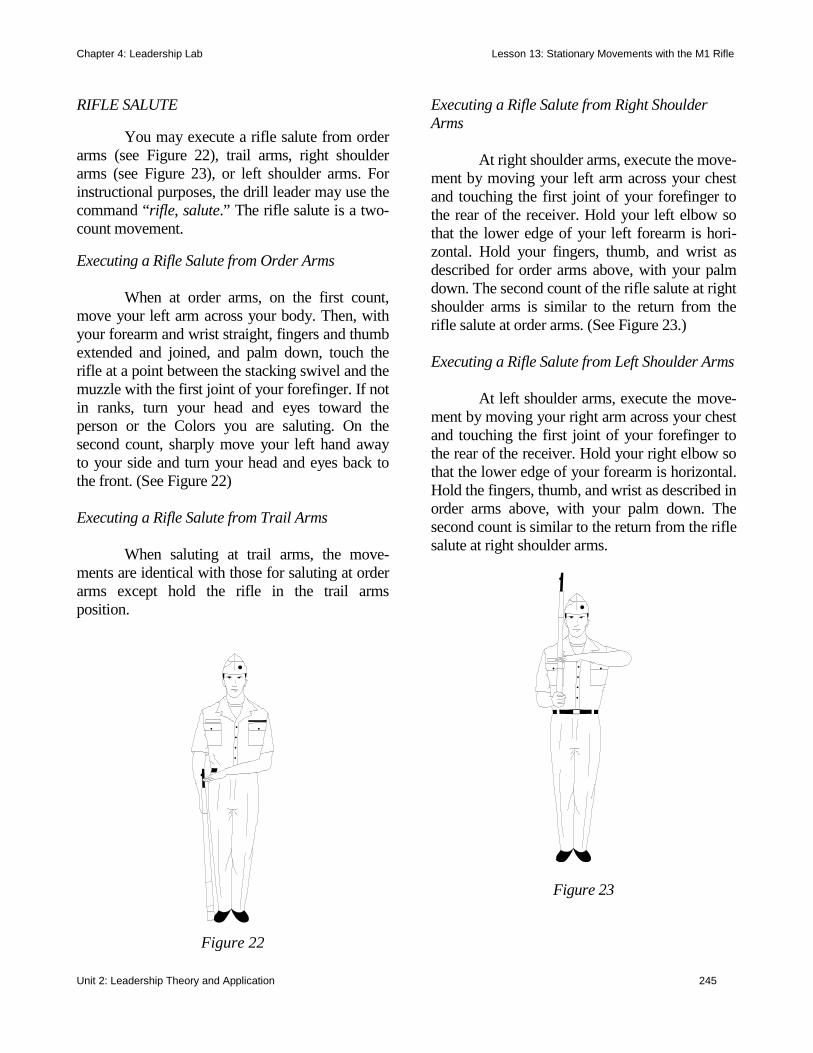
Chapter 4: Leadership Lab Lesson 13: Stationary Movements with the M1 Rifle
Unit 2: Leadership Theory and Application 245
RIFLE SALUTE You may execute a rifle salute from order arms (see Figure 22), trail arms, right shoulder arms (see Figure 23), or left shoulder arms. For instructional purposes, the drill leader may use the command “rifle, salute.” The rifle salute is a two-count movement. Executing a Rifle Salute from Order Arms When at order arms, on the first count, move your left arm across your body. Then, with your forearm and wrist straight, fingers and thumb extended and joined, and palm down, touch the rifle at a point between the stacking swivel and the muzzle with the first joint of your forefinger. If not in ranks, turn your head and eyes toward the person or the Colors you are saluting. On the second count, sharply move your left hand away to your side and turn your head and eyes back to the front. (See Figure 22) Executing a Rifle Salute from Trail Arms When saluting at trail arms, the move-ments are identical with those for saluting at order arms except hold the rifle in the trail arms position.
Figure 22
Executing a Rifle Salute from Right Shoulder Arms At right shoulder arms, execute the move-ment by moving your left arm across your chest and touching the first joint of your forefinger to the rear of the receiver. Hold your left elbow so that the lower edge of your left forearm is hori-zontal. Hold your fingers, thumb, and wrist as described for order arms above, with your palm down. The second count of the rifle salute at right shoulder arms is similar to the return from the rifle salute at order arms. (See Figure 23.) Executing a Rifle Salute from Left Shoulder Arms At left shoulder arms, execute the move-ment by moving your right arm across your chest and touching the first joint of your forefinger to the rear of the receiver. Hold your right elbow so that the lower edge of your forearm is horizontal. Hold the fingers, thumb, and wrist as described in order arms above, with your palm down. The second count is similar to the return from the rifle salute at right shoulder arms.
Figure 23

Chapter 4: Leadership Lab Lesson 13: Stationary Movements with the M1 Rifle
246 Unit 2: Leadership Theory and Application
INSPECTION ARMS Inspection arms from order arms is a four-count movement that you execute only from order arms. The first two counts are the same as in going to port arms. On the third count, release your left hand from the balance and, with your fingers closed, palm in, and forearm horizontal, place your left thumb on the operating rod handle and push it to the rear until it is caught by the operating rod catch. At the same time, lower your head and eyes enough to look into the receiver (see Figure 24). On the fourth count, having found the receiver empty or having emptied it, raise your head and eyes to the front and at the same time regrasp the rifle at the balance with your left hand. Port arms is the only command that the drill leader may give from inspection arms. On the preparatory command, with your fingers extended and joined, and palm in, place the rear edge of your right hand against the operating rod handle and move it slightly to the rear. Then, depress the follower with your right thumb and allow the bolt to move forward slightly, overriding the rear por-tion of the follower. On the command of execution, remove your right thumb from the receiver and at the same time release the operating rod handle. Pull the trigger with your forefinger and regrasp the small of the stock as in the position of port arms.
Figure 24
RIGHT (LEFT) SHOULDER ARMS
RIGHT SHOULDER ARMS
Right shoulder arms from order arms is a four-count movement. On the command of execu-tion, execute the first count of port arms. Hold your right elbow down without strain. On the second count, regrasp the rifle at the butt with your right hand — the heel of the butt should be between your first two fingers and thumb, your fingers closed around the stock, and your thumb and index finger touching. On the third count, place the rifle on your right shoulder with the grasp of your right hand unchanged. Release your left hand from the bal-ance and use it to guide the rifle to your shoulder by placing your left hand at the small of the stock, thumb and fingers extended and joined, palm toward your body, and the first joint of your left
Note: The next to the last count of order and right shoulder arms is not a rifle salute, but is used for steadying the rifle. You execute a rifle salute with the palm of your hand down and the side of the first joint of your forefinger touching the rifle.
DID YOU KNOW? Leaders should execute inspection arms as a safety precaution when they form and dismiss their units.
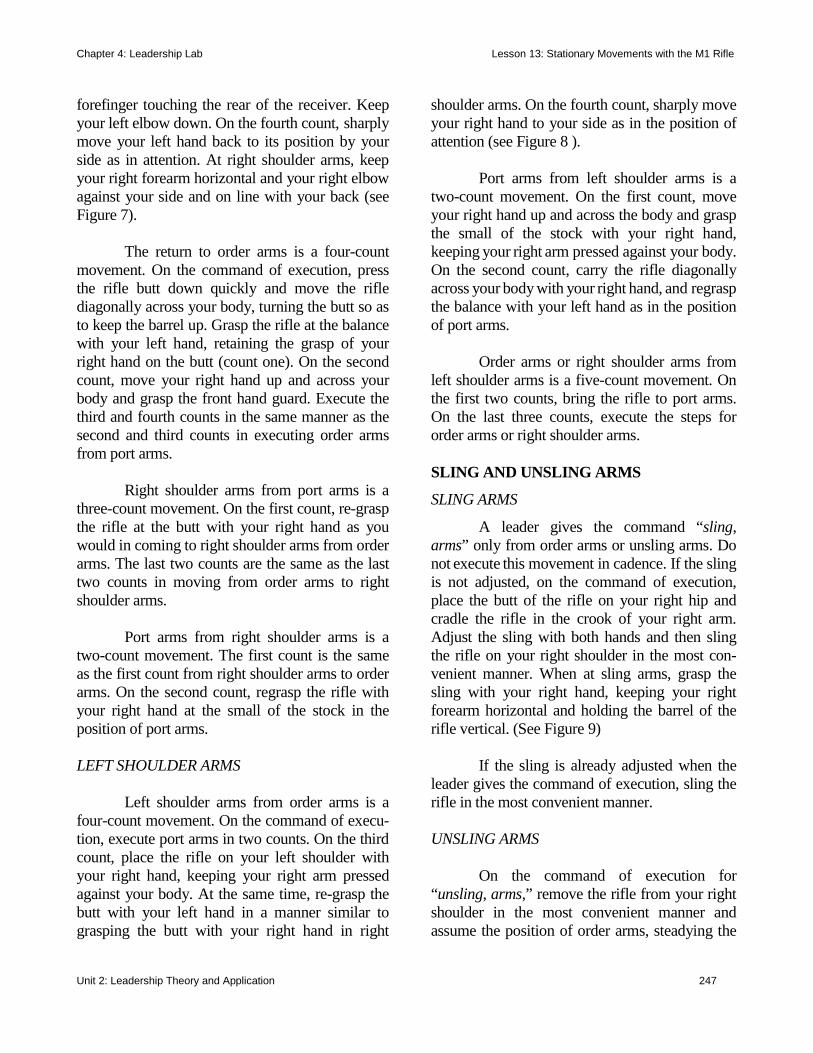
Chapter 4: Leadership Lab Lesson 13: Stationary Movements with the M1 Rifle
Unit 2: Leadership Theory and Application 247
forefinger touching the rear of the receiver. Keep your left elbow down. On the fourth count, sharply move your left hand back to its position by your side as in attention. At right shoulder arms, keep your right forearm horizontal and your right elbow against your side and on line with your back (see Figure 7). The return to order arms is a four-count movement. On the command of execution, press the rifle butt down quickly and move the rifle diagonally across your body, turning the butt so as to keep the barrel up. Grasp the rifle at the balance with your left hand, retaining the grasp of your right hand on the butt (count one). On the second count, move your right hand up and across your body and grasp the front hand guard. Execute the third and fourth counts in the same manner as the second and third counts in executing order arms from port arms. Right shoulder arms from port arms is a three-count movement. On the first count, re-grasp the rifle at the butt with your right hand as you would in coming to right shoulder arms from order arms. The last two counts are the same as the last two counts in moving from order arms to right shoulder arms. Port arms from right shoulder arms is a two-count movement. The first count is the same as the first count from right shoulder arms to order arms. On the second count, regrasp the rifle with your right hand at the small of the stock in the position of port arms. LEFT SHOULDER ARMS Left shoulder arms from order arms is a four-count movement. On the command of execu-tion, execute port arms in two counts. On the third count, place the rifle on your left shoulder with your right hand, keeping your right arm pressed against your body. At the same time, re-grasp the butt with your left hand in a manner similar to grasping the butt with your right hand in right
shoulder arms. On the fourth count, sharply move your right hand to your side as in the position of attention (see Figure 8 ). Port arms from left shoulder arms is a two-count movement. On the first count, move your right hand up and across the body and grasp the small of the stock with your right hand, keeping your right arm pressed against your body. On the second count, carry the rifle diagonally across your body with your right hand, and regrasp the balance with your left hand as in the position of port arms. Order arms or right shoulder arms from left shoulder arms is a five-count movement. On the first two counts, bring the rifle to port arms. On the last three counts, execute the steps for order arms or right shoulder arms. SLING AND UNSLING ARMS
SLING ARMS
A leader gives the command “sling, arms” only from order arms or unsling arms. Do not execute this movement in cadence. If the sling is not adjusted, on the command of execution, place the butt of the rifle on your right hip and cradle the rifle in the crook of your right arm. Adjust the sling with both hands and then sling the rifle on your right shoulder in the most con-venient manner. When at sling arms, grasp the sling with your right hand, keeping your right forearm horizontal and holding the barrel of the rifle vertical. (See Figure 9) If the sling is already adjusted when the leader gives the command of execution, sling the rifle in the most convenient manner. UNSLING ARMS On the command of execution for “unsling, arms,” remove the rifle from your right shoulder in the most convenient manner and assume the position of order arms, steadying the
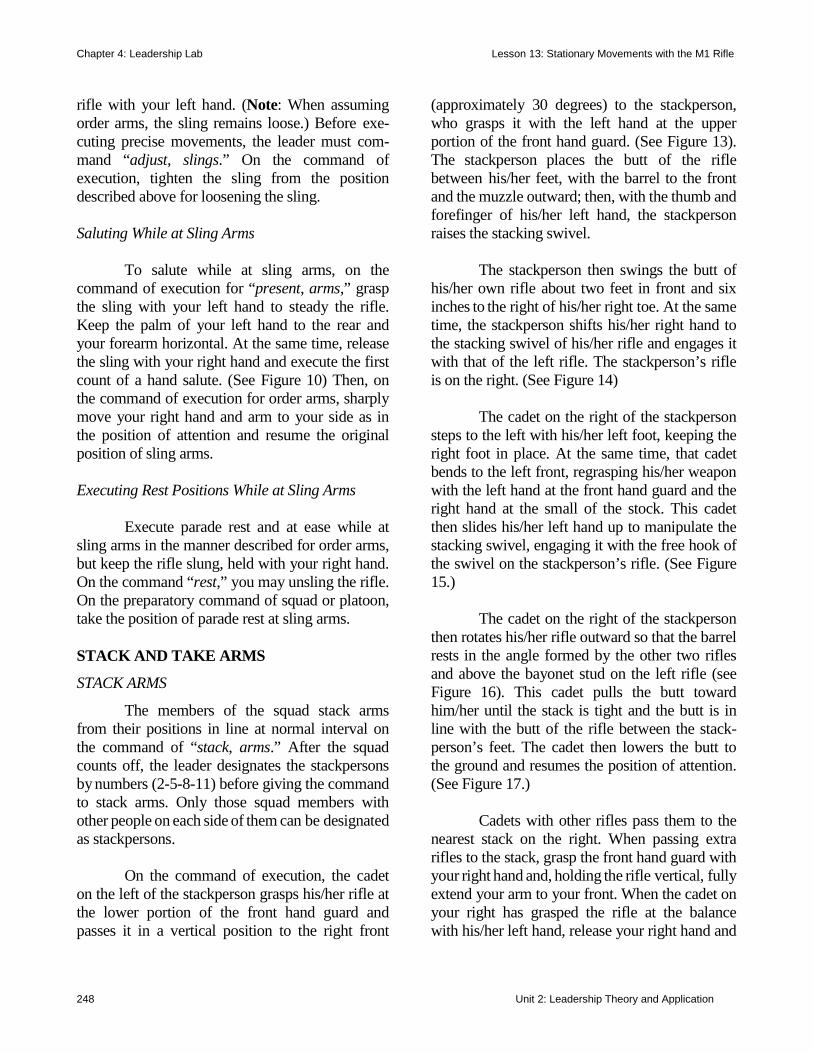
Chapter 4: Leadership Lab Lesson 13: Stationary Movements with the M1 Rifle
248 Unit 2: Leadership Theory and Application
rifle with your left hand. (Note: When assuming order arms, the sling remains loose.) Before exe-cuting precise movements, the leader must com-mand “adjust, slings.” On the command of execution, tighten the sling from the position described above for loosening the sling. Saluting While at Sling Arms To salute while at sling arms, on the command of execution for “present, arms,” grasp the sling with your left hand to steady the rifle. Keep the palm of your left hand to the rear and your forearm horizontal. At the same time, release the sling with your right hand and execute the first count of a hand salute. (See Figure 10) Then, on the command of execution for order arms, sharply move your right hand and arm to your side as in the position of attention and resume the original position of sling arms. Executing Rest Positions While at Sling Arms Execute parade rest and at ease while at sling arms in the manner described for order arms, but keep the rifle slung, held with your right hand. On the command “rest,” you may unsling the rifle. On the preparatory command of squad or platoon, take the position of parade rest at sling arms. STACK AND TAKE ARMS
STACK ARMS
The members of the squad stack arms from their positions in line at normal interval on the command of “stack, arms.” After the squad counts off, the leader designates the stackpersons by numbers (2-5-8-11) before giving the command to stack arms. Only those squad members with other people on each side of them can be designated as stackpersons. On the command of execution, the cadet on the left of the stackperson grasps his/her rifle at the lower portion of the front hand guard and passes it in a vertical position to the right front
(approximately 30 degrees) to the stackperson, who grasps it with the left hand at the upper portion of the front hand guard. (See Figure 13). The stackperson places the butt of the rifle between his/her feet, with the barrel to the front and the muzzle outward; then, with the thumb and forefinger of his/her left hand, the stackperson raises the stacking swivel. The stackperson then swings the butt of his/her own rifle about two feet in front and six inches to the right of his/her right toe. At the same time, the stackperson shifts his/her right hand to the stacking swivel of his/her rifle and engages it with that of the left rifle. The stackperson’s rifle is on the right. (See Figure 14) The cadet on the right of the stackperson steps to the left with his/her left foot, keeping the right foot in place. At the same time, that cadet bends to the left front, regrasping his/her weapon with the left hand at the front hand guard and the right hand at the small of the stock. This cadet then slides his/her left hand up to manipulate the stacking swivel, engaging it with the free hook of the swivel on the stackperson’s rifle. (See Figure 15.) The cadet on the right of the stackperson then rotates his/her rifle outward so that the barrel rests in the angle formed by the other two rifles and above the bayonet stud on the left rifle (see Figure 16). This cadet pulls the butt toward him/her until the stack is tight and the butt is in line with the butt of the rifle between the stack-person’s feet. The cadet then lowers the butt to the ground and resumes the position of attention. (See Figure 17.) Cadets with other rifles pass them to the nearest stack on the right. When passing extra rifles to the stack, grasp the front hand guard with your right hand and, holding the rifle vertical, fully extend your arm to your front. When the cadet on your right has grasped the rifle at the balance with his/her left hand, release your right hand and
Chapter 4: Leadership Lab Lesson 13: Stationary Movements with the M1 Rifle
Unit 2: Leadership Theory and Application 249
resume the position of attention. When you receive a rifle from the cadet on your left, keep it vertical and move it in front of you, with your left hand at the balance; grasp the front hand guard with your right hand and, if you are not the stackperson, pass it to your right as described above. If you are the stackperson, place the rifle on the stack, trigger guard outward, at a sufficient angle from the verti-cal to keep it in place. TAKE ARMS The squad in line behind the stacks takes the rifles on the command of “take, arms.” On the command of execution, the stackperson passes each extra rifle toward its bearer. Cadets hold the rifles in the manner described for passing them to the stack. After cadets receive their weapons, they resume the position of order arms. After the extra rifles have been passed, the stackperson grasps his rifle and the rifle of the cadet on his left. The cadet on the right of the stackperson steps to the left as in stacking, secures his/her rifle, and resumes the position of order arms. The stackperson then disengages the two remaining rifles, grasps the left rifle at the lower part of the front hand guard and passes it to his/ her left front. The cadet on the left grasps it at the front hand guard with the right hand and lowers the rifle to the ground, resuming order arms. The stackperson resumes order arms after the cadet on the left has received his/her rifle. Each cadet comes to order arms by guiding and steadying the rifle with his/her left hand as in the next to the last count of order arms. CONCLUSION This lesson covered the procedures for executing the manual of arms with the M1 rifle while at sling arms and when carrying it with the sling tight. As you have learned in Lesson 13,
precise drill movements with a weapon require a lot of practice and hard work, but the outcome may be rewarding for you and your cadet battalion: winning local, state, and/or national drill competitions. Review the video of the national drill competitions held at Daytona Beach, or the opening of the movie A Few Good Men to see firsthand examples of just how good precision drill can be.
* * *
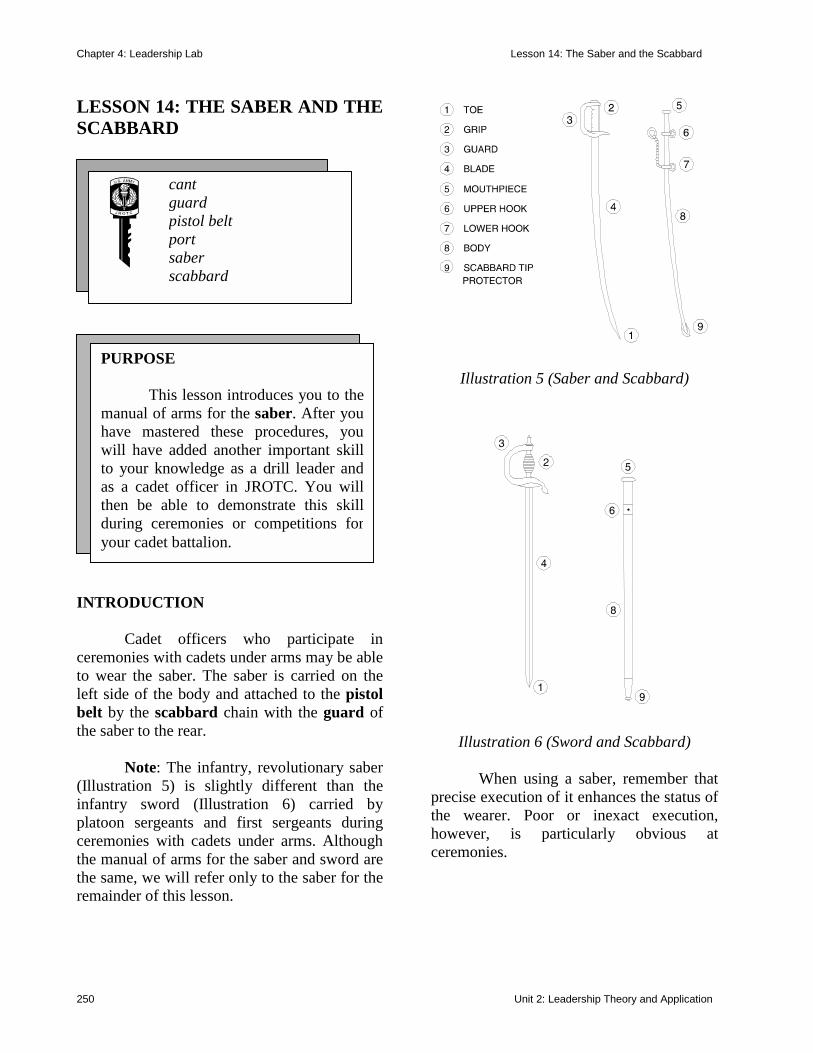
Chapter 4: Leadership Lab Lesson 14: The Saber and the Scabbard
250 Unit 2: Leadership Theory and Application
LESSON 14: THE SABER AND THE SCABBARD
INTRODUCTION Cadet officers who participate in ceremonies with cadets under arms may be able to wear the saber. The saber is carried on the left side of the body and attached to the pistol belt by the scabbard chain with the guard of the saber to the rear. Note: The infantry, revolutionary saber (Illustration 5) is slightly different than the infantry sword (Illustration 6) carried by platoon sergeants and first sergeants during ceremonies with cadets under arms. Although the manual of arms for the saber and sword are the same, we will refer only to the saber for the remainder of this lesson.
Illustration 5 (Saber and Scabbard)
Illustration 6 (Sword and Scabbard) When using a saber, remember that precise execution of it enhances the status of the wearer. Poor or inexact execution, however, is particularly obvious at ceremonies.
cant guard pistol belt port saber scabbard
PURPOSE
This lesson introduces you to themanual of arms for the saber. After youhave mastered these procedures, youwill have added another important skillto your knowledge as a drill leader andas a cadet officer in JROTC. You willthen be able to demonstrate this skillduring ceremonies or competitions foryour cadet battalion.
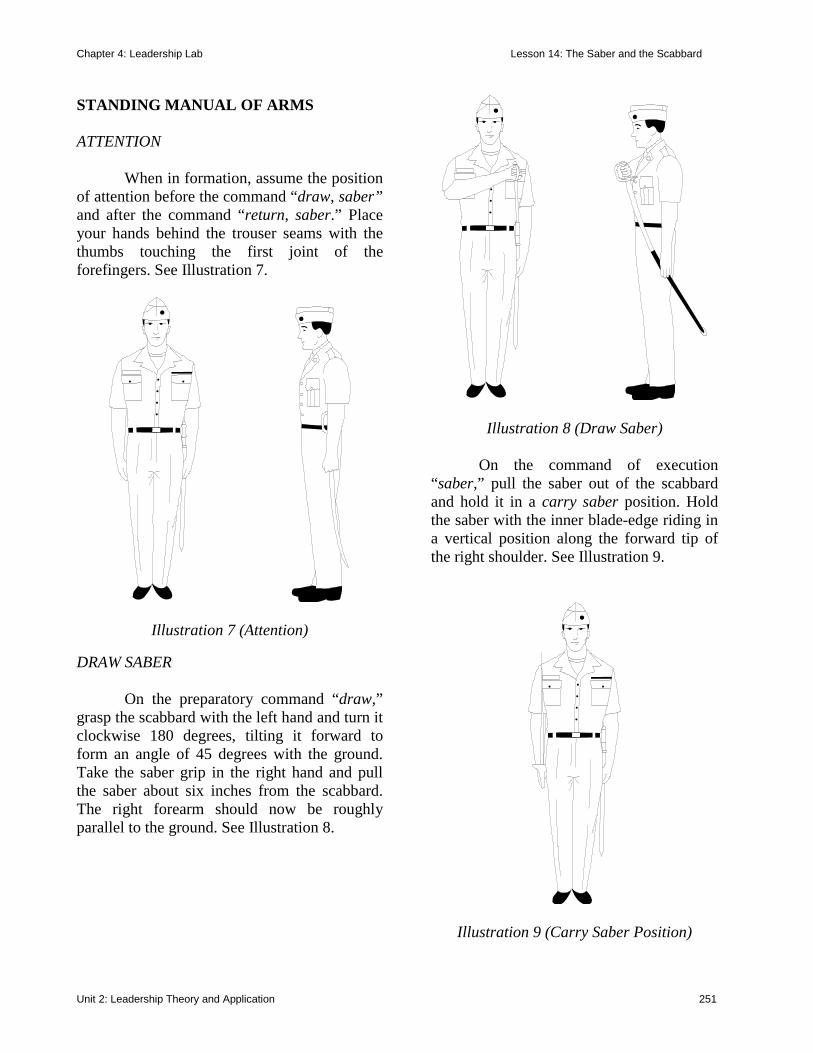
Chapter 4: Leadership Lab Lesson 14: The Saber and the Scabbard
Unit 2: Leadership Theory and Application 251
STANDING MANUAL OF ARMS ATTENTION When in formation, assume the position of attention before the command “draw, saber” and after the command “return, saber.” Place your hands behind the trouser seams with the thumbs touching the first joint of the forefingers. See Illustration 7.
Illustration 7 (Attention) DRAW SABER On the preparatory command “draw,” grasp the scabbard with the left hand and turn it clockwise 180 degrees, tilting it forward to form an angle of 45 degrees with the ground. Take the saber grip in the right hand and pull the saber about six inches from the scabbard. The right forearm should now be roughly parallel to the ground. See Illustration 8.
Illustration 8 (Draw Saber) On the command of execution “saber,” pull the saber out of the scabbard and hold it in a carry saber position. Hold the saber with the inner blade-edge riding in a vertical position along the forward tip of the right shoulder. See Illustration 9.
Illustration 9 (Carry Saber Position)
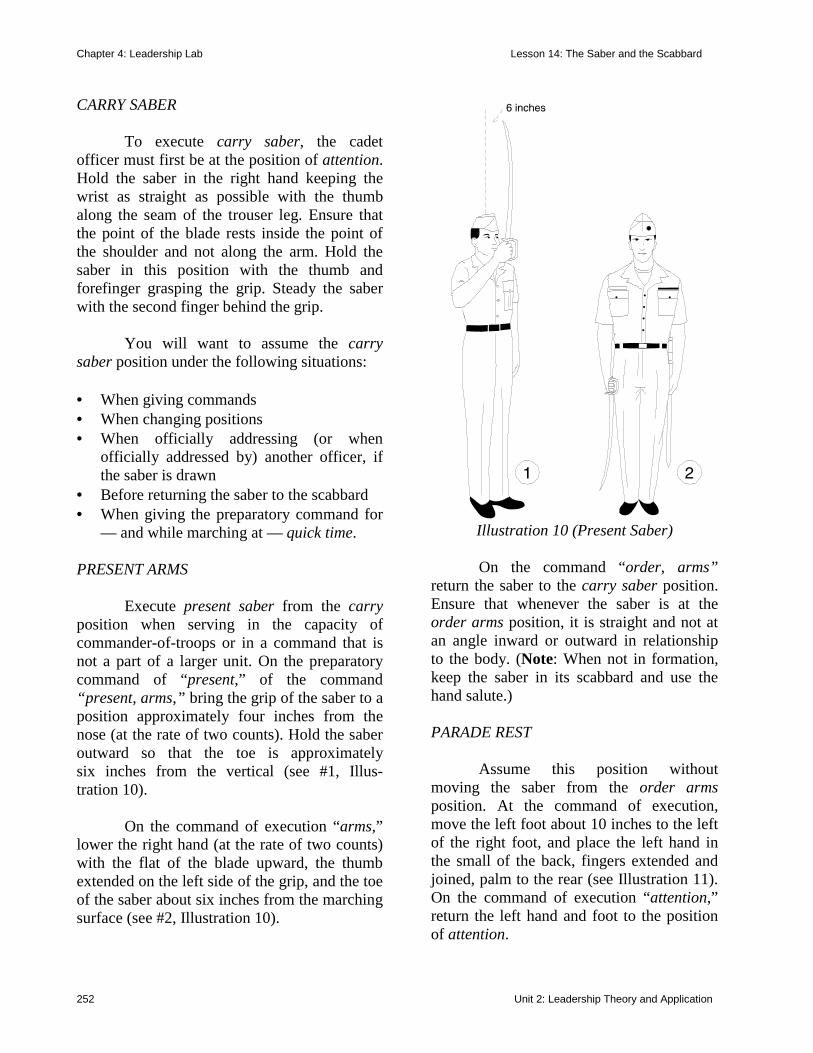
Chapter 4: Leadership Lab Lesson 14: The Saber and the Scabbard
252 Unit 2: Leadership Theory and Application
CARRY SABER To execute carry saber, the cadet officer must first be at the position of attention. Hold the saber in the right hand keeping the wrist as straight as possible with the thumb along the seam of the trouser leg. Ensure that the point of the blade rests inside the point of the shoulder and not along the arm. Hold the saber in this position with the thumb and forefinger grasping the grip. Steady the saber with the second finger behind the grip. You will want to assume the carry saber position under the following situations: • When giving commands • When changing positions • When officially addressing (or when
officially addressed by) another officer, if the saber is drawn
• Before returning the saber to the scabbard • When giving the preparatory command for
— and while marching at — quick time. PRESENT ARMS Execute present saber from the carry position when serving in the capacity of commander-of-troops or in a command that is not a part of a larger unit. On the preparatory command of “present,” of the command “present, arms,” bring the grip of the saber to a position approximately four inches from the nose (at the rate of two counts). Hold the saber outward so that the toe is approximately six inches from the vertical (see #1, Illus-tration 10). On the command of execution “arms,” lower the right hand (at the rate of two counts) with the flat of the blade upward, the thumb extended on the left side of the grip, and the toe of the saber about six inches from the marching surface (see #2, Illustration 10).
Illustration 10 (Present Saber)
On the command “order, arms” return the saber to the carry saber position. Ensure that whenever the saber is at the order arms position, it is straight and not at an angle inward or outward in relationship to the body. (Note: When not in formation, keep the saber in its scabbard and use the hand salute.) PARADE REST Assume this position without moving the saber from the order arms position. At the command of execution, move the left foot about 10 inches to the left of the right foot, and place the left hand in the small of the back, fingers extended and joined, palm to the rear (see Illustration 11). On the command of execution “attention,” return the left hand and foot to the position of attention.
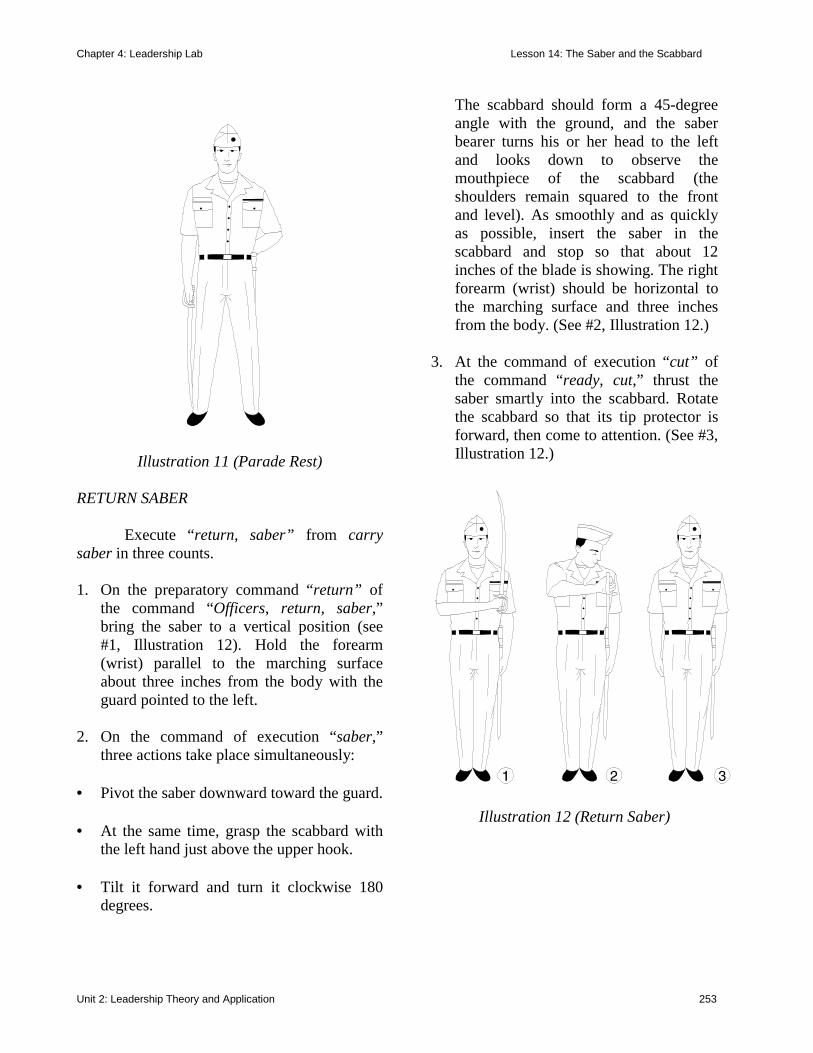
Chapter 4: Leadership Lab Lesson 14: The Saber and the Scabbard
Unit 2: Leadership Theory and Application 253
Illustration 11 (Parade Rest) RETURN SABER Execute “return, saber” from carry saber in three counts. 1. On the preparatory command “return” of
the command “Officers, return, saber,” bring the saber to a vertical position (see #1, Illustration 12). Hold the forearm (wrist) parallel to the marching surface about three inches from the body with the guard pointed to the left.
2. On the command of execution “saber,”
three actions take place simultaneously: • Pivot the saber downward toward the guard. • At the same time, grasp the scabbard with
the left hand just above the upper hook. • Tilt it forward and turn it clockwise 180
degrees.
The scabbard should form a 45-degree angle with the ground, and the saber bearer turns his or her head to the left and looks down to observe the mouthpiece of the scabbard (the shoulders remain squared to the front and level). As smoothly and as quickly as possible, insert the saber in the scabbard and stop so that about 12 inches of the blade is showing. The right forearm (wrist) should be horizontal to the marching surface and three inches from the body. (See #2, Illustration 12.)
3. At the command of execution “cut” of
the command “ready, cut,” thrust the saber smartly into the scabbard. Rotate the scabbard so that its tip protector is forward, then come to attention. (See #3, Illustration 12.)
Illustration 12 (Return Saber)
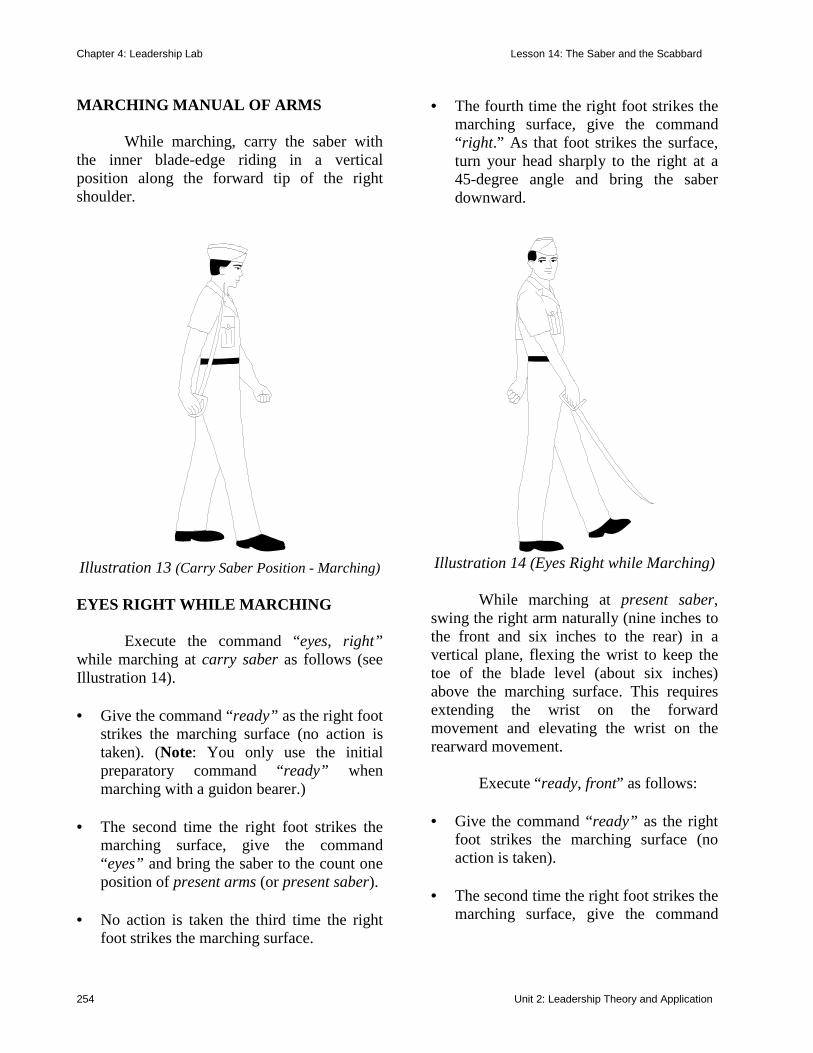
Chapter 4: Leadership Lab Lesson 14: The Saber and the Scabbard
254 Unit 2: Leadership Theory and Application
MARCHING MANUAL OF ARMS While marching, carry the saber with the inner blade-edge riding in a vertical position along the forward tip of the right shoulder.
Illustration 13 (Carry Saber Position - Marching)
EYES RIGHT WHILE MARCHING Execute the command “eyes, right” while marching at carry saber as follows (see Illustration 14). • Give the command “ready” as the right foot
strikes the marching surface (no action is taken). (Note: You only use the initial preparatory command “ready” when marching with a guidon bearer.)
• The second time the right foot strikes the
marching surface, give the command “eyes” and bring the saber to the count one position of present arms (or present saber).
• No action is taken the third time the right
foot strikes the marching surface.
• The fourth time the right foot strikes the marching surface, give the command “right.” As that foot strikes the surface, turn your head sharply to the right at a 45-degree angle and bring the saber downward.
Illustration 14 (Eyes Right while Marching) While marching at present saber, swing the right arm naturally (nine inches to the front and six inches to the rear) in a vertical plane, flexing the wrist to keep the toe of the blade level (about six inches) above the marching surface. This requires extending the wrist on the forward movement and elevating the wrist on the rearward movement. Execute “ready, front” as follows: • Give the command “ready” as the right
foot strikes the marching surface (no action is taken).
• The second time the right foot strikes the
marching surface, give the command
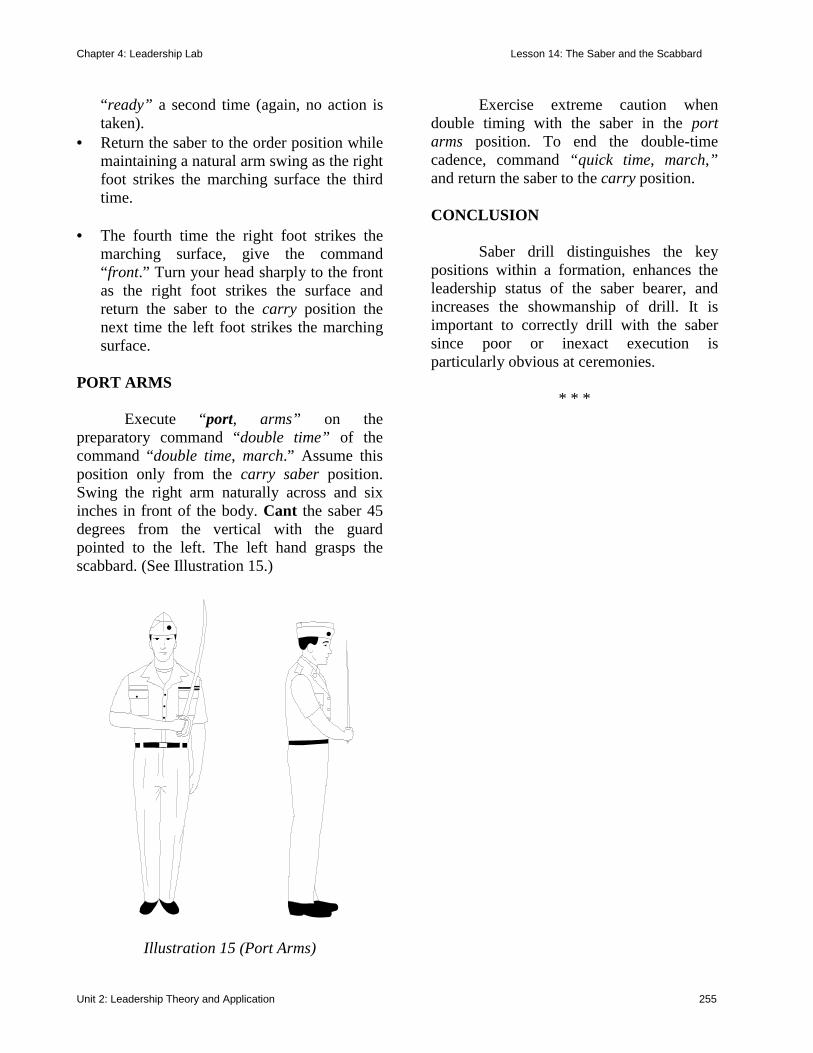
Chapter 4: Leadership Lab Lesson 14: The Saber and the Scabbard
Unit 2: Leadership Theory and Application 255
“ready” a second time (again, no action is taken).
• Return the saber to the order position while maintaining a natural arm swing as the right foot strikes the marching surface the third time.
• The fourth time the right foot strikes the
marching surface, give the command “front.” Turn your head sharply to the front as the right foot strikes the surface and return the saber to the carry position the next time the left foot strikes the marching surface.
PORT ARMS Execute “port, arms” on the preparatory command “double time” of the command “double time, march.” Assume this position only from the carry saber position. Swing the right arm naturally across and six inches in front of the body. Cant the saber 45 degrees from the vertical with the guard pointed to the left. The left hand grasps the scabbard. (See Illustration 15.)
Illustration 15 (Port Arms)
Exercise extreme caution when double timing with the saber in the port arms position. To end the double-time cadence, command “quick time, march,” and return the saber to the carry position. CONCLUSION Saber drill distinguishes the key positions within a formation, enhances the leadership status of the saber bearer, and increases the showmanship of drill. It is important to correctly drill with the saber since poor or inexact execution is particularly obvious at ceremonies.
* * *
Unit 2: Leadership Theory and Application 256
GLOSSARY A acknowledgment Recognition of someone’s authority; a response in return for something done. actions (1) Behavior or conduct; (2) The state or process of acting or doing something. agenda A list or outline of things to be considered or done. alleviate To partially remove or correct. allocate To designate for a specific purpose or to particular persons or things; to set aside or earmark; to distribute according to a plan. approach To draw closer to. arc Anything shaped like a curve, bow, or arch; a curved line. assessing To determine the rate or amount of (as a tax). assessment The action or an instance of assessing. attendee A person who is present on a given occasion or at a given place. attention (1) A military position in which a person stands erect, with arms at sides, heels together, and eyes straight ahead; (2) Position of readiness to execute other movements; (3) A command to take that position. attributes A quality or characteristic (such as a belief, value, ethic, character trait, knowledge, or skill) that belongs to a person or thing; a distinctive personal feature.
B balance A counterbalancing weight, force, or influence. barrel The discharging tube of a gun. base The bottom of something considered as its support. behavior The manner of conducting oneself. beliefs A personal truth; mental acceptance or conviction of particular truths of someone or something. bias(-es) A mental leaning; partiality, pre-judice, bent. biological needs A mental leaning; partiality, prejudice, bent. bolt The mechanism that contains the firing pin, which inserts the round and extracts the cartridge from the chamber. When closed, the bolt locks the rifle so that all energy from a fired round is directed through the barrel. When open in the forward position, there is free access to the chamber area of the rifle. bolt handle The part of the bolt that is grasped for opening and closing the chamber. bribery The act of giving or offering to, or accepting money, property, or a favor from someone in a position of trust to persuade or influence that person to act dishonestly. butt The thicker, larger end of the rifle. C cadence (1) The uniform rhythm in which a movement is executed, or the number of steps or counts per minute at which a movement is

Glossary
Unit 2: Leadership Theory and Application 257
executed; (2) A uniform and rhythmic flow of words. cant To tilt to one side; to slant. censure An opinion or judgment that crit-icizes or condemns sternly. chamber The rear portion of the barrel of a firearm into which a cartridge or shell is inserted. close interval The lateral space between people, measured from right to left by placing the heel of the left hand on the hip (even with the top of the belt line, fingers and thumb joined and extended downward) with the elbow in line with the body and touching the right arm of the person to the left. cocking piece The bolt-hammer assembly that positions the firearm for firing. coercion The act, process, or power of forcing someone to act or think in a given manner, such as by using force or threats as a form of control. coercive power The act, process, or power of forcing someone to act or think in a given manner, such as by using force or threats as a form of control. cohesive Bonding; capable of being logically connected or related as in principles, relationships, or interests. colloquialisms A local or regional dialect expressions. column A formation in which people or elements are arranged one behind the other. command of execution The part of a drill command that tells when the movement is to be executed (carried out).
command voice A properly given command should be understood by everyone in the unit. . communication The exchange of any kind of information (thoughts, messages, etc.) from one person or place to another, especially by speaking or writing. complement That which completes or brings to perfection. conceptual skills To do with basic principles. conclude To bring to an end especially in a particular way or with a particular action. conjecture To draw a conclusion based on inconclusive evidence. constructive criticism A comment that is meant to improve or help. contingency (-ies). An event that may occur but that is not likely or intended; a possible, unforeseen, or accidental occurrence that must be prepared for, as a future emergency. convictions A strong persuasion or belief. cooperate To work together toward a common end or purpose. coordinating staff Principal staff assistants to the commander (e.g., S-1 through S-4). counseling Professional guidance of the individual by utilizing psychological methods especially in collecting case history data, using various techniques of the personal interview, and testing interests and aptitudes. course of action A possible plan open to individuals or commanders that will accomplish their mission of successful; it is normally expressed in terms of “what,” “when,” “where,” “how,” and “why.”
Unit 2: Leadership Theory and Application 258
cultivate To work together toward a common end or purpose. cultural diversity The presence of multiple and different cultural groups and their behaviors within an organization or institution. culture The concepts, habits, skills, arts, instruments, institutions, etc. of a given people in a given period or civilization. D decodes To convert (as a coded message) into intelligible form. dedication (1) Loyalty to a cause, ideal, or system; (2) To commit oneself to a particular course of thought or action. defensive Devoted to resisting or preventing aggression or attack. delegating To entrust to another. development The act, process, or result of developing. developmental Designed to assist growth or bring about improvement (as of a skill). dilemma An argument presenting two or more equally conclusive alternatives against an opponent. direction An explicit instruction. discipline Orderly, obedient, or restrained conduct. discrimination The actions or practices (open or hidden, direct or indirect, intentional or unintentional) carried out by members of dominant groups, or their representatives, that
have a differential and harmful impact on members of subordinates groups. diversified To produce variety. doctrine (1) A principle (or creed of principles) relating to a specific belief, subject, theory, or branch of knowledge; (2) The fundamental policy or standard for a principle or set of principles on a specific subject, theory, or branch of knowledge; (3) Something that is taught. double interval The lateral space between people, measured from right to left by raising both arms shoulder-high with the fingers extended and joined (palms down) so that the fingertips touch the fingertips of the people to the left and right. double time To march in the cadence of 180 steps or counts per minute with a 30-inch step. drill The execution of certain movements by which individuals and/or units are moved in a uniform manner from one formation to another or from one place to another. Movements are executed in unison and with precision. dysfunctions Impaired or abnormal functioning. E echelon A group of individuals at a particular level or grade in an organization. ego The self especially as contrasted with another self or the world. empathy The action of understanding, being aware of, being sensitive to, and vicariously experiencing the feelings, thoughts, and experience of another of either the past or
Glossary
Unit 2: Leadership Theory and Application 259
present without having the feelings, thoughts, and experience fully communicated in an objectively explicit manner. en route On or along the way. encodes To convert (as information) from one system of communication into another. esteem The (high) regard in which one is held. ethics Rules, principles, or standards that guide individuals or groups to do the moral or right thing. In accordance with accepted prin-ciples of right and wrong. ethnicity Ethnic quality or affiliation. evaluation To determine the significance, worth, or condition of usually by careful appraisal and study. executing To carry out fully : put completely into effect. expert power Influence based on special skills or knowledge F facilitate To make easier. favoritism The showing of special favor. feedback The return or a response to information, as in the evaluation of a communication. file A column that has a front of one person (or element). flank The right or left side of any formation as seen by a person (or element) within that formation.
flexibility Responsive to change; adaptable; capable of variation or modification. followership Accepting the guidance or lead-ership of another; the capacity or willingness to follow a leader. formations The arrangement of people or elements of a unit in a prescribed manner. G Gantt chart The Gantt chart is the standard format for displaying a schedule graphically. It consists of a horizontal bar chart with time as the horizontal axis and either resources, jobs, or orders as the vertical axis goal setting. The arrangement of people or elements of a unit in a prescribed manner. gratification A source of satisfaction or pleasure. guard The portion of the hilt (handle) of a saber or sword that protects the hand. guide One that leads or directs another's way. H halt The end of the movement where you assume the position of attention. hand guard The position of the stock group that covers the barrel. human needs Needs that are essential for a person’s existence and for his/her mental and emotional stability. humanistic The revival of classical letters, individualistic and critical spirit, and emphasis on secular concerns characteristic of the Renaissance.
Unit 2: Leadership Theory and Application 260
I impartial Not partial or biased; an absence of prejudice; treating or affecting all equally. implementation To give practical effect to and ensure of actual fulfillment by concrete measures. improving To enhance in value or quality. incentive A stimulus; something that urges one to action. inclusionary The act of including or taking into consideration the majority, if not all, of the whole of something. inflection The rise and fall in the pitch and the tone changes of the voice. influencing Used in leadership to mean getting people to do what you (as leaders) want them to do; it is the means or method to achieve two ends, operating and improving. initiative A quality of seeing what has to be done and taking the necessary action in the absence of clearly defined orders. intangible Something of value, such as good will, that is without form (not real or concrete). interpersonal skills Being, relating to, or involving relations between persons. interval (1) A space (for example of time, counts, or steps) between actions; (2) The difference in pitch between two tones on a given scale; (3) The lateral space between personnel in a formation, measured from right to left with close, double, or normal spacing.
intimacy Marked by extremely strong (close) ties of friendship or acquaintance, often developed through long, private association. introspection An examination of one's own thoughts and feelings. intuitions Instinctive knowledge or percep-tion without conscious reasoning or reference to a rational process; sharp insight. K keeper A device that can hold the sling tight or that can be opened to loosen the sling on a weapon. L leadership The ability to influence, lead, or guide others so as to accomplish a mission in the manner desired. leadership style The manner in which they carry out those responsibilities and the way they interact with others is their style of leadership. legitimate power The power a person receives as a result of his or her position in the formal hierarchy of an organization. liaison officers One that establishes and maintains liaison. line A formation in which people or elements are side by side (or abreast of each other). lower band The device that secures the hand guard at the stock. M management The act, manner, or practice of managing, directing, or controlling the means (resources) to accomplish an end.
Glossary
Unit 2: Leadership Theory and Application 261
managerial Of, or relating to, the concepts of management. mandatory Required as if by an authoritative command or instruction; obligatory. maneuver To perform a movement in military tactics (or in drill) normally to secure an advantage. mark time To march in place, often given as a drill command. mass formation A drill formation where the elements of a company-size or larger unit assemble, or are abreast of each other, at close interval and in a column. mentee One who receives advice, especially officially or professionally. minority The smaller in number of two groups constituting a whole. motivation Provide a need or a purpose which causes a person to want to do something. multicultural(-ism) Of, relating to, reflect-ing, or adapted to diverse cultures. muzzle The front end of a firearm’s barrel where the bullet exits. N negotiation The action or process of negotiat-ing or being negotiated. neutral Not taking either side in a conflict. non-judgmental (1) A person who does not form an opinion of another based on stereotypes, rumors, etc.; (2) An act whereby someone or something is not subject to
judgment by an evaluation (formal or informal) process. normal interval The lateral space between people, measured from right to left by holding the left arm out at shoulder height, fingers and thumb extended and joined, with the tip of the middle finger touching the right shoulder of the person to the left. norms A principle of right action binding upon members of a group and serving to guide, control, or regulate proper and acceptable behavior; a pattern or trait taken to be typical in the behavior of a social group. O objectively Expressing or dealing with actual facts or conditions of someone or something without distortion by personal feelings, preju-dices, or interpretations. observation an act of recognizing and noting a fact or occurrence often involving measurement with instruments. operating Used in leadership to mean actions that leaders do to accomplish the short-term mission and to get the job done on time and to standard. P participating To take part in or share with others in some activity, enterprise, etc. personal staff Staff personnel who work under the immediate direction and control of the commander. philosophy Discipline comprising as its core logic, aesthetics, ethics, metaphysics, and epistemology.
Unit 2: Leadership Theory and Application 262
pistol belt A belt designed to carry a holster, pistol, ammunition pouches, and/or other field accessories as prescribed by local command-ers for use in field training; it may also be worn for ceremonial occasions (or training purposes) without accessories as deemed appropriate by local policy. pivot The point at which a person turns while marching. planning The ability to formulate an action for the accomplishment or attainment of an explicit purpose. port To carry a weapon diagonally across the body, with the muzzle ( or blade ) near the left shoulder. port arms A preparatory command that alerts personnel to bring the weapon to then position. positional bargaining where parties try to improve their own positions/satisfy their own needs without regard for the interests and needs of others. post (2 meanings) (1) The place at which a soldier is stationed; especially : a sentry's beat or station; (2) To put up (as bond). precision Being precise, accurate, or exact. prejudice(-ial) (1) A feeling, favorable or unfavorable, toward a person, thing, or group that may or may not be based on actual experiences; (2) A preconceived judgment or opinion oftentimes adverse and formed without just grounds or knowledge; (3) An irrational attitude of hostility directed against an individual, group, or race. prejudices An adverse opinion or leaning formed without just grounds or before sufficient knowledge.
preparation The action or process of making something ready for use or service or of getting ready for some occasion, test, or duty. preparatory command The part of a drill command that states the movement to be carried out and mentally prepares personnel for its execution. procedure A series of steps followed in a regular definite order. procrastinate To put off intentionally the doing of something that should be done. professionalism (1) The ability to do and to take pride in doing a job well; (2) The conduct, aims, or qualities that characterize a profession or professional person. progression A series (of things or events) that reveals a definite pattern of advance, such as from one point to a higher point. project management The process of planning, organizing, staffing, directing and controlling the production of a system. purpose Something set up as an object or end to be attained. Q quick time To march in the cadence of 120 steps or counts per minute with a 30-inch step. R rank (1) The designation of an official position (such as Sergeant, or Captain); (2) A line formation that is one element in depth. recrimination A retaliatory accusation.
Glossary
Unit 2: Leadership Theory and Application 263
referent power Influence based on posses-sion by an individual or desirable resources of personal traits. relinquishing To give over possession or control. resources (1) Something (materials, time, people, money, etc.) that can be turned to or an available supply that can be drawn from to help support or deal with a situation; (2) Source of strength, ability, or support. respective Particular (of or associated with a person, group, thing, or category). responsibilities The condition of being legally or ethically accountable for the care or welfare of others; a duty or obligation involving personal accountability to act without guidance or superior authority; being the source or cause of things; answerable for one’s own behavior; being reliable. rest A position where you remain standing with your right foot in place; in certain situations, you may move or talk in this position unless otherwise directed. reward power Ability to deliver something of value to others. rhythmic A regular or orderly repetition of sounds or movements; steady; recurring with measured regularity. S saber A regular or orderly repetition of sounds or movements; steady; recurring with measured regularity. scabbard A sheath for a saber or sword, or other similar arm.
self-awareness An awareness of one’s own personality or individuality. self-discipline Training, regulating, or controlling oneself (or one’s conduct, personality, performance, etc.) for the sake of personal improvement. self-evaluation To, with, for, or toward oneself. or itself. selfless Having no concern for self; unselfish. selfless service A willingness to put the welfare of others first. To sacrifice, if need be, even to the point of giving up one’s own life, in service to the Nation. self-motivation Energetic and ambitious, and so able to make plans and get things done without being directed by others. self-regulation Regulating its own affairs rather than being regulated by an outside organization or by law. self-reliance The ability to make your own decisions confidently and independently sight A device that aids the eye in aiming or in finding the direction of an object sling A large triangular bandage hung around the neck to support an arm or hand. sling swivel The device where the sling is attached to the weapon. snap An immediate, sharp, precise response to a drill command. socioeconomic Involving a combination of social and economic factors. span of control The number of immediate subordinates one commander of leader can
Unit 2: Leadership Theory and Application 264
effectively control, supervise, or direct; maximum and minimum limits vary with the conditions under which the unit is designed to operate and the complexity of functions performed. special staff Staff officers who assist the commander in professional, technical, and other functional areas of interest in the command. stacking swivel A metallic link-type device, located at the end of the hand guard, used to secure weapons during stack-arms proce-dures. staff study A detailed report that describes an action or event and how it can be accomplished. status A position or rank in relation to others, especially in a social standing; a relative standing in a hierarchy of prestige, especially one of high prestige. steps The prescribed distance measured from one heel to the other heel of a marching person. stereotype (1) An oversimplified opinion, belief, or viewpoint; (2) A person, group, event, or issue considered to typify or conform to an unvarying pattern or manner; lacking any individually; (3) A standardized mental picture that is held in common by members of a group and that represents an oversimplified opinion, affective attitude, or uncritical judgment. stock A supporting framework or structure. supplementary command An oral order given by a subordinate leader that reinforces and complements a higher order to ensure proper understanding and execution of a movement.
support To uphold or defend as valid or right. T tangible Capable of being perceived especially by the sense of touch. teamwork The cooperative effort or action on the part of a number of people working together, especially to achieve a common goal. technical skills A learned power of doing technical tasks competently. tenets A principle, belief, or doctrine generally held to be true. tone (1) A sound of distinct pitch, loudness, vibration, quality, and/or duration; the particular or relative pitch of a word or phrase; (2) A degree of tension or firmness, as of muscle. trail arms A position (and drill command to assume that position) where a weapon is carried about three inches off the ground and inclined forward at an angle of 30 degrees. transference an act, process, or instance of transferring. transmitted To send or convey from one person or place to another. trigger guard The protective piece over the trigger. tunnel vision Extreme narrowness of viewpoint. U unethical Not doing the moral or right thing (Normally a result of pressures or temptations from self-interest, peers, subordinates, or
Glossary
Unit 2: Leadership Theory and Application 265
seniors — to violate established rules or standards of conduct). unison In complete or perfect agreement; at the same time. unity of command The principle that in every effective military unit there must be only one commander who has the necessary authority of command and is responsible for all that the unit does or fails to do. upper band The device that secures the hand guard at the muzzle. V Values A principle, standard, or quality considered worthwhile or desirable in a person or group; an ideal. visualize To make visible.
Copyright © 2022 FDOKUMEN