
INTRODUCTION TO JAVA Process of building and running ...
211
Java Programming Language 1 | Page Code Editor Java Source Code (.java) javac Java Class File Java javadoc HTML files javah Header Files jdb 1. INTRODUCTION TO JAVA Java was developed by team of programmers at sun micro system in 1991. It took 18 months to develop the first working version of java. Java was initially called as “Oak”, but it was renamed “JAVA” in 1995. The original goal was to develop a language that could be used to write software for different platform supports. Java’s “Write once, run anywhere” philosophy provides the ability to write a program is as beneficial to be transferred over the internet. The java programming language is a genera- purpose, concurrent, class-based, robust, secure (no pointer concept as in c, c++), safe, object-oriented programming language. The java programming language is strongly typed language. Java has two lives, one as a stand alone computer language for general purpose programming (known as Applications) and other as a supporting language for Internet programming (Known as Applet). Process of building and running Java Application Program: . Java Virtual Machine Que: Explain Java Virtual Machine. Java Program Output
-
Upload
khangminh22 -
Category
Documents
-
view
2 -
download
0
Transcript of INTRODUCTION TO JAVA Process of building and running ...

Java Programming Language
1 | P a g e
Code Editor
Java Source Code
(.java)
javac
Java Class File
Java
javadoc HTML files
javah Header Files
jdb
1. INTRODUCTION TO JAVA
Java was developed by team of programmers at sun micro system in 1991. It took 18 months to develop the first working version of java. Java was initially called as “Oak”, but it was
renamed “JAVA” in 1995. The original goal was to develop a language that could be used to write software for different platform
supports. Java’s “Write once, run anywhere” philosophy provides the ability to write a program is as beneficial to be
transferred over the internet. The java programming language is a genera- purpose, concurrent, class-based, robust, secure (no pointer
concept as in c, c++), safe, object-oriented programming language. The java programming language is strongly typed language. Java has two lives, one as a stand alone computer language for general purpose programming (known as
Applications) and other as a supporting language for Internet programming (Known as Applet).
Process of building and running Java Application Program:
.
Java Virtual Machine Que: Explain Java Virtual Machine.
Java Program
Output

Java Programming Language
2 | P a g e
All language compilers translate source code into machine code for specific computer.
Java compiler produces an intermediate code known as bytecode for machine. This machine is called “Java Virtual Machine (JVM)” and it exits only inside the computer’s memory. It is simulator of computer within the computer and does all major functions of a real computer.
Process of Compilation:
Process of converting byte code into machine code
Just In Time Compilers (JIT): The java virtual machine includes an optional “Just In Time (JIT)” compiler. The JIT dynamically byte code into executable code, takes bytecode and compiles them into native code
for the machine, Compiles programs on a methods by method basis just before they are called, JIT is
faster than the Java Virtual Machine.
The Java Runtime Environment (JRE): Que: Explain Java Environment
Source Code (.java) Compiler (javac) Imaginary computers instruction
set (.class)
Machine Language Code
Target Machine
Java Virtual Machine
Java Program Java Compiler Virtual Machine
ByteCode Java Interpreter Machine Code

Java Programming Language
3 | P a g e
The Java Runtime Environment (JRE) consists of the JVM and the program on the other. The java runtime
environment runs code compiled for the JVM by:
Network
Loading the .class files
Verifying byte code
Executing the code
Java’s Magic: The Bytecode Que: What is bytecode? How Java provides platform Independency.
The key that allows Java to solve both the security and the portability problems just described is that the
output of a Java compiler is not executable code. Rather, it is bytecode. Bytecode is a highly optimized set of
instructions designed to be executed by the Java run-time system, which is called the Java Virtual Machine (JVM). That is, in its standard form, the JVM is an interpreter for bytecode. This may come as a bit of a
surprise. As you know, C++ is compiled to executable code. In fact, most modern languages are designed to be
compiled, not interpreted—mostly because of performance concerns. However, the fact that a Java program is
executed by the JVM helps solves the major problems associated with downloading programs over the Internet.
Here is why. The use of bytecode enables the Java run-time system to execute programs much faster than you
might expect.
Java Program Structure: Que: Explain the structure of JAVA program with example.
Que: Describe the Structure of Java program by example.
Que: Describe the structure of a typical Java program.
Que: Write and explain the basic structure of Java programming.
A Java program may contain many classes of which only one class defines a main method. Classes contain data
members and methods that operate on the data members of the class. Methods may contain data type
declarations and executable statements. To write a java program, We first define classes and then put them
together. A Java program may contain one or more sections as shown in below figure.
(Source Code)
(Byte Code)
(Byte Code)
Compile Time
.class
.java
Class Loader
Byte Code
Verifier
Interpreter JIT code
Generator
Runtime
Java Virtual Machine
Run Time
HARDWARE

Java Programming Language
4 | P a g e
Documentation Section Suggested
Package Statement Optional
Import Statements Optional
Interface Statements Optional
Class Definitions Optional
Main Method Class
{
Main Method Definition
}
Essential
Documentation Section:
The documentation section comprises a set of comments lines giving the name of the program, the author and
other details, which the programmer would like to refer to at a later stage.
This would greatly help in maintaining the program. And it is full filled by use of comments.
Package Statement:
The first statement allowed in a Java file is a Package statement. The statement declares a package name and
informs the compiler that the classes defined here belong to this package.
Example:
package student;
The package statement is optional. That is, our classes do not have to be parrot of package.
Import Statement:
The next thing after the package is import statement. This is similar to the #include statement in c.
import student.test;
This statement instructs the interpreter to load the test class contained in the package student. Using import
statements, we ca have access to classes that are part of other named package.
Interface statement:

Java Programming Language
5 | P a g e
An interface is like a class but includes a group of method declarations. This is also an optional section and is
used only when we wish to implements the multiple inheritance features in the program. Interface is a new
concept in Java.
Class Definition:
A Java program may contain multiple class definitions. Classes are the primary and essential elements of a Java
program. These classes are used to map the objects of real-world problems. The number of classes used
depends on the complexity of the problem.
Main Method Class:
Since every Java stand-alone program requires a main method as its starting point, this class is the essential
part of a Java program. A simple Java program may contain only this part. The main method creates objects of
various classes and establishes communication between them. On reaching the end of main, the program
terminates and the control passes back to the operating system.
A first java application program
class test
{
public static void main(String args[]) //declaration of main method
{
System.out.println(“Wel come to the world of JAVA”); //output function of java
}
}
Save this program as test.java
In java file name should be the name of class which contains the main method. Here class test contains the main
method so, file name is test.java
Compile the program with command: javac test.java (javac stands for Java Compiler, javac is available at the
bin directory of Java Development Kit)
So, if you have saved the program in C:\javatest directory then follow these steps to compile and execute the
above program.
Run the command prompt and change the directory to:
C:\Program Files\Java\jdk1.6.0_20\bin
Then compile the file with javac command
C:\Program Files\Java\jdk1.6.0_20\bin\javac C:\javatest\test.java
The above javac command creates a test.class file, which is out bytecode.

Java Programming Language
6 | P a g e
Now convert bytecode into machine code, use following command
C:\Program Files\Java\jdk1.6.0_20\bin\java C:\javatest\test
The output will be: Wel come to the world of JAVA
Explanation of above program
Java is a true object oriented language and therefore, everything must be placed inside a class.
“test” is a Java identifier that specifies the name of the class to be defined .
Que: Explain the task of the main method in java program.
public static void main(String args[]) defines a method named main(). This is similar to the main() function of
C/C++. This is the starting point of program.
Que: Justify main() is a static, public method in an application program.
Public: This is keyword declare the main method as unprotected and therefore making it accessible to all other
classes.
Static: This keyword declare the main method as one that belongs to the entire class and not a part of any
objects of the class. The main must be declared as static since the interpreter uses this method before any
objects are created.
The line System.out.println(“Wel come to the world of JAVA”) is similar to the printf() of C or Cout constructs
of C++. The println method is a member of out object, which is a static member of System class.
Different between C and Java
C includes unique statement keywords sizeof and
typeof
C supports data type like struct and union
C defines the type modifiers like auto, extern,
register, singned and unsigned
C support an explicit pointer type.
C supports preprocessor and therefore we can use
#define, #include, and #ifdef statements.
C does not support instanceof and >>>
C does not have features required for object-oriented
Java does not include the C unique statement
keywords sizeof and typeof
Java does not contain the data types struct and union
Java does not defines the type modifiers like auto,
extern, register, singned and unsigned
Java does not support an explicit pointer type.
Java does not have a preprocessor and therefore we
can not use #define, #include, and #ifdef
statements.
Java adds new operators such as instanceof and >>>
Java adds many features required for object-oriented

Java Programming Language
7 | P a g e
programming programming
Different between C++ and Java Que: How Java differs from C++? Explain in detail.
C++ support operator overloading Java does not supports operator overloading
C++ have templates classes Java does not have template classes as in C++
C++ supports multiple inheritance of classes Java does not support multiple inheritance of
classes. This is accomplished using a new feature
called “interface” .
C++ supports global variables. Java does not support global variables. Every
variable and method is declared within a class and
forms part of that class.
C++ supports pointer Java does not use pointers.
C++ support destructors. Java has replaced the destructor function with a
finalize() function
C++ has header files There are no header files in Java.
Different between Application and Applet Que: What is different between Applet and Application?
Que: State the difference between an applet and an application.
Que: Give the different between Applet and Application.
Que: Write the Major difference between “application” and Applet.
Application can be directly executed by a java.exe tool
Java interpreters runs the application
Application requires main() method for initiating the
execution of the code.
Application can read from or write to the files in the
local computer
Application can run any program from the local
computer
Applet require web browser for their execution. Their
execution is embedded within web pages.
Applet viewer can be used to run an applet
Applets do not use the main() method for initiating the
execution of the code
Applets cannot read from or write to the files in the
local computer
Applets cannot run any program form the local
computer.
1.1 Advantages of Java
Through inheritance, we can eliminates redundant code and extend the use of existing classes. The principle of data hiding helps the programmer to build secure programs that can not be attacked by
code in other parts of the program.

Java Programming Language
8 | P a g e
It is also possible to have multiple objects to coexist without interference. Object oriented system can be easily upgraded from small to large system. Software complexity can be easily managed. Message passing techniques for communicating between objects make the interface description with
external systems much simpler.
Java and Internet Que: Why Java is important to the internet?
Java is strongly associated with the Internet because the first application written in Java was HotJava, a
Web browser to run applets on internet. Internet user can use Java to create applet programs and run them locally using a “Java enabled browser”
such as HotJava. They can also use a java enabled browser to download an applet from a remote computer and run it on his
local computer. In fact, java applets have made the internet a true extension of the storage system of the local computer.
Internet users can also setup their websites containing java applets that could be used buy other remote
users of Internet.
Java and WWW Que: What is remote Applet?
Before Java, WWW was limited to the display of text and motionless images.
The incorporation of Java into web pages has made it capable of supporting animation, graphics, games
and wide range of special effects.
With the support of Java the web has becomes more interactive and dynamic and we can run a java program
on someone else computer across Internet.
Java communicates with a webpage through a special tag called <APPLET>. Figure illustrates this process. User’s Computer Remote Computer
HTML
Document
Request
[Remote Computer]
[User’s Computer]
Output Web Serve
Bytecode
Java Web Browser
Applet Source Code
Bytecode
HTML Document
Applet Tag

Java Programming Language
9 | P a g e
1. The user sends a request for an HTML document to the remote computer’s Web server. The Web
server is a program that accepts a request, processes the request, and sends the required documents.
2. The HTML document is returned to the user’s browser. The document contains the APPLET tag, which
identifies the applet.
3. The corresponding applet bytecode is transferred to the user’s computer. This bytecode had been
previously created by the Java compiler using the Java source code file for that applet.
4. The Java-enable browser on the user’s computer interprets the bytecodes and provides output.
5. The user may have further interaction with the applet but with no further downloading from the
provider’s Web server. This is because the bytecode contains all the information necessary to
interpreter the applet.
1.2 Features of Java Que: Explain the feature of Java programming language.
Que: Explain the feature of Java.
Que: List various feature of Java.
Compiled and Interpreted:
First, java compiler translates source code into bytecode. Bytecodes are not machine instructions and
therefore, In second stage, Java interpreter generated machine code that can be directly executed by the
machine that is running the Java program
Platform Independent:
Que: Why JAVA is known as a platform neutral language?
Program exists into two forms: source code and object code. Source code is a textual version of the
program that we write using the text editor. The executable form of a program is object code. Object code can
be executed by the computer. Typically object is specific to a particular cpu, Therefore, it can not be executed
on the different machine. Java removes this restriction. Like all computer language java program begins with it
source code. But the difference is what happened when java program is complied.
Instead of producing executable code, the java compiler produces an object file that contains
bytecodes. Bytecode are not for any specific CPU. Installed, they are designed to be interpreted by a
JVM(Java Virtual Machine). Platform independence comes from the fact that the same byte codes be executed
by JVM on any platform.
Portability:
Que: “Write once runs anywhere” Justify it.
Que: Justify the statement with reference to Java programming – “Write once run anywhere”.
The most significant and important difference between Java and other languages is its portability. Java
program can be easily moved from one computer to other. Changes and upgrades in OS, processor and system
resources will not force any change in Java program.
We can download a Java applet from a remote computer onto our local system via Internet and execute
it locally.
USER

Java Programming Language
10 | P a g e
Java ensures portability in two ways.
1. First, Java compiler generates bytecode instructions that can be implemented on any machine.
2. Secondly, the size of primitive data types is machine-independent.
Object-Oriented:
Almost everything in java is an Object. All program code and data reside within the objects and classes.
Java comes with extensive set of classes, arranged in packages that we can use in our program by inheritance.
Robust and Secure:
Que: Explain Why Java is Robust and Secure?
It has strict compile time and run time checking of data. Java incorporates concept of exception
handling which captures series errors and eliminates any risk of crashing system. The absence of pointer in
Java ensures that programs cannot gain access to memory location without prior authorization.
Distributed:
Java is designed as distributed languages for creating applications on networks. Java applications can
open and access remote objects on Internet as easily as they can do with local systems. This enables multiple
programmers at multiple remote locations so collaborate and work together on a single project.
Familiar, Simple and Small:
Java is a small and simple language. Many feature of C and C++ are either redundant or sources of
unreliable code are not part of java. It includes automatic storage management, typically using a garbage
collector. To avoid the safety problems of explicit de-allocation of memory references. Java does not use
pointers, preprocessor header files; go to statements and many others. It also eliminates operator overloading
and multiple inheritance. In fact java is simplified version of C++.
Multithreaded and Interactive:
Multithreaded means handling simple task simultaneously. Java supports multithreaded programs. This
means we need not wait for the application to finish one task before beginning other.
High Performance:
Java performance is impressive for an interpreted language, mainly due to the use of intermediate
bytecode. Java architecture is also designed to reduce overheads during runtime. Furthermore, the
incorporation of multithreading enhances the overall execution speed of Java programs.
Dynamic and Extensible:
Java capable of dynamically linking in new class libraries, methods and objects. Java can also determine
the type of class through an query, making it possible to either dynamically link or abort the program,
depending on the response. Java program supports functions written in other languages such as C and C++.
These functions are called native methods. Native methods are linked dynamically at runtime.
Java Programming Language
11 | P a g e
Comments in Java Que: What is function is comments? Explain single-line, multiline and document comment.
Comments provide better readability of programs. They indicate purpose of your source code so that
you can remember later. All the comments are ignored by compiler means they are not translated into the
bytecode.
There are three types of the Java comments.
Single Line Comments:
This begins with the two character sequence // and include the rest of the characters on the same line.
int count = 10; // count is used as a counter
Multi Line Comments:
It begins with two character sequence /* and ends with the two character sequence */.
/* This is a multiline comments */
This form of comments may also extend over several lines shown here.
/* This is a longer comments
That extends over
Manay lines
*/
Documentation Comment:
It begins with the three character sequence /** and ends with the two character sequence */
/** This is a java
Documentation
Comment
*/
The advantage of documentation comment is that tools can extract them from source files and automatillay
generate documentation for java doc that performs this function.
In java a comment can go any where except in the middle of a keyword or class, methods or variable name.
Important Note:
Comments do not nest.
/* and */ have no special meaning in comments that begin with //.
// has no special meaning in comments that begin with /* or /**.
As a result, the text:
/* this comment /* // /** ends here: */ is a single complete comment.

Java Programming Language
12 | P a g e
Escape Sequences for Character and String Literals: The character and string escape sequences allow for the representation of some non-graphic characters
as well as the single quote, double quote, and backslash characters in character literals and string literals.
Escape Sequence Meaning
\b \u0008
\t \u0009
\n \u000a
\f \u000c
\r \u000d
\” \u0022
\’ \u0027
\\ \u005c
: backspace
: horizontal tab
: linefeed
: form feed
: carriage return
: double quote
: single quote
:backslash
BS
HT
LF
FF
CR
“
‘
\
Unicode:
Programs are written using the Unicode character set. Information about this character set and its
associated character encoding may be fount at http://www.unicode.org
The java platform tracks the Unicode specification as it evolves. The precise version of Unicode used
by a given release is specified in the documentation of the Character.
Versions of the java programming language prior to 1.1 used Unicode version 1.1.5. Upgrades to newer
versions of the Unicode Standard occurred in JDK 1.1.
The Unicode standard was originally designed as a fixed width 16-bit character encoding.
It has since been changed to allow for characters whose representation requires more than 16 bits.
The java programming language represents text in sequences of 16-bit code unit using UTF-16 encoding.
Keywords:
The following character sequences, formed from ASCII letters, are reserved for use as keywords and cannot
be used as identifiers.
abstract continue for new switch
assert default if package synchronized
boolean do goto private this
break double implements protected throw
byte else import public throws
case enum instanceof return transient
catch extends int short try
char final interface static void
class finally long strictfp volatile
const float native super while
1.3 Data types, variables and array

Java Programming Language
13 | P a g e
Que: Describe the various datatypes available in JAVA.
Java Is a Strongly Typed Language
It is important to state at the outset that Java is a strongly typed language. Indeed, part of Java’s
safety and robustness comes from this fact. Let’s see what this means. First, every variable has a type, every
expression has a type, and every type is strictly defined. Second, all assignments, whether explicit or via
parameter passing in method calls, are checked for type compatibility. There are no automatic coercions or
conversions of conflicting types as in some languages. The Java compiler checks all expressions and parameters
to ensure that the types are compatible. Any type mismatches are errors that must be corrected before the
compiler will finish compiling the class.
The Simple Types
Java defines eight simple (or elemental) types of data: byte, short, int, long, char, float, double, and
boolean. These can be put in four groups:
Integers this group includes byte, short, int, and long, which are for whole valued signed numbers.
Floating-point numbers this group includes float and double, which represent numbers with fractional
precision.
Characters this group includes char, which represents symbols in a character set, like letters and numbers.
Boolean this group includes Boolean, which is a special type for representing true/false values.
You can use these types as-is, or to construct arrays or your own class types. Thus, they form the basis
for all other types of data that you can create.
The simple types represent single values—not complex objects. Although Java is otherwise completely
object-oriented, the simple types are not. They are analogous to the simple types found in most other non–
object-oriented languages. The reason for this is efficiency. Making the simple types into objects would have
degraded performance too much.
The simple types are defined to have an explicit range and mathematical behavior. Languages such as C
and C++ allow the size of an integer to vary based upon the dictates of the execution environment. However,
Java is different. Because of Java’s portability requirement, all data types have a strictly defined range. For
example, an int is always 32 bits, regardless of the particular platform. This allows programs to be written that
are guaranteed to run without porting on any machine architecture. While strictly specifying the size of an
integer may cause a small loss of performance in some environments, it is necessary in order to achieve
portability.
Let’s look at each type of data in turn.
Integers
Java defines four integer types: byte, short, int, and long. All of these are signed, positive and negative
values. Java does not support unsigned, positive-only integers.
Name Width Range
long 64 –9,223,372,036,854,775,808 to 9,223,372,036,854,775,807
int 32 –2,147,483,648 to 2,147,483,647
short 16 –32,768 to 32,767

Java Programming Language
14 | P a g e
byte 8 –128 to 127
Let’s look at each type of integer.
byte
The smallest integer type is byte. This is a signed 8-bit type that has a range from –128 to 127.
Variables of type byte are especially useful when you’re working with a stream of data from a network or file.
They are also
useful when you’re working with raw binary data that may not be directly compatible with Java’s other built-in
types.
Byte variables are declared by use of the byte keyword. For example, the following declares two byte variables
called b and c:
byte b, c;
short
short is a signed 16-bit type. It has a range from –32,768 to 32,767. It is probably the least-used Java
type,. This type is mostly applicable to 16-bit computers.
Here are some examples of short variable declarations:
short s;
short t;
int
The most commonly used integer type is int. It is a signed 32-bit type that has a range from –
2,147,483,648 to 2,147,483,647. In addition to other uses, variables of type int are commonly employed to
control loops and to index arrays. Any time you have an integer expression involving bytes, shorts, ints, and
literal numbers, the entire expression is promoted to int before the calculation is done.
The int type is the most versatile and efficient type, and it should be used most of the time when you
want to create a number for counting or indexing arrays or doing integer math. It may seem that using short or
byte will save space, but there is no guarantee that Java won’t promote those types to int internally anyway.
Remember, type determines behavior, not size. (The only exception is arrays, where byte is guaranteed to use
only one byte per array element, short will use two bytes, and int
will use four.)
long
long is a signed 64-bit type and is useful for those occasions where an int type is not large enough to
hold the desired value. The range of a long is quite large. This makes it useful when big, whole numbers are
needed. For example, here is a program that computes the number of miles that light will travel in a specified
number of days.
// Compute distance light travels using long variables.

Java Programming Language
15 | P a g e
class Light
{
public static void main(String args[])
{
int lightspeed;
long days;
long seconds;
long distance;
// approximate speed of light in miles per second
lightspeed = 186000;
days = 1000; // specify number of days here
seconds = days * 24 * 60 * 60; // convert to seconds
distance = lightspeed * seconds; // compute distance
System.out.print("In " + days);
System.out.print(" days light will travel about ");
System.out.println(distance + " miles.");
}
}
This program generates the following output:
In 1000 days light will travel about 16070400000000 miles.
Clearly, the result could not have been held in an int variable.
Floating-Point Types
Floating-point numbers, also known as real numbers, are used when evaluating expressions that require
fractional precision. For example, calculations such as square root, or transcendental such as sine and cosine,
result in a value whose precision requires a floating-point type. There are two kinds of floating-point types,
float and double, which represent single- and double-precision numbers, respectively. Their width and ranges
are shown here:
Name Width in Bits Approximate Range
double 64 4.9e–324 to 1.8e+308
float 32 1.4e−045 to 3.4e+038
Each of these floating-point types is examined next.
float
The type float specifies a single-precision value that uses 32 bits of storage. Single precision is faster
on some processors and takes half as much space as double precision, but will become imprecise when the values
are either very large or very small. Variables of type float are useful when you need a fractional component,
but don’t require a large degree of precision. For example, float can be useful when representing dollars and
cents.

Java Programming Language
16 | P a g e
Here are some example float variable declarations:
float hightemp, lowtemp;
double
Double precision, as denoted by the double keyword, uses 64 bits to store a value. Double precision is
actually faster than single precision on some modern processors that have been optimized for high-speed
mathematical calculations. All transcendental math functions, such as sin( ), cos( ), and sqrt( ), return double
values. When you need to maintain accuracy over many iterative calculations, or are manipulating large-valued
numbers, double is the best choice.
Here is a short program that uses double variables to compute the area of a circle:
// Compute the area of a circle.
class Area
{
public static void main(String args[])
{
double pi, r, a;
r = 10.8; // radius of circle
pi = 3.1416; // pi, approximately
a = pi * r * r; // compute area
System.out.println("Area of circle is " + a);
}
}
Characters
In Java, the data type used to store characters is char. In C/C++, char is an integer type that is 8 bits
wide. This is not the case in Java. Instead, Java uses Unicode to represent characters. Unicode defines a fully
international character set that can represent all of the characters found in all human languages. It is a
unification of dozens of character sets, such as Latin, Greek, Arabic, Cyrillic, Hebrew, Katakana, Hangul, and
many more. For this purpose, it requires 16 bits. Thus, in Java char is a 16-bit type. The range of a char is 0 to
65,536. There are no negative chars. The standard set of characters known as ASCII still ranges from 0 to
127 as always, and the extended 8-bit character set, ISO-Latin-1, ranges from 0 to 255. Since Java is designed
to allow applets to be written for worldwide use, it makes sense that it would use Unicode to represent
characters. Of course, the use of Unicode is somewhat inefficient for languages such as English, German,
Spanish, or French, whose characters can easily be contained within 8 bits. But such is the price that must be
paid for global portability.
Here is a program that demonstrates char variables:
// Demonstrate char data type.
class CharDemo
{
public static void main(String args[])
{
char ch1, ch2;

Java Programming Language
17 | P a g e
ch1 = 88; // code for X
ch2 = 'Y';
System.out.print("ch1 and ch2: ");
System.out.println(ch1 + " " + ch2);
}
}
This program displays the following output:
ch1 and ch2: X Y
Notice that ch1 is assigned the value 88, which is the ASCII (and Unicode) value that corresponds to
the letter X. As mentioned, the ASCII character set occupies the first 127 values in the Unicode character
set. For this reason, all the “old tricks” that you have used with characters in the past will work in Java, too.
Even though chars are not integers, in many cases you can operate on them as if they were integers.
This allows you to add two characters together, or to increment the value of a character variable. For example,
consider the following program:
// char variables behave like integers.
class CharDemo2
{
public static void main(String args[])
{
char ch1;
ch1 = 'X';
System.out.println("ch1 contains " + ch1);
ch1++; // increment ch1
System.out.println("ch1 is now " + ch1);
}
}
The output generated by this program is shown here:
ch1 contains X
ch1 is now Y
In the program, ch1 is first given the value X. Next, ch1 is incremented. This results in ch1 containing Y, the
next character in the ASCII (and Unicode) sequence.
Booleans
Java has a simple type, called boolean, for logical values. It can have only one of two possible values, true or
false. This is the type returned by all relational operators, such as a < b. boolean is also the type required by
the conditional expressions that govern the control statements such as if and for.
Here is a program that demonstrates the boolean type:
THE JAVA LANGUAGE

Java Programming Language
18 | P a g e
// Demonstrate boolean values.
class BoolTest
{
public static void main(String args[])
{
boolean b;
b = false;
System.out.println("b is " + b);
b = true;
System.out.println("b is " + b);
// a boolean value can control the if statement
if(b) System.out.println("This is executed.");
b = false;
if(b) System.out.println("This is not executed.");
// outcome of a relational operator is a boolean value
System.out.println("10 > 9 is " + (10 > 9));
}
}
The output generated by this program is shown here:
b is false
b is true
This is executed.
10 > 9 is true
There are three interesting things to notice about this program. First, as you can see, when a boolean
value is output by println( ), “true” or “false” is displayed. Second, the value of a boolean variable is sufficient,
by itself, to control the if statement. There is no need to write an if statement like this:
if(b == true) ...
Third, the outcome of a relational operator, such as <, is a boolean value. This is why the expression 10
> 9 displays the value “true.” Further, the extra set of parentheses around 10 > 9 is necessary because the +
operator has a higher precedence than the >.
Variables
The variable is the basic unit of storage in a Java program. A variable is defined by the combination of an
identifier, a type, and an optional initializer. In addition, all variables have a scope, which defines their visibility,
and a lifetime. These elements are examined next.
Variable Names
A program refers to a variable’s value by the variable’s name.
In the Java programming language, the following must hold true for a variable name:
It must be a legal identifier.
It must not be a keyword, a Boolean literal or reserved word null.
A variable may have the same name as a variable whose declaration appears in a different scope.
Variable name must be beginning with a lowercase letter.

Java Programming Language
19 | P a g e
Declaring a Variable
In Java, all variables must be declared before they can be used. The basic form of a variable
declaration is shown here:
datatype identifier [ = value][, identifier [= value] ...] ;
The type is one of Java’s atomic types, or the name of a class or interface. (Class and interface types
are discussed later in Part I of this book.) The identifier is the name of the variable. You can initialize the
variable by specifying an equal sign and a value. Keep in mind that the initialization expression must result in a
value of the same (or compatible) type as that specified for the variable. To declare more than one variable of
the specified type, use a comma-separated list.
Here are several examples of variable declarations of various types. Note that some include an initialization.
int a, b, c; // declares three ints, a, b, and c.
int d = 3, e, f = 5; // declares three more ints, initializing d and f.
byte z = 22; // initializes z.
double pi = 3.14159; // declares an approximation of pi.
char x = 'x'; // the variable x has the value 'x'.
The identifiers that you choose have nothing intrinsic in their names that indicates their type. Many
readers will remember when FORTRAN predefined all identifiers from I through N to be of type INTEGER
while all other identifiers were REAL. Java allows any properly formed identifier to have any declared type.
Dynamic Initialization
Although the preceding examples have used only constants as initializers, Java allows variables to be
initialized dynamically, using any expression valid at the time the variable is declared.
For example, here is a short program that computes the length of the hypotenuse of a right triangle
given the lengths of its two opposing sides:
// Demonstrate dynamic initialization.
class DynInit
{
public static void main(String args[])
{
double a = 3.0, b = 4.0;
// c is dynamically initialized
double c = Math.sqrt(a * a + b * b);
System.out.println("Hypotenuse is " + c);
}
}
Here, three local variables—a, b,and c—are declared. The first two, a and b, are initialized by
constants. However, c is initialized dynamically to the length of the hypotenuse (using the Pythagorean
theorem). The program uses another of Java’s built-in methods, sqrt( ), which is a member of the Math class,

Java Programming Language
20 | P a g e
to compute the square root of its argument. The key point here is that the initialization expression may use any
element valid at the time of the initialization, including calls to methods, other variables, or literals.
The Scope and Lifetime of Variables
A variable’s scope is the region of a program within which the variable can be referred to by its simple name.
The location of the variable declaration within your program establishes its scope and places it into one of
these four categories:
Member variable
Local variable
Method parameter
Exception-handler parameter
Member variable
A member variable is a member of a class or an object. It is declared within a class but outside of any
method or constructor. A member variable’s scope is the entire declaration of the class. However, the
declaration of a member needs to appear before it is used.
Local Variable
You declare local variable within a block of code. In general, the scope of a local variable extends from
its declaration to the end of the code block in which it was declared. The scope of each variable in that
program extends from the declaration of the variable to the end of the main method- indicated by the first
curtly } in the program code.
Method Parameter
Parameters are formal arguments to methods or constructors and used to pass values into methods and
constructors. The scope of a parameter is the entire method or constructor for which it is a parameter.
Exception-handler Parameters
Exception-handler parameters are similar to parameters but are arguments to an exception handler
rather than to a method of a constructor. The scope of an exception-handler parameter is the code block
between { and } that follow a catch statement.
Member variable scope class myClass {
Method Parameter Scope
Local Variable
Scope
……..
Member variable declarations
……..
public void aMethod( method parameters ) {
…….
Local variable declaration
…….
Catch( exception handler parameters ) {
…
}
local variable declarations
………
catch( exception handler parameters ) {
………
……..
}

Java Programming Language
21 | P a g e
Exception-Handler
Parameter Scope
You declare local variables within a block of code. In general, the scope of a Local Variable extends
form its declaration to the end of the code block in which was declared. The scope of each variable in that
programs extends from the declaration of the variable to the main method- indicated by the first right curly
bracket } in the program code.
Following program illustrates the scope of variable inside the block
public class BlockScope
{
int num = 33;
double y;
{
int i = 45, k;
k = num + i;
System.out.println(“k=” + k);
}
Y = num /3.0;
System.out.println(“y=”+y);
}
output
k = 78
y = 11.0
In above program variable i and k are not accessible outside the block in which they are declared.
However, outer block variable (num,y) are available for inner block to use.
Following program illustrate the compiler error generated when we try to access block outside their scope.
public class scope
{
public static void main( String args[])
{
int num = 35;
double y;
{
int i = 25;
int k;
k = num + I;
System.out.println(“k=”+k);

Java Programming Language
22 | P a g e
}
y = k / 3.0;
System.out.println(“Y=”+y);
}
}
Output
When we try to compile the program we get the following errors:
Progjava2 / scope.java [22:1] Undefined variable, class, or package name
Progjava2 / scope.java [22:1] Invalid expression statement.
Type Conversion and Casting
If you have previous programming experience, then you already know that it is fairly common to assign a
value of one type to a variable of another type. If the two types are compatible, then Java will perform the
conversion automatically. For example, it is always possible to assign an int value to a long variable. However,
not all types are compatible, and thus, not all type conversions are implicitly allowed. For instance, there is no
conversion defined from double to byte. Fortunately, it is still possible to obtain a conversion between
incompatible types. To do so, you must use a cast, which performs an explicit conversion between incompatible
types. Let’s look at both automatic type conversions and casting.
Java’s Automatic Conversions (widening conversion)
When one type of data is assigned to another type of variable, an automatic type conversion will take place
if the following two conditions are met:
The two types are compatible.
The destination type is larger than the source type.
When these two conditions are met, a widening conversion takes place. For example, the int type is always
large enough to hold all valid byte values, so no explicit cast statement is required.
For widening conversions, the numeric types, including integer and floating-point types, are compatible with
each other. However, the numeric types are not compatible with char or boolean. Also, char and boolean are
not compatible with each other. As mentioned earlier, Java also performs an automatic type conversion when
storing a literal integer constant into variables of type byte, short, or long.
class widening
{
Public static void main(String args[])
{
int i = 10;
char c = ‘b’;
byte c = 66;

Java Programming Language
23 | P a g e
double d = i; //automatically converted from int to double
float f = c; // automatically converted from char to float
int n = b; //automatically converted from byte to int
System.out.println(“double value of i=”+d);
System.out.println(“float value of c=”+f);
System.out.println(“integer value of b=”+n);
}
}
output
double value of i=10.0
float value of c=98.0
integer value of b=66
Casting Incompatible Types (narrowing conversion)
Although the automatic type conversions are helpful, they will not fulfill all needs. For example, what if
you want to assign an int value to a byte variable? This conversion will not be performed automatically, because
a byte is smaller than an int. This kind of conversion is sometimes called a narrowing conversion, since you are
explicitly making the value narrower so that it will fit into the target type.
To create a conversion between two incompatible types, you must use a cast. A cast is simply an explicit
type conversion. It has this general form:
(target-type) value
Here, target-type specifies the desired type to convert the specified value to. For example, the
following fragment casts an int to a byte. If the integer’s value is larger than the range of a byte, it will be
reduced modulo (the remainder of an integer division by the) byte’s range.
int a;
byte b;
// ...
b = (byte) a;
A different type of conversion will occur when a floating-point value is assigned to an integer type:
truncation. As you know, integers do not have fractional components. Thus, when a floating-point value is
assigned to an integer type, the fractional component is lost. For example, if the value 1.23 is assigned to an
integer, the resulting value will simply be 1. The 0.23 will have been truncated. Of course, if the size of the
whole number
component is too large to fit into the target integer type, then that value will be reduced modulo the target
type’s range.
The following program demonstrates some type conversions that require casts:
// Demonstrate casts.
class Conversion
{
public static void main(String args[])
{
byte b;

Java Programming Language
24 | P a g e
int i = 257;
double d = 323.142;
System.out.println("\nConversion of int to byte.");
b = (byte) i;
System.out.println("i and b " + i + " " + b);
System.out.println("\nConversion of double to int.");
i = (int) d;
System.out.println("d and i " + d + " " + i);
System.out.println("\nConversion of double to byte.");
b = (byte) d;
System.out.println("d and b " + d + " " + b);
}
}
This program generates the following output:
Conversion of int to byte.
i and b 257 1
Conversion of double to int.
d and i 323.142 323
Conversion of double to byte.
d and b 323.142 67
Let’s look at each conversion. When the value 257 is cast into a byte variable, the result is the
remainder of the division of 257 by 256 (the range of a byte), which is 1 in this case. When the d is converted
to an int, its fractional component is lost. When d is converted to a byte, its fractional component is lost, and the value is reduced modulo 256, which in this case is 67.
Automatic Type Promotion in Expressions
In addition to assignments, there is another place where certain type conversions may occur: in
expressions. To see why, consider the following. In an expression, the precision required of an intermediate
value will sometimes exceed the range of either operand.
For example, examine the following expression:
byte a = 40;
byte b = 50;
byte c = 100;
int d = a * b / c;
The result of the intermediate term a * b easily exceeds the range of either of its byte operands. To
handle this kind of problem, Java automatically promotes each byte or short operand to int when evaluating an
expression. This means that the subexpression a * b is performed using integers—not bytes. Thus, 2,000, the
result of the intermediate expression, 50 * 40, is legal even though a and b are both specified as
type byte.
As useful as the automatic promotions are, they can cause confusing compile-time errors. For example,
this seemingly correct code causes a problem:

Java Programming Language
25 | P a g e
byte b = 50;
b = b * 2; // Error! Cannot assign an int to a byte!
The code is attempting to store 50 * 2, a perfectly valid byte value, back into a byte variable. However,
because the operands were automatically promoted to int when the expression was evaluated, the result has
also been promoted to int. Thus, the result of the expression is now of type int, which cannot be assigned to a
byte without the use of a cast. This is true even if, as in this particular case, the value being assigned would
still fit in the target type.
In cases where you understand the consequences of overflow, you should use an explicit cast, such as
byte b = 50;
b = (byte)(b * 2);
which yields the correct value of 100.
The Type Promotion Rules
In addition to the elevation of bytes and shorts to int, Java defines several type promotion rules that
apply to expressions. They are as follows. First, all byte and short values are promoted to int, as just
described. Then, if one operand is a long, the whole expression is promoted to long. If one operand is a float,
the entire expression is promoted to float. If any of the operands is double, the result is double.
The following program demonstrates how each value in the expression gets promoted to match the
second argument to each binary operator:
class Promote
{
public static void main(String args[])
{
byte b = 42;
char c = 'a';
short s = 1024;
int i = 50000;
float f = 5.67f;
double d = .1234;
double result = (f * b) + (i / c) - (d * s);
System.out.println((f * b) + " + " + (i / c) + " - " + (d * s));
System.out.println("result = " + result);
}
}
Let’s look closely at the type promotions that occur in this line from the program:
double result = (f * b) + (i / c) - (d * s);

Java Programming Language
26 | P a g e
In the first subexpression, f * b, b is promoted to a float and the result of the subexpression is float.
Next, in the subexpression i / c, c is promoted to int, and the result is of type int. Then, in d * s, the value of
s is promoted to double, and the type of the subexpression is double. Finally, these three intermediate values,
float, int, and double, are considered. The outcome of float plus an int is a float. Then the resultant float
minus the last double is promoted to double, which is the type for the final result of the expression.
Arrays
An array is a group of like-typed variables that are referred to by a common name. Arrays of any type can be created and
may have one or more dimensions. A specific element in an array is accessed by its index. Arrays offer a convenient means of
grouping related information.
One-Dimensional Arrays
A one-dimensional array is, essentially, a list of like-typed variables. To create an array, you first must
create an array variable of the desired type. The general form of a one-dimensional array declaration is
type var-name[ ];
Here, type declares the base type of the array. The base type determines the data type of each
element that comprises the array. Thus, the base type for the array determines what type of data the array
will hold. For example, the following declares an array named month_days with the type “array of int”:
int month_days[];
Although this declaration establishes the fact that month_days is an array variable, no array actually
exists. In fact, the value of month_days is set to null, which represents an array with no value. To link
month_days with an actual, physical array of integers, you must allocate one using new and assign it to
month_days. new is a special operator that allocates memory.
You will look more closely at new in a later chapter, but you need to use it now to allocate memory for
arrays. The general form of new as it applies to one-dimensional arrays appears as follows:
array-var = new type[size];
Here, type specifies the type of data being allocated, size specifies the number of elements in the
array, and array-var is the array variable that is linked to the array. That is, to use new to allocate an array,
you must specify the type and number of elements to allocate. The elements in the array allocated by new will
automatically be initialized to zero. This example allocates a 12-element array of integers and links them to
month_days.
month_days = new int[12];
After this statement executes, month_days will refer to an array of 12 integers. Further, all elements
in the array will be initialized to zero.
Let’s review: Obtaining an array is a two-step process. First, you must declare a variable of the desired
array type. Second, you must allocate the memory that will hold the array, using new, and assign it to the array
variable. Thus, in Java all arrays are dynamically allocated. If the concept of dynamic allocation is unfamiliar to
you, don’t worry. It will be described at length later in this book.

Java Programming Language
27 | P a g e
Once you have allocated an array, you can access a specific element in the array by specifying its index
within square brackets. All array indexes start at zero. For example, this statement assigns the value 28 to the
second element of month_days.
month_days[1] = 28;
The next line displays the value stored at index 3.
System.out.println(month_days[3]);
Putting together all the pieces, here is a program that creates an array of the number of days in each month.
// Demonstrate a one-dimensional array.
class Array
{
public static void main(String args[])
{
int month_days[];
month_days = new int[12];
month_days[0] = 31;
month_days[1] = 28;
month_days[2] = 31;
month_days[3] = 30;
month_days[4] = 31;
month_days[5] = 30;
month_days[6] = 31;
month_days[7] = 31;
month_days[8] = 30;
month_days[9] = 31;
month_days[10] = 30;
month_days[11] = 31;
System.out.println("April has " + month_days[3] + " days.");
}
}
When you run this program, it prints the number of days in April. As mentioned, Java array indexes
start with zero, so the number of days in April is month_days[3] or 30.
it is possible to combine the declaration of the array variable with the allocation of the array itself, as
shown here:
int month_days[] = new int[12];
This is the way that you will normally see it done in professionally written Java programs.
Arrays can be initialized when they are declared. The process is much the same as that used to
initialize the simple types. An array initializer is a list of comma-separated expressions surrounded by curly
braces. The commas separate the values of the array elements. The array will automatically be created large
enough to hold the number of elements you specify in the array initializer. There is no need to use new. For
example, to store the number of days in each month, the following code creates an initialized array of integers:

Java Programming Language
28 | P a g e
// An improved version of the previous program.
class AutoArray
{
public static void main(String args[])
{
int month_days[] = { 31, 28, 31, 30, 31, 30, 31, 31, 30, 31, 30, 31 };
System.out.println("April has " + month_days[3] + " days.");
}
}
When you run this program, you see the same output as that generated by the previous version.
Java strictly checks to make sure you do not accidentally try to store or reference values outside of
the range of the array. The Java run-time system will check to be sure that all array indexes are in the correct
range. (In this regard, Java is fundamentally different from C/C++, which provide no run-time boundary
checks.) For example, the run-time system will check the value of each index into month_days to make sure
that it is between 0 and 11 inclusive. If you try to access elements outside the range of the array (negative
numbers or numbers greater than the length of the array), you will cause a run-time error.
Here is one more example that uses a one-dimensional array. It finds the average of a set of numbers.
// Average an array of values.
class Average
{
public static void main(String args[])
{
double nums[] = {10.1, 11.2, 12.3, 13.4, 14.5};
double result = 0;
int i;
for(i=0; i<5; i++)
{
result = result + nums[i];
}
System.out.println("Average is " + result / 5);
}
}
Multidimensional Arrays
In Java, multidimensional arrays are actually arrays of arrays. These, as you might expect, look and act
like regular multidimensional arrays. However, as you will see, there are a couple of subtle differences. To declare a
multidimensional array variable,specify each additional index using another set of square brackets. For example,
the following declares a two-dimensional array variable called twoD.
int twoD[][] = new int[4][5];
This allocates a 4 by 5 array and assigns it to twoD. Internally this matrix is implemented as an array of arrays of int. conceptually; this array will look like the one shown in

Java Programming Language
29 | P a g e
Alternative Array Declaration Syntax
There is a second form that may be used to declare an array:
type[ ] var-name;
Here, the square brackets follow the type specifier, and not the name of the array variable. For example, the
following two declarations are equivalent:
int al[] = new int[3];
int[] a2 = new int[3];
The following declarations are also equivalent:
char twod1[][] = new char[3][4];
char[][] twod2 = new char[3][4];
This alternative declaration form is included as a convenience, and is also useful when specifying an array as a
return type for a method.
Operators
Java provides a rich operator environment. Most of its operators can be divided into the following four
groups: arithmetic, bitwise, relational, and logical. Java also defines some additional operators that handle
certain special situations.
Arithmetic Operators
Arithmetic operators are used in mathematical expressions in the same way that they are used in
algebra. The following table lists the arithmetic operators:
Operator Result

Java Programming Language
30 | P a g e
+ Addition
– Subtraction (also unary minus)
* Multiplication
/ Division
% Modulus
++ Increment
+= Addition assignment
–= Subtraction assignment
*= Multiplication assignment
/= Division assignment
%= Modulus assignment
– – Decrement
The operands of the arithmetic operators must be of a numeric type. You cannot use them on boolean
types, but you can use them on char types, since the char type in Java is, essentially, a subset of int.
The Basic Arithmetic Operators
The basic arithmetic operations—addition, subtraction, multiplication, and division—all behave as you
would expect for all numeric types. The minus operator also has a unary form which negates its single operand.
Remember that when the division operator is applied to an integer type, there will be no fractional component
attached to the result. The following simple example program demonstrates the arithmetic operators. It also
illustrates the difference between floating-point division and integer division.
// Demonstrate the basic arithmetic operators.
class BasicMath
{
public static void main(String args[])
{
// arithmetic using integers
System.out.println("Integer Arithmetic");
int a = 1 + 1;
int b = a * 3;
int c = b / 4;
int d = c - a;
int e = -d;
System.out.println("a = " + a);
System.out.println("b = " + b);
System.out.println("c = " + c);
System.out.println("d = " + d);
System.out.println("e = " + e);
// arithmetic using doubles
System.out.println("\nFloating Point Arithmetic");
double da = 1 + 1;
double db = da * 3;
double dc = db / 4;
double dd = dc - a;
double de = -dd;
System.out.println("da = " + da);
System.out.println("db = " + db);

Java Programming Language
31 | P a g e
System.out.println("dc = " + dc);
System.out.println("dd = " + dd);
System.out.println("de = " + de);
}
}
When you run this program, you will see the following output:
Integer Arithmetic
a = 2
b = 6
c = 1
d = -1
e = 1
Floating Point Arithmetic
da = 2.0
db = 6.0
dc = 1.5
dd = -0.5
de = 0.5
The Modulus Operator
The modulus operator, %, returns the remainder of a division operation. It can be applied to floating-
point types as well as integer types. (This differs from C/C++, in which the % can only be applied to integer
types.) The following example program demonstrates the %:
// Demonstrate the % operator.
class Modulus
{
public static void main(String args[])
{
int x = 42;
double y = 42.25;
System.out.println("x mod 10 = " + x % 10);
System.out.println("y mod 10 = " + y % 10);
}
}
When you run this program you will get the following output:
x mod 10 = 2
y mod 10 = 2.25
Arithmetic Assignment Operators
Java provides special operators that can be used to combine an arithmetic operation with an assignment.
As you probably know, statements like the following are quite common in programming:
a = a + 4;

Java Programming Language
32 | P a g e
In Java, you can rewrite this statement as shown here:
a += 4;
This version uses the += assignment operator. Both statements perform the same action: they increase
the value of a by 4.
Here is another example,
a = a % 2;
which can be expressed as
a %= 2;
In this case, the %= obtains the remainder of a/2 and puts that result back into a. There are
assignment operators for all of the arithmetic, binary operators. Thus, any statement of the form
var = var op expression;
can be rewritten as
var op= expression;
The assignment operators provide two benefits. First, they save you a bit of typing, because they are
“shorthand” for their equivalent long forms. Second, they are implemented more efficiently by the Java run-
time system than are their equivalent long forms. For these reasons, you will often see the assignment
operators used in professionally written Java programs.
Here is a sample program that shows several op= operator assignments in action:
// Demonstrate several assignment operators.
class OpEquals
{
public static void main(String args[])
{
int a = 1;
int b = 2;
int c = 3;
a += 5;
b *= 4;
c += a * b;
c %= 6;
System.out.println("a = " + a);
System.out.println("b = " + b);
System.out.println("c = " + c);
}
}

Java Programming Language
33 | P a g e
The output of this program is shown here:
a = 6
b = 8
c = 3
Increment and Decrement
The ++ and the – – are Java’s increment and decrement operators. They were introduced in Chapter 2.
Here they will be discussed in detail. As you will see, they have some special properties that make them quite
interesting. Let’s begin by reviewing precisely what the increment and decrement operators do.
The increment operator increases its operand by one. The decrement operator decreases its operand by
one. For example, this statement:
x = x + 1;
can be rewritten like this by use of the increment operator:
x++;
Similarly, this statement:
x = x - 1;
is equivalent to
x--;
These operators are unique in that they can appear both in postfix form, where they follow the operand
as just shown, and prefix form, where they precede the operand. In the foregoing examples, there is no
difference between the prefix and postfix forms. However, when the increment and/or decrement operators
are part
of a larger expression, then a subtle, yet powerful, difference between these two forms appears. In the prefix
form, the operand is incremented or decremented before the value is obtained for use in the expression. In
postfix form, the previous value is obtained for use in the expression, and then the operand is modified. For
example:
x = 42;
y = ++x;
In this case, y is set to 43 as you would expect, because the increment occurs before x is assigned to
y. Thus, the line y = ++x; is the equivalent of these two statements:
x = x + 1;
y = x;
However, when written like this,
x = 42;
y = x++;

Java Programming Language
34 | P a g e
the value of x is obtained before the increment operator is executed, so the value of y is 42. Of
course, in both cases x is set to 43. Here, the line y = x++; is the equivalent of these two statements:
y = x;
x = x + 1;
The following program demonstrates the increment operator.
// Demonstrate ++.
class IncDec
{
public static void main(String args[])
{
int a = 1;
int b = 2;
int c;
int d;
c = ++b;
d = a++;
c++;
System.out.println("a = " + a);
System.out.println("b = " + b);
System.out.println("c = " + c);
System.out.println("d = " + d);
}
}
The output of this program follows:
a = 2
b = 3
c = 4
d = 1
The Bitwise Operators: Que: Explain bitwise shift operators in JAVA.
Java defines several bitwise operators which can be applied to the integer types, long, int, short, char,
and byte. These operators act upon the individual bits of their operands.
They are summarized in the following table:
Operator Result
~ Bitwise unary NOT

Java Programming Language
35 | P a g e
& Bitwise AND
| Bitwise OR
^ Bitwise exclusive OR
>> Shift right
>>> Shift right zero fill
<< Shift left
&= Bitwise AND assignment
|= Bitwise OR assignment
^= Bitwise exclusive OR assignment
>>= Shift right assignment
>>>= Shift right zero fill assignment
<<= Shift left assignment
The Bitwise Logical Operators
The bitwise logical operators are &, |, ^, and ~. The following table shows the outcome of each
operation. In the discussion that follows, keep in mind that the bitwise operators are applied to each individual
bit within each operand.
A B A | B A & B A ^ B ~A
0 0 0 0 0 1
1 0 1 0 1 0
0 1 1 0 1 1
1 1 1 1 0 0
The Bitwise NOT
Also called the bitwise complement, the unary NOT operator, ~, inverts all of the bits of bits operand.
For example, the number 42, which has the following bit pattern.
00101010
becomes
11010101
after the NOT operator is applied.
The Bitwise AND
The AND operator, &, produces a 1 bit if both operands are also 1. A zero is produced in all other cases.
Here is an example:
00101010 42
&00001111 15
--------------
00001010 10

Java Programming Language
36 | P a g e
The Bitwise OR
The OR operator, |, combines bits such that if either of the bits in the operands is a 1, then the
resultant bit is a 1, as shown here:
00101010 42
| 00001111 15
-----------------------
00101111 47
The Bitwise XOR
The XOR operator, ^, combines bits such that if exactly one operand is 1, then the result is 1.
Otherwise, the result is zero. The following example shows the effect of the ^. This example also
demonstrates a useful attribute of the XOR operation. Notice how the bit pattern of 42 is inverted wherever
the second operand has a 1 bit. Wherever the second operand has a 0 bit, the first operand is unchanged. You
will find this property useful when performing some types of bit manipulations.
00101010 42
^00001111 15
-------------------
00100101 37
Using the Bitwise Logical Operators
The following program demonstrates the bitwise logical operators:
// Demonstrate the bitwise logical operators.
class BitLogic
{
public static void main(String args[])
{
String binary[] = {"0000", "0001", "0010", "0011", "0100", "0101", "0110", "0111","1000", "1001",
"1010", "1011", "1100", "1101", "1110", "1111"};
int a = 3; // 0 + 2 + 1 or 0011 in binary
int b = 6; // 4 + 2 + 0 or 0110 in binary
int c = a | b;
int d = a & b;
int e = a ^ b;
int f = (~a & b) | (a & ~b);
int g = ~a & 0x0f;
System.out.println(" a = " + binary[a]);
System.out.println(" b = " + binary[b]);
System.out.println(" a|b = " + binary[c]);
System.out.println(" a&b = " + binary[d]);
System.out.println(" a^b = " + binary[e]);
System.out.println("~a&b|a&~b = " + binary[f]);
System.out.println(" ~a = " + binary[g]);
}
}

Java Programming Language
37 | P a g e
In this example, a and b has bit patterns which present all four possibilities for two binary digits: 0-0,
0-1, 1-0, and 1-1. You can see how the | and & operate on each bit by the results in c and d. The values assigned
to e and f are the same and illustrate how the ^ works. The string array named binary holds the human-
readable, binary representation of the numbers 0 through 15. In this example, the array is indexed to show the
binary representation of each result. The array is constructed such that the correct string representation of a
binary value n is stored in binary[n]. The value of ~a is ANDed with 0x0f (0000 1111 in binary) in order to
reduce its value to less than 16, so it can be printed by use of the binary array. Here is the output from this
program:
a = 0011
b = 0110
a|b = 0111
a&b = 0010
a^b = 0101
~a&b|a&~b = 0101
~a = 1100
The Left Shift
Que: Explain shift operator with suitable example.
The left shift operator, <<, shifts all of the bits in a value to the left a specified number of times. It
has this general form:
value << num
Here, num specifies the number of positions to left-shift the value in value. That is, the << moves all of the
bits in the specified value to the left by the number of bit positions specified by num. For each shift left, the
high-order bit is shifted out (and lost), and a zero is brought in on the right. This means that when a left shift
is applied to an int operand, bits are lost once they are shifted past bit position 31. If the operand is a long,
then bits are lost after bit position 63.
Java’s automatic type promotions produce unexpected results when you are shifting byte and short values. As
you know, byte and short values are promoted to int when an expression is evaluated. Furthermore, the result
of such an expression is also an int. This means that the outcome of a left shift on a byte or short value will be
an int, and the bits shifted left will not be lost until they shift past bit position 31. Furthermore, a negative
byte or short value will be sign-extended when it is promoted to int. Thus, the high-order bits will be filled
with 1’s. For these reasons, to perform a left shift on a byte or short implies that you must discard the high-
order bytes of the int result. For example, if you left-shift a byte value, that value will first be promoted to
int and then shifted. This means that you must discard the top three bytes of the result if what you want is
the result of a shifted byte value. The easiest way to do this is to simply cast the result back into a byte. The
following program demonstrates this concept:
// Left shifting a byte value.
class ByteShift
{
public static void main(String args[])
{
byte a = 64, b;
int i;
i = a << 2;

Java Programming Language
38 | P a g e
b = (byte) (a << 2);
System.out.println("Original value of a: " + a);
System.out.println("i and b: " + i + " " + b);
}
}
The output generated by this program is shown here:
Original value of a: 64
i and b: 256 0
Since a is promoted to int for the purposes of evaluation, left-shifting the value 64 (0100 0000) twice
results in i containing the value 256 (1 0000 0000). However, the value in b contains 0 because after the shift,
the low-order byte is now zero. Its only 1 bit has been shifted out.
Since each left shift has the effect of doubling the original value, programmers frequently use this
fact as an efficient alternative to multiplying by 2. But you need to watch out. If you shift a 1 bit into the high-
order position (bit 31 or 63), the value will become negative. The following program illustrates this point:
// Left shifting as a quick way to multiply by 2.
class MultByTwo
{
public static void main(String args[])
{
int i;
int num = 0xFFFFFFE;
for(i=0; i<4; i++)
{
num = num << 1;
System.out.println(num);
}
}
}
The program generates the following output:
536870908
1073741816
2147483632
-32
The starting value was carefully chosen so that after being shifted left 4 bit positions, it would produce
–32. As you can see, when a 1 bit is shifted into bit 31, the number is interpreted as negative.
The Right Shift
The right shift operator, >>, shifts all of the bits in a value to the right a specified number of times. Its
general form is shown here:
value >> num

Java Programming Language
39 | P a g e
Here, num specifies the number of positions to right-shift the value in value. That is, the >> moves all of the
bits in the specified value to the right the number of bit positions specified by num.
The following code fragment shifts the value 32 to the right by two positions, resulting in a being set to 8:
int a = 32;
a = a >> 2; // a now contains 8
When a value has bits that are “shifted off,” those bits are lost. For example, the next code fragment shifts
the value 35 to the right two positions, which causes the two low-order bits to be lost, resulting again in a
being set to 8.
int a = 35;
a = a >> 2; // a still contains 8
Looking at the same operation in binary shows more clearly how this happens:
00100011 35
>> 2
00001000 8
Each time you shift a value to the right, it divides that value by two—and discards any remainder. You can take
advantage of this for high-performance integer division by 2. Of course, you must be sure that you are not
shifting any bits off the right end. When you are shifting right, the top (leftmost) bits exposed by the right
shift are filled in with the previous contents of the top bit. This is called sign extension and serves
to preserve the sign of negative numbers when you shift them right. For example, –8 >> 1 is –4, which, in binary,
is
11111000 –8
>>1
11111100 –4
It is interesting to note that if you shift –1 right, the result always remains –1, since sign extension keeps
bringing in more ones in the high-order bits.
Bitwise Operator Assignments
All of the binary bitwise operators have a shorthand form similar to that of the algebraic operators,
which combines the assignment with the bitwise operation. For example, the following two statements, which
shift the value in a right by four bits, are equivalent:
a = a >> 4;
a >>= 4;
Likewise, the following two statements, which result in a being assigned the bitwise expression a OR b,
are equivalent:
a = a | b;
a |= b;
The following program creates a few integer variables and then uses the shorthand form of bitwise
operator assignments to manipulate the variables:

Java Programming Language
40 | P a g e
class OpBitEquals
{
public static void main(String args[])
{
int a = 1;
int b = 2;
int c = 3;
a |= 4;
b >>= 1;
c <<= 1;
a ^= c;
System.out.println("a = " + a);
System.out.println("b = " + b);
System.out.println("c = " + c);
}
}
The output of this program is shown here:
a = 3
b = 1
c = 6
Relational Operators
The relational operators determine the relationship that one operand has to the other. Specifically,
they determine equality and ordering. The relational operators are shown here:
Operator Result
== Equal to
!= Not equal to
> Greater than
< Less than
>= Greater than or equal to
<= Less than or equal to
The outcome of these operations is a boolean value. The relational operators are most frequently used
in the expressions that control the if statement and the various loop statements.
Any type in Java, including integers, floating-point numbers, characters, and Booleans can be compared
using the equality test, ==, and the inequality test, !=. Notice that in Java (as in C/C++/C#) equality is denoted
with two equal signs, not one. (Remember: a single equal sign is the assignment operator.) Only numeric types
can be compared using the ordering operators. That is, only integer, floating-point, and character operands may
be compared to see which is greater or less than the other.
As stated, the result produced by a relational operator is a boolean value. For example, the following
code fragment is perfectly valid:
int a = 4;

Java Programming Language
41 | P a g e
int b = 1;
boolean c = a < b;
In this case, the result of a<b (which is false) is stored in c.
If you are coming from a C/C++ background, please note the following. In C/C++, these types of statements are
very common:
int done;
// ...
if(!done) ... // Valid in C/C++
if(done) ... // but not in Java.
In Java, these statements must be written like this:
if(done == 0)) ... // This is Java-style.
if(done != 0) ...
The reason is that Java does not define true and false in the same way as C/C++. In C/C++, true is any
nonzero value and false is zero. In Java, true and false are nonnumeric values which do not relate to zero or
nonzero. Therefore, to test for zero or nonzero, you must explicitly employ one or more of the relational
operators.
Boolean Logical Operators
The Boolean logical operators shown here operate only on boolean operands. All of the binary logical
operators combine two boolean values to form a resultant boolean value.
Operator Result
& Logical AND
| Logical OR
^ Logical XOR (exclusive OR)
|| Short-circuit OR
&& Short-circuit AND
! Logical unary NOT
&= AND assignment
|= OR assignment
^= XOR assignment
== Equal to
!= Not equal to
?: Ternary if-then-else
The logical Boolean operators, &, |, and ^, operate on boolean values in the same way that they operate
on the bits of an integer. The logical ! operator inverts the Boolean state: !true == false and !false == true.
The following table shows the effect of each logical operation:
A B A | B A & B A ^ B !A
False False False False False True
True False True False True False

Java Programming Language
42 | P a g e
False True True False True True
True True True True False False
Here is a program that is almost the same as the BitLogic example shown earlier, but it operates on
boolean logical values instead of binary bits:
// Demonstrate the boolean logical operators.
class BoolLogic
{
public static void main(String args[])
{
boolean a = true;
boolean b = false;
boolean c = a | b;
boolean d = a & b;
boolean e = a ^ b;
boolean f = (!a & b) | (a & !b);
boolean g = !a;
System.out.println(" a = " + a);
System.out.println(" b = " + b);
System.out.println(" a|b = " + c);
System.out.println(" a&b = " + d);
System.out.println(" a^b = " + e);
System .out.println("!a&b|a&!b = " + f);
System.out.println(" !a = " + g);
}
}
After running this program, you will see that the same logical rules apply to boolean values as they did
to bits. As you can see from the following output, the string representation of a Java boolean value is one of
the literal values true or false:
a = true
b = false
a|b = true
a&b = false
a^b = true
a&b|a&!b = true
!a = false
Short-Circuit Logical Operators: Que: What are the advantages of short circuit operators?
Que: Explain short circuit operator? State drawback of using it.
Java provides two interesting Boolean operators not found in many other computer languages. These are
secondary versions of the Boolean AND and OR operators, and are known as short-circuit logical operators. As
you can see from the preceding table, the OR operator results in true when A is true, no matter what B is.
Similarly, the AND operator results in false when A is false, no matter what B is. If you use the || and &&
forms, rather than the | and & forms of these operators, Java will not bother to evaluate the right-hand
operand when the outcome of the expression can be determined by the left operand alone. This is very useful

Java Programming Language
43 | P a g e
when the right-hand operand depends on the left one being true or false in order to function properly. For
example, the following code fragment shows how you can take advantage of short-circuit logical evaluation to be
sure that a division operation will be valid before evaluating it:
if (denom != 0 && num / denom > 10)
Since the short-circuit form of AND (&&) is used, there is no risk of causing a run-time exception when
denom is zero. If this line of code were written using the single & version of AND, both sides would have to be
evaluated, causing a run-time exception when denom is zero.
It is standard practice to use the short-circuit forms of AND and OR in cases involving Boolean logic,
leaving the single-character versions exclusively for bitwise operations. However, there are exceptions to this
rule. For example, consider the following statement:
if(c==1 & e++ < 100) d = 100;
Here, using a single & ensures that the increment operation will be applied to e whether c is equal to 1 or not.
The Assignment Operator
You have been using the assignment operator since Chapter 2. Now it is time to take a formal look at it.
The assignment operator is the single equal sign, =. The assignment operator works in Java much as it does in
any other computer language. It has this general form:
var = expression;
Here, the type of var must be compatible with the type of expression. The assignment operator does
have one interesting attribute that you may not be familiar with: it allows you to create a chain of assignments.
For example, consider this fragment:
int x, y, z;
x = y = z = 100; // set x, y, and z to 100
This fragment sets the variables x, y, and z to 100 using a single statement. This works because the =
is an operator that yields the value of the right-hand expression. Thus, the value of z = 100 is 100, which is
then assigned to y, which in turn is assigned to x. Using a “chain of assignment” is an easy way to set a
group of variables to a common value.
The ? Operator Que: Explain the ternary operator with example.
Java includes a special ternary (three-way) operator that can replace certain types of if-then-else
statements. This operator is the ?, and it works in Java much like it does in C, C++, and C#.
expression1 ? expression2 : expression3
Here, expression1 can be any expresion that evaluates to a boolean value. If expression1 is true, then
expression2 is evaluated; otherwise, expression3 is evaluated. The result of the ? operation is that of the

Java Programming Language
44 | P a g e
expression evaluated. Both expression2 and expression3 are required to return the same type, which can’t be
void.
Here is an example of the way that the ? is employed:
i = j == 0 ? 0 : num / denom;
When Java evaluates this assignment expression, it first looks at the expression to the left of the
question mark. If j equals zero, then the expression between the question mark and the colon is evaluated and
used as the value of the entire ? expression. If j does not equal zero, then the expression after the colon is
evaluated and used for the value of the entire ? expression. The result produced by the ? operator is then
assigned to i.
Here is a program that demonstrates the ? operator. It uses it to obtain the absolute value of a variable.
// Demonstrate ?.
class Ternary
{
public static void main(String args[])
{
int i, k;
i = 10;
k = i < 0 ? -i : i; // get absolute value of i
System.out.print("Absolute value of ");
System.out.println(i + " is " + k);
i = -10;
k = i < 0 ? -i : i; // get absolute value of i
System.out.print("Absolute value of ");
System.out.println(i + " is " + k);
}
}
The output generated by the program is shown here:
Absolute value of 10 is 10
Absolute value of -10 is 10
Operator Precedence
Table shows the order of precedence for Java operators, from highest to lowest. Notice that the first
row shows items that you may not normally think of as operators: parentheses, square brackets, and the dot
operator. Parentheses are used to alter the precedence of an operation. As you know from the previous
chapter, the square brackets provide array indexing.
Using Parentheses
Parentheses raise the precedence of the operations that are inside them. This is often necessary to
obtain the result you desire. For example, consider the following expression:
a >> b + 3

Java Programming Language
45 | P a g e
This expression first adds 3 to b and then shifts a right by that result. That is, this expression can be
rewritten using redundant parentheses like this:
a >> (b + 3)
However, if you want to first shift a right by b positions and then add 3 to that result, you will need to
parenthesize the expression like this:
(a >> b) + 3
In addition to altering the normal precedence of an operator, parentheses can sometimes be used to
help clarify the meaning of an expression. For anyone reading your code, a complicated expression can be
difficult to understand. Adding redundant but clarifying parentheses to complex expressions can help prevent
confusion later. For example, which of the following expressions is easier to read?
a | 4 + c >> b & 7
(a | (((4 + c) >> b) & 7))
One other point: parentheses (redundant or not) do not degrade the performance of your program.
Therefore, adding parentheses to reduce ambiguity does not negatively affect your program.
1.5 Overview of control statements
A programming language uses control statements to cause the flow of execution to advance and branch
based on changes to the state of a program. Java’s program control statements can be put into the following
categories: selection, iteration, and jump.
Selection statements allow your program to choose different paths of execution based upon the outcome of an
expression or the state of a variable.

Java Programming Language
46 | P a g e
Iteration statements enable program execution to repeat one or more statements (that is, iteration
statements form loops).
Jump statements allow your program to execute in a nonlinear fashion. All of Java’s control statements are
examined here.
Java’s Selection Statements Que: Describe Java’s selection statements with example
Java supports two selection statements: if and switch. These statements allow you to control the flow
of your program’s execution based upon conditions known only during run time.
if
The if statement is Java’s conditional branch statement. It can be used to route program execution through
two different paths. Here is the general form of the if statement:
if (condition)
statement1;
else
statement2;
Here, each statement may be a single statement or a compound statement enclosed in curly braces (that is, a
block). The condition is any expression that returns a boolean value. The else clause is optional.
The if works like this: If the condition is true, then statement1 is executed. Otherwise, statement2 (if it
exists) is executed. In no case will both statements be executed. For example, consider the following:
int a, b;
// ...
if(a < b)
{
a = 0;
}
else
{
b = 0;
}
Here, if a is less than b, then a is set to zero. Otherwise, b is set to zero. In no case are they both set to
zero.
Nested ifs
A nested if is an if statement that is the target of another if or else. Nested ifs are very common in
programming. When you nest ifs, the main thing to remember is that an else statement always refers to the
nearest if statement that is within the same block as the else and that is not already associated with an else.
Here is an example:
if(i == 10)
{
if(j < 20)

Java Programming Language
47 | P a g e
{
a = b;
}
if(k > 100)
{
c = d; // this if is
}
else
{
a = c; // associated with this else
}
else
{
a = d; // this else refers to if(i == 10)
}
}
As the comments indicate, the final else is not associated with if(j<20), because it is not in the same
block (even though it is the nearest if without an else). Rather, the final else is associated with if(i==10). The
inner else refers to if(k>100), because it is the closest if within the same block.
The if-else-if Ladder
A common programming construct that is based upon a sequence of nested ifs is the if-else-if ladder. It looks
like this:
if(condition)
statement; else if(condition)
statement;
else if(condition)
statement;
...
else
statement;
The if statements are executed from the top down. As soon as one of the conditions controlling the if
is true, the statement associated with that if is executed, and the rest of the ladder is bypassed. If none of
the conditions is true, then the final else statement will be executed. The final else acts as a default condition;
that is, if all other conditional tests fail, then the last else statement is performed. If there is no final else
and all other conditions are false, then no action will take place.
Here is a program that uses an if-else-if ladder to determine which season a particular month is in.
// Demonstrate if-else-if statements.
class IfElse
{

Java Programming Language
48 | P a g e
public static void main(String args[])
{
int month = 4; // April
String season;
if(month == 12 || month == 1 || month == 2)
season = "Winter";
else if(month == 3 || month == 4 || month == 5)
season = "Spring";
else if(month == 6 || month == 7 || month == 8)
season = "Summer";
else if(month == 9 || month == 10 || month == 11)
season = "Autumn";
else
season = "Bogus Month";
System.out.println("April is in the " + season + ".");
}
}
Here is the output produced by the program:
April is in the Spring.
You might want to experiment with this program before moving on. As you will find, no matter what
value you give month, one and only one assignment statement within the ladder will be executed.
switch
The switch statement is Java’s multiway branch statement. It provides an easy way to dispatch
execution to different parts of your code based on the value of an expression. As such, it often provides a
better alternative than a large series of if-else-if statements. Here is the general form of a switch
statement:
switch (expression)
{
case value1:
// statement sequence
break;
case value2:
// statement sequence
break;
...
case valueN:
// statement sequence
break;
default:
// default statement sequence
}

Java Programming Language
49 | P a g e
The expression must be of type byte, short, int, or char; each of the values specified in the case
statements must be of a type compatible with the expression. Each case value must be a unique literal (that is,
it must be a constant, not a variable). Duplicate case values are not allowed.
The switch statement works like this: The value of the expression is compared with each of the literal
values in the case statements. If a match is found, the code sequence following that case statement is
executed. If none of the constants matches the value of the expression, then the default statement is
executed. However, the default statement is optional. If no case matches and no default is present, then no
further action is taken.
The break statement is used inside the switch to terminate a statement sequence. When a break
statement is encountered, execution branches to the first line of code that follows the entire switch
statement. This has the effect of “jumping out” of the switch. Here is a simple example that uses a switch
statement:
// A simple example of the switch.
class SampleSwitch
{
public static void main(String args[])
{
for(int i=0; i<6; i++)
switch(i)
{
case 0:
System.out.println("i is zero.");
break;
case 1:
System.out.println("i is one.");
break;
case 2:
System.out.println("i is two.");
break;
case 3:
System.out.println("i is three.");
break;
default:
System.out.println("i is greater than 3.");
}
}
}
The output produced by this program is shown here:
i is zero.
i is one.
i is two.
i is three.
i is greater than 3.
i is greater than 3.

Java Programming Language
50 | P a g e
As you can see, each time through the loop, the statements associated with the case constant that matches i
are executed. All others are bypassed. After i is greater than 3, no case statements match, so the default
statement is executed. The break statement is optional. If you omit the break, execution will continue on into
the next case. It is sometimes desirable to have multiple cases without break statements between them. For
example, consider the following program:
// In a switch, break statements are optional.
class MissingBreak
{
public static void main(String args[])
{
for(int i=0; i<12; i++)
switch(i)
{
case 0:
case 1:
case 2:
case 3:
case 4:
System.out.println("i is less than 5");
break;
case 5:
case 6:
case 7:
case 8:
case 9:
System.out.println("i is less than 10");
break;
default:
System.out.println("i is 10 or more");
}
}
}
This program generates the following output:
i is less than 5
i is less than 5
i is less than 5
i is less than 5
i is less than 5
i is less than 10
i is less than 10
i is less than 10
i is less than 10
i is less than 10
i is 10 or more
i is 10 or more

Java Programming Language
51 | P a g e
As you can see, execution falls through each case until a break statement (or the end of the switch) is
reached.
While the preceding example is, of course, contrived for the sake of illustration, omitting the break
statement has many practical applications in real programs. To sample its more realistic usage, consider the
following rewrite of the season example shown earlier. This version uses a switch to provide a more efficient
implementation.
// An improved version of the season program.
class Switch
{
public static void main(String args[])
{
int month = 4;
String season;
switch (month)
{
case 12:
case 1:
case 2:
season = "Winter";
break;
case 3:
case 4:
case 5:
season = "Spring";
break;
case 6:
case 7:
case 8:
season = "Summer";
break;
case 9:
case 10:
case 11:
season = "Autumn";
break;
default:
season = "Bogus Month";
}
System.out.println("April is in the " + season + ".");
}
}
Nested switch Statements
You can use a switch as part of the statement sequence of an outer switch. This is called a nested switch. Since a switch statement defines its own block, no conflicts arise between the case constants in the
inner switch and those in the outer switch. For example, the following fragment is perfectly valid:

Java Programming Language
52 | P a g e
switch(count)
{
case 1:
switch(target)
{ // nested switch
case 0:
System.out.println("target is zero");
break;
case 1: // no conflicts with outer switch
System.out.println("target is one");
break;
}
break;
case 2: // ...
Here, the case 1: statement in the inner switch does not conflict with the case 1: statement in the
outer switch. The count variable is only compared with the list of cases at the outer level. If count is 1, then
target is compared with the inner list cases.
In summary, there are three important features of the switch statement to note:
The switch differs from the if in that switch can only test for equality, whereas if can evaluate any type
of Boolean expression. That is, the switch looks only for a match between the value of the expression and
one of its case constants.
No two case constants in the same switch can have identical values. Of course, a switch statement
enclosed by an outer switch can have case constants in common.
A switch statement is usually more efficient than a set of nested ifs.
Iteration Statements Que: Describe the java’s Iteration Statements.
Java’s iteration statements are for, while, and do-while. These statements create what we commonly
call loops. As you probably know, a loop repeatedly executes the same set of instructions until a termination
condition is met. As you will see, Java has a loop to fit any programming need.
while
The while loop is Java’s most fundamental looping statement. It repeats a statement or block while its
controlling expression is true. Here is its general form:
while(condition)
{
// body of loop
}
The condition can be any Boolean expression. The body of the loop will be executed as long as the conditional
expression is true. When condition becomes false, control passes to the next line of code immediately following
the loop. The curly braces are unnecessary if only a single statement is being repeated.
Here is a while loop that counts down from 10, printing exactly ten lines of “tick”:

Java Programming Language
53 | P a g e
// Demonstrate the while loop.
class While
{
public static void main(String args[])
{
int n = 10;
while(n > 0)
{
System.out.println("tick " + n);
n--;
}
}
}
When you run this program, it will “tick” ten times:
tick 10
tick 9
tick 8
tick 7
tick 6
tick 5
tick 4
tick 3
tick 2
tick 1
Since the while loop evaluates its conditional expression at the top of the loop, the body of the loop will
not execute even once if the condition is false to begin with. For example, in the following fragment, the call to
println( ) is never executed:
int a = 10, b = 20;
while(a > b)
System.out.println("This will not be displayed");
The body of the while (or any other of Java’s loops) can be empty. This is because a null statement (one that
consists only of a semicolon) is syntactically valid in Java. For example, consider the following program:
// The target of a loop can be empty.
class NoBody
{
public static void main(String args[])
{
int i, j;
i = 100;
j = 200;
// find midpoint between i and j
while(++i < --j) ; // no body in this loop
System.out.println("Midpoint is " + i);
}
}

Java Programming Language
54 | P a g e
This program finds the midpoint between i and j. It generates the following output: Midpoint is 150
Here is how the while loop works. The value of i is incremented, and the value of j is decremented.
These values are then compared with one another. If the new value of i is still less than the new value of j, then
the loop repeats. If i is equal to or greater than j, the loop stops. Upon exit from the loop, i will hold a value
that is midway between the original values of i and j. (Of course, this procedure only works when i is less than j
to begin with.) As you can see, there is no need for a loop body; all of the action occurs within the conditional
expression, itself. In professionally written Java code, short loops are frequently coded without bodies when
the controlling expression can handle all of the details itself.
do-while
As you just saw, if the conditional expression controlling a while loop is initially false, then the body of
the loop will not be executed at all. However, sometimes it is desirable to execute the body of a while loop at
least once, even if the conditional expression is false to begin with. In other words, there are times when you
would like to test the termination expression at the end of the loop rather than at the beginning. Fortunately,
Java supplies a loop that does just that: the do-while. The do-while loop always executes its body at least
once, because its conditional expression is at the bottom of the loop. Its general form is
do
{
// body of loop
}
while (condition);
Each iteration of the do-while loop first executes the body of the loop and then evaluates the conditional
expression. If this expression is true, the loop will repeat. Otherwise, the loop terminates. As with all of Java’s
loops, condition must be a Boolean expression.
Here is a reworked version of the “tick” program that demonstrates the do-while loop. It generates the same
output as before.
// Demonstrate the do-while loop.
class DoWhile
{
public static void main(String args[])
{
int n = 10;
do
{
System.out.println("tick " + n);
n--;
}
while(n > 0);
}
}
The loop in the preceding program, while technically correct, can be written more efficiently as follows:

Java Programming Language
55 | P a g e
do
{
System.out.println("tick " + n);
}
while(--n > 0);
In this example, the expression (– –n > 0) combines the decrement of n and the test for zero into one
expression. Here is how it works. First, the – –n statement executes, decrementing n and returning the new
value of n. This value is then compared with zero. If it is greater than zero, the loop continues; otherwise it
terminates.
for You were introduced to a simple form of the for loop in Chapter 2. As you will see, it is a powerful and versatile
construct. Here is the general form of the for statement:
for(initialization; condition; iteration)
{
// body
}
If only one statement is being repeated, there is no need for the curly braces. The for loop operates as
follows. When the loop first starts, the initialization portion of the loop is executed. Generally, this is an
expression that sets the value of the loop control variable, which acts as a counter that controls the loop. It is
important to understand that the initialization expression is only executed once. Next, condition is evaluated.
This must be a Boolean expression. It usually tests the loop control variable against a target value. If this
expression is true, then the body of the loop is executed. If it is false, the loop terminates. Next, the iteration portion of the loop is executed. This is usually an expression that increments or decrements the loop control
variable. The loop then iterates, first evaluating the conditional expression, then executing the body of the
loop, and then executing the iteration expression with each pass. This process repeats until the controlling
expression is false. Here is a version of the “tick” program that uses a for loop:
// Demonstrate the for loop.
class ForTick
{
public static void main(String args[])
{
int n;
for(n=10; n>0; n--)
System.out.println("tick " + n);
}
}
Declaring Loop Control Variables Inside the for Loop
Often the variable that controls a for loop is only needed for the purposes of the loop and is not used
elsewhere. When this is the case, it is possible to declare the variable inside the initialization portion of the

Java Programming Language
56 | P a g e
for. For example, here is the preceding program recoded so that the loop control variable n is declared as an
int inside the for:
// Declare a loop control variable inside the for.
class ForTick
{
public static void main(String args[])
{
// here, n is declared inside of the for loop
for(int n=10; n>0; n--)
System.out.println("tick " + n);
}
}
When you declare a variable inside a for loop, there is one important point to remember: the scope of
that variable ends when the for statement does. (That is, the scope of the variable is limited to the for loop.)
Outside the for loop, the variable will cease to exist. If you need to use the loop control variable elsewhere in
your program, you will not be able to declare it inside the for loop. When the loop control variable will not be
needed elsewhere, most Java programmers declare it inside the for. For example, here is a simple program that
tests for prime numbers. Notice that the loop control variable, i, is declared inside the for since it is not
needed elsewhere.
// Test for primes.
class FindPrime
{
public static void main(String args[])
{
int num;
boolean isPrime = true;
num = 14;
for(int i=2; i <= num/2; i++)
{
if((num % i) == 0)
{
isPrime = false;
break;
}
}
if(isPrime) System.out.println("Prime");
else System.out.println("Not Prime");
}
}
Using the Comma
There will be times when you will want to include more than one statement in the nitialization and
iteration portions of the for loop. For example, consider the loop n the following program:
class Sample
{
public static void main(String args[])

Java Programming Language
57 | P a g e
{
int a, b;
b = 4;
for(a=1; a<b; a++)
{
System.out.println("a = " + a);
System.out.println("b = " + b);
b--;
}
}
}
As you can see, the loop is controlled by the interaction of two variables. Since the loop is governed by
two variables, it would be useful if both could be included in the for statement, itself, instead of b being
handled manually. Fortunately, Java provides a way to accomplish this. To allow two or more variables to control
a for loop, Java permits you to include multiple statements in both the initialization and iteration portions of
the for. Each statement is separated from the next by a comma.
Using the comma, the preceding for loop can be more efficiently coded as shown here:
// Using the comma.
class Comma
{
public static void main(String args[])
{
int a, b;
for(a=1, b=4; a<b; a++, b--)
{
System.out.println("a = " + a);
System.out.println("b = " + b);
}
}
}
In this example, the initialization portion sets the values of both a and b. The two comma-separated
statements in the iteration portion are executed each time the loop repeats. The program generates the
following output:
a = 1
b = 4
a = 2
b = 3
Some for Loop Variations
The for loop supports a number of variations that increase its power and applicability. The reason it is so
flexible is that its three parts, the initialization, the conditional test, and the iteration, do not need to be used
for only those purposes. In fact, the three sections of the for can be used for any purpose you desire. Let’s
look at some examples. One of the most common variations involves the conditional expression. Specifically, this
expression does not need to test the loop control variable against some target value. In fact, the condition
controlling the for can be any Boolean expression. For example, consider the following fragment:
boolean done = false;

Java Programming Language
58 | P a g e
for(int i=1; !done; i++)
{
// ...
if(interrupted()) done = true;
}
In this example, the for loop continues to run until the boolean variable done is set
to true. It does not test the value of i.
Here is another interesting for loop variation. Either the initialization or the iteration expression or both may
be absent, as in this next program:
// Parts of the for loop can be empty.
class ForVar
{
public static void main(String args[])
{
int i;
boolean done = false;
i = 0;
for( ; !done; )
{
System.out.println("i is " + i);
if(i == 10) done = true;
i++;
}
}
}
Here, the initialization and iteration expressions have been moved out of the for. Thus, parts of the for
are empty. While this is of no value in this simple example—indeed, it would be considered quite poor style—
there can be times when this type of approach makes sense. For example, if the initial condition is set through
a complex expression elsewhere in the program or if the loop control variable changes in a nonsequential manner
determined by actions that occur within the body of the loop, it may be appropriate to leave these parts of the
for empty.
Here is one more for loop variation. You can intentionally create an infinite loop (a loop that never
terminates) if you leave all three parts of the for empty. For example:
for( ; ; )
{
// ...
}
This loop will run forever, because there is no condition under which it will terminate. Although there
are some programs, such as operating system command processors, that require an infinite loop, most “infinite
loops” are really just loops with special termination requirements. As you will soon see, there is a way to
terminate a loop—
even an infinite loop like the one shown—that does not make use of the normal loop conditional expression.
Nested Loops

Java Programming Language
59 | P a g e
Like all other programming languages, Java allows loops to be nested. That is, one loop may be inside
another. For example, here is a program that nests for loops:
// Loops may be nested.
class Nested
{
public static void main(String args[])
{
int i, j;
for(i=0; i<10; i++)
{
for(j=i; j<10; j++)
System.out.print(".");
System.out.println();
}
}
}
The output produced by this program is shown here:
..........
.........
........
.......
......
.....
....
...
..
.
Jump Statements
Java supports three jump statements: break, continue, and return. These statements transfer control
to another part of your program. Each is examined here.
Using break
In Java, the break statement has three uses. First, as you have seen, it terminates a statement
sequence in a switch statement. Second, it can be used to exit a loop. Third, it can be used as a “civilized” form
of goto. The last two uses are explained here.
Using break to Exit a Loop
By using break, you can force immediate termination of a loop, bypassing the conditional expression and
any remaining code in the body of the loop. When a break statement is encountered inside a loop, the loop is
terminated and program control resumes at the next statement following the loop. Here is a simple example:

Java Programming Language
60 | P a g e
// Using break to exit a loop.
class BreakLoop
{
public static void main(String args[])
{
for(int i=0; i<100; i++)
{
if(i == 10) break; // terminate loop if i is 10
System.out.println("i: " + i);
}
System.out.println("Loop complete.");
}
}
This program generates the following output:
i: 0
i: 1
i: 2
i: 3
i: 4
i: 5
i: 6
i: 7
i: 8
i: 9
Loop complete.
As you can see, although the for loop is designed to run from 0 to 99, the break statement causes it to
terminate early, when i equals 10.
The break statement can be used with any of Java’s loops, including intentionally infinite loops. For
example, here is the preceding program coded by use of a while loop. The output from this program is the same
as just shown.
// Using break to exit a while loop.
class BreakLoop2
{
public static void main(String args[])
{
int i = 0;
while(i < 100)
{
if(i == 10) break; // terminate loop if i is 10
System.out.println("i: " + i);
i++;
}
System.out.println("Loop complete.");
}
}

Java Programming Language
61 | P a g e
When used inside a set of nested loops, the break statement will only break out of the innermost loop. For
example:
// Using break with nested loops.
class BreakLoop3
{
public static void main(String args[])
{
for(int i=0; i<3; i++)
{
System.out.print("Pass " + i + ": ");
for(int j=0; j<100; j++)
{
if(j == 10) break; // terminate loop if j is 10
System.out.print(j + " ");
}
System.out.println();
}
System.out.println("Loops complete.");
}
}
This program generates the following output:
Pass 0: 0 1 2 3 4 5 6 7 8 9
Pass 1: 0 1 2 3 4 5 6 7 8 9
Pass 2: 0 1 2 3 4 5 6 7 8 9
Loops complete.
As you can see, the break statement in the inner loop only causes termination of that loop. The outer
loop is unaffected.
Here are two other points to remember about break. First, more than one break statement may appear
in a loop. However, be careful. Too many break statements have the tendency to destructure your code.
Second, the break that terminates a switch statement affects only that switch statement and not any
enclosing loops.
Using break as a Form of Goto
In addition to its uses with the switch statement and loops, the break statement can also be employed
by itself to provide a “civilized” form of the goto statement. Java does not have a goto statement, because it
provides a way to branch in an arbitrary and unstructured manner. This usually makes goto-ridden code hard to
understand and hard to maintain. It also prohibits certain compiler optimizations. There are, however, a few
places where the goto is a valuable and legitimate construct for flow control. For example, the goto can be
useful when you are exiting from a deeply nested set of loops. To handle such situations, Java defines an
expanded form of the break statement. By using this form of break, you can break out of one or more blocks
of code. These blocks need not be part of a loop or a switch. They can be any block. Further, you can specify
precisely where execution will resume, because this form of break works with a label. As you will see, break
gives you the benefits of a goto without its problems.
The general form of the labeled break statement is shown here:

Java Programming Language
62 | P a g e
break label;
Here, label is the name of a label that identifies a block of code. When this form of break executes,
control is transferred out of the named block of code. The labeled block of code must enclose the break
statement, but it does not need to be the immediately enclosing block. This means that you can use a labeled
break statement to exit from a set of nested blocks. But you cannot use break to transfer control to a block
of code that does not enclose the break statement.
To name a block, put a label at the start of it. A label is any valid Java identifier followed by a colon.
Once you have labeled a block, you can then use this label as the target of a break statement. Doing so causes
execution to resume at the end of the labeled block. For example, the following program shows three nested
blocks, each with its own label. The break statement causes execution to jump forward, past the end of the
block labeled second, skipping the two println( ) statements.
// Using break as a civilized form of goto.
class Break
{
public static void main(String args[])
{
boolean t = true;
first:
{
second:
{
third:
{
System.out.println("Before the break.");
if(t) break second; // break out of second block
System.out.println("This won't execute");
}
System.out.println("This won't execute");
}
System.out.println("This is after second block.");
}
}
}
Running this program generates the following output:
Before the break.
This is after second block.
One of the most common uses for a labeled break statement is to exit from nested loops. For example,
in the following program, the outer loop executes only once:
// Using break to exit from nested loops
class BreakLoop4
{
public static void main(String args[])

Java Programming Language
63 | P a g e
{
outer: for(int i=0; i<3; i++)
{
System.out.print("Pass " + i + ": ");
for(int j=0; j<100; j++)
{
if(j == 10) break outer; // exit both loops
System.out.print(j + " ");
}
System.out.println("This will not print");
}
System.out.println("Loops complete.");
}
}
This program generates the following output:
Pass 0: 0 1 2 3 4 5 6 7 8 9 Loops complete.
As you can see, when the inner loop breaks to the outer loop, both loops have been terminated. Keep in
mind that you cannot break to any label which is not defined for an enclosing block. For example, the following
program is invalid and will not compile:
// This program contains an error.
class BreakErr
{
public static void main(String args[])
{
one: for(int i=0; i<3; i++)
{
System.out.print("Pass " + i + ": ");
}
for(int j=0; j<100; j++)
{
if(j == 10) break one; // WRONG
System.out.print(j + " ");
}
}
}
Since the loop labeled one does not enclose the break statement, it is not possible to transfer control to that
block.
Using continue
Sometimes it is useful to force an early iteration of a loop. That is, you might want to continue running
the loop, but stop processing the remainder of the code in its body for this particular iteration. This is, in
effect, a goto just past the body of the loop, to the loop’s end. The continue statement performs such an
action. In while and

Java Programming Language
64 | P a g e
do-while loops, a continue statement causes control to be transferred directly to the conditional
expression that controls the loop. In a for loop, control goes first to the iteration portion of the for statement
and then to the conditional expression. For all three loops, any intermediate code is bypassed.
Here is an example program that uses continue to cause two numbers to be printed on each line:
// Demonstrate continue.
class Continue
{
public static void main(String args[])
{
for(int i=0; i<10; i++)
{
System.out.print(i + " ");
if (i%2 == 0) continue;
System.out.println("");
}
}
}
This code uses the % operator to check if i is even. If it is, the loop continues without printing a
newline. Here is the output from this program:
0 1
2 3
4 5
6 7
8 9
As with the break statement, continue may specify a label to describe which enclosing loop to continue.
Here is an example program that uses continue to print a triangular multiplication table for 0 through 9.
// Using continue with a label.
class ContinueLabel
{
public static void main(String args[])
{
outer: for (int i=0; i<10; i++)
{
for(int j=0; j<10; j++)
{
if(j > i)
{
System.out.println();
continue outer;
}
System.out.print(" " + (i * j));
}
}

Java Programming Language
65 | P a g e
System.out.println();
}
}
The continue statement in this example terminates the loop counting j and continues with the next
iteration of the loop counting i. Here is the output of this program:
0
0 1
0 2 4
0 3 6 9
0 4 8 12 16
0 5 10 15 20 25
0 6 12 18 24 30 36
0 7 14 21 28 35 42 49
0 8 16 24 32 40 48 56 64
0 9 18 27 36 45 54 63 72 81
Good uses of continue are rare. One reason is that Java provides a rich set of loop statements which fit
most applications. However, for those special circumstances in which early iteration is needed, the continue
statement provides a structured way to accomplish it.
return
The last control statement is return. The return statement is used to explicitly return from a method.
That is, it causes program control to transfer back to the caller of the method. As such, it is categorized as a
jump statement. Although a full discussion of return must wait until methods are discussed in Chapter 7, a
brief look at return is presented here.
At any time in a method the return statement can be used to cause execution to branch back to the
caller of the method. Thus, the return statement immediately terminates the method in which it is executed.
The following example illustrates this point. Here, return causes execution to return to the Java run-time
system, since it is the run-time system that calls main( ).
// Demonstrate return.
class Return
{
public static void main(String args[])
{
boolean t = true;
System.out.println("Before the return.");
if(t) return; // return to caller
System.out.println("This won't execute.");
}
}
The output from this program is shown here:
Before the return.

Java Programming Language
66 | P a g e
As you can see, the final println( ) statement is not executed. As soon as return isexecuted, control
passes back to the caller.
One last point: In the preceding program, the if(t) statement is necessary. Without it, the Java
compiler would flag an “unreachable code” error, because the compiler would know that the last println( )
statement would never be executed. To prevent this error, the if statement is used here to trick the compiler
for the sake of this demonstration.
1.6 Input and output in Java Que: Explain input and output statement with example in java.
Writing to the Screen
To write the screen the text “Hello World” When we run a program we have to use the following statement:
System.out.println(“Hello World”);
You can replace any of the text within the quotation marks (“ ”) with any text that you would like. The
System.out line is run because, when the application starts up, the interpreters look at the first line of code
and executes it. If you place any other code there, it runs that code instead.
Information about System.out and System.in Que: Explain input and output stream in Java with example.
You have just seen how System.out.println is used to print text to the screen. In fact,
System.out.println can be used at any time to print text to what is known as Standard Out. In almost all cases,
Standard Out is the screen. The System.out.println serves approximately the same purpose as printf in C and
cout in C++.
println versus print
There is one minor variation on println which is also readily used: print(“Hello World”). The different
between println and print is that print does not add a carriage return at the end of the line, so any subsequent
printouts are on the same line. To demonstrate this, let’s see example HelloWorld.java.
A HelloWorld.java hello world program with two prinln
public class HelloWorld
{
Public static void main(String args[])
{
System.out.println(“Hello World”);
System.out.println(“Once more Hello World”);
}
}
Save the above program segment code as HelloWorld.java.

Java Programming Language
67 | P a g e
Now compile it and run it.
Output
Hello World
Once more Hello World
A HelloWorld1 program with two print.
public class HelloWorld1
{
public static void main(String args[])
{
System.out.println(“Hello World”);
System.out.println(“Once more Hello World”);
}
}
Save the above program segment code as HelloWorld1.java.
Now compile it and run it.
The output should looks like as below.
Hello World Once more Hello World
When you use print, the program does not add the extra carriage return.
Reading Data from the Keyboard
Import java.io.DataInputStream;
class Reading
{
public static void main(String args[])
{
DataInputStream in = new DataInputSteam(System.in);
int number = 0;
System.out.println(“Enter an Integer:”);
number = Integer.parseInt(in.readLine());
System.out.println(“number=”+number);
}
}
For reading data from the keyboard we have to use the object of the DataInputStream class and the
readLine() method of that class. After reading the value from the keyboard we have to convert it into proper
type. In above example we are reading integer value so we are converting it into integer using parseInt method
of Integer class.

Java Programming Language
68 | P a g e
Output of the above program would be:
Enter an Integer:
123
Number = 123
Following is an example to read data form the input stream generally keyboard and convert it into numeric
value.
import java.io.*;
class SimpleIO
{
public static void main(String args[]) throws IOException
{
int n;
String str;
……..
str =bufReader.readLine();
Integer num = Integer.valueOf(str);
n = num.intValue();
System.out.println(n);
}
}
Following is an example to read data form the input stream generally keyboard:
import java.io.*;
public class Echo
{
` public static void main(String[] args) throws IOException
{
InputStreamReader reader;
BufferedReader bufReader;
reader = new InputStreamReader(System.in);
bufReader = new BufferedReader(reader);
String s;
While(null != (s=bufReader.readLine()))
{
System.out.println(s);
}
}
}
Following is an example to read data from the input stream generally keyboard:
import java.io
class SimpleIO

Java Programming Language
69 | P a g e
{
public static void main(String args[]) throws IOException
{
int n;
String str;
……
str = bufReader.readLine();
n = Integer.valueOf(str).intValue();
System.out.println(n);
}
}
CLASSPATH Variable: Que: Explain the CLASSPATH in brief.
CLASSPATH tells the JDK programs where to find java classes. You must set the CLASSPATH to
identify the location of your classes. You set CLASSPATH differently depending on your operating system. For
Windows 95 and Windows NT, enter the following at the console command line to set your CLASSPATH:
set CLASSPATH=path
A common CLASSPATH is .;C:\java;C:\java\lib\classes.zip
This tell the java compiler and other JDK tools to use the current directory (.), the c:\java directory, and the
file C:\java;C:\java\lib\classes.zip as a base for finding Java class files.
You would enter the following to set this CLASSPATH:
set CLASSPATH= .;C:\java;C:\java\lib\classes.zip
You can also put this statement in your AUTOEXEC.BAT file so that it will be set automatically each time you
start a DOS shell.
Windows NT users can use the System option in the Control Panel to set the CLASSPATH variable.
Java Tools
The java SDK contains a number of tools that are executed from the command line.
If an IDE is being used, then many of these tools will be incorporated within the IDE.
Javac:
javac compiles JAVA source code and produces bytecode class files.
The source code file must have a .java suffix; the resulting class files have a .class suffix.
We can include more than one source file in a single command for compilation for example
javac class1.java class2.java

Java Programming Language
70 | P a g e
We can also group several source files in a single command line
For example, Myfiles could contain class1.java class2.java and class3.java, these can all be compiled with the
command
javac @Myfiles
A program will usually have reference to other classes. javac will search for a corresponding class file.
If a class file is found, but no corresponding source file is found, but no class file, javac will compile the source
file and use the resulting class file.
If both source file and class file are found, the class file is used unless the source file is more recent that the
class file, in which case the source file is recompiled and resulting class file is used.
java:
The java interpreter runs Java application. It loads the application’s class file and invokes the specified
class’s main method, which must be public, void, and static.
There are a number of options for java, including the verbose option that we have seen for the javac compiler
The format of the command is
java filename
Note you do not include the .class suffix in the class name.
Que: Write names of different browsers.
1. Internet Explorer (Microsoft)
2. Netscape Navigator(Netscape)
3. Google Chrome (Google)
4. Mozilla Firefox (Firefox).
5. Opera Browser (Opera)
6. HotJava(Java)
7. Safari(Apple)
Exercise
* Trace output for following program segment.
1. outer: for(int i=0; i<10;i++)
{
for(int j=0; j<10; j++)
{
if(j>i)
{
System.out.println();
Continue outer;
}
System.out.print(“ “ + (i*j));
}

Java Programming Language
71 | P a g e
}
2.
int i=0; j=2;
outer: while(i<j)
{
i++;
inner : do
{
++j;
if(i++ %3 == 2)
{
break inner;
}
else if(j++ 53 == 1)
{
break outer;
}
System.out.println(i*j);
}
While(j>i)
System.out.println(i+j);
}
2. INTRODUCTION TO CLASSES
2.1 Class fundamentals
Perhaps the most important thing to understand about a class is that it defines a new data type. Once
defined, this new type can be used to create objects of that type. Thus, a class is a template for an object, and
an object is an instance of a class. Because an object is an instance of a class, you will often see the two words
object and instance used interchangeably
The General Form of a Class
A class is declared by use of the class keyword. The general form of a class definition is shown here:
class classname {
type instance-variable1;
type instance-variable2;
// ...
type instance-variableN;

Java Programming Language
72 | P a g e
type methodname1(parameter-list)
{
// body of method
}
type methodname2(parameter-list)
{
// body of method
}
// ...
type methodnameN(parameter-list)
{
// body of method
}
}
The data, or variables, defined within a class are called instance variables. The code is contained within
methods. Collectively, the methods and variables defined within a class are called members of the class.
Variables defined within a class are called instance variables because each instance of the class (that is, each
object of the class) contains its own copy of these variables. Thus, the data for one object is separate and
unique from the data for another.
All methods have the same general form as main( ).
A Simple Class
Here is a class called Box that defines three instance variables: width, height, and depth. Currently, Box does
not contain any methods.
class Box
{
double width;
double height;
double depth;
}
As stated, a class defines a new type of data. In this case, the new data type is called Box. You will use
this name to declare objects of type Box. It is important to remember that a class declaration only creates a
template; it does not create an actual object. Thus, the preceding code does not cause any objects of type Box
to come into existence. To actually create a Box object, you will use a statement like the following:
Box mybox = new Box(); // create a Box object called mybox
After this statement executes, mybox will be an instance of Box. Thus, it will have “physical” reality.
Again, each time you create an instance of a class, you are creating an object that contains its own copy of each
instance variable defined by the class. Thus, every Box object will contain its own copies of the instance
variables width, height, and depth. To access these variables, you will use the dot (.) operator. The dot operator

Java Programming Language
73 | P a g e
links the name of the object with the name of an instance variable. For example, to assign the width variable of
mybox the value 100, you would use the following statement:
mybox.width = 100;
This statement tells the compiler to assign the copy of width that is contained within the mybox object
the value of 100. In general, you use the dot operator to access both the instance variables and the methods
within an object.
Here is a complete program that uses the Box class:
/* A program that uses the Box class.
Call this file BoxDemo.java
*/
class Box
{
double width;
double height;
double depth;
}
// This class declares an object of type Box.
class BoxDemo
{
public static void main(String args[])
{
Box mybox = new Box();
double vol;
// assign values to mybox's instance variables
mybox.width = 10;
mybox.height = 20;
mybox.depth = 15;
// compute volume of box
vol = mybox.width * mybox.height * mybox.depth;
System.out.println("Volume is " + vol);
}
}
You should call the file that contains this program BoxDemo.java, because the main( ) method is in the
class called BoxDemo, not the class called Box. When you compile this program, you will find that two .class
files have been created, one for Box and one for BoxDemo. The Java compiler automatically puts each class
into its own .class file. It is not necessary for both the Box and the BoxDemo class to actually be in the same
source
file. You could put each class in its own file, called Box.java and BoxDemo.java, respectively.
To run this program, you must execute BoxDemo.class. When you do, you will see the following output:
Volume is 3000.0
As stated earlier, each object has its own copies of the instance variables. This means that if you have
two Box objects, each has its own copy of depth, width, and height. It is important to understand that changes

Java Programming Language
74 | P a g e
to the instance variables of one object have no effect on the instance variables of another. For example, the
following
program declares two Box objects:
// This program declares two Box objects.
class Box
{
double width;
double height;
double depth;
}
class BoxDemo2
{
public static void main(String args[])
{
Box mybox1 = new Box();
Box mybox2 = new Box();
double vol;
// assign values to mybox1's instance variables
mybox1.width = 10;
mybox1.height = 20;
mybox1.depth = 15;
/* assign different values to mybox2's
instance variables */
mybox2.width = 3;
mybox2.height = 6;
mybox2.depth = 9;
// compute volume of first box
vol = mybox1.width * mybox1.height * mybox1.depth;
System.out.println("Volume is " + vol);
// compute volume of second box
vol = mybox2.width * mybox2.height * mybox2.depth;
System.out.println("Volume is " + vol);
}
}
The output produced by this program is shown here:
Volume is 3000.0
Volume is 162.0
As you can see, mybox1’s data is completely separate from the data contained in mybox2.
2.2 Declaring objects
As just explained, when you create a class, you are creating a new data type. You can use this type to
declare objects of that type. However, obtaining objects of a class is a two-step process. First, you must
declare a variable of the class type. This variable does not define an object. Instead, it is simply a variable that
can refer to an object. Second, you must acquire an actual, physical copy of the object and assign it to that
variable. You

Java Programming Language
75 | P a g e
can do this using the new operator. The new operator dynamically allocates (that is, allocates at run time)
memory for an object and returns a reference to it. This reference is, more or less, the address in memory of
the object allocated by new.
This reference is then stored in the variable. Thus, in Java, all class objects must be dynamically
allocated. Let’s look at the details of this procedure.
In the preceding sample programs, a line similar to the following is used to declare an object of type Box:
Box mybox = new Box();
This statement combines the two steps just described. It can be rewritten like this to show each step more
clearly:
Box mybox; // declare reference to object
mybox = new Box(); // allocate a Box object
The first line declares mybox as a reference to an object of type Box. After this line executes, mybox
contains the value null, which indicates that it does not yet point to an actual object. Any attempt to use mybox
at this point will result in a compile-time error. The next line allocates an actual object and assigns a reference
to it to mybox. After the second line executes, you can use mybox as if it were a Box object. But in reality,
mybox simply holds the memory address of the actual Box object. The effect of these two lines of code is
depicted in Figure.
2.3 Assigning object reference variables
Box b1 = new Box();
Box b2 = b1;
You might think that b2 is being assigned a reference to a copy of the object referred to by b1. That
is, you might think that b1 and b2 refer to separate and distinct objects. However, this would be wrong.
Instead, after this fragment executes, b1 and b2 will both refer to the same object. The assignment of b1 to
b2 did not allocate any memory or copy any part of the original object. It simply makes b2 refer to the same
object as
does b1. Thus, any changes made to the object through b2 will affect the object to which b1 is referring,
since they are the same object.

Java Programming Language
76 | P a g e
This situation is depicted here:
Although b1 and b2 both refer to the same object, they are not linked in any other way. For example, a
subsequent assignment to b1 will simply unhook b1 from the original object without affecting the object or
affecting b2. For example:
Box b1 = new Box();
Box b2 = b1;
// ...
b1 = null;
Here, b1 has been set to null, but b2 still points to the original object.
2.4 Introducing methods
This is the general form of a method:
type name(parameter-list)
{
// body of method
}
Here, type specifies the type of data returned by the method. This can be any valid type,including class
types that you create. If the method does not return a value, its return type must be void. The name of the
method is specified by name. This can be any legal identifier other than those already used by other items
within the current scope. The parameter-list is a sequence of type and identifier pairs separated by commas.
Parameters are essentially variables that receive the value of the arguments passed to the method when it is
called. If the method has no parameters, then the parameter list will be empty.
Methods that have a return type other than void return a value to the calling routine using the following
form of the return statement:
return value;
Here, value is the value returned.
In the next few sections, you will see how to create various types of methods, including those that take
parameters and those that return values.
Adding a Method to the Box Class
// This program includes a method inside the box class.
class Box
{

Java Programming Language
77 | P a g e
double width;
double height;
double depth;
// display volume of a box
void volume()
{
System.out.print("Volume is ");
System.out.println(width * height * depth);
}
}
class BoxDemo3
{
public static void main(String args[])
{
Box mybox1 = new Box();
Box mybox2 = new Box();
// assign values to mybox1's instance variables
mybox1.width = 10;
mybox1.height = 20;
mybox1.depth = 15;
/* assign different values to mybox2's
instance variables */
mybox2.width = 3;
mybox2.height = 6;
mybox2.depth = 9;
// display volume of first box
mybox1.volume();
// display volume of second box
mybox2.volume();
}
}
This program generates the following output, which is the same as the previous version.
Volume is 3000.0
Volume is 162.0
Look closely at the following two lines of code:
mybox1.volume();
mybox2.volume();
The first line here invokes the volume( ) method on mybox1. That is, it calls volume( ) relative to the
mybox1 object, using the object’s name followed by the dot operator. Thus, the call to mybox1.volume( )
displays the volume of the box defined by mybox1, and the call to mybox2.volume( ) displays the volume of the
box defined by mybox2. Each time volume( ) is invoked, it displays the volume for the specified box.
Returning a Value
While the implementation of volume( ) does move the computation of a box’s volume inside the Box
class where it belongs, it is not the best way to do it. For example, what if another part of your program
wanted to know the volume of a box, but not display its value? A better way to implement volume( ) is to have it

Java Programming Language
78 | P a g e
compute the volume of the box and return the result to the caller. The following example, an improved version
of the preceding program, does just that:
// Now, volume() returns the volume of a box.
class Box
{
double width;
double height;
double depth;
// compute and return volume
double volume()
{
return width * height * depth;
}
}
class BoxDemo4
{
public static void main(String args[])
{
Box mybox1 = new Box();
Box mybox2 = new Box();
double vol;
// assign values to mybox1's instance variables
mybox1.width = 10;
mybox1.height = 20;
mybox1.depth = 15;
/* assign different values to mybox2's
instance variables */
mybox2.width = 3;
mybox2.height = 6;
mybox2.depth = 9;
// get volume of first box
vol = mybox1.volume();
System.out.println("Volume is " + vol);
// get volume of second box
vol = mybox2.volume();
System.out.println("Volume is " + vol);
}
}
As you can see, when volume( ) is called, it is put on the right side of an assignment statement. On the
left is a variable, in this case vol, that will receive the value returned by volume( ). Thus, after
vol = mybox1.volume();
executes, the value of mybox1.volume( ) is 3,000 and this value then is stored in vol. There are two important
things to understand about returning values:

Java Programming Language
79 | P a g e
The type of data returned by a method must be compatible with the return type specified by the
method. For example, if the return type of some method is boolean, you could not return an integer.
The variable receiving the value returned by a method (such as vol, in this case) must also be
compatible with the return type specified for the method.
One more point: The preceding program can be written a bit more efficiently because there is actually no
need for the vol variable. The call to volume( ) could have been used in the println( ) statement directly, as
shown here:
System.out.println("Volume is " + mybox1.volume());
In this case, when println( ) is executed, mybox1.volume( ) will be called automatically and its value will
be passed to println( ).
Adding a Method That Takes Parameters
While some methods don’t need parameters, most do. Parameters allow a method to be generalized.
That is, a parameterized method can operate on a variety of data and/or be used in a number of slightly
different situations. To illustrate this point, let’s use a very simple example. Here is a method that returns the
square of the number 10:
int square()
{
return 10 * 10;
}
While this method does, indeed, return the value of 10 squared, its use is very limited. However, if you
modify the method so that it takes a parameter, as shown next, then you can make square( ) much more useful.
int square(int i)
{
return i * i;
}
Now, square( ) will return the square of whatever value it is called with. That is, square( ) is now a
general-purpose method that can compute the square of any integer value, rather than just 10.
Here is an example:
int x, y;
x = square(5); // x equals 25
x = square(9); // x equals 81
y = 2;
x = square(y); // x equals 4
In the first call to square( ), the value 5 will be passed into parameter i. In the second call, i will
receive the value 9. The third invocation passes the value of y, which is 2 in this example. As these examples
show, square( ) is able to return the square of whatever data it is passed.

Java Programming Language
80 | P a g e
It is important to keep the two terms parameter and argument straight. A parameter is a variable
defined by a method that receives a value when the method is called. For example, in square( ), i is a
parameter. An argument is a value that is passed to a method when it is invoked. For example, square(100)
passes 100 as an argument. Inside square( ), the parameter i receives that value.
You can use a parameterized method to improve the Box class. In the preceding examples, the
dimensions of each box had to be set separately by use of a sequence of statements, such as:
mybox1.width = 10;
mybox1.height = 20;
mybox1.depth = 15;
While this code works, it is troubling for two reasons. First, it is clumsy and error prone. For example, it
would be easy to forget to set a dimension. Second, in well-designed Java programs, instance variables should
be accessed only through methods defined by their class. In the future, you can change the behavior of a
method, but you can’t change the behavior of an exposed instance variable.
Thus, a better approach to setting the dimensions of a box is to create a method that takes the
dimension of a box in its parameters and sets each instance variable appropriately. This concept is implemented
by the following program:
// This program uses a parameterized method.
class Box
{
double width;
double height;
double depth;
// compute and return volume
double volume()
{
return width * height * depth;
}
// sets dimensions of box
void setDim(double w, double h, double d)
{
width = w;
height = h;
depth = d;
}
}
class BoxDemo5
{
public static void main(String args[])
{
Box mybox1 = new Box();
Box mybox2 = new Box();
double vol;
// initialize each box
mybox1.setDim(10, 20, 15);
mybox2.setDim(3, 6, 9);

Java Programming Language
81 | P a g e
// get volume of first box
vol = mybox1.volume();
System.out.println("Volume is " + vol);
// get volume of second box
vol = mybox2.volume();
System.out.println("Volume is " + vol);
}
}
As you can see, the setDim( ) method is used to set the dimensions of each box. For example, when
mybox1.setDim(10, 20, 15);
is executed, 10 is copied into parameter w, 20 is copied into h, and 15 is copied into d. Inside setDim( ) the
values of w, h, and d are then assigned to width, height, and depth, respectively.
2.5 Constructors Que: Explain the Constructor in Java.
It can be tedious to initialize all of the variables in a class each time an instance is created. Java allows
objects to initialize themselves when they are created. This automatic initialization is performed through the
use of a constructor.
A constructor initializes an object immediately upon creation. It has the same name as the class in
which it resides and is syntactically similar to a method. Once defined, the constructor is automatically called
immediately after the object is created, before the new operator completes. Constructors look a little strange
because they have no return type, not even void. This is because the implicit return type of a class’ constructor
is the class type itself. It is the constructor’s job to initialize the internal state of an object so that the code
creating an instance will have a fully initialized, usable object immediately. You can rework the Box example so
that the dimensions of a box are automatically initialized when an object is constructed. To do so, replace
setDim( ) with a constructor. Let’s begin by defining a simple constructor that simply sets the dimensions of
each box to the same values. This version is shown here:
/* Here, Box uses a constructor to initialize the
dimensions of a box.
*/
class Box
{
double width;
double height;
double depth;
// This is the constructor for Box.
Box()
{
System.out.println("Constructing Box");
width = 10;
height = 10;
depth = 10;
}
// compute and return volume

Java Programming Language
82 | P a g e
double volume()
{
return width * height * depth;
}
}
class BoxDemo6
{
public static void main(String args[])
{
// declare, allocate, and initialize Box objects
Box mybox1 = new Box();
Box mybox2 = new Box();
double vol;
// get volume of first box
vol = mybox1.volume();
System.out.println("Volume is " + vol);
// get volume of second box
vol = mybox2.volume();
System.out.println("Volume is " + vol);
}
}
When this program is run, it generates the following results:
Constructing Box
Constructing Box
Volume is 1000.0
Volume is 1000.0
Parameterized Constructors
The following version of Box defines a parameterized constructor which sets the dimensions of a box
as specified by those parameters. Pay special attention to how Box objects are created
/* Here, Box uses a parameterized constructor to
initialize the dimensions of a box.
*/
class Box
{
double width;
double height;
double depth;
// This is the constructor for Box.
Box(double w, double h, double d)
{
width = w;
height = h;
depth = d;
}

Java Programming Language
83 | P a g e
// compute and return volume
double volume()
{
return width * height * depth;
}
}
class BoxDemo7
{
public static void main(String args[])
{
// declare, allocate, and initialize Box objects
Box mybox1 = new Box(10, 20, 15);
Box mybox2 = new Box(3, 6, 9);
double vol;
// get volume of first box
vol = mybox1.volume();
System.out.println("Volume is " + vol);
// get volume of second box
vol = mybox2.volume();
System.out.println("Volume is " + vol);
}
}
The output from this program is shown here:
Volume is 3000.0
Volume is 162.0
As you can see, each object is initialized as specified in the parameters to its constructor. For example,
in the following line,
Box mybox1 = new Box(10, 20, 15);
the values 10, 20, and 15 are passed to the Box( ) constructor when new creates the object. Thus,
mybox1’s copy of width, height, and depth will contain the values 10, 20, and 15, respectively.
2.6 The this keyword Que: Explain this keyword.
Sometimes a method will need to refer to the object that invoked it. To allow this, Java defines the
this keyword. this can be used inside any method to refer to the current object. That is, this is always a
reference to the object on which the method was invoked. You can use this anywhere a reference to an object
of the current class’ type is permitted. To better understand what this refers to, consider the following
version of Box( ):
// A redundant use of this.
Box(double w, double h, double d)
{
this.width = w;
this.height = h;

Java Programming Language
84 | P a g e
this.depth = d;
}
This version of Box( ) operates exactly like the earlier version. The use of this is redundant, but
perfectly correct. Inside Box( ), this will always refer to the invoking object. While it is redundant in this case,
this is useful in other contexts, one of which is explained in the next section.
Instance Variable Hiding
As you know, it is illegal in Java to declare two local variables with the same name inside the same or
enclosing scopes. Interestingly, you can have local variables, including formal parameters to methods, which
overlap with the names of the class’ instance variables. However, when a local variable has the same name as an
instance variable, the local variable hides the instance variable. This is why width, height, and depth were not
used as the names of the parameters to the Box( ) constructor inside the Box class. If they had been, then
width would have referred to the formal parameter, hiding the instance variable width. While it is usually
easier to simply use different names, there is another way around this situation. Because this lets you refer
directly to the object, you can use it to resolve any name space collisions that might occur between instance
variables and local variables. For example, here is another version of Box( ), which uses width, height, and
depth for parameter names and then uses this to access the instance variables by the same name: // Use this
to resolve name-space collisions.
Box(double width, double height, double depth)
{
this.width = width;
this.height = height;
this.depth = depth;
}
A word of caution: The use of this in such a context can sometimes be confusing, and some
programmers are careful not to use local variables and formal parameter names that hide instance variables. Of
course, other programmers believe the contrary— that it is a good convention to use the same names for
clarity, and use this to overcome the instance variable hiding. It is a matter of taste which approach you adopt.
Although this is of no significant value in the examples just shown, it is very useful in certain situations.
2.7 Garbage collection Que: Explain Garbage Collection
Since objects are dynamically allocated by using the new operator, you might be wondering how such
objects are destroyed and their memory released for later reallocation. In some languages, such as C++,
dynamically allocated objects must be manually released by use of a delete operator. Java takes a different
approach; it handles deallocation for you automatically. The technique that accomplishes this is called garbage collection. It works like this: when no references to an object exist, that object is assumed to be no longer
needed, and the memory occupied by the object can be reclaimed. There is no explicit need to destroy objects
as in C++. Garbage collection only occurs sporadically (if at all) during the execution of your program. It will not
occur simply because one or more objects exist that are no longer used. Furthermore, different Java run-time
implementations will take varying approaches to garbage collection, but for the most part, you should not have
to think about it while writing your programs.
2.7.1 The finalize method

Java Programming Language
85 | P a g e
Sometimes an object will need to perform some action when it is destroyed. For example, if an object is
holding some non-Java resource such as a file handle or window character font, then you might want to make
sure these resources are freed before an object is destroyed. To handle such situations, Java provides a
mechanism called finalization. By using finalization, you can define specific actions that will occur when an
object is just about to be reclaimed by the garbage collector.
To add a finalizer to a class, you simply define the finalize( ) method. The Java run time calls that
method whenever it is about to recycle an object of that class. Inside the finalize( ) method you will specify
those actions that must be performed before an object is destroyed. The garbage collector runs periodically,
checking for objects that are no longer referenced by any running state or indirectly through other referenced
objects. Right before an asset is freed, the Java run time calls the finalize( ) method on the object.
The finalize( ) method has this general form:
protected void finalize( )
{
// finalization code here
}
Here, the keyword protected is a specifier that prevents access to finalize( ) by code defined outside
its class. It is important to understand that finalize( ) is only called just prior to garbagecollection. It is not
called when an object goes out-of-scope, for example. This means that you cannot know when—or even if—
finalize( ) will be executed. Therefore, yourprogram should provide other means of releasing system resources,
etc., used by the object. It must not rely on finalize( ) for normal program operation.
2.8 Wrapper class Que: Explain Wrapper class constructor methods for converting primitive data types to object type.
Que: Explain the Wrapper class.
Que: What is Wrapper class? List various wrapper classes. Explain the use intValue() and floatValue()
methos.
Que: What is Wrapper class? Explain with suitable example.
Que: What is Wrapper class? Why it is provided in Java.
Primitive data types such as int, float, double and char may be converted into an object type using the
Wrapper classes contain in the java.lang package.
The table below shows the simple data types and their corresponding wrapper class types.
Wrapper classes for Converting Simple Types
Simple Type Wrapper Class boolean Boolean
char Character
double Double
float Float
int Integer
long Long

Java Programming Language
86 | P a g e
The Wrapper classes have a number of unique methods for handling primitive data types and objects.
They are listed into the following tables.
Converting Primitive Numbers to Object Numbers Using Constructor Methods
Constructor Calling Conversion Action Integer IntVal = new Integer(i); Primitive integer to Integer object
Float FloatVal = new Float(f); Primitive float to Float object
Double DoubleVal = new Double(d); Primitive double to Double object
Long LongVal = new Long(l); Primitive long to Long object
Note: i,f,d and l are primitive data values denoting int, float, double and long data types. They may be constants or variables.
Converting Object Numbers to Primitive Numbers Using typeValue() Methods
Method Calling Conversion Action int i = IntVal.intValue(); Object to primitive integer
float f = FloatVal.floatValue(); Object to primitive float
long l = LongVal.longValue(); Object to primitive long
double d = DoubleVal.doubleValue(); Object to primitive double
Converting Numbers to Stings Using to String() Method
Method Calling Conversion Action str = Integer.toString(i); Primitive integer to string
str = Float.toString(f); Primitive float to string
str = Double.toString(d); Primitive double to string
str = Long.toString(l); Primitive long to string
Converting Sting Objects to Numeric Objects Using the Static Method ValueOf()
Method Calling Conversion Action IntVal = Integer.ValueOf(str); Converts string to Integer Object
FloatVal = Float.ValueOf(str); Converts string to Float Object
DoubleVal = Double.ValueOf(str); Converts string to Double Object
LongVal = Long.ValueOf(str); Converts string to Long Object
Note: These numeric objects may be converted to primitive numbers using the typeValue() methods as show in the below given table.
Converting Numeric Strings to Primitive Numbers Using Parsing Methods
Method Calling Conversion Action int i = Integer.parseInt(str); Converts string to primitive integer
long l = Long.parseLong(str); Converts string to primitive long
Note: parseInt() and parseLong() methods throw a NumberFormatException if the value of the str does not rpresent an integer.

Java Programming Language
87 | P a g e
Program:
import java.io;
class Invest
{
public static void main(String args[])
{
Float principalAmount = new Float(0); //Converting numbers to object
Float interestRate = new Float(0);
intYears = 0;
try
{
DataInputStream in = new DataInputStream(System.in);
System.out.println(“Enter Principal Amount:”);
String principalString = in.readLine();
principalAmount = Float.valueOf(principalString); // String Object to number Object
System.out.println(“Enter Interest Rate:”);
String interestString = in.readLine();
interestRate = Float.valueOf(interestString);
System.out.println(“Enter Number of Years:”);
String yearsString = in.readLine();
numYears = Integer.parseInt(yearsString); //Numeric strings to numbers
}
catch(IOException e)
{
System.out.println(“I/O Error”);
System.exit(1);
}
float value = loan(principalAmount.floatValue(), interestRate.floatVal(), numYears);
printline();
System.out.println(“Final value =” + value);
printline();
}
//Method to compute the final value
static float loan(float p, float r, int n)
{
int year = 1;
float sum = p;
while(year <= n)
{

Java Programming Language
88 | P a g e
sum = sum * (1 + r);
year = year + 1;
}
return sum;
}
//Method to draw a line
static void println()
{
for(int i = 1; i <= 30; i++)
{
System.out.println(“=”);
}
System.out.println(“ “);
}
}
The output of the program would be:
Enter Principal Amount: 5000
Enter Interest Rate: 0.15
Enter Number of Year: 4
================================
Final Value: 8745.03
================================

Java Programming Language
89 | P a g e
3. MORE ABOUT METHODS AND CLASSES
3.1 Overloading methods Que: Explain function overloading with suitable example.
Que: Explain overloading of methods with example.
In Java it is possible to define two or more methods within the same class that share the same name, as
long as their parameter declarations are different. When this is the case, the methods are said to be
overloaded, and the process is referred to as method overloading. Method overloading is one of the ways that
Java implements polymorphism.
When an overloaded method is invoked, Java uses the type and/or number of arguments as its guide to
determine which version of the overloaded method to actually call. Thus, overloaded methods must differ in the
type and/or number of their parameters. While overloaded methods may have different return types, the
return type alone is insufficient to distinguish two versions of a method. When Java encounters a call to an
overloaded method, it simply executes the version of the method whose parameters match the arguments used
in the call.
Here is a simple example that illustrates method overloading:
// Demonstrate method overloading.
class OverloadDemo
{
void test()
{
System.out.println("No parameters");
}
// Overload test for one integer parameter.
void test(int a)
{
System.out.println("a: " + a);
}
// Overload test for two integer parameters.
void test(int a, int b)
{
System.out.println("a and b: " + a + " " + b);
}
// overload test for a double parameter
double test(double a)
{
System.out.println("double a: " + a);
return a*a;
}
}
class Overload
{
public static void main(String args[])

Java Programming Language
90 | P a g e
{
OverloadDemo ob = new OverloadDemo();
double result;
// call all versions of test()
ob.test();
ob.test(10);
ob.test(10, 20);
result = ob.test(123.25);
System.out.println("Result of ob.test(123.25): " + result);
}
}
This program generates the following output:
No parameters
a: 10
a and b: 10 20
double a: 123.25
Result of ob.test(123.25): 15190.5625
As you can see, test( ) is overloaded four times. The first version takes no parameters, the second
takes one integer parameter, the third takes two integer parameters, and the fourth takes one double
parameter. The fact that the fourth version of test( ) also returns a value is of no consequence relative to
overloading, since return types do not play a role in overload resolution.
When an overloaded method is called, Java looks for a match between the arguments used to call the
method and the method’s parameters. However, this match need not always be exact. In some cases Java’s
automatic type conversions can play a role in overload resolution. For example, consider the following program:
// Automatic type conversions apply to overloading.
class OverloadDemo
{
void test()
{
System.out.println("No parameters");
}
// Overload test for two integer parameters.
void test(int a, int b)
{
System.out.println("a and b: " + a + " " + b);
}
// overload test for a double parameter
void test(double a)
{
System.out.println("Inside test(double) a: " + a);
}
}
class Overload

Java Programming Language
91 | P a g e
{
public static void main(String args[])
{
OverloadDemo ob = new OverloadDemo();
int i = 88;
ob.test();
ob.test(10, 20);
ob.test(i); // this will invoke test(double)
ob.test(123.2); // this will invoke test(double)
}
}
This program generates the following output:
No parameters
a and b: 10 20
Inside test(double) a: 88
Inside test(double) a: 123.2
As you can see, this version of OverloadDemo does not define test(int). Therefore, when test( ) is
called with an integer argument inside Overload, no matching method is found. However, Java can automatically
convert an integer into a double, and this conversion can be used to resolve the call. Therefore, after test(int)
is not found, Java elevates i to double and then calls test(double). Of course, if test(int) had been defined, it
would have been called instead. Java will employ its automatic type conversions only if no exact match is found.
Method overloading supports polymorphism because it is one way that Java implements the “one
interface, multiple methods” paradigm.
Overloading Constructors
In addition to overloading normal methods, you can also overload constructor methods. In fact, for most
real-world classes that you create, overloaded constructors will be the norm, not the exception. To understand
why, let’s return to the Box class developed in the preceding chapter. Following is the latest version of Box:
class Box
{
double width;
double height;
double depth;
// This is the constructor for Box.
Box(double w, double h, double d)
{
width = w;
height = h;
depth = d;
}
// compute and return volume
double volume()
{
return width * height * depth;

Java Programming Language
92 | P a g e
}
}
As you can see, the Box( ) constructor requires three parameters. This means that all declarations of
Box objects must pass three arguments to the Box( ) constructor. For example, the following statement is
currently invalid:
Box ob = new Box();
Since Box( ) requires three arguments, it’s an error to call it without them. This raises some important
questions. What if you simply wanted a box and did not care (or know) what its initial dimensions were? Or, what
if you want to be able to initialize a cube by specifying only one value that would be used for all three
dimensions? As the Box class is currently written, these other options are not available to you.
Fortunately, the solution to these problems is quite easy: simply overload the Box constructor so that it
Handles the situations just described. Here is a program thatcontains an improved version of Box that does
just that:
/* Here, Box defines three constructors to initialize
the dimensions of a box various ways.
*/
class Box
{
double width;
double height;
double depth;
// constructor used when all dimensions specified
Box(double w, double h, double d)
{
width = w;
height = h;
depth = d;
}
// constructor used when no dimensions specified
Box()
{
width = -1; // use -1 to indicate
height = -1; // an uninitialized
depth = -1; // box
}
// constructor used when cube is created
Box(double len)
{
width = height = depth = len;
}
// compute and return volume
double volume()
{
return width * height * depth;
}
}
class OverloadCons

Java Programming Language
93 | P a g e
{
public static void main(String args[])
{
// create boxes using the various constructors
Box mybox1 = new Box(10, 20, 15);
Box mybox2 = new Box();
Box mycube = new Box(7);
double vol;
// get volume of first box
vol = mybox1.volume();
System.out.println("Volume of mybox1 is " + vol);
// get volume of second box
vol = mybox2.volume();
System.out.println("Volume of mybox2 is " + vol);
// get volume of cube
vol = mycube.volume();
System.out.println("Volume of mycube is " + vol);
}
}
The output produced by this program is shown here:
Volume of mybox1 is 3000.0
Volume of mybox2 is -1.0
Volume of mycube is 343.0
As you can see, the proper overloaded constructor is called based upon the parameters specified when
new is executed.
3.2 Using object as parameters
So far we have only been using simple types as parameters to methods. However, it is both correct and
common to pass objects to methods. For example, consider the following short program:
// Objects may be passed to methods.
class Test
{
int a, b;
Test(int i, int j)
{
a = i;
b = j;
}
// return true if o is equal to the invoking object
boolean equals(Test o)
{
if(o.a == a && o.b == b) return true;
else return false;
}
}

Java Programming Language
94 | P a g e
class PassOb
{
public static void main(String args[])
{
Test ob1 = new Test(100, 22);
Test ob2 = new Test(100, 22);
Test ob3 = new Test(-1, -1);
System.out.println("ob1 == ob2: " + ob1.equals(ob2));
System.out.println("ob1 == ob3: " + ob1.equals(ob3));
}
}
This program generates the following output:
ob1 == ob2: true
ob1 == ob3: false
As you can see, the equals( ) method inside Test compares two objects for equality and returns the
result. That is, it compares the invoking object with the one that it is passed. If they contain the same values,
then the method returns true. Otherwise, it returns false. Notice that the parameter o in equals( ) specifies
Test as its type. Although Test is a class type created by the program, it is used in just the same way as Java’s
built-in types.
One of the most common uses of object parameters involves constructors. Frequently you will want to
construct a new object so that it is initially the same as some existing object. To do this, you must define a
constructor that takes an object of its class as a parameter. For example, the following version of Box allows
one object to initialize another:
// Here, Box allows one object to initialize another.
class Box
{
double width;
double height;
double depth;
// construct clone of an object
Box(Box ob)
{
// pass object to constructor
width = ob.width;
height = ob.height;
depth = ob.depth;
}
// constructor used when all dimensions specified
Box(double w, double h, double d)
{
width = w;
height = h;
depth = d;
}
// constructor used when no dimensions specified

Java Programming Language
95 | P a g e
Box()
{
width = -1; // use -1 to indicate
height = -1; // an uninitialized
depth = -1; // box
}
// constructor used when cube is created
Box(double len)
{
width = height = depth = len;
}
// compute and return volume
double volume()
{
return width * height * depth;
}
}
class OverloadCons2
{
public static void main(String args[])
{
// create boxes using the various constructors
Box mybox1 = new Box(10, 20, 15);
Box mybox2 = new Box();
Box mycube = new Box(7);
Box myclone = new Box(mybox1);
double vol;
// get volume of first box
vol = mybox1.volume();
System.out.println("Volume of mybox1 is " + vol);
// get volume of second box
vol = mybox2.volume();
System.out.println("Volume of mybox2 is " + vol);
// get volume of cube
vol = mycube.volume();
System.out.println("Volume of cube is " + vol);
// get volume of clone
vol = myclone.volume();
System.out.println("Volume of clone is " + vol);
}
}
As you will see when you begin to create your own classes, providing many forms of constructor methods
is usually required to allow objects to be constructed in a convenient and efficient manner.
A Closer Look at Argument Passing

Java Programming Language
96 | P a g e
In general, there are two ways that a computer language can pass an argument to a subroutine. The
first way is call-by-value. This method copies the value of an argument into the formal parameter of the
subroutine. Therefore, changes made to the parameter of the subroutine have no effect on the argument. The
second way an argument can be passed is call-by-reference. In this method, a reference to an argument (not
the value of the argument) is passed to the parameter. Inside the subroutine, this reference is used to access
the actual argument specified in the call. This means that changes made to the parameter will affect the
argument used to call the subroutine. As you will see, Java uses both approaches, depending upon what is
passed.
In Java, when you pass a simple type to a method, it is passed by value. Thus, what occurs to the
parameter that receives the argument has no effect outside the method. For example, consider the following
program:
// Simple types are passed by value.
class Test
{
void meth(int i, int j)
{
i *= 2;
j /= 2;
}
}
class CallByValue
{
public static void main(String args[])
{
Test ob = new Test();
int a = 15, b = 20;
System.out.println("a and b before call: " + a + " " + b);
ob.meth(a, b);
System.out.println("a and b after call: " + a + " " + b);
}
}
The output from this program is shown here:
a and b before call: 15 20
a and b after call: 15 20
As you can see, the operations that occur inside meth( ) have no effect on the values of a and b used in
the call; their values here did not change to 30 and 10.
When you pass an object to a method, the situation changes dramatically, because objects are passed
by reference. Keep in mind that when you create a variable of a class type, you are only creating a reference to
an object. Thus, when you pass this reference to a method, the parameter that receives it will refer to the
same object as that referred to by the argument. This effectively means that objects are passed to methods
by use of call-by-reference. Changes to the object inside the method do affect the object used as an
argument. For example, consider the following program:

Java Programming Language
97 | P a g e
// Objects are passed by reference.
class Test
{
int a, b;
Test(int i, int j)
{
a = i;
b = j;
}
// pass an object
void meth(Test o)
{
o.a *= 2;
o.b /= 2;
}
}
class CallByRef
{
public static void main(String args[])
{
Test ob = new Test(15, 20);
System.out.println("ob.a and ob.b before call: " + ob.a + " " + ob.b);
ob.meth(ob);
System.out.println("ob.a and ob.b after call: " + ob.a + " " + ob.b);
}
}
This program generates the following output:
ob.a and ob.b before call: 15 20
ob.a and ob.b after call: 30 10
As you can see, in this case, the actions inside meth( ) have affected the object used as an argument.
As a point of interest, when an object reference is passed to a method, the reference itself is passed
by use of call-by-value. However, since the value being passed refers to an object, the copy of that value will
still refer to the same object that its corresponding argument does.
When a simple type is passed to a method, it is done by use of call-by-value. Objects are passed by use of call-by-reference.
3.3 Returning objects
A method can return any type of data, including class types that you create. For example, in the
following program, the incrByTen( ) method returns an object in which the value of a is ten greater than it is
in the invoking object.
// Returning an object.

Java Programming Language
98 | P a g e
class Test
{
int a;
Test(int i)
{
a = i;
}
Test incrByTen()
{
Test temp = new Test(a+10);
return temp;
}
}
class RetOb
{
public static void main(String args[])
{
Test ob1 = new Test(2);
Test ob2;
ob2 = ob1.incrByTen();
System.out.println("ob1.a: " + ob1.a);
System.out.println("ob2.a: " + ob2.a);
ob2 = ob2.incrByTen();
System.out.println("ob2.a after second increase: " + ob2.a);
}
}
The output generated by this program is shown here:
ob1.a: 2
ob2.a: 12
ob2.a after second increase: 22
As you can see, each time incrByTen( ) is invoked, a new object is created, and a reference to it is
returned to the calling routine.
The preceding program makes another important point: Since all objects are dynamically allocated using
new, you don’t need to worry about an object going out-of-scope because the method in which it was created
terminates. The object will continue to exist as long as there is a reference to it somewhere in your program.
When there are no references to it, the object will be reclaimed the next time garbage collection takes place.
3.4 Recursion Que: What is recursion? Explain with suitable example.
Java supports recursion. Recursion is the process of defining something in terms of itself. As it relates
to Java programming, recursion is the attribute that allows a method to call itself. A method that calls itself is
said to be recursive.

Java Programming Language
99 | P a g e
The classic example of recursion is the computation of the factorial of a number. The factorial of a
number N is the product of all the whole numbers between 1 and N. For example, 3 factorial is 1 × 2 × 3, or 6.
Here is how a factorial can be computed by use of a recursive method:
// A simple example of recursion.
class Factorial
{
// this is a recursive function
int fact(int n)
{
int result;
if(n==1) return 1;
result = fact(n-1) * n;
return result;
}
}
class Recursion
{
public static void main(String args[])
{
Factorial f = new Factorial();
System.out.println("Factorial of 3 is " + f.fact(3));
System.out.println("Factorial of 4 is " + f.fact(4));
System.out.println("Factorial of 5 is " + f.fact(5));
}
}
The output from this program is shown here:
Factorial of 3 is 6
Factorial of 4 is 24
Factorial of 5 is 120
When a method calls itself, new local variables and parameters are allocated storage on the stack, and
the method code is executed with these new variables from the start. A recursive call does not make a new
copy of the method. Only the arguments are new. As each recursive call returns, the old local variables and
parameters are removed from the stack, and execution resumes at the point of the call inside the method.
The main advantage to recursive methods is that they can be used to create clearer and simpler
versions of several algorithms.
When writing recursive methods, you must have an if statement somewhere to force the method to
return without the recursive call.
3.5 Static and Final keyword Que: Explain Static and Final Keyword with example.
Que: Explain Static Block.
Understanding static

Java Programming Language
100 | P a g e
There will be times when you will want to define a class member that will be used independently of any
object of that class. Normally a class member must be accessed only in conjunction with an object of its class.
However, it is possible to create a member that can be used by itself, without reference to a specific instance.
To create such a member, precede its declaration with the keyword static. When a member is declared static,
it can be accessed before any objects of its class are created, and without reference to any object. You can
declare both methods and variables to be static. The most common example of a static member is main( ).
main( ) is declared as static because it must be called before any objects exist.
Instance variables declared as static are, essentially, global variables. When objects of its class are
declared, no copy of a static variable is made. Instead, all instances of the class share the same static
variable.
Methods declared as static have several restrictions:
They can only call other static methods.
They must only access static data.
They cannot refer to this or super in any way.
If you need to do computation in order to initialize your static variables, you can declare a static block
which gets executed exactly once, when the class is first loaded. The following example shows a class that has
a static method, some static variables, and a static initialization block:
// Demonstrate static variables, methods, and blocks.
class UseStatic
{
static int a = 3;
static int b;
static void meth(int x)
{
System.out.println("x = " + x);
System.out.println("a = " + a);
System.out.println("b = " + b);
}
static
{
System.out.println("Static block initialized.");
b = a * 4;
}
public static void main(String args[])
{
meth(42);
}
}
As soon as the UseStatic class is loaded, all of the static statements are run. First, a is set to 3, then
the static block executes (printing a message), and finally, b is initialized to a * 4 or 12. Then main( ) is
called, which calls meth( ), passing 42 to x. The three println( ) statements refer to the two static variables a
and b, as well as to the local variable x.
It is illegal to refer to any instance variables inside of a static method.

Java Programming Language
101 | P a g e
Outside of the class in which they are defined, static methods and variables can be used independently
of any object. To do so, you need only specify the name of their class followed by the dot operator. For
example, if you wish to call a static method from outside its class, you can do so using the following general
form:
classname.method( )
Here, classname is the name of the class in which the static method is declared. As you can see, this
format is similar to that used to call non-static methods through object- reference variables. A static variable
can be accessed in the same way—by use of the dot operator on the name of the class. This is how Java
implements a controlled version of global methods and global variables.
Here is an example. Inside main( ), the static method callme( ) and the static variable b are accessed
outside of their class.
class StaticDemo
{
static int a = 42;
static int b = 99;
static void callme()
{
System.out.println("a = " + a);
}
}
class StaticByName
{
public static void main(String args[])
{
StaticDemo.callme();
System.out.println("b = " + StaticDemo.b);
}
}
Here is the output of this program:
a = 42
b = 99
Introducing final Que: Explain use of final keyword by example
Que: Explain the final variable.
A variable can be declared as final. Doing so prevents its contents from being modified. This means that
you must initialize a final variable when it is declared. (In this usage, final is similar to const in C/C++/C#.) For
example:
final int FILE_NEW = 1;
final int FILE_OPEN = 2;
final int FILE_SAVE = 3;
final int FILE_SAVEAS = 4;
final int FILE_QUIT = 5;

Java Programming Language
102 | P a g e
Subsequent parts of your program can now use FILE_OPEN, etc., as if they were constants, without
fear that a value has been changed.
It is a common coding convention to choose all uppercase identifiers for final variables. Variables
declared as final do not occupy memory on a per-instance basis. Thus, a final variable is essentially a constant.
The keyword final can also be applied to methods, but its meaning is substantially different than when
it is applied to variables. This second usage of final is described in the next chapter, when inheritance is
described.
3.6 Nested and inner classes Que: Explain inner class.
It is possible to define a class within another class; such classes are known as nested classes. The scope
of a nested class is bounded by the scope of its enclosing class. Thus, if class B is defined within class A, then B
is known to A, but not outside of A. A nested class has access to the members, including private members, of
the class in which it is nested. However, the enclosing class does not have access to the members of the nested
class.
There are two types of nested classes: static and non-static. A static nested class is one which has the
static modifier applied. Because it is static, it must access the members of its enclosing class through an
object. That is, it cannot refer to members of its enclosing class directly. Because of this restriction, static
nested classes are seldom used.
The most important type of nested class is the inner class. An inner class is a non-static nested class. It
has access to all of the variables and methods of its outer class and may refer to them directly in the same way
that other non-static members of the outer class do. Thus, an inner class is fully within the scope of its
enclosing class.
The following program illustrates how to define and use an inner class. The class named Outer has one
instance variable named outer_x, one instance method named test( ), and defines one inner class called Inner.
// Demonstrate an inner class.
class Outer
{
int outer_x = 100;
void test()
{
Inner inner = new Inner();
inner.display();
}
// this is an inner class
class Inner
{
void display()
{
System.out.println("display: outer_x = " + outer_x);
}

Java Programming Language
103 | P a g e
}
}
class InnerClassDemo
{
public static void main(String args[])
{
Outer outer = new Outer();
outer.test();
}
}
Output from this application is shown here:
display: outer_x = 100
In the program, an inner class named Inner is defined within the scope of class Outer. Therefore, any
code in class Inner can directly access the variable outer_x. An instance method named display( ) is defined
inside Inner. This method displays outer_x on the standard output stream. The main( ) method of
InnerClassDemo creates an instance of class Outer and invokes its test( ) method. That method creates an
instance of class Inner and the display( ) method is called.
It is important to realize that class Inner is known only within the scope of class Outer. The Java
compiler generates an error message if any code outside of class Outer attempts to instantiate class Inner.
Generalizing, a nested class is no different than any other program element: it is known only within its enclosing
scope.
As explained, an inner class has access to all of the members of its enclosing class, but the reverse is
not true. Members of the inner class are known only within the scope of the inner class and may not be used by
the outer class. For example,
// This program will not compile.
class Outer
{
int outer_x = 100;
void test()
{
Inner inner = new Inner();
inner.display();
}
// this is an inner class
class Inner
{
int y = 10; // y is local to Inner
void display()
{
System.out.println("display: outer_x = " + outer_x);
}
}
void showy()
{

Java Programming Language
104 | P a g e
System.out.println(y); // error, y not known here!
}
}
class InnerClassDemo
{
public static void main(String args[])
{
Outer outer = new Outer();
outer.test();
}
}
Here, y is declared as an instance variable of Inner. Thus it is not known outside of that class and it
cannot be used by showy( ).
3.7 Command line arguments Que: What is command line argument? How to use command line argument with Java.
Sometimes you will want to pass information into a program when you run it. This is accomplished by
passing command-line arguments to main( ). A command-line argument is the information that directly follows
the program’s name on the command line when it is executed. To access the command-line arguments inside a
Java program is quite easy—they are stored as strings in the String array passed to main( ). For example, the
following program displays all of the command-line arguments that it is called with:
// Display all command-line arguments.
class CommandLine
{
public static void main(String args[])
{
for(int i=0; i<args.length; i++)
System.out.println("args[" + i + "]: " +
args[i]);
}
}
Try executing this program, as shown here:
java CommandLine this is a test 100 -1
When you do, you will see the following output:
args[0]: this
args[1]: is
args[2]: a
args[3]: test
args[4]: 100
args[5]: -1
All command-line arguments are passed as strings. You must convert numeric values to their internal forms manually.

Java Programming Language
105 | P a g e
4. INHERITANCE
4.1 Inheritance basics Que: Explain the super class with example.
A class that is inherited is called a superclass. The class that does the inheriting is called a subclass. Therefore, a subclass is a specialized version of a superclass. It inherits all of the instance variables and
methods defined by the super class and add its own, unique elements.
To inherit a class, you simply incorporate the definition of one class into another by using the extends
keyword. To see how, let’s begin with a short example. The following program creates a superclass called A and
a subclass called B. Notice how the keyword extends is used to create a subclass of A.
// A simple example of inheritance.
// Create a superclass.
class A
{
int i, j;
void showij()
{
System.out.println("i and j: " + i + " " + j);
}
}
// Create a subclass by extending class A.
class B extends A
{
int k;
void showk()

Java Programming Language
106 | P a g e
{
System.out.println("k: " + k);
}
void sum()
{
System.out.println("i+j+k: " + (i+j+k));
}
}
class SimpleInheritance
{
public static void main(String args[])
{
A superOb = new A();
B subOb = new B();
// The superclass may be used by itself.
superOb.i = 10;
superOb.j = 20;
System.out.println("Contents of superOb: ");
superOb.showij();
System.out.println();
/* The subclass has access to all public members of its superclass. */
subOb.i = 7;
subOb.j = 8;
subOb.k = 9;
System.out.println("Contents of subOb: ");
subOb.showij();
subOb.showk();
System.out.println();
System.out.println("Sum of i, j and k in subOb:");
subOb.sum();
}
}
The output from this program is shown here:
Contents of superOb:
i and j: 10 20
Contents of subOb:
i and j: 7 8
k: 9
Sum of i, j and k in subOb:
i+j+k: 24
As you can see, the subclass B includes all of the members of its superclass, A. This is why subOb can access i
and j and call showij( ). Also, inside sum( ), i and j can be referred to directly, as if they were part of B.
Even though A is a superclass for B, it is also a completely independent, stand-alone class. Being a
superclass for a subclass does not mean that the superclass cannot be used by itself. Further, a subclass can be
a superclass for another subclass. The general form of a class declaration that inherits a superclass is shown
here:

Java Programming Language
107 | P a g e
class subclass-name extends superclass-name {
// body of class
}
You can only specify one superclass for any subclass that you create. Java does not support the
inheritance of multiple superclasses into a single subclass.
Member Access and Inheritance
Although a subclass includes all of the members of its superclass, it cannot access those members of
the superclass that have been declared as private. For example, consider the following simple class hierarchy:
// Create a superclass.
class A
{
int i; // public by default
private int j; // private to A
void setij(int x, int y)
{
i = x;
j = y;
}
}
// A's j is not accessible here.
class B extends A
{
int total;
void sum()
{
total = i + j; // ERROR, j is not accessible here
}
}
class Access
{
public static void main(String args[])
{
B subOb = new B();
subOb.setij(10, 12);
subOb.sum();
System.out.println("Total is " + subOb.total);
}
}
This program will not compile because the reference to j inside the sum( ) method of B causes an
access violation. Since j is declared as private, it is only accessible by other members of its own class.
Subclasses have no access to it.

Java Programming Language
108 | P a g e
A class member that has been declared as private will remain private to its class. It is not accessible by any code outside its class, including subclasses.
A More Practical Example
Let’s look at a more practical example that will help illustrate the power of inheritance. Here, the final version
of the Box class developed in the preceding chapter will be extended to include a fourth component called
weight. Thus, the new class will contain a box’s width, height, depth, and weight.
// This program uses inheritance to extend Box.
class Box
{
double width;
double height;
double depth;
// construct clone of an object
Box(Box ob)
{
// pass object to constructor
width = ob.width;
height = ob.height;
depth = ob.depth;
}
// constructor used when all dimensions specified
Box(double w, double h, double d)
{
width = w;
height = h;
depth = d;
}
// constructor used when no dimensions specified
Box()
{
width = -1; // use -1 to indicate
height = -1; / an uninitialized
depth = -1; / box
}
// constructor used when cube is created
Box(double len)
{
width = height = depth = len;
}
// compute and return volume

Java Programming Language
109 | P a g e
double volume()
{
return width * height * depth;
}
}
// Here, Box is extended to include weight.
class BoxWeight extends Box
{
double weight; // weight of box
// constructor for BoxWeight
BoxWeight(double w, double h, double d, double m)
{
width = w;
height = h;
depth = d;
weight = m;
}
}
class DemoBoxWeight
{
public static void main(String args[])
{
BoxWeight mybox1 = new BoxWeight(10, 20, 15, 34.3);
BoxWeight mybox2 = new BoxWeight(2, 3, 4, 0.076);
double vol;
vol = mybox1.volume();
System.out.println("Volume of mybox1 is " + vol);
System.out.println("Weight of mybox1 is " + mybox1.weight);
System.out.println();
vol = mybox2.volume();
System.out.println("Volume of mybox2 is " + vol);
System.out.println("Weight of mybox2 is " + mybox2.weight);
}
}
The output from this program is shown here:
Volume of mybox1 is 3000.0
Weight of mybox1 is 34.3
Volume of mybox2 is 24.0
Weight of mybox2 is 0.076
BoxWeight inherits all of the characteristics of Box and adds to them the weight omponent. It is not
necessary for BoxWeight to re-create all of the features found in ox. It can simply extend Box to meet its
own purposes.
A major advantage of inheritance is that once you have created a superclass that efines the attributes
common to a set of objects, it can be used to create any number f more specific subclasses. Each subclass can
precisely tailor its own classification. For xample, the following class inherits Box and adds a color attribute:

Java Programming Language
110 | P a g e
// Here, Box is extended to include color.
class ColorBox extends Box
{
int color; // color of box
ColorBox(double w, double h, double d, int c)
{
width = w;
height = h;
depth = d;
color = c;
}
}
Remember, once you have created a superclass that defines the general aspects of n object, that
superclass can be inherited to form specialized classes. Each subclass imply adds its own, unique attributes.
This is the essence of inheritance.
A Superclass Variable Can Reference a Subclass Object
A reference variable of a superclass can be assigned a reference to any subclass derived from that
superclass. You will find this aspect of inheritance quite useful in a variety of situations. For example, consider
the following:
class RefDemo
{
public static void main(String args[])
{
BoxWeight weightbox = new BoxWeight(3, 5, 7, 8.37);
Box plainbox = new Box();
double vol;
vol = weightbox.volume();
System.out.println("Volume of weightbox is " + vol);
System.out.println("Weight of weightbox is " +
weightbox.weight);
System.out.println();
// assign BoxWeight reference to Box reference
plainbox = weightbox;
vol = plainbox.volume(); // OK, volume() defined in Box
System.out.println("Volume of plainbox is " + vol);
/* The following statement is invalid because plainbox
does not define a weight member. */
// System.out.println("Weight of plainbox is " + plainbox.weight);
}
}
Here, weightbox is a reference to BoxWeight objects, and plainbox is a reference to Box objects.
Since BoxWeight is a subclass of Box, it is permissible to assign plainbox a reference to the weightbox object.

Java Programming Language
111 | P a g e
It is important to understand that it is the type of the reference variable—not the type of the object
that it refers to—that determines what members can be accessed. That is, when a reference to a subclass
object is assigned to a superclass reference variable, you will have access only to those parts of the object
defined by the superclass. This is why plainbox can’t access weight even when it refers to a BoxWeight object.
If you think about it, this makes sense, because the superclass has no knowledge of what a subclass adds to it.
This is why the last line of code in the preceding fragment is commented out. It is not possible for a Box
reference to access the weight field, because it does not define one.
4.2 Super keyword Que: Explain the Super keyword.
super has two general forms. The first calls the superclass’ constructor. The second is used to access a
member of the superclass that has been hidden by a member of a subclass. Each use is examined here.
Using super to Call Superclass Constructors
A subclass can call a constructor method defined by its superclass by use of the following form of
super:
super(parameter-list);
Here, parameter-list specifies any parameters needed by the constructor in the superclass. super( )
must always be the first statement executed inside a subclass’ constructor.
To see how super( ) is used, consider this improved version of the BoxWeight( ) class:
// BoxWeight now uses super to initialize its Box attributes.
class BoxWeight extends Box
{
double weight; // weight of box
// initialize width, height, and depth using super()
BoxWeight(double w, double h, double d, double m)
{
super(w, h, d); // call superclass constructor
weight = m;
}
}
Here, BoxWeight( ) calls super( ) with the parameters w, h, and d. This causes the Box( ) constructor
to be called, which initializes width, height, and depth using these values. BoxWeight no longer initializes these
values itself. It only needs to initialize the value unique to it: weight. This leaves Box free to make these values
private if desired.
In the preceding example, super( ) was called with three arguments. Since constructors can be
overloaded, super( ) can be called using any form defined by the superclass. The constructor executed will be
the one that matches the arguments. For example, here is a complete implementation of BoxWeight that
provides constructors for the various ways that a box can be constructed. In each case, super( ) is called using
the appropriate arguments. Notice that width, height, and depth have been made private within Box.
// A complete implementation of BoxWeight.
class Box

Java Programming Language
112 | P a g e
{
private double width;
private double height;
private double depth;
// construct clone of an object
Box(Box ob)
{
// pass object to constructor
width = ob.width;
height = ob.height;
depth = ob.depth;
}
// constructor used when all dimensions specified
Box(double w, double h, double d)
{
width = w;
height = h;
depth = d;
}
// constructor used when no dimensions specified
Box()
{
width = -1; // use -1 to indicate
height = -1; // an uninitialized
depth = -1; // box
}
// constructor used when cube is created
Box(double len)
{
width = height = depth = len;
}
// compute and return volume
double volume()
{
return width * height * depth;
}
}
// BoxWeight now fully implements all constructors.
class BoxWeight extends Box
{
double weight; // weight of box
// construct clone of an object
BoxWeight(BoxWeight ob)
{
// pass object to constructor

Java Programming Language
113 | P a g e
super(ob);
weight = ob.weight;
}
// constructor when all parameters are specified
BoxWeight(double w, double h, double d, double m)
{
super(w, h, d); // call superclass constructor
weight = m;
}
// default constructor
BoxWeight()
{
super();
weight = -1;
}
// constructor used when cube is created
BoxWeight(double len, double m)
{
super(len);
weight = m;
}
}
class DemoSuper
{
public static void main(String args[])
{
BoxWeight mybox1 = new BoxWeight(10, 20, 15, 34.3);
BoxWeight mybox2 = new BoxWeight(2, 3, 4, 0.076);
BoxWeight mybox3 = new BoxWeight(); // default
BoxWeight mycube = new BoxWeight(3, 2);
BoxWeight myclone = new BoxWeight(mybox1);
double vol;
vol = mybox1.volume();
System.out.println("Volume of mybox1 is " + vol);
System.out.println("Weight of mybox1 is " + mybox1.weight);
System.out.println();
vol = mybox2.volume();
System.out.println("Volume of mybox2 is " + vol);
System.out.println("Weight of mybox2 is " + mybox2.weight);
System.out.println();
vol = mybox3.volume();
System.out.println("Volume of mybox3 is " + vol);
System.out.println("Weight of mybox3 is " + mybox3.weight);
System.out.println();
vol = myclone.volume();
System.out.println("Volume of myclone is " + vol);
System.out.println("Weight of myclone is " + myclone.weight);
System.out.println();
vol = mycube.volume();

Java Programming Language
114 | P a g e
System.out.println("Volume of mycube is " + vol);
System.out.println("Weight of mycube is " + mycube.weight);
System.out.println();
}
}
This program generates the following output:
Volume of mybox1 is 3000.0
Weight of mybox1 is 34.3
Volume of mybox2 is 24.0
Weight of mybox2 is 0.076
Volume of mybox3 is -1.0
Weight of mybox3 is -1.0
Volume of myclone is 3000.0
Weight of myclone is 34.3
Volume of mycube is 27.0
Weight of mycube is 2.0
Pay special attention to this constructor in BoxWeight( ):
// construct clone of an object
BoxWeight(BoxWeight ob)
{
// pass object to constructor
super(o b);
weight = ob.weight;
}
Notice that super( ) is called with an object of type BoxWeight—not of type Box. This still invokes the
constructor Box(Box ob). As mentioned earlier, a superclass variable can be used to reference any object
derived from that class. Thus, we are able to pass a BoxWeight object to the Box constructor. Of course, Box
only has knowledge of its own members.
Let’s review the key concepts behind super( ). When a subclass calls super( ), it is calling the
constructor of its immediate superclass. Thus, super( ) always refers to the superclass immediately above the
calling class. This is true even in a multileveled hierarchy. Also, super( ) must always be the first statement
executed inside a subclass constructor.
A Second Use for super
The second form of super acts somewhat like this, except that it always refers to the superclass of
the subclass in which it is used. This usage has the following general form:
super.member
Here, member can be either a method or an instance variable.
This second form of super is most applicable to situations in which member names of a subclass hide
members by the same name in the superclass. Consider this simple class hierarchy:
// Using super to overcome name hiding.

Java Programming Language
115 | P a g e
class A
{
int i;
}
// Create a subclass by extending class A.
class B extends A
{
int i; // this i hides the i in A
B(int a, int b)
{
super.i = a; // i in A
i = b; // i in B
}
void show()
{
System.out.println("i in superclass: " + super.i);
System.out.println("i in subclass: " + i);
}
}
class UseSuper
{
public static void main(String args[])
{
B subOb = new B(1, 2);
subOb.show();
}
}
This program displays the following:
i in superclass: 1
i in subclass: 2
Although the instance variable i in B hides the i in A, super allows access to the I defined in the
superclass. As you will see, super can also be used to call methods that are hidden by a subclass.
4.3 Creating multilevel hierarchy
For example, given three classes called A, B, and C, C can be a subclass of B, which is a subclass of A.
When this type of situation occurs, each subclass inherits all of the traits found in all of its superclasses. In
this case, C inherits all aspects of B and A. To see how a multilevel hierarchy can be useful, consider the
following program.
class A
{
int i=10;
void showi()
{
System.out.println("Value of I is:"+ i);

Java Programming Language
116 | P a g e
}
}
class B extends A
{
int j=20;
void showj()
{
System.out.println("Value of J is:"+j);
}
}
class C extends B
{
int k=30;
void showk()
{
System.out.println("Value of K is:"+k);
}
}
class Main
{
public static void main(String[] args)
{
C c = new C();
c.showi();
c.showj();
c.showk();
}
}
Output of the above program is given below:
Value of I is:10
Value of J is:20
Value of K is:30
Here in the above example you can see that class A contains the variable i=10, class B contains the
variable j=20 and class C contains the variable k=30, class B is a subclass of class A, class C is a subclass of
class B. So, by using object reference variable of class C (here “c”), we can access all the variable of its
superclass.
When Constructors Are Called
Constructors are called in order of derivation, from superclass to subclass. Further, since super( ) must
be the first statement executed in a subclass’ constructor, this order is the same whether or not super( ) is

Java Programming Language
117 | P a g e
used. If super( ) is not used, then the default or parameter less constructor of each superclass will be
executed. The following program illustrates when constructors are executed:
// Demonstrate when constructors are called.
// Create a super class.
class A
{
A()
{
System.out.println("Inside A's constructor.");
}
}
// Create a subclass by extending class A.
class B extends A
{
B()
{
System.out.println("Inside B's constructor.");
}
}
// Create another subclass by extending B.
class C extends B
{
C()
{
System.out.println("Inside C's constructor.");
}
}
class CallingCons
{
public static void main(String args[])
{
C c = new C();
}
}
The output from this program is shown here:
Inside A’s constructor
Inside B’s constructor
Inside C’s constructor
As you can see, the constructors are called in order of derivation. If you think about it, it makes sense
that constructors are executed in order of derivation. Because a superclass has no knowledge of any subclass,
any initialization it needs to perform is separate from and possibly prerequisite to any initialization performed
by the subclass. Therefore, it must be executed first.
4.4 Method overriding Que: Explain overriding of methods with example.

Java Programming Language
118 | P a g e
In a class hierarchy, when a method in a subclass has the same name and type signature as a method in
its superclass, then the method in the subclass is said to override the method in the superclass. When an
overridden method is called from within a subclass, it will always refer to the version of that method defined
by the subclass. The version of the method defined by the superclass will be hidden. Consider the following:
// Method overriding.
class A
{
int i, j;
A(int a, int b)
{
i = a;
j = b;
}
// display i and j
void show()
{
System.out.println("i and j: " + i + " " + j);
}
}
class B extends A
{
int k;
B(int a, int b, int c)
{
super(a, b);
k = c;
}
// display k – this overrides show() in A
void show()
{
System.out.println("k: " + k);
}
}
class Override
{
public static void main(String args[])
{
B subOb = new B(1, 2, 3);
subOb.show(); // this calls show() in B
}
}
The output produced by this program is shown here:
k: 3

Java Programming Language
119 | P a g e
When show( ) is invoked on an object of type B, the version of show( ) defined within B is used. That
is, the version of show( ) inside B overrides the version declared in A.
If you wish to access the superclass version of an overridden function, you can do so by using super. For
example, in this version of B, the superclass version of show( ) is invoked within the subclass’ version. This
allows all instance variables to be displayed.
class B extends A
{
int k;
B(int a, int b, int c)
{
super(a, b);
k = c;
}
}
// overload show()
void show(String msg)
{
System.out.println(msg + k);
}
}
class Override
{
public static void main(String args[])
{
B subOb = new B(1, 2, 3);
subOb.show("This is k: "); // this calls show() in B
subOb.show(); // this calls show() in A
}
}
The output produced by this program is shown here:
This is k: 3
i and j: 1 2
The version of show( ) in B takes a string parameter. This makes its type signature different from the
one in A, which takes no parameters. Therefore, no overriding (or name hiding) takes place.
Dynamic Method Dispatch
Dynamic method dispatch is the mechanism by which a call to an overridden method is resolved at run
time, rather than compile time. Dynamic method dispatch is important because this is how Java implements run-
time polymorphism.
Let’s begin by restating an important principle: a superclass reference variable can refer to a subclass
object. Java uses this fact to resolve calls to overridden methods at run time. Here is how. When an overridden
method is called through a superclass reference, Java determines which version of that method to execute

Java Programming Language
120 | P a g e
based upon the type of the object being referred to at the time the call occurs. Thus, this determination is
made at run time. When different types of objects are referred to, different versions of an overridden
method will be called. In other words, it is the type of the object being referred to (not the type of the
reference variable) that determines which version of an overridden method will be executed. Therefore, if a
superclass contains a method that is overridden by a subclass, then when different types of objects are
referred to through superclass reference variable, different versions of the method are executed.
Here is an example that illustrates dynamic method dispatch:
// Dynamic Method Dispatch
class A
{
void callme()
{
System.out.println("Inside A's callme method");
}
}
class B extends A
{
// override callme()
void callme()
{
System.out.println("Inside B's callme method");
}
}
class C extends A
{
// override callme()
void callme()
{
System.out.println("Inside C's callme method");
}
}
class Dispatch
{
public static void main(String args[])
{
A a = new A(); // object of type A
B b = new B(); // object of type B
C c = new C(); // object of type C
A r; // obtain a reference of type A
r = a; // r refers to an A object
r.callme(); // calls A's version of callme
r = b; // r refers to a B object
r.callme(); // calls B's version of callme
r = c; // r refers to a C object
r.callme(); // calls C's version of callme

Java Programming Language
121 | P a g e
}
}
The output from the program is shown here:
Inside A’s callme method
Inside B’s callme method
Inside C’s callme method
This program creates one superclass called A and two subclasses of it, called B and C. Subclasses B and
C override callme( ) declared in A. Inside the main( ) method, objects of type A, B, and C are declared. Also, a
reference of type A, called r, is declared. The program then assigns a reference to each type of object to r
and uses that reference to invoke callme( ). As the output shows, the version of callme( ) executed is
determined by the type of object being referred to at the time of the call. Had it been determined by the type
of the reference variable, r, you would see three calls to A’s callme( ) method.
Why Overridden Methods?
Overridden methods allow Java to support run-time polymorphism. Polymorphism is essential to object-
oriented programming for one reason: it allows a general class to specify methods that will be common to all of
its derivatives, while allowing subclasses to define the specific implementation of some or all of those methods.
Overridden methods are another way that Java implements the “one interface, multiple methods” aspect of
polymorphism.
Applying Method Overriding
Let’s look at a more practical example that uses method overriding. The following rogram creates a
superclass called Figure that stores the dimensions of various wo-dimensional objects. It also defines a method
called area( ) that computes the area f an object. The program derives two subclasses from Figure. The first
is Rectangle nd the second is Triangle. Each of these subclasses overrides area( ) so that it returns he area of
a rectangle and a triangle, respectively.
// Using run-time polymorphism.
class Figure
{
double dim1;
double dim2;
Figure(double a, double b)
{
dim1 = a;
dim2 = b;
}
double area()
{
System.out.println("Area for Figure is undefined.");
return 0;
}
}
class Rectangle extends Figure
{

Java Programming Language
122 | P a g e
Rectangle(double a, double b)
{
super(a, b);
}
// override area for rectangle
double area()
{
System.out.println("Inside Area for Rectangle.");
return dim1 * dim2;
}
}
class Triangle extends Figure
{
Triangle(double a, double b)
{
super(a, b);
}
// override area for right triangle
double area()
{
System.out.println("Inside Area for Triangle.");
return dim1 * dim2 / 2;
}
}
class FindAreas
{
public static void main(String args[])
{
Figure f = new Figure(10, 10);
Rectangle r = new Rectangle(9, 5);
Triangle t = new Triangle(10, 8);
Figure figref;
figref = r;
System.out.println("Area is " + figref.area());
figref = t;
System.out.println("Area is " + figref.area());
figref = f;
System.out.println("Area is " + figref.area());
}
}
The output from the program is shown here:
Inside Area for Rectangle.
Area is 45
Inside Area for Triangle.
Area is 40
Area for Figure is undefined.
Area is 0

Java Programming Language
123 | P a g e
Through the dual mechanisms of inheritance and run-time polymorphism, it is possible to define one
consistent interface that is used by several different, yet related, types of objects. In this case, if an object
is derived from Figure, then its area can be obtained by calling area( ). The interface to this operation is the
same no matter what type of figure is being used.
4.5 Using abstract classes Que: What is abstract class? How it is useful? Explain with suitable example.
There are situations in which you will want to define a superclass that declares the structure of a given
abstraction without providing a complete implementation of every method. That is, sometimes you will want to
create a superclass that only defines a generalized form that will be shared by all of its subclasses, leaving it to
each subclass to fill in the details. Such a class determines the nature of the methods that the subclasses must
implement. One way this situation can occur is when a superclass is unable to create a meaningful
implementation for a method.
You can require that certain methods be overridden by subclasses by specifying the abstract type
modifier. These methods are sometimes referred to as subclasser responsibility because they have no
implementation specified in the superclass. Thus, a subclass must override them—it cannot simply use the
version defined in the superclass. To declare an abstract method, use this general form:
abstract type name(parameter-list);
As you can see, no method body is present. Any class that contains one or more abstract methods must
also be declared abstract. To declare a class abstract, you simply use the abstract keyword in front of the
class keyword at the beginning of the class declaration. There can be no objects of an abstract class. That is,
an abstract class cannot be directly instantiated with the new operator. Such objects would be useless,
because an abstract class is not fully defined. Also, you cannot declare abstract constructors, or abstract
static methods. Any subclass of an abstract class must either implement all of the abstract methods in the
superclass, or be itself declared abstract.
Here is a simple example of a class with an abstract method, followed by a class which implements that method:
// A Simple demonstration of abstract.
abstract class A
{
abstract void callme();
// concrete methods are still allowed in abstract classes
void callmetoo()
{
System.out.println("This is a concrete method.");
}
}
class B extends A
{
void callme()
{
System.out.println("B's implementation of callme.");
}
}

Java Programming Language
124 | P a g e
class AbstractDemo
{
public static void main(String args[])
{
B b = new B();
b.callme();
b.callmetoo();
}
}
Notice that no objects of class A are declared in the program. As mentioned, it is not possible to
instantiate an abstract class. One other point: class A implements a concrete method called callmetoo( ). This
is perfectly acceptable. Abstract classes can include as much implementation as they see fit.
Although abstract classes cannot be used to instantiate objects, they can be used to create object
references, because Java’s approach to run-time polymorphism is implemented through the use of superclass
references. Thus, it must be possible to create a reference to an abstract class so that it can be used to point
to a subclass object.
// Using abstract methods and classes.
abstract class Figure
{
double dim1;
double dim2;
Figure(double a, double b)
{
dim1 = a;
dim2 = b;
}
// area is now an abstract method
abstract double area();
}
class Rectangle extends Figure
{
Rectangle(double a, double b)
{
super(a, b);
}
// override area for rectangle
double area()
{
System.out.println("Inside Area for Rectangle.");
return dim1 * dim2;
}
}
class Triangle extends Figure

Java Programming Language
125 | P a g e
{
Triangle(double a, double b)
{
super(a, b);
}
// override area for right triangle
double area()
{
System.out.println("Inside Area for Triangle.");
return dim1 * dim2 / 2;
}
}
class AbstractAreas
{
public static void main(String args[])
{
// Figure f = new Figure(10, 10); // illegal now
Rectangle r = new Rectangle(9, 5);
Triangle t = new Triangle(10, 8); JAVA LANGUAGE
Figure figref; // this is OK, no object is created
figref = r;
System.out.println("Area is " + figref.area());
figref = t;
System.out.println("Area is " + figref.area());
}
}
As the comment inside main( ) indicates, it is no longer possible to declare objects of type Figure, since
it is now abstract. And, all subclasses of Figure must override area( ). To prove this to yourself, try creating a
subclass that does not override area( ).You will receive a compile-time error.
Although it is not possible to create an object of type Figure, you can create a reference variable of
type Figure. The variable figref is declared as a reference to Figure, which means that it can be used to refer
to an object of any class derived from Figure. As explained, it is through superclass reference variables that
overridden methods are resolved at run time.
4.6 Using final with inheritance Que: Explain use of final keyword by example
Que: Explain about final method
The keyword final has three uses. First, it can be used to create the equivalent of a named constant.
This use was described in the preceding chapter. The other two uses of final apply to inheritance. Both are
examined here.
Using final to Prevent Overriding
While method overriding is one of Java’s most powerful features, there will be times when you will want
to prevent it from occurring. To disallow a method from being overridden, specify final as a modifier at the

Java Programming Language
126 | P a g e
start of its declaration. Methods declared as final cannot be overridden. The following fragment illustrates
final:
class A
{
final void meth()
{
System.out.println("This is a final method.");
}
}
class B extends A
{
void meth()
{
// ERROR! Can't override.
System.out.println("Illegal!");
}
}
Because meth( ) is declared as final, it cannot be overridden in B. If you attempt to do so, a compile-
time error will result. Methods declared as final can sometimes provide a performance enhancement: The
compiler is free to inline calls to them because it “knows” they will not be overridden by a subclass. When a
small final method is called, often the Java compiler can copy the bytecode for the subroutine directly inline
with the compiled code of the calling method, thus eliminating the costly overhead associated with a method
call. Inlining is only an option with final methods. Normally, Java resolves calls to methods dynamically, at run
time. This is called late binding. However, since final methods cannot be overridden, a call to one can be
resolved at compile time. This is called early binding.
Using final to Prevent Inheritance Que: Explain about final class.
Sometimes you will want to prevent a class from being inherited. To do this, precede the class
declaration with final. Declaring a class as final implicitly declares all of its methods as final, too. As you might
expect, it is illegal to declare a class as both abstract and final since an abstract class is incomplete by itself
and relies upon its subclasses to provide complete implementations.
Here is an example of a final class:
final class A
{
// ...
}
// The following class is illegal.
class B extends A
{
// ERROR! Can't subclass A
// ...
}

Java Programming Language
127 | P a g e
As the comments imply, it is illegal for B to inherit A since A is declared as final.
Different between super and this
this Super 1. this is a reference to the currently executing object on which the method or constructor was
invoked.
1. The super keyword in a Java instance refers to the
superclass of the current object.
2. "this" refers to the current class
2. super" refers directly to its immediate above super
class.
Different between Instance variable and Class Variable
Instance Variable Class Variable 1. instance variable can be declare without using static
keyword.
1. class Variable declared by using “static ” keyword.
2. separate memory is allocated for instance variable
for each and every object.
2. common memory space is allocated for the class
variable and it is shared by all the classes.
3. In order to access instance variable you must
required class object.
3. In order to access class variable you just requited
class name.
Different between Abstract class and Interface Que: Write the different between abstract closs and interfaces.
Abstract class Interface 1. An abstract class may contain non-final variables. 1. Variables declared in a Java interface is by
default final
2. A Java abstract class can have the usual flavors of
class members like private, protected, etc..
2. Members of a Java interface are public by default
3. A Java abstract class should be extended using
keyword “extends”.
3. Java interface should be implemented using
keyword “implements”
4. an abstract class can extend another Java class and
implement multiple Java interfaces.
4. An interface can extend another Java interface
only
5. A Java abstract class also cannot be instantiated,
but can be invoked if a main() exists.
5. Interface is absolutely abstract and cannot be
instantiated
6. in comparison with java interfaces, java abstract
classes are fast.
6. in comparison with java abstract classes, java
interfaces are slow as it requires extra indirection.
7. Abstract class has the constructor
7. interface doesn’t have constructor

Java Programming Language
128 | P a g e
5. PACKAGES AND INTERFACES

Java Programming Language
129 | P a g e
Interfaces (Multiple Inheritance): Que: which type of inheritance is possible using interface ? Explain by example.
We have learned about various forms of inheritance and pointed out that Java does not support multiple
inheritances, So, classes in Java cannot have more than one superclass, for example, a definition like
class A extends B extends C
{
……………
……………
}
Is not permitted in Java, Java provides an alternate approach known as interfaces to support the
concept of multiple inheritance. Although a Java class cannot be a subclass of more than one superclass, but it
can implement more than one interface.
Defining Interfaces Que: Explain Interface
Que: What is an interface ? Why it is used ? Give proper example.
Que: Explain interface in detail with suitable example in java.
Que: Define interface.Explain declaration and implementation of an interface with example.
Que: What is interface ? How to implement multiple inheritance with Java.
An interface is basically a kind of class. Like classes, interfaces contain methods and variables but with
a major difference. The different is that interfaces define only abstract method and final fields. This means
that interfaces do not specify any code to implement these method and data fields contain only constants.
Therefore, it is the responsibility of the class that implements an interface to define the code for
implementation of these methods. To implement an interface, a class must create the complete set of methods
defined by the interface. Interfaces are designed to support dynamic method resolution at run time.
The syntax for defining an interface is very similar to that for defining a class. The general form of an
Interface defining is:
interface InterfaceName {
Variables declaration;
Methods declaration;
}
Here, interface is the keyword and InterfaceName is any valid Java variable (just like a class names) .
variables are declared as below.
static final type VariableName = value
Note that all the variables are declared as constants. Methods declaration will contain only a list of
methods without any body statements.
Example:
return-type methodName1 (parameter_list);

Java Programming Language
130 | P a g e
Here is an example of an interface definition that contains two variables an one method.
interface Item
{
static final int code = 1001;
static final String name = “Fan”;
void display();
}
Note that the code for the method is not included in interface and the method declaration simply ends
with the semicolon. The class that implements this interface must define the code for the method.
Extending Interfaces
Like classes, interface can also be extended. That is, an interface can be subinterfaced from other
interfaces. The new subinterface will inherit all the members of the superinterface in the manner similar to
subclasses. This is achieved using the keyword extends as shown below
interface name2 extends name1 {
body of name2 }
For example, we can put all the constants in one interface and methods in other interface. This will
enable as to use the constants in classes where the methods are not required.
Example
interface ItemConstants
{
Int code = 1001;
String name = “Fan”;
}
interface Item extends ItemConstants
{
void display();
}
The interface Item would inherit both the constants code and name into it. Note that the variables
name and code are declared like simple variables. It is allowed because all the variables in an interface are
treated as constants although the keywords final and static are not present.
We can also combine several interfaces together into a single interface. Following declarations are valid.
interface ItemConstants
{
Int code = 1001;
String name = “Fan”;
}

Java Programming Language
131 | P a g e
interface ItemMethods
{
void display();
}
interface Item extends ItemConstants, ItemMethods
{
…………………
…………………
}
While interfaces are allowed to extend to other interfaces, subinterfaces cannot define the methods
declared in the superinterfaces. After all, subinterfaces are still interfaces, not classes. Instead, it is the
responsibility of any class that implements the derived interface to define all the methods. Note that when an
interface extends two or more interfaces, they are separated by commas.
It is important two remember that an interface cannot extend classes. This would violate the rule that
an interface can have only abstract methods and constants.
Implementing interfaces
Interfaces are used as “superclasses” whose properties are inherited by classes. It is therefore
necessary to create a class that inherits the given interface. This is done as follows.
class Classname implements interfacename {
body of Classnbame
}
Here the class Classname “implements” the interface interfacename. A more general form of
implementation may look like this.
class Classname extends superclass implements interface1, interface2,……………
{
body of Classname }
This shows that a class can extend another class while implementing interfaces
When a class implements more than one interface, they are separated by a comma. The implementation
of interfaces can take various forms as given in the figure.
interface class ` interface
implementation Extension Extension
class class interface
Extension Extension implementation
class class
A
B
B
C
C
A
B
B
E
C
D
C
C

Java Programming Language
132 | P a g e
interface interface
Interface
implementation
interface
cl ass class implementation
class
[Various forms of interface implementation]
Accessing interface Variables:
Interface can be used to declare a set of constants that can be used in different classes. The
constants values will be available to any class that implements the interface. The values can be used in any
method, as part of any variable declaration, or anywhere we can use a final value.
Example:
interface A
{
int m = 10;
int n = 50;
}
class B implements A
{
int x = m;
void methodB(int size)
{
…………………
…………………
if(size < n)
{
……………
}
}
}
Below program is an example of implementing multiple inheritance.
class Student
{
int rollNumber;
A
B C
A B
C
D

Java Programming Language
133 | P a g e
void getNumber(int n)
{
rollNumber = n;
}
void putNumber()
{
System.out.println(“Roll No :” + rollNumber);
}
}
class Test extends Student
{
float part1, part2;
void getMarks(float m1, float m2)
{
part1 = m1;
part2 = m2;
}
void putMarsks()
{
System.out.println(“Marks Obtained: ”);
System.out.println(“part1: ”+part1);
System.out.println(“part2: ”+part2);
}
interface Sports
{
float sportWt = 6.0;
void putWt();
}
class Results extends Test implements Sports
{
float total;
public void putWt()
{
System.out.println(“Sport Wt = ” + sportWt);
}
void display()
{
total = part1 + part2 + sportWt;
putNumber();
putMakrs();
putWt();
System.out.println(“Total score = ” + total);
}
}
class Hybrid

Java Programming Language
134 | P a g e
{
public static void main(String args[])
{
Results student1 = new Results();
student1.getNumber(1234);
student1.getMarks(27.5, 33.0);
student1.display();
}
}
Output
Roll No : 1234
Marks Obtained
Part1 = 27.5
Part2 = 33
Sport Wt = 6
Total score = 66.5
5.1 Packages Que: JAVA Packages
Que: What is package ?
Que: Explain packages in Java.
A package is a collection of classes and interfaces. As we know that by using interfaces and classes we
can reuse the existing code only into the same file, but what happened when someone require to use the code
that is contain into the another file, at this time package is very useful to use the existing code of another
package, and it is accomplished by without physically copying the code of one package to another file. Packages
are act as “containers” for classes.
By organizing our classes into the package the following benefits we can get.
1. The classes contained in the packages of other programs can be easily reused.
2. In Packages, classes can be unique compared with classes in other packages. That is, two classes in two
different packages can have same name. They may be refereed by their fully qualified name, comprising
the package name and the class name.
3. Packages provide a way to “hide” classes thus preventing other programs of packages from accessing
classes that are meant for internal use only.
4. Packages are also provides a way for separating “design” from “coding”. First we can design classes and
decide their relationships, and then we cam implement the Java code needed for the methods. It is
possible to change the implementation of any method without affecting the rest of the design.
Java packages are classified into two categories
1. Java API Packages
2. User defined Packages
1. Java API Packages Que: Expalin default packages in java

Java Programming Language
135 | P a g e
Java API provides a large number of classes grouped into different packages according to the
functionality. Java API Packages is given below.
Java System Packages
Package Name Contents
java. Lang
Language support classes. These are classes that Java compiler itself uses and
therefore they are automatically imported. They include classes for primitive
types, strings, math functions, threads and exceptions.
java.util Language utility classes such as vectors, hash tables, random numbers, data etc.
java.io Input / Output supported classes. They provide facilities for the input and
output of data.
java.awt Set of classes for implementing graphical user interface. They include classes
for window, buttons, lists, menus and so on.
java.net Classes for networking. They include classes for communicating with local
computes as well as the internet servers.
java.applet Classes for creating and implementing applets.
Using System Package
The packages are organized in a hierarchical as illustrated given below. This show that the package
named java contains the package awt, which in turn contains various classes required for implementing graphical
user interface.
Java
Package containing awt package
Package containing classes
Classes containing methods
Java
lang util io awt net applet
awt
Color
Image
Font
Graphics

Java Programming Language
136 | P a g e
[Hierarchical representation of java.awt package]
There are two ways to accessing the classes stored in a package.
The first approach is to use the fully qualified class name of class that we want to use. This is done by
using the package name containing the class and then appending the class name to it using the dot operator. For
example, if we want to refer to the class Color in the awt package, then we may do so as follow.
java.awt.Color
Notice that awt is a package within the package java and the hierarchy is represented by separating
levels with the dots. This approach is perhaps the best and easiest one if we need to access the class only once
or when we need not have to access any other classes of the package.
But in many situations, we might want to use a class in a number of places in the program or we may like
to use many of the classes contained in a package. We may achieve this easily as follows.
import packagename.Classname ;
or
import packagename.*;
These are known as a import statements and must appear at top of the file, before any class
declarations, import is a keyword.
The first statement allows the specified class in the specified package to be imported. For example,
the statement.
import java.awt.Color;
imports the class Color and therefore the class name can now be directly used in the program. There is no need
to use the package name to qualify the class.
The second statement imports every class contained in the specified package. For example, the
statement
import java.*;
will brings all the classes of java.awt package.
Naming Conversion
Package can be named using the standard Java naming rules. By convention, however, packages begin
with lowercase letters. This makes it easy for users to distinguished package names from class names when
looking at an explicit reference to a class. We know that all class names, again by convention, begin with an
uppercase letter. For example, look at the following statement.
double y = java.lang.Math,sqrt(x);

Java Programming Language
137 | P a g e
package name
class name
method name
This method uses a fully qualified class name Math to invoke the method sqrt(). Note that methods
begin with lowercase letters.
Every package name must be unique to make the best use of packages. Duplicate names will cause run-
time errors.
Creating a package Que: Write the steps for creating a package.
Que: Write steps to create a user-defined package.
Now let’s see how to create our own packages. We must first declare the name of the package using the
package keyword followed by a package name. This must be the first statement in a Java source file. Then we
define a class, just we normally define a class. Here is an example.
package firstPackage; //package declaration
public class FirstClass //class definition
{
……………………
…………………..(body of class)
…………………..
}
Here the package name is firstPackage. The class FirstClass is now considered a part of this package.
This listing would have be saved as a file called FirstClass.java and located in a directory named firstPackage.
When the source file is compiled, Java will create a .class file and store in the same directory.
Remember that .class file must be located in a directory that has the same name as the package, and
this directory should be a subdirectory of the directory where classes that will import the package are located.
The following steps are required in order to create any user-define package.
1. Declare the package at beginning of a file using the form.
package packagename;
2. Define the class that is to be put in the package and declare it public.
3. Create a subdirectory under the directory where the main source file are stored.
4. Store the listing as the classname.java in the subdirectory created.
5. Compile the file. This create .class file in the subdirectory.
Remember that case in significant and therefore the subdirectory name must name must match the package
name exactly.

Java Programming Language
138 | P a g e
Java also supports the concepts of package hierarchy. This is done by specifying multiple names in package
statements, separated by dots.
package firstPackage.secondPackage;
This approach allows us to group related class into a package and then group related packages into a larger
package. Remember to store this package into a subdirectory named firstPackage/secondPackage.
A java package file can have more than one class definitions. In such cases, only one of the classes may
be declared public and that class name with .java extension is the source file name. When a source file with
more than one class definition is compiled, Java creates independent .class files for those classes.
Finding Packages and CLASSPATH
Que: Explain the CLASSPATH in details.
How does the Java run-time system know where to look for packages that you create? The answer has
two parts. First, by default, the Java run-time system uses the current working directory as its starting point.
Thus, if your package is in the current directory, or a subdirectory of the current directory, it will be found.
Second, you can specify a directory path or paths by setting the CLASSPATH environmental variable.
For example, consider the following package specification.
package MyPack;
In order for a program to find MyPack, one of two things must be true. Either the program is executed
from a directory immediately above MyPack, or CLASSPATH must be set to include the path to MyPack. The
first alternative is the easiest (and doesn’t require a change to CLASSPATH), but the second alternative lets
your program find MyPack no matter what directory the program is in. Ultimately, the choice is yours.
Introducing Access Control Que: Explain following access modifiers in detail (1) Public (2) Protected (3) Private (4) Default
Que: Explain the use of public, protected and default specifiers.
Que: Explain the visibility modifiers of Java
Que: Explain the visibility controls.
Que: Explian the usage of public, private and protected.
We have seen that the variables and methods of a class are visibility everywhere in the program.
However, it may be necessary in some situations to restrict the access to certain variables and methods from
outside of the class.
For example, we may not like the objects of a class directly alter the values of variable or access a
method. We can achieve this in Java by applying visibility modifiers to the instance variables and methods. The
visibility modifiers are also known as access modifiers. Java provides three types of visibility modifiers: public,
private and protected.
public Access

Java Programming Language
139 | P a g e
Any variable or method is visible to the entire class in which it is defined. What if we want to make it
visible to all the classes outside this class? This is possible by simply declaring the variable or method as public.
Example:
public int number;
public void sum()
{
………………
}
A variable of method declared as a public has the widest possible visibility and accessible everywhere.
In fact, this is what we would like to prevent in many programs. This takes as the next levels of protection.
In many of our previous examples, we have not used public modifiers, yet they were still accessible in
other classes in the program. When no access modifiers specified, the members default to a limited version of
public accessibility knows as “friendly” level of access.
The different between the “public” access and “friendly” access is that the public modifier makes fields
visible in all classes, regardless of their packages while the friendly access makes fields visible only in the same
package, but not in other package.
protected access
The visibility of a “protected” field lies in between the public access and friendly access. That is, the
protected modifier makes the fields visible not only to all classes and subclasses in the same package but also
to subclasses in other packages. Note that non-subclasses in other packages cannot access “protected”
members.
private access
private fields enjoy the highest degree of protection. They are accessible only with their own class.
They cannot be inherited by subclasses and therefore not accessible in subclasses. A method declared as
private behaves like a method declared as a final. It prevents the method from being subclassed. Also note
that we cannot override a non-private method in a subclass and then make it private.
private protected access
A field can be declared with two keywords private and protected together like.
private protected int codeNumber;
This gives a visibility level in between the “protected” access the “private” access. This modifier makes
the fields visible in all subclasses regardless of what package they are in. Remember, these fields are not
accessible by other classes in the same package.
Access
modifiers
Access
location
public protected
default
(friendly)
private
protected private

Java Programming Language
140 | P a g e
Same class Yes Yes Yes Yes Yes
Sub class in Same package
Yes Yes Yes Yes No
Other classes In same package
Yes Yes Yes No No
Sub classes in other packages
Yes Yes No Yes
No
Non-subclasses in other packages
Yes No No No No
To understand the effects of public and private access, consider the following program:
/* This program demonstrates the difference between public and private. */
class Test
{
int a; // default access
public int b; // public access
private int c; // private access
// methods to access c
void setc(int i)
{
// set c's value
c = i;
}
int getc()
{
// get c's value
return c;
}
}
class AccessTest
{
public static void main(String args[])
{
Test ob = new Test();
// These are OK, a and b may be accessed directly
ob.a = 10;
ob.b = 20;
// This is not OK and will cause an error
// ob.c = 100; // Error!
// You must access c through its methods
ob.setc(100); // OK
System.out.println("a, b, and c: " + ob.a + " " +
Yes

Java Programming Language
141 | P a g e
ob.b + " " + ob.getc());
}
}
As you can see, inside the Test class, a uses default access, which for this example is the same as
specifying public. b is explicitly specified as public. Member c is given private access. This means that it cannot
be accessed by code outside of its class. So, inside the AccessTest class, c cannot be used directly. It must be
accessed through its public methods: setc( ) and getc( ). If you were to remove the comment symbol from the
beginning of the following line,
// ob.c = 100; // Error!
Then you would not be able to compile this program because of the access violation.
5.3 Importing Packages
As we have known that Java system package can be accessed either using a fully qualified class name or
using a shortcut approach through the import statement when there are many reference to a particular
package or the package name is too long and unwieldy.
The same approaches can be used to access the user-defined package as well. The import statement can
be used to search a list of packages for a particular class. The general form of import statement for searching
a class is as follows:
import package1 [.package2] [.package3].classname;
Here package1 is the name of the top level package; package2 is the name of the package that is inside
the package1, and so on. We can have any number of packages in a package hierarchy. Finally, the explicit
classname is specified.
Note that the statement must end with the semicolon(;), The import statement should appear before
any class definitions in a source file. Multiple import statements are allowed. The following is an example of
importing a particular class:
import firstPackage.secondPackage.MyClass;
After defining this statement, all the members of the class MyClass can be directly accessed using the
class name or its objects (as the case may be) directly without using the package name.
We can also use another approach as follows:
import packagename.*;
Here, packagename may denote a single package of a hierarchy of packages as mentioned earlier. The
star (*) indicates the compiler should search this entire package hierarchy when it encounters a class name.
This implies that we can access all classes contained in the above package directly.
The major drawback of the shortcut approach is that it is difficult to determine from which package a
particular member came. This is particularly true when a large number of packages are imported. But the
advantage is that we need not have to use long package names repeatedly in the program.

Java Programming Language
142 | P a g e
Using a Package
Let us now consider some simple program that will use classes from other package. The listing below
shows a package named package1 containing a single class ClassA.
package package1;
public class ClassA
{
public void displayA()
{
System.out.println(“Class A”);
}
}
This source file should be named ClassA.java and stored in the subdirectory package1 as stated
earlier. Now compile this java file. The resultant ClassA.class will be stored in the same directory.
Now consider the listing shown below.
Import package1.ClassA;
class PackageTest1
{
public static void main(String args[])
{
ClassA objectA = new ClassA();
objectA.displayA();
}
}
This listing shows a simple program that imports the ClassA from the package package1. The source
file should be saving as PackageTest1.java and then compiled. The source file and the compiled file would be
saved in the directory of which package1 was a subdirectory. Now we can run the program and obtain the
results.
During the compilation of PackageTest1.java the compiler checks for the file ClassA.class in the
package1 directory for information it needs, but it does not actually inside the code from ClassA.class in the
file PackageTest1.class. When the PckageTest1 program is run, Java looks for the file PackageTest1.class and
loads it using something called class loader. Now the interpreter knows that it also needs the code in the file
ClassA.class and loads it as well.
Now let us consider another package named package2 containing again a single class as shown below.
package package2;
public class ClassB
{
protected int m = 10;
public void displayB()
{

Java Programming Language
143 | P a g e
System.out.println(“Class B”);
System.out.println(“m = “ + m);
}
}
As usual, the source file and the compiled file of this package are located in the subdirectory package2,
the program shown below uses classes contained in both the packages and therefore it imports pakcage1 and
package2. Note that we have used star instead of explicit class name in importing package2.
import package1.ClassA;
import package2.*;
class PackageTest2
{
public static void main(String args[])
{
ClassA objectA = new ClassA();
ClassB objectB = new ClassB();
objectA.display();
objectB.display();
}
}
This program may be saves as PackageTest2.java, compiled and run to obtain the results. The output will be as
under.
Class A
Class B
m = 10
When we import multiple packages it is likely that two or more packages contains classes with identical names.
Example
Package pakc1;
Public class Teacher
{
…………….
}
Public class Student
{
……………..
}
Package pack2;
Public class Courses
{
……………
}
Public class Student
{

Java Programming Language
144 | P a g e
……………….
}
We may import and use these packages like:
import pack1;
import pack2;
Student student1; //create a student object
Since, both the package contain the class Student, compiler cannot understand which one to use and
therefore generates an error, In such instance, we have to be more explicit about which one we intend to use.
Example
import pack1.*;
import pack2.*;
pack1.Student student1; //OK
pack2.Student student2; //OK
Teacher teacher1; //No problem
Courses course1; //No problem
It is also possible to subclass that has been imported from another package. This is illustrated by program. The
output will be.
Class B
m = 10
Class C
m = 10
n = 20
Note that the variable m has been declared as protected. A subclass in another package can inherit a protected
member. It would not have been possible if it has been declared as either private or “default”,
import pakcage2.ClassB
class ClassC extends ClassB
{
int n = 20;
void displayC()
{
System.out.println(“Class C”);
System.out.println(“m = ” + m);
System.out.println(“n = ” + n);
}
}
class PackageTest3
{

Java Programming Language
145 | P a g e
public static void main(String args[])
{
Class objectC = new ClassC();
objectC.displayB();
objectC.displayC();
}
}
While using packages and inheritance in a program. We should be aware of the visibility restrictions
imposed by various access protection modifiers. As pointed out earlier, packages act as containers for classes
and other packages, and as containers for data and methods. Data members and method can be declared with
the access protections modifiers such as private, protected, and public as well as “default”.
Adding a Class to a Package
It is simple to add a class to an existing package. Consider the following package.
package p1;
public ClassA
{
//body of A
}
The package p1 contains one public class by name A. Suppose we want to add another class B to this package.
This can be done as follows:
1. Defining a class and make it public.
2. Place the package statement
package p1;
before the class definition as follow:
package p1;
public class B
{
//body of B
}
3. Store this as B.java file under the directory p1.
4. Compile B.java file. This will create a B.java file and place it in the directory p1.
Note that we can also add a non-public class to a package using the same procedure.
Now. The package p1 will contains both the classes A and B. A statements like:
import p1.*;
will import both of them.

Java Programming Language
146 | P a g e
Remember that, since a Java source file can have only one class declared as public, we cannot put two
or more public classes together in a .java file. This is because of the restriction that the file name should be
same as the name of the public class with .java extension.
If we want to create a package with multiple public classes in it, we may follow the following steps:
1. Decide the name of the package.
2. Create a subdirectory with this name under the directory where main source files are stored.
3. Create classes that are to be placed in the package in separate source files and declare the package
statement.
package packagename;
at the top of the each source file
4. Switch to the subdirectory created earlier and compile each source file. When completed, the package
would contain .class files of all the source files.
Hiding classes
When we import a package using asterisk (*) all public classes are imported. However, we may prefer to
“not import” certain classes. That, is we may like to hide these classes from accessing from outside of the
package. Such classes should be declared “not public”.
Example
Package p1;
Public class X //public class available outside
{
// body of X
}
class Y //not public, hidden
{
//body of Y
}
Here, the class Y which is not declared public is hidden from outside of the package p1. This class can be seen
and used only by other classes in the same classes in the same package. Note that a Java source file should
contain only one public class and may include any number of non-public classes. We may also add a single non-
public class using the procedure suggested in the previous section.
Now, consider the following code, which imports the package p1 that contains classes X and Y.
Import p1.*;
X objectX; //Ok, class X is available here
Y objectY; //Not Ok, Y is not available

Java Programming Language
147 | P a g e
Java compiler would generate an error message for this code because class Y , which has not been declared
public, is not imported and therefore not available for creating its objects.
Static import
This feature eliminates the need of qualifying a static member with the class name. The static import
declaration is similar to that of import. We can use the import statement to import classes from packages and
use them without qualifying the package.
Similarly, we can use the static import statements to import static members from classes and use them
without qualifying the class name. The syntax for using the static import feature is:
import static package-name.subpackage-name.Class-name.staticmember-name;
Or
import static package-name.subpackage-name.Class-name.*;
Before introducing the static import feature, we had to use the static member with the qualifying class
name. For example, consider the following code that contains the static member PI.
double area_of_circle = Math.PI * radius * radius;
In the above example PI is the static member of class Math, so, the static member PI is used in the
above program with the qualified class name called Math.
Also, before implementing the static import feature, if we use static member in an interface and we
need to use it in a class, then we have to implement that interface in the class. Now, we can use this feature to
import the interface into the class. Consider the following code that provides an example of importing the
interface, salary_increment into the class salary_hike:
public interface Salary_increment
{
public static final double Manager = 0.5;
public static final double Clerk = 0.25;
}
Here, let us assume that the interface is available in the subpackage, employee_details of the employee
package. If we need to access the interface, we can import the interface using the static import statements as
follows:
import static employee.employee_details.Salary_increment;
class Salary_hike
{
public static void main(String args[])
{
double manager_salary = Manager * Manager_current_salary;
double clerk_salary = Clerk * Clerk_current_salary;

Java Programming Language
148 | P a g e
……………………..
………………………
}
}
Thus, we can use the static member in the code without qualifying the class name or interface name.
Also, the static import feature eliminates the redundancy of using the qualified class name with the static
member name and increases the readability of the program.
The below program illustrates the use of static import
import static java.lang.Math.*;
public class methop
{
public void circle(double r)
{
double area = PI * r * r;
System.out.prinln(“The area of circle is: “ + area);
}
public static void main(String args[])
{
mathop obj = new mathop();
obj.circle(2.3);
}
}
The output for the above program is:
The area of circle is: 16.619025137490002
Que: Explain Inheritance in Java, why multiple inheritance is not supported in java? Give the declaration
for following chart.

Java Programming Language
149 | P a g e
6. EXCEPTION HANDLING Types of Errors
Error may be classified into two categories:
1. Compile-time errors
2. Run-time errors
1. Compile-time Errors
All syntax errors will be detected and displayed by the java compiler and therefore these errors are
known as compile-time errors. Whenever the compiler displays an error, it will not create the .class file. It is
therefore necessary that we fix all the errors before we can successfully compile and run the program.
Employee
(VIPUL)
Manager Accountant Sales Person
(GAUTAM)

Java Programming Language
150 | P a g e
class Error1
{
public static void main(String args[])
{
System.out.println(“Hello Java”) // Missing ;
}
}
If we have miss the semicolon at the end of print statement in program , the following message will be be
displayed in the screen:
We can now go to the appropritate line, correct the error, and recompile the program.
The most common compile errors are:
Missing semicolons
Missing (or mismatch of) brackets in classes and methods
Misspelling of identifiers and keywords
Missing double quotes in strings
Use of undeclared variables
Incompatible types in assignments / initialization
Bad references to objects
Use of = in place of == operator
2. Run-time Errors
Sometimes, a program may compile successfully creating the .class file but may not run properly. Such
program may produce wrong results due to wrong logic or may terminate due to errors such as dividing integers
by 0.
Most common run-time errors are:
Dividing an integer by zero.
Accessing an element that is out of the bounds of an array
Trying to store a value into an array of an incompatible class or type.
Passing a parameter that is not in a valid range or value for a method
Attempting to use a negative size for an array
Converting invalid string to a number
Accessing a character that is out of bounds of a string.
Below program illustrates how a run-time error causes termination of execution of the program.
class Error2
{
public static void main(String args[])
{
int a = 10;
int b = 5’
Erro1.java :7: ‘;’ expected
System.out.println(“Hello Java”)
1 error

Java Programming Language
151 | P a g e
int c = 5;
int x = a / (b-c);
System.out.println(“x=” + x);
int y = a / (b + c);
System.out.println(“x=” + y);
}
}
Above program will compiled successfully. However, while executing, it displays the following message and stops
without executing further statements.
java.lang.ArithmeticException : / by Zero
at Error2.main(Error2.java:10)
When Java run-time tries to execute a division by zero, it generates an error condition, which causes the
program to stop after displaying an approprioate message.
Exception Que: Explain exception handling technique in java
Que: Define exception? Explain keywords used in exception with example.
Que: How try and catch blocks are define? Explain with giving example.
An exception is a condition that is caused by run-time error in the program. When the Java interpreter
encounters an error such as dividing an interger by zero, it creates an exception object and throws it. If the
exception object is not caught and handled properly, the interpreter will display an error message as shown in
the above program output and will terminates the program. If we want the program to continue with the
execution of the remaining code, then we should try to catch the exception object thrown by the error
condition and they display an appropriatye message for taking corrective actions.
The purpose of exception handling mechanism is to provide a means to detect and report an “exception
cirtumstance” so that appropriate action can be taken. The mechanism suggestes incorporation of a separate
error hanling code that performs the following tasks:
1. Find the problem ( Hit the exception)
2. Inform that an error has occurred. (Throw the exception)
3. Receive the error information (catch the exception)
4. Take corrective actions (Handle the exception)
The error handling code basically consists of two segments, one to detect errors and to throw exceptions and
the other to catch exceptions and to take appropriate actions.
Syntax for Exception handling Code Que: Expain try and catch with example
The basic concepts of exception handling are throwing an exception and catching it. This is illustrated in
below figure.
Exception object creator
try Block
Statement that
causes an exception

Java Programming Language
152 | P a g e
throw
exception
object
Exception handler
A Java exception is an object that describes an exceptional (that is, error) condition that has occurred in a
piece of code. When an exceptional condition arises, an object representing that exception is created and
thrown in the method that caused the error. That method may choose to handle the exception itself, or pass it
on. Either way, at some point, the exception is caught and processed. Exceptions can be generated by the Java
run-time system, or they can be manually generated by your code.
Java exception handling is managed via five keywords: try, catch, throw, throws,and finally.
Program statements that you want to monitor for exceptions are contained within a try block. If an
exception occurs within the try block, it is thrown. Your code can catch this exception (using catch) and handle
it in some rational manner. System-generated exceptions are automatically thrown by the Java run-time
system. To manually throw an exception, use the keyword throw.
This is the general form of an exception-handling block:
try
{
// block of code to monitor for errors
}
catch (ExceptionType1 exOb)
{
// exception handler for ExceptionType1 }
catch (ExceptionType2 exOb)
{
// exception handler for ExceptionType2 }
// ...
finally
{
// block of code to be executed before try block ends
}
Here, ExceptionType is the type of exception that has occurred.
Using try and catch
catch Block
Stament that
handles the
exception

Java Programming Language
153 | P a g e
To guard against and handle a run-time error, simply enclose the code that you want to monitor inside a
try block. Immediately following the try block, include a catch clause that specifies the exception type that
you wish to catch. To illustrate how easily this can be done, the following program includes a try block and a
catch clause which processes the ArithmeticException generated by the division-by-zero error:
class Exc2
{
public static void main(String args[])
{
int d, a;
try
{
// monitor a block of code.
d = 0;
a = 42 / d;
System.out.println("This will not be printed.");
}
catch (ArithmeticException e)
{
// catch divide-by-zero error
System.out.println("Division by zero.");
}
System.out.println("After catch statement.");
}
}
This program generates the following output:
Division by zero.
After catch statement.
Notice that the call to println( ) inside the try block is never executed. Once an exception is thrown,
program control transfers out of the try block into the catch block. Put differently, catch is not “called,” so
execution never “returns” to the try block from a catch. Thus, the line “This will not be printed.” is not
displayed. Once the catch statement has executed, program control continues with the next line in the program
following the entire try/catch mechanism.
A try and its catch statement form a unit. The scope of the catch clause is restricted to those
statements specified by the immediately preceding try statement. A catch statement cannot catch an
exception thrown by another try statement (except in the case of nested try statements, described shortly).
The statements that are protected by try must be surrounded by curly braces. (That is, they must be within a
block.) You cannot use try on a single statement.
Exception Types Que: list some of the most common types of exceptions that might occur in java?
Java provides two type of exeption checked exeption and unchecked exeption
Throwable
Exception Error

Java Programming Language
154 | P a g e
All exceptions in java are handled by a superclass Throwable. The Throwable class has two subclasses.
Exception and Error. Exception again has two subclasses, IOExcepiton and RuttimeException. The Exception
hierarchy is given in above figure.
Certain exceptions which must be made known to the programmer at the compile time itself. Such
exceptions are listed and the the compiler check whether any of the listed exceptions occur in a program
during compilation. Such exceptions are called checked exception.
Exception that are not listed in the list are identified during runtime. Such exeptions are called
unchecked exception.
Checked exceptions
Class Description
ClassNotFoundException A class can not be found
IllegalAccessException An illegal access to a class was attempted
InterruptedException A thread has been interrupted
NoSuchFieldException A field could not be found
NoSuchMehodException A method could not be found
Unchecked exceptions
Class Description
ArithmeticException Arithmetic error
ArrayIndexOutOfBoundsException Array index is beyond the bounds
ClassCastException Invalid cast
IllegalArgumentException Invalid arguments passed to a method
NegativeArraySizeException Array with negative index
NullPointerException Invalid use of null
NumberFormatException Incorrect conversion of string to a number
StringOutOfBoundsException Trying to access a string beyond its bounds
Uncaught exceptions
This small program includes an expression that intentionally causes a divide-by-zero error.
class Exc0
{
public static void main(String args[])
{
int d = 0;
int a = 42 / d;
}
}
Runtime Exception IO Exception

Java Programming Language
155 | P a g e
When the Java run-time system detects the attempt to divide by zero, it constructs a new exception
object and then throws this exception. This causes the execution of Exc0 to stop, because once an exception
has been thrown, it must be caught by an exception handler and dealt with immediately. In this example, we
haven’t supplied any exception handlers of our own, so the exception is caught by the default handler provided
by the Java run-time system. Any exception that is not caught by your program will ultimately be processed by
the default handler. The default handler displays a string describing the exception, prints a stack trace from
the point at which the exception occurred, and terminates the program.
Here is the output generated when this example is executed.
java.lang.ArithmeticException: / by zero at Exc0.main(Exc0.java:4)
Notice how the class name, Exc0; the method name, main; the filename, Exc0.java; and the line number,
4, are all included in the simple stack trace. Also, notice that the type of the exception thrown is a subclass of
Exception called ArithmeticException, which more specifically describes what type of error happened.
The stack trace will always show the sequence of method invocations that led up to the error. For
example, here is another version of the preceding program that introduces the same error but in a method
separate from main( )
class Exc1
{
static void subroutine()
{
int d = 0;
int a = 10 / d;
}
public static void main(String args[])
{
Exc1.subroutine();
}
}
The resulting stack trace from the default exception handler shows how the entire call stack is
displayed:
java.lang.ArithmeticException: / by zero
at Exc1.subroutine(Exc1.java:4)
at Exc1.main(Exc1.java:7)
As you can see, the bottom of the stack is main’s line 7, which is the call to subroutine( ), which caused
the exception at line 4. The call stack is quite useful for debugging, because it pinpoints the precise sequence
of steps that led to the error.
Multiple catch clauses
In some cases, more than one exception could be raised by a single piece of code. To handle this type of
situation, you can specify two or more catch clauses, each catching a different type of exception. When an
exception is thrown, each catch statement is inspected in order, and the first one whose type matches that of
the exception is executed. After one catch statement executes, the others are bypassed, and execution
continues after the try/catch block. The following example traps two different

Java Programming Language
156 | P a g e
exception types:
// Demonstrate multiple catch statements.
class MultiCatch
{
public static void main(String args[])
{
try
{
int a = args.length;
System.out.println("a = " + a);
int b = 42 / a;
int c[] = { 1 };
c[42] = 99;
}
catch(ArithmeticException e)
{
System.out.println("Divide by 0: " + e);
}
catch(ArrayIndexOutOfBoundsException e)
{
System.out.println("Array index oob: " + e);
}
System.out.println("After try/catch blocks.");
}
}
This program will cause a division-by-zero exception if it is started with no commandline parameters,
since a will equal zero. It will survive the division if you provide a command-line argument, setting a to
something larger than zero. But it will cause an ArrayIndexOutOfBoundsException, since the int array c has a
length of 1, yet the program attempts to assign a value to c[42].
Here is the output generated by running it both ways:
C:\>java MultiCatch
a = 0
Divide by 0: java.lang.ArithmeticException: / by zero
After try/catch blocks.
C:\>java MultiCatch TestArg
a = 1
Array index oob: java.lang.ArrayIndexOutOfBoundsException
After try/catch blocks.
When you use multiple catch statements, it is important to remember thatexception subclasses must
come before any of their superclasses. This is because a catch statement that uses a superclass will catch
exceptions of that type plus any of its subclasses. Thus, a subclass would never be reached if it came after its
superclass. Further, in Java, unreachable code is an error. For example, consider the following program:
/* This program contains an error. A subclass must come before its superclass in a series of catch statements.
If not, unreachable code will be created and a compile-time error will result. */
class SuperSubCatch
{

Java Programming Language
157 | P a g e
public static void main(String args[])
{
try
{
int a = 0;
int b = 42 / a;
}
catch(Exception e)
{
System.out.println("Generic Exception catch.");
}
/* This catch is never reached because
ArithmeticException is a subclass of Exception. */
catch(ArithmeticException e)
{
// ERROR - unreachable
System.out.println("This is never reached.");
}
}
}
If you try to compile this program, you will receive an error message stating that the second catch
statement is unreachable because the exception has already been caught. Since ArithmeticException is a
subclass of Exception, the first catch statement will handle all Exception-based errors, including
ArithmeticException. This means that the second catch statement will never execute. To fix the problem,
reverse the order of the catch statements.
Nested try statements
The try statement can be nested. That is, a try statement can be inside the block of another try. Each
time a try statement is entered, the context of that exception is pushed on the stack. If an inner try
statement does not have a catch handler for a particular exception, the stack is unwound and the next try
statement’s catch handlers are inspected for a match. This continues until one of the catch statements
succeeds, or until all of the nested try statements are exhausted. If no catch statement matches, then the
Java run-time system will handle the exception. Here is an example that uses nested try statements:
// An example of nested try statements.
class NestTry
{
public static void main(String args[])
{
try
{
int a = args.length;
/* If no command-line args are present, the following statement will generate a divide-
by-zero exception. */
int b = 42 / a;
System.out.println("a = " + a);

Java Programming Language
158 | P a g e
try
{
// nested try block
/* If one command-line arg is used, then a divide-by-zero exception will be
generated by the following code. */
if(a==1) a = a/(a-a); // division by zero
/* If two command-line args are used, then generate an out-of-bounds
exception. */
if(a==2)
{
int c[] = { 1 };
c[42] = 99; // generate an out-of-bounds exception
}
}
catch(ArrayIndexOutOfBoundsException e)
{
System.out.println("Array index out-of-bounds: " + e);
}
}
catch(ArithmeticException e)
{
System.out.println("Divide by 0: " + e);
}
}
}
As you can see, this program nests one try block within another. The program works as follows. When
you execute the program with no command-line arguments, a divide-by-zero exception is generated by the outer
try block. Execution of the program by one command-line argument generates a divide-by-zero exception from
within the nested try block. Since the inner block does not catch this exception, it is passed on to the outer
try block, where it is handled. If you execute the program with two command-line arguments, an array boundary
exception is generated from within the inner try block. Here are sample runs that illustrate each case:
C:\>java NestTry
Divide by 0: java.lang.ArithmeticException: / by zero
C:\>java NestTry One
a = 1
Divide by 0: java.lang.ArithmeticException: / by zero
C:\>java NestTry One Two
a = 2
Array index out-of-bounds:
java.lang.ArrayIndexOutOfBoundsException
Throw
So far, you have only been catching exceptions that are thrown by the Java run-time system. However,
it is possible for your program to throw an exception explicitly, using the throw statement. The general form of
throw is shown here: throw ThrowableInstance;
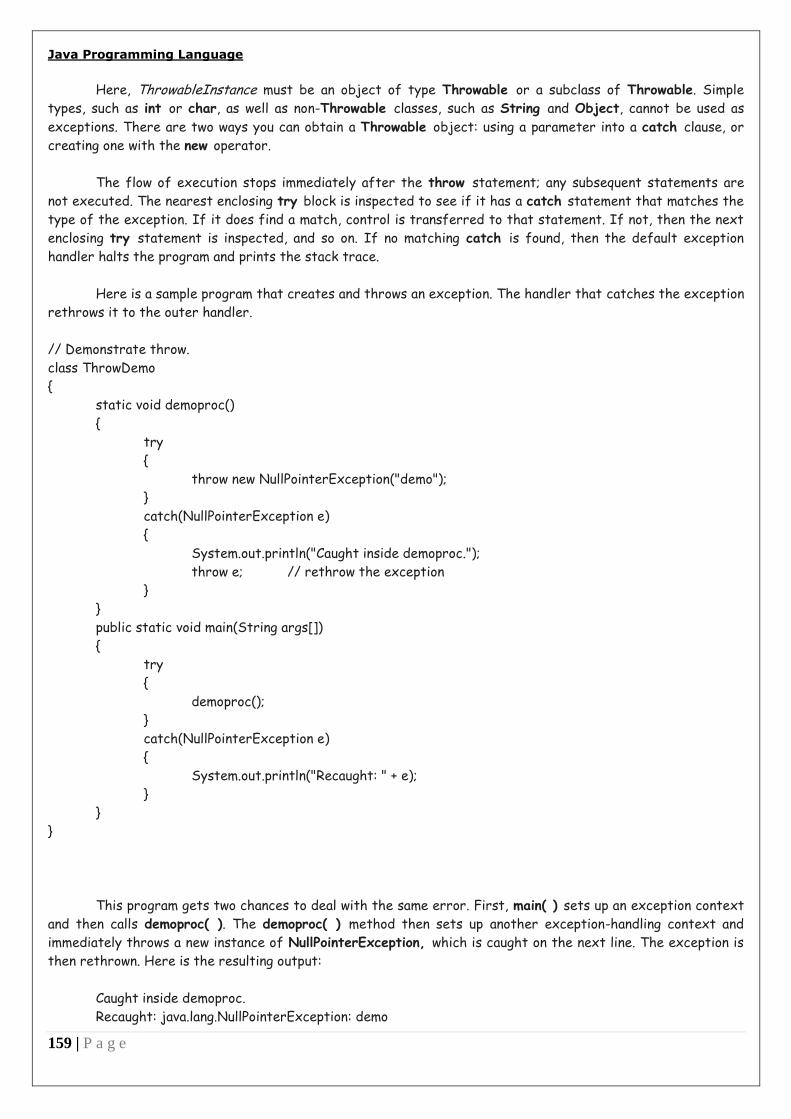
Java Programming Language
159 | P a g e
Here, ThrowableInstance must be an object of type Throwable or a subclass of Throwable. Simple
types, such as int or char, as well as non-Throwable classes, such as String and Object, cannot be used as
exceptions. There are two ways you can obtain a Throwable object: using a parameter into a catch clause, or
creating one with the new operator.
The flow of execution stops immediately after the throw statement; any subsequent statements are
not executed. The nearest enclosing try block is inspected to see if it has a catch statement that matches the
type of the exception. If it does find a match, control is transferred to that statement. If not, then the next
enclosing try statement is inspected, and so on. If no matching catch is found, then the default exception
handler halts the program and prints the stack trace.
Here is a sample program that creates and throws an exception. The handler that catches the exception
rethrows it to the outer handler.
// Demonstrate throw.
class ThrowDemo
{
static void demoproc()
{
try
{
throw new NullPointerException("demo");
}
catch(NullPointerException e)
{
System.out.println("Caught inside demoproc.");
throw e; // rethrow the exception
}
}
public static void main(String args[])
{
try
{
demoproc();
}
catch(NullPointerException e)
{
System.out.println("Recaught: " + e);
}
}
}
This program gets two chances to deal with the same error. First, main( ) sets up an exception context
and then calls demoproc( ). The demoproc( ) method then sets up another exception-handling context and
immediately throws a new instance of NullPointerException, which is caught on the next line. The exception is
then rethrown. Here is the resulting output:
Caught inside demoproc.
Recaught: java.lang.NullPointerException: demo

Java Programming Language
160 | P a g e
The program also illustrates how to create one of Java’s standard exception objects. Pay close
attention to this line:
throw new NullPointerException("demo");
Here, new is used to construct an instance of NullPointerException. All of Java’s built-in run-time
exceptions have at least two constructors: one with no parameter and one that takes a string parameter. When
the second form is used, the argument specifies a string that describes the exception. This string is displayed
when the object is used as an argument to print( ) or println( ). It can also be obtained by a call to
getMessage( ), which is defined by Throwable.
Throws
If a method is capable of causing an exception that it does not handle, it must specify this behavior so
that callers of the method can guard themselves against that exception. You do this by including a throws
clause in the method’s declaration. A throws clause lists the types of exceptions that a method might throw.
This is necessary for all exceptions, except those of type Error or RuntimeException, or any of their
subclasses. All other exceptions that a method can throw must be declared in the throws clause. If they are
not, a compile-time error will result.
This is the general form of a method declaration that includes a throws clause:
type method-name(parameter-list) throws exception-list {
// body of method
}
Here, exception-list is a comma-separated list of the exceptions that a method can throw.
Following is an example of an incorrect program that tries to throw an exception that it does not catch.
Because the program does not specify a throws clause to declare this fact, the program will not compile.
// This program contains an error and will not compile.
class ThrowsDemo
{
static void throwOne()
{
System.out.println("Inside throwOne.");
throw new IllegalAccessException("demo");
}
public static void main(String args[])
{
throwOne();
}
}
To make this example compile, you need to make two changes. First, you need to declare that throwOne( )
throws IllegalAccessException. Second, main( ) must define a try/catch statement that catches this
exception.

Java Programming Language
161 | P a g e
The corrected example is shown here:
// This is now correct.
class ThrowsDemo
{
static void throwOne() throws IllegalAccessException
{
System.out.println("Inside throwOne.");
throw new IllegalAccessException("demo");
}
public static void main(String args[])
{
try
{
throwOne();
}
catch (IllegalAccessException e)
{
System.out.println("Caught " + e);
}
}
}
Here is the output generated by running this example program:
inside throwOne
caught java.lang.IllegalAccessException: demo
finally
finally creates a block of code that will be executed after a try/catch block has completed and before
the code following the try/catch block. The finally block will execute whether or not an exception is thrown. If
an exception is thrown, the finally block will execute even if no catch statement matches the exception. Any
time a method is about to return to the caller from inside a try/catch block, via an uncaught exception or an
explicit return statement, the finally clause is also executed just before the method returns. This can be
useful for closing file handles and freeing up any other resources that might have been allocated at the
beginning of a method with the intent of disposing of them before returning. The finally clause is optional.
However, each try statement requires at least one catch or a finally clause
Here is an example program that shows three methods that exit in various ways, none without executing their
finally clauses:
// Demonstrate finally.
class FinallyDemo
{
// Through an exception out of the method.
static void procA()
{
try
{
System.out.println("inside procA");
throw new RuntimeException("demo");
}

Java Programming Language
162 | P a g e
finally
{
System.out.println("procA's finally");
}
}
// Return from within a try block.
static void procB()
{
try
{
System.out.println("inside procB");
return;
}
finally
{
System.out.println("procB's finally");
}
}
// Execute a try block normally.
static void procC()
{
try
{
System.out.println("inside procC");
}
finally
{
System.out.println("procC's finally");
}
}
public static void main(String args[])
{
try
{
procA();
}
catch (Exception e)
{
System.out.println("Exception caught");
}
procB();
procC();
}
}
In this example, procA( ) prematurely breaks out of the try by throwing an exception. The finally
clause is executed on the way out. procB( )’s try statement is exited via a return statement. The finally clause
is executed before procB( ) returns. In procC( ), the try statement executes normally, without error.
However, the finally block is still executed.
If a finally block is associated with a try, the finally block will be executed upon conclusion of the try.

Java Programming Language
163 | P a g e
Here is the output generated by the preceding program:
inside procA
procA’s finally
Exception caught
inside procB
procB’s finally
inside procC
procC’s finally
Creating your own exception sub classes Although Java’s built-in exceptions handle most common errors, you will probably want to create your
own exception types to handle situations specific to your applications. This is quite easy to do: just define a
subclass of Exception (which is, of course, a subclass of Throwable). Your subclasses don’t need to actually
implement anything—it is their existence in the type system that allows you to use them as exceptions.
The Exception class does not define any methods of its own. It does, of course, inherit those
methods provided by Throwable. Thus, all exceptions, including those that you create, have the methods
defined by Throwable available to them.
The Exception class does not define any methods of its own. It does, of course, inherit those methods
provided by Throwable. Thus, all exceptions, including those that you create, have the methods defined by
Throwable available to them. They are shown in below table Table

Java Programming Language
164 | P a g e
Example:
Import java.lang.Exception;
Class MyException extends Exception
{
MyException(String message)
{
Super(message);
}
}
Class TestMyExcetption
{
public static void main(String args[])
{
int x = 5
int y = 1000;
try
{
float z = (float) X / (float) y;
if(z < 0.01)
{
throw new MyException(“Number is too small”);
}
}
Catch(MyException e)
{
System.out.println(“Caught my exception”);
System.out.println(“e.getMessage()”);
}
finally
{
System.out.println(“I am always here”);

Java Programming Language
165 | P a g e
}
}
}
Output
Caught my exception
Number is too small
I am always here
The object “e” which contains the error message “Number is too small” is caught by the catch block
which then displays the message using the getMessage() method.
Different between Error and Excepiton Que: Give the different between Error and Exception
Error Exception
Error are those which can be handled at compile time Exceptions are those which can be handled at the run
time
Errors are handled at the system level Exceptions are handled at the application level
Error is a syntax error exception is a logical error.
We can not use try and catch block with Error We can use try and catch block for exception
Example of Error: OutOfMemory error,
StackOverflowError etc.
Example of Excepiton: Arithmetic Exception,
ArrayIndexOutOfBoundsException etc.

Java Programming Language
166 | P a g e
7. MULTITHREDED PROGRAMMING
7.1. The Java Thread Model
Que What is thread ?
The Java run-time system depends on threads for many things, and all the class libraries are designed
with multithreading in mind. Single-threaded systems use an approach called an event loop with polling. In this
model, a single thread of control runs in an infinite loop, polling a single event queue to decide what to do next.
Once this polling mechanism returns with, say, a signal that a network file is ready to be read, then the event
loop dispatches control to the appropriate event handler. Until this event handler returns, nothing else can
happen in the system. This wastes CPU time, in a singled-threaded environment, when a thread blocks (that is,
suspends execution) because it is waiting for some resource, the entire program stops running.
The benefit of Java’s multithreading is that the main loop/polling mechanism is eliminated. One thread
can pause without stopping other parts of your program When a thread blocks in a Java program, only the single
thread that is blocked pauses. All other threads continue to run.
Main Thread
Main Method
Module
Start Start
Start
Switching Switching
Thread A Thread B Thread C
[The Thread Model of Java]
The Thread Class and the Runnable Interface
Que: Write two way of creating thread.
Java’s multithreading system is built upon the Thread class, its methods, and its companion interface,
Runnable. To create a new thread, your program will either extend Thread or implement the Runnable
interface. The Thread class defines several methods that help manage threads. The ones that will be used in
this chapter are shown here:
-----------
-----------
-----------
-----------
-----------
-
-----------
-----------
-----------
-----------
-----------
----
-----------
-----------
-----------
-----------
-----------
-----------
-----
-----------
-----------
-----------
-----------
-----------
-----------
-----

Java Programming Language
167 | P a g e
7.2 The main thread
When a Java program starts up, one thread begins running immediately. This is usually called the main
thread of your program, because it is the one that is executed when your program begins. The main thread is
important for two reasons:
It is the thread from which other “child” threads will be created.
Often it must be the last thread to finish execution because it performs various shutdown actions.
Although the main thread is created automatically when your program is started, it can be controlled
through a Thread object. To do so, you must obtain a reference to it by calling the method currentThread( ),
which is a public static member of Thread. Its general form is shown here:
static Thread currentThread( )
This method returns a reference to the thread in which it is called. Once you have a reference to the
main thread, you can control it just like any other thread.
Let’s begin by reviewing the following example:
// Controlling the main Thread.
class CurrentThreadDemo
{
public static void main(String args[])
{
Thread t = Thread.currentThread();
System.out.println("Current thread: " + t);
// change the name of the thread
t.setName("My Thread");
System.out.println("After name change: " + t);
try
{
for(int n = 5; n > 0; n--)
{
System.out.println(n);
Thread.sleep(1000);
}
}
catch (InterruptedException e)
{

Java Programming Language
168 | P a g e
System.out.println("Main thread interrupted");
}
}
}
In this program, a reference to the current thread (the main thread, in this case) is obtained by calling
currentThread( ), and this reference is stored in the local variable t. Next, the program displays information
about the thread. The program then calls setName( ) to change the internal name of the thread. Information
about the thread is then redisplayed. Next, a loop counts down from five, pausing one second between each line.
The pause is accomplished by the sleep( ) method. The argument to sleep( ) specifies the delay period in
milliseconds. Notice the try/catch block around this loop. The sleep( ) method in Thread might throw an
InterruptedException. This would happen if some other thread wanted to interrupt this sleeping one. This
example just this differently. Here is the output generated by this program:
Current thread: Thread[main,5,main]
After name change: Thread[My Thread,5,main]
5
4
3
2
1
Notice the output produced when t is used as an argument to println( ). This displays, in order: the
name of the thread, its priority, and the name of its group. By default, the name of the main thread is main. Its
priority is 5, which is the default value, and main is also the name of the group of threads to which this thread
belongs.
Let’s look more closely at the methods defined by Thread that are used in the program. The sleep( )
method causes the thread from which it is called to suspend execution for the specified period of milliseconds.
Its general form is shown here:
static void sleep(long milliseconds) throws InterruptedException
The number of milliseconds to suspend is specified in milliseconds. This method may throw an
InterruptedException. The sleep( ) method has a second form, shown next, which allows you to specify the
period in terms of milliseconds and nanoseconds:
static void sleep(long milliseconds, int nanoseconds) throws InterruptedException
This second form is useful only in environments that allow timing periods as short as nanoseconds. As
the preceding program shows, you can set the name of a thread by using setName( ). You can obtain the name
of a thread by calling getName( ) (but note that this procedure is not shown in the program). These methods
are members of the Thread class and are declared like this:
final void setName(String threadName)
final String getName( )
Here, threadName specifies the name of the thread.
7.3 Creating a thread Java defines two ways in which this can be accomplished:

Java Programming Language
169 | P a g e
You can implement the Runnable interface.
You can extend the Thread class, itself.
Implementing Runnable
The easiest way to create a thread is to create a class that implements the Runnable interface. You can
construct a thread on any object that implements Runnable. To implement Runnable, a class need only
implement a single method called run( ), which is declared like this:
public void run( )
Inside run( ), you will define the code that constitutes the new thread. It is important to understand
that run( ) can call other methods, use other classes, and declare variables, just like the main thread can.
After you create a class that implements Runnable, you will instantiate an object of type Thread from
within that class. Thread defines several constructors. The one that we will use is shown here:
Thread(Runnable threadOb, String threadName)
In this constructor, threadOb is an instance of a class that implements the Runnable interface. This
defines where execution of the thread will begin. The name of the new thread is specified by threadName.
After the new thread is created, it will not start running until you call its start( ) method, which is
declared within Thread. In essence, start( ) executes a call to run( ). The start( ) method is shown here:
void start( )
Here is an example that creates a new thread and starts it running:
// Create a second thread.
class NewThread implements Runnable
{
Thread t;
NewThread()
{
// Create a new, second thread
t = new Thread(this, "Demo Thread");
System.out.println("Child thread: " + t);
t.start(); // Start the thread
}
// This is the entry point for the second thread.
public void run()
{
try
{
for(int i = 5; i > 0; i--)
{
System.out.println("Child Thread: " + i);
Thread.sleep(500);
}
}

Java Programming Language
170 | P a g e
catch (InterruptedException e)
{
System.out.println("Child interrupted.");
}
System.out.println("Exiting child thread.");
}
}
class ThreadDemo
{
public static void main(String args[])
{
new NewThread(); // create a new thread
try
{
for(int i = 5; i > 0; i--)
{
System.out.println("Main Thread: " + i);
Thread.sleep(1000);
}
}
catch (InterruptedException e)
{
System.out.println("Main thread interrupted.");
}
System.out.println("Main thread exiting.");
}
}
Inside NewThread’s constructor, a new Thread object is created by the following statement:
t = new Thread(this, "Demo Thread");
Passing this as the first argument indicates that you want the new thread to call the run( ) method on
this object. Next, start( ) is called, which starts the thread of execution beginning at the run( ) method. This
causes the child thread’s for loop to begin. After calling start( ), NewThread’s constructor returns to main( ).
When the main thread resumes, it enters its for loop. Both threads continue running, sharing the CPU, until
their loops finish. The output produced by this program is as follows:
Child thread: Thread[Demo Thread,5,main]
Main Thread: 5
Child Thread: 5
Child Thread: 4
Main Thread: 4
Child Thread: 3
Child Thread: 2
Main Thread: 3
Child Thread: 1
Exiting child thread.
Main Thread: 2
Main Thread: 1
Main thread exiting.

Java Programming Language
171 | P a g e
As mentioned earlier, in a multithreaded program, often the main thread must be the last thread to
finish running, The preceding program ensures that the main thread finishes last, because the main thread
sleeps for 1,000 milliseconds between iterations, but the child thread sleeps for only 500 milliseconds. This
causes the child thread to terminate earlier than the main thread.
Extending Thread
Que: how a thread is created by extending the thread class?explain giving example
The second way to create a thread is to create a new class that extends Thread, and then to create an
instance of that class. The extending class must override the run( ) method, which is the entry point for the
new thread. It must also call start( ) to begin execution of the new thread.
// Create a second thread by extending Thread
class NewThread extends Thread
{
NewThread()
{
// Create a new, second thread
super("Demo Thread");
System.out.println("Child thread: " + this);
start(); // Start the thread
}
// This is the entry point for the second thread.
public void run()
{
try
{
for(int i = 5; i > 0; i--)
{
System.out.println("Child Thread: " + i);
Thread.sleep(500);
}
}
catch (InterruptedException e)
{
System.out.println("Child interrupted.");
}
System.out.println("Exiting child thread.");
}
}
class ExtendThread
{
public static void main(String args[])
{
new NewThread(); // create a new thread
try
{
for(int i = 5; i > 0; i--)
{
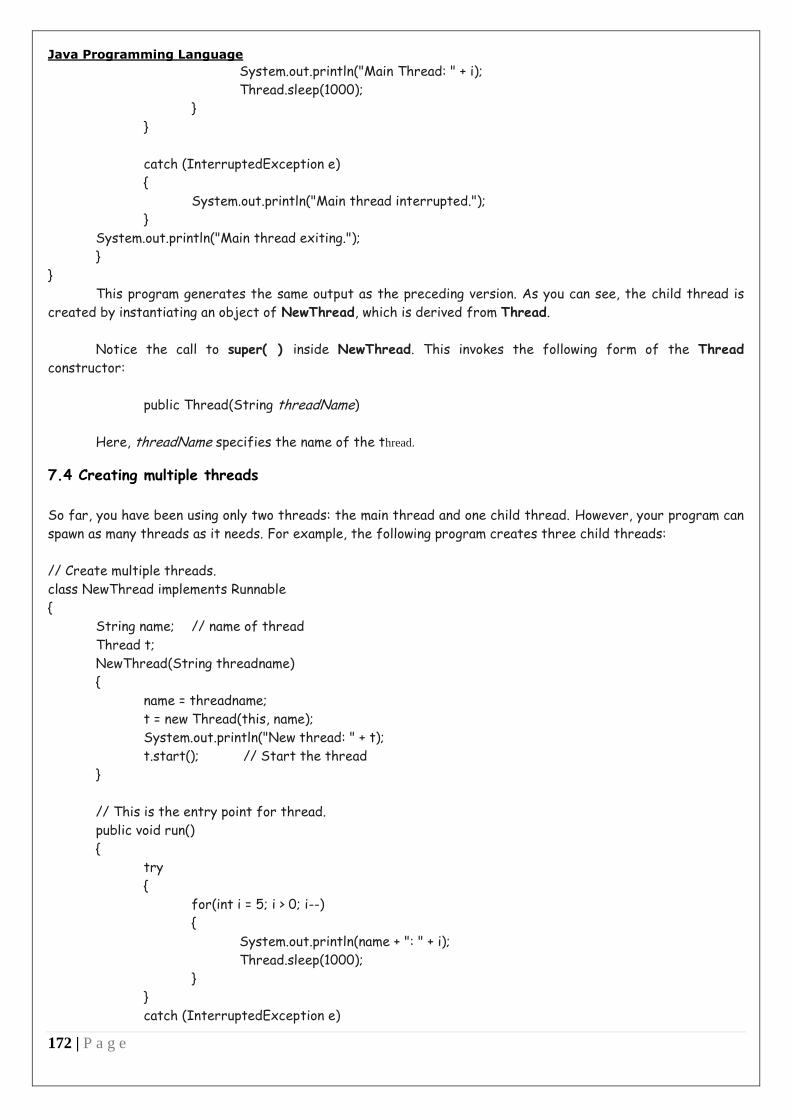
Java Programming Language
172 | P a g e
System.out.println("Main Thread: " + i);
Thread.sleep(1000);
}
}
catch (InterruptedException e)
{
System.out.println("Main thread interrupted.");
}
System.out.println("Main thread exiting.");
}
}
This program generates the same output as the preceding version. As you can see, the child thread is
created by instantiating an object of NewThread, which is derived from Thread.
Notice the call to super( ) inside NewThread. This invokes the following form of the Thread
constructor:
public Thread(String threadName)
Here, threadName specifies the name of the thread.
7.4 Creating multiple threads
So far, you have been using only two threads: the main thread and one child thread. However, your program can
spawn as many threads as it needs. For example, the following program creates three child threads:
// Create multiple threads.
class NewThread implements Runnable
{
String name; // name of thread
Thread t;
NewThread(String threadname)
{
name = threadname;
t = new Thread(this, name);
System.out.println("New thread: " + t);
t.start(); // Start the thread
}
// This is the entry point for thread.
public void run()
{
try
{
for(int i = 5; i > 0; i--)
{
System.out.println(name + ": " + i);
Thread.sleep(1000);
}
}
catch (InterruptedException e)

Java Programming Language
173 | P a g e
{
System.out.println(name + "Interrupted");
}
System.out.println(name + " exiting.");
}
}
class MultiThreadDemo
{
public static void main(String args[])
{
new NewThread("One"); // start threads
new NewThread("Two");
new NewThread("Three");
try
{
// wait for other threads to end
Thread.sleep(10000);
}
catch (InterruptedException e)
{
System.out.println("Main thread Interrupted");
}
System.out.println("Main thread exiting.");
}
}
The output from this program is shown here:
New thread: Thread[One,5,main]
New thread: Thread[Two,5,main]
New thread: Thread[Three,5,main]
One: 5
Two: 5
Three: 5
One: 4
Two: 4
Three: 4
One: 3
Three: 3
Two: 3
One: 2
Three: 2
Two: 2
One: 1
Three: 1
Two: 1
One exiting.
Two exiting.
Three exiting.
Main thread exiting.

Java Programming Language
174 | P a g e
As you can see, once started, all three child threads share the CPU. Notice the call tosleep(10000) in
main( ). This causes the main thread to sleep for ten seconds and ensures that it will finish last.
7.5 Using alive( ) & join( )
Que: Explain is Alive() & Join() methods of thread
As mentioned, often you will want the main thread to finish last. In the preceding examples, this is
accomplished by calling sleep( ) within main( ), with a long enough delay to ensure that all child threads
terminate prior to the main thread. However, this is hardly a satisfactory solution, and it also raises a larger
question: How can one thread know when another thread has ended? Fortunately, Thread provides a means by
which you can answer this question. Two ways exist to determine whether a thread has finished. First, you can
call isAlive( ) on the thread. This method is defined by Thread, and its general form is shown here:
final boolean isAlive( )
The isAlive( ) method returns true if the thread upon which it is called is still running. It returns false
otherwise.
While isAlive( ) is occasionally useful, the method that you will more commonly use to wait for a thread
to finish is called join( ), shown here:
final void join( ) throws InterruptedException
This method waits until the thread on which it is called terminates. Its name comes from the concept of the
calling thread waiting until the specified thread joins it. Additional forms of join( ) allow you to specify a
maximum amount of time that you want to wait for the specified thread to terminate. Here is an improved
version of the preceding example that uses join( ) to ensure that the main thread is the last to stop. It also
demonstrates the isAlive( ) method.
// Using join() to wait for threads to finish.
class NewThread implements Runnable
{
String name; // name of thread
Thread t;
NewThread(String threadname)
{
name = threadname;
t = new Thread(this, name);
System.out.println("New thread: " + t);
t.start(); // Start the thread
}
// This is the entry point for thread.
public void run()
{
try

Java Programming Language
175 | P a g e
{
for(int i = 5; i > 0; i--)
{
System.out.println(name + ": " + i);
Thread.sleep(1000);
}
}
catch (InterruptedException e)
{
System.out.println(name + " interrupted.");
}
System.out.println(name + " exiting.");
}
}
class DemoJoin
{
public static void main(String args[])
{
NewThread ob1 = new NewThread("One");
NewThread ob2 = new NewThread("Two");
NewThread ob3 = new NewThread("Three");
System.out.println("Thread One is alive: " + ob1.t.isAlive());
System.out.println("Thread Two is alive: " + ob2.t.isAlive());
System.out.println("Thread Three is alive: " + ob3.t.isAlive());
// wait for threads to finish
try
{
System.out.println("Waiting for threads to finish.");
ob1.t.join();
ob2.t.join();
ob3.t.join();
}
catch (InterruptedException e)
{
System.out.println("Main thread Interrupted");
}
System.out.println("Thread One is alive: " + ob1.t.isAlive());
System.out.println("Thread Two is alive: " + ob2.t.isAlive());
System.out.println("Thread Three is alive: " + ob3.t.isAlive());
System.out.println("Main thread exiting.");
}
}
Sample output from this program is shown here:
New thread: Thread[One,5,main]
New thread: Thread[Two,5,main]
New thread: Thread[Three,5,main]
Thread One is alive: true

Java Programming Language
176 | P a g e
Thread Two is alive: true
Thread Three is alive: true
Waiting for threads to finish.
One: 5
Two: 5
Three: 5
One: 4
Two: 4
Three: 4
One: 3
Two: 3
Three: 3
One: 2
Two: 2
Three: 2
One: 1
Two: 1
Three: 1
Two exiting.
Three exiting.
One exiting.
Thread One is alive: false
Thread Two is alive: false
Thread Three is alive: false
Main thread exiting.
As you can see, after the calls to join( ) return, the threads have stopped executing.
7.6 Thread priorities
Thread priorities are used by the thread scheduler to decide when each thread should be allowed to
run. In theory, higher-priority threads get more CPU time than lowerpriority threads. A higher-priority thread
can also preempt a lower-priority one. For instance, when a lower-priority thread is running and a higher-
priority thread resumes (from sleeping or waiting on I/O, for example), it will preempt the lower-priority
Thread.
To set a thread’s priority, use the setPriority( ) method, which is a member of Thread. This is its
general form:
final void setPriority(int level)
Here, level specifies the new priority setting for the calling thread. The value of level must be within
the range MIN_PRIORITY and MAX_PRIORITY. Currently, these values are 1 and 10, respectively. To return
a thread to default priority, specify NORM_PRIORITY, which is currently 5. These priorities are defined as
final variables within Thread.
class A extedns Thread
{
Public void run()
{

Java Programming Language
177 | P a g e
System.out.println(“Thread A started”);
for(int i=0; i<=4; i++)
{
System.out.println(“From Thread A:” + i);
}
System.out.println(“Exit From Thread A”);
}
}
class B extedns Thread
{
Public void run()
{
System.out.println(“Thread B started”);
for(int i=0; i<=4; i++)
{
System.out.println(“From Thread B:” + i);
}
System.out.println(“Exit From Thread B”);
}
}
class C extedns Thread
{
Public void run()
{
System.out.println(“Thread C started”);
for(int i=0; i<=4; i++)
{
System.out.println(“From Thread C:” + i);
}
System.out.println(“Exit From Thread C”);
}
}
class ThreadPriority
{
public static void main(String args[])
{
A threadA = new A();
B threadB = new B();
C threadC = new C();
threadC.setPriority(“Thread.MAX_PRIORITY);
threadB.setPriority(“threadA.getPriority() + 1”);
threadA.setPriority(“Thread.MIN_PRIORITY”);

Java Programming Language
178 | P a g e
System.out.println(“Start Thread A”);
threadA.start();
System.out.println(“Start Thread B”);
threadB.start();
System.out.println(“Start Thread C”);
threadC.start();
System.out.println(“End of Main Thread”);
}
}
Output
Start Thread A
Start Thread B
Start Thread C
Thread B Started
From Thread B : 1
From Thread B : 2
Thread C Started
From Thread C : 1
From Thread C : 2
From Thread C : 3
From Thread C : 4
Exit From Thread C
End of Main Thread
From Thread B : 3
From Thread B : 4
Exit From Thread B
Thread A Started
From Thread A : 1
From Thread A : 2
From Thread A : 3
From Thread A : 4
Life Cycle of Thread Que: Describe the life cycle of thread.
During the life time of thread, there are many states it can enter, They include.
1. Newborn State
2. Runnable State
3. Running State
4. Blockde State
5. Dead State
A thread is always in one these five states. It can move form one state to another via variety of ways
as shown in figure. .

Java Programming Language
179 | P a g e
Newborn State:
When we create a thread object, the thread is born and said to be in Newborn state.The thread is not
yet scheduled for running, At this stage we can do only one of the following thinds.
Schedule it for running using start() method.
Kill it using stop() method.
If Scheduled, it moves to the runnable state. If we attempt to use any other method at this stage an exception
will be thrown.
Runnable State
The runnable state means that the thread is ready for execution and is waiting for the availability of
the processor, That is, the thread has joined the queue of threads that we are waiting for execution. If all the
thread has equal priority, then they are given time slot for execution in round robin fashion.
However, if we want a thread to relinquish the control to another thread to equal priority before its
turn comes, we can do so by using the yield() method.

Java Programming Language
180 | P a g e
Running State
Running state means that processors has given its time to the thread for its execution. The thread runs
untill it realease control on its own or it is preempted by higher priority thread. A running thread may release
its control in one of the following situation.
It has been suspended using suspend() method. A suspended thread can be revived by using the
resume() method. This approach is useful when we want to suspend thread a thread for some time due
to certain reason, but do not want to kill it.
It has been made to sleep. We can put a thread to sleep for a specifired time period using the
sleep(time) where time is in milliseconds. This means that the thread is out of the queue during this
time period. The thread re-enters the runnable state as soon as this time period is over.
It has been to wait until some event occurs. This is done using the wait() method. The thread can be
scheduled to run again using the notify() method.
Bloacked State
A thread is said to be blocked when it is prevented from entering into the runnable state and
subsequently the running state. This happens when the thread is suspended, sleeping, or waiting in order to
satisfy certain requirements. A block thread is considered “not runnable” but not dead and therefore fully
qualified to run again.

Java Programming Language
181 | P a g e
Dead State
Every thread has a life cycle. A running thread ends its life when it has completed executing its run()
method. It is a natural death. However, we can kill it by sending the stop message to it at any state thus
causing a premature death to it.
7.7 Synchronization
Que: Explain Synchronization.
When two or more threads need access to a shared resource, they need some way to ensure that the
resource will be used by only one thread at a time. The process by which this is achieved is called
synchronization.
Key to synchronization is the concept of the monitor (also called a semaphore). A monitor is an object
that is used as a mutually exclusive lock, or mutex. Only one thread can own a monitor at a given time. When a
thread acquires a lock, it is said to have entered the monitor. All other threads attempting to enter the locked
monitor will be suspended until the first thread exits the monitor. These other threads are said to be waiting for the monitor. A thread that owns a monitor can reenter the same monitor if it so desires.
Using Synchronized Methods
Synchronization is easy in Java, because all objects have their own implicit monitor associated with
them. To enter an object’s monitor, just call a method that has been modified with the synchronized keyword.
While a thread is inside a synchronized method, all other threads that try to call it (or any other synchronized
method) on the same instance have to wait.
To understand the need for synchronization, let’s begin with a simple example that does not use it—but
should. The following program has three simple classes. The first one, Callme, has a single method named call( ).
The call( ) method takes a String parameter called msg. This method tries to print the msg string inside of
square brackets. The interesting thing to notice is that after call( ) prints the opening bracket and the msg
string, it calls Thread.sleep(1000), which pauses the current thread for one second.
The constructor of the next class, Caller, takes a reference to an instance of the Callme class and a
String, which are stored in target and msg, respectively. The constructor also creates a new thread that will
call this object’s run( ) method. The thread is started immediately. The run( ) method of Caller calls the call(
) method on the target instance of Callme, passing in the msg string. Finally, the Synch class starts by
creating a single instance of Callme, and three instances of Caller, each with a unique message string. The same
instance of Callme is passed to each Caller.
// This program is not synchronized.
class Callme
{
void call(String msg)
{
System.out.print("[" + msg);
try
{
Thread.sleep(1000);
}

Java Programming Language
182 | P a g e
catch(InterruptedException e)
{
System.out.println("Interrupted");
}
System.out.println("]");
}
}
class Caller implements Runnable
{
String msg;
Callme target;
Thread t;
public Caller(Callme targ, String s)
{
target = targ;
msg = s;
t = new Thread(this);
t.start();
}
public void run()
{
target.call(msg);
}
}
class Synch
{
public static void main(String args[])
{
Callme target = new Callme();
Caller ob1 = new Caller(target, "Hello");
Caller ob2 = new Caller(target, "Synchronized");
Caller ob3 = new Caller(target, "World");
// wait for threads to end
try
{
ob1.t.join();
ob2.t.join();
ob3.t.join();
}
catch(InterruptedException e)
{
System.out.println("Interrupted");
}
}
}
Here is the output produced by this program:
Hello[Synchronized[World]
]

Java Programming Language
183 | P a g e
]
To fix the preceding program, you must serialize access to call( ). That is, you must restrict its access
to only one thread at a time. To do this, you simply need to precede call( )’s definition with the keyword
synchronized, as shown here:
class Callme
{
synchronized void call(String msg)
{
…………………
}
}
This prevents other threads from entering call( ) while another thread is using it. fter synchronized
has been added to call( ), the output of the program is as follows:
[Hello]
[Synchronized]
[World]
The synchronized Statement
Imagine that you want to synchronize access to objects of a class that was not designed for
multithreaded access. That is, the class does not use synchronized methods. Further, this class was not
created by you, but by a third party, and you do not have access to the source code. Thus, you can’t add
synchronized to the appropriate methods within the class. How can access to an object of this class be
synchronized? Fortunately, the solution to this problem is quite easy: You simply put calls to the methods
defined by this class inside a synchronized block.
This is the general form of the synchronized statement:
synchronized(object)
{
// statements to be synchronized
}
Here, object is a reference to the object being synchronized. A synchronized block ensures that a call
to a method that is a member of object occurs only after the current thread has successfully entered object’s
monitor.
Here is an alternative version of the preceding example, using a synchronized block within the run( )
method:
// This program uses a synchronized block.
class Callme
{
void call(String msg)
{
System.out.print("[" + msg);
try
{

Java Programming Language
184 | P a g e
Thread.sleep(1000);
}
catch (InterruptedException e)
{
System.out.println("Interrupted");
}
System.out.println("]");
}
}
class Caller implements Runnable
{
String msg;
Callme target;
Thread t;
public Caller(Callme targ, String s)
{
target = targ;
msg = s;
t = new Thread(this);
t.start();
}
// synchronize calls to call()
public void run()
{
synchronized(target)
{
// synchronized block
target.call(msg);
}
}
}
class Synch1
{
public static void main(String args[])
{
Callme target = new Callme();
Caller ob1 = new Caller(target, "Hello");
Caller ob2 = new Caller(target, "Synchronized");
Caller ob3 = new Caller(target, "World");
// wait for threads to end
try
{
ob1.t.join();
ob2.t.join();
ob3.t.join();
}
catch(InterruptedException e)
{

Java Programming Language
185 | P a g e
System.out.println("Interrupted");
}
}
}
Here, the call( ) method is not modified by synchronized. Instead, the synchronized statement is used
inside Caller’s run( ) method. This causes the same correct output as the preceding example, because each
thread waits for the prior one to finish before proceeding.
7.8 Inter thread communication
Java includes an elegant interprocess communication mechanism via the wait( ), notify( ), and notifyAll( )
methods. These methods are implemented as final methods in Object, so all classes have them. All three
methods can be called only from within a synchronized context. Although conceptually advanced from a
computer science perspective, the rules for using these methods are actually quite simple:
wait( ) tells the calling thread to give up the monitor and go to sleep until some other thread enters
the same monitor and calls notify( ).
notify( ) wakes up the first thread that called wait( ) on the same object.
notifyAll( ) wakes up all the threads that called wait( ) on the same object. The highest priority
thread will run first.
These methods are declared within Object, as shown here:
final void wait( ) throws InterruptedException
final void notify( )
final void notifyAll( )
Additional forms of wait( ) exist that allow you to specify a period of time to wait. The following sample
program incorrectly implements a simple form of the producer/consumer problem. It consists of four classes:
Q, the queue that you’re trying to synchronize; Producer, the threaded object that is producing queue entries;
Consumer, the threaded object that is consuming queue entries; and PC, the tiny class that creates the single
Q, Producer, and Consumer.
// A correct implementation of a producer and consumer.
class Q
{
int n;
boolean valueSet = false;
synchronized int get()
{
if(!valueSet)
try
{
wait();
}
catch(InterruptedException e)
{
System.out.println("InterruptedException caught");
}

Java Programming Language
186 | P a g e
System.out.println("Got: " + n);
valueSet = false;
notify();
return n;
}
synchronized void put(int n)
{
if(valueSet)
try
{
wait();
}
catch(InterruptedException e)
{
System.out.println("InterruptedException caught");
}
this.n = n;
valueSet = true;
System.out.println("Put: " + n);
notify();
}
}
class Producer implements Runnable
{
Q q;
Producer(Q q)
{
this.q = q;
new Thread(this, "Producer").start();
}
public void run()
{
int i = 0;
while(true)
{
q.put(i++);
}
}
}
class Consumer implements Runnable
{
Q q;
Consumer(Q q)
{
this.q = q;
new Thread(this, "Consumer").start();
}

Java Programming Language
187 | P a g e
public void run()
{
while(true)
{
q.get();
}
}
}
class PCFixed
{
public static void main(String args[])
{
Q q = new Q();
new Producer(q);
new Consumer(q);
System.out.println("Press Control-C to stop.");
}
}
Inside get( ), wait( ) is called. This causes its execution to suspend until the Producer notifies you that
some data is ready. When this happens, execution inside get( ) resumes. After the data has been obtained, get(
) calls notify( ). This tells Producer that it is okay to put more data in the queue. Inside put( ), wait( )
suspends execution until the Consumer has removed the item from the queue. When execution resumes, the
next item of data is put in the queue, and notify( ) is called. This tells the Consumer that it should now remove
it. Here is some output from this program, which shows the clean synchronous behavior:
Put: 1
Got: 1
Put: 2
Got: 2
Put: 3
Got: 3
Put: 4
Got: 4
Put: 5
Got: 5
Deadlock
A special type of error that you need to avoid that relates specifically to multitasking is deadlock, which occurs when two threads have a circular dependency on a pair of synchronized objects. For example,
suppose one thread enters the monitor on object X and another thread enters the monitor on object Y. If the
thread in X tries to call any synchronized method on Y, it will block as expected. However, if the thread in Y, in
turn, tries to call any synchronized method on X, the thread waits forever, because to access X, it would have
to release its own lock on Y so that the first thread could complete. Deadlock is a difficult error to debug for
two reasons:
In general, it occurs only rarely, when the two threads time-slice in just the right way.

Java Programming Language
188 | P a g e
It may involve more than two threads and two synchronized objects. (That is, deadlock can occur
through a more convoluted sequence of events than just described.)
To understand deadlock fully, it is useful to see it in action. The next example creates two classes, A and
B, with methods foo( ) and bar( ), respectively, which pause briefly before trying to call a method in the other
class. The main class, named Deadlock, creates an A and a B instance, and then starts a second thread to set up
the deadlock condition. The foo( ) and bar( ) methods use sleep( ) as a way to force the deadlock condition
to occur.
// An example of deadlock.
class A
{
synchronized void foo(B b)
{
String name = Thread.currentThread().getName();
System.out.println(name + " entered A.foo");
try
{
Thread.sleep(1000);
}
catch(Exception e)
{
System.out.println("A Interrupted");
}
System.out.println(name + " trying to call B.last()");
b.last();
}
synchronized void last()
{
System.out.println("Inside A.last");
}
}
class B
{
synchronized void bar(A a)
{
String name = Thread.currentThread().getName();
System.out.println(name + " entered B.bar");
try
{
Thread.sleep(1000);
}
catch(Exception e)
{
System.out.println("B Interrupted");
}
System.out.println(name + " trying to call A.last()");
a.last();
}

Java Programming Language
189 | P a g e
synchronized void last()
{
System.out.println("Inside A.last");
}
}
class Deadlock implements Runnable
{
A a = new A();
B b = new B();
Deadlock()
{
Thread.currentThread().setName("MainThread");
Thread t = new Thread(this, "RacingThread");
t.start();
a.foo(b); // get lock on a in this thread.
System.out.println("Back in main thread");
}
public void run()
{
b.bar(a); // get lock on b in other thread.
System.out.println("Back in other thread");
}
public static void main(String args[])
{
new Deadlock();
}
}
When you run this program, you will see the output shown here:
MainThread entered A.foo
RacingThread entered B.bar
MainThread trying to call B.last()
RacingThread trying to call A.last()
Because the program has deadlocked, you need to press CTRL-C to end the program. You can see a full
thread and monitor cache dump by pressing CTRL-BREAK on a PC . You will see that RacingThread owns the
monitor on b, while it is waiting for the monitor on a. At the same time, MainThread owns a and is waiting to
get b. This program will never complete. As this example illustrates, if your multithreaded program locks up
occasionally, deadlock is one of the first conditions that you should check for.
7.9 Suspending, resuming, stopping threads
Sometimes, suspending execution of a thread is useful. For example, a separate thread can be used to
display the time of day. If the user doesn’t want a clock, then its thread can be suspended. Whatever the case,
suspending a thread is a simple matter. Once suspended, restarting the thread is also a simple matter.
A program used suspend( ) and resume( ), which are methods defined by Thread, to pause and restart the
execution of a thread. They have the form shown below:

Java Programming Language
190 | P a g e
final void suspend( )
final void resume( )
The following program demonstrates these methods:
// Using suspend() and resume().
class NewThread implements Runnable
{
String name; // name of thread
Thread t;
NewThread(String threadname)
{
name = threadname;
t = new Thread(this, name);
System.out.println("New thread: " + t);
t.start(); // Start the thread
}
// This is the entry point for thread.
public void run()
{
try
{
for(int i = 15; i > 0; i--)
{
System.out.println(name + ": " + i);
Thread.sleep(200);
}
}
catch (InterruptedException e)
{
System.out.println(name + " interrupted.");
}
System.out.println(name + " exiting.");
}
}
class SuspendResume
{
public static void main(String args[])
{
NewThread ob1 = new NewThread("One");
NewThread ob2 = new NewThread("Two");
try
{
Thread.sleep(1000);
ob1.t.suspend();
System.out.println("Suspending thread One");
Thread.sleep(1000);
ob1.t.resume();
System.out.println("Resuming thread One");
ob2.t.suspend();
System.out.println("Suspending thread Two");

Java Programming Language
191 | P a g e
Thread.sleep(1000);
ob2.t.resume();
System.out.println("Resuming thread Two");
}
catch (InterruptedException e)
{
System.out.println("Main thread Interrupted");
}
// wait for threads to finish
try
{
System.out.println("Waiting for threads to finish.");
ob1.t.join();
ob2.t.join();
}
catch (InterruptedException e)
{
System.out.println("Main thread Interrupted");
}
System.out.println("Main thread exiting.");
}
}
Sample output from this program is shown here:
New thread: Thread[One,5,main]
One: 15
New thread: Thread[Two,5,main]
Two: 15
One: 14
Two: 14
One: 13
Two: 13
One: 12
Two: 12
One: 11
Two: 11
Suspending thread One
Two: 10
Two: 9
Two: 8
Two: 7
Two: 6
Resuming thread One
Suspending thread Two
One: 10
One: 9
One: 8
One: 7
One: 6
Resuming thread Two
Waiting for threads to finish.

Java Programming Language
192 | P a g e
Two: 5
One: 5
Two: 4
One: 4
Two: 3
One: 3
Two: 2
One: 2
Two: 1
One: 1
Two exiting.
One exiting.
Main thread exiting.
The Thread class also defines a method called stop( ) that stops a thread. Its signature is shown here:
final void stop( )
Once a thread has been stopped, it cannot be restarted using resume( ).
8. APPLETS AND APPLICATIONS
9.1 The Applet class
All applets are subclasses of Applet. Thus, all applets must import java.applet. Applets must also import
java.awt. Applets are executed by either a Web browser or an applet viewer. Execution of an applet does not
begin at main( ). Output to your applet’s window is not performed by System.out.println( ). Rather, it is
handled with various AWT methods, such as drawString( ), which outputs a string to a specified X,Y. Input is
also handled differently than in an application.
Once an applet has been compiled, it is included in an HTML file using the APPLET tag. The applet will be
executed by a Java-enabled web browser when it encounters the APPLET tag within the HTML file. To view and
test an applet more conveniently, simply include a comment at the head of your Java source code file that
contains the APPLET tag. This way, your code is documented with the necessary HTML statements needed by
your applet, and you can test the compiled applet by starting the applet viewer with your Java source code file
specified as the target. Here is an example of such a comment:

Java Programming Language
193 | P a g e
/*
<applet code="MyApplet" width=200 height=60>
</applet>
*/
This comment contains an APPLET tag that will run an applet called MyApplet in a window that is 200
pixels wide and 60 pixels high.
Applet provides all necessary support for applet execution, such as starting and stopping. It also
provides methods that load and display images, and methods that load and play audio clips. Applet extends the
AWT class Panel. In turn, Panel extends Container, which extends Component. These classes provide support
for Java’s window-based, graphical interface.
9.2 Applets and HTML (The applet Tag)
The APPLET tag is used to start an applet from both an HTML document and from an applet viewer. The
syntax for the standard APPLET tag is shown here. Bracketed items are optional.
< APPLET
[CODEBASE = codebaseURL]
CODE = appletFile [ALT = alternateText]
[NAME = appletInstanceName]
WIDTH = pixels HEIGHT = pixels [ALIGN = alignment]
[VSPACE = pixels] [HSPACE = pixels]
>
[< PARAM NAME = AttributeName VALUE = AttributeValue>]
[< PARAM NAME = AttributeName2 VALUE = AttributeValue>]
. . .
[HTML Displayed in the absence of Java]
</APPLET>
Let’s take a look at each part now.
CODEBASE: CODEBASE is an optional attribute that specifies the base URL of the applet code, which is the
directory that will be searched for the applet’s executable class file (specified by the CODE tag).
CODE: CODE is a required attribute that gives the name of the file containing your applet’s compiled .class
file. This file is relative to the code base URL of the applet, which is the directory that the HTML file was in
or the directory indicated by CODEBASE if set.
ALT: The ALT tag is an optional attribute used to specify a short text message that should be displayed if the
browser understands the APPLET tag but can’t currently run Java applets. This is distinct from the alternate
HTML you provide for browsers that don’t support applets.
NAME: NAME is an optional attribute used to specify a name for the applet instance. Applets must be named in
order for other applets on the same page to find them by name and communicate with them. To obtain an applet
by name, use getApplet( ), which is defined by the AppletContext interface.

Java Programming Language
194 | P a g e
WIDTH AND HEIGHT: WIDTH and HEIGHT are required attributes that give the size (in pixels) of the
applet display area.
ALIGN: ALIGN is an optional attribute that specifies the alignment of the applet. This attribute is treated the
same as the HTML IMG tag with these possible values: LEFT, RIGHT, TOP, BOTTOM, MIDDLE, BASELINE,
TEXTTOP, ABSMIDDLE, and ABSBOTTOM.
VSPACE AND HSPACE: These attributes are optional. VSPACE specifies the space, in pixels, above and below
the applet. HSPACE specifies the space, in pixels, on each side of the applet.
PARAM NAME AND VALUE: The PARAM tag allows you to specify appletspecific arguments in an HTML page.
Applets access their attributes with the getParameter( ) method.
HANDLING OLDER BROWSERS: Some very old web browsers can’t execute applets and don’t recognize the
APPLET tag. If the applet tags are not recognized by your browser, you will see the alternate markup.
9.3 Life cycles of an applets. (Init(), start, stop, destroy method)
9.4 Graphics class
All graphics are drawn relative to a window. This can be the main window of an applet, a child window of
an applet, or a stand-alone application window. The origin of each window is at the top-left corner and is 0,0.
Coordinates are specified in pixels. All output to a window takes place through a graphics context. A graphics context is encapsulated by the Graphics class and is obtained in two ways:
It is passed to an applet when one of its various methods, such as paint( ) or
update( ), is called.
It is returned by the getGraphics( ) method of Component.
The Graphics class defines a number of drawing functions. Each shape can be drawn edge-only or filled.
Objects are drawn and filled in the currently selected graphics color, which is black by default.
Drawing String
To output a string to an applet, use drawString( ), which is a member of the Graphics class. Typically, it
is called from within either update( ) or paint( ). It has the following general form:
void drawString(String message, int x, int y)
Here, message is the string to be output beginning at x,y. In a Java window, the upper-left corner is
location 0,0. The drawString( ) method will not recognize newline characters. If you want to start a line of
text on another line, you must do so manually, specifying the precise X,Y location where you want the line to
begin.
The following applet draws string:
// Draw String
import java.awt.*;

Java Programming Language
195 | P a g e
import java.applet.*;
/*
<applet code="Lines" width=300 height=200>
</applet>
*/
public class Lines extends Applet
{
public void paint(Graphics g)
{
g.drawString(“Wel come to Java Applet Programming”, 10, 10);
}
}
Sample output from this program is shown here:
Drawing Lines Lines are drawn by means of the drawLine( ) method, shown here:
void drawLine(int startX, int startY, int endX, int endY)
drawLine( ) displays a line in the current drawing color that begins at startX,startY and ends at
endX,endY.
The following applet draws several lines:
// Draw lines
import java.awt.*;
import java.applet.*;
/*
<applet code="Lines" width=300 height=200>
</applet>
*/
public class Lines extends Applet
{
public void paint(Graphics g)

Java Programming Language
196 | P a g e
{
g.drawLine(0, 0, 100, 100);
g.drawLine(0, 100, 100, 0);
g.drawLine(40, 25, 250, 180);
g.drawLine(75, 90, 400, 400);
g.drawLine(20, 150, 400, 40);
g.drawLine(5, 290, 80, 19);
}
}
Sample output from this program is shown here:
Drawing Rectangles
The drawRect( ) and fillRect( ) methods display an outlined and filled rectangle, respectively. They are
shown here:
void drawRect(int top, int left, int width, int height)
void fillRect(int top, int left, int width, int height)
The upper-left corner of the rectangle is at top,left. The dimensions of the rectangle are specified by
width and height. To draw a rounded rectangle, use drawRoundRect( ) or fillRoundRect( ), both shown here:
void drawRoundRect(int top, int left, int width, int height, int xDiam, int yDiam)
void fillRoundRect(int top, int left, int width, int height, int xDiam, int yDiam)
A rounded rectangle has rounded corners. The upper-left corner of the rectangle is at top,left. The
dimensions of the rectangle are specified by width and height. The diameter of the rounding arc along the X
axis is specified by xDiam. The diameter of the rounding arc along the Y axis is specified by yDiam.
The following applet draws several rectangles:
// Draw rectangles
import java.awt.*;
import java.applet.*;
/*

Java Programming Language
197 | P a g e
<applet code="Rectangles" width=300 height=200>
</applet>
*/
public class Rectangles extends Applet
{
public void paint(Graphics g)
{
g.drawRect(10, 10, 60, 50);
g.fillRect(100, 10, 60, 50);
g.drawRoundRect(190, 10, 60, 50, 15, 15);
g.fillRoundRect(70, 90, 140, 100, 30, 40);
}
}
Sample output from this program is shown here:
Drawing Ellipses and Circles
To draw an ellipse, use drawOval( ). To fill an ellipse, use fillOval( ). These methods are shown here:
void drawOval(int top, int left, int width, int height)
void fillOval(int top, int left, int width, int height)
The ellipse is drawn within a bounding rectangle whose upper-left corner is specified by top,left and
whose width and height are specified by width and height. To draw a circle, specify a square as the bounding
rectangle.
The following program draws several ellipses:
// Draw Ellipses
import java.awt.*;
import java.applet.*;
/*
<applet code="Ellipses" width=300 height=200>
</applet>

Java Programming Language
198 | P a g e
*/
public class Ellipses extends Applet
{
public void paint(Graphics g)
{
g.drawOval(10, 10, 50, 50);
g.fillOval(100, 10, 75, 50);
g.drawOval(190, 10, 90, 30);
g.fillOval(70, 90, 140, 100);
}
}
Sample output from this program is shown here:
Drawing Arcs
Arcs can be drawn with drawArc( ) and fillArc( ), shown here:
void drawArc(int top, int left, int width, int height, int startAngle, int sweepAngle)
void fillArc(int top, int left, int width, int height, int startAngle, int sweepAngle)
The arc is bounded by the rectangle whose upper-left corner is specified by top,left and whose width
and height are specified by width and height. The arc is drawn from startAngle through the angular distance
specified by sweepAngle. Angles are specified in degrees. Zero degrees is on the horizontal, at the three
o’clock position. The arc is drawn counterclockwise if sweepAngle is positive, and clockwise if sweepAngle is
negative. Therefore, to draw an arc from twelve o’clock to six o’clock, the start angle would be 90 and the
sweep angle 180.
The following applet draws several arcs:
// Draw Arcs
import java.awt.*;
import java.applet.*;
/*
<applet code="Arcs" width=300 height=200>
</applet>
*/
public class Arcs extends Applet
{

Java Programming Language
199 | P a g e
public void paint(Graphics g)
{
g.drawArc(10, 40, 70, 70, 0, 75);
g.fillArc(100, 40, 70, 70, 0, 75);
g.drawArc(10, 100, 70, 80, 0, 175);
g.fillArc(100, 100, 70, 90, 0, 270);
g.drawArc(200, 80, 80, 80, 0, 180);
}
}
Sample output from this program is shown here:
Drawing Polygons It is possible to draw arbitrarily shaped figures using drawPolygon( ) and fillPolygon( ), shown here:
void drawPolygon(int x[ ], int y[ ], int numPoints)
void fillPolygon(int x[ ], int y[ ], int numPoints)
The polygon’s endpoints are specified by the coordinate pairs contained within the x and y arrays. The
number of points defined by x and y is specified by numPoints. There are alternative forms of these methods in
which the polygon is specified by a Polygon object. The following applet draws an hourglass shape:
// Draw Polygon
import java.awt.*;
import java.applet.*;
/*
<applet code="HourGlass" width=230 height=210>
</applet>
*/
public class HourGlass extends Applet
{
public void paint(Graphics g)
{
int xpoints[] = {30, 200, 30, 200, 30};
int ypoints[] = {30, 30, 200, 200, 30};
int num = 5;

Java Programming Language
200 | P a g e
g.drawPolygon(xpoints, ypoints, num);
}
}
Sample output from this program is shown here:
9.5 Painting the applet
paint( )
The paint( ) method is called each time your applet’s output must be redrawn. This situation can occur
for several reasons. For example, the window in which the applet is running may be overwritten by another
window and then uncovered. Or the applet window may be minimized and then restored. paint( ) is also called
when the applet begins execution. Whatever the cause, whenever the applet must redraw its output, paint( ) is
called. The paint( ) method has one parameter of type Graphics. This parameter will contain the graphics
context, which describes the graphics environment in which the applet is running. This context is used whenever
output to the applet is required.
update( )
In some situations, your applet may need to override another method defined by the AWT, called
update( ). This method is called when your applet has requested that a portion of its window be redrawn. The
default version of update( ) first fills an applet with the default background color and then calls paint( ). If
you fill the background using a different color in paint( ), the user will experience a flash of the default
background each time update( ) is called—that is, whenever the window is repainted.
One way to avoid this problem is to override the update( ) method so that it performs all necessary
display activities. Then have paint( ) simply call update( ). Thus, for some applications, the applet skeleton will
override paint( ) and update( ), as shown here:
public void update(Graphics g)
{
// redisplay your window, here.

Java Programming Language
201 | P a g e
}
public void paint(Graphics g)
{
update(g);
}
For the examples in this book, we will override update( ) only when needed.
repaint( )
The repaint( ) method is defined by the AWT. It causes the AWT run-time system to execute a call to
your applet’s update( ) method, which, in its default implementation, calls paint( ). Thus, for another part of
your applet to output to its window, simply store the output and then call repaint( ). The AWT will then execute
a call to paint( ), which can display the stored information. For example, if part of your applet needs to output a
string, it can store this string in a String variable and then call repaint( ). Inside paint( ), you will output the
string using drawString( ).
The repaint( ) method has four forms. Let’s look at each one, in turn. The simplest version of repaint( )
is shown here:
void repaint( )
This version causes the entire window to be repainted. The following version specifies a region that will
be repainted:
void repaint(int left, int top, int width, int height)
Here, the coordinates of the upper-left corner of the region are specified by left and top, and the
width and height of the region are passed in width and height. These dimensions are specified in pixels. You
save time by specifying a region to repaint. Window updates are costly in terms of time. If you need to update
only a small portion of the window, it is more efficient to repaint only that region. Calling repaint( ) is
essentially a request that your applet be repainted sometime soon. However, if your system is slow or busy,
update( ) might not be called immediately. Multiple requests for repainting that occur within a short time can
becollapsed by the AWT in a manner such that update( ) is only called sporadically. This can be a problem in
many situations, including animation, in which a consistent update time is necessary. One solution to this
problem is to use the following forms of repaint( ):
void repaint(long maxDelay)
void repaint(long maxDelay, int x, int y, int width, int height)
Here, maxDelay specifies the maximum number of milliseconds that can elapse before update( ) is
called. Beware, though. If the time elapses before update( ) can be called, it isn’t called. There’s no return
value or exception thrown, so you must be careful.
THE JAVA LIBRARY
9.6 Passing parameters to applets getparameter() method
The APPLET tag in HTML allows you to pass parameters to your applet. To retrieve a parameter, use the
getParameter( ) method. It returns the value of the specified parameter in the form of a String object. Thus,

Java Programming Language
202 | P a g e
for numeric and Boolean values, you will need to convert their string representations into their internal
formats. Here is an example that demonstrates passing parameters:
// Use Parameters
import java.awt.*;
import java.applet.*;
/*
<applet code="ParamDemo" width=300 height=80>
<param name=num1 value=10>
<param name=num2 value=14>
</applet>
*/
public class ParamDemo extends Applet
{
public void start()
{
String param;
int no1;
int no2;
int sum;
param = getParameter(“num1”);
no1 = Integer.parseInt(“param”);
param = getParameter(“num2”);
no2= Integer.parseInt(“param”);
sum = no1 + no2;
public void paint(Graphics g)
{
g.drawString("num1 is: " + num1, 0, 10);
g.drawString("num2 is: " + num2, 0, 26);
g.drawString("Sum of num1 & num2 is: " + sum, 0, 42);
}
}
Sample output from this program is shown here:
10. USING AWT IN APPLICATION
10.1 The AWT (Abstract Windows Toolkit) classes

Java Programming Language
203 | P a g e
The AWT classes are contained in the java.awt package. It is one of Java’s largest packages.
The below Table lists some of the many AWT classes.

Java Programming Language
204 | P a g e

Java Programming Language
205 | P a g e
10.2 Layout Managers
A layout manager automatically arranges your controls within a window by using some type of algorithm.
Each Container object has a layout manager associated with it. A layout manager is an instance of any class
that implements the LayoutManager interface. The layout manager is set by the setLayout( ) method. If no
call to setLayout( ) is made, then the default layout manager is used. Whenever a container is resized (or sized
for the first time), the layout manager is used to position each of the components within it. The setLayout( )
method has the following general form:
void setLayout(LayoutManager layoutObj) THE JAVA LIBRARY
Here, layoutObj is a reference to the desired layout manager. If you wish to disable the layout manager
and position components manually, pass null for layoutObj. If you do this, you will need to determine the shape
and position of each component manually, using the setBounds( ) method defined by Component. Normally, you
will want to use a layout manager.
There are different types of Layout Mangers are available those are described below:
1. Flow Layout
2. Gride Layout
3. Border Layout
4. Card Layout
10.2.1. Flow Layout
FlowLayout is the default layout manager. FlowLayout implements a simple layout style, which is similar
to how words flow in a text editor. Components are laid out from the upper-left corner, left to right and top to
bottom. When no more components fit on a line, the next one appears on the next line. A small space is left
between each component, above and below, as well as left and right. Here are the constructors for FlowLayout:
FlowLayout( )
FlowLayout(int how)
FlowLayout(int how, int horz, int vert)
The first form creates the default layout, which centers components and leaves five pixels of space
between each component. The second form lets you specify how each line is aligned. Valid values for how are as
follows:
FlowLayout.LEFT
FlowLayout.CENTER
FlowLayout.RIGHT
These values specify left, center, and right alignment, respectively. The third form allows you to
specify the horizontal and vertical space left between components in horz and vert, respectively.
import java.awt.*;
import java.applet.*;
/*
<applet code="GridLayoutDemo" width=300 height=200>
</applet>
*/

Java Programming Language
206 | P a g e
public class FlowdLayoutDemo extends Applet
{
static final int n = 15;
@Override
public void init()
{
setLayout(new FlowLayout());
for(int i = 0; i < n; i++)
{
if(i > 0)
{
add(new Button("" + i));
}
}
}
}
Following is the output generated by the FlowLayoutDemo applet:
10.2..2 Grid Layout
GridLayout lays out components in a two-dimensional grid. When you instantiate a GridLayout, you
define the number of rows and columns. The constructors supported by GridLayout are shown here:
GridLayout( )
GridLayout(int numRows, int numColumns ) GridLayout(int numRows, int numColumns, int horz, int vert)
The first form creates a single-column grid layout. The second form creates a grid layout with the
specified number of rows and columns. The third form allows you to specify the horizontal and vertical space
left between components in horz and vert, respectively. Either numRows or numColumns can be zero. Specifying
numRows as zero allows for unlimited-length columns. Specifying numColumns as zero allows for
unlimited-length rows.

Java Programming Language
207 | P a g e
Here is a sample program that creates a 4×4 grid and fills it in with 15 buttons, each labeled with its
index:
// Demonstrate GridLayout
import java.awt.*;
import java.applet.*;
/*
<applet code="GridLayoutDemo" width=300 height=200>
</applet>
*/
public class GridLayoutDemo extends Applet
{
static final int n = 4;
public void init()
{
setLayout(new GridLayout(n, n));
for(int i = 0; i < n; i++)
{
for(int j = 0; j < n; j++)
{
int k = i * n + j;
if(k > 0)
{
add(new Button("" + k));
}
}
}
}
}
Following is the output generated by the GridLayoutDemo applet:
10.2.3 Border Layout

Java Programming Language
208 | P a g e
The BorderLayout class implements a common layout style for top-level windows. It has four narrow,
fixed-width components at the edges and one large area in the center. The four sides are referred to as north,
south, east, and west. The middle area is called the center. Here are the constructors defined by
BorderLayout:
BorderLayout( )
BorderLayout(int horz, int vert)
The first form creates a default border layout. The second allows you to specify the horizontal and
vertical space left between components in horz and vert, respectively. BorderLayout defines the following
constants that specify the regions:
BorderLayout.CENTER BorderLayout.SOUTH
BorderLayout.EAST BorderLayout.WEST
BorderLayout.NORTH
When adding components, you will use these constants with the following form of add( ), which is
defined by Container:
void add(Component compObj, Object region);
Here, compObj is the component to be added, and region specifies where the component will be added.
10.2.4 Card Layout
The CardLayout class is unique among the other layout managers in that it stores several different
layouts. Each layout can be thought of as being on a separate index card in a deck that can be shuffled so that
any card is on top at a given time. You can prepare the other layouts and have them hidden, ready to be
activated when needed. CardLayout provides these two constructors:
CardLayout( )
CardLayout(int horz, int vert)
The first form creates a default card layout. The second form allows you to specify the horizontal and
vertical space left between components in horz and vert, respectively.
Use of a card layout requires a bit more work than the other layouts. The cards are typically held in an
object of type Panel. This panel must have CardLayout selected as its layout manager. The cards that form the
deck are also typically objects of type Panel. Thus, you must create a panel that contains the deck and a panel
for each card in the deck. Next, you add to the appropriate panel the components that form each card. You
then add these panels to the panel for which CardLayout is the layout manager. Finally, you add this panel to
the main applet panel. Once these steps are complete, you must provide some way for the user to select
between cards. One common approach is to include one push button for each card in the deck.
When card panels are added to a panel, they are usually given a name. Thus, most of the time, you will
use this form of add( ) when adding cards to a panel:
void add(Component panelObj, Object name);
Here, name is a string that specifies the name of the card whose panel is specified by panelObj.

Java Programming Language
209 | P a g e
After you have created a deck, your program activates a card by calling one of the following methods
defined by CardLayout:
void first(Container deck)
void last(Container deck)
void next(Container deck)
void previous(Container deck)
void show(Container deck, String cardName)
Here, deck is a reference to the container (usually a panel) that holds the cards, and cardName is the
name of a card. Calling first( ) causes the first card in the deck to be shown. To show the last card, call last( ).
To show the next card, call next( ). To show the previous card, call previous( ). Both next( ) and previous( )
automatically cycle back to the top or bottom of the deck, respectively. The show( ) method displays the card
whose name is passed in cardName.
The following example creates a two-level card deck that allows the user to select an operating system.
Windows-based operating systems are displayed in one card. Macintosh and Solaris are displayed in the other
card.
The following example creates a two-level card deck that allows the user to select an operating system.
Windows-based operating systems are displayed in one card. Macintosh and Solaris are displayed in the other
card.
// Demonstrate CardLayout.
import java.awt.*;
import java.awt.event.*;
import java.applet.*;
/*
<applet code="CardLayoutDemo" width=300 height=100>
</applet>
*/
public class CardLayoutDemo extends Applet implements ActionListener, MouseListener
{
Checkbox Win98, winNT, solaris, mac;
Panel osCards;
CardLayout cardLO;
Button Win, Other;
public void init()
{
Win = new Button("Windows");
Other = new Button("Other");
add(Win);
add(Other);
cardLO = new CardLayout();
osCards = new Panel();
osCards.setLayout(cardLO); // set panel layout to card layout
Win98 = new Checkbox("Windows 98/XP", null, true);
winNT = new Checkbox("Windows NT/2000");
solaris = new Checkbox("Solaris");
mac = new Checkbox("MacOS");

Java Programming Language
210 | P a g e
// add Windows check boxes to a panel
Panel winPan = new Panel();
winPan.add(Win98);
winPan.add(winNT);
// Add other OS check boxes to a panel
Panel otherPan = new Panel();
otherPan.add(solaris);
otherPan.add(mac);
// add panels to card deck panel
osCards.add(winPan, "Windows");
osCards.add(otherPan, "Other");
// add cards to main applet panel
add(osCards);
// register to receive action events
Win.addActionListener(this);
Other.addActionListener(this);
// register mouse events
addMouseListener(this);
}
// Cycle through panels.
public void mousePressed(MouseEvent me) {
cardLO.next(osCards);
}
// Provide empty implementations for the other MouseListener methods.
public void mouseClicked(MouseEvent me) {
}
public void mouseEntered(MouseEvent me) {
}
public void mouseExited(MouseEvent me) {
}
public void mouseReleased(MouseEvent me) {
}
public void actionPerformed(ActionEvent ae) {
if(ae.getSource() == Win) {
cardLO.show(osCards, "Windows");
}
else {
cardLO.show(osCards, "Other");
}
}
}
Following is the output generated by the CardLayoutDemo applet. Each card is activated
by pushing its button. You can also cycle through the cards by clicking the mouse.

Java Programming Language
211 | P a g e
Remaining thing is that semaphore program and Applet Life Cycle