Core Java Course
258
Welcome to Core Java Course
-
Upload
khangminh22 -
Category
Documents
-
view
5 -
download
0
Transcript of Core Java Course

Welcometo
Core Java Course

Computing platform
In computing, a platform describes some sort of hardware architecture or
software framework that allows software to run.
For example, the platform might be an Intel 80486 processor running DOS
Version 6.0.
The platform could also be UNIX machines on an Ethernet network.
The platform defines a standard around which a system can be
developed.
Once the platform has been defined, software developers can produce
appropriate software and managers can purchase appropriate hardware
and applications.
The term is often used as a synonym of operating system.

Cross-platform (also known as multi-platform) refer to the idea that a
given piece of computer software is able to be run on more than one computer
platform.
There are two major types of cross-platform software
One requires building for each platform that it supports (e.g., is written in
a compiled language, such as C)
Another can be directly run on any platform which supports it (e.g.,
software written in an interpreted language such as Perl, Python, or shell
script)
or
software written in a language which compiles to bytecode and the
bytecode is redistributed (such as is the case with Java and
languages used in the .NET Framework).

The Java Programming Language
o In the Java programming language, all source code is first written in
plain text files ending with the .java extension.
o Those source files are then compiled into .class files by the javaccompiler.
o A .class file does not contain code that is native to your processor.
o It instead contains bytecodes — the machine language of the Java
Virtual Machine (Java VM).
o The java launcher tool then runs your application with an instance of
the Java Virtual Machine.

The Java Platform
o A platform is the hardware or software environment in which a program
runs. We've already know some of the most popular platforms like
Microsoft Windows, Linux, Solaris OS, and Mac OS.
o Most platforms can be described as a combination of the operating
system and underlying hardware. The Java platform differs from most
other platforms in that it's a software-only platform that runs on top of
other hardware-based platforms.
The Java platform has two components:
The Java Virtual Machine
The Java Application Programming Interface (API)

Java Virtual Machine
o Because the Java VM is available on many different operating
systems, the same .class files are capable of running on Microsoft
Windows, the Solaris TM Operating System (Solaris OS), Linux, or
Mac OS.
Through the Java VM, the same application is capable of running on multiple platforms.

Java Application Programming Interface (API)
o The API is a large collection of ready-made software components
that provide many useful capabilities. It is grouped into libraries of
related classes and interfaces; these libraries are known as
packages.
The API and Java Virtual Machine insulate the program from the underlying hardware.

Create a Source File
First, start your editor. You can launch the Notepad editor from the Start menu by
selecting Programs > Accessories > Notepad. In a new document, type in the
following code:
/** * The HelloWorldApp class implements an application that * simply prints "Hello World!" to standard output. */
class HelloWorldApp {
public static void main(String[] args){System.out.println("Hello World!"); // Display the string.
}}

Be Careful When You Type
Type all code, commands, and file names exactly as shown. Both the compiler
(javac) and launcher tool (java) are case-sensitive, so you must capitalize
consistently.
HelloWorldApp helloworldapp

Save the Java Source Code
Save the code in a file with the name HelloWorldApp.java. To do this in
Notepad, first choose the File > Save As menu item. Then, in the Save As
dialog box:
1. Using the Save in combo box, specify the folder (directory) where you'll save
your file. In this example, the directory is java on the C drive.
2. In the File name text field, type "HelloWorldApp.java", including the
quotation marks.
3. From the Save as type combo box, choose Text Documents (*.txt).
4. In the Encoding combo box, leave the encoding as ANSI.

Now click Save, and exit Notepad.

Compile the Source File into a .class File
Bring up a shell, or "command," window. You can do this from the Start menu by
choosing Command Prompt (Windows XP), or by choosing Run... and then
entering cmd. The shell window should look similar to the following figure.
The prompt shows your current directory. When you bring up the prompt, your
current directory is usually your home directory for Windows XP

To compile your source file, change your current directory to the directory where
your file is located. For example, if your source directory is java on the C drive,
type the following command at the prompt and press Enter:
cd D:\java
Now the prompt should change to D:\java>.
Now you are ready to compile. At the prompt, type the following command and
press Enter.
javac HelloWorldApp.java
The compiler has generated a bytecode file, HelloWorldApp.class. At the prompt,
type dir to see the new file that was generated, as shown in the following figure.

Run the Program
In the same directory, enter the following command at the prompt:
java HelloWorldApp
The program prints "Hello World!" to the screen.
Congratulations! Your program works!

A Closer Look at the "Hello World!" Application
Source Code Comments
Comments are ignored by the compiler but are useful to other programmers.
The Java programming language supports three kinds of comments:
/* text */
The compiler ignores everything from /* to */.
/** documentation */
This indicates a documentation comment (doc comment, for short).
The compiler ignores this kind of comment, just like it ignores
comments that use /* and */.
// text
The compiler ignores everything from // to the end of the line.

A Closer Look at the "Hello World!" Application
The HelloWorldApp Class Definition
As shown above, the most basic form of a class definition is:
class name {
. . .…..
}
The keyword class begins the class definition for a class named name, and the
code for each class appears between the opening and closing curly braces
marked above .

A Closer Look at the "Hello World!" Application
The main Method
In the Java programming language, every application must contain a main
method whose signature is:
public static void main(String[] args)
o The modifiers public and static can be written in either order (public
static or static public), but the convention is to use public static as
shown above.
o You can name the argument anything you want, but most
programmers choose "args" or "argv".
o The main method is similar to the main function in C and C++; it's the
entry point for your application and will subsequently invoke all the
other methods required by your program.

A Closer Look at the "Hello World!" Application
The main Method
The main method accepts a single argument: an array of elements of type
String.
public static void main(String[] args)
o This array is the mechanism through which the runtime system passes
information to your application.
o Each string in the array is called a command-line argument.
o Command-line arguments let users affect the operation of the
application without recompiling it.
o For example, a sorting program might allow the user to specify that
the data be sorted in descending order with this command-line
argument:
-descending
o The "Hello World!" application ignores its command-line arguments,
but you should be aware of the fact that such arguments do exist.

A Closer Look at the "Hello World!" Application
The main Method
Finally, the line:
System.out.println("Hello World!");
uses the System class from the core library to print the "Hello World!" message
to standard output.
Portions of this library (also known as the "Application Programming Interface",
or "API").
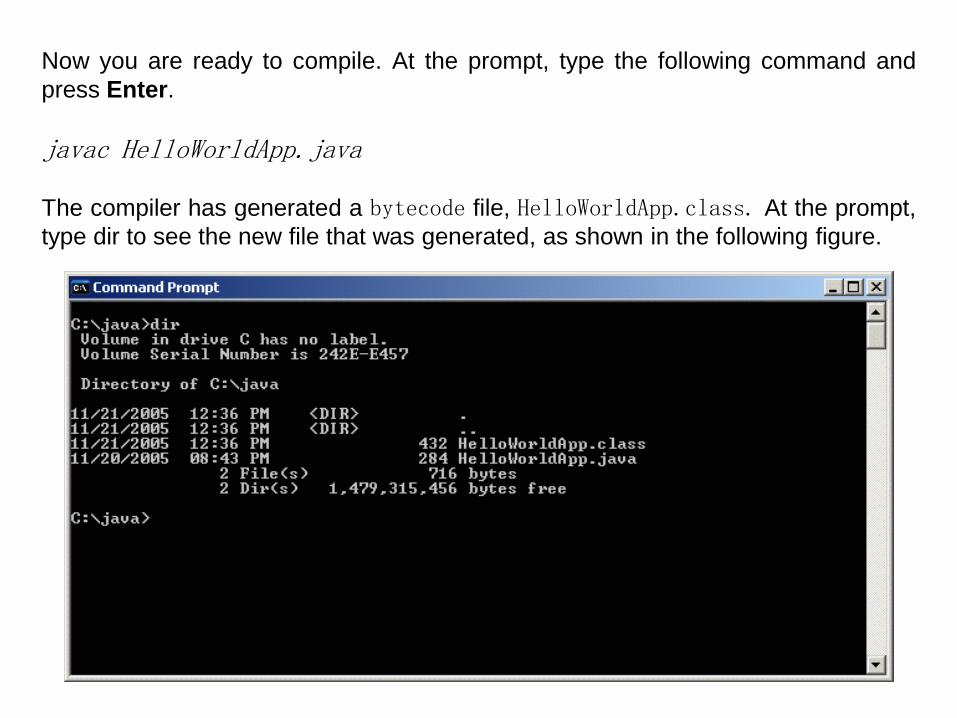
Compiler Problems
Common Error Messages on Microsoft Windows Systems
'javac' is not recognized as an internal or external command, operableprogram or batch file
o If you receive this error, Windows cannot find the compiler (javac).
o Here's one way to tell Windows where to find javac.
Suppose you installed the JDK in C:\jdk6. At the prompt you would type the
following command and press Enter:
C:\jdk6\bin\javac HelloWorldApp.java
If you choose this option, you'll have to precede your javac and java commands
with C:\jdk6\bin\ each time you compile or run a program. To avoid this extra
typing, consult the section Update the PATH variable in the JDK 6 installation
instructions.

Update the PATH variable
It's useful to set the PATH permanently so it will persist after rebooting.
To set the PATH permanently, add the full path of the jdk1.6.0_<version>\bin
directory to the PATH variable. Typically this full path looks something like
C:\Program Files\Java\jdk1.6.0_<version>\bin. Set the PATH as follows on
Microsoft Windows:
1. Click Start > Control Panel > System on Windows XP or Start > Settings
> Control Panel > System on Windows 2000.
2. Click Advanced > Environment Variables.
3. Add the location of bin folder of JDK installation for PATH in User
Variables and System Variables. A typical value for PATH is:
C:\Program Files\Java\jdk1.6.0_<version>\bin

Error Messages on Microsoft Windows Systems
Exception in thread "main" java.lang.NoClassDefFoundError: HelloWorldApp
If you receive this error, java cannot find your bytecode file, HelloWorldApp.class.
One of the places java tries to find your .class file is your current directory.
So if your .class file is in C:\java, you should change your current directory to that.
To change your directory, type the following command at the prompt and press
Enter:
cd c:\java
The prompt should change to C:\java>.
If you enter dir at the prompt, you should see your .java and .class files. Now
enter
java HelloWorldAppagain.

Error Messages on Microsoft Windows Systems
If you still have problems, you might have to change your CLASSPATH variable.
To see if this is necessary, try clobbering the classpath with the following command.
set CLASSPATH=
Now enter java HelloWorldApp again. If the program works now, you'll have to
change your CLASSPATH variable.

Language Basics
o Variables
o Operators
o Expressions, Statements, and Blocks
o Control Flow Statements

Variables
The Java programming language defines the following kinds of variables:
o Instance Variables (Non-Static Fields)
Technically speaking, objects store their individual states in "non-static
fields", that is, fields declared without the static keyword.
Non-static fields are also known as instance variables because their
values are unique to each instance of a class.
The currentSpeed of one bicycle is independent from the currentSpeed of
another.

Variables
The Java programming language defines the following kinds of variables:
o Class Variables (Static Fields)
A class variable is any field declared with the static modifier
This tells the compiler that there is exactly one copy of this variable in
existence, regardless of how many times the class has been instantiated.
The code
static int numGears = 6;
would create such a static field.
Additionally, the keyword final could be added to indicate that the
number of gears will never change.

Variables
The Java programming language defines the following kinds of variables:
o Local Variables
Similar to how an object stores its state in fields, a method will often store
its temporary state in local variables.
for example, int count = 0;
As such, local variables are only visible to the methods in which they are
declared; they are not accessible from the rest of the class.
o Parameters
You've already seen examples of parameters. Recall that the signature
for the main method is
public static void main(String[] args).
Here, the args variable is the parameter to this method.

Naming
The rules and conventions for naming your variables can be summarized
as follows:
o Variable names are case-sensitive
o Beginning with a letter, the dollar sign "$", or the underscore
character "_".
o White space is not permitted.
o Subsequent characters may be letters, digits, dollar signs, or
underscore characters.

Primitive Data Types
Primitive types are special data types built into the language; they are not objects
created from a class.
The Java programming language is strongly-typed, which means that all variables
must first be declared before they can be used.
int gear = 1;
The eight primitive data types supported by the Java programming language are:
byte:
The byte data type is an 8-bit signed two's complement integer.
It has a minimum value of -128 and a maximum value of 127 (inclusive).
short:
The short data type is a 16-bit signed two's complement integer.
It has a minimum value of -32,768 and a maximum value of 32,767
(inclusive).

Primitive Data Types
The Java programming language is strongly-typed, which means that all variables
must first be declared before they can be used.
int gear = 1;
The eight primitive data types supported by the Java programming language are:
int:
The int data type is a 32-bit signed two's complement integer.
It has a minimum value of -2,147,483,648 and a maximum value of
2,147,483,647 (inclusive).
long:
The long data type is a 64-bit signed two's complement integer.
It has a minimum value of -9,223,372,036,854,775,808 and a maximum
value of 9,223,372,036,854,775,807 (inclusive).
Use this data type when you need a range of values wider than those
provided by int.

Primitive Data Types
The Java programming language is strongly-typed, which means that all variables
must first be declared before they can be used.
int gear = 1;
The eight primitive data types supported by the Java programming language are:
float:
The float data type is a single-precision 32-bit IEEE 754 floating point.
double:
The double data type is a double-precision 64-bit IEEE 754 floating point.

Primitive Data Types
The Java programming language is strongly-typed, which means that all variables
must first be declared before they can be used.
int gear = 1;
The eight primitive data types supported by the Java programming language are:
boolean:
The boolean data type has only two possible values: true and false.
char:
The char data type is a single 16-bit Unicode character.
It has a minimum value of '\u0000' (or 0) and a maximum value of '\uffff' (or
65,535 inclusive).

Default Values
o It's not always necessary to assign a value when a field is declared.
o Fields that are declared but not initialized will be set to a reasonable default by the
compiler.
o Generally speaking, this default will be zero or null, depending on the data type.
o Relying on such default values, however, is generally considered bad programming
style.
Data TypeDefault Value (for
fields)
Byte 0
Short 0
Int 0
Long 0L
Float 0.0f
Double 0.0d
Char '\u0000'
String (or any
object) Null
Boolean False

Arrays
An array is a container object that holds a fixed number of values of a single type.
The length of an array is established when the array is created.
An array of ten elements
Each item in an array is called an element, and each element is accessed by its
numerical index.

/* ARRAY PROGRAMMING. */ class ArrayDemo{
public static void main(String[] args){
int[] anArray; // declares an array of integersanArray = new int[10]; // allocates memory for 10 integersanArray[0] = 100; // initialize first elementanArray[1] = 200; // initialize second elementanArray[2] = 300; // etc.anArray[3] = 400;anArray[4] = 500;anArray[5] = 600;anArray[6] = 700;anArray[7] = 800;anArray[8] = 900;anArray[9] = 1000;System.out.println("Element at index 0: " + anArray[0]);System.out.println("Element at index 1: " + anArray[1]);System.out.println("Element at index 2: " + anArray[2]);System.out.println("Element at index 3: " + anArray[3]);System.out.println("Element at index 4: " + anArray[4]);System.out.println("Element at index 5: " + anArray[5]);System.out.println("Element at index 6: " + anArray[6]);System.out.println("Element at index 7: " + anArray[7]);System.out.println("Element at index 8: " + anArray[8]);System.out.println("Element at index 9: " + anArray[9]);
}}

The output from this program is:
Element at index 0: 100Element at index 1: 200Element at index 2: 300Element at index 3: 400Element at index 4: 500Element at index 5: 600Element at index 6: 700Element at index 7: 800Element at index 8: 900Element at index 9: 1000

Declaring a Variable to Refer to an Array
The above program declares anArray with the following line of code:
int[] anArray; // declares an array of integers
An array's type is written as type[], where type is the data type of the contained
elements; the square brackets are special symbols indicating that this variable holds
an array.
The size of the array is not part of its type.
Similarly, you can declare arrays of other types:
byte[] anArrayOfBytes;short[] anArrayOfShorts;long[] anArrayOfLongs;float[] anArrayOfFloats;double[] anArrayOfDoubles;boolean[] anArrayOfBooleans;char[] anArrayOfChars;String[] anArrayOfStrings;
You can also place the square brackets after the array's name:
float anArrayOfFloats[]; // this form is discouraged
Creating, Initializing, and Accessing an Array
One way to create an array is with the new operator.
anArray = new int[10]; // create an array of integers
If this statement were missing, the compiler would print an error like the following,
and compilation would fail:
ArrayDemo.java:4: Variable anArray may not have been initialized.
The next few lines assign values to each element of the array:
anArray[0] = 100; // initialize first elementanArray[1] = 200; // initialize second elementanArray[2] = 300; // etc.
Each array element is accessed by its numerical index:
System.out.println("Element 1 at index 0: " + anArray[0]);System.out.println("Element 2 at index 1: " + anArray[1]);System.out.println("Element 3 at index 2: " + anArray[2]);

Creating, Initializing, and Accessing an Array
Alternatively, you can use the shortcut syntax to create and initialize an array:
int[] anArray = {100, 200, 300, 400, 500, 600, 700, 800, 900, 1000};
Here the length of the array is determined by the number of values provided
between { and }.
You can also declare an array of arrays (also known as a multidimensional array)
by using two or more sets of square brackets, such as String[][] names.
Each element, therefore, must be accessed by a corresponding number of index
values.
class MultiDimArrayDemo{
public static void main(String[] args){String[][] names = {{"Mr. ", "Mrs. ", "Ms. "},
{"Smith", "Jones"}};System.out.println(names[0][0] + names[1][0]);System.out.println(names[0][2] + names[1][1]);}
}

Creating, Initializing, and Accessing an Array
The output from this program is:
Mr. SmithMs. Jones
Finally, you can use the built-in length property to determine the size of any array. The
code
System.out.println(anArray.length);
will print the array's size to standard output.

Copying Arrays
The System class has an arraycopy method that you can use to efficiently copy
data from one array into another:
public static void arraycopy(Object src,int srcPos,Object dest, int destPos,
int length)
The two Object arguments specify the array to copy from and the array to copy to.
The three int arguments specify the starting position in the source array, the
starting position in the destination array, and the number of array elements to copy.

Copying Arrays
/* Array Copy */
class ArrayCopyDemo{
public static void main(String[] args){char[] copyFrom = { 'd', 'e', 'c', 'a', 'f', 'f', 'e',
'i', 'n', 'a', 't', 'e', 'd' };char[] copyTo = new char[7];System.arraycopy(copyFrom, 2, copyTo, 0, 7);System.out.println(new String(copyTo));}
}
The output from this program is:
caffein

Operators
o Operators are special symbols that perform specific operations on one,
two, or three operands, and then return a result.
o Operators with higher precedence are evaluated before operators with
relatively lower precedence.
o When operators of equal precedence appear in the same expression, a
rule must govern which is evaluated first.
Rule: All binary operators except for the assignment operators are
evaluated from left to right; assignment operators are evaluated right to
left.

Operator Precedence
Operators Precedence
postfix expr++ expr--
unary ++expr --expr +expr -expr ~ !
multiplicative * / %
additive + -
shift << >> >>>
relational < > <= >= instanceof
equality == !=
bitwise AND &
bitwise exclusive OR ^
bitwise inclusive OR |
logical AND &&
logical OR ||
ternary ? :
assignment = += -= *= /= %= &= ^= |= <<= >>= >>>=
for example, the assignment operator "=" is far more common than the unsigned right shift operator ">>>".

Assignment, Arithmetic, and Unary Operators
The Simple Assignment Operator
One of the most common operators that you'll encounter is the simple assignment
operator "=".
int cadence = 0;int speed = 0;int gear = 1;
The Arithmetic Operators
The Java programming language provides operators that perform addition,
subtraction, multiplication, and division.
+ additive operator (also used for String concatenation)
-subtraction operator-* multiplication operator-/ division operator-% remainder operator

class ArithmeticDemo{
public static void main (String[] args){
int result = 1 + 2;System.out.println(result);
result = result - 1;System.out.println(result);
result = result * 2;System.out.println(result);
result = result / 2;System.out.println(result);
result = result + 8;result = result % 7;System.out.println(result);
}}
You can also combine the arithmetic operators with the simple assignmentoperator to create compound assignments. For example, x+=1; and x=x+1;both increment the value of x by 1.

class ArithmeticDemo{
public static void main (String[] args){
int result = 1 + 2; // result is now 3System.out.println(result);
result = result - 1; // result is now 2System.out.println(result);
result = result * 2; // result is now 4System.out.println(result);
result = result / 2; // result is now 2System.out.println(result);
result = result + 8; // result is now 10result = result % 7; // result is now 3System.out.println(result);
}}
You can also combine the arithmetic operators with the simple assignmentoperator to create compound assignments. For example, x+=1; and x=x+1;both increment the value of x by 1.

The + operator can also be used for concatenating (joining) two strings together
class ConcatDemo {
public static void main(String[] args){
String firstString = "This is";
String secondString = " a concatenated string.";
String thirdString = firstString+secondString;
System.out.println(thirdString); }
}
By the end of this program, the variable thirdString contains "This is a concatenated string.", which gets printed to standard output.

The Unary Operators
The unary operators require only one operand; they perform various operations
such as incrementing/decrementing a value by one, negating an expression, or
inverting the value of a boolean.
+ Unary plus operator; indicates positive value (numbers arepositive without this, however)
- Unary minus operator; negates an expression
++ Increment operator; increments a value by 1
-- Decrement operator; decrements a value by 1
! Logical complement operator; inverts the value of a boolean

class UnaryDemo {
public static void main(String[] args){
int result = +1; System.out.println(result);
result--; System.out.println(result);
result++; System.out.println(result);
result = -result; System.out.println(result);
boolean success = false; System.out.println(success);
System.out.println(!success); }
}

class UnaryDemo {
public static void main(String[] args){
int result = +1; // result is now 1 System.out.println(result);
result--; // result is now 0 System.out.println(result);
result++; // result is now 1 System.out.println(result);
result = -result; // result is now -1 System.out.println(result);
boolean success = false; System.out.println(success); // false
System.out.println(!success); // true }
}

The following program, illustrates the prefix/postfix unary increment operator
class PrePostDemo{
public static void main(String[] args){
int i = 3;i++;
System.out.println(i);++i;
System.out.println(i);
System.out.println(++i);
System.out.println(i++);
System.out.println(i);}
}

The following program, illustrates the prefix/postfix unary increment operator
class PrePostDemo{
public static void main(String[] args){
int i = 3;i++;
System.out.println(i); // "4"++i;
System.out.println(i); // "5"
System.out.println(++i); // "6"
System.out.println(i++); // "6"
System.out.println(i); // "7"}
}

Equality, Relational, and Conditional Operators
The Equality and Relational Operators
The equality and relational operators determine if one operand is greater than,
less than, equal to, or not equal to another operand.
== equal to!= not equal to> greater than>= greater than or equal to< less than<= less than or equal to

The following program, tests the comparison operators:
class ComparisonDemo {
public static void main(String[] args){
int value1 = 1; int value2 = 2;
if(value1 == value2) System.out.println("value1 == value2");
if(value1 != value2) System.out.println("value1 != value2");
if(value1 > value2) System.out.println("value1 > value2");
if(value1 < value2) System.out.println("value1 < value2");
if(value1 <= value2) System.out.println("value1 <= value2");
} }

Output: value1 != value2 value1 < value2 value1 <= value2

The Conditional Operators
The && and || operators perform Conditional-AND and Conditional-OR operations
on two boolean expressions.
These operators exhibit "short-circuiting" behavior, which means that the second
operand is evaluated only if needed.
&& Conditional-AND|| Conditional-OR

The following program, tests these operators:
class ConditionalDemo1 {
public static void main(String[] args){
int value1 = 1;int value2 = 2;
if((value1 == 1) && (value2 == 2)) System.out.println("value1 is 1 AND value2 is 2");
if((value1 == 1) || (value2 == 1)) System.out.println("value1 is 1 OR value2 is 1");
}}

Another conditional operator is ?:
Which can be thought of as shorthand for an if-then-else statement.
This operator is also known as the ternary operator because it uses three operands.
In the following example, this operator should be read as:
"If someCondition is true, assign the value of value1 to result.
Otherwise, assign the value of value2 to result."

The following program, tests the ?: operator:
class ConditionalDemo2 {
public static void main(String[] args){
int value1 = 1;
int value2 = 2;
int result;
boolean someCondition = true;
result = someCondition ? value1 : value2;
System.out.println(result); }
}
Because someCondition is true, this program prints "1" to the screen.

Expressions
An expression is a collection of variables, operators, and method invocations,
which are constructed according to the syntax of the language, that evaluates to a
single value. You've already seen examples of expressions, illustrated in bold
below:
int cadence = 0;anArray[0] = 100;System.out.println("Element 1 at index 0: " + anArray[0]);
int result = 1 + 2; // result is now 3if(value1 == value2) System.out.println("value1 == value2");
The data type of the value returned by an expression depends on the elements
used in the expression.
The expression cadence = 0 returns an int because the assignment operator
returns a value of the same data type as its left-hand operand.
As you can see from the other expressions, an expression can return other types
of values as well, such as boolean or String.

Expressions
Here's an example of a compound expression:
1 * 2 * 3
In this particular example, the order in which the expression is evaluated is
unimportant because the result of multiplication is independent of order.
The outcome is always the same, no matter in which order you apply the
multiplications.
However, this is not true of all expressions.
For example, the following expression gives different results, depending on
whether you perform the addition or the division operation first:
x + y / 100 // ambiguous
You can specify exactly how an expression will be evaluated using balanced
parenthesis: ( and ).

Expressions
For example, to make the previous expression unambiguous, you could write the
following:
(x + y) / 100 // unambiguous, recommended
Note: If you don't explicitly indicate the order for the operations to beperformed, the order is determined by the precedence assigned to theoperators in use within the expression.
Operators that have a higher precedence get evaluated first.
For example, the division operator has a higher precedence than does the addition
operator. Therefore, the following two statements are equivalent:
x + y / 100
x + (y / 100) // unambiguous, recommended
When writing compound expressions, be explicit and indicate with parentheses
which operators should be evaluated first.
This practice makes code easier to read and to maintain.

Statements
Statements are roughly equivalent to sentences in natural languages.
A statement forms a complete unit of execution.
The following types of expressions can be made into a statement by terminating the
expression with a semicolon (;).
Assignment expressions Any use of ++ or -- Method invocations Object creation expressions
Such statements are called expression statements.
Here are some examples of expression statements.
aValue = 8933.234; // assignment statementaValue++; // increment statementSystem.out.println("Hello World!");// method invocation statement BicyclemyBike = new Bicycle(); // object creation statement

Statements
In addition to expression statements, there are two other kinds of statements:
declaration statements and control flow statements.
A declaration statement declares a variable. You've seen many examples of
declaration statements already:
double aValue = 8933.234; //declaration statement
control flow statements regulate the order in which statements get executed.
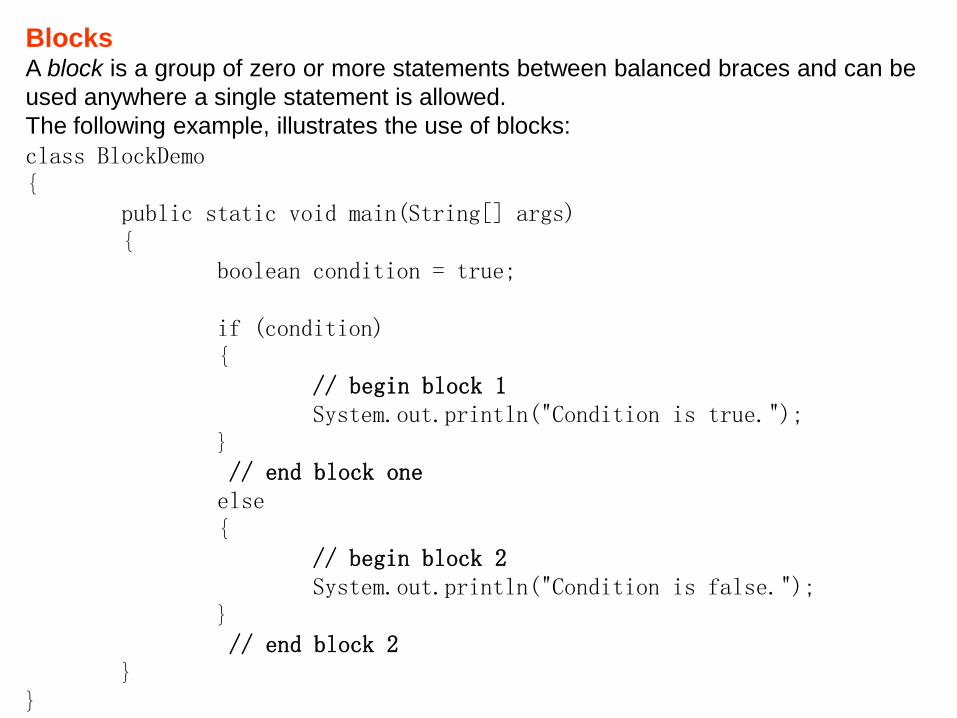
BlocksA block is a group of zero or more statements between balanced braces and can be
used anywhere a single statement is allowed.
The following example, illustrates the use of blocks:
class BlockDemo{
public static void main(String[] args){
boolean condition = true;
if (condition){
// begin block 1System.out.println("Condition is true.");
}// end block oneelse{
// begin block 2System.out.println("Condition is false.");
}// end block 2
}}

Control Flow Statements
This section describes the decision-making statements (if-then, if-then-else,
switch), the looping statements (for, while, do-while), and the branching
statements (break, continue, return) supported by the Java programming
language.

The if-then Statement
The if-then statement is the most basic of all the control flow statements.
It tells your program to execute a certain section of code only if a particular test
evaluates to true.
For example, the Bicycle class could allow the brakes to decrease the bicycle's
speed only if the bicycle is already in motion.
One possible implementation of the applyBrakes method could be as follows:
void applyBrakes(){
if (isMoving){ // the "if" clause: bicycle must movingcurrentSpeed--; // the "then" clause: decrease current speed}
}
If this test evaluates to false (meaning that the bicycle is not in motion), control
jumps to the end of the if-then statement.

The if-then Statement
In addition, the opening and closing braces are optional, provided that the "then"
clause contains only one statement:
void applyBrakes(){
if (isMoving) currentSpeed--; // same as above, but without braces}
Note: Deciding when to omit the braces is a matter of personal taste.Omitting them can make the code more brittle. If a secondstatement is later added to the "then" clause, a common mistakewould be forgetting to add the newly required braces. Thecompiler cannot catch this sort of error; you'll just get thewrong results.

The if-then-else Statement
The if-then-else statement provides a secondary path of execution when an "if"
clause evaluates to false.
You could use an if-then-else statement in the applyBrakes method to take some
action if the brakes are applied when the bicycle is not in motion.
In this case, the action is to simply print an error message stating that the bicycle has
already stopped.
void applyBrakes(){
if (isMoving){
currentSpeed--;}else{
System.err.println("The bicycle has already stopped!");}
}
The Next program, assigns a grade based on the value of a test score: an A for a
score of 90% or above, a B for a score of 80% or above, and so on.

class IfElseDemo {
public static void main(String[] args) {
int testscore = 76; char grade; if (testscore >= 90) {
grade = 'A'; } else if (testscore >= 80) {
grade = 'B'; }else if (testscore >= 70) {
grade = 'C'; }else if (testscore >= 60) {
grade = 'D'; } else {
grade = 'F'; } System.out.println("Grade = " + grade);
} }

The output from the program is:
Grade = C
Note: You may have noticed that the value of testscore can satisfymore than one expression in the compound statement: 76 >= 70and 76 >= 60. However, once a condition is satisfied, theappropriate statements are executed (grade = 'C';) and theremaining conditions are not evaluated.

The switch Statement
Unlike if-then and if-then-else, the switch statement allows for any number of
possible execution paths.
A switch works with the byte, short, char, and int primitive data types.
It also works with enumerated types (discussed in Classes and Inheritance)
The Next program, SwitchDemo, declares an int named month whose value
represents a month out of the year. The program displays the name of the month,
based on the value of month, using the switch statement.

class SwitchDemo {public static void main(String[] args){int month = 8;switch (month) {
case 1: System.out.println("January"); break;case 2: System.out.println("February"); break;case 3: System.out.println("March"); break;case 4: System.out.println("April"); break;case 5: System.out.println("May"); break;case 6: System.out.println("June"); break;case 7: System.out.println("July"); break;case 8: System.out.println("August"); break;case 9: System.out.println("September"); break;case 10: System.out.println("October"); break;case 11: System.out.println("November"); break;case 12: System.out.println("December"); break;default:
System.out.println("Invalid month.");break;}
}}
In this case, "August" is printed to standard output.

The while and do-while Statements
The while statement continually executes a block of statements while a particular
condition is true. Its syntax can be expressed as:
while (expression){
statement(s)
}
The while statement evaluates expression, which must return a boolean value. If
the expression evaluates to true, the while statement executes the statement(s) in
the while block.
The while statement continues testing the expression and executing its block until
the expression evaluates to false.

class WhileDemo{
public static void main(String[] args){
int count = 1;
while (count < 11){
System.out.println("Count is: " + count);count++;
}}
}
You can implement an infinite loop using the while statement as follows:
while (true){
// your code goes here}

The Java programming language also provides a do-while statement, which can be
expressed as follows:
do{
statement(s)} while (expression);
The difference between do-while and while is that do-while evaluates its expression
at the bottom of the loop instead of the top.

class DoWhileDemo {
public static void main(String[] args){
int count = 1;
do {
System.out.println("Count is: " + count); count++;
} while (count <= 11); }
}

The for Statement
The for statement provides a compact way to iterate over a range of values.
Programmers often refer to it as the "for loop" because of the way in which it
repeatedly loops until a particular condition is satisfied.
The general form of the for statement can be expressed as follows:
for (initialization; termination; increment){
statement(s)}
When using this version of the for statement, keep in mind that:
The initialization expression initializes the loop; it's executed once, as the
loop begins.
When the termination expression evaluates to false, the loop terminates.
The increment expression is invoked after each iteration through the loop; it
is perfectly acceptable for this expression to increment or decrement a value.

class ForDemo {
public static void main(String[] args){
for(int i=1; i<11; i++){
System.out.println("Count is: " + i); }
} }
The output of this program is: Count is: 1 Count is: 2 Count is: 3 Count is: 4 Count is: 5 Count is: 6 Count is: 7 Count is: 8 Count is: 9 Count is: 10

The three expressions of the for loop are optional; an infinite loop can be created
as follows:
for ( ; ; ){
// infinite loop// your code goes here
}

The for statement also has another form designed for iteration through arrays.
This form is sometimes referred to as the enhanced for statement, and can be used
to make your loops more compact and easy to read.
To demonstrate, consider the following array, which holds the numbers 1 through
10:
int[] numbers = {1,2,3,4,5,6,7,8,9,10};
class EnhancedForDemo{
public static void main(String[] args){
int[] numbers = {1,2,3,4,5,6,7,8,9,10};
for (int item : numbers){
System.out.println("Count is: " + item);}
}}

Branching Statements
The break Statement
The break statement has two forms:
labeled and unlabeled.
You saw the unlabeled form in the previous discussion of the switch statement.
You can also use an unlabeled break to terminate a for, while, or do-while loop

class BreakDemoUnlabel {
public static void main(String[] args) {
int[] arrayOfInts = { 32, 87, 3, 589, 12, 1076, 2000, 8, 622, 127 };
int searchfor = 12; int i; boolean foundIt = false; for (i = 0; i < arrayOfInts.length; i++) {
if (arrayOfInts[i] == searchfor) {
foundIt = true; break;
} } if (foundIt) {
System.out.println("Found " + searchfor + " at index " + i);
}else {
System.out.println(searchfor + " not in the array");
} }
}

An unlabeled break statement terminates the innermost switch, for, while, or do-
while statement.
But a labeled break terminates an outer statement.
The next program, BreakWithLabelDemo, is similar to the previous program, but
uses nested for loops to search for a value in a two-dimensional array.
When the value is found, a labeled break terminates the outer for loop (labeled
"search"):

class BreakWithLabelDemo {
public static void main(String[] args) {
int[][] arrayOfInts = { { 32, 87, 3, 589 }, { 12, 1076, 2000, 8 }, { 622, 127, 77, 955 } };
int searchfor = 12; int i; int j = 0; boolean foundIt = false;
search: for (i = 0; i < arrayOfInts.length; i++) {
for (j = 0; j < arrayOfInts[i].length; j++) {
if (arrayOfInts[i][j] == searchfor) {
foundIt = true; break search;
} }
}if (foundIt) {
System.out.println("Found " + searchfor + " at " + i + ", " + j); } else {
System.out.println(searchfor + " not in the array"); }
}}

The continue Statement
The continue statement skips the current iteration of a for, while , or do-while loop.
The unlabeled form skips to the end of the innermost loop's body and evaluates the
boolean expression that controls the loop.
The next program, ContinueDemo , steps through a String, counting the occurrences
of the letter "p". If the current character is not a p, the continue statement skips the
rest of the loop and proceeds to the next character. If it is a "p", the program
increments the letter count.

class ContinueDemo {
public static void main(String[] args){String searchMe = "peter piper picked a peck of pickled peppers";int max = searchMe.length(); int numPs = 0;
for (int i = 0; i < max; i++) {
//interested only in p's if (searchMe.charAt(i) != 'p')
continue; //process p's
numPs++; }
System.out.println("Found " + numPs + " p's in the string."); }
}
Here is the output of this program: Found 9 p's in the string.

A labeled continue statement skips the current iteration of an outer loop marked with
the given label.
The next example program, ContinueWithLabelDemo, uses nested loops to search
for a substring within another string.
Two nested loops are required:
one to iterate over the substring and one to iterate over the string being searched.

class ContinueWithLabelDemo {
public static void main(String[] args) { String searchMe = "Look for a substring in me"; String substring = "sub"; boolean foundIt = false; int max = searchMe.length() - substring.length();
test: for (int i = 0; i <= max; i++) {
int n = substring.length(); int j = i; int k = 0; while (n-- != 0) {
if (searchMe.charAt(j++) != substring.charAt(k++)){
continue test; }
} foundIt = true; break test;
}
System.out.println(foundIt ? "Found it" : "Didn't find it"); }
}

The return Statement
The last of the branching statements is the return statement.
The return statement exits from the current method, and control flow returns to
where the method was invoked.
The return statement has two forms:
one that returns a value, and one that doesn't.
To return a value, simply put the value (or an expression that calculates the value)
after the return keyword.
return ++count;
The data type of the returned value must match the type of the method's declared
return value.
When a method is declared void, use the form of return that doesn't return a value.
return;

What Is an Object?
Objects are key to understanding object-oriented technology.
You'll find many examples of real-world objects: your dog, your desk, your
television set, your bicycle.
Real-world objects share two characteristics:
They all have state and behavior.
Dogs have state (name, color, breed, hungry) and behavior (barking,
fetching).
Bicycles also have state (current gear, current pedal cadence, current
speed) and behavior (changing gear, changing pedal cadence, applying
brakes).
Identifying the state and behavior for real-world objects is a great way to
begin thinking in terms of object-oriented programming.

Take a minute right now to observe the real-world objects that are in
your immediate area. For each object that you see, ask yourself two
questions:
"What possible states can this object be in?"
and
"What possible behavior can this object perform?".
Your desktop lamp may have only two possible states (on and off) and
two possible behaviors (turn on, turn off),
But your desktop radio might have additional states (on, off, current
volume, current station) and behavior (turn on, turn off, increase
volume, decrease volume, seek, scan, and tune).
You may also notice that some objects, in turn, will also contain other
objects. These real-world observations all translate into the world of
object-oriented programming.

Software objects are conceptually similar to real-world objects:
they too consist of state and related behavior.
An object stores its state in fields (variables in some programming
languages)
Exposes its behavior through methods (functions in some programming
languages)

What Is a Class?
In the real world, you'll often find many individual objects all of the same
kind.
There may be thousands of other bicycles in existence, all of the same
make and model.
Each bicycle was built from the same set of blueprints and therefore
contains the same components.
In object-oriented terms, we say that your bicycle is an instance of the
class of objects known as bicycles.
A class is the blueprint from which individual objects are created.

The following Bicycle class is one possible implementation of a bicycle:class Bicycle {
int cadence = 0;int speed = 0;int gear = 1;void changeCadence(int newValue) {
cadence = newValue;}void changeGear(int newValue) {
gear = newValue;}void speedUp(int increment) {
speed = speed + increment;}void applyBrakes(int decrement) {
speed = speed - decrement;}void printStates(){System.out.println("cadence:"+cadence+" speed:"+speed+" gear:"+gear);}
}

o The fields cadence, speed, and gear represent the object's state,
and
o The methods (changeCadence, changeGear, speedUp etc.) define its
interaction with the outside world.
o You may have noticed that the Bicycle class does not contain a main
method. That's because it's not a complete application;
o It's just the blueprint for bicycles that might be used in an application.
o The responsibility of creating and using new Bicycle objects belongs to
some other class in your application.

Here's a BicycleDemo class that creates two separate Bicycle objects andinvokes their methods:
class BicycleDemo{
public static void main(String[] args){
// Create two different Bicycle objectsBicycle bike1 = new Bicycle();Bicycle bike2 = new Bicycle();// Invoke methods on those objectsbike1.changeCadence(50);bike1.speedUp(10);bike1.changeGear(2);bike1.printStates();bike2.changeCadence(50);bike2.speedUp(10);bike2.changeGear(2);bike2.changeCadence(40);bike2.speedUp(10);bike2.changeGear(3);bike2.printStates();
}}

The output of this test prints the ending pedal cadence, speed, and gearfor the two bicycles:
cadence:50 speed:10 gear:2cadence:40 speed:20 gear:3

What Is Inheritance?
Different kinds of objects often have a certain amount in common with
each other.
Mountain bikes, road bikes, and tandem bikes, for example, all share the
characteristics of bicycles (current speed, current pedal cadence, current
gear).
Yet each also defines additional features that make them different:
tandem bicycles have two seats and two sets of handlebars; road bikes
have drop handlebars; some mountain bikes have an additional chain ring,
giving them a lower gear ratio.
Object-oriented programming allows classes to inherit commonly used
state and behavior from other classes.
In this example, Bicycle now becomes the superclass of MountainBike,
RoadBike, and TandemBike.
In the Java programming language, each class is allowed to have one
direct superclass, and each superclass has the potential for an unlimited
number of subclasses:

The syntax for creating a subclass is simple. At the beginning of your
class declaration, use the extends keyword, followed by the name of the
class to inherit from:
class MountainBike extends Bicycle{// new fields and methods defining a mountain bike wouldgo here}
This gives MountainBike all the same fields and methods as Bicycle, yet
allows its code to focus exclusively on the features that make it unique.
This makes code for your subclasses easy to read.
However, you must take care to properly document the state and behavior
that each superclass defines, since that code will not appear in the source
file of each subclass.

What Is an Interface?
As you've already learned, objects define their interaction with the outside
world through the methods that they expose.
Methods form the object's interface with the outside world; the buttons on
the front of your television set, for example, are the interface between you
and the electrical wiring on the other side of its plastic casing. You press the
"power" button to turn the television on and off.
In its most common form, an interface is a group of related methods with
empty bodies.
A bicycle's behavior, if specified as an interface, might appear as follows:
interface Bicycle{
void changeCadence(int newValue);void changeGear(int newValue);void speedUp(int increment);void applyBrakes(int decrement);
}

To implement this interface, the name of your class would change (to
ACMEBicycle, for example), and you'd use the implements keyword in the
class declaration:
class ACMEBicycle implements Bicycle{
// remainder of this class implemented as before}
Implementing an interface allows a class to become more formal about the
behavior it promises to provide.
Interfaces form a contract between the class and the outside world, and this
contract is enforced at build time by the compiler.
If your class claims to implement an interface, all methods defined by that
interface must appear in its source code before the class will successfully
compile.
Note: To actually compile the ACMEBicycle class, you'll need to add the
public keyword to the beginning of the implemented interface methods.

What Is a Package?
A package is a namespace that organizes a set of related classes and
interfaces.
Conceptually you can think of packages as being similar to different folders
on your computer.
You might keep HTML pages in one folder, images in another, and scripts
or applications in yet another.
Because software written in the Java programming language can be
composed of hundreds or thousands of individual classes, it makes sense to
keep things organized by placing related classes and interfaces into
packages.
The Java platform provides an enormous class library (a set of packages)
suitable for use in your own applications.
This library is known as the "Application Programming Interface", or "API"
for short.

What Is a Package?
Its packages represent the tasks most commonly associated with general-
purpose programming.
For example,
a String object contains state and behavior for character strings;
a File object allows a programmer to easily create, delete, inspect,compare, or modify a file on the filesystem;
a Socket object allows for the creation and use of network sockets;
various GUI objects control buttons and checkboxes and anything elserelated to graphical user interfaces.

Classespublic class Bicycle {
// the Bicycle class has three fieldspublic int cadence;public int gear;public int speed;// the Bicycle class has one constructor
public Bicycle(int startCadence, int startSpeed, int startGear) {gear = startGear;cadence = startCadence;speed = startSpeed;}
// the Bicycle class has four methodspublic void setCadence(int newValue) {
cadence = newValue;}public void setGear(int newValue) {
gear = newValue;}public void applyBrake(int decrement) {
speed -= decrement;}public void speedUp(int increment) {
speed += increment;}
}

A class declaration for a MountainBike class that is a subclass of Bicycle might look
like this:
public class MountainBike extends Bicycle {// the MountainBike subclass has one field
public int seatHeight;// the MountainBike subclass has one constructor
public MountainBike(int sHeight, int startCadence, int startSpeed,int startGear){
super(startCadence, startSpeed, startGear);seatHeight = sHeight;
}// the MountainBike subclass has one method
public void setHeight(int newValue) {seatHeight = newValue;
}}
MountainBike inherits all the fields and methods of Bicycle and adds the field
seatHeight and a method to set it (mountain bikes have seats that can be moved up
and down as the terrain demands).

Declaring Classes
You've seen classes defined in the following way:
class MyClass {//field, constructor, and method declarations
}
You can provide more information about the class, such as the name of its
superclass, whether it implements any interfaces, and so on, at the start of the class
declaration. For example,
class MyClass extends MySuperClass implements YourInterface {//field, constructor, and method declarations
}
means that MyClass is a subclass of MySuperClass and that it implements the
YourInterface interface.
You can also add modifiers like public or private at the very beginning.

In general, class declarations can include these components, in order:
1. Modifiers such as public, private, and a number of others that you will
encounter later.
2. The class name, with the initial letter capitalized by convention.
3. The name of the class's parent (superclass), if any, preceded by the keyword
extends. A class can only extend (subclass) one parent.
4. A comma-separated list of interfaces implemented by the class, if any,
preceded by the keyword implements. A class can implement more than one
interface.
5. The class body, surrounded by braces, {}.

Declaring Member Variables
There are several kinds of variables:
o Member variables in a class—these are called fields.
o Variables in a method or block of code—these are called local variables.
o Variables in method declarations—these are called parameters.
The Bicycle class uses the following lines of code to define its fields:
public int cadence;public int gear;public int speed;
Field declarations are composed of three components, in order:
o Zero or more modifiers, such as public or private.
o The field's type.
o The field's name.
The fields of Bicycle are named cadence, gear, and speed and are all of data type
integer (int). The public keyword identifies these fields as public members,
accessible by any object that can access the class.

Access Modifiers
public modifier—the field is accessible from all classes.
private modifier—the field is accessible only within its own class.

Defining Methods
Here is an example of a typical method declaration:
public double calculateAnswer(double wingSpan, int numberOfEngines, doublelength, double grossTons)
{
//do the calculation here
}
The only required elements of a method declaration are the method's return type,
name, a pair of parentheses, (), and a body between braces, {}.

Defining Methods
More generally, method declarations have six components, in order:
1. Modifiers—such as public, private, and others you will learn about later.
2. The return type—the data type of the value returned by the method, or void if the
method does not return a value.
3. The method name—the rules for field names apply to method names as well, but
the convention is a little different.
4. The parameter list in parenthesis—a comma-delimited list of input parameters,
preceded by their data types, enclosed by parentheses, (). If there are no
parameters, you must use empty parentheses.
5. An exception list—to be discussed later.
6. The method body, enclosed between braces—the method's code, including the
declaration of local variables, goes here.

Overloading Methods
The Java programming language supports overloading methods, and Java can
distinguish between methods with different method signatures.
public class DataArtist {...
public void draw(String s) {...
}public void draw(int i) {
...}public void draw(double f) {
...}public void draw(int i, double f) {
...}
}

Overloading Methods
Overloaded methods are differentiated by the number and the type of the
arguments passed into the method.
You cannot declare more than one method with the same name and the
same number and type of arguments, because the compiler cannot tell them
apart.
The compiler does not consider return type when differentiating methods, so
you cannot declare two methods with the same signature even if they have a
different return type.

Providing Constructors for Your Classes
A class contains constructors that are invoked to create objects from the
class blueprint.
Constructor declarations look like method declarations—except that they use
the name of the class and have no return type.
For example, Bicycle has one constructor:
public Bicycle(int startCadence, int startSpeed, int startGear){
gear = startGear;cadence = startCadence;speed = startSpeed;
}
To create a new Bicycle object called myBike, a constructor is called by the new
operator:
Bicycle myBike = new Bicycle(30, 0, 8);
new Bicycle(30, 0, 8) creates space in memory for the object and initializes its
fields.

Although Bicycle only has one constructor, it could have others, including a no-
argument constructor:
public Bicycle() {gear = 1;cadence = 10;speed = 0;
}
Bicycle yourBike = new Bicycle();
invokes the no-argument constructor to create a new Bicycle object called yourBike.
Both constructors could have been declared in Bicycle because they have
different argument lists.
As with methods, the Java platform differentiates constructors on the basis
of the number of arguments in the list and their types.
You cannot write two constructors that have the same number and type of
arguments for the same class, because the platform would not be able to
tell them apart.
Doing so causes a compile-time error.

The compiler automatically provides a no-argument, default constructor for
any class without constructors.
This default constructor will call the no-argument constructor of the
superclass.
In this situation, the compiler will complain if the superclass doesn't have a
no-argument constructor so you must verify that it does.
If your class has no explicit superclass, then it has an implicit superclass of
Object, which does have a no-argument constructor.
You can use a superclass constructor yourself. The MountainBike class at
the beginning of this lesson did just that.
You can use access modifiers in a constructor's declaration to control
which other classes can call the constructor.
Note : If another class cannot call a MyClass constructor, it cannot directly
create MyClass objects.

Passing Information to a Method or a Constructor
public double computePayment (double loanAmt, double rate, double futureValue, int numPeriods )
{double interest = rate / 100.0;double partial1 = Math.pow((1 + interest), -numPeriods);double denominator = (1 - partial1) / interest;double answer = (-loanAmt / denominator)-((futureValue * partial1)
/ denominator);return answer;
}
Note: Parameters refers to the list of variables in a method declaration. Arguments
are the actual values that are passed in when the method is invoked. When you
invoke a method, the arguments used must match the declaration's parameters in
type and order.

Passing Primitive Data Type Arguments
public class PassPrimitiveByValue {public static void main(String[] args) {int x = 3;//invoke passMethod() with x as argumentpassMethod(x);// print x to see if its value has changedSystem.out.println("After invoking passMethod, x = " + x);}
// change parameter in passMethod()public static void passMethod(int p) {p = 10;}
}
When you run this program, the output is:
After invoking passMethod, x = 3

Passing Reference Data Type Arguments
Reference data type parameters, such as objects, are also passed into methods by
value.
This means that when the method returns, the passed-in reference still references
the same object as before.
However, the values of the object's fields can be changed in the method, if they
have the proper access level.
For example, consider a method in an arbitrary class that moves Circle objects:
public void moveCircle(Circle circle, int deltaX, int deltaY) {// code to move origin of circle to x+deltaX, y+deltaY
circle.setX(circle.getX() + deltaX);circle.setY(circle.getY() + deltaY);
//code to assign a new reference to circlecircle = new Circle(0, 0);
}
Let the method be invoked with these arguments:
moveCircle(myCircle, 23, 56)

Objectspublic class Point {
public int x = 0;public int y = 0;
// a constructor!public Point(int a, int b) {
x = a;y = b;
}}

public class Rectangle {public int width = 0;public int height = 0;public Point origin;// four constructorspublic Rectangle() {
origin = new Point(0, 0);}public Rectangle(Point p) {
origin = p;}public Rectangle(int w, int h) {
origin = new Point(0, 0);width = w;height = h;
}public Rectangle(Point p, int w, int h) {
origin = p;width = w;height = h;
}// a method for moving the rectanglepublic void move(int x, int y) {
origin.x = x;origin.y = y;
}// a method for computing the area of the rectanglepublic int getArea() {
return width * height;}
}

public class CreateObjectDemo {public static void main(String[] args) {//Declare and create a point object//and two rectangle objects.Point originOne = new Point(23, 94);Rectangle rectOne = newRectangle(originOne, 100, 200);Rectangle rectTwo = new Rectangle(50, 100);//display rectOne's width, height, and areaSystem.out.println("Width of rectOne: " +rectOne.width);
System.out.println("Height of rectOne: " + rectOne.height);System.out.println("Area of rectOne: " + rectOne.getArea());//set rectTwo's position
rectTwo.origin = originOne;//display rectTwo's positionSystem.out.println("X Position of rectTwo: "+ rectTwo.origin.x);System.out.println("Y Position of rectTwo: "+ rectTwo.origin.y);
//move rectTwo and display its new positionrectTwo.move(40, 72);System.out.println("X Position of rectTwo: "+ rectTwo.origin.x);System.out.println("Y Position of rectTwo: "+ rectTwo.origin.y);
}}

This program creates, manipulates, and displays information about variousobjects.
Here's the output:Width of rectOne: 100Height of rectOne: 200Area of rectOne: 20000X Position of rectTwo: 23Y Position of rectTwo: 94X Position of rectTwo: 40Y Position of rectTwo: 72

Initializing an ObjectHere's the code for the Point class:
public class Point {public int x = 0;public int y = 0;//constructorpublic Point(int a, int b){
x = a;y = b;
}}
Point originOne = new Point(23, 94);
The result of executing this statement can be illustrated in the nextfigure:

Here's the code for the Rectangle class, which contains four constructors:public class Rectangle {
public int width = 0;public int height = 0;public Point origin;// four constructorspublic Rectangle() {
origin = new Point(0, 0);}public Rectangle(Point p) {
origin = p;}public Rectangle(int w, int h) {
origin = new Point(0, 0);width = w;height = h;
}public Rectangle(Point p, int w, int h) {
origin = p;width = w;height = h;
}// a method for moving the rectanglepublic void move(int x, int y) {
origin.x = x;origin.y = y;
}// a method for computing the area of the rectanglepublic int getArea() {
return width * height;}
}

Rectangle rectOne = new Rectangle(originOne, 100, 200);

Calling an Object's Methods
new Rectangle(100, 50).getArea()
The expression new Rectangle(100, 50) returns an object reference that refers to a
Rectangle object. As shown, you can use the dot notation to invoke the new
Rectangle's getArea() method to compute the area of the new rectangle.
int areaOfRectangle = new Rectangle(100, 50).getArea();
int height = new Rectangle().height;
Note that after this statement has been executed, the program no longer has a
reference to the created Rectangle, because the program never stored the reference
anywhere. The object is unreferenced, and its resources are free to be recycled by
the Java Virtual Machine.

The Garbage Collector
The Java runtime environment deletes objects when it determines that they
are no longer being used. This process is called garbage collection.
An object is eligible for garbage collection when there are no more references
to that object. References that are held in a variable are usually dropped when
the variable goes out of scope.
Or
you can explicitly drop an object reference by setting the variable to the special
value null.
Remember that a program can have multiple references to the same object;
all references to an object must be dropped before the object is eligible for
garbage collection.
The Java runtime environment has a garbage collector that periodically frees
the memory used by objects that are no longer referenced.
The garbage collector does its job automatically when it determines that the
time is right.

Returning a Value from a Method
A method returns to the code that invoked it when it completes all the statements in
the method, reaches a return statement, or throws an exception (covered later),
You declare a method's return type in its method declaration. Within the body of the
method, you use the return statement to return the value.
If you try to return a value from a method that is declared void, you will get a compiler
error.
Any method that is not declared void must contain a return statement with a
corresponding return value, like this:
return returnValue;
The getArea() method in the Rectangle Rectangle class that was discussed in the
sections on objects returns an integer:
// a method for computing the area of the rectanglepublic int getArea(){
return width * height;}

Returning a Value from a Method
This method returns the integer that the expression width*height evaluates to.
The area method returns a primitive type. A method can also return a reference type.
For example, in a program to manipulate Bicycle objects, we might have a method like
this:
public Bicycle seeWhosFastest(Bicycle myBike, Bicycle yourBike, Environmentenv){
Bicycle fastest;// code to calculate which bike is faster, given// each bike's gear and cadence and given// the environment (terrain and wind)return fastest;
}

Using the this Keyword
Within an instance method or a constructor, this is a reference to the current object
— the object whose method or constructor is being called.
You can refer to any member of the current object from within an instance method or
a constructor by using this.

Using this with a Field
The most common reason for using the this keyword is because a field is shadowed by a
method or constructor parameter.
For example, the Point class was written like this
public class Point {public int x = 0;public int y = 0;//constructorpublic Point(int a, int b){
x = a;y = b;
}}

Using this with a Field
but it could have been written like this:
public class Point {public int x = 0;public int y = 0;//constructorpublic Point(int x, int y){
this.x = x;this.y = y;
}}
Each argument to the second constructor shadows one of the object's fields—inside the
constructor x is a local copy of the constructor's first argument.
To refer to the Point field x, the constructor must use this.x.

Using this with a Constructor
From within a constructor, you can also use the this keyword to call another constructor
in the same class.
Doing so is called an explicit constructor invocation.
Here's another Rectangle class, with a different implementation from the one in the
Objects section.

Using this with a Constructor
public class Rectangle {private int x, y;private int width, height;public Rectangle(){
this(0, 0, 0, 0);}public Rectangle(int width, int height){
this(0, 0, width, height);}public Rectangle(int x, int y, int width, int height){
this.x = x;this.y = y;this.width = width;this.height = height;
}...
}

Using this with a Constructor
This class contains a set of constructors. Each constructor initializes some or all of the
rectangle's member variables.
The constructors provide a default value for any member variable whose initial value is
not provided by an argument.
For example, the no-argument constructor calls the four-argument constructor with four
0 values and the two-argument constructor calls the four-argument constructor with two
0 values.
As before, the compiler determines which constructor to call, based on the number and
the type of arguments.
If present, the invocation of another constructor must be the first line in the constructor.

Controlling Access to Members of a Class
Access level modifiers determine whether other classes can use a particular field or
invoke a particular method. There are two levels of access control:
At the top level—public, or package-private (no explicit modifier).
At the member level—public, private, protected, or package-private (no explicit modifier).
A class may be declared with the modifier public, in which case that class is visible to all
classes everywhere. If a class has no modifier (the default, also known as package-
private), it is visible only within its own package (packages are named groups of related
classes.)
At the member level, you can also use the public modifier or no modifier (package-
private) just as with top-level classes, and with the same meaning.
For members, there are two additional access modifiers: private and protected.
The private modifier specifies that the member can only be accessed in its own class.
The protected modifier specifies that the member can only be accessed within its own
package (as with package-private) and, in addition, by a subclass of its class in another
package.

The following table shows the access to members permitted by each modifier.
Access Levels
Modifier Class Package Subclass World
Public Y Y Y Y
protected Y Y Y N
no modifier Y Y N N
Private Y N N N

Understanding Instance and Class Members
In this section, we discuss the use of the static keyword to create fields and methods
that belong to the class, rather than to an instance of the class.
Class Methods
The Java programming language supports static methods as well as static variables.
Static methods, which have the static modifier in their declarations, should be invoked
with the class name, without the need for creating an instance of the class, as in
ClassName.methodName(args)
Note: You can also refer to static methods with an object reference like
instanceName.methodName(args)
but this is discouraged because it does not make it clear that they are class methods.
A common use for static methods is to access static fields.

Understanding Instance and Class Members
For example, we could add a static method to the Bicycle class to access the
numberOfBicycles static field:
public static int getNumberOfBicycles(){
return numberOfBicycles;}
Not all combinations of instance and class variables and methods are allowed:
Instance methods can access instance variables and instance methods
directly.
Instance methods can access class variables and class methods directly.
Class methods can access class variables and class methods directly.
Class methods cannot access instance variables or instance methods
directly—they must use an object reference.
Also, class methods cannot use the this keyword as there is no instance for
this to refer to.

Constants
The static modifier, in combination with the final modifier, is also used to define
constants.
The final modifier indicates that the value of this field cannot change.
For example, the following variable declaration defines a constant named PI, whose
value is an approximation of pi (the ratio of the circumference of a circle to its
diameter):
static final double PI = 3.141592653589793;
Constants defined in this way cannot be reassigned, and it is a compile-time error if
your program tries to do so.
By convention, the names of constant values are spelled in uppercase letters.
If the name is composed of more than one word, the words are separated by an
underscore (_).

Note: If a primitive type or a string is defined as a constant and the value is known
at compile time, the compiler replaces the constant name everywhere in the code
with its value. This is called a compile-time constant. If the value of the constant in
the outside world changes (for example, if it is legislated that pi actually should be
3.975), you will need to recompile any classes that use this constant to get the
current value.

Interfaces
There are a number of situations in software engineering when it is important for
disparate groups of programmers to agree to a "contract" that spells out how
their software interacts.
Each group should be able to write their code without any knowledge of how the
other group's code is written.
Generally speaking, interfaces are such contracts.

Interfaces in Java
In the Java programming language, an interface is a reference type, similar to a
class, that can contain only constants, method signatures.
There are no method bodies.
Interfaces cannot be instantiated—they can only be implemented by classes or
extended by other interfaces.

Defining an interface is similar to creating a new class:
public interface OperateCar {// constant declarations, if any// method signaturesint turn(Direction direction, // An enum with values RIGHT, LEFT
double radius, double startSpeed, double endSpeed);
int changeLanes(Direction direction, double startSpeed, doubleendSpeed);
int signalTurn(Direction direction, boolean signalOn);int getRadarFront(double distanceToCar, double speedOfCar);int getRadarRear(double distanceToCar, double speedOfCar);
......// more method signatures
}

Note that the method signatures have no braces and are terminated with asemicolon.
To use an interface, you write a class that implements the interface.
When an instantiable class implements an interface, it provides a methodbody for each of the methods declared in the interface.
For example,public class OperateBMW760i implements OperateCar {
// the OperateCar method signatures, with implementation --// for example:int signalTurn(Direction direction, boolean signalOn){
//code to turn BMW's LEFT turn indicator lights on//code to turn BMW's LEFT turn indicator lights off//code to turn BMW's RIGHT turn indicator lights on//code to turn BMW's RIGHT turn indicator lights off
}// other members, as needed -- for example, helper classes// not visible to clients of the interface
}In the robotic car example above, it is the automobile manufacturers whowill implement the interface.

Interfaces as APIs
The robotic car example shows an interface being used as an industry standard
Application Programming Interface (API).
APIs are also common in commercial software products.
Typically, a company sells a software package that contains complex methods that
another company wants to use in its own software product.
An example would be a package of digital image processing methods that are sold
to companies making end-user graphics programs.
The image processing company writes its classes to implement an interface, which it
makes public to its customers.
The graphics company then invokes the image processing methods using the
signatures and return types defined in the interface.

Interfaces and Multiple Inheritance
Interfaces have another very important role in the Java programming language.
Interfaces are not part of the class hierarchy, although they work in combination with
classes.
The Java programming language does not permit multiple inheritances, but
interfaces provide an alternative.
In Java, a class can inherit from only one class but it can implement more than one
interface.

Defining an Interface
An interface uses the keyword interface, the interface name, a comma-separated list
of parent interfaces (if any), and the interface body.
For example:
public interface GroupedInterface extends Interface1,Interface2, Interface3 {
// constant declarationsdouble E = 2.718282;// base of natural logarithms// method signaturesvoid doSomething (int i, double x);int doSomethingElse(String s);
}
The public access specifier indicates that the interface can be used by any class in
any package.
If you do not specify that the interface is public, your interface will be accessible only
to classes defined in the same package as the interface.

Defining an Interface
An interface can extend other interfaces, just as a class can extend or subclass
another class.
However, whereas a class can extend only one other class, an interface can extend
any number of interfaces.
The interface declaration includes a comma-separated list of all the interfaces that it
extends.
All constant values defined in an interface are implicitly public, static, and final. Once
again, these modifiers can be omitted.
public interface area {final static float pi=3.14F;float compute(float x,float y);
}

Defining an Interface
class rectangle implements area {
public float compute(float x,float y){
return(x*y);}
}class circle implements area {
public float compute(float x,float y){
return(pi*x*x);}
}class interfacetest{
public static void main(String args[]){
rectangle rect=new rectangle();circle cir=new circle();
System.out.println("area of rectangle"+rect.compute(10,20));System.out.println("area of circle"+cir.compute(10,20));
}}

Rewriting Interfaces
Consider an interface that you have developed called DoIt:
public interface DoIt{
void doSomething(int i, double x);int doSomethingElse(String s);
}
Suppose that, at a later time, you want to add a third method to DoIt, so that the
interface now becomes:
public interface DoIt{
void doSomething(int i, double x);int doSomethingElse(String s);boolean didItWork(int i, double x, String s);
}
If you make this change, all classes that implement the old DoIt interface will break
because they don't implement the interface anymore. Programmers relying on this
interface will protest loudly.

Rewriting Interfaces
Try to anticipate all uses for your interface and to specify it completely from the
beginning.
Given that this is often impossible, you may need to create more interfaces later.
For example, you could create a DoItPlus interface that extends DoIt:
public interface DoItPlus extends DoIt{
boolean didItWork(int i, double x, String s);}
Now users of your code can choose to continue to use the old interface or to
upgrade to the new interface.
Inheritance
In the Java language, classes can be derived from other classes, thereby inheriting
fields and methods from those classes.
A class that is derived from another class is called a subclass (also a derived class,
extended class, or child class).
The class from which the subclass is derived is called a superclass (also a base
class or a parent class).
A subclass inherits all the members (fields, methods, and nested classes) from its
superclass.
Constructors are not members, so they are not inherited by subclasses, but the
constructor of the superclass can be invoked from the subclass.

An Example of Inheritance
Here is the sample code for a possible implementation of a Bicycle classthat was presented in the Classes and Objects lesson:
public class Bicycle {// the Bicycle class has three fieldspublic int cadence;public int gear;public int speed;
// the Bicycle class has one constructorpublic Bicycle(int startCadence, int startSpeed, int startGear){
gear = startGear;cadence = startCadence;speed = startSpeed;
}// the Bicycle class has four methods
public void setCadence(int newValue){
cadence = newValue;}

An Example of Inheritance
public void setGear(int newValue){
gear = newValue;}public void applyBrake(int decrement){
speed -= decrement;}public void speedUp(int increment){
speed += increment;}
}

An Example of Inheritance
A class declaration for a MountainBike class that is a subclass of Bicyclemight look like this:
public class MountainBike extends Bicycle{
// the MountainBike subclass adds one fieldpublic int seatHeight;// the MountainBike subclass has one constructorpublic MountainBike(int startHeight, int startCadence, int
startSpeed, int startGear){
super(startCadence, startSpeed, startGear);seatHeight = startHeight;
}// the MountainBike subclass adds one method
public void setHeight(int newValue){
seatHeight = newValue;}
}

An Example of Inheritance
MountainBike inherits all the fields and methods of Bicycle and adds thefield seatHeight and a method to set it.
Except for the constructor, it is as if you had written a new MountainBikeclass entirely from scratch, with four fields and five methods.
However, you didn't have to do all the work.

What You Can Do in a Subclass
A subclass inherits all of the public and protected members of its parent, no matter
what package the subclass is in.
If the subclass is in the same package as its parent, it also inherits the package-
private members of the parent.

What You Can Do in a Subclass
You can use the inherited members as is, replace them, hide them, or supplement
them with new members:
The inherited fields can be used directly, just like any other fields.
You can declare a field in the subclass with the same name as the one in
the superclass, thus hiding it (not recommended).
You can declare new fields in the subclass that are not in the superclass.
The inherited methods can be used directly as they are.
You can write a new instance method in the subclass that has the same
signature as the one in the superclass, thus overriding it.
You can write a new static method in the subclass that has the same
signature as the one in the superclass, thus hiding it.
You can declare new methods in the subclass that are not in the
superclass.
You can write a subclass constructor that invokes the constructor of the
superclass, either implicitly or by using the keyword super.

Overriding and Hiding Methods
Instance Methods
An instance method in a subclass with the same signature (name, plus the number
and the type of its parameters) and return type as an instance method in the
superclass overrides the superclass's method.
The ability of a subclass to override a method allows a class to inherit from a
superclass whose behavior is "close enough" and then to modify behavior as
needed.
The overriding method has the same name, number and type of parameters, and
return type as the method it overrides.

Class Methods
If a subclass defines a class method with the same signature as a class method in
the superclass, the method in the subclass hides the one in the superclass.
The distinction between hiding and overriding has important implications.
The version of the overridden method that gets invoked is the one in the subclass.
The version of the hidden method that gets invoked depends on whether it is
invoked from the superclass or the subclass.
Let's look at an example that contains two classes. The first is Animal, which
contains one instance method and one class method:
public class Animal {public static void testClassMethod(){System.out.println("The class method in Animal.");}public void testInstanceMethod(){System.out.println("The instance method in Animal.");}
}

Class MethodsThe second class, a subclass of Animal, is called Cat:
public class Cat extends Animal {public static void testClassMethod(){System.out.println("The class method in Cat.");}public void testInstanceMethod(){System.out.println("The instance method in Cat.");}public static void main(String[] args){
Cat myCat = new Cat();Animal myAnimal = myCat;Animal.testClassMethod();myAnimal.testInstanceMethod();
}}
The Cat class overrides the instance method in Animal and hides the classmethod in Animal.

Class Methods
The main method in this class creates an instance of Cat and callstestClassMethod() on the class and testInstanceMethod() on the instance.
The output from this program is as follows:
The class method in Animal.The instance method in Cat.

Modifiers
The access specifier for an overriding method can allow more, but not less, access
than the overridden method.
For example, a protected instance method in the superclass can be made public,
but not private, in the subclass.
You will get a compile-time error if you attempt to change an instance method in the
superclass to a class method in the subclass, and vice versa.

Summary
The following table summarizes what happens when you define a method with the
same signature as a method in a superclass.
Defining a Method with the Same Signature as a Superclass's Method
Superclass Instance
Method Superclass Static Method
Subclass Instance
Method Overrides
Generates a compile-time
error
Subclass Static
Method
Generates a compile-time
error Hides

Using the Keyword super
Accessing Superclass Members
If your method overrides one of its superclass's methods, you can invoke the
overridden method through the use of the keyword super.
You can also use super to refer to a hidden field (although hiding fields is
discouraged).
Consider this class, Superclass:
public class Superclass{
public void printMethod(){
System.out.println("Printed in Superclass.");}
}

Accessing Superclass MembersHere is a subclass, called Subclass, that overrides printMethod():
public class Subclass extends Superclass{
public void printMethod(){
//overrides printMethod in Superclasssuper.printMethod();System.out.println("Printed in Subclass");
}public static void main(String[] args){
Subclass s = new Subclass();s.printMethod();
}}
Within Subclass, the simple name printMethod() refers to the one declared in
Subclass, which overrides the one in Superclass.
So, to refer to printMethod() inherited from Superclass, Subclass must use a
qualified name, using super as shown.

Compiling and executing Subclass prints the following:
Printed in Superclass.Printed in Subclass

Subclass Constructors
The following example illustrates how to use the super keyword to invoke a
superclass's constructor.
public MountainBike(int startHeight, int startCadence, intstartSpeed, int startGear)
{super(startCadence, startSpeed, startGear);seatHeight = startHeight;
}
Invocation of a superclass constructor must be the first line in the subclass
constructor.
The syntax for calling a superclass constructor is
super(); --or--super(parameter list);
With super(), the superclass no-argument constructor is called.
With super(parameter list), the superclass constructor with a matching parameter
list is called.

Creating a Package
To create a package, you choose a name for the package and put a package
statement with that name at the top of every source file that contains the types
(classes, interfaces) that you want to include in the package.
The package statement (for example, package graphics;) must be the first line in the
source file.
There can be only one package statement in each source file, and it applies to all
types in the file.
If you put the graphics interface and classes listed in the preceding section in a
package called graphics, you would need six source files, like this:

Creating a Package//in the Draggable.java filepackage graphics;
public interface Draggable{
. . .}
//in the Graphic.java filepackage graphics;public abstract class Graphic{
. . .}
//in the Circle.java filepackage graphics;public class Circle extends Graphic implements Draggable{
. . .}
//in the Rectangle.java filepackage graphics;public class Rectangle extends Graphic implements Draggable{
. . .}
//in the Point.java filepackage graphics;public class Point extends Graphic implements Draggable{
. . .}
//in the Line.java filepackage graphics;public class Line extends Graphic implements Draggable{
. . .}
If you do not use a package statement, your type ends up in an unnamed package.
Generally speaking, an unnamed package is only for small or temporary applications
or when you are just beginning the development process.

Naming Conventions
Package names are written in all lowercase to avoid conflict with the names of classes
or interfaces.
Packages in the Java language itself begin with java. or javax.
Importing a Package Member
To import a specific member into the current file, put an import statement at the
beginning of the file before any type definitions but after the package statement, if there
is one.
Here's how you would import the Rectangle class from the graphics package created.
import graphics.Rectangle;
Now you can refer to the Rectangle class by its simple name.
Rectangle myRectangle = new Rectangle();
This approach works well if you use just a few members from the graphics package.
But if you use many types from a package, you should import the entire package.

Importing an Entire Package
To import all the types contained in a particular package, use the import statement with
the asterisk (*) wildcard character.
import graphics.*;
Now you can refer to any class or interface in the graphics package by its simple name.
The asterisk in the import statement can be used only to specify all the classes within a
package, as shown here.
For example, the following does not match all the classes in the graphics package that
begin with A.
import graphics.A*; //does not work
Instead, it generates a compiler error.
With the import statement, you generally import only a single package member or an
entire package.

Name Ambiguities
If a member in one package shares its name with a member in another package
and both packages are imported, you must refer to each member by its qualified
name.
For example, the graphics package defined a class named Rectangle.
The java.awt package also contains a Rectangle class.
If both graphics and java.awt have been imported, the following is ambiguous.
Rectangle rect;
In such a situation, you have to use the member's fully qualified name to indicate
exactly which Rectangle class you want.
For example,
graphics.Rectangle rect;

The Static Import Statement
There are situations where you need frequent access to static final fields (constants)
and static methods from one or two classes.
Prefixing the name of these classes over and over can result in cluttered code.
The static import statement gives you a way to import the constants and static
methods that you want to use so that you do not need to prefix the name of their
class.
The java.lang.Math class defines the PI constant and many static methods,
including methods for calculating sines, cosines, tangents, square roots,maxima, minima, exponents, and many more.
For example,
public static final double PI 3.141592653589793
public static double cos(double a)
Ordinarily, to use these objects from another class, you prefix the class name, as
follows.
double r = Math.cos(Math.PI * theta);

You can use the static import statement to import the static members of
java.lang.Math so that you don't need to prefix the class name, Math.
The static members of Math can be imported either individually:
import static java.lang.Math.PI;
or as a group:
import static java.lang.Math.*;
Once they have been imported, the static members can be used without
qualification.
For example, the previous code snippet would become:
double r = cos(PI * theta);
Obviously, you can write your own classes that contain constants and static
methods that you use frequently, and then use the static import statement.

For example,
import static mypackage.MyConstants.*;
Note: Use static import very sparingly.
Overusing static import can result in code that is difficult to read and maintain,
because readers of the code won't know which class defines a particular static
object.
Used properly, static import makes code more readable by removing class name
repetition.

Setting the CLASSPATH System Variable
To display the current CLASSPATH variable, use these commands in Windows
In Windows: C:\> set CLASSPATH
To delete the current contents of the CLASSPATH variable, use these commands:
In Windows: C:\> set CLASSPATH=
To set the CLASSPATH variable, use these commands (for example):
In Windows: C:\> set CLASSPATH=C:\users\george\java\classes

I/O Streams
An I/O Stream represents an input source or an output destination.
A stream can represent many different kinds of sources and destinations, including
disk files, devices, other programs, and memory arrays.
Streams support many different kinds of data, including simple bytes, primitive data
types, localized characters, and objects.
Some streams simply pass on data; others manipulate and transform the data in
useful ways.
A stream is a sequence of data.

Reading information into a program.
A program uses an output stream to write data to a destination, one item at time:
A program uses an input stream to read data from a source, one item at a time:
Writing information from a program.

For sample input, we'll use the example file input.txt, which contains the
following verse:
A stately pleasure-dome decree:Where Alph, the sacred river, ranThroughcaverns measureless to manDown to a sunless sea.

Byte Streams
Programs use byte streams to perform input and output of 8-bit bytes.
All byte stream classes are descended from InputStream and OutputStream.
There are many byte stream classes.
To demonstrate how byte streams work, we'll focus on the file I/O byte streams,
FileInputStream and FileOutputStream.
Other kinds of byte streams are used in much the same way; they differ mainly in the
way they are constructed.

Using Byte Streams
We'll explore FileInputStream and FileOutputStream by examining an example
program named CopyBytes, which uses byte streams to copy input.txt, one byte
at a time.
import java.io.FileInputStream;import java.io.FileOutputStream;import java.io.IOException;

Using Byte Streams
public class CopyBytes{
public static void main(String[] args) throws IOException{FileInputStream in = null;FileOutputStream out = null;try {in = new FileInputStream("input.txt");out = new FileOutputStream("output.txt");int c;while ((c = in.read()) != -1){
out.write(c);}}

Using Byte Streams
finally{
if (in != null){
in.close();}if (out != null){
out.close();}
}}
}
CopyBytes spends most of its time in a simple loop that reads the input stream and
writes the output stream, one byte at a time, as shown in the figure.

Simple byte stream input and output.
Notice that read() returns an int value.
Using a int as a return type allows read() to use -1 to indicate that it has
reached the end of the stream.

Always Close Streams
Closing a stream when it's no longer needed is very important — so important that
CopyBytes uses a finally block to guarantee that both streams will be closed even if
an error occurs.
This practice helps avoid serious resource leaks.
One possible error is that CopyBytes was unable to open one or both files.
When that happens, the stream variable corresponding to the file never changes
from its initial null value.
That's why CopyBytes makes sure that each stream variable contains an object
reference before invoking close.

When Not to Use Byte Streams
CopyBytes seems like a normal program, but it actually represents a kind of low-
level I/O that you should avoid.
Since input.txt contains character data, the best approach is to use character
streams.
There are also streams for more complicated data types.
Character Streams
The Java platform stores character values using Unicode conventions.
Character stream I/O automatically translates this internal format to and from the
local character set.
For most applications, I/O with character streams is no more complicated than I/O
with byte streams.
Input and output done with stream classes automatically translates to and from the
local character set.

Using Character Streams
All character stream classes are descended from Reader and Writer.
As with byte streams, there are character stream classes that specialize in file I/O:
FileReader and FileWriter.
The CopyCharacters example illustrates these classes.
import java.io.FileReader;import java.io.FileWriter;import java.io.IOException;
public class CopyCharacters{
public static void main(String[] args) throws IOException {FileReader inputStream = null;FileWriter outputStream = null;

Using Character Streamstry {
inputStream = new FileReader("xanadu.txt");outputStream = new FileWriter("characteroutput.txt");int c;
while ((c = inputStream.read()) != -1){
outputStream.write(c);}}finally {
if (inputStream != null){
inputStream.close();}if (outputStream != null){
outputStream.close();}}
}}

Using Character Streams
CopyCharacters is very similar to CopyBytes.
The most important difference is that CopyCharacters uses FileReader and
FileWriter for input and output in place of FileInputStream and FileOutputStream.
Notice that both CopyBytes and CopyCharacters use an int variable to read to and
write from.
However, in CopyCharacters, the int variable holds a character value in its last 16 bits;
in CopyBytes, the int variable holds a byte value in its last 8 bits.

I/O from the Command Line
A program is often run from the command line and interacts with the user in the
command line environment.
The Java platform supports this kind of interaction in two ways:
• Standard Streams and
• Console.

Standard Streams
Standard Streams are a feature of many operating systems.
By default, they read input from the keyboard and write output to the display.
They also support I/O on files and between programs, but that feature is controlled by the
command line interpreter, not the program.
The Java platform supports three Standard Streams:
Standard Input, accessed through System.in;
Standard Output, accessed through System.out; and
Standard Error, accessed through System.err.
These objects are defined automatically and do not need to be opened.
Standard Output and Standard Error are both for output;
By contrast, System.in is a byte stream with no character stream features.
To use Standard Input as a character stream, wrap System.in in InputStreamReader.
InputStreamReader cin = new InputStreamReader(System.in);

The Console
A more advanced alternative to the Standard Streams is the Console.
This is a single, predefined object of type Console that has most of the features
provided by the Standard Streams, and others besides.
The Console is particularly useful for secure password entry.
The Console object also provides input and output streams that are true character
streams, through its reader and writer methods.
Before a program can use the Console, it must attempt to retrieve the Console object
by invoking System.console().
If the Console object is available, this method returns it.
If System.console returns NULL, then Console operations are not permitted, either
because the OS doesn't support them or because the program was launched in a
noninteractive environment.

The Console
The Console object supports secure password entry through its readPasswordmethod.
This method helps secure password entry in two ways.
First, it suppresses echoing, so the password is not visible on the user's
screen.
Second, readPassword returns a character array, not a String, so the
password can be overwritten, removing it from memory as soon as it is no
longer needed

The Password example is a prototype program for changing a user's password.
It demonstrates several Console methods.
import java.io.Console;import java.util.Arrays;import java.io.IOException;
public class Password {public static void main (String args[]) throws IOException
{Console c = System.console();if (c == null) {System.err.println("No console.");System.exit(1);}
String login = c.readLine("Enter your login: ");

The Password example is a prototype program for changing a user's password.
It demonstrates several Console methods.
String login = c.readLine("Enter your login: ");char [] oldPassword = c.readPassword("Enter your old password: ");if (verify(login, oldPassword))
{boolean noMatch;do{
char [] newPassword1 = c.readPassword("Enter your new password: ");char [] newPassword2 = c.readPassword("Enter new password again: ");
noMatch = ! Arrays.equals(newPassword1, newPassword2);if (noMatch){c.format("Passwords don't match. Try again.%n");}else{change(login, newPassword1);c.format("Password for %s changed.%n", login);}

The Password example is a prototype program for changing a user's password.
It demonstrates several Console methods.
Arrays.fill(newPassword1, ' ');Arrays.fill(newPassword2, ' ');} while (noMatch);}Arrays.fill(oldPassword, ' ');}//Dummy verify method.static boolean verify(String login, char[] password){
return true;}//Dummy change method.static void change(String login, char[] password){}
}

Password follows these steps:
1. Attempt to retrieve the Console object. If the object is not available, abort.
2. Invoke Console.readLine to prompt for and read the user's login name.
3. Invoke Console.readPassword to prompt for and read the user's existing
password.
4. Invoke verify to confirm that the user is authorized to change the password.
(In this example, verify is a dummy method that always returns true.)
5. Repeat the following steps until the user enters the same password twice:
a.Invoke Console.readPassword twice to prompt for and read a new
password.
b.If the user entered the same password both times, invoke change to
change it. (Again, change is a dummy method.)
c.Overwrite both passwords with blanks.
6. Overwrite the old password with blanks.

The print and println Methods
Invoking print or println outputs a single value after converting the value using the
appropriate toString method.
We can see this in the Root example:
public class Root {public static void main(String[] args) {
int i = 2;double r = Math.sqrt(i);System.out.print("The square root of ");System.out.print(i); System.out.print(" is ");System.out.print(r);System.out.println(".");i = 5;r = Math.sqrt(i);System.out.println("The square root of " + i + " is " + r +
".");}
}
Here is the output of Root:The square root of 2 is 1.4142135623730951.The square root of 5 is 2.23606797749979.

The format Method
The format method formats multiple arguments based on a format string.
The format string consists of static text embedded with format specifiers; except for
the format specifiers, the format string is output unchanged.
The Root2 example formats two values with a single format invocation:
public class Root2{
public static void main(String[] args){int i = 2;double r = Math.sqrt(i);System.out.format("The square root of %d is %f.%n", i, r);}
}Here is the output:The square root of 2 is 1.414214.

Like the three used in this example, all format specifiers begin with a % and end with
a 1- or 2-character conversion that specifies the kind of formatted output being
generated.
The three conversions used here are:
d formats an integer value as a decimal value. f formats a floating point value as a decimal value. n outputs a platform-specific line terminator.
Here are some other conversions:
x formats an integer as a hexadecimal value. s formats any value as a string. tB formats an integer as a locale-specific month name.

In addition to the conversion, a format specifier can contain several additional
elements that further customize the formatted output.
Here's an example, Format, that uses every possible kind of element.
public class Format {
public static void main(String[] args) {
System.out.format("%f, %1$+020.10f %n", Math.PI); }
}
Here's the output: 3.141593, +00000003.1415926536

The additional elements are all optional. The following figure shows how the longer
specifier breaks down into elements.
Elements of a Format Specifier.

What Is an Exception?
The term exception is shorthand for the phrase "exceptional event."
Definition: An exception is an event, which occurs during the execution of a
program that disrupts the normal flow of the program's instructions.
When an error occurs within a method, the method creates an object and hands it off
to the runtime system.
The object, called an exception object, contains information about the error, including
its type and the state of the program when the error occurred.
Creating an exception object and handing it to the runtime system is called throwing
an exception.
After a method throws an exception, the runtime system attempts to find something
to handle it.
The set of possible "somethings" to handle the exception is the ordered list of
methods that had been called to get to the method where the error occurred.
The list of methods is known as the call stack (see the next figure).

The call stack.
The runtime system searches the call stack for a method that contains a block of
code that can handle the exception.
This block of code is called an exception handler.

The search begins with the method in which the error occurred and
proceeds through the call stack in the reverse order in which the methods
were called.
When an appropriate handler is found, the runtime system passes the
exception to the handler.
An exception handler is considered appropriate if the type of the exception
object thrown matches the type that can be handled by the handler.
The exception handler chosen is said to catch the exception.
If the runtime system searches all the methods on the call stack without
finding an appropriate exception handler, as shown in the next figure, the
runtime system (and, consequently, the program) terminates.

Searching the call stack for the exception handler.

The Three Kinds of Exceptions
The first kind of exception is the checked exception.
For example, suppose an application prompts a user for an input file
name, then opens the file by passing the name to the constructor for
java.io.FileReader.
Normally, the user provides the name of an existing, readable file, so the
construction of the FileReader object succeeds, and the execution of the
application proceeds normally.
But sometimes the user supplies the name of a nonexistent file, and the
constructor throws java.io.FileNotFoundException.
A well-written program will catch this exception and notify the user of the
mistake, possibly prompting for a corrected file name.
Checked exceptions are subject to the Catch or Specify Requirement.
All exceptions are checked exceptions, except for those indicated by Error,
RuntimeException, and their subclasses.

The second kind of exception is the error.
These are exceptional conditions that are external to the application, and
that the application usually cannot anticipate or recover from.
For example, suppose that an application successfully opens a file for
input, but is unable to read the file because of a hardware or system
error function.
The unsuccessful read will throw java.io.IOError.
An application might choose to catch this exception, in order to notify the
user of the problem — but it also might make sense for the program to print
a stack trace and exit.
Errors are not subject to the Catch or Specify Requirement.
Errors are those exceptions indicated by Error and its subclasses.

The third kind of exception is the runtime exception.
These are exceptional conditions that are internal to the application, and
that the application usually cannot anticipate or recover from.
These usually indicate programming bugs, such as logic errors or improper
use of an API.
For example, consider the application described previously that passes a
file name to the constructor for FileReader.
If a logic error causes a null to be passed to the constructor, the constructor
will throw NullPointerException.
The application can catch this exception, but it probably makes more sense
to eliminate the bug that caused the exception to occur.
Runtime exceptions are not subject to the Catch or Specify Requirement.
Runtime exceptions are those indicated by RuntimeException and its
subclasses.
Errors and runtime exceptions are collectively known as unchecked
exceptions.

Catching and Handling Exceptions
The following example defines and implements a class named ListOfNumbers.
When constructed, ListOfNumbers creates a Vector that contains 10 Integer
elements with sequential values 0 through 9.
The ListOfNumbers class also defines a method named writeList, which writes the
list of numbers into a text file called OutFile.txt.

//Note: This class won't compile by design!
import java.io.*;import java.util.Vector;
public class ListOfNumbers {private Vector vector;private static final int SIZE = 10;public ListOfNumbers (){
vector = new Vector(SIZE);for (int i = 0; i < SIZE; i++) {
vector.addElement(new Integer(i));}
}public void writeList() {PrintWriter out = new PrintWriter(new FileWriter("OutFile.txt"));for (int i = 0; i < SIZE; i++) {out.println("Value at: " + i + " = " +
vector.elementAt(i));}out.close();}
}

The constructor initializes an output stream on a file.
If the file cannot be opened, the constructor throws an IOException.
The second boldface line is a call to the Vector class's elementAt method,
which throws an ArrayIndexOutOfBoundsException if the value of its
argument is too small (less than 0) or too large (more than the number of
elements currently contained by the Vector).
If you try to compile the ListOfNumbers class, the compiler prints an error
message about the exception thrown by the FileWriter constructor.
However, it does not display an error message about the exception thrown
by elementAt.
The reason is that the exception thrown by the constructor, IOException, is
a checked exception, and the one thrown by the elementAt method,
ArrayIndexOutOfBoundsException, is an unchecked exception.

The try Block
The first step in constructing an exception handler is to enclose the code that might
throw an exception within a try block. In general, a try block looks like the following.
try {code
}catch and finally blocks . . .
The segment in the example labeled code contains one or more legal lines
of code that could throw an exception.
To construct an exception handler for the writeList method from the
ListOfNumbers class, enclose the exception-throwing statements of the
writeList method within a try block.

The following listing uses one try block for the entire method because the code in
question is very short.
private Vector vector;private static final int SIZE = 10;PrintWriter out = null;try {
System.out.println("Entered try statement");out = new PrintWriter(new FileWriter("OutFile.txt"));for (int i = 0; i < SIZE; i++){out.println("Value at: " + i + " = "+ vector.elementAt(i));}
}catch and finally statements . . .
If an exception occurs within the try block, that exception is handled by an
exception handler associated with it.
To associate an exception handler with a try block, you must put a catch
block after it.

The catch Blocks
You associate exception handlers with a try block by providing one or more catch
blocks directly after the try block.
No code can be between the end of the try block and the beginning of the first catch
block.
try {
}catch (ExceptionType name){}catch (ExceptionType name){}
Each catch block is an exception handler and handles the type of exception indicated
by its argument.

The catch Blocks
The following are two exception handlers for the writeList method — one for two
types of checked exceptions that can be thrown within the try statement.
try {
}catch (FileNotFoundException e) {
System.err.println("FileNotFoundException: " + e.getMessage());
}catch (IOException e) {
System.err.println("Caught IOException: " + e.getMessage());
}
The second handler does nothing else. By catching any IOException that's not
caught by the first handler, it allows the program to continue executing.

The finally Block
The finally block always executes when the try block exits.
But finally is useful for more than just exception handling it allows the programmer to
avoid having cleanup code accidentally bypassed by a return, continue, or break.
Putting cleanup code in a finally block is always a good practice, even when no
exceptions are anticipated.
The try block of the writeList method that you've been working with here opens a
PrintWriter.
The program should close that stream before exiting the writeList method.
This poses a somewhat complicated problem because writeList's try block can exit in
one of three ways.
The new FileWriter statement fails and throws an IOException.
The vector.elementAt(i) statement fails and throws an
ArrayIndexOutOfBoundsException.

The finally Block
Everything succeeds and the try block exits normally.
The runtime system always executes the statements within the finally block
regardless of what happens within the try block. So it's the perfect place to perform
cleanup.
The following finally block for the writeList method cleans up and then closes the
PrintWriter.
finally{
if (out != null) {System.out.println("Closing PrintWriter");out.close();}
else{System.out.println("PrintWriter not open");}
}

When all the components are put together, the writeList method looks like the
following.
public void writeList(){
PrintWriter out = null;try{
System.out.println("Entering try statement");out = new PrintWriter(new FileWriter("OutFile.txt"));for (int i = 0; i < SIZE; i++)
out.println("Value at: " + i + " = "+ vector.elementAt(i));}catch (ArrayIndexOutOfBoundsException e) {
System.err.println("Caught "+"ArrayIndexOutOfBoundsException: “ +
e.getMessage());}catch (IOException e) {System.err.println("Caught IOException: "+ e.getMessage());}

catch (IOException e) {System.err.println("Caught IOException: "+ e.getMessage());}
finally{
if (out != null) {System.out.println("Closing PrintWriter");
out.close();}else{System.out.println("PrintWriter not open");}
}}

To specify that writeList can throw two exceptions, add a throws clause to the
method declaration for the writeList method.
The throws clause comprises the throws keyword followed by a comma-separated
list of all the exceptions thrown by that method.
The clause goes after the method name and argument list and before the brace that
defines the scope of the method;
here's an example.
public void writeList()throws IOException, ArrayIndexOutOfBoundsException {
Remember that ArrayIndexOutOfBoundsException is an unchecked exception;
including it in the throws clause is not mandatory. You could just write the following.
public void writeList() throws IOException {

Getting Familiar with your JSP server
If you do not have a JSP capable web-server or application server, the first step is to
download one.
There are many such servers available, most of which can be downloaded for free evaluation
and/or development.
Some of them are:
Blazix from Desiderata Software (1.5 Megabytes, JSP, Servlets and EJBs)
TomCat from Apache (Approx 6 Megabytes)
WebLogic from BEA Systems (Approx 40 Megabytes, JSP, Servlets and EJBs)
WebSphere from IBM (Approx 100 Megabytes, JSP, Servlets and EJBs)
Once you have a JSP capable web-server or application server, you need to know the
following information about it:
Where to place the files
How to access the files from your browser (with an http: prefix, not as file:)

Getting Familiar with your JSP server
You should be able to create a simple file, such as
<HTML>
<BODY>
Hello, world
</BODY>
</HTML>
Know where to place this file and how
to see it in your browser with an http:// prefix.

Your first JSP
JSP simply puts Java inside HTML pages. You can take any existing HTML page and change
its extension to ".jsp" instead of ".html".
In fact, this is the perfect exercise for your first JSP.
Take the HTML file you used in the previous exercise. Change its extension from ".html" to
".jsp". Now load the new file, with the ".jsp" extension, in your browser.
You will see the same output, but it will take longer! But only the first time. If you reload it
again, it will load normally.
What is happening behind the scenes is that your JSP is being turned into a Java file,
compiled and loaded.
This compilation only happens once, so after the first load, the file doesn't take long to load
anymore. (But everytime you change the JSP file, it will be re-compiled again.)
Of course, it is not very useful to just write HTML pages with a .jsp extension! We now
proceed to see what makes JSP so useful.

Adding dynamic content via expressions
As we saw in the previous section, any HTML file can be turned into a JSP file by changing
its extension to .jsp.
Put the following text in a file with .jsp extension (let us call it hello.jsp), place it in your JSP
directory, and view it in a browser.
<HTML>
<BODY>
Hello! The time is now <%= new java.util.Date() %>
</BODY>
</HTML>
Notice that each time you reload the page in the browser, it comes up with the current time.
The character sequences <%= and %> enclose Java expressions, which are evaluated at run
time.
This is what makes it possible to use JSP to generate dyamic HTML pages that change in
response to user actions or vary from user to user.

Scriptlets
We have already seen how to embed Java expressions in JSP pages by putting them between
the <%= and %> character sequences.
But it is difficult to do much programming just by putting Java expressions inside HTML.
JSP also allows you to write blocks of Java code inside the JSP.
You do this by placing your Java code between <% and %> characters (just like expressions,
but without the = sign at the start of the sequence.)
This block of code is known as a "scriptlet".
By itself, a scriptlet doesn't contribute any HTML. A scriptlet contains Java code that is
executed every time the JSP is invoked.

Scriptlets
Here is a modified version of our JSP from previous section, adding in a scriptlet.
<HTML>
<BODY>
<% // This is a scriptlet. Notice that the "date"
// variable we declare here is available in the
// embedded expression later on.
System.out.println( "Evaluating date now" );
java.util.Date date = new java.util.Date();
%>
Hello! The time is now <%= date %>
</BODY>
</HTML>
If you run the above example, you will notice the output from the "System.out.println" on the
server log.

Scriptlets
By itself a scriptlet does not generate HTML. If a scriptlet wants to generate HTML, it can
use a variable called "out".
This variable does not need to be declared.
It is already predefined for scriptlets, along with some other variables.
The following example shows how the scriptlet can generate HTML output.
<HTML>
<BODY>
<% // This scriptlet declares and initializes "date"
System.out.println( "Evaluating date now" );
java.util.Date date = new java.util.Date();
%>

Scriptlets
Hello! The time is now
<%
// This scriptlet generates HTML output
out.println( String.valueOf( date ));
%>
</BODY>
</HTML>
The JSP "request" variable is used to obtain information from the request as sent by the
browser.
For instance, you can find out the name of the client's host (if available, otherwise the IP
address will be returned.)

Scriptlets
Let us modify the code as shown:
<HTML>
<BODY>
<%
// This scriptlet declares and initializes "date"
System.out.println( "Evaluating date now" );
java.util.Date date = new java.util.Date();
%>
Hello! The time is now
<%
out.println( date );
out.println( "<BR>Your machine's address is " );
out.println( request.getRemoteHost());
%>
</BODY>
</HTML>

Mixing Scriptlets and HTML
We have already seen how to use the "out" variable to generate HTML output from within a
scriptlet.
For more complicated HTML, using the out variable all the time loses some of the
advantages of JSP programming.
It is simpler to mix scriptlets and HTML.
Suppose you have to generate a table in HTML.
This is a common operation, and you may want to generate a table from a SQL table, or from
the lines of a file.
But to keep our example simple, we will generate a table containing the numbers from 1 to
N.
Not very useful, but it will show you the technique.

Mixing Scriptlets and HTMLHere is the JSP fragment to do it:
<TABLE BORDER=2>
<%
for ( int i = 0; i < n; i++ ) {
%>
<TR>
<TD>Number</TD>
<TD><%= i+1 %></TD>
</TR>
<% }%>
</TABLE>
You would have to supply an int variable "n" before it will work, and then it will output a
simple table with "n" rows.

Mixing Scriptlets and HTMLAnother example of mixing scriptlets and HTML is shown here it is assumed that there is a
boolean variable named "hello" available. If you set it to true, you will see one output, if
you set it to false, you will see another output.
<%
if ( hello ) {
%>
<P>Hello, world
<% }
else
{
%>
<P>Goodbye, world
<%
}
%>
It is a little difficult to keep track of all open braces and scriptlet start and ends, but with a
little practice and some good formatting discipline, you will acquire competence in doing it.

JSP DirectivesWe have been fully qualifying the java.util.Date in the examples in the previous sections.
Perhaps you wondered why we don't just import java.util.*;
It is possible to use "import" statements in JSPs, but the syntax is a little different
from normal Java.
Try the following example:
<%@ page import="java.util.*" %>
<HTML>
<BODY>
<%
System.out.println( "Evaluating date now" );
Date date = new Date();
%>
Hello! The time is now
<%= date %>
</BODY>
</HTML>

JSP Directives
The first line in the above example is called a "directive".
A JSP "directive" starts with <%@ characters.
This one is a "page directive".
The page directive can contain the list of all imported packages.
To import more than one item, separate the package names by commas, e.g.
<%@ page import="java.util.*,java.text.*" %>
There are a number of JSP directives, besides the page directive.
Besides the page directives, the other most useful directives are include and
taglib.

JSP DirectivesWe will be covering taglib separately.
The include directive is used to physically include the contents of another file.
The included file can be HTML or JSP or anything else -- the result is as if the
original JSP file actually contained the included text.
To see this directive in action, create a new JSP
<HTML>
<BODY>
Going to include hello.jsp...<BR>
<%@ include file="hello.jsp" %>
</BODY>
</HTML>
View this JSP in your browser, and you will see your original hello.jsp get included
in the new JSP.

JSP DeclarationsThe JSP you write turns into a class definition. All the scriptlets you write are placed inside
a single method of this class.
You can also add variable and method declarations to this class. You can then use these
variables and methods from your scriptlets and expressions.
To add a declaration, you must use the <%! and %> sequences to enclose your
declarations, as shown below.
<%@ page import="java.util.*" %>
<HTML>
<BODY>
<%! Date theDate = new Date();
Date getDate()
{
System.out.println( "In getDate() method" );
return theDate;
}
%>
Hello! The time is now <%= getDate() %>
</BODY>
</HTML>

JSP Declarations
The example has been created a little contrived, to show variable and method declarations.
Here we are declaring a Date variable theDate, and the method getDate.
Both of these are available now in our scriptlets and expressions.
But this example no longer works! The date will be the same, no matter how often you
reload the page.
This is because these are declarations, and will only be evaluated once when the page is
loaded! (Just as if you were creating a class and had variable initialization declared in it.)

JSP Sessions
On a typical web site, a visitor might visit several pages and perform several interactions.
If you are programming the site, it is very helpful to be able to associate some data with
each visitor. For this purpose, "session"s can be used in JSP.
A session is an object associated with a visitor. Data can be put in the session and
retrieved from it.
A different set of data is kept for each visitor to the site.
Here is a set of pages that put a user's name in the session, and display it elsewhere. Try
out installing and using these.

JSP SessionsFirst we have a form, let us call it GetName.html
<HTML>
<BODY>
<FORM METHOD=POST ACTION="SaveName.jsp">
What's your name? <INPUT TYPE=TEXT NAME=username SIZE=20>
<P>
<INPUT TYPE=SUBMIT>
</FORM>
</BODY>
</HTML>
The target of the form is "SaveName.jsp", which saves the user's name in the session.
Note the variable "session".
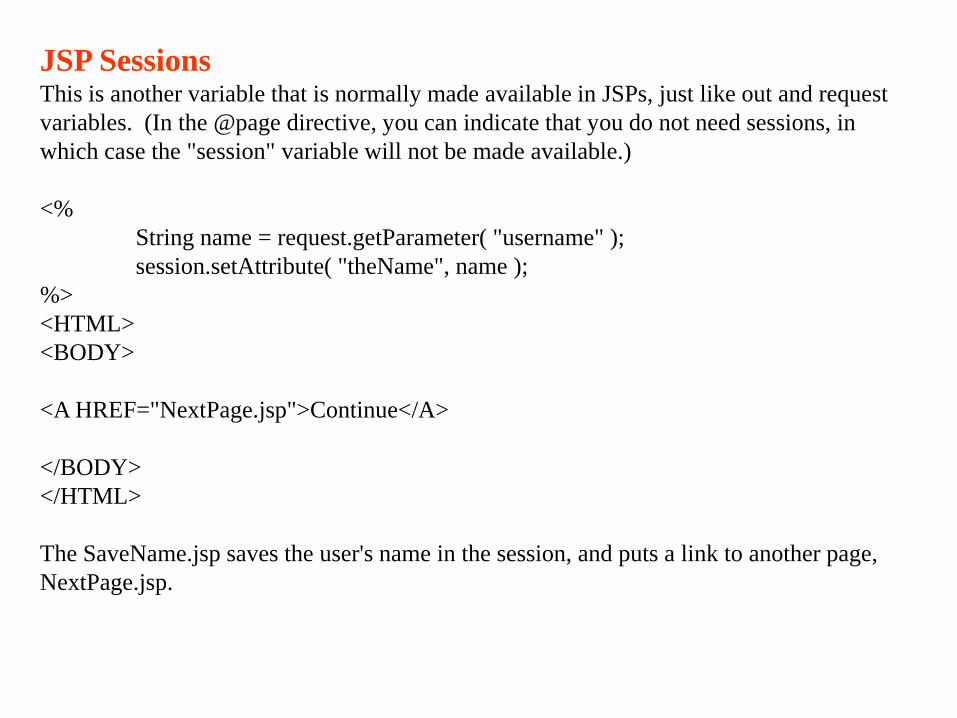
JSP SessionsThis is another variable that is normally made available in JSPs, just like out and request
variables. (In the @page directive, you can indicate that you do not need sessions, in
which case the "session" variable will not be made available.)
<%
String name = request.getParameter( "username" );
session.setAttribute( "theName", name );
%>
<HTML>
<BODY>
<A HREF="NextPage.jsp">Continue</A>
</BODY>
</HTML>
The SaveName.jsp saves the user's name in the session, and puts a link to another page,
NextPage.jsp.

JSP Sessions
NextPage.jsp shows how to retrieve the saved name.
<HTML>
<BODY>
Hello, <%= session.getAttribute( "theName" ) %>
</BODY>
</HTML>
If you bring up two different browsers (not different windows of the same browser), or run
two browsers from two different machines, you can put one name in one browser and
another name in another browser, and both names will be kept track of.
The session is kept around until a timeout period. Then it is assumed the user is no longer
visiting the site, and the session is discarded.

Beans and Form processing
Forms are a very common method of interactions in web sites. JSP makes forms processing
specially easy.
The standard way of handling forms in JSP is to define a "bean".
This is not a full Java bean.
You just need to define a class that has a field corresponding to each field in the form.
The class fields must have "setters" that match the names of the form fields.
For instance, let us modify our GetName.html to also collect email address and age.

Beans and Form processingThe new version of GetName.html is
<HTML>
<BODY>
<FORM METHOD=POST ACTION="SaveName.jsp">
What's your name? <INPUT TYPE=TEXT NAME=username SIZE=20><BR>
What's your e-mail address? <INPUT TYPE=TEXT NAME=email SIZE=20><BR>
What's your age? <INPUT TYPE=TEXT NAME=age SIZE=4>
<P><INPUT TYPE=SUBMIT>
</FORM>
</BODY>
</HTML>
To collect this data, we define a Java class with fields "username", "email" and "age" and we
provide setter methods "setUsername", "setEmail" and "setAge", as shown.
A "setter" method is just a method that starts with "set" followed by the name of the field.
The first character of the field name is upper-cased. So if the field is "email", its "setter"
method will be "setEmail".

Beans and Form processing
Getter methods are defined similarly, with "get" instead of "set". Note that the setters (and
getters) must be public.
package user;public
class UserData
{
String username;
String email;
int age;
public void setUsername( String value )
{ username = value; }
public void setEmail( String value )
{ email = value; }
public void setAge( int value )
{ age = value; }
public String getUsername()
{ return username; }
public String getEmail()
{ return email; }
public int getAge() { return age; }
}

Beans and Form processing
The method names must be exactly as shown. Once you have defined the class, compile it
and make sure it is available in the web-server's classpath.
The server may also define special folders where you can place bean classes, e.g. with Blazix
you can place them in the "classes" folder.
If you have to change the classpath, the web-server would need to be stopped and restarted if
it is already running.
Note that we are using the package name user, therefore the file UserData.class must be
placed in a folder named user under the classpath entry.
Now let us change "SaveName.jsp" to use a bean to collect the data.
<jsp:useBean id="user" class="user.UserData" scope="session"/>
<jsp:setProperty name="user" property="*"/>
<HTML>
<BODY>
<A HREF="NextPage.jsp">Continue</A>
</BODY>
</HTML>

Beans and Form processing
All we need to do now is to add the jsp:useBean tag and the jsp:setProperty tag!
The useBean tag will look for an instance of the "user.UserData" in the session.
If the instance is already there, it will update the old instance.
Otherwise, it will create a new instance of user.UserData (the instance of the user.UserData
is called a bean), and put it in the session.
The setProperty tag will automatically collect the input data, match names against the bean
method names, and place the data in the bean!
Let us modify NextPage.jsp to retrieve the data from bean..
<jsp:useBean id="user" class="user.UserData" scope="session"/>
<HTML>
<BODY>
You entered<BR>Name: <%= user.getUsername() %><BR>
Email: <%= user.getEmail() %><BR>
Age: <%= user.getAge() %><BR>
</BODY>
</HTML>

Beans and Form processing
Notice that the same useBean tag is repeated. The bean is available as the variable named
"user" of class "user.UserData". The data entered by the user is all collected in the bean.
We do not actually need the "SaveName.jsp", the target of GetName.html could have been
NextPage.jsp, and the data would still be available the same way as long as we added a
jsp:setProperty tag.
But in the next tutorial, we will actually use SaveName.jsp as an error handler that
automatically forwards the request to NextPage.jsp, or asks the user to correct the erroneous
data.