


Intermediate Perl By brian d foy, Tom Phoenix, Randal L ...
431
Intermediate Perl By brian d foy, Tom Phoenix, Randal L. Schwartz ............................................... Publisher: O'Reilly Pub Date: March 2006 Print ISBN-10: 0-596-10206-2 Print ISBN-13: 978-0-59-610206-7 Pages: 278 Table of Contents | Index Perl is a versatile, powerful programming language used in a variety of disciplines, ranging from system administration to web programming to database manipulation. One slogan of Perl is that it makes easy things easy and hard things possible. Intermediate Perl is about making the leap from the easy things to the hard ones. Originally released in 2003 as Learning Perl Objects, References, and Modules and revised and updated for Perl 5.8, this book offers a gentle but thorough introduction to intermediate programming in Perl. Written by the authors of the best-selling Learning Perl , it picks up where that book left off. Topics include: Packages and namespaces References and scoping Manipulating complex data structures Object-oriented programming Writing and using modules Testing Perl code Contributing to CPAN Following the successful format of Learning Perl , we designed each chapter in the book to be small enough to be read in just an hour or two, ending with a series of exercises to help you practice
-
Upload
khangminh22 -
Category
Documents
-
view
0 -
download
0
Transcript of Intermediate Perl By brian d foy, Tom Phoenix, Randal L ...

Intermediate Perl
By brian d foy, Tom Phoenix, Randal L. Schwartz
...............................................
Publisher: O'Reilly
Pub Date: March 2006
Print ISBN-10: 0-596-10206-2
Print ISBN-13: 978-0-59-610206-7
Pages: 278
Table of Contents | Index
Perl is a versatile, powerful programming language used in a variety of disciplines, ranging fromsystem administration to web programming to database manipulation. One slogan of Perl is that itmakes easy things easy and hard things possible. Intermediate Perl is about making the leap fromthe easy things to the hard ones.
Originally released in 2003 as Learning Perl Objects, References, and Modules and revised andupdated for Perl 5.8, this book offers a gentle but thorough introduction to intermediateprogramming in Perl. Written by the authors of the best-selling Learning Perl, it picks up where thatbook left off. Topics include:
Packages and namespaces
References and scoping
Manipulating complex data structures
Object-oriented programming
Writing and using modules
Testing Perl code
Contributing to CPAN
Following the successful format of Learning Perl, we designed each chapter in the book to be smallenough to be read in just an hour or two, ending with a series of exercises to help you practice

what you've learned. To use the book, you just need to be familiar with the material in LearningPerl and have ambition to go further.
Perl is a different language to different people. It is a quick scripting tool for some, and a fully-featured object-oriented language for others. It is used for everything from performing quick globalreplacements on text files, to crunching huge, complex sets of scientific data that take weeks toprocess. Perl is what you make of it. But regardless of what you use Perl for, this book helps you doit more effectively, efficiently, and elegantly.
Intermediate Perl is about learning to use Perl as a programming language, and not just a scriptinglanguage. This is the book that turns the Perl dabbler into the Perl programmer.

Intermediate Perl
By brian d foy, Tom Phoenix, Randal L. Schwartz
...............................................
Publisher: O'Reilly
Pub Date: March 2006
Print ISBN-10: 0-596-10206-2
Print ISBN-13: 978-0-59-610206-7
Pages: 278
Table of Contents | Index
Intermediate Perl
Foreword
Preface
Structure of This Book
Conventions Used in This Book
Using Code Examples
Comments and Questions
Safari® Enabled
Acknowledgments
Chapter 1. Introduction
Section 1.1. What Should You Know Already?
Section 1.2. What About All Those Footnotes?
Section 1.3. What's with the Exercises?
Section 1.4. What If I'm a Perl Course Instructor?
Chapter 2. Intermediate Foundations
Section 2.1. List Operators
Section 2.2. Trapping Errors with eval
Section 2.3. Dynamic Code with eval
Section 2.4. Exercises
Chapter 3. Using Modules
Section 3.1. The Standard Distribution
Section 3.2. Using Modules
Section 3.3. Functional Interfaces
Section 3.4. Selecting What to Import
Section 3.5. Object-Oriented Interfaces
Section 3.6. A More Typical Object-Oriented Module: Math::BigInt
Section 3.7. The Comprehensive Perl Archive Network
Section 3.8. Installing Modules from CPAN
Section 3.9. Setting the Path at the Right Time
Section 3.10. Exercises
Chapter 4. Introduction to References
Section 4.1. Performing the Same Task on Many Arrays

Section 4.2. Taking a Reference to an Array
Section 4.3. Dereferencing the Array Reference
Section 4.4. Getting Our Braces Off
Section 4.5. Modifying the Array
Section 4.6. Nested Data Structures
Section 4.7. Simplifying Nested Element References with Arrows
Section 4.8. References to Hashes
Section 4.9. Exercises
Chapter 5. References and Scoping
Section 5.1. More Than One Reference to Data
Section 5.2. What If That Was the Name?
Section 5.3. Reference Counting and Nested Data Structures
Section 5.4. When Reference Counting Goes Bad
Section 5.5. Creating an Anonymous Array Directly
Section 5.6. Creating an Anonymous Hash
Section 5.7. Autovivification
Section 5.8. Autovivification and Hashes
Section 5.9. Exercises
Chapter 6. Manipulating Complex Data Structures
Section 6.1. Using the Debugger to View Complex Data
Section 6.2. Viewing Complex Data with Data::Dumper
Section 6.3. YAML
Section 6.4. Storing Complex Data with Storable
Section 6.5. Using the map and grep Operators
Section 6.6. Applying a Bit of Indirection
Section 6.7. Selecting and Altering Complex Data
Section 6.8. Exercises
Chapter 7. Subroutine References
Section 7.1. Referencing a Named Subroutine
Section 7.2. Anonymous Subroutines
Section 7.3. Callbacks
Section 7.4. Closures
Section 7.5. Returning a Subroutine from a Subroutine
Section 7.6. Closure Variables as Inputs
Section 7.7. Closure Variables as Static Local Variables
Section 7.8. Exercise
Chapter 8. Filehandle References
Section 8.1. The Old Way
Section 8.2. The Improved Way
Section 8.3. The Even Better Way
Section 8.4. IO::Handle
Section 8.5. Directory Handle References
Section 8.6. Exercises
Chapter 9. Practical Reference Tricks
Section 9.1. Review of Sorting
Section 9.2. Sorting with Indices

Section 9.3. Sorting Efficiently
Section 9.4. The Schwartzian Transform
Section 9.5. Multi-Level Sort with the Schwartzian Transform
Section 9.6. Recursively Defined Data
Section 9.7. Building Recursively Defined Data
Section 9.8. Displaying Recursively Defined Data
Section 9.9. Exercises
Chapter 10. Building Larger Programs
Section 10.1. The Cure for the Common Code
Section 10.2. Inserting Code with eval
Section 10.3. Using do
Section 10.4. Using require
Section 10.5. require and @INC
Section 10.6. The Problem of Namespace Collisions
Section 10.7. Packages as Namespace Separators
Section 10.8. Scope of a Package Directive
Section 10.9. Packages and Lexicals
Section 10.10. Exercises
Chapter 11. Introduction to Objects
Section 11.1. If We Could Talk to the Animals...
Section 11.2. Introducing the Method Invocation Arrow
Section 11.3. The Extra Parameter of Method Invocation
Section 11.4. Calling a Second Method to Simplify Things
Section 11.5. A Few Notes About @ISA
Section 11.6. Overriding the Methods
Section 11.7. Starting the Search from a Different Place
Section 11.8. The SUPER Way of Doing Things
Section 11.9. What to Do with @_
Section 11.10. Where We Are So Far...
Section 11.11. Exercises
Chapter 12. Objects with Data
Section 12.1. A Horse Is a Horse, of Course of Courseor Is It?
Section 12.2. Invoking an Instance Method
Section 12.3. Accessing the Instance Data
Section 12.4. How to Build a Horse
Section 12.5. Inheriting the Constructor
Section 12.6. Making a Method Work with Either Classes or Instances
Section 12.7. Adding Parameters to a Method
Section 12.8. More Interesting Instances
Section 12.9. A Horse of a Different Color
Section 12.10. Getting Our Deposit Back
Section 12.11. Don't Look Inside the Box
Section 12.12. Faster Getters and Setters
Section 12.13. Getters That Double as Setters
Section 12.14. Restricting a Method to Class-Only or Instance-Only
Section 12.15. Exercise

Chapter 13. Object Destruction
Section 13.1. Cleaning Up After Yourself
Section 13.2. Nested Object Destruction
Section 13.3. Beating a Dead Horse
Section 13.4. Indirect Object Notation
Section 13.5. Additional Instance Variables in Subclasses
Section 13.6. Using Class Variables
Section 13.7. Weakening the Argument
Section 13.8. Exercise
Chapter 14. Some Advanced Object Topics
Section 14.1. UNIVERSAL Methods
Section 14.2. Testing Our Objects for Good Behavior
Section 14.3. AUTOLOAD as a Last Resort
Section 14.4. Using AUTOLOAD for Accessors
Section 14.5. Creating Getters and Setters More Easily
Section 14.6. Multiple Inheritance
Section 14.7. Exercises
Chapter 15. Exporter
Section 15.1. What use Is Doing
Section 15.2. Importing with Exporter
Section 15.3. @EXPORT and @EXPORT_OK
Section 15.4. %EXPORT_TAGS
Section 15.5. Exporting in a Primarily OO Module
Section 15.6. Custom Import Routines
Section 15.7. Exercises
Chapter 16. Writing a Distribution
Section 16.1. There's More Than One Way To Do It
Section 16.2. Using h2xs
Section 16.3. Embedded Documentation
Section 16.4. Controlling the Distribution with Makefile.PL
Section 16.5. Alternate Installation Locations (PREFIX=...)
Section 16.6. Trivial make test
Section 16.7. Trivial make install
Section 16.8. Trivial make dist
Section 16.9. Using the Alternate Library Location
Section 16.10. Exercise
Chapter 17. Essential Testing
Section 17.1. More Tests Mean Better Code
Section 17.2. A Simple Test Script
Section 17.3. The Art of Testing
Section 17.4. The Test Harness
Section 17.5. Writing Tests with Test::More
Section 17.6. Testing Object-Oriented Features
Section 17.7. A Testing To-Do List
Section 17.8. Skipping Tests
Section 17.9. More Complex Tests (Multiple Test Scripts)
Section 17.10. Exercise
Chapter 18. Advanced Testing
Section 18.1. Testing Large Strings
Section 18.2. Testing Files
Section 18.3. Testing STDOUT or STDERR
Section 18.4. Using Mock Objects
Section 18.5. Testing POD
Section 18.6. Coverage Testing
Section 18.7. Writing Your Own Test::* Modules
Section 18.8. Exercises
Chapter 19. Contributing to CPAN
Section 19.1. The Comprehensive Perl Archive Network
Section 19.2. Getting Prepared
Section 19.3. Preparing Your Distribution
Section 19.4. Uploading Your Distribution
Section 19.5. Announcing the Module
Section 19.6. Testing on Multiple Platforms
Section 19.7. Consider Writing an Article or Giving a Talk
Section 19.8. Exercise
Appendix A. Answers to Exercises
Section A.1. Answers for Chapter 2
Section A.2. Answers for Chapter 3
Section A.3. Answers for Chapter 4
Section A.4. Answers for Chapter 5
Section A.5. Answers for Chapter 6
Section A.6. Answer for Chapter 7
Section A.7. Answers for Chapter 8
Section A.8. Answers for Chapter 9
Section A.9. Answers for Chapter 10
Section A.10. Answers for Chapter 11
Section A.11. Answer for Chapter 12
Section A.12. Answer for Chapter 13
Section A.13. Answers for Chapter 14
Section A.14. Answers for Chapter 15
Section A.15. Answer for Chapter 16
Section A.16. Answer for Chapter 17
Section A.17. Answers for Chapter 18
Section A.18. Answer for Chapter 19
About the Author
Colophon
Index

Intermediate Perlby Randal L. Schwartz, brian d foy, and Tom Phoenix
Copyright (c) 2006, 2003 O'Reilly Media, Inc. All rights reserved.
Printed in the United States of America.
Published by O'Reilly Media, Inc., 1005 Gravenstein Highway North, Sebastopol, CA 95472.
O'Reilly books may be purchased for educational, business, or sales promotional use. Online editionsare also available for most titles (safari.oreilly.com). For more information, contact ourcorporate/institutional sales department: (800) 998-9938 or [email protected].
Editors: Allison Randal and Tatiana Apandi
Production Editor: Darren Kelly
Copyeditor: Chris Downey
Proofreader: Nancy Reinhardt
Indexer: Angela Howard
Cover Designer: Karen Montgomery
Interior Designer: David Futato
Illustrators: Robert Romano, Jessamyn Read, and Lesley Borash
Printing History:
June 2003: First Edition, published as Learning Perl Objects, References & Modules.
March 2006: Second Edition.
Nutshell Handbook, the Nutshell Handbook logo, and the O'Reilly logo are registered trademarks ofO'Reilly Media, Inc. Intermediate Perl, the image of an alpaca, and related trade dress aretrademarks of O'Reilly Media, Inc.
Many of the designations used by manufacturers and sellers to distinguish their products are claimedas trademarks. Where those designations appear in this book, and O'Reilly Media, Inc. was aware ofa trademark claim, the designations have been printed in caps or initial caps.
While every precaution has been taken in the preparation of this book, the publisher and authorsassume no responsibility for errors or omissions, or for damages resulting from the use of theinformation contained herein.

ForewordPerl's object-oriented (OO) mechanism is classic prestidigitation. It takes a collection of Perl's existingnon-OO features, such as packages, references, hashes, arrays, subroutines, and modules, andthenwith nothing up its sleevemanages to conjure up fully functional objects, classes, and methods,seemingly out of nowhere.
That's a great trick. It means you can build on your existing Perl knowledge and ease your way intoOO Perl development, without first needing to conquer a mountain of new syntax or navigate anocean of new techniques. It also means you can progressively fine-tune OO Perl to meet your ownneeds, by selecting from the existing constructs the one that best suits your task.
But there's a problem. Since Perl co-opts packages, references, hashes, arrays, subroutines, andmodules as the basis for its OO mechanism, to use OO Perl you already need to understandpackages, references, hashes, arrays, subroutines, and modules.
And there's the rub. The learning curve hasn't been eliminated; it's merely been pushed back half adozen steps.
So then, how are you going to learn everything you need to know about non-OO Perl so you can startto learn everything you need to know about OO Perl?
This book is the answer. In the following pages, Randal draws on two decades of using Perl, and fourdecades of watching Gilligan's Island and Mr. Ed, to explain each of the components of Perl thatcollectively underpin its OO features. And, better still, he then goes on to show exactly how tocombine those components to create useful classes and objects.
So if you still feel like Gilligan when it comes to Perl's objects, references, and modules, this book isjust what the Professor ordered.
And that's straight from the horse's mouth.
Damian Conway, May 2003

PrefaceOver a decade ago (nearly eternity in Internet Time), Randal Schwartz wrote the first edition ofLearning Perl. In the intervening years, Perl itself has grown substantially from a "cool" scriptinglanguage used primarily by Unix system administrators to a robust object-oriented programming(OOP) language that runs on practically every computing platform known to mankind.
Throughout its four editions, Learning Perl remained the same size (about 300 pages) and continuedto cover much of the same material to remain compact and accessible to the beginning programmer.But there is much more to learn about Perl now than when that first book was written.
Randal called the first edition of this book Learning Perl Objects, References, and Modules, and nowit's Intermediate Perl, but we like to think of it as just Learning More Perl.[*] This is the book thatpicks up where Learning Perl leaves off. We show you how to use Perl to write larger programs.
[*] Don't ask why it isn't called that. We must have had 300 emails on the subject. Okay, ask, since we know you're going to
anyway. You never really stop learning Perl, so Learning More Perl doesn't really tell you much about the book. Our editor chose
the name, which tells you what to expect.
As in Learning Perl, we designed each chapter to be small enough to read in just an hour or so. Eachchapter ends with a series of exercises to help you practice what you've just learned, and theanswers are in the appendix for your reference. And like Learning Perl, we've developed the materialin this book for a teaching environment and used it in that setting, including for our own use atStonehenge Consulting Services, as we conduct on-site and open-enrollment trainings.
You don't have to be a Unix guru, or even a Unix user, to benefit from this book. Unless otherwisenoted, everything in this book applies equally well to Windows ActivePerl from ActiveState and allother modern implementations of Perl. To use this book, you just need to be familiar with thematerial in Learning Perl and have the ambition to go further.

Structure of This Book
You should read this book from front to back, stopping to do the exercises. Each chapter builds onpreceding chapters, and we'll assume that you know the material from those chapters as we discussnew topics.
Chapter 1, Introduction
An introduction to the material.
Chapter 2, Intermediate Foundations
Pick up some intermediate Perl skills you'll need for the rest of the book.
Chapter 3, Using Modules
Use Perl's core modules, as well as modules from other people. We're going to show you howto create your own modules later in the book, but until we do, you can still use modules youalready have.
Chapter 4, Introduction to References
Introduce a level of redirection to allow the same code to operate on different sets of data.
Chapter 5, References and Scoping
Learn how Perl manages to keep track of pointers to data, and an introduction to anonymousdata structures and autovivification.
Chapter 6, Manipulating Complex Data Structures
Create, access, and print arbitrarily deep and nested data structures, including arrays of arraysand hashes of hashes.
Chapter 7, Subroutine References
Capture behavior as an anonymous subroutine that you create dynamically and execute later.
Chapter 8, Filehandle References

Store filehandles in scalar variables that you can easily pass around your program or store indata structures.
Chapter 9, Practical Reference Tricks
Sorting complex operations, the Schwartzian Transform, and working with recursively defineddata.
Chapter 10, Building Larger Programs
Build larger programs by separating code into separate files and namespaces.
Chapter 11, Introduction to Objects
Work with classes, method calls, inheritance, and overriding.
Chapter 12, Objects with Data
Add per-instance data, including constructors, getters, and setters.
Chapter 13, Object Destruction
Add behavior to an object that is going away, including object persistence.
Chapter 14, Some Advanced Object Topics
Use multiple inheritance, automatic methods, and references to filehandles.
Chapter 15, Exporter
How use works, how we can decide what to export, and how we can create our own importroutines.
Chapter 16, Writing a Distribution
Package a module for sharing, including portable installation instructions.
Chapter 17, Essential Testing
Test your code to ensure it does what you want it to do.
Chapter 18, Advanced Testing
Test complex aspects of code and meta-code things such as documentation and test coverage.

Chapter 19, Contributing to CPAN
Share your work with the world by uploading it to CPAN.
Appendix, Answers to Exercises
Where to go to get answers.
Conventions Used in This Book
The following typographic conventions are used in this book:
Constant width
Used for function names, module names, filenames, environment variables, code snippets, andother literal text
Italics
Used for emphasis and for new terms where they are defined

Using Code Examples
This book is here to help you get your job done. In general, you may use the code in this book inyour programs and documentation. You do not need to contact O'Reilly for permission unless you'rereproducing a significant portion of the code. For example, writing a program that uses severalchunks of code from this book does not require permission. Selling or distributing a CD-ROM ofexamples from O'Reilly books does require permission. Answering a question by citing this book andquoting example code does not require permission. Incorporating a significant amount of examplecode from this book into your product's documentation does require permission.
We appreciate, but do not require, attribution. An attribution usually includes the title, author,publisher, and ISBN. For example: Intermediate Perl, by Randal L. Schwartz, brian d foy, and TomPhoenix. Copyright 2006 O'Reilly Media, Inc., 0-596-10206-2.
If you feel your use of code examples falls outside fair use or the permission given above, feel free tocontact us at [email protected].

Comments and Questions
Please address comments and questions concerning this book to the publisher:
O'Reilly Media1005 Gravenstein Highway NorthSebastopol, CA 95472(800) 998-9938 (in the United States or Canada)(707) 829-0515 (international/local)(707) 829-0104 (fax)
The web page for this book, which lists errata, examples, or any additional information, can be foundat:
http://www.oreilly.com/catalog/intermediateperl
To comment or ask technical questions about this book, send email to:
For more information about books, conferences, Resource Centers, and the O'Reilly Network, see theO'Reilly web site at:
http://www.oreilly.com

Safari® Enabled
When you see a Safari® Enabled icon on the cover of your favorite technology book, itmeans the book is available online through the O'Reilly Network Safari Bookshelf. Safari offers asolution that's better than e-books. It's a virtual library that lets you easily search thousands of toptechnology books, cut and paste code samples, download chapters, and find quick answers when youneed the most accurate, current information. Try it for free at http://safari.oreilly.com.

Acknowledgments
From Randal. In the preface of the first edition of Learning Perl, I acknowledged the BeavertonMcMenamin's Cedar Hills Pub[*] just down the street from my house for the "rent-free booth-officespace" while I wrote most of the draft on my Powerbook 140. Well, like wearing your lucky socksevery day when your favorite team is in the play-offs, I wrote nearly all of this book (including thesewords) at the same brewpub, in hopes that the light of success of the first book will shine on metwice. (As I update this preface for the second edition, I can see that my lucky socks do indeedwork!)
[*] http://www.mcmenamins.com/
This McM's has the same great local microbrew beer and greasy sandwiches, but they've gotten rid ofmy favorite pizza bread, replacing it with new items like marionberry cobbler (a local treat) and spicyjambalaya. (And they added two booths and put in some pool tables.) Also, instead of the Powerbook140, I'm using a Titanium Powerbook, with 1,000 times more disk, 500 times more memory, and a200-times-faster CPU running a real Unix-based operating system (OS X) instead of the limited MacOS. I also uploaded all of the draft sections (including this one) over my 144K cell-phone modem andemailed them directly to the reviewers, instead of having to wait to rush home to my 9600-baudexternal modem and phone line. How times have changed!
So, thanks once again to the staff of the McMenamin's Cedar Hills Pub for the booth space andhospitality.
Like the fourth edition of Learning Perl, I also owe much of what I'm saying here and how I'm sayingit to the students of Stonehenge Consulting Services, who have given me immediate, precisefeedback (by their glazed eyes and awkwardly constructed questions) when I was exceeding the"huh?" factor threshold. With that feedback over many dozens of presentations, I was able to keeprefining and refactoring the materials that paved the way for this book.
Speaking of which, those materials started as a half-day "What's new in Perl 5?" summarycommissioned by Margie Levine of Silicon Graphics, in addition to my frequently presented on-site,four-day Llama course (targeted primarily for Perl Version 4 at the time). Eventually, I got the idea tobeef up those notes into a full course and enlisted fellow Stonehenge presenter Joseph Hall for thetask. (He's the one who selected the universe from which the examples are drawn.) Josephdeveloped a two-day course for Stonehenge in parallel with his excellent Effective Perl Programmingbook, which we then used as the course textbook (until now).
Other Stonehenge instructors have also dabbled a bit in the "Packages, References, Objects, andModules" course over the years, including Chip Salzenberg and Tad McClellan. But the bulk of therecent changes have been the responsibility of my senior trainer, Tom Phoenix, who has been"Stonehenge employee of the month" so often that I may have to finally give up my preferredparking space. Tom manages the materials (just as Tad manages operations) so I can focus on beingthe president and the janitor of Stonehenge.
Tom Phoenix contributed most exercises in this book and a timely set of review notes during mywriting process, including entire paragraphs for me to just insert in place of the drivel I had written.

We work well as a team, both in the classroom and in our joint writing efforts. It is for this effort thatwe've acknowledged Tom as a coauthor, but I'll take direct blame for any parts of the book you endup hating: none of that could have possibly been Tom's fault.
And last but not least, a special thanks to my business partner, brian d foy, who herded this bookinto its second revision and wrote most of the changes between the previous edition and this edition.
Of course, a book is nothing without a subject and a distribution channel, and for that I mustacknowledge longtime associates Larry Wall and Tim O'Reilly. Thanks, guys, for creating an industrythat has paid for my essentials, discretionary purchases, and dreams for nearly 15 years.
And, as always, a special thanks to Lyle and Jack for teaching me nearly everything I know aboutwriting and convincing me that I was much more than a programmer who might learn to write: I wasalso a writer who happened to know how to program. Thank you.
And to you, the reader of this book, for whom I toiled away the countless hours while sipping a coldmicrobrew and scarfing down a piece of incredible cheesecake, trying to avoid spilling on my laptopkeyboard: thank you for reading what I've written. I sincerely hope I've contributed (in at least asmall way) to your Perl proficiency. If you ever meet me on the street, please say "Hi."[*] I'd likethat. Thank you.
[*] And yes, you can ask a Perl question at the same time. I don't mind.
From brian. I have to thank Randal first, since I learned Perl from the first edition of Learning Perl,and learned the rest teaching the Llama and Alpaca courses for Stonehenge Consulting. Teaching isoften the best way to learn.
I convinced Randal that we should update Learning Perl, and when we got done with that, I told himit was time to update this book. Our editor, Allison Randal, agreed and did the best she could to keepus on schedule.
Special non-Perl thanks to Stacey, Buster, Mimi, Roscoe, Amelia, Lila, and everyone else who tried todistract me while I was busy but still talked to me, even though I couldn't come out to play.
From Both of Us. Thanks to our reviewers, David H. Adler, Stephen Jenkins, Kevin Meltzer, MatthewMusgrove, Andrew Savige, and Ricardo Signes, for providing comments on the draft of this book.
Thanks also to our many students who have let us know what parts of the course material haveneeded improvement over the years. It's because of you that we're all so proud of it today.
Thanks to the many Perl Mongers who have made us feel at home as we've visited your cities. Let'sdo it again sometime.
And finally, our sincerest thanks to our friend Larry Wall, for having the wisdom to share his reallycool and powerful toys with the rest of the world so that we can all get our work done just a little bitfaster, easier, and with more fun.

Chapter 1. IntroductionWelcome to the next step in your understanding of Perl. You're probably here either because youwant to learn to write programs that are more than 100 lines long or because your boss has told youto do so.
See, our Learning Perl book was great because it introduced the use of Perl for short and mediumprograms (which is most of the programming done in Perl, we've observed). But, to avoid having"the Llama book" be big and intimidating, we left a lot of information out, deliberately and carefully.
In the pages that follow, you can get "the rest of the story" in the same style as our friendly Llamabook. It covers what you need to write programs that are 100 to 10,000 lines long.
For example, you'll learn how to work with multiple programmers on the same project. This is great,because unless you work 35 hours each day, you'll need some help with larger tasks. You'll also needto ensure that all your code fits with the other code as you develop it for the final application.
This book will also show you how to deal with larger and more complex data structures , such aswhat we might casually call a "hash of hashes" or an "array of arrays of hashes of arrays." Once youknow a little about references, you're on your way to arbitrarily complex data structures.
And then there's the buzzworthy notion of object-oriented programming (OOP), which allows parts ofyour code (or hopefully code from others) to be reused with minor or major variations within thesame program. The book will cover that as well, even if you've never seen objects before.
An important aspect of working in teams is having a release cycle and tests for unit and integrationtesting . You'll learn the basics of packaging your code as a distribution and providing unit tests forthat distribution, both for development and for verifying that your code works in the ultimate endenvironment.
And, just as was promised and delivered in Learning Perl, we'll entertain you along the way withinteresting examples and bad puns. (We've sent Fred, Barney, Betty, and Wilma home, though. Anew cast of characters will take the starring roles.)

1.1. What Should You Know Already?
We'll presume that you've already read Learning Perl, or at least pretend you have, and that you'veplayed enough with Perl to already have those basics down. For example, you won't see anexplanation in this book that shows how to access the elements of an array or return a value from asubroutine.
Make sure you know the following things:
How to run a Perl program on your system
The three basic Perl variable types: scalars, arrays, and hashes
Control structures such as while, if, for, and foreach
Subroutines
Perl operators such as grep, map, sort, and print
File manipulation such as open, file reading, and -X (file tests)
You might pick up deeper insight into these topics in this book, but we're going to presume you knowthe basics.

1.2. What About All Those Footnotes?
Like Learning Perl, this book relegates some of the more esoteric items out of the way for the firstreading and places those items in footnotes.[*] You should skip those the first time through and pickthem up on a rereading. You will not find anything in a footnote that you'll need to understand any ofthe material we present later.
[*] Like this.

1.3. What's with the Exercises?
Hands-on training gets the job done better. The best way to provide this training is with a series ofexercises after every half-hour to hour of presentation. Of course, if you're a speed reader, the endof the chapter may come a bit sooner than a half hour. Slow down, take a breather, and do theexercises!
Each exercise has a "minutes to complete" rating. We intend for this rating to hit the midpoint of thebell curve, but don't feel bad if you take significantly longer or shorter. Sometimes it's just a matterof how many times you've faced similar programming tasks in your studies or jobs. Use the numbersmerely as a guideline.
Every exercise has its answer in the Appendix. Again, try not to peek; you'll ruin the value of theexercise.

1.4. What If I'm a Perl Course Instructor?
If you're a Perl instructor who has decided to use this as your textbook, you should know that eachset of exercises is short enough for most students to complete in 45 minutes to an hour, with a littletime left over for a break. Some chapters' exercises should be quicker, and some may take longer.That's because once all those little numbers in square brackets were written, we discovered that wedidn't know how to add.
So let's get started. Class begins after you turn the page . . . .

Chapter 2. Intermediate FoundationsBefore we get started on the meat of the book, we want to introduce some intermediate-level Perlidioms that we use throughout the book. These are the things that typically set apart the beginningand intermediate Perl programmers. Along the way, we'll also introduce you to the cast of charactersthat we'll use in the examples throughout the book.

2.1. List Operators
You already know about several list operators in Perl, but you may not have thought of them asworking with lists. The most common list operator is probably print. We give it one or morearguments, and it puts them together for us.
print 'Two castaways are ', 'Gilligan', ' and ', 'Skipper', "\n";
There are several other list operators that you already know about from Learning Perl. The sortoperator puts its input list in order. In their theme song, the castaways don't come in alphabeticalorder, but sort can fix that for us.
my @castaways = sort qw(Gilligan Skipper Ginger Professor Mary-Ann);
The reverse operator returns a list in the opposite order.
my @castaways = reverse qw(Gilligan Skipper Ginger Professor Mary-Ann);
Perl has many other operators that work with lists, and, once you get used to them, you'll findyourself typing less and expressing your intent more clearly.
2.1.1. List Filtering with grep
The grep operator takes a list of values and a "testing expression." It takes one item after another inthe list and places it into the $_ variable. It then evaluates the testing expression in a scalar context.If the expression evaluates to a true value, grep passes $_ on to the output list.
my @lunch_choices = grep &is_edible($_), @gilligans_posessions.
In a list context, the grep operator returns a list of all such selected items. In a scalar context, grepreturns the number of selected items.
my @results = grep EXPR, @input_list;my $count = grep EXPR, @input_list;
Here, EXPR stands in for any scalar expression that should refer to $_ (explicitly or implicitly). For
example, to find all the numbers greater than 10, in our grep expression we check if $_ is greaterthan 10.
my @input_numbers = (1, 2, 4, 8, 16, 32, 64);my @bigger_than_10 = grep $_ > 10, @input_numbers;
The result is just 16, 32, and 64. This uses an explicit reference to $_. Here's an example of animplicit reference to $_ from the pattern match operator:
my @end_in_4 = grep /4$/, @input_numbers;
And now we get just 4 and 64.
While the grep is running, it shadows any existing value in $_, which is to say that grep borrows theuse of this variable but puts the original value back when it's done. The variable $_ isn't a mere copyof the data item, though; it is an alias for the actual data element, similar to the control variable in aforeach loop.
If the testing expression is complex, we can hide it in a subroutine:
my @odd_digit_sum = grep digit_sum_is_odd($_), @input_numbers;
sub digit_sum_is_odd { my $input = shift; my @digits = split //, $input; # Assume no nondigit characters my $sum; $sum += $_ for @digits; return $sum % 2;}
Now we get back the list of 1, 16, and 32. These numbers have a digit sum with a remainder of "1" inthe last line of the subroutine, which counts as true.
The syntax comes in two forms, though: we just showed you the expression form, and now here'sthe block form. Rather than define an explicit subroutine that we'd use for only a single test, we canput the body of a subroutine directly in line in the grep operator, using the block forms:[*]

[*] In the block form of grep, there's no comma between the block and the input list. In the expression form of grep, there must be
a comma between the expression and the list.
my @results = grep { block; of; code;} @input_list;
my $count = grep { block; of; code;} @input_list;
Just like the expression form, grep temporarily places each element of the input list into $_. Next, itevaluates the entire block of code. The last evaluated expression in the block is the testingexpression. (And like all testing expressions, it's evaluated in a scalar context.) Because it's a fullblock, we can introduce variables that are scoped to the block. Let's rewrite that last example to usethe block form:
my @odd_digit_sum = grep { my $input = $_; my @digits = split //, $input; # Assume no nondigit characters my $sum; $sum += $_ for @digits; $sum % 2;} @input_numbers;
Note the two changes: the input value comes in via $_ rather than an argument list, and we removedthe keyword return. In fact, we would have been wrong to keep the return because we're no longerin a separate subroutine: just a block of code.[*] Of course, we can optimize a few things out of thatroutine since we don't need the intermediate variables:
[*] The return would have exited the subroutine that contains this entire section of code. And yes, some of us have been bitten
by that mistake in real, live coding on the first draft.
my @odd_digit_sum = grep { my $sum; $sum += $_ for split //; $sum % 2;} @input_numbers;
Feel free to crank up the explicitness if it helps you and your coworkers understand and maintain the

code. That's the main thing that matters.
2.1.2. Transforming Lists with map
The map operator has a very similar syntax to the grep operator and shares a lot of the sameoperational steps. For example, it temporarily places items from a list into $_ one at a time, and thesyntax allows both the expression block forms.
However, the testing expression becomes a mapping expression. The map operator evaluates theexpression in a list context (not a scalar context like grep). Each evaluation of the expression gives aportion of the many results. The overall result is the list concatenation of all individual results. In ascalar context, map returns the number of elements that are returned in a list context. But map shouldrarely, if ever, be used in anything but a list context.)
Let's start with a simple example:
my @input_numbers = (1, 2, 4, 8, 16, 32, 64);my @result = map $_ + 100, @input_numbers;
For each of the seven items map places into $_, we get a single output result: the number that is 100greater than the input number. So the value of @result is 101, 102, 104, 108, 116, 132, and 164.
But we're not limited to having only one output for each input. Let's see what happens when eachinput produces two output items:
my @result = map { $_, 3 * $_ } @input_numbers;
Now there are two items for each input item: 1, 3, 2, 6, 4, 12, 8, 24, 16, 48, 32, 96, 64, and 192.We can store those pairs in a hash, if we need a hash showing what number is three times a smallpower of two:
my %hash = @result;
Or, without using the intermediate array from the map:
my %hash = map { $_, 3 * $_ } @input_numbers;
You can see that map is pretty versatile; we can produce any number of output items for each input
item. And we don't always need to produce the same number of output items. Let's see whathappens when we break apart the digits:
my @result = map { split //, $_ } @input_numbers;
The inline block of code splits each number into its individual digits. For 1, 2, 4, and 8, we get a singleresult. For 16, 32, and 64, we get two results per number. When map concatenates the results lists,we end up with 1, 2, 4, 8, 1, 6, 3, 2, 6, and 4.
If a particular invocation results in an empty list, map concatenates that empty result into the largerlist, contributing nothing to the list. We can use this feature to select and reject items. For example,suppose we want only the split digits of numbers ending in 4:
my @result = map { my @digits = split //, $_; if ($digits[-1] = = 4) { @digits; } else { ( ); }} @input_numbers;
If the last digit is 4, we return the digits themselves by evaluating @digits (which is in list context). Ifthe last digit is not 4, we return an empty list, effectively removing results for that particular item.Thus, we can always use a map in place of a grep, but not vice versa.
Of course, everything we can do with map and grep, we can also do with explicit foreach loops. Butthen again, we can also code in assembler or by toggling bits into a front panel.[*] The point is thatproper application of grep and map can help reduce the complexity of the program, allowing us toconcentrate on high-level issues rather than details.
[*] If you're old enough to remember those front panels.

2.2. Trapping Errors with eval
Many lines of ordinary code have the potential to terminate a program prematurely if something goeswrong.
my $average = $total / $count; # divide by zero?print "okay\n" unless /$match/; # illegal pattern?
open MINNOW, '>ship.txt'or die "Can't create 'ship.txt': $!"; # user-defined die?
&implement($_) foreach @rescue_scheme; # die inside sub?
But just because something has gone wrong with one part of our code, that doesn't mean that wewant everything to crash. Perl uses the eval operator as its error-trapping mechanism.
eval { $average = $total / $count } ;
If an error happens while running code inside an eval block, the block is done executing. But eventhough the code inside the block is finished, Perl continues running the code just after the eval. It'smost common after an eval to immediately check $@, which will either be empty (meaning that therewas no error) or the dying words Perl had from the code that failed, perhaps something like "divideby zero" or a longer error message.
eval { $average = $total / $count } ;print "Continuing after error: $@" if $@;
eval { &rescue_scheme_42 } ;print "Continuing after error: $@" if $@;
The semicolon is needed after the eval block because eval is a function (not a control structure, suchas if or while). But the block is a true block and may include lexical variables ("my" variables) andany other arbitrary statements. As a function, eval has a return value much like a subroutine's (thelast expression evaluated, or a value returned early by the return keyword). Of course, if the code inthe block fails, no value is returned; this gives undef in a scalar context, or an empty list in a listcontext. Thus, another way to calculate an average safely looks like this:

my $average = eval { $total / $count } ;
Now $average is either the quotient or undef, depending upon whether the operation completedsuccessfully or not.
Perl even supports nested eval blocks. The power of an eval block to trap errors extends for as longas it's executing, so it catches errors deep within nested subroutine calls. eval can't trap the mostserious of errors, though: the ones in which Perl itself stops running. These include things such as anuncaught signal, running out of memory, and other catastrophes. eval doesn't catch syntax errors ,either; because Perl compiles the eval block with the rest of the code, it catches syntax errors atcompile time, not at runtime. It doesn't catch warnings either (although Perl does provide a way tointercept warning messages; see $SIG{_ _WARN_ _}).

2.3. Dynamic Code with eval
There's also a second form of eval, whose parameter is a string expression instead of a block. Itcompiles and executes code from a string at runtime. While this is useful and supported, it is alsodangerous if any untrustworthy data has gotten into the string. With a few notable exceptions, werecommend you avoid eval on a string. We'll use it a bit later, and you might see it in other people'scode, so we'll show you how it works anyway.
eval '$sum = 2 + 2';print "The sum is $sum\n";
Perl executes that code in the lexical context of the code around it, meaning that it's virtually as if wehad typed that code right there. The result of the eval is the last evaluated expression, so we reallydon't need the entire statement inside the eval.
#!/usr/bin/perl
foreach my $operator ( qw(+ - * /) ) { my $result = eval "2 $operator 2"; print "2 $operator 2 is $result\n"; }
Here, we go through the operators + - * / and use each of those inside our eval code. In the stringwe give to eval, we interpolate the value of $operator into the string. The eval executes the codethat the string represents and returns the last evaluated expression, which we assign it to $result.
If eval can't properly compile and run the Perl code we hand it, it sets $@ just like in its block form. Inthis example, we want to trap any divide-by-zero errors, but we don't divide by anything (anothersort of error).
print 'The quotient is ', eval '5 /', "\n";warn $@ if $@;
The eval catches the syntax error and puts the message in $@, which we check immediately aftercalling eval.
The quotient issyntax error at (eval 1) line 2, at EOF
Later, in Chapters 10, 17, and 18, we'll use this to optionally load modules. If we can't load themodule, Perl normally would stop the program. We'll catch the error and recover on our own whenthis happens.
In case you didn't catch our warning before, we'll say it again: be very careful with this form of eval.If you can find another way to do what you need, try that first. We'll use it later, in Chapter 10 toload code from an external file, but then we'll also show you a much better way to do that too.

2.4. Exercises
You can find the answers to these exercises in "Answers for Chapter 2" in the Appendix.
2.4.1. Exercise 1 [15 min]
Write a program that takes a list of filenames on the command line and uses grep to select the oneswhose size in bytes is less than 1000. Use map to transform the strings in this list, putting four spacecharacters in front of each and a newline character after. Print the resulting list.
2.4.2. Exercise 2 [25 min]
Write a program that asks the user to enter a pattern (regular expression). Read this as data fromthe keyboard; don't get it from the command-line arguments. Report a list of files in some hardcodeddirectory (such as "/etc" or 'C:\\Windows') whose names match the pattern. Repeat this until theuser enters an empty string instead of a pattern. The user should not type the forward slashes thatare traditionally used to delimit pattern matches in Perl; the input pattern is delimited by the trailingnewline. Ensure that a faulty pattern, such as one with unbalanced parentheses, doesn't crash theprogram.

Chapter 3. Using ModulesModules are the building blocks for our programs. They provide reusable subroutines, variables, andeven object-oriented classes. On our way to building our own modules , we'll show you some of thoseyou might be interested in. We'll also look at the basics of using modules that others have alreadywritten.

3.1. The Standard Distribution
Perl comes with many of the popular modules already. Indeed, most of the 50+ MB of the mostrecent distribution are from modules. In October 1996, Perl 5.003_07 had 98 modules. Today, at thebeginning of 2006, Perl 5.8.8 has 359.[*] Indeed, this is one of the advantages of Perl: it alreadycomes with a lot of stuff that you need to make useful and complex programs without doing a lot ofwork yourself.
[*] After you make it through this book, you should be able to use Module::CoreList to discover that count for yourself. That's
what we did to get those numbers, after all.
Throughout this book, we'll try to identify which modules comes with Perl (and in most cases, withwhich version they started coming with Perl). We'll call these "core modules " or note that they're in"the standard distribution ." If you have Perl, you should have these modules. Since we're using Perl5.8.7 as we write this, we'll assume that's the current version of Perl.
As you develop your code, you may want to consider if you want to use only core modules, so thatyou can be sure that anyone with Perl will have that module as long as they have at least the sameversion as you.[ ] We'll avoid that debate here, mostly because we love CPAN too much to dowithout it.
[ ] Although we don't go into here, the Module::CoreList module has the lists of which modules came with which versions of
Perl, along with other historical data.

3.2. Using Modules
Almost every Perl module comes with documentation, and even though we might not know how all ofthe behind-the-scenes magic works, we really don't have to worry about that stuff if we know how touse the interface. That's why the interface is there, after all: to hide the details.
On our local machine, we can read the module documentation with the perldoc command. We give itthe module name we're interested in, and it prints out its documentation.
$ perldoc File::Basename
NAME fileparse - split a pathname into pieces
basename - extract just the filename from a path
dirname - extract just the directory from a path
SYNOPSIS use File::Basename;
($name,$path,$suffix) = fileparse($fullname,@suffixlist) fileparse_set_fstype($os_string); $basename = basename($fullname,@suffixlist); $dirname = dirname($fullname);
We've included the top portion of the documentation to show you the most important section (atleast, the most important when you're starting). Module documentation typically follows the old Unixmanpage format, which starts with a NAME and SYNOPSIS section.
The synopsis gives us examples of the module's use, and if we can suspend understanding for a bitand follow the example, we can use the module. That is to say, it may be that you're not yet familiarwith some of the Perl techniques and syntax in the synopsis, but you can generally just follow theexample and make everything work.
Now, since Perl is a mix of procedural, functional, object-oriented, and other sorts of language types,Perl modules come in a variety of different interfaces. We'll employ these modules in slightly differentfashions, but as long as we can check the documentation, we shouldn't have a problem.

3.3. Functional Interfaces
To load a module, we use the Perl built-in use. We're not going to go into all of the details here, butwe'll get to those in Chapters 10 and 15. At the moment, we just want to use the module. Let's startwith File::Basename, that same module from the core distribution. To load it into our script, we say:
use File::Basename;
When we do this, File::Basename introduces three subroutines, fileparse, basename, and dirname,[*]
into our script.[ ] From this point forward, we can say:
[*] As well as a utility routine, fileparse_set_fstype.
[ ] Actually, it imports them into the current package, but we haven't told you about those yet.
my $basename = basename( $some_full_path );my $dirname = dirname( $some_full_path );
as if we had written the basename and dirname subroutines ourselves, or (nearly) as if they were built-in Perl functions. These routines pick out the filename and the directory parts of a pathname. Forexample, if $some_full_path were D:\Projects\Island Rescue\plan7.rtf (presumably, the programis running on a Windows machine), then $basename would be plan 7.rtf and the $dirname would beD:\Projects\Island Rescue.
The File::Basename module knows what sort of system it's on, and thus its functions figure out howto correctly parse the strings for the different delimiters we might encounter.
However, suppose we already had a dirname subroutine. We've now overwritten it with the definitionprovided by File::Basename! If we had turned on warnings, we would have seen a message statingthat; but otherwise, Perl really doesn't care.

3.4. Selecting What to Import
Fortunately, we can tell the use operation to limit its actions by specifying a list of subroutine namesfollowing the module name, called the import list:
use File::Basename ('fileparse', 'basename');
Now the module only gives us those two subroutines and leaves our own dirname alone. Of course,this is awkward to type, so more often we'll see this written with the quotewords operator:
use File::Basename qw( fileparse basename );
In fact, even if there's only one item, we tend to write it with a qw( ) list for consistency andmaintenance; often we'll go back to say "give me another one from here," and it's simpler if it'salready a qw( ) list.
We've protected the local dirname routine, but what if we still want the functionality provided byFile::Basename's dirname? No problem. We just spell it out with its full package specification:
my $dirname = File::Basename::dirname($some_path);
The list of names following use doesn't change which subroutines are defined in the module's package(in this case, File::Basename). We can always use the full name regardless of the import list, asin:[*]
[*] You don't need the ampersand in front of any of these subroutine invocations, because the subroutine name is already known
to the compiler following use.
my $basename = File::Basename::basename($some_path);
In an extreme (but extremely useful) case, we can specify an empty list for the import list, as in:
use File::Basename ( ); # no importmy $base = File::Basename::basename($some_path);

An empty list is different from an absent list. An empty list says "don't give me anything," while anabsent list says "give me the defaults." If the module's author has done her job well, the default willprobably be exactly what we want.
3.5. Object-Oriented Interfaces
Contrast the subroutines imported by File::Basename with what another core module has by lookingat File::Spec. The File::Spec module is designed to support operations commonly performed on filespecifications. (A file specification is usually a file or directory name, but it may be a name of a filethat doesn't existin which case, it's not really a filename, is it?)
Unlike the File::Basename module, the File::Spec module has a primarily objectoriented interface.We load the module with use, as we did before.
use File::Spec;
However, since this module has an object-oriented interface,[ ] it doesn't import any subroutines.Instead, the interface tells us to access the functionality of the module using its class methods. Thecatfile method joins a list of strings with the appropriate directory separator:
[ ] We can use File::Spec::Functions if we want a functional interface.
my $filespec = File::Spec->catfile( $homedir{gilligan}, 'web_docs', 'photos', 'USS_Minnow.gif' );
This calls the class method catfile of the File::Spec class, which builds a path appropriate for thelocal operating system and returns a single string.[ ] This is similar in syntax to the nearly two dozenother operations provided by File::Spec.
[ ] That string might be something like /home/gilligan/web_docs/photos/USS_Minnow.gif on a Unix system. On a Windows
system, it would typically use backslashes as directory separators . This module lets us write portable code easily, at least where
file specs are concerned.
The File::Spec module provides several other methods for dealing with file paths in a portablemanner. You can read more about portability issues in the perlport documentation.

3.6. A More Typical Object-Oriented Module: Math::BigInt
So as not to get dismayed about how "un-OO" the File::Spec module seems since it doesn't haveobjects, let's look at yet another core module, Math::BigInt, which can handle integers beyond Perl'snative reach.[*]
[*] Behind the scenes, Perl is limited by the architecture it's on. It's one of the few places where the hardware shows through.
use Math::BigInt;
my $value = Math::BigInt->new(2); # start with 2
$value->bpow(1000); # take 2**1000
print $value->bstr( ), "\n"; # print it out
As before, this module imports nothing. Its entire interface uses class methods, such as new, againstthe class name to create instances, and then calls instance methods, such as bpow and bstr, againstthose instances.

3.7. The Comprehensive Perl Archive Network
CPAN is the result of many volunteers working together, many of whom were originally operatingtheir own little (or big) Perl FTP sites back before that Web thing came along. They coordinated theirefforts on the perl-packrats mailing list in late 1993 and decided that disk space was getting cheapenough that the same information should be replicated on all sites rather than having specializationon each site. The idea took about a year to ferment, and Jarkko Hietaniemi established the FinnishFTP site as the CPAN mothership from which all other mirrors could draw their daily or hourlyupdates.
Part of the work involved rearranging and organizing the separate archives. Places were establishedfor Perl binaries for non-Unix architectures, scripts, and Perl's source code itself. However, themodules portion has come to be the largest and most interesting part of the CPAN.
The modules in CPAN are organized as a symbolic-link tree in hierarchical functional categories,pointing to author directories where the actual files are located. The modules area also containsindices that are generally in easy-to-parse-with-Perl formats, such as the Data::Dumper output for thedetailed module index. Of course, these indices are all derived automatically from databases at themaster server using other Perl programs. Often, the mirroring of the CPAN from one server toanother is done with a now-ancient Perl program called mirror.pl.
From its small start of a few mirror machines, CPAN has now grown to over 200 public archives in allcorners of the Net, all churning away, updating at least daily, sometimes as frequently as hourly. Nomatter where we are in the world, we can find a nearby CPAN mirror from which to pull the latestgoodies.
The incredibly useful CPAN Search (http://search.cpan.org) will probably become your favoriteinterface. From that web site, you can search for modules, look at their documentation, browsethrough their distributions, inspect their CPAN Testers reports, and do many other things.
3.8. Installing Modules from CPAN
Installing a simple module from CPAN can be straightforward: we download the module distributionarchive, unpack it, and change into its directory. We use wget here, but it doesn't matter which toolyou use.
$ wget http://www.cpan.org/.../HTTP-Cookies-Safari-1.10.tar.gz$ tar -xzf HTTP-Cookies-Safari-1.10.tar.gz$ cd HTTP-Cookies-Safari-1.10s
From there we go one of two ways (which we'll explain in detail in Chapter 16). If we find a filenamed Makefile.PL, we run this series of commands to build, test, and finally install the source:
$ perl Makefile.PL$ make$ make test$ make install
If we don't have permission to install modules in the system-wide directories,[*] we can tell Perl toinstall them under another path by using the PREFIX argument:
[*] These directories were set when the administrator installed Perl, and we can see them with perl -V.
$ perl Makefile.PL PREFIX=/Users/home/Ginger
To make Perl look in that directory for modules, we can set the PERL5LIB environment variable. Perladds those directories to its module directory search list.
$ export PERL5LIB=/Users/home/Ginger
We can also use the lib pragma to add to the module search path, although this is not as friendly,since we have to change the code, but also because it might not be the same directory on othermachines where we want to run the code.

#!/usr/bin/perluse lib qw(/Users/home/Ginger);
Backing up for a minute, if we found a Build.PL file instead of a Makefile.PL, the process is thesame. These distributions use Module::Build to build and install code. Since Module::Build is not acore Perl module,[*] we have to install it before we can install the distribution that needs it.
[*] At least not yet. It should be part of Perl 5.10, though.
$ perl Build.PL$ perl Build$ perl Build test$ perl Build install
To install into our private directories using Module::Build, we add the install_base parameter. Wetell Perl how to find modules the same way we did before.
$ perl Build.PL --install_base /Users/home/Ginger
Sometimes we find both Makefile.PL and Build.PL in a distribution. What do we do then? We canuse either one. Play favorites, if you like.

3.9. Setting the Path at the Right Time
Perl finds modules by looking through the directories in the special Perl array, @INC. The usestatement executes at compile time, so it looks at the module search path, @INC, at compile time.That can break our program in hard-to-understand ways unless we take @INC into consideration.
For example, suppose we have our own directory under /home/gilligan/lib, and we place our ownNavigation::SeatOfPants module in /home/gilligan/lib/Navigation/SeatOfPants.pm. When we loadour module, Perl won't find it.
use Navigation::SeatOfPants;
Perl complains to us that it can't find the module in @INC and shows us all of the directories it has inthat array.
Can't locate Navigation/SeatofPants.pm in @INC (@INC contains: ...)
You might think that we should just add our module directory to @INC before we call the use.However, even adding:
unshift @INC, '/home/gilligan/lib'; # brokenuse Navigation::SeatOfPants;
doesn't work. Why? Because the unshift happens at runtime, long after the use was attempted atcompile time. The two statements are lexically adjacent but not temporally adjacent. Just because wewrote them next to each other doesn't mean they execute in that order. We want to change @INCbefore the use executes. One way to fix this is to add a BEGIN block around the push:
BEGIN { unshift @INC, '/home/gilligan/lib'; }use Navigation::SeatOfPants;
Now the BEGIN block compiles and executes at compile time, setting up the proper path for thefollowing use.

However, this is noisy and prone to require far more explanation than you might be comfortable with,especially for the maintenance programmer who has to edit your code later. Let's replace all thatclutter with that simple pragma we used before:
use lib '/home/gilligan/lib';use Navigation::SeatOfPants;
Here, the lib pragma takes one or more arguments and adds them at the beginning of the @INCarray, just like unshift did before.[*] It works because it executes at compile time, not runtime.Hence, it's ready in time for the use immediately following.
[*] use lib also unshifts an architecture-dependent library below the requested library, making it more valuable than the explicit
counterpart presented earlier.
Because a use lib pragma will pretty much always have a site-dependent pathname, it is traditionaland we encourage you to put it near the top of the file. This makes it easier to find and update whenwe need to move the file to a new system or when the lib directory's name changes. (Of course, wecan eliminate use lib entirely if we can install our modules in standard @INC locations, but that's notalways practical.)
Think of use lib as not "use this library" but rather "use this path to find my libraries (andmodules)." Too often, we see code written like:
use lib '/home/gilligan/lib/Navigation/SeatOfPants.pm'; # WRONG
and then the programmer wonders why it didn't pull in the definitions. Be aware that use lib indeedruns at compile time, so this also doesn't work:
my $LIB_DIR = '/home/gilligan/lib';...use lib $LIB_DIR; # BROKENuse Navigation::SeatOfPants;
Certainly, Perl establishes the declaration of the $LIB_DIR variable at compile time (so we won't getan error with use strict, although the actual use lib should complain), but the actual assignment ofthe /home/gilligan/lib/ value doesn't happen until runtime. Oops, too late again!
At this point, we need to put something inside a BEGIN block or perhaps rely on yet another compile-time operation: setting a constant with use constant:
use constant LIB_DIR => '/home/gilligan/lib';...use lib LIB_DIR;

use Navigation::SeatOfPants;
There. Fixed again. That is, until we need the library to depend on the result of a calculation. (Wherewill it all end? Somebody stop the madness!) This should handle about 99 percent of our needs.
3.9.1. Handling Module Dependencies
We just saw that if we try to install a module that uses Module::Build, we have to installModule::Build first. That's a mild case of the general dependency headache, and all the coconuts onour castaways' island aren't going to fix it. We might have to install several other modules too, eachof which, in turn, depends on even more modules.
Fortunately, we have tools to help us. The CPAN.pm module has been part of the core distributionsince Perl 5.004. It gives us an interactive module installation shell.
$ perl -MCPAN -e shellcpan shell -- CPAN exploration and modules installation (v1.7601)ReadLine support available (try 'install Bundle::CPAN')
cpan>
To install a module along with its dependencies, we issue the install command with the name of themodule. Now, CPAN.pm handles all the work of downloading, unpacking, building, testing, andinstalling the module, and it does so recursively for all its dependencies.
cpan> install CGI::Prototype
That's a bit too much work, though, so brian created the cpan script, which also comes with Perl. Wesimply list the modules we want to install, and it handles it for us.
$ cpan CGI::Prototype HTTP::Cookies::Safari Test::Pod
Another tool, CPANPLUS, is a complete rewrite of CPAN.pm, but it isn't part of the core distribution as wewrite this.
$ perl -MCPANPLUS -e shellCPANPLUS::Shell::Default -- CPAN exploration and modules installation (v0.03)*** Please report bugs to <[email protected]>.*** Using CPANPLUS::Backend v0.049.

*** ReadLine support available (try 'i Term::ReadLine::Perl').
CPAN Terminal>
To install a module, we use the i command.
CPAN Terminal> i CGI::Prototype
The CPANPLUS module also comes with a convenience script, called cpanp. If we give it the i switchand a list of modules, it installs them just like before.
$ cpanp i CGI::Prototype HTTP::Cookies::Safari Test::Pod

3.10. Exercises
You can find the answers to these exercises in "Answers for Chapter 3" in the Appendix.
3.10.1. Exercise 1 [25 min]
Read the list of files in the current directory and convert the names to their full path specification.Don't use the shell or an external program to get the current directory. The File::Spec and Cwdmodules, both of which come with Perl, should help. Print each path with four spaces before it and anewline after it, just like you did for Exercise 1 of Chapter 2. Can you reuse part of that answer forthis problem?
3.10.2. Exercise 2 [35 min]
Parse the International Standard Book Number from the back of this book (0596102062). Install theBusiness::ISBN module from CPAN and use it to extract the country code and the publisher codefrom the number.

Chapter 4. Introduction to ReferencesReferences are the basis for complex data structures, object-oriented programming (OOP), and fancysubroutine magic. They're the magic that was added between Perl version 4 and version 5 to make itall possible.
A Perl scalar variable holds a single value. An array holds an ordered list of one or more scalars. Ahash holds a collection of scalars as values, keyed by other scalars. Although a scalar can be anarbitrary string, which allows complex data to be encoded into an array or hash, none of the threedata types are well suited to complex data interrelationships. This is a job for the reference. Let'slook at the importance of references by starting with an example.

4.1. Performing the Same Task on Many Arrays
Before the Minnow can leave on an excursion (for example, a three-hour tour), we should checkevery passenger and crew member to ensure they have all the required trip items in their possession.Let's say that, for maritime safety, every person on-board the Minnow needs to have a life preserver,some sunscreen, a water bottle, and a rain jacket. We can write a bit of code to check for theSkipper's supplies:
my @required = qw(preserver sunscreen water_bottle jacket);my @skipper = qw(blue_shirt hat jacket preserver sunscreen);
for my $item (@required) { unless (grep $item eq $_, @skipper) { # not found in list? print "skipper is missing $item.\n"; }}
The grep in a scalar context returns the number of times the expression $item eq $_ returns true,which is 1 if the item is in the list and 0 if not.[*] If the value is 0, it's false, and we print themessage.
[*] There are more efficient ways to check list membership for large lists, but for a few items, this is probably the easiest way to do
so with just a few lines of code.
Of course, if we want to check on Gilligan and the Professor, we might write the following code:
my @gilligan = qw(red_shirt hat lucky_socks water_bottle);for my $item (@required) { unless (grep $item eq $_, @gilligan) { # not found in list? print "gilligan is missing $item.\n"; }}
my @professor = qw(sunscreen water_bottle slide_rule batteries radio);for my $item (@required) { unless (grep $item eq $_, @professor) { # not found in list? print "professor is missing $item.\n"; }}

You may start to notice a lot of repeated code here and think that we should refactor that into acommon subroutine that we can reuse (and you'd be right):
sub check_required_items { my $who = shift; my @required = qw(preserver sunscreen water_bottle jacket); for my $item (@required) { unless (grep $item eq $_, @_) { # not found in list? print "$who is missing $item.\n"; } }}
my @gilligan = qw(red_shirt hat lucky_socks water_bottle);check_required_items('gilligan', @gilligan);
Perl gives the subroutine five items in its @_ array initially: the name gilligan and the four itemsbelonging to Gilligan. After the shift, @_ only has the items. Thus, the grep checks each requireditem against the list.
So far, so good. We can check the Skipper and the Professor with just a bit more code:
my @skipper = qw(blue_shirt hat jacket preserver sunscreen);my @professor = qw(sunscreen water_bottle slide_rule batteries radio);check_required_items('skipper', @skipper);check_required_items('professor', @professor);
And for the other passengers, we repeat as needed. Although this code meets the initialrequirements, we've got two problems to deal with:
To create @_, Perl copies the entire contents of the array to be scanned. This is fine for a fewitems, but if the array is large, it seems a bit wasteful to copy the data just to pass it into asubroutine.
Suppose we want to modify the original array to force the provisions list to include themandatory items. Because we have a copy in the subroutine ("pass by value"), any changes wemake to @_ aren't reflected automatically in the corresponding provisions array.[*]
[*] Actually, assigning new scalars to elements of @_ after the shift modifies the corresponding variable being passed, but
that still wouldn't let us extend the array with additional mandatory provisions.
To solve either or both of these problems, we need pass by reference rather than pass by value. Andthat's just what the doctor (or Professor) ordered.

4.2. Taking a Reference to an Array
Among its many other meanings, the backslash (\) character is also the "take a reference to"operator. When we use it in front of an array name, e.g., \@skipper, the result is a reference to thatarray. A reference to the array is like a pointer: it points at the array, but it is not the array itself.
A reference fits wherever a scalar fits. It can go into an element of an array or a hash, or into a plainscalar variable, like this:
my $reference_to_skipper = \@skipper;
The reference can be copied:
my $second_reference_to_skipper = $reference_to_skipper;
or even:
my $third_reference_to_skipper = \@skipper;
We can interchange all three references. We can even say they're identical, because, in fact, they arethe same thing.
if ($reference_to_skipper = = $second_reference_to_skipper) { print "They are identical references.\n";}
This equality compares the numeric forms of the two references. The numeric form of the referenceis the unique memory address of the @skipper internal data structure, unchanging during the life ofthe variable. If we look at the string form instead, with eq or print, we get a debugging string:
ARRAY(0x1a2b3c)
which again is unique for this array because it includes the hexadecimal (base 16) representation ofthe array's unique memory address. The debugging string also notes that this is an array reference.Of course, if we ever see something like this in our output, it almost certainly means we have a bug;users of our program have little interest in hex dumps of storage addresses!
Because we can copy a reference, and passing an argument to a subroutine is really just copying, wecan use this code to pass a reference to the array into the subroutine:
my @skipper = qw(blue_shirt hat jacket preserver sunscreen);check_required_items("The Skipper", \@skipper);
sub check_required_items { my $who = shift; my $items = shift; my @required = qw(preserver sunscreen water_bottle jacket); ...}
Now $items in the subroutine is a reference to the array of @skipper. But how do we get from areference back into the original array? We dereference the reference, of course.

4.3. Dereferencing the Array Reference
If you look at @skipper, you'll see that it consists of two parts: the @ symbol and the name of thearray. Similarly, the syntax $skipper[1] consists of the name of the array in the middle and somesyntax around the outside to get at the second element of the array (index value 1 is the secondelement because index values start at 0).
Here's the trick: we can place any reference to an array in curly braces in place of the name of anarray, ending up with a method to access the original array. That is, wherever we write skipper toname the array, we use the reference inside curly braces: { $items }. For example, both of theselines refer to the entire array:
@ skipper@{ $items }
whereas both of these refer to the second item of the array:[*]
[*] Note that we added whitespace in these two displays to make the similar parts line up. This whitespace is legal in a program,
even though most programs won't use it.
$ skipper [1]${ $items }[1]
By using the reference form, we've decoupled the code and the method of array access from theactual array. Let's see how that changes the rest of this subroutine:
sub check_required_items { my $who = shift; my $items = shift;
my @required = qw(preserver sunscreen water_bottle jacket); for my $item (@required) { unless (grep $item eq $_, @{$items}) { # not found in list? print "$who is missing $item.\n"; } }}

All we did was replace @_ (the copy of the provisions list) with @{$items}, a dereferencing of thereference to the original provisions array. Now we can call the subroutine a few times, as before:
my @skipper = qw(blue_shirt hat jacket preserver sunscreen);check_required_items('The Skipper', \@skipper);
my @professor = qw(sunscreen water_bottle slide_rule batteries radio);check_required_items('Professor', \@professor);
my @gilligan = qw(red_shirt hat lucky_socks water_bottle);check_required_items('Gilligan', \@gilligan);
In each case, $items points to a different array, so the same code applies to different arrays eachtime we invoke it. This is one of the most important uses of references: decoupling the code from thedata structure on which it operates so we can reuse the code more readily.
Passing the array by reference fixes the first of the two problems we mentioned earlier. Now, insteadof copying the entire provision list into the @_ array, we get a single element of a reference to thatprovisions array.
Could we have eliminated the two shifts at the beginning of the subroutine? Sure, but we sacrificeclarity:
sub check_required_items { my @required = qw(preserver sunscreen water_bottle jacket); for my $item (@required) { unless (grep $item eq $_, @{$_[1]}) { # not found in list? print "$_[0] is missing $item.\n"; } }}
We still have two elements in @_. The first element is the passenger or crew member name, which weuse in the error message. The second element is a reference to the correct provisions array, whichwe use in the grep expression.

4.4. Getting Our Braces Off
Most of the time, the array reference we want to dereference is a simple scalar variable, such as@{$items} or ${$items}[1]. In those cases, we can drop the curly braces, unambiguously forming@$items or $$items[1].
However, we cannot drop the braces if the value within the braces is not a simple scalar variable. Forexample, for @{$_[1]} from that last subroutine rewrite, we can't remove the braces. That's a singleelement access to an array, not a scalar variable.
This rule also means that it's easy to see where the "missing" braces need to go. When we see$$items[1], a pretty noisy piece of syntax, we can tell that the curly braces must belong around thesimple scalar variable, $items. Therefore, $items must be a reference to an array.
Thus, an easier-on-the-eyes version of that subroutine might be:
sub check_required_items { my $who = shift; my $items = shift;
my @required = qw(preserver sunscreen water_bottle jacket); for my $item (@required) { unless (grep $item eq $_, @$items) { # not found in list? print "$who is missing $item.\n"; } }}
The only difference here is that we removed the braces around @$items.

4.5. Modifying the Array
You've seen how to solve the excessive copying problem with an array reference. Now let's look atmodifying the original array.
For every missing provision, we push that provision onto an array, forcing the passenger to considerthe item:
sub check_required_items { my $who = shift; my $items = shift;
my @required = qw(preserver sunscreen water_bottle jacket); my @missing = ( );
for my $item (@required) { unless (grep $item eq $_, @$items) { # not found in list? print "$who is missing $item.\n"; push @missing, $item; } }
if (@missing) { print "Adding @missing to @$items for $who.\n"; push @$items, @missing; }}
Note the addition of the @missing array. If we find any items missing during the scan, we push theminto @missing. If there's anything there at the end of the scan, we add it to the original provision list.
The key is in the last line of that subroutine. We're dereferencing the $items array reference,accessing the original array, and adding the elements from @missing. Without passing by reference,we'd modify only a local copy of the data, which has no effect on the original array.
Also, @$items (and its more generic form, @{$items}) works within a double-quoted string. We can'tinclude any whitespace between the @ and the immediately following character, although we caninclude nearly arbitrary whitespace within the curly braces as if it were normal Perl code.

4.6. Nested Data Structures
In this example, the array @_ contains two elements, one of which is also an array. What if we take areference to an array that also contains a reference to an array? We end up with a complex datastructure, which can be quite useful.
For example, we can iterate over the data for the Skipper, Gilligan, and the Professor by first buildinga larger data structure holding the entire list of provision lists:
my @skipper = qw(blue_shirt hat jacket preserver sunscreen);my @skipper_with_name = ('Skipper', \@skipper);my @professor = qw(sunscreen water_bottle slide_rule batteries radio);my @professor_with_name = ('Professor', \@professor);my @gilligan = qw(red_shirt hat lucky_socks water_bottle);my @gilligan_with_name = ('Gilligan', \@gilligan);
At this point, @skipper_with_name has two elements, the second of which is an array reference similarto what we passed to the subroutine. Now we group them all:
my @all_with_names = ( \@skipper_with_name, \@professor_with_name, \@gilligan_with_name,);
Note that we have just three elements, each of which is a reference to an array that has twoelements: the name and its corresponding initial provisions. A picture of that is in Figure 4-1.
Figure 4-1. The array @all_with_names holds a multilevel data structurecontaining strings and references to arrays
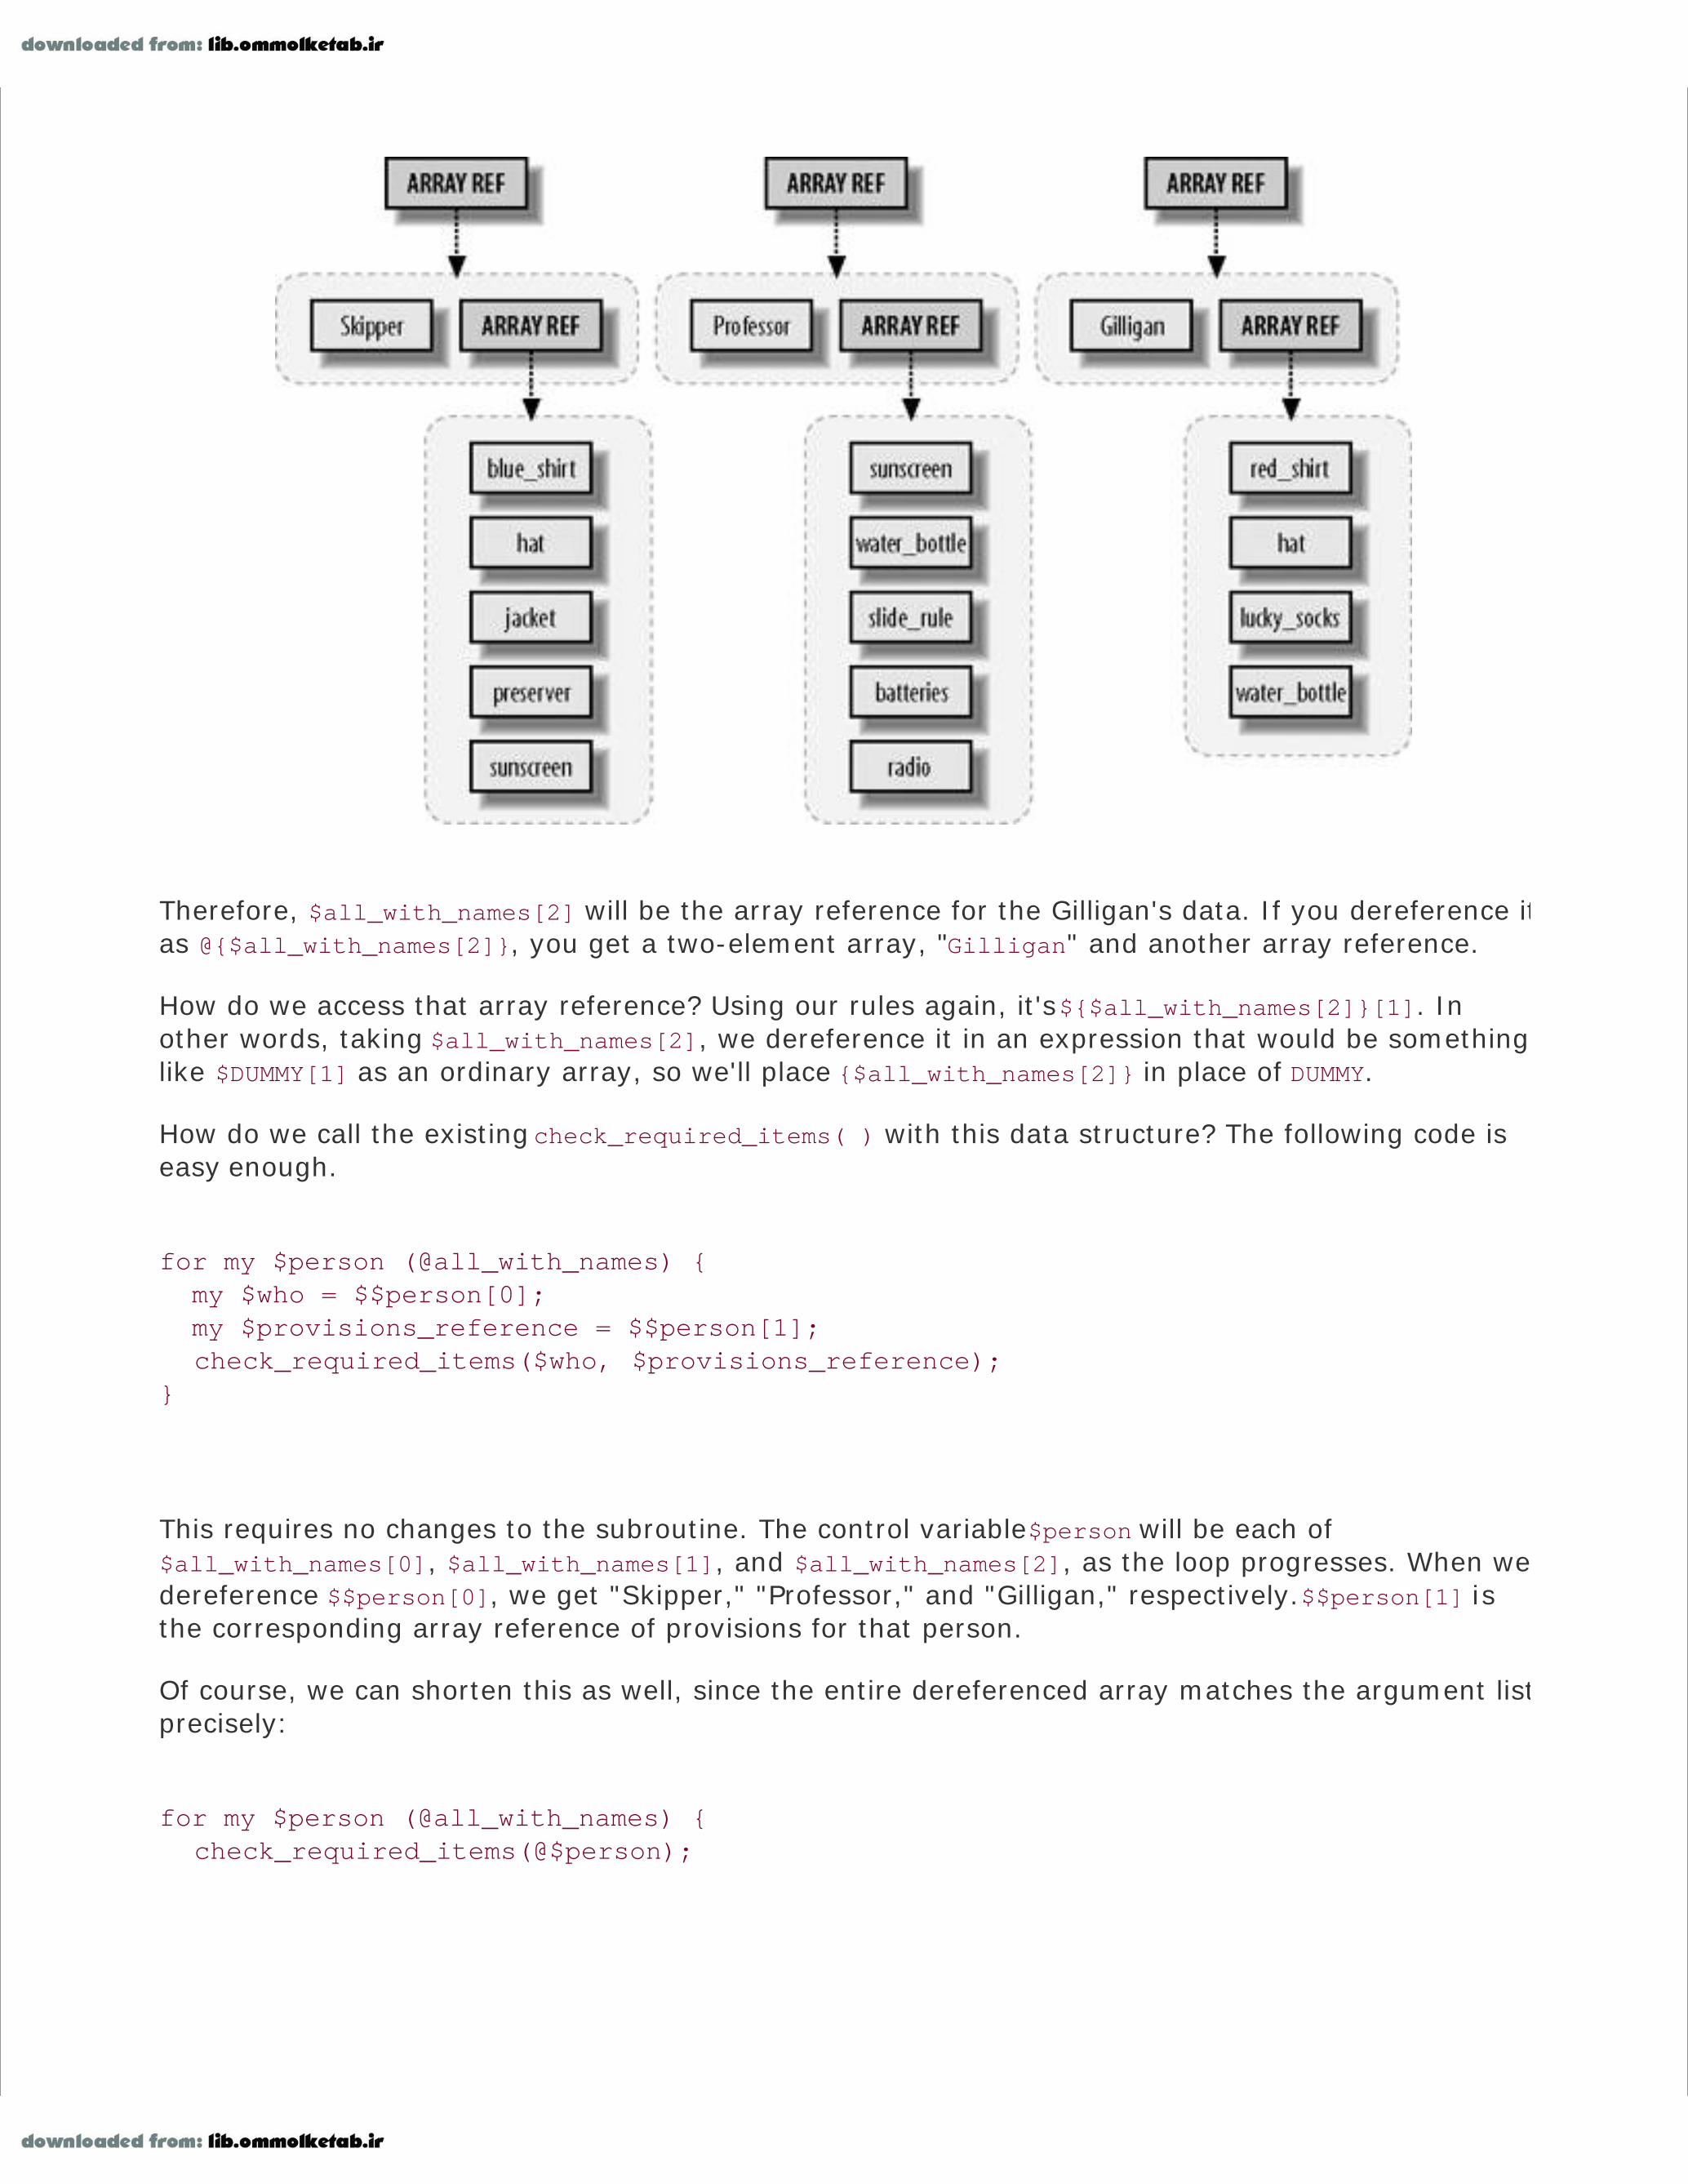
Therefore, $all_with_names[2] will be the array reference for the Gilligan's data. If you dereference itas @{$all_with_names[2]}, you get a two-element array, "Gilligan" and another array reference.
How do we access that array reference? Using our rules again, it's ${$all_with_names[2]}[1]. Inother words, taking $all_with_names[2], we dereference it in an expression that would be somethinglike $DUMMY[1] as an ordinary array, so we'll place {$all_with_names[2]} in place of DUMMY.
How do we call the existing check_required_items( ) with this data structure? The following code iseasy enough.
for my $person (@all_with_names) { my $who = $$person[0]; my $provisions_reference = $$person[1]; check_required_items($who, $provisions_reference);}
This requires no changes to the subroutine. The control variable $person will be each of$all_with_names[0], $all_with_names[1], and $all_with_names[2], as the loop progresses. When wedereference $$person[0], we get "Skipper," "Professor," and "Gilligan," respectively. $$person[1] isthe corresponding array reference of provisions for that person.
Of course, we can shorten this as well, since the entire dereferenced array matches the argument listprecisely:
for my $person (@all_with_names) { check_required_items(@$person);

}
or even:
check_required_items(@$_) for @all_with_names;
As you can see, various levels of optimization can lead to obfuscation. Be sure to consider where yourhead will be a month from now when you have to reread your own code. If that's not enough,consider the new person who will take over your job after you have left.[*]
[*] O'Reilly Media has a great book to help you be nice to the next guy. Perl Best Practices by Damian Conway has 256 tips on
writing more readable and maintainable Perl code.

4.7. Simplifying Nested Element References with Arrows
Look at the curly-brace dereferencing again. As in our earlier example, the array reference forGilligan's provision list is ${$all_with_names[2]}[1]. Now, what if we want to know Gilligan's firstprovision? We need to dereference this item one more level, so it's yet another layer of braces:${${$all_with_names[2]}[1]}[0]. That's a really noisy piece of syntax. Can we shorten that? Yes!
Everywhere we write ${DUMMY}[$y], we can write DUMMY->[$y] instead. In other words, we candereference an array reference, picking out a particular element of that array by simply following theexpression defining the array reference with an arrow and a square-bracketed subscript.
For this example, this means we can pick out the array reference for Gilligan with a simple$all_with_names[2]->[1], and Gilligan's first provision with $all_with_names[2]->[1]->[0]. Wow,that's definitely easier on the eyes.
If that weren't already simple enough, there's one more rule: if the arrow ends up between"subscripty kinds of things," such as square brackets, we can also drop the arrow.$all_with_names[2]->[1]->[0] becomes $all_with_names[2][1][0]. Now it's looking even easier onthe eyes.
The arrow has to be between non-subscripty things. Why wouldn't it be between subscripty things?Well, imagine a reference to the array @all_with_names:
my $root = \@all_with_names;
Now how do we get to Gilligan's first item?
$root -> [2] -> [1] -> [0]
More simply, using the "drop arrow" rule, we can use:
$root -> [2][1][0]
We cannot drop the first arrow, however, because that would mean an array @root's third element,an entirely unrelated data structure. Let's compare this to the full curly-brace form again:
${${${$root}[2]}[1]}[0]
It looks much better with the arrow. Note, however, that no shortcut gets the entire array from anarray reference. If we want all of Gilligan's provisions, we say:
@{$root->[2][1]}
Reading this from the inside out, we can think of it like this:
Take $root.
Dereference it as an array reference, taking the third element of that array (index number 2).
Dereference that as an array reference, taking the second element of that array (index number1).
Dereference that as an array reference, taking the entire array.
The last step doesn't have a shortcut arrow form. Oh well.[*]
[*] It's not that it hasn't been discussed repeatedly by the Perl developers; it's just that nobody has come up with a nice backward-
compatible syntax with universal appeal.

4.8. References to Hashes
Just as we can take a reference to an array, we can also take a reference to a hash. Once again, weuse the backslash as the "take a reference to" operator:
my %gilligan_info = ( name => 'Gilligan', hat => 'White', shirt => 'Red', position => 'First Mate',);my $hash_ref = \%gilligan_info;
We can dereference a hash reference to get back to the original data. The strategy is similar todereferencing an array reference. We write the hash syntax as we would have without references andthen replace the name of the hash with a pair of curly braces surrounding the thing holding thereference. For example, to pick a particular value for a given key, we do this:
my $name = $ gilligan_info { 'name' };my $name = $ { $hash_ref } { 'name' };
In this case, the curly braces have two different meanings. The first pair denotes the expressionreturning a reference, while the second pair delimits the expression for the hash key.
To perform an operation on the entire hash, we proceed similarly:
my @keys = keys % gilligan_info;my @keys = keys % { $hash_ref };
As with array references, we can use shortcuts to replace the complex curly-braced forms undersome circumstances. For example, if the only thing inside the curly braces is a simple scalar variable(as shown in these examples so far), we can drop the curly braces:
my $name = $$hash_ref{'name'};my @keys = keys %$hash_ref;

Like an array reference, when referring to a specific hash element, we can use an arrow form:
my $name = $hash_ref->{'name'};
Because a hash reference fits wherever a scalar fits, we can create an array of hash references:
my %gilligan_info = ( name => 'Gilligan', hat => 'White', shirt => 'Red', position => 'First Mate',);my %skipper_info = ( name => 'Skipper', hat => 'Black', shirt => 'Blue', position => 'Captain',);my @crew = (\%gilligan_info, \%skipper_info);
Thus, $crew[0] is a hash reference to the information about Gilligan. We can get to Gilligan's namevia any one of:
${ $crew[0] } { 'name' }my $ref = $crew[0]; $$ref{'name'}$crew[0]->{'name'}$crew[0]{'name'}
On that last one, we can still drop the arrow between "subscripty kinds of things," even though one isan array bracket and one is a hash brace.
Let's print a crew roster:
my %gilligan_info = ( name => 'Gilligan', hat => 'White', shirt => 'Red', position => 'First Mate',);my %skipper_info = (

name => 'Skipper', hat => 'Black', shirt => 'Blue', position => 'Captain',);my @crew = (\%gilligan_info, \%skipper_info);
my $format = "%-15s %-7s %-7s %-15s\n";printf $format, qw(Name Shirt Hat Position);for my $crewmember (@crew) { printf $format, $crewmember->{'name'}, $crewmember->{'shirt'}, $crewmember->{'hat'}, $crewmember->{'position'};}
That last part looks very repetitive. We can shorten it with a hash slice. Again, if the original syntaxis:
@ gilligan_info { qw(name position) }
the hash slice notation from a reference looks like:
@ { $hash_ref } { qw(name position) }
We can drop the first brace pair because the only thing within is a simple scalar value, yielding:
@ $hash_ref { qw(name position) }
Thus, we can replace that final loop with:
for my $crewmember (@crew) { printf $format, @$crewmember{qw(name shirt hat position)};}
There is no shortcut form with an arrow (->) for array slices or hash slices, just as there is noshortcut for entire arrays or hashes.

A hash reference prints as a string that looks like HASH(0x1a2b3c), showing the hexadecimal memoryaddress of the hash. That's not very useful to an end user and only barely more usable to theprogrammer, except as an indication of the lack of appropriate dereferencing.

4.9. Exercises
You can find the answers to these exercises in "Answers for Chapter 4" in the Appendix.
4.9.1. Exercise 1 [5 min]
How many different things do these expressions refer to?
$ginger->[2][1]${$ginger[2]}[1]$ginger->[2]->[1]${$ginger->[2]}[1]
4.9.2. Exercise 2 [30 min]
Using the final version of check_required_items, write a subroutine check_items_for_all that takes ahash reference as its only parameter, pointing at a hash whose keys are the people aboard theMinnow and whose corresponding values are array references of the things they intend to bringonboard.
For example, the hash reference might be constructed like so:
my @gilligan = ... gilligan items ...;my @skipper = ... skipper items ...;my @professor = ... professor items ...;my %all = ( Gilligan => \@gilligan, Skipper => \@skipper, Professor => \@professor,);check_items_for_all(\%all);
The newly constructed subroutine should call check_required_items for each person in the hash,updating their provisions list to include the required items.

Chapter 5. References and ScopingWe can copy and pass around references like any other scalar. At any given time, Perl knows thenumber of references to a particular data item. Perl can also create references to anonymous datastructures (structures that do not have explicit names) and create references automatically asneeded to fulfill certain kinds of operations. Let's look at copying references and how it affectsscoping and memory usage.

5.1. More Than One Reference to Data
Chapter 4 explored how to take a reference to an array @skipper and place it into a new scalarvariable:
my @skipper = qw(blue_shirt hat jacket preserver sunscreen);my $reference_to_skipper = \@skipper;
We can then copy the reference or take additional references, and they'll all refer to the same thingand are interchangeable:
my $second_reference_to_skipper = $reference_to_skipper;my $third_reference_to_skipper = \@skipper;
At this point, we have four different ways to access the data contained in @skipper:
@skipper@$reference_to_skipper@$second_reference_to_skipper@$third_reference_to_skipper
Perl tracks how many ways it can access the data through a mechanism called reference counting .The original name counts as one, and each additional reference that we create (including copies ofreferences) also counts as one. The total number of references to the array of provisions is now four.
We can add and remove references as we wish, and as long as the reference count doesn't hit zero,Perl maintains the array in memory and it is still accessible via any of the other access paths. Forexample, we might have a temporary reference:
check_provisions_list(\@skipper)
When this subroutine executes, Perl creates a fifth reference to the data and copies it into @_ for thesubroutine. The subroutine is free to create additional copies of that reference, which Perl notes asneeded. Typically, when the subroutine returns, Perl discards all such references automatically, and
you're back to four references again.
We can kill off each reference by using the variable for something other than a reference to the valueof @skipper. For example, we can assign undef to the variable:
$reference_to_skipper = undef;
Or, maybe we just let the variable go out of scope:
my @skipper = ...;
{ # naked block...my $ref = \@skipper;......} # $ref goes out of scope at this point
In particular, a reference held in a subroutine's private (lexical) variable goes away at the end of thesubroutine.
Whether we change the value, or the variable itself goes away, Perl notes it as an appropriatereduction in the number of references to the data.
Perl recycles the memory for the array only when all references (including the name of the array) goaway. In this case, Perl only reclaims memory when @skipper and all the references we created to itdisappear.
Such memory is available to Perl for other data later in this program invocation, and generally Perldoesn't give it back to the operating system.

5.2. What If That Was the Name?
Typically, all references to a variable are gone before the variable itself. But what if one of thereferences outlives the variable name? For example, consider this code:
my $ref;
{ my @skipper = qw(blue_shirt hat jacket preserver sunscreen); $ref = \@skipper;
print "$ref->[2]\n"; # prints jacket\n}
print "$ref->[2]\n"; # still prints jacket\n
Immediately after we declare the @skipper array, we have one reference to the five-element list.After $ref is initialized, we'll have two, down to the end of the block. When the block ends, the@skipper name disappears. However, this was only one of the two ways to access the data! Thus, thefive-element list is still in memory, and $ref still points to that data.
At this point, the five-element list is in an anonymous array, which is a fancy term for an arraywithout a name.
Until the value of $ref changes, or $ref itself disappears, we can still use all the dereferencingstrategies we used prior to when the name of the array disappeared. In fact, it's still a fully functionalarray that we can shrink or grow just as we do any other Perl array:
push @$ref, 'sextant'; # add a new provisionprint "$ref->[-1]\n"; # prints sextant\n
We can even increase the reference count at this point:
my $copy_of_ref = $ref;
or equivalently:

my $copy_of_ref = \@$ref;
The data stays alive until we destroy the last reference:
$ref = undef; # not yet...$copy_of_ref = undef; # poof!
5.3. Reference Counting and Nested Data Structures
The data remains alive until we destroy the last reference, even if that reference lives within a largeractive data structure. Suppose an array element is itself a reference. Recall the example fromChapter 4:
my @skipper = qw(blue_shirt hat jacket preserver sunscreen);my @skipper_with_name = ('The Skipper', \@skipper);
my @professor = qw(sunscreen water_bottle slide_rule batteries radio);my @professor_with_name = ('The Professor', \@professor);
my @gilligan = qw(red_shirt hat lucky_socks water_bottle);my @gilligan_with_name = ('Gilligan', \@gilligan);
my @all_with_names = ( \@skipper_with_name, \@professor_with_name, \@gilligan_with_name, );
Imagine for a moment that the intermediate variables are all part of a subroutine:
my @all_with_names;
sub initialize_provisions_list { my @skipper = qw(blue_shirt hat jacket preserver sunscreen); my @skipper_with_name = ('The Skipper', \@skipper);
my @professor = qw(sunscreen water_bottle slide_rule batteries radio); my @professor_with_name = ('The Professor', \@professor);
my @gilligan = qw(red_shirt hat lucky_socks water_bottle); my @gilligan_with_name = ('Gilligan', \@gilligan);
@all_with_names = ( # set global \@skipper_with_name, \@professor_with_name, \@gilligan_with_name, );}

initialize_provisions_list( );
We set the value of @all_with_names to contain three references. Inside the subroutine we havenamed arrays with references to arrays first placed into other named arrays. Eventually, the valuesend up in the global @all_with_names. However, as the subroutine returns, the names for the sixarrays disappear. Each array has had one other reference taken to it, making the reference counttemporarily two, and then back to one as the name disappears. Because the reference count is notyet zero, the data continues to live on, although it is now referenced only by elements of@all_with_names.
Rather than assign the global variable, we can rewrite this without @all_with_names and return thelist directly:
sub get_provisions_list { my @skipper = qw(blue_shirt hat jacket preserver sunscreen); my @skipper_with_name = ('The Skipper', \@skipper);
my @professor = qw(sunscreen water_bottle slide_rule batteries radio); my @professor_with_name = ('The Professor', \@professor);
my @gilligan = qw(red_shirt hat lucky_socks water_bottle); my @gilligan_with_name = ('Gilligan', \@gilligan);
return ( \@skipper_with_name, \@professor_with_name, \@gilligan_with_name, );}
my @all_with_names = get_provisions_list( );
Here, we create the value that we'll eventually store in @all_with_names as the last expressionevaluated in the subroutine. The subroutine returns a three-element list. As long as the namedarrays within the subroutine have had at least one reference taken of them, and it is still part of thereturn value, the data remains alive.[*] If we alter or discard the references in @all_with_names, Perlreduces the reference count for the corresponding arrays. If that means the reference count hasbecome zero (as in this example), Perl also eliminates the arrays themselves. Because the arraysinside @all_with_names also contain a reference (such as the reference to @skipper), Perl reducesthat reference count by one. Again, that reduces the reference count to zero, freeing that memory aswell, in a cascading effect.
[*] Compare this with having to return an array from a C function. We must either return a pointer to a static memory space,
making the subroutine nonreentrant, or we must malloc new memory space, requiring the caller to know to free the data. Perl
just does the right thing.
Removing the top of a tree of data generally removes all the data contained within. The exception iswhen we make additional copies of the references of the nested data. For example, if we copy

Gilligan's provisions:
my $gilligan_stuff = $all_with_names[2][1];
then when we remove @all_with_names, we still have one live reference to what was formerly@gilligan, and the data from there downward remain alive.
The bottom line is simply: Perl does the right thing. If we still have a reference to data, we still havethe data.

5.4. When Reference Counting Goes Bad
Reference counting as a way to manage memory has been around for a long time. A really long time.The downside of reference counting is that it breaks when the data structure is not a directed graphthat is, when some parts of the structure point back in to other parts in a looping way. For example,suppose each of two data structures contains a reference to the other (see Figure 5-1):
my @data1 = qw(one won);my @data2 = qw(two too to);
push @data2, \@data1;push @data1, \@data2;
Figure 5-1. When the references in a data structure form a loop, Perl'sreference-counting system may not be able to recognize and recycle the
no-longer-needed memory space
At this point, we have two names for the data in @data1: @data1 itself and @{$data2[3]}, and twonames for the data in @data2: @data2 itself and @{$data1[2]}. We've created a loop. In fact, we canaccess won with an infinite number of names, such as $data1[2][3][2][3][2][3][1].
What happens when these two array names go out of scope? Well, the reference count for the twoarrays goes down from two to one, but not zero. And because it's not zero, Perl thinks there mightstill be a way to get to the data, even though there isn't! Thus, we've created a memory leak. Amemory leak in a program causes the program to consume more and more memory over time. Ugh.
At this point, you're right to think that example is contrived. Of course we would never make alooped data structure in a real program! Actually, programmers often make these loops as part of

doubly linked lists, linked rings, or a number of other data structures. The key is that Perlprogrammers rarely do so because the most important reasons to use those data structures don'tapply in Perl. Most of that deals with managing memory and connecting discontiguous memoryblocks, which Perl does for us. If you've used other languages, you may have noticed programmingtasks that are comparatively easy in Perl. For example, it's easy to sort a list of items or to add orremove items, even in the middle of the list. Those tasks are difficult in some other languages, andusing a looped data structure is a common way to get around the language's limitations.
Why mention it here? Well, even Perl programmers sometimes copy an algorithm from anotherprogramming language. There's nothing inherently wrong with doing this, although it would be betterto decide why the original author used a "loopy" data structure and then recode the algorithm to usePerl's strengths. Perhaps you should use a hash instead, or perhaps the data should go into an arraythat will be sorted later.
Some upcoming version of Perl is likely to use garbage collection in addition to, or instead of,referencing counting.[*] Until then, we must be careful not to create circular references or, if we do,break the circle before the variables go out of scope. For example, the following code doesn't leak:
[*] Just don't ask us about it. We wrote this book a long time before you got a chance to read it, so we didn't exactly know the
details back then.
{ my @data1 = qw(one won); my @data2 = qw(two too to); push @data2, \@data1; push @data1, \@data2; ... use @data1, @data2 ... # at the end: @data1 = ( ); @data2 = ( );}
We eliminated the reference to @data2 from within @data1, and vice versa. Now the data have onlyone reference each, which all go to zero references at the end of the block. In fact, we can clear outeither one and not the other, and it still works nicely. Chapter 13 shows how to create weakreferences, which can help with many of these problems.

5.5. Creating an Anonymous Array Directly
In the get_provisions_list routine earlier, we created a half dozen array names that we used onlyso that we could take a reference to them immediately afterward. When the subroutine exited, thearray names all went away, but the references remained.
While creating temporarily named arrays would work in the simplest cases, creating such namesbecomes more complicated as the data structures become more detailed. We'd have to keep thinkingof names of arrays just so we could forget them shortly thereafter.
We can reduce the namespace clutter by narrowing down the scope of the various array names.Rather than declaring them within the scope of the subroutine, we can create a temporary block:
my @skipper_with_name;{ my @skipper = qw(blue_shirt hat jacket preserver sunscreen); @skipper_with_name = ('The Skipper', \@skipper);}
At this point, the second element of @skipper_with_name is a reference to the array formerly knownas @skipper. However, that name is no longer relevant.
This is a lot of typing to simply say "the second element should be a reference to an array containingthese elements." We can create such a value directly using the anonymous array constructor, whichis yet another use for square brackets:
my $ref_to_skipper_provisions = [ qw(blue_shirt hat jacket preserver sunscreen) ];
The square brackets take the value within (evaluated in a list context); establish a new, anonymousarray initialized to those values; and (here's the important part) return a reference to that array. It'sas if we had said:
my $ref_to_skipper_provisions;{ my @temporary_name = ( qw(blue_shirt hat jacket preserver sunscreen) ); $ref_to_skipper_provisions = \@temporary_name;}

Here we don't need to come up with a temporary name, and we don't need the extra noise of thetemporary block. The result of a square-bracketed anonymous array constructor is an arrayreference, which fits wherever a scalar variable fits.
Now we can use it to construct the larger list:
my $ref_to_skipper_provisions = [ qw(blue_shirt hat jacket preserver sunscreen) ];my @skipper_with_name = ('The Skipper', $ref_to_skipper_provisions);
Of course, we didn't actually need that scalar temporary, either. We can put a scalar reference to anarray as part of a larger list:
my @skipper_with_name = ( 'The Skipper', [ qw(blue_shirt hat jacket preserver sunscreen) ]);
Now let's walk through this. We've declared @skipper_with_name, the first element of which is theSkipper's name string, and the second element is an array reference, obtained by placing the fiveprovisions into an array and taking a reference to it. So @skipper_with_name is only two elementslong, just as before.
Don't confuse the square brackets with the parentheses here. They each have their distinct purpose.If we replace the square brackets with parentheses, we end up with a six-element list. If we replacethe outer parentheses (on the first and last lines) with square brackets, we construct an anonymousarray that's two elements long and then take the reference to that array as the only element of theultimate @skipper_with_name array.[*] So, in summary, if we have this syntax:
[*] In classrooms, we've seen that too much indirection (or not enough indirection) tends to contribute to the most common
mistakes made when working with references.
my $fruits;{ my @secret_variable = ('pineapple', 'papaya', 'mango'); $fruits = \@secret_variable;}
we can replace it with:
my $fruits = ['pineapple', 'papaya', 'mango'];

Does this work for more complicated structures? Yes! Anytime we need an element of a list to be areference to an array, we can create that reference with an anonymous array constructor. In fact, wecan also nest them in our provisions list:
sub get_provisions_list { return ( ['The Skipper', [qw(blue_shirt hat jacket preserver sunscreen)] ], ['The Professor', [qw(sunscreen water_bottle slide_rule radio) ] ], ['Gilligan', [qw(red_shirt hat lucky_socks water_bottle) ] ], );}
my @all_with_names = get_provisions_list( );
Walking through this from the outside in, we have a return value of three elements. Each element isan array reference, pointing to an anonymous two-element array. The first element of each array is aname string, while the second element is a reference to an anonymous array of varying lengthsnaming the provisionsall without having to come up with temporary names for any of theintermediate layers.
To the caller of this subroutine, the return value is identical to the previous version. However, from amaintenance point of view, the reduced clutter of not having all the intermediate names saves screenand brain space.
We can show a reference to an empty anonymous array using an empty anonymous arrayconstructor. For example, if we add one "Mrs. Howell" to that travel list, as someone who has packedrather light, we'd simply insert:
['Mrs. Howell', [ ]],
This is a single element of the larger list. This item is a reference to an array with two elements, thefirst of which is the name string, and the second of which is itself a reference to an empty anonymousarray. The array is empty because Mrs. Howell hasn't packed anything for this trip.

5.6. Creating an Anonymous Hash
Similar to creating an anonymous array, you can also create an anonymous hash. Consider the crewroster from Chapter 4:
my %gilligan_info = ( name => 'Gilligan', hat => 'White', shirt => 'Red', position => 'First Mate',);
my %skipper_info = ( name => 'Skipper', hat => 'Black', shirt => 'Blue', position => 'Captain',);
my @crew = (\%gilligan_info, \%skipper_info);
The variables %gilligan_info and %skipper_info are just temporaries we needed to create thehashes for the final data structure. We can construct the reference directly with the anonymous hashconstructor, which is yet another meaning for curly braces, as we'll see. We can replace this:
my $ref_to_gilligan_info;
{ my %gilligan_info = ( name => 'Gilligan', hat => 'White', shirt => 'Red', position => 'First Mate', ); $ref_to_gilligan_info = \%gilligan_info;}
with the anonymous hash constructor:

my $ref_to_gilligan_info = { name => 'Gilligan', hat => 'White', shirt => 'Red', position => 'First Mate',};
The value between the open and closing curly braces is an eight-element list. The eight-element listbecomes a four-element anonymous hash (four key/value pairs). Perl takes a reference to this hashand returns as a single scalar value, which we assign to the scalar variable. Thus, we can rewrite theroster creation as:
my $ref_to_gilligan_info = { name => 'Gilligan', hat => 'White', shirt => 'Red', position => 'First Mate',};
my $ref_to_skipper_info = { name => 'Skipper', hat => 'Black', shirt => 'Blue', position => 'Captain',};
my @crew = ($ref_to_gilligan_info, $ref_to_skipper_info);
As before, we can now avoid the temporary variables and insert the values directly into the top-levellist:
my @crew = ( { name => 'Gilligan', hat => 'White', shirt => 'Red', position => 'First Mate', },
{ name => 'Skipper', hat => 'Black', shirt => 'Blue', position => 'Captain', },);

Note we use trailing commas on the lists when the element is not immediately next to the closingbrace, bracket, or parenthesis. This is a nice style element to adopt because it allows for easymaintenance. We can add or rearrange lines quickly, or comment out lines without destroying theintegrity of our list.
Now @crew is identical to the value it had before, but we no longer need to invent names for theintermediate data structures. As before, the @crew variable contains two elements, each of which is areference to a hash containing keyword-based information about a particular crew member.
The anonymous hash constructor always evaluates its contents in a list context and then constructs ahash from key/value pairs, just as if we had assigned that list to a named hash. Perl returns areference to that hash as a single value that fits wherever a scalar fits.
Now, a word from our parser: because blocks and anonymous hash constructors both use curlybraces in roughly the same places in the syntax tree, the compiler has to make ad hocdeterminations about which of the two you mean. If the compiler ever decides incorrectly, you mightneed to provide a hint to get what you want. To show the compiler that you want an anonymoushash constructor, put a plus sign before the opening curly brace: +{ ... }. To be sure to get a blockof code, just put a semicolon (representing an empty statement) at the beginning of the block: {;... }.
5.7. Autovivification
Let's look again at the provisions list. Suppose we were reading the data from a file, in this format:
The Skipper blue_shirt hat jacket preserver sunscreenProfessor sunscreen water_bottle slide_ruleGilligan red_shirt hat lucky_socks water_bottle
We indent provisions with some whitespace, following a non-indented line with the person's name.Let's construct a hash of provisions. The keys of the hash will be the person's name, and the valuewill be an array reference to an array containing a list of provisions.
Initially, we might gather the data using a simple loop:
my %provisions;my $person;
while (<>) { if (/^(\S.*)/) { # a person's name (no leading whitespace) $person = $1; $provisions{$person} = [ ] unless exists $provisions{$person}; } elsif (/^\s+(\S.*)/) { # a provision die 'No person yet!' unless defined $person; push @{ $provisions{$person} }, $1; } else { die "I don't understand: $_"; }}

First, we declare the variables for the resulting hash of provisions and the current person. For eachline that we read, we determine if it's a person or a provision. If it's a person, we remember thename and create the hash element for that person. The unless exists test ensures that we won'tdelete someone's provision list if his list is split in two places in the datafile.
For example, suppose that "The Skipper" and "sextant" (note the leading whitespace) are at the endof the datafile in order to list an additional data item.
The key is the person's name, and the value is initially a reference to an empty anonymous array. Ifthe line is a provision, push it to the end of the correct array, using the array reference.
This code works fine, but it actually says more than it needs to. Why? Because we can leave out theline that initializes the hash element's value to a reference to an empty array:
my %provisions;my $person;
while (<>) { if (/^(\S.*)/) { # a person's name (no leading whitespace) $person = $1; ## $provisions{$person} = [ ] unless exists $provisions{$person}; } elsif (/^\s+(\S.*)/) { # a provision die 'No person yet!' unless defined $person; push @{ $provisions{$person} }, $1; } else { die "I don't understand: $_"; }}
What happens when we try to store that blue shirt for the Skipper? While looking at the second lineof input, we'll end up with this effect:
push @{ $provisions{'The Skipper'} }, "blue_shirt";
At this point, $provisions{"The Skipper"} doesn't exist, but we're trying to use it as an arrayreference. To resolve the situation, Perl automatically inserts a reference to a new empty anonymousarray into the variable and continues the operation. In this case, the reference to the newly createdempty array is dereferenced, and we push the blue shirt to the provisions list.
This process is called autovivification. Any nonexistent variable, or a variable containing undef, whichwe dereference while looking for a variable location (technically called an lvalue context), isautomatically stuffed with the appropriate reference to an empty item, and Perl allows the operationto proceed.
This is actually the same behavior we've probably been using in Perl all along. Perl creates newvariables as needed. Before that statement, $provisions{"The Skipper"} didn't exist, so Perl created

it. Then @{ $provisions{"The Skipper"} } didn't exist, so Perl created it as well.
For example, this works:
my $not_yet; # new undefined variable@$not_yet = (1, 2, 3);
Here, we dereference the value $not_yet as if it were an array reference. But since it's initially undef,Perl acts as if we had said:
my $not_yet;$not_yet = [ ]; # inserted through autovivification@$not_yet = (1, 2, 3);
In other words, an initially empty array becomes an array of three elements.
This autovivification also works for multiple levels of assignment:
my $top;$top->[2]->[4] = 'lee-lou';
Initially, $top contains undef, but because we dereference it as if it were an array reference, Perlinserts a reference to an empty anonymous array into $top. Perl then accesses the third element(index value 2), which causes Perl to grow the array to be three elements long. That element is alsoundef, so Perl stuffs it with a reference to another empty anonymous array. We then spin out alongthat newly created array, setting the fifth element to lee-lou.
5.8. Autovivification and Hashes
Autovivification also works for hash references . If we dereference a variable containing undef as if itwere a hash reference, a reference to an empty anonymous hash is inserted, and the operationcontinues.
One place this comes in very handy is in a typical data reduction task. For example, let's say theProfessor gets an island-area network up and running (perhaps using Coco-Net or maybe Vines) andnow wants to track the traffic from host to host. He begins logging the number of bytes transferredto a log file, giving the source host, the destination host, and the number of transferred bytes:
professor.hut gilligan.crew.hut 1250professor.hut lovey.howell.hut 910thurston.howell.hut lovey.howell.hut 1250professor.hut lovey.howell.hut 450professor.hut laser3.copyroom.hut 2924ginger.girl.hut professor.hut 1218ginger.girl.hut maryann.girl.hut 199...
Now the Professor wants to produce a summary of the source host, the destination host, and thetotal number of transferred bytes for the day. Tabulating the data is as simple as:
my %total_bytes;while (<>) { my ($source, $destination, $bytes) = split; $total_bytes{$source}{$destination} += $bytes;}
Let's see how this works on the first line of data. We'll be executing:
$total_bytes{'professor.hut'}{'gilligan.crew.hut'} += 1250;
Because %total_bytes is initially empty, Perl doesn't find the first key of professor.hut, but itestablishes an undef value for the dereferencing as a hash reference. (Keep in mind that an implicitarrow is between the two sets of curly braces here.) Perl sticks a reference to an empty anonymoushash in that element, which it then immediately extends to include the element with a key of

gilligan.crew.hut. Its initial value is undef, which acts like a zero when you add 1250 to it, and theresult of 1250 is inserted back into the hash.
Any later data line that contains this same source host and destination host will re-use that samevalue, adding more bytes to the running total. But each new destination host extends a hash toinclude a new initially undef byte count, and each new source host uses autovivification to create adestination host hash. In other words, Perl does the right thing, as always.
Once we've processed the file, it's time to display the summary. First, we determine all the sources:
for my $source (keys %total_bytes) {...
Now, we should get all destinations. The syntax for this is a bit tricky. We want all keys of the hash,resulting from dereferencing the value of the hash element, in the first structure:
for my $source (keys %total_bytes) { for my $destination (keys %{ $total_bytes{$source} }) {....
For good measure, we should probably sort both lists to be consistent:
for my $source (sort keys %total_bytes) { for my $destination (sort keys %{ $total_bytes{$source} }) { print "$source => $destination:", " $total_bytes{$source}{$destination} bytes\n"; } print "\n";}
This is a typical data-reduction report generation strategy.[*] Simply create a hash-of-hashrefs(perhaps nested even deeper, as you'll see later), using autovivification to fill in the gaps in the upperdata structures as needed, and then walk through the resulting data structure to display the results.
[*] You can read more examples in the Perl Data Structures Cookbook, the perldsc documentation page.

5.9. Exercises
You can find the answers to these exercises in "Answers for Chapter 5" in the Appendix.
5.9.1. Exercise 1 [5 min]
Without running it, can you see what's wrong with this piece of a program? If you can't see theproblem after a minute or two, see whether trying to run it will give you a hint of how to fix it.
my %passenger_1 = { name => 'Ginger', age => 22, occupation => 'Movie Star', real_age => 35, hat => undef,};
my %passenger_2 = { name => 'Mary Ann', age => 19, hat => 'bonnet', favorite_food => 'corn',};
my @passengers = (\%passenger_1, \%passenger_2);
5.9.2. Exercise 2 [40 min]
The Professor's datafile (mentioned earlier in this chapter) is available as coconet.dat in the files youcan download from the O'Reilly web site. There may be comment lines (beginning with a pound sign);be sure to skip them. (That is, your program should skip them. You might find a helpful hint if youread them!)
Modify the code from this chapter so that each source machine's portion of the output shows the totalnumber of bytes from that machine. List the source machines in order from most to least datatransferred. Within each group, list the destination machines in order from most to least datatransferred to that target from the source machine.
The result should be that the machine that sent the most data will be the first source machine in thelist, and the first destination should be the machine to which it sent the most data. The Professor canuse this printout to reconfigure the network for efficiency.
Chapter 6. Manipulating Complex DataStructuresNow that you've seen the basics of references, let's look at additional ways to manipulate complexdata. We'll start by using the debugger to examine complex data structures and then useData::Dumper to show the data under programmatic control. Next, you'll learn to store and retrievecomplex data easily and quickly using Storable, and finally we'll wrap up with a review of grep andmap and see how they apply to complex data.

6.1. Using the Debugger to View Complex Data
The Perl debugger can display complex data easily. For example, let's single-step through one version of thebyte-counting program from Chapter 5 :
my %total_bytes;while (<>) { my ($source, $destination, $bytes) = split; $total_bytes{$source}{$destination} += $bytes;}for my $source (sort keys %total_bytes) { for my $destination (sort keys %{ $total_bytes{$source} }) { print "$source => $destination:", " $total_bytes{$source}{$destination} bytes\n"; } print "\n";}
Here's the data we'll use to test it:
professor.hut gilligan.crew.hut 1250professor.hut lovey.howell.hut 910thurston.howell.hut lovey.howell.hut 1250professor.hut lovey.howell.hut 450ginger.girl.hut professor.hut 1218ginger.girl.hut maryann.girl.hut 199
We can do this a number of ways. One of the easiest is to invoke Perl with a -d switch on the command line:
myhost% perl -d bytecounts bytecounts-in
Loading DB routines from perl5db.pl version 1.19Editor support available.
Enter h or 'h h' for help, or 'man perldebug' for more help.
main::(bytecounts:2): my %total_bytes; DB<1> smain::(bytecounts:3): while (<>) { DB<1> s

main::(bytecounts:4): my ($source, $destination, $bytes) = split; DB<1> smain::(bytecounts:5): $total_bytes{$source}{$destination} += $bytes; DB<1> x $source, $destination, $bytes0 'professor.hut'1 'gilligan.crew.hut'2 1250
If you're playing along at home, be aware that each new release of the debugger works differently than anyother, so your screen probably won't look exactly like ours. Also, if you get stuck at any time, type h forhelp or look at perldoc perldebug .
The debugger shows each line of code before it executes it. That means that, at this point, we're about toinvoke the autovivification, and we've got our keys established. The s command single-steps the program,while the x command dumps a list of values in a nice format. We can see that $source , $destination , and$bytes are correct, and now it's time to update the data:
DB<2> s main::(bytecounts:3): while (<>) {
We've created the hash entries through autovivification. Let's see what we've got:
DB<2> x \%total_bytes 0 HASH(0x132dc) 'professor.hut' => HASH(0x37a34) 'gilligan.crew.hut' => 1250
When we give x a hash reference, it dumps the entire contents of the hash, showing the key/value pairs. Ifany of the values are also hash references, it dumps those as well, recursively. What we'll see is that the%total_bytes hash has a single key of professor.hut , whose corresponding value is another hashreference. The referenced hash contains a single key of gilligan.crew.hut , with a value of 1250 , asexpected.
Let's see what happens just after the next assignment:
DB<3> s main::(bytecounts:4): my ($source, $destination, $bytes) = split;DB<3> s main::(bytecounts:5): $total_bytes{$source}{$destination} += $bytes;DB<3> x $source, $destination, $bytes 0 'professor.hut' 1 'lovey.howell.hut' 2 910

DB<4> s main::(bytecounts:3): while (<>) {DB<4> x \%total_bytes 0 HASH(0x132dc) 'professor.hut' => HASH(0x37a34) 'gilligan.crew.hut' => 1250 'lovey.howell.hut' => 910
Now we've added bytes flowing from professor.hut to lovey.howell.hut . The top-level hash hasn'tchanged, but the second-level hash has added a new entry. Let's continue:
DB<5> s main::(bytecounts:4): my ($source, $destination, $bytes) = split;DB<6> s main::(bytecounts:5): $total_bytes{$source}{$destination} += $bytes;DB<6> x $source, $destination, $bytes 0 'thurston.howell.hut' 1 'lovey.howell.hut' 2 1250DB<7> s main::(bytecounts:3): while (<>) {DB<7> x \%total_bytes 0 HASH(0x132dc) 'professor.hut' => HASH(0x37a34) 'gilligan.crew.hut' => 1250 'lovey.howell.hut' => 910 'thurston.howell.hut' => HASH(0x2f9538) 'lovey.howell.hut' => 1250
Ah, now it's getting interesting. A new entry in the top-level hash has a key of thurston.howell.hut , and anew hash reference, autovivified initially to an empty hash. Immediately after the new empty hash was putin place, a new key/value pair was added, indicating 1250 bytes transferred from thurston.howell.hut tolovey.howell.hut . Let's step some more:
DB<8> s main::(bytecounts:4): my ($source, $destination, $bytes) = split;DB<8> s main::(bytecounts:5): $total_bytes{$source}{$destination} += $bytes;DB<8> x $source, $destination, $bytes 0 'professor.hut' 1 'lovey.howell.hut' 2 450DB<9> s main::(bytecounts:3): while (<>) {DB<9> x \%total_bytes 0 HASH(0x132dc)

'professor.hut' => HASH(0x37a34) 'gilligan.crew.hut' => 1250 'lovey.howell.hut' => 1360 'thurston.howell.hut' => HASH(0x2f9538) 'lovey.howell.hut' => 1250
Now we're adding in some more bytes from professor.hut to lovey.howell.hut , reusing the existing valueplace. Nothing too exciting there. Let's keep stepping:
DB<10> s main::(bytecounts:4): my ($source, $destination, $bytes) = split;DB<10> s main::(bytecounts:5): $total_bytes{$source}{$destination} += $bytes;DB<10> x $source, $destination, $bytes 0 'ginger.girl.hut' 1 'professor.hut' 2 1218DB<11> s main::(bytecounts:3): while (<>) {DB<11> x \%total_bytes 0 HASH(0x132dc) 'ginger.girl.hut' => HASH(0x297474) 'professor.hut' => 1218 'professor.hut' => HASH(0x37a34) 'gilligan.crew.hut' => 1250 'lovey.howell.hut' => 1360 'thurston.howell.hut' => HASH(0x2f9538) 'lovey.howell.hut' => 1250
This time, we added a new source, ginger.girl.hut . Notice that the top level hash now has threeelements, and each element has a different hash reference value. Let's step some more:
DB<12> s main::(bytecounts:4): my ($source, $destination, $bytes) = split;DB<12> s main::(bytecounts:5): $total_bytes{$source}{$destination} += $bytes;DB<12> x $source, $destination, $bytes 0 'ginger.girl.hut' 1 'maryann.girl.hut' 2 199DB<13> s main::(bytecounts:3): while (<>) {DB<13> x \%total_bytes 0 HASH(0x132dc) 'ginger.girl.hut' => HASH(0x297474) 'maryann.girl.hut' => 199

'professor.hut' => 1218 'professor.hut' => HASH(0x37a34) 'gilligan.crew.hut' => 1250 'lovey.howell.hut' => 1360 'thurston.howell.hut' => HASH(0x2f9538) 'lovey.howell.hut' => 1250
Now we've added a second destination to the hash that records information for all bytes originating atginger.girl.hut . Because that was the final line of data (in this run), a step brings us down to the lowerforeach loop:
DB<14> s main::(bytecounts:8): for my $source (sort keys %total_bytes) {
Even though we can't directly examine the list value from inside those parentheses, we can display it:
DB<14> x sort keys %total_bytes 0 'ginger.girl.hut' 1 'professor.hut' 2 'thurston.howell.hut'
This is the list the foreach now scans. These are all the sources for transferred bytes seen in this particularlogfile. Here's what happens when we step into the inner loop:
DB<15> s main::(bytecounts:9): for my $destination (sort keys %{ $total_bytes{$source} }) {
At this point, we can determine from the inside out exactly what values will result from the list value frominside the parentheses. Let's look at them:
DB<15> x $source 0 'ginger.girl.hut'DB<16> x $total_bytes{$source} 0 HASH(0x297474) 'maryann.girl.hut' => 199 'professor.hut' => 1218DB<18> x keys %{ $total_bytes{$source } } 0 'maryann.girl.hut' 1 'professor.hut'DB<19> x sort keys %{ $total_bytes{$source } }

0 'maryann.girl.hut' 1 'professor.hut'
Note that dumping $total_bytes{$source} shows that it was a hash reference. Also, the sort appears notto have done anything, but the output of keys is not necessarily in a sorted order. The next step finds thedata:
DB<20> s main::(bytecounts:10): print "$source => $destination:", main::(bytecounts:11): " $total_bytes{$source}{$destination} bytes\n";DB<20> x $source, $destination 0 'ginger.girl.hut' 1 'maryann.girl.hut'DB<21> x $total_bytes{$source}{$destination} 0 199
As we can see with the debugger, we can easily show the data, even structured data, to help us understandour program.

6.2. Viewing Complex Data with Data::Dumper
Another way to visualize a complex data structure rapidly is to dump it. A particularly nice dumpingpackage is included in the Perl core distribution, called Data::Dumper. Let's replace the last half of thebyte-counting program with a simple call to Data::Dumper:
use Data::Dumper;
my %total_bytes;while (<>) { my ($source, $destination, $bytes) = split; $total_bytes{$source}{$destination} += $bytes;}
print Dumper(\%total_bytes);
The Data::Dumper module defines the Dumper subroutine. This subroutine is similar to the x commandin the debugger. We can give Dumper one or more values, and Dumper turns those values into aprintable string. The difference between the debugger's x command and Dumper, however, is that thestring generated by Dumper is Perl code:
myhost% perl bytecounts2 <bytecounts-in$VAR1 = { 'thurston.howell.hut' => { 'lovey.howell.hut' => 1250 }, 'ginger.girl.hut' => { 'maryann.girl.hut' => 199, 'professor.hut' => 1218 }, 'professor.hut' => { 'gilligan.crew.hut' => 1250, 'lovey.howell.hut' => 1360 } };myhost%
The Perl code is fairly understandable; it shows that we have a reference to a hash of three elements,with each value of the hash being a reference to a nested hash. We can evaluate this code and get ahash that's equivalent to the original hash. However, if you're thinking about doing this in order to
have a complex data structure persist from one program invocation to the next, please keep reading.
Data::Dumper, like the debugger's x command, handles shared data properly. For example, go backto that "leaking" data from Chapter 5:
use Data::Dumper;$Data::Dumper::Purity = 1; # declare possibly self-referencing structuresmy @data1 = qw(one won);my @data2 = qw(two too to);push @data2, \@data1;push @data1, \@data2;print Dumper(\@data1, \@data2);
Here's the output from this program:
$VAR1 = [ 'one', 'won', [ 'two', 'too', 'to', [ ] ] ];$VAR1->[2][3] = $VAR1;$VAR2 = $VAR1->[2];
Notice how we've created two different variables now, since there are two parameters to Dumper. Theelement $VAR1 corresponds to a reference to @data1, while $VAR2 corresponds to a reference to@data2. The debugger shows the values similarly:
DB<1> x \@data1, \@data2 0 ARRAY(0xf914) 0 'one' 1 'won' 2 ARRAY(0x3122a8) 0 'two' 1 'too' 2 'to' 3 ARRAY(0xf914) -> REUSED_ADDRESS 1 ARRAY(0x3122a8) -> REUSED_ADDRESS

Note that the phrase REUSED_ADDRESS indicates that some parts of the data are actually referenceswe've already seen.

6.3. YAML
Data::Dumper is not the only game on the island, though. Brian Ingerson came up with Yet AnotherMarkup Language (YAML) to provide a more readable (and more compact) dump. It works in thesame way as Data::Dumper. We'll see more about YAML when we talk about modules later, so wewon't say much about it here.
From the earlier example, we plug in YAML where we had Data::Dumper, and use Dump( ) where wehad Dumper( ).
use YAML;
my %total_bytes;
while (<>) { my ($source, $destination, $bytes) = split; $total_bytes{$source}{$destination} += $bytes; }
print Dump(\%total_bytes);
When you use the same data from the earlier example, you get this output:
--- #YAML:1.0ginger.girl.hut: maryann.girl.hut: 199 professor.hut: 1218professor.hut: gilligan.crew.hut: 1250 lovey.howell.hut: 1360thurston.howell.hut: lovey.howell.hut: 1250
That's a lot easier to read because it takes up less space on the screen, which can be really handywhen you have deeply nested data structures.

6.4. Storing Complex Data with Storable
We can take the output of Data::Dumper's Dumper routine, place it into a file, and then load the file toa different program. When we evaluate the code as Perl code, we end up with two package variables,$VAR1 and $VAR2, that are equivalent to the original data. This is called marshaling the data:converting complex data into a form that we can write to a file as a stream of bytes for laterreconstruction.
However, another Perl core module is much better suited for marshaling: Storable. It's better suitedbecause compared to Data::Dumper, Storable produces smaller and faster-to-process files. (TheStorable module is standard in recent versions of Perl, but you can always install it from the CPAN ifit's missing.)
The interface is similar to using Data::Dumper, except we must put everything into one reference. Forexample, let's store the mutually referencing data structures:
use Storable;my @data1 = qw(one won);my @data2 = qw(two too to);push @data2, \@data1;push @data1, \@data2;store [\@data1, \@data2], 'some_file';
The file produced by this step is under 100 bytes, which is quite a bit shorter than the equivalentData::Dumper output. It's also much less readable for humans. It's easy for Storable to read, as you'llsoon see.[*] Next, fetch the data, again using the Storable module. The result will be a single arrayreference. We dump the result to see if it stored the right values:
[*] The format used by Storable is architecture byte-order dependent by default. Its documentation shows how to create byte-
order-independent storage files.
use Storable;my $result = retrieve 'some_file';use Data::Dumper;$Data::Dumper::Purity = 1;print Dumper($result);
Here's the result:
$VAR1 = [

[ 'one', 'won', [ 'two', 'too', 'to', [ ] ] ], [ ] ];$VAR1->[0][2][3] = $VAR1->[0];$VAR1->[1] = $VAR1->[0][2];
This is functionally the same as the original data structure. We're now looking at the two arrayreferences within one top-level array. To get something closer to what we saw before, we can bemore explicit about the return value:
use Storable;my ($arr1, $arr2) = @{ retrieve 'some_file' };use Data::Dumper;$Data::Dumper::Purity = 1;print Dumper($arr1, $arr2);
or equivalently:
use Storable;my $result = retrieve 'some_file';use Data::Dumper;$Data::Dumper::Purity = 1;print Dumper(@$result);
and we'll get:
$VAR1 = [ 'one', 'won', [ 'two', 'too', 'to', [ ]

] ];$VAR1->[2][3] = $VAR1;$VAR2 = $VAR1->[2];
just as we did in the original program. With Storable, we can store data and retrieve it later. Moreinformation on Storable can be found in perldoc Storable, as always.

6.5. Using the map and grep Operators
As the data structures become more complex, it helps to have higher-level constructs deal withcommon tasks such as selection and transformation. In this regard, Perl's grep and map operators areworth mastering.

6.6. Applying a Bit of Indirection
Some problems that may appear very complex are actually simple once we've seen a solution or two.For example, suppose we want to find the items in a list that have odd digit sums but don't want theitems themselves. What we want to know is where they occurred in the original list.
All that's required is a bit of indirection .[*] First, we have a selection problem, so we use a grep. Let'snot grep the values themselves but the index for each item:
[*] A famous computing maxim states that "there is no problem so complex that it cannot be solved with appropriate additional
layers of indirection." Of course, with indirection comes obfuscation, so there's got to be a magic middle ground somewhere.
my @input_numbers = (1, 2, 4, 8, 16, 32, 64);my @indices_of_odd_digit_sums = grep { ...} 0..$#input_numbers;
Here, the expression 0..$#input_numbers will be a list of indices for the array. Inside the block, $_ isa small integer, from 0 to 6 (seven items total). Now, we don't want to decide whether $_ has an odddigit sum. We want to know whether the array element at that index has an odd digit sum. Instead ofusing $_ to get the number of interest, use $input_numbers[$_]:
my @indices_of_odd_digit_sums = grep { my $number = $input_numbers[$_]; my $sum; $sum += $_ for split //, $number; $sum % 2;} 0..$#input_numbers;
The result will be the indices at which 1, 16, and 32 appear in the list: 0, 4, and 5. We could usethese indices in an array slice to get the original values again:
my @odd_digit_sums = @input_numbers[ @indices_of_odd_digit_sums ];
The strategy here for an indirect grep or map is to think of the $_ values as identifying a particularitem of interest, such as the key in a hash or the index of an array, and then use that identificationwithin the block or expression to access the actual values.

Here's another example: select the elements of @x that are larger than the corresponding value in @y.Again, we'll use the indices of @x as our $_ items:
my @bigger_indices = grep { if ($_ > $#y or $x[$_] > $y[$_]) { 1; # yes, select it } else { 0; # no, don't select it }} 0..$#x;my @bigger = @x[@bigger_indices];
In the grep, $_ varies from 0 to the highest index of @x. If that element is beyond the end of @y, weautomatically select it. Otherwise, we look at the individual corresponding values of the two arrays,selecting only the ones that meet our match.
However, this is a bit more verbose than it needs to be. We could simply return the booleanexpression rather than a separate 1 or 0:
my @bigger_indices = grep { $_ > $#y or $x[$_] > $y[$_];} 0..$#x;my @bigger = @x[@bigger_indices];
More easily, we can skip the step of building the intermediate array by simply returning the items ofinterest with a map:
my @bigger = map { if ($_ > $#y or $x[$_] > $y[$_]) { $x[$_]; } else { ( ); }} 0..$#x;
If the index is good, return the resulting array value. If the index is bad, return an empty list, makingthat item disappear.

6.7. Selecting and Altering Complex Data
We can use these operators on more complex data. Taking the provisions list from Chapter 5:
my %provisions = ( 'The Skipper' => [qw(blue_shirt hat jacket preserver sunscreen)], 'The Professor' => [qw(sunscreen water_bottle slide_rule radio) ], 'Gilligan' => [qw(red_shirt hat lucky_socks water_bottle) ],);
In this case, $provisions{"The Professor"} gives an array reference of the provisions brought by theProfessor, and $provisions{"Gilligan"}[-1] gives the last item Gilligan thought to bring.
We run a few queries against this data. Who brought fewer than five items?
my @packed_light = grep @{ $provisions{$_} } < 5, keys %provisions;
In this case, $_ is the name of a person. We take that name, look up the array reference of theprovisions for that person, dereference that in a scalar context to get the count of provisions, andthen compare it to 5. And wouldn't you know it; the only name is Gilligan.
Here's a trickier one. Who brought a water bottle?
my @all_wet = grep { my @items = @{ $provisions{$_} }; grep $_ eq 'water_bottle', @items;} keys %provisions;
Starting with the list of names again (keys %provisions), we pull up all the packed items first andthen use that list in an inner grep to count the number of those items that equal water_bottle. If thecount is 0, there's no bottle, so the result is false for the outer grep. If the count is nonzero, we havea bottle, so the result is true for the outer grep. Now we see that the Skipper will be a bit thirstylater, without any relief.
We can also perform transformations. For example, turn this hash into a list of array references, witheach array containing two items. The first is the original person's name; the second is a reference toan array of the provisions for that person:

my @remapped_list = map { [ $_ => $provisions{$_} ];} keys %provisions;
The keys of %provisions are names of the people. For each name, we construct a two-element list ofthe name and the corresponding provisions array reference. This list is inside an anonymous arrayconstructor, so we get back a reference to a newly created array for each person. Three names in;three references out.[*] Or, let's go a different way. Turn the input hash into a series of references toarrays. Each array will have a person's name and one of the items they brought:
[*] If we had left the inner brackets off, we'd end up with six items out. That's not very useful, unless we're creating a different hash
from them.
my @person_item_pairs = map { my $person = $_; my @items = @{ $provisions{$person} }; map [$person => $_], @items;} keys %provisions;
Yes, a map within a map. The outer map selects one person at a time. We save this name in $person,and then we extract the item list from the hash. The inner map walks over this item list, executing theexpression to construct an anonymous array reference for each item. The anonymous array containsthe person's name and the provision item.
We had to use $person here to hold the outer $_ temporarily. Otherwise, we can't refer to bothtemporary values for the outer map and the inner map.

6.8. Exercises
You can find the answers to these exercises in "Answers for Chapter 6" in the Appendix.
6.8.1. Exercise 1 [20 min]
The program from Exercise 2 in Chapter 5 needs to read the entire datafile each time it runs.However, the Professor has a new router logfile each day and doesn't want to keep all that data inone giant file that takes longer and longer to process.
Fix up that program to keep the running totals in a datafile so the Professor can simply run it on eachday's logs to get the new totals.
6.8.2. Exercise 2 [5 min]
To make it really useful, what other features should be added to that program? You don't need toimplement them!

Chapter 7. Subroutine ReferencesSo far, you've seen references to three main Perl data types: scalars, arrays, and hashes. We canalso take a reference to a subroutine (sometimes called a coderef).
Why would we want to do that? Well, in the same way that taking a reference to an array lets youhave the same code work on different arrays at different times, taking a reference to a subroutineallows the same code to call different subroutines at different times. Also, references permit complexdata structures. A reference to a subroutine allows a subroutine to effectively become part of thatcomplex data structure.
Put another way, a variable or a complex data structure is a repository of values throughout theprogram. A reference to a subroutine can be thought of as a repository of behavior in a program. Theexamples in this section show how this works.
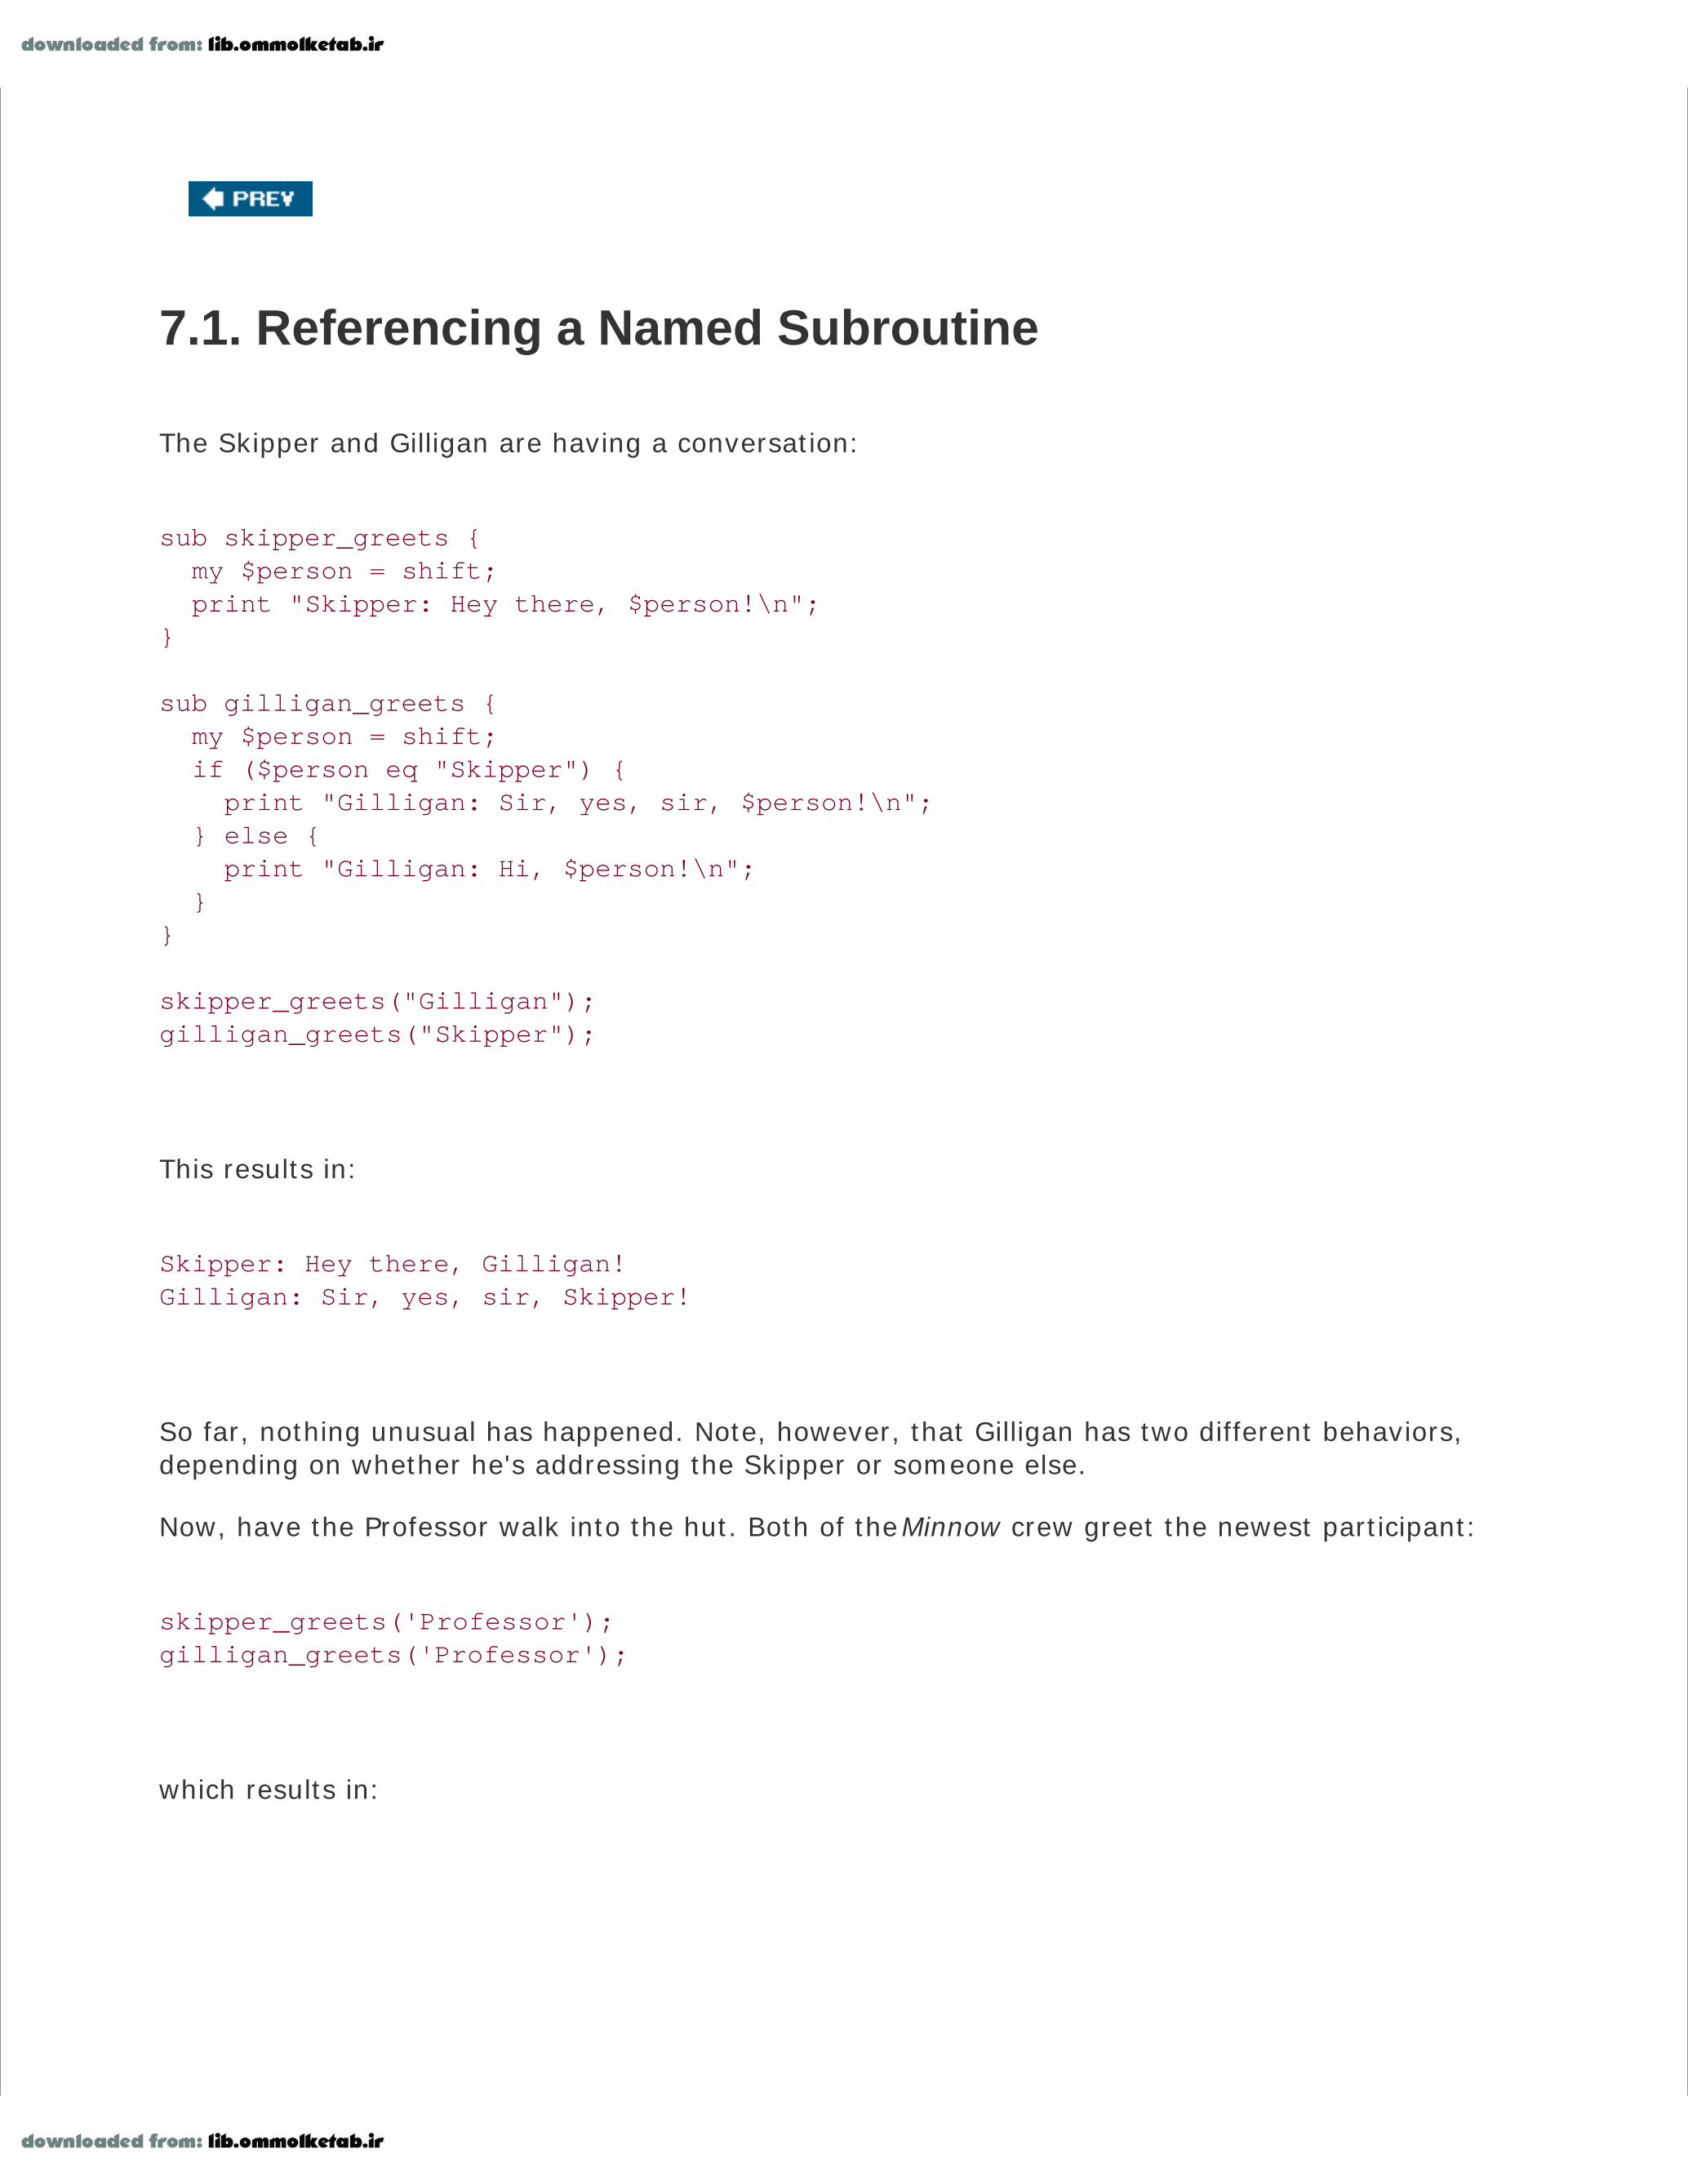
7.1. Referencing a Named Subroutine
The Skipper and Gilligan are having a conversation:
sub skipper_greets { my $person = shift; print "Skipper: Hey there, $person!\n";}
sub gilligan_greets { my $person = shift; if ($person eq "Skipper") { print "Gilligan: Sir, yes, sir, $person!\n"; } else { print "Gilligan: Hi, $person!\n"; }}
skipper_greets("Gilligan");gilligan_greets("Skipper");
This results in:
Skipper: Hey there, Gilligan!Gilligan: Sir, yes, sir, Skipper!
So far, nothing unusual has happened. Note, however, that Gilligan has two different behaviors,depending on whether he's addressing the Skipper or someone else.
Now, have the Professor walk into the hut. Both of the Minnow crew greet the newest participant:
skipper_greets('Professor');gilligan_greets('Professor');
which results in:

Skipper: Hey there, Professor!Gilligan: Hi, Professor!
Now the Professor feels obligated to respond:
sub professor_greets { my $person = shift; print "Professor: By my calculations, you must be $person!\n";}
professor_greets('Gilligan');professor_greets('Skipper');
resulting in:
Professor: By my calculations, you must be Gilligan!Professor: By my calculations, you must be Skipper!
Whew! That's lot of typing and not very general. If each person's behavior is in a separate namedsubroutine, and a new person walks in the door, we have to figure out what other subroutines to call.We could certainly do it with enough hard-to-maintain code, but we can simplify the process byadding a bit of indirection, just as we did with arrays and hashes.
First, let's use the "take a reference to" operator. It actually needs no introduction because it's thatvery same backslash as before:
my $ref_to_greeter = \&skipper_greets;
We're taking a reference to the subroutine skipper_greets( ). Note that the preceding ampersand ismandatory here, and the lack of trailing parentheses is also intentional. Perl stores the reference tothe subroutine (a coderef) within $ref_to_greeter, and, like all other references, it fits nearlyanywhere a scalar fits.
There's only one reason to get back to the original subroutine by dereferencing the coderef: to invokeit. Dereferencing a code reference is similar to dereferencing other references. First, start with theway we would have written it before we heard of references (including the optional ampersandprefix):
& skipper_greets ( 'Gilligan' )

Next, we replace the name of the subroutine with curly braces around the thing holding thereference:
& { $ref_to_greeter } ( 'Gilligan' )
There we have it. This construct invokes the subroutine currently referenced by $ref_to_greeter,passing it the single Gilligan parameter.
But boy-oh-boy, is that ugly or what? Luckily, the same reference simplification rules apply. If thevalue inside the curly braces is a simple scalar variable, we can drop the braces:
& $ref_to_greeter ( 'Gilligan' )
We can also flip it around a bit with the arrow notation:
$ref_to_greeter -> ( 'Gilligan' )
That last form is particularly handy when the coderef is in a larger data structure, as you'll see in amoment.
To have both Gilligan and the Skipper greet the Professor, we merely need to iterate over all thesubroutines:
for my $greet (\&skipper_greets, \&gilligan_greets) { $greet->('Professor');}
First, inside the parentheses, we create a list of two items, each of which is a coderef. The coderefsare then individually dereferenced, invoking the corresponding subroutine and passing it theProfessor string.
We've seen the coderefs in a scalar variable and as an element of a list. Can we put these coderefsinto a larger data structure? Certainly. Create a table that maps people to the behavior they exhibitto greet others, and then rewrite that previous example using the table:
sub skipper_greets { my $person = shift; print "Skipper: Hey there, $person!\n";
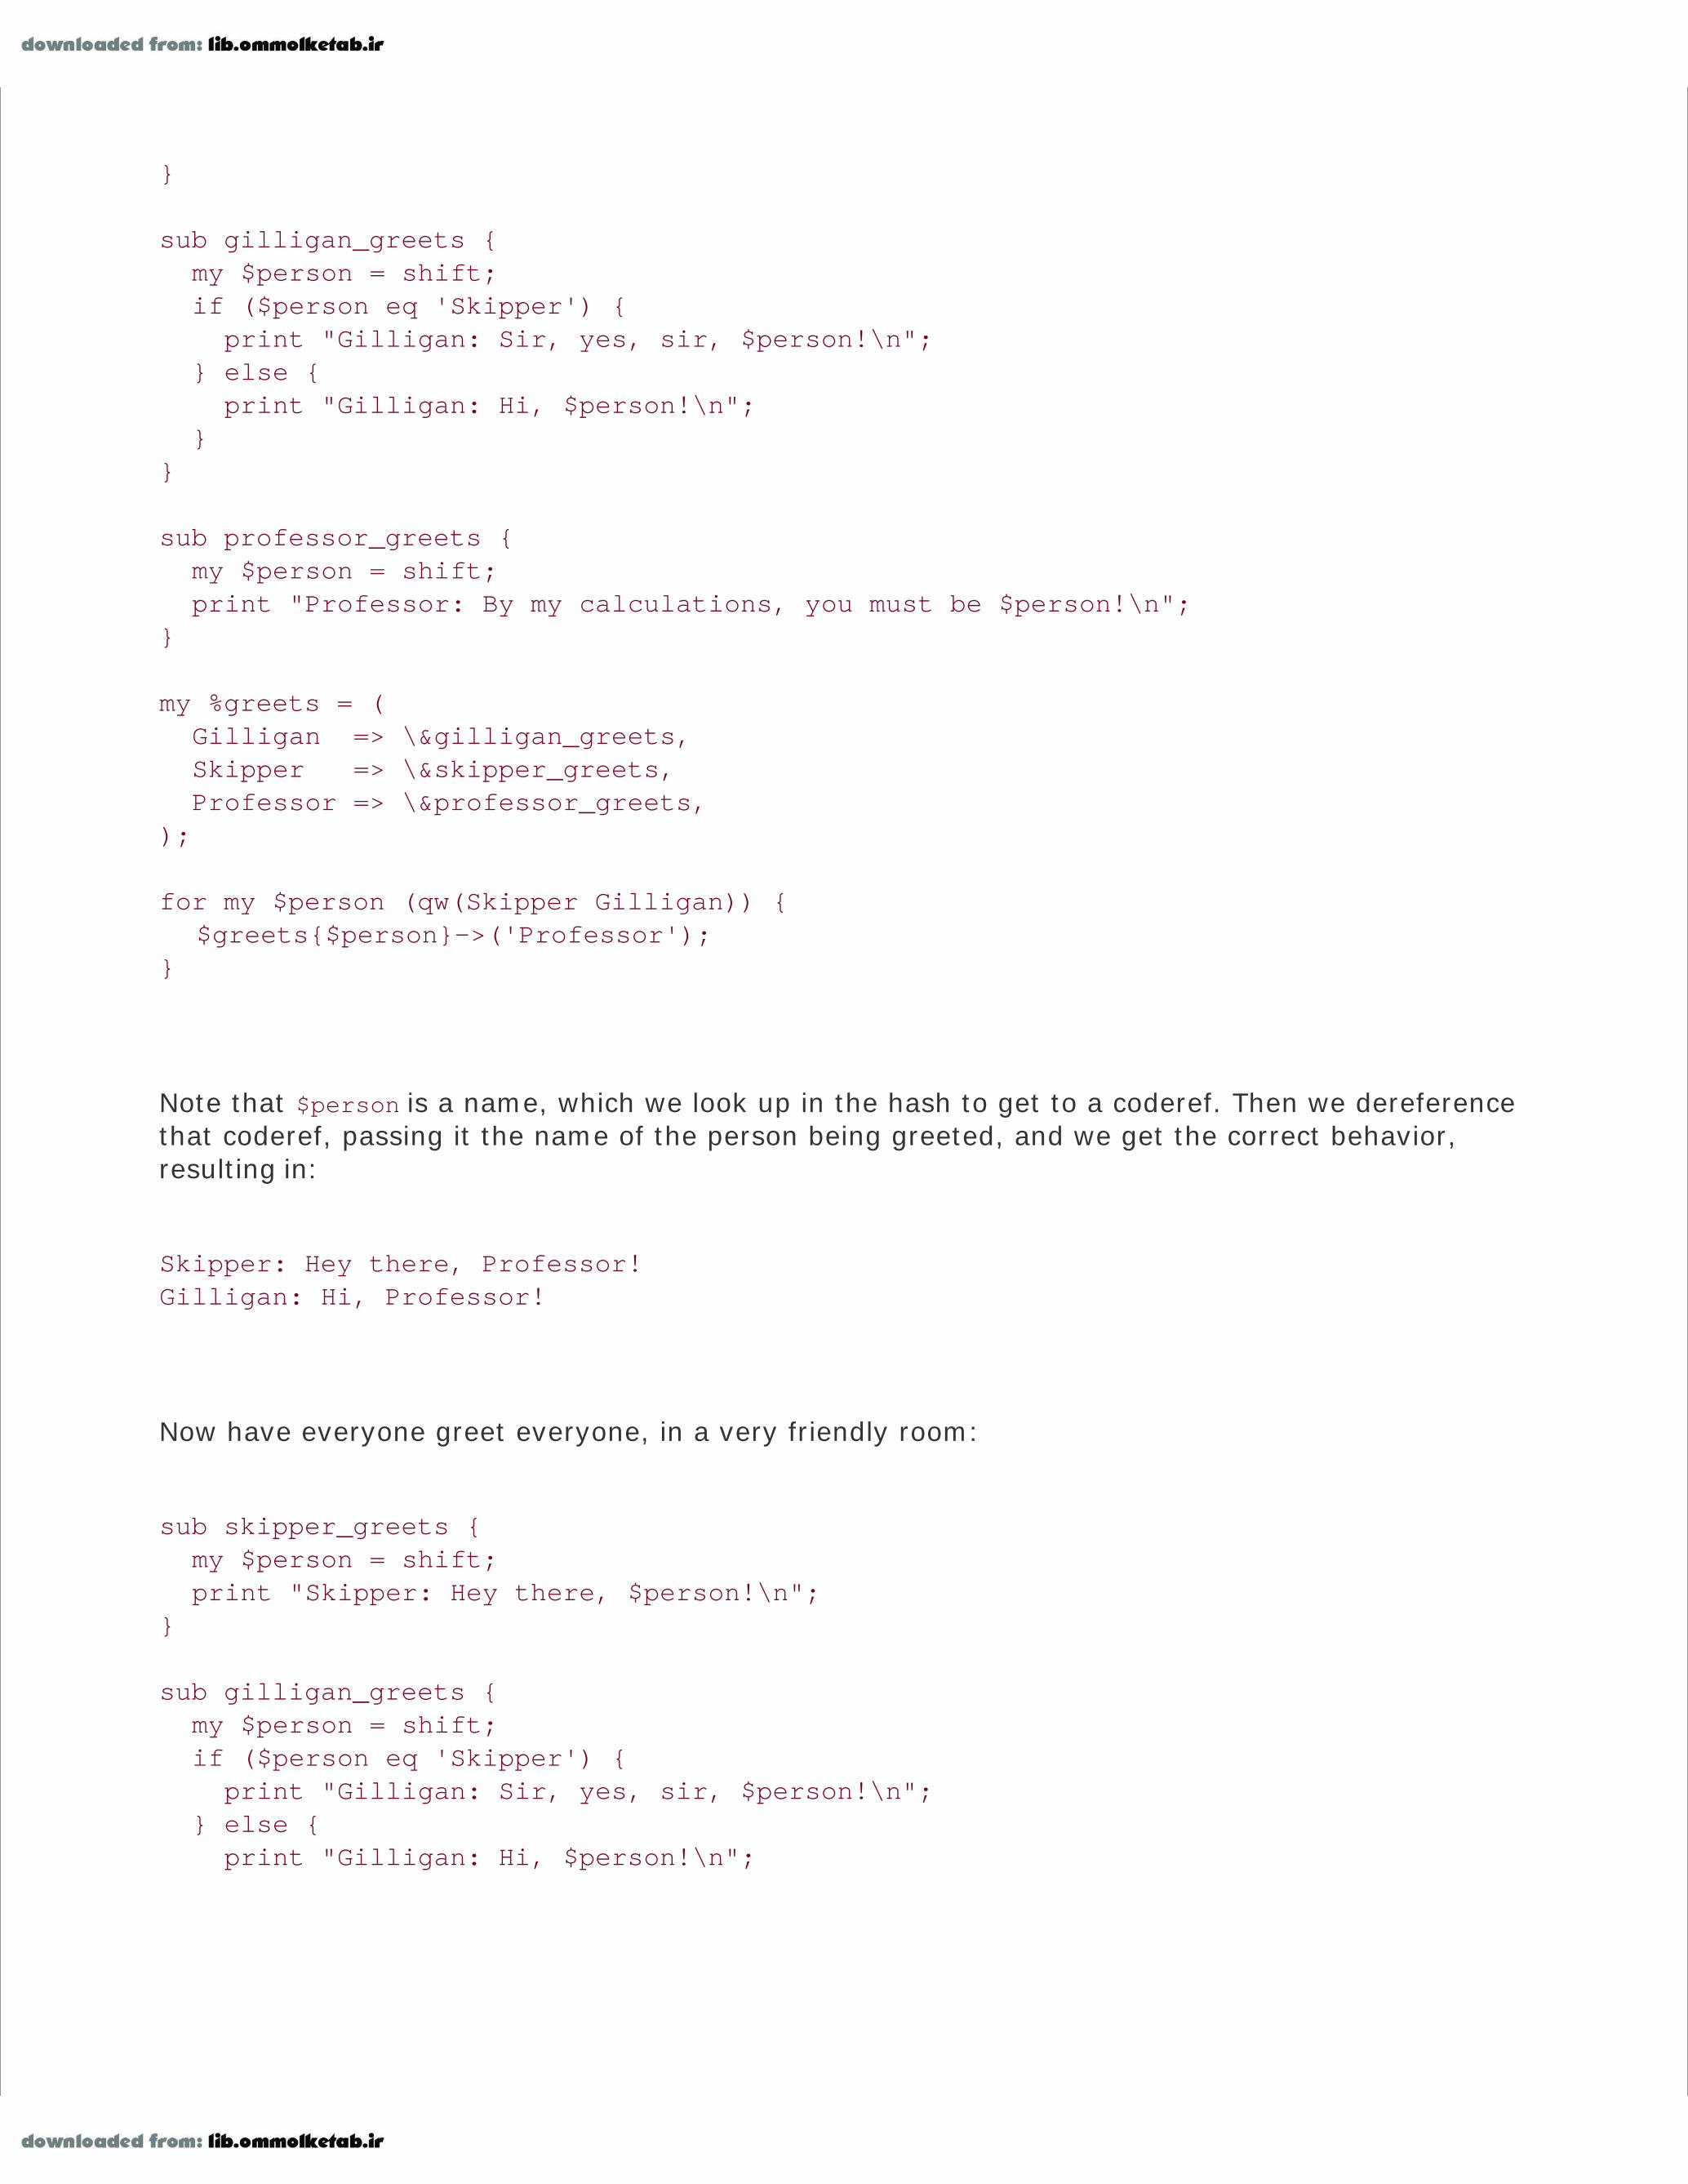
}
sub gilligan_greets { my $person = shift; if ($person eq 'Skipper') { print "Gilligan: Sir, yes, sir, $person!\n"; } else { print "Gilligan: Hi, $person!\n"; }}
sub professor_greets { my $person = shift; print "Professor: By my calculations, you must be $person!\n";}
my %greets = ( Gilligan => \&gilligan_greets, Skipper => \&skipper_greets, Professor => \&professor_greets,);
for my $person (qw(Skipper Gilligan)) { $greets{$person}->('Professor');}
Note that $person is a name, which we look up in the hash to get to a coderef. Then we dereferencethat coderef, passing it the name of the person being greeted, and we get the correct behavior,resulting in:
Skipper: Hey there, Professor!Gilligan: Hi, Professor!
Now have everyone greet everyone, in a very friendly room:
sub skipper_greets { my $person = shift; print "Skipper: Hey there, $person!\n";}
sub gilligan_greets { my $person = shift; if ($person eq 'Skipper') { print "Gilligan: Sir, yes, sir, $person!\n"; } else { print "Gilligan: Hi, $person!\n";

}}
sub professor_greets { my $person = shift; print "Professor: By my calculations, you must be $person!\n";}
my %greets = ( Gilligan => \&gilligan_greets, Skipper => \&skipper_greets, Professor => \&professor_greets,);
my @everyone = sort keys %greets;for my $greeter (@everyone) { for my $greeted (@everyone) { $greets{$greeter}->($greeted) unless $greeter eq $greeted; # no talking to yourself }}
This results in:
Gilligan: Hi, Professor!Gilligan: Sir, yes, sir, Skipper!Professor: By my calculations, you must be Gilligan!Professor: By my calculations, you must be Skipper!Skipper: Hey there, Gilligan!Skipper: Hey there, Professor!
Hmm. That's a bit complex. Let's let them walk into the room one at a time:
sub skipper_greets { my $person = shift; print "Skipper: Hey there, $person!\n";}
sub gilligan_greets { my $person = shift; if ($person eq 'Skipper') { print "Gilligan: Sir, yes, sir, $person!\n"; } else { print "Gilligan: Hi, $person!\n"; }}

sub professor_greets { my $person = shift; print "Professor: By my calculations, you must be $person!\n";}
my %greets = ( Gilligan => \&gilligan_greets, Skipper => \&skipper_greets, Professor => \&professor_greets,);
my @room; # initially emptyfor my $person (qw(Gilligan Skipper Professor)) { print "\n"; print "$person walks into the room.\n"; for my $room_person (@room) { $greets{$person}->($room_person); # speaks $greets{$room_person}->($person); # gets reply } push @room, $person; # come in, get comfy}
The result is a typical day on that tropical island:
Gilligan walks into the room.
Skipper walks into the room.Skipper: Hey there, Gilligan!Gilligan: Sir, yes, sir, Skipper!
Professor walks into the room.Professor: By my calculations, you must be Gilligan!Gilligan: Hi, Professor!Professor: By my calculations, you must be Skipper!Skipper: Hey there, Professor!

7.2. Anonymous Subroutines
In that last example, we never explicitly called subroutines such as professor_greets( ), we onlycalled them indirectly through the coderef. Thus, we wasted some brain cells to come up with a namefor the subroutine used only in one other place, to initialize the data structure. But, just as we cancreate anonymous hashes and arrays, we can create anonymous subroutines !
Let's add another island inhabitant: Ginger. But rather than define her greeting behavior as a namedsubroutine, we create an anonymous subroutine:
my $ginger = sub { my $person = shift; print "Ginger: (in a sultry voice) Well hello, $person!\n";};$ginger->('Skipper');
An anonymous subroutine looks like an ordinary sub declaration, but there's no name (or prototype)between sub and the block that follows. It's also part of a statement, so we need a trailing semicolonor other expression separator after it in most cases.
sub { ... body of subroutine ... };
The value in $ginger is a coderef, just as if we had defined the following block as a subroutine andthen taken a reference to it. When we reach the last statement, we see:
Ginger: (in a sultry voice) Well hello, Skipper!
Although we kept the value in a scalar variable, we could have put that sub { ... } construct directlyinto the initialization of the greetings hash:
my %greets = (
Skipper => sub { my $person = shift; print "Skipper: Hey there, $person!\n"; },

Gilligan => sub { my $person = shift; if ($person eq 'Skipper') { print "Gilligan: Sir, yes, sir, $person!\n"; } else { print "Gilligan: Hi, $person!\n"; } },
Professor => sub { my $person = shift; print "Professor: By my calculations, you must be $person!\n"; },
Ginger => sub { my $person = shift; print "Ginger: (in a sultry voice) Well hello, $person!\n"; },
);
my @room; # initially emptyfor my $person (qw(Gilligan Skipper Professor Ginger)) { print "\n"; print "$person walks into the room.\n"; for my $room_person (@room) { $greets{$person}->($room_person); # speaks $greets{$room_person}->($person); # gets reply } push @room, $person; # come in, get comfy}
Notice how much it simplifies the code. The subroutine definitions are right within the only datastructure that references them directly. The result is straightforward:
Gilligan walks into the room.
Skipper walks into the room.Skipper: Hey there, Gilligan!Gilligan: Sir, yes, sir, Skipper!
Professor walks into the room.Professor: By my calculations, you must be Gilligan!Gilligan: Hi, Professor!Professor: By my calculations, you must be Skipper!Skipper: Hey there, Professor!
Ginger walks into the room.Ginger: (in a sultry voice) Well hello, Gilligan!

Gilligan: Hi, Ginger!Ginger: (in a sultry voice) Well hello, Skipper!Skipper: Hey there, Ginger!Ginger: (in a sultry voice) Well hello, Professor!Professor: By my calculations, you must be Ginger!
Adding a few more castaways is as simple as putting the entry for the greeting behavior into the hashand adding them into the list of people entering the room. We get this scaling of effort because we'vepreserved the behavior as data over which you can iterate and look up, thanks to your friendlysubroutine references.

7.3. Callbacks
A subroutine reference is often used for a callback. A callback defines what to do when a subroutinereaches a particular place in an algorithm.
For example, the File::Find module exports a find subroutine that can efficiently walk through agiven filesystem hierarchy in a fairly portable way. In its simplest form, we give the find subroutinetwo parameters: a starting directory and "what to do" for each file or directory name foundrecursively below that starting directory. The "what to do" is specified as a subroutine reference:
use File::Find;sub what_to_do { print "$File::Find::name found\n";}my @starting_directories = qw(.);
find(\&what_to_do, @starting_directories);
find starts at the current directory (.) and locates each file or directory. For each item, we call thesubroutine what_to_do( ), passing it a few documented values through global variables. In particular,the value of $File::Find::name is the item's full pathname (beginning with the starting directory).
In this case, we're passing both data (the list of starting directories) and behavior as parameters tothe find routine.
It's a bit silly to invent a subroutine name to use the name only once, so we can write the previouscode using an anonymous subroutine, such as:
use File::Find;my @starting_directories = qw(.);
find( sub { print "$File::Find::name found\n"; }, @starting_directories,);

7.4. Closures
We could also use File::Find to find out some other things about files, such as their size. For thecallback's convenience, the current working directory is the item's containing directory, and theitem's name within that directory is found in $_.
Maybe you have noticed that, in the previous code, we used $File::Find::name for the item's name.So which name is real, $_ or $File::Find::name? $File::Find::name gives the name relative to thestarting directory, but during the callback, the working directory is the one that holds the item justfound. For example, suppose that we want find to look for files in the current working directory, sowe give it (".") as the list of directories to search. If we call find when the current working directoryis /usr, find looks below that directory. When find locates /usr/bin/perl, the current workingdirectory (during the callback) is /usr/bin. $_ holds perl, and $File::Find::name holds ./bin/perl,which is the name relative to the directory in which you started the search.
All of this means that the file tests, such as -s, automatically report on the just-found item. Althoughthis is convenient, the current directory inside the callback is different from the search's startingdirectory.
What if we want to use File::Find to accumulate the total size of all files seen? The callbacksubroutine cannot take arguments, and the caller discards its result. But that doesn't matter. Whendereferenced, a subroutine reference can see all visible lexical variables when the reference to thesubroutine is taken. For example:
use File::Find;
my $total_size = 0;find(sub { $total_size += -s if -f }, '.');print $total_size, "\n";
As before, we call the find routine with two parameters: a reference to an anonymous subroutineand the starting directory. When it finds names within that directory (and its subdirectories), it callsthe anonymous subroutine.
Note that the subroutine accesses the $total_size variable. We declare this variable outside thescope of the subroutine but still visible to the subroutine. Thus, even though find invokes thecallback subroutine (and would not have direct access to $total_size), the callback subroutineaccesses and updates the variable.
The kind of subroutine that can access all lexical variables that existed at the time we declared it iscalled a closure (a term borrowed from the world of mathematics). In Perl terms, a closure is just asubroutine that references a lexical variable that has gone out of scope.
Furthermore, the access to the variable from within the closure ensures that the variable remains

alive as long as the subroutine reference is alive. For example, let's number the output files:[*]
[*] This code seems to have an extra semicolon at the end of the line that assigns to $callback, doesn't it? But remember, the
construct sub { ... } is an expression. Its value (a coderef) is assigned to $callback, and there's a semicolon at the end of
that statement. It's easy to forget to put the proper punctuation after the closing curly brace of an anonymous subroutine
declaration.
use File::Find;
my $callback;{ my $count = 0; $callback = sub { print ++$count, ": $File::Find::name\n" };}find($callback, '.');
Here, we declare a variable to hold the callback. We cannot declare this variable within the nakedblock (the block following that is not part of a larger Perl syntax construct), or Perl will recycle it atthe end of that block. Next, the lexical $count variable is initialized to 0. We then declare ananonymous subroutine and place its reference into $callback. This subroutine is a closure because itrefers to the lexical $count variable.
At the end of the naked block, the $count variable goes out of scope. However, because it is stillreferenced by subroutine in $callback, it stays alive as an anonymous scalar variable.[*] When thecallback is invoked from find, the value of the variable formerly known as $count is incrementedfrom 1 to 2 to 3, and so on.
[*] To be more accurate, the closure declaration increases the reference count of the referent, as if another reference had been
taken explicitly. Just before the end of the naked block, the reference count of $count is two, but after the block has exited, the
value still has a reference count of one. Although no other code may access $count, it will still be kept in memory as long as the
reference to the sub is available in $callback or elsewhere.

7.5. Returning a Subroutine from a Subroutine
Although a naked block worked nicely to define the callback, having a subroutine return thatsubroutine reference instead might be more useful:
use File::Find;
sub create_find_callback_that_counts { my $count = 0; return sub { print ++$count, ": $File::Find::name\n" };}
my $callback = create_find_callback_that_counts( );find($callback, '.');
It's the same process here, just written a bit differently. When we invokecreate_find_callback_that_counts( ), we initialize the lexical variable $count to 0. The return valuefrom that subroutine is a reference to an anonymous subroutine that is also a closure because itaccesses the $count variable. Even though $count goes out of scope at the end of thecreate_find_callback_that_counts( ) subroutine, there's still a binding between it and the returnedsubroutine reference, so the variable stays alive until the subroutine reference is finally discarded.
If we reuse the callback, the same variable still has its most recently used value. The initializationoccurred in the original subroutine (create_find_callback_that_counts), not the callback (unnamed)subroutine:
use File::Find;
sub create_find_callback_that_counts { my $count = 0; return sub { print ++$count, ": $File::Find::name\n" };}
my $callback = create_find_callback_that_counts( );print "my bin:\n";find($callback, 'bin');print "my lib:\n";find($callback, 'lib');
This example prints consecutive numbers starting at 1 for the entries below bin, but then continues

the numbering when we start entries in lib. The same $count variable is used in both cases.However, if we invoke the create_find_callback_that_counts( ) twice, we get two different $countvariables:
use File::Find;
sub create_find_callback_that_counts { my $count = 0; return sub { print ++$count, ": $File::Find::name\n" };}
my $callback1 = create_find_callback_that_counts( );my $callback2 = create_find_callback_that_counts( );print "my bin:\n";find($callback1, 'bin');print "my lib:\n";find($callback2, 'lib');
In this case, we have two separate $count variables, each accessed from within their own callbacksubroutine.
How would we get the total size of all found files from the callback? Earlier, we were able to do thisby making $total_size visible. If we stick the definition of $total_size into the subroutine thatreturns the callback reference, we won't have access to the variable. But we can cheat a bit. For onething, we can determine that we'll never call the callback subroutine with any parameters, so, if thesubroutine receives a parameter, we make it return the total size:
use File::Find;
sub create_find_callback_that_sums_the_size { my $total_size = 0; return sub { if (@_) { # it's our dummy invocation return $total_size; } else { # it's a callback from File::Find: $total_size += -s if -f; } };}
my $callback = create_find_callback_that_sums_the_size( );find($callback, 'bin');my $total_size = $callback->('dummy'); # dummy parameter to get sizeprint "total size of bin is $total_size\n";
Distinguishing actions by the presence or absence of parameters is not a universal solution.

Fortunately, we can create more than one subroutine reference increate_find_callback_that_counts( ):
use File::Find;
sub create_find_callbacks_that_sum_the_size { my $total_size = 0; return(sub { $total_size += -s if -f }, sub { return $total_size });}
my ($count_em, $get_results) = create_find_callbacks_that_sum_the_size( );find($count_em, 'bin');my $total_size = &$get_results( );print "total size of bin is $total_size\n";
Because we created both subroutine references from the same scope, they both have access to thesame $total_size variable. Even though the variable has gone out of scope before we call eithersubroutine, they still share the same heritage and can use the variable to communicate the result ofthe calculation.
Returning the two subroutine references from the creating subroutine does not invoke them. Thereferences are just data at that point. It's not until we invoke them as a callback or an explicitsubroutine dereferencing that they actually do their duty.
What if we invoke this new subroutine more than once?
use File::Find;
sub create_find_callbacks_that_sum_the_size { my $total_size = 0; return(sub { $total_size += -s if -f }, sub { return $total_size });}
## set up the subroutinesmy %subs;foreach my $dir (qw(bin lib man)) { my ($callback, $getter) = create_find_callbacks_that_sum_the_size( ); $subs{$dir}{CALLBACK} = $callback; $subs{$dir}{GETTER} = $getter;}
## gather the datafor (keys %subs) { find($subs{$_}{CALLBACK}, $_);}
## show the datafor (sort keys %subs) {
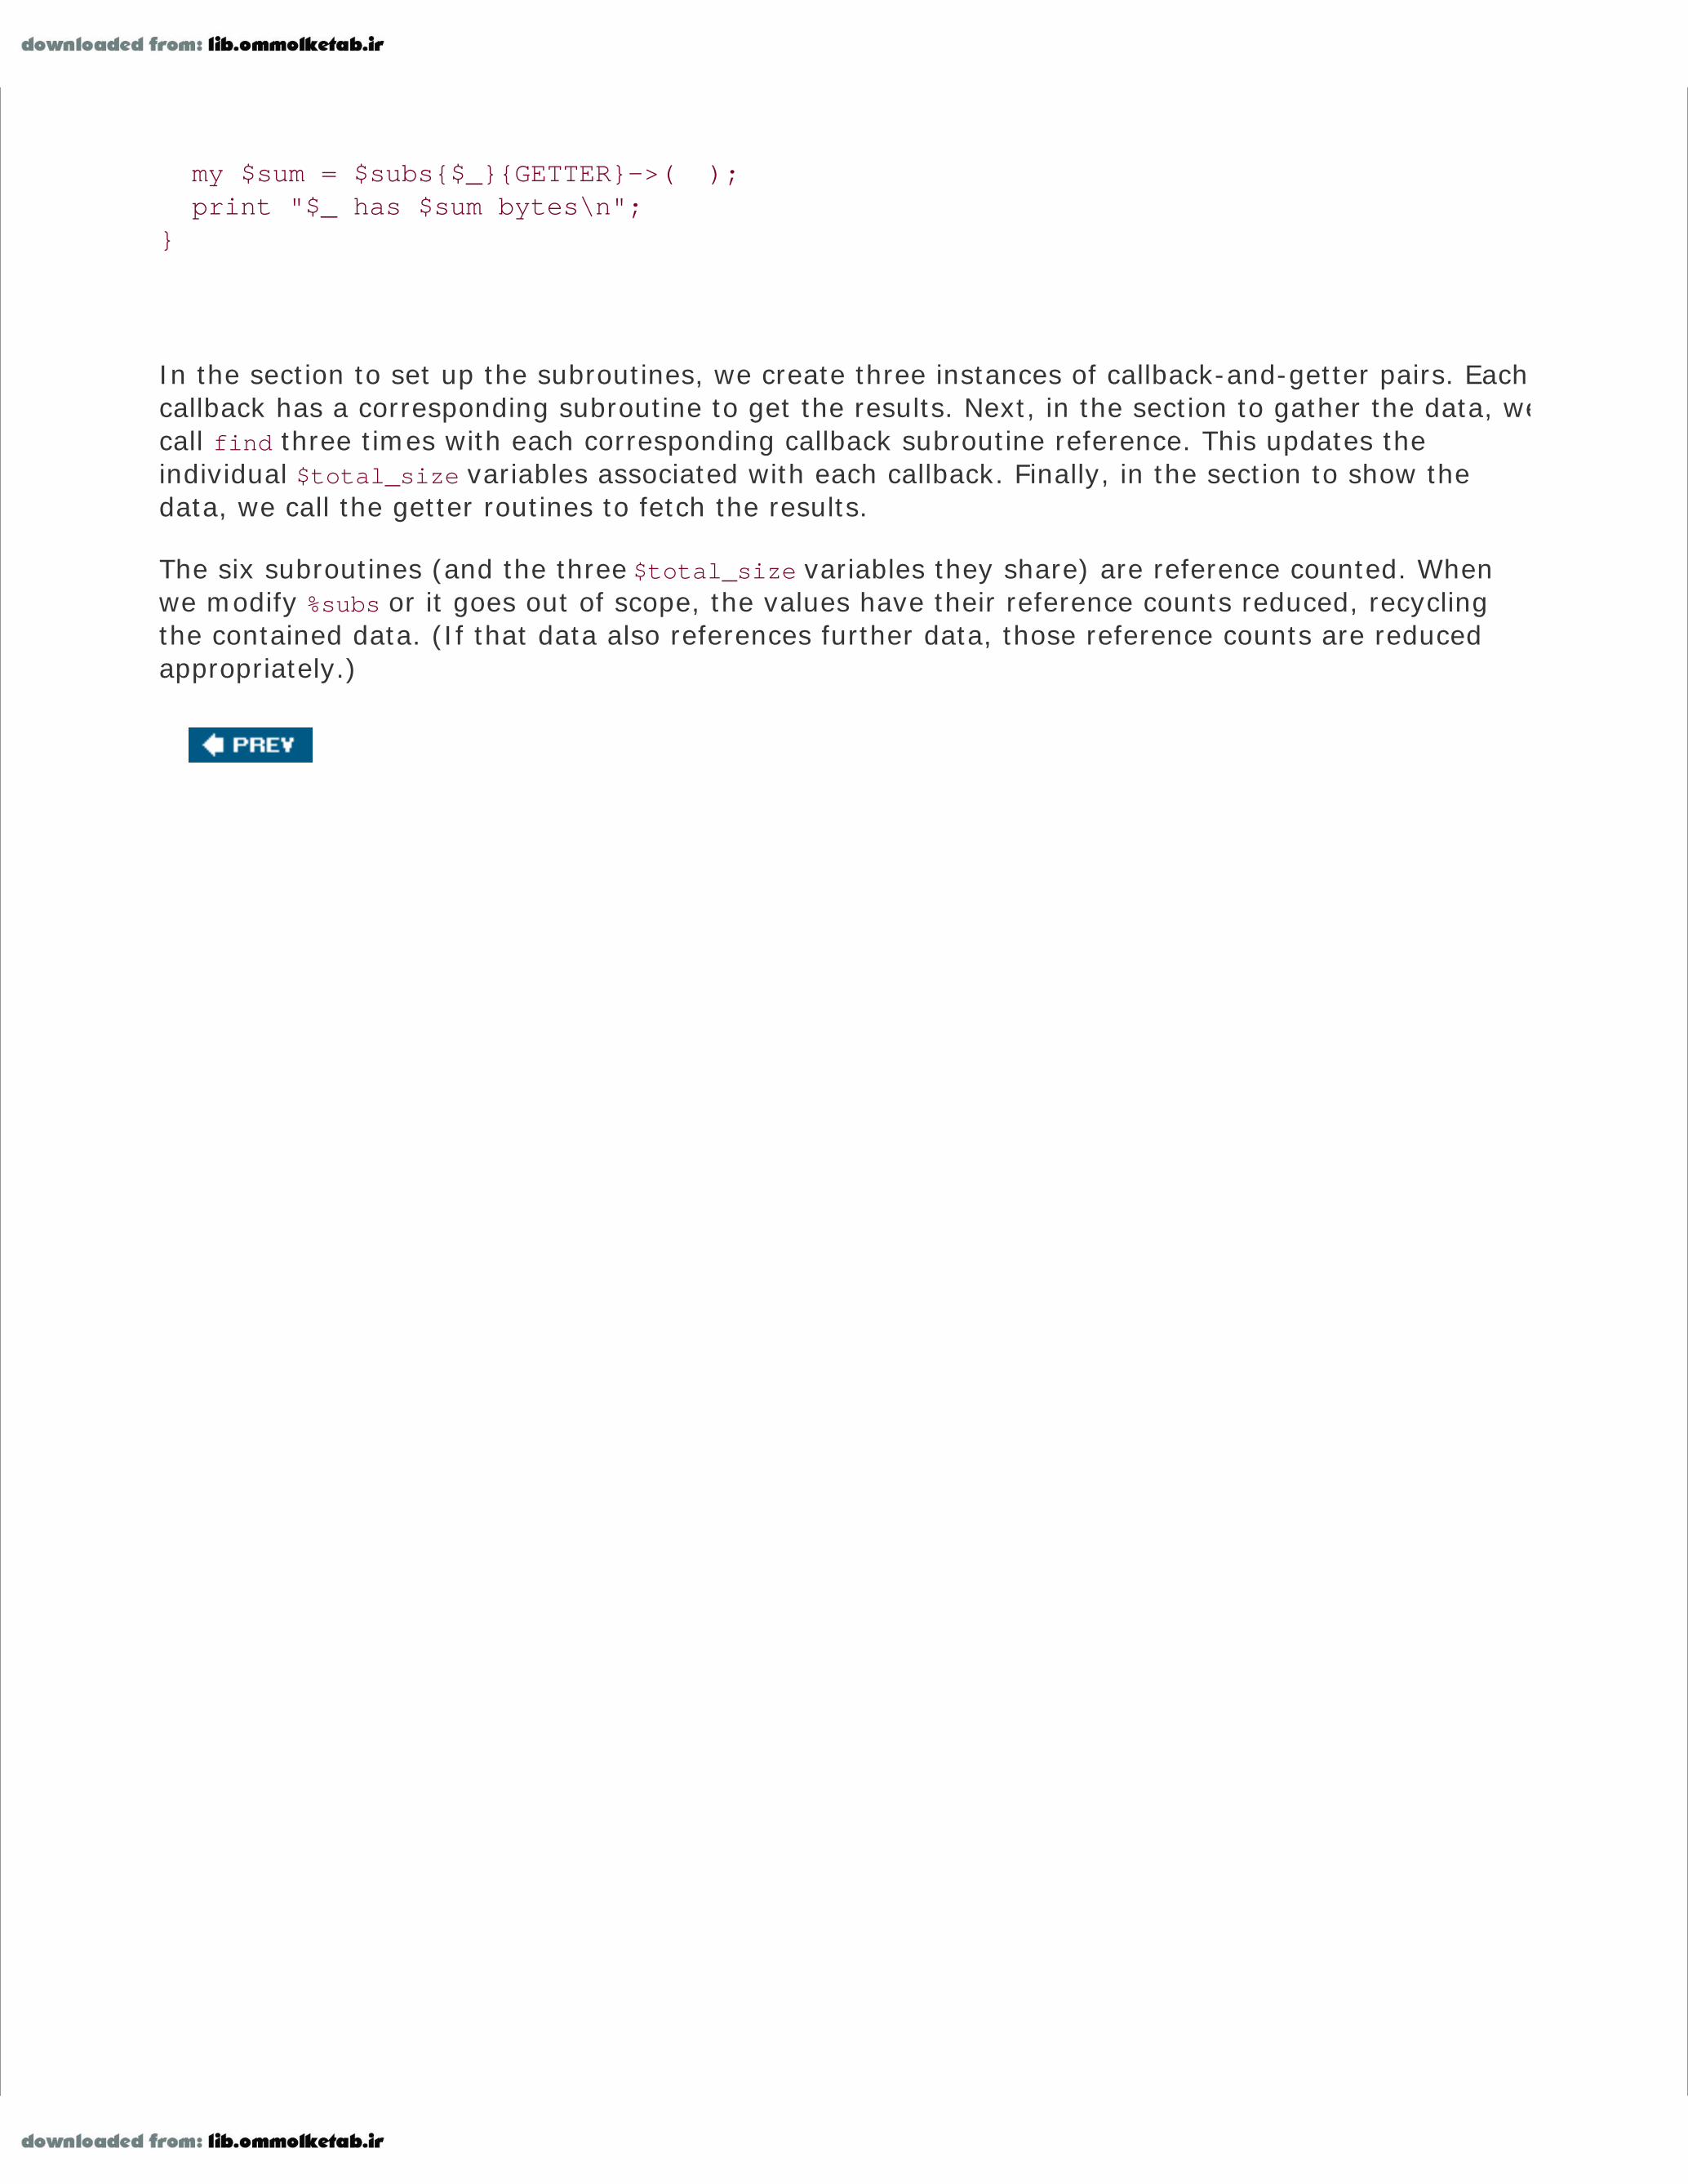
my $sum = $subs{$_}{GETTER}->( ); print "$_ has $sum bytes\n";}
In the section to set up the subroutines, we create three instances of callback-and-getter pairs. Eachcallback has a corresponding subroutine to get the results. Next, in the section to gather the data, wecall find three times with each corresponding callback subroutine reference. This updates theindividual $total_size variables associated with each callback. Finally, in the section to show thedata, we call the getter routines to fetch the results.
The six subroutines (and the three $total_size variables they share) are reference counted. Whenwe modify %subs or it goes out of scope, the values have their reference counts reduced, recyclingthe contained data. (If that data also references further data, those reference counts are reducedappropriately.)

7.6. Closure Variables as Inputs
While the previous examples showed closure variables being modified, closure variables are alsouseful to provide initial or lasting input to the subroutine. For example, let's write a subroutine tocreate a File::Find callback that prints files exceeding a certain size:
use File::Find;
sub print_bigger_than { my $minimum_size = shift; return sub { print "$File::Find::name\n" if -f and -s >= $minimum_size };}
my $bigger_than_1024 = print_bigger_than(1024);find($bigger_than_1024, 'bin');
We pass the 1024 parameter into the print_bigger_than, which then gets shifted into the$minimum_size lexical variable. Because we access this variable within the subroutine referenced bythe return value of the print_bigger_than variable, it becomes a closure variable, with a value thatpersists for the duration of that subroutine reference. Again, invoking this subroutine multiple timescreates distinct "locked-in" values for $minimum_size, each bound to its corresponding subroutinereference.
Closures are "closed" only on lexical variables, since lexical variables eventually go out of scope.Because a package variable (which is a global) never goes out of scope, a closure never closes on apackage variable. All subroutines refer to the same single instance of the global variable.
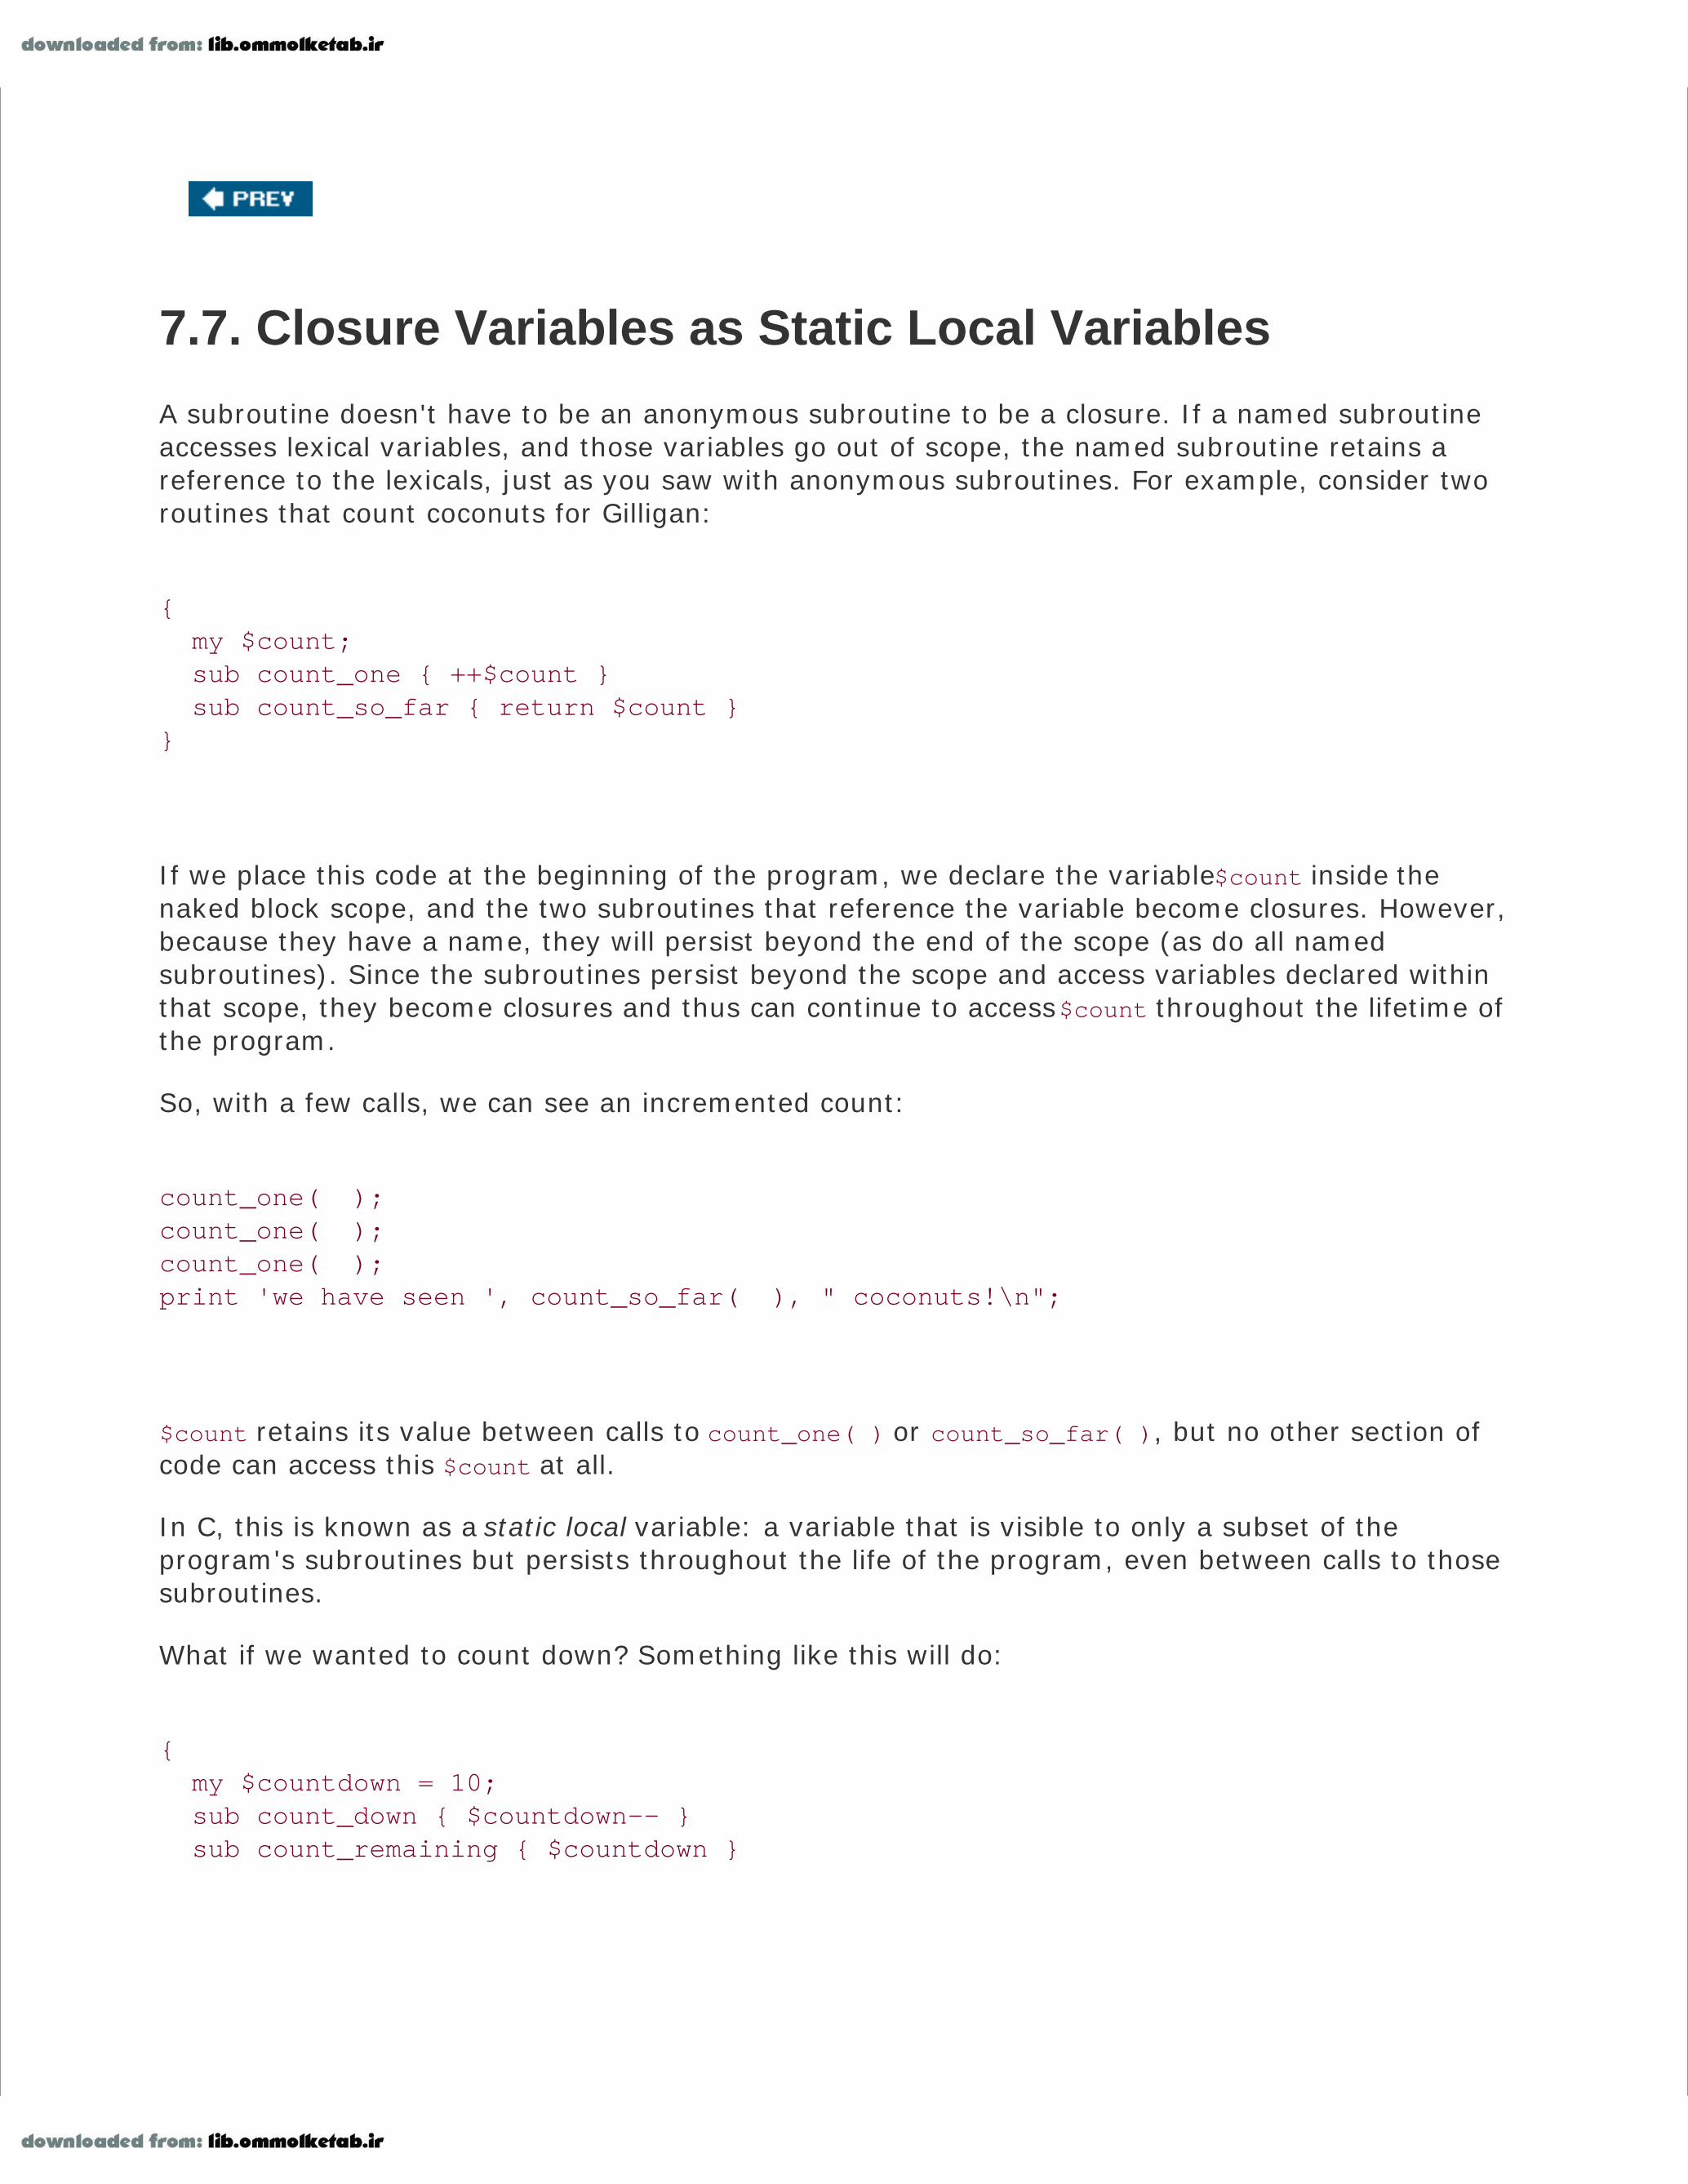
7.7. Closure Variables as Static Local Variables
A subroutine doesn't have to be an anonymous subroutine to be a closure. If a named subroutineaccesses lexical variables, and those variables go out of scope, the named subroutine retains areference to the lexicals, just as you saw with anonymous subroutines. For example, consider tworoutines that count coconuts for Gilligan:
{ my $count; sub count_one { ++$count } sub count_so_far { return $count }}
If we place this code at the beginning of the program, we declare the variable $count inside thenaked block scope, and the two subroutines that reference the variable become closures. However,because they have a name, they will persist beyond the end of the scope (as do all namedsubroutines). Since the subroutines persist beyond the scope and access variables declared withinthat scope, they become closures and thus can continue to access $count throughout the lifetime ofthe program.
So, with a few calls, we can see an incremented count:
count_one( );count_one( );count_one( );print 'we have seen ', count_so_far( ), " coconuts!\n";
$count retains its value between calls to count_one( ) or count_so_far( ), but no other section ofcode can access this $count at all.
In C, this is known as a static local variable: a variable that is visible to only a subset of theprogram's subroutines but persists throughout the life of the program, even between calls to thosesubroutines.
What if we wanted to count down? Something like this will do:
{ my $countdown = 10; sub count_down { $countdown-- } sub count_remaining { $countdown }

}
count_down( );count_down( );count_down( );print 'we're down to ', count_remaining( ), " coconuts!\n";
That is, it'll do as long as we put it near the beginning of the program, before any invocations ofcount_down( ) or count_remaining( ). Why?
This block doesn't work when you put it after those invocations because there are two functionalparts to the first line:
my $countdown = 10;
One part is the declaration of $countdown as a lexical variable. That part is noticed and processed asthe program is parsed during the compile phase. The second part is the assignment of 10 to theallocated storage. This is handled as Perl executes the code during the run phase. Unless Perlexecutes the run phase for this code, the variable has its initial undef value.
One practical solution to this problem is to change the block in which the static local appears into aBEGIN block:
BEGIN { my $countdown = 10; sub count_down { $countdown-- } sub count_remaining { $countdown }}
The BEGIN keyword tells the Perl compiler that as soon as this block has been parsed successfully(during the compile phase), jump for a moment to run phase and run the block as well. Presumingthe block doesn't cause a fatal error, compilation then continues with the text following the block. Theblock itself is also discarded, ensuring that the code within is executed precisely once in a program,even if it had appeared syntactically within a loop or subroutine.
7.8. Exercise
You can find the answer to this exercise in "Answer for Chapter 7" in the Appendix.
7.8.1. Exercise [50 min]
The Professor modified some files on Monday afternoon, and now he's forgotten which ones theywere. This happens all the time. He wants you to make a subroutine called gather_mtime_between,which, given a starting and ending timestamp, returns a pair of coderefs. The first one will be usedwith File::Find to gather the names of only the items that were modified between those two times;the second one should return the list of items found.
Here's some code to try; it should list only items that were last modified on the most recent Monday,although you could easily change it to work with a different day. (You don't have to type all of thiscode. This program should be available as the file named ex6-1.plx in the downloadable files,available on the O'Reilly web site.)
Hint: you can find a file's timestamp (mtime) with code such as:
my $timestamp = (stat $file_name)[9];
Because it's a slice, remember that those parentheses are mandatory. Don't forget that the workingdirectory inside the callback isn't necessarily the starting directory in which find was called.
use File::Find;use Time::Local;
my $target_dow = 1; # Sunday is 0, Monday is 1, ...my @starting_directories = (".");
my $seconds_per_day = 24 * 60 * 60;my($sec, $min, $hour, $day, $mon, $yr, $dow) = localtime;my $start = timelocal(0, 0, 0, $day, $mon, $yr); # midnight todaywhile ($dow != $target_dow) { # Back up one day $start -= $seconds_per_day; # hope no DST! :-) if (--$dow < 0) { $dow += 7; }}

my $stop = $start + $seconds_per_day;
my($gather, $yield) = gather_mtime_between($start, $stop);find($gather, @starting_directories);my @files = $yield->( );
for my $file (@files) { my $mtime = (stat $file)[9]; # mtime via slice my $when = localtime $mtime; print "$when: $file\n";}
Note the comment about DST. In many parts of the world, on the days when daylight savings time orsummer time kicks in and out, the day is no longer 86,400 seconds long. The program glosses overthis issue, but a more pedantic coder might take it into consideration appropriately.

Chapter 8. Filehandle ReferencesWe've seen arrays, hashes, and subroutines passed around in references, permitting a level ofindirection to solve certain types of problems. We can also store filehandles in references. Let's lookat the old problems and the new solutions.

8.1. The Old Way
In the olden days, Perl used barewords for filehandle names. The filehandle is another Perl data type,although people don't talk about it too much since it doesn't get its own special sigil. You've probablyalready seen a lot of code that uses these bareword filehandles .
open LOG_FH, '>> castaways.log' or die "Could not open castaways.log: $!";
What happens if we want to pass around these filehandles so we could share them with other parts ofour code, such as libraries? You've probably seen some tricky looking code that uses a typeglob or areference to a typeglob.
log_message( *LOG_FH, 'The Globetrotters are stranded with us!' );
log_message( *LOG_FH, 'An astronaut passes overhead' );
In the log_message( ) routine, we take the first element off of the argument list and store it inanother typeglob. Without going into too many details, a typeglob stores pointers to all the packagevariables of that name. When we assign one typeglob to another, we create aliases to the same data.We can now access the data, including the details of the filehandle, from another name. Then, whenwe use that name as a filehandle, Perl knows to look for the filehandle portion of the typeglob. We'dhave a much easier time if filehandles had sigils!
sub log_message { local *FH = shift;
print FH @_, "\n";}
Notice the use of local there. A typeglob works with the symbol table, which means it's dealing withpackage variables. Package variables can't be lexical variables, so we can't use my. Since we don'twant to stomp on anything else that might be named FH somewhere else in the script, we must uselocal to say that the name FH has a temporary value for the duration of the log_message subroutineand that when the subroutine finishes, Perl should restore any previous values to FH as if we werenever there.

If all of that makes you nervous and wish that none of this stuff existed, that's good. Don't do thisanymore! We put it in a section called "The Old Way" because there is a much better way to do itnow. Pretend this section never existed and move on to the next one.
8.2. The Improved Way
Starting with Perl 5.6, open can create a filehandle reference in a normal scalar variable. Instead ofusing a bareword for the filehandle name, we use a scalar variable whose value is undef.
my $log_fh;open $log_fh, '>> castaways.log' or die "Could not open castaways.log: $!";
If the scalar already has a value, this doesn't work because Perl won't stomp on our data.
my $log_fh = 5;open $log_fh, '>> castaways.log' or die "Could not open castaways.log: $!";print $log_fh "We need more coconuts!\n"; # doesn't work
However, the Perl idiom is to do everything in one step. We can declare the variable right in the openstatement. It looks funny at first, but after doing it a couple (okay, maybe several) times, you'll getused to it and like it better.
open my $log_fh, '>> castaways.log' or die "Could not open castaways.log: $!";
When we want to print to the filehandle, we use the scalar variable instead of a bareword. Notice thatthere is still no comma after the filehandle.
print $log_fh "We have no bananas today!\n";
That syntax might look funny to you, though, and even if it doesn't look funny to you, it might lookodd to the person who has to read your code later. In Perl Best Practices, Damian Conwayrecommends putting braces around the filehandle portion to explicitly state what you intend. Thissyntax makes it look more like grep and map with inline blocks.

print {$log_fh} "We have no bananas today!\n";
Now we treat the filehandle reference just like any other scalar. We don't have to do any tricky magicto make it work.
log_message( $log_fh, 'My name is Mr. Ed' );
sub log_message { my $fh = shift;
print $fh @_, "\n";}
We can also create filehandle references from which we can read. We simply put the right thing in thesecond argument.
open my $fh, "castaways.log" or die "Could not open castaways.log: $!";
Now we use the scalar variable in place of the bareword in the line input operator. Before, we wouldhave seen the bareword between the angle brackets:
while( <LOG_FH> ) { ... }
And now we see the scalar variable in its place.
while( <$log_fh> ) { ... }
In general, where we've seen the bareword filehandle we can substitute the scalar variable filehandlereference.
In any of these forms, when the scalar variable goes out of scope (or we assign another value to it),Perl closes the file. We don't have to explicitly close the file ourselves.

8.3. The Even Better Way
So far, our examples have shown the two-argument form of open, but that actually has a catch: theopen mode and the filename both live in the second argument. That means that we have to store twodifferent things in one string, and we have to trust Perl to be able to figure it out.
To get around that, we break the second argument into two separate arguments.
open my $log_fh, '>>', 'castaways.log' or die "Could not open castaways.log: $!";
This three-argument form has the added advantage of access to the Perl IO filters. We won't go intotoo much detail here.[*] The open function's entry in perlfunc is over 400 lines, even though it has itsown perldoc tutorial, perlopentut.
[*] Although brian does in "Get More Out of Open," The Perl Journal , October 31, 2005,
http://www.tpj.com/documents/s=9923/tpj1130955178261/bdf_open.htm.

8.4. IO::Handle
Behind the scenes, Perl is really using the IO::Handle module to work this magic, so our filehandlescalar is really an object.[*] The IO::Handle package is a base class for input-output things, so ithandles a lot more than just files.
[*] Have you ever wondered why there is no comma after the filehandle portion of the print? It's really the indirect object notation
(which we haven't mentioned yet, unless you've read the whole book before you read the footnotes, like we told you to do in the
preface!).
Unless you're creating new IO modules, you probably shouldn't use IO::Handle directly. Instead, usesome of the handy modules built on top of it. We haven't told you about object-orientedprogramming (OOP) yet (it's in Chapter 11, so we almost have), but in this case, you just have tofollow the example in its documentation.
Some of these modules do some of the same things that we can already do with Perl's built-in open(depending on which version of Perl we have), but they can be handy when we want to decide as lateas possible which module should handle input or output. Instead of using the built-in open, we use themodule interface. To switch the behavior, we simply change the module name. Since we've set upour code to use a module interface, it's not that much work to switch modules.
8.4.1. IO::File
The IO::File module subclasses IO::Handle to work with files. It comes with the standard Perldistribution, so you should already have it. There are a variety of ways to create an IO::File object.
We can create the filehandle reference with the one-argument form of the constructor. We check theresult of the operation by looking for a defined value in the filehandle reference variable.
use IO::File;
my $fh = IO::File->new( '> castaways.log' ) or die "Could not create filehandle: $!";
If you don't like that (for the same reasons as regular open), use one of the other calling conventions.The optional second argument is the filehandle mode.[ ]
[ ] These are the ANSI C fopen mode strings. You can also use these with the built-in open. Indeed, IO::File uses the built-in
open behind the scenes.
my $read_fh = IO::File->new( 'castaways.log', 'r' );

my $write_fh = IO::File->new( 'castaways.log', 'w' );
Using a bit mask as the mode allows for more granular control. The IO::File module supplies theconstants.
my $append_fh = IO::File->new( 'castaways.log', O_WRONLY|O_APPEND );
Besides opening named files, we might want to open an anonymous temporary file. On systems thatsupport this sort of thing, we simply create the new object to get a read-write filehandle.
my $temp_fh = IO::File->new_tmpfile;
As before, Perl closes these files when the scalar variable goes out of scope, but if that's not enough,we do it ourselves explicitly.
$temp_fh->close;
undef $append_fh;
8.4.2. Anonymous IO::File Objects
If we don't put our IO::File object in a simple scalar variable, some operations require a slightlymodified syntax to work. For example, we want to copy every file matched by the glob pattern of*.input to a corresponding file whose suffix is .output, but do it in parallel. First, we open all thefiles, both inputs and outputs:
my @handlepairs;
foreach my $file ( glob( '*.input' ) ) { (my $out = $file) =~ s/\.input$/.output/; push @handlepairs, [ (IO::File->new('<$file') || die), (IO::File->new('>$out') || die), ];}

Now we have an array of references to arrays, each element of which is an IO::File object. Now,let's pump the data from the input files to the output files.
while (@handlepairs) { @handlepairs = grep { if (defined(my $line = $_->[0]->getline)) { print { $_->[1] } $line; } else { 0; } } @handlepairs;}
As long as we have pairs, we keep passing the list through the grep structure:
@handlepairs = grep { CONDITION } @handlepairs;
On each pass, only the handle pairs that evaluate as true in the grep CONDITION survive. Inside, wetake the first element of each pair and try to read from it. If that's successful, write that line to thesecond element of the pair (the corresponding output handle). If the print is successful, it returnstrue, which lets grep know that we want to keep that pair. If either the print fails or the getlinereturns undef, the grep sees the false value as an indication to discard that pair. Discarding the pairautomatically closes both filehandles. Cool!
Note that we can't use the more traditional filehandle read or filehandle print operations, because thereading and writing filehandles weren't in a simple scalar variable. We can rewrite that loop to see ifcopying the handles is easier:
while (@handlepairs) { @handlepairs = grep { my ($IN, $OUT) = @$_; if (defined(my $line = <$IN>)) { print $OUT $line; } else { 0; } } @handlepairs;}
This scenario is arguably better. Most of the time, simply copying the complexly referenced value intoa simple scalar is easier on the eyes. In fact, another way to write that loop is to get rid of the uglyif structure:

while (@handlepairs) { @handlepairs = grep { my ($IN, $OUT) = @$_; my $line; defined($line = <IN>) and print $OUT $line; } @handlepairs;}
As long as someone understands that and is a partial evaluator and that print returns true wheneverything is okay, this is a fine replacement. Remember the Perl motto: "There's more than oneway to do it" (although not all of them are equally nice or legitimate).
8.4.3. IO::Scalar
Sometimes we don't want to print to a file and would rather build up the output in a string. Somemodule interfaces don't give us that option, so we have to make it look like we are printing to a fileby using a filehandle. We might also want to build up our content before we write it to a file so wecan encrypt it, compress it, or send it as email directly from your program.
The IO::Scalar module uses the magic of tie behind the scenes to give us a filehandle reference thatappends to a scalar. This module doesn't come with the standard Perl distribution, so you'll have toinstall it yourself most likely.
use IO::Scalar;
my $string_log = '';my $scalar_fh = IO::Scalar->new( \$string_log );
print $scalar_fh "The Howells' private beach club is closed\n";
Now our log message ends up in the scalar variable $string_log instead of a file. What if we want toread from our logfile, though? We do the same thing. In this example, we create $scalar_fh just aswe did before, then read from it with the line input operator. In our while loop, we'll extract the logmessages that contain Gilligan (which is probably most of them, since he's always part of the mess):
use IO::Scalar;
my $string_log = '';my $scalar_fh = IO::Scalar->new( \$string_log );
while( <$scalar_fh> ) { next unless /Gilligan/; print;

}
As of Perl version 5.8, we can do this directly in Perl without using IO::Scalar.
open( my $fh, '>>', \$string_log ) or die "Could not append to string! $!";
8.4.4. IO::Tee
What if we want to send output to more than one place at a time? What if we want to send it to a fileand save it in a string at the same time? Using what we know already, we'd have to do somethinglike this:
my $string = '';
open my $log_fh, '>>', 'castaways.log' or die "Could not open castaways.log;open my $scalar_fh, '>>', \$string;
my $log_message = "The Minnow is taking on water!\n"print $log_fh $log_message;print $scalar_fh $log_message;
Of course, we could shorten that a bit so we only have one print statement. We use the foreachcontrol structure to iterate through the filehandle references, store each in $fh in turn, and print toeach one.
foreach my $fh ( $log_fh, $scalar_fh ) { print $fh $log_message;}
That's still a bit too much work. In the foreach, we had to decide which filehandles to include. What ifwe could just define a group of filehandles that answered to the same name? Well, that's whatIO::Tee does for us. Imagine it like a tee connector on a bilge output pipe; when the water gets tothe tee, it can flow it two different directions at the same time. When our output gets to IO::Tee, itcan go to two (or more) different channels at the same time. That is, IO::Tee multiplexes output. Inthis example, the castaways' log message goes to both the logfile and the scalar variable.
use IO::Tee;
$tee_fh = IO::Tee->new( $log_fh, $scalar_fh );
print $tee_fh "The radio works in the middle of the ocean!\n";
That's not all, though. If the first argument to IO::Tee is an input filehandle (the succeedingarguments must be output filehandles), we can use the same teed filehandle to read from input andwrite to the output. The source and destination channels are different, but we get to treat them as asingle filehandle.
use IO::Tee;
$tee_fh = IO::Tee->new( $read_fh, $log_fh, $scalar_fh );
# reads from $read_fhmy $message = <$tee_fh>;
# prints to $log_fh and $scalar_fhprint $tee_fh $message;
The $read_fh doesn't have to be connected to a file, either. It might also be connected to a socket, ascalar variable, an external command's output,[*] or anything else we can dream up.
[*] You can create readable filehandles to external commands with IO::Pipe.

8.5. Directory Handle References
In the same way that we can create references to filehandles, we can create directory handlereferences.
opendir my $dh, '.' or die "Could not open directory: $!";
foreach my $file ( readdir( $dh ) ) { print "Skipper, I found $file!\n"; }
The directory handle reference obeys the same rules we laid out before. This only works if the scalarvariable does not already have a value, and the handle automatically closes when the variable goesout of scope or we assign it a new value.
8.5.1. IO::Dir
We can use object-oriented interfaces for directory handles too. The IO::Dir module has been part ofthe standard Perl distribution since 5.6. It doesn't add interesting new features but wraps the Perlbuilt-in functions.[ ]
[ ] For each IO::Dir method name, append "dir" and look at the documentation in perlfunc.
use IO::Dir;
my $dir_fh = IO::Dir->new( '.' ) || die "Could not open dirhandle! $!\n";
while( defined( my $file = $dir_fh->read ) ) { print "Skipper, I found $file!\n"; }
We don't have to create a new directory handle if we decide we want to go through the list again(perhaps later in the program). We can rewind the directory handle to start over:
while( defined( my $file = $dir_fh->read ) ) { print "I found $file!\n"; }

# time passes$dir_fh->rewind;
while( defined( my $file = $dir_fh->read ) ) { print "I can still find $file!\n"; }

8.6. Exercises
You can find the answers to these exercises in "Answers for Chapter 8" in the Appendix.
8.6.1. Exercise 1 [20 min]
Write a program that prints the date and the day of the week, but allow the user to choose to sendthe output either to a file, a scalar, or both at the same time. No matter which output channels theuser selects, send the output with a single print statement. If the user chooses to send the output toa scalar, at the end of the program print the scalar's value to standard output.
8.6.2. Exercise 2 [30 min]
The Professor has to read a logfile that looks like:
Gilligan: 1 coconutSkipper: 3 coconutsGilligan: 1 bananaGinger: 2 papayasProfessor: 3 coconutsMaryAnn: 2 papayas...
He wants to write a series of files, called gilligan.info, maryann.info, and so on. Each file shouldcontain all the lines that begin with that name. (Names are always delimited by the trailing colon.) Atthe end, gilligan.info should start with:
Gilligan: 1 coconutGilligan: 1 banana
Now the logfile is large, and the coconut-powered computer is not very fast, so he wants to processthe input file in one pass and write all output files in parallel. How does he do it?
Hint: use a hash, keyed by the castaway name, holding IO::File objects for each output file. Createthem as necessary.

8.6.3. Exercise 3 [15 min]
Write a program that takes in multiple directory names from the command line, then prints out theircontents. Use a function that takes a directory handle reference that you made using IO::Dir.

Chapter 9. Practical Reference TricksThis chapter looks at optimizing sorting and dealing with recursively defined data.
9.1. Review of Sorting
Perl's built-in sort operator sorts text strings in their natural text order, by default.[*] This is fine ifwe want to sort text strings:
[*] My friends call that the "ASCIIbetical" ordering. Normally, modern Perl doesn't use ASCII; instead, it uses a default sort order,
depending on the current locale and character set. See the perllocale (not perllocal!) manpage.
my @sorted = sort qw(Gilligan Skipper Professor Ginger Mary_Ann);
but gets pretty messy when we want to sort numbers:
my @wrongly_sorted = sort 1, 2, 4, 8, 16, 32;
The resulting list is 1, 16, 2, 32, 4, 8. Why didn't sort order these properly? It treats each item as astring and sorts them in string order. Any string that begins with 3 sorts before any string that beginswith 4.
If we don't want the default sorting order, we don't need to write an entire sorting algorithm, which isgood news since Perl already has a good one of those. But no matter what sorting algorithm we use,at some point we have to look at item A and item B and decide which one comes first. That's the partwe'll write: code to handle just two items. Perl will do the rest.
By default, as Perl orders the items, it uses a string comparison. We can specify a new comparisonusing a sort block that we place between the sort keyword and the list of things to sort.[ ] Withinthe sort block, $a and $b stand in for two of the items sort will compare. If we're sorting numbers,then $a and $b will be two numbers from our list.
[ ] We can also used a name subroutine that sort invokes for each comparison.
The sort block must return a coded value to indicate the sort order. If $a comes before $b in ourdesired sorting order, it should return -1; it should return +1 if $b comes before $a; if the orderdoesn't matter, it should return 0. The order might not matter, for example, if it's a case-insensitivesort comparing "FRED" to "Fred", or if it's a numeric sort comparing 42 to 42.[*]
[*] Actually, we can use any negative or positive number in place of -1 and +1, respectively. Recent Perl versions include a default
sorting engine that is stable, so zero returns from the sort block cause the relative ordering of $a and $b to reflect their order in
the original list. Older versions of Perl didn't guarantee such stability, and a future version might not use a stable sort, so don't rely
on it.
For example, to sort those numbers in their proper order, we can use a sort block comparing $a and$b, like so:

my @numerically_sorted = sort { if ($a < $b) { -1 } elsif ($a > $b) { +1 } else { 0 }} 1, 2, 4, 8, 16, 32;
Now we have a proper numeric comparison, so we have a proper numeric sort. Of course, this is fartoo much typing, so we can use the spaceship operator instead:
my @numerically_sorted = sort { $a <=> $b } 1, 2, 4, 8, 16, 32;
The spaceship operator returns -1, 0, and +1, according to the rules we laid out. A descending sort issimple in Perl:[ ]
[ ] As of version 5.8.6, Perl recognizes the reverse sort and does it without generating the temporary, intermediate list.
my @numerically_descending = reverse sort { $a <=> $b } 1, 2, 4, 8, 16, 32;
But there is more than one way to do it. The spaceship operator is nearsighted; and can't see whichone of its parameters comes from $a and which from $b; it sees only which value is to its left andwhich is to its right. If we reverse the position of $a and $b, the spaceship will sort everything in theopposite order:
my @numerically_descending = sort { $b <=> $a } 1, 2, 4, 8, 16, 32;
In every place the previous sort expression returned -1, this expression returns +1, and vice versa.Thus, the sort is in the opposite order, and so it doesn't need a reverse. It's also easy to rememberbecause if $a is to the left of $b, we get out the lower items first, just like a and b would be in theresulting list.
Which way is better? When should we use a reverse sort, and when should we switch $a and $b?Well, in most cases it shouldn't matter much for efficiency, so it's probably best to optimize for clarityand use reverse. For a more complex comparison, however, a single reverse may not be up to thetask.
Like the spaceship operator, we can indicate a string sort with cmp, although this is rarely used alonebecause it is the default comparison. The cmp operator is most often used in more complexcomparisons, as we'll show shortly.

9.2. Sorting with Indices
In the same way we used indices to solve a few problems with grep and map back in Chapter 2, wecan also use indices with sort to get some interesting results. For example, let's sort the list ofnames from earlier:
my @sorted = sort qw(Gilligan Skipper Professor Ginger Mary_Ann);print "@sorted\n";
which necessarily results in:
Gilligan Ginger Mary_Ann Professor Skipper
But what if we wanted to look at the original list and determine which element of the original list nowappears as the first, second, third, and so on, element of the sorted list? For example, Ginger is thesecond element of the sorted list and was the fourth element of the original list. How do wedetermine that the second element of the final list was the fourth element of the original list?
Well, we can apply a bit of indirection. Let's not sort the actual names but rather the indices of eachname:
my @input = qw(Gilligan Skipper Professor Ginger Mary_Ann);my @sorted_positions = sort { $input[$a] cmp $input[$b] } 0..$#input;print "@sorted_positions\n";
This time, $a and $b aren't the elements of the list, but the indices. So instead of comparing $a to $b,we use cmp to compare $input[$a] to $input[$b] as strings. The result of the sort are the indices, inan order defined by the corresponding elements of @input. This prints 0 3 4 2 1, which means thatthe first element of the sorted list is element 0 of the original list, Gilligan. The second element of thesorted list is element 3 of the original list, which is Ginger, and so on. Now we can rank informationrather than just move the names around.
Actually, we have the inverse of the rank. We still don't know, for a given name in the original list,which position it occupies in the output list. But with a bit more magic, we can get there as well:
my @input = qw(Gilligan Skipper Professor Ginger Mary_Ann);

my @sorted_positions = sort { $input[$a] cmp $input[$b] } 0..$#input;my @ranks;@ranks[@sorted_positions] = (0..$#sorted_positions);print "@ranks\n";
The code prints 0 4 3 1 2. This means that Gilligan is position 0 in the output list, Skipper is position4, Professor is position 2, and so on. The positions here are 0-based, so add 1 to get "human" ordinalvalues. One way to cheat is to use 1..@sorted_positions instead of 0..$#sorted_positions, so a wayto dump it all out looks like:
my @input = qw(Gilligan Skipper Professor Ginger Mary_Ann);my @sorted_positions = sort { $input[$a] cmp $input[$b] } 0..$#input;my @ranks;@ranks[@sorted_positions] = (1..@sorted_positions);for (0..$#ranks) { print "$input[$_] sorts into position $ranks[$_]\n";}
This results in:
Gilligan sorts into position 1Skipper sorts into position 5Professor sorts into position 4Ginger sorts into position 2Mary_Ann sorts into position 3
This general technique can be convenient if we need to look at our data in more than one way.Perhaps we keep many records in order by a numeric code for efficiency reasons, but we occasionallywant to view them in alphabetical order as well. Or maybe the data items themselves are impracticalto sort, such as a month's worth of server logs.

9.3. Sorting Efficiently
As the Professor tries to maintain the community computing facility (built entirely out of bamboo,coconuts, and pineapples, and powered by a certified Perl-hacking monkey), he continues to discoverthat people are leaving entirely too much data on the single monkey-powered filesystem and decidesto print a list of offenders.
The Professor has written a subroutine called ask_monkey_about( ), which, given a castaway's name,returns the number of pineapples of storage they use. We have to ask the monkey because he's incharge of the pineapples. An initial naive approach to find the offenders from greatest to least mightbe something like:
my @castaways = qw(Gilligan Skipper Professor Ginger Mary_Ann Thurston Lovey);my @wasters = sort { ask_monkey_about($b) <=> ask_monkey_about($a)} @castaways;
In theory, this would be fine. For the first pair of names (Gilligan and Skipper), we ask the monkey"How many pineapples does Gilligan have?" and "How many pineapples does Skipper have?" We getback two values from the monkey and use them to order Gilligan and Skipper in the final list.
However, at some point, we have to compare the number of pineapples that Gilligan has with anothercastaway as well. For example, suppose the pair is Ginger and Gilligan. We ask the monkey aboutGinger, get a number back, and then ask the monkey about Gilligan...again. This will probably annoythe monkey a bit, since we already asked earlier. But we need to ask for each value two, three, ormaybe even four times, just to put the seven values into order.
This can be a problem because it irritates the monkey.
How do we keep the number of monkey requests to a minimum? Well, we can build a table first. Weuse a map with seven inputs and seven outputs, turning each castaway item into a separate arrayreference, with each referenced array consisting of the castaway name and the pineapple countreported by the monkey:
my @names_and_pineapples = map { [ $_, ask_monkey_about($_) ]} @castaways;
At this point, we asked the monkey seven questions in a row, but that's the last time we have to talk

to the monkey! We now have everything we need to finish the task.
For the next step, we sort the arrayrefs, ordering them by the monkey-returned value:
my @sorted_names_and_pineapples = sort { $b->[1] <=> $a->[1];} @names_and_pineapples;
In this subroutine, $a and $b are still two elements from the list of things to be sorted. When we'resorting numbers, $a and $b are numbers; when we're sorting references, $a and $b are references.We dereference them to get to the corresponding array itself, and pick out item 1 from the array (themonkey's pineapple value). Because $b appears to the left of $a, it'll be a descending sort as well.(We want a descending sort because the Professor wants the first name on the list to be the personwho uses the most pineapples.)
We're almost done, but what if we just wanted the top names, rather than the names and pineapplecounts? We merely need to perform another map to transform the references back to the originaldata:
my @names = map $_->[0], @sorted_names_and_pineapples;
Each element of the list ends up in $_, so we'll dereference that to pick out the element 0 of thatarray, which is just the name.
Now we have a list of names, ordered by their pineapple counts, and the monkey's off our backs, allin three easy steps.

9.4. The Schwartzian Transform
The intermediate variables between each of these steps were not necessary, except as input to thenext step. We can save ourselves some brainpower by just stacking all the steps together:
my @names = map $_->[0], sort { $b->[1] <=> $a->[1] } map [ $_, ask_monkey_about($_) ], @castaways;
Because the map and sort operators are right to left, we have to read this construct from the bottomup. Take a list of @castaways, create some arrayrefs by asking the monkey a simple question, sortthe list of arrayrefs, and then extract the names from each arrayref. This gives us the list of names inthe desired order.
This construct is commonly called the Schwartzian Transform, which was named after Randal (butnot by Randal), thanks to a Usenet posting he made many years ago. The Schwartzian Transformhas since proven to be a very nice thing to have in our bag of sorting tricks.
If this transform looks like it might be too complex to memorize or come up with from first principles,it might help to look at the flexible and constant parts:
my @output_data = map $_->[0], sort { SORT COMPARISON USING $a->[1] AND $b->[1] } map [ $_, EXPENSIVE FUNCTION OF $_ ], @input_data;
The basic structure maps the original list into a list of arrayrefs, computing the expensive functiononly once for each; sorts those array refs, looking at the cached value of each expensive functioninvocation;[*] and then extracts the original values back out in the new order. All we have to do isplug in the proper two operations, and we're done. For example, to use the Schwartzian Transform toimplement a case-insensitive sort, we could use code like this:[ ]
[*] An expensive operation is one that takes a relatively long time or a relatively large amount of memory.
[ ] This is an efficient way to do this only if the uppercasing operation is sufficiently expensive, which it might be if our strings tend
to be very long or if we have a large enough number of them. For a small number of not-long strings, a simple my @output_data
= sort { "\U$a" cmp "\U$b"} @input_data is probably more efficient. If in doubt, benchmark.

my @output_data = map $_->[0], sort { $a->[1] cmp $b->[1] } map [ $_, "\U$_" ], @input_data;
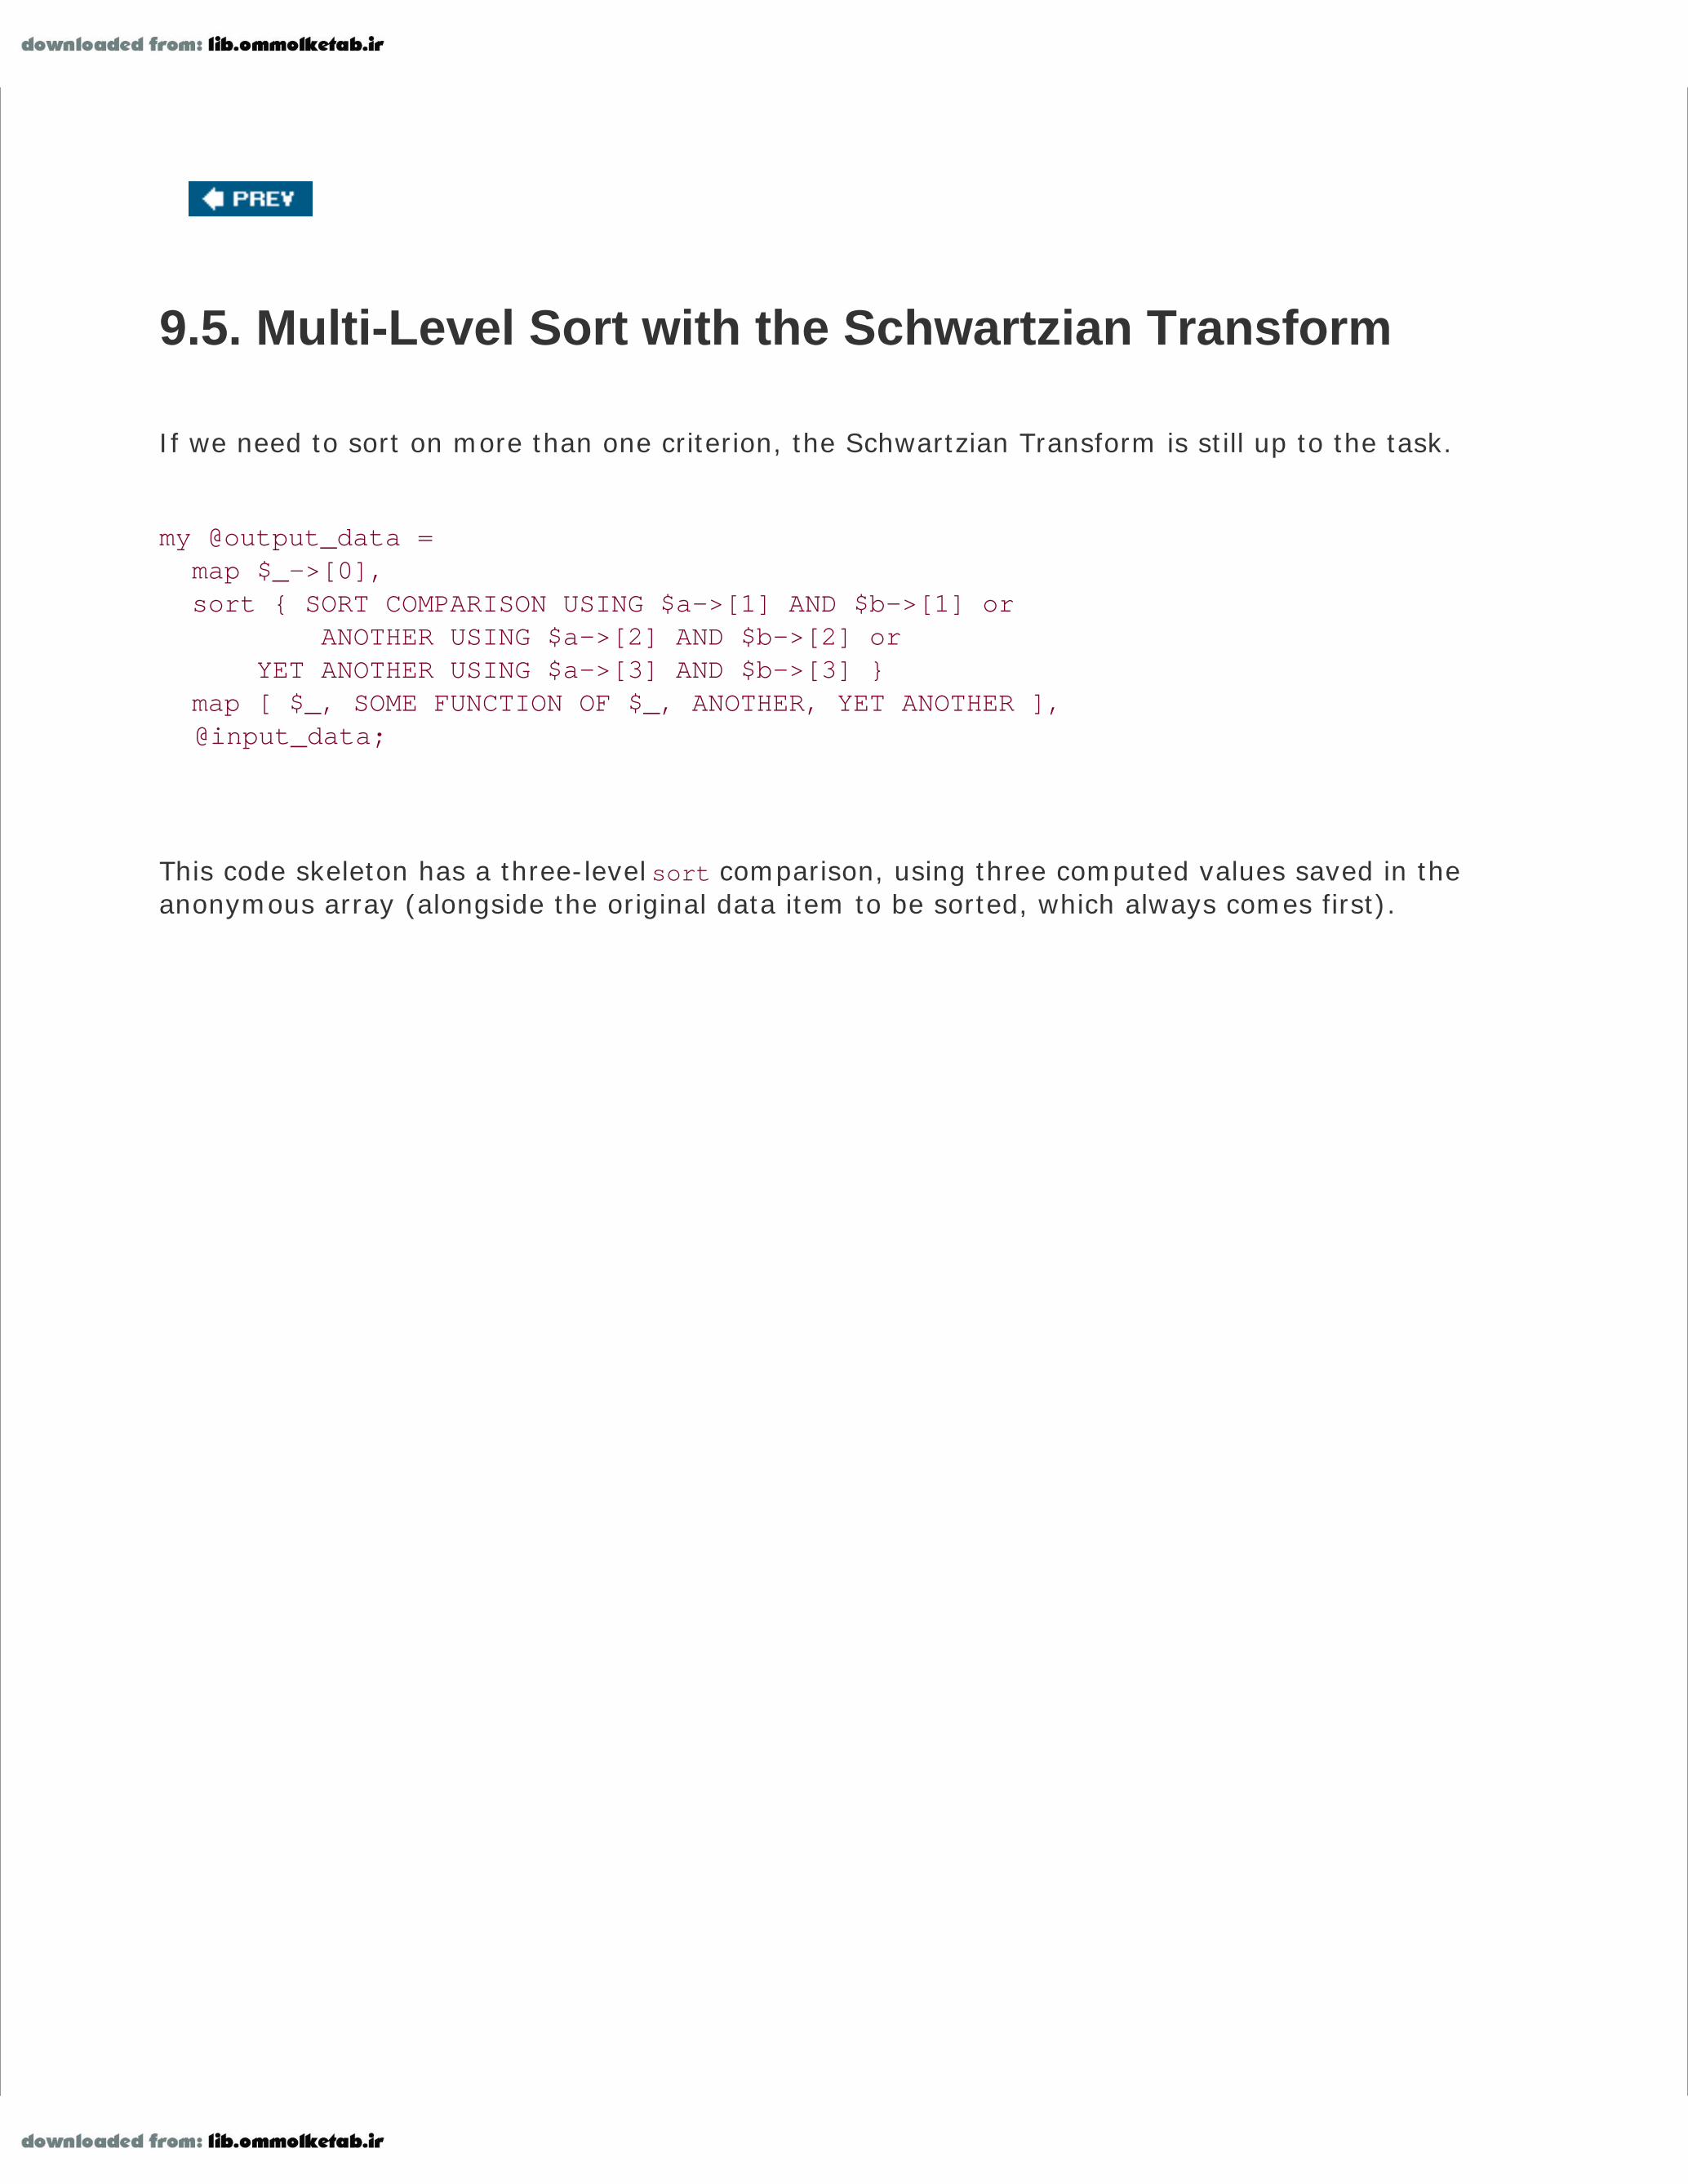
9.5. Multi-Level Sort with the Schwartzian Transform
If we need to sort on more than one criterion, the Schwartzian Transform is still up to the task.
my @output_data = map $_->[0], sort { SORT COMPARISON USING $a->[1] AND $b->[1] or ANOTHER USING $a->[2] AND $b->[2] or YET ANOTHER USING $a->[3] AND $b->[3] } map [ $_, SOME FUNCTION OF $_, ANOTHER, YET ANOTHER ], @input_data;
This code skeleton has a three-level sort comparison, using three computed values saved in theanonymous array (alongside the original data item to be sorted, which always comes first).

9.6. Recursively Defined Data
While the data we've processed with references up to this point has been rather fixed structure,sometimes we have to deal with hierarchical data, which is often defined recursively.
For Example One, consider an HTML table that has rows containing cellsand some of those cells mayalso contain entire tables. Example Two could be a visual representation of a filesystem consisting ofdirectories containing files and other directories. Example Three is a company organization chart,which has managers with direct reports, some of whom may be managers themselves. And ExampleFour is a more complex organization chart, which can contain instances of the HTML tables ofExample One, the filesystem representations of Example Two, or even entire organization charts . . ..
We can use references to acquire, store, and process such hierarchical information. Frequently, theroutines to manage the data structures end up as recursive subroutines.
Recursive algorithms deal with the unlimited complexity of their data by beginning with a base caseand building upon that.[*] The base case considers what to do in the simplest case: when the leafnode has no branches, when the array is empty, when the counter is at zero. In fact, it's common tohave more than one base case in various branches of a recursive algorithm. A recursive algorithmwith no base case is an infinite loop.
[*] Recursive functions should all have a base, or trivial case, where they don't need to recurse and that all other recursions can
eventually reach. That is, unless we have a lot of time on our hands to let the function recurse forever.
A recursive subroutine has a branch from which it calls itself to handle a portion of the task, and abranch that doesn't call itself to handle the base cases. In Example One above, the base case couldbe a table cell that is empty. There could also be base cases for empty tables and table rows. InExample Two, base cases would be needed for files, and perhaps for empty directories.
For example, a recursive subroutine handling the factorial function , which is one of the simplestrecursive functions, might look like:
sub factorial { my $n = shift; if ($n <= 1) { return 1; } else { return $n * factorial($n - 1); }}
Here we have a base case where $n is less than or equal to 1, which does not invoke the recursiveinstance, along with a recursive case for $n greater than 1, which calls the routine to handle a portion

of the problem (i.e., compute the factorial of the next lower number).
This task would probably be solved better using iteration rather than recursion, even though theclassic definition of factorial is often given as a recursive operation.
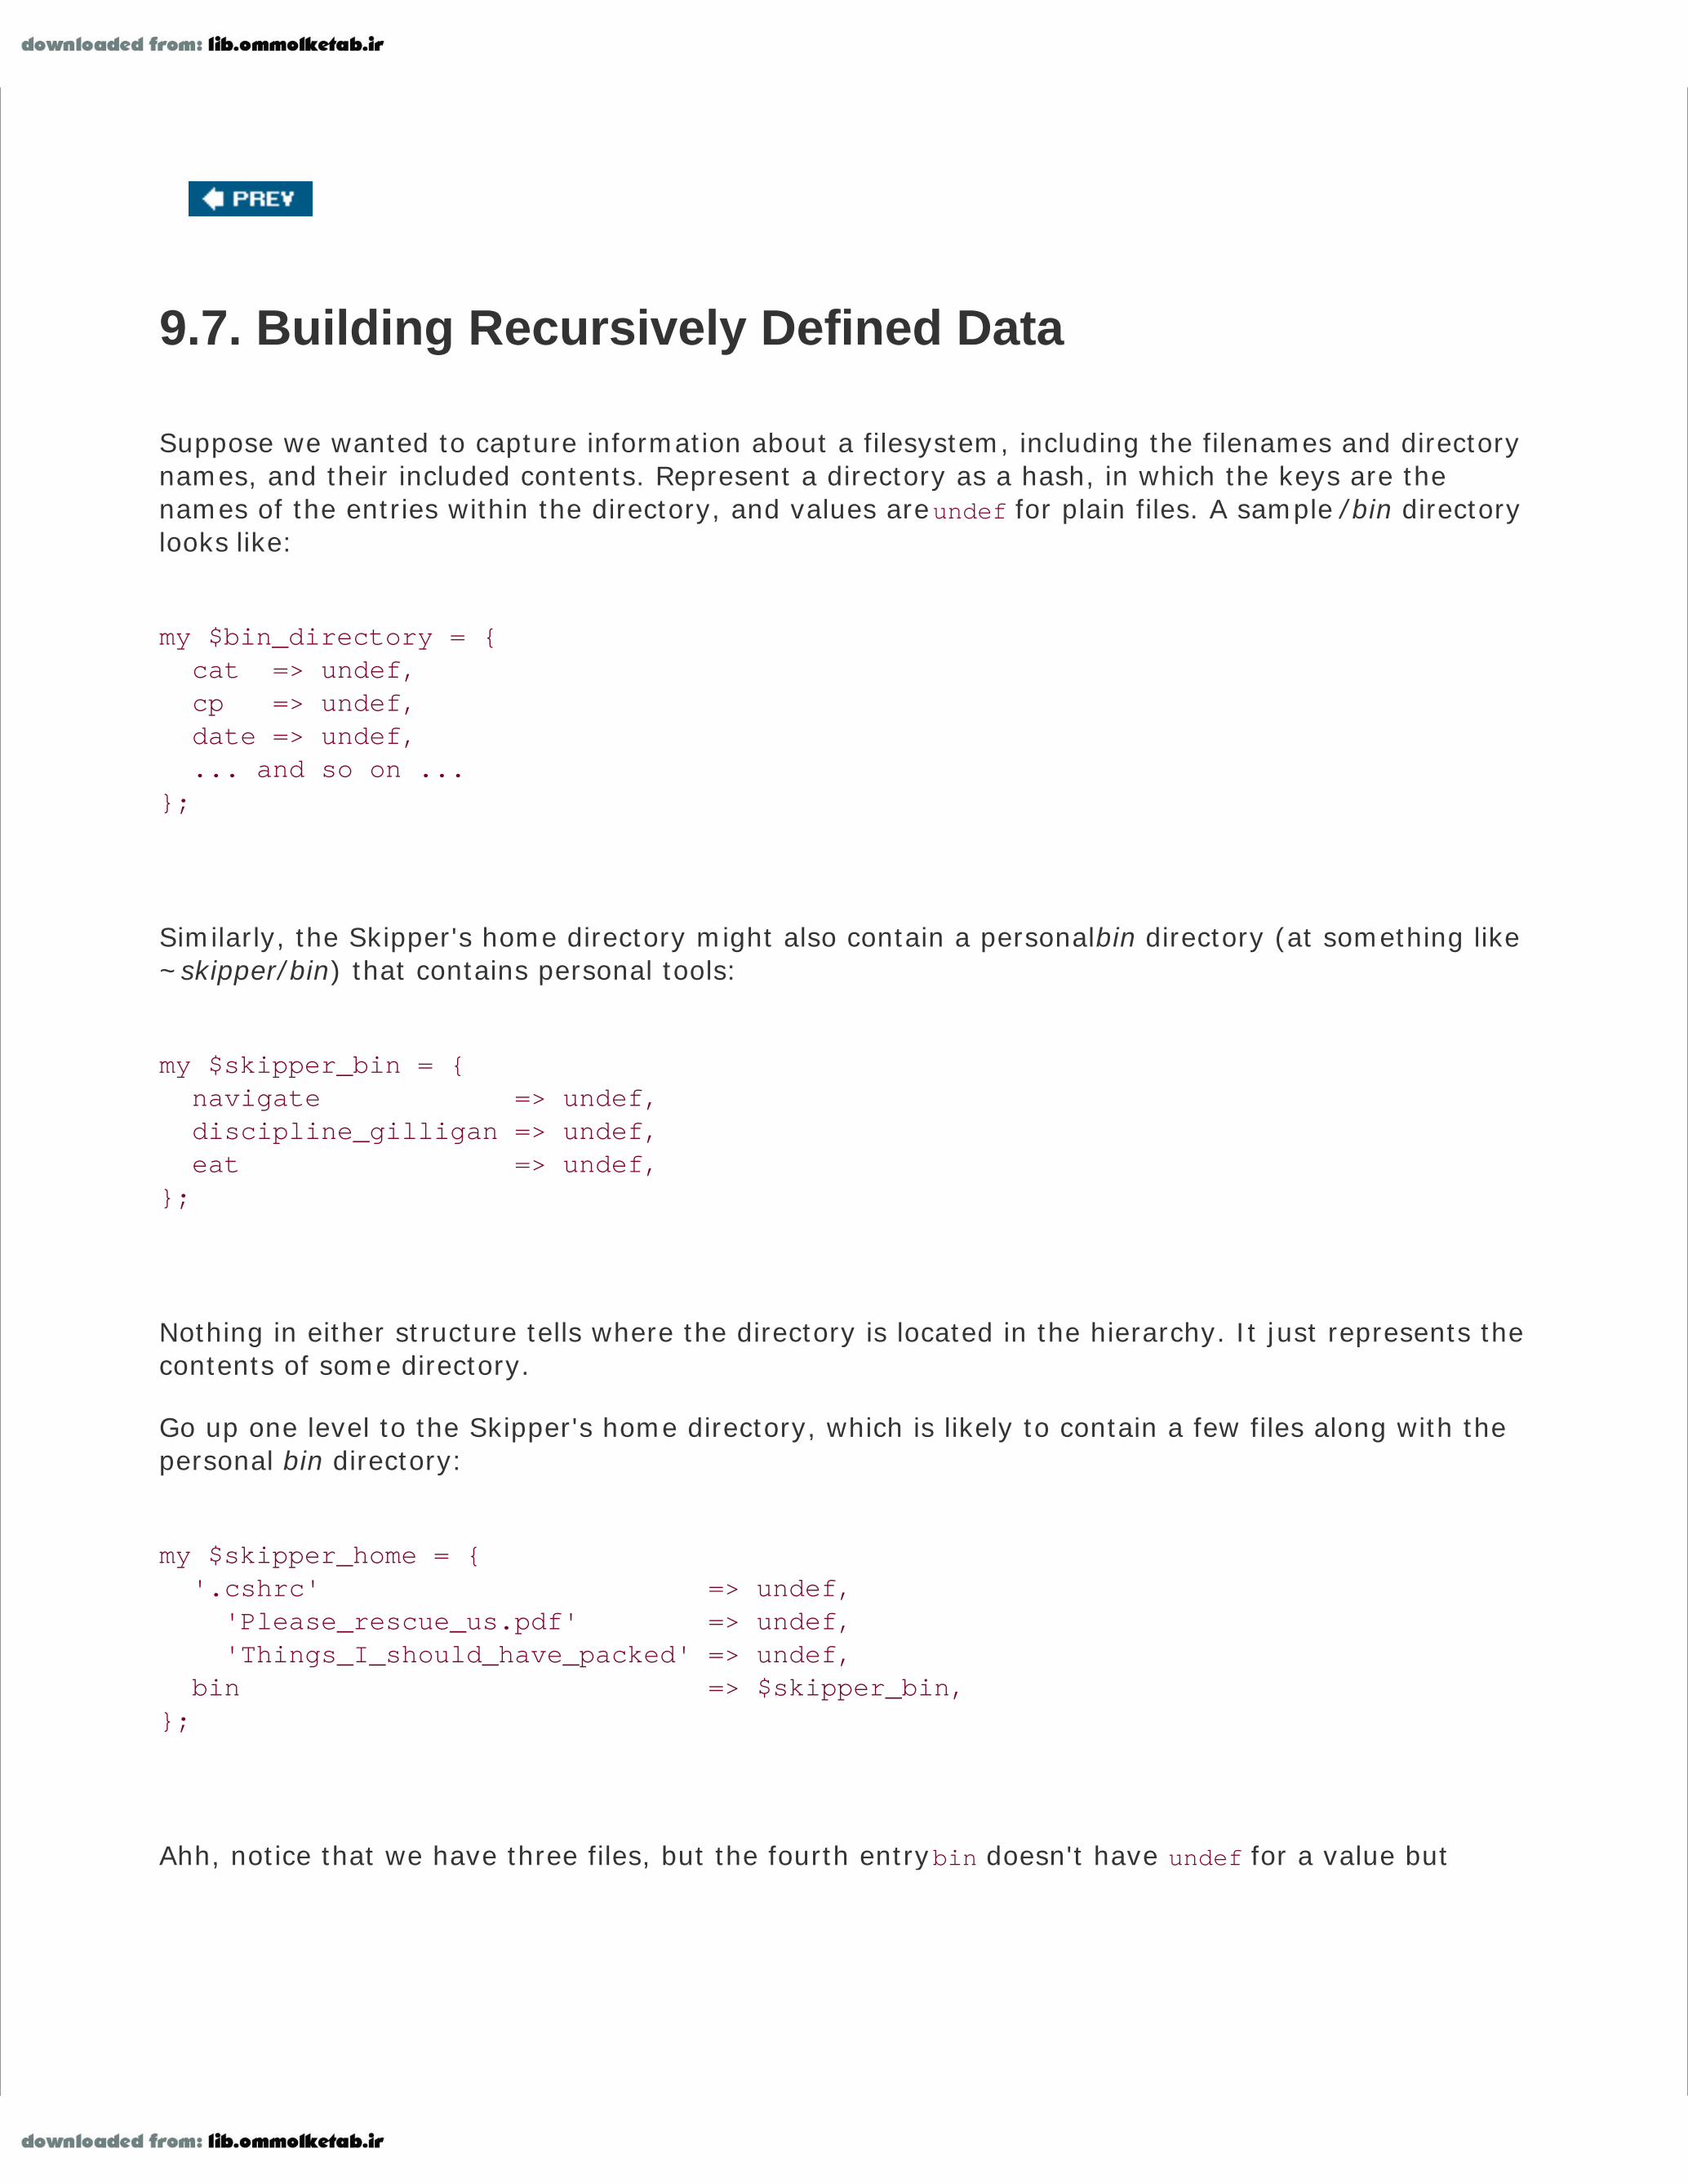
9.7. Building Recursively Defined Data
Suppose we wanted to capture information about a filesystem, including the filenames and directorynames, and their included contents. Represent a directory as a hash, in which the keys are thenames of the entries within the directory, and values are undef for plain files. A sample /bin directorylooks like:
my $bin_directory = { cat => undef, cp => undef, date => undef, ... and so on ...};
Similarly, the Skipper's home directory might also contain a personal bin directory (at something like~skipper/bin) that contains personal tools:
my $skipper_bin = { navigate => undef, discipline_gilligan => undef, eat => undef,};
Nothing in either structure tells where the directory is located in the hierarchy. It just represents thecontents of some directory.
Go up one level to the Skipper's home directory, which is likely to contain a few files along with thepersonal bin directory:
my $skipper_home = { '.cshrc' => undef, 'Please_rescue_us.pdf' => undef, 'Things_I_should_have_packed' => undef, bin => $skipper_bin,};
Ahh, notice that we have three files, but the fourth entry bin doesn't have undef for a value but

rather the hash reference created earlier for the Skipper's personal bin directory. This is how weindicate subdirectories. If the value is undef, it's a plain file; if it's a hash reference, we have asubdirectory, with its own files and subdirectories. Of course, we can have combined these twoinitializations:
my $skipper_home = { '.cshrc' => undef, Please_rescue_us.pdf => undef, Things_I_should_have_packed => undef,
bin => { navigate => undef, discipline_gilligan => undef, eat => undef, },};
Now the hierarchical nature of the data starts to come into play.
Obviously, we don't want to create and maintain a data structure by changing literals in the program.We should fetch the data by using a subroutine. Write a subroutine that returns undef for a givenpathname if the path is a file, or a hash reference of the directory contents if the path is a directory.The base case of looking at a file is the easiest, so let's write that:
sub data_for_path { my $path = shift; if (-f $path) { return undef; } if (-d $path) { ... } warn "$path is neither a file nor a directory\n"; return undef;}
If the Skipper calls this on .cshrc, he'll get back an undef value, indicating that a file was seen.
Now for the directory part. We need a hash reference, which we declare as a named hash inside thesubroutine. For each element of the hash, we call ourselves to populate the value of that hashelement. It goes something like this:
sub data_for_path { my $path = shift; if (-f $path or -l $path) { # files or symbolic links

return undef; } if (-d $path) { my %directory; opendir PATH, $path or die "Cannot opendir $path: $!"; my @names = readdir PATH; closedir PATH; for my $name (@names) { next if $name eq '.' or $name eq '..'; $directory{$name} = data_for_path("$path/$name"); } return \%directory; } warn "$path is neither a file nor a directory\n"; return undef;}
The base cases in this recursive algorithm are the files and symbolic links. This algorithm wouldn'tcorrectly traverse the filesystem if it followed symbolic links to directories as if they were true (hard)links, since it could end up in a circular loop if the symlink pointed to a directory that contained thesymlink.[*] It would also fail to correctly traverse a malformed filesystemthat is, one in which thedirectories form a ring rather than a tree structure, say. Although malformed filesystems may notoften be an issue, recursive algorithms in general are vulnerable to errors in the structure of therecursive data.
[*] Not that any of us have ever done that and wondered why the program took forever. The second time really wasn't our fault
anyway, and the third time was just bad luck. That's our story and we're sticking to it.
For each file within the directory being examined, the response from the recursive call todata_for_path is undef. This populates most elements of the hash. When the reference to the namedhash is returned, the reference becomes a reference to an anonymous hash because the nameimmediately goes out of scope. (The data itself doesn't change, but the number of ways in which wecan access the data changes.)
If there is a subdirectory, the nested subroutine call uses readdir to extract the contents of thatdirectory and returns a hash reference, which is inserted into the hash structure created by thecaller.
At first, it may look a bit mystifying, but if we walk through the code slowly, we'll see it's alwaysdoing the right thing. Test the results of this subroutine by calling it on . (the current directory) andinspecting the result:
use Data::Dumper;print Dumper(data_for_path('.'));
Obviously, this will be more interesting if our current directory contains subdirectories.

9.8. Displaying Recursively Defined Data
The Dumper routine of Data::Dumper displays the output nicely, but what if we don't like the formatbeing used? We can write a routine to display the data. Again, for recursively defined data, arecursive subroutine is usually the key.
To dump the data, we need to know the name of the directory at the top of the tree, because that'snot stored within the structure:
sub dump_data_for_path { my $path = shift; my $data = shift;
if (not defined $data) { # plain file print "$path\n"; return; } ... }
For a plain file, dump the pathname; for a directory, $data is a hash reference. Let's walk through thekeys and dump the values:
sub dump_data_for_path { my $path = shift; my $data = shift;
if (not defined $data) { # plain file print "$path\n"; return; }
my %directory = %$data;
for (sort keys %directory) { dump_data_for_path("$path/$_", $directory{$_}); }}
For each element of the directory, we pass a path consisting of the incoming path followed by the
current directory entry, and the data pointer is either undef for a file or a subdirectory hash referencefor another directory. We can see the results by running:
dump_data_for_path('.', data_for_path('.'));
Again, this is more interesting in a directory that has subdirectories, but the output should be similarto:
find . -print
from the shell prompt.

9.9. Exercises
You can find the answers to these exercises in "Answers for Chapter 9" in the Appendix.
9.9.1. Exercise 1 [15 min]
Using the glob operator, a naive sort of every name in the /bin directory by their relative sizes mightbe written as:
my @sorted = sort { -s $a <=> -s $b } glob "/bin/*";
Rewrite this using the Schwartzian Transform technique.
If you don't have many files in the /bin directory, perhaps because you don't have a Unix machine,change the argument to glob as needed.
9.9.2. Exercise 2 [15 min]
Read up on the Benchmark module, included with Perl. Write a program that will answer the question"How much does using the Schwartzian Transform speed up the task of Exercise 1?"
9.9.3. Exercise 3 [10 min]
Using a Schwartzian Transform, read a list of words, and sort them in "dictionary order." Dictionaryorder ignores all capitalization and internal punctuation. Hint: the following transformation might beuseful:
my $string = 'Mary-Ann';$string =~ tr/A-Z/a-z/; # force all lowercase$string =~ tr/a-z//cd; # strip all but a-z from the stringprint $string; # prints "maryann"
Be sure you don't mangle the data! If the input includes the Professor and the skipper, the outputshould have them listed in that order, with that capitalization.

9.9.4. Exercise 4 [20 min]
Modify the recursive directory dumping routine so it shows the nested directories throughindentation. An empty directory should show up as:
sandbar, an empty directory
while a nonempty directory should appear with nested contents, indented two spaces:
uss_minnow, with contents: anchor broken_radio galley, with contents: captain_crunch_cereal gallon_of_milk tuna_fish_sandwich life_preservers

Chapter 10. Building Larger ProgramsThis chapter looks at how to break up a program into pieces and includes some of the concerns thatarise when we put those pieces back together again, or when many people work together on thesame program.

10.1. The Cure for the Common Code
The Skipper writes many Perl programs to provide navigation for all the common ports of call for theMinnow. He finds himself cutting and pasting a very common routine into each program:
sub turn_toward_heading { my $new_heading = shift; my $current_heading = current_heading( ); print "Current heading is ", $current_heading, ".\n"; print "Come about to $new_heading "; my $direction = 'right'; my $turn = ($new_heading - $current_heading) % 360; if ($turn > 180) { # long way around $turn = 360 - $turn; $direction = 'left'; } print "by turning $direction $turn degrees.\n";}
This routine gives the shortest turn to make from the current heading (returned by the subroutinecurrent_heading( )) to a new heading (given as the first parameter to the subroutine).
The first line of this subroutine might have read instead:
my ($new_heading) = @_;
This is mostly a style call: in both cases, the first parameter ends up in $new_heading. However,we've seen that removing the items from @_ as they are identified does have some advantages. So,we stick (mostly) with the "shifting" style of argument parsing. Now back to the matter at hand . . . .
After writing a dozen programs using this routine, the Skipper realizes that the output is excessivelychatty when he's already taken the time to steer the proper course (or perhaps simply starteddrifting in the proper direction). After all, if the current heading is 234 degrees and he needs to turnto 234 degrees, we see:
Current heading is 234.Come about to 234 by turning right 0 degrees.
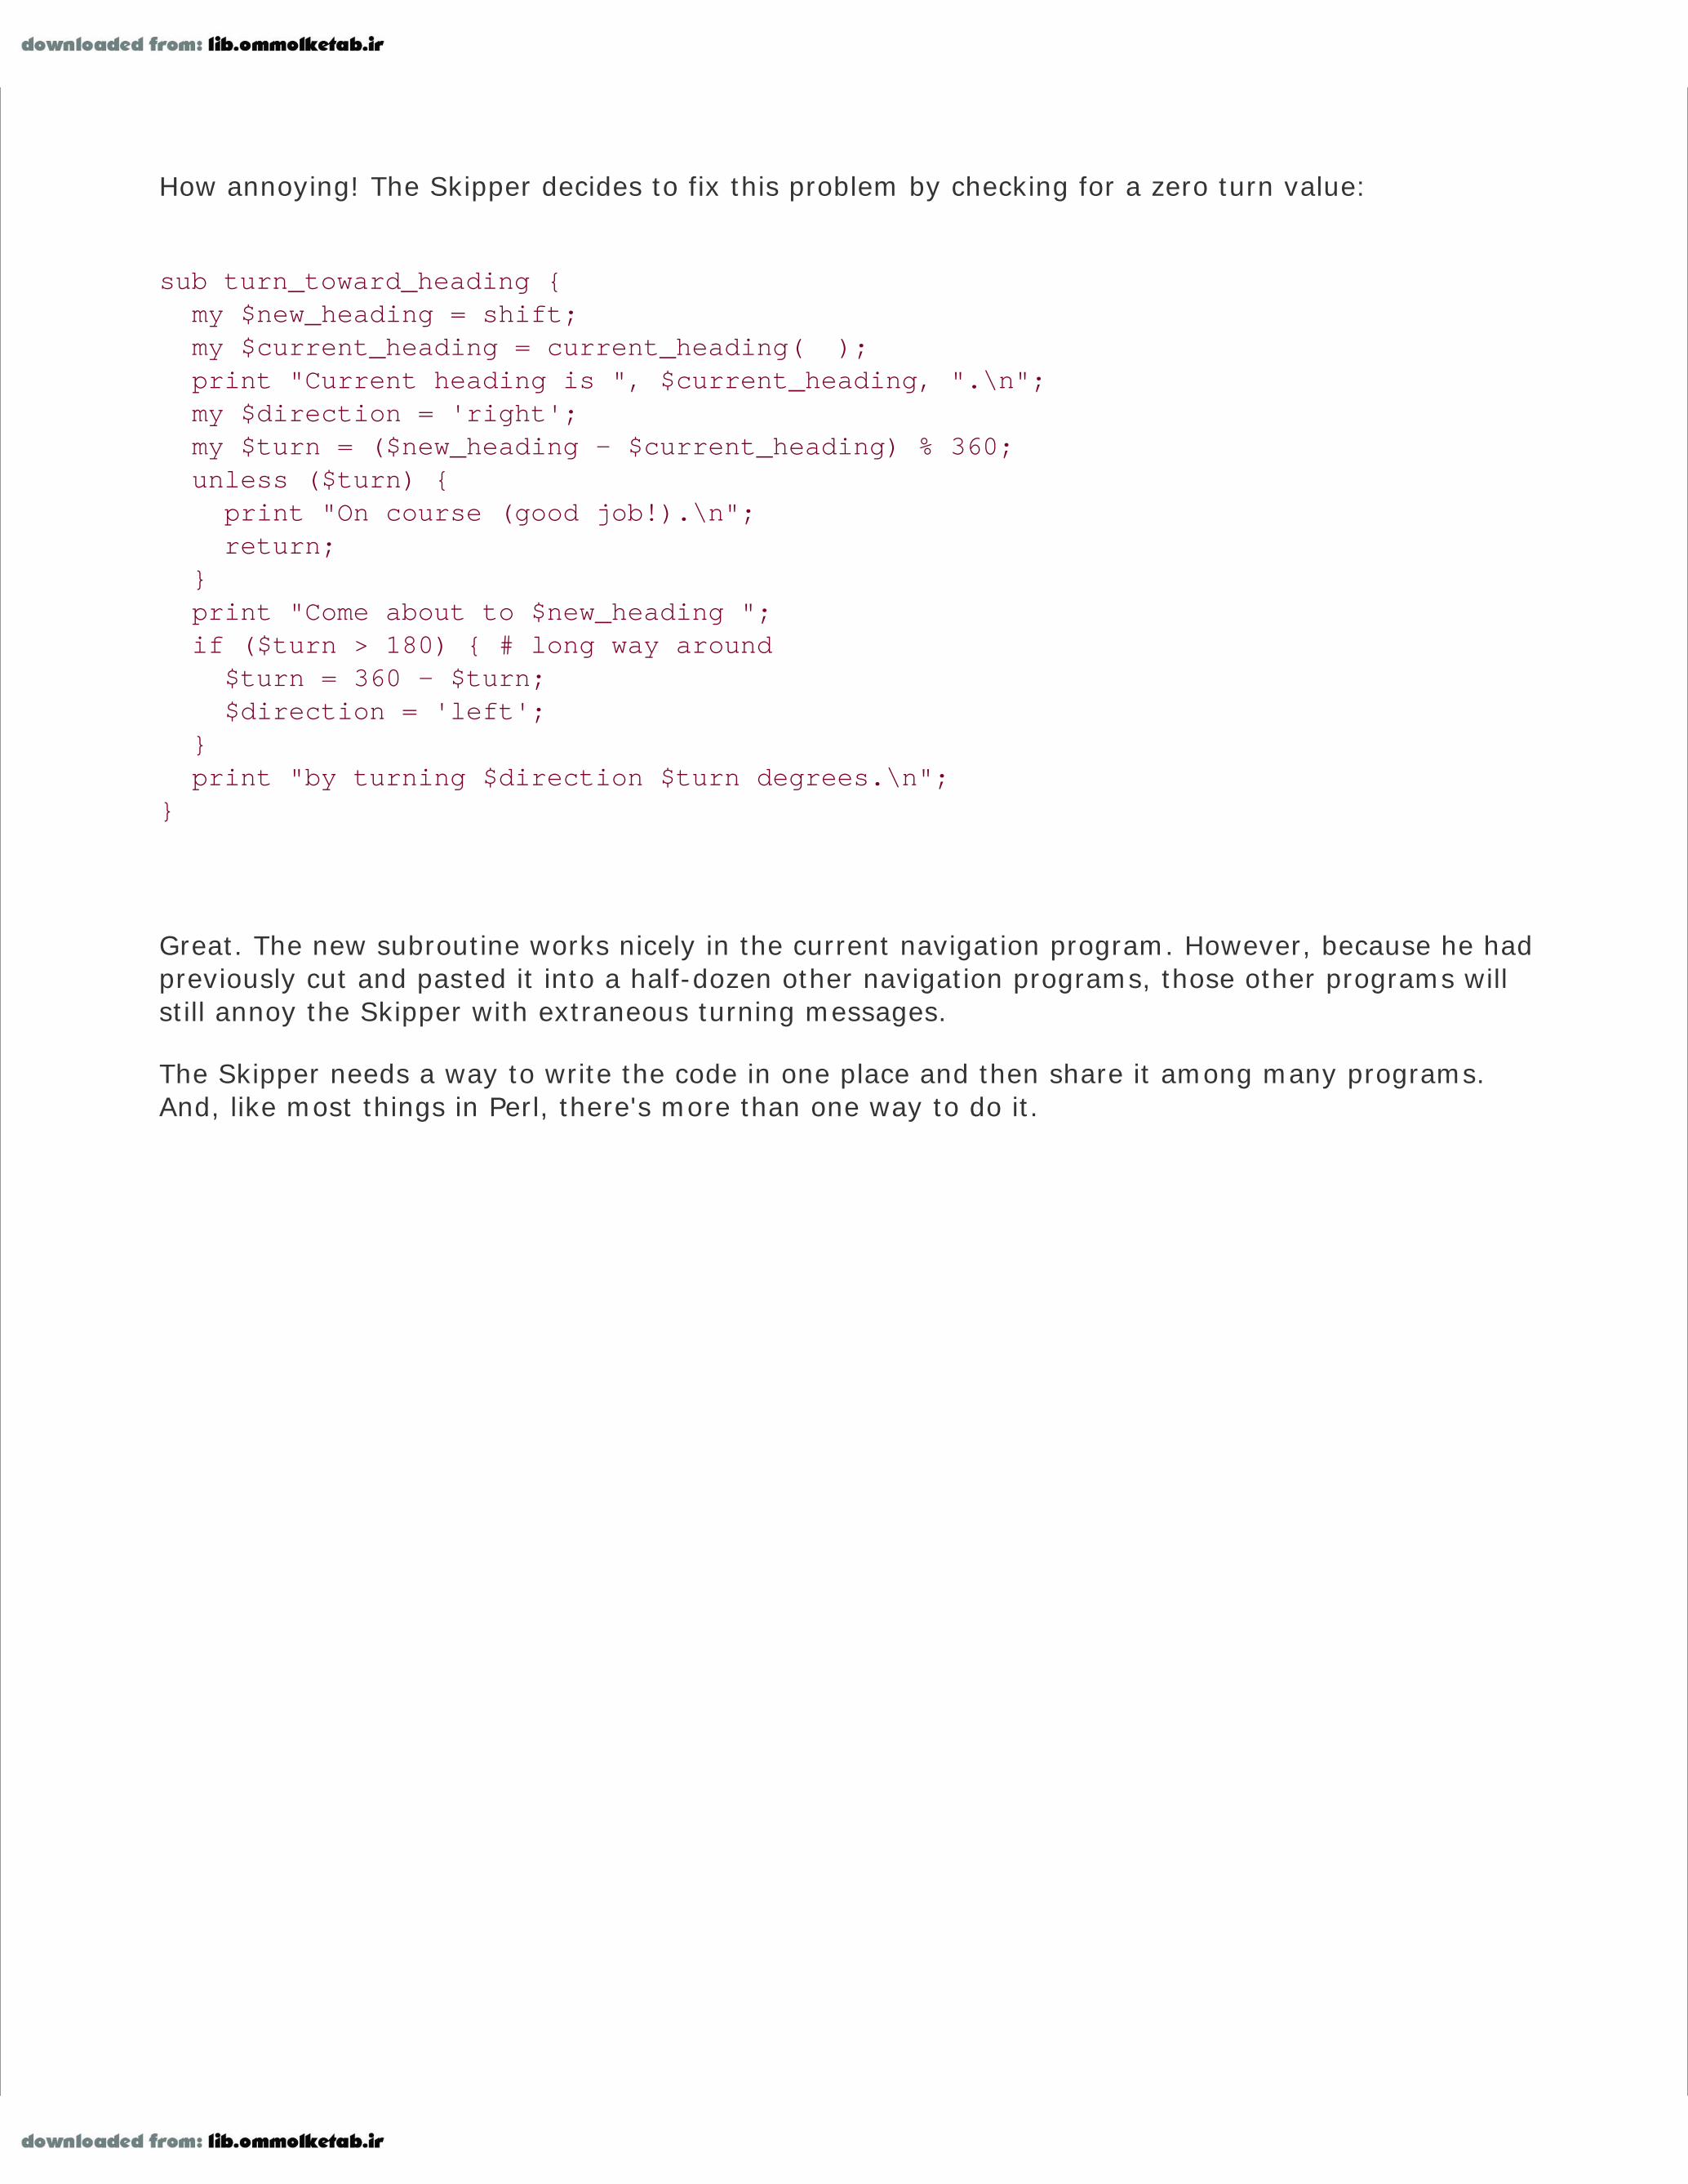
How annoying! The Skipper decides to fix this problem by checking for a zero turn value:
sub turn_toward_heading { my $new_heading = shift; my $current_heading = current_heading( ); print "Current heading is ", $current_heading, ".\n"; my $direction = 'right'; my $turn = ($new_heading - $current_heading) % 360; unless ($turn) { print "On course (good job!).\n"; return; } print "Come about to $new_heading "; if ($turn > 180) { # long way around $turn = 360 - $turn; $direction = 'left'; } print "by turning $direction $turn degrees.\n";}
Great. The new subroutine works nicely in the current navigation program. However, because he hadpreviously cut and pasted it into a half-dozen other navigation programs, those other programs willstill annoy the Skipper with extraneous turning messages.
The Skipper needs a way to write the code in one place and then share it among many programs.And, like most things in Perl, there's more than one way to do it.

10.2. Inserting Code with eval
The Skipper can save disk space (and brain space) by bringing the definition for turn_toward_headingout into a separate file. For example, suppose the Skipper figures out a half-dozen commonsubroutines related to navigating the Minnow that he seems to use in most or all of the programshe's writing for the task. He can put them in a separate file called navigation.pm, which consists onlyof the needed subroutines.
But now, how can we tell Perl to pull in that program snippet from another file? We could do it thehard way, using the string form of eval that we discussed in Chapter 2.
sub load_common_subroutines { open MORE_CODE, 'navigation.pm' or die "navigation.pm: $!"; undef $/; # enable slurp mode my $more_code = <MORE_CODE>; close MORE_CODE; eval $more_code; die $@ if $@;}
Perl reads the code from navigation.pm into the $more_code variable. We then use eval to processthat text as Perl code. Any lexical variables in $more_code remain local to the evaluated code.[*] Ifthere's a syntax error, Perl sets the $@ variable and causes the subroutine to die with the appropriateerror message.
[*] Oddly, the variable $more_code is also visible to the evaluated code, not that it is of any use to change that variable during the
eval.
Now, instead of a few dozen lines of common subroutines to place in each file, we simply have onesubroutine to insert in each file.
But that's not very nice, especially if we need to keep doing this kind of task repeatedly. Luckily, Perlhas several ways to help us out.
10.3. Using do
The Skipper placed a few common navigation subroutines into navigation.pm. If the Skipper merelyinserts:
do 'navigation.pm';die $@ if $@;
into his typical navigation program, it's almost the same as if the eval code were executed right atthat point in the program.[ ]
[ ] Except in regard to @INC, %INC, and missing file handling, which we'll show later.
That is, the do operator acts as if the code from navigation.pm were incorporated into the currentprogram, although in its own scope block, so that lexicals (my variables) and most directives (such asuse strict) from the included file don't leak into the main program.
Now the Skipper can safely update and maintain one copy of the common subroutines without havingto copy and recopy all the fixes and extensions into the many separate navigation programs hecreates and uses. Figure 10-1 illustrates how the Skipper can use his common library.
Figure 10-1. The Skipper uses the navigation.pm file in all his othernavigation programs

Of course, this requires a bit of discipline, because breaking the expected interface of a givensubroutine now breaks many programs instead of just one.[ ] The Skipper needs to give specialthought to his design for reusable components and modularity design. We'll presume the Skipper hashad some experience at that, but we'll show some more on that in later chapters.
[ ] In later chapters, we'll show how to set up tests to be used while maintaining reused code.
By placing some of the code into a separate file, other programmers can reuse the Skipper's routines,and vice versa. If Gilligan writes a routine to drop_anchor( ) and places it in the file drop_anchor.pm,then the Skipper can use Gilligan's code by including his library:
do 'drop_anchor.pm';die $@ if $@;...drop_anchor( ) if at_dock( ) or in_port( );
Thus, the code that we bring in from separate files permits easy maintenance and interprogrammercooperation.

While the code we brought in from a .pm file can have direct executable statements, it's much morecommon to simply define subroutines that we can load using do.
Going back to that drop_anchor.pm library for a second, what if the Skipper wrote a program thatneeded to "drop anchor" as well as navigate?
do 'drop_anchor.pm';die $@ if $@;do 'navigation.pm';die $@ if $@;...turn_toward_heading(90);...drop_anchor( ) if at_dock( );
That works fine and dandy. The subroutines defined in both libraries are available to this program.

10.4. Using require
Suppose navigation.pm itself also pulls in drop_anchor.pm for some common navigation task. Perlreads the file once directly and then again while processing the navigation package. This needlesslyredefines drop_anchor( ). Worse than that, if we have warnings enabled,[*] we'll get a warning fromPerl that we've redefined the subroutine, even if it's the same definition.
[*] You are using warnings, right? You can enable them with either -w or use warnings;.
We need a mechanism that tracks which files we've brought in and then brings them in only once.Perl has such an operation, called require. Change the previous code to simply:
require 'drop_anchor.pm';require 'navigation.pm';
The require operator keeps track of the files Perl has read.[ ] Once Perl has processed a filesuccessfully, it simply ignores any further require operations on that same file. This means that evenif navigation.pm contains require "drop_anchor.pm", Perl imports the drop_anchor.pm file exactlyonce, and we'll get no annoying error messages about duplicate subroutine definitions (see Figure 10-2). Most importantly, we'll also save time by not processing the file more than once.
[ ] In the %INC hash, as described in the entry for require in the perlfunc documentation.
Figure 10-2. Once Perl brings in the drop_anchor.pm file, it ignoresanother attempt to require it

The require operator also has two additional features:
Any syntax error in the required file causes the program to die; thus, the many die $@ if $@statements are unnecessary.
The last expression evaluated in the file must return a true value.
Because of the second point, most files evaluated for require have a cryptic 1; as their last line ofcode. This ensures that the last evaluated expression is, in fact, true. Try to carry on this tradition aswell.
Originally, the mandatory true value was intended as a way for an included file to signal to theinvoker that the code was processed successfully and that no error condition existed. However,nearly everyone has adopted the die if ... strategy instead, deeming the "last expressionevaluated is false" strategy a mere historic annoyance.

10.5. require and @INC
So far, the examples have glossed over how we've set up the directory structure of where the maincode and the included files are located. That's because it "just works" for the simplest case where wehave a program and its libraries in the same directory and we run the program from that directory.
Things get a bit more complicated when the libraries aren't in the current directory. In fact, Perlsearches for libraries along a library search path, similar to what the shell does with the PATHenvironment variable. The current directory (represented in Unix by a single dot) is an element of thesearch path. So, as long as our libraries are in our current working directory, everything is fine.
The search path is a list of elements in the special @INC array, as we briefly discussed in Chapter 3.By default, the array contains the current directory and a half-dozen or so directories specified by theperson who compiled Perl. Typing perl -V on the command line shows what these directories are, inthe last dozen lines of the output. Also, the following command displays just the @INC directories:[*]
[*] On a Windows machine, use double quotes instead of single quotes on the command line.
perl -le 'print for @INC'
Except for . in that list, we probably won't be able to write to any of the other directories unlesswe're the person responsible for maintaining Perl on our machine, in which case, we should be able towrite to all of them. The remaining directories are where Perl searches for system-wide libraries andmodules, as we'll see later.
10.5.1. Extending @INC
We may run into some cases where we can't install modules in the pre-configured directories in @INC.We can change @INC itself before the require, so Perl searches our directories too. The @INC array isan ordinary array, so have the Skipper add a directory below his home directory to the mix:
unshift @INC, '/home/skipper/perl-lib';
Now, in addition to searching the standard directories and the current directory, Perl searches theSkipper's personal Perl library. In fact, Perl searches in that directory first, since it is the first one in@INC. By using unshift rather than push, Perl resolves any conflict in names between the Skipper'sprivate files and the system-installed files, with the Skipper's file-taking precedence.
Normally we want to ensure that this happens before anything else, so we can wrap it in a BEGINblock. Perl executes the code in the BEGIN block during the compile phase before the require
executes at runtime. Otherwise, Perl executes statements in the order that it finds them, and wehave to ensure that our unshift shows up before our require.
BEGIN { unshift @INC, '/home/skipper/perl-lib';};
This is such a common operation, though, that Perl has a pragma for it. The pragma makeseverything happen before runtime, so we'll get what we expect. It puts the directories we specify atthe beginning of @INC, just like we did before.
use lib qw(/home/skipper/perl-lib);
We don't always have to know the path ahead of time, either. In the previous examples, we'vehardcoded the paths. If we don't know what those will be because we're passing code around toseveral machines, the FindBin module, which comes with Perl, can help. It finds the full path to thescript directory so we can use it to build paths.
use FindBin qw($Bin);
Now, in $Bin is the path to the directory that holds our script. If we have our libraries in the samedirectory, our next line can be:
use lib $Bin;
If we have the libraries in a directory close to the script directory, we put the right path componentstogether to make it work.
use lib "$Bin/lib"; # in a subdirectory
use lib "$Bin/../lib"; # up one, then down into lib
So, if we know the relative path from the script directory, we don't have to hardcode the whole path.This makes the script more portable.
10.5.2. Extending @INC with PERL5LIB
The Skipper must edit each program that uses his private libraries to include those lines from theprevious section. If that seems like too much editing, he can instead set the PERL5LIB environmentvariable to the directory name. For example, in the C shell, he'd use the line:
setenv PERL5LIB /home/skipper/perl-lib
In Bourne-style shells, he'd use something like:
PERL5LIB=/home/skipper/perl-lib; export PERL5LIB
The Skipper can set PERL5LIB once and forget about it. However, unless Gilligan has the samePERL5LIB environment variable, his program will fail! While PERL5LIB is useful for personal use, wecan't rely on it for programs we intend to share with others. (And we can't make our entire team ofprogrammers add a common PERL5LIB variable. Believe us, we've tried.)
The PERL5LIB variable can include multiple directories separated by colons. Perl inserts all specifieddirectories at the beginning of @INC.
While a system administrator might add a setting of PERL5LIB to a system-wide startup script, mostpeople frown on that. The purpose of PERL5LIB is to enable non-administrators to extend Perl torecognize additional directories. If a system administrator wants additional directories, he merelyneeds to recompile and reinstall Perl.
10.5.3. Extending @INC with -I
If Gilligan recognizes that one of the Skipper's programs is missing the proper directive, Gilligan caneither add the proper PERL5LIB variable or invoke Perl directly with one or more -I options. Forexample, to invoke the Skipper's get_us_home program, the command line might be something like:
perl -I/home/skipper/perl-lib /home/skipper/bin/get_us_home
Obviously, it's easier for Gilligan if the program itself defines the extra libraries. But sometimes justadding a -I fixes things right up.[*] This works even if Gilligan can't edit the Skipper's program. Hestill has to be able to read it, of course, but Gilligan can use this technique to try a new version of hislibrary with the Skipper's program, for example.
[*] Extending @INC with either PERL5LIB orI also automatically adds the versionand architecture-specific subdirectories of the
specified directories. Adding these directories automatically simplifies the task of installing Perl modules that include architecture-
or version-sensitive components, such as compiled C code.

10.6. The Problem of Namespace Collisions
Sometimes the Skipper runs a ship into an island, but sometimes the collision involved is just acouple of names in a Perl program. Suppose that the Skipper has added all his cool and usefulroutines to navigation.pm and that Gilligan has incorporated the library into his own navigationpackage, head_toward_island:
#!/usr/bin/perl
require 'navigation.pm';
sub turn_toward_port { turn_toward_heading(compute_heading_to_island( ));}
sub compute_heading_to_island { .. code here ..}
.. more program here ..
Gilligan then has his program debugged (perhaps with the aid of a smart person whom we'll call "theProfessor"), and everything works well.
However, now the Skipper decides to modify his navigation.pm library, adding a routine calledturn_toward_port that makes a 45-degree turn toward the left (known as "port" in nautical jargon).
Gilligan's program will fail in a catastrophic way as soon as he tries to head to port: he'll startsteering the ship in circles! The problem is that the Perl compiler first compiles turn_toward_portfrom Gilligan's main program, then when Perl evaluates the require at runtime, it redefinesturn_toward_port as the Skipper's definition. Sure, if Gilligan has warnings enabled, he'll noticesomething is wrong, but why should he have to count on that?
The problem is that Gilligan defined turn_toward_port as meaning "turn toward the port on theisland," while the Skipper defined it as "turn toward the left." How do we resolve this?
One way is to require that the Skipper put an explicit prefix in front of every name defined in thelibrary, say, navigation_. Thus, Gilligan's program ends up looking like:
#!/usr/bin/perl
require 'navigation.pm';

sub turn_toward_port { navigation_turn_toward_heading(compute_heading_to_island( ));}
sub compute_heading_to_island { .. code here ..}
.. more program here ..
Clearly, the navigation_turn_toward_heading comes from the navigation.pm file. This is great forGilligan but awkward for the Skipper, as his file now has longer subroutine names:
sub navigation_turn_toward_heading { .. code here ..}
sub navigation_turn_toward_port { .. code here ..}
1;
Yes, every scalar, array, hash, filehandle, or subroutine now has to have a navigation_ prefix in frontof it to guarantee that the names won't collide with any potential users of the library. Obviously, forthat old sailor, this ain't gonna float his boat. What do we do instead?

10.7. Packages as Namespace Separators
If the name prefix of the last example didn't have to be spelled out on every use, things would workmuch better. We can improve the situation by using a package:
package Navigation;
sub turn_toward_heading { .. code here ..}
sub turn_toward_port { .. code here ..}
1;
The package declaration at the beginning of this file tells Perl to virtually insert Navigation:: in frontof most names within the file. Thus, the code above practically says:
sub Navigation::turn_toward_heading { .. code here ..}
sub Navigation::turn_toward_port { .. code here ..}
1;
Now when Gilligan uses this file, he simply adds Navigation:: to the subroutines defined in the libraryand leaves the Navigation:: prefix off for subroutines he defines on his own:
#!/usr/bin/perl
require 'navigation.pm';
sub turn_toward_port { Navigation::turn_toward_heading(compute_heading_to_island( ));

}
sub compute_heading_to_island { .. code here ..}
.. more program here ..
Package names are like variable names: they consist of alphanumerics and underscores but can'tbegin with a digit. Also, for reasons explained in the perlmodlib documentation, a package nameshould begin with a capital letter and not overlap an existing CPAN or core module name. Packagenames can also have multiple names separated by double colons, such as Minnow::Navigation andMinnow::Food::Storage.
Nearly every scalar, array, hash, subroutine, and filehandle name[*] is actually prefixed by thecurrent package, unless the name already contains one or more double-colon markers.
[*] Except lexicals, as we'll show in a moment.
So, in navigation.pm, we can use variables such as:[ ]
[ ] Trivia note: 21.283 degrees north, 157.842 degrees west is the location of the real-life marina where the opening shot of a
famous television series was filmed. Check it out on Google Maps if you don't believe us.
package Navigation;@homeport = (21.283, -157.842);
sub turn_toward_port { .. code ..}
We can refer to the @homeport variable in the main code with its full package specification:
@destination = @Navigation::homeport;
If every name has a package name inserted in front of it, what about names in the main program?Yes, they are also in a package, called main. It's as if package main; were at the beginning of eachfile. Thus, to keep Gilligan from having to say Navigation::turn_toward_heading, the navigation.pmfile can say:
sub main::turn_toward_heading { .. code here ..}

Now the subroutine is defined in the main package, not the Navigation package. This isn't an optimalsolution (we'll show better solutions in Chapter 15 when we talk about Exporter), but at least there'snothing sacred or terribly unique about main compared to any other package.
This is what the modules in Chapter 3 were doing when they imported symbols into our scripts, butwe didn't tell you the whole story then. Those modules imported the subroutines and variables intothe current package (again, that's main in our scripts, usually). That is, those symbols are onlyavailable in that package unless we use the full package specification. We'll get more into how thisworks later.

10.8. Scope of a Package Directive
All files start as if we had said package main;.[*] Any package directive remains in effect until the nextpackage directive, unless that package directive is inside a curly-braced scope. In that case, Perlremembers the prior package and restores it when that scope ends. Here's an example:
[*] Perl doesn't make us create an explicit main( ) loop like C. Perl knows that every script needs one, so it gives it to us for free.
package Navigation;
{ # start scope block package main; # now in package main
sub turn_toward_heading { # main::turn_toward_heading .. code here .. }
} # end scope block
# back to package Navigation
sub turn_toward_port { # Navigation::turn_toward_port .. code here ..}
The current package is lexically scoped, similar to the scope of my variables, narrowed to theinnermost-enclosing brace pair or file in which we introduced the package.
Most libraries have only one package declaration at the top of the file. Most programs leave thepackage as the default main package. However it's nice to know that we can temporarily have adifferent current package.[ ]
[ ] Some names are always in package main regardless of the current package: ARGV, ARGVOUT, ENV, INC, SIG, STDERR, STDIN,
and STDOUT. We can always refer to @INC and be assured of getting @main::INC. The punctuation mark variables, such as $_,
$2, and $!, are either all lexicals or forced into package main, so when we write $., we never get $Navigation::. by mistake.

10.9. Packages and Lexicals
A lexical variable (a variable introduced with my) isn't prefixed by the current package becausepackage variables are always global: we can always reference a package variable if we know its fullname. A lexical variable is usually temporary and accessible for only a portion of the program. If wedeclare a lexical variable, then using that name without a package prefix gets the lexical variable. Apackage prefix ensures that we are accessing a package variable and never a lexical variable.
For example, suppose a subroutine within navigation.pm declares a lexical @homeport variable. Anymention of @homeport will then be the newly introduced lexical variable, but a fully qualified mentionof @Navigation::homeport accesses the package variable instead.
package Navigation;@homeport = (21.283, -157.842);
sub get_me_home { my @homeport;
.. @homeport .. # refers to the lexical variable .. @Navigation::homeport .. # refers to the package variable
}
.. @homeport .. # refers to the package variable
Obviously, this can lead to confusing code, so we shouldn't introduce such duplication needlessly. Theresults are completely predictable, though.

10.10. Exercises
You can find the answers to these exercises in "Answers for Chapter 10" in the Appendix.
10.10.1. Exercise 1 [25 min]
The Oogaboogoo natives on the island have unusual names for the days and months. Here is somesimple but not very well-written code from Gilligan. Fix it up, add a conversion function for the monthnames, and make the whole thing into a library. For extra credit, add suitable error checking andconsider what should be in the documentation.
@day = qw(ark dip wap sen pop sep kir);sub number_to_day_name { my $num = shift @_; $day[$num]; }@month = qw(diz pod bod rod sip wax lin sen kun fiz nap dep);
10.10.2. Exercise 2 [15 min]
Make a program that uses your library and the following code to print out a message, such as Todayis dip, sen 15, 2011, meaning that today is a Monday in August. (Hint: the year and month numbersreturned by localtime may not be what you'd expect, so you need to check the documentation.)
my($sec, $min, $hour, $mday, $mon, $year, $wday) = localtime;
Chapter 11. Introduction to ObjectsObject-oriented programming (OOP) helps programmers run code sooner and maintain it easier byorganizing the code into things that we can name. We need a little more infrastructure to get goingwith objects, but in the long run, it's worth it.
The benefits of OOP become worthwhile when our program (including all external libraries andmodules) exceeds about N lines of code. Unfortunately, nobody can agree on what the value of N is,but for Perl programs, it's arguably around 1,000 lines of code. If our whole program is only a couplehundred lines of code, using objects is probably overkill.
Like references, Perl's object architecture was grafted on after a substantial amount of existing pre-Perl 5 code was already in use, so we had to ensure that it wouldn't break existing syntax.Amazingly, the only additional syntax to achieve object nirvana is the method call, introduced shortly.But the meaning of that syntax requires a bit of study, so let's proceed.
The Perl object architecture relies heavily on packages, subroutines, and references, so if you'reskipping around in this book, please go back to the beginning. Ready? Here we go.

11.1. If We Could Talk to the Animals...
Obviously, the castaways can't survive on coconuts and pineapples alone. Luckily for them, a bargecarrying random farm animals crashed on the island not long after they arrived, and the castawaysbegan farming and raising animals.
Let's listen to those animals for a moment:
sub Cow::speak { print "a Cow goes moooo!\n";}sub Horse::speak { print "a Horse goes neigh!\n";}sub Sheep::speak { print "a Sheep goes baaaah!\n";}
Cow::speak;Horse::speak;Sheep::speak;
This results in:
a Cow goes moooo!a Horse goes neigh!a Sheep goes baaaah!
Nothing spectacular here: simple subroutines, albeit from separate packages, and called using the fullpackage name. Let's create an entire pasture:
sub Cow::speak { print "a Cow goes moooo!\n";}sub Horse::speak { print "a Horse goes neigh!\n";}sub Sheep::speak { print "a Sheep goes baaaah!\n";

}
my @pasture = qw(Cow Cow Horse Sheep Sheep);foreach my $beast (@pasture) { &{$beast."::speak"}; # Symbolic coderef}
This results in:
a Cow goes moooo!a Cow goes moooo!a Horse goes neigh!a Sheep goes baaaah!a Sheep goes baaaah!
Wow. That symbolic coderef dereferencing there in the body of the loop is pretty nasty. We'recounting on no strict 'refs' mode, certainly not recommended for larger programs.[*] And whywas that necessary? Because the name of the package seems inseparable from the name of thesubroutine we want to invoke within that package.
[*] Although all examples in this book should be valid Perl code, some examples in this chapter will break the rules enforced by
use strict to make them easier to understand. By the end of the chapter, though, we'll show how to make strict-compliant
code again.
Or is it?

11.2. Introducing the Method Invocation Arrow
A class is a group of things with similar behaviors and traits. For now, let's say that Class->methodinvokes subroutine method in package Class. A method is the object-oriented version of thesubroutine, so we'll say "method" from now on.[*] That's not completely accurate, but we'll go on onestep at a time. Let's use it like so:
[*] In Perl, there really isn't a difference between a subroutine and a method. They both get an argument list in @_, and we have to
make sure we do the right thing.
sub Cow::speak { print "a Cow goes moooo!\n";}sub Horse::speak { print "a Horse goes neigh!\n";}sub Sheep::speak { print "a Sheep goes baaaah!\n";}
Cow->speak;Horse->speak;Sheep->speak;
And once again, this results in:
a Cow goes moooo!a Horse goes neigh!a Sheep goes baaaah!
That's not fun yet. We've got the same number of characters, all constant, no variables. However,the parts are separable now:
my $beast = 'Cow';$beast->speak; # invokes Cow->speak
Ahh! Now that the package name is separated from the subroutine name, we can use a variable

package name. This time, we've got something that works even when we enable use strict 'refs'.
Take the arrow invocation and put it back in the barnyard example:
sub Cow::speak { print "a Cow goes moooo!\n";}sub Horse::speak { print "a Horse goes neigh!\n";}sub Sheep::speak { print "a Sheep goes baaaah!\n";}
my @pasture = qw(Cow Cow Horse Sheep Sheep);foreach my $beast (@pasture) { $beast->speak;}
There! Now all the animals are talking, and safely at that, without the use of symbolic coderefs.
But look at all that common code. Each speak method has a similar structure: a print operator and astring that contains common text, except for two words. One of OOP's core principles is to minimizecommon code: if we write it only once, we'll save time. If we test and debug it only once, we'll savemore time.
Now that we know more about what the method invocation arrow actually does, we've got an easierway to do the same thing.

11.3. The Extra Parameter of Method Invocation
The invocation of:
Class->method(@args)
attempts to invoke the subroutine Class::method as:
Class::method('Class', @args);
(If it can't find the method, inheritance kicks in, but we'll show that later.) This means that we getthe class name as the first parameter, or the only parameter, if no arguments are given. We canrewrite the Sheep speaking method as:
sub Sheep::speak { my $class = shift; print "a $class goes baaaah!\n";}
The other two animals come out similarly:
sub Cow::speak { my $class = shift; print "a $class goes moooo!\n";}sub Horse::speak { my $class = shift; print "a $class goes neigh!\n";}
In each case, $class gets the value appropriate for that method. But once again, we have a lot ofsimilar structure. Can we factor out that commonality even further? Yesby calling another method inthe same class.

11.4. Calling a Second Method to Simplify Things
We can call out from speak to a helper method called sound. This method provides the constant textfor the sound itself:
{ package Cow; sub sound { 'moooo' } sub speak { my $class = shift; print "a $class goes ", $class->sound, "!\n"; }}
Now, when we call Cow->speak, we get a $class of Cow in speak. This, in turn, selects the Cow->soundmethod, which returns moooo. How different would this be for the Horse?
{ package Horse; sub sound { 'neigh' } sub speak { my $class = shift; print "a $class goes ", $class->sound, "!\n"; }}
Only the name of the package and the specific sound change. So can we share the definition forspeak between the cow and the horse? Yes, with inheritance !
Now let's define a common method package called Animal with the definition for speak:
{ package Animal; sub speak { my $class = shift; print "a $class goes ", $class->sound, "!\n"; }}
Then, for each animal, we can say it inherits from Animal, along with the animal-specific sound:
{ package Cow; @ISA = qw(Animal); sub sound { "moooo" }}
Note the added @ISA array. We'll get to that in a minute.
What happens when we invoke Cow->speak now?
First, Perl constructs the argument list. In this case, it's just Cow. Then Perl looks for Cow::speak.That's not there, so Perl checks for the inheritance array @Cow::ISA. It's there and contains the singlename Animal.
Perl next checks for speak inside Animal instead, as in Animal::speak. That found, Perl invokes thatmethod with the already frozen argument list, as if we had said:
Animal::speak('Cow');
Inside the Animal::speak method, $class becomes Cow as the first argument is shifted off. When weget to the step of invoking $class->sound while performing the print, it looks for Cow->sound:
print "a $class goes ", $class->sound, "!\n";# but $class is Cow, so...print 'a Cow goes ', Cow->sound, "!\n";# which invokes Cow->sound, returning 'moooo', soprint 'a Cow goes ', 'moooo', "!\n";
and we get our desired output.

11.5. A Few Notes About @ISA
This magical @ISA variable (pronounced "is a" not "ice-uh") declares that Cow "is a" Animal.[*] Notethat it's an array, not a simple single value, because on rare occasions it makes sense to have morethan one parent class searched for the missing methods. We'll show more about that later.
[*] ISA is actually a linguistic term. Once again, Larry Wall's background as a linguist has come back to influence Perl.
If Animal also had an @ISA, Perl would check there too.[ ] Typically, each @ISA has only one element(multiple elements means multiple inheritance and multiple headaches), so we get a nice tree ofinheritance.[ ]
[ ] The search is recursive, depth-first, and left to right in each @ISA.
[ ] There is also inheritance through UNIVERSAL and AUTOLOAD; see the perlobj manpage for the whole story.
When we turn on use strict, we'll get complaints on @ISA because it's not a variable containing anexplicit package name, nor is it a lexical (my) variable. We can't make it a lexical variable, though: ithas to belong to the package to be found by the inheritance mechanism.
There are a couple of straightforward ways to handle the declaration and setting of @ISA. The easiestis to just spell out the package name:
@Cow::ISA = qw(Animal);
We can also allow it as an implicitly named package variable:
package Cow;use vars qw(@ISA);@ISA = qw(Animal);
If you're on a recent-enough Perl (5.6 or later), you can use the our declaration to shorten it to:
package Cow;our @ISA = qw(Animal);
However, if you think your code might be used by people stuck with Perl 5.005 or earlier, it's best toavoid our.

If we're bringing in the class from outside, via an object-oriented module, we can change:
package Cow;use Animal;use vars qw(@ISA);@ISA = qw(Animal);
to just:
package Cow;use base qw(Animal);
That's pretty darn compact. Furthermore, use base has the advantage that it's performed at compiletime, eliminating a few potential errors from setting @ISA at runtime, like some of the other solutions.

11.6. Overriding the Methods
Let's add a mouse that can barely be heard:
{ package Animal; sub speak { my $class = shift; print "a $class goes ", $class->sound, "!\n"; }}{ package Mouse; @ISA = qw(Animal); sub sound { 'squeak' } sub speak { my $class = shift; print "a $class goes ", $class->sound, "!\n"; print "[but you can barely hear it!]\n"; }}
Mouse->speak;
which results in:
a Mouse goes squeak![but you can barely hear it!]
Here, Mouse has its own speaking routine, so Mouse->speak doesn't immediately invoke Animal->speak. This is known as overriding . We use overriding to shadow the method in the derived class(Mouse) because we have a specialized version of the routine, instead of calling the more generalbase class's method (in Animal). In fact, we didn't even need to initialize @Mouse::ISA to say that aMouse was an Animal, because all the methods needed for speak are defined completely with Mouse.
We've now duplicated some of the code from Animal->speak; this can be a maintenance headache.For example, suppose someone decides that the word goes in the output of the Animal class is a bug.Now the maintainer of that class changes goes to says. Our mice will still say goes, which means thecode still has the bug. The problem is that we invoked cut and paste to duplicate code, and in OOP,that's a sin. We should reuse code through inheritance, not by cut and paste.
How can we avoid that? Can we say somehow that a Mouse does everything any other Animal does,

but add in the extra comment? Sure!
As our first attempt, let's invoke the Animal::speak method directly:
{ package Animal; sub speak { my $class = shift; print "a $class goes ", $class->sound, "!\n"; }}{ package Mouse; @ISA = qw(Animal); sub sound { 'squeak' } sub speak { my $class = shift; Animal::speak($class); print "[but you can barely hear it!]\n"; }}
Note that because we've stopped using the method arrow, we have to include the $class parameter(almost surely the value Mouse) as the first parameter to Animal::speak.
Why did we stop using the arrow? Well, if we invoke Animal->speak there, the first parameter to themethod is "Animal" not "Mouse" and when the time comes for it to call for the sound, it won't have theright class to select the proper methods for this object.
Invoking Animal::speak directly is a mess, however. What if Animal::speak didn't exist before, and itinherited from a class mentioned in @Animal::ISA? For example, suppose the code was:
{ package LivingCreature; sub speak { ... } ...}{ package Animal; @ISA = qw(LivingCreature); # no definition for speak( ) ...}{ package Mouse; @ISA = qw(Animal); sub speak { ... Animal::speak( ... ); } ...}

Because we no longer use the method arrow, we get one and only one chance to hit the right methodbecause we're treating it like a regular subroutine with no inheritance magic. We'll look for it inAnimal and not find it, and the program aborts.
The Animal class name is now hardwired into the method selection. This is a mess if someonemaintains the code, changing @ISA for Mouse, and doesn't notice Animal there in speak. Thus, this isprobably not the right way to go.

11.7. Starting the Search from a Different Place
A better solution is to tell Perl to search from a different place in the inheritance chain:
{ package Animal; sub speak { my $class = shift; print "a $class goes ", $class->sound, "!\n"; }}{ package Mouse; @ISA = qw(Animal); sub sound { 'squeak' } sub speak { my $class = shift; $class->Animal::speak(@_); print "[but you can barely hear it!]\n"; }}
Ahh. As ugly as this is, it works. Using this syntax, start with Animal to find speak and use all ofAnimal's inheritance chain if not found immediately. The first parameter is $class (because we'reusing an arrow again), so the found speak method gets Mouse as its first entry and eventually worksits way back to Mouse::sound for the details.
This isn't the best solution, however. We still have to keep the @ISA and the initial search package insync (changes in one must be considered for changes in the other). Worse, if Mouse had multipleentries in @ISA, we wouldn't necessarily know which one had actually defined speak.
So, is there an even better way?

11.8. The SUPER Way of Doing Things
By changing the Animal class to the SUPER class in that invocation, we get a search of all oursuperclasses (classes listed in @ISA) automatically:
{ package Animal; sub speak { my $class = shift; print "a $class goes ", $class->sound, "!\n"; }}{ package Mouse; @ISA = qw(Animal); sub sound { 'squeak' } sub speak { my $class = shift; $class->SUPER::speak; print "[but you can barely hear it!]\n"; }}
Thus, SUPER::speak means to look in the current package's @ISA for speak, invoking the first onefound if there's more than one. In this case, we look in the one and only base class, Animal, findAnimal::speak, and pass it Mouse as its only parameter.

11.9. What to Do with @_
In that last example, had there been any additional parameters to the speak method (like how manytimes, or in what pitch for singing, for example), the parameters would be ignored by theMouse::speak method. If we want them to be passed uninterpreted to the parent class, we can add itas a parameter:
$class->SUPER::speak(@_);
This invokes the speak method of the parent class, including all the parameters that we've not yetshifted off of our parameter list.
Which one is correct? It depends. If we are writing a class that simply adds to the parent classbehavior, it's best to simply pass along arguments we haven't dealt with. However, if we want precisecontrol over the parent class's behavior, we should determine the argument list explicitly and pass it.

11.10. Where We Are So Far...
So far, we've used the method arrow syntax:
Class->method(@args);
or the equivalent:
my $beast = 'Class';$beast->method(@args);
which constructs an argument list of:
('Class', @args)
and attempts to invoke:
Class::method('Class', @args);
However, if Perl doesn't find Class::method, it examines @Class::ISA (recursively) to locate apackage that does indeed contain method and then invokes that version instead.
Chapter 12 shows how to distinguish the individual animals by giving them associated properties,called instance variables.

11.11. Exercises
You can find the answers to these exercises in "Answers for Chapter 11" in the Appendix.
11.11.1. Exercise 1 [20 min]
Type in the Animal, Cow, Horse, Sheep, and Mouse class definitions. Make it work with use strict. Useour if you're using a recent enough version of Perl. Your program should ask the user to enter thenames of one or more barnyard animals. Create a barnyard with those animals, and have eachanimal speak once.
11.11.2. Exercise 2 [40 min]
Add a Person class at the same level as Animal, and have both of them inherit from a new class calledLivingCreature. Also make the speak method take a parameter of what to say, falling back to thesound (humming for a Person) if no parameter is given. Since this isn't Dr. Dolittle, make sure theanimals can't talk. (That is, don't let speak have any parameters for an animal.) Try not to duplicateany code, but be sure to catch likely errors of usage, such as forgetting to define a sound for ananimal.
Demonstrate the Person class by invoking a person with nothing to say, and then demonstrate it asecond time by invoking a person with something to say.

Chapter 12. Objects with DataUsing the simple syntax introduced in Chapter 11, we have class methods, (multiple) inheritance,overriding, and extending. We've been able to factor out common code and provide a way to reuseimplementations with variations. This is at the core of what objects provide, but objects also provideinstance data, which we haven't even begun to cover.

12.1. A Horse Is a Horse, of Course of Courseor Is It?
Let's look at the code used in Chapter 11 for the Animal classes and Horse classes:
{ package Animal; sub speak { my $class = shift; print "a $class goes ", $class->sound, "!\n" }}{ package Horse; @ISA = qw(Animal); sub sound { 'neigh' }}
This lets us invoke Horse->speak to ripple upward to Animal::speak, calling back to Horse::sound toget the specific sound, and the output of:
a Horse goes neigh!
But all Horse objects would have to be absolutely identical. If we add a method, all horsesautomatically share it. That's great for making horses identical, but how do we capture the propertiesof an individual horse? For example, suppose we want to give our horse a name. There's got to be away to keep its name separate from those of other horses.
We can do so by establishing an instance. An instance is generally created by a class, much like a caris created by a car factory. An instance will have associated properties, called instance variables (ormember variables, if you come from a C++ or Java background). An instance has a unique identity(like the serial number of a registered horse), shared properties (the color and talents of the horse),and common behavior (e.g., pulling the reins back tells the horse to stop).
In Perl, an instance must be a reference to one of the built-in types. Start with the simplest referencethat can hold a horse's name, a scalar reference:[*]
[*] It's the simplest, but rarely used in real code for reasons we'll show shortly.
my $name = 'Mr. Ed';my $tv_horse = \$name;

Now $tv_horse is a reference to what will be the instance-specific data (the name). The final step inturning this into a real instance involves a special operator called bless:
bless $tv_horse, 'Horse';
The bless operator follows the reference to find what variable it points toin this case, the scalar$name. Then it "blesses" that variable, turning $tv_horse into an objecta Horse object, in fact.(Imagine that a little sticky-note that says Horse is now attached to $name.)
At this point, $tv_horse is an instance of Horse.[ ] That is, it's a specific horse. The reference isotherwise unchanged and can still be used with traditional dereferencing operators.[ ]
[ ] Actually, $tv_horse points to the object, but, in common terms, we nearly always deal with objects by references to those
objects. Hence, it's simpler to say that $tv_horse is the horse, not "the thing that $tv_horse references."
[ ] Although doing so outside the class is a bad idea, as we'll show later.

12.2. Invoking an Instance Method
The method arrow can be used on instances, as well as names of packages (classes). Let's get thesound that $tv_horse makes:
my $noise = $tv_horse->sound;
To invoke sound, Perl first notes that $tv_horse is a blessed reference, and thus an instance. Perlthen constructs an argument list, similar to the way an argument list was constructed when we usedthe method arrow with a class name. In this case, it'll be just ($tv_horse). (Later we'll show thatarguments will take their place following the instance variable, just as with classes.)
Now for the fun part: Perl takes the class in which the instance was blessed, in this case, Horse, anduses it to locate and invoke the method, as if we had said Horse->sound instead of $tv_horse->sound.The purpose of the original blessing is to associate a class with that reference to allow Perl to find theproper method.
In this case, Perl finds Horse::sound directly (without using inheritance), yielding the final subroutineinvocation:
Horse::sound($tv_horse)
Note that the first parameter here is still the instance, not the name of the class as before. neigh isthe return value, which ends up as the earlier $noise variable.
If Perl did not find Horse::sound, it would walk up the @Horse::ISA list to try to find the method in oneof the superclasses, just as for a class method. The only difference between a class method and aninstance method is whether the first parameter is an instance (a blessed reference) or a class name(a string).[*]
[*] This is perhaps different from other OOP languages with which you may be familiar.

12.3. Accessing the Instance Data
Because we get the instance as the first parameter, we can now access the instance-specific data. Inthis case, let's add a way to get at the name:
{ package Horse; @ISA = qw(Animal); sub sound { 'neigh' } sub name { my $self = shift; $$self; }}
Now we call for the name:
print $tv_horse->name, " says ", $tv_horse->sound, "\n";
Inside Horse::name, the @_ array contains just $tv_horse, which the shift stores into $self. It'straditional to shift the first parameter into a variable named $self for instance methods, so staywith that unless you have strong reasons to do otherwise (Perl places no significance on the name$self, however).[ ] Then we dereference $self as a scalar reference, yielding Mr. Ed. The result is:
[ ] If you come from another OO language background, you might choose $this or $me for the variable name, but you'll probably
confuse most other Perl OO hackers.
Mr. Ed says neigh.

12.4. How to Build a Horse
If we constructed all our horses by hand, we'd most likely make mistakes from time to time. Makingthe "inside guts" of a Horse visible also violates one of the principles of OOP. That's good if we're aveterinarian but not if we just like to own horses. We let the Horse class build a new horse:
{ package Horse; @ISA = qw(Animal); sub sound { 'neigh' } sub name { my $self = shift; $$self; } sub named { my $class = shift; my $name = shift; bless \$name, $class; }}
Now, with the new named method, we build a Horse:
my $tv_horse = Horse->named('Mr. Ed');
We're back to a class method, so the two arguments to Horse::named are "Horse" and "Mr. Ed". Thebless operator not only blesses $name, it also returns the reference to $name, so that's fine as a returnvalue. And that's how we build a horse.
We called the constructor named here so it quickly denotes the constructor's argument as the namefor this particular Horse. We can use different constructors with different names for different ways of"giving birth" to the object (such as recording its pedigree or date of birth). However, we'll find thatmost people use a single constructor named new, with various ways of interpreting the arguments tonew. Either style is fine, as long as we document our particular way of giving birth to an object. Mostcore and CPAN modules use new, with notable exceptions, such as DBI's DBI->connect( ). It's reallyup to the author.

12.5. Inheriting the Constructor
Was there anything specific to Horse in that method? No. Therefore, it's also the same recipe forbuilding anything else inherited from Animal, so let's put it there:
{ package Animal; sub speak { my $class = shift; print "a $class goes ", $class->sound, "!\n" } sub name { my $self = shift; $$self; } sub named { my $class = shift; my $name = shift; bless \$name, $class; }}{ package Horse; @ISA = qw(Animal); sub sound { 'neigh' }}
Ahh, but what happens if we invoke speak on an instance?
my $tv_horse = Horse->named('Mr. Ed');$tv_horse->speak;
We get a debugging value:
a Horse=SCALAR(0xaca42ac) goes neigh!
Why? Because the Animal::speak method expects a class name as its first parameter, not aninstance. When we pass in the instance, we'll use a blessed scalar reference as a string, which showsup as we showed it just nowsimilar to a stringified reference, but with the class name in front.

12.6. Making a Method Work with Either Classes orInstances
All we need to fix this is a way to detect whether the method is called on a class or an instance. Themost straightforward way to find out is with the ref operator. This operator returns a string (theclass name) when used on a blessed reference, and undef when used on a string (like a class name).We modify the name method first to notice the change:
sub name { my $either = shift; ref $either ? $$either # it's an instance, return name : "an unnamed $either"; # it's a class, return generic}
Here the ?: operator selects either the dereference or a derived string. Now we can use it with eitheran instance or a class. Note that we changed the first parameter holder to $either to show that it isintentional:
print Horse->name, "\n"; # prints "an unnamed Horse\n"
my $tv_horse = Horse->named('Mr. Ed');print $tv_horse->name, "\n"; # prints "Mr. Ed.\n"
and now we'll fix speak to use this:
sub speak { my $either = shift; print $either->name, ' goes ', $either->sound, "\n";}
Since sound already worked with either a class or an instance, we're done!

12.7. Adding Parameters to a Method
Let's train our animals to eat:
{ package Animal; sub named { my $class = shift; my $name = shift; bless \$name, $class; } sub name { my $either = shift; ref $either ? $$either # it's an instance, return name : "an unnamed $either"; # it's a class, return generic } sub speak { my $either = shift; print $either->name, ' goes ', $either->sound, "\n"; } sub eat { my $either = shift; my $food = shift; print $either->name, " eats $food.\n"; }}{ package Horse; @ISA = qw(Animal); sub sound { 'neigh' }}{ package Sheep; @ISA = qw(Animal); sub sound { 'baaaah' }}
Now try it out:
my $tv_horse = Horse->named('Mr. Ed');$tv_horse->eat('hay');Sheep->eat('grass');

It prints:
Mr. Ed eats hay.an unnamed Sheep eats grass.
An instance method with parameters gets invoked with the instance, and then the list of parameters.That first invocation is like:
Animal::eat($tv_horse, 'hay');
The instance methods form the Application Programming Interface (API) for an object. Most of theeffort involved in designing a good object class goes into the API design, because the API defines howreusable and maintainable the object and its subclasses will be. Don't rush to freeze an API designbefore you've considered how you (or others) will use the object.

12.8. More Interesting Instances
What if an instance needs more data? Most interesting instances are made of many items, each ofwhich can, in turn, be a reference or another object. The easiest way to store these items is often ina hash. The keys of the hash serve as the names of parts of the object (also called instance ormember variables), and the corresponding values are, well, the values.
How do we turn the horse into a hash?[*] Recall that an object is any blessed reference. We can justas easily make it a blessed hash reference as a blessed scalar reference, as long as everything thatlooks at the reference is changed accordingly.
[*] Other than calling on a butcher, that is.
Let's make a sheep that has a name and a color:
my $lost = bless { Name => 'Bo', Color => 'white' }, Sheep;
$lost->{Name} has Bo, and $lost->{Color} has white. But we want to make $lost->name access thename, and that's now messed up because it's expecting a scalar reference. Not to worry, because it'spretty easy to fix:
## in Animalsub name { my $either = shift; ref $either ? $either->{Name} : "an unnamed $either";}
named still builds a scalar sheep, so let's fix that as well:
## in Animalsub named { my $class = shift; my $name = shift; my $self = { Name => $name, Color => $class->default_color }; bless $self, $class;}
What's this default_color? If named has only the name, we still need to set a color, so we'll have aclass-specific initial color. For a sheep, we might define it as white:
## in Sheepsub default_color { 'white' }
Then, to keep from having to define one for each additional class, define a backstop method, whichserves as the "default default," directly in Animal:
## in Animalsub default_color { 'brown' }
Thus, all animals are brown (muddy, perhaps), unless a specific animal class gives a specific overrideto this method.
Now, because name and named were the only methods that referenced the structure of the object, theremaining methods can stay the same, so speak still works as before. This supports another basicrule of OOP: if only the object accesses its internal data, there's less code to change when it's time tomodify that structure.

12.9. A Horse of a Different Color
Having all horses be brown would be boring. Let's add a method or two to get and set the color:
## in Animalsub color { my $self = shift; $self->{Color};}sub set_color { my $self = shift; $self->{Color} = shift;}
Now we can fix that color for Mr. Ed:
my $tv_horse = Horse->named('Mr. Ed');$tv_horse->set_color('black-and-white');print $tv_horse->name, ' is colored ', $tv_horse->color, "\n";
which results in:
Mr. Ed is colored black-and-white

12.10. Getting Our Deposit Back
Because of the way the code is written, the setter also returns the updated value. Think about this(and document it) when we write a setter. What does the setter return? Here are some commonvariations:
The updated parameter (same as what was passed in)
The previous value (similar to the way umask or the single-argument form of select works)
The object itself
A success/fail code
Each has advantages and disadvantages. For example, if we return the updated parameter, we canuse it again for another object:
$tv_horse->set_color( $eating->set_color( color_from_user( ) ));
The implementation given earlier returns the newly updated value. Frequently, this is the easiestcode to write, and often the fastest to execute.
If we return the previous parameter, we can easily create "set this value temporarily to that"functions:
{ my $old_color = $tv_horse->set_color('orange'); ... do things with $tv_horse ... $tv_horse->set_color($old_color);}
This is implemented as:
sub set_color { my $self = shift; my $old = $self->{Color}; $self->{Color} = shift; $old;}

For more efficiency, we can avoid stashing the previous value when in a void context using thewantarray function:
sub set_color { my $self = shift; if (defined wantarray) { # this method call is not in void context, so # the return value matters my $old = $self->{Color}; $self->{Color} = shift; $old; } else { # this method call is in void context $self->{Color} = shift; }}
If we return the object itself, we can chain settings:
my $tv_horse = Horse->named('Mr. Ed') ->set_color('grey') ->set_age(4) ->set_height('17 hands');
This works because the output of each setter is the original object, becoming the object for the nextmethod call. Implementing this is, again, relatively easy:
sub set_color { my $self = shift; $self->{Color} = shift; $self;}
The void context trick can be used here too, although with questionable value because we've alreadyestablished $self.
Finally, returning a success status is useful if it's fairly common for an update to fail, rather than anexceptional event. The other variations would have to indicate failure by throwing an exception withdie.

In summary: use what you want, be consistent if you can, but document it nonetheless (and don'tchange it after you've already released one version).

12.11. Don't Look Inside the Box
We might have obtained or set the color outside the class simply by following the hash reference:$tv_horse->{Color}. However, this violates the encapsulation of the object by exposing its internalstructure. The object is supposed to be a black box, but we've pried off the hinges and looked inside.
One purpose of OOP is to enable the maintainer of Animal or Horse to make reasonably independentchanges to the implementation of the methods and still have the exported interface work properly. Tosee why accessing the hash directly violates this, let's say that Animal no longer uses a simple colorname for the color, but instead changes to use a computed RGB triple to store the color (holding it asan arrayref). In this example, we use a fictional (at the time of this writing) Color::Conversionsmodule to change the format of the color data behind the scenes:
use Color::Conversions qw(color_name_to_rgb rgb_to_color_name);...sub set_color { my $self = shift; my $new_color = shift; $self->{Color} = color_name_to_rgb($new_color); # arrayref}sub color { my $self = shift; rgb_to_color_name($self->{Color}); # takes arrayref}
We can still maintain the old interface if we use a setter and getter, because they can perform thetranslations without the user knowing about it. We can also add new interfaces now to enable thedirect setting and getting of the RGB triple:
sub set_color_rgb { my $self = shift; $self->{Color} = [@_]; # set colors to remaining parameters}sub get_color_rgb { my $self = shift; @{ $self->{Color} }; # return RGB list}
If we use code outside the class that looks at $tv_horse->{Color} directly, this change is no longerpossible. It won't work to store a string ('blue') where an arrayref is needed ([0,0,255]) or to use an

arrayref as a string. This is why OO programming encourages you to call getters and setters, even ifthey take some time.

12.12. Faster Getters and Setters
Because we're going to play nice and always call the getters and setters instead of reaching into thedata structure, getters and setters are called frequently. To save a teeny-tiny bit of time, we mightsee these getters and setters written as:
## in Animalsub color { $_[0]->{Color} }sub set_color { $_[0]->{Color} = $_[1] }
We save a bit of typing when we do this, and the code is slightly faster, although probably notenough for us to notice it with everything else that's going on in our program. The $_[0] is just thesingle element access to the @_ array. Instead of using shift to put the argument into anothervariable, we can simply use it directly.

12.13. Getters That Double as Setters
Another alternative to the pattern of creating two different methods for getting and setting aparameter is to create one method that notes whether or not it gets any additional arguments. If thearguments are absent, it's a get operation; if the arguments are present, it's a set operation. Asimple version looks like:
sub color { my $self = shift; if (@_) { # are there any more parameters? # yes, it's a setter: $self->{Color} = shift; } else { # no, it's a getter: $self->{Color}; }}
Now we can say:
my $tv_horse = Horse->named('Mr. Ed');$tv_horse->color('black-and-white');print $tv_horse->name, ' is colored ', $tv_horse->color, "\n";
The presence of the parameter in the second line denotes that we are setting the color, while itsabsence in the third line indicates a getter.
This strategy is attractive because of its simplicity, but it also has disadvantages. It complicates theactions of the getter, which is called frequently. It also makes it difficult to search through our codeto find the setters of a particular parameter, which are often more important than the getters. We'vebeen burned in the past when a setter became a getter because another function returned moreparameters than expected after an upgrade.

12.14. Restricting a Method to Class-Only or Instance-Only
Setting the name of an unnameable generic Horse is probably not a good idea; neither is calling namedon an instance. Nothing in the Perl method definition says "this is a class method" or "this is aninstance method." Fortunately, the ref operator lets us throw an exception when called incorrectly.As an example of instance- or class-only methods , consider the following, where we check theargument to see what to do:
use Carp qw(croak);
sub instance_only { ref(my $self = shift) or croak "instance variable needed"; ... use $self as the instance ...}
sub class_only { ref(my $class = shift) and croak "class name needed"; ... use $class as the class ...}
The ref function returns true for an instance, which is just a blessed reference, or false for a class,which is just a string. If it returns an undesired value, we use the croak function from the Carpmodule (which comes in the standard distribution). The croak function places the blame on the callerby making the error message look like it came from the spot where we called the method instead ofthe spot where we issued the error. The caller will get an error message like this, giving the linenumber in their code where the wrong method was called:
instance variable needed at their_code line 1234
Just as croak is provided as the alternate form of die, Carp also provides carp as a replacement forwarn. Each tells the user which line of code called the code that caused the problem. Instead of usingdie or warn in your modules, use the Carp functions instead. Your users will thank you for it.

12.15. Exercise
You can find the answer to this exercise in "Answer for Chapter 12" in the Appendix.
12.15.1. Exercise [45 min]
Give the Animal class the ability to get and set the name and color. Be sure that your result worksunder use strict. Also make sure your get methods work with both a generic animal and a specificanimal instance. Test your work with:
my $tv_horse = Horse->named('Mr. Ed');$tv_horse->set_name('Mister Ed');$tv_horse->set_color('grey');print $tv_horse->name, ' is ', $tv_horse->color, "\n";print Sheep->name, ' colored ', Sheep->color, ' goes ', Sheep->sound, "\n";
What should you do if you're asked to set the name or color of a generic animal?

Chapter 13. Object DestructionIn the previous two chapters, we looked at basic object creation and manipulation. In this chapter,we'll look at an equally important topic: what happens when objects go away.
As we showed in Chapter 4, when the last reference to a Perl data structure goes away, Perlautomatically reclaims the memory of that data structure, including destroying any links to otherdata. Of course, that in turn may cause Perl to destroy other ("contained") structures as well.
By default, objects work in this manner because objects use the same reference structure to makemore complex objects. An object built of a hash reference is destroyed when the last reference tothat hash goes away. If the values of the hash elements are also references, they're similarlyremoved, possibly causing further destruction.

13.1. Cleaning Up After Yourself
Suppose our object uses a temporary file to hold data that won't fit entirely in memory. The objectcan include the filehandle for this temporary file in its instance data. While the normal objectdestruction sequence will properly close the handle, we still have the temporary file on disk unless wetake further action.
To perform the proper cleanup operations when an object is destroyed, we need to know when thathappens. Thankfully, Perl provides such notification upon request. We can request this notification bygiving the object a DESTROY method.
When the last reference to an objectsay, $bessiedisappears, Perl invokes that object's DESTROYmethod automatically, as if we had called it ourselves.
$bessie->DESTROY
This method call is like most other method calls: Perl starts at the class of the object and works itsway up the inheritance hierarchy until it finds a suitable method. However, unlike other method calls,there's no error if Perl doesn't find a suitable method.[*]
[*] Normally, our own method calls will cause an error if Perl doesn't find them. If we want to prevent that, we just put a do-nothing
method into the base class.
For example, going back to the Animal class defined in Chapter 11, we can add a DESTROY method toknow when objects go away, purely for debugging purposes:
## in Animalsub DESTROY { my $self = shift; print '[', $self->name, " has died.]\n";}
Now when we create any Animals in the program, we get notification as they leave. For example:
## include animal classes from previous chapter...
sub feed_a_cow_named { my $name = shift; my $cow = Cow->named($name); $cow->eat('grass');

print "Returning from the subroutine.\n"; # $cow is destroyed here}print "Start of program.\n";my $outer_cow = Cow->named('Bessie');print "Now have a cow named ", $outer_cow->name, ".\n";feed_a_cow_named('Gwen');print "Returned from subroutine.\n";
This prints:
Start of program.Now have a cow named Bessie.Gwen eats grass.Returning from the subroutine.[Gwen has died.]Returned from subroutine.[Bessie has died.]
Note that Gwen is active inside the subroutine. However, as the subroutine exits, Perl notices thereare no references to Gwen; it automatically invokes Gwen's DESTROY method, printing the Gwen hasdied message.
What happens at the end of the program? Since objects don't live beyond the end of the program,Perl makes one final pass over all remaining data and destroys it. This is true whether the data isheld in lexical variables or package global variables. Because Bessie is still alive at the end of theprogram, she needs to be recycled, and so we get the message for Bessie after all other steps in theprogram are complete.[*]
[*] This is just after the END blocks are executed and follows the same rules as END blocks: there must be a nice exit of the
program rather than an abrupt end. If Perl runs out of memory, all bets are off.

13.2. Nested Object Destruction
If an object holds another object (say, as an element of an array or the value of a hash element),Perl DESTROYs the containing object before any of the contained objects begin their discardingprocess. This is reasonable because the containing object may need to reference its contents in orderto disappear gracefully. To illustrate this, let's build a "barn" and tear it down. And, just to beinteresting, we'll make the barn a blessed array reference, not a hash reference.
{ package Barn; sub new { bless [ ], shift } sub add { push @{+shift}, shift } sub contents { @{+shift} } sub DESTROY { my $self = shift; print "$self is being destroyed...\n"; for ($self->contents) { print ' ', $_->name, " goes homeless.\n"; } }}
Here, we're really being minimalistic in the object definition. To create a new barn, we simply blessan empty array reference into the class name passed as the first parameter. Adding an animal justpushes it to the back of the barn. Asking for the barn's contents merely dereferences the object arrayreference to return the contents.[ ] The fun part is the destructor. Let's take the reference toourselves, display a debugging message about the particular barn being destroyed, and then ask forthe name of each inhabitant in turn. In action, this would be:
[ ] Did you wonder why there's a plus sign (+) before shift in two of those subroutines? That's due to one of the quirks in Perl's
syntax. If the code were simply @{shift}, because the curly braces contain nothing but a bareword, it would be interpreted as a
soft reference: @{"shift"}. In Perl, the unary plus (a plus sign at the beginning of a term) is defined to do nothing (not even
turning what follows into a number), just so it can distinguish cases such as this.
my $barn = Barn->new;$barn->add(Cow->named('Bessie'));$barn->add(Cow->named('Gwen'));print "Burn the barn:\n";$barn = undef;print "End of program.\n";

This prints:
Burn the barn:Barn=ARRAY(0x541c) is being destroyed... Bessie goes homeless. Gwen goes homeless.[Gwen has died.][Bessie has died.]End of program.
Note that Perl first destroys the barn, letting us get the name of the inhabitants cleanly. However,once the barn is gone, the inhabitants have no additional references, so they also go away, and thusPerl invokes their destructors too. Compare that with the cows having a life outside the barn:
my $barn = Barn->new;my @cows = (Cow->named('Bessie'), Cow->named('Gwen'));$barn->add($_) for @cows;print "Burn the barn:\n";$barn = undef;print "Lose the cows:\n";@cows = ( );print "End of program.\n";
This produces:
Burn the barn:Barn=ARRAY(0x541c) is being destroyed... Bessie goes homeless. Gwen goes homeless.Lose the cows:[Gwen has died.][Bessie has died.]End of program.
The cows will now continue to live until the only other reference to the cows (from the @cows array)goes away.
The references to the cows disappear only when the barn destructor is completely finished. In somecases, we may wish instead to shoo the cows out of the barn as we notice them. In this case, it's assimple as destructively altering the barn array, rather than iterating over it.[*] Let's alter the Barn toBarn2 to illustrate this:
[*] If we're using a hash instead, we can use delete on the elements we wish to process immediately.

{ package Barn2; sub new { bless [ ], shift } sub add { push @{+shift}, shift } sub contents { @{+shift} } sub DESTROY { my $self = shift; print "$self is being destroyed...\n"; while (@$self) { my $homeless = shift @$self; print ' ', $homeless->name, " goes homeless.\n"; } }}
Now use it in the previous scenarios:
my $barn = Barn2->new;$barn->add(Cow->named('Bessie'));$barn->add(Cow->named('Gwen'));print "Burn the barn:\n";$barn = undef;print "End of program.\n";
This produces:
Burn the barn:Barn2=ARRAY(0x541c) is being destroyed... Bessie goes homeless.[Bessie has died.] Gwen goes homeless.[Gwen has died.]End of program.
As we can see, Bessie had no home by being booted out of the barn immediately, so she also died.(Poor Gwen suffers the same fate.) There were no references to her at that moment, even before thedestructor for the barn was complete.
Thus, back to the temporary file problem. We modify our Animal class to use a temporary file byusing the File::Temp module, which is part of the standard distribution. Its tempfile routine knowshow to make temporary files, including where to put them and so on, so we don't have to. Thetempfile function returns a filehandle and a filename, and we store both of those because we needboth of them in the destructor.
## in Animaluse File::Temp qw(tempfile);
sub named { my $class = shift; my $name = shift; my $self = { Name => $name, Color => $class->default_color }; ## new code here... my ($fh, $filename) = tempfile( ); $self->{temp_fh} = $fh; $self->{temp_filename} = $filename; ## .. to here bless $self, $class;}
We now have a filehandle and its filename stored as instance variables of the Animal class (or anyclass derived from Animal). In the destructor, we close it down and delete the file:[*]
[*] As it turns out, we can tell File::Temp to do this automatically, but then we wouldn't be able to illustrate doing it manually.
Doing it manually allows us to do extra processing, such as storing a summary of the information from the temporary file into a
database.
sub DESTROY { my $self = shift; my $fh = $self->{temp_fh}; close $fh; unlink $self->{temp_filename}; print '[', $self->name, " has died.]\n";}
When Perl destroys the last reference to the Animal-ish object (even if it's at the end of theprogram), it also automatically removes the temporary file to avoid a mess.

13.3. Beating a Dead Horse
Because the destructor method is inherited, we can also override and extend superclass methods. Forexample, we'll decide the dead horses need a further use. In our Horse class, we override theDESTROY method we inherited from Animal so we can do extra processing. However, since theAnimal class might be doing things we aren't supposed to know about, we call its version of DESTROYusing the SUPER:: pseudo-class we saw in Chapter 11.
## in Horsesub DESTROY { my $self = shift; $self->SUPER::DESTROY; print "[", $self->name, " has gone off to the glue factory.]\n";}
my @tv_horses = map Horse->named($_), ('Trigger', 'Mr. Ed');$_->eat('an apple') for @tv_horses; # their last mealprint "End of program.\n";
This prints:
Trigger eats an apple.Mr. Ed eats an apple.End of program.[Mr. Ed has died.][Mr. Ed has gone off to the glue factory.][Trigger has died.][Trigger has gone off to the glue factory.]
We'll feed each horse a last meal; at the end of the program, each horse's destructor is called.
The first step of this destructor is to call the parent destructor. Why is this important? Without callingthe parent destructor, the steps taken by superclasses of this class will not properly execute. That'snot much if it's simply a debugging statement, as we've shown, but if it was the "delete thetemporary file" cleanup method, you wouldn't have deleted that file!
So, the rule is:
Always include a call to $self->SUPER::DESTROY in our destructors (even if we don't yet have anybase/parent classes).

Whether we call it at the beginning or the end of our own destructor is a matter of hotly contesteddebate. If our derived class needs some superclass instance variables, we should probably call thesuperclass destructor after we complete our operations, because the superclass destructor will likelyalter them in annoying ways. On the other hand, in the example, we called the superclass destructorbefore the added behavior, because we wanted the superclass behavior first.

13.4. Indirect Object Notation
The arrow syntax used to invoke a method is sometimes called the direct object syntax becausethere's also the indirect object syntax, also known as the "only works sometimes" syntax, for reasonswe explain in a moment. We can generally replace what we'd write with the arrow notation:
Class->class_method(@args);$instance->instance_method(@other);
with the method name preceding the class name and the arguments at the end.
classmethod Class @args;instancemethod $instance @other;
This idiom was much more prevalent in the earlier days of Perl 5, and we're still trying to eradicate itfrom the world. We wish that we didn't have to cover it here (if you don't know about it, you can'tuse it), but it sticks around in otherwise good code, so you need to know what is going on. You'lltypically see this with the new method where module authors replace the arrow syntax:
my $obj = Some::Class->new(@constructor_params);
with something that reads more like English:
my $obj = new Some::Class @constructor_params;
which makes the C++ people feel right at home. Of course, in Perl, there's nothing special about thename new, but at least the syntax is hauntingly familiar.
Why the "generally" caveat on when you can replace the arrow syntax with indirect object syntax?Well, if the instance is something more complicated than a simple scalar variable:
$somehash->{$somekey}->[42]->instance_method(@parms);

then we can't just swap it around to the indirect notation:
instance_method $somehash->{$somekey}->[42] @parms;
The only things acceptable to indirect object syntax are a bareword (e.g., a class name), a simplescalar variable, or braces denoting a block returning either a blessed reference or a classname.[*]
This means we have to write it like so:
[*] Astute readers will note that these are the same rules as for an indirect filehandle syntax, which indirect object syntax directly
mirrors, as well as the rules for specifying a reference to be dereferenced.
instance_method { $somehash->{$somekey}->[42] } @parms;
And that goes from simple to ugly in one step. There's another downside: ambiguous parsing. Whenwe developed the classroom materials concerning indirect object references, we wrote:
my $cow = Cow->named('Bessie');print name $cow, " eats.\n";
because we were thinking about the indirect object equivalents for:
my $cow = Cow->named('Bessie');print $cow->name, " eats.\n";
However, the latter works; the former doesn't. We were getting no output. Finally, we enabledwarnings (via -w on the command line)[ ] and got this interesting series of messages:
[ ] Using -w should be the first step when Perl does something we don't understand. Or maybe it should be the zeroth, because
we should normally have -w in effect whenever we're developing code.
Unquoted string "name" may clash with future reserved word at ./foo line 92.Name "main::name" used only once: possible typo at ./foo line 92.print( ) on unopened filehandle name at ./foo line 92.
Ahh, so that line was being parsed as:

print name ($cow, " eats.\n");
In other words, print the list of items to the filehandle named name. That's clearly not what wewanted, so we had to add additional syntax to disambiguate the call.[ ]
[ ] The ambiguity shows up because print( ) itself is a method called on the filehandle. You're probably used to thinking of it as
a function, but remember that missing comma after the filehandle. It looks just like our indirect object calling syntax, because it is.
This leads us to our next strong suggestion: Use direct object syntax at all times.
We realize, though, that people write new Class ... rather than Class->new(...) and that most of usare fine with that. Older modules preferred that notation in their examples, and once you write it thatway, you tend to keep doing it that way. However, there are circumstances in which even that canlead to ambiguity (e.g., when a subroutine named new has been seen, and the class name itself hasnot been seen as a package). When in doubt, ignore indirect object syntax. Your maintenanceprogrammer will thank you.

13.5. Additional Instance Variables in Subclasses
One of the nice things about using a hash for a data structure is that derived classes can addadditional instance variables without the superclass needing to know of their addition. For example,let's derive a RaceHorse class that is everything a Horse is but also tracks its win/place/show/losestandings. The first part of this is trivial:
{ package RaceHorse; our @ISA = qw(Horse); ...}
We'll also want to initialize "no wins of no races" when we create the RaceHorse. We do this byextending the named subroutine and adding four additional fields (wins, places, shows, losses, forfirst-, second-, and third-place finishes, and none of the above):
{ package RaceHorse; our @ISA = qw(Horse); ## extend parent constructor: sub named { my $self = shift->SUPER::named(@_); $self->{$_} = 0 for qw(wins places shows losses); $self; }}
Here, we pass all parameters to the superclass, which should return a fully formed Horse. However,because we pass RaceHorse as the class, it is blessed into the RaceHorse class.[*] Next, we add thefour instance variables that go beyond those defined in the superclass, setting their initial values to 0.Finally, return the modified RaceHorse to the caller.
[*] Similar to the way the Animal constructor creates a Horse, not an Animal, when passed Horse as the class.
It's important to note here that we've actually "opened the box" a bit while writing this derived class.We know that the superclass uses a hash reference and that the superclass hierarchy doesn't use thefour names chosen for a derived class. This is because RaceHorse will be a "friend" class (in C++ orJava terminology), accessing the instance variables directly. If the maintainer of Horse or Animal everchanges representation or names of variables, there could be a collision, which might go undetecteduntil that important day when we're showing off our code to the investors. Things get even moreinteresting if the hashref is changed to an arrayref as well.

One way to decouple this dependency is to use composition rather than inheritance as a way tocreate a derived class. In this example, we need to make a Horse object an instance variable of aRaceHorse and put the rest of the data in separate instance variables. You also need to pass anyinherited method calls on the RaceHorse down to the Horse instance, through delegation. However,even though Perl can certainly support the needed operations, that approach is usually slower andmore cumbersome. Enough on that for this discussion, however.
Next, let's provide some access methods:
{ package RaceHorse; our @ISA = qw(Horse); ## extend parent constructor: sub named { my $self = shift->SUPER::named(@_); $self->{$_} = 0 for qw(wins places shows losses); $self; } sub won { shift->{wins}++; } sub placed { shift->{places}++; } sub showed { shift->{shows}++; } sub lost { shift->{losses}++; } sub standings { my $self = shift; join ', ', map "$self->{$_} $_", qw(wins places shows losses); }}
my $racer = RaceHorse->named('Billy Boy');# record the outcomes: 3 wins, 1 show, 1 loss$racer->won;$racer->won;$racer->won;$racer->showed;$racer->lost;print $racer->name, ' has standings of: ', $racer->standings, ".\n";
This prints:
Billy Boy has standings of: 3 wins, 0 places, 1 shows, 1 losses.[Billy Boy has died.][Billy Boy has gone off to the glue factory.]
Note that we're still getting the Animal and Horse destructor. The superclasses are unaware thatwe've added four additional elements to the hash, so they still function as they always have.

13.6. Using Class Variables
What if we want to iterate over all the animals we've made so far? Animals may exist all over theprogram namespace but are lost once they're handed back from the named constructor method.[*]
[*] Well, not really lost. Perl knows where they are, but we don't.
However, we can record the created animal in a hash and iterate over that hash. The key to the hashcan be the stringified form of the animal reference,[ ] while the value can be the actual reference,allowing us to access its name or class.
[ ] Or any other convenient and unique string.
For example, let's extend named as follows:
## in Animalour %REGISTRY;sub named { my $class = shift; my $name = shift; my $self = { Name => $name, Color => $class->default_color }; bless $self, $class; $REGISTRY{$self} = $self; # also returns $self}
The uppercase name for %REGISTRY is a reminder that this variable is more global than mostvariables. In this case, it's a meta-variable that contains information about many instances.
When we use $self as a key, Perl stringifies it, which means it turns into a string unique to theobject.
We also need to add a new method:
sub registered { return map { 'a '.ref($_)." named ".$_->name } values %REGISTRY;}
Now we can see all the animals we've made:
my @cows = map Cow->named($_), qw(Bessie Gwen);

my @horses = map Horse->named($_), ('Trigger', 'Mr. Ed');my @racehorses = RaceHorse->named('Billy Boy');print "We've seen:\n", map(" $_\n", Animal->registered);print "End of program.\n";
This prints:
We've seen: a RaceHorse named Billy Boy a Horse named Mr. Ed a Horse named Trigger a Cow named Gwen a Cow named BessieEnd of program.[Billy Boy has died.][Billy Boy has gone off to the glue factory.][Bessie has died.][Gwen has died.][Trigger has died.][Trigger has gone off to the glue factory.][Mr. Ed has died.][Mr. Ed has gone off to the glue factory.]
Note that the animals die at their proper time because the variables holding the animals are all beingdestroyed at the final step. Or are they?

13.7. Weakening the Argument
The %REGISTRY variable also holds a reference to each animal. So even if we toss away the containingvariables, for instance by letting them go out of scope:
{ my @cows = map Cow->named($_), qw(Bessie Gwen); my @horses = map Horse->named($_), ('Trigger', 'Mr. Ed'); my @racehorses = RaceHorse->named('Billy Boy');}print "We've seen:\n", map(" $_\n", Animal->registered);print "End of program.\n";
we'll still see the same result. The animals aren't destroyed, even though none of the code is holdingthe animals. At first glance, it looks like we can fix this by altering the destructor:
## in Animalsub DESTROY { my $self = shift; print '[', $self->name, " has died.]\n"; delete $REGISTRY{$self};}## this code is bad (see text)
But this still results in the same output. Why? Because the destructor isn't called until the lastreference is gone, but the last reference won't be destroyed until the destructor is called.[*]
[*] We'd make a reference to chickens and eggs, but that would introduce yet another derived class to Animal.
One solution for fairly recent Perl versions[ ] is to use weak references . A weak reference doesn'tcount as far as the reference counting, um, counts. It's best illustrated by example.
[ ] 5.6 and later.
The weak reference mechanism is built into the core of Perl version 5.8. We need an externalinterface for the weaken routine, though, which can be imported from the Scalar::Util module. InPerl 5.6, we can emulate the same function using the WeakRef CPAN module. After installing thismodule (if needed),[*] we can update the constructor as follows:
[*] See Chapter 3 for information on installing modules.

## in Animaluse Scalar::Util qw(weaken); # in 5.8 and lateruse WeakRef qw(weaken); # in 5.6 after CPAN installation
sub named { ref(my $class = shift) and croak 'class only'; my $name = shift; my $self = { Name => $name, Color => $class->default_color }; bless $self, $class; $REGISTRY{$self} = $self; weaken($REGISTRY{$self}); $self;}
When Perl counts the number of active references to a thingy,[ ] it won't count any that have beenconverted to weak references by weaken. If all ordinary references are gone, Perl deletes the thingyand turns any weak references to undef.
[ ] A thingy, as defined in Perl's own documentation, is anything a reference points to, such as an object. If you are an especially
boring person, you could call it a referent instead.
Now we'll get the right behavior for:
my @horses = map Horse->named($_), ('Trigger', 'Mr. Ed');print "alive before block:\n", map(" $_\n", Animal->registered);{ my @cows = map Cow->named($_), qw(Bessie Gwen); my @racehorses = RaceHorse->named('Billy Boy'); print "alive inside block:\n", map(" $_\n", Animal->registered);}print "alive after block:\n", map(" $_\n", Animal->registered);print "End of program.\n";
This prints:
alive before block: a Horse named Trigger a Horse named Mr. Edalive inside block: a RaceHorse named Billy Boy a Cow named Gwen a Horse named Trigger a Horse named Mr. Ed a Cow named Bessie[Billy Boy has died.][Billy Boy has gone off to the glue factory.]

[Gwen has died.][Bessie has died.]alive after block: a Horse named Trigger a Horse named Mr. EdEnd of program.[Mr. Ed has died.][Mr. Ed has gone off to the glue factory.][Trigger has died.][Trigger has gone off to the glue factory.]
Notice that the racehorses and cows die at the end of the block, but the ordinary horses die at theend of the program. Success!
Weak references can also solve some memory leak issues. For example, suppose an animal wantedto record its pedigree. The parents might want to hold references to all their children, while each childmight want to hold references to each parent.
We can weaken one or the other (or even both) of these links. If we weaken the link to the child, Perlcan destroy the child when all other references are lost, and the parent's link simply becomes undef(or we can set a destructor to completely remove it). However, a parent won't disappear as long as itstill has offspring. Similarly, if the link to the parent is weakened, we'll simply get it as undef whenthe parent is no longer referenced by other data structures. It's really quite flexible.[*]
[*] When using weak references, always ensure you don't dereference a weakened reference that has turned to undef.
Without weakening, as soon as we create any parent-child relationship, both the parent and the childremain in memory until the final global destruction phase, regardless of the destruction of the otherstructures holding either the parent or the child.
Be aware though: use weak references carefully and don't just throw them at a problem of circularreferences. If you destroy data that is held by a weak reference before its time, you may have somevery confusing programming problems to solve and debug.

13.8. Exercise
You can find the answer to this exercise in "Answer for Chapter 13" in the Appendix.
13.8.1. Exercise [45 min]
Modify the RaceHorse class to get the previous standings from a DBM hash (keyed by the horse'sname) when the horse is created, and update the standings when the horse is destroyed. Forexample, running this program four times:
my $runner = RaceHorse->named('Billy Boy');$runner->won;print $runner->name, ' has standings ', $runner->standings, ".\n";
should show four additional wins. Make sure that a RaceHorse still does everything a normal Horsedoes otherwise.
For simplicity, use four space-separated integers for the value in the DBM hash.

Chapter 14. Some Advanced Object TopicsYou might wonder, "Do all objects inherit from a common class?" "What if a method is missing?""What about multiple inheritance?" or "How can I tell what sort of object I have?" Well, wonder nomore. This chapter covers these subjects and more.

14.1. UNIVERSAL Methods
As we define classes, we create inheritance hierarchies through the global @ISA variables in eachpackage. To search for a method, Perl wanders through the @ISA TRee until it finds a match or fails.
After the search fails, however, Perl always looks in one special class called UNIVERSAL and invokes amethod from there, if found, just as if it had been located in any other class or superclass.
One way to look at this is that UNIVERSAL is the base class from which all objects derive. Any methodwe place here, such as:
sub UNIVERSAL::fandango { warn 'object ', shift, " can do the fandango!\n";}
enables all objects of our program to be called as $some_object->fandango.
Generally, we should provide a fandango method for specific classes of interest and then provide adefinition in UNIVERSAL::fandango as a backstop, in case Perl can't find a more specific method. Apractical example might be a data-dumping routine for debugging or maybe a marshaling strategy todump all application objects to a file. We simply provide the general method in UNIVERSAL andoverride it in the specific classes for unusual objects.
Obviously, we should use UNIVERSAL sparingly, because there's only one universe of objects, and ourfandango might collide with some other included module's fandango. For this reason, UNIVERSAL ishardly used for anything except methods that must be completely, well, universal, like duringdebugging or other Perl-internal behavior that ordinary programmers may blissfully ignore.

14.2. Testing Our Objects for Good Behavior
Besides providing a place for us to put universally available methods, the UNIVERSAL package comespreloaded with two very useful utility methods: isa and can. Because UNIVERSAL defines thesemethods, they are available to all objects.
The isa method tests to see whether a given class or instance is a member of a given class or amember of a class that inherits from the given class. For example, continuing on with the Animalfamily from the previous chapters:
if (Horse->isa('Animal')) { # does Horse inherit from Animal? print "A Horse is an Animal.\n";}
my $tv_horse = Horse->named("Mr. Ed");if ($tv_horse->isa('Animal')) { # is it an Animal? print $tv_horse->name, " is an Animal.\n"; if ($tv_horse->isa('Horse')) { # is it a Horse? print 'In fact, ', $tv_horse->name, " is a Horse.\n"; } else { print "...but it's not a Horse.\n"; }}
This is handy when we have a heterogeneous mix of objects in a data structure and want todistinguish particular categories of objects:
my @horses = grep $_->isa('Horse'), @all_animals;
The result will be only the horses (or racehorses) from the array. We compare that with:
my @horses_only = grep ref $_ eq 'Horse', @all_animals;
which picks out just the horses, because a RaceHorse won't return Horse for ref.
In general, we shouldn't use:

ref($some_object) eq 'SomeClass'
in our programs because it prevents future users from subclassing that class. Use the isa constructas given earlier.
One downside of the isa call here is that it works only on blessed references or scalars that look likeclass names. If we happen to pass it an unblessed reference, we get a fatal (but trappable) error of:
Can't call method "isa" on unblessed reference at ...
To call isa more robustly, we could call it as a subroutine:
if (UNIVERSAL::isa($unknown_thing, 'Animal')) { ... it's an Animal! ...}
This runs without an error, no matter what $unknown_thing contains. But it's subverting the OOmechanism, which has its own set of problems.[*] This is a job for an exception mechanism, which iseval. If the value in $unknown_thing isn't a reference, then we can't call a method on it. The evalTRaps that error and returns undef, which is false.
[*] Particularly, if Animal has a custom isa method (perhaps it rejects a mutant branch of talking animals in the family tree),
calling UNIVERSAL::isa skips past Animal::isa and may give you the wrong answer.
if (eval { $unknown_thing->isa('Animal') }) { ... it's an Animal ...}
As in the case of isa, we can test for acceptable behaviors with the can method. For example:
if ($tv_horse->can('eat')) { $tv_horse->eat('hay');}
If the result of can is true, then somewhere in the inheritance hierarchy, a class claims it can handlethe eat method. Again, the caveats about $tv_horse being only either a blessed reference or a classname as a scalar still apply, so the robust solution when we might deal with nearly anything lookslike:

if (eval { $tv_horse->can('eat') } ) { ... }
Note that if we defined UNIVERSAL::fandango earlier, then:
$object->can('fandango')
always returns true, because all objects can do the fandango.

14.3. AUTOLOAD as a Last Resort
After Perl searches the inheritance tree and UNIVERSAL for a method, it doesn't just stop there if thesearch is unsuccessful. Perl repeats the search through the very same hierarchy (includingUNIVERSAL), looking for a method named AUTOLOAD.
If an AUTOLOAD exists, the subroutine is called in place of the original method, passing it the normalpredetermined argument list: the class name or instance reference, followed by any argumentsprovided to the method call. The original method name is passed in the package variable called$AUTOLOAD (in the package where the subroutine was compiled) and contains the fully qualifiedmethod name, so we should generally strip everything up to the final double colon if we want asimple method name.
The AUTOLOAD subroutine can execute the desired operation itself, install a subroutine and then jumpinto it, or perhaps just die if asked to perform an unknown method.
One use of AUTOLOAD defers the compilation of a large subroutine until it is actually needed. Forexample, suppose the eat method for an animal is complex but unused in nearly every invocation ofthe program. We can defer its compilation as follows:
## in Animalsub AUTOLOAD { our $AUTOLOAD; (my $method = $AUTOLOAD) =~ s/.*:://s; # remove package name if ($method eq "eat") { ## define eat: eval q{ sub eat { ... long definition goes here ... } }; # End of eval's q{ } string die $@ if $@; # if typo snuck in goto &eat; # jump into it } else { # unknown method croak "$_[0] does not know how to $method\n"; }}

If the method name is eat, we'll define eat (which we had previously in a string but had notcompiled) and then jump into it with a special construct that replaces the current subroutineinvocation of AUTOLOAD with an invocation of eat, just as if we invoked &eat instead of AUTOLOAD.[*]
After the first AUTOLOAD hit, the eat subroutine is now defined, so we won't be coming back here. Thisis great for compile-as-you-go programs because it minimizes startup overhead.
[*] Although goto is generally (and rightfully) considered evil, this form of goto, which gives a subroutine name as a target, is not
really the evil goto; it's the good goto. In particular, this is the "magic goto." Its trick is that AUTOLOAD is completely invisible to
the subroutine.
For a more automated way of creating code to do this, which makes it easy to turn the autoloadingoff during development and debugging, see the AutoLoader and SelfLoader core moduledocumentation.

14.4. Using AUTOLOAD for Accessors
Chapter 12 showed how to create color and set_color to get and set the color of an animal. If wehad 20 attributes instead of 1 or 2, the code would be painfully repetitive. However, using anAUTOLOAD method, we can construct the nearly identical accessors as needed, saving both compilationtime and wear-and-tear on the developer's keyboard.
We use a code reference as a closure to do the job. First, we set up an AUTOLOAD for the object anddefine a list of hash keys for which we want trivial accessors:
sub AUTOLOAD { my @elements = qw(color age weight height);
Next, we'll see if the method is a getter for one of these keys, and, if so, we install a getter and jumpto it:
our $AUTOLOAD;if ($AUTOLOAD =~ /::(\w+)$/ and grep $1 eq $_, @elements) { my $field = ucfirst $1; { no strict 'refs'; *{$AUTOLOAD} = sub { $_[0]->{$field} }; } goto &{$AUTOLOAD};}
We need to use ucfirst because we named the method color to fetch the hash element called Color.The glob notation here installs a wanted subroutine as defined by the coderef closure, which fetchesthe corresponding key from the object hash. Consider this part to be magic that we just cut andpaste into our program. Finally, the goto construct jumps into the newly defined subroutine.
Otherwise, perhaps it's a setter:
if ($AUTOLOAD =~ /::set_(\w+)$/ and grep $1 eq $_, @elements) { my $field = ucfirst $1; { no strict 'refs'; *{$AUTOLOAD} = sub { $_[0]->{$field} = $_[1] }; }

goto &{$AUTOLOAD};}
If it is neither, death awaits:
croak "$_[0] does not understand $method\n"; }
Again, we pay the price for the AUTOLOAD only on the first hit of a particular getter or setter. Afterthat, a subroutine is now already defined, and we can just invoke it directly.

14.5. Creating Getters and Setters More Easily
If all that coding for creating accessors using AUTOLOAD looks messy, rest assured that we really don'tneed to tackle it, because there's a CPAN module that does it a bit more directly:Class::MethodMaker.[*]
[*] Sometimes Class::MethodMaker can be a bit much. We can also check out the lighter Class::Accessor.
For example, a simplified version of the Animal class might be defined as follows:
package Animal;use Class::MethodMaker new_with_init => 'new', get_set => [-eiffel => [qw(color height name age)]], abstract => [qw(sound)],;sub init { my $self = shift; $self->set_color($self->default_color);}sub named { my $self = shift->new; $self->set_name(shift); $self;}sub speak { my $self = shift; print $self->name, ' goes ', $self->sound, "\n";}sub eat { my $self = shift; my $food = shift; print $self->name, " eats $food\n";}sub default_color { 'brown';}
The getters and setters for the four instance attributes (name, height, color, and age) are definedautomatically, using the method color to get the color and set_color to set the color. (The eiffelflag says "do it the way the Eiffel language does it," which is the way it should be done here.) Themessy blessing step is now hidden behind a simple new method. We define the initial color as thedefault color, as before, because the generated new method calls the init method.

However, we can still call Horse->named('Mr. Ed') because it immediately calls the new routine aswell.
Class::MethodMaker generated the sound method as an abstract method. Abstract methods areplaceholders, meant to be defined in a subclass. If a subclass fails to define the method, the methodClass::MethodMaker generates for Animal's sound dies.
We lose the ability to call the getters (such as name) on the class itself, rather than an instance. Inturn, this breaks our prior usage of calling speak and eat on generic animals, since they call theaccessors. One way around this is to define a more general version of name to handle either a class orinstance and then change the other routines to call it:
sub generic_name { my $either = shift; ref $either ? $either->name : "an unnamed $either";}sub speak { my $either = shift; print $either->generic_name, ' goes ', $either->sound, "\n";}sub eat { my $either = shift; my $food = shift; print $either->generic_name, " eats $food\n";}
There. Now it's looking nearly drop-in compatible with the previous definition, except for those friendclasses that referenced the attribute names directly in the hash as the initial-cap-keyed versions(such as Color) rather than through the accessors ($self->color).
That brings up the maintenance issue again. The more we can decouple our implementation (hashversus array, names of hash keys, or types of elements) from the interface (method names,parameter lists, or types of return values), the more flexible and maintainable our system becomes.
The flexibility isn't free, however. Since the performance cost of a method call is higher than the costof a hash lookup, in some circumstances it may make sense to have a friend class peek inside.

14.6. Multiple Inheritance
How does Perl wander through the @ISA TRee? The answer may be simple or complex. If we don'thave multiple inheritance (that is, if no @ISA has more than one element), it is simple: Perl simplygoes from one @ISA to the next until it finds the ultimate base class whose @ISA is empty.
Multiple inheritance is more complex. It occurs when a class's @ISA has more than one element. Forexample, suppose we have a class called Racer, which has the basic abilities for anything that canrace, so that it's ready to be the base class for a runner, a fast car, or a racing turtle. With that, wecould make the RaceHorse class as simply as this:[*]
[*] If there is a conflict among the methods of Horse and Racer, or if their implementations aren't able to work together, the
situation can become much more difficult. The various classes in @ISA may not play well together and may step on one another's
data, for instance.
{ package RaceHorse; our @ISA = qw{ Horse Racer };}
Now a RaceHorse can do anything a Horse can do, and anything a Racer can do as well. When Perlsearches for a method that's not provided directly by RaceHorse, it first searches through all thecapabilities of the Horse (including all its parent classes, such as Animal). When the Horse possibilitiesare exhausted, Perl turns to see whether Racer (or one of its subclasses) supplies the neededmethod. On the other hand, if we want Perl to search Racer and its subclasses before searchingHorse, we can put them into @ISA in that order (see Figure 14-1).
Figure 14-1. A class may not need to implement any methods of its ownif it inherits everything it needs from its parent classes through multiple
inheritance

14.7. Exercises
You can find the answers to these exercises in "Answers for Chapter 14" in the Appendix.
14.7.1. Exercise 1 [20 min]
Write a module named MyDate that has an AUTOLOAD method that handles the calls to the methodsnamed day, month, and year, returning the appropriate value for each one. For any other method, theAUTOLOAD should carp about the unknown method name. Write a script that uses your module andprints the values for the date, month, and year.
14.7.2. Exercise 2 [40 min]
Starting with the script you wrote for the previous exercise, add a UNIVERSAL::debug function thatprints a timestamp before the message you pass to it. Call the debug method on the MyDate object.What happens? How does this get around the AUTOLOAD mechanism?

Chapter 15. ExporterIn Chapter 3, we showed you how to use modules, some of which pulled functions into the currentnamespace. Now we're going to show you how to get your own modules to do that.

15.1. What use Is Doing
So, just what does use do? How does the import list come into action? Perl interprets the use list as aparticular form of BEGIN block wrapped around a require and a method call. For example, thefollowing two operations are equivalent:
use Island::Plotting::Maps qw( load_map scale_map draw_map );
BEGIN { require Island::Plotting::Maps; Island::Plotting::Maps->import( qw( load_map scale_map draw_map ) );}
Let's break this code down, piece by piece. First, the require is a package-name require, rather thanthe string-expression require from Chapter 10. The colons are turned into the native directoryseparator (such as / for Unix-like systems), and the name is suffixed with .pm (for "Perl module").For this example on a Unix-like system, we end up with:
require "Island/Plotting/Maps.pm";
Recalling the operation of require from earlier, this means Perl looks in the current value of @INC,checking through each directory for a subdirectory named Island that contains a further subdirectorynamed Plotting that contains the file named Maps.pm.[*] If Perl doesn't find an appropriate file afterlooking at all of @INC, the program dies.[ ] Otherwise, the first file found is read and evaluated. Asalways with require, the last expression evaluated must be true (or the program dies),[*] and oncePerl has read a file, it will not reread if requested again. In the module interface, we expect therequire'd file to define subroutines in the same-named package, not the caller's package. So, forexample, a portion of the File::Basename file might look something like this, if we took out all thegood stuff:
[*] The .pm portion is defined by the interface and can't be changed. Thus, all module filenames must end in dot-p-m.
[ ] Trappable with an eval, of course.
[*] Again, trappable with eval.
package File::Basename;sub dirname { ... }sub basename { ... }sub fileparse { ... }

1;
These three subroutines are then defined in the File::Basename package, not the package in whichour use occurs. A require'd file must return a true value, and it's traditional to use 1; as the last lineof a module's code.
How do these subroutines get from the module's package into the user's package? That's the secondstep inside the BEGIN block. Perl automatically calls a routine called import in the module's package,passing along the entire import list. Typically, this routine aliases some of the names from theimported namespace to the importing namespace. The module author is responsible for providing anappropriate import routine. It's easier than it sounds, as discussed later in this chapter.
Finally, the whole thing is wrapped in a BEGIN block. This means that the use operation happens atcompile time, rather than runtime, and indeed it does. Thus, subroutines are associated with thosedefined in the module, prototypes are properly defined, and so on.

15.2. Importing with Exporter
In Chapter 3, we skipped over that "and now magic happens" part where the import routine (definedby the module author) is supposed to take File::Basename::fileparse and somehow alias it into thecaller's package so it's callable as fileparse.
Perl provides a lot of introspection capabilities. Specifically, we can look at the symbol table (where allsubroutines and many variables are named), see what is defined, and alter those definitions. You sawa bit of that back in the AUTOLOAD mechanism earlier in Chapter 14. In fact, as the author ofFile::Basename, if we simply want to force filename, basename, and fileparse from the currentpackage into the main package, we can write import like this:
sub import { no strict 'refs'; for (qw(filename basename fileparse)) { *{"main::$_"} = \&$_; }}
Boy, is that cryptic! And limited. What if the caller didn't want fileparse? What if the caller invokeduse in a package other than main?
Thankfully, there's a standard import that's available in the Exporter module. As the module author,all we do is add:
use base qw(Exporter);
Now the import call to the package will inherit upward to the Exporter class, providing an importroutine that knows how to take a list of subroutines[*] and export them to the caller's package.
[*] And variables, although far less common, and arguably the wrong thing to do.

15.3. @EXPORT and @EXPORT_OK
The import provided by Exporter examines the @EXPORT variable in the module's package todetermine which variables it exports by default. For example, File::Basename might do somethinglike:
package File::Basename;our @EXPORT = qw( basename dirname fileparse );use base qw(Exporter);
The @EXPORT list both defines a list of available subroutines for export (the public interface) andprovides a default list for Perl to use when we don't specify an import list. For example, these twocalls are equivalent:
use File::Basename;
BEGIN { require File::Basename; File::Basename->import }
We pass no list to import. In that case, the Exporter->import routine looks at @EXPORT and provideseverything in the list.[ ]
[ ] Remember, having no list is not the same as having an empty list. If the list is empty, the module's import method is simply
not called at all.
What if we had subroutines we didn't want as part of the default import but that would still beavailable if we asked for them? We can add those subroutines to the @EXPORT_OK list in the module'spackage. For example, suppose that Gilligan's module provides the guess_direction_toward routineby default but could also provide the ask_the_skipper_about and get_north_from_professor routines,if requested. We can start it like this:
package Navigate::SeatOfPants;our @EXPORT = qw(guess_direction_toward);our @EXPORT_OK = qw(ask_the_skipper_about get_north_from_professor);use base qw(Exporter);
The following invocations would then be valid:
use Navigate::SeatOfPants; # gets guess_direction_toward
use Navigate::SeatOfPants qw(guess_direction_toward); # same
use Navigate::SeatOfPants qw(guess_direction_toward ask_the_skipper_about);
use Navigate::SeatOfPants qw(ask_the_skipper_about get_north_from_professor); ## does NOT import guess_direction_toward!
If we specify any names, they must be in either @EXPORT or @EXPORT_OK, so this request is rejected byExporter->import:
use Navigate::SeatOfPants qw(according_to_GPS);
because according_to_GPS is in neither @EXPORT nor @EXPORT_OK.[*] Thus, with those two arrays, wehave control over our public interface. This does not stop someone from sayingNavigate::SeatOfPants::according_to_GPS (if it existed), but at least now it's obvious that they'reusing something we didn't intend to offer them.
[*] This check also catches misspellings and mistaken subroutine names, keeping you from wondering why the
get_direction_from_professor routine isn't working.

15.4. %EXPORT_TAGS
We don't have to list every function or variable that we want to import, either. We can createshortcuts, or tags, to group them under a single name. In the import list, we precede the tag namewith a colon. For example, the core Fcntl module makes the flock constants available as a groupwith the :flock tag:
use Fcntl qw( :flock ); # import all flock constants
As described in the Exporter documentation, a few shortcuts are available automatically. The DEFAULTtag pulls in the same things as if we had provided no import list:
use Navigate::SeatOfPants qw(:DEFAULT);
That isn't very useful on its own, but if we want to pull in the default symbols and more, we don'thave to type everything out simply because we supply an import list:
use Navigate::SeatOfPants qw(:DEFAULT get_north_from_professor);
These are rarely seen in practice. Why? The purpose of explicitly providing an import list is generallyto control the subroutine names we use in our program. Those last examples do not insulate us fromfuture changes to the module, which may import additional subroutines that could collide with ourcode.[ ] In a few cases, a module may supply dozens or hundreds of possible symbols. Thesemodules can use advanced techniques (described in the Exporter documentation) to make it easy toimport batches of related symbols.
[ ] For this reason, it is generally considered a bad idea for an update to a released module to introduce new default imports. If
you know that your first release is still missing a function, though, there's no reason why you can't put in a placeholder: sub
according_to_GPS { die "not implemented yet" } .
In our modules, we use the %EXPORT_TAGS hash to define these tags. The hash key is the name of thetag (without the colon), and the value is an anonymous array of symbols.
package Navigate::SeatOfPants;use base qw(Exporter);
our @EXPORT = qw(guess_direction_toward);
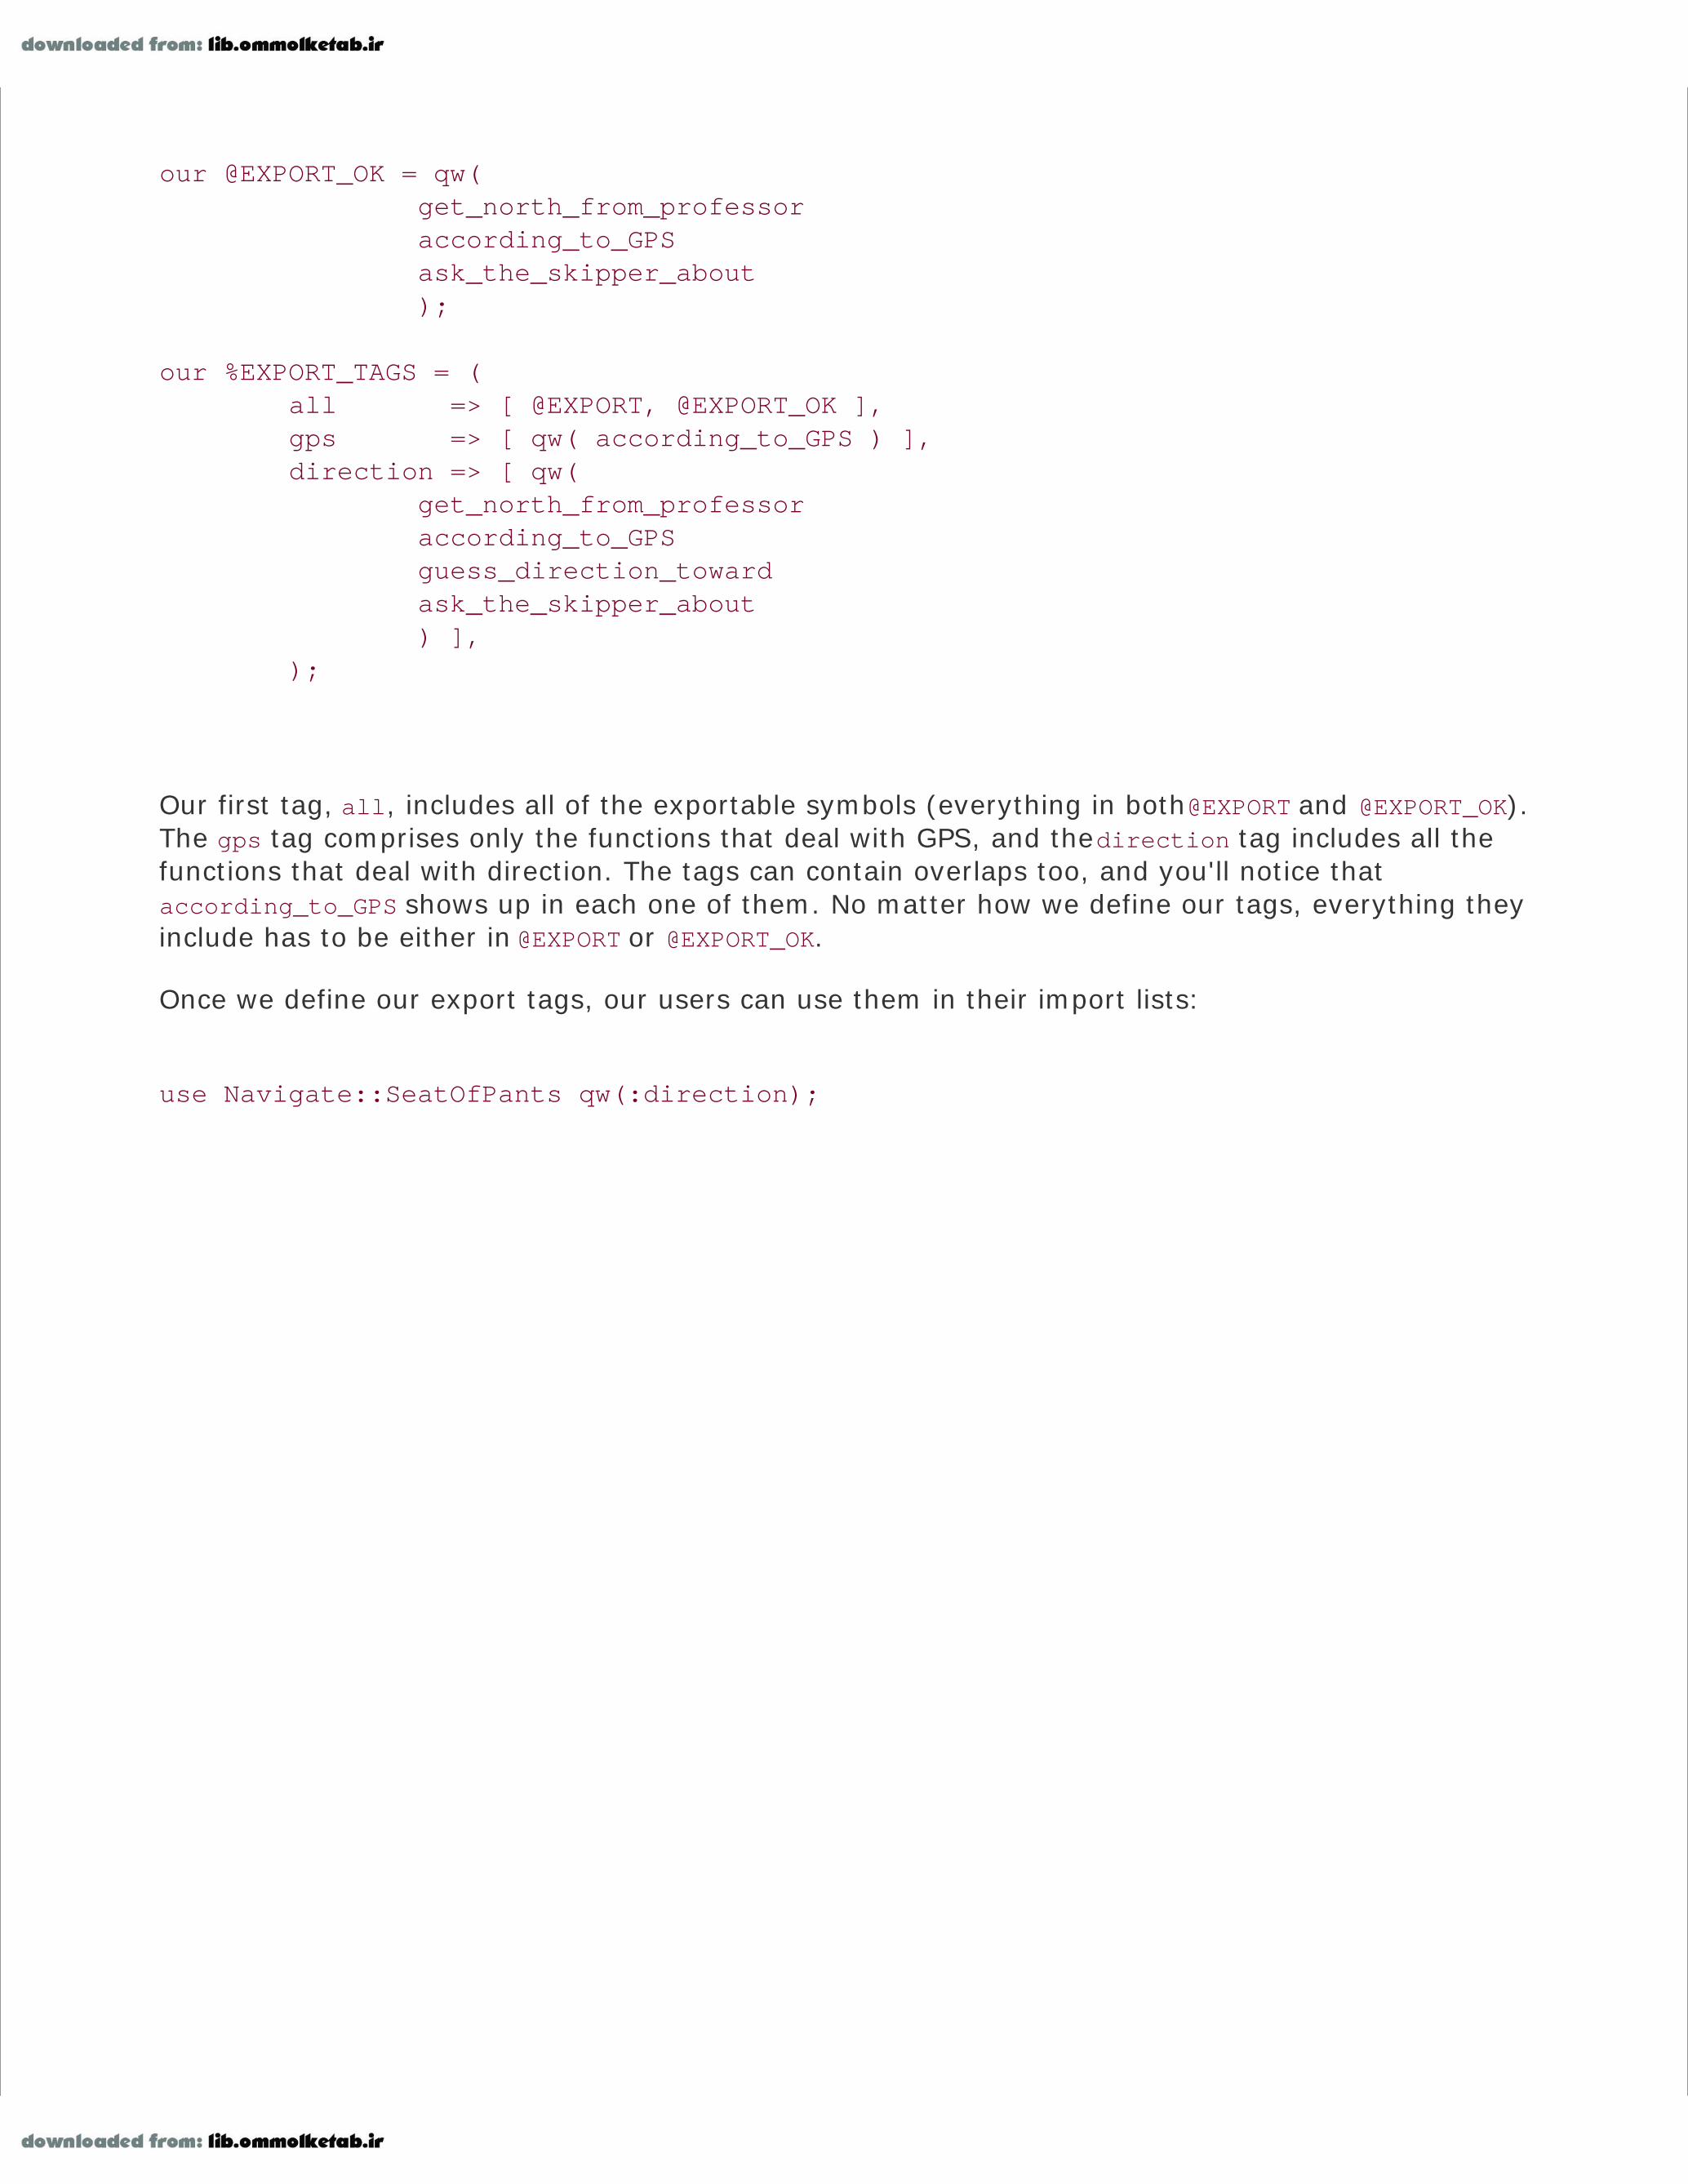
our @EXPORT_OK = qw( get_north_from_professor according_to_GPS ask_the_skipper_about );
our %EXPORT_TAGS = ( all => [ @EXPORT, @EXPORT_OK ], gps => [ qw( according_to_GPS ) ], direction => [ qw( get_north_from_professor according_to_GPS guess_direction_toward ask_the_skipper_about ) ], );
Our first tag, all, includes all of the exportable symbols (everything in both @EXPORT and @EXPORT_OK).The gps tag comprises only the functions that deal with GPS, and the direction tag includes all thefunctions that deal with direction. The tags can contain overlaps too, and you'll notice thataccording_to_GPS shows up in each one of them. No matter how we define our tags, everything theyinclude has to be either in @EXPORT or @EXPORT_OK.
Once we define our export tags, our users can use them in their import lists:
use Navigate::SeatOfPants qw(:direction);

15.5. Exporting in a Primarily OO Module
As seen earlier, the normal means of using an object-oriented module is to call class methods andthen methods against instances resulting from constructors of that class. This means that an OOmodule typically exports nothing, so we'll have:
package My::OOModule::Base;our @EXPORT = ( ); # you may even omit this lineuse base qw(Exporter);
What if we then derive a class from this base class? The most important thing to remember is thatthe import method must be defined from the Exporter class, so we add it like so:
package My::OOModule::Derived;use base qw(Exporter My::OOModule::Base);
However, wouldn't the call to My::OOModule::Derived->import eventually find its way up to Exportervia My::OOModule::Base? Sure it would. So we can leave that out:
package My::OOModule::Derived;use base qw(My::OOModule::Base);
Only the base classes at the top of the tree need to specify Exporter, and only when they derive fromno other classes.
Please be aware of all the other reserved method names that can't be used by your OO module (asdescribed in the Exporter manpage). At the time of this writing, the list is export_to_level,require_version, and export_fail. Also, we may wish to reserve unimport because Perl will call thatroutine when we replace use with no. That use is rare for user-written modules, however, although itoften shows up with pragmas such as strict and warnings.
Even though an OO module typically exports nothing, we might choose to export a namedconstructor or management routine. This routine typically acts a bit like a class method, but we wantusers to call it as a regular subroutine.
One example is the LWP library, available on the CPAN as part of the libwww-perl distribution. TheURI::URL module, now deprecated and replaced by the URI module, deals with universal resource

identifiers, most commonly seen as URLs such as http://www.gilligan.crew.hut/maps/island.pdf. Wecan construct a URI::URL object as a traditional object constructor with:
use URI::URL;my $u = URI::URL->new('http://www.gilligan.crew.hut/maps/island.pdf');
The default import list for URI::URL also imports a url subroutine, which we can use as a constructoras well:
use URI::URL;my $u = url('http://www.gilligan.crew.hut/maps/island.pdf');
Because this imported routine isn't a class method, we don't use the arrow method call to invoke it.Also, the routine is unlike anything else in the module: it gets no initial class parameter. Even thoughnormal subroutines and method calls are both defined as subroutines in the package, the caller andthe author must agree as to which is which.
The url convenience routine was nice, initially. However, it clashed with the same-name routine thatCGI.pm TRied to export as well, leading to interesting errors (especially in a mod_perl setting). Themodule that got there last won. (The modern interface in the URI module doesn't export such aconstructor.) Prior to that, in order to prevent a crash, we had to remember to bring it in with anempty import list:
use URI::URL ( ); # don't import "url"my $u = URI::URL->new(...);

15.6. Custom Import Routines
Let's use CGI.pm as an example of a custom import routine before we show you how to write yourown. Not satisfied with the incredible flexibility of the Exporter's import routine, CGI.pm author LincolnStein created a special import for the CGI module.[*] If you've ever gawked at the dizzying array ofoptions that can appear after use CGI and wondered how it all worked, it's all a simple matter ofprogramming. You can just look at the source yourself.
[*] Some have dubbed this the "Lincoln Loader" out of a simultaneous deep respect for Lincoln and the sheer terror of having to
deal with something that just doesn't work like anything else they've encountered.
As part of the extension provided by this custom import, you can use the CGI module as an object-oriented module:
use CGI;my $q = CGI->new; # create a query objectmy $f = $q->param('foo'); # get the foo field
or a function-oriented module:
use CGI qw(param); # import the param functionmy $f = param('foo'); # get the foo field
If you don't want to spell out every possible subfunction, bring them all in:
use CGI qw(:all); # define 'param' and 800-gazillion othersmy $f = param('foo');
And then there's pragmata available. For example, if you want to disable the normal sticky fieldhandling, simply add -nosticky into the import list:
use CGI qw(-nosticky :all);
If you want to create the start_table and end_table routines, in addition to the others, it's simply:
use CGI qw(-nosticky :all *table);
Truly a dizzying array of options. How did Lincoln make it all work? You can just look in the CGI.pmcode, see for yourself, but we'll show you the basics.
The import method is just a regular method, so we can make it do anything that we want. Earlier weshowed a simple (although hypothetical) example for File::Basename. In that case, instead of usingthe import method from Exporter as the real module does, we wrote our own to force the symbolsinto the main namespace.
sub import { no strict 'refs'; for (qw(filename basename fileparse)) { *{"main::$_"} = \&$_; }}
This only works for main since that's what we hardcoded into the routine. We can figure out thecalling package on the fly, however, by using the built-in caller. In scalar context, caller returns thecalling package:
sub import { no strict 'refs'; my $package = caller; for (qw(filename basename fileparse)) { *{$package . "::$_"} = \&$_; }}
We can get even more information from caller by using it in list context.
sub import { no strict 'refs'; my( $package, $file, $line ) = caller; warn "I was called by $package in $file\n"; for (qw(filename basename fileparse)) { *{$package . "::$_"} = \&$_; }}

Since import is just a method, any arguments to it (that's the import list, remember) show up in @_.We can inspect the argument list and decide what to do. Let's turn on debugging output only if debugshows up in the import list. We're not going to import a subroutine named debug. We're only going toset $debug to a true value if it's there, then do the same stuff we did before. This time we only printthe warning if we've turned on debugging.
sub import { no strict 'refs'; my $debug = grep { $_ eq 'debug' } @_; my( $package, $file, $line ) = caller; warn "I was called by $package in $file\n" if $debug; for (qw(filename basename fileparse)) { *{$package . "::$_"} = \&$_; }}
These are the basic tricks that Lincoln used to work his CGI magic, and it's the same stuff that theTest::More module, which we introduce in Chapter 17, uses in its own import to control how testingworks.

15.7. Exercises
You can find the answers to these exercises in "Answers for Chapter 15" in the Appendix.
15.7.1. Exercise 1 [15 min]
Take the Oogaboogoo library you created in Chapter 10, Exercise 1 and turn it into a module you canbring in with use. Alter the invoking code so that it uses the imported routines (rather than the fullpackage specification, as you did before), and test it.
15.7.2. Exercise 2 [15 min]
Modify your answer to Exercise 1 to use an export tag named all. When the user uses all, yourmodule should import all of the subroutine names.
use Oogaboogoo::date qw(:all);

Chapter 16. Writing a DistributionIn Chapter 15, we created a fictional Island::Plotting::Maps module and built the right support forExporter so that we could include use Island::Plotting::Maps in a program.
While the resulting .pm file was useful, it wasn't very practical. We have a lot more work to do beforewe can share our work, whether that means simply installing it ourselves on another one of ourmachines or giving it to someone else to use.
Installation location
How does everything get in the right place so Perl can find it? Where is our code going to bestored on the system? Can users make it available to everyone on the system because theyhave root or administrator privileges, or do they have to install it in their own directories?
Documentation
Where is the documentation for the module? How is the documentation installed so the usercan read it?
Archive completeness
Is there anything extra that the users of our software will need? What else do I have to includewith my code to make it usable?
Testing
How do we know our software works? Have we verified that it does what we say it does? Howdo we know it works the same on other operating systems or versions of Perl?
C-language interfaces
If our module contains C or C++ code (not covered here), how can the developer describe howto compile and link the code in the developer's environment or the end user environment?
16.1. There's More Than One Way To Do It
A distribution contains the module (or collection of related modules), plus all the support filesrequired to document, test, ship, and install the module. While you could potentially construct allthese files by hand, it's much simpler to use something to do it for you.
In the beginning,[*] we had to create modules by hand. Soon after, the h2xs program grew into amodule distribution creator, and that worked well for a while. Andy Lester created Module::Starter tomake a better starter distribution, Jim Keenan created ExtUtils::ModuleMaker to make a betterh2xs, and many other module creation systems popped up.[ ]
[*] Well, since Perl 5 at least, when the third party module system came into being.
[ ] brian simply creates a template directory he processes with ttree from Template::Toolkit. You can read about it in the
December 2004 issue of The Perl Journal at http://www.tpj.com/documents/s=9622/tpj0412e/0412e.html.
No matter which way we create our distribution or which tools we use, the process is the same. Werun a Perl script that creates a file that pulls together all the information it needs to prepare andinstall the code. From there, we can test and install the modules.
If we are using the traditional Makefile.PL, we start the installation with:
$ perl Makefile.PL
After that, we can test and install the module by telling make to perform the actions for thosetargets.[ ]
[ ] We can specify the test and install targets in the same make invocation. If make encounters an error, it won't go on.
$ make all test install
We may not want to use a Makefile.PL, though. It relies on the external program make, which, sinceit started life as a Unix tool, may not be available on all systems.[§] Ken Williams created the pure-Perl Module::Build system as a make replacement. Since we know that we must already have Perlinstalled and that Perl is portable, we can use it to install modules.
[§] There is an nmake for Windows that is available from Microsoft.
The Module::Build process looks the same, except that we start with a Build.PL file.
$ perl Build.PL
From there, we do the same sort of thing we did before.
perl Buildperl Build testperl Build install
There are reasons to decide to use one or the other. The Makefile.PL method has been around for along time, and it mostly works, except in odd cases. Its underpinnings depend onExtUtils::Makemaker, which comes with Perl. Unfortunately, ExtUtils::Makemaker has become a bearto maintain, since it has to handle all of the special cases for the many, many systems on which Perlworks. The Module::Build method is much newer, so it's still maturing and not as many people useit.[*] However, since Module::Build doesn't require an external program, it's easier for some peopleto use.
[*] Yet. Module::Build will be part of the Perl standard distribution starting with Perl 5.10 and is likely the future for Perl modules.

16.2. Using h2xs
We'll explain the Makefile.PL process using the awkwardly named h2xs.[ ] We use h2xs to create aset of template files that are a starting point for our distribution files. We simply need to say H2xs -XAn, followed by the name of the modulein this case, Island::Plotting::Maps.[ ] Here's what theoutput looks like:[§]
[ ] The name h2xs has an interesting pedigree. Back in the early days of Perl 5, Larry invented the XS language to describe the
glue code that Perl needs to talk to C-language functions and libraries. Originally, this code was written entirely by hand, but the
h2xs tool was written to scan simple C-include header files (ending in .h) and generate most of the XS directly. Hence, h 2 (to)
XS. Over time, more functions were added, including generating template files for the rest of the distribution. Now here we are,
about to describe how to use h2xs for things that aren't either h or XS. Amazing.
[ ] If there's more than one module in the distribution, it should be the name of the most important module. Others can be added
later.
[§] The exact behavior and output of h2xs may vary depending upon the version of Perl.
Defaulting to backwards compatibility with perl 5.8.7If you intend this module to be compatible with earlier perl versions, pleasespecify a minimum perl version with the -b option.
Writing Island-Plotting-Maps/lib/Island/Plotting/Maps.pmWriting Island-Plotting-Maps/Makefile.PLWriting Island-Plotting-Maps/READMEWriting Island-Plotting-Maps/t/Island-Plotting-Maps.tWriting Island-Plotting-Maps/ChangesWriting Island-Plotting-Maps/MANIFEST
16.2.1. MANIFEST
The h2xs program created a directory and several files. These are mostly the same files that theother module creation tools set up for us, so even if you decide not to use h2xs, you still need tounderstand these files. Let's examine the MANIFEST file, which contains the list of files that thedistribution will contain. At the start, our MANIFEST contains:[**]
[**] Again, there may be slight variations based on tool and Perl versions.
ChangesMakefile.PLMANIFESTREADMEt/Island-Plotting-Maps.t
lib/Island/Plotting/Maps.pm
The MANIFEST file is really a table of contents for our distribution. When we decide to bundle thearchive, all of the files in MANIFEST go into the archive. When the end user unpacks the distribution,the module installer tool verifies that all of the files in MANIFEST are in the archive. In fact, we'reready to make an archive right now. First, we need to run the Makefile.PL. After that, we find a newfile, Makefile, in our directory.
$ perl Makefile.PL$ make tardist
If we don't want to make a tar achive, we can create a zip file.
$ make ziptest
While maintaining a MANIFEST sounds like it might be painful, we know that we won't accidentallyinclude our "notes to self" in the distribution just because those files happened to be in the wrongdirectory. Later, we'll show you how to update MANIFEST.
16.2.2. README
The next file is README, which is a standard name for the first bit of information you want all users ofyour module to read. It's customary to include at least a brief description of the module, installationinstructions, and licensing details.
Island-Plotting-Maps version 0.01= == == == == == == == == == == == == == == == ==
The README is used to introduce the module and provide instructions onhow to install the module, any machine dependencies it may have (forexample C compilers and installed libraries) and any other informationthat should be provided before the module is installed.
A README file is required for CPAN modules since CPAN extracts theREADME file from a module distribution so that people browsing thearchive can use it get an idea of the modules uses. It is usually agood idea to provide version information here so that people candecide whether fixes for the module are worth downloading.
INSTALLATION
To install this module type the following:
perl Makefile.PL make make test make install
DEPENDENCIES
This module requires these other modules and libraries:
blah blah blah
COPYRIGHT AND LICENSE
Put the correct copyright and license information here.
Copyright (C) 2005 by Ginger Grant
This library is free software; you can redistribute it and/or modifyit under the same terms as Perl itself, either Perl Version 5.8.7 or,at your option, any later version of Perl 5 you may have available.
Obviously, you will want to edit this file to be whatever you want it to be. The phrase "blah blah blah"is often used in the templates to indicate things that must be changed.[*] If we leave unchanged theblah blah blah and other placeholder notes from h2xs, potential users will suspect that bugs in ourcode have also escaped our scrutiny, so we should proofread this stuff (along with our code) beforewe distribute our module.
[*] When you're bored, you might find it amusing to do a search on CPAN for all places in which blah blah blah occurs.
Pay special attention to the copyright and license section. (It should have your name in place ofGinger's name, unless your machine is very confused about who is sitting at the keyboard.) Youremployer may require you to change the copyright notice to include your company name rather thanyour name, for example. Or, if you're including someone else's code in your module, you may needto mention their copyright (or lack thereof) as well.
The README file also has a special responsibility: the master CPAN archiving tools pull out theREADME file as a separate entry automatically, permitting the search engines on the variousworldwide archives to index them. The CPAN installation tools can download it and display it withoutdownloading the entire distribution. In the CPAN.pm shell, for example, you can say:[ ]
[ ] Well, you would be able to do this, if there were actually a module on CPAN named Island::Plotting::Maps.
$ perl -MCPAN -eshellcpan> readme Island::Plotting::Maps
In CPANPLUS, the successor to CPAN.pm, we do something similar:
$ perl -MCPANPLUS -eshellcpanp> r Island::Plotting::Maps
Depending on your version of Perl, you might have the cpan or cpanp programs:
$ cpancpan> readme Island::Plotting::Maps
16.2.3. Changes
The Changes file tracks the evolution of our code. Users typically check this file to see what's newwith the module and to decide if they want to upgrade.[*] In this file, we note any bugs we fixed,features we added, and how important the changes are (i.e., should everyone upgrade right away?).
[*] Why not upgrade? Some people are content, and rightfully so, with something they already know works. Why chance breaking
anything if you don't need to?
$ cat ChangesRevision history for Perl extension Island::Plotting::Maps.
0.01 Wed Oct 16 15:53:23 2002 - original version; created by h2xs 1.22 with options -XAn Island::Plotting::Maps
We need to maintain this file manually unless our interactive development environment hasautomated tools for such maintenance. We can also use this file to help us track changes and theireffects: if we realize that a certain bug turned up three releases back, we can look here to remindourselves of new features or bug fixes that we introduced in that release.
16.2.4. META.yml
Recent versions of the module tools create a file named META.yml that presents the moduleinformation in a human-readable form that is also easy to parse. It uses the YAML format we told youabout in Chapter 6.
# http://module-build.sourceforge.net/META-spec.html#XXXXXXX This is a prototype!!! It will change in the future!!! XXXXX#

name: HTTP-Sizeversion: 0.91version_from: lib/Size.pminstalldirs: siterequires: HTML::SimpleLinkExtor: 0 HTTP::Request: 0 URI: 0
distribution_type: modulegenerated_by: ExtUtils::MakeMaker version 6.17
In this case, ExtUtils::MakeMaker automatically created this file for me. When we create thedistribution archive, the Makefile creates this file, ensures that it's in MANIFEST, and includes it indistribution. Other tools and services, including the ones we cover in Chapter 19, can use this file todiscover things about the module without having to run any of the distribution code. There is a lotmore to this file, and its format documentation reference is right there in the file.
16.2.5. The Prototype Module Itself
Finally we come to the most important part of the distribution, which is the actual code:
package Island::Plotting::Maps;
It looks good so far. The module automatically starts with an appropriate package directive. Followingthat, we get the standard, good-practice pragmas.
use 5.008007;use strict;use warnings;
Now we're declaring that the module is compatible with Perl 5.8.7 or later and that the compilerrestrictions and warnings are enabled automatically. We like to encourage good practices. Obviously,we're free to delete or modify anything inappropriate. If we know that our module works with earlierversions of Perl, we can modify the use 5.008007; line (or delete it altogether).
Next comes the mechanism by which we can make our functions and variables show up in thepackage that called the module. The Exporter function takes care of all of that for us by providing theimport method that we talked about in Chapter 15.
require Exporter;

our @ISA = qw(Exporter);
This is fine for non-object-oriented modules, but object-oriented modules typically don't exportanything since they require the user to call methods on an object. We'll replace the Exporter lineswith one that declares the class that we inherit from, if any.
use base qw(Geo::Maps);
We have to include some information for Exporter, and h2xs sets that up for us. We have to fill in (ornot fill in) three variables:
our %EXPORT_TAGS = ( 'all' => [ qw(
) ] );
our @EXPORT_OK = ( @{ $EXPORT_TAGS{'all'} } );
our @EXPORT = qw(
);
The @EXPORT array contains the names of all the variables and subroutines that use will automaticallyimport into the caller by default. All of those show up in the calling package unless we tell useotherwise.
use Island::Plotting::Maps; # import everything in @EXPORT
We won't get anything imported if we give use an empty import list.
use Island::Plotting::Maps ( ); # import nothing
The @EXPORT_OK array contains the names of all the variables and subroutines that use can import ifthe user asks for them by name (and @EXPORT_OK implicitly contains @EXPORT). If the variables orsubroutines are not in one of these arrays, use won't be able to import them.
use Island::Plotting::Maps ( ); # import nothing

The %EXPORT_TAGS hash lets us give names to sets of variables and functions so we can export groupsof symbols without making the user type too much. The keys to %EXPORT_TAGS are the group labels,and the hash values are anonymous arrays of symbols that belong to that tag. In the use statement'simport list, we include the tag name preceded by a colon.[*]
[*] Technically, you don't need :all because /^/ (include all symbols that match at least a beginning of string) does the same.
Many people are familiar with typing :all, and it's far more self-documenting than /^/ is, so include it if you can.
use Island::Plotting::Maps qw(:all)
After the Exporter setup, we get the version number for our new module.
our $VERSION = '0.01';
This version number is important for many reasons, and we need to pay special attention to it.Choose the version number carefully, because many other things use it and depend on it:
Unique identification
The version number identifies a particular release of a particular module as it floats around theInternet.
Filename generation
The archive of the distribution includes the version number of the primary module by default.PAUSE won't let us upload the same filename twice, either, so if our code changes but ourversion number doesn't, we'll have some trouble there.
Upgrade indication
Generally, numbers that increase numerically supersede previous versions. For this test, thenumber is considered a floating-point number, so 2.10 (which is really 2.1) is less than 2.9(which must be the same as 2.90, by the same logic). To avoid confusion, if we've have twodigits after the decimal point in one release, we should have two digits in the next release.[ ]
[ ] Perl Best Practices recommends using a three-part version string, such as qv(1.2.3), but their use isnot widespread, requires version.pm (a non-core module as of Perl 5.8), does not integrate with common
tools yet, and has lexical issues.
Interface stability

Generally, numbers that begin with 0 are alpha or beta, with external interfaces that may stillbe in flux. Also, most people use a major version number change (from 1.x to 2.x, etc.) toindicate a potential break in upward compatibility.
Recognition by the various CPAN tools
The CPAN distribution management tools use the version number to track a particular release,and the CPAN installation tools can determine missing or out-of-date distributions.
Perl's own operators
The use operator can be given a version number in addition to (or instead of) the import list,forcing the use operation to fail if the imported module is not equal to or greater than thatversion:
use Island::Plotting::Maps 1.10 qw{ map_debugger };
Generally, you can start with the 0.01 given by the template and increase it consistently with eachnew test release.[*] Now you're past the header information and down to the core of your module. Inthe template, it is indicated by a simple comment:
[*] The perlmod page includes an example that extracts the CVS/RCS version number for the module's version number.
# Preloaded methods go here.
What? You didn't think the h2xs tool would even write the module for you, now did you? Anyway, thisis where the code goes, usually as a series of subroutines, possibly preceded by some shared moduledata (using my declarations) and perhaps a few package variables (using our declarations in recentPerl versions). Following the code, you'll find your necessary true value:
1;
so the require (inside the use) doesn't abort.

16.3. Embedded Documentation
Immediately following the mandatory true value in the file, you'll find the _ _END_ _ marker. That'sdouble underscore followed by END followed by another double underscore. It's at the beginning of theline and has a newline immediately following it:
_ _END_ _
This marker tells Perl that there's no Perl code anywhere later in the file and that the Perl parser canstop now.[ ] Following the _ _END_ _ marker, you'll find the embedded documentation for themodule:
[ ] The data immediately following the _ _END_ _ marker is available by reading from the DATA filehandle, which is a great way to
include a small amount of constant data with your program. However, that's not why we're using it here.
# Below is stub documentation for your module. You'd better edit it!
=head1 NAME
Island::Plotting::Maps - Perl extension for blah blah blah
=head1 SYNOPSIS
use Island::Plotting::Maps; blah blah blah
=head1 ABSTRACT
This should be the abstract for Island::Plotting::Maps. The abstract is used when making PPD (Perl Package Description) files. If you don't want an ABSTRACT you should also edit Makefile.PL to remove the ABSTRACT_FROM option.
=head1 DESCRIPTION
Stub documentation for Island::Plotting::Maps, created by h2xs. It looks like theauthor of the extension was negligent enough to leave the stubunedited.
Blah blah blah.
=head1 EXPORT

None by default.
=head1 SEE ALSO
Mention other useful documentation such as the documentation ofrelated modules or operating system documentation (such as manpagesin UNIX), or any relevant external documentation such as RFCs orstandards.
If you have a mailing list set up for your module, mention it here.
If you have a web site set up for your module, mention it here.
=head1 AUTHOR
Ginger Grant, <[email protected]>
=head1 COPYRIGHT AND LICENSE
Copyright 2006 by Ginger Grant
This library is free software; you can redistribute it and/or modifyit under the same terms as Perl itself.
=cut
This documentation is in POD format . The perlpod manpage describes the POD format in detail. LikePerl itself, POD is said to mean various things, such as Perl Online Documentation or Plain OldDocumentation, and so on. To most of us, it's just POD.
As the template describes, you're expected to edit portions of this text to fit your particular module.In particular, leaving the blah blah blah is considered bad form.
The POD information is extracted automatically by the installation process to create the nativedocumentation format, such as Unix manpages or HTML. Also, the perldoc command can locate PODin the installed scripts and modules and format it for the screen.
One nice thing about POD is that it can be interspersed with the Perl implementation code itdescribes. Each POD directive (a line beginning with an equals sign) switches from Perl mode (linesinterpreted as Perl code) to POD mode (lines interpreted as documentation), and each line beginningwith =cut switches back. For example, you had three subroutines in the Island::Plotting::Mapsmodule. The resulting file with mixed code and documentation looks something like:
package Island::Plotting::Maps;[... stuff down to the $VERSION setting above ...]
=head1 NAME
Island::Plotting::Maps - Plot maps on the island

=head1 SYNOPSIS
use Island::Plotting::Maps; load_map("/usr/share/map/hawaii.map"); scale_map(20, 20); draw_map(*STDOUT);
=head1 DESCRIPTION
This module draws maps. [ more here ]
=over
=item load_map($filename)
This function [ more here ].
=cut
sub load_map { my $filename = shift; [ rest of subroutine ]}
=item scale_map($x, $y)
This function [ more here ].
=cut
sub scale_map { my ($x, $y) = (shift, shift); [ rest of subroutine ]}
=item draw_map($filehandle)
This function [ more here ].
=cut
sub draw_map { my $filehandle = shift; [ rest of subroutine ]}
=back
=head1 SEE ALSO
"Map Reading for Dummies", "First Mates: why they're not the captain",

and be sure to consult with the Professor.
=head1 AUTHOR
Ginger Grant, <[email protected]>
=head1 COPYRIGHT AND LICENSE
Copyright 2006 by Ginger Grant
This library is free software; you can redistribute it and/or modifyit under the same terms as Perl itself.
=cut
1;
As you can see, the documentation for the subroutines is now very near the subroutine definition, inthe hope that as one gets updated, the other will be similarly changed. (Out-of-date documentation isoften worse than no documentation at all, because at least with no documentation at all, the user isforced to look at the source code.) Many modules in the CPAN do this. The penalty is a very slightincrease in compile-time activity because the Perl parser has to skip over the embedded PODdirectives.
Whether you place your POD at the end of the file (as the template suggests) or intertwined withyour code (as presented in the preceding paragraphs), the important thing to remember is always todocument your code. Even if it's just for you, a few months later, when your brain has been 42,000other places before you look at the code again, you'll be glad to have those notes. Documentation isimportant.

16.4. Controlling the Distribution with Makefile.PL
The Perl developers have chosen to rely on the standard Unix make utility to build and install Perlitself, and that same mechanism is used for additional modules. If you have a non-Unix system, amake-like utility should also be available. On Windows, for example, you may have dmake or anotherprogram. The command perl -V:make will tell you the name of your make utility program; if it saysmake='nmake', simply use nmake wherever you use make. In any case, you should call the controllingfile a Makefile, even though its name may vary as well.
However, crafting a Makefile is tricky but repetitive. And what better way to accomplish a tricky butrepetitive task than with a program? Since you're talking about Perl add-on modules, you know thatPerl is available, so how about a Perl program to generate the Makefile?
That's exactly what happens. The distribution is required to contain a Makefile.PL, which is a Perlprogram to build a Makefile. Then from there, you use make (or something like it) to control all of theremaining tasks.
The h2xs tool generates a template Makefile.PL that you probably won't even need to touch forsingle-module distributions:
$ cat Makefile.PLuse 5.008;use ExtUtils::MakeMaker;# See lib/ExtUtils/MakeMaker.pm for details of how to influence# the contents of the Makefile that is written.WriteMakefile( 'NAME' => 'Island::Plotting::Maps', 'VERSION_FROM' => 'Maps.pm', # finds $VERSION 'PREREQ_PM' => { }, # e.g., Module::Name => 1.1 ($] >= 5.005 ? ## Add these new keywords supported since 5.005 (ABSTRACT_FROM => 'Maps.pm', # retrieve abstract from module AUTHOR => 'Ginger Grant <[email protected]>') : ( )),);
Yes, this is a Perl program. The WriteMakefile routine is defined by the ExtUtils::MakeMaker module(included with Perl) to generate a Makefile. As the developer of the module, use this makefile to buildand test your module and prepare a distribution file:
$ perl Makefile.PLChecking if your kit is complete...Looks goodWriting Makefile for Island::Plotting::Maps

The ultimate user of your distribution will execute the identical command at his site. However, theMakefile will most likely be different, reflecting the differences in installation locations, local policies,and even the C compiler and linking instructions appropriate for their architecture. It's a nice systemthat has worked quite well over the years.
The creation of the Makefile.PL (and resulting Makefile) is quite flexible. For example, you can runcode to ask the person installing your module about the locations of other installed libraries or tools,or get options for variations in activity.[*]
[*] Please keep the number of questions to a minimum, however. Most people are irritated when asked a series of questions,
especially when they are just upgrading your module. If possible, store the answers in a configuration module that you install, so
that a later invocation of your installer can pull the previous answers as defaults.
The PREREQ_PM setting is important if your module depends on non-core Perl modules, especially ifyou plan to upload your code to the CPAN. Proper use of the prerequisites list can make installingyour module nearly painless, and your user community will thank you.

16.5. Alternate Installation Locations (PREFIX=...)
The Makefile built by the default invocation of Makefile.PL presumes that the module will be installedin the system-wide Perl directory that all Perl programs can access directly with the built-in @INCpath.
However, if you are testing a module, you certainly don't want to install it into the system directories,possibly corrupting a previous version of your module and breaking production programs.
Also, if you're not the system administrator, it's unlikely that you can change those central Perldirectories, because that would be a great way to insert a Trojan horse for privileged users tostumble across.[ ]
[ ] Even if you weren't the system administrator, you'd soon have all the powers of the system administrator.
Luckily, the Makefile contains provisions for considering an alternate installation location for scripts,manpages, and libraries. The easiest way to specify an alternate location is with a PREFIX value as aparameter on the command line:
$ perl Makefile.PL PREFIX=~/TestingChecking if your kit is complete...Looks goodWriting Makefile for Island::Plotting::Maps
Although the messages don't indicate anything different, the Makefile will now install scripts to$PREFIX/bin, manpages below $PREFIX/man, and libraries below $PREFIX/lib/site_perl. In this case,you've selected a subdirectory of your home directory called Testing as the value of $PREFIX.
If you were a project librarian, managing code for a team of developers, you might instead saysomething like:
$ perl Makefile.PL PREFIX=/path/to/shared/area
which then builds the files into a shared area. Of course, you'd need write privileges to such adirectory, and the rest of the team would have to add the bin subdirectory to their PATH, the mansubdirectory to their MANPATH, and the lib/site_perl directory to their @INC path, as you'll see shortly.

16.6. Trivial make test
Testing. Testing. Testing. We talk more about testing in depth in Chapters 17 and 18 , but here's abrief introduction.
Testing is important. First, you should at least ensure that the code you've written even compilesbefore you install it and start playing with it. That test is free. You can invoke it directly from thenewly created Makefile by simply typing make test , as in:
$ make testcp Maps.pm blib/lib/Island/Plotting/Maps.pmPERL_DL_NONLAZY=1 /usr/local/bin/perl "-MExtUtils::Command::MM" "-e" "test_harness(0,'blib/lib', 'blib/arch')" t/*.tt/1....okAll tests successful.Files=1, Tests=1, 1 wallclock secs ( 0.08 cusr + 0.04 csys = 0.12 CPU)
But what happened there?
First, the .pm file was copied to the testing staging area: the area headed by blib (build library) belowthe current directory.[*] Next, the perl that invoked the Makefile.PL is called upon to run the testharness a program that manages all test invocations and reports the results at the end.[ ]
[*] Had there been XS files or other more complex build steps, these also would have happened here.
[ ] The perl that invoked the Makefile.PL is used for all configuration decisions. If you have more than one version of Perl installed
on your system, be sure to execute the Makefile.PL with the correct one. From there, full paths are always used, so there's no
chance of mixing anything else up.
The test harness runs all files in the t subdirectory that end in .t in their natural order. You have onlyone file (created by h2xs ), which looks like this:
$ cat t/1.t# Before 'make install' is performed this script should be runnable with# 'make test'. After 'make install' it should work as 'perl 1.t'
#########################
# change 'tests => 1' to 'tests => last_test_to_print';
use Test::More tests => 1;BEGIN { use_ok('Island::Plotting::Maps') };
#########################

# Insert your test code below, the Test::More module is use( )ed here so read# its manpage ( perldoc Test::More ) for help writing this test script.
It's a simple test program. The test pulls in the Test::More module, described further in Chapter 17 .The import list for the module is treated specially; you're declaring that this test file consists of onlyone "test."
The test is given in the following line and attempts to use the module. If this succeeds, you get an"OK" sign, and the overall test file succeeds. This would fail if the module had a syntax error, or if youforgot to have that true value at the end of the file.
In this example, the test succeeds, so you get a message for it and a summary of the CPU time usedfor the test.

16.7. Trivial make install
Since you know the module can at least compile, let's be daring and install it. Of course, you'reinstalling it only into the path specified by the PREFIX in the earlier step, but that's enough to showhow it would have worked for the user's installation .[*] The installation is triggered with makeinstall:
[*] If you're playing along at home, be sure not to install this pretend module anywhere but in a temporary, testing directory.
Although removing an installed module is generally difficult, you'll be able to simply delete the testing directory, along with its
contents.
$ make installManifying blib/man3/Island::Plotting::Maps.3Installing /home/ginger/Testing/lib/site_perl/5.8.7/Island/Plotting/Maps.pmInstalling /home/ginger/Testing/man/man3/Island::Plotting::Maps.3Writing /home/ginger/Testing/lib/site_perl/5.8.7/darwin/auto/Island/Plotting/Maps/.packlistAppending installation info to /home/ginger/Testing/lib/site_perl/5.8.7/darwin/perllocal.pod
Note that you're installing the module below the $PREFIX/lib/site_lib directory (presuming a PREFIXof /home/ginger/Testing from earlier) and a manpage below $PREFIX/man (on Unix machines, in theSection 3 area for subroutines, for example). The manpage comes automatically when you extractthe module's POD data and convert it to TRoff -man code, making it compatible with the Unix mancommand.[ ]
[ ] On a non-Unix system, or even a few odd Unix systems, you'll see different behavior but roughly the same overall result.

16.8. Trivial make dist
After some testing, you may decide it's time to share your work with friends and associates. To dothis, make a single distribution file. Many mechanisms are available to do this, but the most commonone on most modern Unix platforms is the GNU gzip compressed tar archive, commonly named witha .tar.gz or .tgz extension.
Again, with a simple make invocation (make dist), you end up with the required file:
$ make distrm -rf Island-Plotting-Maps-0.01/usr/local/bin/perl "-MExtUtils::Manifest=manicopy,maniread" \ -e "manicopy(maniread( ),'Island-Plotting-Maps-0.01', 'best');"mkdir Island-Plotting-Maps-0.01mkdir Island-Plotting-Maps-0.01/ttar cvf Island-Plotting-Maps-0.01.tar Island-Plotting-Maps-0.01Island-Plotting-Maps-0.01/Island-Plotting-Maps-0.01/ChangesIsland-Plotting-Maps-0.01/Makefile.PLIsland-Plotting-Maps-0.01/MANIFESTIsland-Plotting-Maps-0.01/Maps.pmIsland-Plotting-Maps-0.01/READMEIsland-Plotting-Maps-0.01/t/Island-Plotting-Maps-0.01/t/1.trm -rf Island-Plotting-Maps-0.01gzip --best Island-Plotting-Maps-0.01.tar
Now there's a file named Island-Plotting-Maps-0.01.tar.gz in the directory. The version number in thename comes from the module's $VERSION variable.[*]
[*] If there's more than one module, you need to designate the primary module in the Makefile.PL.

16.9. Using the Alternate Library Location
The libraries are installed relative to the PREFIX specified earlier. If Ginger used a PREFIX of/home/ginger/Testing, you need to add the appropriate directory below it to the search path. The uselib directive of:
use lib '/home/ginger/Testing/lib/site_perl';
does the right thing to find the version-specific directory below it, as well as the architecture-specificdirectory below it, if needed (usually for architecture-specific files, such as compiled binaries).
You can also specify the include directory on the command line with a -M option:
$ perl -Mlib=/home/ginger/Testing/lib/site_perl myproggy
or a -I option:
$ perl -I /home/ginger/Testing/lib/site_perl myproggy
or even by setting the PERL5LIB environment variable (using sh-like syntax here):
$ PERL5LIB=/home/ginger/Testing/lib/site_perl; export PERL5LIB$ ./myproggy
However, the downside of any of these methods (other than the use lib method) is that they requireyou to do something more than just execute the file. If someone (or something) else (such as acoworker or a web server) executes your program, it's unlikely that the proper environment variableor command-line option will be present. Your program will fail because it can't find your locallyinstalled module.
Use use lib when you can. The other ways are useful mainly for trying out a new version of an oldmodule before replacing the old module (and possibly breaking the programs that use it).

16.10. Exercise
You can find the answer to this exercise in "Answer for Chapter 16" in the Appendix.
16.10.1. Exercise [30 min]
Package up the Animal and Horse classes from Chapter 12 as a distribution. Be sure to add theproper POD documentation for the subroutine. Test the module, install it locally, and then build adistribution file. If you have time, unpack the distribution into a different directory, pick a new prefix,and install it again to verify that the distribution archive contains everything necessary.

Chapter 17. Essential TestingAs we briefly described in Chapter 16, a distribution contains a testing facility that we can invokefrom make test. This allows us to write and run tests during development and maintenance, and italso lets our end user verify that the module works in her environment.
Although we cover testing briefly here, you should check out Perl Testing: A Developer's Notebook(O'Reilly), which covers the subject in depth.

17.1. More Tests Mean Better Code
Why should we test during development? The short answer is that we find out about problems soonerand tests force us to program in much smaller chunks (since they are easier to test), which isgenerally good programming practice. Although we may think we have extra work to do, that's onlyshort-term overhead. We win down the line when we spend less time debugging, both because we'vefixed most of the problems before they were problems and because the tests usually point us right atthe problem we need to fix.
Along with that, we'll find that it's psychologically easier to modify code because the tests will tell us ifwe broke something. When we talk to our boss or coworkers, we'll also have the confidence in ourcode to answer their queries and questions. The tests tell us how healthy our code is.
Different people have different ideas about testing. One school of thought, known as Test-DrivenDevelopment , says that we should write the tests before we write the code that is being tested. Onthe first go-around, the test fails. What good is the test if it doesn't fail when it should? Once weknow it fails, we write the code to make it work. When that works, we write a test for anotherfeature, repeat the process, and keep doing that until we're done. Along the way, we've verified thefunctionality and features.
We're never really done, though. Even when the module ships, we shouldn't abandon the test suite!Unless we code the mythical "bug-free module," our users will send us bug reports. We can turn eachreport into a test case.[*] While fixing the bug, the remaining tests prevent our code from regressingto a less functional version of the codehence the name regression testing .
[*] If we're reporting a bug in someone else's code, we can generally assume that they'll appreciate us sending them a test for the
bug. They'll appreciate a patch even more!
Then there are always the future releases to think about. When we want to add new features, westart by adding tests.[ ] Because the existing tests ensure our upward compatibility, we can beconfident that our new release does everything the old release did, and then some.
[ ] And writing the documentation at the same time, made easier by Test::Inline, as we'll see later.
17.2. A Simple Test Script
Before we go on, let's write some Perl code. We just told you about creating the tests before youwrite the code, so maybe we should follow our own advice. We'll get to the details later, but for nowwe start with the Test::More module,[ ] which comes with the standard Perl distribution.
[ ] There is also a Test::Simple module, but most people use its successor, Test::More, so we'll stick to that.
To start our testing, we write a simple Perl script. All of our tests are going to be scripts, so we canuse the stuff you already know about Perl. We load Test::More and tell it how many tests we want torun. After that, we use the convenience functions from Test::More, which we'll go through later. Inshort, most of them compare their first argument, which is the result we got, to the secondargument, which is what we expected.
#!/usr/bin/perl
use Test::More tests => 4;
ok( 1, '1 is true' );
is( 2 + 2, 4, 'The sum is 4' );
is( 2 * 3, 5, 'The product is 5' );
isnt( 2 ** 3, 6, "The result isn't 6" );
like( 'Alpaca Book', qr/alpaca/i, 'I found an alpaca!' );
When we run this simple script, we get this output. When the received and expected values are thesame, Test::More outputs a line starting with ok. When those values don't match, it outputs a linestarting with not ok. It also outputs some diagnostic information that tells us what the test expectedand what we actually gave it.
1..4ok 1 - 1 is trueok 2 - The sum is 4not ok 3 - The product is 5# Failed test 'The product is 5'# in /Users/brian/Desktop/test at line 9.# got: '6'# expected: '5'# Looks like you planned 4 tests but ran 1 extra.

# Looks like you failed 1 test of 5 run.ok 4 - The result isn't 6ok 5 - I found an alpaca!
Later on, we'll see how Perl takes all of this output to create a nice report for us. We won't have tolook at a lot of output to find the important bits once Test::Harness goes through it for us.

17.3. The Art of Testing
Good tests also give small examples of what we meant in our documentation. It's another way toexpress the same thing, and some people may like one way over the other.[*] Good tests also giveconfidence to the user that your code (and all its dependencies) is portable enough to work on hersystem.
[*] A few of the modules we've used from CPAN are easier to learn from test examples than by the actual POD. Of course, any
really good example should be repeated in your module's POD documentation.
Testing is an art. People have written and read dozens of how-to-test books (and then ignore them, itseems). Mostly, it's important to remember everything we have ever done wrong while programming(or heard other people do), and then test that we didn't do it again for this project.
When you create tests, think like a person using a module, not like one writing a module. You knowhow you should use your module, because you invented it and had a specific need for it. Other peoplewill probably have different uses for it and they'll try to use it in all sorts of different ways. Youprobably already know that given the chance, users will find every other way to use your code. Youneed to think like that when you test.
Test things that should break as well as things that should work. Test the edges and the middle. Testone more or one less than the edge. Test things one at a time. Test many things at once. Ifsomething should throw an exception, make sure it doesn't also have bad side effects. Pass extraparameters. Pass insufficient parameters. Mess up the capitalization on named parameters. Throw fartoo much or too little data at it. Test what happens for unexpected values such as undef.
Since we can't look at your module, let's suppose that we want to test Perl's sqrt function, whichcalculates square roots. It's obvious that we need to make sure it returns the right values when itsparameter is 0, 1, 49, or 100. It's nearly as obvious to see that sqrt(0.25) should come out to be 0.5.We should also ensure that multiplying the value for sqrt(7) by itself gives something between6.99999 and 7.00001.[*]
[*] Remember, floating-point numbers aren't always exact; there's usually a little roundoff. The Test::Number::Delta module
can handle those situations.
Let's express that as code. We use the same stuff that we used for our first example. This script teststhings that should work.
#!/usr/bin/perl
use Test::More tests => 6;
is( sqrt( 0), 0, 'The square root of 0 is 0' );is( sqrt( 1), 1, 'The square root of 1 is 1' );is( sqrt( 49), 7, 'The square root of 49 is 7' );is( sqrt(100), 10, 'The square root of 100 is 10' );

is( sqrt(0.25), 0.5, 'The square root of 0.25 is 0.5' );
my $product = sqrt(7) * sqrt(7);
ok( $product > 6.999 && $product < 7.001, "The product [$product] is around 7" );
We should make sure that sqrt(-1) yields a fatal error and that sqrt(-100) does too. What happenswhen we request sqrt(&test_sub( )), and &test_sub returns a string of "10000"? What doessqrt(undef) do? How about sqrt( ) or sqrt(1,1)? Maybe we want to give our function a googol:sqrt( 10**100 ). Because this function is documented to work on $_ by default, we should ensurethat it does so. Even a simple function such as sqrt should get a couple dozen tests; if our code doesmore complex tasks than sqrt does, expect it to need more tests, too. There are never too manytests.
In this simple script, we tested a lot of odd conditions.[ ]
[ ] And in writing this, we discovered that we can't write sqrt(-1) because eval doesn't trap that. Apparently, Perl catches it at
compile time.
#!/usr/bin/perl
use Test::More tests => 9;
sub test_sub { '10000' }
is( $@, '', '$@ is not set at start' );
{$n = -1;eval { sqrt($n) };ok( $@, '$@ is set after sqrt(-1)' );}
eval { sqrt(1) };is( $@, '', '$@ is not set after sqrt(1)' );
{my $n = -100;eval { sqrt($n) };ok( $@, '$@ is set after sqrt(-100)' );}
is( sqrt( test_sub( ) ), 100, 'String value works in sqrt( )' );
eval { sqrt(undef) };is( $@, '', '$@ is not set after sqrt(undef)' );
is( sqrt, 0, 'sqrt( ) works on $_ (undefined) by default' );

$_ = 100;is( sqrt, 10, 'sqrt( ) works on $_ by default' );
is( sqrt( 10**100 ), 10**50, 'sqrt( ) can handle a googol' );
If you write the code and not just the tests, think about how to get every line of your code exercisedat least once for full code coverage. (Are you testing the else clause? Are you testing every elsifcase?) If you aren't writing the code or aren't sure, use the code coverage facilities.[*]
[*] Basic code coverage tools such as Devel::Cover are available in CPAN.
Check out other test suites, too. There are literally tens of thousands of test files on CPAN, and someof them contain hundreds of tests. The Perl distribution itself comes with thousands of tests, designedto verify that Perl compiles correctly on our machine in every possible way. That should be enoughexamples for anyone. Michael Schwern earned the title of "Perl Test Master" for getting the Perl corecompletely tested and still constantly beats the drum for "test! test! test!" in the community.

17.4. The Test Harness
We usually invoke tests, either as the developer or the user, by using make test . The Makefile usesthe Test::Harness module to run the tests, watch the output, and report the results.
Tests live in files in the t directory at the top level of the distribution, and each test file ends in .t.The test harness invokes each file separately, so an exit or die terminates only the testing in thatfile, not the whole testing process.[*]
[*] If we decide that we need to stop all testing, we can "bail out" of the process by printing "bail out" to standard output. This can
be handy if we encounter an error that is going to cause a cascade of errors that we don't want to wait to encounter or sift
through.
The test file communicates with the test harness through simple messages on standard output.[ ]
The three most important messages are the test count, a success message, and a failure message.
[ ] The exact details are documented in the perldoc Test::Harness::TAP, if you're curious. Actually, they're there, even if you're
not curious.
An individual test file comprises one or more tests. These tests are numbered as counting numbers,starting with one. The first thing a test file must announce to the test harness (on STDOUT) is theexpected number of tests, as a string that looks like a Perl range, 1..N. For example, if there are 17tests, the first line of output should be:
1..17
followed by a newline. The test harness uses the upper number to verify that the test file hasn't justterminated early. If the test file is testing optional things and has no testing to do for this particularinvocation, the string 1..0 suffices.
We don't have to worry about printing that ourselves, though, because Test::More does it for us.When we load the module, we tell it the number of tests that we want to run, and the moduleoutputs the test range for us. To get that 1..17, we tell Test::More we're running 17 tests.
use Test::More tests => 17;
After we print the test range, we send to standard output one line per test. That line starts with ok ifthe test passed, or not ok if the test failed. If we wrote that by hand, a test to check that 1 plus 2 is3 might look like this:

print +(1 + 2 = = 3 ? '', 'not '), "ok 1\n";
We could also print the not only if the test failed, with the ok as a separate step. But on someplatforms, this may fail unnecessarily, due to some I/O-related oddity. For maximum portability, printthe entire string of ok N or not ok N in one print step. Don't forget the space after not!
print 'not ' unless 2 * 4 = = 8;print "ok 2\n";
We don't have to do that much work, though, and we don't have to count the tests ourselves. What ifwe wanted to add a test between the two previous tests? We'd have to give that new test the testnumber 2 and change the last test to test number 3. Not only that, we haven't output anythinguseful if the test fails, so we won't know what went wrong. We could do all that, but it's too muchwork! Luckily, we can use the convenience functions from Test::More.

17.5. Writing Tests with Test::More
The Test::More[*] module comes with the standard Perl distribution starting with Perl 5.8, and it'savailable on CPAN if we need to install it on earlier Perl versions. It works all the way back to perl5.6,at least. We rewrite the tests from the previous section (and throw in a couple more) in this testscript, which uses the ok( ) function from Test::More.
[*] The name plays off Test::Simple, which did some of the same stuff but with far fewer convenience functions.
use Test::More tests => 4;
ok(1 + 2 = = 3, '1 + 2 = = 3');ok(2 * 4 = = 8, '2 * 4 = = 8');my $divide = 5 / 3;ok(abs($divide - 1.666667) < 0.001, '5 / 3 = = (approx) 1.666667');my $subtract = -3 + 3;ok(($subtract eq '0' or $subtract eq '-0'), '-3 + 3 = = 0');
The ok( ) function prints "ok" if its first argument is true, and "not ok" otherwise. The optionalsecond argument lets us name the test. After the initial output to indicate success, ok( ) adds ahyphen and then the name of the test. When we find a test that does not work, we can find it by thename that we gave it.
1..4ok 1 - 1 + 2 = = 3ok 2 - 2 * 4 = = 8ok 3 - 5 / 3 = = (approx) 1.666667ok 4 - -3 + 3 = = 0
Now Test::More does all of the hard work. We don't have to think about the output or the testnumbering. But what about that nasty little 4 constant in the first line? That's fine once we're shippingthe code, but while we're testing, retesting (retesting some more), and adding more tests, we don'twant to keep updating that number to keep the test harness from complaining about too many or toofew tests. We change that to no_plan so Test::More can figure it out later.
use Test::More "no_plan"; # during development
ok(1 + 2 = = 3, '1 + 2 = = 3');ok(2 * 4 = = 8, '2 * 4 = = 8');

my $divide = 5 / 3;ok(abs($divide - 1.666667) < 0.001, '5 / 3 = = (approx) 1.666667');my $subtract = -3 + 3;ok(($subtract eq '0' or $subtract eq '-0'), '-3 + 3 = = 0');
The output from Test::More is a bit different, and the test range moves to the end. That's just thenumber of tests that we actually ran, which might not be the number we intended to run:
ok 1 - 1 + 2 = = 3ok 2 - 2 * 4 = = 8ok 3 - 5 / 3 = = (approx) 1.666667ok 4 - -3 + 3 = = 01..4
The test harness knows that if it doesn't see a header, it's expecting a footer. If the number of testsdisagree or there's no footer (and no header), it's a broken result. We can use this duringdevelopment, but we have to remember to put the final number of tests in the script before we shipit as real code.
But wait: there's more (to Test::More). Instead of a simple yes/no, we can ask if two values are thesame. The is( ) function, as we showed earlier, compares its first argument, which is the result wegot, with the second argument, which is what we expected. The optional third argument is the namewe give the test, just as we did with the ok function earlier.
use Test::More 'no_plan';
is(1 + 2, 3, '1 + 2 is 3');is(2 * 4, 8, '2 * 4 is 8');
Note that we've gotten rid of numeric equality and instead asked if "this is that." On a successful test,this doesn't give much advantage, but on a failed test, we get much more interesting output.
use Test::More 'no_plan';
is(1 + 2, 3, '1 + 2 is 3');is(2 * 4, 6, '2 * 4 is 6');
This script yields much more useful output that tells us what is( ) was expecting and what it actuallygot.

ok 1 - 1 + 2 is 3not ok 2 - 2 * 4 is 6# Failed test (1.t at line 4)# got: '8'# expected: '6'1..2# Looks like you failed 1 tests of 2.
Of course, this is an error in the test, but note that the output told us what happened: we got an 8when we were expecting a 6.[*] This is far better than just "something went wrong" as before.There's also a corresponding isnt( ) when we want to compare for inequality rather than equality.
[*] More precisely: we got an '8' but were expecting a '6'. Did you notice that these are strings? The is( ) test checks for string
equality. If we don't want that, we just build an ok( ) test instead, or try cmp_ok, coming up in a moment.
What about that third test, where we allowed the value to vary within some tolerance? Well, we canjust use the cmp_ok routine instead.[*] The first and third arguments are the operands,[ ] and theintervening, second argument is the comparison operator (as a string!).
[*] Although Test::Number::Delta can handle this for us.
[ ] There's no joy for RPN fans.
use Test::More 'no_plan';
my $divide = 5 / 3;cmp_ok(abs($divide - 1.666667), '<' , 0.001, '5 / 3 should be (approx) 1.666667');
If the test we give in the second argument fails between the first and third arguments, then we get adescriptive error message with both of the values and the comparison, rather than a simple pass orfail value as before.
How about that last test? We wanted to see if the result was a 0 or minus 0 (on the rare systemsthat give back a minus 0). We can do that with the like( ) function:
use Test::More 'no_plan';
my $subtract = -3 + 3;like($subtract, qr/^-?0$/, '-3 + 3 = = 0');
Here, we take the string form of the first argument and attempt to match it against the secondargument. The second argument is typically a regular expression object (created here with qr), butwe can also use a simple string, which like( ) will convert to a regular expression object. We caneven write the string form as if it were (almost) a regular expression:

like($subtract, qr/^-?0$/, '-3 + 3 = = 0');
The string form is portable back to older Perls.[ ] If the match succeeds, it's a good test. If not, theoriginal string and the regex are reported along with the test failure. We can change like to unlike ifwe expect the match to fail instead.
[ ] The qr// form wasn't introduced until Perl 5.005.

17.6. Testing Object-Oriented Features
For object-oriented modules , we want to ensure that we get back an object when we call theconstructor. For this, isa_ok( ) and can_ok( ) are good interface tests:
use Test::More 'no_plan';
use Horse;my $trigger = Horse->named('Trigger');isa_ok($trigger, 'Horse');isa_ok($trigger, 'Animal');can_ok($trigger, $_) for qw(eat color);
These tests have default test names, so our test output looks like this:
ok 1 - The object isa Horseok 2 - The object isa Animalok 3 - Horse->can('eat')ok 4 - Horse->can('color')1..4
Here we're testing that it's a horse, but also that it's an animal, and that it can both eat and return acolor.[*] We could further test to ensure that each horse has a unique name:
[*] Well, we're testing to see that it can('eat') and can('color'). We haven't checked whether it really can use those method
calls to do what we want!
use Test::More 'no_plan';
use Horse;
my $trigger = Horse->named('Trigger');isa_ok($trigger, 'Horse');
my $tv_horse = Horse->named('Mr. Ed');isa_ok($tv_horse, 'Horse');
# Did making a second horse affect the name of the first horse?is($trigger->name, 'Trigger', 'Trigger's name is correct');

is($tv_horse->name, 'Mr. Ed', 'Mr. Ed's name is correct');is(Horse->name, 'a generic Horse');
The output of this shows us that the unnamed Horse is not quite what we thought it was.
ok 1 - The object isa Horseok 2 - The object isa Horseok 3 - Trigger's name is correctok 4 - Mr. Ed's name is correctnot ok 5# Failed test (1.t at line 13)# got: 'an unnamed Horse'# expected: 'a generic Horse'1..5# Looks like you failed 1 tests of 5.
Oops! Look at that. We wrote a generic Horse, but the string really is an unnamed Horse. That's anerror in our test, not in the module, so we should correct that test error and retry. Unless, of course,the module's specification actually called for 'a generic Horse.'[ ] You shouldn't be afraid to justwrite the tests and test the module. If you get either one wrong, the other will generally catch it.
[ ] And, we'll find that the tests not only check the code, but they create the specification in code form.
You can even test the use with Test::More when you want to ensure that the module loads correctly:
use Test::More 'no_plan';
BEGIN{ use_ok('Horse') }
my $trigger = Horse->named('Trigger');isa_ok($trigger, 'Horse');# .. other tests as before ..
The difference between doing this as a test and doing it as a simple use is that the test won'tcompletely abort if the use fails, although many other tests are likely to fail as well. It's also countedas one of the tests, so we get an "ok" for free even if all it does is compile properly to help pad oursuccess numbers for the weekly status report.
We put the use_ok inside a BEGIN block so any exported subroutines from the module are properlydeclared for the rest of the program, as recommended by the documentation. For most object-oriented modules, this won't matter because they don't export subroutines.

17.7. A Testing To-Do List
When we write tests before we write the code, the tests will initially fail. We might even add newfeatures that temporarily fail while we are developing. There are several situations where we realize atest is going to fail, but we don't want to pay attention to its failure. The Test::More module realizesthis and allows us to mark a test as TODO, meaning that we expect it to fail and we'll get to it later.
In this example, we know that we want to add the talk( ) method to our Horses class, but wehaven't actually done it. We wrote the test already, since it was part of our specification. We knowthe test is going to fail, and that's okay. Test::More won't really count it as a failure.
use Test::More 'no_plan';
use_ok('Horse');my $tv_horse = Horse->named('Mr. Ed');
TODO: { local $TODO = 'haven't taught Horses to talk yet';
can_ok($tv_horse, 'talk'); # he can talk!}
is($tv_horse->name, 'Mr. Ed', 'I am Mr. Ed!');
The naked block of code we labeled with TODO to mark the section of the tests that we expect to fail.Inside the block, we create a local version of $TODO, which holds as its value the reason we think thetests will fail. Test::More marks the test as a TODO test in the output, and the test harness[*] noticesit and doesn't penalize us for the failure.[ ]
[*] TODO tests require Test::Harness Version 2.0 or later, which comes with Perl 5.8, but in earlier releases, they have to be
installed from CPAN.
[ ] Although, if the test passes when we said it should fail, it warns us that the test unexpectedly passed. That might mean that
the test doesn't fail when it should.
ok 1 - use Horse;not ok 2 - Horse->can('talk') # TODO haven't taught Horses to talk yet# Failed (TODO) test (1.t at line 7)# Horse->can('talk') failedok 3 - I am Mr. Ed!1..3

17.8. Skipping Tests
In some cases, we want to skip tests. For instance, some of our features may only work for aparticular version of Perl, a particular operating system, or only when optional modules are available.To skip tests, we do much the same thing we did for the TODO tests, but Test::More does somethingmuch different.
In this example, we again use a naked block to create a section of code to skip, and we label it withSKIP. While testing, Test::More will not execute these tests, unlike the TODO block where it ran themanyway. At the start of the block, we call the skip( ) function to tell it why we want to skip the testsand how many tests we want to skip.
In this example, we check if the Mac::Speech module is installed before we try to test thesay_it_aloud( ) method. If it isn't, the eval( ) block returns false and we execute the skip( )function.
SKIP: { skip 'Mac::Speech is not available', 1 unless eval { require 'Mac::Speech' };
ok( $tv_horse->say_it_aloud( 'I am Mr. Ed' );}
When Test::More skips tests, it outputs special ok messages to keep the test numbering right and totell the test harness what happened. Later, the test harness can report how many tests we skipped.
Don't skip tests because they aren't working right. Use the TODO block for that. We use SKIP when wewant to make tests optional in certain circumstances.

17.9. More Complex Tests (Multiple Test Scripts)
Initially, the h2xs program[*] gave us a single testing file, t/1.t.[ ] We can stick all our tests intothis file, but it generally makes more sense to break the tests into logical groups in separate files.
[*] If you're using one of the other module creation tools from Chapter 16, you probably got other test files, and ones that are more
complex.
[ ] As of Perl 5.8, that is. Earlier versions create a test.pl file, which is still run from a test harness during make test, but the
output isn't captured in the same way.
The easiest way for us to add additional tests is to create t/2.t. That's itjust bump the 1 to a 2. Wedon't need to change anything in the Makefile.PL or in the test harness: the file is noticed andexecuted automatically.
We can keep adding files until we get to 9.t, but once we add 10.t, we might notice that it getsexecuted between 1.t and 2.t. Why? Because the tests are always executed in sorted order. This isa good thing because it lets us ensure that the most fundamental tests are executed before the moreexotic tests simply by controlling the names.
Many people choose to rename the files to reflect a specific ordering and purpose by using names like01-core.t, 02-basic.t, 03-advanced.t, 04-saving.t, and so on. The first two digits control the testingorder, while the rest of the name gives a hint about the general area of testing.
As we saw earlier in Chapter 16, different module creation tools do different things and create one ormore default tests. By default, Test::Harness runs those tests in the same order we just described.
Besides that, brian wrote Test::Manifest to get around this sort of naming scheme. Instead of lettingthe filenames dictate the order of tests, the file t/test_manifest does. Only the tests in that file run,and they run in the order we have them in the file. We name our test files after what they do ratherthan what order they should run. Later, when we want to insert new test files anywhere in the testingorder, we just change the order in t/test_manifest.

17.10. Exercise
You can find the answer to this exercise in "Answer for Chapter 17" in the Appendix.
17.10.1. Exercise [60 min]
Write a module distribution, starting from the tests first.
Your goal is to create a module My::List::Util that exports two routines on request: sum( ) andshuffle( ). The sum( ) routine takes a list of values and returns the numeric sum. The shuffle( )routine takes a list of values and randomly shuffles the ordering, returning the list.
Start with sum( ). Write the tests, and then add the code. You'll know you're done when the testspass. Now include tests for shuffle, and then add the implementation for shuffle. You might peek inthe perlfaq to find a shuffle( ) implementation.
Be sure to update the documentation and MANIFEST file as you go along.
If you can pair up with someone on this exercise, even better. One person writes the test for sum( )and the implementation code for shuffle( ), and the other does the opposite. Swap the t/* files,and see if you can locate any errors!
Chapter 18. Advanced TestingThe Test::More module provides some simple and general functions, but other Test::* modulesprovide more specific tests for particular problem domains so that we don't have to write much codeto do what we need. If we use it once, we'll probably use it again, anyway.
In this chapter, we give you a taste of some of the more popular test modules. Unless we sayotherwise, these modules are not part of the Perl standard distribution (unlike Test::More) and you'llneed to install them yourself. You might feel a bit cheated by this chapter since we're going to say"See the module documentation" quite a bit, but we're gently nudging you out into the Perl world. Formuch more detail, you can also check out Perl Testing: A Developer's Notebook, which covers thesubject further.

18.1. Testing Large Strings
We showed in Chapter 17 that when a test fails, Test::More can show us what we expected and whatwe actually got.
#!/usr/bin/perluse Test::More 'no_plan';is( "Hello Perl", "Hello perl" );
When I run this program, Test::More shows me what went wrong.
$ perl test.plnot ok 1# Failed test (test.pl at line 5)# got: 'Hello Perl'# expected: 'Hello perl'1..1# Looks like you failed 1 test of 1.
What if that string is really long? We don't want to see the whole string, which might be hundreds orthousands of characters long. We just want to see where they start to be different.
#!/usr/bin/perl
use Test::More 'no_plan';use Test::LongString;
is_string( "The quick brown fox jumped over the lazy dog\n" x 10,
"The quick brown fox jumped over the lazy dog\n" x 9 . "The quick brown fox jumped over the lazy camel", );
The error output doesn't have to show us the whole string to tell us where things went wrong. Itshows us the relevant parts along with the string lengths. Although our example is a bit contrived,imagine doing this with a web page, configuration file, or some other huge chunk of data that we

don't want cluttering our testing output.
not ok 1# Failed test in long_string.pl at line 6.# got: ..." the lazy dog\x{0a}"...# length: 450# expected: ..." the lazy camel"...# length: 451# strings begin to differ at char 4471..1# Looks like you failed 1 test of 1.

18.2. Testing Files
The code to test things like file existence and file size is simple, but the more code we write, and themore parts each code statement has, the more likely we are not only to mess up, but tomiscommunicate our intent to the maintenance programmer.
We could test for file existence very easily. We use the -e file test operator in the ok( ) function fromTest::More. That works just fine.
use Test::More 'no_plan';
ok( -e 'minnow.db' );
Well, it works just fine if that's what we meant to test, but nothing in that code tells anyone what wemeant to do. What if we wanted to ensure the file did not exist before we started testing? The codefor that is a difference of one character.
use Test::More 'no_plan';
ok( ! -e 'minnow.db' );
We could add a code comment, but as you probably already know, most code comments seem toassume that you already know what's supposed to happen. Does this comment let you know which ofthe two situations we want? Should we pass the test if the file is there?
use Test::More 'no_plan';
# test if the file is thereok( ! -e 'minnow.db' );
The Test::File module, written by brian, encapsulates intent in the name of the function. If we wantthe test to pass when the file is there, we use file_exists_ok.
use Test::More 'no_plan';use Test::File;

file_exists_ok( 'minnow.db' );
If we want the test to pass when the file is not there, we use file_not_exists_ok.
use Test::More 'no_plan';use Test::File;
file_not_exists_ok( 'minnow.db' );
That's a simple example, but the module has many other functions that follow the same namingscheme: the first part of the name tells you what the function checks (file_exists) and the last parttells you what happens if that's true (_ok). It's a lot harder to miscommunicate the intent when wehave to type it out.
use Test::More 'no_plan';use Test::File;
my $file = 'minnow.db';
file_exists_ok( $file );file_not_empty_ok( $file );file_readable_ok( $file );file_min_size_ok( $file, 500 );file_mode_is( $file, 0775 );
So, not only do the explicit function names communicate intent, but they also contribute to parallelstructure in the code.

18.3. Testing STDOUT or STDERR
One advantage to using the ok( ) functions (and friends) is that they don't write to STDOUT directly,but to a filehandle secretly duplicated from STDOUT when our test script begins. If we don't changeSTDOUT in our program, of course, this is a moot point. But let's say we wanted to test a routine thatwrites something to STDOUT, such as making sure a horse eats properly:
use Test::More 'no_plan';use_ok 'Horse';isa_ok(my $trigger = Horse->named('Trigger'), 'Horse');
open STDOUT, ">test.out" or die "Could not redirect STDOUT! $!";$trigger->eat("hay");close STDOUT;
open T, "test.out" or die "Could not read from test.out! $!";my @contents = <T>;close T;is(join("", @contents), "Trigger eats hay.\n", "Trigger ate properly");
END { unlink "test.out" } # clean up after the horses
Note that just before we start testing the eat method, we (re)open STDOUT to our temporary outputfile. The output from this method ends up in the test.out file. We bring the contents of that file inand give it to the is( ) function. Even though we've closed STDOUT, the is( ) function can still accessthe original STDOUT, and thus the test harness sees the proper ok or not ok messages.
If you create temporary files like this, please note that your current directory is the same as the testscript (even if you're running make test from the parent directory). Also, pick fairly safe cross-platform names if you want people to be able to use and test your module portably.
There is a better way to do this, though. The Test::Output module can handle this for us. Thismodule gives us several functions that automatically take care of all of the details.
#!/usr/bin/perluse strict;
use Test::More "noplan";use Test::Output;
sub print_hello { print STDOUT "Welcome Aboard!\n" }sub print_error { print STDERR "There's a hole in the ship!\n" }
stdout_is( \&print_hello, "Welcome Aboard\n" );
stderr_like( \&print_error, qr/ship/ );
All of the functions take a code reference as their first argument, but that's not a problem becausewe told you all about those in Chapter 7. If we don't have a subroutine to test, we wrap the code wewant to test in a subroutine and use that.
sub test_this {... }
stdout_is( \&test_this, ... );
If our code is short enough, we might want to skip the step where we define a named subroutine anduse an anonymous one.
stdout_is( sub { print "Welcome Aboard" }, "Welcome Aboard" );
We can even use an inline block of code, like we did with grep and map. As with those two listoperators, notice that we don't have a comma after the inline code block.
stdout_is { print "Welcome Aboard" } "Welcome Aboard";
Besides Test::Output, we can do something similar with Test::Warn, which specifically tests warningoutput. Its interface uses the inline block form exclusively.
#!/usr/bin/perl
use Test::More "noplan";use Test::Warn;
sub add_letters { "Skipper" + "Gilligan" }
warning_like { add_letters( ) }, qr/non-numeric/;
We all strive to make our code warning-free, and we can test for that too. Perl warnings can changefrom version to version, and we want to know when the new warnings pop up, or if Perl will emit

warnings on one of our customer's computers. The Test::NoWarnings module is a bit different fromthe ones we've already shown. It automatically adds a test just by loading the module, and we justhave to ensure we add the hidden test to the count we give to Test::More.
#!/usr/bin/perluse warnings;
use Test::More tests => 1;use Test::NoWarnings;
my( $n, $m );# let's use an uninitialized valuemy $sum = $n + $m;
When we try to compute the sum, we use two variables to which we haven't given values. Thattriggers the annoying "use of uninitialized value" warning (ensure you have warnings turned on!). Wedon't want those sorts of things filling up our logfiles, now, do we? Test::NoWarnings tells us whenthat happens so we can fix it.
1..1not ok 1 - no warnings# Failed test 'no warnings'# in /usr/local/lib/perl5/5.8.7/Test/NoWarnings.pm at line 45.# There were 2 warning(s)# Previous test 0 ''# Use of uninitialized value in addition (+) at nowarnings.pl line 6.## ----------# Previous test 0 ''# Use of uninitialized value in addition (+) at nowarnings.pl line 6.## Looks like you failed 1 test of 1 run.

18.4. Using Mock Objects
Sometimes we don't want to ramp up the entire system to test only parts of it. We can be fairlycertain, or at least assume, that other parts of the system work. We don't need to open expensivedatabase connections or instantiate objects with large memory footprints to test every part of thecode.
The Test::MockObject module creates "pretend" objects. We give it information about the part of theobject's interface we want to use, and it pretends to be that part of the interface. Basically, thepretend method has to return the right thing when we call it, and it doesn't have to do anyprocessing.
Instead of creating a real Minnow object, which would mean turning on all sorts of things on the boat,we can create a mock object for it. Once we create the mock object and store it in $Minnow, we tell ithow to respond to the methods we need to call. In this case, we tell the mock object to return truefor engines_on and to return false for moored_to_dock. We're not really testing the object for the ship,but we want to test our quartermaster object, which takes a ship as an argument. Rather than testthe quartermaster with a real ship, we use our mock one.
#!/usr/bin/perl
use Test::More 'no_plan';use Test::MockObject;
# my $Minnow = Real::Object::Class->new( ... );my $Minnow = Test::MockObject->new( );
$Minnow->set_true( 'engines_on' );$Minnow->set_true( 'has_maps' );$Minnow->set_false( 'moored_to_dock' );
ok( $Minnow->engines_on, "Engines are on" );ok( ! $Minnow->moored_to_dock, "Not moored to the dock" );
my $Quartermaster = Island::Plotting->new( ship => $Minnow, # ... )
ok( $Quartermaster->has_maps, "We can find the maps" );
We can create more complex methods that do anything we like. Suppose, instead of methods thatreturn true or false, we need one that returns a list. Perhaps we need to pretend to connect to a

database and retrieve some records. As we're developing, we might try this several times and we'drather not connect and disconnect from the real database every time we try to track down a bug.
In this example, we mock the database method list_names, which we know will return us threenames. Since we already know this, and we're actually testing something else (which we don't showyou in this contrived example), it doesn't bother us to create the mock method that stands in place ofthe real database.
#!/usr/bin/perl
use Test::More 'no_plan';use Test::MockObject;
my $db = Test::MockObject->new( );
# $db = DBI->connect( ... );$db->mock( list_names => sub { qw( Gilligan Skipper Professor ) } );
my @names = $db->list_names;
is( scalar @names, 3, 'Got the right number of results' );is( $names[0], 'Gilligan', 'The first result is Gilligan' );
print "The names are @names\n";

18.5. Testing POD
We can even test things that aren't code. Documentation is just as important as code, since otherpeople can't use our perfect, lovely code unless they know what to do with it. As we mentioned inChapter 16, the Perl way to document code is by embedding POD formatted text in the code. Toolssuch as perldoc can extract the POD and display it in a variety of formats.
What if we mess up the POD format so that formatters can't parse it as we intended? To solve thisproblem, brian wrote Test::Pod to go through his modules looking for POD errors.[*] For most things,we can take the entire test code from the Test::Pod documentation.
[*] It's now maintained by Andy Lester and is so popular that it's become part of Module::Starter and the CPAN Testers
Service's (CPANTS) Kwalitee rating.
use Test::More;eval "use Test::Pod 1.00";plan skip_all => "Test::Pod 1.00 required for testing POD" if $@;all_pod_files_ok( );
We don't want to require everyone to install the module though, so the suggested test code firstchecks if we can load the module by using the string form of eval that we told you about in Chapter2. If that fails, eval sets the error variable $@, and once that is set, we tell Test::More to skip the restof the tests.
If we've installed the module, however, we'll get past the skip_all check and run all_pod_files_ok.The module takes care of finding all the POD files, which it then checks for format. If we want tochange which files it checks, we can do that too. Without arguments, all_pod_files_ok TRies to findfiles in the usual places. With arguments, it only tests the files we tell it to test.
use Test::More;eval "use Test::Pod 1.00";plan skip_all => "Test::Pod 1.00 required for testing POD" if $@;all_pod_files_ok( 'lib/Maps.pm' );
Testing the POD format isn't all we can do, though. What if we want to ensure that we documentedall of our methods? It's Test::Pod::Coverage to the rescue. It goes through our embeddeddocumentation and tells us which subroutine names don't have corresponding entries in the

documentation. The example use looks almost the same as that for Test::Pod.[*]
[*] That's because Andy Lester wrote both examples.
use Test::More;eval "use Test::Pod::Coverage";plan skip_all => "Test::Pod::Coverage required for testing pod coverage" if $@;plan tests => 1;pod_coverage_ok( "Island::Plotting::Maps");
Both of these modules can do more than what we've shown you, so check their documentation to getthe full story. If you use Module::Starter that we talked about in Chapter 16, you'll probably alreadyhave these tests in your distribution.
18.6. Coverage Testing
We can also test our testing. In a perfect world, we'd test our program with every possible input andenvironment so that our program follows every particular path. That's certainly what the Professorwould do. In reality, we tend to be more like Gilligan, though.
We won't go too deeply into the theory and practice of coverage tests, but there are many thingsthat we can test. Statement coverage tells us how many of the statements in our code we executeduring a run. Branch coverage tells us how many of the decision paths we actually follow. Pathcoverage, expression coverage, and other sorts of coverage exist too. The best starting point is theDevel::Coverage::Tutorial documentation.
The module comes with a program named cover, which handles most of the things that we need todo. For any particular program we want to measure, we simply load the Devel::Cover module whenwe run it.
$ perl -MDevel::Cover yourprog args$ cover
After we finish running the program, Devel::Cover leaves behind a file with all of the information itcollected. Running the cover command turns that information into a set of HTML pages. When welook at the coverage.html page, we see a summary of our project along with its coverage statistics.The links on that page drill down into the individual files to see their coverage statistics too.
If we want to test a distribution, we just do this at the same time that we run our test suite. First, weget rid of any previous coverage results by passing cover the -delete option. After that, we have torun our make test and get Devel::Cover to do its magic at the same time. We can set the testingharness switches with the HARNESS_PERL_SWITCHES environment variable, in which we put the -MDevel::Cover we used on the command line previously. Now every time the test harness wants toinvoke Perl (which is for every test file), it also loads Devel::Cover. As that script runs, it adds to thecoverage database (which is why we deleted the database before we started). Finally, once we'vefinished going through the tests, we call cover again to turn the results into something we can read.
$ cover -delete$ HARNESS_PERL_SWITCHES=-MDevel::Cover make test$ cover
Everything shows up in a directory named cover_db in the current working directory. The coveragedatabase shows up in cover_db, and the top-level page shows up in cover_db/coverage.html.

18.7. Writing Your Own Test::* Modules
You don't have to wait for other people to write cool test modules. If you have a particular testingsituation that you'd like to wrap up in a test function, you can write your own Test::* module usingthe Test::Builder module, which handles all of the tricky integration with Test::Harness andTest::More. If you look behind the scenes of many of the Test::* modules, you'll find Test::Builder.
Again, the advantage to test functions is that they wrap reusable code in a function name. To testsomething, you use the function name rather than typing out a bunch of separate statements. It'seasy for people to understand what you meant to test based on a single function name, but that getsharder as you write out several statements to do the same thing.
In Chapter 4, we wrote some code to check that the castaways had all of their required items. Let'sturn that into a Test::* module. Here's the check_required_items subroutine as we left it:
sub check_required_items { my $who = shift; my $items = shift;
my @required = qw(preserver sunscreen water_bottle jacket); my @missing = ( );
for my $item (@required) { unless (grep $item eq $_, @$items) { # not found in list? print "$who is missing $item.\n"; push @missing, $item; } }
if (@missing) { print "Adding @missing to @$items for $who.\n"; push @$items, @missing; }}
We need to turn this into a Test::* module that simply checks the items (so it doesn't add themissing ones) and then outputs the right thing. The basics for any new testing module are the same.We call our new module Test::Minnow::RequiredItems and start with this stub:
package Test::Minnow::RequiredItems;use strict;
use base qw(Exporter);use vars qw(@EXPORT $VERSION);
use Test::Builder;
my $Test = Test::Builder->new( );
$VERSION = '0.10';@EXPORT = qw(check_required_items_ok);
sub check_required_items_ok { # .... }
1;
We start by declaring the package, then turning on strictures because we want to be goodprogrammers (even if this three-hour tour is ultimately doomed, it won't be from one of our softwareerrors). We pull in the Exporter module and add required_items_ok to @EXPORT, since we want thatfunction to show in the calling namespace, just as we discussed in Chapter 15. We set $VERSION justlike we discussed in Chapter 16. The only stuff we haven't shown you is Test::Builder. At thebeginning of our test module, we create a new Test::Builder object that we assign to the lexicalvariable $Test, which is scoped to the entire file.[*]
[*] It's almost like a global variable, except it doesn't live in a package and can't be seen outside its file.
The $Test object is going to handle all of the testing details for us. We remove all of the output partsfrom check_required_items, and we take out the parts to modify the input list. Once we go throughthe other logic, the only thing we need to do at the end is tell the test harness if the test is ok ornot_ok.
sub check_required_items { my $who = shift; my $items = shift;
my @required = qw(preserver sunscreen water_bottle jacket); my @missing = ( );
for my $item (@required) { unless (grep $item eq $_, @$items) { # not found in list? push @missing, $item; } }
if (@missing) { ... } else { ...

}}
Now we have to add the parts to turn our function into a testing one. We call methods on $Test to tellthe test harness what happened. In each case, the last evaluated expression should be a call to$Test->ok( ), so that becomes the return value of the entire function.[*] If we discovered missingitems, we want the test to fail, so we pass a false value to $Test->ok( ), but before we do that weuse $Test->diag( ) with a message to tell us what went wrong.
[*] We often don't use the return value since most people call most test functions in a void context, but we might as well return
something that makes sense.
sub check_required_items_ok { my $who = shift; my $items = shift;
my @required = qw(preserver sunscreen water_bottle jacket); my @missing = ( );
for my $item (@required) { unless (grep $item eq $_, @$items) { # not found in list? push @missing, $item; } }
if (@missing) { $Test->diag( "$who needs @missing.\n" ); $Test->ok(0); } else { $Test->ok(1); }}
That's it. Although there are more things that we can do, there isn't more that we have to do. Oncewe save our Test::Minnow::RequiredItems, we can use it immediately in a test script. We still useTest::More to set the plan.[*]
[*] We could do that from our module, but most likely the test script will use other modules too. Only one of them can set the plan,
so we let Test::More handle that.
use Test::More 'no_plan';use Test::Minnow::RequiredItems;
my @gilligan = ( Gilligan => [ qw(red_shirt hat lucky_socks water_bottle) ] );
check_required_items_ok( @gilligan );
Since Gilligan doesn't have all of his required items, the test fails. It prints the not_ok along with thediagnostic message.
not ok 11..1# Gilligan needs preserver sunscreen jacket.# Failed test (/Users/Ginger/Desktop/package_test.pl at line 49)# Looks like you failed 1 test of 1.
And, now that we've created the Test::Minnow::RequiredItems module, how we do we test the test?We can use the Test::Builder::Tester module. You'll have to investigate that one yourself, though.
18.8. Exercises
You can find the answers to these exercises in "Answers for Chapter 18" in the Appendix.
18.8.1. Exercise 1 [20 min]
Document the My::List::Util module you created in the exercise for Chapter 17. Add a test for thePOD documentation using Test::Pod.
18.8.2. Exercise 2 [20 min]
Write your own test module, Test::My::List::Util, that has a single test function, sum_ok, whichtakes two arguments: the actual sum and the expected sum. Print a diagnostic message if the two donot match.
my $sum = sum( 2, 2 );sum_ok( $sum, 4 );

Chapter 19. Contributing to CPANBesides allowing others in your organization to receive the benefits of these wonderful modules anddistributions you've created, you can contribute to the Perl community at large. The mechanism forsharing your work is called the Comprehensive Perl Archive Network (CPAN), which is 10 years old aswe write this and has about 9,000 different modules.

19.1. The Comprehensive Perl Archive Network
We covered the basic CPAN history in Chapter 3, but that was from a user's perspective. Now wewant to contribute to CPAN, so we have to look at it from an author's perspective.
It's no accident that CPAN is so useful. The ethos of the project has been that anyone should be ableto contribute and that it should be easy for people to share their work. Because of that, it has morethan 9,000 modules (as we write this) and is the model that other languages wish they couldadopt.[*]
[*] However, whenever the discussion comes up in other languages, the first thing they do is try to set restrictions, which CPAN
purposedly avoided.
Remember that CPAN is just a big storage device. That's its magic. Everything else that revolvesaround it, such as CPAN Search (http://search.cpan.org), CPAN.pm, and CPANPLUS.pm, merely usewhat's already there, not create what it is.

19.2. Getting Prepared
Since CPAN is just a big file-storage site, you just need to upload your code. To contribute to CPAN,you need two things:
Something to contribute, ideally already in the shape of a module
A Perl Authors Upload Server (PAUSE) ID
The PAUSE ID is your passport to contributing to CPAN. You get a PAUSE ID by simply asking. Thedetails are described at http://www.cpan.org/modules/04pause.html. You fill out a web form (linkedfrom there) with a few basic details, such as your name, home web page, email address, and yourpreferred PAUSE ID. At the moment, PAUSE IDs must be between four and nine characters. (Somelegacy PAUSE IDs are only three characters long.)[*] Once you have your PAUSE ID, you need tothink globally about your contribution. Because your module will probably be used in programs alongwith other modules from other authors, you need to ensure that the package names for modulesdon't collide with existing modules or confuse the people who browse CPAN. Luckily for you, there is aloose collection of volunteers on the Perl Modules list ([email protected]) who've been working withCPAN and modules for quite a while and can help you sort through most problems.
[*] Originally, the PAUSE IDs had to be five characters or less, until Randal wanted his MERLYN ID, and the appropriate
accommodation was made.
Before you send your first email to the PAUSE admins, it's probably a good idea to do a few thingsfirst:
Look at the current module list. Get an idea for how things are named. Better yet, are youreinventing a subset of something that already exists, or can you contribute your work as apatch to another module?
Visit the list archives (pointers can be found at http://lists.perl.org) to see what the typicalconversations look like. That might help you to avoid shock at your response or better phraseyour initial request.
Above all, get it in your head that this whole process is run by volunteers who aren't perfect andare doing this in their spare time for the good of the Perl community. Have patience. Havetolerance.

19.3. Preparing Your Distribution
Once you've gotten your module name settled and you've tested your module with its new name (ifneeded), you should ensure your distribution is ready for prime time. While this is similar to releasinga distribution in-house, as described in Chapter 16, you might want to ensure a few additional thingsabout your distribution:
Create a README file. This file is automatically extracted to a separate file on the CPAN archivesand lets someone view or download just the key facts about your distribution before fetching orunpacking the rest.
Make and test your Makefile.PL or Build.PL. Modules without a Makefile.PL are accepted viaPAUSE to go into the CPAN but usually get a grimace from those of us who download your stuff,because we might have to figure out how to build and install your distribution.
Bring your MANIFEST up to date. If you add files that should be part of the distribution, theyalso need to be in the MANIFEST. One quick trick is to clean things up as you would want themin the distribution, and then invoke make manifest, which updates the MANIFEST file to beexactly what you are holding at the moment.[*]
[*] If make manifest adds too many files, you can create a MANIFEST.SKIP file that has a set of Perl regular expressions
that tells make manifest which files to ignore. Once you have that file, make manifest will remove from MANIFEST files
that match those patterns.
Have a logical distribution version number. The Makefile.PL file should specify either a VERSIONvalue or a VERSION_FROM value. If you have a single module (such as a .pm file) in yourdistribution, it's usually best to grab the version number from there with VERSION_FROM. If youhave multiple files, either designate one of them as the one you'll always update just before anew release or use the VERSION within the Makefile.PL instead. Also keep in mind that yourversion number must always increase numerically for newer versions of your distribution. (AfterVersion 1.9, the next release can't be Version 1.10, because even if you're calling it "versionone point ten," it's still merely 1.1 to the tools that compare version numbers.)
Have tests! Reread Chapter 17 if you must. There's nothing that builds more confidence in aninstalled distribution than at least a few dozen tests that are run during the installation phase. Ifyou're not adding a test for each bug that you find, how do you know the bug is fixed?
Invoke make disttest , which builds a distribution archive of everything in MANIFEST, unpacksthe archive into a separate directory, and then runs the tests on your distribution. If thatdoesn't work for you, you can't expect it to work for anyone else who downloads yourdistribution from the CPAN.

19.4. Uploading Your Distribution
Once you have your distribution ready to share, visit the PAUSE upload page athttps://pause.perl.org/pause/authenquery?ACTION=add_uri. You'll have to log in using your PAUSEID and PAUSE password, and then you'll be given several options to upload your distribution.
On that page, you can upload your file directly through the HTTP file upload or tell PAUSE where elseon the Web it can fetch the distribution. Besides that, you can FTP the distribution toftp://pause.perl.org.
No matter which way you upload the file, it should appear in the list of uploaded files at the bottom ofthat page. You might have to wait a bit for PAUSE to fetch remote files, but they usually show uppretty quickly. If you don't see your PAUSE ID next to the distribution name, you can claim it.
Once PAUSE has the file and knows who it belongs to, it indexes it. You should get email from thePAUSE indexer telling you what happened. After that, your distribution is on its way to CPAN proper.Remember that the N in CPAN is "Network," so your distribution may take hours or days to reach allof the CPAN mirrors. It shouldn't take longer than a couple of days, though.
If you have a problem or think something didn't happen the way it should have, you can ask thePAUSE administrators about it by sending mail to [email protected].

19.5. Announcing the Module
How will users learn about your module? Your module gets noticed automatically in many places,including:
The "Recent modules" page of http://search.cpan.org
The "new modules" section of http://use.perl.org
A daily announcement in the "Perl news" mailing list
An IRC bot on a few of the Perl-related IRC channels announces uploads as soon as theybecome available
An update or an uninstalled module in one of the CPAN shells, CPAN.pm, or CPANPLUS.pm
For greater visibility, you can also prepare a short notice to be posted to the Usenetcomp.lang.perl.announce newsgroup. Just post the notice, and within a day or two, your newsposting will be whisking around to news servers all over the globe.

19.6. Testing on Multiple Platforms
The CPAN Testers (http://testers.cpan.org) automatically test almost all modules uploaded to CPAN.Volunteers around the world automatically download and test each distribution on whatever setupthey have. Among them, they test your module on just about every platform, operating system, andPerl version that matters (and many that you probably don't pay attention to). They send email tothe module authors telling them what happened, and they automatically update the Testersdatabase. You can look at the results for any module through the Testers web site or on CPAN Search(http://search.cpan.org).
Often, testers can help you figure out problems for platforms to which you do not have access.

19.7. Consider Writing an Article or Giving a Talk
Many of the short talks at Perl conferences involve the author of a distribution talking about his ownwork. After all, who is better qualified to help others use your module than you? The more interestedother people are in your module, the better it gets as they send in their bug reports, featurerequests, and patches.
If the idea of proposing a conference talk intimidates you a bit, or you don't want to wait that long,look to your local Perl user group . They're generally looking for speakers (usually for the meetingcoming up in the next week or two), and the group size is usually small enough to be a nice casualsetting. You can generally find a Perl user group near you by looking on the Perl Mongers web site athttp://www.pm.org. If you can't find one, start one!

19.8. Exercise
You can find the answer to this exercise in "Answer for Chapter 19" in the Appendix.
19.8.1. Exercise [Infinite min]
Write a module to solve the halting problem with respect to Perl source code.[*] Your module shouldexport a function, will_halt, which takes a string and returns true if the string is the source code fora no-input Perl program that does not infinitely loop, and false otherwise.
[*] http://en.wikipedia.org/wiki/Halting_problem

Appendix A. Answers to ExercisesThis appendix contains the answers to the exercises presented throughout the book.

A.1. Answers for Chapter 2
A.1.1. Exercise 1
Here's one way to do it. The command-line arguments show up in the special array @ARGV, so we usethat for our input list. The file test operator -s works on $_ by default, and that's just the currentelement that grep tests. All of the files with a byte -size smaller than 1,000 bytes end up in@smaller_than_1000. That array becomes the input for the map, which takes each element andreturns it with spaces tacked on the front and a newline on the end.
#!/usr/bin/perl
my @smaller_than_1000 = grep { -s < 1000 } @ARGV;
print map { " $_\n" } @smaller_than_1000;
Typically we'll do that without the intermediate array, though.
print map { " $_\n" } grep { -s < 1000 } @ARGV;
A.1.2. Exercise 2
We chose to use our home directory as the hardcoded directory. When we call chdir without anargument, it goes to our home directory (so this is one of the few places where Perl doesn't use $_ asthe default).
After that, an infinite while loop keeps our code running, at least until we can't satisfy the conditionto last that breaks us out of the loop. Look at the condition carefully: we don't just test for truth.What would happen if we wanted to find all the files with a 0 in them? We look for defined values witha nonzero length, so undef (end of input) and the empty string (simply hitting enter) stop the loop.
Once we have our regular expression, we do that same thing we did in the previous answer. Thistime we use the result of glob as the input list and a pattern match inside the grep. We wrap an eval{ } around the pattern match in case the pattern doesn't compile (for instance, it has an unmatchedparenthesis or square bracket).
#!/usr/bin/perl

chdir; # go to our home directory
while( 1 ) { print "Please enter a regular expression> "; chomp( my $regex = <STDIN> ); last unless( defined $regex && length $regex );
print map { " $_\n" } grep { eval{ /$regex/ } } glob( ".* *" ); }
A.2. Answers for Chapter 3
A.2.1. Exercise 1
The trick in this exercise is to let the modules do all of the hard work. It's a good thing we've shownyou how to use modules! The Cwd module (cwd is an acronym for "current working directory")automatically imports the getcwd function. We don't have to worry about how it does its magic, butwe can be confident that it does it correctly for most major platforms.
Once we have the current path in $cwd, we can use that as the first argument to the catfile methodfrom the File::Spec function. The second argument comes from the input list to our map and showsup in $_.
#!/usr/bin/perl
use Cwd;use File::Spec;
my $cwd = getcwd;
print map { " " . File::Spec->catfile( $cwd, $_ ) . "\n" } glob( ".* *" );
A.2.2. Exercise 2
We can't give you much help installing the module, although if you run into problems, you mightwant to ask brian about them since he wrote the module, as well as the cpan program you can use toinstall it.
Once we have the module, we just have to follow the example in the documentation. Our programtakes the ISBN from the command line and creates the new ISBN object, which we store in $isbn.Once we have the object, we simply follow the examples in the documentation.
#!/usr/bin/perl
use Business::ISBN;
my $isbn = Business::ISBN->new( $ARGV[0] );
print "ISBN is " . $isbn->as_string . "\n";

print "Country code: " . $isbn->country_code . "\n";print "Publisher code: " . $isbn->publisher_code . "\n";

A.3. Answers for Chapter 4
A.3.1. Exercise 1
They're all referring to the same thing, except for the second one, ${$ginger[2]}[1]. That one is thesame as $ginger[2][1], whose base is the array @ginger, rather than the scalar $ginger.
A.3.2. Exercise 2
First, we construct the hash structure:
my @gilligan = qw(red_shirt hat lucky_socks water_bottle);my @professor = qw(sunscreen water_bottle slide_rule batteries radio);my @skipper = qw(blue_shirt hat jacket preserver sunscreen);my %all = ( "Gilligan" => \@gilligan, "Skipper" => \@skipper, "Professor" => \@professor,);
Then we pass it to the first subroutine:
check_items_for_all(\%all);
In the subroutine, the first parameter is a hashref, so we dereference it to get the keys and thecorresponding values:
sub check_items_for_all { my $all = shift; for my $person (sort keys %$all) { check_required_items($person, $all->{$person}); }}

From there, we call the original subroutine:
sub check_required_items { my $who = shift; my $items = shift; my @required = qw(preserver sunscreen water_bottle jacket); my @missing = ( ); for my $item (@required) { unless (grep $item eq $_, @$items) { # not found in list? print "$who is missing $item.\n"; push @missing, $item; } } if (@missing) { print "Adding @missing to @$items for $who.\n"; push @$items, @missing; }}

A.4. Answers for Chapter 5
A.4.1. Exercise 1
The curly braces of the anonymous hash constructor make a reference to a hash. That's a scalar (asare all references), so it's not suitable to use alone as the value of a hash. Perhaps this code's authorintended to assign to scalar variables (like $passenger_1 and $passenger_2) instead of hashes. Butyou can fix the problem simply by changing the two pairs of curly braces to parentheses.
If you tried running this, Perl may have given you a helpful diagnostic message as a warning. If youdidn't get the warning, perhaps you didn't have warnings turned on, either with the -w switch or withthe use warnings pragma. Even if you don't usually use Perl's warnings, you should enable themduring debugging. (How long would it take you to debug this without Perl's warnings to help you?How long would it take to enable Perl's warnings? 'Nuff said.)
What if you got the warning message but couldn't tell what it meant? That's what the perldiagmanpage is for. Warning texts need to be concise because they're compiled into the perl binary (theprogram that runs your Perl code). But perldiag should list all the messages you should ever get fromPerl, along with a longer explanation of what each one means, why it's a problem, and how to fix it.
If you want to be ultimately lazy, you can add use diagnostics; at the beginning of your program,and any error message will look itself up in the documentation and display the entire detailedmessage. Don't leave this in production code, however, unless you like burning a lot of CPU cyclesevery time your program starts, whether or not an error occurs.
A.4.2. Exercise 2
You will be keeping count of how much data has been sent to all machines, so at the start, set thevariable $all to a name that will stand in for all of them. It should be a name that will never be usedfor any real machine, of course. Storing it in a variable is convenient for writing the program andmakes it easy to change later.
my $all = "**all machines**";
The input loop is nearly the same as given in the chapter, but it skips comment lines. Also, it keeps asecond running total, filed under $all.
my %total_bytes;while (<>) { next if /^#/;

my ($source, $destination, $bytes) = split; $total_bytes{$source}{$destination} += $bytes; $total_bytes{$source}{$all} += $bytes;}
Next, make a sorted list. This holds the names of the source machines in descending order of totaltransferred bytes. This list is used for the outer for loop. (Rather than using a temporary array,@sources, you might have put the sort directly into the parens of the for loop.)
my @sources = sort { $total_bytes{$b}{$all} <=> $total_bytes{$a}{$all} } keys %total_bytes;
for my $source (@sources) { my @destinations = sort { $total_bytes{$source}{$b} <=> $total_bytes{$source}{$a} } keys %{ $total_bytes{$source} }; print "$source: $total_bytes{$source}{$all} total bytes sent\n"; for my $destination (@destinations) { next if $destination eq $all; print " $source => $destination:", " $total_bytes{$source}{$destination} bytes\n"; } print "\n";}
Inside the loop, print out the total number of bytes sent from that source machine, and then make asorted list of the destination files (similar to the list in @sources). As you step through that list, usenext to skip over the dummy $all item. Because that item will be at the head of the sorted list, whywasn't shift used to discard it, since that would avoid checking repeatedly for $all inside the innerloop? The answer is in this footnote.[*] You can simplify this program, perhaps. The subexpression$total_bytes{$source} is used many times in the large output for loop (and twice in the input loopas well). That can be replaced by a simple scalar, initialized at the top of the loop:
[*] Even though the dummy item will sort to the head of the sorted list, it won't necessarily be the first item in the list. If a machine
sent data to just one other, that destination machine's total will be equal to the source machine's total output, so that list could sort
in either order.
for my $source (@sources) { my $tb = $total_bytes{$source}; my @destinations = sort { $tb->{$b} <=> $tb->{$a} } keys %$tb; print "$source: $tb->{$all} total bytes sent\n"; for my $destination (@destinations) { next if $destination eq $all; print " $source => $destination: $tb->{$destination} bytes\n"; }

print "\n";}
This makes the code shorter and (likely) a bit faster as well. Give yourself extra credit if you thoughtto do this. Also give yourself extra credit if you thought that it might be too confusing and decidednot to make the change.

A.5. Answers for Chapter 6
A.5.1. Exercise 1
This is similar to what you saw in Chapter 5, but now it uses Storable.
use Storable;
my $all = "**all machines**";my $data_file = "total_bytes.data";
my %total_bytes;if (-e $data_file) { my $data = retrieve $data_file; %total_bytes = %$data;}
while (<>) { next if /^#/; my ($source, $destination, $bytes) = split;
$total_bytes{$source}{$destination} += $bytes; $total_bytes{$source}{$all} += $bytes;}
store \%total_bytes, $data_file;
### remainder of program is unchanged
Near the top, put the filename into a variable. You can then retrieve the data but only if the datafilealready exists.
After reading the data, use Storable again to write it back out to the same disk file.
If you chose to write the hash's data to a file the hard way, by writing your own code and your ownfile format, you're working too hard. More to the point, unless you're extraordinarily talented orspend way too long on this exercise, you almost certainly have bugs in your serialization routines, orat least flaws in your file format.
A.5.2. Exercise 2

There should probably be some checks to ensure that Storable was successful. It will catch someerrors (and die), but it will simply return undef for some. See the documentation for Storable. (Ofcourse, if you checked the return values from store and retrieve, you should give yourself extracredit on the previous exercise.)
The program should save the old datafile (if any) under a backup filename so that it's easy to revertthe latest additions. In fact, it could even keep several backups, such as the last week's worth.
It might also be nice to be able to print the output without having any new input data. As it's written,this can be done by giving an empty file (such as /dev/null) as the input. However, there should bean easier way. The output functionality could be separated entirely from the updating, in fact.

A.6. Answer for Chapter 7
A.6.1. Exercise
sub gather_mtime_between { my($begin, $end) = @_; my @files; my $gatherer = sub { my $timestamp = (stat $_)[9]; unless (defined $timestamp) { warn "Can't stat $File::Find::name: $!, skipping\n"; return; } push @files, $File::Find::name if $timestamp >= $begin and $timestamp <= $end; }; my $fetcher = sub { @files }; ($gatherer, $fetcher);}
This code is pretty straightforward. The main challenge is getting the item names correct. Whenusing stat inside the callback, the filename is $_, but when returning the filename (or reporting it tothe user), the name is $File::Find::name.
If the stat fails for some reason, the timestamp will be undef. (That can happen, for example, if itfinds a dangling symbolic link.) In that case, the callback simply warns the user and returns early. Ifyou omit that check, you can get warnings of an undefined value during the comparison with $beginand $end.
When you run the completed program with this subroutine, your output should show only filemodification dates on the previous Monday (unless you changed the code to use a different day ofthe week, of course).
A.7. Answers for Chapter 8
A.7.1. Exercise 1
In this exercise, we have to use three different output methods: to a file, which you're alreadyfamiliar with; to a scalar (and you'll need Perl 5.8 for this); or to both at the same time. The trick isto store the output channels in the same variable that you'll use for the print statement. When thefilehandle is a variable, we can put anything we like in it and decide what to put in it at runtime.
#!/usr/bin/perluse strict;
use IO::Tee;
my $fh;my $scalar;
print "Enter type of output [Scalar/File/Tee]> ";my $type = <STDIN>;
if( $type =~ /^s/i ) { open $fh, ">", \$scalar; }elsif( $type =~ /^f/i ) { open $fh, ">", "$0.out"; }elsif( $type =~ /^t/i ) { open my $file_fh, ">", "$0.out"; open my $scalar_fh, ">", \$scalar; $fh = IO::Tee->new( $file_fh, $scalar_fh ); }
my $date = localtime;my $day_of_week = (localtime)[6];
print $fh <<"HERE";This is run $$The date is $dateThe day of the week is $day_of_weekHERE
print STDOUT <<"HERE" if $type =~ m/^[st]/i;Scalar contains:

$scalarHERE
In this program, we prompt the user for the type of output, and we want her to type either "scalar","file", or "tee". Once we read the input, we detect which one she typed by matching on the firstcharacter (using a case-insensitive match for more flexibility).
If the user chose "scalar", we open $fh to a scalar reference. If she chose "file", we open $fh to a file,as you know from before. We name the file after the program name, stored in $0, and append .out toit. If the user chose "tee", we create filehandles for a file and a scalar, then combine both of those inan IO::Tee object that we store in $fh. No matter which method the user chose, the output channels,whether sole or multiple, end up in the same variable.
From there it's just a matter of programming, and it doesn't matter much what we actually print. Forthis exercise, we get the date string by using localtime in scalar context, then get the day of theweek with a literal list slice.
In the string we print to $fh, we include the process ID (contained in the special variable $$), so wecan tell the difference between separate runs of our program, and then the date and the day of theweek.
Finally, if we choose to send the output to a scalar (either alone or with a file), we print the scalarvalue to STDOUT to ensure the right thing ended up there.
A.7.2. Exercise 2
use IO::File;my %output_handles;while (<>) { unless (/^(\S+):/) { warn "ignoring the line with missing name: $_"; next; } my $name = lc $1; my $handle = $output_handles{$name} ||= IO::File->open(">$name.info") || die "Cannot create $name.info: $!"; print $handle $_;}
At the beginning of the while loop, use a pattern to extract the person's name from the data line,issuing a warning if that's not found.
Once you have the name, force it to lowercase so that an entry for "Maryann" will get filed in thesame place as one for "MaryAnn." This is also handy for naming the files, as the next statementshows.

The first time through the loop, the filehandle must be created. Let's see how to do that. The ||operator has a higher precedence than the assignment, so it is evaluated first; the program will die ifthe file can't be created. The ||= operator assigns the filehandle to the hash, and the = operatorpasses it to $handle as well.
The next time you have the same name in $name, the ||= operator kicks in. Remember that$gilligan ||= $anything is effectively like $gilligan = $gilligan || $anything. If the variable onthe left is a false value (such as undef), it's replaced by the value on the right, but if it's true (such asa filehandle), the value on the right won't even be evaluated. Thus, since the hash already has avalue for that person's name, the hash's value is used and assigned directly to $handle withouthaving to (re)create the file.
It wasn't necessary to code the castaways' names into this program, because they will be read in asdata. This is good because any additional castaway won't require having to rewrite the program. Ifsomeone's name is accidentally misspelled, however, it puts some of their data into a new file underthe wrong name.
A.7.3. Exercise 3
Here's one way to do it. First, we go through the arguments in @ARGV to find out which ones don'trepresent directories, then print error messages for each of those.
After that, we go through @ARGV again to find the elements that are valid directories. We take the listthat comes out of that grep and send it into map, where we turn each string into an IO::Dir object(ignoring error handling for the moment). The file output list ends up in @dir_hs, which we gothrough with the foreach loop and send to print_contents.
There is nothing fancy about print_contents, though. It simply takes its first argument and stores itin $dh, which it then uses to walk through the directory.
#!/usr/bin/perl -wuse strict;
use IO::Dir;
my @not_dirs = grep { ! -d } @ARGV;foreach my $not_dir ( @not_dirs ) { print "$not_dir is not a directory!\n"; }
my @dirs = grep { -d } @ARGV;
my @dir_hs = map { IO::Dir->new( $_ ) } grep { -d } @ARGV;
foreach my $dh ( @dir_hs ) { print_contents( $dh ) };
sub print_contents { my $dh = shift;

while( my $file = $dh->read ) { next if( $file eq '.' or $file eq '..'); print "$file\n"; } };

A.8. Answers for Chapter 9
A.8.1. Exercise 1
my @sorted = map $_->[0], sort { $a->[1] <=> $b->[1] } map [$_, -s $_], glob "/bin/*";
Using the -s operator to determine the file's size is an expensive operation; by caching its value, youcan save some time. How much? Let's see in the next exercise's answer.
A.8.2. Exercise 2
use Benchmark qw(timethese);
my @files = glob "/bin/*";
timethese( -2, { Ordinary => q{ my @results = sort { -s $a <=> -s $b } @files; }, Schwartzian => q{ my @sorted = map $_->[0], sort { $a->[1] <=> $b->[1] } map [$_, -s $_], @files; },});
On the 33-element /bin on his laptop, Randal was seeing 260 iterations per second of the Ordinaryimplementation and roughly 500 per second of the Schwartzian implementation, so writing thecomplex code saved about half of the execution time. On a 74-element /etc, the SchwartzianTransform was nearly three times as fast. In general, the more items sorted, the more expensive thecomputed function, and the better you can expect the Schwartzian Transform to perform. That

doesn't even count the burden on the monkeyer, we mean the operating system.
In the previous edition of this book, we had a slight design error in this code that made theSchwartzian transform seem a lot slower. brian noticed this one day while he was teaching thisexercise, then sat down to go over it in way too much detail. You can read the lengthy analysis onPerl Monks : http://www.perlmonks.com/?node_id=393128.
A.8.3. Exercise 3
my @dictionary_sorted = map $_->[0], sort { $a->[1] cmp $b->[1] } map { my $string = $_; $string =~ tr/A-Z/a-z/; $string =~ tr/a-z//cd; [ $_, $string ]; } @input_list;
Inside the second map, which executes first, make a copy of $_. (If you don't, you'll mangle the data.)
A.8.4. Exercise 4
sub data_for_path { my $path = shift; if (-f $path or -l $path) { return undef; } if (-d $path) { my %directory; opendir PATH, $path or die "Cannot opendir $path: $!"; my @names = readdir PATH; closedir PATH; for my $name (@names) { next if $name eq "." or $name eq ".."; $directory{$name} = data_for_path("$path/$name"); } return \%directory; } warn "$path is neither a file nor a directory\n"; return undef;}
sub dump_data_for_path { my $path = shift;
my $data = shift; my $prefix = shift || ""; print "$prefix$path"; if (not defined $data) { # plain file print "\n"; return; } my %directory = %$data; if (%directory) { print ", with contents of:\n"; for (sort keys %directory) { dump_data_for_path($_, $directory{$_}, "$prefix "); } } else { print ", an empty directory\n"; }}dump_data_for_path(".", data_for_path("."));
By adding a third (prefix) parameter to the dumping subroutine, you can ask it to indent its output.By default, the prefix is empty, of course.
When the subroutine calls itself, it adds two spaces to the end of the prefix. Why the end and not thebeginning? Because it's comprised of spaces, either end will work. By using trailing spaces, you cancall the subroutine like this:
dump_data_for_path(".", data_for_path("."), "> ");
This invocation quotes the entire output by prefixing each line with the given string. You can (in somehypothetical future version of this program) use such quoting to denote NFS-mounted directories orother special items.

A.9. Answers for Chapter 10
A.9.1. Exercise 1
Here's one way to do it. First, start with the package directive and use strict:
package Oogaboogoo::date;use strict;
Then define the constant arrays to hold the mappings for day-of-week and month names:
my @day = qw(ark dip wap sen pop sep kir);my @mon = qw(diz pod bod rod sip wax lin sen kun fiz nap dep);
Next, define the subroutine for day-of-week number to name. Note that this subroutine will beaccessible as Ooogaboogoo::date::day:
sub day { my $num = shift @_; die "$num is not a valid day number" unless $num >= 0 and $num <= 6; $day[$num];}
Similarly, you have the subroutine for the month-of-year number to name:
sub mon { my $num = shift @_; die "$num is not a valid month number" unless $num >= 0 and $num <= 11; $mon[$num];}
Finally, the mandatory true value at the end of the package:
1;
Name this file date.pm within a directory of Oogaboogoo in one of the directories given in your @INCvariable, such as the current directory.
A.9.2. Exercise 2
Here's one way to do it. Pull in the .pm file from a place in your @INC path:
use strict;require 'Oogaboogoo/date.pm';
Then get the information for the current time:
my($sec, $min, $hour, $mday, $mon, $year, $wday) = localtime;
Then use the newly defined subroutines for the conversions:
my $day_name = Oogaboogoo::date::day($wday);my $mon_name = Oogaboogoo::date::mon($mon);
The year number is offset by 1900 for historical purposes, so you need to fix that:
$year += 1900;
Finally, it's time for the output:
print "Today is $day_name, $mon_name $mday, $year.\n";

A.10. Answers for Chapter 11
A.10.1. Exercise 1
Here's one way to do it. First define the Animal class with a single method:
use strict;{ package Animal; sub speak { my $class = shift; print "a $class goes ", $class->sound, "!\n"; }}
Now define each subclass with a specific sound:
{ package Cow; our @ISA = qw(Animal); sub sound { "moooo" }}{ package Horse; our @ISA = qw(Animal); sub sound { "neigh" }}{ package Sheep; our @ISA = qw(Animal); sub sound { "baaaah" }}
The Mouse package is slightly different because of the extra quietness:
{ package Mouse; our @ISA = qw(Animal); sub sound { "squeak" } sub speak { my $class = shift; $class->SUPER::speak; print "[but you can barely hear it!]\n";

}}
Now, enter the interactive part of the program:
my @barnyard = ( );{ print "enter an animal (empty to finish): "; chomp(my $animal = <STDIN>); $animal = ucfirst lc $animal; # canonicalize last unless $animal =~ /^(Cow|Horse|Sheep|Mouse)$/; push @barnyard, $animal; redo;}
foreach my $beast (@barnyard) { $beast->speak;}
This code uses a simple check, via a pattern match, to ensure that the user doesn't enter Alpaca oranother unavailable animal, because doing so will crash the program. In Chapter 14, you'll learnabout the isa method, which lets you check more simply whether something is an available animal,even allowing for the possibility that it is an animal that was added to the program after the checkwas written.
A.10.2. Exercise 2
Here's one way to do it. First, create the base class of LivingCreature with a single speak method:
use strict;{ package LivingCreature; sub speak { my $class = shift; if (@_) { # something to say print "a $class goes '@_'\n"; } else { print "a $class goes ", $class->sound, "\n"; } }}
A person is a living creature, so define the derived class here:

{ package Person; our @ISA = qw(LivingCreature); sub sound { "hmmmm" }}
The Animal class comes next, making appropriate sounds but unable to talk (except to Dr. Dolittle):
{ package Animal; our @ISA = qw(LivingCreature); sub sound { die "all Animals should define a sound" } sub speak { my $class = shift; die "animals can't talk!" if @_; $class->SUPER::speak; }}{ package Cow; our @ISA = qw(Animal); sub sound { "moooo" }}{ package Horse; our @ISA = qw(Animal); sub sound { "neigh" }}{ package Sheep; our @ISA = qw(Animal); sub sound { "baaaah" }}{ package Mouse; our @ISA = qw(Animal); sub sound { "squeak" } sub speak { my $class = shift; $class->SUPER::speak; print "[but you can barely hear it!]\n"; }}
Finally, have the person speak:
Person->speak; # just hmmsPerson->speak("Hello, world!");
Notice that the main speak routine has now moved into the LivingCreature class, which means youdon't need to write it again to use it in Person. In Animal, though, you need to check that to ensurean Animal won't try to speak before calling SUPER::speak.
Although it's not the way the assignment was written, you can get a similar result if you choose tomake Person a subclass of Animal. (In that case, LivingCreature would presumably be needed as aparent class for an eventual Plant class.) Of course, since an Animal can't speak, how can a Person?The answer is that Person::speak would have to handle its parameters, if any, before or after (orinstead of) calling SUPER::speak.
Which would be the better way to implement this? It all depends upon what classes you'll need in thefuture and how you'll use them. If you expect to add features to Animal that would be needed forPerson, it makes sense for Person to inherit from Animal. If the two are nearly completely distinct,and nearly anything that a Person has in common with an Animal is common to all LivingCreatures,it's probably better to avoid the extra inheritance step. The ability to design a suitable inheritancestructure is a crucial talent for any OOP programmer.
In fact, you may find that after developing the code one way, you'll want to "refactor" the code adifferent way. This is common with OOP. However, it's very important to have enough testing in placeto ensure that you don't break things while you're moving them around.

A.11. Answer for Chapter 12
A.11.1. Exercise
First, start the Animal package:
use strict;{ package Animal; use Carp qw(croak);
And now for the constructor:
## constructorssub named { ref(my $class = shift) and croak "class name needed"; my $name = shift; my $self = { Name => $name, Color => $class->default_color }; bless $self, $class;}
Now, for virtual methods: the methods that should be overridden in a subclass. Perl doesn't requirevirtual methods to be declared in the base class, but they're nice as a documentation item.
## backstops (should be overridden)sub default_color { "brown" }sub sound { croak "subclass must define a sound" }
Next comes the methods that work with either a class or an instance:
## class/instance methodssub speak { my $either = shift; print $either->name, " goes ", $either->sound, "\n";}sub name {

my $either = shift; ref $either ? $either->{Name} : "an unnamed $either";}sub color { my $either = shift; ref $either ? $either->{Color} : $either->default_color;}
Finally, the methods that work only for the particular instance:
## instance-only methodssub set_name { ref(my $self = shift) or croak "instance variable needed"; $self->{Name} = shift;}sub set_color { ref(my $self = shift) or croak "instance variable needed"; $self->{Color} = shift;}}
Now that you have your abstract base class, define some concrete classes that can have instances:
{ package Horse; our @ISA = qw(Animal); sub sound { "neigh" }}{ package Sheep; our @ISA = qw(Animal); sub color { "white" } # override the default color sub sound { "baaaah" } # no Silence of the Lambs}
Finally, a few lines of code to test your classes:
my $tv_horse = Horse->named("Mr. Ed");$tv_horse->set_name("Mister Ed");$tv_horse->set_color("grey");print $tv_horse->name, " is ", $tv_horse->color, "\n";

print Sheep->name, " colored ", Sheep->color, " goes ", Sheep->sound, "\n";
A.12. Answer for Chapter 13
A.12.1. Exercise
First, start the class:
{ package RaceHorse; our @ISA = qw(Horse);
Next, use a simple dbmopen to associate %STANDINGS with permanent storage:
dbmopen (our %STANDINGS, "standings", 0666) or die "Cannot access standings dbm: $!";
When a new RaceHorse is named, either pull the existing standings from the database or invent zerosfor everything:
sub named { # class method my $self = shift->SUPER::named(@_); my $name = $self->name; my @standings = split ' ', $STANDINGS{$name} || "0 0 0 0"; @$self{qw(wins places shows losses)} = @standings; $self;}
When the RaceHorse is destroyed, the standings are updated:
sub DESTROY { # instance method, automatically invoked my $self = shift; $STANDINGS{$self->name} = "@$self{qw(wins places shows losses)}"; $self->SUPER::DESTROY;}

Finally, the instance methods are defined:
## instance methods:sub won { shift->{wins}++; }sub placed { shift->{places}++; }sub showed { shift->{shows}++; }sub lost { shift->{losses}++; }sub standings { my $self = shift; join ", ", map "$self->{$_} $_", qw(wins places shows losses);}
A.13. Answers for Chapter 14
A.13.1. Exercise 1
There a couple of ways to tackle this problem. In our solution, we created a MyDate package in thesame file as the script. The naked block defines the scope of the package MyDate statement. Later, inour script, we can't use the module because Perl won't find a file for it. We'll have to remember to callthe import method to get the symbols into our main namespace.
To make the AUTOLOAD subroutine work only for the right subroutines, we defined %Allowed_methods tohold the names of the methods that will work. Their values are their offsets in the list we get backfrom localtime. That almost solves it, but localtime uses 0-based numbers for the month and year.In the @Offsets array, we store the number to add to the corresponding entry in the localtime list. Itseems like a lot of work now since only two values have offsets, but doing it this way eliminates twospecial cases.
We need a new method (or some constructor) to give us an object. In this example, it doesn't reallymatter what the object actually looks like. We just use an empty, anonymous hash blessed into thecurrent package (that's the first thing in the argument list, so it's $_[0]). We also know that we'llneed a DESTROY method, since Perl will automatically look for it when it tries to clean up the object. Ifwe don't have it, our AUTOLOAD will complain about an unknown method when it tries to handleDESTROY on its own (comment out the DESTROY to see what happens).
Inside the AUTOLOAD, we store the method name in $method so we can change it. We want to strip offthe package information and get just the method name. That's everything after the last ::, so we usethe substitution operator to get rid of everything up to that point. Once we have the method name,we look for its key in %Allowed_methods. If it's not there, we print an error with carp. TRy calling anunknown method. For which line does Perl report the error?
If we find the method name in %Allowed_methods, we get the value, which is the position of the valuein the localtime list. We store that in $slice_index and use it to get the value from localtime as wellas the offset for that value. We add those two values together and return the result.
That sounds like a lot of work, but how much work would we have to do to add new methods for thehour and minute? We simply add those names to %Allowed_methods. Everything else already works.
#!/usr/bin/perl -wuse strict;
{package MyDate;use vars qw($AUTOLOAD);
use Carp;

my %Allowed_methods = qw( date 3 month 4 year 5 );my @Offsets = qw(0 0 0 0 1 1900 0 0 0);
sub new { bless { }, $_[0] }sub DESTROY { }
sub AUTOLOAD { my $method = $AUTOLOAD; $method =~ s/.*:://;
unless( exists $Allowed_methods{ $method } ) { carp "Unknown method: $AUTOLOAD"; return; }
my $slice_index = $Allowed_methods{ $method };
return (localtime)[$slice_index] + $Offsets[$slice_index]; }}
MyDate->import; # we don't use itmy $date = MyDate->new( );
print "The date is " . $date->date . "\n";print "The month is " . $date->month . "\n";print "The year is " . $date->year . "\n";
A.13.2. Exercise 2
Our script looks the same as the previous answer with the addition of the UNIVERSAL::debug routine.At the end of our script, we call the debug method on our $date object. It works without changing theMyDate module.
MyDate->import; # we don't use itmy $date = MyDate->new( );
sub UNIVERSAL::debug { my $self = shift; print '[' . localtime . '] ' . join '|', @_ }
print "The date is " . $date->date . "\n";print "The month is " . $date->month . "\n";print "The year is " . $date->year . "\n";
$date->debug( "I'm all done" );

How did that get past the AUTOLOAD? Remember that Perl searches through all of @ISA and UNIVERSALbefore it starts looking in any AUTOLOAD method. So, Perl finds UNIVERSAL::debug before it has to useour AUTOLOAD magic.

A.14. Answers for Chapter 15
A.14.1. Exercise 1
The module Oogaboogoo/date.pm looks like this:
package Oogaboogoo::date;use strict;use Exporter;our @ISA = qw(Exporter);our @EXPORT = qw(day mon);
my @day = qw(ark dip wap sen pop sep kir);my @mon = qw(diz pod bod rod sip wax lin sen kun fiz nap dep);
sub day { my $num = shift @_; die "$num is not a valid day number" unless $num >= 0 and $num <= 6; $day[$num];}
sub mon { my $num = shift @_; die "$num is not a valid month number" unless $num >= 0 and $num <= 11; $mon[$num];}
1;
The main program now looks like this:
use strict;use Oogaboogoo::date qw(day mon);
my($sec, $min, $hour, $mday, $mon, $year, $wday) = localtime;my $day_name = day($wday);my $mon_name = mon($mon);$year += 1900;print "Today is $day_name, $mon_name $mday, $year.\n";

A.14.2. Exercise 2
Most of this answer is the same as the previous answer. We just need to add the parts for the exporttag all.
our @EXPORT = qw(day mon);our %EXPORT_TAGS = ( all => \@EXPORT );
Everything that we put in %EXPORT_TAGS has to also be in either @EXPORT or @EXPORT_OK. For the alltag, we use a reference to @EXPORT directly. If we don't like that, we can make a fresh copy so thetwo do not reference each other.
our @EXPORT = qw(day mon);our %EXPORT_TAGS = ( all => [ @EXPORT ] );
Modify the program from the previous exercise to use the import tag by prefacing it with a colon inthe import list.
The main program now starts off like this:
use strict;use Oogaboogoo::date qw(:all);

A.15. Answer for Chapter 16
A.15.1. Exercise
We don't have code to show you: it's just the stuff in Chapter 12. Lift that code and put it into adistribution. Most of the work is just typing.
There are a few different approaches, though. Once you have the distribution built with your favoritetool, you can split up the classes into separate module files. You can have an Animal.pm, Horse.pm,and so on. Put all the files in the same place as the original .pm that the module tool created. Youalso need to change the Makefile.PL or Build.PL to tell it about the new module files. Just follow theexample of what is already there. Finally, make sure all the right files show up in MANIFEST.
Once you have all of the code in place, run the Makefile.PL, which you'll need to do every time youchange that file. When you change the module files, you'll need to run make again too, although thathappens when you run make test or make dist.
When you're ready, run make dist. You should find a new archive file in the current directory. Youcan also call make zipdist if you want a ZIP archive. Move that archive to another directory andunpack it. When you run Makefile.PL, you shouldn't get any errors or warnings if you did everythingright. If you get a warning, fix that (it's probably a missing file, if anything) and try again.

A.16. Answer for Chapter 17
A.16.1. Exercise
Let's start with the test file. We write this first, and as we write the code (which we can't run until wewrite the module), we get an idea of the interface that we want.
In the BEGIN block, we first test if we can use My::List::Util. This will obviously fail, since wehaven't written the module yet. We'll worry about that later.
Next, we check if we've defined the sum subroutine. Once we implement the My::List::Util minimalmodule, the use_ok will pass but this will fail. That's Test Driven Development. You define what youwant, ensure that the test fails when the infrastructure is missing, then make it pass. Getting tests topass can be easy if we don't care if they fail when they should.
After we check for the sum routine, we test a series of sums, using different numbers of argumentsand different values. We don't have to identify every special case at this point (we can always addtests later), but we want to ensure that we test several different ways to call the subroutine. Weeven throw in a test where we pass it a non-number and a number, then a test where we pass it twonon-numbers.
We do something different for shuffle. We ensure the subroutine is defined, then define $array as astarting point, but immediately copy it to $shuffled so we don't disturb the original. Before we'vewritten the code, we've decided to pass an array reference, and that will allow our routine to affectthe data that we pass to it (rather than creating a copy).
To test this, we do something really simple. We compare the original array to the shuffled one anduse cmp_ok to test that at least two positions are different. That wouldn't be a very good shuffle, butwe're going to punt to you for the rest of the tests.
BEGIN{ use_ok( 'My::List::Util' ) }
use Test::More 'no_plan';
# # # # # # sumok( defined &sum, 'The sum( ) routine exists');is( sum( 2, 2 ), 4, '2 + 2 = 4' );is( sum( 2, 2, 3 ), 7, '2 + 2 + 3 = 7' );is( sum( ), 0, 'null sum is 0' );is( sum( -1 ), -1, '-1 = -1' );is( sum( -1, 1 ), 0, '-1 + 1 = 0' );is( sum( 'Ginger', 5 ), 5, 'A string + 5 = 5' );is( sum( qw(Ginger Mary-Ann) ), 0, 'Two strings give 0' );

# # # # # # shuffleok( defined &shuffle, "The shuffle( ) routine exists");my $array = [qw( a b c d e f )];
my $shuffled = $array;shuffle( $shuffled );
my $same_count = 0;
foreach my $index ( 0 .. $#$array ) { $same_count++ if $shuffle->[$index] eq $array->[$index]; }
cmp_ok( $same_count, '<', $#$array - 2, 'At least two positions are different');
Now that we have the tests, we write the code. As we write the code, we run the tests. At first, mostof the tests will fail, but as we add more code (and possibly debug the code that's already there),more and more tests pass. Here's our finished module:
package My::List::Util;use strict;
use base qw(Exporter);use vars qw(@EXPORT $VERSION);
use Exporter;
$VERSION = '0.10';@EXPORT = qw(sum shuffle);
sub shuffle { # Fisher-Yates shuffle from perlfaq4 my $deck = shift; # $deck is a reference to an array my $i = @$deck; while ($i--) { my $j = int rand ($i+1); @$deck[$i,$j] = @$deck[$j,$i]; } }
sub sum { my @array = @_;
my $sum = 0;
foreach my $element ( @array ) { $sum += $element; }
A.17. Answers for Chapter 18
A.17.1. Exercise 1
Since you're starting with your distribution from the last chapter, we don't have much code to showyou. To add a POD test, create a t/pod.t file (or whatever you want to call it). In there, put the codeyou lift for Test::Pod:
use Test::More;eval "use Test::Pod 1.00";plan skip_all => "Test::Pod 1.00 required for testing POD" if $@;all_pod_files_ok( );
This code is clever: it only runs tests if the user has installed Test::Pod, and doesn't cause anyproblems if she hasn't.
If you are especially motivated, you can do the same thing with Test::Pod::Coverage. Create at/pod_coverage.t file and lift the code directly from the module documentation.
Depending on which module creation tool you used, you might already have these files, too.
A.17.2. Exercise 2
You could create a new distribution for your test module, but you don't have to. You can include itwith the distribution that you already made. You just have to put the module file in the right placeand ensure that Makefile.PL or Build.PL knows about it.
We'll just show you the code, though. This is a long way to go to test $n = = $m, but we wanted tomake it as uncomplicated as possible so you could focus on the Test::Builder part. You can lift mostof the code directly from the example in the chapter and then write the sum_ok function.
package Test::My::List::Util;use strict;
use base qw(Exporter);use vars qw(@EXPORT $VERSION);
use Exporter;use Test::Builder;

my $Test = Test::Builder->new( );
$VERSION = '0.10';@EXPORT = qw(sum_ok);
sub sum_ok { my( $actual, $expected ) = @_;
if( $actual = = $expected ) { $Test->ok( 1 ) } else { $Test->diag( "The sum is not right\n", "\tGot: $actual\n", "\tExpected: $expected\n" );
$Test->ok( 0 ) } }
1;
A.18. Answer for Chapter 19
A.18.1. Exercise
Were you able to solve the halting problem? We didn't really expect you to solve this problem since,in 1936, Alan Turing proved you couldn't create a general solution. You can read about the haltingproblem at Wikipedia: http://en.wikipedia.org/wiki/Halting_problem.
There's not much we can show you as an answer to an exercise about distributions. You know abouttesting now, so as long as your tests pass, you know you're doing the right thing (or the tests don'twork!).
We're kicking you out into the real world now. We don't have anything left to tell you in this book. Goback and read the footnotes now. Good luck!

About the Author
Randal L. Schwartz is a renowned expert on the Perl programming language. In addition to writingLearning Perl and the first two editions of Programming Perl, he has been the Perl columnist for UNIXReview, Web Techniques, Sys Admin, and Linux Magazine. He has contributed to a dozen Perl booksand over 200 magazine articles. Randal runs a Perl training and consulting company(StonehengeConsulting Services) and is highlysought after as a speaker for his combination of technical skill,comedic timing, and crowd rapport. He's also a pretty good Karaoke singer.
brian d foy has been an instructor for Stonehenge Consulting Services since 1998. He founded thefirst Perl user group, the New York Perl Mongers, as well as the Perl advocacynonprofit Perl Mongers,Inc., which helped form more than 200 Perl user groups across the globe. He maintains the perlfaqportions of the core Perl documentation, several modules on CPAN, and some standalone scripts.He's the publisher of The Perl Review and is a frequent speaker at conferences. His writings on Perlappear on The O'Reilly Network and use.perl.org, and in The Perl Journal, Dr. Dobbs Journal, and ThePerl Review.
Tom Phoenix has been working in the field of education since 1982. After more than 13 years ofdissections, explosions, work with interesting animals, and high-voltage sparks during his work at ascience museum, he started teaching Perl for Stonehenge Consulting Services, where he's workedsince 1996. As it is traditional for Perl people to have at least three other unlikely interests, Tomenjoys amateur cryptography, Esperanto, and Squeak (Smalltalk). According to rumor, he has neverturned down an opportunityto playa game of Zendo. He lives in Portland, Oregon, with his wife andcats.

Colophon
The animal on the cover of Intermediate Perl is an alpaca (Lama pacos). The alpaca is a member ofthe South American camelid family, which is closely related to the more familiar Asian and Africancamels. South American camelids also include the llama, the vicuna, and the guanaco. The alpaca issmaller (36 inches at the withers) than a llama but larger than its other relations. Ninety-ninepercent of the world's approximately three million alpacas are found in Peru, Bolivia, and Chile.
The evolution of the wild vicuna into the domestic alpaca began between six and seven thousandyears ago. The specialized breeding of alpacas for fiber production wasn't developed until around 500B.C. The Incas developed the alpaca into the two distinct fleece types, the Huacaya (pronounced wa-kai-ya) and the less common Suri. The main difference between the two types of alpacas is the fiberthey produce. The Huacaya fleece has crimp or wave; the Suri fleece is silky and lustrous and has nocrimp. Alpacas are prized for their fleece, which is as soft as cashmere and warmer, lighter, andstronger than wool. Alpaca fleece comes in more colors than that of any, COLOPHON.26810 Page 1Thursday, February 23, 2006 4:17 PM other fiber-producing animal (approximately22 basic colorswith manyvariations and blends).
The lifespan of the alpaca is about 20 years. Gestation is 11.5 months, producing one offspring, orcria, every14 to 15 months. The alpaca is a modified ruminant, not onlyeating less grass than mostother animals but converting it to energyveryefficiently. Unlike true ruminants, they have threecompartments in their stomach, not four, and can thus survive in areas unsuitable to otherdomesticated animals. Alpacas are gentle and don't bite or butt. Even if theydid, without incisors,horns, hoofs, or claws, they would do little damage.
The cover image is a 19th-centuryengraving from Animate Creations, Volume II. The cover font isAdobe ITC Garamond. The text font is Linotype Birka; the heading font is Adobe Myriad Condensed;and the code font is LucasFont's TheSans Mono Condensed.

Index
[SYMBOL] [A] [B] [C] [D] [E] [F] [G] [H] [I] [K] [L] [M] [N] [O] [P] [R] [S] [T] [U] [V] [W] [X] [Y]

Index
[SYMBOL] [A] [B] [C] [D] [E] [F] [G] [H] [I] [K] [L] [M] [N] [O] [P] [R] [S] [T] [U] [V] [W] [X] [Y]
& (ampersand), in subroutine references
@_ (at sign, underscore) parameter list, passing to methods
\ (backslash)
as directory separator
as reference operator 2nd 3rd
{} (curly braces)
anonymous hash constructors using
dereferencing arrays
dereferencing hashes
dereferencing subroutines
enclosing package directive
when not needed 2nd
$_ (dollar sign, underscore) variable
+ (plus sign)
preceding anonymous hash constructor
preceding terms
?: (question mark, colon) operator
: (semicolon), preceding blocks
<=> (spaceship operator)
[] (square brackets), anonymous array constructors using
_ _END_ _ marker

Index
[SYMBOL] [A] [B] [C] [D] [E] [F] [G] [H] [I] [K] [L] [M] [N] [O] [P] [R] [S] [T] [U] [V] [W] [X] [Y]
abstract methods
all_pod_files_ok function
ampersand (&), in subroutine references
anonymous arrays 2nd
anonymous hash constructors
anonymous scalar variables
anonymous subroutines
arrays
anonymous arrays 2nd
dereferencing 2nd 3rd
memory used by, recycling
modifying
multiple, performing same task on
nested
references in elements of
references to
arrows
dereferencing using 2nd
invocation for methods 2nd 3rd 4th
AUTOLOAD method
autovivification
debugging and
for hash references
Index
[SYMBOL] [A] [B] [C] [D] [E] [F] [G] [H] [I] [K] [L] [M] [N] [O] [P] [R] [S] [T] [U] [V] [W] [X] [Y]
backslash (\)
as directory separator
as reference operator 2nd 3rd
bareword filehandles
base case for recursive algorithm
BEGIN blocks
changing order of execution
static local variables in
use operator interpreted as
bless operator
blocks
BEGIN blocks
changing order of execution
static local variables in
use operator interpreted as
parsed as anonymous hash constructors
books
Learning Perl (Schwartz)
Perl Best Practices (Conway)
Perl Testing: A Developer's Notebook (Langworth)
brackets ([]), anonymous array constructors using
Build.PL file 2nd

Index
[SYMBOL] [A] [B] [C] [D] [E] [F] [G] [H] [I] [K] [L] [M] [N] [O] [P] [R] [S] [T] [U] [V] [W] [X] [Y]
callbacks
can method
can_ok function
CGI module
Changes file
class variables
class-only methods
Class::MethodMaker module
classes
as first parameter of method invocation 2nd
constructors for
destructors for 2nd
invoking methods with
iterating over
superclasses 2nd
testing membership of
closures
package variables and
variables in
as inputs to subroutines
as static local variables
cmp operator
cmp_ok routine
code sharing
do operator for
eval operator for
namespace collisions and 2nd
reasons for
require operator for
-d command line switch
complex data structures 2nd
indirection and
selection and 2nd
storing (marshaling)
subroutine references in
transformation of
viewing
with Data::Dumper package
with debugger
constructors
anonymous array constructors

anonymous hash constructors
inheriting
Conway, Damian (Perl Best Practices)
core modules
cover program
coverage testing
CPAN (Comprehensive Perl Archive Network)
contributing modules to
installing modules from
README file used by
test files on
version number used by
cpan program
CPAN Search 2nd 3rd
CPAN Testers
CPAN.pm module
cpanp program
CPANPLUS module
curly braces ({})
anonymous hash constructors using
dereferencing arrays
dereferencing hashes
dereferencing subroutines
enclosing package directive
when not needed 2nd

Index
[SYMBOL] [A] [B] [C] [D] [E] [F] [G] [H] [I] [K] [L] [M] [N] [O] [P] [R] [S] [T] [U] [V] [W] [X] [Y]
data reduction
Data::Dumper package
viewing complex data with
viewing recursively defined data with
debugger
help for
viewing complex data with
dereferencing
arrays 2nd 3rd
arrows for 2nd
hashes
derived classes, instance variables in
DESTROY method 2nd
destructors 2nd
Devel::Cover module
direct object syntax
directed graph
directory handles, references to
directory hierarchy, capturing recursively
directory separators
distributions
alternate installation locations for
alternate library locations, using
contributing to CPAN
creating
embedded documentation for
installation, testing
make test for
Makefile.PL for
presenting at Perl conferences
testing
do operator
documentation, embedded
format for
testing
Dump subroutine
Dumper subroutine 2nd

Index
[SYMBOL] [A] [B] [C] [D] [E] [F] [G] [H] [I] [K] [L] [M] [N] [O] [P] [R] [S] [T] [U] [V] [W] [X] [Y]
embedded documentation
format for
testing
encapsulation
errors
syntax errors 2nd
trapping
warnings 2nd
eval operator
code sharing using
dynamic code in
errors not trapped by
nesting
trapping errors with
exercises
solutions to
using
@EXPORT variable 2nd
@EXPORT_OK variable 2nd
%EXPORT_TAGS variable 2nd
Exporter module 2nd
ExtUtils::MakeMaker module 2nd
ExtUtils::ModuleMaker module

Index
[SYMBOL] [A] [B] [C] [D] [E] [F] [G] [H] [I] [K] [L] [M] [N] [O] [P] [R] [S] [T] [U] [V] [W] [X] [Y]
factorial function
File::Basename module
File::Spec module
file_not_exists_ok function
filehandles
barewords for
references to
anonymous IO::File objects as
in scalar variables
IO::File objects as
IO::Scalar objects as
IO::Tee objects as
files
testing
filesystem hierarchy, capturing recursively
filtering lists
foy, brian d (author)
cpan program
"Get More Out of Open"
Test::File module
Test::Manifest module
Test::Pod module
functional interfaces for modules

Index
[SYMBOL] [A] [B] [C] [D] [E] [F] [G] [H] [I] [K] [L] [M] [N] [O] [P] [R] [S] [T] [U] [V] [W] [X] [Y]
garbage collection
"Get More Out of Open" (foy)
getters
AUTOLOAD method for
creating
performance of
setters included in
grep operator 2nd 3rd

Index
[SYMBOL] [A] [B] [C] [D] [E] [F] [G] [H] [I] [K] [L] [M] [N] [O] [P] [R] [S] [T] [U] [V] [W] [X] [Y]
h2xs program 2nd
hashes
anonymous hash constructors
autovivification and
dereferencing
instance data in 2nd
references to
hierarchical data (see recursively defined data)
Hietaniemi, Jarkko (CPAN FTP site)

Index
[SYMBOL] [A] [B] [C] [D] [E] [F] [G] [H] [I] [K] [L] [M] [N] [O] [P] [R] [S] [T] [U] [V] [W] [X] [Y]
-I command line option
import routine
@INC variable
include path for libraries
indices
indirection using
of CPAN modules
sorting with
indirect object syntax
indirection
Ingerson, Brian (YAML)
inheritance
multiple inheritance
of constructors
instance data
accessing
filehandles in
in hashes 2nd
instance variables
filehandles in
in subclasses
instance-only methods
IO::Dir module
IO::File module 2nd
IO::Handle module
IO::Scalar module
IO::Tee module
is function 2nd
isa method
@ISA variable 2nd 3rd 4th
isa_ok function
isnt function

Index
[SYMBOL] [A] [B] [C] [D] [E] [F] [G] [H] [I] [K] [L] [M] [N] [O] [P] [R] [S] [T] [U] [V] [W] [X] [Y]
Keenan, Jim (ExtUtils::ModuleMaker module)

Index
[SYMBOL] [A] [B] [C] [D] [E] [F] [G] [H] [I] [K] [L] [M] [N] [O] [P] [R] [S] [T] [U] [V] [W] [X] [Y]
Langworth, Ian (Perl Testing: A Developer's Notebook)
Learning Perl (Schwartz), xiii
Lester, Andy (Module::Starter module)
lexical variables
closures accessing
packages and
lib pragma
libraries
include path for
including
with do operator
with require operator
like function
lists
creating
filtering
mapping
operators for
reversing
sorting

Index
[SYMBOL] [A] [B] [C] [D] [E] [F] [G] [H] [I] [K] [L] [M] [N] [O] [P] [R] [S] [T] [U] [V] [W] [X] [Y]
make dist
make disttest
make install
make program
make test 2nd
make utility
Makefile.PL file 2nd 3rd
MANIFEST file 2nd
map operator 2nd 3rd 4th 5th
marshaling data
Math::BigInt module
memory leaks
META.yml file
methods
abstract methods
AUTOLOAD method
class-only methods
constructors
DESTROY method 2nd
direct object syntax for
helper methods called from
in UNIVERSAL class
indirect object syntax for
instance-only methods
invoking 2nd 3rd 4th 5th
with either classes or objects
with parameters 2nd
not existing, alternate method for
overriding
parameters for
testing existence in inheritance hierarchy
mock objects, testing with
Module::Build module
Module::Starter module
modules
contributing to CPAN
dependencies of
embedded documentation for
format for
reading
testing

exporting subroutines from
functional interfaces for
importing subroutines from
all subroutines
custom routines for
specific subroutines
with import routine
with use operator
in standard distribution
installing from CPAN
local subroutines with same names as subroutines in
object-oriented 2nd
exporting
testing
search path for (@INC)
multiple inheritance

Index
[SYMBOL] [A] [B] [C] [D] [E] [F] [G] [H] [I] [K] [L] [M] [N] [O] [P] [R] [S] [T] [U] [V] [W] [X] [Y]
namespace collisions
nested arrays
numbers, sorting
Index
[SYMBOL] [A] [B] [C] [D] [E] [F] [G] [H] [I] [K] [L] [M] [N] [O] [P] [R] [S] [T] [U] [V] [W] [X] [Y]
object-oriented modules 2nd
exporting
testing
objects
creating 2nd
destruction of 2nd
at end of program
effects of
for nested objects
instance data for
accessing
filehandles in
in hashes 2nd
invoking methods of 2nd
mock objects, testing with
setters for
testing membership of
ok function 2nd
OOP (object-oriented programming)
encapsulation
inheritance
multiple inheritance
of constructors
when to use
open statement, creating filehandle references in 2nd
operators
list operators
our declaration

Index
[SYMBOL] [A] [B] [C] [D] [E] [F] [G] [H] [I] [K] [L] [M] [N] [O] [P] [R] [S] [T] [U] [V] [W] [X] [Y]
package variables
closures and
scope of
packages
as namespace separators
lexical variables and
naming
scope of
PAUSE (Perl Authors Upload Server)
ID
upload page
Perl
standard distribution of
version used by this book
Perl Best Practices (Conway)
Perl Modules list
Perl Mongers web site
Perl Monks web site
Perl Testing: A Developer's Notebook (Langworth)
Perl user groups
perl-packrats mailing list
PERL5LIB environment variable
plus sign (+)
preceding anonymous hash constructor
preceding terms
POD format 2nd
PREFIX parameter 2nd
PREREQ_PM setting
print operator

Index
[SYMBOL] [A] [B] [C] [D] [E] [F] [G] [H] [I] [K] [L] [M] [N] [O] [P] [R] [S] [T] [U] [V] [W] [X] [Y]
README file 2nd
recursive algorithms
recursively defined data
building
displaying
ref operator
reference counting
failure of
garbage collection as alternative to
nested data structures and
references
assigning to variables or data structure elements 2nd
backslash operator for 2nd 3rd
copying 2nd
deleting
in array elements
multiple, to one data structure 2nd
to arrays
to deleted variable
to directory handles
to filehandles
anonymous IO::File objects as
in scalar variables
IO::File objects as
IO::Scalar objects as
IO::Tee objects as
to hashes
to subroutines
anonymous subroutines
dereferencing
for callbacks
in complex data structures
named subroutines
returning from subroutines
weak references
regression testing
release cycle
require operator 2nd
REUSED_ADDRESS, in debugger
reverse operator
reverse sort operator

Index
[SYMBOL] [A] [B] [C] [D] [E] [F] [G] [H] [I] [K] [L] [M] [N] [O] [P] [R] [S] [T] [U] [V] [W] [X] [Y]
s command, debugger
scalar variables
anonymous scalar variables
directory handle references in
filehandle references in
hash references in
references in 2nd
Schwartz, Randal L. (author)
Learning Perl, xiii
Schwartzian Transform
Schwartzian Transform
Schwern, Michael ("Perl Test Master")
scope of package directive
$self variable
semicolon (:), preceding blocks
setters
AUTOLOAD method for
creating
for objects
getters doubling as
performance of
SKIP designation for tests
sort block
sort operator 2nd 3rd
sorting
efficiency of
in descending order
map operator and
multi-level sorting
Schwartzian Transform for
sort operator 2nd 3rd
with indices
spaceship operator (<=>)
square brackets ([]), anonymous array constructors using
standard distribution
static local variables, closure variables as
STDERR, testing
STDOUT, testing
Stein, Lincoln (CGI module)
Storable module
strings

eval operator on, avoiding
large, testing
sorting
subclasses, instance variables in
subroutines
anonymous subroutines
closure variables
as inputs to
as static local variables to
closures
importing from modules
all subroutines
custom routines for
specific subroutines
with import routine
with use operator
in grep operator
local, with same name as module subroutine
references to
anonymous subroutines
dereferencing
for callbacks
in complex data structures
named subroutines
returning from subroutines
returning subroutines from
SUPER:: pseudo-class
superclasses 2nd
syntax errors 2nd
Index
[SYMBOL] [A] [B] [C] [D] [E] [F] [G] [H] [I] [K] [L] [M] [N] [O] [P] [R] [S] [T] [U] [V] [W] [X] [Y]
Test-Driven Development
Test:: modules, writing
Test::File module
Test::Harness module
Test::LongString module
Test::Manifest module
Test::MockObject module
Test::More module 2nd
functions for object-oriented testing
skipping tests
TODO designation
Test::NoWarnings module
Test::Output module
Test::Pod module
Test::Pod::Coverage module
Test::Warn module
testing
code that hasn't been written yet
coverage testing
CPAN test files for
distribution
embedded documentation
files
guidelines for
installation
invoking tests
large strings
make test
methods for
multiple test scripts
object-oriented modules
of modules uploaded to CPAN
Perl test files
reasons for
scripts for, writing
skipping tests
standard filehandles used during
STDERR
STDOUT
Test::More functions for
with mock objects

writing Test:: modules for
The Perl Journal 2nd
TODO designation for tests
typeglobs, for filehandle sharing

Index
[SYMBOL] [A] [B] [C] [D] [E] [F] [G] [H] [I] [K] [L] [M] [N] [O] [P] [R] [S] [T] [U] [V] [W] [X] [Y]
UNIVERSAL class
unlike function
unshift operator
use base pragma
use lib pragma
use operator 2nd
absent list in
empty list in
subroutine list in
Index
[SYMBOL] [A] [B] [C] [D] [E] [F] [G] [H] [I] [K] [L] [M] [N] [O] [P] [R] [S] [T] [U] [V] [W] [X] [Y]
variables
class variables
in closures
as inputs to subroutines
as static local variables
instance variables
filehandles in
in subclasses
lexical variables
closures accessing
packages and
package variables
closures and
scope of
static local variables

Index
[SYMBOL] [A] [B] [C] [D] [E] [F] [G] [H] [I] [K] [L] [M] [N] [O] [P] [R] [S] [T] [U] [V] [W] [X] [Y]
warnings 2nd
weak references
weaken routine
web site resources
CPAN Search
PAUSE ID, obtaining
Perl Mongers
Perl Monks
The Perl Journal 2nd
Williams, Ken (Module::Build module)
WriteMakefile subroutine

Index
[SYMBOL] [A] [B] [C] [D] [E] [F] [G] [H] [I] [K] [L] [M] [N] [O] [P] [R] [S] [T] [U] [V] [W] [X] [Y]
x command, debugger

Index
[SYMBOL] [A] [B] [C] [D] [E] [F] [G] [H] [I] [K] [L] [M] [N] [O] [P] [R] [S] [T] [U] [V] [W] [X] [Y]
YAML (Yet Another Markup Language)