Specification of a UX Process Reference Model towards the ...
Upload
khangminh22Category
view
2download
0
HP-UX Handbook 10 Ignite-UX
August 2007 1/53
Ignite-UX

HP-UX Handbook 10 Ignite-UX
August 2007 2/53
INDEX
IGNITE-UX.....................................................................................................................................................1
OVERVIEW ....................................................................................................................................................4OBTAINING IGNITE-UX .................................................................................................................................4
Application CD-ROM/DVD......................................................................................................................5HP-UX 11i Core OS CD/DVD 1...............................................................................................................5WWW to HP’s Software Depot .................................................................................................................5FTP to HP’s Software Depot ....................................................................................................................5
IGNITE-UX MAILING LISTS............................................................................................................................5Ignite-UX Updates ...................................................................................................................................5Ignite-UX FAQs .......................................................................................................................................6
CHANGES IN THE C.7.2 RELEASE ....................................................................................................................6INSTALLING IGNITE-UX ................................................................................................................................7
Installing Ignite-UX Bundles Downloaded from the Net ............................................................................7Installing Ignite-UX from Application CD ................................................................................................7Installing Ignite-UX from HP-UX 11i CoreOS CD1..................................................................................8
CONFIGURING THE IGNITE-UX SERVER ..........................................................................................................8Starting Ignite-UX....................................................................................................................................8Configuring the Ignite-UX Server .............................................................................................................8Configuring the Ignite-UX Server for Itanium clients..............................................................................10Using bootpd method: ............................................................................................................................11Using the instl_bootd method:................................................................................................................11Setting up a Boot Helper ........................................................................................................................14
USEFUL TIPS BASED ON PRACTICAL EXPERIENCE .........................................................................................14IGNITE-UX SYSTEM RECOVERY TOOLS - LIMITATIONS .................................................................................17
Ignite-UX System Recovery Tools - make_recovery.................................................................................18Ignite-UX System Recovery Tools - make_tape_recovery ........................................................................18Overview ...............................................................................................................................................18Creating a make_tape_recovery Tape - Ignite-UX Server GUI................................................................18Creating a make_tape_recovery tape - Command Line Examples............................................................19Verifying the make_tape_recovery Tape .................................................................................................22Restoring from a make_tape_recovery Tape ...........................................................................................22Restoring from a make_tape_recovery Tape on Itaniums systems............................................................23
IGNITE-UX SYSTEM RECOVERY TOOLS - MAKE_NET_RECOVERY .....................................................................24Overview ...............................................................................................................................................24Large File Support for Archives Greater than 2GB.................................................................................24Archive Configuration Policies...............................................................................................................25Exporting the archive directory ..............................................................................................................25Creating a make_net_recovery Archive - Ignite-UX Server GUI..............................................................26Creating a make_net_recovery Archive - Command Line Examples ........................................................26Verifying the Network Recovery Archive.................................................................................................28Restoring from the Network Recovery Archive ........................................................................................28Creating a Bootable Recovery Tape with a make_net_recovery Archive..................................................28
RECOVERING MIRRORED DISKS AFTER INSTALLATION WITH IGNITE-UX .......................................................29MAPPING BETWEEN DEVICE SPECIAL FILES AND DEVICES CANNOT BE RESTORED DURING RECOVERY ..............30IGNITE-UX AND SAS DEVICES ....................................................................................................................31CREATING SD-UX AND NON-SD-UX SOFTWARE DEPOTS.............................................................................31
Creating an HP-UX Core-OS Depot.......................................................................................................31Creating a Support Plus Patch Bundle Depot .........................................................................................32Creating an Individual Patch Depot .......................................................................................................33Special Handling of Patch, ACE and HWE Installations .........................................................................34Creating an Application Depot...............................................................................................................34Creating non-SD-UX Depots ..................................................................................................................35Creating Ignite-UX Config Files for SD-UX and non-SD-UX Depots ......................................................35Managing the INDEX File......................................................................................................................35Modifying/Adding Depots.......................................................................................................................36

HP-UX Handbook 10 Ignite-UX
August 2007 3/53
Example 1 - Creating SD-UX Depots for an HP-UX 11.00 Installation ...................................................36Example 2 - Creating a CD-ROM SD-UX Depot.....................................................................................37
BOOTING AND INSTALLING AN HP-UX CLIENT.............................................................................................39Booting the Client from the Ignite-UX Server - Using the User Interface.................................................39Booting the Client from the Ignite-UX Server - Using the bootsys Command...........................................40Booting the Itanium and PA-RISC Clients from the Network ...................................................................40Booting the Client using make_boot_tape ...............................................................................................42
PERFORMING A NON-INTERACTIVE IGNITE-UX INSTALLATION ......................................................................43CLONING WITH GOLDEN SYSTEM IMAGES ....................................................................................................44
Creating a Golden System Image............................................................................................................44Creating a Bootable Golden System Image Tape.....................................................................................46Creating a Bootable Golden System Image CD-ROM .............................................................................47
SIMPLIFIED CREATION OF BOOTABLE CD/DVD MEDIA ................................................................................51Two-Step Recovery CD/DVD..................................................................................................................51Golden Archive DVD .............................................................................................................................52
ADDITIONAL INFORMATION .........................................................................................................................53

HP-UX Handbook 10 Ignite-UX
August 2007 4/53
Overview
Ignite-UX
• is an installation tool for HP-UX systems. The Ignite-UX clients can be installed from software depots containing the Core OS, patches and applications, or from archived “images”. These depots do not necessarily need to be placed onto the Ignite-UX server; any NFS-capable system can be used as the depot server;
• can be used for cloning systems. A so-called Golden System Image will be created from pre-configured source systems. This Golden System Image contains the configuration of the source system, but target specific information like the network configuration and log files will be exchanged. As a prerequisite, the systems must be nearly identical regarding the hardware setup. Additionally, the installed software must be compatible for both systems;
• can use post load scripts to further customize your system;
• can be used to create your own installation media. You can create bootable tapes and CD-/DVD-ROMs;
• can be used to archive and recover the root volume group (vg00). With make_tape_recovery and make_net_recovery volume groups (VGs) other than the root volume group can be recovered as well. However, under normal circumstances, these VGs should be backed up using proper backup tools, for example fbackup. Do not put Ignite-UX with “backup” and “restore” in one sentence. Ignite-UX is not considered for data backup, but rather for system recovery!
• is free of charge.
All necessary information like the Administration Guide, Release Notes, FAQs, etc. can be found at http://www.software.hp.com/products/IUX. There are also documents to be found in /opt/ignite/share/doc.
Obtaining Ignite-UX
For an Ignite-UX server running HP-UX 11.0, 11i, 11iv2 (11.23) obtain Ignite-UX version C.x (as of this writing C.7.2.x is the current version). An Ignite-UX C.x server can install HP-UX 11.x OS and applications on Ignite-UX clients.
Ignite-UX added support for HP-UX 11.31 with the C.7.0, February 2007, release. WithIgnite-UX version C.7.0, the product bundle that installs on all supported versions of HP-UX has changed from B5725AA to IGNITE. When IGNITE is installed, B5725AA is automatically removed.

HP-UX Handbook 10 Ignite-UX
August 2007 5/53
If scripts reference the old bundle name, they must be updated to reference the new bundle name. The HP-UX version-specific bundles, such as Ignite-UX-11-23, will not change names.
As of this writing the current version is Ignite-UX C.7.2, June 2007. This will change in the near future. Please check the web at software.hp.com
For an Ignite-UX server running HP-UX 10.x, obtain Ignite-UX version A.x. An Ignite-UX A.x server can only install HP-UX 10.x clients. The latest version is A.3.7. It is not available on the web anymore; you have to scan through older Application or CoreOS CDs (2002 and earlier)
Ignite-UX is available from these sources in standard Software Distributor (SD) depot format:
Application CD-ROM/DVD
This CD is supplied with HP-UX OS media.
HP-UX 11i Core OS CD/DVD 1
The Core OS CD already contains the "HP-UX Installation Utilities".
WWW to HP’s Software Depot
The software depot is located at http://www.software.hp.com/products/IUX/download.html.
You may download one or more of the individual Ignite-UX bundles or choose the entire product.
Example: Your Ignite-UX server is running HP-UX 11.00; your Ignite-UX clients run HP-UX 11.00 and 11.i. You will have to download the Ignite-UX C-version selecting both bundles for “HP-UX 11.00” and “HP-UX 11i version 1.0 (B.11.11)". Or you can choose to download “All 4 bundles”.
FTP to HP’s Software Depot
The FTP depot does not seem to be updated anymore; the last files are from 2002.
# /usr/bin/ftp www.software.hp.comlogin: anonymouspasswd: email_addressftp> cd /dist/swdepotftp> binftp> get file_name.tar
file_name choices for 11.0/11i server/systems: ignite11_11.00.tar, ignite11_ALL.tar
Ignite-UX Mailing Lists
Ignite-UX Updates

HP-UX Handbook 10 Ignite-UX
August 2007 6/53
To receive a email when a new version of Ignite-UX is available, write an email to:[email protected] with following content:
subscribe ignite-ux-notify<your_email_address>end
Ignite-UX FAQs
Write an empty email to:[email protected]
Changes in the C.7.2 release
The C.7.2 release of Ignite-UX supports the the following HP-UX release/architecture combinations:
HP-UX release HP 9000 systems HP Integrity systems
B.11.00 Yes NoB.11.11 Yes NoB.11.23 Yes YesB.11.31 Yes Yes
This version can be installed on any server running one of the above releases of HP-UX when downloaded from the Web.
If you are installing HP-UX 11i v3, your boot disk must be at least 9 GB. HP-UX 11i v3 requires more space on the HP-UX boot disk than prior HP-UX releases.
Ignite-UX version C.7.2 contains the following new features:
This is the final Ignite-UX release supporting HP-UX 11.00 installation and recovery. The Ignite-UX-11-00 bundle and its contents will not be provided in future releases.
Significant changes to the default system configuration for HP-UX 11i v2 have been made to support software added to HP-UX after initial release, better handle larger mass storage devices and support future updates to other HP-UX releases. In particular, the default sizes of /stand and / have been increased. Default primary swap size has also been increased for some configurations. These changes are consistent with support for future update to HP-UX 11i v3.
Ignite-UX will now recover the Memory File System (MemFS) configuration. The content is not recovered, but the file system configuration will be preserved.
In response to the request to improve Ignite-UX I/O inventory performance, Ignite-UX has introduced the ability to block particular paths and protocols during inventory. See instl_adm (4).

HP-UX Handbook 10 Ignite-UX
August 2007 7/53
An example script has been added to simplify creation of recovery DVD media: /opt/ignite/data/scripts/examples/make_opticaldisc_recovery. This script can be used to create a recovery DVD if the archive will fit on a single media (generally less than 4GB).
Installing Ignite-UX
Installing Ignite-UX Bundles Downloaded from the Net# /usr/sbin/swinstall -s <full path of downloaded file> \*
Example: ignite11_all.tar downloaded to /var/tmp
# /usr/sbin/swinstall -s /var/tmp/ignite_all.tar \*
NOTE: NetInstall is an obsolete application and should not be found on any currently supported installation of HP-UX. This note is “just in case”.
Ignite-UX is a replacement for the Net-Install product. If your server contains the Net-Install bundle (HPUX-Install product), Ignite-UX will require that the NetInstall bundle be removed (using swremove), or that you touch the file /tmp/okay_to_remove_net_install before loading Ignite-UX, in which case loading Ignite-UX will automatically remove the NetInstall software. Otherwise loading any of the Ignite-UX software bundles will give an error.
Installing Ignite-UX from Application CD
Look for the required device file for your CD-ROM. If the mount point does not exist, create it with mkdir. Then mount the Applications CD to /SD_CDROM.
# /usr/sbin/ioscan -fnC disk
Class I H/W Path Driver S/W State H/W Type Description=====================================================================disk 0 8/4.5.0 sdisk CLAIMED DEVICE SEAGATE ST32171W
/dev/dsk/c0t5d0 /dev/rdsk/c0t5d0disk 1 8/4.6.0 sdisk CLAIMED DEVICE SEAGATE ST34371W
/dev/dsk/c0t6d0 /dev/rdsk/c0t6d0disk 2 8/16/5.2.0 sdisk CLAIMED DEVICE TOSHIBA CD-ROM XM-5401TA
/dev/dsk/c1t2d0 /dev/rdsk/c1t2d0
# /usr/bin/mkdir /SD_CDROM# /usr/sbin/mount /dev/dsk/c1t2d0 /SD_CDROM
To find out which bundles and filesets are available for installation, you can use:
# /usr/bin/ls /SD_CDROM
Then either select the whole bundle for installation with:
# /usr/sbin/swinstall -s /SD_CDROM B5725AA

HP-UX Handbook 10 Ignite-UX
August 2007 8/53
Or for example if you only want to load the filesets for installing HP-UX 11.00 and 11.i Ignite-UX clients:
# /usr/sbin/swinstall -s /SD_CDROM Ignite-UX-11-00# /usr/sbin/swinstall -s /SD_CDROM Ignite-UX-11-11
Installing Ignite-UX from HP-UX 11i CoreOS CD1
To install Ignite-UX, you need to mark one of the Ignite-UX filesets or the complete bundle B5725AA for installation in the software tab after choosing the Advanced Installation screen.
Configuring the Ignite-UX Server
Starting Ignite-UX
The search path /opt/ignite/bin has been added to /etc/PATH during the installation. To update your current PATH variable source /etc/PATH use:
# . ./etc/PATH
or simply login again. To startup Ignite-UX:
# /opt/ignite/bin/ignite
If the error message occurs stating the Ignite-UX server not being set up as an NFS server, start NFS with:
# /usr/bin/vi /etc/rc.config.d/nfsconf
NFS_SERVER=1NFS_CLIENT=1
# /sbin/init.d/nfs.server start# /sbin/init.d/nfs.client start
Look up if the /etc/exports file already has following entry:
/var/opt/ignite/clients -anon=2
Then export the directories with:
# /usr/sbin/exportfs –av
Configuring the Ignite-UX Server
Either follow the <Tutorial/Server Setup> or step out of the tutorial choosing <Do not show this screen again> and <OK>. Then choose the quick setup selecting <Options> <Server Configuration...> from the Ignite-UX screen. The following describes the quick setup.

HP-UX Handbook 10 Ignite-UX
August 2007 9/53
Server options:
• Select the <Default Configuration> box and highlight the Operating System you want to use from the list. When doing a client installation, this configuration will be installed on targets if no other is specified. The default setting can be overridden on a per-client basis by Ignite-UX.
• Click on the <Default Printer> list to display the available (configured) printers. Select the one you want to use. If needed, use SAM’s <Default Printer> area to configure a new printer onto the system. This will be the printer for printing the manifest or installation history. The printer address will be checked by Ignite-UX before a job is sent.
• Select the appropriate <Client Timeout (minutes)> time, or choose <off> , to set the time limit for the client to be connected without responding. This will set a limit on the time since the client install log has been written in. Some points in the installation may require 15 to 30 minutes. A warning note will be displayed if this time is exceeded. Setting Client Timeout to <off> disables this notification.
• Use the <Run client installation UI on> list to designate where you want to see the client User Interface for this installation. If you have a server configured, you can have the choice of running the client installation interface from either the <target> (as a Terminal User Interface) or the Ignite-UX <server> (as the ignite screen). If the client installation is to be non-interactive (no interface), select <none>. The default location for the interface display is the Ignite-UX <server>.
• At <Configure Booting IP Addresses…> enter IP addresses that have notbeen assigned to a client or reserve the IP of an Ignite-UX client to its LLA address (MAC address). Ignite-UX uses these IP's temporarily to boot clients. If you reserved an IP, only the client with the corresponding MAC address can be booted with this IP.
• You also can edit the /etc/opt/ignite/instl_boottab file manually (for more help see the file itself):
# /usr/bin/vi /etc/opt/ignite/instl_boottab
15.1.53.18015.1.53.181:
Example: /etc/0x08000969DE78::reserve
As an alternative, you can also use the /etc/bootptab or DHCP for assigning temporary boot IP's (Do not use DHCP unless you are very familiar with it).
bootptab entry for an Ignite-UX client:
sysname:\hn:\vm=rfc1048:\

HP-UX Handbook 10 Ignite-UX
August 2007 10/53
ht=ether:\ha=080009352575:\ip=15.1.51.82:\sm=255.255.248.0:\bf=/opt/ignite/boot/boot_lif
Session options:
• <Confirm New Clients> controls the appearance of a dialog screen each time a new client is booted from the Ignite-UX server.
• <Ask for customer information during client installation>: select this to see the form for <Customer Name, " System Serial #, and Order Number> when installing clients.
• <Show the welcome screen for the install server>: select this to automatically display the Ignite-UX server Welcome screen. This is a useful default if many new operators run Ignite-UX.
• <Halt the client after installation>: select this to cause the client system to halt (rather than reboot) after installation.
• <Automatically move completed clients to history>: select this button to automatically add completed clients to the end of the history log, /var/opt/ignite/clients/history/history.log. It will also move their config and manifest files to history for future reference. The client icon will be removed from the client-server screen. The client must be complete (fully installed) for this to take place.
Configuring the Ignite-UX Server for Itanium clients
Itanium systems lack the ability to boot directly from the Ignite-UX server. On PA-RISC systems you can specify the LAN address of the Ignite-UX server in the boot command “boot lan.<IP> install”. This is not possible on Itanium, where the “lanboot” command on the EFI shell will send a DHCP/BOOTP broadcast into the subnet, choosing the server, which answers first. There are two mutually exclusive options available to configure the Ignite-UX server for Itanium clients:
• In HP-UX 11.23, the bootpd server has been modified so that it is possible to configure bootpd to respond to anonymous Itanium clients
• In Ignite-UX 4.2, the Ignite instl_bootd server has been modified so that it will respond to anonymous Itanium clients
Use bootpd method, if:
• Ignite-UX server is running HP-UX 11.23 or greater
• Any release of Ignite-UX is installed

HP-UX Handbook 10 Ignite-UX
August 2007 11/53
• bootpd is being used, e.g. this machine is a DHCP/BOOTP server
• Manual configuration of files is ok (/etc/dhcptab)
Use instl_bootpd method, if:
• The Ignite-UX server is running any OS release
• Ignite-UX 4.2 (or greater) is installed
• bootpd is not being used on this machine
• You would like to use the same method (screens, setup, etc.) for Itanium and PA-RISC clients
• Manual configuration of files is not desired (do not want to manually change /etc/dhcptab)
Using bootpd method:
To use this feature, set up an entry similar to the following in /etc/dhcptab:
dhcp_device_group:\re:\ncid:\class-id="PXEClient:Arch:00002:.*":\lease-time=300:\subnet-mask=255.255.255.0:\addr-pool-start-address=192.168.1.10:\addr-pool-last-address=192.168.1.20:\bf=/opt/ignite/boot/nbp.efi
The following is a brief explaination for each of the parts of the description above as well as what areas to customize:
subnet-mask the subnet mask of your Itanium clientaddr-pool-* starting and ending IP addresses to allocateba: broadcast the responsebf= boot file for network bootstrap loaderclass-id 00002 stands for Itanium, 00000 would be x86
Restart the bootpd daemon.
Note: Prior to release 4.2 there were problems with the class-id and bootpd recognizing it, see the customer viewable document KBNL00000383 in K-Mine.
Using the instl_bootd method:
• instl_bootd daemon is used by Ignite-UX to boot PA-RISC clients
• configure instl_bootd using the Options:Server Configuration screen
• configuration file is /etc/opt/ignite/instl_bootptab
HP-UX Handbook 10 Ignite-UX
August 2007 12/53
• instl_bootd daemon normally runs on ports 1067/1068 (unique) used only for booting PA-RISC clients
• Ignite 4.2 and later: instl_bootd has been enhanced to respond to Itanium clients on standard BOOTP network ports 67/68
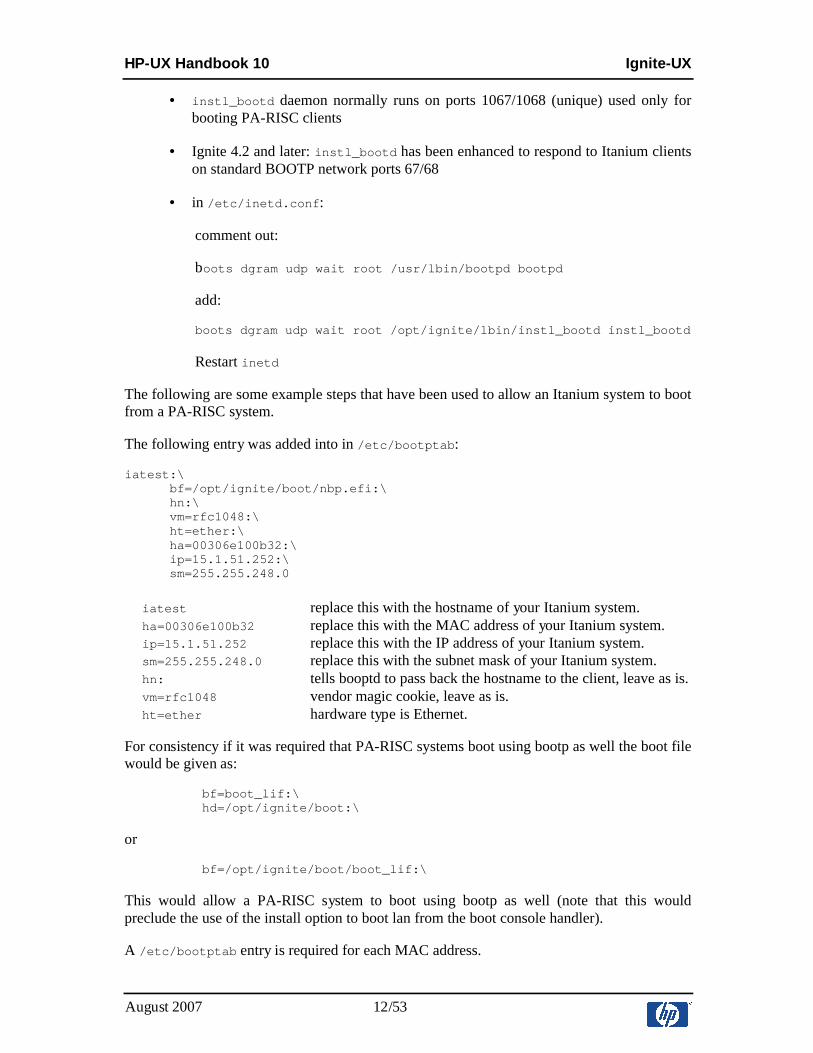
• in /etc/inetd.conf:
comment out:
boots dgram udp wait root /usr/lbin/bootpd bootpd
add:
boots dgram udp wait root /opt/ignite/lbin/instl_bootd instl_bootd
Restart inetd
The following are some example steps that have been used to allow an Itanium system to boot from a PA-RISC system.
The following entry was added into in /etc/bootptab:
iatest:\bf=/opt/ignite/boot/nbp.efi:\hn:\vm=rfc1048:\ht=ether:\ha=00306e100b32:\ip=15.1.51.252:\sm=255.255.248.0
iatest replace this with the hostname of your Itanium system.ha=00306e100b32 replace this with the MAC address of your Itanium system.ip=15.1.51.252 replace this with the IP address of your Itanium system.sm=255.255.248.0 replace this with the subnet mask of your Itanium system.hn: tells booptd to pass back the hostname to the client, leave as is.vm=rfc1048 vendor magic cookie, leave as is.ht=ether hardware type is Ethernet.
For consistency if it was required that PA-RISC systems boot using bootp as well the boot file would be given as:
bf=boot_lif:\hd=/opt/ignite/boot:\
or
bf=/opt/ignite/boot/boot_lif:\
This would allow a PA-RISC system to boot using bootp as well (note that this would preclude the use of the install option to boot lan from the boot console handler).
A /etc/bootptab entry is required for each MAC address.
HP-UX Handbook 10 Ignite-UX
August 2007 13/53
Troubleshooting checklist for Itanium boot situations with /etc/bootptabIn setting up an /etc/bootptab configuration, there are several places where things can go wrong. Following is a typical error that indicates that the client was unable to boot from the server:
Shell> lanboot
Running LoadFile()
CLIENT MAC ADDR: 00 30 6E 10 0B 32
PXE-E16: Valid PXE offer not received.Exit status code: Invalid Parameter
If this error occurs, following is a checklist that can be used to help troubleshoot the problem:
Check inetd
• Check /etc/inetd.conf for “bootps” and “tftp” entries being uncommented. The "tftp" line must contain /opt/ignite and /var/opt/ignite paths.
• Was inetd restarted or given an option to re-read the configuration files (inetd -c), after they were edited? Is the inetd process running?
• Check for entries in /var/adm/inetd.sec that may cause inetd to deny service to certain clients.
• Check /var/adm/syslog/syslog.log whether inetd was restarted, and that no error messages are found. Check for messages from “bootpd” and “tftpd”
Check bootpd
• Check the /etc/bootptab entry. The MAC address should match the client MAC address. Use "dhcptools -v" to validate the format of the /etc/bootptabfile.
• Check for entries in /etc/dhcpdeny to insure that bootpd is not set up to deny service for particular clients.
• Check /var/adm/syslog/syslog.log for a message from bootpd that indicates it was started when a bootpd packet was received.
• If packets were not received, use a tool such as tcpdump to check for network packets. Verify that bootp packets are being seen by the system.
• Find out if there are other systems on the network that may also be replying to the booting client system.
• If the system booting is on a different subnet to the bootp server ensure that any router in between allows the forwarding of bootp requests (this is router specific on how it would be configured).

HP-UX Handbook 10 Ignite-UX
August 2007 14/53
Check tftpd
• Check the tftp line in /etc/inetd.conf to make certain /opt/ignite and /var/opt/ignite directories are listed.
• Check the tftpd connection manually by using the "tftp" command, for example:
$ tftp <server-name>
tftp> get /opt/ignite/boot/nbp.efi /tmp/nbp.efi
Received n bytes in s seconds
tftp> quit
Caveats: Because the Itanium client sends a broadcast no other DHCP servers should be in the same subnet as the Ignite-UX server and the client. Other DHCP servers my answers faster than the Ignite-UX client, leading to failed installation attempts.
Setting up a Boot Helper
If the client is not in the same subnet as the Ignite-UX server and the clients need to be booted from the network (the client is currently not running HP-UX 9.x or later), a boot helper needs to be installed. The boot helper must be on a HP-UX system within the subnet of the Ignite-UX client.
Note: For setting up a boot helper on 9.x systems, please refer to the Ignite-UX Admin Guide.
Example: The ignite11_all.tar fileset was downloaded to /var/tmp on the Ignite-UX server.
# /usr/sbin/swinstall –s <Ignite_Server_IP>:/var/tmp/ignite11_all.tar \ Ignite-UX.MinimumRuntime
# /opt/ignite/bin/instl_adm -t <Ignite_Server_IP># /opt/ignite/bin/instl_adm -g <Gateway_to_Ignite_Server>
Check your settings with:
# /opt/ignite/bin/instl_adm –d
Now, edit the /etc/opt/ignite/instl_boottab or /etc/bootptab on the boot helper to assign IP addresses that have NOT been assigned to a client or reserve the IP of an Ignite-UX client to its LLA address (MAC address). Please see also "Configuring the Ignite-UX Server".
Remember to configure the boot helper for Itanium clients, if required (see chapter before).
Useful Tips Based on Practical Experience

HP-UX Handbook 10 Ignite-UX
August 2007 15/53
• Everything has to be executed as the root user. The umask(1) must be set toumask 022, so every user can read the ignite-UX config files. If these config files are not "world readable", the client boot will stop with an tftp error.
• It is strongly recommended to use the standard directories /var/opt/ignite/data/Rel_B.xx.yy for your own config files. If other directories are used, they have to be exported via tftp and NFS.
• An up-to-date tar, pax, bootp, tftp, NFS, ARPA and LVM patch level should be installed as well on the Ignite-UX server as well as on the client system. For all needed patches please look up the latest Release Notes at http://www.software.hp.com/products/IUX/docs.html, chapter "Required Patches" in the latest Release Notes at http://www.software.hp.com/products/IUX/docs.html.
• The most problematic when installing from network is permission and network protocol errors. Before installing the client, you should check tftp, inet, NFS, etc. The /var/adm/syslog/syslog.log can be very useful regarding this issue. Check the /etc/exportfs and /etc/inetd.conf for correct settings. Often the /etc/exports file states anon=-2 instead of -anon=2
# /usr/bin/vi /etc/exports
/var/opt/ignite/clients -anon=2
• When changing config files, you should always check them with:
# /opt/ignite/bin/instl_adm –T
• Also check the network settings with:
# /opt/ignite/bin/instl_adm –d
• When creating a Golden System Image, make sure that the source system does not have the LLA (MAC address) of the network interface set explicitly. Otherwise, the same LLA will be used by the cloned target system. The LLA is set in the section HP_BASE100_STATION_ADDRESS in /etc/rc.config.d/hpbase100conf.
• If an installation via boot_sys fails or you have accidentally booted a client:
o Stop the boot process and boot into Single User Mode:
BOOT ADMIN> boot pri isl -> Interact with IPL? -> n
o Boot the hpux kernel:
ISL> hpux (;0)/stand/vmunix
o Correct the AUTO file
# /usr/sbin/mkboot –a "hpux" /dev/rdsk/c0t1d0

HP-UX Handbook 10 Ignite-UX
August 2007 16/53
o If the old HP-UX system has already been overwritten via Ignite-UX, you have to boot the system over the network.
• If you have problems booting from a boot server, try following:
BOOT ADMIN> boot lan INSTALL -> Interact with IPL? -> y
• You now can see which server wrongly answers the boot request. Or do a
# /usr/bin/tail /var/adm/syslog/syslog.log
on the server to see if maybe there isn't any unassigned IP available for the client.
• If you are using different DDS drives for backup and recovery, you should always use a DDS1 device file for creating a tape. Using the DDS1 device file makes the tape compatible with other DDS tape drives. Creating a DDS1 device file:
o Look up the hardware path
# /usr/sbin/ioscan -fC tape
Class I H/W Path Driver S/W State H/W Type Description
==============================================================
tape 0 8/16/5.6.0 stape CLAIMED DEVICE HP C1533A
o Create the device file
# /usr/sbin/mksf -v -H 8/16/5.6.0 -b DDS1 -n –a
This will create the device file, /dev/rmt/c1t6d0DDS1n, for example.
• If you can't boot the client either from hard disk or from network, you can create a bootable tape which will then contact the next available Ignite-UX server.
o using make_medialif
# /opt/ignite/bin/make_medialif -m -l /tmp/helper.lif
# /usr/bin/dd if=/tmp/helper.lif of=/dev/rmt/c1t6d0DDS1n obs=2k
Note: Use a DDS1 device and block size of 2k as well as check that the correct Ignite-UX server IP is set with
# /opt/ignite/bin/instl_adm –d
o using make_boot_tape
# /opt/ignite/bin/instl_adm -d > tmp_config_file
Edit the tmp_config_file as appropriate. Then create the bootable tape:
# /opt/ignite/bin/make_boot_tape -f tmp_config_file –v \

HP-UX Handbook 10 Ignite-UX
August 2007 17/53
–d /dev/rmt/c1t6d0DDS1n
• Ignite-UX does not set the maximal physical extents (Max PE per PV) correspondingly high enough to implement larger hard disk into the VG. These parameters can be set on the Ignite-UX server. Note: The maximum physical extents of a boot disk is 5628. You have to increase the PE size for larger hard disks.
• You can also write a golden system image onto tape if you have space problems:
# /opt/ignite/data/scripts/make_sys_image -d /dev/rmt/0m -s local
• When using make_sys_image, important system files are temporarily replaced which leads to intensive disruptions on a productive system, among other things, the name resolution, login, etc. Therefore, if you run make_sys_image, the system should never be in use by other applications!!!
• If a make_sys_image was disrupted e.g. with # kill -9, # shutdown, etc., then among other things the /etc/hosts and the transition links may have also been removed. To recover from missing transition links, do the following in the multi-user run level:
# /sbin/pax -r -pe –f /tmp/ign_configure/keepsafe
# /opt/upgrade/bin/tlinstall
Ignite-UX System Recovery Tools - Limitations
Logical Volume Physical Extent Allocation Not Preserved:
The LVM physical extents allocated to a logical volume may be in a different location on the disk than before. The recovery tools use a very specific and complex algorithm for extending logical volumes to ensure success (such as extending contiguous volumes before non-contiguous).
VxVM disk groups is not included in earlier Ignite versions:
Up to Ignite-UX version B.3.7, the disk groups managed by VERITAS Volume Manager (VxVM) cannot be included in the Ignite-UX archive. If they are included, an error will occur. Those disk groups will be left undisturbed and re-integrated to the system after the recovery is complete.
LVM Disk Mirrors not restored:
The tools will create a recovery tape for a system with mirrored disks, but it will not restore the mirrored disk configuration. If the system is later recovered, previously mirrored volumes will no longer be mirrored. They can be manually re-mirrored after the system is up. For more details, see the white paper /opt/ignite/share/doc/diskmirror.pdf.

HP-UX Handbook 10 Ignite-UX
August 2007 18/53
EFI partition on Itanium systems may grow in size:
Beginning with Ignite-UX version C.6.0.x the default EFI partition size changed from 100MB to 500MB, in order to accommodate enough space for new purposes not yet implemented. If the EFI partition was 100MB it will be resized to 500MB during recovery. This may introduce disk space problems, if the disk is fully used. You can change the default size from 500MB to any other size in the installation routine.
Ignite-UX System Recovery Tools - make_recovery
The make_recovery command has been obsolete for some time, but was shipped with Ignite-UX along with its replacements command make_tape_recovery. Executing make_recoveryprompted a note saying:
NOTE: make_recovery(103): The make_recovery command will be replaced by make_tape_recovery. Both commands are supported in this release (Ignite-UX Revision 3.2). Please read the man page make_tape_recovery(1M) for usage of the new command. In a future release, make_recovery will be replaced by a script that calls make_tape_recovery.
With Ignite-UX version C.6.0.x the make_recovery command was dropped completely and is not available.
Be aware that options used with make_recovery are not identical with the same options used with make_tape_recovery. Example: the “–A” option has different meanings for make_recovery and make_tape_recovery. By default ‘make_recovery –A’ archived the complete root volume group, whereas ‘make_tape_recovery -A’ will only include “essential” files and directories.
Ignite-UX System Recovery Tools - make_tape_recovery
Overview
• Can be executed locally (also using a Terminal User Interface) as well as from the Ignite-UX server.
• Creates a bootable DDS/DLT tape. It can also span multiple tapes if run locally.
• Besides the root volume group, other volume groups can be archived as well. Note: This is not recommended, because Ignite-UX is not a backup tool. Backup data with proper backup utilities such as fbackup, tar, etc.
• The client specific configuration files are either stored locally or on the Ignite-UX server.
• Replaces make_recovery since Ignite-UX versions A.3.2/B.3.2.
Creating a make_tape_recovery Tape - Ignite-UX Server GUI
On your host system, allow the Ignite-UX server to access the display with:
HP-UX Handbook 10 Ignite-UX
August 2007 19/53
# xhost +<Ignite_server_name>
for example
# xhost +host1
Export the display if necessary:
# export DISPLAY=<hostname>:0
for example
# export DISPLAY=host1:0
On the Ignite-UX server start Ignite-UX as root:
# /opt/ignite/bin/ignite
In case of a new client, add the new client first:
Choose <Actions> <Add New Client for Recovery...>
Then start the Tape Recovery Archive Creation:
Click on the client icon and select <Actions> <Create Tape Recovery Archive ...>
You will now be guided through some screens for additional configuration. Note: Do not forget to press <add selected disk/vg> for the vg00 in the Archive Content screen if you want to backup the complete vg00. Otherwise, only a core OS will be backed up. You may also include other VGs, directories or files and also exclude certain ones.
Creating a make_tape_recovery tape - Command Line Examples
When the server is stated using the -s option, the configuration, log and status files will be created on the Ignite-UX server at:/
var/opt/ignite/recovery/clients/0x{LLA}/recovery/<date,time>.
If no Ignite-UX server is stated, they will be created locally on the client system at /var/opt/ignite/recovery/<date,time>.
Note: Every example below shows the command line with and without the -s option to remind you of the different possibilities.
Archiving up only essential core OS files using the default device file /dev/rmt/0mn# /opt/ignite/bin/make_tape_recovery
or
# /opt/ignite/bin/make_tape_recovery -s <Ignite_server>
Note: make_tape_recovery will check if there are configuration files from previously saved archives. If no configuration files exist that have different settings, only a core OS (essential

HP-UX Handbook 10 Ignite-UX
August 2007 20/53
files) will be archived. /opt/ignite/recovery/mnr_essentials lists the files and directories that are considered essential.
Archiving the complete root volume group using the default device file /dev/rmt/0mn# /opt/ignite/bin/make_tape_recovery –x inc_entire=vg00
or
# /opt/ignite/bin/make_tape_recovery –x inc_entire=vg00 -s <Ignite_server>
Note: Remember that the “-A” option is different from make_recovery:
-A: Based on the files that are specified for inclusion, this option identifies the disk(s) and/or VG(s) that contain these files and includes all files from the disk(s)/VG(s) in the archive. If no further files are specified for inclusion, the default essentials file list /opt/ignite/recovery/mnr_essentials is used for specifying the included files.
Archiving the complete root VG using a non-default device file# /opt/ignite/bin/make_tape_recovery -Av -a c0t1d0BESTn
or
# /opt/ignite/bin/make_tape_recovery -Av -a c0t1d0BESTn \ -s <Ignite_server>
-a: Tape drive device file. Always use a no-rewind device file. You can use DDS and supported DLT tape drives. For supported DLT's please see the Release Notes at http://www.software.hp.com/products/IUX/docs.html.
Archiving complete VGs/disks - including and excluding files and directories# /opt/ignite/bin/make_tape_recovery -x inc_entire=vg00 \ -x inc_entire=vg01
or
# /opt/ignite/bin/make_tape_recovery -x inc_entire=vg00 \ -x inc_entire=vg01 -s <Ignite_server>
-x inc_entire=vg_name|/dev/dsk/<name>: Includes all file systems contained on the VG. Use the VG name (such as vg00) when you want all file systems that are part of that LVM VG to be included in the archive. You also can specify disks. For this, use a block device file of the format /dev/dsk/<name> when specifying a whole-disk (non-LVM) file system.
Further -x arguments:
-x include=file|dir: Includes the file or directory in the recovery archive but does not cross any mount points.

HP-UX Handbook 10 Ignite-UX
August 2007 21/53
-x inc_cross=file|dir: Includes the file or directory in the recovery archive and crosses mount points to access any directories that are mounted or files contained in directories that are mounted.
-x exclude=file|dir: Excludes the file or directory from the archive. When a directory is specified, no files beneath that directory will be stored in the archive.
Archiving choosing the archive contents in interactive mode
# /opt/ignite/bin/make_tape_recovery –i
or
# /opt/ignite/bin/make_tape_recovery –i -s <Ignite_server>
-i: Causes make_tape_recovery to run interactively to allow you to select which files and directories are to be included in the recovery archive.
Note: Better start directly from the Ignite-UX server. If you use it anyway, do not forget to press <add selected disk/vg> for the vg00 in the Archive Content screen if you want to backup the complete vg00. Otherwise only a core OS will be backed up!
Backing up the root VG to change the system configuration# /opt/ignite/bin/make_tape_recovery -Av –I
or
# /opt/ignite/bin/make_tape_recovery -Av -I -s <Ignite_server>
-I: Cause the system recovery process to always present the interactive menus when booting from the tape during the later installation.
Using make_tape_recovery in preview mode
# /opt/ignite/bin/make_tape_recovery -v –p
or
# /opt/ignite/bin/make_tape_recovery -v –p -s <Ignite_server>
-p: If the tape was created without stating an Ignite-UX server , the files will be located at /var/opt/ignite/recovery/latest. If the IUX server was stated, the files are at /var/opt/ignite/clients/<LLA>/recovery/<date,time>.
Only following files will be created which can be edited before presuming the tape creation:archive_cfg, control_cfg, system_cfg. The files that end in _cfg contain configuration information that can be changed, like converting from HFS to JFS.
flist lists all files will be included in the tar archive. Note: Only delete user specific files as deleting other files can cause corruption of the archive.

HP-UX Handbook 10 Ignite-UX
August 2007 22/53
After making the desired changes, you can use the –r option to resume the tape creation based on the changes you made.
# /opt/ignite/bin/make_tape_recovery –r
Verifying the make_tape_recovery Tape
Looking up the log files
If make_tape_recovery was run locally, look up the log files at
/var/opt/ignite/recovery/<date,time>/.
If it was run from the Ignite-UX server, look up log files at
/var/opt/ignite/recovery/clients/0x{LLA}/recovery/<date,time>.
recovery.log progress and error log file
flist tar archive content
Checking boot volume on tape (LIF header)
# /opt/ignite/bin/copy_boot_tape -u /dev/rmt/0mn -b -d /tmp
# /usr/bin/lifls –l /tmp/bootimage
Checking the tar archive on the tape
# /usr/bin/mt -t /dev/rmt/0mn rew
# /usr/bin/mt -t /dev/rmt/0mn fsf 1
# /usr/bin/tar tvf /dev/rmt/0m Note: 0m not 0mn
Extracting single files from the tar archive
# /usr/bin/mt -t /dev/rmt/0mn rew# /usr/bin/mt -t /dev/rmt/0mn fsf 1# /usr/bin/tar xvf /dev/rmt/0m filename1 filename2
Restoring from a make_tape_recovery Tape
automatically
1. Insert the System Recovery tape into the tape drive.
2. Boot the system.
3. Interrupt the boot sequence to redirect it to the tape drive.
4. Select no intervention with ISL.
5. Allow the install process to complete automatically.

HP-UX Handbook 10 Ignite-UX
August 2007 23/53
interactive mode (changing system configuration, cloning)
1. Insert the System Recovery tape into the tape drive.
2. Boot the system.
3. Interrupt the boot sequence to redirect it to the tape drive.
4. Cancel the non-interactive installation by hitting the <Return> key when the following messages are displayed:
5. WARNING: The configuration information calls for a non- interactive installation.Press <Return> within 10 seconds to cancel batch-mode installation:
The "Ignite-UX Welcome" screen will be presented. Select the option: [ Install HP-UX ]
6. Then select the option: [ ] Advanced Installation
7. Make any desired changes to the file systems, hostname, IP address, timezone, root password, DNS server, and gateway information.
8. Select [ GO ] to proceed with the installation.
Restoring from a make_tape_recovery Tape on Itaniums systems
With the latest firmware, for most systems you can simply boot the tape device, but for older version to boot from an Ignite Tape you need to:
1. Insert the CoreOS CD-ROM into the CD-ROM drive.
2. Boot the system.
3. Interrupt the boot sequence to redirect it to the CD-ROM drive.
4. Cancel the non-interactive installation by hitting the <Return> key when the following messages are displayed:
5. WARNING: The configuration information calls for a non-interactive installation.Press <Return> within 10 seconds to cancel batch-mode installation:
The “User Interface and Media Options” screen will be presented.
6. Check “Media only installation” and “Guided installation”
7. The “Media Installation” screen will be presented.
8. Check “Boot from CD/DVD, Recover from Tape” option
9. Choose the appropriate tape drive in the “Tape Drive Selection” screen

HP-UX Handbook 10 Ignite-UX
August 2007 24/53
10. Make any desired changes to the file systems, hostname, IP address, timezone, root password, DNS server, and gateway information.
11. Select [ GO ] to proceed with the installation.
Ignite-UX System Recovery Tools - make_net_recovery
Overview
The command make_net_recovery can be executed locally (also using a Terminal User Interface) as well as from the Ignite-UX server using the Ignite-UX user interface. It creates an archive on the Ignite-UX or another Archive Server (must be an NFS server). It can archive the root volume group AND other volume groups as well.
Note: This is not recommended because Ignite-UX is not a backup tool. Backup other volume groups with proper backup utilities such as fbackup, tar, etc.
The client specific configuration files are stored on the Ignite-UX server.
Large File Support for Archives Greater than 2GB
Specific support for large files is needed if archives greater than 2GB are to be created. To support NFS mount and network data transfer of large files, you will need to have NFS PV3 installed on both the client and server. If the client or server is running HP-UX 10.20, the Networking ACE patch (containing the NFS PV3 software) should be installed and updated with a patch cited in the Ignite-UX Release Notes. HP-UX 11.00 and later versions come with PV3 by default. The Ignite-UX Release Notes located at: http://www.software.hp.com/products/IUX/docs.html identify which patches are required for NFS support of archives greater than 2GB for HP-UX 10.20, 11.00 and later. You may also need to download the latest gzip Version from http://hpux.asknet.de/hppd/hpux/Gnu/.
Determining if your file system supports large files and changing to large file support
Without Online-JFS, you must create a new file system to change the file system to support largefiles. Check if the file system supports large files with:
# /usr/sbin/fstyp -v /dev/vgxx/lvolx|grep f_flag
f_flag: 16 large files are activatedf_flag: 0 large files are inactive
With Online-JFS
# /usr/sbin/fsadm -F vxfs /file_system_path
If the output shows largefiles, then large files are activated. If it shows nolargefileslarge files are inactive. To change a file system to support large files, do the following:
# /usr/sbin/fsadm -F file_system -o largefiles /dev/vgxx/lvolx

HP-UX Handbook 10 Ignite-UX
August 2007 25/53
for example
# /usr/sbin/fsadm -F vxfs -o largefiles /dev/vg01/lvol6
In order for clients to be affected by the change if the file system is already exported, re-run:
# /usr/sbin/exportfs –av
Archive Configuration Policies
When specifying archive content, either via the Ignite-UX GUI or in the make_net_recoverycommand line, the following rules apply:
• No essential file or directory can be excluded.
• Files and directories inside an included directory will be included recursively.
• If a symbolic link to a file or directory is included, only the link will be included in the archive, not the actual file or directory, unless it, too, is included. A warning will be given when the item itself is a symbolic link.
• If a directory is included which contains symbolic links to other files or directories, the symbolic links will be included but not the referenced files or directories, unless they, too, are included. No warnings are given regarding these links.
• If a directory contains local mount points, the files and directories under the local mount points will not be included, by default. This policy can be waived by specifying the option inc_cross (include directory and cross-mount points), in the selection interface or command line.
• In case of conflicting entries in the selections, Exclusions take precedence over inclusions.
Exporting the archive directory
The default archive location on the Ignite-UX server is /var/opt/ignite/recovery/archives/<hostname>. The hostname is the name of the system being archived. If the recovery archive creation is initiated from the Ignite-UX GUI on the Ignite-UX server and the archive is saved on the Ignite-UX server, the /etc/exports file will be edited automatically. If you put the archive onto another path or archive server, the directory used to store the archives must be exported from the archive server to each client.
1. On the archive server, create a directory for each client to hold the archive of the client's files. It is best to use the default path but you can also state other paths.
# /usr/bin/mkdir -p /var/opt/ignite/recovery/archives/<client_hostname>
2. Change the owner and group to bin
# /usr/bin/chown bin:bin

HP-UX Handbook 10 Ignite-UX
August 2007 26/53
/var/opt/ignite/recovery/archives/<client_hostname>
3. Edit /etc/exports on the archive server to add an entry for each client.
# /usr/bin/vi
/var/opt/ignite/recovery/archives/<client_hostname> \
-anon=2,access=<client_hostname>
4. Run the exportfs command to have the edits to the exports file take effect:
# /usr/sbin/exportfs –a
Creating a make_net_recovery Archive - Ignite-UX Server GUI
On your host system, allow the Ignite-UX server to access the display with:
# xhost +<Ignite_server_name>
for example
# xhost +host1
Export the display if necessary:
# export DISPLAY=<hostname>:0
for example
# export DISPLAY=host1:0
On the Ignite-UX server start Ignite-UX as root:
# /opt/ignite/bin/ignite
In case of a new client, add the new client first:
Choose <Actions> <Add New Client for Recovery...>
Start the Tape Recovery Archive Creation:
Click on the client icon and select <Actions> <Create Network Recovery Archive ...>. You will now be guided through some screens for additional configuration.
Note: Do not forget to press <add selected disk/vg> for the vg00 in the Archive Content screen if you want to backup the complete vg00. Otherwise, only a core OS will be backed up. You may also include other VGs, directories or files and also exclude certain ones.
Creating a make_net_recovery Archive - Command Line Examples
Archiving only essential core OS files
# /opt/ignite/bin/make_net_recovery -s <Ignite_server>

HP-UX Handbook 10 Ignite-UX
August 2007 27/53
Note: make_net_recovery will check if there are configuration files from previously saved archives. If no configuration files exist that have different settings, only a core OS (essential files) will be backed up. /opt/ignite/recovery/mnr_essentials lists the files and directories that are considered essential.
Archiving the complete root VG
# /opt/ignite/bin/make_net_recovery -Av -s <Ignite_server>
-A: Based on the files that are specified for inclusion, this option identifies the disk(s) and/or VGs that contain these specified files and includes all files from the disk(s)/VGs in the archive. If no further files are specified for inclusion, the default essentials file list /opt/ignite/recovery/mnr_essentials is used for specifying the included files.
-v: Verbose mode, error and process logs will be displayed.
Archiving the complete root VG to a different archive location
# /opt/ignite/bin/make_net_recovery -Av \ -a archive_server:archive_directory_path -s <Ignite_server>
for example
# /opt/ignite/bin/make_net_recovery -Av -a host2:/my_archives -s host1
-a: Specifies the NFS server and location to store the archive. The archive directory must be NFS exported and sufficient disk space is required.
Archiving complete VGs/disks and including and excluding files and directories
# /opt/ignite/bin/make_net_recovery -x inc_entire=vg00 \ -x inc_entire=vg01 -s <Ignite_server>
-x inc_entire=vg_name|/dev/dsk/<name>: Includes all file systems contained on the VG. Use the VG name (such as vg00) when you want all file systems that are part of that LVM VG to be included in the archive. You also can specify disks. For this, use a block device file of the format /dev/dsk/<name> when specifying a whole-disk (non-LVM) file system.
Further -x arguments:
-x include=file|dir: Includes the file or directory in the recovery archive but does not cross any mount points.
-x inc_cross=file|dir: Includes the file or directory in the recovery archive and crosses mount points to access any directories that are mounted or files contained in directories that are mounted.
-x exclude=file|dir: Excludes the file or directory from the archive. When a directory is specified, no files beneath that directory will be stored in the archive.
Please see also "Archive configuration policies".

HP-UX Handbook 10 Ignite-UX
August 2007 28/53
Archiving choosing the archive contents in interactive mode
# /opt/ignite/bin/make_net_recovery –i -s <Ignite_server>
-i: Causes make_net_recovery to run interactively to allow you to select which files and directories are to be included in the recovery archive.
Note: better start directly from the Ignite-UX server. If you use it anyway, do not forget to press <add selected disk/vg> for the vg00 in the Archive Content screen if you want to backup the complete vg00. Otherwise only a core OS will be backed up!
Verifying the Network Recovery Archive
Looking up the log files at
/var/opt/ignite/recovery/clients/0x{LLA}/recovery/<date,time>/
recovery.log progress and error log fileflist tar archive content
Checking the zipped tar archive
# /usr/contrib/bin/gzcat \/var/opt/ignite/recovery/archives/<hostname>/<date,time> \| tar -tvf - > /tmp/archive_content
or
# /usr/contrib/bin/gzcat \/var/opt/ignite/recovery/archives/<hostname>/<date,time> \| tar -tvf - | more
Restoring from the Network Recovery Archive
Please see chapter "Booting and installing an HP-UX client”.
Note: If you have problems installing for a make_net_recovery archive, check the /var/opt/ignite/clients/CINDEX file and the config files mentioned in the CINDEX file. Also make sure that the archive is exported via NFS.
Creating a Bootable Recovery Tape with a make_net_recovery Archive
Note: It is important that the archive fits onto a single tape.
Example: The hostname is sys1, the recovery archive is named “2002-03-12,09:00”
Creating the LIF header (Boot Header)
# /usr/bin/cd /var/opt/ignite/clients/sys1/recovery/2002-03-12,09:00# /opt/ignite/bin/make_medialif \ -f system_cfg -f control_cfg -f archive_cfg \ -C "2002-03-12,09:00 sys1 recovery image" \ -a -l /var/tmp/my_lif

HP-UX Handbook 10 Ignite-UX
August 2007 29/53
Now modify the LIF file to set it up for use on the tape:
# /opt/ignite/bin/instl_adm -d -F /var/tmp/my_lif > /var/tmp/cfg
Edit the /var/tmp/cfg file and add the following lines to the end of the file:
control_from_server=FALSErun_ui=TRUE
Or, if you just want the recovery to proceed without any interaction, make run_ui FALSE and specify to allow warnings, as shown in the following:
control_from_server=FALSErun_ui=FALSEenv_vars += "INST_ALLOW_WARNINGS=10"
Then, issue the following command:
# /opt/ignite/bin/instl_adm -F /var/tmp/my_lif -f /var/tmp/cfg
Writing the LIF Header and the network recovery archive onto tape
Create a DDS1 device file if you do not have one already. A DDS1 device file is compatible with most tape drives:
# /usr/sbin/ioscan -fC tape
Class I H/W Path Driver S/W State H/W Type Description==============================================================tape 0 8/16/5.6.0 stape CLAIMED DEVICE HP C1533A
# /usr/sbin/mksf -v -H 8/16/5.6.0 -b DDS1 -n –a
This will create the device file, /dev/rmt/c1t6d0DDS1n, for example. Rewind the tape and write the LIF Header and the archive onto the tape:
# /usr/bin/mt -t /dev/rmt/c1t0d0DDS1n rew
# /usr/bin/dd if=/var/tmp/my_lif of=/dev/rmt/c1t0d0DDS1n obs=2k# /usr/bin/dd \if=/var/opt/ignite/recovery/archives/sys1/2002-03-12,09:00
of=/dev/rmt/c1t0d0DDS1n obs=10k
Then rewind the tape again:
# /usr/bin/mt -t /dev/rmt/c1t0d0DDS1n rew
Recovering Mirrored Disks after Installation with Ignite-UX
It is possible to use Ignite-UX for backing up the root volume group of mirrored disks, but Ignite-UX will not preserve the mirror configurations. The disk mirrors will be lost and must be reconfigured using LVM commands. The boot header of the mirrored disks will be touched as well when recovering using Ignite-UX (pvcreate)!

HP-UX Handbook 10 Ignite-UX
August 2007 30/53
Example: The mirror disk is /dev/dsk/c1t6d0.
Make sure the disk is removed from the root volume group.
# /usr/sbin/vgreduce /dev/vg00 /dev/dsk/c1t6d0
Create the boot header on the mirrored disk.
# /usr/sbin/pvcreate -f -B /dev/rdsk/c1t6d0
Add the mirrored disk back to the group.
# /usr/sbin/vgextend /dev/vg00 /dev/dsk/c1t6d0
Copy the boot area to the disk.
# /usr/sbin/mkboot -l /dev/rdsk/c1t6d0# /usr/sbin/mkboot -a \"hpux -lq\" /dev/rdsk/c1t6d0
Allocate the mirrors. Mirrors must be allocated for all logical volumes that were previously mirrored.
# /usr/sbin/lvextend -m 1 /dev/vg00/lvol1 /dev/dsk/c1t6d0# /usr/sbin/lvextend -m 1 /dev/vg00/lvol2 /dev/dsk/c1t6d0# /usr/sbin/lvextend -m 1 /dev/vg00/lvol3 /dev/dsk/c1t6d0...
Update the BDRA and LABEL file.
# /usr/sbin/lvlnboot -r /dev/vg00/lvol3# /usr/sbin/lvlnboot -b /dev/vg00/lvol1# /usr/sbin/lvlnboot -s /dev/vg00/lvol2# /usr/sbin/lvlnboot -d /dev/vg00/lvol2
Mapping between device special files and devices cannot be restored during recovery
During recovery on a system that has more than seven disk and tape devices, Ignite-UX may not successfully remap the device special file names so that they refer to the original devices. Because of this problem, the make_net_recovery and make_tape_recovery commands on HP-UX 11i v3 print a WARNING message and prompt the user to confirm that they wish to continue.
When scripts encounter this prompt, they may hang or fail depending on how the script handles stdin. HP will not support Ignite-UX version C.7.0, even for cold installing HP-UX, after September 2007.
HP recommends that you upgrade to Ignite-UX version C.7.1.x or later to fix this problem. After installing Ignite-UX version C.7.1.x, recreate your tape recovery archive. For network recovery, you can update your Ignite server to Ignite-UX version C.7.1.x and you do not need to recreate the recovery archive.

HP-UX Handbook 10 Ignite-UX
August 2007 31/53
Ignite-UX and SAS Devices
SAS disks are identified to a system with a unique World-Wide Name (WWN) also known as a World-Wide ID (WWID, sometimes referred to as SAS Address). The I/O stack on HP-UX 11i v2 internally associates that WWN to a hardware path. The hardware path is not a typical hardware path since the hardware path can change if you reinstall or recover the system and the SAS configuration has changed.
On HP-UX 11i v3 the legacy devices for SAS devices are handled similarly to 11i v2, this means if the SAS configuration changes, the legacy devices for SAS devices can change during an install or recovery.
With persistent DSFs on 11i v3 there is a reliable mapping between a SAS device and the persistent DSF. Since the system knows about the correlation between the WWN and the persistent DSF² Ignite-UX is able to keep the mapping between persistent DSF and WWN when performing a recovery. This requires you to use Ignite-UX version C.7.2 or above to be able to reliably recover persistent DSFs for SAS devices when you have more than 7 mass storage devices connected to a system
Note: You will have actions to perform when replacing a SAS device on HP-UX 11i v3 since a persistent DSF is tied to a WWN. See the io_redirect_dsf manual page on any HP-UX 11i v3 system for more information. If you use legacy devices you may also need to use thesasmgr commands replace_tgt option.
You should be aware of the following information when you configure RAID LUNs.
Ignite-UX fully supports a configuration where only RAID LUNs are presented to a system. (This includes having a hot spare configured.) Note that the HP PCI/PCI-X SAS MPT Adapter supports a maximum of two RAID LUNs and a hot spare. These restrictions do not apply to the P400 Core I/O card. The P400 Core I/O card presents only RAID LUNs to the system; it is not possible to present individual SAS drives to a system. You must configure the RAID LUNs and hot spare from EFI before installing the system.
If you have a system containing a mixture of RAID LUNs and individual SAS devices, the devices used for the RAID LUNs and the global spare should be configured from Bay 8 working downwards, and the individual SAS drives populated from Bay 1 upwards. Do not change the configuration after system installation.
For more information: http://www.docs.hp.com/en/5992-2160/5992-2160.pdf
Creating SD-UX and non-SD-UX Software Depots
Creating an HP-UX Core-OS Depot
It is assumed that the CD-ROM drive is connected at /dev/dsk/c1t2d0 (to be looked up with # /usr/bin/ioscan -fnC disk). Note: do not mount the CD-ROM for creating Core-OS depots.
HP-UX Handbook 10 Ignite-UX
August 2007 32/53
Example 1: A disk depot for an HP-UX 10.20 workstation installation will be created.
Please insert the HP-UX 10.20 Core-OS CD-ROM for workstations (700 systems). The depot will be named core_700 and will be created at /var/opt/ignite/depots/Rel_B.10.20.
# /opt/ignite/bin/make_depots -s /dev/dsk/c1t2d0 -r B.10.20 -a 700
or
# /opt/ignite/bin/make_depots -s /dev/dsk/c1t2d0 \ -d /var/opt/ignite/depots/Rel_B.10.20/core_700
Note: If you want to create an HP-UX 10.20 depot on an 11.x Ignite-UX server, you must additionally use the -x layout_version=0.8 option.
If you would like to create a depot for an HP-UX B.10.20 server, please specify -a 800 or use the -d option to specify core_800.
Example 2: A disk depot for an HP-UX 11.00 installation will be created.
Please insert the HP-UX 11.00 Core-OS CD-ROM. The depot will be named core and will be created at /var/opt/ignite/depots/Rel_B.11.00.
# /opt/ignite/bin/make_depots -s /dev/dsk/c1t2d0 -r B.11.00
or
# /opt/ignite/bin/ make_depots -s /dev/dsk/c1t2d0 \ -d /var/opt/ignite/depots/Rel_B.11.00/core
Example 3: A disk depot for an HP-UX 11i installation will be created.
Please insert the first of the two HP-UX 11i Core-OS CD-ROMs in the CD-ROM drive. The depot will be named mcoe_core and will be created at: /var/opt/ignite/depots/Rel_B.11.11.
# /opt/ignite/bin/make_depots -s /dev/dsk/c2t3d0 \ -d /var/opt/ignite/depots/Rel_B.11.11/mcoe_core
When the make_depots command has succeeded, please insert the second Core-OS CD-ROM and repeat above step using exactly the same command line.
Creating a Support Plus Patch Bundle Depot
Because the SupportPlus CD-ROM contains not only one, but several depots in form of patch bundles, the CD-ROM must be mounted first. If the mountpoint /SD_CDROM does not yet exist, create it with mkdir. Mount the SupportPlus CD to /SD_CDROM. To find out witch depots are available for installation, you can use # ls /SD_CDROM.
Example: A support plus patch bundle depot for an HP-UX 10.20 workstation installation will be created.
# /opt/ignite/bin/make_depots -s /SD_CDROM/XSW700GR1020 \-d /var/opt/ignite/depots/Rel_B.10.20/XSW700GR1020

HP-UX Handbook 10 Ignite-UX
August 2007 33/53
Note: If you want to create HP-UX 10.20 depots on an 11.x Ignite-UX server, you must additionally use the -x layout_version=0.8 option. Remember that 10.20 clients are not officially supported.
Example: A support plus patch bundle depot for an HP-UX 11.00 installation will be created.
# /opt/ignite/bin/make_depots -s /SD_CDROM/QPK1100 \-d /var/opt/ignite/depots/Rel_B.11.00/QPK1100
Example: A support plus patch bundle depot for an HP-UX 11i-installation will be created.
# /opt/ignite/bin/make_depots -s /SD_CDROM/GOLDQPK11i \-d /var/opt/ignite/depots/Rel_B.11.11/GOLDQPK11i
Creating an Individual Patch Depot
Example: individual patches for HP-UX 11.00 were downloaded to /tmp/patch_download.
Unpacking the patches in /tmp/patch_download.
# /usr/bin/cd /tmp/patch_download# for i in PH*> do> sh $i> done
Moving the descriptions for example to /tmp/patch_description.
# /usr/bin/mkdir /tmp/patch_description# /usr/bin/mv /tmp/patch_download /*.text /tmp/patch_description
Creating the individual patch depot.
# /usr/bin/mkdir /var/opt/ignite/depots/Rel_B.11.00/my_patches# for i in PH*.depot> do> /usr/sbin/swcopy -s ${PWD}/$i \* @ \ /var/opt/ignite/depots/Rel_B.11.00/my_patches
> done
Note: If you want to use swcopy for HP-UX 10.20 depots on a 11.x Ignite-UX server, you must additionally use the -x layout_version=0.8 option.
Making sure all installed patches are included in the individual patch depot.
# /usr/sbin/swlist -d @ /var/opt/ignite/depots/Rel_B.11.00/my_patches
Converting the individual patches into a single bundle and putting the bundle in the patch depot (Ignite-UX can only handle SD bundles).
# /opt/ignite/bin/make_bundles -B -n individual_patches \ -t "HP-UX 11.00 Patches" \/var/opt/ignite/depots/Rel_B.11.00/my_patches
Running swlist again to verify the creation of the bundle.

HP-UX Handbook 10 Ignite-UX
August 2007 34/53
# /usr/sbin/swlist -d @ /var/opt/ignite/depots/Rel_B.11.00/my_patches
To display the patches of this bundle, use
# /usr/sbin/swlist -l product \-d @ /var/opt/ignite/depots/Rel_B.11.00/my_patches
Changing individual patch depots.
If you need to add additional patches to the depot in the future, simply unshar the patches as described above, swcopy them into the patch depot, and rerun make_bundles. If you would like to remove a patch from the depot, simply use the swremove command and rerun make_bundles. The example below removes the patch PHKL_8376 from the patch depot which was previously named individual_patches via the -n option.
# /usr/sbin/swremove -d individual_patches.PHKL_8376 \@ /var/opt/ignite/depots/Rel_B.11.00/my_patches
Special Handling of Patch, ACE and HWE Installations
For issues concerning
• Avoiding Backup Patch Files
• Avoiding Problems With Superseded Patches
• Using Ignite-UX with Additional Core Enhancements (ACE) and Hardware Extensions (HWE)
please see the Ignite-UX Admin Guide athttp://www.software.hp.com/products/IUX/docs.html
Creating an Application Depot
Example: Copying an application from one of the application CDs.
If the mount point /SD_CDROM does not yet exist, create it with mkdir. Then mount the application CD to /SD_CDROM. To find out witch products are available for installation, you can use # ls /SD_CDROM. For further examples, please see swcopy (1M).
# /usr/sbin/swcopy -s /SD_CDROM B3691AA_TRY \@ /var/opt/ignite/depots/Rel_B.11.00/my_applications
Example 2: Copying applications from a depot
All software from the depot /my_depots/depot1 which is located on host1 to/var/opt/ignite/depots/Rel_B.11.00/my_applications will be copied.
# /usr/sbin/swcopy -s host1:/my_depots/depot1 \* \ @ /var/opt/ignite/depots/Rel_B.11.00/my_applications
Note: If you want to use swcopy for HP-UX 10.20 depots on a 11.x Ignite-UX server,

HP-UX Handbook 10 Ignite-UX
August 2007 35/53
you must additionally use the -x layout_version=0.8 option.
Creating non-SD-UX Depots
If the source is a non-SD-UX depot, the make_depots command is not applicable. Do not attempt to use non-core-OS archives (such as layered applications) that contain files that get loaded in /var/adm/sw/* . Delivering files in this directory in this method may corrupt the software distributor database. Please proceed with the next step "Creating Ignite-UX Config Files for SD-UX and non-SD-UX Depots".
Creating Ignite-UX Config Files for SD-UX and non-SD-UX Depots
Example 1: Creating Config Files for all SD-UX depots found in the default location /var/opt/ignite/depots/Rel_B.xx.yy
# /opt/ignite/bin/make_config -r B.11.00
Example 2: Creating config files for all SD-UX depots located at /my_depots/Rel_B.11.00
# /usr/bin/cd /my_depots/Rel_B.11.00# for i in *> do> /opt/ignite/bin/make_config -s ${PWD}/$i \ -c /var/opt/ignite/data/Rel_B.11.00/$i.cfg
> done
Example 3: Creating a Config File for one SD-UX Depot located on another system at /my_depots/Rel_B.11.00/core
# /opt/ignite/bin/make_config -s host1:/my_depots/Rel_B.11.00/core \ -c /var/opt/ignite/data/Rel_B.11.00/core.cfg
Example 4: Creating Ignite-UX Config Files for Individual Patch Depots
# /opt/ignite/bin/make_config \ -s /var/opt/ignite/depots/Rel_B.11.00/my_patches \-c /var/opt/ignite/data/Rel_B.10.20/my_patches.cfg
Example 5: Creating Ignite-UX Config Files for Non-SD Depots
A sample config file for a non-coreOS (application) tar, cpio, pax archive can be found at /opt/ignite/data/examples/noncore.cfg.
Copy the noncore.cgf file to /var/opt/ignite/data/Rel_B.xx.yy and edit it manually as described within the sample file itself.
# /usr/bin/cp /opt/ignite/data/examples/noncore.cfg \/var/opt/ignite/data/Rel_B.11.00/non_SD_config.cfg
When done editing this file, check it with
# /opt/ignite/bin/instl_adm -T –f \/var/opt/ignite/data/Rel_B.11.00/non_SD_config.cfg
Managing the INDEX File

HP-UX Handbook 10 Ignite-UX
August 2007 36/53
The order of the INDEX file determines in which order the depots will be loaded. There must always be a HP-UX release specific config file such as /opt/ignite/data/Rel_B.11.00/config as the first line. If you are using the/var/opt/ignite/config.local file, it should always be the last entry for the cfg clause.
Example 1: using the manage_index command to add the config file /var/opt/ignite/data/Rel_B.11.00/core.cfg into the /var/opt/ignite/INDEX file for the cfg clause "HP-UX B.11.00 Default".
# /opt/ignite/bin/manage_index -a -f \ /var/opt/ignite/data/Rel_B.11.00/core.cfg -c "HP-UX B.11.00 Default"
Example 2: adding the required config files manually to the /var/opt/ignite/INDEX file for the cfg clause "HP-UX B.11.00 Default".
# /usr/bin/vi /var/opt/ignite/INDEX
cfg "HP-UX B.11.00 Default" {description "This selection supplies a HP-UX B.11.00
default installation" "/opt/ignite/data/Rel_B.11.00/config" "/opt/ignite/data/Rel_B.11.00/hw_patches_cfg"
"/var/opt/ignite/data/Rel_B.11.00/core.cfg" "/var/opt/ignite/data/Rel_B.11.00/XSWGR1100.cfg" "/var/opt/ignite/data/Rel_B.11.00/individual_patches.cfg" "/var/opt/ignite/data/Rel_B.11.00/my_applications.cfg" "/var/opt/ignite/config.local"
}
Modifying/Adding Depots
Use make_depots, swcopy or swremove to edit your depots. Rerun make_config for the corresponding release to update your config files. Run manage_index for each newly added software depot.
Example 1 - Creating SD-UX Depots for an HP-UX 11.00 Installation
1) Look up the device file for the CD-ROM drive.
# /usr/sbin/ioscan -fnC disk
Class I H/W Path Driver S/W State H/W Type Description================================================================================disk 0 8/0/19/0.6.0 sdisk CLAIMED DEVICE IBM DDRS-34560WS
/dev/dsk/c0t6d0 /dev/rdsk/c0t6d0disk 2 8/16/5.1.0 sdisk CLAIMED DEVICE TOSHIBA CD-ROM XM-5701TA
/dev/dsk/c1t1d0 /dev/rdsk/c1t1d0disk 1 8/16/5.5.0 sdisk CLAIMED DEVICE QUANTUM FIREBALL1050S
/dev/dsk/c1t5d0 /dev/rdsk/c1t5d0
2) Insert the HP-UX 11.00 Core-OS CD, but do not mount it. Then create the Core OS depot.
# /opt/ignite/bin/make_depots -s /dev/dsk/c1t1d0 -r B.11.00
# /opt/ignite/bin/make_depots -s /dev/dsk/c1t1d0 \ -d /var/opt/ignite/depots/Rel_B.11.00/core

HP-UX Handbook 10 Ignite-UX
August 2007 37/53
Note for HP-UX 11i: For the second CD, repeat make_depots with the same syntax.
3) Insert the Support Plus CD and mount it at /SD_CDROM.
# /usr/bin/mkdir /SD_CDROM# /usr/sbin/mount /dev/dsk/c1t1d0 /SD_CDROM
4) Create the General Release Patch depot:
# /opt/ignite/bin/make_depots -s /SD_CDROM/QPK1100 \-d /var/opt/ignite/depots/Rel_B.11.00/QPK1100
5) Export the depots via NFS, if you did not use the default directory or you placed the depots on another depot server.
# /usr/bin/vi /etc/exports
/ignite/depots -anon=2
# /usr/sbin/exportfs –av
6) Create config files for the depot at /var/opt/ignite/data/Rel_B.11.00.
# /opt/ignite/bin/make_config -r B.11.00
If you have not used the /var/opt/ignite/data/Rel_B.11.00, you must specify the config files individually:
# /opt/ignite/bin/make_config -v \ -s host1:/var/opt/ignite/depots/Rel_B.11.00/core \ -c /var/opt/ignite/data/Rel_B.11.00/core.cfg
# /opt/ignite/bin/make_config –v \ -s host1:/var/opt/ignite/depots/Rel_B.11.00/QPK1100 \ -c /var/opt/ignite/data/Rel_B.11.00/QPK1100.cfg
7) Add the configuration to the /var/opt/ignite/INDEX file:
Copy the cfg section of "HP-UX B.11.00 Default" completely and rename the new section as you like, e.g. "HP-UX B.11.00 my installation" and use following scripts:
cfg "HP-UX B.11.00 Default" {description "HP-UX B.11.00 my installation""/opt/ignite/data/Rel_B.11.00/config""/opt/ignite/data/Rel_B.11.00/hw_patches_cfg""/var/opt/ignite/data/Rel_B.11.00/core.cfg""/var/opt/ignite/data/Rel_B.11.00/QPK1100.cfg""/var/opt/ignite/config.local"
}
8) Check the INDEX file with:
# /opt/ignite/bin/instl_adm –T
9) Please see chapter "Booting and installing an HP-UX client" to install the client.
Example 2 - Creating a CD-ROM SD-UX Depot

HP-UX Handbook 10 Ignite-UX
August 2007 38/53
Note: You can only create a CD-ROM depot for installations containing one Core-OS CD.
1) Look up the device file for the CD-ROM drive.
# /usr/sbin/ioscan -fnC disk
Class I H/W Path Driver S/W State H/W Type Description================================================================================disk 0 8/0/19/0.6.0 sdisk CLAIMED DEVICE IBM DDRS-34560WS
/dev/dsk/c0t6d0 /dev/rdsk/c0t6d0disk 2 8/16/5.1.0 sdisk CLAIMED DEVICE TOSHIBA CD-ROM XM-5701TA
/dev/dsk/c1t1d0 /dev/rdsk/c1t1d0disk 1 8/16/5.5.0 sdisk CLAIMED DEVICE QUANTUM FIREBALL1050S
/dev/dsk/c1t5d0 /dev/rdsk/c1t5d0
2) Insert the Core-OS CD and mount it at /SD_CDROM.
# /usr/bin/mkdir /SD_CDROM# /usr/sbin/mount /dev/dsk/c1t1d0 /SD_CDROM
3) Register the CD-ROM as an depot with swreg:
# /usr/sbin/swreg -l depot @ /SD_CDROM
4) Create a config file of this depot at var/opt/ignite/data/Rel_B.xx.yy/core.cfg:
# /opt/ignite/bin/make_config -s /SD_CDROM \ -c /var/opt/ignite/data/Rel_B.11.00/core.cfg
5) Add the configuration to the /var/opt/ignite/INDEX file:
Copy the cfg section of "HP-UX B.11.00 Default" completely and rename the new section as you like, for example "HP-UX B.11.00 Custom".
Use following scripts:
cfg "HP-UX B.11.00 Default" {description "HP-UX B.11.00 my installation""/opt/ignite/data/Rel_B.11.00/config""/opt/ignite/data/Rel_B.11.00/hw_patches_cfg""/var/opt/ignite/data/Rel_B.11.00/core.cfg""/var/opt/ignite/config.local"
}
6) Check the INDEX file with:
# /opt/ignite/bin/instl_adm –T
7) Please see chapter "Booting and installing an HP-UX client" to install the client.

HP-UX Handbook 10 Ignite-UX
August 2007 39/53
Booting and Installing an HP-UX Client
If the client system is running HP-UX 9.X or later, you can either use the bootsys(1M) command or perform a network boot to install the client. It can be invoked either from a command shell, or from the Ignite-UX screen.
If the client is currently not up and running HP-UX 9.X or later, the client has to be booted over the network. If the client is not in the same subnet as the Ignite-UX server, the client has to be booted from the boothelper. For more details on supported systems, please look up chapter "Networking Issues" in the Ignite-UX Release Notes at http://www.software.hp.com/products/IUX/docs.html.
Make sure that you have at least one booting IP available in the /etc/opt/ignite/instl_boottab, /etc/bootptab or via DHCP on the Ignite-UX server respectively the boot helper.
Note: The IP must be an unassigned IP! If you do not have any unassigned IP's available and you are using the /etc/opt/ignite/instl_boottab, reserve the client's IP and the corresponding MAC address by inserting a line with the reserve option:
# /usr/bin/vi /etc/opt/ignite/instl_boottab
1.3.4.5:0060B0F99816::reserve (IP:MAC_address::reserve)
Booting the Client from the Ignite-UX Server - Using the User Interface
Note: The clients must be currently running HP-UX 9.x or later.
Starting the Ignite-UX screen:
# /opt/ignite/bin/ignite
Booting the client using bootsys: If you have not yet a client icon, select <ACTIONS> <BOOT NEW CLIENT>. Enter the hostname and if required the password. After the client has booted, the client icon will appear on the Ignite-UX screen.
Starting the client installation: Right-click the client icon and choose <INSTALL CLIENT> <New Install>.
Configuring the client installation: Select one of you previously created cfg selections from the /var/opt/ignite/INDEX file or an make_net_recovery archive. For this, click on <Configurations:> from the Basic Tab.
Adjust any other parameters like selecting the boot disk, etc. For adding/removing Software to be installed, please go to the <Software> tab. At the <System> tab, you can adjust you system settings like the hostname, IP adress, etc.

HP-UX Handbook 10 Ignite-UX
August 2007 40/53
Please go to the <File System> tab for tuning file system sizes, LVM parameters, etc. At the <Advanced> tab, select or deselect any scripts you have available from the /var/opt/ignite/INDEX file. These scripts will be executed during the final reboot, before the startup scripts (rc scripts) are called up.
Starting the installation: Click on the the < Go!> button. You can look up the installation progress now via the log file.
Booting the Client from the Ignite-UX Server - Using the bootsys Command
Note: If you have already run an install session from the server, issuing bootsys without the option –w will result in an automatic installation without further intervention!
Interactive installation
# /opt/ignite/bin/bootsys -w <system_name>
Enter the password if required. After the client has booted, the client icon will appear on the Ignite-UX screen. For further options please see the manpage of bootsys.
You can now proceed with step 3) from "Booting the Client from the Ignite-UX server - Using the User Interface".
Automatic installation
To start an automatic installation, please enter:
# /opt/ignite/bin/bootsys –a –I <cfg_configuration> –v <system_name>
-a: If no configuration is given with the –I option, the defaults will be used for the automatic installation.
-I : You can specify a configuration which is listed as a cfg section in the /var/opt/ignite/INDEX file. To find out which configuration is available, use:
# /opt/ignite/bin/manage_index –l
Booting the Itanium and PA-RISC Clients from the Network
Note: For booting older workstations please see the Ignite-UX Admin Guide athttp://docs.hp.com/hpux/onlinedocs/B2355-90704/B2355-90704.html
1) Switch the client on and interrupt the boot sequence pressing any key.
2) Boot from the Ignite-UX server or boothelper using one of these ways:
a) PA-RISC: If your network only has one Ignite-UX server available, enter:
BOOT ADMIN> boot lan install
Itanium: If your network only has one Ignite-UX server available, enter:

HP-UX Handbook 10 Ignite-UX
August 2007 41/53
EFI shell> lanboot
b) PA-RISC: If you want to boot from a certain Ignite-UX server, enter:
BOOT ADMIN> boot lan.15.10.18.156 install
where 15.10.18.156 is the IP of the Ignite-UX server.
Itanium: This option is not available on Itanium. There should only be one Ignite server per subnet and no other DHCP/BOOTP servers.
c) PA-RISC: If the client is not in the same subnet as the Ignite-UX server, direct the installation to a boot helper:
BOOT ADMIN> boot lan.15.10.18.156 install
where 15.10.18.156 is the IP of the Ignite-UX boot helper. The client will be booted from the boot helper and then redirected to the Ignite-UX server to complete the installation.
Itanium: Again, this option is not available on Itanium. There should only be one Ignite boot helper per subnet and no other DHCP/BOOTP servers.
d) PA-RISC: Otherwise make the system search for servers and pick one or explicitly tell the system where to boot, as follows
BOOT ADMIN> search lan install
The list of servers will be displayed with IP addresses. Pick the IP address of the Ignite-UX server you want to boot from by entering, for example:
BOOT ADMIN> boot lan.15.10.18.156 install
where 15.10.18.156 is the IP of the Ignite-UX server or boot helper.
Note: It typically takes two or three searches before the Ignite-UX server will be found, due to a built-in delayed response from the server system.
Itanium: Again, this option is not available on Itanium.
3) Enter n when asked if you want to interact with IPL (there is no IPL on Itanium).
4) If the networking startup fails, press <Enter>. Note: This behavior is normal. Just enter the networking parameters now. The networking startup will always fails if you have not specified the networking parameters via the bootsys command or the INSTALLFS file (instl_adm settings).
5) Choose the keyboard if it has not been selected automatically via the INSTALLFS file or other config files.
6) Choose [ Install HP-UX ]
7) If you want to proceed the installation from the the Ignite-UX server now, please choose:

HP-UX Handbook 10 Ignite-UX
August 2007 42/53
[ * ] Remote graphical interface running on the Ignite-UX server
If you want to proceed the Installation from the Client, please choose
[ * ] Remote graphical interface running on the Ignite-UX server
Booting the Client using make_boot_tape
make_boot_tape can be used if the client does not support a network boot or if the client is not on the same subnet as the Ignite-UX server.
The system will be booted from the Ignite-UX kernel on the tape and then the Ignite-Ux server will be contacted to proceed with the installation.
Typically the tape is created on the Ignite-UX server, because it contains Ignite-UX server specific information from the INSTALLFS file (edited with instl_adm).
The tape can also be used if you have several lan cards and you want to use another than the built-in lan card for installation. You will be asked which lan card you want to initialize.
1) Create a DDS1 device file for the tape drive first.
# /usr/sbin/ioscan -fC tape
Class I H/W Path Driver S/W State H/W Type Description=======================================================================tape 0 8/16/5.6.0 stape CLAIMED DEVICE HP C1533A
# /usr/sbin/mksf -v -H 8/16/5.6.0 -b DDS1 -n –a
The device file will be called something like /dev/rmt/c1t6d0DDS1n.
2) Check your instl_adm settings and edit them if necessary.
# /opt/ignite/bin/ instl_adm -d > /tmp/config_file
# /usr/bin/vi /tmp/config_file
server="15.140.10.59"
netmask[]="0xfffff800"
3) Create the boot tape
# /opt/ignite/bin/make_boot_tape -f /tmp/config_file \-d /dev/rmt/c1t6d0DDS1n –v
4) Now you can boot from tape to contact the Ignite-UX server.
Note: Itanium systems cannot boot from tape, therefore the boot tape option is useless for them.

HP-UX Handbook 10 Ignite-UX
August 2007 43/53
Performing a non-interactive Ignite-UX Installation
Note: the client will be installed without any user interaction.
1) First you have to adjust the boot kernel /opt/ignite/boot/INSTALLFS of the Ignite-UX server. Read the current configuration and save it to a defaults file
# /opt/ignite/bin/instl_adm -d >/var/opt/ignite/defaults
2) Now edit this defaults file adding following lines:
run_ui=false control_from_server=false env_vars+="INST_ALLOW_WARNINGS=1"
With this step the interactive user interface has been switched off and the client will be installed automatically when booting from the net.
3) It is recommended to make further settings, because during the installation, you now cannot adjust any parameters like system name and IP address.
Note: Do not forget to take them out of the configuration after performing the installation of the client. Additionally make sure that in the /etc/opt/ignite/instl_boottab, only the entry for the client to be installed is available. Also make sure that nobody else uses the Ignite-UX server while you have set these parameters!
Add following parameters:
system_name="blubber"ip_addr="1.2.3.4" timezone="MET-1METDST"
For further information about possible parameter setting, see the instl_adm(4) manpage.
4) When you have done all necessary settings, change the boot image INSTALLFS after checking the syntax:
# /usr/bin/cd /opt/ignite/boot
# /opt/ignite/bin/instl_adm -T -f /var/opt/ignite/defaults
If the syntax is ok, edit the boot image
# /opt/ignite/bin/instl_adm -f /var/opt/ignite/defaults
5) Before starting the non-interactive installation, you should have checked the used config files (for the Golden Image, SD-UX depots, etc.) before in interactive mode to see if they are working.
6) Please see chapter "Booting and installing an HP-UX client" to install the client.

HP-UX Handbook 10 Ignite-UX
August 2007 44/53
Cloning with Golden System Images
Creating a Golden System Image
Note: Because files like /etc/hosts and devices files are temporarily removed from the clients system during the execution of make_sys_image, the system should not be in use !!!
1) Install the required operating system, patches and applications at the source system and configure it to your needs.
2) Create the archive directory on the Ignite-UX server:
# /usr/bin/mkdir –p /var/opt/ignite/archives/Rel_B.xx.yy
3) Copy /opt/ignite/data/scripts/make_sys_image from the Ignite-UX Server to /tmpat the source system and make it executable.
4) Run make_sys_image on the source system with following options:
# /opt/ignite/data/scripts/make_sys_image –v \ -f <script with files or directories to exclude> \ -d <directory to place the archive> \ -s <ip-address of system to place the archive>
for example
# /opt/ignite/data/scripts/make_sys_image -v -f /tmp/exclude \ -d /var/opt/ignite/archives/Rel_B.10.20 -s 1.2.3.4
-f: You also can list single files. For further information please see the man page of make_sys_image. In this example, the directories /space and /export will not be saved into the Golden System Image. The exclude file has following format:
# /usr/bin/cat exclude
+ ONLY NO_ARCHIVE
/space/export
-d : The chosen directory must have enough space. The Image will be created as a gnuzip file and is about half the size of the data to be saved. It also has to be exported via NFS.
-s: Instead of the Ignite-UX server IP, you can also state local for creating the System Image locally. Then you can copy the archive named <hostname>.gz later to the Ignite-UX or another archive server.
You may check the image contents with:
# gzcat <hostname>.gz | pax –v | grep <file_name>

HP-UX Handbook 10 Ignite-UX
August 2007 45/53
5) Copy the config files and edited them correspondingly. If you have used the –s localoption you will have to copy the files from the Ignite-UX server, if Ignite-UX is not installed on the local system.
For HP-UX 10.x copy /opt/ignite/data/examples/core.cfg to /var/opt/ignite/data/Rel_B.10.20/core_700_archive.cfg
For HP-UX 11.x copy /opt/ignite/data/examples/core11.cfg to /var/opt/ignite/data/Rel_B.11.00/core_archive.cfg
Edit the copied config files changing following in the section sw_source:
nfs_source = "<Ignite_Server_IP>:/var/opt/ignite/archives/Rel_B.11.00"
Note: This is the path to the archive which has to be NFS exported.
6) Rename the archive_path in the section init sw_sel "golden image1" so it matches the name of the Golden Image. And if desired change the description as well.
archive_path = "<hostname>.gz"
description = "My Golden System Archive"
7) Get the file system size information of the Golden Image with archive_impact:
/opt/ignite/lbin/archive_impact -t -g \
/var/opt/ignite/archives/Rel_B.11.00/<hostname>.gz
Exchange the current sample "impacts" lines of the config file with the output of the archive_impact command, for example:
impacts = "/" 30 Kb impacts = "/etc" 1722 Kb impacts = "/opt" 123430 Kb ...
8) Add the new configuration to the /var/opt/ignite/INDEX file:
cfg "HP-UX B.11.00 archive" {description "HP-UX B.11.00 archive""/opt/ignite/data/Rel_B.11.00/config""/var/opt/ignite/data/Rel_B.11.00/core_archive.cfg""/var/opt/ignite/config.local"
}
9) Check the INDEX file with:
# /opt/ignite/bin/instl_adm –T
10) Ensure that the client and the archive directory are exported via NFS.
# /usr/bin/vi /etc/exports /var/opt/ignite/clients -anon=2/var/opt/ignite/archives/Rel_B.11.00 –ro,anon=2
# /usr/sbin/exportfs –av

HP-UX Handbook 10 Ignite-UX
August 2007 46/53
11) Please see chapter "Booting and installing an HP-UX client" to install the client.
Creating a Bootable Golden System Image Tape
Note: Because files like /etc/hosts and devices files are temporarily removed from the clients system during the execution of make_sys_image, the system should not be in use!
Please repeat step 1) to 4) of chapter "Creating a Golden System image".
5) Then copy the config files and edited them correspondingly:
For H-UX 10.x copy /opt/ignite/data/examples/core.cfg to /var/opt/ignite/data/Rel_B.10.20/golden_image_cd.cfg
For HP-UX 11.x copy /opt/ignite/data/examples/core11.cfg to /var/opt/ignite/data/Rel_B.11.00/golden_image_cd.cfg
6) Change following in the section sw_source:
source_type="MT"change_media=FALSE ß uncomment this line
7) Then comment these lines:
# nfs_source = "15.1.54.123:/var/opt/ignite/archives" # ftp_source = "[email protected]:iux"# remsh_source = [email protected]
Rename the archive_path in the section init sw_sel "golden image1", so it matches the name of the Golden Image:
archive_path = "<hostname>.gz"
and eventually change the description
description = "My Golden System Archive"
Get the file system size information of the Golden Image with archive_impact:
# /opt/ignite/lbin/archive_impact -t -g \ /var/opt/ignite/archives/Rel_B.11.00/<hostname>.gz
Exchange the current sample "impacts" lines of the config file with the output of the archive_impact command, for example:
impacts = "/" 30 Kb impacts = "/etc" 1722 Kb impacts = "/opt" 123430 Kb …
8) In the next step an HFS file system needs to be created which is a little larger than the Golden Image:
# /usr/sbin/lvcreate -L <image+10%-MB> -n goldenimage /dev/vg00
# /usr/sbin/newfs -F hfs -f 2048 /dev/vg00/rgoldenimage

HP-UX Handbook 10 Ignite-UX
August 2007 47/53
respectively for an Image > 2GB
# /usr/sbin/newfs -F hfs -f 2048 -o largefiles /dev/vg00/rgoldenimage
# /usr/bin/mkdir /bootcd
# /usr/sbin/mount /dev/vg00/goldenimage /bootcd
# /usr/bin/cp /tmp/<hostname>.gz /bootcd
# /usr/sbin/umount /bootcd
9) Then create the boot (LIF) header for the tape. For example, create a LIF image based on /var/opt/ignite/data/Rel_B.11.00/core_archive.cfg . The LIF image will be named uxinstlf_tape. For further information please see the manpage of make_medialif.
# /opt/ignite/bin/make_medialif\ -f /opt/ignite/data/Rel_B.11.00/config\ -f /var/opt/ignite/data/Rel_B.11.00/core_archive.cfg\ -l /var/opt/ignite/data/Rel_B.11.00/uxinstlf_tape
10) The next step would be to write the LIF header and the Golden Image onto tape. Therefore, you have to use a Non-Rewind DDS-1 Device, for example:
# /usr/bin/mt -t /dev/rmt/c0t3d0DDS1n rew# /usr/bin/dd if=/var/opt/ignite/data/Rel_B.11.00/uxinstlf_tape \of=/dev/rmt/c0t3d0DDS1n obs=2k
# /usr/bin/dd if=/var/opt/ignite/archives/Rel_B.11.00/<hostname>.gz \of=/dev/rmt/c0t3d0DDS1n obs=10k
# /usr/bin/mt -t /dev/rmt/c0t3d0DDS1n rew
11) Now you have created a bootable tape. If you install from it, you will receive the "Welcome" screen of the Cold Installation process. You can also change system parameters like file system sizes just as you were used to.
Creating a Bootable Golden System Image CD-ROM
Note: Because files like /etc/hosts and devices files are temporarily removed from the clients system during the execution of make_sys_image, the system should not be in use!
Please repeat step 1) to 4) of chapter "Creating a Golden System image".
5) Then copy the config files and edited them correspondingly:
For HP-UX 10.x copy /opt/ignite/data/examples/core.cfg to /var/opt/ignite/data/Rel_B.10.20/golden_image_cd.cfg
For HP-UX 11.x copy /opt/ignite/data/examples/core11.cfg to /var/opt/ignite/data/Rel_B.11.00/golden_image_cd.cfg
6) Change following in the section sw_source:
source_type="DSK"change_media=FALSE ß uncomment this line

HP-UX Handbook 10 Ignite-UX
August 2007 48/53
7) Then comment these lines:
# nfs_source = "15.1.54.123:/var/opt/ignite/archives" # ftp_source = "[email protected]:iux"# remsh_source = [email protected]
8) Rename the archive_path in the section init sw_sel "golden image1", so it matchesthe name of the Golden Image:
archive_path = "<hostname>.gz"
and eventually change the description
description = "My Golden System Archive"
9) Get the file system size information of the Golden Image with archive_impact:
# /opt/ignite/lbin/archive_impact -t -g \ /var/opt/ignite/archives/Rel_B.11.00/<hostname>.gz
Exchange the current sample "impacts" lines of the config file with the output of the archive_impact command, for example:
impacts = "/" 30 Kb impacts = "/etc" 1722 Kb impacts = "/opt" 123430 Kb ...
10) In the next step an HFS file system needs to be created which is a little larger than the Golden Image:
# /usr/sbin/lvcreate -L <image+10%-MB> -n goldenimage /dev/vg00
# /usr/sbin/newfs -F hfs -f 2048 /dev/vg00/rgoldenimage
respectively for an Image > 2GB
# /usr/sbin/newfs -F hfs -f 2048 -o largefiles /dev/vg00/rgoldenimage
# /usr/bin/mkdir /bootcd
# /usr/sbin/mount /dev/vg00/goldenimage /bootcd
# /usr/bin/cp /tmp/<hostname>.gz /bootcd
# /usr/sbin/umount /bootcd
11) Then copy the config files and edited them correspondingly:
For HP-UX 10.x copy /opt/ignite/data/examples/core.cfg to /var/opt/ignite/data/Rel_B.10.20/golden_image_cd.cfg
For HP-UX 11.x copy /opt/ignite/data/examples/core11.cfg to /var/opt/ignite/data/Rel_B.11.00/golden_image_cd.cfg
12) Change following in the section sw_source:

HP-UX Handbook 10 Ignite-UX
August 2007 49/53
source_type="DSK"change_media=FALSE ß uncomment this line
Then comment these lines:
# nfs_source = "15.1.54.123:/var/opt/ignite/archives" # ftp_source = "[email protected]:iux"# remsh_source = [email protected]
Rename the archive_path in the section init sw_sel "golden image1", so it matches the name of the Golden Image:
archive_path = "<hostname>.gz"
and eventually change the description
description = "My Golden System Archive"
Get the file system size information of the Golden Image with archive_impact:
# /opt/ignite/lbin/archive_impact -t -g \ /var/opt/ignite/archives/Rel_B.11.00/<hostname>.gz
Exchange the current sample "impacts" lines of the config file with the output of the archive_impact command, for example:
impacts = "/" 30 Kb impacts = "/etc" 1722 Kb impacts = "/opt" 123430 Kb ...
13) Now create the Boot (LIF) Header for the CD-ROM . For example, create a LIF image based on /var/opt/ignite/data/Rel_B.11.00/golden_image_cd.cfg. The LIF image will be named uxinstlf_cd. For further information please see the manpage of make_medialif.
# /opt/ignite/bin/make_medialif \-f /opt/ignite/data/Rel_B.11.00/config \-f /var/opt/ignite/data/Rel_B.11.00/golden_image_cd.cfg \-l /tmp/uxinstlf_cd
14) In the next step an HFS file system needs to be created which is a little larger than the Golden Image:
# /usr/sbin/lvcreate -L <image+10%-MB> -n goldenimage /dev/vg00
# /usr/sbin/newfs -F hfs -f 2048 /dev/vg00/rgoldenimage
respectively for an Image > 2GB
# /usr/sbin/newfs -F hfs -f 2048 -o largefiles /dev/vg00/rgoldenimage
# /usr/bin/mkdir /bootcd
# /usr/sbin/mount /dev/vg00/goldenimage /bootcd

HP-UX Handbook 10 Ignite-UX
August 2007 50/53
# /usr/bin/cp /tmp/<hostname>.gz /bootcd
# /usr/sbin/umount /bootcd
15) Now copy the Golden Image into a dd file:
# /usr/bin/dd if=/dev/vg00/goldenimage of=/tmp/bootcd_hfs bs=1024k
16) Now the LIF Image has to be put in front of the Golden Image file:
# /opt/ignite/lbin/instl_combine -F /tmp/uxinstlf_cd \ -C /tmp/bootcd_hfs
17) Now you can burn the Image onto CD-ROM. For this, you can use an CD Writer Utility "CDRecord" at ftp://ftp.fokus.gmd.de/pub/unix/cdrecord
# cdrecord -v speed=2 dev=1,5,0 /tmp/bootcd_hfs
The dev syntax depends on the bus, target, LUN – you can look up the values with:
# cdrecord –scanbus
If you want to test everything before while having the laser burner turned off, you have to call up cdrecord with:
# cdrecord -dummy -v speed=2 dev=1,5,0 /tmp/bootcd_hfs
The Golden Image CD should now be ready – install from it as it being a Cold Installation Medium – just boot from CD.
Copying a bootable CD-ROM using UNIX
1) To copy a CD-ROM, you can use for example the CD Writer Utility "CDRecord" at ftp://ftp.fokus.gmd.de/pub/unix/cdrecord.
2) Insert the original CD-ROM into the drive
# cdrecord -toc -dev=1,3,0first: 1 last 1track: 1 lba: 0 ( 0) 00:02:00 adr: 1 control: 4 mode: 1track:lout lba: 306565 ( 1226260) 68:09:40 adr: 1 control: 4 mode: -1
3) Then eventually insert the CD into a faster drive.
# /usr/bin/dd if=/dev/SD_CDROM of=/image/cdimage.raw bs=2k count=306564
Note: one number less! When doing the dd there shouldn't be any IO/Error. But therewould be an error if you would state 306565.
Insert the blanc disk omitting eject
# cdrecord -vv -eject -speed=2 -dev=1,3,0 /image/cdimage.raw

HP-UX Handbook 10 Ignite-UX
August 2007 51/53
Simplified Creation of Bootable CD/DVD Media
The make_media_install script greatly simplifies the creation of custom bootable CD/DVD media. With one simple command line a CD/DVD can be created that supports two-step media recovery. Additionally, make_media_install can write golden archives to a bootable DVD.
The make_media_install script was introduced with Ignite-UX version C.6.2.241 to simplify the creation of bootable media. This script can be used to replace the instructions for building installation CDs and DVDs in the Ignite-UX Administration Guide.
All HP-UX 11i v2 and HP-UX 11i v3 bootable CD/DVDs created with make_media_installsupport both Itanium®-based and PA-RISC boot.
You can find the script at /opt/ignite/data/scripts/examples/make_media_install. Detailed usage information is available via
# make_media_install -?
Additional information is located at the start of the script.
This white paper assumes the system running make_media_install has a CD or DVD writer. The make_media_install script will automatically write the .iso image (default file name is image.iso) to the CD/DVD. If there is no writable CD/DVD available, the script will halt with a message similar to
:-[ LOAD TRAY failed with SK=5h/ASC=24h/ACQ=00h]: I/O error
and the .iso file will remain in the iso_directory specified with the –m option. Make sure you have enough disk space in the iso_directory to hold the .iso image.
Two-Step Recovery CD/DVD
Two-step media recovery using a bootable CD/DVD is necessary to restore from tapes created with the Ignite-UX command make_tape_recovery on certain Itanium-based systems that do not support direct tape boot. See the section regarding tape recovery with no tape boot support in the Ignite-UX Administration Guide for more information on two-step media recovery.
two-step media recovery requires the version of Ignite-UX on the tape, on the bootable CD/DVD, and on the system creating the CD/DVD media to be identical. If you do not have a matching Operating Environment DVD, the make_media_install script can be used to easily create a bootable CD/DVD with the correct Ignite-UX version.
Example Create HP-UX 11i v3 bootable CD/DVD media for two-step media recovery
On a system with a CD/DVD writer and the same version of Ignite-UX as on your tape, execute the following command (iso_directory is the target directory for the .iso media file and the –r option specifies the release, such as B.11.23 or B.11.31):
# make_media_install –r B.11.31 –m iso_directory

HP-UX Handbook 10 Ignite-UX
August 2007 52/53
Golden Archive DVD
Golden Archive media can be built for PA-RISC systems, Itanium-based systems, or both since the bootable DVD created with make_media_install on HP-UX 11i v2 or 11i v3 will support boot for either architecture. The golden archive, however, can only be installed on a system matching the architecture type it was created from.
The make_media_install script will generate impact statements for you, using either the –lcommand line option or the default $ImpactLevelDefault. See the start of the script for more information.
The following examples write golden archives created with the make_sys_image command to DVD.
Note: Large golden archives may not fit on a DVD. For more information, see the sections FILE SIZES and IMAGE SIZE at the start of the make_media_install script.
Example: Put an Itanium-based HP-UX 11i v3 golden archive on a DVD
On a system with a DVD writer, execute the following commands. (The iso_directory is the target directory for the .iso media file. The –r option specifies the release – valid values for Itanium-based systems are B.11.23 and B.11.31. The –o option specifies the hardware architecture - the only valid value for an Itanium-based system is IA.)
# mkdir /var/opt/ignite/media/pseudo_root/archive
# cp goldenarchive.gz /var/opt/ignite/media/pseudo_root/archive
# make_media_install –r B.11.31 –o IA –a goldenarchive.gz \
–m iso_directory
Example: Put a PA-RISC HP-UX 11i v2 golden archive on a DVD
On a system with a DVD writer, execute the following commands. (The iso_directory is the target directory for the .iso media file. The –r option specifies the release, such as B.11.11, B.11.23, or B.11.31. The –o option specifies the hardware architecture – valid choices on a PA-RISC system are: 32, 64v, or 64w.)
# mkdir /var/opt/ignite/media/pseudo_root/archive
# cp goldenarchive.gz /var/opt/ignite/media/pseudo_root/archive
# make_media_install –r B.11.23 –o 64w –a goldenarchive.gz \–m iso_directory
Example: Put two HP-UX 11i v2 golden archives, one Itanium-based and one PA-RISC, on a DVD
The Itanium-based golden archive can only be installed on another Itanium-based system. Similarly, the PA-RISC golden archive can only be installed on another PA-RISC system. The DVD will be able to boot either type of architecture.

HP-UX Handbook 10 Ignite-UX
August 2007 53/53
On a system with a DVD writer, execute the following commands. (The file suffixes .pa.gzand .ia.gz replace the make_media_install –o option. The iso_directory is the target directory for the .iso media file. The –r option specifies the release, such as B.11.23, or B.11.31.)
# mkdir /var/opt/ignite/media/pseudo_root/archive
# cp PAgoldenarchive.pa.gz /var/opt/ignite/media/pseudo_root/archive
# cp IAgoldenarchive.ia.gz /var/opt/ignite/media/pseudo_root/archive
# make_media_install –r B.11.23 –a PAgoldenarchive.pa.gz \–a IPgoldenarchive.ia.gz –m iso_directory
Additional information
Ignite-UX Administration Guide: http://docs.hp.com/hpux/onlinedocs/B2355-90704/B2355-90704.html
Ignite-UX and vPars: If you like to use Ignite-UX with HP-UX Virtual Partitions (vPars) refer to vPars chapter.
Copyright © 2022 FDOKUMEN