HRMS Communication Site - NC DPI
707
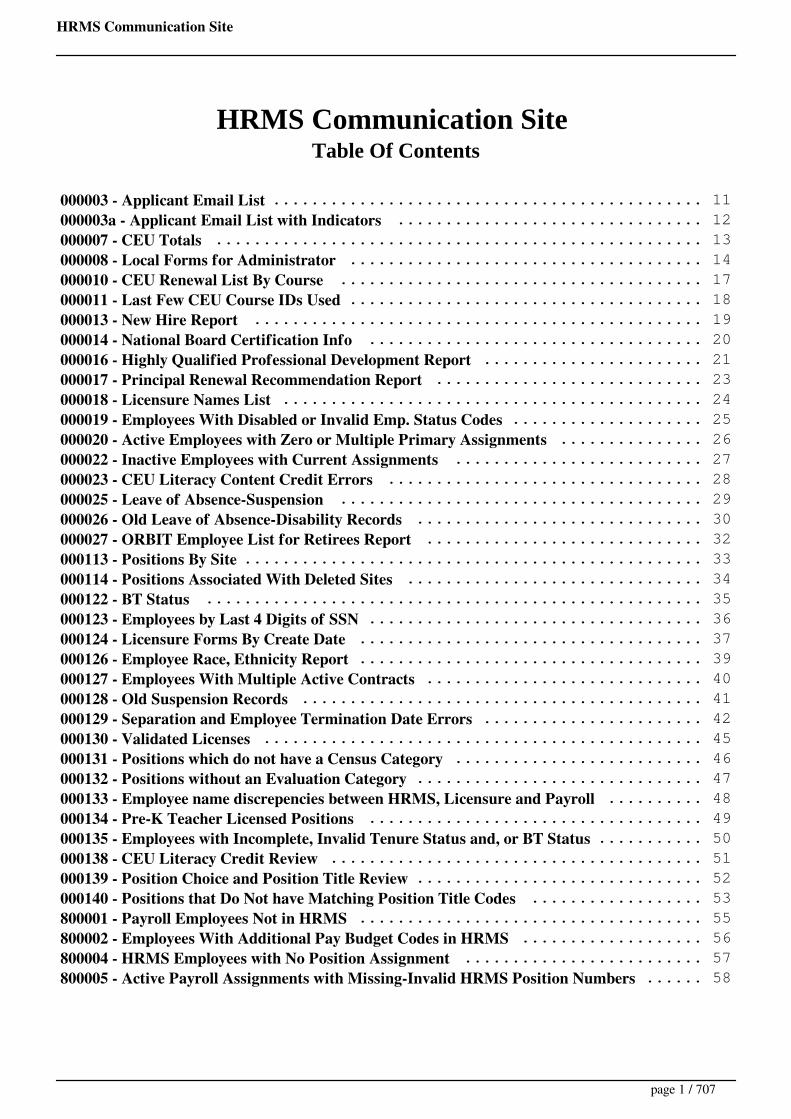
HRMS Communication Site HRMS Communication Site Table Of Contents 000003 - Applicant Email List ............................................. 11 000003a - Applicant Email List with Indicators ................................ 12 000007 - CEU Totals ................................................... 13 000008 - Local Forms for Administrator ..................................... 14 000010 - CEU Renewal List By Course ...................................... 17 000011 - Last Few CEU Course IDs Used ..................................... 18 000013 - New Hire Report ............................................... 19 000014 - National Board Certification Info ................................... 20 000016 - Highly Qualified Professional Development Report ....................... 21 000017 - Principal Renewal Recommendation Report ............................ 23 000018 - Licensure Names List ............................................ 24 000019 - Employees With Disabled or Invalid Emp. Status Codes .................... 25 000020 - Active Employees with Zero or Multiple Primary Assignments ............... 26 000022 - Inactive Employees with Current Assignments .......................... 27 000023 - CEU Literacy Content Credit Errors ................................. 28 000025 - Leave of Absence-Suspension ...................................... 29 000026 - Old Leave of Absence-Disability Records .............................. 30 000027 - ORBIT Employee List for Retirees Report ............................. 32 000113 - Positions By Site ................................................ 33 000114 - Positions Associated With Deleted Sites ............................... 34 000122 - BT Status .................................................... 35 000123 - Employees by Last 4 Digits of SSN ................................... 36 000124 - Licensure Forms By Create Date .................................... 37 000126 - Employee Race, Ethnicity Report .................................... 39 000127 - Employees With Multiple Active Contracts ............................. 40 000128 - Old Suspension Records .......................................... 41 000129 - Separation and Employee Termination Date Errors ....................... 42 000130 - Validated Licenses .............................................. 45 000131 - Positions which do not have a Census Category .......................... 46 000132 - Positions without an Evaluation Category .............................. 47 000133 - Employee name discrepencies between HRMS, Licensure and Payroll .......... 48 000134 - Pre-K Teacher Licensed Positions ................................... 49 000135 - Employees with Incomplete, Invalid Tenure Status and, or BT Status ........... 50 000138 - CEU Literacy Credit Review ....................................... 51 000139 - Position Choice and Position Title Review .............................. 52 000140 - Positions that Do Not have Matching Position Title Codes .................. 53 800001 - Payroll Employees Not in HRMS .................................... 55 800002 - Employees With Additional Pay Budget Codes in HRMS ................... 56 800004 - HRMS Employees with No Position Assignment ......................... 57 800005 - Active Payroll Assignments with Missing-Invalid HRMS Position Numbers ...... 58 page 1 / 707
-
Upload
khangminh22 -
Category
Documents
-
view
2 -
download
0
Transcript of HRMS Communication Site - NC DPI
HRMS Communication Site
HRMS Communication SiteTable Of Contents
000003 - Applicant Email List ............................................. 11000003a - Applicant Email List with Indicators ................................ 12
000007 - CEU Totals ................................................... 13000008 - Local Forms for Administrator ..................................... 14000010 - CEU Renewal List By Course ...................................... 17
000011 - Last Few CEU Course IDs Used ..................................... 18000013 - New Hire Report ............................................... 19
000014 - National Board Certification Info ................................... 20
000016 - Highly Qualified Professional Development Report ....................... 21000017 - Principal Renewal Recommendation Report ............................ 23000018 - Licensure Names List ............................................ 24000019 - Employees With Disabled or Invalid Emp. Status Codes .................... 25000020 - Active Employees with Zero or Multiple Primary Assignments ............... 26000022 - Inactive Employees with Current Assignments .......................... 27
000023 - CEU Literacy Content Credit Errors ................................. 28
000025 - Leave of Absence-Suspension ...................................... 29
000026 - Old Leave of Absence-Disability Records .............................. 30
000027 - ORBIT Employee List for Retirees Report ............................. 32
000113 - Positions By Site ................................................ 33000114 - Positions Associated With Deleted Sites ............................... 34
000122 - BT Status .................................................... 35
000123 - Employees by Last 4 Digits of SSN ................................... 36000124 - Licensure Forms By Create Date .................................... 37000126 - Employee Race, Ethnicity Report .................................... 39000127 - Employees With Multiple Active Contracts ............................. 40000128 - Old Suspension Records .......................................... 41000129 - Separation and Employee Termination Date Errors ....................... 42000130 - Validated Licenses .............................................. 45000131 - Positions which do not have a Census Category .......................... 46000132 - Positions without an Evaluation Category .............................. 47000133 - Employee name discrepencies between HRMS, Licensure and Payroll .......... 48000134 - Pre-K Teacher Licensed Positions ................................... 49
000135 - Employees with Incomplete, Invalid Tenure Status and, or BT Status ........... 50000138 - CEU Literacy Credit Review ....................................... 51000139 - Position Choice and Position Title Review .............................. 52000140 - Positions that Do Not have Matching Position Title Codes .................. 53
800001 - Payroll Employees Not in HRMS .................................... 55800002 - Employees With Additional Pay Budget Codes in HRMS ................... 56800004 - HRMS Employees with No Position Assignment ......................... 57
800005 - Active Payroll Assignments with Missing-Invalid HRMS Position Numbers ...... 58
page 1 / 707

HRMS Communication Site
800006 - Active HRMS Employees Not in Payroll ............................... 59About HRMS ........................................................ 60Absences ........................................................... 62
Action Notice Recipients ................................................ 64
Add Assignment ...................................................... 68Advanced Properties ................................................... 72All Employees and Substitutes ............................................ 73
Assign CEU Credits .................................................... 75Assignment Actions .................................................... 77Assignment Type ...................................................... 80Assignments Active Between .............................................. 82Assignments Active On ................................................. 83
Beginning Teacher Reports .............................................. 84
Beginning Teacher Turnover Summary ...................................... 85Beginning Teachers Leaving .............................................. 86Beginning Teachers Not Leaving ........................................... 87Board Action Date ..................................................... 88Board Action Reports .................................................. 89
BT Status Mass Update ................................................. 90Budget Code Request Details ............................................. 92CC Names & Titles .................................................... 95Certified Mail Number ................................................. 96
CEU Employee History (Edit) ............................................. 97CEU Employee History (View) ............................................ 99CEU Template Management ............................................. 101Change SSN ........................................................ 103Class Code ......................................................... 105Class Completed on ................................................... 106Class Completed on or After ............................................. 107Class Credits ....................................................... 108
Class Description .................................................... 109
Class Period ........................................................ 110Class Source ........................................................ 111Contact By Date ..................................................... 112
Content & Literacy Credits ............................................. 113
Continuing Education ................................................. 115Continuing Education Class Templates ..................................... 116Continuing Education History by Class ..................................... 117Continuing Education History by Employee .................................. 118Contract & Letter Data Fields ........................................... 120
Contract Conditions .................................................. 122
Contract Created on or After ............................................ 123Contract Non-Renewal Letters ........................................... 124Contract Type ....................................................... 126Contract Types ...................................................... 127
page 2 / 707

HRMS Communication Site
Contracts .......................................................... 128Contracts & Cover Letters .............................................. 129Contracts Mass Build ................................................. 131
Correct Employee Dates ................................................ 133Create a Course Template .............................................. 136
Create a Position ..................................................... 138Create Address File for Mail Merge ....................................... 139
Create Edit Contract .................................................. 142Current Assignment with End Date ........................................ 145Custom Contracts & Letters ............................................. 146Daily-Hourly Rate .................................................... 149Dismissed Teacher List ................................................ 150
Do Not Hire List ..................................................... 153Do Not Hire Staff Action ............................................... 155Edit a Course Template ................................................ 157Edit a Position ...................................................... 158
Edit Assignment ..................................................... 159Edit Assignment Dates or Employment Status ................................ 165EEO-5 Detail by Classification ........................................... 171EEO-5 Detail by Site .................................................. 172EEO-5 Error ........................................................ 173EEO-5 Reports ...................................................... 175EEO-5 Summary ..................................................... 177Employee Comments .................................................. 178Employee Demographics ............................................... 182
Employee Job Action .................................................. 184Employee License Data ................................................ 186
Employee Listing .................................................... 191
Employee Page ...................................................... 192Employee Paraprofessional ............................................. 194
Employee Self-Service ................................................. 197Employee Status ..................................................... 198Employee Summary ................................................... 199Employee View Documents .............................................. 202Employee View Substitutes .............................................. 204Employee Views ..................................................... 209
Employment Status ................................................... 210Envelope Home Address ............................................... 213
Envelope Site Address ................................................. 214Expiring License Letter ................................................ 215Export Report Data ................................................... 216Fit Contracts on One Page .............................................. 218forum ............................................................ 220
Frequency Of Payment ................................................ 221
Getting Started ...................................................... 222
page 3 / 707

HRMS Communication Site
Go-To-Webinar Customer View .......................................... 225Granting DTL Access ................................................. 226
Hide LEA Address ................................................... 227
Home ............................................................. 228HQ - Non-HQ ....................................................... 229HRMS 6.3 Tips ...................................................... 230HRMS Help ........................................................ 231HRMS Home Page Help ................................................ 233HRMS Overview ..................................................... 234HRMS Training ..................................................... 241IAC Confirm Contracts ................................................ 243IAC Review Contracts ................................................. 244IAC Setup Contracts .................................................. 245Import Payroll Data .................................................. 246
Include Only Core Academic Areas ........................................ 247Include Protected Addresses ............................................. 248Include Signature Line ................................................ 249
Include Site Name on Contract ........................................... 250Include Telephone Numbers ............................................. 251Include Unlisted Home Phone Numbers ..................................... 252Installing & Upgrading ................................................ 253
Iran Divestment Act and Personnel Contracts ................................ 254
Job Actions ......................................................... 255KB10000 - I am new to HRMS. What Help should I review first? ................... 257KB10100 - HRMS Local Forms ........................................... 259KB10101 - Change SSN Error ............................................ 262KB10102 - UID or Payroll ID missing in HRMS. .............................. 263
KB10103 - BT Status Best Practices ....................................... 264
KB10202 - How do I search for a name with an apostrophe? ...................... 266
KB10300 - Removing a Current Assignment .................................. 267KB10301 - Switching Assignments for 2 Staff Members (Flip Flopping) .............. 268KB10302 - Automate Assignments Ending for Temporary Employees ................ 271KB10303 - When is the employee's Original Hire Date set? ....................... 272
KB10305 - When do assignments get archived? future assignments become current? ..... 273KB10306 - Tracking Staff Starting as a Sub Then Moving to Permanent Status in the SamePosition Best Practices ................................................. 274KB10307 - Best way to remove someone who resigns before starting. ................ 275
KB10308 - How to Show an Employee Status, Hours, or Percent Employe Change for theSame Position With an Archive ........................................... 276KB10400 - RT2012 Workstation Requirements ................................ 279KB10401 - How to Download the Reporting Tool 2012 ........................... 280KB10402 - I am getting a 'Conversion Error' when running a CEU report in RT2012. .... 281
KB10403 - I installed RT2012 on my desktop, but there is no icon. How can I create one? .. 282KB10404 - The left margin on printed contracts is very narrow. What can I do to fix this? .. 283KB10405 - How can I export data from HRMS Reporting Tool 2012? ................ 285
page 4 / 707

HRMS Communication Site
KB10406 - IBM i Access for Window(s) 8, 8.1, 10 .............................. 286KB10410 - Where can I find a Tutorial for Query Builder? ....................... 288KB10411 - Special Query Keywords for Local Web Reports ....................... 289KB10412 - Password Protecting Local Web Reports ............................ 292KB10413 - Prompts for my Local Web Reports are not appearing and I am getting noresults. ............................................................ 293KB10414 - When creating a Filter in Query Builder, I do not get a prompt. How can I fixthis? ............................................................. 294
KB10415 - My Web Reports or Local Web Reports are hanging and I have a blank screen. .. 295KB10416 - Cross Site Scripting error when running local or web reports .............. 296KB10506 - Problem Deleting Position Titles .................................. 297KB10600 - Changing Pay Method for Someone in a Current Assignment ............. 298
KB10601 - Salary Schedules, Grades and Steps are missing in HRMS? ............... 299KB10700 - Why Can't I Access the Dismissed Teacher List? ...................... 300
KB10702 - I changed someone's User Roles and the access is not correct. What do I do? ... 301KB10703 - What role(s) should someone have just to run certain Local Web Reports? .... 302
KB10704 - A No Resume message appears with I try to register a new staff member whowill use HRMS. ...................................................... 303KB10705 - I am getting the error 'Invalid Username and or password' when trying to loginto HRMS. ........................................................ 304
KB10800 - HRMS Website is not up, what should I do? .......................... 305KB10801 - I am getting a TOMCAT error, what should I do? ...................... 307KB10802 - System Data Update Schedule .................................... 308KB10803 - Corrupt Server ID Error on Lotus Domino Console. .................... 309KB10804 - Domino and AS400 HRMS Certification ............................ 310KB10805 - Lotus Notes Scheduled Agent is Not Running ......................... 311KB10810 - SSL Warnings with IE7 and above. ................................ 312KB10811 - My Menu Bar in Internet Explorer is gone. How do I get it back? .......... 313
KB10812 - How To Disable (Do you want to view only webpages content that was deliveredsecurely?) message. ................................................... 314KB10813 - Unable to Access HRMS. No Continue To Website (not recommended) Option .. 315KB10900 - Is the Lookup My CEUs - UID Page secure? .......................... 317KB11000 - What roles should my principals have? ............................. 318
KB11100 - Are substitutes put into positions? ................................ 319
KB11200 - Can my Professional Development Vendor interface with HRMS? .......... 320KB11201 - The Split of Content and Literacy credits is not occuring when I post a class ... 321KB11300 - Can I print Contracts in HRMS and not use the Reporting Tool? ........... 322KB11301 - How can I print an old Career Contract? ............................ 323KB11501 - How Current is Licensure Data in HRMS? .......................... 324
KB11502 - I get an error when I try and view Licensure Data Changes. ............... 325KB11503 - HQ Codes and Descriptions ..................................... 326KB11504 - Licensure Class Codes and Descriptions ............................ 327
KB11505 - Licensure Status Codes ........................................ 328
KB11506 - Licensure Basis Codes ......................................... 330KB11600 - How do I change the contact information printing on the Licensure Form? .... 332
page 5 / 707

HRMS Communication Site
KB11800 - How often is payroll data in HRMS refreshed? ........................ 333KB11801 - Who has priority in putting the position number on the payroll assignmentrecords with the new ISIS? Payroll or HRMS? ............................... 334
KB11802 - Configure HRMS for ISIS 6 ..................................... 335KB12000 - Do Not Hire, Dismissed Teacher, Subpar Candidate, & Revoked License List .. 337KB12001 - Calculating Days Worked During School Year ........................ 338KB12002 - Getting error when trying to validate name when entering a CEU. .......... 339
KB12003 - What are HRMS IDs and what are they used for? ...................... 340KB13000 - Contract Condition Examples .................................... 341KB14002 - When I select an action of the Staff Action Console, nothing happens. ........ 342KB14003 - Leave of Absence Best Practices .................................. 344KB14201 - What is the best way to change a Future Resignation? ................... 346KB14202 - Why is there a Rehire Eligibility date on separations? ................... 347KB14204 - When Editing an Archived (Completed) Separation, I get the error EffectiveDate of the Separation Must Remain in the Past ............................... 348KB14205 - How do I remove a termination date for an active employee? .............. 349KB15000 - Workaround for Internet Explorer 9 Issues .......................... 350KB15001 - Truenorthlogic Data Load - FAQs ................................. 351KB15002 - Workaround for Internet Explorer 10 Issues ......................... 353
KB15003 - Workaround for Internet Explorer 11 Issues ......................... 355
KB15004 - Issues viewing CEU History ..................................... 357KB20000 - HRMS Website issues caused by Zscaler ............................ 358KB402 Contract Digital Signatures ........................................ 359KB72015 - Reporting Tool upgrade error .................................... 360KeyContacts ........................................................ 361Knowledge Base ..................................................... 362
Last Hire Date between ................................................ 372LEA Settings ....................................................... 373
Leave and Disability .................................................. 376
Leave Balances ...................................................... 386Leave of Absence .................................................... 389
License Area Effective Date ............................................. 391License Area-Category Cross Reference .................................... 392
License Assignment and Contract Info ..................................... 393
License Categories .................................................... 398License Expiring On .................................................. 399License Renewal Letter ................................................ 400License Status ....................................................... 401License Type ........................................................ 402Licensed Label ...................................................... 403Licensure Data Changes ............................................... 404
Licensure Forms ..................................................... 406Licensure Report ..................................................... 414LOA Types ......................................................... 416Local Forms ........................................................ 417
page 6 / 707

HRMS Communication Site
Local Forms Setup ................................................... 422
Local Use Labels Employee ............................................. 429
Local Use Labels Employee Assignment ..................................... 430Local Use Labels Position .............................................. 431
Logging In ......................................................... 432Longevity .......................................................... 433Lookup My CEUs or UID ............................................... 434Manage Users ....................................................... 435Mass Update Literacy Credits ........................................... 442
Mass Update Single Course ............................................. 444
Mass Updates ....................................................... 445MBC Confirm Contracts ............................................... 446MBC Find Employees ................................................. 447MBC Review Contracts ................................................ 449MBC Select Contracts ................................................. 450MBC Setup Contracts ................................................. 451NCLB Licensed HQ Qualifications Reports .................................. 453New Employee Demographics ............................................ 455New employee Position Assignment ........................................ 459New Hire .......................................................... 462New Hire Employee ................................................... 464New Hire Report ..................................................... 469New Hire Screen ..................................................... 470New Hire Without Vacancy Permit ........................................ 472New Hires ......................................................... 473
New_GovDelivery .................................................... 477Next School Year ..................................................... 478Output Type ........................................................ 479Paraprofessional Reports ............................................... 480Payroll Position Number Update .......................................... 482Personnel Calendar ................................................... 485Personnel Directory ................................................... 491Personnel Manager Name & Title ......................................... 492Phone Number ...................................................... 493Pick Employee Statuses ................................................ 494Pick Employees ...................................................... 495Pick Licensure Areas .................................................. 496Pick Position Descriptions .............................................. 497Pick Position Titles ................................................... 498Pick Sites .......................................................... 499Pick Sites (Substitutes) ................................................ 500
Position Budget Code Mass Update ........................................ 501Position Choices and Position Titles ....................................... 503
Position Employee Hierarchy ............................................ 504Position Groups ..................................................... 506
page 7 / 707

HRMS Communication Site
Position Information .................................................. 509Position List & Inactive List ............................................. 517Position Management (Central Office) ..................................... 518
Position Management (Principals) ........................................ 520
Position Search Page .................................................. 521Position Titles ....................................................... 522Position Type ....................................................... 523Positions .......................................................... 524
Primary - Non-Primary ................................................ 525Principal Page - Lists .................................................. 526Principals Page ...................................................... 531Principals Page Central Office View ....................................... 534Principals Page Forms ................................................. 535Prior Renewal Cycle ending on ........................................... 542Professional Development Report ......................................... 543Program Codes ...................................................... 545Promotion, Demotion, or Salary Change .................................... 546
Public Records Date Selection ............................................ 554Public Records Law ................................................... 555Public Records Reports ................................................ 556PublicRecords Date ................................................... 558Re-employment ...................................................... 559Reference Guides .................................................... 566
Register ........................................................... 567Renewal Cycle ending on ............................................... 569Renewal List ........................................................ 570Report Period ....................................................... 572Report Title ........................................................ 573
Reporting Tool ...................................................... 574School Year Employed ................................................. 576Search Applications ................................................... 577Search Employee Information ........................................... 578
Select Report ....................................................... 579
Selection Criteria .................................................... 580
Separation ......................................................... 582Setting the TCP-IP Address ............................................. 590Site Assignment Information ............................................ 591Site Contacts ....................................................... 592
Sites .............................................................. 593Sort by ............................................................ 594Specify a Class Roster ................................................. 595SQL Logging ....................................................... 597
SS-200 Detail ....................................................... 598
SS-200 Error ....................................................... 599
SS-200 Instructions ................................................... 602
page 8 / 707

HRMS Communication Site
SS-200 Reports ...................................................... 603SS-200 Summary by Classification ........................................ 605SS-200 Summary by Site ............................................... 606
SS-300 Detail ....................................................... 607
SS-300 Error ....................................................... 608
SS-300 Instructions ................................................... 614SS-300 Reports ...................................................... 616SS-300 Summary ..................................................... 619SSN (Display) ....................................................... 620Staff Action Console .................................................. 621Staff Action Search ................................................... 623Staff Action Workflow Management ....................................... 626Staff Actions ....................................................... 628
Staffing Options ..................................................... 629Status and Benefits ................................................... 630Steering Committee ................................................... 633Subject ........................................................... 636
Substitute Grades .................................................... 637Substitute Listing .................................................... 638Substitute Profile .................................................... 639
Substitute Rate Mass Update ............................................ 642Substitute Type ...................................................... 644Substitute Types ..................................................... 645Substitute Web Reports ................................................ 646Support Resources ................................................... 647
Suspension ......................................................... 648System Configuration ................................................. 658TCP-IP Settings ..................................................... 660Teacher Turnover Exception ............................................ 661
Teacher Turnover Reports .............................................. 663Teacher Turnover Summary ............................................. 664Teachers Leaving .................................................... 665
Teachers Not Leaving ................................................. 666
Template .......................................................... 667
Tenure Status ....................................................... 668Tenure Status Code Mass Update ......................................... 669Tenure Status Codes .................................................. 672Tips for Exporting Reports ............................................. 673
Training Resources ................................................... 675Transfer Assignment .................................................. 676Transmitting Private Information Electronically .............................. 679
Update Substitutes ................................................... 680
User Roles ......................................................... 682
Video - CEUs and Licensure Renewal ...................................... 683Video - Creating Contracts .............................................. 684
page 9 / 707

HRMS Communication Site
Video - Creating Positions, Adding Assignments, and Transfers .................... 685Video - Desktop Reporting Tool .......................................... 686
Video - Entering and Maintaining CEUs .................................... 687Video - Entering New Employees (Without Vacancy Permit) ...................... 688Video - HRMS 6.3 Highlights (Separations) .................................. 689Video - HRMS Communication Website .................................... 690
Video - HRMS Managing Applications ..................................... 691
Video - HRMS Web Reports ............................................. 692Video - Payroll Position Number Update .................................... 693Video - Preparing for Year End .......................................... 694
Video - Review of Credentials ............................................ 695Video - Reviewing Employee Data - Principal ................................. 696Video - Running the EEO-5 Report ........................................ 697Video - Webinar Test .................................................. 698Videos ............................................................ 699View a Position ...................................................... 700View All Assignment Details ............................................. 701Web Reports ........................................................ 704WIKI Space changes .................................................. 706Years Experience .................................................... 707
page 10 / 707
HRMS Communication Site
HRMS Help > Web Reports > 000003 - Applicant Email List
User Roles: Principal/Hiring Agent, Applicant Viewer, Applicant Entry, System Administrator
Last Updated: Nov 16, 2017 5:17 am
The purpose of this report is to provide a listing of applicant's email address and contact information forthose applicants who submitted or modified an application between the dates specified. The user mayselect Licensed, Classified, Bus Driver or Substitute application type. The results are sorted by applicationmodification date and then name. The email listing may prove beneficial for informing applicants of LEAspecific events, such as upcoming job-fairs, or to send follow-up e-mail to those applicants who attended ajob fair.
page 11 / 707

HRMS Communication Site
HRMS Help > Web Reports > 000003a - Applicant Email List with Indicators
User Roles: Principal/Hiring Agent, Applicant Viewer, Applicant Entry, System Administrator
Last Updated: Nov 16, 2017 5:18 am
The purpose of this report is to provide a listing of applicant's contact information and indicators (Subpar,Do Not Hire, Revoked License, Dismissed, Current Employee Status.) The user may select a date rangeand application type. The results are sorted by application modification date and then name. This report isbased on 000003 with the addition of indicator fields. The listing may prove beneficial for districts thathave switched to the new NC School Jobs powered by PeopleAdmin when seeking applicants to contactfrom School Jobs as part of the districts transition process.
page 12 / 707

HRMS Communication Site
HRMS Help > Web Reports > 000007 - CEU Totals
User Roles: System Administrator, Continuing Education Editor, Finance OfficerLast Updated: Aug 31, 2017 8:00 am
Report Description: The purpose of this report is to list total CEUs per Licensed staff within theirRenewal Cycle. HQ Count is the number of classes taken that were identified as HQ. This can assist HRstaff with reviewing the number of credits a staff member needs for upcoming License renewal.
Output Options: XML (Default), Plain Text XML, Excel
Selection Criteria: None
Sample Report
page 13 / 707
HRMS Communication Site
HRMS Help > Web Reports > 000008 - Local Forms for Administrator
User Roles: System AdministratorLast Updated: Oct 28, 2015 6:33 am
Report Description: allows LEAs using Local Forms to query from a selected form by a specific daterange.
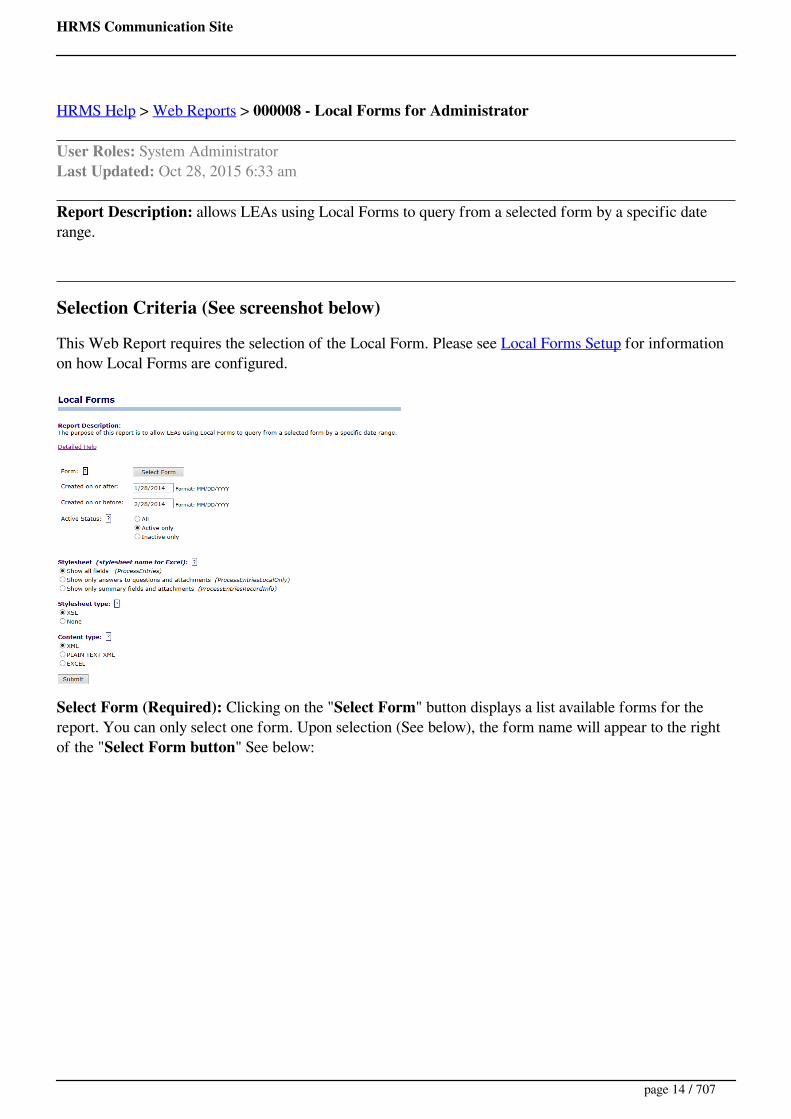
Selection Criteria (See screenshot below)
This Web Report requires the selection of the Local Form. Please see Local Forms Setup for informationon how Local Forms are configured.
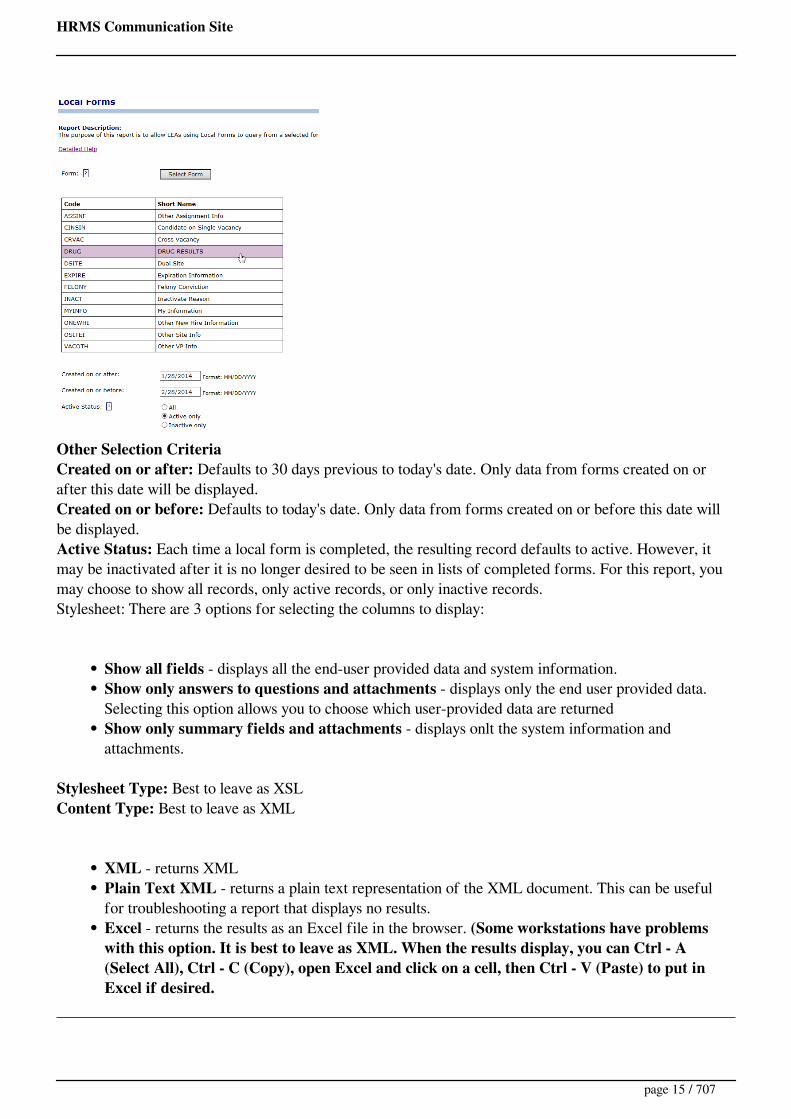
Select Form (Required): Clicking on the "Select Form" button displays a list available forms for thereport. You can only select one form. Upon selection (See below), the form name will appear to the rightof the "Select Form button" See below:
page 14 / 707
HRMS Communication Site
Other Selection CriteriaCreated on or after: Defaults to 30 days previous to today's date. Only data from forms created on orafter this date will be displayed.Created on or before: Defaults to today's date. Only data from forms created on or before this date willbe displayed.Active Status: Each time a local form is completed, the resulting record defaults to active. However, itmay be inactivated after it is no longer desired to be seen in lists of completed forms. For this report, youmay choose to show all records, only active records, or only inactive records.Stylesheet: There are 3 options for selecting the columns to display:
Show all fields - displays all the end-user provided data and system information.Show only answers to questions and attachments - displays only the end user provided data.Selecting this option allows you to choose which user-provided data are returnedShow only summary fields and attachments - displays onlt the system information andattachments.
Stylesheet Type: Best to leave as XSLContent Type: Best to leave as XML
XML - returns XMLPlain Text XML - returns a plain text representation of the XML document. This can be usefulfor troubleshooting a report that displays no results.Excel - returns the results as an Excel file in the browser. (Some workstations have problemswith this option. It is best to leave as XML. When the results display, you can Ctrl - A(Select All), Ctrl - C (Copy), open Excel and click on a cell, then Ctrl - V (Paste) to put inExcel if desired.
page 15 / 707
HRMS Communication Site
TipsYou may have to add leading zeros to date fields in the selection criteria.
Sample Report
page 16 / 707

HRMS Communication Site
HRMS Help > Web Reports > 000010 - CEU Renewal List By Course
User Roles: System Administrator, CEU Viewer and Editor, Finance OfficerLast Updated: Jun 26, 2017 12:01 pm
Report Description: The purpose of this report is to provide a list of staff who have taken a specifiedCEU course.
Output Options: XML (Default), Plain Text XML, Excel
Selection Criteria: Course Code
Sample Report
The report below displays a list of renewal credits for course/class 042798.
page 17 / 707
HRMS Communication Site
HRMS Help > Web Reports > 000011 - Last Few CEU Course IDs Used
User Roles: System Administrator, Continuing Education Entry, Finance OfficerLast Updated: Jun 26, 2017 12:10 pm
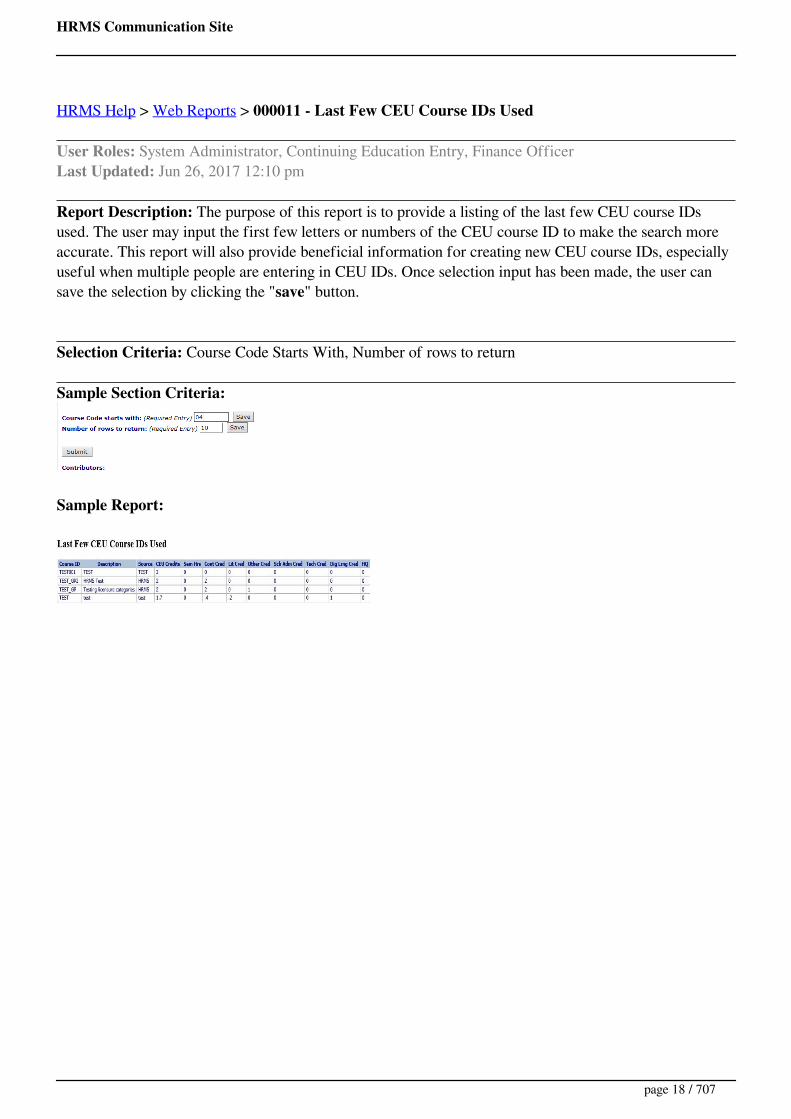
Report Description: The purpose of this report is to provide a listing of the last few CEU course IDsused. The user may input the first few letters or numbers of the CEU course ID to make the search moreaccurate. This report will also provide beneficial information for creating new CEU course IDs, especiallyuseful when multiple people are entering in CEU IDs. Once selection input has been made, the user cansave the selection by clicking the "save" button.
Selection Criteria: Course Code Starts With, Number of rows to return
Sample Section Criteria:
Sample Report:
page 18 / 707

HRMS Communication Site
HRMS Help > Web Reports > 000013 - New Hire Report
User Roles: System Administrator, Finance OfficerLast Updated: Oct 28, 2015 6:31 am
Report Description: The purpose of this report is to provide LEA's with an accurate list of newly hiredemployees.
Selection Criteria/Information:
Starting Last Hire DateEnding Last Hire DateEmployer NameEmployer AddressEmployer CityEmployer StateEmployer ZipSEINFEIN
Output Options: XML (Default), Plain Text XML, Excel
Sample Section Criteria:
Sample Report:
page 19 / 707

HRMS Communication Site
HRMS Help > Web Reports > 000014 - National Board Certification Info
User Roles: System Administrator, Finance OfficerLast Updated: Oct 28, 2015 6:31 am
Report Description: The purpose of this report is to provide a list of individuals with a National BoardCertification, their NBPTS expiration date, and associated budget code information. Employees must be inan assignment in order to be included in the report. The result set is sorted by employee last name.
Selection Criteria: None
Output Options: XML (Default), Plain Text XML, Excel
Sample Report
page 20 / 707
HRMS Communication Site
HRMS Help > Web Reports > 000016 - Highly Qualified Professional Development Report
User Roles: System Administrator, Finance OfficerLast Updated: Oct 28, 2015 6:31 am
Report Description: The purpose of the following reports are to provide LEA's with an accurate list ofvarious types of teachers in Core Academic Areas.
Tips:
Only one of the Report Data options can be selected.Make sure to review the "Core Academic" indicator on positions and edit if needed.Position number must be on payroll assignment records since payroll object codes are used todetermine if a teacher or not.
Output Options: XML (Default), Plain Text XML, Excel
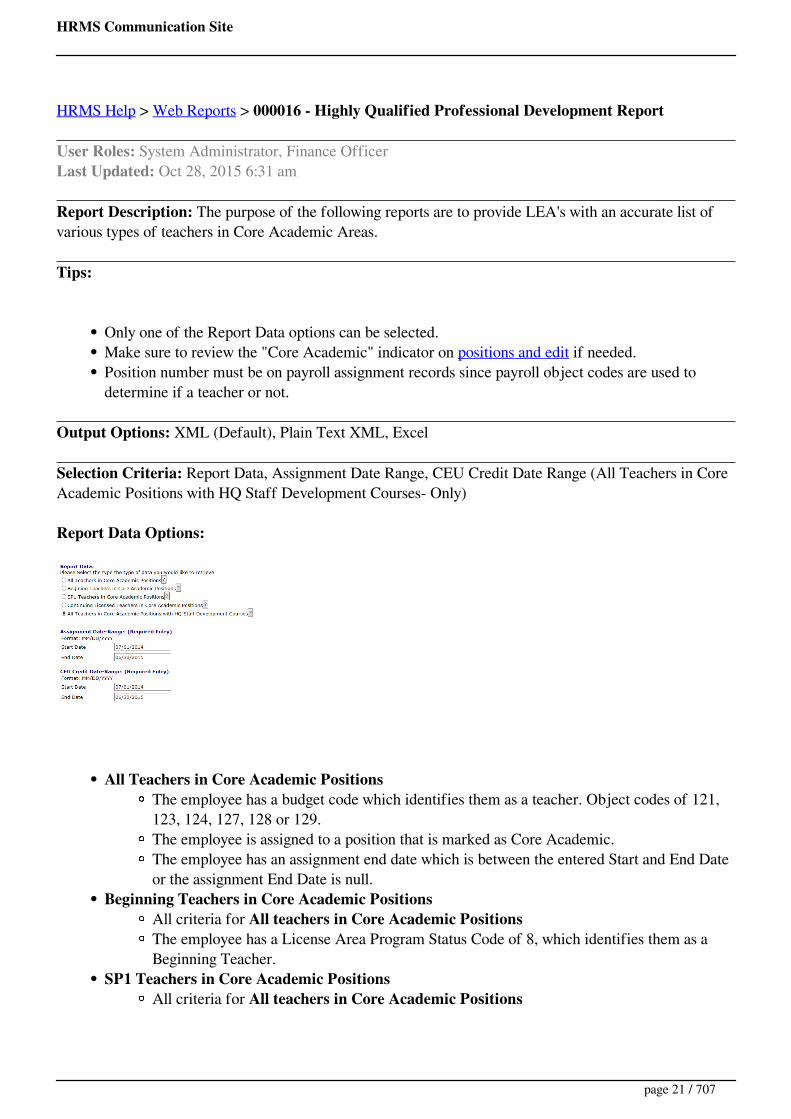
Selection Criteria: Report Data, Assignment Date Range, CEU Credit Date Range (All Teachers in CoreAcademic Positions with HQ Staff Development Courses- Only)
Report Data Options:
All Teachers in Core Academic PositionsThe employee has a budget code which identifies them as a teacher. Object codes of 121,123, 124, 127, 128 or 129.The employee is assigned to a position that is marked as Core Academic.The employee has an assignment end date which is between the entered Start and End Dateor the assignment End Date is null.
Beginning Teachers in Core Academic PositionsAll criteria for All teachers in Core Academic PositionsThe employee has a License Area Program Status Code of 8, which identifies them as aBeginning Teacher.
SP1 Teachers in Core Academic PositionsAll criteria for All teachers in Core Academic Positions
page 21 / 707
HRMS Communication Site
The employee has a License Area Program Status Code of S, which identifies them as anout of state teacher with an SP1 license.
Continuing Licensed Teachers in Core Academic PositionsAll criteria for All teachers in Core Academic PositionsThe employee has a License Area Program Status Code of 0, which identifies their licenseas Continuing.
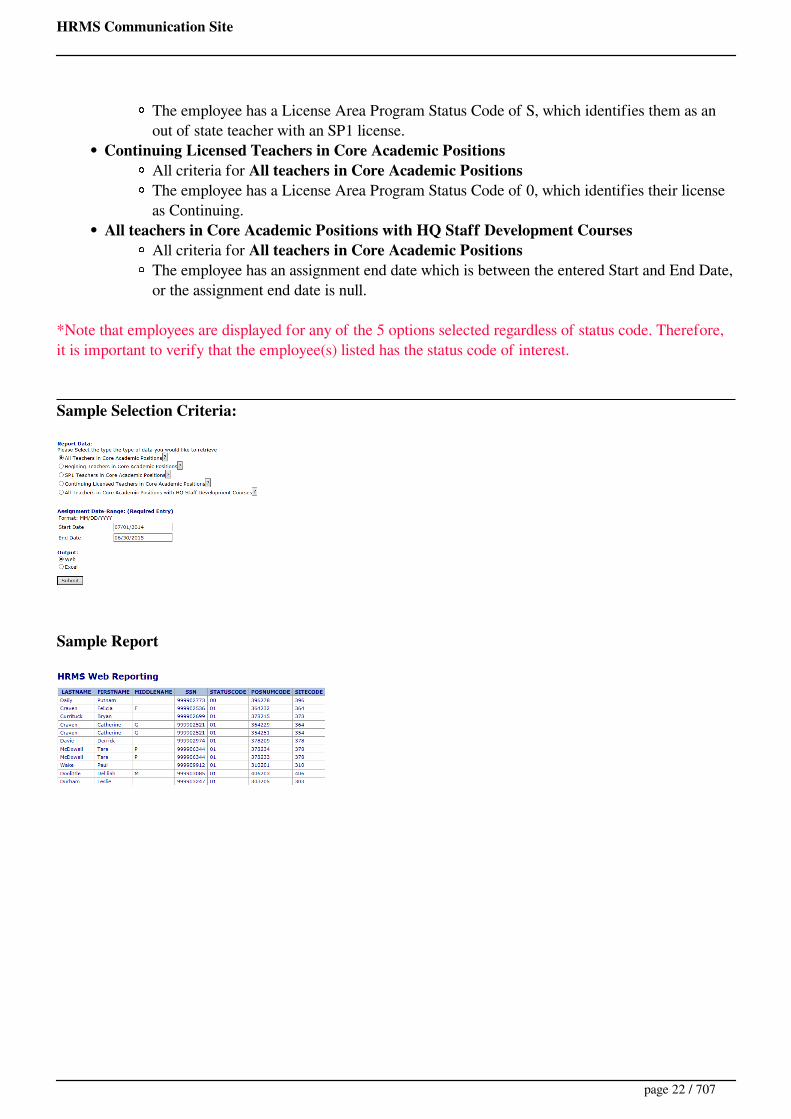
All teachers in Core Academic Positions with HQ Staff Development CoursesAll criteria for All teachers in Core Academic PositionsThe employee has an assignment end date which is between the entered Start and End Date,or the assignment end date is null.
*Note that employees are displayed for any of the 5 options selected regardless of status code. Therefore,it is important to verify that the employee(s) listed has the status code of interest.
Sample Selection Criteria:
Sample Report
page 22 / 707
HRMS Communication Site
HRMS Help > Web Reports > 000017 - Principal Renewal Recommendation Report
User Roles: System Administrator, Finance OfficerLast Updated: Oct 28, 2015 6:29 am
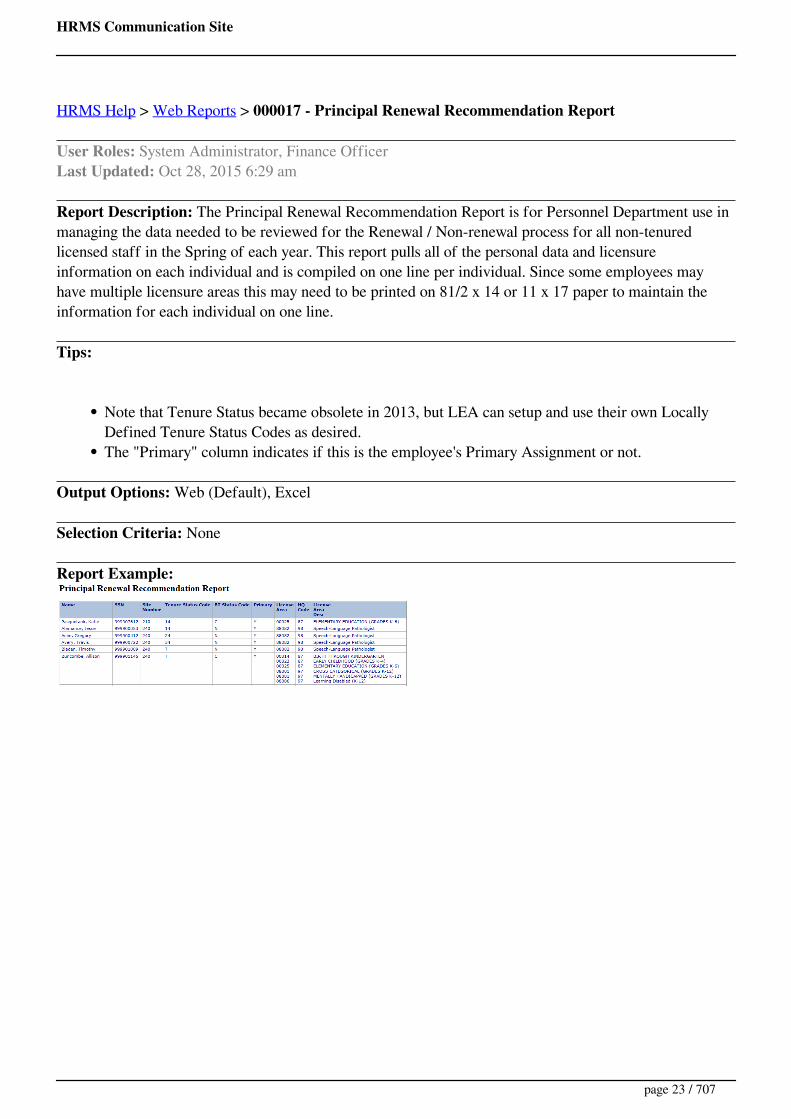
Report Description: The Principal Renewal Recommendation Report is for Personnel Department use inmanaging the data needed to be reviewed for the Renewal / Non-renewal process for all non-tenuredlicensed staff in the Spring of each year. This report pulls all of the personal data and licensureinformation on each individual and is compiled on one line per individual. Since some employees mayhave multiple licensure areas this may need to be printed on 81/2 x 14 or 11 x 17 paper to maintain theinformation for each individual on one line.
Tips:
Note that Tenure Status became obsolete in 2013, but LEA can setup and use their own LocallyDefined Tenure Status Codes as desired.The "Primary" column indicates if this is the employee's Primary Assignment or not.
Output Options: Web (Default), Excel
Selection Criteria: None
Report Example:
page 23 / 707

HRMS Communication Site
HRMS Help > Web Reports > 000018 - Licensure Names List
User Roles: System Administrator, Finance OfficerLast Updated: Oct 28, 2015 6:29 am
Report Description: The purpose of the following report is to display a list of employee names as theyappear exactly in Licensure.
Tips:
Only includes Licensed staff currently in a position.
Output Options: Web (Default), Excel
Selection Criteria: Licensure Employee Names (Default), Licensure Employee Names with SiteInformation
Report Example(s):
page 24 / 707
HRMS Communication Site
HRMS Help > Web Reports > 000019 - Employees With Disabled or Invalid Emp. Status Codes
User Roles: System Administrator, Finance OfficerLast Updated: Oct 28, 2015 6:28 am
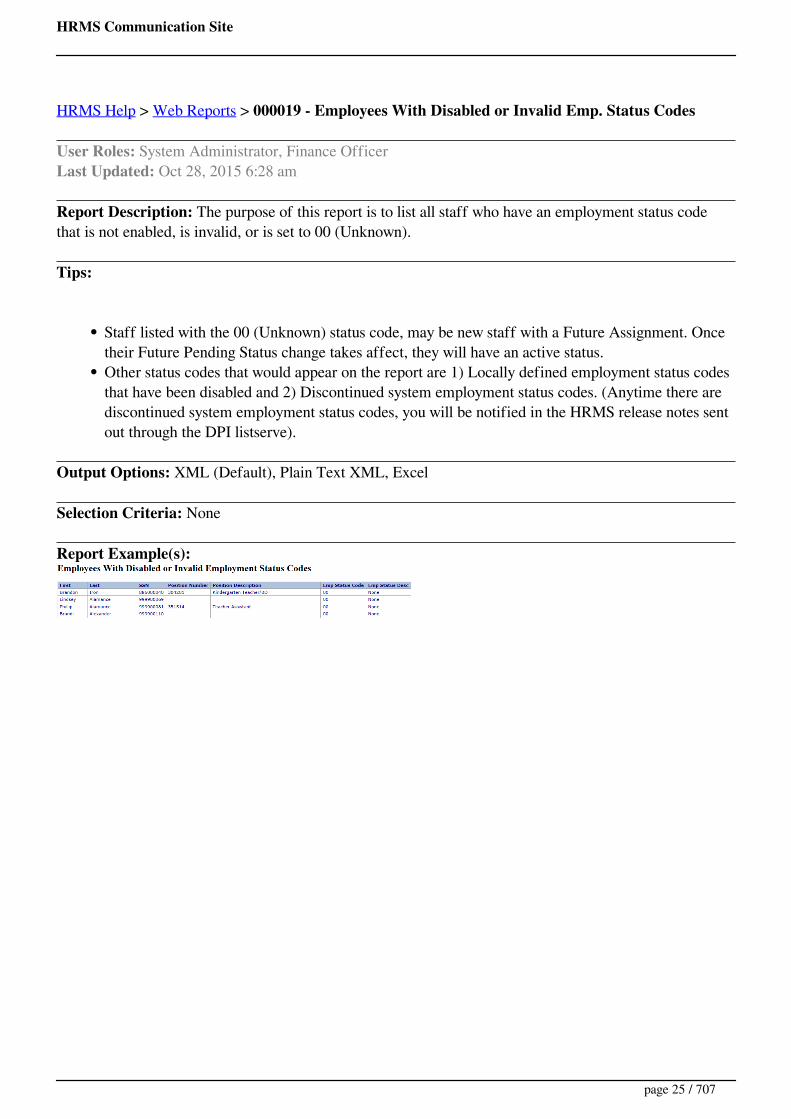
Report Description: The purpose of this report is to list all staff who have an employment status codethat is not enabled, is invalid, or is set to 00 (Unknown).
Tips:
Staff listed with the 00 (Unknown) status code, may be new staff with a Future Assignment. Oncetheir Future Pending Status change takes affect, they will have an active status.Other status codes that would appear on the report are 1) Locally defined employment status codesthat have been disabled and 2) Discontinued system employment status codes. (Anytime there arediscontinued system employment status codes, you will be notified in the HRMS release notes sentout through the DPI listserve).
Output Options: XML (Default), Plain Text XML, Excel
Selection Criteria: None
Report Example(s):
page 25 / 707
HRMS Communication Site
HRMS Help > Web Reports > 000020 - Active Employees with Zero or Multiple PrimaryAssignments
User Roles: System AdministratorLast Updated: Dec 2, 2015 5:45 am
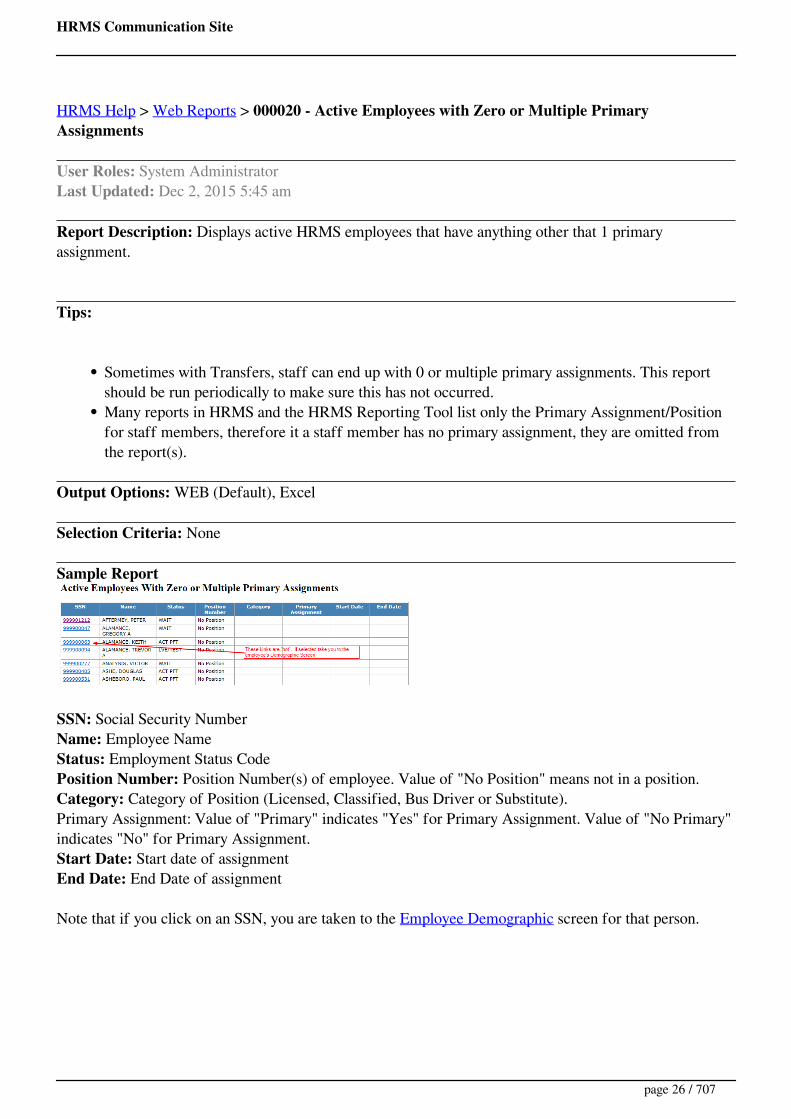
Report Description: Displays active HRMS employees that have anything other that 1 primaryassignment.
Tips:
Sometimes with Transfers, staff can end up with 0 or multiple primary assignments. This reportshould be run periodically to make sure this has not occurred.Many reports in HRMS and the HRMS Reporting Tool list only the Primary Assignment/Positionfor staff members, therefore it a staff member has no primary assignment, they are omitted fromthe report(s).
Output Options: WEB (Default), Excel
Selection Criteria: None
Sample Report
SSN: Social Security NumberName: Employee NameStatus: Employment Status CodePosition Number: Position Number(s) of employee. Value of "No Position" means not in a position.Category: Category of Position (Licensed, Classified, Bus Driver or Substitute).Primary Assignment: Value of "Primary" indicates "Yes" for Primary Assignment. Value of "No Primary"indicates "No" for Primary Assignment.Start Date: Start date of assignmentEnd Date: End Date of assignment
Note that if you click on an SSN, you are taken to the Employee Demographic screen for that person.
page 26 / 707
HRMS Communication Site
HRMS Help > Web Reports > 000022 - Inactive Employees with Current Assignments
User Roles: System Administrator, Finance OfficerLast Updated: Oct 28, 2015 6:28 am
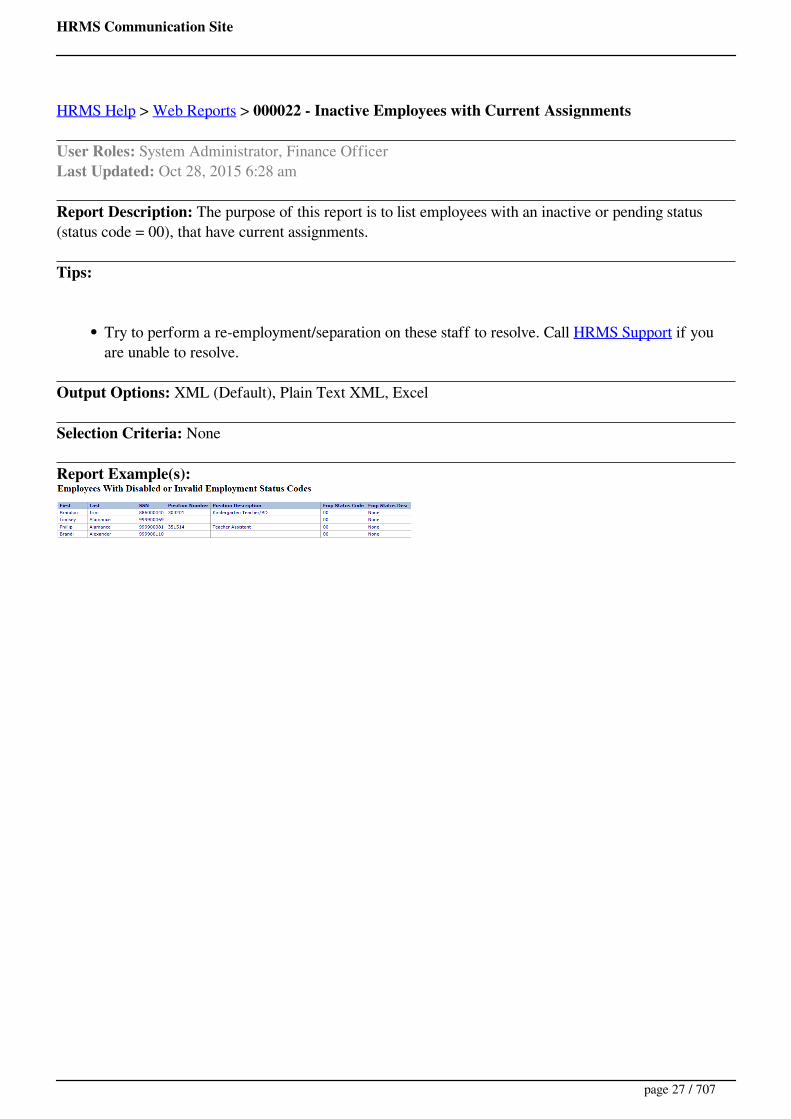
Report Description: The purpose of this report is to list employees with an inactive or pending status(status code = 00), that have current assignments.
Tips:
Try to perform a re-employment/separation on these staff to resolve. Call HRMS Support if youare unable to resolve.
Output Options: XML (Default), Plain Text XML, Excel
Selection Criteria: None
Report Example(s):
page 27 / 707
HRMS Communication Site
HRMS Help > Web Reports > 000023 - CEU Literacy Content Credit Errors
User Roles: System Administrator, Finance OfficerLast Updated: Oct 28, 2015 6:27 am
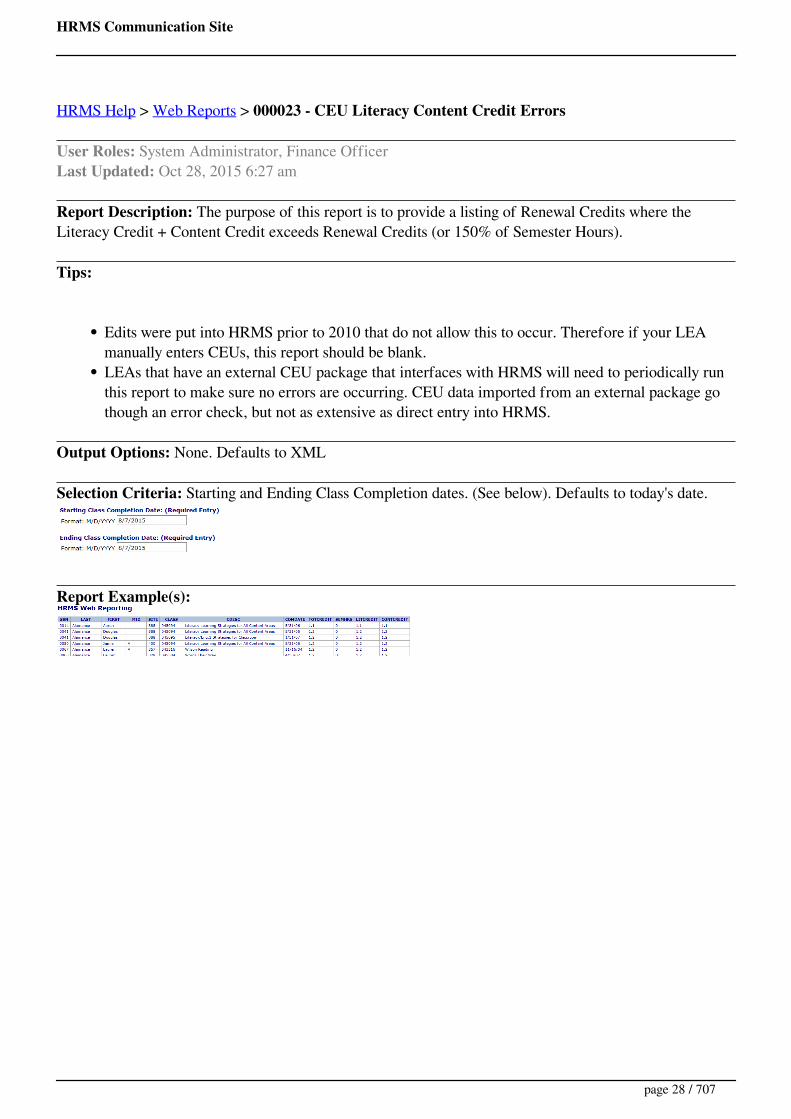
Report Description: The purpose of this report is to provide a listing of Renewal Credits where theLiteracy Credit + Content Credit exceeds Renewal Credits (or 150% of Semester Hours).
Tips:
Edits were put into HRMS prior to 2010 that do not allow this to occur. Therefore if your LEAmanually enters CEUs, this report should be blank.LEAs that have an external CEU package that interfaces with HRMS will need to periodically runthis report to make sure no errors are occurring. CEU data imported from an external package gothough an error check, but not as extensive as direct entry into HRMS.
Output Options: None. Defaults to XML
Selection Criteria: Starting and Ending Class Completion dates. (See below). Defaults to today's date.
Report Example(s):
page 28 / 707
HRMS Communication Site
HRMS Help > Web Reports > 000025 - Leave of Absence-Suspension
User Roles: System Administrator, Finance OfficerLast Updated: Oct 28, 2015 6:27 am
Report Description: Allows LEAs to print a report of:
Employees Currently on Leave and/or SuspensionEmployees on Leave and/or Suspension whose Anticipated End Date has PassedEmployees on Leave and/or Suspension during a Specified Date Range
Tips
The report will not include any Leaves/Disabilities that were created prior to the implementation ofRelease 5.8 (September 2010) unless the LEA re-keyed those Leaves into the new Leave of Absencemodule after 5.8 was rolled out.
Suspension records created prior to implementation of Release 6.2 (May 2011) were converted duringrollout and will be included on the reports.
Employees Currently on Leave and/or Suspension – includes Active Leaves/Suspensions with anEffective Date less than or equal to today's date.
Employees on Leave and/or Suspension whose Anticipated End Date has Passed – also includesLeaves/Suspension without an Anticipated End Date.
This report will be useful in identifying the outstanding Leaves that may need some type of actiontaken on them --- i.e., they may need to be Ended or Extended.Run this report frequently to ensure that returning employees are reinstated in a timely fashion.
Employees on Leave and/or Suspension during a Specified Date Range – lists all Leaves/Suspensionswith a Start/Effective Date or an Anticipated End Date that falls within the date range entered. CancelledLeaves/Suspensions are excluded.
Sample Report
Employees Currently on Leave/Suspension
page 29 / 707
HRMS Communication Site
HRMS Help > Web Reports > 000026 - Old Leave of Absence-Disability Records
User Roles: System Administrator, HR Staff Action Officer, Leave Editor, Leave Viewer, SuspensionClerk, Finance Officer, Staff Action ClerkLast Updated: Oct 28, 2015 6:26 am
Report Description: Displays old Leave, Disability and Reinstate records (from the old staff_actionhistory table) that were created prior to the rollout of the LEA 5.8 release. DPI recommends that LEAs runthis report to find Leaves/Disabilities that were in progress when LEA 5.8 was rolled out and to re-keythose Leaves into the new Leave of Absence module.
Tips
Effective with LEA Release 5.8, HRMS uses a new data model for storing Leave of Absence/Disabilityrecords. Old Leave and Disability records that were created prior to 5.8 still reside in an old table that willno longer be used for managing Leaves. Those old Leave/Disability records were not converted to the newdata model when release 5.8 was rolled out. Instead of having the system automatically convert old Leaverecords, LEAs will run this report to find old Leave/Disability records that should be re-keyed into the newLeave of Absence module. Re-keying those outstanding Leaves/Disabilities into the new Leave of Absencemodule will allow LEAs to modify, end, reinstate, or cancel those Leaves thereafter. LEAs will not havethe ability to view, modify or end old Leaves entered prior to Release 5.8 unless they are re-entered intothe new Leave module.
The best way to find Leaves and Disabilities that were in progress when release 5.8 was rolled out isto run this report using the Anticipated End Date filter. Follow these steps to use that option:
1. Select the Filtered By Anticipated End Date option on the report selection form.2. From Date: Enter the day that LEA 5.8 was rolled out to find all Leaves/Disabilities that were
expected to end on or after that Date.3. To Date: Enter a date in the distant future, to ensure that all old Leaves in the file that are set to end
in the future are included.4. Submit the report. This will bring back a list of all Leaves that were in progress (and expected to
end at some point in the future) when LEA 5.8 rolled out.5. Have a Staff Action Clerk in your LEA re-key these into the new HRMS Leave of Absence
module.
To find all old Leave/Disability records for a particular employee:
1. Select the Filtered By SSN option on the report selection form.2. Enter the last 4 digits of the employee’s SSN.3. Submit the report. This will bring back a list of all old Leave/Disability records for employees
matching the last 4 digits of SSN entered.
page 30 / 707
HRMS Communication Site
To find all old Leave/Disability records with a Start/Effective Date during a particular date range:
1. Select the Filtered By Effective Date option on the report selection form.2. From Date: Enter the beginning date of the range that you wish to use.3. To Date: Enter the ending date of the range that you wish to use .4. Submit the report. This will bring back a list of all old Leave/Disability records that began during
the date range entered.
To find all old Leave/Disability records for the LEA:
1. Select the All LEV/DIS and RFL Staff Actions option on the report selection form.2. Submit the report. This will bring back a list of all old Leave/Disability records entered prior to the
rollout of Release 5.8.
Sample Report
page 31 / 707

HRMS Communication Site
HRMS Help > Web Reports > 000027 - ORBIT Employee List for Retirees Report
User Roles: System Administrator, Finance OfficerLast Updated: Oct 28, 2015 6:26 am
Report Description: Produces a list of current employees that can be used to copy and paste into theORBIT form that validates SSNs. Lists all active retired employees, including substitutes. In other words,all active employees (Active, Pending and Leave) --- i.e., everyone who is not Inactive.
Tips:
Note that staff with an Unknown/Pending active employment status are not included.
Output Options: Web (Default), Excel
Selection Criteria: None.
Report Example(s):
page 32 / 707

HRMS Communication Site
HRMS Help > Web Reports > 000113 - Positions By Site
User Roles: System Administrator, Finance OfficerLast Updated: Oct 28, 2015 6:25 am
Report Description: The purpose of this report is to provide a listing of Positions by Site. Budget codesare also included if available for the position.
Tips:
Leave Site Code blank for all positions
Output Options: XML (Default), Plain Text XML, Excel
Selection Criteria: Site Code (Leave blank for All). See below for example for site 003.
Report Example(s):
page 33 / 707

HRMS Communication Site
HRMS Help > Web Reports > 000114 - Positions Associated With Deleted Sites
User Roles: enter list hereLast Updated: Jul 6, 2016 11:09 am
Report Description: The purpose of this report is to provide a listing of Positions at Sites that no longerexist.
page 34 / 707
HRMS Communication Site
HRMS Help > Web Reports > 000122 - BT Status
User Roles: System Administrator, Finance OfficerLast Updated: Oct 28, 2015 6:25 am
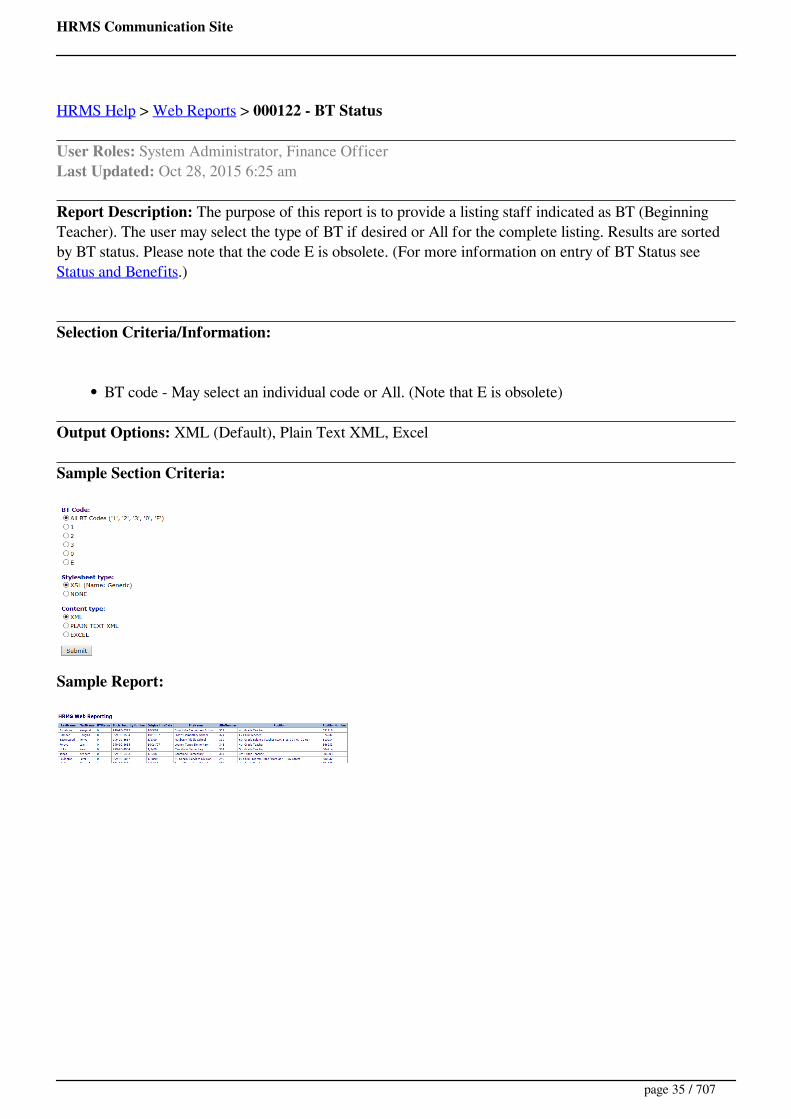
Report Description: The purpose of this report is to provide a listing staff indicated as BT (BeginningTeacher). The user may select the type of BT if desired or All for the complete listing. Results are sortedby BT status. Please note that the code E is obsolete. (For more information on entry of BT Status see Status and Benefits.)
Selection Criteria/Information:
BT code - May select an individual code or All. (Note that E is obsolete)
Output Options: XML (Default), Plain Text XML, Excel
Sample Section Criteria:
Sample Report:
page 35 / 707

HRMS Communication Site
HRMS Help > Web Reports > 000123 - Employees by Last 4 Digits of SSN
User Roles: System Administrator, Finance OfficerLast Updated: Oct 28, 2015 6:24 am
Report Description: The purpose of this report is to list staff whose SSN has the last 4 digits as entered inthe "Last 4 digits of SSN" box.
Tips:
Leave Site Code blank for all positions
Output Options: None
Selection Criteria: Last 4 of SSN. See below for example of last 4, 9998.
Report Example(s):
page 36 / 707

HRMS Communication Site
HRMS Help > Web Reports > 000124 - Licensure Forms By Create Date
User Roles: System Administrator, Finance OfficerLast Updated: Oct 28, 2015 6:23 am
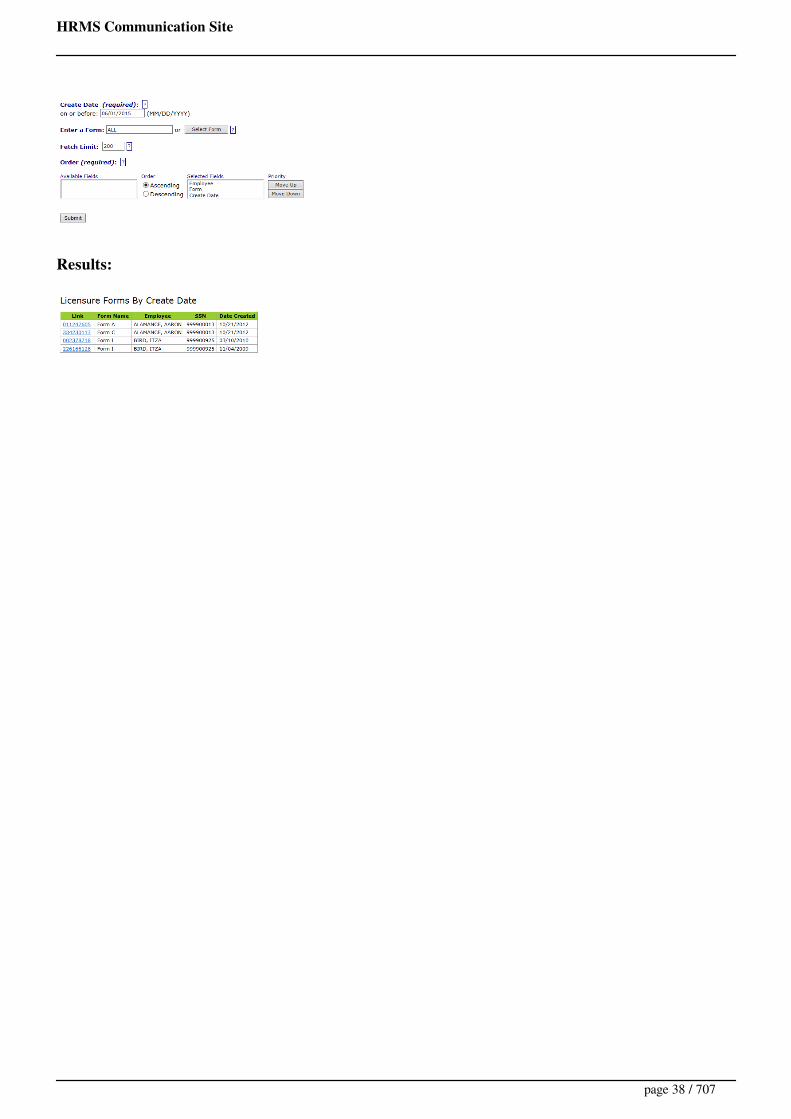
Report Description: The purpose of this report is to allow LEAs to view all licensure forms created on orbefore the specified date.
Tips:
Leaving "Enter a Form" as ALL will return all forms.A "Blank" fetch limit does not return all rows.
Output Options: None
Selection Criteria:
Create Date: Forms created on or before the date entered will be displayed.Enter a Form:
ALL: Displays all FormsSelect Form Button: Clicking on this button displays a list of the various Licensure Forms.Once a Form is selected from the list it displays in the "Enter a Form" box. Note that onlyone Form can be selected.
Fetch Limit: Limits results to number of rows. Default is 200.Order: Click to select the fields you wish to order by. Al least one field is required. Ascending or Descending applies to each field individually. Double-click a selected field to remove if from theSelected Fields list. Use the Move Up and Move Down buttons to reorder the Selected Fields ifneeded.
Report Example:
Selection Criteria Used:
page 37 / 707
HRMS Communication Site
Results:
page 38 / 707
HRMS Communication Site
HRMS Help > Web Reports > 000126 - Employee Race, Ethnicity Report
User Roles: System Administrator, Finance OfficerLast Updated: Oct 28, 2015 6:23 am
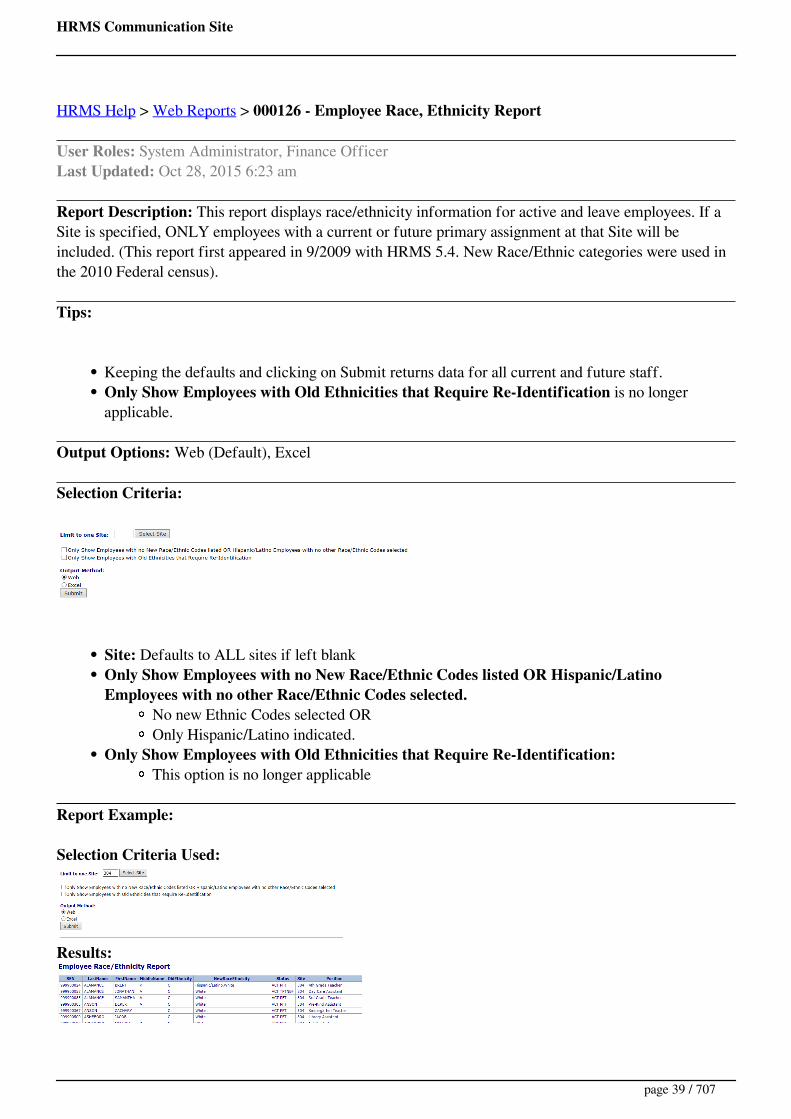
Report Description: This report displays race/ethnicity information for active and leave employees. If aSite is specified, ONLY employees with a current or future primary assignment at that Site will beincluded. (This report first appeared in 9/2009 with HRMS 5.4. New Race/Ethnic categories were used inthe 2010 Federal census).
Tips:
Keeping the defaults and clicking on Submit returns data for all current and future staff.Only Show Employees with Old Ethnicities that Require Re-Identification is no longerapplicable.
Output Options: Web (Default), Excel
Selection Criteria:
Site: Defaults to ALL sites if left blankOnly Show Employees with no New Race/Ethnic Codes listed OR Hispanic/LatinoEmployees with no other Race/Ethnic Codes selected.
No new Ethnic Codes selected OROnly Hispanic/Latino indicated.
Only Show Employees with Old Ethnicities that Require Re-Identification:This option is no longer applicable
Report Example:
Selection Criteria Used:
Results:
page 39 / 707
HRMS Communication Site
HRMS Help > Web Reports > 000127 - Employees With Multiple Active Contracts
User Roles: System Administrator, Finance OfficerLast Updated: Oct 28, 2015 6:23 am
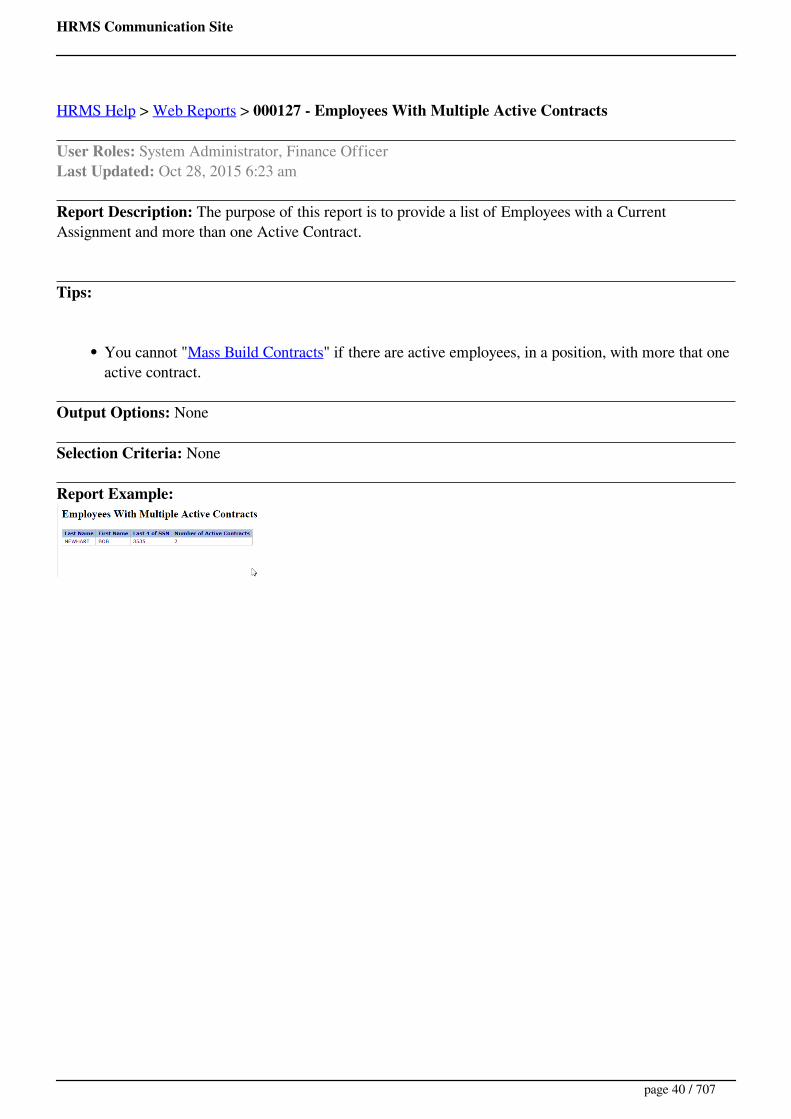
Report Description: The purpose of this report is to provide a list of Employees with a CurrentAssignment and more than one Active Contract.
Tips:
You cannot "Mass Build Contracts" if there are active employees, in a position, with more that oneactive contract.
Output Options: None
Selection Criteria: None
Report Example:
page 40 / 707
HRMS Communication Site
HRMS Help > Web Reports > 000128 - Old Suspension Records
User Roles: System Administrator, HR Staff Action Officer, Leave Editor, Leave Viewer, SuspensionClerk, Finance Officer, Staff Action ClerkLast Updated: Oct 28, 2015 6:22 am
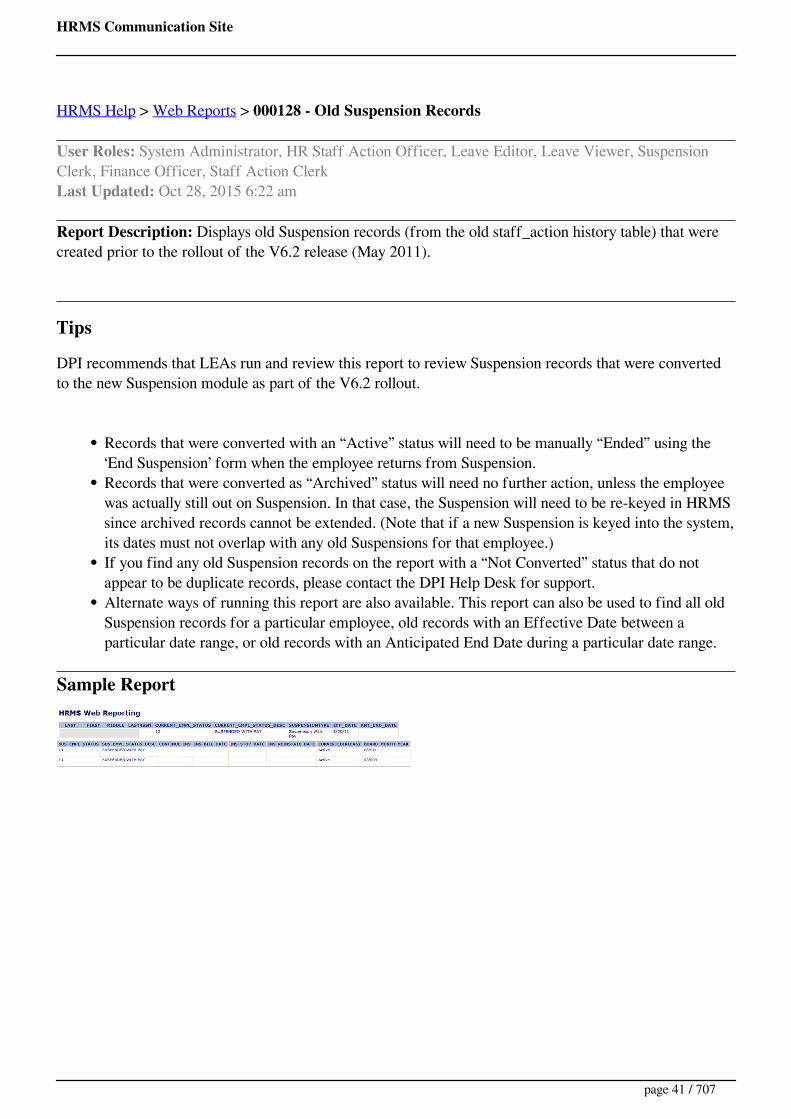
Report Description: Displays old Suspension records (from the old staff_action history table) that werecreated prior to the rollout of the V6.2 release (May 2011).
Tips
DPI recommends that LEAs run and review this report to review Suspension records that were convertedto the new Suspension module as part of the V6.2 rollout.
Records that were converted with an “Active” status will need to be manually “Ended” using the‘End Suspension’ form when the employee returns from Suspension.Records that were converted as “Archived” status will need no further action, unless the employeewas actually still out on Suspension. In that case, the Suspension will need to be re-keyed in HRMSsince archived records cannot be extended. (Note that if a new Suspension is keyed into the system,its dates must not overlap with any old Suspensions for that employee.)If you find any old Suspension records on the report with a “Not Converted” status that do notappear to be duplicate records, please contact the DPI Help Desk for support.Alternate ways of running this report are also available. This report can also be used to find all oldSuspension records for a particular employee, old records with an Effective Date between aparticular date range, or old records with an Anticipated End Date during a particular date range.
Sample Report
page 41 / 707

HRMS Communication Site
HRMS Help > Web Reports > 000129 - Separation and Employee Termination Date Errors
User Roles: System Administrator, HR Staff Action Officer, Separation EditorLast Updated: Oct 28, 2015 6:22 am
Report Description: Displays issues related to Separations converted as part of the LEA V6.3 release(January 2013).
Note about editing Separations that were created during the rollout of v6.3:In cases where there was not enough information in the old staff action history record to populate all thefields in the new Separation record, the missing fields had to be left blank. If one of these convertedSeparations is edited, the system will require the user to enter information that was not requiredwhen the Separation was originally created. If you want to avoid having to enter information about oldSeparations that was not required prior to v6.3, it is recommended that LEAs not edit those old convertedSeparations unless absolutely necessary.
TipsThere are 3 report options available:
Option 1 – Errors for Future Separations & Termination DatesOption 2 – Employees with Multiple Separations (within Specified Timeframe)Option 3 – Errors for Past Separations & Termination Dates
Option Error Tips
1 Future Separation Date Does NotMatch Employee's TerminationDate
If the Separation EffectiveDate is incorrect, proceedto the ‘Edit Separation’form and update theEffective Date to thecorrect date.If the Separation EffectiveDate is correct, proceed tothe ‘Edit Separation’ formand “save” the Separationwith the existing EffectiveDate. Saving this form willreset the employee’sTermination Date to matchthe Separation EffectiveDate
1 Future Separation for Employeewith Inactive Employment Status
Review the Separation(using the ‘SeparationDetails’ form) to verify thatit is correct. You can
page 42 / 707
HRMS Communication Site
remove the Separation(using the ‘RemoveSeparation’ form) if thestaff action was created inerror.
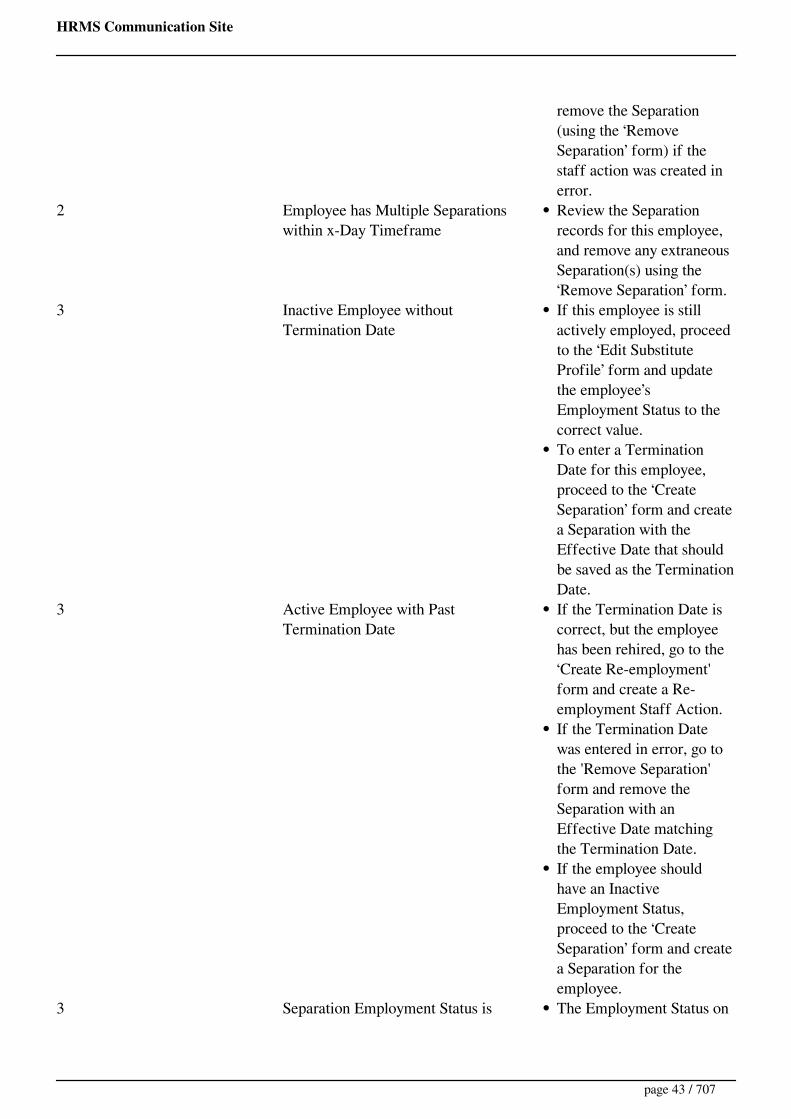
2 Employee has Multiple Separationswithin x-Day Timeframe
Review the Separationrecords for this employee,and remove any extraneousSeparation(s) using the‘Remove Separation’ form.
3 Inactive Employee withoutTermination Date
If this employee is stillactively employed, proceedto the ‘Edit SubstituteProfile’ form and updatethe employee’sEmployment Status to thecorrect value.To enter a TerminationDate for this employee,proceed to the ‘CreateSeparation’ form and createa Separation with theEffective Date that shouldbe saved as the TerminationDate.
3 Active Employee with PastTermination Date
If the Termination Date iscorrect, but the employeehas been rehired, go to the‘Create Re-employment'form and create a Re-employment Staff Action.If the Termination Datewas entered in error, go tothe 'Remove Separation'form and remove theSeparation with anEffective Date matchingthe Termination Date.If the employee shouldhave an InactiveEmployment Status,proceed to the ‘CreateSeparation’ form and createa Separation for theemployee.
3 Separation Employment Status is The Employment Status on
page 43 / 707

HRMS Communication Site
Not a Valid Inactive EmploymentStatus
these Separations are eitheractive or are anEmployment Status that isno longer valid. You maywish to keep this Separationrecord for historicalpurposes; but in the future,Separations can be createdonly if the EmploymentStatus is being changed toan inactive code.
page 44 / 707

HRMS Communication Site
HRMS Help > Web Reports > 000130 - Validated Licenses
User Roles: System Administrator, HR Staff Action Officer, Leave Editor, Leave Viewer, SuspensionClerk, Finance Officer, Staff Action Clerk
Last Updated: Oct 28, 2015 6:21 am
Report Description:
This report displays staff with a "Validated" license.These staff have licenses which have expired and are employed by a school system.Once the "Validated" license is issued, staff have 3 years to earn 15 CEUs, then will be granted alicense with a 5 year renewal cycle.
Sample Report
page 45 / 707
HRMS Communication Site
HRMS Help > Web Reports > 000131 - Positions which do not have a Census Category
User Roles: System Administrator, HR Staff Action Officer, Leave Editor, Leave Viewer, SuspensionClerk, Finance Officer, Staff Action Clerk
Last Updated: Oct 28, 2015 6:21 am
Report Description:
The purpose of this report is to list all Positions that do not have a "Census" category assigned.
Sample Report
page 46 / 707

HRMS Communication Site
HRMS Help > Web Reports > 000132 - Positions without an Evaluation Category
User Roles: System Administrator, HR Staff Action Officer, Leave Editor, Leave Viewer, SuspensionClerk, Finance Officer, Staff Action Clerk
Last Updated: Oct 28, 2015 6:20 am
Report Description:
The purpose of this report is to list all Positions without an Evaluation Category.
Sample Report
page 47 / 707
HRMS Communication Site
HRMS Help > Web Reports > 000133 - Employee name discrepencies between HRMS, Licensure andPayroll
User Roles: System Administrator, HR Staff Action Officer, Leave Editor, Leave Viewer, SuspensionClerk, Finance Officer, Staff Action Clerk
Last Updated: Oct 28, 2015 7:04 am
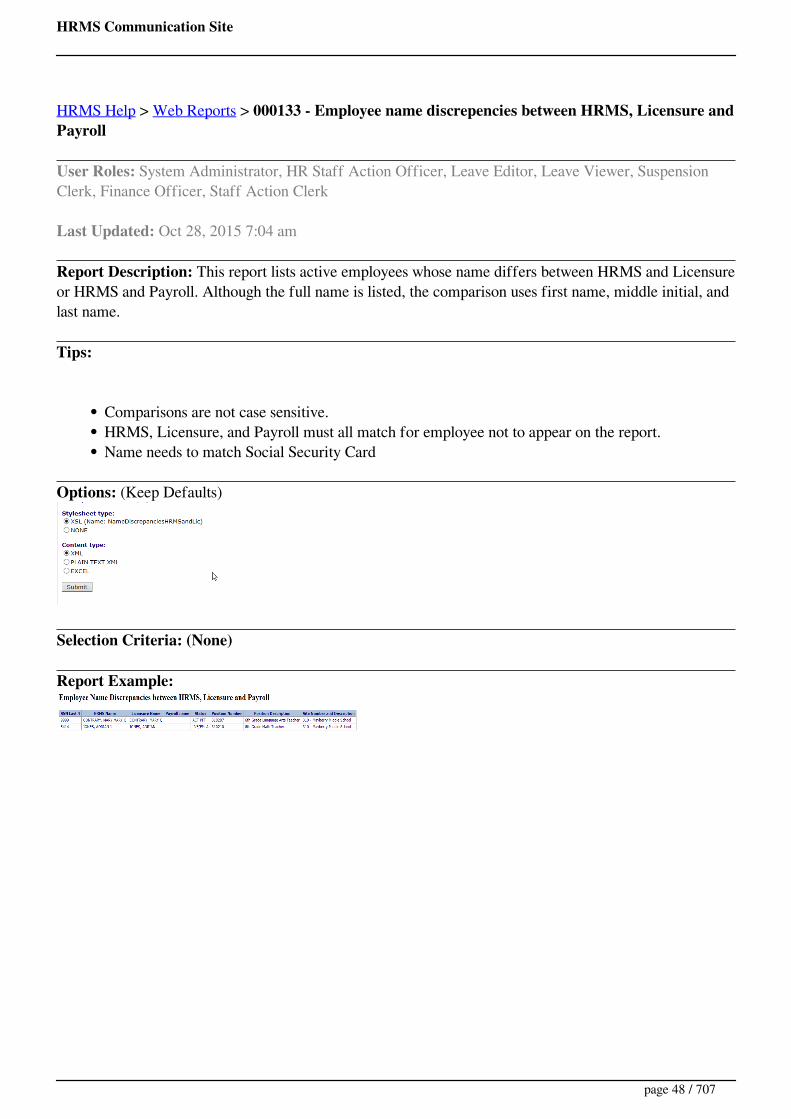
Report Description: This report lists active employees whose name differs between HRMS and Licensureor HRMS and Payroll. Although the full name is listed, the comparison uses first name, middle initial, andlast name.
Tips:
Comparisons are not case sensitive.HRMS, Licensure, and Payroll must all match for employee not to appear on the report.Name needs to match Social Security Card
Options: (Keep Defaults)
Selection Criteria: (None)
Report Example:
page 48 / 707

HRMS Communication Site
HRMS Help > Web Reports > 000134 - Pre-K Teacher Licensed Positions
User Roles: System Administrator, HR Staff Action Officer, Leave Editor, Leave Viewer, SuspensionClerk, Finance Officer, Staff Action Clerk
Last Updated: Dec 22, 2015 12:09 pm
Report Description: This report lists licensed positions where the Pre-K Teacher indicator is set to 'Yes.'If the position is filled, the name of the assigned employee is included.
Tips:
If employee name is blank, then the position is currently vacant.If a Pre-K Teacher position is not on the list, Edit the Position and change the Pre-K Teacherindicator to 'Yes.'
Options: (Keep Defaults)
Selection Criteria: (None)
Report Example:
page 49 / 707

HRMS Communication Site
HRMS Help > Web Reports > 000135 - Employees with Incomplete, Invalid Tenure Status and, orBT Status
User Roles: System Administrator, Finance OfficerLast Updated: Feb 23, 2016 5:20 am
Web Report 000135 - Employees with Incomplete, Invalid Tenure Status and, or BT Status
Report Description: This report lists active employees assigned to a Licensed position who have a TenureStatus and/or BT Status Code that is missing or invalid.
This report prints a list of all active employees assigned to a Licensed position who have a Tenure Statusand/or BT Status Code that is missing or invalid. If a Licensed employee’s Tenure Status and/or BT StatusCode is blank or missing, or if the Position Evaluation Category = “Teacher” and their Tenure Status Code= “N/A”, they will appear on the report
Output Options: XML (Default), Plain Text XML, Excel
Selection Criteria: None
Sample Report
page 50 / 707

HRMS Communication Site
HRMS Help > Web Reports > 000138 - CEU Literacy Credit Review
User Roles: System Administrator, CEU Viewer and Editor, Finance OfficerLast Updated: Jul 17, 2015 7:47 am
Web Report 000138 - CEU Literacy Credit Review
Report Description: The purpose of this report is to list total CEUs per Licensed staff with > 3 Contentand Staff renewing their License on or after 6/30/2016 require 3 Literacy and 3 Content credits. (Previouslythe requirement was 1 Literacy and 1 Content.) HRMS automatically "Splits" the credits when the creditcould apply to either Literacy or Content, first making sure Literacy gets to 3, then Content. Sincepreviously the split applied for 1 and 1 there may be extra Content credit that should be moved back toLiteracy. It is suggested to first review staff renewing 6/30/2016. Since the split is now occurring for 3 and3, staff renewing in 2017 and later may already have the credits needed by the time of their renewal. See Content and Literacy Credit for more information.
Output Options: XML (Default), Plain Text XML, Excel
Selection Criteria: None
Sample Report
page 51 / 707
HRMS Communication Site
HRMS Help > Web Reports > 000139 - Position Choice and Position Title Review
User Roles: System AdministratorLast Updated: Oct 21, 2016 8:24 am
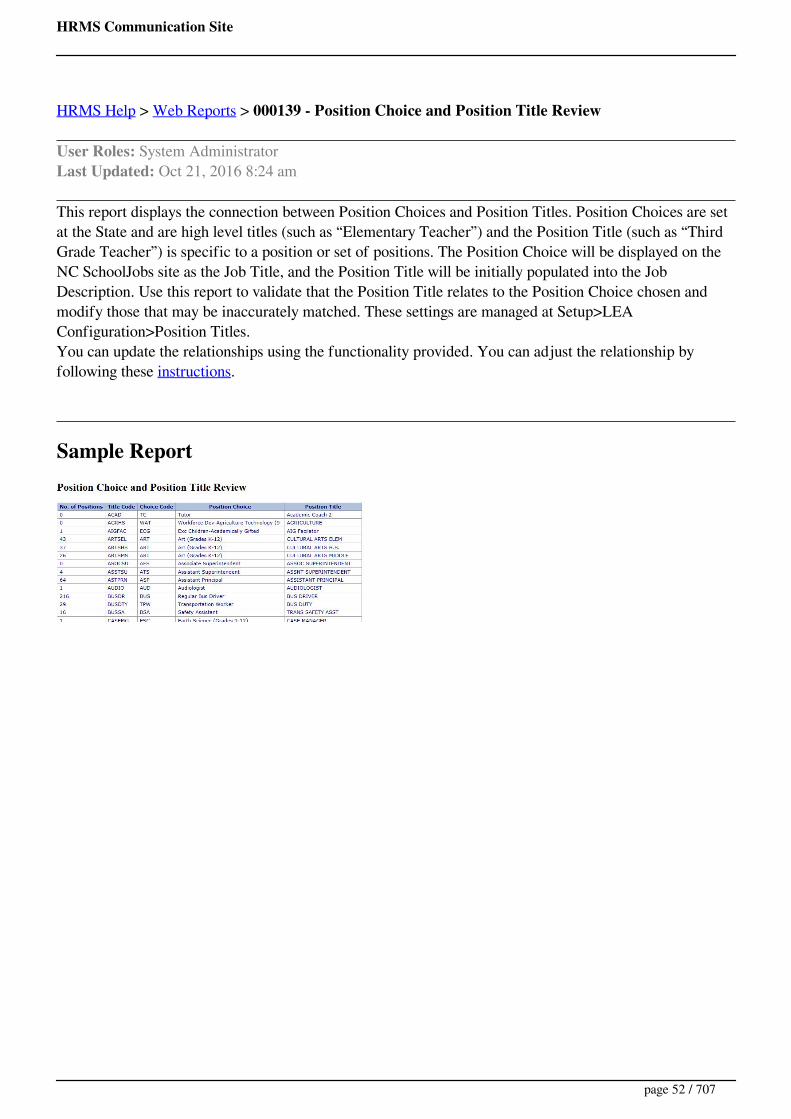
This report displays the connection between Position Choices and Position Titles. Position Choices are setat the State and are high level titles (such as “Elementary Teacher”) and the Position Title (such as “ThirdGrade Teacher”) is specific to a position or set of positions. The Position Choice will be displayed on theNC SchoolJobs site as the Job Title, and the Position Title will be initially populated into the JobDescription. Use this report to validate that the Position Title relates to the Position Choice chosen andmodify those that may be inaccurately matched. These settings are managed at Setup>LEAConfiguration>Position Titles.You can update the relationships using the functionality provided. You can adjust the relationship byfollowing these instructions.
Sample Report
page 52 / 707
HRMS Communication Site
HRMS Help > Web Reports > 000140 - Positions that Do Not have Matching Position Title Codes
User Roles: System AdministratorLast Updated: Feb 23, 2017 8:18 am
This report shows active positions that have Position Title Codes that no longer exist. Position Titles areset up by the district using HRMS Home>Setup>LEA Configuration>Position Titles. Previously a districtcould remove title codes from the listing, this resulted in some position titles being orphaned. As part ofthe integration with the new NC School Jobs system, HRMS sends the Position Title and the ChoiceDescription values. The connection between these two items is managed in the LEA Configuration. Whenthe connection is not there, we do not send the positions to the applicant tracking system.
How to use the reportUsing the report results, add a new Position Title using the code shown in the data. For some of the codesyou may have multiple titles, in this case you will need to create new codes since you cannot have morethan one Position Title Code per unique Position Title.
For example, look at the table below. Create a new Position title code as “VOCED1” with Title of positionas ”Business Teacher”; however, you will need to have new codes for the other titles shown in the examplebelow. Each Position Title Code + Position Title combination must be unique. Suggestion for the otherentries could be Position title code as “VOCED2” with Title of position as ”Electrical Trades” and“VOCED3” with ”Home Economics”. The fourth entry is the example is a duplicate of record 1, so it onlyneeds to be added once; however, the position will need to be edited per the steps below.Position Number Position Title Code Position Title
324256 VOC ED Business Teacher
336256 VOC ED Electrical Trades
308226 VOC ED Home Economics
310255 VOC ED Business Teacher
After you have made the changes, you will need to edit every position in the list and make sure theassociated Position Title is selected and click Save.
Here are the steps:
1. Run Web Report 0001402. Review the unique Position Title Code - Position Titles in the report and create a new entry using
the Position Title configuration. If you have an existing entry that meets your need, you can usethat instead of creating a new entry, when updating the Position in Step 3.
3. Edit each position that is listed in the report, changing the Position Title to match the title from thedrop down listing.
page 53 / 707
HRMS Communication Site
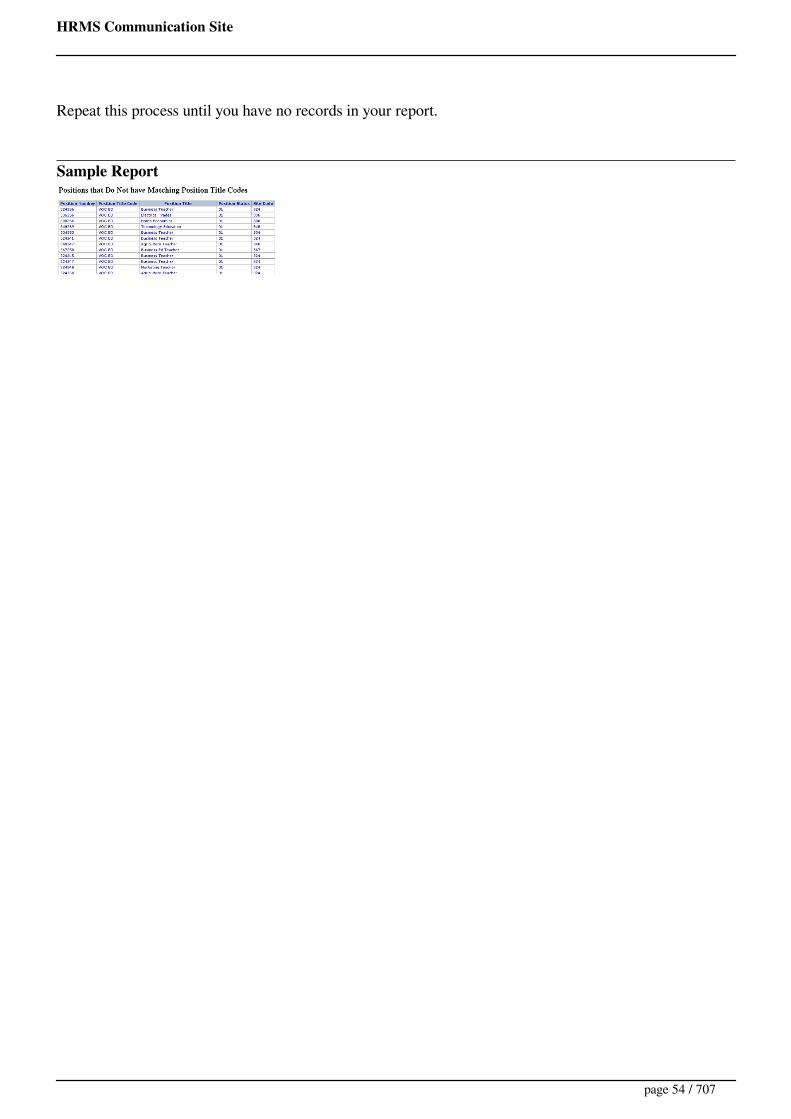
Repeat this process until you have no records in your report.
Sample Report
page 54 / 707
HRMS Communication Site
HRMS Help > Web Reports > 800001 - Payroll Employees Not in HRMS
User Roles: Staff Action Clerk, HR Staff Action Officer, Employee Hire, Payroll, Finance Officer,System AdministratorLast Updated: Dec 22, 2015 10:29 am
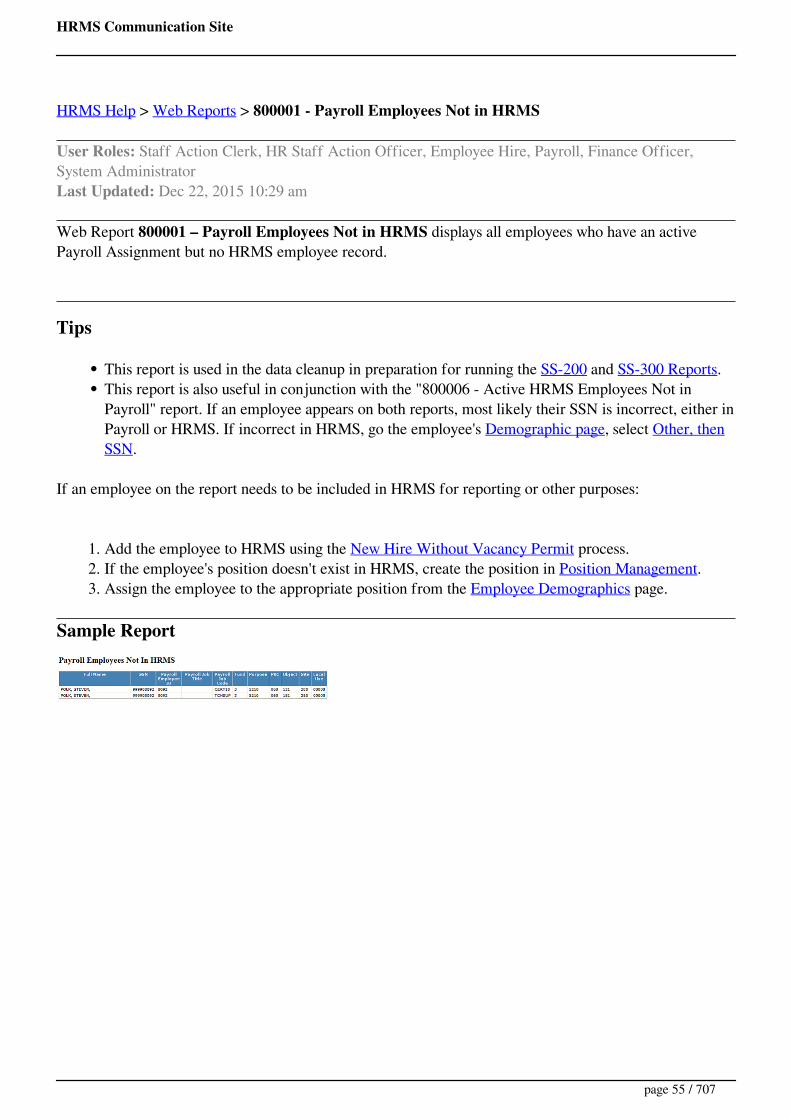
Web Report 800001 – Payroll Employees Not in HRMS displays all employees who have an activePayroll Assignment but no HRMS employee record.
Tips
This report is used in the data cleanup in preparation for running the SS-200 and SS-300 Reports.This report is also useful in conjunction with the "800006 - Active HRMS Employees Not inPayroll" report. If an employee appears on both reports, most likely their SSN is incorrect, either inPayroll or HRMS. If incorrect in HRMS, go the employee's Demographic page, select Other, thenSSN.
If an employee on the report needs to be included in HRMS for reporting or other purposes:
1. Add the employee to HRMS using the New Hire Without Vacancy Permit process.2. If the employee's position doesn't exist in HRMS, create the position in Position Management.3. Assign the employee to the appropriate position from the Employee Demographics page.
Sample Report
page 55 / 707

HRMS Communication Site
HRMS Help > Web Reports > 800002 - Employees With Additional Pay Budget Codes in HRMS
User Roles: Staff Action Clerk, HR Staff Action Officer, Employee Hire, Payroll, Finance Officer,System AdministratorLast Updated: Dec 5, 2011 1:27 pm
Web Report 800002 – Employees With Additional Pay Budget Codes in HRMS displays HRMSemployees that have Additional Pay budget codes assigned to them.
Tips
This report is used in the data cleanup in preparation for running the SS-300 Reports.
Additional Pay Budget Codes should only be entered in HRMS if:
Payroll Supplement does not exist or is not active when the SS-300 is run (or if the Supplement ishandled as a “quick pay” and no assignment record exists in Payroll), orPayroll Supplement is not valid (e.g., Pay Method = Other; Frequency not M, S, or A).
To exclude an HRMS Additional Pay Assignment Budget Code from the SS-300 report, set its Supplementindicator to ‘No’ from the Edit Assignment form.
Sample Report
page 56 / 707

HRMS Communication Site
HRMS Help > Web Reports > 800004 - HRMS Employees with No Position Assignment
User Roles: Staff Action Clerk, HR Staff Action Officer, Employee Hire, Payroll, Finance Officer,System AdministratorLast Updated: Dec 22, 2015 10:32 am
Web Report 800004 – HRMS Employees with No Position Assignments displays HRMS employeeswith an "Active" or "Leave" Employee Status that have no current or future assignments. Substitutes areexcluded.
Tips
This report is used in the data cleanup in preparation for running the SS-200 and SS-300 Reports.
If an employee on the report needs to be assigned to a position for reporting or other purposes:
1. If the employee's position doesn't exist in HRMS, create the position in Position Management.2. Assign the employee to the appropriate position from the Employee Demographics page.
If an employee's Employee Status in HRMS is not up-to-date, perform the appropriate Staff Action inHRMS to correct the employee's Status.
Sample Report
page 57 / 707
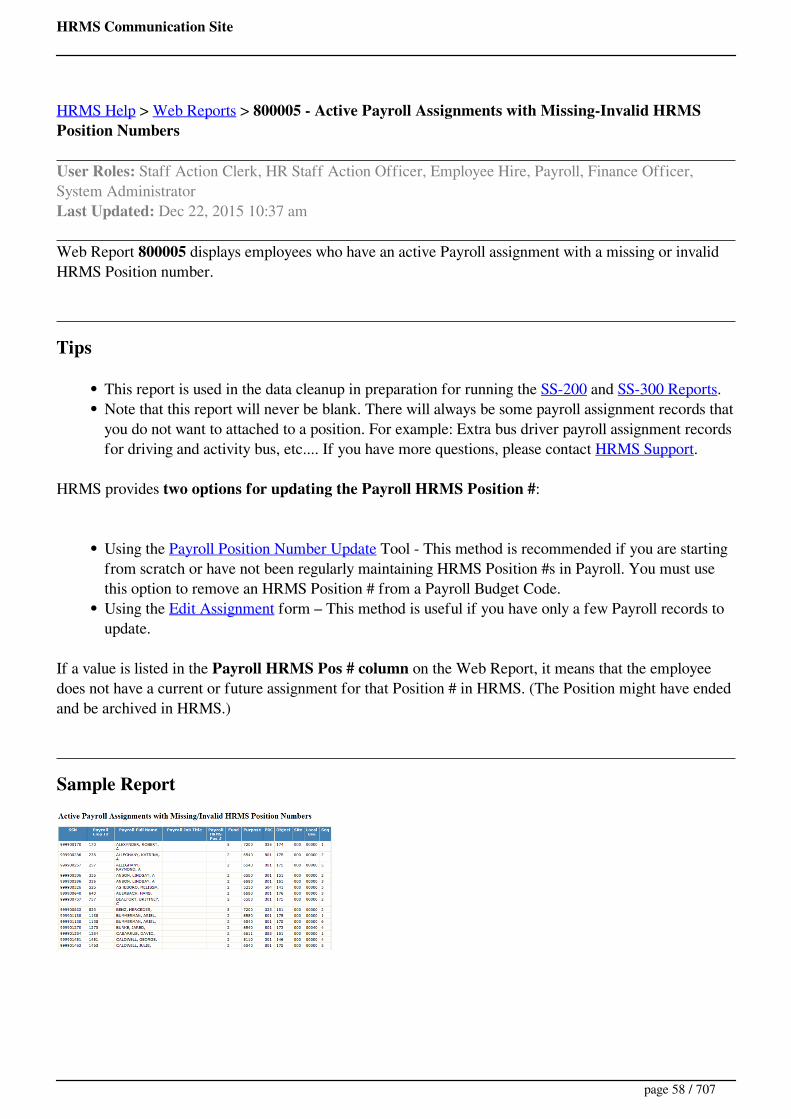
HRMS Communication Site
HRMS Help > Web Reports > 800005 - Active Payroll Assignments with Missing-Invalid HRMSPosition Numbers
User Roles: Staff Action Clerk, HR Staff Action Officer, Employee Hire, Payroll, Finance Officer,System AdministratorLast Updated: Dec 22, 2015 10:37 am
Web Report 800005 displays employees who have an active Payroll assignment with a missing or invalidHRMS Position number.
Tips
This report is used in the data cleanup in preparation for running the SS-200 and SS-300 Reports.Note that this report will never be blank. There will always be some payroll assignment records thatyou do not want to attached to a position. For example: Extra bus driver payroll assignment recordsfor driving and activity bus, etc.... If you have more questions, please contact HRMS Support.
HRMS provides two options for updating the Payroll HRMS Position #:
Using the Payroll Position Number Update Tool - This method is recommended if you are startingfrom scratch or have not been regularly maintaining HRMS Position #s in Payroll. You must usethis option to remove an HRMS Position # from a Payroll Budget Code.Using the Edit Assignment form – This method is useful if you have only a few Payroll records toupdate.
If a value is listed in the Payroll HRMS Pos # column on the Web Report, it means that the employeedoes not have a current or future assignment for that Position # in HRMS. (The Position might have endedand be archived in HRMS.)
Sample Report
page 58 / 707

HRMS Communication Site
HRMS Help > Web Reports > 800006 - Active HRMS Employees Not in Payroll
User Roles: Staff Action Clerk, HR Staff Action Officer, Employee Hire, Payroll, Finance Officer,System AdministratorLast Updated: Dec 5, 2011 2:06 pm
Web Report 800006 displays HRMS employees with an Active or Leave Employee Status and no activePayroll Assignments.
Important: Substitute, Mentor, Stipend, Staff Development and Overtime are not considered active PayrollAssignments.
Tips
This report is used in the data cleanup in preparation for running the SS-200 and SS-300 Reports.
If an employee's Employee Status in HRMS is not up-to-date, perform the appropriate Staff Action inHRMS to correct the employee's Status.
Sample Report
page 59 / 707
HRMS Communication Site
Table of ContentsHistory
The Benefits
HRMS LEA
HRMS Reporting Suite
HistoryThe Human Resource Management System (HRMS) is a software solution specifically designed to meetthe human resource management needs of all public schools in North Carolina. It integrates tightly withvendor-supplied payroll systems in use by LEAs, eliminating the need for duplicate data entry andmaintenance.
The BenefitsAlthough the name HRMS may imply a single product application, the HRMS web application actuallycontains multiple system components. The components which form the HRMS product include: the LEAModule, the Reporting tools. These individual components provide significant benefits to all partiesassociated with performing HR-related tasks or providing HR data to other entities.
The current HRMS product provides the following:
Management of employment, benefits, evaluation and licensure processesIntegration with LEA payroll systemsReporting tool for legislative and general reportingGenerally enhances the ability of Personnel Administrators, Finance Officers, and staff employeesto conduct daily business.
HRMS LEAThe primary component of HRMS is the LEA module. It consists of numerous modules includingadvanced applicant search capabilities, vacancies, hiring, positions, budget code management, benefits,leave of absence, contracts, licensure forms, continuing education, substitutes, and end-of-year transitions.
page 60 / 707
HRMS Communication Site
Additionally, HRMS integrates with financial systems reduces the probability of error in data entry,reduces duplication of effort, and allows HR and financial staff access to data that has always been neededyet has been difficult to share across functional boundaries.
HRMS LEA System RequirementsSupported Operating Systems:
IBM I-Series Client Access V6R1
Supported Web Browsers:
IE 8, 9, 10 and 11.
HRMS Reporting SuiteThe HRMS reporting tools benefit HR professionals in multiple areas and excel in intergovernmentalcollaboration and transactional processing. LEAs and the State of North Carolina actively use the reportingtool to cut costs, improve productivity, and provide added value to all parties involved. The reporting toolsmeet the changing needs of State, local and Federal governments. HRMS accomplishes this through acollaborative effort with multiple agency representation.
Desktop Reporting Tool System RequirementsSupported Operating Systems:
Windows XP (32/64bit)Windows Vista (32/64bit)Windows 7 (32/64bit)High Speed Internet Connection1GB Free Disk Space1024x768 resolution or higher
page 61 / 707

HRMS Communication Site
HRMS Help > Absences
User Roles: System Administrator, General User, HR Staff Action Officer, Staff Action
Last Updated: Jun 20, 2014 11:17 am
Printer friendly
Table of ContentsQuick Facts
Configuration
Where to Select
Absence Search
Quick Facts
Absences are only available in HRMS if you are exporting this data from payroll and importing toHRMS on a monthly basis. This process uses an old HRMS / Payroll interface implemented earlyon in HRMS. Note that this is a rarely used feature.Note that this interface is not available for ISIS 6.
ConfigurationIn order for Leave Balances to be imported into HRMS, "Payroll to HRMS" must be set to Yes in thePayroll Information section of LEA Settings . (See below)
Note that if ISIS 6 is selected in "Payroll System in Use", the "HRMS to Payroll" and "Payroll toHRMS" options are not available.
page 62 / 707
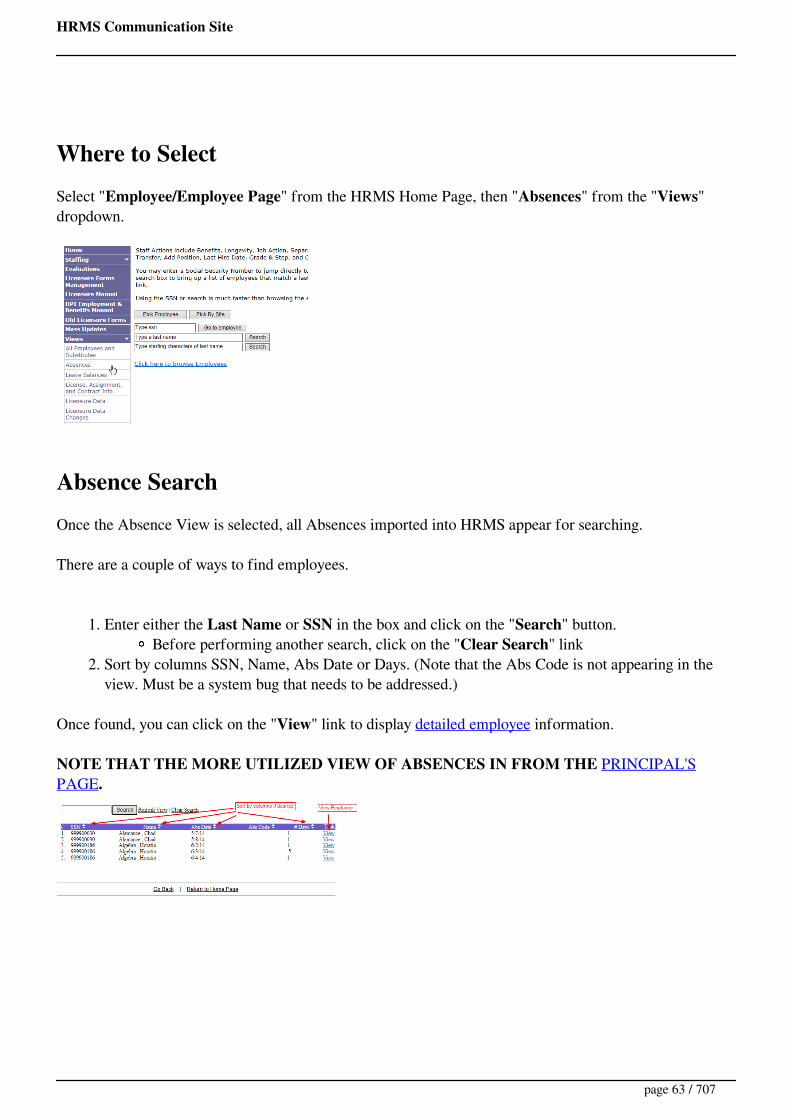
HRMS Communication Site
Where to SelectSelect "Employee/Employee Page" from the HRMS Home Page, then "Absences" from the "Views"dropdown.
Absence SearchOnce the Absence View is selected, all Absences imported into HRMS appear for searching.
There are a couple of ways to find employees.
1. Enter either the Last Name or SSN in the box and click on the "Search" button.Before performing another search, click on the "Clear Search" link
2. Sort by columns SSN, Name, Abs Date or Days. (Note that the Abs Code is not appearing in theview. Must be a system bug that needs to be addressed.)
Once found, you can click on the "View" link to display detailed employee information.
NOTE THAT THE MORE UTILIZED VIEW OF ABSENCES IN FROM THE PRINCIPAL'SPAGE.
page 63 / 707

HRMS Communication Site
HRMS Help > System Configuration > Action Notice Recipients
User Roles: System AdministratorLast Updated: Dec 31, 2013 7:26 am
Printer friendly
Table of ContentsConfiguration Form
Adding/Modifying Recipient Notifications
Actions Available
Action BEN
Action DEM
Action PCG
Action SSN
Action VPE
The Action Notice Recipients configuration allows for the setup of email notifications to Site Contactswhen certain employee actions occur. These employees must be assigned to the Site Contact's site, in orderfor the email notification to be sent. Please note that this feature is slowly going away as staff actions moveto the HRMS Staff Action Console. As actions move to the Staff Action console, they will be removedfrom the configuration form as seen below. Also note that you may need to contact HRMS support tomake sure email in HRMS is configured properly in order for email to flow out of HRMS.
Configuration FormAfter selecting "Action Notice Recipients" from the "LEA Configuration" screen, a screen appearswhere you must first select the Site, then the Site Contact.
page 64 / 707
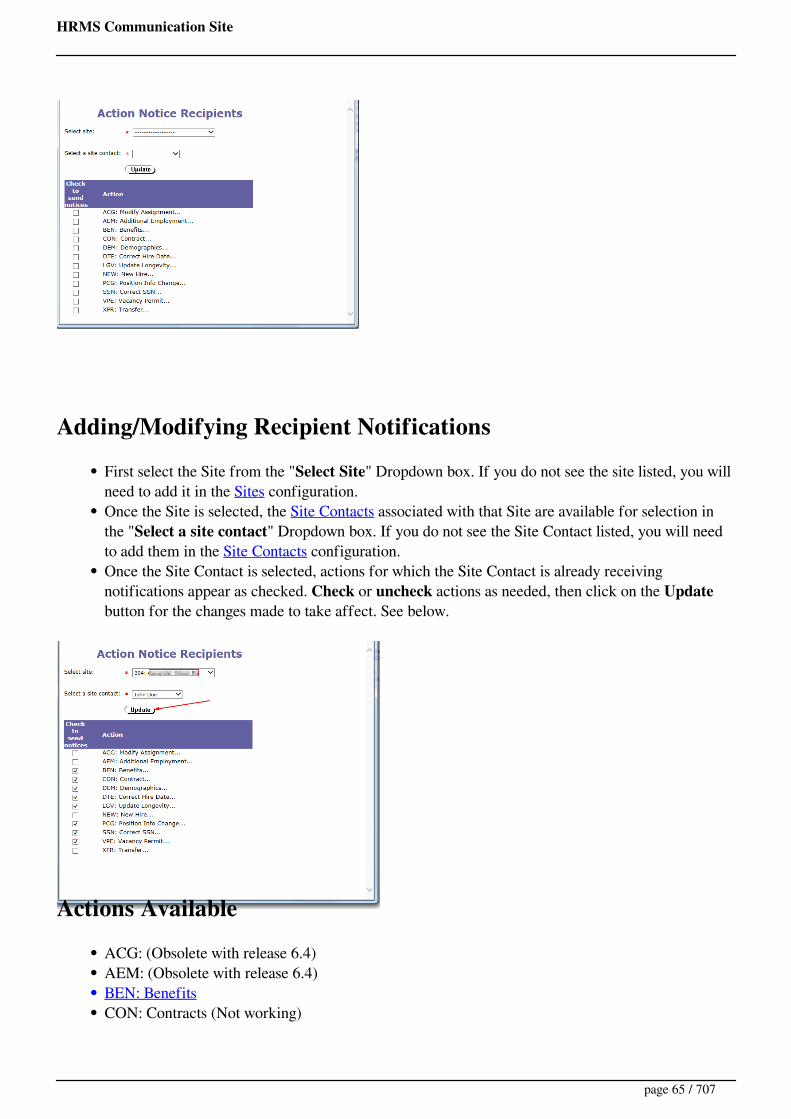
HRMS Communication Site
Adding/Modifying Recipient Notifications
First select the Site from the "Select Site" Dropdown box. If you do not see the site listed, you willneed to add it in the Sites configuration.Once the Site is selected, the Site Contacts associated with that Site are available for selection inthe "Select a site contact" Dropdown box. If you do not see the Site Contact listed, you will needto add them in the Site Contacts configuration.Once the Site Contact is selected, actions for which the Site Contact is already receivingnotifications appear as checked. Check or uncheck actions as needed, then click on the Updatebutton for the changes made to take affect. See below.
Actions Available
ACG: (Obsolete with release 6.4)AEM: (Obsolete with release 6.4)BEN: BenefitsCON: Contracts (Not working)
page 65 / 707

HRMS Communication Site
DEM: DemographicsDTE: Correction to Last Hire Date (Obsolete with release 6.4)LGV: Update Longevity (Obsolete with release 6.4)NEW: (Obsolete in release 6.4)PCG: Position ChangesSSN: SSN CorrectionVPE: Vacancy Permit CreationXRF: (Obsolete with release 6.4)
Back to Top
Action BENAction Notice Recipients will receive an email if there are changes made to an employee's Status andBenefits. In the example below changes were made to Jane Doe's benefits.
Jane Doe's benefits have been changed.
Back to Top
Action DEMAction Notice Recipients will receive an email if there are updates made on an employee's Demographicscreen. In the example below, Jane Doe's middle initial and street address were updated. Note that this isan old feature in HRMS and as new data fields were added to the Employee Demographic screen over theyears, this email notification was not updated. Therefore, when some data fields (like Hispanic/Latinoindicator) are updated, the Action Notice Recipient will receive a blank email.
Details for employee, Jane Doe, were changed on 12/30/2013 as follows:middle_nm--->Sstreet_ad--->415 Elm Street
Back to Top
page 66 / 707

HRMS Communication Site
Action PCGAction Notice Recipients will receive an email if there are updates made on an employee's position information. In the example below, Jane Doe's position description was updated. Note that this isan old feature in HRMS and as new data fields were added to the position screen over the years, this emailnotification was not updated. Therefore, when some data fields (such as Evaluation Category) are updated,the Action Notice Recipient will not receive an email.
Position , ASTPRN was modified on 12/31/13
Back to Top
Action SSNAction Notice Recipients will receive an email if and employee's SSN is changed. In the example below,Jane Doe's SSN was changed.
*WARNING* Change of SSN for current employee -- Jane S Doe
Back to Top
Action VPEAction Notice Recipients is not working for the Vacancy Permit Creation option. When the VacancyPermit is created, there is an option to Notify the Primary Site Contact if desired. Please see the emailexample of the Primary Site Contact notification of a new Vacancy Permit.
Back to Top
page 67 / 707

HRMS Communication Site
HRMS Help > Employee Demographics > Add Assignment
User Roles: Employee Hire, Staff Action, HR Staff Action Officer, System AdministratorLast Updated: Dec 16, 2014 7:13 am
Printer friendly
Table of ContentsQuick Facts
Add Assignment
Edit Assignment
Quick Facts
The Add Assignment form is used to add assignment records for employees in HRMS.You need to have the position number before continuing on the Add Assignment form.Also, you will have to enter a reason for the assignment such as New Hire, Re-employment or NewAssignment for Current Employee.
Add Assignment
Accessed from Employee Demographics under the Assignment menuSelect Add to open Add Assignment pop up window
Enter Position Number (required)Select Reason this assignment is being added (required) (An appropriate Staff Action recordwill be recorded and available on the Staff Action Console depending on this selection):
New Hire
page 68 / 707

HRMS Communication Site
Re-employmentNew Assignment for Current Employee
Click Submit to open the Add Assignment form.
Complete all the required fields:Under Employee Information
Update Employment Status (if necessary)Original Hire Dates and Last Hire Dates fields are required but cannot be edited on thisform. Use the Correct Employees Dates form instead.
Under Assignment Information you will have different options depending on the reason theassignment is being added.
For New Assignment for Current EmployeeIs this the employee's primary position?: Yes or NoPost on Board Report: Yes or No
page 69 / 707

HRMS Communication Site
If Yes enter the Board Report DateIf No the Board Report Date will not appear
Enter the Start Date.
Complete all required fields then Click Save & Edit
After clicking Save & Edit the Edit Assignment form opens.
Edit Assignment
page 70 / 707

HRMS Communication Site
For Salary Information (Salary information is incomplete!)
Click Edit Salary Information and/or Record Promotion/Demotion/Salary Change.See **Promotion, Demotion, or Salary Change**.
You have the following options on the upper portion of the Edit Assignment form:
Click Close to close the Edit Assignment formClick Save & Close to save any changes and close the Edit Assignment formClick Save & Edit to save any changes and continue editingClick Delete This Future Assignment to delete this assignment from the employee's assignmentrecord
On the bottom portion you can:
Click Close to close the Edit Assignment formClick Sync Budget Codes to Position - This process syncs HRMS data with Payroll (as long asthe position number is one the payroll assignment record). The data includes:
Position Budget Codes Available (includes deleting those no longer being used)Position Pay Table and Grade (from "base" budget codes)Assignment Pay Table, Grade and Step (from "base" budget codes)
page 71 / 707

HRMS Communication Site
HRMS Help > Reporting Tool > Advanced Properties
User Roles: Any user with Reporting Tool installed on PCLast Updated: Dec 12, 2011 6:14 am
The Advanced Connection Properties setting specifies whether your HRMS database server uses SSL forconnection.
To change this setting, click the Advanced Properties button on the Settings tab.
Check/uncheck the box on the Advanced Connection Properties form, depending on whether SSL isenabled.
page 72 / 707

HRMS Communication Site
HRMS Help > All Employees and Substitutes
User Roles: System Administrator, General User, HR Staff Action Officer, Staff Action
Last Updated: Jun 20, 2014 11:59 am
Printer friendly
Table of ContentsQuick Facts
Where to Select
Employee/Substitute Search
Quick Facts
This search and view of employees and substitutes is mainly for staff only needing viewinformation.
Where to SelectSelect "Employee/Employee Page" from the HRMS Home Page, then "All Employees and Substitutes"from the "Views" dropdown.
Employee/Substitute SearchOnce the "All Employees and Substitutes" View is selected, all Absences imported into HRMS appearfor searching.
page 73 / 707
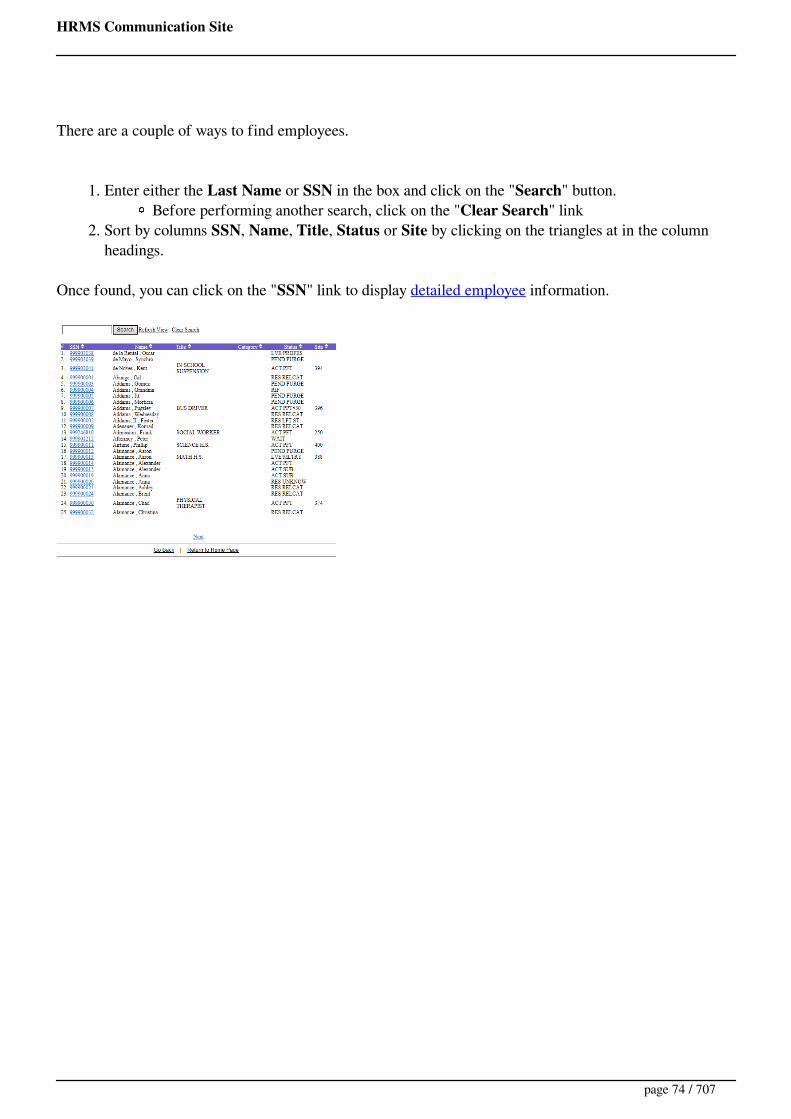
HRMS Communication Site
There are a couple of ways to find employees.
1. Enter either the Last Name or SSN in the box and click on the "Search" button.Before performing another search, click on the "Clear Search" link
2. Sort by columns SSN, Name, Title, Status or Site by clicking on the triangles at in the columnheadings.
Once found, you can click on the "SSN" link to display detailed employee information.
page 74 / 707

HRMS Communication Site
HRMS Help > Continuing Education > Assign CEU Credits
User Roles: Continuing Education Editor, System AdministratorLast Updated: Aug 31, 2017 7:41 am
To assign CEU credits using an existing course template, first search for the template on the CEUTemplate Management form, and then click the Assign Icon to the left of the Course Code.
The Assign Continuing Education Class form will display. Instructions follow the screen shot.
Step 1: Enter Completion Date
Enter the course completion date in the Completion Date field at the top of the form. You must enter thisdate before selecting a roster since the system will check to see if employees have already received creditfor the class on the same date.
Step 2: Review Course Template Information for Accuracy
Review all of the course information fields for accuracy based on the verification of successful completioncertificates / rosters.
See the Create a Course Template help topic for an explanation of each data field.The only data field that cannot be adjusted is Class Code.
Temporary Adjustments- If you need to make adjustments only for this posting, make thechanges directly on the Assign Continuing Education Class form before posting the credits.Permanent Adjustments - If more permanent adjustments are needed to the CEU Template,click the Edit link to the right of the Course Code at the top of the form. The CEU Templatescreen will display. Adjustments made on this page are saved to the CEU Template and will nowbecome the starting point for any future use of this template. Once the adjustments are made to theCEU Template, click the Submit button to save the changes. The Assign Continuing EducationClass page will refresh with the modified values displayed.
Step 3: Specify Class Roster
Select the process you want to use to identify the individual(s) to receive Renewal Credit for the course.See Specify a Class Roster.
After you specify a roster, the Assign Continuing Education Class form will refresh with the selectedemployees listed. The number of Literacy and Content Credits to be awarded to each employee will also
page 75 / 707

HRMS Communication Site
display.
Step 4: Finalize Credit Assignment
Click the Validate button and then click the Submit button to finalize the assigning of credits.
A confirmation page will display summarizing the credits awarded. If desired, you can print theconfirmation page for your records.
page 76 / 707

HRMS Communication Site
HRMS Help > Employee Page > Employee Demographics > Staff Actions > Assignment Actions
User Roles: System Administrator, HR Staff Action Officer, Staff Action Clerk, Employee HireLast Updated: Oct 16, 2014 1:21 pm
Printer friendly
Table of ContentsQuick Facts
Staff Action Console
Assignment Action Details
Staff Action Request Details
Quick Facts
The Assignment Action Details form allows authorized user to view the details of 'Transfer', 'NewAssignment for Current Employee' and 'Drop Assignment' records.System Administrators, HR Staff Action Officers, Staff Action Clerks and Employee Hire rolescan access this form from the Staff Action Console or Staff Action Search form.
Staff Action Console
page 77 / 707

HRMS Communication Site
Three (3) types of Assignment Actions:
Dropped AssignmentTransferNew Assignment for Current Employee
Click the Assignment Action Details you want to view.You cannot edit or remove an assignment action record from the Assignment Actions Details form.However, you may cancel the action before the effective date by doing the following:
To cancel a 'Drop Assignment'Go to Edit Assignment and click Edit Assignment Date then select 'Cancel DropAssignment'
To cancel a "Transfer'Go to Edit Assignment for the old assignment and click Edit Assignment Dates then select'Cancel Transfer'
To cancel a 'New Assignment for Current Employee'Go to Edit Assignment for the New assignment click 'Delete this future assignment'
Assignment Action Details
page 78 / 707
HRMS Communication Site
Staff Action Request Details
page 79 / 707

HRMS Communication Site
HRMS Help > Reporting Tool > Selection Criteria > Assignment Type
Last Updated: Dec 12, 2011 6:57 am
This option is available on various Standard Reports and Letters. It is used to select employees withCurrent, Future, and/or Archived Assignments (or no assignments).
How To
You must select at least one of the following:
Current (default)FutureArchivedNo Current or Future Assignment
While you may select any combination of values for Employee Status and Assignment Type, the followingcombinations are suggested:
Employees Assigned to Positions Selected Employee Status Suggested Assignment Type
Yes Active Current
Yes Leave Current or Archived (depends onwhether employees on Leave are
removed from Assignment)
Yes Pending Future
Yes Inactive Archived
No Any No Current or Future Assignment
Example 1
Select Current.The system will select employees currently in an assignment and display current assignment data.
Example 2
page 80 / 707

HRMS Communication Site
Select Current, Future, and No Current or Future Assignment.The system will select employees in a current assignment, employees in a future assignment, andemployees who have neither a current assignment nor a future assignment (may have an archivedassignment). Assignment data will be displayed for employees in a current or future assignment.
Example 3
Select Archived.The system will select employees in an archived assignment and display archived assignment data.
page 81 / 707

HRMS Communication Site
HRMS Help > Reporting Tool > Selection Criteria > Assignments Active Between
Last Updated: Dec 12, 2011 7:44 am
This option is available on various Standard Reports. It is used to select employees with a current orarchived assignment active during the specified date range.
How To
Enter beginning and ending dates or click the down arrow to use the calendar to pick dates.
page 82 / 707
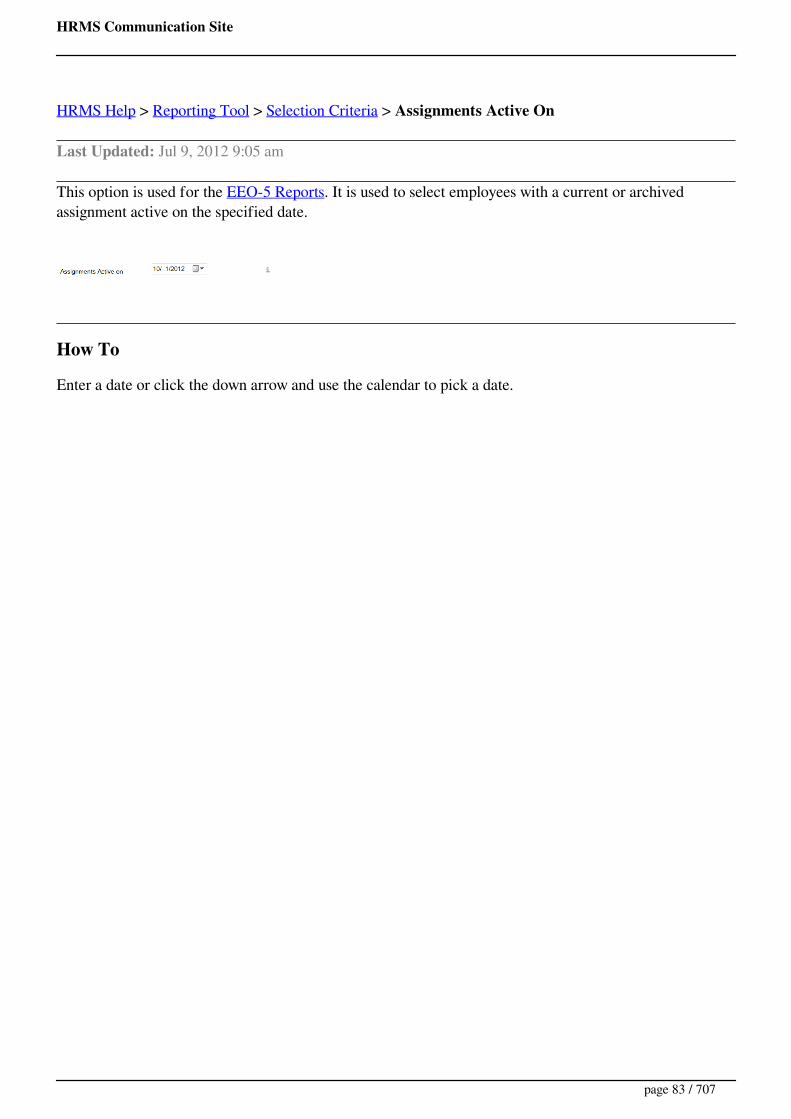
HRMS Communication Site
HRMS Help > Reporting Tool > Selection Criteria > Assignments Active On
Last Updated: Jul 9, 2012 9:05 am
This option is used for the EEO-5 Reports. It is used to select employees with a current or archivedassignment active on the specified date.
How To
Enter a date or click the down arrow and use the calendar to pick a date.
page 83 / 707
HRMS Communication Site
HRMS Help > Reporting Tool > Beginning Teacher Reports
User Roles: Any user with Reporting Tool installed on PCLast Updated: Apr 30, 2012 10:59 am
The Beginning Teacher Reports include:
Beginning Teachers Leaving – Lists beginning teachers who left the LEA during a specified reportperiod.Beginning Teachers Not Leaving – Lists beginning teachers still employed by the LEA during aspecified report period.Summary – Lists total number of beginning teachers employed by the LEA, total number ofbeginning teachers leaving, and counts of beginning teachers leaving for specific reasons during aspecified report period.
The Summary Report in HRMS was once used as part of the official annual Beginning Teacher TurnoverSummary Report required by DPI. Although the report is no longer used as the official report, it can behelpful in completing the report required by DPI. The turnover information produced by this report isbased on HRMS data and therefore might not coincide with the numbers that are being reported to DPI,which are based on UERS/Payroll data.
Selection Criteria
The definition of who is considered to be a Teacher for these reports is based on the Object Codes theyare paid from. The following Teaching Object Codes are used for this report:
121 – Teacher123 – JROTC Teacher124 – Foreign Exchange (VIF)
Beginning Teachers are those who are in their 1st, 2nd, or 3rd year of teaching (BT Status = 1st, 2nd, or3rd Year).
The designation as to whether an individual completed a Teacher Education Program (TE) or enteredteaching through Lateral Entry (LE) is based on the individual’s License Program Status and Basis.
TE Codes: 81, 83, 84, 86, and 88.LE Codes: 4L, LL, 35, 85, 8L, and 8R.
page 84 / 707

HRMS Communication Site
HRMS Help > Reporting Tool > Beginning Teacher Reports > Beginning Teacher Turnover Summary
User Roles: Any user with Reporting Tool installed on PCLast Updated: Jul 22, 2015 8:49 am
The Beginning Teacher Turnover Summary Report lists totals from the Beginning Teachers Leavingand Beginning Teachers Not Leaving Reports, including a breakdown of the number of teachers who leftby reason.
The Summary Report in HRMS was once used as part of the official annual Beginning Teacher TurnoverReport required by DPI. Although the report is no longer used as the official report, it can be helpful incompleting the report required by DPI. The turnover information produced by this report is based onHRMS data and therefore might not coincide with the numbers that are being reported to DPI, which arebased on UERS/Payroll data.
VERY IMPORTANT: Please note that Licensure data in HRMS is as of TODAY and teachers are placedin the TE or LE category as of the date you run the report, not as of any date in the date range entered forthe report. Only teachers falling into either the TE or LE category are on the report. Therefore, if you runthis report in July, for the previous year and some or your 3rd year BT teachers now have clear licenses,they are not counted.
Selection Criteria
Report PeriodExport Report Data
Since the totals come from the Beginning Teachers Leaving and Beginning Teachers Not LeavingReports, the selection criteria are the same as for those reports.
Sample Report
page 85 / 707

HRMS Communication Site
HRMS Help > Reporting Tool > Beginning Teacher Reports > Beginning Teachers Leaving
User Roles: Any user with Reporting Tool installed on PCLast Updated: Apr 30, 2012 11:28 am
The Beginning Teachers Leaving Report lists teachers at the LEA who left teaching during a specifiedreport period. It is used to populate totals on the Beginning Teacher Turnover Summary Report.
The report lists specific teaching position(s) that each employee left during the report period and the totalnumber of unique teachers who left during the report period.
Selection Criteria
Report PeriodSSN (Display)Export Report Data
The report returns two groups of Beginning Teachers:
Group 1- Employees who terminated employment during the report period.These employees are reported with their current employment status code. Employees with alocally-defined inactive status are reported with a status of '65 - Resigned-Other Reasons'.
Group 2- Active employees who switched from a teaching to a non-teaching position during thereport period.
These employees are reported with an employment status code of '75 - Moved to a Non-Teaching Position in LEA'.
Sample Report
page 86 / 707

HRMS Communication Site
HRMS Help > Reporting Tool > Beginning Teacher Reports > Beginning Teachers Not Leaving
User Roles: Any user with Reporting Tool installed on PCLast Updated: May 1, 2012 6:27 am
The Beginning Teachers Not Leaving Report lists beginning teachers at the LEA who remained in ateaching position during a specified report period. It is used to populate totals on the Beginning TeacherTurnover Summary Report.
The report lists specific teaching position(s) that the employee holds and the total number of uniqueteachers who remained in teaching during the report period.
Selection Criteria
Report PeriodSSN (Display)Export Report Data
The report returns three groups of Beginning Teachers:
Group 1– Active Employees with a current teaching assignment that began before the end of thereport period.Group 2– Employees with an archived teaching assignment that began before the end of the reportperiod and ended after the report period.Group 3- Active Employees with a teaching assignment that ended during the report period and acurrent or future assignment teaching assignment that starts after the report period.
This group will display as 'Returning' on the report. If any of these employees actuallyterminated employment during the report period, they may need to be listed as 'Leaving'instead.
Sample Report
page 87 / 707
HRMS Communication Site
HRMS Help > Reporting Tool > Selection Criteria > Board Action Date
Last Updated: Jul 8, 2015 1:04 pm
For Contracts and Contract Cover Letters, this is an optional field. It is used to override the BoardAction Date entered on the contract in HRMS. If you enter Board Action Date, the date will display in theappropriate fields on the Contract or Cover Letter. If you leave the field blank, the Board Action Dateentered on the contract will display.
For the Contract Non-Renewal, Board, Post Board Meeting Notice, this is a required field. It is used toenter the Date of the Board Meeting during which the Board voted not to renew the employee's contract.
How To
Enter a date or click the down arrow and use the calendar to pick a date. For Contracts, click the check-box before entering/picking a date.
page 88 / 707
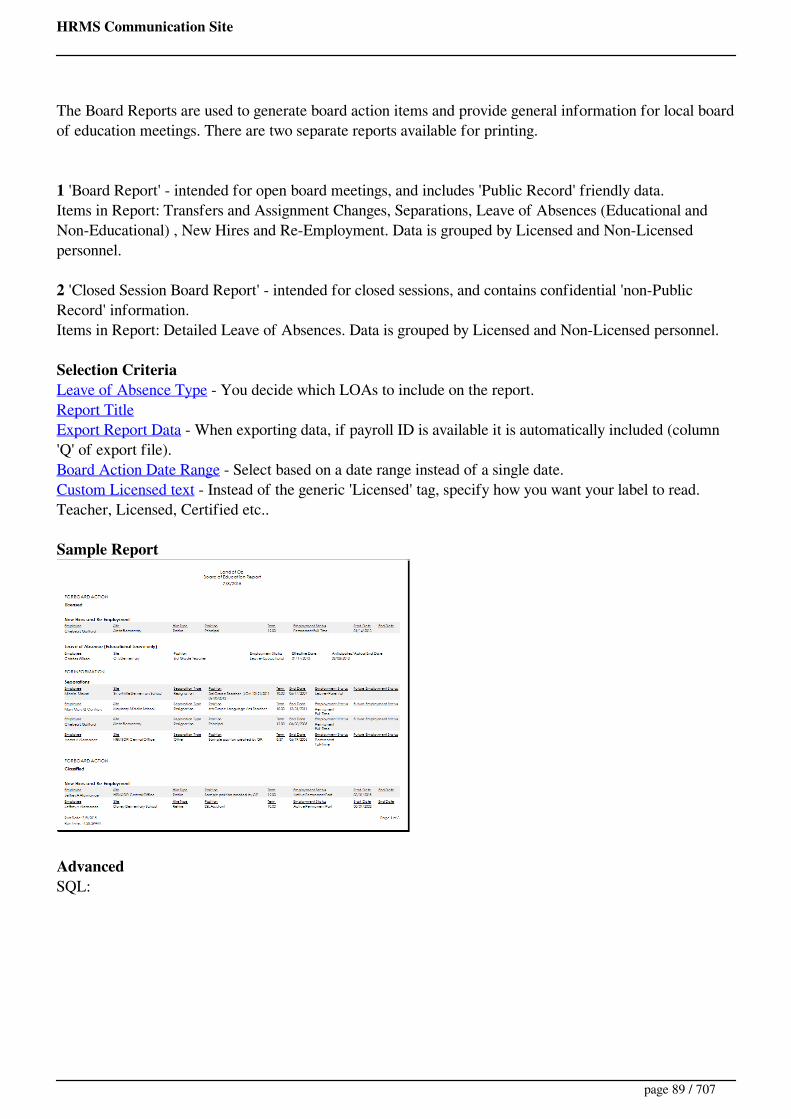
HRMS Communication Site
The Board Reports are used to generate board action items and provide general information for local boardof education meetings. There are two separate reports available for printing.
1 'Board Report' - intended for open board meetings, and includes 'Public Record' friendly data.Items in Report: Transfers and Assignment Changes, Separations, Leave of Absences (Educational andNon-Educational) , New Hires and Re-Employment. Data is grouped by Licensed and Non-Licensedpersonnel.
2 'Closed Session Board Report' - intended for closed sessions, and contains confidential 'non-PublicRecord' information.Items in Report: Detailed Leave of Absences. Data is grouped by Licensed and Non-Licensed personnel.
Selection CriteriaLeave of Absence Type - You decide which LOAs to include on the report.Report TitleExport Report Data - When exporting data, if payroll ID is available it is automatically included (column'Q' of export file).Board Action Date Range - Select based on a date range instead of a single date.Custom Licensed text - Instead of the generic 'Licensed' tag, specify how you want your label to read.Teacher, Licensed, Certified etc..
Sample Report
AdvancedSQL:
page 89 / 707

HRMS Communication Site
HRMS Help > BT Status Mass Update
User Roles: Mass Updates, System Administrator
Last Updated: Dec 31, 2013 10:34 am
The functionality for the mass update of BT (Beginning Teacher) status is intended to provide an easyway to annually "bump" the BT status of beginning teachers. (Note that there is no system configurationfor locally defined BT status codes.) Valid values are N - Not applicable, 0 - 0 year (hired too late in theyear to receive 1st year status), 1 - 1st year, 2 - 2nd year, 3 - 3rd year and C - Completed. It is notnecessary to have non-teaching staff with the status of N. Just leaving blank is a indicator that BT status isnot applicable for the staff member.
To access the Contract Mass Build , go to: HRMS Home > Employees > Employee Page > MassUpdates > BT Status Code (Old ILT Status)
ProcessOnce selected, a screen appears reminding you to bump to the higher values first. You should first bump3 to C, then 2 to 3, then 1 to 2, and lastly 0 to 1. After closing the reminder screen the following screen isavailable.
Select the "From" code and "To" Code from the drop downs and click on Submit.
In the example below, 3 was selected for "From" and C was selected for "To". These are staff to movefrom their 3rd year of Beginning Teaching to "Completed".
page 90 / 707

HRMS Communication Site
Note in the screen above you are reminded of the "From" and "To" values that were entered. All staffwhose current BT status is the "From" value, appear for update. If anyone should not be "bumped" to the"To" value, simply uncheck the "Update" box on their row.
Once you have "unchecked" anyone who should not be bumped, click on the "Submit" button and youwill get a confirmation screen that you can print if desired. (See below).
page 91 / 707
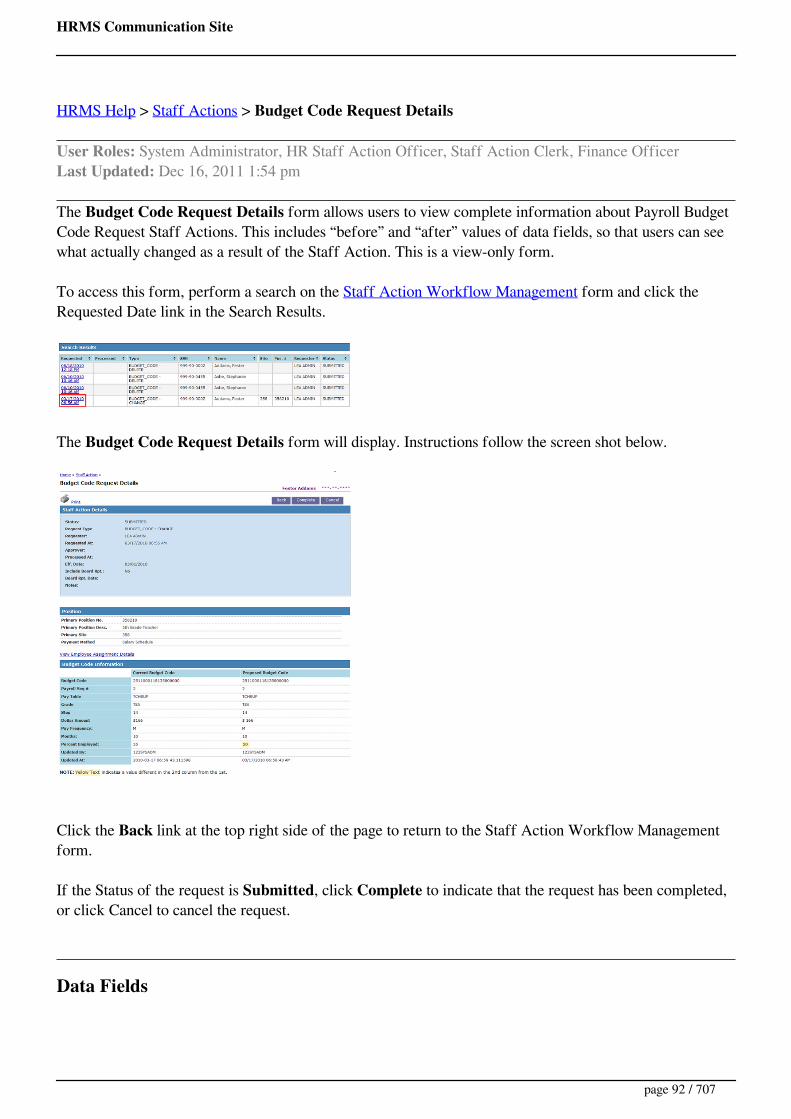
HRMS Communication Site
HRMS Help > Staff Actions > Budget Code Request Details
User Roles: System Administrator, HR Staff Action Officer, Staff Action Clerk, Finance OfficerLast Updated: Dec 16, 2011 1:54 pm
The Budget Code Request Details form allows users to view complete information about Payroll BudgetCode Request Staff Actions. This includes “before” and “after” values of data fields, so that users can seewhat actually changed as a result of the Staff Action. This is a view-only form.
To access this form, perform a search on the Staff Action Workflow Management form and click theRequested Date link in the Search Results.
The Budget Code Request Details form will display. Instructions follow the screen shot below.
Click the Back link at the top right side of the page to return to the Staff Action Workflow Managementform.
If the Status of the request is Submitted, click Complete to indicate that the request has been completed,or click Cancel to cancel the request.
Data Fields
page 92 / 707

HRMS Communication Site
Employee Name and SSN display on the top right-hand side of the form. SSN displays as *-- by default,but you may click the SSN to display either the last 4 digits or full SSN.
Staff Action Details includes high-level information about the Staff Action request selected. Thefollowing Staff Action data fields are included in this section:
Status (Submitted, Cancelled, or Completed)Request TypeRequester (Name of person who requested the Staff Action)Request DateApprover (Name of person who approved the request)Processed DateEffective DateInclude on Board ReportBoard Report DateStaff Action Notes
Position Information includes the following information about the employee’s position assignment.
Primary Position No.Primary Position Desc.Primary SitePayment Method
View Employee Assignment Details links you to the View Employee Assignment Details form. This willenable you to check the employee’s assignment information to determine whether this request has beenposted in Payroll.
Budget Code Information displays all the “before” and “after” information about the budget coderequest. If this is a Budget Code Change request, then both “before” and “after” values will be displayed. Ifthis is a Budget Code Add request, then only “after” values will be displayed. If this is a Budget CodeDelete request, then only “before” values will be displayed. “Before” values will be displayed in the‘Current Budget Code’ column; “after” values will be displayed in the ‘Proposed Budget Code’ column. Allvalues in the ‘Proposed Budget Code’ column that changed as a result of this Staff Action will behighlighted in yellow text. The following data fields listed below are included in this Budget CodeInformation section:
Budget CodePayroll Sequence #Pay TableGradeStepDollar Amount
page 93 / 707

HRMS Communication Site
Pay Frequency (M = Monthly; get other values)MonthsPercent EmployedUpdated By (UserID)Updated At (Date)
A Print button will allow you to print this page, in case you need a hard copy for your Payroll Department,the employee’s work Site, or the employee’s file.
page 94 / 707

HRMS Communication Site
HRMS Help > Reporting Tool > Selection Criteria > CC Names & Titles
Last Updated: Dec 12, 2011 7:46 am
This option is available on the Contract Non-Renewal Letters. It is used to enter names and titles ofindividuals who receive copies of the letter.
How To
Type one name and title per line.
Example
page 95 / 707

HRMS Communication Site
HRMS Help > Reporting Tool > Selection Criteria > Certified Mail Number
Last Updated: Dec 12, 2011 7:47 am
This option is available on the Contract Non-Renewal - Post Board Meeting Notice. It is used to enterthe USPS Certified Mail Number that should display at the top of the letter.
How To
Enter the USPS Certified Mail Number (up to 20 digits) in the text box.
page 96 / 707
HRMS Communication Site
HRMS Help > Continuing Education > CEU Employee History (Edit)
User Roles: Continuing Education Editor, System AdministratorLast Updated: Jun 26, 2017 11:42 am
Authorized users can add, edit, and remove CEU credits for an individual employee from the CEUEmployee History form. All other features of the form are the same as the view-only version.
To access the form:
From the Renewal List:Perform an SSN search, orPerform a Class search and click on a row in the search results.
From the Employee Demographics page, select Other > Renewals/CEUs.
Adding CEU Credits
1. Enter a Class Code and click the Add to Class button. The Assign Continuing Education Classform will display with the current employee selected for the Class Roster.
2. Follow the steps outlined in Assign CEU Credits (Skip Step 3, Specifying a Roster).
Example
Editing CEU Credits
1. Click the Edit button for a specific class. The Edit Continuing Education Class form will display.2. Adjust any fields except Class Code and Completion Date. Note that the validation processes for
Reading & Academic Credits will be bypassed.3. Click Validate and then click Submit. The CEU Employee History page will refresh showing the
new values.
Removing CEU Credits
1. Click the Remove button for a specific class. A dialog box will display asking you to confirm thedeletion.
2. Click OK to confirm. The CEU Employee History page will refresh to show the change.
page 97 / 707

HRMS Communication Site
page 98 / 707
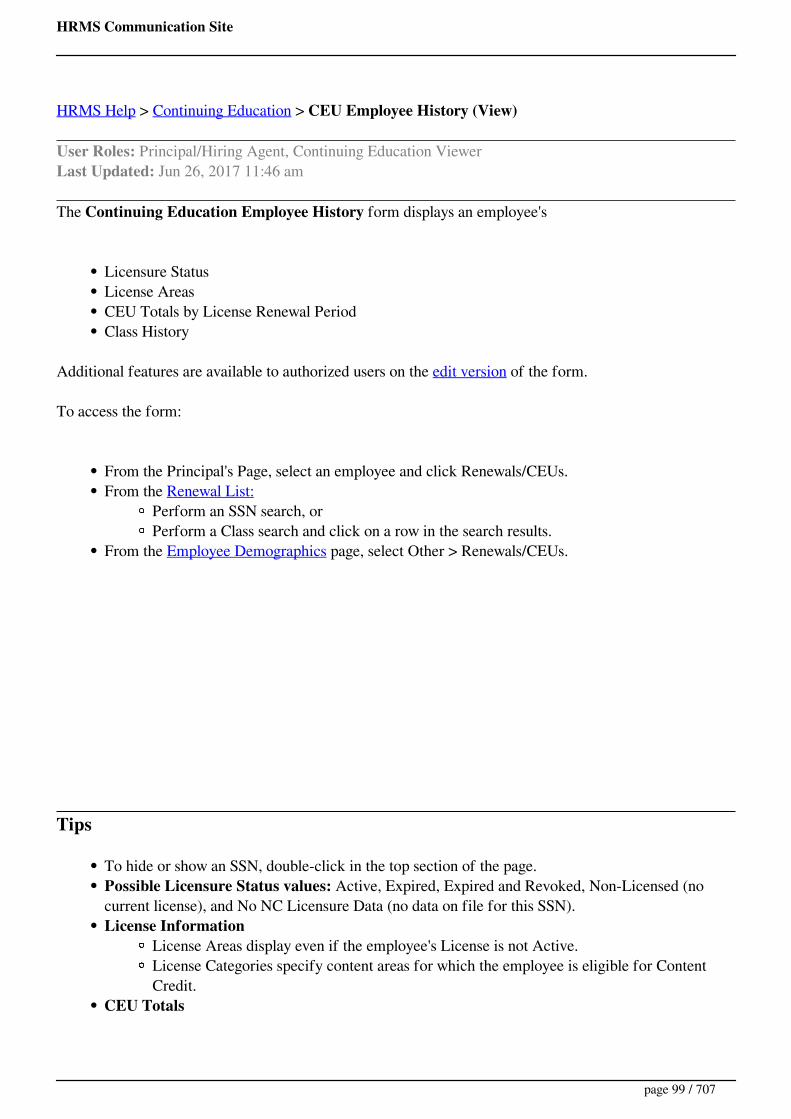
HRMS Communication Site
HRMS Help > Continuing Education > CEU Employee History (View)
User Roles: Principal/Hiring Agent, Continuing Education ViewerLast Updated: Jun 26, 2017 11:46 am
The Continuing Education Employee History form displays an employee's
Licensure StatusLicense AreasCEU Totals by License Renewal PeriodClass History
Additional features are available to authorized users on the edit version of the form.
To access the form:
From the Principal's Page, select an employee and click Renewals/CEUs.From the Renewal List:
Perform an SSN search, orPerform a Class search and click on a row in the search results.
From the Employee Demographics page, select Other > Renewals/CEUs.
Tips
To hide or show an SSN, double-click in the top section of the page.Possible Licensure Status values: Active, Expired, Expired and Revoked, Non-Licensed (nocurrent license), and No NC Licensure Data (no data on file for this SSN).License Information
License Areas display even if the employee's License is not Active.License Categories specify content areas for which the employee is eligible for ContentCredit.
CEU Totals
page 99 / 707

HRMS Communication Site
Current and Future CEU Totals display only if the employee has an established LicenseRenewal period. Prior CEU Totals display if the employee has a Prior License Renewalperiod.Classes where No Credit is awarded are not included in the CEU totals.
Class History: Click on a column heading in the Class History List to sort by that column (firstascending, and then descending).
page 100 / 707

HRMS Communication Site
HRMS Help > Continuing Education > CEU Template Management
User Roles: Continuing Education Editor, System AdministratorLast Updated: Aug 31, 2017 7:34 am
The CEU Template Management form allows users to:
Create a Course TemplateSearch for a Course Template- After finding a template, users can:
Edit the TemplateAssign CEU Credits using the template
Mass Update a Single CourseMass Update Literacy Credits
To access the CEU Template Management form, go to: HRMS Home > Continuing Ed > CEU TemplateMgmt.
The CEU Template Management form will display.
Search for a Course Template
The CEU Template Management form provides several ways to find a template, as described below.
Find a Template by Course Description
1. Unless you know the exact course description, uncheck the Exact check-box.2. Enter text (not case-sensitive) contained anywhere in the class description in the Search value field.3. Click the Description button.
Up to 10 results display per page. Use the navigation options above the search results to browse throughthe results.
Find a Template by Course Code
1. Check Exact to find a specific Course Code, or uncheck Exact to find courses where the CourseCode begins with a specific value.
2. Enter an exact or partial Course Code in the Search value field.3. Click the Course Code button.
page 101 / 707

HRMS Communication Site
Find a Template by Source
1. Unless you know the exact source, uncheck the Exact check-box.2. Enter text (not case-sensitive) contained anywhere in the source in the Search value field.3. Click the Source button.
Find a Template by Course Completion Date
1. Enter the date that the course was completed by one or more employees in the Search value field.2. Click the Date button.
Find a Template by Credit Subcategory
1. Select a Credit subcategory (Content, Literacy, etc.) in the Show only courses drop-down box.2. Click Go.
page 102 / 707

HRMS Communication Site
HRMS Help > Change SSN
User Roles: System Administrator, HR Staff Action OfficerLast Updated: Apr 4, 2014 8:22 am
Printer friendly
Table of ContentsQuick Facts
Where to Select
Changing the SSN
Update Complete Message
Quick Facts
Change SSN Staff Actions are created by selecting the SSN option from the Other menu on the Employee Demographics form.Once submitted, there is not a place in HRMS to see that these staff actions were entered by acertain person....on a certain date....etc....If the SSN that you are changing to, already exists in the system, you will get an error message. Inthe case where someone is in HRMS with both an incorrect and correct SSN, you will need tocontact HRMS support to remove the incorrect SSN.Sometimes this function may fail. See ODBC Error on Change SSN for more information.
Where to Select
Changing the SSN
page 103 / 707
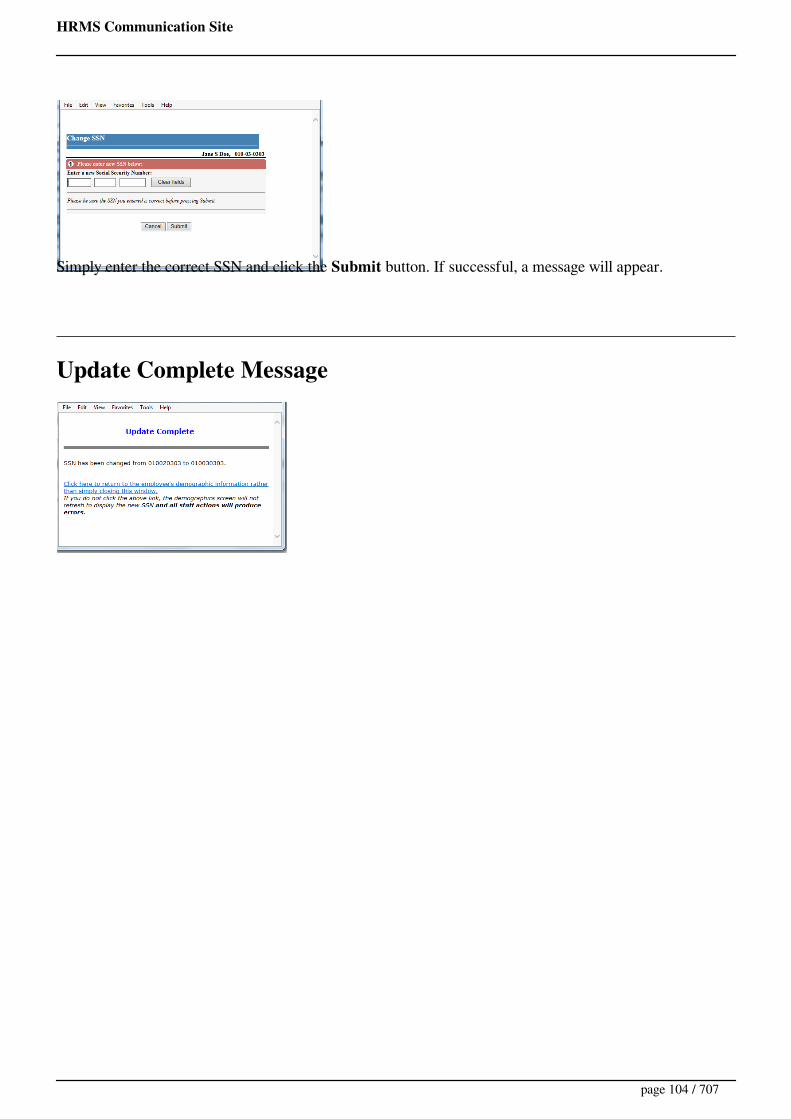
HRMS Communication Site
Simply enter the correct SSN and click the Submit button. If successful, a message will appear.
Update Complete Message
page 104 / 707

HRMS Communication Site
HRMS Help > Reporting Tool > Selection Criteria > Class Code
Last Updated: Dec 12, 2011 7:48 am
This option is available on the Continuing Education History Reports. Is is used to select employees whotook a specific course.
How To
Enter a complete Class Code (not case-sensitive), or select a value from the drop-down list.(The drop-down list includes all Class Codes for which renewal credits have been awarded.)
Example 1
Enter "hrms101".The system will select employees with renewal credits for Class Code HRMS101 and returnmatching class data.
Example 2
Select "HRMS101" from the drop-down list.The system will select employees with renewal credits for Class Code HRMS101 and returnmatching class data.
page 105 / 707
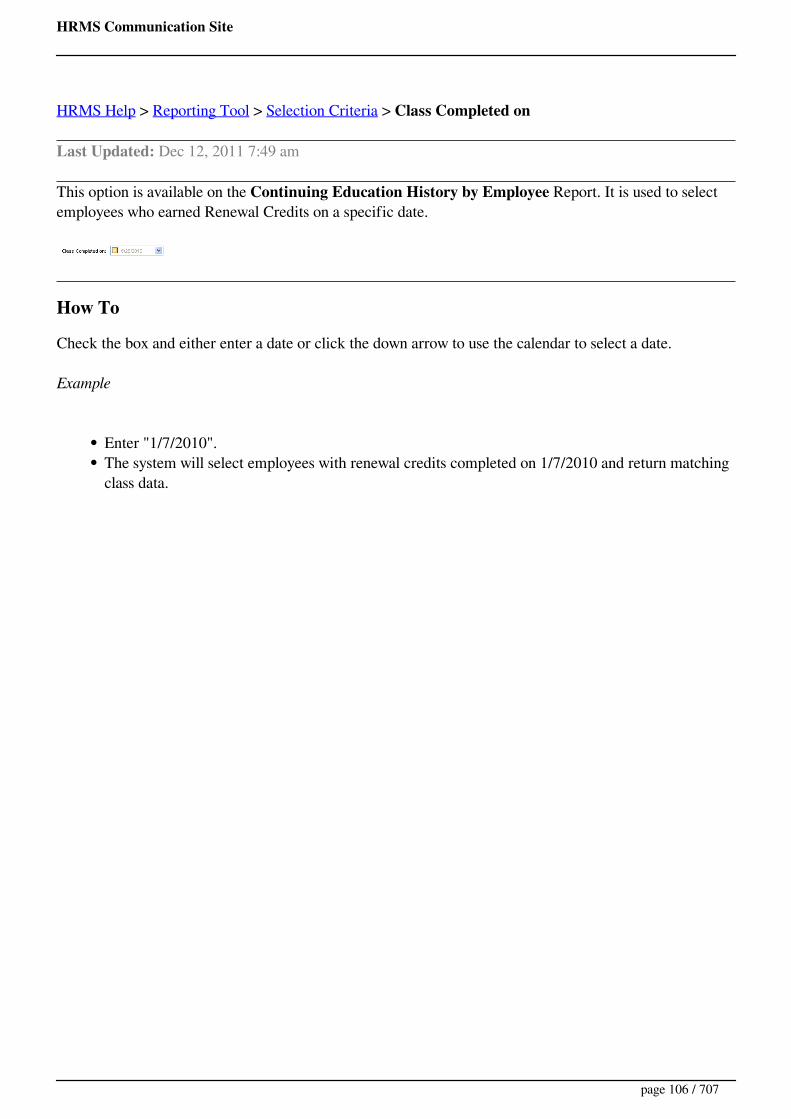
HRMS Communication Site
HRMS Help > Reporting Tool > Selection Criteria > Class Completed on
Last Updated: Dec 12, 2011 7:49 am
This option is available on the Continuing Education History by Employee Report. It is used to selectemployees who earned Renewal Credits on a specific date.
How To
Check the box and either enter a date or click the down arrow to use the calendar to select a date.
Example
Enter "1/7/2010".The system will select employees with renewal credits completed on 1/7/2010 and return matchingclass data.
page 106 / 707

HRMS Communication Site
HRMS Help > Reporting Tool > Selection Criteria > Class Completed on or After
Last Updated: Dec 12, 2011 7:50 am
This option is available on the Continuing Education History by Class Report. It is used to selectemployees who earned Renewal Credits on or after a specific date.
How To
Check the box and either enter a date or click the down arrow to use the calendar to select a date.
Example
Enter "1/7/2010".The system will select employees with renewal credits completed on or after 1/7/2010 and returnmatching class data.
page 107 / 707

HRMS Communication Site
HRMS Help > Reporting Tool > Selection Criteria > Class Credits
Last Updated: Jul 9, 2015 11:37 am
This option is available on the Continuing Education History by Employee Report. It is used to selectemployees with less than the specified number of CEU Credits awarded for a specific category for theselected Class Period.
How To
Enter a number in one or more of the Credits fields.
Example 1
Select Class Period = Within Current Renewal Period Only and Renewal Credits .The system will return employees who have fewer than 8 Renewal Credits for their CurrentRenewal Cycle.
Example 2
Select Class Period = Within Current Renewal Period Only, Renewal Credits , and ContentCredits .The system will return employees who have fewer than 3 Renewal Credits OR fewer than 3Content Credits for their Current Renewal Cycle.
page 108 / 707
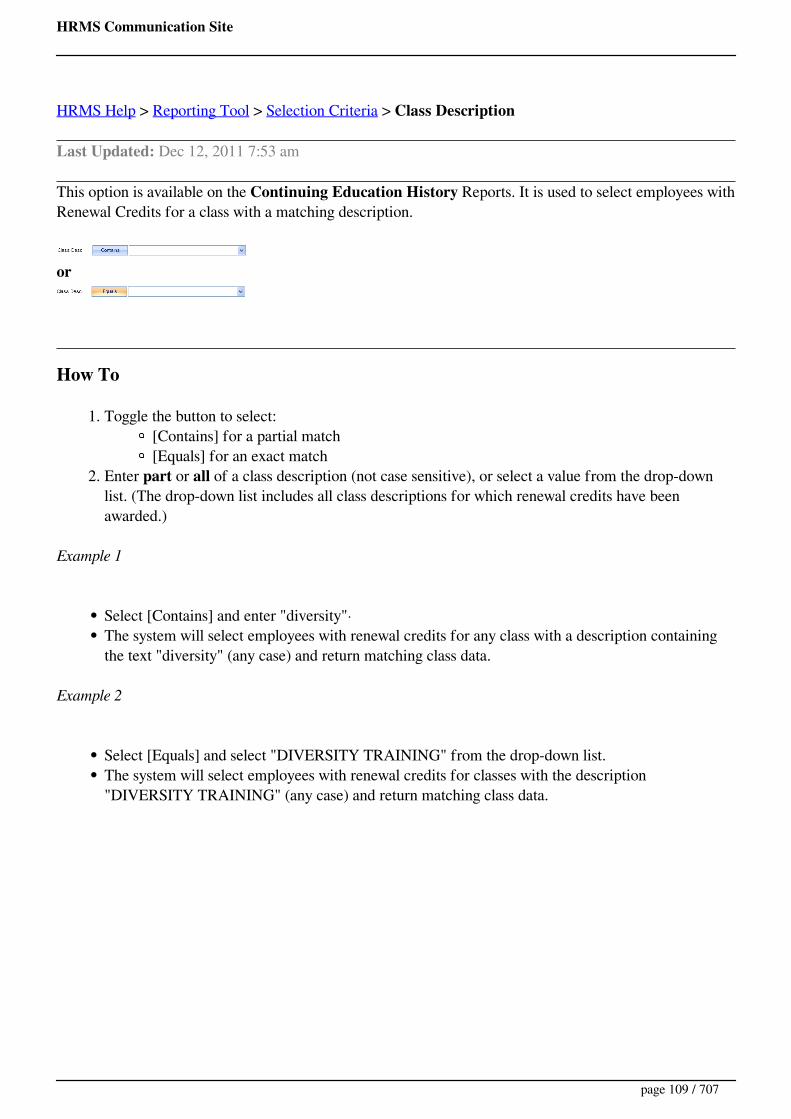
HRMS Communication Site
HRMS Help > Reporting Tool > Selection Criteria > Class Description
Last Updated: Dec 12, 2011 7:53 am
This option is available on the Continuing Education History Reports. It is used to select employees withRenewal Credits for a class with a matching description.
or
How To
1. Toggle the button to select:[Contains] for a partial match[Equals] for an exact match
2. Enter part or all of a class description (not case sensitive), or select a value from the drop-downlist. (The drop-down list includes all class descriptions for which renewal credits have beenawarded.)
Example 1
Select [Contains] and enter "diversity"·The system will select employees with renewal credits for any class with a description containingthe text "diversity" (any case) and return matching class data.
Example 2
Select [Equals] and select "DIVERSITY TRAINING" from the drop-down list.The system will select employees with renewal credits for classes with the description"DIVERSITY TRAINING" (any case) and return matching class data.
page 109 / 707

HRMS Communication Site
HRMS Help > Reporting Tool > Selection Criteria > Class Period
Last Updated: Dec 12, 2011 7:53 am
This option is available on the Continuing Education History by Employee Report. It is used to selectRenewal Credits earned within a specific Licensure Renewal Period, or Life to Date.
How To
Select one of the following:
Life to DateWithin Current Renewal Period Only (default)Within Prior Renewal Period Only
If you selected Position Type = Classified, Bus Driver, or Substitute, select Class Period = Life to Date(since employees assigned to those Position Types do not usually have a Renewal Period).
page 110 / 707
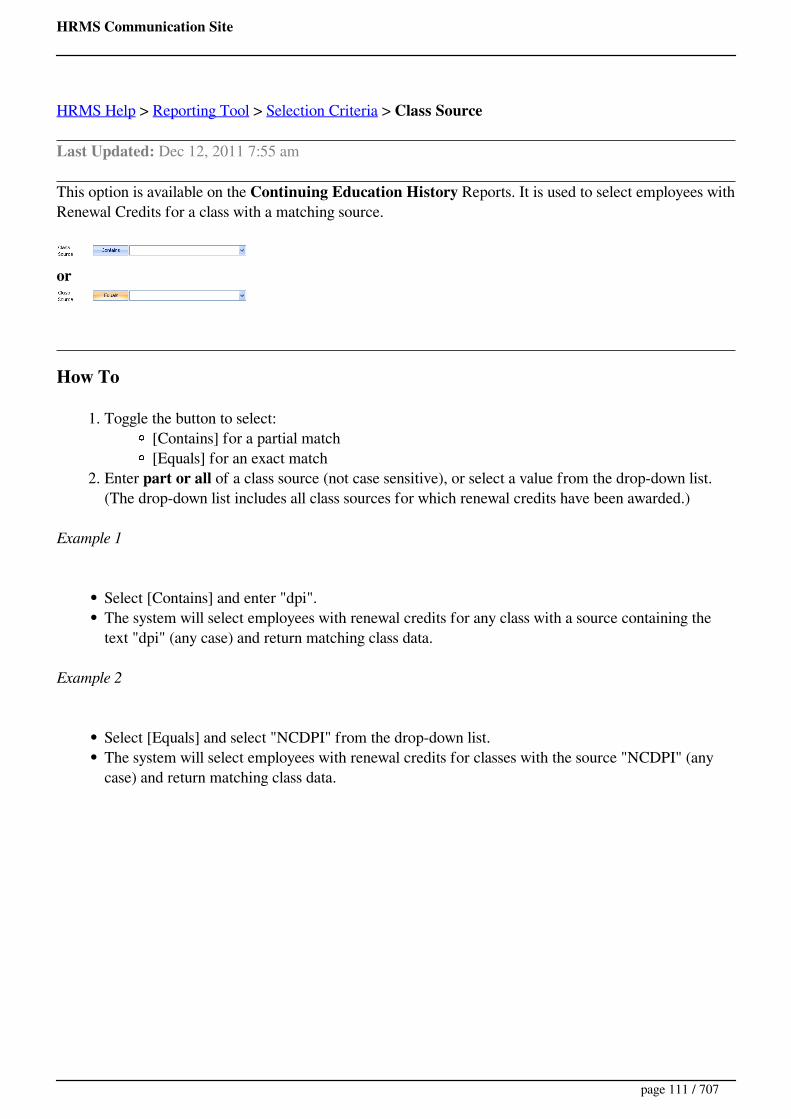
HRMS Communication Site
HRMS Help > Reporting Tool > Selection Criteria > Class Source
Last Updated: Dec 12, 2011 7:55 am
This option is available on the Continuing Education History Reports. It is used to select employees withRenewal Credits for a class with a matching source.
or
How To
1. Toggle the button to select:[Contains] for a partial match[Equals] for an exact match
2. Enter part or all of a class source (not case sensitive), or select a value from the drop-down list.(The drop-down list includes all class sources for which renewal credits have been awarded.)
Example 1
Select [Contains] and enter "dpi".The system will select employees with renewal credits for any class with a source containing thetext "dpi" (any case) and return matching class data.
Example 2
Select [Equals] and select "NCDPI" from the drop-down list.The system will select employees with renewal credits for classes with the source "NCDPI" (anycase) and return matching class data.
page 111 / 707

HRMS Communication Site
HRMS Help > Reporting Tool > Selection Criteria > Contact By Date
Last Updated: Dec 12, 2011 7:56 am
This option is available on various Letters. It prints a deadline for responding to the LEA concerninginformation contained in the letter.
How To
This is a required field. Either enter a date or click the down arrow to use the calendar to select a date.
page 112 / 707

HRMS Communication Site
HRMS Help > Continuing Education > Content & Literacy Credits
User Roles: Continuing Education Editor, System AdministratorLast Updated: Aug 31, 2017 7:54 am
This topic covers special rules and procedures for awarding Content and Literacy Credits.
Licensure Rules
Source: http://www.ncpublicschools.org/licensure/update/
Awarding Content Credits in HRMS
To implement Licensure rules regarding Content Credits, the following procedures are in place:
License Categories representing general content areas are set up in LEA Configuration.License Areas are linked to License Categories in LEA Configuration.When assigning a CEU Class with Content Credits, the user must select applicable LicenseCategories (content areas).Employees who have a License Area linked to any of the selected License Categories for a courseare eligible to receive Content Credit for the course.
You can view the License Categories associated with an employee's license on the CEU Employee Historyform.
Literacy & Academic Credit Combination in HRMS
To ensure that Licensure rules are being met for awarding Content and Literacy Credits for the samecourse, HRMS performs the checks below.
Scenario A – If Literacy + Content is not greater than Total renewal credits, then the credits will be postedas entered. (Eligibility for Content Credit is based on the License Categories assigned to the course).Example:
page 113 / 707

HRMS Communication Site
Scenario B
– If Literacy + Content is greater than Total renewal credits, the system will then assign Literacy and Content Credits as follows:
The HRMS system will first review each individual's license dating cycles (prior, current or future) if they have any, and determine which cycle the credit falls within.
Once the dating cycle is determined, the system will then look at the amount of Literacy Credits already awarded for the correct dating cycle and post only sufficient Literacy Credit to bring the individual's Literacy credits up to 3required units for K-8 teachers (the total amount needed for extension). Note: Effective 7/8/2015 the split of Content and Literacy credits will no longer take place on any teachers other than K-8 but will instead all be posted as
Content Credits in this scenario.
All remaining credits for K-8 teachers will be posted as Content Credits, if the individual is eligible based on the License Categories assigned to the course. (Literacy Credits were selected as the first value to be posted as it was felt
by the Steering Committee that this was the more difficult requirement for most teachers to meet.)
Note: An authorized HRMS user can go to an employee's CEU Employee History, find the particularcredit to adjust and override the system's calculations by clicking on that credit's Edit button, ifcircumstances warrant this action.
page 114 / 707
HRMS Communication Site
HRMS Help > Continuing Education
User Roles: Varies by FunctionLast Updated: Jul 9, 2015 10:38 am
The Continuing Education (aka CEU) Module in HRMS allows LEAs to create and maintain coursetemplates, assign continuing education credits using course templates, view and edit credits for individualemployees, and perform mass updates for existing credits.
LEA staff can view their CEU records without logging into HRMS using the Lookup My CEUs/ or UIDform.
CEU Functions
P indicates a function available to Principals.
System ConfigurationCEU Template ManagementCreate a Course TemplateEdit a Course TemplateAssign CEU CreditsSpecify a Class RosterContent & Literacy CreditsRenewal ListCEU Employee History (View) PCEU Employee History (Edit)Mass Update Single CourseMass Update Literacy Credits
CEU Reports in the Reporting Tool
Continuing Education History by ClassContinuing Education History by EmployeeContinuing Education Class Templates
System Configuration for CEUs
License CategoriesLicense Area/Category Cross Reference
page 115 / 707

HRMS Communication Site
HRMS Help > Reporting Tool > Continuing Education Class Templates
User Roles: Any user with Reporting Tool installed on PCLast Updated: Aug 31, 2017 10:39 am
The Continuing Education Class Templates Report is used to generate a list of all class templates. Thereport includes Class Code, Description, Source, total Renewal Credits, Semester Hours, Content Credits,Literacy Credits, Other Credits, School Admin Credits, Technology Credits, Digital Learning Credits andHigh Quality indicator for each class template.
Selection Criteria
No selection criteria options are used for this report.
Sample Report
page 116 / 707
HRMS Communication Site
HRMS Help > Reporting Tool > Continuing Education History by Class
User Roles: Any user with Reporting Tool installed on PCLast Updated: Aug 31, 2017 10:43 am
The Continuing Education History by Class Report is used to generate a list, by continuing educationclass, of all employees that have completed the class, along with the number of CEU credits received forthe class.
Selection Criteria
Pick EmployeesEmployee StatusPick SitesPosition TypeAssignment TypeLicense expiring onRenewal Cycle ending onPrior Renewal Cycle ending onClass CodeClass SourceClass DescriptionClass Completed on or AfterSSN (Display)Export Report Data
Sample Report
page 117 / 707
HRMS Communication Site
HRMS Help > Reporting Tool > Continuing Education History by Employee
User Roles: Any user with Reporting Tool installed on PCLast Updated: Aug 31, 2017 10:53 am
The Continuing Education History by Employee Report is used to generate a list, by employee, of allcontinuing education classes that an employee has completed, along with the number of CEU creditsreceived for each of those courses. The report also displays the employee’s total Renewal Credits receivedduring the prior renewal cycle, current renewal cycle, and life-to-date, plus individualized totals for eachof the subcategory requirements. (This is one of HRMS's most heavily used reports and is generatedroutinely to provide employees with a record of their cumulative continuing education history.) This sameinformation can also be printed from an individual's renewal listing found under the Other Tab on theindividual's Demographic Page but if printed from this tool is a much more condense/concise formatsaving paper!
This report also provides an option to generate a listing by employee for all individuals that currently donot have sufficient credits to extend their NC Teacher's License for an additional 5 year dating cycle. Thisreport can be configured to search for employees who do not have enough total credits needed to renew (8units) or who do not have enough credits in a specific category to renew. For example, the report can beconfigured to search for employees who have insufficient Content Credits (3.0 units required for allteachers and other educators) or Literacy Credits (3.0 units required for K-8 teachers). It can also beconfigured to search for employees who have insufficient Technology Credits, although this is now a localdecision (Technology Credits are no longer required by the state). When configured correctly, this reportwill provide a list of all individuals who are deficient in any one or more of these requirements.
Selection Criteria
Pick EmployeesEmployee StatusPick SitesPosition TypeAssignment TypeLicense expiring onRenewal Cycle ending onPrior Renewal Cycle ending onClass PeriodClass CreditsClass CodeClass SourceClass DescriptionClass Completed onSSN (Display)Include Signature Line Export Report Data
page 118 / 707

HRMS Communication Site
Sample Report
page 119 / 707
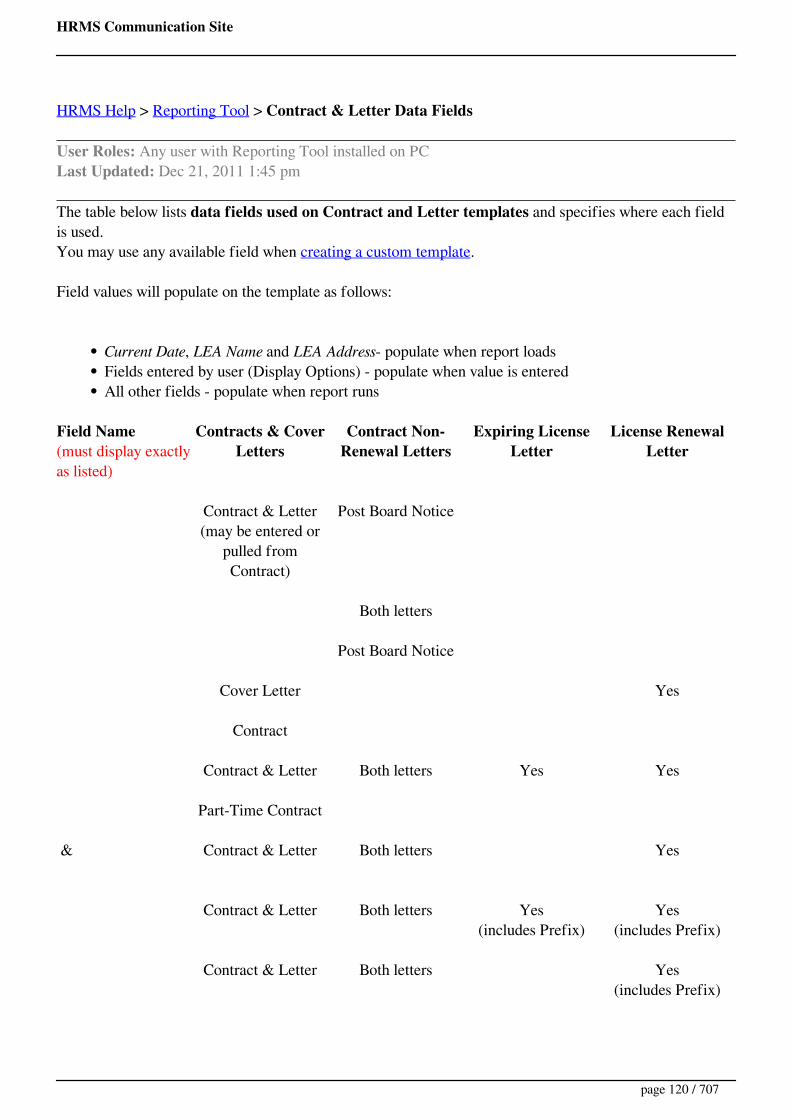
HRMS Communication Site
HRMS Help > Reporting Tool > Contract & Letter Data Fields
User Roles: Any user with Reporting Tool installed on PCLast Updated: Dec 21, 2011 1:45 pm
The table below lists data fields used on Contract and Letter templates and specifies where each fieldis used.You may use any available field when creating a custom template.
Field values will populate on the template as follows:
Current Date, LEA Name and LEA Address- populate when report loadsFields entered by user (Display Options) - populate when value is enteredAll other fields - populate when report runs
Field Name(must display exactlyas listed)
Contracts & CoverLetters
Contract Non-Renewal Letters
Expiring LicenseLetter
License RenewalLetter
Contract & Letter(may be entered or
pulled fromContract)
Post Board Notice
Both letters
Post Board Notice
Cover Letter Yes
Contract
Contract & Letter Both letters Yes Yes
Part-Time Contract
& Contract & Letter Both letters Yes
Contract & Letter Both letters Yes(includes Prefix)
Yes(includes Prefix)
Contract & Letter Both letters Yes(includes Prefix)
page 120 / 707
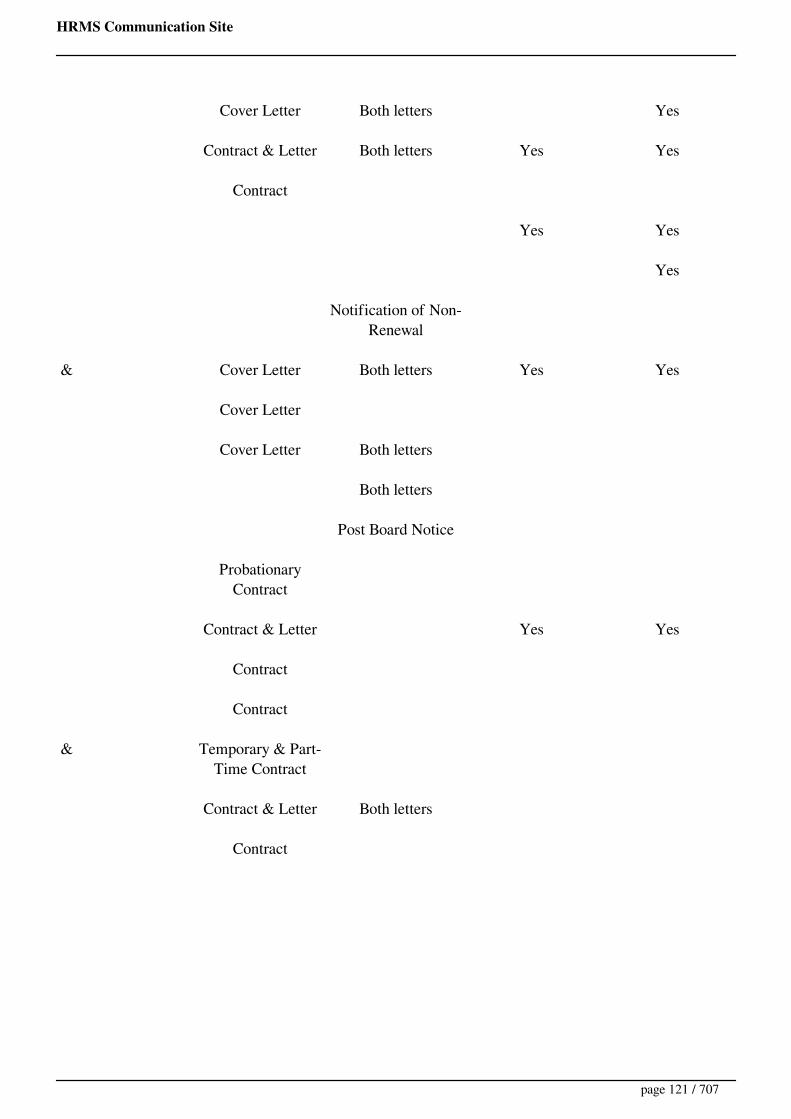
HRMS Communication Site
Cover Letter Both letters Yes
Contract & Letter Both letters Yes Yes
Contract
Yes Yes
Yes
Notification of Non-Renewal
& Cover Letter Both letters Yes Yes
Cover Letter
Cover Letter Both letters
Both letters
Post Board Notice
ProbationaryContract
Contract & Letter Yes Yes
Contract
Contract
& Temporary & Part-Time Contract
Contract & Letter Both letters
Contract
page 121 / 707
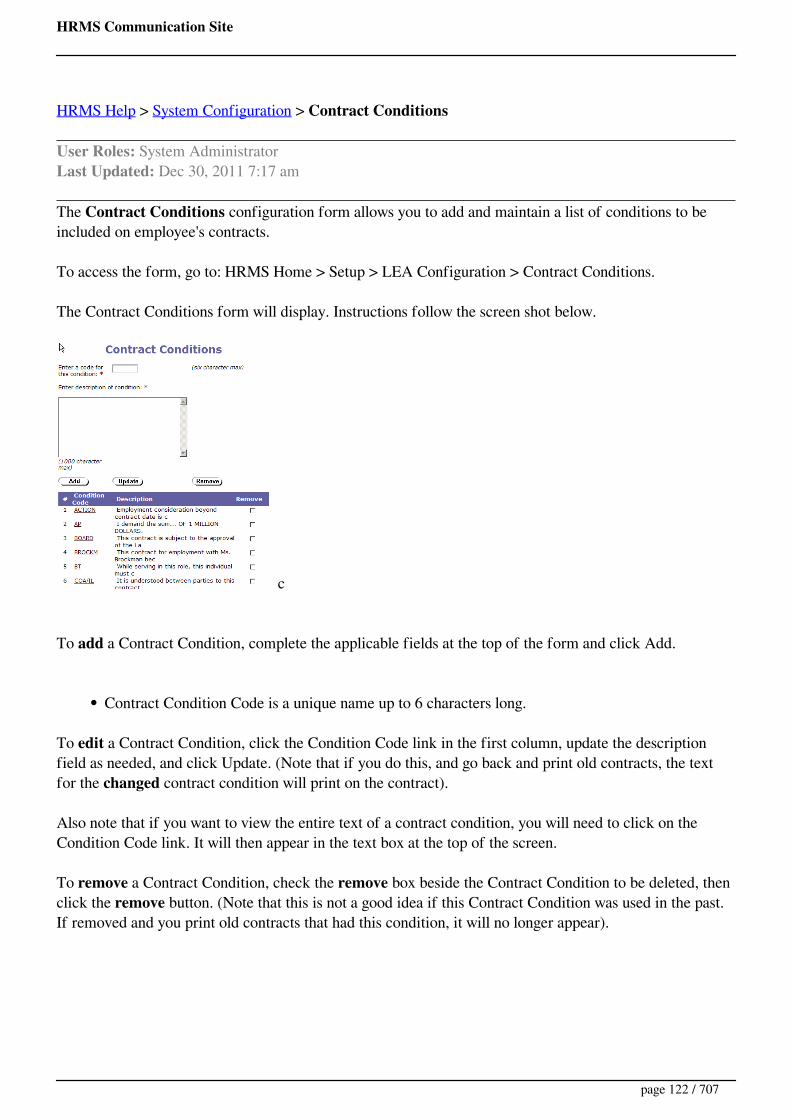
HRMS Communication Site
HRMS Help > System Configuration > Contract Conditions
User Roles: System AdministratorLast Updated: Dec 30, 2011 7:17 am
The Contract Conditions configuration form allows you to add and maintain a list of conditions to beincluded on employee's contracts.
To access the form, go to: HRMS Home > Setup > LEA Configuration > Contract Conditions.
The Contract Conditions form will display. Instructions follow the screen shot below.
c
To add a Contract Condition, complete the applicable fields at the top of the form and click Add.
Contract Condition Code is a unique name up to 6 characters long.
To edit a Contract Condition, click the Condition Code link in the first column, update the descriptionfield as needed, and click Update. (Note that if you do this, and go back and print old contracts, the textfor the changed contract condition will print on the contract).
Also note that if you want to view the entire text of a contract condition, you will need to click on theCondition Code link. It will then appear in the text box at the top of the screen.
To remove a Contract Condition, check the remove box beside the Contract Condition to be deleted, thenclick the remove button. (Note that this is not a good idea if this Contract Condition was used in the past.If removed and you print old contracts that had this condition, it will no longer appear).
page 122 / 707

HRMS Communication Site
HRMS Help > Reporting Tool > Selection Criteria > Contract Created on or After
Last Updated: Dec 12, 2011 7:57 am
This option is used for Contracts and Contract Cover Letters. It is used to select active contracts createdon or after the specified date.
How To
Check the box and either enter a date or click the down arrow to use the calendar to select a date.
page 123 / 707
HRMS Communication Site
HRMS Help > Reporting Tool > Contract Non-Renewal Letters
User Roles: Any user with Reporting Tool installed on PCLast Updated: Dec 12, 2011 6:52 am
The Contract Non-Renewal Letters notify teachers of non-renewal and inform them of their rightsaccording to G.S. 115C-325:
Teacher must be notified of non-renewal by May 15.Teacher may request to receive written notice of the reasons for the superintendent'srecommendation for non-renewal.Teacher has the right to a hearing if requested within 10 days.LEA must provide follow up notification of Board’s decision.
The Reporting Tool provides two letters to meet the notification requirements:
1. Notification of Non-Renewal2. Post Board Meeting Notice
Templates are provided for each letter but LEAs can create custom versions of both letters. Each LEA'slegal counsel needs to be party to the official letter drafting.
Selection Criteria
Pick EmployeesPersonnel Manager Name & TitleCC Names & Titles
Notification of Non-Renewal Only:
Next School Year
Post Board Meeting Notice Only:
Board Action DateCertified Mail NumberSchool Year Employed
Sample Notification of Non-Renewal
page 124 / 707

HRMS Communication Site
Sample Post Board Meeting Notice
page 125 / 707

HRMS Communication Site
HRMS Help > Reporting Tool > Selection Criteria > Contract Type
Last Updated: Mar 12, 2014 12:24 pm
This option is used for Contracts and Contract Cover Letters. It is used to select the type of contract youwish to print.
The drop-down list includes system-defined contract types (Teacher, Temporary Full-Time, andTemporary Part-Time), plus any locally-defined contract types created in LEA Configuration. Obsoletecontract types (Career, Probationary).
How To
Select the desired Contract Type from the drop-down list.
page 126 / 707
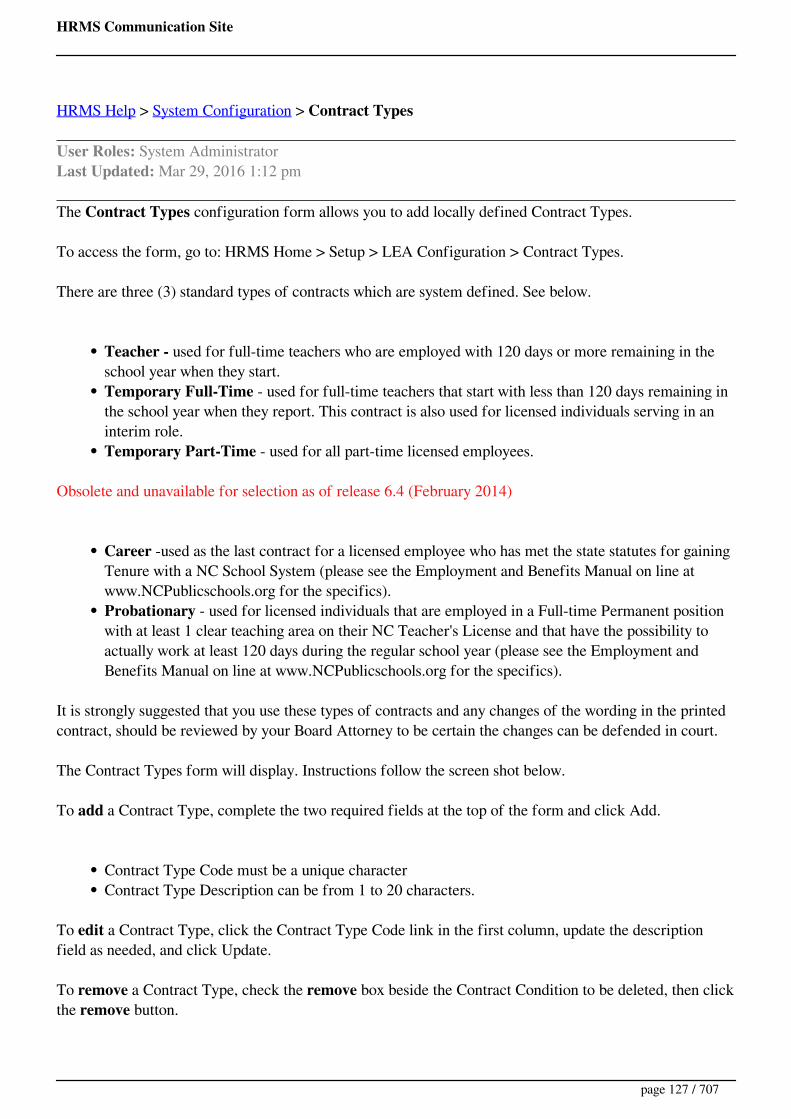
HRMS Communication Site
HRMS Help > System Configuration > Contract Types
User Roles: System AdministratorLast Updated: Mar 29, 2016 1:12 pm
The Contract Types configuration form allows you to add locally defined Contract Types.
To access the form, go to: HRMS Home > Setup > LEA Configuration > Contract Types.
There are three (3) standard types of contracts which are system defined. See below.
Teacher - used for full-time teachers who are employed with 120 days or more remaining in theschool year when they start.Temporary Full-Time - used for full-time teachers that start with less than 120 days remaining inthe school year when they report. This contract is also used for licensed individuals serving in aninterim role.Temporary Part-Time - used for all part-time licensed employees.
Obsolete and unavailable for selection as of release 6.4 (February 2014)
Career -used as the last contract for a licensed employee who has met the state statutes for gainingTenure with a NC School System (please see the Employment and Benefits Manual on line atwww.NCPublicschools.org for the specifics).Probationary - used for licensed individuals that are employed in a Full-time Permanent positionwith at least 1 clear teaching area on their NC Teacher's License and that have the possibility toactually work at least 120 days during the regular school year (please see the Employment andBenefits Manual on line at www.NCPublicschools.org for the specifics).
It is strongly suggested that you use these types of contracts and any changes of the wording in the printedcontract, should be reviewed by your Board Attorney to be certain the changes can be defended in court.
The Contract Types form will display. Instructions follow the screen shot below.
To add a Contract Type, complete the two required fields at the top of the form and click Add.
Contract Type Code must be a unique characterContract Type Description can be from 1 to 20 characters.
To edit a Contract Type, click the Contract Type Code link in the first column, update the descriptionfield as needed, and click Update.
To remove a Contract Type, check the remove box beside the Contract Condition to be deleted, then clickthe remove button.
page 127 / 707

HRMS Communication Site
HRMS Help > Employee Page > Other > Contracts
User Roles: HR Staff Action Officer, System AdministratorLast Updated: Apr 3, 2013 6:42 am
The Contracts (Other) option in Employee Demographics allows authorized users to either create or editan employee's contract. Contracts can also be created or inactivated in mass (if there are existing contractsfor previous years) by the Build Contracts mass update. Note that in order to print contracts you must usethe HRMS Reporting Tool. In order to have Special Contract Conditions printed on the contract you mustcreate them in System Configuration.
Contract Functions:
Create/Edit Contract TypesCreate/Edit Contract ConditionsCreate/Edit Employee ContractContracts Mass Build
Step 1: Find EmployeesStep 2: Select ContractsStep 3: SetupStep 4: ReviewStep 5: Confirmation
Contracts Mass InactivateThe first 2 steps are the same as Contracts Mass BuildStep 3: SetupStep 4: ReviewStep 5: Confirmation
Print Contracts and Cover Letters
page 128 / 707

HRMS Communication Site
HRMS Help > Reporting Tool > Contracts & Cover Letters
User Roles: Any user with Reporting Tool installed on PCLast Updated: Feb 10, 2016 5:44 am
After creating your Contracts in HRMS, use the Contracts Report to generate and print your contracts.
The Contracts Report allows you to print active Contracts or Cover Letters for contracts created onor after a specific date.Standard templates are provided for the Cover Letter and System Contract Types (Teacher, Temporary, and Part-Time). Obsolete contract types (Career, Probationary).If needed, you can reduce the font size of the Special Conditions to fit contracts on one page.When printing contracts for Local Contract Types, you will need to create a custom template.
Selection Criteria
Pick EmployeesPick SitesAssignment Type- If you choose both Current and Future, two contracts will print for employeeswho are in both a current and a future primary assignment.Contract TypeContract Created on or AfterTemplate - Contracts or Cover LettersBoard Action Date - Date from contract is used if left blank.
Contracts Only:
Include Site Name on Contract -- Note: It is recommended that you NOT SELECT this optionsince an employee may be reassigned to a different Site during the course of his/her contract. Bydefault, Site Name is included on the Contract Cover Letters, so you can use the Site Name on theCover Letters to assist with contract distribution.
Cover Letters Only:
Personnel Manager Name & TitlePhone Number
Sample Contract
page 129 / 707

HRMS Communication Site
Sample Cover Letter
page 130 / 707

HRMS Communication Site
HRMS Help > Contracts > Contracts Mass Build
User Roles: HR Staff Action Officer, System AdministratorLast Updated: Mar 11, 2014 12:51 pm
The functionality for mass building contracts was added with the 5.6 Release and is intended to provide aneasy way to create contracts in large numbers. Using this new mass update is contingent upon the schoolsystem previously building their original contracts within HRMS and having their employees currentlyassigned to positions established in HRMS.
Note: (Tenure status has been frozen at 2013-14 levels) Note that with release 6.4 of HRMS, only locallydefined codes are available. Please verify the accuracy of an employee's tenure status. If there is an error,please contact the DPI Help Desk at (919) 807-4357. This is necessary to ensure the system has anaccurate listing of current employees tenure status in case that information is needed for future reference.
To access the Contract Mass Build , go to: HRMS Home > Employees > Employee Page > MassUpdates > Build Contracts
WARNING: HRMS was designed such that each employee should have only one active contract at a time.If any of your employees with current assignments have more than one active contract, you will receive theerror message shown below, and you will not be able to use the Mass Build Contracts feature until youhave removed the extra contracts for those employees.
If you receive this error message, before your LEA can use the new Mass Build Contracts form, you willneed to first run the new Web Report 000127 (Employees with Multiple Active Contracts) and remove theextra contracts for the employees listed on this report. See below:
An easy way to clean up old contracts is to create the new contract (individually) for each of theseemployees, because the system will automatically inactivate all their old contracts when you build theirnew contract. If you prefer, you may instead remove those old contracts for each employee (on theirindividual Contract form) and then build their new contract as part of the Mass Build Contracts process.
page 131 / 707
HRMS Communication Site
Once there are no longer any employees with multiple active contracts you can begin the 5 step process tocreate contracts:
Step 1: Find EmployeesStep 2: Select ContractsStep 3: SetupStep 4: ReviewStep 5: Confirmation
page 132 / 707

HRMS Communication Site
HRMS Help > Employee Page > Employee Demographics > Staff Actions > Correct Employee Dates
User Roles: System Administrator, HR Staff Action Officer, Staff Action Clerk and Employee HireLast Updated: Oct 23, 2014 10:47 am
Printer friendly
Table of ContentsQuick Facts
Employee Demographics 'Other' menu
Staff Action Console
Correct Employee Dates
Employee Date Change Details
Quick Facts
The new Correct Employee Dates form replaces the 'Last Hire Date', 'Original Hire Date' and'Longevity' forms.The Correct Employee Dates form can be accessed from the 'Other' menu on the 'EmployeeDemographics' form or from the drop-down menu on the Staff Action Console.
Employee Demographics 'Other' menu
Staff Action Console
page 133 / 707
HRMS Communication Site
Correct Employee Dates
Fields on the 'Correct Employee Dates' form:
Original Hire Date - If the employee has a new hire record, a link to edit the New Hire recorddisplays. Otherwise, the field is editable and required.Last Hire Date - If the employee has a matching Re-employment, a link to edit the Re-employment record displays. Otherwise, the field is editable and required.Longevity Date (optional) - Must be 1st of month.Reason for Longevity Change - Required if Longevity Date was updated.Termination Date - If populated, a link to edit the employee's Separation displays.Retirement Date - If populated, a link to edit the employee's Retirement record displays.Comments (optional)
Click Correct Employee Dates to save the record.
page 134 / 707

HRMS Communication Site
Employee Date Change DetailsThe Employee Date Change Details form can be accessed from the Staff Action Console or Staff ActionSearch form.
page 135 / 707
HRMS Communication Site
HRMS Help > Continuing Education > Create a Course Template
User Roles: Continuing Education Editor, System AdministratorLast Updated: Aug 31, 2017 7:34 am
If you are not sure if a template already exists for the course for which you want to assign credits, searchfor the template on the CEU Template Management form.
If you need to create a new template, click the New Course button.
A blank CEU Template will display. Once completed, the template can be thought of as a masterdocument that can be retrieved and used again whenever additional employees complete the same class.
Instructions for completing the template follow the screen shot.
Completing the Template
1. Enter a Class Code. This is a unique identifier used for one specific renewal credit title.2. Click the Verify Availability button. A pop-up box will appear and let you know whether the
Class Code is available.3. Enter the Class Source (agency or individual that sponsored the class).4. Enter the Class Description (course title).5. Enter the total amount of credit to be awarded in either the Renewal Credits or Semester Hours
field.If the class is an actual college/university class with semester credit awarded, then thenumber of semester hours should be entered instead of Renewal Credit. The HRMS systemwill multiply the number of Semester hours by 1.5 for inclusion in the individual's RenewalCredit Totals. When a semester hour class is posted this way it is very easy to determine ifan employee has successfully completed their Lateral Entry / Provisional LicenseRequirements for the current school year.
6. Select Yes or No for each Credit Subcategory and enter the Amount of Subcategory Credit.An individual cannot receive full credit in more than one State-required subcategory(Literacy / Content Credit) for a particular course. The full amount, however, can be splitbetween two or more subcategories based on the content of the course. See Content &Literacy Credits for details on how this rule has been automated in HRMS.Note: For courses where semester hours are awarded, the subcategory value may be up to1.5 times the number of semester hours.For additional information on the subcategories and their amount of credit required pleasesee the Licensure Manual or contact the Division of Licensure at DPI.
7. Select the appropriate License Categories. This option displays if Content Credits is set to “Yes.”License Categories are used to identify which license areas an individual must have on his
page 136 / 707
HRMS Communication Site
or her NC Teaching License in order to receive Content Credit for the course.The option ALL - ALL LICENSE CATEGORIES is available for courses / classes that areof general teaching methodology nature.For additional information on this functionality, see Content & Literacy Credits.
8. Click the Submit button. This will save the CEU Template. After the template is saved, the AssignContinuing Education Class form will display with the template information pre-populated.
9. Follow Steps 1 through 4 on the Assign CEU Credits help topic.
page 137 / 707

HRMS Communication Site
HRMS Help > Positions > Create a Position
User Roles: Position Editor, System Administrator Last Updated: Jun 11, 2013 7:08 am
To create a new position, go to:
HRMS Home > Positions > Create Position, ORPosition Management > Actions menu > Create Position > Click Go.
The New Position form will display. See screen shot below.
See Position Information for details about each of the fields on the form.The Copy data from an existing position feature allows you to create a new position bydefaulting in the values, including Budget Codes, from an existing position.Click Save & Close or Save & Edit to save the Position.
page 138 / 707

HRMS Communication Site
HRMS Help > Reporting Tool > Selection Criteria > Create Address File for Mail Merge
Last Updated: Apr 30, 2012 1:22 pm
This option is available for Contracts and Letters. It creates a text file of names and addresses that youcan use to produce envelopes or mailing labels.
How To
1. Select the desired selection criteria for your contracts or letters, and select Create Address Filefor Mail Merge.
2. When prompted, enter a file name and location for your address file.3. Run your contracts or letters. After the report runs, your address file will be saved using the
location and name you entered.
See the instructions below for performing a Mail Merge in Microsoft Word. You may want to read the Mail Merge Tips first.
Microsoft Word Mail Merge
The steps below explain how to perform a Mail Merge from scratch. To start the mail merge:
Word 2003 – On the 'Tools' menu, click Letters and Mailings and then click Mail Merge.Word 2007 or 2010 – On the 'Mailings' tab, click Start Mail Merge and then click Step by StepMail Merge Wizard.
The Mail Merge task pane will take you through the steps below. At the top of the task pane, you canselect options for the current step, and at the bottom of the task pane, you can navigate to the Next orPrevious step.
Step 1: Select document type
1. At the top of the Mail Merge task pane, select Envelopes (or Labels).2. At the bottom of the Mail Merge task pane, click Next: Starting document.
Step 2: Select starting document
1. At the top of the Mail Merge task pane, select Change document layout.
page 139 / 707
HRMS Communication Site
2. Under 'Change document layout', click Envelope options (or Label options).3. On the 'Envelope Options' (or 'Label Options') window, select the appropriate envelope or label
type and click OK. The selected envelope or label format will display.See Tip #1 for how to include the LEA address by default if you are not using preprintedenvelopes.
4. At the bottom of the Mail Merge task pane, click Next: Select recipients.
Step 3: Select recipients
1. At the top of the Mail Merge task pane, select Use an existing list.2. Under 'Use an existing list', click Browse.3. From the 'Select Data Source' window, select the text file that was created when you ran your
contracts or letters.4. If the Word option 'Confirm conversion at Open' is enabled, the following steps are required. (See
Tip #2for steps to disable this option.)On the 'Confirm Data Source' window, select OLE DB Database Files and click OK.On the 'Text File Connection Parameters' window, select Other and enter the ‘|’ (pipe)character (Shift+\). NOTE: You may have to do this twice.
5. On the 'Mail Merge Recipients' window, select the desired employees and click OK.6. At the bottom of the Mail Merge task pane, click Next: Arrange your envelope (or labels).
Step 4: Arrange your envelopes (or labels)
1. Click in the document where the employee’s address should display. For envelopes, click in themiddle of the envelope until you see a box. For labels, click in the upper left corner of thedocument.
2. Under 'Arrange your envelope' (or labels), click Address block.3. The 'Insert Address Block' window will display.
You should not need to make any adjustments here because addresses are already formattedto comply with USPS postal addressing standards (see Tip #3).If needed, you will be able to edit individual addresses in Step 6 (Complete the merge).Click OK.
4. For labels, click the Update all labels button under 'Replicate labels'.5. At the bottom of the Mail Merge task pane, click Next: Preview your envelopes (or labels).
Step 5: Preview your envelope (or labels)
1. At the top of the Mail Merge task pane, use the forward and back buttons to preview yourenvelopes or labels.
2. If needed, use the options under 'Make changes' to exclude individual recipients.3. At the bottom of the Mail Merge task pane, click Next: Complete the merge.
Step 6: Complete the merge
page 140 / 707
HRMS Communication Site
To send the envelopes or labels directly to the printer, click Print.To save the envelopes or labels in a document before printing, click Edit individual labels.
Mail Merge Tips
Tip #1: Saving Return Address for Envelopes - If you are not using preprinted envelopes, you caninclude the LEA return address by following these steps:
Word 2003 - From the 'Tools' menu, select 'Options'. Then select the 'User Information' tab andenter the LEA address in the 'UserAddress' field.Word 2007 or 2010 - Click the 'Microsoft Office' button and click 'Word Options'. Then, click'Advanced' and enter the LEA address in the 'Mailing address' field in the 'General' section.
Tip #2: Disabling 'Confirm Conversion on Open' Option in MS Word - Disabling this option willavoid extra steps when importing the address file. (See Step 3, #4.)
Word 2003 - From the 'Tools' menu, select 'Options'. Then, select the 'General' tab and uncheck'Confirm conversion at Open'.Word 2007 or 2010 - Click the 'Microsoft Office' button and click 'Word Options'. Then, click'Advanced' and uncheck 'Confirm file format conversion on open' in the 'General' section.
Tip #3: Address Format - Address files generated in the Reporting Tool are formatted to comply withUSPS postal addressing standards when used with the Microsoft Word Mail Merge function.
According to USPS standards, unit designators (like apartment or suite) should display either at the end ofthe delivery address line or immediately above the delivery address line. To accommodate long addresses,the Reporting Tool puts the second address line from the Employee Demographics form above the maindelivery address.
Example: Apt. # in Address Line 2 on Employee Demographics will display as follows:
Mr. M MurrayApt 202123 Springfield Gardens CirAsheville, NC 28801
page 141 / 707

HRMS Communication Site
HRMS Help > Contracts > Create Edit Contract
User Roles: HR Staff Action Officer, System AdministratorLast Updated: Mar 11, 2014 11:15 am
To access the Create/Edit Contract form, go to: HRMS Home > Employees > Employee Page > Put incriteria to select employee > Employee Demographics > Other > Contract
Use this screen to create an employee’s contract or edit an existing contract.
Completing the Choose Contract ScreenAs shown on the screen below you must indicate whether you are creating a new contract or editing anexisting contract. You will see the contract(s) previously created for this employee in the grid below. Toupdate an existing contract, click the Edit button on the row for the contract that you wish to update. Toremove an existing contract, click on the Remove button on the row for the contract that needs to bedeleted. To create a new contract, click on the Create New Contract button.
Completing the Create New Contract Screen
The above is the default view when the form opens. You will see the appropriate fields for inputdepending on the 'Contract Type' selected.
For best results enter as much information on this screen as possible. As always the Red * is arequired field and must be completed prior to clicking the Submit button. Please see the followingpages for explanation on each identified function.
1 Contract Type: Select the type of contact for the employee from the drop down menu. Contract types
page 142 / 707

HRMS Communication Site
are system defined with the structure and verbiage mandated by General Statute 115-325. The contracttypes are:
Teacher - used for full-time teachers (for 25% offered and accepted pay increase beginning2014-15 school year in exchange for giving up their tenure). Also used for full-time teachers thatwill start on the first day of school, each school year.Temporary Full-Time - used for full-time teachers that start on the 2nd day (or anytime later).Also used for licensed individuals as well as those employees serving in an interim role.Temporary Part-Time - used for all part-time licensed employees.'Locally Defined' - You can create other contract types, but this is not advised. See ContractTypes.Obsolete and unavailable for selection as of release 6.4 (February 2014)
Career - used as the last contract for a licensed employee who has met the state statues forgaining Tenure with a NC School System (please see the Employment and Benefits Manualon line at www.NCPublicschools.org for the specifics).Probationary - used for licensed individuals that are employed in a Full-time Permanentposition with at least 1 clear teaching area on their NC Teacher's License and that have thepossibility to actually work at least 120 days during the regular school year (please see theEmployment and Benefits Manual on line at www.NCPublicschools.org for the specifics).
2 Board Action Date: Enter the date of Board action in MM/DD/YYYY format. You may instead clickon the icon next to this field to select the date from the calendar.
3 Start Date: Enter the beginning date of the contract in MM/DD/YYYY format. You may instead clickon the icon next to each field to select the date from the calendar.
4 Percent Employed: As a part of Release 5.6, a new data field was added to the Part Time Contract.This new data field allows the operator to indicate the Percentage (%) that an individual is to be employedduring the current term of employment. This is not a required field, but the use of the percentage field ishighly recommended to eliminate any question regarding the amount of time an employee is beingcontracted for during the time period indicated.
5 End Date: Enter ending date of the contract in MM/DD/YYYY format. You may instead click on theicon next to each field to select the date from the calendar.
6 Beginning School Year: For teacher contracts select the appropriate school year from the drop downmenu.
7 Special Conditions: Select the codes associated with special conditions to be printed on the contract.Contract condition codes are locally defined and entered using the Contract Conditions program located onthe LEA Configuration page. You may select multiple Contract Conditions by holding the control key asyou click to make your selections.
8 Contract Status: The default is Active and should be left that way unless a specific action warrants achange to Inactive.
page 143 / 707

HRMS Communication Site
9 Comments: The information contained in the Comments section DOES NOT appear on the contractwhen printed. This data entry field is simply used to clarify Tenure issues each spring when using theHRMS System to review each individual's credentials to determine their employment eligibility.
10 Tenure Status: (Tenure status has been frozen at 2013-14 levels) Note that with release 6.4 of HRMS,only locally defined codes are available. Locally defined codes are entered using the Tenure Status formaccessed from the LEA Configuration page.
11 Contract Effective Date: For Teacher Contracts enter the Effective Date in MM/DD/YYYY format.You may instead click on the icon next to this field to select the date from the calendar. For TemporaryFull-Time and Temporary Part-Time contracts the Contract Effective Date will be the same as theContract Start Date.
12 Submit: Review all information and click the Submit button to create the contract.
page 144 / 707

HRMS Communication Site
HRMS Help > Reporting Tool > Selection Criteria > Current Assignment with End Date
Last Updated: Dec 12, 2011 7:59 am
This option is available on the Licensure Report. It is used to select employees in a current assignmentthat has an end date in HRMS.
How To
You must select Assignment Type = Current to use this option.Check the box to only select employees that have an assignment with an end date.
page 145 / 707
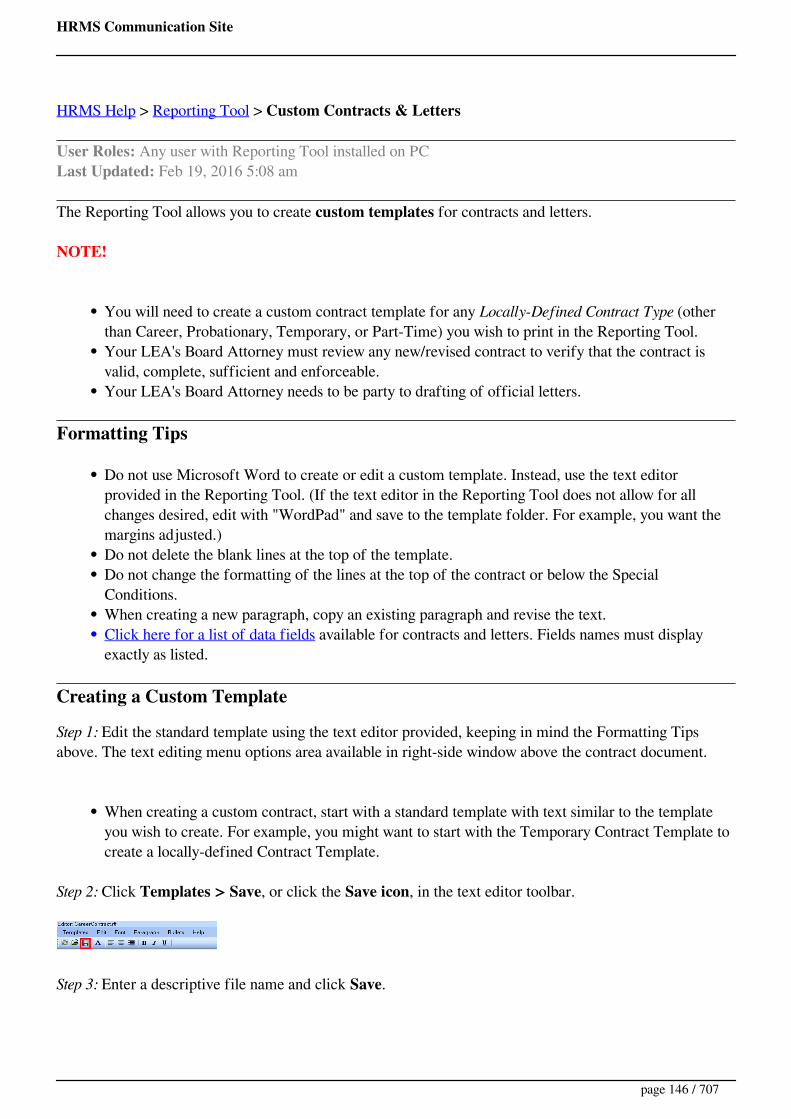
HRMS Communication Site
HRMS Help > Reporting Tool > Custom Contracts & Letters
User Roles: Any user with Reporting Tool installed on PCLast Updated: Feb 19, 2016 5:08 am
The Reporting Tool allows you to create custom templates for contracts and letters.
NOTE!
You will need to create a custom contract template for any Locally-Defined Contract Type (otherthan Career, Probationary, Temporary, or Part-Time) you wish to print in the Reporting Tool.Your LEA's Board Attorney must review any new/revised contract to verify that the contract isvalid, complete, sufficient and enforceable.Your LEA's Board Attorney needs to be party to drafting of official letters.
Formatting Tips
Do not use Microsoft Word to create or edit a custom template. Instead, use the text editorprovided in the Reporting Tool. (If the text editor in the Reporting Tool does not allow for allchanges desired, edit with "WordPad" and save to the template folder. For example, you want themargins adjusted.)Do not delete the blank lines at the top of the template.Do not change the formatting of the lines at the top of the contract or below the SpecialConditions.When creating a new paragraph, copy an existing paragraph and revise the text.Click here for a list of data fields available for contracts and letters. Fields names must displayexactly as listed.
Creating a Custom Template
Step 1: Edit the standard template using the text editor provided, keeping in mind the Formatting Tipsabove. The text editing menu options area available in right-side window above the contract document.
When creating a custom contract, start with a standard template with text similar to the templateyou wish to create. For example, you might want to start with the Temporary Contract Template tocreate a locally-defined Contract Template.
Step 2: Click Templates > Save, or click the Save icon, in the text editor toolbar.
Step 3: Enter a descriptive file name and click Save.
page 146 / 707

HRMS Communication Site
Step 5: Click Yes when prompted to create the file.
Using a Custom Template
To print contracts or letters using a custom template, complete the following steps (in this order):
Step 1 (Contracts Only): From the Selection Criteria form, select the desired Contract Type and Template.(In this example, "Substitute" is a locally-defined Contract Type.)
Step 2: Click Templates > Load, or click the Open File icon, in the text editor toolbar.
Step 3: Select the desired custom template.
Step 4: Complete the remaining fields on the Selection Criteria form as needed.
Step 5: Click Run.
Editing a Custom Template
Step 1: Click Templates > Load, or click the Open File icon, in the text editor toolbar.
page 147 / 707

HRMS Communication Site
Step 2: Select the template you wish to edit.
Step 3: Edit the text using the text editor provided, keeping in mind the Formatting Tips above.
Step 4: Click Templates > Save (or click the Save icon) in the text editor toolbar.
Step 5: Select the same template you selected in Step 2 and click Save.
Step 6: Click Yes when prompted to replace the existing file.
Managing Custom Templates
Click Templates > Manage to open the default template folder in Windows Explorer (My Documents >Reporting Tool Templates ).
From here, you can copy, rename, and delete existing templates.
To share templates, either copy the templates to the "My Documents > Reporting Tool Templates" folderfor a different user, or switch to a shared folder when saving, opening, or managing templates.
page 148 / 707
HRMS Communication Site
HRMS Help > Reporting Tool > Selection Criteria > Daily-Hourly Rate
Last Updated: Dec 12, 2011 8:01 am
This option is available on the Substitute Listing Report. It is used to select substitute profiles with aspecific Rate.
How To
Enter a Rate or select a value from the drop-down list.(The drop-down list includes all Rates entered on Substitute Profiles in HRMS.)
Example 1
Enter "25".The system will select substitute profiles with a Rate of 25.00.
Example 2
Select "25.00" from the drop-down list.The system will select substitute profiles with a Rate of 25.00.
page 149 / 707

HRMS Communication Site
HRMS Help > Dismissed Teacher List
User Roles: Dismissed Teacher ListLast Updated: Jun 30, 2015 10:35 am
Per North Carolina statutes G.S. 115C-333.1 (f) and G.S. 115C-325 (o), teacher dismissal is to be reportedto the State Board of Education (SBE). This can be done through the use of the Human ResourceManagement System (HRMS) Dismissed Teacher List (DTL) or by notifying the SBE Attorney directly inwriting. Even when reporting through HRMS, backup documentation must be sent to the SBE Attorney forreview. Contact for the NC SBE attorney is below.
Katie CornettoNC State Board Of Education Attorney6328 Mail Service CenterRaleigh, NC 27699-6328(919) 807-3406
In addition, North Carolina School systems are required to check the DTL maintained by the SBE beforehiring a teacher. If a school system is hiring someone on the DTL they MUST contact the SBE Attorneyfor further instructions.
Accessing the Dismissed Teacher List in HRMS
Staff needing to access the Dismissed Teacher List (DTL) MUST be registered in HRMS. If you needaccess, contact your HRMS Administrator and they can provide you with a User Name and Password.Only an HRMS user with Administrator rights can create/update User Names and Passwords. (NOTE:Once an HRMS ID is established with DTL access or an existing HRMS ID is granted access, it willtake up to 1 day to take effect.)
HRMS Administrators can refer to Granting DTL access for Help
Direct Link - https://core.dpi.state.nc.us/dismissed
Accessing through HRMSLog Onto HRMSFrom the Home Page, select Employee, select Employee Page, select Add DismissedTeacher
page 150 / 707
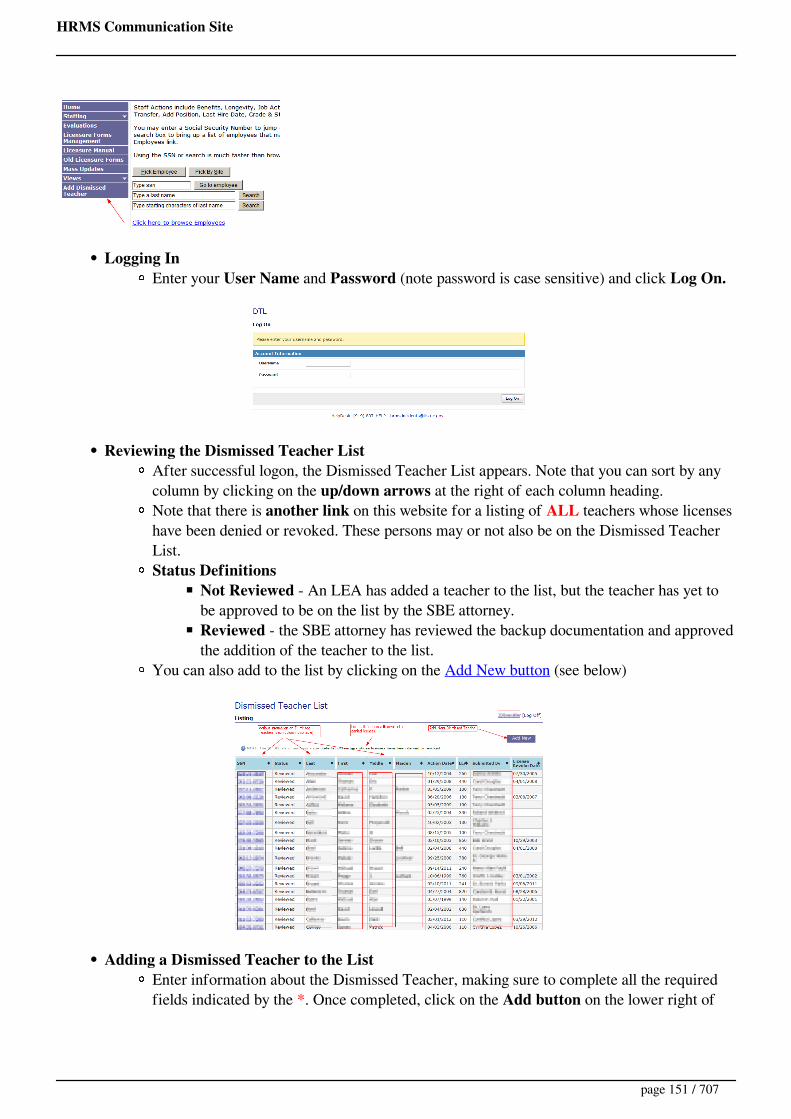
HRMS Communication Site
Logging InEnter your User Name and Password (note password is case sensitive) and click Log On.
Reviewing the Dismissed Teacher ListAfter successful logon, the Dismissed Teacher List appears. Note that you can sort by anycolumn by clicking on the up/down arrows at the right of each column heading.Note that there is another link on this website for a listing of ALL teachers whose licenseshave been denied or revoked. These persons may or not also be on the Dismissed TeacherList.Status Definitions
Not Reviewed - An LEA has added a teacher to the list, but the teacher has yet tobe approved to be on the list by the SBE attorney.Reviewed - the SBE attorney has reviewed the backup documentation and approvedthe addition of the teacher to the list.
You can also add to the list by clicking on the Add New button (see below)
Adding a Dismissed Teacher to the ListEnter information about the Dismissed Teacher, making sure to complete all the requiredfields indicated by the *. Once completed, click on the Add button on the lower right of
page 151 / 707
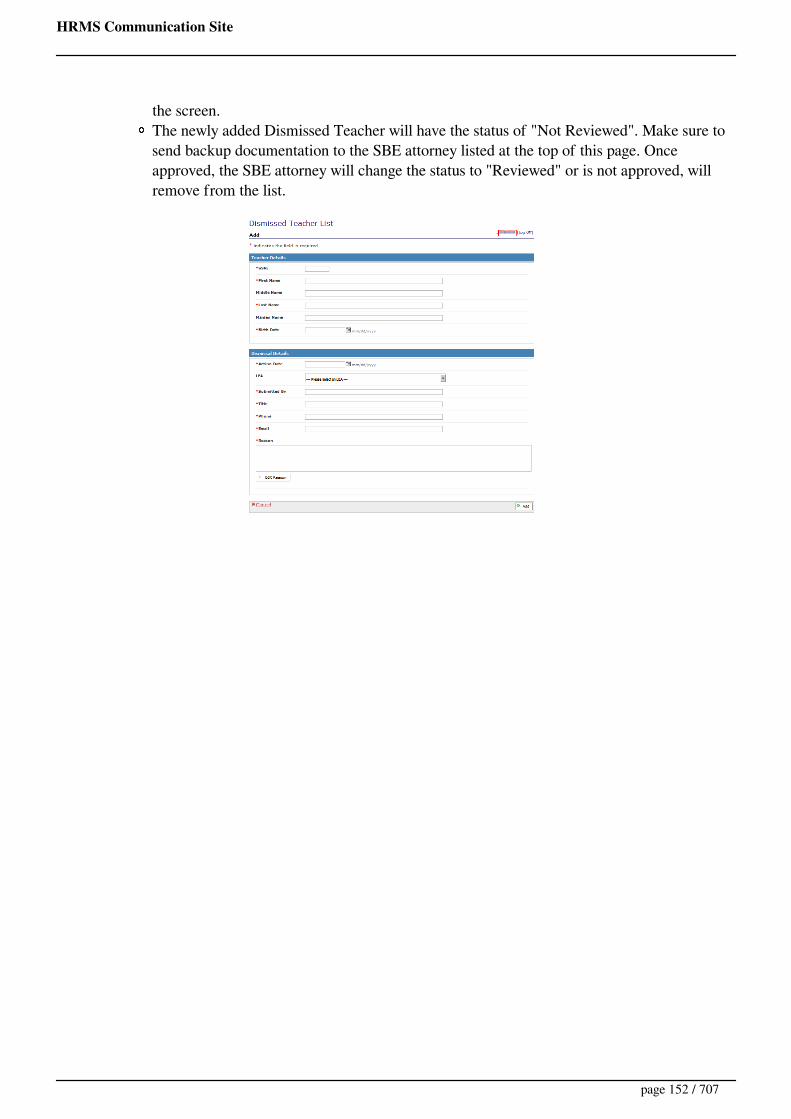
HRMS Communication Site
the screen.The newly added Dismissed Teacher will have the status of "Not Reviewed". Make sure tosend backup documentation to the SBE attorney listed at the top of this page. Onceapproved, the SBE attorney will change the status to "Reviewed" or is not approved, willremove from the list.
page 152 / 707
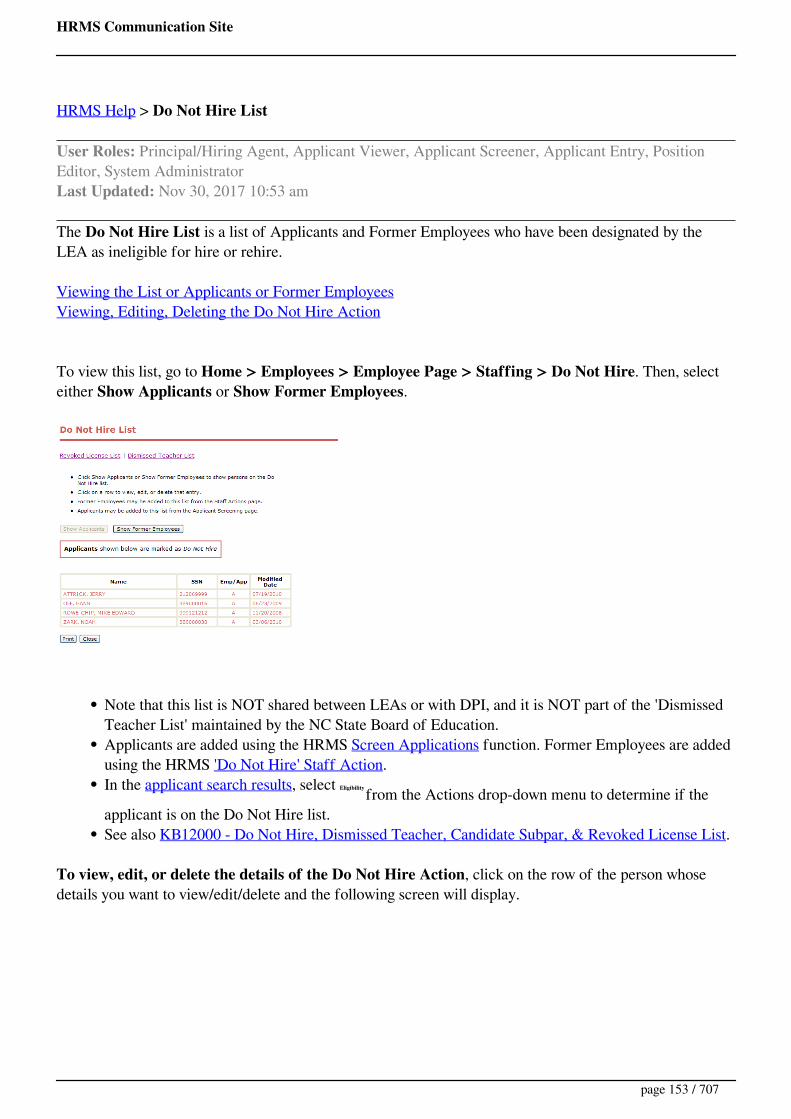
HRMS Communication Site
HRMS Help > Do Not Hire List
User Roles: Principal/Hiring Agent, Applicant Viewer, Applicant Screener, Applicant Entry, PositionEditor, System AdministratorLast Updated: Nov 30, 2017 10:53 am
The Do Not Hire List is a list of Applicants and Former Employees who have been designated by theLEA as ineligible for hire or rehire.
Viewing the List or Applicants or Former EmployeesViewing, Editing, Deleting the Do Not Hire Action
To view this list, go to Home > Employees > Employee Page > Staffing > Do Not Hire. Then, selecteither Show Applicants or Show Former Employees.
Note that this list is NOT shared between LEAs or with DPI, and it is NOT part of the 'DismissedTeacher List' maintained by the NC State Board of Education.Applicants are added using the HRMS Screen Applications function. Former Employees are addedusing the HRMS 'Do Not Hire' Staff Action.In the applicant search results, select Eligibility from the Actions drop-down menu to determine if theapplicant is on the Do Not Hire list.See also KB12000 - Do Not Hire, Dismissed Teacher, Candidate Subpar, & Revoked License List.
To view, edit, or delete the details of the Do Not Hire Action, click on the row of the person whosedetails you want to view/edit/delete and the following screen will display.
page 153 / 707

HRMS Communication Site
Make any changes desired and click on the Submit button. If you want to remove this employee/applicantfrom the Do Not Hire List, click on the Delete button.
page 154 / 707
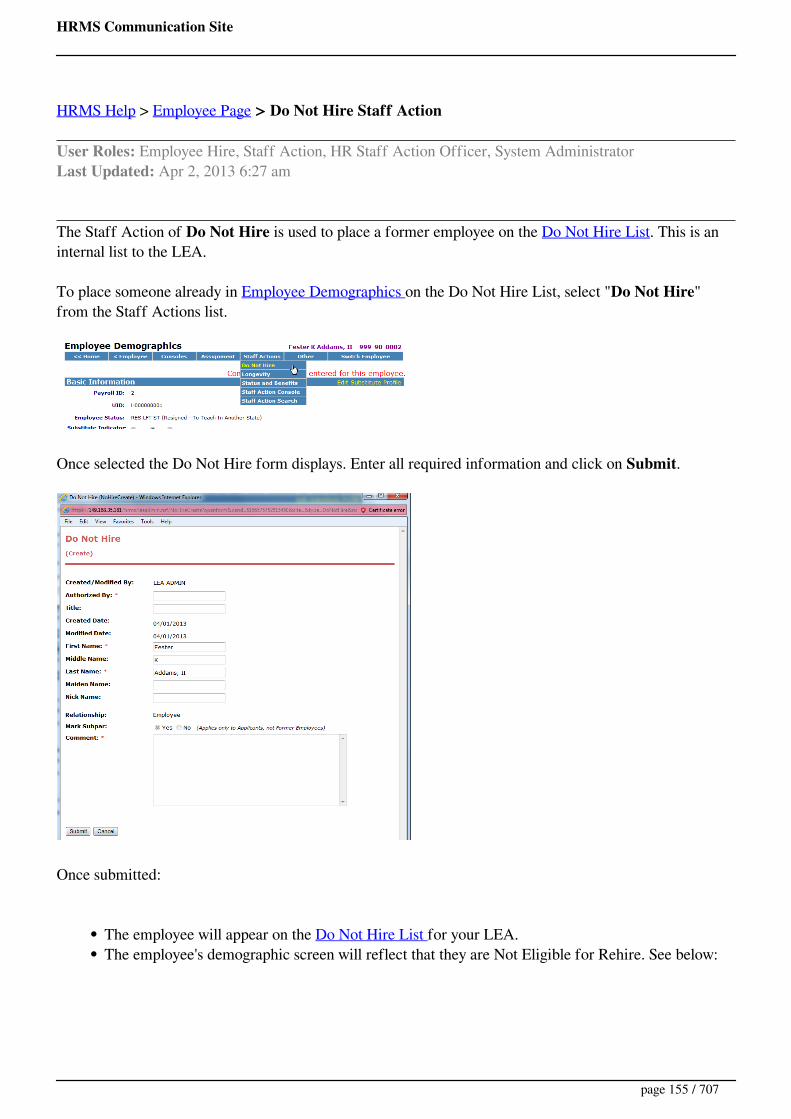
HRMS Communication Site
HRMS Help > Employee Page > Do Not Hire Staff Action
User Roles: Employee Hire, Staff Action, HR Staff Action Officer, System AdministratorLast Updated: Apr 2, 2013 6:27 am
The Staff Action of Do Not Hire is used to place a former employee on the Do Not Hire List. This is aninternal list to the LEA.
To place someone already in Employee Demographics on the Do Not Hire List, select "Do Not Hire"from the Staff Actions list.
Once selected the Do Not Hire form displays. Enter all required information and click on Submit.
Once submitted:
The employee will appear on the Do Not Hire List for your LEA.The employee's demographic screen will reflect that they are Not Eligible for Rehire. See below:
page 155 / 707
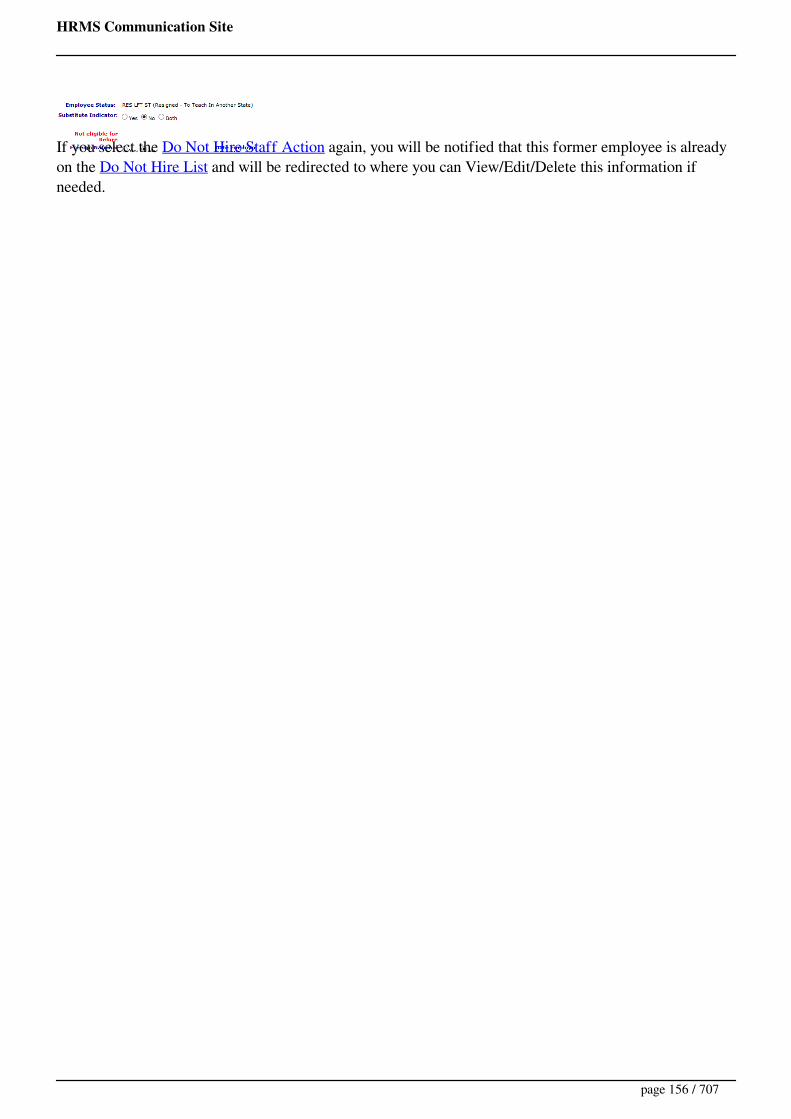
HRMS Communication Site
If you select the Do Not Hire Staff Action again, you will be notified that this former employee is alreadyon the Do Not Hire List and will be redirected to where you can View/Edit/Delete this information ifneeded.
page 156 / 707
HRMS Communication Site
HRMS Help > Continuing Education > Edit a Course Template
User Roles: Continuing Education Editor, System AdministratorLast Updated: Aug 31, 2017 7:33 am
The Edit Course Template form allows you to edit or delete a course template.
To access this form, search for the template on the CEU Template Management form and click the EditCourse Template icon next to the desired Course Code.
The CEU Template form will display in Edit Mode.
To edit the template, update the desired fields and click the Submit button.
To delete the template, click the Delete Course button.
page 157 / 707
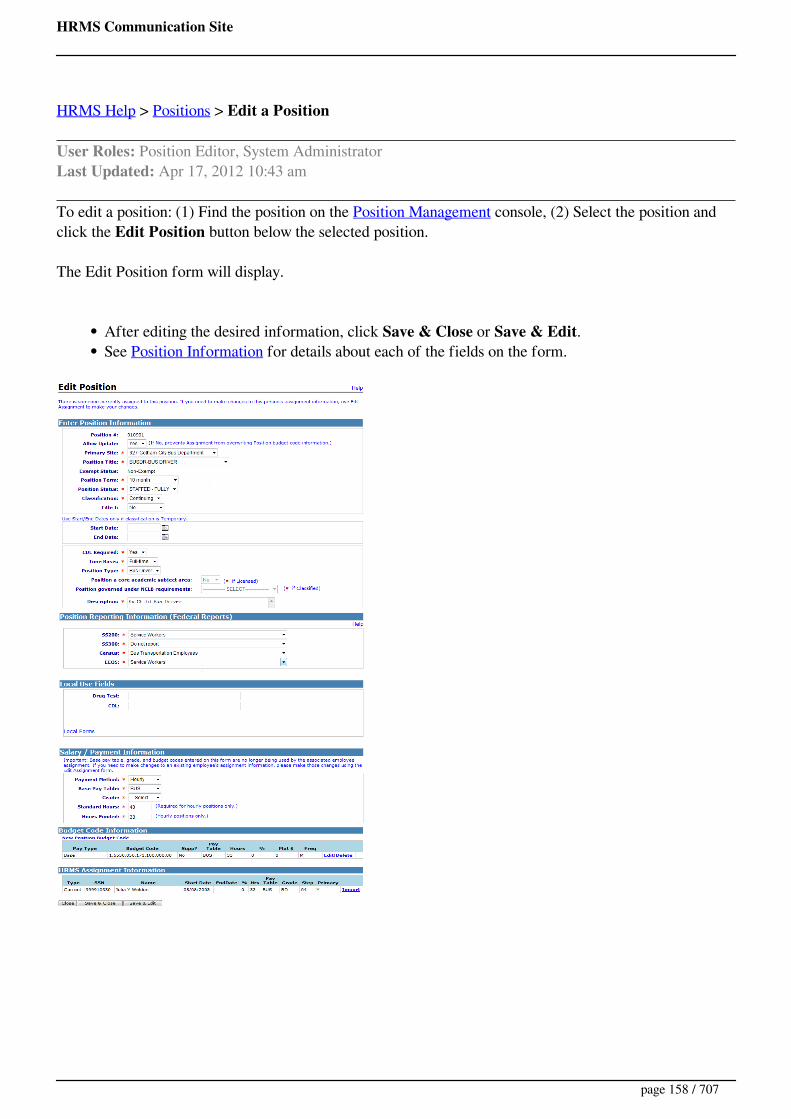
HRMS Communication Site
HRMS Help > Positions > Edit a Position
User Roles: Position Editor, System AdministratorLast Updated: Apr 17, 2012 10:43 am
To edit a position: (1) Find the position on the Position Management console, (2) Select the position andclick the Edit Position button below the selected position.
The Edit Position form will display.
After editing the desired information, click Save & Close or Save & Edit.See Position Information for details about each of the fields on the form.
page 158 / 707

HRMS Communication Site
HRMS Help > Employee Page > Edit Assignment
User Roles: Employee Hire, Staff Action, HR Staff Action Officer, System AdministratorLast Updated: Apr 10, 2015 7:20 am
Printer friendly
Table of ContentsQuick Facts
Where to Access
Edit Assignment Form
Position Information
Employee Information
Assignment Information
Salary Information
Budget Code Info.
Quick Facts
The Edit Assignment form allows authorized users to view and update various informationconcerning an employee's assignment(s).This is where you would "Drop" (or end) an assignment for someone who is not actually separating.(If the employee is separating you would perform a Separation Staff Action.)The following sections are available for view/action:
Position InformationEmployee InformationAssignment InformationSalary InformationBudget Code Information
Where to Access
page 159 / 707
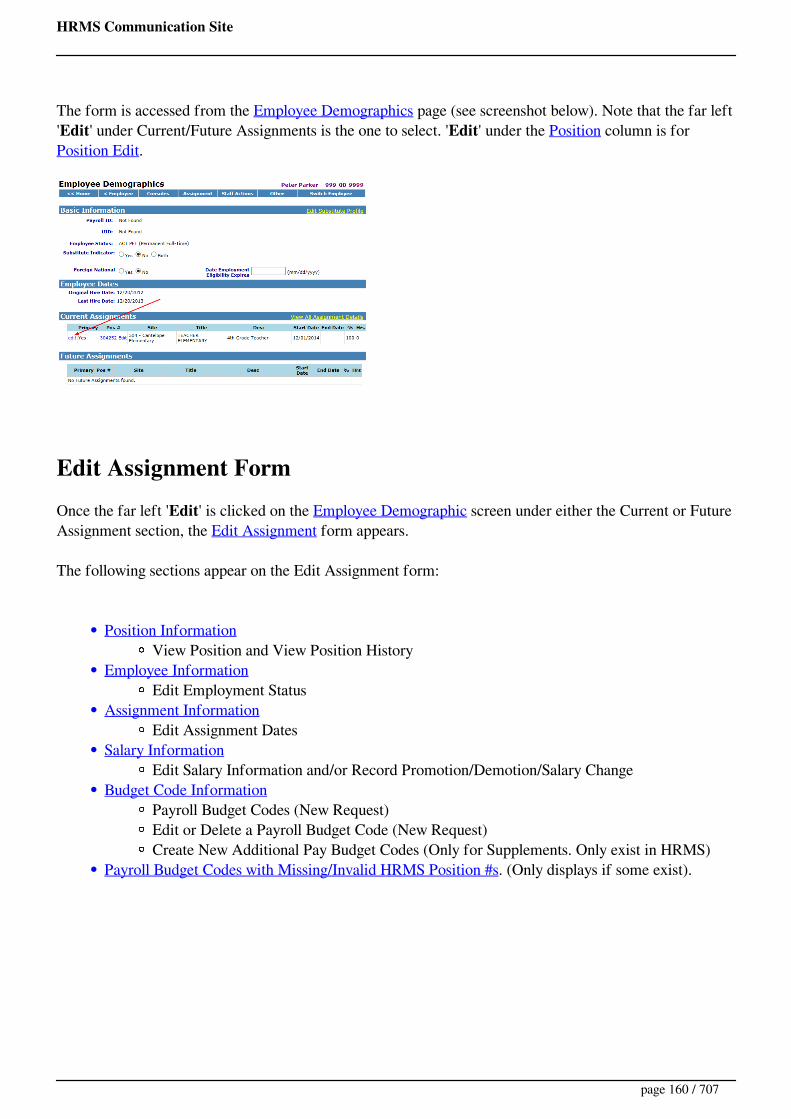
HRMS Communication Site
The form is accessed from the Employee Demographics page (see screenshot below). Note that the far left'Edit' under Current/Future Assignments is the one to select. 'Edit' under the Position column is for Position Edit.
Edit Assignment FormOnce the far left 'Edit' is clicked on the Employee Demographic screen under either the Current or FutureAssignment section, the Edit Assignment form appears.
The following sections appear on the Edit Assignment form:
Position InformationView Position and View Position History
Employee InformationEdit Employment Status
Assignment InformationEdit Assignment Dates
Salary InformationEdit Salary Information and/or Record Promotion/Demotion/Salary Change
Budget Code InformationPayroll Budget Codes (New Request)Edit or Delete a Payroll Budget Code (New Request)Create New Additional Pay Budget Codes (Only for Supplements. Only exist in HRMS)
Payroll Budget Codes with Missing/Invalid HRMS Position #s. (Only displays if some exist).
page 160 / 707

HRMS Communication Site
Position InformationThe first section on the Edit Assignment form displays high level Position Information. To display allinformation concerning the position, click on the Position Number and the View Position form willdisplay. To see a listing of who has held, is holding and or will hold this position, click on the"Show/Hide" link and the position history will display. To collapse the history, just click on "Show/Hide"again.
page 161 / 707

HRMS Communication Site
Employee InformationThe second section on the Edit Assignment form displays the Employment Status and critical EmployeeDates. To edit the Employee's status click on the "Edit Employment Status" link and you will be taken tothe "Edit Assignment Dates/Employment Status" screen.
Assignment InformationThe third section on the Edit Assignment form displays the employee's Assignment information. This iswhere you can indicate if this is the employee's primary assignment or not. (Note that an employee musthave only 1 primary assignment).
To edit the Assignment Start or End date click on the "Edit Assignment Dates" link and you will betaken to the "Edit Assignment Dates/Employment Status" screen. Assignment Local Use fields also appearfor update. Once information is updated, click on 'Save & Close' or 'Save & Edit' to save.
Note also that if this is a Future Assignment the 'Delete This Future Assignment' button is available.Upon deleting the future assignment the following occurs:
The status of any Transfer or New Assignment for Current Employee Staff Action is set tocancelled.If the deleted assignment was the result of a Transfer, the End Date will be removed from the oldassignment.
Salary InformationThe fourth section on the Edit Assignment form displays the employee's current Salary information inread-only format for this Assignment. Promotion/Demotion/Salary Changes Staff Actions are alsodisplayed.
page 162 / 707

HRMS Communication Site
To update salary information and/or enter information regarding a promotion, demotion, or salary change,click the link labeled Edit Salary Information and/or Record a Promotion/Demotion/Salary Change. A newwindow opens for entry. Once saved, this Staff Action will display both on the Employee's Staff ActionConsole and under the Promotions/Demotions/Salary Changes (from HRMS) heading as seen below. Clicking on a row under the Promotions/Demotions/Salary Changes (from HRMS) headingdisplays the details of the Staff Action.
Budget Code Info.The last section on the Edit Assignment form displays Budget Code/Payroll Assignment information.Under this heading are 3 main sections:
Position Budget Codes Available - This simply lists the Budget Codes that already exist on thePosition.Payroll Budget Codes - Lists the Active Payroll Budget codes with a valid HRMS positionnumber for the employee. The "New Request" link allows you to create a Budget Code StaffAction for payroll. Note that there is no automation here. Once created, the Staff Action can beprinted and taken to Payroll. Once processed, Payroll can go into HRMS WorkFlow ManagementConsole and mark the request as Completed.Additional Pay Budget Codes (from HRMS) - Lists any Additional Payroll Budget codesentered into HRMS. Note that only Supplement budget codes are allowed to be entered.
The heading "Payroll Budget Codes with Missing/Invalid HRMS Position #'s" only appears if thereare Payroll Assignment records for this employee (match on SSN), where the position number is eitherblank (missing) or incorrect (invalid).
page 163 / 707
HRMS Communication Site
If desired, enter the position number in the empty box in the Payroll Pos # column, and click on the Update Payroll link. This will put the HRMS position number on the payroll assignment and the payrollassignment will move to the Payroll Budget Codes section. (Note that the screen refreshes when youclick on the Update Payroll link, therefore you should only update one of these at the time.) Once this iscompleted it is advised to click on the 'Sync Budget Codes to Position' button on the bottom. Whenclicked the following occurs:
The Budget Codes on the position are replaced with the Payroll Budget Codes.The Salary Schedule, Grade and Step in the Salary Information section is replaced with the SalaryGrade and Step on the Base Payroll Budget Code.
Note that you must go to the Employee View, Payroll Position Number Update to Remove/Delete positionnumbers from the Payroll Assignment records.
page 164 / 707
HRMS Communication Site
HRMS Help > Employee Page > Edit Assignment Dates or Employment Status
User Roles: Employee Hire, Staff Action, HR Staff Action Officer, System AdministratorLast Updated: Sep 28, 2017 8:19 am
Printer friendly
Table of ContentsQuick Facts
Where to Access
Main Form
No Assignment End Date
End Date Matching Separation Effective Date
End Date Matching Transfer Effective Date
End Date Matching Drop Assignment Effective Date
End Date without any matching Staff Action
Dropping an Assignment
Cancelling a Drop Assignment
Quick Facts
The Edit Assignment Dates/Employment Status form allows authorized users to view and updateAssignment Dates and/or an Employee's Status. (There are many 'validation' rules that enforce dataintegrity, therefore not all attempted changes are allowed. Appropriate error messages will displayas needed.)This is the form where you would "Drop" (or end) an assignment for an employee who is notactually separating from or transferring within the school system. If the employee is separating youwould perform a Separation Staff Action. If the employee is transferring you would perform anAssignment > Transfer from the Employee Demographics page.
page 165 / 707

HRMS Communication Site
Where to AccessThe Edit Assignment Dates/Employment Status form is accessed from the Edit Assignment form from an Employee's Demographic Page. Clicking on either Edit Employee Status or Edit Assignment Dates willtake you to this form.
Main FormOnce selected from the Edit Assignment form the Edit Assignment Dates/Employment Status formappears. Below the Position Number/Position Description are the Assignment Start Date (could be in thefuture) and the Employment Status (now or as of Assignment Start Date). If an Assignment End Dateexists for this Assignment, the Assignment End Date and Employment Status as of that AssignmentEnd Date will also appear. Available fields depend on which of the following scenarios applies. (Note thatif the employee's current Employment Status is a Leave or Suspension Code, the field is not editable.Otherwise, it is editable and any Active Status code may be selected).
No Assignment End DateEnd Date Matching Separation Effective DateEnd Date Matching Transfer Effective DateEnd Date Matching 'Drop Assignment' Effective DateEnd Date without any matching Staff Action
No Assignment End DateIn this scenario, you may adjust the Assignment Start Date or change the Employee's Status to anotherActive Status. Click on Drop Assignment if this assignment is ending, but the employee is NOT separating
page 166 / 707
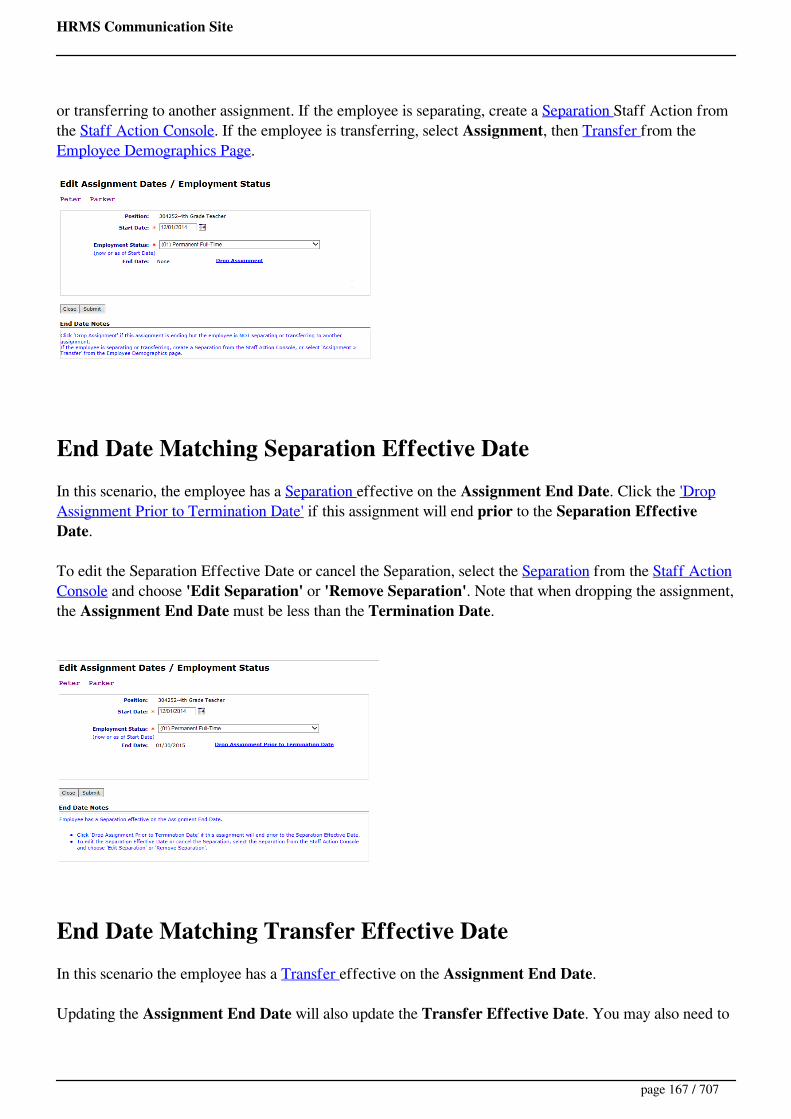
HRMS Communication Site
or transferring to another assignment. If the employee is separating, create a Separation Staff Action fromthe Staff Action Console. If the employee is transferring, select Assignment, then Transfer from the Employee Demographics Page.
End Date Matching Separation Effective DateIn this scenario, the employee has a Separation effective on the Assignment End Date. Click the 'DropAssignment Prior to Termination Date' if this assignment will end prior to the Separation EffectiveDate.
To edit the Separation Effective Date or cancel the Separation, select the Separation from the Staff ActionConsole and choose 'Edit Separation' or 'Remove Separation'. Note that when dropping the assignment,the Assignment End Date must be less than the Termination Date.
End Date Matching Transfer Effective DateIn this scenario the employee has a Transfer effective on the Assignment End Date.
Updating the Assignment End Date will also update the Transfer Effective Date. You may also need to
page 167 / 707

HRMS Communication Site
adjust the Start Date on the employee's new assignment.
Click on the 'Cancel Transfer' checkbox to cancel the Transfer. This will remove the AssignmentEnd Date AND remove the related new assignment unless the transfer was from multipleassignments.
End Date Matching Drop Assignment Effective DateIn this scenario, the Employee has a 'Drop Assignment' record effective on the Assignment End Date.Updating the End Date or Employment Status will also update the 'Drop Assignment' staff actionrecord. Click on the Cancel Drop Assignment checkbox (it will become checked) and then click on Submit to cancel the Drop Assignment.
End Date without any matching Staff ActionIn this scenario, the Assignment End Date is not associated with any Staff Action. Adjusting the EndDate will not result in any Staff Actions being created or updated. (This scenario only exists forAssignments with end dates entered before the 6.5 release. By the start of the 2015/2016 school year, thisscenario should not exist.)
page 168 / 707

HRMS Communication Site
To Edit, simply update Start Date, Employment Status or End Date and click on Submit. As long asthe update does not violate and data integrity, the updates will be applied.
Dropping an AssignmentIf you choose to Drop the Assignment the form below appears. Enter the End Date (must be after theAssignment Start Date) , Select the Employment Status as of the End Date, Post on Board Reportindicator, Board Report Date (if applicable), enter Comments if desired and click on Submit.
Once completed, the Assignment will have an End Date. If the End Date is in the future, a PendingStatus change for the employee's employment status will be created and take affect on the AssignmentEnd Date. A Drop Assignment Staff Action will also be recorded and available for viewing on theemployee's Staff Action Console.
A Cancel the Drop Assignment box will now be available to remove the Drop Assignment if desired.
page 169 / 707

HRMS Communication Site
Cancelling a Drop AssignmentTo Cancel a Drop Assignment, check the Cancel 'Drop Assignment' box and click on Submit. The Assignment End Date and associated Pending Status Change will be deleted. The Drop AssignmentStaff Action will also be cancelled.
page 170 / 707

HRMS Communication Site
HRMS Help > Reporting Tool > EEO-5 Reports > EEO-5 Detail by Classification
User Roles: Any user with Reporting Tool installed on PCLast Updated: Jul 11, 2012 12:32 pm
The EEO-5 Detail by Classification Report is used to validate data for the EEO-5 Summary Report thatis normally run bi-annually in October.
The report lists position assignment, race/ethnicity, and gender data by Staff Type (Full-Time Staff, Part-Time Staff, and New Hires) and EEO-5 Classification. It also includes race/ethnicity and gender totals byStaff Type and EEO-5 Classification.
See the EEO-5 Reports topic for additional details.
Sample Report
page 171 / 707

HRMS Communication Site
HRMS Help > Reporting Tool > EEO-5 Reports > EEO-5 Detail by Site
User Roles: Any user with Reporting Tool installed on PCLast Updated: Jul 11, 2012 12:29 pm
The EEO-5 Detail by Site Report is used to validate data for the EEO-5 Summary Report that is normallyrun bi-annually in October.
The report lists position assignment, race/ethnicity, and gender data by Site and Staff Type (Full-TimeStaff, Part-Time Staff, and New Hires). It also includes race/ethnicity and gender totals by Site, StaffType, and EEO-5 Classification.
See the EEO-5 Reports topic for additional details.
Sample Report
page 172 / 707

HRMS Communication Site
HRMS Help > Reporting Tool > EEO-5 Reports > EEO-5 Error
User Roles: Any user with Reporting Tool installed on PCLast Updated: Jul 16, 2012 7:04 am
The EEO-5 Error Report is used to clean up data in preparation for the EEO-5 Summary Report.
The report provides details about error conditions for employees, positions, and assignments that need tobe addressed prior to running the Summary Report.
EEO-5 Error Messages and Tips
Error/Warning Message Explanation and Tips
EEO-5 Classification Code is missing The position has no value for EEO-5 ReportingClassification.
Fix: Edit the position and select a validEEO-5 Reporting Classfication on the EditPosition form.
Employee has locally-defined Employee Status The employee's Employment Status is locallydefined, and the system cannot determine whetherthe employee is full-time or part-time.
Fix: If the employee should be included onthe EEO-5 Report, go to the Edit Assignmentform and select one of the full-timeEmployment Statuses listed on the EEO-5Reports help topic.
Employee has more than one Primary Position The employee has two or more primary assignmentsactive on the 'Assignments Active On' Date entered.Employees should have only one primary assignmentat a time.
Fix: Change the Primary Assignmentindicator on one (or more) of the employee'sassignments on the Edit Assignment form.
Ethnic Code Not Found for Employee The employee has no values selected forHispanic/Latino or Race in HRMS.
page 173 / 707

HRMS Communication Site
Fix: Select values for Hispanic/Latino andRace for the employee on the EmployeeDemographics page.
Gender Code Not Found for Employee The employee has no value for gender in HRMS.
Fix: Select a gender for the employee on theEmployee Demographics page.
No Primary HRMS Position Assignment forEmployee
The employee has a full-time or part-timeEmployment Status, but has no primary assignmentsactive on the 'Assignments Active On' date entered.
Fix: If the employee should be included onthe EEO-5 Report, assign the employee to aposition (and ensure the position has thecorrect EEO-5 classification).
Position Payment Method not S or H The position has a payment method of 'F' (FlatDollar) rather than 'S' or 'H' (Salaried or Hourly).Flat Dollar positions should not be included on theEEO-5 Reports.
Fix: Edit the position and change the EEO-5Reporting Classification to 'Do not report.'
Sample Report
page 174 / 707

HRMS Communication Site
HRMS Help > Reporting Tool > EEO-5 Reports
User Roles: Any user with Reporting Tool installed on PCLast Updated: Jul 11, 2012 12:38 pm
The EEO-5 (Elementary-Secondary Staff Information) Report is a bi-annual federal reportadministered by the Equal Employment Opportunity Commission. The race/ethnicity and gender datacompiled on this report is used by the EEOC to determine demographic information about public schoolemployees across the country.
This report is normally run bi-annually in October (in even numbered years) and provides summary datafor all personnel (part-time or full-time) employed by the school system. The EEOC’s intent for requestingthis report is to determine if there is a bias in hiring, in terms of gender or race. The EEOC requests thisreport from a sampling of LEAs, usually more than 60%. Because of past complaints, some LEAs arealways asked to participate in the sample.
The LEA Summary (168A) Report includes the data reported to the EEOC.
The EEO-5 Error, Detail by Classification, and Detail by Site Reports are normally run first to clean upand validate the report data.
Selection Criteria & Business Rules
User Selection Options:
Last Hire Date betweenDatesUsed to identify which employees should be reported as New Hires (Section C).Defaults to 7/1 to 9/30 of the current school year.
Assignments Active OnDateCurrent and archived assignments active on the specified date are included on the report.Defaults to 10/1 of the current school year.
The Detail and Summary Reports categorize employees by Staff Type (as defined below). Only employeeswith the specified employment status codes who are assigned to a position with a valid EEO-5 ReportingClassification are included.A. Full-Time Staff
Includes primary assignments for employees with any of the following employment status codes:01 - Permanent Full-time10 - Interim with Full Benefits13 - Suspended with Pay14 - Retiree Return FT w/ No Benefits Under Earnings Cap
page 175 / 707
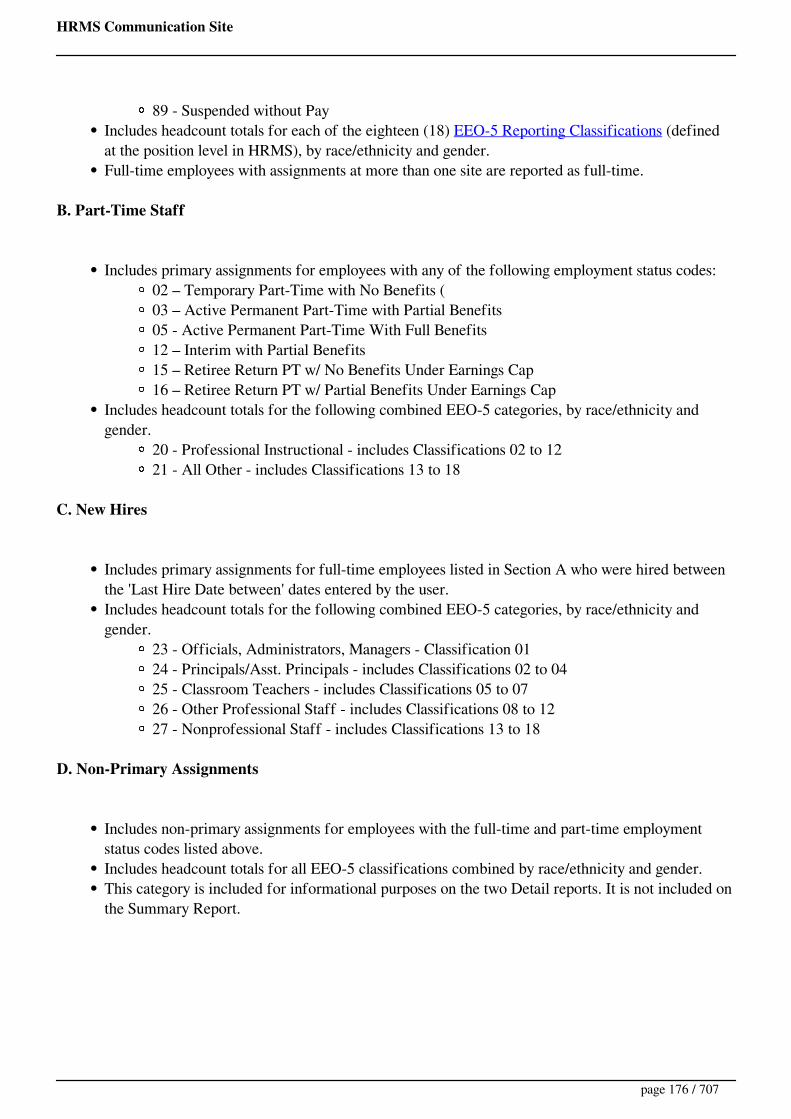
HRMS Communication Site
89 - Suspended without PayIncludes headcount totals for each of the eighteen (18) EEO-5 Reporting Classifications (definedat the position level in HRMS), by race/ethnicity and gender.Full-time employees with assignments at more than one site are reported as full-time.
B. Part-Time Staff
Includes primary assignments for employees with any of the following employment status codes:02 – Temporary Part-Time with No Benefits (03 – Active Permanent Part-Time with Partial Benefits05 - Active Permanent Part-Time With Full Benefits12 – Interim with Partial Benefits15 – Retiree Return PT w/ No Benefits Under Earnings Cap16 – Retiree Return PT w/ Partial Benefits Under Earnings Cap
Includes headcount totals for the following combined EEO-5 categories, by race/ethnicity andgender.
20 - Professional Instructional - includes Classifications 02 to 1221 - All Other - includes Classifications 13 to 18
C. New Hires
Includes primary assignments for full-time employees listed in Section A who were hired betweenthe 'Last Hire Date between' dates entered by the user.Includes headcount totals for the following combined EEO-5 categories, by race/ethnicity andgender.
23 - Officials, Administrators, Managers - Classification 0124 - Principals/Asst. Principals - includes Classifications 02 to 0425 - Classroom Teachers - includes Classifications 05 to 0726 - Other Professional Staff - includes Classifications 08 to 1227 - Nonprofessional Staff - includes Classifications 13 to 18
D. Non-Primary Assignments
Includes non-primary assignments for employees with the full-time and part-time employmentstatus codes listed above.Includes headcount totals for all EEO-5 classifications combined by race/ethnicity and gender.This category is included for informational purposes on the two Detail reports. It is not included onthe Summary Report.
page 176 / 707
HRMS Communication Site
HRMS Help > Reporting Tool > EEO-5 Reports > EEO-5 Summary
User Roles: Any user with Reporting Tool installed on PCLast Updated: Jul 16, 2012 7:02 am
The EEO-5 LEA Summary (168A) Report is used to prepare the federal EEO-5 Report administered bythe Equal Employment Opportunity Commission. It is normally run bi-annually in October.
The report lists headcount totals by Staff Type (Full-Time, Part-Time, and New Hire), EEO-5Classification, and race/ethnicity and gender for the entire LEA.
See the EEO-5 Reports topic for additional details.
Sample Report
page 177 / 707

HRMS Communication Site
HRMS Help > Employee Comments
User Roles: System Administrator, Comment Entry, Comment Editor, Comment ViewerLast Updated: Jan 3, 2014 6:04 am
Printer friendly
Table of ContentsQuick Facts
Where to Select
Comments Options
Create a New Comment
View a Comment
Edit a Comment
Delete a Comment
Quick Facts
Employee Comments can be accessed from the Employee Demographics page in two ways.Deletion of comments does not remove them from the system. They can still be retrieved ifneeded.There are no standard web reports for review of comments. Contact HRMS support of you need areport including Employee Comments.Only user roles, System Administrators and Comment Entry, Editor and Viewer have access to theEmployee comments.
Where to SelectThe first way to access Employee Comments is from the Comments option in Employee Demographics.Authorized users may add, edit or view employee comments.
page 178 / 707
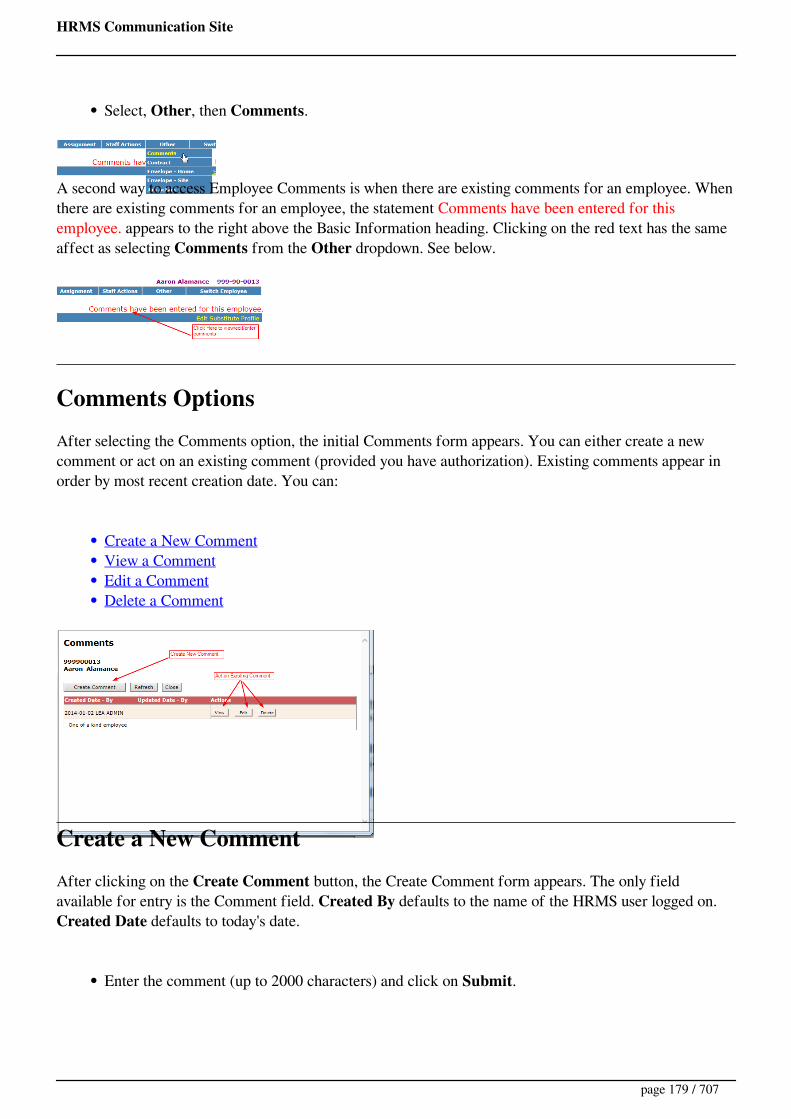
HRMS Communication Site
Select, Other, then Comments.
A second way to access Employee Comments is when there are existing comments for an employee. Whenthere are existing comments for an employee, the statement Comments have been entered for thisemployee. appears to the right above the Basic Information heading. Clicking on the red text has the sameaffect as selecting Comments from the Other dropdown. See below.
Comments OptionsAfter selecting the Comments option, the initial Comments form appears. You can either create a newcomment or act on an existing comment (provided you have authorization). Existing comments appear inorder by most recent creation date. You can:
Create a New CommentView a CommentEdit a CommentDelete a Comment
Create a New CommentAfter clicking on the Create Comment button, the Create Comment form appears. The only fieldavailable for entry is the Comment field. Created By defaults to the name of the HRMS user logged on. Created Date defaults to today's date.
Enter the comment (up to 2000 characters) and click on Submit.
page 179 / 707

HRMS Communication Site
View a CommentAfter clicking on the View button the View Comment form appears. This is just a display of theComment Create Date, Created by, Last Updated Date, Last Update by and the actual comment itself.
Click on the Close button after viewing the comment.
Edit a CommentAfter clicking on the Edit button, the Modify Comment form appears. The Created By, Created Date,Updated By (current logged on user) and Updated Date (today's date) appear. The comment appears forupdate.
Update the comment (up to 2000 characters) and click on Submit. The comment is updated.
page 180 / 707

HRMS Communication Site
Delete a CommentAfter clicking on the Delete button, the message below appears.
Click on the OK button to remove the Comment from display in the system.
If OK was selected, the Comment is marked as deleted and no longer displays in the system. (Note that theComment is still in the system, but just does not display. Contact HRMS support if you need a report tosee deleted comments.
Click on OK to close this window.
Back To Top
page 181 / 707

HRMS Communication Site
HRMS Help > Employee Page > Employee Demographics
User Roles: Employee Hire, Staff Action Clerk, HR Staff Action Officer, System AdministratorLast Updated: Apr 10, 2015 10:11 am
Printer friendlyThe Employee Demographics page is the main page from which to view/edit an employee'sdemographic, assignment, status and benefits, and other information.
Click here for details about the menu options at the top of the page as well as other pages that can beaccessed from the Employee Demographics page (including links to related help topics).
Dates will only display if dates are in the fields
Menu Options at Top of Employee Demographics
Home (Return to the HRMS Home Page)Employee (Return to the Employee Page)Consoles
Position Management
page 182 / 707
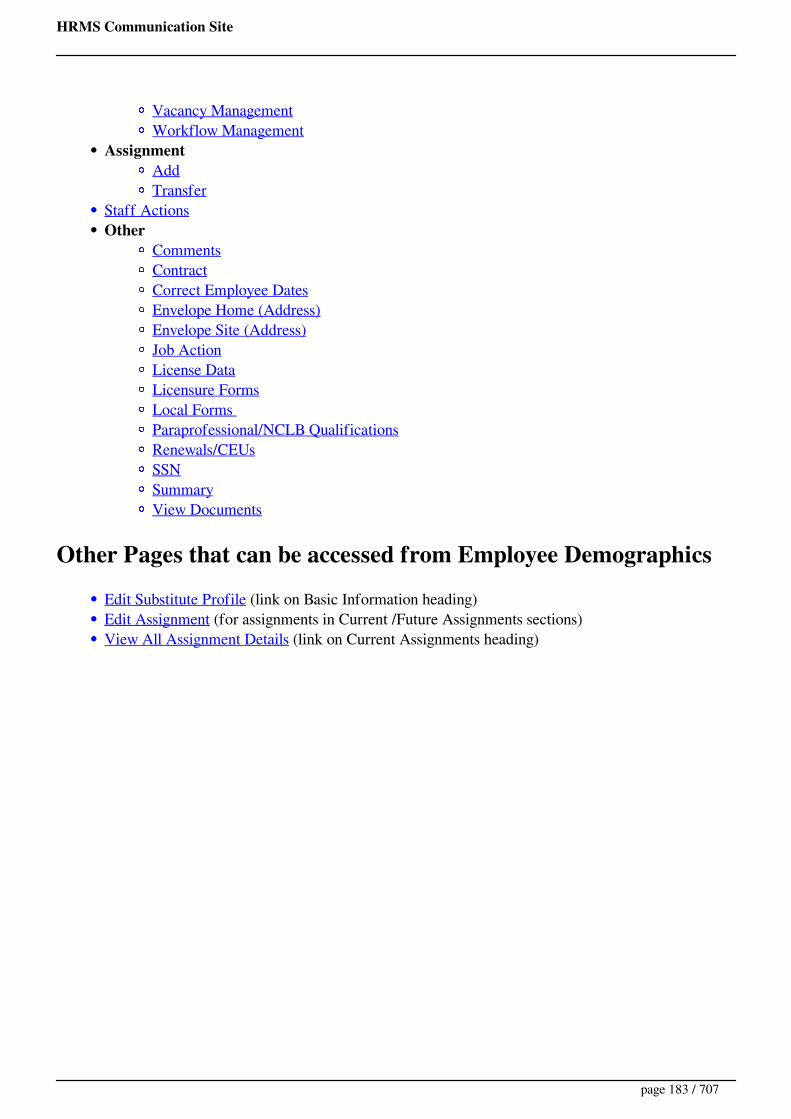
HRMS Communication Site
Vacancy ManagementWorkflow Management
AssignmentAddTransfer
Staff ActionsOther
CommentsContractCorrect Employee DatesEnvelope Home (Address)Envelope Site (Address)Job ActionLicense DataLicensure FormsLocal Forms Paraprofessional/NCLB QualificationsRenewals/CEUsSSNSummaryView Documents
Other Pages that can be accessed from Employee Demographics
Edit Substitute Profile (link on Basic Information heading)Edit Assignment (for assignments in Current /Future Assignments sections)View All Assignment Details (link on Current Assignments heading)
page 183 / 707

HRMS Communication Site
HRMS Help > Employee Job Action
User Roles: Employee Hire, Staff Action Clerk, HR Staff Action Officer, System Administrator
Last Updated: Mar 10, 2014 1:31 pm
Printer friendly
Table of ContentsQuick Facts
Where to Select
Job Action Entry
Quick Facts
Job Actions are created by selecting the Job Action option under "Other" on the EmployeeDemographics form.The only Job Actions available for selection are "Locally Defined" on the Job ActionsConfiguration page. Please review the Job Actions Configuration page for important informationconcerning Job Actions.Note that Job Actions are rarely used by LEAs in HRMS.
Where to Select
Job Action EntryOnce selected, the Job Action form appears. Job Action, Effective Date and Post on Board Reportindicator are all required. If Post on Board Report indicate set to "Yes", Month and Year are also required.
page 184 / 707

HRMS Communication Site
Select the appropriate Job Action from the dropdown list and enter the Effective Date. Select the BoardMonth and Board Year if desired.
Click on the "Submit" button to complete. Click on the "Cancel" button to return to the EmployeeDemographics screen.
page 185 / 707

HRMS Communication Site
HRMS Help > Employee License Data
User Roles: System Administrator, Staff Action Clerk, Employee Hire, HR Staff Action OfficerLast Updated: Jun 27, 2017 9:55 am
Printer friendly
Table of ContentsQuick Facts
Selection from Employee Demographics
Selection from the Principal's Page
Selection from the Employee Page, Views Drop-down
Selection from the Lic/Sal Website
Licensure Data Screen
License Data Section
License Areas Section
Quick Facts
Employee Licensure data can be accessed from the:Employee Demographics screenPrincipals PageEmployee Page View drop-downLicensure Salary Website.
Licensure data in HRMS is updated daily. See the KB article 10802 for more information.
Selection from Employee DemographicsYou can access an Employee's Licensure Data from the Licensure Data option in EmployeeDemographics.
Select, Other, then License Data.
page 186 / 707
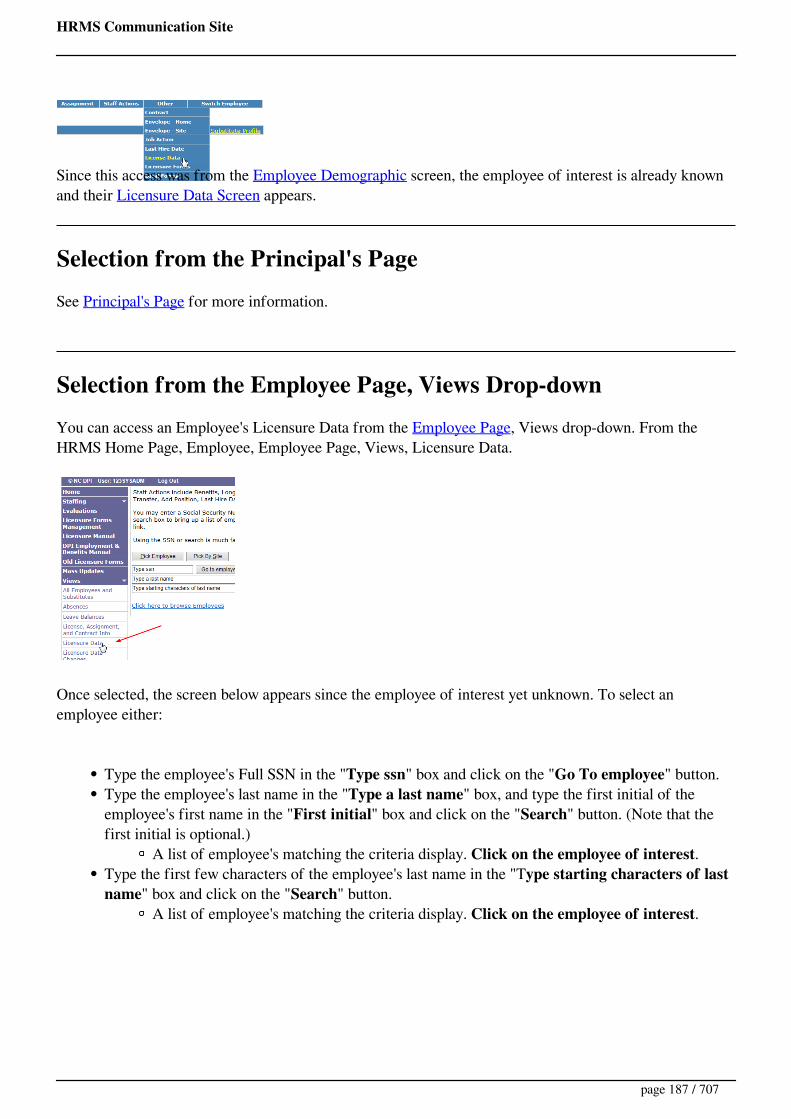
HRMS Communication Site
Since this access was from the Employee Demographic screen, the employee of interest is already knownand their Licensure Data Screen appears.
Selection from the Principal's PageSee Principal's Page for more information.
Selection from the Employee Page, Views Drop-downYou can access an Employee's Licensure Data from the Employee Page, Views drop-down. From theHRMS Home Page, Employee, Employee Page, Views, Licensure Data.
Once selected, the screen below appears since the employee of interest yet unknown. To select anemployee either:
Type the employee's Full SSN in the "Type ssn" box and click on the "Go To employee" button.Type the employee's last name in the "Type a last name" box, and type the first initial of theemployee's first name in the "First initial" box and click on the "Search" button. (Note that thefirst initial is optional.)
A list of employee's matching the criteria display. Click on the employee of interest.Type the first few characters of the employee's last name in the "Type starting characters of lastname" box and click on the "Search" button.
A list of employee's matching the criteria display. Click on the employee of interest.
page 187 / 707
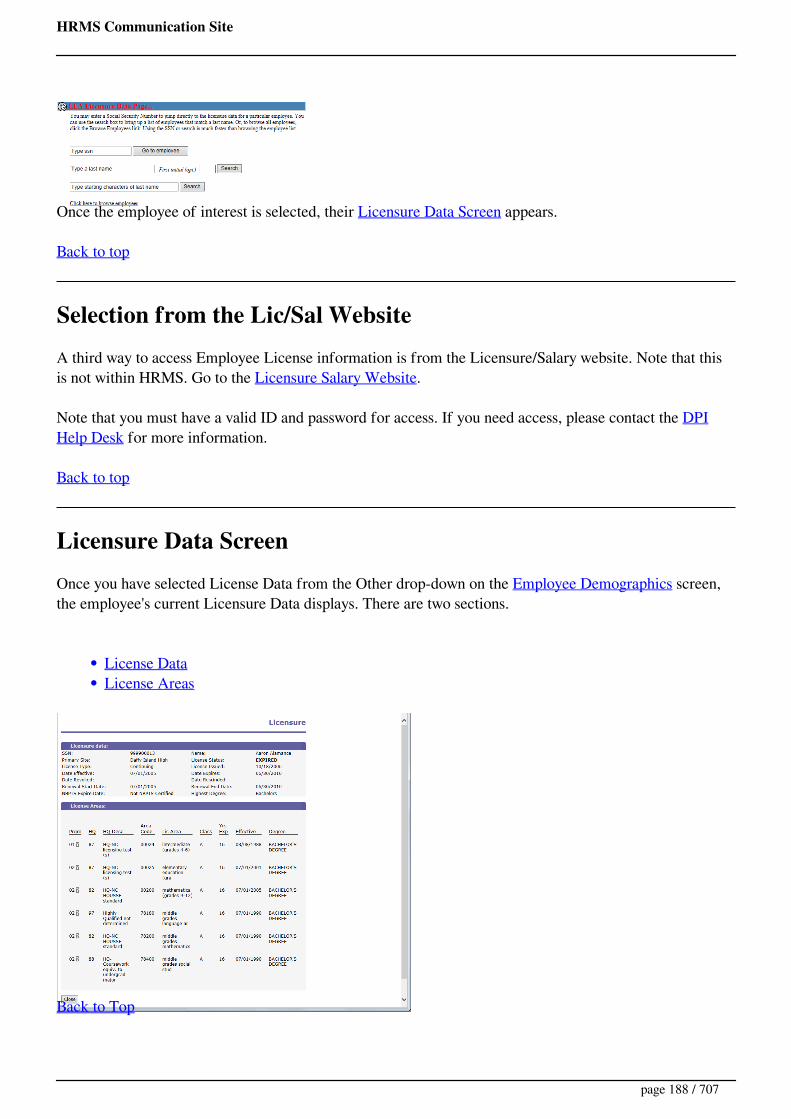
HRMS Communication Site
Once the employee of interest is selected, their Licensure Data Screen appears.
Back to top
Selection from the Lic/Sal WebsiteA third way to access Employee License information is from the Licensure/Salary website. Note that thisis not within HRMS. Go to the Licensure Salary Website.
Note that you must have a valid ID and password for access. If you need access, please contact the DPIHelp Desk for more information.
Back to top
Licensure Data ScreenOnce you have selected License Data from the Other drop-down on the Employee Demographics screen,the employee's current Licensure Data displays. There are two sections.
License DataLicense Areas
Back to Top
page 188 / 707

HRMS Communication Site
License Data SectionThe License Data Section displays Demographic, Assignment and License data.
SSN: Social Security NumberName: HRMS (not Licensure) namePrimary Site: Name of primary site assigned in HRMSLicense Status: Status of License (Expired, Active, Revoked)License Type: Type of License (Continuing, Initial, Provisional, or eligible for 1 Year)License Issued: Date most recent License was issued.Date Effective: Effective Date of LicenseDate Expires: License Expiration DateDate Revoked: Date License RevokedDate Rescinded: Date License Revocation was rescindedRenewal Start Date: License Renewal Cycle Beginning DateRenewal End Date: License Renewal Cycle Ending DateNBPTS Expire Date: Date of NBPTS ExpirationHighest Degree: Highest Degree earned on file with Licensure
Back to Top
License Areas SectionThe License Areas Section displays details for each License Area held by the employee. If you hover youmouse over the ? in the Prgm column, the description for that program code displays. See below.
page 189 / 707
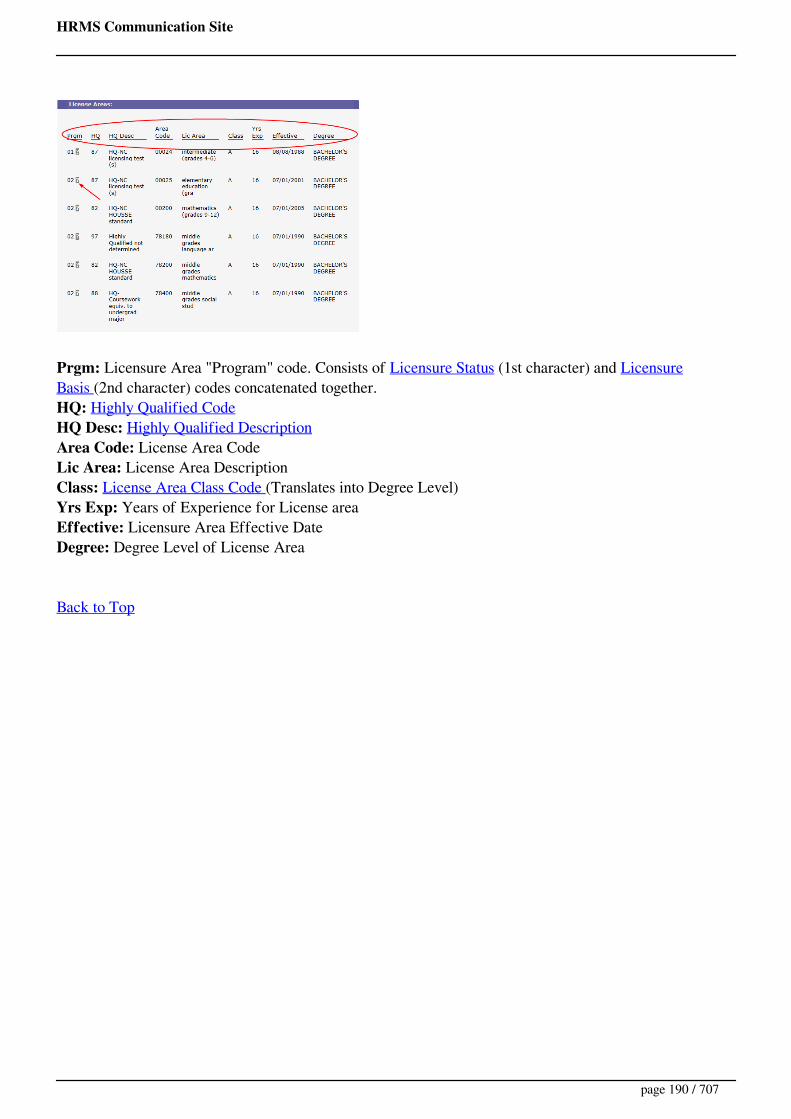
HRMS Communication Site
Prgm: Licensure Area "Program" code. Consists of Licensure Status (1st character) and LicensureBasis (2nd character) codes concatenated together.HQ: Highly Qualified CodeHQ Desc: Highly Qualified DescriptionArea Code: License Area CodeLic Area: License Area DescriptionClass: License Area Class Code (Translates into Degree Level)Yrs Exp: Years of Experience for License areaEffective: Licensure Area Effective DateDegree: Degree Level of License Area
Back to Top
page 190 / 707

HRMS Communication Site
HRMS Help > Reporting Tool > Employee Listing
User Roles: Any user with Reporting Tool installed on PCLast Updated: Jul 13, 2012 6:23 am
The Employee Listing Report displays basic employee and assignment information. The report providesten different sort options.
Selection Criteria
Pick EmployeesEmployee StatusPick Employee StatusesLast Hire Date betweenTenure StatusPick SitesAssignment TypePrimary/Non-PrimaryPick Position TitlesPick Position DescriptionsSort bySSN (Display)Export Report Data
Sample Report
page 191 / 707

HRMS Communication Site
HRMS Help > Employee Page
User Roles: Employee Hire, Staff Action, HR Staff Action Officer, System AdministratorLast Updated: Dec 4, 2017 7:18 am
The Employee Page is the main page to perform employee searches (get to employee demographics), hirestaff, select mass updates, and to view other types of information concerning employees.
The main function of this page is to allow the user to search for an employee (center of window), thendisplay the employee's information in Employee Demographics. Search options are:
Pick Employee (link)Pick By Site (link)Type SSN and then Go To EmployeeType EXACT Last name (not case sensitive), then Search
Note that if the last name contains an apostrophe, you will need to enter 2 apostrophes inthe last name for the search. For example, if searching for the last name O'Briant, you willneed to enter O''Briant in the "Type a last name" box.
Type starting characters of last name (not case sensitive), then SearchNote that if the last name contains an apostrophe, you will need to enter 2 apostrophes inthe last name. For example, if searching for anyone whose last name starts wtih O', you willneed to enter O'' in the "Type starting characters of last name" box.
Browse Employees, then select (Link)
Upon a successful search for an employee, you are taken to the Employee's Demographic Page.
From this page you can also navigate to:
Staffing OptionsEvaluations (obsolete)
page 192 / 707

HRMS Communication Site
Licensure Forms ManagementDPI Employment and Benefits ManualMass UpdatesEmployee ViewsDismissed Teacher ListStaff Action Search
page 193 / 707
HRMS Communication Site
HRMS Help > Employee Paraprofessional
User Roles: Employee Hire, Staff Action, HR Staff Action Officer, System Administrator
Last Updated: Aug 29, 2017 7:50 am
Printer friendly
Table of ContentsQuick Facts
Where to select
Update Screen (No Criteria Selected)
Update Screen (Criteria Completed)
Quick Facts
This form is used to enter and maintain NCLB qualification information for Paraprofessionals.Paraprofessionals employed after January 8, 2002 must fully meet the NCLB requirements beforebeing employed in a Title I school-wide program or targeted assistance program.The No Child Left Behind Act attempts to increase the quality of educators by addressing thequalifications for employment of paraprofessionals and teachers. For many paraprofessionalsemployed in schools supported with Title I funds, employment criteria changed immediately uponenactment of the law and others must meet employment criteria by the end of the 2005-2006school year.In order to provide assessment options available for paraprofessionals, the North CarolinaDepartment of Public Instruction created a committee of various stakeholders and practitioners toexamine the issue. See Qualifications for Paraprofessionals for more information.
Where to selectSelect, Other, then Paraprofessional/NCLB Qualifications from the Employee Demographics page.
page 194 / 707
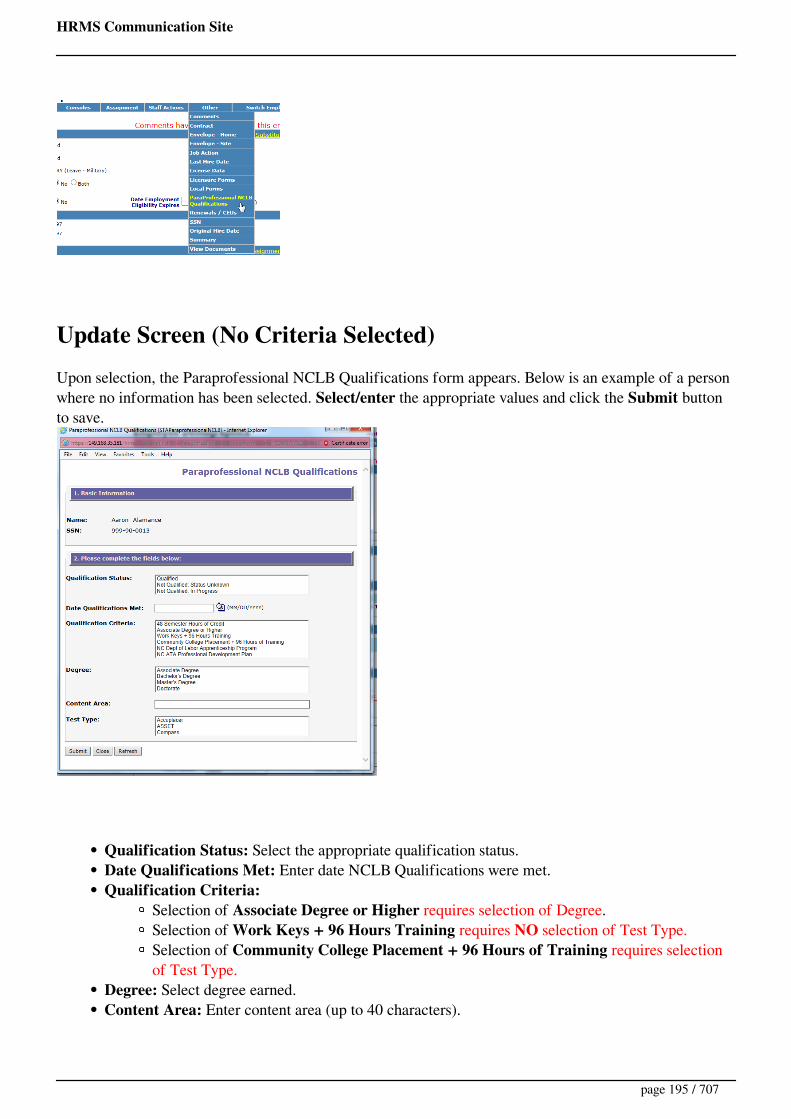
HRMS Communication Site
Update Screen (No Criteria Selected)Upon selection, the Paraprofessional NCLB Qualifications form appears. Below is an example of a personwhere no information has been selected. Select/enter the appropriate values and click the Submit buttonto save.
Qualification Status: Select the appropriate qualification status.Date Qualifications Met: Enter date NCLB Qualifications were met.Qualification Criteria:
Selection of Associate Degree or Higher requires selection of Degree.Selection of Work Keys + 96 Hours Training requires NO selection of Test Type.Selection of Community College Placement + 96 Hours of Training requires selectionof Test Type.
Degree: Select degree earned.Content Area: Enter content area (up to 40 characters).
page 195 / 707
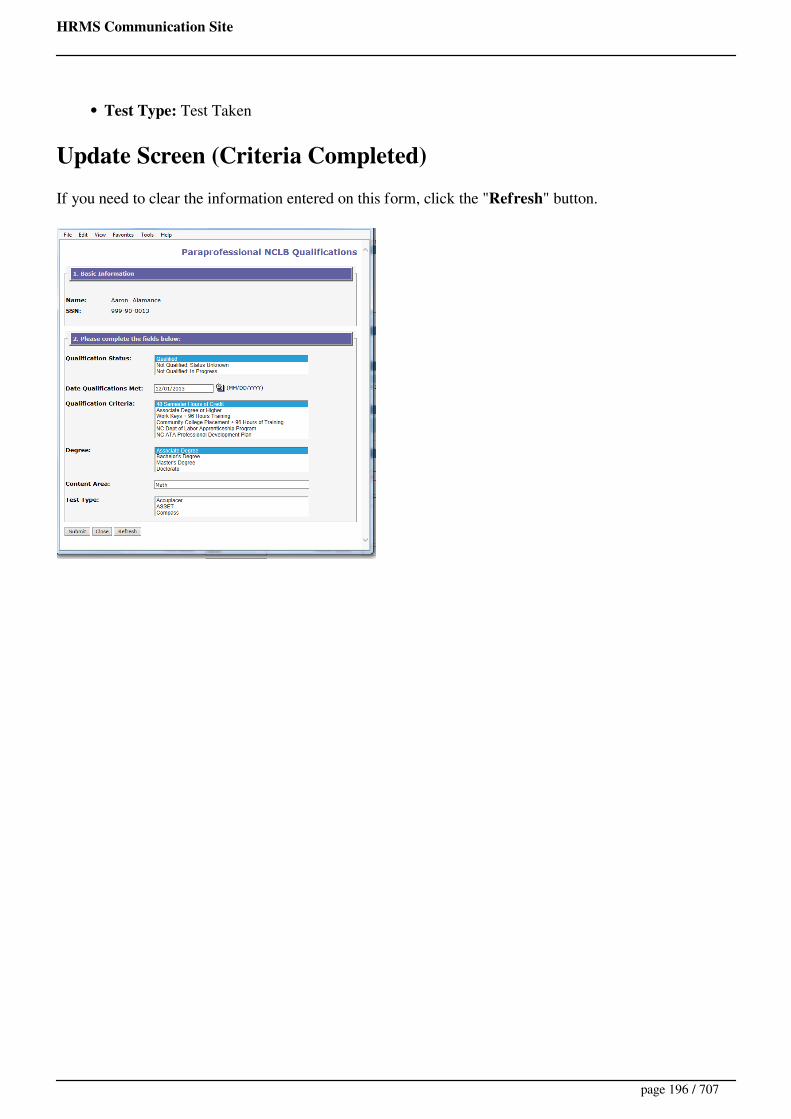
HRMS Communication Site
Test Type: Test Taken
Update Screen (Criteria Completed)If you need to clear the information entered on this form, click the "Refresh" button.
page 196 / 707
HRMS Communication Site
HRMS Help > Employee Self-Service
User Roles: No login requiredLast Updated: Dec 13, 2017 4:53 am
The following Employee Self-Service features can be accessed by any LEA employee without beinglogged in to the system:
Lookup My CEUs or UID
See also
Continuing Education
page 197 / 707

HRMS Communication Site
HRMS Help > Reporting Tool > Selection Criteria > Employee Status
Last Updated: Dec 12, 2011 8:02 am
This option is available on various Standard Reports and Letters. It is used to select employees basedon the Active Indicator assigned to their Employment Status. (This indicator is set by the SystemAdministrator in LEA Configuration.)
Employee Status Examples:
Active: 01 (Permanent Full-Time)Inactive: 61 (Resigned - Family Relocation)Leave: 80 (Leave - Military)Pending: 00 (None)
How To
You may select one or more of the following:
1 -Active (default)2 -Inactive3 -Leave (default)4 -Pending
page 198 / 707

HRMS Communication Site
HRMS Help > Employee Summary
User Roles: Employee Hire, Staff Action, HR Staff Action Officer, System Administrator
Last Updated: Oct 20, 2014 11:20 am
Printer friendly
Table of ContentsQuick Facts
Where to select
Summary Form Display
Location of Data in HRMS
Editing Data or Label before printing
Quick Facts
The "Summary" option in Employee Demographics allows authorized users to view or print a shortsummary of information associated with an employee.Labels and data displayed can be edited before printing.Data desired for display on this form was last updated with release 6.4.
Where to selectSelect, Other, then Summary from the Employee Demographics page.
page 199 / 707
HRMS Communication Site
Summary Form DisplayThe Summary form displays with selected data for view or printing. Note that you can select the Font Sizeand Font before printing the document. Note also that this page is "Editable". You can click on a "Label"or the actual data and make changes before printing. Note that any changes made are not saved, just usedfor printing.
Location of Data in HRMSBelow is list of the data displayed on the Summary form along with where the data can be updated inHRMS.
SSN: SSN Option on Employee Demographics.UID: Payroll. An Employee's UID cannot be entered or updated through HRMS. HRMS imports UIDsfrom payroll several times during the day. See KB10802 - System Data Update Schedule Primary Position Number: Employee Demographics then Edit AssignmentName: Employee DemographicsAddress 1: Employee DemographicsAddress 2: Employee DemographicsCity/State/Zip: Employee DemographicsHome Phone: Employee DemographicsUnlisted: Employee DemographicsWork Email: Employee DemographicsBirth Date: Employee DemographicsGender: Employee DemographicsOld Ethnicity: Employee DemographicsRace/Ethnicity: Employee DemographicsEmployee Status: Employee Status and Benefits or Edit Substitute Profile or through various actions onthe Staff Action ConsoleOriginal Hire Date: Original Hire Date option on Employee Demographics (Other) or Edit AssignmentLast Rehire Date: Last Hire Date option on Employee Demographics (Other) or Edit AssignmentLongevity Date: Longevity or Employee Status and Benefits option on Employee DemographicsLongevity Years: Longevity or Employee Status and Benefits option on Employee DemographicsEmployment End Date: If there is no employment end date you can add a Separation in the Staff ActionConsole. If the employment end date is incorrect, you can Edit the last Separation.Retirement Date: If there is no Retirement Date you can add a Separation in the Staff Action Console. If
page 200 / 707

HRMS Communication Site
the retirement date is incorrect, you can Edit the last Separation.Sick Leave: Employee Status and BenefitsAnnual Leave: Employee Status and BenefitsAnnual Leave Accrual Rate: Employee Status and BenefitsHoliday Pay: Employee Status and BenefitsPersonal Leave: Employee Status and BenefitsHealth Insurance: Employee Status and BenefitsHealth Insurance Start Date: Employee Status and BenefitsRetirement ID: Employee Status and BenefitsSubstitute: Employee DemographicsBT Status: Employee Status and BenefitsLocal Use Fields: Employee Demographics. To add additional Local Use Fields see Employee Local UseLabels.
Editing Data or Label before printingTo update data or a label before printing, simply click on the Data or Label. A box will appear around thedata and it can be changed.
page 201 / 707

HRMS Communication Site
HRMS Help > Employee View Documents
User Roles: Employee Hire, Staff Action, HR Staff Action Officer, System Administrator
Last Updated: Jan 17, 2014 10:50 am
Printer friendly
Table of ContentsQuick Facts
Where to Select
Where to Setup
Quick Facts
The "View Documents" option in Employee Demographics directs authorized users to thedocument management website used by your system.Setup of the location of the document management system is configured on the LEA Settings form.This option was new in release 6.0 (November 2010).
Where to SelectSelect, Other, then View Documents from the Employee Demographics page.
Once "View Documents" is selected, you will be redirected to your document management system website.
page 202 / 707
HRMS Communication Site
Where to SetupSetup of the URL is on the LEA Settings Configuration page.
page 203 / 707

HRMS Communication Site
HRMS Help > Site Staff > Employee View Substitutes
User Roles: System Administrator, General User, HR Staff Action Officer, Staff Action
Last Updated: Dec 4, 2017 8:23 am
Printer friendly
Table of ContentsQuick Facts
Where to Select
Search Options
Search by SSN
Search by Last Name
Search by Starting Characters of Last Name
Search by "Click here to browse substitutes"
Substitute Data Display
Substitute Profile Display
Quick Facts
When searching, results are not limited to only substitutes.Searching by SSN will be much faster that other searches.
Where to SelectSelect "Employee/Employee Page" from the HRMS Home Page, then "Substitutes" from the "Views"dropdown.
page 204 / 707
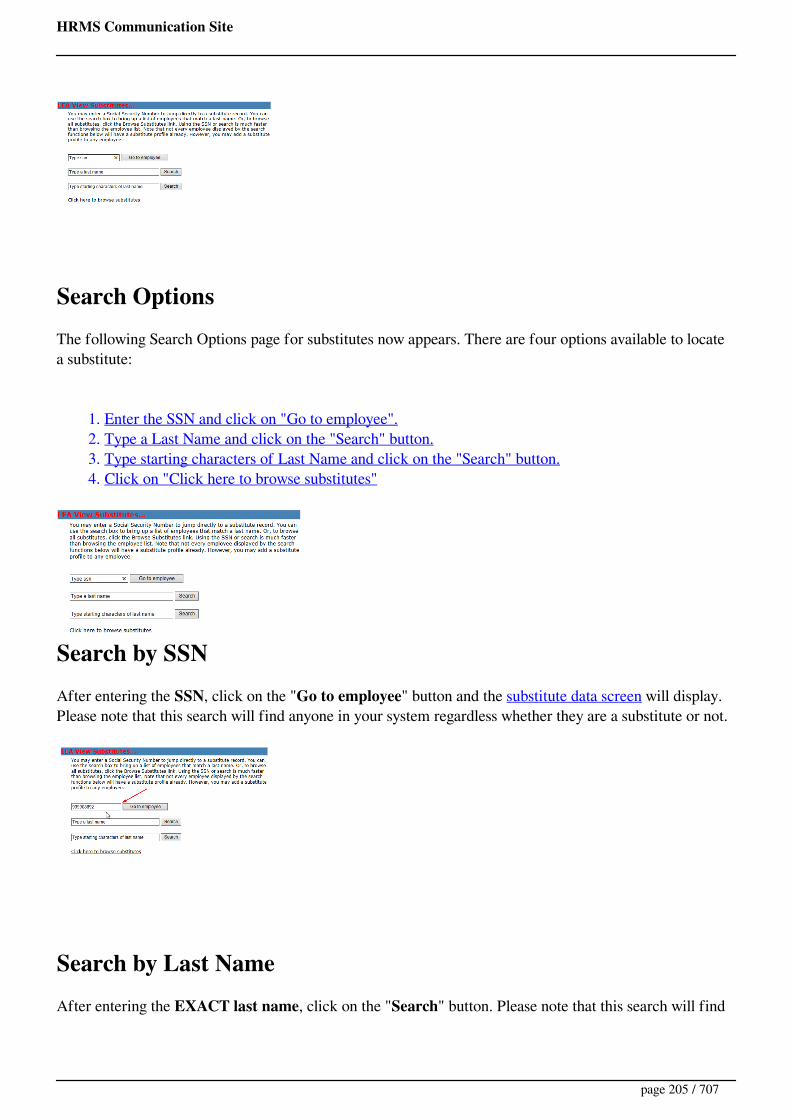
HRMS Communication Site
Search OptionsThe following Search Options page for substitutes now appears. There are four options available to locatea substitute:
1. Enter the SSN and click on "Go to employee".2. Type a Last Name and click on the "Search" button.3. Type starting characters of Last Name and click on the "Search" button.4. Click on "Click here to browse substitutes"
Search by SSNAfter entering the SSN, click on the "Go to employee" button and the substitute data screen will display.Please note that this search will find anyone in your system regardless whether they are a substitute or not.
Search by Last NameAfter entering the EXACT last name, click on the "Search" button. Please note that this search will find
page 205 / 707

HRMS Communication Site
anyone in your system regardless whether they are a substitute or not.
A listing of all employees with the last name entered will display. Click on the SSN to display thesubstitute data screen.
Search by Starting Characters of Last NameAfter entering the first few letters of the last name, click on the "Search" button. Please note that thissearch will find anyone in your system regardless whether they are a substitute or not.
A listing of all employees with the last name starting with the letters entered will display. Click on theSSN to display the substitute data screen.
page 206 / 707

HRMS Communication Site
Search by "Click here to browse substitutes"Please note that this search will find anyone in your system regardless whether they are a substitute or not.
The following screen will display. Click on the SSN link to display the substitute data screen. You canalso SEARCH here by putting the Last Name of the employee in the Search Box and clicking on the"Search Button". Note that you can navigate to the next page of results by clicking on "Next" at thebottom center of the screen.
page 207 / 707

HRMS Communication Site
Substitute Data DisplayFirst, a basic information screen appears where substitute profile information is blank. Click any available"Subject" link in section 3 and the data for that "Substitute Profile" will display.
Substitute Profile DisplayAfter click on a link in Section 3, the Substitute Profile information for that subject appears.
page 208 / 707
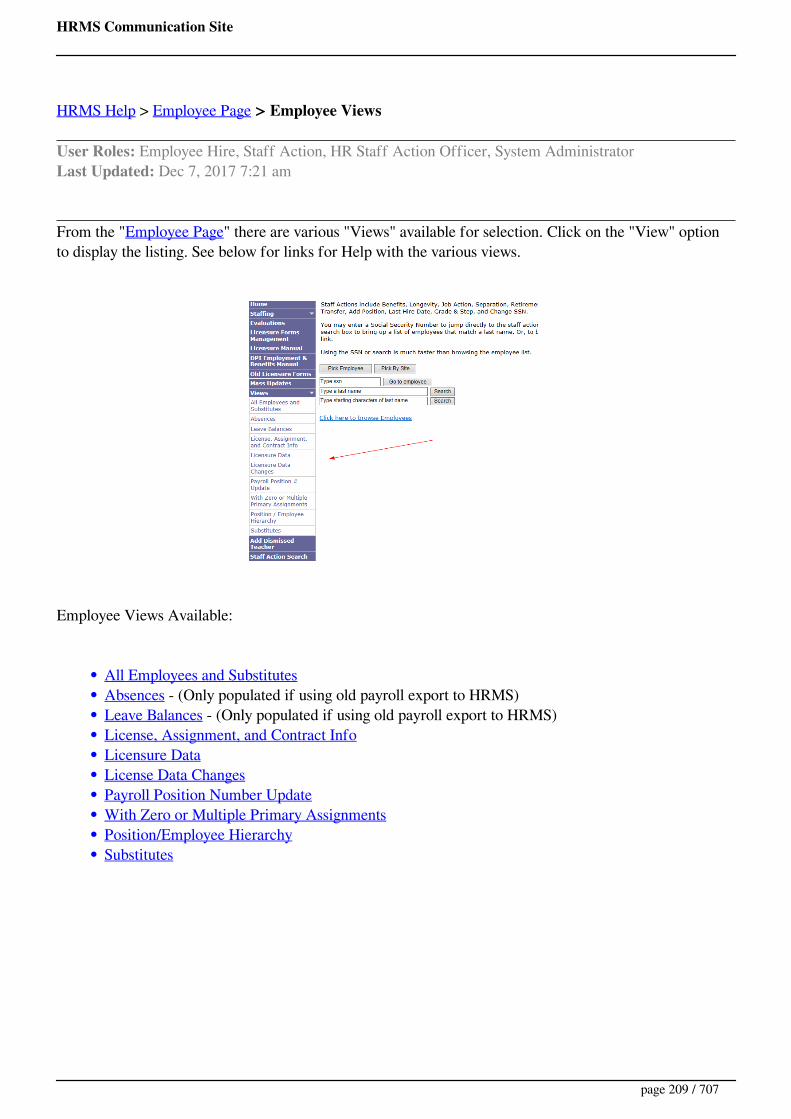
HRMS Communication Site
HRMS Help > Employee Page > Employee Views
User Roles: Employee Hire, Staff Action, HR Staff Action Officer, System AdministratorLast Updated: Dec 7, 2017 7:21 am
From the "Employee Page" there are various "Views" available for selection. Click on the "View" optionto display the listing. See below for links for Help with the various views.
Employee Views Available:
All Employees and SubstitutesAbsences - (Only populated if using old payroll export to HRMS)Leave Balances - (Only populated if using old payroll export to HRMS)License, Assignment, and Contract InfoLicensure DataLicense Data ChangesPayroll Position Number UpdateWith Zero or Multiple Primary AssignmentsPosition/Employee HierarchySubstitutes
page 209 / 707

HRMS Communication Site
HRMS Help > System Configuration > Employment Status
User Roles: System AdministratorLast Updated: Nov 15, 2013 7:51 am
The Employment Status Code configuration form allows you to view both system and locally-definedemployment status codes. Locally-defined employment status codes can be added, edited, enabled, ordisabled.
To access the form, go to: HRMS Home > Setup > LEA Configuration > Employment Status.
The Employment Status form will display. (See below).
The last column, "Local", indicates if the Employment Status Code is a "System" or "Locally"defined code. A "-" in this column indicates a Locally-defined code. "System" codes cannot beedited.A total of 19 codes (39-49, 90-97) are available for Local Use.
Adding a Locally-Defined Employment Status Code
System Administrators may add new Employment Status Codes.
To add a new Employment Status Code:
1. Code: Enter the 2 digit Employment Status Code (must be in one of these ranges. 39-49, 90-97).2. Abbreviation: Enter up to 10 characters for an Abbreviation. (This is what is seen in the
Employment Status dropdown box throughout HRMS).3. Description: Enter up to 40 characters as a more detailed description.
page 210 / 707
HRMS Communication Site
4. Active: Select the Active IndicatorActive - Staff with this status are considered "Active"Inactive - Staff with this status are considered "Inactive"Leave - Staff with this status are considered "On Leave of Absence"Pending - Do not select this status. Reserved for Code 00
5. Type: Select the status code "Type". Options are:Select one of the following if the "Active" indicator is "Active"
ContractorPermanentRetireeSubstituteSubstitute RetireeSuspendedTemporary
Select "Leave of Absence" if "Active" indicator is "Leave"Select "Prior Employee" if "Active" indicator is "Inactive"
6. Enabled: Select "Yes"7. Click the "Add" button to add the new locally-defined Employment Status Code
Click the Cancel button to cancel.
Updating a Locally-Defined Employment Status Code
System Administrators may revise any of the values of Locally-defined Employment Status Codes otherthan the 2 digit code itself.
To edit a Locally-defined Employment Status Code:
1. Click on the appropriate Abbreviation link. (Once selected, the information for thisEmployment Status Code appears at the top of the screen in the "Code Info" section.)
2. Update/change selections for editable values. See 'Adding a Locally-Defined Employment StatusCode' above for field definitions.
3. Click Save. A confirmation message will display and you will be returned to the configurationpage.
Click the Cancel button to cancel your changes.
Disabling a Locally-Defined Leave Type
System Administrators may disable any Locally-defined Employment status code.To disable a Locally-defined Employment status code:
1. Click on the appropriate Abbreviation link. (Once selected, the information for this
page 211 / 707

HRMS Communication Site
Employment Status Code appears at the top of the screen in the "Code Info" section.)2. Set the Enabled indicator to "No". The system does not physically remove the record but
prevents it from display for selection in the HRMS system. If you ever need to resume using thisEmployment Status Code, you may edit the record and set its Enabled indicator back to “Yes”.
3. Click Save. A confirmation message will display and you will be returned to the configurationpage.
Click the Cancel button to cancel your changes.
page 212 / 707

HRMS Communication Site
HRMS Help > Employee Page > Other > Envelope Home Address
User Roles: Employee Hire, Staff Action, HR Staff Action Officer, System AdministratorLast Updated: Apr 3, 2013 7:16 am
The Envelope Site (Address) option in Employee Demographics allows authorized users to print anenvelope with the employee's Primary Site Address. Select, Other, then Envelope - Site.
A window then displays with envelope settings. Adjust the setting as needed and click on "Apply". Thenclick on "Print", and select the desired printer to print the envelope with the employee's Primary SiteAddress.
page 213 / 707

HRMS Communication Site
HRMS Help > Employee Page > Other > Envelope Site Address
User Roles: Employee Hire, Staff Action, HR Staff Action Officer, System AdministratorLast Updated: Apr 3, 2013 7:22 am
The Envelope Site (Address) option in Employee Demographics allows authorized users to print anenvelope with the employee's Primary Site Address. Select, Other, then Envelope - Site.
A window then displays with envelope settings. Adjust the setting as needed and click on "Apply". Thenclick on "Print", and select the desired printer to print the envelope with the employee's Primary SiteAddress.
page 214 / 707

HRMS Communication Site
HRMS Help > Reporting Tool > Expiring License Letter
User Roles: Any user with Reporting Tool installed on PCLast Updated: Oct 8, 2015 11:23 am
The Expiring License Letter informs an employee that their teaching license has an upcoming expirationdate. The Reporting Tool provides the option to print an Expiring License Letter for a specific employeeor to print Expiring License Letters for multiple employees at one time.
A standard template is provided but LEAs can also create a custom version of the letter.
Selection Criteria
Pick EmployeesLicense expiring onRenewal Cycle ending onPersonnel Manager Name & Title
Sample Letter
page 215 / 707

HRMS Communication Site
HRMS Help > Reporting Tool > Selection Criteria > Export Report Data
Last Updated: Feb 10, 2012 1:33 pm
This option is available on most Standard Reports. It allows you to open an Excel file with the raw reportdata, or to save the raw data as an XML or delimited file. With each option, the regular report will stilldisplay in the report panel.
For the Licensure and NCLB Licensed HQ Qualifications Reports, Assignment and License Area data islisted in separate rows. For these reports, contact HRMS Support if you need an Excel file that contains alldata in one row.
How To
Click the checkbox and select one of the following options from the drop-down list.
Open in ExcelSave XMLSave as Delimited File
See further instructions for each option below. Also, see Tips for Exporting Reports.
Open in Excel - This option opens an Excel spreadsheet with the raw report data. You may save the file ifdesired.
The Excel option can be VERY SLOW if a large number of rows is returned. For large reports(1000s of rows), you may want to use the Save XML option instead and then open the XML file inExcel.
Save XML - When you select this option, the system prompts for a file name and location. When you runthe report, an XML file is saved in the chosen location.
To open the XML file in Excel:
1. Open Excel.2. Select the 'Open File' option and browse to the file location.3. Select 'As an XML table' when asked how you would like to open the file.
page 216 / 707
HRMS Communication Site
The first few columns and rows of the Excel file will contain information about the XML data elements.You will probably want to delete these extra rows and columns so that the spreadsheet includes only theactual report data.
Save as Delimited File - When you select this option, the system prompts for a file name and location.When you run the report, the system prompts you to specify a data delimiter (defaults to comma) and atext file is saved in the chosen location.
To open the delimited file in Excel:
1. Open Excel.2. Select the 'Open File' option and browse to the file location.3. Change 'Files of type' to Text Files.4. Use the Import Text Wizard - Select 'Delimited' as the File Type, select the delimiter, and click
Finish.
page 217 / 707

HRMS Communication Site
HRMS Help > Reporting Tool > Contracts & Cover Letters > Fit Contracts on One Page
User Roles: Any user with Reporting Tool installed on PCLast Updated: Dec 12, 2011 6:49 am
In cases where the Contract Special Conditions are very long, the contract may print on two pages. In mostcases, you can fit the contract on one page by following these steps:
Step 1: Select the field in the contract.
Step 2: Click Font > Select Font, or click the 'A' icon, in the text editor toolbar.
Step 3: Select Font = Times New Roman, Font style = Regular, Size = 8 or 9. Click OK.
Step 4: Click Run and verify whether long contracts now fit on one page.
If the contract still will not fit on one page, try the following:
Delete the line that includes at the top of the contract. (This field only prints if you select "IncludeSite Name on Contract".)Delete one of the blank lines between the Special Conditions and the Signature line.DO NOT delete the blank line above the contract title. Doing so will cause the title to displayincorrectly.
Tips
After making the changes described above, you may:
Generate contracts (by clicking Run) without saving the changes as a custom template.Create a custom template that includes your changes. If you do this, you will need to recreate thetemplate if the system-provided version is revised in a subsequent Reporting Tool release.
page 218 / 707
HRMS Communication Site
If only a few employees have contracts over one page, you may want to use the Pick Employees option toselect only those employees when printing the reformatted contract.
page 219 / 707

HRMS Communication Site
page 220 / 707
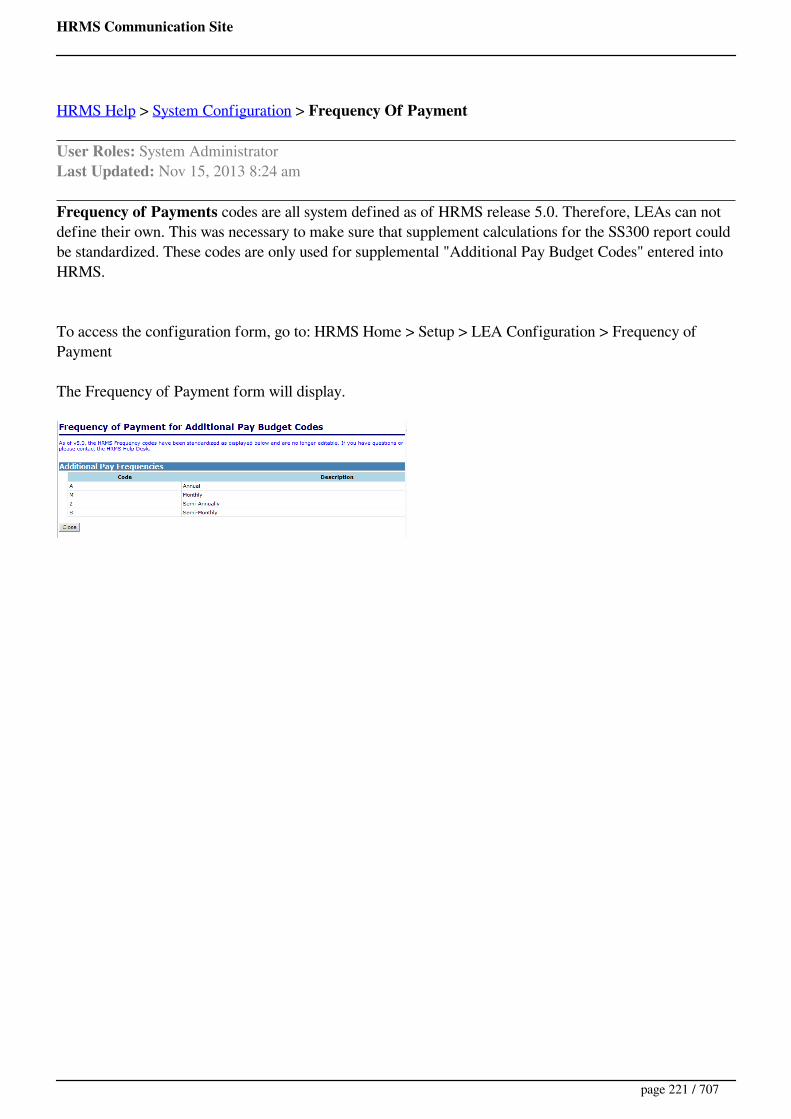
HRMS Communication Site
HRMS Help > System Configuration > Frequency Of Payment
User Roles: System AdministratorLast Updated: Nov 15, 2013 8:24 am
Frequency of Payments codes are all system defined as of HRMS release 5.0. Therefore, LEAs can notdefine their own. This was necessary to make sure that supplement calculations for the SS300 report couldbe standardized. These codes are only used for supplemental "Additional Pay Budget Codes" entered intoHRMS.
To access the configuration form, go to: HRMS Home > Setup > LEA Configuration > Frequency ofPayment
The Frequency of Payment form will display.
page 221 / 707

HRMS Communication Site
HRMS Help > Reporting Tool > Getting Started
User Roles: Any user with Reporting Tool installed on PCLast Updated: Mar 15, 2018 11:04 am
Topics:
Viewing HelpRunning a ReportReturning to the Selection PanelNavigating through a ReportPrinting a ReportClosing a ReportOpening Multiple Reports
Viewing Help
About tab - When you log into the Reporting Tool, this 'Getting Started' page displays in the About tab.From the About tab, click here to view the main Reporting Tool Help page directly in the Reporting Tool.
Help menu - After selecting a report to run in the Reporting Tool, a list of reports will display in the Helpsection of the menu ribbon. Click a report name to view help for that report in a browser window.
Selection Criteria panel - After selecting a report to run, click the 'i' icon next to an option in theSelection Criteria panel to view help for that option in a browser window.
Running a Report
Click the Standard Reports or Contracts & Letters button on the Reports tab.
Select the desired report.
page 222 / 707
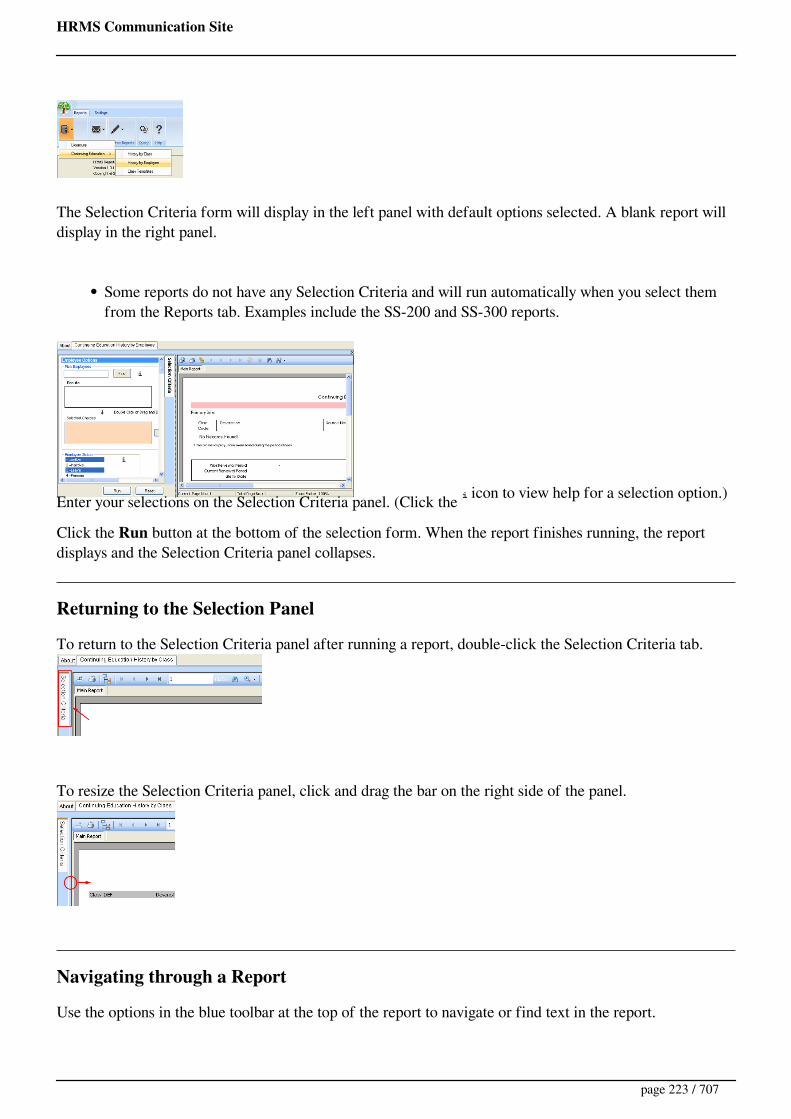
HRMS Communication Site
The Selection Criteria form will display in the left panel with default options selected. A blank report willdisplay in the right panel.
Some reports do not have any Selection Criteria and will run automatically when you select themfrom the Reports tab. Examples include the SS-200 and SS-300 reports.
Enter your selections on the Selection Criteria panel. (Click the icon to view help for a selection option.)
Click the Run button at the bottom of the selection form. When the report finishes running, the reportdisplays and the Selection Criteria panel collapses.
Returning to the Selection Panel
To return to the Selection Criteria panel after running a report, double-click the Selection Criteria tab.
To resize the Selection Criteria panel, click and drag the bar on the right side of the panel.
Navigating through a Report
Use the options in the blue toolbar at the top of the report to navigate or find text in the report.
page 223 / 707

HRMS Communication Site
Go to First Page Go to Previous Page Go to Next Page Go to Last PageGo to PageFind Text Zoom
The Group Tree option allows you to jump to specific locations in the report, based on the way the data isgrouped.
Printing a Report
The print option allows you to print one page, a range of pages, or all pages of a report.
Closing a Report
To close a report, click the X button at the top right of the report window.
Opening Multiple Reports
If you open multiple reports at once, each report will display in a separate tab. A yellow bar displays at thetop of the active tab.
page 224 / 707

HRMS Communication Site
HRMS Help > Go-To-Webinar Customer View
User Roles: Not ApplicableLast Updated: Jan 16, 2012 6:17 am
The 2 screen shots below represent the Go-To-Webinar Attendee interface. The Viewer Window is whereattendees see the presenter's screen. See below. This window can be re-sized by clicking on and draggingthe lower right corner of the window.
The Control Panel is where attendees can interact with organizers.
Grab Tab - Allows you to move this and Control Panel around your screenHide/Show Control Panel - Toggle which will Hide or Show the Control PanelFull Screen/Window Mode - Toggle which will cause Viewer Window to either be in Window or FullScreen Mode.Raise/Lower Hand - Allows you to interact with the Organizer when asked to raise or lower hand. Canalso indicate if you have question, etc...Control Panel - Allows for setup of Audio and asking of questions. Can be minimized by clicking on theHide/Show Control Panel. If you prefer to keep your Control Panel open during the Webinar, click Viewin the top menu and un-check Auto-Hide the Control Panel.Audio Setup -You can choose to join the audio through your telephone. Select Telephone and dial thenumber listed and enter the Access Code when prompted.Questions - Allows you to post a question to the Organizer.
page 225 / 707
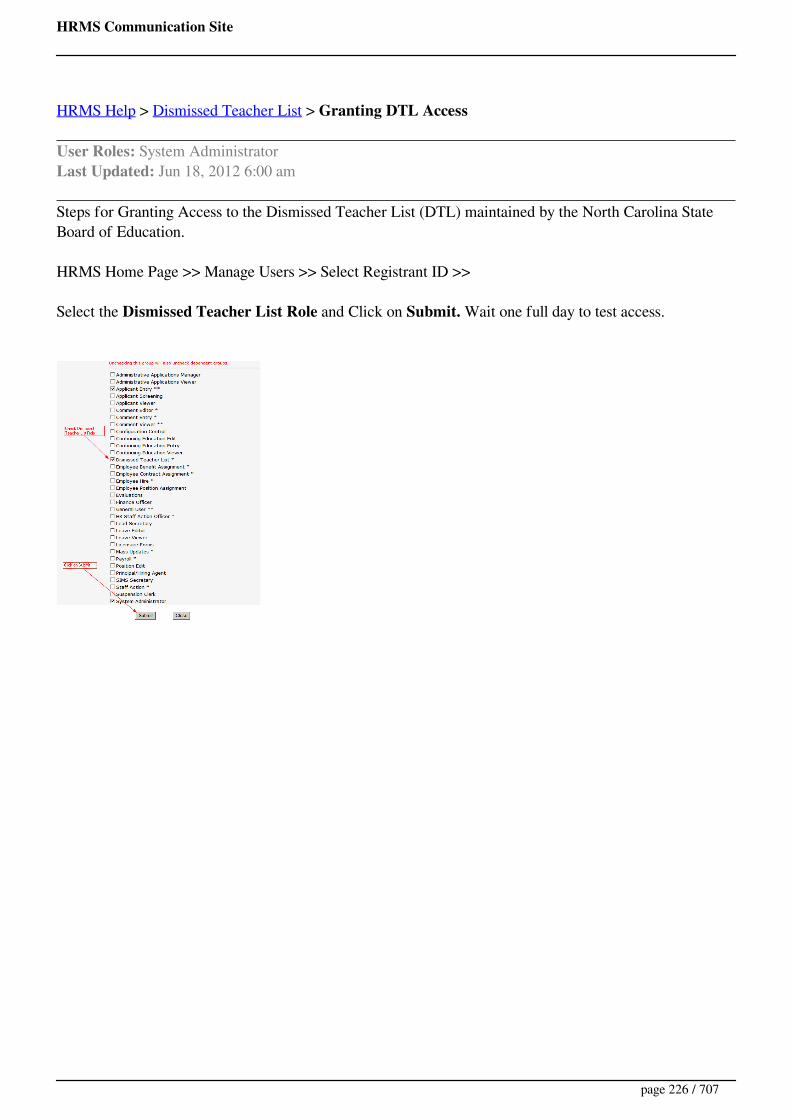
HRMS Communication Site
HRMS Help > Dismissed Teacher List > Granting DTL Access
User Roles: System AdministratorLast Updated: Jun 18, 2012 6:00 am
Steps for Granting Access to the Dismissed Teacher List (DTL) maintained by the North Carolina StateBoard of Education.
HRMS Home Page >> Manage Users >> Select Registrant ID >>
Select the Dismissed Teacher List Role and Click on Submit. Wait one full day to test access.
page 226 / 707
HRMS Communication Site
HRMS Help > Reporting Tool > Selection Criteria > Hide LEA Address
Last Updated: Dec 12, 2011 8:04 am
This option is available on various Letters. It is used to prevent the LEA address from printing in caseyou want to print letters on letterhead.
How To
Check the box to prevent the LEA address from printing on the letter.
page 227 / 707

HRMS Communication Site
News
LEA Release 6.5.3.6 and New Security Instructions (6/12/2018) NEW
WIKI Space changes. (3/23/2018)
Iran Divestment Act and Personnel Contracts RESCINDED (07/27/2017)Support page has been added to navigation. This page includes a link to Remedy and an instructional video on how to use that system. (7/26/2017)
Review of Credentials for Renewal/Non-Renewal Consideration - Recording and presentation (03/16/2017)
Transmitting Private Information Electronically: Best Practices Guide for CommunicatingPersonally Identifiable Information by Email, Fax or Other Electronic Means (02/14/2017)NC School Jobs powered by PeopleAdmin has its own WIKI (9/13/2016)
Recent Site Updates
LEA 6.5.3.6 Release NotesReporting Tool 12.0.13 Release Notes
page 228 / 707

HRMS Communication Site
HRMS Help > Reporting Tool > Selection Criteria > HQ - Non-HQ
Last Updated: Feb 10, 2012 1:56 pm
This option is used for the NCLB Licensed HQ Qualifications Reports. It is used to select HQ licenseareas only, Non-HQ license areas only, or all license areas.
page 229 / 707

HRMS Communication Site
HRMS Help > HRMS 6.3 Tips
Last Updated: Jan 30, 2013 6:19 am
Please review the following KB articles that were created due to the 6.3 release.
Issues that DPI is working to correct.
Issue 1: When Hiring from the "New Hire Nominees (Vacancy Permit)", you select "Re-Employment" and nothing happens. Note: The Re-Employment form uses the TOMCAT server inHRMS. If this is the first time you have used the TOMCAT server is this session of the browser,this problem occurs.Work Around 1: Go back to the HRMS Home Page and select Employees/Staff Action Search(This uses the TOMCAT server). Then try the Re-Employment from the New Hire Nominees(Vacancy Permit) screen again.
Tips
KB14204 - When Editing an Archived Separation, I get the error Effective Date of the SeparationMust Remain in the PastKB14002 - When I select an action of the Staff Action Console, nothing happens.
page 230 / 707
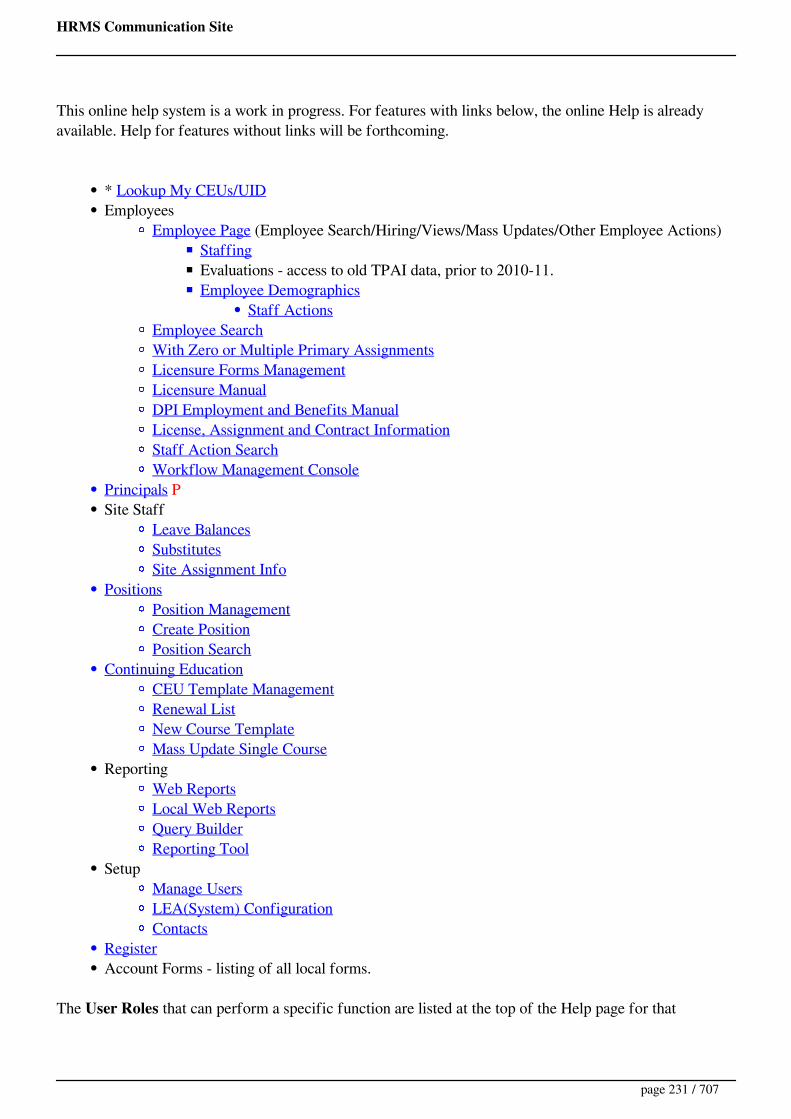
HRMS Communication Site
This online help system is a work in progress. For features with links below, the online Help is alreadyavailable. Help for features without links will be forthcoming.
* Lookup My CEUs/UIDEmployees
Employee Page (Employee Search/Hiring/Views/Mass Updates/Other Employee Actions)StaffingEvaluations - access to old TPAI data, prior to 2010-11.Employee Demographics
Staff ActionsEmployee SearchWith Zero or Multiple Primary AssignmentsLicensure Forms ManagementLicensure ManualDPI Employment and Benefits ManualLicense, Assignment and Contract InformationStaff Action SearchWorkflow Management Console
Principals PSite Staff
Leave BalancesSubstitutesSite Assignment Info
PositionsPosition ManagementCreate PositionPosition Search
Continuing EducationCEU Template ManagementRenewal ListNew Course TemplateMass Update Single Course
ReportingWeb ReportsLocal Web ReportsQuery BuilderReporting Tool
SetupManage UsersLEA(System) ConfigurationContacts
RegisterAccount Forms - listing of all local forms.
The User Roles that can perform a specific function are listed at the top of the Help page for that
page 231 / 707

HRMS Communication Site
function.More about User Roles
(*) Does not require login access to HRMS.
page 232 / 707
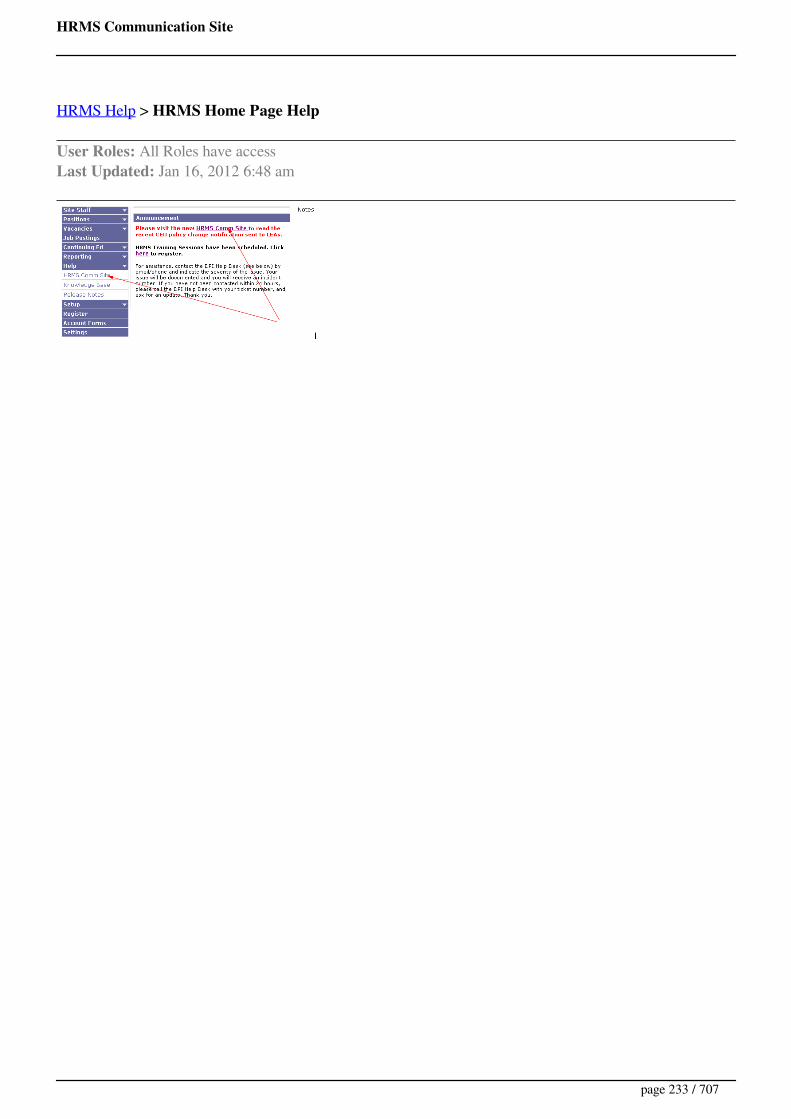
HRMS Communication Site
HRMS Help > HRMS Home Page Help
User Roles: All Roles have accessLast Updated: Jan 16, 2012 6:48 am
page 233 / 707

HRMS Communication Site
Printer friendlyThis HRMS Overview is a work in progress. Additional help and training materials will be forthcoming.
Table of ContentsHRMS LEA
Reports (State and Federal)
Reports (Other)
The Human Resource Management System (HRMS) is a comprehensive information system specificallydesigned to meet the human resource management needs of all public schools in North Carolina. The twointegrated HRMS modules include HRMS LEA and HRMS Reporting Tool. The current system providesthe following:
Management of employment and benefit information, as well as licensure information andlicensure forms developmentReporting tool for legislative and general reporting
HRMS LEA
The primary component of HRMS is the LEA module. It consists of numerous features including:
Maintaining employee recordsEmployee Demographics - The Employee Demographics page is the main page from whichto view/edit an employee's demographic, assignment, status and benefits, and otherinformation. Items below are accessed through the Employee Demographics page.
ConsolesPosition Management - provides several ways to search for a position. Afterselecting a position, you may act on it.Workflow Management - allows users to view complete history for PayrollBudget Code Requests
AssignmentAdd - used to add assignment records for employees in HRMS. You need tohave the position number before continuing on the Add Assignment form.You will have to enter a reason for the assignment such as New Hire, Re-employment or New Assignment for Current Employee
page 234 / 707

HRMS Communication Site
Transfer - The Transfer Assignment form is used to transfer an employeefrom one assignment to a new assignment.
Staff Actions - View or launch staff actions for a single employee. View or modifyother Staff Actions created in other HRMS modules.
Do Not Hire - The Staff Action of Do Not Hire is used to place a formeremployee on the Local Do Not Hire List. This is an internal list to the LEA.Status and Benefits
Tenure and LeaveTenure - although an individual can no longer work toward orgain Tenure this status code is still important in thegeneration of reports and tracking statuses of employees.Beginning Teacher StatusLeaveSickAnnualHolidayPersonal
Health and RetirementHealth InsuranceLongevityRetirement
Staff Action Console - The Staff Action Console allows authorized users tocreate, view, and update staff actions for an individual employee.
Employee DatesLeave or DisabilityPromotion, Demotion, or Salary ChangeRe-employmentSeparationSuspension
Staff Action Search - The Staff Action Search page allows authorized usersto search for staff actions across the LEA including the following types:Assignment Action; Leave and Disability; Employee Dates; Promotion,Demotion, or Salary Change; New Hire; Re-employment; Separation; andSuspension
OtherComments - allows you to enter employee commentsContract - The Contracts (Other) option in Employee Demographics allowsauthorized users to either create or edit an employee's contract.Correct Employee Dates - The new Correct Employee Dates form replacesthe 'Last Hire Date', 'Original Hire Date' and 'Longevity' forms.Envelope Home (Address)Envelope Site (Address)Job Action
page 235 / 707

HRMS Communication Site
License Data - Licensure data in HRMS is updated daily from the NC DPILicensure System.Licensure Forms - This module is used to quickly complete Licensure formsfor submission to DPI for processing by pre-populating the forms partiallywith information retrieved from their HRMS information. Forms can besaved for future reference.Local Forms - Local Forms can be used to custom HRMS to the businessprocesses performed at the LEA. This feature enhances the ability to storesupplemental data without having to wait for new fields/forms to beincluded in an HRMS release.Paraprofessional/NCLB Qualifications - This form is used to enter andmaintain NCLB qualification information for ParaprofessionalsRenewals/CEUs - The Continuing Education Employee History formdisplays an employee's Licensure Status, License Areas, CEU Totals byLicense Renewal Period, Class History, State Required renewal creditamounts, Remaining Row to show the difference between the StateRequired credit amounts and the Current credit amounts. When there is adeficiency, it will appear shaded in red.SSN - allows you to change SSN if entered incorrectlySummary - The "Summary" option in Employee Demographics allowsauthorized users to view or print a short summary of information associatedwith an employee.View Documents - The "View Documents" option in EmployeeDemographics directs authorized users to the document managementwebsite used by your system.
Position management (Central Office - Principals) - The Position Module in HRMS allows LEAsto create, edit and view positions. Authorized users can post open positions using theAnnouncements or Vacancy Permits feature.
Position informationBudget code managementSite LocationPosition descriptionFT/PTLicensed
Core Subject IdentifierClassified
NCLB Required StatusEvaluation Category
Assignment managementPosition Assigned with all supporting informationGrade and Step IdentificationBudget Code Assigned
page 236 / 707
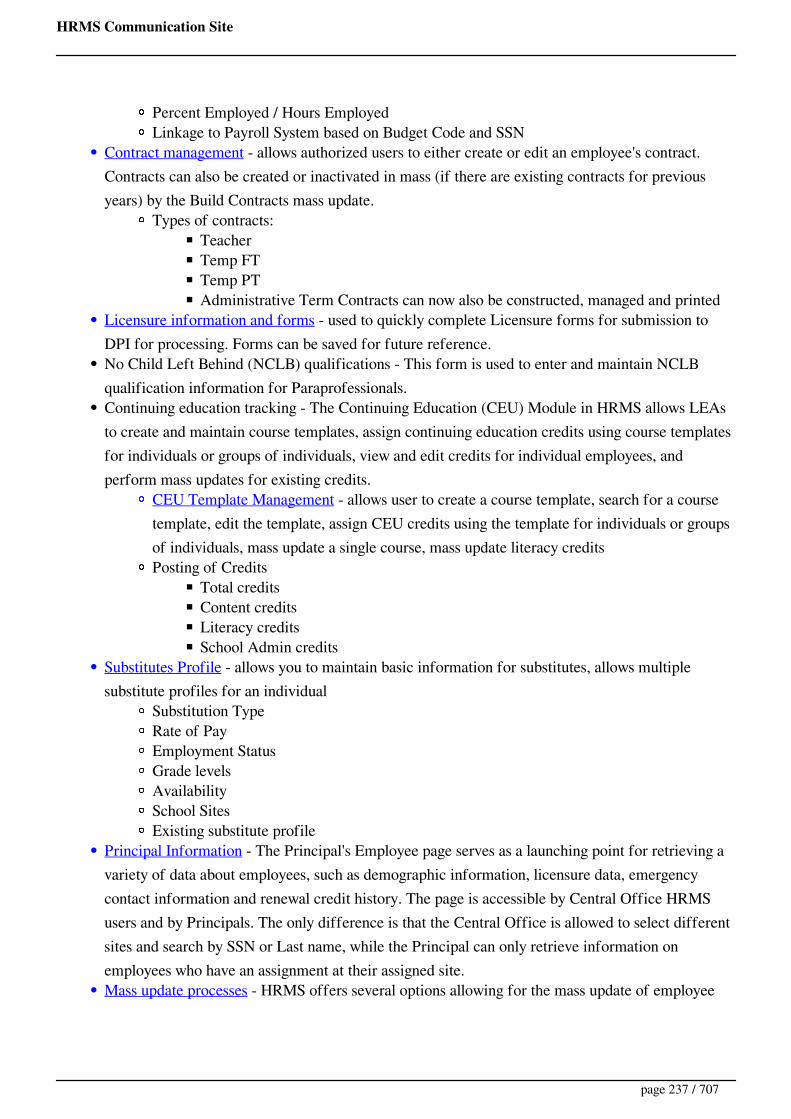
HRMS Communication Site
Percent Employed / Hours EmployedLinkage to Payroll System based on Budget Code and SSN
Contract management - allows authorized users to either create or edit an employee's contract.Contracts can also be created or inactivated in mass (if there are existing contracts for previousyears) by the Build Contracts mass update.
Types of contracts:TeacherTemp FTTemp PTAdministrative Term Contracts can now also be constructed, managed and printed
Licensure information and forms - used to quickly complete Licensure forms for submission toDPI for processing. Forms can be saved for future reference.No Child Left Behind (NCLB) qualifications - This form is used to enter and maintain NCLBqualification information for Paraprofessionals.Continuing education tracking - The Continuing Education (CEU) Module in HRMS allows LEAsto create and maintain course templates, assign continuing education credits using course templatesfor individuals or groups of individuals, view and edit credits for individual employees, andperform mass updates for existing credits.
CEU Template Management - allows user to create a course template, search for a coursetemplate, edit the template, assign CEU credits using the template for individuals or groupsof individuals, mass update a single course, mass update literacy creditsPosting of Credits
Total creditsContent creditsLiteracy creditsSchool Admin credits
Substitutes Profile - allows you to maintain basic information for substitutes, allows multiplesubstitute profiles for an individual
Substitution TypeRate of PayEmployment StatusGrade levelsAvailabilitySchool SitesExisting substitute profile
Principal Information - The Principal's Employee page serves as a launching point for retrieving avariety of data about employees, such as demographic information, licensure data, emergencycontact information and renewal credit history. The page is accessible by Central Office HRMSusers and by Principals. The only difference is that the Central Office is allowed to select differentsites and search by SSN or Last name, while the Principal can only retrieve information onemployees who have an assignment at their assigned site.Mass update processes - HRMS offers several options allowing for the mass update of employee
page 237 / 707

HRMS Communication Site
data.BT Status Code (Old ILT Status) - The functionality for the mass update of BT (BeginningTeacher) status is intended to provide an easy way to annually "bump" the BT status ofbeginning teachers.Tenure Status Code - No longer applicable (Tenure status has been frozen at 2013-14levels). The system allows for local Tenure Status Codes which most school systems areusing to track the fact that they were last hired after the change in the Tenure Status Law orif they are employed under the new Temporary Status provisions for contract purposes.Rebuild Position Budget Codes (v5.0) - The Position Budget Code Mass Update allows forthe sync of ALL payroll data with the HRMS data including Position Budget CodesAvailable (Includes deleting those no longer being used); Position Pay Table and Grade(from "base" budget Codes) and Assignment Pay Table, Grade and Step (from "base"budget codes).Substitute Rate - The functionality for the mass update of Substitute Rates provides an easyway to increase or decrease substitute rates on Substitute ProfilesBuild Contracts
Online help documentation and knowledge baseTraining & Support - provides training sessions delivered via GoToWebinar. All sessions aredesigned to assist LEAs in learning functionality of the Human Resource Management System.Also provides technical support for all HRMS functionality.
On-going trainingTraining on new releasesTechnical supportOn-site assistance
HRMS Reporting Suite (Apple Tree and LEA module)
The HRMS reporting tool benefits HR professionals in multiple areas by allowing them to meet the stateand federal reporting requirements. The reporting tool cut costs, improves productivity, establisheduniformity in reporting and provides added value to the LEAs. The reporting tool meets the changingneeds of state, local and federal governments. The Reporting Tool compiles reports as well as contractscreated within HRMS LEA.
Reports (State and Federal)
NCLB - The NCLB Licensed HQ Qualifications Reports list employee, assignment, and licenseinformation for either Teachers or All Professional EducatorsNew Hire - The New Hire Report is used to generate a report for the North Carolina Directory ofNew Hires. North Carolina State Law, G.S. 110-129.2 and the Personal Responsibility and WorkOpportunity Reconciliation Act of 1996, requires all employers to report newly hired and re-hired
page 238 / 707

HRMS Communication Site
employees to a state directory within 20 days of their start date.Paraprofessional - The Paraprofessional Reports list employees with NCLB qualification data inHRMSProfessional Development - The Professional Development Report assists LEAs in completingtheir annual No Child Left Behind (NCLB) reporting and Title I and Title II auditsPublic Records - The Public Records reports are a series of 3 reports designed to display theinformation required in GS_115C-320.SS-200 - The SS-200 Report is an annual report used to generate the state required Public SchoolSystem Full-Time Personnel Report (SS-200). The race/gender and funding source data of full-time personnel compiled on this report is used by DPI to provide demographic information aboutpublic school employees to various private and public organizations.SS-300 - The SS-300 Report is an annual report used to generate the state-required Local SalarySupplement Report (SS-300). This report is used to determine how many positions an LEA has,and how many of those positions receive local salary supplements.EEO-5 - The EEO-5 (Elementary-Secondary Staff Information) Report is a bi-annual federalreport administered by the Equal Employment Opportunity Commission. The race/ethnicity andgender data compiled on this report is used by the EEOC to determine demographic informationabout public school employees across the country.Teacher Turnover - The Teacher Turnover report includes teachers leaving with the reason forleaving and teachers not leaving during a specified report period. The turnover informationproduced by this report is based on HRMS data and therefore might not coincide with the numbersthat are being reported to DPI, which are based on UERS/Payroll data.Beginning Teacher Turnover - The Beginning Teacher Reports include: Beginning TeachersLeaving with the reason for leaving – Lists beginning teachers who left the LEA during a specifiedreport period. Beginning Teachers Not Leaving – Lists beginning teachers still employed by theLEA during a specified report period. Summary – Lists total number of beginning teachersemployed by the LEA, total number of beginning teachers leaving, and counts of beginningteachers leaving for specific reasons during a specified report period.Board Report
Board Report - intended for open board meetings, and includes 'Public Record' friendlydata. Items in Report: Transfers and Assignment Changes, Separations, Leave of Absences(Educational and Non-Educational), New Hires and Re-Employment.Closed Session Board Report - intended for closed sessions, and contains confidential 'non-Public Record' information. Items in Report: Detailed Leave of Absences. Data is groupedby Licensed and Non-Licensed personnel.
Reports (Other)
Licensure - The Licensure Report displays employee, assignment, license, and license areainformation for selected employees.Continuing Education
Continuing Education Class Template - The Continuing Education Class Templates Reportis used to generate a list of all class templates.Continuing Education History by Class - The Continuing Education History by ClassReport is used to generate a list, by continuing education class, of all employees that have
page 239 / 707
HRMS Communication Site
completed the class, along with the number of CEU credits received for the class.Continuing Education History by Employee - The Continuing Education History byEmployee Report is used to generate a list, by employee, of all continuing education classesthat an employee has completed, along with the number of CEU credits received for eachof those courses. The report also displays the employee’s total Renewal Credits receivedduring the prior renewal cycle, current renewal cycle, and life-to-date, plus individualizedtotals for each of the subcategory requirements.
Employee Listing - The Employee Listing Report displays basic employee and assignmentinformation.Personnel Directory - The Personnel Directory report displays employee assignment informationand home addresses and phone numbers.Substitute Listing - The Substitute Listing report allows users to request a list of substitutes basedon information contained in the substitute profile.Standard Web Reports - HRMS Web Reports include simple LEA reports that do not requireextensive calculations or formatting. These reports were developed by HRMS team members.Some reports include contributions from LEA staff.Query Builder - The Query Builder (QB) module in HRMS, provides users the ability to developtheir own “queries” of HRMS data. The results of these queries can be exported to other softwaresuch as Excel for further manipulation and reporting or the queries can be saved as Local Reportsto be executed as needed. The training document for Query Builder is not available online. Pleasecall the DPI Help Desk (919) 807-4357 and ask for HRMS Support if you want the document.Local Web Reports - Web reports developed by LEA staff or HRMS staff that are specific to thatLEA but not included in HRMS standard web reports.
page 240 / 707
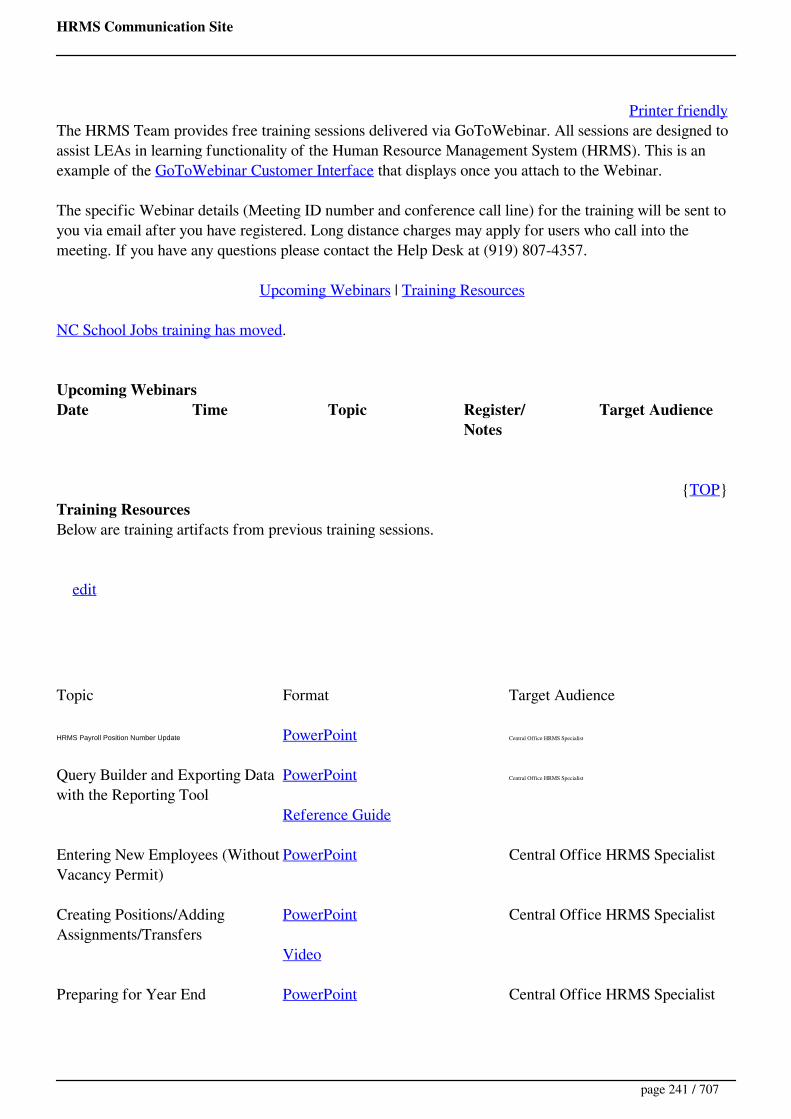
HRMS Communication Site
Printer friendlyThe HRMS Team provides free training sessions delivered via GoToWebinar. All sessions are designed toassist LEAs in learning functionality of the Human Resource Management System (HRMS). This is anexample of the GoToWebinar Customer Interface that displays once you attach to the Webinar.
The specific Webinar details (Meeting ID number and conference call line) for the training will be sent toyou via email after you have registered. Long distance charges may apply for users who call into themeeting. If you have any questions please contact the Help Desk at (919) 807-4357.
Upcoming Webinars | Training Resources
NC School Jobs training has moved.
Upcoming WebinarsDate Time Topic Register/
NotesTarget Audience
{TOP}Training ResourcesBelow are training artifacts from previous training sessions.
edit
Topic Format Target Audience
HRMS Payroll Position Number Update PowerPoint Central Office HRMS Specialist
Query Builder and Exporting Datawith the Reporting Tool
PowerPoint
Reference Guide
Central Office HRMS Specialist
Entering New Employees (WithoutVacancy Permit)
PowerPoint Central Office HRMS Specialist
Creating Positions/AddingAssignments/Transfers
PowerPoint
Video
Central Office HRMS Specialist
Preparing for Year End PowerPoint Central Office HRMS Specialist
page 241 / 707
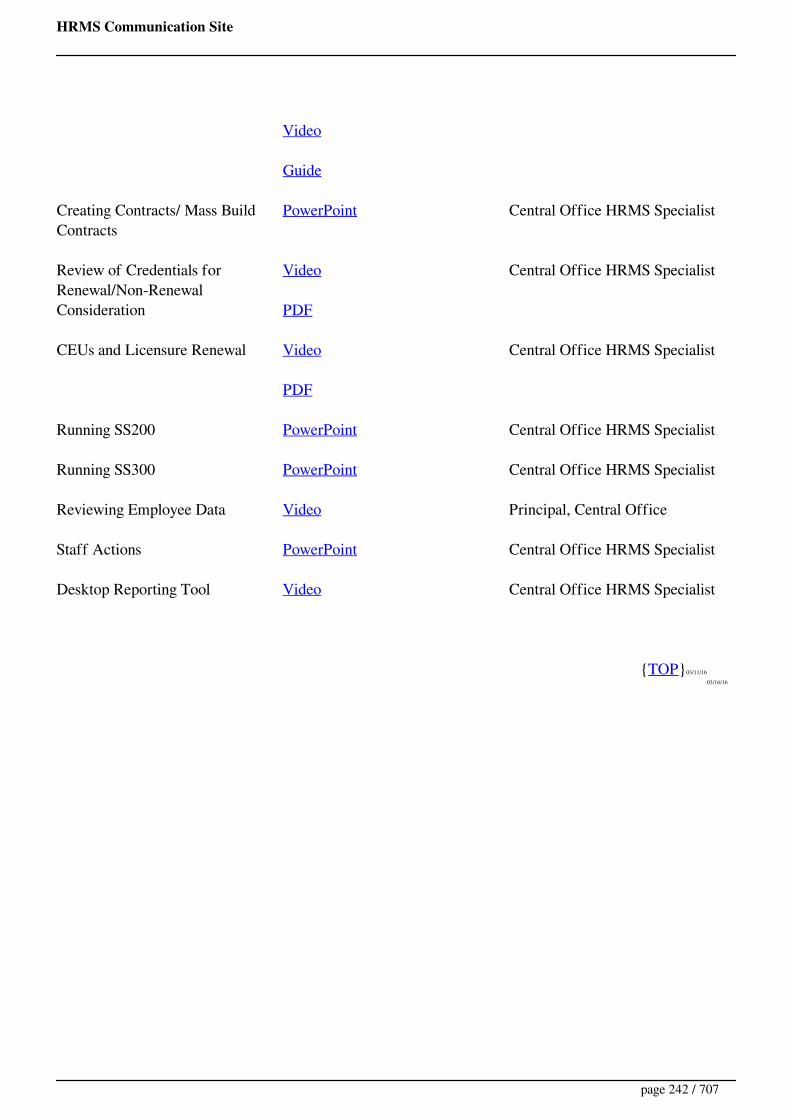
HRMS Communication Site
Video
Guide
Creating Contracts/ Mass BuildContracts
PowerPoint Central Office HRMS Specialist
Review of Credentials forRenewal/Non-RenewalConsideration
Video
Central Office HRMS Specialist
CEUs and Licensure Renewal Video
Central Office HRMS Specialist
Running SS200 PowerPoint Central Office HRMS Specialist
Running SS300 PowerPoint Central Office HRMS Specialist
Reviewing Employee Data Video Principal, Central Office
Staff Actions PowerPoint Central Office HRMS Specialist
Desktop Reporting Tool Video Central Office HRMS Specialist
{TOP}03/11/16
03/16/16
page 242 / 707
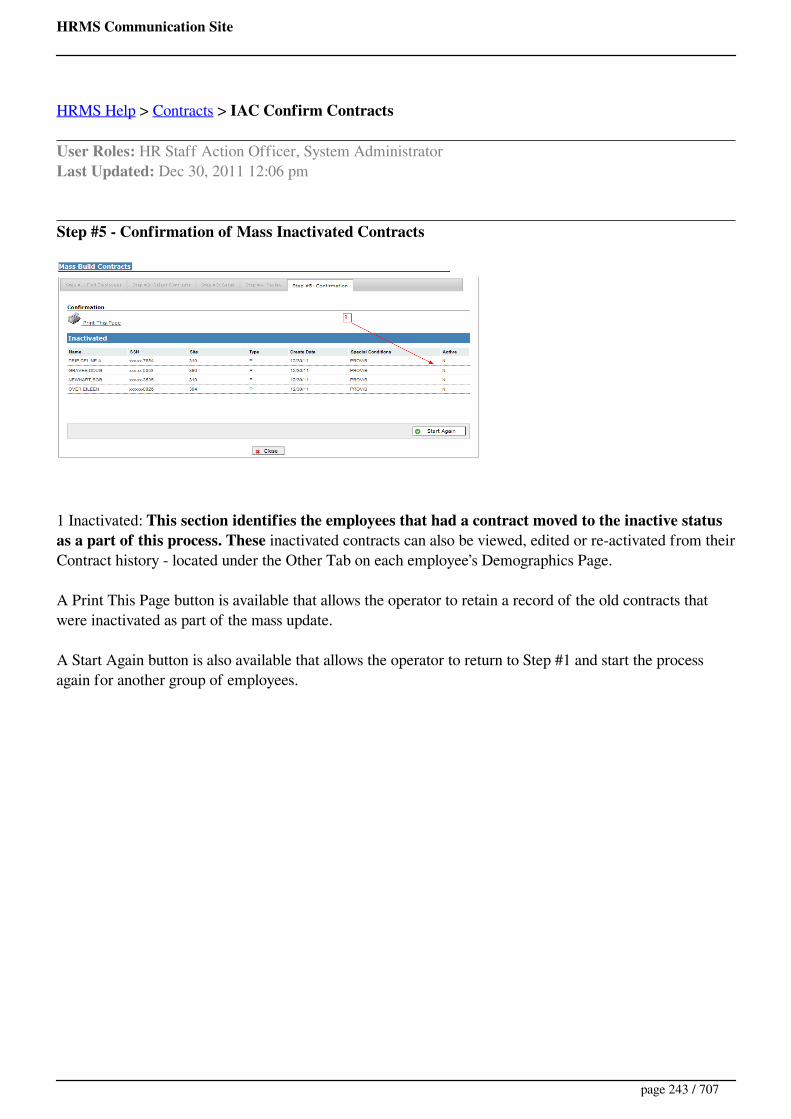
HRMS Communication Site
HRMS Help > Contracts > IAC Confirm Contracts
User Roles: HR Staff Action Officer, System AdministratorLast Updated: Dec 30, 2011 12:06 pm
Step #5 - Confirmation of Mass Inactivated Contracts
1 Inactivated: This section identifies the employees that had a contract moved to the inactive statusas a part of this process. These inactivated contracts can also be viewed, edited or re-activated from theirContract history - located under the Other Tab on each employee’s Demographics Page.
A Print This Page button is available that allows the operator to retain a record of the old contracts thatwere inactivated as part of the mass update.
A Start Again button is also available that allows the operator to return to Step #1 and start the processagain for another group of employees.
page 243 / 707

HRMS Communication Site
HRMS Help > Contracts > IAC Review Contracts
User Roles: HR Staff Action Officer, System AdministratorLast Updated: Dec 30, 2011 11:51 am
Step #4 - Final Review of Mass Inactivate Contracts
1 Selected List: This section lists the individuals that will have their contract set to Inactive, within theirHRMS records, once the Okay button is clicked.
2 Values to Set: This section indicates that the contracts for the individuals selected will been set toInactive.
3 Edit: If the operator needs to refine or change the their selections in any way, they may click the Editbutton and be returned to Step #3, where they will have the opportunity to make any needed adjustments.
4 Okay: If the operator is satisfied that the correct employees have been identified and their selections arecorrect, then they should click the Okay button. The operator will then be taken to Step #5.
page 244 / 707
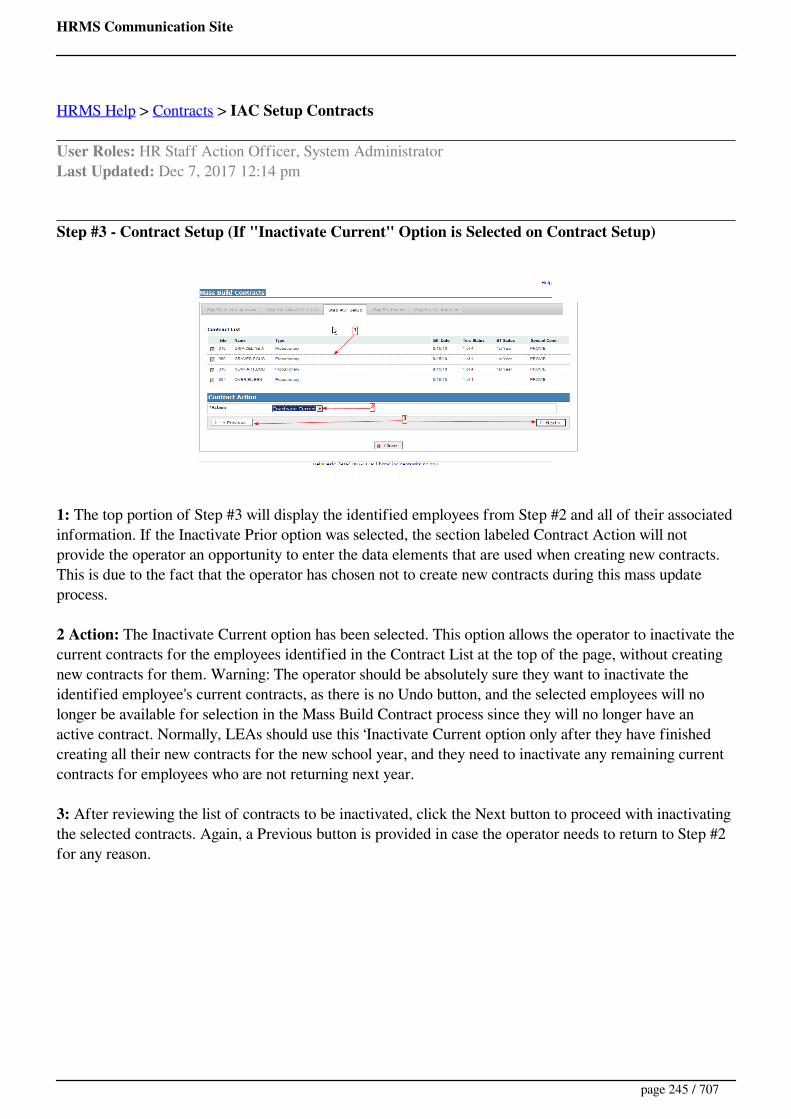
HRMS Communication Site
HRMS Help > Contracts > IAC Setup Contracts
User Roles: HR Staff Action Officer, System AdministratorLast Updated: Dec 7, 2017 12:14 pm
Step #3 - Contract Setup (If "Inactivate Current" Option is Selected on Contract Setup)
1: The top portion of Step #3 will display the identified employees from Step #2 and all of their associatedinformation. If the Inactivate Prior option was selected, the section labeled Contract Action will notprovide the operator an opportunity to enter the data elements that are used when creating new contracts.This is due to the fact that the operator has chosen not to create new contracts during this mass updateprocess.
2 Action: The Inactivate Current option has been selected. This option allows the operator to inactivate thecurrent contracts for the employees identified in the Contract List at the top of the page, without creatingnew contracts for them. Warning: The operator should be absolutely sure they want to inactivate theidentified employee's current contracts, as there is no Undo button, and the selected employees will nolonger be available for selection in the Mass Build Contract process since they will no longer have anactive contract. Normally, LEAs should use this ‘Inactivate Current option only after they have finishedcreating all their new contracts for the new school year, and they need to inactivate any remaining currentcontracts for employees who are not returning next year.
3: After reviewing the list of contracts to be inactivated, click the Next button to proceed with inactivatingthe selected contracts. Again, a Previous button is provided in case the operator needs to return to Step #2for any reason.
page 245 / 707

HRMS Communication Site
HRMS Help > Positions > Import Payroll Data
User Roles: Position Editor, System AdministratorLast Updated: Nov 3, 2011 11:09 am
HRMS provides several ways to update a position's Pay Table, Grade, and Budget Codes from Payrolldata:
Edit Position Form - Click the Import link next to a current assignment in the AssignmentInformation section.Run the Position Budget Codes Mass Update and select 'All' or 'Base' for 'Budget Codes Types'.Edit Assignment Form - Click the 'Sync Budget Codes to Position' button.Archive Assignment Process - Position data is updated from Payroll automatically when anassignment is archived (the assignment end date passes).
The following conditions must be met for the update to be performed:
The HRMS Position Number must be saved in the Payroll Assignment Budget Code.The position Allow Update field must be set to 'Yes'.
page 246 / 707

HRMS Communication Site
HRMS Help > Reporting Tool > Selection Criteria > Include Only Core Academic Areas
Last Updated: Feb 10, 2012 1:54 pm
This option is used for the NCLB Licensed HQ Qualifications Reports. It is used to select onlyassignments to Core Academic Subject Areas.
How To
By default, all assignments will be included. Check the box to include only assignments to Core AcademicSubject Areas.
page 247 / 707

HRMS Communication Site
HRMS Help > Reporting Tool > Selection Criteria > Include Protected Addresses
Last Updated: Jul 9, 2012 2:09 pm
This option is available on the Personnel Directory Report. It is used to indicate whether addressesdesignated as protected under the NC Address Confidentiality Program (on the EmployeeDemographics page) should be included on the report.
How To
Check/uncheck the box to include/exclude protected addresses on the report. (The default is exclude.)
If included, protected addresses are designated with a 'Y' in the 'Protected Address' column on the report.
page 248 / 707

HRMS Communication Site
HRMS Help > Reporting Tool > Selection Criteria > Include Signature Line
Last Updated: Jul 9, 2012 1:38 pm
This option is available on the Continuing Education History by Employee Report. It is used to print asignature line after each employee's renewal totals
How To
Check the box to include a signature line after each employee's renewal totals.
You must enter a Name to display under the Signature Line. Title is optional.
Example
Displays on report as:
page 249 / 707

HRMS Communication Site
HRMS Help > Reporting Tool > Selection Criteria > Include Site Name on Contract
Last Updated: Dec 12, 2011 8:06 am
This option is used for Contracts. It is used to print the Site Name for the employee's primary assignmentat the top of the Contract.
Note: It is recommended that you NOT SELECT this option since an employee may be reassigned to adifferent Site during the course of his/her contract. By default, Site Name is included on the ContractCover Letters, so you can use the Site Name on the Cover Letters to assist with contract distribution.
How To
Check the box to print the Site Name on the selected contracts.
page 250 / 707
HRMS Communication Site
HRMS Help > Reporting Tool > Selection Criteria > Include Telephone Numbers
Last Updated: Jul 9, 2012 1:57 pm
This option is available on the Personnel Directory Report. It is used to indicate whether home telephonenumbers should be included on the report.
How To
Uncheck/check the box to exclude/include home telephone numbers on the report.
page 251 / 707
HRMS Communication Site
HRMS Help > Reporting Tool > Selection Criteria > Include Unlisted Home Phone Numbers
Last Updated: Jul 9, 2012 2:09 pm
This option is available on the Personnel Directory Report. It is used to indicate whether home telephonenumbers designated as unlisted (on the Employee Demographics page) should be included on the report.
How To
Uncheck/check the box to exclude/include unlisted home telephone numbers on the report.
If included, unlisted phone numbers are designated with a 'Y' in the 'Unlisted' column on the report.
page 252 / 707
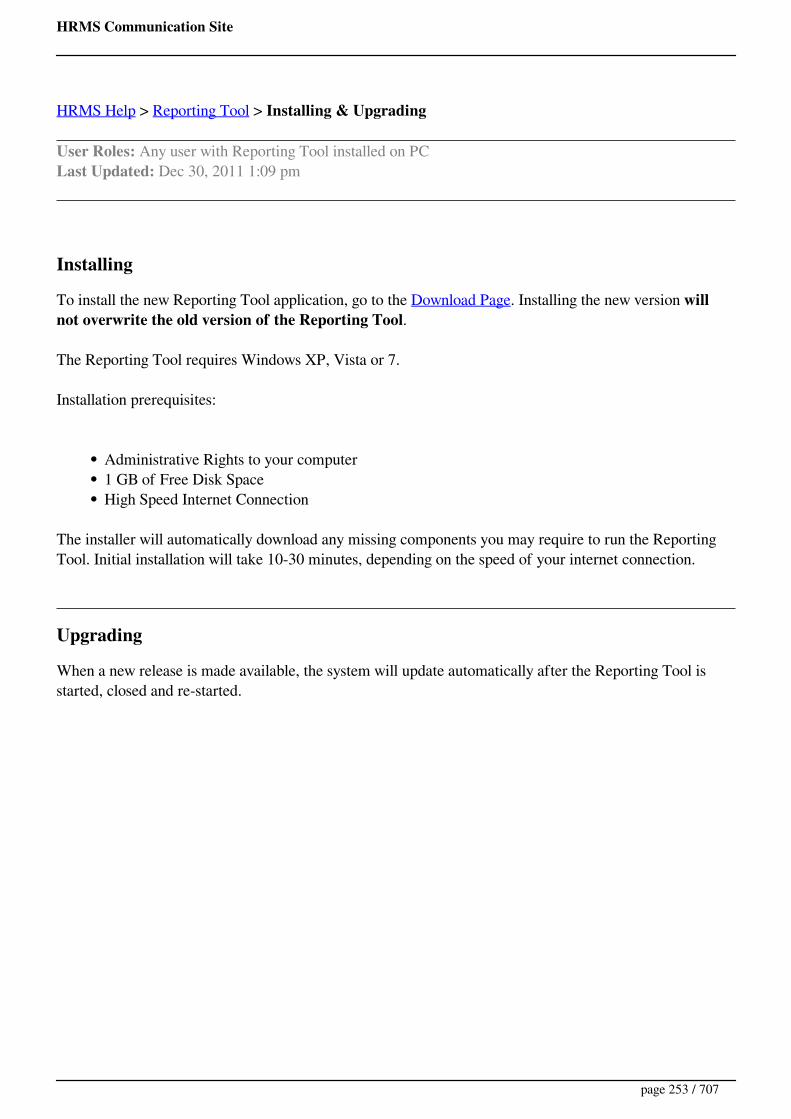
HRMS Communication Site
HRMS Help > Reporting Tool > Installing & Upgrading
User Roles: Any user with Reporting Tool installed on PCLast Updated: Dec 30, 2011 1:09 pm
Installing
To install the new Reporting Tool application, go to the Download Page. Installing the new version willnot overwrite the old version of the Reporting Tool.
The Reporting Tool requires Windows XP, Vista or 7.
Installation prerequisites:
Administrative Rights to your computer1 GB of Free Disk SpaceHigh Speed Internet Connection
The installer will automatically download any missing components you may require to run the ReportingTool. Initial installation will take 10-30 minutes, depending on the speed of your internet connection.
Upgrading
When a new release is made available, the system will update automatically after the Reporting Tool isstarted, closed and re-started.
page 253 / 707
HRMS Communication Site
NOTE: This was rescinded as a requirement 7/28/17 per this memo.
We have recently received some questions concerning the applicable nature of the Iran Divestment Act(S.L. 2015-118; SB455) to LEA staff contracts. I have read the “Iran Divestment Act FAQ” from theUNC School of Government and contacted the staff there. Based on the wording of the statute, theybelieve that there is no exemption for personnel contracts. While the requirements to be on the list likelypreclude any staff you will be contracting (there is a $20 million threshold of investment or creditofferings), it was still pointed out that there is no exemption.
Based on the guidance offered, we suggest you may want to include a statement in your contracts similar tothe following: “By acceptance of this contract, I affirm I am not listed on the Final Divestment List createdby the State Treasurer pursuant to N.C.G.S. 143C-6A-4, Iran Divestment Act Certification."This is HRMS team guidance and not offered or representative of NCDPI or the State Board of Education.As with all contract verbiage, we recommend that your local Board attorneys review any changes you maketo your contracts.
Remember, you can edit and create custom templates in the Reporting Tool. Instructions on creatingcustom contracts and letters.
page 254 / 707

HRMS Communication Site
HRMS Help > System Configuration > Job Actions
User Roles: System AdministratorLast Updated: Dec 20, 2013 6:30 am
LEAs can setup locally defined Job Actions for selection from the "Other" drop down on the EmployeeDemographic page. This option is rarely used in HRMS, due to the fact that once you enter Job Actionsfor an employee, there is no option in HRMS that allows you to view the Job Actions that were entered.
To get a listing of Job Actions entered for employees, you will need to contact HRMS support to have aLocal Web report created using the "Staff Action" table. (The "Staff Action" table has existed since thebeginning of HRMS web, collecting both "System" and Locally Defined job/staff actions. Please note thatwith the advent of the Staff Action Console, many "System" staff actions are now recorded in differenttables and available for viewing on the Staff Action Console. Eventually all Job/Staff Actions will move tothe Staff Action Console and the current "Staff Action" table will become obsolete.)
Please note that when viewing all the Job Actions on the configuration screen, you will see many "System"codes. These "System" codes are not available from the Employee Page/Other/Job Action option sincethese are automatically recorded by the system while processing staff. Please note that most of these"System" job actions are already obsolete with the advent of the HRMS Staff Action Console.
In a future release of HRMS, many of these "System" codes will be removed from the configurationscreen, since they are no longer recorded by this method, but through the Staff Action Console.
To access the configuration form, go to: HRMS Home > Setup > LEA Configuration > Job Actions
The Job Actions form will display.
To add a Job Action, complete the applicable fields at the top of the form and click Add.
page 255 / 707
HRMS Communication Site
Code is a unique name up to 3 characters long.
To edit a Job Action, click the Job Action Code link in the second column, update the description field asneeded, and click Update.
To remove a Job Action, check the remove box beside the Job Action to be deleted, then click the remove button. (Note that this is not a good idea if this Job Action was used in the past. If there will JobActions recorded with this code with no associated description.)
page 256 / 707
HRMS Communication Site
Knowledge Base > KB10000 - I am new to HRMS. What Help should I review first?
Contributor: Steve AndrewLast Updated: Oct 4, 2016 6:45 am
Below are links to help you get started using HRMS. Please review these in order to get a betterunderstanding of the various modules of the HRMS System.
About HRMS
HRMS Communication Website - VideoAbout HRMSRegister for upcoming Training
System Access
Registering New UsersManaging Existing Users (Updating Roles...etc...)
Employment Applications that are transferred to your HRMS from DPI
School Jobs Application SystemApplicants
Video - Searching ApplicationsVideo - HRMS Managing Applications
Entering Employees Into HRMS
Employee PageVideo - Entering New Employees (Without Vacancy Permit)
Staffing OptionsNew Hire Without Vacancy PermitNew Hire EmployeeSubstitute ProfileVideo - Payroll Position Number UpdateContracts
Video - Creating Contracts
Positions and Assignments
Positions
page 257 / 707
HRMS Communication Site
Video - Creating Positions, Adding Assignments, and Transfers
Separating Employees
Video - HRMS 6.3 Highlights (Separations)
Vacancies
AnnouncementsVacancy Permits
Video - Posting Announcements and VacanciesVideo - Vacancy Permit SetupVideo - Vacancy Permit - Central OfficeVideo - Hiring Using The Vacancy Permit - Principal
Principal's Page
Video - Reviewing Employee Data - Principal
Continuing Education Units
Continuing Education Video - Entering and Maintaining CEUsVideo - CEUs and Licensure Renewal
Reporting
Desktop Reporting ToolVideo - Desktop Reporting ToolKB10405 - How can I export data from HRMS Reporting Tool 2012?Running the SS200 ReportRunning the SS300 REport
HRMS Standard Web ReportsVideo - HRMS Web Reports
Review of all Knowledge Base Articles
Knowledge Base Articles
page 258 / 707

HRMS Communication Site
Knowledge Base > KB10100 - HRMS Local Forms
Contributor: Rob PinionLast Updated: Jan 30, 2014 10:30 am
HRMS Local Forms
In Release 3.5, HRMS included a new feature called Local Forms. You can use Local Forms to custom tailor HRMS to the business processes performed at your LEA. This feature greatly enhances your ability to store the data you need without having to wait for new fields to be included in an HRMS release.
Without any programming, the HRMS System Administrator creates as many Local Forms as needed. The form can be associated with employees, applicants, candidates for vacancies, positions, etc. It takes about 2 minutes to create a local form, and you specify exactly where in HRMS it should be available, such as the
Search Applicant screen, or the Employee Demographic screen. Some forms can even appear in multiple places.
For example, you might need to make a record of each time a bus driver completes a random drug test.
Using the Local Forms feature, you could easily create a local form called, for example, "Drug Test" and specify which information you want to collect, such as the date of the test, the testing company, the type of test, and the results. You then specify that the form should be available from the Staff Action page, and you
write brief instructions on how the form should be used. When an employee takes a drug test, an HRMS user with access to the Staff Action page can fill out a "Drug Test" form online. The information entered is stored along with the rest of the employee's information and can be easily accessed.
In another example, you might ask each prospective teacher to sign a commitment document when they accept a job. First, you create a Local Form called "Commitment" and indicate that it should be available for each Vacancy Candidate. The principal or hiring agent has the candidate sign the commitment document
and then faxes it to the central office where it is scanned and attached to the local form. Anyone with proper access can now can view and print the scanned form because it is stored online.
Other types of forms you might want to create include surveys, consent forms, benefits enrollment and change requests, demographic information updates, attendance of a continuing education course, etc.
HRMS 3.5 shipped ship with a local form called "Photo" that lets you store an employee photo. A companion web report lets you easily print a staff directory for each site at your LEA, with the photos sorted by name or position description. This local form will serve as a sample for you as you create new local forms.
HRMS 3.5 also included a highly-customizable web report that will allow you to extract all the data stored in local forms by the name of the form and a date range.
Frequently Asked Questions about Local Forms
How many Local Forms can I create?
As many as you like. There is no limit in the system.
We want to create a form for expense reimbursement. Currently, we use an Excel spreadsheet and send it by e-mail. How can we do this with Local Forms?
You can continue to use the spreadsheet, if you wish, but just attach it to a Local Form. If there is no math involved, you might want to replace your spreadsheet with just a single Local Form.
How many fields are on each Local Form?
Up to 9, plus one field for attachments.
Can the same Local Form be submitted multiple times, such as an expense reimbursement request?
Yes. The most recently submitted form shows up at the top of the list of completed forms.
What happens when I no longer want a form available?
Edit the Local Form to set Active = No. The form will no longer be available to end-users, but completed forms can continue to be displayed.
page 259 / 707
HRMS Communication Site
Can the user edit a the data submitted using a Local Form?
Yes, so long as it is not frozen. The end user or administrator can freeze a form submission, but only the system administrator can unfreeze it.
Can I get information from a set of completed Local Forms, such as survey results, into Excel?
Yes. The Local Forms web report will allow you to export the data into Excel or to save it as XML. XML data can be imported to Access and other databases. You can also use the Query Tool to extract data to Excel.
Can I delete completed Local Forms?
You can delete them individually. (Note: administrators should not attempt to delete completed Local Forms with a SQL query without contacting HRMS Support because there may be associated attachments, which cannot be deleted with SQL, and attempting to do so may result in orphaned files.)
What do I do if I need to attach more than one file on a form?
You can't attach more than one file to a single form, but you can create more than one form, example Benefits Part 1 and Benefits Part 2, and so forth, and attach one file to each form. When you set up the forms, be sure to include in the usage instructions that the user should submit multiple forms.
What do I do if I need more than 9 text fields for my form?
Create more than one form and instruct the user which forms must be submitted to complete the process.
Where are the attachments stored?
They are stored in a Domino database called "leaattach.nsf". They are keyed to the DB2 tables by a unique ID.
Is there a limit on the attachment size or type?
No. This is to allow maximum flexibility in your storing data in HRMS. However, for the employee photo directory, you should greatly limit the size of the photos you attach or the photo directly will be very slow to load. You should also give user instructions on what types of files they can attach to local forms and how
to reduce the size of scanned documents while retaining readability.
What happens when the file holding the attachments gets too big?
HRMS Support has a quick process by which you can begin using a new file to store attachments. We expect this to happen very infrequently, less than once per year for large LEAs, but it depends on how many attachments and of what size are used. You might also want to use a different Domino database if you wish to
perform selective backups.
What kind of fields are in Local Form's?
All fields are text fields, though you can store any kind of data in the fields, such as dates or numbers. If you export the data to Excel, you might need to change the format of the cells for Excel to sort the data properly.
I have a Word document that I would like user to fill out and attach to a form. Where do I put it?
Store the Word Document somewhere on your network, your system's web server, or an external web server. In the usage instructions, put an HTML link to a form stored online, and instruct the user to fill out the form, save it, and attach it to the Local Form being submitted. An example of an HTML link is:
Expense Report
Who can create new Local Forms?
System administrators create and manage Local Forms using the Configuration settings.
Who can submit data using a Local Forms?
Anyone with proper access to the HRMS subsystem to which the administrator indicates the form belongs. For example, the Photo form that is included with version 3.5 as a sample is available in the New Hire System, and the Staff Action screen. Other forms that you create may be limited to the Staff Action screen or
some other subsystem.
What if I attach the wrong file?
page 260 / 707

HRMS Communication Site
You can easily reattach a different file so long as you did not freeze the record.
What if I make a mistake when I am submitting a form?
You can correct your mistake, or simply delete the form and submit it again, so long as you did not freeze the record.
page 261 / 707

HRMS Communication Site
Knowledge Base > KB10101 - Change SSN Error
Contributor: Steve AndrewLast Updated: Apr 4, 2014 7:51 am
If you discover that someone's SSN is incorrect in HRMS, DO NOT enter them into EmployeeDemographics again with the correct SSN. Instead, go to the person's Employee Demographic screen,select Other, then SSN, enter the correct SSN, and submit.
If the person is already in HRMS with both the correct and incorrect SSN, please contact HRMS Supportto resolve.
Sometimes when changing someone's SSN, an ODBC error appears, meaning the change failed. (Usuallyafter this occurs, the employee appears in HRMS with both the incorrect and correct SSN, but informationfor the correct SSN is limited). This is usually due to the fact, that somewhere in the Employee'sinformation (comments, application, etc....) there is an apostrophe. Please contact HRMS Support forresolution.
page 262 / 707

HRMS Communication Site
Knowledge Base > KB10102 - UID or Payroll ID missing in HRMS.
Contributor: Steve AndrewLast Updated: May 15, 2014 12:10 pm
On the Employee Demographics screen, both the employee's UID and Payroll ID are displayed. If one orboth are blank, below are some tips to resolve the issue.
Missing Payroll ID
Payroll data is imported into HRMS every hour. (If your LEA is using ISIS 6 (Payroll) or a laterversion, please remember that there is a process that must be executed in Payroll in order topopulate the interface tables for import into HRMS.)The employee's Payroll ID is matched with HRMS data based on Social Security Number (SSN).Therefore, if the employee is in both Payroll and HRMS, but has no Payroll ID in HRMS, thenmore than likely, the SSN in Payroll and the SSN in HRMS are different. If you run reports 800001 - Payroll Employees Not In HRMS and 800006 - Active HRMS Employees Not in Payrolland the employee appears on both, this is the issue. Verify which SSN is correct and change asappropriate. If this is not the case, please contact HRMS Support to further investigate.
Missing UID
UIDs are imported into HRMS every 3 hours during the day. (If your LEA is using ISIS 6 (Payroll)or a later version, please remember that there is a process that must be executed in Payroll in orderto populate the interface tables for import into HRMS.)Please make sure that the employee's UID is in payroll. If not, it will not appear in HRMS.If the UID is in payroll, but not in HRMS, please contact HRMS Support to further investigate. Iftwo different employees have the same UID in payroll, it will not import and DPI staff can look tosee if this is the case.
page 263 / 707

HRMS Communication Site
Knowledge Base > KB10103 - BT Status Best Practices
Contributor: Steve AndrewLast Updated: Jul 23, 2015 11:24 am
Printer friendly
Table of ContentsQuick Facts
Valid BT Values
Reports with BT Status
When to Run Reporting Tool Reports
When to Bump BT Status
Quick Facts
Background: Beginning (novice) teachers are required to participate in a three-year inductionprogram. During the induction period beginning teachers are to have a formal orientation, mentorsupport, and both formative and summative evaluations.Beginning Teacher (BT) status is updated from the Employee Demographics page by selecting Staff Actions then Status and Benefits.There is a Mass Update in HRMS to "Bump" (Move to the next level) staff BT status codes, whichshould be performed annually before school starts for the next year.As teaching staff are entered into HRMS it is advised to update new staff as either:
0 - Late Hire1 - BT 1C - Completed (Previously completed program)
Valid BT Values
Late Hire (Will not meet requirements for Year 1)1st Year2nd Year3rd YearCompletedNot Required for Position
page 264 / 707

HRMS Communication Site
Reports with BT Status
Web Report 000122 - BT Status: Lists current staff who have either the code of 0, 1, 2, or 3 fortheir BT status.Reporting Tool Reports: These reports default to 4/1/20XX - 3/31/20YY, where XX is theprevious year and YY the current year. Keep these defaults since teacher turnover is reported forthis date range.
Teacher Turnover Not LeavingTeacher Turnover Leaving
In May LEAs receive spreadsheets of teaching staff from the DPI School BusinessAdministration staff to be completed with various information. These 2 reports canassist you in completing those spreadsheets with the reason for separation.
Beginning Teacher Turnover Summary -In October LEAs receive The Beginning Teacher Support Program Report tocomplete for the previous year.Therefore you need to know the BT status for staff as of the previous year. HRMSDOES NOT KEEP A HISTORY of BT Status as of a certain date. Whatever iscurrently in HRMS is the only BT status that will display in HRMS or appear on areport.VERY IMPORTANT: Please note that Licensure data in HRMS is as of TODAY and
teachers are placed in the TE or LE category as of the date you run the report, not as of anydate in the date range entered for the report. Only teachers falling into either the TE or LEcategory are on the report. Therefore, if you run this report in July, for the previous yearand some or your 3rd year BT teachers now have clear licenses, they are not counted.
When to Run Reporting Tool Reports
It is best to run and save and/or print all 3 Reporting Tool Teacher Turnover reports as early inApril as possible so the BT status and LE/TE categories at that time are on the report. Please see Tips for Exporting Reports, to see how to save report as a pdf.If these reports are run late April or later, at least do not "Bump" the BT status before saving and/orprinting the reports.
When to Bump BT Status
DO NOT BUMP the BT status for staff until you have executed, verified and saved the 3Reporting Tool reports to a .pdf file or printed them. This is due to the LEA needing the BT statusas of the previous year to complete the Beginning Teacher Support Program Report (usuallyrequested in October).
page 265 / 707
HRMS Communication Site
Knowledge Base > KB10202 - How do I search for a name with an apostrophe?
Contributor: Steve AndrewLast Updated: Jan 30, 2014 11:54 am
When searching for an applicant by last name, and the last name contains an apostrophe, you must put intwo apostrophes in order to get results. For example, if you are looking for Jane O'Connor, put O''Connorin the search box and search by last name. (Keep in mind that sometimes applicants will not use theapostrophe, so in the above example you would want to search by OConnor also.)
page 266 / 707
HRMS Communication Site
Knowledge Base > KB10300 - Removing a Current Assignment
Contributor: Steve AndrewLast Updated: Apr 19, 2012 10:09 am
Before release 5.0, you could not remove a current assignment. This would be necessary if either theperson did not show up for the assignment or an assignment was entered incorrectly. You would have toend the assignment and let it archive. You also could not move assignments between Future and Current,depending on the Assignment Start Date. With release 5.0, you can “Edit” assignments, change the StartDate and save. Depending on the current date, the assignment will either be Future or Current. Therefore,to delete a Current Assignment, follow these steps.
(1) Edit the Current Assignment and change the Start Date to a date in the Future, then Save and Close.(You will also have to enter an Effective Date since it is required.)(2) The Assignment is now a Future Assignment(3) Edit the Future Assignment, scroll to the bottom and click on “Delete this Future Assignment”, Saveand Close(4) The Assignment is now gone
page 267 / 707
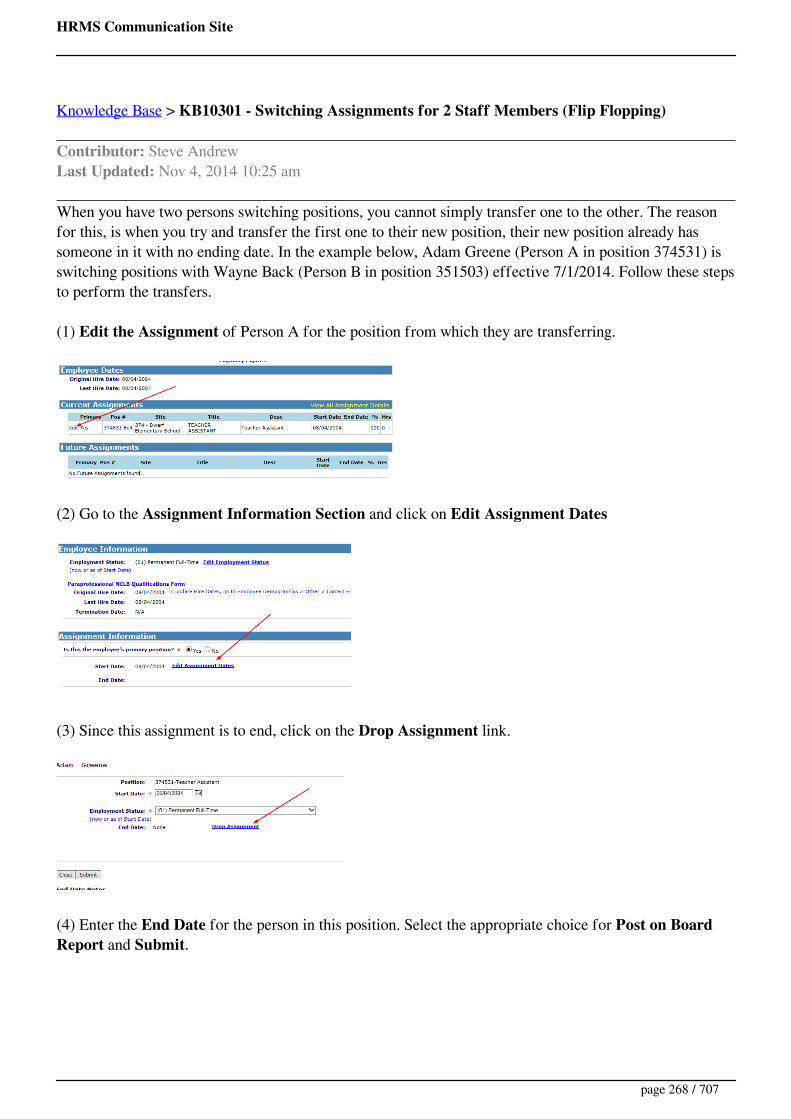
HRMS Communication Site
Knowledge Base > KB10301 - Switching Assignments for 2 Staff Members (Flip Flopping)
Contributor: Steve AndrewLast Updated: Nov 4, 2014 10:25 am
When you have two persons switching positions, you cannot simply transfer one to the other. The reasonfor this, is when you try and transfer the first one to their new position, their new position already hassomeone in it with no ending date. In the example below, Adam Greene (Person A in position 374531) isswitching positions with Wayne Back (Person B in position 351503) effective 7/1/2014. Follow these stepsto perform the transfers.
(1) Edit the Assignment of Person A for the position from which they are transferring.
(2) Go to the Assignment Information Section and click on Edit Assignment Dates
(3) Since this assignment is to end, click on the Drop Assignment link.
(4) Enter the End Date for the person in this position. Select the appropriate choice for Post on BoardReport and Submit.
page 268 / 707

HRMS Communication Site
(5) Now Person A has an end date on their assignment.
(6) Transfer Person B into the position you just Dropped for Person A with a Start date after the Endingdate for Person A. Start on Person B's Demographic page and select Assignment, then Transfer.
Select the Position Person B is transferring from, enter the Date to Remove and the New PositionNumber transferring to (Person A's position). Click on Submit
page 269 / 707

HRMS Communication Site
Complete the Add Assignment screen by making sure to 1) Select a new Employment Status ifappropriate and checking the Is Employment Status Correct? box, 2) Selecting whether or not thetransfer is Voluntary or Involuntary, 3) Selecting to Post on Board Report or not, 4) Entering their Start Date in the new position, then click on Save & Edit.
Now Person B is transferred to Person A's position and Person B's old position has an end date. SincePerson B's old position has an end date, Person A can be transferred to that position.
(7) Transfer Person A to Person B’s old position following Step 6 above.
page 270 / 707
HRMS Communication Site
Knowledge Base > KB10302 - Automate Assignments Ending for Temporary Employees
Contributor: Steve AndrewLast Updated: Jan 22, 2013 2:27 pm
Sometimes, when you hire someone, it is for a certain period of time and you already know when theiremployment will end. You want to enter them in once and not have to go back later and update their status.Follow the steps below to do this.
(1) “Add” their assignment as usual, but with no ending date.
(2) Immediately perform the Separation Staff action. Put the employee's Ending date as the Effective dateand make sure to select the Employee Status Code effective upon separation. This “Future” employmentstatus is saved in the system. (Once the Separation occurs, the system will archive the Assignment andSeparation and update the Employee’s status.)
(3) You will now see the Employee’s assignment ending on the date you entered.
page 271 / 707

HRMS Communication Site
Knowledge Base > KB10303 - When is the employee's Original Hire Date set?
Contributor: Rob PinionLast Updated: Oct 16, 2014 12:13 pm
An employee's original hire date (emp_orighire_dte) value is set:
1. When the New Hire Without Vacancy Permit Employee Demographics screen is submitted.
2. When the New Hire Nominees - Position Assignment - New Employee Position Assignment form issubmitted. (This is part of the vacancy permit process.)
If this needs to be changed, display the person in Employee Demographics, select Other, select CorrectEmployee Dates, modify and submit.
page 272 / 707

HRMS Communication Site
Knowledge Base > KB10305 - When do assignments get archived? future assignments becomecurrent?
Contributor: Steve AndrewLast Updated: Feb 4, 2014 4:57 am
Any assignment with an End Date on or after the current date is archived at 8:30PM each evening.
Any assignment with a Future Start Date on or before today becomes current at 7:00AM each morning.
See KB10802 - System Data Update Schedule for a list of all automated types of data updates.
page 273 / 707

HRMS Communication Site
Knowledge Base > KB10306 - Tracking Staff Starting as a Sub Then Moving to Permanent Status inthe Same Position Best Practices
Contributor: Steve AndrewLast Updated: Mar 25, 2014 4:32 am
Sometimes an LEA may want to track staff that start off as a substitute, then move to permanent status, inthe same position. Maybe some final paperwork needs to be completed, a License issued, etc....
Below are suggested steps to track the staff member from substitute status to permanent. By followingthese steps, both the current and archived assignments can be reviewed know this occurred.
1. Hire or re-employ staff member with the status of “Active Sub”.2. Add the Assignment, putting the staff member in the position with the Start Date as a sub. If
there is a Salary Schedule, a Grade and a Step that are appropriate, select and save.3. Since substitute budget codes are not imported from Payroll, you will not have a budget code to
connect to their assignment. Therefore, they will show as an error on your SS200 report. If youwant the staff member counted on the SS200, you must manually add them to summarized countsfrom the HRMS Reporting Tool.
4. Once the staff member is going to move to a non-sub status, put an end date on the currentassignment.
5. Add a new assignment for the same position, with a start date of the first working day after theending date as a sub.
6. Edit the new assignment and put the position number on the payroll assignment record (ifalready available).
7. Click on “Edit Salary Information and/or Record Promotion/Demotion/Salary Change"1. Select the new Base Pay Table, Grade and Step2. For “Type of Action” – Salary Change Only3. Enter Effective Date, Old Salary, Old Pay Basis (Daily or Hourly), New Salary
Amount, New Pay Basis (Monthly), Reason (Other).4. Select whether to Post on Board Report and enter a Comment (Required).5. Save
By performing these steps you now have the following information in HRMS available.
An archived assignment as a sub (will have to look at the Salary Schedule Grade and Step to knowthey were a sub during this time).A Salary Change record in the Staff Action Console.Correct Start and End Dates on both the substitute and permanent assignment.
Remember to create a Temporary Full Time contract for the staff member once in permanent status.
page 274 / 707

HRMS Communication Site
Knowledge Base > KB10307 - Best way to remove someone who resigns before starting.
Contributor: Steve AndrewLast Updated: Jul 18, 2014 5:50 am
Sometimes future employees either resign before starting work or just do not show up. Below are steps totake if this occurs and the person is already in HRMS. From the Employee's Demographic screen:
If the person already has a Future Assignment
1. Edit the Future Assignment and click on the "Delete this Future Assignment" button.2. If the Assignment is Current, Edit the Current Assignment, change the Assignment Start Date to a
future date, save, then perform Step 1.
If the person already has a Contract in HRMS
1. Go to "Other" and select "Contracts"2. Remove or inactivate contract as you feel appropriate.
Separation of employee through Staff Actions
1. Go to "Staff Actions" and select "Staff Action Console"2. Perform a Separation with "7A - Did Not Report" as the Separation Reason and enter comments
if desired.
page 275 / 707

HRMS Communication Site
Knowledge Base > KB10308 - How to Show an Employee Status, Hours, or Percent Employe Changefor the Same Position With an Archive
Contributor: Steve AndrewLast Updated: Feb 16, 2016 8:41 am
When someone's percent employed and/or hours change, you can always Edit the Assignment, click on "Edit Salary Information and/or Record Promotion/Demotion/Salary Change", complete the form andsubmit. This creates a "Salary Change" staff action on the employee's Staff Action Console.
You may want to record this change through creating an archive of how the assignment is now, and afuture assignment with the new values. Then you can look back through the employee's archives from theirDemographic screen and see this change.
In the example below, an employee is currently part time and employed 50%. On 2/29/2016 they are tobecome Full Time and be employed 100%, and remain in the same position. You want an archivedassignment showing this employee was working 50% from 10/13/2005 - 2/28/2016 and a futureassignment showing they become full fime on 2/16/2016.
Current Demographic Screen
Step 1 - Drop the Current AssignmentYou cannot "Add an Assignment" or perform a "Transfer" to the same position since there is no "EndDate" for the current assignment.
1. Click on the far left "Edit" under "Current Assignments".2. Once on the "Edit Assignment" screen, scroll to the "Assignment Information" section and click
on "Edit Assignment Dates."3.
page 276 / 707

HRMS Communication Site
4. Once on the "Edit Assignment Dates / Employment Status" screen, click on "DropAssignment"
5.
6. Enter the Drop Assignment Date, Select the employee's new Employment Status for the"Employment Status as of End Date", Select the appropriate Board Report options, Enter anycomments and click on Submit.
7.
8. The employee's demographic screen is below. Note:1. The Pending Status change.2. The Assignment End Date. Note that if you have made a mistake, all you have to do is 1)
Click on the far left Edit for "Edit Assignment", 2) Select "Edit Assignment Dates" andthere is an option to "Cancel" the "Drop Assignment."
9.
10. Edit the Position and change to 100% Funded so when the Assignment is added it will default to100%.
11. Now you are ready to put them in the same position, starting 2/29/2016 with a new status andpercent employed. From Employee Demographics, click on Assignment, then Add. Enter the
page 277 / 707
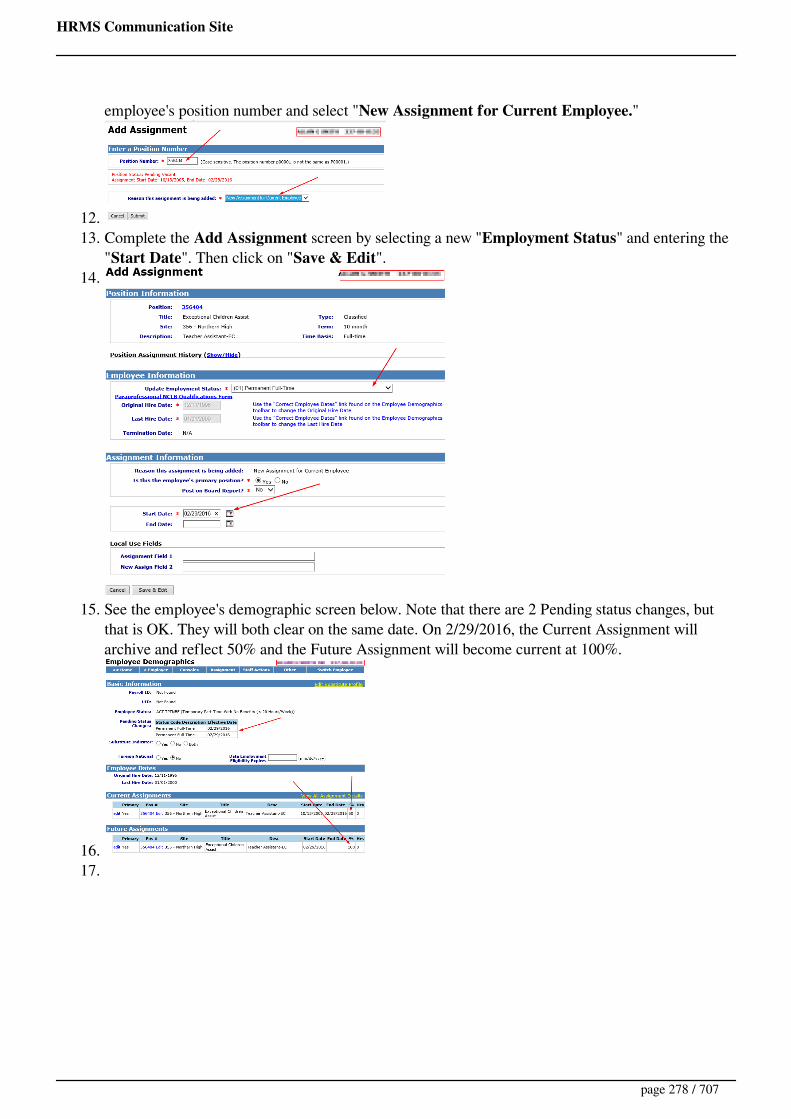
HRMS Communication Site
employee's position number and select "New Assignment for Current Employee."
12.
13. Complete the Add Assignment screen by selecting a new "Employment Status" and entering the"Start Date". Then click on "Save & Edit".
14.
15. See the employee's demographic screen below. Note that there are 2 Pending status changes, butthat is OK. They will both clear on the same date. On 2/29/2016, the Current Assignment willarchive and reflect 50% and the Future Assignment will become current at 100%.
16.
17.
page 278 / 707

HRMS Communication Site
Knowledge Base > KB10400 - RT2012 Workstation Requirements
Contributor: Jared WinchesterLast Updated: Sep 24, 2015 5:37 am
HRMS Reporting Tool 2012 Minimum System Requirements
Windows XP Professional Processor: 1 GHz Dual Core CPU (Quad Core CPUrecommended)Memory: at least 1GB RAM (2 GB or more,recommended)Hard Disk: Up to 761 MB of available space maybe requiredDisplay: 1024 x 768 high color, 32-bit(Minimum);1280 x 1024 high color, 32-bit (Recommended)
Windows Vista/7Business,
Enterprise, or Ultimate(32/64-bit editions)
Processor: 1 GHz Dual Core CPU (Quad Core CPUrecommended)Memory:2 GB RAM (4GB ,or more, recommended)Hard Disk: Up to 761 MB of available space maybe requiredDisplay: 1024 x 768 high color, 32-bit(Minimum);1280 x 1024 high color, 32-bit (Recommended)
Windows 8, 8.1 all editions
(32/64-bit editions)
Processor: 1 GHz Dual Core CPU (Quad Core CPU recommended)
Memory:2 GB RAM (4GB ,or more, recommended)
Hard Disk: Up to 761 MB of available space may be required
Display: 1024 x 768 high color, 32-bit(Minimum);
1280 x 1024 high color, 32-bit (Recommended)
Windows 10 all editions (32/64-bit editions)
Processor: 1 GHz Dual Core CPU (Quad Core CPU recommended)
Memory:2 GB RAM (4GB ,or more, recommended)
Hard Disk: Up to 761 MB of available space may be required
Display: 1024 x 768 high color, 32-bit(Minimum);
1280 x 1024 high color, 32-bit (Recommended)
page 279 / 707

HRMS Communication Site
Knowledge Base > KB10401 - How to Download the Reporting Tool 2012
Contributor: Jared WinchesterLast Updated: Apr 14, 2016 7:39 am
Download the Reporting Tool 2012 here
page 280 / 707
HRMS Communication Site
Knowledge Base > KB10402 - I am getting a 'Conversion Error' when running a CEU report inRT2012.
Contributor: Steve AndrewLast Updated: Nov 7, 2011 7:10 am
Call the DPI Help Desk at (919) 807-4357 and ask for HRMS Support. This is more than likely a problemwith your data having unprintable characters in either an employee's Middle Initial, CEU Description orCEU Source field.
Note to HRMS Support. 1) Find out the criteria used by the LEA. 2) Run the report and see where thereported data stops. 3). Check the next person's data in HRMS. If their detailed CEU information displaysin HRMS, then more than likely the Middle initial is the problem. If CEU detail information does notdisplay, then the problem is either with the CEU description or CEU source.
page 281 / 707

HRMS Communication Site
Knowledge Base > KB10403 - I installed RT2012 on my desktop, but there is no icon. How can Icreate one?
Contributor: Steve AndrewLast Updated: Feb 4, 2014 6:19 am
Sometimes the install of Reporting Tool 2012 may fail to place an icon on your desktop. If this occurs,follow the steps below.
1. Click on Programs (bottom left of screen).2. Select "NC Dept of Public Instruction".3. Right click on "HRMS Reporting Tool 2012".4. Select "Send To".5. Select "Desktop" (Create Shortcut).
page 282 / 707
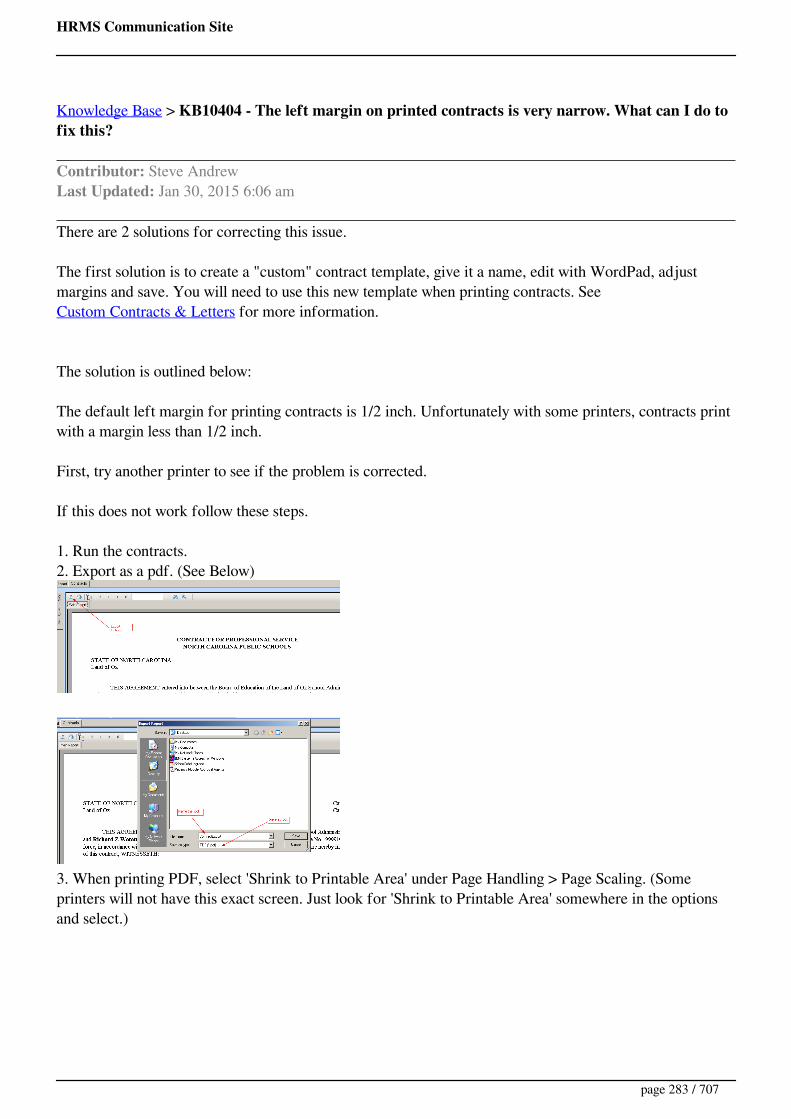
HRMS Communication Site
Knowledge Base > KB10404 - The left margin on printed contracts is very narrow. What can I do tofix this?
Contributor: Steve AndrewLast Updated: Jan 30, 2015 6:06 am
There are 2 solutions for correcting this issue.
The first solution is to create a "custom" contract template, give it a name, edit with WordPad, adjustmargins and save. You will need to use this new template when printing contracts. SeeCustom Contracts & Letters for more information.
The solution is outlined below:
The default left margin for printing contracts is 1/2 inch. Unfortunately with some printers, contracts printwith a margin less than 1/2 inch.
First, try another printer to see if the problem is corrected.
If this does not work follow these steps.
1. Run the contracts.2. Export as a pdf. (See Below)
3. When printing PDF, select 'Shrink to Printable Area' under Page Handling > Page Scaling. (Someprinters will not have this exact screen. Just look for 'Shrink to Printable Area' somewhere in the optionsand select.)
page 283 / 707
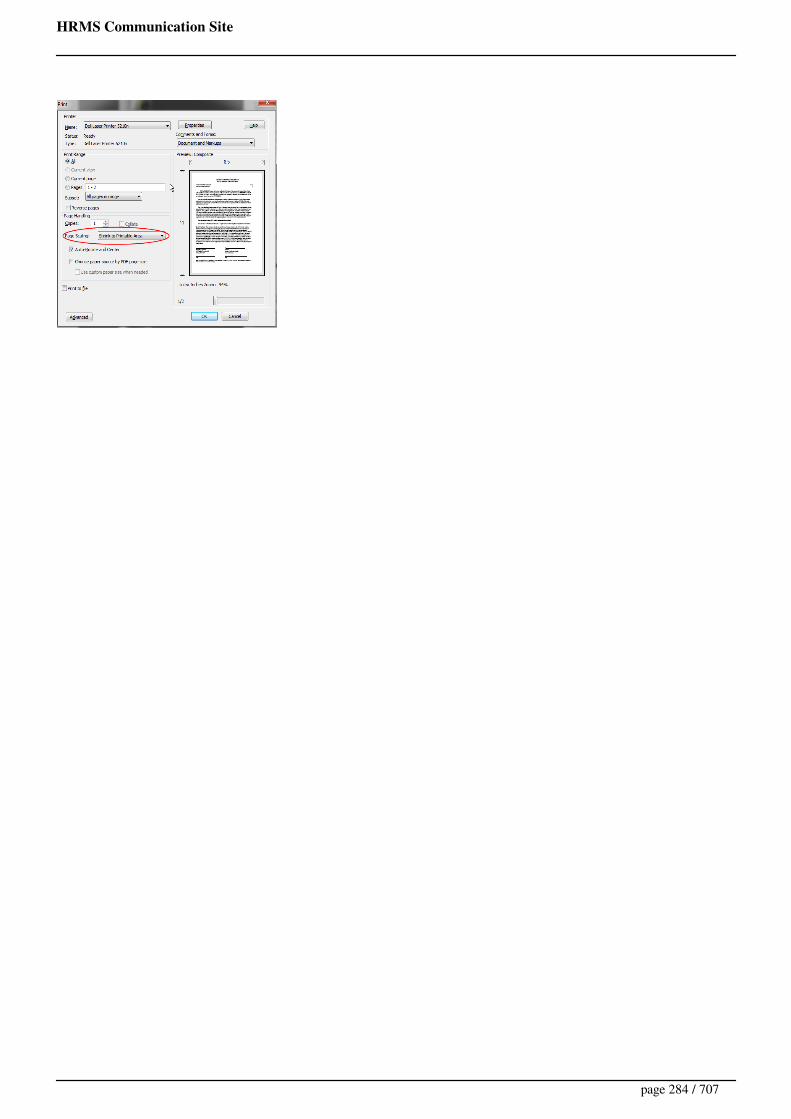
HRMS Communication Site
page 284 / 707

HRMS Communication Site
Knowledge Base > KB10405 - How can I export data from HRMS Reporting Tool 2012?
Contributor: Steven AndrewLast Updated: Jun 3, 2015 5:47 am
A powerpoint of how to export data using the HRMS Reporting Tool exists, but is not available on thiswebsite. Please contact HRMS support for an electronic copy of this Powerpoint. It has detailedexplanations on the various ways to export data.
There is also help within this site at: Tips for Exporting Reports
If you would like the PowerPoint Presentation of exporting data from the HRMS Reporting Tool 2012,please contact HRMS Support.
page 285 / 707

HRMS Communication Site
Knowledge Base > KB10406 - IBM i Access for Window(s) 8, 8.1, 10
Contributor: jaredwinchesterLast Updated: Oct 28, 2015 11:48 am
A note from IBM regarding Windows support
Problem: After installing System i Navigator on Windows 8-10, system errors are generated when I try tostart the application.
Solution: Although IBM will no longer offer support for IBM i Access for Windows, it is easy to fix thestart up errors. Just put the application in 'Windows 7 Compatibility Mode'
Step 1) Open All Apps > Find IBM i Access for Windows > Right click on System i Navigator > SelectOpen file location
Step 2) Right click on System i Navigator in the Folder that just opened > Click Properties
page 286 / 707

HRMS Communication Site
Step 3) Click the Compatibility Tab > Check Run this program in compatibility mode for: > SelectWindows 7 > Check Run this program as an administrator
page 287 / 707

HRMS Communication Site
Knowledge Base > KB10410 - Where can I find a Tutorial for Query Builder?
Contributor: Steve AndrewLast Updated: Dec 4, 2017 8:14 am
Please call the DPI Help Desk (919) 807-4357 then choose option 3 then 2 or use support to put in arequest, HRMS Support. This document is not available online.
Once you learn how to use the Query Builder, you will be able to create your own Local Web Reports forrepeated use.
page 288 / 707

HRMS Communication Site
Knowledge Base > KB10411 - Special Query Keywords for Local Web Reports
Contributor: Rob PinionLast Updated: Nov 15, 2011 12:33 pm
Queries for the Local Web Reports can be customized to automatically determine the user's site numberand to prompt the user for additional data on the fly. These two capabilities allow Local Web Reports to bemuch more powerful while still not requiring programming. (Note that in all examples, tables names andfield names are bogus, since this is a public site.)
Limit Results to the User's SiteIf you wish to limit the results of a query to the records matching the user's site, you may place the specialkeyword SITECODE at the point where the site code is to be inserted into the query. For example,consider the following query:select field1 as Position_Number, field2 as Position_Desc fromlibrary.table where pos_site_cd='SITECODE' If Mary Smith's HRMS user account profile recordshows the her primary site is Mayberry Elementary, and Mayberry Elementary is site number 123, thenwhen Mary runs a local web report based on the above query, only positions records with the site code 123will appear in the report. Mary is not prompted to enter anything. Her site number is automaticallydetermined and inserted into the query.Typically, such local reports will be most useful to principals andsite-based secretaries, and you should make sure the appropriate role is selected on the Local Web Reportso that proper access can be gained to the report. Principal accounts are typically assigned the HiringAgentrole.If the user has one of the following roles, the user will be prompted to enter a site number, and the sitenumber entered will be substituted for every occurrence of SITECODE in the query.[Administrator] -LEA System Administrator[Licensure] - Licensure[Screener] - Application Screener[AppEntry] -Application Entry[ContEdView] - Continuing Education Viewer:[Evaluations] - Evalutions[Common] -General User (several other roles, including Payroll, receive this role). The SITECODE keyword shouldnot be used on reports that are available to Anonymous users as there will be no way to determine theuser's site.
Prompting the User for Data When a Local Web Report is LaunchedUsers can be prompted to enter data into a query when a Local Web Report is run. Asking the user for thisdata is as simple as inserting a specially-formatted prompt statement into your query. So long as you followa few conventions when writing your prompts, a single Local Web Report can produce a nearly infinitecombination of results.Formatting conventions for user prompts:1. Start each prompt with the keyword PROMPTSTART. It must be upper case. This is not a SQLkeyword, but is specific to this feature within HRMS.2. End each prompt with the keyword PROMPTEND. Again, it must be upper case.3. Between the PROMPTSTART and PROMPTEND keywords, write your prompt.4. Your prompt should not contain parenthesis, quotes, apostrophes, or most other special characters,though periods, commas, and slashes may be used.
Example: select field1 AS ETHNICITY, UPPER(field2) AS LAST, UPPER(field3) AS FIRST,UPPER(field4) AS MIDDLE from library.table where field1 = 'PROMPTSTART Enter anEthnicity Code B C A or I. PROMPTEND' AND upper(field2) LIKE 'PROMPTSTART LastName starts with - user upper case please. PROMPTEND%'
page 289 / 707

HRMS Communication Site
If the user's first response is B and second response is J the following query will be submitted:field1 AS ETHNICITY, UPPER(field2) AS LAST, UPPER(field3) AS FIRST,UPPER(field4) AS MIDDLE from library.table where field1 = 'B' AND
upper(field2) LIKE 'J%'
Prompting for a value once and inserting the response it multiple times:If you include a prompt command multiple times in the same way EXACTLY, the system will prompt theuser only a single time for that input and will insert the response into the query as many times as you repeatthe prompt command. For example, in the query below, the system prompts the user twice: first, to enteran ethnicity code and second, to enter the starting character of the first and last name. Even though thereare three prompt commands below, the last two are exactly the same, and the system only prompts for thatanswer once.
Example: select field1 AS ETHNICITY, UPPER(field2) AS LAST, UPPER(field3) AS FIRST,UPPER(field4) AS MIDDLE from library.table where field1 = 'PROMPTSTART Enter anEthnicity Code B C A or I. PROMPTEND' AND UPPER(field2) LIKE 'PROMPTSTART Firstand Last Name both start with - user upper case please. PROMPTEND%' AND UPPER(field3)LIKE 'PROMPTSTART First and Last Name both start with - use upper case please.PROMPTEND%'If the user's first response is B and second response is J the following query will be submitted. Notice thatthe user's J answer has been inserted twice:field1 AS ETHNICITY, UPPER(field2) AS LAST, UPPER(field3) AS FIRST,UPPER(field4) AS MIDDLE from library.table where field1 = 'B' AND
upper(field2) LIKE 'J%' AND upper(field3) LIKE 'J%'
Prompting for dates and changing the case on the user input:See the sample below for a good way or prompting the user to enter a date or converting the value enteredto upper case.Example: select * from library.table1 join library.table2 on field1=field2 where field3 ='SITECODE' and field4 = UPPER('PROMPTSTART PleaseEnter C for Classified or L for Licensed PROMPTEND')and field5 >=
'PROMPTSTART Please Enter a Start Date in the following formatMM/DD/YYYY PROMPTEND'
Prompting for SSN:See the sample below for a good way or prompting the user to enter a Social Security Number. In this case,you may want to make the report available to Anonymous users. Example: select field1 from library.tablewhere field3 = 'PROMPTSTART Please enter your Social Security Number without dashesPROMPTEND'
Prompting for a combination of partial SSN and Name:See the sample below for a good way or prompting the user to enter a partial Social Security Number andlast name. In this case, you may want to make the report available to Anonymous users.Example:select field1 from library.table1 join library.table2 on field4ssn = field5ssn where
page 290 / 707
HRMS Communication Site
right(trim(field4ssn),5) = 'PROMPTSTART Please enter the last five digits of Social Security Numberwithout dashes. PROMPTEND' and upper(trim(fieldlastname)) = upper('PROMPTSTART Please enteryour last name. PROMPTEND')
Using special commands with the Query BuilderThe Query Builder does not prompt you to insert special commands. However, you will typically want touse the Query Builder to generate your base query, then insert the special commands in place of hard-coded values, such as substituting SITECODE for a hard-coded site number in the WHERE clause.
Potential Large Record SetsIf you prompt for a value used with the LIKE % syntax, and the user does not enter a value whenprompted, the number of record returned may be large and could impact your system's performance whilethe report is being generated. Therefore, it is recommended that you be judicious in the use of the LIKE %syntax, especially when making reports available to Anonymous users and those users with limitedknowledge of HRMS.
page 291 / 707
HRMS Communication Site
Knowledge Base > KB10412 - Password Protecting Local Web Reports
Contributor: Rob PinionLast Updated: Oct 18, 2011 7:08 am
You may require that the user enter a password to run a local web report. To do so, you type a specially-formatted prompt in the WHERE clause of the SQL Statement. The password is prompted for when thereport is run.
For example, assume you have a report based on the query below:
select field1 from library.table
where field3 = 'L'
fetch first 10 rows only
To password protect this report with the password "12a34", add a user prompt as follows:
select field1 from library.table
where field3 = 'L'
and '12A34' = upper('PROMPTSTART Please type the password. PROMPTEND')
fetch first 10 rows only
If you want the password to be case-sensitive, leave out the upper() command around the prompt.
Note: The passwords described in this article are not a replacement for requiring a specific user account orrole, nor are they as secure as the normal HRMS user authentication system. However, you may choose touse them as an additional step that the user must take to access a report. Using this type of passcode ismost appropriate when granting access to a report displaying sensitive, but non-personal, information to alimited set of Anonymous users to whom you will give the password. In this case, Anonymous should betype of individual users who can access the report. ("Anonymous" is not the equivalent of "anyone"because HRMS is always secured behind your network firewall, and only persons using a computer onyour network could have access to HRMS in the first place..)
page 292 / 707
HRMS Communication Site
Knowledge Base > KB10413 - Prompts for my Local Web Reports are not appearing and I amgetting no results.
Contributor: Steve AndrewLast Updated: Jul 23, 2013 4:18 am
Your IE browser was updated and HRMS needs to be added as one of your "Trusted Sites". Do thefollowing:
1. Select "Tools" from your IE Menu Bar (If the IE Menu Bar is not available, press the ALT key and itwill display)2. Select "Internet Options"3. Select the "Security" tab4. Click on the green check mark "Trusted Sites"5. Click the "Sites" button (the URL for HRMS will move from the top box to the bottom box).6. Click the "Close" button7. Click on OK
Try the report again
If it is still failing to prompt, you will need to set your browser security back to the default. Do thefollowing:
1. Select "Tools" from your IE Menu Bar (If the IE Menu Bar is not available, press the ALT key and itwill display)2. Select "Internet Options"3. Select the "Security" tab4. In the "Security Level for this Zone" section, click on "Default".5. Click on OK
page 293 / 707

HRMS Communication Site
Knowledge Base > KB10414 - When creating a Filter in Query Builder, I do not get a prompt. Howcan I fix this?
Contributor: Steve AndrewLast Updated: Feb 4, 2014 1:03 pm
Your IE browser was updated and HRMS needs to be added as one of your "Trusted Sites". Do thefollowing:
1. Select "Tools" from your IE Menu Bar2. Select "Internet Options"3. Select the "Security" tab4. Click on the green check mark "Trusted Sites"5. Click the "Sites" button (the URL for HRMS will move from the top box to the bottom box).6. Click the "Close" button7. Click on OK
Try to create the Filter again.
page 294 / 707

HRMS Communication Site
Knowledge Base > KB10415 - My Web Reports or Local Web Reports are hanging and I have ablank screen.
Contributor: Steve AndrewLast Updated: Mar 7, 2014 7:39 am
If you have a Web Report of Local Web Report that "hangs" and no results display, more that likely, yourworkstation lacks sufficient memory to bring the results of the report/query back to the web browser.
Please try from another workstation.
page 295 / 707

HRMS Communication Site
Knowledge Base > KB10416 - Cross Site Scripting error when running local or web reports
Contributor: Steve AndrewLast Updated: Mar 29, 2016 6:58 am
This error occurs if "Cross-site Scripting (XSS) Filter" is enabled in Internet Explorer.
You may go to disable this feature by following the steps below:
1. Open Internet Explorer2. Click on "Tools" on the Menu Bar. (If the Menu Bar is not displayed, press the ALT key)3. Select "Internet Options"4. Select "Internet Zone"5. Click on "Custom Level"6. Under Scripting, select the radio button "Disable" under "Enable XSS filter" (This is near the verybottom of the options)7. Save the changes by clicking on "OK"
page 296 / 707

HRMS Communication Site
Knowledge Base > KB10506 - Problem Deleting Position Titles
Contributor: Steven AndrewLast Updated: Feb 16, 2016 11:46 am
Once a Position Title is added to HRMS, it cannot be removed through the HRMS interface. LEA staffmust contact DPI HRMS support to have a Position Title removed. This is due to the fact that if a PositionTitle is deleted and there are positions using the deleted Position Title, there is no longer a Position Titledescription to display. Therefore, you must work with DPI HRMS support to have the Position Titledeleted.
Notes for DPI HRMS Support Staff1. Before deleting a Position Title code, make sure that it has never been used. Check both the Positionand Archived Assignment tables. If it has been used, then it must be converted to another valid PositionTitle code in these tables, before being deleted from the Position Title code table.2. Also, make sure that the Position Title code to be deleted is not being used in the Position_Group_Titletable. If it is, you will not be allowed to delete it from the Position Title code table.3. If a Position Title has never been deleted at the LEA, you may have a "Journaling" error whenattempting to delete a Position Title code. If so, use Operations Navigator and "End" the Journal for thePosition Title table. Then "Start" the Journal again, but in the same Library where the Position tableresides. After this is completed once for an LEA, you will not need to do again. Once the Journal restarts,you should be able to remove the Position Title. There have only been a few LEAs where this did notwork. Unfortunately, their Position Titles cannot be removed.
page 297 / 707

HRMS Communication Site
Knowledge Base > KB10600 - Changing Pay Method for Someone in a Current Assignment
Contributor: Steve AndrewLast Updated: May 4, 2015 1:22 pm
The system does not allow for the change of the pay method for a position while someone is assigned.Complete the following steps to change the pay method for a non vacant position.
1) Note the Position Number, Start Date for the position, Pay Schedule, Grade and Step.2) Remove the person from the position by following the steps below.
Edit the Current AssignmentClick on Edit Assignment Data
Change the Start Date to a date in the future and SubmitNow the Assignment is in the future.Click on the "Delete Future Assignment" buttonNow the Assignment is deleted
3) Edit the Position and change the Pay Method4) Add the Position Assignment back to the staff member as an "Additional Assignment".
Note: If you have over 20 of these to do at one time, call the DPI Help Desk and ask for HRMS Support.HRMS Support MAY be able to change the position and assignment information for you with a massupdate.
page 298 / 707
HRMS Communication Site
Knowledge Base > KB10601 - Salary Schedules, Grades and Steps are missing in HRMS?
Contributor: Steve AndrewLast Updated: Jun 17, 2015 7:10 am
Every morning at 7:30AM, the HRMS Salary Schedule/Grade/Step table is deleted and recreated frompayroll data. If the Payroll file is "busy" the HRMS Salary Schedule/Grade/Step table is empty.
Solution: Copy the link below to your browser and press enter. This will reload the table.
https://PUTYOURIPADDRESSHERE/hrms/leaadmin.nsf/salarytableupdate
For ISIS 6 LEAs, there could be another issue. In HRMS, there can be only 1 salary for each unique SalarySchedule, Grade and Step. ISIS 6 allows for different salaries for each unique Job Code (in HRMSreferred to as Salary Schedule), Grade and Step as long as the Job Code "Description" is different. Theload of current Salary Schedules, Grades and Steps into HRMS fails when it reaches the duplicate. Whenthis occurs, payroll will either need to remove the duplicate and rerun the option to "push" data to HRMSand/or you will need to call HRMS Support to correct.
page 299 / 707
HRMS Communication Site
Knowledge Base > KB10700 - Why Can't I Access the Dismissed Teacher List?
Contributor: Steve AndrewLast Updated: Mar 10, 2016 8:51 am
Registered Users of HRMS must have the "Dismissed Teacher List" role to access the Dismissed TeacherList. Having the "System Administrator" Role will not give you this access.
Once the "Dismissed Teacher List" role is selected, it can take up to one day to take affect.
If you have accessed the Dismissed Teacher List before and are now having problems, you may haveattempted to log in too many times with the incorrect User Name and Password and your account islocked. Please call HRMS support. HRMS Support will unlock your account with the School Jobs Finduser tool.
page 300 / 707
HRMS Communication Site
Knowledge Base > KB10702 - I changed someone's User Roles and the access is not correct. What doI do?
Contributor: Steve AndrewLast Updated: Jul 23, 2015 4:48 am
Sometimes when you change a person's user roles the system gets confused and roles removed/added maynot have taken effect. Here are the steps to resolve.
1. Ask the user to not log in until resolved.2. Go to Manage User Roles and select the user.3. Check ALL the roles and submit.4. Uncheck ALL the roles and submit.5. Wait several minutes and check until the ID has no access once logged in.6. Go back to Manage User Roles and select the user.7. Check the appropriate roles and submit.8. Wait several minutes and check until the ID has the correct access once logged in.
page 301 / 707

HRMS Communication Site
Knowledge Base > KB10703 - What role(s) should someone have just to run certain Local WebReports?
Contributor: Steve AndrewLast Updated: Oct 2, 2012 5:39 am
In order for someone to run ALL Local Web Reports, they must have the "System Administrator" role.There are times when you want staff, with limited authority, to be able to run specific Local Web Reports.In order to to this, you specify the specific user name in the Local Web Report configuration itself. Seebelow:
In rarer instances, you may want someone to only have access to run one or more Local Web Reports andhave no other access. HRMS requires at least one User Role to be selected in order to run one or moreLocal Web Reports. Select the "Administrative Applications Viewer" role AND ONLY the"Adminstrative Applications Viewer" role to do this. See below: (The "Administrator App Viewer" role isno longer really used for any other access).
page 302 / 707

HRMS Communication Site
Knowledge Base > KB10704 - A No Resume message appears with I try to register a new staffmember who will use HRMS.
Contributor: Steve AndrewLast Updated: Jun 21, 2013 11:37 am
If this occurs contact the HRMS support staff at (919) 807-4357. They will need to resolve this issue.
Note to HRMS Support Staff: Remove the index on the names.nsf database and recreate. Once the indexis recreated, try again.
page 303 / 707
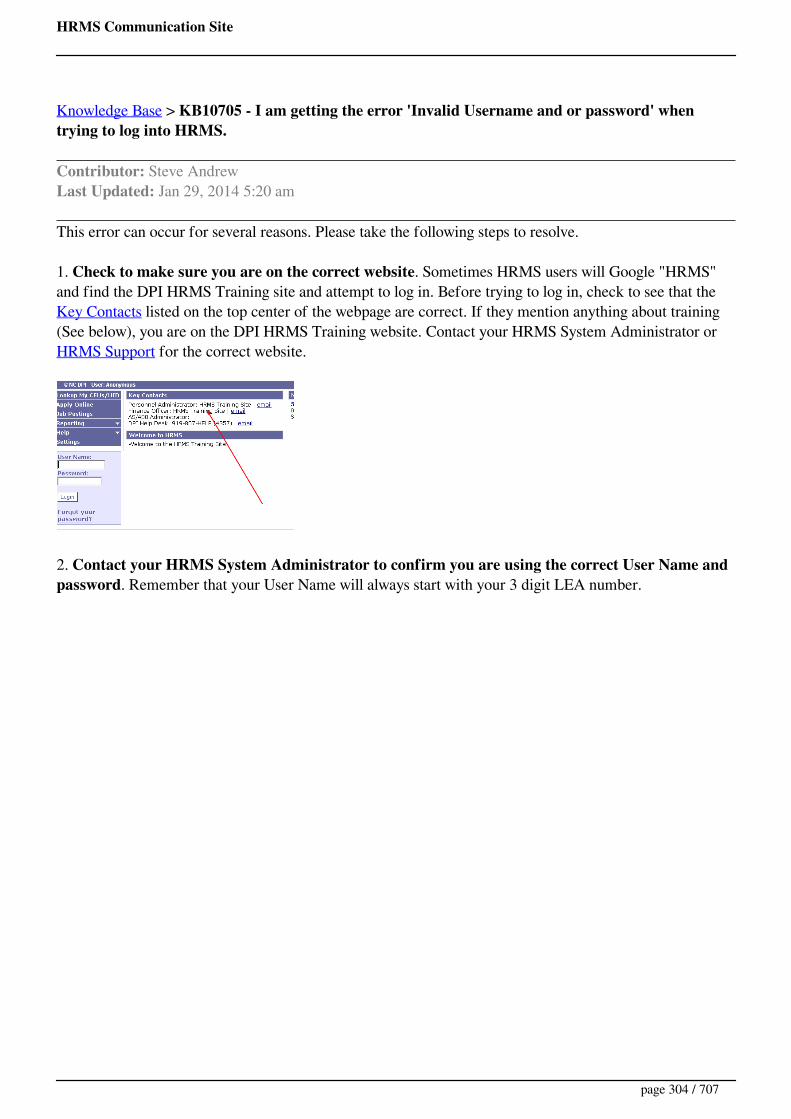
HRMS Communication Site
Knowledge Base > KB10705 - I am getting the error 'Invalid Username and or password' whentrying to log into HRMS.
Contributor: Steve AndrewLast Updated: Jan 29, 2014 5:20 am
This error can occur for several reasons. Please take the following steps to resolve.
1. Check to make sure you are on the correct website. Sometimes HRMS users will Google "HRMS"and find the DPI HRMS Training site and attempt to log in. Before trying to log in, check to see that the Key Contacts listed on the top center of the webpage are correct. If they mention anything about training(See below), you are on the DPI HRMS Training website. Contact your HRMS System Administrator or HRMS Support for the correct website.
2. Contact your HRMS System Administrator to confirm you are using the correct User Name andpassword. Remember that your User Name will always start with your 3 digit LEA number.
page 304 / 707

HRMS Communication Site
Knowledge Base > KB10800 - HRMS Website is not up, what should I do?
Contributor: Steve AndrewLast Updated: Mar 4, 2016 6:06 am
Contact your AS400 Administrator and have them do the following:
1. Type "WRKACTJOB" on the command line and review the "jobs" running under the LEAxxxDOMSubsystem. If there are none running (see screen shot below), the server is more than likely in the "Ended"state. (When no jobs are running under a Subsystem, only the Subsystem appears.
If there are some jobs running (see screen shot below) the server is either in the "Starting" or "Ending"state. If you see multiple instances of QNNINSTS or SERVER, this means that the server was restartedbefore completely ending and it is trying to come up a second time.
Proceed to Step 2 (Step 1 was mainly for information purposes, just to see what is currently going on withthe server.
2. Type “WRKDOMSVR” on the command line and review the status of the Domino Server.
If it is “ENDED”, try to “Start” by typing a “1” in the Opt column and pressing enter. Wait a fewminutes and continue to refresh until it is “Started”.If it is “STARTED”, or “STARTING”, type a “6” in the Opt column and press enter to see if youcan get the server to the “ENDED” status. If you are successful, try to "Start" it again with an
page 305 / 707
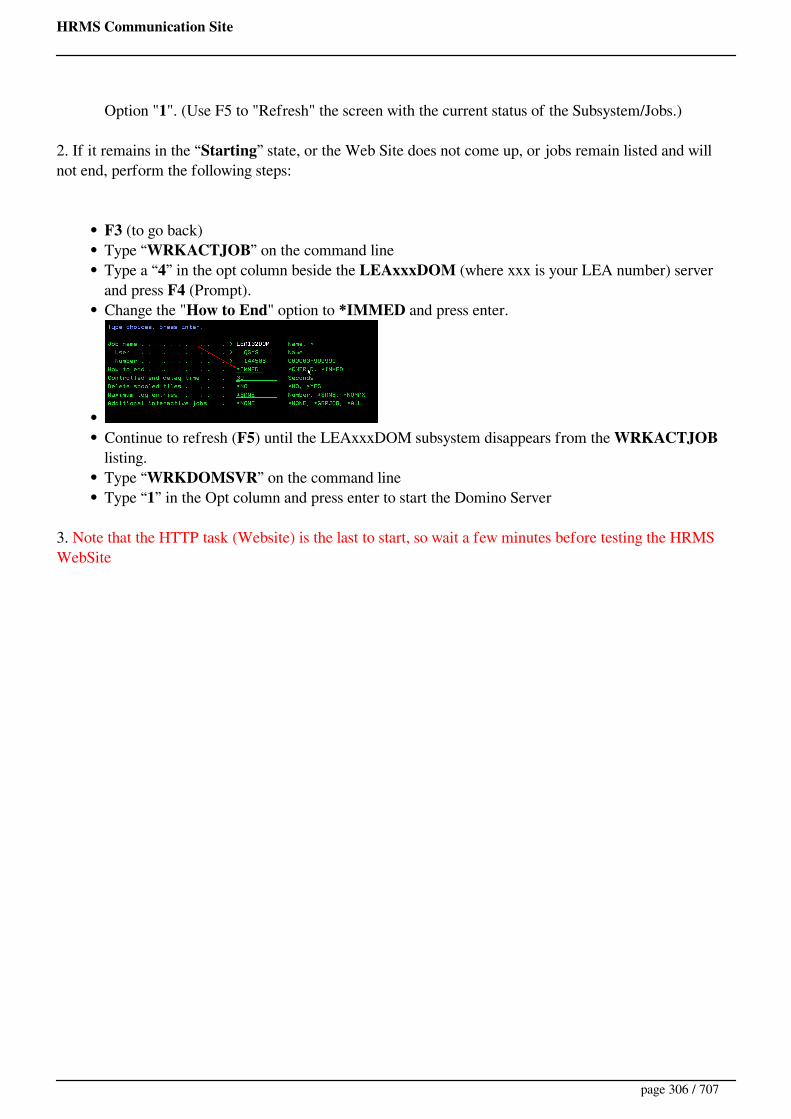
HRMS Communication Site
Option "1". (Use F5 to "Refresh" the screen with the current status of the Subsystem/Jobs.)
2. If it remains in the “Starting” state, or the Web Site does not come up, or jobs remain listed and willnot end, perform the following steps:
F3 (to go back)Type “WRKACTJOB” on the command lineType a “4” in the opt column beside the LEAxxxDOM (where xxx is your LEA number) serverand press F4 (Prompt).Change the "How to End" option to *IMMED and press enter.
Continue to refresh (F5) until the LEAxxxDOM subsystem disappears from the WRKACTJOBlisting.Type “WRKDOMSVR” on the command lineType “1” in the Opt column and press enter to start the Domino Server
3. Note that the HTTP task (Website) is the last to start, so wait a few minutes before testing the HRMSWebSite
page 306 / 707
HRMS Communication Site
Knowledge Base > KB10801 - I am getting a TOMCAT error, what should I do?
Contributor: Steve AndrewLast Updated: Feb 17, 2014 9:55 am
Your AS400 was probably restarted during the day and the TOMCAT server did not start.
Contact your AS400 SYSTEM Administrator and have them do the following steps
Logon to the AS400Type WRKJOBSCDE on the Command LineFind ENDTOMCAT and type 10 in the "OPT" column to start immediately. Enter.Type WRKSBSJOB TOMCAT on the Command Line. Enter.Continue to repeat this command until you get the response "Subsystem TOMCAT Not Active"Type WRKJOBSCDE on the Command LineFind STRTOMCAT and type 10 in the "OPT" column to start immediately. Enter.Type WRKSBSJOB TOMCAT to make sure startedHave HR try option where they were getting the error again
page 307 / 707
HRMS Communication Site
Knowledge Base > KB10802 - System Data Update Schedule
Contributor: Steve AndrewLast Updated: Oct 20, 2014 12:00 pm
In HRMS, there are several data updates/refreshes of data, that occur overnight and during the day. Belowis a current list of those types of data updates.
Employment Status/Staff Actions
7:30 AM - The Employment status of any staff member with "Pending (Active) Status Changes", isupdated. (DPI Note: Java Agent)8:00 PM - The Employment status of any staff member with "Pending (Inactive) Status Changes",is updated. (DPI Note: Java Agent)8:15 PM - All Separations with an effective date
page 308 / 707
HRMS Communication Site
Knowledge Base > KB10803 - Corrupt Server ID Error on Lotus Domino Console.
Contributor: Steve AndrewLast Updated: Mar 26, 2014 7:01 am
Sometimes due to a power outage or a sudden "crash" of the iSeries (AS400), the server.id for the DominoServer becomes corrupt. The Domino server must be up and running in order for HRMS to be available atyour LEA.
This "corruption error" is seen when the AS400 Administrator "starts" the Domino Server on the AS400and then views the Domino console. (WRKDOMSVR on command line, then option 8).
The corrupted serverXXX.id file is located in the /lotus/domino/leaXXXdom folder on the AS400. (XXXis the LEA number).
A copy of the serverXXX.id is located in the /lotus/domino folder (just one level back) on the AS400.Have you AS400 administrator follow the following steps to resolve.
1. "End" the Domino server (WRKDOMSVR on command line, then option 6).2. "Copy" the serverXXX.id from the /lotus/domino folder to the /lotus/domino/leaXXXdom folder.
(Replacing the corrupted file).3. "Start" the Domino server (WRKDOMSVR on the command line, then option 1).
page 309 / 707

HRMS Communication Site
Knowledge Base > KB10804 - Domino and AS400 HRMS Certification
Contributor: Steven AndrewLast Updated: Oct 21, 2015 12:09 pm
Below are the latest recommended versions on Lotus Domino and AS400 OS certified by HRMS:
Lotus Domino - 9.0.1FP4
Resolves issue of Domino Server periodically crashing and restarting.Allows for Notes Certificate using TLS.
AS400 - V6R1
Latest OS updates, especially:Java 6 - SR16FP4 (Current version of SF99562) (Resolves TOMCAT access error byDomino)
JVM updates are installed via Java Group PTFs and you will need to install anupdated Java Group PTF to get these changesTo check and make sure correct version of JVM is installed, do the following:
Sign onto your AS400 with and ID that has QSECOFR Access.Type WRKDOMSVR on the Command Line and press enterOption 8 to "Work With Console"Type SH JVM and press enterMake sure the JVM version has the date (20150701) see screenshot belowPress F3 to exit and sign off the AS400
page 310 / 707
HRMS Communication Site
Knowledge Base > KB10805 - Lotus Notes Scheduled Agent is Not Running
Contributor: Steve AndrewLast Updated: Feb 17, 2016 4:17 am
When you notice that a scheduled Lotus Notes (Domino) agent is not running, you will need to delete the.nsf database in which the agent resides at the LEA, and create a new replica for the production server.(Only DPI Support Staff can perform this task).
page 311 / 707

HRMS Communication Site
Knowledge Base > KB10810 - SSL Warnings with IE7 and above.
Contributor: Douglas McKinneyLast Updated: Feb 26, 2014 4:47 am
Internet Explorer version 7 and above displays a warning page when entering HRMS System pages usingSSL certificates.
To continue when the warning page is displayed. Click the red text labeled ‘Continue to thiswebsite (not recommended)’.
This warning can be ignored for all HRMS System web pages. The SSL certificate problem is caused dueto the fact DPI creates all HRMS System SSL certificates. During the certificate creation process a genericURL is used. This prevents a unique certificate needing to be generated for each LEA’s Domino server.
IE 7 is checking for a Phishing attack since the SSL certificate name does not exactly match the site URLit assumes the certificate wasn’t issued to the site using the certificate.
Your connection to the HRMS system will still be secured using the certificate even with the error. Youshould only get this error when first logging into HRMS.
If you are continuously getting this error as you navigate through the system, then HRMS needs to beadded as one of your "Trusted Sites". Do the following:
1. Select "Tools" from your IE Menu Bar2. Select "Internet Options"3. Select the "Security" tab4. Click on the green check mark "Trusted Sites"5. Click the "Sites" button (the URL for HRMS will move from the top box to the bottom box).6. Click the "Close" button7. Clik on OK
To remove all certificate error messages and in keeping with industry standards and best practices, you willneed to purchase a 3rd party SSL certificate from a certified vendor such as Verisign, Go Daddy, Comodo,etc. Please contact your technical staff and give them this information.
Once you have purchased the 3rd party SSL certificate, DPI will need to create a "Certificate Request",send to your tech staff, they will process, and return to DPI for installation on your server. Please contact HRMS Support for more information.
page 312 / 707

HRMS Communication Site
Knowledge Base > KB10811 - My Menu Bar in Internet Explorer is gone. How do I get it back?
Contributor: Steve AndrewLast Updated: Jun 26, 2012 8:13 am
If the "Menu Bar" no longer displays in IE, simply press the ALT key on your keyboard and it willappear. To make it stay, "Right Click" to the right of "Help" and click on "Menu Bar", so that it ischecked.
page 313 / 707
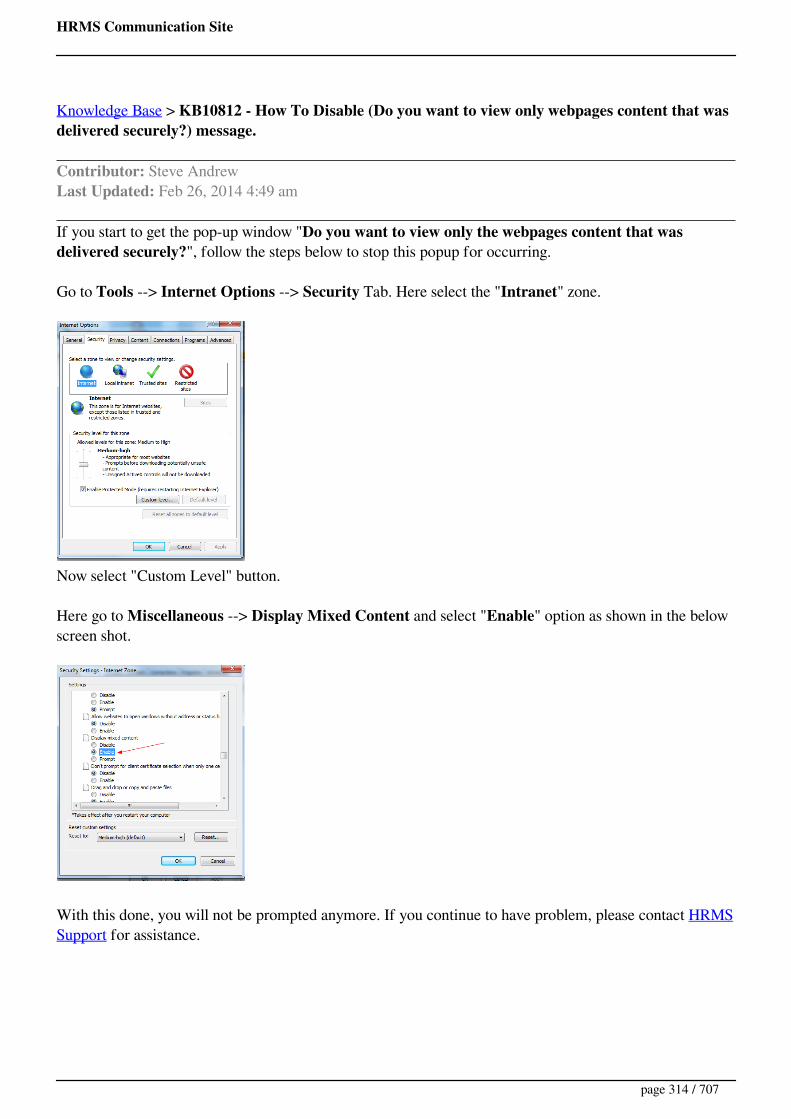
HRMS Communication Site
Knowledge Base > KB10812 - How To Disable (Do you want to view only webpages content that wasdelivered securely?) message.
Contributor: Steve AndrewLast Updated: Feb 26, 2014 4:49 am
If you start to get the pop-up window "Do you want to view only the webpages content that wasdelivered securely?", follow the steps below to stop this popup for occurring.
Go to Tools --> Internet Options --> Security Tab. Here select the "Intranet" zone.
Now select "Custom Level" button.
Here go to Miscellaneous --> Display Mixed Content and select "Enable" option as shown in the belowscreen shot.
With this done, you will not be prompted anymore. If you continue to have problem, please contact HRMSSupport for assistance.
page 314 / 707
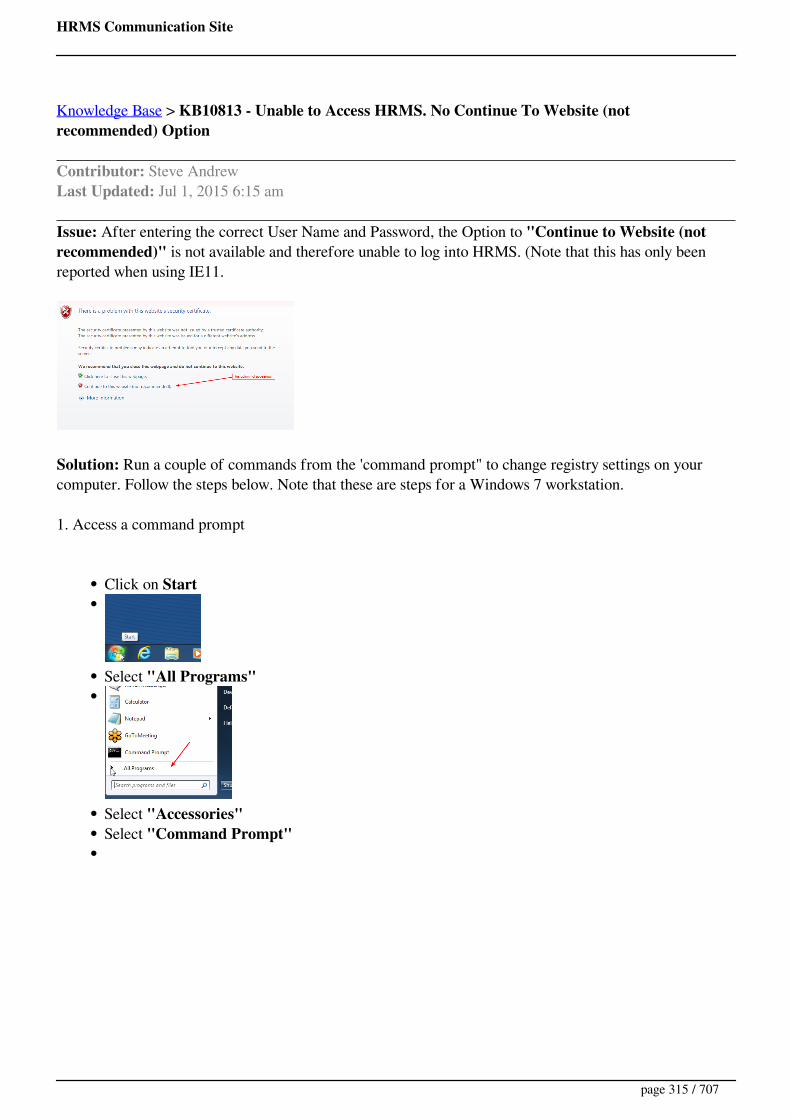
HRMS Communication Site
Knowledge Base > KB10813 - Unable to Access HRMS. No Continue To Website (notrecommended) Option
Contributor: Steve AndrewLast Updated: Jul 1, 2015 6:15 am
Issue: After entering the correct User Name and Password, the Option to "Continue to Website (notrecommended)" is not available and therefore unable to log into HRMS. (Note that this has only beenreported when using IE11.
Solution: Run a couple of commands from the 'command prompt" to change registry settings on yourcomputer. Follow the steps below. Note that these are steps for a Windows 7 workstation.
1. Access a command prompt
Click on Start
Select "All Programs"
Select "Accessories"Select "Command Prompt"
page 315 / 707
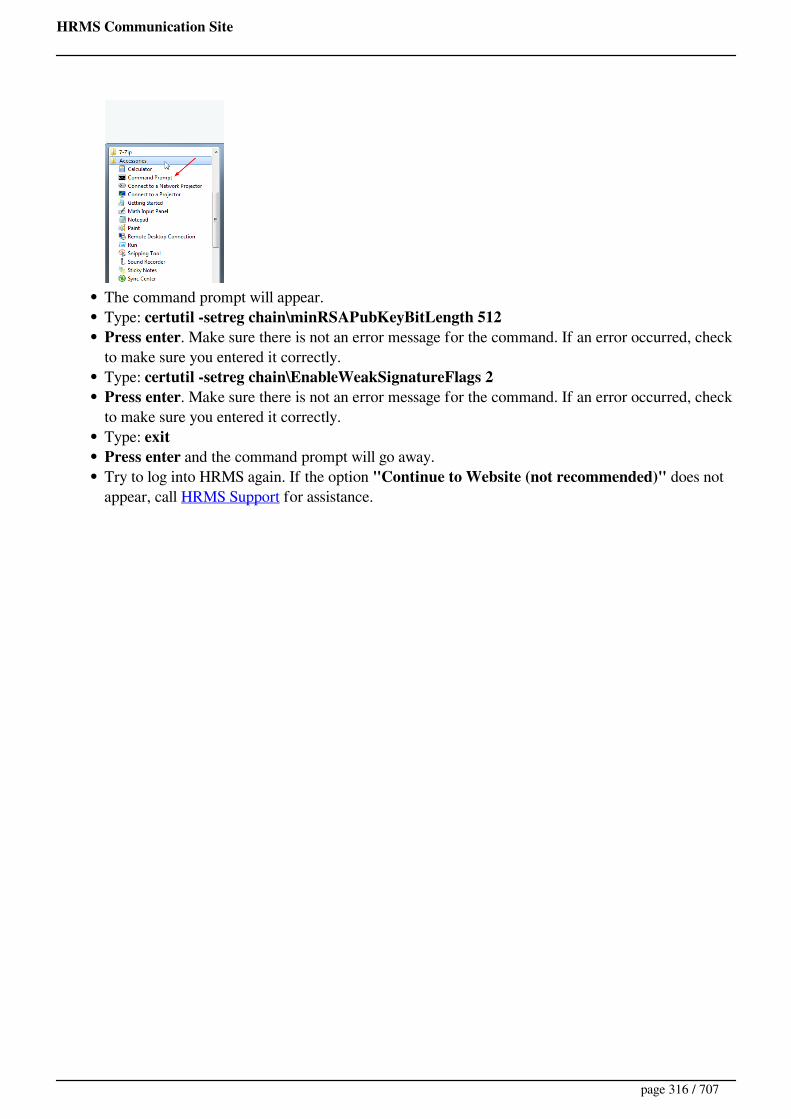
HRMS Communication Site
The command prompt will appear.Type: certutil -setreg chain\minRSAPubKeyBitLength 512Press enter. Make sure there is not an error message for the command. If an error occurred, checkto make sure you entered it correctly.Type: certutil -setreg chain\EnableWeakSignatureFlags 2Press enter. Make sure there is not an error message for the command. If an error occurred, checkto make sure you entered it correctly.Type: exitPress enter and the command prompt will go away.Try to log into HRMS again. If the option "Continue to Website (not recommended)" does notappear, call HRMS Support for assistance.
page 316 / 707

HRMS Communication Site
Knowledge Base > KB10900 - Is the Lookup My CEUs - UID Page secure?
Contributor: Steve AndrewLast Updated: Oct 18, 2011 10:20 am
No, but it does not need to be. Although you put in an SSN or Payroll ID, the information displayed is notsensitive. The only information displayed are Continuing Education classes taken and a UID. There is nopersonal information such as name, birthdate, etc....listed.
page 317 / 707
HRMS Communication Site
Knowledge Base > KB11000 - What roles should my principals have?
Contributor: Steve AndrewLast Updated: Feb 17, 2016 4:19 am
In order to view applications, see their Principals Page and work with their Vacancy Permits, they onlyneed the following role selected when managing users:
Principal/Hiring Agent
Note: Having the Principal/Hiring Agent role prevents the access to "License Data Changes".
page 318 / 707
HRMS Communication Site
Knowledge Base > KB11100 - Are substitutes put into positions?
Contributor: Steve AndrewLast Updated: Feb 26, 2014 5:24 am
Normally no.
Substitute profiles are created (Edit Substitute Profile) which allow principals to view substitutes for theirsite from the Principals Page (Home Page/Principals).
There are some school systems who have chosen to put substitutes into positions to better track theiremployment history. This can be done, but it is suggested that the position numbers used for substitutes areeasily recognizable. Also, it is important to remember that Payroll Budget Codes for substitutes are notimported for display in HRMS. Therefore you cannot put the HRMS position number on the payrollassignment record from within HRMS for these substitutes.
page 319 / 707

HRMS Communication Site
Knowledge Base > KB11200 - Can my Professional Development Vendor interface with HRMS?
Contributor: Steve AndrewLast Updated: Feb 26, 2014 5:25 am
Yes, if they follow the instructions at:https://licsalweb.dpi.state.nc.us/hrms/api
Please also contact HRMS Support for more informaiton.
page 320 / 707
HRMS Communication Site
Knowledge Base > KB11201 - The Split of Content and Literacy credits is not occuring when I post aclass
Contributor: Steve AndrewLast Updated: Jul 9, 2015 11:05 am
The split of Academic and Literacy credits only occurs if Academic Credits + Literacy Credits totals morethan the Total number of credits being awarded for the class (See Content and Literacy Credits). This canbecome an issue if there are additional types of credits being awarded. For example:
Total Credit = 1.4School Admin = .2Tech = .6Content = .6Literacy = .6
In this scenario, you really want the Content and Literacy to be "split", first applying Literacy credits forthe Renewal Cycle up to 1.0, then applying to Content. The problem is that Content (.6) + Literacy (.6) isless than the Total (1.4) to be awarded. Therefore the credits are posted as entered. Both Content andLiteracy are awarded as .6.
In order to resolve, you can:1) Go ahead and post as normal, but then you must manually update each person's credits to be correct.2) Post the Literacy and Content as one class (split will occur) and post the other credits as a different classon the same date.
page 321 / 707

HRMS Communication Site
Knowledge Base > KB11300 - Can I print Contracts in HRMS and not use the Reporting Tool?
Contributor: Steve Andrew, Brian PropstLast Updated: Feb 26, 2014 6:06 am
No, you must use Reporting Tool 2012 (Tree icon on desktop) to print contracts.
Contracts are created in HRMS from the employee's Demographic page (Other/Contract) or from the Mass Contract Build (Home Page/Employees/Employee Page/Mass Updates/Build Contracts).
page 322 / 707

HRMS Communication Site
Knowledge Base > KB11301 - How can I print an old Career Contract?
Contributor: Steve AndrewLast Updated: Mar 16, 2016 5:31 am
In 2013, the NC Legislature eliminated tenure for Public School personnel. At that time severalenhancements were made in HRMS to accommodate this change. One change was to no longer allow theprinting of the standard Career Contract. (Although the option to print the Career Contract is no longeravailable, the template is still within the tool......you will just have to locate it).
Occasionally there may be a need to reprint on old Career Contract. Below are the steps:
If the Career contract already exists in HRMS, perform the following steps.1. Call HRMS Support and have them change the "Contract Type" of the Career Contract to "Teacher".2. Open the HRMS Reporting Tool and complete the selection criteria, selecting "Teacher" as the type ofcontract.3. Go over to the right pane and select "Templates" (in the upper left), then "Load".4. Now you must search for the old "careercontract.rtf". Use the search box in the upper right to find thistemplate.5. Once found, select it. It will appear in the right pane.6. Print the contract7. Contact HRMS Support and have them change the Contract code back to Career.
(If you have problems, you are already in contact with HRMS Support, so they can help you)
If the Career contract does not exist in HRMS, perform the following steps.1. Create a "Teacher" Contract for the person.2. Call HRMS Support and have them change the "Contract Type" to "Teacher".2. Open the HRMS Reporting Tool and complete the selection criteria, selecting "Teacher" as the type ofcontract.3. Go over to the right pane and select "Templates" (in the upper left), then "Load".4. Now you must search for the old "careercontract.rtf". Use the search box in the upper right to find thistemplate.5. Once found, select it. It will appear in the right pane.6. Print the contract7. Contact HRMS Support and have them change the Contract code to Career.
page 323 / 707
HRMS Communication Site
Knowledge Base > KB11501 - How Current is Licensure Data in HRMS?
Contributor: Steve AndrewLast Updated: Feb 26, 2014 6:08 am
Licensure data in HRMS is updated by 8:00AM every weekday with the previous day's changes.
Also see: System Data and Update Schedule
page 324 / 707

HRMS Communication Site
Knowledge Base > KB11502 - I get an error when I try and view Licensure Data Changes.
Contributor: Steve AndrewLast Updated: Feb 9, 2016 9:42 am
Licensure Data Changes can be checked by: Home Page >> Employees >> Employee Page >> Views >>Licensure Data Changes
If a "Registered User" gets a strange error message when trying to view these changes, the problem is thatthe "Principal/Hiring Agent" role or the "Lead Secretary" role has been selected for this"Registered User".
1. Go to Setup >> Manage Users, select their registration, uncheck the "Principal/Hiring Agent" and the"Lead Secretary" boxes and submit.2. Wait a few minutes, then test their ID to make sure the error message is gone and the LicensureChanges Messages appear.3. TIP 1: Remember that if someone needs "System Administrator" rights, the only role they need are: 1)System Administrator and 2) Dismissed Teacher List.4. Tip 2: Note that either the role of "Licensure Forms" or "System Administrator" is required to seeLicensure Data Changes. If the Registered User has limited access, make sure that the "Licensure Forms"role is selected.
page 325 / 707

HRMS Communication Site
Knowledge Base > KB11503 - HQ Codes and Descriptions
Contributor: Steve AndrewLast Updated: Jan 6, 2014 11:19 am
HQ Codes and Descriptions
Code Description
80 Highly Qualified based on Other State's verification
81 Highly Qualified based on Other State HOUSSEstandard
82 Highly Qualified based on NC HOUSSE standard
83 Highly Qualified based on NBPTS
84 Highly Qualified based on master's level licensure orabove
85 Highly Qualified based on a graduate degree
86 Highly Qualified based on Other State licensingtest(s)
87 Highly Qualified based on NC licensing test(s)
88 Highly Qualified based on coursework equivalent toan undergraduate major
89 Highly Qualified based on undergraduate academicmajor
97 Highly Qualified not determined
98 Not Applicable for Non-Core Academic Areas
99 Not Highly Qualified
page 326 / 707
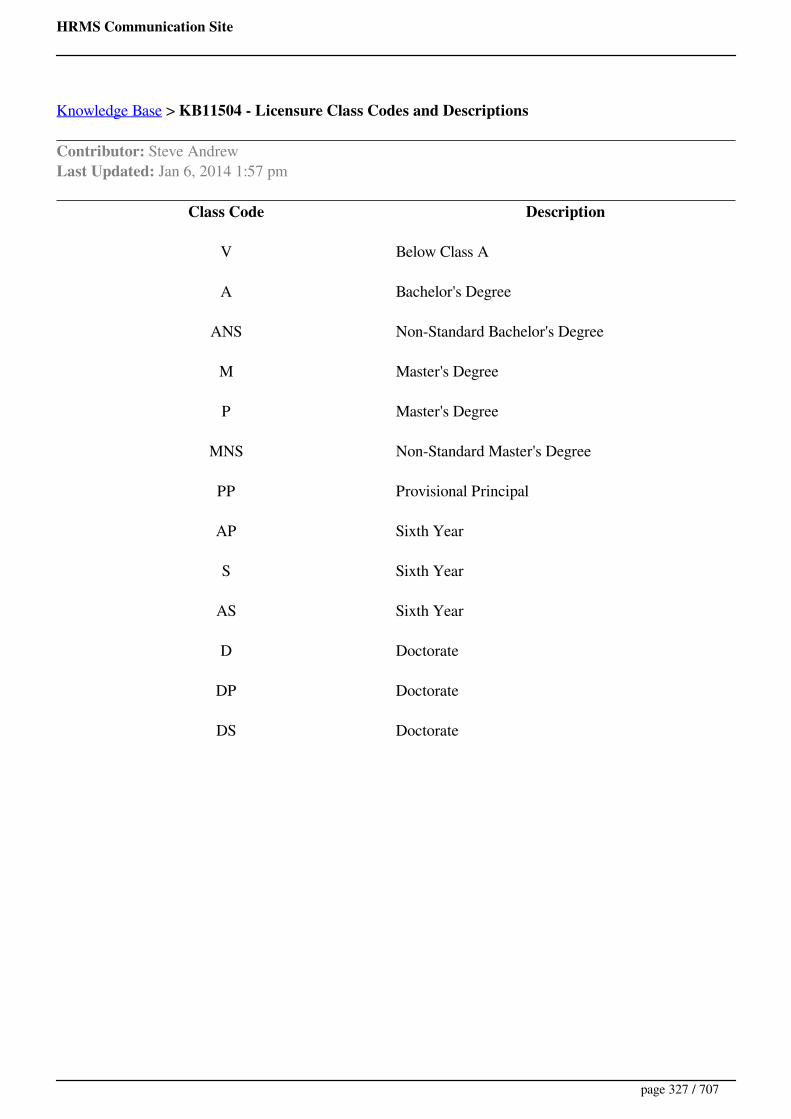
HRMS Communication Site
Knowledge Base > KB11504 - Licensure Class Codes and Descriptions
Contributor: Steve AndrewLast Updated: Jan 6, 2014 1:57 pm
Class Code Description
V Below Class A
A Bachelor's Degree
ANS Non-Standard Bachelor's Degree
M Master's Degree
P Master's Degree
MNS Non-Standard Master's Degree
PP Provisional Principal
AP Sixth Year
S Sixth Year
AS Sixth Year
D Doctorate
DP Doctorate
DS Doctorate
page 327 / 707

HRMS Communication Site
Knowledge Base > KB11505 - Licensure Status Codes
Contributor: Steve AndrewLast Updated: Jun 3, 2016 6:49 am
Code Description
0 Continuing license with no limitations. Renewalrequired by expiration date.
2 Provisional license. Valid only for the remainder ofthe fiscal year following the effective date. Holdermust satisfy deficiencies by earing required creditprior to the beginning of the school year that followsthe expiration date.
3 Restricted license. Holder must satisfy deficienciesby earning required credit prior to the beginning ofthe school year that follows the expiration date.
4 Temporary permit. Valid for the remainder of thefiscal year during which licensure is established.Holder must meet Praxis requirement(s) to continuebeyond the expiration date of the license.
5 Inactive Initial (formerly SP I) license. Can bevalidated upon employment.
8 Initial (formerly SP I) license. Valid for initialemployment in North Carolina. Converts to aContinuing (formerly SP II) license when the holdersuccessfully completes the Initial (formerly SP I)requirements.
I International Faculty conditional license issued for amaximum of 3 years.
L Lateral entry license. The testing requirement hasbeen met or not required for lateral entry licensearea(s).
M Restricted to service as a Methods Faculty in a NorthCarolina Institution of Higher Education.
P Emergency Permit to teach. Valid only for theremainder of the fiscal year following the effective
page 328 / 707

HRMS Communication Site
date.
S Initial (formerly SP I) License. Valid foremployment in North Carolina. Converts to aContinuing (formerly SP II) license when the holdercompletes one year of successful teaching in NorthCarolina and is recommended by the employingschool system.
page 329 / 707
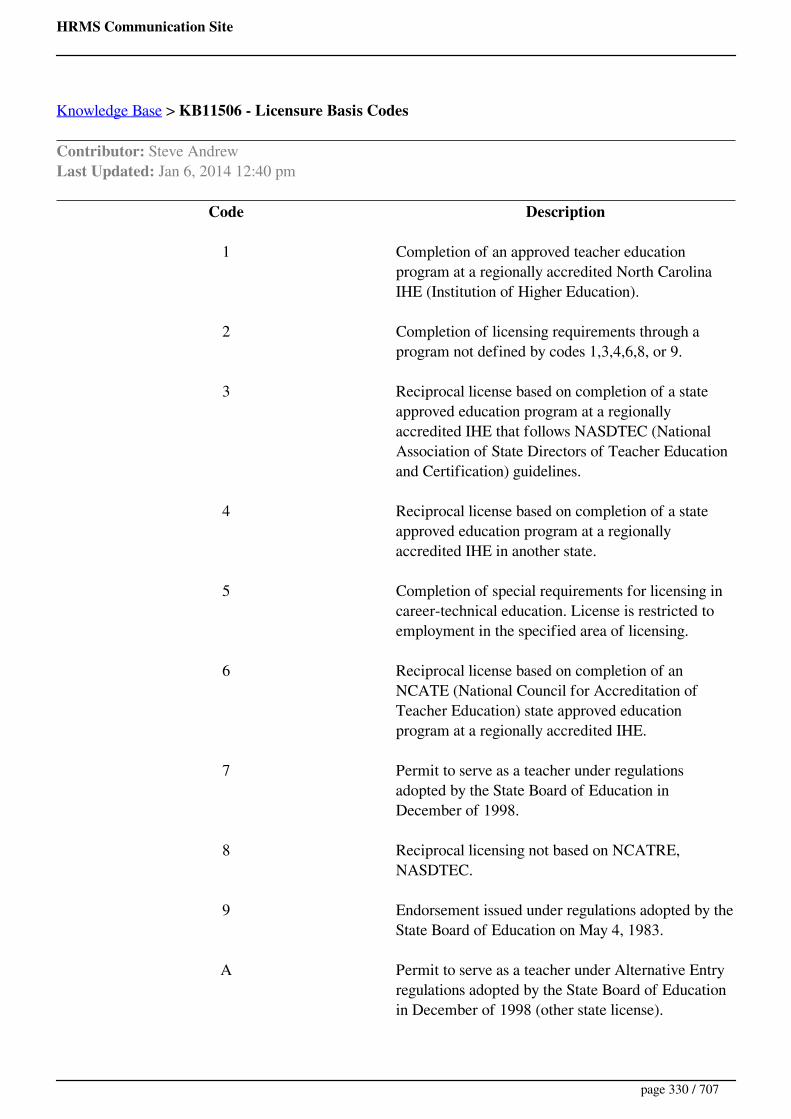
HRMS Communication Site
Knowledge Base > KB11506 - Licensure Basis Codes
Contributor: Steve AndrewLast Updated: Jan 6, 2014 12:40 pm
Code Description
1 Completion of an approved teacher educationprogram at a regionally accredited North CarolinaIHE (Institution of Higher Education).
2 Completion of licensing requirements through aprogram not defined by codes 1,3,4,6,8, or 9.
3 Reciprocal license based on completion of a stateapproved education program at a regionallyaccredited IHE that follows NASDTEC (NationalAssociation of State Directors of Teacher Educationand Certification) guidelines.
4 Reciprocal license based on completion of a stateapproved education program at a regionallyaccredited IHE in another state.
5 Completion of special requirements for licensing incareer-technical education. License is restricted toemployment in the specified area of licensing.
6 Reciprocal license based on completion of anNCATE (National Council for Accreditation ofTeacher Education) state approved educationprogram at a regionally accredited IHE.
7 Permit to serve as a teacher under regulationsadopted by the State Board of Education inDecember of 1998.
8 Reciprocal licensing not based on NCATRE,NASDTEC.
9 Endorsement issued under regulations adopted by theState Board of Education on May 4, 1983.
A Permit to serve as a teacher under Alternative Entryregulations adopted by the State Board of Educationin December of 1998 (other state license).
page 330 / 707
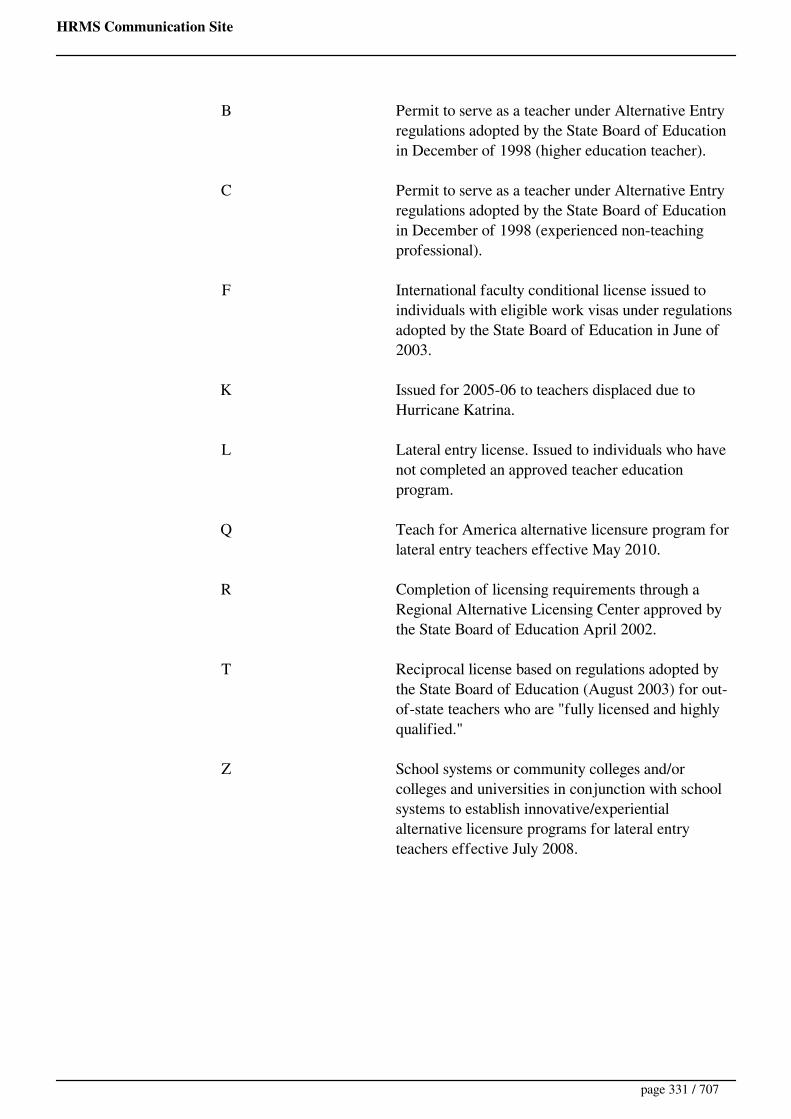
HRMS Communication Site
B Permit to serve as a teacher under Alternative Entryregulations adopted by the State Board of Educationin December of 1998 (higher education teacher).
C Permit to serve as a teacher under Alternative Entryregulations adopted by the State Board of Educationin December of 1998 (experienced non-teachingprofessional).
F International faculty conditional license issued toindividuals with eligible work visas under regulationsadopted by the State Board of Education in June of2003.
K Issued for 2005-06 to teachers displaced due toHurricane Katrina.
L Lateral entry license. Issued to individuals who havenot completed an approved teacher educationprogram.
Q Teach for America alternative licensure program forlateral entry teachers effective May 2010.
R Completion of licensing requirements through aRegional Alternative Licensing Center approved bythe State Board of Education April 2002.
T Reciprocal license based on regulations adopted bythe State Board of Education (August 2003) for out-of-state teachers who are "fully licensed and highlyqualified."
Z School systems or community colleges and/orcolleges and universities in conjunction with schoolsystems to establish innovative/experientialalternative licensure programs for lateral entryteachers effective July 2008.
page 331 / 707

HRMS Communication Site
Knowledge Base > KB11600 - How do I change the contact information printing on the LicensureForm?
Contributor: Steve AndrewLast Updated: Feb 26, 2014 7:01 am
Once you are in Licensure Forms Management (Employee Demograhpics/Other/Licensure Forms), clickon "Contact Setup" in the upper right. See Licensure Forms Management for details on updating contacts.
page 332 / 707
HRMS Communication Site
Knowledge Base > KB11800 - How often is payroll data in HRMS refreshed?
Contributor: Steve AndrewLast Updated: Feb 26, 2014 7:03 am
See KB10802 - System Data Update Schedule
page 333 / 707

HRMS Communication Site
Knowledge Base > KB11801 - Who has priority in putting the position number on the payrollassignment records with the new ISIS? Payroll or HRMS?
Contributor: Steve AndrewLast Updated: Nov 8, 2017 8:37 am
The answer is: "it depends".
History: With LINQ, payroll no longer resides on the AS400. Yet, HRMS still needs this information.Therefore, "interface tables" were created on your AS400. These "interface tables" are populated/updatedwith payroll data when the payroll option "Select HRMS Tables to Update" is executed. Data from these"interface tables" are used to populate the payroll tables within HRMS every hour.
The only time payroll has priority in entering the position number on the payroll assignment record is whenposition number on the payroll assignment record is blank. This occurs when payroll creates a new payrollassignment record or HRMS staff have not yet entered the position number on the payroll assignmentrecord. As a rule of thumb, if you want payroll to have control, they should enter the position number onthe payroll assignment record when the payroll assignment record is created. Unfortunately, if the positionnumber needs to change (miss-keyed, transfer, etc....) it must be entered from HRMS.
Any other time, HRMS has priority. The 2 places to perform the entry or change of position number inHRMS is from Editing the staff member's assignment from Employee Demographics or from the HRMS Payroll Position # Update Tool.
page 334 / 707
HRMS Communication Site
Knowledge Base > KB11802 - Configure HRMS for ISIS 6
Contributor: Steven AndrewLast Updated: Nov 8, 2017 8:42 am
The primary objective of HRMS 6.2.1 (April 2012) was to develop an interface with the Payroll vendors’new web-based systems. This interface provides the same link between HRMS Position numbers andPayroll Budget Codes that is available to LEAs using LINQ or Sartox legacy systems.
There are 4 DB2 tables in the interface library on the AS400 that must exist and be populated beforeHRMS can be configured to read from these tables.
These tables are:
PRVNDEMP - (Employees) Contains Employee Name, Payroll ID, UID etc...PRVNDASS - (Employee Jobs) Payroll Assignment, HRMS Position number, etc..PRVNDGDSTP - (Pay Grades/Steps) Grade, Step, Salary, etc...PRVNDGLCOA - (Chart of Accounts) Budget Code listing.
In LINQ, payroll staff can select Utilities, then State Specific, then Update HRMS Tables to reach ascreen where they can select/check one or more of the above tables to "update" the AS400 interfacetables with current payroll information. Once the box(es) are selected, click on "Save" and the process willstart. Payroll staff will be able to tell when the process completes by how the screen appears. (Note that thefirst time these options are checked and saved, the interface tables are created. Also note that some LEAsgive HR staff rights to run this option from the payroll screen.)
Once these tables are populated, check the following before making the configuration change inHRMS:
Check PRVNDEMP to make sure there are values in the PREUID field. (Note that you will notsee UIDs for every person).Check PRVNDASS to see if there are values in the PROPOSNUM field. (Note that you will notsee values in this field for every payroll assignment record.)Check to make sure there are no duplicated Salary Schedules, Grades and Steps in the PRVNDGDSTP table by running the following SQL code. If there are duplicates, the LEA willneed to contact ISIS to resolve.
select count(*), pgssalsch, pgsgrade, pgsstep from prvndgdstpgroup by pgssalsch, pgsgrade, pgsstephaving count(*) >1order by pgssalsch, pgsgrade, pgsstep
Once the three items above are confirmed, it is time to make the configuration change in HRMS byperforming the following steps:
page 335 / 707
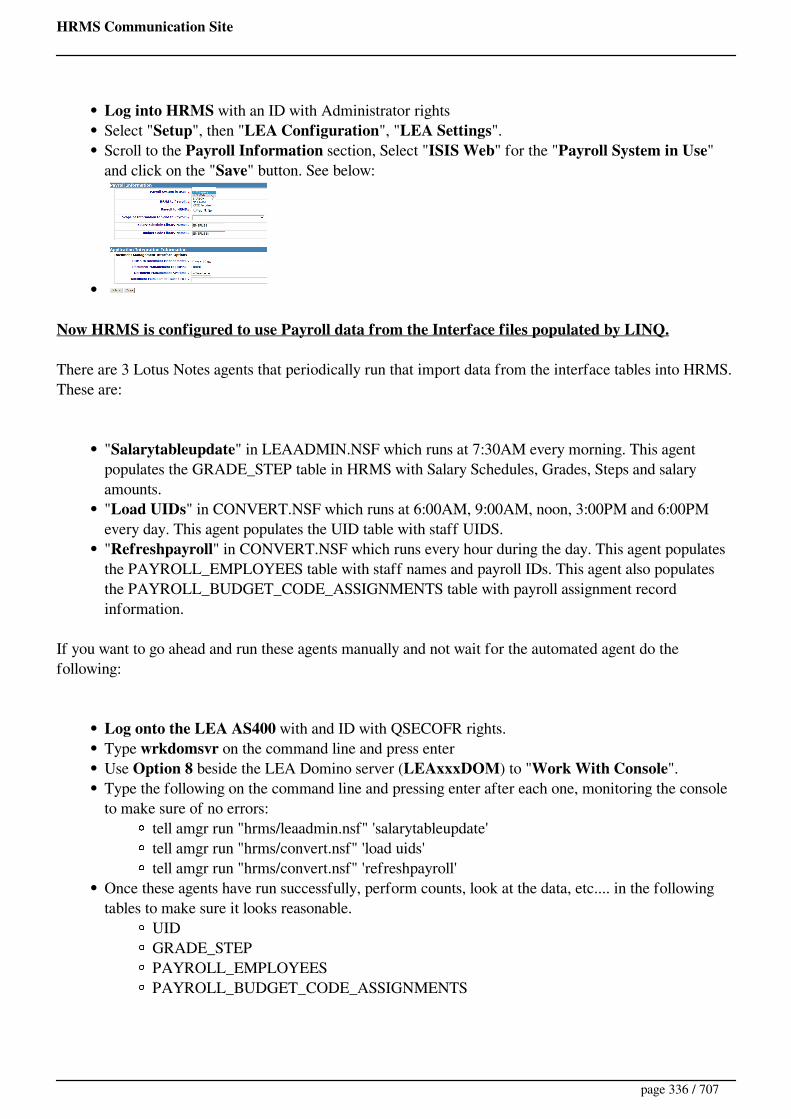
HRMS Communication Site
Log into HRMS with an ID with Administrator rightsSelect "Setup", then "LEA Configuration", "LEA Settings".Scroll to the Payroll Information section, Select "ISIS Web" for the "Payroll System in Use"and click on the "Save" button. See below:
Now HRMS is configured to use Payroll data from the Interface files populated by LINQ.
There are 3 Lotus Notes agents that periodically run that import data from the interface tables into HRMS.These are:
"Salarytableupdate" in LEAADMIN.NSF which runs at 7:30AM every morning. This agentpopulates the GRADE_STEP table in HRMS with Salary Schedules, Grades, Steps and salaryamounts."Load UIDs" in CONVERT.NSF which runs at 6:00AM, 9:00AM, noon, 3:00PM and 6:00PMevery day. This agent populates the UID table with staff UIDS."Refreshpayroll" in CONVERT.NSF which runs every hour during the day. This agent populatesthe PAYROLL_EMPLOYEES table with staff names and payroll IDs. This agent also populatesthe PAYROLL_BUDGET_CODE_ASSIGNMENTS table with payroll assignment recordinformation.
If you want to go ahead and run these agents manually and not wait for the automated agent do thefollowing:
Log onto the LEA AS400 with and ID with QSECOFR rights.Type wrkdomsvr on the command line and press enterUse Option 8 beside the LEA Domino server (LEAxxxDOM) to "Work With Console".Type the following on the command line and pressing enter after each one, monitoring the consoleto make sure of no errors:
tell amgr run "hrms/leaadmin.nsf" 'salarytableupdate'tell amgr run "hrms/convert.nsf" 'load uids'tell amgr run "hrms/convert.nsf" 'refreshpayroll'
Once these agents have run successfully, perform counts, look at the data, etc.... in the followingtables to make sure it looks reasonable.
UIDGRADE_STEPPAYROLL_EMPLOYEESPAYROLL_BUDGET_CODE_ASSIGNMENTS
page 336 / 707

HRMS Communication Site
Knowledge Base > KB12000 - Do Not Hire, Dismissed Teacher, Subpar Candidate, & RevokedLicense List
Contributor: Alice RoebuckLast Updated: Nov 8, 2017 8:31 am
Confused by all of the indicators that display when searching for applicants? The table below explainsthe difference between the Do Not Hire, Audit/Subpar, and Dismissed Teacher indicators, plus theRevoked License List.
Description Viewing Updating
Do Not Hire List Internal LEA list ofapplicants and formeremployees designated asineligible for hire orrehire
To view the entire Do Not Hire List, select Employees > Employee Page> Staffing > 'Do Not Hire' from the HRMS Home page. Then, select
either 'Show Applicants' or 'Show Former Employees.'
Former Employees areadded using the HRMS'Do Not Hire' StaffAction.
Audit/Subpar Indicator Internal LEA indicatorused to designate that anapplicant/ application doesnot meet LEA standards
In the applicant searchresults, an asterisk willdisplay in the 'Aud'column if theapplicant/application hasbeen marked Subpar.
Applicants may bemarked Subpar from the Screen Applications pageor from the 'Edit VacancyPermit' page (if they are acandidate on theVacancy).Note that If an applicantupdates his/herapplication, the Subparindicator is not removed.The indicator must beremoved manually.
Dismissed Teacher List State-wide list ofdismissed teachers
In the applicant searchresults, an asterisk willdisplay in the 'Dis'column if the applicant ison the Dismissed TeacherList.
See Dismissed TeacherList help page.
Revoked Licensed List State-wide list ofindividuals whose Licensehas been revoked
To view the entire list,click here, or click the 'Revoked License List'
link at top of Do Not HireList page.
The list is maintained bythe DPI LicensureDepartment.
page 337 / 707

HRMS Communication Site
Knowledge Base > KB12001 - Calculating Days Worked During School Year
Contributor: Alice RoebuckLast Updated: Jan 16, 2013 12:09 pm
The spreadsheet below calculates the number of days worked by a specific employee during the schoolyear.You must enter the following data into the spreadsheet:
1. Employee's beginning and ending dates for the school year.2. Dates of holidays and mandated leave days for the school year.3. Individual days taken by the employee during their employment period (sick leave, personal leave,
and days without pay).4. Beginning and ending dates for any extended leave taken by the employee during their employment
period.
Calculating Days Worked in School Year (Excel 2007).xls
DetailsDownload47 KB
page 338 / 707
HRMS Communication Site
Knowledge Base > KB12002 - Getting error when trying to validate name when entering a CEU.
Contributor: Steve AndrewLast Updated: Feb 26, 2014 7:18 am
Sometimes you may get an error if the last name of the employee contains a comma. This wasusually done when putting a suffix in the last name. For example Jones, III.
Solution: Remove the comma an the suffix from the last name field. Put the suffix in the suffix field.
page 339 / 707

HRMS Communication Site
Knowledge Base > KB12003 - What are HRMS IDs and what are they used for?
Contributor: Steve AndrewLast Updated: Feb 27, 2014 10:19 am
HRMS IDs are assigned to every applicant and staff member entered into the HRMS system. This ID isunique for each individual and used solely for the transfer of data from a CEU (Continuing EducationUnit) vendor to an LEA's HRMS system. The HRMS ID should not be used for any other purpose and isnot visible on any screen in HRMS. (Usually, only LEAs that are accepting CEU information from avendor are even aware if this ID.)
HRMS IDs are assigned to applicants as they register with the schooljobs site. Therefore, by the time anapplicant is employed in HRMS, their HRMS ID has already been created.
If a staff member is added to HRMS who did not complete an online application, it can take up to 24hours for the HRMS ID to be created and assigned to the staff member.
If you have any questions, please contact HRMS Support.
page 340 / 707

HRMS Communication Site
HRMS Help > KB13000 - Contract Condition Examples
User Roles: Steven AndrewLast Updated: Jan 12, 2012 10:36 am
Click on this link for some Examples of Contract Conditions.
page 341 / 707

HRMS Communication Site
Knowledge Base > KB14002 - When I select an action of the Staff Action Console, nothing happens.
Contributor: Steve AndrewLast Updated: Mar 12, 2013 4:26 am
If this problem occurs, your IE Browser is NOT in Compatability Mode.
Click on the Broken Window icon in the top of your Browser window. Once clicked it will turn blue.(See below)Try to select the action again.
If you do not see the "Broken Window" do the following:
1. From the Tools Menu, Select Compatability View Settings
2. Make sure that "Display all websites in Compatability View" is checked. Click on Close.
page 342 / 707

HRMS Communication Site
3. Press Ctrl F5 to refresh settings.4. You may need to shut down IE completely and restart HRMS from the login.5. Try to complete the staff action again.
page 343 / 707
HRMS Communication Site
Knowledge Base > KB14003 - Leave of Absence Best Practices
Contributor: Steve AndrewLast Updated: Feb 26, 2014 7:24 am
In addition to processing the LOA from an employee's demographics (Staff Action Console), there aresome additional steps you may want to take if someone is filling in for the employee on LOA.
There are 2 options concerning Position Management
1. Employee on LOA stays in their position. Staff member filling in for the employee on LOAis put in an LOA position.
AdvantagesWhen the employee's LOA ends, if they "return to work", they are already in theirposition. No transfer needed.
DisadvantagesWhen looking at the history of a position, you will not see the employee who filledin for the staff member on LOA.
Initial Steps for LOACreate the LOA for the employee on leave.Create or use an existing LOA position (First character of the position number is an'L') associated with the particular site (school)). This will be for the staff memberfilling in for the employee on LOA. For example L08001 (For site 308), L12001(For site 312). Many school systems reuse these over and over as needed, changingthe position description as appropriate. You will need to decide if you want theemployee on LOA OR the staff member filling in for the employee on LOA to becounted on the SS200. They should not both be counted. For the one NOT to becounted, make sure all the Federal Reporting Categories are set to "Do NotReport". (Most LEAs have the Federal Reporting Categories set to "Do NotReport" on all the LOA positions and keep the Federal Reporting Categories set onthe non-LOA position.)
Steps once the employee returns from LOAEnd the LOA for the employee and select ("Employee Returning to Work")Reselect the Federal Reporting Categories for the non-LOA position if they hadbeen set to "Do Not Report".Separate or end the assignment for the staff member that was filling in for theemployee on LOA.
Steps if the employee separates and does not return from LOAEnd the LOA for the employee and select the appropriate reason.If the staff member filling in for the employee will continue in the position, transferthem from the LOA position to the separated employees position starting the dayafter the LOA ended.
2. Create an LOA position for the employee on LOA and place them in it until they return. TheStaff member filling in for the employee on LOA is put into the original position.
Advantages
page 344 / 707
HRMS Communication Site
You can look at the employee's archives and see when on LOA.If the employee on LOA separates and does not return, the person who replacedthem is already in the position. The only processing needed is to End the LOA
DisadvantagesOnce the LOA ends, you have to transfer the employee back into their originalposition if they are returning to work.
Initial Steps for LOACreate a new LOA position with the same position number as the employee onLOA, except make the first character an 'L'. For example, the employee in position308001 goes on leave. Create position L08001.When creating the LOA position, just "copy" from the employee's current position,but make sure that the Federal Reporting categories are all set to "Do not report".(We do not want to count this person on the SS200 or have them show up as anerror).Transfer the employee going on leave to the new LOA position.Create the LOA for the employee on leave.Add an assignment or hire into the position vacated by the employee on leave. (Theperson replacing the employee on leave will be counted on the SS200 as long as theFederal Reporting Categories are set on the non-leave position and this person iscoded as Full Time.)
Steps once the employee returns from LOAEnd the Assignment or Separate the employee filling for the employee on LOA.Transfer the employee that was on LOA back to their original position.End the LOA for the employee.
Steps if the employee separates and does not return from LOA.End the LOA for the employee.Leave the person that was filling for the employee on LOA in the position ifdesired.
Note:With Release 6.3, there are 3 new Employment status codes allowing for staff to be on "Partial Leave". (Inleave for one position, but not another. These Employment Status Codes are 06 (Partial Leave/PartialEmployment with Full Benefits), 07 (Partial Leave/Partial Employment with Partial Benefits) and 08(Partial Leave/Partial Employment with No Benefits).
page 345 / 707
HRMS Communication Site
Knowledge Base > KB14201 - What is the best way to change a Future Resignation?
Contributor: Steven AndrewLast Updated: Feb 26, 2014 7:33 am
Sometimes after an employee has notified personnel when they are separating/retiring, they change theirmind. If you have already entered their future resignation into HRMS, you see both a 'Pending StatusChange' and Assignment End Dates matching the future separations date, on their Demographics page.Here are the steps to properly modify the separation.
1. On the Employee's Demographic page, select Staff Action Console.2. Select the Future Separation in the Type column. (It will be an Active separation).3. In the upper right, select Edit Separation in the Select Action dropdown.4. Change the Effective Date and Last Day employed as appropriate.5. Click on Save in the lower right.
Once back on the Demographics screen, you will notice that both the Effective Date of the Pending StatusChange and the End Date of the Assignment(s) have been updated to the new separation date.
page 346 / 707

HRMS Communication Site
Knowledge Base > KB14202 - Why is there a Rehire Eligibility date on separations?
Contributor: Steven AndrewLast Updated: Feb 26, 2014 7:34 am
With release 6.3 of HRMS, there is now a "Rehire Eligibility Date" recorded on separations.
Some LEAs have policies about eligibility for rehire. Depending on why an employee separates, there maybe some time period during which they are not eligible for rehire – as short as 3 months, as long as 5 years.(Note that if the employee is on the LEA's Do Not Hire List, the employee is "Not Eligible forRehire" and there will be not be a "Rehire Eligibility Date".)
You will notice that the "Rehire Eligibility Date" defaults to 1 day after the effective date of theseparation, unless it is a retirement. For a retirement, this date defaults to 6 months after the effective dateof the separation.
page 347 / 707

HRMS Communication Site
Knowledge Base > KB14204 - When Editing an Archived (Completed) Separation, I get the errorEffective Date of the Separation Must Remain in the Past
Contributor: Steve AndrewLast Updated: May 22, 2014 12:01 pm
When Editing an Archived/Completed Separation you cannot change the Effective Date to be after thecurrent date. (This is due to fact that the assignment(s) has/have already been archived). You will need to wait until the day after the new Effective Date and edit the separation then.
When you change the Effective Date of an archived separation successfully the following tasks areperformed:1. If this is the most recent Separation record (excluding cancelled separations) and the employee'sEmployment Status is in the Inactive Status, the employee's Termination date is changed to the newEffective Date.2. The Assignment End Dates on the employee's archived assignment(s) (where Assignment End Datematches the original Effective Date of the Separation) are changed to reflect the new Effective Date.
page 348 / 707
HRMS Communication Site
Knowledge Base > KB14205 - How do I remove a termination date for an active employee?
Contributor: Steve AndrewLast Updated: Aug 15, 2014 11:28 am
There are times when processing for an employee leaves a Termination date for an active employee. (Forexample, if you have a Future Separation and a Future Re-employment and Edit the Future Separation. Inthis case, it is best to remove/cancel the Future Re-employment, Edit the Future Separation, then recreatethe re-employment.)
Creating a Re-Employment removes the Termination Date for an employee. Therefore, if you want toremove a Termination date for an employee, create a Re-Employment with the correct effective date. Ifthe last Staff Action for the employee is a Re-Employment, you must first Remove/Cancel that Re-Employment, then recreate.
page 349 / 707
HRMS Communication Site
Knowledge Base > KB15000 - Workaround for Internet Explorer 9 Issues
Contributor: Alice RoebuckLast Updated: Mar 11, 2015 5:48 am
Some HRMS features do not function correctly when using the default settings in Internet Explorer 9. Theissue is that certain pages do not automatically display current data. Some known examples include:
When adding a candidate to a Vacancy Permit, the new candidate does not display in theCandidates section.When screening applications, applications that have been Released continue to display asUnreleased.When deleting "Licensure Forms" that were created for an employee.When entering comments on the Employee Demographics page.When returning to the Position Management Console for a second time and searching by site, theposition listing does not display.When "Switching" employees on the Staff Action Console a long error page appears.
Modifying one of the options within the IE 9 browser seems to eliminate this issue. To make this change toyour browser settings:
1. Select Tools > Internet Options from the toolbar at the top of the browser window.2. On the General (default) tab, click the Settings button in the Browsing history section.3. In the Temporary Internet Files box, under the Check for newer versions of stored pages:
question, select Every time I visit the webpage.4. Click OK twice to save the changes to your browser settings.
page 350 / 707
HRMS Communication Site
Knowledge Base > KB15001 - Truenorthlogic Data Load - FAQs
Contributor: Gordon MillspaughLast Updated: Jul 10, 2017 10:43 am
The following FAQs pertain to the memo sent to HRMS users on 5/22/2013 regarding the TruenorthlogicData Load from HRMS.
Should this year’s or last year’s Tenure and Beginning Teacher (BT) Status be entered in HRMS?What if we have not completed the Teacher Turnover Report yet?
If you have been maintaining your Tenure statuses and BT statuses in HRMS, keep your 2012-13school data until you complete the Teacher Turnover Report and Beginning Teacher Reports forthe 2012-13 school year first. Then “bump” Tenure Statuses and BT statuses. Hopefully this can becompleted by the June 7th target date for validating these data elements. However, if not, then when the adjustments are made in HRMS they will be picked up the next night with thenightly upload (to be operational by June 15th).
If you have NOT been maintaining Tenure and BT Status in HRMS, enter the 2013-14 statuses. Ifyou have not used that information this year in HRMS, this information is not important this year.If you enter next year's statuses you won't have to worry about doing the "bump" this year.
We have a lot of employees with a missing BT Status in HRMS (listed on Web Report 000135).How can we clean up this data?What should we enter for BT Status for a teacher who completed the BT Program at another LEAor was not required to complete the BT Program?
Some LEAs choose to leave BT Status blank if the teacher completed the BT program at anotherLEA or was not required to go through the BT Program. If an employee has no BT Status inHRMS, the data load to Truenorthlogic will use the employee’s Tenure Status and EmploymentStatus (if they are Temporary/Interim) to determine the correct Evaluation Status. (See nextquestion regarding how an employee’s Evaluation Status is determined.)
How are Tenure Status, BT Status, and Employment Status used to determine an employee’sEvaluation Status in Truenorthlogic?
The following logic is used to determine Evaluation Status:
If (Employee Status Type = Temporary OR Tenure Status = Temporary)If BT Status = 0, 1, 2, or 3
page 351 / 707
HRMS Communication Site
Set to Temporary/Interim Beginning TeacherElse
Set to Temporary/InterimElse
If Tenure Status = 'C'Set to Career
ElseIf BT Status = 0, 1, 2, or 3
Set to Probationary/Beginning TeacherElse
Set to Probationary Other
Since Administrators do not have Career Status, will it matter what "Career / Probationary /Beginning Teacher" status they have in HRMS?
The classification status for administrators does not matter. TNL will determine that they are anadministrator from the Budget Code pulled from your Payroll system. However if you want tocorrect your data in case of future needs, administrators (principals / assistant principals/ centraloffice administrators) should have their Tenure Status identified as ‘N/A’ (unless you have happento still have one of the few Career administrators that are still left in the state) and their BT statusshould be identified as ‘Not Required for this Position’.
Should the ‘Pre-K Teacher’ indicator be set to ‘Yes’ for Exceptional Children Positions?
If the teacher is an EC Pre-K teacher, then yes! The Pre-K Teacher indicator should be set to ‘Yes’for all teachers that are actually teaching Pre-K students.
page 352 / 707
HRMS Communication Site
Knowledge Base > KB15002 - Workaround for Internet Explorer 10 Issues
Contributor: Steve AndrewLast Updated: Mar 11, 2015 5:48 am
Please make the following 2 configuration changes to your IE 10 Browser.
#1 "Check for new versions of stored pages."Some HRMS features do not function correctly when using the default settings in Internet Explorer 10. Theissue is that certain pages do not automatically display current data. Some known examples include:
When adding a candidate to a Vacancy Permit, the new candidate does not display in theCandidates section.When screening applications, applications that have been Released continue to display asUnreleased.When deleting "Licensure Forms" that were created for an employee.When entering comments on the Employee Demographics page.When returning to the Position Management Console for a second time and searching by site, theposition listing does not display.When "Switching" employees in the Staff Action Console a long error page appears.
Modifying one of the options within the IE 10 browser eliminates this issue. To make this change to yourbrowser settings:
1. Select Tools > Internet Options from the menubar at the top of the browser window. (If you donot see the menubar see KB10811.)
2. On the General (default) tab, click the Settings button in the Browsing history section.3. In the Temporary Internet Files box, under the Check for newer versions of stored pages:
question, select Every time I visit the webpage.4. Click OK twice to save the changes to your browser settings.
#2 "Compatibility View."If IE 10 is not in "Compatibility Mode", you will get "unauthorized" messages throughout HRMS. Tomake this change to your browser settings:
1. Go to your HRMS Login Page2. Select Tools > Compatibility View Settings from the menubar at the top of the browser window.
(If you do not see the menubar see KB10811.)3.
page 353 / 707

HRMS Communication Site
4. Click on the "Add" button to add your HRMS URL to the list of "Websites you've added toCompatibility View".
5. Check the box "Display all website in Compatibility View" and click on Close.6.
7. Log into HRMS and make sure you can access as needed.
page 354 / 707

HRMS Communication Site
Knowledge Base > KB15003 - Workaround for Internet Explorer 11 Issues
Contributor: Steve AndrewLast Updated: Mar 11, 2015 5:49 am
Please make the following 2 configuration changes to your IE 11 Browser.
#1 "Check for new versions of stored pages."Some HRMS features do not function correctly when using the default settings in Internet Explorer 11. Theissue is that certain pages do not automatically display current data. Some known examples include:
When adding a candidate to a Vacancy Permit, the new candidate does not display in theCandidates section.When screening applications, applications that have been Released continue to display asUnreleased.When deleting "Licensure Forms" that were created for an employee.When entering comments on the Employee Demographics page.When returning to the Position Management Console for a second time and searching by site, theposition listing does not display.When "Switching" employees on the Staff Action Console a long error page appears.
Modifying one of the options within the IE 11 browser eliminates this issue. To make this change to yourbrowser settings:
1. Select Tools > Internet Options from the menu bar at the top of the browser window. (If you donot see the menu bar see KB10811.)
2. On the General (default) tab, click the Settings button in the Browsing history section.3. In the Temporary Internet Files box, under the Check for newer versions of stored pages:
question, select Every time I visit the webpage.4. Click OK twice to save the changes to your browser settings.
#2 "Compatibility View."If your HRMS Website has not been added to the list of websites for "Compatibility View", you will getthe error message below:
To resolve, perform the following steps:
Go to your HRMS Login Page.
page 355 / 707
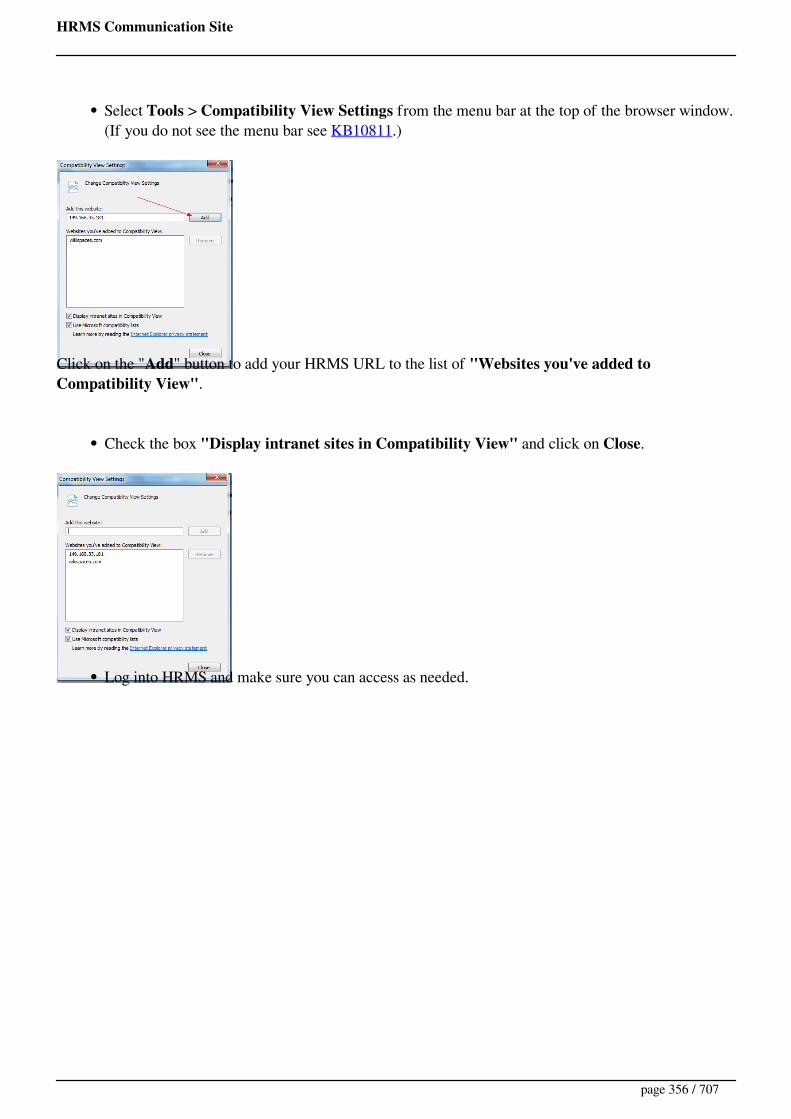
HRMS Communication Site
Select Tools > Compatibility View Settings from the menu bar at the top of the browser window.(If you do not see the menu bar see KB10811.)
Click on the "Add" button to add your HRMS URL to the list of "Websites you've added toCompatibility View".
Check the box "Display intranet sites in Compatibility View" and click on Close.
Log into HRMS and make sure you can access as needed.
page 356 / 707

HRMS Communication Site
Knowledge Base > KB15004 - Issues viewing CEU History
Contributor: enter name hereLast Updated: Aug 3, 2017 10:12 am
If you are having problems viewing CEU history do the following in your browser:
Go to Internet OptionsOn the General tab go to 'Browsing history' and click SettingsOn the Temporary Internet Files tab, go to 'Check for newer versions of stored pages:' and select'Every time I visit the webpage'.Click OK twice so that all of the pop-up windows are gone.Close the browser.
Now when you open the CEU history, you should be able to view the CEUs.
page 357 / 707

HRMS Communication Site
Knowledge Base > KB20000 - HRMS Website issues caused by Zscaler
Contributor: Steve AndrewLast Updated: Feb 27, 2014 11:42 am
There have been reported issues with HRMS functions such as:
1. When trying to Search Applications By Vacancy, the list of vacancies do not appear in the dropdownbox for selection after entering first part of position number or position description.2. When accessing the Staff Action Console, there is no error, just a spinning arrow that never takes you tothe console.
The common factor in these issues was the use of Zscaler.
To fix, make sure to allow the following URLs to bypass Zscaler's user authentication:
core.dpi.state.nc.usfiles.dpi.state.nc.ushrmscomm.wikispaces.comhrms.dpi.state.nc.us
Also, the URL for HRMS that is used for your LEA.
page 358 / 707

HRMS Communication Site
Knowledge Base
KB402 Contract Digital Signatures
Last Updated: Nov 23, 2015 12:13 pm
Inserting an electronic signature into contracts in the Reporting ToolSteps
- Format the contract .rtf to make it mass-insert friendly
- Run Contracts in the Reporting Tool
- Export the results to MS Word
- Mass-insert the electronic signature(http://word.tips.net/T000397_Searching_and_Replacing_Graphics.html)
*Note this only works with image based electronic signatures (JPG, GIF, or PNG files)Enter body of KB article here...
page 359 / 707
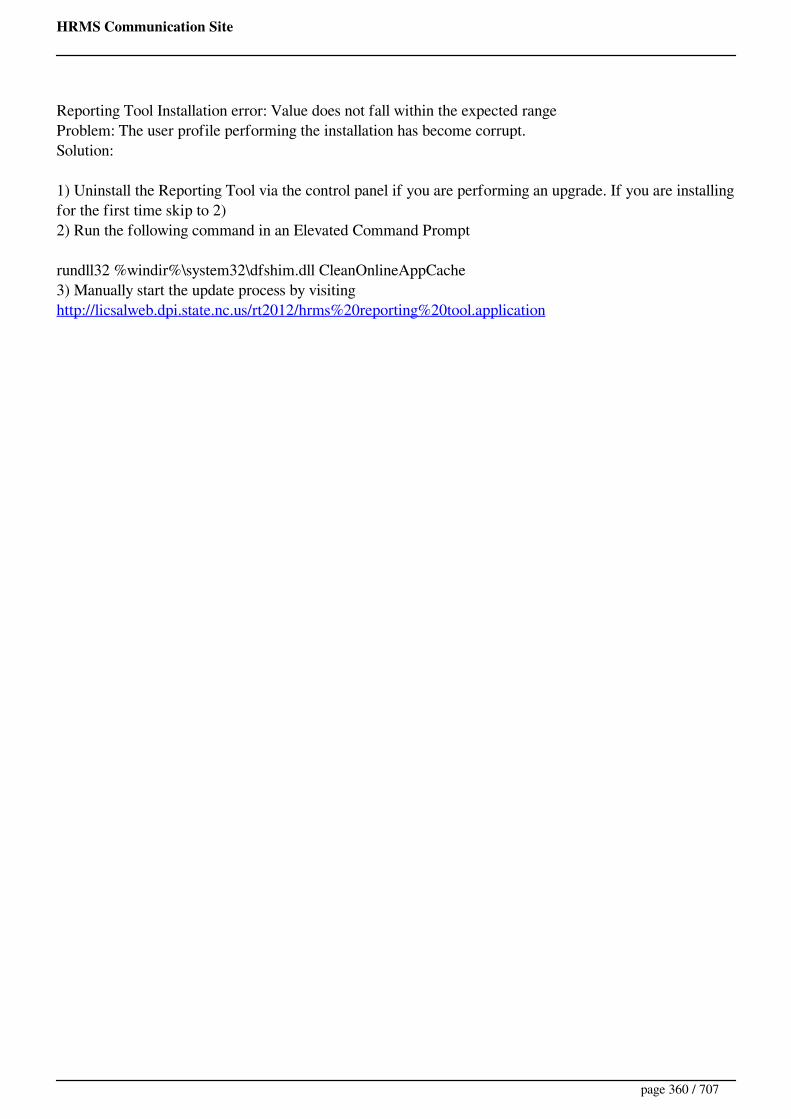
HRMS Communication Site
Reporting Tool Installation error: Value does not fall within the expected rangeProblem: The user profile performing the installation has become corrupt.Solution:
1) Uninstall the Reporting Tool via the control panel if you are performing an upgrade. If you are installingfor the first time skip to 2)2) Run the following command in an Elevated Command Prompt
rundll32 %windir%\system32\dfshim.dll CleanOnlineAppCache3) Manually start the update process by visiting http://licsalweb.dpi.state.nc.us/rt2012/hrms%20reporting%20tool.application
page 360 / 707

HRMS Communication Site
HRMS Help > Setup > KeyContacts
User Roles: System AdministratorLast Updated: Dec 4, 2017 8:25 am
The Key Contacts (Personnel Administrator, Finance Officer, AS400 Administrator) are displayed on theHRMS Home Page regardless of whether anyone is logged in or not. Once a System Administrator islogged in, 'Edit' options are available. See below.
Once you click on either 'Edit' or 'Contacts, the screen below displays, listing your current Key Contacts. YOU CAN ONLY HAVE 1 KEY CONTACT FOR EACH OF THE 3 JOB TITLES.
To add a Key Contact, complete ALL the fields at the top of the form and click SUBMIT. (You cannotchange the LEA Number). If a Key Contact already exists for the Job Title selected, you will be promptedto confirm that you want to replace the existing Key Contact with the one just entered.
To edit a Key Contact, click the person's name in the table and the text boxes at the top of the screen willbe populated with that person's information. Change as desired and click on SUBMIT.
To delete a Key Contact, click the person's name in the table, then click DELETE.
NOTE: The Show All LEA's box is not currently working
page 361 / 707
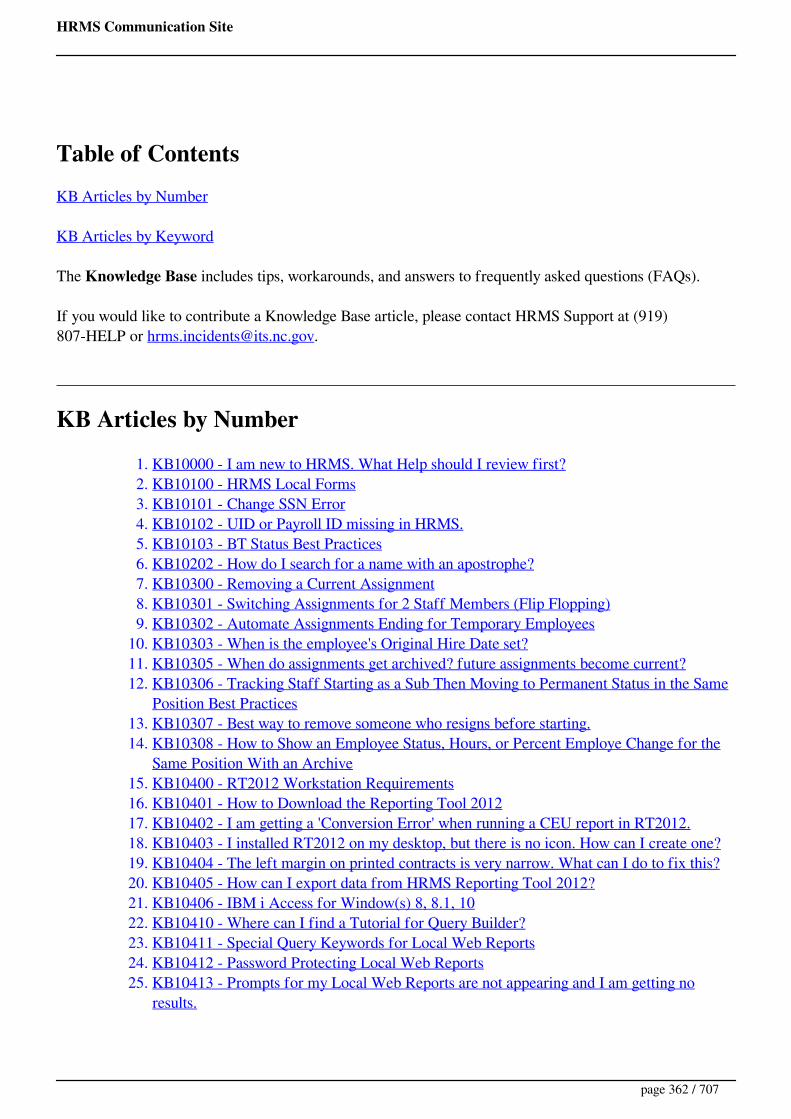
HRMS Communication Site
Table of ContentsKB Articles by Number
KB Articles by Keyword
The Knowledge Base includes tips, workarounds, and answers to frequently asked questions (FAQs).
If you would like to contribute a Knowledge Base article, please contact HRMS Support at (919)807-HELP or [email protected].
KB Articles by Number
1. KB10000 - I am new to HRMS. What Help should I review first?2. KB10100 - HRMS Local Forms3. KB10101 - Change SSN Error4. KB10102 - UID or Payroll ID missing in HRMS.5. KB10103 - BT Status Best Practices6. KB10202 - How do I search for a name with an apostrophe?7. KB10300 - Removing a Current Assignment8. KB10301 - Switching Assignments for 2 Staff Members (Flip Flopping)9. KB10302 - Automate Assignments Ending for Temporary Employees
10. KB10303 - When is the employee's Original Hire Date set?11. KB10305 - When do assignments get archived? future assignments become current?12. KB10306 - Tracking Staff Starting as a Sub Then Moving to Permanent Status in the Same
Position Best Practices13. KB10307 - Best way to remove someone who resigns before starting.14. KB10308 - How to Show an Employee Status, Hours, or Percent Employe Change for the
Same Position With an Archive15. KB10400 - RT2012 Workstation Requirements16. KB10401 - How to Download the Reporting Tool 201217. KB10402 - I am getting a 'Conversion Error' when running a CEU report in RT2012.18. KB10403 - I installed RT2012 on my desktop, but there is no icon. How can I create one?19. KB10404 - The left margin on printed contracts is very narrow. What can I do to fix this?20. KB10405 - How can I export data from HRMS Reporting Tool 2012?21. KB10406 - IBM i Access for Window(s) 8, 8.1, 1022. KB10410 - Where can I find a Tutorial for Query Builder?23. KB10411 - Special Query Keywords for Local Web Reports24. KB10412 - Password Protecting Local Web Reports25. KB10413 - Prompts for my Local Web Reports are not appearing and I am getting no
results.
page 362 / 707
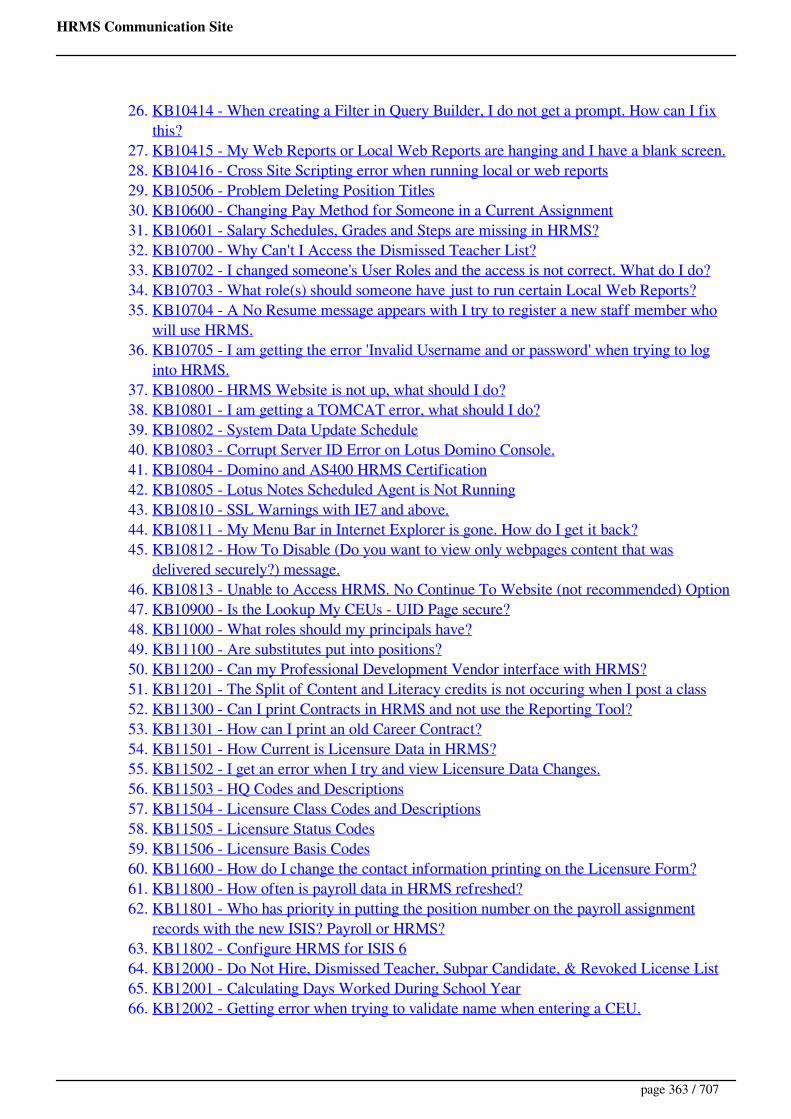
HRMS Communication Site
26. KB10414 - When creating a Filter in Query Builder, I do not get a prompt. How can I fixthis?
27. KB10415 - My Web Reports or Local Web Reports are hanging and I have a blank screen.28. KB10416 - Cross Site Scripting error when running local or web reports29. KB10506 - Problem Deleting Position Titles30. KB10600 - Changing Pay Method for Someone in a Current Assignment31. KB10601 - Salary Schedules, Grades and Steps are missing in HRMS?32. KB10700 - Why Can't I Access the Dismissed Teacher List?33. KB10702 - I changed someone's User Roles and the access is not correct. What do I do?34. KB10703 - What role(s) should someone have just to run certain Local Web Reports?35. KB10704 - A No Resume message appears with I try to register a new staff member who
will use HRMS.36. KB10705 - I am getting the error 'Invalid Username and or password' when trying to log
into HRMS.37. KB10800 - HRMS Website is not up, what should I do?38. KB10801 - I am getting a TOMCAT error, what should I do?39. KB10802 - System Data Update Schedule40. KB10803 - Corrupt Server ID Error on Lotus Domino Console.41. KB10804 - Domino and AS400 HRMS Certification42. KB10805 - Lotus Notes Scheduled Agent is Not Running43. KB10810 - SSL Warnings with IE7 and above.44. KB10811 - My Menu Bar in Internet Explorer is gone. How do I get it back?45. KB10812 - How To Disable (Do you want to view only webpages content that was
delivered securely?) message.46. KB10813 - Unable to Access HRMS. No Continue To Website (not recommended) Option47. KB10900 - Is the Lookup My CEUs - UID Page secure?48. KB11000 - What roles should my principals have?49. KB11100 - Are substitutes put into positions?50. KB11200 - Can my Professional Development Vendor interface with HRMS?51. KB11201 - The Split of Content and Literacy credits is not occuring when I post a class52. KB11300 - Can I print Contracts in HRMS and not use the Reporting Tool?53. KB11301 - How can I print an old Career Contract?54. KB11501 - How Current is Licensure Data in HRMS?55. KB11502 - I get an error when I try and view Licensure Data Changes.56. KB11503 - HQ Codes and Descriptions57. KB11504 - Licensure Class Codes and Descriptions58. KB11505 - Licensure Status Codes59. KB11506 - Licensure Basis Codes60. KB11600 - How do I change the contact information printing on the Licensure Form?61. KB11800 - How often is payroll data in HRMS refreshed?62. KB11801 - Who has priority in putting the position number on the payroll assignment
records with the new ISIS? Payroll or HRMS?63. KB11802 - Configure HRMS for ISIS 664. KB12000 - Do Not Hire, Dismissed Teacher, Subpar Candidate, & Revoked License List65. KB12001 - Calculating Days Worked During School Year66. KB12002 - Getting error when trying to validate name when entering a CEU.
page 363 / 707

HRMS Communication Site
67. KB12003 - What are HRMS IDs and what are they used for?68. KB13000 - Contract Condition Examples69. KB14002 - When I select an action of the Staff Action Console, nothing happens.70. KB14003 - Leave of Absence Best Practices71. KB14201 - What is the best way to change a Future Resignation?72. KB14202 - Why is there a Rehire Eligibility date on separations?73. KB14204 - When Editing an Archived (Completed) Separation, I get the error Effective
Date of the Separation Must Remain in the Past74. KB14205 - How do I remove a termination date for an active employee?75. KB15000 - Workaround for Internet Explorer 9 Issues76. KB15001 - Truenorthlogic Data Load - FAQs77. KB15002 - Workaround for Internet Explorer 10 Issues78. KB15003 - Workaround for Internet Explorer 11 Issues79. KB15004 - Issues viewing CEU History80. KB20000 - HRMS Website issues caused by Zscaler81. KB72015 - Reporting Tool upgrade error
KB Articles by KeywordKeyword Articles
Announcements
Applicants
Assignments
1. KB10101 - Change SSN Error2. KB10300 - Removing a Current Assignment3. KB10301 - Switching Assignments for 2
Staff Members (Flip Flopping)4. KB10302 - Automate Assignments Ending
for Temporary Employees5. KB10303 - When is the employee's Original
Hire Date set?6. KB10305 - When do assignments get
archived? future assignments becomecurrent?
page 364 / 707
HRMS Communication Site
7. KB10306 - Tracking Staff Starting as a SubThen Moving to Permanent Status in theSame Position Best Practices
8. KB10307 - Best way to remove someone whoresigns before starting.
9. KB10308 - How to Show an EmployeeStatus, Hours, or Percent Employe Changefor the Same Position With an Archive
10. KB10600 - Changing Pay Method forSomeone in a Current Assignment
11. KB10802 - System Data Update Schedule12. KB11801 - Who has priority in putting the
position number on the payroll assignmentrecords with the new ISIS? Payroll orHRMS?
13. KB11802 - Configure HRMS for ISIS 614. KB14201 - What is the best way to change a
Future Resignation?
Best Practices
1. KB10103 - BT Status Best Practices2. KB10306 - Tracking Staff Starting as a Sub
Then Moving to Permanent Status in theSame Position Best Practices
3. KB14003 - Leave of Absence Best Practices
CEUs
1. KB10402 - I am getting a 'Conversion Error'when running a CEU report in RT2012.
2. KB10802 - System Data Update Schedule3. KB10900 - Is the Lookup My CEUs - UID
Page secure?4. KB11200 - Can my Professional
Development Vendor interface with HRMS?5. KB11201 - The Split of Content and Literacy
credits is not occuring when I post a class6. KB12001 - Calculating Days Worked During
School Year7. KB12002 - Getting error when trying to
validate name when entering a CEU.
page 365 / 707

HRMS Communication Site
8. KB12003 - What are HRMS IDs and whatare they used for?
9. KB15004 - Issues viewing CEU History
Contracts
1. KB10404 - The left margin on printedcontracts is very narrow. What can I do to fixthis?
2. KB11300 - Can I print Contracts in HRMSand not use the Reporting Tool?
3. KB11301 - How can I print an old CareerContract?
4. KB13000 - Contract Condition Examples
Employees
1. KB10100 - HRMS Local Forms2. KB10101 - Change SSN Error3. KB10102 - UID or Payroll ID missing in
HRMS.4. KB10103 - BT Status Best Practices5. KB10303 - When is the employee's Original
Hire Date set?6. KB10306 - Tracking Staff Starting as a Sub
Then Moving to Permanent Status in theSame Position Best Practices
7. KB10307 - Best way to remove someone whoresigns before starting.
8. KB10308 - How to Show an EmployeeStatus, Hours, or Percent Employe Changefor the Same Position With an Archive
9. KB10704 - A No Resume message appearswith I try to register a new staff member whowill use HRMS.
10. KB10802 - System Data Update Schedule11. KB11501 - How Current is Licensure Data in
HRMS?12. KB12001 - Calculating Days Worked During
School Year13. KB14205 - How do I remove a termination
date for an active employee?
page 366 / 707

HRMS Communication Site
Licensure
1. KB10802 - System Data Update Schedule2. KB11501 - How Current is Licensure Data in
HRMS?3. KB11502 - I get an error when I try and view
Licensure Data Changes.4. KB11503 - HQ Codes and Descriptions5. KB11504 - Licensure Class Codes and
Descriptions6. KB11505 - Licensure Status Codes7. KB11506 - Licensure Basis Codes8. KB11600 - How do I change the contact
information printing on the Licensure Form?
Payroll Interface
1. KB10802 - System Data Update Schedule2. KB11800 - How often is payroll data in
HRMS refreshed?3. KB11801 - Who has priority in putting the
position number on the payroll assignmentrecords with the new ISIS? Payroll orHRMS?
4. KB11802 - Configure HRMS for ISIS 6
Positions
1. KB10301 - Switching Assignments for 2Staff Members (Flip Flopping)
2. KB10306 - Tracking Staff Starting as a SubThen Moving to Permanent Status in theSame Position Best Practices
3. KB10307 - Best way to remove someone whoresigns before starting.
4. KB10506 - Problem Deleting Position Titles5. KB10600 - Changing Pay Method for
Someone in a Current Assignment6. KB10601 - Salary Schedules, Grades and
Steps are missing in HRMS?
page 367 / 707
HRMS Communication Site
7. KB10802 - System Data Update Schedule8. KB11100 - Are substitutes put into positions?9. KB11801 - Who has priority in putting the
position number on the payroll assignmentrecords with the new ISIS? Payroll orHRMS?
10. KB11802 - Configure HRMS for ISIS 6
Principals
1. KB11000 - What roles should my principalshave?
Reporting
1. KB10400 - RT2012 WorkstationRequirements
2. KB10402 - I am getting a 'Conversion Error'when running a CEU report in RT2012.
3. KB10403 - I installed RT2012 on mydesktop, but there is no icon. How can Icreate one?
4. KB10404 - The left margin on printedcontracts is very narrow. What can I do to fixthis?
5. KB10405 - How can I export data fromHRMS Reporting Tool 2012?
6. KB10406 - IBM i Access for Window(s) 8,8.1, 10
7. KB10410 - Where can I find a Tutorial forQuery Builder?
8. KB10411 - Special Query Keywords forLocal Web Reports
9. KB10412 - Password Protecting Local WebReports
10. KB10413 - Prompts for my Local WebReports are not appearing and I am getting noresults.
11. KB10414 - When creating a Filter in QueryBuilder, I do not get a prompt. How can I fixthis?
12. KB10415 - My Web Reports or Local Web
page 368 / 707
HRMS Communication Site
Reports are hanging and I have a blankscreen.
13. KB10416 - Cross Site Scripting error whenrunning local or web reports
14. KB10703 - What role(s) should someonehave just to run certain Local Web Reports?
15. KB11300 - Can I print Contracts in HRMSand not use the Reporting Tool?
Staff Actions
1. KB10101 - Change SSN Error2. KB10302 - Automate Assignments Ending
for Temporary Employees3. KB10307 - Best way to remove someone who
resigns before starting.4. KB12001 - Calculating Days Worked During
School Year5. KB14002 - When I select an action of the
Staff Action Console, nothing happens.6. KB14003 - Leave of Absence Best Practices7. KB14201 - What is the best way to change a
Future Resignation?8. KB14202 - Why is there a Rehire Eligibility
date on separations?9. KB14204 - When Editing an Archived
(Completed) Separation, I get the errorEffective Date of the Separation MustRemain in the Past
10. KB14205 - How do I remove a terminationdate for an active employee?
11. KB20000 - HRMS Website issues caused byZscaler
Substitutes
1. KB11100 - Are substitutes put into positions?
System Configuration
page 369 / 707

HRMS Communication Site
1. KB10416 - Cross Site Scripting error whenrunning local or web reports
2. KB10703 - What role(s) should someonehave just to run certain Local Web Reports?
3. KB10705 - I am getting the error 'InvalidUsername and or password' when trying tolog into HRMS.
4. KB10800 - HRMS Website is not up, whatshould I do?
5. KB10801 - I am getting a TOMCAT error,what should I do?
6. KB10803 - Corrupt Server ID Error on LotusDomino Console.
7. KB10804 - Domino and AS400 HRMSCertification
8. KB10805 - Lotus Notes Scheduled Agent isNot Running
9. KB10810 - SSL Warnings with IE7 andabove.
10. KB10811 - My Menu Bar in InternetExplorer is gone. How do I get it back?
11. KB10813 - Unable to Access HRMS. NoContinue To Website (not recommended)Option
12. KB11802 - Configure HRMS for ISIS 6
Users
1. KB10700 - Why Can't I Access theDismissed Teacher List?
2. KB10702 - I changed someone's User Rolesand the access is not correct. What do I do?
3. KB10703 - What role(s) should someonehave just to run certain Local Web Reports?
4. KB10705 - I am getting the error 'InvalidUsername and or password' when trying tolog into HRMS.
5. KB11000 - What roles should my principalshave?
Vacancies
page 370 / 707

HRMS Communication Site
Website Issues
1. KB10413 - Prompts for my Local WebReports are not appearing and I am getting noresults.
2. KB10414 - When creating a Filter in QueryBuilder, I do not get a prompt. How can I fixthis?
3. KB10800 - HRMS Website is not up, whatshould I do?
4. KB10801 - I am getting a TOMCAT error,what should I do?
5. KB10812 - How To Disable (Do you want toview only webpages content that wasdelivered securely?) message.
6. KB11502 - I get an error when I try and viewLicensure Data Changes.
7. KB14002 - When I select an action of theStaff Action Console, nothing happens.
8. KB15000 - Workaround for Internet Explorer9 Issues
9. KB15002 - Workaround for Internet Explorer10 Issues
10. KB15003 - Workaround for Internet Explorer11 Issues
11. KB15004 - Issues viewing CEU History12. KB20000 - HRMS Website issues caused by
Zscaler
page 371 / 707

HRMS Communication Site
HRMS Help > Reporting Tool > Selection Criteria > Last Hire Date between
Last Updated: Jul 9, 2012 8:38 am
This option is used to select or identify employees hired between the start and end dates entered(inclusive).
For the New Hire Report and the EEO-5 Reports, this is a required field.
For the Employee Listing, this is an optional field.
How To
Enter a date or click the down arrow and use the calendar to pick a date.
page 372 / 707

HRMS Communication Site
HRMS Help > System Configuration > LEA Settings
User Roles: System AdministratorLast Updated: May 19, 2014 12:05 pm
The LEA Settings configuration form stores basic LEA information, plus configuration settings related toApplicants, Vacancy Permits, and Payroll Information.
To access the configuration form, go to: HRMS Home > Setup > LEA Configuration > LEA Settings.
The LEA Settings form will display. More information follows the screen shot below.
Applicant-Related Settings
Prescreen Applicants? – Select 'Yes' if your HR Department prescreens applicants beforereleasing them to those responsible for hiring.Maximum number of records for search results – This is the maximum number of results thatwill be returned on the Search Applicants and Activate/Inactivate Individual Applications screens.If your search returns more than the maximum number of records, you will be instructed to enteradditional criteria to narrow the search. The default value is 500. Increasing this number could
page 373 / 707

HRMS Communication Site
have a negative impact on system performance.
Vacancy Permit-Related Settings
Use System-Wide Hiring Agents? - These agents may be used in the Vacancy Permit process tohire for positions that are shared across the district (e.g., Exceptional Children, WorkforceDevelopment).Use Nominee Approval Agents? - These agents may be used in the Vacancy Permit process to signoff on a Principal's recommendation for hire before sending it to the Central Office for finalapproval.
URL’s for the Rejection Letter – You may enter a URL that points to a graphic file that willdisplay at the top or bottom of Candidate Rejection Letters. This enables you to generate theseletters on your system letterhead.
Recommendations for Rejection Letter Graphics:Create graphics as jpg, png, or gif files.Name the graphic file without using spaces or special characters (except underscore) (e.g.,MyTopLogo.gif)Match the case of the URL to the graphic exactlyUse “https” or secure and encrypted web addresses for graphics (e.g., https://myserver/graphics/MyTopLogo.gif).
Payroll Information
Payroll System in Use. Options are:ISIS LegacyISIS WebSartox
HRMS to Payroll (Contact HRMS Support before changing)When set to YES, changes made (dependent upon the option selected in "Scope ofInformation to send to Payroll") are written to an interface file and ready for import intoPayroll. Please contact your Payroll vendor for the option to import.
Payroll to HRMS (Contact HRMS Support before changing)When set to yes, selected data exported from Payroll (Absence and/or Leave Data) willautomatically import into HRMS at 9:15PM. (Note that at one time there was a Payrollexport of Assignment/Budgetary data and Salary data that are no longer applicable.)
Scope of Information to send to Payroll (Contact HRMS Support before changing and todiscuss.)
Demographic Data OnlyDemographic Data and New Employee Position InfoDemographic Data and Employee Position Info
Salary Schedule Library Name and Budget Code Library Name
page 374 / 707
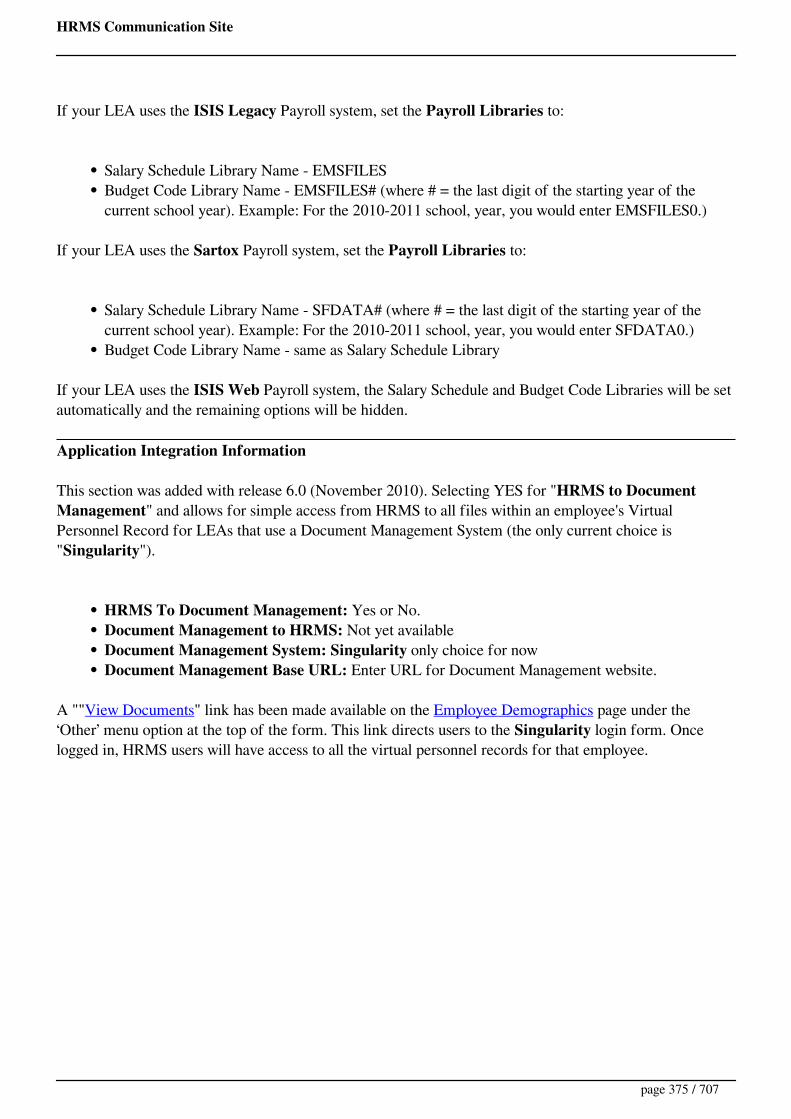
HRMS Communication Site
If your LEA uses the ISIS Legacy Payroll system, set the Payroll Libraries to:
Salary Schedule Library Name - EMSFILESBudget Code Library Name - EMSFILES# (where # = the last digit of the starting year of thecurrent school year). Example: For the 2010-2011 school, year, you would enter EMSFILES0.)
If your LEA uses the Sartox Payroll system, set the Payroll Libraries to:
Salary Schedule Library Name - SFDATA# (where # = the last digit of the starting year of thecurrent school year). Example: For the 2010-2011 school, year, you would enter SFDATA0.)Budget Code Library Name - same as Salary Schedule Library
If your LEA uses the ISIS Web Payroll system, the Salary Schedule and Budget Code Libraries will be setautomatically and the remaining options will be hidden.
Application Integration Information
This section was added with release 6.0 (November 2010). Selecting YES for "HRMS to DocumentManagement" and allows for simple access from HRMS to all files within an employee's VirtualPersonnel Record for LEAs that use a Document Management System (the only current choice is"Singularity").
HRMS To Document Management: Yes or No.Document Management to HRMS: Not yet availableDocument Management System: Singularity only choice for nowDocument Management Base URL: Enter URL for Document Management website.
A ""View Documents" link has been made available on the Employee Demographics page under the‘Other’ menu option at the top of the form. This link directs users to the Singularity login form. Oncelogged in, HRMS users will have access to all the virtual personnel records for that employee.
page 375 / 707
HRMS Communication Site
HRMS Help > Employee Page > Employee Demographics > Staff Actions > Leave and Disability
User Roles: System Administrator, HR Staff Action Officer, Leave Editor, Leave Viewer (Leave Viewerscan only view Leave Details.)Last Updated: Nov 15, 2013 11:17 am
Printer friendly
Table of ContentsQuick Facts
Creating a Leave
Leave Details
Editing a Leave
Extending a Leave
Ending a Leave
Removing a Leave
Quick Facts
Leaves/Disabilities are created from the Staff Action Console and maintained from the LeaveDetails page.Leave/Disability records remain Active until they are Ended or Removed.An employee can have both a current and a future Leave if the dates don't overlap.Leave and Suspension dates cannot overlap.A Leave cannot be created for an Inactive employee.Note: When an employee is placed on Leave, the system does not automatically remove them fromtheir position assignments. Be mindful when running some reports that select current employees.The potential exists for including those on Leave as current employees. Always use discretion whenreporting on employees on Leave and their temporary replacements, as the potential exists for
page 376 / 707
HRMS Communication Site
double counting.
Creating a LeaveTo create a Leave/Disability, select Create Leave from the menu at the top of the Staff Action Console.
Top Part of Create Leave Form
Select Leave Type. The drop-down list will include all the possible Leave and Disability typesavailable.
Leave types are all locally-defined on the Leave of Absence Configuration form. AllDisability types are system-defined.
Enter the Effective Start Date.Select the employee’s Employment Status while on Leave/Disability. All Active Leave typeEmployment Status Codes will be included in the drop-down list.
If this is a current Leave/Disability, the employee’s current Employment Status Code willbe changed immediately after this form is submitted.If this is a future Leave/Disability, the future Employment Status Code will be saved by thesystem and the employee’s current Employment Status Code will not change until theEffective Start Date is reached.
Enter the employee’s Last Day on Payroll, if applicable.This field is used only when the employee is using accrued leave to cover all or part of theLeave/Disability.
Enter the Anticipated End Date of the Leave/Disability, if known.Anticipated End Date is not required because oftentimes (especially in the case of a
page 377 / 707
HRMS Communication Site
Disability) this date is not known when the Leave begins. If a date is entered, it must beafter the Effective Start Date.
Select the employee’s Anticipated Employment Status Upon Return, if known.This is the Employment Status Code that the employee is expected to return to when theirLeave/Disability ends. The system will automatically default in the employee’s currentEmployment Status (prior to going on Leave), but you may change it to any other activeEmployment Status Code that you deem appropriate.
Bottom Part of Create Leave Form
Enter Comments regarding this Leave of Absence/Disability (Max 250 characters).Insurance - Select Yes or No for Continue at System Expense?
If you answer No, Continue at Employee’s Expense? will display.If you answer Yes, then enter the Effective Billing Date(required).If you answer No, enter a value for Stop Insurance on this Date (required)
Staff Action - Select Yes or No for Post on Board Report?If you answer Yes, enter the Board Report Date (required).
Click the Add Leave button when you are ready to save the new Leave/Disability record.After the record is saved, the Leave Details form will display showing the new Leave.
Leave DetailsUse the Leave Details form to view, edit, extend, end, or remove an existing Leave/Disability.
To access the form, click the desired record from the Staff Action Console.
The Leave Details form displays the current values of the Leave record.
page 378 / 707
HRMS Communication Site
Click on an action in the Type column of the History section to view details about the action.
The Staff Action Request Details form displays values of the Leave record before and after theselected action.
page 379 / 707
HRMS Communication Site
Editing a LeaveUse the Edit Leave form to modify a current or future Leave/Disability. (You cannot edit a Leave after ithas been Ended.)
To access the form, select Edit Leave from the menu at the top of the Leave Details form.
The Edit Leave form allows you to edit all fields of the Leave record. See Creating a Leave for detailsabout each field.
Special Notes:
Effective Start DateIf you change the Effective Date from a current to a future date, the system will promptyou to select the employee's current Employment Status Code (defaults to the employee’sprevious Employment Status Code).If you change the Effective Date from a future to a current date, the system will set theemployee’s current Employment Status to the Leave status.
Leave Type & Employment Status- To make a correction, use the Edit Leave form. If theemployee is switching to a different Leave Type/Status, end the current Leave and create a newone.Anticipated End Date - To make a correction, use the Edit Leave form. If the employee isextending his/her current Leave, use the Extend Leave form instead.
page 380 / 707
HRMS Communication Site
Click the Save button to save your changes to the Leave/Disability record.
Click the Reset button (bottom-right) to reset all the fields on this form to their original values withoutsaving anything.
Note: Any time a Leave/Disability is edited the system creates an audit trail record. If a hard copy of thechange is needed for the Payroll Department, the employee’s work Site, or the employee’s file, we suggestthat you perform the action, go to the Leave Details page, click on the Staff Action Type link in the'History' section, and print your hard copy there. Changes made as a result of each action are highlighted inyellow.
Extending a LeaveUse the Extend Leave form when an employee is extending his/her current Leave.
To access the form, select Extend Leave from the menu at the top of the Leave Details form.
Only a few of the Leave fields are editable on the Extend Leave form.
Special Notes:
page 381 / 707
HRMS Communication Site
Anticipated End Date– Since you are extending this Leave/Disability, the new date entered mustbe after the original Anticipated End Date shown on the form.Anticipated Employment Status Upon Return – If the extension period for this Leave/Disabilityinvolves a different Employment Status Code, then you should not use the Extend form to recordthe extension period. Instead, you should end this Leave and create a new Leave for the extensionperiod.
Click the Save button when you are ready to save your changes to the Leave/Disability record.
Ending a LeaveUse the End Leave feature to end a current Leave in the following situations:
Employee is Returning to WorkType of Leave/Disability is ChangingSeparation*Suspension
*Note: If an employee who has an active Leave record is separating, you do not have to end the Leave.Just create a Separation and the system will automatically end the Leave on the Separation Effective Date.
page 382 / 707
HRMS Communication Site
To access the form, select End Leave from the menu at the top of the Leave Details form.
Instructions follow the screen shot below.
Select the Reason for ending the Leave. The drop-down list will include all the possible reasons forending a Leave/Disability:
Employee is Returning to WorkSelect this option if you want to reinstate the employeeIf this option is selected, the Status of the Leave will be set to 'Reinstated'.
Type of Leave/Disability is ChangingSelect this option if the employee is extending their Leave and the EmploymentStatus Code for the extension period is changing. After ending this Leave, youshould immediately proceed to the ‘Create Leave’ form and create the new Leavefor the extension period.If this option is selected, the Status of the Leave will be set to 'Converted'.
SeparationSelect this option if the employee is separating for any reason before returning fromthe Leave of Absence/Disability. After ending this Leave, the system will direct youto the ‘Separation’ Staff Action form to record the separation.If this option is selected, the Status of the Leave will be set to 'Ended'.
SuspensionSelect this option if the employee was suspended before returning from the Leaveof Absence/Disability. After ending this Leave, the system will direct you to the‘Create Suspension’ Staff Action form to record the suspension.If this option is selected, the Status of the Leave will be set to 'Ended'.
page 383 / 707
HRMS Communication Site
Enter the Effective End Date(date that the employee’s Leave/Disability ends).. This date must beless than or equal to today’s date. Enter this date in MM/DD/YYYY format.If ‘Employee is Returning to Work’ was selected as the reason for ending the Leave/ Disability,the following fields will display.
Select the employee’s Returning Employment Status. This is the Employment Status thatthe employee should be returned to when the Leave/Disability ends. All ActiveEmployment Status Codes will be available in the drop-down list.Select either Yes or No for Reinstate Insurance?If the answer is Yes, enter Date toReinstate.Select Yes or No for Post on Board Report? If the answer is Yes, then enter the BoardReport Date.
If you wish, you can enter a note about why the Leave/Disability is being ended in the StaffAction Notes box.
Click the Save button when you are ready to save your changes to the Leave/Disability record.
Removing a LeaveUse the Remove Leave feature to cancel a current or future Leave that was entered in error, or if theemployee withdrew their Leave request before they actually went out on Leave. (Completed Leaves cannotbe removed.)
To access the form, select Remove Leave from the menu at the top of the Leave Details form.
When removing a Leave, you must enter Notes about why this Leave was Removed.
page 384 / 707

HRMS Communication Site
Click the Save button when you are ready to remove the Leave/Disability record. The Leave status will beset to 'Cancelled'.
page 385 / 707
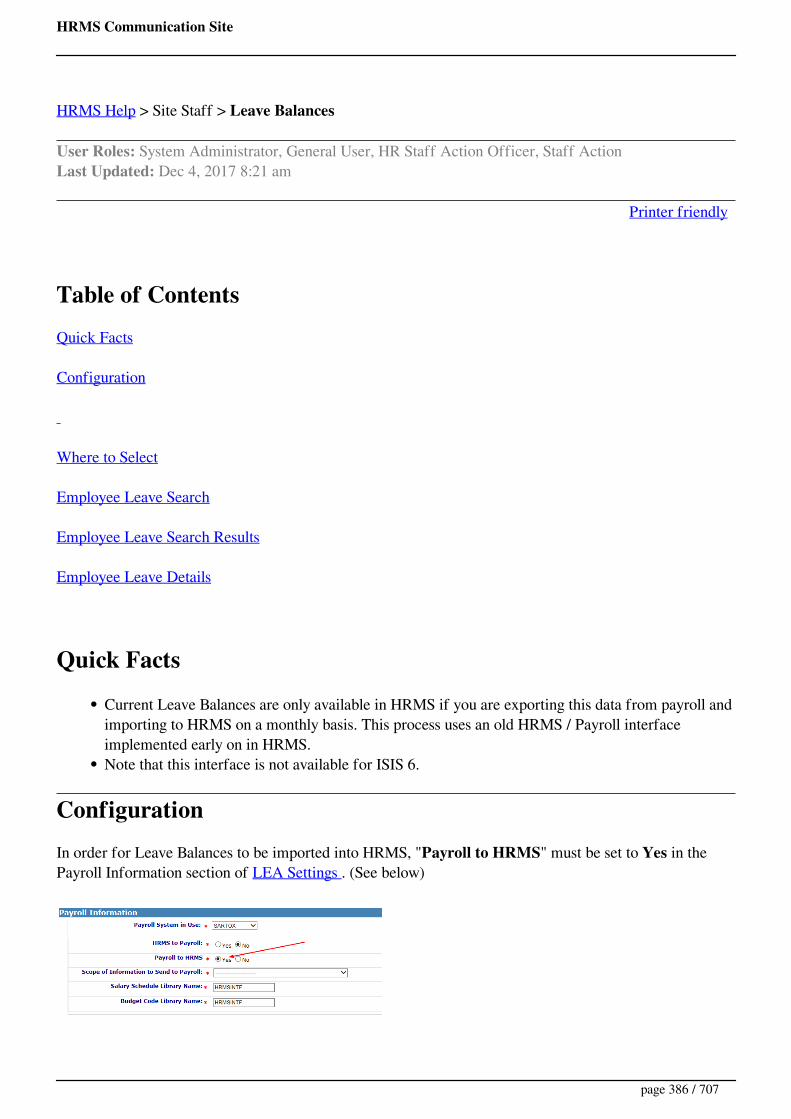
HRMS Communication Site
HRMS Help > Site Staff > Leave Balances
User Roles: System Administrator, General User, HR Staff Action Officer, Staff ActionLast Updated: Dec 4, 2017 8:21 am
Printer friendly
Table of ContentsQuick Facts
Configuration
Where to Select
Employee Leave Search
Employee Leave Search Results
Employee Leave Details
Quick Facts
Current Leave Balances are only available in HRMS if you are exporting this data from payroll andimporting to HRMS on a monthly basis. This process uses an old HRMS / Payroll interfaceimplemented early on in HRMS.Note that this interface is not available for ISIS 6.
ConfigurationIn order for Leave Balances to be imported into HRMS, "Payroll to HRMS" must be set to Yes in thePayroll Information section of LEA Settings . (See below)
page 386 / 707

HRMS Communication Site
Note that if ISIS 6 is selected in "Payroll System in Use", the "HRMS to Payroll" and "Payroll toHRMS" options are not available.
Where to SelectSelect "Employee/Employee Page" from the HRMS Home Page, then "Leave Balances" from the"Views" dropdown.
Employee Leave SearchThere are several options available to find employees. In this example, site 308 was selected for the search.
1. Enter the SSN in the Search Value box and click on the SSN button.2. Enter the Last Name in the Search Value box and click on the Last Name button. Note that you
can enter the first few characters of the Last Name and uncheck "Exact" if desired.3. Either enter the Site Code in the Search Value box or select the "Site List" link and select the site,
then click on the Site Code button.4. Note that unchecking the "Exact" box only works with the Last Name option.
Employee Leave Search ResultsSearch results display. Click on the employee for display of Leave Balance data.
page 387 / 707

HRMS Communication Site
Employee Leave DetailsDetails of the employee's leave display. See below.
1
page 388 / 707

HRMS Communication Site
HRMS Help > System Configuration > Leave of Absence
User Roles: System AdministratorLast Updated: Mar 24, 2016 8:09 am
Leave of Absence and Disability types are combined on the same LEA Configuration form.
All Disability types are system-defined and can be viewed on this form but cannot be modified.Leave of Absence types are all locally-defined by each LEA and can be viewed and/or modifiedusing this form.
To access the configuration form, go to: HRMS Home > Setup > LEA Configuration > Leave of Absence.
The Leave of Absence/Disability Types form will display. Instructions follow the screen shot below.
Adding a Locally-Defined Leave Type
System Administrators may add new Leave Types because they are locally defined. (New Disability codescannot be added, however).
To add a new Leave type, click on the Create button on the top right side of the form. The system willdirect you to the New Leave Type form.
To complete the New Leave Type form:
1. Enter the Leave Code - 1 or 2 digit code composed of characters and/or numbers.2. Enter the Leave Description - can be a combination of characters and numbers up to 30 characters.3. Select Yes or No for Enabled Indicator - This determines whether this new Type being created will
be available for use. Defaults to Yes.4. Click the Save button to create the new Leave type record. The system will display a confirmation
message and send you back to the Leave of Absence/Disability Types configuration page, whereyou can view the new record just created.
Click the Cancel button to cancel without saving changes.
page 389 / 707

HRMS Communication Site
Updating a Locally-Defined Leave Type
System Administrators may revise any of the Leave Types shown on this form because they are all locallydefined. (Disability codes, however, are system-defined and cannot be revised).
To edit a Leave type:
1. Click on the appropriate Description link. The Edit Leave Type form will display.2. All of the fields are editable. See 'Adding a Locally-Defined Leave Type' above for field
definitions.3. Click Save. A confirmation message will display and you will be returned to the configuration
page.
Click the Cancel button to cancel your changes.
Disabling a Locally-Defined Leave Type
System Administrators may disable any of the Leave Types shown on this form because they are all locallydefined. (Disability codes, however, are system-defined and cannot be removed).
To disable a Leave type:
1. Click on the appropriate Description link. The Edit Leave Type form will display.2. Set the Enabled indicator to "No". The system does not physically remove the record but prevents
it from being used in the future. If you ever need to resume using this Leave type, you may edit therecord and set its Enabled indicator back to “Yes”.
3. Click Save. A confirmation message will display and you will be returned to the configurationpage.
Click the Cancel button to cancel your changes.
page 390 / 707
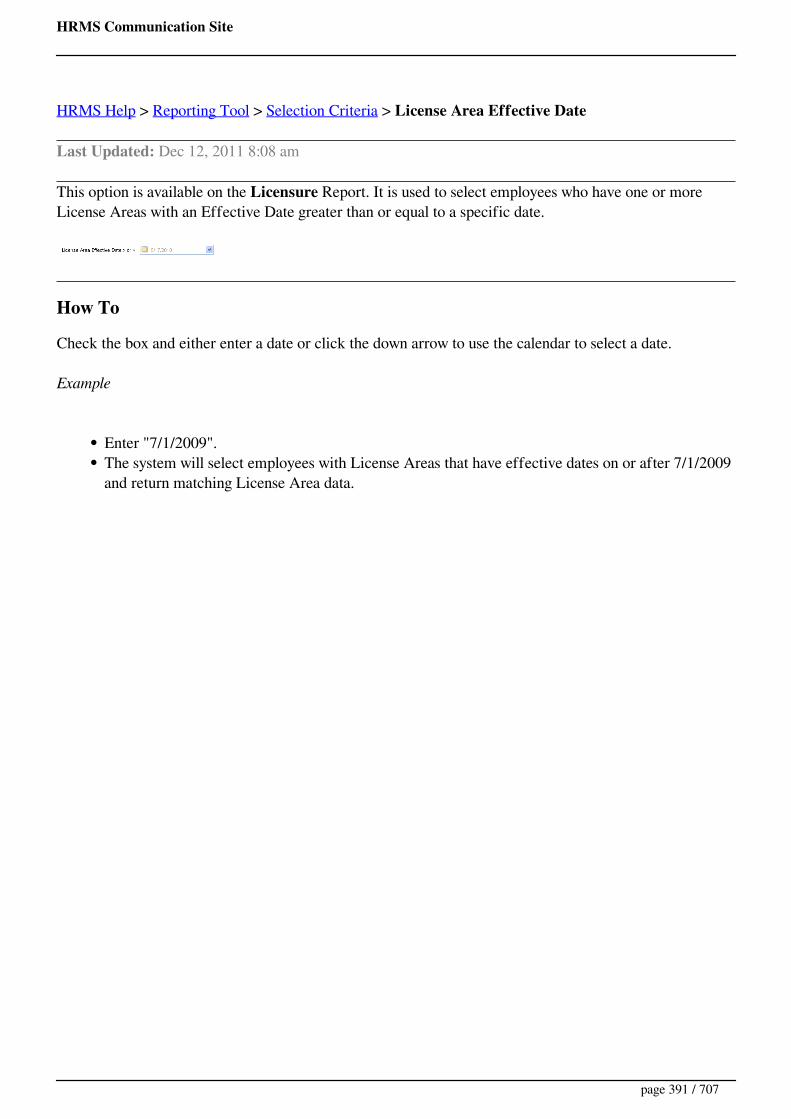
HRMS Communication Site
HRMS Help > Reporting Tool > Selection Criteria > License Area Effective Date
Last Updated: Dec 12, 2011 8:08 am
This option is available on the Licensure Report. It is used to select employees who have one or moreLicense Areas with an Effective Date greater than or equal to a specific date.
How To
Check the box and either enter a date or click the down arrow to use the calendar to select a date.
Example
Enter "7/1/2009".The system will select employees with License Areas that have effective dates on or after 7/1/2009and return matching License Area data.
page 391 / 707

HRMS Communication Site
HRMS Help > System Configuration > License Area-Category Cross Reference
User Roles: System AdminstratorLast Updated: Jul 9, 2015 10:39 am
The License Area/Category Cross Reference configuration form allows you to link all of the variousDPI License Areas to specific content areas or License Categories.
These content areas are also linked to courses in the Continuing Education console and are used todetermine eligibility for Content Credit.
To access the form, go to: HRMS Home > Setup > LEA Configuration > License Area/Category Cross-Reference.
The License Area/Category Cross Reference form will display.
The basic structure for the Licensure Areas linkage was established by the HRMS Steering Committee.You can modify or delete mappings, or add additional mappings to fit the needs of your LEA.
page 392 / 707

HRMS Communication Site
HRMS Help > Employees > License Assignment and Contract Info
User Roles: System Administrator, General User, HR Staff Action Officer, Staff Action
Last Updated: Dec 7, 2017 8:31 am
Printer friendly
Table of ContentsQuick Facts
Where to Select
Selection Criteria
Output
Employee Data
Assignment Data
License Data
Contract Data
Quick Facts
This report/module can assist you in auditing the assignment of personnel to licensed positionsbased on their current areas of licensure.This report is designed to print on "Legal" paper in "Landscape" orientation. You will need tospecify Legal and Landscape on the File, Page Setup menu in Internet Explorer. Print Preview willnot show the correct page breaks until you fix the Page Setup. Because a page break prints beforethe start of each new employee, the Title page will print on a separate sheet.Since this report returns a large amount of information, you will typically want to narrow theinformation returned to a specific site or group of sites.When the report has run, you can click on the visible Employee Information, Assignment, and Contract records to go to the corresponding Staff Action Demographics, Modify Assignment, orEdit Contract screens. In this way, you can easily access a variety of records directly from thereport.
page 393 / 707
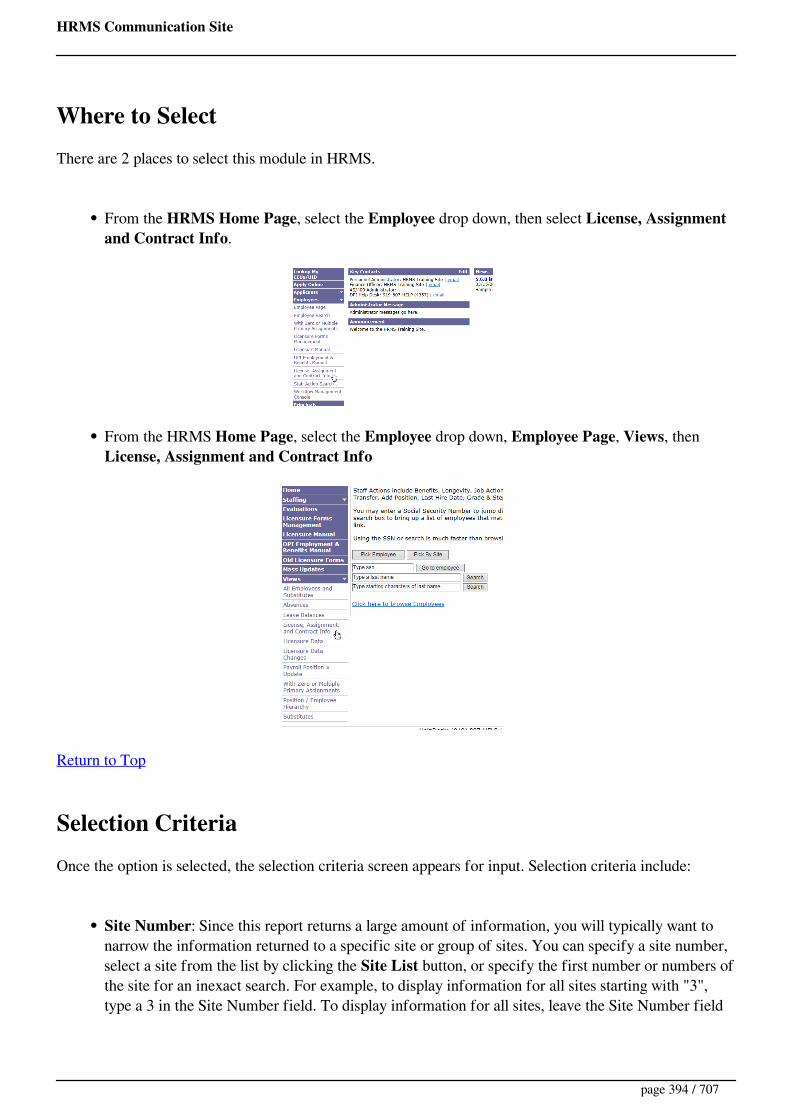
HRMS Communication Site
Where to SelectThere are 2 places to select this module in HRMS.
From the HRMS Home Page, select the Employee drop down, then select License, Assignmentand Contract Info.
From the HRMS Home Page, select the Employee drop down, Employee Page, Views, then License, Assignment and Contract Info
Return to Top
Selection CriteriaOnce the option is selected, the selection criteria screen appears for input. Selection criteria include:
Site Number: Since this report returns a large amount of information, you will typically want tonarrow the information returned to a specific site or group of sites. You can specify a site number,select a site from the list by clicking the Site List button, or specify the first number or numbers ofthe site for an inexact search. For example, to display information for all sites starting with "3",type a 3 in the Site Number field. To display information for all sites, leave the Site Number field
page 394 / 707

HRMS Communication Site
empty.Current or Future Assignment: This report returns information for employees in currentassignments or future assignments at the specified site(s), depending on your selection. If youselect current assignments, the employees returned must have a current assignment at the sitespecified, though the report displays all assignments for matching employees, whether current andfuture. Likewise, if you select future assignments, the employees returned must have a futureassignment at the site specified.Tenure Status Categories: Select one or more Tenure Status if desired, or leave blank to includeall.Licensed Employees Only: Set to Yes if you only want to view information for employees whohave a record in the Licensed Personnel tableLicensed Positions Only: Set to Yes if you only want to view information employees who have anassignment to a position whose category is set to Licensed.Records to Display: This determines the maximum amount of rows you want returned. You mightwant to set a small number (5 or so) to determine if the settings are returning the kind of recordsyou want, then expand the number (e.g. 9999) to show all matching employees.Limit to SSN: This allows you to limit the report to a single individual. Type the SSN with nodashes, or pick an employee using the Pick Employee button.Output: Leave this value as XML unless you wish to export the data.Stylesheet: Leave this value with the default value unless you are exporting XML and do not wantthe stylesheet. Additional stylesheets may be made available in the future.
Return to Top
OutputAfter entering selection criteria, click on the Submit button for results. In the example below, the only
page 395 / 707

HRMS Communication Site
selection criteria entered was the value of 380 in for Site. Employee, Assignment, Licensure and Contractinformation appear for each employee meeting the selection criteria. Each employee has a heading withtheir name and option to Add Contract or access Renewal Credits.
Return to Top
Employee DataThe first section of information for each employee in the report includes a header with the employee'sname and options to either Add Contract or access Renewal Credits.
Clicking on Add Contract link takes you to the Contracts screen where you can add, edit or removecontracts.Clicking on the Renewal Credits link takes you to the Continuing Education Employee screenwhere you can add, edit, or remove CEUs.As you hover over the Employee's line of data (SSN, BT status, etc....) the arrow turns to a handand the row changes from white to yellow, meaning that you can click on the row. Clicking on therow takes you to the person's Employee Demographic screen.
Return to Top
Assignment DataThe second section contains Assignment information for the employee. Note that Label #1 and Label #2are the Assignment Local Use fields.
page 396 / 707

HRMS Communication Site
As you hover over the Employee's line of data (Site, Position Number, etc....) the arrow turns to ahand and the row changes from white to yellow, meaning that you can click on the row. Clickingon the row takes you to the person's Edit Assignment screen.
Return to Top
License DataThe third section contains Licensure information for the employee. This information is static so there is noplace to "click" to view/edit data.
Return to Top
Contract DataThe last section contains Contract information for the employee.
As you hover over the Employee's line of contract data (Active, Type, etc....) the arrow turns to ahand and the row changes from white to yellow, meaning that you can click on the row. Clickingon the row takes you to the person's Edit Contract screen for the contract selected.
Return to Top
page 397 / 707
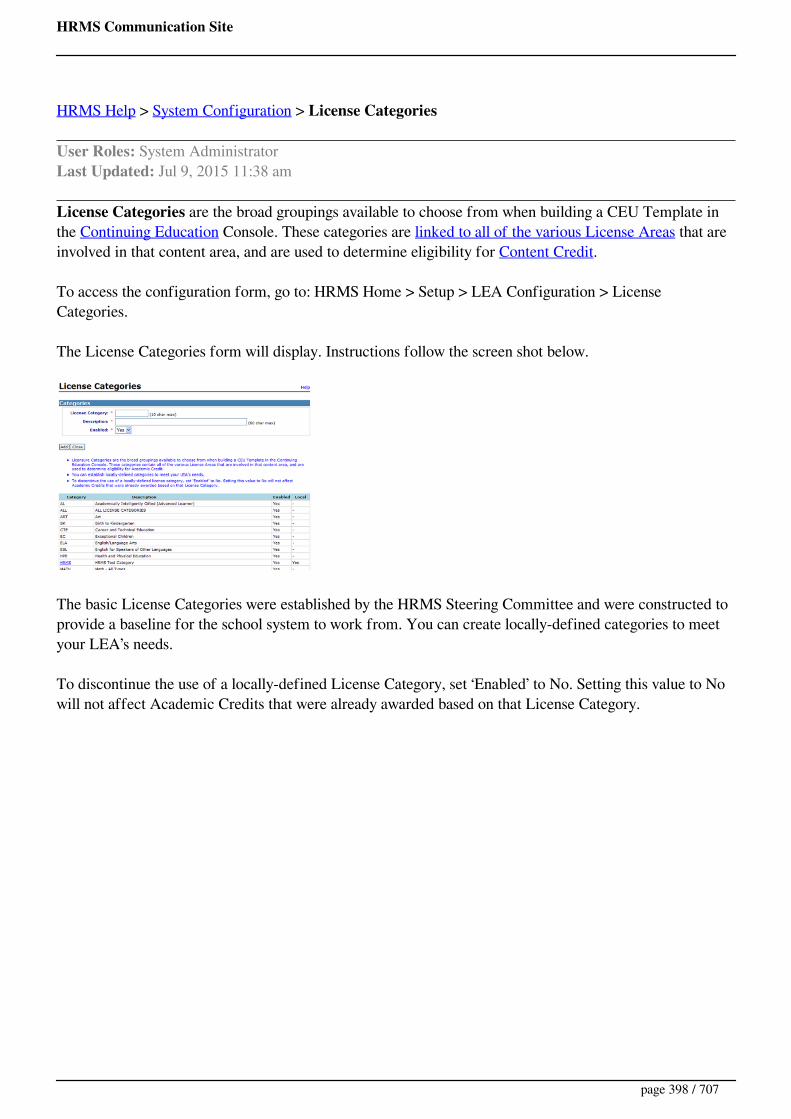
HRMS Communication Site
HRMS Help > System Configuration > License Categories
User Roles: System AdministratorLast Updated: Jul 9, 2015 11:38 am
License Categories are the broad groupings available to choose from when building a CEU Template inthe Continuing Education Console. These categories are linked to all of the various License Areas that areinvolved in that content area, and are used to determine eligibility for Content Credit.
To access the configuration form, go to: HRMS Home > Setup > LEA Configuration > LicenseCategories.
The License Categories form will display. Instructions follow the screen shot below.
The basic License Categories were established by the HRMS Steering Committee and were constructed toprovide a baseline for the school system to work from. You can create locally-defined categories to meetyour LEA’s needs.
To discontinue the use of a locally-defined License Category, set ‘Enabled’ to No. Setting this value to Nowill not affect Academic Credits that were already awarded based on that License Category.
page 398 / 707
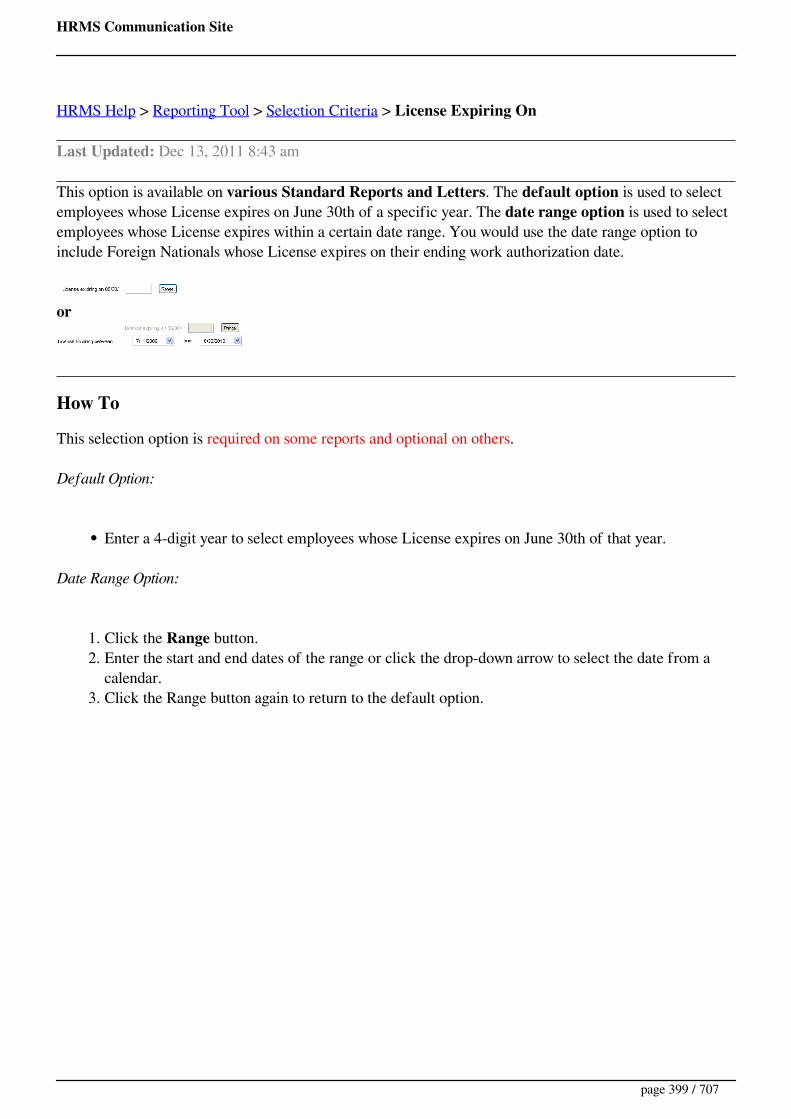
HRMS Communication Site
HRMS Help > Reporting Tool > Selection Criteria > License Expiring On
Last Updated: Dec 13, 2011 8:43 am
This option is available on various Standard Reports and Letters. The default option is used to selectemployees whose License expires on June 30th of a specific year. The date range option is used to selectemployees whose License expires within a certain date range. You would use the date range option toinclude Foreign Nationals whose License expires on their ending work authorization date.
or
How To
This selection option is required on some reports and optional on others.
Default Option:
Enter a 4-digit year to select employees whose License expires on June 30th of that year.
Date Range Option:
1. Click the Range button.2. Enter the start and end dates of the range or click the drop-down arrow to select the date from a
calendar.3. Click the Range button again to return to the default option.
page 399 / 707

HRMS Communication Site
HRMS Help > Reporting Tool > License Renewal Letter
User Roles: Any user with Reporting Tool installed on PCLast Updated: Dec 12, 2011 6:54 am
The License Renewal Letter informs an employee about the status of their teaching license for the nextschool year. The Reporting Tool provides the option to print a License Renewal Letter for a specificemployee or to print License Renewal Letters for multiple employees at one time by specifying aparticular license type or by not entering any selection criteria at all.
A standard template is provided but LEAs can also create a custom version of the letter.
Selection Criteria
Pick EmployeesLicense expiring onLicense TypeHide LEA Address(for printing on letterhead)Contact By DatePersonnel Manager Name & Title
Sample Letter
page 400 / 707

HRMS Communication Site
HRMS Help > Reporting Tool > Selection Criteria > License Status
Last Updated: Dec 12, 2011 8:15 am
This option is available on the Licensure Report. It is used to select employees based on License Status.
License Status Definitions:
Active: Revoke Date is null and Expire Date >= current dateExpired: Revoke Date is null and Expire Date Revoked: Revoke Date is not null
How To
You may select one or more of the following:
Active (default)ExpiredRevoked
page 401 / 707
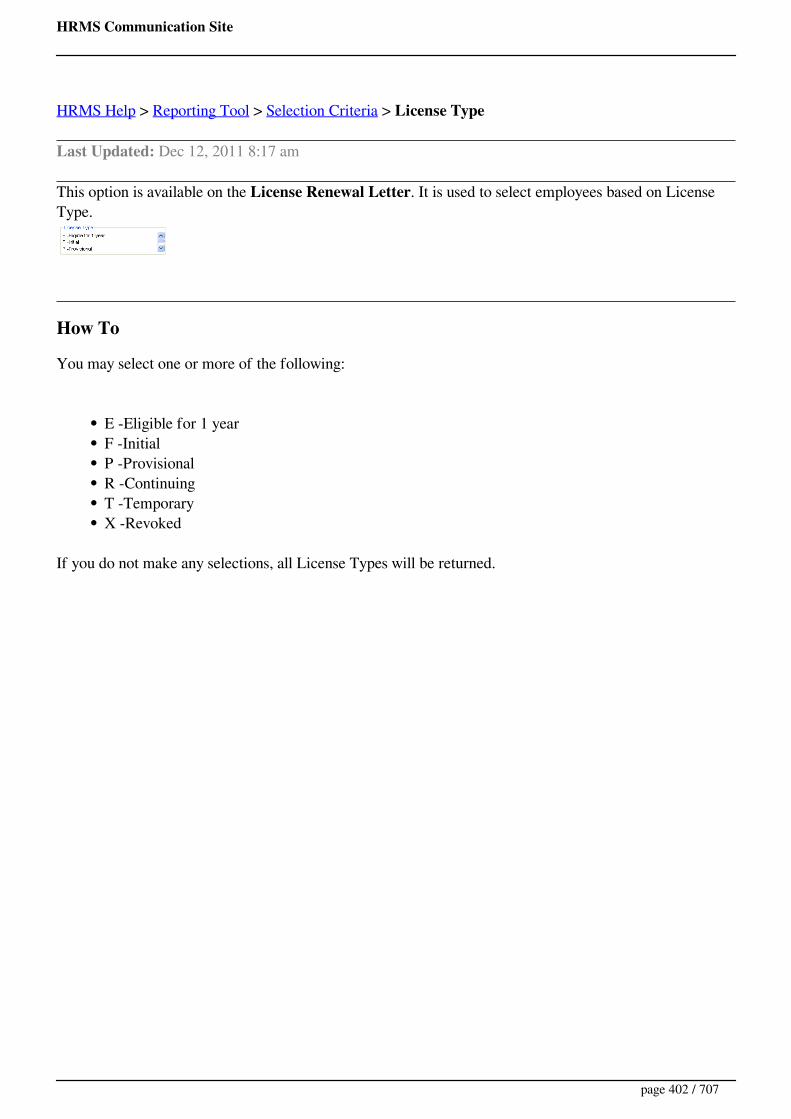
HRMS Communication Site
HRMS Help > Reporting Tool > Selection Criteria > License Type
Last Updated: Dec 12, 2011 8:17 am
This option is available on the License Renewal Letter. It is used to select employees based on LicenseType.
How To
You may select one or more of the following:
E -Eligible for 1 yearF -InitialP -ProvisionalR -ContinuingT -TemporaryX -Revoked
If you do not make any selections, all License Types will be returned.
page 402 / 707
HRMS Communication Site
HRMS Help > Reporting Tool > Selection Criteria > Licensed LabelDefault values for control
Instead of the generic 'Licensed' tag, specify how you want your label to read. Teacher, Licensed, Certifiedetc..
page 403 / 707

HRMS Communication Site
HRMS Help > Licensure Data Changes
User Roles: Employee Hire, Staff Action, HR Staff Action Officer, System Administrator
Last Updated: May 19, 2014 10:00 am
Printer friendly
Table of ContentsQuick Facts
Where to Select
Display of Recent Changes
Quick Facts
Licensure Data is updated in HRMS every morning by 6:30AM with the previous days updatesfrom the Licensure system at DPI.Licensure Data Changes for your staff are available in HRMS for review and are kept for 30 days.
Where to SelectTo see Licensure Data Changes, Select "Employees", then "Employee Page" from the HRMS Home page,then select "Licensure Data Changes" from the "Views" dropdown. See below
page 404 / 707

HRMS Communication Site
Display of Recent ChangesOnce selected, Licensure Data Changes appear sorted by move recent date, then by last name.
To move to the next screen of changes, click on "Next" at the bottom center of the screen.Note that you can sort by SSN, Name or Date by clicking on the triangles at the top of thecolumns.You can Search by SSN or Last Name.
Enter the SSN or Last Name in the box to the left of the Search button, then click on the"Search" Button. You will need to "Clear Search" before searching again.
page 405 / 707
HRMS Communication Site
HRMS Help > Employees > Licensure Forms
User Roles: System Administrator, Licensure FormsLast Updated: Dec 4, 2017 8:22 am
Printer friendly
Table of ContentsQuick Facts
Where to select
Licensure Forms Management Screen (No employee selected)
Contact Setup
Contact Setup (Create)
Contact Setup (Edit)
Contact Setup (Default)
Mass Delete
File Format
Select Employee
Show Saved Forms
Action Requested
Available Licensure Forms
Quick Facts
This module is used to quickly complete Licensure forms for submission to DPI for processing.Forms can be saved for future reference.There is no electronic submission of forms. Once created, the form(s) must be printed and mailedto DPI.
page 406 / 707

HRMS Communication Site
The forms and instructions in HRMS may not be updated immediately when the procedures of theDPI Licensure Section change. It is advisable that you keep abreast of current Licensure Sectionprocedures by consulting the online publications and other materials from the Licensure Section ona regular basis.This option will probably become obsolete when the new Licensure system comes on line in 2014.
Where to selectThere are two locations in HRMS where the Licensure Forms module can be selected.
The first location is from the HRMS Home page. Select, Employee, then Licensure FormsManagement from the HRMS Home page. Selecting here will require the selection of theemployee once into the module.
The second location is from the Employee Demographics page. Select, Other, then LicensureForms from the Employee Demographics page. Selecting here will not require the selection of theemployee once in the module. The system already knows the employee of interest since access isfrom their Employee Demographic page.
Licensure Forms Management Screen (No employee selected)
page 407 / 707

HRMS Communication Site
The Licensure Forms Management screen has several sections with various buttons available.
Licensure Forms Management HeaderContact SetupMass DeleteHelp (Displays the same Help as found on this webpage)Close (Closes Licensure Forms Management window)
File FormatSelect EmployeeShow Saved Forms
Action RequestedSearch DescriptionToggle ScrollbarsCollapse
Available Licensure FormsShow All
Contact SetupA Licensure Forms Contact is an individual that is authorized to sign licensure forms for your LEA. Witha Licensure Form Contact, an HRMS User may create a licensure form while automatically displaying thename and title of a different person, such as the Superintendent, on the form.
Contacts are associated with HRMS User accounts, and each HRMS User may have only one Contact. AllHRMS Users at your LEA may have the same Contact, such as the Superintendent, but each User-Contactrelationship must be set up individually.
If the current HRMS User does not have a Contact relationship set up, the User's first and last name willdisplay beneath the signature line for Signature of Superintendent or Designee, or in other areas of theform as appropriate.
For ease of creating new Contact records, you may set one Contact as the default. After you create a
page 408 / 707

HRMS Communication Site
default Contact, all new Contact records will inherit values from the default Contact. Setting up a defaultContact is optional. Only one Contact can be the default. Setting a Contact as the default has no effect onother existing Contact records or any saved licensure forms. It only facilitates creation of new Contactrecords.
The name and title of the Contact (or the HRMS User if a Contact has not been set up) are editabledirectly on the form. In that way, you may change the information on an individual form without having tomodify the User's Contact.
Contact Setup (Create)
1. Click the "New Contact" button. The "Registered Users" window will appear.2. Select the first letter of the last name of the registered HRMS User for whom you wish to create
a Contact.3. Select the HRMS User from the resulting list. The "Create New Contact" window will open. If a
default Contact has been set up previously, the information for the default Contact will display inall fields. If there is no default Contact, all fields will be empty.
4. Modify any information needed then click Submit.
Click the refresh button (or F5) for the list of existing Contacts to refresh. The list of Contacts is sortedalphabetically by HRMS User name.
Contact Setup (Edit)
1. Clicking on the HRMS User name.2. Making any desired changes and click Submit.
Click the refresh button (or F5) for the list of existing Contacts to refresh.
page 409 / 707
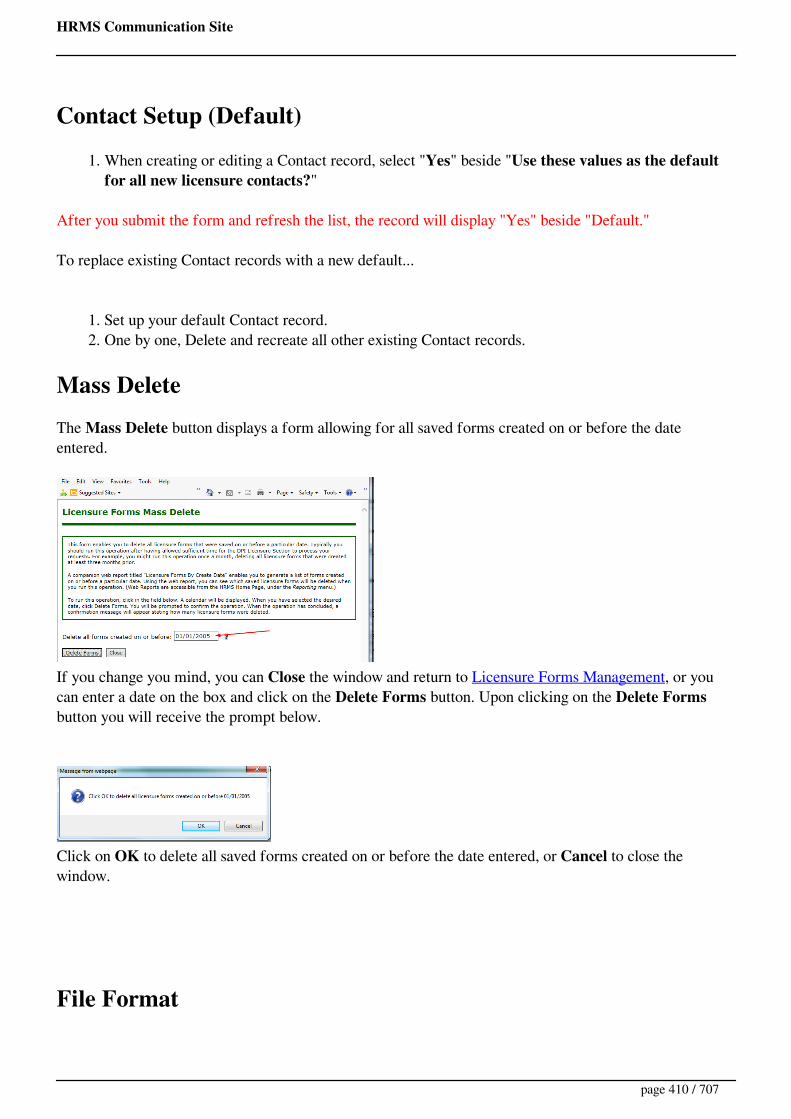
HRMS Communication Site
Contact Setup (Default)
1. When creating or editing a Contact record, select "Yes" beside "Use these values as the defaultfor all new licensure contacts?"
After you submit the form and refresh the list, the record will display "Yes" beside "Default."
To replace existing Contact records with a new default...
1. Set up your default Contact record.2. One by one, Delete and recreate all other existing Contact records.
Mass DeleteThe Mass Delete button displays a form allowing for all saved forms created on or before the dateentered.
If you change you mind, you can Close the window and return to Licensure Forms Management, or youcan enter a date on the box and click on the Delete Forms button. Upon clicking on the Delete Formsbutton you will receive the prompt below.
Click on OK to delete all saved forms created on or before the date entered, or Cancel to close thewindow.
File Format
page 410 / 707

HRMS Communication Site
Forms can be pre-populated with data from the HRMS system, or displayed as blank forms in either Abode Acrobat or Microsoft Word format. Only pre-populated forms can be saved in HRMS and that isusually the format you should select.
Select EmployeeFor HRMS to automatically populate licensure forms with an employee's information, you must firstselect the employee. Then you select all of the individual forms you wish to complete for that employee,one at a time, saving each completed form as you go along.
You may select an employee using the familiar Employee Picker interface. You may find anemployee by SSN, last name, first name, or a combination of last name and first name. Partialsearch values are allowed.For the form values to be pre-populated, the desired employee record must already exist in HRMS.That is, you cannot create a prepopulated licensure form for an applicant who has not already been"hired" in HRMS. However, you can print a blank licensure form and fill it in by hand.In the Employee Picker, only first 10 matching results are displayed unless you change the “Rowsto display” value.
Show Saved FormsThe Show Saved Forms button displays a list of all the Licensure forms that were created and saved forthe Selected Employee. (Note that this does not necessarily mean they were sent to DPI for processing,since that requires printing and mailing of the form.)
You can Print List, which simply sends a screen print to the printer, Close and return to the LicensureForms Management screen, or View a saved form. You can choose to Delete an individual saved formupon which you will receive the prompt below.
page 411 / 707
HRMS Communication Site
Click on OK to Delete the individual saved form or Cancel to close the window.
You can also choose to Delete All saved forms, upon which you will receive the prompt below.
Click on OK to Delete all the individual saved forms listed or Cancel to close the window.
Action RequestedThis section allows you to easily narrow down the list of forms displayed in the Available LicensureForms section. By default, all forms show up in the Available Licensure forms, and when you click on oneof the Actions, the list of forms is narrowed.
“Search description” allows a user to enter a word, partial word, or phrase to be found in theaction description column. After clicking the “Search” button, the table displays only the actionsthat match. After typing your search value, click the “Search” button to initiate the search.Use “Show all” to reset the list.”Toggle Scrollbars” allows the user to view all available Actions. This is useful for viewing orprinting the entire Actions list without having to use the small scroll bar."Collapse" minimizes the Action Requested box to make more room for showing the list oflicensure forms. If the section is collapsed, the "Expand" button will display the Action Requestedsection in its original, uncollapsed manner.Clicking an action will narrow the list of available licensure forms list to the appropriate set offorms necessary to complete that action. Click the ? (question mark / help) button to display theinstructions for completing the selected action. This instructions may contain additional steps inaddition to the licensure forms displayed in the list.
The instructions in HRMS are only a handy reference and may not be updated immediately whenthe procedures of the DPI Licensure Section change. It is advisable that you keep abreast of currentLicensure Section procedures by consulting the online publications and other materials from theLicensure Section on a regular basis.
Available Licensure Forms
page 412 / 707
HRMS Communication Site
This section shows all available licensure forms. When you select an Action Requested in the table above,the list of available forms is narrowed to match the forms available for the Action Requested.
If you have narrowed the list by clicking an Action Request, the Show All button will redisplay thecomplete list of available licensure forms.Selecting a form will open and pre-populate it with the selected employee’s relevant information, orwill open a blank form in PDF or DOC format.Submitting a prepopulated form will save your changes to the database. (You cannot submit a blankform in PDF or DOC format.)When completing a blank form, sometimes underlines or very small print do not appear. However,those will be on the printed form.
page 413 / 707
HRMS Communication Site
HRMS Help > Reporting Tool > Licensure Report
User Roles: Any user with Reporting Tool installed on PCLast Updated: Jun 14, 2016 6:27 am
The Licensure Report displays employee, assignment, license, and license area information for selectedemployees. The report can be sorted by employee name or site and employee name.
The Program Codes option allows you to select:
All licensed employeesInitial (formerly SPI) licenses (active or inactive)Initial (formerly SPI) licenses (inactive only)Initial (formerly SPI) licenses (active only)Lateral entry licensesNon-provisional licensesProvisional licensesTesting requirementsContinuing (formerly SPII) licensesChoose my own Program Codes
Selection Criteria
Employee StatusPick SitesAssignment TypeCurrent Assignment with End DatePrimary/Non-Primary AssignmentsLicense StatusLicense Expiring OnProgram CodesPick Licensure AreasLicense Area Effective DateYears ExperienceReport TitleSort bySSN (Display)Export Report Data (For this report, Contact HRMS Support if you need an Excel file that containsEmployee, Assignment, and License Area data in one row.)
Sample Report
page 414 / 707

HRMS Communication Site
page 415 / 707
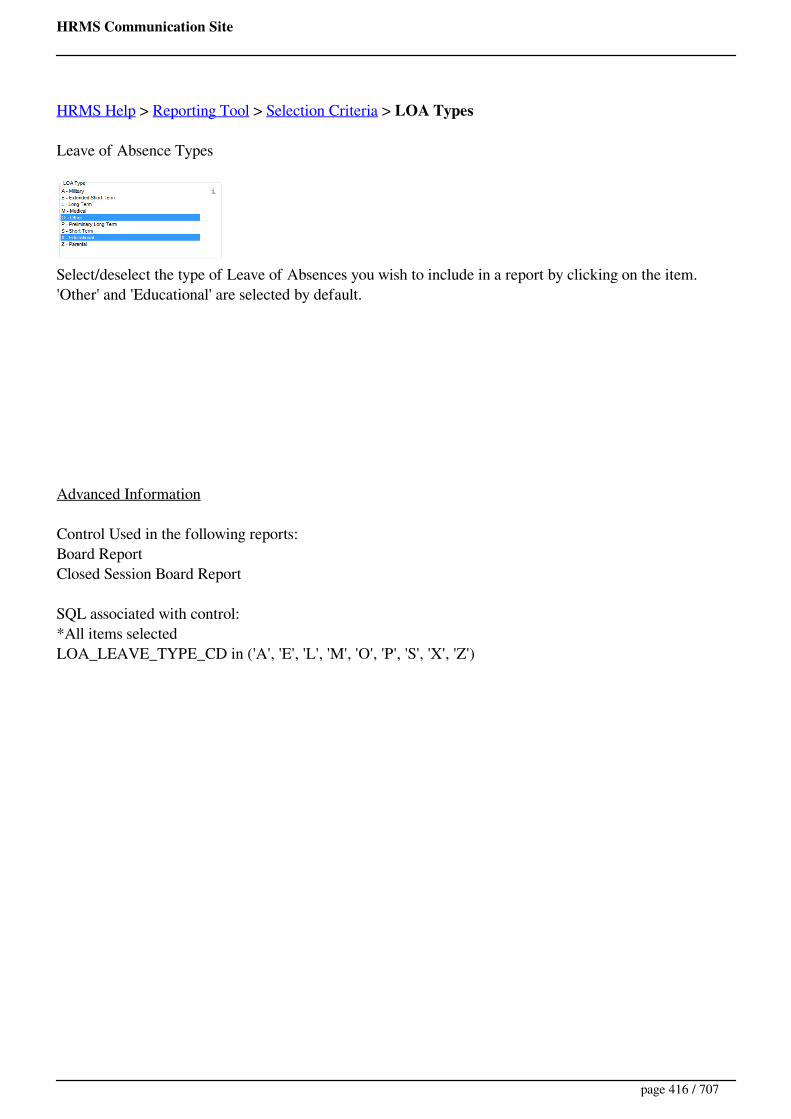
HRMS Communication Site
HRMS Help > Reporting Tool > Selection Criteria > LOA Types
Leave of Absence Types
Select/deselect the type of Leave of Absences you wish to include in a report by clicking on the item.'Other' and 'Educational' are selected by default.
Advanced Information
Control Used in the following reports:Board ReportClosed Session Board Report
SQL associated with control:*All items selectedLOA_LEAVE_TYPE_CD in ('A', 'E', 'L', 'M', 'O', 'P', 'S', 'X', 'Z')
page 416 / 707
HRMS Communication Site
HRMS Help > Local Forms
User Roles: System Administrator, various roles depending on location of Local FormLast Updated: Mar 4, 2014 1:11 pm
Printer friendly
Table of ContentsQuick Facts
Where to select
Available Forms
Completing a Local Form
Viewing/Editing Completed Forms
Reporting for Local Forms
Quick Facts
Local Forms can be used to custom HRMS to the business processes performed at the LEA. Thisfeature enhances the ability to store supplemental data without having to wait for new fields/formsto be included in an HRMS release.Without any programming, a HRMS System Administrator can create as many Local Forms asneeded. The form can be associated with employees, applicants, candidates for vacancies, positions, etc. The "HRMS Subsystem" of the form determines where visible in HRMS, such as theSearch Applicant screen, or Employee Demographics screen. Some forms can even appear inmultiple places. See Local Forms Setup for a list of where local forms are available, depending onthe "HRMS Subsystem" selected.Using the Local Forms feature, one can create a local form called, for example, "Drug Test" andspecify data to be collected, such as the date of the test, the testing company, the type of test, andthe results. One can then specify that the form should be available from the Employee page, andwrite brief instructions on how the form should be used. When an employee takes a drug test, anHRMS user with access to the Employee page can fill out a "Drug Test" form online. Theinformation entered is stored along with the rest of the employee's information and can be easilyaccessed. Each time a Drug Test is performed a local form can be completed and all completedforms are available for future reference if needed.Web Report 000008 - Local Forms for Administrator can be used for reporting of data entered into
page 417 / 707

HRMS Communication Site
the Local Forms.
Where to selectWhere to select local forms is dependent on the "HRMS Subsystem" of the local form and thereforevaries throughout HRMS. To see a list of the various locations, see Local Forms Setup.
For purposes of this webpage, selection is from the Employee Demographic Page. See below.
Available FormsOnce the Local Forms option is selected, the Local Forms window appears. Forms available forcompletion are listed in the "Available Forms" section and "Completed Forms" are listed in the lowersection.
To complete a new form, double click on it's row in the "Available Forms" section. In the examplebelow, the "Drug Results" form is selected.
page 418 / 707
HRMS Communication Site
Completing a Local FormOnce a Local Form is selected, it appears with the Form Code, Short Name, Description, UsageInstructions and HRMS Subsystem at the top. Make sure to follow any instructions provided.
The form defaults to "Yea" for "Active" and "No for "Frozen"
Active - Setting to "No" will cause this local form entry to no longer appear in the list of completedforms, although data entered in the from can be reviewed using Web Report 00008 - Local FormsAdministrator, if you have sufficient rights to produce web reports based on the current subsystem.
Reason Inactivated - If Active set to "No", you may enter a reason.Frozen - All users may "freeze" a completed form. Setting this indicator to "frozen" prevents allstaff with non-administrator roles from further editing the completed form. Administrators willcontinue to have the ability to modify or delete all completed forms. An Administrator should setthe "frozen" indicator back to "No", if the completed form is to be available for editing by non-Administrators.
All active Data Entry Fields for the form appear with their label setup in the Local Forms Setup. Up to1000 characters can be entered in any of the Data Entry field boxes. Please refrain from cutting andpasting or using and special characters, including apostrophes.
Attachment Files: You can browse an attachment (only one) if desired.
Once all data is entered, click on the "Submit" button to save the completed form.
page 419 / 707
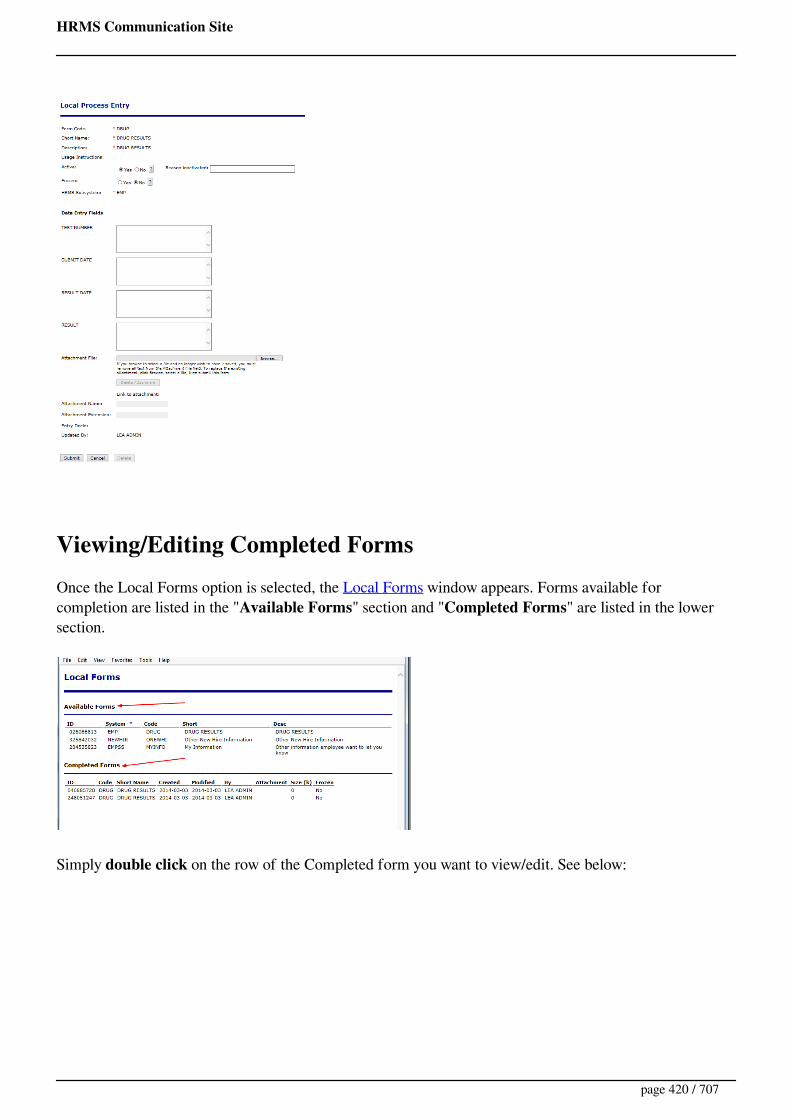
HRMS Communication Site
Viewing/Editing Completed FormsOnce the Local Forms option is selected, the Local Forms window appears. Forms available forcompletion are listed in the "Available Forms" section and "Completed Forms" are listed in the lowersection.
Simply double click on the row of the Completed form you want to view/edit. See below:
page 420 / 707
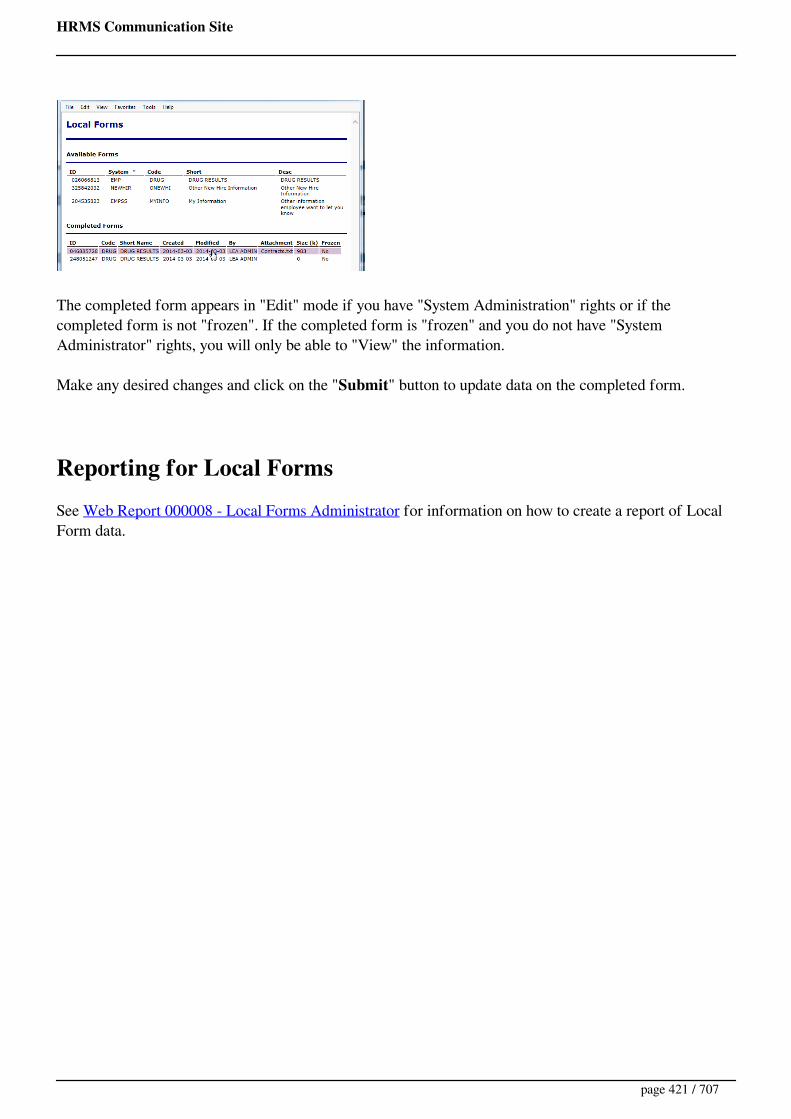
HRMS Communication Site
The completed form appears in "Edit" mode if you have "System Administration" rights or if thecompleted form is not "frozen". If the completed form is "frozen" and you do not have "SystemAdministrator" rights, you will only be able to "View" the information.
Make any desired changes and click on the "Submit" button to update data on the completed form.
Reporting for Local FormsSee Web Report 000008 - Local Forms Administrator for information on how to create a report of LocalForm data.
page 421 / 707
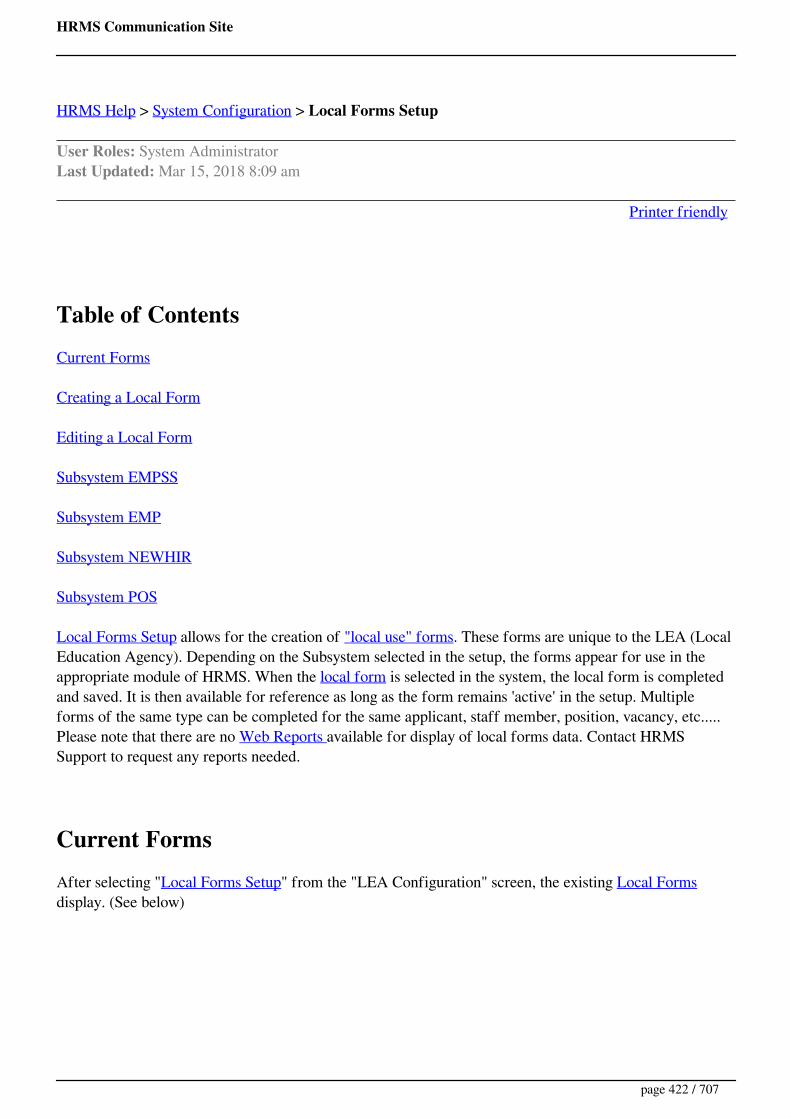
HRMS Communication Site
HRMS Help > System Configuration > Local Forms Setup
User Roles: System AdministratorLast Updated: Mar 15, 2018 8:09 am
Printer friendly
Table of ContentsCurrent Forms
Creating a Local Form
Editing a Local Form
Subsystem EMPSS
Subsystem EMP
Subsystem NEWHIR
Subsystem POS
Local Forms Setup allows for the creation of "local use" forms. These forms are unique to the LEA (LocalEducation Agency). Depending on the Subsystem selected in the setup, the forms appear for use in theappropriate module of HRMS. When the local form is selected in the system, the local form is completedand saved. It is then available for reference as long as the form remains 'active' in the setup. Multipleforms of the same type can be completed for the same applicant, staff member, position, vacancy, etc.....Please note that there are no Web Reports available for display of local forms data. Contact HRMSSupport to request any reports needed.
Current FormsAfter selecting "Local Forms Setup" from the "LEA Configuration" screen, the existing Local Formsdisplay. (See below)
page 422 / 707

HRMS Communication Site
Creating a Local FormTo create a new Local Form Template, click on the "New" button. The following form appears. Afterentering all the required information, click on Submit. There are 9 Fields available for each form thatallow for 1000 characters of text to be entered. Explanations of the information requested are listed belowthe screenshot below.
Form Code (Required) - Code used to identify form. 6 character maximum.Short Name (Required) - Short Name used to identify form. 30 character maximum.Description (Required) - Longer description of form.Usage instructions - Instructions that will appear for use by the person completing the form.Display Order (Required) - Order in which the form is displayed for selection in the system.Active - Default Yes. Whether or not the form is active in the system.Automatically display attached images - Default No. If yes, image files with extensions of JPG, GIF, or
page 423 / 707
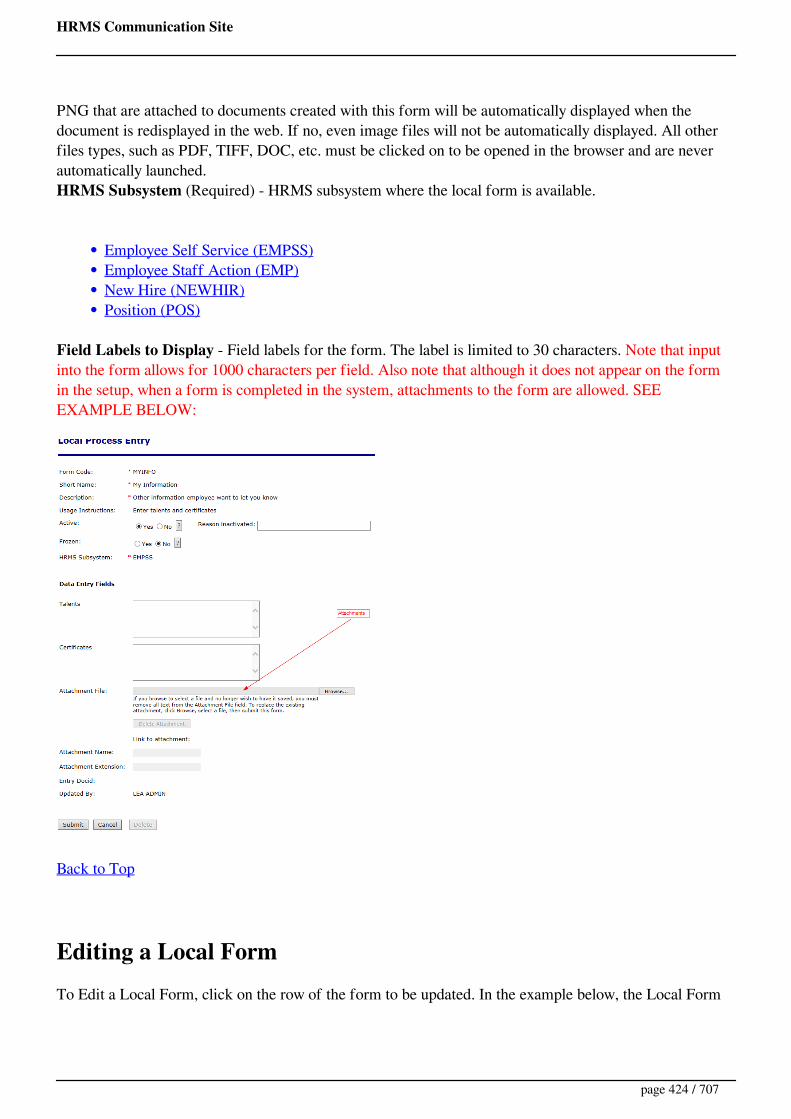
HRMS Communication Site
PNG that are attached to documents created with this form will be automatically displayed when thedocument is redisplayed in the web. If no, even image files will not be automatically displayed. All otherfiles types, such as PDF, TIFF, DOC, etc. must be clicked on to be opened in the browser and are neverautomatically launched.HRMS Subsystem (Required) - HRMS subsystem where the local form is available.
Employee Self Service (EMPSS)Employee Staff Action (EMP)New Hire (NEWHIR)Position (POS)
Field Labels to Display - Field labels for the form. The label is limited to 30 characters. Note that inputinto the form allows for 1000 characters per field. Also note that although it does not appear on the formin the setup, when a form is completed in the system, attachments to the form are allowed. SEEEXAMPLE BELOW:
Back to Top
Editing a Local FormTo Edit a Local Form, click on the row of the form to be updated. In the example below, the Local Form
page 424 / 707

HRMS Communication Site
(Dual Site) is selected for update.
Once selected, the form will appear in Edit mode. (See below). Make any needed changes and click on theSubmit button. It is not a good idea to change the Form Code, or any labels after the form has been used inthe system. Keep in mind that if you change Field Labels, the data on forms already saved will appear withthe new label.
Back to Top
page 425 / 707

HRMS Communication Site
Subsystem EMPSSLocal Forms created for the Employee Self Service (EMPSS) subsystem are only available on the Employee Demographics screen. Please note that the Employee Self Service module in HRMS is no longeravailable. That module was the primary location for the subsystem form.
Back to Top
Subsystem EMPLocal Forms created for the Employee Staff Action (EMP) subsystem are only available on the EmployeeDemographics screen.
Back to Top
Subsystem NEWHIRLocal Forms created for the New Hire (NEWHIR) subsystem are available on the EmployeeDemographics and New Hire Nominee (Vacancy Permit) screens.
page 426 / 707

HRMS Communication Site
Back to Top
Subsystem POSLocal Forms created for the Position (POS) subsystem are only available on the Position Edit Screen.
page 427 / 707
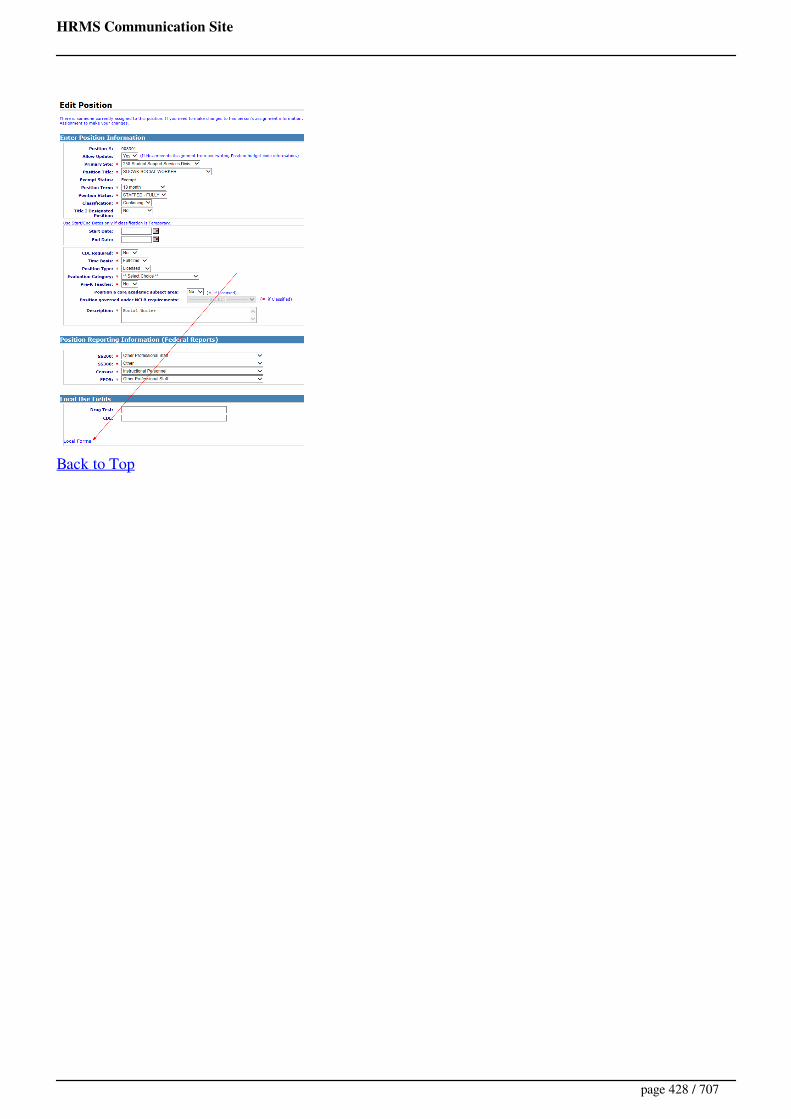
HRMS Communication Site
Back to Top
page 428 / 707

HRMS Communication Site
HRMS Help > System Configuration > Local Use Labels Employee
User Roles: System AdministratorLast Updated: Feb 20, 2012 8:16 am
The Employee Local Use Field Labels configuration form allows you to define up to twenty (20) localuse fields to capture information that is not available on the standard Employee Demographic form.
To access the form, go to: HRMS Home > Setup > LEA Configuration > Local Use Labels > Employee.
The Employee Local Use Field Labels form will display.
Instructions
To add a new Employee Local Use field label, enter the desired values into the fields at the top ofthe form and click the Add button.Sort Order determines the order of display on forms and reports, and must be 1–20 for Activefields.Active Indicator should be set to 'Yes' for all Local Use fields that are currently in use. To stopusing a specific Local Use field, set its Active Indicator to 'No'.
Because Inactive fields do not appear within the system, Active and Inactive fields areallowed to have the same Sort Order number.Label Names cannot be reused, but Inactive fields can be reactivated.Data associated with Inactive Local Use fields will not be archived with positionassignments.
page 429 / 707
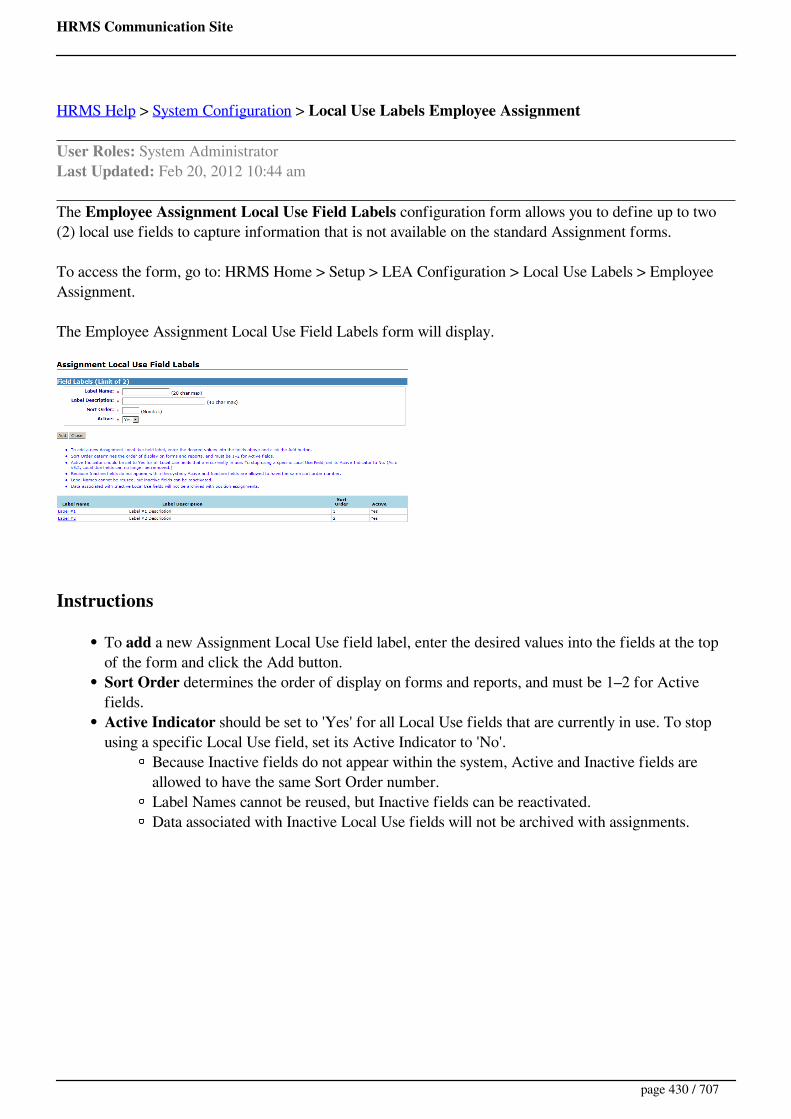
HRMS Communication Site
HRMS Help > System Configuration > Local Use Labels Employee Assignment
User Roles: System AdministratorLast Updated: Feb 20, 2012 10:44 am
The Employee Assignment Local Use Field Labels configuration form allows you to define up to two(2) local use fields to capture information that is not available on the standard Assignment forms.
To access the form, go to: HRMS Home > Setup > LEA Configuration > Local Use Labels > EmployeeAssignment.
The Employee Assignment Local Use Field Labels form will display.
Instructions
To add a new Assignment Local Use field label, enter the desired values into the fields at the topof the form and click the Add button.Sort Order determines the order of display on forms and reports, and must be 1–2 for Activefields.Active Indicator should be set to 'Yes' for all Local Use fields that are currently in use. To stopusing a specific Local Use field, set its Active Indicator to 'No'.
Because Inactive fields do not appear within the system, Active and Inactive fields areallowed to have the same Sort Order number.Label Names cannot be reused, but Inactive fields can be reactivated.Data associated with Inactive Local Use fields will not be archived with assignments.
page 430 / 707

HRMS Communication Site
HRMS Help > System Configuration > Local Use Labels Position
User Roles: System AdministratorLast Updated: Feb 20, 2012 8:16 am
The Position Local Use Field Labels configuration form allows you to define up to five (5) local usefields to capture information that is not available on the standard Position forms.
To access the form, go to: HRMS Home > Setup > LEA Configuration > Local Use Labels > Position.
The Position Local Use Field Labels form will display.
Instructions
To add a new Position Local Use field label, enter the desired values into the fields at the top ofthe form and click the Add button.Sort Order determines the order of display on forms and reports, and must be 1–5 for Activefields.Active Indicator should be set to 'Yes' for all Local Use fields that are currently in use. To stopusing a specific Local Use field, set its Active Indicator to 'No'.
Because Inactive fields do not appear within the system, Active and Inactive fields areallowed to have the same Sort Order number.Label Names cannot be reused, but Inactive fields can be reactivated.Data associated with Inactive Local Use fields will not be archived with positionassignments.
page 431 / 707

HRMS Communication Site
HRMS Help > Reporting Tool > Logging In
User Roles: Any user with Reporting Tool installed on PCLast Updated: Dec 12, 2011 6:16 am
To start the application, double-click the HRMS Reporting Tool (apple tree) shortcut on your desktop.
The Login form will display.
Enter your HRMS User name and Password and click OK.
See also: Setting the TCP/IP Address
page 432 / 707

HRMS Communication Site
HRMS Help > System Configuration > Longevity
User Roles: System AdministratorLast Updated: Nov 15, 2013 11:11 am
The Longevity Change Reason configuration form allows you to add locally defined reasons for the Longevity Change Staff Action. (Please note that very few, if any LEAs, attempt to maintain Longevityinformation in HRMS. Longevity information is accurate and up to date in the LEA payroll system since itinterfaces with the ORBIT system.)
To access the form, go to: HRMS Home > Setup > LEA Configuration > Longevity.
There are four system defined reasons. See below.
AI - Information from Previous EmployerCC - Calculation CorrectionLA - Return from Leave of AbsenceSU - Return from Suspension without pay
The Longevity Change Reason form will display. Instructions follow the screen shot below.
To add a locally-defined Longevity Reason, complete the applicable fields at the top of the form and clickAdd.
Longevity Change Reason - unique name up to 2 characters long.
To edit a locally-defined Longevity Change Reason, click the Condition Code link, update the descriptionfield as needed, and click Update.
To remove a locally-defined Longevity Change Reason, check the remove box beside the one to beremoved, then click the remove button.
page 433 / 707
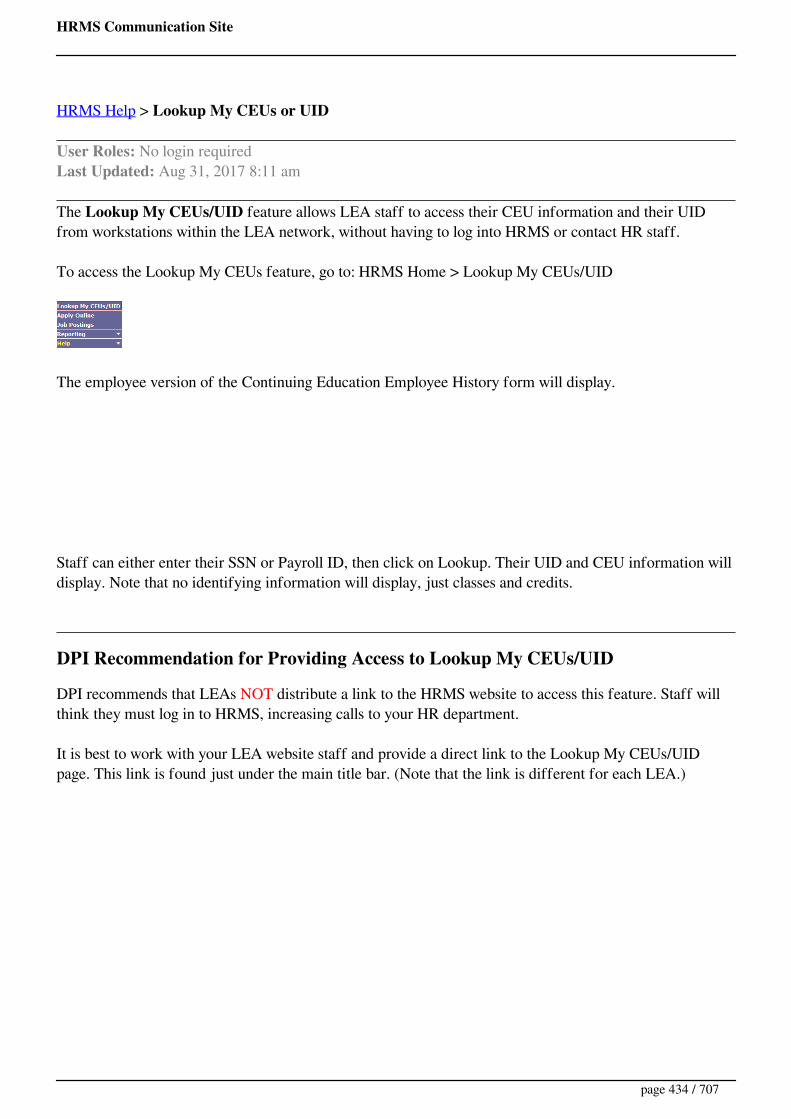
HRMS Communication Site
HRMS Help > Lookup My CEUs or UID
User Roles: No login requiredLast Updated: Aug 31, 2017 8:11 am
The Lookup My CEUs/UID feature allows LEA staff to access their CEU information and their UIDfrom workstations within the LEA network, without having to log into HRMS or contact HR staff.
To access the Lookup My CEUs feature, go to: HRMS Home > Lookup My CEUs/UID
The employee version of the Continuing Education Employee History form will display.
Staff can either enter their SSN or Payroll ID, then click on Lookup. Their UID and CEU information willdisplay. Note that no identifying information will display, just classes and credits.
DPI Recommendation for Providing Access to Lookup My CEUs/UID
DPI recommends that LEAs NOT distribute a link to the HRMS website to access this feature. Staff willthink they must log in to HRMS, increasing calls to your HR department.
It is best to work with your LEA website staff and provide a direct link to the Lookup My CEUs/UIDpage. This link is found just under the main title bar. (Note that the link is different for each LEA.)
page 434 / 707
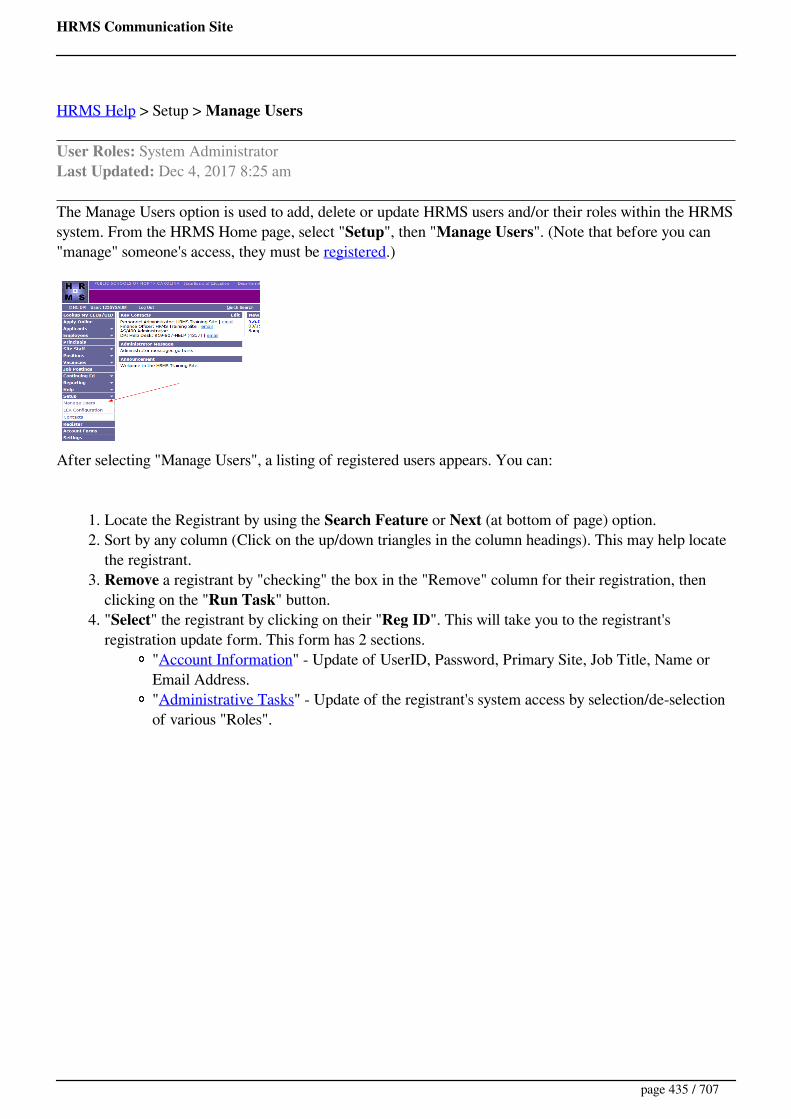
HRMS Communication Site
HRMS Help > Setup > Manage Users
User Roles: System AdministratorLast Updated: Dec 4, 2017 8:25 am
The Manage Users option is used to add, delete or update HRMS users and/or their roles within the HRMSsystem. From the HRMS Home page, select "Setup", then "Manage Users". (Note that before you can"manage" someone's access, they must be registered.)
After selecting "Manage Users", a listing of registered users appears. You can:
1. Locate the Registrant by using the Search Feature or Next (at bottom of page) option.2. Sort by any column (Click on the up/down triangles in the column headings). This may help locate
the registrant.3. Remove a registrant by "checking" the box in the "Remove" column for their registration, then
clicking on the "Run Task" button.4. "Select" the registrant by clicking on their "Reg ID". This will take you to the registrant's
registration update form. This form has 2 sections."Account Information" - Update of UserID, Password, Primary Site, Job Title, Name orEmail Address."Administrative Tasks" - Update of the registrant's system access by selection/de-selectionof various "Roles".
page 435 / 707

HRMS Communication Site
Account InformationIn the first section on this page, you can perform the following tasks.
1. Change UserName (Does not always work correctly so use sparingly. If you have problems,contact HRMS Support.)
Check the "Change UserName?" boxEnter a new UserName (without the leading LEA 3 character code)Scroll to the bottom and click on the "Submit" button
2. Change PasswordCheck the "Change Password?" boxEnter a new Password in both the "New Password" and "Confirm Password" boxScroll to the bottom and click on the "Submit" button
3. Change Site or Job Title selections. Change name or email address.Select new site or job titleType over existing name or email addressScroll to the bottom and click on the "Submit" button
page 436 / 707

HRMS Communication Site
Administrative TasksThe second section of the page allows for selection of various "Roles" for the registrant. Select or de-selectthe roles for the registrant, then click on the submit button. Please wait a few minutes for the changes totake affect. The following buttons are available for use.
1. Check All - Checks all Roles2. Uncheck All - Unchecks all Roles3. Group Info - Displays a pop-up window of what options within HRMS are associated with the
various roles listed.4. Dependency Rules - Displays a pop-up window of roles that are dependent upon one another. You
will notice when selecting roles, that when some are checked, others are automatically checked.
page 437 / 707
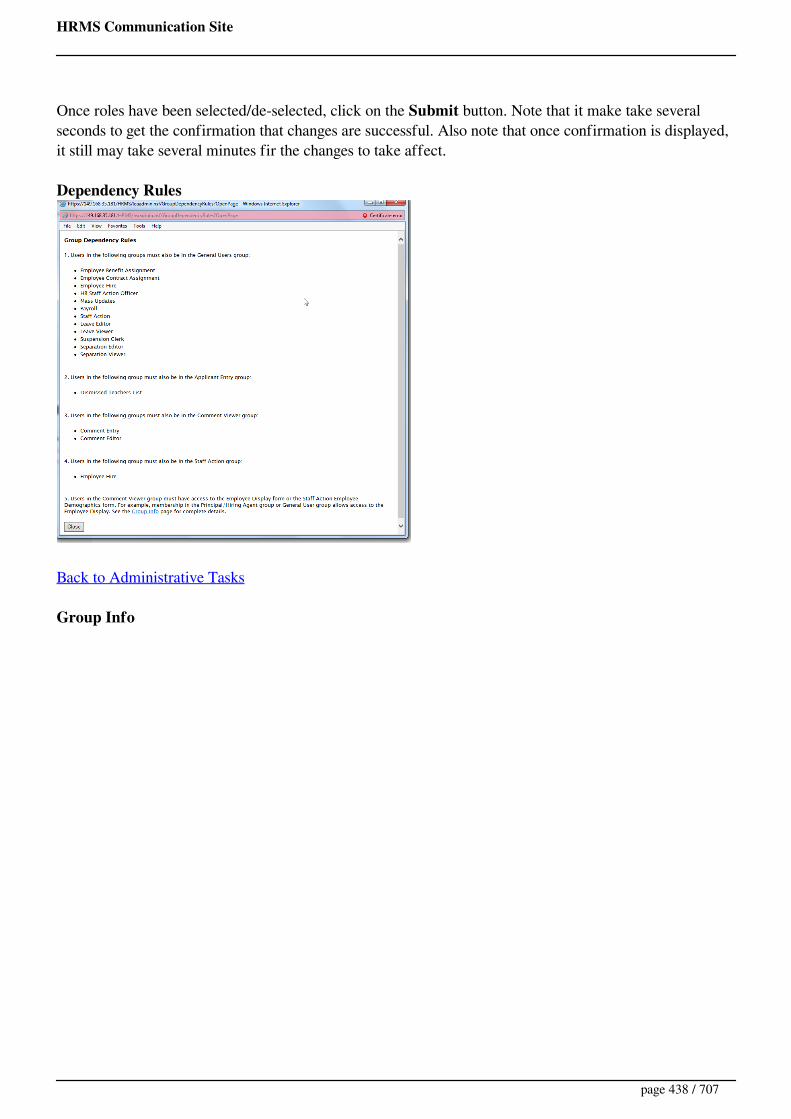
HRMS Communication Site
Once roles have been selected/de-selected, click on the Submit button. Note that it make take severalseconds to get the confirmation that changes are successful. Also note that once confirmation is displayed,it still may take several minutes fir the changes to take affect.
Dependency Rules
Back to Administrative Tasks
Group Info
page 438 / 707
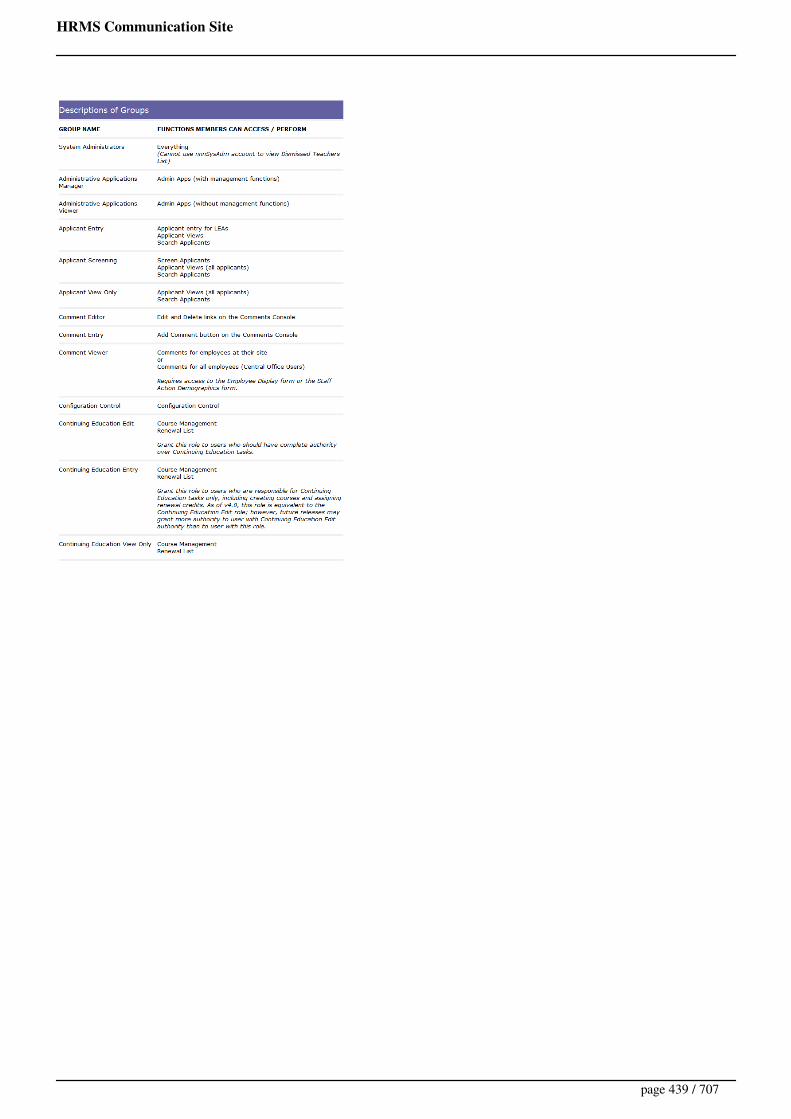
HRMS Communication Site
page 439 / 707

HRMS Communication Site
page 440 / 707

HRMS Communication Site
Back to Administrative Tasks
page 441 / 707
HRMS Communication Site
HRMS Help > Continuing Education > Mass Update Literacy Credits
User Roles: Continuing Education Editor, System AdministratorLast Updated: Jul 9, 2015 7:05 am
The Literacy Credit Mass Update form allows you to update previously-awarded Literacy credits for aspecific course.
Note: Classes that have Academic Credit assigned will be excluded from the update process due to thecomplexity of the rules requiring that an individual cannot receive both Content Credit and Literacy Creditfor the same course. These classes can still be adjusted via the Mass Update Single Course feature or viathe individual's CEU Employee History.
Prior to performing the Mass Update
Record the Class Code for the course you wish to update. You can do this by searching for the template onthe CEU Template Management form.
Accessing the Mass Update Form
From the CEU Template Management form, select Literacy Credit in the Mass Update drop-down list, andclick Go.
The CEU Mass Update - Literacy Credit form will display (see example below).
Performing the Mass Update
1. Select the corresponding Alpha or Numeric character that corresponds to the first character of theclass code. A list of courses/complete dates for courses beginning with the selected character willdisplay.
2. Use the navigation options above the search results to find the desired course/complete date.3. Click on the course/complete date to be updated. The row will become highlighted and a list of
employees who received renewal credits for the course on the selected date will display.4. If needed, adjust the value in the New Literacy Credits field for any employee (defaults to Renewal
Credits value).5. Click the Update All button (above the list) to update credits for all employees, or click the Update
button(s) in the table to update credits for specific employees. The page will refresh showing thechanges.
page 442 / 707

HRMS Communication Site
page 443 / 707
HRMS Communication Site
HRMS Help > Continuing Education > Mass Update Single Course
User Roles: Continuing Education Editor, System AdministratorLast Updated: Aug 31, 2017 7:47 am
The Mass Update Single Course form allows you to update renewal credits that were previously awardedfor a particular course using the current values on the Course Template.
Prior to performing the Mass Update:
1. Search for the course template.2. Edit the course template to make any needed adjustments.3. Record the Course Code.
Accessing the Mass Update Form
From the CEU Template Management form, select Single Course in the Mass Update drop-down list, andclick Go.
The Update Credits Using a Course Template form will display (see example below).
Performing the Mass Update
1. Enter the Course Code and click the Find Course button. The system will display the latest CourseTemplate information for the course plus a list of all instances where the course has been assigned.
2. Under Pick the Course(s) to find Attendees, select the courses to be corrected by clicking thecorresponding check boxes.
3. Click the Find Attendees button. A roster of individuals that have credit posted for the selectedcourse dates will display.
4. Under Uncheck the Attendees you wish to 'Exclude' from being updated..., uncheck anyindividuals whose renewal credit history DOES NOT NEED to be corrected by clicking on theircheck boxes.
5. Click the Update Selected Attendees button.
The system will update each selected individual's CEU history information using the current CourseTemplate values, and a confirmation screen will display.
If desired, click the Print button to print the confirmation page for your records.
page 444 / 707

HRMS Communication Site
HRMS Help > Employee Page > Mass Updates
User Roles: Employee Hire, Staff Action, HR Staff Action Officer, System AdministratorLast Updated: Dec 31, 2013 11:34 am
Printer friendlyHRMS offers several options allowing for the mass update of employee data. Please note that if you do notsee a needed Mass Update, you should contact HRMS support to discuss the data you need modified orremoved. Hopefully HRMS support can go "behind the scenes" to update or remove the data and save dataentry time.
To access the Mass Updates, go to: HRMS Home > Employees > Employee Page > Mass Updates.
Below is a screen shot of the current Mass Updates
Click on a link below for more information on each Employee Mass Update
BT Status Code (Old ILT Status)Tenure Status CodeCopy Payroll SSN Name / Update Verified Indicator (Not currently working. Contact HRMSSupport)Rebuild Position Budget Codes (v5.0)Remove Old HRMS Additional Pay Budget Codes (v5.0) (Obsolete)Substitute RateAdditional Pay Budget Code Step (Not currently working. Contact HRMS Support)Build Contracts
page 445 / 707

HRMS Communication Site
HRMS Help > Contracts > Contracts Mass Build > MBC Confirm Contracts
User Roles: HR Staff Action Officer, System AdministratorLast Updated: Jan 24, 2012 11:42 am
Step #5 - Confirmation of Mass Build Contracts
Step 5 is the confirmation screen of what has just been completed as a part of this Mass Build Contractprocess.
1 Created: This section identifies the employees that received new contracts, and some information aboutthe new contracts that have been created as a part of this Mass Contract process. This contract can beviewed or edited from the employee's Contract History that is located under the Other Tab on theirDemographic Page. This contract can be printed from the HRMS Desk Top Reporting Tool.
2 Inactivated: This section identifies the employees that had a contract moved to the inactive status as apart of this process. These inactivated contracts can also be viewed, edited or re-activated from theirContract History as explained above.
A Print This Page button is available that allows the operator to retain a record of the new contractscreated and the old contracts that were inactivated as part of the mass update.
A Start Again button is also available that allows the operator to return to Step #1 and start the processagain for another group of employees.
page 446 / 707
HRMS Communication Site
HRMS Help > Contracts > Contracts Mass Build > MBC Find Employees
User Roles: HR Staff Action Officer, System AdministratorLast Updated: Mar 11, 2014 12:56 pm
Step # 1: Find Employees
In this step you locate employees from the previous year for which you want to create a contract for thecurrent year.
1 Step #1: Find Employees: The Mass Build Contract option will display Step #1 of the 5 step process.After completing the Search Criteria, the selected employees will be displayed.
2 Contract Type: An authorized HRMS clerk must first select the current active contract type for whichthey want to create new contracts. Only the system-defined types of Teacher, Temporary Full-Time orTemporary Part-Time can be selected for mass create.
3 Site(s): Next the particular site(s) that the operator wants to work with should be selected. Please notethat the default is for ALL sites; if no Sites are selected, the system may return an unmanageable numberof employees to work with. It is recommended, at least to start with, that the operator work with one site ata time until they are comfortable with the Mass Build Contract functionality. Please note that the BuildContract Search SITE criteria only includes Sites that have employees with active contracts.
4 Between: The dates entered here will determine which currently active contracts to access. The selection
page 447 / 707

HRMS Communication Site
will include all employees that have an Active Contract and an Effective Date within the identified timeframe and also meet the other selection criteria.
5 Tenure Status: The current tenure status of the active contracts to access. The selection will include allemployees the selected tenure status that have an Active Contract. Please note that the default is for ALLTenure Statuses
6 Special Condition(s): The identifying codes used in your HRMS Contract Conditions file will appearhere and the operator can select 1 or more contract condition codes. As with the other selection fields thiswill further reduce the number of employees to only those that have a current contract that includes thatcontract condition. Please note that a contract may contain only the specific contract condition selected, orthis may be simply one of several contract conditions that are found on a particular contract.
7 Next: When the selection process is completed the Next button should be clicked.
page 448 / 707

HRMS Communication Site
HRMS Help > Contracts > Contracts Mass Build > MBC Review Contracts
User Roles: HR Staff Action Officer, System AdministratorLast Updated: Jan 24, 2012 11:40 am
Step #4 - Confirm (Final Review of Mass Contract Build)
Step 4 is a final review screen that lists the individuals to receive a new contract in the first section and thespecific data elements to be used in the construction of the new contracts in the second section.
1 Selected List: This section lists the individual(s) that will have a new contract established, within theirHRMS records, once the Okay button is clicked.
2 Values to Set: This section lists the specific data elements that are to be used in the building of the newcontracts.
3 Edit: If the operator needs to refine or change the selected elements of the new contract in any way, theymay click the Edit button and be returned to Step #3, where they will have the opportunity to make anyneeded adjustments.
4 Okay: If the operator is satisfied that the correct employees have been identified and that the specificdata elements for the new contract are correct, then they should click the Okay button to create the newcontracts. The operator will then be taken to Step #5.
page 449 / 707

HRMS Communication Site
HRMS Help > Contracts > Contracts Mass Build > MBC Select Contracts
User Roles: HR Staff Action Officer, System AdministratorLast Updated: Jan 24, 2012 11:37 am
Step #2: Select Contracts
1 Search Summary: This area displays the search criteria that was used in returning the below identifiedemployees for possible development of a contract via the Mass Build Contracts process.
2: This section of the screen displays the individuals that met the search criteria. The informationdisplayed includes the employee's current Primary Site, the employee's Name, the Effective Date of theircurrently active contract, their current Tenure Status, current Beginning Teacher Status and the SpecialCondition Code(s) from their current active contract.
3: The check marks indicate the employee(s) identified as having been selected to receive a new contractvia the Contract Mass Update process. Please note that the default is for all employees who met the searchcriteria to be defaulted to a check (included in the mass build contract process). Employees in the list whoshould be excluded need to be unchecked. Also there is an Unselect All button available, if needed,directly below the last identified employee.
Note that the Mass Build Contracts process will not check end dates on assignments. For employees whoseassignment is ending at the end of the current school year, you will need to de-select them so that they willnot be included in the mass update.
4: Upon completion of the review and selection process, the Next button should be clicked to proceed withestablishing the new contract components found in step #3. However, if it is determined that the selectioncriteria was incorrect and the returned set of employees is not the desired set, the operator can simply clickthe Previous button to be returned to Step #1 and establish a new set of search criteria.
page 450 / 707
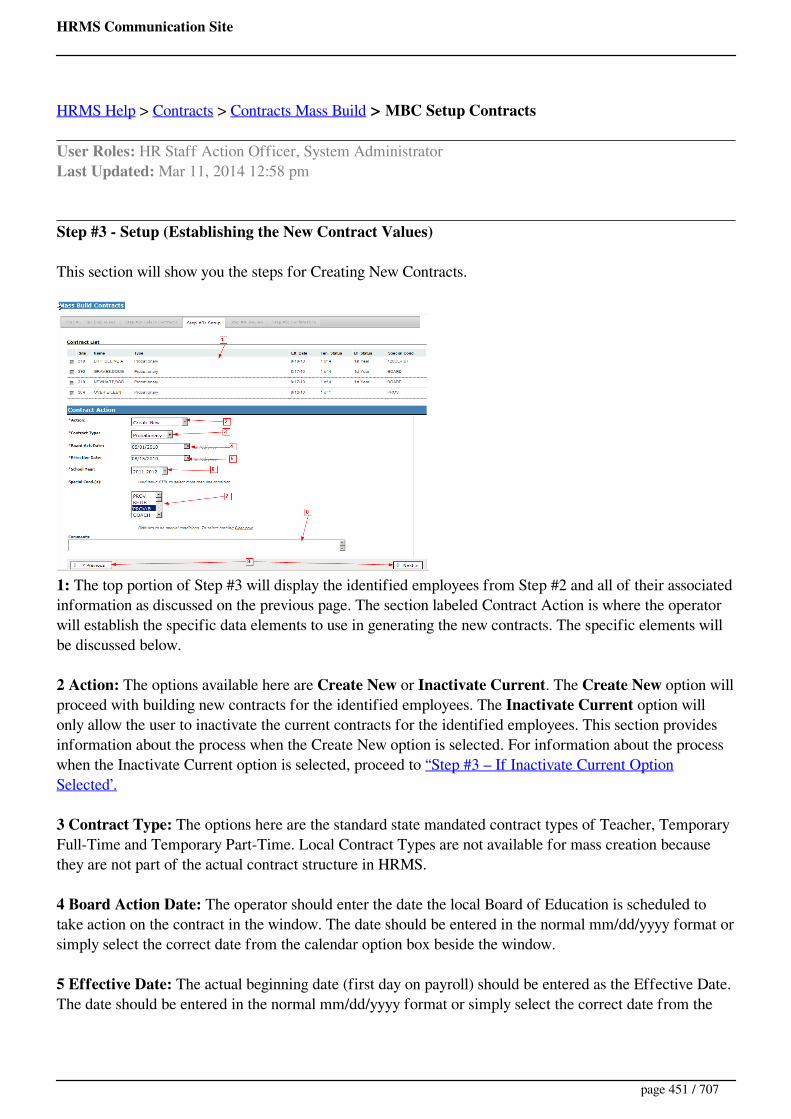
HRMS Communication Site
HRMS Help > Contracts > Contracts Mass Build > MBC Setup Contracts
User Roles: HR Staff Action Officer, System AdministratorLast Updated: Mar 11, 2014 12:58 pm
Step #3 - Setup (Establishing the New Contract Values)
This section will show you the steps for Creating New Contracts.
1: The top portion of Step #3 will display the identified employees from Step #2 and all of their associatedinformation as discussed on the previous page. The section labeled Contract Action is where the operatorwill establish the specific data elements to use in generating the new contracts. The specific elements willbe discussed below.
2 Action: The options available here are Create New or Inactivate Current. The Create New option willproceed with building new contracts for the identified employees. The Inactivate Current option willonly allow the user to inactivate the current contracts for the identified employees. This section providesinformation about the process when the Create New option is selected. For information about the processwhen the Inactivate Current option is selected, proceed to “Step #3 – If Inactivate Current OptionSelected’.
3 Contract Type: The options here are the standard state mandated contract types of Teacher, TemporaryFull-Time and Temporary Part-Time. Local Contract Types are not available for mass creation becausethey are not part of the actual contract structure in HRMS.
4 Board Action Date: The operator should enter the date the local Board of Education is scheduled totake action on the contract in the window. The date should be entered in the normal mm/dd/yyyy format orsimply select the correct date from the calendar option box beside the window.
5 Effective Date: The actual beginning date (first day on payroll) should be entered as the Effective Date.The date should be entered in the normal mm/dd/yyyy format or simply select the correct date from the
page 451 / 707
HRMS Communication Site
calendar option box beside the window.
6 School Year: The school year that the new contract applies to.
7 Special Condition(s): In this window the operator should select the Special Conditions to be included inthe new contract(s). Multiple Special Conditions can be selected by holding down the CTRL key, on thekeyboard, while scrolling through the various contract condition codes and selecting the other appropriateconditions.
8 Comments: This data entry box is to be used as a communication tool for information pertaining to thenext renewal / non-renewal review. The information entered here WILL NOT appear on the contract andwill ONLY appear within the renewal / non-renewal data returned as a part of the Assignment, Contractand License contained as an option on the View tab found on the Employee Page.Note that the example provided here is for creating Probationary contracts. If the operator elects to createa different Contract Type, the data elements shown in the Contract Action section will vary slightly.
9: After selection of the specific elements to be used in the new contracts the Next button should beclicked to proceed with building the new contracts. Again, as in Step #2 there is a Previous button if theoperator needs to return to Step #2 for any reason.
page 452 / 707

HRMS Communication Site
HRMS Help > Reporting Tool > NCLB Licensed HQ Qualifications Reports
User Roles: Any user with Reporting Tool installed on PCLast Updated: Feb 13, 2012 1:35 pm
The NCLB Licensed HQ Qualifications Reports list employee, assignment, and license information foreither Teachers or All Professional Educators.
The Teachers report selects teachers based on assignment budget codes (object codes 121, 123 and124) from Payroll. The user must specify 'Assignments Active Between' dates, and the systemselects current and archived assignments active during that period.
The All Professional Educators report includes licensed employees with a current assignment,and those not in an assignment as of the current date. This option is intended for LEAs that do notassign employees to positions or LEAs that do not enter HRMS position numbers on Payroll budgetcodes.
For both reports, you may select:
Primary assignments (default) or both primary and non-primary assignmentsAll assignments (default) or 'Include Only Core Academic Areas'HQ (default), non-HQ, or ALL License areas
An Error Report is also available that lists:
Employees in Licensed positions without a base budget code (Teachers option)Employees in licensed positions without an active North Carolina License
Selection Criteria
Select ReportPick EmployeesEmployee StatusAssignments Active Between*Pick SitesPrimary/Non-PrimaryPick Position TitlesPick Position DescriptionsInclude Only Core Academic AreasHQ/Non-HQPick Licensure AreasSort by
page 453 / 707

HRMS Communication Site
SSN (Display)Export Report Data (For this report, contact HRMS Support if you need an Excel file that containsEmployee, Assignment, and License Area data in one row.)
*Not available for 'All Professional Educators' Report
Sample - Teachers (by Site, Employee Name, and License Area)
Sample - Error Report
page 454 / 707

HRMS Communication Site
HRMS Help > New Hire Nominees > New Hire Screen > New Employee Demographics
User Roles: Hiring Agent, System AdministratorLast Updated: Dec 13, 2011 4:12 pm
The New Hire Demographic form is used by the New Hire Nominee process (requires Vacancy Permit) toenter Employee Demographics for new staff. Note that all information with a red * are required and mustbe entered before data can be submitted.
There are four sections of the New Employee Demographics form:
Basic InformationName, Address and PhoneDemographicsOther
Basic Information (All information is defaulted from the employment application when possible.)
page 455 / 707

HRMS Communication Site
Candidate- Name of candidate for filling the vacancy.Position- Position number being filled by the vacancySSN- Social Security Number of Candidate/New Employee.Site- Site number of the position.Title- Position Title of the vacancy's position.Substitute Indicator- Indicates in new employee will server as a substitute. (Default is No)
No - Not a substituteYes - Is a substituteBoth - Both a substitute and non-substitute employee
Edit Substitute Profile Link - Takes you to the Edit Substitute ProfileFormForeign National Indicator- Indicates if new employee is a Foreign National. (Default is No)Date Employment Eligibility Expires - Date employment eligibility expires for the ForeignNational staff member.
Name, Address and Phone
Prefix- Prefix for employee's name. For ex. Mr., Ms., Dr., etc..Name as it appears on Social Security card- Check once name on Social Security Card isverified.
First Name- Employee's First NameMiddle Name- Employee's Middle NameLast Name- Employee's Last NameSuffix- Suffix for employee name. For ex, Jr, Sr, III, etc..
Preferred Name (Note that if none of the Preferred Name fields are entered, they willdefault to the "Name as it appears on Social Security Card" fields above.)
First Name- Employee's Preferred First NameMiddle Name- Employee's Preferred Middle NameLast Name- Employee's PreferredLast NameSuffix- Preferred suffix for employee name. For ex, Jr, Sr, III, etc..
Nickname- Employee's NicknameMaiden Name- Employee's Maiden NameStreet Address Line 1- First line of Street AddressStreet Address Line 2- Second line of Street Address (if needed)City- City of employee addressState- State of employee addressZip- Zip code of employee addressIs Address protected under the NC Address Confidentiality Program? - Check 'Yes' ifemployee's address is protected under G.S. 15C-3 & 15C-8.Home Phone- Employee's Home PhoneOffice Phone- Employee's Office PhoneCell Phone- Employee's Cell PhoneHome Phone Unlisted Indicator- Check if the employee's home phone is unlisted.Email Address - Email address of employee to be used by HRMS.
page 456 / 707

HRMS Communication Site
Demographics
Date of Birth- Employee's Date of BirthOld Ethnicity- Old Ethnicity Code (soon to be removed from form) (Can only select one)
Asian or Pacific IslanderBlackWhiteHispanicAmerican Indian or AlaskanOther
Hispanic/Latino?- Hispanic/Latino indicator.YesNo
Which races is this employee considered to be?- New Ethnicity code as of Fall 2010. Multipleselections allowed.
WhiteNative Hawaiian or Other Pacific IslanderAsianAmerican Indian or Alaska NativeWhite
GenderF - FemaleM - Male
Handicap- Handicapped indicator. Can only select one from dropdown.NO ENTRY - UnknownNONE - No HandicapBLIND - BlindDEAF - DeafARM/HND - Arm and/or Hand handicapWHEELCHAIR - Employee in wheelchairORTHOPEDIC - Orthopedic handicapRESPIRATORY - Respiratory handicapNEURO DISR - Neurological DisorderMENT ILL - Mental IllnessMENT RETRD - Mentally RetardedLRND DISAB - Learning DisabledOTHER - Other DisabilityYES - Unspecified HandicapNo - No Handicap
Veteran- Veteran IndicatorYesNo
Other
page 457 / 707
HRMS Communication Site
Paid Mentor- Does this new staff member have a paid mentor?YesNo
Mentor Rate- Pay rate for this person's mentorMentor Name- Mentor nameMentor SSN- Mentor SSNLocal use fields - Employee Local use fields.
page 458 / 707
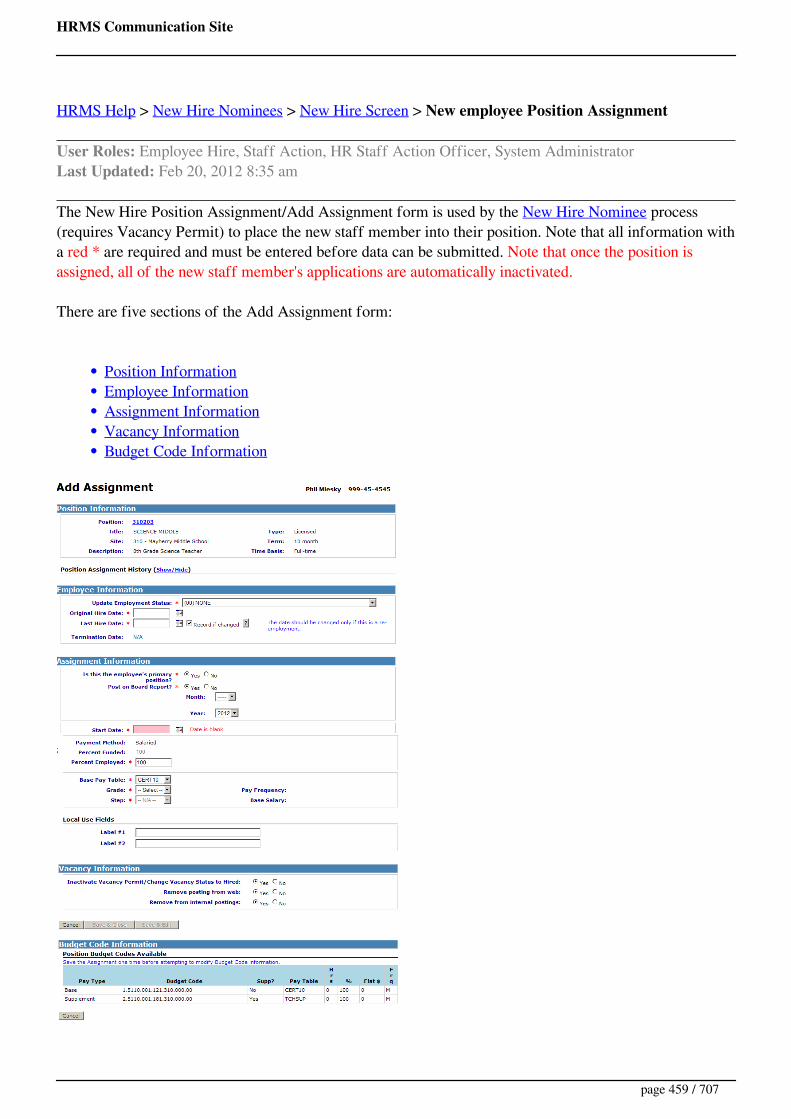
HRMS Communication Site
HRMS Help > New Hire Nominees > New Hire Screen > New employee Position Assignment
User Roles: Employee Hire, Staff Action, HR Staff Action Officer, System AdministratorLast Updated: Feb 20, 2012 8:35 am
The New Hire Position Assignment/Add Assignment form is used by the New Hire Nominee process(requires Vacancy Permit) to place the new staff member into their position. Note that all information witha red * are required and must be entered before data can be submitted. Note that once the position isassigned, all of the new staff member's applications are automatically inactivated.
There are five sections of the Add Assignment form:
Position InformationEmployee InformationAssignment InformationVacancy InformationBudget Code Information
page 459 / 707
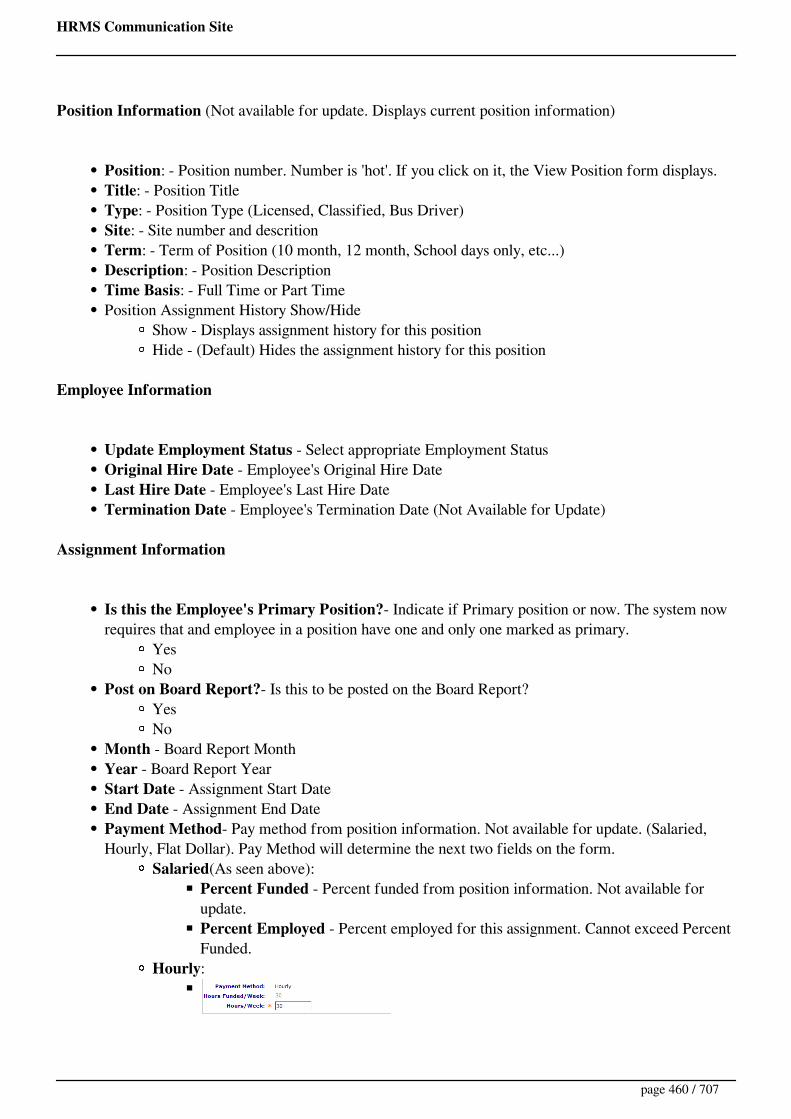
HRMS Communication Site
Position Information (Not available for update. Displays current position information)
Position: - Position number. Number is 'hot'. If you click on it, the View Position form displays.Title: - Position TitleType: - Position Type (Licensed, Classified, Bus Driver)Site: - Site number and descritionTerm: - Term of Position (10 month, 12 month, School days only, etc...)Description: - Position DescriptionTime Basis: - Full Time or Part TimePosition Assignment History Show/Hide
Show - Displays assignment history for this positionHide - (Default) Hides the assignment history for this position
Employee Information
Update Employment Status - Select appropriate Employment StatusOriginal Hire Date - Employee's Original Hire DateLast Hire Date - Employee's Last Hire DateTermination Date - Employee's Termination Date (Not Available for Update)
Assignment Information
Is this the Employee's Primary Position?- Indicate if Primary position or now. The system nowrequires that and employee in a position have one and only one marked as primary.
YesNo
Post on Board Report?- Is this to be posted on the Board Report?YesNo
Month - Board Report MonthYear - Board Report YearStart Date - Assignment Start DateEnd Date - Assignment End DatePayment Method- Pay method from position information. Not available for update. (Salaried,Hourly, Flat Dollar). Pay Method will determine the next two fields on the form.
Salaried(As seen above):Percent Funded - Percent funded from position information. Not available forupdate.Percent Employed - Percent employed for this assignment. Cannot exceed PercentFunded.
Hourly:
page 460 / 707

HRMS Communication Site
Hours Funded/Week - Hours funded per week from position information. Notavailable for update.Hours/Week - Hours worked per week. Cannot exceed Hours Funded Per Week.
Flat Dollar:
Base Pay Table - Salary Schedule for employee pay. (Defaults to Salary Schedule on Position)Grade - Salary Grade for employee pay.Step - Salary Step for employee pay.Pay Frequency - Payment Frequency (Displays after Base Pay Table, Grade and Step are selected)Base Salary - Salary (Displays after Base Pay Table, Grade and Step are selected)Assignment Local Use Fields - Local Use Fields used for assignments.
Vacancy Information (All options below default to Yes)
Inactivate Vacancy Permit/Change Vacancy Status to Hired? Yes, will inactivate VacancyPermit and set the Vacancy Permit status to 80 (Hired) Important: If you select Yes, and do notcomplete all the forms on the New Hire Screen before exiting, you will not be able to find thecandidate again in Search New Hire Nominees since the status of the Vacancy Permit is no longer'Offer Accepted'. Remove Posting from Web? Yes, will remove the posting from the DPI WebsiteRemove from Internal Job Postings? Yes will remove from Internal Job Postings.
Budget Code Information
Displays Position Budget Codes Available - From Position information. Not available forupdate.
page 461 / 707
HRMS Communication Site
HRMS Help > Employee Page > Employee Demographics > Staff Actions > New Hire
User Roles: System Administrator, HR Staff Action Officer, ...Last Updated: Oct 20, 2014 1:43 pm
Printer friendly
Table of ContentsQuick Facts
New Hire Details
Edit New Hire
Quick Facts
A New Hire Details form is now available to System Administrators, HR Staff Action Officers,Staff Action Clerks, and Employee Hire roles. The form can be accessed from the Staff ActionConsole or Staff Action Search form.
Click on the New Hire link to view New Hire Details
New Hire Details
Edit New Hire
page 462 / 707
HRMS Communication Site
An Edit New Hire form is available to the same user roles by selecting the Edit New Hire recordfrom the New Hire Details form. Make any necessary changes and click Save.
Effective Date of New Hire: Enter Date (Required)Employment Status Upon Hire: Select Status (Required)Comments: (Optional)Post on Board Report: Yes or No (Required)
When Hire Effective Date is modified:Original Hire Date will be set to the new Hire Effective Date.Assignment Start Dates that match the original Hire Effective Date will be set to the newHire Effective Date.If Hire Effective Date is in the past, it cannot be changed to a future date. You must waituntil the correct Hire Date has passed to make the change.
New Hire records cannot be removed/cancelled. A Separation must be entered instead.
page 463 / 707

HRMS Communication Site
HRMS Help > Employee Page > New Hire Employee
User Roles: Employee Hire, Staff Action, HR Staff Action Officer, System AdministratorLast Updated: Oct 16, 2014 11:34 am
The New Hire Employee form is used by HR staff to enter Employee Information for new staff. Allinformation with a red * is required and must be entered before data can be submitted. (Note that if thenew staff member has an application on file, as much data as possible on this form will be populated fromthe application. All pre-populated data can be edited. In this example, there is not an application on file)
There are seven sections of the Hire New Employee form. The form is displayed below. For anexplanation of the fields to be entered click on a link below. After entering all required information clickon "Submit" at the bottom of the form.
Basic InformationHire InformationName, Address and PhoneEmergency ContactsDemographicsContractsOther
Process
Enter all information desired making sure to complete all required fieldsClick on "Submit",A message reminding you to "Inactivate" the staff member's application if desired will appear. Click on "OK" to continue.A message indicating that the "New Employee Record Was Saved" will appear. Also included willbe a reminder to create a contract if you checked that the employee needs a contract on the formand a reminder to create a Substitute Profile, if the employment type of substitute was selected onthe previous screen. Click on "OK" to continue.The new employee's Demographic screen will display to allow for further action.
page 464 / 707

HRMS Communication Site
Basic Information (All information is defaulted from the employment application when possible.)
SSN- Social Security Number of Candidate/New Employee.Substitute Indicator- Indicates in new employee will server as a substitute. (Default is No)
No - Not a substituteYes - Is a substituteBoth - Both a substitute and non-substitute employee
page 465 / 707
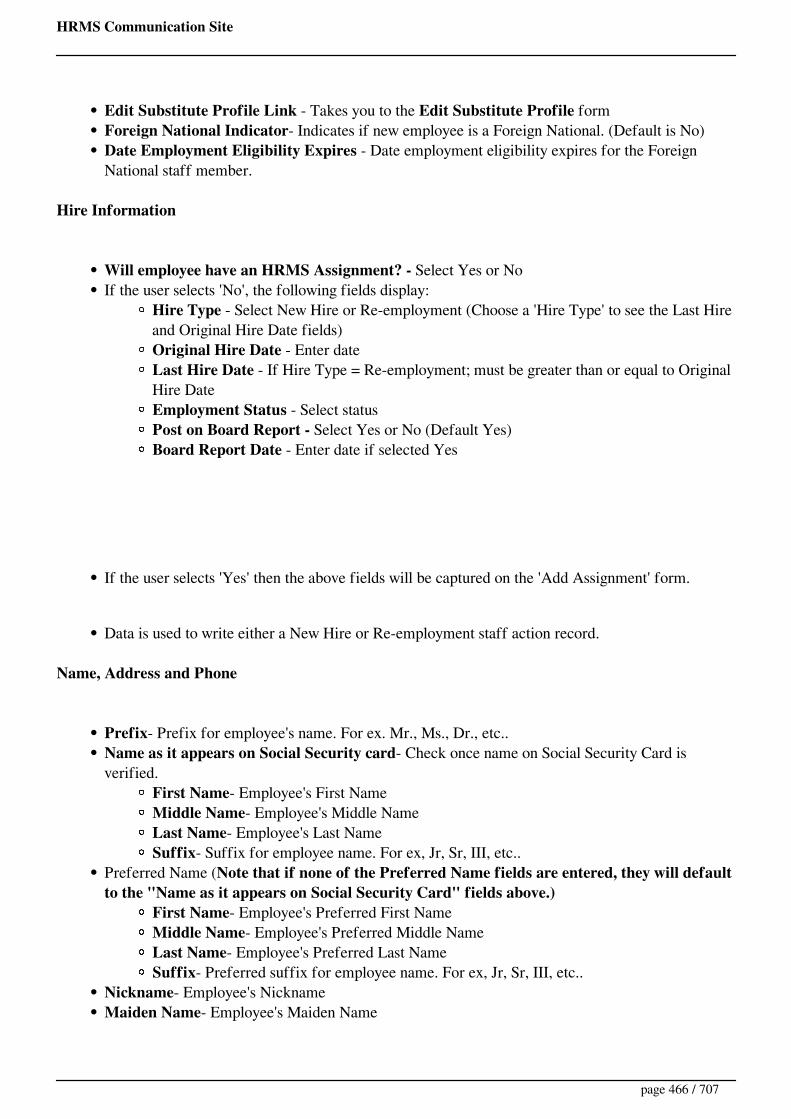
HRMS Communication Site
Edit Substitute Profile Link - Takes you to the Edit Substitute Profile formForeign National Indicator- Indicates if new employee is a Foreign National. (Default is No)Date Employment Eligibility Expires - Date employment eligibility expires for the ForeignNational staff member.
Hire Information
Will employee have an HRMS Assignment? - Select Yes or NoIf the user selects 'No', the following fields display:
Hire Type - Select New Hire or Re-employment (Choose a 'Hire Type' to see the Last Hireand Original Hire Date fields)Original Hire Date - Enter dateLast Hire Date - If Hire Type = Re-employment; must be greater than or equal to OriginalHire DateEmployment Status - Select statusPost on Board Report - Select Yes or No (Default Yes)Board Report Date - Enter date if selected Yes
If the user selects 'Yes' then the above fields will be captured on the 'Add Assignment' form.
Data is used to write either a New Hire or Re-employment staff action record.
Name, Address and Phone
Prefix- Prefix for employee's name. For ex. Mr., Ms., Dr., etc..Name as it appears on Social Security card- Check once name on Social Security Card isverified.
First Name- Employee's First NameMiddle Name- Employee's Middle NameLast Name- Employee's Last NameSuffix- Suffix for employee name. For ex, Jr, Sr, III, etc..
Preferred Name (Note that if none of the Preferred Name fields are entered, they will defaultto the "Name as it appears on Social Security Card" fields above.)
First Name- Employee's Preferred First NameMiddle Name- Employee's Preferred Middle NameLast Name- Employee's Preferred Last NameSuffix- Preferred suffix for employee name. For ex, Jr, Sr, III, etc..
Nickname- Employee's NicknameMaiden Name- Employee's Maiden Name
page 466 / 707

HRMS Communication Site
Street Address Line 1- First line of Street AddressStreet Address Line 2- Second line of Street Address (if needed)City- City of employee addressState- State of employee addressZip- Zip code of employee addressIs Address protected under the NC Address Confidentiality Program? - Check 'Yes' ifemployee's address is protected under G.S. 15C-3 & 15C-8.Home Phone- Employee's Home PhoneOffice Phone- Employee's Office PhoneCell Phone- Employee's Cell PhoneHome Phone Unlisted Indicator- Check if the employee's home phone is unlisted.Work Email - Work email address of employeePersonal Email - Personal email address of employee (usually from application).
Emergency Contacts
Name - Full Name of first Emergency ContactRelationship - First Emergency Contact's relationship to staff memberHome Phone - Home phone number of first Emergency ContactWork Phone - Work phone number of first Emergency ContacName - Full Name of second Emergency ContactRelationship - Second Emergency Contact's relationship to staff memberHome Phone - Home phone number of second Emergency ContactWork Phone - Work phone number of second Emergency Contactt
Demographics
Date of Birth- Employee's Date of BirthOld Ethnicity- Old Ethnicity Code (soon to be removed from form) (Can only select one)
Asian or Pacific IslanderBlackWhiteHispanicAmerican Indian or AlaskanOther
Hispanic/Latino?- Hispanic/Latino indicator.YesNo
Which races is this employee considered to be?- New Ethnicity code as of Fall 2010. Multipleselections allowed.
WhiteNative Hawaiian or Other Pacific IslanderAsianAmerican Indian or Alaska Native
page 467 / 707

HRMS Communication Site
WhiteGender
F - FemaleM - Male
Disabled PersonYesNo
Veteran- Veteran IndicatorYesNo
Contacts
Check this box if you want to be reminded to enter a contract for this employee after theform is saved.
Other
Paid Mentor- Does this new staff member have a paid mentor?YesNo
Mentor Rate- Pay rate for this person's mentorMentor Name- Mentor nameMentor SSN- Mentor SSNLocal use fields - Employee Local use fields.See Correct Employee Dates if changes need to be made to last hire and original hire dates.
page 468 / 707

HRMS Communication Site
HRMS Help > Reporting Tool > New Hire Report
User Roles: Any user with Reporting Tool installed on PCLast Updated: Dec 12, 2011 6:21 am
The New Hire Report is used to generate a report for the North Carolina Directory of New Hires. NorthCarolina State Law, G.S. 110-129.2 and the Personal Responsibility and Work Opportunity ReconciliationAct of 1996, requires all employers to report newly hired and re-hired employees to a state directorywithin 20 days of their start date. The North Carolina Directory of New Hires is managed by the NCDepartment of Health and Human Services (DHHS) Child Support Enforcement Division. New hirereporting speeds up the child support income withholding order process, expedites collection of childsupport from parents who change jobs frequently, and quickly locates alleged fathers/non-custodial parentsto help in establishing paternity and child support orders. The report includes basic Employer information(name, address, Federal and State ID numbers) and Employee information (name, SSN, address, date ofbirth, and hire date).
The Reporting Tool will allow users select an Output Type of either Reporting Tool or Excel. TheReporting Tool version can be faxed or used to enter data online, and the Excel file can be submittedonline. LEAs should consult DHHS’s New Hire Reporting website for detailed information on reportingand data submission requirements: http://newhire-reporting.com/NC-Newhire/default.aspx
Selection Criteria
Last Hire Date betweenSort byOutput Type
Sample Report - Reporting Tool Version
Sample Report - Excel Version
page 469 / 707
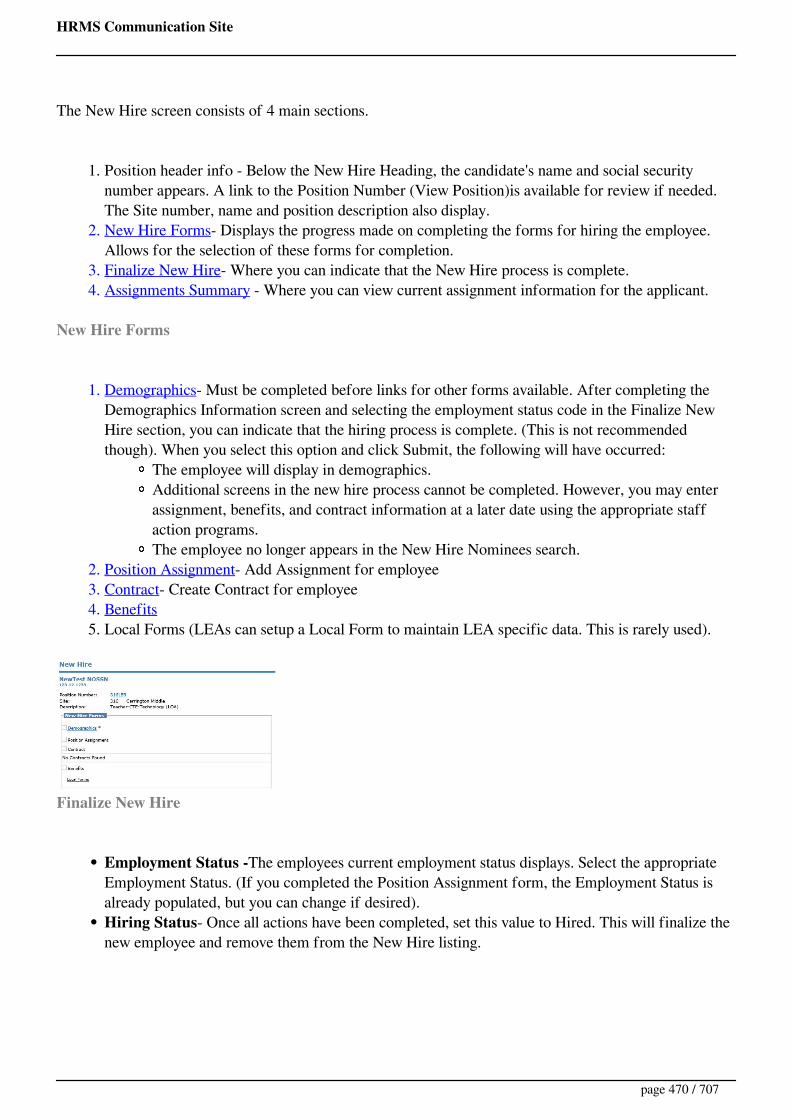
HRMS Communication Site
The New Hire screen consists of 4 main sections.
1. Position header info - Below the New Hire Heading, the candidate's name and social securitynumber appears. A link to the Position Number (View Position)is available for review if needed.The Site number, name and position description also display.
2. New Hire Forms- Displays the progress made on completing the forms for hiring the employee.Allows for the selection of these forms for completion.
3. Finalize New Hire- Where you can indicate that the New Hire process is complete.4. Assignments Summary - Where you can view current assignment information for the applicant.
New Hire Forms
1. Demographics- Must be completed before links for other forms available. After completing theDemographics Information screen and selecting the employment status code in the Finalize NewHire section, you can indicate that the hiring process is complete. (This is not recommendedthough). When you select this option and click Submit, the following will have occurred:
The employee will display in demographics.Additional screens in the new hire process cannot be completed. However, you may enterassignment, benefits, and contract information at a later date using the appropriate staffaction programs.The employee no longer appears in the New Hire Nominees search.
2. Position Assignment- Add Assignment for employee3. Contract- Create Contract for employee4. Benefits5. Local Forms (LEAs can setup a Local Form to maintain LEA specific data. This is rarely used).
Finalize New Hire
Employment Status -The employees current employment status displays. Select the appropriateEmployment Status. (If you completed the Position Assignment form, the Employment Status isalready populated, but you can change if desired).Hiring Status- Once all actions have been completed, set this value to Hired. This will finalize thenew employee and remove them from the New Hire listing.
page 470 / 707

HRMS Communication Site
Assignments Summary (All data display only. No updating in this section)
Lists current assignments for this position (Note that there can only be one) The Show AssignmentDetails link is 'hot' and if clicked will display more detailed assignment information.Lists any future assignments for this position.Lists all assignments for the candidate being processed.
page 471 / 707

HRMS Communication Site
HRMS Help > Employee Page > New Hire Without Vacancy Permit
User Roles: Employee Hire, Staff Action, HR Staff Action Officer, System AdministratorLast Updated: Oct 16, 2014 7:42 am
To access this screen, go to: HRMS Home > Employee > Employee Page > New Hire Without VacancyPermit
The New Hire Without Vacancy Permit option allows you to add staff to HRMS, bypassing the VacancyPermit process. Staff can be added whether or not they have completed an online application.
Once you select the New Hire Without Vacancy Permit option, the following screen appears.
Enter the new staff member's SSN and select their type of employment, click Submit.If the SSN is not in the system the New Hire Employee form appears.If an existing SSN is entered then the following form will display.
Click Add Assignment if the employee with have a HRMS assignmentClick Re-employment without Assignment if the employee will not have a HRMS assignment.
page 472 / 707

HRMS Communication Site
HRMS Help > Employee Page > Staffing > New Hires
User Roles: enter list of user rolesLast Updated: Dec 6, 2017 6:53 am
Table of ContentsNew Hires Listing
Current or Former Employee
New Employee
When you click on the New Hires link, you can access all newly hired staff that have been transferredfrom the applicant system to HRMS. Click on any of the fields to begin bringing the new employee intoHRMS.
New Hires ListingThe listing shows all applicants hired against job orders that were built from HRMS positions. The displayshows the position number, position title, site number and the new employee’s name. The final columnsshow the steps have been completed. At a minimum, the Demographics must be completed to finalize thenew employee.
Once you click on the new employee, if the applicant did not provide an SSN on their application, a pop-up screen will prompt for it. An SSN is required to continue the process.
After entering the SSN, or if the applicant provided it, the system will check against the employee tablefor an existing record. This check is against all employee records, current and former.{Return to Top}
page 473 / 707
HRMS Communication Site
Current or Former EmployeeIf a match is found, the screen will appear to allow you to view their current and future assignments. You will then be able to process them using Re-employment, add a New Assignment for a Current Employee or Transfer them to
another assignment. Once an employee is Finalized, they no longer appear in the New Hires listing.
{Return to Top}
New EmployeeIf the SSN does not match to a current or former employee, you will be directed to the New Hire screen. At a minimum, you must complete the Demographics portion in order to finalize a new employee.
edit The New Hire screen consists of 4 main sections.
1. Position header info - Below the New Hire Heading, the candidate's name and social securitynumber appears. A link to the Position Number (View Position)is available for review if needed.The Site number, name and position description also display.
2. New Hire Forms- Displays the progress made on completing the forms for hiring the employee.Allows for the selection of these forms for completion.
3. Finalize New Hire- Where you can indicate that the New Hire process is complete.4. Assignments Summary - Where you can view current assignment information for the applicant.
New Hire Forms
page 474 / 707

HRMS Communication Site
1. Demographics- Must be completed before links for other forms available. After completing theDemographics Information screen and selecting the employment status code in the Finalize NewHire section, you can indicate that the hiring process is complete. (This is not recommendedthough). When you select this option and click Submit, the following will have occurred:
The employee will display in demographics.Additional screens in the new hire process cannot be completed. However, you may enterassignment, benefits, and contract information at a later date using the appropriate staffaction programs.The employee no longer appears in the New Hire Nominees search.
2. Position Assignment- Add Assignment for employee3. Contract- Create Contract for employee4. Benefits5. Local Forms (LEAs can setup a Local Form to maintain LEA specific data. This is rarely used).
Finalize New Hire
Employment Status -The employees current employment status displays. Select the appropriateEmployment Status. (If you completed the Position Assignment form, the Employment Status isalready populated, but you can change if desired).Hiring Status- Once all actions have been completed, set this value to Hired. This will finalize thenew employee and remove them from the New Hire listing.
Assignments Summary (All data display only. No updating in this section)
Lists current assignments for this position (Note that there can only be one) The Show AssignmentDetails link is 'hot' and if clicked will display more detailed assignment information.Lists any future assignments for this position.Lists all assignments for the candidate being processed.
page 475 / 707
HRMS Communication Site
{Return to Top}
page 476 / 707

HRMS Communication Site
Communications migrating from Lyris to GovDeliveryThe current HRMS email list is migrating to the new GovDelivery system used by NCDPI. With the newsystem, you can subscribe and manage your topic subscriptions. The link below is for the LEA HumanResources topic. When setting up or modifying your account, we have three sub-topics for which you canrequest updates. These sub-topics are Applicant Tracking (includes announcements related to both SchoolJobs and the new TeacherMatch systems), HRMS (for HRMS users to keep updated on releases, generalsystem announcements, etc.) and Human Resources general topics (for HR general topics such as reportingdue dates, non-HRMS specific HR notices.)
Register Here
New SubscriberIf you are a new subscriber, enter your email address and then complete the following page to confirmemail address. You can optionally add a password to your account. Once you click Submit, you are amember of the list, LEA Human Resources. Next, you will need to click the Subscriber Preferences link tofurther set up your account.Click the Subscriber Preferences link to set up your topic preferences. This page has three tabs.
Subscriptions tab shows ALL NCDPI lists for which your email address is subscribed. You canclick Add Subscriptions at the bottom of the page to see other NCDPI maintained list topics forwhich you may have interest.Preferences allows you to edit your email or password information.Questions allows you to provide list specific details including the specific Human Resource topicsyou wish to receive information (Applicant Tracking, HRMS, Human Resources general topics).
Already SubscribedClick the Subscriber Preferences link to set up or modify your topic preferences. This page has three tabs.
Subscriptions tab shows ALL NCDPI lists for which your email address is subscribed. You canclick Add Subscriptions at the bottom of the page to see other NCDPI maintained list topics forwhich you may have interest.Preferences allows you to edit your email or password information.Questions allows you to provide list specific details including the specific Human Resource topicsyou wish to receive information (Applicant Tracking, HRMS, Human Resources general topics).
page 477 / 707
HRMS Communication Site
HRMS Help > Reporting Tool > Selection Criteria > Next School Year
Last Updated: Dec 12, 2011 8:19 am
This option is available on the Contract Non-Renewal, Notification of Non-Renewal. It is used to enterthe next school year (the year for which the teacher's contract will not be renewed), which displays on theletter.
How To
Enter the next school year formatted as YYYY-YYYY.
Example
page 478 / 707
HRMS Communication Site
HRMS Help > Reporting Tool > Selection Criteria > Output Type
Last Updated: Dec 12, 2011 8:20 am
This option is available on the New Hire Report and is used to specify whether a formatted report orExcel file should be generated.
How To
The Reporting Tool version can be faxed or used to enter data online. The Excel file can be submittedonline.
LEAs should consult DHHS’s New Hire Reporting website for detailed information on reporting and datasubmission requirements: http://newhire-reporting.com/NC-Newhire/default.aspx
page 479 / 707
HRMS Communication Site
HRMS Help > Reporting Tool > Paraprofessional Reports
User Roles: Any user with Reporting Tool installed on PCLast Updated: Feb 10, 2012 11:18 am
The Paraprofessional Reports list employees with NCLB qualification data in HRMS. The followingreports are available:
Employees/Positions Governed by NCLB at Federal LevelEmployees/Positions Governed by NCLB at Local LevelEmployees/Positions Governed by NCLB at Local or Federal LevelEmployee Listing
The Employees/Positions Governed by NCLB options list employees assigned to classifiedpositions governed under NCLB at the Federal level, Local level, or both Federal and Local level.The user must enter a date range and the report returns employees with active assignments (currentor archived) during that date range. Totals are included for each site and for the LEA.
The Employee Listing option lists all employees with NCLB Qualification data, regardless ofwhether they are assigned to a position. Assignment data is not included on this report.
There is also a Paraprofessional Error Report that lists classified employees who do not have NCLBQualifications information in HRMS but are currently assigned to Locally- or Federally-mandated NCLBpositions.
Selection Criteria
Select ReportPick EmployeesEmployee StatusAssignments Active Between*Pick Sites*Pick Position Titles*Pick Position Descriptions*SSN (Display)Export Report Data
*Not available for Employee Listing
Sample - Employees/Positions Governed by NCLB at Federal Level
page 480 / 707
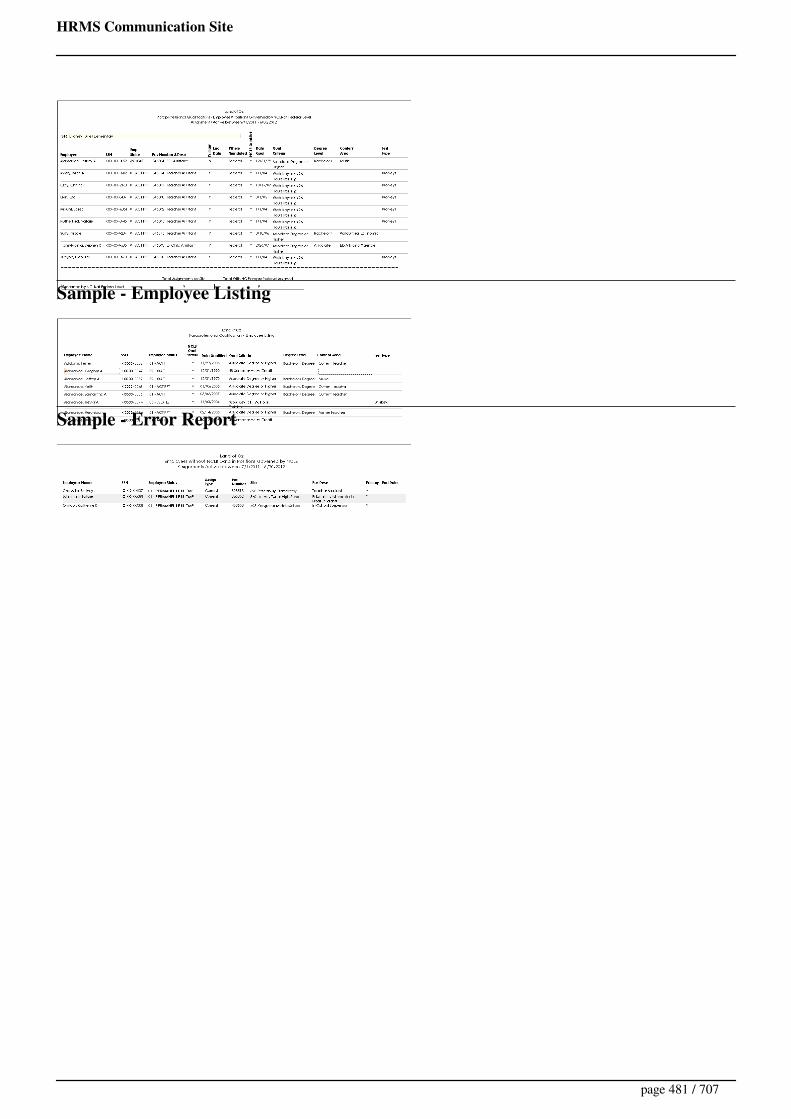
HRMS Communication Site
Sample - Employee Listing
Sample - Error Report
page 481 / 707

HRMS Communication Site
HRMS Help > Payroll Position Number Update
User Roles: Position Editor, System AdministratorLast Updated: Apr 15, 2014 7:04 am
The Payroll HRMS Position # Reconciliation Tool allows HRMS users to update the HRMS PositionNumber in the Payroll Assignment file. This allows your LEA to pull budget codes from Payroll intoHRMS. Please see KB article Who has priority in putting the HRMS position number on the payrollassignment records with ISIS 6? for more information if your LEA uses ISIS 6.
HRMS provides two options for updating the Payroll HRMS Position #:
Using the Payroll HRMS Position # Reconciliation Tool – This method is recommended if you arestarting from scratch or have not been regularly maintaining HRMS Position #s in Payroll.Using the Edit Assignment form – This method is useful if you have only a few Payroll records toupdate.
Web Report 800005 – Active Payroll Assignments with Missing/Invalid HRMS Position Numbers willhelp determine which Payroll records need to be updated.
Important! Prior to updating HRMS Position Numbers always check with your Payroll Department tomake sure they are not updating an open payroll.
To access the tool, go to: HRMS Home > Employees > Employee Page > Views > Payroll Position #Update. The Reconciliation Tool will open in a new window.
Example - After performing a search
Search Options
If no search options are entered, the query will include all employees that have at least one Current orFuture HRMS Assignment and at least one active Payroll Assignment record.
If you have a limited number of Payroll records to update, you may want to search by SSN.
page 482 / 707

HRMS Communication Site
If you have a lot of records to update, use search options that will allow you to systematically work throughall employees. For example, you could work through one Site at a time or use the 'Range of Names' featureto work through employees by Last Name.
Search Options
Employee w/ no Pay Pos # – Returns only employees with at least one Position # in HRMS and atleast one active Payroll assignment without an HRMS Position #.Employee w/ Multiple HRMS Pos #’s - Returns only employees with multiple current or futureassignments.SSN – Allows you to select an employee by full SSN or last few digits of SSN.Category – Returns employees with Licensed, Classified, Substitute or Bus Driver assignments.SitePosition DescriptionLast Name Like – Returns employees whose Last Name begins with the characters entered.Range of Names – Allows you to select by the first letter of Last Names that begin with that letter.
Actions
Reload Report Data – This allows you to refresh data for this form manually at any time. Anautomatic agent will run to refresh your data daily at 5:00 a.m. Please make sure that no otherHRMS users are updating Payroll Position numbers before proceeding with this refresh feature.Cancel – Closes the report window.Reset – Clears all data entered in the search options.Get Results – Displays the number of rows that will be returned. If your results exceed 1000 rows,you will receive a warning window before the report populates requesting you to select OK orCancel. If you select OK to run the report anyway, all rows will populate. This can take a while orcause Internet Explorer to lock up. When you select Cancel you will be able to enter new searchcriteria.
Search Results
The following data fields are included in the search results grid:
Pay SSN – Employee SSN in PayrollPay Name – Employee Name in PayrollSRC – Identifies whether the employee assignment is Current (C) or Future (F). When you hoverover this field, the Start and End Date of the assignment shows.HRMS Position DescHRMS Pos #H Site – HRMS Site CodeHRMS Budget Code – Displays any Additional Pay Budget Codes in HRMS
page 483 / 707

HRMS Communication Site
Pay Job Title – Payroll Employee Job TitlePay Pos # Current – Current HRMS Position # in PayrollPay Pos # New – The new 6-digit HRMS Position # to update in Payroll. (Only Position #s for thespecific employee may be saved in Payroll.)Pay Budget Code – Current Payroll Budget CodeP Site – Payroll Site CodeP SEQ – Order of Payroll assignment record
Update Tool Options
Save Employee – This feature is obsolete. It was used for the initial release of the tool when manyLEAs were still entering Base and Supplemental Budget Codes in HRMS.Copy Pos # – Auto-populates the HRMS Position # into the Pay Pos # New field for all PayrollBudget Codes for the employee. This feature can be used only for employees with one assignmentin HRMS.Save – Saves the value in the Pay Pos # New column for the individual Budget Code.Delete – Removes the current HRMS Position # from the Payroll Budget Code record.
Note: Once you have updated a few of your HRMS positions go into your Payroll system or have someonein your Payroll department verify the HRMS Position # is updating properly.
page 484 / 707

HRMS Communication Site
HRMS Help > Personnel Calendar
Last Updated: Dec 5, 2017 12:11 pm
Printer friendlyPersonnel Calendar
Daily/Weekly
Check for unemployment claims on-lineCheck HRMS for licensure changes on-line (HRMS Home page>Employees>Employeepage>Views>Licensure Data Changes) (BT Status / Salary / Budget Code)In-process new employees prior to beginning their first day of employment.Monitor Licensure Exceptions to resolve audit exceptions for licensed personnel (check Lic/Salwebsite.)Screen candidate applications if your system has selected that option in HRMS.
Monthly
Send Bureau of Labor Statistics after payroll is run and payroll sends you the number of checksthat have been run. Run the SS200 Report for other monthly information.Complete the New Hire Report for Department of Health and Human Services, Division of SocialServices Child Support Enforcement. There is a standard report in the HRMS Reporting Tool toassist with this task.Run the mass update “Rebuild Position Budget Codes (v5.0)” to make sure all Salary Schedules,Grades and Steps on the HRMS Assignments match the Salary Schedules, Grades and Steps inpayroll.Track the progress of new teachers completing their Online Licensure Application requirementsand notify those that have not completed the task completely including payment of the processingfee.
August
Check that you have updated the “Salary Schedule” and Budget Code Library” in your HRMS“LEA Settings” (need to coordinate with payroll). (Not applicable for ISIS 6 LEAs).Be sure the 10 days of support for new Lateral Entry teachers is completed prior to them startingtheir independent work with the students.Start licensure applications in the Online Licensure System and notify new impacted teachers tocomplete their part of the licensure process. Make sure they understand any required processingfee is paid once all data entry has been proofed for accuracy. The fee is non-refundable!Determine the specific dates for leave balances to change from month to month and print calendarfor personnel staff.Close in-processing list to track newly hired licensed employees and the status of A-0 new hires.Determine the number of vacancies, where they are located and what area the vacancy is in, for the
page 485 / 707
HRMS Communication Site
school year on the first day of school.Follow-up on all licenses that need to be cleared prior to re-employment and then create newcontract and post to the board report for re-employment.Run Variable Licensure Report and check on all Continuing (formerly SPII) licenses that expiredon June 30th to be sure the requirements have been met and the requests to extend / clear thelicense have been submitted to the Licensure Section at DPI using the NCDPI Online LicensureSystem.Send a list of Continuing (formerly SPII) licensed teachers to principals. Remind the principals andaffected teachers of the performance component of renewal and the consequences for not meetingthat requirement.Work with your payroll department to ensure that all new employees have been processed properlyand will be included in the first payroll.Work with your payroll department to ensure all credentials processed by the Licensure Section atDPI are correctly reflected in payroll (Grade and Steps).Conduct Teacher Evaluation Instrument Training for All licensed teachers.
September
Check Audit Exceptions (open); see the Licensure/Salary screens from DPI.Run HRMS Web Report 800004 - HRMS Employees with No Position Assignment and adjustHRMS as needed.Notify licensed staff with licenses expiring 6/30 of this school year, that are short in anyrequirement, status of their renewal credits (2nd notice).Send notification of any changes in renewal requirements to all affected staff.Send list of school employees to principals and have them to correct position titles. Some teachersmay have been assigned different grade levels or subjects. Make adjustments in HRMS data andcheck for appropriate licensure status if needed.In-process substitute teachers.Check the Online Licensure System for teachers who have not completed their documentation andsubmitted their processing fees to DPI for their licenses and contact as needed.Reflect on the summer staffing (with CO/School staff involved in staffing) to adjust for the futureprocess.
October
Attend Fall PANC (Personnel Administrators of North Carolina) conference.Run the 800000 series HRMS Web Reports and cleanup HRMS as identified in the reports.Run HRMS Web Reports 000019 - Employees With Disabled or Invalid Emp Status Codesand 000022 - Inactive Employees with Current Assignments and make adjustments as needed.Re-sync your HRMS System with Payroll after completion of the above referenced HRMS WebReports and prior to starting on the SS200, SS300 and EEO5 Reports.Run the SS200, SS300 and EEO5 reports which are due. Be sure to run the reports listed above andperform any clean-up activities prior to running these reports.Think about any special projects that staff might work on in December and January. Make certain
page 486 / 707

HRMS Communication Site
your HR department is “cleaned up” from the summer frenzy!
November
Receive yearly bill from the Employment Security Commission. Go on-line(http://www.ncesc.com/business/default.asp ) and go under potential charges and print out the billwhich is under an October date. Give the bill to the Finance department.National Board results are announced. Need to change the rate of pay to National Board levelretroactive to 7/1.
National Board Credits
National Board participants earn full renewal credits regardless of passing or not.
National Board requires renewal every ten years.
Credits earned for National Boards participation can count for your system technology, the 1 Academic credit and the 1 Digital Learning credit requirements.
These credits can be used in the current dating cycle or next renewal cycle. They cannot be split between cycles.
National Board renewal earns 2 renewal credits. This also covers the Digital Learning and Academic Credit requirements.
December
Review administrative contract information (review status of provisional requirements or renewalcredits for these administrators affected) and draft memo to superintendent indicatingadministrators who have a contract ending date this school year. (Include copy of GS 115C-287.1)Establish date on which new full-time teachers will start going on a Temporary Contract because ofbeing employed less than 6 months. (New interpretation of who goes on the new TeacherContract).Note that 12-month employees must be hired by 12/31 to have six-months of employment for astep increase.Discuss with principals and administrators the process for meeting with all licensed staff that theyhave possible performance concerns with and the documentation process needed for possible non-renewal because of performance. (Start the process of generating a Not-Proficient letter forpossible delivery in January for under-performing staff.)Remind principals that individuals that have been employed for three years full-time must have arating of "Proficient" or higher on the first 5 functions of this year's evaluation to be considered fora multi-year contract. (This begins with the 2018-19 school year.)
January
page 487 / 707

HRMS Communication Site
Begin the renewal process—contact certified personnel who have licensure requirements and emailabout current status and needed documentation for re-employment consideration.Send Administrative contract info to superintendent, principals, and directors who have impactedemployees under their supervision. For the administrators who also have licenses expiring at thesame time, check to be certain that they meet renewal credit and / or provisional requirements.Ask principals for notification of any possible performance concerns that might affect re-employment consideration.Work with principals and supervisors to deliver and get signatures on file copy of Not-ProficientLetter for under-performing staff.Discuss with Principals/Supervisors any Continuing (formerly SPII) licensed staff that may notmeet the performance portion of their renewal requirement and the possible consequences.
February
Send recommendation sheets regarding re-employment to principals for staff that are up forcontract renewal this school year. These recommendation sheets will be due back in early April.Include master list of all affected employees at their site.The recommendation sheets for re-employment should include the opportunity to recommend anystaff members that meet the local school system's requirements for a multi-year contract (2 or 4years). Multi-year contracts become possible starting with the 2018-19 school year.Review employees who are on continuing contracts and have provisional and or lateral licenses.Notify each employee of their remaining requirements that need to be completed in order toremain in their position for the next school year.Send a reminder to all licensed employees that have a certificate renewal end date this year and arestill deficient. (3rd notice)Remind principals and other supervisors about Summary Evaluation deadlines for under-performing staff so proper time-frames can be met regarding notification of non-renewalrecommendation to the Board.
March
Begin work on the teacher allotment process.Begin the review process of ALL employees whose contracts expire at the end of this school yearto determine their re-employment status. Use the tool provided in HRMS>EmployeePage>Views>License, Assignment and Contract Info.Generate Contracts for the Next School Year (DO NOT change their Tenure Status or theirBeginning Teacher Status at this time!)
April
Attend Spring PANC (Personnel Administrators of North Carolina) conference.Update contract conditions in HRMS for the upcoming school year prior to running contracts forthe upcoming school year.
page 488 / 707

HRMS Communication Site
Review renewal credits for any employee with an ending date this year that is deficient in anyrequired credits and determine if they will meet the requirements.Notify all employees that have a regular renewal end date of next year with a copy of the renewalcredits.Notify National Board certified employees that have an expiration date of next year of theirexpiration and loss of the 12% extra supplement and determine in writing from those individuals,their plans for doing the renewal process.Request conversion paperwork of S (Out of State) coded licenses that can move to a Continuing(formerly SPII) license.Prepare the letters of Notification, Rights to Information used to determine the non-renewalrecommendations to the Board, and Appeal Rights for all non-tenured teachers beingrecommended for non-renewal. These notices must be delivered no later than June 1st, but werecommend at least 30 days prior to the date you will be taking the recommendation to non-renewto the Board.Work on your Teacher Turnover Report with DPI to remove individuals that show up but are stillemployed. (Teachers that should be removed are those on approved Leaves of Absence, Disabilityor Workers Compensation.)Run your Teacher Turnover Report and Beginning Teacher Report via the HRMS Reporting Toolto have your data available when the actual reports come from DPI. This must be done prior toconverting Initial (formerly SPI) licenses to Continuing (formerly SPII) licenses and prior to theBUMP of BT Status in HRMS.
May
May 1 is deadline for superintendent to notify administrators of intent to non-renew theirAdministrator Term Contract.Take teacher contract recommendations to the Board of Education for approval.Take administrative contracts to Board of Education if this was not done in April.Begin to track new licensure hires and determine whether they are lateral entry or A-0 employeeson an in-processing database (need statistics for May-August)Convert Initial (formerly SPI) licenses to Continuing (formerly SPII) licenses using the NCDPIOnline Licensure System.
June
June 1 is the deadline for the Local Board of Education to notify administrator of non-renewal.June 15 is the deadline to notify teachers of their employment status for the upcomingschool year.Send reasonable assurance letters to substitutes and other classified staff. Get confirmation fromyour substitutes, all categories, of their willingness to continue to serve.
July
page 489 / 707
HRMS Communication Site
Calculate administrative salaries (CO and school-based principals and APs) as soon as the statebudget is passed. (In some school systems, this may be handled by the Finance Department).Run all Local End of Year Reports.Later Entry Staff Development Report.Teacher Turnover report at the close of the fiscal year (Count for March 1st of last year untilMarch 31st of this year). Use the HRMS Reporting Tool Teacher Turnover Reports to assist.Do the Beginning Teacher Report, this should be done as a sub-set of the Teacher TurnoverReport.Follow-up on all licenses that need to be cleared prior to re-employment and then create a newcontract and post to the board report for re-employment.
Major Reports
SS200—Full-time employee report—Due in October to DPI.SS300—Report of Supplements—Due in October to DPI.EE05—Full-time, Part-time, and New Hires—Due October of Even Years.Teacher Turnover Report—Teachers who left teaching positions - Due in July to DPI.
page 490 / 707

HRMS Communication Site
HRMS Help > Reporting Tool > Personnel Directory
User Roles: Any user with Reporting Tool installed on PCLast Updated: Jul 11, 2012 12:17 pm
The Personnel Directory report displays employee assignment information and home addresses andphone numbers. There are several sort options, including by Employee Name and by Site and EmployeeName. Options are available to include or exclude the following: protected addresses, all home phonenumbers, and unlisted home phone numbers.
Selection Criteria
Employee StatusPick SitesAssignment TypePrimary/Non-PrimaryPick Position TitlesSort byInclude Protected AddressesInclude Telephone NumbersInclude Unlisted Home Phone NumbersExport Report Data
Sample Report
page 491 / 707

HRMS Communication Site
HRMS Help > Reporting Tool > Selection Criteria > Personnel Manager Name & Title
Last Updated: Dec 12, 2011 8:22 am
These options are available on various Letters and are used to print the Personnel Manager's Name andTitle on the letter.
How To
These are required entries.
Enter a Name and Title as you want them to display on the letter.
page 492 / 707
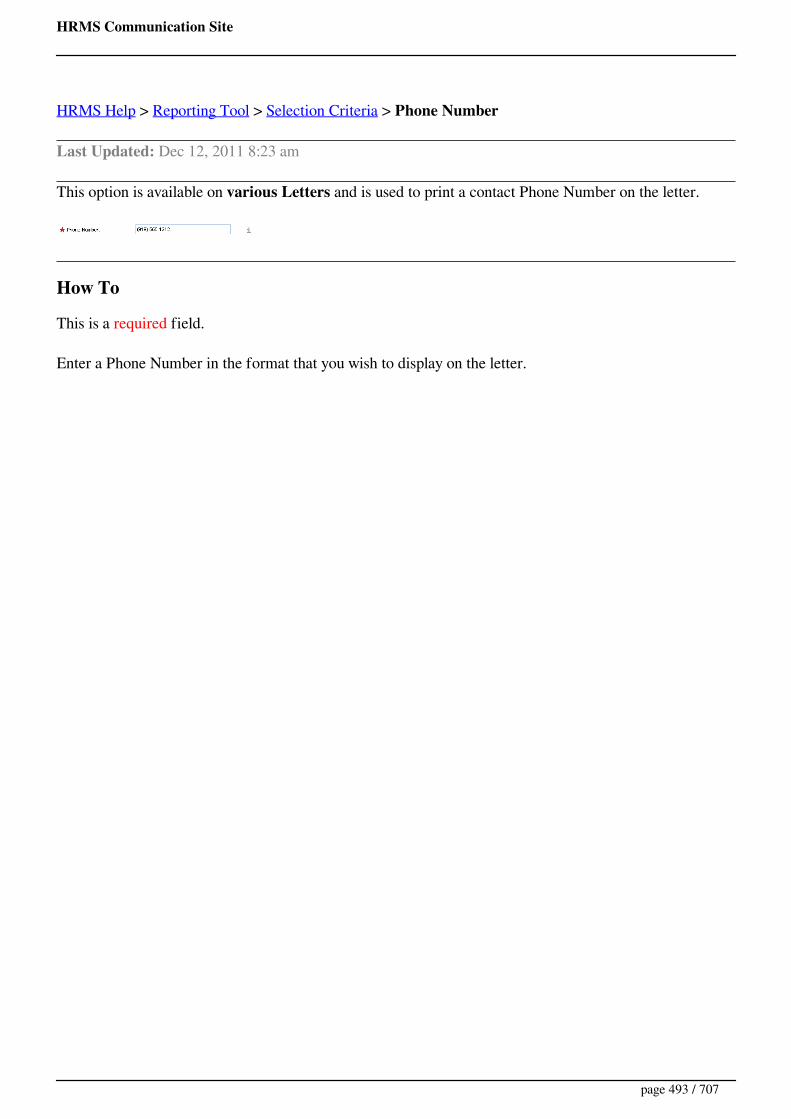
HRMS Communication Site
HRMS Help > Reporting Tool > Selection Criteria > Phone Number
Last Updated: Dec 12, 2011 8:23 am
This option is available on various Letters and is used to print a contact Phone Number on the letter.
How To
This is a required field.
Enter a Phone Number in the format that you wish to display on the letter.
page 493 / 707
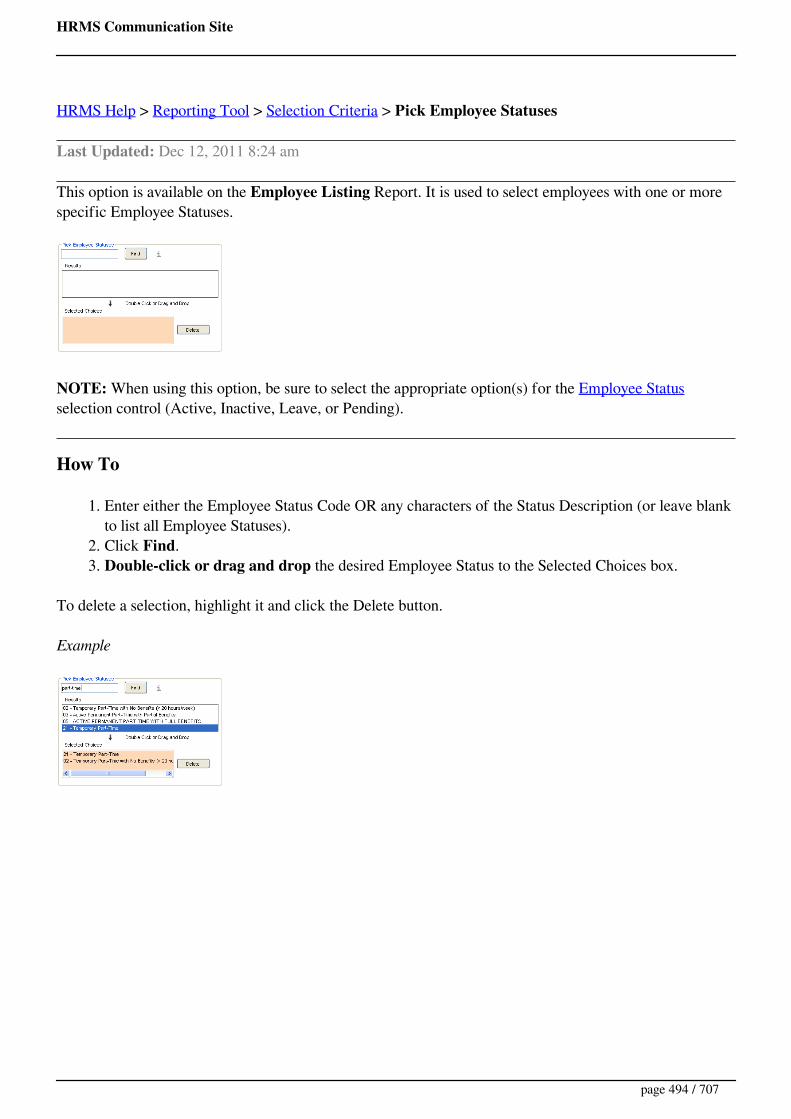
HRMS Communication Site
HRMS Help > Reporting Tool > Selection Criteria > Pick Employee Statuses
Last Updated: Dec 12, 2011 8:24 am
This option is available on the Employee Listing Report. It is used to select employees with one or morespecific Employee Statuses.
NOTE: When using this option, be sure to select the appropriate option(s) for the Employee Statusselection control (Active, Inactive, Leave, or Pending).
How To
1. Enter either the Employee Status Code OR any characters of the Status Description (or leave blankto list all Employee Statuses).
2. Click Find.3. Double-click or drag and drop the desired Employee Status to the Selected Choices box.
To delete a selection, highlight it and click the Delete button.
Example
page 494 / 707
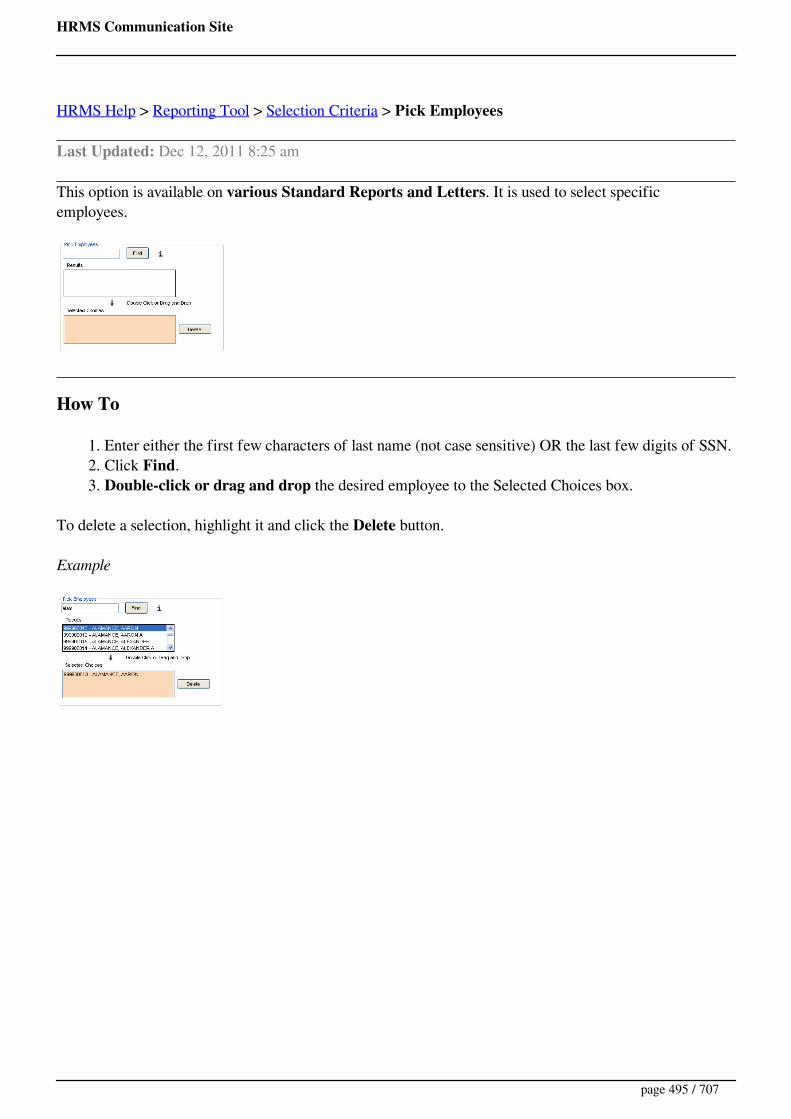
HRMS Communication Site
HRMS Help > Reporting Tool > Selection Criteria > Pick Employees
Last Updated: Dec 12, 2011 8:25 am
This option is available on various Standard Reports and Letters. It is used to select specificemployees.
How To
1. Enter either the first few characters of last name (not case sensitive) OR the last few digits of SSN.2. Click Find.3. Double-click or drag and drop the desired employee to the Selected Choices box.
To delete a selection, highlight it and click the Delete button.
Example
page 495 / 707

HRMS Communication Site
HRMS Help > Reporting Tool > Selection Criteria > Pick Licensure Areas
Last Updated: Dec 12, 2011 8:26 am
This option is available on the Licensure Report. It is used to select employees with one or more specificLicense Areas.
How To
1. Enter either any digits of License Area Code OR any characters of License Area Description (orleave blank to list all License Areas).
2. Click Find.3. Double-click or drag and drop the desired License Area to the Selected Choices box.
To delete a selection, highlight it and click the Delete button.
Example
page 496 / 707

HRMS Communication Site
HRMS Help > Reporting Tool > Selection Criteria > Pick Position Descriptions
Last Updated: Feb 16, 2012 5:53 am
This option is available on various standard reports. It is used to select employees assigned to positionswith one or more specific Position Descriptions.
How To
1. Enter any characters of the Position Description (or leave blank to list all Position Descriptions).2. Click Find.3. Double-click or drag and drop the desired Position Description to the Selected Choices box.
To delete a selection, highlight it and click the Delete button.
Example
page 497 / 707

HRMS Communication Site
HRMS Help > Reporting Tool > Selection Criteria > Pick Position Titles
Last Updated: Feb 16, 2012 5:52 am
This option is available on various standard reports. It is used to select employees assigned to positionswith one or more specific Position Titles.
How To
1. Enter any characters of the Position Title (or leave blank to list all Position Titles).2. Click Find.3. Double-click or drag and drop the desired Position Title to the Selected Choices box.
To delete a selection, highlight it and click the Delete button.
Example
page 498 / 707
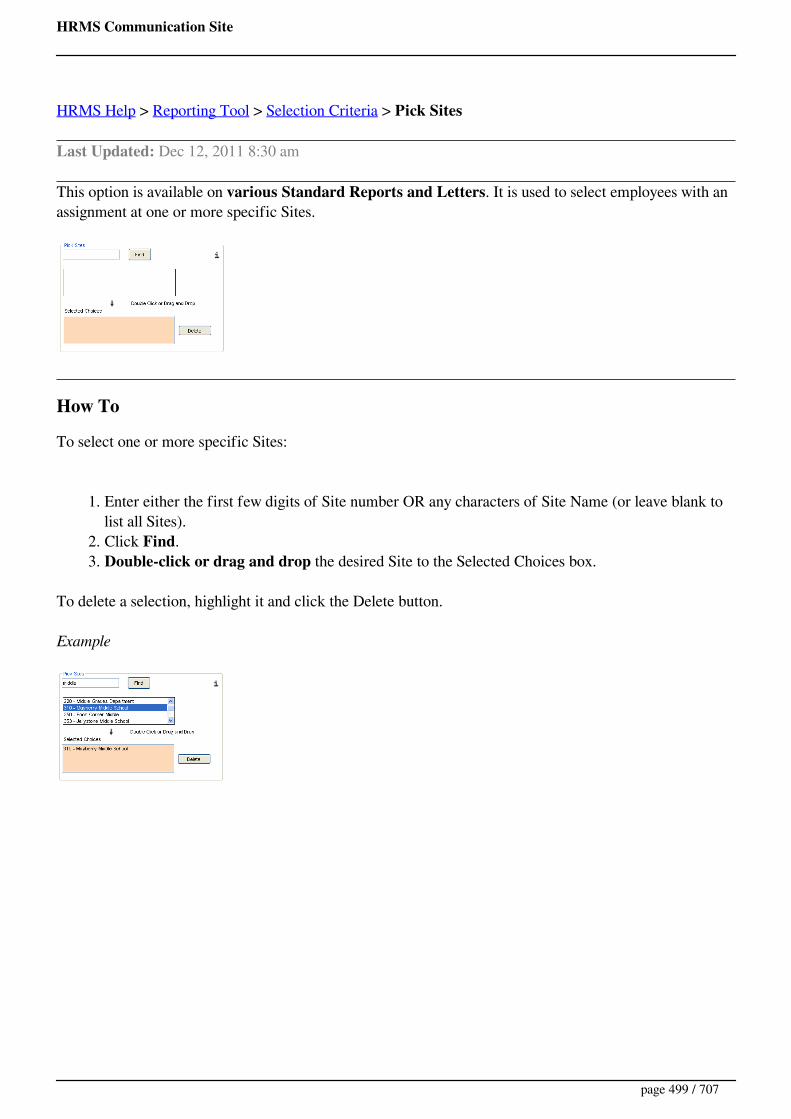
HRMS Communication Site
HRMS Help > Reporting Tool > Selection Criteria > Pick Sites
Last Updated: Dec 12, 2011 8:30 am
This option is available on various Standard Reports and Letters. It is used to select employees with anassignment at one or more specific Sites.
How To
To select one or more specific Sites:
1. Enter either the first few digits of Site number OR any characters of Site Name (or leave blank tolist all Sites).
2. Click Find.3. Double-click or drag and drop the desired Site to the Selected Choices box.
To delete a selection, highlight it and click the Delete button.
Example
page 499 / 707

HRMS Communication Site
HRMS Help > Reporting Tool > Selection Criteria > Pick Sites (Substitutes)
Last Updated: Dec 12, 2011 10:05 am
This option is available on the Substitute Listing Report. It is used to select substitute profiles with one ormore specific Sites.
How To
To select one or more specific Sites:
1. Enter either the first few digits of Site number OR any characters of Site Name (or leave blank tolist all Sites).
2. Click Find.3. Double-click or drag and drop the desired Site to the Selected Choices box.
To delete a selection, highlight it and click the Delete button.
Example
page 500 / 707
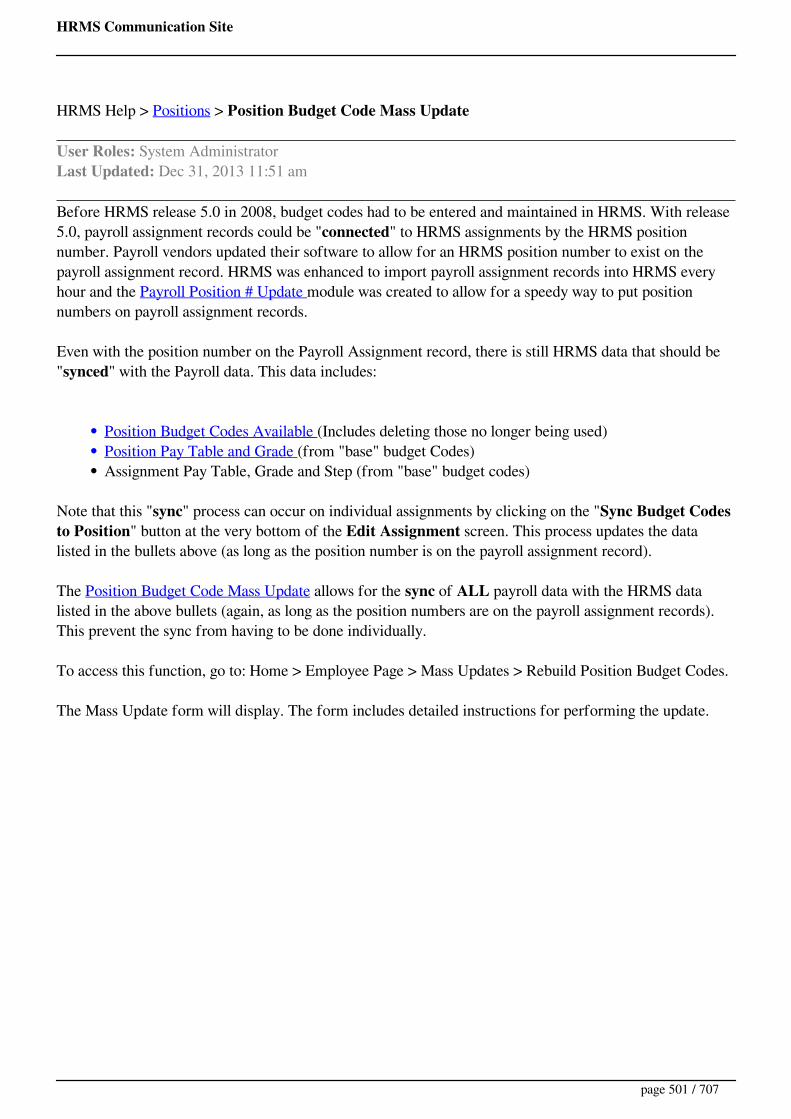
HRMS Communication Site
HRMS Help > Positions > Position Budget Code Mass Update
User Roles: System AdministratorLast Updated: Dec 31, 2013 11:51 am
Before HRMS release 5.0 in 2008, budget codes had to be entered and maintained in HRMS. With release5.0, payroll assignment records could be "connected" to HRMS assignments by the HRMS positionnumber. Payroll vendors updated their software to allow for an HRMS position number to exist on thepayroll assignment record. HRMS was enhanced to import payroll assignment records into HRMS everyhour and the Payroll Position # Update module was created to allow for a speedy way to put positionnumbers on payroll assignment records.
Even with the position number on the Payroll Assignment record, there is still HRMS data that should be"synced" with the Payroll data. This data includes:
Position Budget Codes Available (Includes deleting those no longer being used)Position Pay Table and Grade (from "base" budget Codes)Assignment Pay Table, Grade and Step (from "base" budget codes)
Note that this "sync" process can occur on individual assignments by clicking on the "Sync Budget Codesto Position" button at the very bottom of the Edit Assignment screen. This process updates the datalisted in the bullets above (as long as the position number is on the payroll assignment record).
The Position Budget Code Mass Update allows for the sync of ALL payroll data with the HRMS datalisted in the above bullets (again, as long as the position numbers are on the payroll assignment records).This prevent the sync from having to be done individually.
To access this function, go to: Home > Employee Page > Mass Updates > Rebuild Position Budget Codes.
The Mass Update form will display. The form includes detailed instructions for performing the update.
page 501 / 707
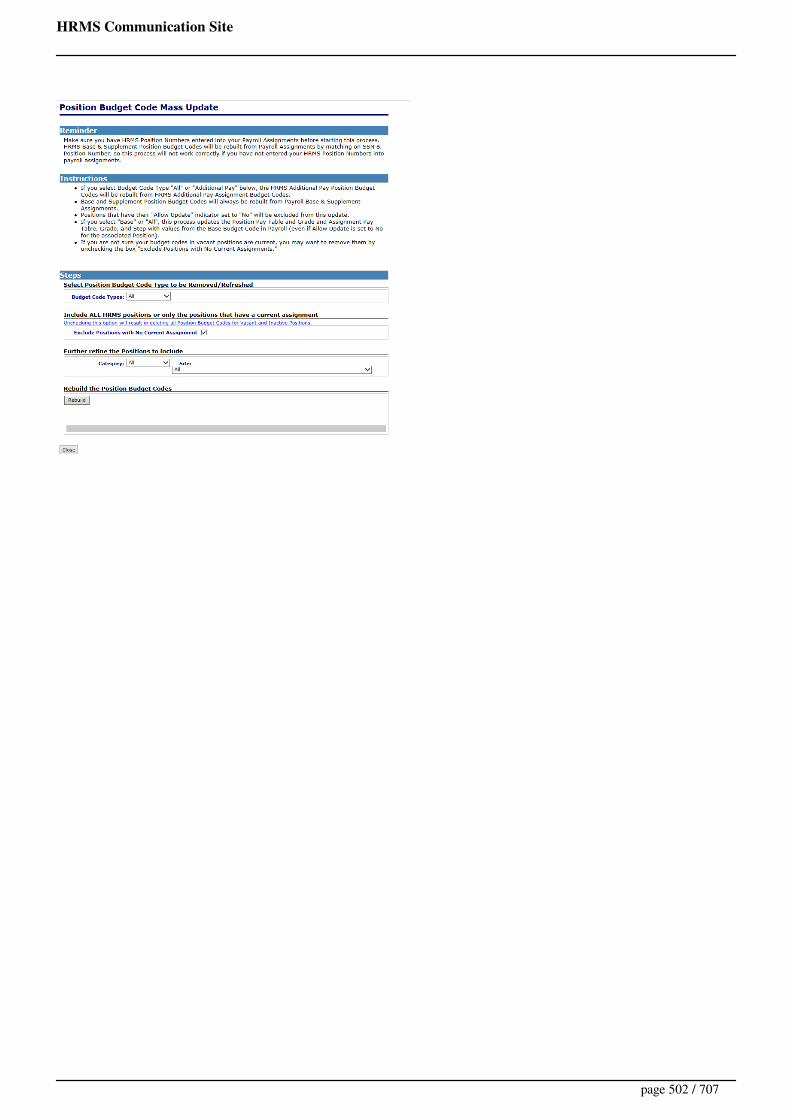
HRMS Communication Site
page 502 / 707

HRMS Communication Site
At a recent meeting, an LEA asked why they should clean up their Position Titles in preparation for themove to NC SchoolJobs powered by PeopleAdmin. The LEA stated they historically have not paidattention to the pairing of Position Choice Description and Position Title and want to understand thepurpose.
How is it used now?In the current School Jobs system, when an applicant creates an application, they must choose at least onePosition Choice. The Position Choices are set up at the state level. When an LEA wants to check the poolof applicants, they can search on these choices to find the appropriate applicant.
Why are we doing this? With the new NC SchoolJobs, we will be using the Position Choice as theactual Job Title.
Consistency for the ApplicantWhen an applicant is searching vacancies, these consistent Job Titles will be one method for finding jobs.While the actual Position Title used in HRMS can vary and be as specific as needed for an LEA, the JobTitle consistency in NC SchoolJobs will aide in searching vacancies. Example, an applicant is seeking ajanitorial position. LEA #1 has a position titled Janitor, LEA #2 has the same position titled Custodianand LEA #3 has the position titled Environmental Engineer. By using the same Position Choice of Custodian, a candidate can find all three of these vacant positions.
The Position Choice will be displayed in NC School Jobs as the Job Title and your Position Title will displayas the Job Description. Both fields are editable in NC School Jobs.
State Analysis and ReportingThe new system will allow DPI to report on the hiring and staffing issues across the state. Which positionstake the longest to fill, posting to hiring timeframe. Are there specific geographic areas that have moredifficulty in hiring, specific or general positions? By using standard, consistent titles for the posted jobs,the state can track and report on this information.
What does the LEA need to do?
LEAs need to review and update their Position Titles in LEA Configuration. As part of the data HRMSsends TeacherMatch, we will be including the Position ChoiceDescription in HRMS as the Job Title in theTeacherMatch Job Order and the Position Title in HRMS as the Job Description in the TeacherMatch JobOrder. In order to assist you in cleanup we provide Web Report 000139 Position Choice and PositionTitle Review, which shows the relationships between your Position Choices and your Position Titles. Youcan update the relationships using the functionality provided. If you need to do any cleanup of extra codesor expansion of codes, contact the Service Desk for assistance.(http://hrmscomm.wikispaces.com/Position+Titles )
page 503 / 707

HRMS Communication Site
HRMS Help > Position Employee Hierarchy
User Roles: System Administrator, General User, HR Staff Action Officer, Staff Action
Last Updated: Jun 20, 2014 12:01 pm
Printer friendly
Table of ContentsQuick Facts
Where to Select
Position/Employee Search
Quick Facts
This search and view of employees/positions is mainly for staff needing to only view information.
Where to SelectSelect "Employee/Employee Page" from the HRMS Home Page, then "Position/Employee Hierarchy"from the "Views" dropdown.
Position/Employee SearchOnce the "Position/Employee Hierarchy" View is selected, all active positions appear in position numberorder.
page 504 / 707

HRMS Communication Site
There are a couple of ways to find employees.
1. Enter either the Last Name or SSN in the box and click on the "Search" button.Before performing another search, click on the "Clear Search" link
2. Sort by columns SSN, Name, Site, or Status by clicking on the triangles in the column headings.Unfortunately on this page, the sorting is not working.
Once found, you can click on the "SSN" link or "View" link to display detailed employee information.
page 505 / 707

HRMS Communication Site
HRMS Help > System Configuration > Position Groups
User Roles: System AdministratorLast Updated: Jan 9, 2012 6:49 am
The Position Groups configuration form allows you to:
Create, edit and remove Position Groups.Add Position Titles to or remove them from a Position Group.Specify whether System-Wide Hiring Agents and Nominee Approval Agents should be used forthe Position Group, and select individuals to act in these roles. (These agents may be used whenhiring through the Vacancy Permit process.)Select a Reference Question Set for the group.
To access the form, go to: HRMS Home > Setup > LEA Configuration > Position Groups.
The Position Groups form will display.
Create a Position Group
To create a new Position Group, click the New Group button at the top of the Position Groups page (seeabove). The New Position Group form will display.
Complete the following fields and click Save.
Position Group Code– Unique code, 4 to 10 charactersPosition Group Description– Unique descriptionUse System-Wide Hiring Agent?Use Nominee Approval Agent?Comments – optional
page 506 / 707
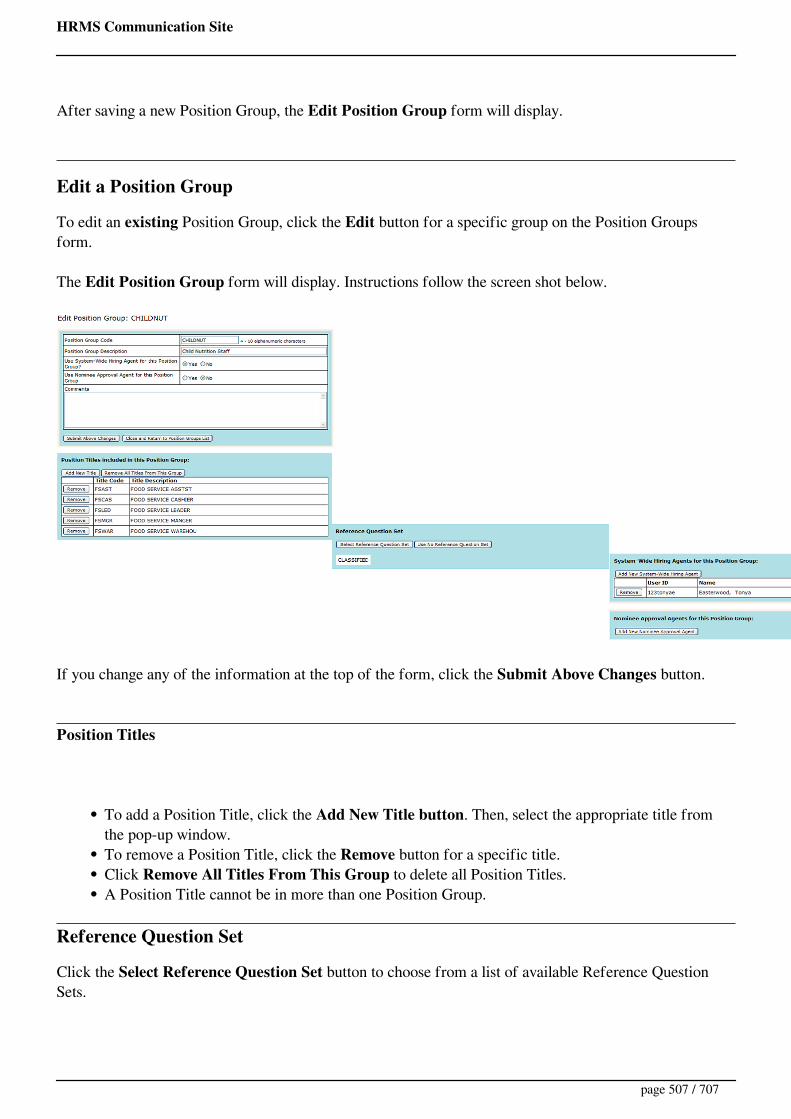
HRMS Communication Site
After saving a new Position Group, the Edit Position Group form will display.
Edit a Position Group
To edit an existing Position Group, click the Edit button for a specific group on the Position Groupsform.
The Edit Position Group form will display. Instructions follow the screen shot below.
If you change any of the information at the top of the form, click the Submit Above Changes button.
Position Titles
To add a Position Title, click the Add New Title button. Then, select the appropriate title fromthe pop-up window.To remove a Position Title, click the Remove button for a specific title.Click Remove All Titles From This Group to delete all Position Titles.A Position Title cannot be in more than one Position Group.
Reference Question Set
Click the Select Reference Question Set button to choose from a list of available Reference QuestionSets.
page 507 / 707
HRMS Communication Site
Reference Question Sets are used when conducting Reference Checks in the Vacancy Permitprocess.Reference Questions and Reference Question Sets are maintained in LEA Configuration.
To quit using a Reference Question Set, click Use No Reference Question Set.
System-Wide Hiring Agents & Nominee Approval Agents
System-Wide Hiring Agents and Nominee Approval Agents may be used when hiring through the VacancyPermit process.
Click Add New System-Wide Hiring Agent or Add New Nominee Approval Agent to select theappropriate registered user. Note! Users must have the Position Edit or System Administrator user roleto perform these functions.
To remove an individual, click the Remove button for that individual.
page 508 / 707

HRMS Communication Site
HRMS Help > Positions > Position Information
User Roles: Principal/Hiring Agent (View Position Only), Position Editor, System AdministratorLast Updated: Jul 28, 2015 4:33 am
This topic describes Position Information fields on the following forms:
New PositionView PositionEdit Position
Click a link below to view details about the applicable section of the form:
Position InformationPosition Reporting InformationLocal Use FieldsSalary/Payment InformationBudget Code InformationAssignment Information
Position Information
Position #– Six-character value used to uniquely identify the position. LEAs often use site numberfor the first three characters and sequential numbers for the last three characters. Example: Forpositions at Site 304, Position 304001, 304002, etc.Allow Update– Indicates whether Assignment information can overwrite Position information. Ifthis field is set to 'Yes', Pay Table, Grade, and Budget Codes are updated from Payroll Assignmentdata in the following instances:
when the Rebuild Position Budget Codes Mass Update is run.when Assignment Information is imported from the Edit Position formwhen the 'Sync Budget Codes to Position' function is run from the Edit Assignment form.when an assignment is archived (end date passes).
Primary Site – Site location where the majority of position functions are performed. Sites aredefined in LEA Configuration.Position Title – High-level grouping to which the position belongs. Position Titles are locally-defined in LEA Configuration.Exempt Status– Read-only; inherited from Position Title.Position Term– Number of months out of the school-year that the position is filled.Position Status
Vacant – no current assignmentStaffed-Fully – employee currently assigned and Percent Employed = Percent FundedStaffed-Partially – employee currently assigned and Percent Employed Pending Vacant – employee currently assigned and assignment has an end dateInactive – position is not in use
page 509 / 707

HRMS Communication Site
Frozen – employee cannot be assigned to positionPending Purge – position may be deleted
Classification– Continuing or TemporaryTitle I Designated Position – Unspecified, Yes, or NoStart Date and End Date– Used only if Classification is TemporaryCDL Required– indicates whether position requires a Commercial Driver's LicenseTime Basis– Full-time or Part-timePosition Type– Licensed, Classified, Bus Driver, or SubstituteEvaluation Category
SuperintendentAssociate or Deputy SuperintendentAssistant SuperintendentDirector or SupervisorPrincipalAssistant PrincipalTeacherGuidance CounselorMedia SpecialistSocial WorkerPsychologistSpeech Language PathologistAudiologistLicensed Support
Pre-K Teacher - Yes or NoPosition a core academic subject area (Licensed positions only) – Yes or NoPosition governed under NCLB requirements (Classified positions only) – Yes. At federallevel, Yes. At local level, or NoDescription – Text description of position that may be more specific than Position Title. Althoughthis is a free-text field, you should try to use consistent values since this field will display on otherforms and on reports. Example: If Position Title is Teacher Elementary, Position Description couldbe 1st Grade Teacher.
Reporting Information
SS200 – Classification used to report the position on the SS-200 Report (Full-Time PersonnelReport). See SS200 Category descriptions below.SS300– Classification used to report the position on the SS-300 Report (Local Salary SupplementReport). See SS300 Category descriptions below.Census – Classification used to report the position on the old SS-510 Report (Bureau of theCensus Supplementary Data Report). Note: The SS-510 report is now obsolete. However, someLEAs use SS-510 data to assist with preparing the E-6 Report (Annual Survey of PublicEmployment and Payroll - School Systems). See Census Category descriptions below.EEO5 – Classification used to report the position on the EEO-5 Report (Elementary andSecondary Staff Information Report). See descriptions below.
SS-200 / EEO-5 Classifications
page 510 / 707
HRMS Communication Site
1 – Officials, Administrators and ManagersAdministrative personnel who set broad policies (not elected or appointed officials),exercise overall responsibility for execution of these policies, or direct individualdepartments of the school system, or district or school operations. Includes superintendentof schools, deputy, associate, and assistant superintendent of schools, school businessofficials, directors and administrators of district-wide programs, and other professionaladministrative staff. (Do not include principals, assistant principals or supervisors ofinstruction).
2 – PrincipalsStaff members performing the assigned activities of the administrative head of theirrespective schools (not school systems or districts) to whom has been delegatedresponsibility for the coordination and direction of the activities of the school.
3 – Assistant Principals (Teaching)Staff members who, in addition to assisting the head of a school (normally the principal) inperforming the activities of directing and managing schools, are also engaged in instructingpupils in courses in classroom situations.
4 – Assistant Principals (Non-Teaching)Staff members who perform only the professional activities of assisting the head of aschool (normally the principal) in performing the activities of directing and managing aschool.
5, 6, and 7 – Classroom TeachersStaff members assigned the professional activities of instructing pupils in courses inclassroom situations for which daily pupil attendance figures for the school system are kept.Include music, band, physical education, and home economics teachers, etc. as classroomteachers if they teach full-time at a school campus.
5 – Elementary Classroom TeachersInclude classroom teachers who teach classes in grades K-8.
6 – Secondary Classroom TeachersInclude classroom teachers who teach classes in grades 9-12.Note: Report teachers who teach at both elementary and secondary levels only on the levelwhere the greater portion of their time is spent.
7 – Other Classroom TeachersApplies to full-time classroom teachers who teach ungraded classes, special education, art,music, band, physical education, home economics, etc. who have not been reported in theElementary or Secondary Classroom Teacher category.
8 – GuidanceCounselors, Student Counselors and other guidance personnel. Include staff membersresponsible for advising pupils with regard to their abilities and aptitudes, educational andoccupational opportunities, personal and social adjustments, etc.
9 – PsychologicalInclude only psychologists, psychometrics, psychiatrists and psychological/social workerswho are engaged in providing psychological-evaluative services to pupils for placementpurposes regardless of the amount of time spent in this activity. All other professionals
page 511 / 707

HRMS Communication Site
engaged in placement of pupils should be reported in their most pertinent category, such as1 (Officials/Administrators/Managers), 8 (Guidance) or 12 (Other Professional Staff), etc.
10 – Librarians, Audiovisual StaffLibrarians include staff members who are responsible for organizing and managing schoollibraries. Audio-visual personnel include staff members responsible for preparing, caringfor, and making available to instructional programs, the equipment, materials, scripts, andother aids which assist teaching and learning through special appeal to the senses of sightand hearing; e.g., a director of audiovisual services, scriptwriter, etc.
11 – Consultants, Supervisors of InstructionInclude staff members who perform activities of leadership, guidance, and expertise in thefield of specialization for the purpose of improving the performance of teachers and otherinstructional staff members.
12 – Other Professional StaffInclude staff members performing some instructional or related function on a full-timebasis who cannot be properly placed in other categories, such as non-classroom teacherswho may be teaching the home-bound, teaching through correspondence, teaching throughradio or television from a studio, providing instruction for exceptional pupils released fromregular classes for short periods of time, and instructing pupils in non-course (co-curricular)activities. Include persons engaged in psychotherapy and other mental health services suchas psychiatrists or psychologists who are not reported in the Psychological category. Alsoinclude professional non-instructional staff such as physicians, dentists, speech therapists,school social workers, community workers, attendance officers, attorneys, architects,engineers, registered professional nurses and other professional non-instructional personnel.
13 – Teacher AssistantsA staff member performing assigned activities which are not classified as professionaleducational, but which assist a staff member to perform professional-educational-teachingassignments. Include all personnel working with students under the direct supervision ofeither a classroom teacher or a staff member performing professional-educational-teachingassignments on a regularly scheduled basis. Also include Exceptional Children assistantsand Tutors in this category.Example 1 – Librarian Aide:A librarian aide who functions to fulfill particular educationalneeds of specific students on a regularly scheduled basis should be reported as a TeacherAssistant.A librarian aide who functions as a clerical or physical aide to the librarians andwhose contact with particular students is casual or irregular should be counted in theLibrarians, Audiovisual Staff category.Example 2 – Playground Aide:A playground aide who has been advised by the professionalstaff of the particular educational needs of specific children and who regularly directsefforts toward meeting these needs should be counted as a Teacher Assistant.A playgroundaide whose prime function is custodial should be counted in the Service Worker category.
14 – TechniciansOccupations requiring a combination of knowledge and manual skill which can be obtainedthrough about 2 years of post-high school education, such as is offered in many technicalinstitutes and junior colleges, or through equivalent, on-the-job training. Includes: computerprogrammers and operators, film inspectors, projectionists, graphic artists, drafters,engineering aides, non-teaching-related mathematical aides, nurses (licensed, practical orvocational), dietitians, photographers, radio operators, scientific assistants, technical
page 512 / 707
HRMS Communication Site
illustrators, technicians (medical, dental, electronic, physical sciences) and similaroccupations which cannot be properly classified in other activity assignments.
15 – Clerical, Secretarial StaffInclude secretaries, bookkeepers, messengers, office-machine operators, clerk-typists,stenographers, court transcribers, hearing reporters, statistical clerks, dispatchers, licensedistributors, payroll clerks, etc.
16 – Service WorkersStaff members performing a service for which there are no formal qualifications includingparaprofessionals and nonsupervisory personnel in cafeteria, or transportation work.Include also custodial workers or others with the responsibility for cleaning the buildings ofschool plants or supporting service facilities; maintenance and operating such equipment asheating and ventilating systems; preserving the security of school property; and keeping theschool plant safe for occupancy and use. Such activities may include cleaning, sweeping,disinfecting, heating, lighting, moving furniture, keeping school entrances appropriatelylocked or unlocked, keeping such facilities as fire escapes and panic bars in working order,and guard duties.
17 – Skilled CraftsOccupations in which workers perform jobs which require special manual skill and athorough and comprehensive knowledge of the processes involved in the work which isacquired through on-the-job training and experience or through apprenticeship or otherformal training programs. Includes: mechanics and repairers, electricians, heavy equipmentoperators, stationary engineers, skilled machining occupations, carpenters, compositors andtypesetters and kindred workers.
18 – Laborers, UnskilledStaff members who perform manual labor not classified in another activity assignmentclassification. Include garage laborers, car washers and greasers, gardeners andgroundskeepers or activities such as lifting, digging, mixing, loading and pulling operations.
SS-300 Classifications
1 – TeachersInclude classroom teachers who teach classes in grades K-12.
2 - Principals (Elementary)Staff members performing the assigned activities of the administrative head of theirrespective schools (not school systems or districts) to whom has been delegatedresponsibility for the coordination and direction of the activities of the school. Grades K-5.
3 - Principals (Junior/Middle)Staff members performing the assigned activities of the administrative head of theirrespective schools (not school systems or districts) to whom has been delegatedresponsibility for the coordination and direction of the activities of the school. Grades 6-8.
4 - Principals (High School)Staff members performing the assigned activities of the administrative head of theirrespective schools (not school systems or districts) to whom has been delegatedresponsibility for the coordination and direction of the activities of the school. Grades 9-12.
page 513 / 707
HRMS Communication Site
5 - Assistant PrincipalsStaff members who perform professional activities of assisting the head of a school(normally the principal) in performing the activities of directing and managing a school.
6 - SupervisorsStaff members in a supervisory role who do not fall into another SS300 classification.
7 - Associate/Assistant SuperintendentsAdministrative personnel who set broad policies (not elected or appointed officials),exercise overall responsibility for execution of these policies, or direct individualdepartments of the school system, or district or school operations. Includes deputy,associate, and assistant superintendent of schools, only.
8 - SuperintendentsAdministrative staff member who sets broad policies (not elected or appointed officials),exercise overall responsibility for execution of these policies at the district level. Includessuperintendent of schools, only.
9 - Band DirectorsStaff members specifically classified as a Band Director.
10 - High School CoachesStaff members assigned to coach high school athletics (grades 9-12).
11 - OtherOther staff who do not fall into one of the above SS300 Categories who receive asupplement.
Census Classifications
1 – Instructional PersonnelTeachersTeacher AssistantsSubstitute TeachersPrincipalsSupervisors of InstructionSuperintendentsSchool LibrariansGuidance PersonnelPsychological Personnel
2 - Other School System EmployeeAdministrative and ClericalPlant OperationsMaintenance and CustodialCafeteria PersonnelBus/TransportationHealthRecreationStudent EmployeesOther Employees
page 514 / 707
HRMS Communication Site
Local Use Fields
The System Administrator may define up to two Position Local Use fields in LEA Configuration. Theselocal use fields allow you to capture position information that is not available on the standard Positionform.
Salary/Payment Information
Payment Method– Salaried, Hourly, or Flat Dollar.Base Pay Table– Default Pay Table (Salary Schedule) from which the position is paid.Grade– Default Grade for position.Standard Hours– Standard number of hours per work-week.Hours Funded(Hourly positions only) – Funded hours per work-week.Percent Funded (Salaried positions only)
You can update Pay Table and Grade on the Edit Position form, or import Pay Table, Grade, and BudgetCodes from Payroll for a current position assignment.
Budget Code Information
You may create Position Budget Codes in HRMS (as described below), or import budget codes fromPayroll.
To create a Position Budget Code in HRMS:
1. Go to the Edit Position form.2. Click the New Position Budget Code link under the Budget Code Information heading.3. Complete the form and click Save.
Position Budget Codes can use either a Pay Table or a Flat $ Amount.
Important! The Salary Schedule and Budget Code Library Names on the LEA Settings form must reflectthe current school year!
To edit a Position Budget Code:
page 515 / 707

HRMS Communication Site
1. Go to the Edit Position form.2. Click the Edit button for the appropriate Budget Code.3. Make the desired changes and click Save.
To delete a Position Budget Code:
1. Go to the Edit Position form.2. Click the Deletebutton for the appropriate Budget Code.3. Confirm the deletion.
Assignment Information
The Assignment Information section displays data for Current, Future, and Archived (past) Assignmentsthat exist for the Position.
On the Edit Position form, you can:
View Assignment Details by clicking on an assignment row.Update the position's Pay Table, Grade, and Budget Codes from Payroll data by clicking the Importlink.
The Import link only displays for Current assignments.The Allow Update field in the Position Information section must be set to 'Yes'.
page 516 / 707

HRMS Communication Site
HRMS Help > Positions > Position List & Inactive List
User Roles: Position Editor, System AdministratorLast Updated: Nov 3, 2011 11:09 am
The Position List displays a list of all positions sorted by Position #, and the Inactive List displays a listof all inactive positions sorted by Position #.
To access one of these features, go to:
Position Management Console > Actions menu > Position List or Inactive List > Click Go.
The Position List or Inactive List will display.
Example - Inactive List
From the results, you can:
Filter the list by entering a value in the Search box. (See Tips below.)Browse through the list by clicking Next or Previous at the bottom of the form.View a position by clicking the Position # link or the View link.
Tips – Filtering the Position List
If you enter a number, the system will search the Position #, Site, and Position Description fields.If you enter text, the system will search the Position #, Position Title, Position Description,Position Category, and Position Status fields.Click the Clear Search link to remove the filter. If you entered multiple filters, you may need toclick this link several times.
page 517 / 707

HRMS Communication Site
HRMS Help > Positions > Position Management (Central Office)
User Roles: Position Editor, System AdministratorLast Updated: Dec 21, 2017 8:27 am
Authorized Central Office users can perform the following actions from the Position ManagementConsole:
Create a PositionSearch for a PositionPerform Position ActionsAccess the Position Search PageAccess the Position List & Inactive List
To access the Position Management Console, go to: HRMS Home > Positions > Position Management.
Search for a Position
The Position Management Console provides several ways to search for a position. After selecting aposition, you may act on it.
If you know the position number, enter it and click Show Position. The system will return the position asthe selected position.
If you don't know the position number:
Enter a partial position number and click 'Search Matching Positions.'Click 'Show Position Title List' and select a position title from the pop-up window.Click 'Show Position Groups List' and select a position group from the pop-up window.Enter a Site Number and click 'Search Site.'Click 'Show Site List' and select a site from the pop-up window.
Search Results
page 518 / 707
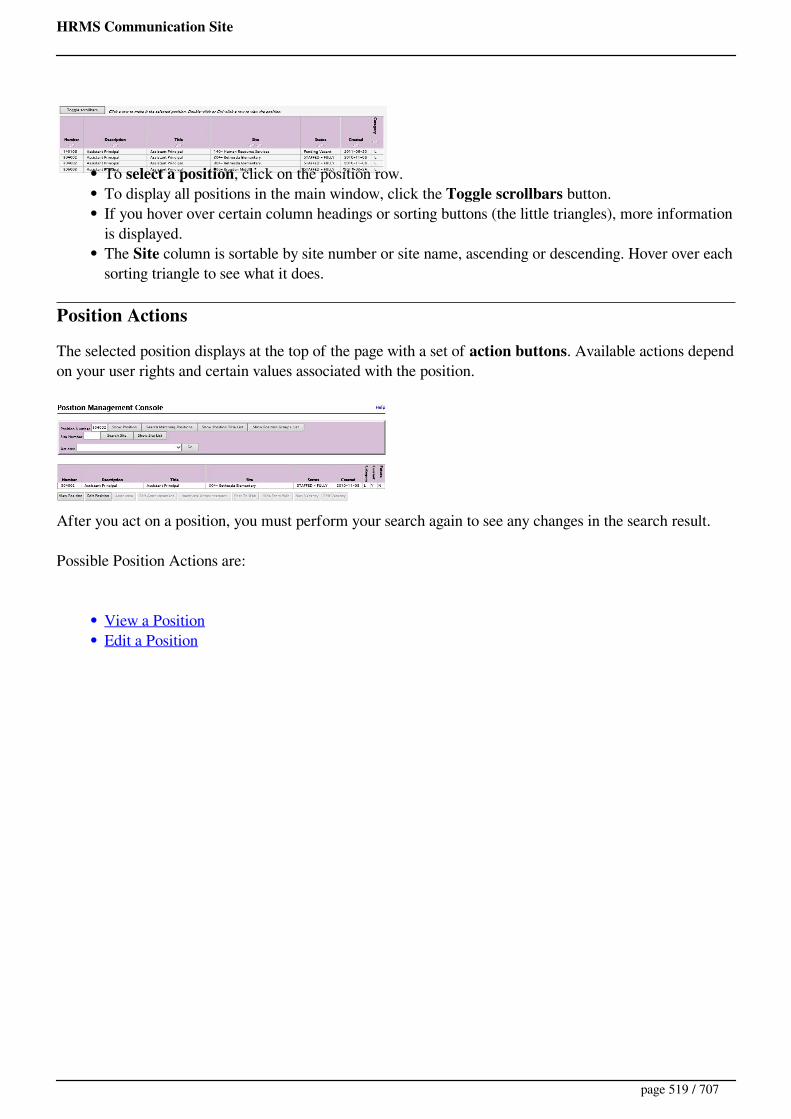
HRMS Communication Site
To select a position, click on the position row.To display all positions in the main window, click the Toggle scrollbars button.If you hover over certain column headings or sorting buttons (the little triangles), more informationis displayed.The Site column is sortable by site number or site name, ascending or descending. Hover over eachsorting triangle to see what it does.
Position Actions
The selected position displays at the top of the page with a set of action buttons. Available actions dependon your user rights and certain values associated with the position.
After you act on a position, you must perform your search again to see any changes in the search result.
Possible Position Actions are:
View a PositionEdit a Position
page 519 / 707
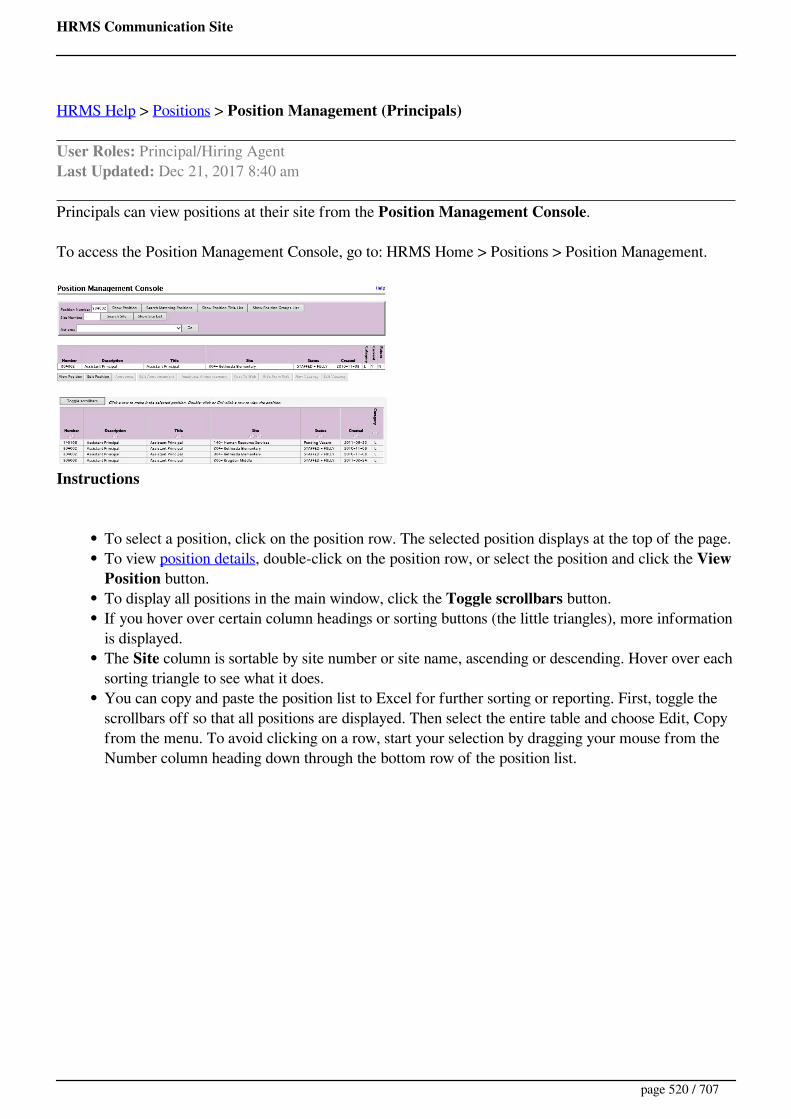
HRMS Communication Site
HRMS Help > Positions > Position Management (Principals)
User Roles: Principal/Hiring AgentLast Updated: Dec 21, 2017 8:40 am
Principals can view positions at their site from the Position Management Console.
To access the Position Management Console, go to: HRMS Home > Positions > Position Management.
Instructions
To select a position, click on the position row. The selected position displays at the top of the page.To view position details, double-click on the position row, or select the position and click the ViewPosition button.To display all positions in the main window, click the Toggle scrollbars button.If you hover over certain column headings or sorting buttons (the little triangles), more informationis displayed.The Site column is sortable by site number or site name, ascending or descending. Hover over eachsorting triangle to see what it does.You can copy and paste the position list to Excel for further sorting or reporting. First, toggle thescrollbars off so that all positions are displayed. Then select the entire table and choose Edit, Copyfrom the menu. To avoid clicking on a row, start your selection by dragging your mouse from theNumber column heading down through the bottom row of the position list.
page 520 / 707

HRMS Communication Site
HRMS Help > Positions > Position Search Page
User Roles: Position Editor, System AdministratorLast Updated: Nov 3, 2011 11:09 am
The Position Search feature allows you to find positions and then edit or view positions from the searchresults.
To access this feature, go to:
HRMS Home > Positions > Position Search, orPosition Management Console > Actions menu > Search Positions > Click Go.
The Search Position Information form will display.
To perform a search, select one or more search criteria, and click the Search button at the top of the form.A list of positions matching your search criteria will display in the same window.
From the results, you can:
Edit the position by clicking the Position # link.View the position by clicking the View link.Sort the results by clicking the triangles in the column headings.
page 521 / 707

HRMS Communication Site
HRMS Help > System Configuration > Position Titles
User Roles: System AdministratorLast Updated: Jan 17, 2012 2:17 pm
Position Titles are way to classify positions with similar characteristics, such as function, level taught(elementary, middle, or high school), content taught, etc. Your LEA must decide how narrowly you wish todefine Position Titles.
To access the configuration form, go to: HRMS Home > Setup > LEA Configuration > Position Titles.
The Position Titles form will display.
To add a Position Title, complete the following fields at the top of the form and click Add.
Position Title Code – Unique code, up to 6 characters.Position Choice Code – Identifies the Position Choice on the School Jobs Application System.Position Title – Unique title, up to 30 characters.Exempt or Non-Exempt – FLSA Status
To edit a Position Title, click the Title Code link in the first column, update any field as needed, and clickUpdate.
page 522 / 707

HRMS Communication Site
HRMS Help > Reporting Tool > Selection Criteria > Position Type
Last Updated: Dec 12, 2011 10:07 am
This option is available on various Standard Reports and Letters. It is used to select employees assignedto specific Position Types.
How To
You may select one or more of the following:
B -Bus DriversC -ClassifiedL -Licensed (default)S -Substitute
page 523 / 707

HRMS Communication Site
HRMS Help > Positions
User Roles: Varies by FunctionLast Updated: Dec 13, 2017 5:08 am
The Position Module in HRMS allows LEAs to create, edit and view positions.
Position Functions
P indicates a function available to Principals.
Position Management (Central Office)Position Management (Principals) PCreate a PositionPosition InformationEdit a PositionView a Position PPosition Search PagePosition List & Inactive ListImport Payroll DataPosition Budget Code Mass Update
System Configuration for Positions
Position TitlesPosition GroupsPosition Local Use LabelsSitesSite ContactsLEA Settings (Salary Schedule & Budget Code Libraries)
page 524 / 707

HRMS Communication Site
HRMS Help > Reporting Tool > Selection Criteria > Primary - Non-Primary
Last Updated: Dec 12, 2011 10:20 am
This option is available on various Standard Reports. It is used to include information for either primaryassignments only or for both primary and non-primary assignments on the report.
How To
Select one of the following:
Primary Assignments Only (default)Primary and Non-Primary Assignments
page 525 / 707
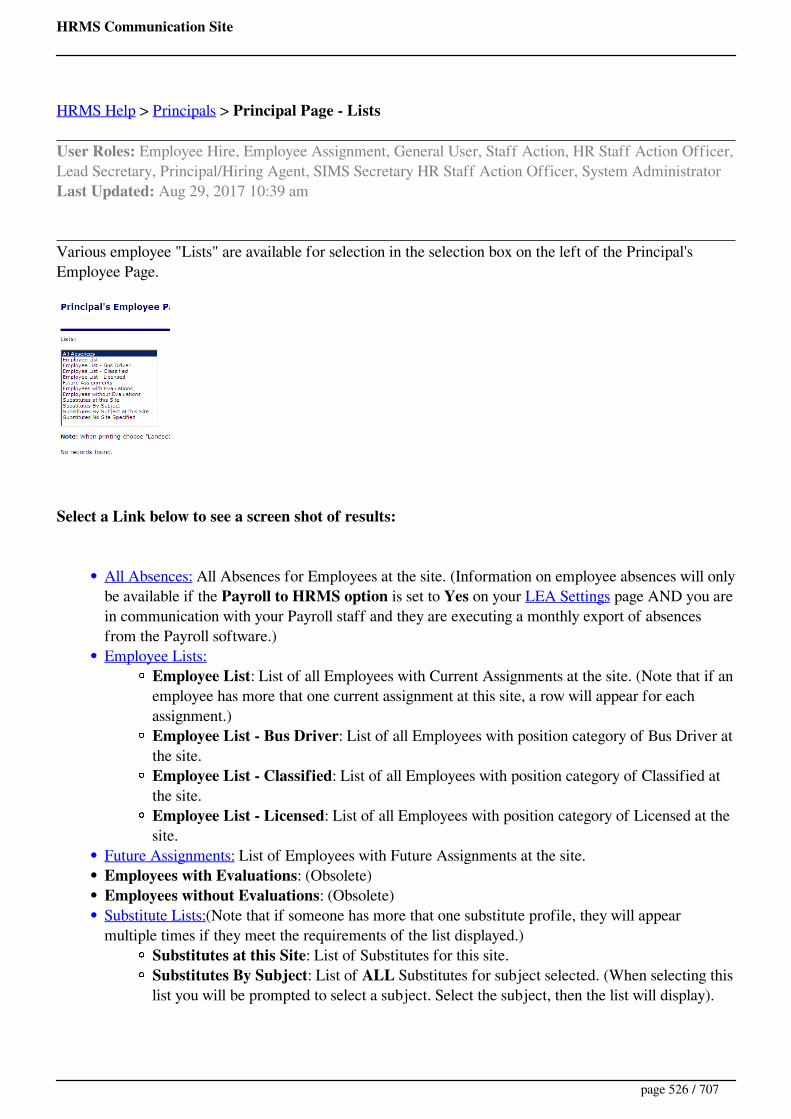
HRMS Communication Site
HRMS Help > Principals > Principal Page - Lists
User Roles: Employee Hire, Employee Assignment, General User, Staff Action, HR Staff Action Officer,Lead Secretary, Principal/Hiring Agent, SIMS Secretary HR Staff Action Officer, System AdministratorLast Updated: Aug 29, 2017 10:39 am
Various employee "Lists" are available for selection in the selection box on the left of the Principal'sEmployee Page.
Select a Link below to see a screen shot of results:
All Absences: All Absences for Employees at the site. (Information on employee absences will onlybe available if the Payroll to HRMS option is set to Yes on your LEA Settings page AND you arein communication with your Payroll staff and they are executing a monthly export of absencesfrom the Payroll software.)Employee Lists:
Employee List: List of all Employees with Current Assignments at the site. (Note that if anemployee has more that one current assignment at this site, a row will appear for eachassignment.)Employee List - Bus Driver: List of all Employees with position category of Bus Driver atthe site.Employee List - Classified: List of all Employees with position category of Classified atthe site.Employee List - Licensed: List of all Employees with position category of Licensed at thesite.
Future Assignments: List of Employees with Future Assignments at the site.Employees with Evaluations: (Obsolete)Employees without Evaluations: (Obsolete)Substitute Lists:(Note that if someone has more that one substitute profile, they will appearmultiple times if they meet the requirements of the list displayed.)
Substitutes at this Site: List of Substitutes for this site.Substitutes By Subject: List of ALL Substitutes for subject selected. (When selecting thislist you will be prompted to select a subject. Select the subject, then the list will display).
page 526 / 707

HRMS Communication Site
Substitutes By Subject at this Site: List of Substitutes for this site for subject selected.(When selecting this list you will be prompted to select a subject. Select the subject, thenthe list will display).Substitutes No Site Specified: List of Substitutes that do not have any site explicitlyspecified.
all absence data for employees at this site.
Same as the Employee List, but only those employees at this site who are assigned a bus driver position.Same as the Employee List, but only those employees at this site who are assigned a classified position.Same as the Employee List, but only those employees at this site who are assigned a licensed position.Employess with Evaluations displays employees who have at least one evaluation record on file, regardlessof the year in which the evaluation was completed. Employees without Evaluation displays employees whodo not have any evaluation records on file, regardless of the year. Licensure Forms displays employeeswho have at least one completed licensure form on file. Note: this is not the same as showing employeeswho hold a license. For that, choose an employee from the Employee List and click Licensure Data.Displays substitutes who have indicated an explicit willingness to substitute at the current site. Displays alist of subjects. When you select a subject, the table will display substitutes who can teach the selectedsubject. The results are not site-specific, so the substitute might not have indicated a willingness to teach atthe current site. If your school system uses 'Any' to indicate the substitute is willing to teach any subject,then 'Any' will be in the subject list. Displays a list of subjects taught by substitutes willing to substitute atthe current site. When you select a subject, the table will display substitutes who are willing to teach theselected subject at the current site. If your school system uses 'Any' to indicate the substitute is willing toteach any subject, then 'Any' will be in the subject list. Displays substitutes who do not have any sitesexplicitly specified. Renewals shows the Continuing Education History for the currently-selectedemployee. Shows the Substitute form for the currently-selected employee. Scroll to the bottom of thatform to display a list of subjects taught by the substitute. Click on a subject to display the locations wherethe sub is willing to teach the subject. Evaluations shows the Employee Evaluation form for the currently-selected employee. Once the evaluation form displays, you may select a school year to show the evaluationrecord for that year, if the employee has any existing evalution records. Employee Info shows theEmployee Display form for the currently-selected employee. This form shows demographic, tenure, andbenefits data, and a link to complete assignment details for the employee. Absences shows the same detailas the All Absences list, only for the currently-selected employee. After you show an employee's absences,you may want to click Employee List to be able to select another employee. Leave Balance shows theEmployee Leave Display form for the currently-selected employee. If HRMS is configured to read dataexported from the financial system, you will see leave balances of various types i.e., sick, personal,vacation, and extended. Licensure Data shows the Licensure display form for the currently-selectedemployee, listing the licensure data received from DPI Licensure Section records. All Absences
page 527 / 707
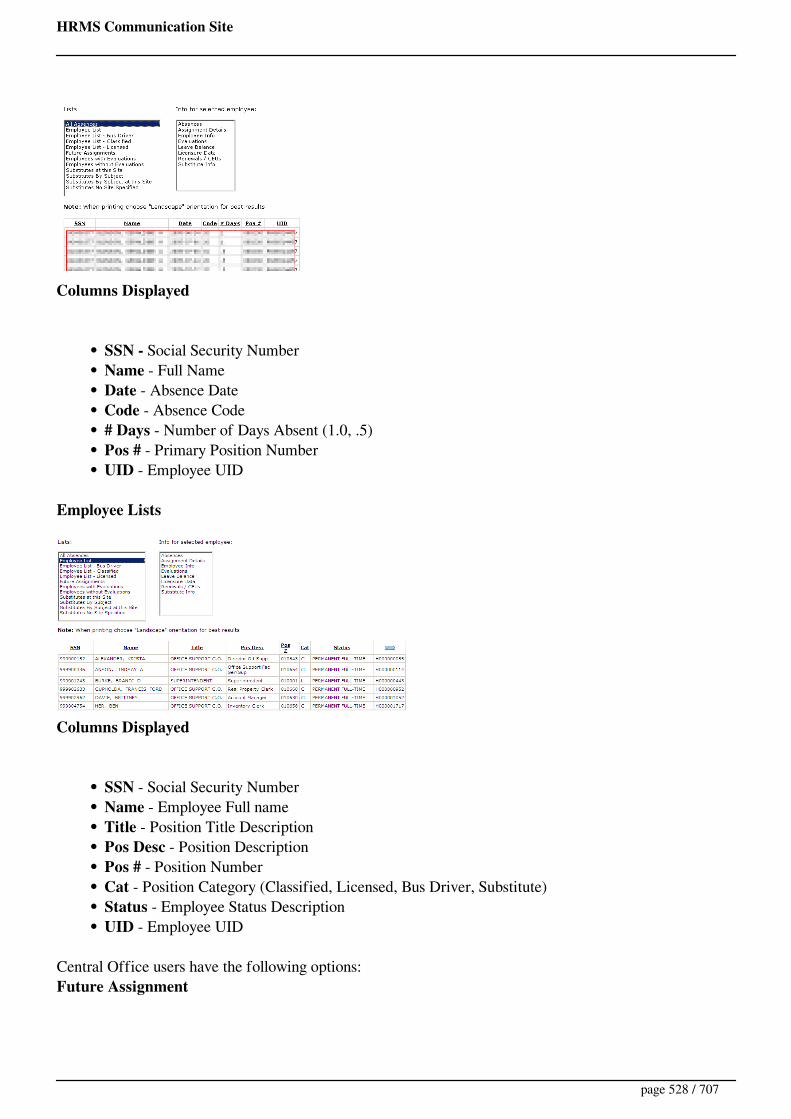
HRMS Communication Site
Columns Displayed
SSN - Social Security NumberName - Full NameDate - Absence DateCode - Absence Code# Days - Number of Days Absent (1.0, .5)Pos # - Primary Position NumberUID - Employee UID
Employee Lists
Columns Displayed
SSN - Social Security NumberName - Employee Full nameTitle - Position Title DescriptionPos Desc - Position DescriptionPos # - Position NumberCat - Position Category (Classified, Licensed, Bus Driver, Substitute)Status - Employee Status DescriptionUID - Employee UID
Central Office users have the following options:Future Assignment
page 528 / 707

HRMS Communication Site
Columns Displayed
SSN - Social Security NumberName - Employee Full nameTitle - Position Title DescriptionPos Desc - Position DescriptionPos # - Position NumberCat - Position Category (Classified, Licensed, Bus Driver, Substitute)Status - Employee Status DescriptionUID - Employee UID
Substitutes
Columns Displayed
SSN - Social Security NumberName - Employee Full nameType - Substitute TypeRate - Substitute Pay RateSubject - Subject willing to substitute forFrom Grade - Minimum Grade willing to substitute forTo Grade - Maximum Grade willing to substitute forM - (Yes/No) - Available on MondaysT - (Yes/No) - Available on TuesdaysW - (Yes/No) - Available on WednesdaysT - (Yes/No) - Available on ThursdaysF - (Yes/No) - Available on Fridays
page 529 / 707

HRMS Communication Site
Home Phone - Home Phone NumberCell Phone - Cell Phone NumberPos # - Position Number (Normally blank since subs are not put into positions)UID - Employee UID
page 530 / 707

HRMS Communication Site
HRMS Help > Principals > Principals Page
User Roles: Employee Hire, Employee Assignment, General User, Staff Action, HR Staff Action Officer,Lead Secretary, Principal/Hiring Agent, SIMS Secretary HR Staff Action Officer, System AdministratorLast Updated: Mar 27, 2012 7:16 am
The Principal's Employee page serves as a launching point for retrieving a variety of data about employees,such as demographic information, licensure data, and renewal credit history. The page is accessible byCentral Office HRMS users and by Principals. The only difference is that the Central Office is allowed toselect different sites and search by SSN or Last name, while the Principal can only retrieve information onemployees who have an assignment at the principal's site.
Access the Principal's Employee Page from the HRMS Home Page
Principal's Employee Page - Central Office View
Principal's Employee page (Principal/Hiring Agent and Lead Secretary Roles) P
Basics
Getting Started with this pageSubstitutes - General InformationCentral Office Users
Lists1:Info for selected employee (Information Forms)2:
Getting Started with this pageThis page is divided into three sections:
page 531 / 707

HRMS Communication Site
A selection box of Different Lists1 that can be displayedA selection box of Information Forms2 available for the selected employeeA Data Table3 showing a list of employees or other data available
In general, you will follow these steps:
1. Click one of the lists in the "Lists" selection box1, for example Employee List, and wait forthe Data Table3 to display. The default sort in the Data Table3, is by Employee Last name. Notethat selecting "Substitutes By Subject" or "Substitutes By Subject at this Site" causes a popupof subjects to display. Once a subject is selected, the Data Table3 displays. Note that selecting "AllAbsences" populates the Data Table immediately without having to select a specific employee.
2. Click on an row in the Data Table3. The row will turn yellow, indicating that it is the selectedrow and that you must now select an Information Form2 to display.
3. Click on one of the options in the selection box labeled "Info for Selected Employee2". Thiswill launch a new window displaying the requested information.
4. At this point, you can select another employee in the Data Table3 or select another InformationForm2.
If you select another employee, the same type of information requested for the previously-selected employee will be displayed automatically for the newly-selected employee.If you select another Information Form2, that information will be displayed for thecurrently-selected employee.This method of displaying information may take a few minutes to get used to, but you will soon
discover it is very efficient for displaying the same type of information for multiple employees,and for displaying different types of information for a single employee.
Other Tips on Using This Page
Sorting of the Data Table3The default sort is by Employee Last name. You can click on any underlined columnheading (Pos Desc, Title, etc...) to sort the table by that value in ascending order. Clickagain to sort by that value in descending order.
PrintingRight Click on the window and Select "Print". Make sure to select the "Orientation" of "Landscape" in your printer preferences.To remove the column containing a social security number, you can right-click thecolumn heading to hide that column. This will be convenient when printing out a list ofsubstitutes, for example. Once the SSN column is hidden, you must refresh the browserwindow and perform the search again to redisplay the SSN column.
Substitutes - General Information
page 532 / 707

HRMS Communication Site
In some cases, a substitute record may exist for a current employee. After selecting the substitute,click Assignment Details to make sure the substitute does not have a current assignment.Sometimes the site entered does not match any site code at the LEA. For example, the substituterecord might have a site code "Any" or "All Sites" which cannot be displayed using these searchesunless the substitute can be selected by subject area.
page 533 / 707

HRMS Communication Site
HRMS Help > Principals > Principals Page > Principals Page Central Office View
User Roles: Employee Hire, Employee Assignment, General User, Staff Action, HR Staff Action Officer,SIMS Secretary HR Staff Action Officer, System AdministratorLast Updated: Mar 19, 2012 6:39 am
When the Principal's Employee Page displays for Central Office users, the Default Site1 is the SchoolSite of the user's registration.
Central Office users have the following options:
Select Site button2. Click this button to set the desired site. All of the actions you choose arerelative to the currently selected site, though you may select a new site at any time.SSN or Last Name input3.
Type an SSN, with or without dashes, and press ENTER to look information about aspecific employee. You can also type a partial or complete last name.For SSN searches, the field will display the employee's name if the SSN is found in theemployee table.For Last Name searches, a list of matching employees with current assignments will bedisplayed. Select the employee desired from the popup list. After you select the desiredemployee, click on one of the Info options to display information for that employee.Double-click in the field to clear the previous entry
For information on the Lists: and Info For selected employee:, go back to Principals Page.
page 534 / 707

HRMS Communication Site
HRMS Help > Principals > Principals Page Forms
User Roles: Employee Hire, Employee Assignment, General User, Staff Action, HR Staff Action Officer,Lead Secretary, Principal/Hiring Agent, SIMS Secretary HR Staff Action Officer, System AdministratorLast Updated: Mar 15, 2018 8:14 am
From the Principal's Employee Page, once a list of employees appears in the Data table, a row can beselected. Upon selection it will turn yellow. (Normally, when you want to see more detailed information onan employee and are planning on using one of the information forms in "Info for selected employee:", youinitially select one of the Employee Lists in the Lists box.) See below:
Once an employee is selected, a selection in the "Info for selected employee:" box can be selected todisplay that information form for the employee.
Information forms available (Click on the link to find more information):
Absences: - Absence data for the selected employee. (Information on employee absences will onlybe available if the Payroll to HRMS option is set to Yes on your LEA Settings page AND you arein communication with your Payroll staff and they are executing a monthly export of absencesfrom the Payroll software.)Assignment Details: - Assignment data for the selected employee. Current, Future and Archivedassignments are all displayed.Employee Info: - 1) Employee Demographic, 2) Tenure, Leave, and Misc, 3) Health, Longevityand Retirement data for the selected employee. Also, the following information pages are availablefor selection on this form.
View Application: Link is available if the system finds and application for the employee.Employee Summary: Summary page of employee data available for editing and printing ifneeded.Assignment Details: Assignment data for the selected employee. Current, Future andArchived assignments are all displayed.Comments: List of comments made on employee. (ONLY AVAILABLE FOR SYSTEMADMINISTRATORS)View Documents: Only available if you have a Document Management System (DMS)indicated in LEA Settings of your LEA Configuration. Any documents in your DMS for
page 535 / 707

HRMS Communication Site
this employee will display.Evaluations: - (Obsolete)Leave Balance - Employee Leave Balances.(Information on employee leave balances will only beavailable if the Payroll to HRMS option is set to Yes on your LEA Settings page AND you are incommunication with your Payroll staff and they are executing a monthly export of absences fromthe Payroll software.)Licensure Data - Licensure data for the selected employee.Renewals/CEUS - CEU and limited Licensure data for the selected employee.Substitute Info - Substitute profile data for the selected employee.
Absences (back to top)
Columns DisplayedSSN - Social Security NumberName - Full NameDate - Absence DateCode - Absence Code# Days - Number of Days Absent (1.0, .5)Pos # - Primary Position NumberUID - Employee UID
Assignment Details (back to top)
Information Displayed (Note that this is the same information page as displayed when youselected "View All Assignment Details" from the Employee Demographic screen.)Employee Information
Name - Employee NameSSN - Social Security NumberPayroll Employee ID - Employee's Payroll IDCurrent Date - Today's Date
Current, Future and Archived Assignments
page 536 / 707

HRMS Communication Site
Employee Info
Employee Demographic (back to top)
An abbreviated set of Employee Demographics display along with five "hot" links/buttons.Selecting "Employee Summary", "Assignment Details", "Comments", "View Documents"or "View Application" will open a new window with corresponding information.
Tenure, Leave and Misc (back to top)
Section 2 of the Employee Info form displays information that you would find in whenselecting "Staff Action/Status and Benefits" on the Employee Demographics page. (Important note: This information may not reflect what is in Payroll. Informationhere does not affect Payroll.)Section 3, Position Information can be ignored. It is not working properly. Positioninformation can be found by clicking on the Assignment Details button at the top of thisscreen.
page 537 / 707

HRMS Communication Site
Health, Longevity and Retirement (back to top)
Section 4 of the Employee Info form displays information that you would find in whenselecting "Staff Action/Status and Benefits" on the Employee Demographics page. It alsodisplays the Employee's Original and Termination date. (Important note: Thisinformation may not reflect what is in Payroll. Information here does not affectPayroll.)
View Application (back to top)
If an application exits for this employee the "View Application" link is available. Note thatif more than one type of application (Licensed, Classified, Bus Driver, Substitute) exists forthis employee, the system randomly displays one of them. If you need to see a differentapplication go to the HRMS Home Page and select Applicants/Search Applications.
Employee Summary (back to top)
The Employee Summary lists various information concerning the employee. Note that youcan change the font and size before printing. Also, this form is "editable" in case you wantto remove or change the displayed information before printing. Note that changinginformation on this form does not update any data in HRMS.
page 538 / 707

HRMS Communication Site
Comments (back to top)
Comments are available for viewing, editing or deleting for SYSTEMADMINISTRATORS only.
Leave Balance (back to top)
The employee name and status appear in the first section. The Annual Leave, Holiday Payand Personal Leave indicators appear in section 2 along with the Annual Leave rate. LeaveBalances will only appear if the Payroll to HRMS indicator is set to YES in the LEASettings and if Payroll is exporting this data on a monthly basis. More than likely, the Leaverate will only be correct if the export is occurring.
Licensure Data (back to top)
The employee SSN and Primary site appear along with their Licensure information. Notethat Licensure information that appears in HRMS is current as of the end of the previousbusiness day. This is the same information that appears on the Employee Demographicpage when Other/License Data is selected.
page 539 / 707

HRMS Communication Site
Renewals/CEUs (back to top)
The employee name, SSN, Licensure Status, Primary Position, Primary Site and ProgramArea information displays along with Renewal Cycles and CEU totals for each of thosecycles. The grid at the bottom of the screen displays the Class History list in order frommost recent Date to the oldest. Note that you can click on any column heading to sort bythe data in that column. Note also, that if a System Administrator is logged in, Edit,Add and Remove options are available.
Substitute Info (back to top)
To display Substitute Info, you will first need to select one of the Substitute Lists1. TheData Table will populate. Then select the row in the Data Table2 for the desired substitute.The only additional information displayed by selecting Substitute Info3 in the "Info forselected employee" box will be additional sites where this person is available for serving asa substitute.
After "Substitute Info" is selected the following screen appears. Select the appropriateprofile in section 3 to populate sections 1 and 2.
page 540 / 707
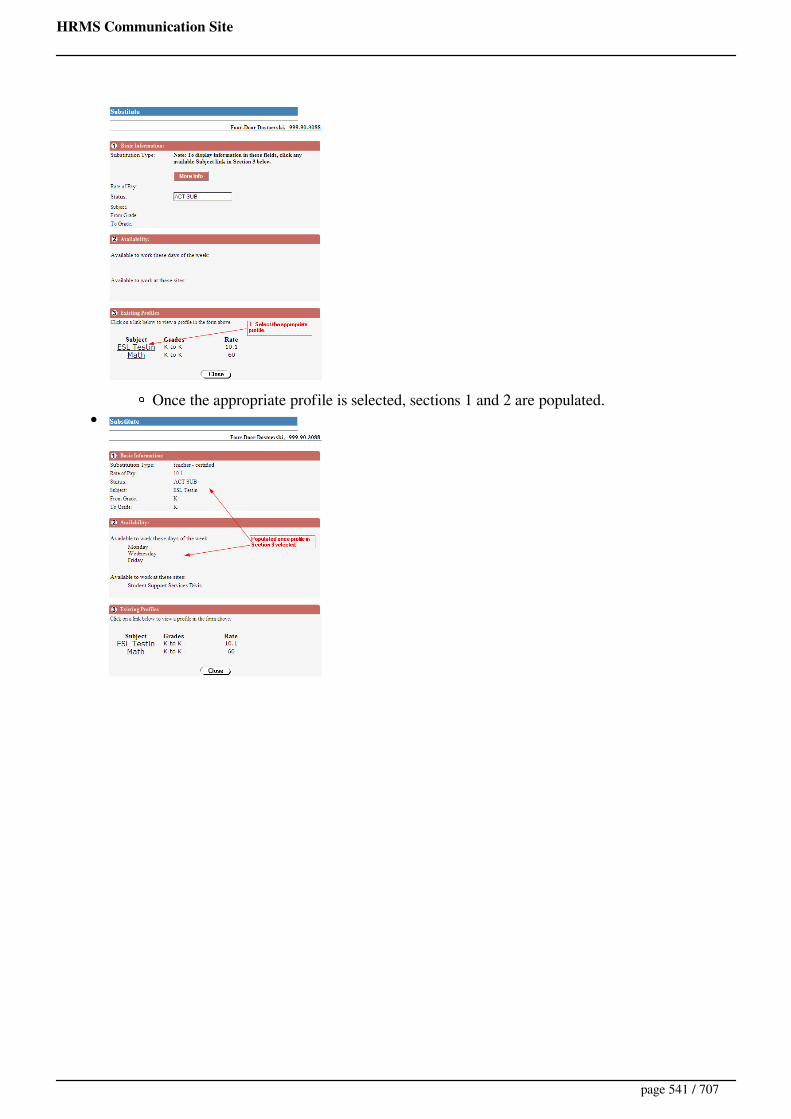
HRMS Communication Site
Once the appropriate profile is selected, sections 1 and 2 are populated.
page 541 / 707
HRMS Communication Site
HRMS Help > Reporting Tool > Selection Criteria > Prior Renewal Cycle ending on
Last Updated: Dec 12, 2011 10:22 am
This option is available on the Continuing Education History Reports. It is used to select employeeswhose Prior Licensure Renewal Cycle ended on June 30th of a specific year.
How To
Enter a 4-digit year to select employees whose Prior Renewal Cycle ended on June 30th of that year.
page 542 / 707
HRMS Communication Site
HRMS Help > Reporting Tool > Professional Development Report
User Roles: Any user with Reporting Tool installed on PCLast Updated: Jun 13, 2016 1:20 pm
The Professional Development Report assists LEAs in completing their annual No Child Left Behind(NCLB) reporting and Title I and Title II audits. The report provides information about which teachershave completed High Quality Professional Development activities within the reporting period. The reportincludes all teachers in the LEA who are assigned to licensed positions, whether the position is marked as acore academic subject area or not.
The report includes site and LEA totals by Program Code Category*, including total in Core AcademicPositions, total in Core Academic Positions with an HQ Development Class, and total without an HQDevelopment Class (see sample report below).
*Program Code Categories are defined as:
Continuing License - Program Status Code of '0' in a teaching license area.Beginning Teachers - Program Status Code of '8' or Program Code of '4L' or 'LL' (lateral entryteachers) or '35' (provisional vocational teachers) in a teaching license area.Experienced Out-of-State w/ SPI License - Program Status Code of 'S' in a teaching licensearea.Other Program Codes - those that do not fall into one of the other three categories, or those whodo not have any teaching license areas.
Selection Criteria
Assignments Active BetweenPick SitesPick Position TitlesSSN (Display)Export Report Data
Sample Report
page 543 / 707
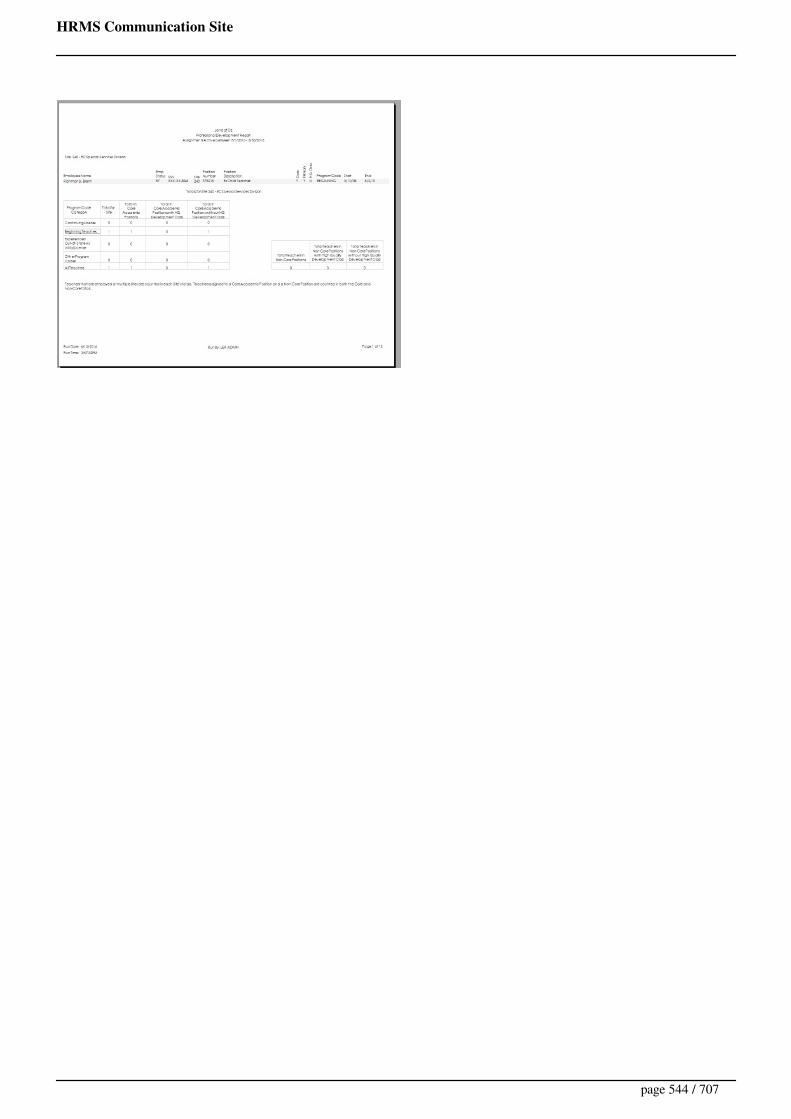
HRMS Communication Site
page 544 / 707
HRMS Communication Site
HRMS Help > Reporting Tool > Selection Criteria > Program Codes
Last Updated: Jun 14, 2016 6:26 am
This option is available on the Licensure Report. It is used to select employees who have License Areaswith specific Program Codes.
How To
Select one of the following from the Suggested Groupings drop-down list:·
All licensed employees (default)Initial (formerly SPI) licenses (active or inactive)Initial (formerly SPI) licenses (inactive only)Initial (formerly SPI) licenses (active only)Lateral entry licensesNon-provisional licensesProvisional licensesTesting requirementsContinuing (formerly SPII) licensesChoose my own Program Codes
Based on your selection, the system will populate the appropriate Program Codes/Statuses.
Example 1
Select Lateral entry licenses.The system selects "Program Codes 4L and LL".
Example 2
Select Provisional licenses.The system selects Program Statuses L, P, V, 2, 3, and 4.
page 545 / 707

HRMS Communication Site
HRMS Help > Employee Demographics > Staff Actions > Promotion, Demotion, or Salary Change
User Roles: System Administrator, HR Staff Action Officer, Staff Action Clerk, Employee HireLast Updated: Dec 30, 2014 1:28 pm
Printer friendly
Table of ContentsQuick Facts
Recording Salary Info for Employees with Assignments
Recording Salary Info for Employees without Assignments
Viewing Salary Info Details
Removing/Cancelling Salary Info Records
Quick FactsStarting with version 6.4, LEAs can track promotions, demotions and salary changes in HRMS for thepurpose of the NC Public Records Law.
For employees with assignments, promotion/demotion/salary change information must be capturedin the 'Salary Information' section of the Edit Assignment form.For employees without assignments, promotion/demotion/salary change staff actions must beinitiated from the Staff Action Console.Promotion/demotion/salary change records cannot be edited. Records entered in error must be removed and re-entered.A public records report to include promotions, demotions, and salary changes entered in HRMS,will be made available in a future release. Contact HRMS Support if you need assistance pullingdata for a public records request until the report is available.
TIP: If only an employee's assignment hours are changing and the action does not involve a promotion ordemotion, select the Type of Action 'Salary Change Only' and enter the same hourly rate for Old and NewSalary $ Amount.
IMPORTANT: Although salary information can be entered in HRMS at the individual assignment level,
page 546 / 707

HRMS Communication Site
there is no capability in HRMS to record across-the-board salary increases in mass. A record of those actions,as well as current salary information for employees, must be obtained from the LEA's Payroll system.
Recording Salary Info for Employees with AssignmentsStarting with version 6.4, salary information fields -- Percent Employed, Hours/Week, and Step -- cannotbe updated on the Add Assignment form. Salary fields must now be updated on the Edit Assignment formafter the assignment has been added.
When the Edit Assignment form loads, existing salary information will display in read-only format. Toupdate salary information and/or enter information regarding a promotion, demotion, or salary change,click the link labeled Edit Salary Information and/or Record a Promotion/Demotion/Salary Change.
The following form will expand:
Example - Promotion with Salary Increase
First, make any needed adjustments to fields in the 'Edit Salary Information' section (PercentEmployed, Hours/Week, Base Pay Table, Grade and Step).
Next, complete the fields in the ‘Record Promotion, Demotion and/or Salary Change’ section:
TIP: If only an employee's assignment hours are changing and the action does not involve apromotion or demotion, select the Type of Action 'Salary Change Only' and enter the same hourly ratefor Old and New Salary $ Amount.
page 547 / 707

HRMS Communication Site
Type of Action (required)If adding an initial assignment for a new hire - Select ‘Initial or Additional Assignment’.If adding an additional assignment for a current employee - If the new assignment isdeemed a promotion, select ‘Promotion with/without Salary Increase’. Otherwise, select‘Initial or Additional Assignment’.If employee is being transferred - If the transfer involves a promotion or demotion, select‘Promotion with/without Salary Increase’ or 'Demotion with/without Salary Decrease’.Otherwise, select ‘Lateral Transfer’.If employee’s salary is changing for an existing assignment - If the salary change involvesa promotion or demotion, select ‘Promotion with Salary Increase’ or ‘Demotion with SalaryDecrease’. Otherwise, select ‘Salary Change Only'.If correcting salary information and salary is not changing - Select ‘Data Correction'.
Effective Date (required) - Must be between the Assignment Start and End Dates.
Old Salary $ Amount (required if Type of Action is 'Promotion with Salary Increase', 'Demotionwith Salary Decrease', or 'Salary Change Only')
If salary is changing for existing assignment - Enter employee’s previous salary (Base +Supplement) for the assignment.If employee is being transferred - Enter employee’s salary (Base + Supplement) forassignment(s) they are transferring from.If adding an additional assignment - Enter 0 (since there is no old salary for thisassignment).
Old Pay BasisSelect the pay basis (Monthly, Hourly, Annually or Daily) for the Old Salary $ Amount.If Old Salary Amount = 0, select 'N/A'.
Old Percent Employed or Old Hours/WeekIf Old Pay Basis is Monthly, enter the employee's Percent Employed before the salarychange.If Old Pay Basis is Hourly, enter the employee's Hours/Week before the salary change.
New Salary $ Amount (required if Type of Action is 'Initial or Additional Assignment','Promotion with Salary Increase', 'Demotion with Salary Decrease', or 'Salary Change Only')
Enter employee’s new salary (Base + Supplement) for the assignment being edited.Do not include salary amount for any other assignments.
New Pay Basis - Select the pay basis (Monthly, Hourly, Annually or Daily) for the New Salary $Amount.
Reason (required if Type of Action is 'Promotion', 'Demotion', or 'Salary Change Only')
page 548 / 707
HRMS Communication Site
Select the applicable reason from the drop-down list.
Was it authorized by the local Board of Education? - If you selected the Reason ‘Result ofdisciplinary action’, indicate whether the board authorized the action.
Post on Board Report? - Indicate whether this action should be included on the Board Report. Ifyou select ‘Yes,’ you will be required to enter the Board Report Date.
Comments (required if Type of Action is 'Promotion', 'Demotion', or 'Salary Change Only')Enter comments (max 250 characters) to further explain the ‘Promotion/Demotion/SalaryChange’ staff action.
Recording Salary Info for Employees without AssignmentsTo record a promotion, demotion, or salary change for an employee without an HRMS assignment (e.g.,substitute), go to the Staff Action Console and select 'Create Promotion/Demotion/Salary Change'.
The following form will display:
c
Fields on this form are the same as those on the Edit Assignment form (described above), with thefollowing exceptions:
The following Types of Action are not available on the standalone form: 'Data Correction', 'Initial
page 549 / 707
HRMS Communication Site
or Additional Assignment', and 'Lateral Transfer'.The following Type of Action is available on the standalone form in the Staff Action Console, butnot on the Edit Assignment form: 'New Employee without Assignment'.The following fields do not display on the standalone form: Old Percent Employed and OldHours/Week (associated with Old Salary $ Amount).
Viewing Salary Info DetailsDetails of a Promotion/Demotion/Salary Change record can be accessed from the Edit Assignment form,Staff Action Console, or Staff Action Search form.
Edit Assignment formPromotions/Demotions/Salary Changes entered for a current or future assignment are listed in the SalaryInformation section of the Edit Assignment form.
Click on a row to view details.
Staff Action ConsolePromotion/Demotion/Salary Change records are also listed on the Staff Action Console.
page 550 / 707
HRMS Communication Site
Click the link in the 'Type' column to view details.
Staff Action SearchThe Staff Action Search form allows you to search for Promotion/Demotion/Salary Change records acrossthe LEA.
Select Type = 'Salary Info'.Select one or more values for Sub-Type to find specific Types of Action.
page 551 / 707

HRMS Communication Site
Click the desired record in the Search Results to view details.
Removing/Cancelling Salary Info RecordsSystem Administrators can change the status of a Promotion/Demotion/Salary Change record to'Cancelled' by following these steps:
1. Go to the employee's Staff Action Console (Employee Demographics > Staff Action > StaffAction Console).
2. Select the record you wish to remove.3. Select 'Remove Promotion/Demotion/Salary Change' from the menu at the top right.
The Remove Promotion/Demotion/Salary Change form will display:
page 552 / 707
HRMS Communication Site
NOTE: Removing a Promotion/Demotion/Salary Change does not restore the employee's assignment salaryinformation back to the previous values.
Cancelled records will not display on the public records report to be made available in a future HRMSrelease.
page 553 / 707

HRMS Communication Site
HRMS Help > Reporting Tool > Selection Criteria > Public Records Date Selection
Required date selection control(s) for Public Records ReportsThere are three different date selection controls for the public records reports.
Position and Contract Public Records Report
Selects data based on the required Contract Effective Date entered when creating a new contract.
Position and Salary Public Records Report
Position and Staff Action Public Records Report
page 554 / 707

HRMS Communication Site
HRMS Help > Reporting Tool > Public Records Law
GS_115C-320.pdf
DetailsDownload7 KB
User Roles: Any user with Reporting Tool installed on PCLast Updated: Nov 6, 2014 5:17 am
page 555 / 707
HRMS Communication Site
HRMS Help > Reporting Tool > Public Records Reports
User Roles: Any user with Reporting Tool installed on PCLast Updated: Mar 9, 2015 6:20 am
The Public Records reports are a series of 3 reports designed to display the information required inGS_115C-320. The Reports pull information with regards to the following data in HRMS (items 1-12). Itis highly recommended that the report data be exported to Excel (using the 'Export Report Data' control) ifyou wish to filter it further.(1) Name.(2) Age.(3) Date of original employment or appointment.(4) The terms of any contract by which the employee is employed whetherwritten or oral, past and current, to the extent that the board has the writtencontract or a record of the oral contract in its possession.(5) Current position.(6) Title.(7) Current salary.(8) Date and amount of each increase or decrease in salary with that local boardof education.(9) Date and type of each promotion, demotion, transfer, suspension, separation,or other change in position classification with that local board of education.(10) Date and general description of the reasons for each promotion with thatlocal board of education.(11) Date and type of each dismissal, suspension, or demotion for disciplinaryreasons taken by the local board of education. If the disciplinary action was adismissal, a copy of the written notice of the final decision of the local boardeducation setting forth the specific acts or omissions that are the basis of thedismissal.(12) The office or station to which the employee is currently assigned
Only employees assigned to a position will display in the reports (Current or Archived).
The Context of the reports are broken down in the following way. The numbers listed are fromGS_115C-320.
Public Records Position and Contract Report(1)(2)(3)(4)(5)(6)(12)
Public Records Position and Salary(1)(2)(3)(5)(6)(7)(8)(12)
Public Records Position and Staff Actions(1)(2)(3)(5)(6)(9)(10)(11)(12)
page 556 / 707

HRMS Communication Site
Selection Criteria
1. Pick Employees2. Pick Employee Statuses3. Pick Sites4. Pick Position Titles5. Pick Position Descriptions6. Export Report Data
Sample Public Records Report
page 557 / 707

HRMS Communication Site
Required Date Selection for Public Records Reports
page 558 / 707

HRMS Communication Site
HRMS Help > Employee Page > Employee Demographics > Staff Actions > Re-employment
User Roles:System Administrator, HR Staff Action Officer, Employee Hire, Separation Editor,Separation Viewer(Separation Viewer can only view Re-employment Details.)Last Updated: Oct 16, 2014 12:07 pm
Printer friendly
Table of ContentsQuick Facts
Creating a Re-employment
Viewing Re-employment Details
Editing Re-employment Details
Staff Action Request Details
Removing a Re-employment (System Administrator Only)
Quick Facts
The Create Re-employment form should now be used only for employees who will not be placed inan HRMS assignment.This process removes the termination date once it is submitted.The employee’s Last Hire Date will also be updated to match the Re-employment Effective Date.
Creating a Re-employment
Accessed from the Employee Demographics Staff Actions menu under Staff Action Console
To create a Re-employment, select Create Re-employment.
page 559 / 707
HRMS Communication Site
The Re-employment form will appear.
NOTE: This form should only be used if the employee will not have an HRMS Assignment.Complete the required fields:
Effective Date of Re-employmentEmployment Status Upon Re-employment
Enter Comments regarding this Re-employment (Maximum 250 characters)Select Post on Board Report? Yes or NoEnter the Board Report Date (required if Post on Board Report is Yes)Click Submit to save the Re-employment record.
page 560 / 707
HRMS Communication Site
If the Re-employment is submitted successfully:The system will take you to the Re-employment Details form, with the following messagedisplayed at the top of the form:
Re-employment record created successfully.
Viewing Re-employment Details
Select the Re-employment record from the Staff Action Console
The Re-employment Details form will appear.
page 561 / 707
HRMS Communication Site
Re-employment Details includes the following information:Status – Active or ArchivedEffective Date – Effective Date of the Separation; Last Day WorkedCommentsUpdated By – User IdUpdated At – Date & Time
Staff Action History is included in the grid at the bottom of the form:Type – Create and Archive (only options for re-employment staff action history)Requester – Name of the person who entered the staff action.Submitted – Date and time the action was taken.Status – This will always be ‘Completed’ since there is no approval process for Re-employments.
Editing Re-employment Details
Select the Re-employment record from the Staff Action Console
The Re-employment Details form will appear.To edit a Re-employment, select Edit Re-employment.
The Edit Re-employment Details form will appear.
page 562 / 707

HRMS Communication Site
Enter the Effective Date of Re-employment.Enter Comments regarding this Re-employment (Maximum 250 characters)Select Post on Board Report? Yes or NoEnter the Board Report Date (required if Post on Board Report is Yes)Click Save to complete the Edit Re-employment record.
If the Edit Re-employment is submitted successfully:The system will take you to the Re-employment Details form, with the following message displayed at the top of the form: Re-employment record updated successfully.
Staff Action Request Details
You can view the Staff Action Request Details by clicking on the Re-employment Type recordunder the History section on the Re-Employment Details Form.
page 563 / 707

HRMS Communication Site
Removing a Re-employment (System Administrator Only)
Only Systems Administrators have authority to remove a Re-employment, by selecting "RemoveRe-employment" on the ‘Re-employment Details’ form.
If the selected employee has more than one Re-employment record, only the most recent (non-cancelled) record can be removed. If you wish to remove a Re-employment that is not theemployee’s most recent one, you must first remove the employee’s more recent Re-employment(s)and Separation(s) that occurred after this Re-employment.
If you attempt to remove an employee’s most recent Re-employment but the employee hasseparated since the Re-employment, you must remove the Separation first.
If the reason that the Re-employment record is being removed is because the employee did notreport for work, or the LEA withdrew the offer, then you should not remove the Re-employmentbut should enter a Separation instead. Re-employments should be removed only if they wereentered in error.
If a Re-employment record is removed, the system will set the employee’s Last Hire Date andcurrent Employment Status back to the previous values (before the Re-employment was created.) Itwill also set the employee’s Termination Date and Rehire Eligibility Date back to the values savedin the employee’s most recent (non-cancelled) Separation record. It will also delete the employee’scurrent and/or future assignments if they have a Start Date that is on or after the Re-employmentEffective Date.
page 564 / 707

HRMS Communication Site
Re-employment Details form can be used to view the details of individual Re-employment staffactions, by clicking on a row in the History section of the ‘Re-employment Details’ form.
page 565 / 707

HRMS Communication Site
This page contains documents pertaining to the HRMS LEA Software Application. Please contact theHRMS team with questions or comments concerning all documents at [email protected].
Reference Guide Last Update Videos
Employees
Calculate Days Worked in SchoolYear (Excel 2003)
05/21/2010
Calculate Days Worked in SchoolYear (Excel 2007)
05/21/2010
Edit Assignment 07/17/2009
Licensure Forms Management 07/17/2009
License, Assignment, ContractInformation
10/22/2009
User Guides Summary Last Update
Getting Started with the HRMSPayroll Interface
Setting Up Your HRMS System toSync with Payroll
01/24/2008
Query Builder - Contact DPI HelpDesk and ask for HRMS Support
Running Queries using HRMSQuery Builder
page 566 / 707

HRMS Communication Site
HRMS Help > Register
User Roles: System AdministratorLast Updated: Nov 12, 2013 1:07 pm
The "Register" option on the HRMS Home Page allows anyone with the Administrator role to add newusers to the system.
After selecting "Register", the screen below appears. All fields are required. After completing all fields,click on the "Register" button. (Note that after clicking on the "Register" button, the system may takeseveral seconds to respond with a "Successful" message.)
User Name: (Maximum 9 characters. Note that the 3 character "Site Code" will be appended tothe beginning of the UserName. For example, if you enter JDOE in the UserName field, the actualUserName created will be xxxJDOE, where xxx is your LEA code.)Password: (Maximum 10 characters)Confirm Password: (Maximum 10 characters. Must match Password.)Social Security #: User's SSNPrefix: (Mr., Mrs. etc....selected from dropdown list.)First Name: User's First NameLast Name: User's Last NameEmail: User's Email AddressPrimary School#: (Select from dropdown list of "Sites"). (Note that anyone given the"Principal/Hiring Agent" role will be able to see information for staff in positions at this site, whenon the "Principal's Page".)Job Description: (Select from the dropdown list of Job Descriptions).
page 567 / 707

HRMS Communication Site
When a staff member is first registered, they have no rights/roles except to login. Select "Setup", "ManageUsers" from the HRMS Home Page to grant rights/roles.
page 568 / 707
HRMS Communication Site
HRMS Help > Reporting Tool > Selection Criteria > Renewal Cycle ending on
Last Updated: Dec 12, 2011 10:26 am
This option is available on the various Standard Reports and Letters. It is used to select employeeswhose current Licensure Renewal Cycle ends on June 30th of a specific year.
How To
This option is required on some reports and optional on others.
Enter a 4-digit year to select employees whose current Renewal Cycle ends on June 30th of that year.
page 569 / 707

HRMS Communication Site
HRMS Help > Continuing Education > Renewal List
User Roles: Continuing Education Editor, Continuing Education Viewer, System AdministratorLast Updated: Aug 31, 2017 7:52 am
The Renewal List allows you to view Renewal Credit History for specific employees or specific courses.
To access the Renewal List, go to: HRMS Home > Continuing Ed > Renewal List
The Renewal List form will display.
Viewing Credits for a Specific Employee
1. Enter an employee's SSN in the Search value box (or click the Pick Employee button to find anemployee).
2. Click the SSN button.
The CEU Employee History form will display. This form includes a complete history of the employee'srenewal credits, and is the same form that can be accessed from the Employee Demographics page.
Viewing Credits by Class Code
1. Check/uncheck the Exact box depending on whether you know the exact Class Code.2. Enter the full Class Code (or the first few characters) in the Search value box.3. Click the Class Code button.
A list of Renewal Credits for matching classes will display.
Click on an individual row in the grid to display the CEU Employee History form for the selectedemployee.Scroll to the right to view the Course Description.Up to 50 rows display per page. Use the navigation options above the search results to movethrough the results.
page 570 / 707

HRMS Communication Site
Viewing Credits by Class Description
1. Uncheck the Exact box unless you know the exact Class Description.2. Enter text contained anywhere in the Class Description in the Search value box.3. Click the Class Description button.
The same information is returned as described above for the Class Code option.
page 571 / 707

HRMS Communication Site
HRMS Help > Reporting Tool > Selection Criteria > Report Period
Last Updated: Dec 12, 2011 10:28 am
This option is available on the Teacher Turnover and Beginning Teacher Turnover Reports. It is usedto specify a date range for which to identify teachers who left teaching or remained an active teacher.
How To
Enter Start and End dates or click the down arrow to use the calendar to select dates.
page 572 / 707

HRMS Communication Site
HRMS Help > Reporting Tool > Selection Criteria > Report Title
Last Updated: Dec 12, 2011 10:29 am
This option is available on various Standard Reports. It is used to specify the report title that prints atthe top of each page of the report.
How To
This is a required entry.
Enter a Report Title as you want it to display on the report.
page 573 / 707
HRMS Communication Site
HRMS Help > Reporting > Reporting Tool
User Roles: Any user with Reporting Tool installed on PCLast Updated: Dec 4, 2017 8:24 am
The Reporting Tool application includes the reports and letters listed below. Although these reports arestill available in the old Reporting Tool, those versions have not been updated to meet current businessrequirements.
Standard Reports
Beginning Teacher ReportsBoard ReportsContinuing Education Class TemplatesContinuing Education History by ClassContinuing Education History by EmployeeEEO-5 ReportsEmployee ListingLicensure ReportNCLB Licensed HQ Qualifications ReportsNew Hire ReportParaprofessional ReportsPersonnel DirectoryProfessional Development ReportPublic Records ReportsSS-200 ReportsSS-300 ReportsSubstitute ListingTeacher Turnover ReportsTips for Exporting Reports
For a PowerPoint presentation of exporting data from the HRMS Reporting Tool, contact HRMS Support.
Contracts & Letters
Contracts & Cover LettersContract Non-Renewal LettersExpiring License LetterLicense Renewal LetterCustom Contracts & LettersCreate Address File for Merge
page 574 / 707

HRMS Communication Site
General
Installing & UpgradingSetting the TCP/IP AddressLogging InGetting StartedSelection CriteriaSQL LoggingTCP/IP SettingsAdvanced Properties
page 575 / 707
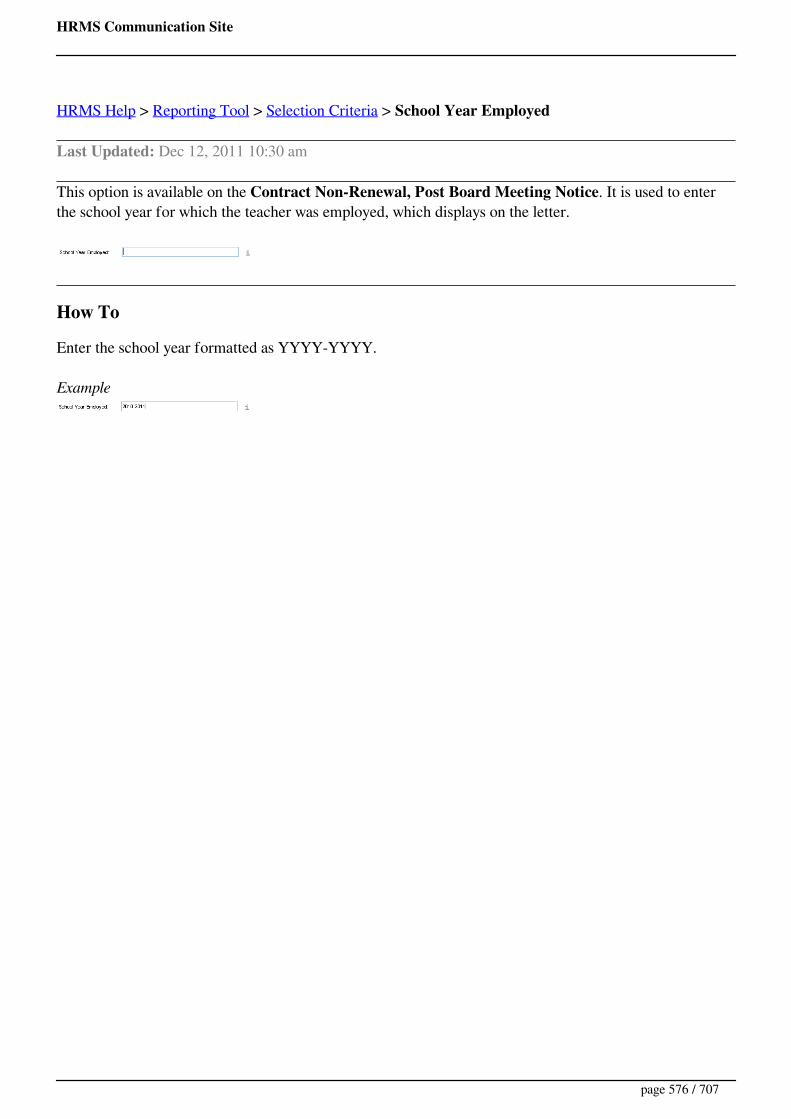
HRMS Communication Site
HRMS Help > Reporting Tool > Selection Criteria > School Year Employed
Last Updated: Dec 12, 2011 10:30 am
This option is available on the Contract Non-Renewal, Post Board Meeting Notice. It is used to enterthe school year for which the teacher was employed, which displays on the letter.
How To
Enter the school year formatted as YYYY-YYYY.
Example
page 576 / 707

HRMS Communication Site
HRMS Help > Employees > Staffing > Search Applications
User Roles: Principal/Hiring Agent, Applicant Viewer, Applicant Screener, Applicant Entry, PositionEditor, System AdministratorLast Updated: Dec 4, 2017 7:14 am
The Search Historic Applicants feature provides a way to find historic applications submitted from theformer School Jobs Application System.
Instructions
1. Enter one of the following:Last Name or first few letters of Last NameLast Name and First Initial (must be exact)SSN or last few digits of SSN
2. Check the Exact box if you entered an exact search value.3. Select the applicable radio button.4. Click the Search button at the bottom of the form.
page 577 / 707
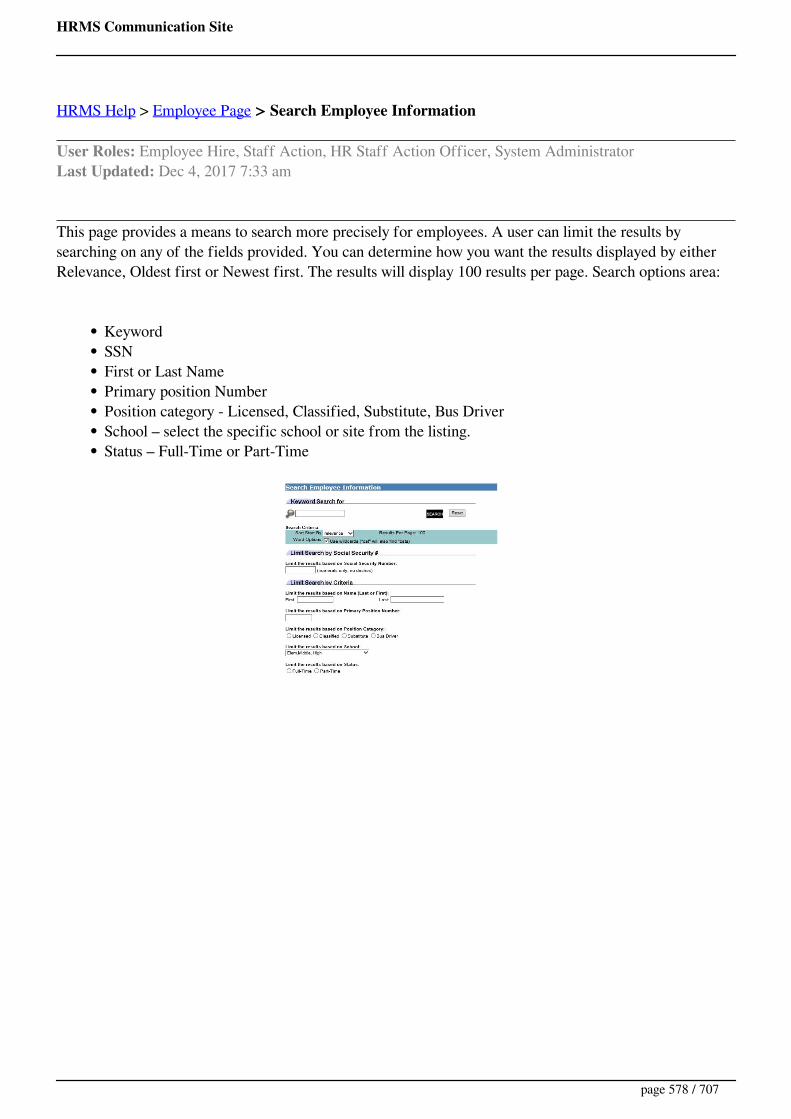
HRMS Communication Site
HRMS Help > Employee Page > Search Employee Information
User Roles: Employee Hire, Staff Action, HR Staff Action Officer, System AdministratorLast Updated: Dec 4, 2017 7:33 am
This page provides a means to search more precisely for employees. A user can limit the results bysearching on any of the fields provided. You can determine how you want the results displayed by eitherRelevance, Oldest first or Newest first. The results will display 100 results per page. Search options area:
KeywordSSNFirst or Last NamePrimary position NumberPosition category - Licensed, Classified, Substitute, Bus DriverSchool – select the specific school or site from the listing.Status – Full-Time or Part-Time
page 578 / 707
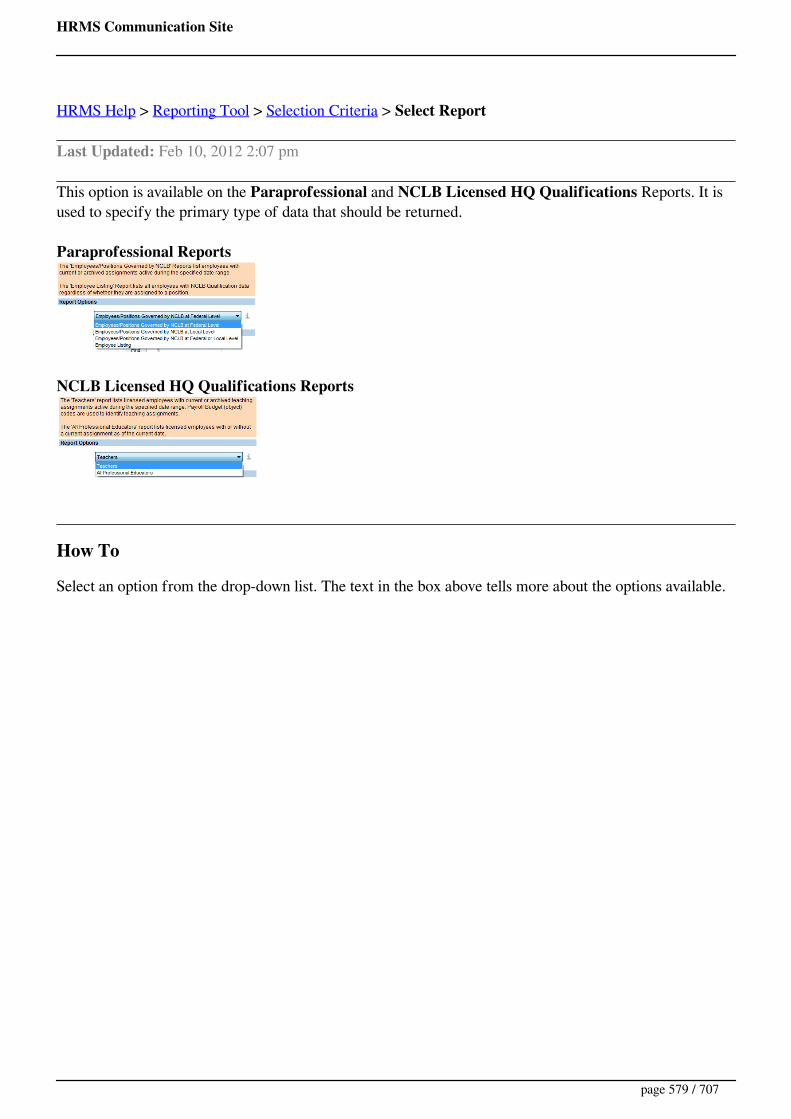
HRMS Communication Site
HRMS Help > Reporting Tool > Selection Criteria > Select Report
Last Updated: Feb 10, 2012 2:07 pm
This option is available on the Paraprofessional and NCLB Licensed HQ Qualifications Reports. It isused to specify the primary type of data that should be returned.
Paraprofessional Reports
NCLB Licensed HQ Qualifications Reports
How To
Select an option from the drop-down list. The text in the box above tells more about the options available.
page 579 / 707
HRMS Communication Site
HRMS Help > Reporting Tool > Selection Criteria
User Roles: Any user with Reporting Tool installed on PCLast Updated: Dec 20, 2011 11:14 am
When you select a report from the menu, the Selection Criteria panel displays* on the left side of thewindow. Click the "i" icon next to any selection option to view help for that option.
Example
*The SS-200, SS-300, and Continuing Education Class Template Reports do not have any Selection Criteria.These reports run automatically when selected from the reports menu.
Selection Options in Alphabetical Order
1. Assignment Type2. Assignments Active Between3. Assignments Active On4. Board Action Date5. CC Names & Titles6. Certified Mail Number7. Class Code8. Class Completed on9. Class Completed on or After
10. Class Credits11. Class Description12. Class Period13. Class Source14. Contact By Date15. Contract Created on or After16. Contract Type17. Create Address File for Mail Merge18. Current Assignment with End Date19. Daily-Hourly Rate20. Employee Status21. Export Report Data22. Hide LEA Address23. HQ - Non-HQ24. Include Only Core Academic Areas25. Include Protected Addresses26. Include Signature Line
page 580 / 707
HRMS Communication Site
27. Include Site Name on Contract28. Include Telephone Numbers29. Include Unlisted Home Phone Numbers30. Last Hire Date between31. License Area Effective Date32. License Expiring On33. License Status34. License Type35. Next School Year36. Output Type37. Personnel Manager Name & Title38. Phone Number39. Pick Employee Statuses40. Pick Employees41. Pick Licensure Areas42. Pick Position Descriptions43. Pick Position Titles44. Pick Sites45. Pick Sites (Substitutes)46. Position Type47. Primary - Non-Primary48. Prior Renewal Cycle ending on49. Program Codes50. Renewal Cycle ending on51. Report Period52. Report Title53. School Year Employed54. Select Report55. Sort by56. SSN (Display)57. Subject58. Substitute Grades59. Substitute Type60. Template61. Tenure Status62. Years Experience
page 581 / 707

HRMS Communication Site
HRMS Help > Employee Page > Employee Demographics > Staff Actions > Separation
User Roles: System Administrator, HR Staff Action Officer, Staff Action Clerk, Separation Editor,Separation Viewer (Separation Viewer can only view Separation Details.)Last Updated: Jan 23, 2013 9:33 am
Printer friendly
Table of ContentsQuick Facts
Creating a Separation
Editing a Separation
Removing a Separation
Quick Facts
A new Separation Editor role has been created. This role will have authority for creating, editing,and removing Separations.A new Separation Viewer role has also been created. The new Separation Viewer role will have“view” only permissions for Separations via the ‘Separation Details’ form.For details about Separation staff actions, see the Staff Action History section at the bottom of the‘Separation Details’ form. A “Print” button is also included on this form. This affords LEAs aconvenient mechanism for capturing the staff action made by HR personnel and sending a copy toPayroll.Use Web Report 000129 - Separation and Employee Termination Date Errors to view and clean upissues related to Separations converted as part of the LEA V6.3 release.
Creating a Separation
Accessed from the Employee Demographics Staff Actions menu under Staff Action Console
page 582 / 707

HRMS Communication Site
To create a Separation, select Create Separation from the menu at the top of the Staff ActionConsole.
The Create Separation form appears.
Select Employment Statusfrom the drop-down list (required)Enter the Effective Date(required)
This is normally the Last Day Worked. For Retirement, this is the last day the employeewill be in payroll status
Enter the Last Day Employed(required)Usually same as Effective Date, but may be later if employee is using leave
Enter the Stop Insurance Date, if knownSelect Eligible for Rehire?The system defaults to Yes.
If No, then the system will prompt you to add employee to Do Not Hire List before creatinga separationDo Not Hire List can be accessed via Employee Demographics Staff Actions menu
Enter Rehire Eligibility Date(required field if Eligible for Rehire is Yes)System defaults the date to the Separation Effective Date + 1 dayIf Retirement is selected, system defaults the date to Retirement Date + 6 monthsIf the employee is not eligible for rehire immediately, enter the date that they will beeligible
Other fields will display depending on Employment Status selected
For Dismissal
page 583 / 707

HRMS Communication Site
Dismissed for Disciplinary Reasons?Yes or No (required) If Yes, Answer the following:Was this action authorized by the local Board of Education?If No, this question will not be required.
For Retirement
Enter Retirement Date(Always 1st of month) (On or after last day employed) (required)Select Benefits StatusEnter Total Local Aggregate Service, if knownEnter Total State of NC Service, if known
For Non-Renewal
Select Reason(required)Was Employee Notified?Yes or NoIf Yes, enter the Date Notified and By Whom?(required)If No, Date Notified and By Whom will not appear
For Resignation in Lieu of Dismissal
Was this the Result of Disciplinary Action that had been Initiated?Yes or No (required)Was this done with the consent of the LEA Superintendent? Yes or No (required)
For Withdrew Offer of Employment
page 584 / 707

HRMS Communication Site
Select Mark Candidate Subpar? Yes or No (required)
Bottom of Create Separation Form
Enter Comments regarding this separation (Maximum 1000 characters)
Select Post on Board Report:Yes or NoEnter the Board Report Date:(required if Post on Board Report is Yes)Click Add Separation to save the Separation record
If the Separation is added successfully:The system will take you to the Separation Details formIf this employee has a (primary) current assignment and no outstanding Vacancy Permitexists for this position, the following question will be displayed:
Should a Vacancy Permit be created for the employee’s primary assignment? (Youmay need to create additional vacancy permits if the employee has multipleassignments.)Select Okay or Not Right Now. If you select Okay, then the system will take you tothe Vacancy Permit form, with the Position number for the employee’s currentprimary position pre-populated.
Background processing performed when the Separation is added:Assignments that start before and end after the Separation Effective Date (including thosewith no end date) will be set to end on the Separation Effective Date.The employee’s termination date is set to the Separation Effective Date.A Pending Status Change record is written (so that the employee’s Employment StatusCode is updated when the Separation Effective Date is reached.)If the employee is assigned to any positions, the Position Status is set to “Pending Vacant”.
page 585 / 707

HRMS Communication Site
Editing a Separation
Accessed from the Staff Action ConsoleSelect the Separation record to be edited
The Separation Detailsform appears.To edit a Separation, select Edit Separation from the menu at the top of the Separation Detailsform.
The Edit Separation form appears.
page 586 / 707

HRMS Communication Site
All fields can be editedSee Creating Separations for specific field information.Special Notes:
Employment Status - The drop-down list will only include the Separation EmploymentStatuses associated with the category. If you need to change the Employment Status to onethat is not listed, you must remove the Separation and enter a new one.Effective Date - When modifying an archived Separation, you can change Effective Dateonly to another date in the past. Because the Separation has already taken place and theemployee has been removed from their assignment(s), the system cannot permit LEAs toeffectively reverse a Separation by changing the Effective Date to a current or future date.
If you need to change the Effective Date of an archived Separation to a date in thefuture, just wait until the new Separation Date has passed and then modify theEffective Date.If you enter an Effective Date that is in the past, the system will require you toconfirm that this date is correct. This is because it is too easy to enter the incorrectdate; if you accidentally enter a past date when it really should be a future date, theSeparation will be archived and become effective that night, thereby removing theemployee from their assignments.
Eligible for Rehire? This field displays only if (1) this is an active Separation (SeparationDate has not passed) or (2) If this is a past Separation, it is the employee’s most recentseparation and they have an inactive Employment Status.Once you have edited the separation record you have the following options:
Click Cancel to return to the Separation Details form without saving.Click Reset to reset all the fields on this form to their original values without savingany changes.Click Save to save your changes to the Separation record.
Note: Any time a Separation is edited, the system creates an audit trail record. If a hardcopy of the change is needed for the Payroll Department, the employee’s work Site, or theemployee’s file, we suggest that you perform the action, go to the Separation Details page,click on the Staff Action Type link in the ‘Staff Action History’ section, and print your hardcopy there. Changes made as a result of each action are highlighted in yellow.
Removing a Separation
page 587 / 707

HRMS Communication Site
Accessed from the Staff Action ConsoleSelect the Separation record to be removed
The Separation Details form appears.To remove a Separation, select Remove Separation from the menu at the top of the SeparationDetails form.
The Remove Separation form appears.
Select Post on Board Report: Yes or NoEnter the Board Report Date (required if Post on Board Report is Yes)Enter Notes about why this Separation was Removed
page 588 / 707

HRMS Communication Site
Click Save to remove the Separation record
The Separation record will be archived with a status of “Cancelled” on the Staff Action Console.
Background processing performed when a Separation is cancelled:If the employee is currently assigned to any positions:
Position Status is set to “Fully Staffed” if this employee’s assignment uses all theavailable fundingPosition Status is set to “Partially Staffed” if this employee’s assignment uses onlypart of the available funding
If an outstanding Vacancy Permit exists for the position, the system displays the followingmessage:
“The Separation was removed successfully. An outstanding Vacancy Permit existsfor the employee’s position, so you may need to remove the Vacancy Permit aswell.”
If this is an active Separation:The system removes the employee’s current Assignment End Dates that match theEffective Date of the separation.The system removes the employee’s Termination Date.The system cancels any pending status change records with an effective date thatmatches the Separation Effective Date and an Employment Status that matches theSeparation Employment Status.
If this is an archived Separation:If the Separation just cancelled is the employee’s most recent Separation, the systemremoves the employee’s Termination Date if it matches the Separation EffectiveDate.The system displays the following message:
Since the Separation Date has passed, this employee has already beenremoved from their assignments. Any current or future assignments thisemployee had previously will need to be added back manually. If this is anactive employee with no assignments, update their Employment Status onthe Substitute Profile form.”
The system blanks out the employee’s Rehire Eligibility Date (if one exists).
page 589 / 707
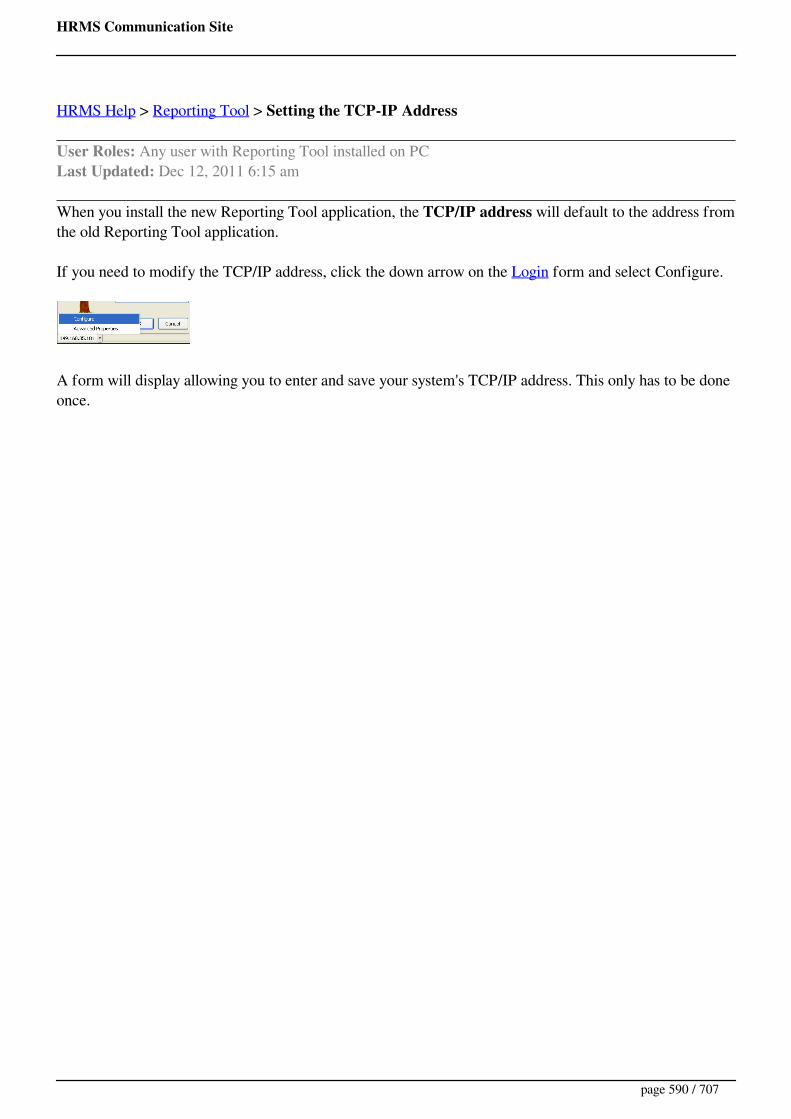
HRMS Communication Site
HRMS Help > Reporting Tool > Setting the TCP-IP Address
User Roles: Any user with Reporting Tool installed on PCLast Updated: Dec 12, 2011 6:15 am
When you install the new Reporting Tool application, the TCP/IP address will default to the address fromthe old Reporting Tool application.
If you need to modify the TCP/IP address, click the down arrow on the Login form and select Configure.
A form will display allowing you to enter and save your system's TCP/IP address. This only has to be doneonce.
page 590 / 707

HRMS Communication Site
HRMS Help > Site Staff > Site Assignment Information
User Roles: enter list of user rolesLast Updated: Dec 4, 2017 8:23 am
This page allows the user to search for all staff assigned to a specific site. The user keys in the site numberor can click Show Site List to return a list of sites. Once a site is selected or keyed, the screen will displaythe results.
page 591 / 707

HRMS Communication Site
HRMS Help > System Configuration > Site Contacts
User Roles: System AdministratorLast Updated: Dec 13, 2011 12:22 pm
The Site Contacts configuration form allows you to define multiple contacts for a Site for various roles.
One primary contact may be designated for each site. This will be the default contact when a vacancy iscreated for a position at that site.
To access the form, go to: HRMS Home > Setup > LEA Configuration > Site Contacts.
The Site Contacts form will display. Instructions follow the screen shot below.
To add a Site Contact, complete the applicable fields at the top of the form and click Add.
To edit a Site Contact, click the Site link in the first column, update any field as needed, and click Update.
To remove a Site Contact, check the box in the row for that Contact, and click Remove.configuration form allows you to define multiple contacts for a Site for various roles.
page 592 / 707
HRMS Communication Site
HRMS Help > System Configuration > Sites
User Roles: System Administrator Last Updated: Jun 12, 2013 6:19 am
The Site Settings configuration form allows you to add and maintain a list of Sites, including schools anddivisions, within your LEA. You must select a specific Site when defining a Position.
To access the form, go to: HRMS Home > Setup > LEA Configuration > Sites.
The Site Settings form will display. Instructions follow the screen shot below.
To add a Site, complete the applicable fields at the top of the form and click Add.
Site name is a unique name up to 30 characters long.Site code is a unique 3-character code.
To edit a Site, click the Site Code link in the first column, update any field as needed, and click Update.
page 593 / 707
HRMS Communication Site
HRMS Help > Reporting Tool > Selection Criteria > Sort by
Last Updated: Dec 12, 2011 10:33 am
This option is available on various Standard Reports. It is used to specify the sort order for the report.
How To
Select a sort order from the drop-down list. The options available differ from report to report.
page 594 / 707
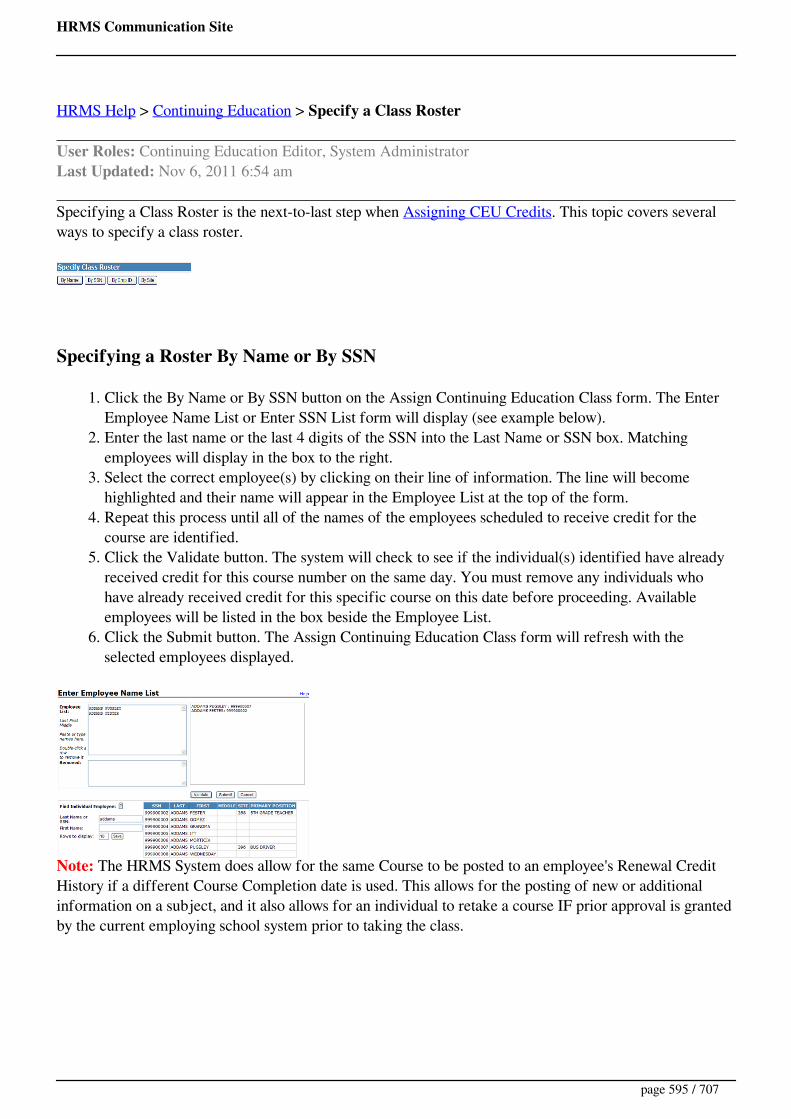
HRMS Communication Site
HRMS Help > Continuing Education > Specify a Class Roster
User Roles: Continuing Education Editor, System AdministratorLast Updated: Nov 6, 2011 6:54 am
Specifying a Class Roster is the next-to-last step when Assigning CEU Credits. This topic covers severalways to specify a class roster.
Specifying a Roster By Name or By SSN
1. Click the By Name or By SSN button on the Assign Continuing Education Class form. The EnterEmployee Name List or Enter SSN List form will display (see example below).
2. Enter the last name or the last 4 digits of the SSN into the Last Name or SSN box. Matchingemployees will display in the box to the right.
3. Select the correct employee(s) by clicking on their line of information. The line will becomehighlighted and their name will appear in the Employee List at the top of the form.
4. Repeat this process until all of the names of the employees scheduled to receive credit for thecourse are identified.
5. Click the Validate button. The system will check to see if the individual(s) identified have alreadyreceived credit for this course number on the same day. You must remove any individuals whohave already received credit for this specific course on this date before proceeding. Availableemployees will be listed in the box beside the Employee List.
6. Click the Submit button. The Assign Continuing Education Class form will refresh with theselected employees displayed.
Note: The HRMS System does allow for the same Course to be posted to an employee's Renewal CreditHistory if a different Course Completion date is used. This allows for the posting of new or additionalinformation on a subject, and it also allows for an individual to retake a course IF prior approval is grantedby the current employing school system prior to taking the class.
page 595 / 707
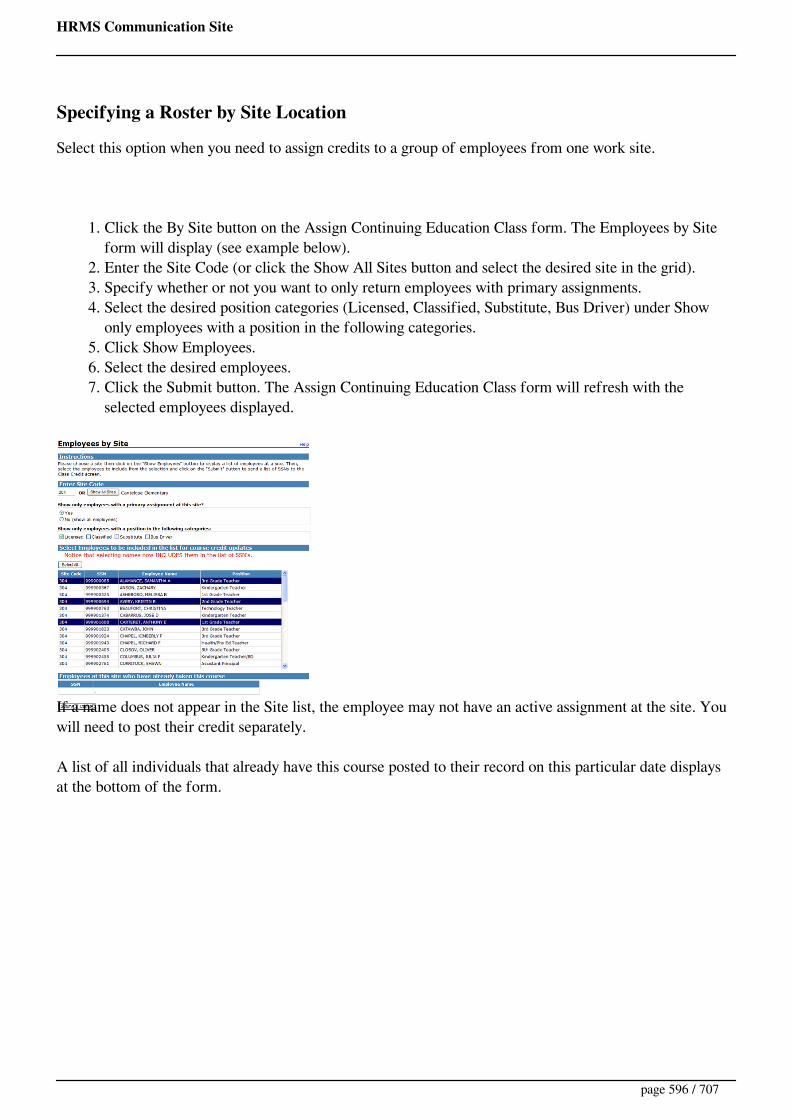
HRMS Communication Site
Specifying a Roster by Site Location
Select this option when you need to assign credits to a group of employees from one work site.
1. Click the By Site button on the Assign Continuing Education Class form. The Employees by Siteform will display (see example below).
2. Enter the Site Code (or click the Show All Sites button and select the desired site in the grid).3. Specify whether or not you want to only return employees with primary assignments.4. Select the desired position categories (Licensed, Classified, Substitute, Bus Driver) under Show
only employees with a position in the following categories.5. Click Show Employees.6. Select the desired employees.7. Click the Submit button. The Assign Continuing Education Class form will refresh with the
selected employees displayed.
If a name does not appear in the Site list, the employee may not have an active assignment at the site. Youwill need to post their credit separately.
A list of all individuals that already have this course posted to their record on this particular date displaysat the bottom of the form.
page 596 / 707
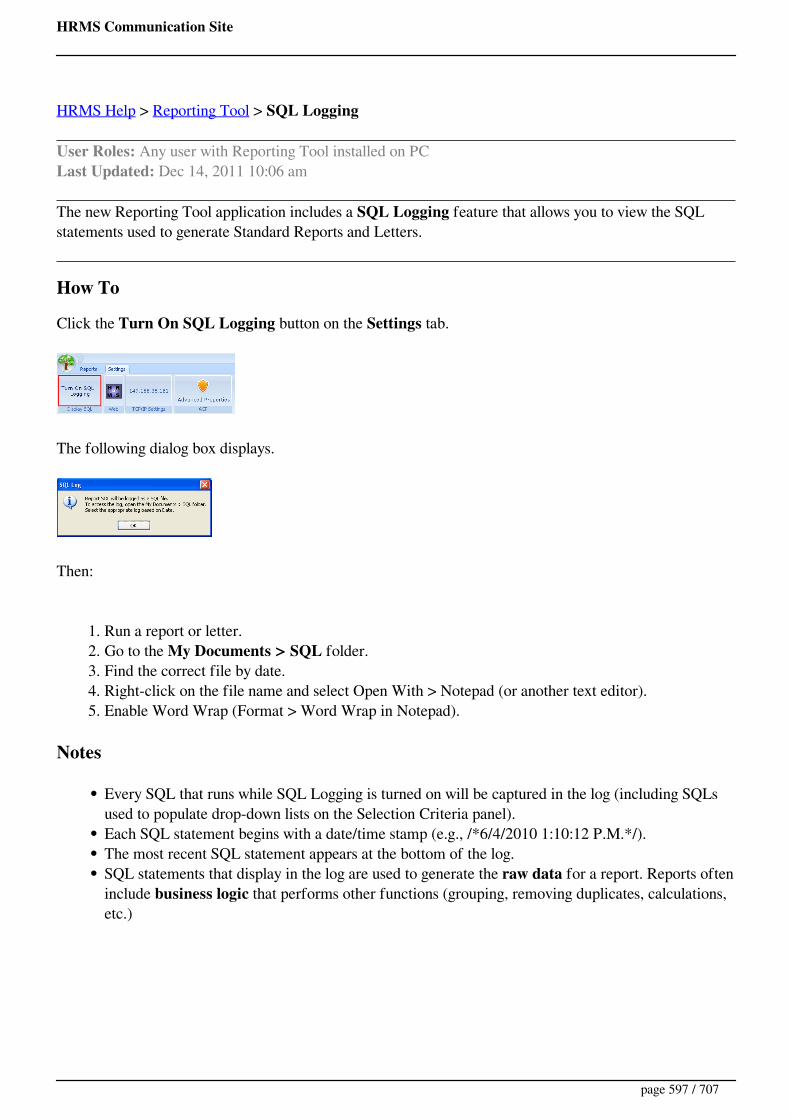
HRMS Communication Site
HRMS Help > Reporting Tool > SQL Logging
User Roles: Any user with Reporting Tool installed on PCLast Updated: Dec 14, 2011 10:06 am
The new Reporting Tool application includes a SQL Logging feature that allows you to view the SQLstatements used to generate Standard Reports and Letters.
How To
Click the Turn On SQL Logging button on the Settings tab.
The following dialog box displays.
Then:
1. Run a report or letter.2. Go to the My Documents > SQL folder.3. Find the correct file by date.4. Right-click on the file name and select Open With > Notepad (or another text editor).5. Enable Word Wrap (Format > Word Wrap in Notepad).
Notes
Every SQL that runs while SQL Logging is turned on will be captured in the log (including SQLsused to populate drop-down lists on the Selection Criteria panel).Each SQL statement begins with a date/time stamp (e.g., /*6/4/2010 1:10:12 P.M.*/).The most recent SQL statement appears at the bottom of the log.SQL statements that display in the log are used to generate the raw data for a report. Reports ofteninclude business logic that performs other functions (grouping, removing duplicates, calculations,etc.)
page 597 / 707
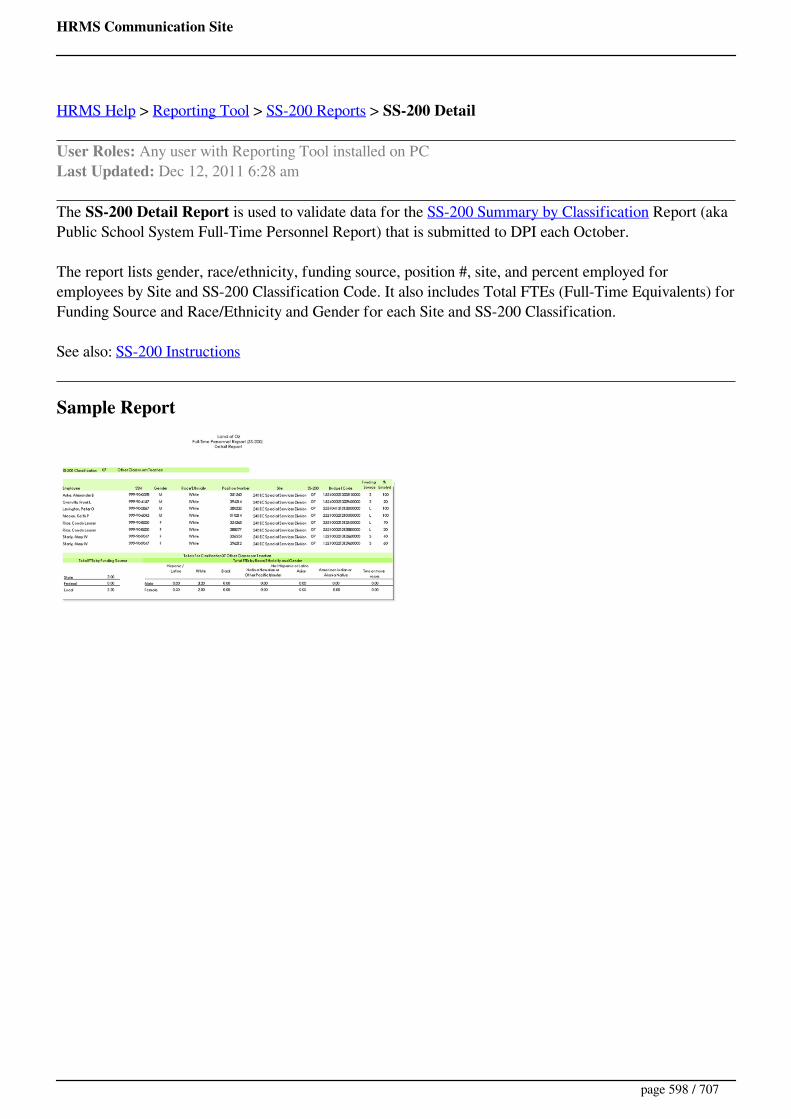
HRMS Communication Site
HRMS Help > Reporting Tool > SS-200 Reports > SS-200 Detail
User Roles: Any user with Reporting Tool installed on PCLast Updated: Dec 12, 2011 6:28 am
The SS-200 Detail Report is used to validate data for the SS-200 Summary by Classification Report (akaPublic School System Full-Time Personnel Report) that is submitted to DPI each October.
The report lists gender, race/ethnicity, funding source, position #, site, and percent employed foremployees by Site and SS-200 Classification Code. It also includes Total FTEs (Full-Time Equivalents) forFunding Source and Race/Ethnicity and Gender for each Site and SS-200 Classification.
See also: SS-200 Instructions
Sample Report
page 598 / 707

HRMS Communication Site
HRMS Help > Reporting Tool > SS-200 Reports > SS-200 Error
User Roles: Any user with Reporting Tool installed on PCLast Updated: Dec 12, 2011 6:27 am
The SS-200 Error Report is used to clean up data in preparation for the SS-200 Summary byClassification Report (aka Public School System Full-Time Personnel Report) that is submitted to DPIeach October.
The report provides details about error conditions for employees, positions, assignments, and budget codesthat need to be addressed prior to running the SS-200 Summary by Classification Report.
See also: SS-200 Instructions
SS-200 Error Messages and Tips
Error/Warning Message Explanation and Tips
Cannot calculate Percent Employed because HoursEmployed missing from the HRMS Assignmentrecord
This is an Hourly position and the assignment has novalue for Weekly Hours. The system needs this valueto calculate Percent Employed for Hourly positions.
Fix: Edit the assignment and enter a value forHours/Week.
Cannot calculate Percent Employed because PositionStandard Hours Missing
This is an Hourly position with no value for StandardHours. The system needs this value to calculatePercent Employed for Hourly positions.
Fix: Edit the position and enter a value forStandard Hours.
Employee has locally-defined Employee Status The employee's Employment Status is locallydefined, and the system cannot determine whetherthe employee is full-time or not.
Fix: If the employee should be included onthe SS-200 Report, go to the Edit Assignmentform and select one of the full-timeEmployment Statuses listed on the SS-200Overview help topic.
Employee has No Salaried or Hourly Assignments The employee's only position assignment in HRMS isa Flat Dollar assignment.
page 599 / 707

HRMS Communication Site
Fix: No fix necessary unless the employee hasa missing Salaried or Hourly assignment.
Gender Code Not Found for Employee The employee has no value for gender in HRMS.
Fix: Select a gender for the employee on theEmployee Demographics page.
Invalid Fund Code on Assignment Base Budget Code The Payroll Base Budget Code for the SSN andPosition # has a first digit of zero.
Fix: Contact Payroll to correct Budget Code.No Active Base Budget Codes found in Payroll forEmployee
The employee has a current assignment in HRMS butthere is no active Base Budget Code in Payroll forthe SSN and Position #.
Fix: Go to the Edit Assignment form todetermine if any Payroll Budget Codes withMissing/Invalid Budget Codes are listed. If aBase Budget Code is listed that applies to theassignment, enter the Position # on theBudget Code.
No HRMS Position Assignment for Employee The employee has a full-time employment status butis not assigned to a current position.
Fix: If the employee should be included onthe SS-200 Report, assign the employee to aposition.
Payment Method Not Valid for Assignment This is an old position that has not been updated touse a standard Payment Method. Standard PaymentMethods are Salaried, Hourly, and Flat Dollar.
Fix: Edit the position and change thePayment Method to one of the standardvalues.
Race/Ethnic Code Not Found for Employee The employee has no value for race and ethnicity inHRMS.
Fix: Select values for Hispanic/Latino? andWhich race(s) is this employee considered tobe? on the Employee Demographics page.
Salaried Employee's Percent Employed Missing fromPercent Employed is missing or zero on the Payroll
page 600 / 707

HRMS Communication Site
Payroll Assignment Record Base Budget Code for the SSN and Position #.
Fix: Contact Payroll to correct Budget Code.SS-200 Classification Code is missing The position contains a blank in the SS-200
Reporting Class.
Fix: Edit the position and select a validSS-200 Reporting Class on the Edit Positionform.
Warning: Total Percent Employed for Payroll BaseBudget Codes exceeds 100 Percent
The sum of Percent Employed on the Payroll BaseBudget Codes for the SSN and Position # exceeds100 Percent.
Fix: (1) If multiple Base Budget Codes aremapped to the SSN and Position #, you mayneed to go to the Payroll Position # Updateform and remove the HRMS Position # fromone of the Base Budget Codes. (2) ContactPayroll if there is an error on the PayrollBudget Codes.
Sample Report
page 601 / 707

HRMS Communication Site
HRMS Help > Reporting Tool > SS-200 Reports > SS-200 Instructions
User Roles: Any user with Reporting Tool installed on PCLast Updated: Jan 6, 2012 6:12 am
SS-200 Reporting Classifications
For the report to be accurate, the SS-200 Reporting Classification must be set properly for HRMSpositions. The SS-200 Classification is viewable on the View Position form and editable on the EditPosition form.
All positions should have their SS-200 classification marked; if a position does not need to be included onthe report, it should be marked with a ‘Do Not Report’ SS-200 classification.
Data Cleanup (Prior to Running the SS-200 Reports)
Run the following Web Reports to clean up your data before running the SS-200 Reports.
800001 - Payroll Employees Not in HRMS800006 - Active HRMS Employees Not in Payroll800004 - HRMS Employees with no Position Assignment800005 - Active Payroll Assignments with Missing/Invalid HRMS Position Numbers
Running the SS-200 Reports
1. Run the SS-200 ErrorReport.2. Review and correct errors as needed.3. Run the SS-200 DetailReport.4. Review and make changes as needed.5. Run the SS-200 Summary by SiteReport (optional).6. Review and make changes as needed.7. Repeat Steps 1 - 6 as needed.8. Run the SS-200 Summary by Classification Report.
page 602 / 707
HRMS Communication Site
HRMS Help > Reporting Tool > SS-200 Reports
User Roles: Any user with Reporting Tool installed on PCLast Updated: Aug 26, 2013 10:10 am
The SS-200 Report is an annual report used to generate the state required Public School System Full-Time Personnel Report (SS-200). The race/gender and funding source data of full-time personnelcompiled on this report is used by DPI to provide demographic information about public school employeesto various private and public organizations.
This report is run annually in October. DPI’s Statistical Research and Data Center notifies the LEAs eachyear of the report due date, usually October 31st, but sometimes as late as Thanksgiving.
The Summary by Classification Report is the information that is submitted to DPI.
The Error, Detail, and Summary by Site Reports are normally run first to clean up and validate the reportdata. Even before these reports are run, several steps should be taken to ensure data in HRMS and Payrollis up-to-date.
See SS-200 Instructions.
Selection Criteria
Full-Time employees who have a current HRMS assignment are selected. The following EmploymentStatuses are considered Full-Time:
01 - Permanent Full-Time10 - Interim with Full Benefits13 - Suspended with Pay14 - Retiree Return FT w/ No Benefits Under Earnings Cap17 - Retiree Return FT Outside Earnings Cap20 - Temporary Full-Time
Positions must have a valid SS-200 Reporting Classification in HRMS.
Payroll Budget Codes are selected by matching on SSN and HRMS Position #. Budget Codes must meetthe following criteria to be selected for the SS-200 report:
Must be a Base Budget Code (based on Object Code)Must have a Valid Fund Code (1st digit must be non-zero )For Salaried positions, Percent Employed > 0.For Hourly positions, HRMS Assignment Hours & Position Standard Hours > 0.
page 603 / 707

HRMS Communication Site
Rules for Determining Race/Ethnicity and Funding Source
If Hispanic/Latino? is set to 'Yes' on the Employee Demographics page, the employee is reported asHispanic/Latino (any Races selected are ignored).
If Hispanic/Latino? is set to 'No' on the Employee Demographics page:
If one Race is selected, the employee is reported as that Race.If multiple Races are selected, the employee is reported as 'Two or More Races'.
If the first digit of the Base Budget Code is:
1, Funding Source = State3, Funding Source = Federal2, 4, 5, 6, 7, 8, or 9, Funding Source = Local
Formulas for Calculating Percent Employed and FTEs
Percent Employed for each Assignment / Base Budget Code is calculated as follows:
For Salaried Positions, Percent Employed = Percent Employed on Payroll Base Budget Code.For Hourly Positions*, Percent Employed = HRMS Assignment Hours/Week / HRMS PositionStandard Hours x 100.If Percent Employed for a specific Budget Code exceeds 100, it is reported as 100 Percent.
Note: We cannot use Percent Employed on the Payroll Budget Code for Hourly employees becausethis field is valid in Payroll only for Salaried employees. Therefore, we must compute the PercentEmployed for hourly employees at the HRMS assignment level (instead of the budget code level).
FTEs (Full-Time Equivalents) in the report totals are calculated as follows:
Sum of Percent Employed from each detail line for each Fund Source or Race/Ethnicity andGender divided by 100.Because the totals represent FTEs and not head counts, they are not always listed as wholenumbers.
page 604 / 707
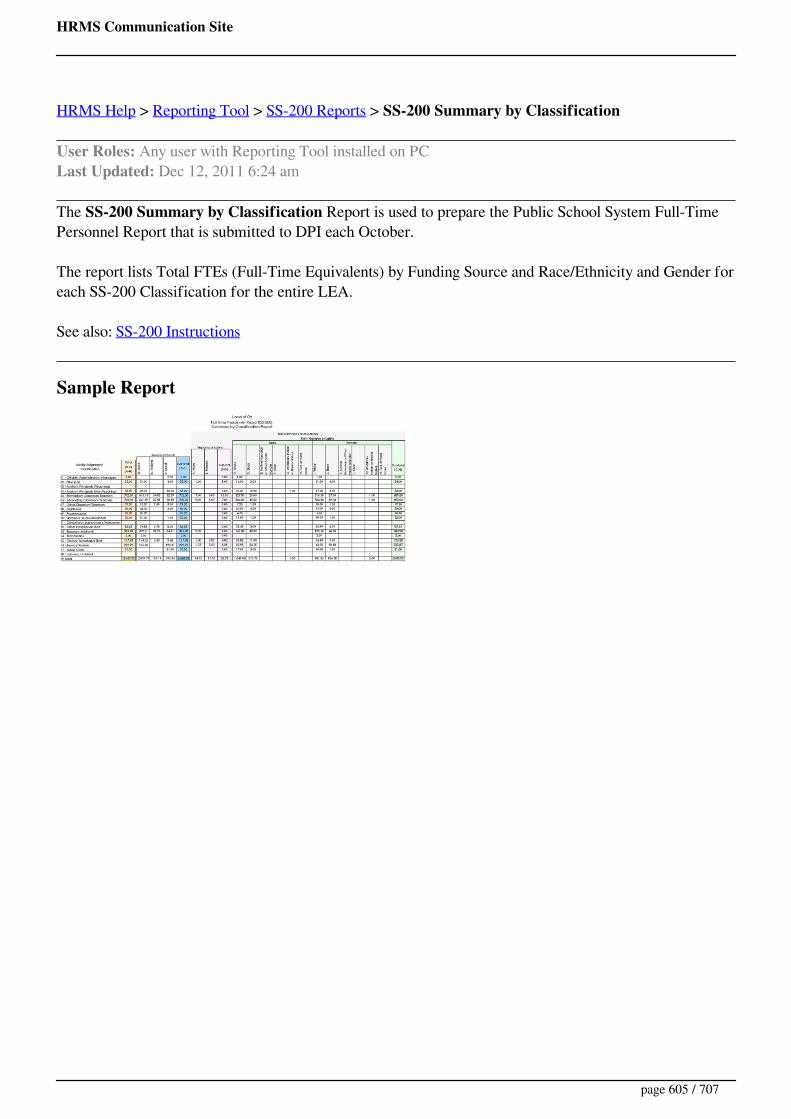
HRMS Communication Site
HRMS Help > Reporting Tool > SS-200 Reports > SS-200 Summary by Classification
User Roles: Any user with Reporting Tool installed on PCLast Updated: Dec 12, 2011 6:24 am
The SS-200 Summary by Classification Report is used to prepare the Public School System Full-TimePersonnel Report that is submitted to DPI each October.
The report lists Total FTEs (Full-Time Equivalents) by Funding Source and Race/Ethnicity and Gender foreach SS-200 Classification for the entire LEA.
See also: SS-200 Instructions
Sample Report
page 605 / 707

HRMS Communication Site
HRMS Help > Reporting Tool > SS-200 Reports > SS-200 Summary by Site
User Roles: Any user with Reporting Tool installed on PCLast Updated: Dec 12, 2011 6:32 am
The SS-200 Summary by Site Report is used to validate data for the SS-200 Summary by ClassificationReport (aka Public School System Full-Time Personnel Report) that is submitted to DPI each October.
The report lists Total FTEs (Full-Time Equivalents) by Funding Source and Race/Ethnicity and Gender foreach Site and SS-200 Classification.
See also: SS-200 Instructions
Sample Report
page 606 / 707

HRMS Communication Site
HRMS Help > Reporting Tool > SS-300 Reports > SS-300 Detail
User Roles: Any user with Reporting Tool installed on PCLast Updated: Dec 12, 2011 6:31 am
The SS-300 Detail Report is used to validate data for the SS-300 Summary Report (aka Local SalarySupplement Report) that is submitted to DPI each October.
The report lists budget code, percent employed, and total supplement for employees/assignments bySS-300 Classification Code. It also includes a Position Count, Supplement Count, and Minimum,Maximum and Total Supplement for each SS-300 Classification, and Grand Totals for the entire LEA.
See also: SS-300 Instructions
Sample Report
page 607 / 707

HRMS Communication Site
HRMS Help > Reporting Tool > SS-300 Reports > SS-300 Error
User Roles: Any user with Reporting Tool installed on PCLast Updated: Dec 12, 2011 6:30 am
The SS-300 Error Report is used to clean up data in preparation for the SS-300 Summary Report (akaLocal Salary Supplement Report) that is submitted to DPI each October.
The report provides details about error conditions for employees, positions, assignments, and budget codesthat need to be addressed prior to running the SS-300 Summary Report.
See also: SS-300 Instructions
SS-300 Error Messages and Tips
Error / Warning Message Explanation and Tips
Cannot calculate supplement because Employee’sHours Employed missing from the HRMSassignment record
This position has an active matching supplementbudget code in payroll with a payment method of ‘H’(Hourly), but the Hours Employed on the HRMSassignment is either missing or invalid. The programneeds a valid Hours Employed on the HRMSassignment in order to compute Percent Employedfor this assignment, since it cannot extract HoursEmployed from payroll files.
Fix: Log on to the HRMS Edit Assignmentform and enter the Hours Employed for theassignment.
Cannot calculate supplement because HRMSAdditional Pay record has neither flat dollar amountnor Salary Schedule
The program has selected an Additional Payassignment budget code from HRMS for thisposition where the Supplement Indicator = Yes, butthe record has neither a flat dollar amount enterednor a valid Salary Schedule, making it impossible forthe program to calculate a supplement amount forthis budget code.
Fix: Log on to the HRMS Edit Assignmentform, and select the Additional Pay budgetcode that contains the error. Enter either avalid flat dollar amount or a valid SalarySchedule/Grade/Step for this budget code.
Cannot calculate supplement because Months This position has an active matching supplement
page 608 / 707

HRMS Communication Site
Employed Missing or Invalid budget code in payroll, but the Months Employed ismissing or invalid. The program needs a validMonths Employed in order to compute thesupplement amount for this assignment.
Fix for Sartox LEAs: Months Employed istaken directly from the Months Employed inthe payroll assignment record. Log on to yourpayroll system and correct the MonthsEmployed on this payroll assignment record.Fix for ISIS LEAs: Months Employed istaken from the Term field in the HRMSPosition record. Log on to the HRMS EditPosition form and enter a valid Term for thisposition.
Cannot calculate supplement because Pay AmountMissing for Payroll Assignment
This position has an active matching supplementbudget code in payroll, but the salary amount ismissing or invalid. The program needs a valid salaryamount in order to compute the supplement amountfor this assignment.
Fix for Sartox LEAs: For Salaried employees,if the Step on the payroll assignment is blank,the salary amount is taken from theBeginning Gross field. For Hourlyemployees, if the Step on the payrollassignment is blank, the salary amount istaken from the Hourly Rate field. If the Stepis not blank, the program uses the SalarySchedule, Grade & Step to look up the salaryamount in your pay tables. Log on to yourpayroll system to look up this payrollassignment and correct the SalarySchedule/Grade/Step (if the salary amount isstored in a salary schedule); or enter thePayline Gross (for a Salaried employee) orthe Hourly Rate (for an Hourly employee) ifthe salary amount is not stored in a salaryschedule.Fix for ISIS LEAs: The program uses theSalary Schedule (Assignment ID), Grade &Step to look up the salary amount in your paytables. Log on to your payroll system to lookup this payroll assignment and modify the
page 609 / 707

HRMS Communication Site
Salary Schedule/Grade/Step, or correct thesalary amount in the pay table for the existingSalary Schedule/Grade/Step.
Cannot calculate supplement because SalariedEmployee’s Percent Employed missing from payrollassignment record
This position has an active matching supplementbudget code in payroll with a payment method of ‘S’(Salaried), but the Percent Employed on that budgetcode is either missing or invalid.
Fix: Log onto your payroll system and enter avalid Percent Employed on this payrollassignment record.
Cannot calculate supplement because SalarySchedule/Grade/Step and Flat Dollar Amount bothentered on Additional Pay budget code.
This position has a matching Additional Payassignment budget code in HRMS, but that recordcontains both a valid Salary Schedule/Grade/Stepcombination and a Flat Dollar Amount. The programcannot calculate the supplement amount because itdoes not know whether the intention was for thesupplement to be entered as a SalarySchedule/Grade/Step, or as a Flat Dollar Amount.
Fix: Log on to the HRMS Edit Assignmentform and remove either the SalarySchedule/Grade/Step or the Flat DollarAmount, so that only one or the other isincluded.
Cannot calculate Supplement because SalarySchedule/ Grade/Step on HRMS Additional Payrecord not found in Pay Table
This position has a matching HRMS Additional Payassignment budget code, but the SalarySchedule/Grade/Step combination for this budgetcode is invalid.
Fix: Log on to the HRMS Edit Assignmentform and enter a valid SalarySchedule/Grade/Step combination for thisbudget code.
Cannot calculate Supplement because SupplementAmount in Pay Table is 0 or invalid
This position has a matching HRMS Additional Payassignment budget code, but the salary amount in thepay table for the Salary Schedule/Grade/Step enteredis zero.
Fix: Check the pay table for the designatedSalary Schedule, Grade & Step, and enter avalid salary amount.
page 610 / 707
HRMS Communication Site
Cannot calculate supplement because Term invalidon HRMS Position Record
This position has a matching Additional Payassignment budget code in HRMS, but the Term onthis position in HRMS is invalid.
Fix: Log on to the HRMS Edit Position formand enter a valid Term for this position.
HRMS Position has invalid SS-300 Reporting Class This position contains an SS-300 Reporting Classthat is not a valid value.
Fix: Log on to the HRMS Edit Position formand select a valid SS-300 Reporting Class forthis position.
Payroll Supplement has unsupported PaymentMethod and no valid HRMS Additional Pay recordexists
This position has an active matching supplementbudget code in payroll but the Payment Method onthat assignment is not ‘S’ (Salaried) or ‘H’ (Hourly),and the position does not have a valid HRMSAdditional Pay assignment budget code either.
Fix: Change the Payment Method on thepayroll assignment to either ‘S’ or ‘H’. If thoseare not applicable pay methods for thisassignment, you may opt to enter thesupplement budget code in HRMS as anAdditional Pay Assignment Budget Codeinstead.
Position Not Assigned to SS-300 Reporting Class This position contains a blank in the SS-300Reporting Class, indicating that it has not yet beenassigned an SS-300 Reporting Class.
Fix: Log on to the HRMS Edit Position formand select the correct SS-300 Reporting Classfor this position.
Supplement cannot be calculated because HoursEmployed missing from HRMS Additional Payrecord
This position has a matching Additional Payassignment budget code in HRMS with a paymentmethod of ‘H’ (Hourly), but the Hours Employed onthe Additional Pay assignment budget code ismissing or invalid. The program needs a valid HoursEmployed on the Additional Pay budget code inorder to compute the Percent Employed and thesupplement amount.
page 611 / 707
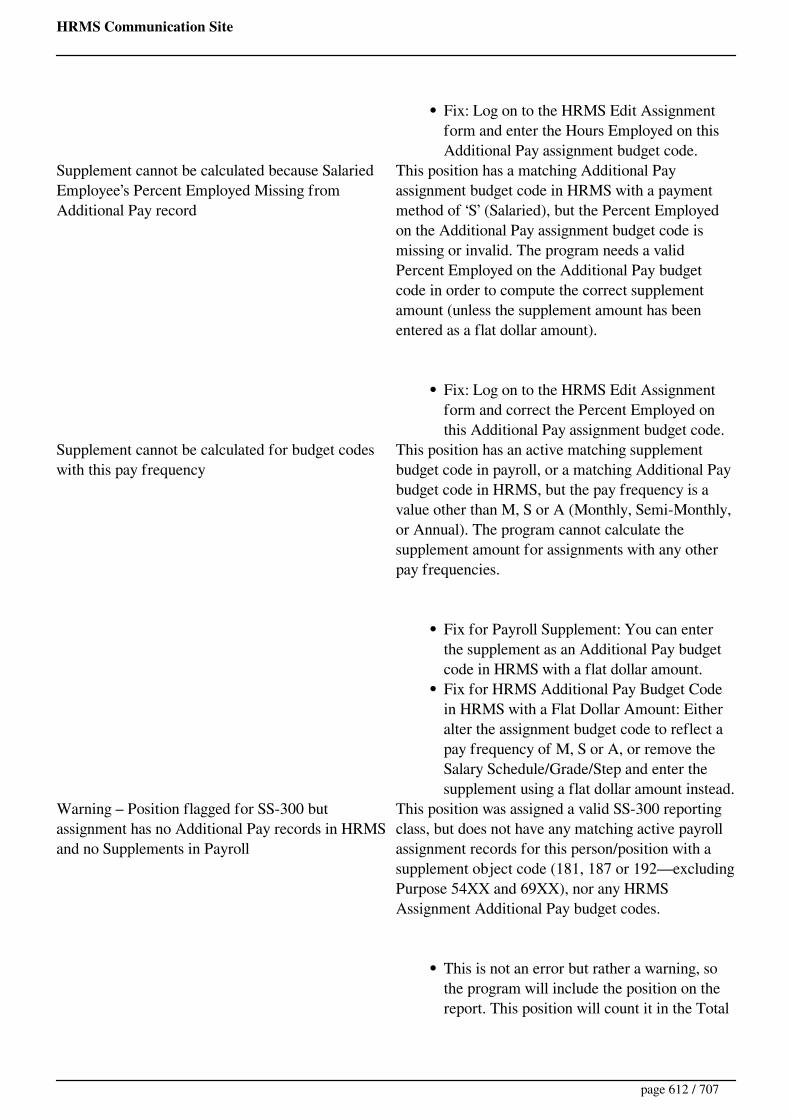
HRMS Communication Site
Fix: Log on to the HRMS Edit Assignmentform and enter the Hours Employed on thisAdditional Pay assignment budget code.
Supplement cannot be calculated because SalariedEmployee’s Percent Employed Missing fromAdditional Pay record
This position has a matching Additional Payassignment budget code in HRMS with a paymentmethod of ‘S’ (Salaried), but the Percent Employedon the Additional Pay assignment budget code ismissing or invalid. The program needs a validPercent Employed on the Additional Pay budgetcode in order to compute the correct supplementamount (unless the supplement amount has beenentered as a flat dollar amount).
Fix: Log on to the HRMS Edit Assignmentform and correct the Percent Employed onthis Additional Pay assignment budget code.
Supplement cannot be calculated for budget codeswith this pay frequency
This position has an active matching supplementbudget code in payroll, or a matching Additional Paybudget code in HRMS, but the pay frequency is avalue other than M, S or A (Monthly, Semi-Monthly,or Annual). The program cannot calculate thesupplement amount for assignments with any otherpay frequencies.
Fix for Payroll Supplement: You can enterthe supplement as an Additional Pay budgetcode in HRMS with a flat dollar amount.Fix for HRMS Additional Pay Budget Codein HRMS with a Flat Dollar Amount: Eitheralter the assignment budget code to reflect apay frequency of M, S or A, or remove theSalary Schedule/Grade/Step and enter thesupplement using a flat dollar amount instead.
Warning – Position flagged for SS-300 butassignment has no Additional Pay records in HRMSand no Supplements in Payroll
This position was assigned a valid SS-300 reportingclass, but does not have any matching active payrollassignment records for this person/position with asupplement object code (181, 187 or 192—excludingPurpose 54XX and 69XX), nor any HRMSAssignment Additional Pay budget codes.
This is not an error but rather a warning, sothe program will include the position on thereport. This position will count it in the Total
page 612 / 707

HRMS Communication Site
Position Count within the appropriatereporting class, but no supplement amountsfor this position can be calculated.
Warning – Position has Supplement in Payroll andAdditional Pay record in HRMS
This position has been selected for processing andthe program found both valid payroll assignmentsand valid Additional Pay records in HRMS. Thiswarning message is issued to alert the LEAs that theyshould check to ensure that budget codes (andsupplements) have not been duplicated between theirPayroll and HRMS systems, which could result indoubling of supplement amounts computed.
This is not an error but rather a warning, sothe program will continue to include theposition. Check to ensure that thesupplement(s) recorded in payroll are notduplicated in HRMS Additional Payassignment records.
Sample Report
page 613 / 707

HRMS Communication Site
HRMS Help > Reporting Tool > SS-300 Reports > SS-300 Instructions
User Roles: Any user with Reporting Tool installed on PCLast Updated: Nov 21, 2017 10:19 am
SS-300 Reporting Classifications
For the report to be accurate, the SS-300 Reporting Classification must be set properly for HRMSpositions. The SS-300 Classification is viewable on the View Position form and editable on the EditPosition form.
All positions should have their SS-300 classification marked; if a position does not need to be included onthe report, it should be marked with a ‘Do Not Report’ SS-300 classification.
Data Cleanup (Prior to Running SS-300 Reports)
Run the following Web Reports to clean up your data before running the SS-300 Reports.
800001 - Payroll Employees Not in HRMS800006 - Active HRMS Employees Not in Payroll800004 - HRMS Employees with no Position Assignment800005 - Active Payroll Assignments with Missing/Invalid HRMS Position Numbers800002 - Employees with Additional Pay Budget Codes in HRMS
Budget Code Tips
See SS-300 Reports, Selection Criteria, for details on how Payroll and HRMS Additional Pay Budget Codesare selected for the SS-300 Reports.
If a Position Assignment has a valid Payroll Supplement and a valid HRMS Additional Pay Budget Code,both will be included on the SS-300 reports (but will appear as a Warning on SS-300 Error Report).
To exclude a Payroll Budget Code from the SS-300 report, remove the HRMS Position # from that PayrollBudget Code.
HRMS provides two options for updating the Payroll HRMS Position #:
Using the Payroll HRMS Position # Reconciliation Tool – This method is recommended if you arestarting from scratch or have not been regularly maintaining HRMS Position #s in Payroll.Using the Edit Assignment form – This method is useful if you have only a few Payroll records toupdate.
Additional Pay Budget Codes should only be entered in HRMS if:
page 614 / 707
HRMS Communication Site
Payroll Supplement does not exist or is not active when the SS-300 is run (or if the Supplement ishandled as a “quick pay” and no assignment record exists in Payroll), orPayroll Supplement is not valid (e.g., Pay Method = Other; Frequency not M, S, or A).
To exclude an HRMS Additional Pay Assignment Budget Code from the SS-300 report, set its Supplementindicator to ‘No’ from the Edit Assignment form.
Running the SS-300 Reports
1. Run the SS-300 Error Report.2. Review and correct errors as needed.3. Run the SS-300 Detail Report.4. Review and make changes as needed.5. Repeat Steps 1 - 4 as needed.6. Run the SS-300 Summary Report.
page 615 / 707

HRMS Communication Site
HRMS Help > Reporting Tool > SS-300 Reports
User Roles: Any user with Reporting Tool installed on PCLast Updated: Oct 8, 2012 1:08 pm
The SS-300 Report is an annual report used to generate the state-required Local Salary SupplementReport (SS-300). This report is used to determine how many positions an LEA has, and how many of thosepositions receive local salary supplements. Supplement is defined as the amount of locally paid money toaugment the salary of a position over and above the state salary schedule. The Information Center at DPIuses this data to publish the Local Salary Supplement for NC Schools and City Units report and todetermine the average teacher’s salary within the state.
This report is run annually in October. DPI’s Statistical Research and Data Center notifies the LEAs eachyear of the report due date, usually October 31st, but sometimes as late as Thanksgiving.
The Summary Report is the information that is submitted to DPI.
The Error and Detail Reports are normally run first to clean up and validate the report data. Even beforethese reports are run, several steps should be take to ensure data in HRMS and Payroll is up-to-date.
See SS-300 Instructions.
Selection Criteria
Employees with a current HRMS assignment are selected.
Positions must have a valid SS-300 Reporting Classification in HRMS.
The SS-300 Reports include the following budget code types:
Supplement Budget Codes from Payroll– Payroll Budget Codes are selected by matching onSSN and HRMS Position #. Payroll Supplements must meet the following criteria to be selected forthe SS-300 report:
Object Code = 181, 187 or 192 (Note: Budget Codes with an Object Code of 192 andpurpose code of 54XX or 69XX are excluded.)Payment Method = Salaried or HourlyIf Payment Method is Salaried, Percent Employed > 0If Payment Method is Hourly, HRMS Assignment Hours > 0Months Employed > 0Gross Pay > 0Pay Frequency = Monthly, Semi-monthly, or Annual
Additional Pay Budget Codes with Flat Dollar Amounts from HRMS– HRMS Additional Pay
page 616 / 707

HRMS Communication Site
Budget Codes are selected by reading the HRMS Assignment Budget Code table and matching onSSN and Position. Flat Dollar Additional Pay Budget Codes must meet the following criteria to beselected:
Pay Type = Additional PaySupplement Indicator = 'Yes'Flat $ amount > 0Position Pay Method = Salaried, Hourly, or Flat Dollar
Additional Pay Budget Codes with Salary Schedule/Grade/Step from HRMS– HRMSAdditional Pay Budget Codes are selected by reading the HRMS Assignment Budget Code tableand matching on SSN and Position. Additional Pay Budget Codes with Salary Schedule/Grade/Stepmust meet the following criteria to be selected:
Pay Type = Additional PaySupplement Indicator = 'Yes'Salary Schedule/Grade/Step must be valid.Flat $ amount = 0Gross Salary Amount for Salary Schedule/Grade/Step > 0Pay Frequency for Schedule/Grade/Step = Monthly, Semi-Monthly, or AnnualPosition Pay Method = Salaried or HourlyIf Position Pay Method is Salaried, Percent Employed on Budget Code > 0If Position Pay Method is Hourly, Hours on Budget Code > 0Position Term must be valid.
Base Budget Codes from Payroll– Payroll Budget Codes are selected by matching on SSN andHRMS Position #. Payroll Base Budget Codes must meet the following criteria to be selected forthe SS-300 report:
The assignment must not have any valid Payroll Supplement Budget Codes OR any validHRMS Additional Pay Budget Codes.Must have one of the following Object Codes: 111, 112, 113, 114, 115, 116, 117, 118, 121,122, 123, 124, 128, 131, 132, 133, 134, 135, 141, 142, 143, 144, 145, 146, 147, 148, 149,151, 152, 153, 164, 171, 173, 174, 175, 176, 177, 178, 195, or 198.
Formulas for Calculating Annual Supplements
Payroll Supplement Budget Codes - These budget codes usually have their supplement amountcalculated by using the Salary Schedule/Grade/Step. (Some LEAs do not use Grade & Step, but the dollaramount for those assignments is stored in the Payroll Beginning Gross field. Gross Pay includes thesupplement amount retrieved from Payroll for each budget code). Unless noted, all values are taken fromthe Payroll Budget Code.
If Pay Method is Salaried:If Pay Frequency is Monthly: Annual Supplement = Gross Pay x (Percent Employed / 100)x Months EmployedIf Pay Frequency is Semi-Monthly: Annual Supplement = Gross Pay x (Percent Employed /100) x Months Employed x 2
page 617 / 707

HRMS Communication Site
If Pay Frequency is Annual: Annual Supplement = Gross Pay x (Percent Employed / 100)If Pay Method is Hourly:
Annual Supplement = Gross Pay x (HRMS Assignment Hours x Months Employed x4.3333)
HRMS Additional Pay Budget Codes with Flat Dollar Amount
Annual Supplement = Flat $ Amount
HRMS Additional Pay Budget Codes with Salary Schedule/Grade/Step
If Position Pay Method is Salaried:If Pay Frequency for Salary Schedule/Grade/Step is Monthly: Annual Supplement = SalaryAmount for Salary Schedule/Grade/Step x (Percent Employed for Budget Code / 100) xPosition TermIf Pay Frequency for Salary Schedule/Grade/Step is Semi-Monthly: Annual Supplement =Salary Amount for Salary Schedule/Grade/Step x (Percent Employed for Budget Code /100) x Position Term x 2If Pay Frequency for Salary Schedule/Grade/Step is Annual: Annual Supplement = SalaryAmount for Salary Schedule/Grade/Step x (Percent Employed for Budget Code / 100)
If Position Pay Method is Hourly:Annual Supplement = Salary Amount for Salary Schedule/Grade/Step x Hours for BudgetCode x (Position Term x 4.3333)
page 618 / 707
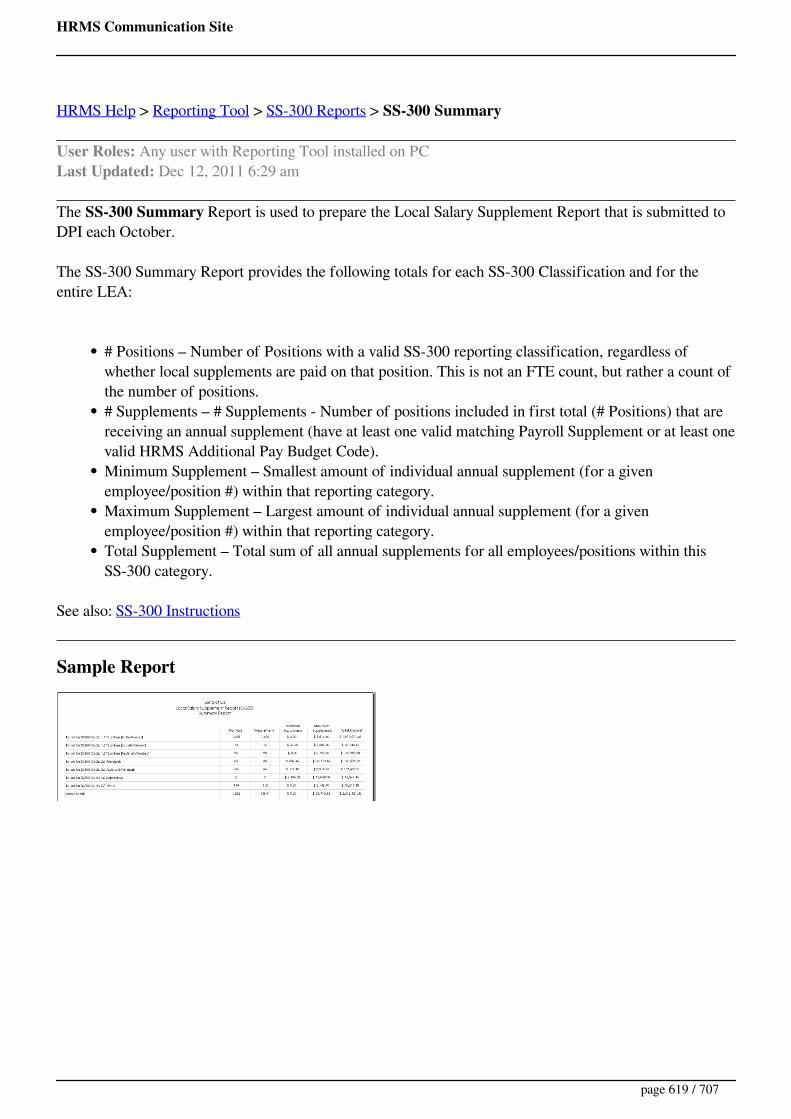
HRMS Communication Site
HRMS Help > Reporting Tool > SS-300 Reports > SS-300 Summary
User Roles: Any user with Reporting Tool installed on PCLast Updated: Dec 12, 2011 6:29 am
The SS-300 Summary Report is used to prepare the Local Salary Supplement Report that is submitted toDPI each October.
The SS-300 Summary Report provides the following totals for each SS-300 Classification and for theentire LEA:
# Positions – Number of Positions with a valid SS-300 reporting classification, regardless ofwhether local supplements are paid on that position. This is not an FTE count, but rather a count ofthe number of positions.# Supplements – # Supplements - Number of positions included in first total (# Positions) that arereceiving an annual supplement (have at least one valid matching Payroll Supplement or at least onevalid HRMS Additional Pay Budget Code).Minimum Supplement – Smallest amount of individual annual supplement (for a givenemployee/position #) within that reporting category.Maximum Supplement – Largest amount of individual annual supplement (for a givenemployee/position #) within that reporting category.Total Supplement – Total sum of all annual supplements for all employees/positions within thisSS-300 category.
See also: SS-300 Instructions
Sample Report
page 619 / 707
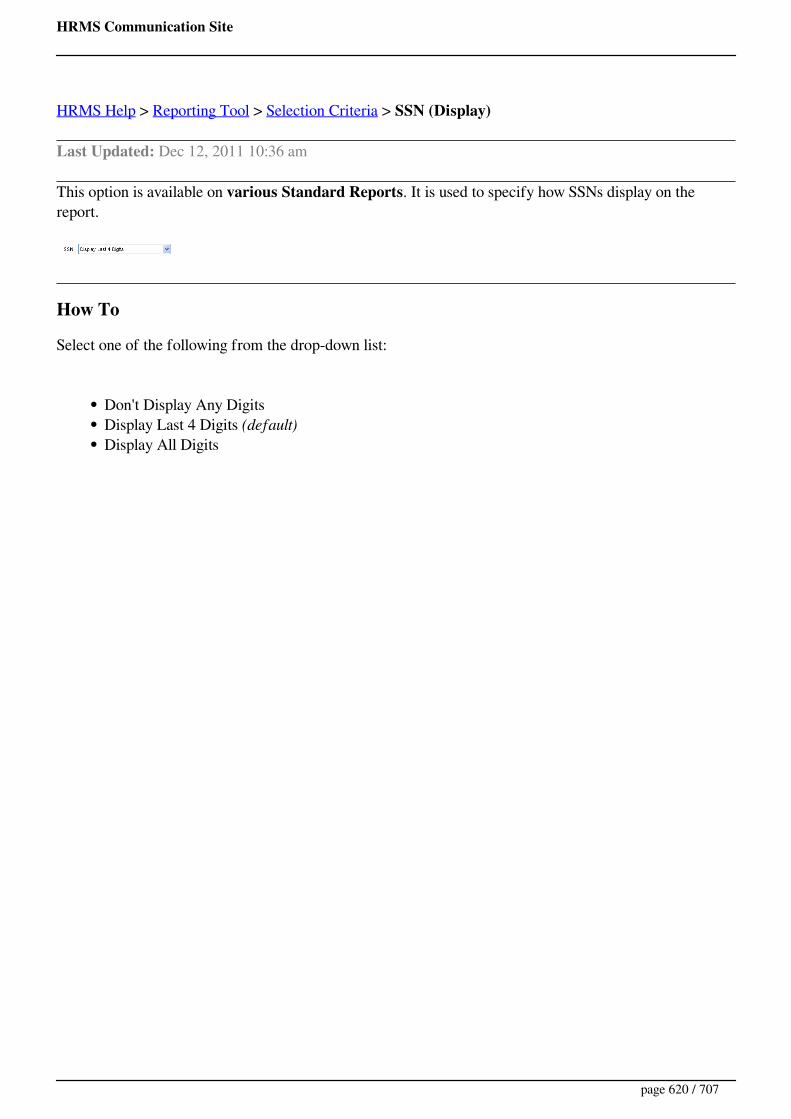
HRMS Communication Site
HRMS Help > Reporting Tool > Selection Criteria > SSN (Display)
Last Updated: Dec 12, 2011 10:36 am
This option is available on various Standard Reports. It is used to specify how SSNs display on thereport.
How To
Select one of the following from the drop-down list:
Don't Display Any DigitsDisplay Last 4 Digits (default)Display All Digits
page 620 / 707

HRMS Communication Site
HRMS Help > Employee Page > Employee Demographics > Staff Actions > Staff Action Console
User Roles: System Administrator, HR Staff Action Officer, Staff Action Clerk, Employee Hire,Separation Editor, Separation Viewer, Leave Editor, Leave Viewer, Suspension ClerkLast Updated: Dec 30, 2014 1:10 pm
Printer friendly
Quick Facts
The Staff Action Console allows authorized users to create, view, and update staff actions for anindividual employee.The form currently includes the following staff actions:
Employee DatesLeave/DisabilityPromotion, Demotion, or Salary ChangeRe-employmentSeparationSuspension
The form also allows authorized users to view or act upon the following staff actions, not createdon this form, but from other HRMS modules.
New HireSalary ChangesAssignment Actions (Transfers, Dropped (Ended) Assignments, and New Assignments forCurrent Staff)
See the Staff Actions help page for a chart showing which user roles can access each staff actionfunction.
To access the Staff Action Console, select Staff Action Console from the Staff Actions menu on theEmployee Demographics page.
The Staff Action Console form will display.
page 621 / 707

HRMS Communication Site
To create a staff action, select the action from the drop-down menu at the top of the page.
All active, completed, and cancelled Leaves & Disabilities, Promotions/Demotions/Salary Changes, Re-employments, Separations, and Suspensions appear on this form. Rows are sorted in descending order byEffective Date, and can be re-sorted by clicking on individual column headings.
The value in the 'Type' column appears as a hyperlink to the applicable 'Details' form if the user has rightsto view details for that staff action type. From the 'Details' form, authorized users can act on the staffaction.
page 622 / 707
HRMS Communication Site
HRMS Help > Employee Page > Employee Demographics > Staff Actions > Staff Action Search
User Roles: System Administrator, HR Staff Action Officer, Staff Action Clerk, Employee Hire,Separation Editor, Separation Viewer, Leave Editor, Leave Viewer, Suspension Clerk, Finance OfficerLast Updated: Oct 20, 2014 1:08 pm
Printer friendly
Table of ContentsQuick Facts
Search Options
Search Results
Quick Facts
The Staff Action Search page allows authorized users to search for staff actions across the LEA.The following staff actions types are available:
Assignment ActionLeave and DisabilityEmployee DatesPromotion, Demotion, or Salary ChangeNew HireRe-employmentSeparationSuspension
User roles listed at the top of this help page can search for any staff action type. However, onlycertain roles can drill down to view details for specific staff action types. (See the chart on the Staff Actions help page for details.)
The form can be accessed using one of the following paths:
LEA Home Page > Employees > “Staff Action Search”Employee Page > “Staff Action Search” in left navigationEmployee Demographics Page > Staff Actions menu > “Staff Action Search”"Staff Action Search" link at the top of any Staff Action form
page 623 / 707

HRMS Communication Site
Search Options
Type - You must select at least one staff action Type. (Hold down Ctrl to select more than one.)Sub-Type - This option is available for all Types except Re-employment and is not available ifmultiple Types were selected.Status - Limits results to Active, Completed, and/or Cancelled staff actions. (Hold down Ctrl toselect more than one.)Employee- Allows you to find staff actions for a specific employee by entering one of thefollowing:
Last NameLast Name and First InitialLast 4 digits of SSNLast few digits of Payroll ID
Staff Action Date RangeIf searching for Separations or Re-employments, the system returns records with anEffective Date that falls between the two dates entered (inclusive).If searching for Leaves of Absence, Disabilities or Suspensions, the system returns recordsthat were in effect at any time during the date range specified.
Site- Limits results to employees with a primary assignment at the selected Site on the EffectiveDate of the staff action.SSN Display- Determines whether Last 4 digits, all digits, or no digits of SSN display.Max Results - Use this option to increase the number of results allowed if your search exceeds thecurrent value.
Search Results
For authorized users, the Staff Action Type column serves as a hyperlink to the “Details” form.Search results can be sorted by column headings.
page 624 / 707

HRMS Communication Site
page 625 / 707
HRMS Communication Site
HRMS Help > Staff Actions > Staff Action Workflow Management
User Roles: System Administrator, HR Staff Action Officer, Leave Editor, Leave Viewer, SuspensionClerkLast Updated: Jan 22, 2013 1:43 pm
Printer friendly
Table of ContentsSearch Options
Search Results
The Staff Action Workflow Management form allows users to view complete history for Payroll BudgetCode Requests
To access the Workflow Management form, go to:
HRMS Home > Employees > Workflow Management Console, OREmployee Demographics > Consoles > Workflow Management
The Staff Action Workflow Management form will display.
Click the Home link at the top of the page to return to the HRMS Home Page or Employee Demographicspage.
Search Options
This section allows users to select/enter the following search criteria:
Staff Action Type – Only available option is Budget Code.
page 626 / 707
HRMS Communication Site
Status - Available options are Submitted, Cancelled, Completed. (Default = Submitted)Employee Last Name or SSN (last 4 digits)Date Range Request – Allows users to enter a Beginning and Ending Date to search on. StaffAction records that were submitted between those two dates (inclusive) will be returned.
Search Results
This section displays the Staff Action Request records that matched the search criteria entered.
To view details of a Staff Action Request, click on the Date Requested link for the applicable row. Thiswill open the Budget Code Request Details form.
To resort the list, click on the small triangles in the column heading.
Search results are limited to 500 rows; if the search results exceeds that number, you will be asked to enteradditional search criteria to reduce the number of records returned.
page 627 / 707
HRMS Communication Site
HRMS Help > Employee Page > Employee Demographics > Staff Actions
User Roles: See chart belowLast Updated: Dec 5, 2017 12:00 pm
The Staff Actions menu at the top of the Employee Demographics page includes the following options:
Do Not HireStatus and BenefitsStaff Action Console - View or launch staff actions (listed below) for a single employee. View ormodify other Staff Actions created in other HRMS modules.Staff Action Search - Find staff actions (listed below) across the LEA
Staff Actions accessible from the Staff Action Console and Staff Action Search forms include:
Employee DatesLeave or DisabilityPromotion, Demotion, or Salary ChangeRe-employmentSeparationSuspension
The chart below shows functions available for each staff action by user role:
page 628 / 707

HRMS Communication Site
HRMS Help > Employee Page > Staffing Options
User Roles: Employee Hire, Staff Action, HR Staff Action Officer, System AdministratorLast Updated: Dec 6, 2017 6:45 am
There are four options on the Employee Page which are related to the hiring of staff.
New HiresNew Hire Without Vacancy PermitSearch Historic ApplicantsDo Not Hire ListUpdate Substitutes
page 629 / 707

HRMS Communication Site
HRMS Help > Status and Benefits
User Roles: System Administrator, Employee Hire, Staff Action, HR Staff Action Officer
Last Updated: Dec 7, 2017 8:29 am
Printer friendly
Table of ContentsQuick Facts
Where to Select
Status and Benefits Entry
Tenure and Leave
Health and Retirement
Quick Facts
Status and Benefits Staff Actions are created by selecting the Status and Benefits option from theStaff Actions menu on the Employee Demographics form.Once entered, there is not a place in HRMS to see that these staff actions were entered by a certainperson....on a certain date....etc.... There is no logging of this data. Only the most current data iskept.Changes to Tenure Status, BT Status and Employment Status will affect data passed onto the NorthCarolina Education Evaluator System (NCEES).Changes to other information such as Sick Leave, Annual Leave, etc...are only maintained inHRMS and do not have any affect on other systems....such as payroll.
Where to Select
Status and Benefits Entry
page 630 / 707

HRMS Communication Site
Make any changes needed and click on the "Submit" button to complete. Click on the "Cancel" buttonto return to the Employee Demographics screen.
Return to Top
Tenure and Leave
Tenure Status: Select the appropriate Tenure Status from the dropdown.System Defined Codes - Note that with Release 6.4 (February 2014) or HRMS, SystemDefined codes are no longer available for selection. LEAs may continue to update to any ofthe locally-defined codes established in the Tenure Status Code Configuration.
1 of 42 of 43 of 44 of 41 of 1CompletedNAT
Locally-Define Codes - Established in the Tenure Status Code Configuration.BT Status: Select the appropriate BT (Beginning Teacher) status.
Late Hire1st Year2nd Year3rd YearCompletedNot Required for Position
page 631 / 707

HRMS Communication Site
Date Tenure Granted: Enter the date Tenure was granted. Note that if you use the Tenure StatusCode Mass Update, this date is automatically populated from that process. Note that if you enter adate in this field and this person is updated through the Tenure Status Code Mass Update, the MassUpdate will overwrite this date with either the date tenure was granted, or blank if tenure not yetgranted.Choose Employee Status: Select a different employment status if desired. Note that if the currentstatus is an "Active" status, only other "Active" status will display. If the current status is an"Inactive", then only other "Inactive" status will display. Sick Leave: Select Yes if the employee earns sick leave. (1 day per month worked)Annual Leave: Select Yes if the employee earns annual (vacation) leave.
If Yes, Rate: If Yes was selected for Annual Leave, select the leave rate from thedropdown box.
Holiday Pay: Select Yes if the employee earns Holiday pay.Personal Leave: Select Yes if the employee earns Personal Leave. (.2 days per month with amaximum of 2 days per year).
Return to Top
Health and Retirement
Health Insurance: Select Yes if the employee receives Health Insurance through the schoolsystem.
If Yes, Start Date: Enter date employee started receiving Health Insurance through theschool system.
Longevity Date: Select month from the dropdown, enter Year and yrs information. Please notethat it is better to depend on payroll for this information, since the yrs field will change eachmonth. LEAs rarely maintain this information in HRMS.Retirement: Select Yes if the employee participates in the NC State Retirement SystemRetirement Number: Employee's Retirement Number
Return to Top
page 632 / 707

HRMS Communication Site
Effective May 15, 2018, the HRMS Steering Committee was dissolved. All representation from thecommittee became Voting or Non-Voting Members of the new Education Business SystemsAdvisory Committee (EBSAC).
The HRMS Steering Committee encourages dialogue and develops consensus of identified functionalitycontained in or proposed for inclusion in the Human Resource Management System (HRMS), and setsfunctionality development/revision priorities; analyzes the current use of the HRMS in the local educationagencies (LEAs), and determines the yearly subscription rate for the HRMS.
**Steering Committee Members**
Meetings are scheduled quarterly, but times and location can vary. All files below are in presented asPDFs.
DATE LOCATION AGENDA MINUTES
05/15/2018 Greensboro Agenda Minutes
03/27/2018 NCSU Friday Institute Agenda Minutes(School Business SystemsModernization)
10/24/2017 NCSU Friday Institute Agenda Minutes(HRMS & ApplicantTracking Activities; School Business SystemsModernization; PositionControl; DRAFT PositionInformation FileOverview; DRAFTPosition Information FileSpecifications)
07/24/2017 NCSU Friday Institute Agenda Minutes(Applicant TrackingActivities for 2017 Q3; HRMS Activities for 2017Q3; School BSM Q32017)
05/05/2017 NCSU Friday Institute Agenda Minutes 05-05-2017(Applicant TrackingActivities for 2017 Q2; HRMS Activities for 2017Q2; Interconnectivity of HRMS-PeopleAdmin-
page 633 / 707
HRMS Communication Site
AppliTrack Q2 2017; School Business SystemsModernization Q2 2017)
02/03/2017 NCSU Friday Institute Agenda Minutes 02-03-2017(Applicant TrackingProject Update 2017 Q1; HRMS Activities for 2017Q1;[[image:/i/file_not_found.png width="32"height="32" caption="FileNot Found"]]File NotFound; School Business SystemsModernization 2.3.17; PA-Overview-NCDPI_2.3.17;Training and Support)
11/03/2016 NCSU Friday Institute Agenda Minutes 11-03-2016(Applicant TrackingProject Update 2016 Q4; Training Cutover Status)
08/02/2016 NCSU Friday Institute Agenda Minutes 08-02-2016(Applicant TrackingUpdate; Social_Media_Program; SchoolSpring)
04/22/2016 NCSU Friday Institute Agenda Minutes 04-22-2016(Applicant TrackingUpdate; Active Perm PT)
01/29/2016 NCSU Friday Institute Agenda Minutes 01-29-2016(Applicant TrackingUpdate)
09/18/2015 NCSU Friday Institute Agenda Minutes 09-18-2015
05/28/2015 NCSU Friday Institute Agenda Minutes 05-28-2015
02/19/2015 NCDPI Agenda Minutes 02-19-2015
11/14/2014 NCSU Friday Institute Agenda Minutes 11-14-2014
page 634 / 707

HRMS Communication Site
08/05/2014 NCDPI Agenda Minutes 08-05-2014
05/16/2014 NCSU Friday Institute Agenda Minutes 05-16-2014
02/07/2014 NCSU Friday Institute Agenda Minutes 02-07-2014
11/15/2013 NCSU Friday Institute Agenda Minutes 11-15-2013
08/23/2013 NCSU Friday Institute Agenda Minutes 08-23-2013
03/13/2013 NCDPI 01-25-2013 (Cont.) Minutes 03-13-2013
01/25/2013 NCDPI Agenda Minutes 01-25-2013
09/28/2012 NCDPI Agenda Minutes 09-28-2012
06/22/2012 NCDPI Agenda Minutes 06-22-2012
02/03/2012 NCDPI Agenda Minutes 02-03-2012
11/04/2011 NCDPI Agenda Minutes 11-04-2011
07/21/2011 NCDPI Agenda Minutes 07-21-2011
04/29/2011 Kannapolis City Schools Agenda Minutes 04-29-2011
01/21/2011 NCDPI Agenda Minutes 01-21-2011
09/10/2010 NCDPI Agenda Minutes 09-10-2010
page 635 / 707
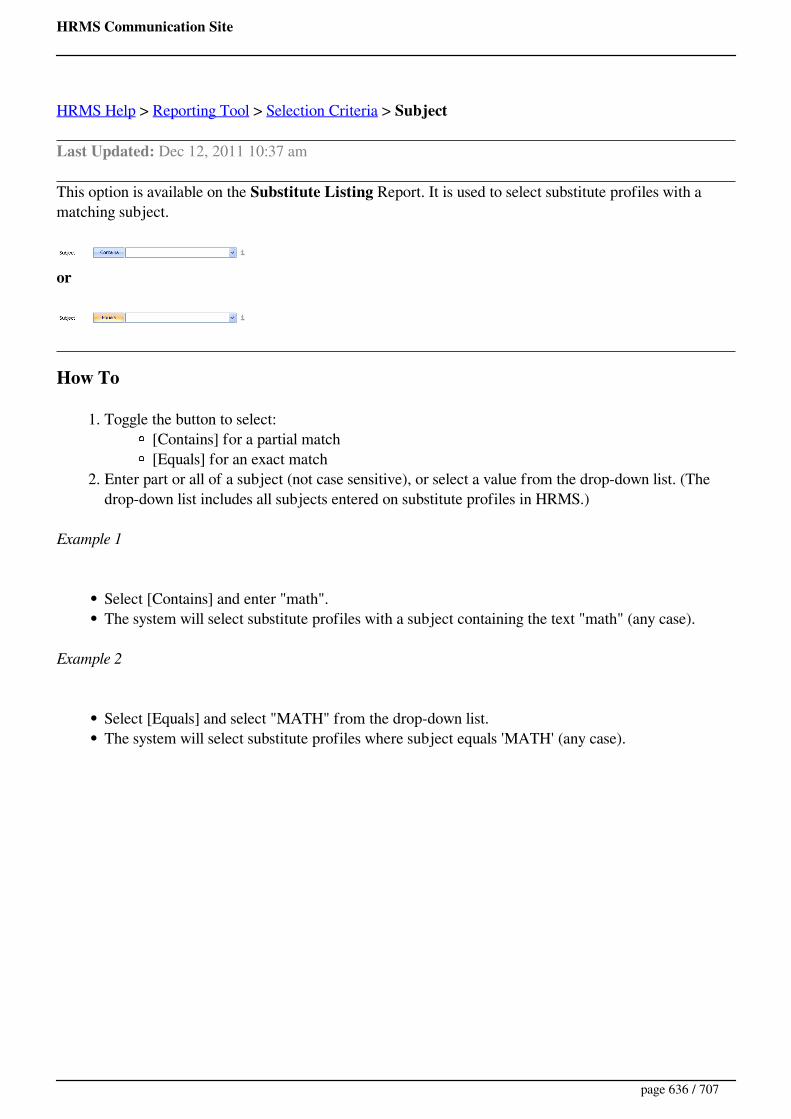
HRMS Communication Site
HRMS Help > Reporting Tool > Selection Criteria > Subject
Last Updated: Dec 12, 2011 10:37 am
This option is available on the Substitute Listing Report. It is used to select substitute profiles with amatching subject.
or
How To
1. Toggle the button to select:[Contains] for a partial match[Equals] for an exact match
2. Enter part or all of a subject (not case sensitive), or select a value from the drop-down list. (Thedrop-down list includes all subjects entered on substitute profiles in HRMS.)
Example 1
Select [Contains] and enter "math".The system will select substitute profiles with a subject containing the text "math" (any case).
Example 2
Select [Equals] and select "MATH" from the drop-down list.The system will select substitute profiles where subject equals 'MATH' (any case).
page 636 / 707

HRMS Communication Site
HRMS Help > Reporting Tool > Selection Criteria > Substitute Grades
Last Updated: Dec 12, 2011 10:38 am
This option is available on the Substitute Listing Report. It is used to select substitute profiles that matchany of the Grades selected.
How To
You may select one or more Grades.
If you do not make any selections, substitute profiles with any From/To Grade values will be returned.
Example
Select PK and K.The system will return substitute profiles where the From/To Grade range includes either PK or K.
page 637 / 707

HRMS Communication Site
HRMS Help > Reporting Tool > Substitute Listing
User Roles: Any user with Reporting Tool installed on PCLast Updated: Dec 14, 2011 6:29 am
The Substitute Listing report allows users to request a list of substitutes based on information containedin the substitute profile. Numerous sort options are available.
Selection Criteria
Pick EmployeesEmployee StatusPick Sites (Substitutes)Substitute TypeDaily/Hourly RateSubjectSubstitute GradesSort bySSN (Display)Export Report Data
Sample Report
page 638 / 707
HRMS Communication Site
HRMS Help > Employee Page > Substitute Profile
User Roles: Employee Hire, Staff Action, HR Staff Action Officer, System AdministratorLast Updated: Aug 27, 2013 7:21 am
There are 2 ways to reach the Substitute Profile form.
The most common way is to first go to the Employee/Employee Page, find the employee using thesearch selection criteria, and then click on the "Edit Substitute Profile" link on the EmployeeDemographic form.
The other way is to first go to the Employee/Employee Page, Staffing/Update Substitutes, and thenfind the employee using the search selection criteria.
When the Substitute Profile form appears, it assumes you want to add an additional profile. Any existingprofiles for the employee are listing in the last section "Existing Substitute Profiles for". Below is anexample of someone without a substitute profile.
Basic InformationSubstitution Type: Type of substituteRate of Pay: Rate of pay for substitute. For example. 65.50Subject: Substitute subject (Available for searching on Principal's Page)Status: Status of employeeFrom Grade: First Grade willing to substitute for. For ex. KTo Grade: Last Grade willing to substitute for. For ex. 12List of schools: The box on the right indicates all schools willing to sub for. Select theschool in the box on the left and click on Add to move to the box on the right. If a schoolneeds to be removed from the box on the right, select the school and click on remove to
page 639 / 707
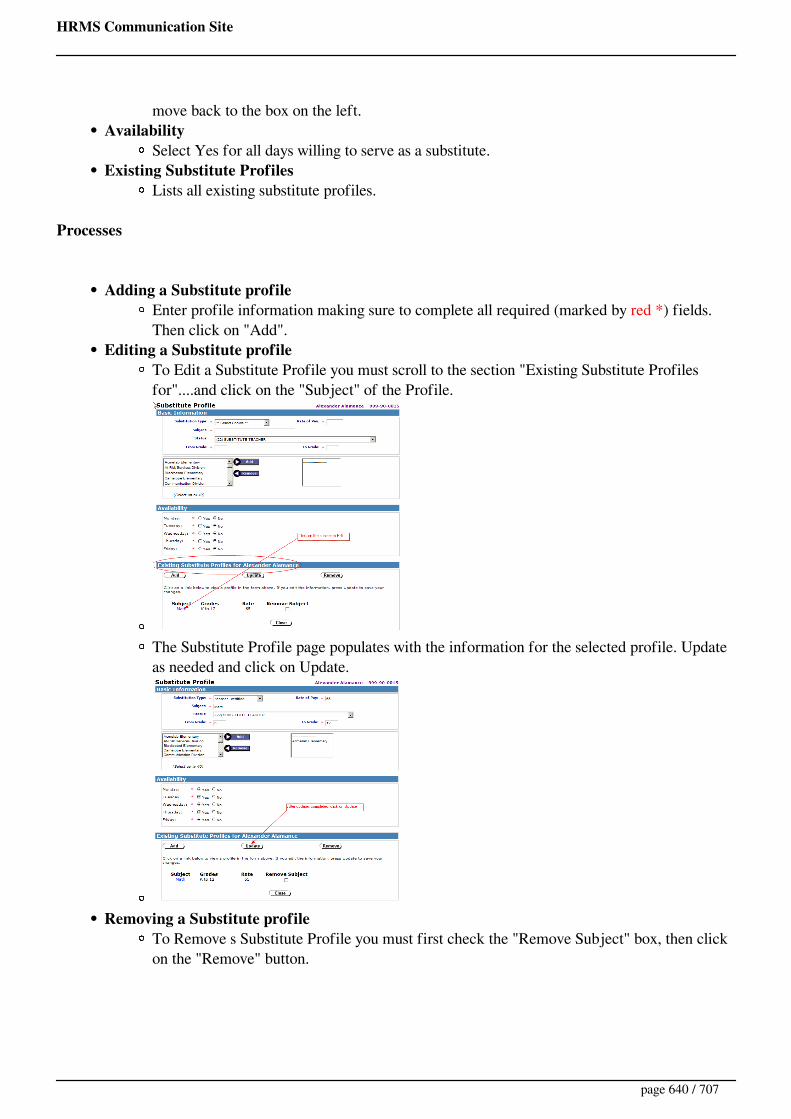
HRMS Communication Site
move back to the box on the left.Availability
Select Yes for all days willing to serve as a substitute.Existing Substitute Profiles
Lists all existing substitute profiles.
Processes
Adding a Substitute profileEnter profile information making sure to complete all required (marked by red *) fields.Then click on "Add".
Editing a Substitute profileTo Edit a Substitute Profile you must scroll to the section "Existing Substitute Profilesfor"....and click on the "Subject" of the Profile.
The Substitute Profile page populates with the information for the selected profile. Updateas needed and click on Update.
Removing a Substitute profileTo Remove s Substitute Profile you must first check the "Remove Subject" box, then clickon the "Remove" button.
page 640 / 707
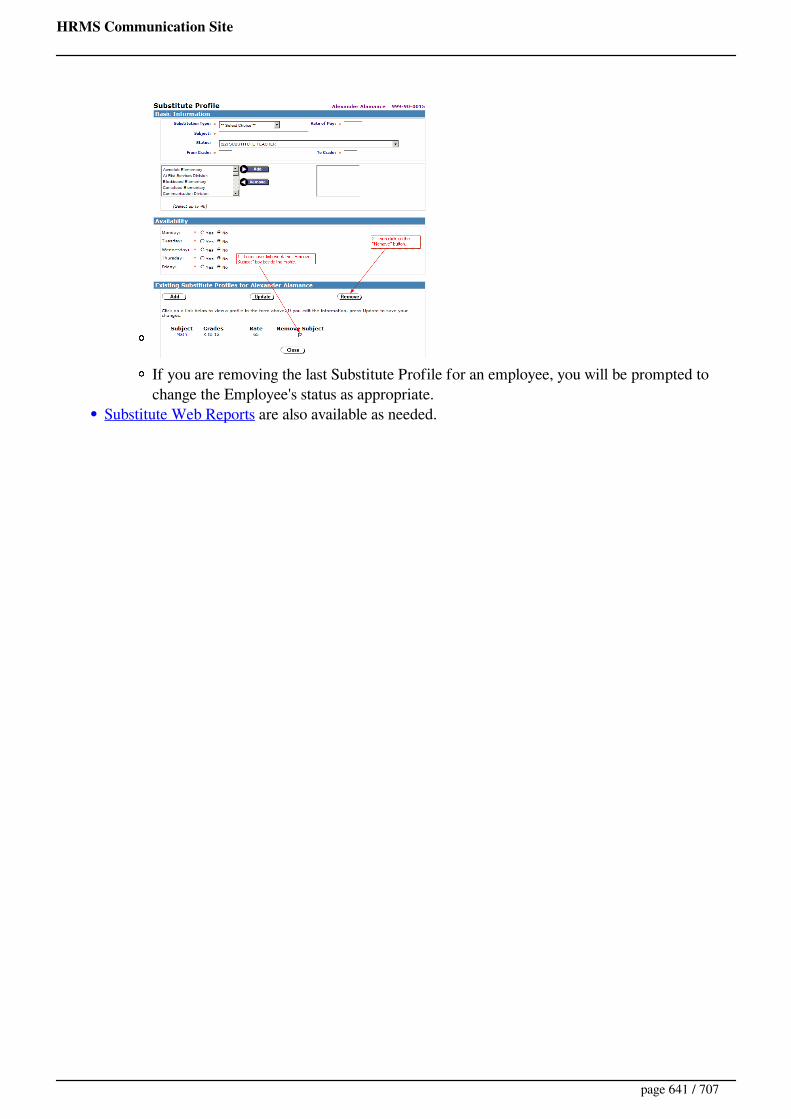
HRMS Communication Site
If you are removing the last Substitute Profile for an employee, you will be prompted tochange the Employee's status as appropriate.
Substitute Web Reports are also available as needed.
page 641 / 707
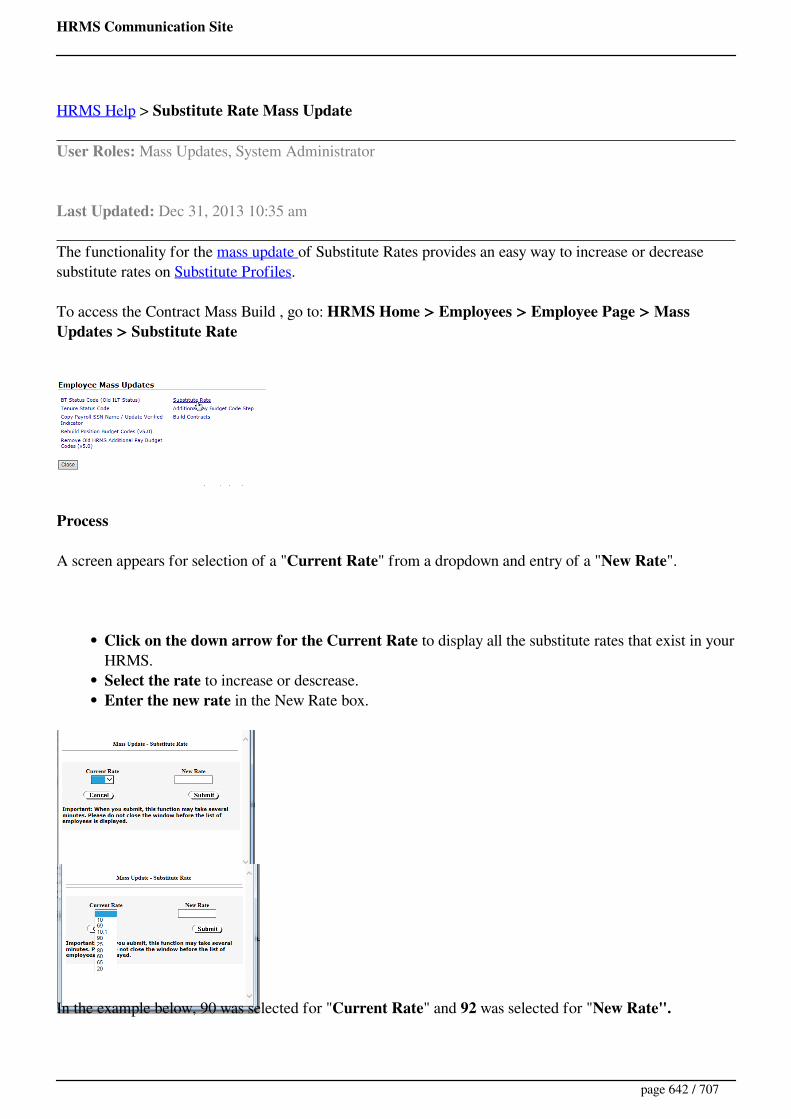
HRMS Communication Site
HRMS Help > Substitute Rate Mass Update
User Roles: Mass Updates, System Administrator
Last Updated: Dec 31, 2013 10:35 am
The functionality for the mass update of Substitute Rates provides an easy way to increase or decreasesubstitute rates on Substitute Profiles.
To access the Contract Mass Build , go to: HRMS Home > Employees > Employee Page > MassUpdates > Substitute Rate
Process
A screen appears for selection of a "Current Rate" from a dropdown and entry of a "New Rate".
Click on the down arrow for the Current Rate to display all the substitute rates that exist in yourHRMS.Select the rate to increase or descrease.Enter the new rate in the New Rate box.
In the example below, 90 was selected for "Current Rate" and 92 was selected for "New Rate".
page 642 / 707

HRMS Communication Site
Click on the Submit button.
All Substitute Profiles with a rate matching the "Current Rate" appear with the Update box checked.
Uncheck the Update box for any Substitute Profile for which the rate should not be changed.Click on the Submit button
In the example below, it was decided that Max Stout's substitute rate should not change.
You will get a confirmation screen listing staff whose Substitute Profile rate of pay was changes. You canprint if desired. (See below).
page 643 / 707
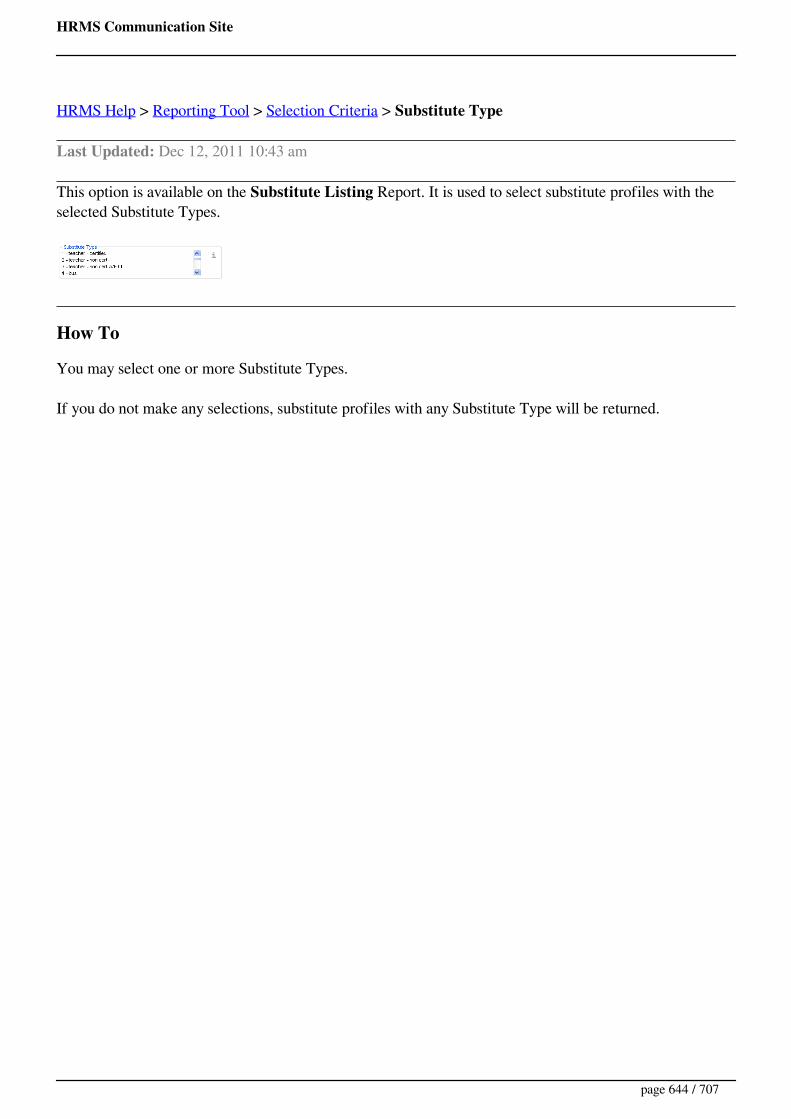
HRMS Communication Site
HRMS Help > Reporting Tool > Selection Criteria > Substitute Type
Last Updated: Dec 12, 2011 10:43 am
This option is available on the Substitute Listing Report. It is used to select substitute profiles with theselected Substitute Types.
How To
You may select one or more Substitute Types.
If you do not make any selections, substitute profiles with any Substitute Type will be returned.
page 644 / 707
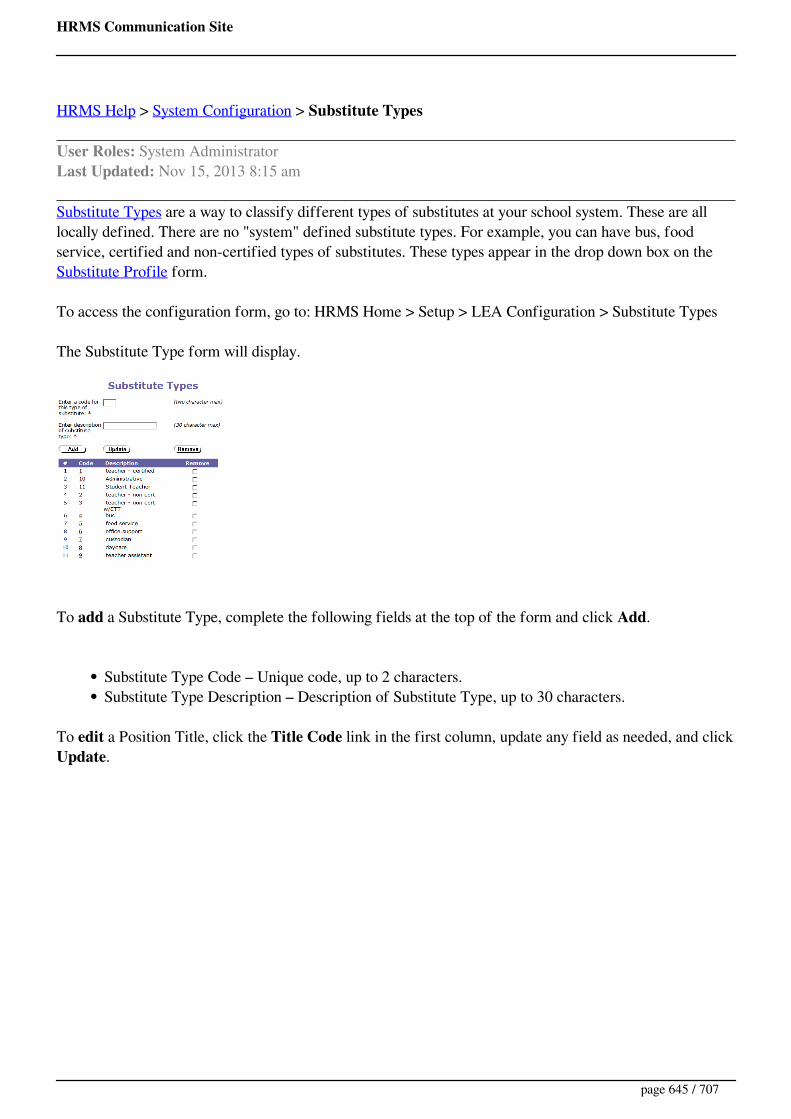
HRMS Communication Site
HRMS Help > System Configuration > Substitute Types
User Roles: System AdministratorLast Updated: Nov 15, 2013 8:15 am
Substitute Types are a way to classify different types of substitutes at your school system. These are alllocally defined. There are no "system" defined substitute types. For example, you can have bus, foodservice, certified and non-certified types of substitutes. These types appear in the drop down box on the Substitute Profile form.
To access the configuration form, go to: HRMS Home > Setup > LEA Configuration > Substitute Types
The Substitute Type form will display.
To add a Substitute Type, complete the following fields at the top of the form and click Add.
Substitute Type Code – Unique code, up to 2 characters.Substitute Type Description – Description of Substitute Type, up to 30 characters.
To edit a Position Title, click the Title Code link in the first column, update any field as needed, and clickUpdate.
page 645 / 707

HRMS Communication Site
HRMS Help> Web Reports > Substitute Web Reports
User Roles: Hiring Agent, System Administrator, Finance OfficerLast Updated: Aug 6, 2012 11:26 am
The following Web Reports provide useful information about substitutes:
000002 - Substitutes By Subject
The purpose of this report is to provide a list of LEA substitutes by subject. In order to generate a list bysubject, enter a subject first letter, word, or part of the word in the substitutes subject field; otherwiseleave the field blank to generate a list of all substitutes. Then click on Submit. The results will be sorted bysubstitute subject and then by site (if a site is entered for the individual).
000125 - Substitute Error Report
The purpose of this report is to provide a list of LEA substitutes that may potentially have incomplete orinaccurate substitute data. Below is a list of possible errors.
1. Substitute Emp Status and No Sub Profile - The Employment Status indicates a substitute, butthere is not a substitute profile for the person.
2. Sub Code = Y or B and No Sub Profile - The Substitute indicator is Y'es or B'oth, but there isnot a substitute profile for the person.
3. Sub Code = N and Sub Profile Exists - The Substitute indicator is N'o, but a substitute profileexists.
4. No Sites selected on Sub Profile - No sites have been selected for the substitute profile.5. Non-Standard Grade on Sub Profile - Grades entered on the substitute profile are in error.6. No Valid Phone Number - There is not a valid phone number in the employee demographics for
the substitute.
page 646 / 707

HRMS Communication Site
Contact Options
Phone Support: 919-807-4357 then choose option 3 then 2Email: [email protected]: https://nc-myit.us.onbmc.com
This is a 25 minute video explaining how to use Remedy.
Knowledge Base - Includes articles with varying content including step-by-step instructions, queries, andworkarounds.
page 647 / 707
HRMS Communication Site
HRMS Help > Employee Page > Employee Demographics > Staff Actions > Suspension
User Roles: System Administrator, Suspension Clerk, HR Staff Action Officer (HR Staff Action Officerscan only view Suspension Details and cannot view Suspension Comments. Only the System Adminstratorcan remove a Suspension.)Last Updated: Feb 20, 2014 11:45 am
Printer friendly
Table of ContentsQuick Facts
Creating a Suspension
Suspension Details
Editing a Suspension
Extending a Suspension
Ending a Suspension
Removing a Suspension
Quick Facts
Suspensions are created from the Staff Action Console and maintained from the SuspensionDetails page.Employees may have one current or one future Suspension.Suspension records remain Active, regardless of the Anticipated End Date, until the Suspension is Ended or Removed.Suspension and Leave dates cannot overlap.A Suspension cannot be created for an Inactive employee.When an employee is placed on Suspension, the system does not automatically remove them fromtheir position assignments.
Creating a Suspension
page 648 / 707

HRMS Communication Site
To create a Suspension, select Create Suspension from the menu at the top of the Staff Action Console.
Top Part of Create Suspension Form
Select Suspension Type (Suspension With Pay or Suspension Without Pay).Select Yes or No for For Disciplinary Reasons? and Was this action voted on by the localBoard of Education?
This information is required as part of the new Public Records Law (G.S. 115C-320),which became effective 10/1/2010.
Enter the Effective Start Date.Select the employee’s Employment Status while on Suspension.
If this is a current Suspension, the employee’s current Employment Status Code will bechanged immediately after this form is submitted.If this is a future Suspension, the future Employment Status Code will be saved by thesystem and the employee’s current Employment Status Code will not change until theEffective Start Date is reached.
Enter the employee’s Last Day on Payroll, if applicable.This field is used only when the employee is using accrued leave to cover all or part of theSuspension.
Enter the Anticipated End Dateof the Suspension, if known.If a date is entered, it must be after the Effective Start Date.
Select the employee’s Anticipated Employment Status Upon Return, if known.This is the Employment Status Code that the employee is expected to return to when theirSuspension ends. The system will automatically default in the employee’s current
page 649 / 707

HRMS Communication Site
Employment Status (prior to going on Suspension), but you may change it to any otheractive Employment Status Code that you deem appropriate.
Bottom Part of Create Suspension Form
Enter Comments regarding this Suspension (Max 500 characters).Comments entered for a Suspension can only be viewed by the System Administrator andthe Suspension Clerk.
Insurance - Select Yes or No for Continue at System Expense?If you answer No, Continue at Employee’s Expense? will display.
If you answer Yes, then enter the Effective Billing Date(required).If you answer No, enter a value for Stop Insurance on this Date (required)
Staff Action - Select Yes or No for Post on Board Report?If you answer Yes, enter the Board Report Date (required).
Click the Add Suspension button when you are ready to save the new Suspension record.After the record is saved, the Suspension Details form will display showing the new Suspension.
Suspension DetailsUse the Suspension Details form to view, edit, extend, end, or remove an existing Suspension.
To access the form, click the desired record from the Staff Action Console.
The Suspension Details form displays the current values of the Suspension record.
page 650 / 707

HRMS Communication Site
Click on an action in the Type column of the History section to view details about the action.
The Staff Action Request Details form displays values of the Suspension record before and after theselected action.
page 651 / 707

HRMS Communication Site
Editing a SuspensionUse the Edit Suspension form to modify a current or future Suspension. (You cannot edit a Suspensionafter it has been ended.)
To access the form, select Edit Suspension from the menu at the top of the Suspension Details form.
The Edit Suspension form allows you to edit all fields of the Suspension record. See Creating a Suspensionfor details about each field.
Special Notes:
Effective Start DateIf you change the Effective Date from a current to a future date, the system will promptyou to select the employee's current Employment Status Code (defaults to the employee’sprevious Employment Status Code).If you change the Effective Date from a future to a current date, the system will set theemployee’s current Employment Status to the Leave status.
Suspension Type & Employment Status- To make a correction, use the Edit Suspension form. Ifthe employee is switching to a different Suspension Type/Status, end the current Suspension andcreate a new one.Anticipated End Date - To make a correction, use the Edit Suspension form. If the currentSuspension is being extended, use the Extend Suspension form instead.
page 652 / 707
HRMS Communication Site
Click the Save button to save your changes to the Suspension record.
Click the Reset button (bottom-right) to reset all the fields on this form to their original values withoutsaving anything.
Note: Any time a Suspension is edited the system creates an audit trail record. If a hard copy of the changeis needed for the Payroll Department, the employee’s work Site, or the employee’s file, we suggest that youperform the action, go to the Suspension Details page, click on the Staff Action Type link in the 'History'section, and print your hard copy there. Changes made as a result of each action are highlighted in yellow.
Extending a SuspensionUse the Extend Suspension form when a current Suspension is being extended.
To access the form, select Extend Suspension from the menu at the top of the Suspension Details form.
Only a few of the Suspension fields are editable on the Extend Suspension form.
page 653 / 707

HRMS Communication Site
Special Notes:
Anticipated End Date– Since you are extending this Suspension, the new date entered must beafter the original Anticipated End Date shown on the form.Anticipated Employment Status Upon Return – If the extension period for this Suspensioninvolves a different Employment Status Code, then you should not use the Extend form to recordthe extension period. Instead, you should end this Suspension and create a new Suspension for theextension period.
Click the Save button when you are ready to save your changes to the Suspension record.
Ending a SuspensionUse the End Suspension feature to end a current Suspension in the following situations:
Employee is Returning to WorkType of Suspension is ChangingSeparation*Leave of Absence
*Note: If an employee who has an active Suspension record is separating, you do not have to end the
page 654 / 707

HRMS Communication Site
Suspension. Just create a Separation and the system will automatically end the Suspension on theSeparation Effective Date.
To access the form, select End Suspension from the menu at the top of the Suspension Details form.
Instructions follow the screen shot below.
Select the Reason for ending the Suspension. The drop-down list will include all the possiblereasons for ending a Suspension:
Employee is Returning to WorkSelect this option if you want to reinstate the employeeIf this option is selected, the Status of the Suspension will be set to 'Reinstated'.
Type of Suspension is ChangingSelect this option if the Suspension is being extended and the Employment StatusCode for the extension period is changing. After ending this Suspension, you shouldimmediately proceed to the ‘Create Suspension form and create the new Suspensionfor the extension period.If this option is selected, the Status of the Suspension will be set to 'Converted'.
SeparationSelect this option if the employee is separating for any reason before returning fromthe Suspension. After ending this Suspension, the system will direct you to the‘Separation’ Staff Action form to record the separation.If this option is selected, the Status of the Suspension will be set to 'Ended'.
Leave of Absence/DisabilitySelect this option if the employee went on Leave before returning from the
page 655 / 707
HRMS Communication Site
Suspension. After ending this Suspension, the system will direct you to the ‘CreateLeave’ Staff Action form to record the Leave.If this option is selected, the Status of the Suspension will be set to 'Ended'.
Enter the Effective End Date(date that the employee’s Suspension ends).. This date must be lessthan or equal to today’s date. Enter this date in MM/DD/YYYY format.If ‘Employee is Returning to Work’ was selected as the reason for ending the Suspension, thefollowing fields will display.
Select the employee’s Returning Employment Status. This is the Employment Status thatthe employee should be returned to when the Suspension ends. All Active EmploymentStatus Codes will be available in the drop-down list.Select either Yes or No for Reinstate Insurance?If the answer is Yes, enter Date toReinstate.
Select Yes or No for Post on Board Report?If Yes, then enter the Board Report Date.
If you wish, you can enter a note about why the Suspension is being ended in the Staff ActionNotes box.
Click the Save button when you are ready to save your changes to the Suspension record.
Removing a SuspensionUse the Remove Suspension feature to cancel a current or future Suspension that was entered in error.(Completed Suspensions cannot be removed.) Only System Administrators can perform this function.
To access the form, select Remove Suspension from the menu at the top of the Suspension Details form.
When removing a Suspension, you must enter Notes about why this Suspension was Removed.
page 656 / 707

HRMS Communication Site
Click the Save button when you are ready to remove the Suspension record. The Suspension status will beset to 'Cancelled'.
page 657 / 707
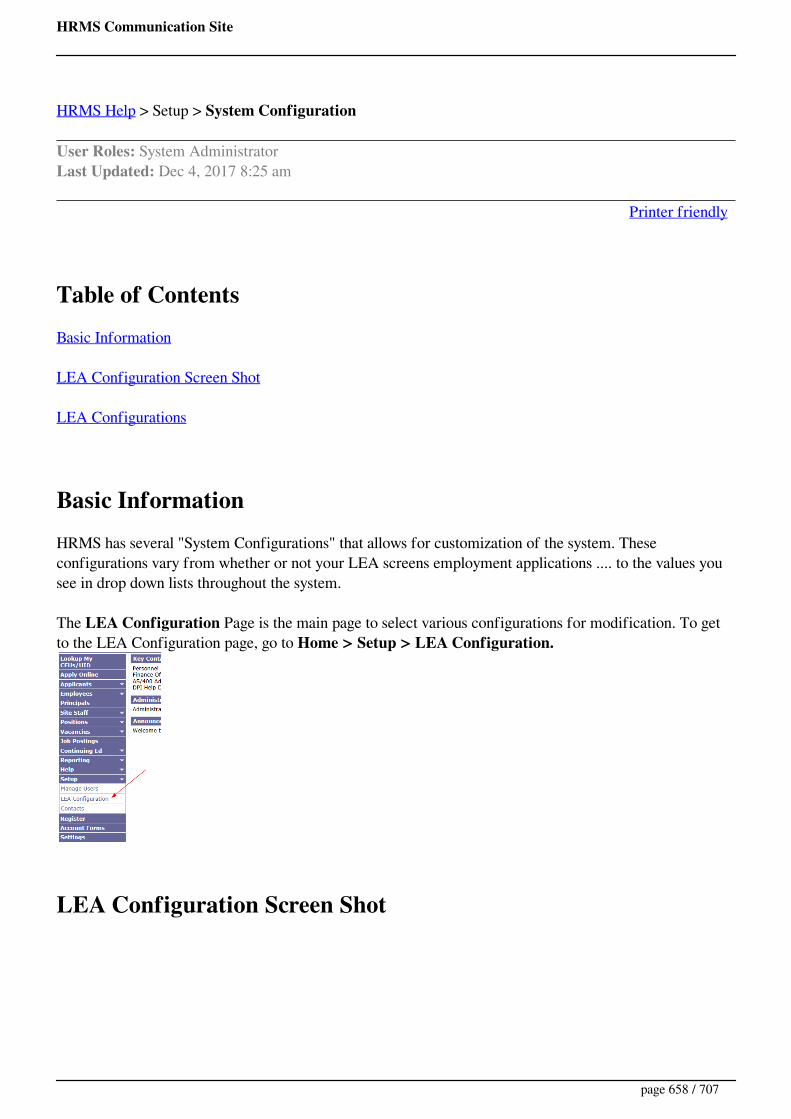
HRMS Communication Site
HRMS Help > Setup > System Configuration
User Roles: System AdministratorLast Updated: Dec 4, 2017 8:25 am
Printer friendly
Table of ContentsBasic Information
LEA Configuration Screen Shot
LEA Configurations
Basic InformationHRMS has several "System Configurations" that allows for customization of the system. Theseconfigurations vary from whether or not your LEA screens employment applications .... to the values yousee in drop down lists throughout the system.
The LEA Configuration Page is the main page to select various configurations for modification. To getto the LEA Configuration page, go to Home > Setup > LEA Configuration.
LEA Configuration Screen Shot
page 658 / 707

HRMS Communication Site
LEA ConfigurationsClick a link below to view a help topic.
1. Action Notice Recipients2. Contract Conditions3. Contract Types4. Employment Status5. Frequency Of Payment6. Job Actions7. KB10416 - Cross Site Scripting error when running local or web reports8. KB10703 - What role(s) should someone have just to run certain Local Web Reports?9. KB10705 - I am getting the error 'Invalid Username and or password' when trying to log
into HRMS.10. KB10800 - HRMS Website is not up, what should I do?11. KB10801 - I am getting a TOMCAT error, what should I do?12. KB10803 - Corrupt Server ID Error on Lotus Domino Console.13. KB10804 - Domino and AS400 HRMS Certification14. KB10805 - Lotus Notes Scheduled Agent is Not Running15. KB10810 - SSL Warnings with IE7 and above.16. KB10811 - My Menu Bar in Internet Explorer is gone. How do I get it back?17. KB10813 - Unable to Access HRMS. No Continue To Website (not recommended) Option18. KB11802 - Configure HRMS for ISIS 619. LEA Settings20. Leave of Absence21. License Area-Category Cross Reference22. License Categories23. Local Forms Setup24. Local Use Labels Employee25. Local Use Labels Employee Assignment26. Local Use Labels Position27. Longevity28. Position Groups29. Position Titles30. Site Contacts31. Sites32. Substitute Types33. Tenure Status Codes
page 659 / 707

HRMS Communication Site
HRMS Help > Reporting Tool > TCP-IP Settings
User Roles: Any user with Reporting Tool installed on PCLast Updated: Dec 21, 2011 10:14 am
The TCP/IP address setting displays on the Settings tab.
See also: Setting the TCP-IP Address
page 660 / 707

HRMS Communication Site
HRMS Help > Reporting Tool > Teacher Turnover Reports > Teacher Turnover Exception
User Roles: Any user with Reporting Tool installed on PCLast Updated: Jan 6, 2012 6:30 am
The Teacher Turnover Exception Report lists HRMS assignments with missing budget codes and Payrollassignments with missing/invalid HRMS position numbers. These assignments need to be reviewed todetermine each employee's teaching status for the report period.
Selection Criteria
Report PeriodSSN (Display)Export Report Data
Exceptions and Recommended Steps
Possible Exceptions:
Archived licensed assignment w/o base budget code – ended during report periodArchived licensed assignment w/o base budget code – ended after report periodCurrent licensed assignment w/o base budget code – active during report periodCurrent licensed assignment w/o base budget code – started after report periodFuture licensed assignment w/o base budget code – starts after report periodPayroll teaching assignment with missing or invalid HRMS position number
Steps:
1. Export the report to Excel.2. Enable the Data Filter.3. Filter on Position Title and delete non-teaching assignments.4. For the remaining rows, review each employee's assignments (on the 'View All Assignments' page)
to determine if the employee should be counted as Leaving or Not Leaving for the report period.5. Determine whether the employee is listed on the Teachers Leaving or Teachers Not
LeavingReport.6. Based on the results, the employee may need to be subtracted from OR added to the Leaving or
Not Leaving total.
Sample Report
page 661 / 707

HRMS Communication Site
page 662 / 707
HRMS Communication Site
HRMS Help > Reporting Tool > Teacher Turnover Reports
User Roles: Any user with Reporting Tool installed on PCLast Updated: Jul 11, 2016 6:39 am
The Teacher Turnover Reports include:
Teachers Leaving – Lists teachers who left the LEA during a specified report period.Teachers Not Leaving – Lists teachers still employed by the LEA during a specified report period.Summary Report – Lists total number of teachers employed by the LEA, total number of teachersleaving, and counts of teachers leaving for specific reasons during a specified report period.Exception Report – Lists HRMS assignments with missing budget codes and Payroll assignmentswith missing/invalid HRMS position numbers. These assignments need to be reviewed to determineeach employee's teaching status for the report period.
The Summary Report in HRMS was once used as part of the official annual Teacher Turnover SummaryReport required by DPI. Although the report is no longer used as the official report, it can be helpful incompleting the report required by DPI. The turnover information produced by this report is based onHRMS data and therefore might not coincide with the numbers that are being reported to DPI, which arebased on UERS / Payroll data.
Selection Criteria
The definition of who is considered to be a Teacher for these reports is based on the Object Codes theyare paid from. The following Teaching Object Codes are used for this report:
121 – Teacher123 – JROTC Teacher124 – Foreign Exchange (VIF)
page 663 / 707
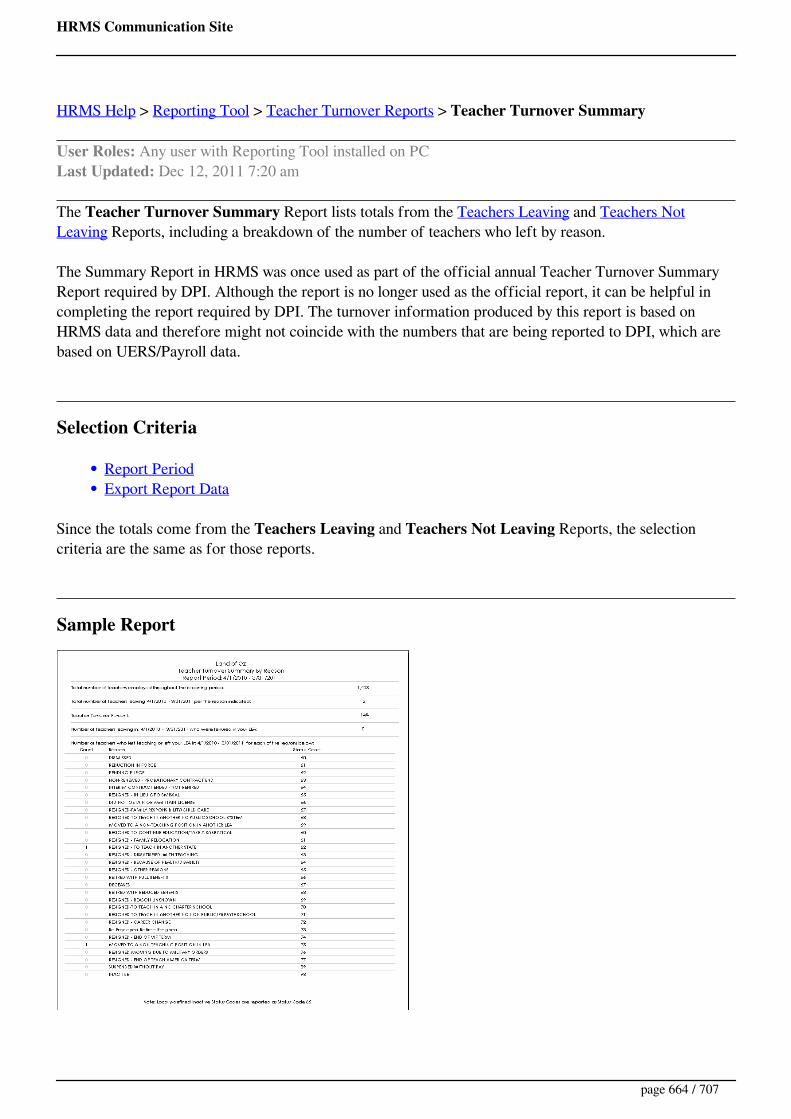
HRMS Communication Site
HRMS Help > Reporting Tool > Teacher Turnover Reports > Teacher Turnover Summary
User Roles: Any user with Reporting Tool installed on PCLast Updated: Dec 12, 2011 7:20 am
The Teacher Turnover Summary Report lists totals from the Teachers Leaving and Teachers NotLeaving Reports, including a breakdown of the number of teachers who left by reason.
The Summary Report in HRMS was once used as part of the official annual Teacher Turnover SummaryReport required by DPI. Although the report is no longer used as the official report, it can be helpful incompleting the report required by DPI. The turnover information produced by this report is based onHRMS data and therefore might not coincide with the numbers that are being reported to DPI, which arebased on UERS/Payroll data.
Selection Criteria
Report PeriodExport Report Data
Since the totals come from the Teachers Leaving and Teachers Not Leaving Reports, the selectioncriteria are the same as for those reports.
Sample Report
page 664 / 707

HRMS Communication Site
HRMS Help > Reporting Tool > Teacher Turnover Reports > Teachers Leaving
User Roles: Any user with Reporting Tool installed on PCLast Updated: Apr 26, 2012 12:40 pm
The Teachers Leaving Report lists teachers at the LEA who left teaching during a specified report period.It is used to populate totals on the Teacher Turnover Summary Report.
The report lists specific teaching position(s) that each employee left during the report period and the totalnumber of unique teachers who left during the report period.
Selection Criteria
Report PeriodSSN (Display)Export Report Data
The report returns two groups of Teachers:
Group 1- Teachers who terminated employment during the report period.These employees are reported with their current employment status code. Employees with alocally-defined inactive status are reported with a status of '65 - Resigned-Other Reasons'.
Group 2- Active employees who switched from a teaching to a non-teaching position during thereport period.
These employees are reported with an employment status code of '75 - Moved to a Non-Teaching Position in LEA'.
Sample Report
page 665 / 707

HRMS Communication Site
HRMS Help > Reporting Tool > Teacher Turnover Reports > Teachers Not Leaving
User Roles: Any user with Reporting Tool installed on PCLast Updated: May 1, 2012 6:28 am
The Teachers Not Leaving Report lists teachers at the LEA who remained in a teaching position during aspecified report period. It is used to populate totals on the Teacher Turnover Summary Report.
The report lists specific teaching position(s) that the employee holds and the total number of uniqueteachers who remained in teaching during the report period.
Selection Criteria
Report PeriodSSN (Display)Export Report Data
The report returns three groups of Teachers:
Group 1– Active Employees with a current teaching assignment that began before the end of thereport period.Group 2– Employees with an archived teaching assignment that began before the end of the reportperiod and ended after the report period.Group 3- Active Employees with a teaching assignment that ended during the report period and acurrent or future assignment teaching assignment that starts after the report period.
This group will display as 'Returning' on the report. If any of these employees actuallyterminated employment during the report period, they may need to be listed as 'Leaving'instead.
Sample Report
page 666 / 707

HRMS Communication Site
HRMS Help > Reporting Tool > Selection Criteria > Template
Last Updated: Dec 12, 2011 10:44 am
This option is used to select either Contracts or Cover Letters when printing contracts.
How To
Select either Contracts (default) or Cover Letters from the drop-down list.
If you select Contracts and select one of the system-defined Contract Types (Career,Probationary, Temporary, or Part-Time), the default template for the selected contract type willdisplay.
If you select Contracts and select a locally-defined Contract Type, you will be instructed to createor load a custom template.
If you select Cover Letters, the default cover letter template will display.
page 667 / 707
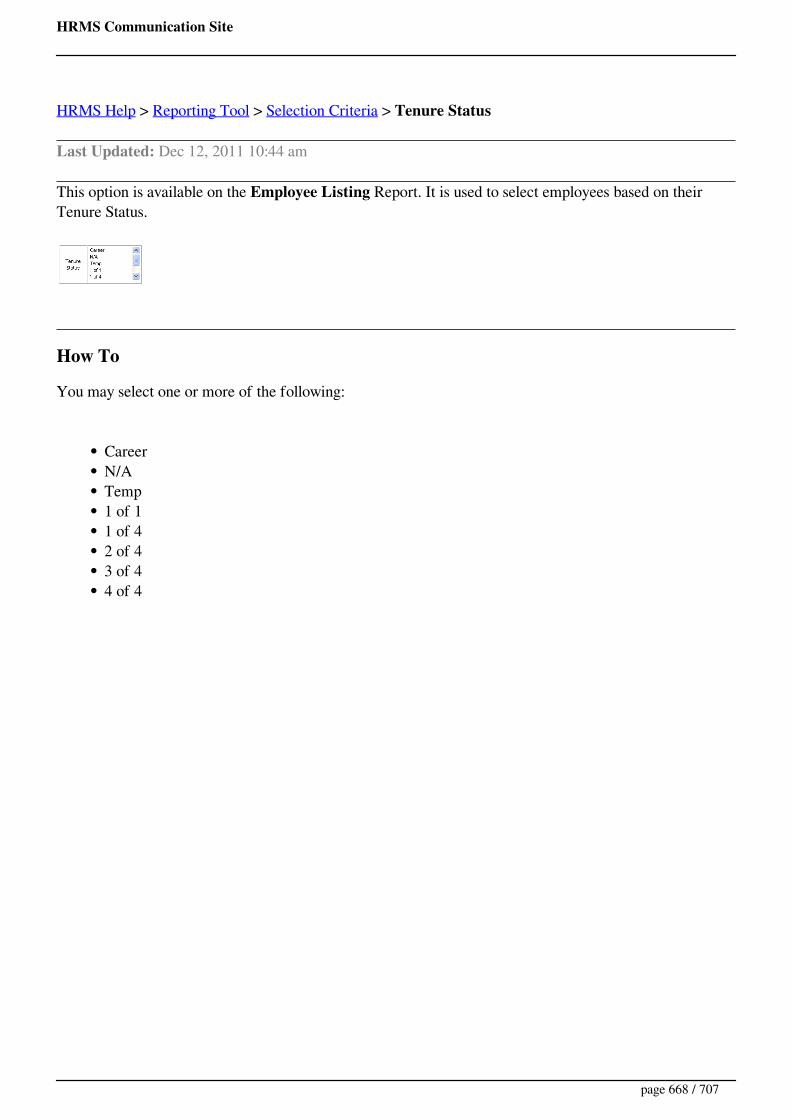
HRMS Communication Site
HRMS Help > Reporting Tool > Selection Criteria > Tenure Status
Last Updated: Dec 12, 2011 10:44 am
This option is available on the Employee Listing Report. It is used to select employees based on theirTenure Status.
How To
You may select one or more of the following:
CareerN/ATemp1 of 11 of 42 of 43 of 44 of 4
page 668 / 707
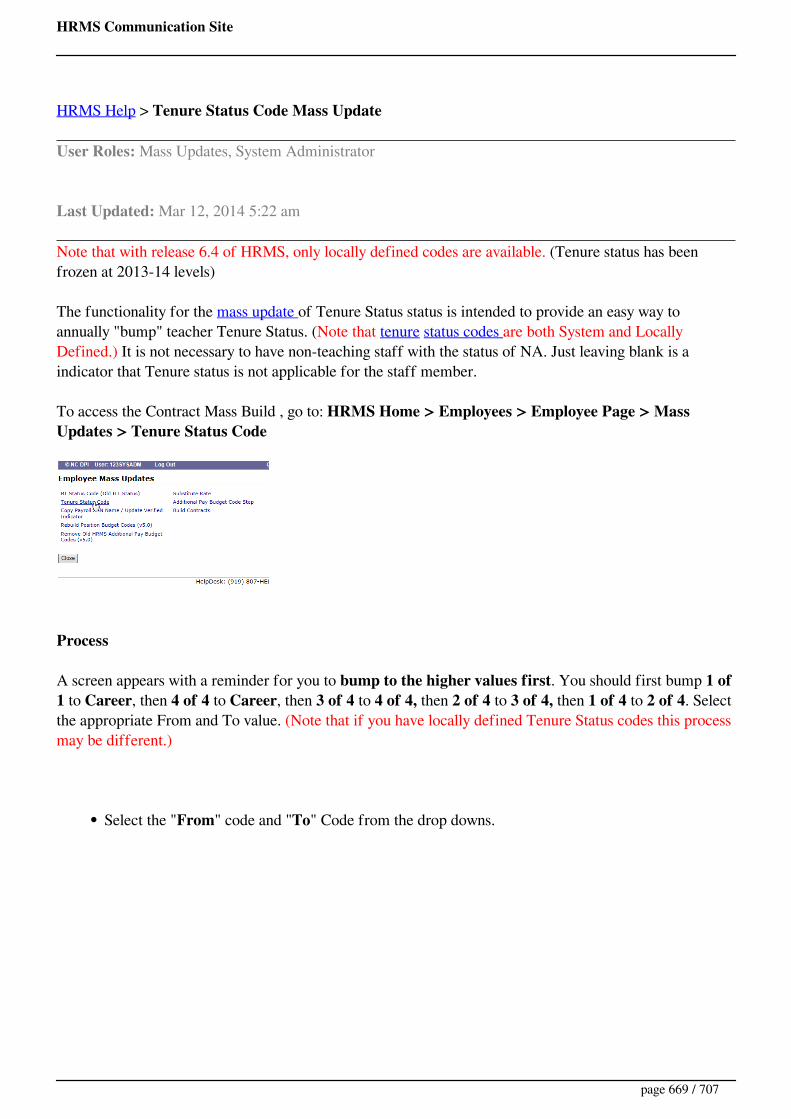
HRMS Communication Site
HRMS Help > Tenure Status Code Mass Update
User Roles: Mass Updates, System Administrator
Last Updated: Mar 12, 2014 5:22 am
Note that with release 6.4 of HRMS, only locally defined codes are available. (Tenure status has beenfrozen at 2013-14 levels)
The functionality for the mass update of Tenure Status status is intended to provide an easy way toannually "bump" teacher Tenure Status. (Note that tenure status codes are both System and LocallyDefined.) It is not necessary to have non-teaching staff with the status of NA. Just leaving blank is aindicator that Tenure status is not applicable for the staff member.
To access the Contract Mass Build , go to: HRMS Home > Employees > Employee Page > MassUpdates > Tenure Status Code
Process
A screen appears with a reminder for you to bump to the higher values first. You should first bump 1 of1 to Career, then 4 of 4 to Career, then 3 of 4 to 4 of 4, then 2 of 4 to 3 of 4, then 1 of 4 to 2 of 4. Selectthe appropriate From and To value. (Note that if you have locally defined Tenure Status codes this processmay be different.)
Select the "From" code and "To" Code from the drop downs.
page 669 / 707

HRMS Communication Site
In the example below, 1 of 1 was selected for "From" and Career was selected for "To". Since Career wasselected for the "To" value, the Board Action Date appeared. The date entered will become the "DateTenure Granted" value found on the employee's Status and Benefits form.
All staff whose Tenure Status Code matches the "From" value appear in the "Include" window on the left.
For any staff that should not be "bumped", click on their name and they will move to the"Exclude" window on the right.
In the example below, Jamie Alamance and Jason Craven did not meet the criteria for having their TenureStatus "bumped", so their names were clicked and moved to the "Exclude" window.
page 670 / 707

HRMS Communication Site
Once you have excluded all staff necessary, click on the "Submit" button and you will get a confirmationscreen that you can print if desired. (See below).
page 671 / 707
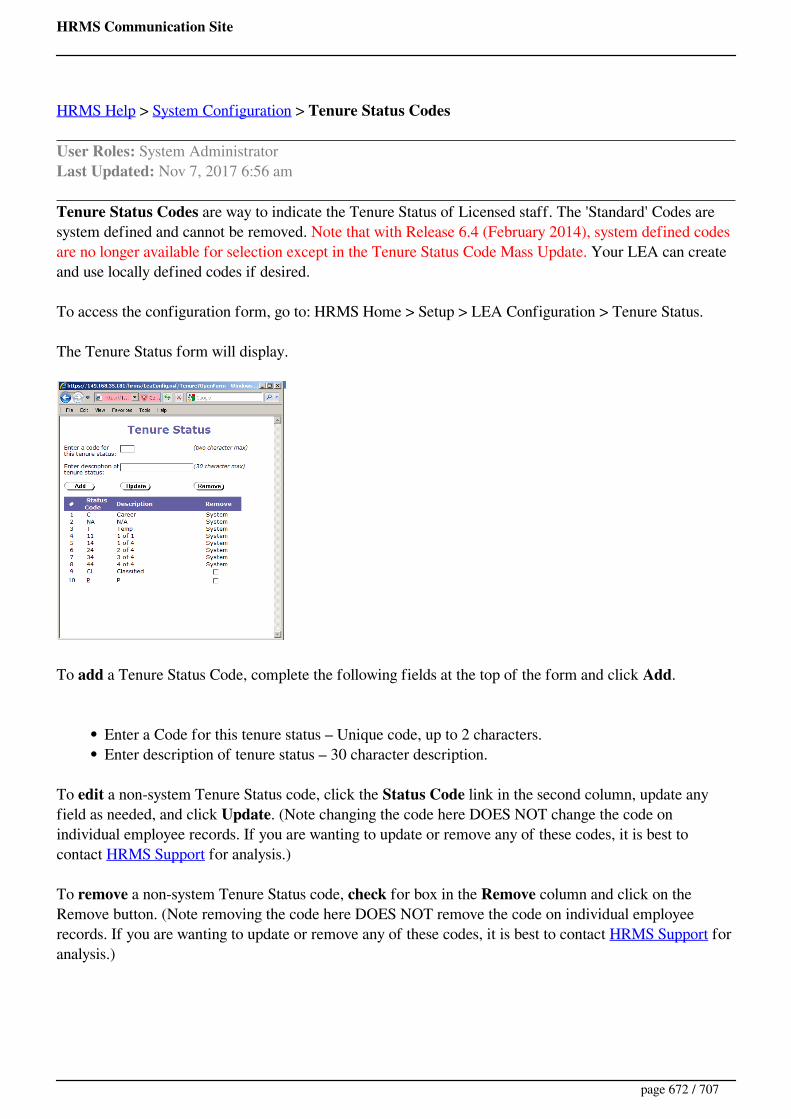
HRMS Communication Site
HRMS Help > System Configuration > Tenure Status Codes
User Roles: System AdministratorLast Updated: Nov 7, 2017 6:56 am
Tenure Status Codes are way to indicate the Tenure Status of Licensed staff. The 'Standard' Codes aresystem defined and cannot be removed. Note that with Release 6.4 (February 2014), system defined codesare no longer available for selection except in the Tenure Status Code Mass Update. Your LEA can createand use locally defined codes if desired.
To access the configuration form, go to: HRMS Home > Setup > LEA Configuration > Tenure Status.
The Tenure Status form will display.
To add a Tenure Status Code, complete the following fields at the top of the form and click Add.
Enter a Code for this tenure status – Unique code, up to 2 characters.Enter description of tenure status – 30 character description.
To edit a non-system Tenure Status code, click the Status Code link in the second column, update anyfield as needed, and click Update. (Note changing the code here DOES NOT change the code onindividual employee records. If you are wanting to update or remove any of these codes, it is best tocontact HRMS Support for analysis.)
To remove a non-system Tenure Status code, check for box in the Remove column and click on theRemove button. (Note removing the code here DOES NOT remove the code on individual employeerecords. If you are wanting to update or remove any of these codes, it is best to contact HRMS Support foranalysis.)
page 672 / 707
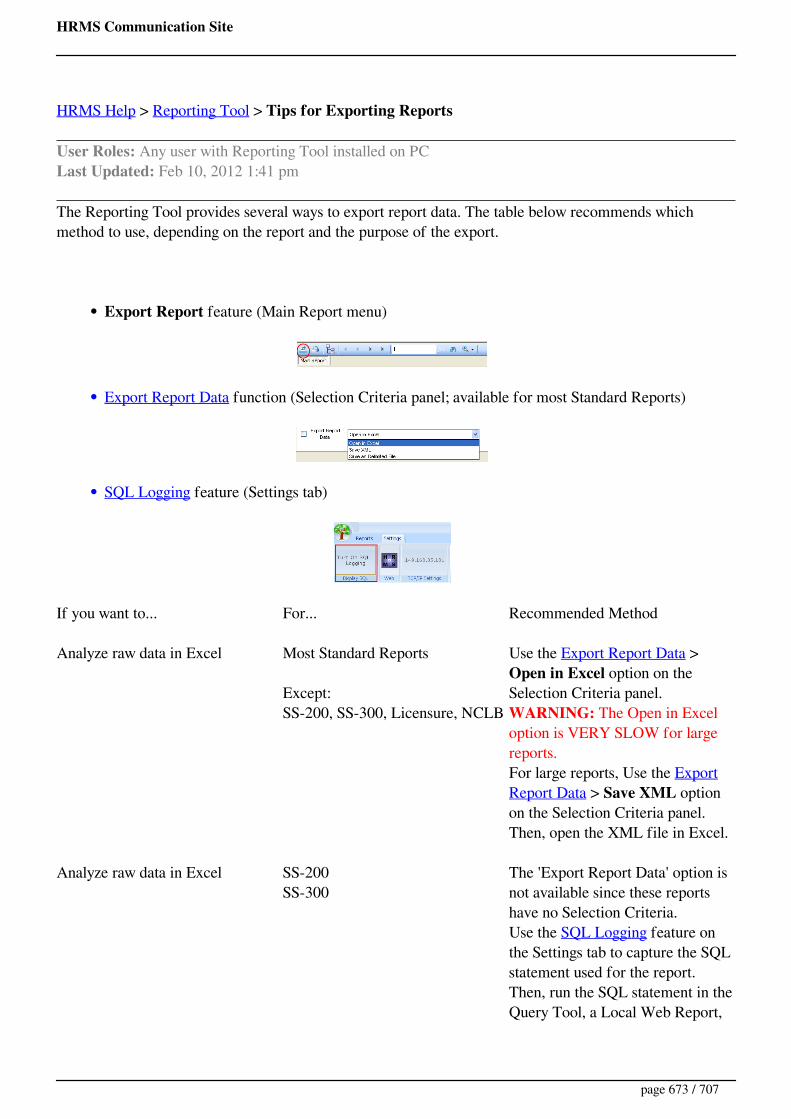
HRMS Communication Site
HRMS Help > Reporting Tool > Tips for Exporting Reports
User Roles: Any user with Reporting Tool installed on PCLast Updated: Feb 10, 2012 1:41 pm
The Reporting Tool provides several ways to export report data. The table below recommends whichmethod to use, depending on the report and the purpose of the export.
Export Report feature (Main Report menu)
Export Report Data function (Selection Criteria panel; available for most Standard Reports)
SQL Logging feature (Settings tab)
If you want to... For... Recommended Method
Analyze raw data in Excel Most Standard Reports
Except:SS-200, SS-300, Licensure, NCLB
Use the Export Report Data > Open in Excel option on theSelection Criteria panel.WARNING: The Open in Exceloption is VERY SLOW for largereports.For large reports, Use the ExportReport Data > Save XML optionon the Selection Criteria panel.Then, open the XML file in Excel.
Analyze raw data in Excel SS-200SS-300
The 'Export Report Data' option isnot available since these reportshave no Selection Criteria.Use the SQL Logging feature onthe Settings tab to capture the SQLstatement used for the report.Then, run the SQL statement in theQuery Tool, a Local Web Report,
page 673 / 707
HRMS Communication Site
or iSeries Navigator.
Analyze raw data in Excel LicensureNCLB Licensed HQ
Both the Export Report Data and SQL Logging features producetwo types of data rows for thesereports (Assignment data andLicense Area data). Contact HRMSSupport if you need an Excel filethat contains Assignment andLicense Area data in one row.
Save formatted report (read-only) All Standard Reports Use the Export Report feature inthe Main Report menu.Select PDF (*.pdf) for 'Save astype'.
Save formatted report (editable) All Standard Reports Use the Export Report feature inthe Main Report menu.Select Microsoft Word (97-2003)(*.doc) for 'Save as type'.
page 674 / 707

HRMS Communication Site
Topic Format Target Audience
HRMS Payroll Position Number Update PowerPoint Central Office HRMS Specialist
Query Builder and Exporting Datawith the Reporting Tool
PowerPoint
Reference Guide
Central Office HRMS Specialist
Entering New Employees (WithoutVacancy Permit)
PowerPoint Central Office HRMS Specialist
Creating Positions/AddingAssignments/Transfers
PowerPoint
Video
Central Office HRMS Specialist
Preparing for Year End PowerPoint
Video
Guide
Central Office HRMS Specialist
Creating Contracts/ Mass BuildContracts
PowerPoint Central Office HRMS Specialist
Review of Credentials forRenewal/Non-RenewalConsideration
Video
Central Office HRMS Specialist
CEUs and Licensure Renewal Video
Central Office HRMS Specialist
Running SS200 PowerPoint Central Office HRMS Specialist
Running SS300 PowerPoint Central Office HRMS Specialist
Reviewing Employee Data Video Principal, Central Office
Staff Actions PowerPoint Central Office HRMS Specialist
Desktop Reporting Tool Video Central Office HRMS Specialist
page 675 / 707
HRMS Communication Site
HRMS Help > Employee Demographics > Transfer Assignment
User Roles: Employee Hire, Staff Action, HR Staff Action Officer, System AdministratorLast Updated: Oct 24, 2014 1:31 pm
Printer friendly
Table of ContentsQuick Facts
Transfer Assignment
Edit Assignment
Quick Facts
The Transfer Assignment form is used to transfer an employee from one assignment to a newassignment.Before you begin you should know which assignment will be removed, the date to remove and thenew position number.
Transfer Assignment
Accessed from Employee Demographics under the Assignment menuSelect Transfer to open Transfer Assignment pop up window
Transfer Assignment window pops up
page 676 / 707

HRMS Communication Site
Select Assignments to RemoveEnter Date to RemoveEnter New Position #Then click SubmitAfter you click Submit the Add Assignment form displays.
After you click Save & Edit the Edit Assignment form displays.
Edit Assignment
page 677 / 707

HRMS Communication Site
page 678 / 707

HRMS Communication Site
The NCDPI Data Management Group provides a document, Transmitting Private InformationElectronically: Best Practices Guide for Communicating Personally Identifiable Information by Email, Faxor Other Electronic Means ,that anyone who deals with sensitive data should read. We all have occasionswhen we need to share data, such as when we are trying to resolve issues, and this guide will provide youwith the best practice that should be used.
page 679 / 707
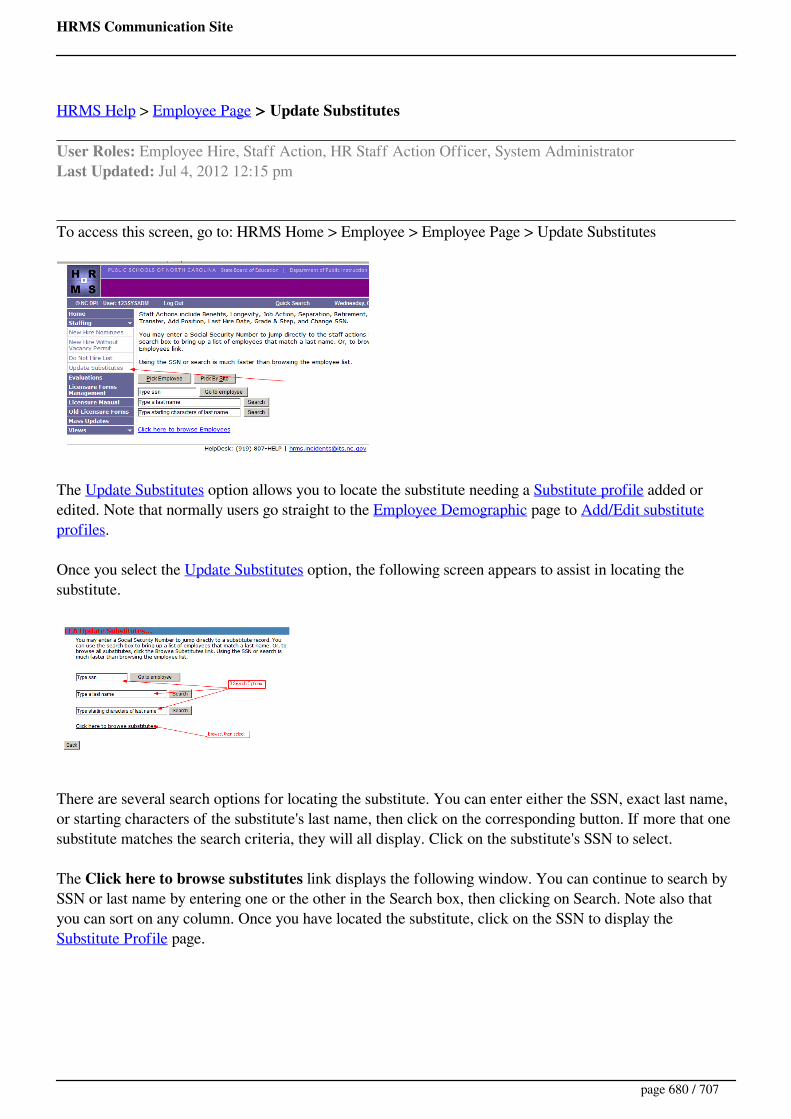
HRMS Communication Site
HRMS Help > Employee Page > Update Substitutes
User Roles: Employee Hire, Staff Action, HR Staff Action Officer, System AdministratorLast Updated: Jul 4, 2012 12:15 pm
To access this screen, go to: HRMS Home > Employee > Employee Page > Update Substitutes
The Update Substitutes option allows you to locate the substitute needing a Substitute profile added oredited. Note that normally users go straight to the Employee Demographic page to Add/Edit substituteprofiles.
Once you select the Update Substitutes option, the following screen appears to assist in locating thesubstitute.
There are several search options for locating the substitute. You can enter either the SSN, exact last name,or starting characters of the substitute's last name, then click on the corresponding button. If more that onesubstitute matches the search criteria, they will all display. Click on the substitute's SSN to select.
The Click here to browse substitutes link displays the following window. You can continue to search bySSN or last name by entering one or the other in the Search box, then clicking on Search. Note also thatyou can sort on any column. Once you have located the substitute, click on the SSN to display the Substitute Profile page.
page 680 / 707

HRMS Communication Site
page 681 / 707
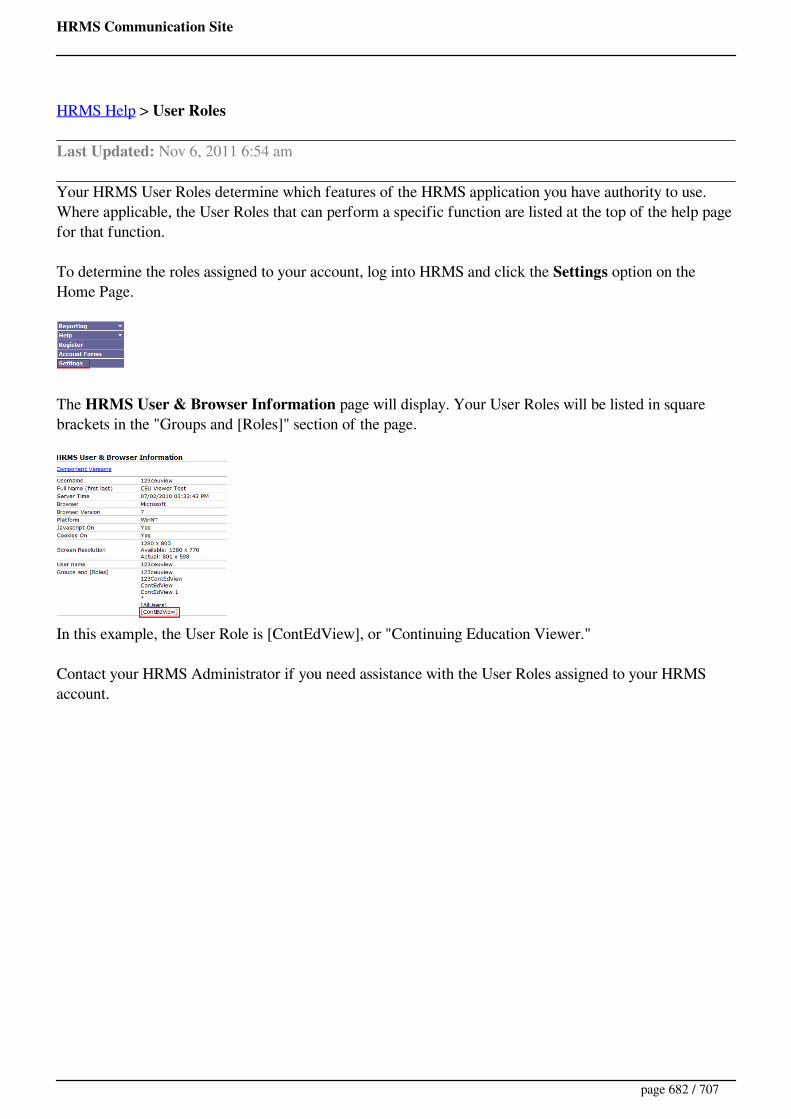
HRMS Communication Site
HRMS Help > User Roles
Last Updated: Nov 6, 2011 6:54 am
Your HRMS User Roles determine which features of the HRMS application you have authority to use.Where applicable, the User Roles that can perform a specific function are listed at the top of the help pagefor that function.
To determine the roles assigned to your account, log into HRMS and click the Settings option on theHome Page.
The HRMS User & Browser Information page will display. Your User Roles will be listed in squarebrackets in the "Groups and [Roles]" section of the page.
In this example, the User Role is [ContEdView], or "Continuing Education Viewer."
Contact your HRMS Administrator if you need assistance with the User Roles assigned to your HRMSaccount.
page 682 / 707

HRMS Communication Site
Creation Date: 1/28/2016Description: 1) Review of State Board of Education policy on License Renewal and Recent LegislativeUpdates 2) Determining who is short in requirements and 3) Lic/Sal Criminal Affidavit and LicenseProcessAudience: Licensure SpecialistsHRMS Module: HRMS Reporting Tool 2012Duration: 40 minutes
Notes since video was made: None
Click to View Video
File Not Found
page 683 / 707
HRMS Communication Site
Creation Date: 2/27/2013Description: Discusses Contract Types and configuration of Contract Conditions, creating individualcontracts, printing contracts (from HRMS Reporting Tool 2012), and mass build of contracts.Audience: HR AdministratorsHRMS Module: Contracts, Reporting ToolDuration: 47 minutes
Notes since video was made: None
Click to View Video
page 684 / 707

HRMS Communication Site
Creation Date: 08/05/2015Description: Configurations items for Positions are discussed. Demonstration of how to: 1) Createpositions, 2) Add Assignments and 3) Perform Transfers.Audience: HR AdministratorsHRMS Module: Position, AssignmentsDuration: 48 Minutes
Click To View Video
page 685 / 707

HRMS Communication Site
Creation Date: 9/16/2015Description: How to find Help within the tool, maneuver through reports, selection criteria, runningreports and mention of other features. Features such as exporting data, creating mailing labels, etc...arementioned, but not demonstrated. All the specific reports are not reviewed. The purpose of this Webinarwas to demonstrate the features and uses of the tool.Audience: HRMS AdministratorsHRMS Module: Desktop Reporting ToolDuration: 23 minutes
Notes since video made: None
Video
page 686 / 707

HRMS Communication Site
Creation Date: 9/5/2012Description: This Webinar discusses and demonstrates, "Lookup My CEUs", CEU configuration items,creating/editing/searching CEU Templates, assigning CEUs, CEU renewal lists, mass corrections to CEUsentered in error and various Web Reports and Reporting Tool 2012 reports associated with CEUs.Audience: Human Resource staff that enter or report on CEUs.HRMS Module: Continuing EducationDuration: 60 minutes
Notes since video was made: None
Click to View Video
page 687 / 707

HRMS Communication Site
Creation Date: 5/14/2014Description: This Webinar briefly discusses how to search for applicants, then demonstrates how to enternew staff in HRMS (not using the vacancy permit process).Audience: Hiring Agents, Anyone with the ability to add staff to employee demographics.HRMS Module: Applicant Search, Employee DemographicsDuration: 32 minutes
Notes since video was made: None
Click to View Video
File Not Found
page 688 / 707
HRMS Communication Site
Creation Date: 1/23/2013Description: This Webinar changes in HRMS with release 6.3 (January 2013). A new, more robust StaffAction Console is now used for Leaves of Absences, Suspensions, and Separations. A new "Re-employment" staff action is also now available. The Staff Action Workflow is now only used for BudgetCode requests and the Other/Termination form is now obsolete.Audience: HRMS AdministratorsHRMS Module: Staff Action Console, Separations and Re-employments, Staff Action Workflow andStaff Action SearchDuration: 42 minutes
Notes since video was made: None
Click to View Video
Click here to view Powerpoint
page 689 / 707

HRMS Communication Site
Creation Date: 08/21/2013Description: Demonstration of how to use the HRMS Communication Website to find helpfulinformation concerning HRMS.Audience: All HR staff and PrincipalsHRMS Module: N/ADuration: 22 minutes
Notes since video was made: None
Click to View Video
page 690 / 707

HRMS Communication Site
Creation Date: 08/19/2015Description: Managing Applications focuses on how to handle employment applications that are sent tothe LEAs from DPI's School Jobs Application System.Audience: Central Office Staff, HRMS SpecialistHRMS Module: ApplicantsDuration: 41 minutes
Notes since video was made: None
Click to View Video
File Not Found
page 691 / 707

HRMS Communication Site
Creation Date: 06/11/2014Description: This Webinar reviews each HRMS Web Report and it's use.Audience: HR AdministratorsHRMS Module: HRMS Standard Web ReportsDuration: 50 Minutes
Notes since video was made:
None
Click to View Video
page 692 / 707

HRMS Communication Site
Creation Date: 1/21/2015Description: This webinar explains why this function is important, use of 80000 series reports for datacleanup and demonstrates 1) the various ways to update payroll assignment records with the HRMSposition number, 2) mass sync of payroll information to HRMS, 3) archiving of budget code informationwith the assignment and 4) why you may not want to put the HRMS position number on all an employee'spayroll assignment records.Audience: Central Office HR StaffHRMS Module: Edit Assignment, Payroll Position # UpdateDuration: 35 Minutes
Notes since video was made: None
Click to View Video
page 693 / 707
HRMS Communication Site
Creation Date: 03/25/2015Description: Review of HRMS data to be updated as you close out one school year and begin another.Tools are identified to assist HRMS Administrators in identifying data needing to be updated, timelines forthese updates, and steps to consider while making these updates.Audience: HRMS System Administrators, Licensure SpecialistsHRMS Modules: Employee Demographics, Contracts, Positions, System Configuration, Mass UpdatesDuration: 32 minutes
Notes since video was made: None
Click to View Video
page 694 / 707

HRMS Communication Site
Creation Date: 3/5/2014Description: This course demonstrates procedures of Credential Review to make a determination about anindividual's reemployment eligibility based upon current license information and contract conditions.Audience: HRMS Administrators and Licensure SpecialistsHRMS Modules: Employee Demographics, Contracts, RT 2012, License Assignment and Contract Info,Licensure Data and Mass UpdatesDuration: 1.5 hours
Notes since video was made: None
Click to View Video
page 695 / 707

HRMS Communication Site
Creation Date: 9/09/2015Description: Demonstrates how Principals can search and display information specific to their employeesusing the HRMS Principal's Page.Audience: Central Office Staff and PrincipalsHRMS Module: Principal's PageDuration: 34 minutes
Notes since video was made: None
Video
page 696 / 707

HRMS Communication Site
Creation Date: 09/10/2014Description:Audience: HRMS AdministratorsHRMS Module: HRMS Reporting ToolDuration: 22 minutes
Notes since video was made: None
Click Here to View Video
page 697 / 707

HRMS Communication Site
Creation Date:Description:Audience:HRMS Module:Duration:
Notes since video was made: None
Webinar Test
page 698 / 707
HRMS Communication Site
Quick, informative media covering key HRMS Processes.Principal's Part 1Principal's Part 2
page 699 / 707

HRMS Communication Site
HRMS Help > Positions > View a Position
User Roles: Principal/Hiring Agent, Position Editor, System AdministratorLast Updated: Apr 17, 2012 10:44 am
To view a position, find the desired position on the Position Management Console. Then, double-clickthe position row, or select the position and click the View Position button.
The View Position form will display. See Position Information for details about each of the fields on theform.
page 700 / 707

HRMS Communication Site
HRMS Help > Employee Page > View All Assignment Details
User Roles: Employee Hire, Staff Action, HR Staff Action Officer, System AdministratorLast Updated: Apr 10, 2015 10:10 am
Printer friendly
Table of ContentsQuick Facts
Where to Access
View All Assignment Details Form
Quick Facts
The View All Assignment Details form allows authorized users to view current, archived andfuture assignments for an employee.Any Payroll Assignment Records with missing or invalid position numbers are also displayed at thebottom.
Where to AccessThe form is accessed from the Employee Demographics page by clicking on the View All AssignmentDetails link (far right) on the Current Assignments header. (see screenshot below).
page 701 / 707

HRMS Communication Site
View All Assignment Details FormThis form consists of 5 different sections (see below).
Employee Information - Simply displays the employee's Name, SSN, Payroll ID and CurrentDate. (The current date is useful when printing screen shots for later review.)Current HRMS Assignments - Lists all current assignments with selected Position, Assignmentand Payroll Budget Code (if position number on payroll assignment record) information. The Pos #is a link which displays the current position information in "View" mode.Future HRMS Assignments -Lists all future assignments with selected Position, Assignment andPayroll Budget Code (if position number on payroll assignment record) information. The Pos # is alink which displays the current position information in "View" mode.Archived HRMS Assignments -Lists all archived assignments with selected Position, Assignmentand Payroll Budget Code (if position number was on payroll assignment record(s) at the time of thearchive) information. The Pos # is a link which displays the position information at the time of thearchive in "View" mode.Payroll Budget Code Assignments with Missing/Invalid HRMS Position Numbers - Headingand data only display if there are active payroll assignment records with the employee's SSN wherethe position number is blank or the employee is no longer in the position on the payroll assignmentrecord.
page 702 / 707
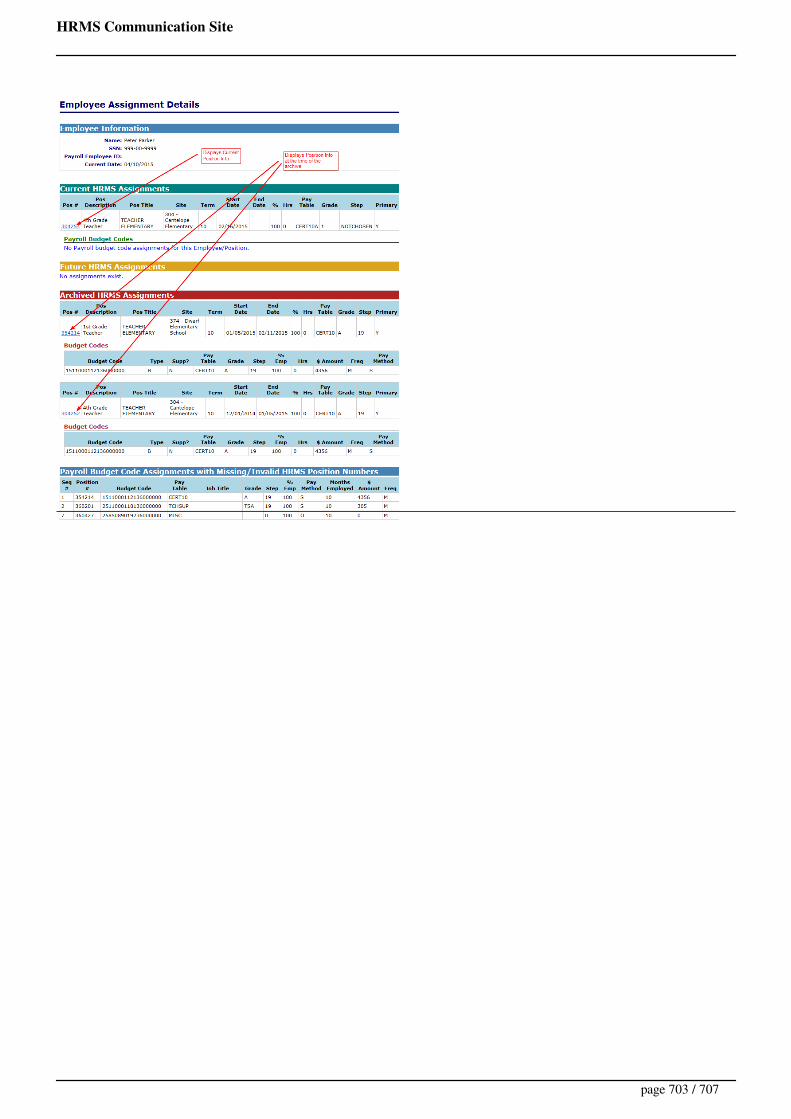
HRMS Communication Site
page 703 / 707

HRMS Communication Site
HRMS Help > Reporting > Web Reports
User Roles: Varies by ReportLast Updated: Dec 4, 2017 8:24 am
HRMS Web Reports include simple LEA reports that do not require extensive calculations or formatting.Those more complex reports are available in the HRMS Reporting Tool application.
To access Web Reports, go to HRMS Home > Reporting > Web Reports
The HRMS Web Reports page will display.
The reports available to you depend on your HRMS User Role.To access a report, click on the Report Name.To sort the list by a specific column, click the triangles in the column heading.Once results display in your browser, perform the following steps to export to Excel.
Click on the resultsCtrl A (Selects all data. The data will highlight.)Ctrl C (Copies all data to clipboard. You will not see anything happen.)Open Excel and click on a cellCtrl V (Paste)
HRMS Web ReportsClick a link below to view details about a specific Web Report.
1. 000003 - Applicant Email List2. 000003a - Applicant Email List with Indicators3. 000007 - CEU Totals4. 000008 - Local Forms for Administrator5. 000010 - CEU Renewal List By Course6. 000011 - Last Few CEU Course IDs Used7. 000013 - New Hire Report8. 000014 - National Board Certification Info9. 000016 - Highly Qualified Professional Development Report
10. 000017 - Principal Renewal Recommendation Report11. 000018 - Licensure Names List12. 000019 - Employees With Disabled or Invalid Emp. Status Codes13. 000020 - Active Employees with Zero or Multiple Primary Assignments14. 000022 - Inactive Employees with Current Assignments15. 000023 - CEU Literacy Content Credit Errors16. 000025 - Leave of Absence-Suspension17. 000026 - Old Leave of Absence-Disability Records
page 704 / 707

HRMS Communication Site
18. 000027 - ORBIT Employee List for Retirees Report19. 000113 - Positions By Site20. 000114 - Positions Associated With Deleted Sites21. 000122 - BT Status22. 000123 - Employees by Last 4 Digits of SSN23. 000124 - Licensure Forms By Create Date24. 000126 - Employee Race, Ethnicity Report25. 000127 - Employees With Multiple Active Contracts26. 000128 - Old Suspension Records27. 000129 - Separation and Employee Termination Date Errors28. 000130 - Validated Licenses29. 000131 - Positions which do not have a Census Category30. 000132 - Positions without an Evaluation Category31. 000133 - Employee name discrepencies between HRMS, Licensure and Payroll32. 000134 - Pre-K Teacher Licensed Positions33. 000135 - Employees with Incomplete, Invalid Tenure Status and, or BT Status34. 000138 - CEU Literacy Credit Review35. 000139 - Position Choice and Position Title Review36. 000140 - Positions that Do Not have Matching Position Title Codes37. 800001 - Payroll Employees Not in HRMS38. 800002 - Employees With Additional Pay Budget Codes in HRMS39. 800004 - HRMS Employees with No Position Assignment40. 800005 - Active Payroll Assignments with Missing-Invalid HRMS Position Numbers41. 800006 - Active HRMS Employees Not in Payroll42. Substitute Web Reports
page 705 / 707

HRMS Communication Site
The HRMS team has used WIKIspaces to provide the HRMS Communications and the NC School Jobsinformation sites. As you access these sites you may be presented with a banner informing you that thesesites will be ending soon. The HRMS team is aware and has been working with others at NCDPI to find anew home for this information. When a new method is found we will send out notifications through thislist as well as post on the WIKIs as well.
To keep informed of changes and activities be sure to sign up for the email list.
page 706 / 707
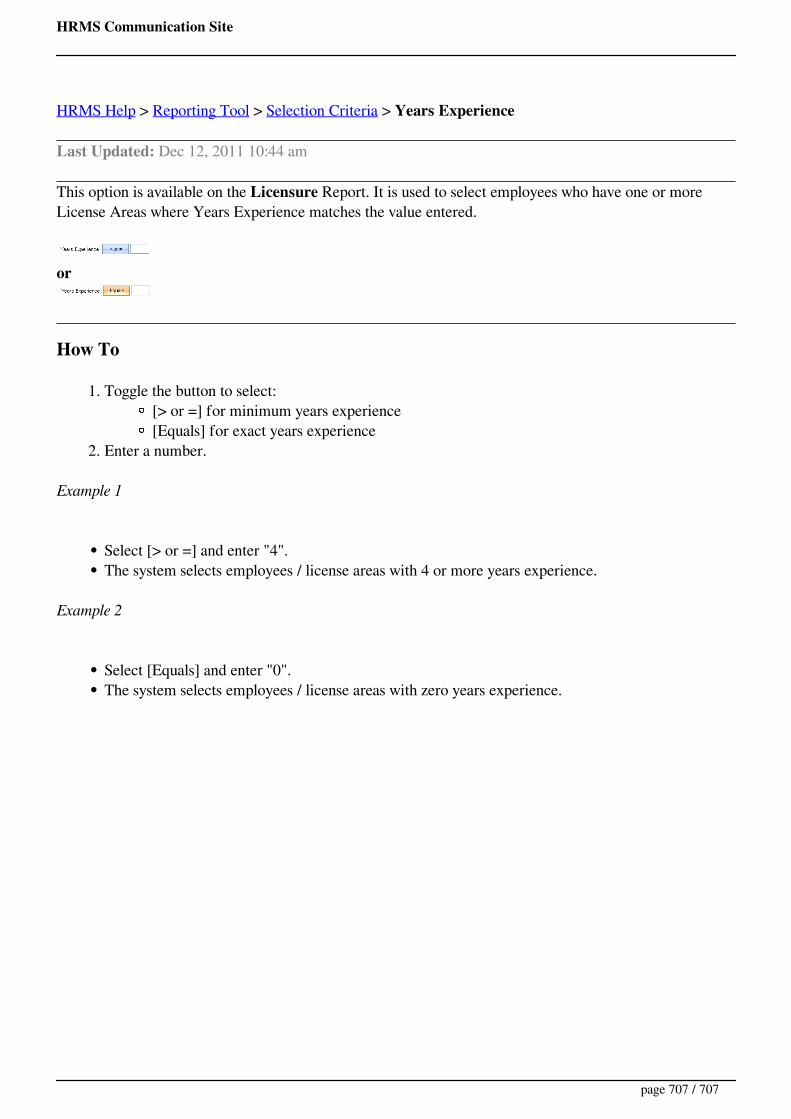
HRMS Communication Site
HRMS Help > Reporting Tool > Selection Criteria > Years Experience
Last Updated: Dec 12, 2011 10:44 am
This option is available on the Licensure Report. It is used to select employees who have one or moreLicense Areas where Years Experience matches the value entered.
or
How To
1. Toggle the button to select:[> or =] for minimum years experience[Equals] for exact years experience
2. Enter a number.
Example 1
Select [> or =] and enter "4".The system selects employees / license areas with 4 or more years experience.
Example 2
Select [Equals] and enter "0".The system selects employees / license areas with zero years experience.
Powered by TCPDF (www.tcpdf.org)
page 707 / 707