HP Select Audit Software - Support
114
HP Select Audit Software for the Windows ® , HP-UX ® , Linux ® , and Solaris ® operating systems Software Version: 1.02 Report Developer’s Guide Document Release Date: July 2007 Software Release Date: July 2007
-
Upload
khangminh22 -
Category
Documents
-
view
3 -
download
0
Transcript of HP Select Audit Software - Support

HP Select Audit Software
for the Windows®, HP-UX®, Linux®, and Solaris® operating systems
Software Version: 1.02
Report Developer’s Guide
Document Release Date: July 2007Software Release Date: July 2007
Legal Notices
Warranty
The only warranties for HP products and services are set forth in the express warranty statements accompanying such products and services. Nothing herein should be construed as constituting an additional warranty. HP shall not be liable for technical or editorial errors or omissions contained herein.
HP provides third-party products, software, and services that are not HP Branded “AS IS” without warranties or representations of any kind from HP, although the original manufacturers or third party suppliers of such products, software and services may provide their own warranties, representations or conditions. By using this software you accept the terms and conditions.
The information contained herein is subject to change without notice.
Restricted Rights Legend
Confidential computer software. Valid license from HP required for possession, use or copying. Consistent with FAR 12.211 and 12.212, Commercial Computer Software, Computer Software Documentation, and Technical Data for Commercial Items are licensed to the U.S. Government under vendor's standard commercial license.
Copyright Notices
© Copyright 2006- 2007 Hewlett-Packard Development Company, L.P.
Trademark Notices
HP Select Audit includes software developed by third parties. The software HP Select Audit uses includes:
• ANTLR Copyright 2005 Terrence Parr.
• commons-logging from the Apache Software Foundation.
• Install Anywhere, Copyright 2004 Zero G Software, Inc.
• Jasper Decisions Copyright 2000-2006 JasperSoft Corporation.
• JavaScript Tree, Copyright 2002-2003 Geir Landro.
• Legion of the Bouncy Castle developed by Bouncy Castle.
• log4J from the Apache Software Foundation.
• Microsoft SQL Server 2005 JDBC Driver
• OpenAdaptor from the Software Conservancy.
• Oracle JDBC Thin Driver
• Quartz, Copyright 2004 - 2005 OpenSymphony
• spring-framework from the Apache Software Foundation.
• Tomahawk from the Apache Software Foundation.
• treeviewjavascript from GubuSoft.
• Xalan-Java from the Apache Software Foundation.
• Xerces-Java version from the Apache Software Foundation.
Please check the <install_dir>/3rd_party_license folder for expanded copyright notices from such third party suppliers.
2
Documentation Updates
This guide’s title page contains the following identifying information:
• Software Version number, which indicates the software version.
• Document Release Date, which changes each time the document is updated.
• Software Release Date, which indicates the release date of this version of the software.
To check for recent updates, or to verify that you are using the most recent edition of a document, go to:
http://ovweb.external.hp.com/lpe/doc_serv/
You will also receive updated or new editions if you subscribe to the appropriate product support service. Contact your HP sales representative for details.
3
Support
You can visit the HP software support web site at:
www.hp.com/go/hpsoftwaresupport
HP Software online support provides an efficient way to access interactive technical support tools. As a valued support customer, you can benefit by using the support site to:
• Search for knowledge documents of interest
• Submit and track support cases and enhancement requests
• Download software patches
• Manage support contracts
• Look up HP support contacts
• Review information about available services
• Enter into discussions with other software customers
• Research and register for software training
Most of the support areas require that you register as an HP Passport user and sign in. Many also require a support contract.
To find more information about access levels and HP Passport, go to:
http://h20230.www2.hp.com/new_access_levels.jsp
To find more information about HP Passport, go to:
http://h20229.www2.hp.com/passport-registration.html
4

Contents
1 Overview . . . . . . . . . . . . . . . . . . . . . . . . . . . . . . . . . . . . . . . . . . . . . . . . . . . . . . . . . . . . . . . . . . . . . . . . . . . . 11
Who is This Book For? . . . . . . . . . . . . . . . . . . . . . . . . . . . . . . . . . . . . . . . . . . . . . . . . . . . . . . . . . . . . . . . . . . 11What’s in This Book? . . . . . . . . . . . . . . . . . . . . . . . . . . . . . . . . . . . . . . . . . . . . . . . . . . . . . . . . . . . . . . . . . . . 11The Select Audit Documentation Set . . . . . . . . . . . . . . . . . . . . . . . . . . . . . . . . . . . . . . . . . . . . . . . . . . . . . . 12. . . . . . . . . . . . . . . . . . . . . . . . . . . . . . . . . . . . . . . . . . . . . . . . . . . . . . . . . . . . . . . . . . . . . . . . . . . . . . . . . . . . . 13
2 Terms and Concepts . . . . . . . . . . . . . . . . . . . . . . . . . . . . . . . . . . . . . . . . . . . . . . . . . . . . . . . . . . . . . . . . . . 15
RDL. . . . . . . . . . . . . . . . . . . . . . . . . . . . . . . . . . . . . . . . . . . . . . . . . . . . . . . . . . . . . . . . . . . . . . . . . . . . . . . . . 15Structure . . . . . . . . . . . . . . . . . . . . . . . . . . . . . . . . . . . . . . . . . . . . . . . . . . . . . . . . . . . . . . . . . . . . . . . . . . 16
Top-level Tags . . . . . . . . . . . . . . . . . . . . . . . . . . . . . . . . . . . . . . . . . . . . . . . . . . . . . . . . . . . . . . . . . . . 16Properties . . . . . . . . . . . . . . . . . . . . . . . . . . . . . . . . . . . . . . . . . . . . . . . . . . . . . . . . . . . . . . . . . . . . . . . 16Parameters . . . . . . . . . . . . . . . . . . . . . . . . . . . . . . . . . . . . . . . . . . . . . . . . . . . . . . . . . . . . . . . . . . . . . . 16Content. . . . . . . . . . . . . . . . . . . . . . . . . . . . . . . . . . . . . . . . . . . . . . . . . . . . . . . . . . . . . . . . . . . . . . . . . 17Paginations . . . . . . . . . . . . . . . . . . . . . . . . . . . . . . . . . . . . . . . . . . . . . . . . . . . . . . . . . . . . . . . . . . . . . 17Sortings . . . . . . . . . . . . . . . . . . . . . . . . . . . . . . . . . . . . . . . . . . . . . . . . . . . . . . . . . . . . . . . . . . . . . . . . 17Layout. . . . . . . . . . . . . . . . . . . . . . . . . . . . . . . . . . . . . . . . . . . . . . . . . . . . . . . . . . . . . . . . . . . . . . . . . . 17
Component . . . . . . . . . . . . . . . . . . . . . . . . . . . . . . . . . . . . . . . . . . . . . . . . . . . . . . . . . . . . . . . . . . . . . . . . . . . 17Control . . . . . . . . . . . . . . . . . . . . . . . . . . . . . . . . . . . . . . . . . . . . . . . . . . . . . . . . . . . . . . . . . . . . . . . . . . . . . . 18Parameter . . . . . . . . . . . . . . . . . . . . . . . . . . . . . . . . . . . . . . . . . . . . . . . . . . . . . . . . . . . . . . . . . . . . . . . . . . . . 19Profile . . . . . . . . . . . . . . . . . . . . . . . . . . . . . . . . . . . . . . . . . . . . . . . . . . . . . . . . . . . . . . . . . . . . . . . . . . . . . . . 19Data Source . . . . . . . . . . . . . . . . . . . . . . . . . . . . . . . . . . . . . . . . . . . . . . . . . . . . . . . . . . . . . . . . . . . . . . . . . . 19Query . . . . . . . . . . . . . . . . . . . . . . . . . . . . . . . . . . . . . . . . . . . . . . . . . . . . . . . . . . . . . . . . . . . . . . . . . . . . . . . 20
Data Blocks . . . . . . . . . . . . . . . . . . . . . . . . . . . . . . . . . . . . . . . . . . . . . . . . . . . . . . . . . . . . . . . . . . . . . . . . 20Theme . . . . . . . . . . . . . . . . . . . . . . . . . . . . . . . . . . . . . . . . . . . . . . . . . . . . . . . . . . . . . . . . . . . . . . . . . . . . . . . 20Catalog . . . . . . . . . . . . . . . . . . . . . . . . . . . . . . . . . . . . . . . . . . . . . . . . . . . . . . . . . . . . . . . . . . . . . . . . . . . . . . 21Library . . . . . . . . . . . . . . . . . . . . . . . . . . . . . . . . . . . . . . . . . . . . . . . . . . . . . . . . . . . . . . . . . . . . . . . . . . . . . . 21Report Creation Tools . . . . . . . . . . . . . . . . . . . . . . . . . . . . . . . . . . . . . . . . . . . . . . . . . . . . . . . . . . . . . . . . . . 21
Report Designer . . . . . . . . . . . . . . . . . . . . . . . . . . . . . . . . . . . . . . . . . . . . . . . . . . . . . . . . . . . . . . . . . . . . 22RDL Generation Toolkit . . . . . . . . . . . . . . . . . . . . . . . . . . . . . . . . . . . . . . . . . . . . . . . . . . . . . . . . . . . . . . . . 22Ad Hoc Wizard . . . . . . . . . . . . . . . . . . . . . . . . . . . . . . . . . . . . . . . . . . . . . . . . . . . . . . . . . . . . . . . . . . . . . . . . 22
Creating a New Report . . . . . . . . . . . . . . . . . . . . . . . . . . . . . . . . . . . . . . . . . . . . . . . . . . . . . . . . . . . . . . . 22Creating a Report From an Existing One . . . . . . . . . . . . . . . . . . . . . . . . . . . . . . . . . . . . . . . . . . . . . . . . 23
Permissions, Directories, and ACLs . . . . . . . . . . . . . . . . . . . . . . . . . . . . . . . . . . . . . . . . . . . . . . . . . . . . . . . 23Expression . . . . . . . . . . . . . . . . . . . . . . . . . . . . . . . . . . . . . . . . . . . . . . . . . . . . . . . . . . . . . . . . . . . . . . . . . . . 23Uploading and Publishing . . . . . . . . . . . . . . . . . . . . . . . . . . . . . . . . . . . . . . . . . . . . . . . . . . . . . . . . . . . . . . . 24Schedule . . . . . . . . . . . . . . . . . . . . . . . . . . . . . . . . . . . . . . . . . . . . . . . . . . . . . . . . . . . . . . . . . . . . . . . . . . . . . 24Report APIs . . . . . . . . . . . . . . . . . . . . . . . . . . . . . . . . . . . . . . . . . . . . . . . . . . . . . . . . . . . . . . . . . . . . . . . . . . 24Report Variables. . . . . . . . . . . . . . . . . . . . . . . . . . . . . . . . . . . . . . . . . . . . . . . . . . . . . . . . . . . . . . . . . . . . . . . 25
5
3 Parameters . . . . . . . . . . . . . . . . . . . . . . . . . . . . . . . . . . . . . . . . . . . . . . . . . . . . . . . . . . . . . . . . . . . . . . . . . . 27
Parameters and RDL . . . . . . . . . . . . . . . . . . . . . . . . . . . . . . . . . . . . . . . . . . . . . . . . . . . . . . . . . . . . . . . . . . . 27Content Parameters . . . . . . . . . . . . . . . . . . . . . . . . . . . . . . . . . . . . . . . . . . . . . . . . . . . . . . . . . . . . . . . . . 28Layout Parameters . . . . . . . . . . . . . . . . . . . . . . . . . . . . . . . . . . . . . . . . . . . . . . . . . . . . . . . . . . . . . . . . . . 28
Tips for Using Parameters. . . . . . . . . . . . . . . . . . . . . . . . . . . . . . . . . . . . . . . . . . . . . . . . . . . . . . . . . . . . . . . 28Tips for the Content Section. . . . . . . . . . . . . . . . . . . . . . . . . . . . . . . . . . . . . . . . . . . . . . . . . . . . . . . . . . . 28
Making Sure the Parameter has a Value . . . . . . . . . . . . . . . . . . . . . . . . . . . . . . . . . . . . . . . . . . . . . . 28Making Sure the Parameter has Only One Value . . . . . . . . . . . . . . . . . . . . . . . . . . . . . . . . . . . . . . . 29
Tips for the Layout Section . . . . . . . . . . . . . . . . . . . . . . . . . . . . . . . . . . . . . . . . . . . . . . . . . . . . . . . . . . . 29Example . . . . . . . . . . . . . . . . . . . . . . . . . . . . . . . . . . . . . . . . . . . . . . . . . . . . . . . . . . . . . . . . . . . . . . . . . . . . . 29
4 Guidelines for Developing Reports. . . . . . . . . . . . . . . . . . . . . . . . . . . . . . . . . . . . . . . . . . . . . . . . . . . . . . 35
Building the Report Using the Report Designer . . . . . . . . . . . . . . . . . . . . . . . . . . . . . . . . . . . . . . . . . . . . . 35Test-publishing Your Report . . . . . . . . . . . . . . . . . . . . . . . . . . . . . . . . . . . . . . . . . . . . . . . . . . . . . . . . . . . . . 36
Using the Report Server’s Developers Center to Test Publish a Report . . . . . . . . . . . . . . . . . . . . . . . . 36Publishing Your Report . . . . . . . . . . . . . . . . . . . . . . . . . . . . . . . . . . . . . . . . . . . . . . . . . . . . . . . . . . . . . . . . . 37
5 Working with Non-SQL Data Sources . . . . . . . . . . . . . . . . . . . . . . . . . . . . . . . . . . . . . . . . . . . . . . . . . . 39
Queries and Parameters . . . . . . . . . . . . . . . . . . . . . . . . . . . . . . . . . . . . . . . . . . . . . . . . . . . . . . . . . . . . . . . . 39Non-SQL SELECT “Queries” . . . . . . . . . . . . . . . . . . . . . . . . . . . . . . . . . . . . . . . . . . . . . . . . . . . . . . . . . . 39Parameters Not in SQL SELECT Statements . . . . . . . . . . . . . . . . . . . . . . . . . . . . . . . . . . . . . . . . . . . . 39
XML Data Sources . . . . . . . . . . . . . . . . . . . . . . . . . . . . . . . . . . . . . . . . . . . . . . . . . . . . . . . . . . . . . . . . . . . . . 40Select Audit Parameters and XML Data Sources . . . . . . . . . . . . . . . . . . . . . . . . . . . . . . . . . . . . . . . . . . 40Select Audit Parameters and XQueries . . . . . . . . . . . . . . . . . . . . . . . . . . . . . . . . . . . . . . . . . . . . . . . . . . 40Designating Rows and Columns from an XML Data Source . . . . . . . . . . . . . . . . . . . . . . . . . . . . . . . . . 42Examples . . . . . . . . . . . . . . . . . . . . . . . . . . . . . . . . . . . . . . . . . . . . . . . . . . . . . . . . . . . . . . . . . . . . . . . . . . 43
EJB Data Sources . . . . . . . . . . . . . . . . . . . . . . . . . . . . . . . . . . . . . . . . . . . . . . . . . . . . . . . . . . . . . . . . . . . . . 44Setting Up a JNDI Connection . . . . . . . . . . . . . . . . . . . . . . . . . . . . . . . . . . . . . . . . . . . . . . . . . . . . . . . . 45WebLogic Example . . . . . . . . . . . . . . . . . . . . . . . . . . . . . . . . . . . . . . . . . . . . . . . . . . . . . . . . . . . . . . . . . . 46WebSphere Example. . . . . . . . . . . . . . . . . . . . . . . . . . . . . . . . . . . . . . . . . . . . . . . . . . . . . . . . . . . . . . . . . 46Example Java Files. . . . . . . . . . . . . . . . . . . . . . . . . . . . . . . . . . . . . . . . . . . . . . . . . . . . . . . . . . . . . . . . . . 46Basic EJB Example . . . . . . . . . . . . . . . . . . . . . . . . . . . . . . . . . . . . . . . . . . . . . . . . . . . . . . . . . . . . . . . . . 47Parameterized EJB Example . . . . . . . . . . . . . . . . . . . . . . . . . . . . . . . . . . . . . . . . . . . . . . . . . . . . . . . . . . 48
Stored Procedure Data Sources. . . . . . . . . . . . . . . . . . . . . . . . . . . . . . . . . . . . . . . . . . . . . . . . . . . . . . . . . . . 48Example Stored Procedure Arguments . . . . . . . . . . . . . . . . . . . . . . . . . . . . . . . . . . . . . . . . . . . . . . . . . . 48Handling Return Values. . . . . . . . . . . . . . . . . . . . . . . . . . . . . . . . . . . . . . . . . . . . . . . . . . . . . . . . . . . . . . 49
Return Values from Oracle Stored Procedures . . . . . . . . . . . . . . . . . . . . . . . . . . . . . . . . . . . . . . . . . 49
6 Select Audit APIs . . . . . . . . . . . . . . . . . . . . . . . . . . . . . . . . . . . . . . . . . . . . . . . . . . . . . . . . . . . . . . . . . . . . . 51
API Overview . . . . . . . . . . . . . . . . . . . . . . . . . . . . . . . . . . . . . . . . . . . . . . . . . . . . . . . . . . . . . . . . . . . . . . . . . 51HTTP API. . . . . . . . . . . . . . . . . . . . . . . . . . . . . . . . . . . . . . . . . . . . . . . . . . . . . . . . . . . . . . . . . . . . . . . . . . . . 51
URL Syntax for the HTTP API . . . . . . . . . . . . . . . . . . . . . . . . . . . . . . . . . . . . . . . . . . . . . . . . . . . . . . . . 52Example HTTP Request . . . . . . . . . . . . . . . . . . . . . . . . . . . . . . . . . . . . . . . . . . . . . . . . . . . . . . . . . . . . . . 52
SOAP API . . . . . . . . . . . . . . . . . . . . . . . . . . . . . . . . . . . . . . . . . . . . . . . . . . . . . . . . . . . . . . . . . . . . . . . . . . . . 52Setting Up the SOAP API . . . . . . . . . . . . . . . . . . . . . . . . . . . . . . . . . . . . . . . . . . . . . . . . . . . . . . . . . . . . 53
Java Applications. . . . . . . . . . . . . . . . . . . . . . . . . . . . . . . . . . . . . . . . . . . . . . . . . . . . . . . . . . . . . . . . . 53Non-Java Applications. . . . . . . . . . . . . . . . . . . . . . . . . . . . . . . . . . . . . . . . . . . . . . . . . . . . . . . . . . . . . 53
6
Types of Methods . . . . . . . . . . . . . . . . . . . . . . . . . . . . . . . . . . . . . . . . . . . . . . . . . . . . . . . . . . . . . . . . . . . 53Session Management. . . . . . . . . . . . . . . . . . . . . . . . . . . . . . . . . . . . . . . . . . . . . . . . . . . . . . . . . . . . . . 53Library . . . . . . . . . . . . . . . . . . . . . . . . . . . . . . . . . . . . . . . . . . . . . . . . . . . . . . . . . . . . . . . . . . . . . . . . . 54Directory. . . . . . . . . . . . . . . . . . . . . . . . . . . . . . . . . . . . . . . . . . . . . . . . . . . . . . . . . . . . . . . . . . . . . . . . 54Report Execution . . . . . . . . . . . . . . . . . . . . . . . . . . . . . . . . . . . . . . . . . . . . . . . . . . . . . . . . . . . . . . . . . 54Schedule . . . . . . . . . . . . . . . . . . . . . . . . . . . . . . . . . . . . . . . . . . . . . . . . . . . . . . . . . . . . . . . . . . . . . . . . 54
Java Client SOAP API . . . . . . . . . . . . . . . . . . . . . . . . . . . . . . . . . . . . . . . . . . . . . . . . . . . . . . . . . . . . . . . . . . 54Extensibility API . . . . . . . . . . . . . . . . . . . . . . . . . . . . . . . . . . . . . . . . . . . . . . . . . . . . . . . . . . . . . . . . . . . . . . 55Using the Report Server API Examples . . . . . . . . . . . . . . . . . . . . . . . . . . . . . . . . . . . . . . . . . . . . . . . . . . . . 55
Building and Deploying the Examples . . . . . . . . . . . . . . . . . . . . . . . . . . . . . . . . . . . . . . . . . . . . . . . . . . 55Set Up a Report Server Deployment . . . . . . . . . . . . . . . . . . . . . . . . . . . . . . . . . . . . . . . . . . . . . . . . . 56Build and Deploy Examples . . . . . . . . . . . . . . . . . . . . . . . . . . . . . . . . . . . . . . . . . . . . . . . . . . . . . . . . 56Test Data Source Example with Supplied RDL Files . . . . . . . . . . . . . . . . . . . . . . . . . . . . . . . . . . . . 56
Custom Data Source Examples. . . . . . . . . . . . . . . . . . . . . . . . . . . . . . . . . . . . . . . . . . . . . . . . . . . . . . . . 57JoinDataSource . . . . . . . . . . . . . . . . . . . . . . . . . . . . . . . . . . . . . . . . . . . . . . . . . . . . . . . . . . . . . . . . . . 57CSVDataSource . . . . . . . . . . . . . . . . . . . . . . . . . . . . . . . . . . . . . . . . . . . . . . . . . . . . . . . . . . . . . . . . . . 57
Custom Data Source API. . . . . . . . . . . . . . . . . . . . . . . . . . . . . . . . . . . . . . . . . . . . . . . . . . . . . . . . . . . . . . . . 58Description of Data Sources . . . . . . . . . . . . . . . . . . . . . . . . . . . . . . . . . . . . . . . . . . . . . . . . . . . . . . . . . . . 58
Content Element Example . . . . . . . . . . . . . . . . . . . . . . . . . . . . . . . . . . . . . . . . . . . . . . . . . . . . . . . . . 58Overview of Data Source Processing Steps During Report Creation . . . . . . . . . . . . . . . . . . . . . . . . 59Implementation . . . . . . . . . . . . . . . . . . . . . . . . . . . . . . . . . . . . . . . . . . . . . . . . . . . . . . . . . . . . . . . . . . 60
Custom Directory API . . . . . . . . . . . . . . . . . . . . . . . . . . . . . . . . . . . . . . . . . . . . . . . . . . . . . . . . . . . . . . . . . . 60Implementing the Directory Handler API. . . . . . . . . . . . . . . . . . . . . . . . . . . . . . . . . . . . . . . . . . . . . . . . 61Configuring and Deploying the Example Directory Handler. . . . . . . . . . . . . . . . . . . . . . . . . . . . . . . . . 62Writing a Custom XQuery Data Source . . . . . . . . . . . . . . . . . . . . . . . . . . . . . . . . . . . . . . . . . . . . . . . . . 62Writing a Custom Authentication Module . . . . . . . . . . . . . . . . . . . . . . . . . . . . . . . . . . . . . . . . . . . . . . . 62
App Server Plugin API . . . . . . . . . . . . . . . . . . . . . . . . . . . . . . . . . . . . . . . . . . . . . . . . . . . . . . . . . . . . . . . . . 63App Server Plugin Architecture. . . . . . . . . . . . . . . . . . . . . . . . . . . . . . . . . . . . . . . . . . . . . . . . . . . . . . . . 64App Server Plugin API Methods . . . . . . . . . . . . . . . . . . . . . . . . . . . . . . . . . . . . . . . . . . . . . . . . . . . . . . . 64App Server Plugin Examples . . . . . . . . . . . . . . . . . . . . . . . . . . . . . . . . . . . . . . . . . . . . . . . . . . . . . . . . . . 65
7 Managing Images . . . . . . . . . . . . . . . . . . . . . . . . . . . . . . . . . . . . . . . . . . . . . . . . . . . . . . . . . . . . . . . . . . . . 67
Static and Dynamic Images. . . . . . . . . . . . . . . . . . . . . . . . . . . . . . . . . . . . . . . . . . . . . . . . . . . . . . . . . . . . . . 67Static Images. . . . . . . . . . . . . . . . . . . . . . . . . . . . . . . . . . . . . . . . . . . . . . . . . . . . . . . . . . . . . . . . . . . . . . . 67Dynamic Images . . . . . . . . . . . . . . . . . . . . . . . . . . . . . . . . . . . . . . . . . . . . . . . . . . . . . . . . . . . . . . . . . . . . 67
Image Usage. . . . . . . . . . . . . . . . . . . . . . . . . . . . . . . . . . . . . . . . . . . . . . . . . . . . . . . . . . . . . . . . . . . . . . . . . . 68Images in an RDL File . . . . . . . . . . . . . . . . . . . . . . . . . . . . . . . . . . . . . . . . . . . . . . . . . . . . . . . . . . . . . . . 68Images in a Component File. . . . . . . . . . . . . . . . . . . . . . . . . . . . . . . . . . . . . . . . . . . . . . . . . . . . . . . . . . . 68Background Images for Charts . . . . . . . . . . . . . . . . . . . . . . . . . . . . . . . . . . . . . . . . . . . . . . . . . . . . . . . . 68Fill Images for Charts. . . . . . . . . . . . . . . . . . . . . . . . . . . . . . . . . . . . . . . . . . . . . . . . . . . . . . . . . . . . . . . . 68Sorting Icon Images . . . . . . . . . . . . . . . . . . . . . . . . . . . . . . . . . . . . . . . . . . . . . . . . . . . . . . . . . . . . . . . . . 69Dynamic Images Generated by Chart Components . . . . . . . . . . . . . . . . . . . . . . . . . . . . . . . . . . . . . . . . 69
Deploying Images. . . . . . . . . . . . . . . . . . . . . . . . . . . . . . . . . . . . . . . . . . . . . . . . . . . . . . . . . . . . . . . . . . . . . . 69Configuring the Image Directory . . . . . . . . . . . . . . . . . . . . . . . . . . . . . . . . . . . . . . . . . . . . . . . . . . . . . . . 69Temporary Images Directory per Server Instance . . . . . . . . . . . . . . . . . . . . . . . . . . . . . . . . . . . . . . . . . 69
The Image Servlet . . . . . . . . . . . . . . . . . . . . . . . . . . . . . . . . . . . . . . . . . . . . . . . . . . . . . . . . . . . . . . . . . . . . . 70Images in the Library . . . . . . . . . . . . . . . . . . . . . . . . . . . . . . . . . . . . . . . . . . . . . . . . . . . . . . . . . . . . . 70
7
Images in the Configurable Images Directory . . . . . . . . . . . . . . . . . . . . . . . . . . . . . . . . . . . . . . . . . . 70Per-server Temporary Chart Images . . . . . . . . . . . . . . . . . . . . . . . . . . . . . . . . . . . . . . . . . . . . . . . . . 70
Authentication and Authorization . . . . . . . . . . . . . . . . . . . . . . . . . . . . . . . . . . . . . . . . . . . . . . . . . . . . . . . . 71Library Permissions . . . . . . . . . . . . . . . . . . . . . . . . . . . . . . . . . . . . . . . . . . . . . . . . . . . . . . . . . . . . . . . . . 71
8 Incorporating Reports into HTML . . . . . . . . . . . . . . . . . . . . . . . . . . . . . . . . . . . . . . . . . . . . . . . . . . . . . . . 73
Using the StandardDashboard . . . . . . . . . . . . . . . . . . . . . . . . . . . . . . . . . . . . . . . . . . . . . . . . . . . . . . . . . . . 73Using the StandardRecordGrid or StandardBandedTable . . . . . . . . . . . . . . . . . . . . . . . . . . . . . . . . . . . . . 73Using Templates . . . . . . . . . . . . . . . . . . . . . . . . . . . . . . . . . . . . . . . . . . . . . . . . . . . . . . . . . . . . . . . . . . . . . . 73
Changing the Default Templates . . . . . . . . . . . . . . . . . . . . . . . . . . . . . . . . . . . . . . . . . . . . . . . . . . . . . . . 74Specifying the Templates for a Report. . . . . . . . . . . . . . . . . . . . . . . . . . . . . . . . . . . . . . . . . . . . . . . . . . . 74
Writing Your Own HTML Page. . . . . . . . . . . . . . . . . . . . . . . . . . . . . . . . . . . . . . . . . . . . . . . . . . . . . . . . . . . 74Example. . . . . . . . . . . . . . . . . . . . . . . . . . . . . . . . . . . . . . . . . . . . . . . . . . . . . . . . . . . . . . . . . . . . . . . . . . . 75
Calling Reports from JSP or Servlets . . . . . . . . . . . . . . . . . . . . . . . . . . . . . . . . . . . . . . . . . . . . . . . . . . . . . . 76
9 Using JavaScript for HTML Output . . . . . . . . . . . . . . . . . . . . . . . . . . . . . . . . . . . . . . . . . . . . . . . . . . . . . . 77
Where in RDL to Put the JavaScript . . . . . . . . . . . . . . . . . . . . . . . . . . . . . . . . . . . . . . . . . . . . . . . . . . . . . . 77Examples . . . . . . . . . . . . . . . . . . . . . . . . . . . . . . . . . . . . . . . . . . . . . . . . . . . . . . . . . . . . . . . . . . . . . . . . . . . . 77
Directly Invoking JavaScript . . . . . . . . . . . . . . . . . . . . . . . . . . . . . . . . . . . . . . . . . . . . . . . . . . . . . . . . . . 78JavaScript Inside a Function . . . . . . . . . . . . . . . . . . . . . . . . . . . . . . . . . . . . . . . . . . . . . . . . . . . . . . . . . . 78
10 Formatting PDF Output . . . . . . . . . . . . . . . . . . . . . . . . . . . . . . . . . . . . . . . . . . . . . . . . . . . . . . . . . . . . . . . . 81
Technical Overview . . . . . . . . . . . . . . . . . . . . . . . . . . . . . . . . . . . . . . . . . . . . . . . . . . . . . . . . . . . . . . . . . . . . 81RDL Arguments for PDF Formatting . . . . . . . . . . . . . . . . . . . . . . . . . . . . . . . . . . . . . . . . . . . . . . . . . . . . . . 82Page Dimensions . . . . . . . . . . . . . . . . . . . . . . . . . . . . . . . . . . . . . . . . . . . . . . . . . . . . . . . . . . . . . . . . . . . . . . 82Customizing the Header and Footer . . . . . . . . . . . . . . . . . . . . . . . . . . . . . . . . . . . . . . . . . . . . . . . . . . . . . . . 82Page Breaks . . . . . . . . . . . . . . . . . . . . . . . . . . . . . . . . . . . . . . . . . . . . . . . . . . . . . . . . . . . . . . . . . . . . . . . . . . 83PopCharts Image Size . . . . . . . . . . . . . . . . . . . . . . . . . . . . . . . . . . . . . . . . . . . . . . . . . . . . . . . . . . . . . . . . . . 83Using UTF-8 Fonts in PDFs . . . . . . . . . . . . . . . . . . . . . . . . . . . . . . . . . . . . . . . . . . . . . . . . . . . . . . . . . . . . . 83
Create TrueType Font Metrics. . . . . . . . . . . . . . . . . . . . . . . . . . . . . . . . . . . . . . . . . . . . . . . . . . . . . . . . . 83Register Fonts with FOP . . . . . . . . . . . . . . . . . . . . . . . . . . . . . . . . . . . . . . . . . . . . . . . . . . . . . . . . . . . . . 84Modify defaultscope.xml . . . . . . . . . . . . . . . . . . . . . . . . . . . . . . . . . . . . . . . . . . . . . . . . . . . . . . . . . . . . . . 84
Miscellaneous Formatting Tips . . . . . . . . . . . . . . . . . . . . . . . . . . . . . . . . . . . . . . . . . . . . . . . . . . . . . . . . . . . 85Cell Padding . . . . . . . . . . . . . . . . . . . . . . . . . . . . . . . . . . . . . . . . . . . . . . . . . . . . . . . . . . . . . . . . . . . . . . . 85Cell Colors . . . . . . . . . . . . . . . . . . . . . . . . . . . . . . . . . . . . . . . . . . . . . . . . . . . . . . . . . . . . . . . . . . . . . . . . . 85Checking XSL:FO Output . . . . . . . . . . . . . . . . . . . . . . . . . . . . . . . . . . . . . . . . . . . . . . . . . . . . . . . . . . . . 85
Constraints . . . . . . . . . . . . . . . . . . . . . . . . . . . . . . . . . . . . . . . . . . . . . . . . . . . . . . . . . . . . . . . . . . . . . . . . . . . 85Repeating Table Headers . . . . . . . . . . . . . . . . . . . . . . . . . . . . . . . . . . . . . . . . . . . . . . . . . . . . . . . . . . . . . 85Custom Components. . . . . . . . . . . . . . . . . . . . . . . . . . . . . . . . . . . . . . . . . . . . . . . . . . . . . . . . . . . . . . . . . 85Hyperlinks. . . . . . . . . . . . . . . . . . . . . . . . . . . . . . . . . . . . . . . . . . . . . . . . . . . . . . . . . . . . . . . . . . . . . . . . . 86StandardInclude and CDATA Markup . . . . . . . . . . . . . . . . . . . . . . . . . . . . . . . . . . . . . . . . . . . . . . . . . . 86Fonts . . . . . . . . . . . . . . . . . . . . . . . . . . . . . . . . . . . . . . . . . . . . . . . . . . . . . . . . . . . . . . . . . . . . . . . . . . . . . 86Oversized Page Content . . . . . . . . . . . . . . . . . . . . . . . . . . . . . . . . . . . . . . . . . . . . . . . . . . . . . . . . . . . . . . 86
11 Runtime RDL Processing . . . . . . . . . . . . . . . . . . . . . . . . . . . . . . . . . . . . . . . . . . . . . . . . . . . . . . . . . . . . . . . 87Step 1: The Request is Received. . . . . . . . . . . . . . . . . . . . . . . . . . . . . . . . . . . . . . . . . . . . . . . . . . . . . . . . 87Step 2: The Request is Passed Through the Authentication Filter . . . . . . . . . . . . . . . . . . . . . . . . . . . . 88Step 3: The Parameters are Extracted . . . . . . . . . . . . . . . . . . . . . . . . . . . . . . . . . . . . . . . . . . . . . . . . . . 88
8

Step 4: The RDL File is Parsed . . . . . . . . . . . . . . . . . . . . . . . . . . . . . . . . . . . . . . . . . . . . . . . . . . . . . . . . 88Step 5: The Report Output is Constructed . . . . . . . . . . . . . . . . . . . . . . . . . . . . . . . . . . . . . . . . . . . . . . . 88Step 6: The Report Output is Sent to the Client. . . . . . . . . . . . . . . . . . . . . . . . . . . . . . . . . . . . . . . . . . . 89
12 RDL Generation Toolkit . . . . . . . . . . . . . . . . . . . . . . . . . . . . . . . . . . . . . . . . . . . . . . . . . . . . . . . . . . . . . . . . 91
Functionality Overview . . . . . . . . . . . . . . . . . . . . . . . . . . . . . . . . . . . . . . . . . . . . . . . . . . . . . . . . . . . . . . . . . 91Package Overview . . . . . . . . . . . . . . . . . . . . . . . . . . . . . . . . . . . . . . . . . . . . . . . . . . . . . . . . . . . . . . . . . . . . . 92Extending the Functionality . . . . . . . . . . . . . . . . . . . . . . . . . . . . . . . . . . . . . . . . . . . . . . . . . . . . . . . . . . . . . 93Sample Application . . . . . . . . . . . . . . . . . . . . . . . . . . . . . . . . . . . . . . . . . . . . . . . . . . . . . . . . . . . . . . . . . . . . 93Using the Toolkit . . . . . . . . . . . . . . . . . . . . . . . . . . . . . . . . . . . . . . . . . . . . . . . . . . . . . . . . . . . . . . . . . . . . . . 93
13 PopChart Support . . . . . . . . . . . . . . . . . . . . . . . . . . . . . . . . . . . . . . . . . . . . . . . . . . . . . . . . . . . . . . . . . . . . 95
PopChart Basics . . . . . . . . . . . . . . . . . . . . . . . . . . . . . . . . . . . . . . . . . . . . . . . . . . . . . . . . . . . . . . . . . . . . . . . 95Terminology . . . . . . . . . . . . . . . . . . . . . . . . . . . . . . . . . . . . . . . . . . . . . . . . . . . . . . . . . . . . . . . . . . . . . . . . . . 95Data Requirements for PopChart Types. . . . . . . . . . . . . . . . . . . . . . . . . . . . . . . . . . . . . . . . . . . . . . . . . . . . 96How Select Audit Uses PopCharts . . . . . . . . . . . . . . . . . . . . . . . . . . . . . . . . . . . . . . . . . . . . . . . . . . . . . . . . 97
How PopCharts are Represented in RDL . . . . . . . . . . . . . . . . . . . . . . . . . . . . . . . . . . . . . . . . . . . . . . . . 97Using the Extra Argument. . . . . . . . . . . . . . . . . . . . . . . . . . . . . . . . . . . . . . . . . . . . . . . . . . . . . . . . . . . . 98
Adding Drilldown Capability . . . . . . . . . . . . . . . . . . . . . . . . . . . . . . . . . . . . . . . . . . . . . . . . . . . . . . . 98Pie Chart Tips . . . . . . . . . . . . . . . . . . . . . . . . . . . . . . . . . . . . . . . . . . . . . . . . . . . . . . . . . . . . . . . . . . . . . . . . 98Using the addPCXML and setPCXMLAttribute Tags . . . . . . . . . . . . . . . . . . . . . . . . . . . . . . . . . . . . . . . . . 99Limitations . . . . . . . . . . . . . . . . . . . . . . . . . . . . . . . . . . . . . . . . . . . . . . . . . . . . . . . . . . . . . . . . . . . . . . . . . . 100
14 Localization . . . . . . . . . . . . . . . . . . . . . . . . . . . . . . . . . . . . . . . . . . . . . . . . . . . . . . . . . . . . . . . . . . . . . . . . . 101
Localizing Reports . . . . . . . . . . . . . . . . . . . . . . . . . . . . . . . . . . . . . . . . . . . . . . . . . . . . . . . . . . . . . . . . . . . . 101Resources Section in RDL . . . . . . . . . . . . . . . . . . . . . . . . . . . . . . . . . . . . . . . . . . . . . . . . . . . . . . . . . . . 101External Resource Files . . . . . . . . . . . . . . . . . . . . . . . . . . . . . . . . . . . . . . . . . . . . . . . . . . . . . . . . . . . . . 101Resource IDs . . . . . . . . . . . . . . . . . . . . . . . . . . . . . . . . . . . . . . . . . . . . . . . . . . . . . . . . . . . . . . . . . . . . . . 102Arguments and JavaScript. . . . . . . . . . . . . . . . . . . . . . . . . . . . . . . . . . . . . . . . . . . . . . . . . . . . . . . . . . . 102Internal Resources . . . . . . . . . . . . . . . . . . . . . . . . . . . . . . . . . . . . . . . . . . . . . . . . . . . . . . . . . . . . . . . . . 102
Testing Localized Reports . . . . . . . . . . . . . . . . . . . . . . . . . . . . . . . . . . . . . . . . . . . . . . . . . . . . . . . . . . . . . . 103Sample Report . . . . . . . . . . . . . . . . . . . . . . . . . . . . . . . . . . . . . . . . . . . . . . . . . . . . . . . . . . . . . . . . . . . . . . . 103
A Select Audit Variable Syntax . . . . . . . . . . . . . . . . . . . . . . . . . . . . . . . . . . . . . . . . . . . . . . . . . . . . . . . . . . 105
Parameter Variables . . . . . . . . . . . . . . . . . . . . . . . . . . . . . . . . . . . . . . . . . . . . . . . . . . . . . . . . . . . . . . . . . . 105Content Block Parameter Syntax . . . . . . . . . . . . . . . . . . . . . . . . . . . . . . . . . . . . . . . . . . . . . . . . . . . . . 105
Examples . . . . . . . . . . . . . . . . . . . . . . . . . . . . . . . . . . . . . . . . . . . . . . . . . . . . . . . . . . . . . . . . . . . . . . 106Layout Block Parameter Syntax . . . . . . . . . . . . . . . . . . . . . . . . . . . . . . . . . . . . . . . . . . . . . . . . . . . . . . 106Parameter Types. . . . . . . . . . . . . . . . . . . . . . . . . . . . . . . . . . . . . . . . . . . . . . . . . . . . . . . . . . . . . . . . . . . 107
User Variables . . . . . . . . . . . . . . . . . . . . . . . . . . . . . . . . . . . . . . . . . . . . . . . . . . . . . . . . . . . . . . . . . . . . . . . 107Content Block User Variable Syntax . . . . . . . . . . . . . . . . . . . . . . . . . . . . . . . . . . . . . . . . . . . . . . . . . . . 107
Examples . . . . . . . . . . . . . . . . . . . . . . . . . . . . . . . . . . . . . . . . . . . . . . . . . . . . . . . . . . . . . . . . . . . . . . 107Layout Block Parameter Syntax . . . . . . . . . . . . . . . . . . . . . . . . . . . . . . . . . . . . . . . . . . . . . . . . . . . . . . 108User Variable Types . . . . . . . . . . . . . . . . . . . . . . . . . . . . . . . . . . . . . . . . . . . . . . . . . . . . . . . . . . . . . . . . 108
Data Variables . . . . . . . . . . . . . . . . . . . . . . . . . . . . . . . . . . . . . . . . . . . . . . . . . . . . . . . . . . . . . . . . . . . . . . . 108Data Variable Types . . . . . . . . . . . . . . . . . . . . . . . . . . . . . . . . . . . . . . . . . . . . . . . . . . . . . . . . . . . . . . . . 109
Cell Name Variables . . . . . . . . . . . . . . . . . . . . . . . . . . . . . . . . . . . . . . . . . . . . . . . . . . . . . . . . . . . . . . . . . . 109
9
Cell Name Variable Types . . . . . . . . . . . . . . . . . . . . . . . . . . . . . . . . . . . . . . . . . . . . . . . . . . . . . . . . . . . 109URL Variables . . . . . . . . . . . . . . . . . . . . . . . . . . . . . . . . . . . . . . . . . . . . . . . . . . . . . . . . . . . . . . . . . . . . . . . 110Script Variables . . . . . . . . . . . . . . . . . . . . . . . . . . . . . . . . . . . . . . . . . . . . . . . . . . . . . . . . . . . . . . . . . . . . . . 110
Index . . . . . . . . . . . . . . . . . . . . . . . . . . . . . . . . . . . . . . . . . . . . . . . . . . . . . . . . . . . . . . . . . . . . . . . . . . . . . . . . . . 111
10
1 Overview
HP Select Audit software makes reporting easy for the developer and flexible for the end user. Select Audit provides tools for report developers with different levels of expertise, experience, and authorization. It also provides a web-based tool for end users to easily develop their own Ad Hoc reports.
Using a Select Audit report, an end user can easily connect to live data and display it in a web browser or Microsoft Excel, or print or save it in any of a number of formats. The end user can also change the report’s data, layout, and appearance at runtime. No software other than the browser is required on the end user’s machine.
The web-based Report server processes complex data queries and handles dynamic report formatting, security, and scheduling.
The files underlying each report are clear text and use an XML-based format, making it possible to connect your report to many types of data sources and application servers. These underlying files allow experts to make low-level changes to a report file using only a text editor.
Who is This Book For?
This book uses the following terms for the different types of people who use Select Audit:
• Developers create reports for others to use. Some developers are highly skilled and experienced in all aspects of report development, some specialize in either data or presentation, and some have only a high-level understanding of report development. Select Audit provides tools for all these kinds of developers.
• Administrators manage configuration, security, database access, and troubleshooting.
• End Users run web-based reports created by developers and managed by administrators, create their own Ad Hoc reports from scratch or based on reports created by developers, or use Microsoft Excel’s graphing and charting capabilities to view reports.
The HP Select Audit 1.02 Report Developer’s Guide is addressed to developers. This is the first guide that developers should read.
What’s in This Book?
The chapters in this book are given in Table 1.
See the HP Select Audit 1.02 Release Notes (SAudit_release_notes_1.02.html) on the Select Audit installation CD for known installation issues at the time of this release.
11
The Select Audit Documentation Set
This manual refers to the following Select Audit documents. These documents are available on the Select Audit CD.
• HP Select Audit 1.02 Administration Guide, © Copyright 2006 - 2007 Hewlett-Packard Development Company, L.P. (administration_guide.pdf).
• HP Select Audit 1.02 Installation Guide, © Copyright 2006 - 2007 Hewlett-Packard Development Company, L.P. (installation_guide.pdf).
• HP Select Audit 1.02 User’s Guide, © Copyright 2006 - 2007 Hewlett-Packard Development Company, L.P. (user_guide.pdf).
Table 1 Chapter Summary
Chapter Description
Chapter 1, Overview This chapter describes the HP Select Audit 1.02 Report Developer’s Guide and its contents.
Chapter 2, Terms and Concepts Defines the terms and concepts used in the Select Audit Report Designer.
Chapter 3, Parameters Shows how to use Select Audit parameters.
Chapter 4, Guidelines for Developing Reports
Describes the typical report development cycle.
Chapter 5, Working with Non-SQL Data Sources
Gives pointers for using Select Audit with XML, EJB, or stored procedures as a data source.
Chapter 6, Select Audit APIs Introduces the APIs included in Select Audit.
Chapter 7, Managing Images Shows how to manage report images.
Chapter 8, Incorporating Reports into HTML
Shows the various ways to embed Select Audit reports in your application.
Chapter 9, Using JavaScript for HTML Output
Shows how to enhance your reports using JavaScript.
Chapter 10, Formatting PDF Output
This chapter provides technical information and stylistic guidelines for creating well-formatted PDF report output.
Chapter 11, Runtime RDL Processing
This chapter shows how RDL is processed at runtime.
Chapter 13, PopChart Support Describes Select Audit’s optional PopChart support.
Appendix A, Select Audit Variable Syntax
Describes the syntax of parameters, user variables, and query results in RDL.
12 Chapter 1
• HP Select Audit 1.02 Sarbanes-Oxley Model Guide, © Copyright 2006 - 2007 Hewlett-Packard Development Company, L.P. (sb_model_guide.pdf)
• HP Select Audit 1.02 Concepts Guide, © Copyright 2006 - 2007 Hewlett-Packard Development Company, L.P. (concepts_guide.pdf)
• HP Select Audit 1.02 Report Center User’s Guide, © Copyright 2006 - 2007 Hewlett-Packard Development Company, L.P. (rpt_center_guide.pdf)
• HP Select Audit 1.02 Report Designer’s Guide, © Copyright 2006 - 2007 Hewlett-Packard Development Company, L.P. (rpt_design_guide.pdf)
• HP Select Audit 1.02 Report Developer’s Guide, © Copyright 2006 - 2007 Hewlett-Packard Development Company, L.P. (rpt_devel_guide.pdf)
Online help is available with the Audit Portal.
Overview 13

14 Chapter 1

2 Terms and Concepts
This chapter introduces terms important to Select Audit reports. Most of these terms are standard English words but have specific meanings in the Select Audit context.
This chapter defines the following terms as used in Select Audit reports and related documentation:
• RDL on page 15
• Component on page 17
• Control on page 18
• Parameter on page 19
• Profile on page 19
• Data Source on page 19
• Query on page 20
• Theme on page 20
• Catalog on page 21
• Library on page 21
• Report Creation Tools on page 21
• Ad Hoc Wizard on page 22
• Permissions, Directories, and ACLs on page 23
• Expression on page 23
• Uploading and Publishing on page 24
• Schedule on page 24
• Report APIs on page 24
• Report Variables on page 25
RDL
The report file is the basis of an Select Audit report. The report file determines the report’s content and layout. This file also contains other information, such as how the report handles sorting and pagination.
Select Audit report files use a format called RDL (pronounced “riddle”). Report files use the .rdl extension. RDL adheres to the XML standard.
The server program that renders RDL into an interactive report is called the Report server.
15
Like all XML-based languages, RDL is easily modifiable in any text editor. In fact, the Query Designer and Report Designer provide a text area for viewing and modifying the RDL file. You can write an RDL file from scratch, or you can create it using the client tool and modify it later if you choose. (See Client Tools on page 9 for more detail on the client tools.)
An end user can take an existing report (which may or may not contain layout information) and create layout for her own report using the Ad Hoc Wizard.
Structure
It is helpful to understand RDL’s high-level structure to develop Select Audit reports. The following is a brief high-level description of RDL. If you use the client tool to create reports, you don’t need an in-depth knowledge of the RDL language. However, it is advisable to learn at least the RDL blocks described in this section.
Top-level Tags
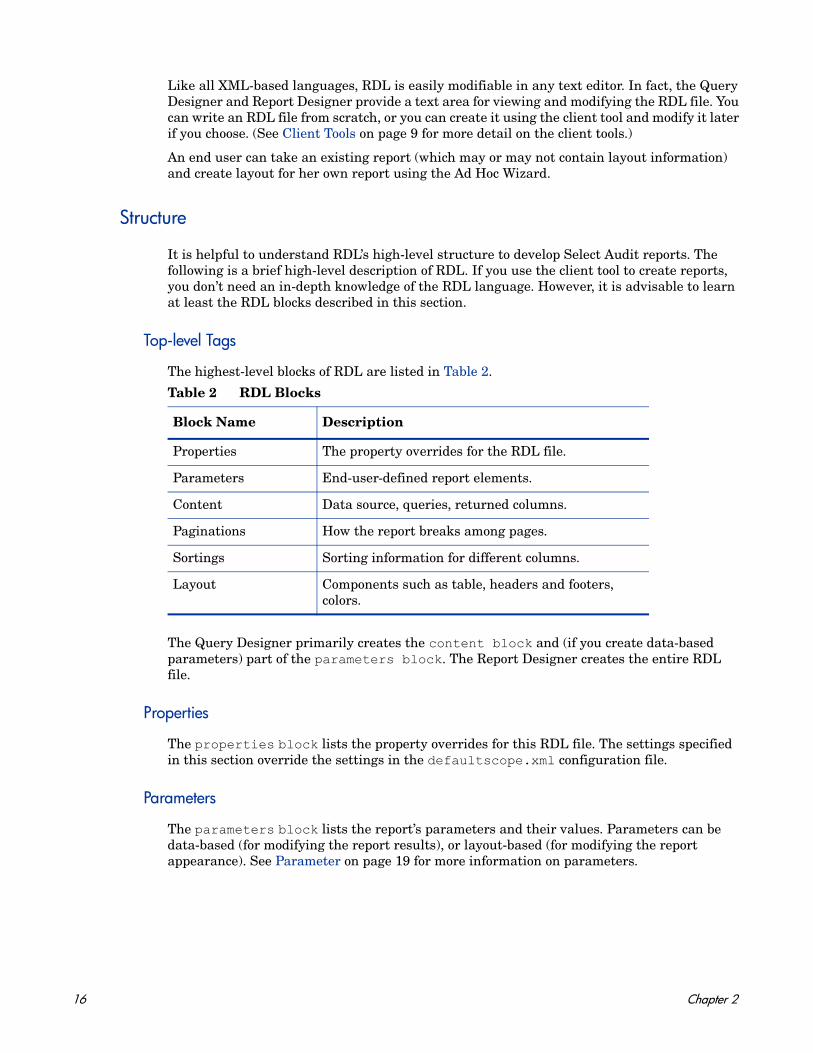
The highest-level blocks of RDL are listed in Table 2.
The Query Designer primarily creates the content block and (if you create data-based parameters) part of the parameters block. The Report Designer creates the entire RDL file.
Properties
The properties block lists the property overrides for this RDL file. The settings specified in this section override the settings in the defaultscope.xml configuration file.
Parameters
The parameters block lists the report’s parameters and their values. Parameters can be data-based (for modifying the report results), or layout-based (for modifying the report appearance). See Parameter on page 19 for more information on parameters.
Table 2 RDL Blocks
Block Name Description
Properties The property overrides for the RDL file.
Parameters End-user-defined report elements.
Content Data source, queries, returned columns.
Paginations How the report breaks among pages.
Sortings Sorting information for different columns.
Layout Components such as table, headers and footers, colors.
16 Chapter 2
Content
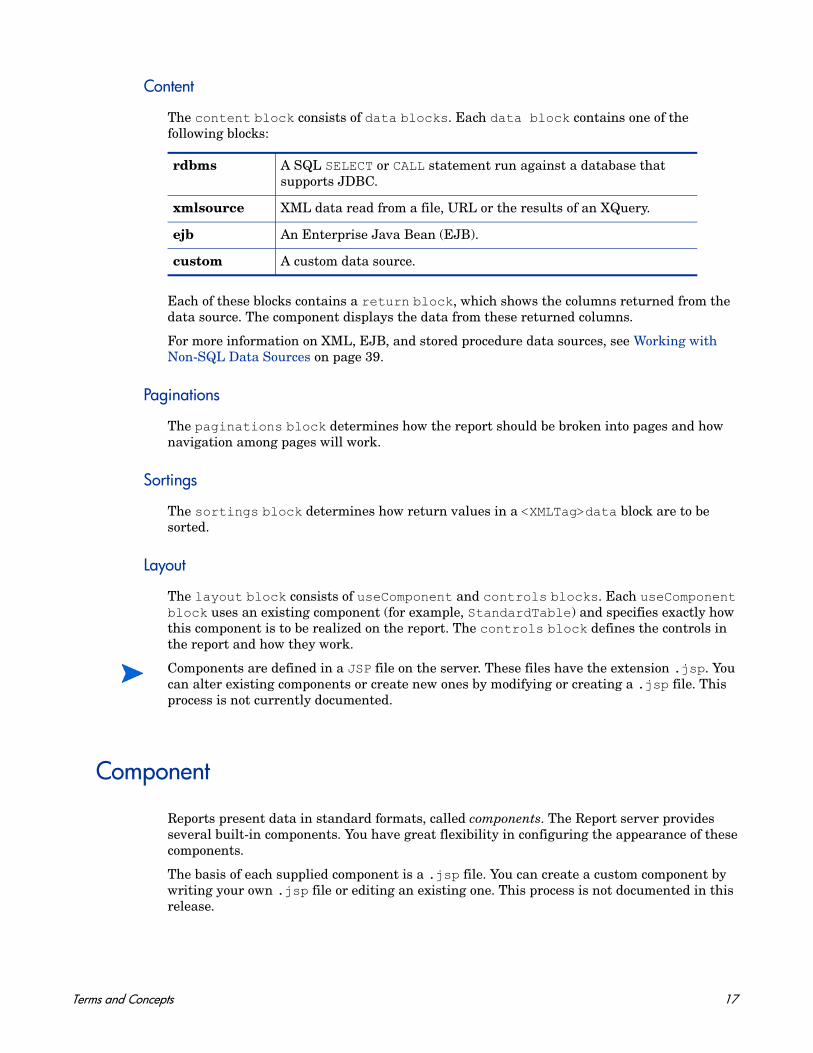
The content block consists of data blocks. Each data block contains one of the following blocks:
Each of these blocks contains a return block, which shows the columns returned from the data source. The component displays the data from these returned columns.
For more information on XML, EJB, and stored procedure data sources, see Working with Non-SQL Data Sources on page 39.
Paginations
The paginations block determines how the report should be broken into pages and how navigation among pages will work.
Sortings
The sortings block determines how return values in a <XMLTag>data block are to be sorted.
Layout
The layout block consists of useComponent and controls blocks. Each useComponent block uses an existing component (for example, StandardTable) and specifies exactly how this component is to be realized on the report. The controls block defines the controls in the report and how they work.
Component
Reports present data in standard formats, called components. The Report server provides several built-in components. You have great flexibility in configuring the appearance of these components.
The basis of each supplied component is a .jsp file. You can create a custom component by writing your own .jsp file or editing an existing one. This process is not documented in this release.
rdbms A SQL SELECT or CALL statement run against a database that supports JDBC.
xmlsource XML data read from a file, URL or the results of an XQuery.
ejb An Enterprise Java Bean (EJB).
custom A custom data source.
Components are defined in a JSP file on the server. These files have the extension .jsp. You can alter existing components or create new ones by modifying or creating a .jsp file. This process is not currently documented.
Terms and Concepts 17
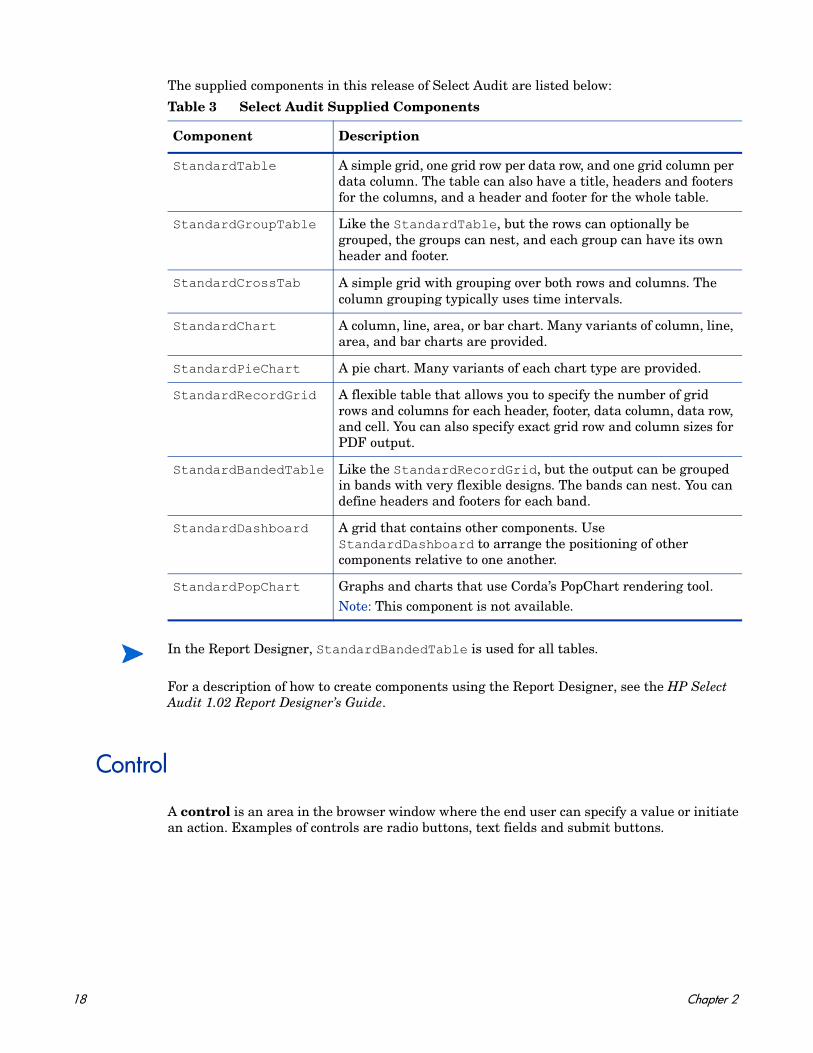
The supplied components in this release of Select Audit are listed below:
For a description of how to create components using the Report Designer, see the HP Select Audit 1.02 Report Designer’s Guide.
Control
A control is an area in the browser window where the end user can specify a value or initiate an action. Examples of controls are radio buttons, text fields and submit buttons.
Table 3 Select Audit Supplied Components
Component Description
StandardTable A simple grid, one grid row per data row, and one grid column per data column. The table can also have a title, headers and footers for the columns, and a header and footer for the whole table.
StandardGroupTable Like the StandardTable, but the rows can optionally be grouped, the groups can nest, and each group can have its own header and footer.
StandardCrossTab A simple grid with grouping over both rows and columns. The column grouping typically uses time intervals.
StandardChart A column, line, area, or bar chart. Many variants of column, line, area, and bar charts are provided.
StandardPieChart A pie chart. Many variants of each chart type are provided.
StandardRecordGrid A flexible table that allows you to specify the number of grid rows and columns for each header, footer, data column, data row, and cell. You can also specify exact grid row and column sizes for PDF output.
StandardBandedTable Like the StandardRecordGrid, but the output can be grouped in bands with very flexible designs. The bands can nest. You can define headers and footers for each band.
StandardDashboard A grid that contains other components. Use StandardDashboard to arrange the positioning of other components relative to one another.
StandardPopChart Graphs and charts that use Corda’s PopChart rendering tool.Note: This component is not available.
In the Report Designer, StandardBandedTable is used for all tables.
18 Chapter 2
Parameter
In Select Audit, parameters are a type of Report Variable whose values can be set by the end user at runtime. Parameters are bound to controls on the report. For example, parameters can allow the end user to specify that she wants her report output to show only data from the Eastern region or to display only page 5 of the full output.
The Client Tool let you create and manage parameters. You can specify the parameter name, the kind of values it can take and how the values are presented, and optional default values. You can also save parameters to or fetch them from the Catalog.
For more detail on parameters, see Parameters on page 27. For a description of parameter syntax, see Select Audit Variable Syntax on page 105.
Profile
Typically, a particular end user uses the same sets of layout parameters each time she runs a report. For example, the manager of the Vancouver office may always choose only Western Canada sales data, and she may always prefer to see her report in earthtone colors. You, the developer, can create a control on the report that allows the end user to assign a name to the version of the report specifying, say, “Western Canada” as the region parameter and “Earthtone” as the theme parameter. (See Theme on page 20 for more information on themes.)
The name that the end user assigns to a set of parameters for a report is called a profile. When the end user opens a report in the Report Center (see Library on page 33), she can choose the profile for the report results.
Data Source
A data source can be one of the following:
• A relational database management system (RDBMS) that supports JDBC, accessed either by SQL statements or stored procedures.
• An XML file.
• An Enterprise Java Bean (EJB).
• A stored procedure.
• A custom source (a Java class implementing a particular interface).
For more details on using XML, EJB or stored procedure data sources, see Working with Non-SQL Data Sources on page 39.
In Select Audit’s Client Tool, you interact with the data source by specifying the connection name (the connection is defined in an administration file) and the “columns” returned by the data source.
The profile name is limited to letters, digits, and spaces.
Profile controls are optional. A report cannot contain more than one profile control.
Terms and Concepts 19
Query
The term query is used to mean several different things in Select Audit:
• A SQL statement that returns values. This may be a SELECT statement or a stored procedure call. In RDL, this is an SQL block within a data block.
• A call to an XML data source that returns values. In RDL, this is an xmlsource block within a data block.
• A call to an Enterprise Java Bean that returns values. In RDL, this is an ejb block within a data block.
• An entire <XMLTag>data block in an RDL file (See Data Blocks on page 20).
• An entire RDL file that contains only data information. (The term query is used this way in the Catalog.)
• The “queries” saved by the Client Tool are <XMLTag>data blocks or complete RDL files containing a single <XMLTag>data block. The Client Tools always save a connection name and returned column list along with each “query”; they never save sql, xmlsource and ejb blocks without the rest of the <XMLTag>data block.
Select Audit’s documentation uses the following conventions to avoid confusion:
• SQL queries are referred to as SQL statements. (Although in standard database parlance queries are actually only one kind of SQL statement, SQL statements that are not queries are never used in Select Audit.)
• A SQL statement (or other source of return values), a connection name and the return values are collectively called a <XMLTag>data block.
• Catalog files of type “query” are called query files.
Data Blocks
The content block of the RDL file contains blocks called data. Each <XMLTag>data block for an RDBMS data source consists of the following:
• A connection name.
• A SQL statement that returns values.
• A list of returned columns.
Other data source types have similar content blocks.
Theme
In Select Audit, a theme is a set of CSS attributes associated with an element of a component. For example, for a standard table, the elements include title and the themes for a report title may include font family, font size and color.
The report developer can use both inline or external style sheets to design reports.
In the Ad Hoc Wizard, themes are called “styles”.
20 Chapter 2
Catalog
The Catalog is one of the folders in the Library. It lets you save and re-use report elements. The Catalog elements are listed in Table 4.
Using the Catalog, you can easily insert existing Catalog entries into your report and modify them slightly, if necessary. Once you create a query, parameter, theme or permission, you can save it in the Catalog for yourself or others to use later (if you have permission).
There is no standalone Catalog tool. The Ad Hoc Wizard has links to Catalog manager screens that let you retrieve elements from or save them to the Catalog.
Library
The Library is a virtual hierarchical file system that contains Catalog, Parameter and other files. It is a repository for files that many users of a particular Report server may find useful. The Library contains the Catalog as a subfolder. In addition to Catalog entries, the Library contains runnable reports and report output in any of several formats.
You interact with the Library using the Report Center, Select Audit’s web-based Library management application. See the HP Select Audit 1.02 Report Center User’s Guide for more information.
Report Creation Tools
Both developers and end users can create reports. Developers can define any part of the report. End users can start with a report prepared by a developer and create or re-create its layout.
Table 4 Catalog Elements
Element Description
Queries A Catalog query file is an RDL file containing a content block that contains a single of data block. If the data block uses parameter values, the Catalog query also contains a parameters section containing the parameters referred to in the data block.
Parameters A Catalog parameter is an RDL file containing a parameters block that contains a single parameter block. If the Catalog parameter is based on a query, the Catalog parameter also contains one content block containing one data block.
Themes A Catalog theme is an XML file describing multiple styles, grouping them, and naming the groups.
Permissions A Catalog permission is an Access Control List (ACL) string stored in a text file. See ACLs on page 76 for details.
Terms and Concepts 21

Report-creation tools create an RDL file (see RDL on page 15). Each RDL file represents a single report. You have great flexibility in deciding when to create a report using the report-building tools and when to modify report files. You can create a report in three ways:
• Using the tools alone.
• Using the tools and then modifying the resulting report file.
• Writing an RDL file from scratch.
The developer tool for creating reports is called the Report Designer. The end-user tool for creating a report with a new layout is the Ad Hoc Wizard.
Report Designer
The Report Designer is a powerful tool for both beginners and experts to create complete reports. The Report Designer is a graphical Java-based tool that enables both novices and experts to create and modify all aspects of a report, including both content and layout, by creating and modifying RDL files.
For general information about the Report Designer, see the HP Select Audit 1.02 Report Designer’s Guide.
RDL Generation Toolkit
The RDL Generation Toolkit is a Java API that lets you generate a RDL file programmatically, using neither the client tools nor hand-coding. See RDL Generation Toolkit on page 32 for more information.
Ad Hoc Wizard
The Ad Hoc Wizard is used by end users to design the layout for their own reports. The Ad Hoc Wizard is a browser-based tool that is launched from the Report Center. It lets end users design layouts for their own reports. Any report in the Library with Ad Hoc permission can be used to launch the Ad Hoc Wizard.
The Ad Hoc Wizard allows end users to fashion the tabular or graphic layout they wish using the information that the developer put in a report. If the report contains parameters and the report developer wants the Ad Hoc Wizard to use different labels or parameter mappings for the report, you can do this using the Report Center.
Creating a New Report
By clicking the Ad Hoc button in the Report Center when a report is not selected, you can launch the Ad Hoc Wizard and create a new report from scratch.
22 Chapter 2
Creating a Report From an Existing One
Any report in the Library with Ad Hoc permission can be used to launch the Ad Hoc Wizard. The Ad Hoc Wizard allows end users to design the tabular or graphic layout they wish using the information that you, the developer, put in a report. If the report contains parameters and you want the Ad Hoc Wizard to use different labels or parameter mappings for the report, you have the option of doing so using the Report Center. To quickly enable end users to create an Ad Hoc report when you have not yet uploaded the corresponding report to the Library, open the Query Designer, create a query and upload it to the Library. If the query is an SQL statement, you can cut and paste it into the Query Designer. Once the report is uploaded to the Library, use the Report Center to add Ad Hoc to the report’s permission set.
For more information about the Ad Hoc Wizard, see the HP Select Audit 1.02 Report Center User’s Guide.
Permissions, Directories, and ACLs
You can define which end users have access to which reports, queries, parameters, themes or even columns and rows of particular reports.
Catalog permissions files are ACL lists that are stored in text files.
A directory is a customer’s list of users and groups. Often these lists are maintained remotely. LDAP is a commonly-used standard protocol for accessing remote directories.
Access Control Lists (ACLs) are formatted lists that determine which users and groups have access to which objects. ACL lists are used in the Catalog permissions files and inside RDL files (to control column permissions). For a description of ACL grammar, see ACLs on page 76.
Some Select Audit elements are secured using Select Audit, and some using the file system’s native security. Parameter files are secured at the file system level, which means that you must use your operating system’s security to control who can access these elements. Column-level security is defined within the RDL file, so it is also secured at the file system level. All Catalog items are secured by Select Audit, as is row-level security.
For details on the Select Audit security model, see Security on page 33.
Expression
The SQL database language includes functions (AVG, COUNT, MAX, MIN, and SUM) that allow queries to return calculated values and present them in the query results as a virtual or derived column.
You can create your own columns whose values are derived from functions that you create. These functions are called expressions. The set of operators available with Select Audit expressions is much richer than that provided by SQL.
For example, if your data source returns columns named FIRST_NAME and LAST_NAME, you may want to create a virtual column named full_name. To do that, use an expression like FIRST_NAME + LAST_NAME.
Terms and Concepts 23

Uploading and Publishing
Moving reports and other files from your file system to the Library is called uploading. When you upload Catalog files, they are automatically validated and made available to Library users. Report files, on the other hand, are not validated on upload, and are invisible to other users until you publish them. Publishing validates the report file and makes it visible to users to whom you have given permission.
Use the Report Center to upload files to the Library, publish reports, and assign permissions. See the HP Select Audit 1.02 Report Center User’s Guide for details.
Schedule
A Schedule determines the frequency with which the Report Center creates static report output. The Report Center lets you create report output automatically from published reports according to a schedule of your choosing. The report output can be in any of several formats: HTML, PDF (Adobe Acrobat), CSV, XML, and Microsoft Excel. Scheduling reports lets end users see reports containing recent data without the overhead of querying the data source or running the Report server.
For information on scheduling report output, see the HP Select Audit 1.02 Report Center User’s Guide.
Report APIs
Select Audit provides application programming interfaces (APIs) to let expert developers create and manage reports. describes the APIs in this release.
Table 5 Report APIs
API Description
HTTP “API” Though not exactly an API, a sophisticated URL syntax lets you access reports and report output by specifying strings within the URL.
Extensibility API The Java API for integrating Select Audit with custom or legacy environments.
SOAP API The SOAP API allows you to programmatically interact with the Report server. (See Report Server on page 31 for more information.)
24 Chapter 2
Report Variables
Select Audit provides variables that can be used within SQL code and elsewhere in the RDL file. Select Audit variables include:
• Parameter values
• user
• data
• cellname
For details on how parameter values and other variables are represented inside RDL files, see Select Audit Variable Syntax on page 105.
Terms and Concepts 25

26 Chapter 2
3 Parameters
Parameters make reports interactive by allowing end users to configure both the content and appearance of report output.
Parameters are variables that the report developer creates as part of the report. The values are set at runtime. The end user provides a value to the parameter by using a control on the report. Each parameter is “bound” to a control, meaning that what the end user does with the control determines the value assigned to the parameter.
Parameters can take two kinds of values: strings and lists. If the parameter value is a string, you provide a text field where the end user can enter the parameter’s value. If the parameter is a list, you can either create an explicit list of possible values to be displayed using a list-based control (for example, radio buttons), or you can use a <XMLTag>data block’s return values to populate the list.
You can provide default values for a parameter or you can require the end user to supply a value to the parameter.
Parameters can configure either data or layout. Data parameters affect the data in the report output. Layout parameters affect report appearance.
Data parameters restrict the amount and kind of data returned from the database. For example, you can create a parameter called salesperson, associate it with the SALES_REP_LAST_NAME column returned from the database, and bind it to a pick list control labeled “Salesperson:”. The end user selects a name from the list and only orders for that salesperson are shown in the report results.
Layout parameters let the end user configure a report’s appearance. For example, you can create a parameter called tableTitle and bind it to a text field control labeled “Title:”. The text that the end user types in this control appears as the title of the report output.
You can create parameters and bind them to controls by using the Ad Hoc Wizard or by hand-editing the RDL file. For a description of parameter syntax, see Parameter Variables on page 105.
Parameters and RDL
Parameters appear in several places in the RDL file. They are defined and configured in the parameters block. The content block can use parameters to let the end use control displayed data (for example, which orders to display), and the layout block can use parameters to let the end user control report appearance (for example, which header text to use).
This section lists the parts of the RDL file that you can parameterize.
27
Content Parameters
Parameters can appear in the following places within the content block:
• Anywhere within an SQL block.
• Anywhere within the URL in an xmlsource block.
• In an ejb block, in any value of an arg.
For the syntax of parameters in the content block, see Content Block Parameter Syntax on page 105.
Layout Parameters
In the layout section, you can parameterize any literal string value of any of the args within the useComponent block.
For the syntax of parameters in the layout block, see Layout Block Parameter Syntax on page 106.
Tips for Using Parameters
When writing RDL, make sure to handle cases where the end user might assign multiple values to a single-value parameter or a null value to any parameter.
Since the content and layout sections use different parameter syntax, the way you handle these cases is different.
See Example on page 29 for an RDL file containing many instances of content and layout parameters.
Tips for the Content Section
The content block has its own parameter syntax. This richer syntax gives you a lot of flexibility when using parameters, especially for defining multi-value parameters. However, you must make sure that multiple values don’t get assigned to a single-value parameter, and that parameters are assigned a value when necessary. See Parameter Variables on page 105 for details.
Making Sure the Parameter has a Value
Assign a default to the parameter to make sure that it has a value. You can do this using the Parameter Manager accessed through the Report Designer or you can do it directly in RDL by making sure that one of the values in the parameter section has default set to true, and that the value that has default set to true is not null.
For example, the following multi-value parameter is sure to have at least one value:
<rdl:parameter name="title" readonly="false" queryParam="false"> <rdl:value label="Title1" default="true">title1</rdl:value>
For EJBs, the parameter syntax is different from elsewhere in the content block.
28 Chapter 3

<rdl:value label="Title2" default="false">title2</rdl:value></rdl:parameter>
If the list of possible values is generated by a query, or if the report is run using an API rather than by the end user (see Chapter 6, Select Audit APIs), then selecting a default value may not guarantee that the parameter has a value. For query-generated values, this is because the list of possible values for the parameter may no longer include the designated default value. For API-generated values, this is because the API may override the default value by explicitly specifying no value at all.
Making Sure the Parameter has Only One Value
You must make sure that single-value parameters are not assigned multiple values. To do this, bind the parameter to a single-value control type. The single-value control types are listed below:
• Text field
• Radio button
• Single-value list
Tips for the Layout Section
In the layout section, make sure that empty selections are not allowed. To do this, insert the value ““, which creates a null string rather than a null value. For example:
<rdl:arg name="header"><![CDATA[{(param.pNoneCategoryProduct.label.equals("") ? "" : param.pNoneCategoryProduct.label)}]]></rdl:arg>
Example
The following example shows some of the many ways that you can use parameters in an RDL file:
<?xml version="1.0"?><!DOCTYPE rdl:RDL SYSTEM "ReportDescriptionLanguage.dtd"><rdl:RDL xmlns:rdl="http://www.panscopic.com/RDL" name="PanscopicScope"><!-- This report provides an example of parameterizing the GROUP BY, HAVING, and ORDER BY clauses used for generating a table report. Additionally, this report also provides an example of using JavaScript to alter the layout of the report at runtime.
The default value holds only the first time the report is run. If the end user selects a different value and then reruns the report, the default no longer applies.
This technique may not work for API-generated values. If the API-specifies multiple values, the single value generated is a concatenation of all the specified values, rather than any one of the individual values.
Parameters 29
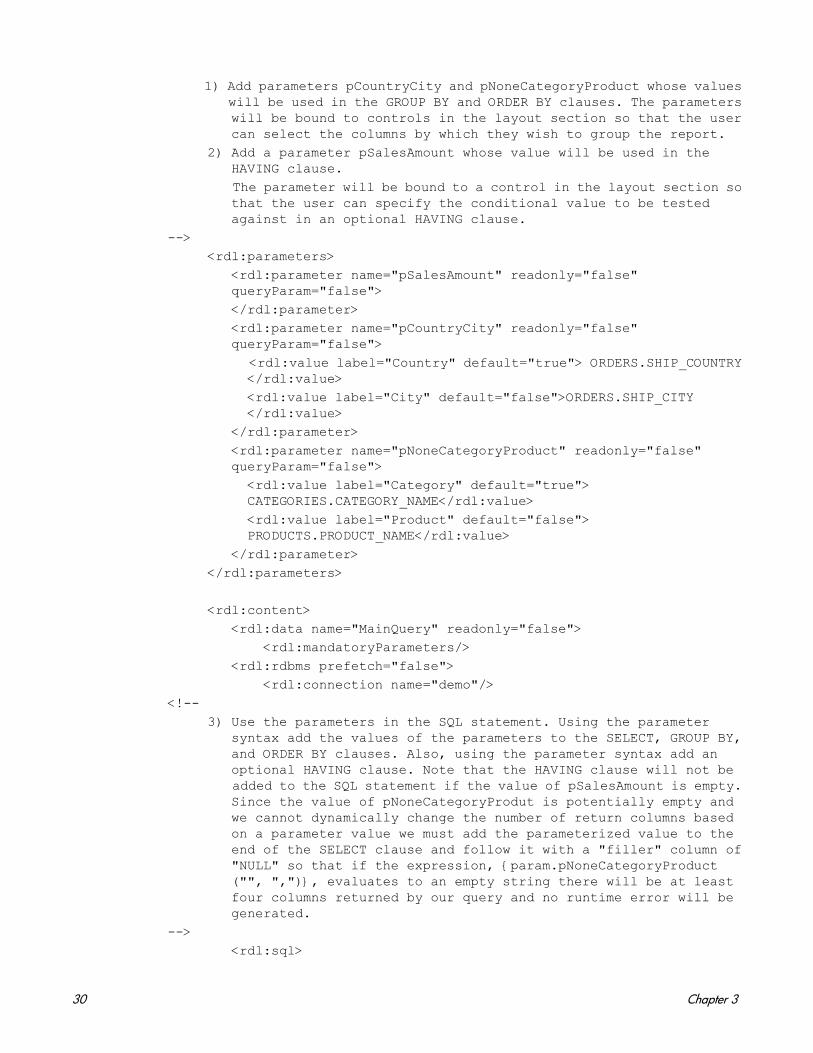
1) Add parameters pCountryCity and pNoneCategoryProduct whose values will be used in the GROUP BY and ORDER BY clauses. The parameters will be bound to controls in the layout section so that the user can select the columns by which they wish to group the report. 2) Add a parameter pSalesAmount whose value will be used in the HAVING clause. The parameter will be bound to a control in the layout section so that the user can specify the conditional value to be tested against in an optional HAVING clause.--> <rdl:parameters> <rdl:parameter name="pSalesAmount" readonly="false" queryParam="false"> </rdl:parameter> <rdl:parameter name="pCountryCity" readonly="false" queryParam="false"> <rdl:value label="Country" default="true"> ORDERS.SHIP_COUNTRY </rdl:value> <rdl:value label="City" default="false">ORDERS.SHIP_CITY </rdl:value> </rdl:parameter> <rdl:parameter name="pNoneCategoryProduct" readonly="false" queryParam="false"> <rdl:value label="Category" default="true"> CATEGORIES.CATEGORY_NAME</rdl:value> <rdl:value label="Product" default="false"> PRODUCTS.PRODUCT_NAME</rdl:value> </rdl:parameter> </rdl:parameters> <rdl:content> <rdl:data name="MainQuery" readonly="false"> <rdl:mandatoryParameters/> <rdl:rdbms prefetch="false"> <rdl:connection name="demo"/><!-- 3) Use the parameters in the SQL statement. Using the parameter syntax add the values of the parameters to the SELECT, GROUP BY, and ORDER BY clauses. Also, using the parameter syntax add an optional HAVING clause. Note that the HAVING clause will not be added to the SQL statement if the value of pSalesAmount is empty. Since the value of pNoneCategoryProdut is potentially empty and we cannot dynamically change the number of return columns based on a parameter value we must add the parameterized value to the end of the SELECT clause and follow it with a "filler" column of "NULL" so that if the expression, {param.pNoneCategoryProduct ("", ",")}, evaluates to an empty string there will be at least four columns returned by our query and no runtime error will be generated.--> <rdl:sql>
30 Chapter 3

<![CDATA[ SELECT {param.pCountryCity("", ",")} EMPLOYEES.LAST_NAME, SUM(ORDER_DETAILS.UNIT_PRICE * ORDER_DETAILS.QUANTITY), {param.pNoneCategoryProduct("", ",")} NULL
FROM ORDERS, ORDER_DETAILS, CATEGORIES, PRODUCTS, SUPPLIERS, EMPLOYEES
WHERE ORDERS.ORDER_ID = ORDER_DETAILS.ORDER_ID AND ORDERS.EMPLOYEE_ID = EMPLOYEES.EMPLOYEE_ID AND ORDER_DETAILS.PRODUCT_ID = PRODUCTS.PRODUCT_ID AND CATEGORIES.CATEGORY_ID = PRODUCTS.CATEGORY_ID AND PRODUCTS.SUPPLIER_ID = SUPPLIERS.SUPPLIER_ID
GROUP BY {param.pCountryCity("", ",")} {param.pNoneCategoryProduct("", ",")} EMPLOYEES.LAST_NAME
{param.pSalesAmount("HAVING SUM (ORDER_DETAILS.UNIT_PRICE * ORDER_DETAILS.QUANTITY) > ", "")}
ORDER BY {param.pCountryCity("", " ASC,")} {param.pNoneCategoryProduct("", " ASC,")} SUM(ORDER_DETAILS.UNIT_PRICE * ORDER_DETAILS.QUANTITY) DESC ]]> </rdl:sql><!-- 4) Add return columns which represents the return values of the parameterized columns from the SELECT clause.--> <rdl:return> <rdl:column name="COUNTRY_CITY" type="string" index="1"/> <rdl:column name="EMPLOYEES_LAST_NAME" type="string" index="2"/> <rdl:column name="SUMORDER_DETAILS_UNIT_PRICE_MUL_ORDER_ DETAILS_QUANTITY" type="integer" index="3"/> <rdl:column name="NONE_CATEGORY_PRODUCT" type="string" index="4"/> </rdl:return> </rdl:rdbms> </rdl:data> </rdl:content>
Parameters 31
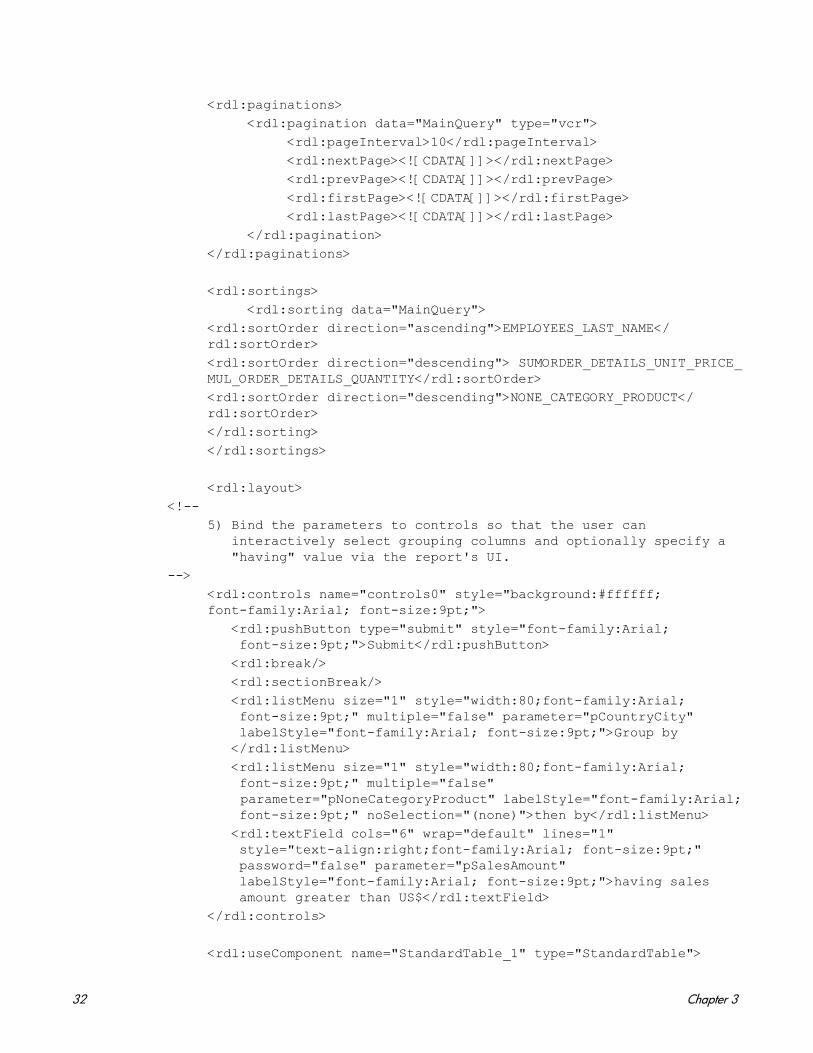
<rdl:paginations> <rdl:pagination data="MainQuery" type="vcr"> <rdl:pageInterval>10</rdl:pageInterval> <rdl:nextPage><![CDATA[]]></rdl:nextPage> <rdl:prevPage><![CDATA[]]></rdl:prevPage> <rdl:firstPage><![CDATA[]]></rdl:firstPage> <rdl:lastPage><![CDATA[]]></rdl:lastPage> </rdl:pagination> </rdl:paginations>
<rdl:sortings> <rdl:sorting data="MainQuery"> <rdl:sortOrder direction="ascending">EMPLOYEES_LAST_NAME</ rdl:sortOrder> <rdl:sortOrder direction="descending"> SUMORDER_DETAILS_UNIT_PRICE_ MUL_ORDER_DETAILS_QUANTITY</rdl:sortOrder> <rdl:sortOrder direction="descending">NONE_CATEGORY_PRODUCT</ rdl:sortOrder> </rdl:sorting> </rdl:sortings>
<rdl:layout><!-- 5) Bind the parameters to controls so that the user can interactively select grouping columns and optionally specify a "having" value via the report's UI. --> <rdl:controls name="controls0" style="background:#ffffff; font-family:Arial; font-size:9pt;"> <rdl:pushButton type="submit" style="font-family:Arial; font-size:9pt;">Submit</rdl:pushButton> <rdl:break/> <rdl:sectionBreak/> <rdl:listMenu size="1" style="width:80;font-family:Arial; font-size:9pt;" multiple="false" parameter="pCountryCity" labelStyle="font-family:Arial; font-size:9pt;">Group by </rdl:listMenu> <rdl:listMenu size="1" style="width:80;font-family:Arial; font-size:9pt;" multiple="false" parameter="pNoneCategoryProduct" labelStyle="font-family:Arial; font-size:9pt;" noSelection="(none)">then by</rdl:listMenu> <rdl:textField cols="6" wrap="default" lines="1" style="text-align:right;font-family:Arial; font-size:9pt;" password="false" parameter="pSalesAmount" labelStyle="font-family:Arial; font-size:9pt;">having sales amount greater than US$</rdl:textField> </rdl:controls>
<rdl:useComponent name="StandardTable_1" type="StandardTable">
32 Chapter 3
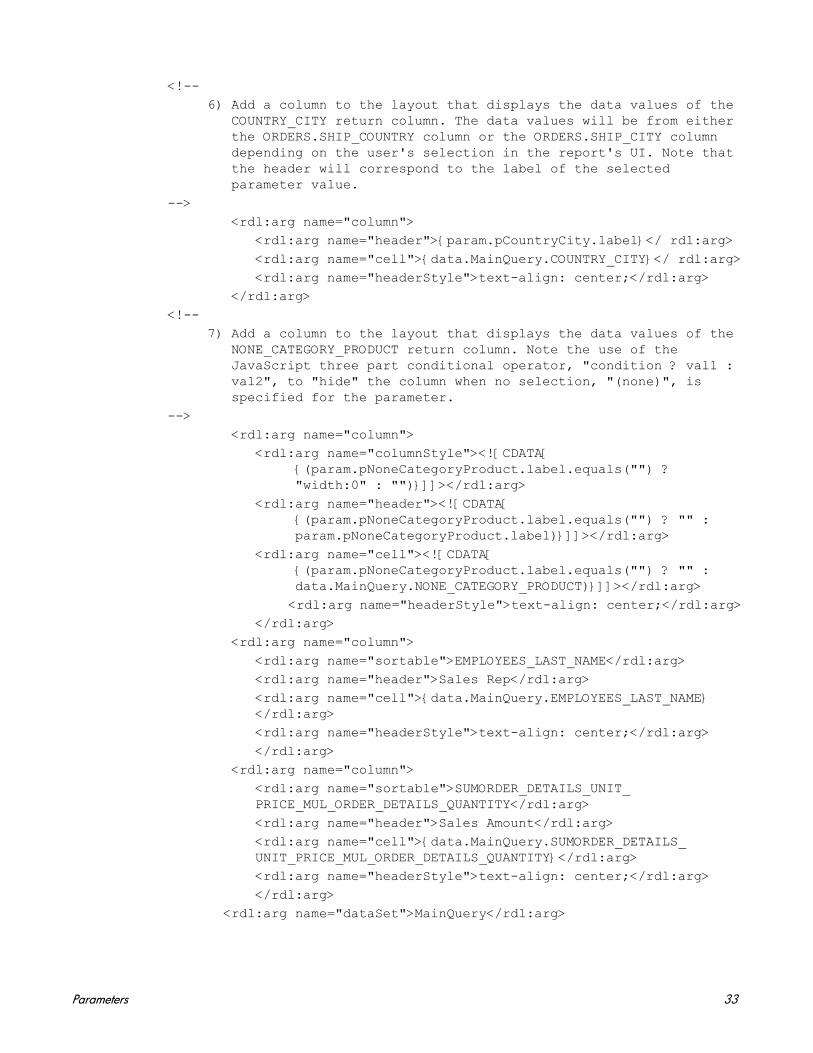
<!-- 6) Add a column to the layout that displays the data values of the COUNTRY_CITY return column. The data values will be from either the ORDERS.SHIP_COUNTRY column or the ORDERS.SHIP_CITY column depending on the user's selection in the report's UI. Note that the header will correspond to the label of the selected parameter value.--> <rdl:arg name="column"> <rdl:arg name="header">{param.pCountryCity.label}</ rdl:arg> <rdl:arg name="cell">{data.MainQuery.COUNTRY_CITY}</ rdl:arg> <rdl:arg name="headerStyle">text-align: center;</rdl:arg> </rdl:arg><!-- 7) Add a column to the layout that displays the data values of the NONE_CATEGORY_PRODUCT return column. Note the use of the JavaScript three part conditional operator, "condition ? val1 : val2", to "hide" the column when no selection, "(none)", is specified for the parameter.--> <rdl:arg name="column"> <rdl:arg name="columnStyle"><![CDATA[ {(param.pNoneCategoryProduct.label.equals("") ? "width:0" : "")}]]></rdl:arg> <rdl:arg name="header"><![CDATA[ {(param.pNoneCategoryProduct.label.equals("") ? "" : param.pNoneCategoryProduct.label)}]]></rdl:arg> <rdl:arg name="cell"><![CDATA[ {(param.pNoneCategoryProduct.label.equals("") ? "" : data.MainQuery.NONE_CATEGORY_PRODUCT)}]]></rdl:arg> <rdl:arg name="headerStyle">text-align: center;</rdl:arg> </rdl:arg> <rdl:arg name="column"> <rdl:arg name="sortable">EMPLOYEES_LAST_NAME</rdl:arg> <rdl:arg name="header">Sales Rep</rdl:arg> <rdl:arg name="cell">{data.MainQuery.EMPLOYEES_LAST_NAME} </rdl:arg> <rdl:arg name="headerStyle">text-align: center;</rdl:arg> </rdl:arg> <rdl:arg name="column"> <rdl:arg name="sortable">SUMORDER_DETAILS_UNIT_ PRICE_MUL_ORDER_DETAILS_QUANTITY</rdl:arg> <rdl:arg name="header">Sales Amount</rdl:arg> <rdl:arg name="cell">{data.MainQuery.SUMORDER_DETAILS_ UNIT_PRICE_MUL_ORDER_DETAILS_QUANTITY}</rdl:arg> <rdl:arg name="headerStyle">text-align: center;</rdl:arg> </rdl:arg> <rdl:arg name="dataSet">MainQuery</rdl:arg>
Parameters 33
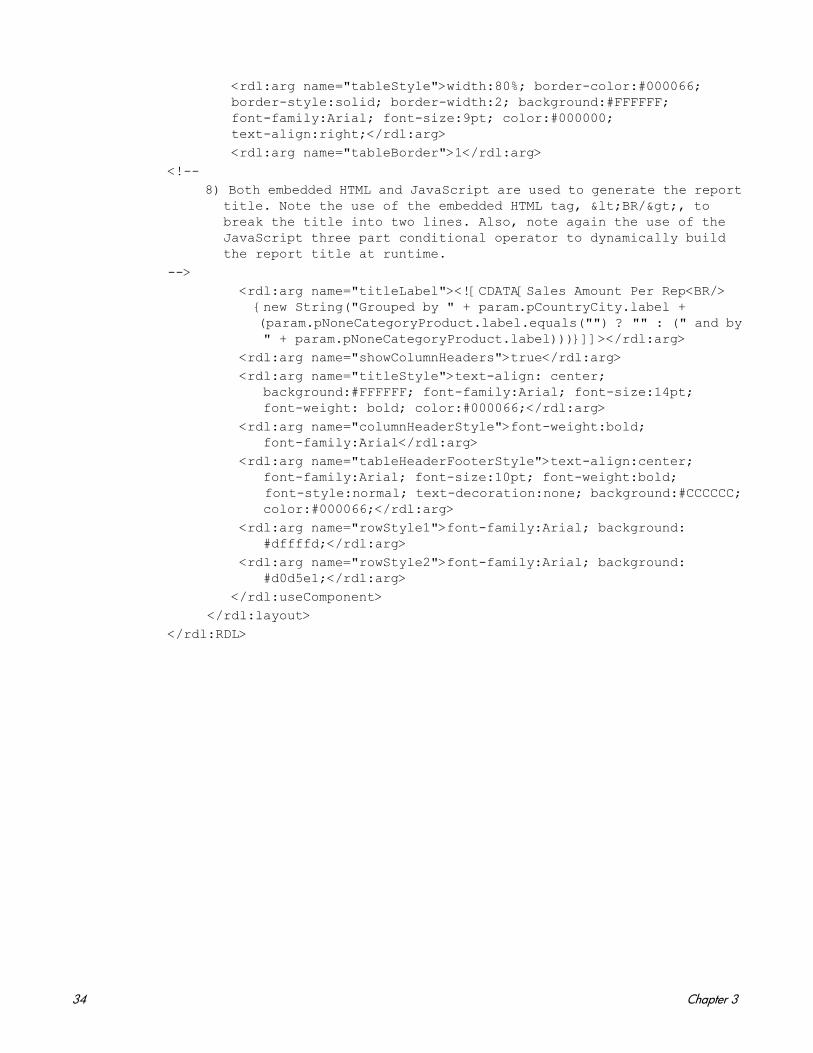
<rdl:arg name="tableStyle">width:80%; border-color:#000066; border-style:solid; border-width:2; background:#FFFFFF; font-family:Arial; font-size:9pt; color:#000000; text-align:right;</rdl:arg> <rdl:arg name="tableBorder">1</rdl:arg><!-- 8) Both embedded HTML and JavaScript are used to generate the report title. Note the use of the embedded HTML tag, <BR/>, to break the title into two lines. Also, note again the use of the JavaScript three part conditional operator to dynamically build the report title at runtime.--> <rdl:arg name="titleLabel"><![CDATA[Sales Amount Per Rep<BR/> {new String("Grouped by " + param.pCountryCity.label + (param.pNoneCategoryProduct.label.equals("") ? "" : (" and by " + param.pNoneCategoryProduct.label)))}]]></rdl:arg> <rdl:arg name="showColumnHeaders">true</rdl:arg> <rdl:arg name="titleStyle">text-align: center; background:#FFFFFF; font-family:Arial; font-size:14pt; font-weight: bold; color:#000066;</rdl:arg> <rdl:arg name="columnHeaderStyle">font-weight:bold; font-family:Arial</rdl:arg> <rdl:arg name="tableHeaderFooterStyle">text-align:center; font-family:Arial; font-size:10pt; font-weight:bold; font-style:normal; text-decoration:none; background:#CCCCCC; color:#000066;</rdl:arg> <rdl:arg name="rowStyle1">font-family:Arial; background: #dffffd;</rdl:arg> <rdl:arg name="rowStyle2">font-family:Arial; background: #d0d5e1;</rdl:arg> </rdl:useComponent> </rdl:layout></rdl:RDL>
34 Chapter 3

4 Guidelines for Developing Reports
This chapter describes the steps you typically take to develop reports using the Report Designer and the Report Center. The principal steps in report development are as follows:
• Building the Report Using the Report Designer on page 35
• Test-publishing Your Report on page 36
• Publishing Your Report on page 37
Building the Report Using the Report Designer
Typically, you start building a report using the Report Designer by performing the following steps:
1 Connect to the server that contains your data sources.
2 Select the data source that will populate the report.
3 Create the SQL statement.
4 Decide the choices that the end user can make at runtime that affect the data in the component. For example, if the report will contain a table of orders, you might want to let the end user select to display only orders placed in certain countries and/or only orders above a certain amount. Create a parameter to represent each choice.
5 If the set of possible parameter values will not be known until runtime, create a separate query to generate the items to choose from. For example, if a parameter lets the end user limit the shown orders to those from certain countries, create a new query to generate the list of countries.
6 If you have created queries to produce parameter values, bind the queries to the parameters.
7 Add the parameter to the query that generates data for display using Report Designer’s SQL editor.
8 Preview the report using the Preview tab.
9 Select the component (Table, CrossTab, or Chart) to present the data.
10 Use the wizard to create the component.
11 Rearrange and style the various parts of the component. (See the HP Select Audit 1.02 Report Designer’s Guide for examples.)
12 Select the controls for the report. Bind the controls to parameters (some controls, for example the Run button, are not bound to parameters).
13 Run Live Preview to check whether the report runs as expected.
14 Save the RDL file.
35
Test-publishing Your Report
You must publish a report to run it in the Library. It is desirable to test your report in the Report server using the Report Center’s Developers Center before publishing it.
For details on the Developers Center, see the HP Select Audit 1.02 Report Center User’s Guide.
Using the Report Server’s Developers Center to Test Publish a Report
1 You must do the following before you test publish a report:
• Set the development server property in the scopeserver.xml file to true.
• Copy the report to the following directory under the directory in your Select Audit installation:
WEBAPPS_HOME\scopeserver\WEB-INF\rdl
2 Open the Developers Center. The URL of the Developers Center is:
http://<servername>/scopeserver/
where <servername> is the address of the Report server. The Developers Center Test screen opens.
You can create subdirectories of the rdl directory and copy the report into one of the subdirectories, if you wish.
It’s a good idea to save this page as a favorite or bookmark in your browser.
36 Chapter 4
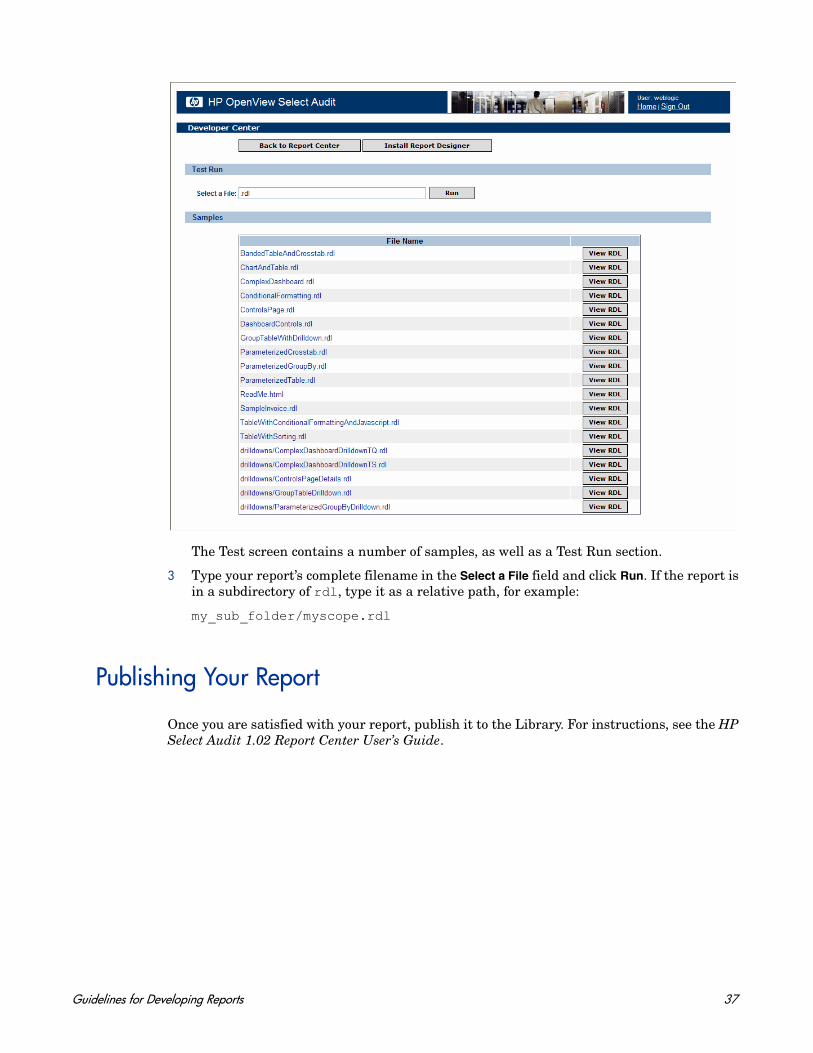
The Test screen contains a number of samples, as well as a Test Run section.
3 Type your report’s complete filename in the Select a File field and click Run. If the report is in a subdirectory of rdl, type it as a relative path, for example:
my_sub_folder/myscope.rdl
Publishing Your Report
Once you are satisfied with your report, publish it to the Library. For instructions, see the HP Select Audit 1.02 Report Center User’s Guide.
Guidelines for Developing Reports 37

38 Chapter 4
5 Working with Non-SQL Data Sources
This chapter discusses how to work with XML, EJB and stored procedure data sources. (Even though stored procedures actually are SQL-based, they are discussed in this chapter because Select Audit handles them differently from SQL SELECT queries.)
This chapter frequently refers to the tags contained in the RDL content block.
Queries and Parameters
Data returned from any supported data source type can be treated similarly to the results of an SQL SELECT statement. The Select Audit parameter model also works with all supported data source types.
Non-SQL SELECT “Queries”
The definition of the values returned from a data source (the equivalent of a “query” in SQL) is defined in the various sub-blocks of the RDL file’s content block. XML “queries” are defined in the xmlsource block, EJB “queries” are defined in the ejb block, and stored procedure “queries” are defined in the sql block.
The Report server uses a list of data elements internally, each of which must contain the same number of fields. Data returned from all sources is mapped to this internal data structure. In the case of SQL data, the data elements are rows and the fields are the columns in each row. For XML data, each data element is a node in the XML DOM. For EJBs, each element is an instance of an EJB.
Parameters Not in SQL SELECT Statements
Select Audit parameters are variables with dynamic values. (See Parameters on page 27 for more information on Select Audit parameters.) Select Audit parameters are a powerful way to restrict the return set generated by any data source.They can be used as part of an XML URL, an EJB argument, or a stored procedure argument. The sections in this chapter explain how to use parameters with each supported data source type.
You can work with XML, EJB and stored procedure data sources using the Query Designer.
You can also create a custom data source. See Custom Data Source API on page 58 for details.
39
XML Data Sources
Select Audit accesses an XML source either through a URL or as the result of an XQuery. You retrieve XML from a URL by setting the url attribute of the xmlsource block. The specified URL must include the protocol. Be sure to use file: for reading XML from a local file. To specify XQuery content, nest an xquery block inside the xmlsource. When using an XQuery, the url attribute sets the default document to query against.
Select Audit Parameters and XML Data Sources
The url attribute of an XML source can be fully parameterized. The parameters can be used to pass information to the source of the XML or even to change the source of the data. You can parameterize the entire URL or just part of it, and you can put multiple parameters in the URL. You can a Select Audit parameter as the value of a URL parameter.
Select Audit parameter syntax in an URL is the same as in a SQL query. See Content Block Parameter Syntax on page 105 for details.
The following is an example of parameterized URL that changes the source of the XML data:
<rdl:xmlsource url="file://{param.region('samples/XML/', '', '')}">...</rdl:xmlsource>
If the value of the region parameter is East, the file samples/XML/East is used. Similarly, if the value is West, the file samples/XML/West is loaded.
If the same data had originated from a dynamic XML source, you might want to modify the request sent to the XML source. If the data in the previous example came from a servlet or web services invocation, the example be as follows:
<rdl:xmlsource url="http://myserver/xmlProcessor?{param.region('region=','','')}">...</rdl:xmlsource>
In this example, if the region parameter is set to East, the actual URL used is:
http://myserver/xmlProcessor?region=East
If region is set to West, the URL is:
http://myserver/xmlProcessor?region=West
Select Audit Parameters and XQueries
Because XQueries are strongly typed, the syntax for parameterizing an XQuery is different from the syntax for parameterizing a URL or SQL query. An XQuery in an xmlsource block consists of a series of static text and parameterized text, all enclosed in an xquery block. Static text is enclosed in an insertText block, while parameterized text is enclosed in a parameterizedCondition block.
The following example shows the W3C’s sample XQuery Q1 inside an RDL file. (See http://w3c.org/TR/xquery-use-cases/#xmp-queries-results-q1 for more information on the sample XQueries defined by the W3C.)
40 Chapter 5

<rdl:xmlsource> <rdl:xquery> <rdl:insertText> <![CDATA[ <bib> { for $b in doc("http://bstore1.example.com/bib.xml")/bib/book where $b/publisher = "Addison-Wesley" and $b/@year > 1991 return <book year="{ $b/@year }"> { $b/title } </book> } </bib> ]]> </rdl:insertText> </rdl:xquery> ...</rdl:xmlsource>
A parameterizedCondition always contains one predicate block, which specifies which parameter the block depends on. If the parameter does not have a defined value, the entire block evaluates to an empty string; otherwise it evaluates to the optional leading static text, the parameterized expression, and the optional trailing static text. The predicate requires a parameter and a string that acts as a placeholder for the parameter value, and can contain the type of the parameter and a boolean operator to use if the parameter has more than one value. If no boolean operator is specified and the parameter has more than one value the query fails and an error is thrown.
The following extension to the previous example parameterizes the publisher:
<rdl:xmlsource> <rdl:xquery> <rdl:insertText> <![CDATA[ <bib> { for $b in doc("http://bstore1.example.com/bib.xml")/bib/book where $b/@year > 1991 ]]> </rdl:insertText> <rdl:parameterizedCondition> <rdl:insertText> and (<rdl"insertText> <rdl:predicate parameter="Publisher" bindingSymbol="##" booleanOp="or"> $b/publisher='##' </rdl:predicate> <rdl:insertText> ) </rdl:insertText> </rdl:parameterizedCondition> <rdl:insertText> <
$b/publisher = "Addison-Wesley" and return <book year="{ $b/@year }"> { $b/title } </book> } </bib> ]]> </rdl:insertText> </rdl:xquery> ...</rdl:xmlsource>
If the Publisher parameter does not have any values, every book published since 1991 is returned, regardless of the publisher. If Publisher is set to “Addison-Wesley” the data returned matches the first example, and if Publisher is set to “Addison-Wesley” and “Morgan Kaufmann Publishers” all books published since 1991 by either publisher are returned.
In addition, if you are using Select Audit driver for the Saxon XQuery engine available from Saxonica (http://www.saxonica.com), you can specify a custom URI resolver to use when loading data into the XQuery engine.
Designating Rows and Columns from an XML Data Source
Select Audit treats XML data as a sequence of nodes, with the specific fields to report on for each node specified relative to each node. The full DOM is available when specifying the fields to use.
Specifying the XML data to include in a report is a two-step process. First you identify the set of nodes to include in the report and then you specify the data fields for each node. In both cases, Select Audit uses XPath (http://www.w3.org/TR/xpath) to identify both the node set and the data fields.
Select Audit uses the Java API for XML Processing (JAXP) to perform all operations on the XML data and follows the JAXP specification when determining which transformer to use.
Use the selectPath attribute of the return block to specify an XPath expression that identifies the nodes to include in the report. To identify the information you want to include for each node, use the fieldPath attribute of nested column tags.
If your XML data source returns data containing explicit namespaces, you must tell Select Audit the prefixes that are being used in the returned data. Do this using the namespace elements nested inside the return block.
The context for the XPath used in the fieldPath attribute is the current node, not the entire document. You should always specify fieldPath expressions relative to a node and begin each with "./".
42 Chapter 5

Examples
The examples in this section all use the following XML data:
<?xml version="1.0" encoding="UTF-8"?><Regions> <Region name="East"> <City name="New York"> <Population>8000000</Population> </City> <City name="Boston"> <Population>600000</Population> </City> <City name="Philadelphia"> <Population>1500000</Population> </City> <City name="Chicago"> <Population>2900000</Population> </City> </Region> <Region name="West"> <City name="Dallas"> <Population>1200000</Population> </City> <City name="San Francisco"> <Population>800000</Population> </City> <City name="Seattle"> <Population>600000</Population> </City> <City name="San Diego"> <Population>1300000</Population> </City> </Region></Regions>
The following RDL code returns a simple table of all the cities, the regions they are in and their populations. The code selects all the City nodes and includes a reference to the Region ancestor as one of the data fields:
<rdl:return selectNode="/Regions/Region/City">
<rdl:column name="Region" type="string" fieldPath="ancestor::Region/ @name"/> <rdl:column name="City" type="string" fieldPath="./@name"/> <rdl:column name="Population" type="int" fieldPath="./Population"/></rdl:return>
The resulting data set is:
East New York 8000000East Boston 600000
Working with Non-SQL Data Sources 43
East Philadelphia 1500000East Chicago 2900000West Dallas 1200000West San Francisco 800000West Seattle 600000West San Diego 1300000
The next example uses XPath predicates to further filter the data set. This example extends the previous one to find only the cities that start with the string “San”.
<rdl:return selectNode="/Regions/Region/City[starts-with(@name,'San')]"> <rdl:column name="Region" type="string" fieldPath="ancestor::Region/ @name"/> <rdl:column name="City" type="string" fieldPath="./@name"/> <rdl:column name="Population" type="int" fieldPath="./Population"/></rdl:return>
The results are:
West San Francisco 800000West San Diego 1300000
The final example shows how to take advantage of all the XPath and XSLT functions. This example counts the number of cities in a Region and sums up the total population for the cities using functions to aggregate the information and format the output:
<rdl:return selectNode="/Regions/Region"> <rdl:column name="Region" type="string" fieldPath="./@name"/> <rdl:column name="NumCities" type="string" fieldPath="count(descendant::City)"/> <rdl:column name="Population" type="string" fieldPath="format-number(sum(child::City/Population), '#,##0')"/></rdl:return>
The output is:
East 4 13,000,000 West 4 3,900,000
EJB Data Sources
The ejb tag takes three arguments: connection, service and method.
The connection attribute specifies the EJB’s JNDI connection. This attribute specifies the logical name of the connection as defined in the scopeserver.xml file.
The service attribute is the logical name under which the EJB server advertises itself on the JNDI naming service.
The method attribute is the name of the method to invoke on the object. The method returns either a single bean or a collection of beans. Single beans are useful for record- or invoice-type reports. Collections are useful for showing tabular or chart data.
44 Chapter 5

The specified method can be any method on the Home interface. It may or may not be a finder method. You can also use a series of methods, separated by a slash (/), where the first method is on the Home interface and subsequent methods are on the object returned by the previous method.
The return objects can be Entity beans, Session beans, or Java beans (serializable state objects). Each returned bean is mapped as a row in Select Audit. If the EJB “query” returns a single object rather than a collection, the results contain only one row. A collection of 12 beans results in 12 rows of data.
The return block within the ejb block contains the “columns” to return. Each of the return objects becomes a row of data and the public access methods become the “columns”. The property attribute of each column refers to methods on the bean, typically “getters” or “setters”. For example, if a column name is lastName, the column’s property is typically the getLastName method on the bean.
The arg blocks within the ejb block is how the Select Audit parameter model is realized on an EJB. The value attribute of each arg is typically a Select Audit parameter. The parameter is sent to the EJB as an argument to a bean method.
Setting Up a JNDI Connection
To use an EJB data source, make sure that a JNDI connection is defined in the scopeserver.xml file. The JNDI connection definition depends on the application server. This section shows sample JNDI connection definitions for different application servers.
For example, using the supplied Tomcat application server framework, the following JNDIConnection block in scopeserver.xml might define the jndi-demo connection used in the examples that follow:
<JNDIConnection> <name>jndi-demo</name> <Properties> <Property name="java.naming.factory.initial"> org.openejb.client.JNDIContext </Property> <Property name="java.naming.provider.url"> 127.0.0.1:4201 </Property> <Property name="java.naming.security.principal"> myuser </Property> <Property name="java.naming.security.credentials"> mypass </Property> </Properties></JNDIConnection>
The method specified with the method attribute is not on the same object as the access method. The former is on the Home interface and the latter is on a returned bean.
Working with Non-SQL Data Sources 45
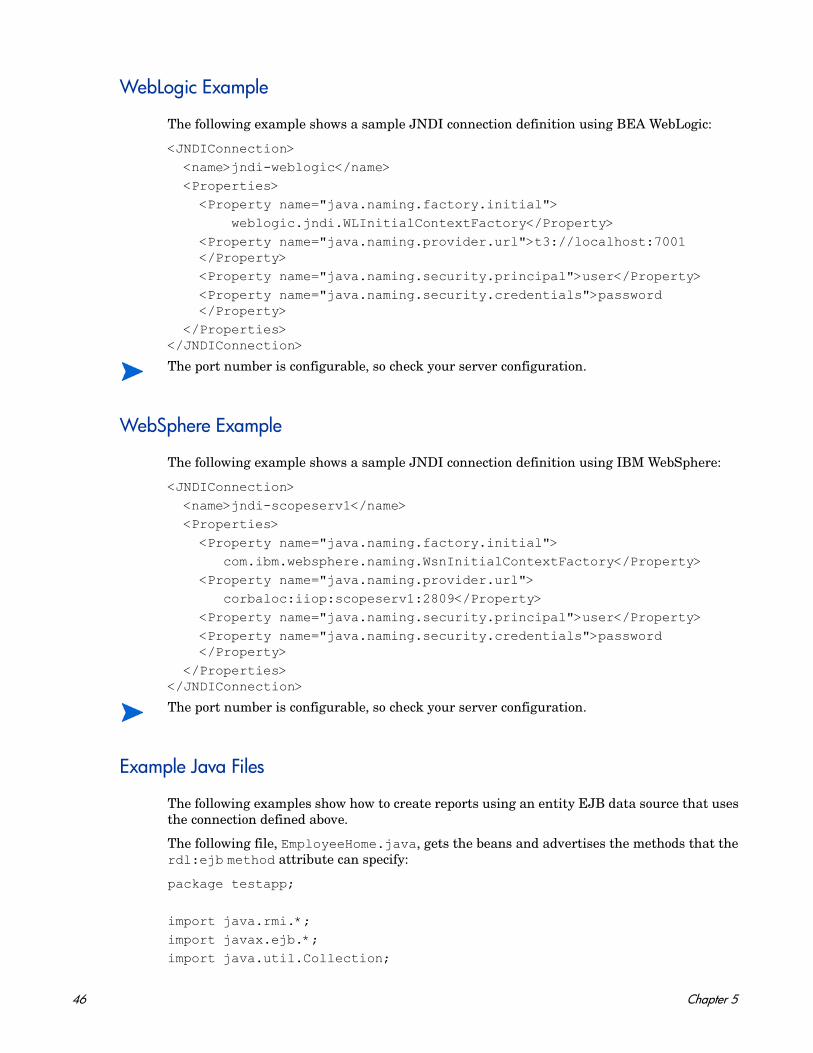
WebLogic Example
The following example shows a sample JNDI connection definition using BEA WebLogic:
<JNDIConnection> <name>jndi-weblogic</name> <Properties> <Property name="java.naming.factory.initial"> weblogic.jndi.WLInitialContextFactory</Property> <Property name="java.naming.provider.url">t3://localhost:7001 </Property> <Property name="java.naming.security.principal">user</Property> <Property name="java.naming.security.credentials">password </Property> </Properties></JNDIConnection>
WebSphere Example
The following example shows a sample JNDI connection definition using IBM WebSphere:
<JNDIConnection> <name>jndi-scopeserv1</name> <Properties> <Property name="java.naming.factory.initial"> com.ibm.websphere.naming.WsnInitialContextFactory</Property> <Property name="java.naming.provider.url"> corbaloc:iiop:scopeserv1:2809</Property> <Property name="java.naming.security.principal">user</Property> <Property name="java.naming.security.credentials">password </Property> </Properties></JNDIConnection>
Example Java Files
The following examples show how to create reports using an entity EJB data source that uses the connection defined above.
The following file, EmployeeHome.java, gets the beans and advertises the methods that the rdl:ejb method attribute can specify:
package testapp;
import java.rmi.*;import javax.ejb.*;import java.util.Collection;
The port number is configurable, so check your server configuration.
The port number is configurable, so check your server configuration.
46 Chapter 5
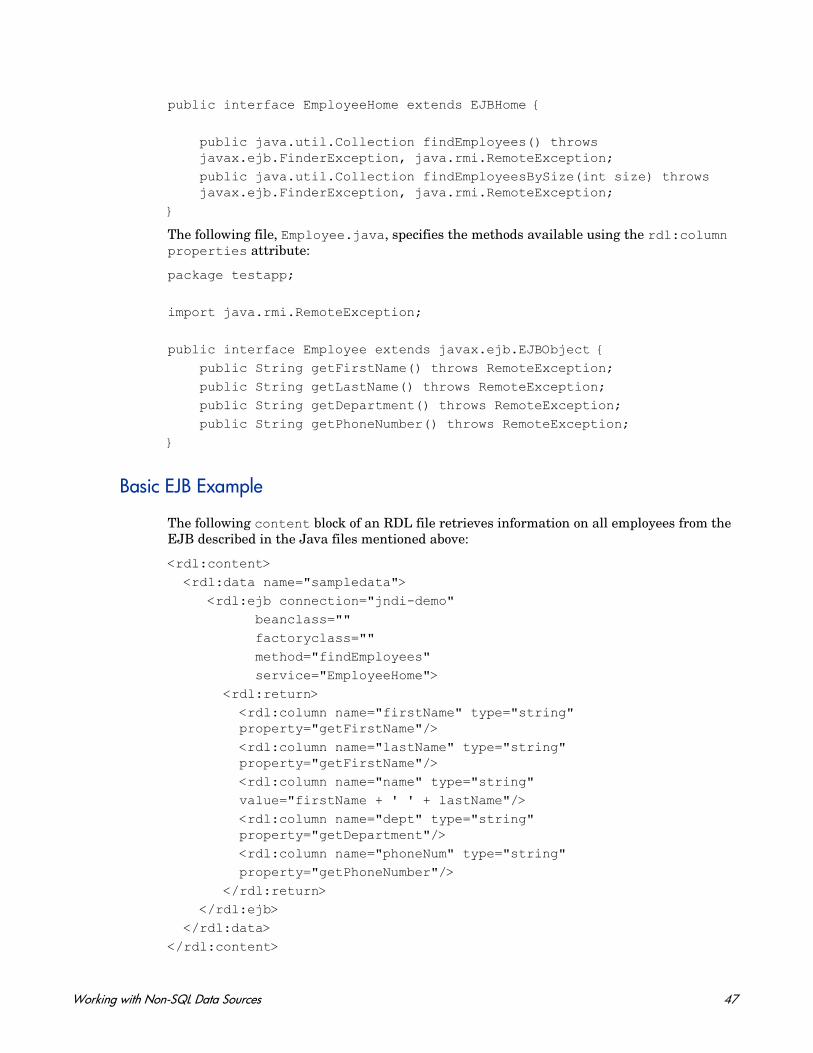
public interface EmployeeHome extends EJBHome {
public java.util.Collection findEmployees() throws javax.ejb.FinderException, java.rmi.RemoteException; public java.util.Collection findEmployeesBySize(int size) throws javax.ejb.FinderException, java.rmi.RemoteException;}
The following file, Employee.java, specifies the methods available using the rdl:column properties attribute:
package testapp;
import java.rmi.RemoteException;
public interface Employee extends javax.ejb.EJBObject { public String getFirstName() throws RemoteException; public String getLastName() throws RemoteException; public String getDepartment() throws RemoteException; public String getPhoneNumber() throws RemoteException;}
Basic EJB Example
The following content block of an RDL file retrieves information on all employees from the EJB described in the Java files mentioned above:
<rdl:content> <rdl:data name="sampledata"> <rdl:ejb connection="jndi-demo" beanclass="" factoryclass="" method="findEmployees" service="EmployeeHome"> <rdl:return> <rdl:column name="firstName" type="string" property="getFirstName"/> <rdl:column name="lastName" type="string" property="getFirstName"/> <rdl:column name="name" type="string" value="firstName + ' ' + lastName"/> <rdl:column name="dept" type="string" property="getDepartment"/> <rdl:column name="phoneNum" type="string" property="getPhoneNumber"/> </rdl:return> </rdl:ejb> </rdl:data></rdl:content>
Working with Non-SQL Data Sources 47
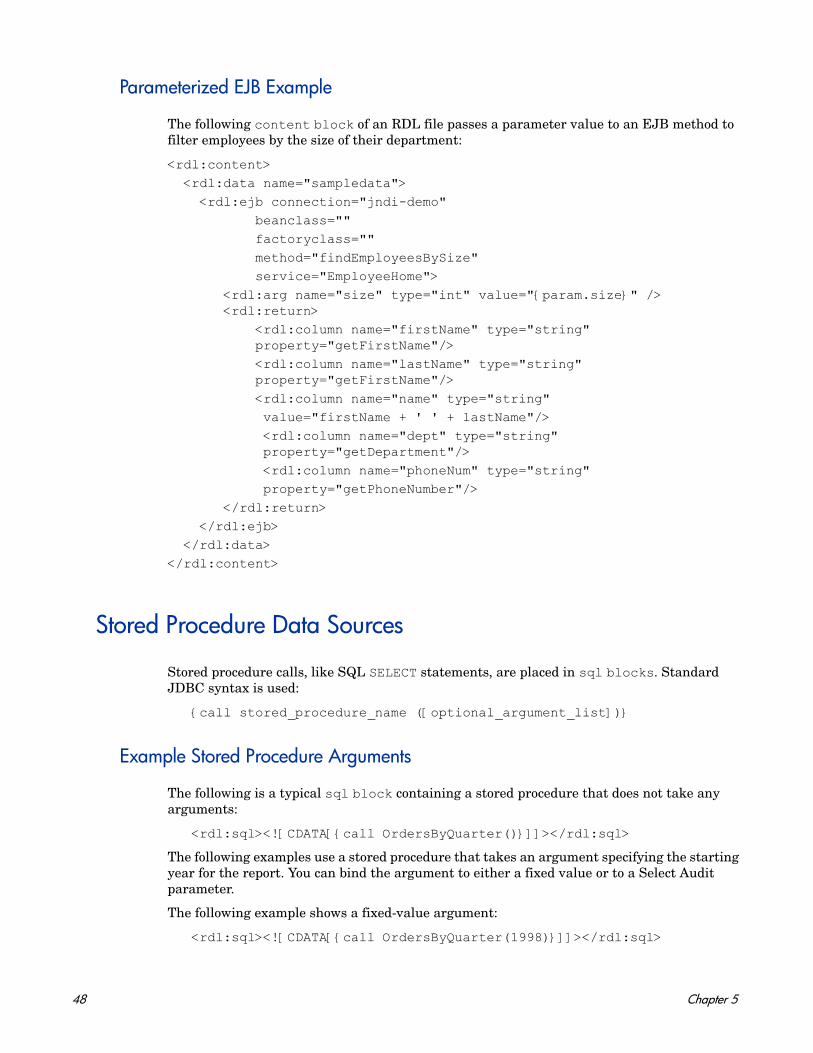
Parameterized EJB Example
The following content block of an RDL file passes a parameter value to an EJB method to filter employees by the size of their department:
<rdl:content> <rdl:data name="sampledata"> <rdl:ejb connection="jndi-demo" beanclass="" factoryclass="" method="findEmployeesBySize" service="EmployeeHome"> <rdl:arg name="size" type="int" value="{param.size}" /> <rdl:return> <rdl:column name="firstName" type="string" property="getFirstName"/> <rdl:column name="lastName" type="string" property="getFirstName"/> <rdl:column name="name" type="string" value="firstName + ' ' + lastName"/> <rdl:column name="dept" type="string" property="getDepartment"/> <rdl:column name="phoneNum" type="string" property="getPhoneNumber"/> </rdl:return> </rdl:ejb> </rdl:data></rdl:content>
Stored Procedure Data Sources
Stored procedure calls, like SQL SELECT statements, are placed in sql blocks. Standard JDBC syntax is used:
{call stored_procedure_name ([optional_argument_list])}
Example Stored Procedure Arguments
The following is a typical sql block containing a stored procedure that does not take any arguments:
<rdl:sql><![CDATA[{call OrdersByQuarter()}]]></rdl:sql>
The following examples use a stored procedure that takes an argument specifying the starting year for the report. You can bind the argument to either a fixed value or to a Select Audit parameter.
The following example shows a fixed-value argument:
<rdl:sql><![CDATA[{call OrdersByQuarter(1998)}]]></rdl:sql>
48 Chapter 5
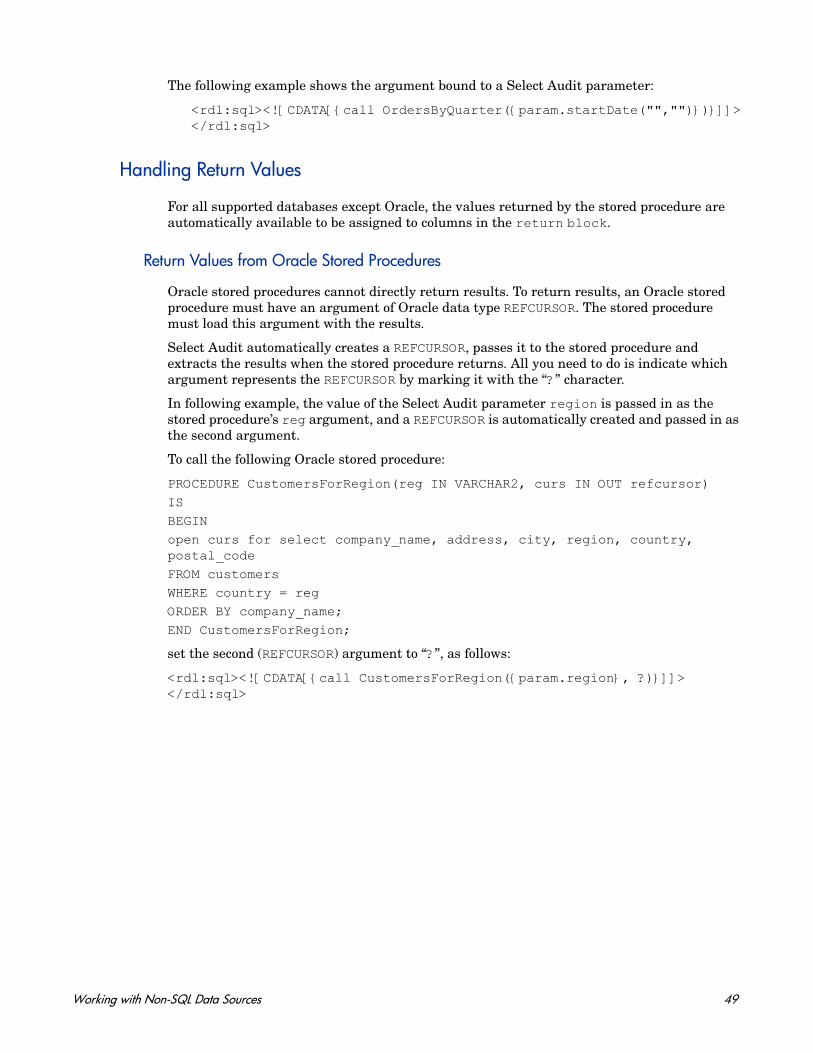
The following example shows the argument bound to a Select Audit parameter:
<rdl:sql><![CDATA[{call OrdersByQuarter({param.startDate("","")})}]]></rdl:sql>
Handling Return Values
For all supported databases except Oracle, the values returned by the stored procedure are automatically available to be assigned to columns in the return block.
Return Values from Oracle Stored Procedures
Oracle stored procedures cannot directly return results. To return results, an Oracle stored procedure must have an argument of Oracle data type REFCURSOR. The stored procedure must load this argument with the results.
Select Audit automatically creates a REFCURSOR, passes it to the stored procedure and extracts the results when the stored procedure returns. All you need to do is indicate which argument represents the REFCURSOR by marking it with the “?” character.
In following example, the value of the Select Audit parameter region is passed in as the stored procedure’s reg argument, and a REFCURSOR is automatically created and passed in as the second argument.
To call the following Oracle stored procedure:
PROCEDURE CustomersForRegion(reg IN VARCHAR2, curs IN OUT refcursor)ISBEGINopen curs for select company_name, address, city, region, country, postal_codeFROM customersWHERE country = regORDER BY company_name;END CustomersForRegion;
set the second (REFCURSOR) argument to “?”, as follows:
<rdl:sql><![CDATA[{call CustomersForRegion({param.region}, ?)}]]></rdl:sql>
Working with Non-SQL Data Sources 49

50 Chapter 5
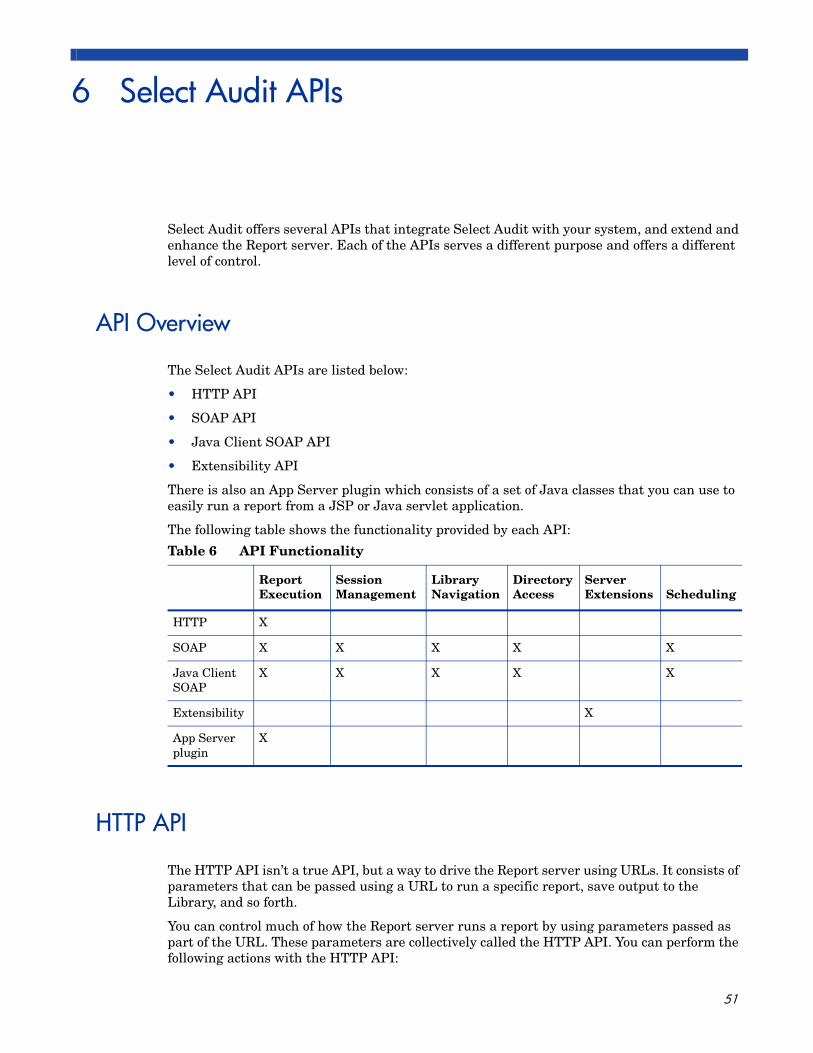
6 Select Audit APIs
Select Audit offers several APIs that integrate Select Audit with your system, and extend and enhance the Report server. Each of the APIs serves a different purpose and offers a different level of control.
API Overview
The Select Audit APIs are listed below:
• HTTP API
• SOAP API
• Java Client SOAP API
• Extensibility API
There is also an App Server plugin which consists of a set of Java classes that you can use to easily run a report from a JSP or Java servlet application.
The following table shows the functionality provided by each API:
HTTP API
The HTTP API isn’t a true API, but a way to drive the Report server using URLs. It consists of parameters that can be passed using a URL to run a specific report, save output to the Library, and so forth.
You can control much of how the Report server runs a report by using parameters passed as part of the URL. These parameters are collectively called the HTTP API. You can perform the following actions with the HTTP API:
Table 6 API Functionality
Report Execution
Session Management
Library Navigation
Directory Access
Server Extensions Scheduling
HTTP X
SOAP X X X X X
Java Client SOAP
X X X X X
Extensibility X
App Server plugin
X
51
• Specify report parameters.
• Configure how the report runs.
• Specify the output format.
URL Syntax for the HTTP API
The URL syntax for using HTTP API is:
http://<server>/scopeserver/ScopeServer?<URL_parameter_string>
where:
• <server> is the URL of your server
• <URL_parameter_string> is a sequence of parameter name/value pairs separated by ampersands (&).
Example HTTP Request
The following URL causes the App Server Plugin to request that the Report Generator execute the file Leads.rdl in the Library’s Sales folder and display the results in XML format:
http://myappserver:8080/scopeserver/ScopeServer?_p_r=/Sales/Leads&_p_ch=xml
SOAP API
The SOAP API allows you to programmatically interact with the Report server. Currently, this API includes Library calls, Directory access, Session management and Report Execution sections
SOAP (Simple Object Access Protocol) is an XML-based messaging protocol designed to be language- and transport-neutral. SOAP is currently the most popular protocol for deploying a web service. Select Audit fully supports SOAP 1.1.
SOAP uses XML to send a message or make a remote procedure call across a network, such as the Internet. All the parameters in the XML body of the request, as well as information about the request itself, are contained in a special section of the XML data called the envelope. Because all the information is encoded in XML, you can access a SOAP server from any operating system that supports the underlying protocol used to send the message. Similarly, you can write the SOAP client in any programming language.
You can make Select Audit SOAP API calls from any language. Select Audit also provides a Java client implementation for applications written in Java.
The Select Audit SOAP implementation requires HTTP transport. Cookies maintain state between requests.
52 Chapter 6
Setting Up the SOAP API
This section shows how to set up the SOAP API for Java and non-Java applications.
Java Applications
To call the Select Audit SOAP API from a Java application, include the panscopicsoap.jar file in your application’s classpath and use the Java objects it contains to make all the calls. This is the Java Client SOAP API. See the Javadoc that comes with the Java SOAP client library for more information.
Non-Java Applications
To call the Select Audit SOAP API from a non-Java based application, use a SOAP library to format all the requests. You can write your own SOAP library if you choose to. Your SOAP library should have some way to call an arbitrary SOAP Action and specify the method, the namespace URI and all parameters.
All the methods in the SOAP API require that you log in first. The SOAP API is stateful and uses servlet-based sessions to maintain the login state. The first method you call must be login, which returns a cookie over the HTTP transport as well as a session ID. If your SOAP client library supports it, cache the cookie and send it back with each subsequent request. If your client does not support cookies and you cannot add support for them, you must add the session ID to each subsequent request. To do so, add:
;jsessionid=sessionid
to each URL before any parameters.
Since Select Audit uses servlet-maintained sessions, SOAP sessions time out. If your client code may have long delays between logging in and making an additional call, prepare to detect a timeout and log back in.
Types of Methods
The Select Audit SOAP API contains the following sets of methods:
• Session management
• Library
• Directory
• Report execution
• Schedule
Session Management
The Session Management methods of the SOAP API let you log into Select Audit and programmatically end a session. The Select Audit SOAP API is stateful and login must be the first call your code makes. If your code makes any other calls before login, an error results.
The login method uses the configured authentication model (and the configured Authentication Module if appropriate) to perform authentication. See Authentication Models on page 71 for more information about the available authentication models.
Select Audit APIs 53
To end a session programmatically, call the logout method. This is useful to force Select Audit sessions to end when a session expires in another integrated application.
Library
The Library methods of the SOAP API enable you to do the following:
• Browse the contents of the Library (without using the Report Center).
• Get the metadata about objects in the Library.
• Upload, publish and unpublish reports.
• Generate a list of available reports.
• Add or delete objects from the Library.
• Integrate with an existing portal.
The Library methods include search, getChildren, getObject, removeObject and addObject.
Directory
The Directory methods of the SOAP API give you programmatic access to the user and group information available to Select Audit. These methods act as a gateway to the underlying configured directory provider. See Authentication Providers on page 72 for more information about directory providers. The Directory methods include getUsers, getRoles, getSubRoles and getUsersInRole.
Report Execution
The Report Execution section of the SOAP API enables you to programmatically run reports in either full page or part-of-page mode. The method getScope allows you to run any report in the Library, supply parameters to it, and get the resulting output, usually HTML. (You can specify another format as part of the request, if desired.) The most common use of the getScope method is to get the HTML output of a report and embed it in another page.
Schedule
The Schedule section of the SOAP API lets you manage schedules for reports.
Java Client SOAP API
The Select Audit Java Client SOAP API is a set of Java classes that perform SOAP communication with the Report server through a Java API.
The supplied com.panscopic.soap.client.CommandLineInterface example demonstrates a typical use of the Java Client SOAP API.
54 Chapter 6
Extensibility API
The Extensibility API is a set of Java interfaces that extend and modify the Report server. The Select Audit Extensibility API extends Select Audit and integrates it with custom or legacy environments. Using the Extensibility API, you can integrate the Report server with a custom directory or authentication engine, or add a custom data source.
Each element of the Extensibility API consists of one or more Java interfaces that must be implemented as well as configuration information on how to use the extension. For complete information about the interfaces that must be implemented, see the Javadoc installed with the Select Audit API.
Using the Report Server API Examples
This section includes API examples as well as build, deployment and implementation instructions.
The following files are included:
• src/: Java source for all the examples.
• javadoc/: Javadoc for all the public APIs.
• rdl/: RDL files for use with the examples.
• classes/: Location of class files built from the Java examples.
• javaApiSamples.jar: JAR file created from the class files.
• build.xml: An Ant build file that allows you to compile, JAR and deploy the examples.
Building and Deploying the Examples
Adding custom extensions to the Report server entails the following steps:
• Compiling the Java code into class files.
• Building a JAR file.
• Copying the JAR to the directory where the Report server is deployed.
The API example directory (REPORTSERVER_HOME/integration/java_api) has an Ant build file to automate these steps. This build file requires that the JAVA_HOME environment variable points to a valid JDK 1.4 installation. The version of Ant included with the Report server uses a built-in JVM by default, but this JVM does not include the full JDK. To check your JAVA_HOME, run the following command:
• On Windows:
%JAVA_HOME%\bin\javac -help
• On UNIX:
$JAVA_HOME/bin/javac -help
You should get a help message if JAVA_HOME is set correctly. All the following steps assume that your current directory is REPORTSERVER_HOME/integration/java_api.
Select Audit APIs 55
Set Up a Report Server Deployment
In order to deploy the JAR file with the examples, the Ant build file needs a path to a deployed Report server webapp, which is typically under REPORTSERVER_HOME/deployedWebApps. Create a file called build.properties with a line that sets the targetWebApp property, such as the following:
targetWebApp=c:/download/20060609-minizip/deployedWebApps/embeddedTomcatscopeserver-
2006Jun09-120821/scopeserver
Build and Deploy Examples
Run the built-in Ant executable (this is in a cygwin shell):
$ ../../ant/bin/ant clean deploy
Buildfile: build.xml
clean:
[delete] Deleting directory C:\download\20060609-
minizip\integration\java_api\classes
jar:
[mkdir] Created dir: C:\download\20060609-minizip\integration\java_api\classes
[javac] Compiling 2 source files to C:\download\20060609-
minizip\integration\java_api\classes
[jar] Building jar: C:\download\20060609-
minizip\integration\java_api\javaApiSamples.jar
deploy:
[copy] Copying 1 file to C:\download\20060609-
minizip\deployedWebApps\embeddedTomcat-scopeserver-2006Jun09-
120821\scopeserver\WEB-INF\lib
BUILD SUCCESSFUL
Total time: 2 seconds
The webapp will need to be reloaded before you have access to the new JAR file.
Test Data Source Example with Supplied RDL Files
The rdl directory contains test RDL files for each of the examples. Select one of the RDL files to upload and run using the Report server.
56 Chapter 6
Custom Data Source Examples
JoinDataSource
This data source will perform a Join between two other datasets specified in the content section. The Java source is in src/com/acme/java_api_examples/JoinDataSource.java, and a test RDL is in rdl/JoinExample.rdl. The data element which uses the data source is shown below:
<rdl:data name="MainQuery" readonly="false">
<rdl:custom classname="com.acme.java_api_examples.JoinDataSource">
<rdl:arg name="dataset1" value="products"/>
<rdl:arg name="dataset2" value="suppliers"/>
<rdl:arg name="joinColumn1" value="supplierId"/>
<rdl:arg name="joinColumn2" value="supplierId"/>
<rdl:return>
<rdl:column name="products_ProductName" type="string" index="1"/>
<rdl:column name="products_UnitsInStock" type="integer"index="2"/>
<rdl:column name="suppliers_CompanyName" type="string"index="3"/>
<rdl:column name="suppliers_ContactName" type="string"index="4"/>
<rdl:column name="suppliers_City" type="string" index="5"/>
<rdl:column name="suppliers_Country" type="string" index="6"/>
</rdl:return>
</rdl:custom>
<rdl:mandatoryParameters/>
</rdl:data>
The four parameters specify dataset names and column names for the two datasets being joined. The column names are in the form dataset_column, where dataset is one of the source dataset names and column is a column in that dataset.
CSVDataSource
This data source will read a CSV file. Before using this, create a CSV file with at least four columns and change the test RDL to point to the CSV file. The Java source is in src/com/acme/java_api_examples/CSVDataSource.java and a test RDL is in rdl/csvExample.rdl. The data element which uses the data source is shown below:
<rdl:data name="MainQuery" readonly="false">
<rdl:custom classname="com.acme.java_api_examples.CSVDataSource">
<rdl:arg name="file" value="c:/download/ssmsg.csv"/>
<rdl:return>
<rdl:column name="name" type="string" index="0"/>
<rdl:column name="status" type="string" index="1"/>
<rdl:column name="code" type="string" index="2"/>
Select Audit APIs 57
<rdl:column name="sourcePath" type="string" index="3"/>
</rdl:return>
</rdl:custom>
<rdl:mandatoryParameters/>
</rdl:data>
The file argument specifies the path to the file.
Custom Data Source API
The Report server can access many different kinds of data sources, including RDBMS, XML and EJB. You can also implement a custom data source.
A custom data source gives you complete control on how the data is presented to the Report server. For example, you can write a data source that performs a join between an Oracle server and a Sybase server, and appears to the Report server as a single database. As another example, you can write a custom data source that goes to a URL and “screen scrapes” the returned HTML to convert tabular data into a data stream.
The main goals of the data source API are to allow customers and PS to extend the Report server to accept data from new sources, and o transform data from existing data sources.
Description of Data Sources
A RDL file (report template) contains a content element which consists of one or more data elements, each of which represents a data source which maps to an implementation of the Java DataSource interface. When the report engine runs a report, different implementations are created by the report engine depending on the child element of the data element.
Content Element Example
The following is an example of a content element with a single SQL data source.
<rdl:content>
<rdl:data name="MainQuery" readonly="false">
<rdl:rdbms prefetch="false">
<rdl:connection name="demo"/>
<rdl:sql><![CDATA[SELECT PRODUCTS.PRODUCT_NAME,
PRODUCTS.UNITS_IN_STOCK,
SUPPLIERS.COMPANY_NAME,SUPPLIERS.CONTACT_NAME,
SUPPLIERS.CITY, SUPPLIERS.COUNTRY
FROM PRODUCTS, SUPPLIERS
WHERE PRODUCTS.SUPPLIER_ID = SUPPLIERS.SUPPLIER_ID
{param.Country ("AND SUPPLIERS.COUNTRY ='", "'")}]]>
</rdl:sql>
58 Chapter 6
<rdl:return>
<rdl:column name="ProductName" type="string" index="1"/>
<rdl:column name="UnitsInStock" type="integer" index="2"/>
<rdl:column name="CompanyName" type="string" index="3"/>
<rdl:column name="ContactName" type="string" index="4"/>
<rdl:column name="City" type="string" index="5"/>
<rdl:column name="Country" type="string" index="6"/>
</rdl:return>
</rdl:rdbms>
<rdl:mandatoryParameters/>
</rdl:data>
</rdl:content>
The columns of the data source are described by the column elements under the return element. The attributes of column tell the data source and the RDL file more information about the data source:
• Name: Used to identify the column to the rest of the RDL file. For this reason, it needs to conform to the syntax of JavaScript identifiers, which start with a “_” or letter and contain letters, numbers or “_”.
• Type: Identifies the type of data expected for column values.
• Index: An integer value used by the SQL data set, which retrieves result set values by index.
• Value: Used to specify a JavaScript expression which is evaluated to find the column’s value All of these attributes can be used in custom data source implementations.
Overview of Data Source Processing Steps During Report Creation
Data Source implementations are created from the content element of the RDL file For each Data Source:
If caching is active (default):
• getCacheKey() is called to get a key string which is used to look up previously fetched data.
• If the data is not found in the cache, getDataSet() is called to obtain the actual data.
• All the rows of the data set are retrieved, stored in the cache under the previously obtained key and are ready to be used in the layout phase below.
If caching is inactive (default):
• In the layout phase the layout element is evaluated to render the report.
• Tables, charts, crosstabs and other components iterate through the rows of the datasets obtained in the previous processing phase.
• Column values are accessed in various ways, including references to the column names or JavaScript expressions.
Select Audit APIs 59

Implementation
Previous versions of the Report server required custom data source implementations to supply a full DataSource and DataSet implementation. In this release, a custom data source can be created by implementing the CustomDataSourceHandler interface, which has four methods:
• init(CustomDataSource dataSource) does any initialization, using the CustomDataSource parameter to access information that it needs to create the data set.
• nextRow() gets a new row of data.
• getColumnValue(ColumnInfo column) gets a value for the column, which is specified by the ColumnInfo object. This object allows access to all the attributes specified by the column element (name, index, type and value). It is up to the implementation to interpret these values to calculate the column value, but each attribute has syntax restrictions (see above). Value is the least restricted but it still has to conform to XML attribute value syntax.
• getCacheKey(CustomDataSource dataSource) returns a unique object (typically a string) that will allow the caching layer to look up the data set, for example, a data source that reads a CSV file would return the file name. This gets called before init(), so it needs to do its own calculation based on the arguments passed to it. If you return null, caching will be disabled for this dataset. This is appropriate if your implementation is using data from another data source, as in JoinDataSource on page 57.
The CustomDataSource passed to the init() method can be used to access information required to create the data set.
• getArgs() returns a map of all the argument names and values from arg elements.
• getArg(String name) returns the value of a specific argument.
• getReturnInfo() returns a ReturnInfo object which can be used to get information about the return columns declared in column elements.
• getDataSet(String name) looks up the data source with the given name from the list of data sources defined under the content element and returns the corresponding BasicDataSet.
Custom Directory API
The Report server uses a directory to maintain the following data:
• A list of users known to the system.
• A list of roles which users can assume.
• Named attribute values for each user and role.
getDataSet() cannot be called within the getCacheKey() implementation, because datasets have not yet been created from the data sources.
Most of the time, a BasicDataSet returned by getDataSet() can be cast to a RandomAccessDataSet, which has some extra methods allowing access to rows in any order. The JoinDataSource example uses this. The only time when casting cannot be done is when caching is disabled by setting cacheTimeout="-1" in the RDL or adding the parameter "_p_cacheTimeout=-1" in the HTTP request for the report.
60 Chapter 6

The directory is used for the following tasks:
• Authenticating users when the Report server is configured to do authentication internally.
• Retrieving attribute values for the current user for use within reports.
The Report server has a Java directory interface called DirectoryProvider, with multiple built-in implementations that can store directory data in the following sources:
• An XML file in the Report server web application.
• A relational database.
• An LDAP directory.
The directory support is configured with the file WEB-INF/conf/ directory.xml. If the built-in DirectoryProvider implementations are not suitable, you can build your own implementation, taking one of these three approaches:
• Implement the DirectoryProvider interface directly.
• Implement the ReadOnlyDirectoryHandler, which is simpler than DirectoryProvider and doesn’t rely on internal APIs.
• Implement the WriteableDirectoryHandler, which includes everything in ReadOnlyDirectoryHandler, along with methods for updating the directory. (The base system uses the directory in a read-only mode, but custom extensions may need to update the directory.)
This document focuses on the last two options, but there is an XMLDirectoryProvider.java in the example directory which implements DirectoryProvider directly. Other implementation decisions include the following:
• Whether to support nested roles (roles which contain other roles).
• Whether to read all directory data once on initialization or reread the directory data to look for changes.
Implementing the Directory Handler API
The examples directory contains the source for XMLDirectoryHandler.java which implements WriteableDirectoryHandler by reading and writing an XML file stored in the Report server web application. The following is the section of directory.xml that configures the example handler:
<DirectoryProvider
class="com.panscopic.scopeserver.extensions. CustomDirectoryAdapterImpl" >
<CustomDirectoryProvider
handlerClass="com.acme.java_api_examples.XMLDirectoryHandler">
<arg name="path" value="xmldirdata.xml"/>
</CustomDirectoryProvider>
</DirectoryProvider>
The DirectoryProvider element specifies a special directory provider that acts as a wrapper for the WriteableDirectoryHandler implementation. When you implement a directory handler (either WriteableDirectoryHandler or ReadOnlyDirectoryHandler), set the handlerClass attribute to your implementation class and add any arguments needed to configure the handler.
Select Audit APIs 61
At startup, the Report server calls the handler’s init() function, passing a CustomDirectoryAdapter. This object has methods to read arguments specified in directory.xml under the CustomDirectoryProvider element and to read other files in the webapp directory.
The init() function of XMLDirectoryHandler reads an XML file named by the path argument and initializes its lists of users, roles and attributes based on the contents of the XML. Once these are initialized, it can provide answers to all the other methods in WriteableDirectoryHandler.
Configuring and Deploying the Example Directory Handler
The example directory has a conf directory containing the following files:
• directory.xml is the main directory configuration file.
• xmldirdata.xml is the file used by XMLDirectoryHandler to store directory data.
• authentication.xml is an authentication configuration file which configures the Report server to use the directory for authenticating user logins.
In order to install these files in the webapp, make sure that your build.properties file has been configured as in Building and Deploying the Examples on page 55, then run the following command and reload the webapp:
$ ../../ant/bin/ant deploy-dir-conf
Writing a Custom XQuery Data Source
Select Audit provides full support for XQuery data sources. One area where XQuery standardization lags behind SQL standardization is the lack of a standard interface to talk to a XQuery provider. Select Audit provides an interface to the Saxon XQuery engine, and you can also write an adaptor to talk to a different XQuery engine.
To add support for an additional XQuery engine, write an XQuery data source that implements the com.panscopic.scopeserver.queryengine.XQueryConnection interface. The only method that you must implement is executeQuery(); the other methods can be empty. You do not have to parameterize XQuery or parsing the results; Select Audit does all that for you.
Writing a Custom Authentication Module
A custom authentication module integrates Select Audit with an authentication source that does not already have an authentication module available. This could be a proprietary system or a SQL database that the generic SQLAuthModule cannot handle.
Before implementing a custom authentication module you should familiarize yourself with the JAAS authentication module by consulting Sun Microsystems’ documentation, especially their LoginModule Developer’s Guide, available from their web site. Note that the Select Audit authentication engine handles all Callback-related issues for you, so you do not have to implement javax.security.auth.callback.CallbackHandler yourself.
To implement a custom authentication module, write an implementation of the javax.security.auth.spi.LoginModule interface. Your object needs to provide only the default constructor, as all configuration information is passed to the initialize method on each attempt to authenticate.
62 Chapter 6
For more information about authentication modules, see Authentication Providers on page 72.
App Server Plugin API
This section describes the App Server Plugin API, an extremely simple interface for interacting with the App Server Plugin. The Report server contains an embedded application server to handle HTTP requests for reports. However, you may want to integrate your company’s existing application servers and web infrastructure with the Report server. Select Audit provides the App Server Plugin for this purpose.
The App Server Plugin lives in your own application server and forwards requests to a Report server. To the end user, reports appear just like other web pages served by your application server. The reports can include the complete page (reports) or may fill only part of the page (Scopelets). (HTML output from reports includes the <head> and <body> tags while output from Scopelets does not.) Additionally, the App Server Plugin lets you put multiple reports onto a single web page.
In addition to preserving your web site’s look and feel, the App Server Plugin does the following:
• It provides additional security. Only the App Server Plugin needs to be exposed to the external network. The Report server and the backend databases can be protected behind a second firewall.
• It supports single sign-on. The App Server Plugin enables sharing of the currently-authenticated user. User information can be passed explicitly as an argument to the report object or implicitly from the HTTP request.
• It provides load balancing to enhance scalability. The App Server Plugin can be configured to use multiple Report servers.
Select Audit APIs 63
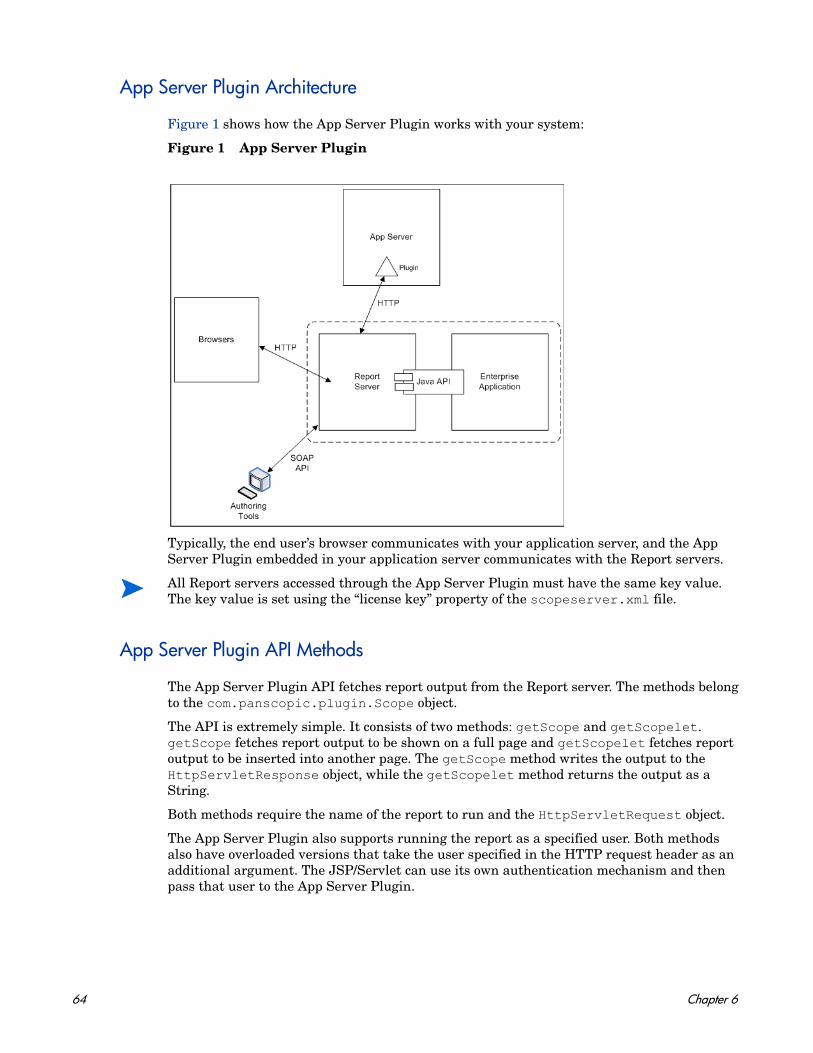
App Server Plugin Architecture
Figure 1 shows how the App Server Plugin works with your system:
Figure 1 App Server Plugin
Typically, the end user’s browser communicates with your application server, and the App Server Plugin embedded in your application server communicates with the Report servers.
App Server Plugin API Methods
The App Server Plugin API fetches report output from the Report server. The methods belong to the com.panscopic.plugin.Scope object.
The API is extremely simple. It consists of two methods: getScope and getScopelet. getScope fetches report output to be shown on a full page and getScopelet fetches report output to be inserted into another page. The getScope method writes the output to the HttpServletResponse object, while the getScopelet method returns the output as a String.
Both methods require the name of the report to run and the HttpServletRequest object.
The App Server Plugin also supports running the report as a specified user. Both methods also have overloaded versions that take the user specified in the HTTP request header as an additional argument. The JSP/Servlet can use its own authentication mechanism and then pass that user to the App Server Plugin.
All Report servers accessed through the App Server Plugin must have the same key value. The key value is set using the “license key” property of the scopeserver.xml file.
64 Chapter 6
App Server Plugin Examples
Examples are provided to show how to use the App Server Plugin. These examples are typically in WEBAPPS_HOME\plugin\examples.
ReportServer.jsp Illustrates part-page mode from a JSP file. This example runs ProductsProfessionalStyle.rdl in the Library samples/Products folder as user RKing.
PresidioServer.jsp Same as ReportServer.jsp but in a full-page mode. The Report server generates the page elements as well.
ParameterizedReports.jsp Same as PresidioServer.jsp but lets the user specify the report to run. If no value is specified, this example runs ProductsProfessionalStyle.rdl in the Library samples/Products folder.
CustomerServlet.java Sample servlet that uses the App Server Plugin to include ProductsProfessionalStyle.rdl in the Library samples/Products directory in the Servlet output. The report is run as user RKing.
ReportServerServlet.java Slight variation of the CustomerServlet.java example with the output generated in full page mode.
Select Audit APIs 65

66 Chapter 6

7 Managing Images
This chapter discusses image management in the Report server. Image management refers to generation, storage, retrieval, and cleanup of images in single and clustered server configurations.
Images can be incorporated into reports (see Static Images on page 9) or generated by reports (see Dynamic Images Generated by Chart Components on page 11).
Images can be included in reports in any of the following ways:
• Using the rdl:image tag.
• Using HTML tags whose src attributes refer to an image (such as img or input) in a JSP report component.
• Within chart background images, chart series fill images or the chart component itself.
• Image locations are specified as fully-qualified URLs in the src attribute of an rdl:image or HTML <img> tag.
Images can be persisted in the Library or in a file system directory. See Deploying Images on page 11.
Images are served by a servlet. See The Image Servlet on page 12 for details.
Static and Dynamic Images
Select Audit can support either static or dynamic images. All image output, both static and dynamic, is accessed using either the rdl:image tag (for a supplied component) or the <img> HTML tag (for a custom component).
Static Images
Images that are stored and fetched before the report is run are called static images. Static images are pre-generated and included in the report output. Examples are header and footer images, icons, and logos.
The static images themselves may be stored in the Library or in a specific location under the Report server home directory. The images can be of any type supported by the presenting application (typically a web browser).
Dynamic Images
Images that are generated by the report’s charting components at runtime are called dynamic images. Dynamic images are saved to either a temporary file or to the Library. The acceptable types of dynamic images are: JPEG, GIF (licensing from Unisys is required) and PNG.
67
Image Usage
This section shows the RDL and component file syntax for managing different kinds of images.
Images in an RDL File
The following RDL code generates the text “Press Me!” next to an image taken from the file system on the server machine:
<rdl:image src="http://myserver/images/myimage.gif">Press Me!</rdl:image>
The following RDL code does the same thing from a generated image file in the Library:
<rdl:image src="http://scopeserv1:7001/scopeserver/servlet/imageservlet?action=get&store=library&loc=User+Scopes%2Fjeff%2Fchart-1443091197.jpg">Press Me!</rdl:image>
Images in a Component File
The following example includes an image from a known spot on the Report server in a component. The component refers to the images that use the HTML src tag attribute:
<img id="Chart_1" src="http://myserver/images/myimage.gif"alt="Column" >
The following HTML example includes a Library image in a component:
<img id="Chart_1"
src="http://scopeserv1:7001/scopeserver/servlet/
imageservlet?action=get&store=library&loc=User+Scopes%2Fjeff%2Fchart-1443091197.jpg" alt="Column">
Background Images for Charts
Chart components can refer to images for use within the chart. For example, the chart background can display an image using the following syntax:
<rdl:arg name="Chart.BackgroundImage">http://myserver/images/myimage.gif</rdl:arg>
Fill Images for Charts
Each chart series can use a fill image by using the following syntax:
<rdl:arg name="ChartData.ChartSeries1.FillImage">
http://myserver/images/myimage.gif
</rdl:arg>
68 Chapter 7

Sorting Icon Images
You can specify the images to use for “up” and “down” sorting icons, if your report uses them. For example, the following RDL code selects an image for the “up” sorting icon:
<rdl:sorting data="data" upIcon="http://myserver/images/myimage.gif">
Dynamic Images Generated by Chart Components
Dynamic images of charts are generated when a charting component is included in a report.
<rdl:useComponent name="Chart_1" type="StandardPieChart">
<rdl:arg name="chartargname">argvalue</rdl:arg>
…
</rdl:useComponent>
Deploying Images
Deploy images either to the Library or to a directory that is configurable in the Report server configuration file. Doing so enables multiple servers to share the images in a clustered environment. You can store static images directly under this configurable directory.
Configuring the Image Directory
To configure the image servlet directory that stores images, set the image path property. If this property is not set or is set to the null string, the image directory is the images directory under the Report server webapp root. If this property is set to a value other than null, the specified path is an absolute path available in the server machine. This can be a local path or a network path.
Temporary Images Directory per Server Instance
The images directory also contains the tmp subdirectory, which contains directories for each Report server instance. For example, if the names of two Report servers in a clustered environment are myserver and yourserver, then the tmp directory under the image directory contains two directories called myserver and yourserver. Maintaining a different temporary directory for each Report server prevents UID conflicts among server instances.
Each of these server-specific directories stores the temporary images that are generated when a report is executed but not stored in the Library. The temporary image filenames follow the following naming convention:
chart-<uid>.<imagetype>
where <uid> is a unique ID generated in the server. The UID is unique to the server machine.
Only the “admin” user should be able to configure this directory.
Managing Images 69
The Image Servlet
All images are served by an image servlet. The servlet’s main URL is:
http://serverinstance:<portnumber>/scopeserver/servlet/imageservlet
The image servlet uses the following attributes:
You can serve the image to the browser using a different server instance than the one that generated the image. The temporary file is automatically deleted after it is served.
Image servlet serves URLs that access the following image types:
• Images in the Library
• Images in the Configurable Images directory
• Per-server temporary chart images
Images in the Library
The following URL accesses the image at /User Reports/jdoe/myimage.gif in the Library. It assumes the server is accessible through port 1234.
http://serverinstance:1234/scopeserver/servlet/imageservlet?action=get&store=library&loc=/User%20Reports/jdoe/myimage.gif
Images in the Configurable Images Directory
The following URL accesses the image file myimage.gif under the images directory:
http://serverinstance:1234/scopeserver/servlet/imageservlet?action=get&store=file&loc=myimage.gif
Per-server Temporary Chart Images
The following URL accesses temporary images generated by charts generated by a server instance:
http://serverinstance:1234/scopeserver/servlet/imageservlet?action=get&store=file &loc=tmp/chart/serverinstance/chart-uid.jpg&del=true
Table 7 Image Servlet Attributes
Attribute name Function Valid values
action Indicates what to do with the image. get
loc The URL of the image. valid URL
store Indicates where the image is. library, file
70 Chapter 7
Authentication and Authorization
The image servlet uses the Report server authentication and authorization mechanism for images stored in the Library. Therefore, to ensure that images are served, make sure that the User object has been set in the User Session object.
The images stored in the well-known directory in the Report server distribution do not use the authentication and authorization mechanism. Anyone can view them using the image servlet.
Library Permissions
If the image is stored as a part of report output, then the image content is created in the same folder and with the same permission as the report output. The content type is set to GENERIC. The name of the image file uses the pattern:
chart-<uid>.<imagetype>
where <uid> is a unique ID generated in the server. The UID is unique to the server machine.
Managing Images 71

72 Chapter 7
8 Incorporating Reports into HTML
Most developers need to create complex HTML output. Typically, you need to group multiple components into a single report and embed reports into an existing template or web site. This chapter shows how to do this.
The ways of incorporating reports into HTML are as follows (in increasing order of flexibility):
• Using the StandardDashboard on page 73
• Using the StandardRecordGrid or StandardBandedTable on page 73
• Using Templates on page 73
• Writing Your Own HTML Page on page 74
• Calling Reports from JSP or Servlets on page 76
Using the StandardDashboard
The simplest way to create a multi-component report is to use the Report Designer. If you create a multi-component report, the reports are automatically placed in a StandardDashboard component.
Using the StandardRecordGrid or StandardBandedTable
The StandardRecordGrid is more flexible and more complex than the StandardDashboard. It uses IFrames, and is more flexible at including image and text than StandardDashboard. StandardBandedTable is more flexible still, providing nesting.
Using Templates
Use templates when the same Report server both accesses your data source and serves your end users. To use custom templates, follow these steps:
1 Create the report.
2 Publish the report on the Report server.
Pagination applies to the data rather than the component. If multiple components use the same data, they are paginated the same way. To paginate reports on the same page differently, duplicate the query and use a different instance of the query for each differently paginated report.
73
3 Link to the wrapping JSPs.
Select Audit ships with sample template header and footer files, called provencalheader.jsp and provencalfooter.jsp, for a fictitious food distribution company.
Changing the Default Templates
All reports use the default header and footer templates defined in the following two files:
WEBAPPS_HOME/scopeserver/header.jsp
WEBAPPS_HOME/scopeserver/footer.jsp
To modify the headers and footers for your web site’s reports, edit these two files.
Specifying the Templates for a Report
To specify header and footer templates for a particular report, include the template attribute in the rdl:layout tag. The name of the .jsp files called by a template are:
<templatename>header.jsp
and
<templatename>footer.jsp
where <templatename> is the name of the template attribute of the rdl:layout tag.
For example, to use the provencal template, include the following block in the RDL file:
<rdl:layout template="provencal">
...
</rdl:layout>
This block uses following header and footer templates:
WEBAPPS_HOME/scopeserver/provencalheader.jsp
WEBAPPS_HOME/scopeserver/provencalfooter.jsp
Writing Your Own HTML Page
You can usually create the multi-component reports you need using only the Report Designer. However, if you prefer, you can write your own HTML code to tie the reports, text and links together. To do this, you must be able to access the main multi-component page and all the reports it links to using URLs, using frames or JavaScript.
Multi-component pages can use IFrames or other technologies to load the URL. You can put each report into its own inline frame, position it where you like and add other HTML code for images, lines and links. See Example on page 75 for a sample multi-component page using IFrames. If you cannot use URLs to call the reports, use a Select Audit API instead. See Calling Reports from JSP or Servlets on page 76.
74 Chapter 8
When you use the HTTP API to call a report, the Report server typically returns an HTML page, though it can return other formats. You can, however, publish a page in HTML format directly to the Report server and call it using the HTTP “API”, just as you would a report. Once published to the Report server, access to the multi-component HTML file is secured through the standard Report server security mechanism.
Example
The following example shows an HTML page containing customized formatting, descriptive text, links, and two reports:
<html><head><title>My Main Page</title><meta http-equiv="Content-Type" content="text/html; charset=iso-8859-1"></head><body bgcolor="#FFFFFF" leftMargin=20 topMargin=20 marginheight="0" marginwidth="0" ><!-- MAIN TABLE --><table border=0 cellpadding=0 cellspacing=0 ><!-- ROW 1 --><tr>e<!-- COLUMN 1 WHICH CONTAINS PROJECT LOGO--><td style="vertical-align:top;text-align:left;width:400"><img src="/scopeserver/scopecenter/img/myLogo.gif"></td><!-- COLUMN 2 WHICH CONTAINS LINK TO SECOND MULTI-COMPONENT REPORT --><td style="text-align:right;width:400">Main View | <a href="/scopeserver/servlet/scopecenter?action=show&_p_fn=/ User%20Scopes/-Dashboard%20(Secondary%20View)-">Secondary View</a></td></tr><!-- ROW 2 --><tr><!-- COLUMN 1, 2 WHICH CONTAIN DASHBOARD TITLE--><td colspan="2" style="background-color:#FFFFFF; color:#000000 ;text-align:left; font: bold large Times, serif;">My Main Analysis</td></tr><!-- ROW 3 --><tr><!-- COLUMN 1, 2 WHICH CONTAIN REPORTS AND DESCRIPTIVE TEXT--><td colspan="2" valign="top"><!-- MAIN DIVISION--><div style="position:relative; top:0; left:0; width:800; height:1000; border-top: solid black 1px; border-bottom: solid black 1px;"> <!-- INLINE FRAME WHICH CONTAINS FIRST REPORT -->
Incorporating Reports into HTML 75
<iframe name="i1"src="/scopeserver/ScopeServer?_p_r=/User%20Scopes/ main_analysis_table_view" style="position:relative; top: 10; left: 10; width:800; height:400" border=none frameborder=0 allowtransparency></iframe><!-- INLINE FRAME WHICH CONTAINS SECOND REPORT --><iframe name="i1"src="/scopeserver/ScopeServer?_p_r=/User%20Scopes/ main_analysis_graphical_view" style="position:relative; top: 510; left: 10; width:800; height:400" border=none frameborder=0 allowtransparency></iframe><!-- SUB DIVISION WHICH CONTAINS DESCRIPTIVE TEXT --><div style="position:absolute; top:600; left:500; width:300; height:200; font: Times, serif;background-color:#FFFFFF; color:#999999">How many items were created?<br/>Which group buys more?<br/></div></div></td></tr><!-- ROW 4 --><tr><!-- COLUMN 1, 2 WHICH CONTAIN LINK TO SECOND DASHBOARD --><td colspan="2" style="text-align:right;width:800">Main View | <a href="/scopeserver/servlet/scopecenter?action=show&_p_fn=/ User%20Scopes/-Dashboard%20(Secondary%20View)-">Secondary View</a></td></tr></table></body></html>
Calling Reports from JSP or Servlets
If you want to link reports to an already-developed web application, or if your application dynamically generates web content, link your page to reports using the Select Audit-supplied APIs.
76 Chapter 8
9 Using JavaScript for HTML Output
This chapter describes how to use JavaScript within an RDL file to control HTML output.
JavaScript is a good way to add custom functionality to your reports. For example, you can use JavaScript to ensure that the end user types a string with valid date syntax into a report text control. You can also use it to provide rollover text.
To incorporate JavaScript in an RDL file, use the StandardInclude component. You can put the JavaScript code directly in the RDL file, but it is better to reference an external JavaScript file using the SRC attribute, because some characters, particularly curly braces ({}), must be escaped if they appear directly in the RDL file.
The JavaScript file that you invoke must be accessible by specifying a path on the file system. The path is relative to WEBAPPS_HOME/scopeserver.
Where in RDL to Put the JavaScript
The placement of the StandardInclude component containing the JavaScript reference is significant. The script must appear after the object it acts on. For example, if the script acts on a control, you must place the StandardInclude component after the controls block containing that control.
The basic rules for placing JavaScript calls in RDL are listed below:
• Put the StandardInclude component where you want the script executed.
• If the action is to be executed immediately, have the JavaScript execute unconditionally (see Directly Invoking JavaScript on page 78).
• If the action is to be executed at some event, put the JavaScript inside a function and use the browser’s object model to invoke it (see JavaScript Inside a Function on page 78).
Examples
This section contains examples of the two ways to incorporate JavaScript into RDL.
These examples are taken from a single RDL file and a single JSP file. To see the complete files from which these snippets are taken, see the Examples page that ships with this documentation.
77
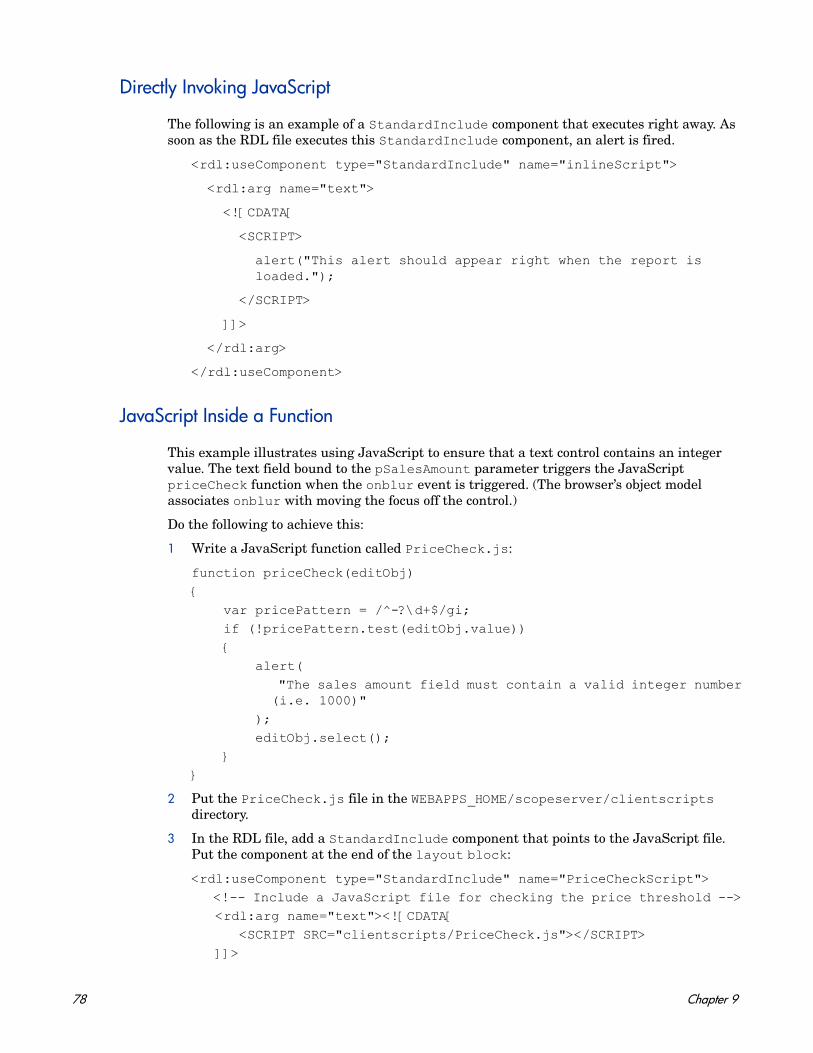
Directly Invoking JavaScript
The following is an example of a StandardInclude component that executes right away. As soon as the RDL file executes this StandardInclude component, an alert is fired.
<rdl:useComponent type="StandardInclude" name="inlineScript">
<rdl:arg name="text">
<![CDATA[
<SCRIPT>
alert("This alert should appear right when the report is loaded.");
</SCRIPT>
]]>
</rdl:arg>
</rdl:useComponent>
JavaScript Inside a Function
This example illustrates using JavaScript to ensure that a text control contains an integer value. The text field bound to the pSalesAmount parameter triggers the JavaScript priceCheck function when the onblur event is triggered. (The browser’s object model associates onblur with moving the focus off the control.)
Do the following to achieve this:
1 Write a JavaScript function called PriceCheck.js:
function priceCheck(editObj){ var pricePattern = /^-?\d+$/gi; if (!pricePattern.test(editObj.value)) { alert( "The sales amount field must contain a valid integer number (i.e. 1000)" ); editObj.select(); }}
2 Put the PriceCheck.js file in the WEBAPPS_HOME/scopeserver/clientscripts directory.
3 In the RDL file, add a StandardInclude component that points to the JavaScript file. Put the component at the end of the layout block:
<rdl:useComponent type="StandardInclude" name="PriceCheckScript"> <!-- Include a JavaScript file for checking the price threshold --> <rdl:arg name="text"><![CDATA[ <SCRIPT SRC="clientscripts/PriceCheck.js"></SCRIPT> ]]>
78 Chapter 9
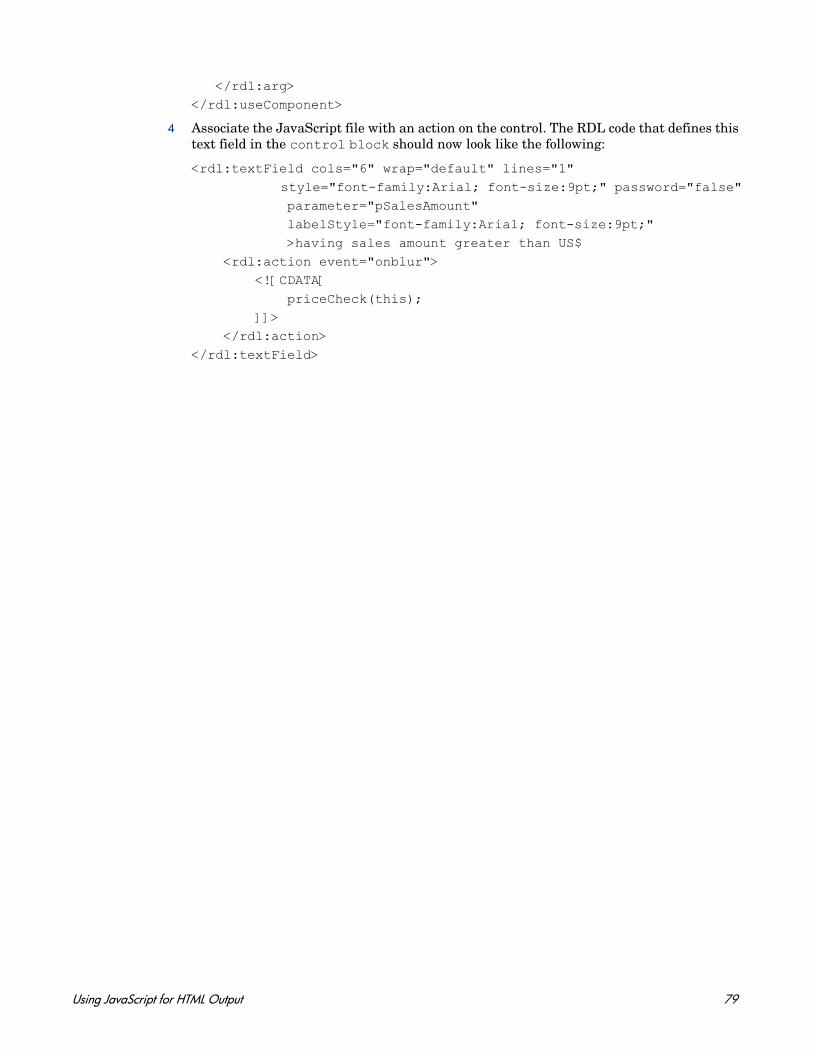
</rdl:arg></rdl:useComponent>
4 Associate the JavaScript file with an action on the control. The RDL code that defines this text field in the control block should now look like the following:
<rdl:textField cols="6" wrap="default" lines="1" style="font-family:Arial; font-size:9pt;" password="false" parameter="pSalesAmount" labelStyle="font-family:Arial; font-size:9pt;" >having sales amount greater than US$ <rdl:action event="onblur"> <![CDATA[ priceCheck(this); ]]> </rdl:action></rdl:textField>
Using JavaScript for HTML Output 79

80 Chapter 9
10 Formatting PDF Output
This chapter provides technical information and stylistic guidelines for creating well-formatted PDF report output.
See examples/Reports/SampleInvoice.rdl for an example of the report formatted for PDF output.
Technical Overview
Select Audit uses the XSL:Formatting Objects (XSL:FO) standard for formatting PDF output. (For details on the XSL standard, see http://www.w3.org/TR/2001/REC-xsl-20011015/Overview.html#contents.) XSL:FO describes the visual layout of documents to be translated into various output types. Apache’s FOP (Formatting Objects Processor) (http://docs.pushtotest.com/soapdocs/install/FAQ_Tomcat_SOAP_SSL.html) is an open-source library that renders XSL:FO documents into printer-friendly formats, including PDF.
The Report server comes bundled with the Apache FOP processor to provide PDF generation out of the box. In addition, the Report server supports another third-party PDF renderer, XEP, made by RenderX. By default, the Report server is configured to use FOP instead of XEP globally, but you can configure it on a report-by-report basis.
When the Report server requests the PDF channel as part of the report execution process (for example, through the use of the download control or the _p_ch=pdf HTTP parameter), the following events occur:
1 The Report server formatting engine uses the relevant PDF JSP files to generate header and footer information in XSL:FO format (see the files FODocHeader.jsp, printheader.jsp and printfooter.jsp in the webapps/scopeserver directory).
2 Each standard layout component used in the report generates XSL:FO output.
3 The Report server formatting engine passes the generated XML document to the FOP processor.
4 The Report server formatting engine outputs the generated PDF document (from FOP) to the user.
XEP is not bundled with the Report server.
81

RDL Arguments for PDF Formatting
RDL contains several arguments and tags specifically for PDF usage:
• Various page-size properties (see Page Dimensions on page 82).
• The pdfWidth argument, which controls the column width for PDF output within a cell. The formatting engine does not recognize the style sheet column width arguments that are used for HTML output.
• The PDFContentDisposition property in the <rdl:properties> block, which dictates whether the document is displayed to the user inline or as a new window.
• The forenderer parameter, which dictates the type of renderer to use (FOP or XEP). You can also set the property to none to see the generated XML directly.
• In StandardBandedTable, the componentWidth argument, which dictates the PDF size of bands placed next to each other (using the band break).
• In StandardBandedTable, the columnWidth block, which dictates each column width within a single XML block for the table.
Page Dimensions
To set page dimensions, use the properties illustrated in the example below. Keep in mind that you may want to reserve top and bottom margin space for the header and footer.
<rdl:properties>
<rdl:property name="pageWidth">8.5in</rdl:property>
<rdl:property name="pageHeight">11in</rdl:property>
<rdl:property name="pageMarginLeft">.5in</rdl:property>
<rdl:property name="pageMarginRight">.5in</rdl:property>
<rdl:property name="pageMarginTop">1in</rdl:property>
<rdl:property name="pageMarginBottom">1in</rdl:property>
</rdl:properties>
The defaults for these properties are set in the conf/defaultscope.xml file.
Customizing the Header and Footer
To customize the PDF header (for example, to put the date and user information in every page header), modify the FODocHeader.jsp file. You need a basic understanding of XSL:FO to do this. See webapps/scopeserver/FODocHeader.jsp for an example.
For a reference of XSL:FO, see http://www.w3.org/TR/2001/REC-xsl-20011015/Overview.html#contents.
82 Chapter 10

Page Breaks
The StandardBandedTable component uses the pageBreak argument in the header sections to generate a break before the header. If you are not using StandardBandedTable, another option is to insert a “dummy” component in the relevant section of your RDL file, as follows:
<rdl:useComponent name="pgbrk" type="StandardBandedTable">
<rdl:arg name="dataSet"></rdl:arg>
<rdl:arg name="header">
<rdl:arg name="pageBreak">true</rdl:arg>
</rdl:arg>
</rdl:useComponent>
PopCharts Image Size
To ensure that PopCharts images are properly displayed in PDF, set the chart dimensions explicitly in the image style to match the dimensions in RDL, including the border dimensions, as in the following example:
<rdl:arg name="imageStyle">width:150px;height:100px,border:0</rdl:arg>
Note that the unit of measurement indicator (in this example, px for pixels) is required. This property is accessible in the Properties window.
Using UTF-8 Fonts in PDFs
Follow these steps to use UTF-8 fonts in PDFs:
Create TrueType Font Metrics
1 Locate the TTF font file you want to use for example, C:\WINDOWS\Fonts\ArialUni.ttf.
2 Create a new folder, for example, c:\fop and change directories into it.
3 Create a metrics file such as ttfarialuni.xml in Windows from the TrueType font, as follows:
java -cp build\fop.jar;lib\avalon-framework.jar;
lib\xml-apis.jar;lib\xercesImpl.jar;
lib\xalan.jar org.apache.fop.fonts.apps.TTFReader
C:\WINDOWS\Fonts\ArialUni.ttf ttfarialuni.xml
This creates ttfarialuni.xml in c:\fop.
Formatting PDF Output 83
Register Fonts with FOP
Create a new file in c:\fop and call it userconfig.xml. Type the following content in that file:
<!-- <!DOCTYPE configuration SYSTEM "config.dtd"> -->
<configuration>
<entry>
<key>fontBaseDir</key>
<value>C:\fop</value>
</entry>
<fonts>
<font metrics-file="ttfarialuni.xml" embedfile="
C:\WINDOWS\Fonts\ArialUni.ttf" kerning="yes">
<font-triplet name="ArialUni" style="normal" weight="normal" />
<font-triplet name="ArialUni" style="normal" weight="bold" />
<font-triplet name="ArialUni" style="italic" weight="normal" />
<font-triplet name="ArialUni" style="italic" weight="bold" />
</font>
</fonts>
</configuration>
Since the configuration file is XML, be sure to keep it well-formed. In font-triplets, ArialUni is the name of the font. You can call it anything you want as long as you are consistent.
Modify defaultscope.xml
In defaultscope.xml, edit the properties fopConfigFile and fopFont.
• For fopConfigFile, type the location of your config file created in Register Fonts with FOP on page 84, for example:
<Property name="fopConfigFile">C:\\fop\\userconfig.xml</Property>
• For fopFont, type the name of the font you specified in that config file. Note that the name is case-sensitive and it must match the case specified in the config file. For example:
<Property name="fopFont">ArialUni</Property>
At this point, this font will be embedded into every PDF file generated by the server. Make sure you have the distribution rights for that font!
84 Chapter 10
Miscellaneous Formatting Tips
This section contains some other formatting suggestions.
Cell Padding
Use the cell padding style argument to prevent text from bleeding into table borders. For example:
<rdl:arg name="style">font-weight:bold;padding-left:3pt</rdl:arg>
Cell Colors
In StandardBandedTable, use row styles instead of cell styles to prevent white space (or table background color) from appearing in remainder of cells in situations where some cells have a line break and others don’t.
Checking XSL:FO Output
To check the XSL:FO output for debugging or educational purposes, run the report with the _p_ch=pdf&_p_forenderer=none parameters. This will generate the XML that would normally be passed to the FOP engine, but instead is passed to your browser window for display.
Constraints
This section describes constraints in PDF rendering.
Repeating Table Headers
XSL:FO supports the concepts of table-header and table-body. With the more recent versions of FOP, table-headers also have the behavior of repeating on page breaks (for tables that span multiple pages).
Each table has only one header section. Therefore, if you use StandardBandedTable, you might design a report where each band looks like a new table, but is in fact the continuation of one larger table. This way, only the global table header, not the band headers, appear on each page.
Custom Components
If you write custom components, you must also write XSL:FO to support PDF rendering. The standard layout components provide good examples of this output.
Formatting PDF Output 85
Hyperlinks
Hyperlinks are not rendered in PDF format.
StandardInclude and CDATA Markup
The StandardInclude component enables report developers to set the format of embedded HTML. The StandardInclude component and embedded HTML are not converted to PDF format. For example, the formatting of the following RDL code is not preserved in PDF output:
<rdl:arg name=”text”><![CDATA[My <h1/>Heading</h1>]]></rdl:arg>
Fonts
FOP supports only the base 14-font package defined in the Adobe PDF specification, which includes Helvetica, Times, Courier, Symbol and ZapfDingbats. FOP automatically maps other fonts specified by style component arguments to one of the above fonts. The Report server does not control that mapping. Therefore, when deciding on fonts for styles, indicate the optimal font first and then a secondary font as a backup for PDF display.
Oversized Page Content
If a generated component “stretches” to the page boundaries, it is cut off. To avoid this, explicitly set the column widths and the page dimensions to provide the best proportions for optimal display.
86 Chapter 10
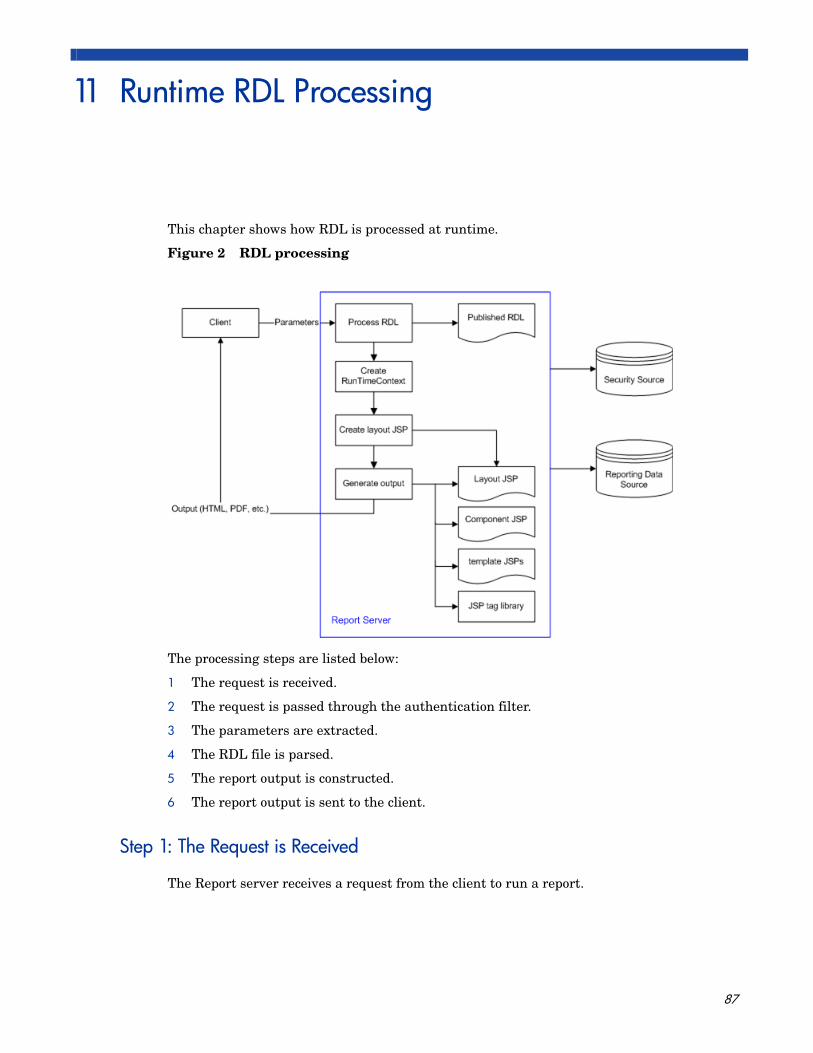
11 Runtime RDL Processing
This chapter shows how RDL is processed at runtime.
Figure 2 RDL processing
The processing steps are listed below:
1 The request is received.
2 The request is passed through the authentication filter.
3 The parameters are extracted.
4 The RDL file is parsed.
5 The report output is constructed.
6 The report output is sent to the client.
Step 1: The Request is Received
The Report server receives a request from the client to run a report.
87

Step 2: The Request is Passed Through the Authentication Filter
The request goes through the standard Report server Authentication Filter, which verifies that a user is authenticated and exists in the directory. The flow of the authentication and authorization process depends on the Report server configuration settings.
Step 3: The Parameters are Extracted
The Report server servlet extracts parameters from the request. The Report server uses standard parameters to determine the report to be executed and its output channel. The most commonly-used parameters are listed below:
Custom parameters are passed in the request as name-value pairs. These parameters can be applied to either report content or layout.
Step 4: The RDL File is Parsed
The Report server retrieves content of the RDL template file from the library and parses the RDL.
Initialize the RunTimeContext object by setting standard properties and objects, including the User object, the output channel, default and report-override report properties, parameters, the Content object, and compiled JavaScript expressions.
Construct the layout JSP file in the scopeserver/tmp/layout directory. The layout JSP file contains tags related to the layout section of the RDL template and is reconstructed only when the layout section of the RDL template changes. The tags used in the layout JSP file are defined in the Report server JSP tag library: scopeserver/WEB-INF/rdl.tld.
Step 5: The Report Output is Constructed
The Report server constructs report output by including contents of the layout template and layout JSP in the HttpResponse object.
The RunTimeContext object is set in the request and is available in the layout template and layout JSP through the RDL object. The RDL object is an instance of com.panscopic.scopeserver.taglibs.RDL and is initialized by including the RDL.jsp file through the JSP include directive:
<%@ include file="RDL.jsp" %>
The layout template consists of the header and footer JSP files in the scopeserver directory. The naming convention of these files is:
[template name]header.jsp
[template name]footer.jsp
_p_r The name of the published RDL file.
_p_ch The output channel (HTML, PDF, Excel, CSV, XML).
_p_pi The name of the profile.
_p_pg Part-of-page mode.
88 Chapter 11
The template is applied to the report through the template attribute of the layout RDL argument, as follows:
<layout template="[template name]">
The layout JSP invokes the appropriate tag implementations from the tag library. After the <rdl:useComponent> tag is processed, the content of the corresponding component JSP is included in the HttpResponse object. The component is defined by component JSP file and referenced in the rdl:useComponent tag through the type attribute:
rdl:useComponent type="[component name]">
The component implementation provides functionality for accessing a data source, iterating through the data result set, and providing presentation logic for different output channels. The RunTimeContext object can be accessed in the component JSP through the RDL object.
Step 6: The Report Output is Sent to the Client
The report output is sent to the client for rendering and display.
Runtime RDL Processing 89

90 Chapter 11
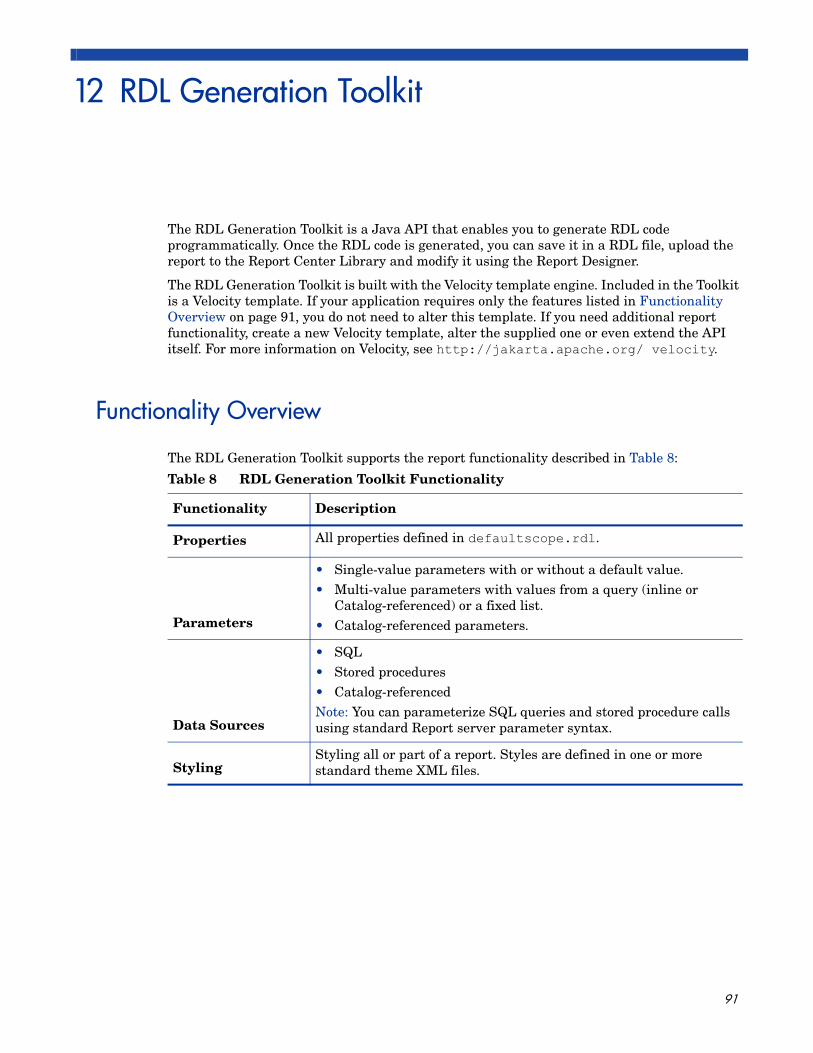
12 RDL Generation Toolkit
The RDL Generation Toolkit is a Java API that enables you to generate RDL code programmatically. Once the RDL code is generated, you can save it in a RDL file, upload the report to the Report Center Library and modify it using the Report Designer.
The RDL Generation Toolkit is built with the Velocity template engine. Included in the Toolkit is a Velocity template. If your application requires only the features listed in Functionality Overview on page 91, you do not need to alter this template. If you need additional report functionality, create a new Velocity template, alter the supplied one or even extend the API itself. For more information on Velocity, see http://jakarta.apache.org/ velocity.
Functionality Overview
The RDL Generation Toolkit supports the report functionality described in Table 8:
Table 8 RDL Generation Toolkit Functionality
Functionality Description
Properties All properties defined in defaultscope.rdl.
Parameters
• Single-value parameters with or without a default value.• Multi-value parameters with values from a query (inline or
Catalog-referenced) or a fixed list.• Catalog-referenced parameters.
Data Sources
• SQL• Stored procedures• Catalog-referencedNote: You can parameterize SQL queries and stored procedure calls using standard Report server parameter syntax.
Styling Styling all or part of a report. Styles are defined in one or more standard theme XML files.
91
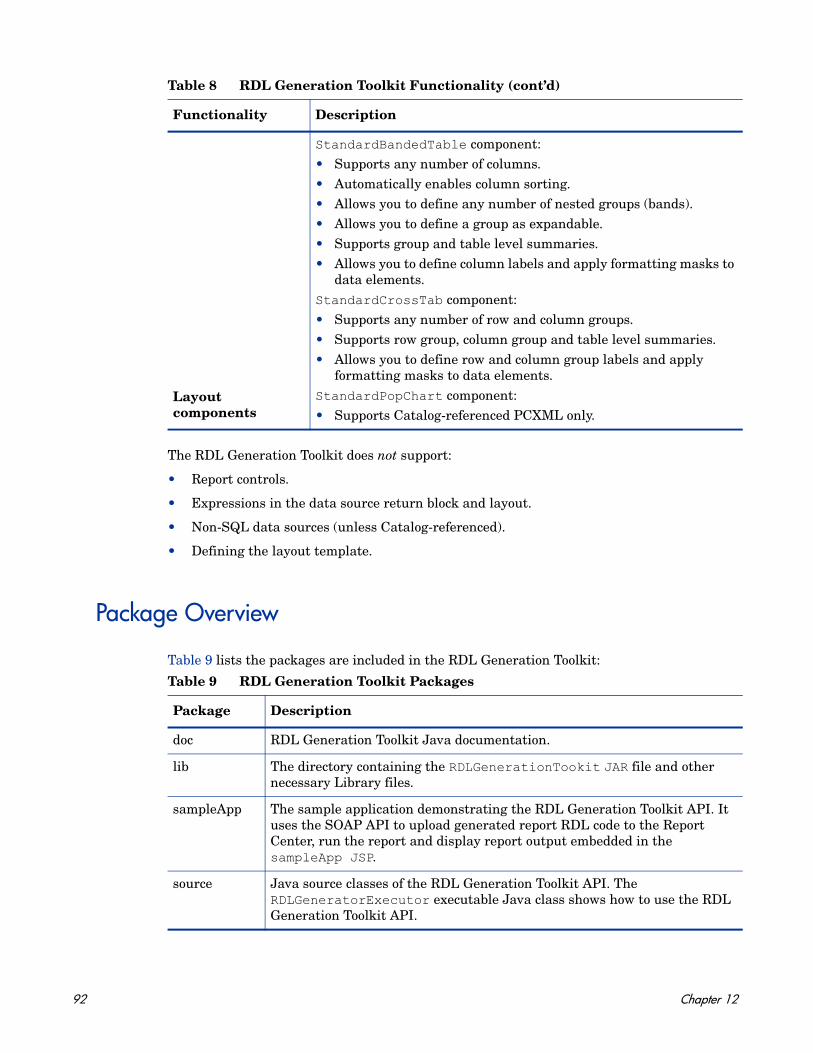
The RDL Generation Toolkit does not support:
• Report controls.
• Expressions in the data source return block and layout.
• Non-SQL data sources (unless Catalog-referenced).
• Defining the layout template.
Package Overview
Table 9 lists the packages are included in the RDL Generation Toolkit:
Layout components
StandardBandedTable component:• Supports any number of columns.• Automatically enables column sorting.• Allows you to define any number of nested groups (bands).• Allows you to define a group as expandable.• Supports group and table level summaries.• Allows you to define column labels and apply formatting masks to
data elements.StandardCrossTab component:• Supports any number of row and column groups.• Supports row group, column group and table level summaries.• Allows you to define row and column group labels and apply
formatting masks to data elements.StandardPopChart component:• Supports Catalog-referenced PCXML only.
Table 8 RDL Generation Toolkit Functionality (cont’d)
Functionality Description
Table 9 RDL Generation Toolkit Packages
Package Description
doc RDL Generation Toolkit Java documentation.
lib The directory containing the RDLGenerationTookit JAR file and other necessary Library files.
sampleApp The sample application demonstrating the RDL Generation Toolkit API. It uses the SOAP API to upload generated report RDL code to the Report Center, run the report and display report output embedded in the sampleApp JSP.
source Java source classes of the RDL Generation Toolkit API. The RDLGeneratorExecutor executable Java class shows how to use the RDL Generation Toolkit API.
92 Chapter 12
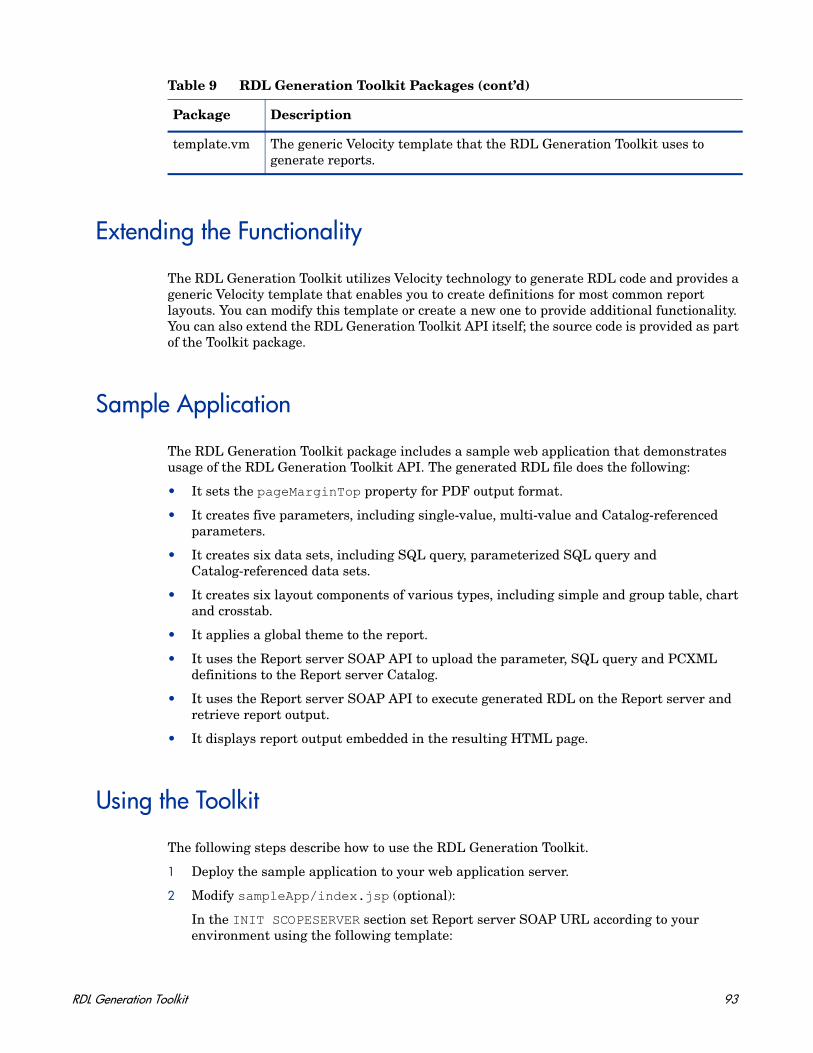
Extending the Functionality
The RDL Generation Toolkit utilizes Velocity technology to generate RDL code and provides a generic Velocity template that enables you to create definitions for most common report layouts. You can modify this template or create a new one to provide additional functionality. You can also extend the RDL Generation Toolkit API itself; the source code is provided as part of the Toolkit package.
Sample Application
The RDL Generation Toolkit package includes a sample web application that demonstrates usage of the RDL Generation Toolkit API. The generated RDL file does the following:
• It sets the pageMarginTop property for PDF output format.
• It creates five parameters, including single-value, multi-value and Catalog-referenced parameters.
• It creates six data sets, including SQL query, parameterized SQL query and Catalog-referenced data sets.
• It creates six layout components of various types, including simple and group table, chart and crosstab.
• It applies a global theme to the report.
• It uses the Report server SOAP API to upload the parameter, SQL query and PCXML definitions to the Report server Catalog.
• It uses the Report server SOAP API to execute generated RDL on the Report server and retrieve report output.
• It displays report output embedded in the resulting HTML page.
Using the Toolkit
The following steps describe how to use the RDL Generation Toolkit.
1 Deploy the sample application to your web application server.
2 Modify sampleApp/index.jsp (optional):
In the INIT SCOPESERVER section set Report server SOAP URL according to your environment using the following template:
template.vm The generic Velocity template that the RDL Generation Toolkit uses to generate reports.
Table 9 RDL Generation Toolkit Packages (cont’d)
Package Description
RDL Generation Toolkit 93

http://[host name]:[port number]/scopeserver/soapserver
3 Start your web application server.
4 Go to http://[host name]:[port number]/sampleApp/index.jsp.
94 Chapter 12
13 PopChart Support
PopChart Basics
PopChart graphs are described using a custom XML syntax called PCXML. PCXML files, also called appearance files, have the extension .pcxml. PCXML includes tags to describe the chart’s type, its layout and configuration, and the data that it should display. An appearance file may contain many chart objects, each with its own configuration. It may also include other objects, such as labels, legends and images.
Use the Report Designer or hand-code RDL to design the StandardPopChart component that uses the appearance file.
The PopChart server is embedded in the Report server. At report generation time, the Report server uses PCScript to insert data and other dynamic elements into the each of the chart objects. Select Audit can also override settings within the appearance file.
PCScript cannot manipulate every PCXML tag. However, it does have methods for adding any PCXML snippet on the fly to override existing values. Using these methods you can provide standard Select Audit parameters. (See Using the addPCXML and setPCXMLAttribute Tags on page 99 for details.)
Terminology
The terms used in this section are:
Categories The X-axis data values. Categories are typically strings like Salesperson Name, or Region. Categories are specified with the categories argument in the RDL useComponent block.
Series The Y-axis data values. Typically, these are the main values for graphs. Strings like Total Sales and Closing Price are typical values. Series are specified with the series argument in the RDL useComponent block. This block contains data label and data value information.
Data Labels The labels required by each series. Each label is denoted with a label argument in the RDL useComponent block.
Data Values The values assigned to a series. Each series requires at least one data value. Some graph types require multiple data values per series. For these graphs, use multiple data tags. Data values are denoted within the RDL data block.
95

Data Requirements for PopChart Types
This section describes the PopChart graph types and the data requirements for each.
Table 10 PopChart Types
PopChart Graph Type Data Requirements
barstacked barlineline bar comboarearadar
One category.One or more series. Fixed number of series.One data value in each series.
pareto Multiple categories.One or more series. Fixed number of series.One data value in each series.
pie A single title, which becomes the category name.A series for the labels. The number of series is typically dynamic.A series for the data values. The number of series is typically dynamic.See Pie Chart Tips on page 98 for more information on creating PopChart pies in the StandardPopChart component.
X-YX-Y bubbletime bubbletime plot
No category.One or more series.Each series requires at least two data values representing the X and Y coordinates respectively. An optional third data value converts the graph to a bubble graph, where the last value is the size of the bubble.For time plots, the first data value in each series should be a date. You can sort dates using either the AddPCXML tag or the appearance file.
stock graphs(candlestick, high-low /open-close)
A single category value.One or more series.Each series requires least two data values (representing high/low stock values). Optional third and forth values represent open/close values respectively.
gauge Must have a value.May have label, min, max, and dataSet.If min and max are set in the appearance file, they are not required by the StandardPopChart component.
unknown This graph type is used if the type is unspecified or of a type unknown to the Report Designer.No limitations are placed on the number of series you can have or the number of data fields per series. You must have at least one data series, however.
96 Chapter 13
How Select Audit Uses PopCharts
The StandardPopChart component classifies PopCharts as follows:
• graph
• pie charts
• gauge
• map
Graph represents all graph types except pie charts. (Even pie charts sometimes have type graph in StandardPopChart; see Pie Chart Tips on page 98.)
See the HP Select Audit 1.02 Report Designer’s Guide for more information on PopChart support in the Report Designer.
How PopCharts are Represented in RDL
PopCharts are represented in RDL by a useComponent block of type StandardPopChart containing the following:
• A pointer to a PCXML file (or a complete inline PCXML file).
• An image type (defaults to JPEG), height and width.
• One or more blocks with arg names graph, pie, gauge, map or extra.
The following sample useComponent block is for a single graph with two series:
<rdl:useComponent name=a"Chart_2" type="StandardPopChart">
<rdl:arg name="pcxmlFile">pop.pcxml</rdl:arg>
<rdl:arg name="imageType">JPEG</rdl:arg>
<rdl:arg name="height">400</rdl:arg>
<rdl:arg name="width">700</rdl:arg>
<rdl:arg name="graph">
<rdl:arg name="object">graph</rdl:arg>
<rdl:arg name="dataSet">Query1</rdl:arg>
<rdl:arg name="maxRows">20</rdl:arg>
<rdl:arg name="series">
<rdl:arg name="label">US$ Sold</rdl:arg>
<rdl:arg name="data">{data.Query1.PriceExt}</rdl:arg>
<rdl:arg name="data">{data.Query1.SumQuantity}</rdl:arg>
<rdl:arg name="data">2</rdl:arg>
</rdl:arg>
<rdl:arg name="series">
PopChart Support 97
<rdl:arg name="label">Quantity Ordered</rdl:arg>
<rdl:arg name="data">{data.Query1.PriceExt}</rdl:arg>
<rdl:arg name="data">{data.Query1.SumQuantity}</rdl:arg>
</rdl:arg>
</rdl:arg> <!-- end of graph -->
...
</rdl:useComponent>
Using the Extra Argument
Use the extra argument to do the following:
• Add drill-down capability to a region that does not normally take drilldowns in a PopChart. (See Adding Drilldown Capability on page 98.)
• Set or change PCXML objects or tags. (See Using the addPCXML and setPCXMLAttribute Tags on page 99.)
• Pass Select Audit parameters to the chart. (See Using the addPCXML and setPCXMLAttribute Tags on page 99 for an example.)
Adding Drilldown Capability
To add drilldowns to region without drilldown support in PopChart, use the extra block to override the object on which you want to drill down and add drilldown capabilities to that object.
The following RDL snippet illustrates adding drilldown to a title:
<rdl:arg name="extra">
<rdl:arg name="object">title</rdl:arg>
<rdl:arg name="addPCXML"><![CDATA[<Text>CLICK ON ME!</Text>]]> </rdl:arg>
<rdl:arg name="drilldown">
<rdl:arg name="url"><![CDATA[http://www.panscopic.com]]> </rdl:arg>
</rdl:arg>
</rdl:arg>
Pie Chart Tips
The slices of pie charts can be generated in one of two ways:
• All the slices of the pie are created from a single data column.
• Each slice of the pie corresponds to its own data column.
98 Chapter 13
If all the slices of the pie are created from a single column, use the pie attribute of the StandardPopChart. To assign a different data column to each slice, use graph rather than pie. In the graph block, assign a different series to each slice.
Using the addPCXML and setPCXMLAttribute Tags
addPCXML and setPCXMLAttribute, which correspond to PCScript methods of the same name, override values in the appearance file. They can be used either in the main section of the appearance file or on a specific object.
These two arguments typically let you use Select Audit parameters in a PopChart.
For example, the following RDL code sets the PCXML attribute:
<rdl:arg name="extra">
<rdl:arg name="object">pie1</rdl:arg>
<rdl:arg name="addPCXML">
<![CDATA[<Properties PieExplodedSeriesNumber='{param.explode}' />]]>
</rdl:arg>
</rdl:arg>
where the parameter named explode is defined in the RDL parameters block. The PieExplodedSeriesNumber attribute of the Properties tag on the chart is set to the parameter’s value. Any attributes that can be modified using addPCXML or setPCXMLAttribute can be configured this way at run time.
The following more complete example illustrates adding drilldowns to a graph:
<rdl:useComponent name="Chart_2" type="StandardPopChart">
<rdl:arg name="pcxmlFile">drill_down.pcxml</rdl:arg>
<rdl:arg name="imageType">FLASH</rdl:arg>
<rdl:arg name="height">600</rdl:arg>
<rdl:arg name="width">800</rdl:arg>
<rdl:arg name="extra">
<rdl:arg name="object">graph</rdl:arg>
<rdl:arg name="addPCXML"><![CDATA[<Drilldown
MetaString='{url.scopeserver}
?{url.scope("/User Scopes/pop_chart/orders_over_time")}
&pProductName=%_CATEGORY_NAME' />]]></rdl:arg>
</rdl:arg>
<rdl:arg name="graph">
<rdl:arg name="categories">{data.Query1.PRODUCT_NAME}</rdl:arg>
<rdl:arg name="series">
PopChart Support 99

<rdl:arg name="label">Cost</rdl:arg>
<rdl:arg name="data">{data.Query1.Cost}</rdl:arg>
</rdl:arg>
<rdl:arg name="series">
<rdl:arg name="label">Revenue</rdl:arg>
<rdl:arg name="data">{data.Query1.Revenue}</rdl:arg>
</rdl:arg>
<rdl:arg name="dataSet">Query1</rdl:arg>
<rdl:arg name="maxRows">{param.pCount}</rdl:arg>
</rdl:arg>
</rdl:useComponent>
Limitations
When you use the Ad Hoc Wizard on a report containing a PopChart, you get a standard Select Audit chart, and initial column selections are not recognized.
100 Chapter 13
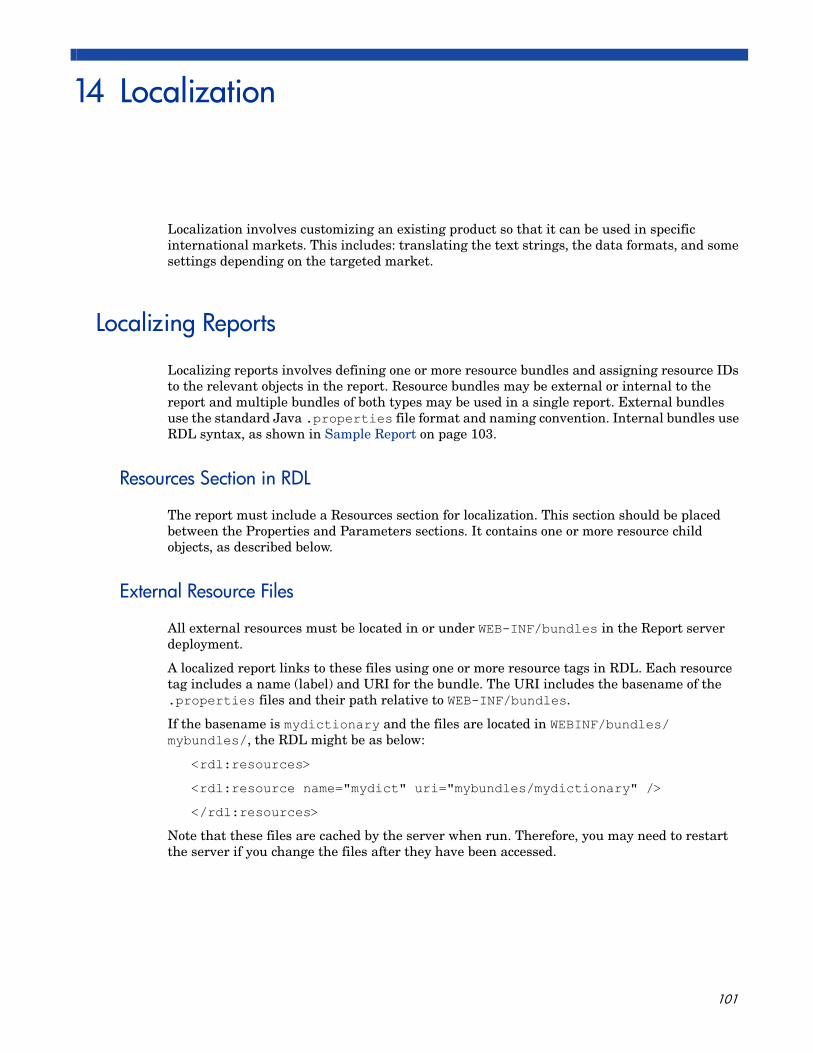
14 Localization
Localization involves customizing an existing product so that it can be used in specific international markets. This includes: translating the text strings, the data formats, and some settings depending on the targeted market.
Localizing Reports
Localizing reports involves defining one or more resource bundles and assigning resource IDs to the relevant objects in the report. Resource bundles may be external or internal to the report and multiple bundles of both types may be used in a single report. External bundles use the standard Java .properties file format and naming convention. Internal bundles use RDL syntax, as shown in Sample Report on page 103.
Resources Section in RDL
The report must include a Resources section for localization. This section should be placed between the Properties and Parameters sections. It contains one or more resource child objects, as described below.
External Resource Files
All external resources must be located in or under WEB-INF/bundles in the Report server deployment.
A localized report links to these files using one or more resource tags in RDL. Each resource tag includes a name (label) and URI for the bundle. The URI includes the basename of the .properties files and their path relative to WEB-INF/bundles.
If the basename is mydictionary and the files are located in WEBINF/bundles/mybundles/, the RDL might be as below:
<rdl:resources>
<rdl:resource name="mydict" uri="mybundles/mydictionary" />
</rdl:resources>
Note that these files are cached by the server when run. Therefore, you may need to restart the server if you change the files after they have been accessed.
101

Resource IDs
Once a resource has been defined within the report, resource IDs may be assigned to the report objects. If more than one resource bundle has been defined, the IDs should include their resource name as a prefix. If no resource name is given, the first resource found in the file is used.
For example, if title is an ID that exists in the mydictionary.properties resource file defined above, the following RDL might be used for the value of the report title text element in a banded table:
<rdl:arg name="value" resourceid="mydict.title">Report Title</rdl:arg>
The following RDL would also work, if mydictionary was the only or the first resource listed in the RDL:
<rdl:arg name="value" resourceid="title">Report Title</rdl:arg>
The resourceID property is supported for all user-visible labels and masks. The Report Designer exposes these supported instances in the Property Pane.
Arguments and JavaScript
The value of a resource ID in a .properties file may include argument references, for example, Page {0} of {1}. A reference to that resource ID must then include the two argument values: resourceid="mydict.pageno(12,100)". These values cannot themselves be variables.
The value of a resource ID may also contain JavaScript, either alone or in combination with text, for example, Hello: {param.myParameter}. All JavaScript must be surrounded by curly braces and any interior braces must be escaped with a double backslash ( \\{ and \\}). Also, a resource ID value cannot include both {0} arguments and JavaScript.
Internal Resources
Internal resources exist entirely within the report. Therefore, they have a name but no URI. Each internal resource contains a set of child objects defining a single default bundle and any number of additional language bundles. Each bundle has a locale property that associates the bundle with a specific locale. This property corresponds to the Java .properties suffix and uses the same syntax. Therefore, the fr bundle below will be used when the language of the current locale is French.
If another bundle is created for Canadian French, the locale property will be set to fr_CA and so on.
<rdl:resource name="localwords"><rdl:default locale="en"><rdl:id name="subtitle1" index="1">English Version:</rdl:id><rdl:id name="subtitle2" index="2">Hello</rdl:id></rdl:default><rdl:bundle locale="fr"><rdl:id index="1">Version Française:</rdl:id><rdl:id index="2">Bonjour</rdl:id></rdl:bundle>
102 Chapter 14
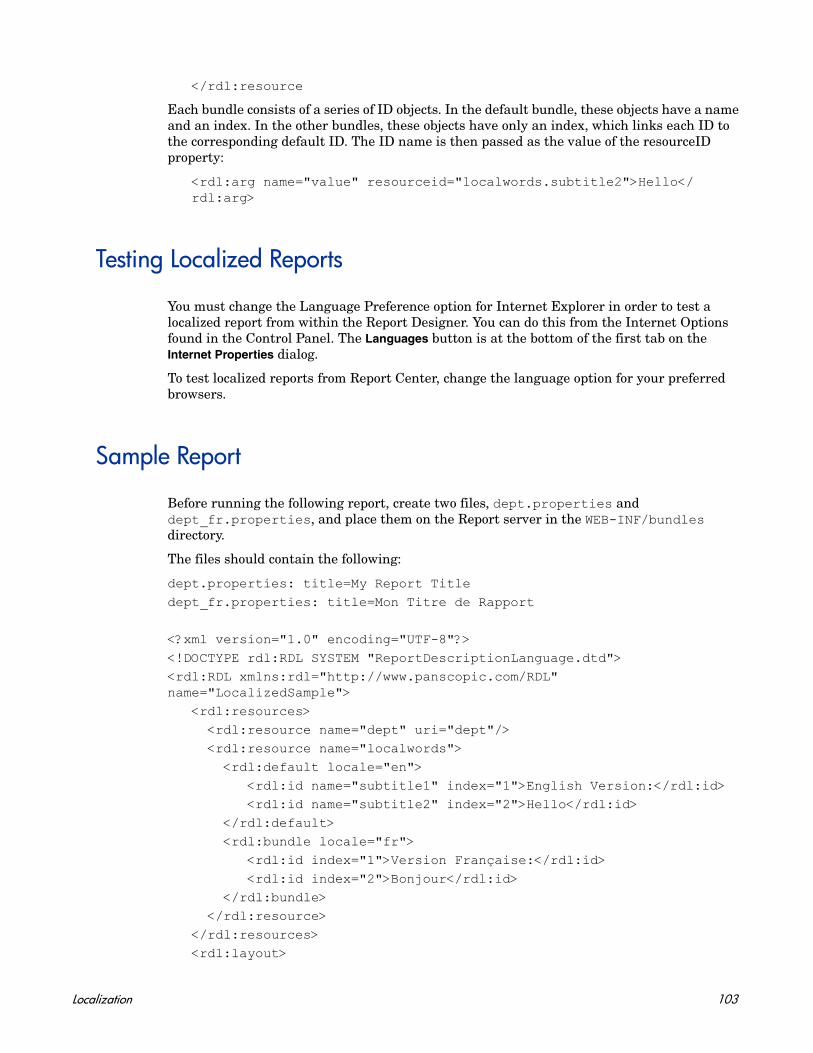
</rdl:resource
Each bundle consists of a series of ID objects. In the default bundle, these objects have a name and an index. In the other bundles, these objects have only an index, which links each ID to the corresponding default ID. The ID name is then passed as the value of the resourceID property:
<rdl:arg name="value" resourceid="localwords.subtitle2">Hello</rdl:arg>
Testing Localized Reports
You must change the Language Preference option for Internet Explorer in order to test a localized report from within the Report Designer. You can do this from the Internet Options found in the Control Panel. The Languages button is at the bottom of the first tab on the Internet Properties dialog.
To test localized reports from Report Center, change the language option for your preferred browsers.
Sample Report
Before running the following report, create two files, dept.properties and dept_fr.properties, and place them on the Report server in the WEB-INF/bundles directory.
The files should contain the following:
dept.properties: title=My Report Titledept_fr.properties: title=Mon Titre de Rapport
<?xml version="1.0" encoding="UTF-8"?><!DOCTYPE rdl:RDL SYSTEM "ReportDescriptionLanguage.dtd"><rdl:RDL xmlns:rdl="http://www.panscopic.com/RDL" name="LocalizedSample"> <rdl:resources> <rdl:resource name="dept" uri="dept"/> <rdl:resource name="localwords"> <rdl:default locale="en"> <rdl:id name="subtitle1" index="1">English Version:</rdl:id> <rdl:id name="subtitle2" index="2">Hello</rdl:id> </rdl:default> <rdl:bundle locale="fr"> <rdl:id index="1">Version Française:</rdl:id> <rdl:id index="2">Bonjour</rdl:id> </rdl:bundle> </rdl:resource> </rdl:resources> <rdl:layout>
Localization 103
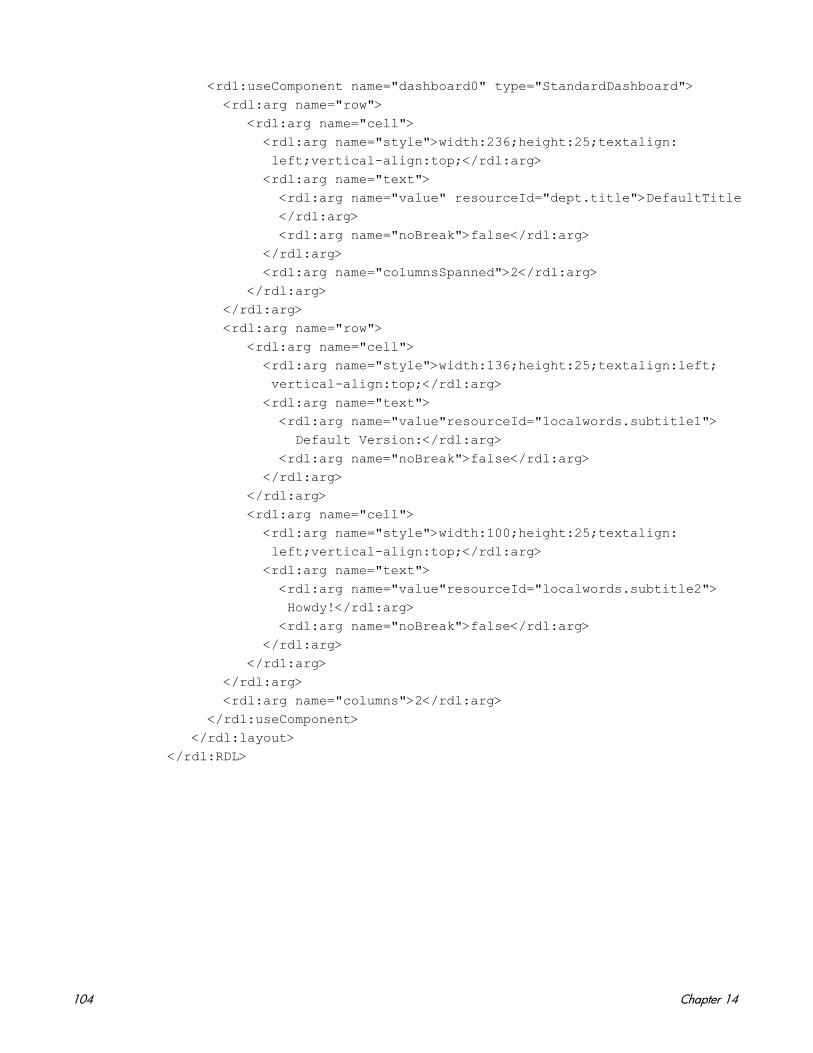
<rdl:useComponent name="dashboard0" type="StandardDashboard"> <rdl:arg name="row"> <rdl:arg name="cell"> <rdl:arg name="style">width:236;height:25;textalign: left;vertical-align:top;</rdl:arg> <rdl:arg name="text"> <rdl:arg name="value" resourceId="dept.title">DefaultTitle </rdl:arg> <rdl:arg name="noBreak">false</rdl:arg> </rdl:arg> <rdl:arg name="columnsSpanned">2</rdl:arg> </rdl:arg> </rdl:arg> <rdl:arg name="row"> <rdl:arg name="cell"> <rdl:arg name="style">width:136;height:25;textalign:left; vertical-align:top;</rdl:arg> <rdl:arg name="text"> <rdl:arg name="value"resourceId="localwords.subtitle1"> Default Version:</rdl:arg> <rdl:arg name="noBreak">false</rdl:arg> </rdl:arg> </rdl:arg> <rdl:arg name="cell"> <rdl:arg name="style">width:100;height:25;textalign: left;vertical-align:top;</rdl:arg> <rdl:arg name="text"> <rdl:arg name="value"resourceId="localwords.subtitle2"> Howdy!</rdl:arg> <rdl:arg name="noBreak">false</rdl:arg> </rdl:arg> </rdl:arg> </rdl:arg> <rdl:arg name="columns">2</rdl:arg> </rdl:useComponent> </rdl:layout></rdl:RDL>
104 Chapter 14

A Select Audit Variable Syntax
This appendix shows how to use Select Audit variables within RDL. There are four types of Select Audit variables:
• Parameter Variables
• User Variables
• Data Variables
• Cell Name Variables
Curly braces ({}) are used to indicate Select Audit variables.
Select Audit variables can appear in the following places in the RDL file:
• In rdl:column value attributes.
• As rdl:arg values. The exception is when the name of the rdl:arg name attribute is expression. In this case, the “bracket” Select Audit variable syntax is not permitted, but you can use any JavaScript expression as the expression value.
• Within sql blocks (for RDBMS data sources) and url blocks (for XML data sources).
Parameter Variables
Select Audit provides two types of parameter variables: one for use within a content block, and one for use within the layout block.
Content Block Parameter Syntax
The syntax for parameters within the content block is shown below:
{param.<paramName>(<argument1>, <argument2>, [<argument3>])}
The parameter can take either two or three arguments. The first argument represents what will appear before the parameter’s first value. The second argument represents what will appear after the parameter’s last value. The third (optional) argument represents the separator characters between parameter values. The third argument is ignored if the parameter can take only one value. If the third argument is not included, a comma followed by a space is assumed.
The parameter may evaluate to NULL. To ensure that the SQL statement is still valid, Select Audit inserts 1=1 if needed after WHERE, AND or OR when this occurs.
ejb blocks use a simplified parameter syntax: {param.<paramname>}.
105

Examples
Assume a parameter called region that can take values EAST, WEST, NORTH and SOUTH.
Single-value Parameters
When the parameter can have only one value, there is no need to include the third argument. For example, if the end user chooses the value EAST for the region parameter, the following query:
SELECT * FROM tableX WHERE {param.region("region='", "'"})
evaluates to:
SELECT * FROM tableX WHERE region='EAST'
In this example, if the end user does not choose a value for the region, the Select Audit inserts “1=1” and the query evaluates to:
SELECT * FROM tableX WHERE 1=1
which returns all rows from tableX.
Multi-value Parameters
If comma followed by space is an acceptable separator, you don’t need to include the third argument. This is often the case if the parameter returns integers or other data types that don’t need to be put between single quotation marks in the SQL language.
If the parameter returns a string value, you typically do need to specify the third argument. For example, assume the end user selects both NORTH and EAST from a multi-valued list. The query:
SELECT * FROM tableX WHERE region IN {param.region("('", "')", "', '")}
evaluates to:
SELECT * FROM tableX WHERE region IN ('NORTH', 'EAST')
Layout Block Parameter Syntax
Parameters used within the layout block let you to fetch either the value of a parameter or its label. The syntax for parameters in the layout block is:
{param.<paramname>.label}
or
{param.<paramname>.value}
For example, if your report contains a control that allows the end user to set the table header, the useComponent block of the layout block may contain the following line:
<rdl:arg name="Header">{param.headerParam.label}</rdl:arg>
You can use JavaScript expression syntax, for example:
<rdl:arg name="Header">'Report: View by ' + {param.headerParam.label}</rdl:arg>
106 Appendix A
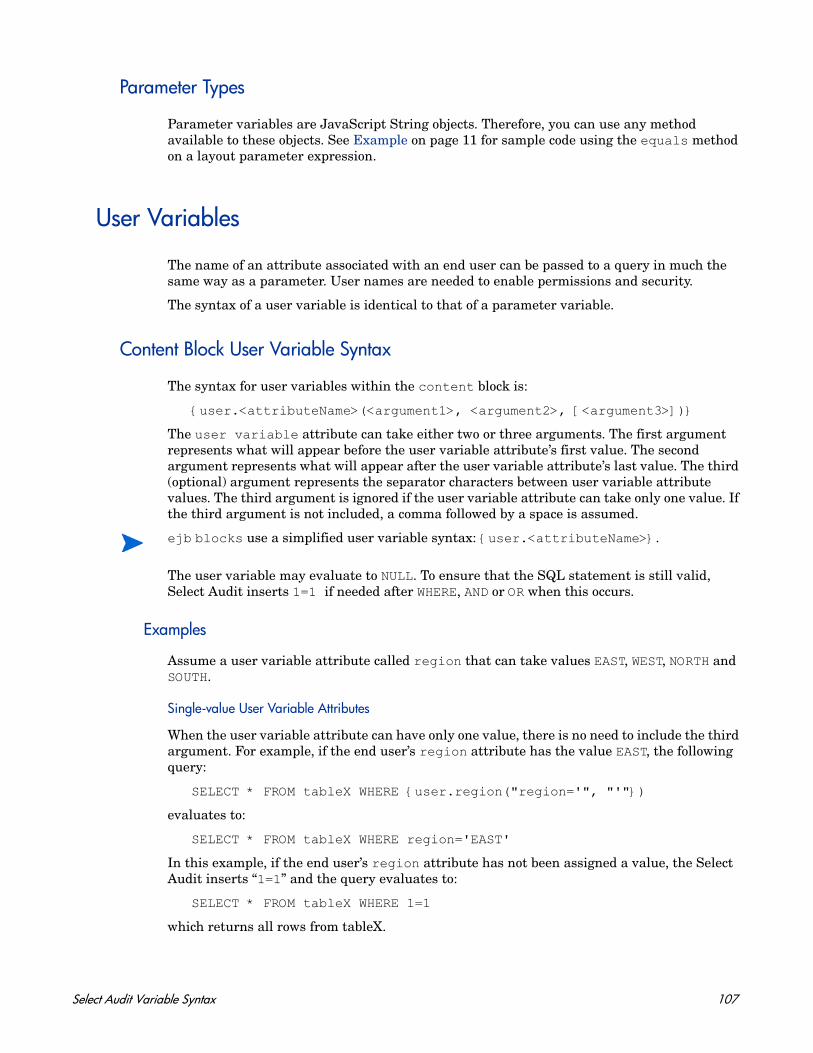
Parameter Types
Parameter variables are JavaScript String objects. Therefore, you can use any method available to these objects. See Example on page 11 for sample code using the equals method on a layout parameter expression.
User Variables
The name of an attribute associated with an end user can be passed to a query in much the same way as a parameter. User names are needed to enable permissions and security.
The syntax of a user variable is identical to that of a parameter variable.
Content Block User Variable Syntax
The syntax for user variables within the content block is:
{user.<attributeName>(<argument1>, <argument2>, [<argument3>])}
The user variable attribute can take either two or three arguments. The first argument represents what will appear before the user variable attribute’s first value. The second argument represents what will appear after the user variable attribute’s last value. The third (optional) argument represents the separator characters between user variable attribute values. The third argument is ignored if the user variable attribute can take only one value. If the third argument is not included, a comma followed by a space is assumed.
The user variable may evaluate to NULL. To ensure that the SQL statement is still valid, Select Audit inserts 1=1 if needed after WHERE, AND or OR when this occurs.
Examples
Assume a user variable attribute called region that can take values EAST, WEST, NORTH and SOUTH.
Single-value User Variable Attributes
When the user variable attribute can have only one value, there is no need to include the third argument. For example, if the end user’s region attribute has the value EAST, the following query:
SELECT * FROM tableX WHERE {user.region("region='", "'"})
evaluates to:
SELECT * FROM tableX WHERE region='EAST'
In this example, if the end user’s region attribute has not been assigned a value, the Select Audit inserts “1=1” and the query evaluates to:
SELECT * FROM tableX WHERE 1=1
which returns all rows from tableX.
ejb blocks use a simplified user variable syntax: {user.<attributeName>}.
Select Audit Variable Syntax 107

Multi-value User Variable Attributes
If comma followed by space is an acceptable separator, you don’t need to include the third argument. This is often the case if the user variable attributes evaluate to integers or other data types that don’t need to be put between single quotation marks in the SQL language.
If the user variable attribute is a string value, you typically do need to specify the third argument. For example, assume the end user selects both NORTH and EAST from a multi-valued list. The query:
SELECT * FROM tableX WHERE region IN {user.region("('", "')", "', '")}
evaluates to:
SELECT * FROM tableX WHERE region IN ('NORTH', 'EAST')
Layout Block Parameter Syntax
The syntax for user variable attributes in the layout block is shown below:
{user.<attributeName>}
For example, if your report assigns a different table header to each user, the useComponent block of the layout block may contain the following line:
<rdl:arg name="Header">{user.name}</rdl:arg>
You can use JavaScript expression syntax, for example:
<rdl:arg name="Header">'Welcome ' + {user.name}</rdl:arg>
User Variable Types
User variables are JavaScript String objects. Therefore, you can use any method available to these objects. For information on the JavaScript String class, see http://developer.netscape.com/docs/manuals/js/core/jsref15/contents.html.
Data Variables
Data variables represent return values from a query. They are typically used in the layout block of the RDL file, and refer to return values in the <XMLTag>data block.
The syntax of a data variable is:
{data.<data_block_name>.<return_column_name>}
For example, the following data variable represents the values of the product_id column in the salesquery <XMLTag>data block.
{data.salesquery.product_id}
Layout parameter expressions are really JavaScript String objects, so you can use JavaScript methods, such as “equals”. See Example on page 11 for sample code using the “equals” object on a layout parameter expression.
108 Appendix A
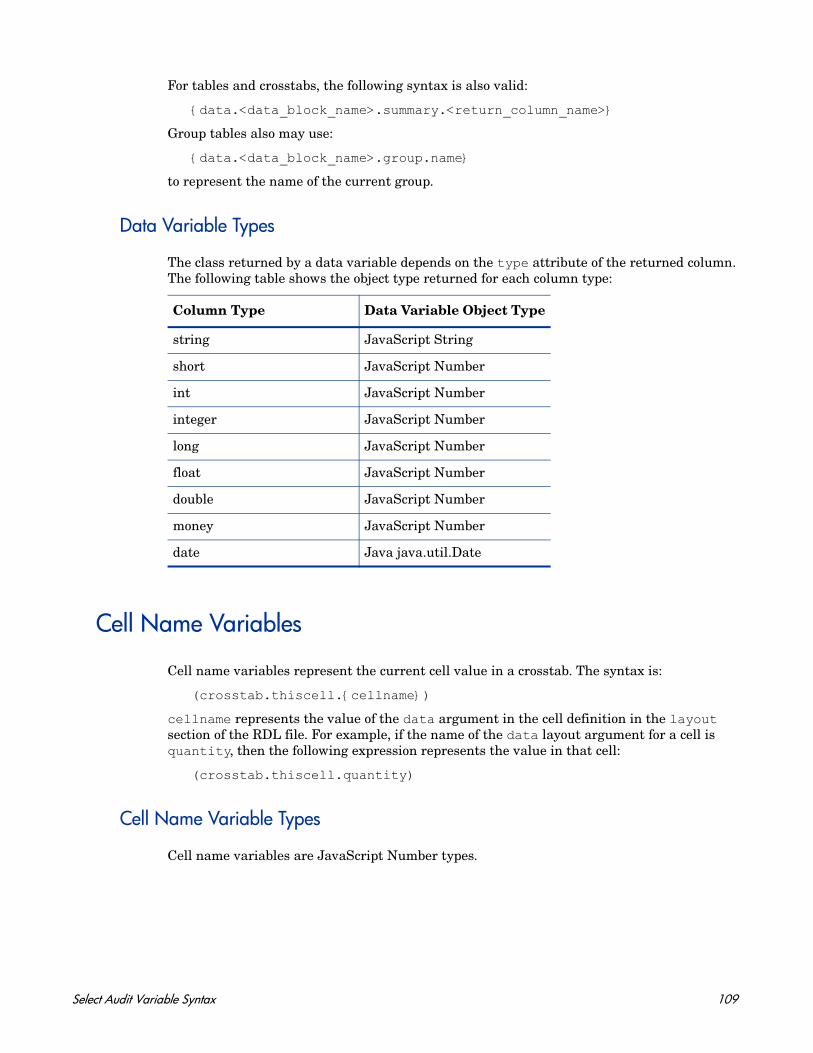
For tables and crosstabs, the following syntax is also valid:
{data.<data_block_name>.summary.<return_column_name>}
Group tables also may use:
{data.<data_block_name>.group.name}
to represent the name of the current group.
Data Variable Types
The class returned by a data variable depends on the type attribute of the returned column. The following table shows the object type returned for each column type:
Cell Name Variables
Cell name variables represent the current cell value in a crosstab. The syntax is:
(crosstab.thiscell.{cellname})
cellname represents the value of the data argument in the cell definition in the layout section of the RDL file. For example, if the name of the data layout argument for a cell is quantity, then the following expression represents the value in that cell:
(crosstab.thiscell.quantity)
Cell Name Variable Types
Cell name variables are JavaScript Number types.
Column Type Data Variable Object Type
string JavaScript String
short JavaScript Number
int JavaScript Number
integer JavaScript Number
long JavaScript Number
float JavaScript Number
double JavaScript Number
money JavaScript Number
date Java java.util.Date
Select Audit Variable Syntax 109
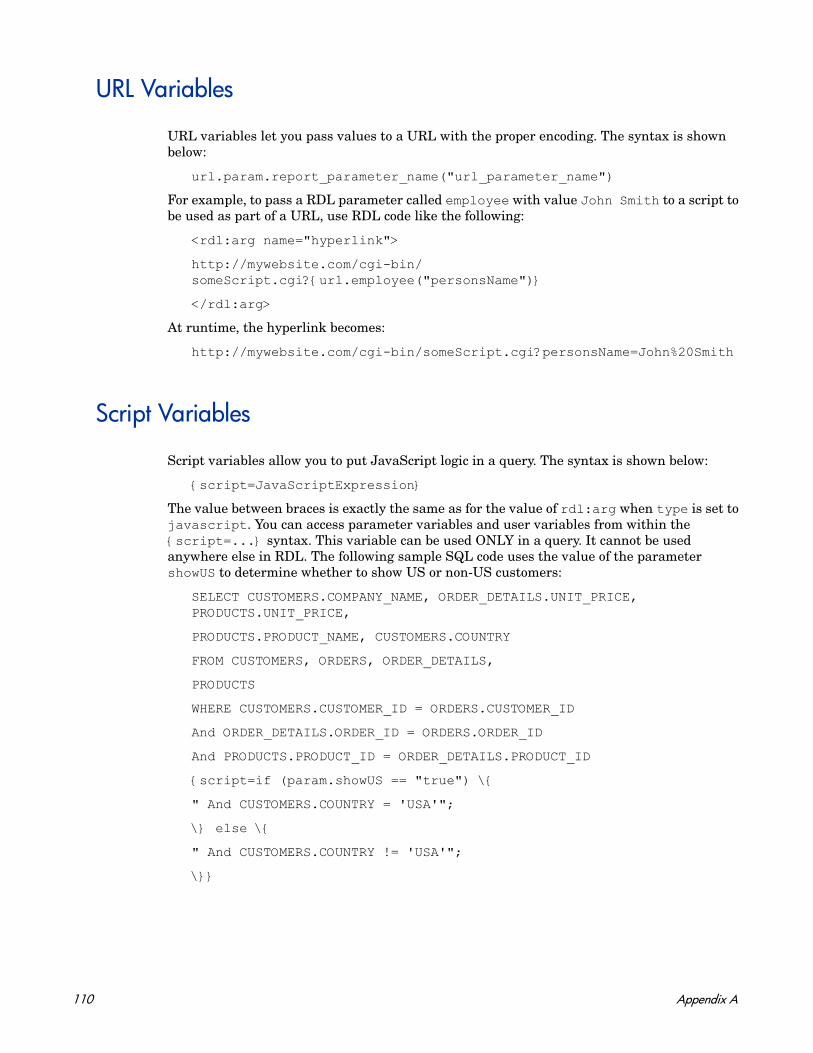
URL Variables
URL variables let you pass values to a URL with the proper encoding. The syntax is shown below:
url.param.report_parameter_name("url_parameter_name")
For example, to pass a RDL parameter called employee with value John Smith to a script to be used as part of a URL, use RDL code like the following:
<rdl:arg name="hyperlink">
http://mywebsite.com/cgi-bin/someScript.cgi?{url.employee("personsName")}
</rdl:arg>
At runtime, the hyperlink becomes:
http://mywebsite.com/cgi-bin/someScript.cgi?personsName=John%20Smith
Script Variables
Script variables allow you to put JavaScript logic in a query. The syntax is shown below:
{script=JavaScriptExpression}
The value between braces is exactly the same as for the value of rdl:arg when type is set to javascript. You can access parameter variables and user variables from within the {script=...} syntax. This variable can be used ONLY in a query. It cannot be used anywhere else in RDL. The following sample SQL code uses the value of the parameter showUS to determine whether to show US or non-US customers:
SELECT CUSTOMERS.COMPANY_NAME, ORDER_DETAILS.UNIT_PRICE, PRODUCTS.UNIT_PRICE,
PRODUCTS.PRODUCT_NAME, CUSTOMERS.COUNTRY
FROM CUSTOMERS, ORDERS, ORDER_DETAILS,
PRODUCTS
WHERE CUSTOMERS.CUSTOMER_ID = ORDERS.CUSTOMER_ID
And ORDER_DETAILS.ORDER_ID = ORDERS.ORDER_ID
And PRODUCTS.PRODUCT_ID = ORDER_DETAILS.PRODUCT_ID
{script=if (param.showUS == "true") \{
" And CUSTOMERS.COUNTRY = 'USA'";
\} else \{
" And CUSTOMERS.COUNTRY != 'USA'";
\}}
110 Appendix A
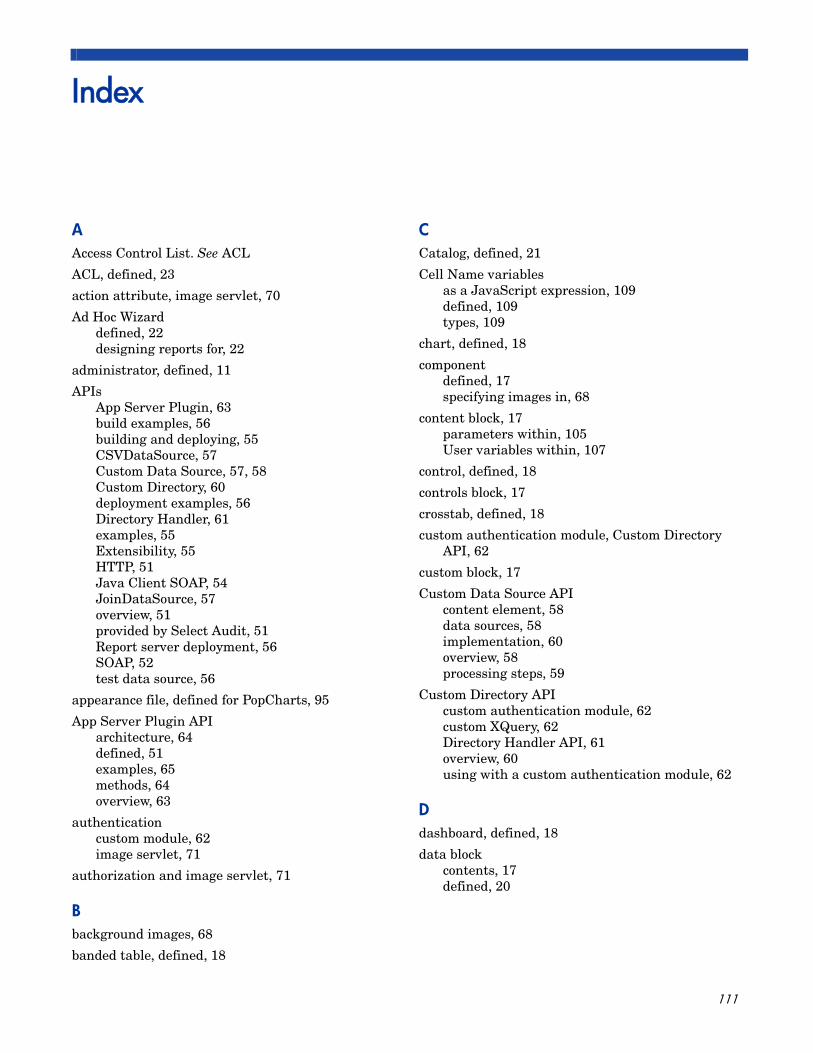
Index
AAccess Control List. See ACL
ACL, defined, 23
action attribute, image servlet, 70
Ad Hoc Wizarddefined, 22designing reports for, 22
administrator, defined, 11
APIsApp Server Plugin, 63build examples, 56building and deploying, 55CSVDataSource, 57Custom Data Source, 57, 58Custom Directory, 60deployment examples, 56Directory Handler, 61examples, 55Extensibility, 55HTTP, 51Java Client SOAP, 54JoinDataSource, 57overview, 51provided by Select Audit, 51Report server deployment, 56SOAP, 52test data source, 56
appearance file, defined for PopCharts, 95
App Server Plugin APIarchitecture, 64defined, 51examples, 65methods, 64overview, 63
authenticationcustom module, 62image servlet, 71
authorization and image servlet, 71
Bbackground images, 68
banded table, defined, 18
CCatalog, defined, 21
Cell Name variablesas a JavaScript expression, 109defined, 109types, 109
chart, defined, 18
componentdefined, 17specifying images in, 68
content block, 17parameters within, 105User variables within, 107
control, defined, 18
controls block, 17
crosstab, defined, 18
custom authentication module, Custom Directory API, 62
custom block, 17
Custom Data Source APIcontent element, 58data sources, 58implementation, 60overview, 58processing steps, 59
Custom Directory APIcustom authentication module, 62custom XQuery, 62Directory Handler API, 61overview, 60using with a custom authentication module, 62
Ddashboard, defined, 18
data blockcontents, 17defined, 20
111
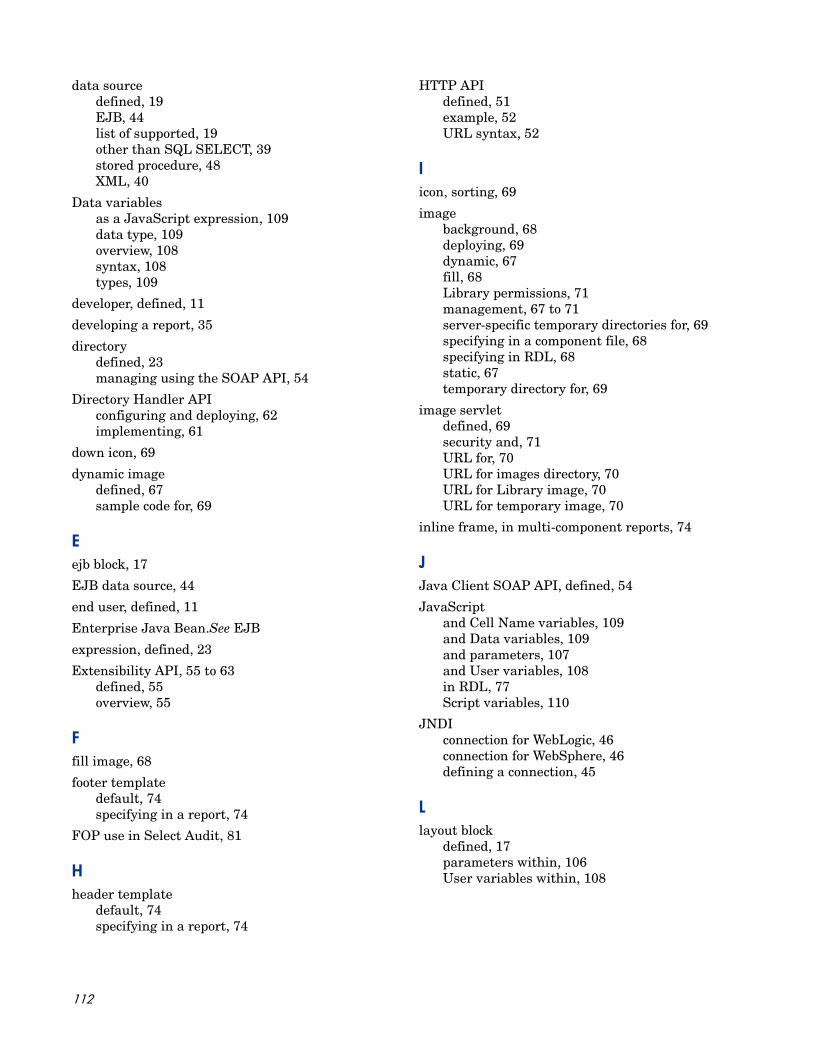
data sourcedefined, 19EJB, 44list of supported, 19other than SQL SELECT, 39stored procedure, 48XML, 40
Data variablesas a JavaScript expression, 109data type, 109overview, 108syntax, 108types, 109
developer, defined, 11
developing a report, 35
directorydefined, 23managing using the SOAP API, 54
Directory Handler APIconfiguring and deploying, 62implementing, 61
down icon, 69
dynamic imagedefined, 67sample code for, 69
Eejb block, 17
EJB data source, 44
end user, defined, 11
Enterprise Java Bean.See EJB
expression, defined, 23
Extensibility API, 55 to 63defined, 55overview, 55
Ffill image, 68
footer templatedefault, 74specifying in a report, 74
FOP use in Select Audit, 81
Hheader template
default, 74specifying in a report, 74
HTTP APIdefined, 51example, 52URL syntax, 52
Iicon, sorting, 69
imagebackground, 68deploying, 69dynamic, 67fill, 68Library permissions, 71management, 67 to 71server-specific temporary directories for, 69specifying in a component file, 68specifying in RDL, 68static, 67temporary directory for, 69
image servletdefined, 69security and, 71URL for, 70URL for images directory, 70URL for Library image, 70URL for temporary image, 70
inline frame, in multi-component reports, 74
JJava Client SOAP API, defined, 54
JavaScriptand Cell Name variables, 109and Data variables, 109and parameters, 107and User variables, 108in RDL, 77Script variables, 110
JNDIconnection for WebLogic, 46connection for WebSphere, 46defining a connection, 45
Llayout block
defined, 17parameters within, 106User variables within, 108
112

Librarydefined, 21managing using the SOAP API, 54permission on images in, 71security and images in, 71URL for images stored in, 70
localizationarguments, 102described, 101external resource files, 101internal reports, 102JavaScript, 102RDL resources section, 101report IDs, 102sample report, 103testing reports, 103
loc attribute, image servlet, 70
LoginModule interface, 62
Mmulti-component report, 73
OOracle stored procedures, 49
Ppaginations block, 17
parameterand PopCharts, 99and XML data source, 40as a JavaScript expression, 107data type, 107defined, 19discussion, 27 to 34where used in RDL, 27within content block, 105within layout block, 106
parameterizedCondition, 40
parameters block, 16
Parameter variablescontent block syntax, 105examples, 106layout block syntax, 106multi-value, 106overview, 105parameter types, 107single-value, 106
PDFformatting output, 81 to 86RDL arguments for, 82UTF-8 fonts, 83
permission, and image servlet, 71
PopChartcomponent defined, 18parameters for, 99
profile, defined, 19
properties block, 16
publishing, defined, 24
Qquery
defined, 20parameters within, 105User variables within, 107
query file, defined, 20
Rrdbms block, 17
RDLcontent blocks, 17controls block, 17custom block, 17defined, 15ejb block, 17highest level blocks, 16image, 67layout block, 17paginations block, 17parameters block, 16properties block, 16rdbms block, 17sortings block, 17specifying images in, 68useComponent block, 17where variables can appear in, 105xmlsource block, 17
RDL Generation Toolkitextending functionality, 93functionality, 91overview, 91packages, 92sample application, 93using, 93
record grid, defined, 18
Report Center schedule creation, 24
Report Definition Language. See RDL
report development cycle, 35
report execution using the SOAP API, 54
Report parameter and XQuery, 40
113
Sschedule
defined, 24using the SOAP API, 54
Script variables, 110
securityand image servlet, 71defined, 23
Select Audit variables. See variables
servletimage, 69URL for image, 70
session management, using the SOAP API, 53
SOAP API, 52 to 54defined, 52directory management, 54Java applications, 53Library management, 54methods, 53non-Java applications, 53report execution, 54schedule management, 54session management, 53setting up, 53
sortingicon for, 69specifying icons for, 69
sortings block, 17
SQL statementparameters within, 105User variables within, 107
StandardInclude componentand PDF output, 86using with JavaScript, 77
static image, 67
store attribute, image servlet, 70
stored procedure as a data source, 48
syntaxCell Name variables, 109Data variables, 108Parameter variables, 105User variables, 107
Ttable, defined, 18
template, 73 to 74custom, 73using, 73
theme, defined, 20
Uup icon, 69
uploading, defined, 24
URL variables, 110
useComponent block, defined, 17
User variablesas a JavaScript expression, 108content block syntax, 107data type, 108examples, 107layout block syntax, 108multi-value attributes, 108overview, 107single-value attributes, 107syntax, 107types, 108within content block, 107within layout block, 108
UTF-8 fonts, using in PDFs, 83
Vvariables
Cell Name, 109Data, 108defined, 105Parameter, 105Script, 110URL, 110User, 107where in RDL it can appear, 105
XXEP use in Select Audit, 81
XML data sourcedescribed, 40designating rows and columns from, 42
xmlsource block, 17
XQueryand Report parameters, 40as a data source, 40writing a custom data source, 62
XSL:FOchecking output, 85how used by Select Audit, 81
114