HP Operations Manager Service Discovery and Topology ...
55
HP Operations Manager Software Version: 9.21 UNIX and Linux operating systems Service Discovery and Topology Synchronization Guide Document Release Date: March 2016 Software Release Date: March 2016
-
Upload
khangminh22 -
Category
Documents
-
view
0 -
download
0
Transcript of HP Operations Manager Service Discovery and Topology ...

HP Operations ManagerSoftware Version: 9.21UNIX and Linux operating systems
Service Discovery and Topology SynchronizationGuide
Document Release Date: March 2016Software Release Date: March 2016
Legal Notices
WarrantyThe only warranties for HP products and services are set forth in the express warranty statementsaccompanying such products and services. Nothing herein should be construed as constituting anadditional warranty. HP shall not be liable for technical or editorial errors or omissions contained herein.
The information contained herein is subject to change without notice.
Restricted Rights LegendConfidential computer software. Valid license from HP required for possession, use or copying. Consistentwith FAR 12.211 and 12.212, Commercial Computer Software, Computer Software Documentation, andTechnical Data for Commercial Items are licensed to the U.S. Government under vendor's standardcommercial license.
Copyright Notice© Copyright 1996 - 2016 Hewlett-Packard Development Company, L.P.
Trademark NoticesAdobe™ is a trademark of Adobe Systems Incorporated.
Microsoft® and Windows® are U.S. registered trademarks of Microsoft Corporation.
UNIX® is a registered trademark of The Open Group.
This product includes an interface of the 'zlib' general purpose compression library, which is Copyright ©1995-2002 Jean-loup Gailly and Mark Adler.
SupportVisit the HP Software Support Online web site at: https://softwaresupport.hp.com
This web site provides contact information and details about the products, services, and support that HPSoftware offers.
HP Software online support provides customer self-solve capabilities. It provides a fast and efficient way toaccess interactive technical support tools needed to manage your business. As a valued support customer,you can benefit by using the support web site to:
l Search for knowledge documents of interestl Submit and track support cases and enhancement requestsl Download software patchesl Manage support contractsl Look up HP support contactsl Review information about available servicesl Enter into discussions with other software customersl Research and register for software training
Most of the support areas require that you register as an HP Passport user and sign in. Many also require asupport contract. To register for an HP Passport ID, go to:
https://hpp12.passport.hp.com/hppcf/createuser.do
To find more information about access levels, go to:
https://softwaresupport.hp.com/web/softwaresupport/access-levels
HP Software Solutions Now accesses the HPSW Solution and Integration Portal Web site. This site enablesyou to explore HP Product Solutions to meet your business needs, includes a full list of Integrations between
Service Discovery and Topology Synchronization Guide
HP Operations Manager (9.21) Page 2 of 56

HP Products, as well as a listing of ITIL Processes. The URL for this Web site ishttp://h20230.www2.hp.com/sc/solutions/index.jsp
Service Discovery and Topology Synchronization Guide
HP Operations Manager (9.21) Page 3 of 56

Contents
Chapter 1: Introduction 6Prerequisite Patches 6
Chapter 2: Service Auto-Discovery 8Service Auto-Discovery Policies 9Management Modules and Service Types 9Discovery Server and Agent 10Removing Discovered Services 12Configure a Service Auto-Discovery Policy 12Custom Service Auto-Discovery 13
Upload the Custom Discovery Module 13Create a Service Type 13
To create a service type: 14To import service types from HPOM forWindows: 14
Create a Custom Service Auto-Discovery Script 15Example Service XML 19
Create a new service instance and component relationship 19Create a dependency relationship 20Move a dependency relationship 21Delete service instances 22
Configure a Custom Service Auto-Discovery Policy 23ServiceTypeDefinitionCLI 25enableToposync 25ovagtrep 27opcsvcdisc 28
Configuration Variables 29Log Files 30
Testing and Troubleshooting 31Manually Run a Discovery Policy 31Log Files 31opcsvcdisc Memory Allocation 31
Chapter 3: Topology Synchronization 34Map Topology Data on the Target 35
Operator Elements 38Operand Elements 41
Forward Topology Data 47Start Synchronization 47Migrate from Scheduled Synchronization 48Stop Forwarding Topology Data 49
Testing and Troubleshooting 49Topology Synchronization Configuration Parameters 49Validating XMLConfiguration Files 50
Service Discovery and Topology Synchronization Guide
HP Operations Manager (9.21) Page 4 of 56

Validating Files Automatically 50Validating Files Manually 50
Dumping Synchronization Data 51Creating a Synchronization Data Dump 51Data Dump Example 52Viewing a Synchronization Data Dump 53
Writing Rules 53Simplifying Rule Development 53Matching Against Existing Attributes Only 54
Log Level Configuration 54Service Discovery Server Log Level Configuration 54Mapping Log Level Configuration 54
Send Documentation Feedback 55
Service Discovery and Topology Synchronization Guide
HP Operations Manager (9.21) Page 5 of 56

Chapter 1: IntroductionThis document provides information on how to configure the following features of HPOM for UNIX andHPOM on Linux:
l Service auto-discoveryThis feature enables you to discover services in your environment and automatically populate yourservice hierarchy. Custom service auto-discovery enables you to discover services that are specificto your organization, and that you would otherwise need to add to your service hierarchy manually.For details, see "Service Auto-Discovery" on page 8.
l Topology synchronizationThis feature enables you to automatically exchange and update node and service configurationsbetweenmultiple HPOM management servers. Topology synchronization enables you tomake surethat topology data is always up-to-date on all management servers in your environment without theneed tomaintain the data on each server manually. For details, see "Topology Synchronization" onpage 34.
Prerequisite PatchesCustom service auto-discovery and topology synchronization are available after you install one of thefollowingmanagement server patches:
l HP Operations Manager for UNIX or Linux 9.11 and 9.20No patches are required.
l HP Operations Manager for UNIX or Linux 9.10:l On the HP-UX operating system:PHSS_42736 IA-64 consolidated patch 09.10.220
l On the Red Hat Enterprise Linux operating system:OML_00050 consolidated patch 09.10.220
l On the Solaris operating system:ITOSOL_00772 consolidated patch 09.10.220
Note: The patch installation only places a configuration file for custom service auto-discovery on themanagement server. Youmust manually upload the file after the patch installation is finished. Fordetails, see "Upload the Custom Discovery Module" on page 13.
HP Operations Manager (9.21) Page 6 of 56

l HP Operations Manager forWindows:l On theWindows 32-bit operating system:OMW_00121 or higher
l On theWindows 64-bit operating system:OMW_00122 or higher
Service Discovery and Topology Synchronization Guide
HP Operations Manager (9.21) Page 7 of 56
Chapter 2: Service Auto-DiscoveryA service hierarchy in HPOM is a logical organization of the services you provide. Services are thebuilding blocks of your service hierarchy. A servicemay be anything from a low-level hardwarecomponent to a high-level software application. The services in a service hierarchy are dependent oneach other. Rules determine the severity of a service based on the states of the contributing services.For more information about services in HPOM, see the chapter on HPOM Service Navigator in theAdministrator's Reference.
You can add services to HPOM and create a basic service hierarchy using the followingmethods:
l Service configuration filesService configuration files are XML files that define individual services, the relationships betweenservices, and the rules that determine a service's severity. You can create service configuration filesmanually or generate them automatically using scripts or programs. Before your services appear inthe HPOM JavaGUI, youmust manually activate your service configuration using the opcservicecommand line tool. For more information about service configuration files and the opcservice tool,see the chapter on HPOM Service Navigator in theAdministrator's Reference.
l Service auto-discovery policiesInstead of building a service hierarchy based on service configuration files, you can use serviceauto-discovery policies to populate the service hierarchy on the HPOMmanagement server. Serviceauto-discovery policies configure the discovery agent. The discovery agent runs the discovery scriptcontained in the policy and collects the discovery data, for example, hardware resources, operatingsystem attributes, applications, and other information frommanaged objects. The agent then sendsthe discovery data to themanagement server to bemerged into the service hierarchy.After the first deployment, the auto-discovery policy is set to run periodically. Each time thediscovery agent runs, it compares the service information retrieved with the results of the previousrun. If the discovery agent finds any changes or additions to the services running on themanagednode since the previous run, it sends that information to the HPOMmanagement server, whichupdates the service hierarchy with the changes.For more information about the communication between the discovery agent and themanagementserver, see "Discovery Server and Agent" on page 10.
HP Operations Manager (9.21) Page 8 of 56

Service Auto-Discovery PoliciesService auto-discovery policies aremostly supplied by HP Operations Smart Plug-ins (SPIs) todiscover services in your managed environment and display them in a service hierarchy. You can alsocreate your own custom service auto-discovery policies.
Youmust deploy a service auto-discovery policy to amanaged node before it can be executed. Whenyou remove a service auto-discovery policy from amanaged node, the discovered services andrelationships are removed from the service hierarchy.
Usually there is no need tomodify the SPI auto-discovery policies. However, certain SPIs may requirethat you configure this policy by adding parameter data such as a user name or password to allowaccess and discovery of specific applications on amanaged node. You can alsomodify the executionschedule, if necessary. For details, see "Configure a Service Auto-Discovery Policy" on page 12.
Management Modules and Service TypesA service auto-discovery policy references amanagement module, a discovery script, and anexecution schedule. The discovery script contains the discovery rules and actions that allowdistributed discovery. The schedule defines when the script runs; it can be configured.
Themanagement module contains the service types that define the service hierarchy structure to bepopulated by the discovery script. A service type is similar to a template. The service type is usedwhen HPOM creates a service instance. The service instance inherits the properties and associationsdefined for the service type. For example, if you associate a service type with specific propagationrules, the rules are associated with every instance of that service that has been or will be created. Theservice type ensures that properties and associations are applied globally to all services of that type.
The following figure shows a service auto-discovery policy of the HP Operations Smart Plug-in forSystems Infrastructure. The policy references a hierarchy of service types, where the top-level servicetype is called _Class_OS. The policy runs the Perl script ispi_ovperl sysdisc.pl.
A management module is stored on themanagement server. By itself it is not deployed or active. To beexecuted, any management module has to be referenced and started by a service auto-discoverypolicy.
HP Operations Smart Plug-ins (SPIs) provide predefinedmanagement modules and service types. TheSPIs also provide the service auto-discovery policies and the discovery scripts.
Service Discovery and Topology Synchronization Guide
HP Operations Manager (9.21) Page 9 of 56
HPOM does not allow you to createmanagement modules, but does provide the Custom-Discoverymanagement module. You can use the Custom-Discovery management module if you want to createyour own custom service auto-discovery policies. For details, see "Custom Service Auto-Discovery"on page 13.
Discovery Server and AgentThe service discovery server on themanagement server and the discovery agent are responsible forservice discovery:
l The discovery policies configure the discovery agent (agtrep) to run scripts on themanaged nodethat retrieve information about services. The discovery agent stores the services that it discovers inthe agent repository (agtrep.xml), which is a local data store of services that exist on themanagednode.When discovery runs for the first time, the agent sends all discovered services to themanagementserver. After that the discovery agent forwards the changes only.You canmodify the default behavior of the discovery agent by modifying configuration variables inthe agtrep namespace. For details, see "ovagtrep" on page 27.
l The service discovery server (opcsvcdisc) on themanagement server receives the discoveredtopology data and processes it by applying context mapping rules. Context mapping rules filter thetopology data to determine which topology data updates themanagement server accepts. Fordetails, see "Map Topology Data on the Target" on page 35.You canmodify the default behavior of the discovery server by modifying configuration variables inthe om.svcdiscserver and om.svcdiscserver.mapping namespaces. For details, see "TopologySynchronization Configuration Parameters" on page 49 and "Creating a Synchronization DataDump" on page 51.
Service Discovery and Topology Synchronization Guide
HP Operations Manager (9.21) Page 10 of 56

The following figure shows the flow of topology data from the discovery agent to themanagementserver, and from there to another management server.
Note: The discovery agent sends the discovery data to the communication broker on themanagement server. The communication broker then forwards the discovery data to the discoveryserver. If a firewall separates themanagement server from themanaged nodes, thecommunication broker port (default value 383) must be opened in the firewall. If you want to bindthe discovery agent process agtrep to certain ports and IP addresses, configure the CLIENT_PORTand CLIENT_BIND_ADDR variables in the namespace bbc.http.ext.agtrep.agtrep. For moreinformation, see theHPOM Firewall Concepts and Configuration Guide.
Service Discovery and Topology Synchronization Guide
HP Operations Manager (9.21) Page 11 of 56

Removing Discovered ServicesTo remove a service, keep the following inmind:
l Undesired services in the service hierarchy that were discovered can bemanually removed usingthe opcservice command line tool (for example with opcservice -remove myService). Theseservices will not be rediscovered unless a change in the environment is detected. If the removedservice is a parent service and has a component relationship, then the child service cannot becreated. If a dependency relationship exists, the dependency cannot be created. You can find detailsof the failed actions in the service discovery server log file/var/opt/OV/shared/server/log/OvSvcDiscServer.log.You can use the ovagtrep command line tool (for example, ovagtrep -publish) to force agents toresend service discovery data. When themanagement server receives the service discovery data, itrecreates the service hierarchy, including any services that you previously removed.
l The discovery agent deletes the services from the agent repository if a service discovery policy failsto discover existing services five times (by default). You can control how often a service auto-discovery policy must run before amissing service is automatically deleted by changing the agentparameter INSTANCE_DELETION_THRESHOLD in the agtrep namespace. For details, see "ovagtrep"on page 27.
Configure a Service Auto-Discovery PolicyUsually there is no need tomodify a SPI auto-discovery policy. However, certain SPIs may require thatyou configure a policy by adding parameter data such as a user name or password to allow access anddiscovery of specific applications on amanaged node. You can alsomodify the schedule at which thepolicy runs.
1. Edit the service auto-discovery policy that you want to modify.2. In the policy editor, click theService Auto Discovery tab.
The Service Auto Discovery tab shows the service types and the discovery command that thepolicy runs. Use the text boxes provided to enter or modify any editable parameters, for exampleuser name or password.
3. Click theSchedule tab.The Schedule tab shows when and how often the service-discovery process runs. You canmodifythe schedule as needed.
Service Discovery and Topology Synchronization Guide
HP Operations Manager (9.21) Page 12 of 56

4. Redeploy themodified policy to themanaged nodes.5. After the policy runs, the discovered services appear in the service hierarchy.
To list all services use the following command:
opcservice –list –subentity
To assign the discovered services use the following command:
opcservice –assign <operator> <service>
CustomService Auto-DiscoveryYou can create new service auto-discovery policies to discover services in your environment andautomatically populate your service hierarchy. The services that you discover can belong to anyexisting service type, including any new service types that you decide to configure.
Upload the CustomDiscoveryModuleCustom service auto-discovery requires the custom discovery management module to discoverservices that are specific to your organization. For details, see "Service Auto-Discovery Policies" onpage 9.
The patch installation only places themodule configuration file (DiscoveryInstances.mof) on themanagement server. Youmust manually upload the file after the patch installation has completed. Toupload the data, type the following command:
/opt/OV/bin/OpC/utils/mof_cfgupld.sh /opt/OV/contrib/\OpC/HPOMDiscovery/DiscoveryInstances.mof
Themodule configuration file (DiscoveryInstances.mof) uses theMetaObject Facility (MOF)specification. For more information about MOF, see http://www.omg.org/mof/.
The command mof_cfgupld.sh logs information about the upload in the log file/var/opt/OV/log/OpC/mgmt_sv/mof_upload.log.
Create a Service TypeIt is only possible to discover and synchronize services if the service type already exists on the targetmanagement server. A service type is similar to a template. The service instance inherits the propertiesand associations defined for the service type. For example, if you associate a service type withspecific propagation rules, the rules are associated with every instance of that service that has been orwill be created. The service type ensures that properties and associations are applied globally to allservices of that type.
If the service type of a service does not exist on the target management server, youmust create theservice typemanually. Alternatively, you can import service types that have previously been exportedfrom HPOM forWindows.
Service Discovery and Topology Synchronization Guide
HP Operations Manager (9.21) Page 13 of 56

To create a service type:
1. Create a text file that contains the service type definition.The following example defines a service type with the ID “My_Service_Type_Definition”, and alsodefines the calculation rule and the propagation rule when the service is placed under a service ofthe type “Class_ResourcePools”.
Example:
<Services><Service>
<Name>My_Service_Type_Definition</Name><OriginalId>$KeyFormat$</OriginalId><Label>$Caption$</Label><Description>$Description$</Description><Icon>test.ico</Icon><CalcRuleRef>DDK_DefaultCalculationRule</CalcRuleRef>
</Service><Association>
<Composition/><SourceRef>My_Service_Type_Definition</SourceRef><TargetRef>Class_ResourcePools</TargetRef><PropRuleRef>DDK_DefaultPropagationRule</PropRuleRef>
</Association></Services>
Tip: You can list existing service types using the following command:/opt/OV/bin/ServiceTypeDefinitionCLI -l
2. Type the following command to upload the service type definition:
/opt/OV/bin/ServiceTypeDefinitionCLI -a <filename>
Formore information about ServiceTypeDefinitionCLI, see "ServiceTypeDefinitionCLI" on page 25.
To import service types from HPOM for Windows:
1. On the HPOM forWindows management server, export the HPOM forWindows service types,type:
ovpmutil cfg svt dnl <service_types>.mof /p <service_type_ID>
The following example command exports the parent service type Root Service Typewith the IDroot and all children service types to a file named dnl-svt.mof:ovpmutil cfg svt dnl c:\test\dnl-svt.mof /p root
2. On the HPOM for UNIX or Linux management server, import the HPOM forWindows servicetypes, type:
/opt/OV/bin/OpC/utils/mof_cfgupld.sh <service_types>.mof
The following example command imports the service types contained in the file dnl-svt.mof:
Service Discovery and Topology Synchronization Guide
HP Operations Manager (9.21) Page 14 of 56

/opt/OV/bin/OpC/utils/mof_cfgupld.sh /tmp/dnl-svt.mof.mof
The command mof_cfgupld.sh logs information about the upload in the log file/var/opt/OV/log/OpC/mgmt_sv/mof_upload.log.
Create a CustomService Auto-Discovery ScriptBefore you can configure a custom service auto-discovery policy, youmust create a script (or program)that the agent can run on amanaged node to discover services. This service discovery script mustwrite details of each discovered service in XML to the standard output stream (STDOUT). The agentstores these details in the agent repository, which is a local data store of services that exist on thenode. The agent publishes details of new, changed, and removed services to themanagement server,but does not resend details of unchanged services.
Tip: You can also add services to HPOM using the opcservice command on themanagementserver. The services to addmust be defined in a service configuration file, which you then uploadto themanagement server. Compared to dynamic custom service discovery, which discovers themanaged environment automatically, service configuration files are usually static andmust beupdatedmanually. For more information about adding services to HPOM using HPOM SeviceNavigator, see theHPOM Administrator's Reference.
Service XML SchemaDefinition (XSD)
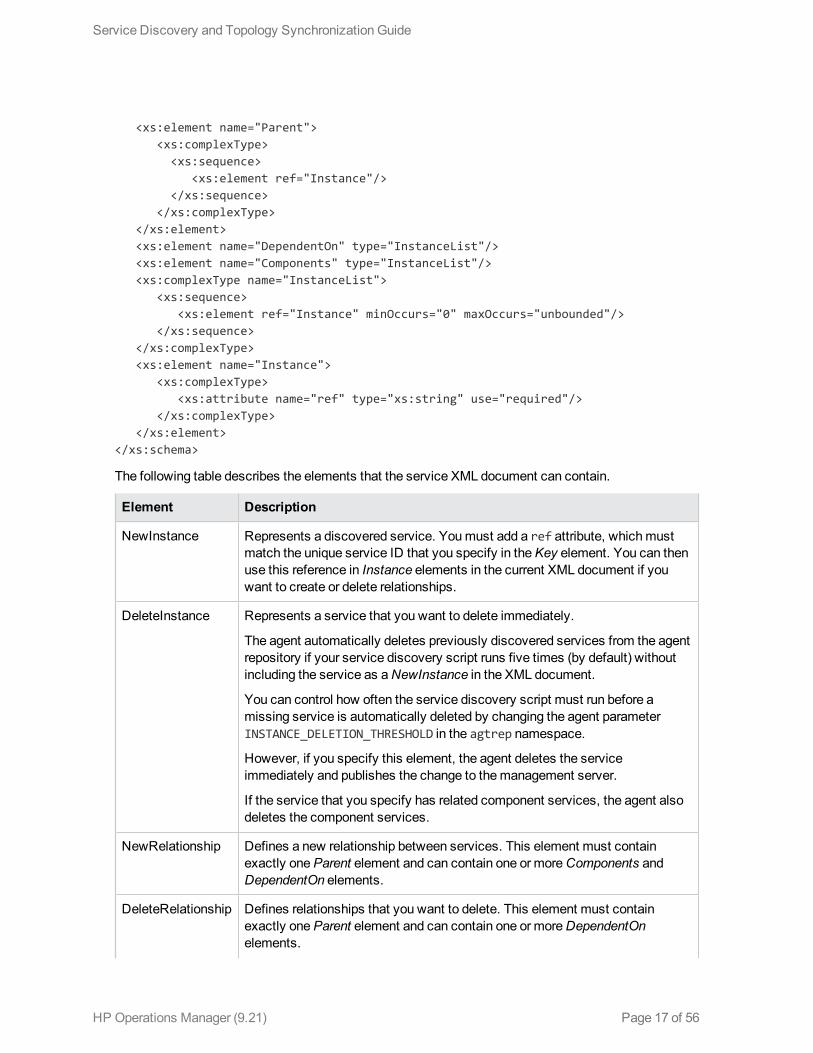
Your service discovery script must output XML that conforms to the following schema:
<?xml version="1.0" encoding="UTF-8"?><xs:schema xmlns:xs="http://www.w3.org/2001/XMLSchema">
<xs:element name="Service"><xs:complexType>
<xs:choice maxOccurs="unbounded"><xs:element ref="NewInstance"/><xs:element ref="DeleteInstance"/><xs:element ref="NewRelationship"/><xs:element ref="DeleteRelationship"/>
</xs:choice></xs:complexType><xs:key name="InstanceKey">
<xs:selector xpath="NewInstance|DeleteInstance"></xs:selector><xs:field xpath="Key"></xs:field>
</xs:key><xs:keyref refer="InstanceKey" name="InstanceKeyRef">
<xs:selector xpath="NewInstance|DeleteInstance"></xs:selector><xs:field xpath="@ref"></xs:field>
</xs:keyref><xs:keyref refer="InstanceKey" name="InstanceRef">
<xs:selectorxpath="NewRelationship/*/Instance|DeleteRelationship/*/Instance"></xs:selector>
<xs:field xpath="@ref"></xs:field></xs:keyref>
</xs:element>
Service Discovery and Topology Synchronization Guide
HP Operations Manager (9.21) Page 15 of 56

<xs:element name="NewInstance" type="InstanceType"/><xs:element name="DeleteInstance" type="InstanceType"/><xs:complexType name="InstanceType">
<xs:sequence><xs:element ref="Std"/><xs:element ref="NodeGuid" minOccurs="0"/><xs:element ref="Virtual" minOccurs="0"/><xs:element ref="Key"/><xs:element ref="GraphInstanceID" minOccurs="0" maxOccurs="1"/><xs:element ref="Attributes"/>
</xs:sequence><xs:attribute name="ref" type="xs:string" use="required"/>
</xs:complexType><xs:element name="NewRelationship" type="RelationType"/><xs:element name="DeleteRelationship" type="RelationType"/><xs:complexType name="RelationType">
<xs:sequence><xs:element ref="Parent"/><xs:element ref="Components" minOccurs="0"/><xs:element ref="DependentOn" minOccurs="0"/>
</xs:sequence></xs:complexType><xs:element name="Std">
<xs:simpleType><xs:restriction base="xs:string">
<xs:enumeration value="DiscoveredElement"/></xs:restriction>
</xs:simpleType></xs:element><xs:element name="Virtual">
<xs:complexType/></xs:element><xs:element name="NodeGuid" type="xs:string"/><xs:element name="Key" type="xs:string"/><xs:element name="GraphInstanceID" type="xs:string"/><xs:element name="Attributes">
<xs:complexType><xs:sequence>
<xs:element ref="Attribute" maxOccurs="unbounded"/></xs:sequence>
</xs:complexType></xs:element><xs:element name="Attribute">
<xs:complexType><xs:attribute name="value" type="xs:string" use="required"/><xs:attribute name="name" type="xs:string" use="required"/>
</xs:complexType></xs:element>
Service Discovery and Topology Synchronization Guide
HP Operations Manager (9.21) Page 16 of 56
<xs:element name="Parent"><xs:complexType>
<xs:sequence><xs:element ref="Instance"/>
</xs:sequence></xs:complexType>
</xs:element><xs:element name="DependentOn" type="InstanceList"/><xs:element name="Components" type="InstanceList"/><xs:complexType name="InstanceList">
<xs:sequence><xs:element ref="Instance" minOccurs="0" maxOccurs="unbounded"/>
</xs:sequence></xs:complexType><xs:element name="Instance">
<xs:complexType><xs:attribute name="ref" type="xs:string" use="required"/>
</xs:complexType></xs:element>
</xs:schema>
The following table describes the elements that the service XML document can contain.
Element Description
NewInstance Represents a discovered service. Youmust add a ref attribute, whichmustmatch the unique service ID that you specify in theKey element. You can thenuse this reference in Instance elements in the current XML document if youwant to create or delete relationships.
DeleteInstance Represents a service that you want to delete immediately.
The agent automatically deletes previously discovered services from the agentrepository if your service discovery script runs five times (by default) withoutincluding the service as aNewInstance in the XML document.
You can control how often the service discovery script must run before amissing service is automatically deleted by changing the agent parameterINSTANCE_DELETION_THRESHOLD in the agtrep namespace.
However, if you specify this element, the agent deletes the serviceimmediately and publishes the change to themanagement server.
If the service that you specify has related component services, the agent alsodeletes the component services.
NewRelationship Defines a new relationship between services. This element must containexactly oneParent element and can contain one or moreComponents andDependentOn elements.
DeleteRelationship Defines relationships that you want to delete. This element must containexactly oneParent element and can contain one or moreDependentOnelements.
Service Discovery and Topology Synchronization Guide
HP Operations Manager (9.21) Page 17 of 56

Element Description
(missing or bad snippet)The agent does not allow to delete componentrelationships to avoid orphaned child services. To delete a componentrelationship, youmust delete the component service using aDeleteInstanceelement.
Std Must contain the string DiscoveredElement.
NodeGuid Contains the core ID, primary node name, or IP address of the node that hoststhis service. If this element contains an IP address, themanagement servermust be able to resolve the corresponding primary node name (for example,from a correctly configured DNS server).
You need to include this element only if the service is hosted on a differentnode.
For example, you can include this element if your service discovery script runson a central computer that has data about services on other computers.
Virtual Include this element if the service is virtual. A virtual service is abstract anddoes not exist on any node. Omit this element if the service is hosted on anode.
Key Contains the full service ID for this service, whichmust be unique. Youmustinclude this element in all NewInstance andDeleteInstance elements. Youmust not specify aNewInstance andDeleteInstancewith the same key in thesame XML document.
(missing or bad snippet)If you do not want to invent IDs yourself, use one of theID generators that are available on the Internet.
GraphInstanceID Contains the unique ID of a graph that you want to associate with the service.
Attributes Contains Attribute elements.
Attribute Has a name attribute and a value attribute.
Youmust include anAttribute element with the name hpom_realstdid. Thevalue of this attributemust contain the unique ID of the service type that thisservice belongs to.
Themanagement server can use any other name and value pairs to generatethe service's display name and description according to the formats in theservice type.
Alternatively, you can override the service type's display name and descriptionformats, by including attributes with the names hpom_captionformat andhpom_descriptionformat.
Parent Contains an Instance element, which defines the service that is the parent ofthis relationship.
The parent instance that you specify must exist on themanagement server andin the agent repository on the node. Therefore, youmay need to include a
Service Discovery and Topology Synchronization Guide
HP Operations Manager (9.21) Page 18 of 56

Element Description
NewInstance element to add the parent to the agent repository, even if theparent already exists on themanagement server.
Instance Has a ref attribute that refers to aNewInstance element in the current XMLdocument.
DependentOn Contains one or more Instance elements, which refer to the services that aredependent on the specifiedParent element.
Components Contains one or more Instance elements, which refer to the services that arecomponents of the specifiedParent element.
Your service discovery script must output an XML document that meets the following additionalrequirements:
l Each service instancemust include anAttribute element with the name hpom_realstdid. The valueof this attributemust contain the unique ID of the service type that this service belongs to. You canfind this unique ID using the command /opt/OV/bin/ServiceTypeDefinitionCLI -l. In theoutput of this command, each <Name> element contains the unique ID of a service type.
l A service appears in the service hierarchy only after you create a component relationship withanother service that already exists in the service hierarchy. For example, to add a service at the toplevel of the service hierarchy, youmust create a component relationship with the root service, whichhas the service ID Root_Services and the service type unique ID root.
Example Service XMLThe following examples show the XML that a script could output to create andmaintain variousservices, relationships, and dependencies.
Create a new service instance and component relationship
The following XML creates a new service with the service ID CustomServiceID, which belongs to acustom service type that has the ID My_Service_Type_Definition_1. The XML specifies that thedisplay name of the service is Custom Service 1, and the description is Example custom service.
The XML adds the new service to the service hierarchy as a component of the root service. The rootservice already exists on themanagement server, but is specified as a new service instance so thatthe agent adds it to the local agent repository.
Example:
<Service><NewInstance ref="CustomServiceID">
<Std>DiscoveredElement</Std><Key>CustomServiceID</Key><Attributes>
<Attribute name="hpom_realstdid" value="My_Service_Type_Definition_1" /><Attribute name="hpom_captionformat" value="Custom Service 1" />
Service Discovery and Topology Synchronization Guide
HP Operations Manager (9.21) Page 19 of 56

<Attribute name="hpom_descriptionformat" value="Example custom service" /></Attributes>
</NewInstance><NewInstance ref="Root_Services">
<Std>DiscoveredElement</Std><Key>Root_Services</Key><Virtual /><Attributes>
<Attribute name="hpom_realstdid" value="root" /></Attributes>
</NewInstance><NewRelationship>
<Parent><Instance ref="Root_Services" />
</Parent><Components>
<Instance ref="CustomServiceID" /></Components>
</NewRelationship></Service>
Create a dependency relationship
The following XML creates two new services, which belong to different service types. The XML addsthe new services to the service hierarchy as components of the root service. The XML also specifies adependency relationship between the two new services.
Each service specifies an example attribute, which themanagement server can use in the service'sdisplay name. (The service type has a display name format that contains the corresponding variable$ExampleAttribute$.)
Example:
<Service><NewInstance ref="ServiceA">
<Std>DiscoveredElement</Std><Key>ServiceA</Key><Attributes>
<Attribute name="hpom_realstdid" value="My_Service_Type_Definition_2" /><Attribute name="ExampleAttribute" value="ExampleA" />
</Attributes></NewInstance><NewInstance ref="ServiceB">
<Std>DiscoveredElement</Std><Key>ServiceB</Key><Attributes>
<Attribute name="hpom_realstdid" value="My_Service_Type_Definition_3" /><Attribute name="ExampleAttribute" value="ExampleB" />
Service Discovery and Topology Synchronization Guide
HP Operations Manager (9.21) Page 20 of 56

</Attributes></NewInstance><NewInstance ref="Root_Services">
<Std>DiscoveredElement</Std><Key>Root_Services</Key><Virtual /><Attributes>
<Attribute name="hpom_realstdid" value="root" /></Attributes>
</NewInstance><NewRelationship>
<Parent><Instance ref="Root_Services" />
</Parent><Components>
<Instance ref="ServiceA" /><Instance ref="ServiceB" />
</Components></NewRelationship><NewRelationship>
<Parent><Instance ref="ServiceB" />
</Parent><DependentOn>
<Instance ref="ServiceA" /></DependentOn>
</NewRelationship></Service>
Move a dependency relationship
The following XML specifies that the services from the previous example still exist, but moves thedependency relationship from one service to another.
Example:
<Service><NewInstance ref="ServiceA">
<Std>DiscoveredElement</Std><Key>ServiceA</Key><Attributes>
<Attribute name="hpom_realstdid" value="My_Service_Type_Definition_2" /><Attribute name="ExampleAttribute" value="ExampleA" />
</Attributes></NewInstance><NewInstance ref="ServiceB">
<Std>DiscoveredElement</Std>
Service Discovery and Topology Synchronization Guide
HP Operations Manager (9.21) Page 21 of 56

<Key>ServiceB</Key><Attributes>
<Attribute name="hpom_realstdid" value="My_Service_Type_Definition_3" /><Attribute name="ExampleAttribute" value="ExampleB" />
</Attributes></NewInstance><NewInstance ref="Root_Services">
<Std>DiscoveredElement</Std><Key>Root_Services</Key><Virtual /><Attributes>
<Attribute name="hpom_realstdid" value="root" /></Attributes>
</NewInstance><NewRelationship>
<Parent><Instance ref="Root_Services" />
</Parent><Components>
<Instance ref="ServiceA" /><Instance ref="ServiceB" />
</Components></NewRelationship><DeleteRelationship>
<Parent><Instance ref="ServiceB" />
</Parent><DependentOn>
<Instance ref="ServiceA" /></DependentOn>
</DeleteRelationship><NewRelationship>
<Parent><Instance ref="ServiceA" />
</Parent><DependentOn>
<Instance ref="ServiceB" /></DependentOn>
</NewRelationship></Service>
Delete service instances
The following XML immediately deletes a service with the service ID CustomServiceID, which belongsto a custom service type that has the ID My_Service_Type_Definition_1.
Example:
Service Discovery and Topology Synchronization Guide
HP Operations Manager (9.21) Page 22 of 56

<Service><DeleteInstance ref="CustomServiceID">
<Std>DiscoveredElement</Std><Key>CustomServiceID</Key><Attributes>
<Attribute name="hpom_realstdid" value="My_Service_Type_Definition_1" /></Attributes>
</DeleteInstance></Service>
Configure a CustomService Auto-Discovery PolicyAfter you create the script (or program) that the agent can run on amanaged node to discover services,youmust configure a service auto-discovery policy to start the script on the node with an appropriateschedule. Youmust also create an instrumentation category to ensure that the script and policy aredeployed together.
1. Make sure that your management server meets the prerequisites for custom service auto-discovery. See "Prerequisite Patches" on page 6.
2. Create an instrumentation category, and then copy your service discovery script to the categorysubdirectory on themanagement server.For more information about creating instrumentation categories, see the opcinstrumcfg(1m)manual page.
3. Create a new policy of the type Service Auto-Discovery.4. In the policy editor, click the Service Auto-Discovery tab.5. In the list of management modules, select Custom-Discovery.6. Modify CommandLine to specify the name of your service discovery script. You can specify a
different command line forWindows and UNIX nodes.
Use the variable $ACTION_DIR to represent the folder that contains instrumentation onmanagednodes. For example, you could specify the command line "$ACTION_DIR/custom_discovery.cmd".Escape any backslashes (\) with a second backslash (\\).
7. Optional. By default, the agent starts the service discovery script under the same account as theagent is running under. You can specify a different user and password if you want the script to rununder a different account.
8. Configure the schedule in the Schedule tab.9. In the Properties tab, specify aName for the policy, and then click Save.10. Assign to the policy the instrumentation category that contains the service discovery script.11. Deploy the policy to the appropriate managed nodes.
(missing or bad snippet)Themaximum frequency that you can schedule for a service auto-discovery policy is hourly. This frequency may not be convenient when you are developing andtesting your policy. However, after you deploy your policy to a node, you can run the policy ondemand using the command ovagtrep -run <policy name> on the node.
Service Discovery and Topology Synchronization Guide
HP Operations Manager (9.21) Page 23 of 56

12. After the policy runs, the discovered services appear below the Auto-Discovery service.To list all services use the following command:
opcservice –list –subentity
To assign the discovered services use the following command:
opcservice –assign <operator> AutoDiscovery
Service Discovery and Topology Synchronization Guide
HP Operations Manager (9.21) Page 24 of 56

ServiceTypeDefinitionCLIThe command ServiceTypeDefinitionCLI configures the service types used when an instance of aservice is created.
SYNOPSIS
ServiceTypeDefinitionCLI [-l][-a <filename> [-o]][-d <definition>]
DESCRIPTION
A service type is similar to a template. The service type is used when HPOM creates a serviceinstance. The service instance inherits the properties and associations defined for the service type. Forexample, if you associate a service type with specific propagation rules, the rules are associated withevery instance of that service that has been or will be created. The service type ensures that propertiesand associations are applied globally to all services of that type.
The ServiceTypeDefinitionCLI command has the following options:
-l
Lists existing service types and their associated propagation rules.
-a <filename>
Uploads the service type definitions contained in <filename>. For more information about how todefine service types in a text file, see "Create a Service Type" on page 13.
-o
Updates existing service types with modified definitions. If you use the -a option without the -ooption and <filename> contains modifications to existing services types, thosemodifications willnot be uploaded.
-d <service_type_name>
Deletes service types and their associated propagation rules.
EXAMPLES
l You can list existing service types using the following command:
/opt/OV/bin/ServiceTypeDefinitionCLI -l
l To upload service types defined in the file my_service_types.txt to themanagement server, type:/opt/OV/bin/ServiceTypeDefinitionCLI -a my_service_types.txt
l To update the service type My_Service_Type_Definitionwith a new definition, type:/opt/OV/bin/ServiceTypeDefinitionCLI -a my_service_types.txt -o
enableToposyncThe enableToposync.sh script configures topology synchronization.
SYNOPSIS
Service Discovery and Topology Synchronization Guide
HP Operations Manager (9.21) Page 25 of 56
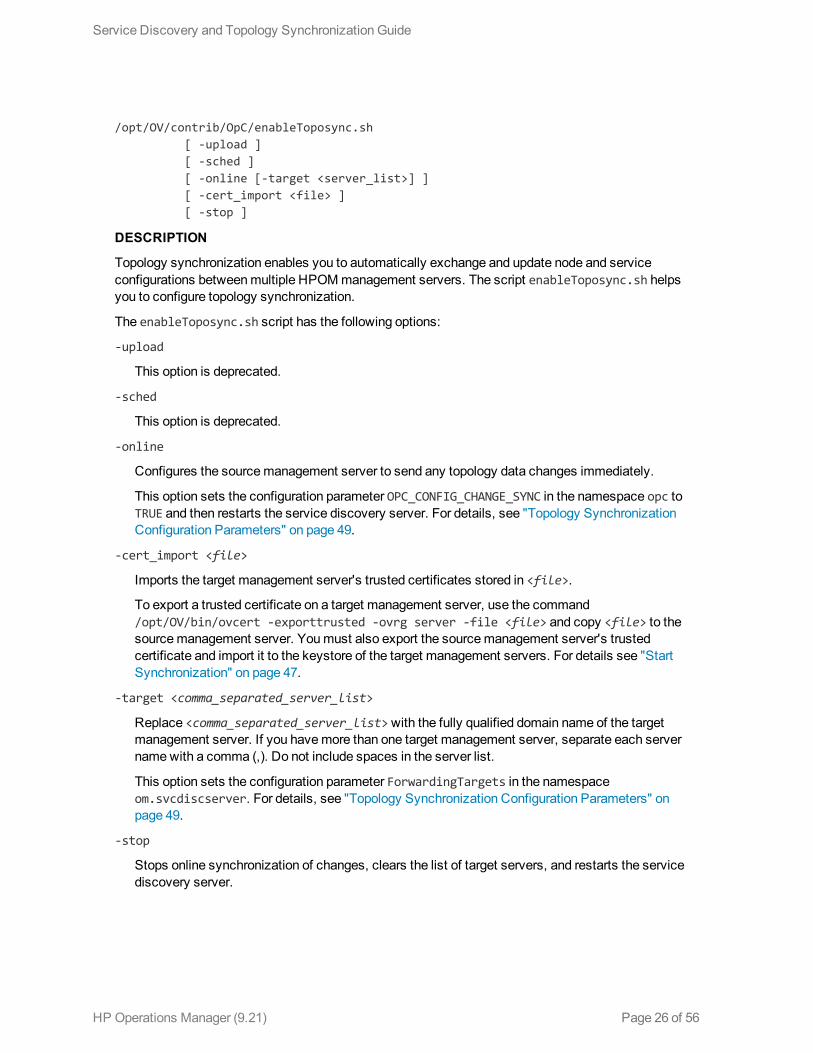
/opt/OV/contrib/OpC/enableToposync.sh[ -upload ][ -sched ][ -online [-target <server_list>] ][ -cert_import <file> ][ -stop ]
DESCRIPTION
Topology synchronization enables you to automatically exchange and update node and serviceconfigurations betweenmultiple HPOMmanagement servers. The script enableToposync.sh helpsyou to configure topology synchronization.
The enableToposync.sh script has the following options:
-upload
This option is deprecated.
-sched
This option is deprecated.
-online
Configures the sourcemanagement server to send any topology data changes immediately.
This option sets the configuration parameter OPC_CONFIG_CHANGE_SYNC in the namespace opc toTRUE and then restarts the service discovery server. For details, see "Topology SynchronizationConfiguration Parameters" on page 49.
-cert_import <file>
Imports the target management server's trusted certificates stored in <file>.
To export a trusted certificate on a target management server, use the command/opt/OV/bin/ovcert -exporttrusted -ovrg server -file <file> and copy <file> to thesourcemanagement server. Youmust also export the sourcemanagement server's trustedcertificate and import it to the keystore of the target management servers. For details see "StartSynchronization" on page 47.
-target <comma_separated_server_list>
Replace <comma_separated_server_list>with the fully qualified domain name of the targetmanagement server. If you havemore than one target management server, separate each servernamewith a comma (,). Do not include spaces in the server list.
This option sets the configuration parameter ForwardingTargets in the namespaceom.svcdiscserver. For details, see "Topology Synchronization Configuration Parameters" onpage 49.
-stop
Stops online synchronization of changes, clears the list of target servers, and restarts the servicediscovery server.
Service Discovery and Topology Synchronization Guide
HP Operations Manager (9.21) Page 26 of 56

ovagtrepovagtrep enables configuration and control of the discovery agent and agent repository.
SYNOPSIS
ovagtrep [-clearall] |[-run <policy name>] |[-publish]
DESCRIPTION
The discovery agent is an extension to the HTTPS agent, which runs service discovery policies thathave been deployed from amanagement server. It stores the services that it discovers in the agentrepository, which is a local data store of services that exist on the node.
The agent synchronizes the services in the agent repository with themanagement server. Themanagement server receives details of new, changed, and removed services only. Details ofunchanged services are not resent.
The ovagtrep command enables you to configure and control the discovery agent and agentrepository. It has the following options:
-clearall
Clears all services from the agent repository. The next time that the discovery agent runs servicediscovery policies, it will recreate the services. The agent then synchronizes the services with themanagement server. This is enables you to force the agent to synchronize unchanged services withthemanagement server.
-run <policy name>
Runs a service discovery policy. Use this to run a policy at an unscheduled time, to discover anychanges immediately. The agent sends details of changes to themanagement server. You can findthe names of installed policies using ovpolicy.
-publish
Resends details of all the services that are currently in the agent repository to themanagementserver. Use this for troubleshooting if services fail to appear on themanagement server.
The discovery agent and agent repository are part of a component that is registered with the controlservice. You can start and stop the component with the commands ovc -start agtrep and ovc -stop agtrep.
The agent repository is stored in the agtrep.xml file:
l Windows:
%OvDataDir%datafiles\agtrep.xml
l UNIX and Linux:
/var/opt/OV/datafiles/agtrep.xml
You can use the command ovconfchg to modify the following settings in the agtrep name space:
ACTION_TIMEOUT <minutes>
Service Discovery and Topology Synchronization Guide
HP Operations Manager (9.21) Page 27 of 56

Sets themaximum number of minutes that a service discovery policy can run. If the policy runs anylonger, the discovery agent stops running the policy and logs an error in the system log (<data_dir>/log/System.txt).
INSTANCE_DELETION_THRESHOLD <value>
Sets the number of times that service discovery policies must fail to discover existing servicesbefore the agent deletes the services from the agent repository.
If a service discovery policy can no longer discover a service that exists in the agent repository, thediscovery agent deletes the service from the agent repository only after the service discovery policyhas run the number of times that you specify with this setting.
For example, to set the action timeout to fiveminutes with the following command:
ovconfchg -ns agtrep -set ACTION_TIMEOUT 5
After you change the action timeout or instance deletion threshold, restart the component with thefollowing command:
ovc -restart agtrep.
opcsvcdiscopcsvcdisc is the service discovery server process on the HPOMmanagement server.
DESCRIPTION
The service discovery server (opcsvcdisc) on themanagement server receives the discoveredtopology data and processes it by applying context mapping rules. Context mapping rules filter thetopology data to determine which topology data updates the target management server accepts. Fordetails, see "Map Topology Data on the Target" on page 35.
Service Discovery and Topology Synchronization Guide
HP Operations Manager (9.21) Page 28 of 56

Configuration VariablesYou can use the command ovconfchg to modify the following settings:
l OPC_CONFIG_CHANGE_SYNC
Enables online configuration synchronization betweenmanagement servers. The synchronizationupdates changes to nodes, node groups, and services. In addition, node to node group assignmentsare synchronized.
Namespace: opcDefault value: FALSEFor details, see "Topology Synchronization Configuration Parameters" on page 49.
l ForwardingTargets
Comma-separated list of target management servers. Format: <server>:port,…. Requires a restartof the opcsvcdisc process.Namespace: om.svcdiscserverDefault value: emptyFor details, see "Topology Synchronization Configuration Parameters" on page 49.
l LOG_LEVEL
The service discovery server supports the following log levels:l Log level 1 logs errors only.
l Log level 3 logs errors and information (including raw data received from the agent).
l Log level 10 logs tracing information for debugging purposes, for examplemethod parameters.
Namespace: om.svcdiscsserverDefault value: 3For details, see "Log Level Configuration" on page 54.
l opr.toposync.dumpData
Dumps the synchronization data into XML files.
Namespace: om.svcdiscserver.mappingDefault value: FALSEFor details, see "Creating a Synchronization Data Dump" on page 51.
l SVCDISC_MAXHEAP
Sets themaximum amount of memory allocated to the opcsvcdisc process. The valuemust be amultiple of 1024. Requires a restart of the opcsvcdisc process.Namespace: opcDefault value: emptyFor details, see "opcsvcdisc Memory Allocation" on page 31.
Service Discovery and Topology Synchronization Guide
HP Operations Manager (9.21) Page 29 of 56

Log FilesThe service discovery server logs are stored in the following log files:
l /var/opt/OV/shared/server/log/OvSvcDiscServer.log
OvSvcDiscServer.log contains log information related to the discovery server (for example,receiving data, processing data, and storing data in themodel).For details about increasing the level of detail maintained in the log file, see "Service DiscoveryServer Log Level Configuration" on page 54.
l /var/opt/OV/shared/server/log/opr-svcdiscserver.log
opr-svcdiscserver.log contains log information related tomapping and filtering.For details about increasing the level of detail maintained in the log file, see "Mapping Log LevelConfiguration" on page 54.
Service Discovery and Topology Synchronization Guide
HP Operations Manager (9.21) Page 30 of 56

Testing and Troubleshooting
Manually Run a Discovery PolicyTomake sure that all discovered services are forwarded to themanagement server before the nextscheduled discovery, complete the following steps:
1. On themanaged node, clear the agent repository, type:
ovagtrep -clearall
2. Run the discovery policy, type:
ovagtrep -run <policy_name>
For example, type ovagtrep -run "SI-SystemDiscovery" to run the Systems InfrastructureSPI policy SI-SystemDiscovery.
Log FilesThe discovery agent logs are stored in the following log files:
l Windows:
%OvDataDir%log\System.txt
l UNIX and Linux:
/var/opt/OV/log/System.txt
The service discovery server logs are stored in the following log files:
l /var/opt/OV/shared/server/log/OvSvcDiscServer.log
OvSvcDiscServer.log contains log information related to the discovery server (for example,receiving data, processing data, and storing data in themodel).For details about increasing the level of detail maintained in the log file, see "Service DiscoveryServer Log Level Configuration" on page 54.
l /var/opt/OV/shared/server/log/opr-svcdiscserver.log
opr-svcdiscserver.log contains log information related tomapping and filtering.For details about increasing the level of detail maintained in the log file, see "Mapping Log LevelConfiguration" on page 54.
opcsvcdiscMemory AllocationHPOM by default allocates amaximum of 1024MB (HP-UX) and 2047MB (Linux and Sun Solaris) tothe service discovery process opcsvcdisc. You can change this value by setting the SVCDISC_MAXHEAP configuration variable as follows:
1. Configure themaximummemory allocated to the service discovery process opcsvcdisc on themanagement server:
/opt/OV/bin/ovconfchg -ovrg server -ns opc -set SVCDISC_MAXHEAP \<value_in_MBs>
Service Discovery and Topology Synchronization Guide
HP Operations Manager (9.21) Page 31 of 56

The value of SVCDISC_MAXHEAPmust be amultiple of 1024 (HP-UX) or 2047MB (Linux and SunSolaris). If you set the variable to a lower value, the default values assigned to the Java processare used.
2. Then restart the service discovery server by typing the following command:
/opt/OV/bin/ovc -restart opcsvcdisc
Service Discovery and Topology Synchronization Guide
HP Operations Manager (9.21) Page 32 of 56

Chapter 3: Topology SynchronizationIn an environment with multiple HPOM management servers, you can automatically exchangetopology data betweenmanagement servers by configuring topology synchronization.
You can synchronize topology data between the following products:
l HP Operations Manager for UNIX (HPOM for UNIX) version 9.10 and higher (with the appropriateserver patch)
l HP Operations Manager on Linux (HPOM on Linux) version 9.10 and higher (with the appropriateserver patch)
l HP Operations Manager forWindows (HPOM forWindows) version 8.16 and higherl HP Operations Manager i (HP OMi) version 9.00 and higherFor details, see "Prerequisite Patches" on page 6.
Topology synchronization includes the following types of topology data:
l Nodesl Node groupsl Node hierarchies(missing or bad snippet) If you synchronize hierarchical node groups from HPOM forWindows to anHPOM for UNIX or HPOM on Linux management server, the hierarchy becomes a flat list of nodegroups on the HPOM for UNIX or HPOM on Linux management server.
l Layout groupsl Servicesl Assignments between these types of topology dataThese types of topology data are referred to generically as configuration items (CIs).
(missing or bad snippet)Topology synchronization does not forward other types of configuration data,for example policies, instruction texts, or applications. For information about exchanging the completeHPOM configuration (for example in server pooling environments), see theHPOM Administrator'sReference.
When you use topology synchronization, the sourcemanagement servers forward topology data to alist of target management servers that you specify. The sourcemanagement servers send all thetopology data, and the target management servers process the data that they receive by applyingcontext mapping rules. Context mapping rules filter the topology data to determine which topology dataupdates the target management server accepts.
Therefore, when you configure topology synchronization, make sure that you configure the contextmapping rules on the target management server before the sourcemanagement server starts to sendtopology data.
Service Discovery and Topology Synchronization Guide
HP Operations Manager (9.21) Page 34 of 56

Map Topology Data on the TargetTarget management servers filter configuration items (CIs) in topology data that they receive byapplying context mapping rules. A context is a group of CIs. A context mapping applies a context toCIs that match specified conditions. Themanagement server synchronizes all the CIs that youmap toany context, and ignores all other CIs.
HPOM provides default context mapping rules. The default context mapping rules map incoming CIs toa context, except for some default CIs and someCIs that relate to HP BSM Operations Management.Therefore, if you use the default context mapping rules, a target management server synchronizesalmost all the topology data that it receives from sourcemanagement servers.
You canmodify the default context mapping rules so that the target management server synchronizesonly the CIs that you need on that server. Youmodify the default context mapping rules by changingthe following XML file:
/var/opt/OV/shared/server/conf/discovery/sync-packages/default/contextmapping.xml
Note: The default context mapping file is part of a default synchronization package, which alsocontains other types of mapping files. The other mapping files are reserved for future use. Youmust not remove the default synchronization package.
The default context mapping file maps the context called default to those services that do not havethe ID root_services, systemservices, or applicationservices, and to those nodes that are not ofthe type agent, omserver, ipaddress, or interface.
Default contextmapping file
<?xml version="1.0" encoding="UTF-8"?><Mapping xmlns:xsi="http://www.w3.org/2001/XMLSchema-instance"
xsi:noNamespaceSchemaLocation="../../../schemas/mapping.xsd"><Rules>
<Rule name="Filter out default and OMi related instances"><Condition>
<And><Not>
<Equals ignoreCase="true"><OMId/><Value>root_services</Value>
</Equals></Not><Not>
<Equals ignoreCase="true"><OMId/><Value>systemservices</Value>
</Equals></Not><Not>
<Equals ignoreCase="true">
Service Discovery and Topology Synchronization Guide
HP Operations Manager (9.21) Page 35 of 56

<OMId/><Value>applicationservices</Value>
</Equals></Not><Not>
<Equals><OMType/><Value>agent</Value>
</Equals></Not><Not>
<Equals><OMType/><Value>omserver</Value>
</Equals></Not><Not>
<Equals><OMType/><Value>ipaddress</Value>
</Equals></Not><Not>
<Equals><OMType/><Value>interface</Value>
</Equals></Not>
</And></Condition><MapTo>
<Context>default</Context></MapTo>
</Rule></Rules>
</Mapping>
If you want to excludemore topology data, you canmodify the contents of the Condition element. TheCondition element contains operator elements (for example And, Not, Equals). Some of theseoperator elements contain other operator elements, and others contain operand elements (for example,OMId, OMType, Value).
Example domain name condition
The following example shows a fragment of XML, which excludes nodes that are in the domainexample.com :
Example:
Service Discovery and Topology Synchronization Guide
HP Operations Manager (9.21) Page 36 of 56

<Not><And>
<IsNode/> <Matches>
<OMAttribute>PrimaryNodeName</OMAttribute><Value>.*\.example\.com</Value>
</Matches></And>
</Not>
Example service type ID condition
The following example shows a fragment of XML, which excludes services that have a service type IDthat starts with "SiteScope":
Example:
<Not><StartsWith>
<OMType/><Value>SiteScope</Value>
</StartsWith></Not>
Example origin server condition
The following example shows a fragment of XML, which excludes CIs that originate from the serverhpom5.example.com:
Example:
<Not><Equals>
<OriginServer/><Value>hpom5.example.com</Value>
</Equals></Not>
Service Discovery and Topology Synchronization Guide
HP Operations Manager (9.21) Page 37 of 56

Operator Elements
True
<True/>
This operator always returns true when all nested operators return true. It is useful for declaring default(fall-back) rules. In amapping engine that is using the early-out mode, make sure that this operator isonly used at the end of the synchronization package with the lowest priority.
False
<False/>
Always returns false. You can use the False element to temporarily disable rules.
And
<And><!-- Operator --><!-- Operator -->[... more operators ...]
</And>
Returns true when all nested operators return true.
The <And> operator is exclusive. This means that if the result of the first operator is false, the nextoperator is not evaluated. Use this operator to implement rules with higher performance by placing thesimplest condition first and themost complex condition at the end.
Or
<Or><!-- Operator --><!-- Operator -->[... more operators ...]
</Or>
Returns true if at least one of the operators returns true.
Not
<Not><!-- Operator -->
</Not>
Returns true if the operator does not return true.
The <Not> operator is exclusive. This means that evaluation stops as soon as a child operator returnstrue.
Service Discovery and Topology Synchronization Guide
HP Operations Manager (9.21) Page 38 of 56

Exists
<Exists><!-- Operand -->
<Exists>
The value of the operandmust not be null.
Is Node
<IsNode/>
True if the CI is imported as a node, which is the case if the CI type is listed in the nodetypes.xml file.
True if the element is amanaged node in HPOM.
Is Root CI
<IsRootCI/>
True if the CI is a root CI (a root CI has no parent).
Equals
<Equals><!-- Operand --><!-- Operand --><!-- ... -->
</Equals>
<Equals ignoreCase="[true|false]"><!-- Operand --><!-- Operand --><!-- ... -->
</Equals>
The values of the operands must be equal. If there aremore than two operands, all operands must beequal to each other. Using the optional attribute ignoreCase, you can also compare the string values ofthe operands independent of capitalization. By default the equals operator does not ignore case.
Starts With
<StartsWith><!-- Operand --><!-- Operand -->
</StartsWith>
The string value of the first operandmust start with the value of the second operand.
Ends With
<EndsWith><!-- Operand --><!-- Operand -->
Service Discovery and Topology Synchronization Guide
HP Operations Manager (9.21) Page 39 of 56

</EndsWith>
The string value of the first operandmust end with the value of the second operand.
Matches
<Matches><!-- Operand --><!-- Operand -->
</Matches>
The string value of the first operandmust match the regular expression of the second operand.
Example:
<Matches><Attribute>host_dnsname</Attribute><Value>.*\.example\.com</Value>
</Matches>
Formore information on applicable regular expressions, see:
http://docs.oracle.com/javase/7/docs/api/java/util/regex/Pattern.html
Contains
<Contains><!-- Operand --><!-- Operand -->
<Contains>
The value returned by the first operandmust contain the value of the second operand. If the operand’sreturn type is a list, the list must contain at least one element that is equal to the second operand. If theoperand’s return type is a string, the value of the second operandmust be a substring of the firstoperand.
Is Deletion CI
<IsDeletionCI/>
True if the CI is used to delete CIs.
Service Discovery and Topology Synchronization Guide
HP Operations Manager (9.21) Page 40 of 56

Operand Elements
HPOM Service ID
<OMId/>
Return type: String
Returns the HPOM ID string of the CI as stored in Operations Management. The HPOM ID returnsdifferent values as follows:
Services: HPOM ID is the service ID
Nodes: HPOM ID is the unique ID
NodeGroups: HPOM ID is the node group ID
HPOM Type
<OMType/>
Return type: String
Returns the HPOM Type stored in Operations Management. For HPOM services, the HPOM Type isthe service type definition. For nodes, the HPOM Type is set to the constant value “node”.
Caption
<Caption/>
Return type: String
Returns the caption string of the CI in the RTSM or BSM.
HPOM Attribute
<OMAttribute>[Name]</OMAttribute>
Return type: String
Returns the value of the HPOM attribute with the given name.
Replace
<Replace [regExp="true|false"]> <In> <!-- 1st. Operand --> </In> <For> <!-- 2nd. Operand --> </For> <By> <!-- 3rd. Operand --> </By></Replace>
Service Discovery and Topology Synchronization Guide
HP Operations Manager (9.21) Page 41 of 56

Return type: String
Replaces the strings in the return value of the first operand for all occurrences of the return value of thesecond operator by the return value of the third operand. For example, to replace all occurrences of abackslash in the CI caption by an underscore, youmust declare the following:
<Replace> <In> <CiCaption/> </In> <For> <Value>\</Value> </For> <By> <Value>_</Value> </By></Replace>
Optionally, you can use regular expressions for the second operand. You can also use back referencesin the third operand.
For more information on applicable regular expressions, see:
http://docs.oracle.com/javase/7/docs/api/java/util/regex/Pattern.html
This example uses regular expressions to extract part of a domain name:
<Replace regExp="true"> <In> <Attribute>host_dnsname</Attribute> </In> <For> <Value>^[^.]*\.([^.]*).*</Value> </For> <By> <Value>$1</Value> </By></Replace>
If the attribute host_dnsname contains the value server.rio.example.com, the result of the Replaceoperand is rio.
Value
<Value>[String]</Value>
Return type: String
Return the constant value.
List
<List><!--Operand-->
Service Discovery and Topology Synchronization Guide
HP Operations Manager (9.21) Page 42 of 56

<!--Operand--><!--...-->
</List>
Return type: List
The list operand is designed for use with operators that accept lists as input parameters, such as thecontains operator. The list operand contains a list of other operands, the values of which are to beadded to the returned list.
Parent CI
<ParentCI/>
Return type: CI
Returns the parent CI of the current CI. If the current CI is the root CI, null is returned.
Tip: To check for the root CI, use the IsRoot operator.
Child CI
<ChildCI>[Operator]
</ChildCI>
<ChildCI relationType="[relationType]">[Operator]
</ChildCI>
Return type: CI
Description: Returns the first child CI of the current CI that matches the enclosed operator.
Optional elements:
relationType: Only follow relations with the specified relation type.
Child CI List
<ChildCIList>[Operator (Optional)]
</ChildCIList>
<ChildCIList relationType="[relationType]">[Operator (Optional)]
</ChildCIList>
Return type: List of CIs
Returns all CI children of the current CI.
Optional elements:
Operator: Only CIs that match the operator will be returned.
relationType: Only follow relations with the specified relation type.
Service Discovery and Topology Synchronization Guide
HP Operations Manager (9.21) Page 43 of 56

Ancestor CI
<AncestorCI>[Operator]
</AncestorCI>
<AncestorCI relationType="[relationType]">[Operator]
</AncestorCI>
Return type: CI
Returns the first ancestor CI of the current CI that matches the enclosed operator. An ancestor CI isthe parent or parent of the parent (and so on) of the current CI.
Optional elements:
relationType: The dependency must have the specified relation type.
Descendant CI
<DescendantCI>[Operator]
</DescendantCI>
<DescendantCI relationType="[relationType]">[Operator]
</DescendantCI>
Return type: CI
Returns the first descendant CI of the current CI that matches the enclosed operator. A descendant CIis the child or child of the child (and so on) of the current CI.
Optional elements:
relationType: Only follow relations with the specified relation type.
Descendant CI List
<DescendantCIList>[Operator (Optional)]
</DescendantCIList>
<DescendantCIList relationType="[relationType]">[Operator (Optional)]
</DescendantCIList>
Return type: List of CIs
Returns the all descendant CIs of the current CI. A descendant CI is the child or child of the child (andso on) of the current CI.
Optional elements:
Operator: Only CIs that match the operator will be returned.
Service Discovery and Topology Synchronization Guide
HP Operations Manager (9.21) Page 44 of 56

relationType: Only follow relations with the specified relation type.
Dependency CI
<DependencyCI>[Operator]
</DependencyCI>
<DependencyCI relationType="[relationType]">[Operator]
</DependencyCI>
Return type: CI
Returns the first dependency CI that matched the included operator.
Optional elements:
relationType: Only follow relations with the specified relation type.
Dependency CI List
<DependencyCIList>[Operator (Optional)]
</DependencyCIList>
<DependencyCIList relationType="[relationType]">[Operator (Optional)]
</DependencyCIList>
Return type: CI
Returns the list of dependencies.
Optional elements:
Operator: Only CIs that match the operator will be returned.
relationType: The dependency must have the specified relation type.
Dependent CI
<DependentCI>[Operator]
</DependentCI>
<DependentCI relationType="[relationType]">[Operator]
</DependentCI>
Return type: CI
Returns the first dependent CI that matched the included operator.
Example for a dependent CI:
ServiceA > hosted_on > HostB
Service Discovery and Topology Synchronization Guide
HP Operations Manager (9.21) Page 45 of 56
In this case ServiceA is a dependent CI of HostB. That means if you have HostB and want to have allservices that depend on this host, you have to use the <DependentCI> operand. If you have ServiceAand want to have HostB, you have to use the <DependencyCI> operand instead.
Optional elements:
relationType: Only follow relations with the specified relation type.
Dependent CI List
<DependentCIList>[Operator (Optional)]
</DependentCIList>
<DependentCIList relationType="[relationType]">[Operator (Optional)]
</DependentCIList>
Return type: CI
Returns the list of dependent CI.
Example for a dependent CI:
ServiceA > hosted_on > HostB
In this case ServiceA is a dependent CI of HostB. That means if you have HostB and want to have allservices that depend on this host, you have to use the <DependentCI> operand. If you have ServiceAand want to have HostB, you have to use the <DependencyCI> operand instead.
Optional elements:
Operator: Only CIs that match the operator will be returned.
relationType: The dependency must have the specified relation type.
From CI Get
<From><CI>
[CI Operand]</CI><Get>
[Operand]</Get>
</From>
Return type: Return type of the second operand.
Using this operand you can get values from another CI. The first operand [CI Operand] must return a CIinstance. The second operand operates on that CI instance and the value of this second operand will bereturned by this From operand.
Example:
<From><CI>
Service Discovery and Topology Synchronization Guide
HP Operations Manager (9.21) Page 46 of 56

<ParentCI></CI><Get>
<Caption/></Get>
</From>
Returns the caption from the parent CI of the current CI.
Origin Server
<OriginServer/>
Return type: String
This operand returns the hostname of the server that originally received the discovery data beforeforwarding it to other servers.
Forward Topology DataTopology synchronization enables you to automatically exchange and update node and serviceconfigurations betweenmultiple HPOM management servers. A process on the sourcemanagementserver listens for additions, modifications, or deletions to topology data. When a change occurs, thesourcemanagement server immediately forwards the changed data to the target management serversthat you specify. The listener process ensures that the topology data on all servers is always up todate.
The listener process only forwards changes to topology data that occur after you enable it. Youtherefore need to forward all the topology data that already exists on HPOMmanagement serversmanually. (You forward topology datamanually using the tool startInitialSync on the sourcemanagement server.)
Caution: Topology synchronization only forwards changes to topology data that occur when themanagement server processes are running.
Note: Previous releases of HPOM also supported scheduled synchronization based on serviceauto-discovery policies. Because of performance issues associated with these service auto-discovery policies you are encouraged tomigrate to online synchronization. For details, see"Migrate from Scheduled Synchronization" on the next page.
Start SynchronizationTo start forwarding topology data, complete the following steps:
1. Make sure that your management server meets the prerequisites for topology synchronization.See "Prerequisite Patches" on page 6.
2. Configure eachmanagement server to trust certificates from the other management servers:a. On the source and target management server, export the trusted certificate to a file using the
following command:
Service Discovery and Topology Synchronization Guide
HP Operations Manager (9.21) Page 47 of 56

/opt/OV/bin/ovcert -exporttrusted -ovrg server -file <file>
The command generates a file with the name that you specify.b. Copy each file to the correspondingmanagement server, and then import the trusted
certificate using the following commands:
/opt/OV/bin/ovcert -importtrusted -ovrg server -file <file>
/opt/OV/bin/ovcert -importtrusted -file <file>
3. Type the following command to enable topology synchronization:
/opt/OV/contrib/OpC/enableToposync.sh -online -target <comma_separated_server_list>
Replace <comma_separated_server_list>with the fully qualified domain name of the targetmanagement server. If you havemore than one target management server, separate each servernamewith a comma (,). Do not include spaces in the server list.This command restarts the service discovery server. The sourcemanagement server begins tosend any topology data changes immediately.
4. Type the following command to start the initial synchronization of topology data:
/opt/OV/bin/OpC/startInitialSync.sh
Note: In a non-root environment, the /opt/OV/bin/OpC/startInitialSync.sh commandrequires an additional <temporary directory> parameter. The <temporary directory> isa directory to which the non-root user has write permission.
For more information about enableToposync.sh, see "enableToposync" on page 25.
Migrate fromScheduled SynchronizationTomigrate from scheduled synchronization, complete the following steps:
1. Make sure that your management server meets the prerequisites for topology synchronization.See "Prerequisite Patches" on page 6.
2. Clear the agent repository cache on themanagement server using the following command:
/opt/OV/bin/ovagtrep -clearall
3. Remove the service auto-discovery policies from themanagement server node using the followingcommand:
/opt/OV/bin/ovpolicy -remove DiscoverOM
/opt/OV/bin/ovpolicy -remove DiscoverOMTypes
4. Deassign the service auto-discovery policies from themanagement server node using thefollowing command:
/opt/OV/bin/OpC/utils/opcnode -deassign_pol node_name=<management_server> net_type=NETWORK_IP pol_name=DiscoverOMTypespol_type=svcdisc
/opt/OV/bin/OpC/utils/opcnode -deassign_pol node_name=<management_server> net_type=NETWORK_IP pol_name=DiscoverOMpol_type=svcdisc
/opt/OV/bin/OpC/opcragt -dist <management_server>
Service Discovery and Topology Synchronization Guide
HP Operations Manager (9.21) Page 48 of 56

Replace <management_server>with the name of themanagement_server.5. Type the following command to enable topology synchronization:
/opt/OV/contrib/OpC/enableToposync.sh -online
This command restarts the service discovery server. The sourcemanagement server begins tosend any topology data changes immediately.
6. Type the following command to start the initial synchronization of topology data:
/opt/OV/bin/OpC/startInitialSync.sh
Note: In a non-root environment, the /opt/OV/bin/OpC/startInitialSync.sh commandrequires an additional <temporary directory> parameter. The <temporary directory> isa directory to which the non-root user has write permission.
Stop Forwarding Topology DataType the following command to stop forwarding topology data:
/opt/OV/contrib/OpC/enableToposync.sh -stop
This command stops online synchronization of changes, clears the list of target servers, and restartsthe service discovery server.
Testing and TroubleshootingThis chapter contains information on:
l "Validating XMLConfiguration Files" on the next pagel "Dumping Synchronization Data" on page 51l "Writing Rules" on page 53l "Log Level Configuration" on page 54
Topology Synchronization Configuration ParametersThe script enableToposync.sh sets twomain configuration parameters. You can also set theseparameters directly.
l To change the target management servers, type the following command:
/opt/OV/bin/ovconfchg -ovrg server -ns om.svcdiscserver -set ForwardingTargets<comma_separated_server_list>
If you change this parameter, youmust restart the service discovery server by typing the followingcommand:
/opt/OV/bin/ovc -restart opcsvcdisc
l To enable synchronization:
/opt/OV/bin/ovconfchg -ovrg server -ns opc -set OPC_CONFIG_CHANGE_SYNC TRUE
You can change this parameter at any time, without restarting the service discovery server.
Service Discovery and Topology Synchronization Guide
HP Operations Manager (9.21) Page 49 of 56

Validating XML Configuration FilesYou can use the supplied XML schema definitions to validate the correctness of XML configurationfiles. You can also use the supplied XML schema definition files to make writing new configuration fileseasier when using a suitable XML editor. You can use Eclipse or another editor of your choice that iscapable of validating an XML file against a schema.
XSD1 is a standard fromWorldWideWebConsortium (W3C) for describing and validating thecontents of XML files. XSD files are provided for all XML configuration files.
For more information, see the XMLSchema documentation by W3C available from the following website: http://www.w3.org/XML/Schema.
The XML schema definition that you can use to validate contextmapping.xml is in the following file:
/var/opt/OV/shared/server/conf/discovery/schemas/mapping.xsd
Validating Files Automatically
Each configuration file is automatically validated against the associated XSD file whenever it is read. Ifa file cannot be validated, an error message is written to the error log that describes the location of theerror in the validated file.
Validating Files Manually
With amodern XML editor, you can validate a file against a schema. Eclipse, for example, can validatean XML file against a schema, if the top level element of the document contains a reference to an XSDfile. To enable validation, add the following attributes to the top level element of an XML file:
xmlns:xsi="http://www.w3.org/2001/XMLSchema-instance"xsi:noNamespaceSchemaLocation="<path or URL to schema file>"
Replace <pathorURLtoschemafile>with the respective path or URL to the schema file against whichyou want to validate. For a contextmapping.xml file, add the following:
<?xml version="1.0" encoding="UTF-8"?><Mapping xmlns:xsi="http://www.w3.org/2001/XMLSchema-instance"xsi:noNamespaceSchemaLocation="/var/opt/OV/shared/server/conf/discovery/schemas/mapping.xsd">...</Mapping>
After you have added the reference, the Eclipse editor validates the file and suggests valid elementswhen pressingCTRL+SPACE during editing. See the following figure for an example.
1XMLSchemaDefinition
Service Discovery and Topology Synchronization Guide
HP Operations Manager (9.21) Page 50 of 56

Note: Youmay have to reopen the XML file after you have added the XSD reference to the XMLfile before Eclipse starts to validate it and provides suggestions.
Dumping Synchronization DataYou can use a dump of the synchronization data to:
l Troubleshoot mapping rules to discover incorrect mappings.l Compare the data sent to the data in the database, and the data changed and added during themapping.
Creating a Synchronization Data Dump
A synchronization data dump contains the synchronized topology data in XML files.
There are two separate dumps:
l The first is recorded following CI data normalization.l The second is recorded following the processing of themapping rules.To activate the creation of synchronization data dumps:
Service Discovery and Topology Synchronization Guide
HP Operations Manager (9.21) Page 51 of 56

1. Type the following command:
ovconfchg -ovrg server -ns om.svcdiscserver.mapping -set opr.toposync.dumpDataTRUE
2. Type the following command to restart the service discovery server:
ovc -restart opcsvcdisc
Data Dump Example
Here is an example extract from a data dump after mapping has been performed:
<CI><OMId>Root</OMId><OMType /><Caption>Root</Caption><Node>false</Node><Service>false</Service><OMAttributes /><CMDBId /><CMDBAttributes /><CMDBType /><RootContainerId /><Children>
<RelationType>container_f</RelationType><CI>
<Context>operations-agent</Context><OMId>03a2f7b2-ec88-7539-0532-c5b07da188dd</OMId><OMType>agent</OMType><Caption>Operations-agent on met</Caption><Node>false</Node><Service>false</Service><OMAttributes>
<AgentId>03a2f7b2-ec88-7539-0532-c5b07da188dd</AgentId><Name>met.deu.hp.com</Name>
</OMAttributes><CMDBType>hp_operations_agent</CMDBType><RootContainerId>{8BB8864B-CEC9-4B26-BD4C-41F2C97C108E}</RootContainerId><Dependencies>
<RelationType>hosted_on</RelationType><CI>
<Context>VISPI</Context><Context>nodegroups</Context><OMId>{8BB8864B-CEC9-4B26-BD4C-41F2C97C108E}</OMId><OMType>node</OMType><Caption>met</Caption><Node>true</Node><Service>false</Service><NodeGroupList>
<NodeGroupID>OpenView_Windows2000</NodeGroupID>
Service Discovery and Topology Synchronization Guide
HP Operations Manager (9.21) Page 52 of 56

<NodeGroupID>Root_Nodes</NodeGroupID></NodeGroupList><MACAddressList /><OMAttributes>
<AgentId>03a2f7b2-ec88-7539-0532-c5b07da188dd</AgentId><CommType>HTTPS</CommType><DiscoveryDomain>${DefaultDomain}</DiscoveryDomain><Domain>deu.hp.com</Domain><Name>met.deu.hp.com</Name><OSType>Windows_32</OSType><OSVersion>2000 (5.0)</OSVersion><SystemType>x86/x64 Compatible</SystemType><VirtualNodeType>0</VirtualNodeType>
</OMAttributes><CMDBId />
<CMDBType>nt</CMDBType><RootContainerId />
</CI></Dependencies>
</CI></Children>
</CI>
Viewing a Synchronization Data Dump
To view synchronization data dumps, navigate to the directory:
/var/opt/OV/shared/server/tmp/discovery
The directory contains the following subdirectories:
l Contains the synchronization data after the CI data structure has been normalized. The data reflectswhat has been loaded from the sourcemanagement server.
l Contains the synchronization data after themapping rules have been executed on the normalizeddata.
Using a file comparison tool of your choice you can easily see what has been changed duringenrichment.
Writing RulesThis section contains a set of guidelines for writing rules.
Simplifying Rule Development
You can ease the writing of rules by selecting an XML editor that can validate and suggest elementsaccording to an XML schema. See "Validating XMLConfiguration Files" on page 50 for moreinformation.
Service Discovery and Topology Synchronization Guide
HP Operations Manager (9.21) Page 53 of 56
Matching Against Existing Attributes Only
Accessing attributes that do not exist for all CIs is very performance intensive in combination with arelative expression depending on the complexity of the service hierarchy.
Log Level ConfigurationTopology synchronization logs details of the synchronization process in log files. You can change thelevel of detail for debugging purposes.
Service Discovery Server Log Level Configuration
The service discovery server supports the following log levels:
l Log level 1 logs errors only.l Log level 3 logs errors and information (including raw data received from the agent). This is thedefault.
l Log level 10 logs tracing information for debugging purposes, for examplemethod parameters.To change the log level of the service discovery server:
1. Type the following command:
ovconfchg -ovrg server -ns om.svcdiscserver -set LOG_LEVEL [1|3|10]
2. Type the following command to restart the service discovery server:
ovc -restart opcsvcdisc
The service discovery server generates the following log file:
/var/opt/OV/shared/server/log/OvSvcDiscServer.log
Mapping Log Level Configuration
To change the log level of themapping engine, follow these steps:
1. Open the following file in a text editor:
/var/opt/OV/shared/server/conf/discovery/opr-svcdisc.properties
2. Locate the line starting with loglevel=3. Set the log level to any of the following values (for example, loglevel=INFO):
DEBUG designates fine-grained informational events that aremost useful to debug an application.INFO designates informational messages that highlight the progress of the application at coarse-grained level.
WARN designates potentially harmful situations.ERROR designates error events that might still allow the application to continue running.FATAL designates very severe error events that will presumably lead the application to abort.
Themapping engine generates the following log file:
/var/opt/OV/shared/server/log/opr-svcdiscserver.log
Service Discovery and Topology Synchronization Guide
HP Operations Manager (9.21) Page 54 of 56
Send Documentation FeedbackIf you have comments about this document, you can contact the documentation team by email. If anemail client is configured on this system, click the link above and an email window opens with thefollowing information in the subject line:
Feedback on Service Discovery and Topology Synchronization Guide (Operations Manager9.21)
Just add your feedback to the email and click send.
If no email client is available, copy the information above to a new message in a webmail client, andsend your feedback to [email protected].
We appreciate your feedback!
HP Operations Manager (9.21) Page 55 of 56