How to Resize Textures and Materials in Sketch Up
44
1 How to Resize Textures and Materials in Sketch Up In the present SketchUp speedy tip, we are going to show you how to modify the size of textures in SketchUp. Basically the entirety of a material‘s traits is overseen in the materials area of the plate. For this situation, we're going to discuss picture based textures. The way SketchUp makes picture based textures is by rehashing pictures again and again to make a consistent looking texture. In the event that you take a gander at this CMU square texture, you can see reiteration of a similar picture on the off chance that you look carefully enough. In the event that you look in the edit tab under this material, you can see down at the base that there are a few measurements in boxes. For this situation, this ash square texture is a rehashing texture 1'6" wide by 8" high. On the off chance that we go in and change this, you can see that the texture picture size changes in our model. You can utilize this with photograph textures you import to resize texture pictures so they are to the correct scale for your model. There's likewise a picture of a chain off to one side of the measurements. For whatever length of time that the chain is solid, that demonstrates that the perspective proportion of the texture is bolted. This forestalls distortion of your picture. On the off chance that you click on the chain so it seems broken, it opens the perspective proportion. This can permit you to extend your picture to change the way that it looks. Whether that you ever need to reset your texture size, essentially click on the bolts to one side hand side of the measurements. To add detail and authenticity to your models, SketchUp empowers you to paint materials on faces. Materials are basically paints that have a shading and discretionary texture (characterized inside a picture document). For instance, in the accompanying figure, the roofing material has a blue shading and a texture that reproduces metal material. The siding and grass are likewise materials that have a shading and texture. After you apply materials like these to your model, the exceptional abilities of SketchUp's materials can assist you with doing any of the accompanying: Supplant one material with another: Say you need to show a metal rooftop rather than shingles. You can trade the roofing material for shingles rapidly and without any problem. COVER STORY
-
Upload
khangminh22 -
Category
Documents
-
view
0 -
download
0
Transcript of How to Resize Textures and Materials in Sketch Up

1
How to Resize Textures and
Materials in Sketch Up In the present SketchUp speedy tip, we are going to show you how to modify the size of textures in SketchUp. Basically the entirety of a material‘s traits is overseen in the materials area of the plate. For this situation, we're going to discuss picture based textures. The way SketchUp makes picture based textures is by rehashing pictures again and again to make a consistent looking texture. In the event that you take a gander at this CMU square texture, you can see reiteration of a similar picture on the off chance that you look carefully enough. In the event that you look in the edit tab under this material, you can see down at the base that there are a few measurements in boxes. For this situation, this ash square texture is a rehashing texture 1'6" wide by 8" high. On the off chance that we go in and change this, you can see that the texture picture size changes in our model. You can utilize this with photograph textures you import to resize texture pictures so they are to the correct scale for your model. There's likewise a picture of a chain off to one side of the measurements. For whatever length of time that the chain is solid, that demonstrates that the perspective proportion of the texture is bolted. This forestalls distortion of your picture. On the off chance that you click on the chain so it seems broken, it opens the perspective proportion. This can permit you to extend your picture to change the way that it looks. Whether that you ever need to reset your texture size, essentially click on the bolts to one side hand side of the measurements. To add detail and authenticity to your models, SketchUp empowers you to paint materials on faces. Materials are basically paints that have a shading and discretionary texture (characterized inside a picture document). For instance, in the accompanying figure, the roofing material has a blue shading and a texture that reproduces metal material. The siding and grass are likewise materials that have a shading and texture. After you apply materials like these to your model, the exceptional abilities of SketchUp's materials can assist you with doing any of the accompanying:
Supplant one material with another: Say you need to show a metal rooftop rather than shingles. You can trade the roofing material for shingles rapidly and without any problem.
COVER STORY

2
Edit the material: Because the shading and texture are isolated, you can transform them freely of one another. For instance, you can change the siding shading (what does yellow look like?) however keep a similar texture. You can likewise edit a material's murkiness, which controls how obscure or straightforward the material is.
Ascertain how much material you need: SketchUp can reveal to you the territory of the considerable number of shingles or the siding. Obviously, for this estimation to mean anything, you have to make an exact model with the goal that the numbers mirror your model's real size.
Tip: SketchUp incorporates a few assortments of materials: cover, tile, groundcover, glass, wood, and
that's only the tip of the iceberg. In any case, if the particular material you need isn't accessible, you can make your own material. This component is particularly helpful in case you're a decorator or manufacturer who needs to show your customers exact completions. In the SketchUp interface, you model materials with the Paint Bucket apparatus () and the Materials board (Microsoft Windows) or the Colors board (macOS). The Materials or Colors board additionally empowers you to see, oversee, and sort out the materials. The Materials or Colors board monitors the materials in your model, and it's the place you can make custom materials assortments explicit to your tasks or work processes.
3
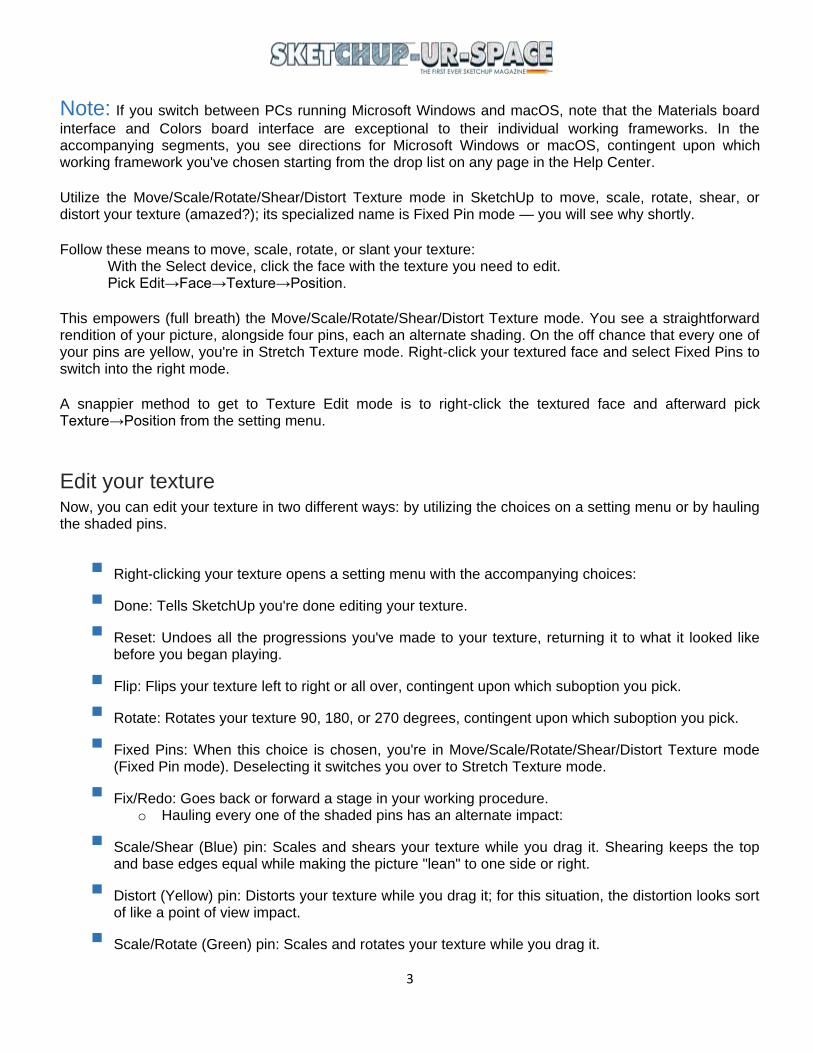
Note: If you switch between PCs running Microsoft Windows and macOS, note that the Materials board
interface and Colors board interface are exceptional to their individual working frameworks. In the accompanying segments, you see directions for Microsoft Windows or macOS, contingent upon which working framework you've chosen starting from the drop list on any page in the Help Center. Utilize the Move/Scale/Rotate/Shear/Distort Texture mode in SketchUp to move, scale, rotate, shear, or distort your texture (amazed?); its specialized name is Fixed Pin mode — you will see why shortly. Follow these means to move, scale, rotate, or slant your texture:
With the Select device, click the face with the texture you need to edit. Pick Edit→Face→Texture→Position.
This empowers (full breath) the Move/Scale/Rotate/Shear/Distort Texture mode. You see a straightforward rendition of your picture, alongside four pins, each an alternate shading. On the off chance that every one of your pins are yellow, you're in Stretch Texture mode. Right-click your textured face and select Fixed Pins to switch into the right mode. A snappier method to get to Texture Edit mode is to right-click the textured face and afterward pick Texture→Position from the setting menu.
Edit your texture Now, you can edit your texture in two different ways: by utilizing the choices on a setting menu or by hauling the shaded pins.
Right-clicking your texture opens a setting menu with the accompanying choices:
Done: Tells SketchUp you're done editing your texture.
Reset: Undoes all the progressions you've made to your texture, returning it to what it looked like before you began playing.
Flip: Flips your texture left to right or all over, contingent upon which suboption you pick.
Rotate: Rotates your texture 90, 180, or 270 degrees, contingent upon which suboption you pick.
Fixed Pins: When this choice is chosen, you're in Move/Scale/Rotate/Shear/Distort Texture mode (Fixed Pin mode). Deselecting it switches you over to Stretch Texture mode.
Fix/Redo: Goes back or forward a stage in your working procedure. o Hauling every one of the shaded pins has an alternate impact:
Scale/Shear (Blue) pin: Scales and shears your texture while you drag it. Shearing keeps the top and base edges equal while making the picture "lean" to one side or right.
Distort (Yellow) pin: Distorts your texture while you drag it; for this situation, the distortion looks sort of like a point of view impact.
Scale/Rotate (Green) pin: Scales and rotates your texture while you drag it.

4
Move (Red) pin: Moves your texture around while you drag it. Of every one of the four hued pins, this one is the most valuable. You'll utilize it all the opportunity to definitely reposition block, shingle, and other structured material textures in your models.
Rather than simply hauling around the different hued pins, attempt single-clicking one of them to get it; at that point click again to drop it any place you need. This stunt proves to be useful particularly when you're utilizing the Move and Rotate pins. Click anyplace outside your texture in your demonstrating window to leave Texture Edit mode. You can likewise press Enter or right-click and pick Done from the setting menu. That‘s it, you‘re done resizing!
Learn Lumion the Right Way Lumion is quick, simple, and wonderful, however much more so when you have a way to progress. You need a repeatable procedure that nets unsurprising outcomes. We are depicting the work process. The Lumion Workflow Tutorial Series is designed to get you fully operational today. In the principal arrangement of instructional exercises, we disclose the procedure to make a daytime render. This is the most effortless undertaking type and an extraordinary spot to begin learning. The work process goes somewhat like this.
o Import a design model
o Supplant texture pictures with Lumion's hyper-sensible materials
o Include company objects like trees, vehicles, and individuals from the broad library
o Lastly, render delightful pictures with my exceptional mix of effects
Watchers of all ability levels will get something out of this, since we additionally tell you the best way to make propelled occasional renderings. There are two types of tutorial available in this line.
Consolidated Tutorials Is it safe to say that you are a propelled client? A speedy report? Well then the consolidated instructional exercises are actually what you need. This arrangement covers a similar material as the all-inclusive instructional exercises, twofold time! In the event that you need a more inside and out clarification, at a slower pace, look down.
ARTICLE

5
The instructional exercise is partitioned into numerous parts, for example,
o Presentation
o Design Level
o Materials
o Company
o Layers and Base Effects
o Foggy Summer Photo Studio
o Fresh Fall Photo Studio
o Bleak Winter Photo Studio
o Wet Spring Photo Studio
o Sending out
o Grass Tips
o PC System
o Bulletin Materials
o Reflection Planes
Expanded Tutorials
ARTICLE

6
In the event that you are searching for bit by bit guidance, conveyed at an instructional pace, look no further. These instructional exercises are roughly twice the length of the dense instructional exercises however spread a similar substance. They are separated into indistinguishable boards from above, yet they are much progressively itemized and increasingly helpful to the learners since they don't forget about anything with the expectation of complimentary understanding. Anyway this makes the recordings twofold long and size. You can discover these instructional exercise recordings on the Lumion Blog. Lumion is quick, simple, and delightful, however considerably more so when you have a way to progress. You need a repeatable procedure that nets unsurprising outcomes. We are depicting the work process. The Lumion Workflow Tutorial Series is designed to get you fully operational today. In the principal arrangement of instructional exercises, we disclose the procedure to make a daytime render.
What's New in V-Ray 3.6
Chaos Group has released V-Ray 3.6 for SketchUp, the latest update for its professional rendering plugin. Built with the Chaos Group's industry-leading technology, V-Ray 3.6 for SketchUp simplifies the design process for architects and designers, offering photorealistic visuals and easy-to-use concept controls for construction. This latest update brings a simplified interface, improved GPU rendering and support for
SketchUp 2018.
With a complete set of creative tools, V-Ray allows you to render anything and everything - from fast design models to the most detailed 3D scenes.
ARTICLE

7
New stuff in V-Ray 3.6 Viewport rendering: With the new Viewport rendering, you can easily select and render multiple regions at the same time, and quickly blend between your V-Ray render and the SketchUp model using +/- hot keys to control opacity. Powerful GPU Rendering: Faster and more powerful GPU processing, with additional support for aerial perspective, displacement, underground dispersion, matte / shadows and more.
Hybrid GPU + CPU Rendering: The V-Ray GPU running on NVIDIA CUDA can take full advantage of all available hardware, including CPUs and GPUs.
Adaptive Lights: For scenes with lots of lights, the new adaptive light mode can help you reduce rendering times by up to 700%.
Intelligent Interface: The entire V-Ray interface for SketchUp is now cleaner and simpler, with better support for 4K monitors.
File Manager: Manage all your scene files in one place. Define file paths, create scene files and track resources such as textures, IES files and proxy objects.
V-Ray Color Picker: New color picker that is simple and powerful. Select color values in the Screen sRGB (0-255) or Rendering (0.0-1.0) color space.
Scene Import: Import and render V-Ray scenes (.vrscene) from other applications, such as 3ds Max, Rhino and Revit.
Sun Studies: Create sunlight and shadow studies with SketchUp sun animation.
Mist: Give your scenes depth with new realistic 3D fog and light scattering effects.
New Texture Maps: Adjust the look of your scene with new texture maps of procedural and gradient noise.
2D Displacement: Quickly add surface details without extra modeling with optimized 2D displacement - perfect for architectural materials like bricks and stones.
Animated Proxy Objective: Easily add pre-animated 3D objects like people on foot and trees blowing in the wind with animated V-Ray proxies.
Proxy Presentation: Control the appearance of V-Ray proxies in the SketchUp display window. Select from Entire Mesh, Binder Box, Point (Origin) and the new low Poly Proxy preview mode.
ARTICLE

8
Best Viewporter Material: Get a more accurate preview of your V-Ray materials in the SketchUp display window.
Improved Denoiser: The Denoiser V-Ray is now easier to configure and you can refine settings even after rendering.
Technical information Title: V-Ray for SketchUp Category: Software Subcategory: Image and Video, 3D Modeling and CAD, Architecture Release Year: 2018 Manufacturer: Chaos Group Language: Multi Version: 3.6 Format: RAR, EXE File Size: 547 MB (Installation + Video Lesson) Activation Method: Pre-Activated
System Requirements
Operating System: Windows 7 / 8.1 / 10 64-bit Processor: Intel Pentium IV or processor with SSE3 support RAM: 4 GB Video Card: 3D with a minimum of 1 GB Disk Space: 5 GB Pre-Installed: SketchUp 2015, 2016, 2017, 2018 or later
Clarifying the 'Move' Tool in SketchUp One of the most important Sketchup‘s functions is the Move tool. The explanation lays on the way that the particular tool empowers us to execute more than one order. In the accompanying instructional exercise we will see its first essential capacities. What is its fundamental capacity? Precisely what its name proclaims. With the particular tool we can move objects starting with one point then onto the next. The manner in which it works is extremely basic likewise with all tools in Sketchup. Here, we will see precisely how the Move and another two orders work. So as to utilize the Move tool and have the option to drag an item, a surface or a line, we should initially choose it by utilizing the Select tool. The choice can be made either with a solitary click, or cross window on the off chance that we need to choose numerous articles.
ARTICLE

9
When we have chosen the thing that we need to move, we select the Move tool from the principle Sketchup's tool bar. In a perfect world, we select the article from an endpoint so as to have higher exactness while taking care of the item. While moving the mouse, we can see the article following. In the event that we left – click by and by with the mouse, we select the highlight which we need our item to move. Similarly, we can determine the separation that we need our article to move. For instance, we can move the rectangular of the picture 4, by 234 cm to one side or along a hub. So as to do this, we should initially choose the rectangular and afterward the Move tool. After a left click of the mouse, we can demonstrate the heading that we need our item to move. We leave the mouse (without clicking once more) and type the separation that we need the item to move, ie 234 cm. To finish the order, we press the enter button. Notice that the article has moved.
Precisely the same procedure applies, when we need to move a gathering. We initially select it and afterward we either drag it to the point that we need or we type the specific separation so as to be more exact. Just in the event that we decide to move a gathering, we may see that 4 red crosses and a protractor on each side of the gathering appear. This implies we can pivot our item around one of the three primary tomahawks (red, green, blue). In this way, pivot is one more capacity of the Move tool that applies just in a gathering. We click onto a cross and turn the gathering by utilizing the mouse. A subsequent click will decide the detect that we need to leave the item. What occurs on the off chance that we select just one line out of various articles that are joined together? On the off chance that we select and move the line, we notice that the state of the article contorts while all
ARTICLE

10
the rest of the lines just as the surface follow the line toward any path this may move. The equivalent applies in 3d objects. In any case, this is the easiest method to Extrude a surface or an item in Sketchup. We select a line and afterward we provide guidance by utilizing the mouse. As appeared in Figure 9, by moving the line, the item's surface develops. We follow indistinguishable strides from previously, by giving explicit incentive for the separation that we need to move the line. Selecting the line provides guidance to one side, onto the green pivot and composing the length of the separation. In the model above, it is apparent to one side that one side of the square is 435 cm long. To extend this side in 600 cm, we just need to pick the line, move it towards the correct bearing and give the right worth, ie 165cm. Press enter to finish the model change. Loads of people invest energy chasing around in SketchUp, attempting to make sense of how to make duplicates. It's straightforward: You simply press a modifier key — a button on your keyboard that advises SketchUp to accomplish something else — while you're utilizing the Move tool. Rather than moving something, you move a copy of it. Here are two or three things to remember. Press the Ctrl key to copy in Windows, and press the Option key to copy on a Mac. This advises SketchUp to change from Move to Copy while you're moving something with the Move tool. Your cursor shows a little + close to it, and your copy moves when you move your mouse. On the off chance that you conclude you would prefer not to make a copy, simply press the Ctrl key (Option on a Mac) again to flip back to Move; the + sign vanishes. Copying is much the same as moving, aside from you're moving a copy. This implies no different standards for utilizing the Move tool apply to making duplicates, as well. You can make more than each copy in turn. Maybe you need to make five similarly divided duplicates of a segment. You should simply move a copy to where you need your last segment to be; at that point type 5/and press Enter. This makes five duplicates of my segment and spaces them equally between the first and last segment in the line. Flawless, right? In the event that you know how far separated you need your duplicates to be, you can move a copy that separation, type 5x, and press Enter. Your five duplicates show up similarly dispersed in succession.
How SketchUp 2020 is more User-Friendly In light of client criticism, SketchUp cleaned up a couple of highlights that will keep your work process murmuring along easily! Its significance is a gradual update to 2020 not another version, so it overwrites your current 2020 as opposed to introducing independently.
This implies all expansions and toolbars and so forth stay unaltered, so no compelling reason to remake anything. In any case, it implies that on the off chance that it causes issues on your particular framework it is somewhat harder to return to your working version. Dissimilar to running 2020 close to 2019 until you are
ARTICLE

11
certain it is working for you. That is only an expression of alert so you recognize what you are doing before refreshing in a significant cutoff time.
Download SketchUp Pro 2020.1 here.
Sprucing up SketchUp Pro
Scenes Panel. Since you've had some ideal opportunity to appreciate better flipping perceivability with hidden geometry and objects, this element just showed signs of improvement. Hidden geometry and hidden objects are presently separated so you can select and save them independently on a Scene-by-Scene premise.
You will see another checkbox in the Scenes board that lets you save the perceivability condition of hidden objects, not simply hidden geometry. This gives you better perceivability control per Scene.
Section Planes and Scenes In the new version of SketchUp, you can save Section Plane perceivability in each Scene. Since Section Planes are gathered with objects, we need to ensure they carry on like objects. What's the incentive here? Prior to this change, just high level perceivability could be saved per Scene. Once more, more control in your Scenes — and consistency across usefulness.
ARTICLE
12
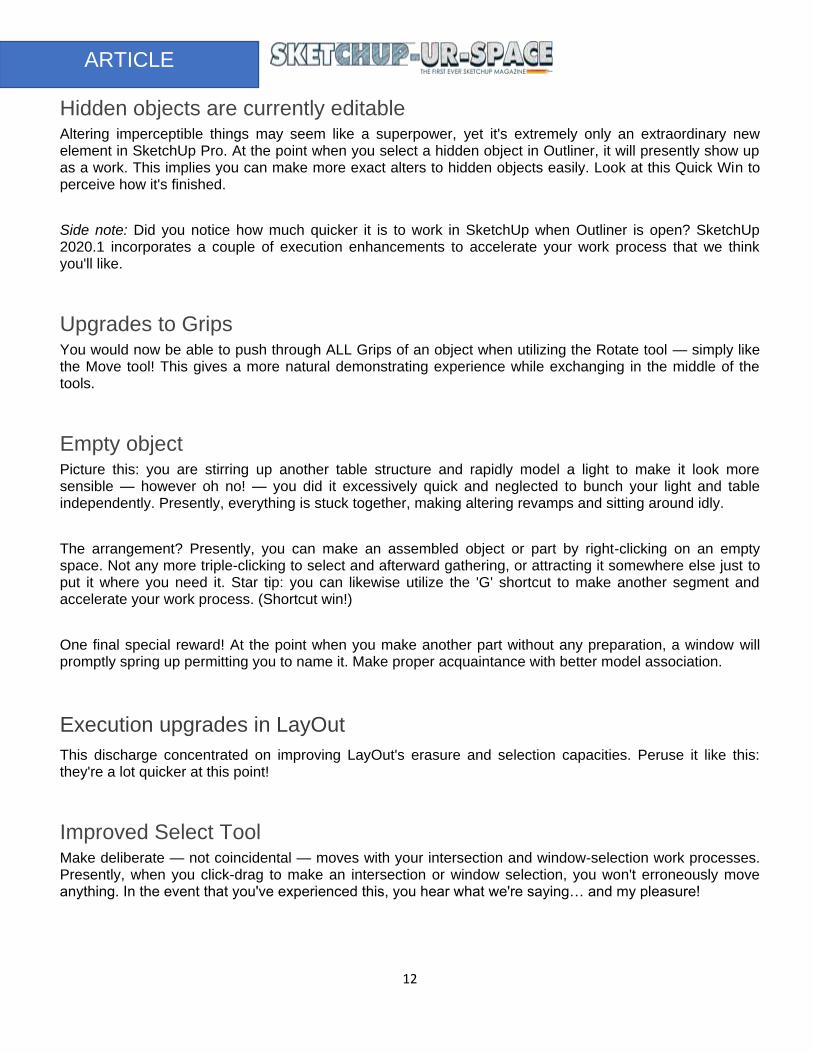
Hidden objects are currently editable Altering imperceptible things may seem like a superpower, yet it's extremely only an extraordinary new element in SketchUp Pro. At the point when you select a hidden object in Outliner, it will presently show up as a work. This implies you can make more exact alters to hidden objects easily. Look at this Quick Win to perceive how it's finished.
Side note: Did you notice how much quicker it is to work in SketchUp when Outliner is open? SketchUp 2020.1 incorporates a couple of execution enhancements to accelerate your work process that we think you'll like.
Upgrades to Grips You would now be able to push through ALL Grips of an object when utilizing the Rotate tool — simply like the Move tool! This gives a more natural demonstrating experience while exchanging in the middle of the tools.
Empty object Picture this: you are stirring up another table structure and rapidly model a light to make it look more sensible — however oh no! — you did it excessively quick and neglected to bunch your light and table independently. Presently, everything is stuck together, making altering revamps and sitting around idly.
The arrangement? Presently, you can make an assembled object or part by right-clicking on an empty space. Not any more triple-clicking to select and afterward gathering, or attracting it somewhere else just to put it where you need it. Star tip: you can likewise utilize the 'G' shortcut to make another segment and accelerate your work process. (Shortcut win!)
One final special reward! At the point when you make another part without any preparation, a window will promptly spring up permitting you to name it. Make proper acquaintance with better model association.
Execution upgrades in LayOut
This discharge concentrated on improving LayOut's erasure and selection capacities. Peruse it like this: they're a lot quicker at this point!
Improved Select Tool Make deliberate — not coincidental — moves with your intersection and window-selection work processes. Presently, when you click-drag to make an intersection or window selection, you won't erroneously move anything. In the event that you've experienced this, you hear what we're saying… and my pleasure!
ARTICLE

13
In case you're pondering, "how would I move an object now?" — just pre-select an element and move from that point. Likewise, selections and moves currently happen while clicking on the genuine object, instead of the object's jumping box, reinforcing that deliberate work process.
Download the new version, play with the most recent enhancements and let us recognize what you think. As usual, we will be there tuning in, reacting, and getting good thoughts for new updates. See you on the Axis!
Download or Update to SketchUp Pro 2020.1 Today The entirety of the 2020.1 highlights are accessible to Classic permit clients with dynamic Maintenance and Support, and dynamic SketchUp Pro and SketchUp Studio membership clients. Update today to begin utilizing new highlights!
How Sam De Vries Designs with SketchUp
The famous Australian landscape designer Sam de Vries has hitched his down to earth and hypothetical abilities to shocking effect with his WA-based practice, De Vries Designs. What's more, at the core of what he does is SketchUp which, Sam clarifies, isn't just permitting him to make an interpretation of his thoughts into the real world, however helping him convey those dreams to customers – and win him anticipates. Model Project: Hillarys As the pictures show, the SketchUp introductions genuinely turned into a reality for Sam and the proprietors! This exquisite plan mixes in impeccably with the general condition while offering a one of a kind and commonsense utilization of room. The presentation of different materials joins various zones, upgrading the modernity and moderate way to deal with this awesome structure. The proprietors needed to amplify their utilization of open air space while additionally making a striking perspective from within the house this is the place the presentation of a glass pool window was encircled into the plan to give this dazzling picture outline.
Sam built up De Vries Designs in 2018 subsequent to working for one of Perth's driving scene firms, Tim Davies Landscaping. He'd showed up in WA a year prior to that to work in the mining business. Sam's training includes scene structures and he has a specific pizazz for pools and their arranging. As his portfolio illustrates, a ton of it is very good quality work, yet Sam stresses he is glad chipping away at any undertaking that extends him as an architect. "I have a foundation in development – Dad's a developer – and I did a Bachelor of Design, studying Industrial Design at the Victoria University of Wellington, so I have involvement in the two sides of the business, in the workplace and on the tools," Sam said.
NEWS

14
"I started utilizing SketchUp when I was at uni in 2008 – one of my instructors acquainted me with it. It's been a piece of my tools since the time truly." Sam said the upsides of utilizing SketchUp in his business traversed various viewpoints. "SketchUp is very easy to understand so it permits me to effortlessly decipher my thoughts and ideas for a site," he said. "I model the property, the house, thus can structure the arranging or potentially pool in the genuine setting it will be in. For a customer it implies they can truly observe what's arranged and for us it gives us it can work, outwardly and for all intents and purposes. "It additionally has the bit of leeway over AutoCAD and 2D of having the option to convey thoughts and ideas simple to a customer in light of the fact that having the option to see them in 3D is considerably more effective. Furthermore, changes in accordance with an arrangement are anything but difficult to do in the workplace or on location – you can adjust and alter as required absent a lot of exertion. "I likewise utilize the SketchUp plans as a major aspect of the endorsement procedure as we can show the significant authorities the structure and other 'stray pieces of a plan, particularly cross sections, making it simpler for them to see everything's right." Sam said he was a firm adherent to being nearby during the development procedure as a way to all the more likely convey a venture's look and feel. "I take my tablet all over. It is extraordinary to have the option to really show temporary workers the SketchUp renders – it gives them a lot more understanding and knowledge into a task and it likewise permits an incredible profundity of detail to be incorporated," he said. "It additionally implies that what's structured is what's manufactured. I can show customers past ventures
NEWS

15
and contrast the SketchUp structures with photographs of the completed undertaking so they can see they will get what's on the screen, in actuality. That is clearly a certainty for them – and I realize it's won me work as well." SketchUp has additionally affected Sam's own abilities, he said. "I realize I am a superior architect as a result of it. It gives you the tools to propel yourself and your capacities," he said. "It additionally expands your inventiveness, giving you the best approach to investigate thoughts basically and productively."
Interior Designing Made Easy With SketchUp Pitching for another project is one of the most energizing pieces of the design procedure. Innovativeness needs to stream however cutoff times are around the bend. You need to get thoughts off of your mind rapidly and transform them into winning outcomes that will wow your customer, chief or group. Influence the full intensity of a SketchUp Pro membership at each phase of your innovative procedure to convey effective ideas, rapidly. In this piece of this arrangement, we'll show you how to begin without any preparation and make design choices easily. In Part 2, you'll figure out how to feature those designs in their best light, leaving your crowd hypnotized. The models utilized are interior design centered however don't stress, these ideas can be applied to practically any industry!
Begin with a 2D sketch, floorplan or photograph in SketchUp Pro There are a couple of various approaches to bring your project into SketchUp directly from the beginning. Try not to be reluctant to utilize what you have contingent upon the project, regardless of whether a sketch or photo (look at how to utilize Match Photo) or a 2D plan. Working from a hand-drawn sketch? Import the hand drawing as a picture and begin following with the Line apparatus to make a floorplan. This is an easy (and in this manner well known) approach to bring a floorplan into SketchUp. Have a lot of plans? Import a story plan in CAD, picture or PDF. Draw the outline of your project by scaling and drawing from the arrangement as a source of perspective. No floor intends to work with? Use Match Photo to make your model from a certifiable photograph of the space.
Bring the outline into 3D When you have an outline, you're prepared to draw outside dividers. This work process features how to utilize imported CAD geometry as your beginning stage. You should check out SketchUp‘s help pages to find out how to import CAD files into SketchUp space and use them in your own design.
Make various design alternatives utilizing 3D Warehouse
NEWS

16
It's an ideal opportunity to rejuvenate your space. Apply hues and surfaces with materials to add detail and authenticity to your models. Picture your design thoughts quick by bringing in genuine items from 3D Warehouse. SketchUp lets you rapidly work through setups and expand upon the ones you like. Hotshot alternatives for goods or include different kinds of greenery to light up the space and give your design some character. The way to display and sorting out design choices for your projects in SketchUp is utilization of Layers and Scenes. Layers assist you with sorting out your model, and Scenes assist you with introducing designs effectively by modifying layers, items, styles and that's only the tip of the iceberg!
Save your project to Trimble Connect Since you have your design choices close by, it's an ideal opportunity to save your project to the cloud. Trimble Connect offers you boundless distributed storage with full form control. The best part? It's remembered for a SketchUp Pro membership.
Being a portion of a design group Cooperating just got somewhat simpler with Trimble Connect. Suppose you're taking a shot at the interior design simultaneously another colleague is dealing with the MEP design. You can import a reference model into SketchUp from Trimble Connect.

17
You won't have the option to change the model, however you can utilize it as a setting to all more effectively arrange the project. This is valuable when you have a group of designers taking a shot at various regions. Welcome others to your project, make bunches with various consents to control which records individuals can get to. You can likewise use form control to follow project history and progress.
Flying colors performance Each time you transfer a duplicate of your design document, Trimble Connect will monitor the adaptations. Use rendition control to oversee various emphasess of your model and offer those as design alternatives with your customer. A lot of tasks and rapidly work through customer input, all inside Trimble Connect.
LayOut Changes and New Naming System This year, we have seen many great changes in SketchUp 2020 and 2020.1. We have seen these changes mentioned in many places, right? However, we often neglect it‘s buddy, LayOut. Today, we will talk about the new naming system in SketchUp that you may be unfamiliar with. Also, the changes in LayOut 2020, such as the new Document control, new Model Views, advanced Customization etc. need a thorough going-over.
LayOut 2020
There are a few changes in the LayOut 2020 as well. Which means, your documentation just got hiked up a notch! Let‘s see what‘s new in LayOut 2020.
Better Document Control The Trimble team has been working hard to improve the communication between SketchUp and LayOut. This has been updated. Now you have more editing options right there in LayOut itself! No more switching between the two apps to update all the scenes. Well, there will be a little of that going on, still. But it's much less than before.
Model Views Now LayOut is more intelligent and understands your model much better. To that end, now you are able to change the viewing style in LayOut without fear of losing changes. To indicate that you have made changes to the viewing style here, part of your toolbar will darken. This lets you have a hitherto unexperienced level of freedom in LayOut. What if you want your original viewport back? No worries, you can always resync.
NEWS

18
Customization Previously, linking a viewport to another model was a real pain in the, you know. You had to delete that view port first. Then you‘d insert a new SKP. And then you‘d have to resync all your scale and viewport sizes. Hurts, huh? Well, no longer. Now, if you have multiple viewports for a single model, you can link one of them directly to another model. Easy, right? But, do note that you can do that with one and only one viewport for each model.
Not only the above, there‘s more. Now you can toggle tag visibility directly in your LayOut Doc. Meaning, you need not create extra scenes just for your SketchUp files. This results in improved workflow and much
less going back and forth between SketchUp and LayOut.
The New Nomenclatures
The Trimble team has been deliberating over this for a while now. Without changing your workflow, the new naming conventions are supposed to give you better control over your model. The naming system is more logical now, and they sound more appropriate.
Naming changes in SketchUp 2020:
‗Objects‘ now collectively mean groups and components. This includes dynamic components as well.
‗Layers‘ now are called tags.

19
This means you won‘t have to use multiple words to mean a bunch of similar stuff now. Also, the thinking process of the designer changes depending upon the words that are used in the design interface. Not to worry though, it isn‘t changing the internal workings of SketchUp at all. These are just changes in the naming stream.
No doubt the new changes in the system of SketchUp will accelerate the workflow for newer designers as well as experienced ones. From new ways to look at your model and to understand it, to better and faster ways of documenting it has really revolutionized SketchUp‘s getup. Trust LayOut to do half of your work for you!
However, if you are mch practiced with the older ways and would rather depend on your trusty old system of workflow, Trimble urges you not to leave that. Because, of course, every designer has his or her own style of work, and no amount of software coding can change your feeling for a system you have well-settled in.
Picking the Best Renderer for SketchUp Picking the correct instrument for the activity consistently makes carrying out the responsibility simpler. The equivalent is valid for SketchUp rendering modules. Render Plus has two rendering bundles for SketchUp. SketchUp is one of the most generally utilized 3D demonstrating programs around, particularly among planners and inside creators. It gives the speed and adaptability to roll out brisk improvements to a structure, and loan solidarity to the way toward building up a task. Without anyone else, SketchUp is a ground-breaking configuration apparatus and a satisfactory representation device. In any case, there is a force secured away SketchUp that must be opened with beneficial programming and modules that change its simple designs into photorealistic portrayals of your work
Two Basic Qualifications When choosing which Renderer to buy, item features and cost are regularly the most significant components. On the off chance that you are an expert, for example, an engineer, offering rendering administrations to your customers then a full-featured renderer is the thing that you'll need. On the off chance that you use SketchUp to just imagine your structures, as a space organizer may, at that point a smoothed out renderer, with simply the basics, will be the correct instrument for you. Cost is likewise dictated by the quantity of features. The two sorts of renderers will create an excellent picture, however you will pay more for the control that originates from a full-featured, proficient rendering module. Here is some data to assist you with choosing which one is the correct instrument for you. The rendering programs on this rundown are the best for use with SketchUp as a result of the manner in which they change the most available 3D demonstrating program into a representation force to be reckoned with.
NEWS

20
A significant number of these projects are similarly as simple to use as SketchUp itself, making for a smooth progress for the individuals who don't have a lot of involvement with rendering and after creation. Here are some rendering programs for use with SketchUp.
SU Podium SU Podium was structured starting from the earliest stage to be utilized explicitly with SketchUp - making it the just one of its sort on this rundown. There aren't numerous extravagant accessories here, only a simple to-utilize rendering module that will have your SketchUp models looking gleaming and new very quickly. In the event that you invest energy enumerating your SketchUp models and finely tuning the applied
surfaces and lighting sources, Podium will wrap up. It permits you to change things like brilliance, complexity, and shading channels after the rendering is finished, adding some adaptability to the entire procedure. For new clients, Podium is the primary spot you should search for rendering help.
V-Ray Regardless of how far we've come since the beginning of PC designs and 3D rendering, V-Ray will consistently be at the head of the evolved way of life. As innovation propels, so does V-Rays capacity to deliver the most brain twisting representations, renderings, and movements conceivable with ones and zeros. V-Ray comes furnished with a module that interfaces straightforwardly with SketchUp. It unquestionably accompanies an expectation to absorb information, however those ready to invest the energy are remunerated with the capacity to do pretty much anything with a rendering. With V-Ray, SketchUp is in a split second changed into a rendering instrument experts can be pleased to use.
Twilight Render Twilight Render is a perception device for experts and specialists the same. Truth be told, that is actually how it's promoted, and in light of current circumstances. It presents the easy to use interface SketchUp clients acknowledge, with an amazing rendering motor that can deliver photorealistic pictures for even the greenest of novices.
NEWS

21
Twilight Render isn't the most feature-rich rendering program on the planet, however it gives only enough quality and speed to discover bounty to like here. For individuals who are simply getting their perception established underneath them, it's an outright sure thing and one that won't cost them a lot to get going.
KeyShot In case you're hoping to plunge your feet into the front line of rendering innovation, look no farther than Keyshot. It uses constant rendering in a manner that permits you to see the aftereffects of a rendered scene as you're taking a shot at it. That implies you can change surfaces, lighting, camera, and in any event, massing and promptly see the rendering. Keyshot is as yet taking a shot at a legitimate module for SketchUp, yet can bring your models into the base rendering program for speedy use. SketchUp clients will be dazzled at exactly how simple Keyshot is to utilize, particularly considering the mechanical enchantment it conveys with it in the engine. Keyshot is something that must be believed to accept.
Brighter3D On the off chance that SU Podium needs more to fulfill the expert renderers needs, Brighter3D is another restrictive SketchUp module to test. It works inside SketchUp's as of now easy to use interface, and has enough as far as alternatives and adaptability that accomplished clients will cherish. It underpins a wide range of lighting models, including counterfeit and HDR. Brighter3D is a CPU performing multiple tasks rendering motor, which means you won't need a costly graphics card to open its capacity. It is the ideal rendering module for individuals who don't have the cash to construct themselves a devoted perception machine.
RpTreeMaker plug-in for SketchUp We have been conveying data about RpTreeMaker to websites, pamphlets and magazines which spread SketchUp. Any individual who understands this and runs a blog, and so forth ought to feel free to post this discharge, and furthermore email us at [email protected] to tell us about your distribution so we can tell you when different Press Releases are prepared.
Render Plus reports RpTreeMaker, a free extra for Google SketchUp. RpTreeMaker is another, free, item to make sensible, fractal trees and spot them into the SketchUp model as consistently face-camera parts. Boundaries, for example,
Tips & Tricks
NEWS

22
Tree Type
Number of Trunks
Bowing
Slantedness
Leaf Type,
...and so on.
RpTreeMaker lets the client effectively make custom trees for use in SketchUp models. Make custom, fractal, trees and plants. The tree is recovered each time the tree is rendered. The more you are zoomed in, the more detail is incorporated. This is particularly valuable for close ups of trees and different plants.
For foundation trees, this is a choice to render utilizing the 2D tee picture store in SketchUp, which can improve the rendering time when you have heaps of foundation trees. RpTreeMaker Free tree set as a picture in SketchUp and rendered with IRender nXt. Note the nature of the fractal rendering and the nuance of the shadows.
RpTreeMaker Free is a free coordinated module for SketchUp that makes reasonable trees for SketchUp. What RpTreeMaker Free intends to you...
Another approach to add profundity and authenticity to your SketchUp model.
Rapidly and effectively change it up from trees to your SketchUp model.
Make custom trees to coordinate any setting.
It's Free!
The most effective method to Use RpTreeMaker
Download and Installation
Continue to ‗Downloads‘ to download a copy of RpTreeMaker. In the wake of downloading the ZIP document, Click to install to install it.
Characterize the tree
In the wake of Starting SketchUp, Select 'RpTreeMaker' from the Plugins menu. Utilize the Tree Editor to characterize the tree (See documentation underneath.) Click OK when done.
Tips & Tricks

23
Make a tree picture
Subsequent to characterizing the tree shape and boundaries:
o Enter a name for the segment.
o Enter a goal for the picture put away in SketchUp.
o Select the ideal revolution
o Click Start to render the tree. Subsequent to creating the primary picture, you can change the goal or
pivot and produce another picture by clicking Remake Image.
o Click Save Tree Image when done.
Save tree picture
o Change the Brightness, whenever wanted
o Click Save Tree Image.
Tree proofreader utilization
Set the sort from the Type menu at the top. There are four tree types - Standard, Conifer, Palm, and Broad Crown. Each has a distinctive setting on the main tab of the tree settings. You can select new leaves, trunk, and so forth by clicking on the picture. You can likewise include your own leaves and bark to the Plant Image organizer and use them for your custom trees.
RayTrace
o Click 'Start' on the RayTrace drop down menu to see an example of the tree with foliage.
Rendering tips RpTreeMaker tree set as a picture in SketchUp and rendered with IRender. Note the nature of the fractal rendering and the nuance of the shadows. Clients of rendering items other than IRender nXt have found that they have to detonate the tree segment, detonate the picture element into a face, and change to tree part so as to get the tree to render appropriately.
For IRender clients, the RpTreeMaker tree will consequently re-render as a full, fractal, 3D tree. IRender clients should make their tree pictures at the least goal to spare time and keep the SketchUp model quick and little. After the tree is re-rendered the first picture goal won't impact the last picture.
Settings There is a Settings menu which allows you to set the following:
Tips & Tricks

24
Foundation mode while rendering (this had nothing to do with the last picture, yet the HDRi setting
gives you some feeling of how the HDRi light functions - If you turn it on you will see that the tree is
lit up in a woods with the sun sparkling from behind on the left).
Default Illumination of the picture. - (Smaller numbers make the picture more splendid)
HDRi sky pivot for light. (55 degrees leaves the tree half in light and half in shadow)
Notes
o The Tree Editor permits you to browse four kinds of trees (all the more just around the corner.)
o .ArPlant documents can be spared and stacked in the supervisor.
o .ArPlant documents can be stacked into SketchUp for rendering.
o A few Limitations on Trees (still various)
o Bushes might be hard to do in the current interface
o We don't have layouts for things like Herbaceous Plants yet.
o You can't transform anything about the trees right now.
Frequently Asked Questions
Would you be able to change shading? Provided that this is true, how? This would be significant.
To change shading, you can take the raster pictures for the leaves or bark, change the shading, and spare them with another name. These are put away in generally:
C:\Program Files\Render Plus Systems\RpTreeMaker\Support\Plants in a Bark and a Leaves subfolder.
For example, we took the standard leaf, made it yellow, spared it as another leaf, and utilized it to render the tree. You can make your own bark and leaf pictures by changing the shade of existing pictures. You will require a paint program which regards the Alpha Channel. (We don't have one, however there is an instrument in RpTools which will change over the foundation shade of a picture to an alpha channel which I utilized.)
Tips & Tricks

25
Would you be able to utilize this to make a 3D tree?
The system is still in the works. This will be done when it will be done, as they say. So far, yes, it should work - but these high-poly medals will eat your ram and graphics card like hell, so you should do this on your own responsibility.
FredoTools Sketchup Plugin FredoTools is an exceptionally helpful Sketchup Plugin. It is really a pack of little plugins, not only one. You can download FredoTools Plugin by Fredo 6 by pursuing free on the sketchucation website.
Unites some of the independent plugins. By conveying them as a solitary bundle, it lessens the impression on Sketchup and dodges the individual establishment of each plugin
Features
The fundamental attributes of FredoTools are:
1. Single folder in the Plugins registry (Fredo6_FredoTools)
Tips & Tricks

26
2. Single menu passage (as a matter of course in Tools > Fredo Tools > … .)
3. Single relevant menu
4. Single toolbar, with control of the icons showed
5. Snappy Launcher
Likewise, just a little piece of the plugins is stacked at Sketchup startup (just the menus). The remainder of the code is stacked the first occasion when you dispatch the plugin.
System Requirements: Sketchup version: SU2017 or more
OS: Windows and Mac OS X
LibFredo6: v10.4b or above
Expense: Free
FredoTools bunches some of my independent plugins. By conveying them as a solitary bundle, it lessens the impression on Sketchup and maintains a strategic distance from the singular establishment of each plugin.
Package details Plugins contained in for FredoTools package:
DrawAlong
Similar to the Sketchup Draw Line tool, yet with extra capacities.
MoveAlong
Similar to the Sketchup Move tool, yet with extra capacities.
ThruPaint
Paint Faces as well as Edges over the limits of gatherings and components - Interactive artistic creation by click and drag - Several UV modes to apply textures - Interactive situating and direction of textures.

27
ReverseOrientFaces
Interactively return and orientate faces - Works over the limits of gatherings and components - Interactive inversion by click and drag - Manage effectively switching of textures.
EdgeInspector
Inspects, and afterward fixes, some Edge abandons in the model, generally coming after DXF imports and Intersections. It at present backings 7 edge absconds.
ColorBySlope
Create a shading planning of a territory work dependent on the inclines of its appearances. You can alternatively include a legend and a 2D shading map.
ColorByAltitude
Create a persistent shading planning of a territory work dependent on the height of its appearances, in view of a solitary textured material. You can alternatively include a lot of isocontours, a legend and a 2D shading map.
ColorPaint
Configurable Color Selector with Favorites, free from models and continued across Sketchup meetings.
ColorFlatMode
Switch to Flat hues with no concealing and hues appeared as close as their RGB details.
AngleInspector
Inspect Angles between components of the model in a single click, regardless of whether components are far away. Components are Faces (typical), Edges, Guide lines, tomahawks (model and nearby) and tomahawks of polygon/circular segment.
ReportLabelArea [Report]
Build a report of zones by material utilized in model or selection - Support various units and decimal accuracy.
ReportLabelArea [Label]
Interactively show and total the regions of chose components - Label components with zones - Support various units and decimal exactness.
ElementStats
Provides insights and data on gatherings, components and any element in the model. Measurements are given on the dynamic model (and dynamic setting, if inside a gathering or component), the selection (starting, set by the Outliner or intuitive selection), substances under the cursor. Data is shown in a gliding palette.
Tips & Tricks
28
DivideEdges
Divide as well as Mark Edges and bends from pre-selection or by basic click. Stamping is finished with Guide Points.
AutoReverseFaces
Automatically play out the arrangement of face directions just as their legitimate direction on shapes that resembles a strong, that is, the place outwardly you could tell where is within and where is the outside.
Convexify
Performs the deterioration of 3D shapes into Convex shapes - Can be helpful for Physics movement and games.
SolidVolume
Compute the volume and the absolute faces region of the genuine solids (gatherings and component examples) in the selection - SolidVolume gives the right worth paying little heed to the direction of countenances and the situation in the model.
RevertCurve Revert the bearing of chosen bends.
CurviShear
Create slopes by shearing bends.
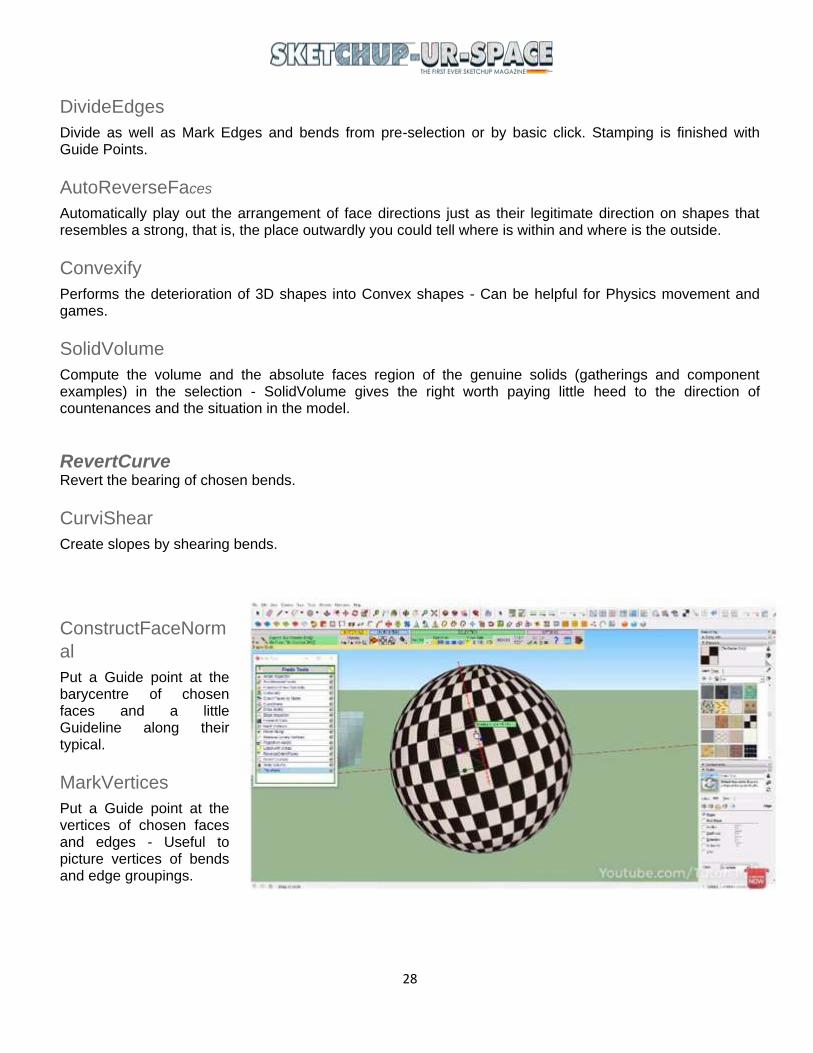
ConstructFaceNorm
al
Put a Guide point at the barycentre of chosen faces and a little Guideline along their typical.
MarkVertices
Put a Guide point at the vertices of chosen faces and edges - Useful to picture vertices of bends and edge groupings.

29
CountFacesBySides
Count the quantity of appearances by number of sides.
RemoveLonelyVertices
Remove the forlorn vertices circumscribed by 2 collinear edges - These vertices are really futile much of the time.
FaceTriangulator
Face Triangulation - in light of Delaunay with plausibility to include/alter custom triangulation focuses.
MIO PlasticForms - 3D Warehouse for SketchUp Make any divider wake up with measurement and example. PlasticForms are enriching, secluded backdrop tiles made in the US out of reused plastic jugs (rPET). They are lightweight, solid and simple to introduce and clean. PlasticForms divider boards can be painted and introduced briefly with twofold sided mounting tape or for all time with polyurethane development glues. Tiles can be legitimately stuck to drywall or mounted to canvas, pressed wood and other brief settings. Extraordinary for lounges, rooms, sitting areas, meeting rooms, career expos, stages and occasion improvement. Import the image as a texture, and you can apply the image to an existing face. However, you also gain access to all the materials and Position Texture tools. These tools are introduced in Adding Colors and Textures with Materials, but that article focuses on tiled images. In this article, find out how to do special techniques with a single image, such as wrapping an image around corners, wrapping an image around a hidden face on a cylinder, or projecting an image onto a face. When you project textures, you can apply them to curved surfaces.
Model Info Materials: 2
Polygons: 7,717
File Size: 1MB
Modified Date: 6/4/2020
Layers: 1
Unit of Measure: inches
Bounds: 2 x 70 x 12
Distance from Origin: 31.7
Tips & Tricks

30
V2 PlasticForms Wall Tiles
Arrange any wall come to life with dimension and pattern. V2 PlasticForms are decorative, modular wallpaper tiles made in the US out of recycled plastic bottles (rPET). They are lightweight, durable and easy to install and clean. There are 12 tiles in the set. Have you ever stuck a decal on a window or a wall? In SketchUp, sticking an image on a face is even easier than those decals, because digital images don‘t wrinkle or trap air bubbles. Technically speaking, SketchUp enables you to import images that are already on your hard drive. When you import images from your hard drive (select File > Import to see the Open dialog box, shown in the figure), you can import the image as an image, a texture, or a matched photo. PlasticForms wall panels can be painted and installed temporarily with double-sided mounting tape or permanently with polyurethane construction adhesives. Tiles can be directly glued to drywall or mounted to canvas, plywood and other temporary backdrops. Great for living rooms, bedrooms, waiting rooms, boardrooms, trade shows, stages and event decoration. To create with PlasticForms and get inspired download our Sketchup files. Digital images and SketchUp models are so diverse, it‘s difficult to give specific recommendations here. However, here‘s an example to illustrate how you might find the right resolution and file type for an image. Say your image was captured with a digital camera in a JPEG or JPEG+RAW format.

31
Try saving a copy of your digital image at a resolution of 72 ppi (pixels per inch) and in the JPEG format. If your model dimensions aren‘t very large, you may want to reduce the image dimensions as well (the width and height in pixels). Then, import the image into your SketchUp model and see how the image looks. If you save a copy of the original image, you can always go back and try different settings in your image editor until you find the resolution and dimensions that work well with your SketchUp model.
Revisiting SketchUp Pro 2019 While we are utilizing the best and most up to date versions of SketchUp in 2020, a few people despite everything need to utilize more established versions of SketchUp for soundness issues, or something else. Today, for those of you hoping to get SketchUp 2019, we will return to this version and see what it's salient focuses.
In case you're as of now a SketchUp client, you know the reasons you love utilizing SketchUp for 3D design and displaying. From the easy-to-utilize programming and basic incorporation to the great yields that you have to dazzle your customers – it's the ideal programming for your toolkit. Yet, imagine a scenario where SketchUp could do significantly more for you.
Regardless of whether you're new to SketchUp, 2019 will offer you a totally different involvement in all the basics SketchUp has satisfied for quite a long time including:

32
o Grow completely archived drawings including text, illustrations and measurements;
o Experience programming that is so easy and natural to utilize that you don't require broad preparing
to begin;
o Joining with a library of expansions to use on your models including renders and interiors.
What's happening with SketchUp Pro 2019
Interface Upgrades
There have been a few changes made to the general interface and toolbar so it will be simpler to deal with your projects and licenses. Open new projects or as of late utilized records at the snap of a catch or see your authorizing data with easy access. Also, this is only the start.
Line Styles
Strong lines can't generally recount to the full story in a 2D or 3D model, and your customers may require a bonus to truly comprehend your design thought. So dashed lines have been brought into SketchUp Pro 2019. Controlled from the layers board, these runs are properties of Layers and as easy to use as strong lines. These dashed lines can be sent out as EPS, PDF, and DWG/DXF, or even printed legitimately!
DWG Importer/Exporter
Combination is the way into your prosperity – and now it's considerably simpler for you to move between various applications and projects. Keep on exploiting DWG libraries with Import/Export of the 2018 DWG file position currently bolstered.
SketchUp Tape Measure Tool
The widely adored and fundamental Tape Measure Tool has had a redesign! Invest less energy opening the tool in 2019 – see the length of edges, zones of appearances and facilitates by just survey a surmising tip. Get the data you need at the bit of a catch!
Design File Locking
Ever make unexpected alters that take very long to return to the manner in which it was? All things considered, that is going to turn into an issue of the past! SketchUp has made it harder to overwrite LayOut files. In the event that a file is opened on two separate LayOut occasions, it will briefly lock the file as "read just" – basic!
Change the Way You work together with SketchUp 2019
These advancements have been made with the goal that you can wow your customers and partners as well as to make your life simpler too. Regardless of whether you're utilizing 2D or 3D demonstrating for game

33
design, engineering, style, arranging, realistic or interior design or whatever else you can envision, SketchUp is the correct decision for you.
With business and instruction licenses accessible, our open design programming is appropriate for all expertise levels and spending plans. In case you're simply beginning or have utilized a set-up of different items, SketchUp is easy to learn with an instinctive interface that will give you exquisite designs, without fail.
SketchUp 3D Basecamp 2012 Presently that the fourth SketchUp 3D Basecamp is finished and the members are going home, it's an ideal opportunity to think back and recap a portion of the news and things that occurred at the occasion. In any case, first We need to state that Trimble's SketchUp group has once more assembled a stunning occasion in Boulder, their old neighborhood. We delighted in each moment of it and tragically needed to head back home a piece too soon (in view of different responsibilities). So on the off chance that you missed it, this is what occurred in SketchUp 3D Basecamp 2012.
State of the Union, Keynote and Presentations The principal day's introductions were held at the Boulder Theater, a wonderful, noteworthy spot in the focal point of town. After some inviting words by Aidan Chopra, SketchUp's Product Evangelist (and untiring coordinator of the occasion), John Bacus, Product Manager for SketchUp presented Trimble Sector VP Bryn Fosburgh. In his short discourse, Bryn guaranteed clients the amount Trimble contributed (and contributing!) in SketchUp and how SketchUp fills a void fixated on Architecture in Trimble's portfolio. He additionally delineated how SketchUp will be utilized as a "stage" for different undertakings and that there consistently will be a free form. At the point when John came back to the stage a while later, he had also positive, forward-looking words. He additionally reported some SketchUp-related news that can be summed up as:
o SketchUp will change to an anticipated yearly delivery cycle. Hence, the following delivery will be
"SketchUp 2013". (Obviously they won't play Autodesk's down of naming it 2014 out of 2013)
Blog

34
o The SketchUp people are taking a shot at the following variant of the 3D Warehouse. It will
incorporate WebGL innovation that has just been remembered for the SketchUp Showcase.
o 45% of SketchUp clients use modules. Subsequently, a portion of the primary foci of this occasion
were modules and Ruby scripting.
o SketchUp is evaluating open-source code advancement for a portion of its parts. You would already
be able to witness this on their GitHub site.
The principal venture in this vault, delivered at Basecamp, is an all the more remarkable Ruby Console, the Developer Console. It takes into account multi-line altering and is extensible. The subsequent undertaking, additionally delivered at Basecamp, is the TestUp programming that permits Ruby code engineers to utilize a similar unit-testing stage that SketchUp utilizes inside to test and troubleshoot their modules and other Ruby parts.
What got the greatest cheers (particularly from Bre Pettis, author of MakerBot), was the arrival of a STL merchant/exporter, likewise publicly released in the GitHub file. It depends on work by module engineers and makes STL fare of models (for 3D printing) simpler. There will consistently be a free SketchUp rendition and a moderate Pro form.
Blog

35
After these morning introductions, it was the ideal opportunity for a boxed lunch and a gathering of delivering programming that included Bloom Unit, iRender nXt, Podium, Render[in], Shaderlight, Thea and VRay. After this outwardly energizing arrangement of introductions, it was the ideal opportunity for an item feature for different instruments that broaden SketchUp:
o BuildEdge – A BIM-like expansion for dividers and Roofs (for the time being) in SketchUp
o sunglass.io – A program based (WebGL) 3D-model watcher and coordinated effort stage
o Item Connect – A module that can improve any article based SketchUp model with (producer)
information
o 4D Virtual Builder – An approach to add development plan information to a SketchUp model for
development arranging
Excitedly anticipated by everybody in the crowd was the following project point – a keynote by Bre Pettis, organizer of MakerBot (he is right now on the front of WIRED magazine). Bre conveyed an elevating introduction that demonstrated where he (and the whole creator development so far as that is concerned) originated from and how inquisitive experimentation can prompt extraordinary things. He additionally displayed the MakerBot Replicator 2 (their most recent model) and upheld "Made in America" (their 3D printers are made right in Brooklyn). At long last, he underscored the amount SketchUp was "near his heart". The night occasion at Boulder's Absinthe House was unexpectedly incredible with the program features having been the pitching of Unconference meetings for the following day and a SketchUp-pified variant of Pictionary.
Unconference User Presentations Day 2 was totally committed to introductions by clients and item makers. It was an opportunity to gain proficiency with a great deal about what is conceivable with SketchUp. In contrast to these meetings, two "Ruby 101" half-day courses were offered in close by Hotel Boulderado. The occasion space at Rembrandt Yard was additionally loaded up with exhibitors flaunting a considerable lot of the products we found in the principal day's introductions. The following are the slides from my introduction. You can likewise download them as a PDF here. As should be obvious in the last slide, my introduction gave a review of a portion of the subjects that are remembered for my pending book "Engineering Design with SketchUp" (delivery date is November fourteenth).
Blog

36
Ruby Developer Conference and Design Charrette Lamentably We needed to leave after Day 2 and consequently could take an interest neither in the Ruby Developers Conference nor the Design Charrette on this day. From what We have heard through Google+: "Day 3 likewise had the Design Charrette where 15 groups were tested to plan "A wired, remote study hall for the following 50 years" and "A framework for sorting out versatile gadgets". The exhibits were stunning, and the triumphant groups fought it out with exceptional SketchUp random data to win MarkerBot Replicators."
Importing DWG Files in SketchUp Trimble SketchUp is probably the most popular 3D modeling software among people who aren‘t hardcore professionals. Its ease of use, easy-to-understand toolset and flexibility have fanned the fumes of popularity for SketchUp. Most of the time, we are happy to be working with the default SketchUp files (.skp).
But sometimes we may need to use files from other applications into SketchUp. For example, quite often architects, construction professionals or engineers need to use their professional CAD software files inside Trimble SketchUp. Most commonly, we see the need for importing AutoCAD files, like DWG or DXF, for this purpose. Today we will see how to properly import and use CAD files into SketchUp.
Compatibility
Before you whisk your DWG into SketchUp, you will need to know if they are compatible or not. Only the SketchUp Pro version supports importing CAD files into it; any lesser versions like SketchUp Web/Free, Make or Shop will not let you do this. Since the Pro Bundle and Unity come with SketchUp Pro, they support importing as well. Files spawned by most versions of AutoCAD are supported by the latest version of SketchUp Pro. However, AutoCAD 2013-14 version files work best in SketchUp, so you might probably want to save your drawing to that version format if you were using a higher version of AutoCAD.
Also, you need to care about which elements or entities of CAD are supported in SketchUp and which aren‘t. Here is a comprehensive list:
Supported Entities:
o Arcs
o Circles
Blog

37
o Entities With Thickness
o Faces
o 3D faces
o Layers
o Lines and Linestyles
o Materials
o Polyline-based solids
o Nested Blocks
o AutoCAD Regions
o Point
Blog

38
o Ellipse
o Spline
o Raster Image
Not supported Entities
o Proprietary ADT or ARX objects
o Dimensions
o Hatching
o Text
o XREFs SketchUp will simply blank out any unsupported elements if you try to import them into it.
Preparation
To make sure you don‘t lose data and to streamline the import process, you should prepare your CAD file before you begin importing. This will also resolve potential conflicts between CAD elements and the SketchUp engine. Make sure you keep a backup of your DWG for safety.
Replace Unsupported Elements
If your CAD drawing has unsupported elements in them, as listed above, you should try to simplify them into basic CAD entities that SketchUp would support. Exploding them often works.
Get Close to Origin
Try to make sure that the geometry starts at, or is very near the origin point (0,0,0). Sometimes, actual drawing geometry can be very far away from the origin of the drawing in case of large projects. For example, a construction site blueprint or model, where the actual buildings start far away from 0-0-0. If you import that directly into SketchUp, it will invariably cause performance issues. You will need to move the actual geometry on or close to origin to prevent this. Alternatively, you may choose not to preserve the drawing origin while importing; SketchUp will choose the starting point as best it can for your drawing.
Reduce File Size
You should not face any problems while importing if the CAD file size is less than 15MB. Above that, there may be severe performance issues or even the import may fail. Also, the smaller the file, the better SketchUp will be able to work with it. Therefore you should try to reduce the file size as much as you can before importing. You can try to remove the geometry you don‘t actually need. Also, if your DWG file has multiple levels each holding tons of details, you should export each level into its own file and then import them when necessary.
Blog

39
Equalize Units
It would matter whether the original drawing was created using a foot, inches, meter or millimeter scale. When importing you should make sure that your SketchUp template is exactly the same or there would be scaling issues. SketchUp 2018 or above can try to do this automatically if that information is present in the DWG file‘s metadata.
Importing
After you have checked and prepared your CAD file to make sure it can be completely assimilated by SketchUp, follow these steps to import the file into SketchUp.
1. Open up your SketchUp model.
2. Click File > Import to open the file selection dialog box.
3. Select the dwg/dxf file (one file every time only) in the dialog.
4. Click on Options. The Import DWG/DXF box will open.
5. If required, use the Merge Coplanar Faces and Orient Faces Consistently options. Note: the first
option is a must if you are importing a LayOut file created using the ―export for SketchUp‖ option.
6. If required, you can deselect the Preserve Origin for reasons stated above.
7. If required, select the correct unit of measurement, for reasons stated above.
8. When you are sure about all your options, click OK.
9. Click Import. SketchUp will begin importing your file now.
Based on the file size and complexity, the importing process can take a while. Note that in later versions of SketchUp Pro there is drag-and-drop importing support. While importing your CAD files into SketchUp, remember that cleaning up and compacting your file is indispensable for a successful and efficient import.
Brightman Designs 3D Models Brightman Designs deal with a wide exhibit of undertakings running from private to business, conventional to current, covering regions from parcels to squares to miles of roadway. Each venture brings explicit needs and difficulties for outwardly imparting design. There is not one size fits all model, anyway we can order each model we produce as one of these three 3d model sorts for designers: PhotoTextured, RenderReady, ConDoc.

40
While each model kind has various qualities, shortcomings, strategies, difficulties, and worth, they all make them thing in like manner, Lumion. Each model is connected to Lumion to make drawing in images, movements, and virtual visits. When you comprehend the model sorts, you can make an educated arrangement to build up your design and present it with a viable representation.
PhotoTextured Models A PhotoTextured model is commonly "down to business", ideal for foundation structures in perceptions, massing charts, and shadow examines. PhotoTextured models are made utilizing SketchUp's Match Photo and Texture Tweaking highlights to overlay photos into a paper slim 3d model. These models shed byte-weight by speaking to subtleties with photos instead of 3D geometry. PhotoTextured models breathe life into representations when utilized as a foundation instead of an announcement background image. At the point when fabricated cautiously, these models can be exact enough for massing and rise concentrates without really estimating the structure.
RenderReady Model
A RenderReady model is normally the advancement of a PhotoTextured Model. The 2D photos are followed utilizing modeling tools, bringing about 3D geometry that produces genuine shadows. Detail once spoke to by photos is presently modeled utilizing surfaces and rehashing tiled surfaces. RenderReady models are best used for design study cycles and refined representations. These models have practical 3D detail, permitting them to be appeared in the frontal area without bargaining the authenticity of the last image.

41
ConDoc Model
A ConDoc model is likely worked from a sketch, field notes, or existing CAD plan, at that point layered to the Brightman Method principles introduced in "The SketchUp Workflow for Architecture". Curve, SITE, and CONC layers are relegated to settled gatherings and segments. This progressing hierarchical structure is important to deal with line loads, get to dynamic incubates, and work with experts inside industry principles. A ConDoc model is a computerized model of the proposed design, at the end of the day a Building Information Model (BIM). The model is progressively connected to LayOut and Lumion to make engaging development records, persuading introduction parcels, and tempting perceptions. Planning and Delivery Stay away from the basic entanglement of modeling pointless subtleties by making an arrangement and adhering to it. It is basic to distinguish what you have to impart in the visuals, at that point model it in the most effective manner.
Prior to plunging into any task, ask yourself the accompanying inquiries:
o For what reason would you say you are making the representation?
o Is the objective to fund-raise, influence speculators, change a customer's point of view, or better
comprehend a design?
o How might you best achieve your objective?
o Would it be a good idea for you to convey a cleaned photorealistic image, massing outline, shadow
study, or design sketch?
Having responded to these inquiries you would now be able to settle on an educated choice on which mix regarding model sorts will be best for your introduction.
Need More Materials with SketchUp SketchUp has an exceptionally pleasant library of materials for models. On the off chance that you need more materials, they are accessible at SketchUp Textures. Enrollment is free and you are free to help this exertion as a club part for just $12/year. Club individuals get a few pleasant favorable circumstances, well worth $1/month! The site is composed and simple to explore with bunches of materials that will improve your SketchUp models. Short instructions to get more materials (TL;DR)

42
1. Browse to a material and download it. Enlisted clients can download upwards of 15 materials for every day.
2. Add the new material to the SketchUp library. Click the Add Material symbol on the Materials Tray.
3. Find the material picture and open it. Remember to determine a one of a kind name for your new material.
4. Spare the material to another or existing assortment.
5. Utilize the material in your model.
A more point by point adaptation of how you can include more materials in SketchUp is given underneath. At the point when all you need is a material, (for example, block, tile, or grass), bringing in an entire segment from 3D Warehouse into your model can swell the record with content you neither need nor need. Luckily, you can download just the material. To discover and download a segment's material straightforwardly in 3D Warehouse, follow these means. First, open the subtleties page for the model whose material you need to download. In the details board, click the Materials interface. You at that point see a rundown of the materials alongside a touch of information about every one. At the point when you locate a material, click the Download connect. In the event that you got to 3D Warehouse from SketchUp 2017, SketchUp then recovers the material from 3D Warehouse and initiates the Paint Bucket tool with the material stacked and all set. Click on a superficial level that you need to apply the material to, and, you're finished!

43
On the off chance that you got to 3D Warehouse through an internet browser, the SKM record for that material downloads. You would then be able to add the SKM document to your nearby SketchUp content organizers. To add detail and authenticity to your models, SketchUp empowers you to paint materials on faces. Materials are basically paints that have a color and discretionary surface (characterized inside a picture record). For instance, in the accompanying figure, the roofing material has a blue color and a surface that reproduces metal material. The siding and grass are likewise materials that have a color and surface. After you apply materials like these to your model, the uncommon capacities of SketchUp's materials can assist you with doing any of the following.
o Supplant one material with another: Say you need to show a metal rooftop rather than shingles. You
can trade the roofing material for shingles rapidly and without any problem.
o Alter the material: Because the color and surface are isolated, you can transform them
autonomously of one another. For instance, you can change the siding color (what does yellow look
like?) however keep a similar surface. You can likewise alter a material's obscurity, which controls
how dark or straightforward the material is.
o Compute how much material you need: SketchUp can reveal to you the zone of the considerable
number of shingles or the siding. Obviously, for this count to mean anything, you have to make an
exact model with the goal that the numbers mirror your model's real size.
Note: SketchUp incorporates a few assortments of materials: cover, tile, groundcover, glass, wood, and that's just the beginning. Be that as it may, if the particular material you need isn't accessible, you can make your own material. This element is particularly helpful in case you're a decorator or manufacturer who needs to show your customers exact completions. In the SketchUp interface, you model materials with the Paint Bucket tool and the Materials board (Microsoft Windows) or the Colors board (macOS). The Materials or Colors board likewise empowers you to see, oversee, and compose the materials. The Materials or Colors board monitors the materials in your model, and it's the place you can make custom materials assortments explicit to your activities or work processes. Note: If you switch between PCs running Microsoft Windows and macOS, note that the Materials board interface and Colors board interface are exceptional to their particular working frameworks. In the accompanying segments, you see guidelines for Microsoft Windows or macOS, contingent upon which working framework you've chosen starting from the drop list on any page in the Help Center.

44
Applying materials to your model is quite basic - just select a face or faces and afterward select your ideal material. In case you're painting gatherings or parts, look at the tips toward the finish of this area, which can make applying materials much simpler. You apply materials to your model with the Paint Bucket tool, which you find in the accompanying pieces of SketchUp's interface:
o Getting Started toolbar
o Large Tool Set toolbar
o Head toolbar
o Tools > Paint Bucket on the menu bar
o To begin applying materials to your model, follow these means:
o Select the Paint Bucket tool.
o Starting from the drop list, select a materials assortment.
o Click the material you need to utilize.
Note: To test a material that is now in your model, hold down the Alt key to switch briefly to a Sample tool. With the Sample tool's eyedropper cursor, click the face whose material you need to test. Delivery the Alt key to come back to the Paint Bucket tool.
o Back in the drawing territory, click a face or faces to apply the material.
To reestablish the default colors, follow the former advances, however as opposed to clicking a material, click Set Material to Paint with Default in the upper right corner and click a face in your model to apply the default colors.