How to Build a Mousetrap Car
11
Reader Approved How to Build a Mousetrap Car Three Parts: Planning Your Mousetrap Car Making the Wheels and Chassis Engaging Your Car A mousetrap car makes for a great science project, physics classroom experiment, or a fun weekend activity. Mousetrap cars are frequently used to help students learn about mechanical advantage, distance, and gravity, with many teachers turning the experiment into a long distance challenge.The stored potential energy in the spring of the mousetrap's snapper arm transforms into the kinetic energy that propels a car that you will make. But to create your own rodent roadster, you'll need the right materials, an understanding of a few physical principles, and a little effort. 1 Imagine your mousetrap car. You're going to need to attach your mousetrap to a chassis (or body), which will form the frame of your car, wheels, and an engine to power the contraption. These kinds of miniature cars are often used for physics experiment when learning about mechanical advantage, gravity, and gear ratios. For the purposes of this example, heavy cardboard will be used as the chassis, but you also might use: Foam core. The body of an old toy car. A piece of light, durable wood, like balsa wood. 2 Use physics to your advantage for best results. You can modify the design of your car to achieve certain goals. For example, if your physics class is having a distance race competition, you'll want to: Lighten your car as much as possible. If using a solid chassis, this might include drilling holes in its frame and wheels. Use wheels that are both thin and stiff. Decrease air resistance by making the front of your car small and sleek. [1][2] Part 1 Planning Your Mousetrap Car
-
Upload
khangminh22 -
Category
Documents
-
view
1 -
download
0
Transcript of How to Build a Mousetrap Car

ReaderApprovedHow to Build a Mousetrap Car
Three Parts: Planning Your Mousetrap Car Making the Wheels and Chassis Engaging Your Car
A mousetrap car makes for a great science project, physics classroom experiment, or a fun weekend activity. Mousetrap carsare frequently used to help students learn about mechanical advantage, distance, and gravity, with many teachers turning theexperiment into a long distance challenge.The stored potential energy in the spring of the mousetrap's snapper armtransforms into the kinetic energy that propels a car that you will make. But to create your own rodent roadster, you'll need theright materials, an understanding of a few physical principles, and a little effort.
1 Imagine your mousetrap car. You're going to need to attach your mousetrap to a chassis (or body), whichwill form the frame of your car, wheels, and an engine to power the contraption. These kinds of miniature
cars are often used for physics experiment when learning about mechanical advantage, gravity, and gear ratios.For the purposes of this example, heavy cardboard will be used as the chassis, but you also might use:
Foam core.The body of an old toy car.A piece of light, durable wood, like balsa wood.
2 Use physics to your advantage for best results. You can modify the design of your car to achievecertain goals. For example, if your physics class is having a distance race competition, you'll want to:
Lighten your car as much as possible. If using a solid chassis, this might include drilling holes in itsframe and wheels.Use wheels that are both thin and stiff.Decrease air resistance by making the front of your car small and sleek.[1][2]
Part
1 Planning Your Mousetrap Car
3 Take into account the surface your car will run on. If your car will be traveling up a ramp or across hillyterrain, smaller wheels will be able to manage the incline better due to inertia. Flat surfaces, like table and
floors, can be best traversed with larger wheels.[3]
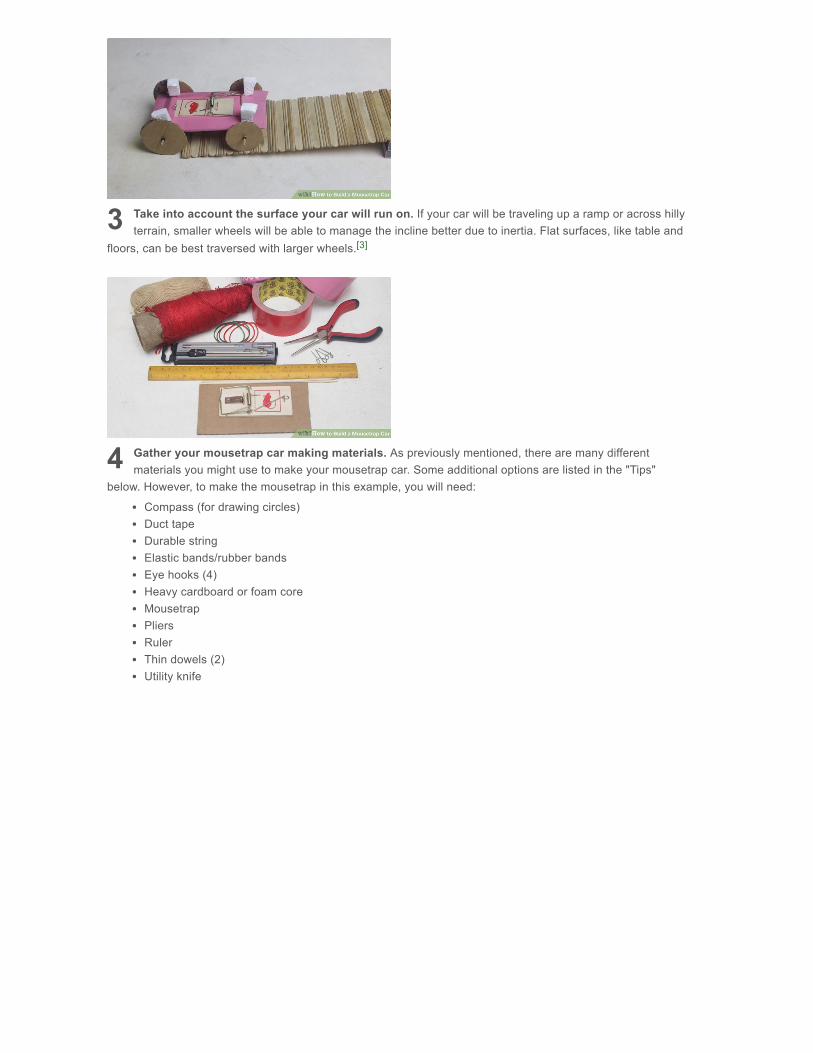
4 Gather your mousetrap car making materials. As previously mentioned, there are many differentmaterials you might use to make your mousetrap car. Some additional options are listed in the "Tips"
below. However, to make the mousetrap in this example, you will need:
Compass (for drawing circles)Duct tapeDurable stringElastic bands/rubber bandsEye hooks (4)Heavy cardboard or foam coreMousetrapPliersRulerThin dowels (2)Utility knife
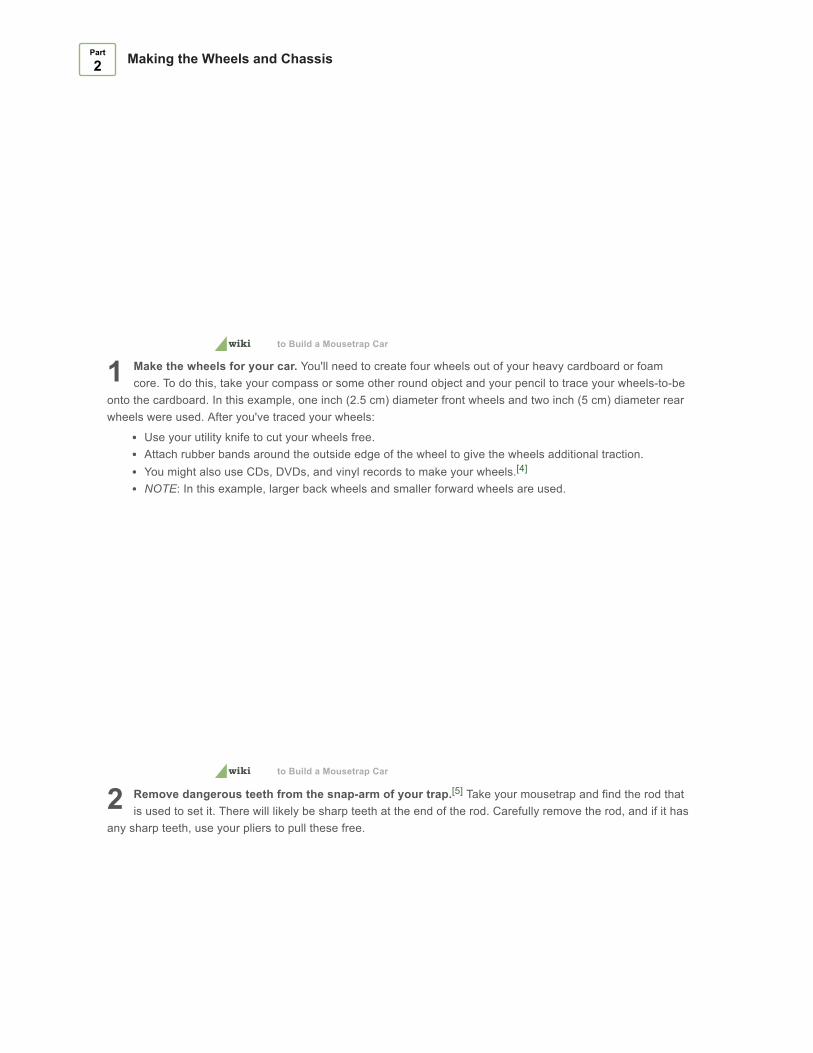
1 Make the wheels for your car. You'll need to create four wheels out of your heavy cardboard or foamcore. To do this, take your compass or some other round object and your pencil to trace your wheels-to-be
onto the cardboard. In this example, one inch (2.5 cm) diameter front wheels and two inch (5 cm) diameter rearwheels were used. After you've traced your wheels:
to Build a Mousetrap Car
Use your utility knife to cut your wheels free.Attach rubber bands around the outside edge of the wheel to give the wheels additional traction.You might also use CDs, DVDs, and vinyl records to make your wheels.[4]
NOTE: In this example, larger back wheels and smaller forward wheels are used.
2 Remove dangerous teeth from the snap-arm of your trap.[5] Take your mousetrap and find the rod thatis used to set it. There will likely be sharp teeth at the end of the rod. Carefully remove the rod, and if it has
any sharp teeth, use your pliers to pull these free.
to Build a Mousetrap Car
Part
2 Making the Wheels and Chassis
3 Fashion your chassis from your heavy cardboard. To accommodate your mousetrap, you'll need yourchassis to be about ½" (13 mm) bigger on all sides than your trap. Measure and mark this out on your
cardboard, and then use your utility knife to cut out your chassis from the cardboard.[6]
Balsa or basswood make a light but more durable body for the car.[7]
4 Attach your mousetrap to the top of your chassis. Center the mousetrap on top of the chassis andthen, using duct tape or clear packaging tape, secure the mousetrap into place on all 4 sides.
to Build a Mousetrap Car
While taping your trap into place you should avoid taping the spring. The spring should be found in themiddle of the trap and snapper arm.
5 Align and attach your eye hooks to the bottom of your chassis.[8] These eye hooks will hold the axlerods, which are the rod on which you will attach your wheels. If these hooks are out of line, your car won't
travel straight, so you should:
to Build a Mousetrap Car
Use your ruler and a pencil to mark the location of your eye hooks in the four corners of your chassis.Double check the marks are evenly lined up with your ruler.

Screw the eye hooks into place through the cardboard chassis where you have marked.
6 Create your axle rods.[9] Cut 2 thin skewers to a length about 4 centimeter (1.6 in) longer than the widthof your eye hooks. These dowels/wooden skewer sticks will be the axle rods for the wheels that you made.
They should be thin enough to slide through the eye hooks and spin freely.
to Build a Mousetrap Car
Eye hooks that are too thick or skewers that are too thin will cause the axle rod to pivot in its eye hookholder, which could affect the alignment of your car.
7 Attach your wheels to your axle rods.[10] You should be able to poke holes in the center of each wheelwith the point of your compass. This should create holes that are slightly smaller than the dowel rods. Then
you should:
to Build a Mousetrap Car
Wind a rubber band onto your axle so that it is close to the body, but not touching it. This will form abuffer between your wheel and the chassis of your car, but can create friction if it comes in contact withyour chassis.Push your wheels onto the axle rods. If you have larger drive wheels, these should go on the rear axleand the smaller wheels on the front axle.Your axle dowels should extend past your wheel about 1" (2.5 cm).
8 Prevent your wheels from coming off or unaligned.[11] You can do this by wrapping a thin elastic bandaround your dowel just outside each of wheels. The elastic band will keep the wheels from falling off of the
car.
to Build a Mousetrap Car
1 Tie your string to the snap-arm. Carefully lift the snap-arm just enough to slide one end of your stringbeneath it. Then, wrap the string around the snap-arm and tie a tight knot to secure the string.
to Build a Mousetrap Car
A general knot, like a square knot should work fine for attaching your string to the arm of your trap.
Part
3 Engaging Your Car
2 Cut your string. Before you do, make sure that it is long enough to reach past the car's rear axle. Thelonger the string, the longer time it will take for the force of your trap to be released, which will create
slower acceleration but greater distance traveled.[12]
to Build a Mousetrap Car
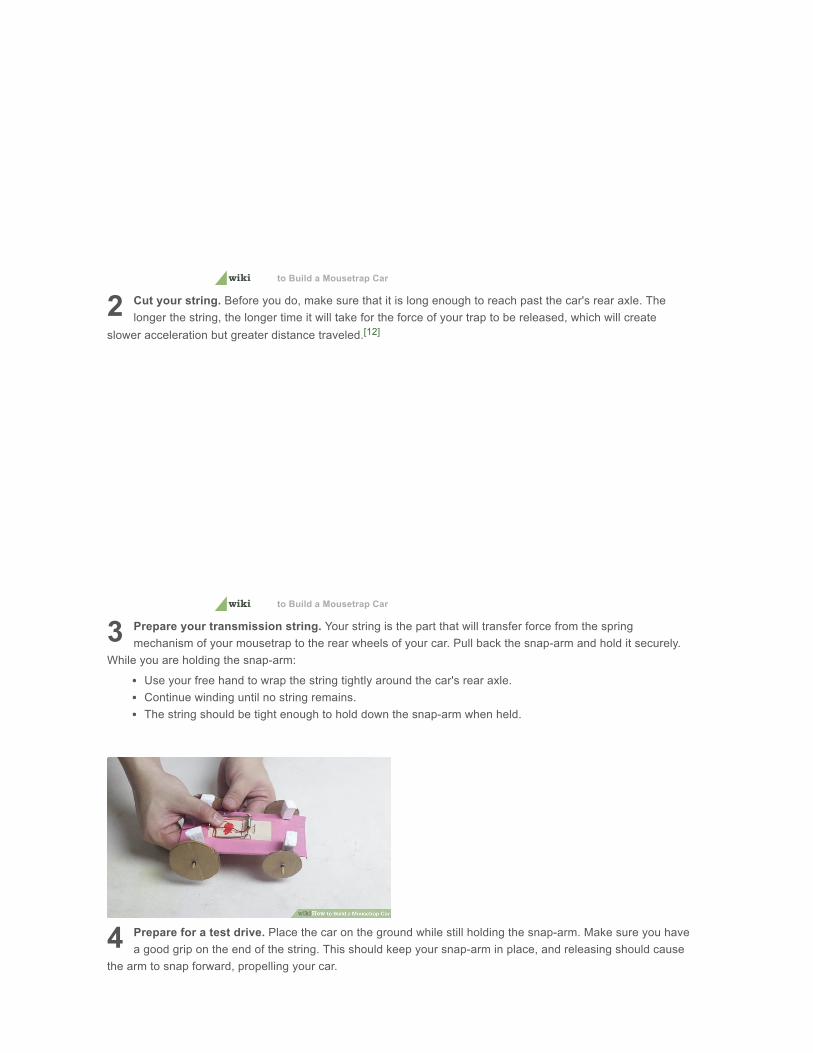
3 Prepare your transmission string. Your string is the part that will transfer force from the springmechanism of your mousetrap to the rear wheels of your car. Pull back the snap-arm and hold it securely.
While you are holding the snap-arm:
to Build a Mousetrap Car
Use your free hand to wrap the string tightly around the car's rear axle.Continue winding until no string remains.The string should be tight enough to hold down the snap-arm when held.
4 Prepare for a test drive. Place the car on the ground while still holding the snap-arm. Make sure you havea good grip on the end of the string. This should keep your snap-arm in place, and releasing should cause
the arm to snap forward, propelling your car.
5 Release your car and watch it go. Move your hands clear of your mousetrap car and let go of the string.The kinetic energy of the mousetrap spring will transfer through your string to your read axle, causing your
mousetrap car to travel forward a few feet, depending on construction and the length of the string.[13]
to Build a Mousetrap Car
wikiHow Contributor
wikiHow Contributor
wikiHow Contributor
Raif
wikiHow Contributor
wikiHow Contributor
wikiHow Contributor
Will this car go farther than 2 meters? How far will it go?
When building a mousetrap car, what is the proper way to tie the string and rubber band?
What is an alternative to using the eye hooks?
How does the car move?
Will four wheels work better than three?
What is the best way to prevent my mousetrap car from changing direction?
What are the steps if I want to add a motor?
It depends on the size of the string. To make it go farther, I would add a stick addition onto the trigger arm tomake it longer. This also makes the string longer. Increasing the length of the chassis will also help withdistance.
Not Helpful 45 Helpful 83
Go over the top of the axel. then loop around, making sure the string crosses over itself. Then slowly lift thearm of the trap and spin the wheels to continue wrapping it.
Not Helpful 45 Helpful 79
If your dowels are thick enough, cut sections of straws and hot glue them to the bottom of the chassis.Not Helpful 40 Helpful 59
The string being wrapped around the axle which holds the wheel causes the acceleration. What makes it go isthe spring mechanism (the string being wrapped around the axle).
Not Helpful 46 Helpful 60
It depends, but they might! As long as you have at least two wheels, you can adapt the design to work forhowever many wheels you want.
Not Helpful 31 Helpful 34
The best thing to do is ensure that your wheels have been aligned and tightened properly. Make sure nothingis weighing your car down on one side either.
Not Helpful 29 Helpful 28
Remove the mouse trap, place motor on card (with batteries), put a belt from the motor to the axle and turn iton.
Community Q&A
wikiHow Contributor
wikiHow Contributor
wikiHow Contributor
How do I make one from wood?
Should I put cheese on my mouse trap?
How do I make it go faster?
Not Helpful 68 Helpful 43
Use thin pieces you can cut to size.Not Helpful 27 Helpful 20
Cheese is good, but peanut butter is better. The key is to place the trap properly. Place the trap at the bottomof a wall that has traffic from the mouse or mice you're trying to trap. The trap must be placed with the baitedside towards the wall.
Not Helpful 93 Helpful 48
See Adapt a Mousetrap Car for Speed.Not Helpful 22 Helpful 14
Be sure to clear a path in front of your mousetrap car. Obstacles may break the fragile design.
If you don't have thin skewers, straws are a good replacement.
You can also use the axles and wheels from a toy card to replace the cardboard and dowel. However, you will needsuperglue to stick the string in place.
To help the self-propelled car roll smoothly, you can place some weight on the back or front of the car. Somerecycled materials you can use include: bottle lids, cord, blu tack and eraser/rubber.
Never try this project with a rat trap. If the snapper arm of a rat trap releases early, the force could easily breaksomeone's finger.
Young children should only assemble a mousetrap car with adult assistance.
Compass (for drawing circles)
Pencil (for drawing circles)
Duct tape
Durable string
Elastic bands/rubber bands
Eye hooks (4)
Heavy cardboard or foam core
Mousetrap
Pliers
Ruler
Tips
Warnings
Things You'll Need
Thin dowels (2)
Utility knife
1. http://www.real-world-physics-problems.com/mousetrap-car-physics.html
2. http://www.hometrainingtools.com/a/mousetrap-physics-newsletter
3. http://hea-www.harvard.edu/~fine/opinions/wheelsize.html
4. http://www.docfizzix.com/topics/construction-tips/Mouse-Trap-Cars/using-cds.shtml
5. http://www.hometrainingtools.com/a/mousetrap-physics-newsletter
6. http://www.hometrainingtools.com/a/mousetrap-physics-newsletter
7. http://www.docfizzix.com/topics/construction-tips/Mouse-Trap-Cars/using-cds.shtml
8. http://tbpmindset.org/modules/GatorTRAX/Mousetrap/Mousetrap_Cars_Simple_Instructions.pdf
9. http://www.stevespanglerscience.com/lab/experiments/mousetraps-in-motion/
10. http://www.capstonekids.com/make-stuff/projects/mousetrap-car.html
11. http://tbpmindset.org/modules/GatorTRAX/Mousetrap/Mousetrap_Cars_Simple_Instructions.pdf
12. http://www.hometrainingtools.com/a/mousetrap-physics-newsletter
13. http://mesa.eng.uci.edu/Resources/Students/Mousetrap_Car_General.pdf
Uploaded 2 years ago Uploaded 3 years ago Uploaded 3 years ago
Sources and Citations
Made Recently